by Steve Laug
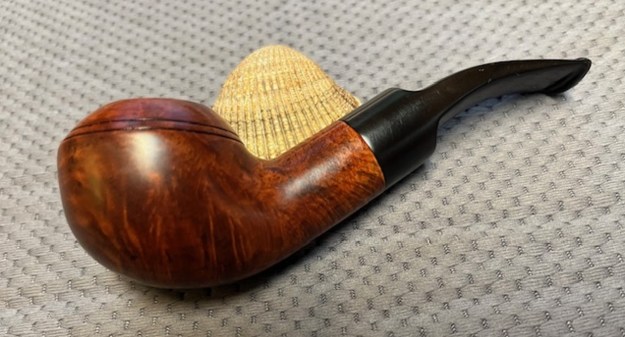
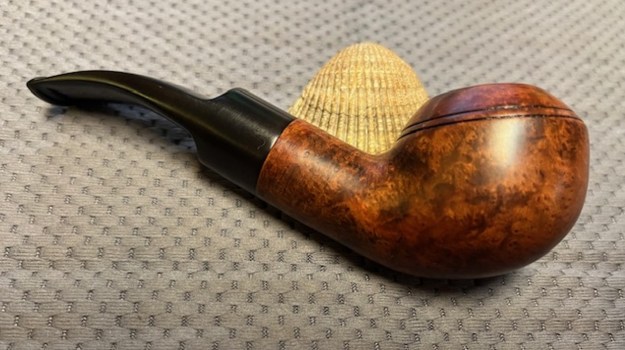
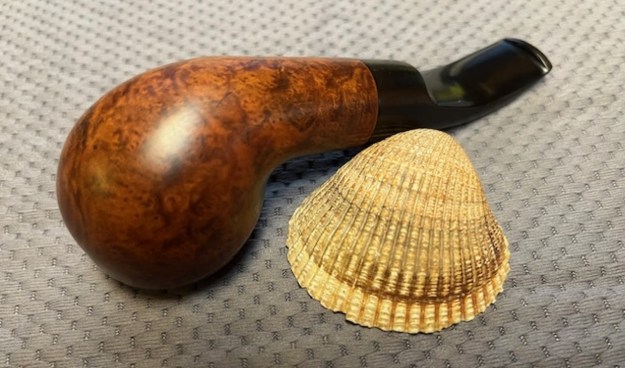
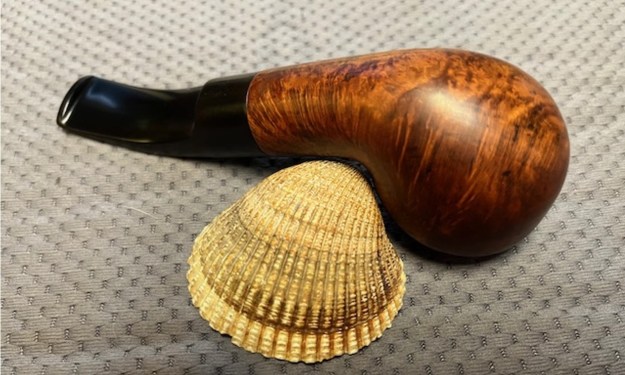
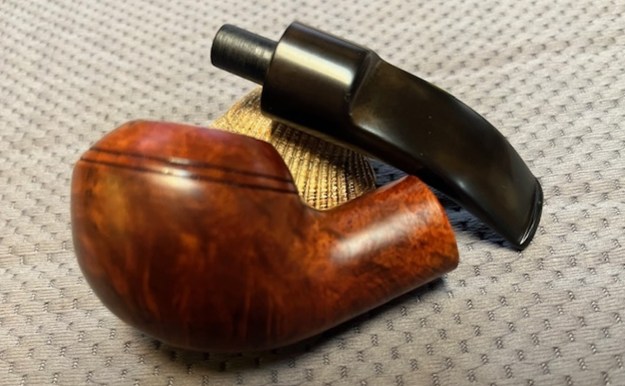
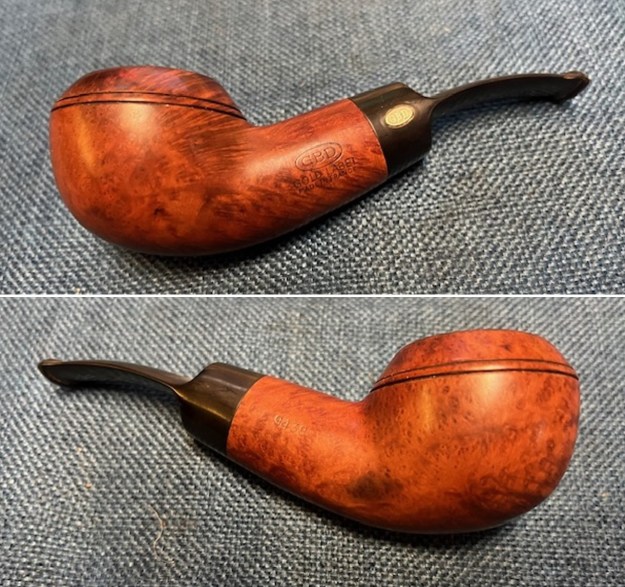
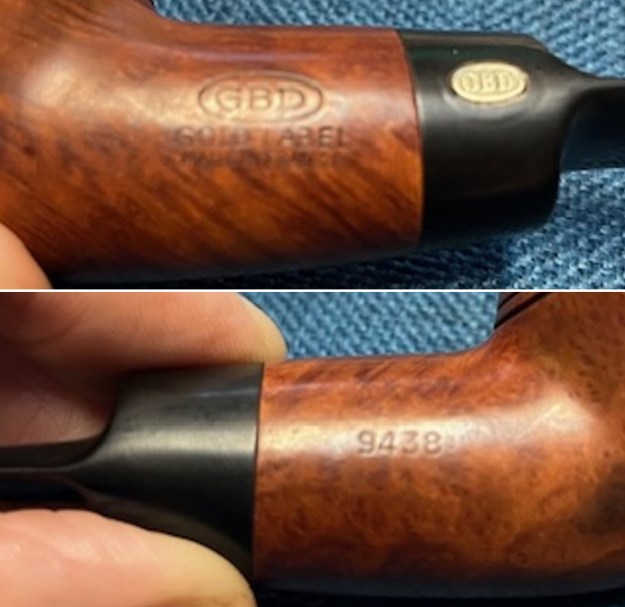
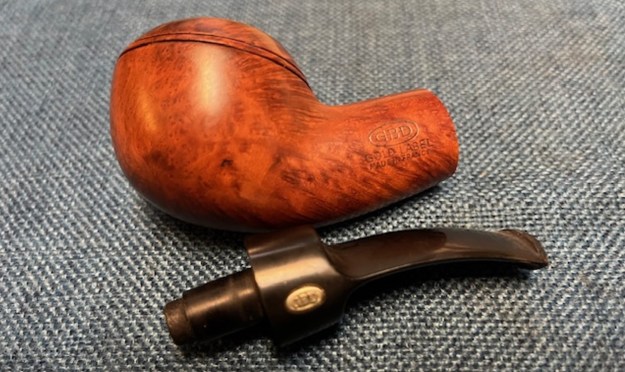
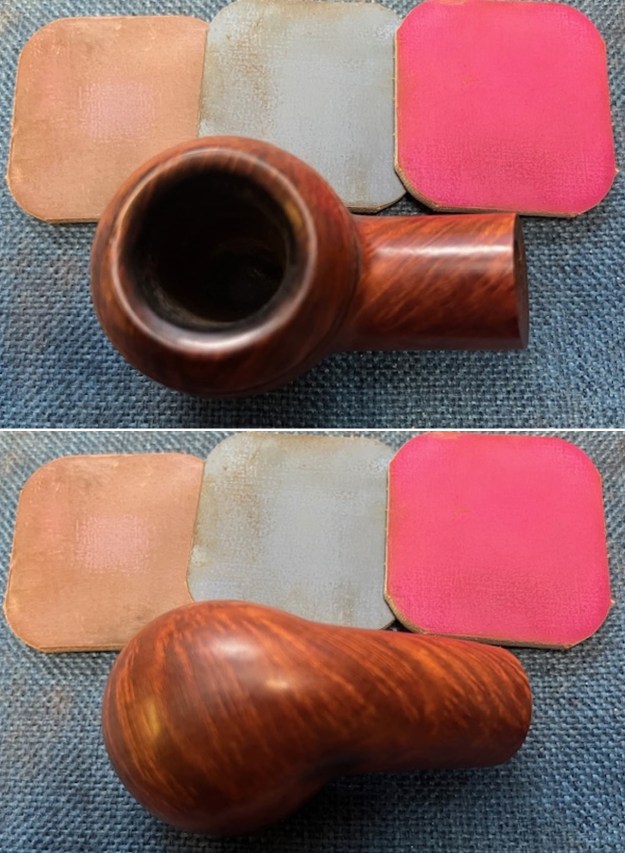
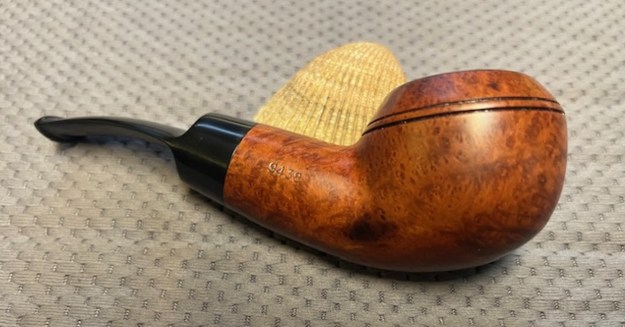
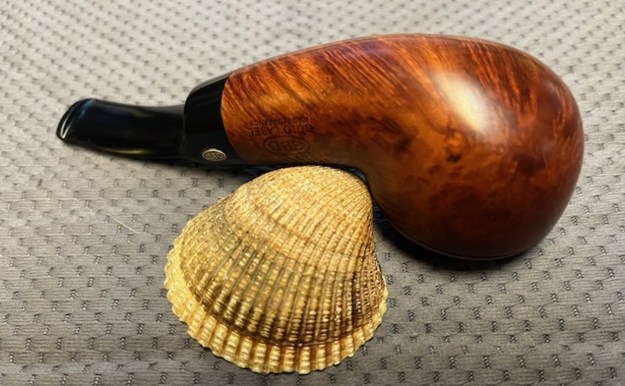
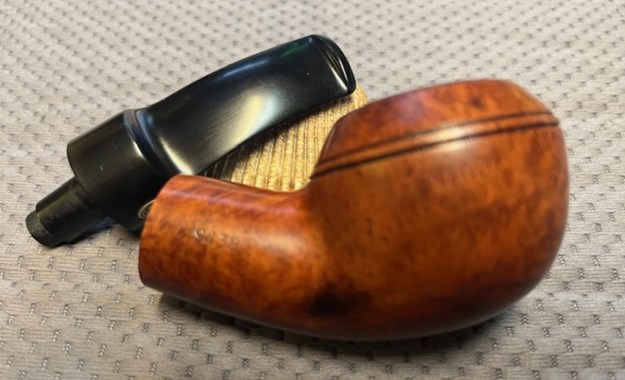
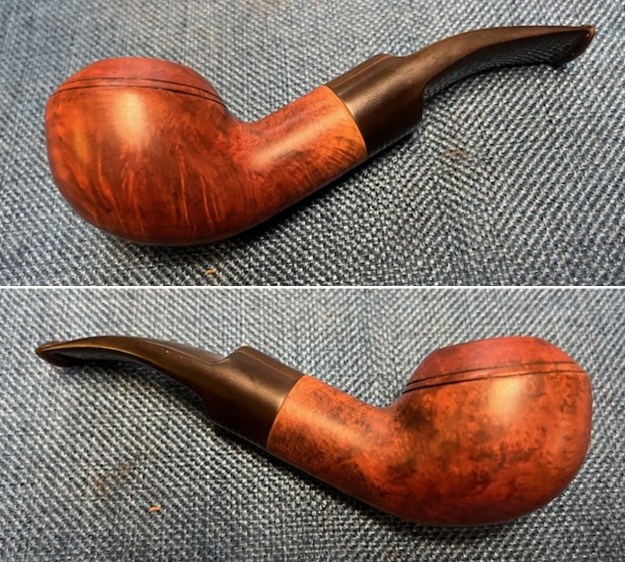
I have always liked the GBD 9438 shaped pipe and this one was one that I picked up many years ago when I first started working on pipes. I found it at an antique shop. It was in the early days when I picked up most every pipe I found. I believe that like others I found in the early days this pipe cost me about $6CDN. Just remembering that reminds me how much things have changed over the years. It became a favourite shape of mine and over the years I have purchased many more 9438 pipes made by GBD for their main and their seconds lines such as Irwin and Dr. Plumb. I have added them to my collection. Here is a link to a blog I did on my collection back in 2013 (https://rebornpipes.com/2013/12/12/my-gbd-9438-saddle-stems-and-tapered-stem-rhodesians/). I have 12 – some were in rough shape and others not so bad. 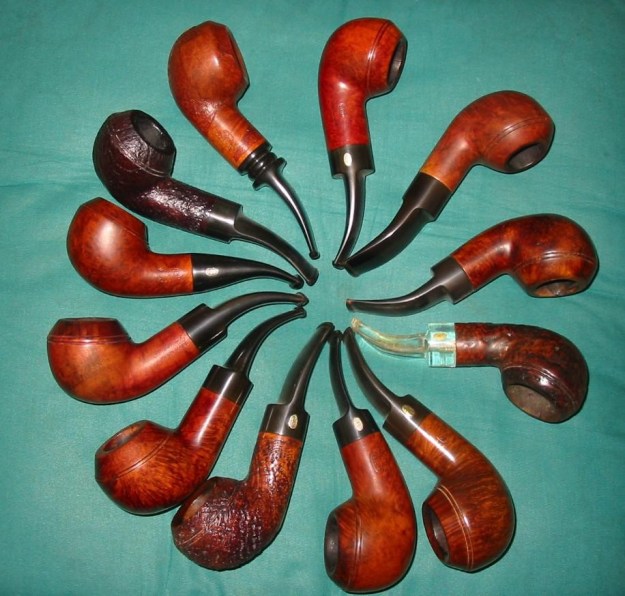 I have been sorting through my pipe collection and thinning out pipes that I am willing to part with. I have sold many already and others are currently on the store. For the most part these pipes have been early restorations and all needed a bit of work to bring them up to my current standard. I have set aside three 9438 pipes that I decided to rework. This is the third of them. It is one I restored twice in 2012 (https://rebornpipes.com/2012/09/15/a-beatup-gbd-9438-given-a-new-look/, https://rebornpipes.com/2012/09/14/irwin-943810-by-gbd-a-makeover/). It is one that I did a lot of work on at that time – both refinishing and restoring. It was a real mess that picked up off eBay. The stamping is very faint on the shank sides. It is stamped on the left side and it looked like there was a faint brand name Irwin (maybe) [over] London Made (faint but still readable with a lens). On the right side it is stamped with the faint six-digit shape number 943810. I have seen that shape number on Dr. Plum and on Irwin Rhodesians, both made by GBD. While it was very workable and I had not smoked it much over the years. I knew that the original restoration on it was less rigorous than my current standards. So, before I listed it for sale I wanted to work it over again. I took photos of the pipe to give a sense of the beauty.
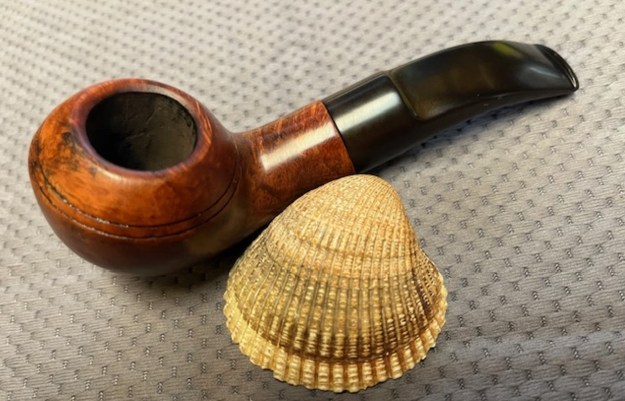
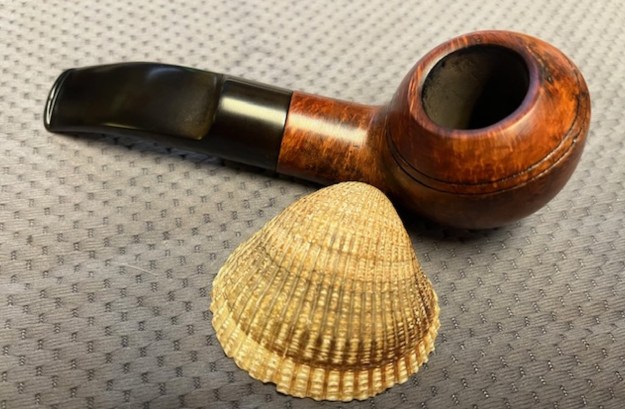
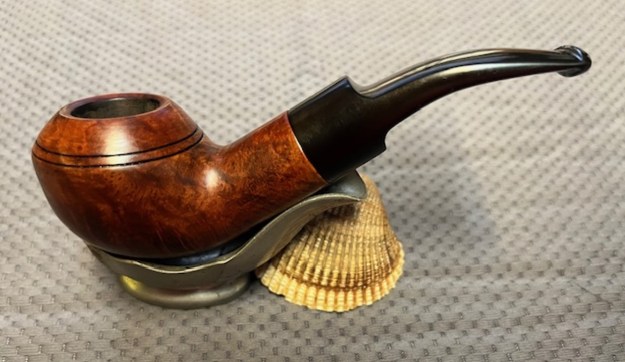
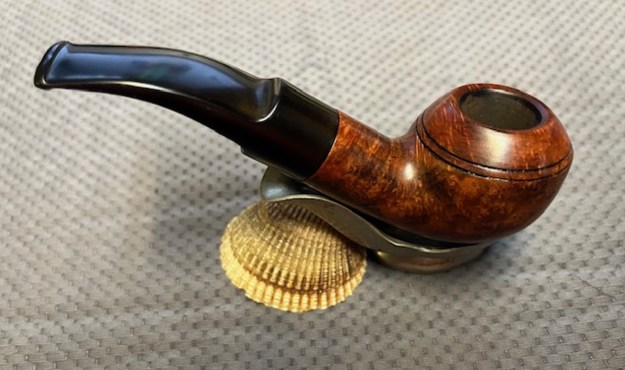
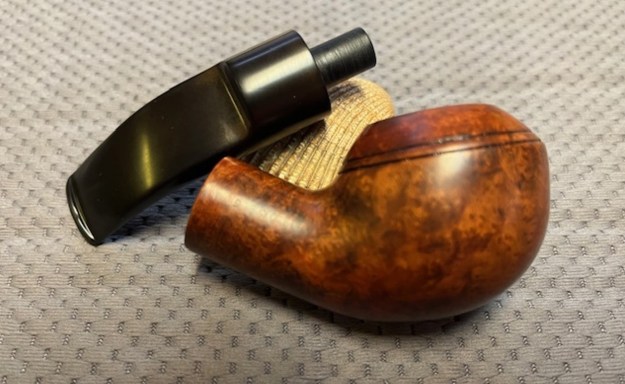
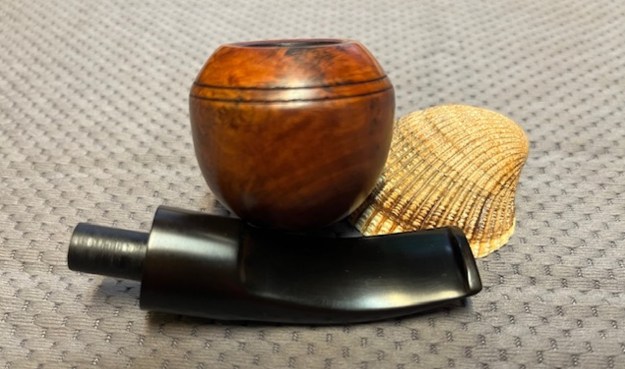
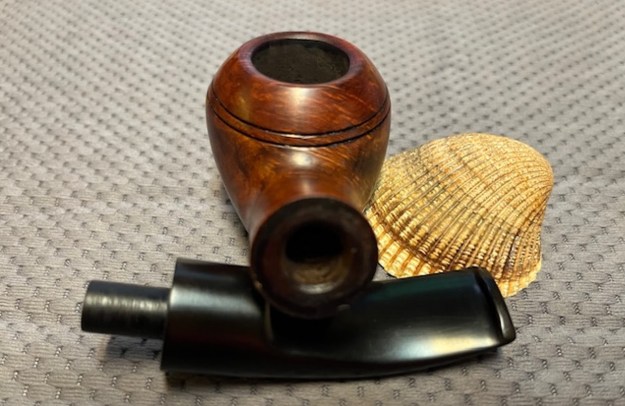
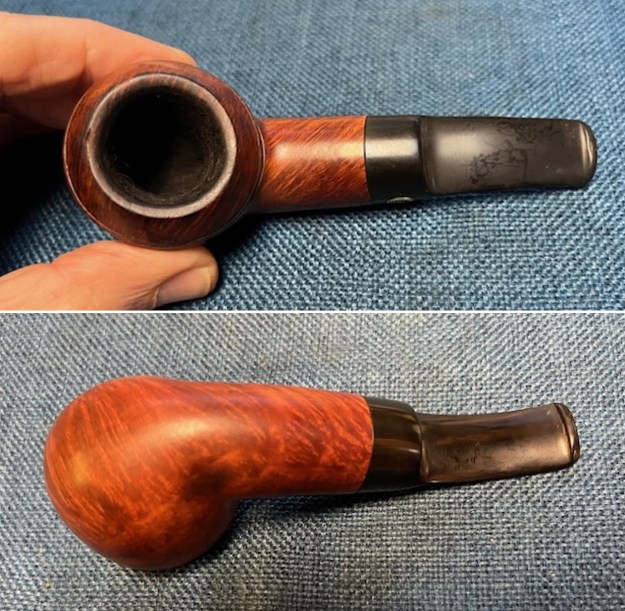
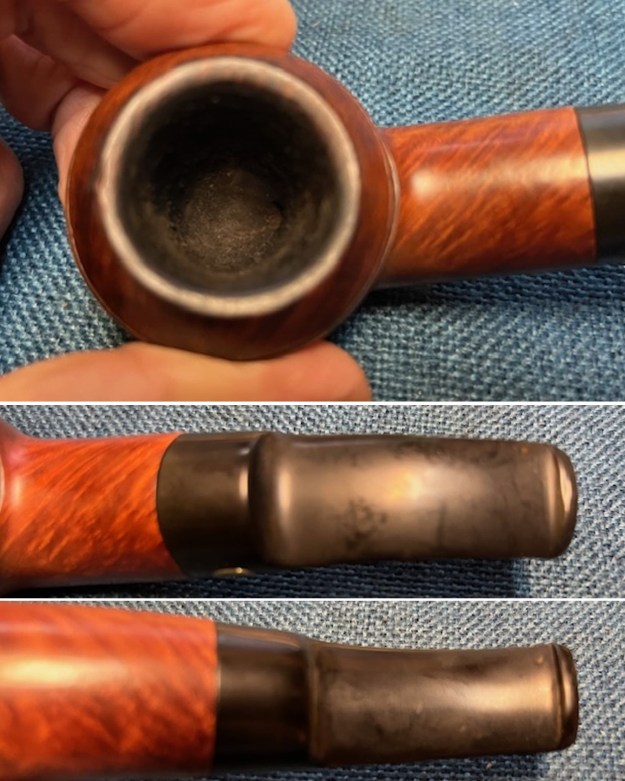
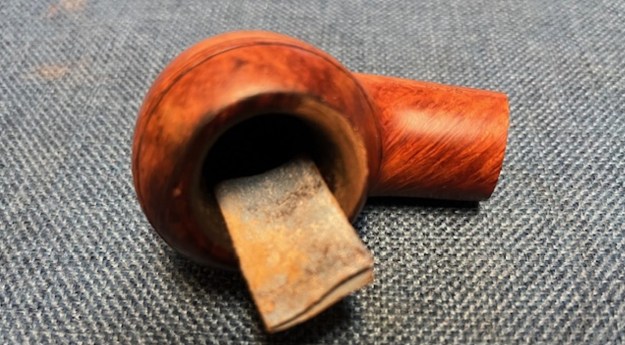
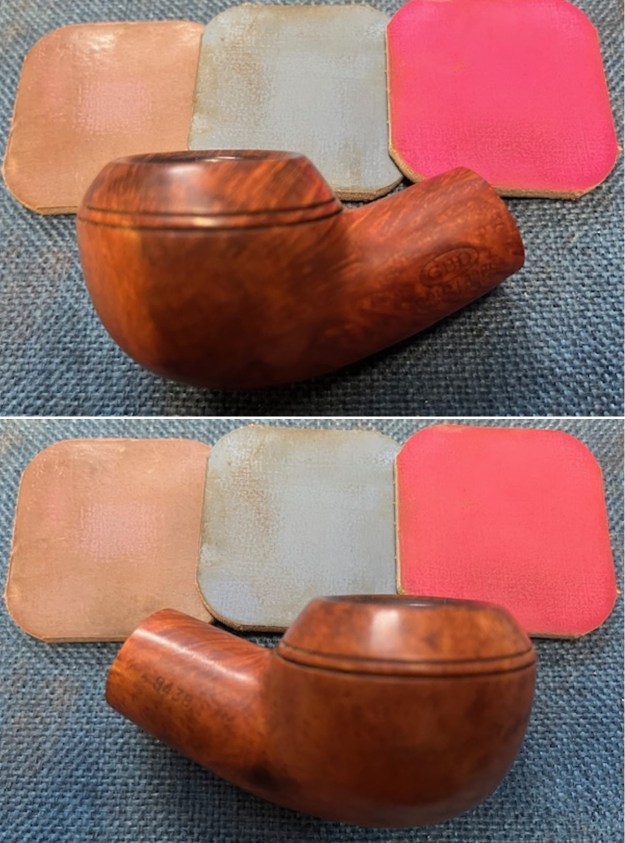
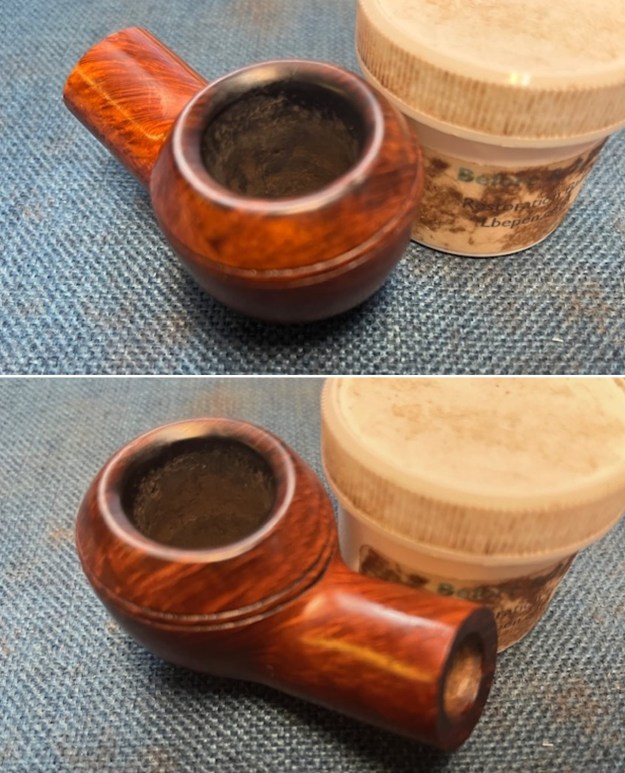
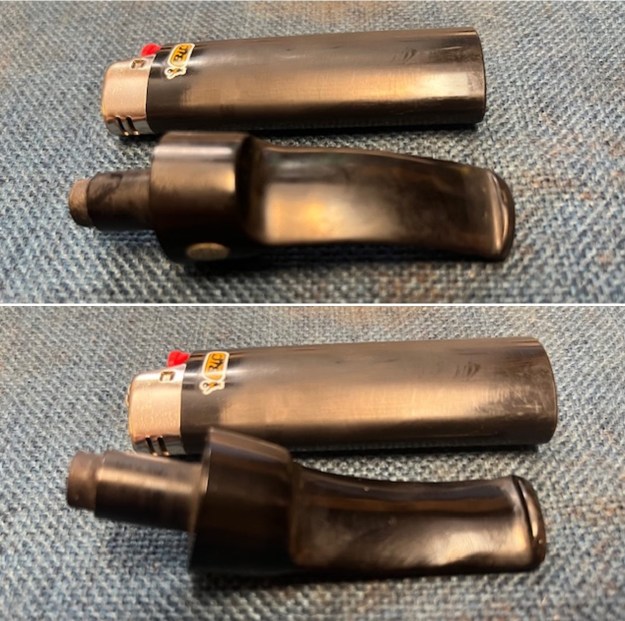
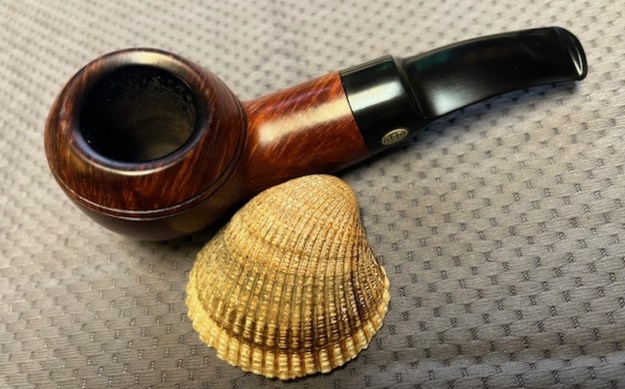
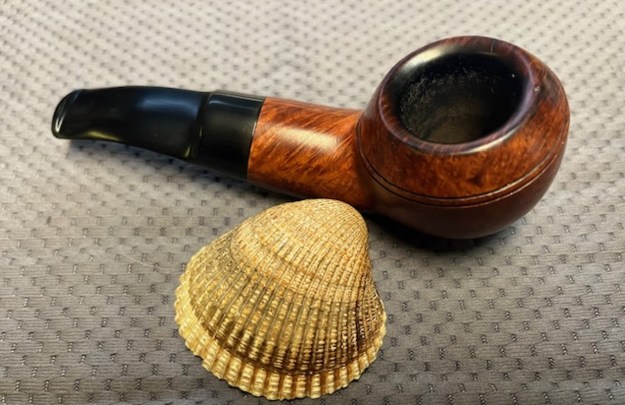
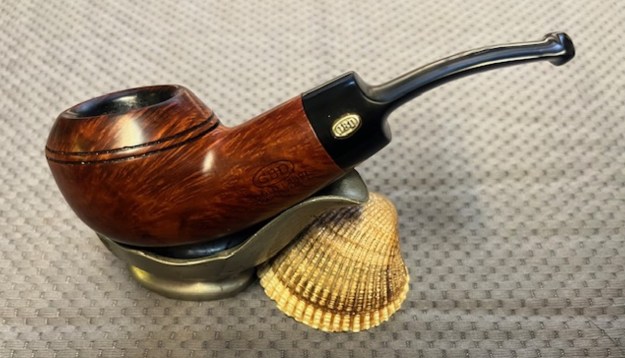
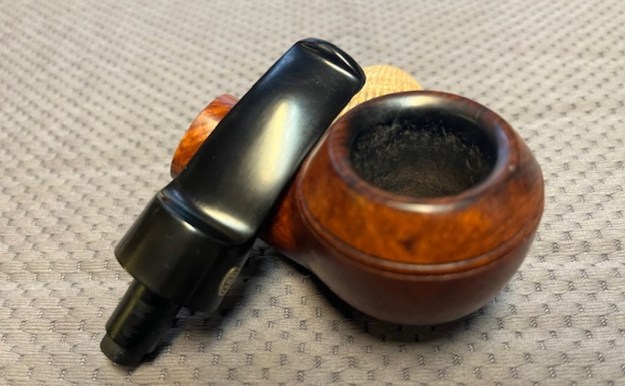
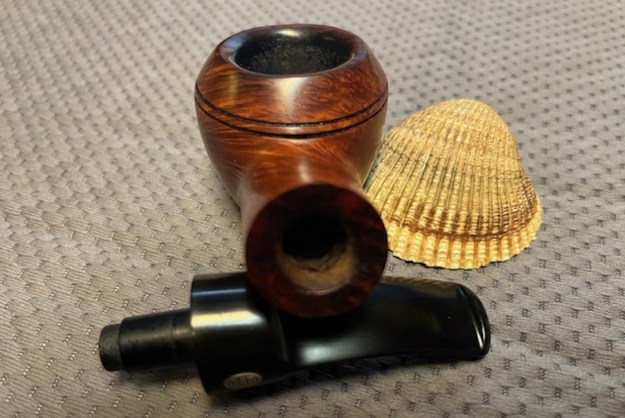
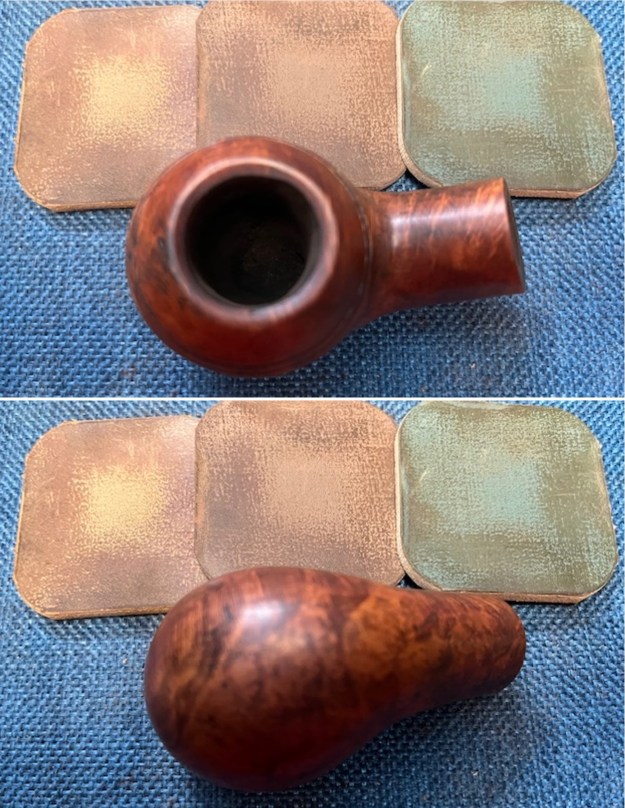
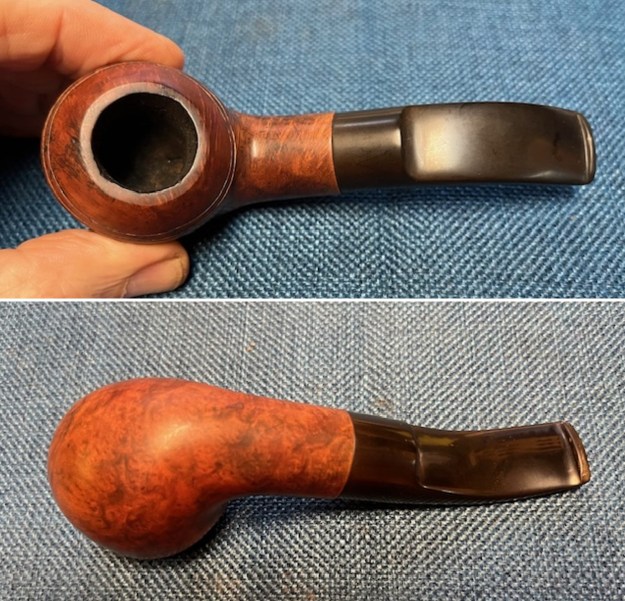 I took photos of the pipe’s bowl and rim top to show the light cake in the bowl and the rough inner edge of the bowl. The outer edge of the bowl looks very good. The rim top is also nicked and damaged slightly. I also took photos to capture the condition of the stem. It had some light oxidation and tooth chatter and marks on the top and underside ahead of the button.
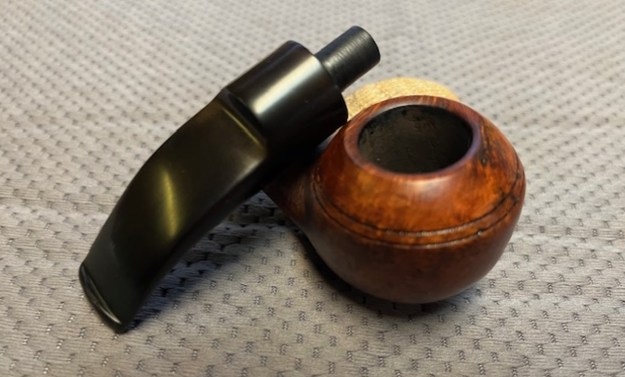
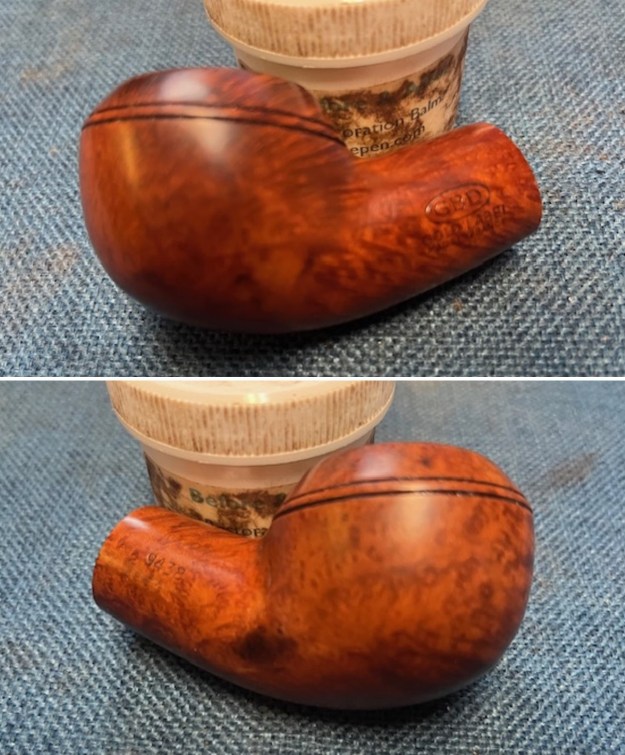
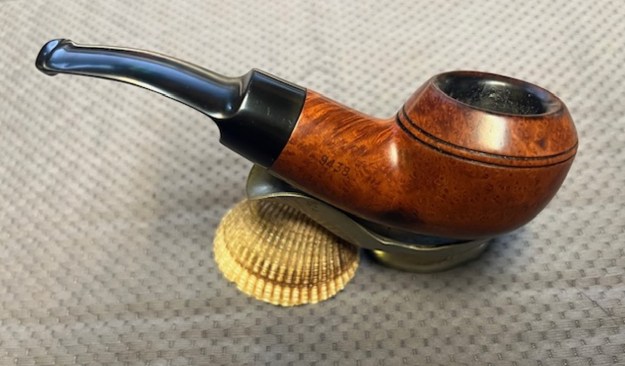
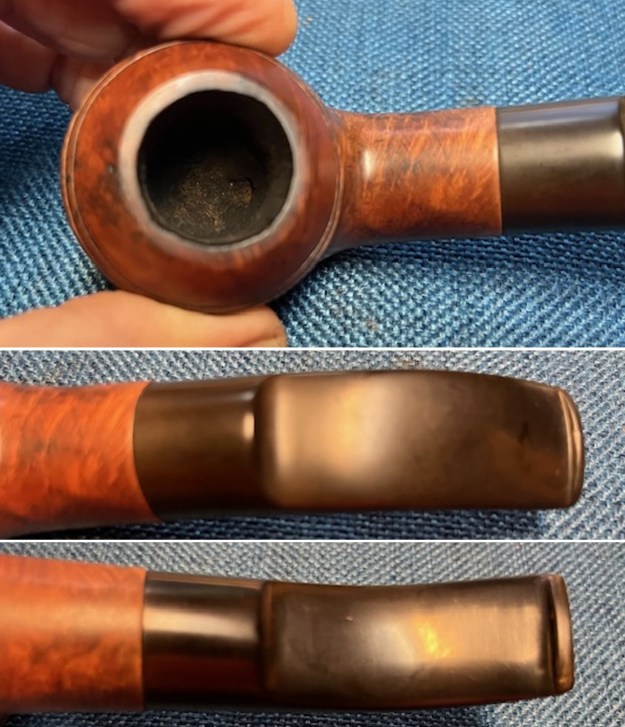 I took photos of the stamping on each side of the shank. It is faint and I was unable to capture it with the photos below. There is no logo or inlaid stamp on the sides of the saddle stem.
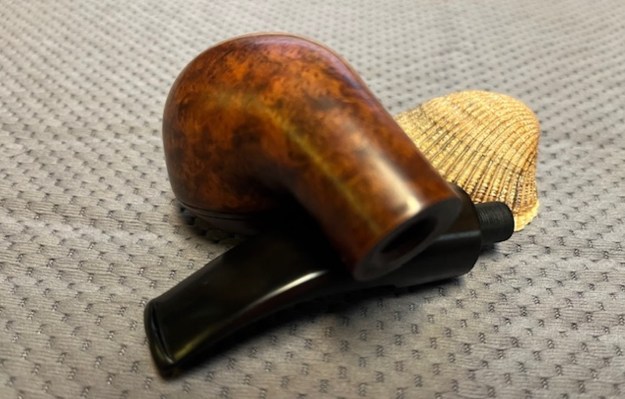
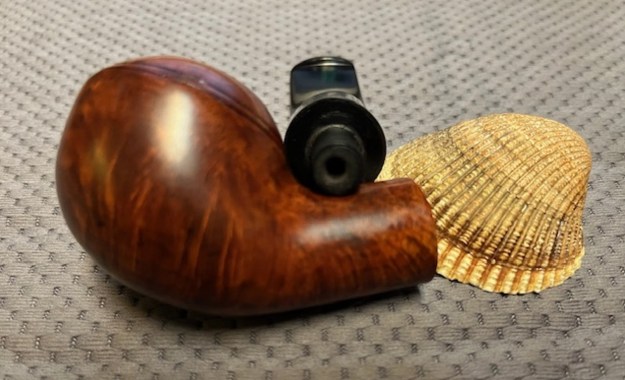
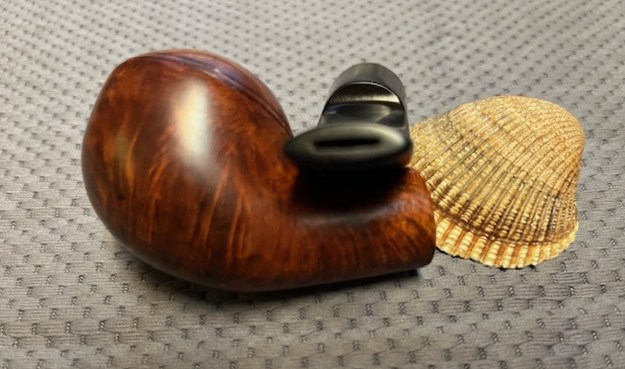
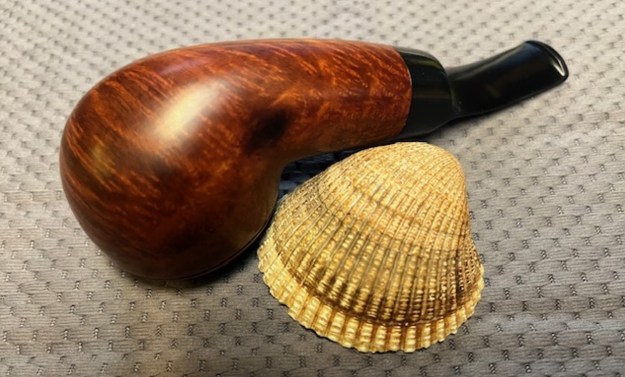
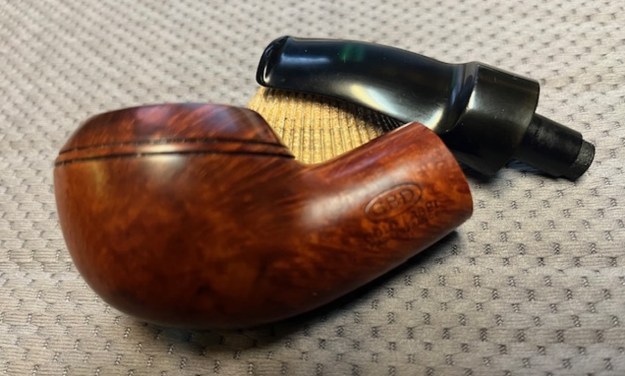
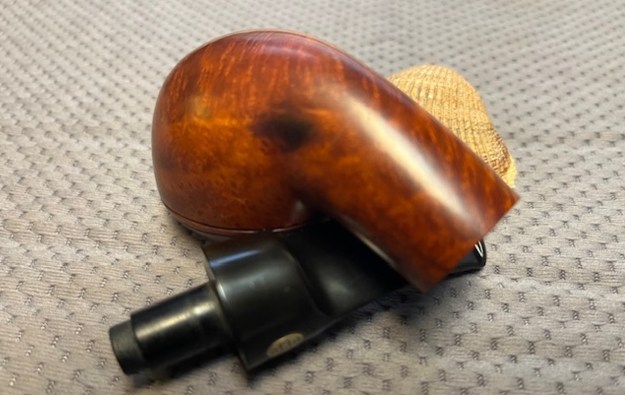
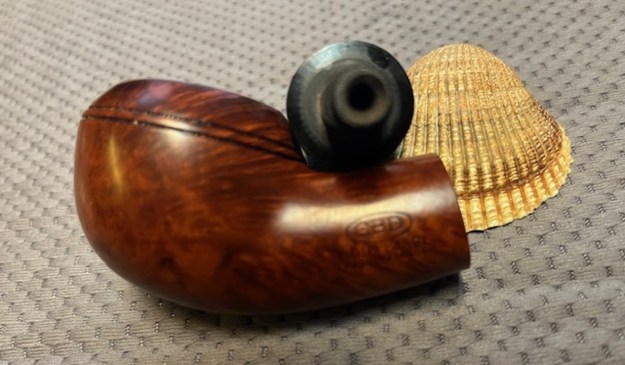
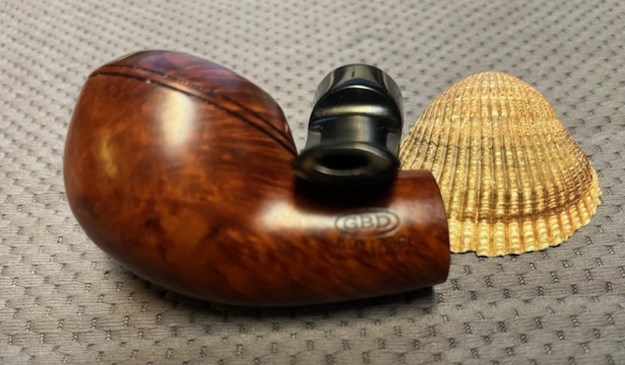
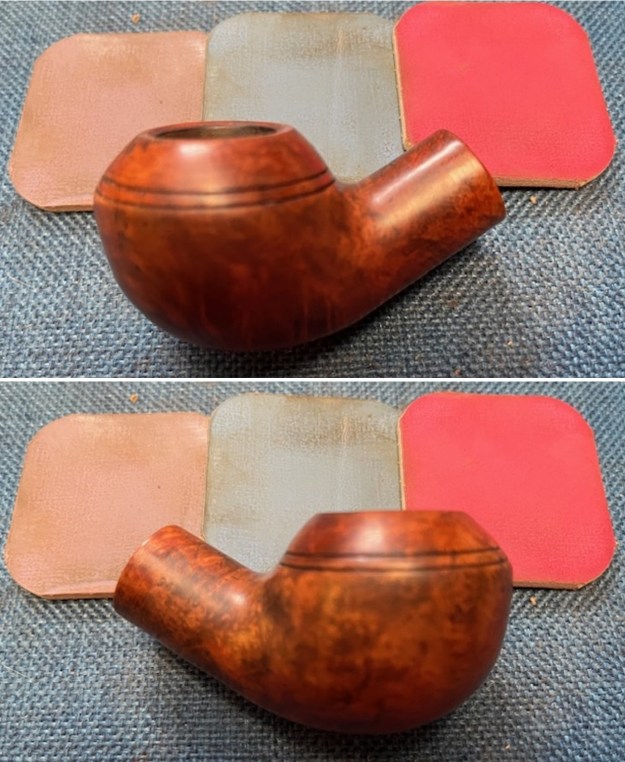
 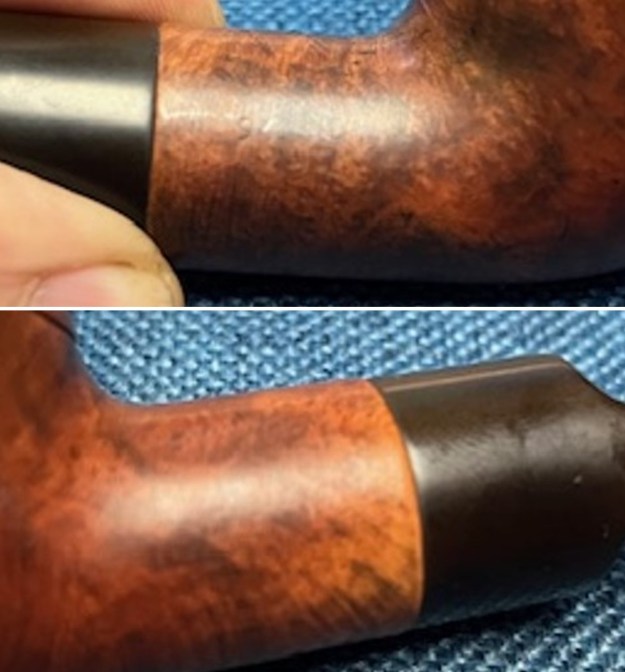 I took the stem off the shank and took a photo of the look of the pipe. It a nicely grained 9438 shape pipe. There is some beautiful grain around the bowl and shank.
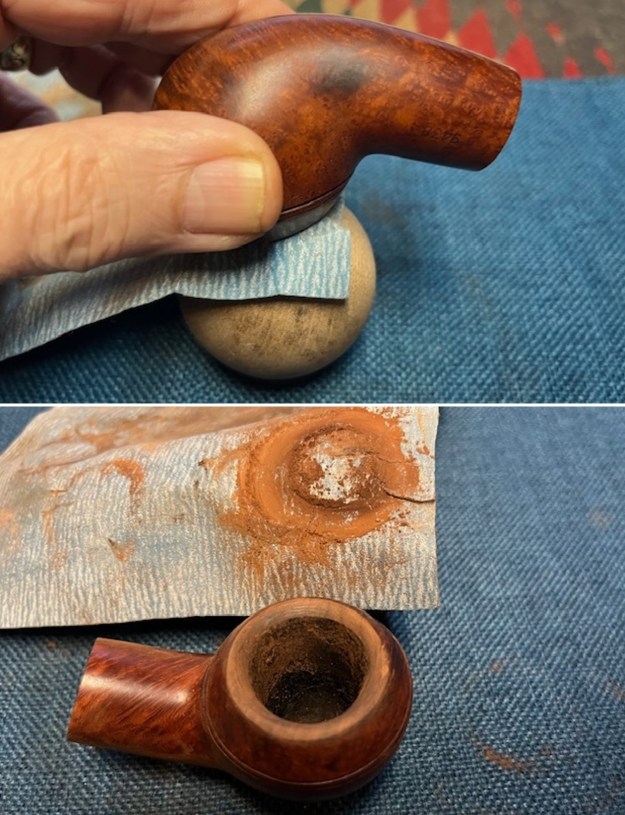
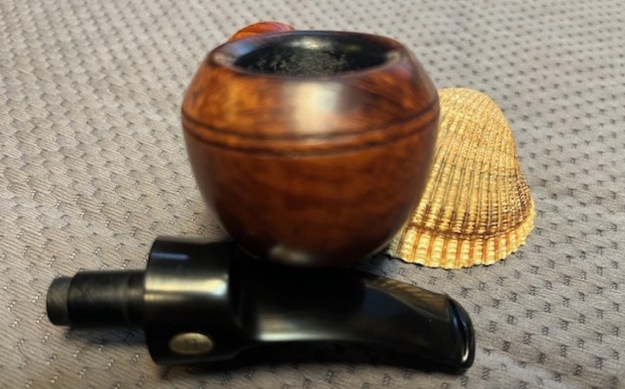
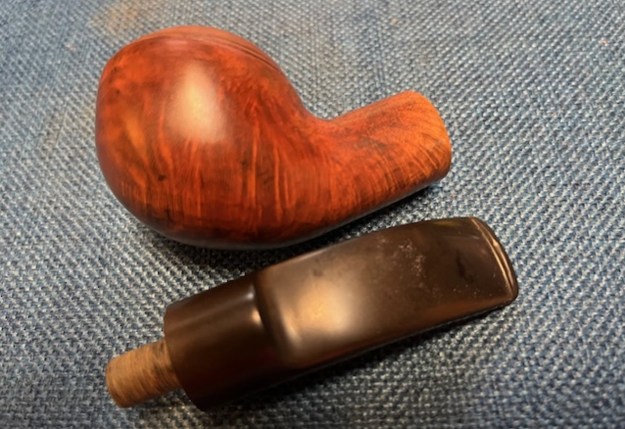 I decided to address the damage to the rim top and inner edge of the bowl. To deal with the rough inner edge of the rim and the rim top damage I worked on the edge with a piece of 220 grit sandpaper. I used a piece of 220 grit sandpaper on a wooden ball to further clean up the bevel. It took a bit of work to smooth out the damage and the darkening on the inner edge of the bowl. It looked much better at this point.
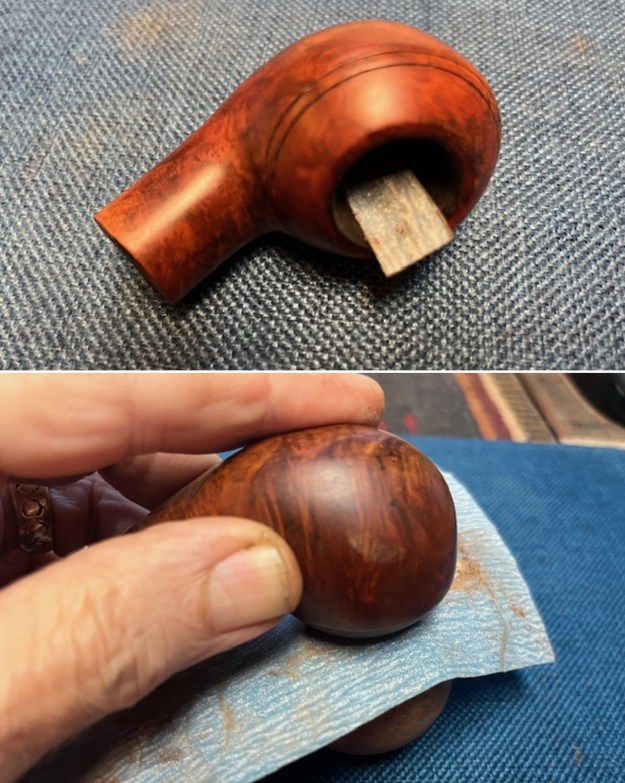
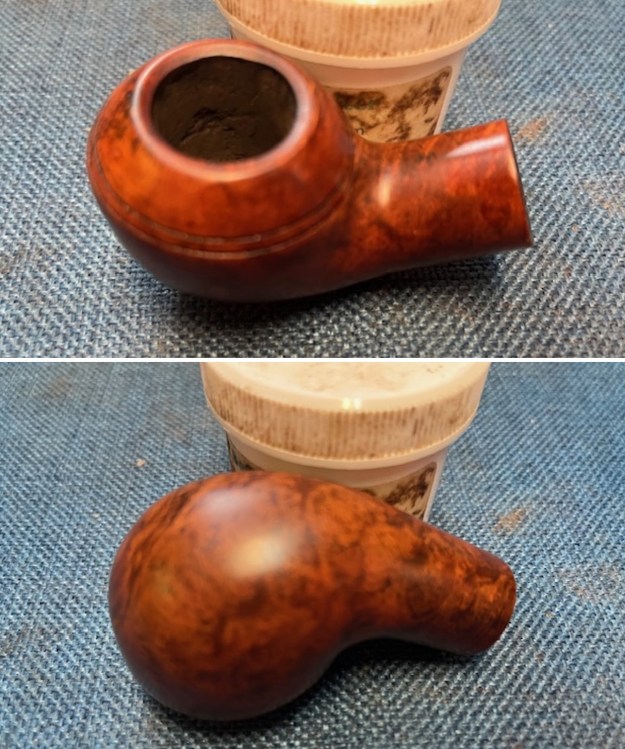
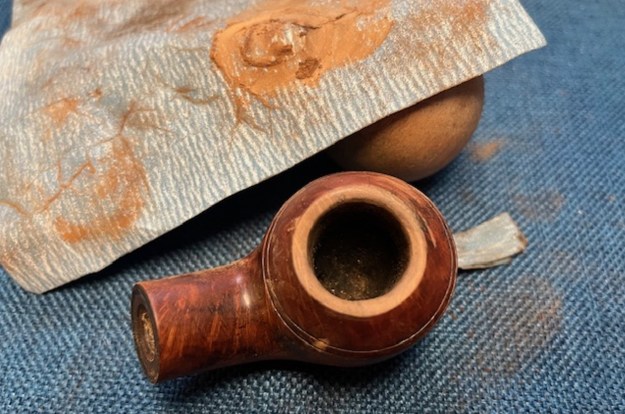 I reamed the bowl with a Savinelli Fitsall Pipe Knife to take out the cake. I removed ti back to bare briar. I sanded the bowl walls with a piece of 220 grit sandpaper wrapped around a dowel to smooth out the walls. It looked very good. No burn damage or checking on the bowl walls.
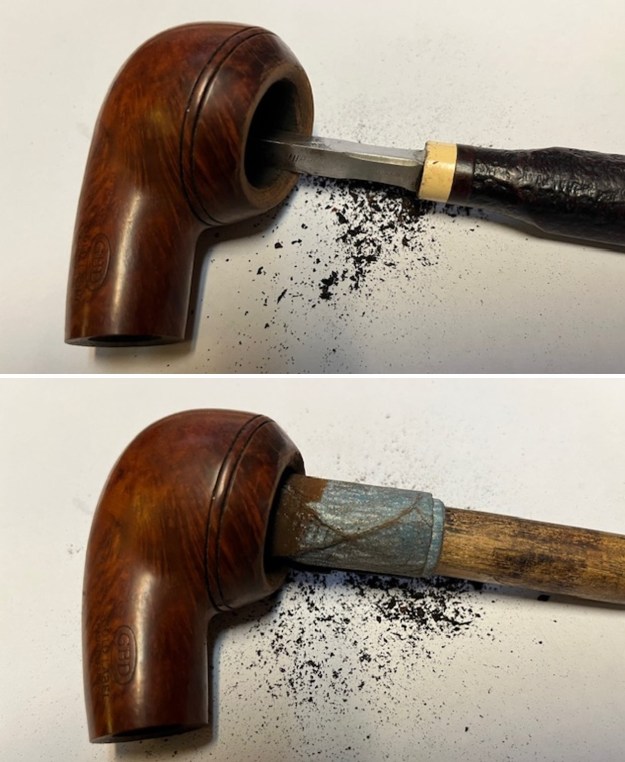
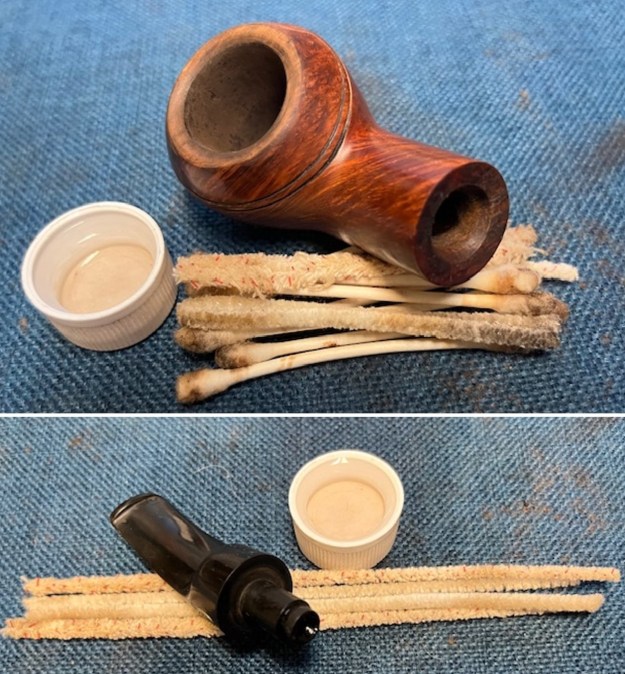
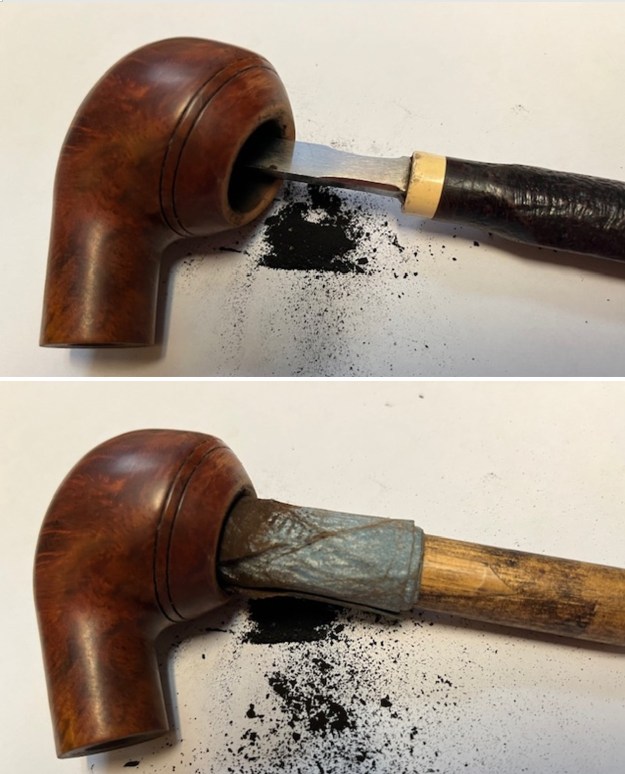 I scrubbed out the shank and the stem with pipe cleaners, cotton swabs and alcohol to remove the tars and oils. The shank was dirty though the stem airway was not too bad. It cleaned up well.
 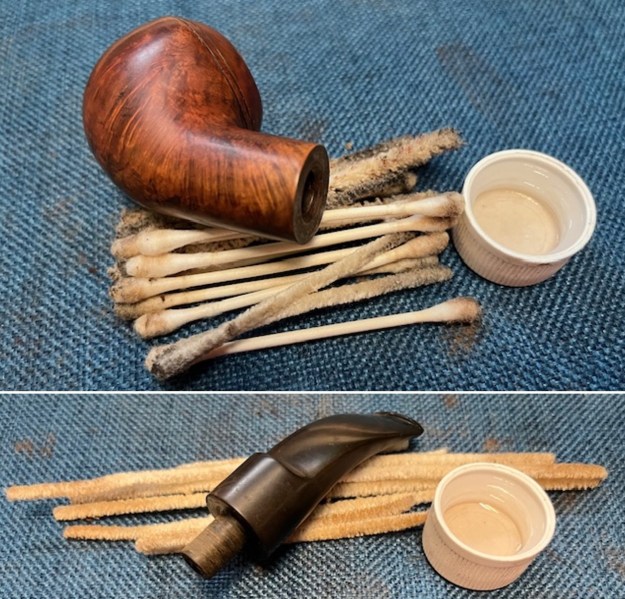 I touched up the rim top and lightened areas on the shank end with an Oak Stain pen. I was able to blend it into the surrounding briar around the bowl and rim top. It looks mch better than when I started.
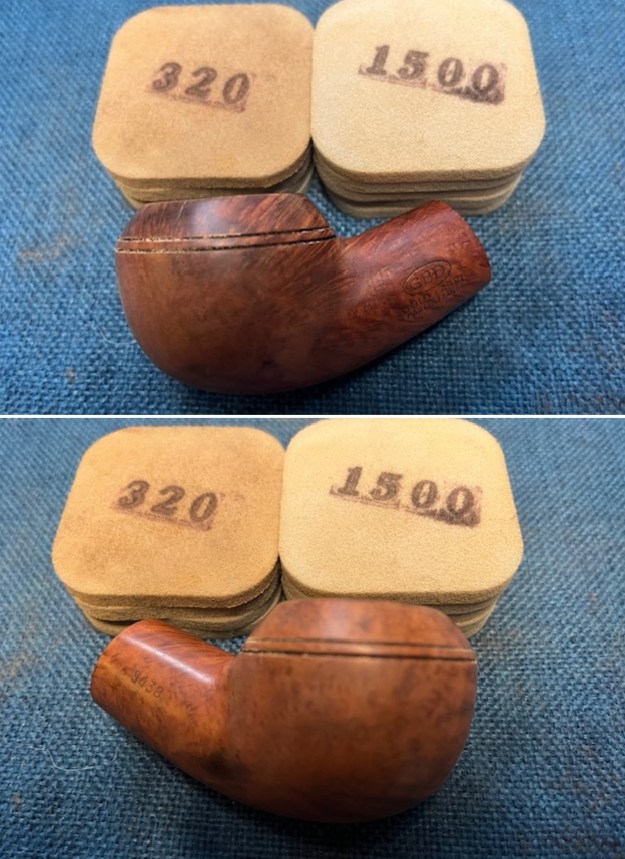
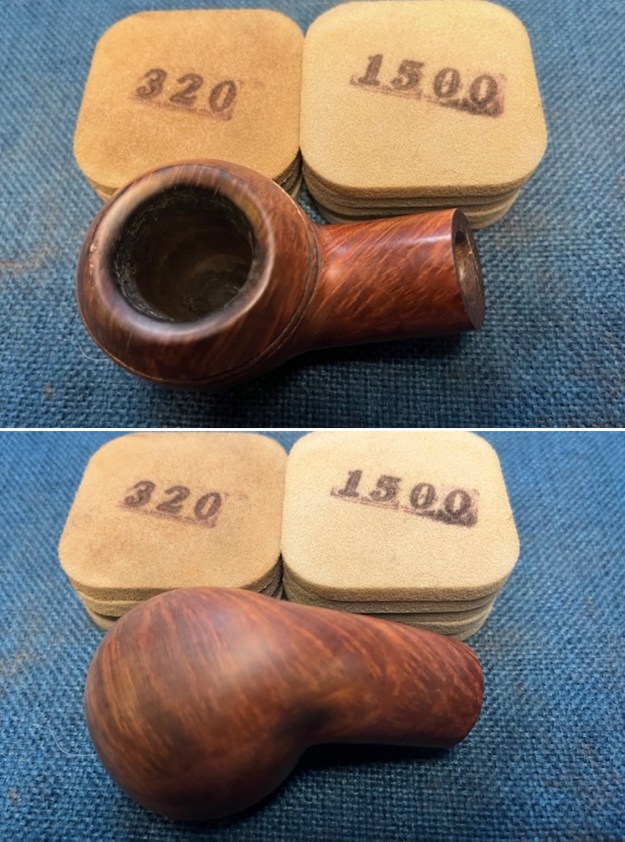
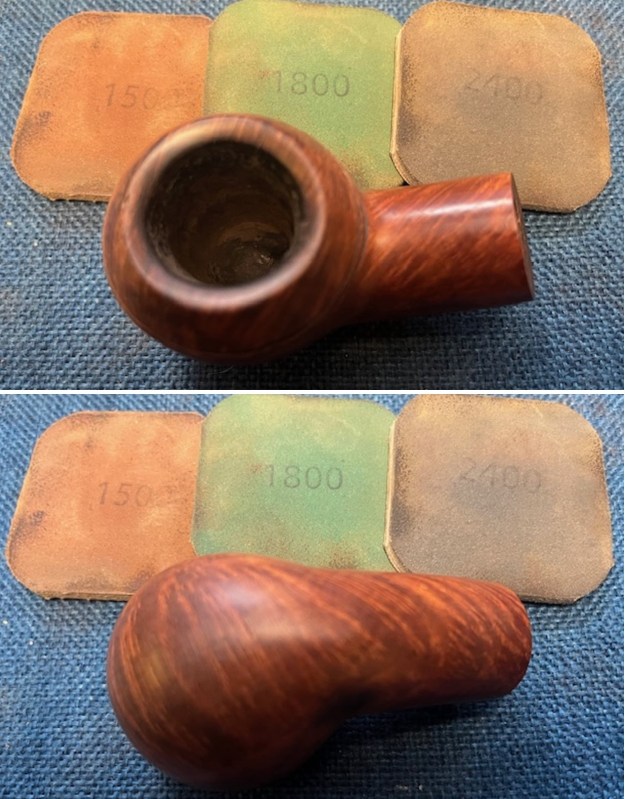
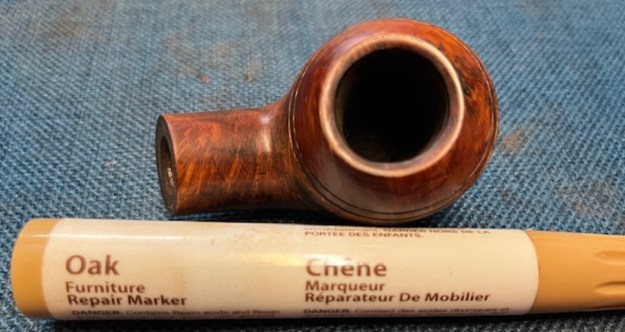 I polished the briar with micromesh sanding pads – dry sanding with 1500-12000 grit pads. I wiped it down after each sanding pad with a damp cloth to remove the sanding debris on the surface.
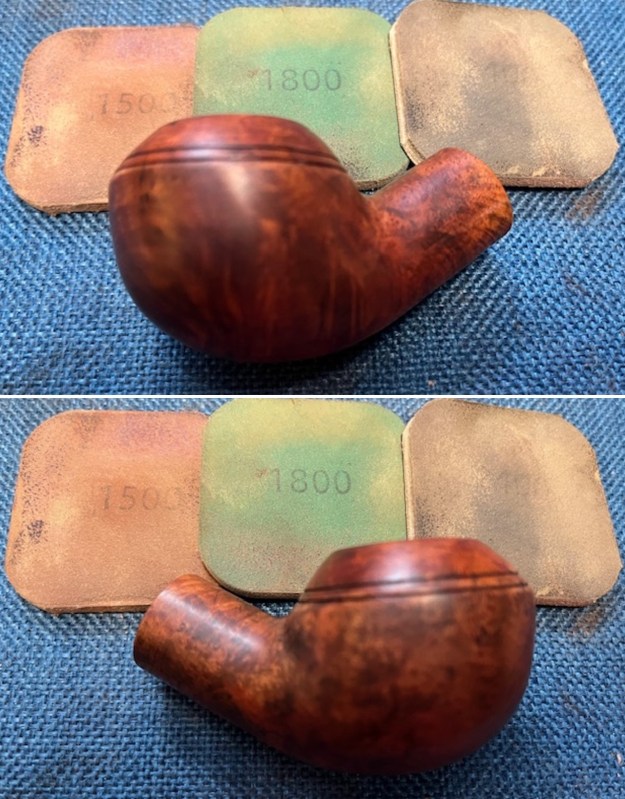

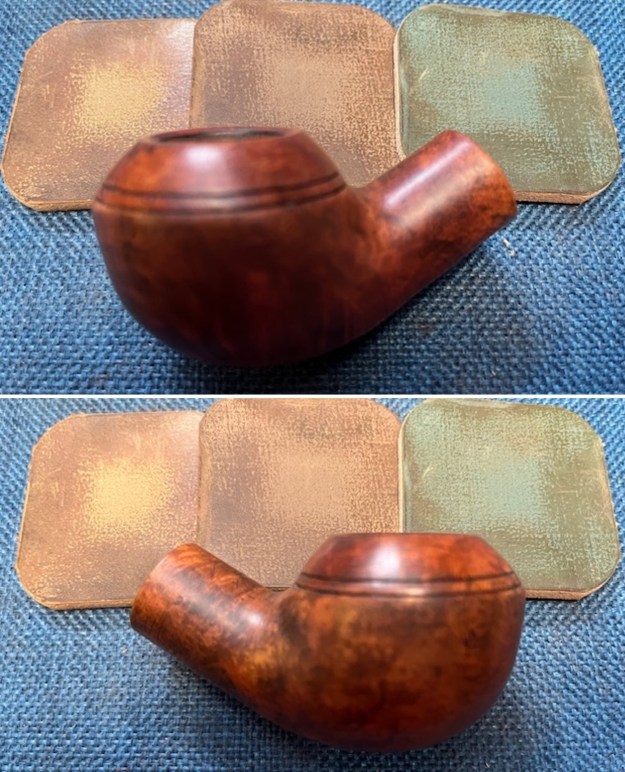
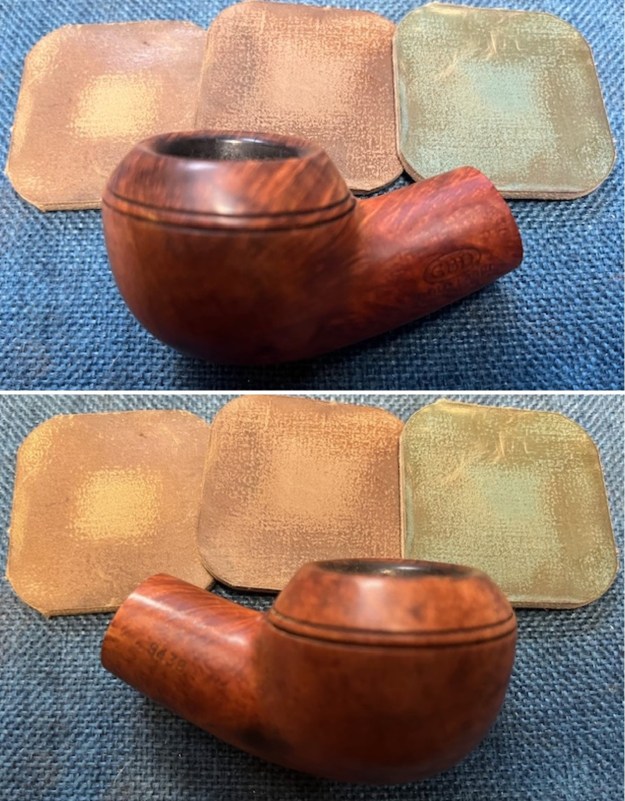
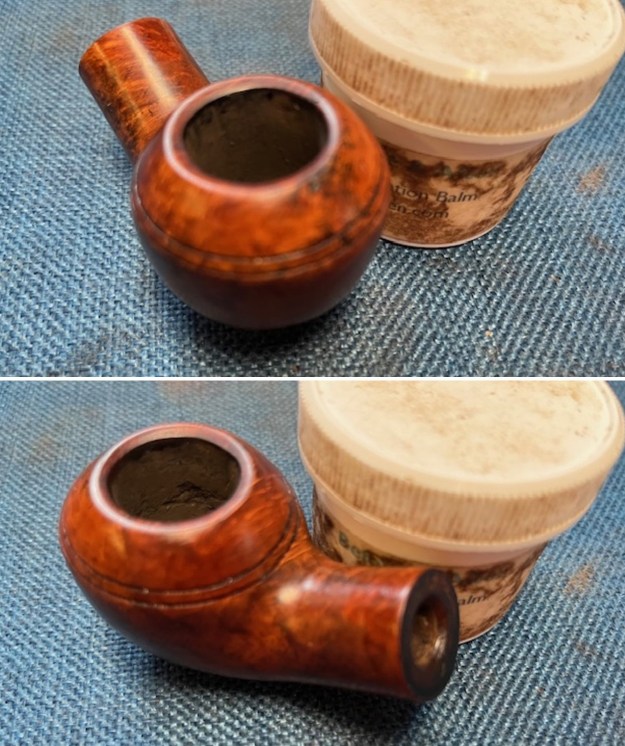
 I rubbed the bowl down with Before & After Restoration Balm. I worked it into the surface of the briar with my fingertips to clean, enliven and protect it. I used a shoe brush to work it into the twin rings around the bowl cap. I let the balm sit for a little while and then buffed with a cotton cloth and shoe brush to raise the shine.
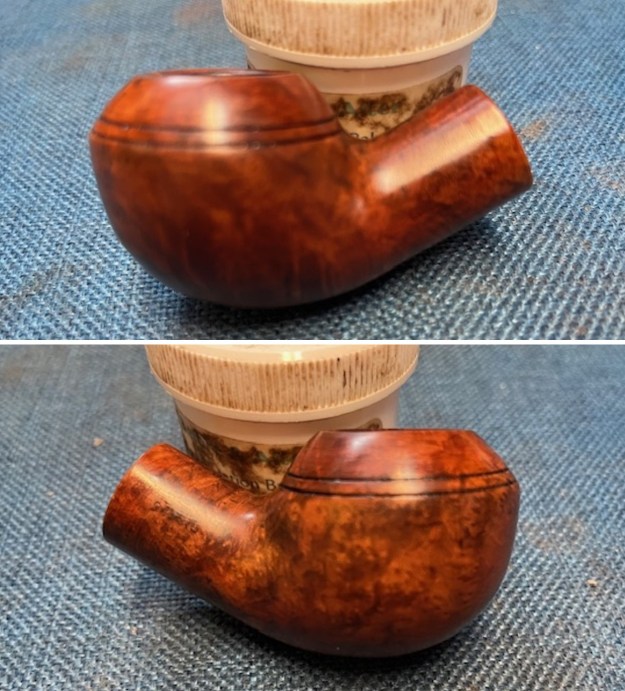
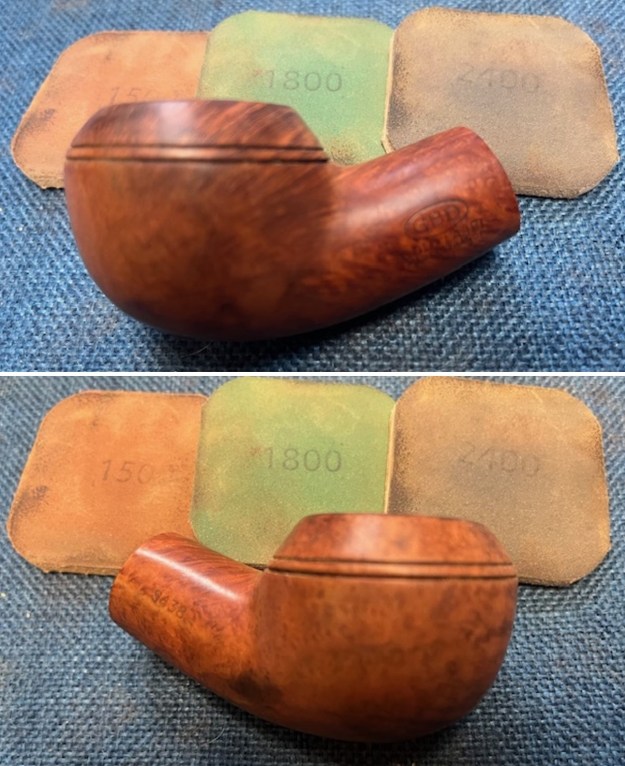
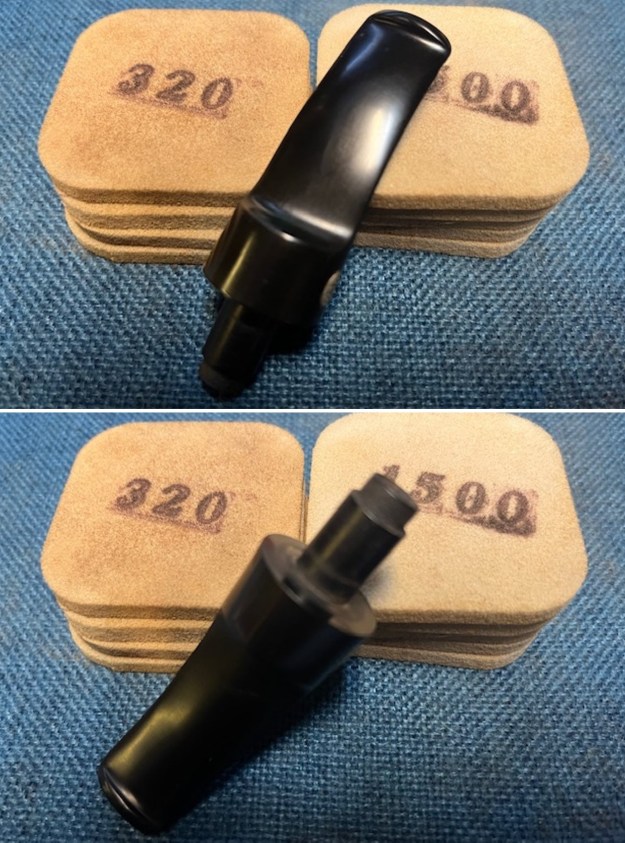
 I set the bowl aside and turned to address the stem. I sanded the stem surface with 320-3500 grit sanding pads to remove all the marks remaining from the tooth damage. I wiped the stem down after each pad with a cloth impregnated with Obsidian Oil. It looked much better.
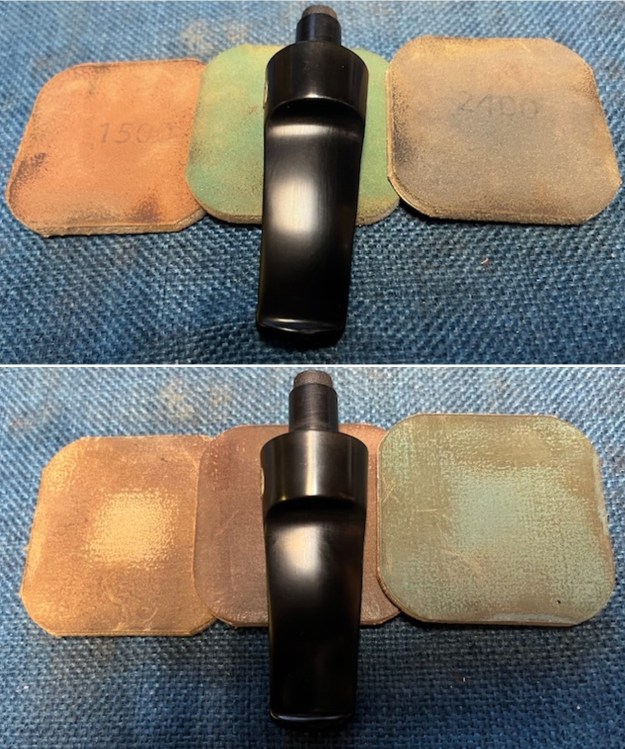
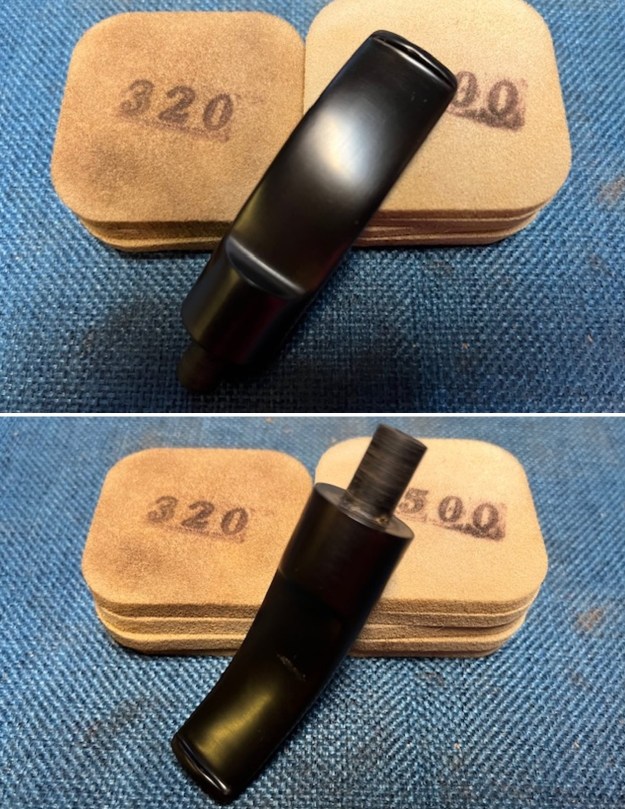 I polished the vulcanite with micromesh sanding pads – 1500-12000 grit pads. I wiped it down with Obsidian Oil after each sanding pad. I used Before & After Pipe Polish – both Fine and Extra Fine to further polish the stem. I gave it a final coat of Obsidian Oil and set it aside to dry.
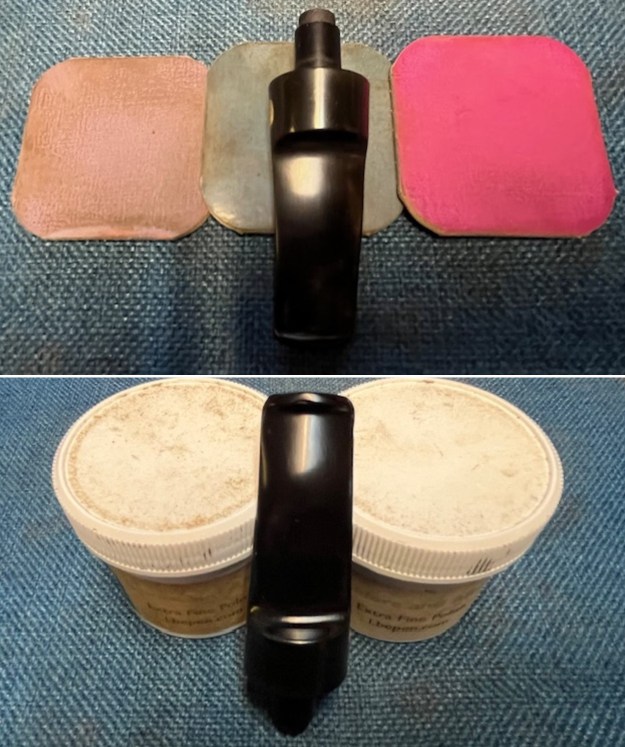
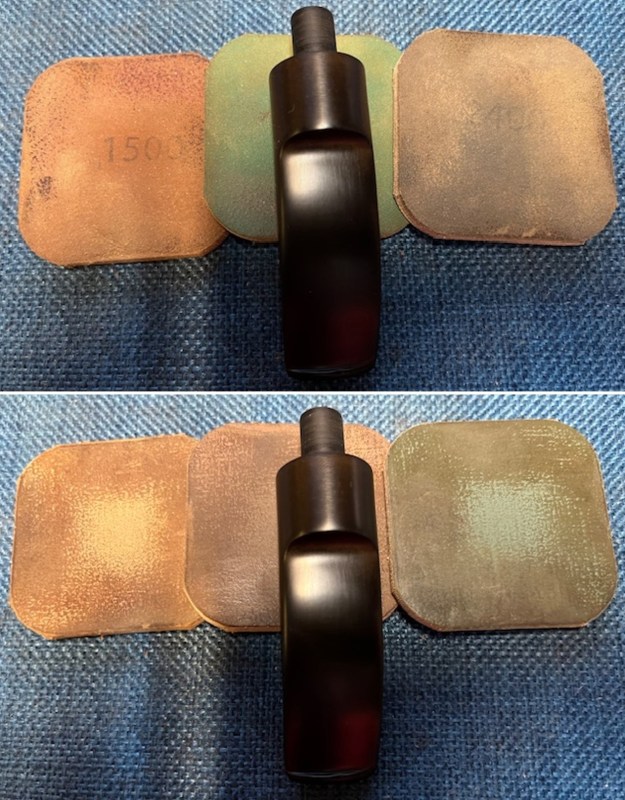
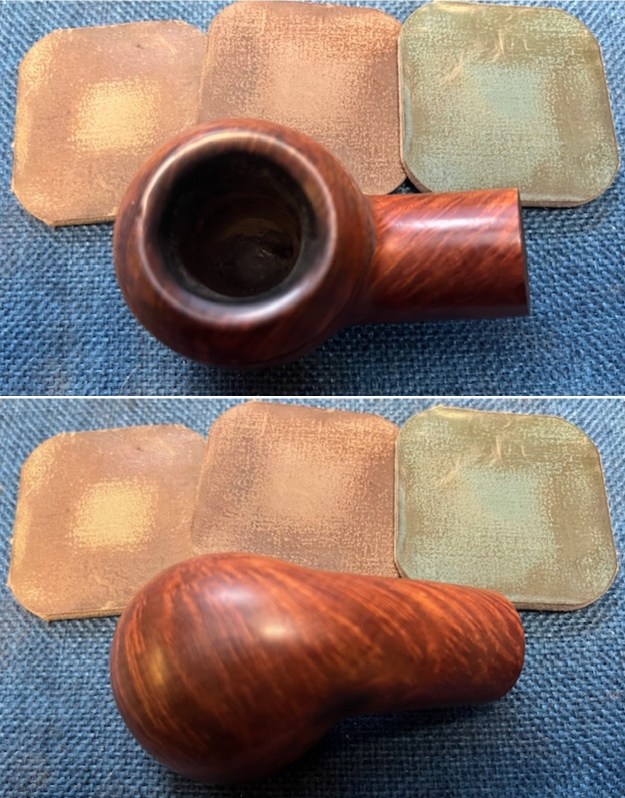
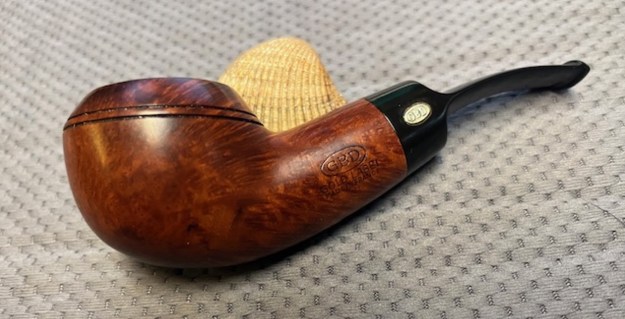
 This GBD Made Irwin London Made 943810 Bent Rhodesian cleaned up much better this time around and looks very good. The Before & After Restoration Balm brought the colours and grain out in the finish on the pipe. It works well with the polished vulcanite saddle stem. I put the stem back on the bowl and carefully buffed the pipe with Blue Diamond on the buffing wheel using a light touch on the briar. I gave the bowl and the stem multiple coats of carnauba wax on the buffing wheel. I followed that by buffing the entire pipe with a clean buffing pad. I hand buffed the pipe with a microfiber cloth to deepen the shine. The finished Irwin London Made 943810 Rhodesian fits nicely in the hand and I think it feel greats as it heats up with a good tobacco. Give the finished pipe a look in the photos below. The dimensions of the pipe are Length: 5 inches, Height: 1 ½ inches, Outside diameter of the bowl: 1 ½ inches, Chamber diameter: ¾ of an inch. The weight of the pipe is 1.87 ounces/53 grams. It is time to move it on to someone who will give it proper attention. I will be adding this one to the British Pipemakers Section of the rebornpipes store shortly. If you want to add it to your collection let me know. Thanks for reading this blog and my reflections on the pipe while I worked on it.