Tag Archives: Stem repairs

A Piece of Tobacciana – Restoring an Old Nylon Cigarette Filter/Holder

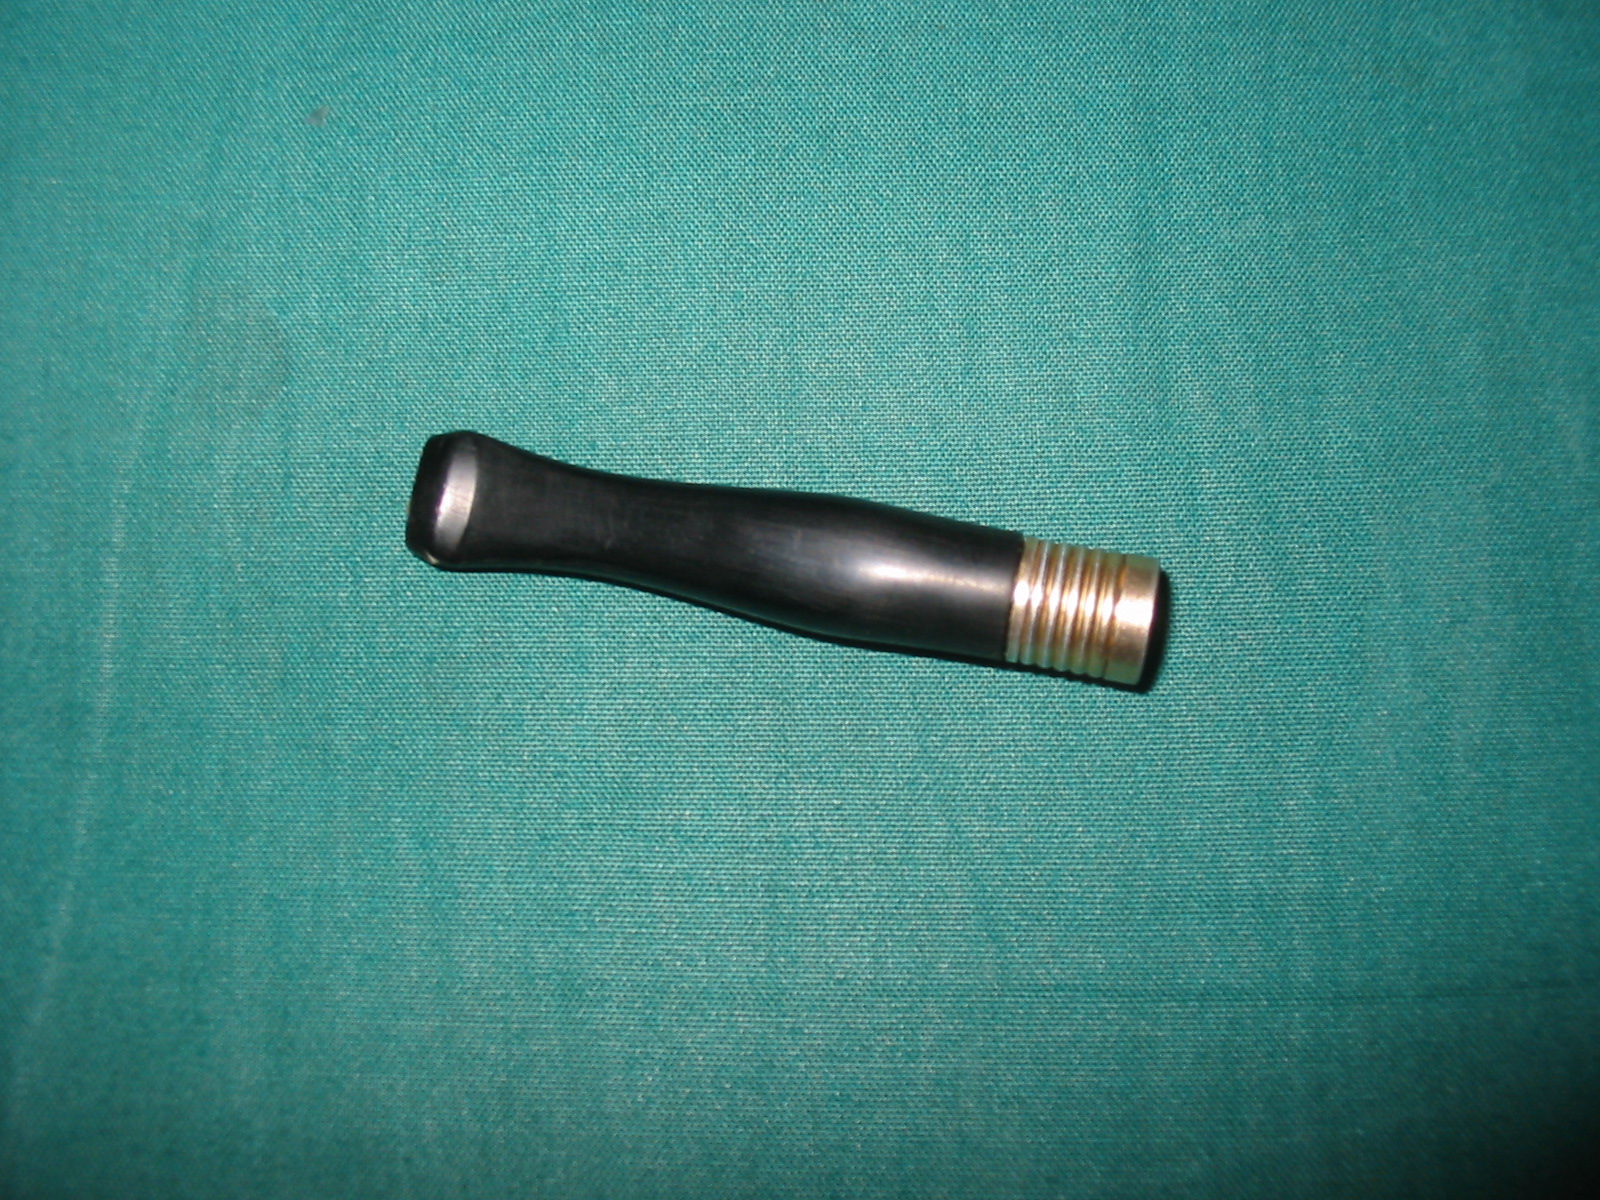
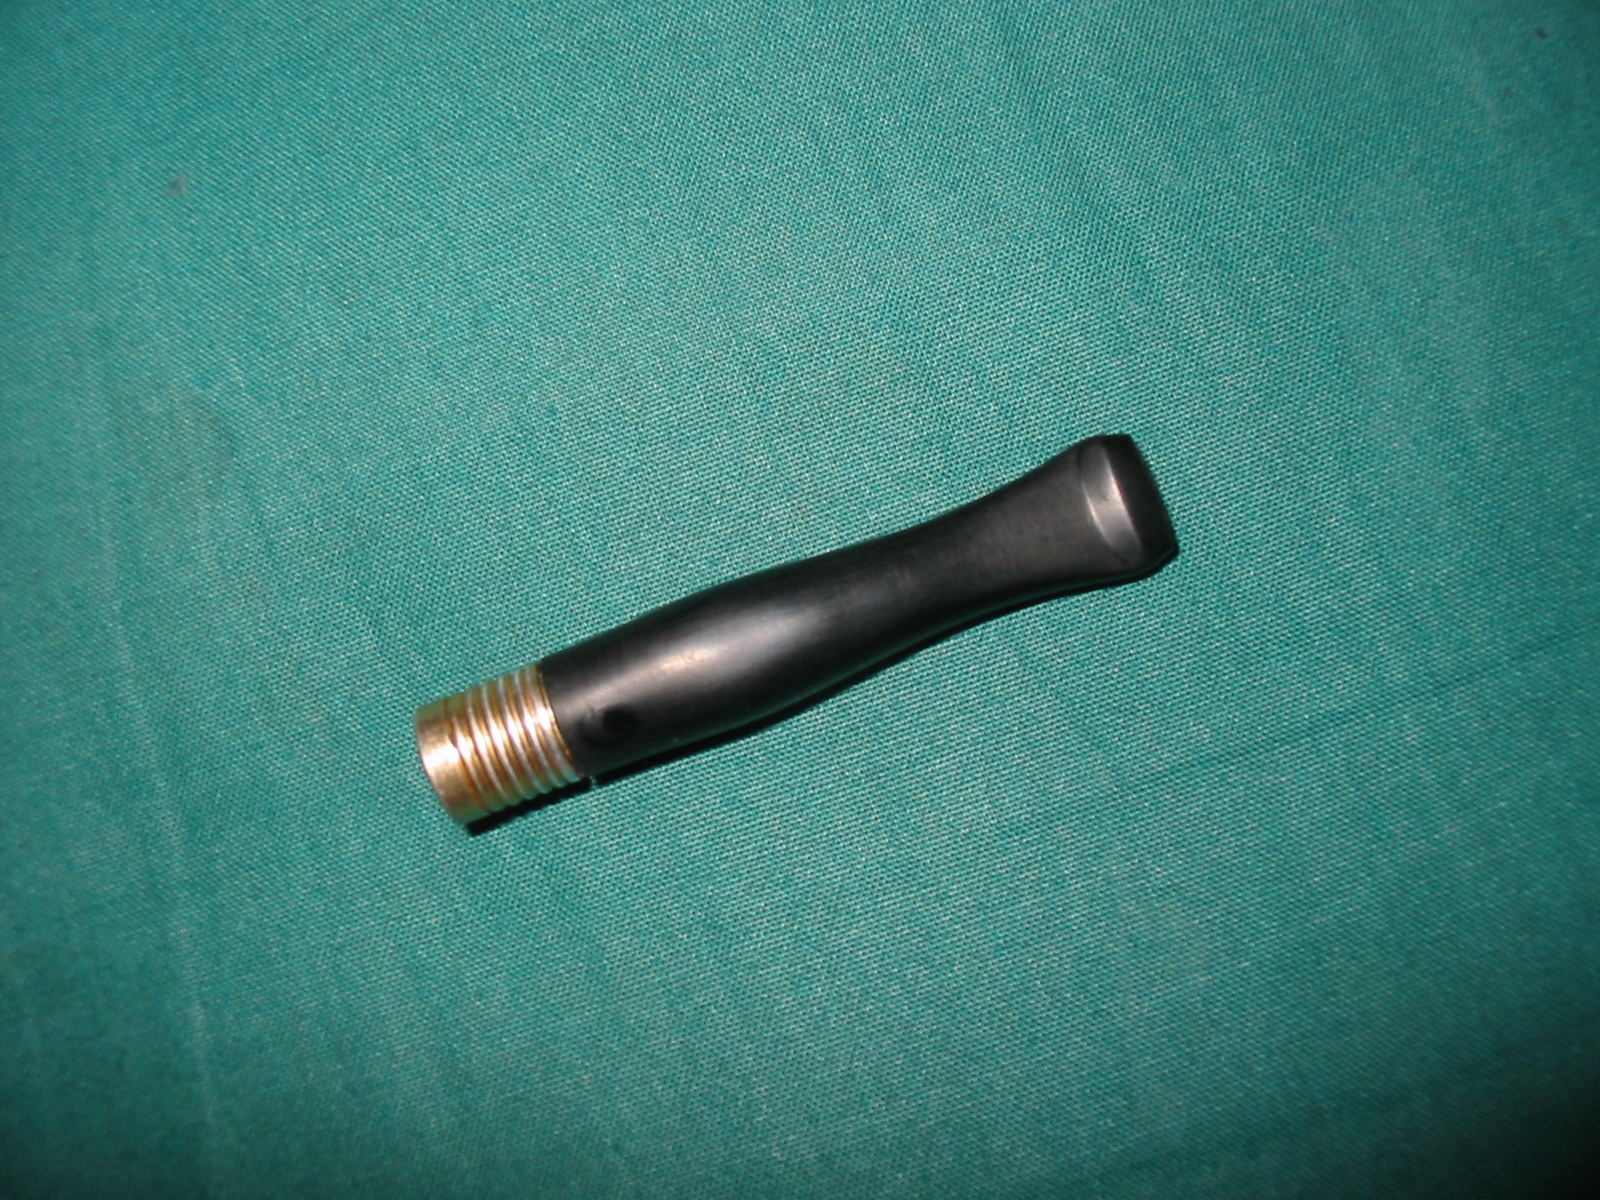
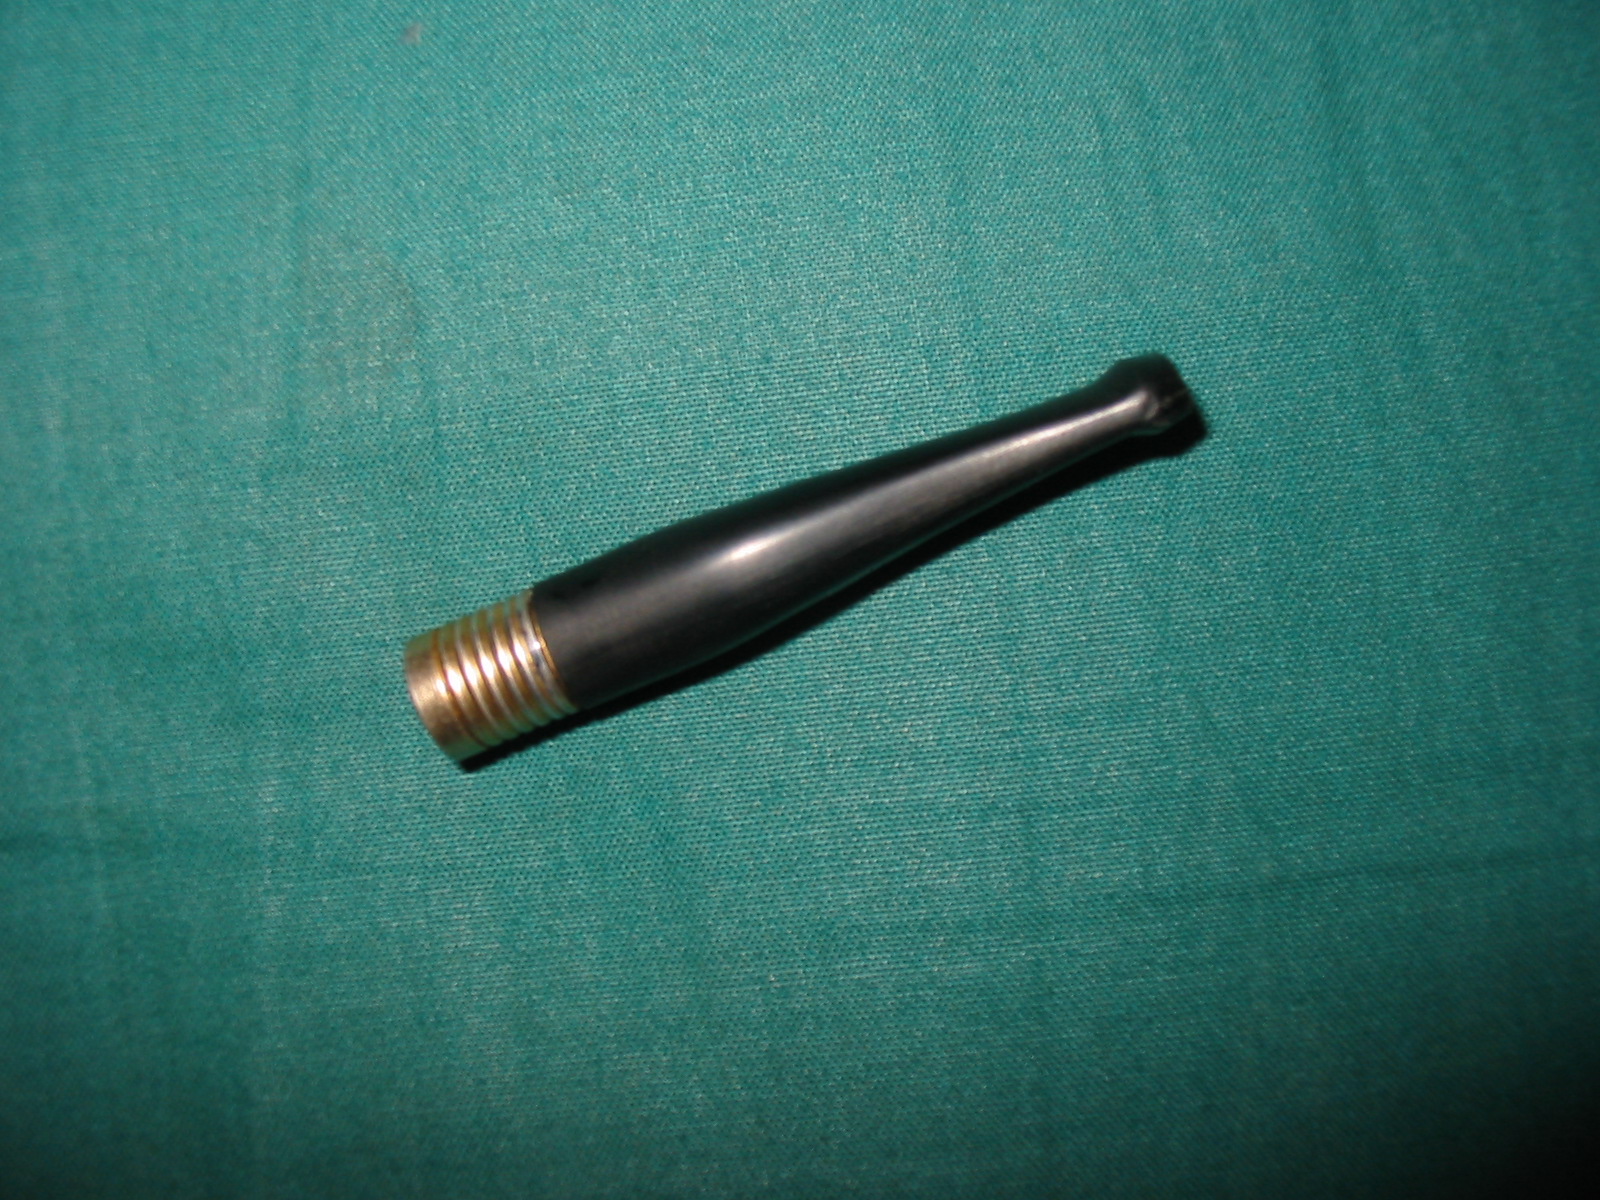
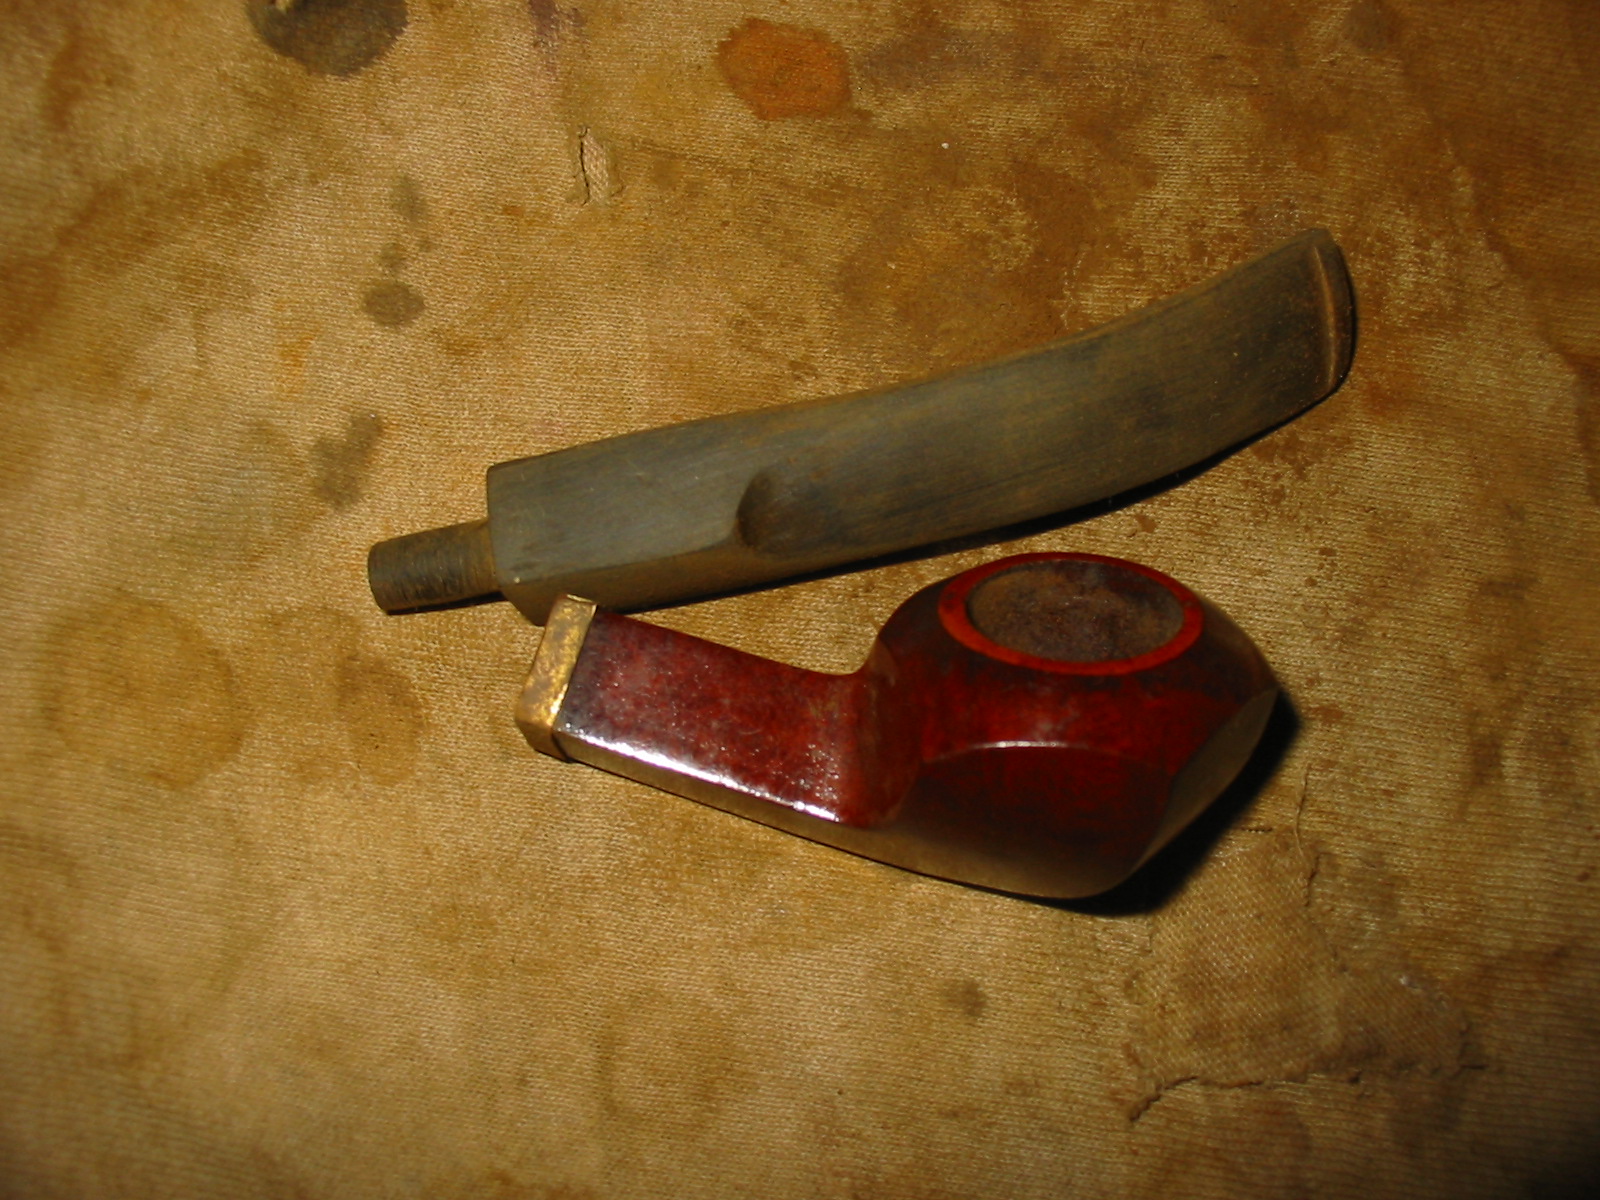
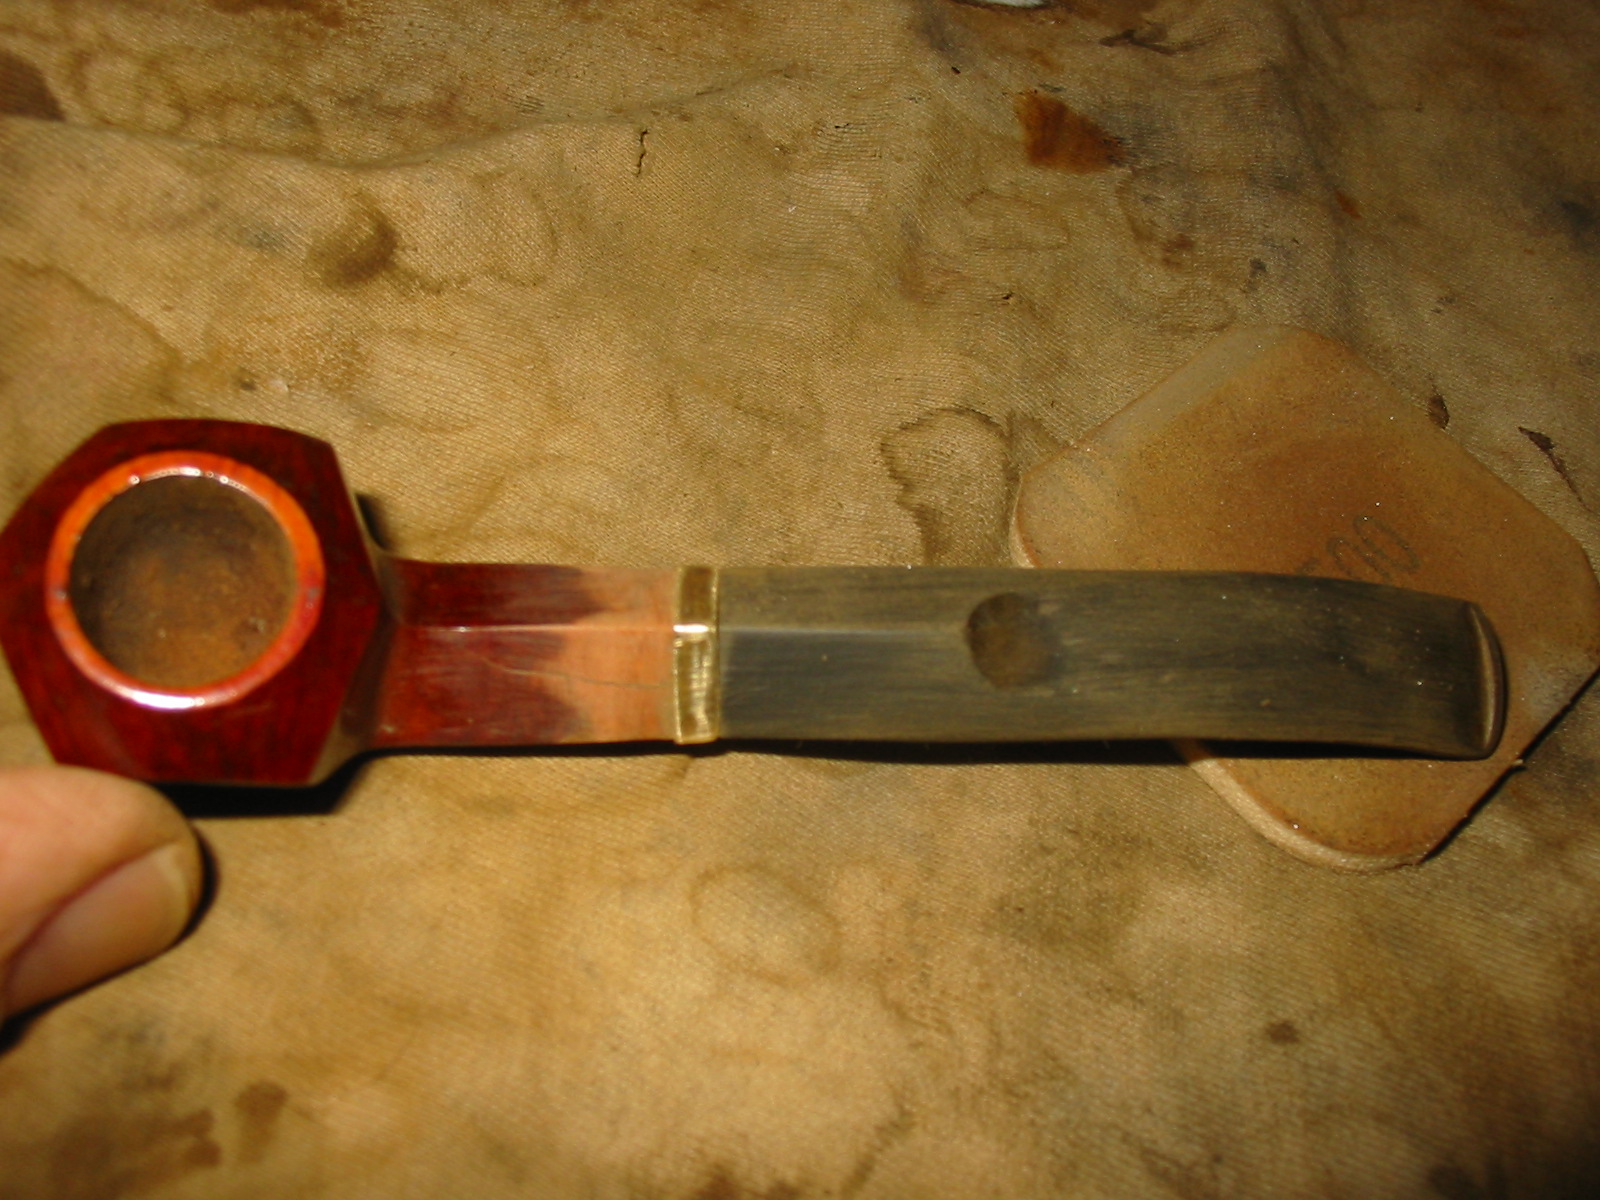
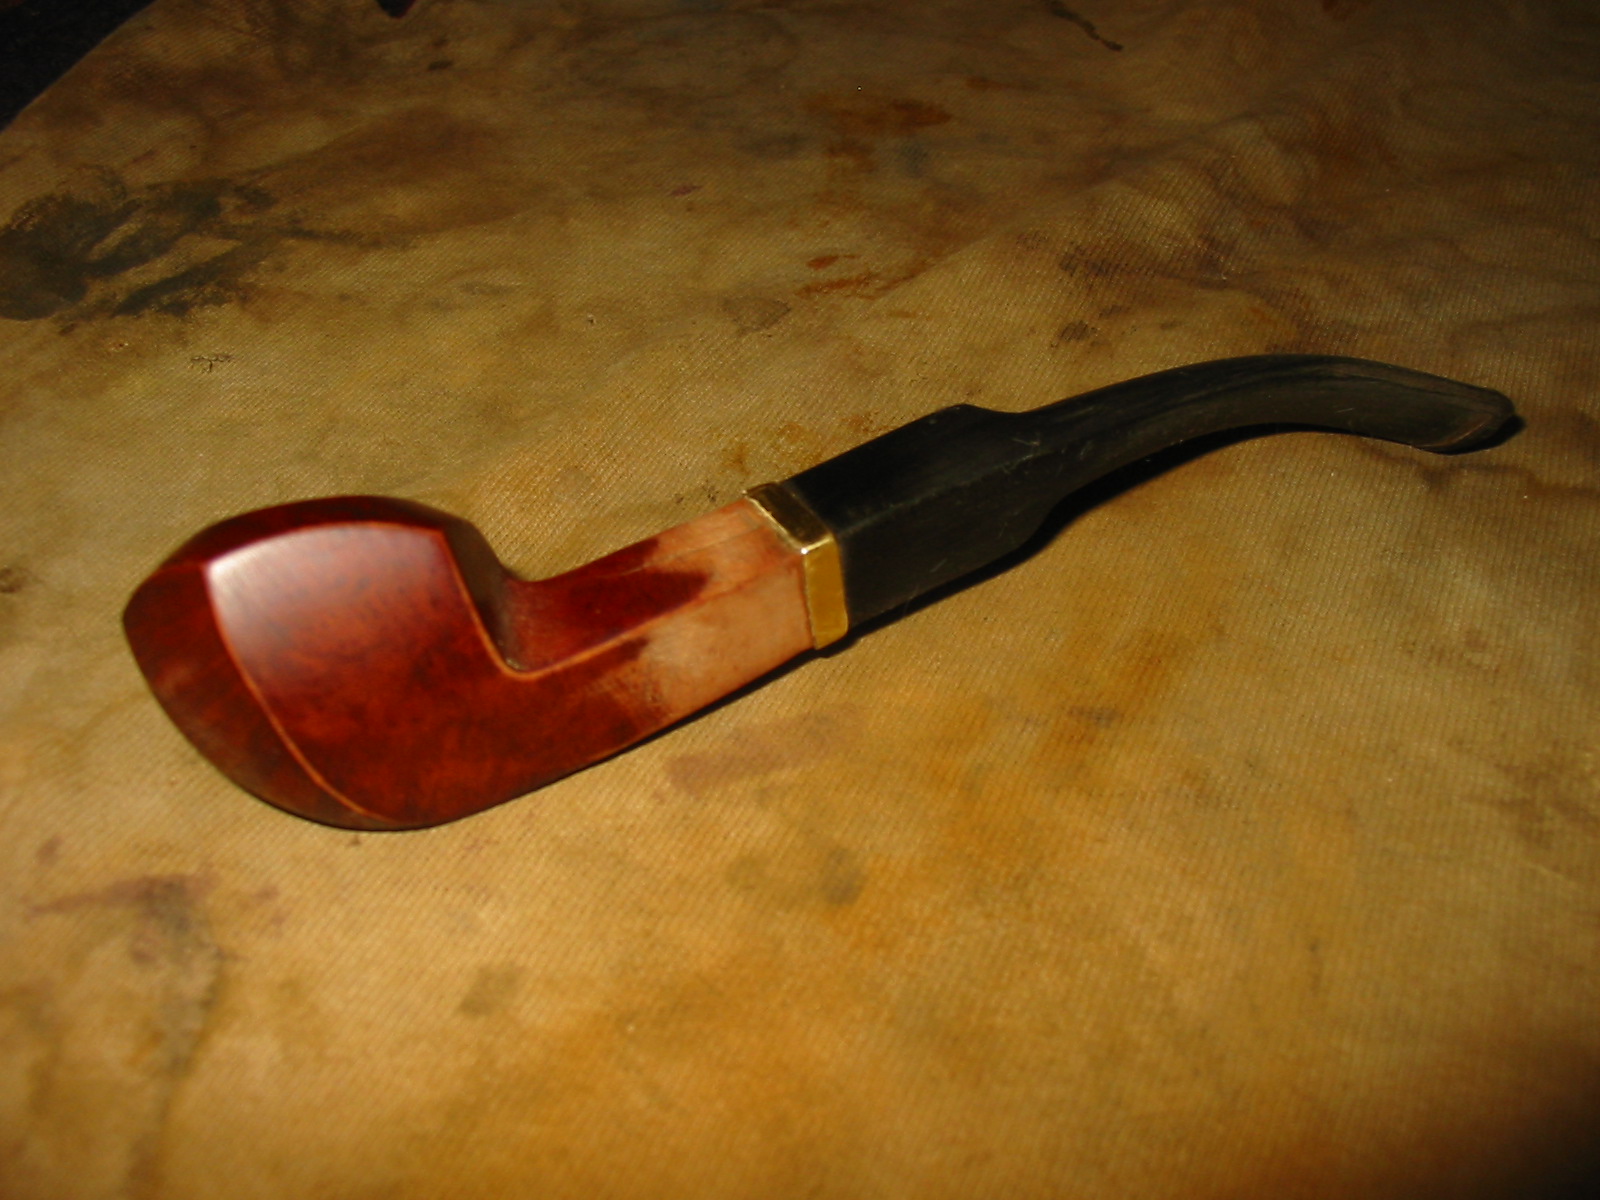
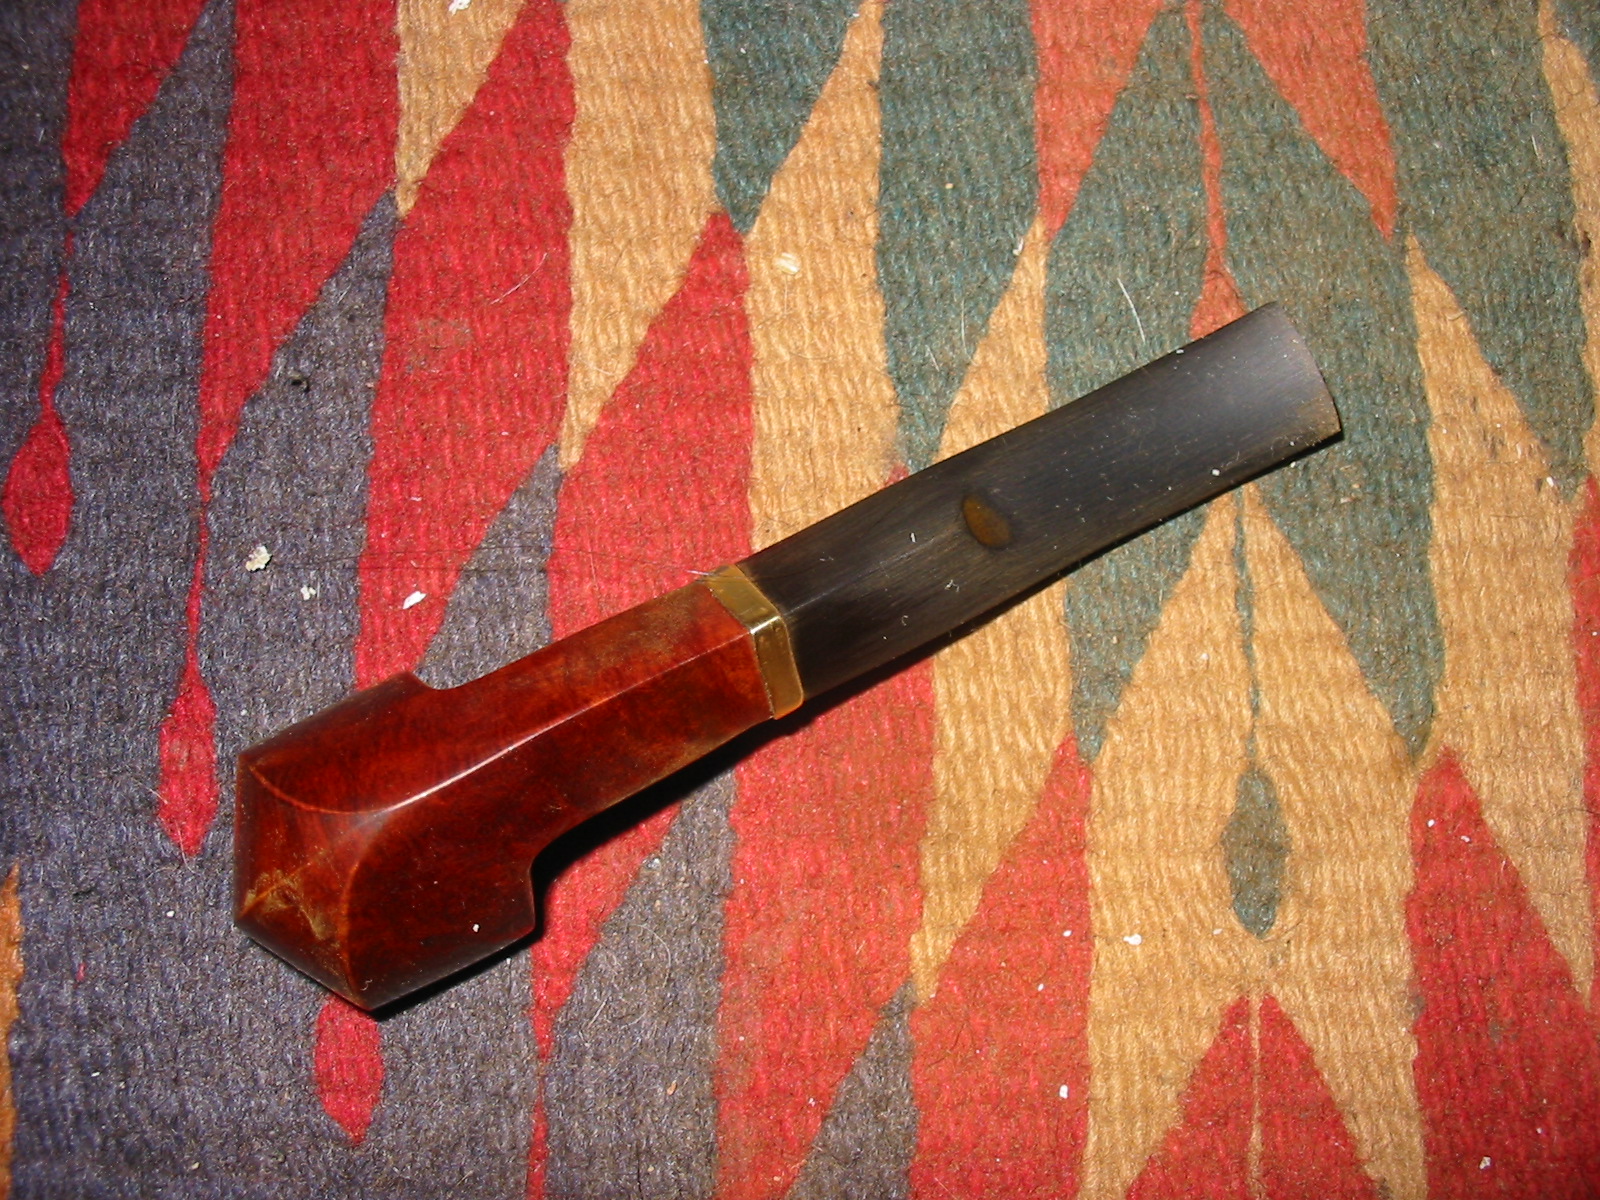
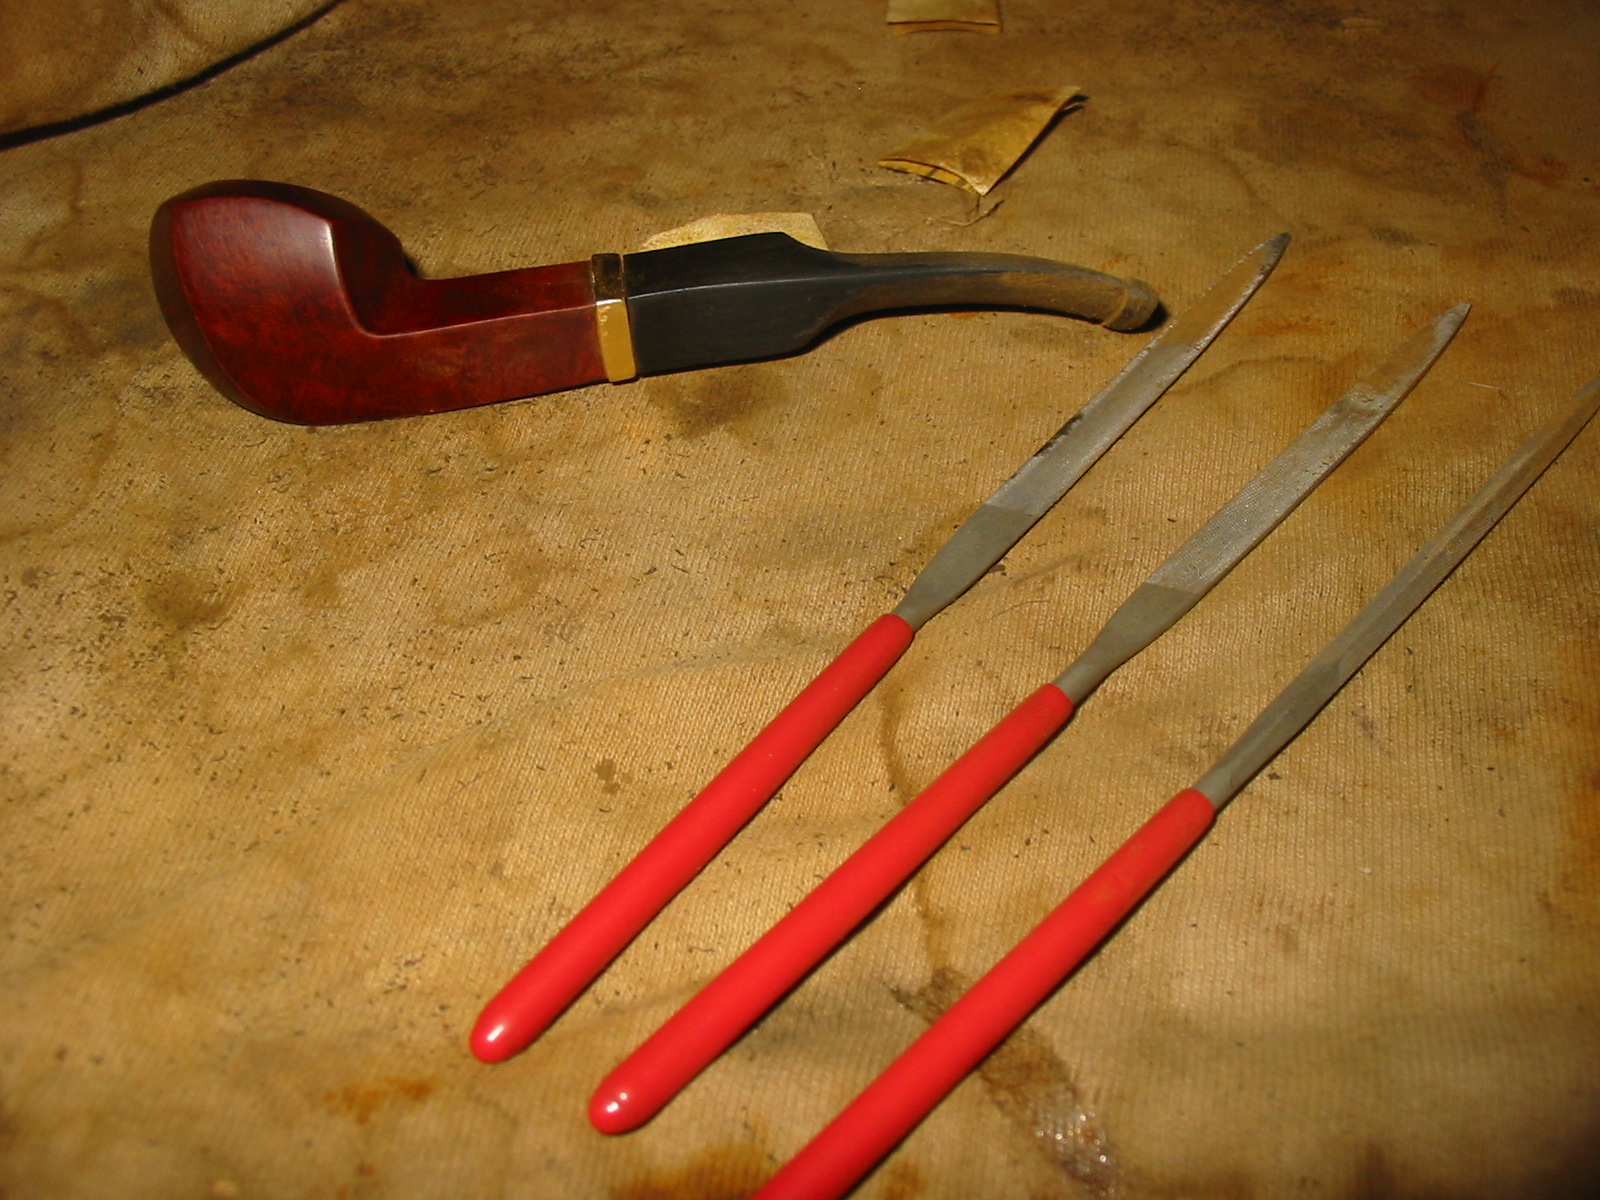
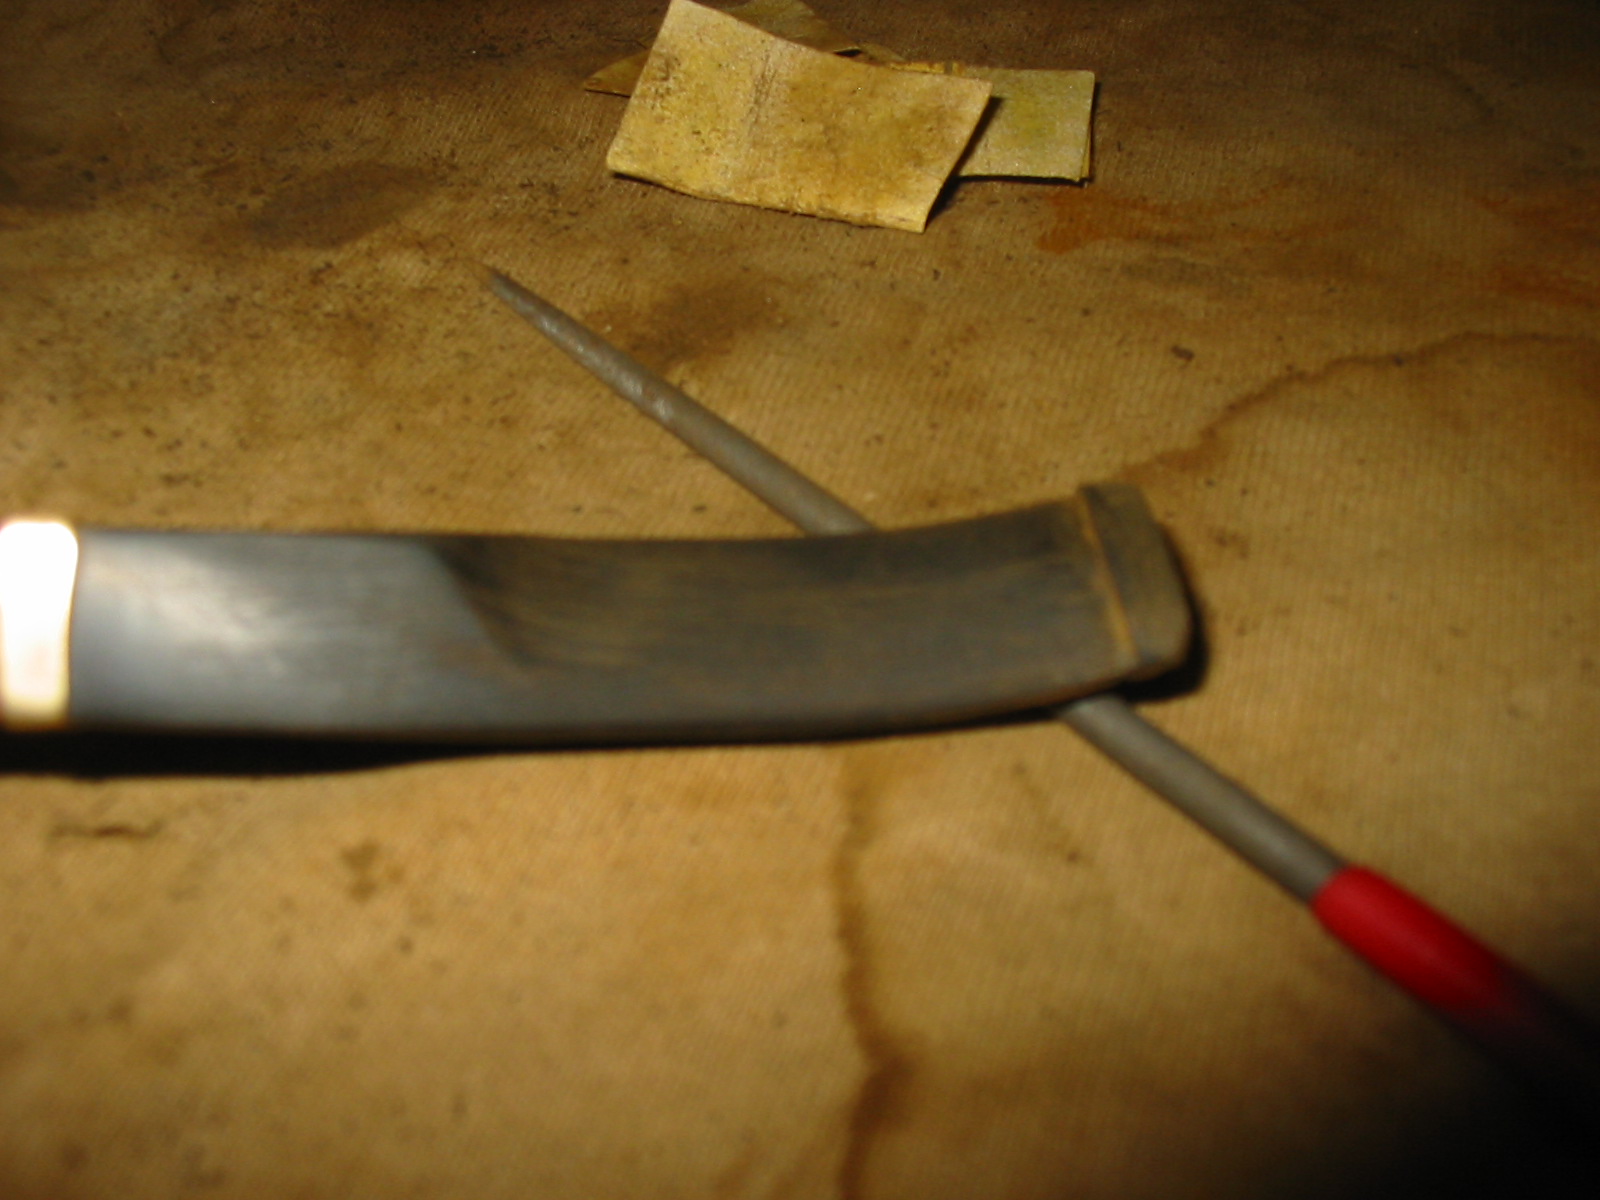
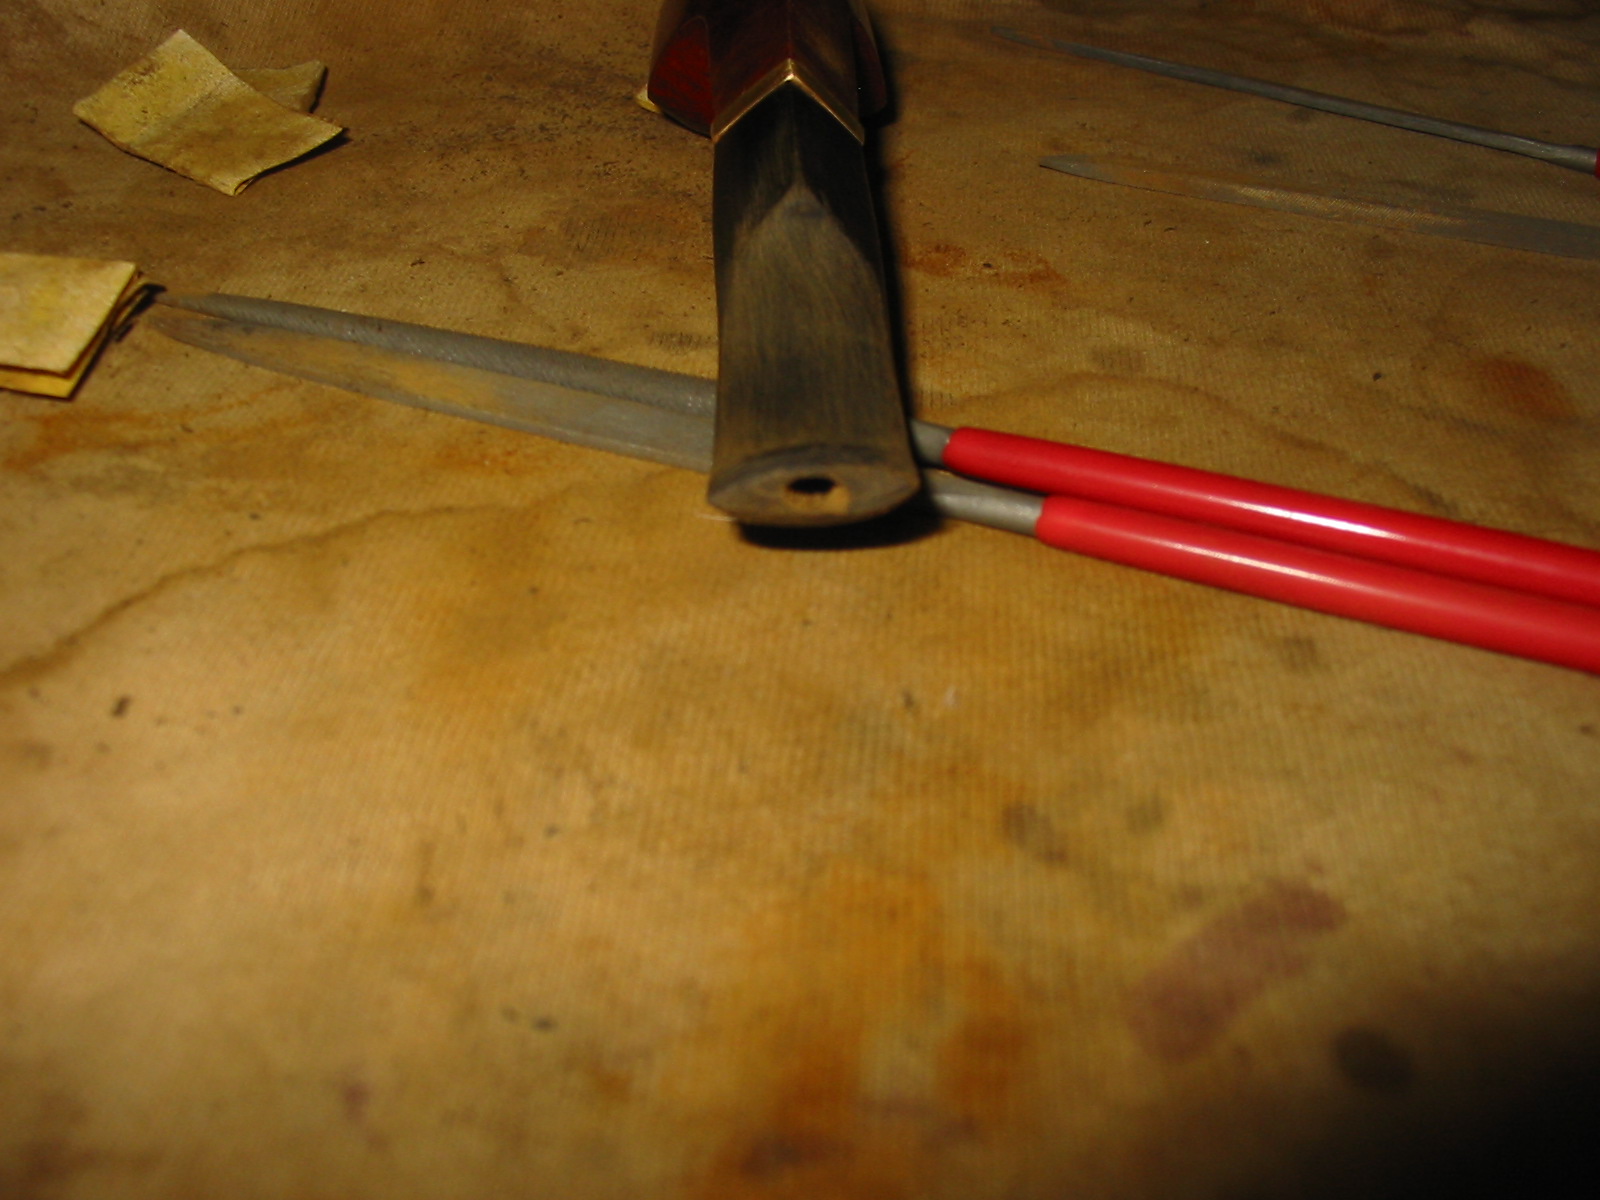
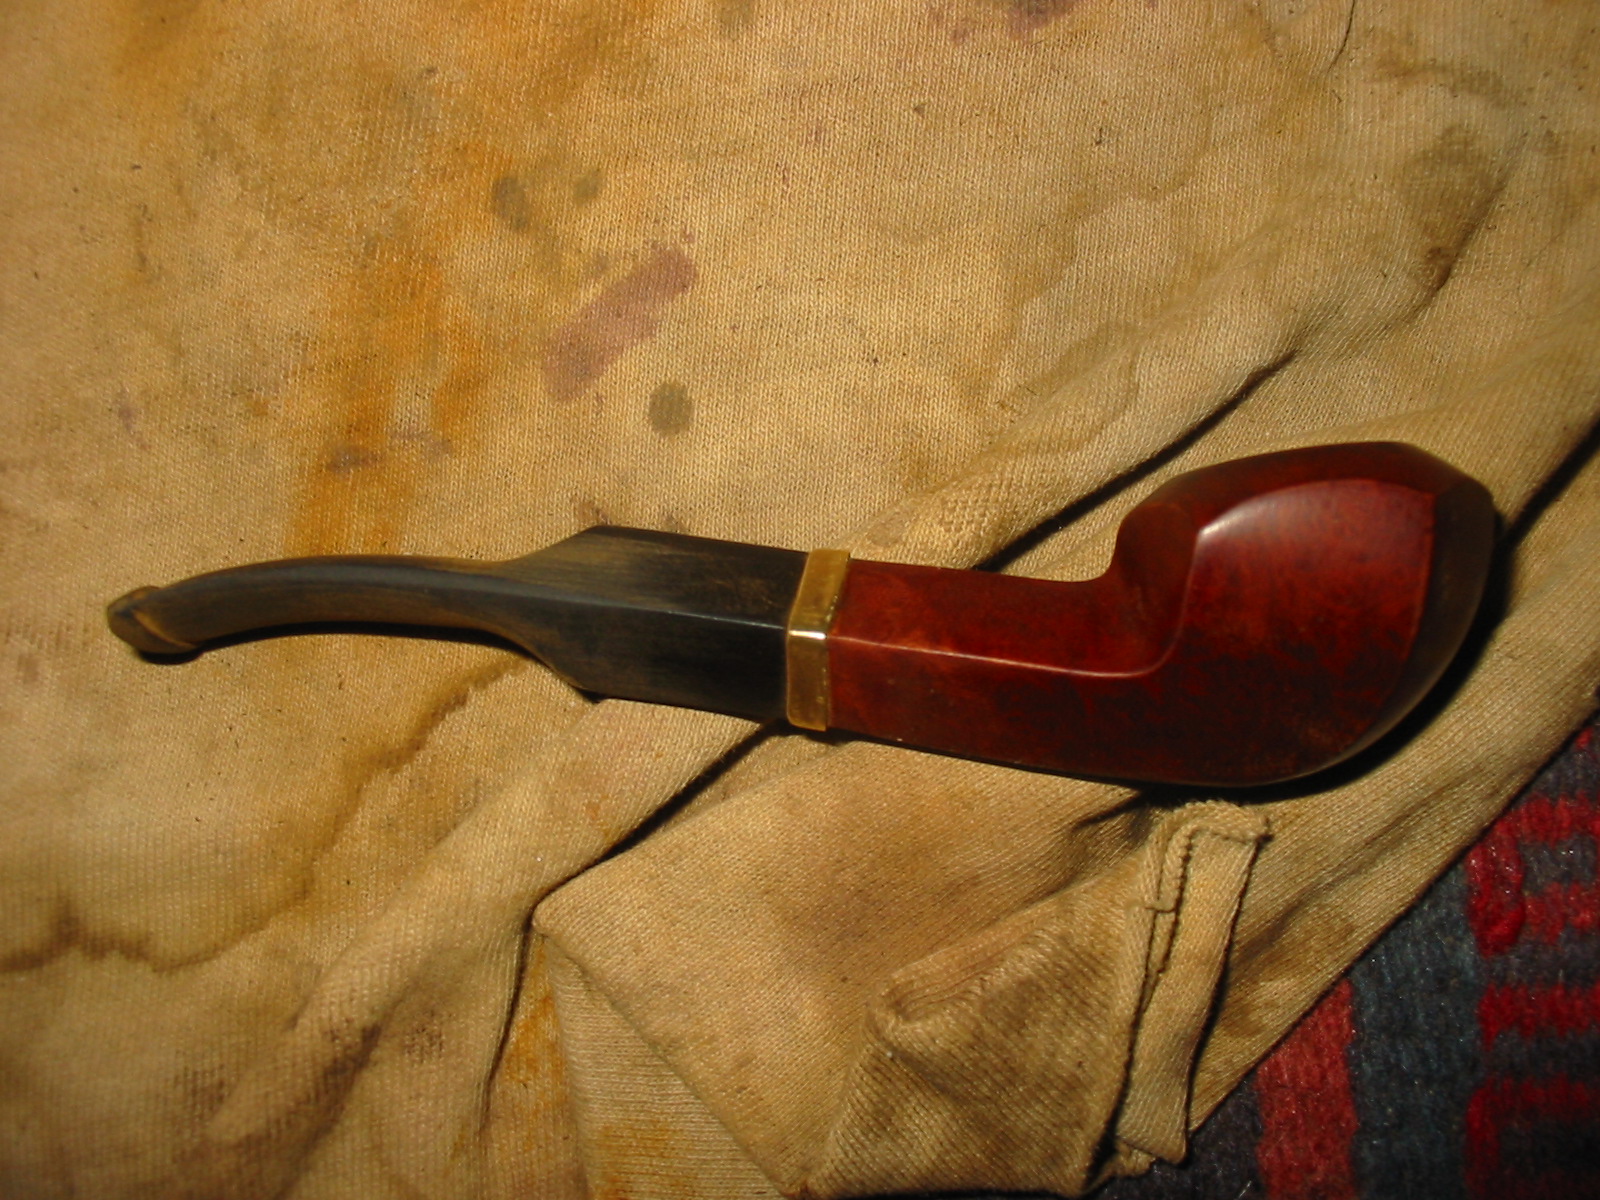
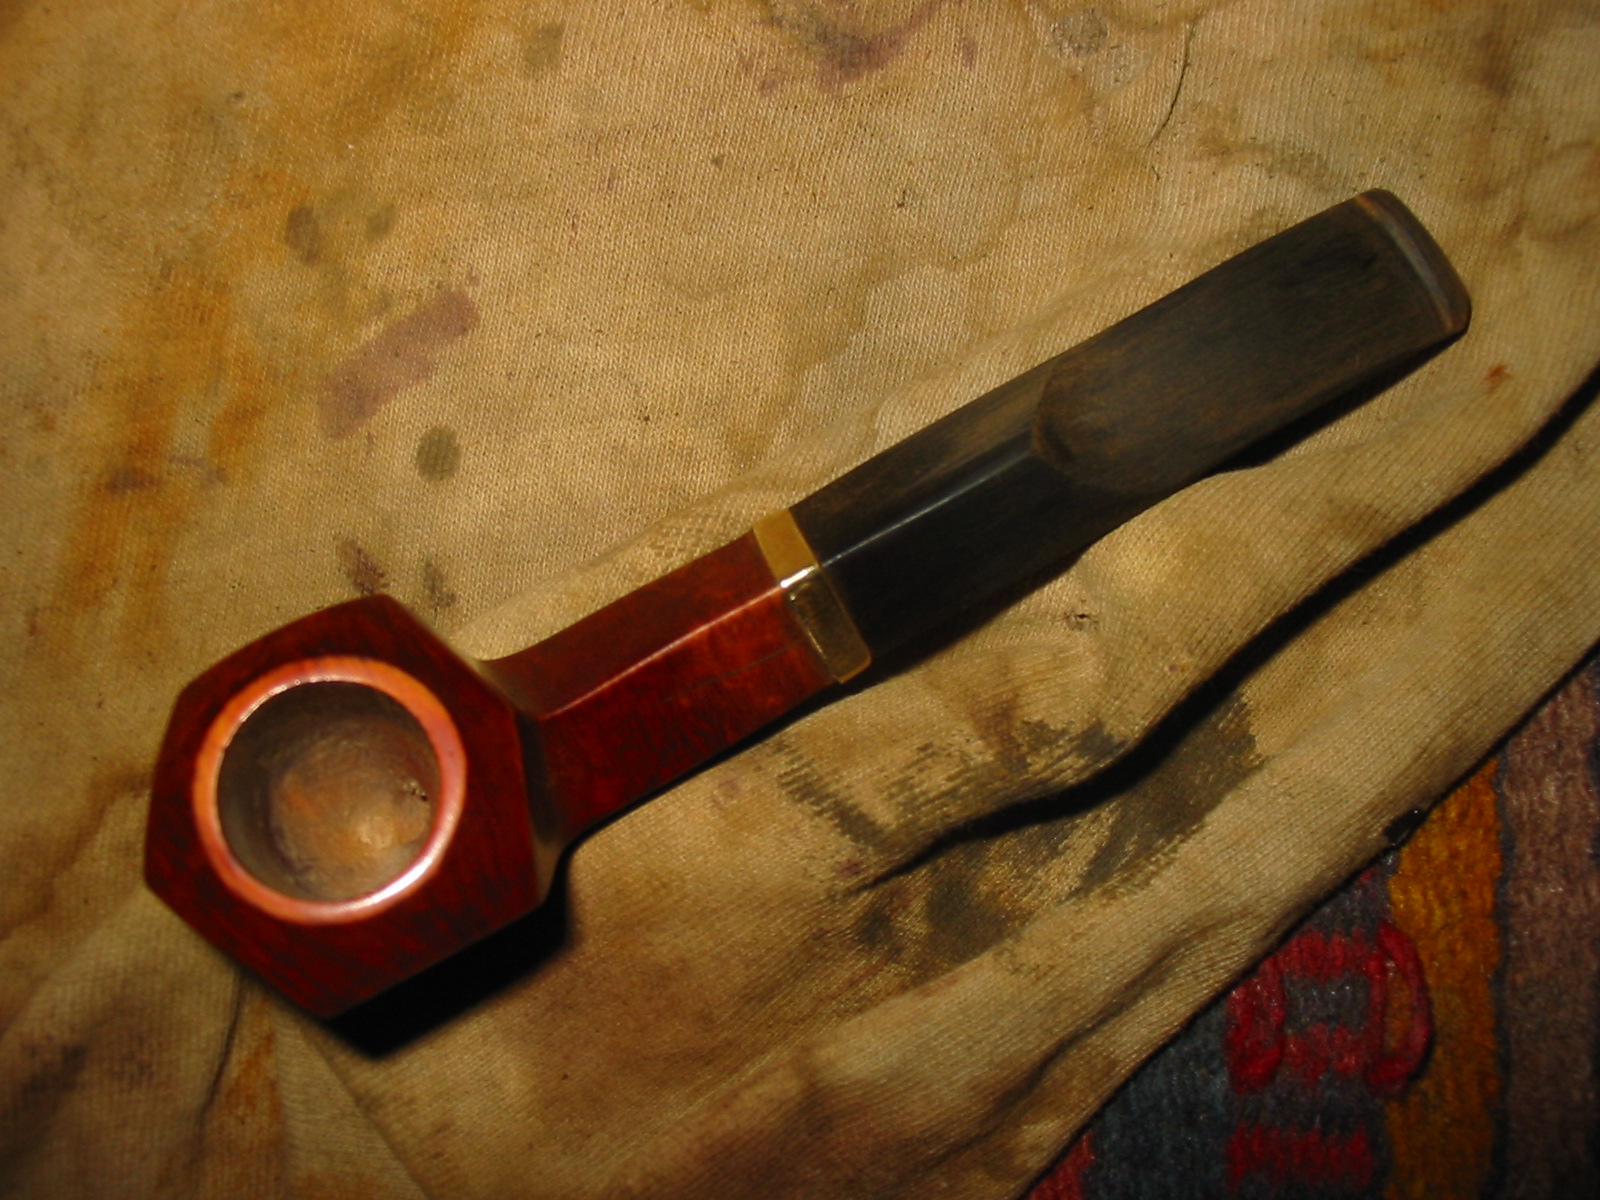
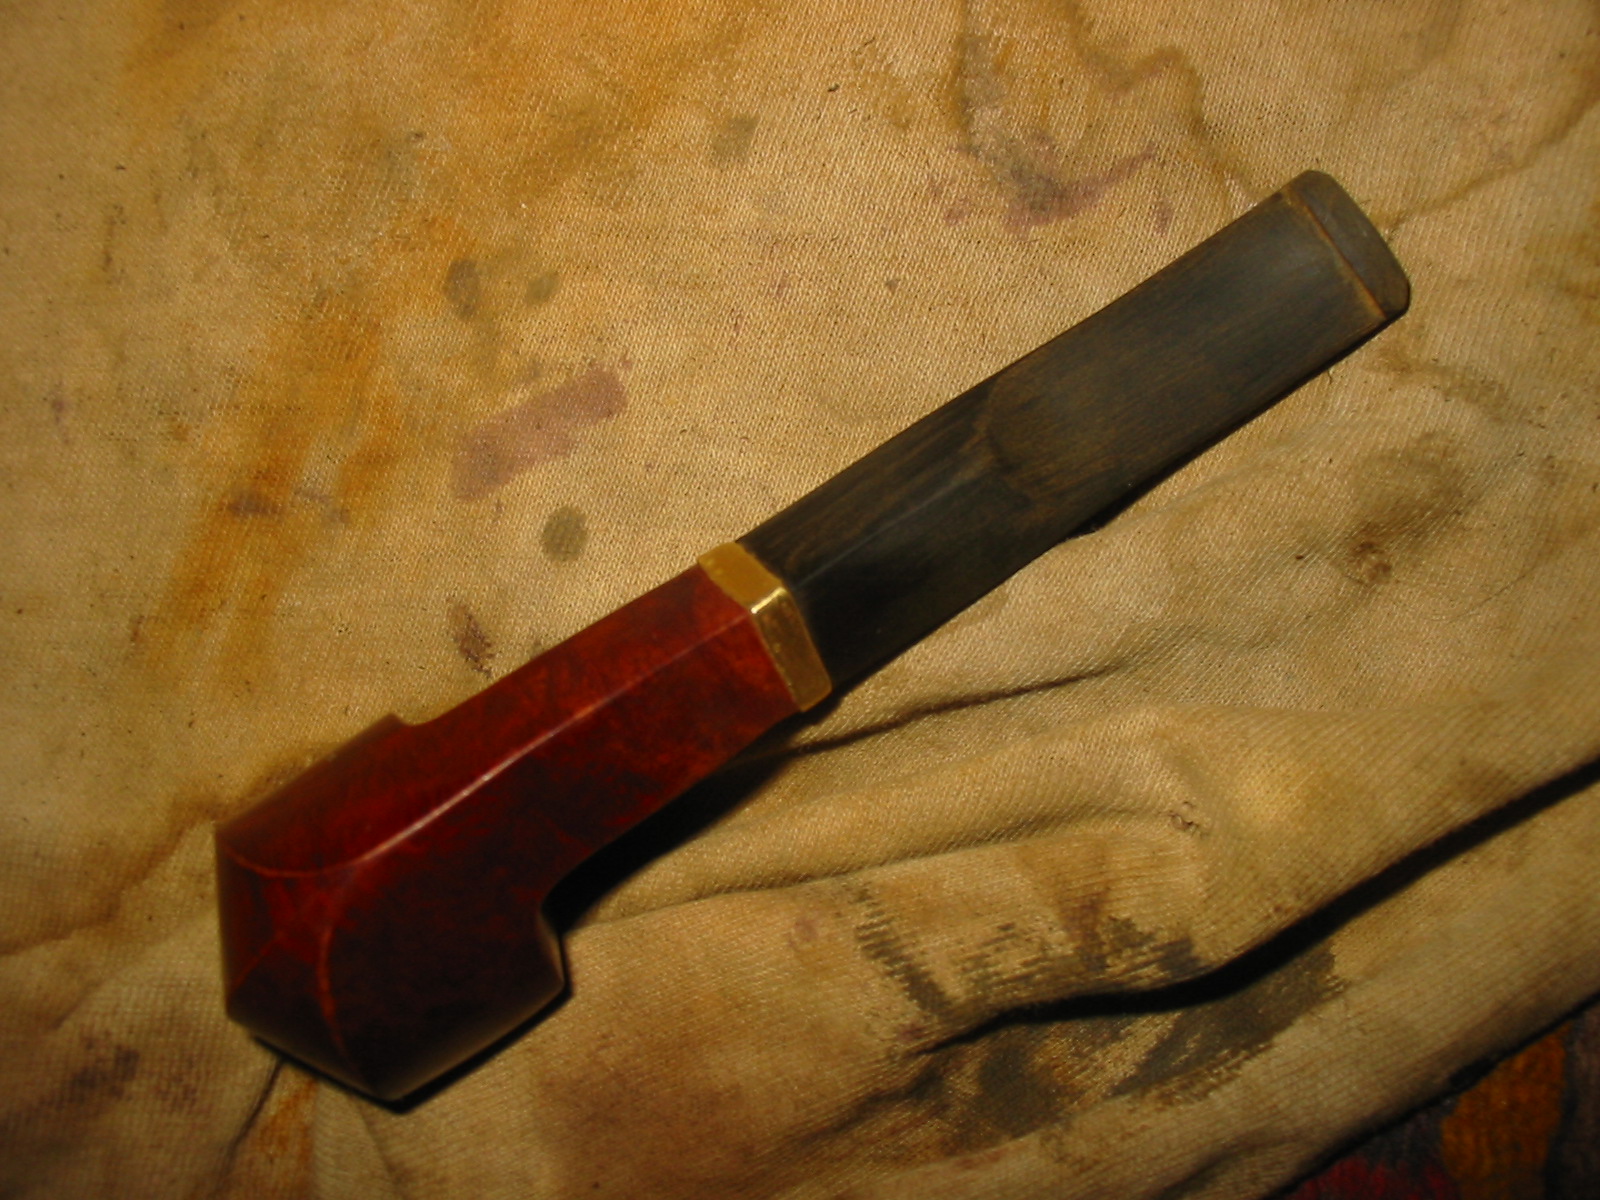
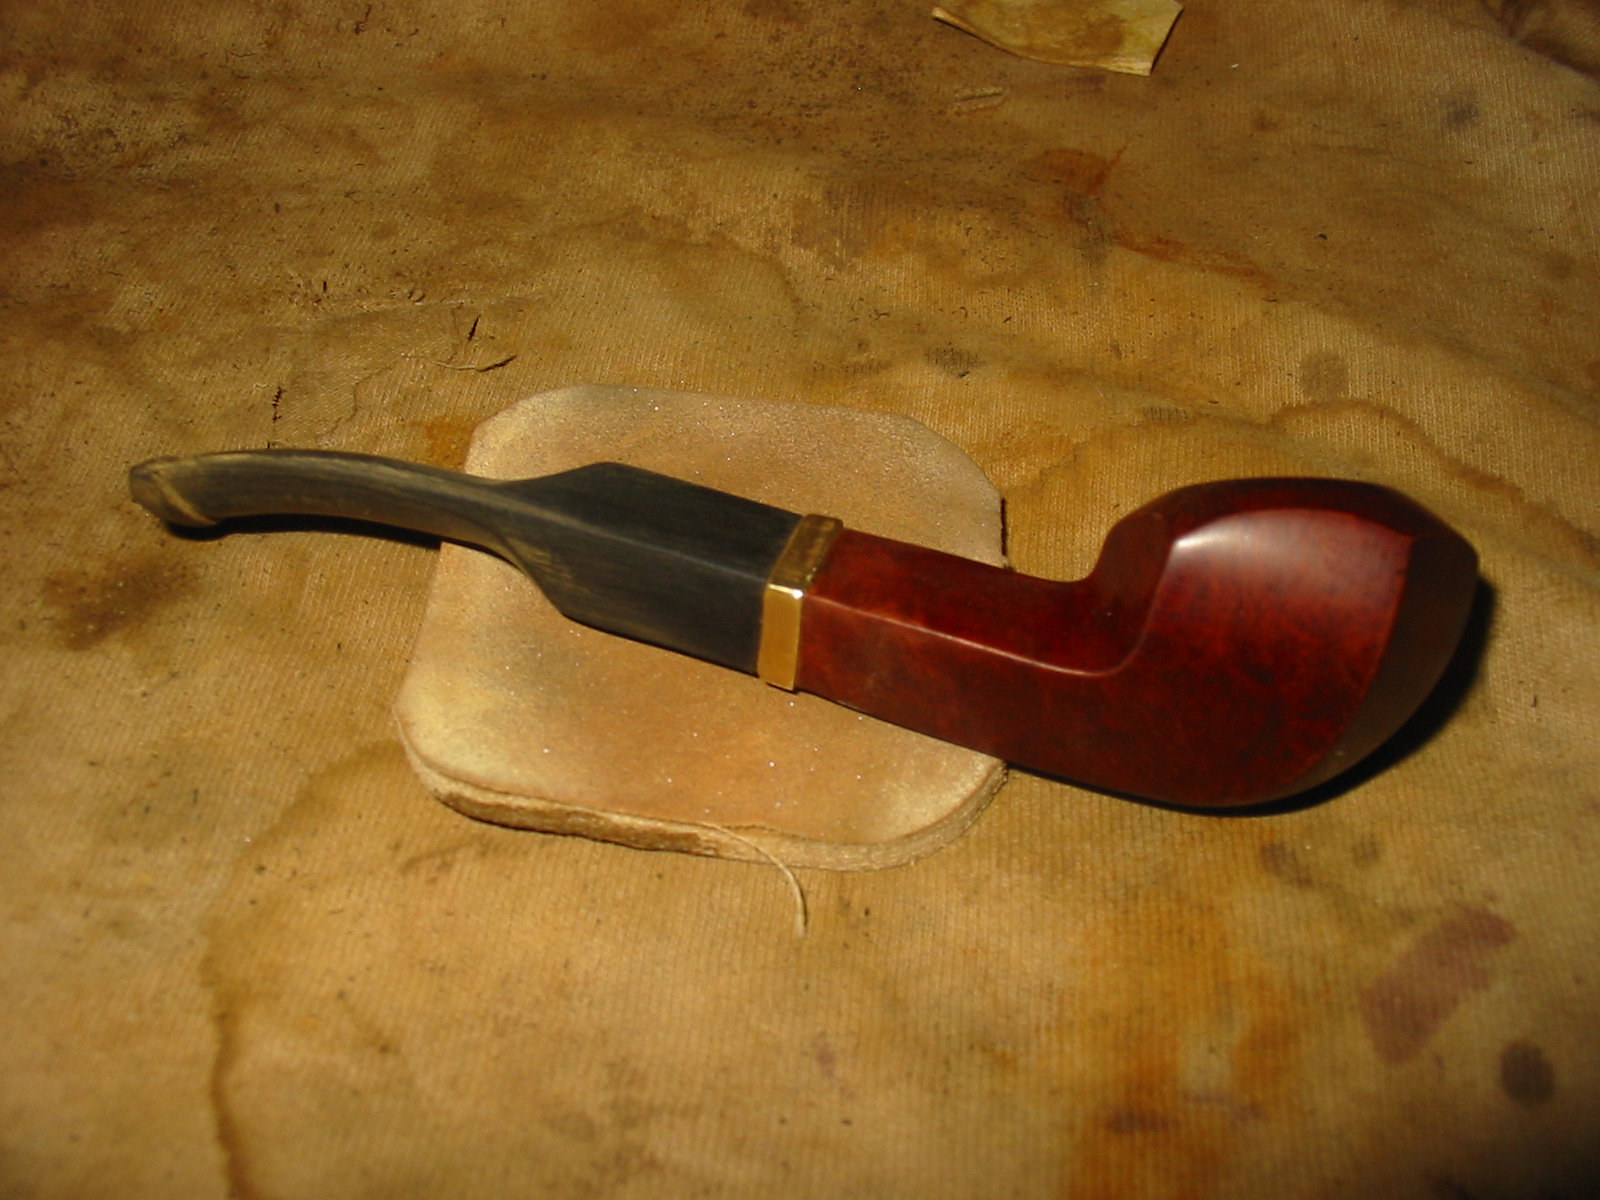
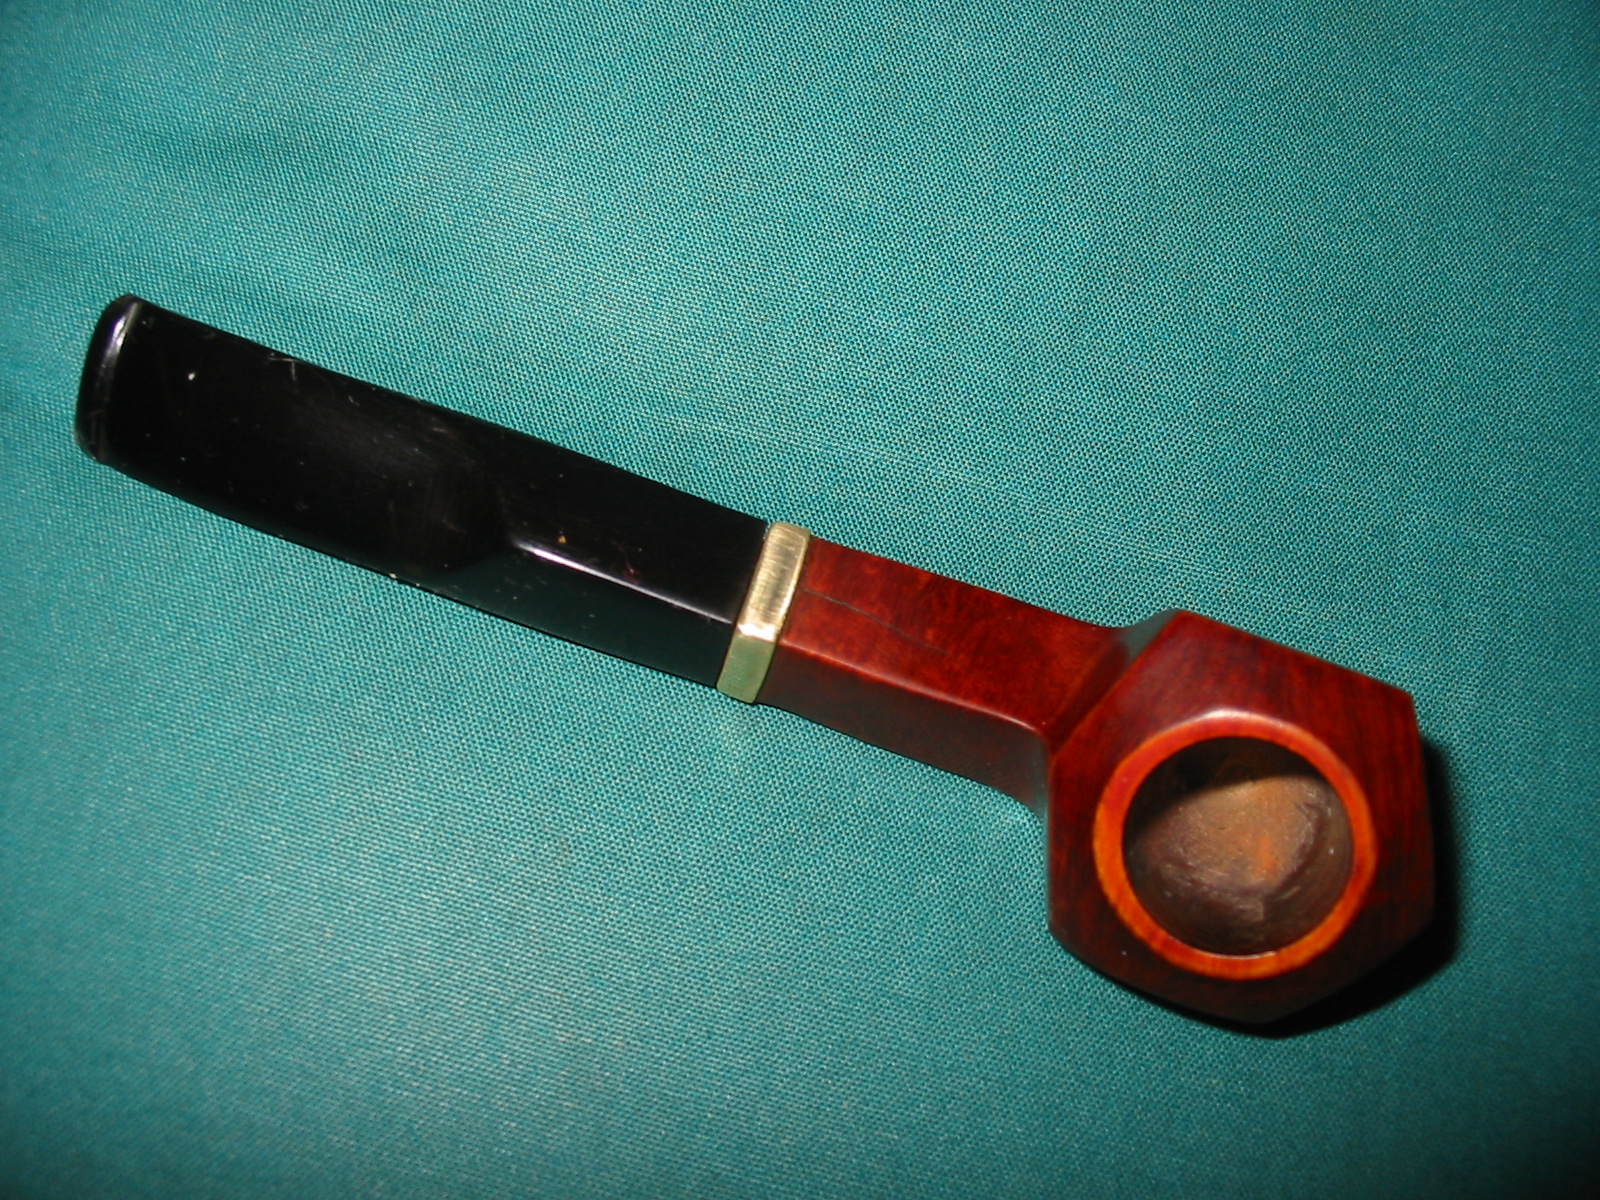
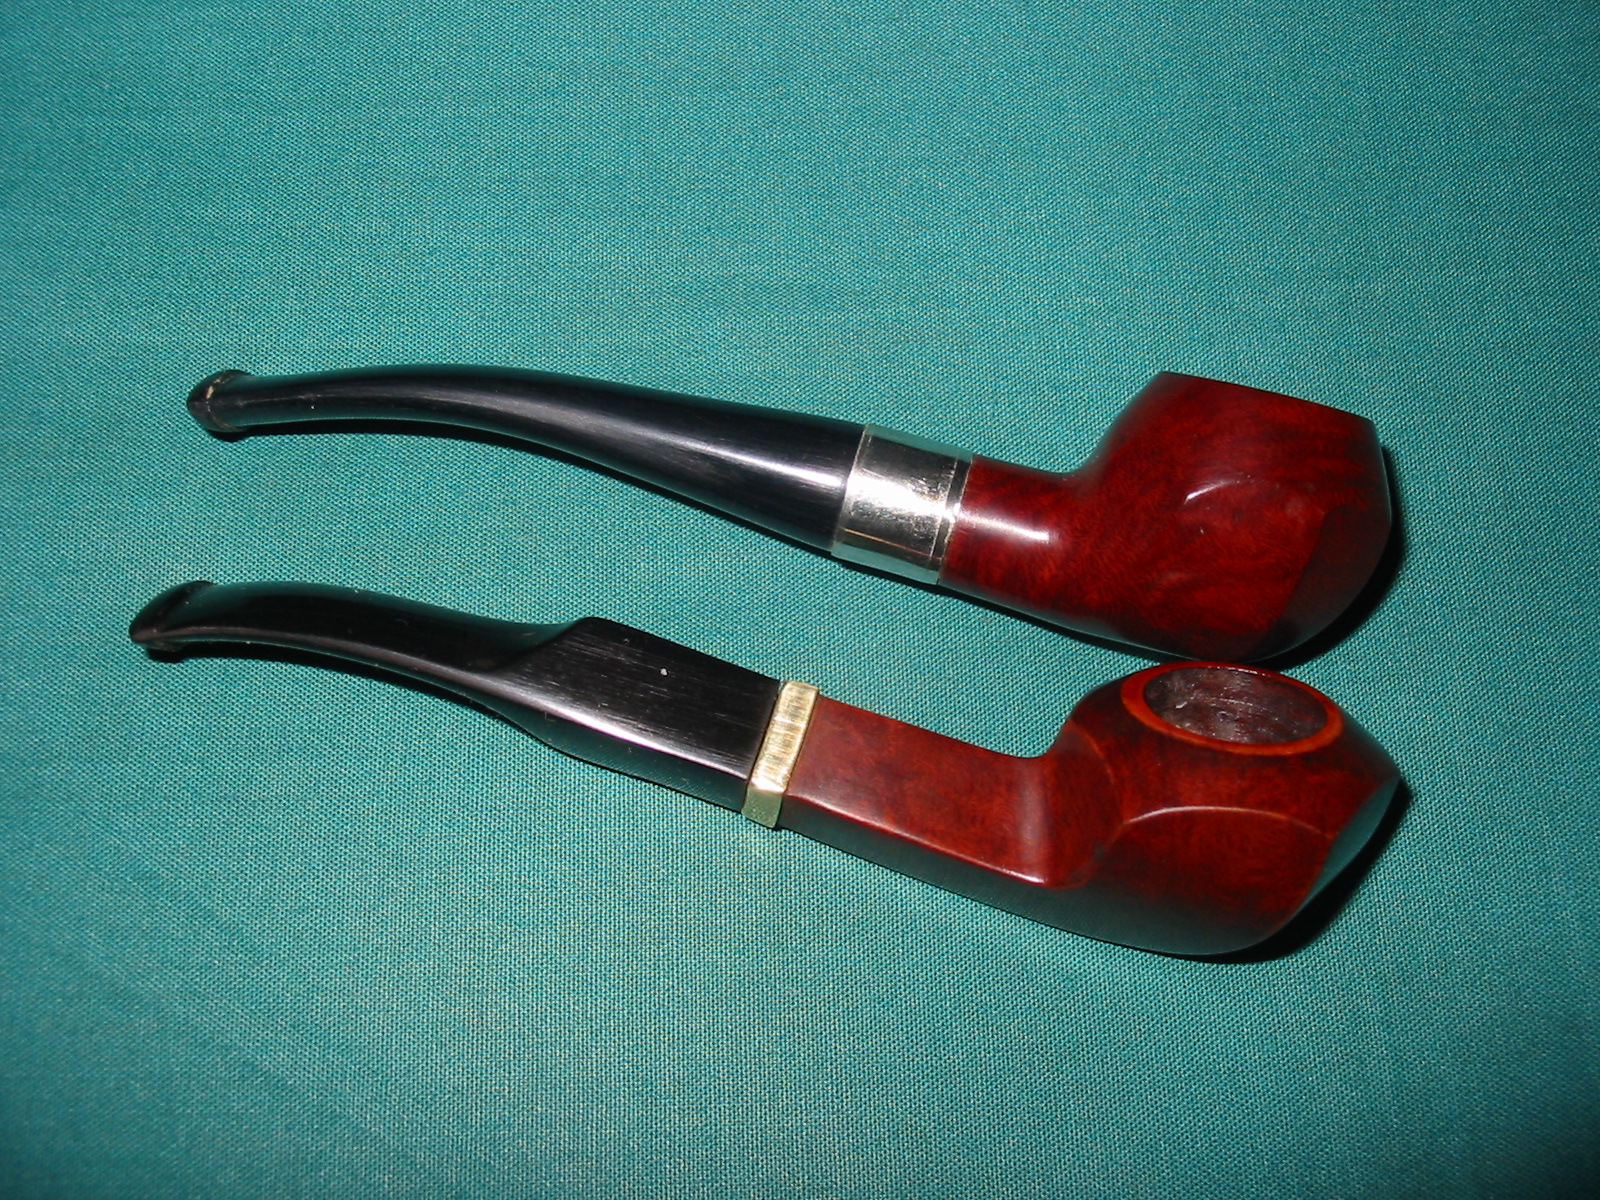
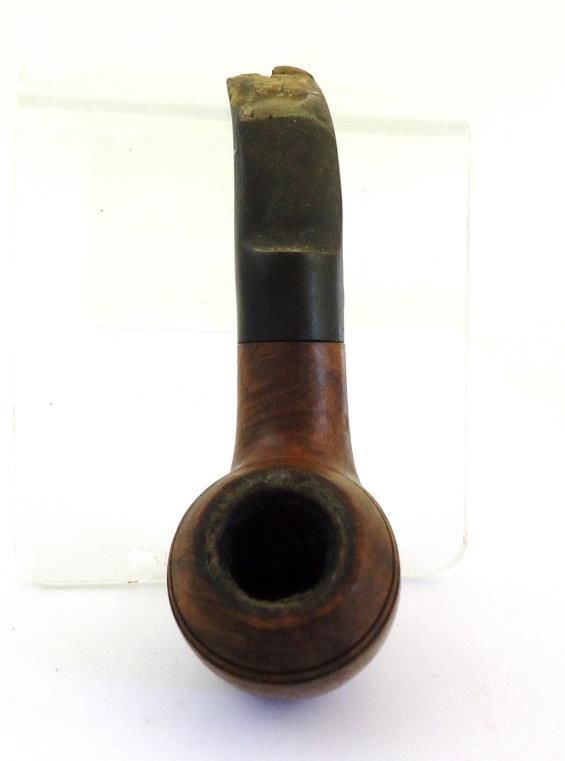
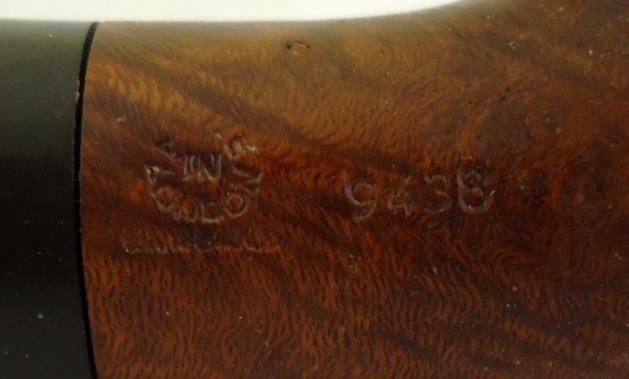
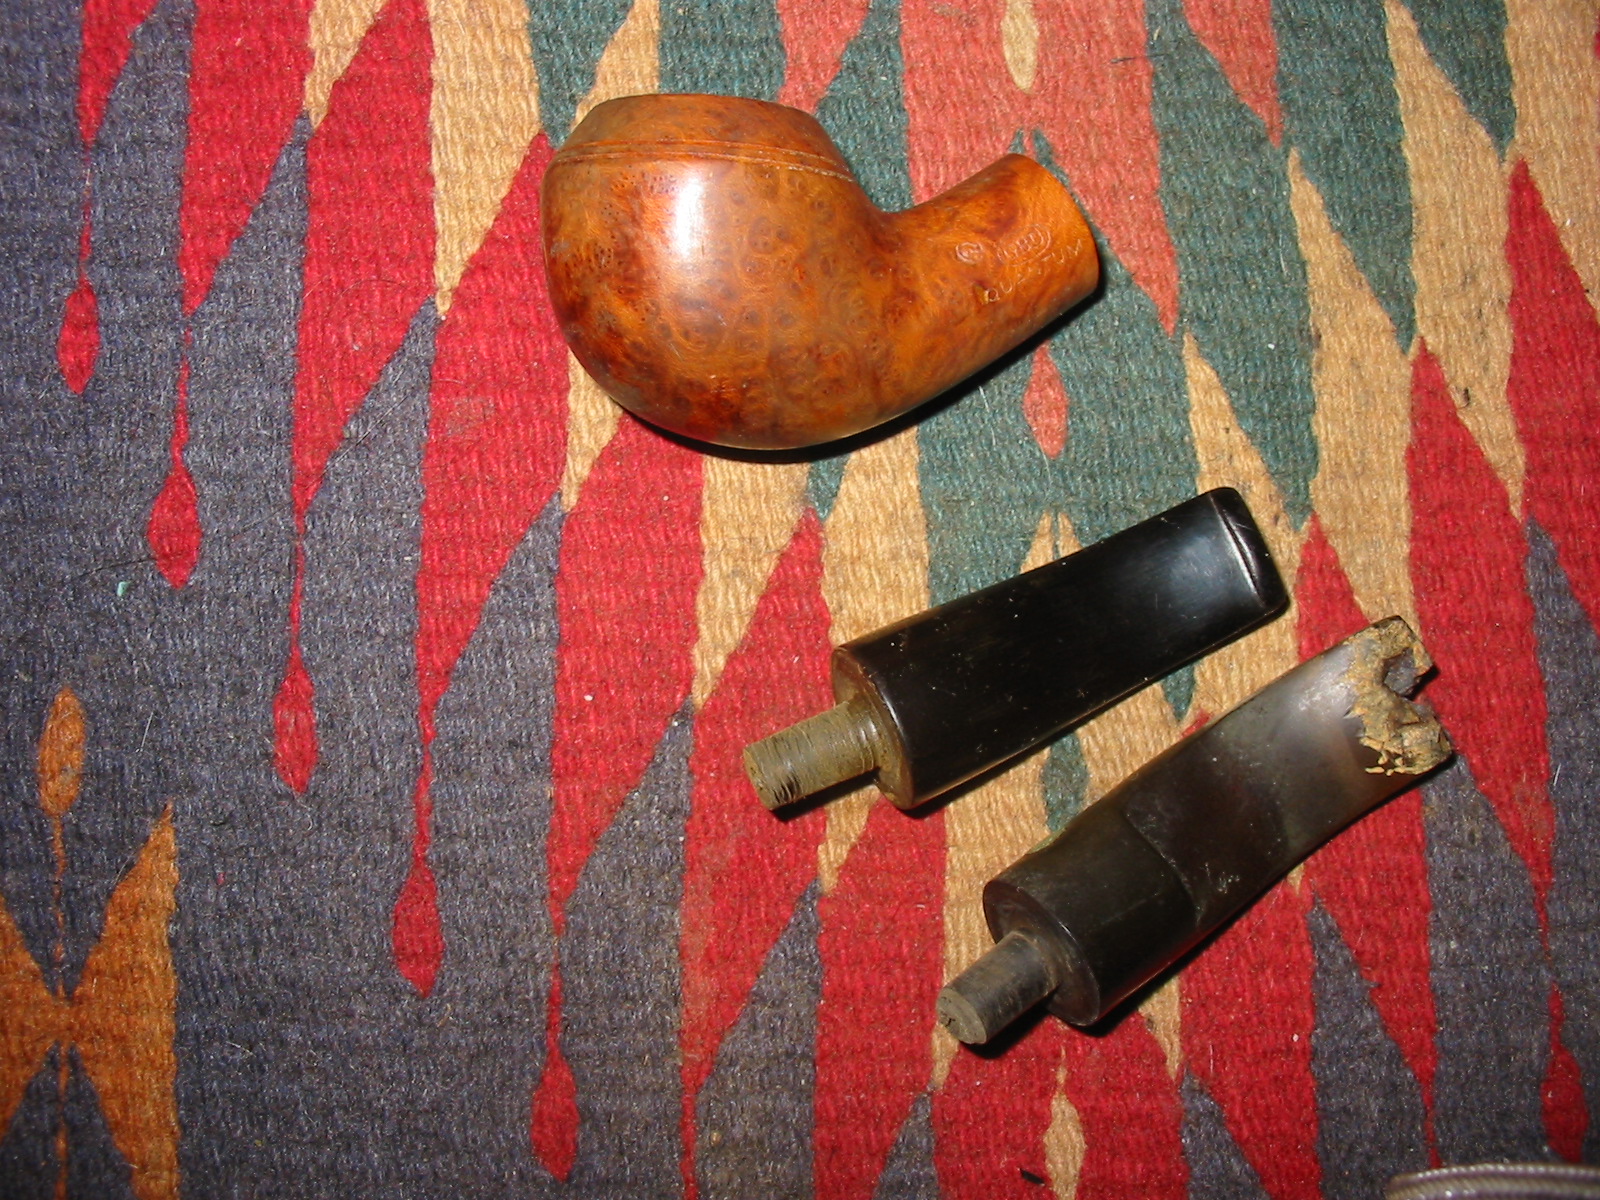
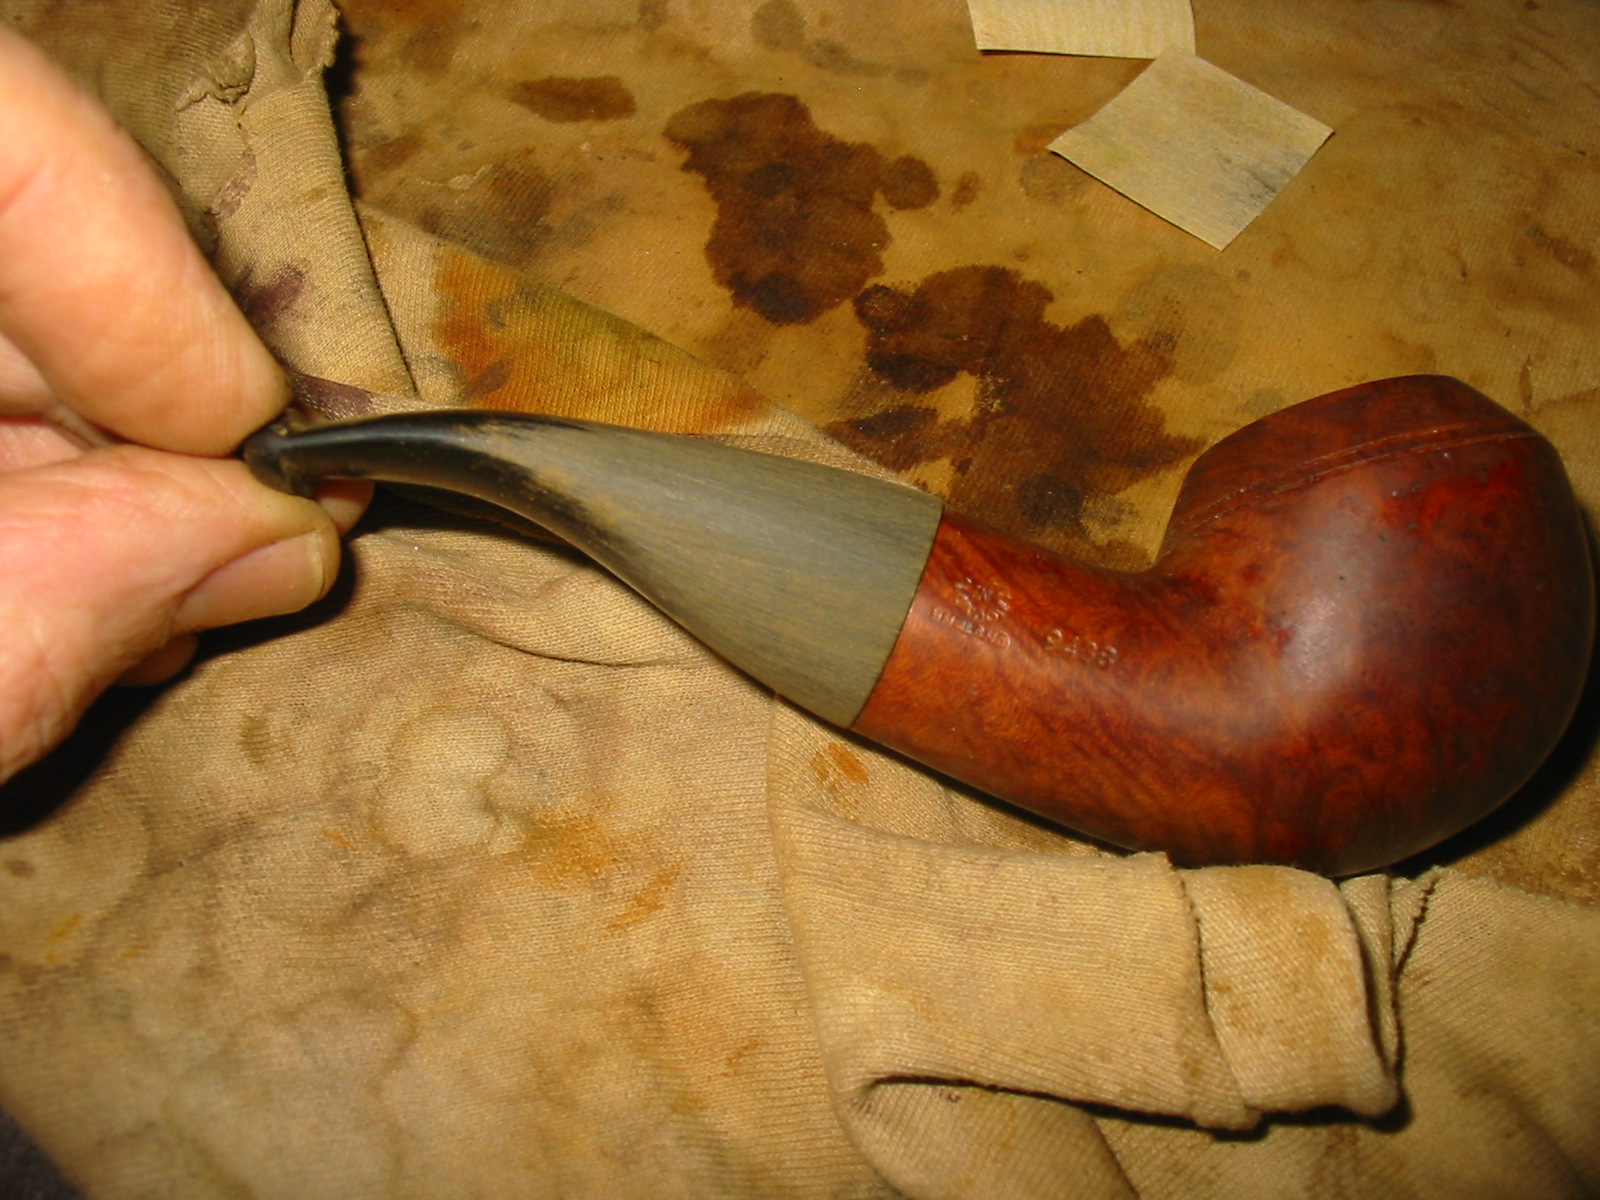
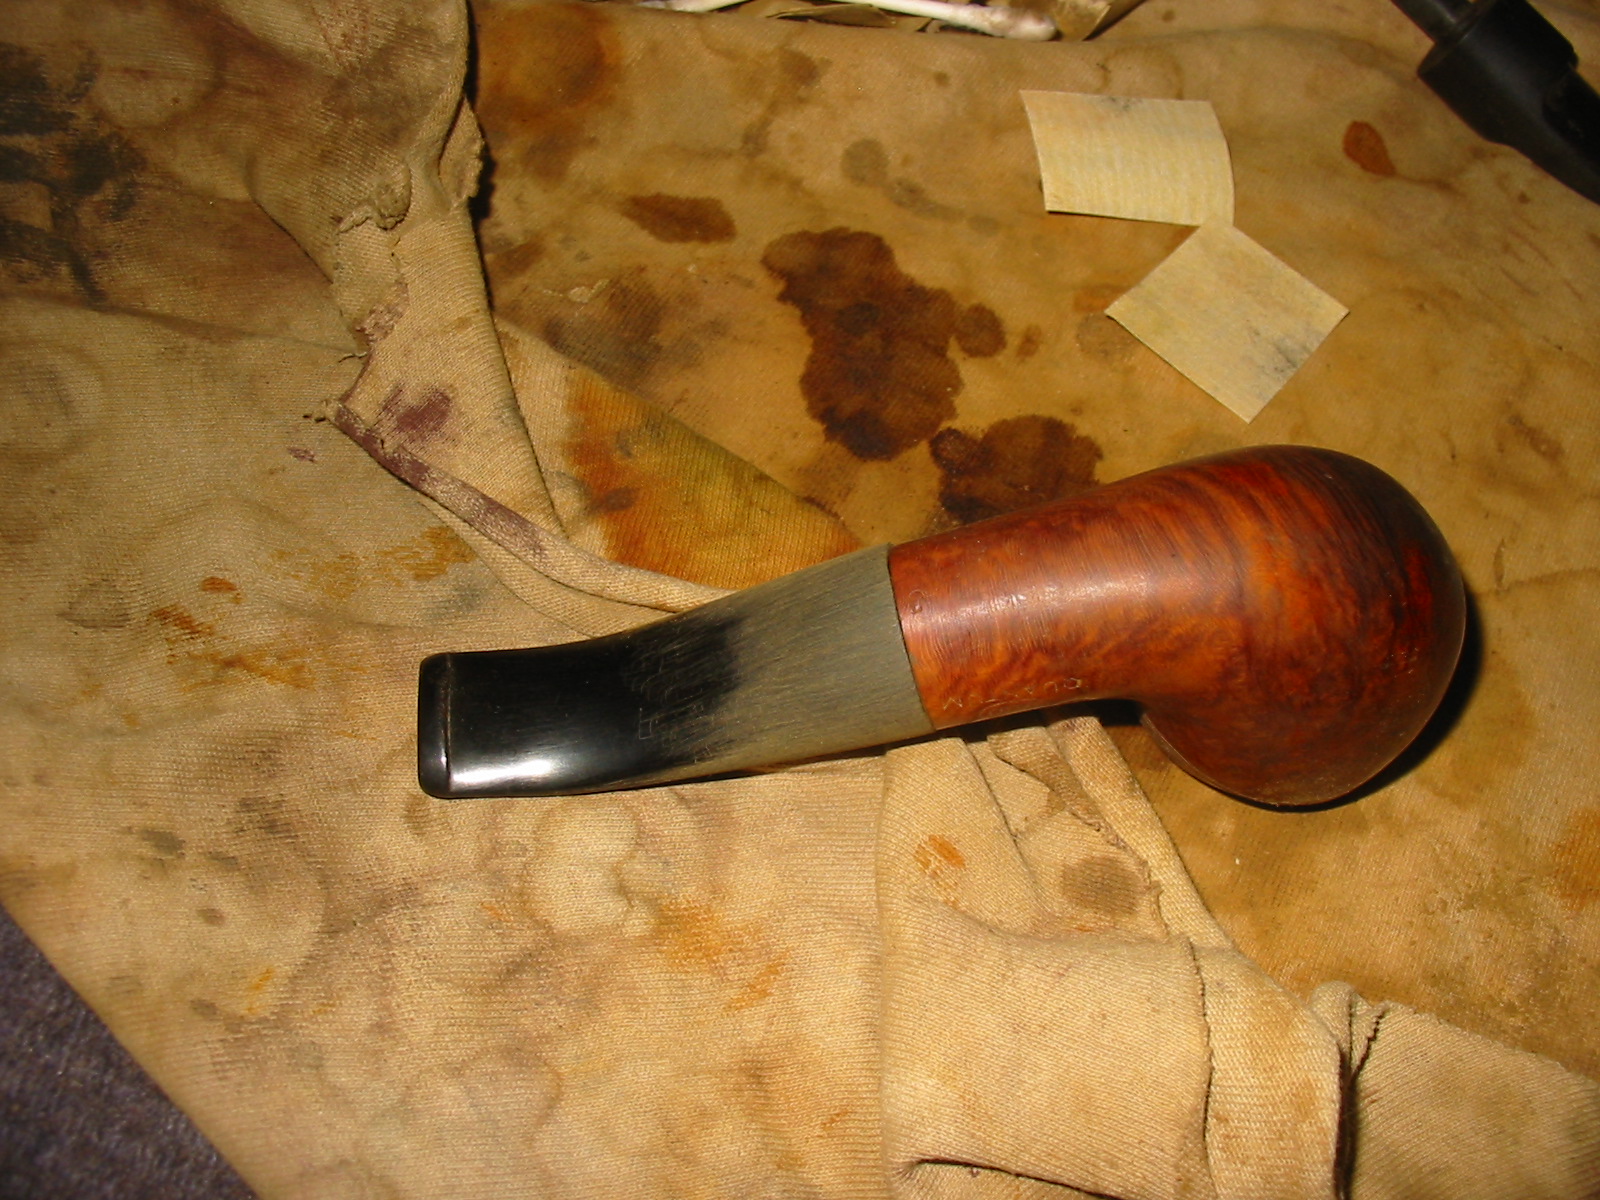
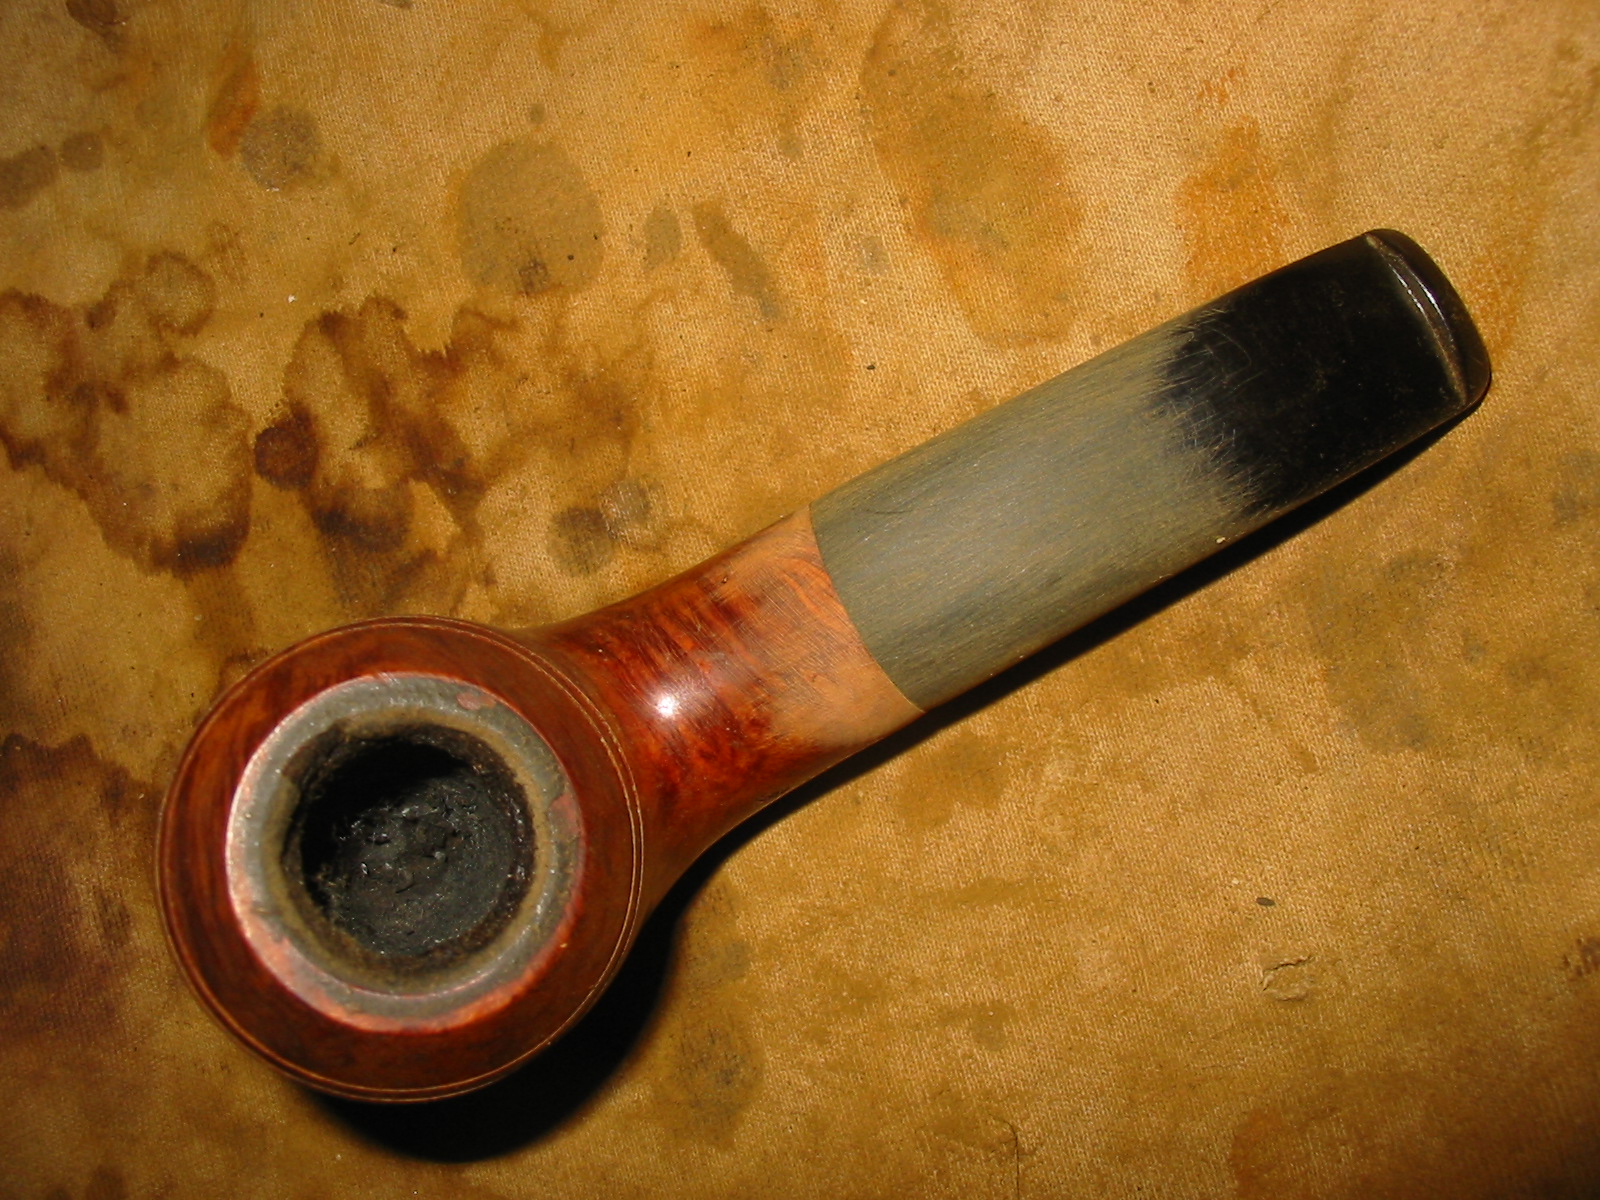
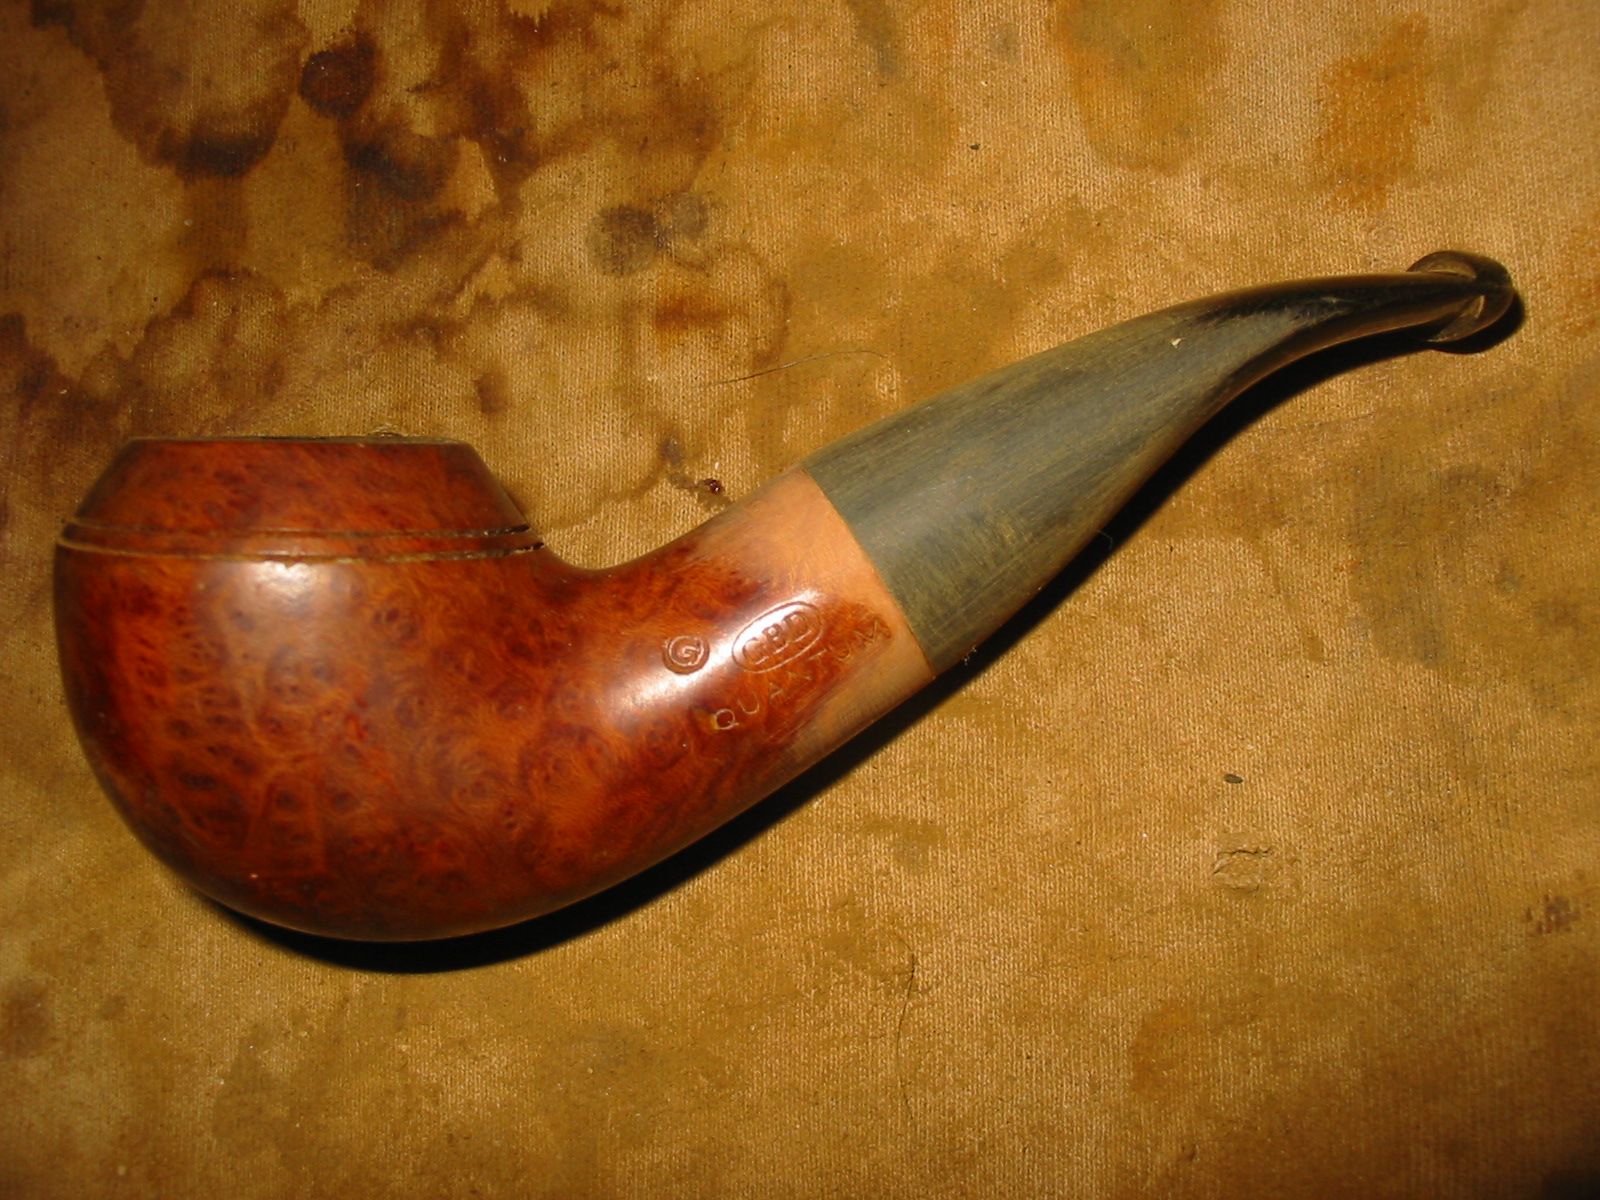
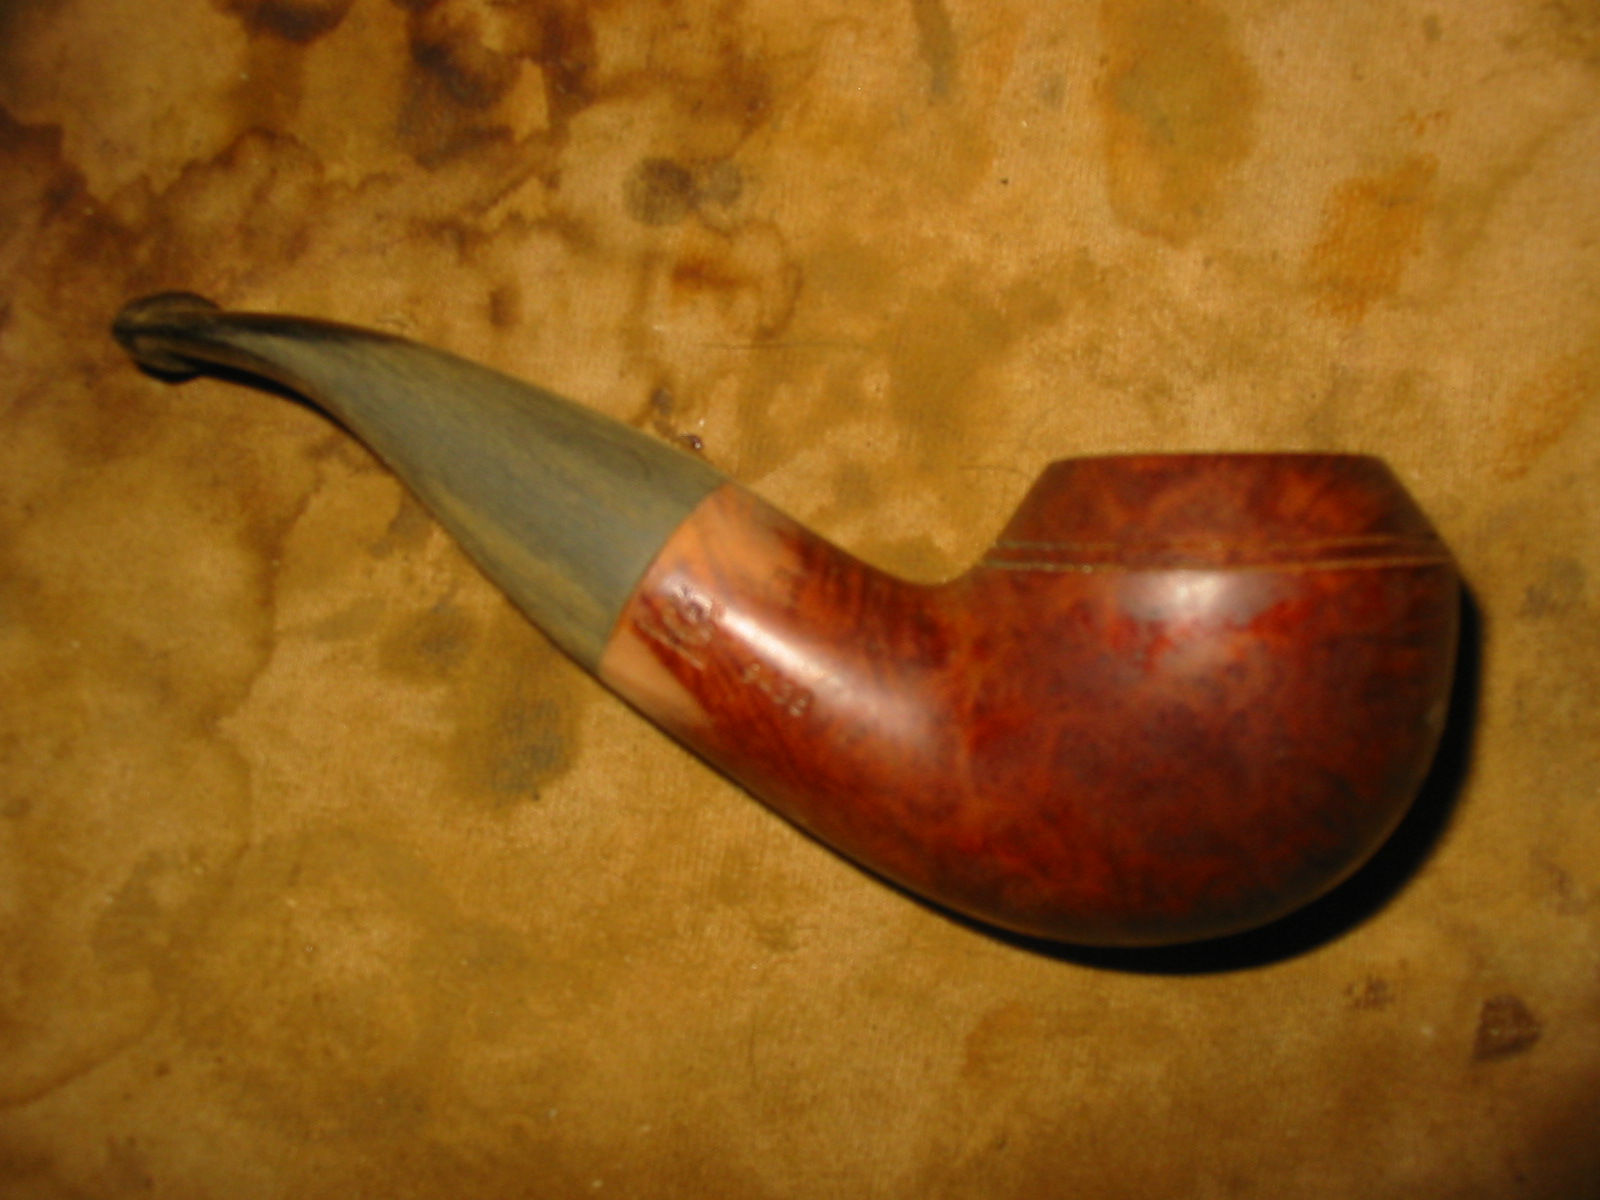
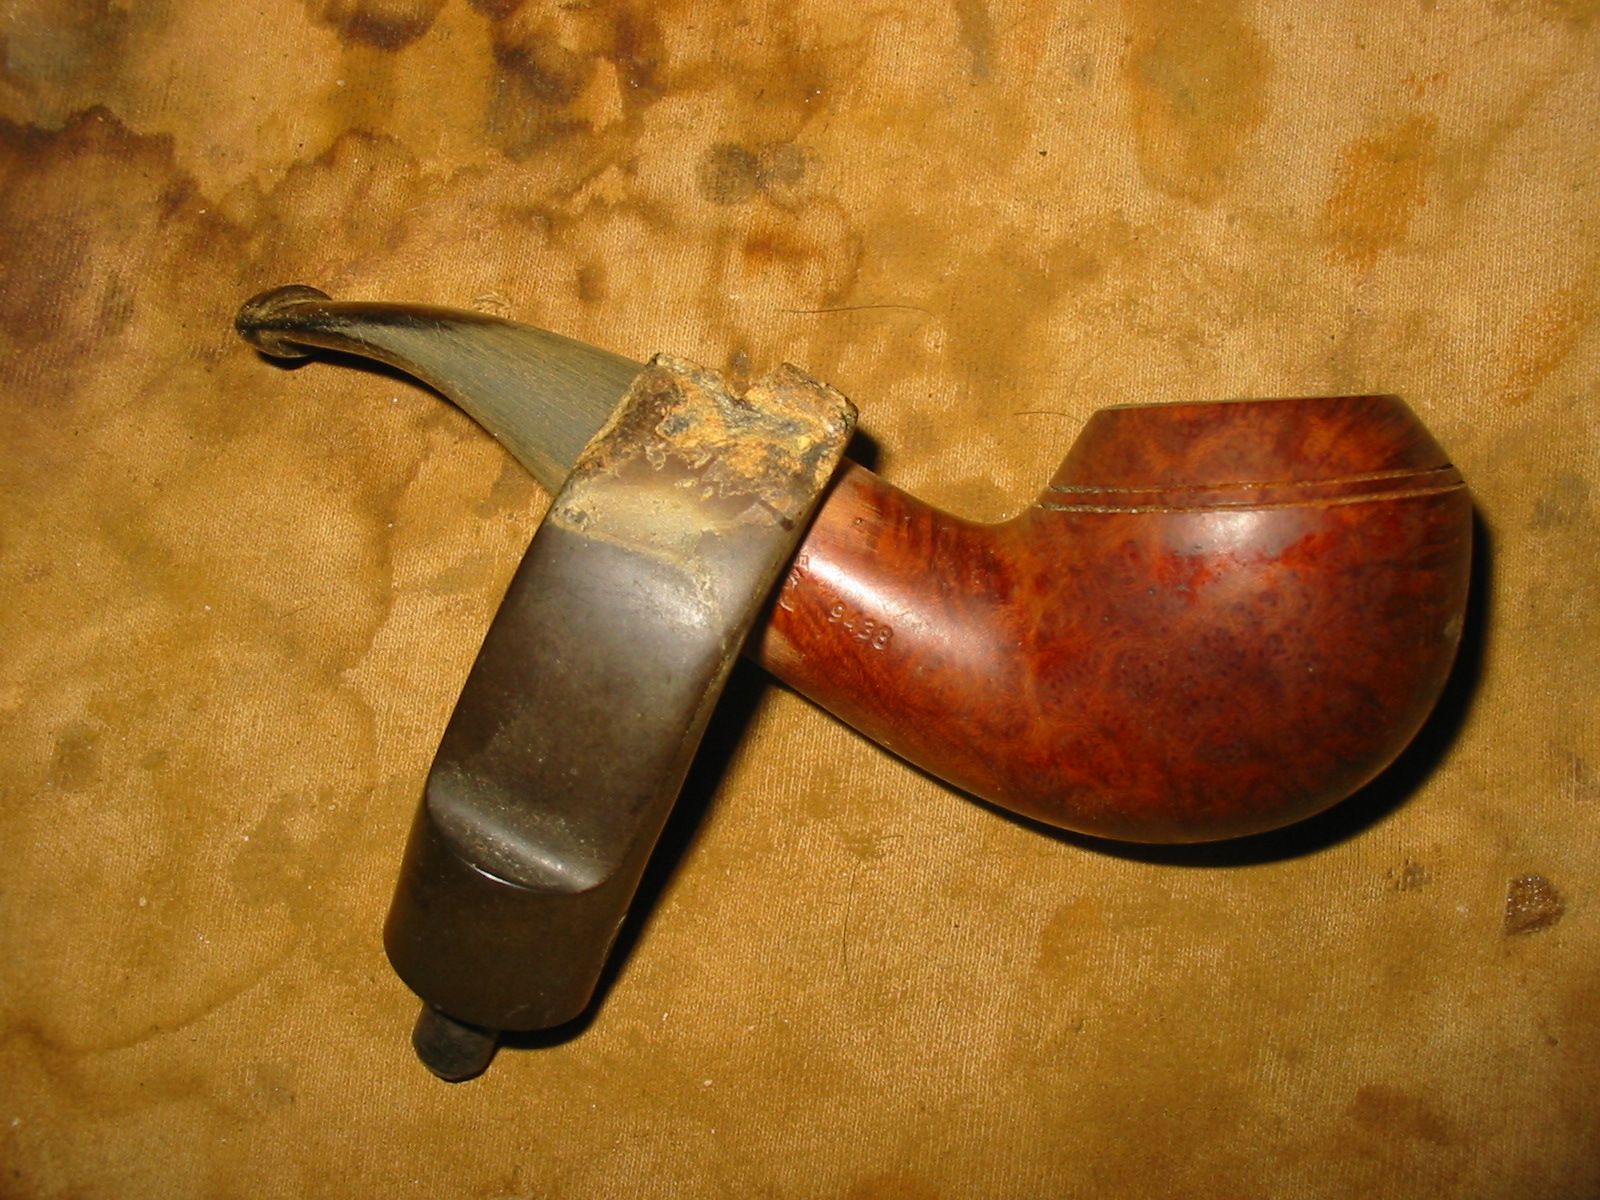
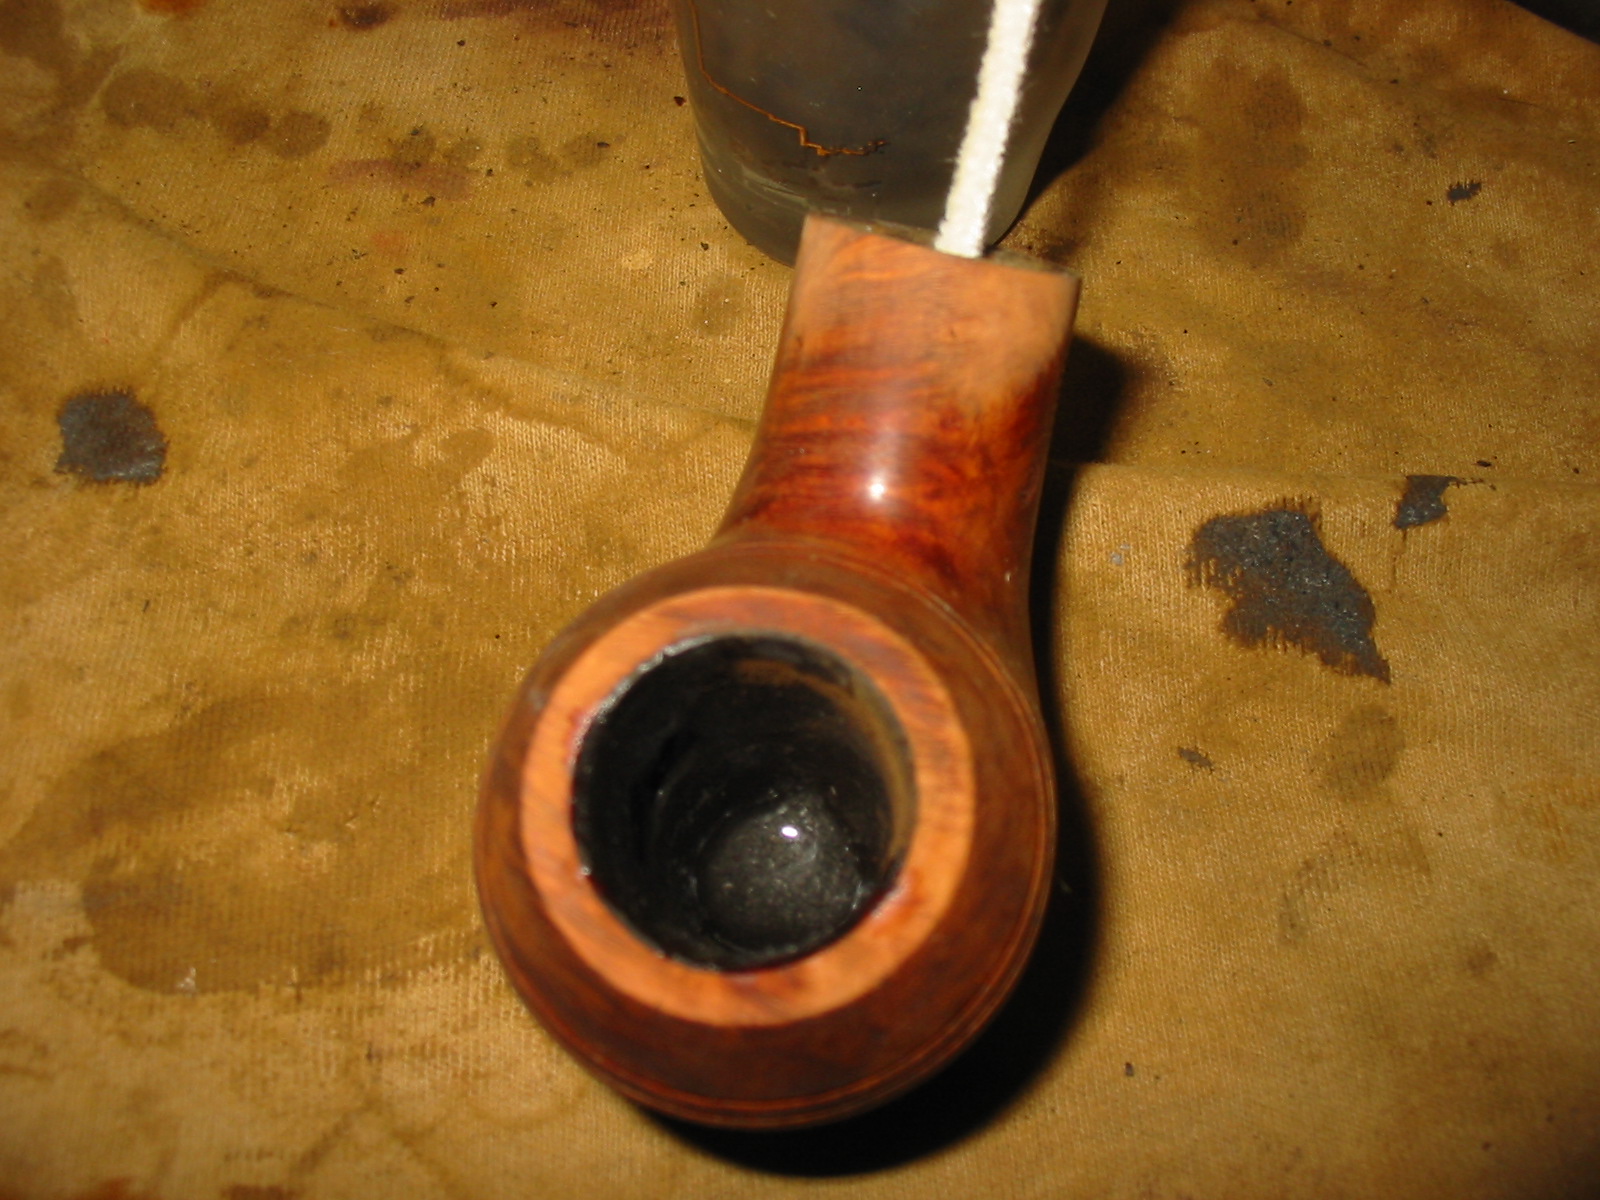
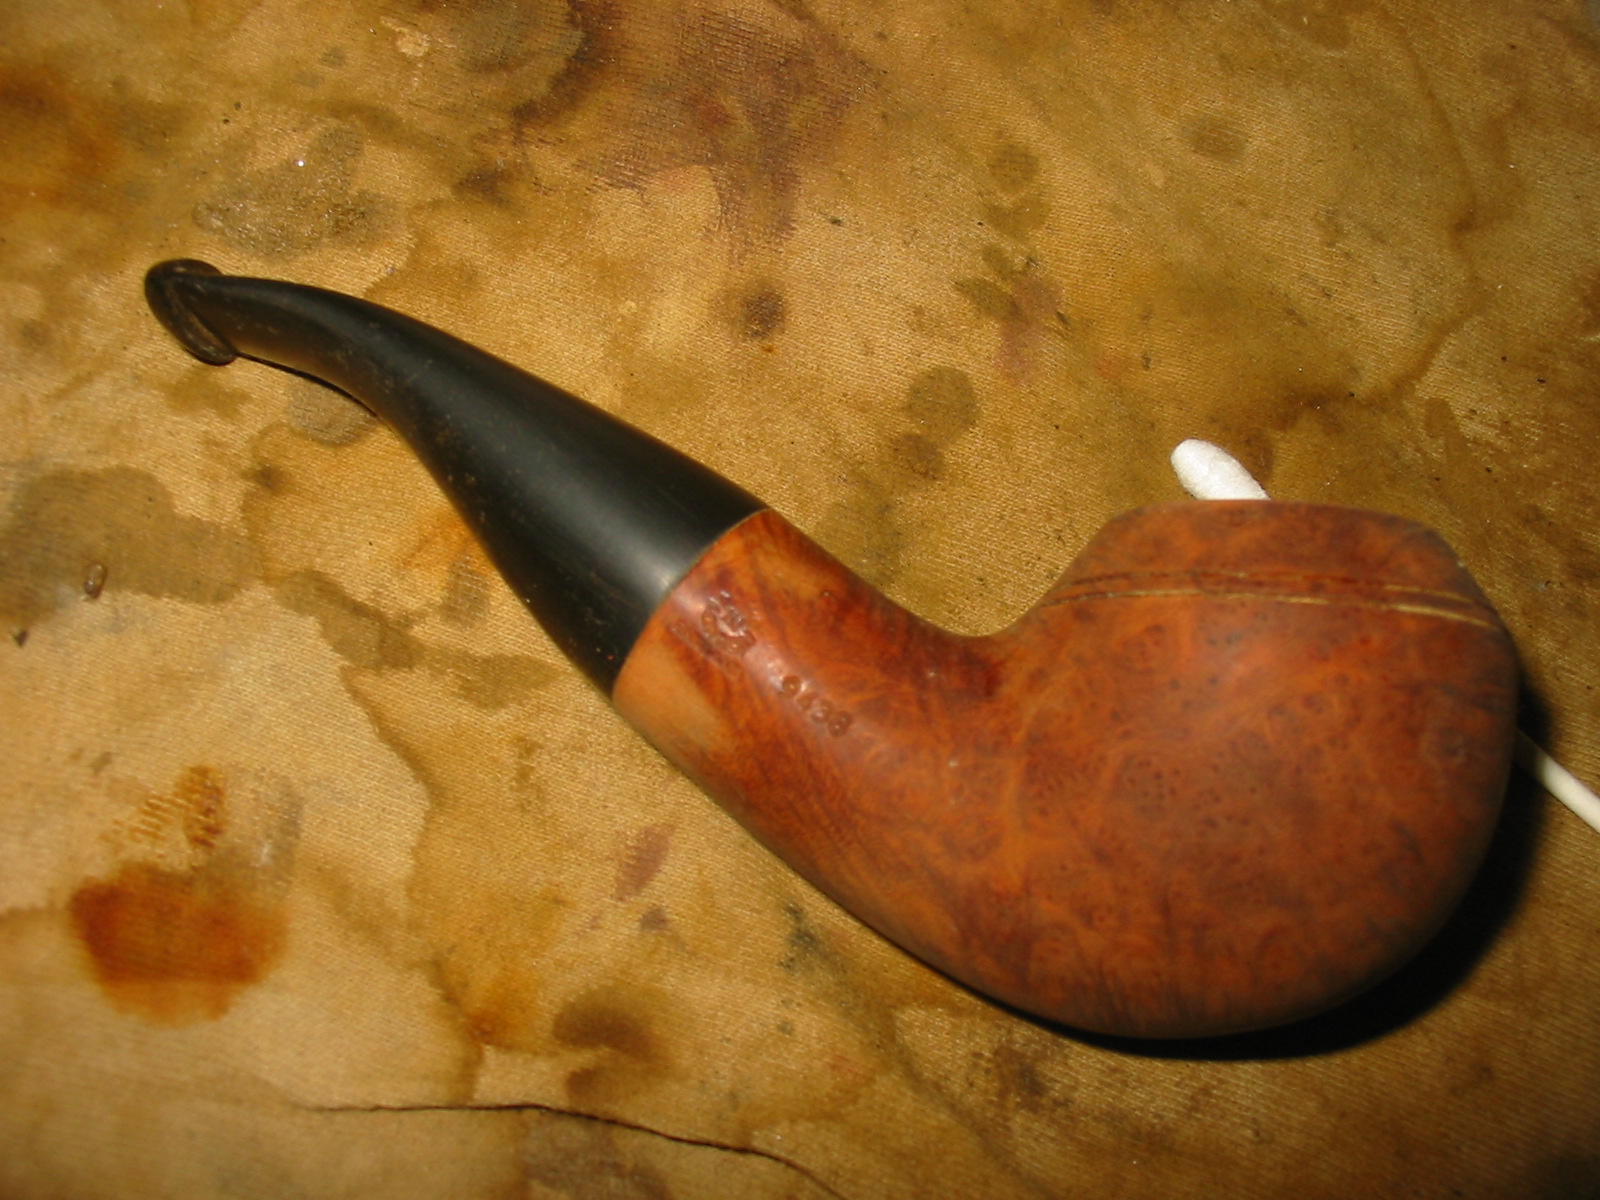
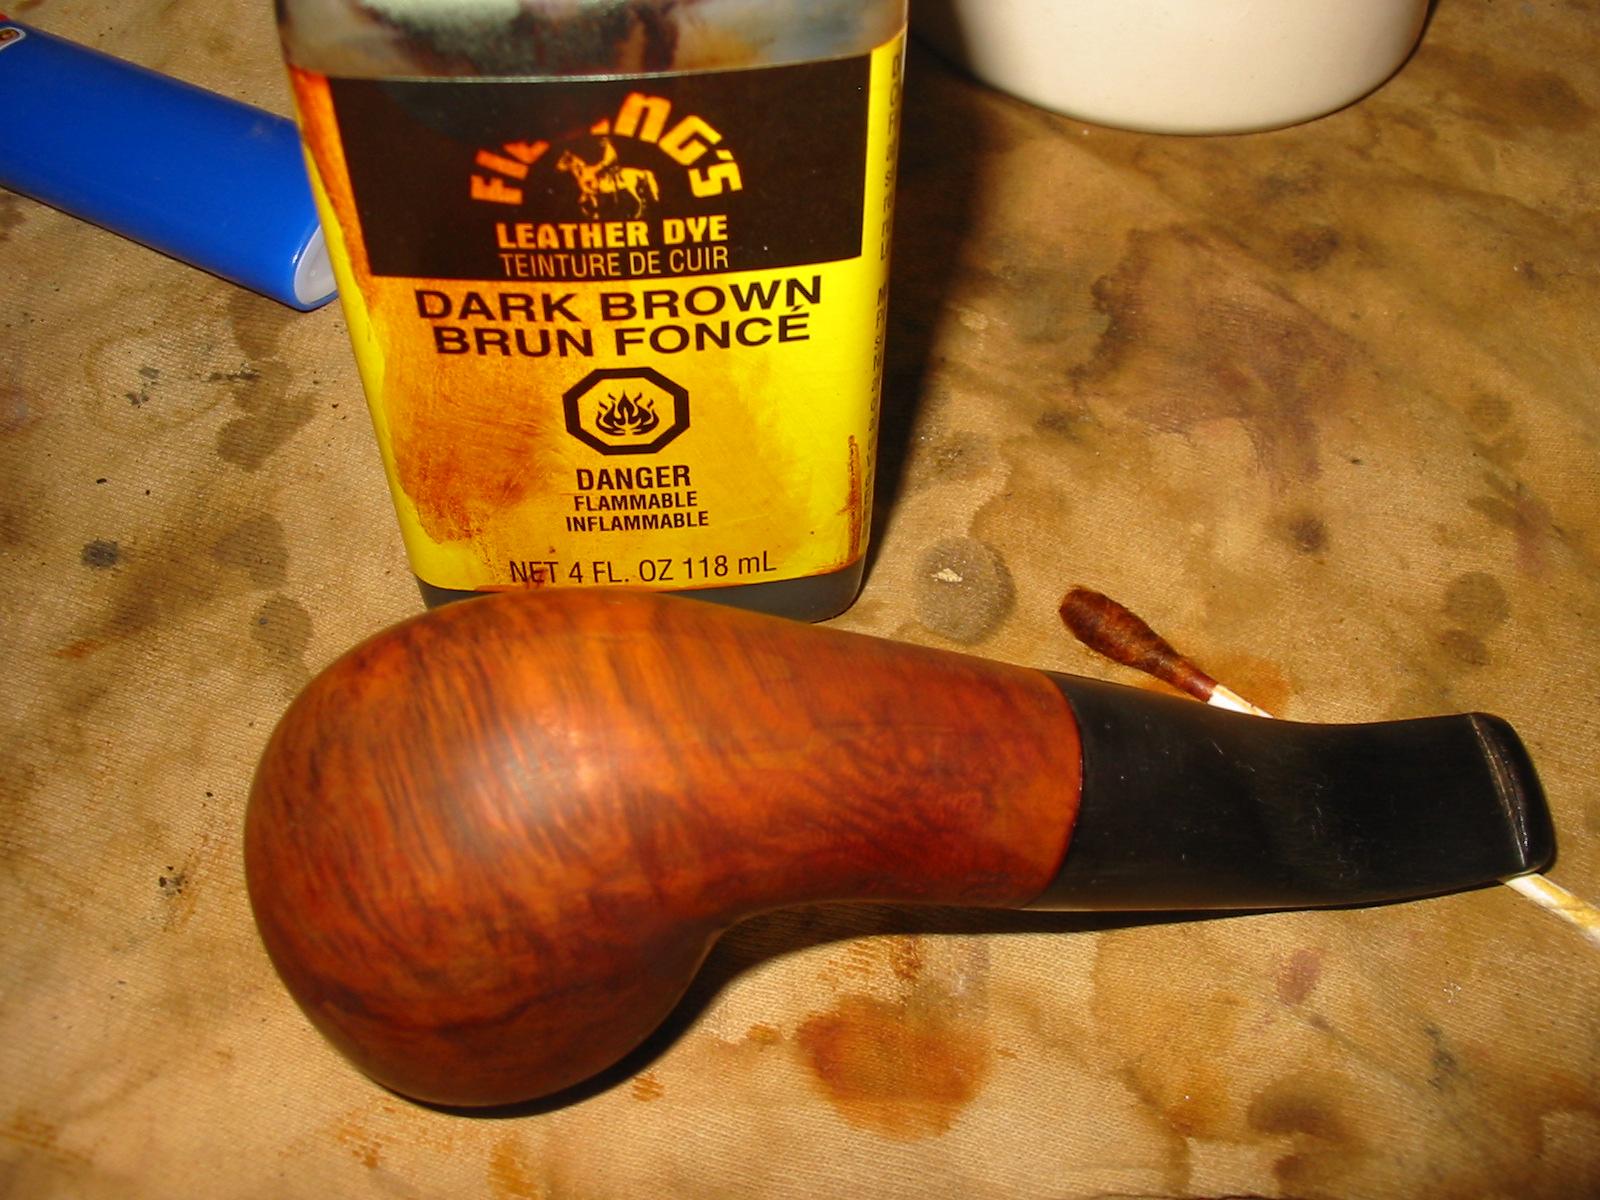
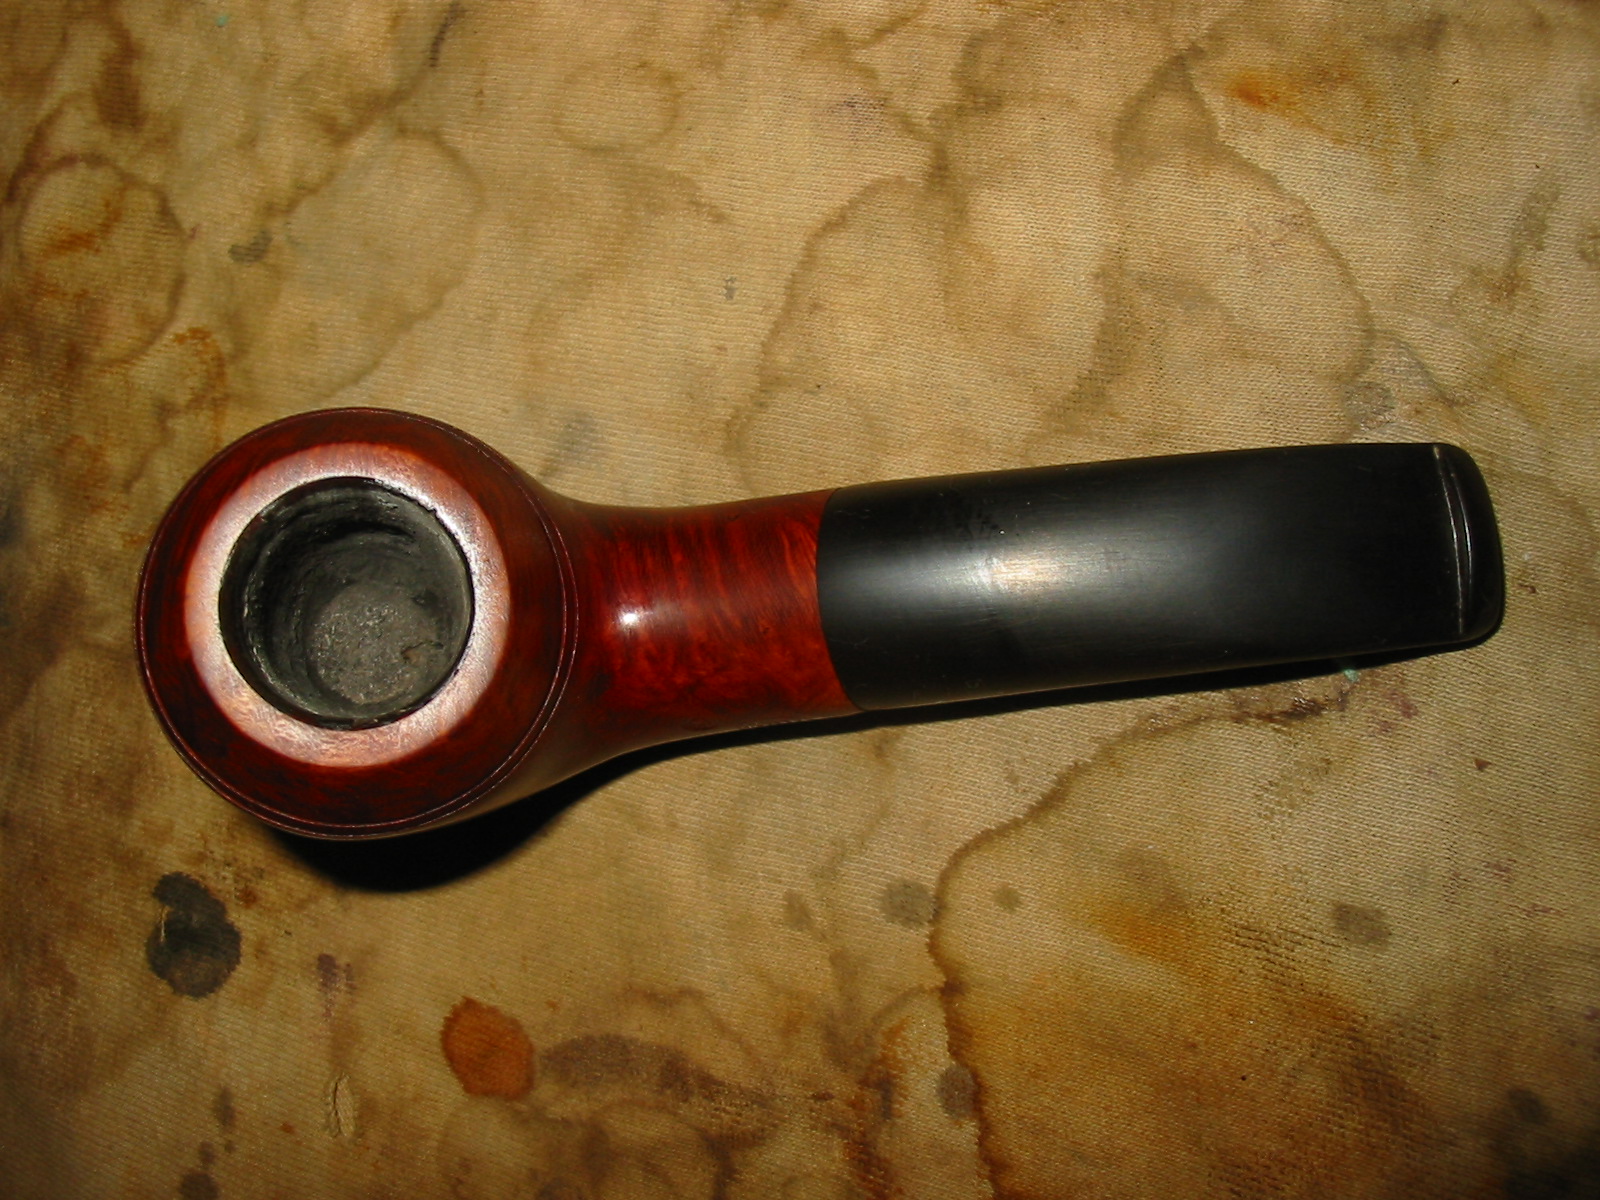
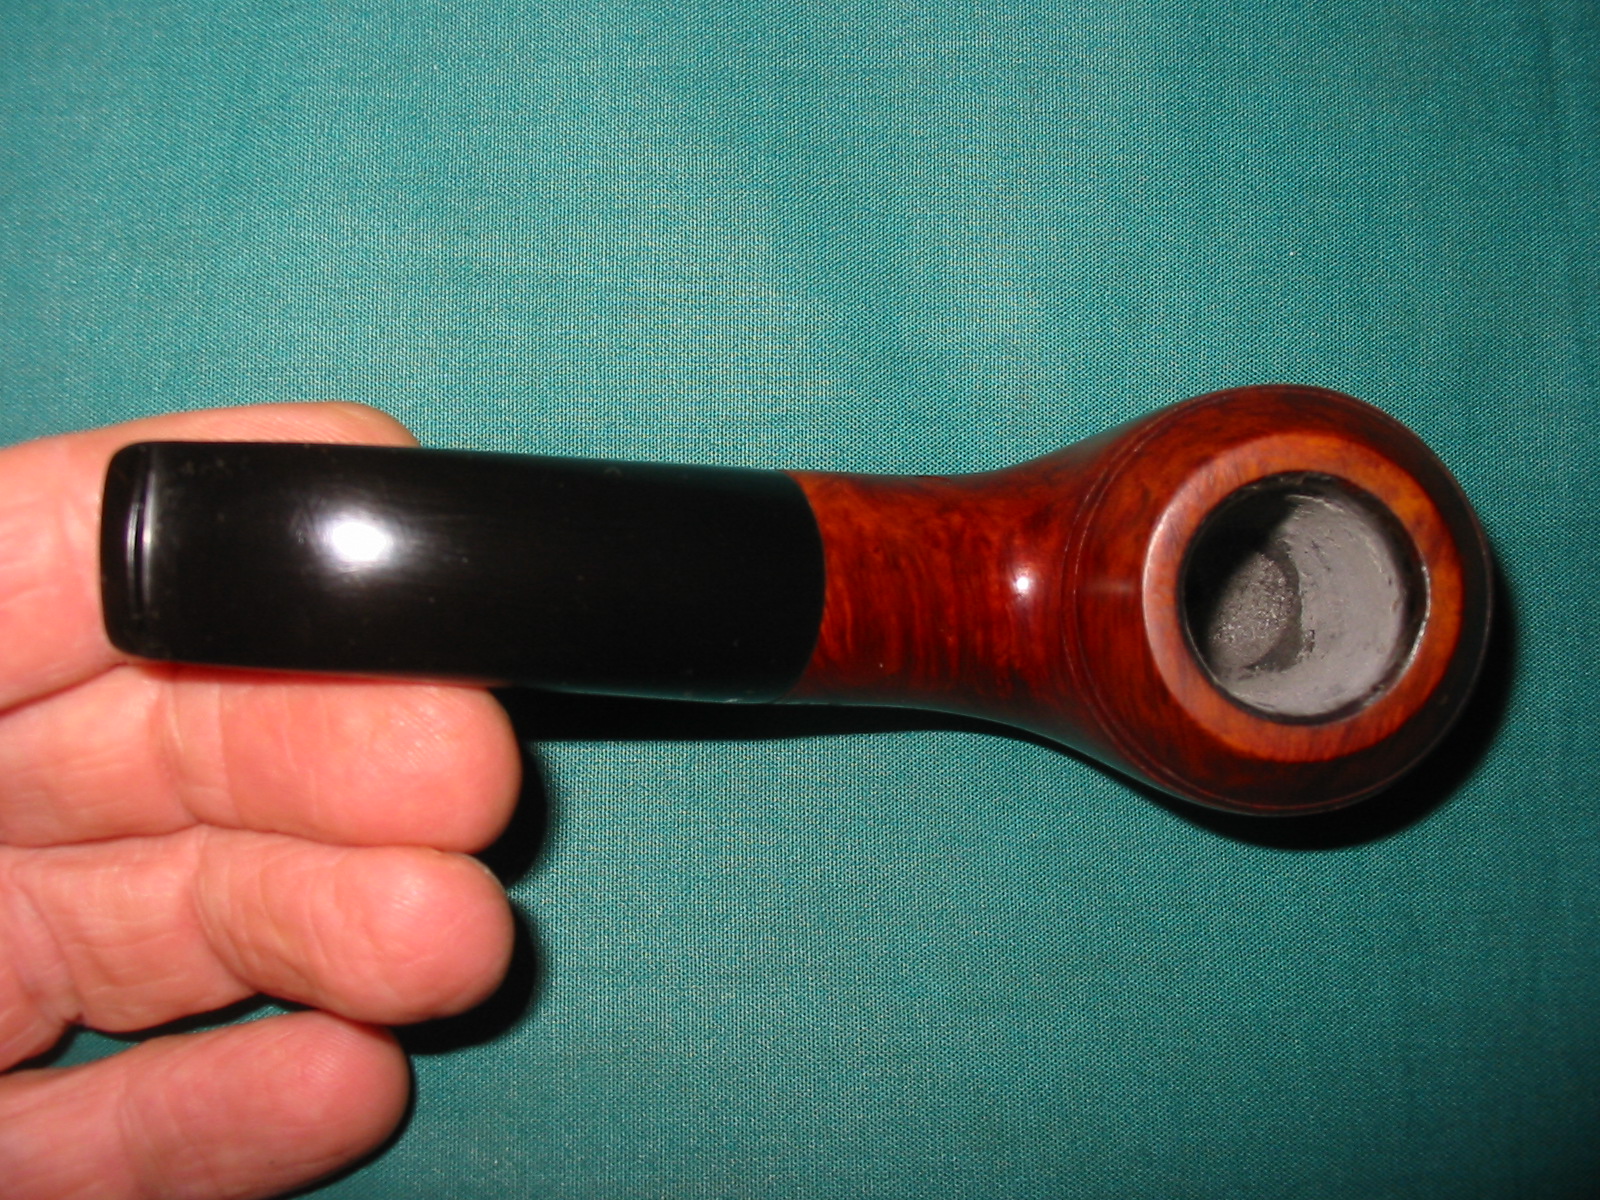
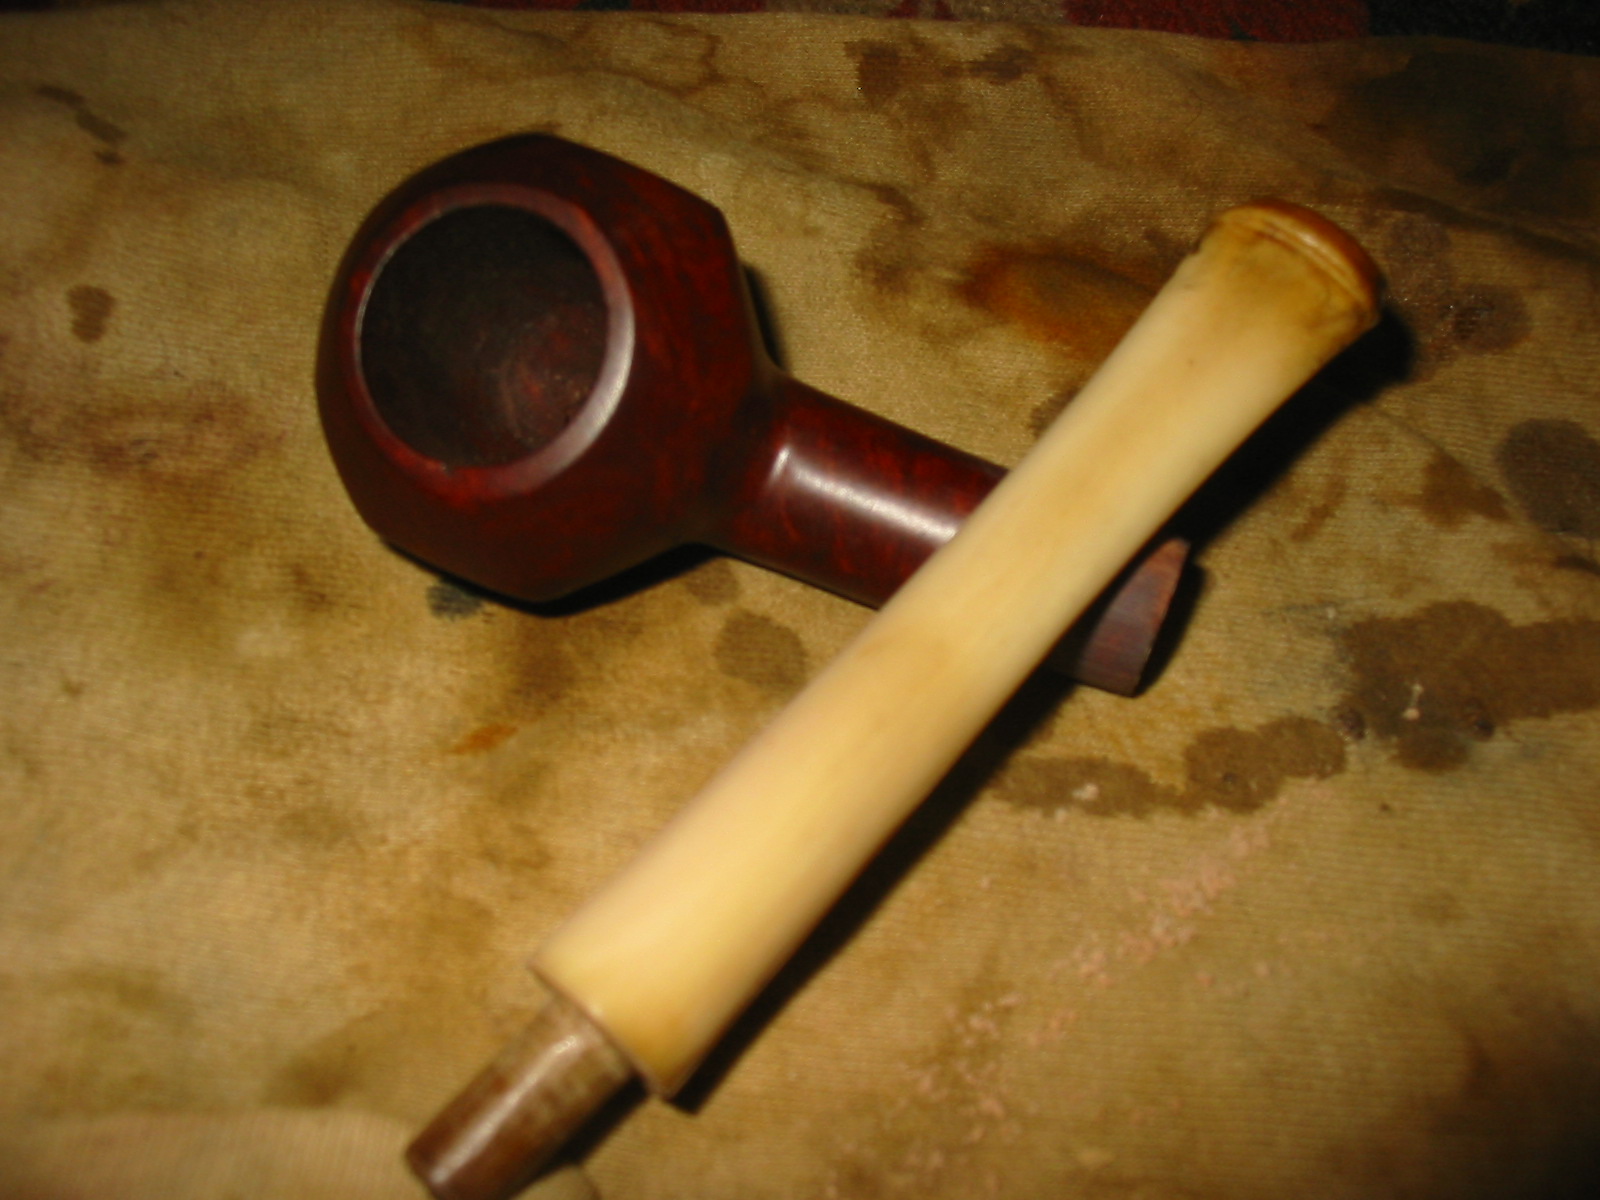
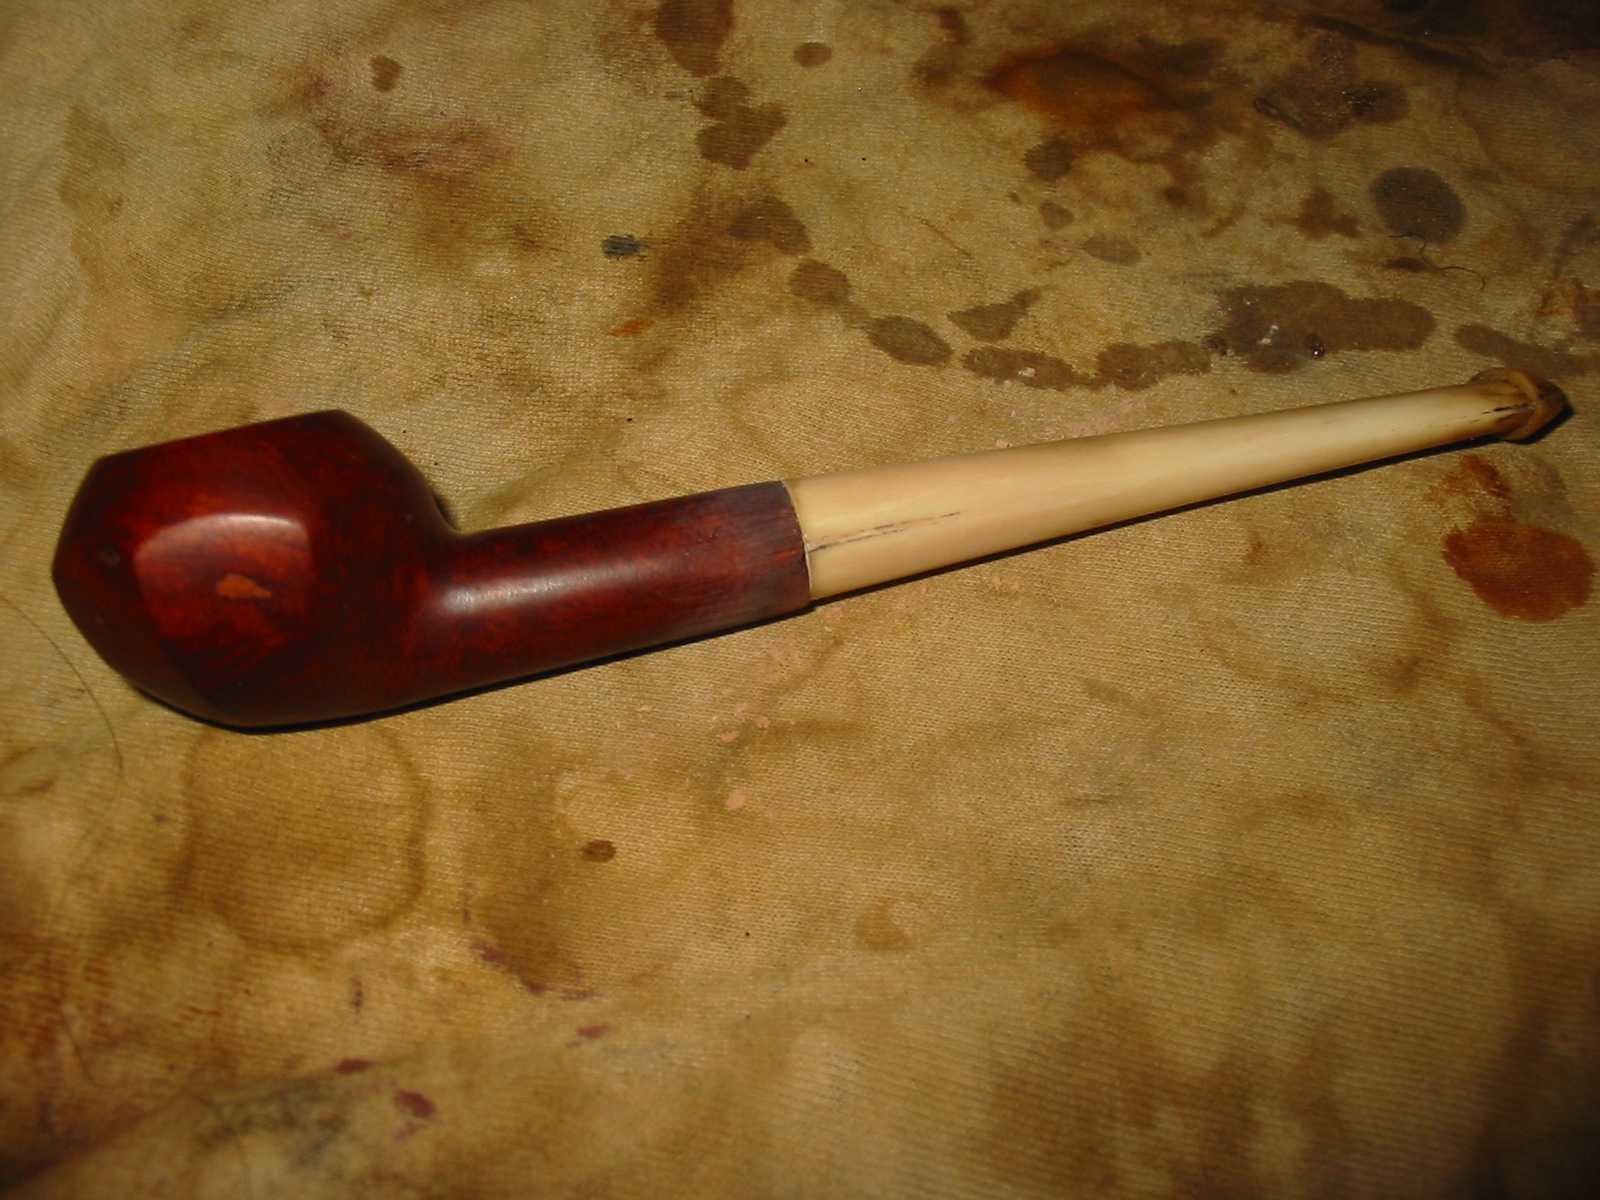
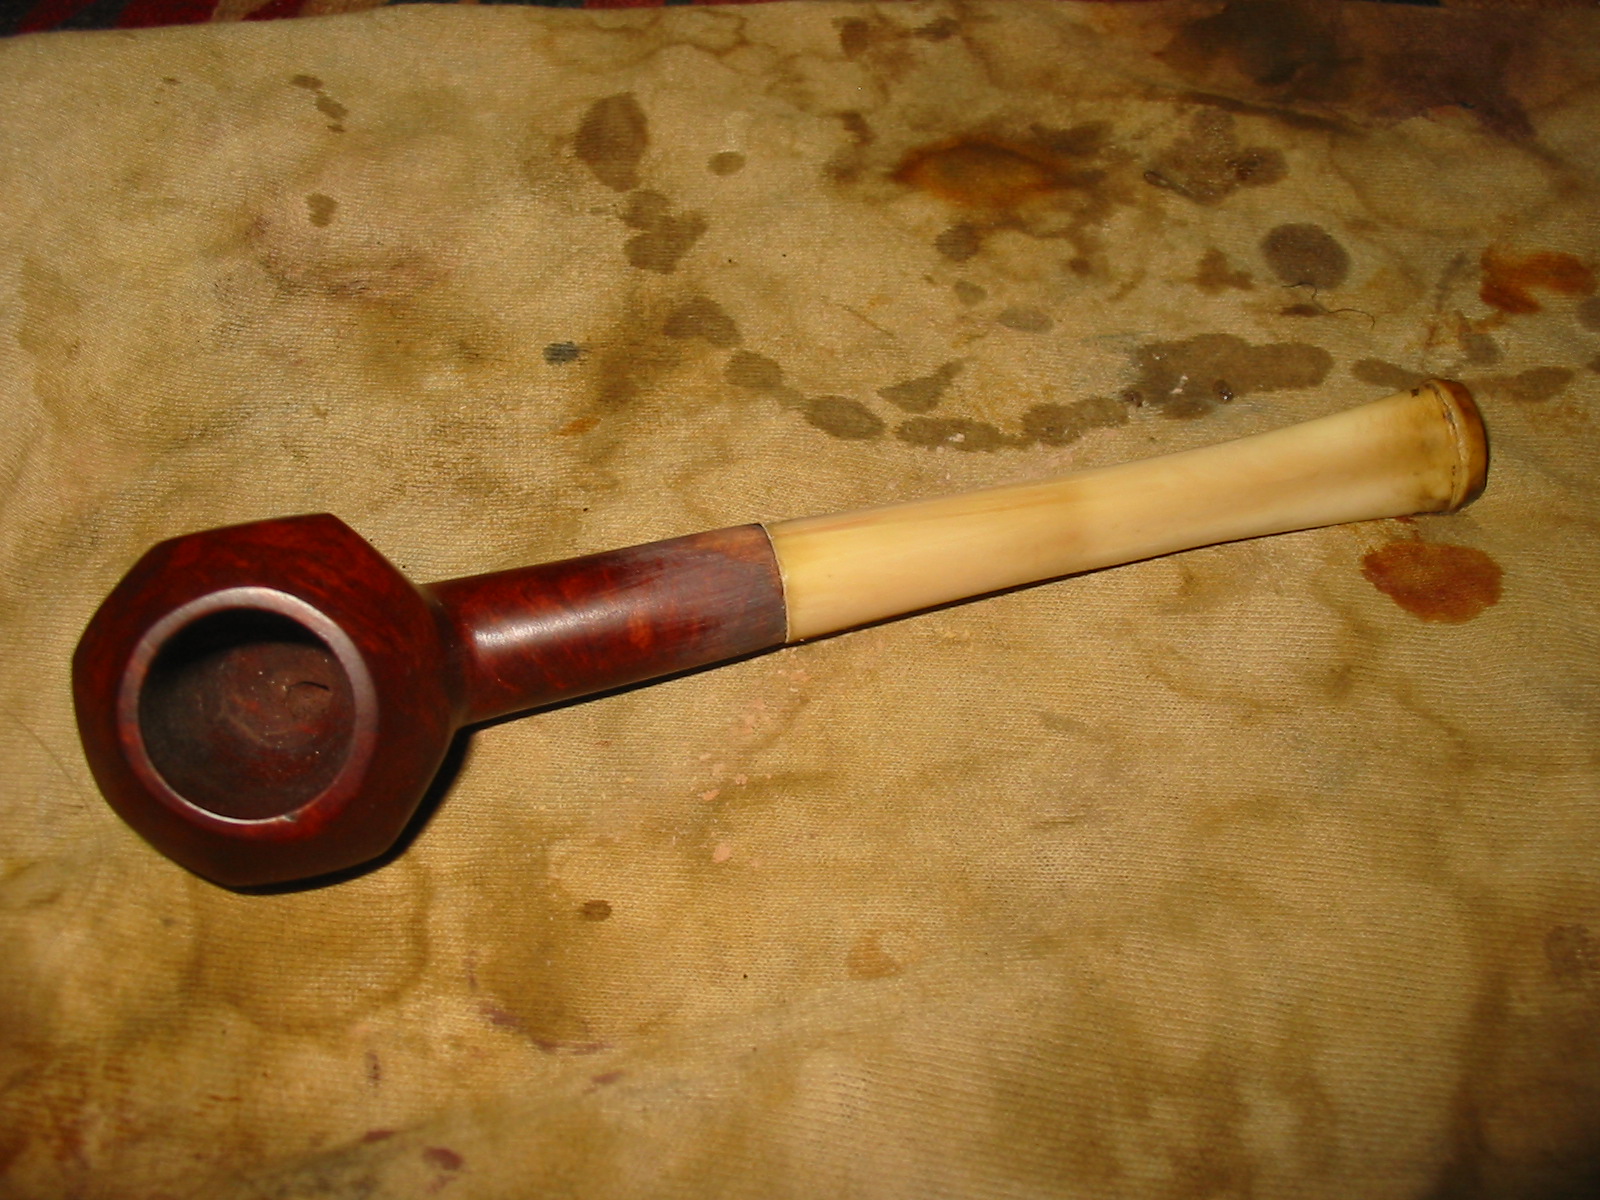
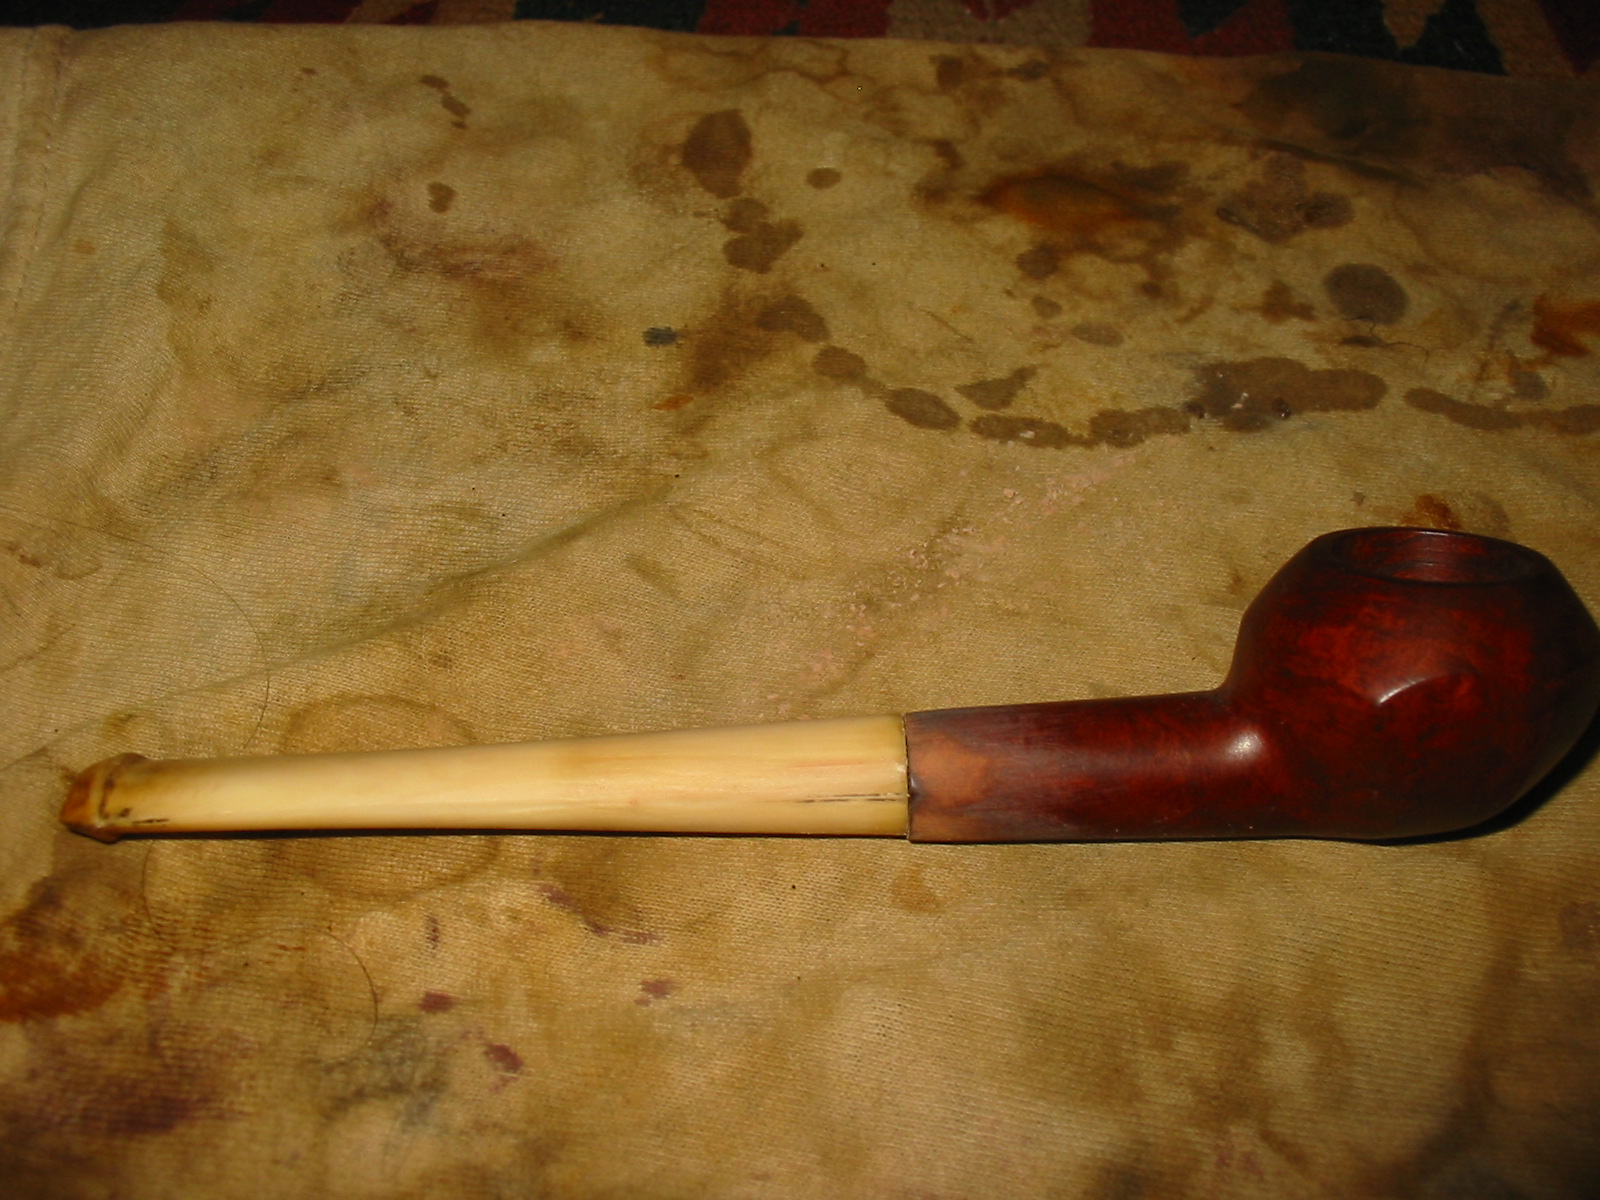
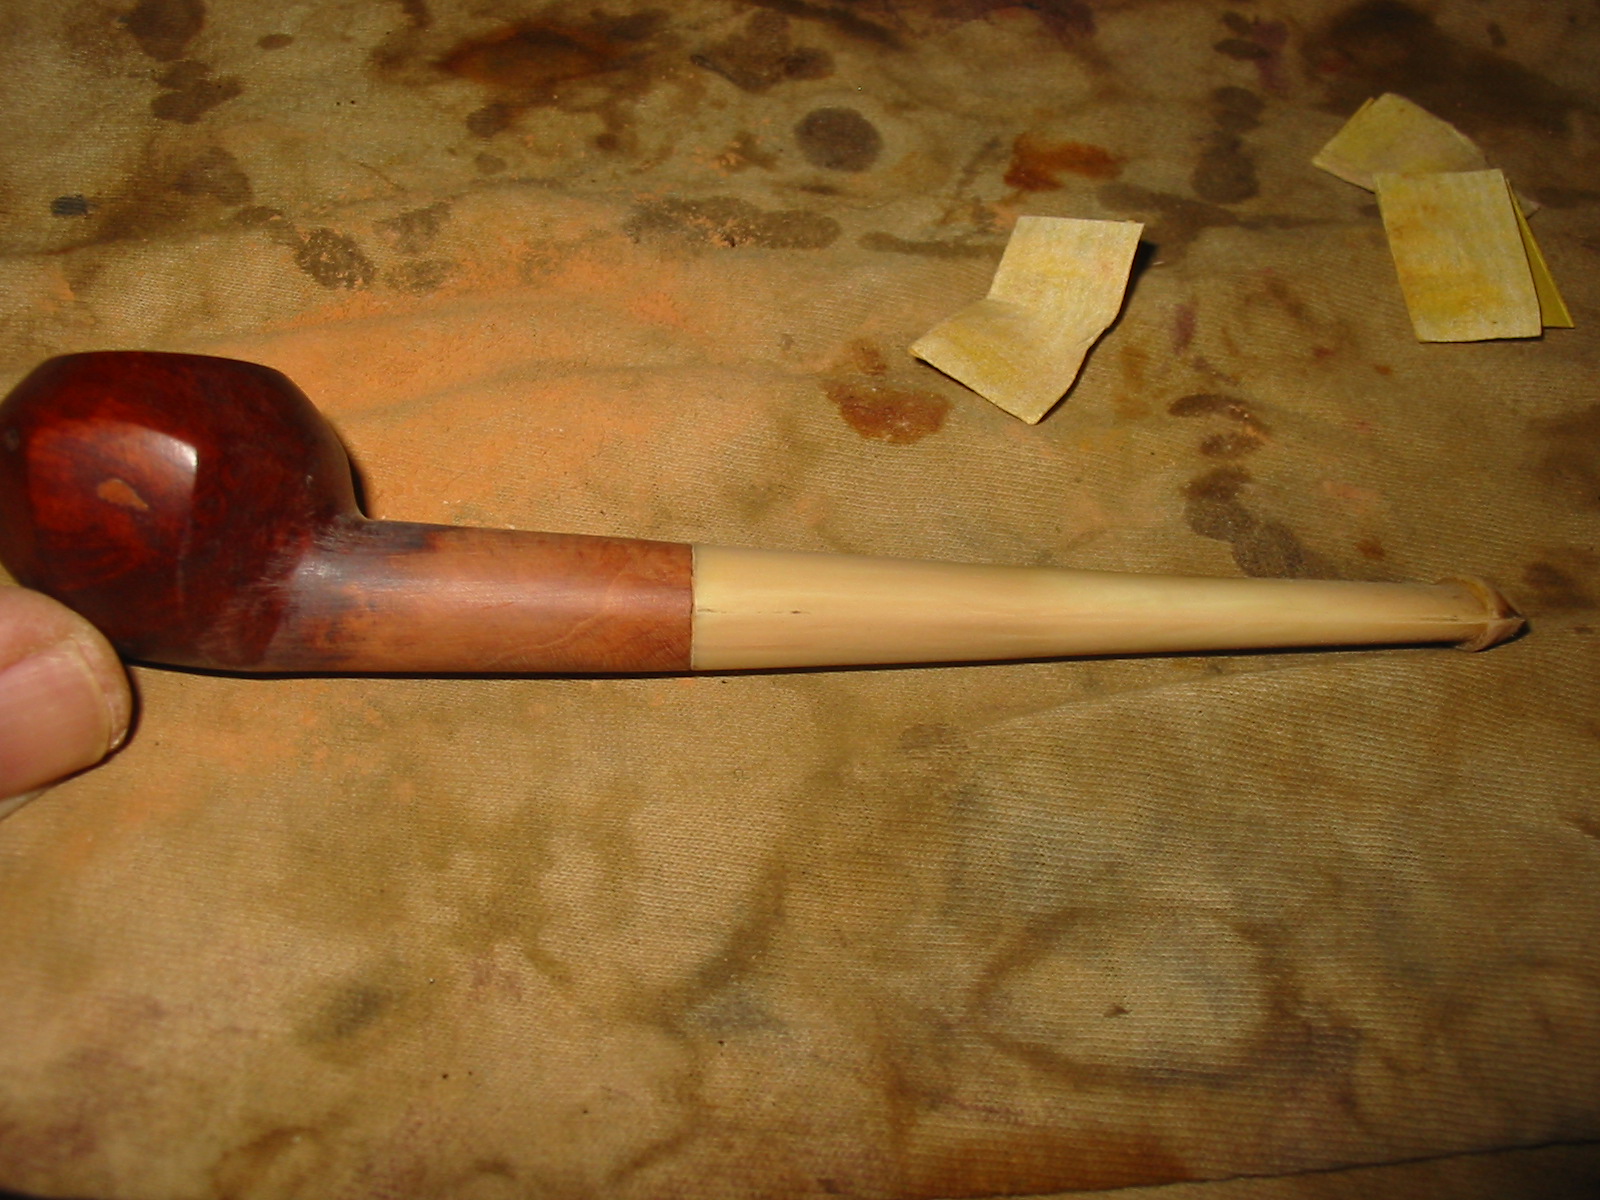
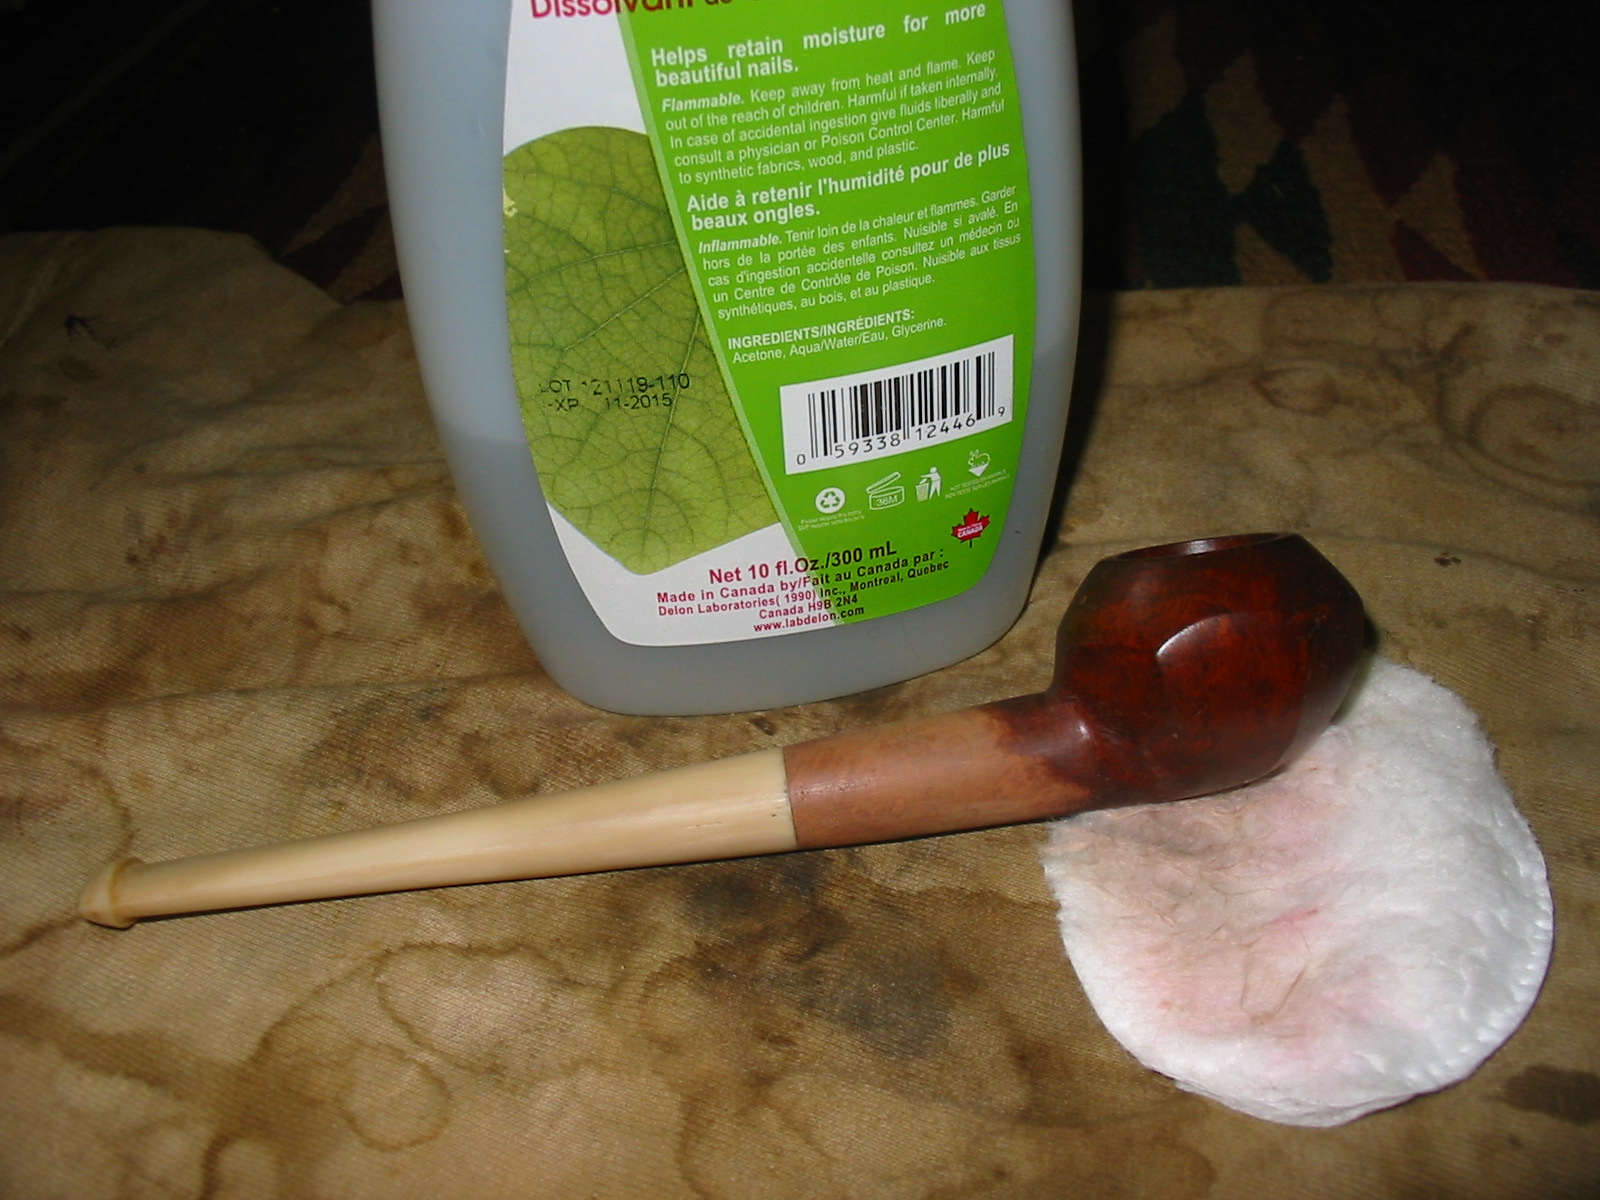
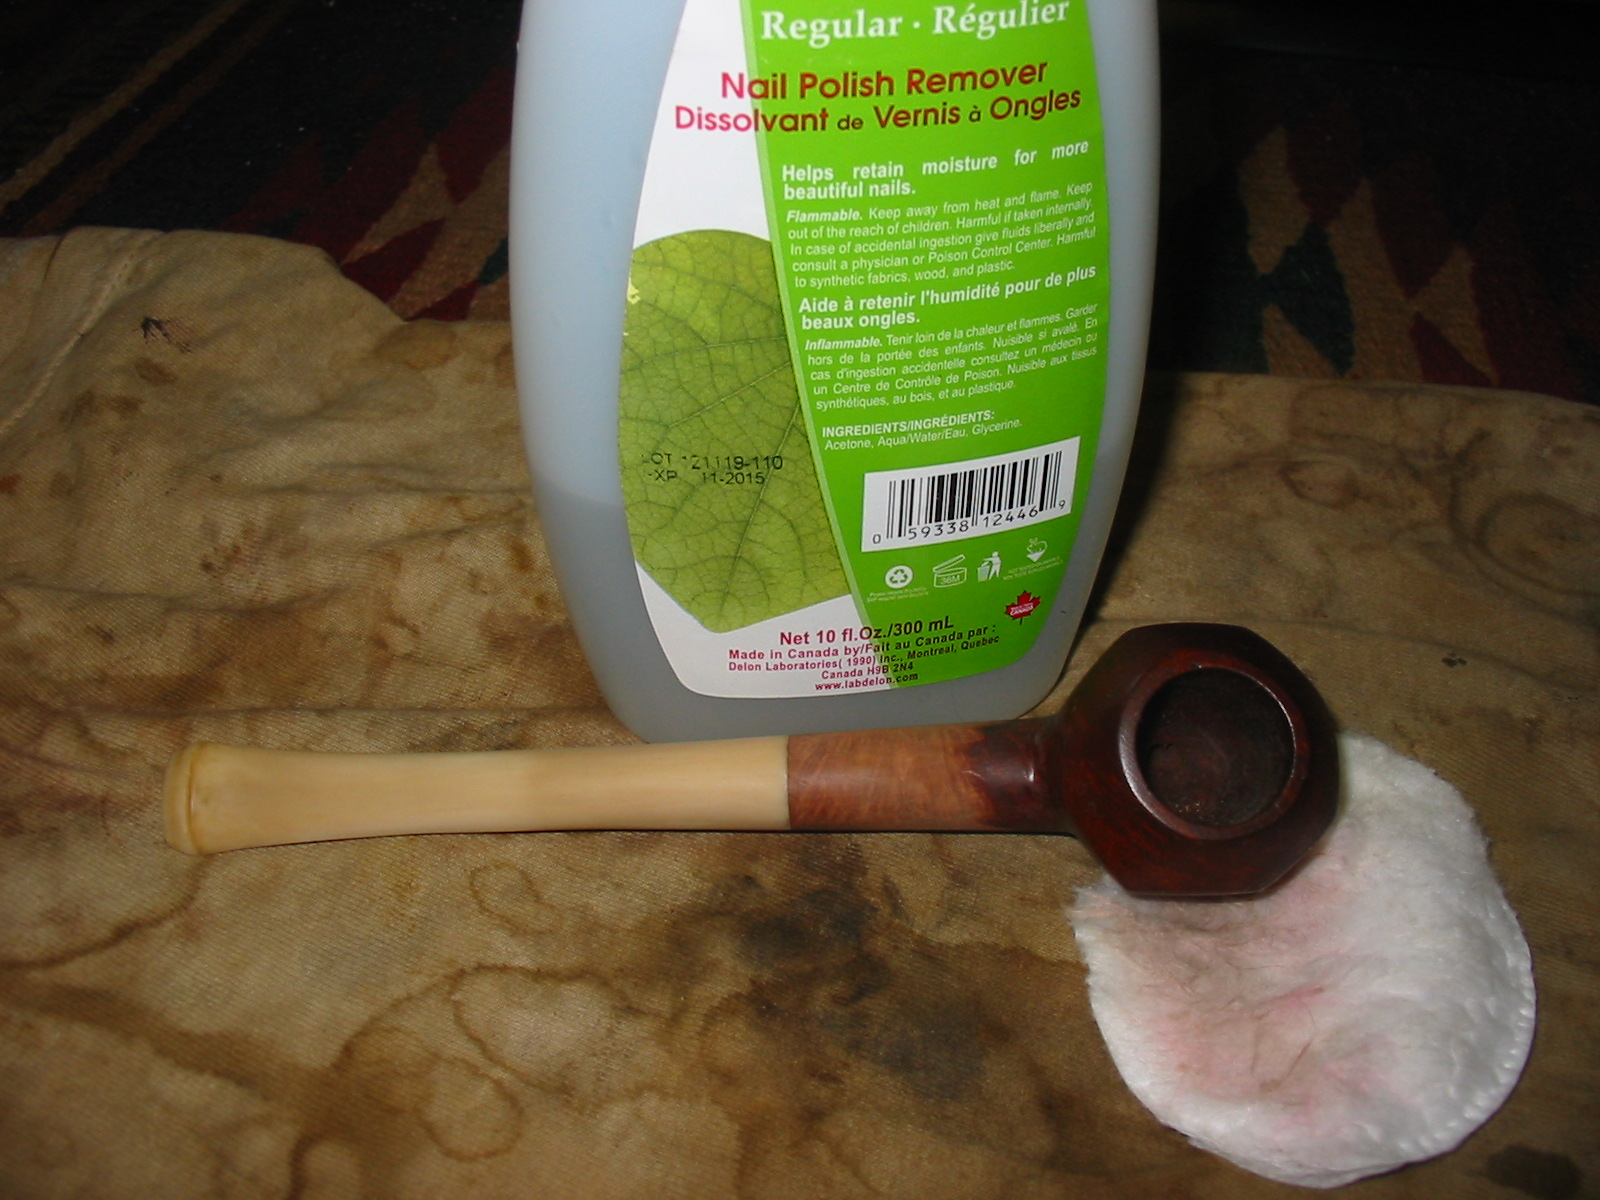
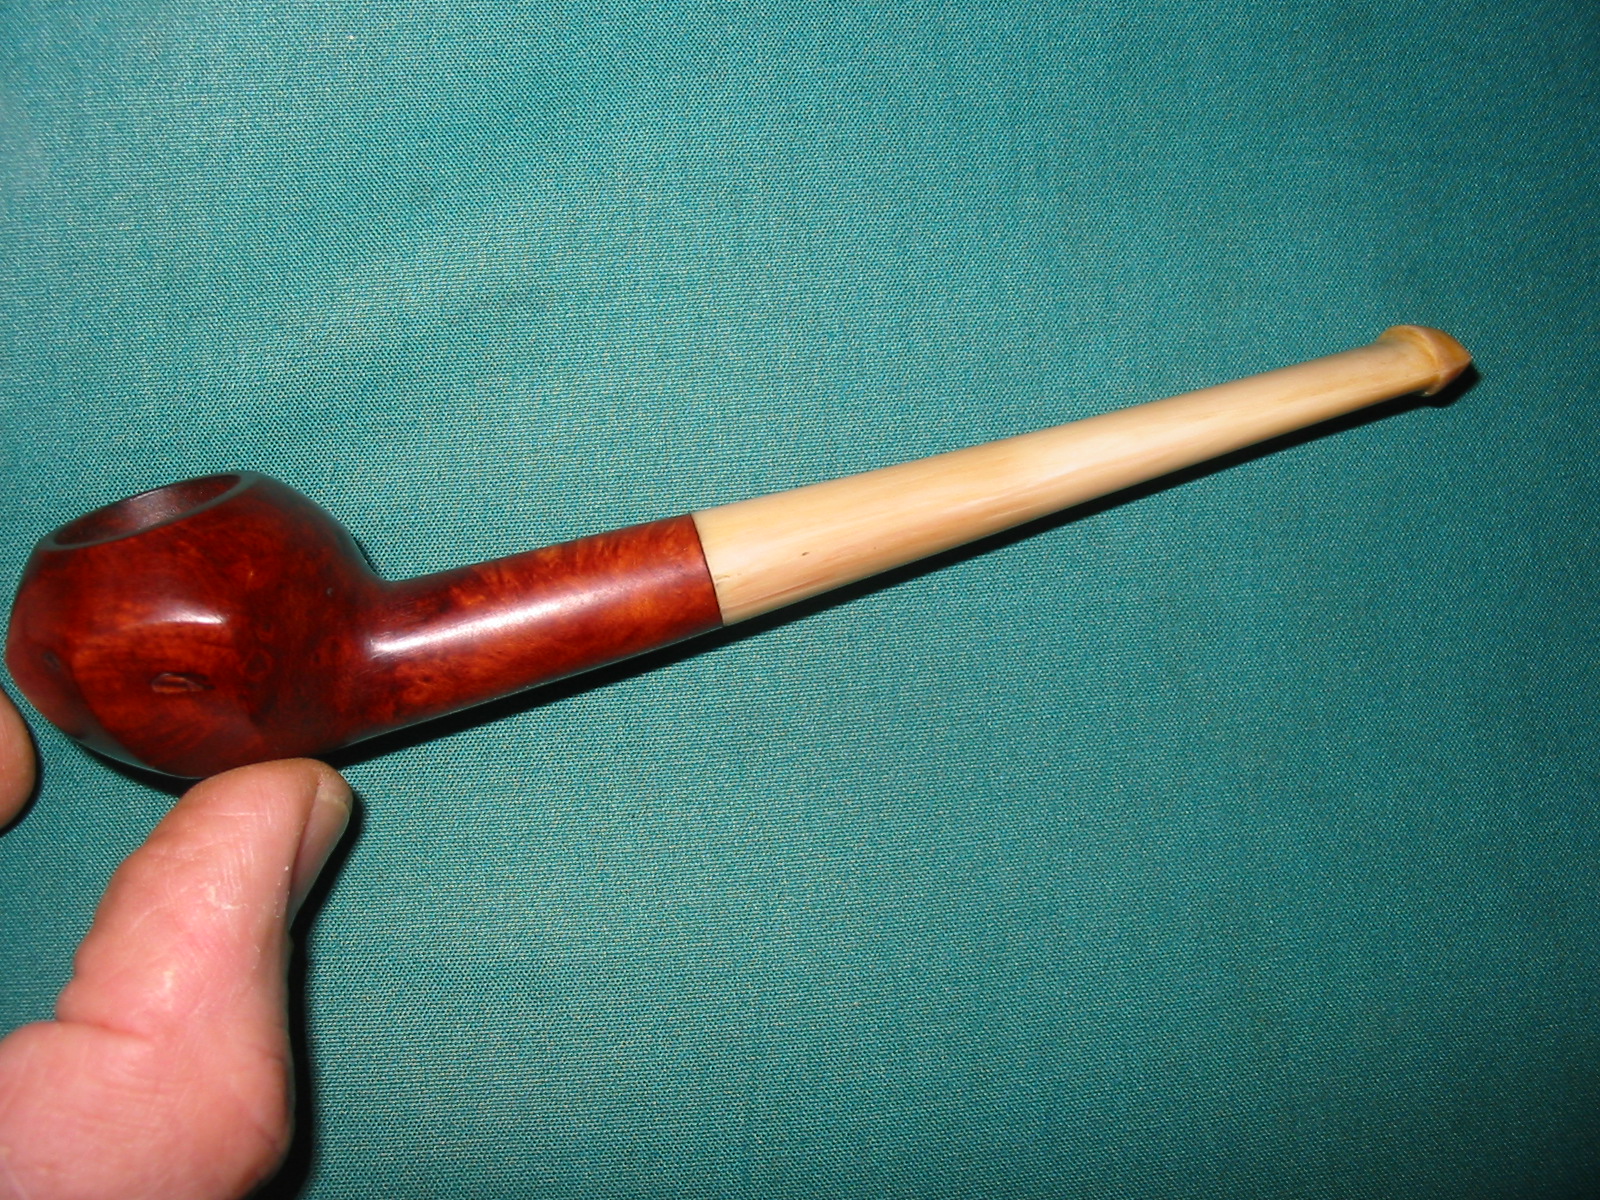
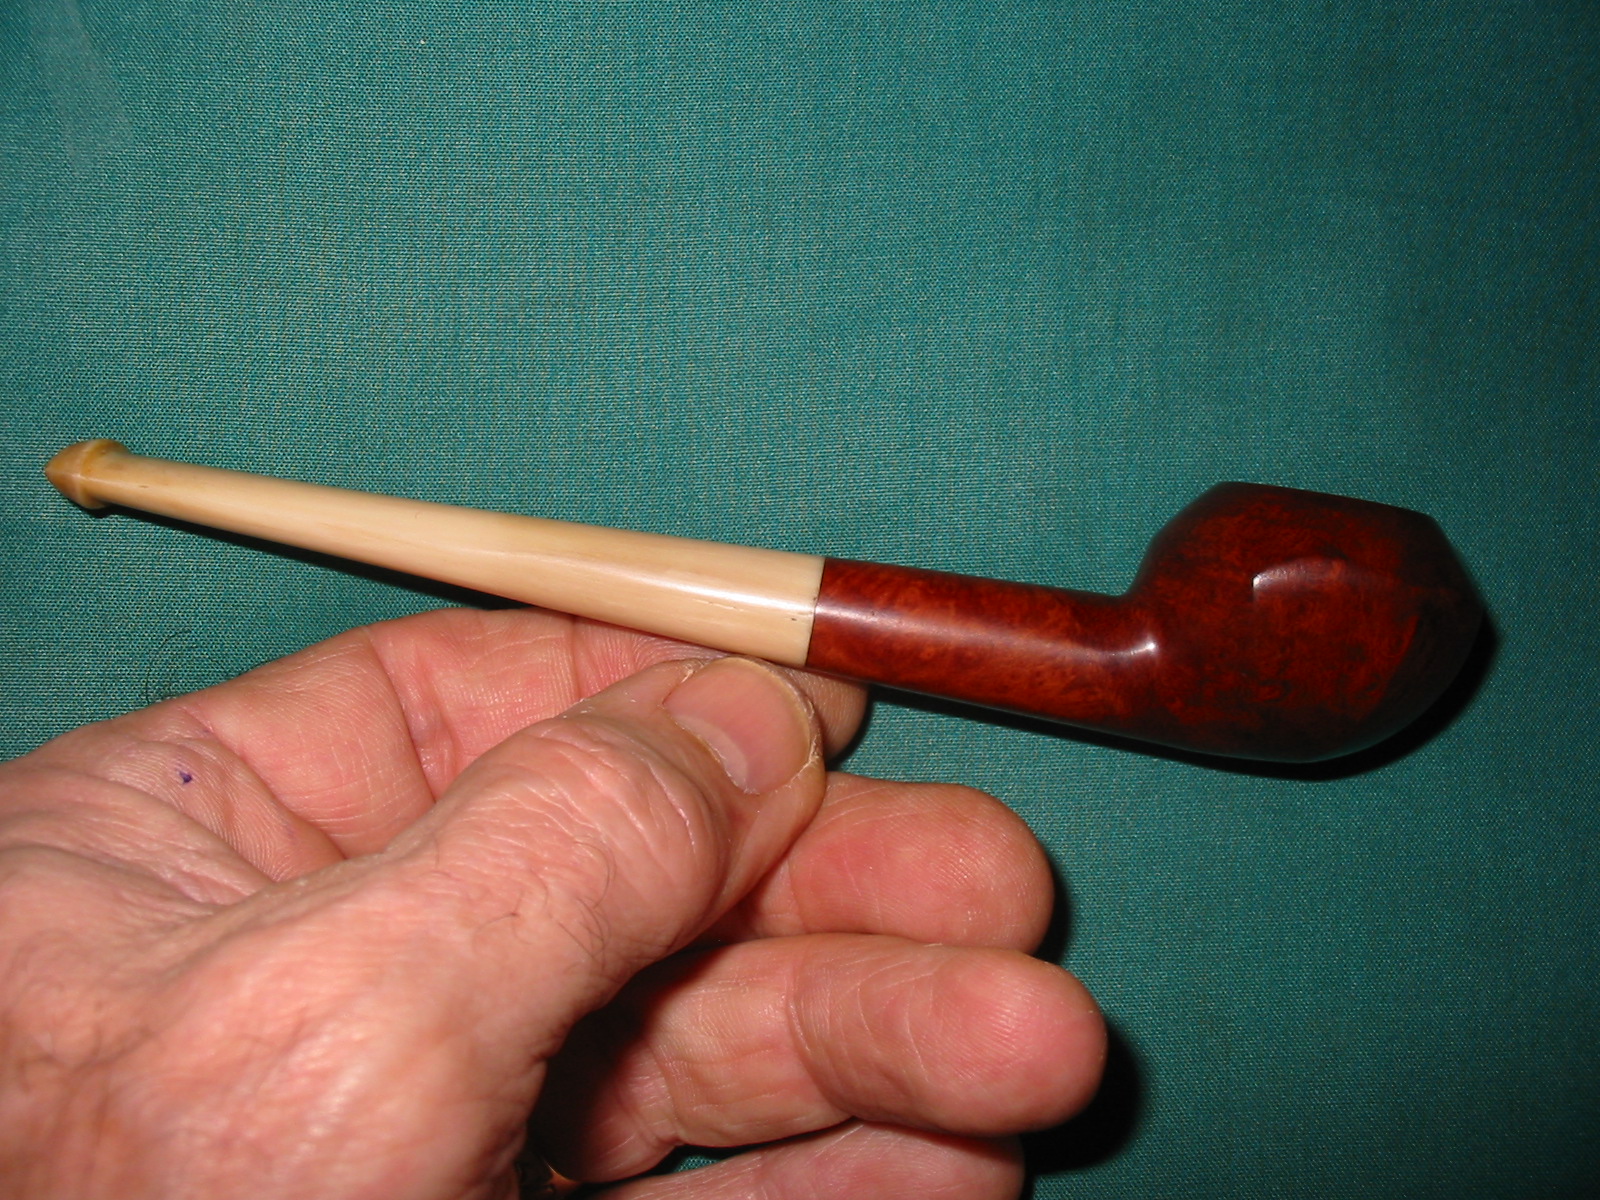
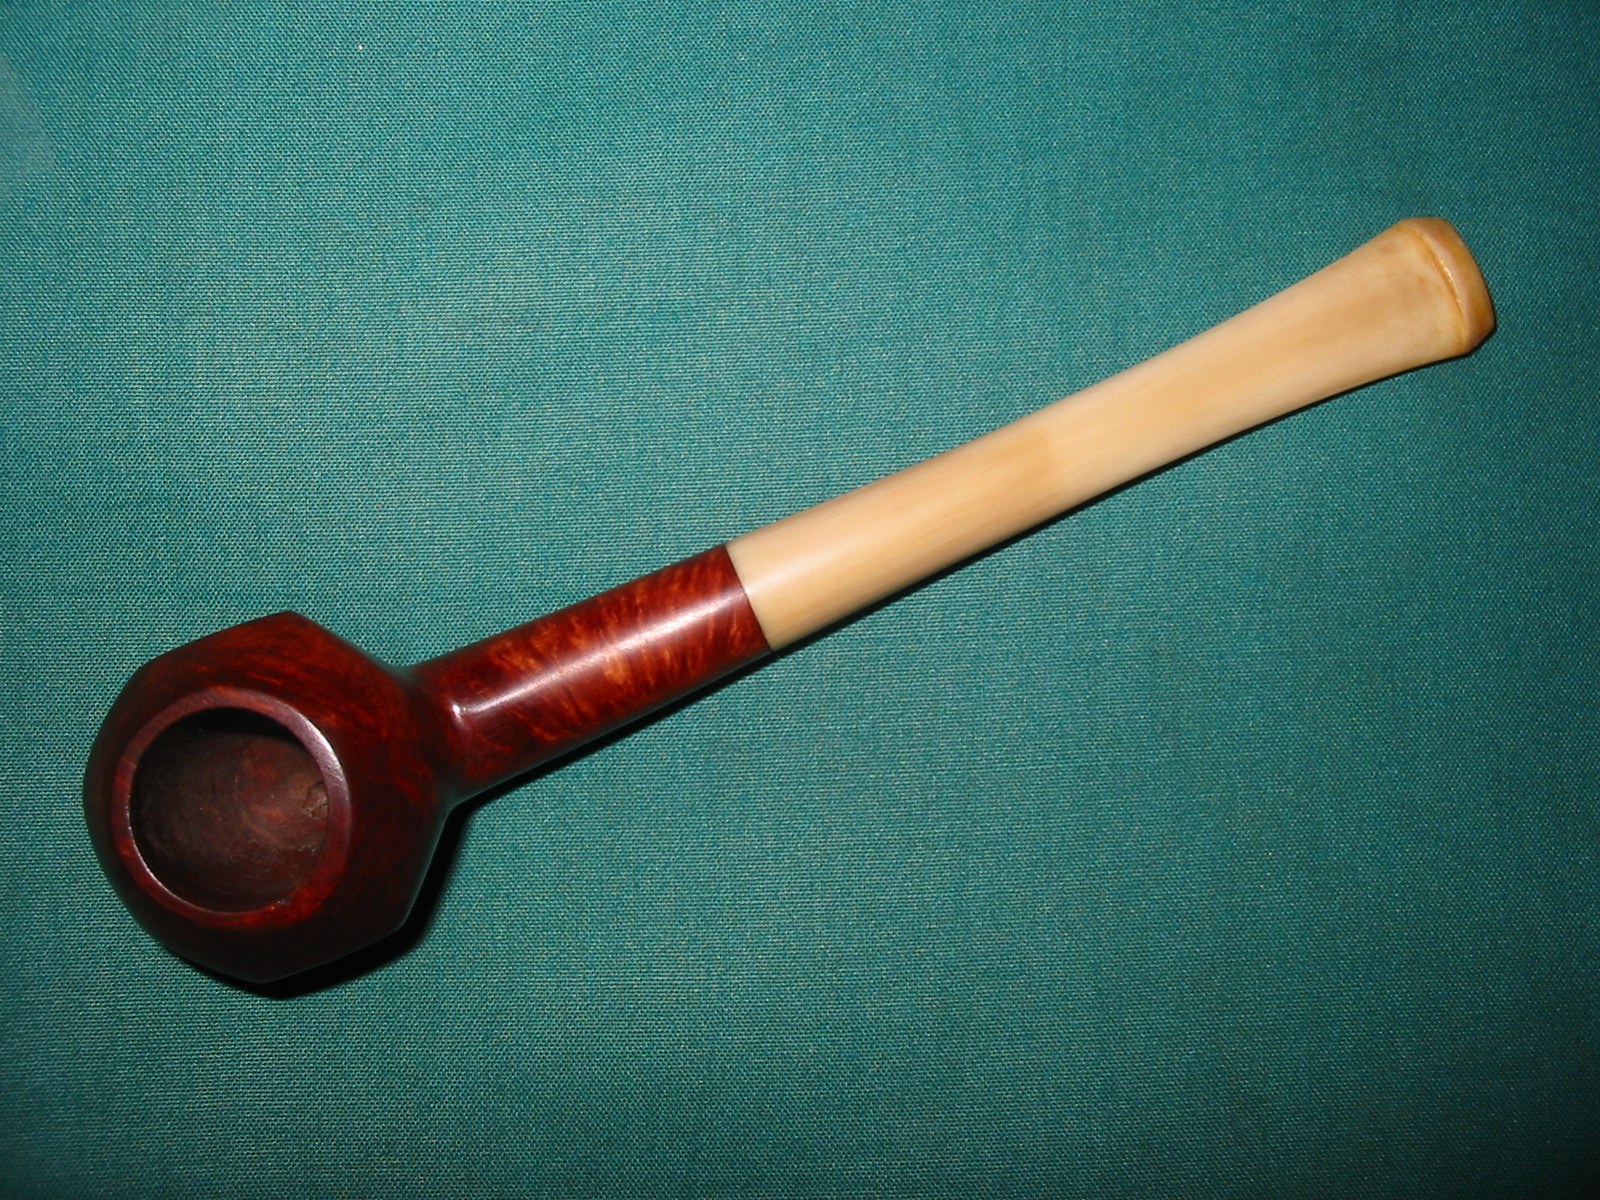
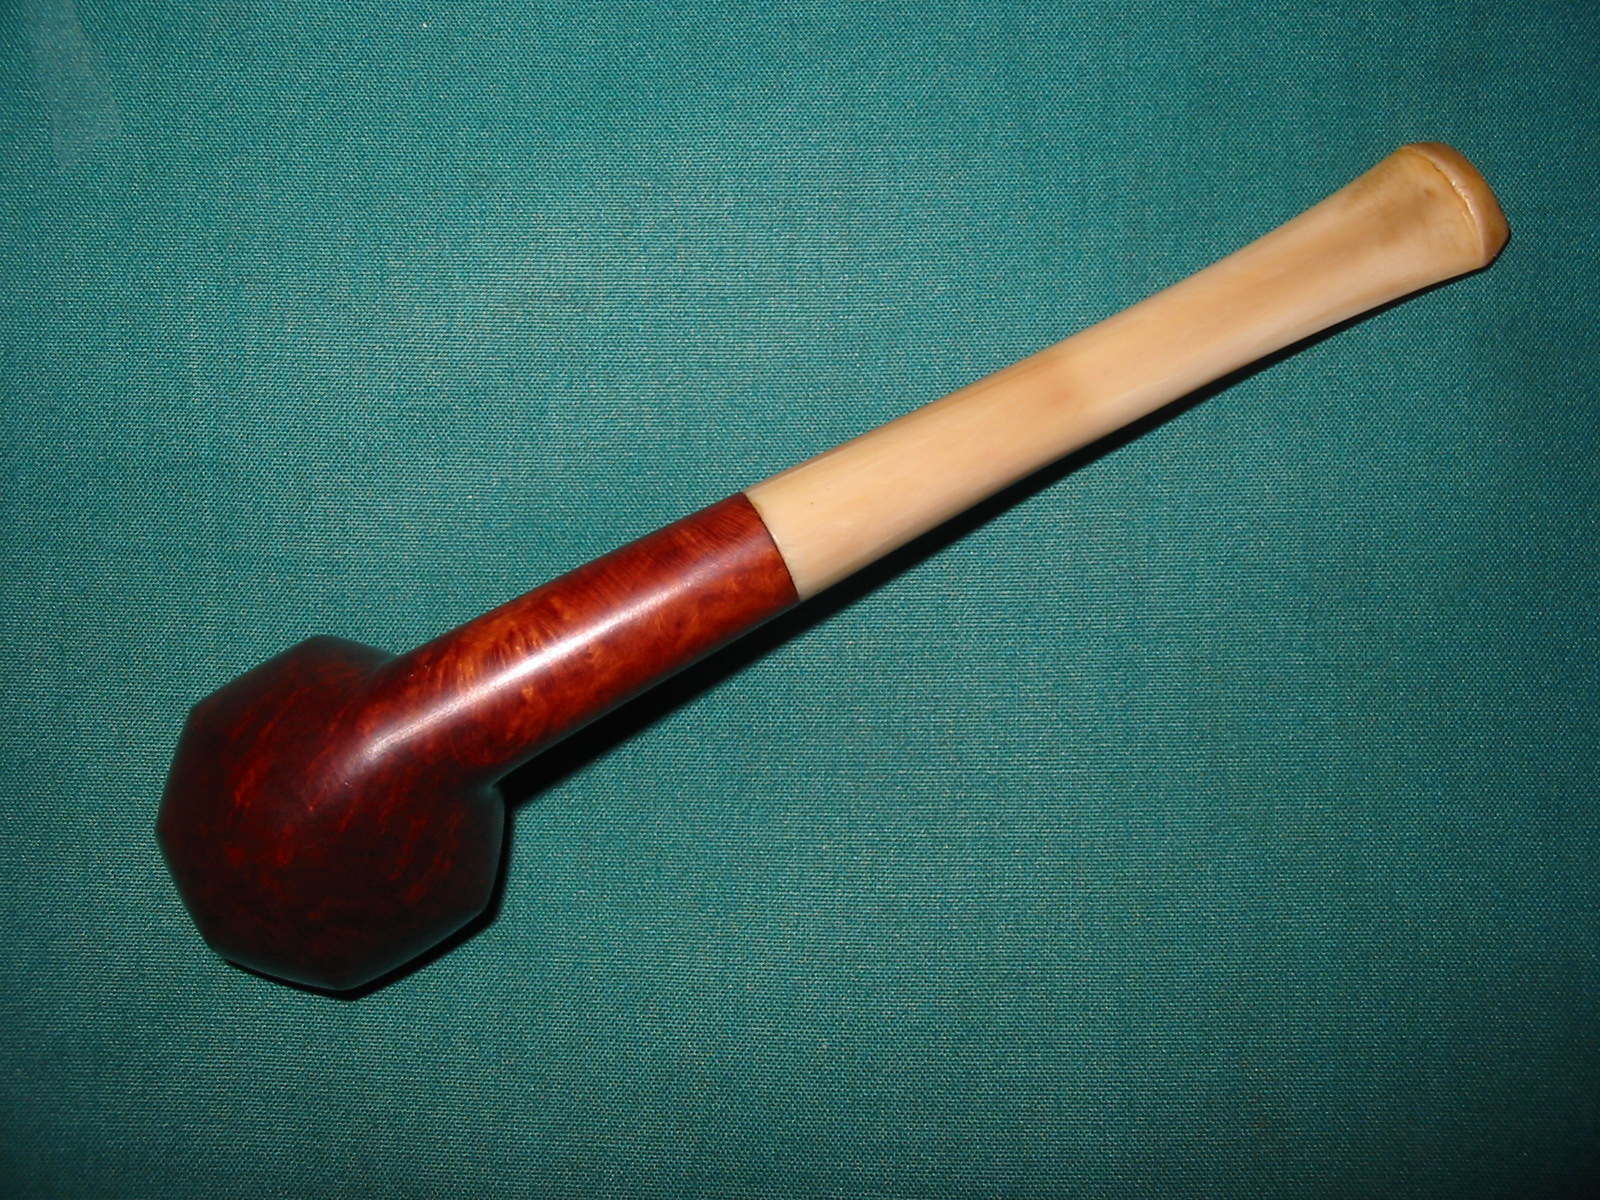
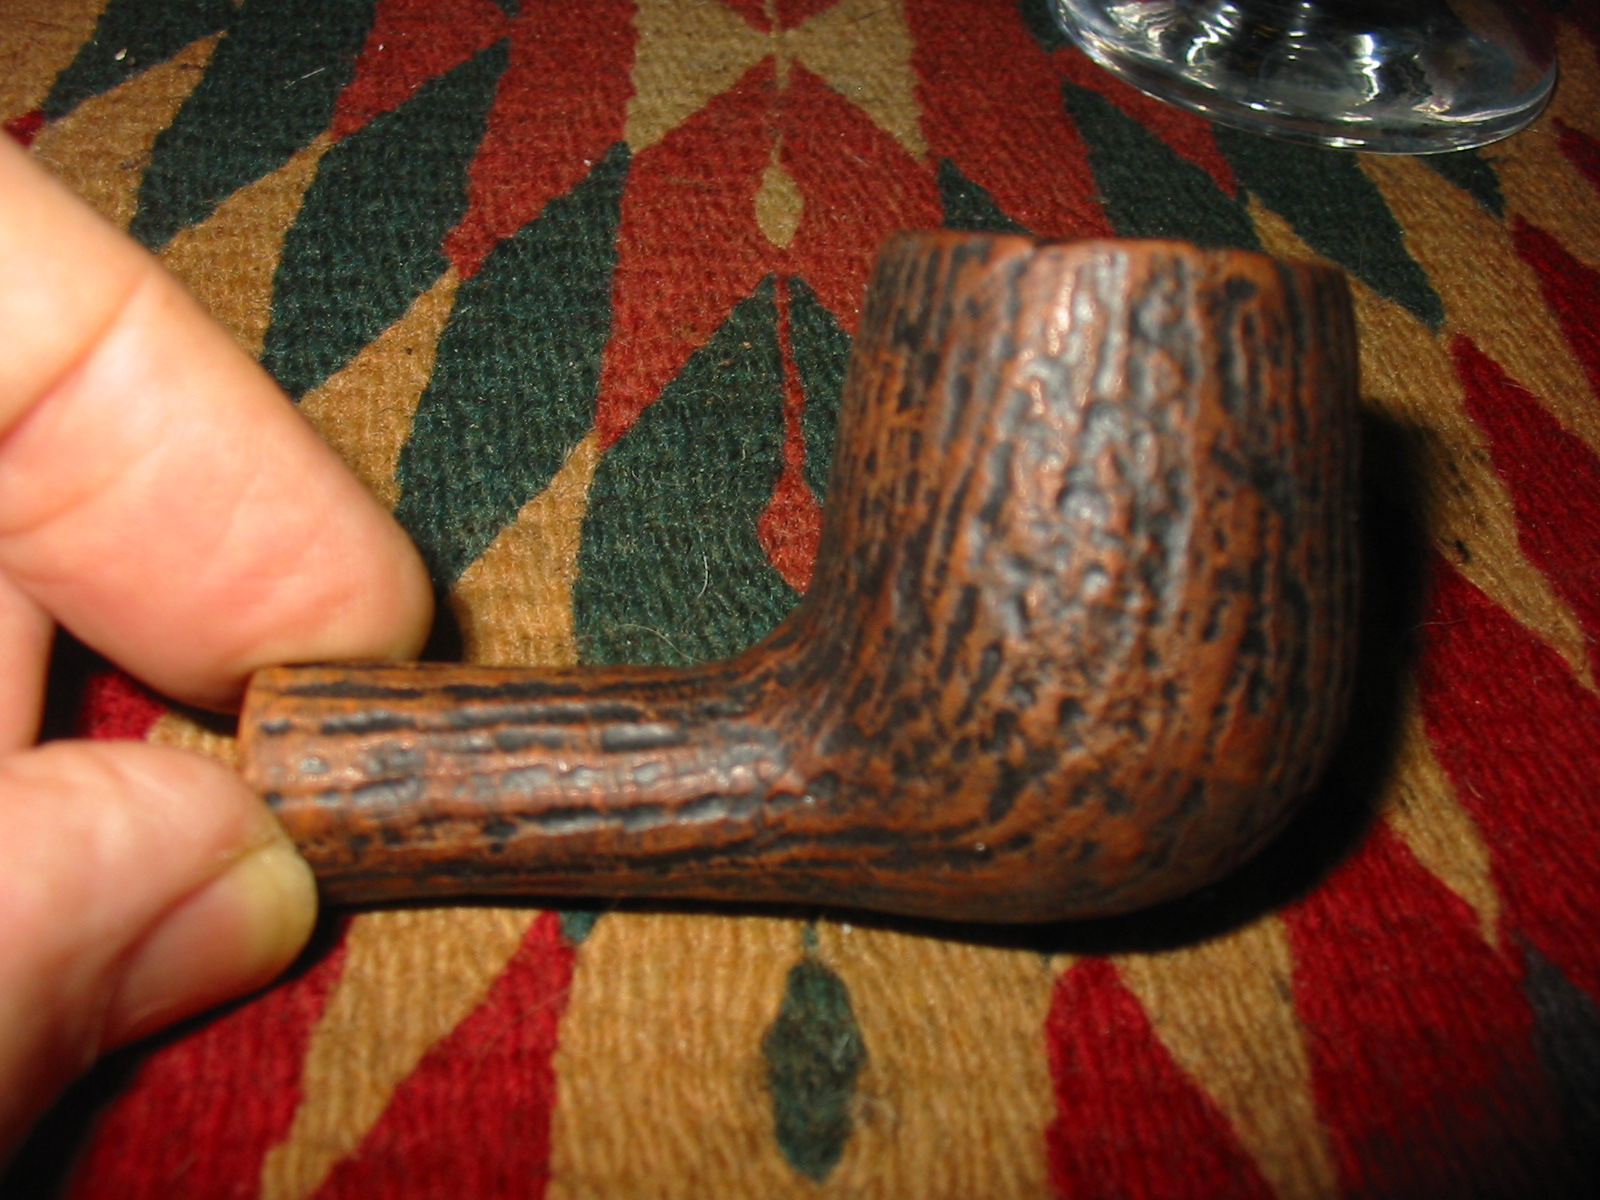
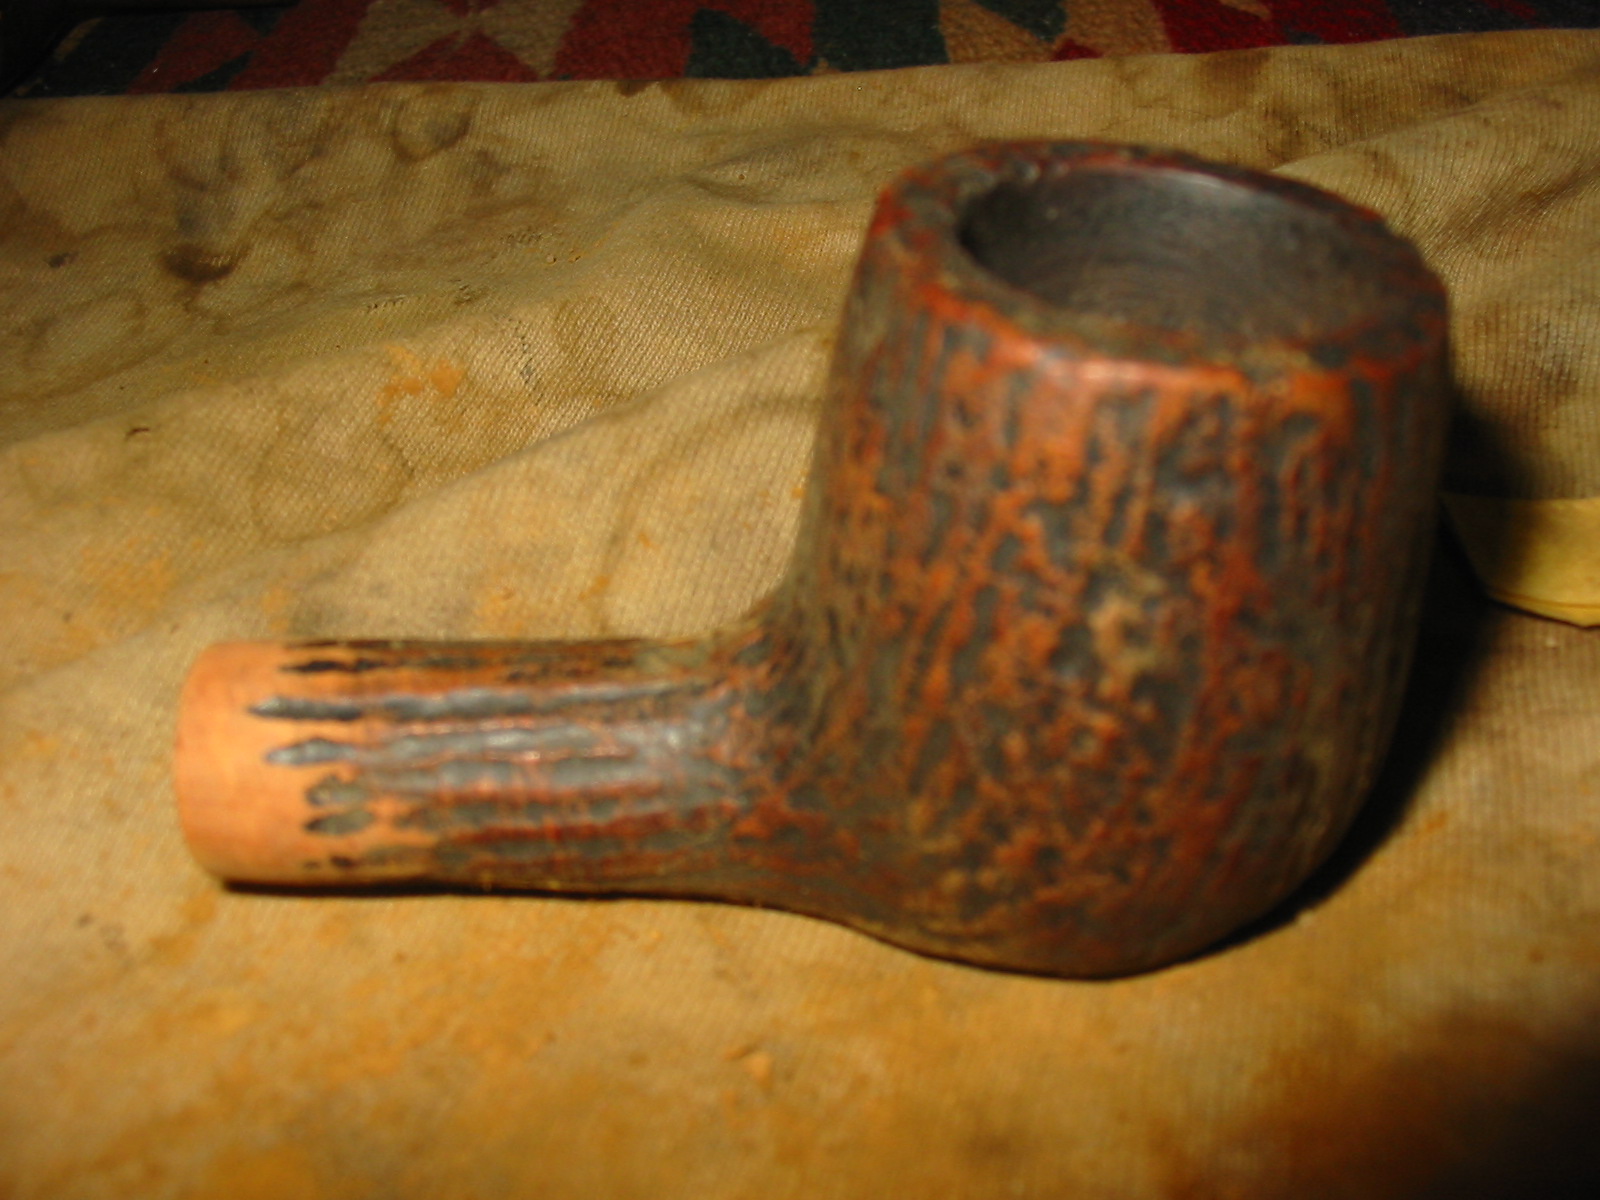
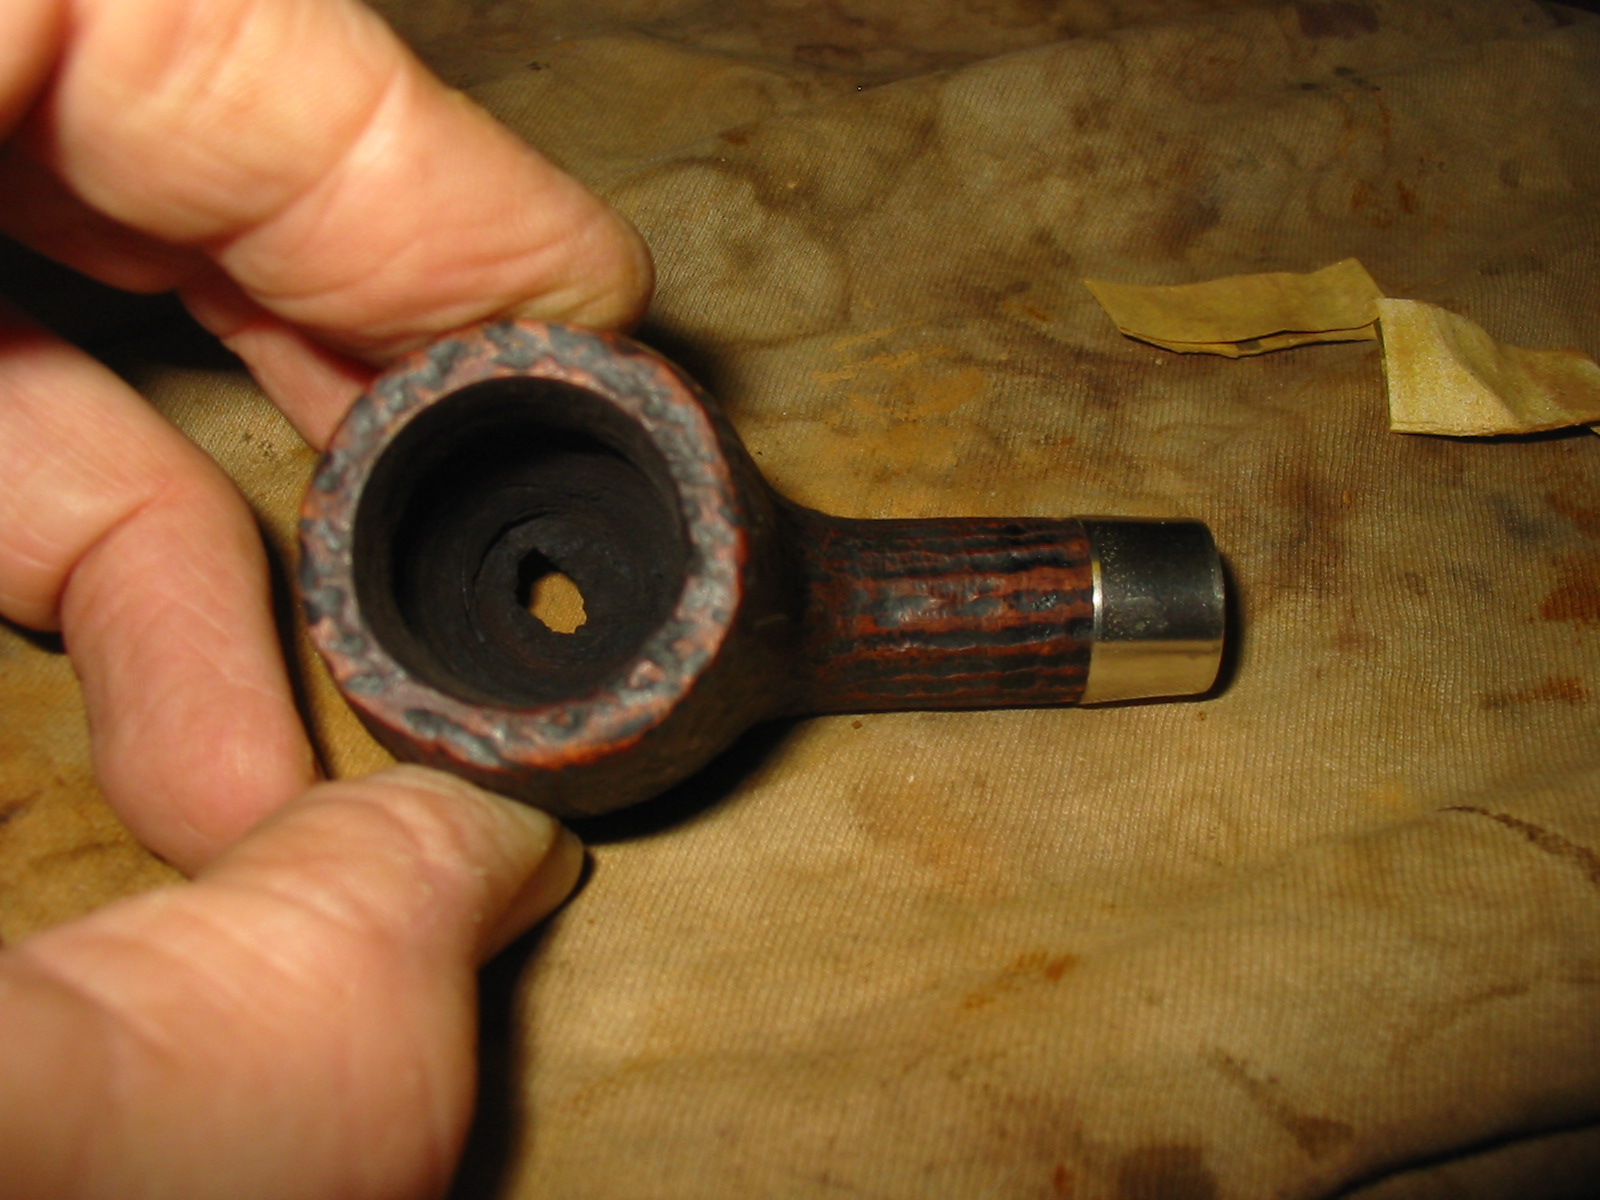
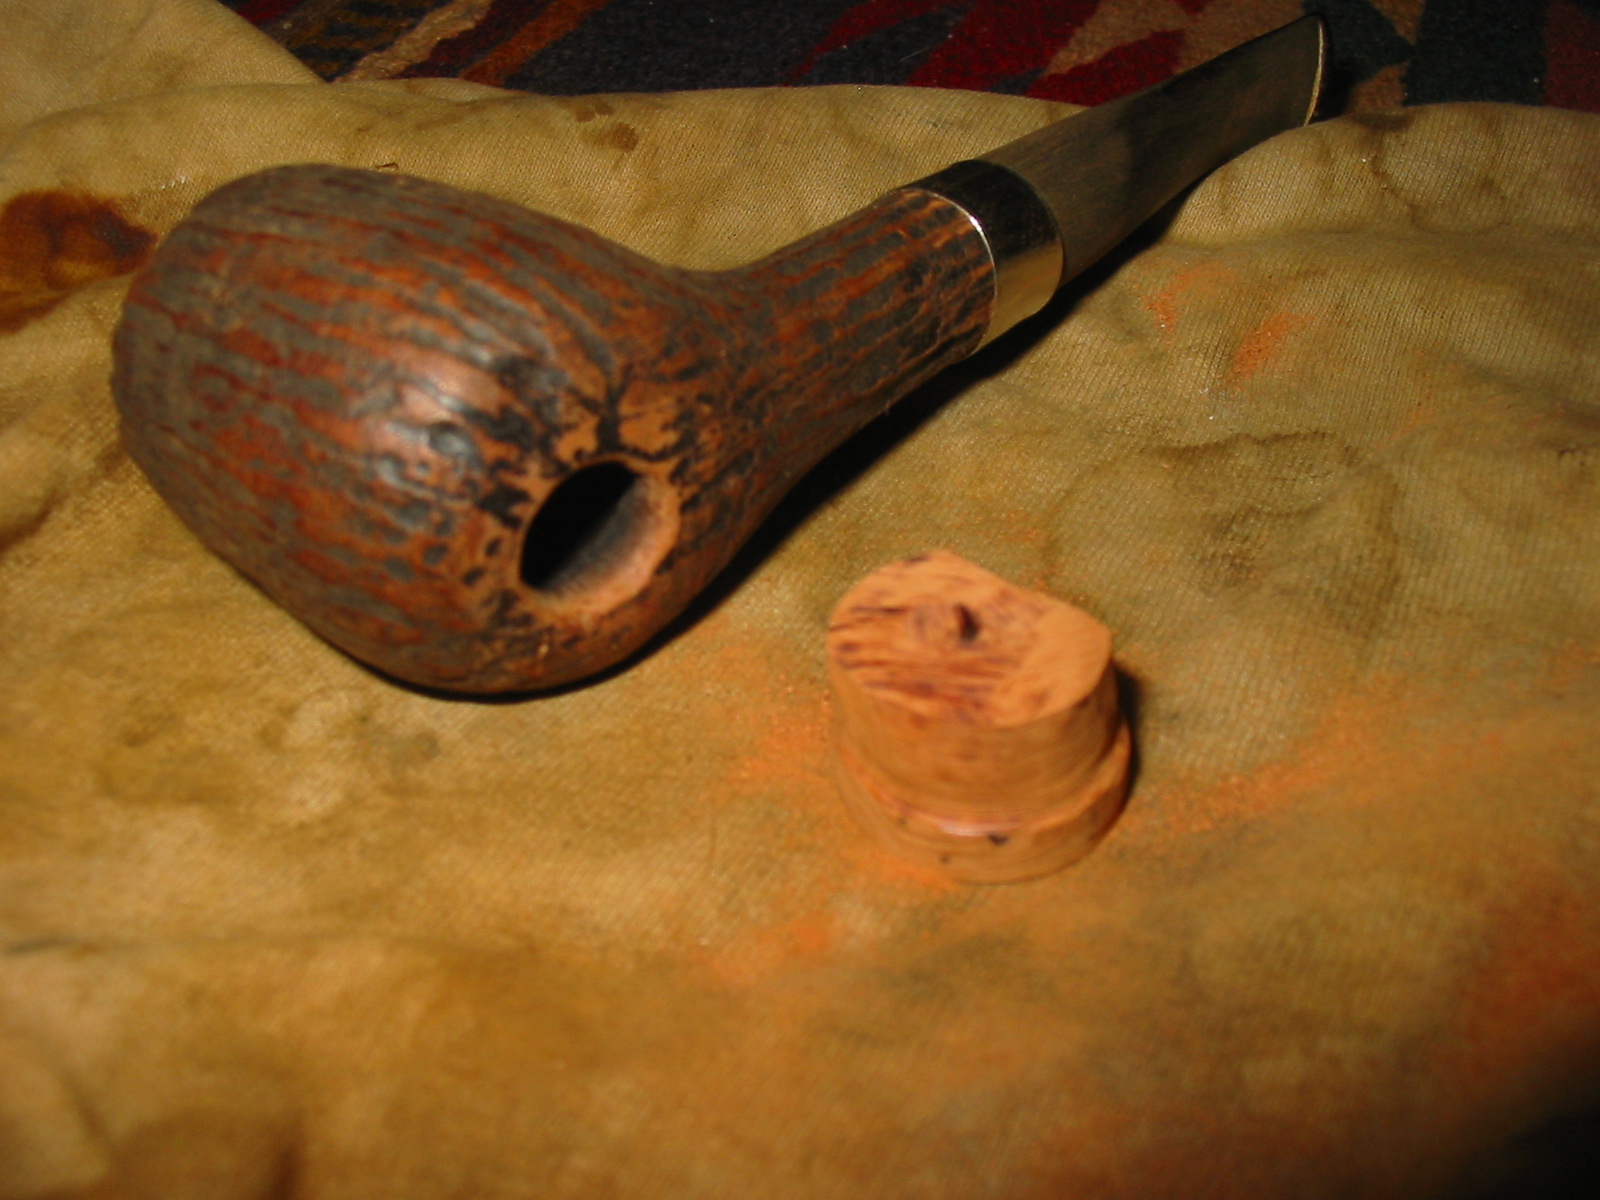
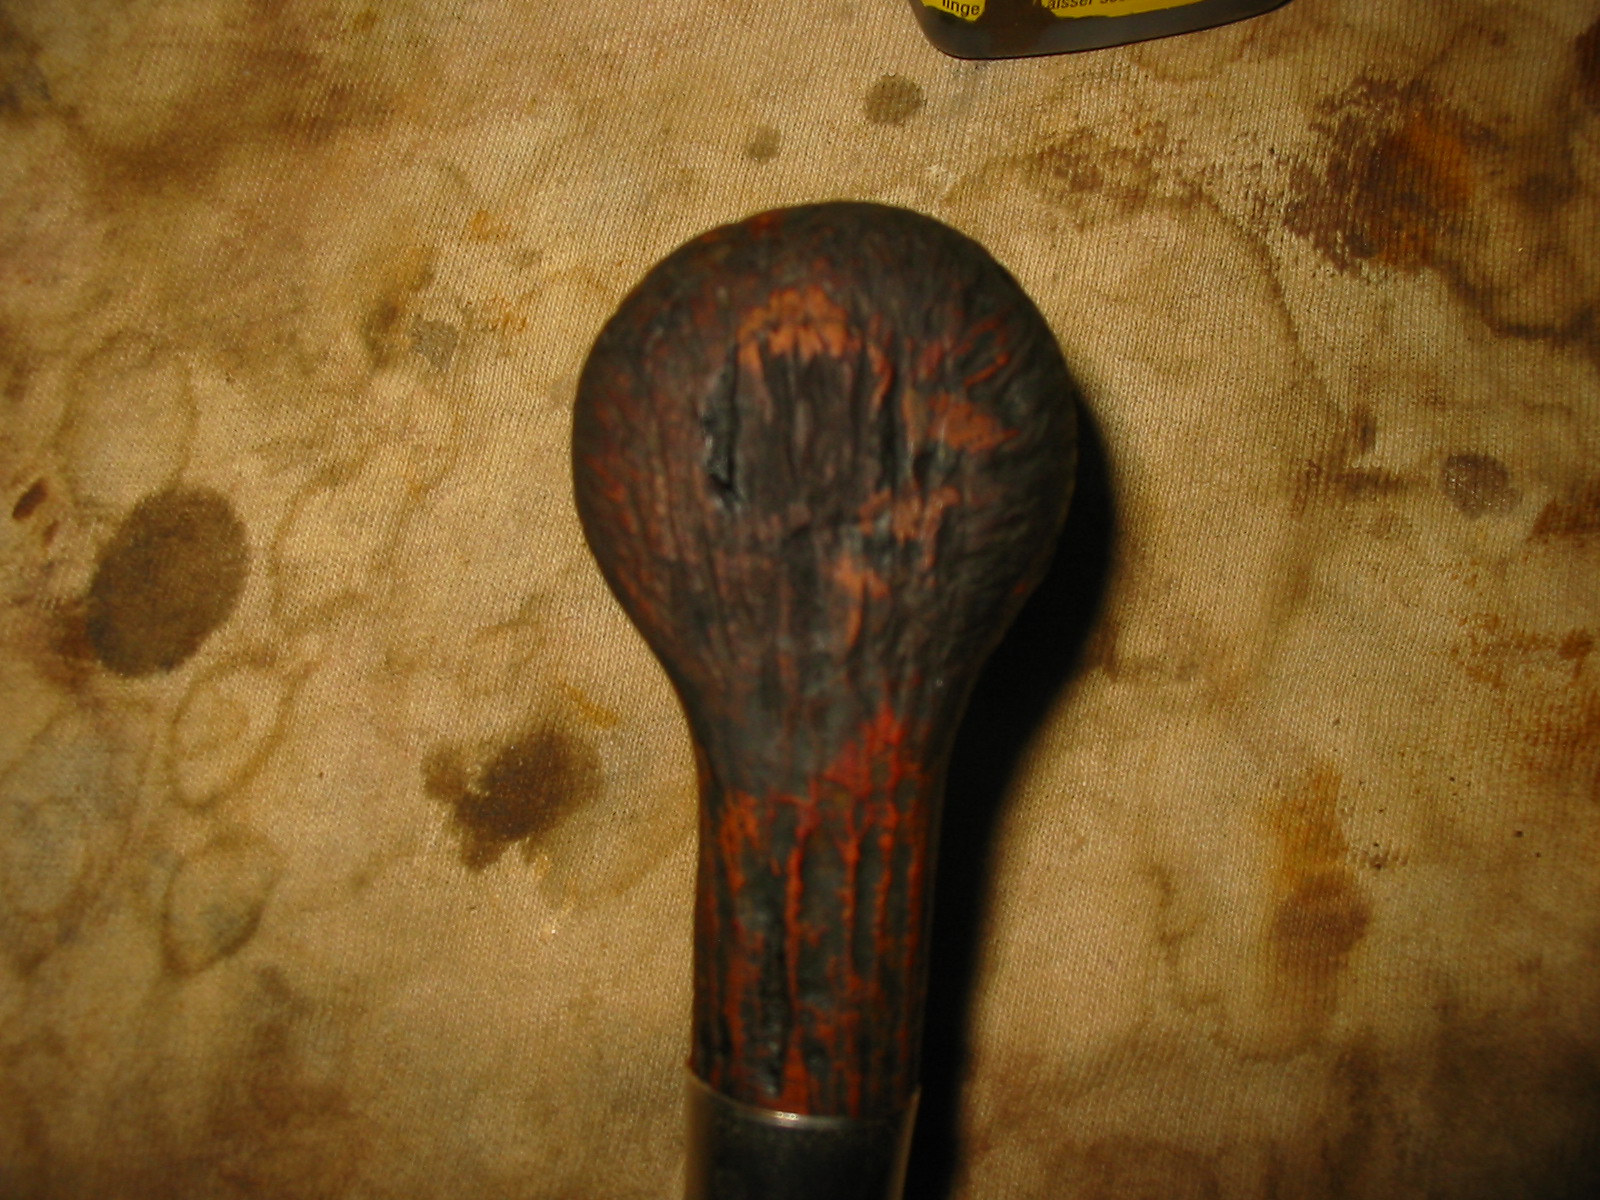
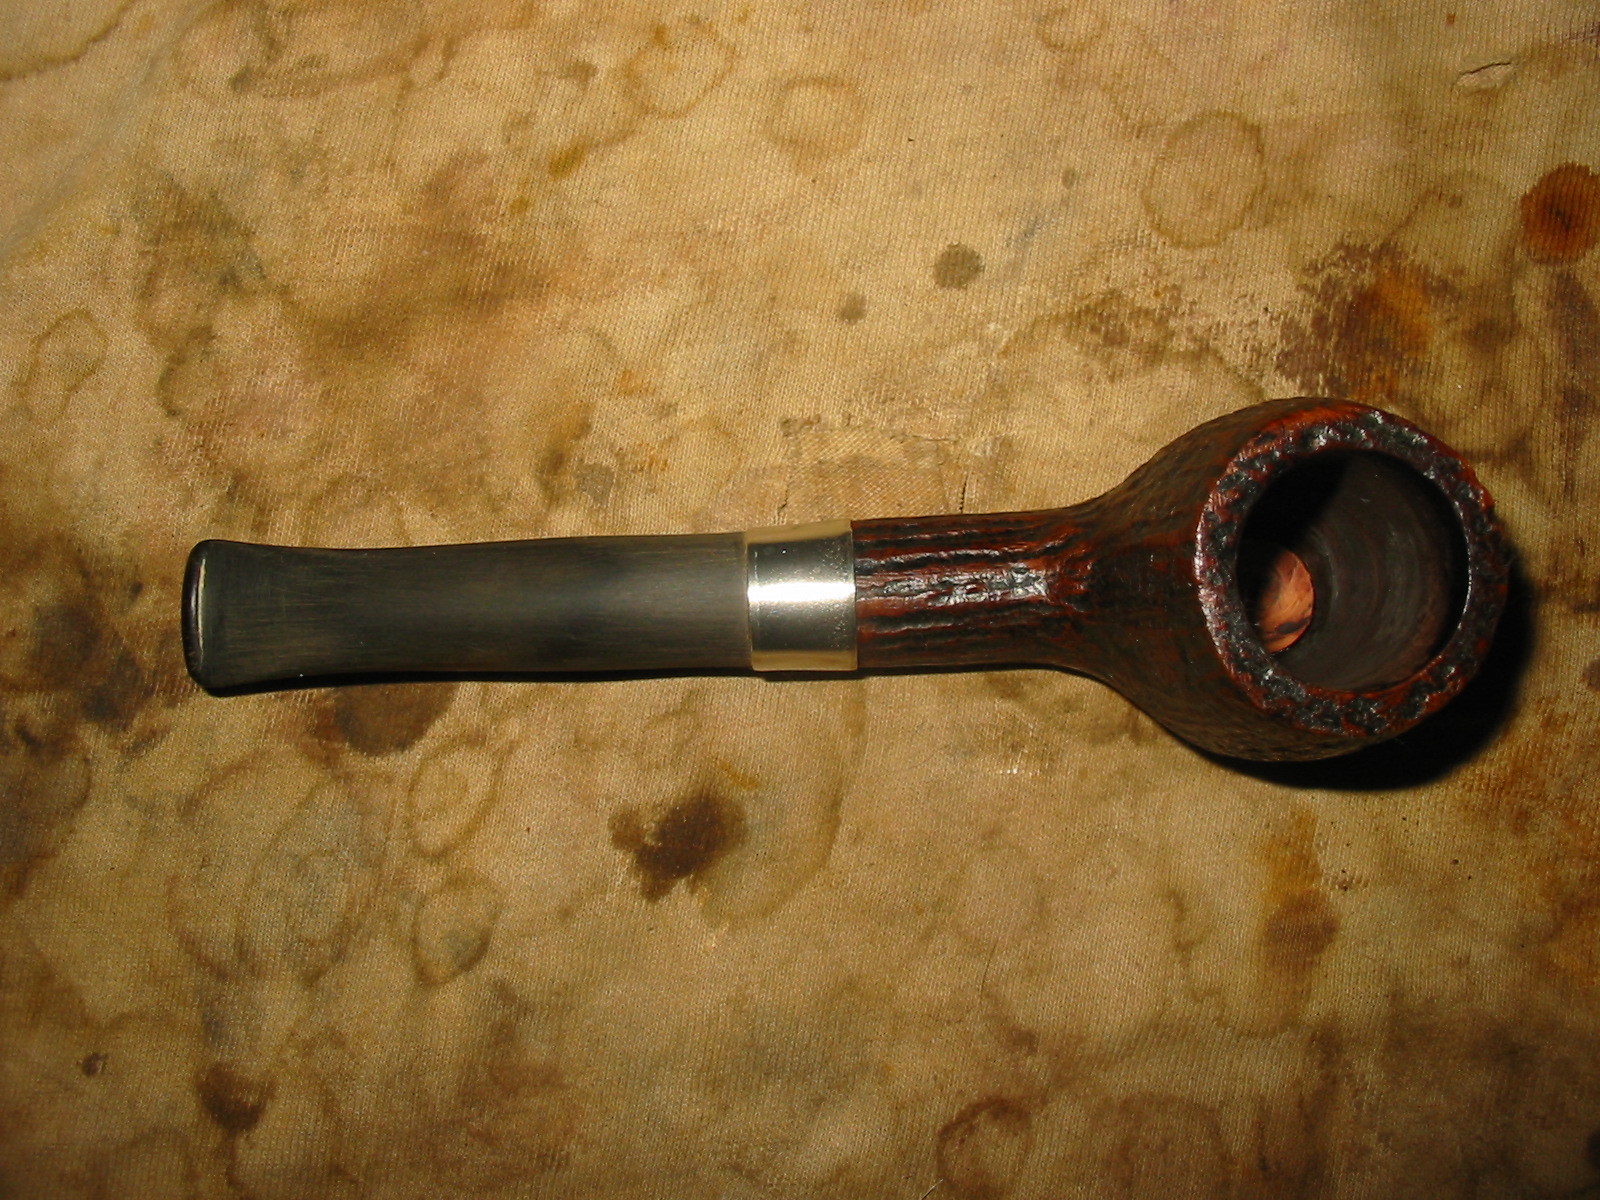
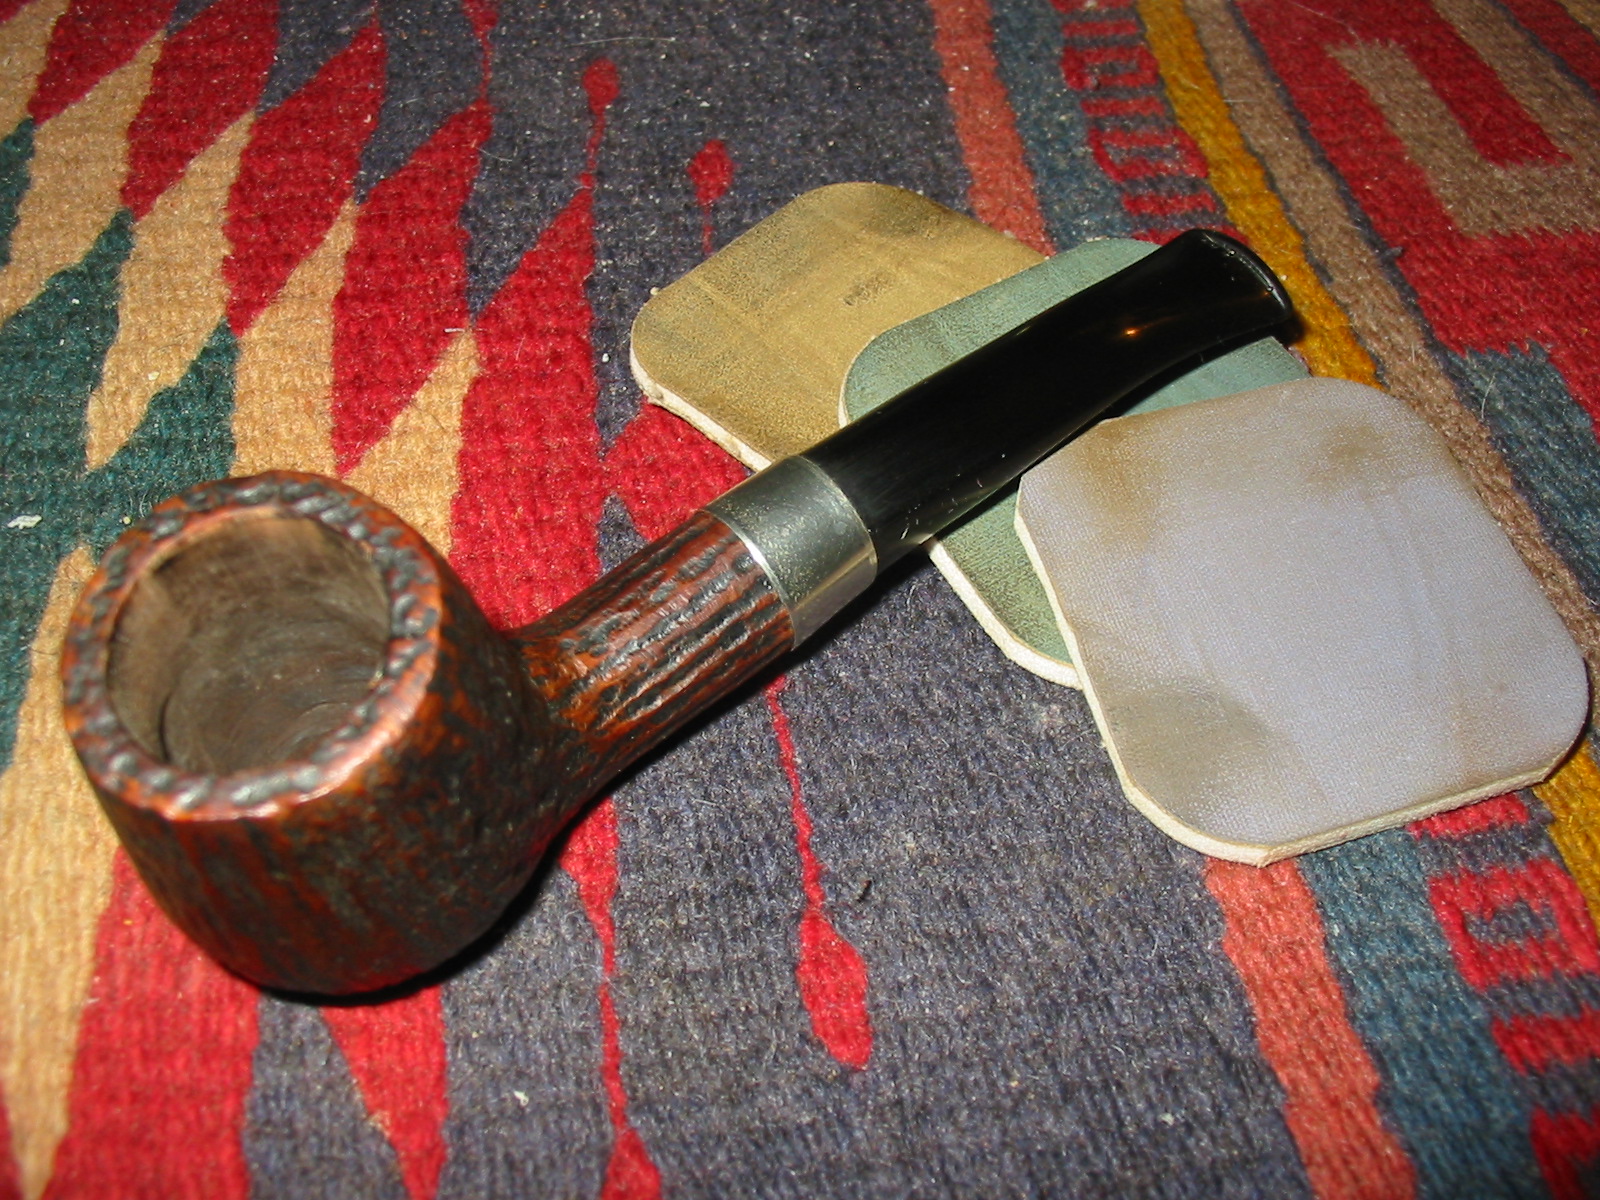
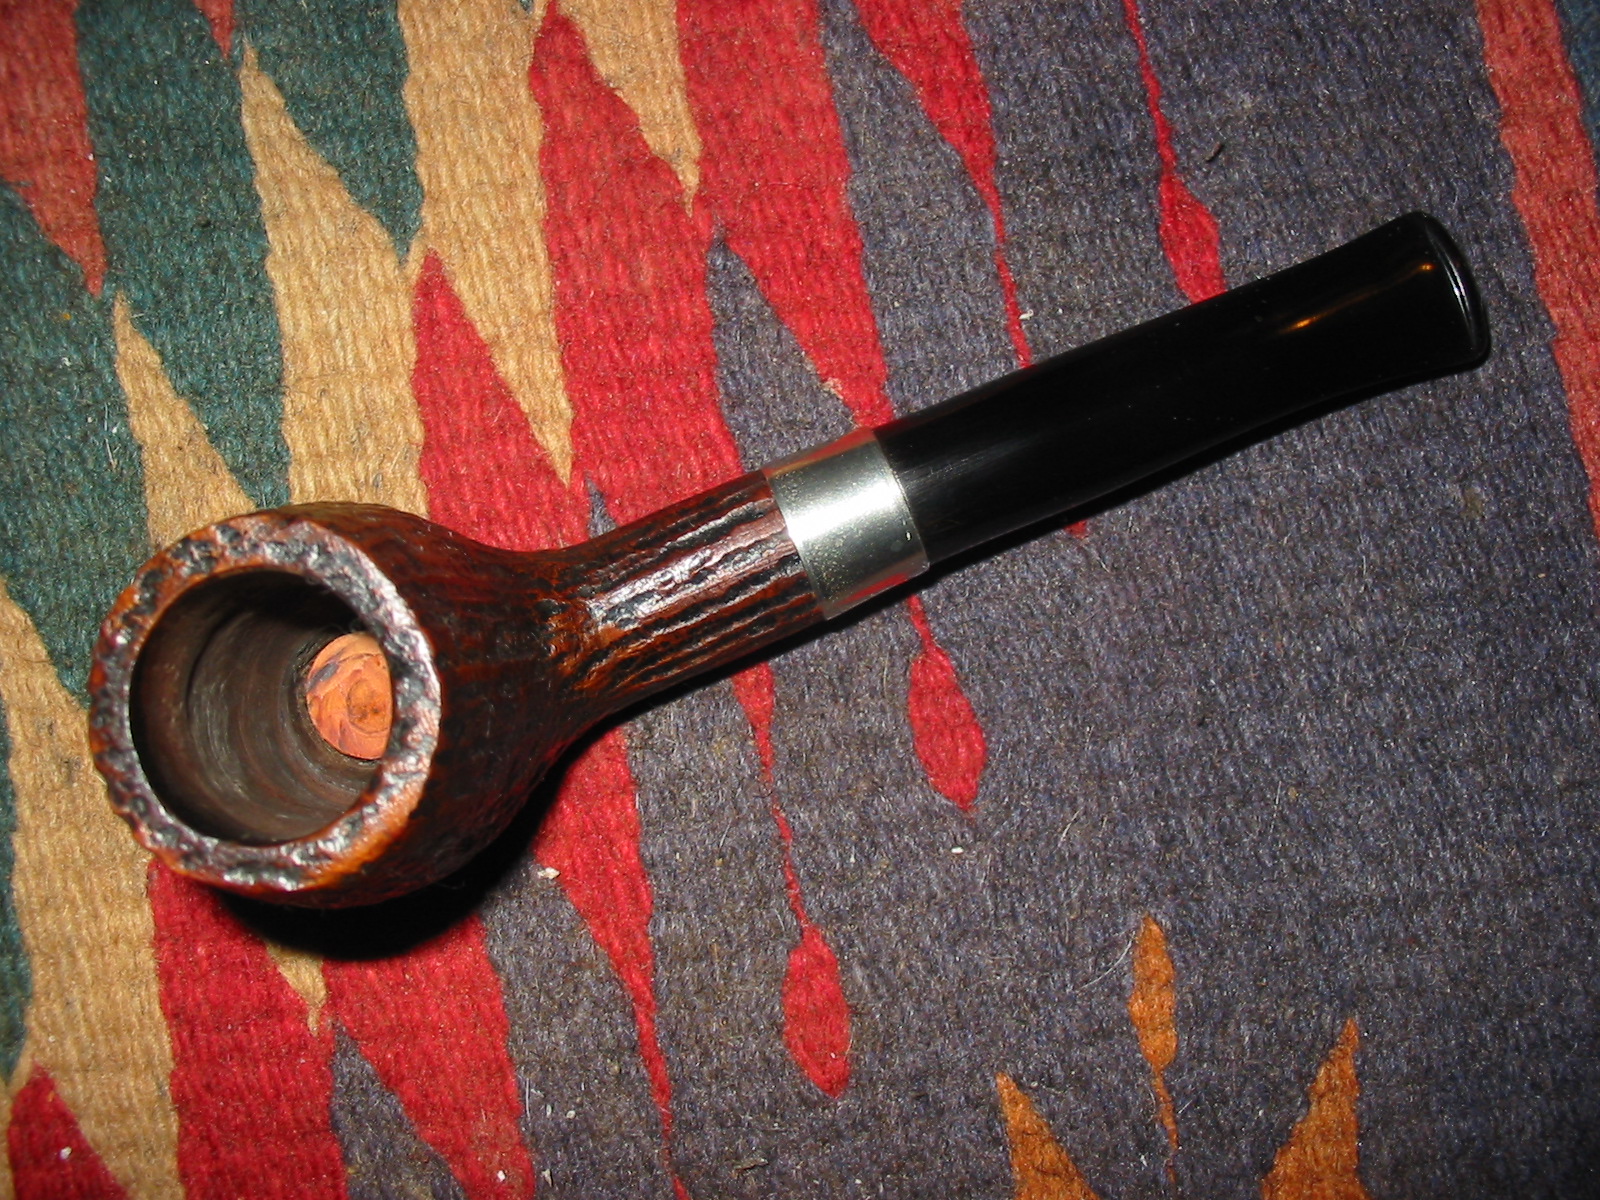
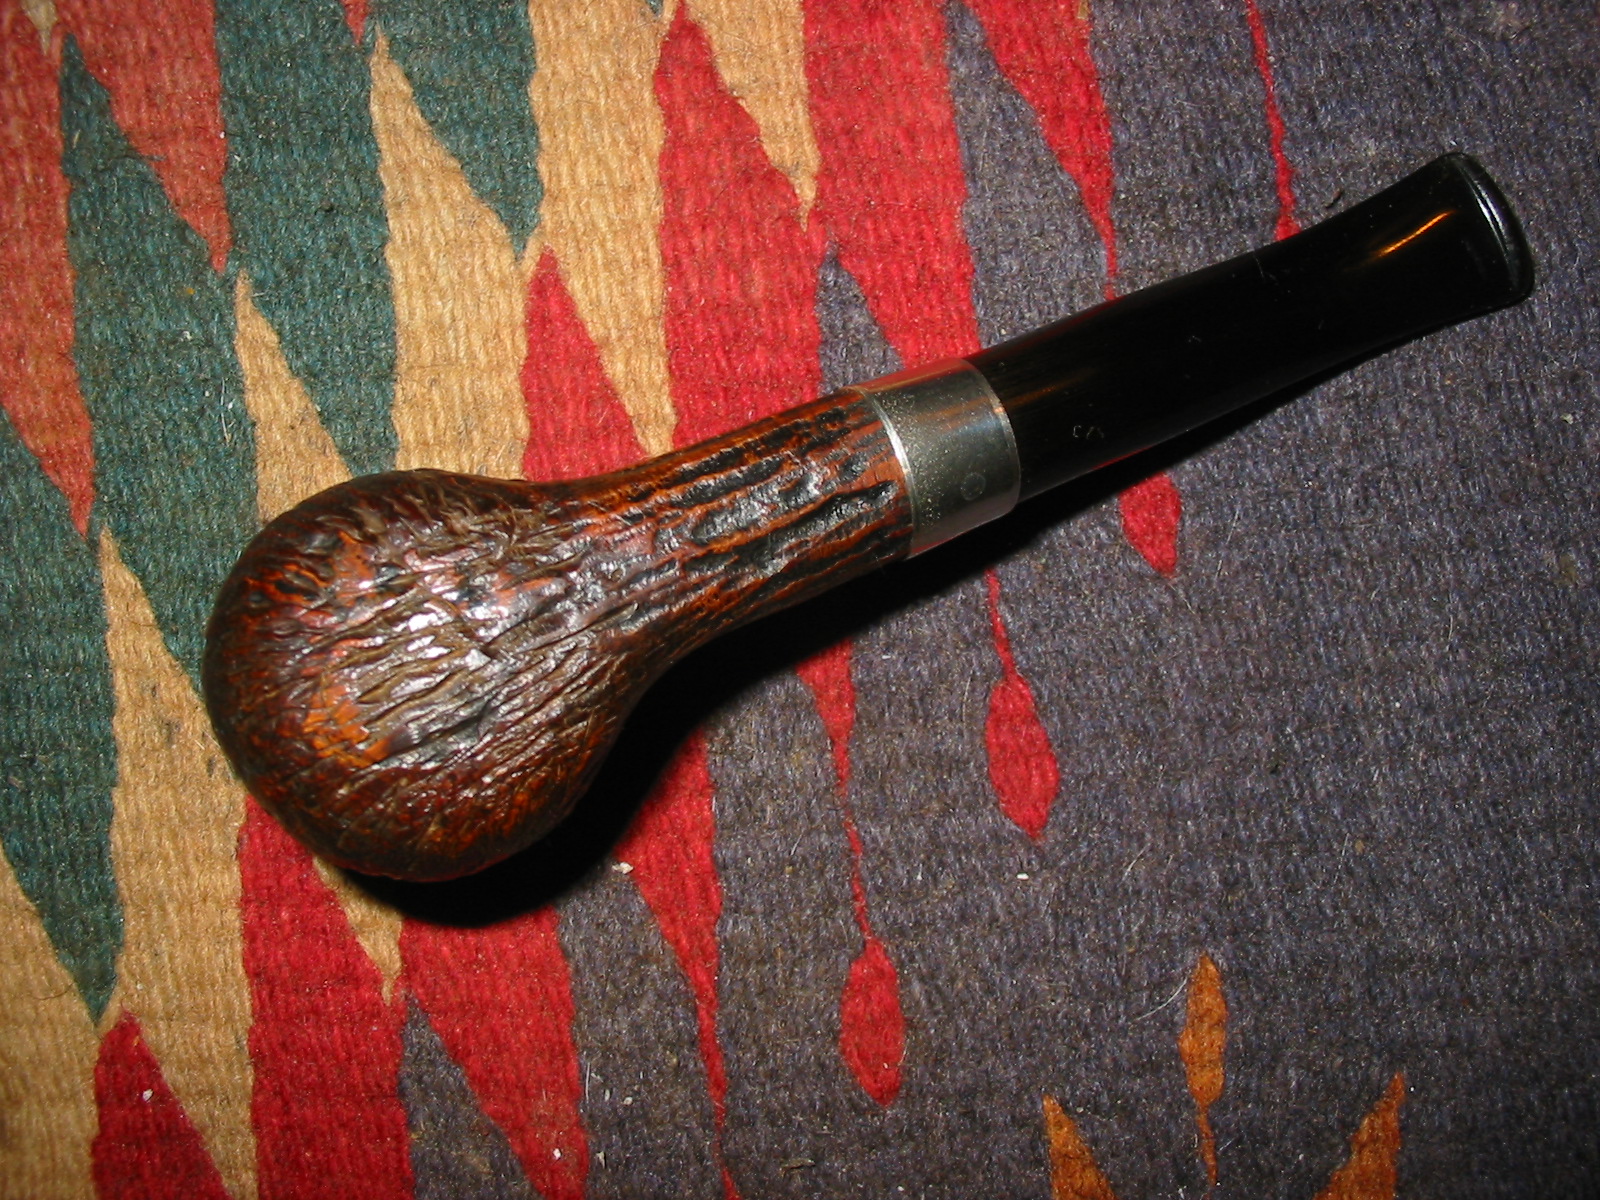
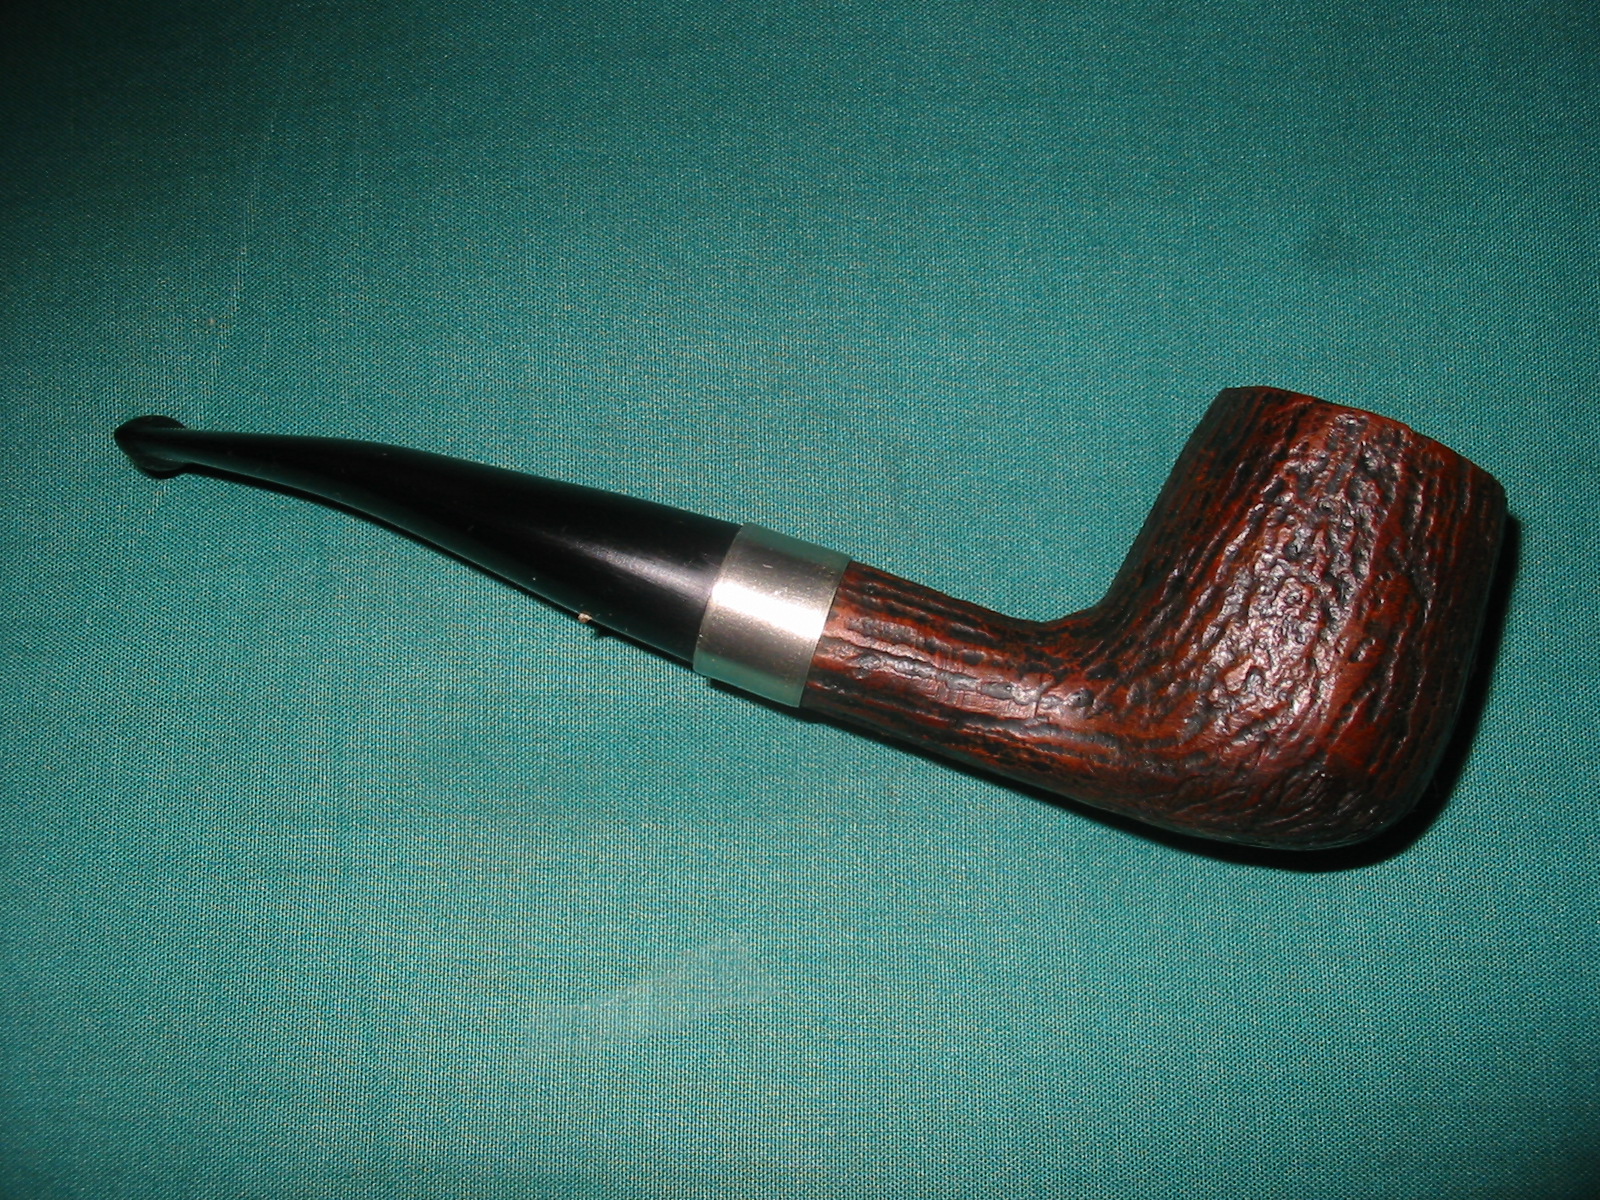
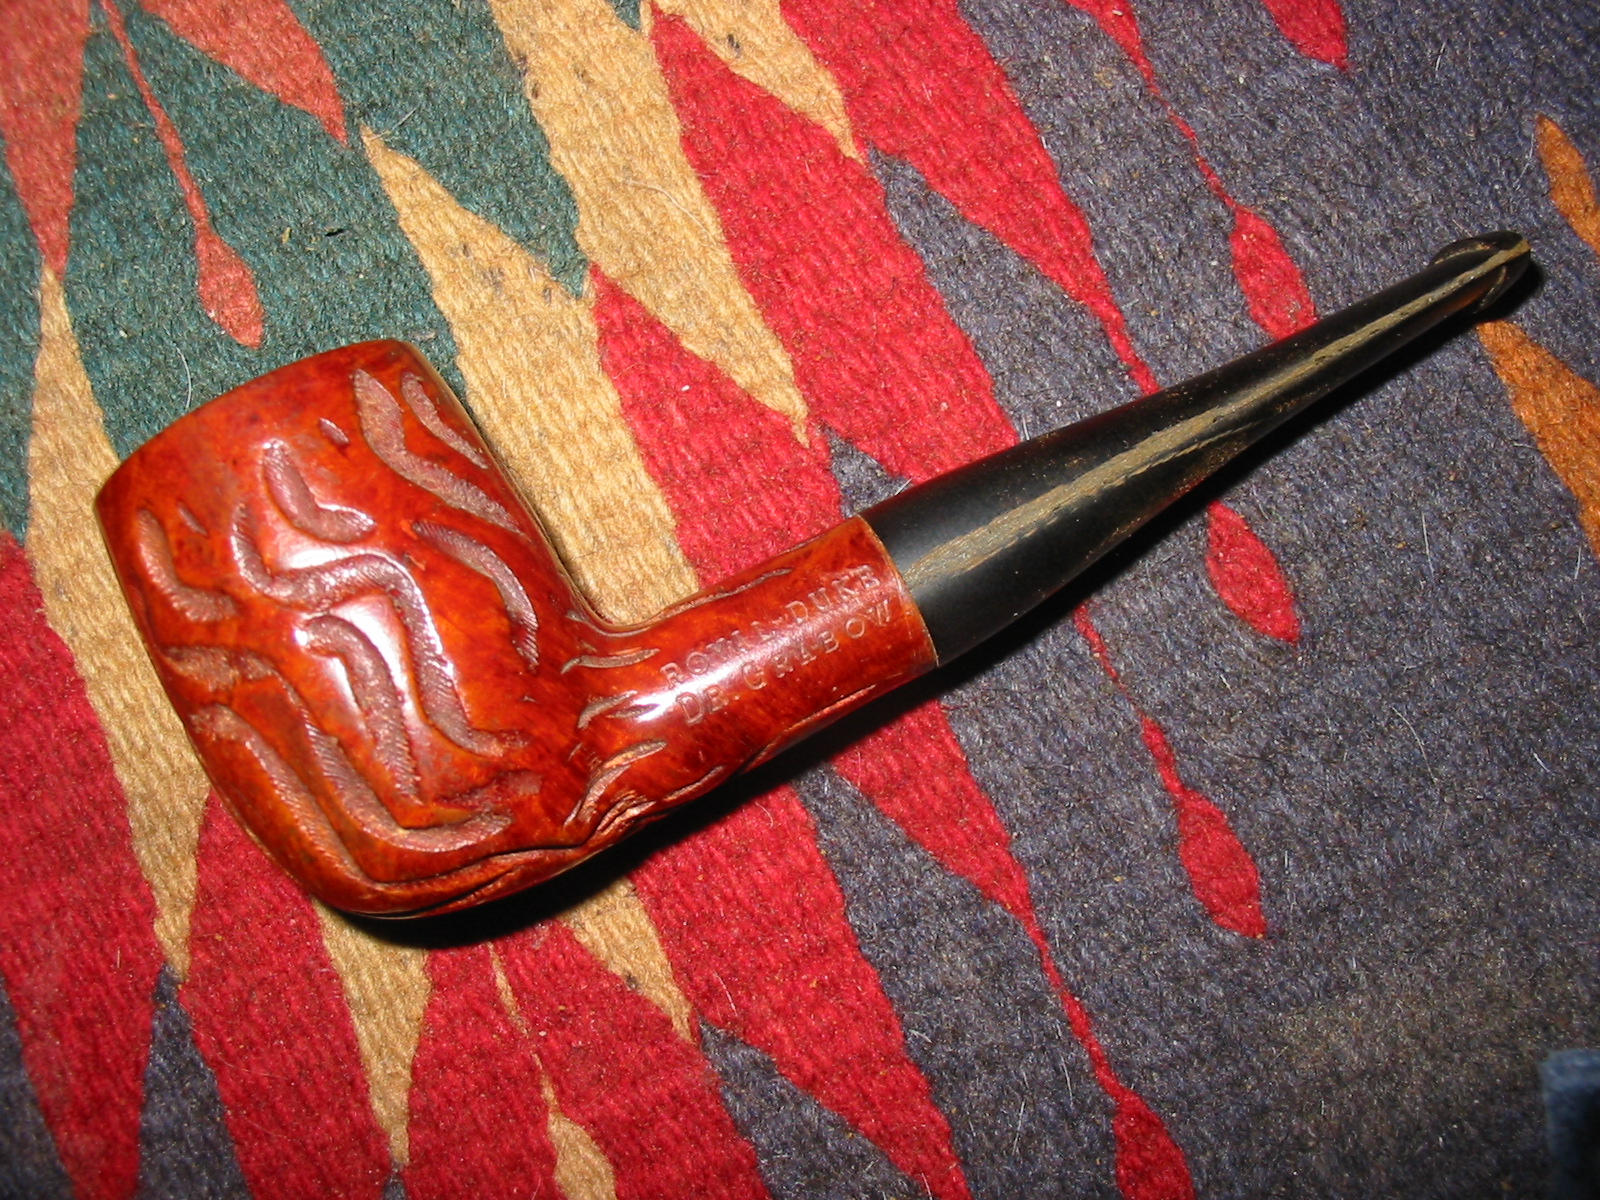
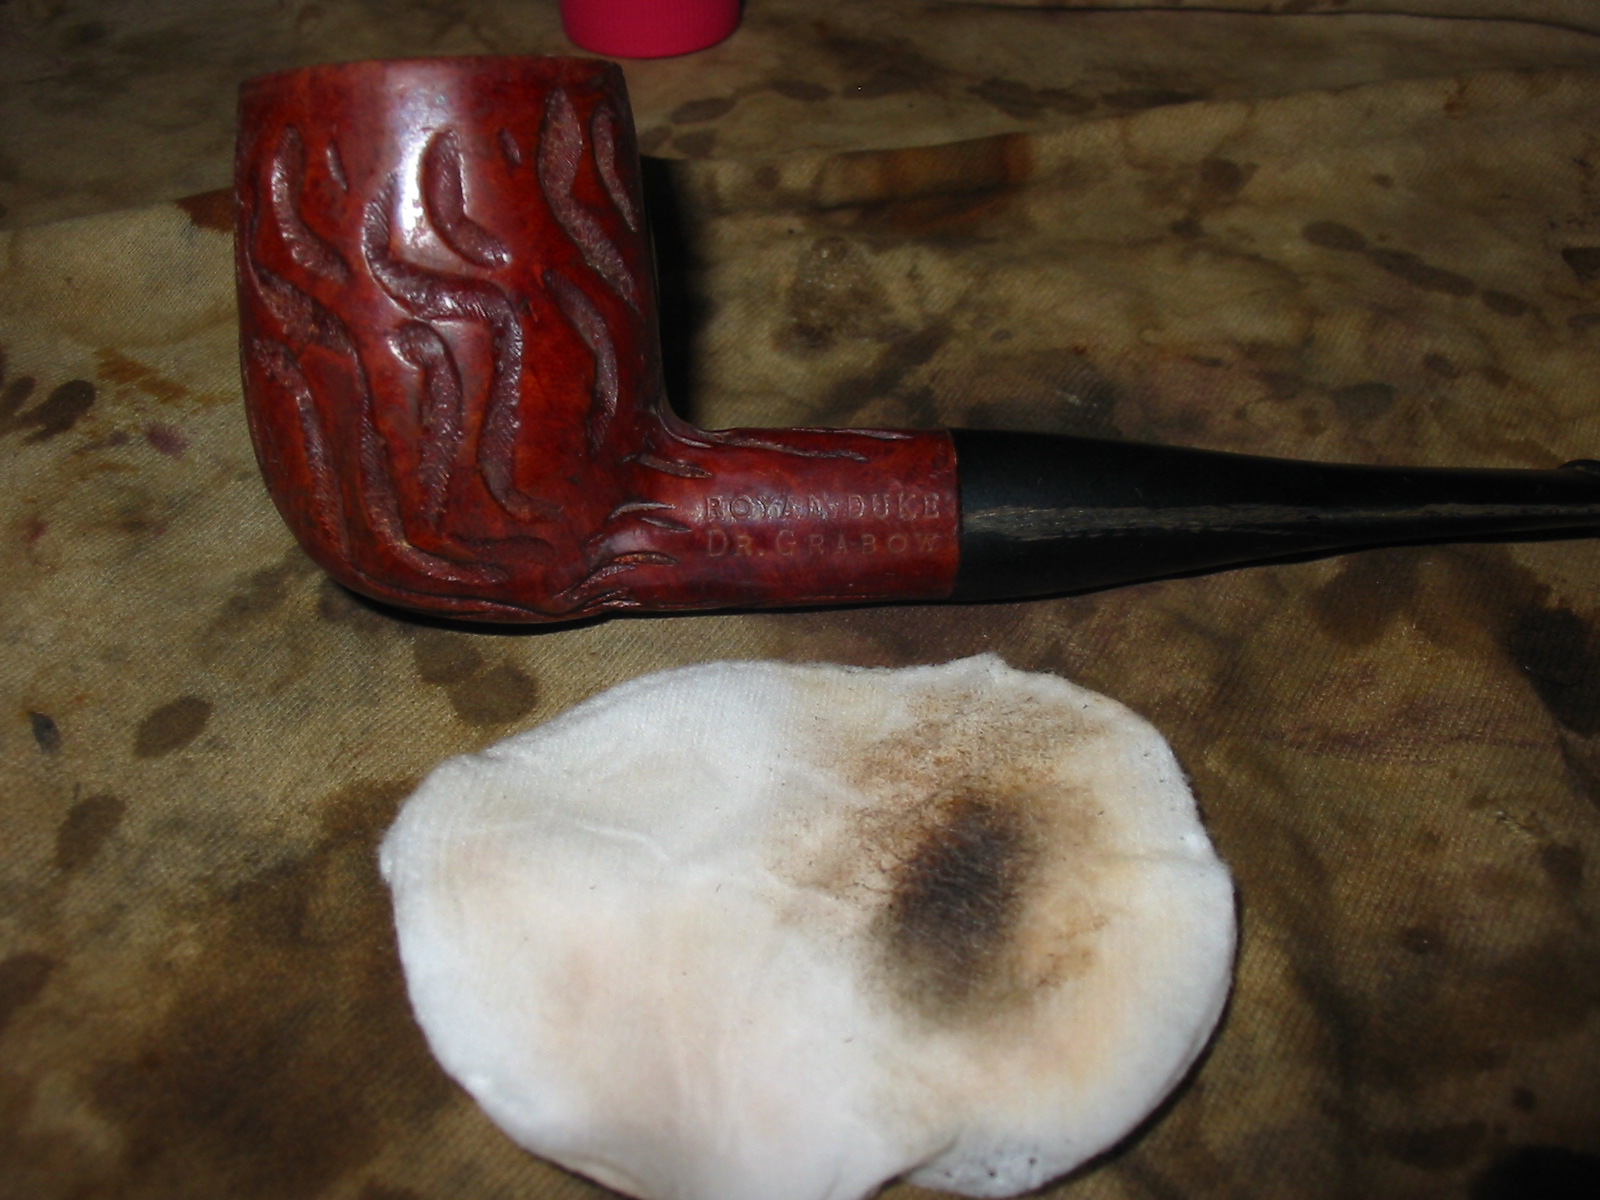
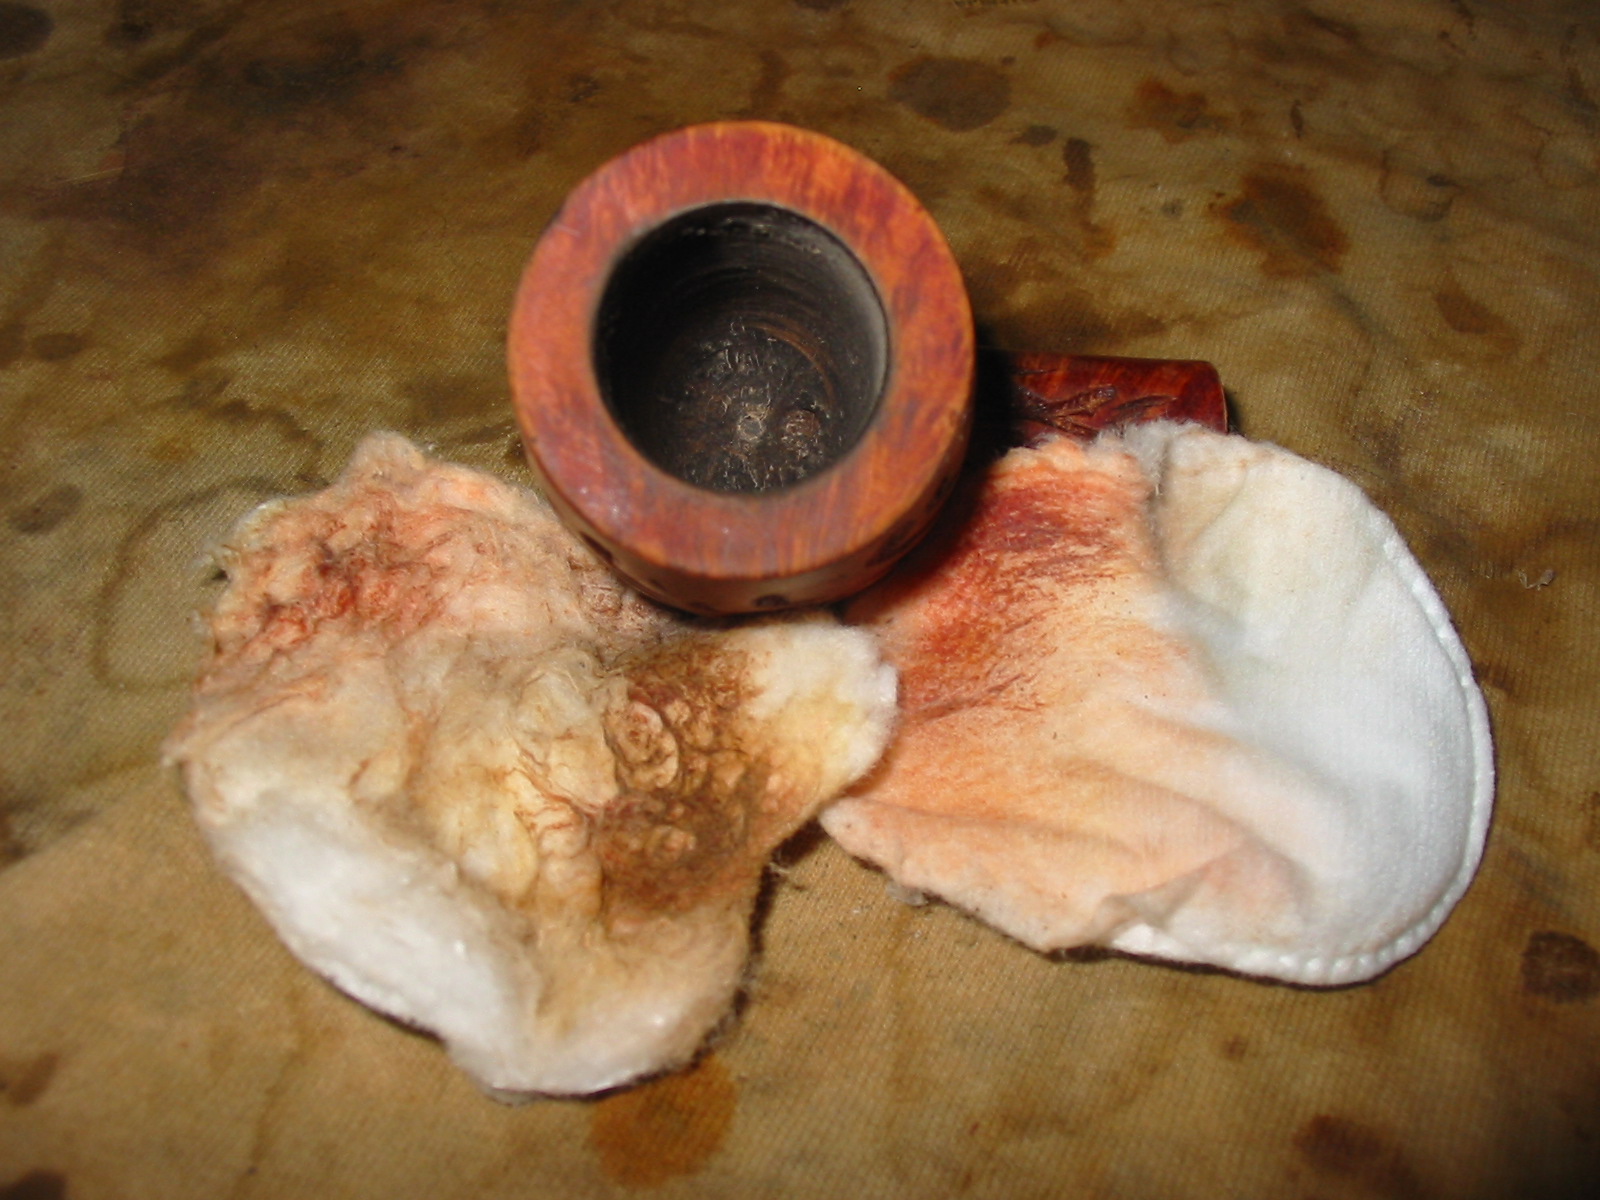
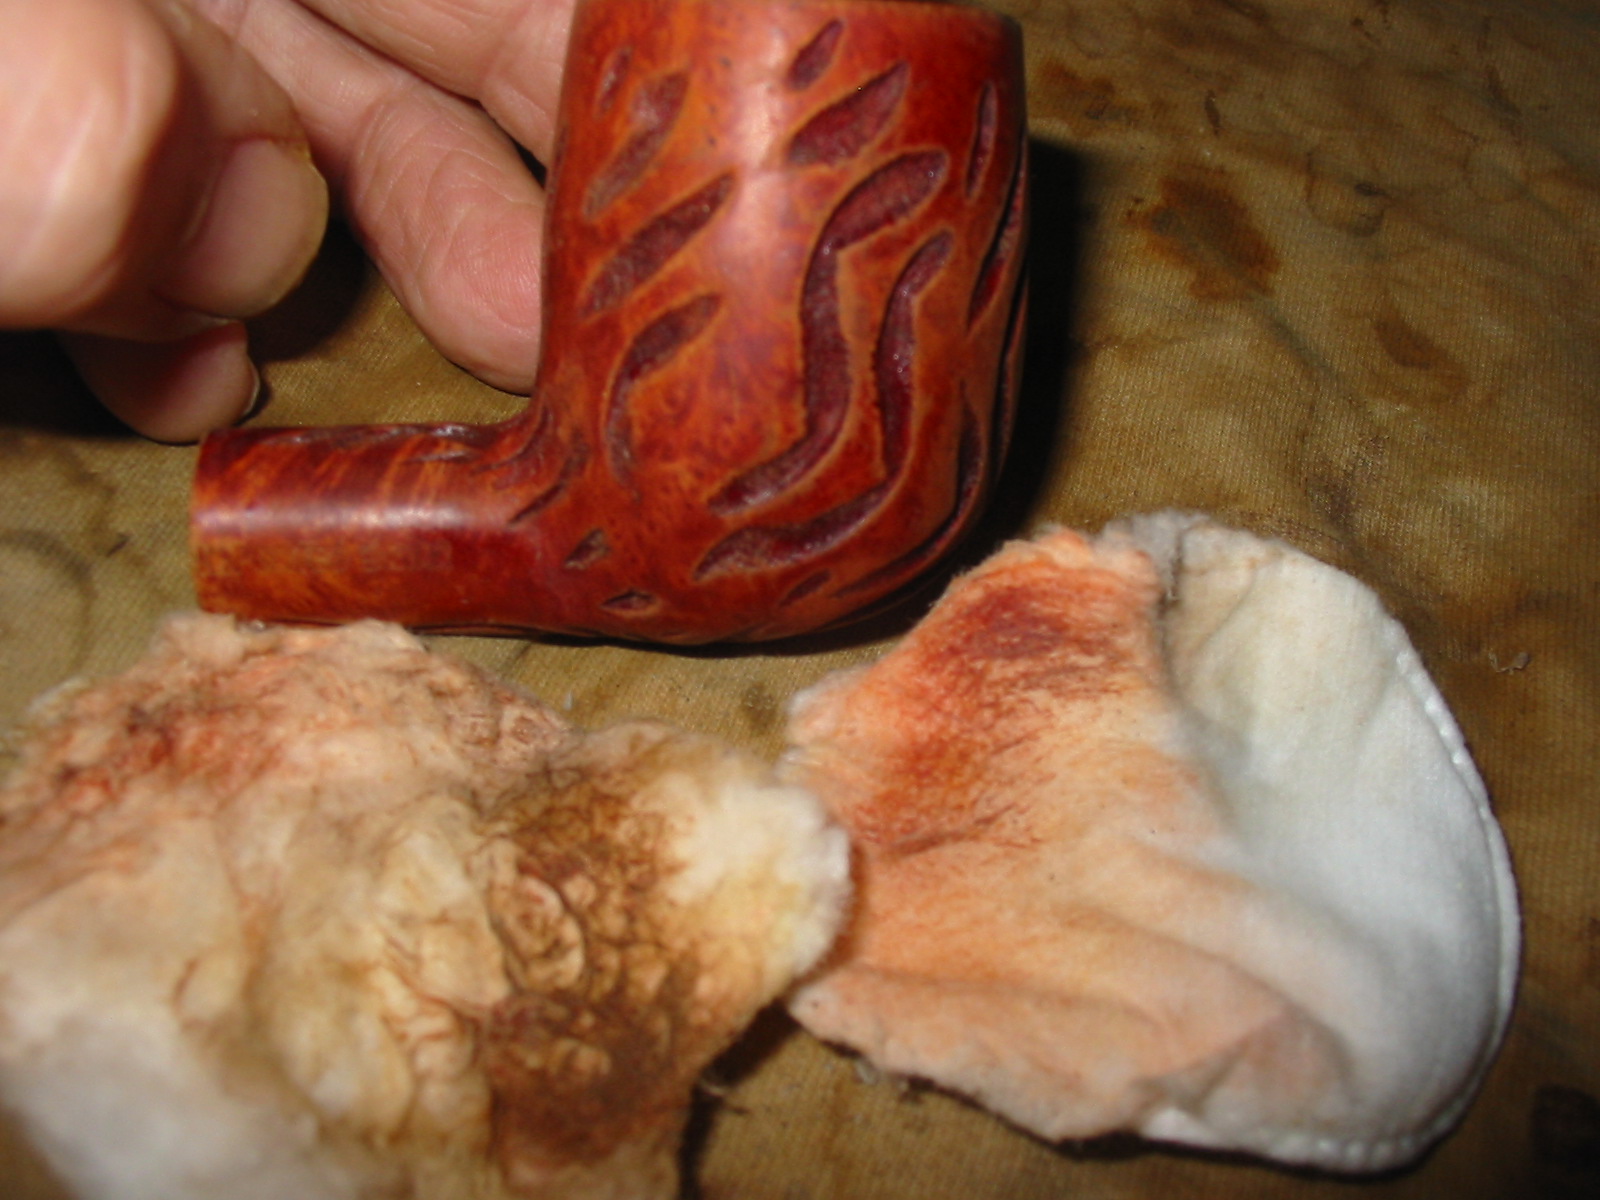
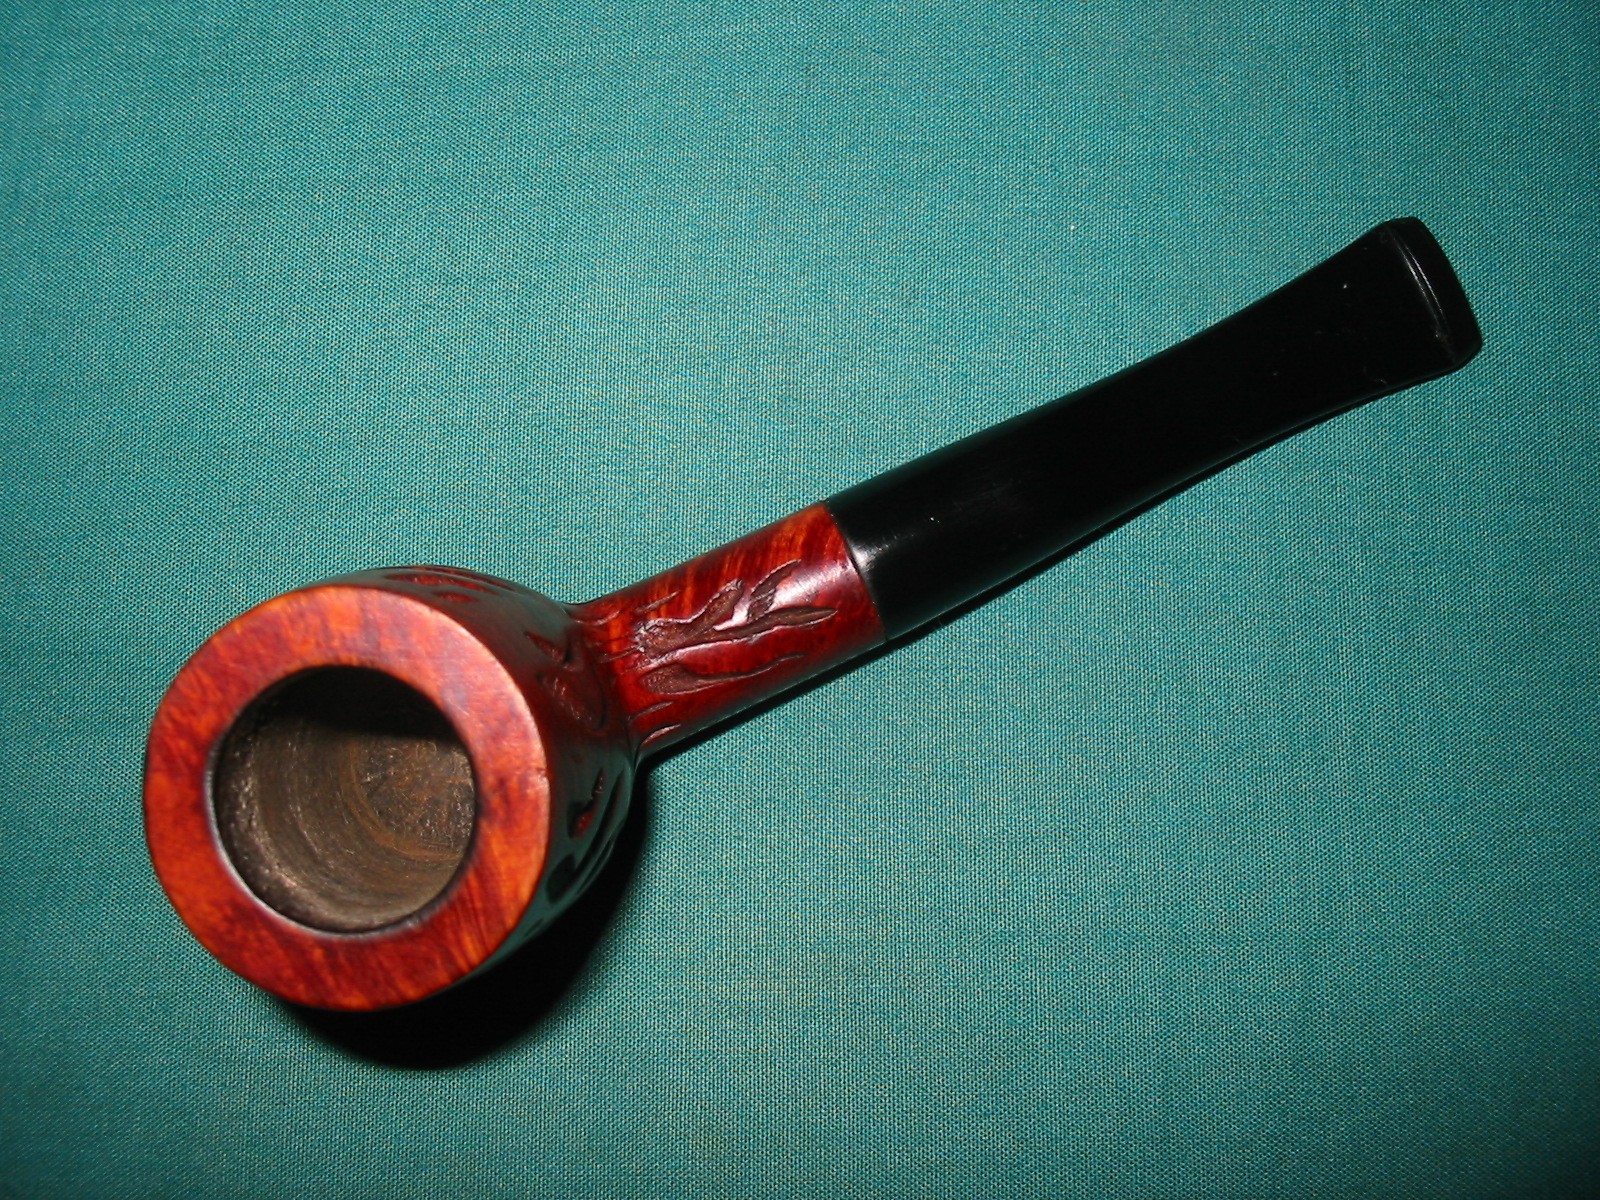
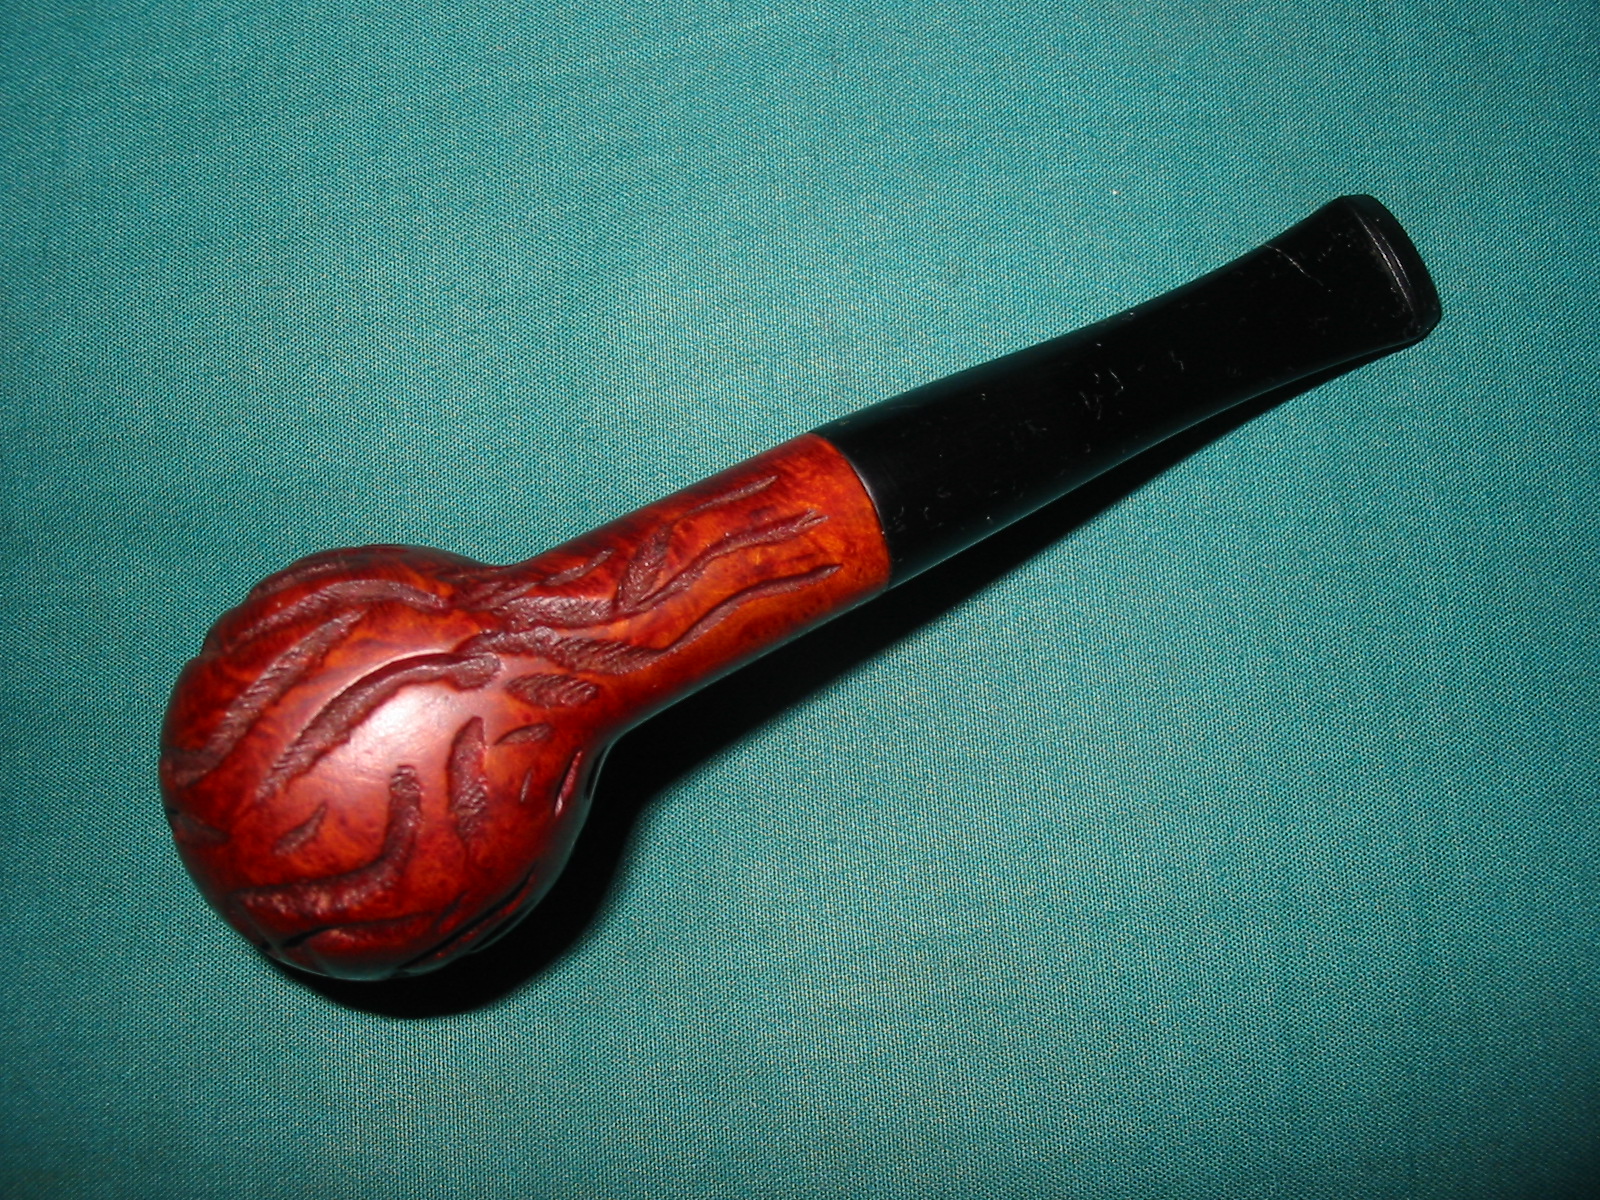
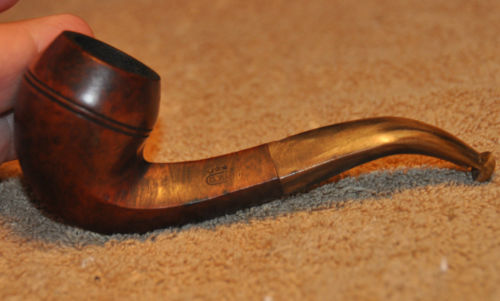
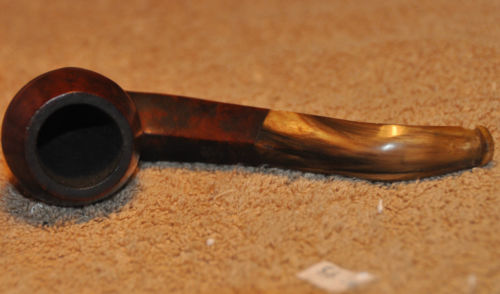
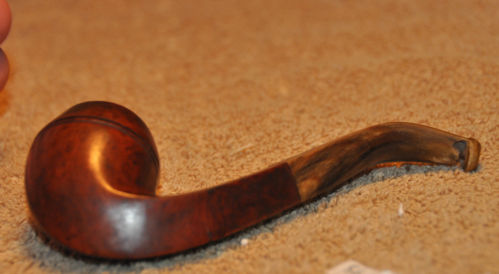
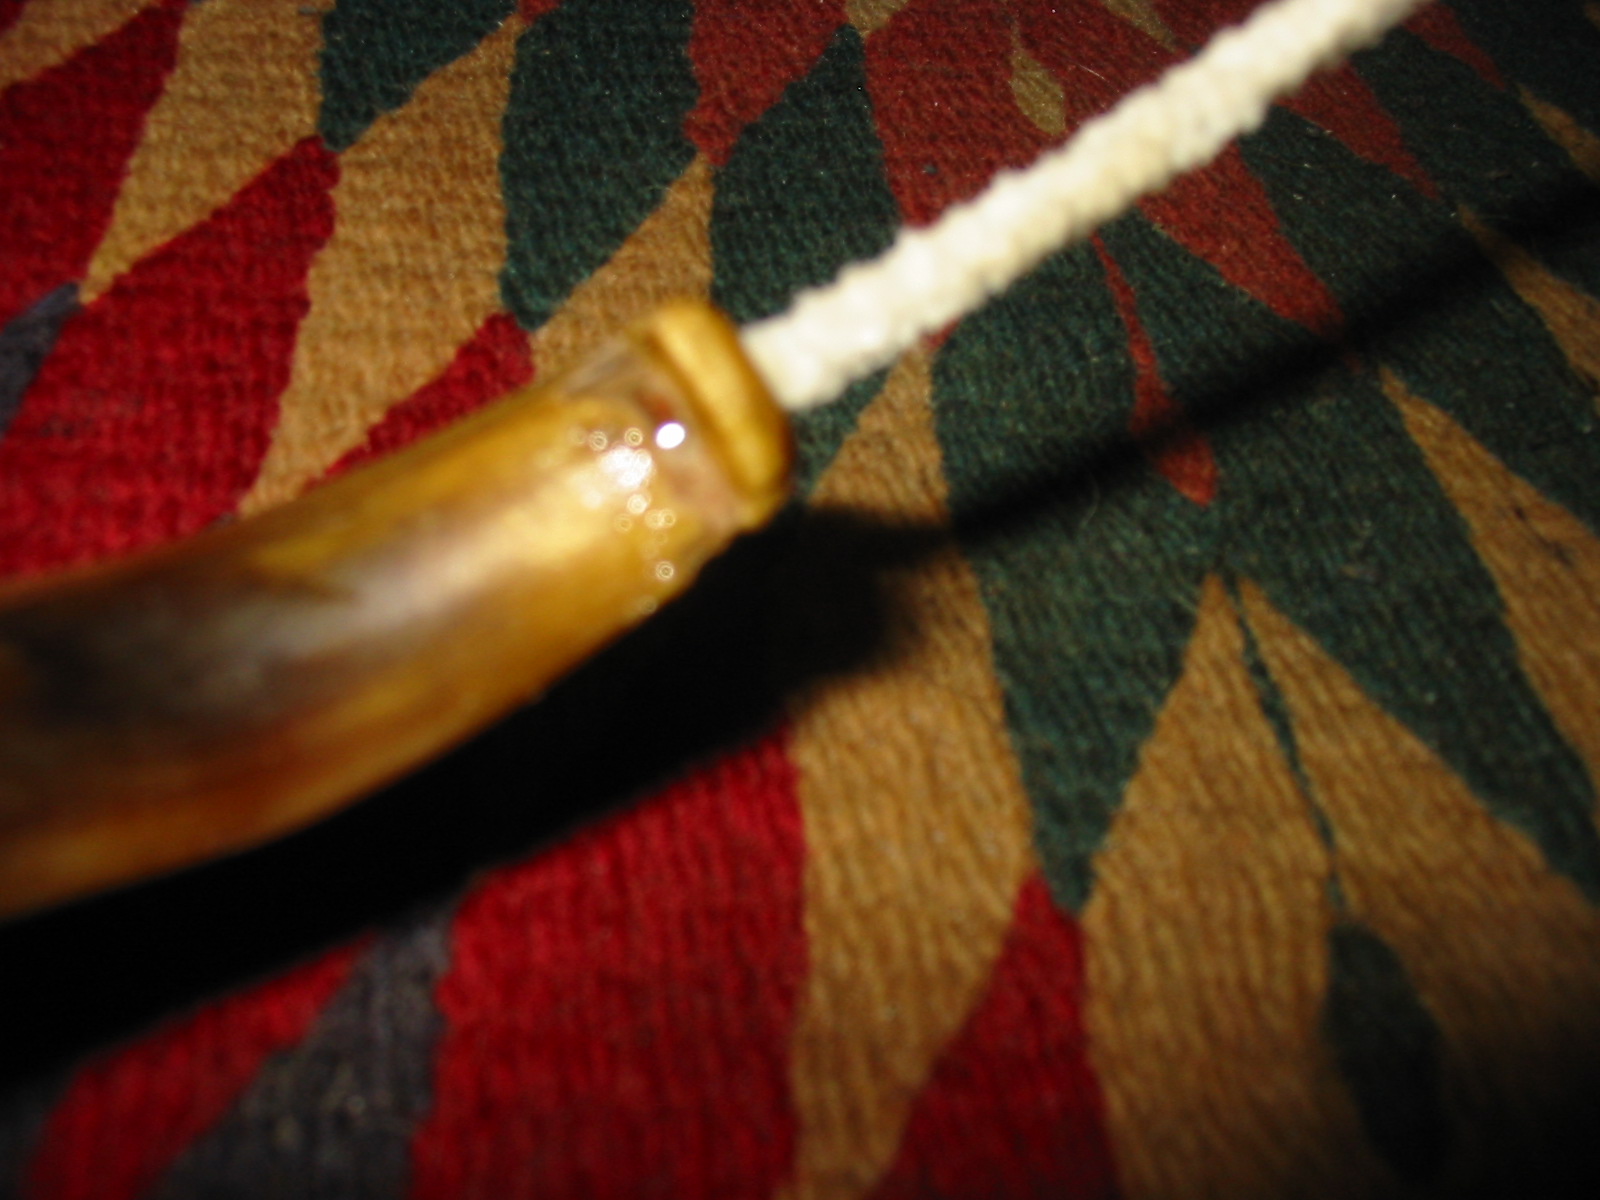
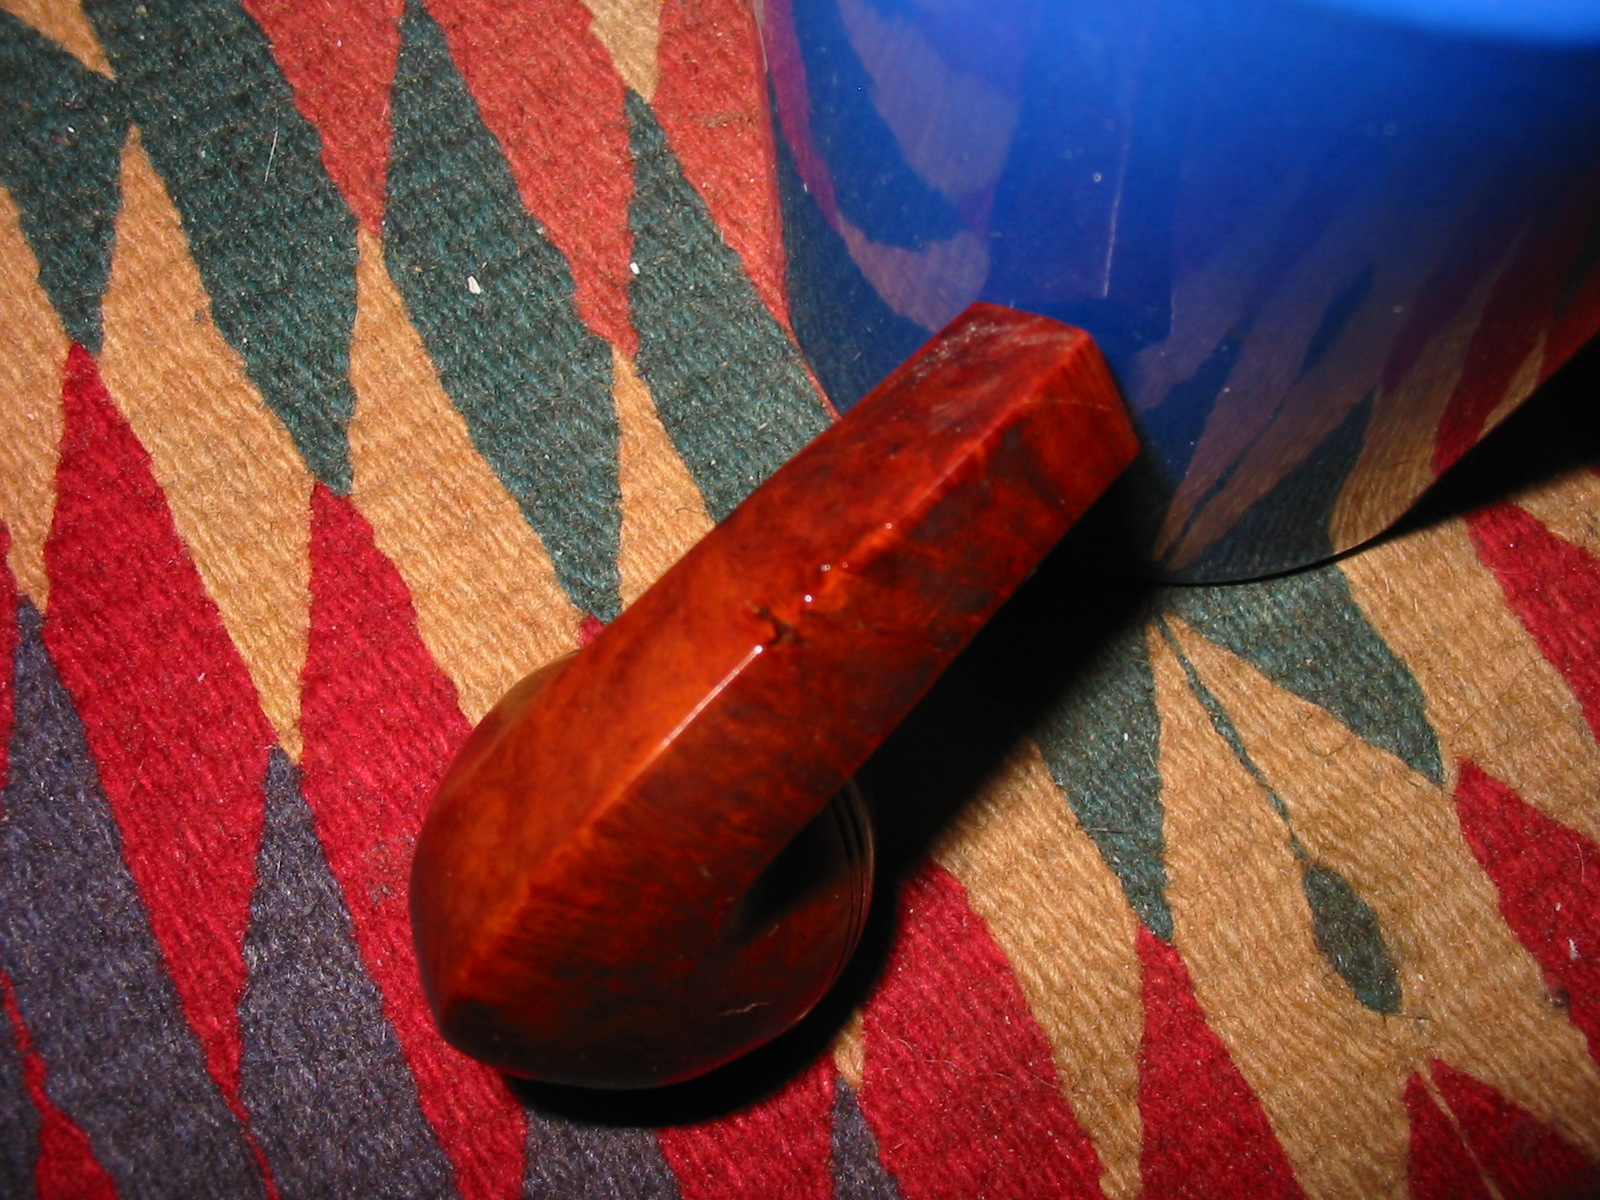
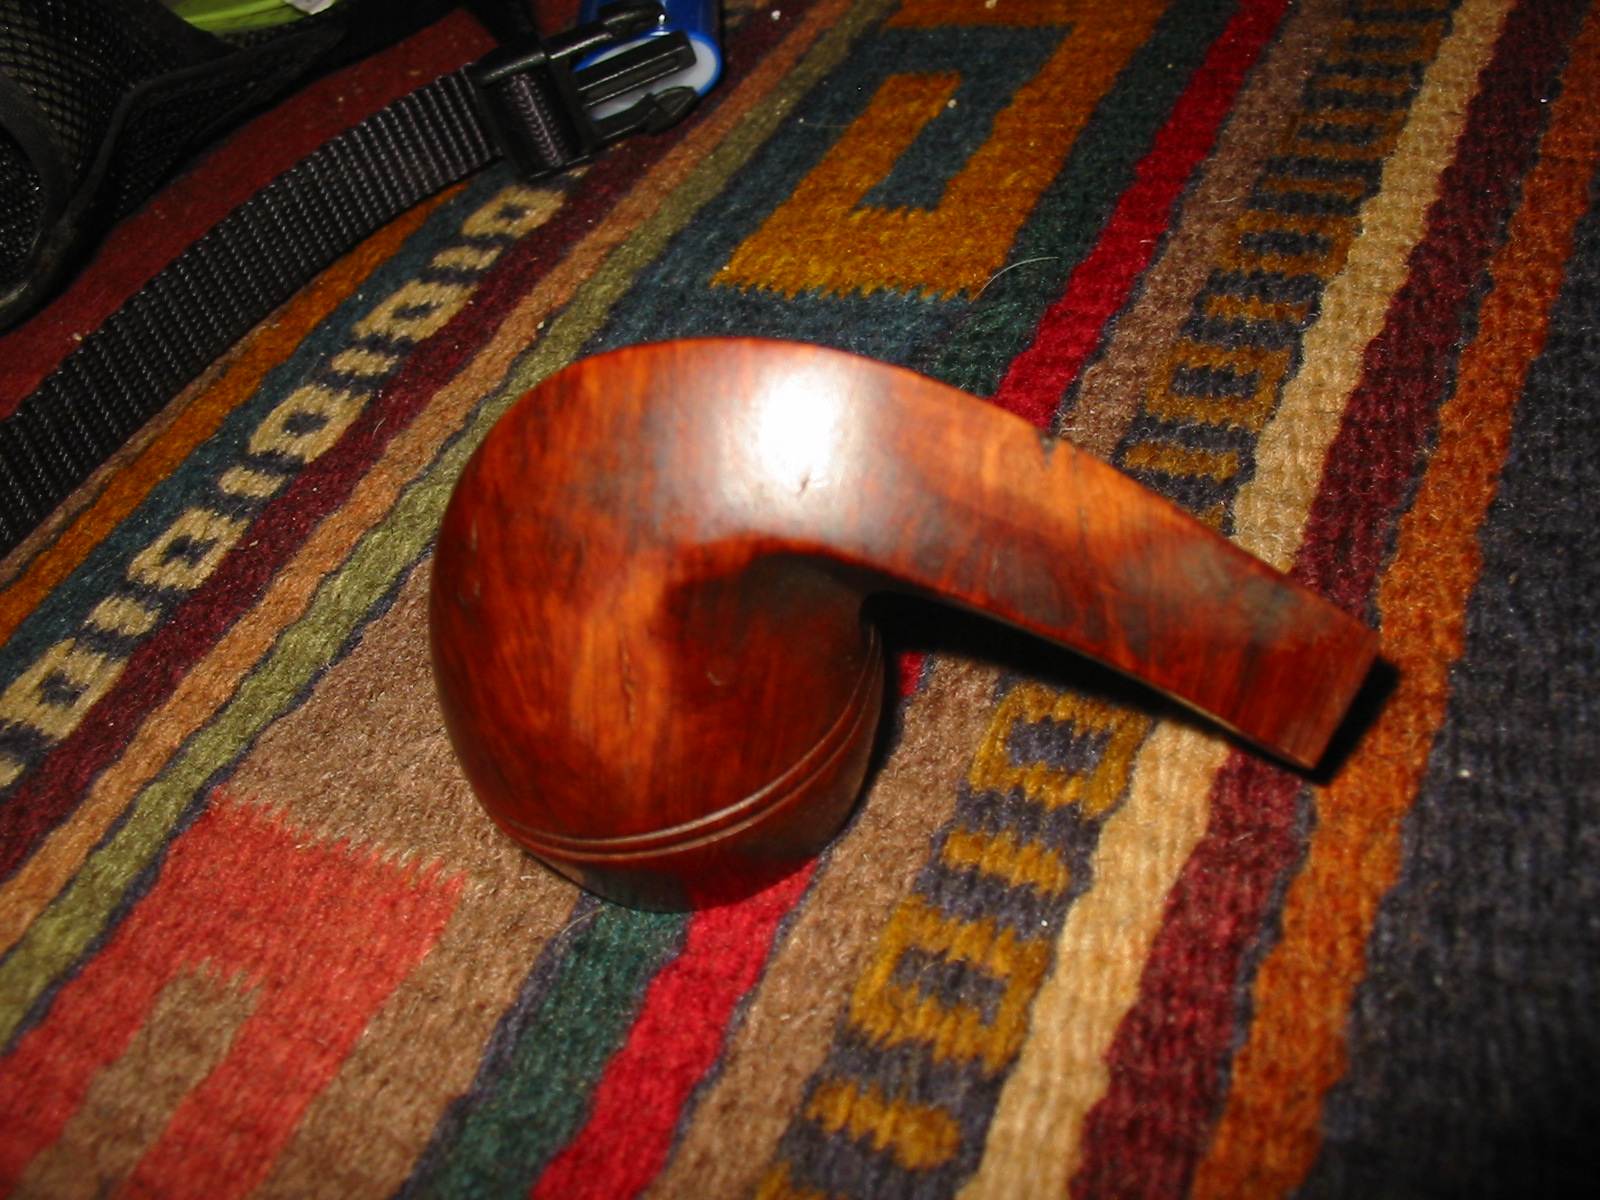
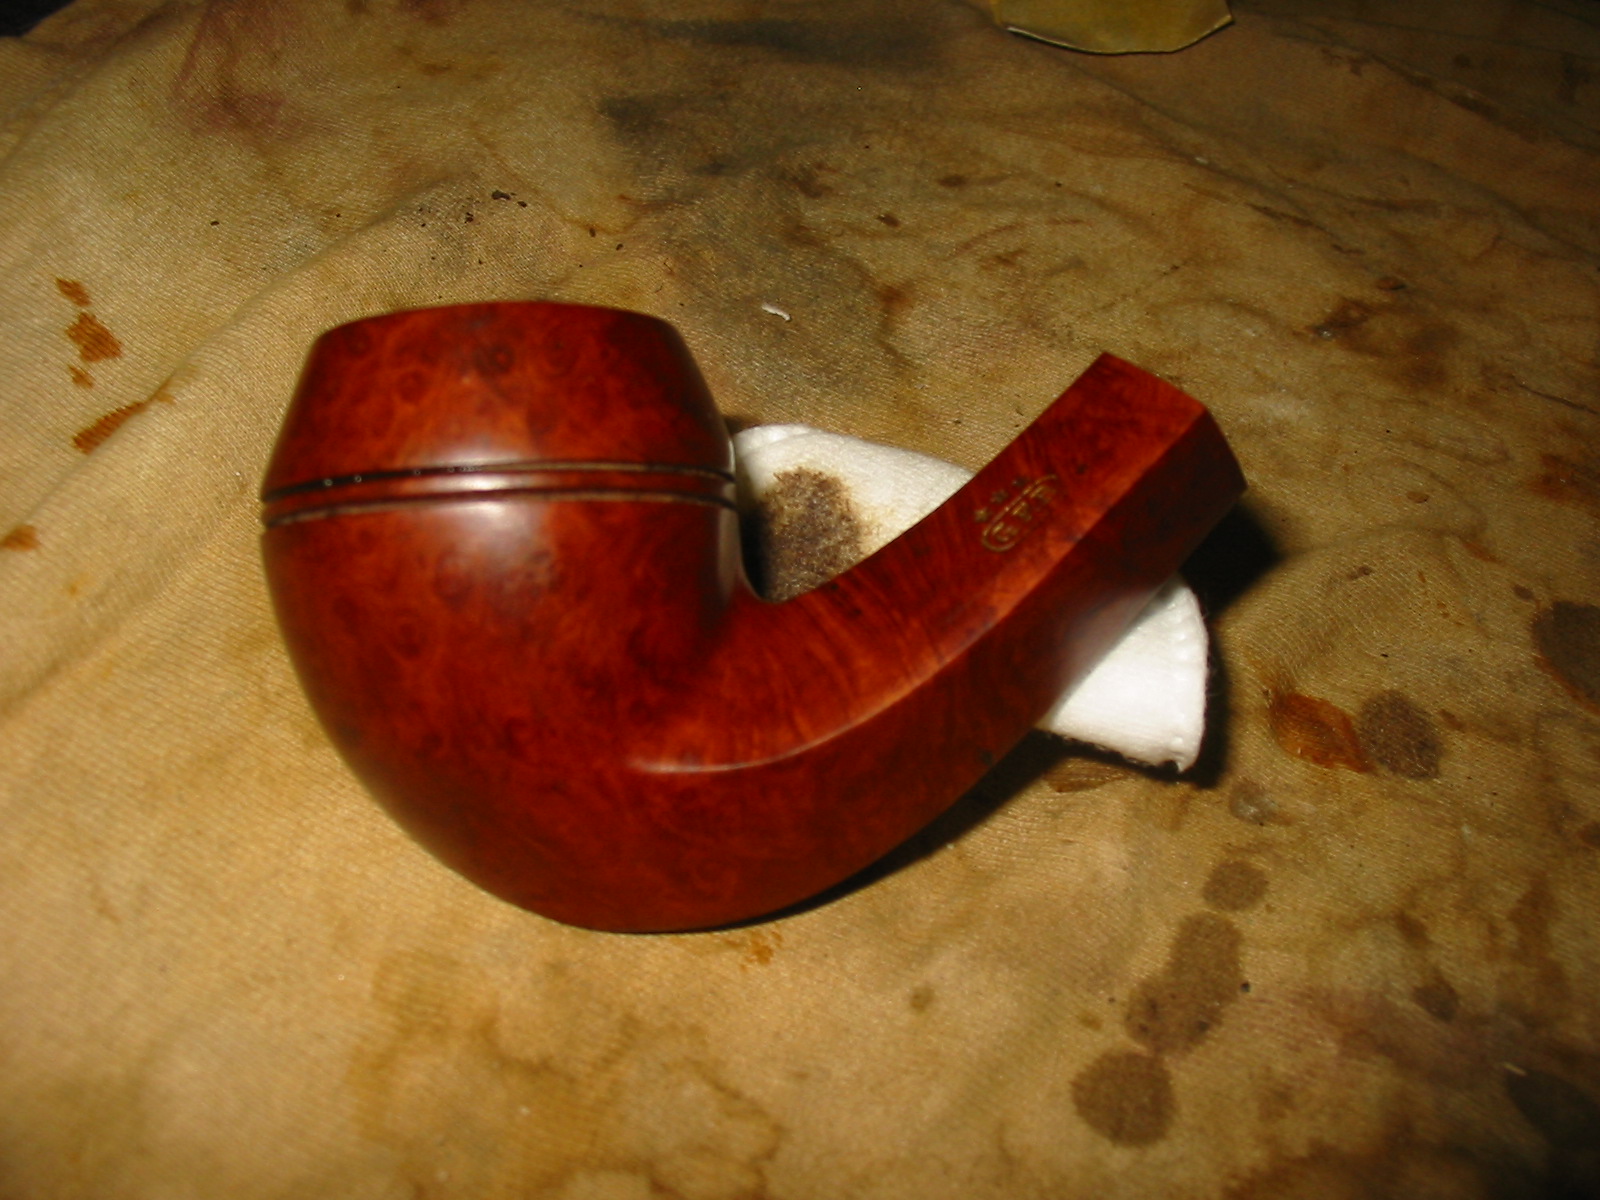
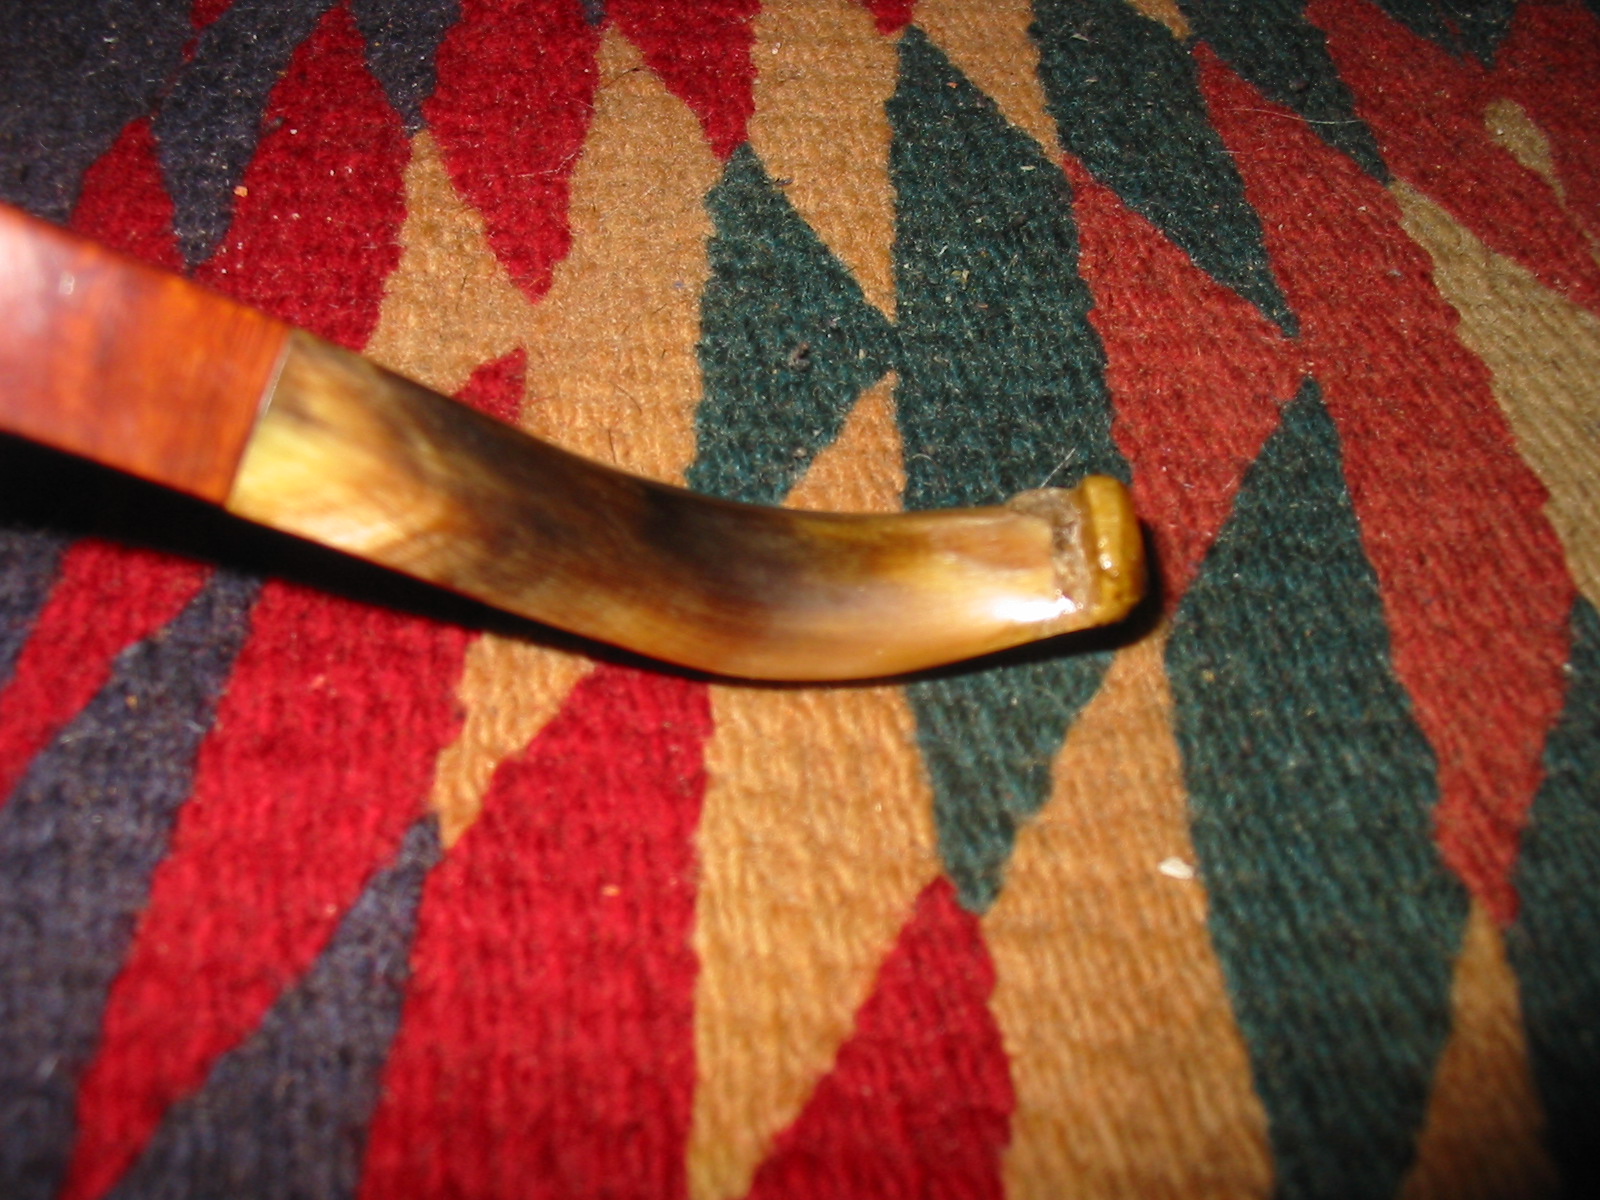
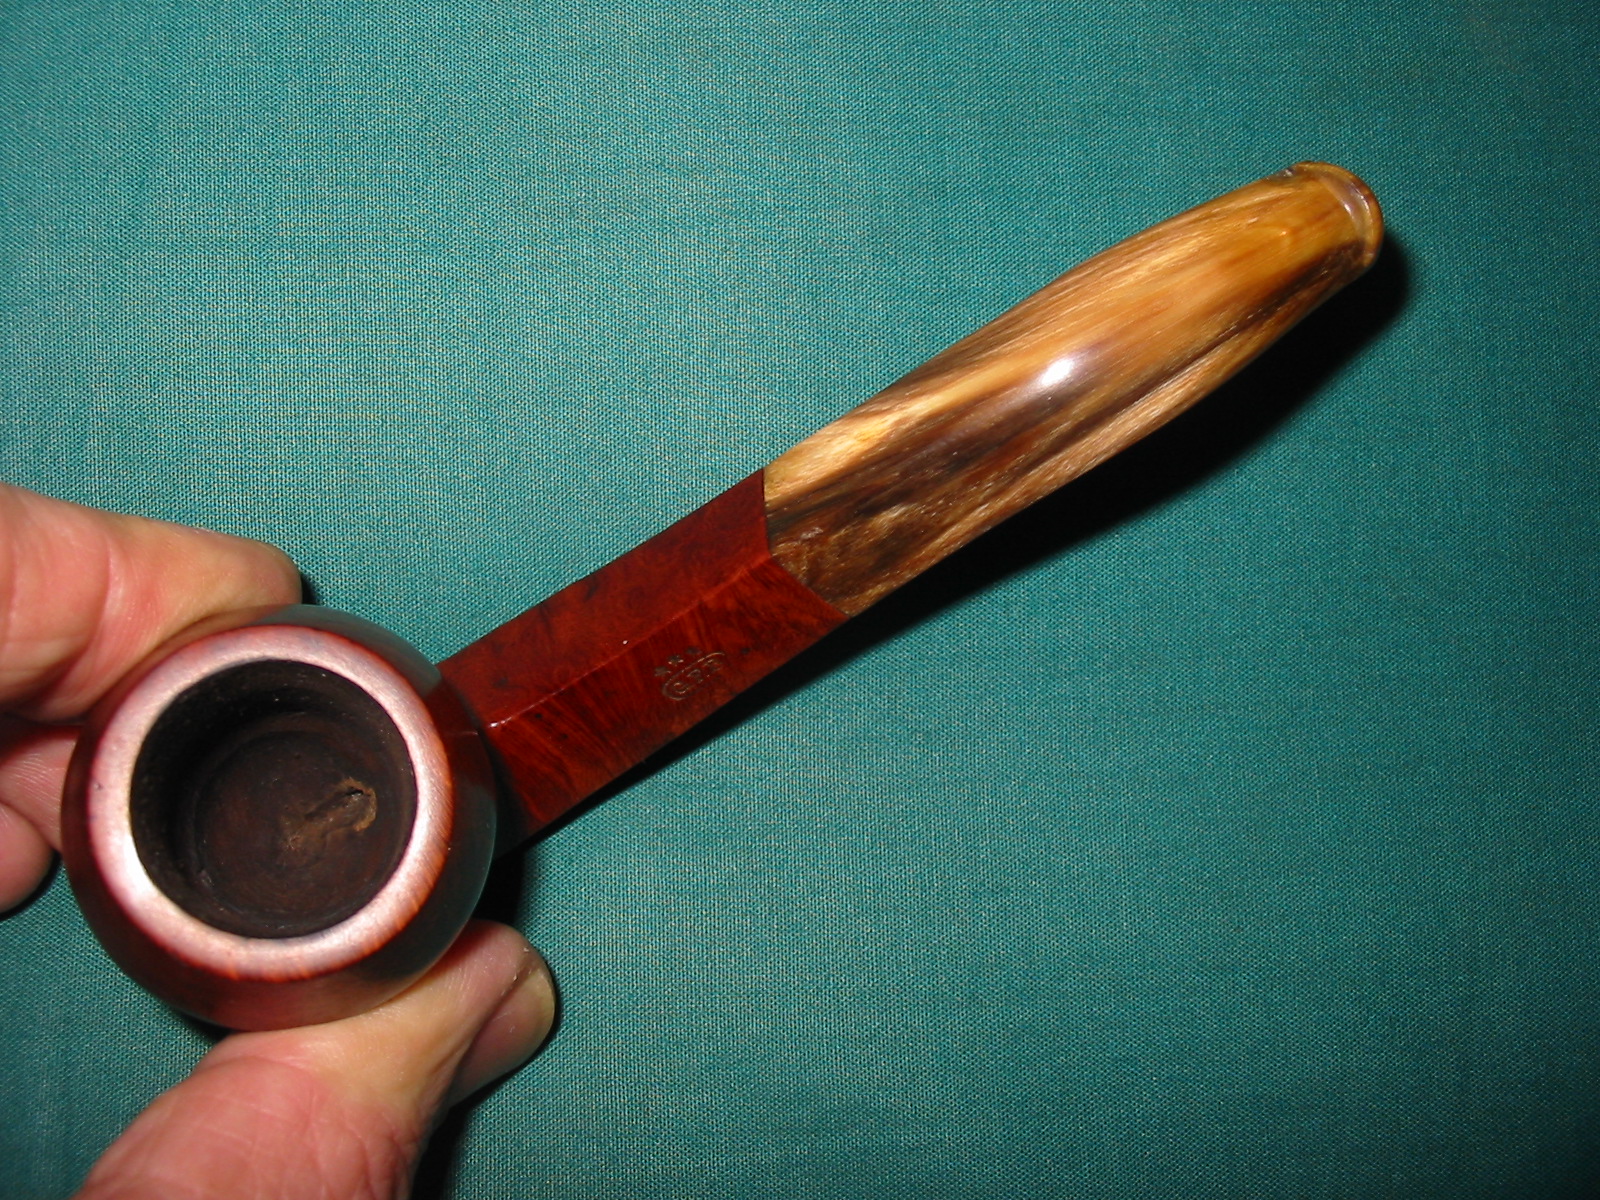
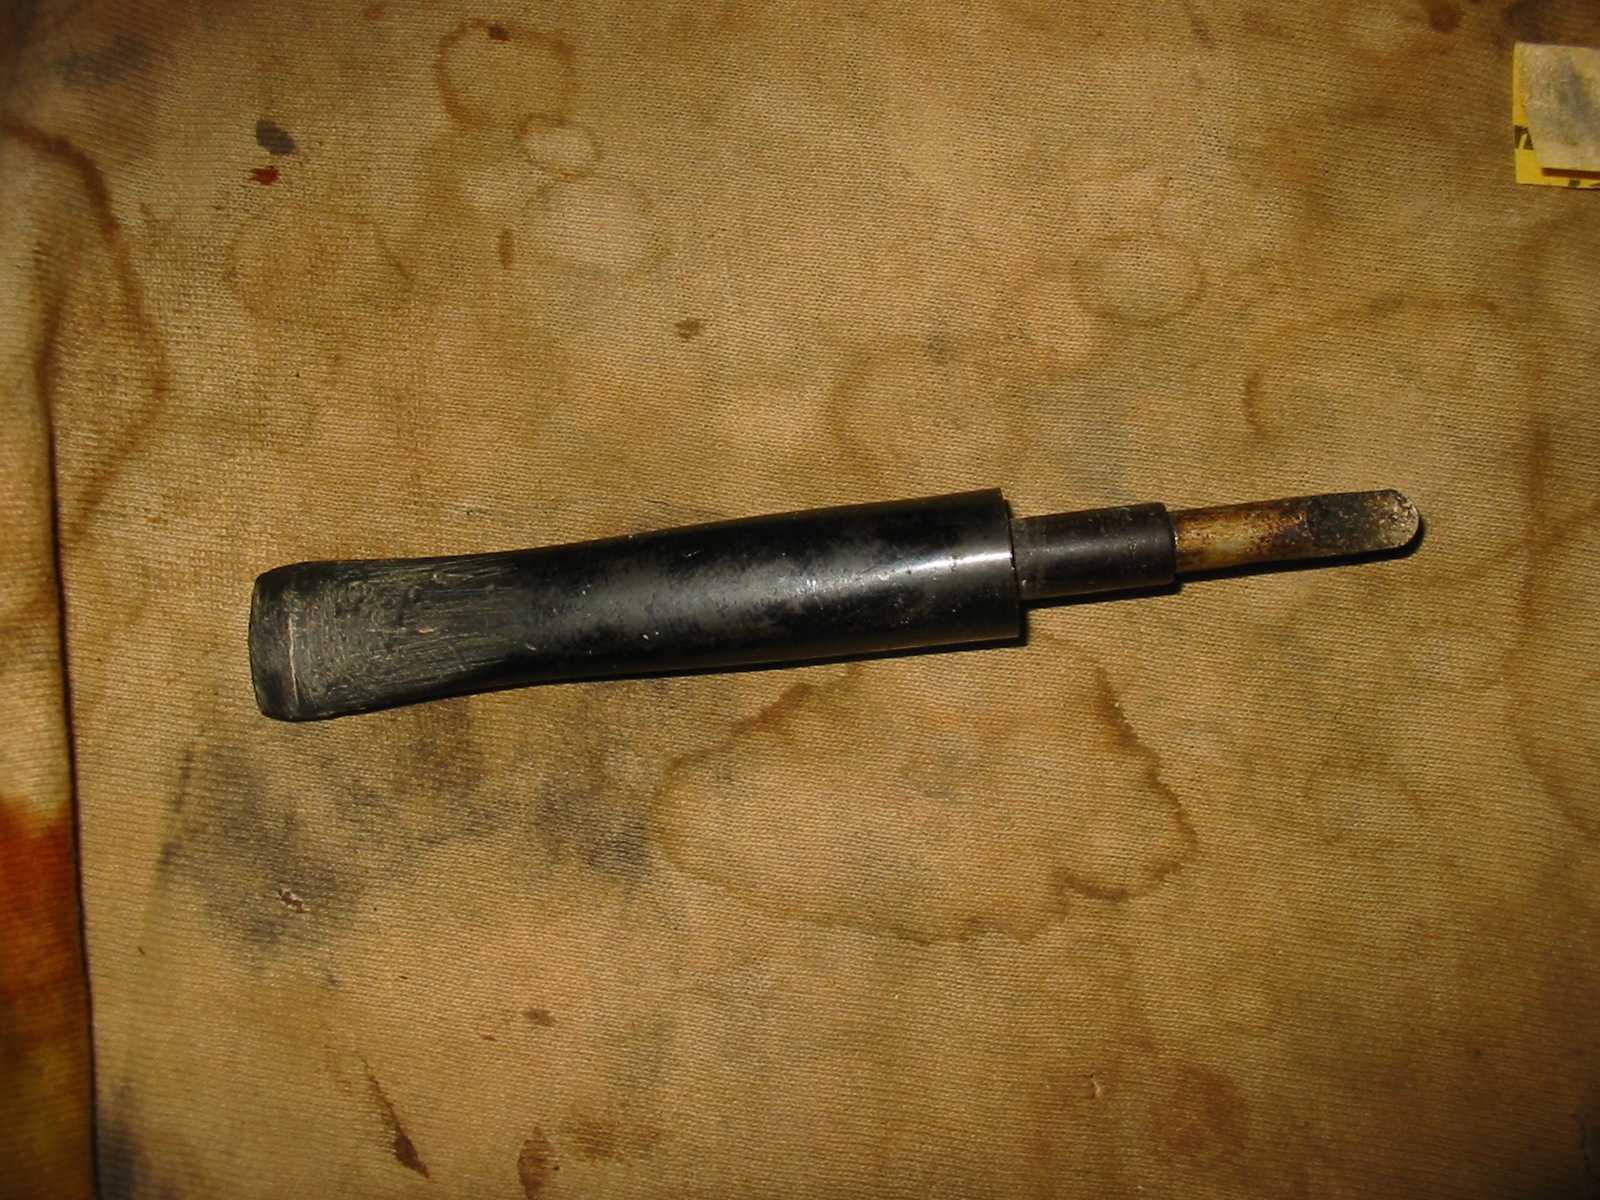
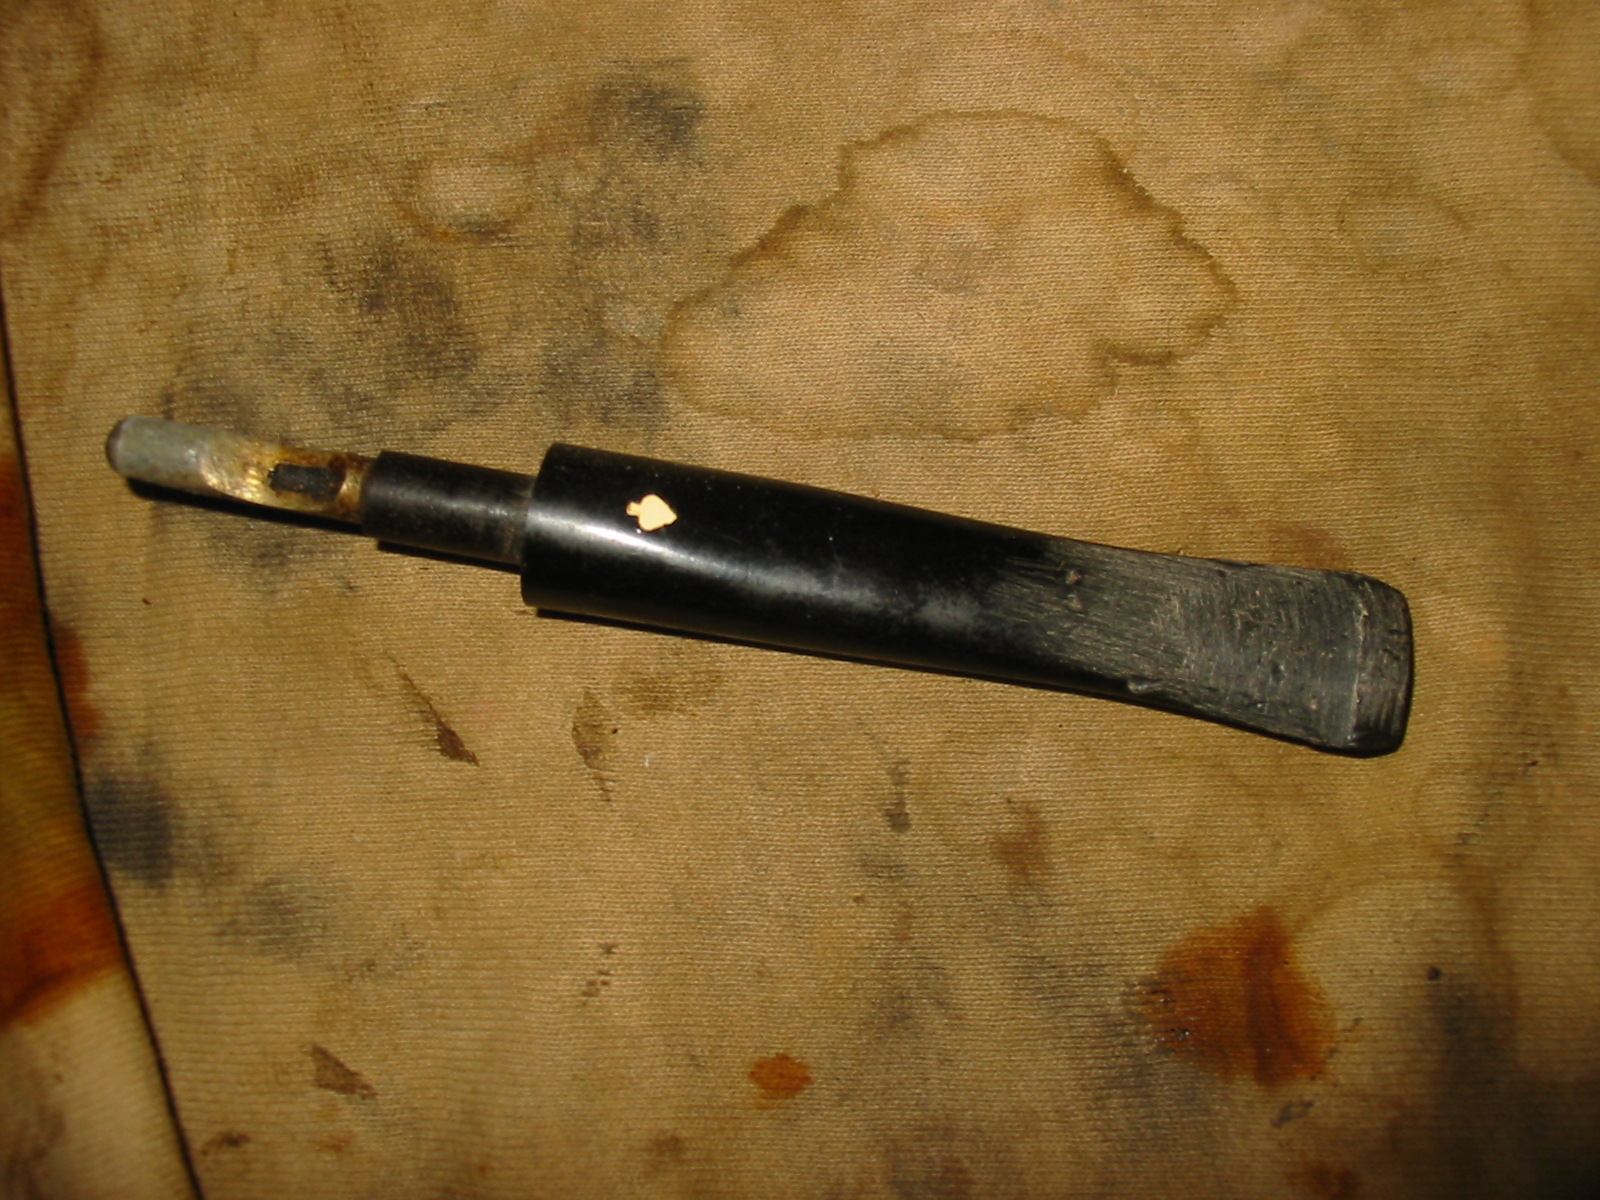
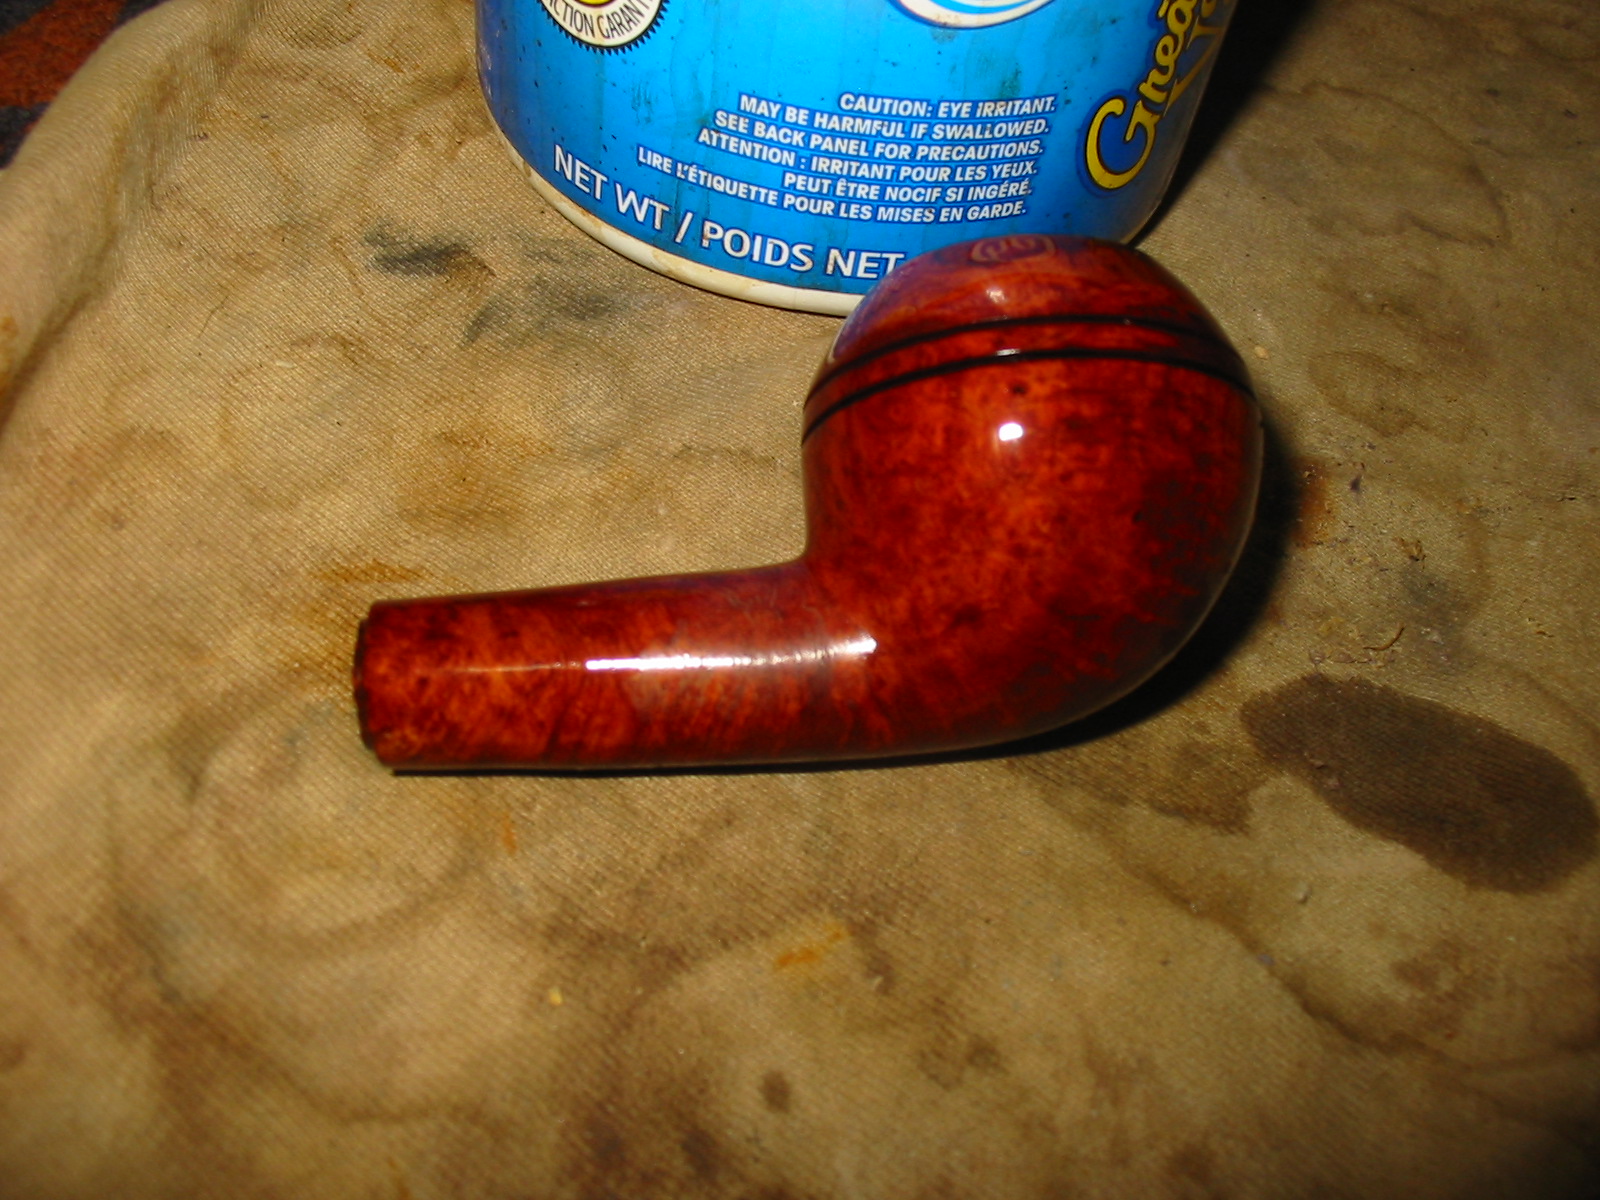
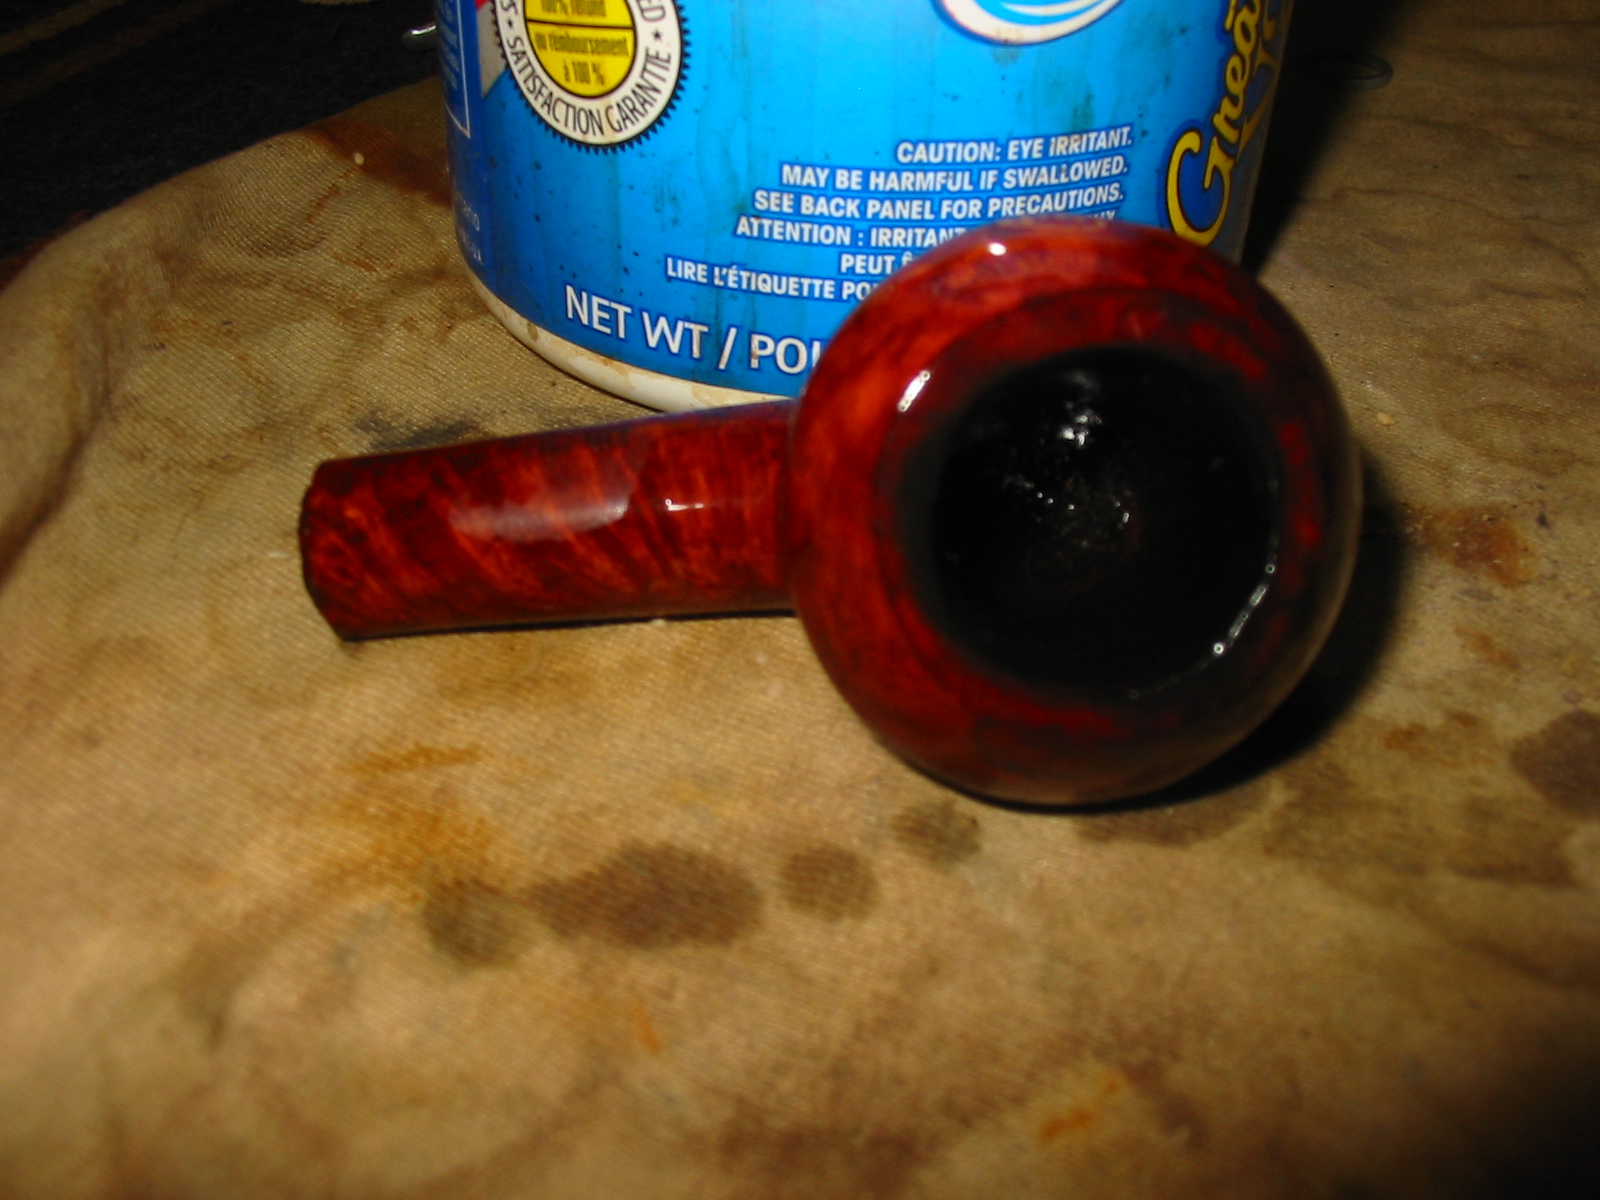
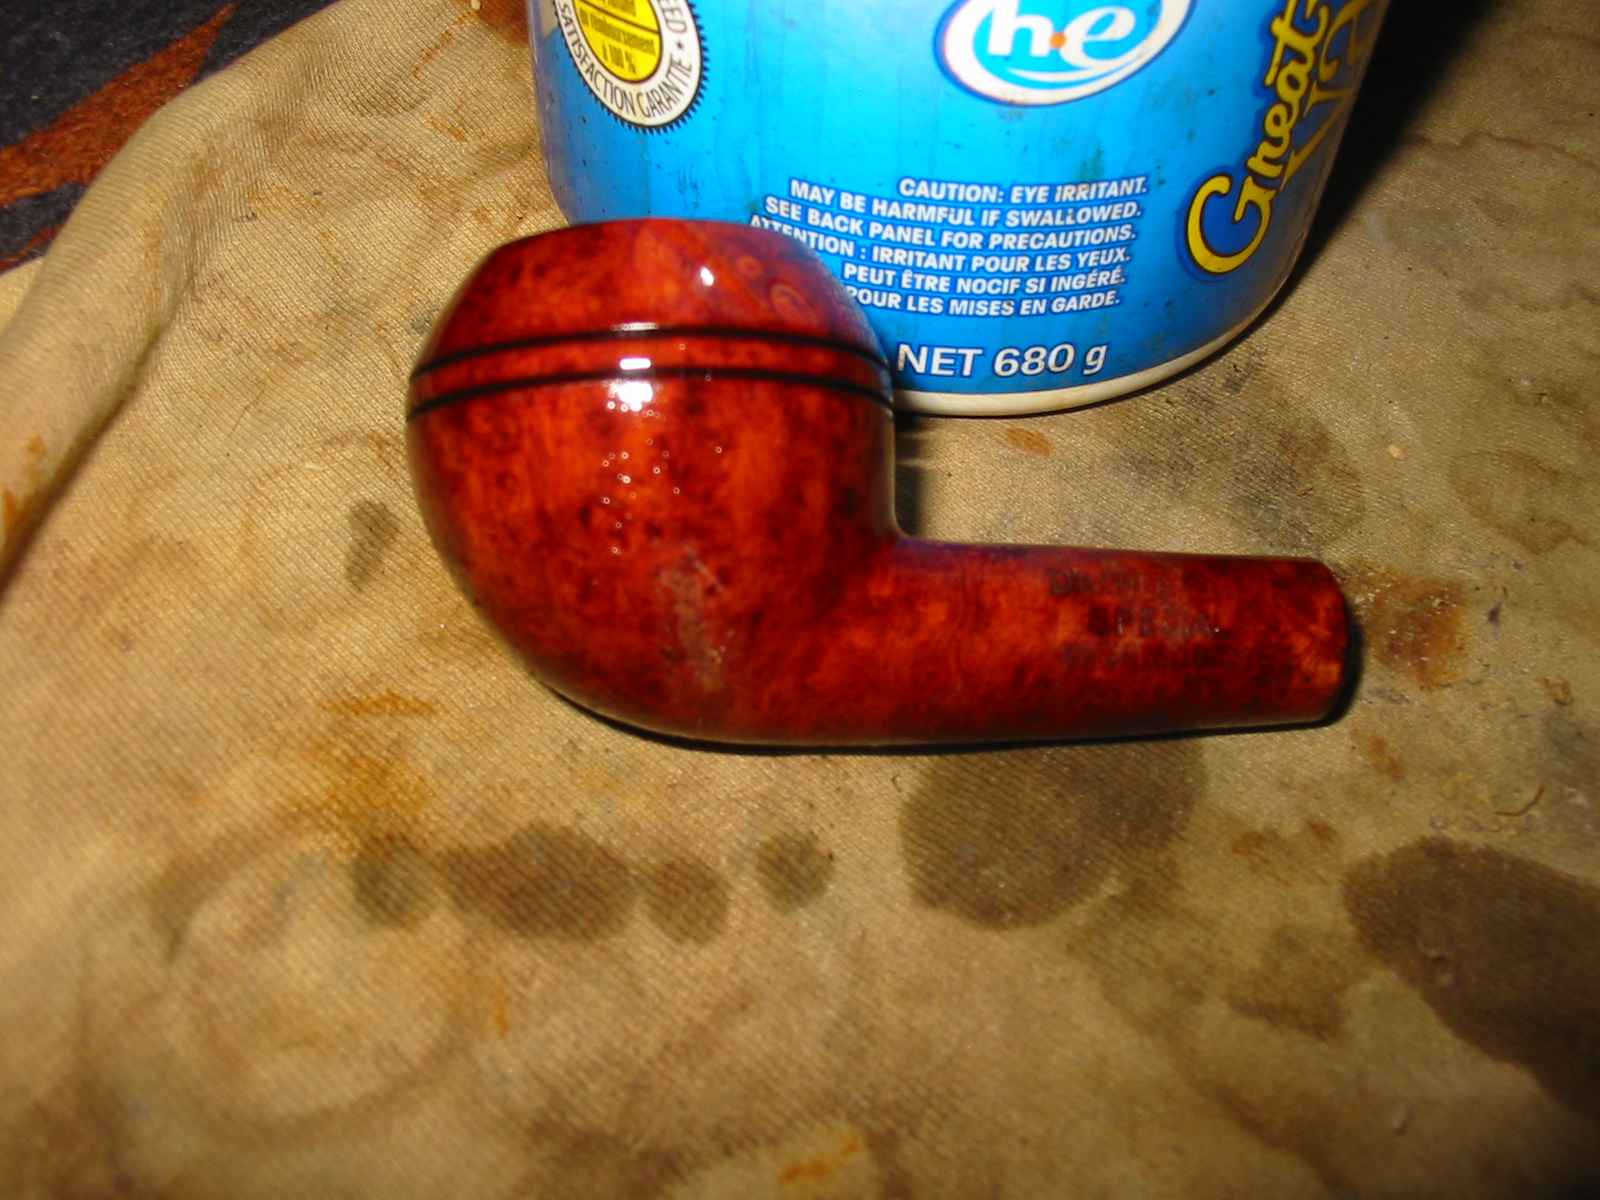
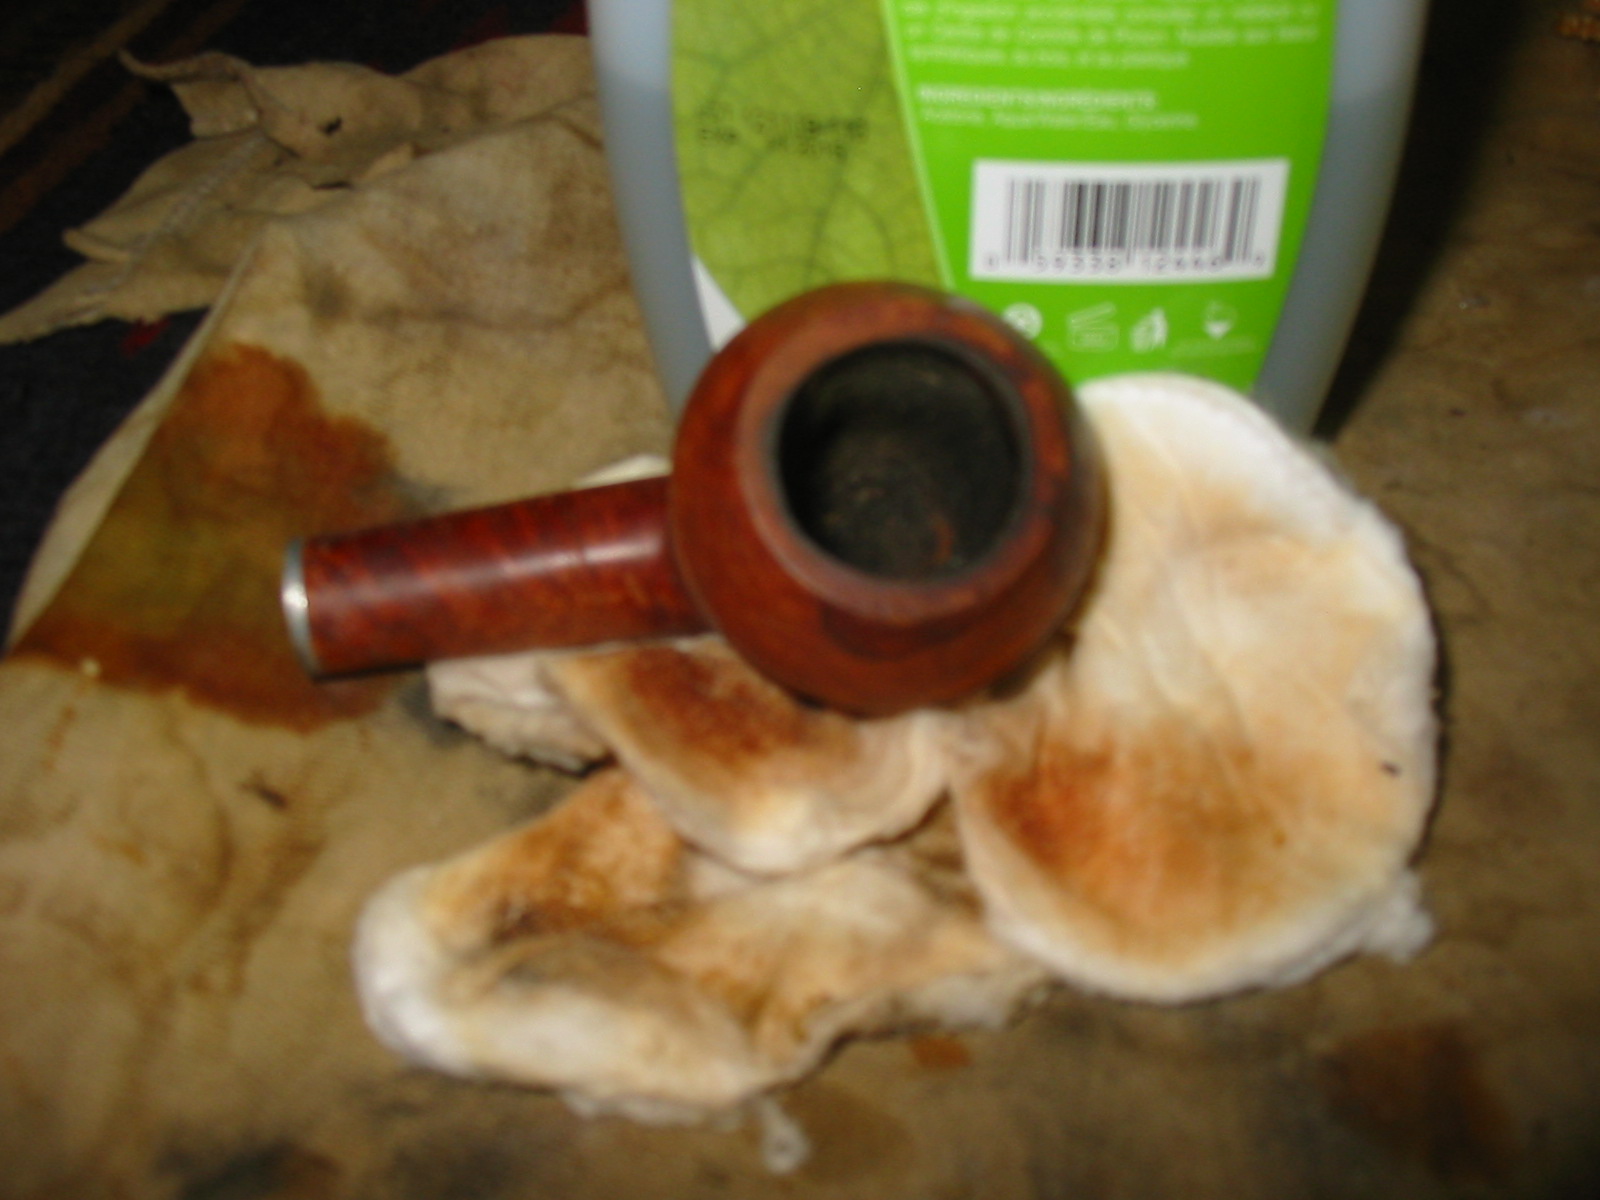
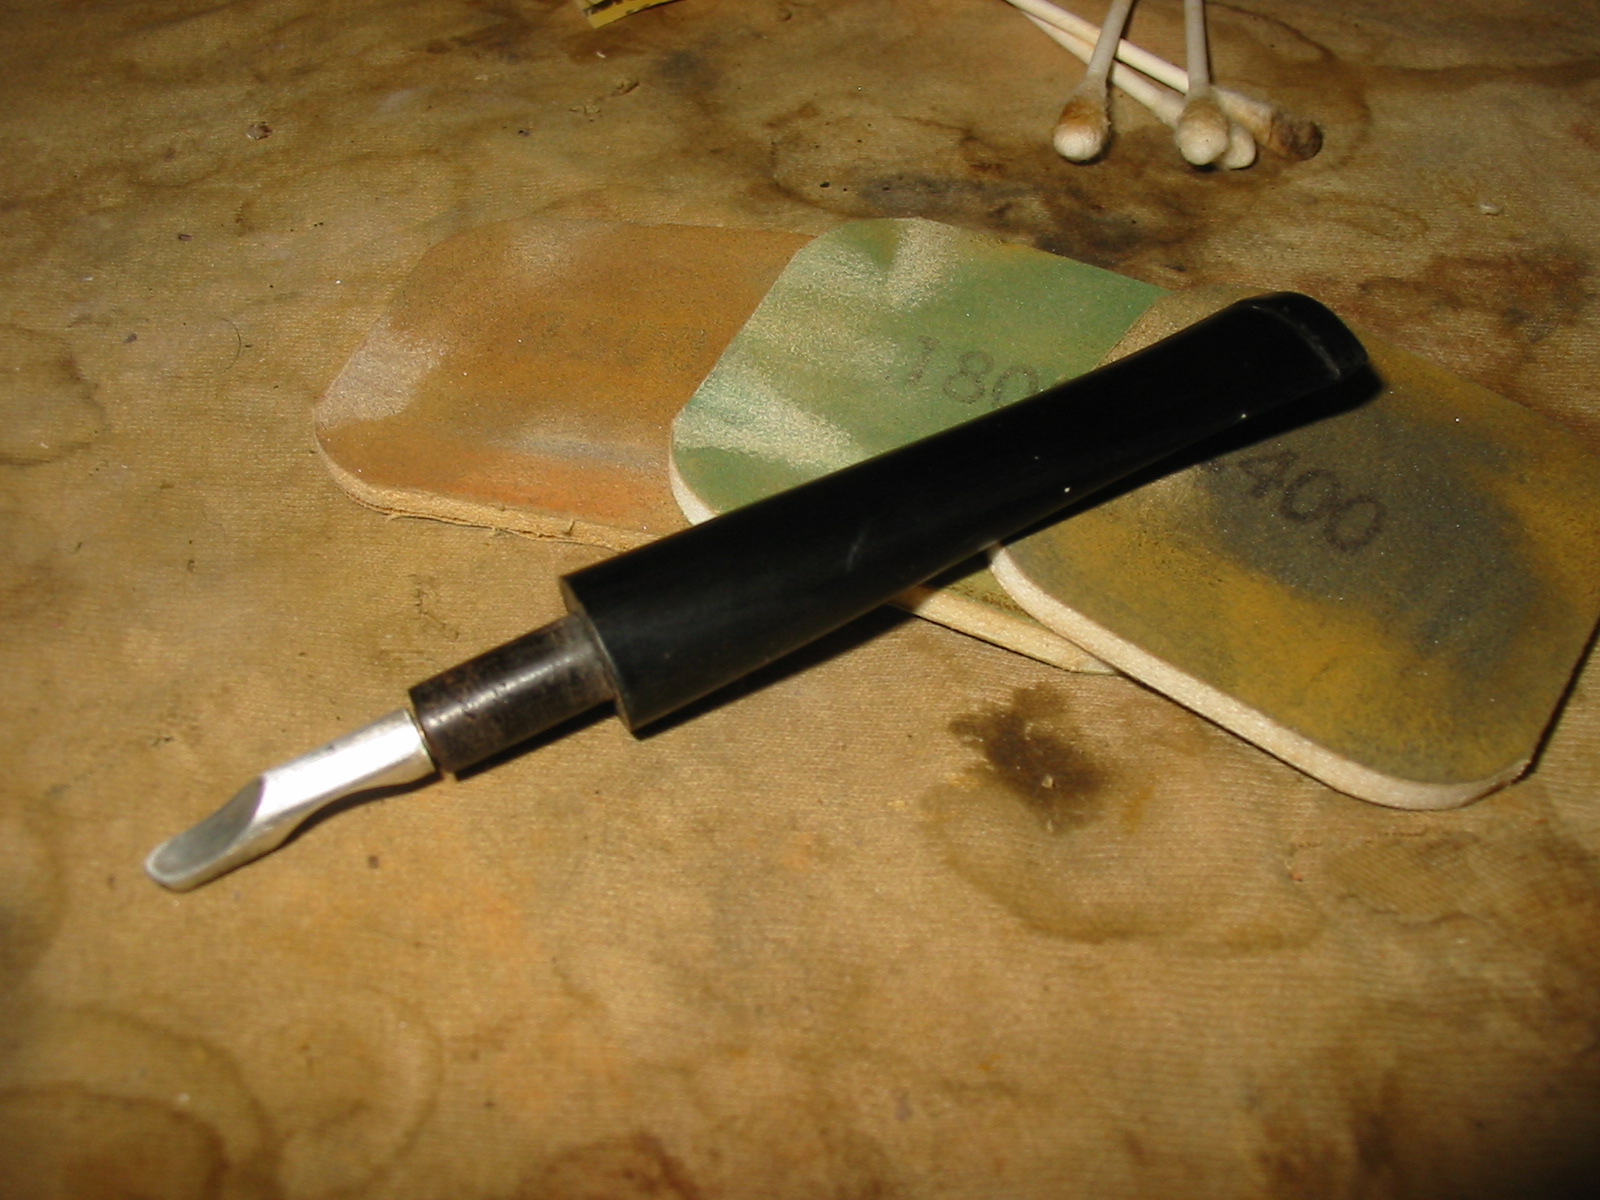
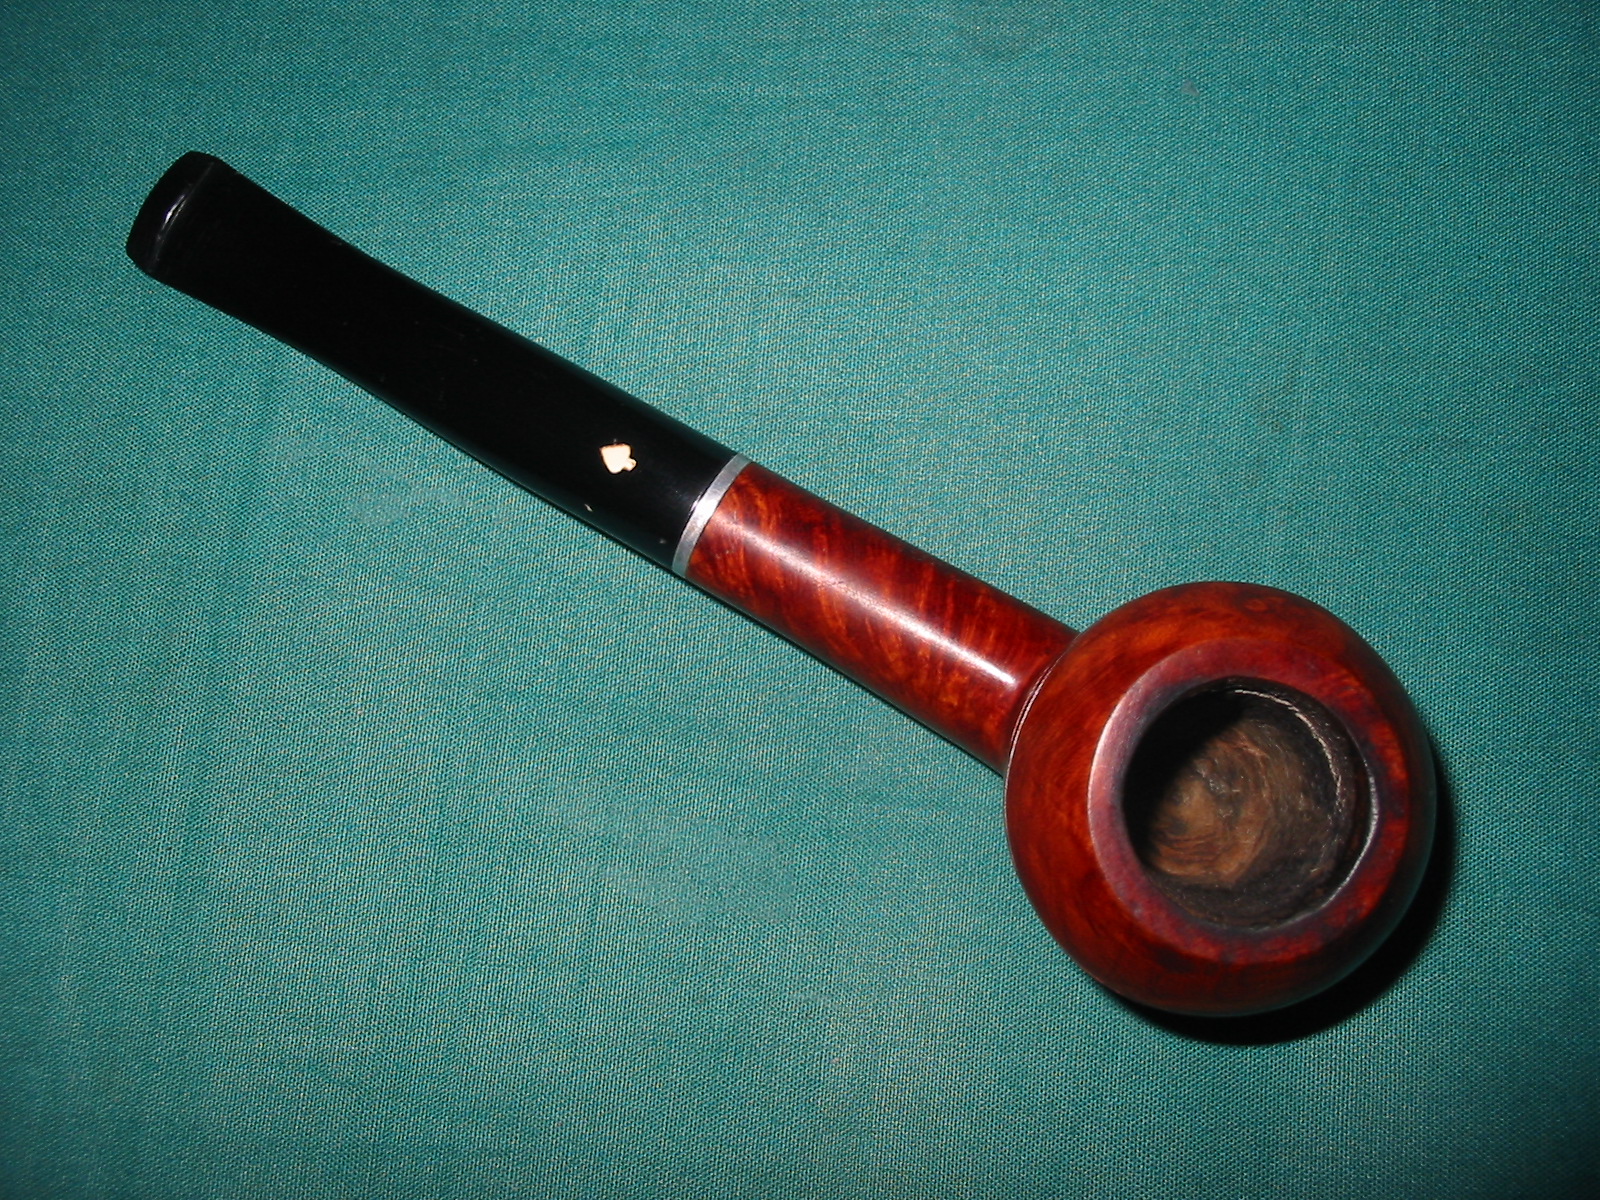
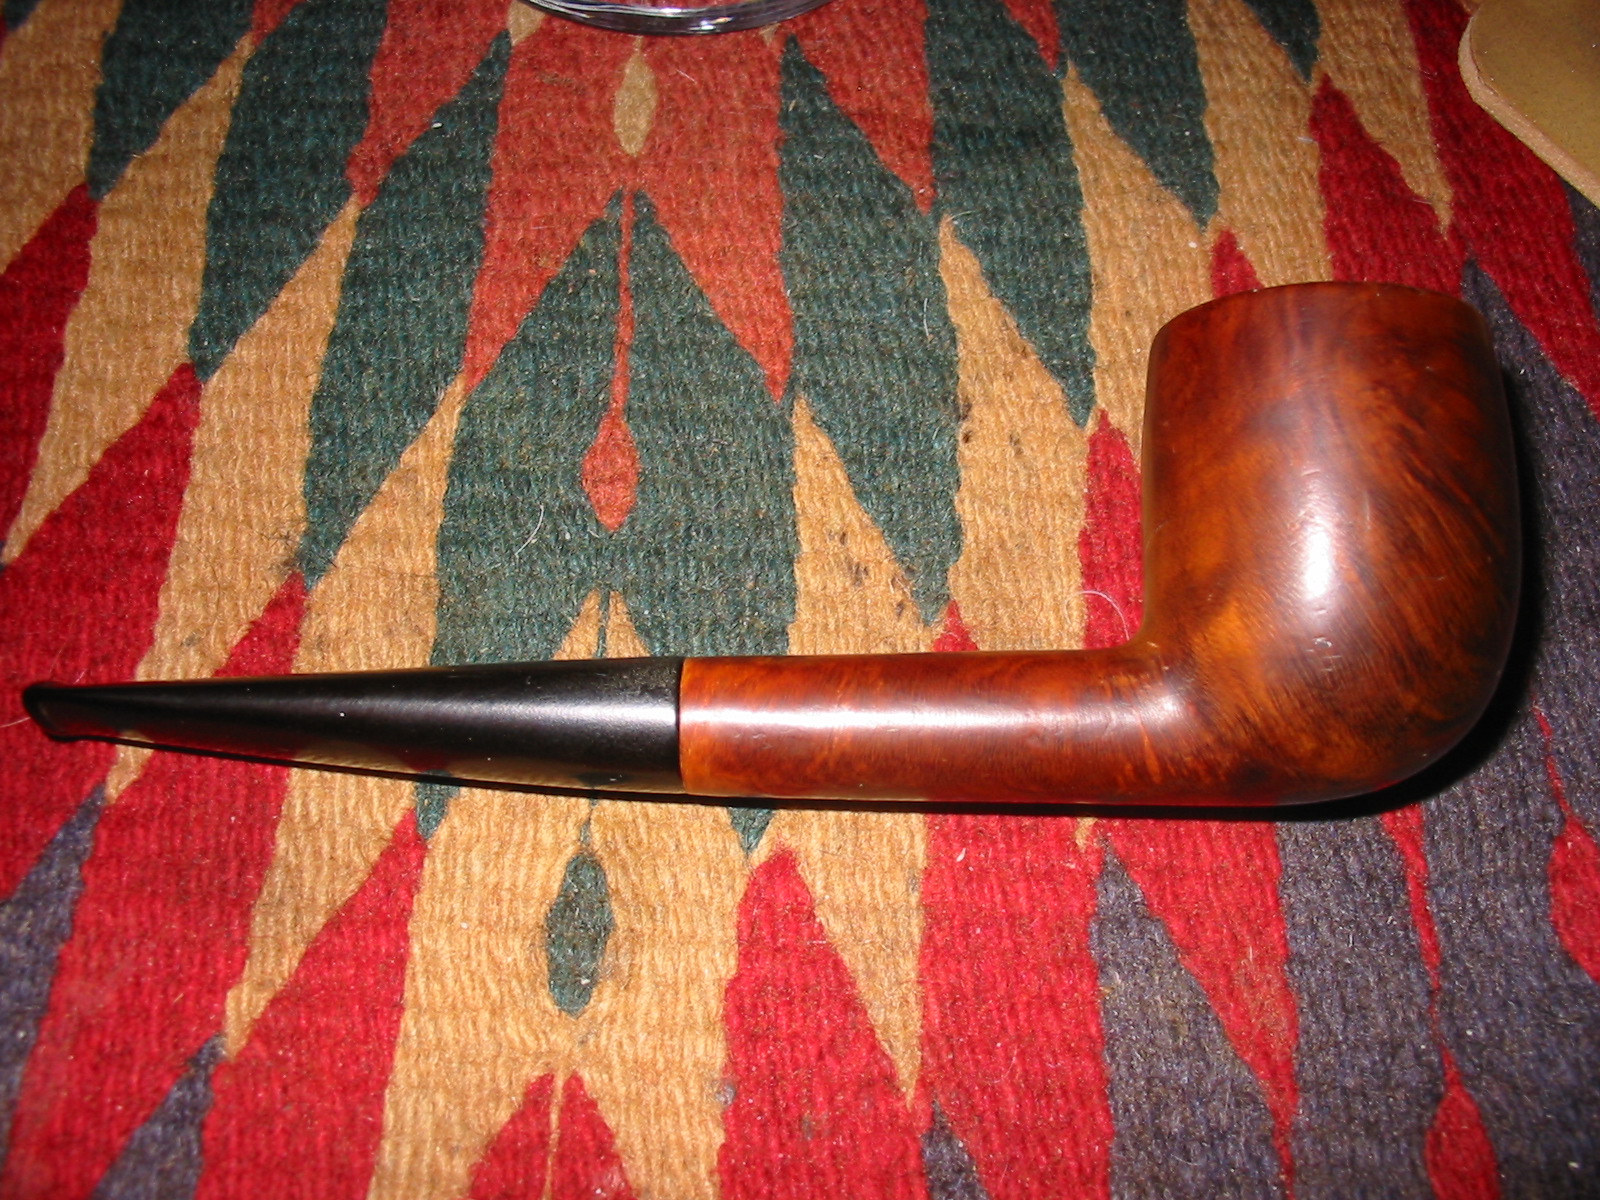
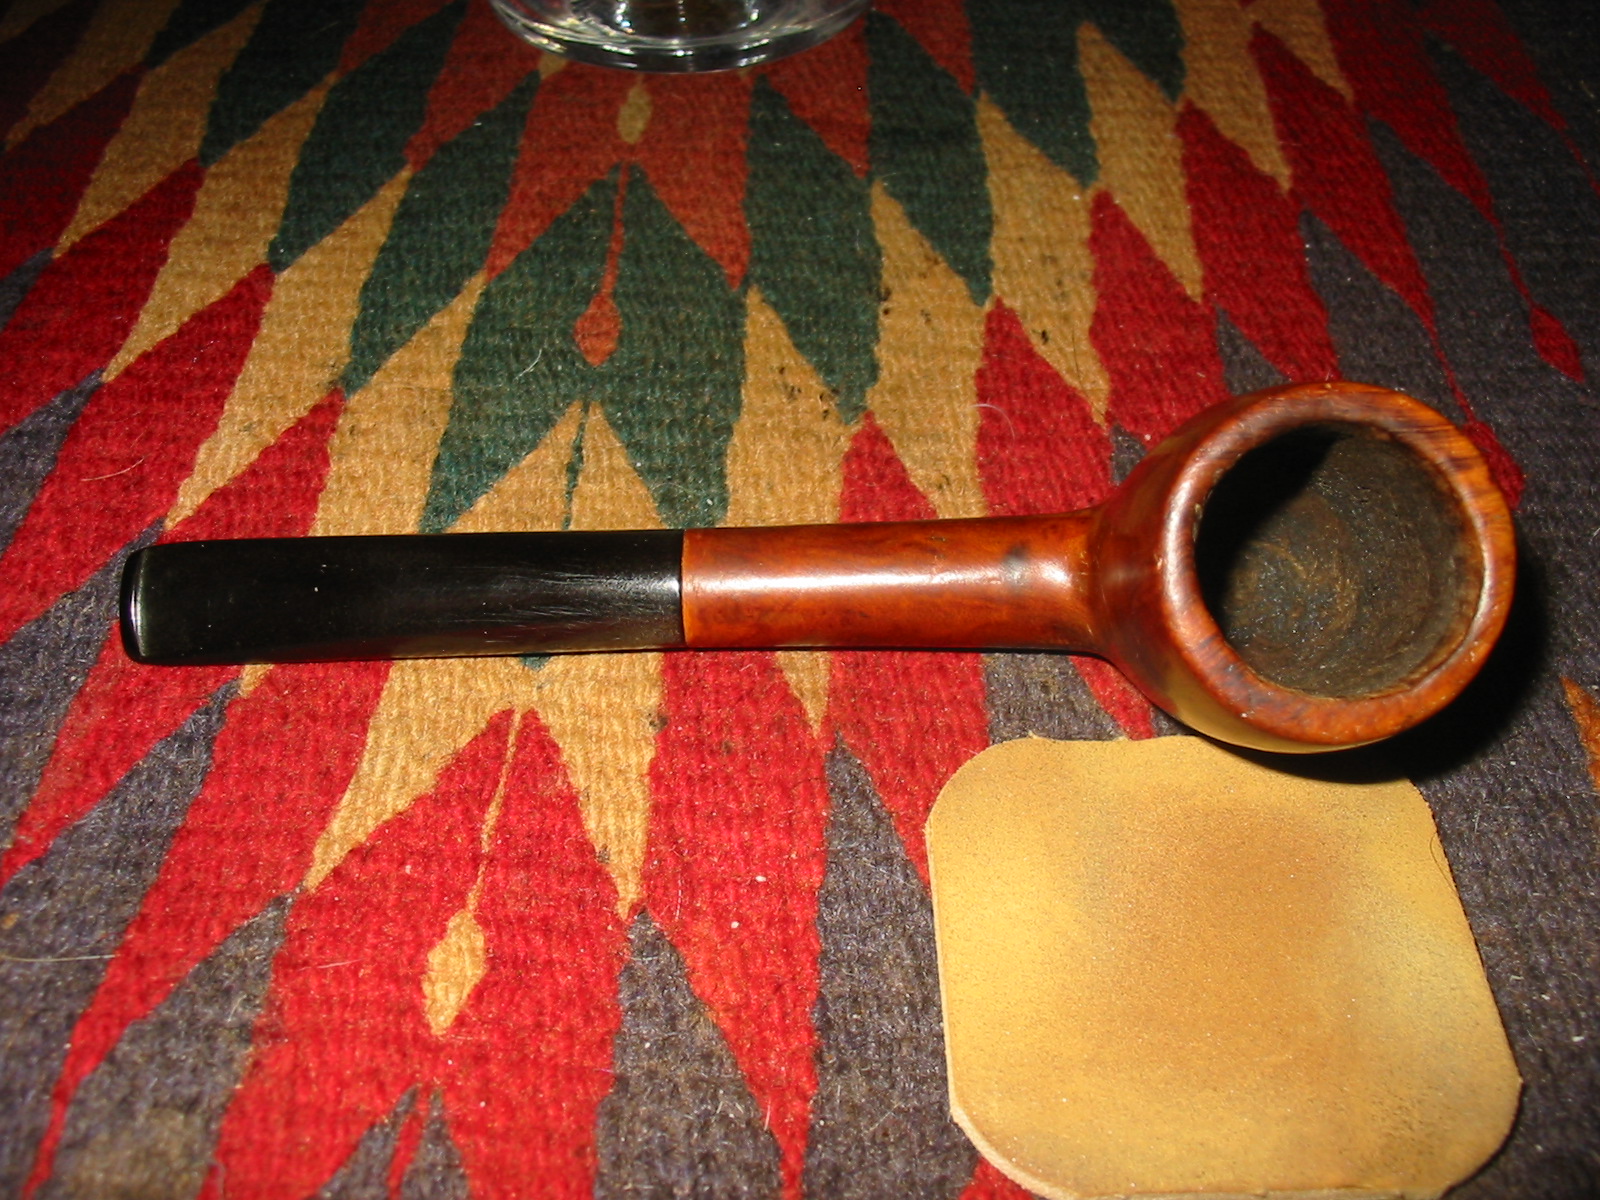
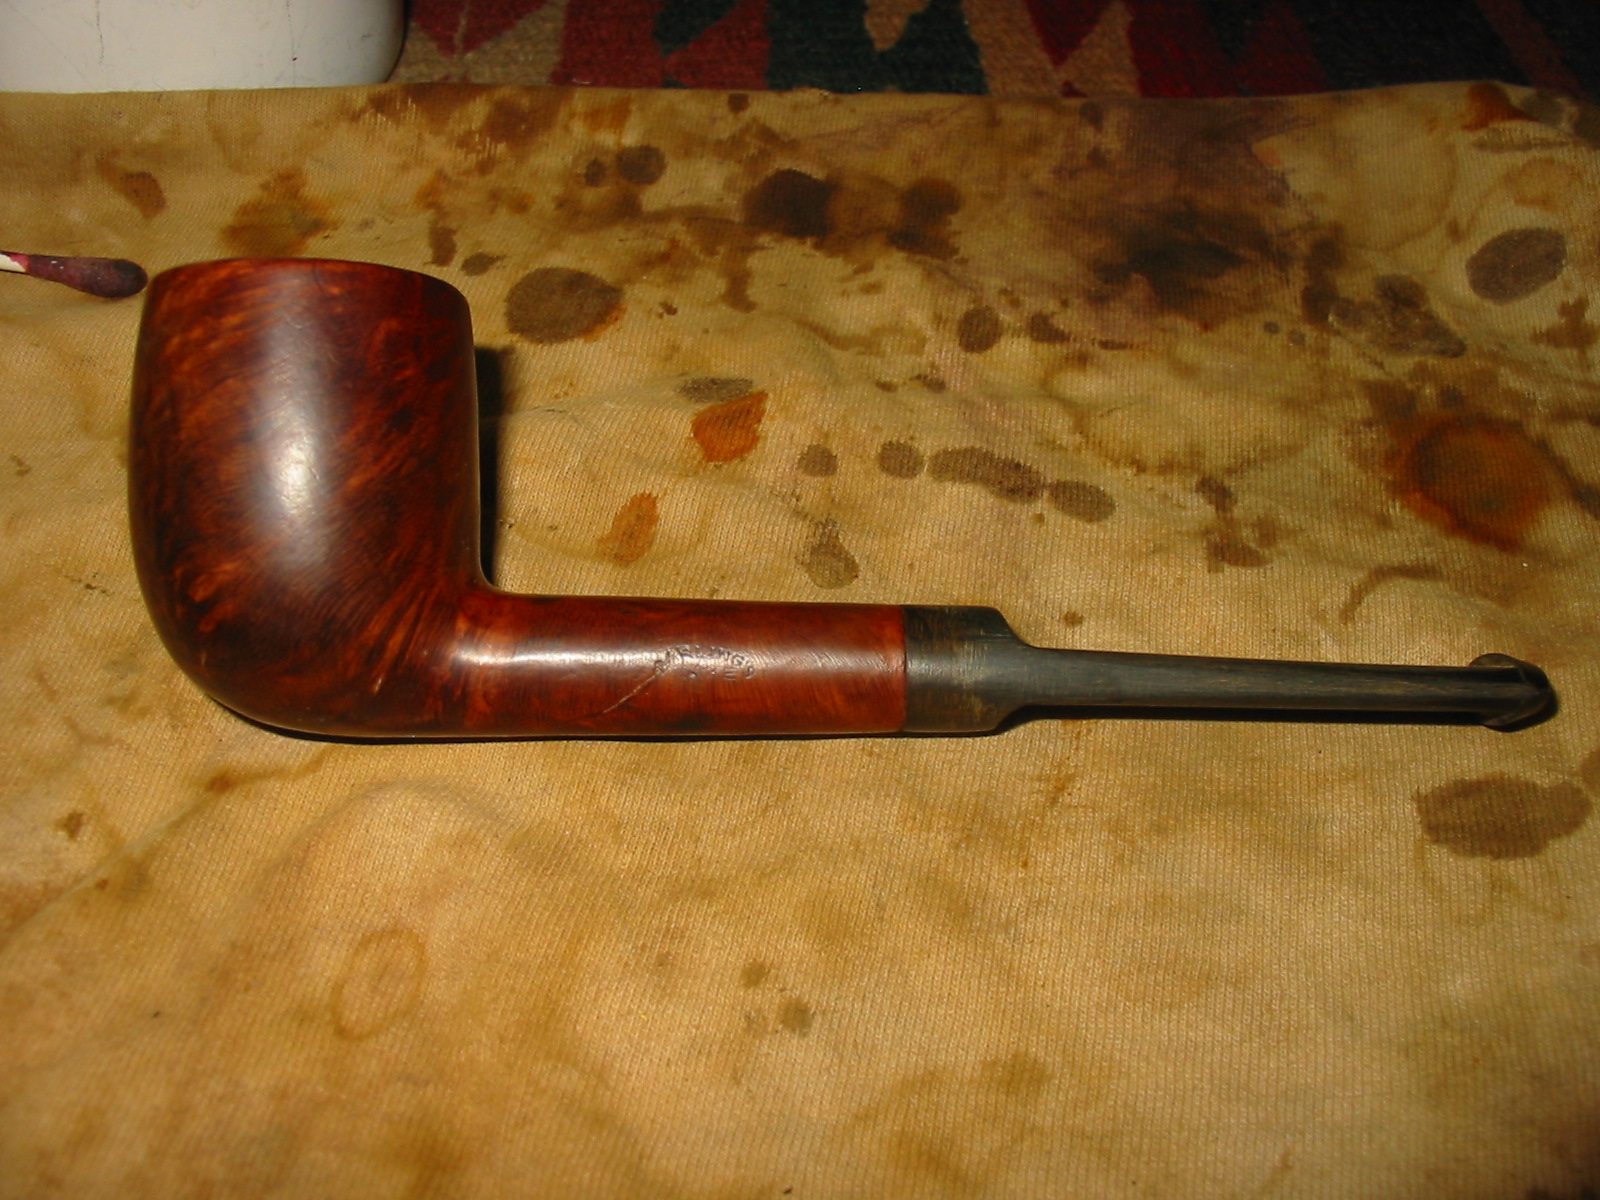
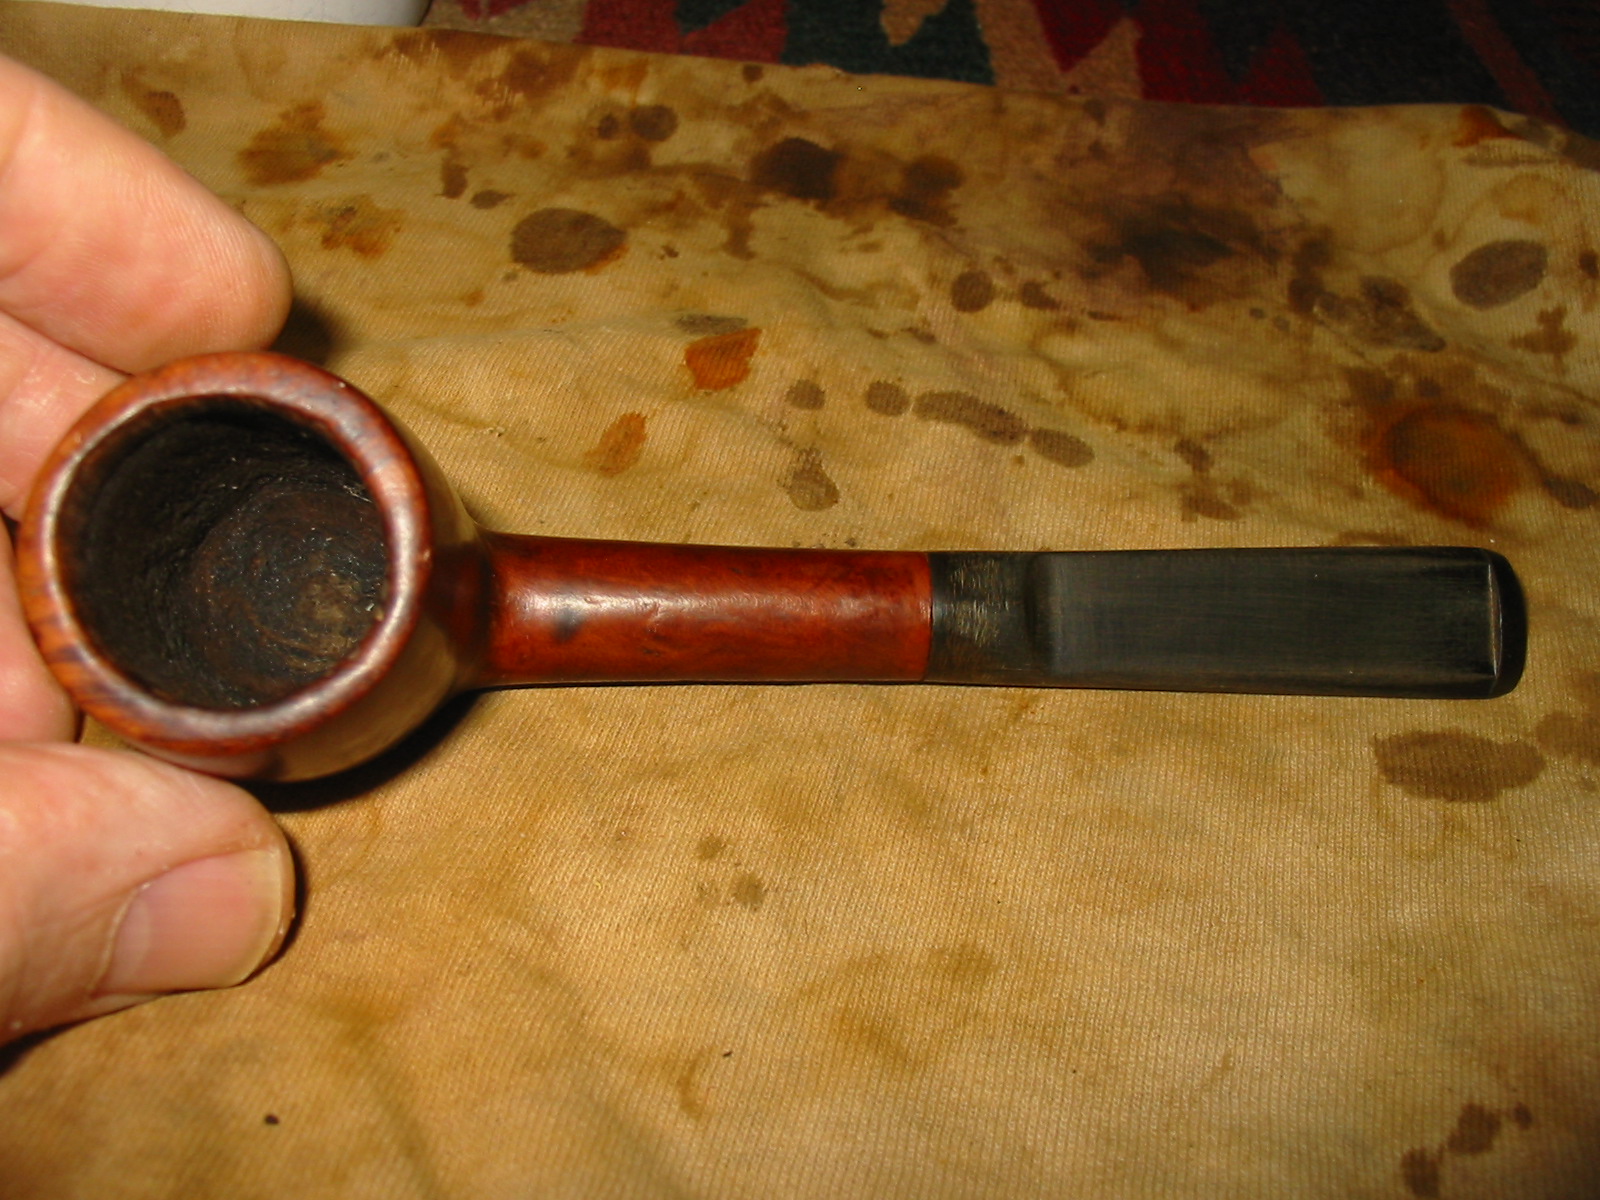
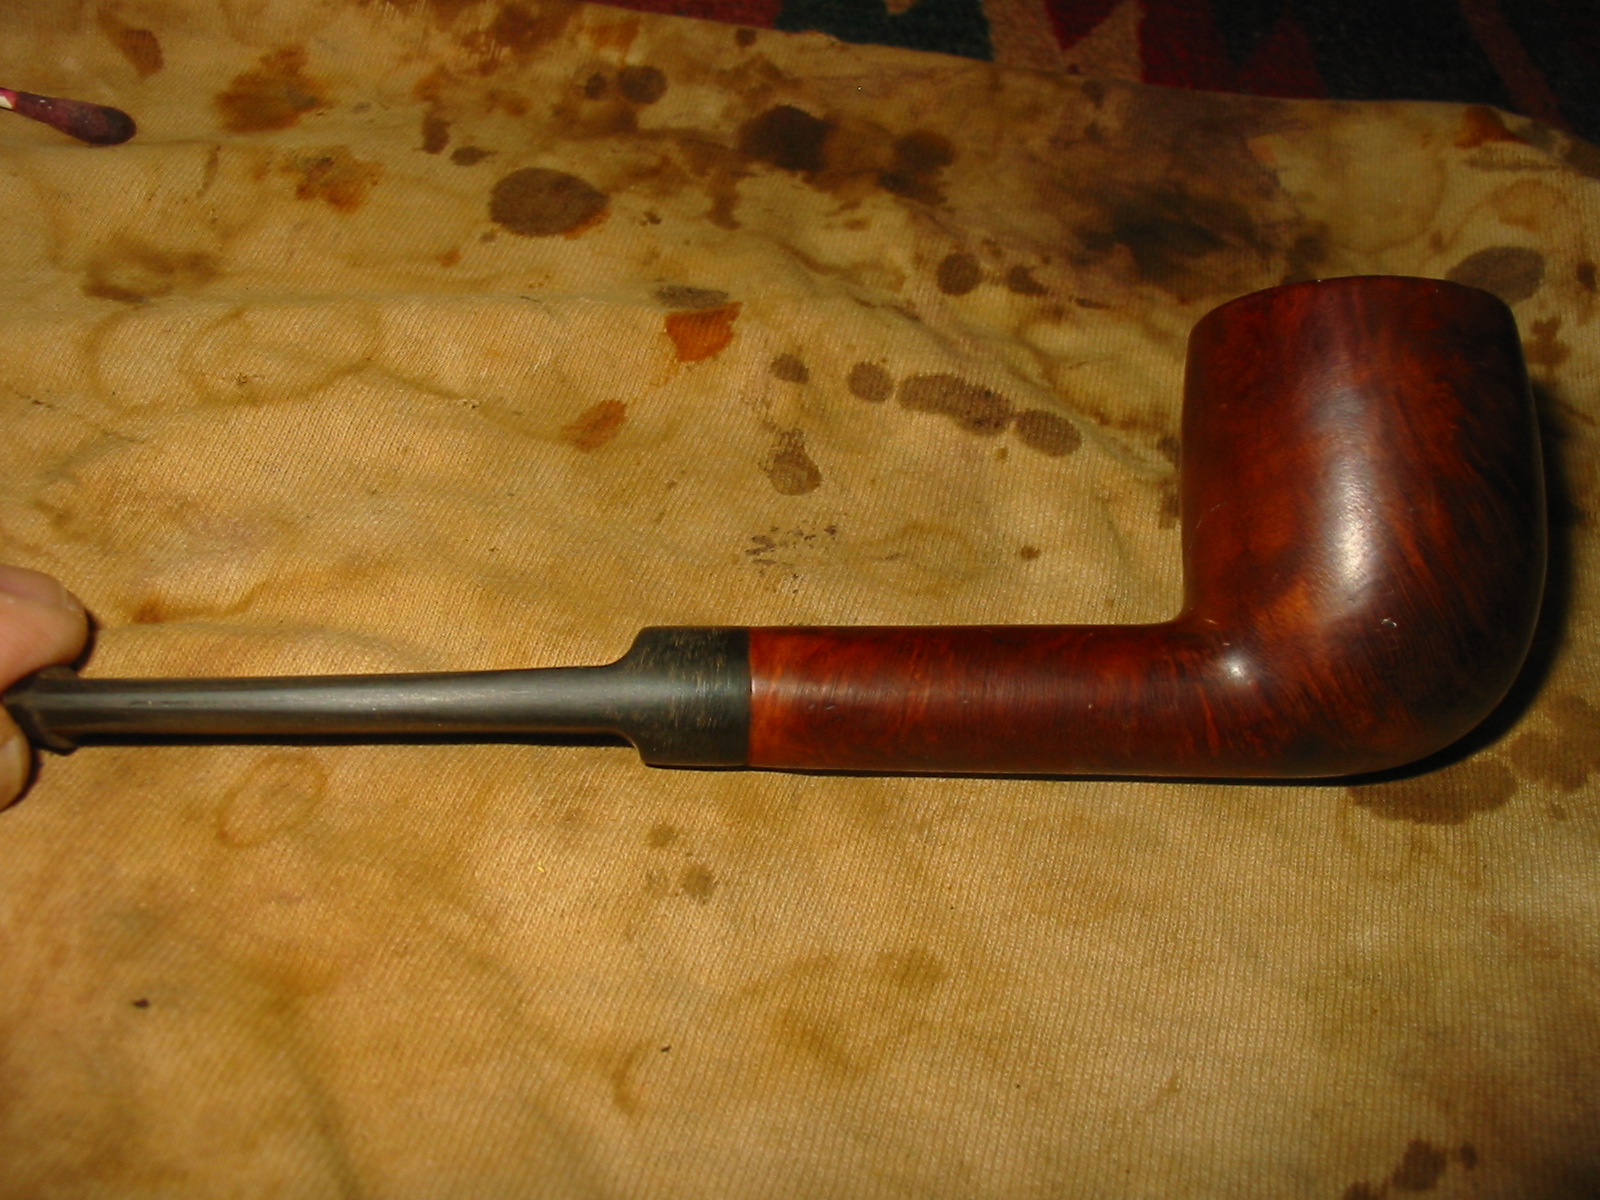
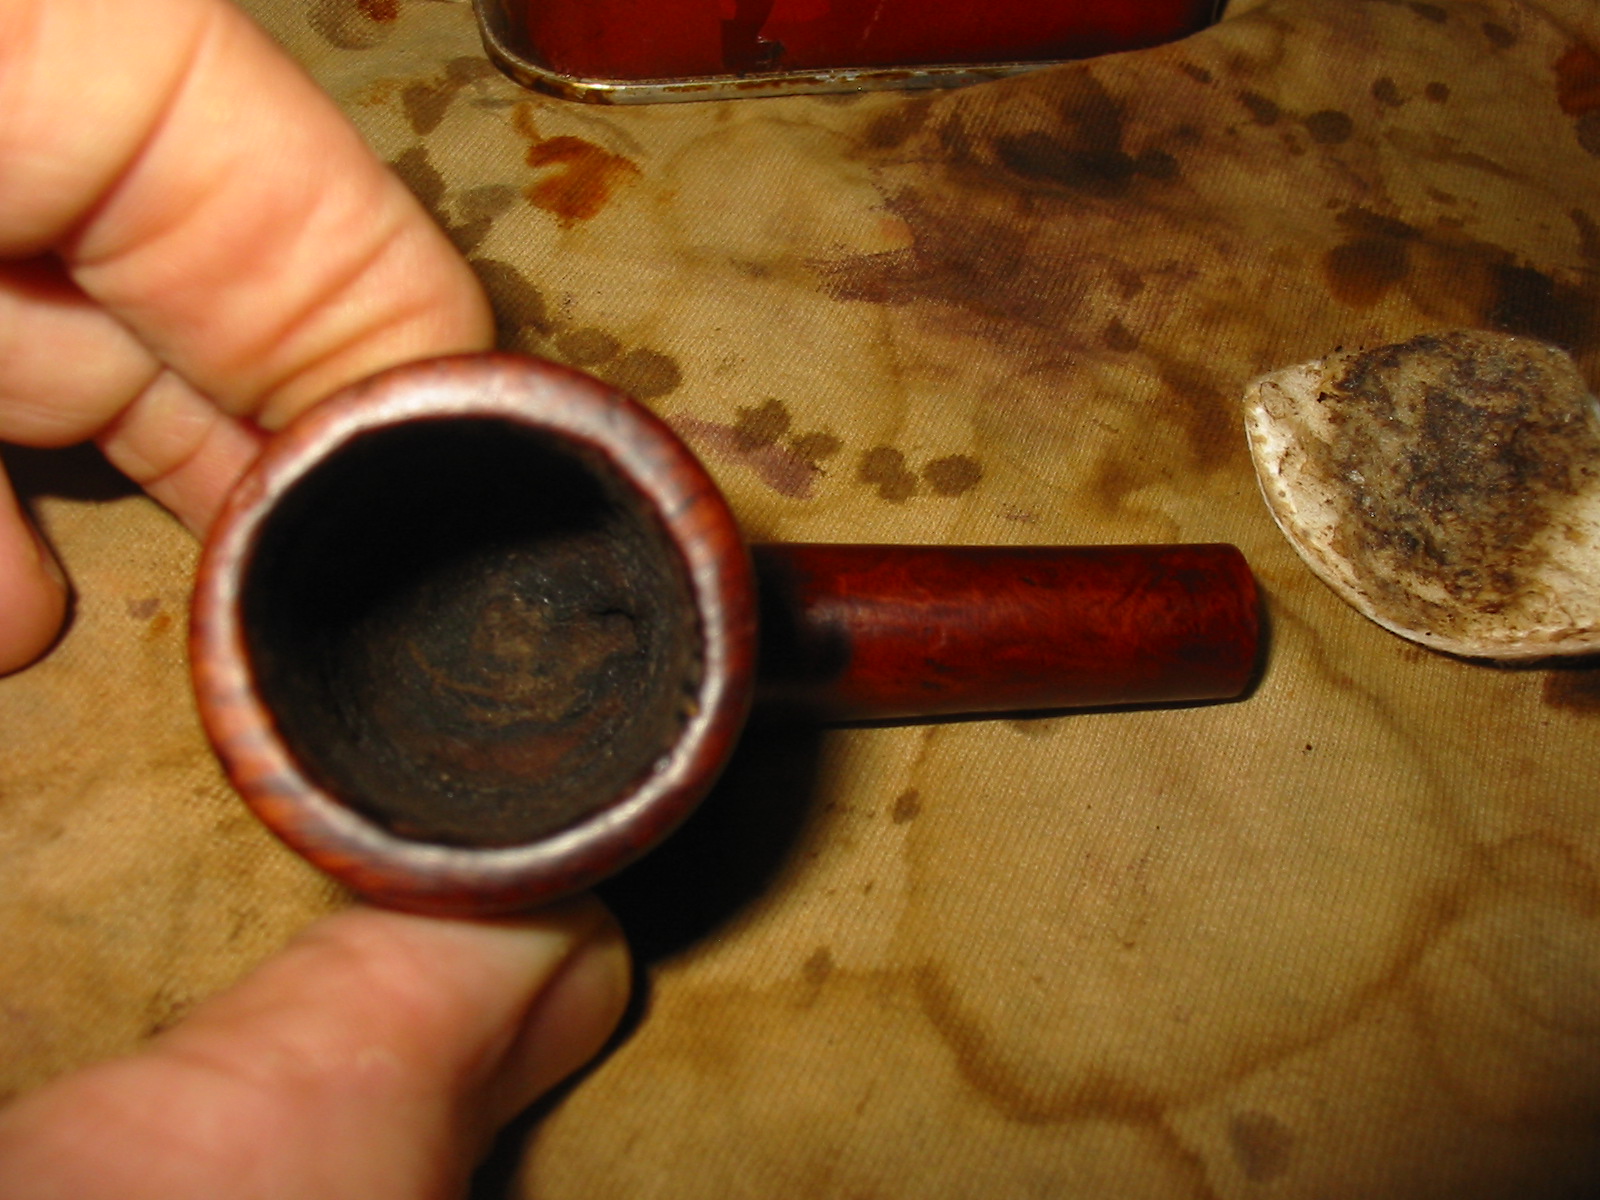
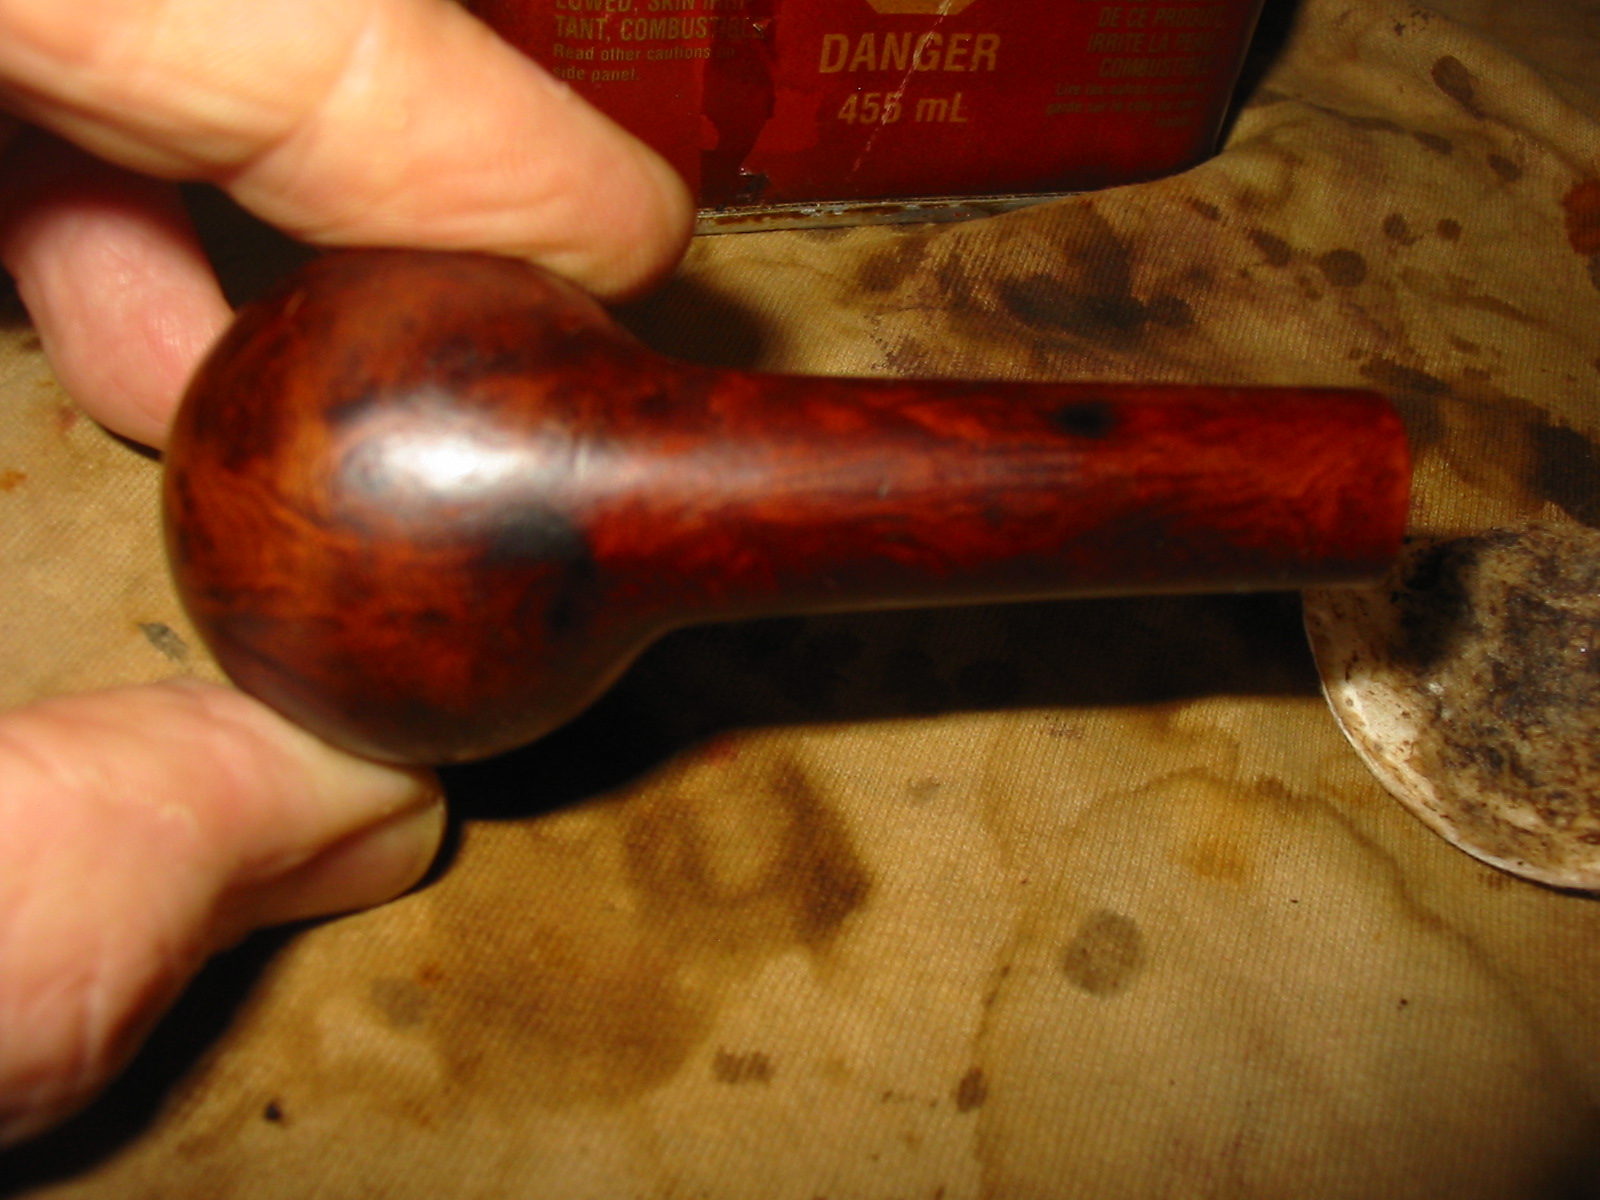
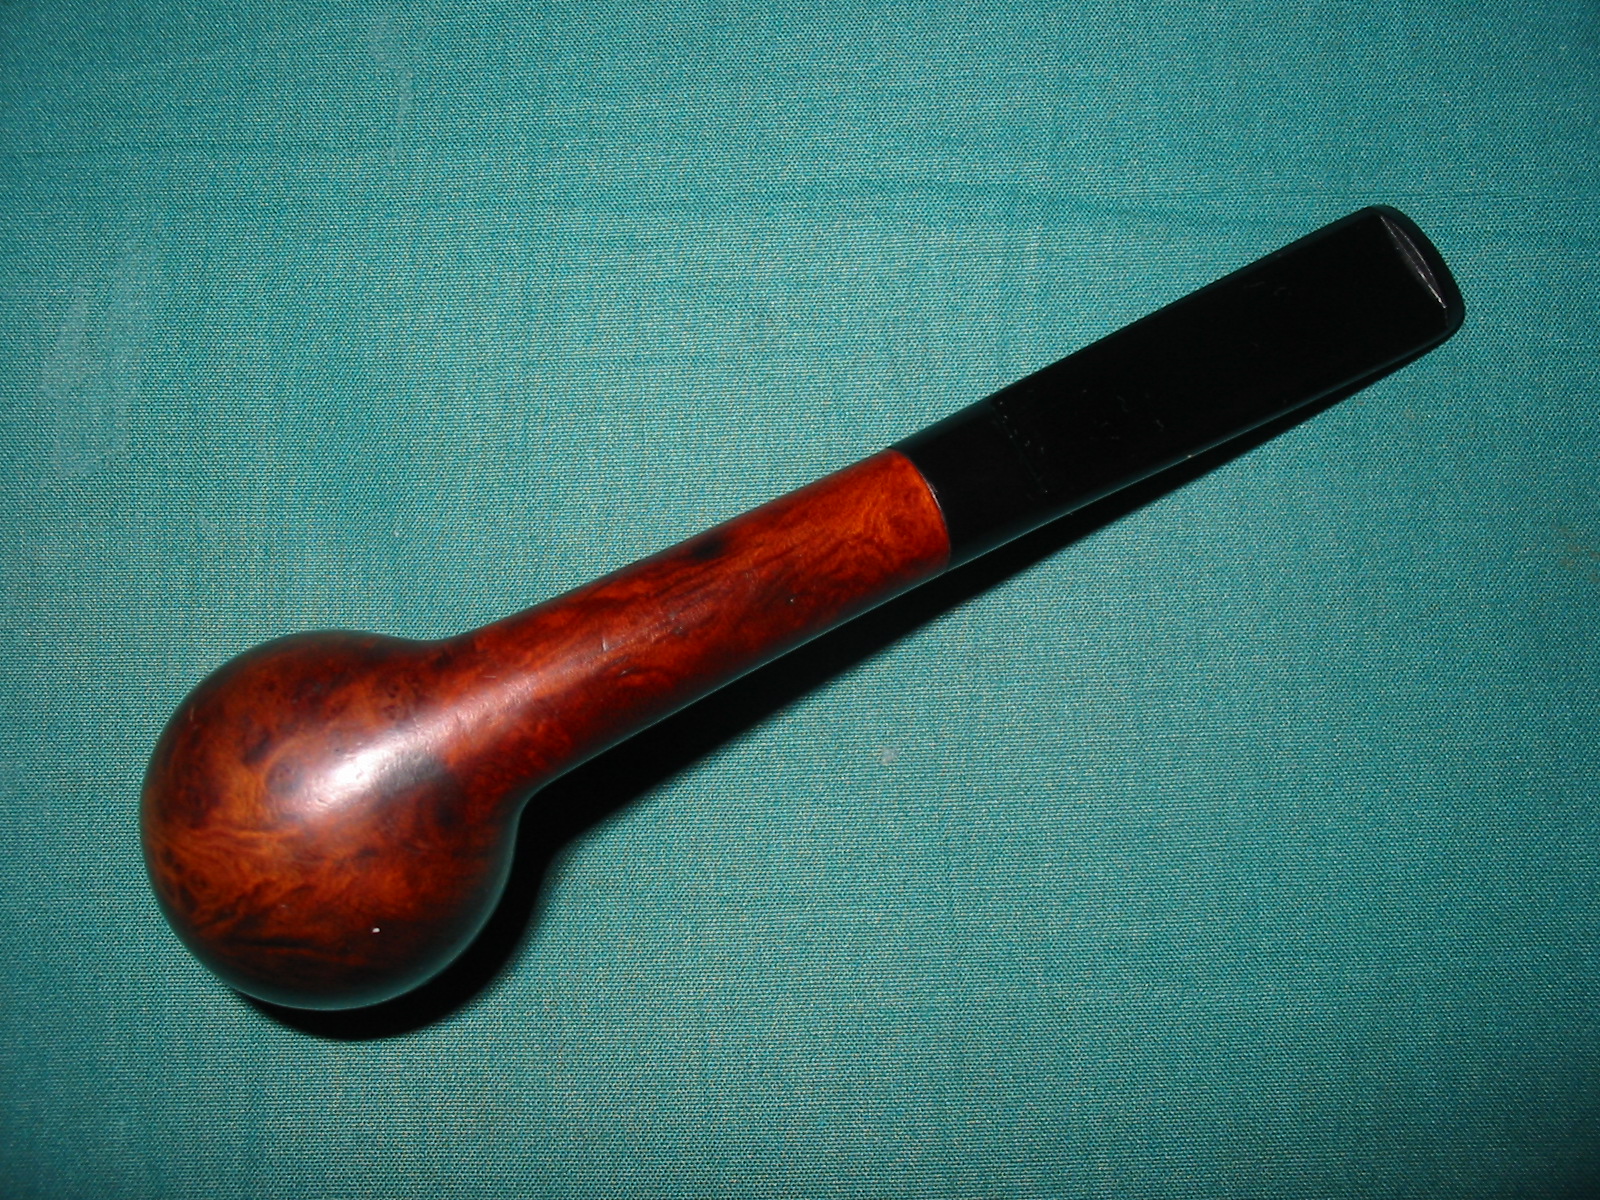
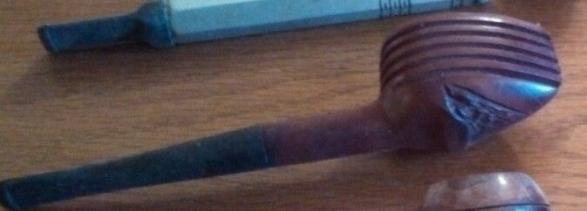
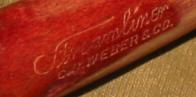
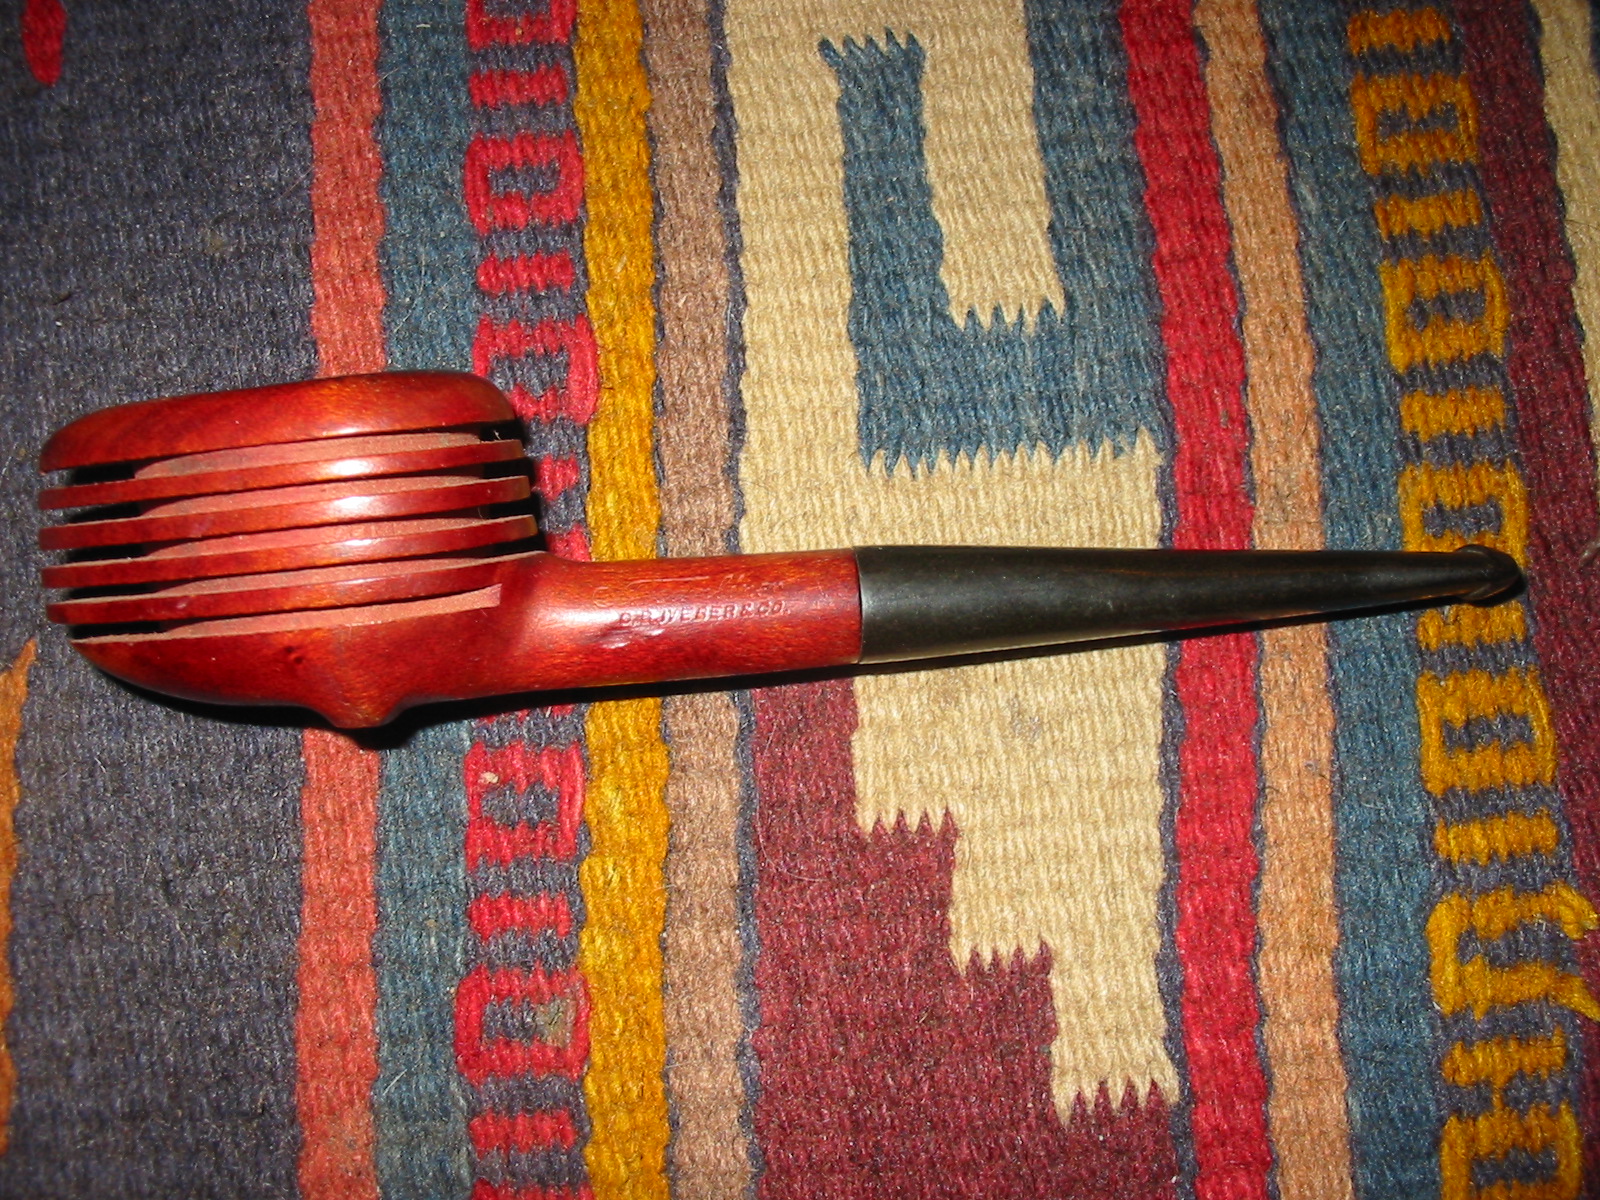
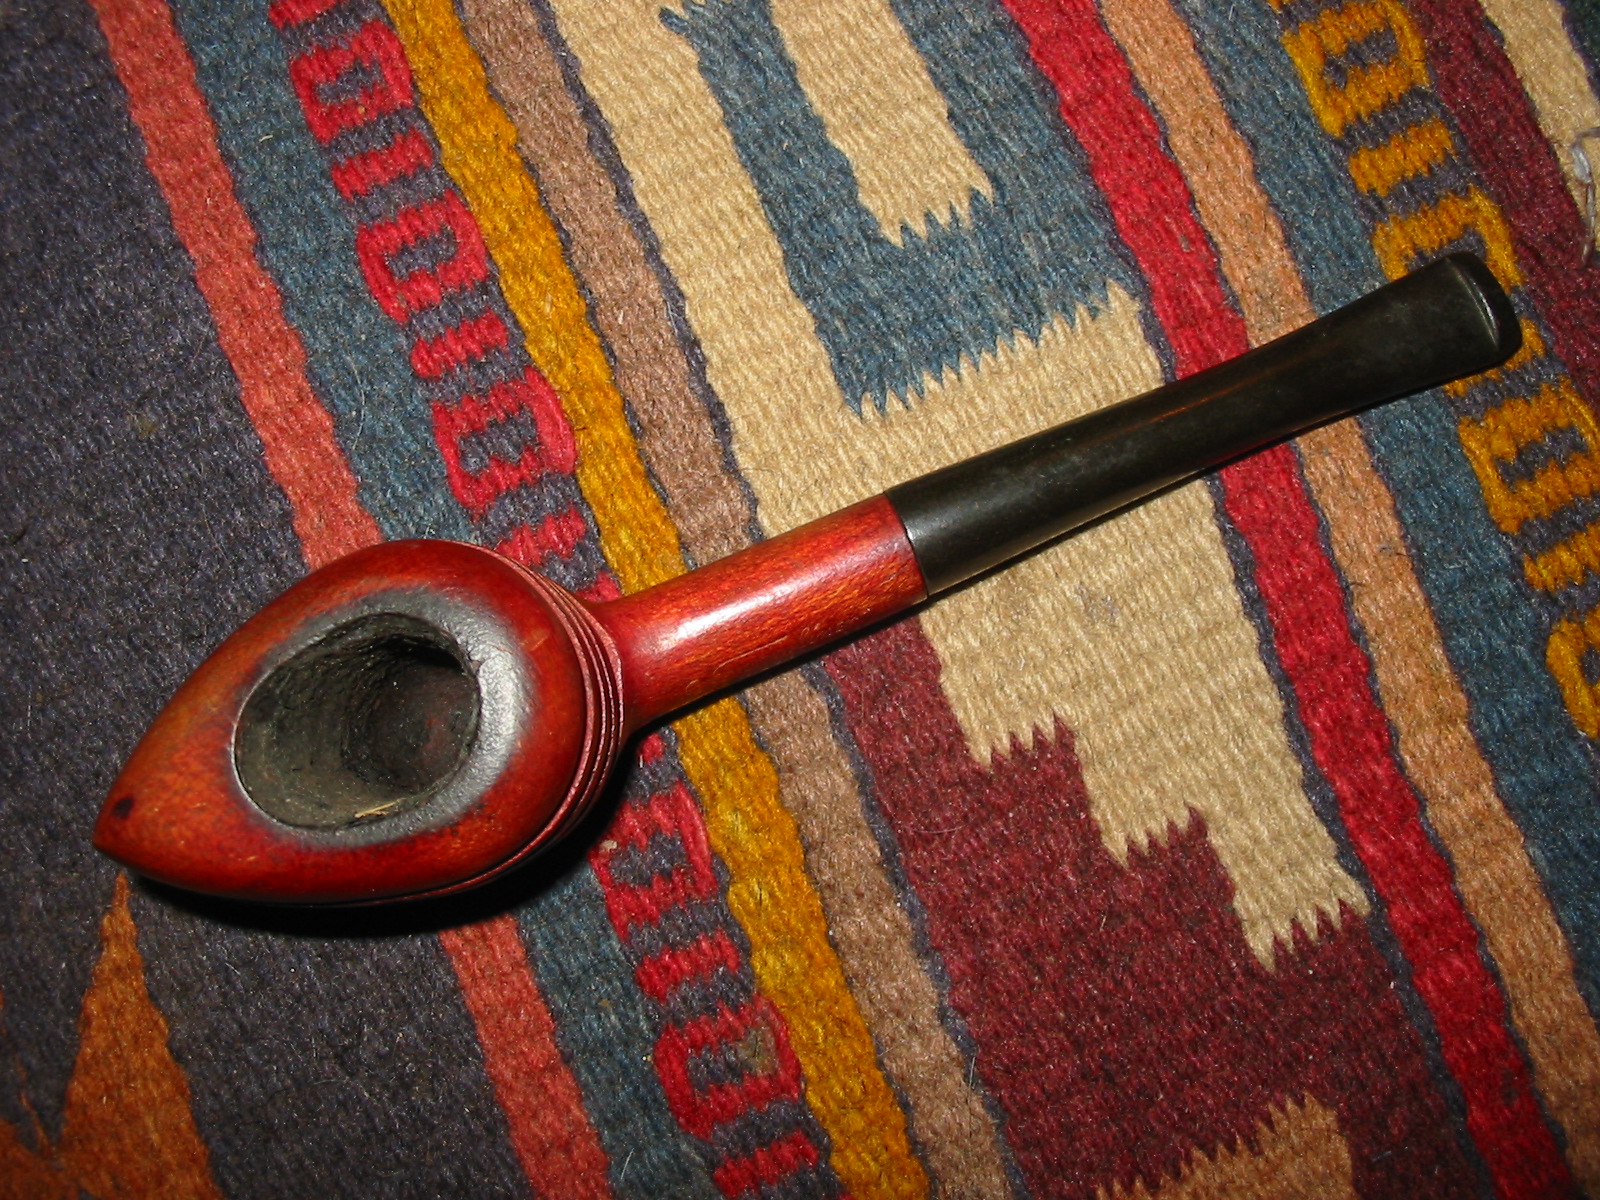
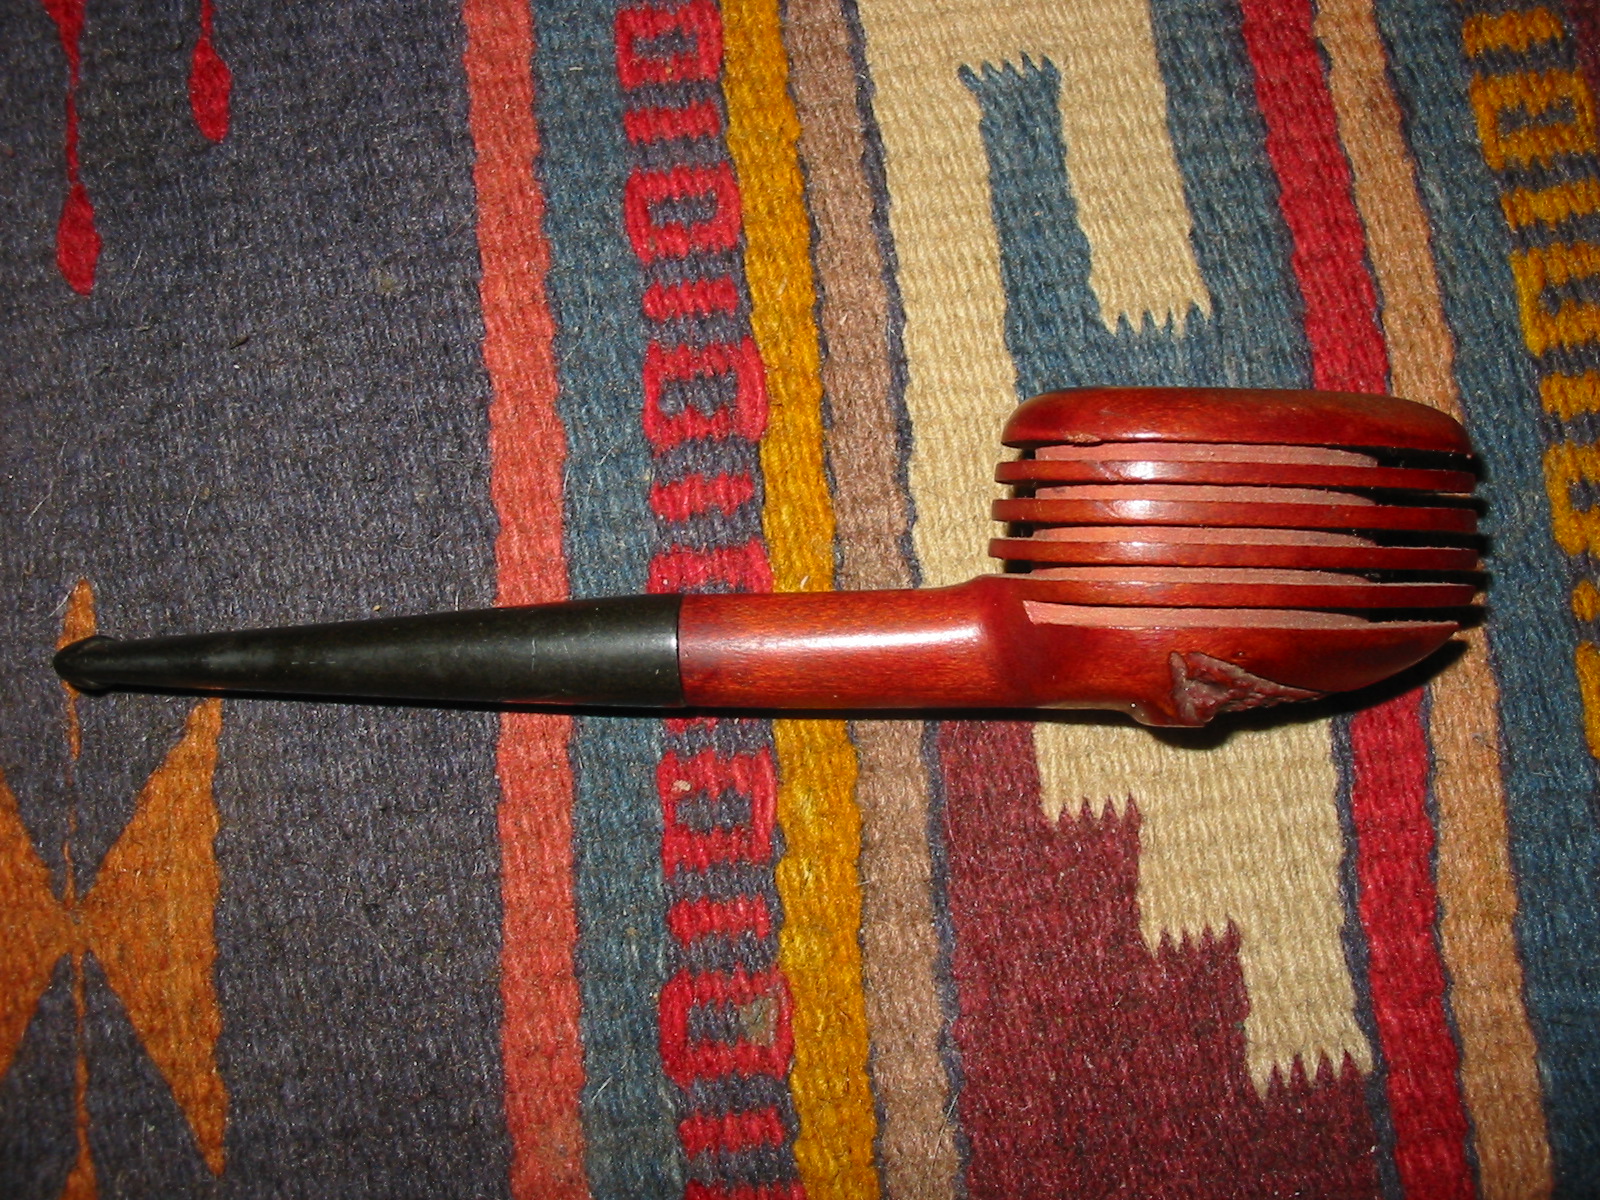
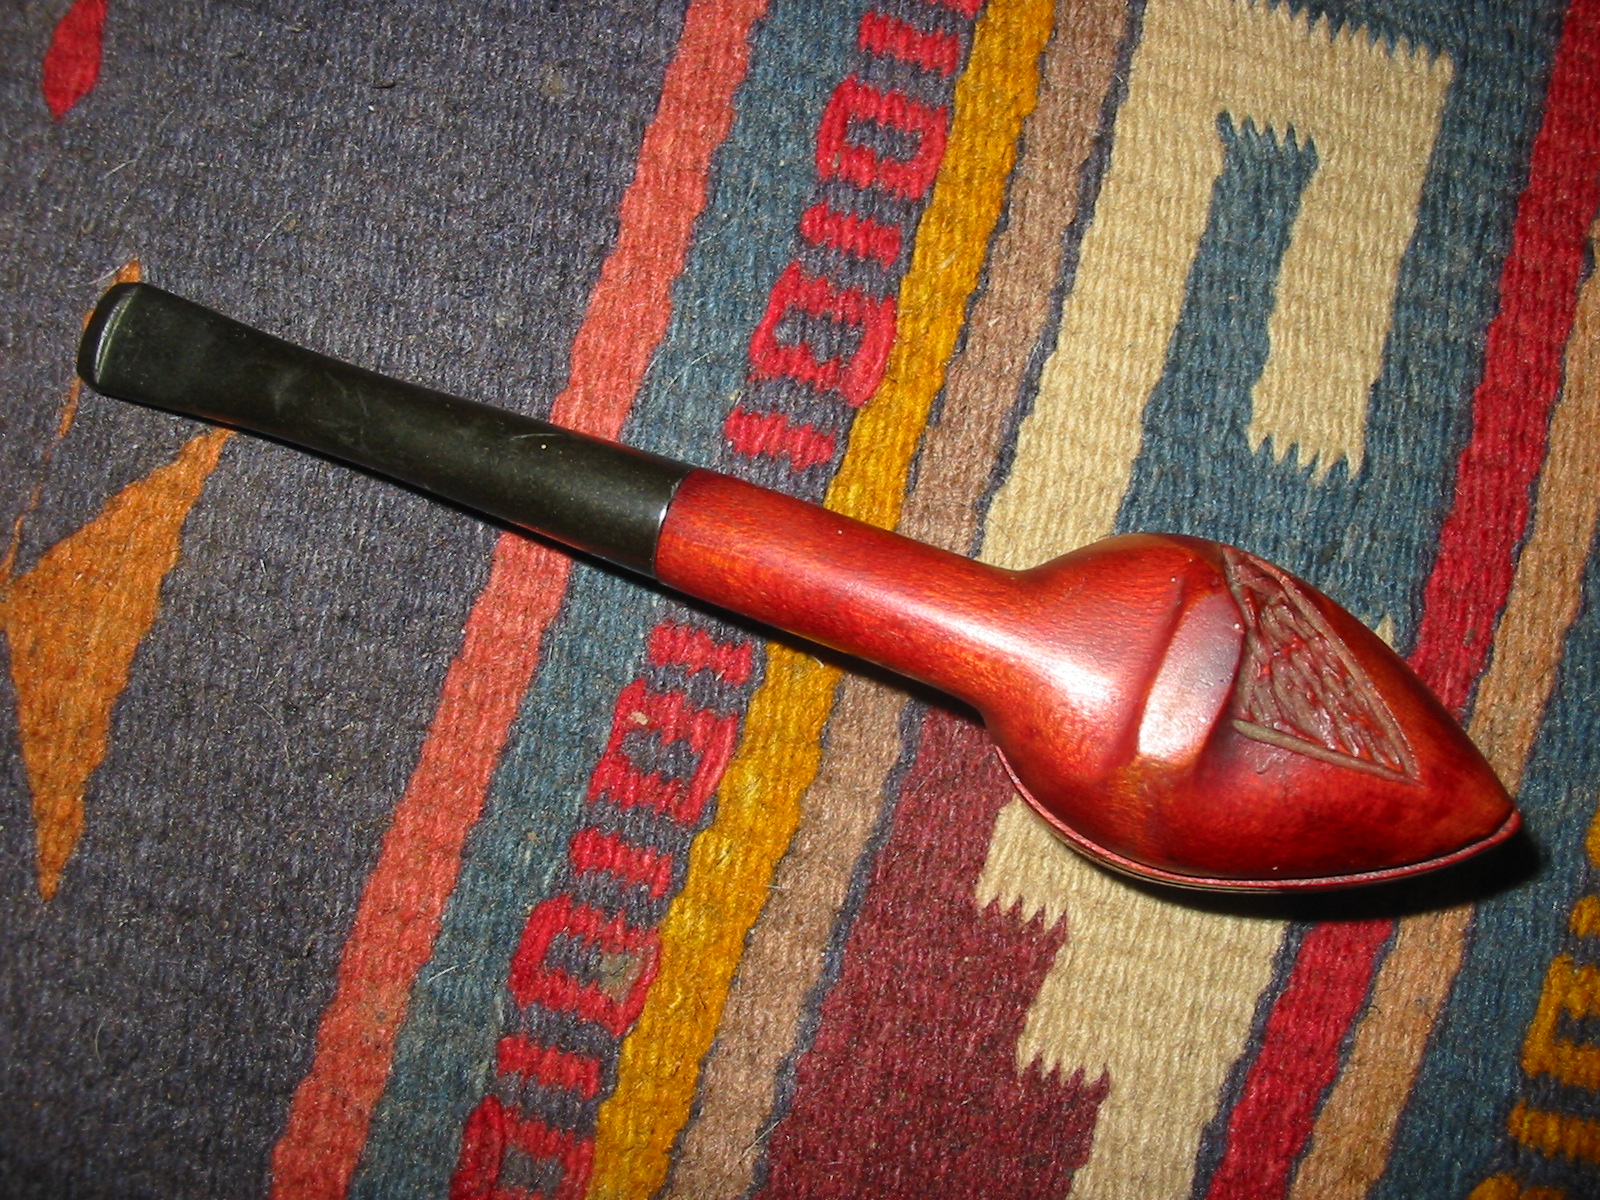
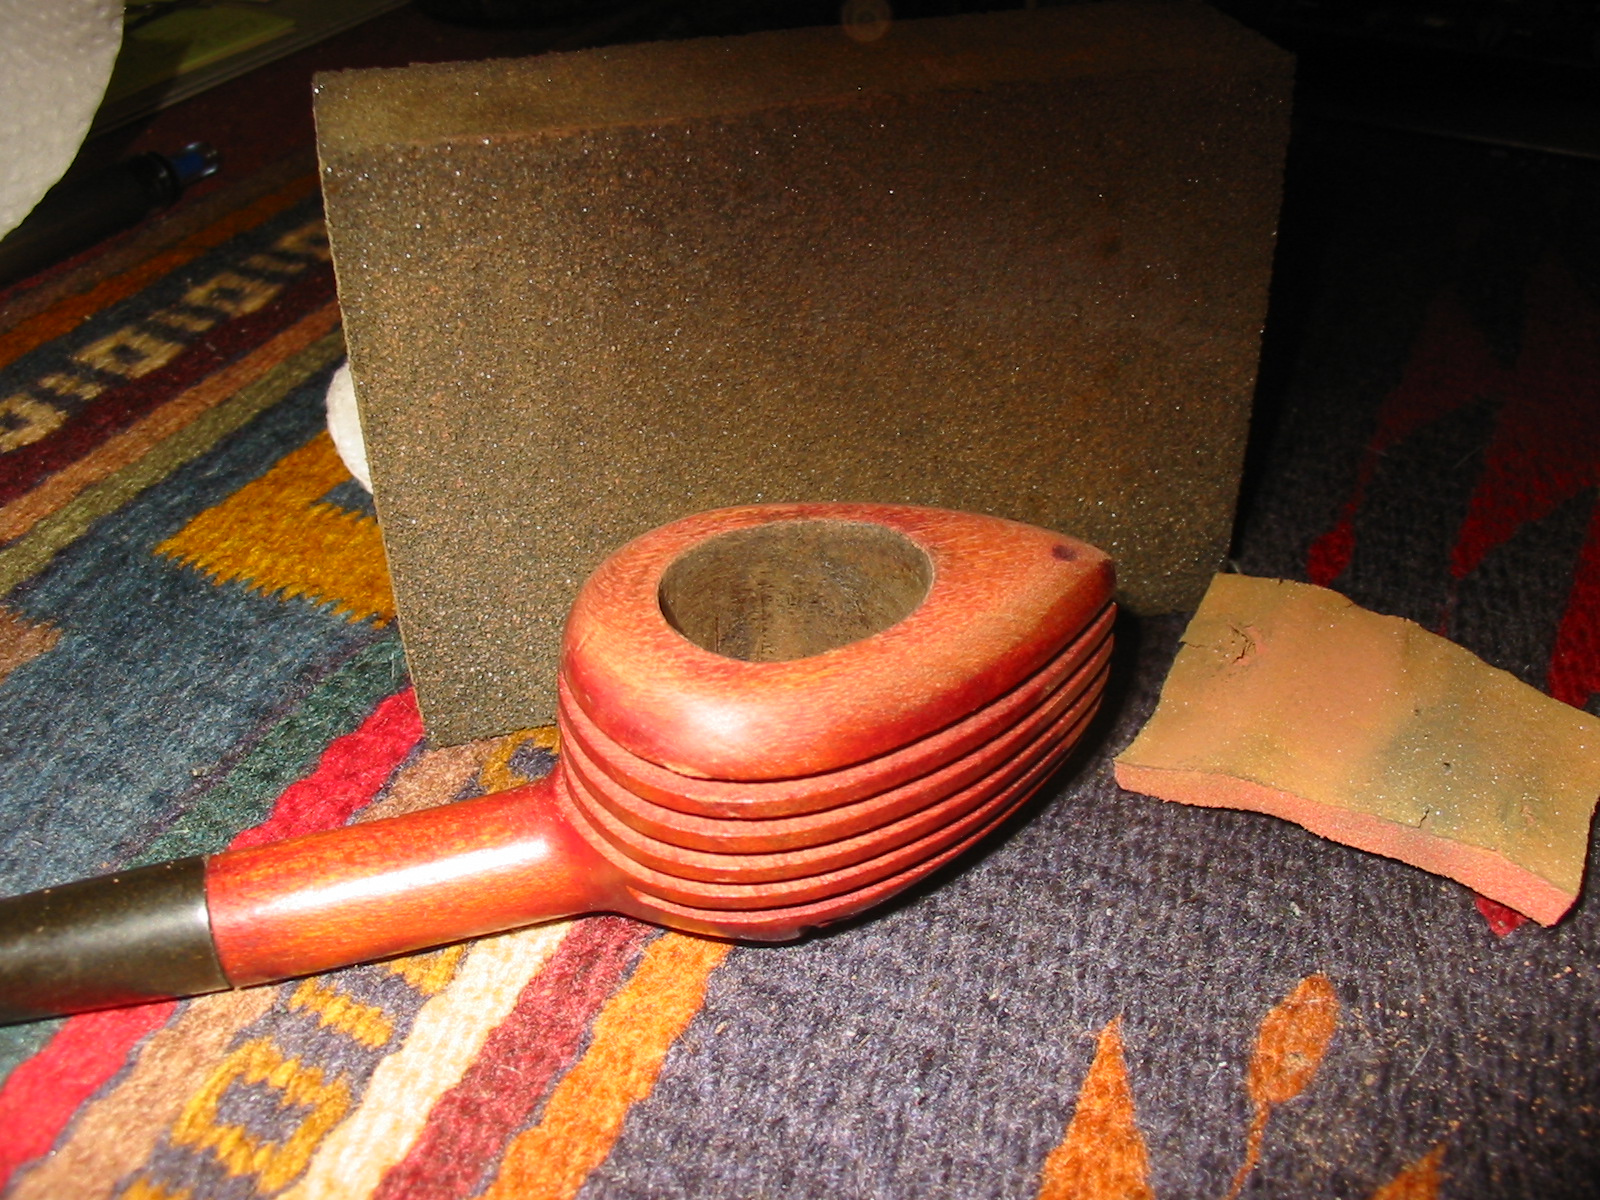
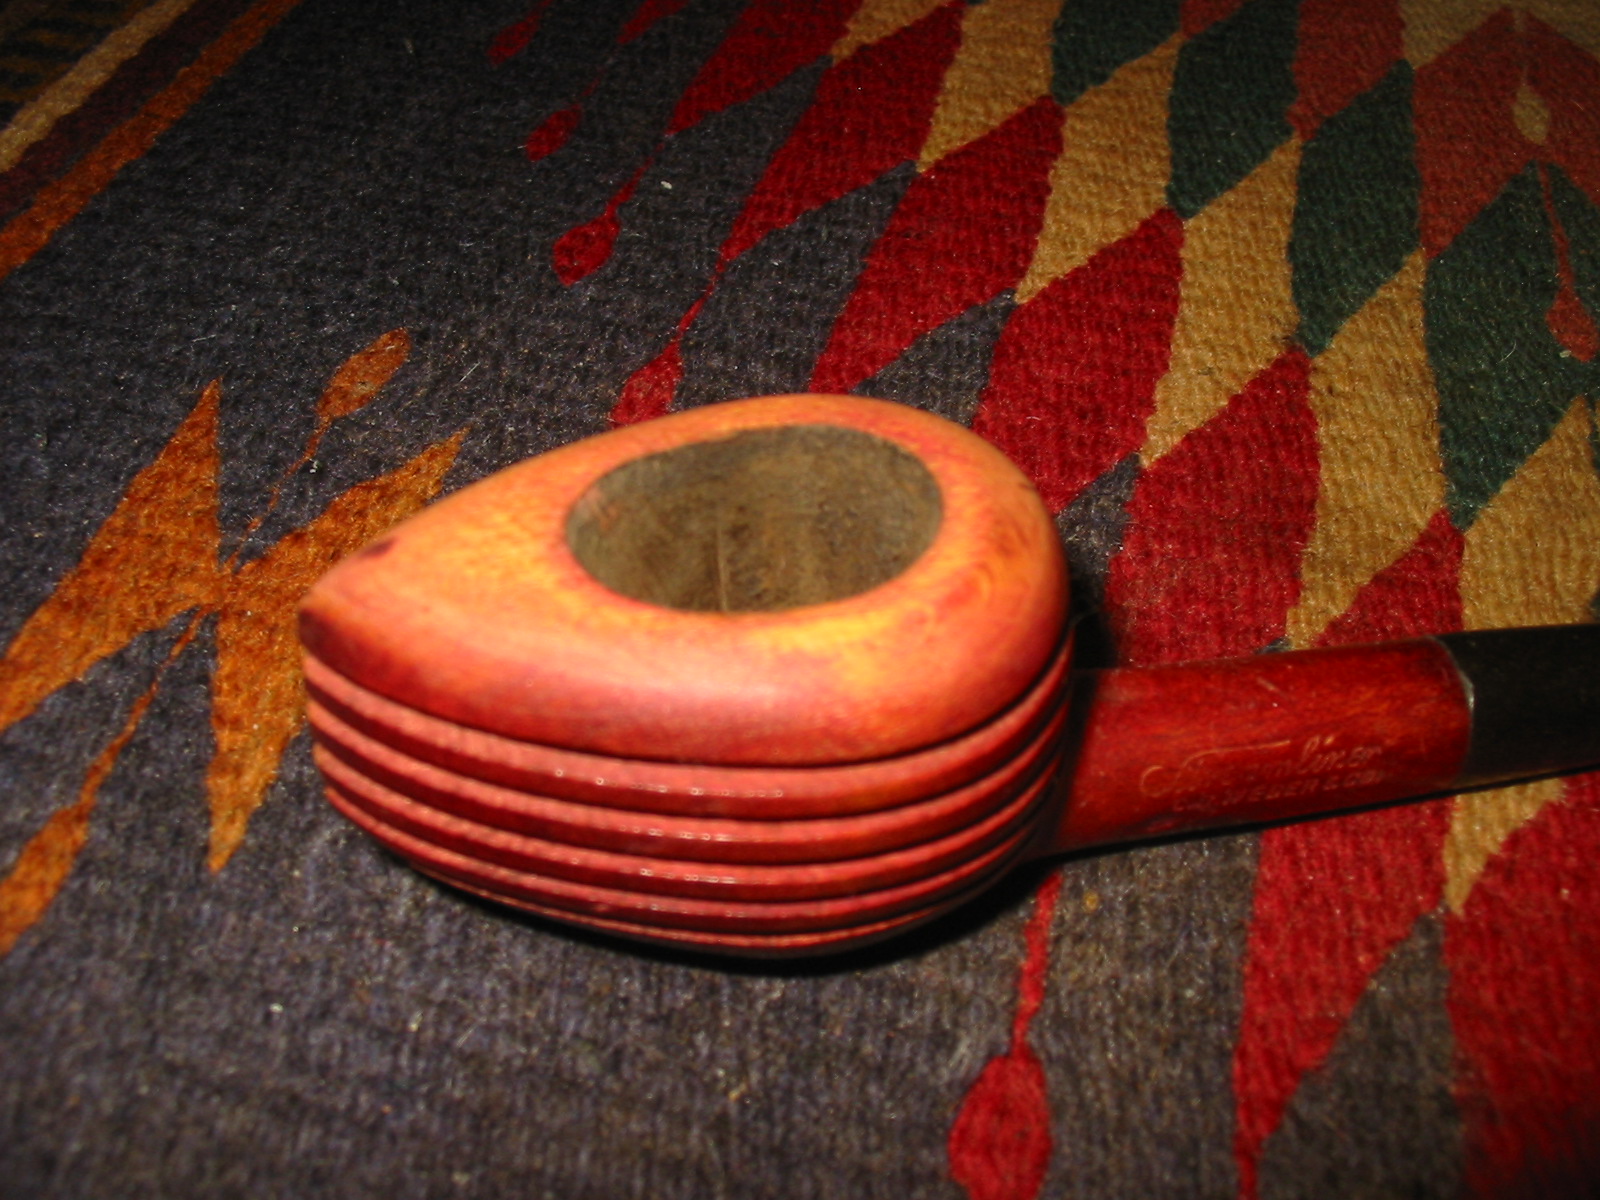
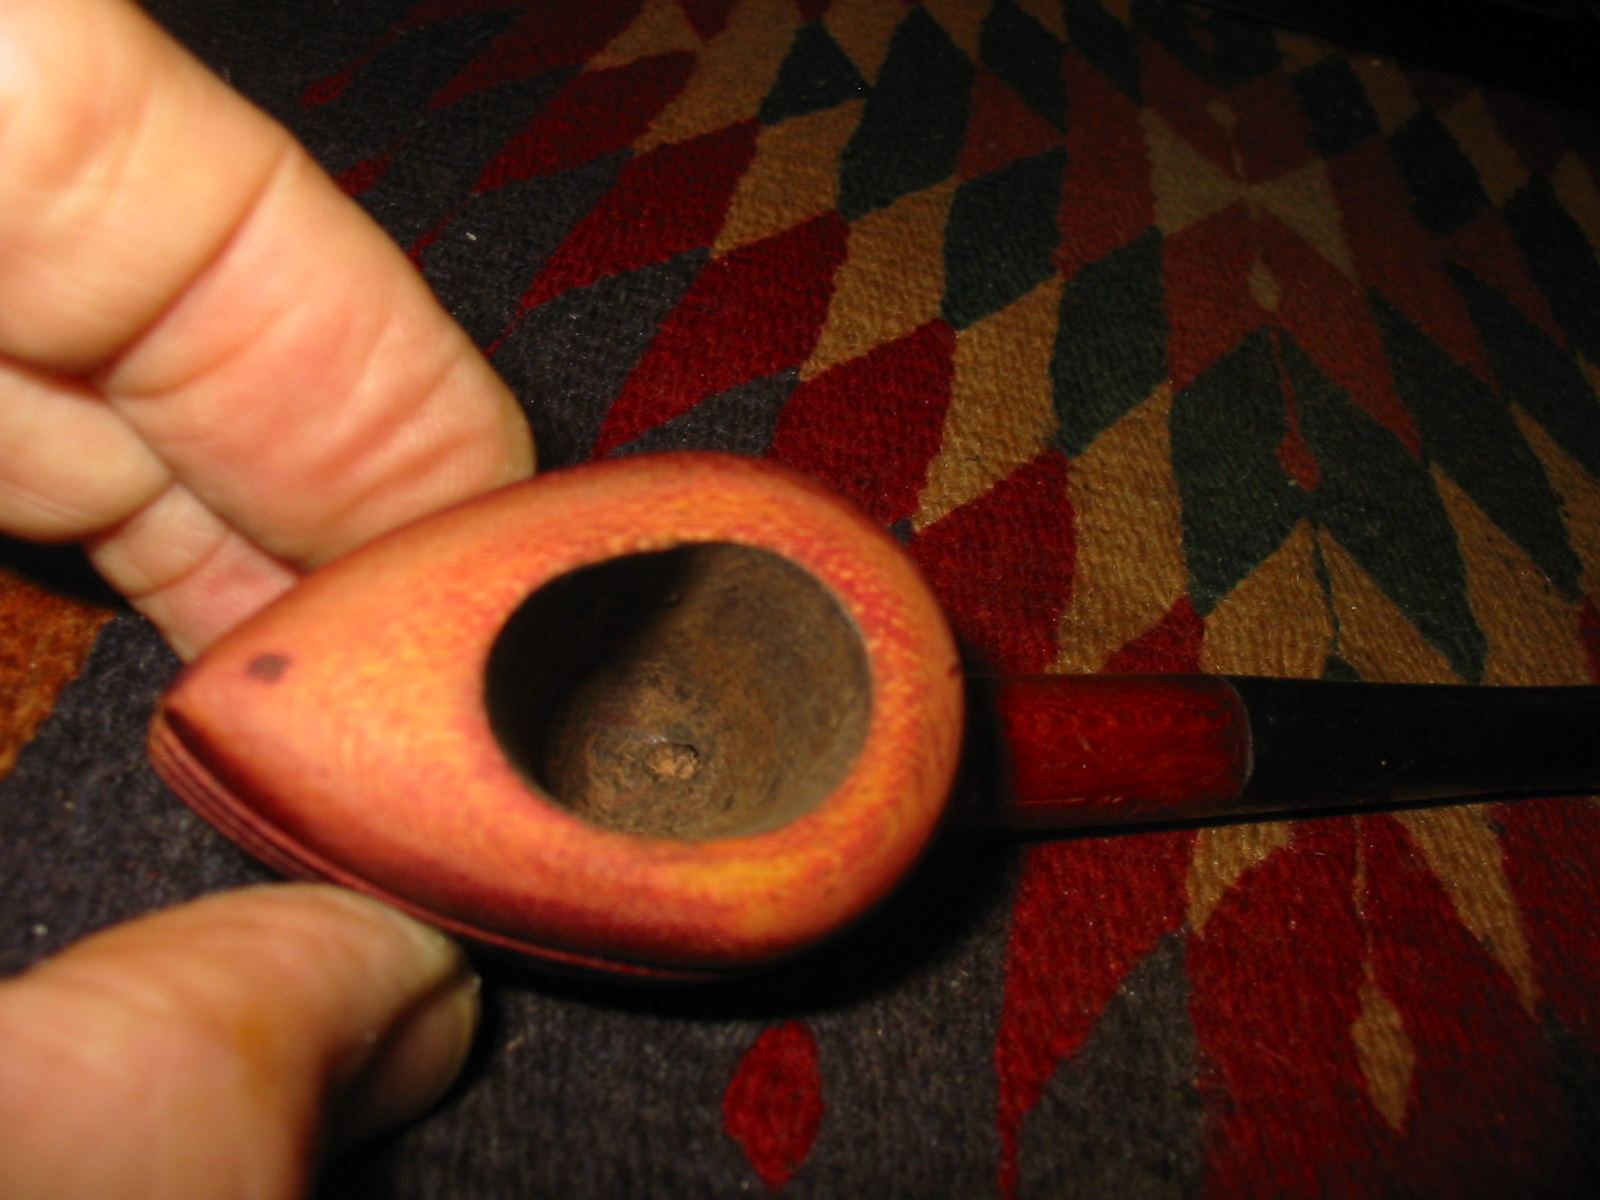
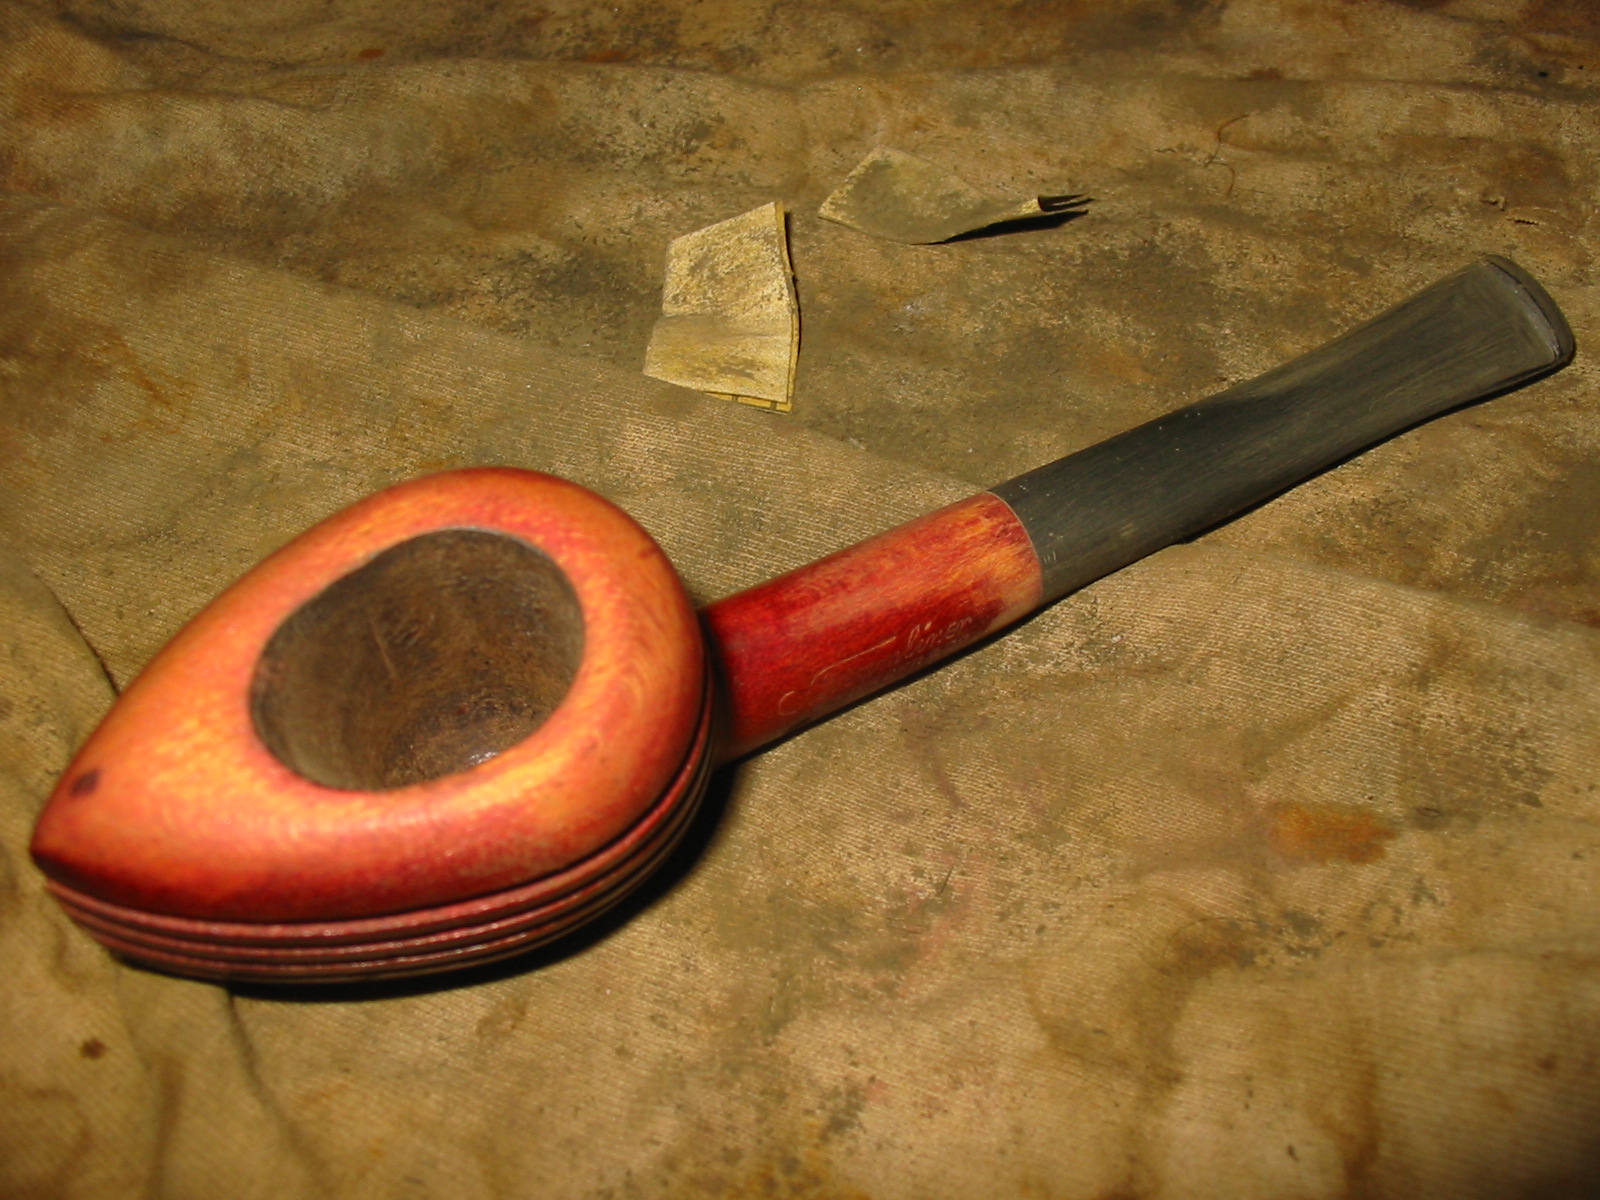
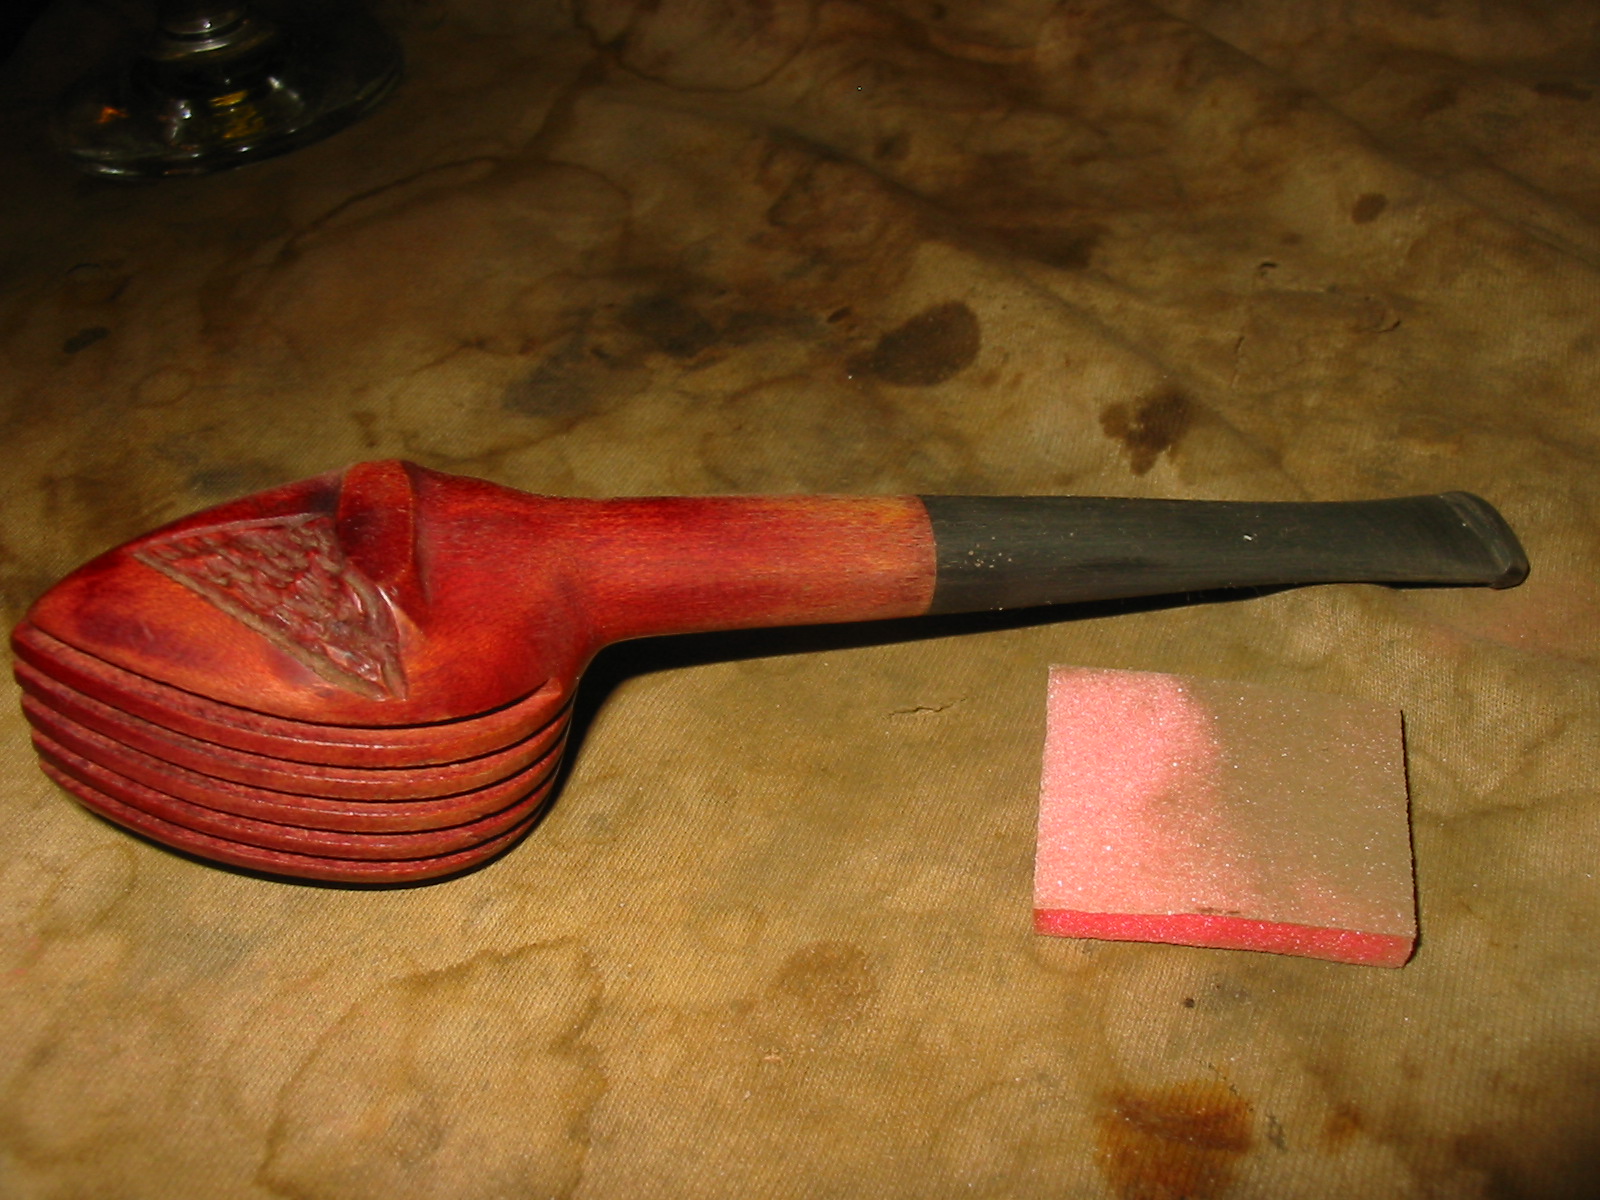
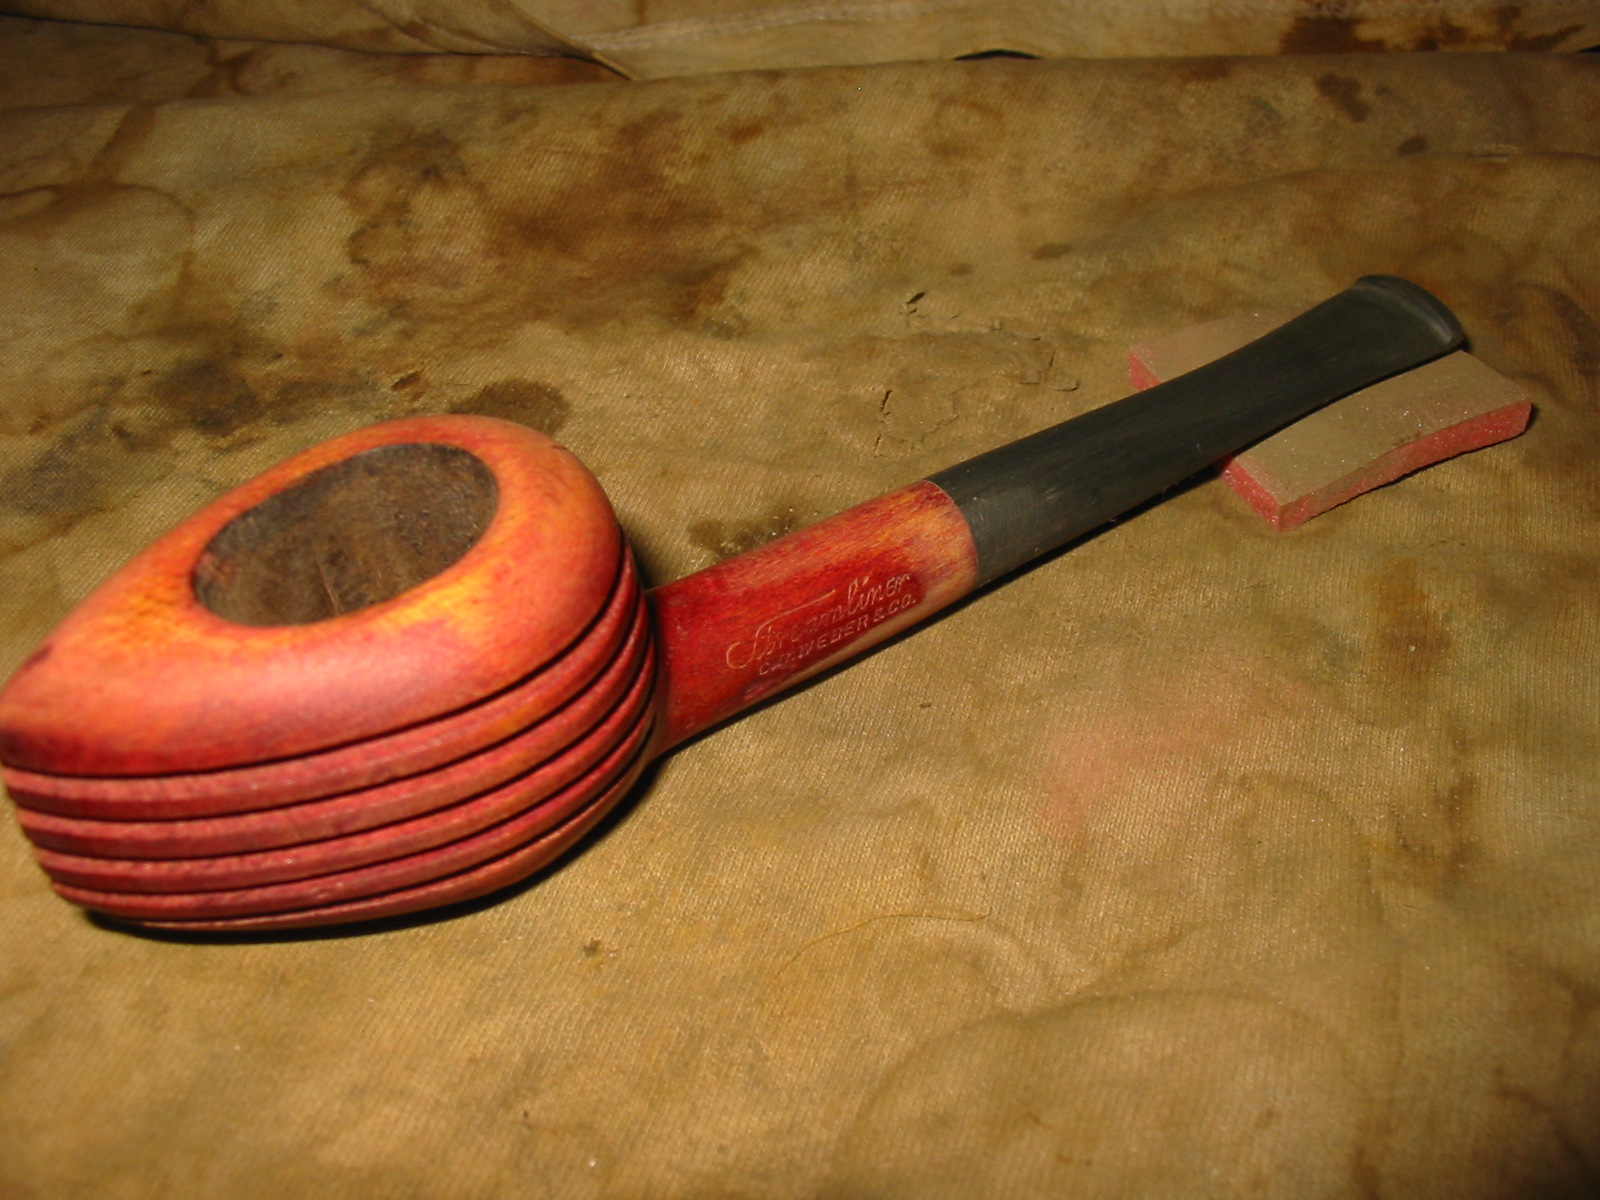
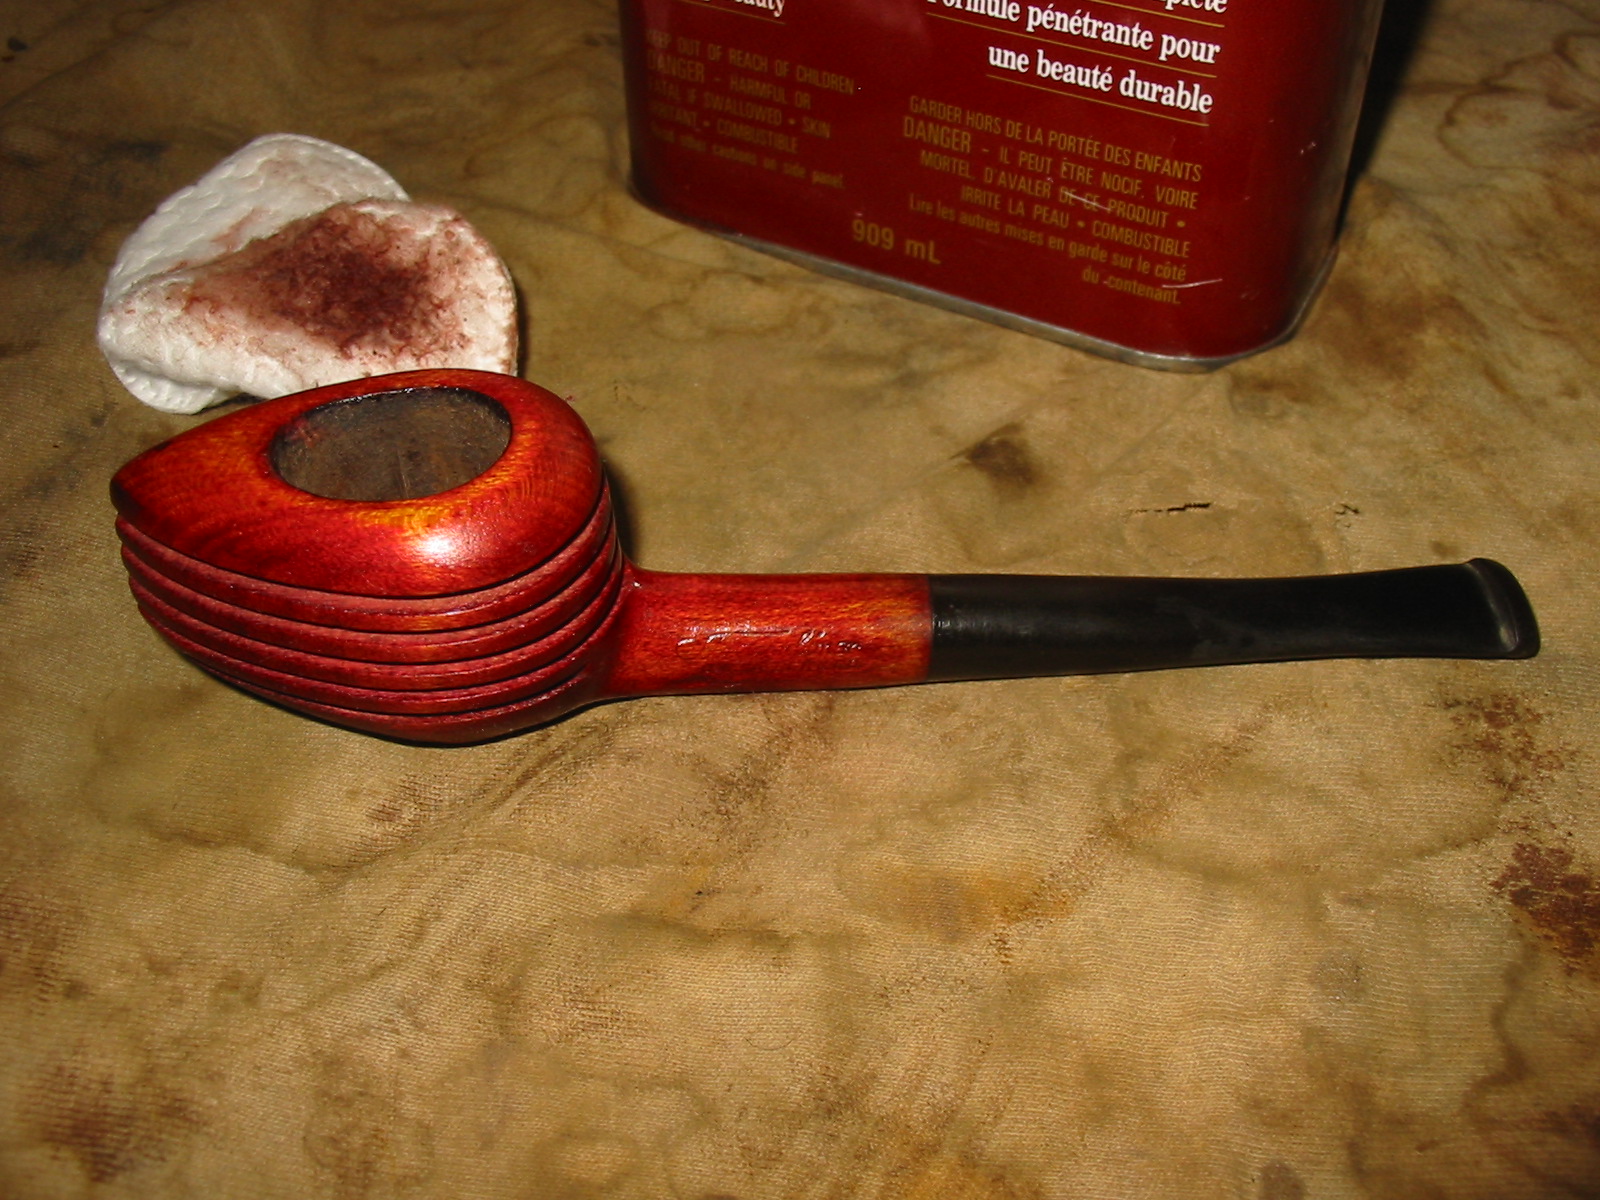
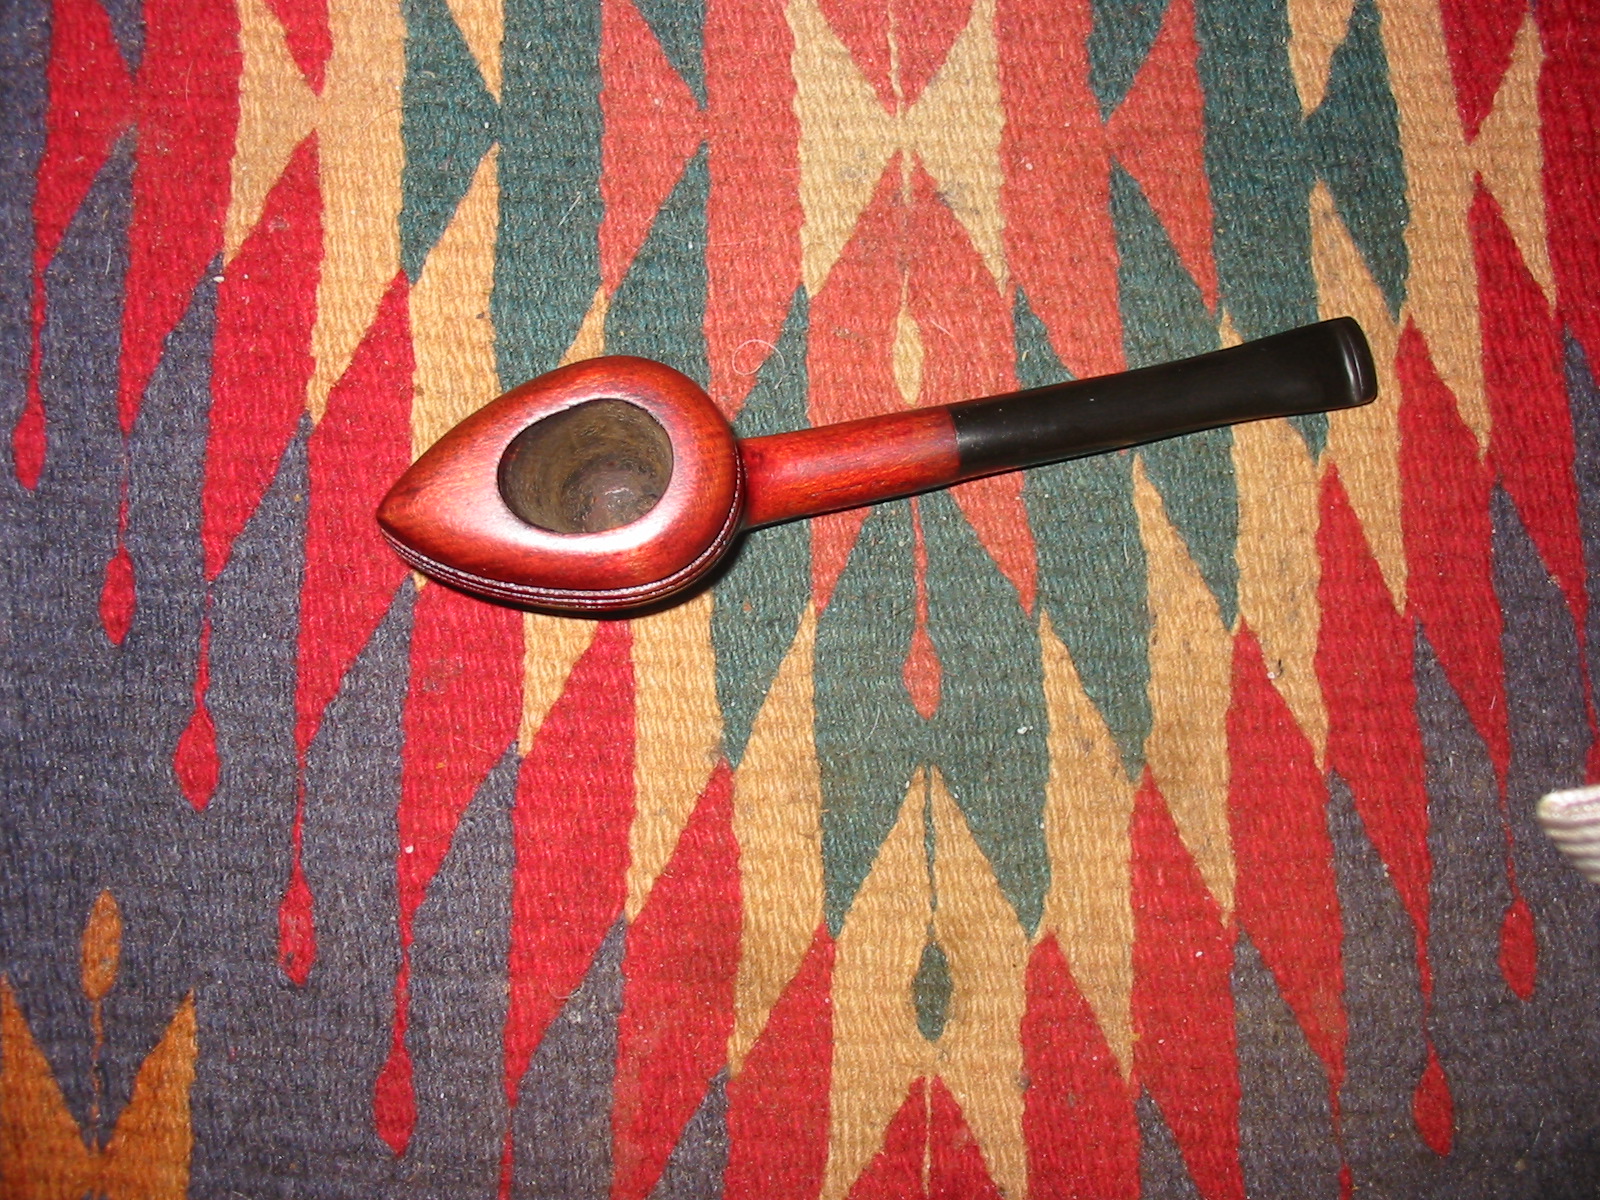
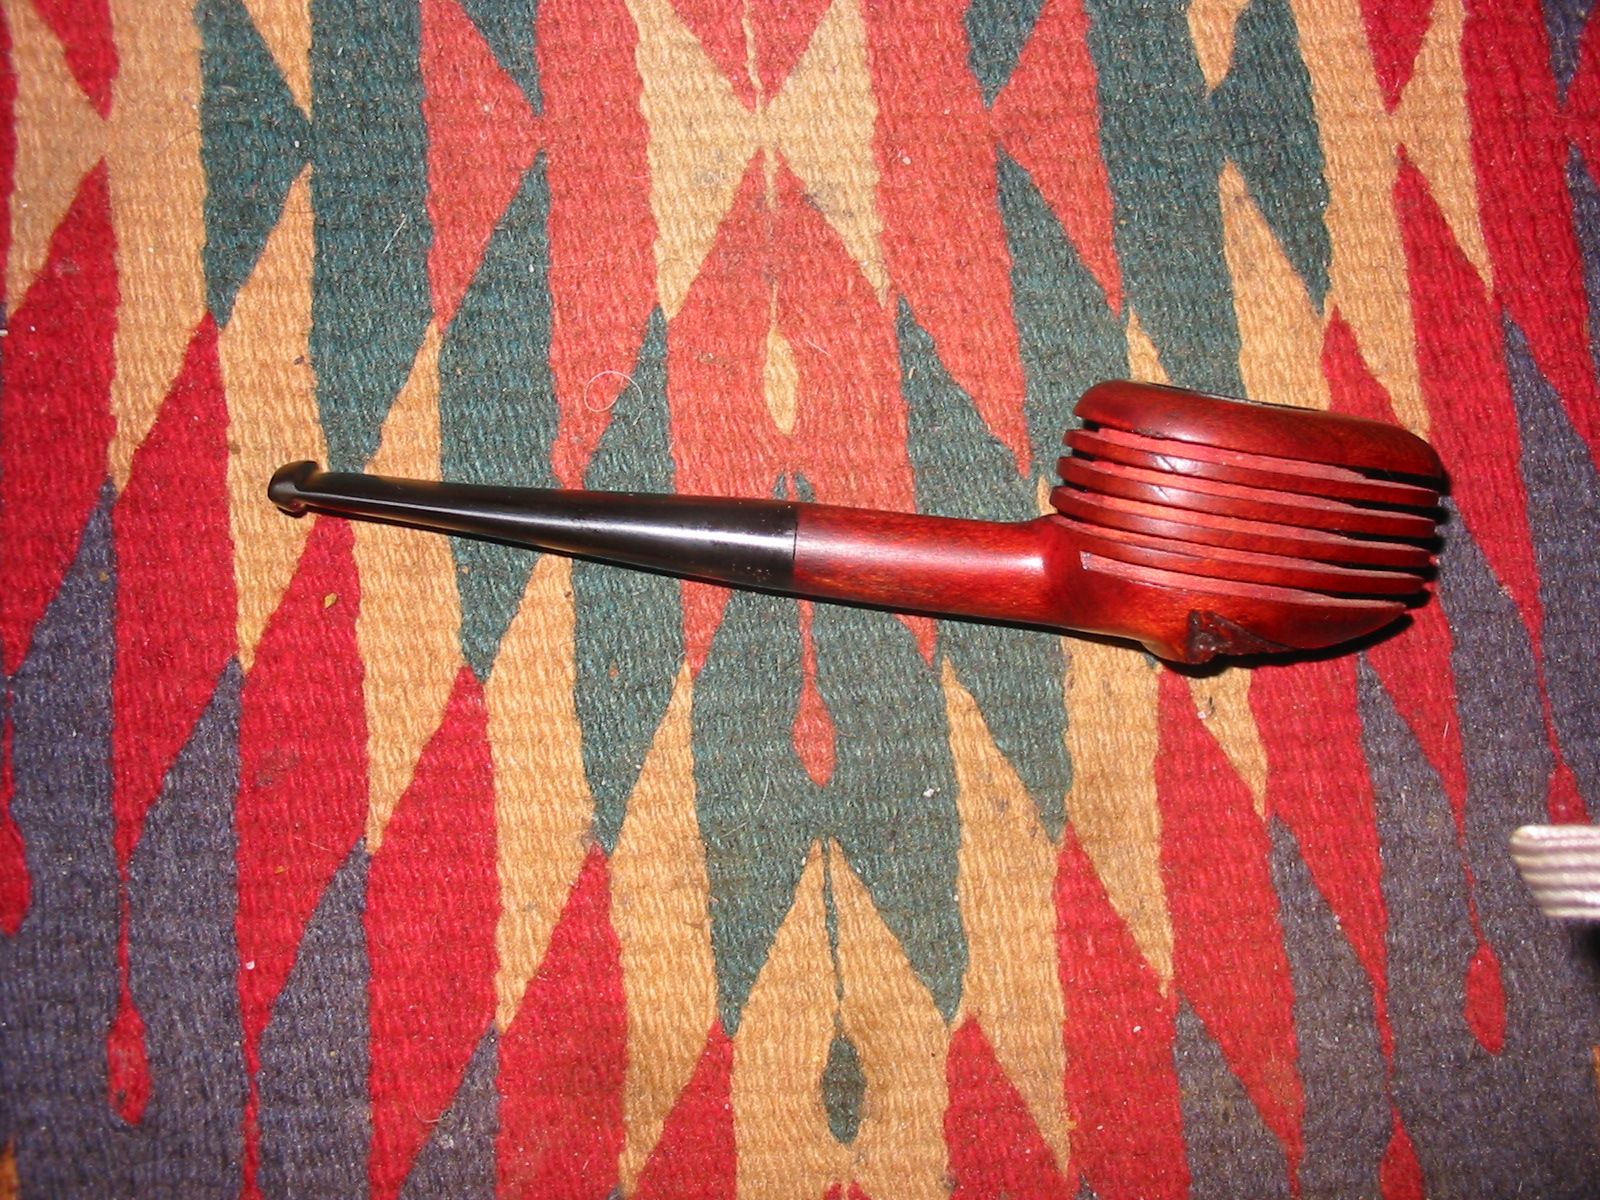
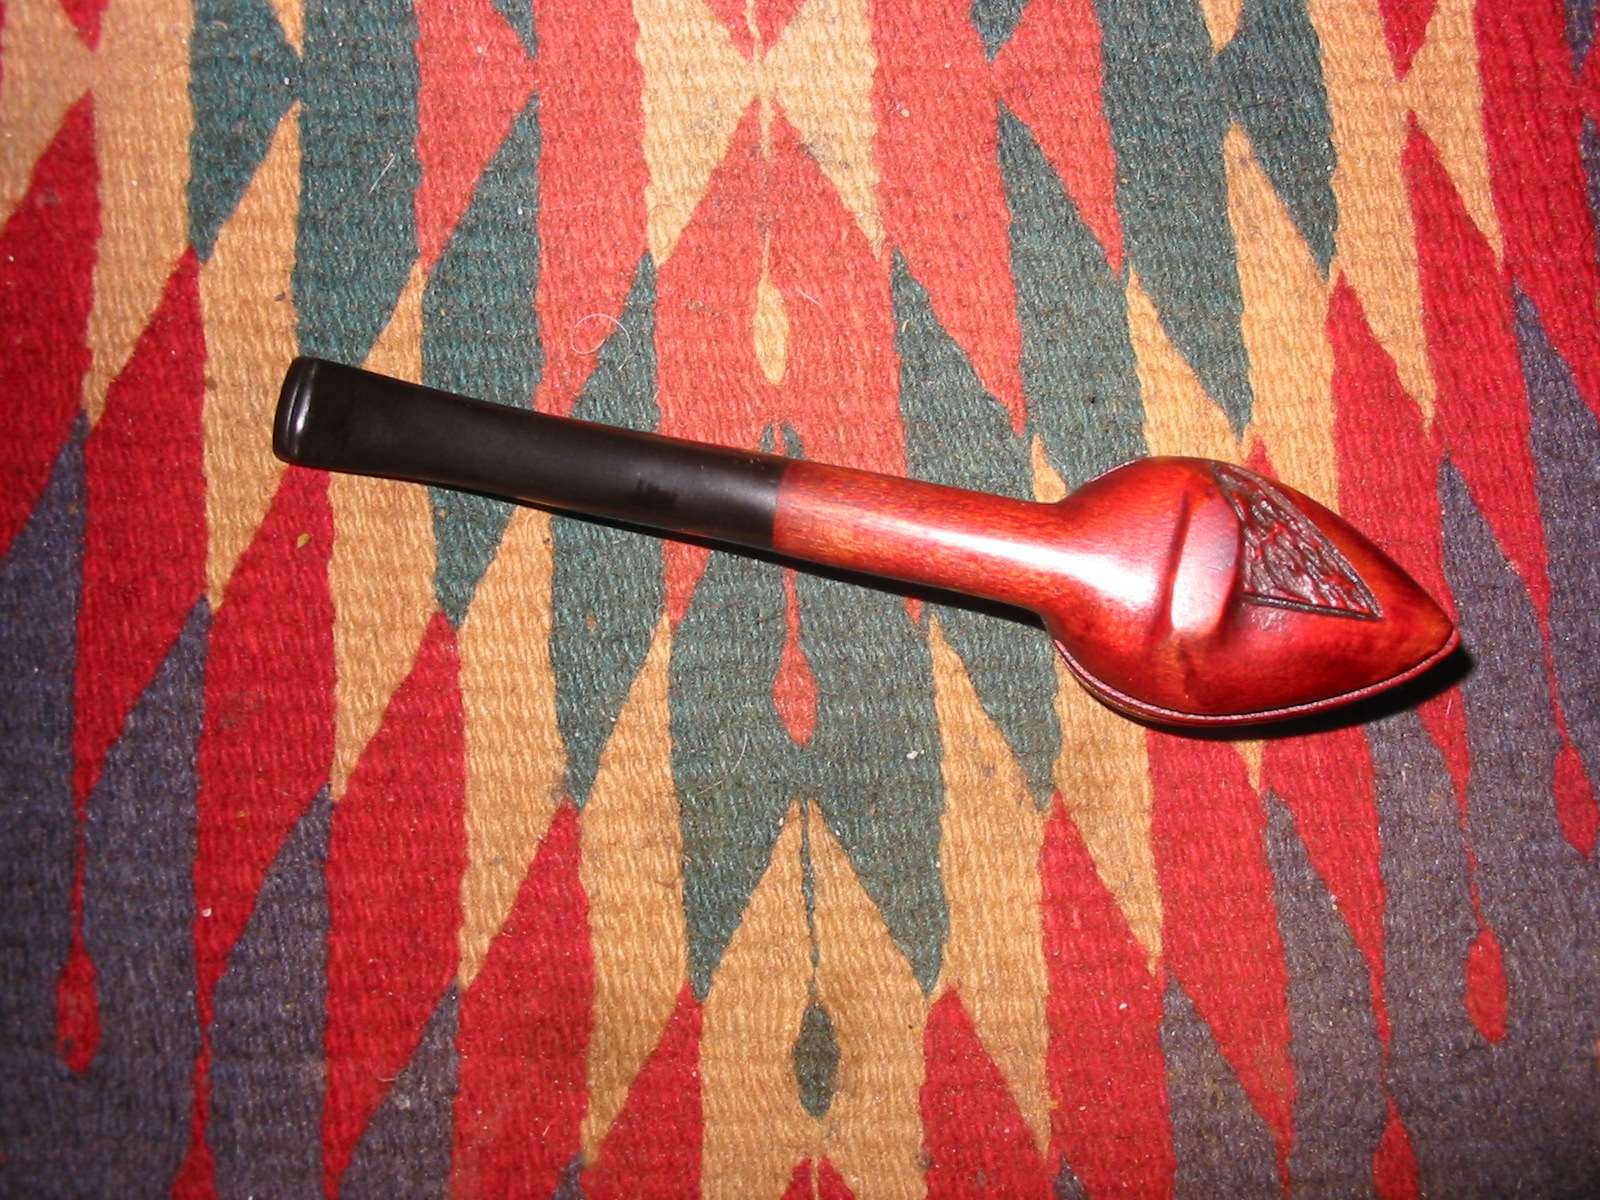
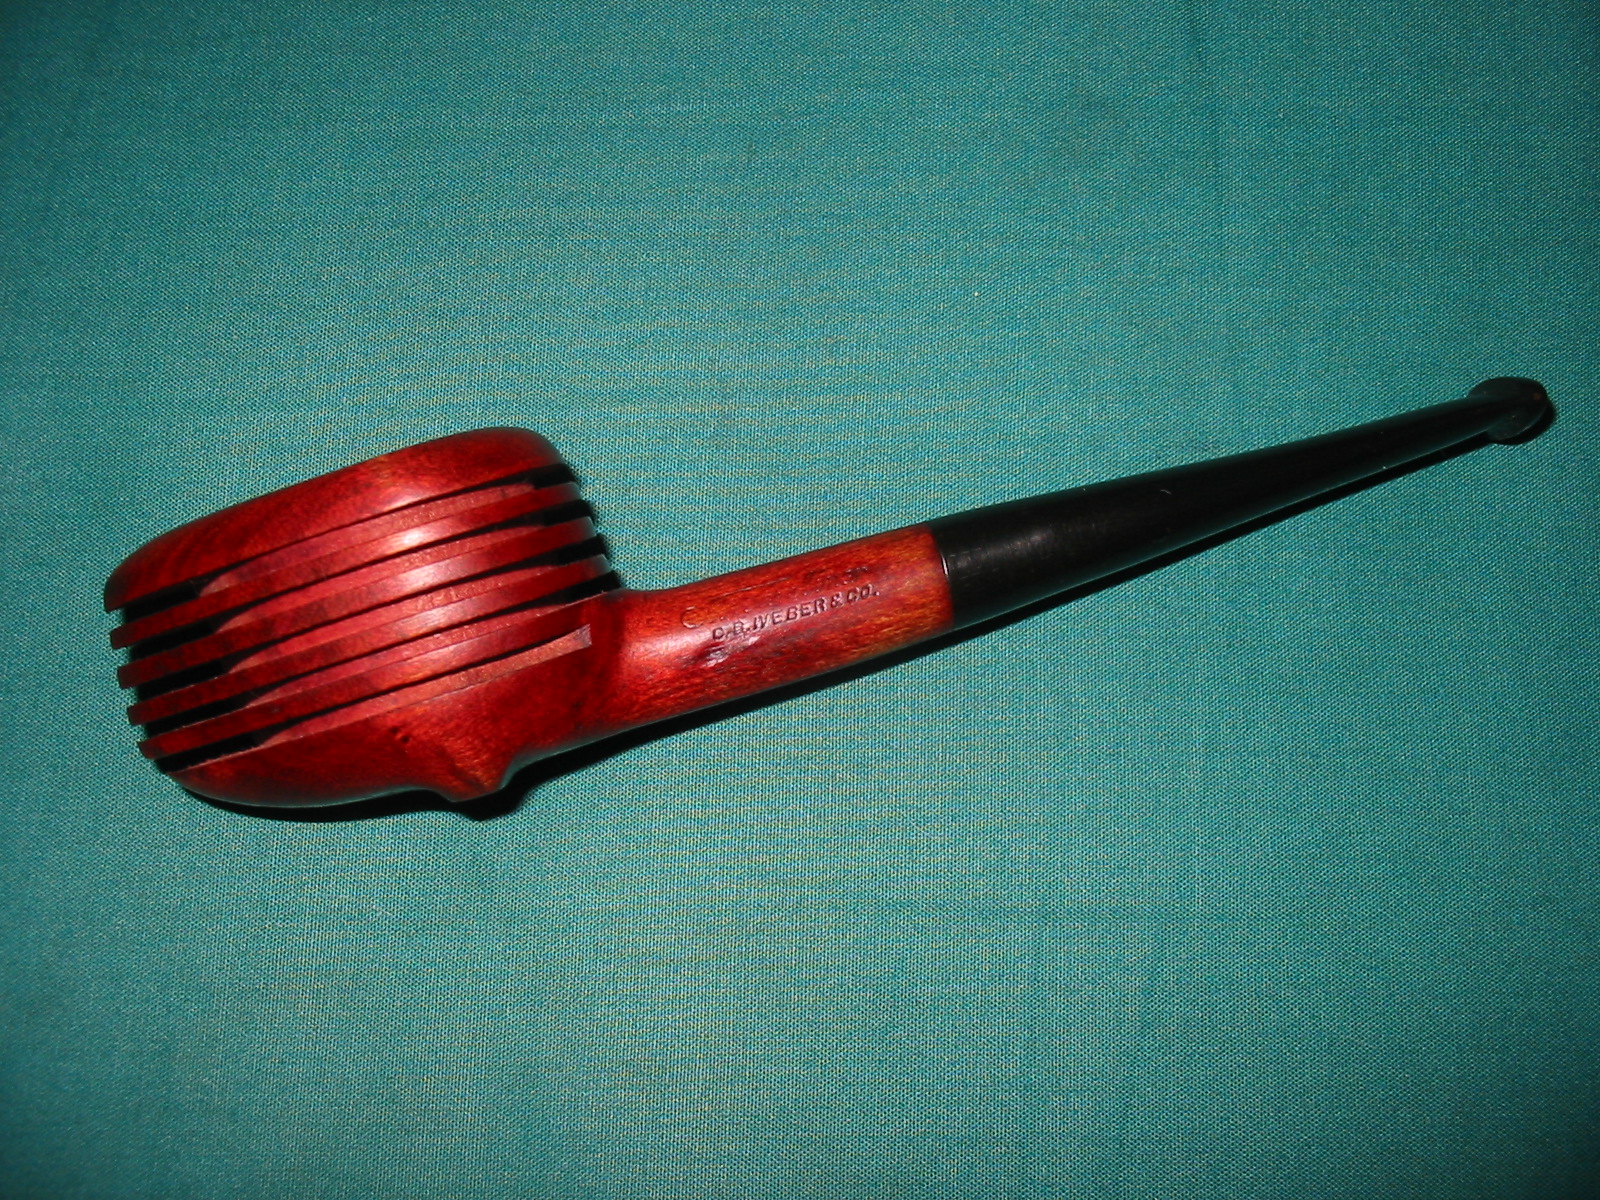
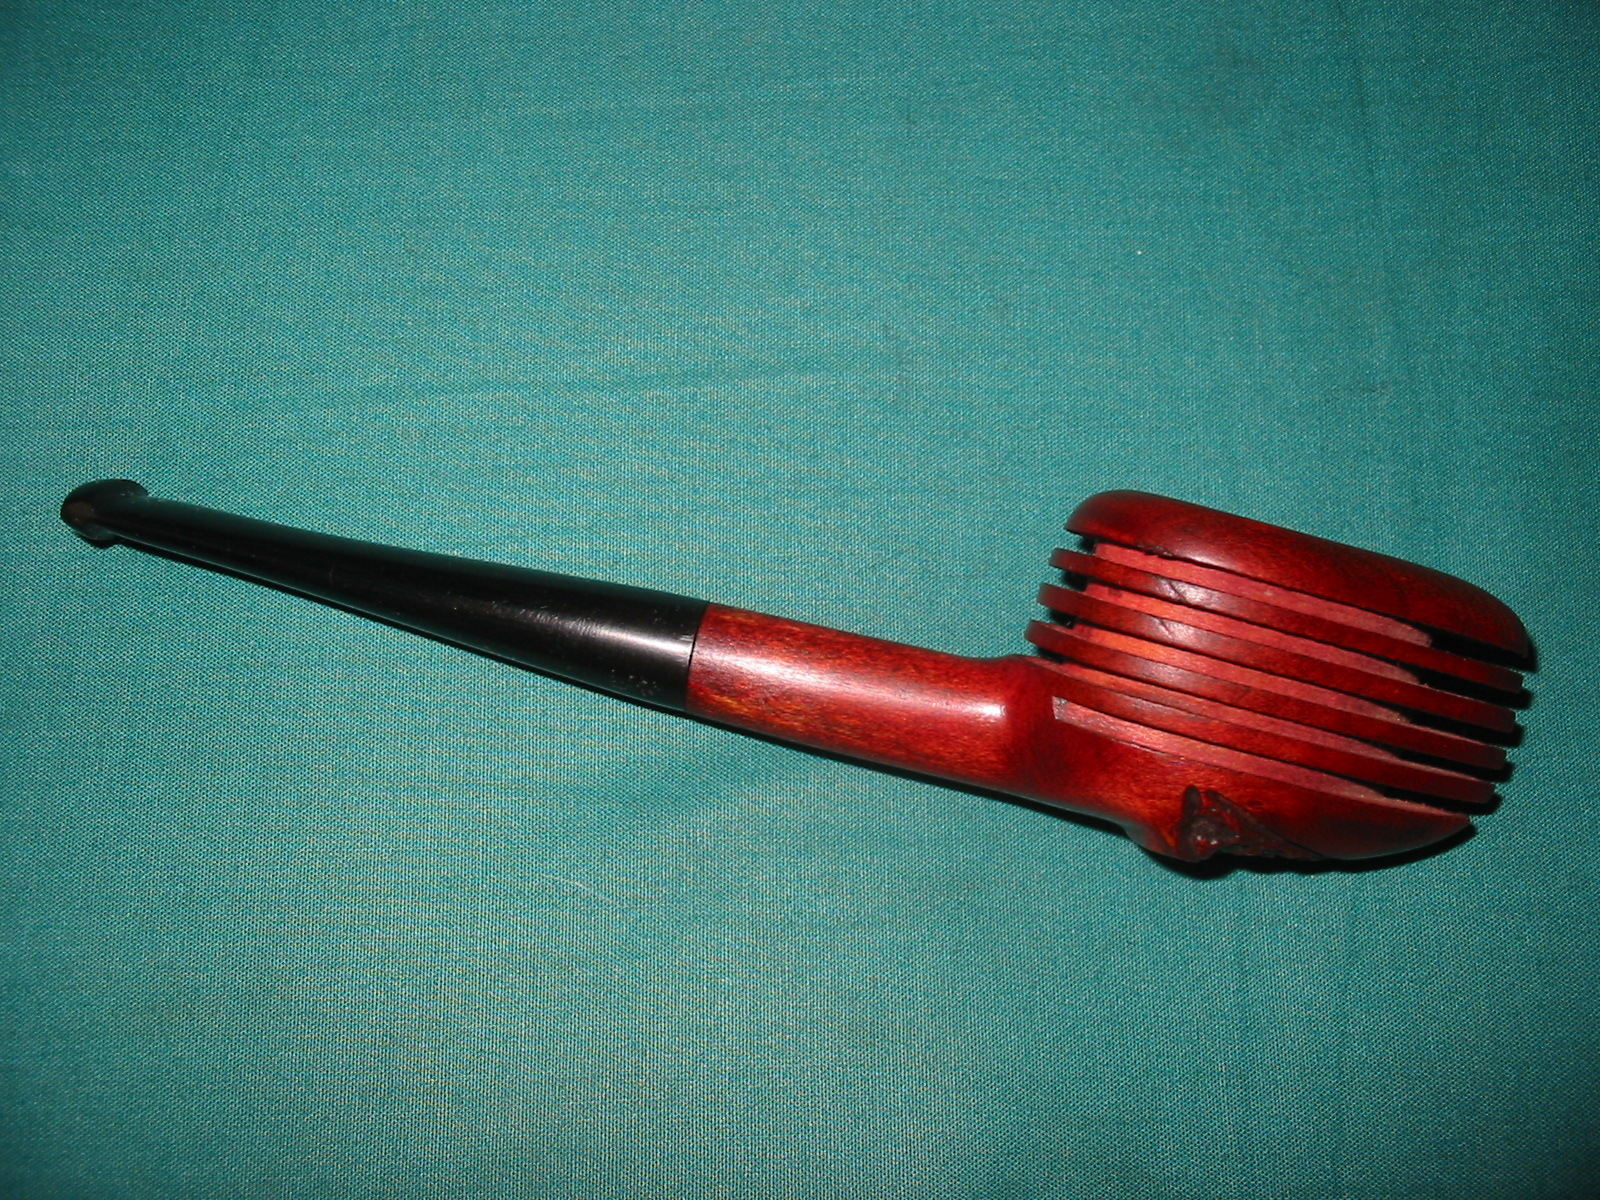
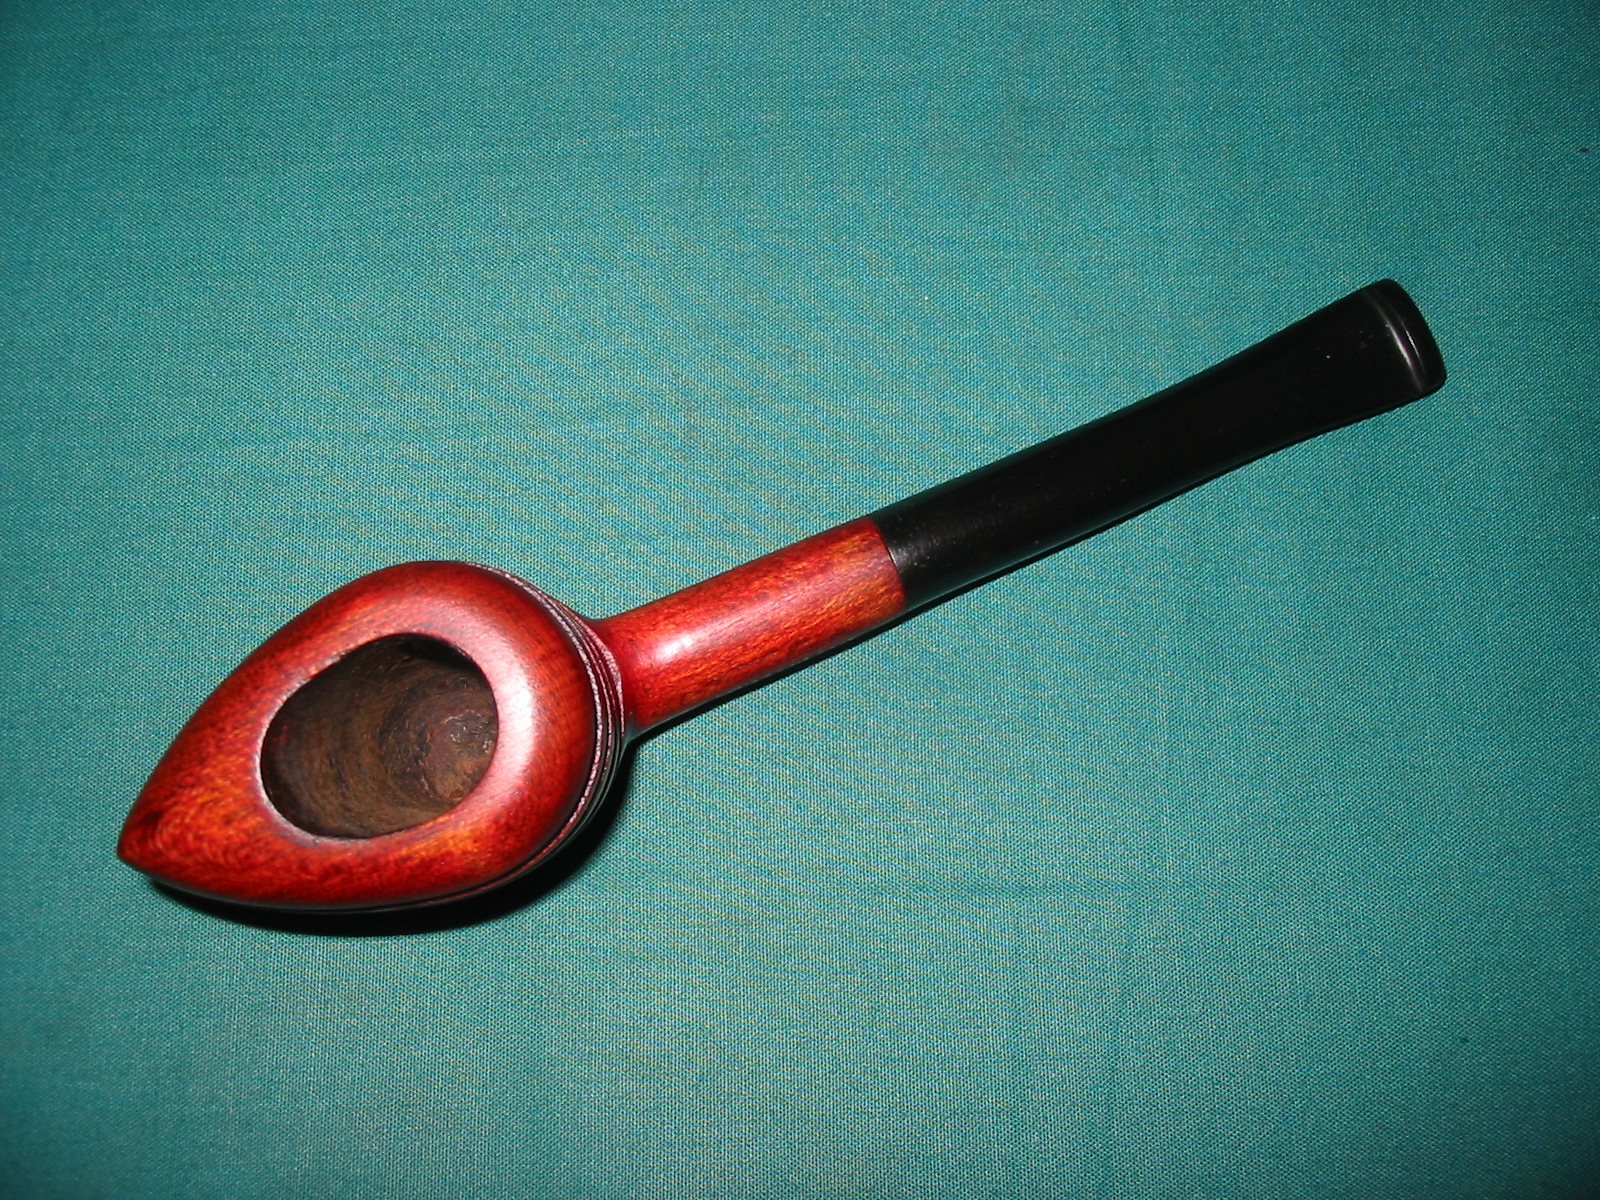
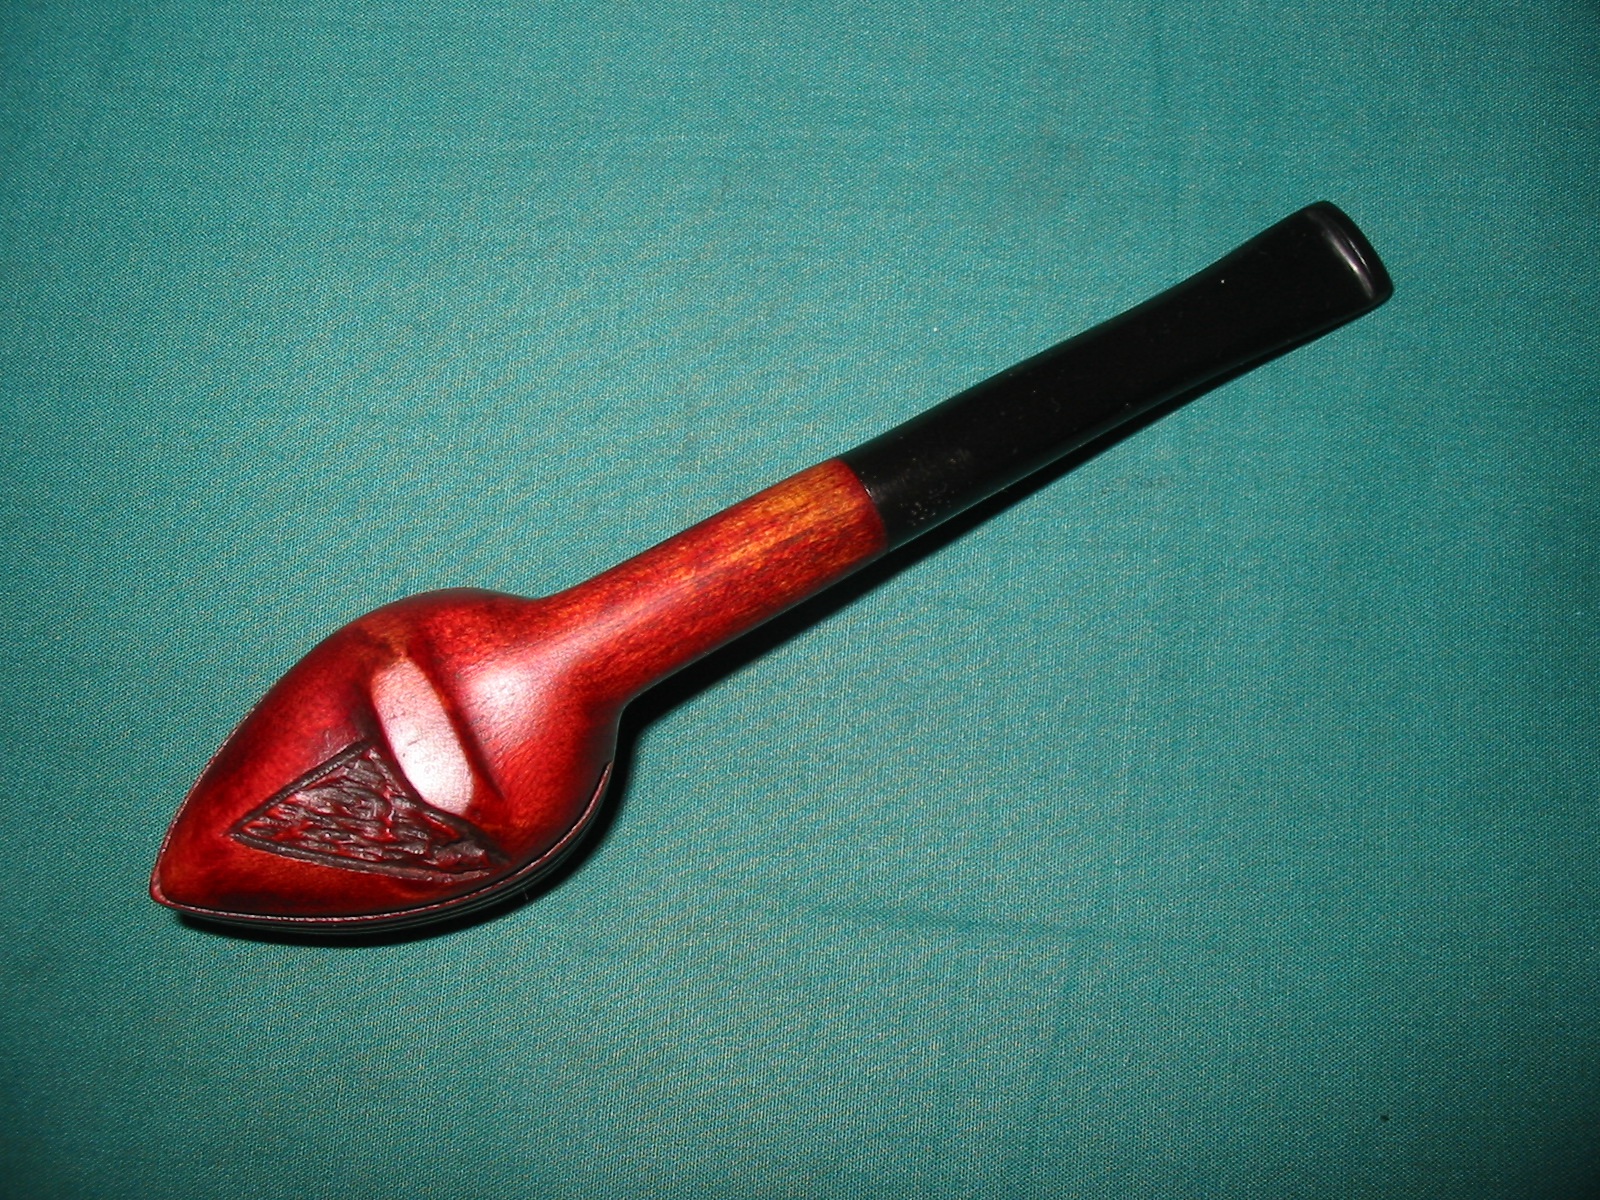
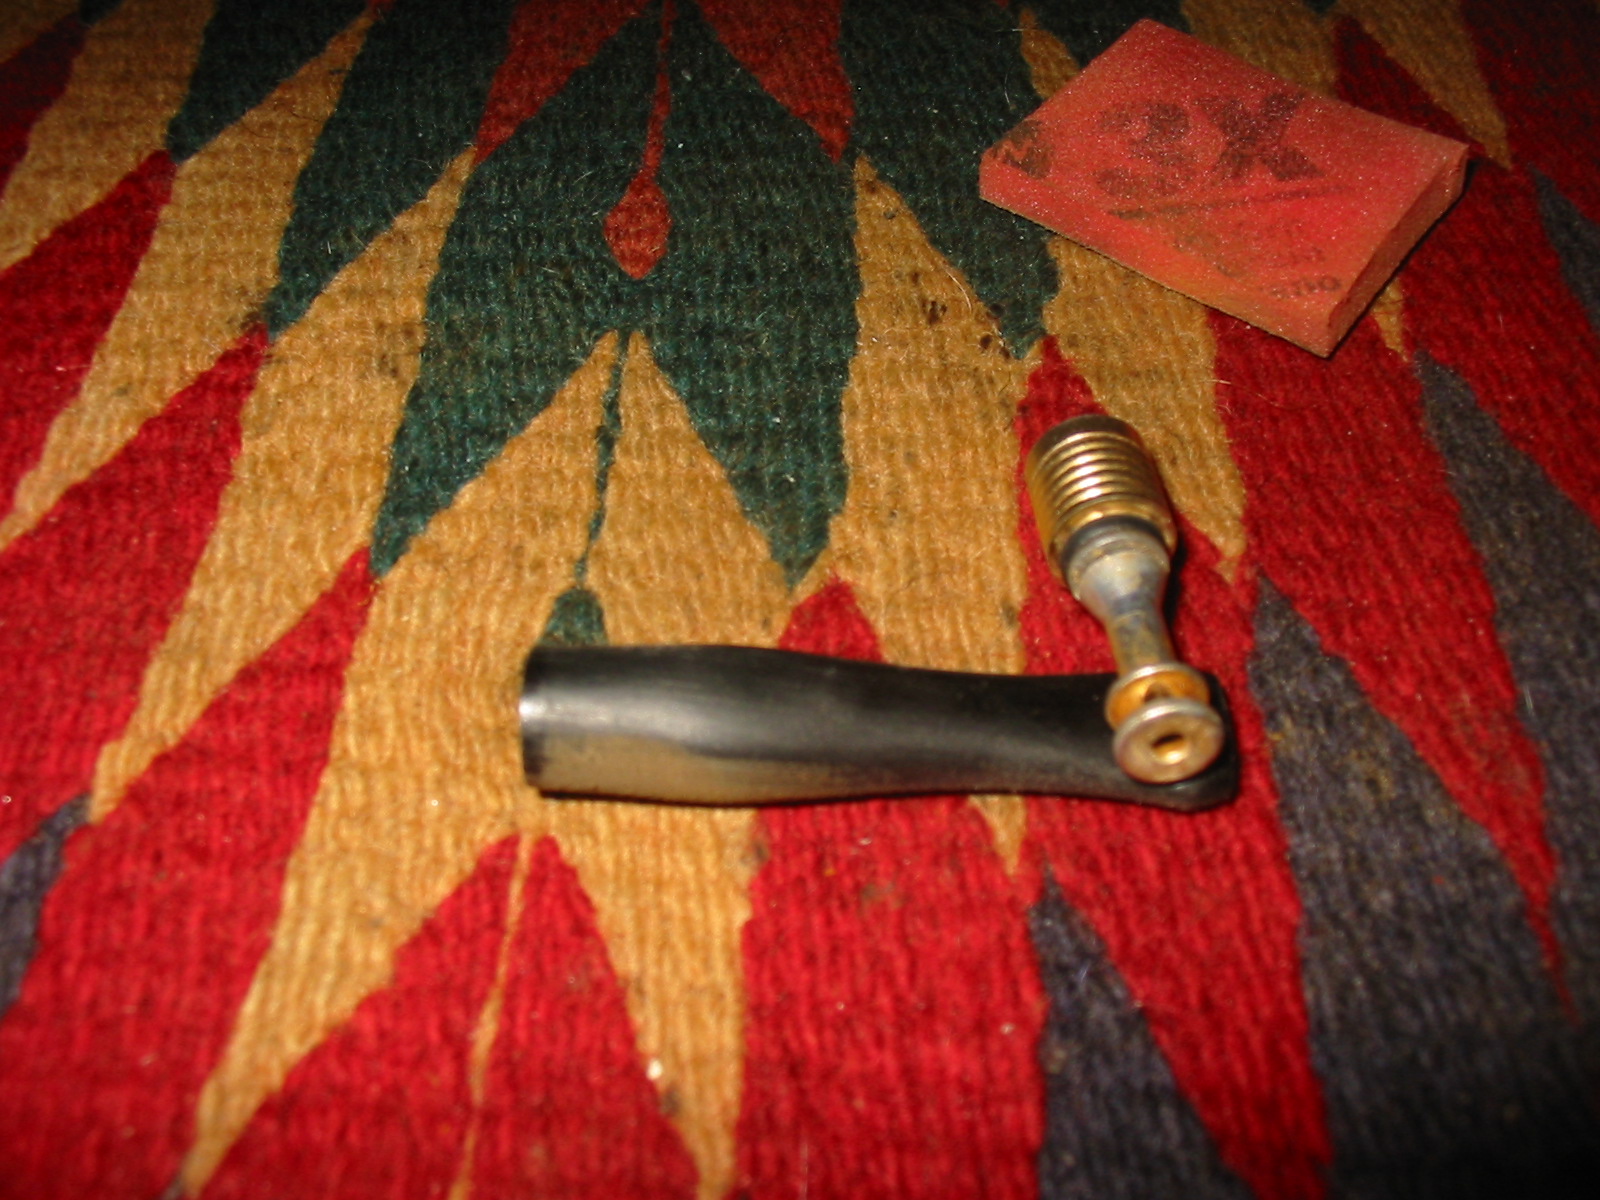
Somewhere along the way in one of the pipe lots I bought off EBay this old cigarette holder was included as a pipe stem. I put it in a drawer and forgot about it for several years at least. The other evening I was cleaning out a drawer of pipes that I had already refurbished getting them ready for my daughter to catalogue and came across the old holder. At first glance it appeared to be a cigarette holder. There was no filter apparatus present and the mouthpiece was short and condensed so I did not think there would be one inside the stem itself. I sanded down the casting marks on the side of the stem and also cleaned the stem of debris. There was one burn spot on the underside of the stem near the metal holder end. The metal holder was brass and quite clean with a slight nicotine and tar build up on the inside. The airway on the stem was plugged and no air could pass through it.
IMG_3182

IMG_3183

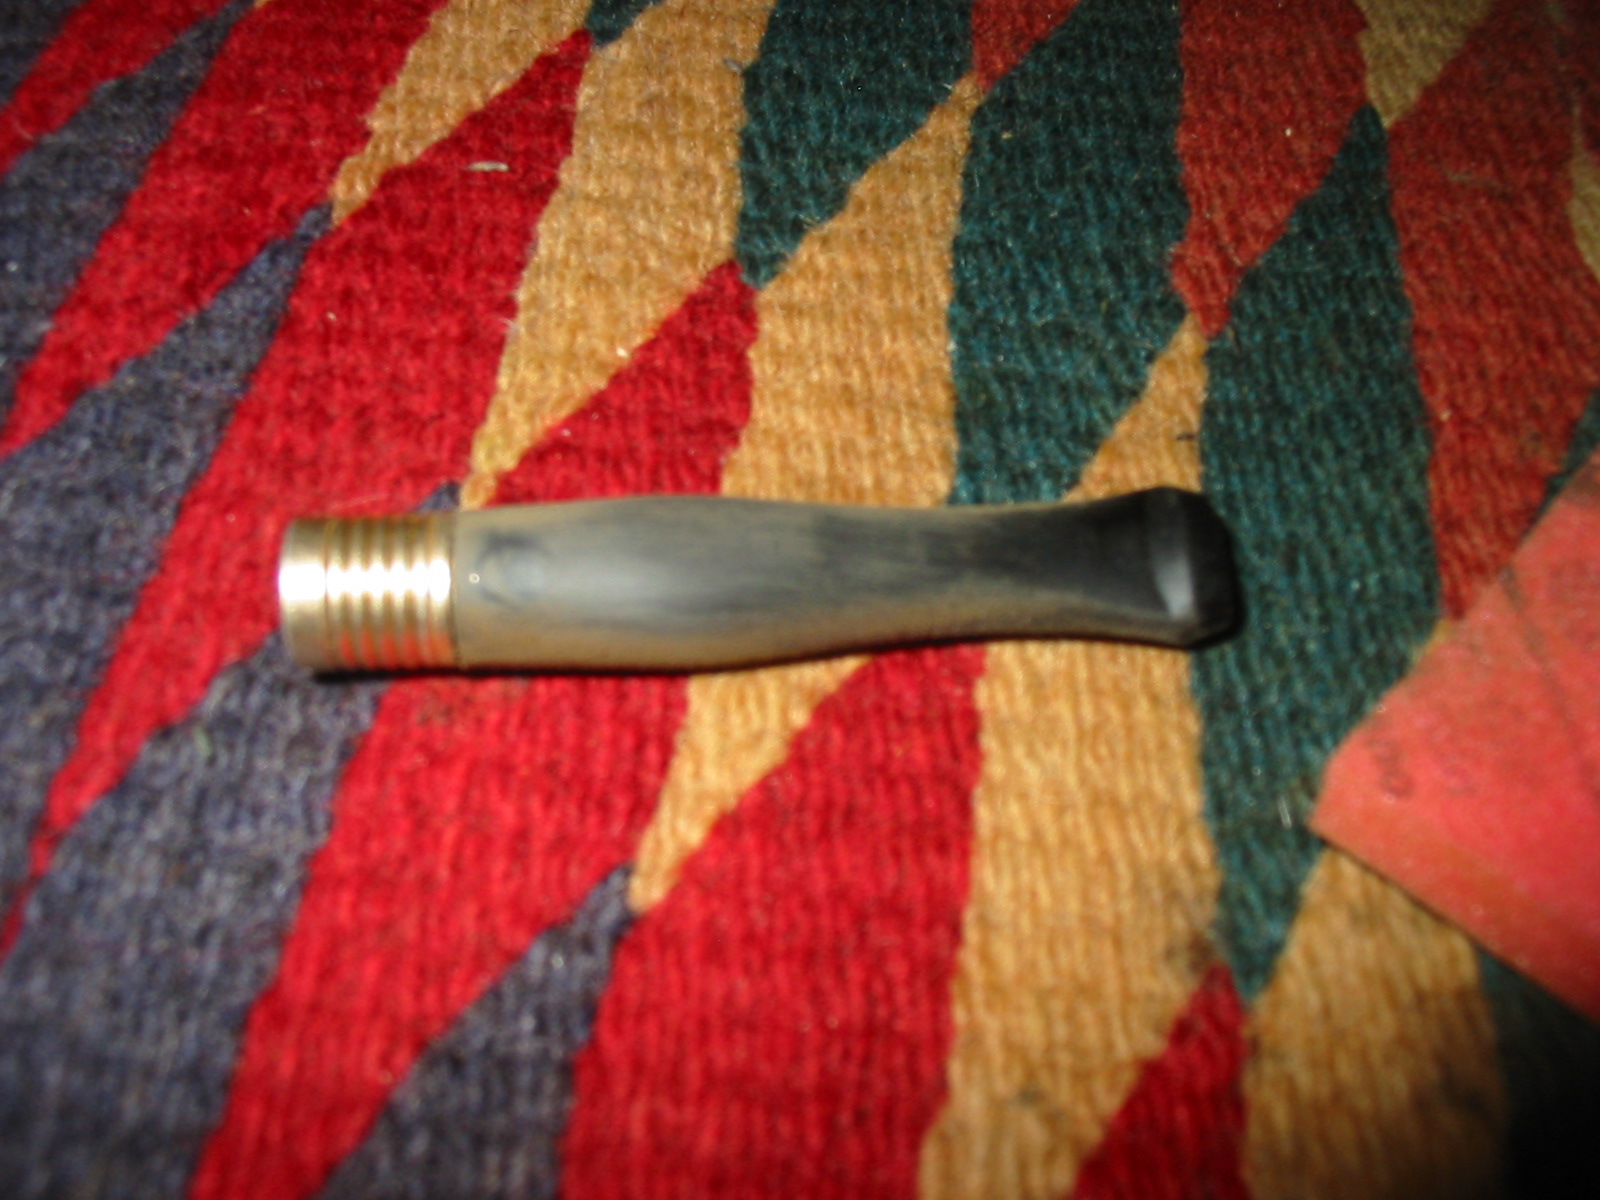
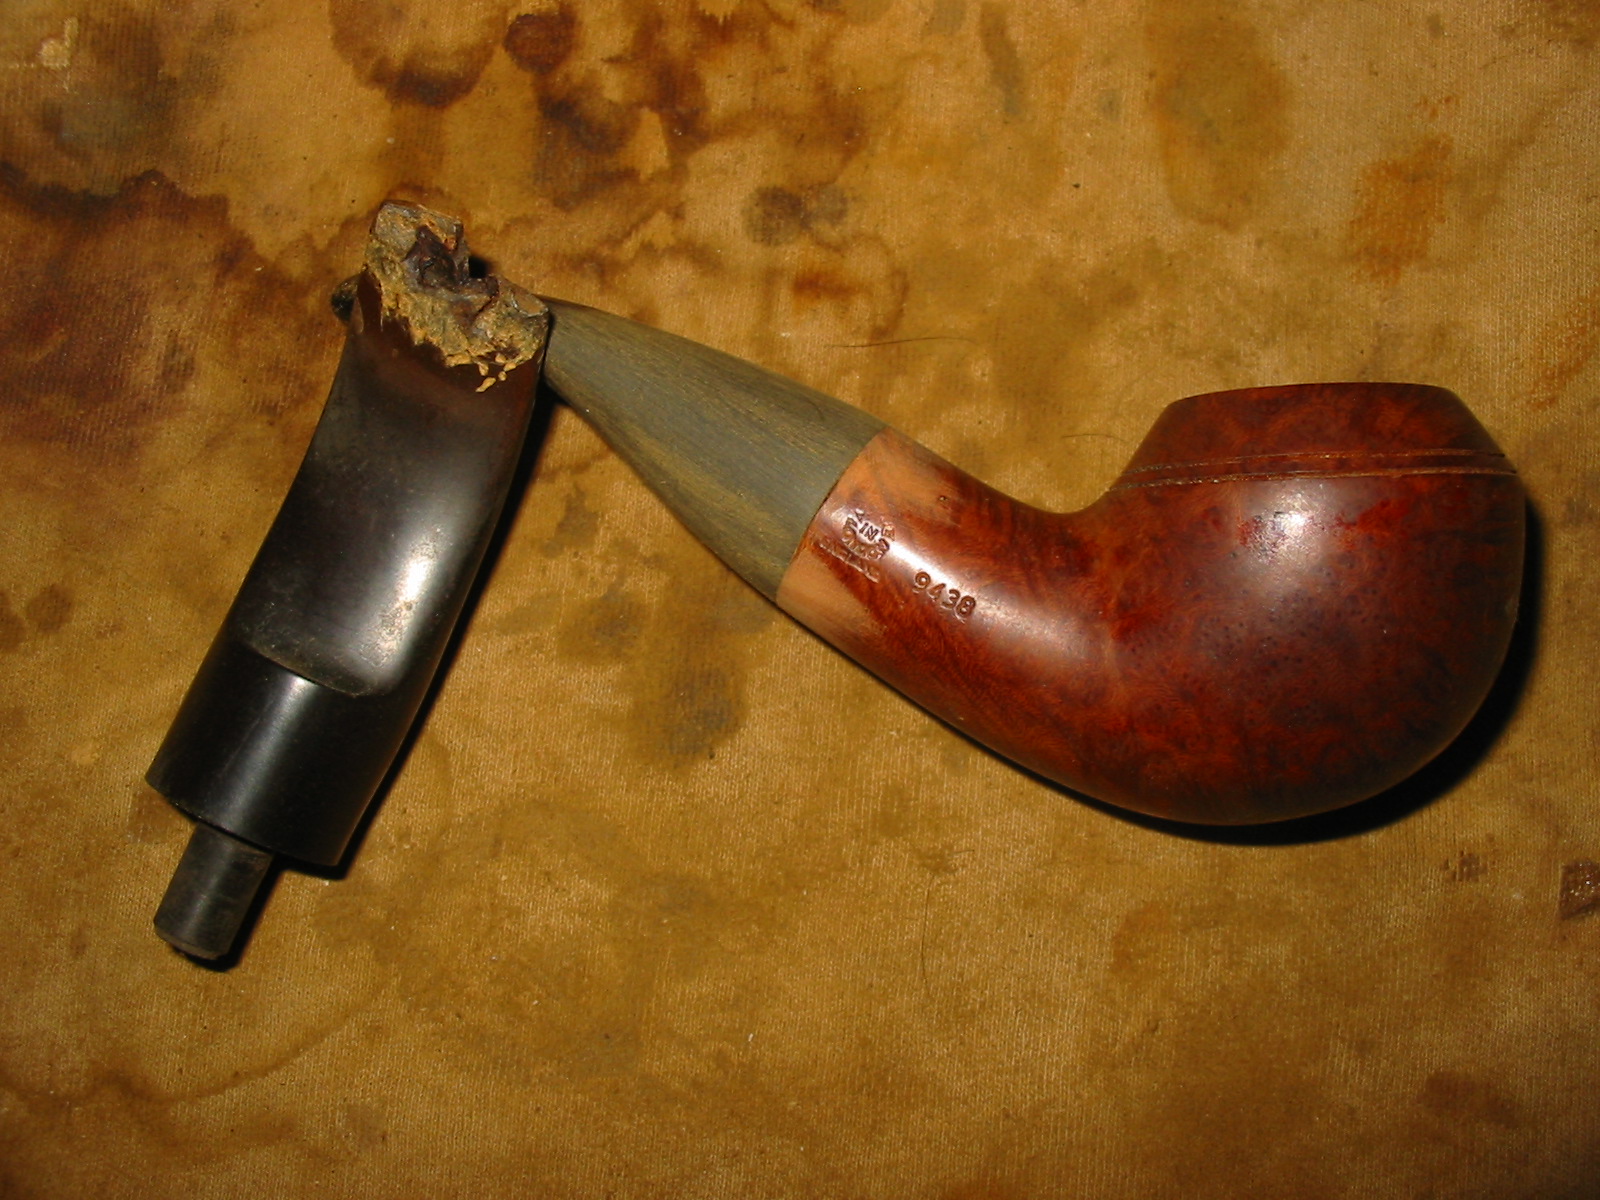
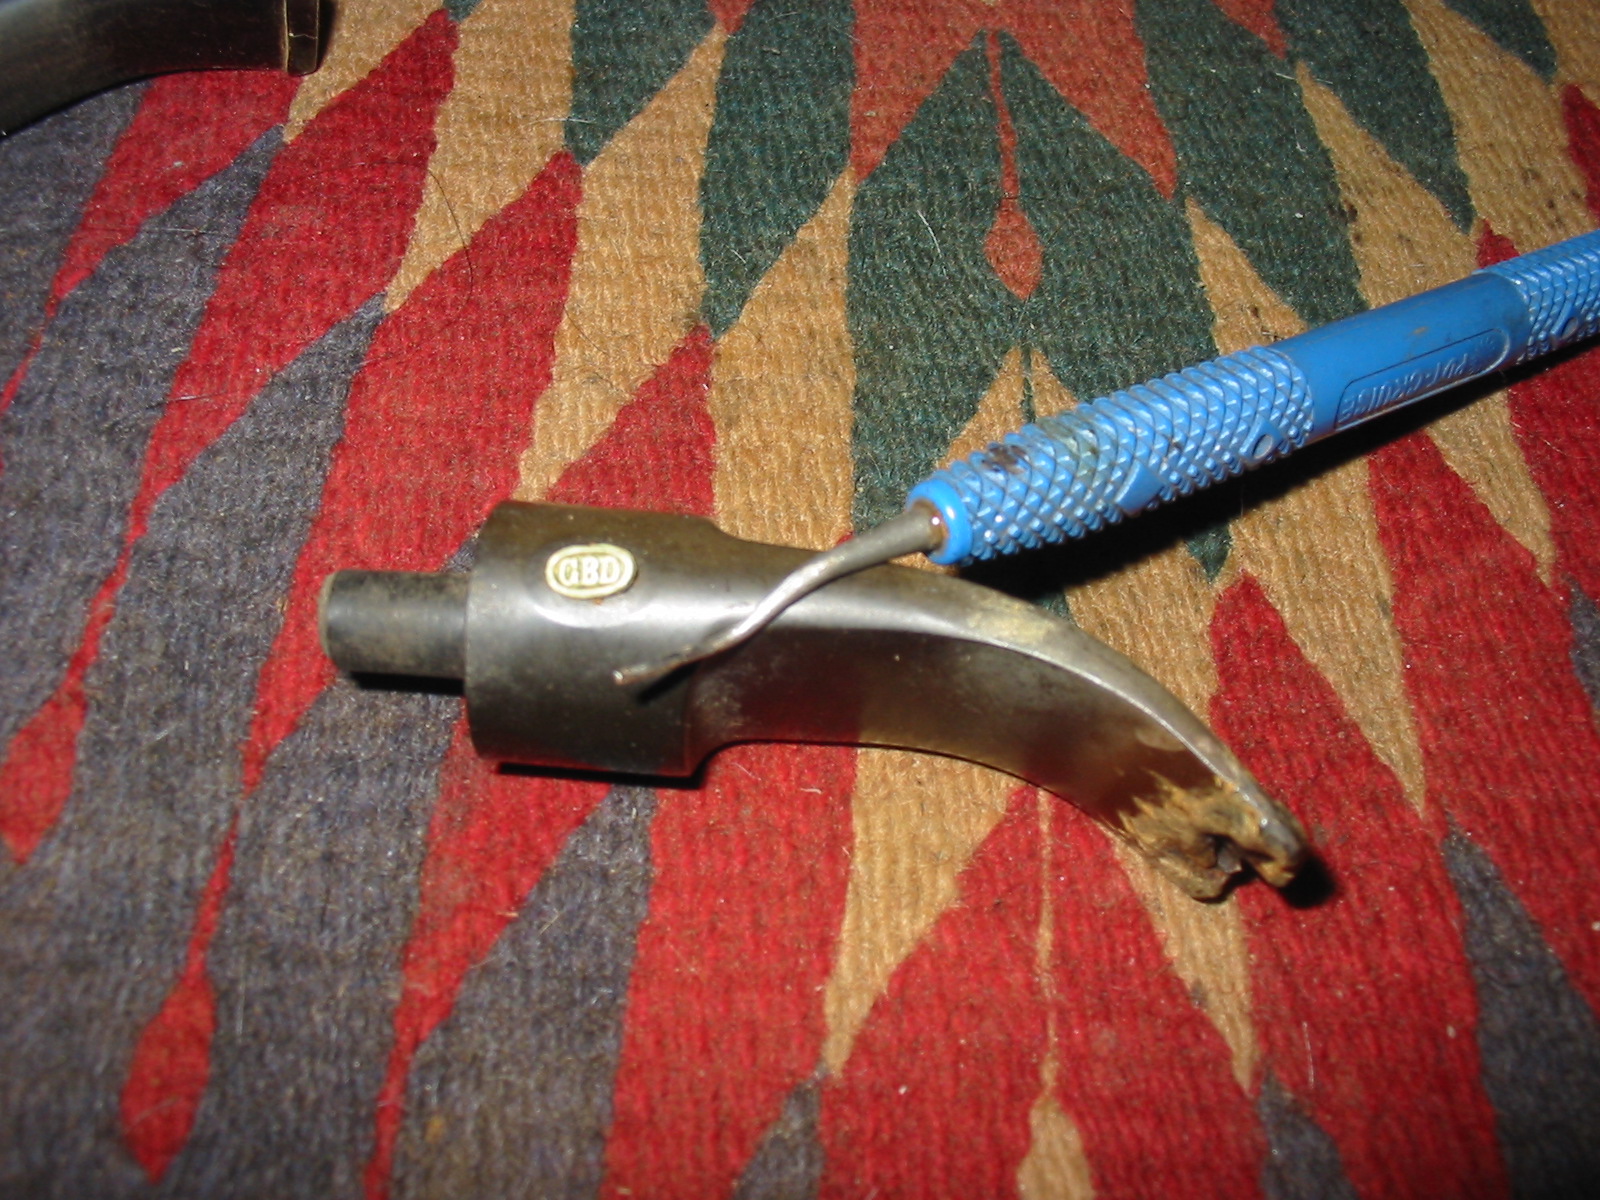
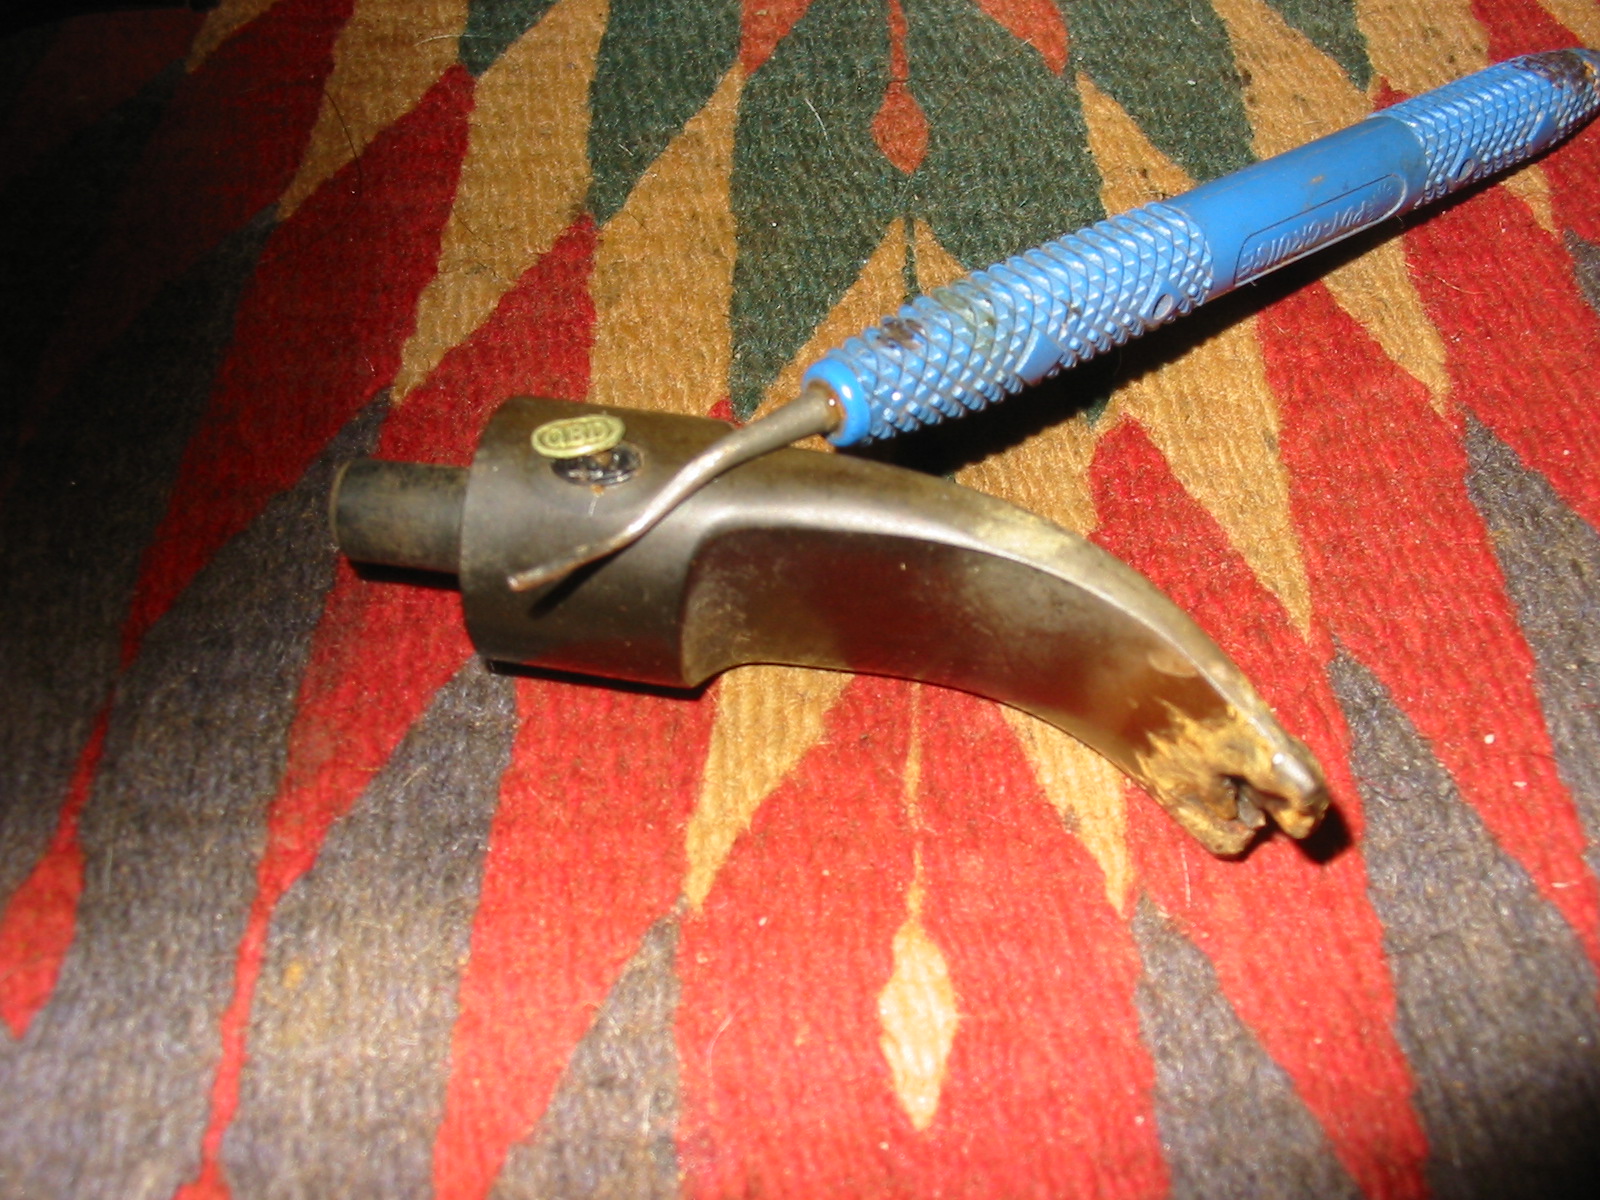
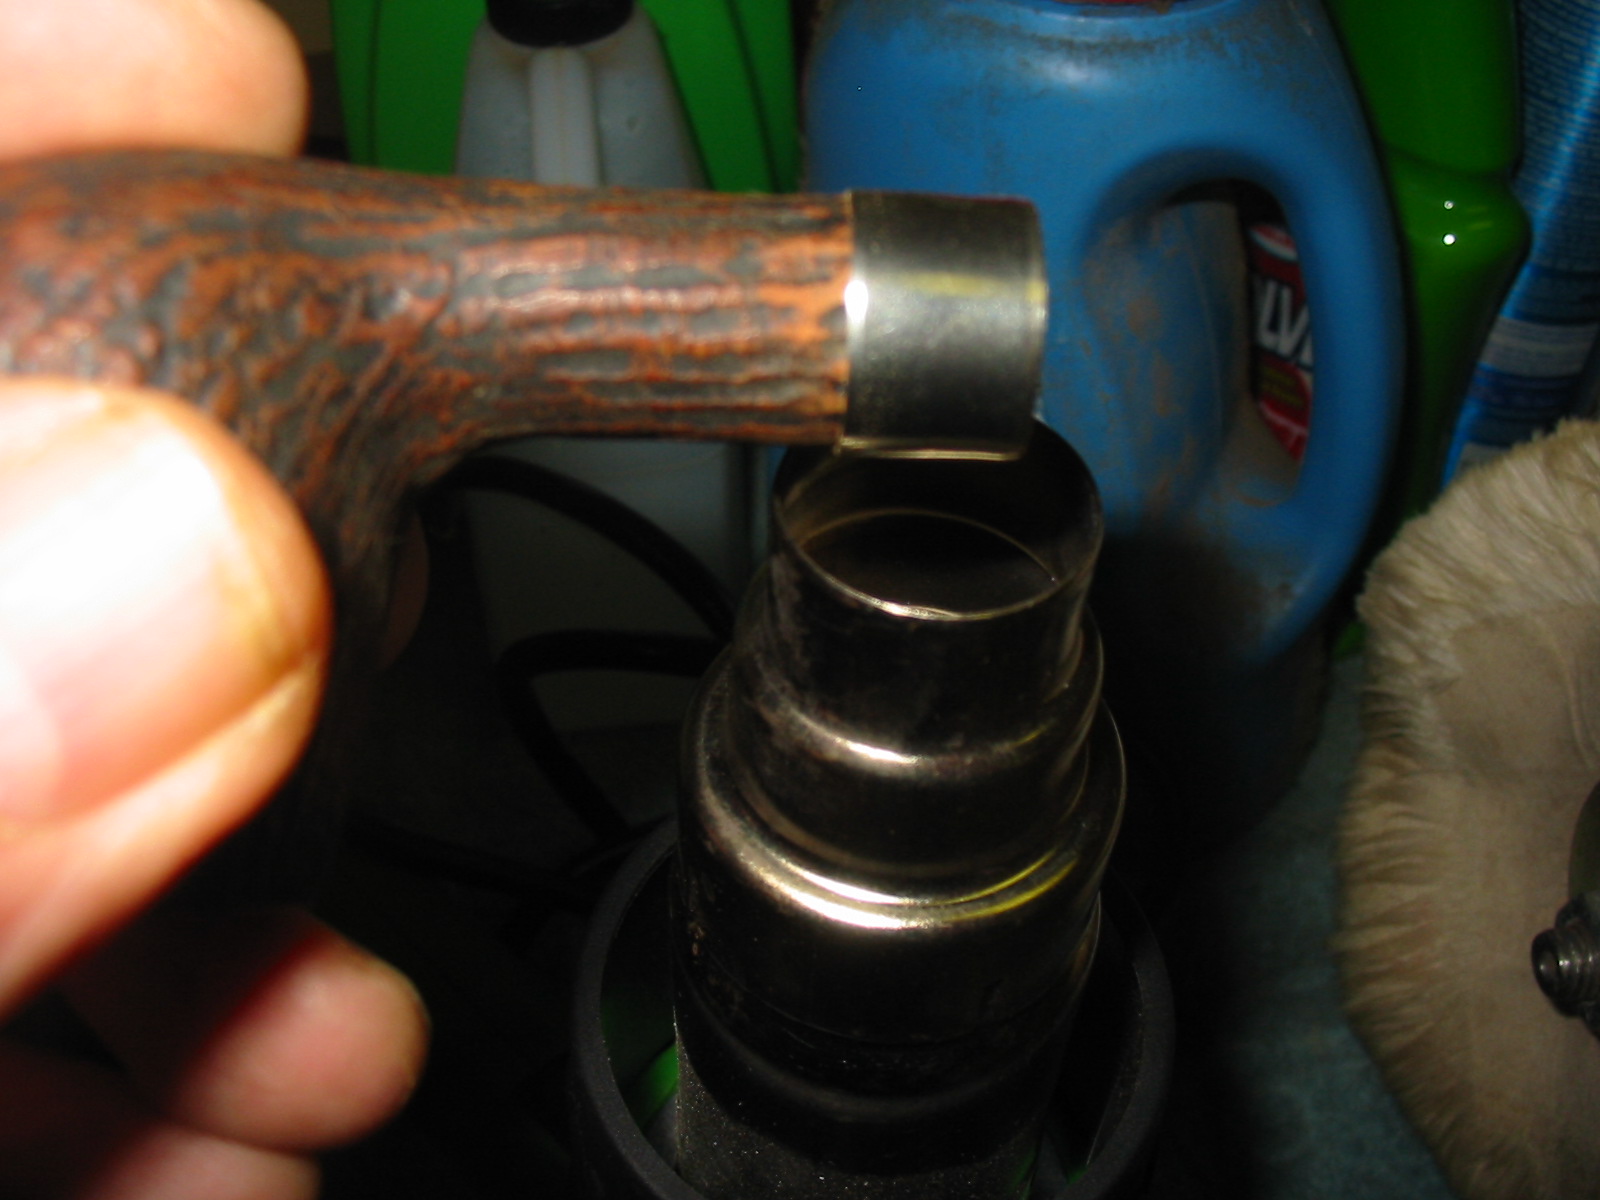
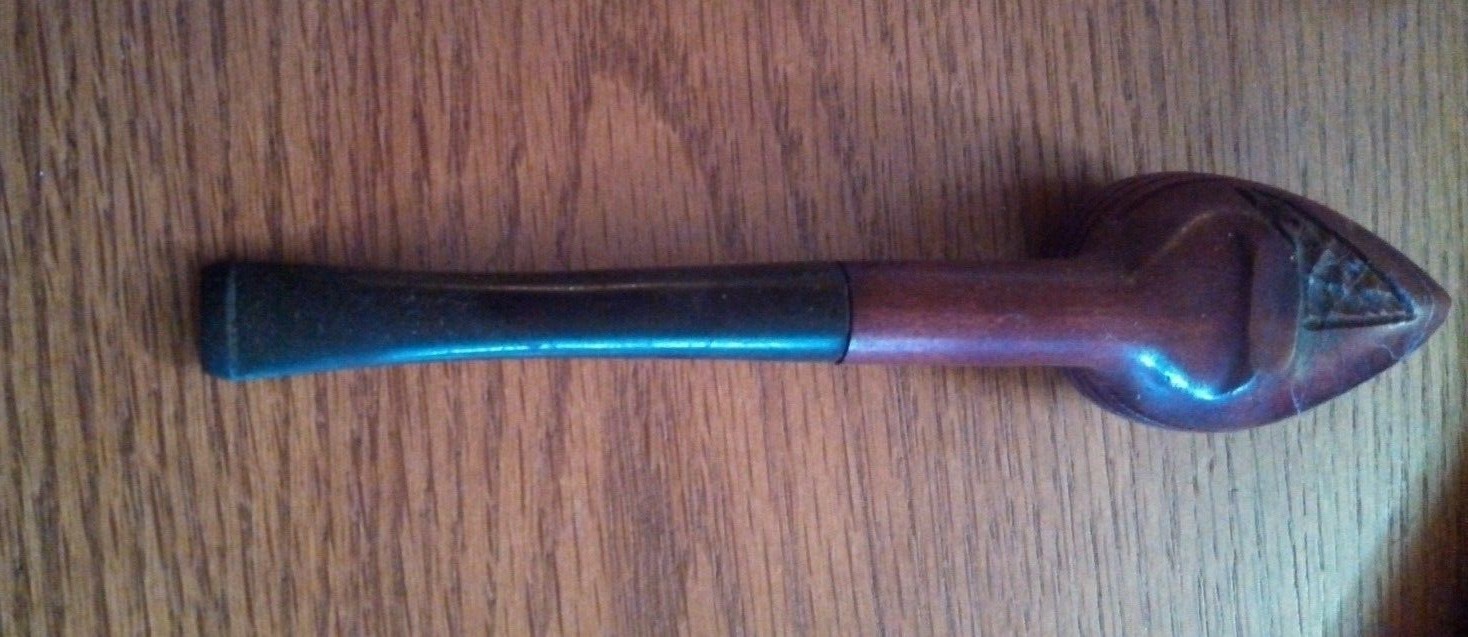
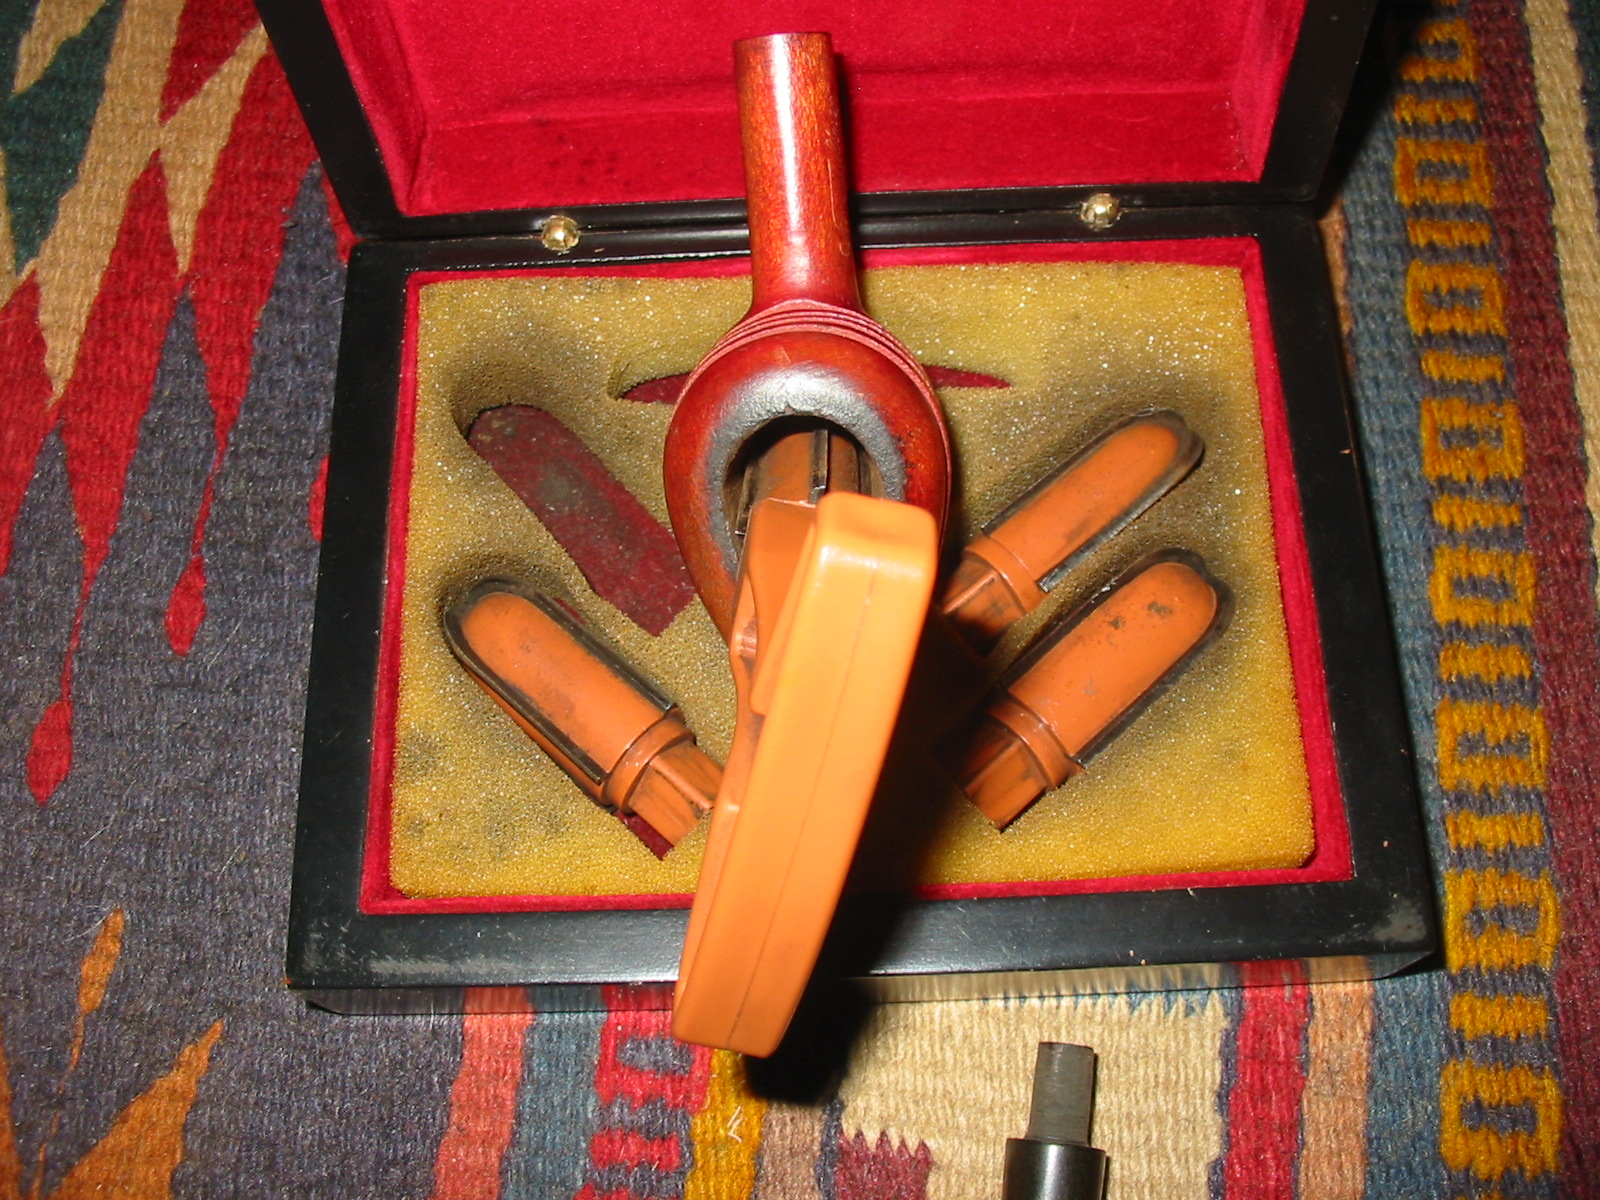
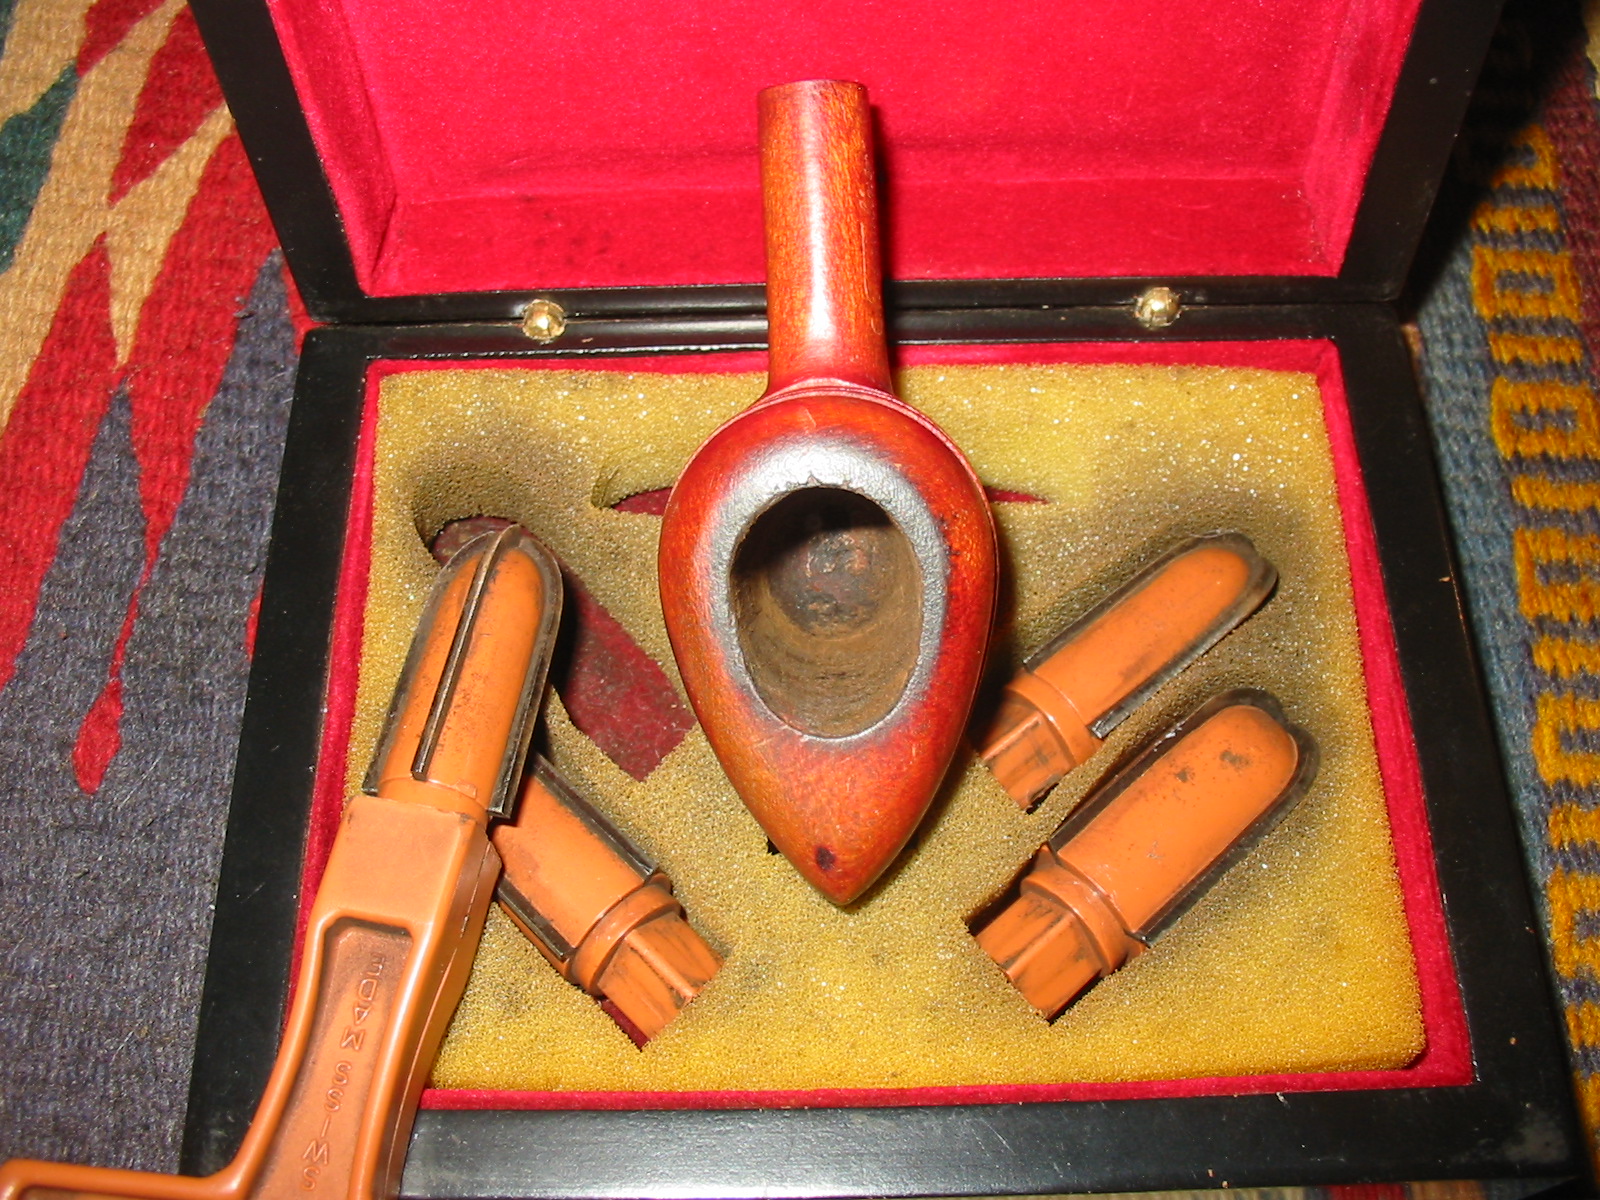
I twisted the end cap and it came free from the stem itself. Inside was a filter apparatus similar to the different stingers that one finds in American made pipes of days gone by. This apparatus was a single unit. There was a rubber o-ring around the top just below the holder top. This held the cap unit snugly in place in the stem.
IMG_3181

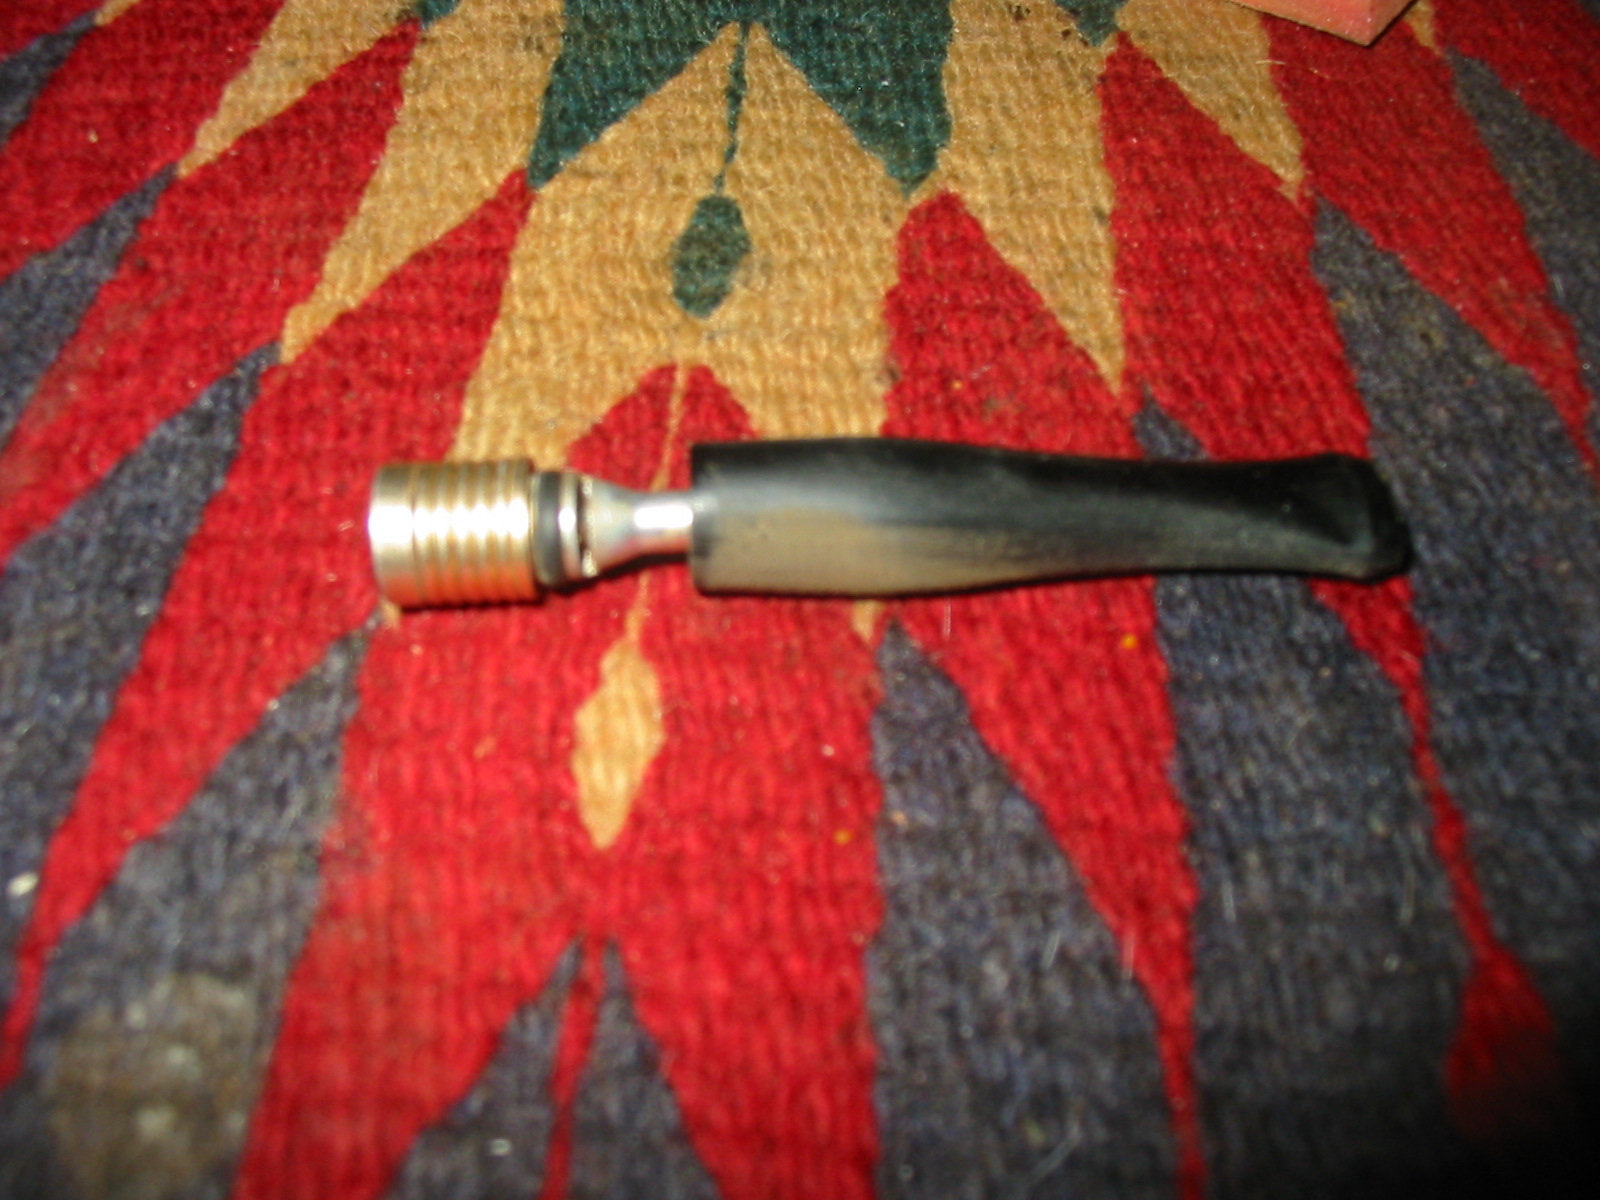
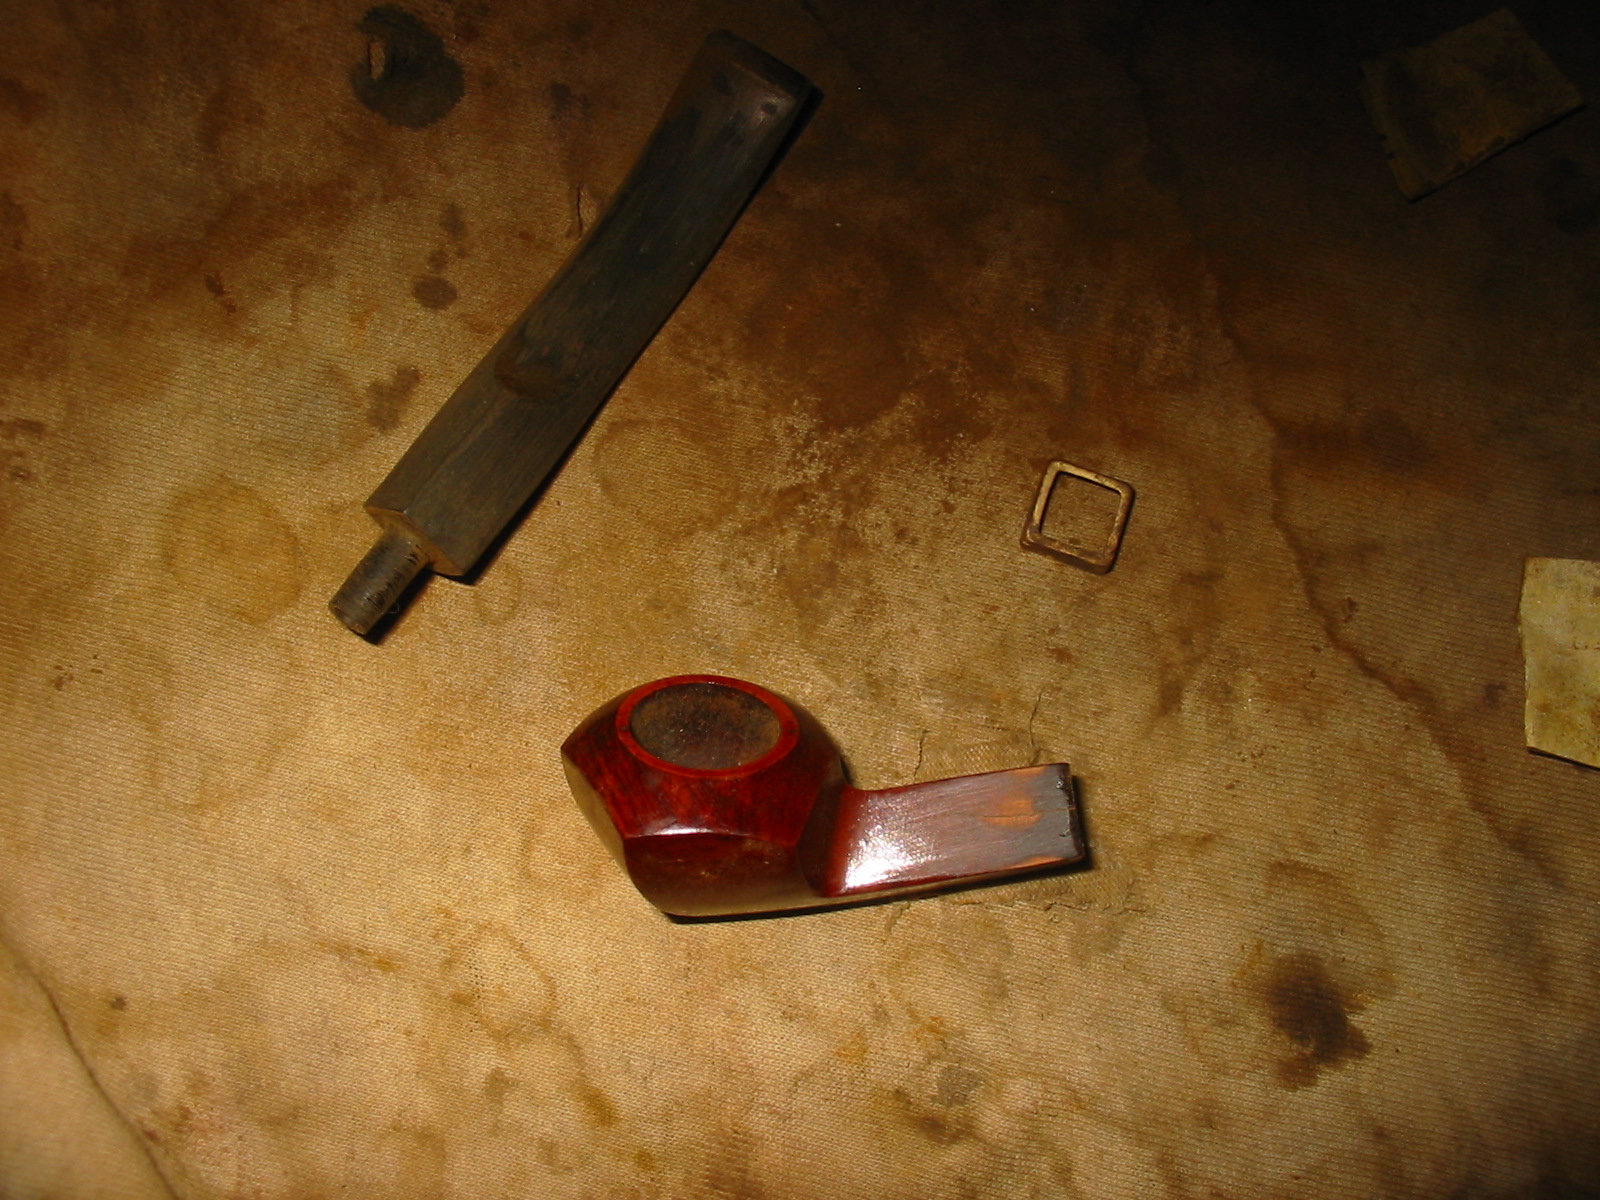
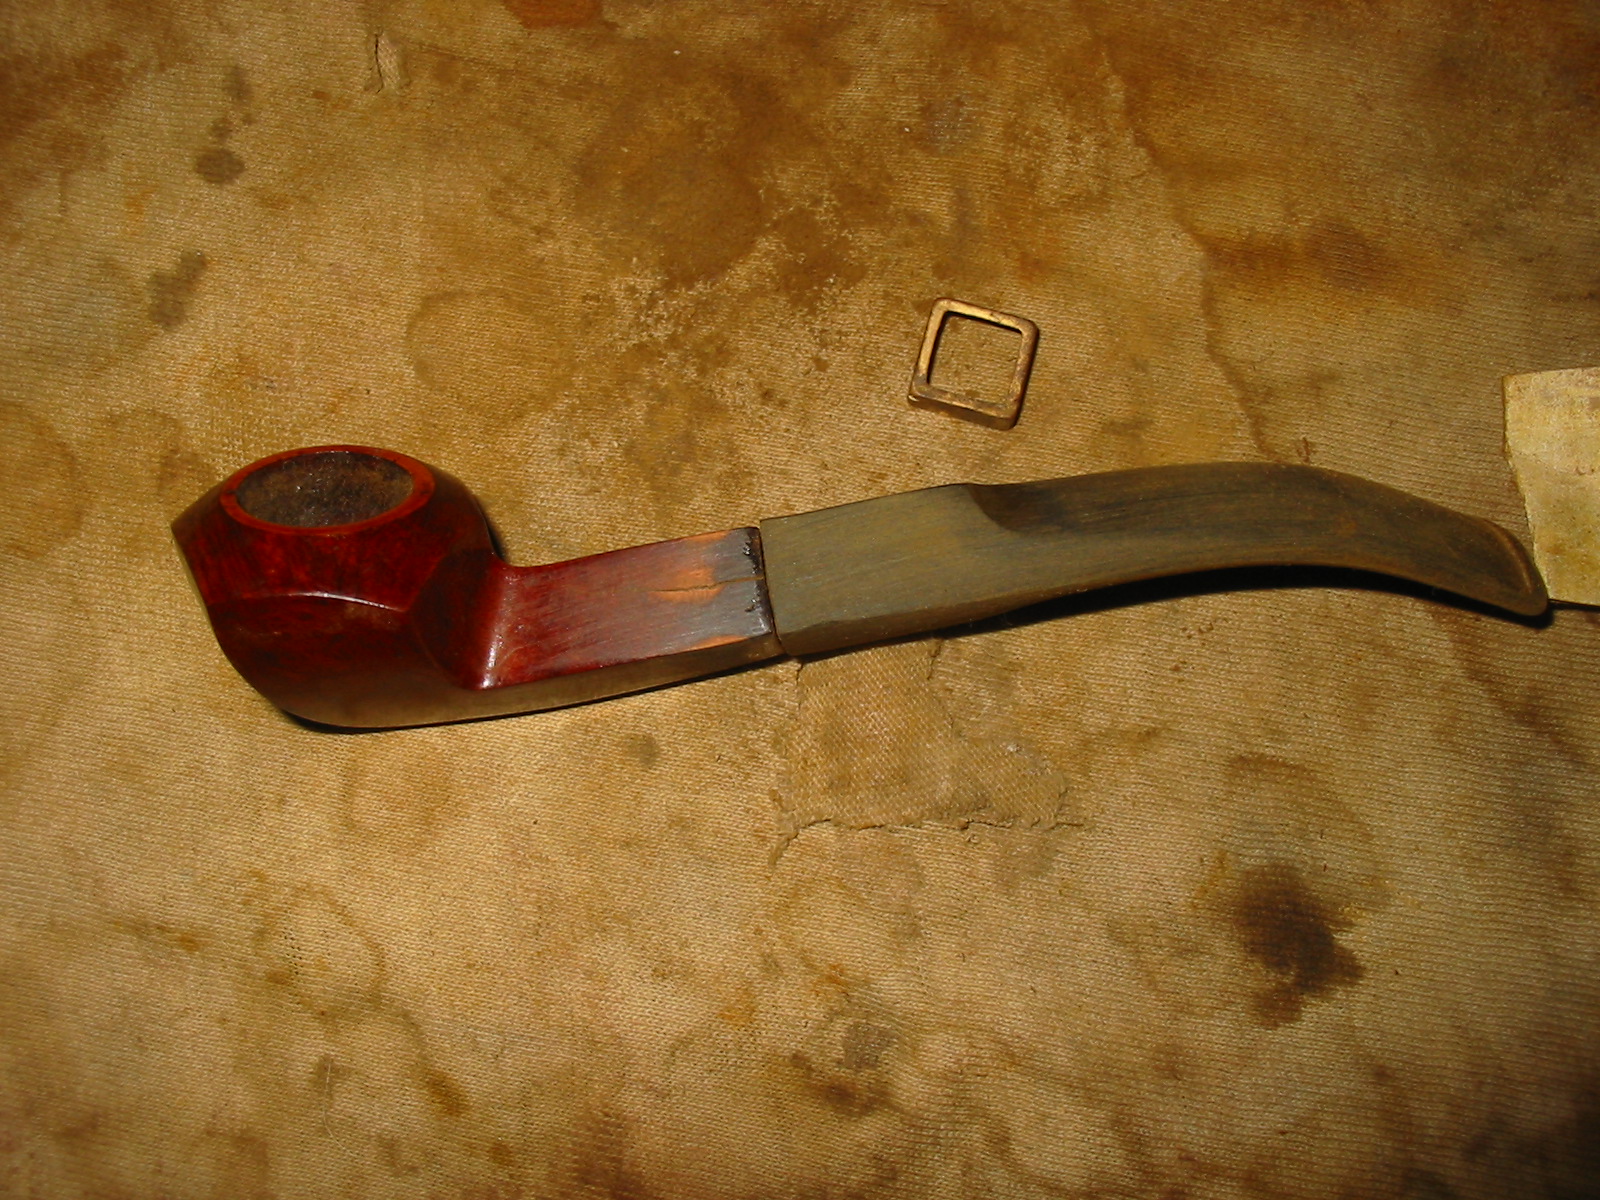
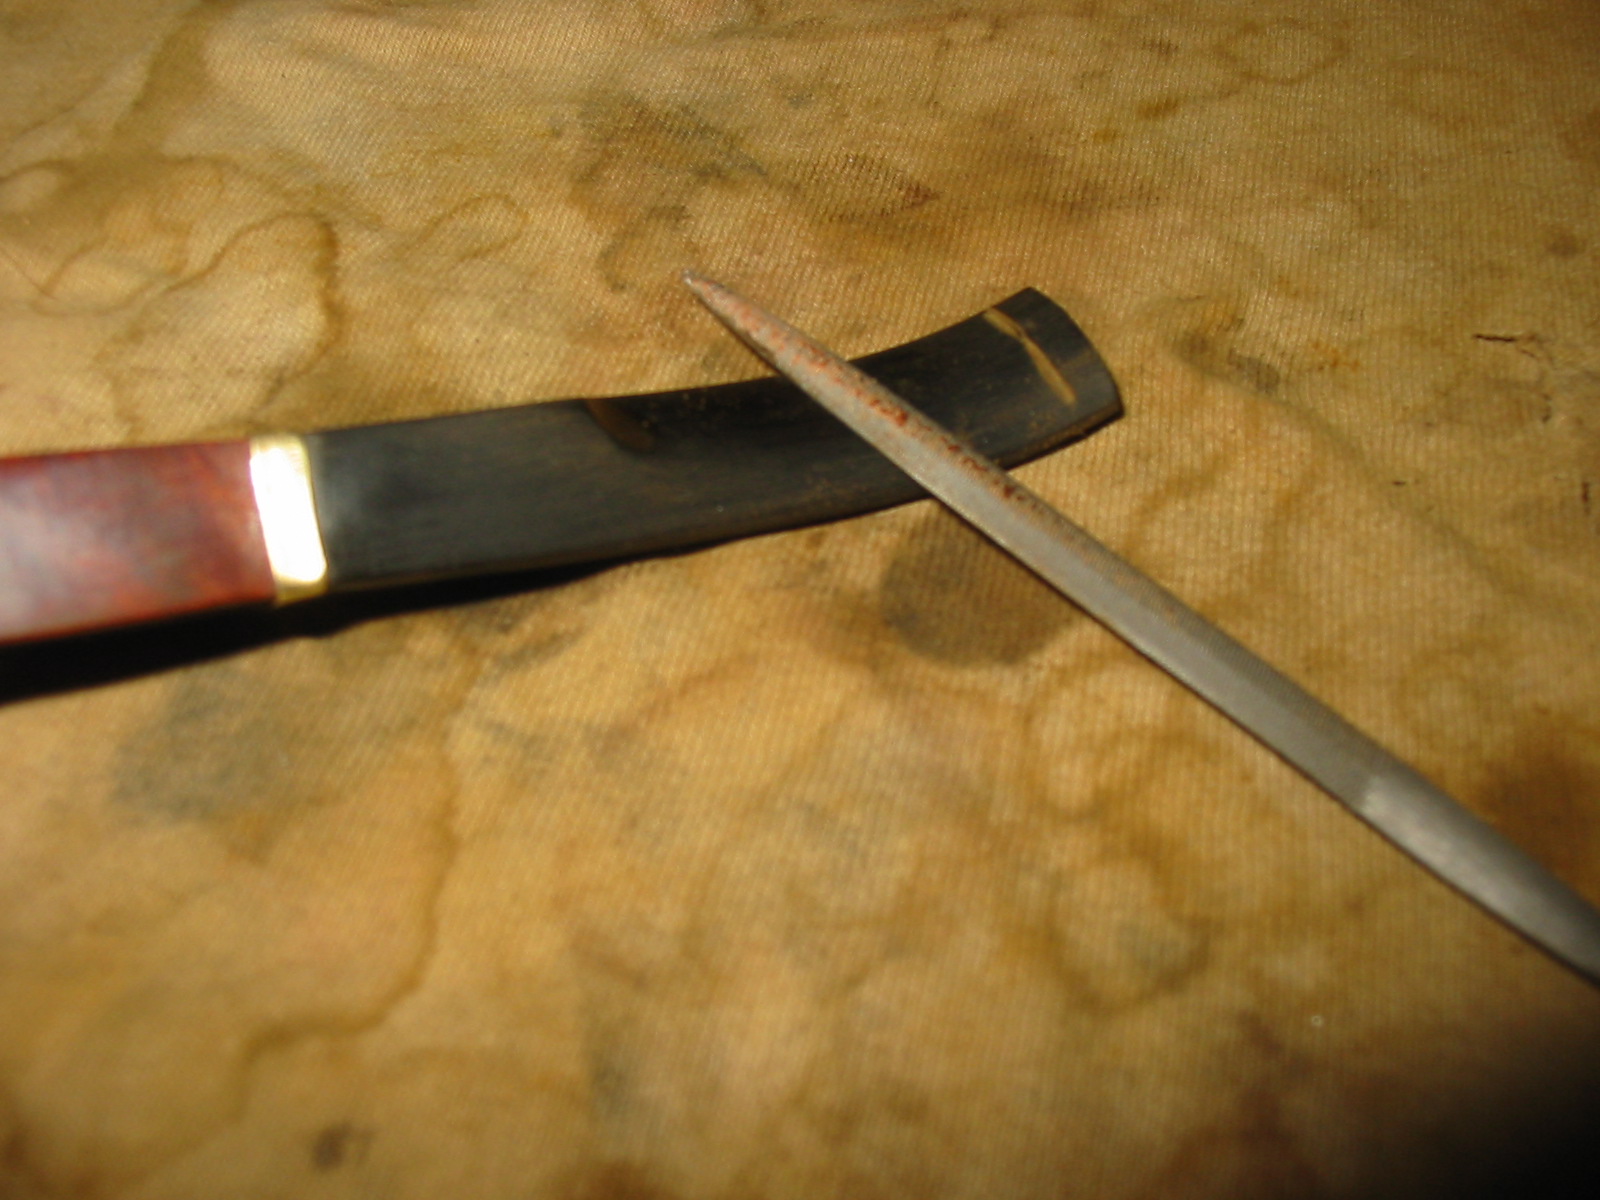
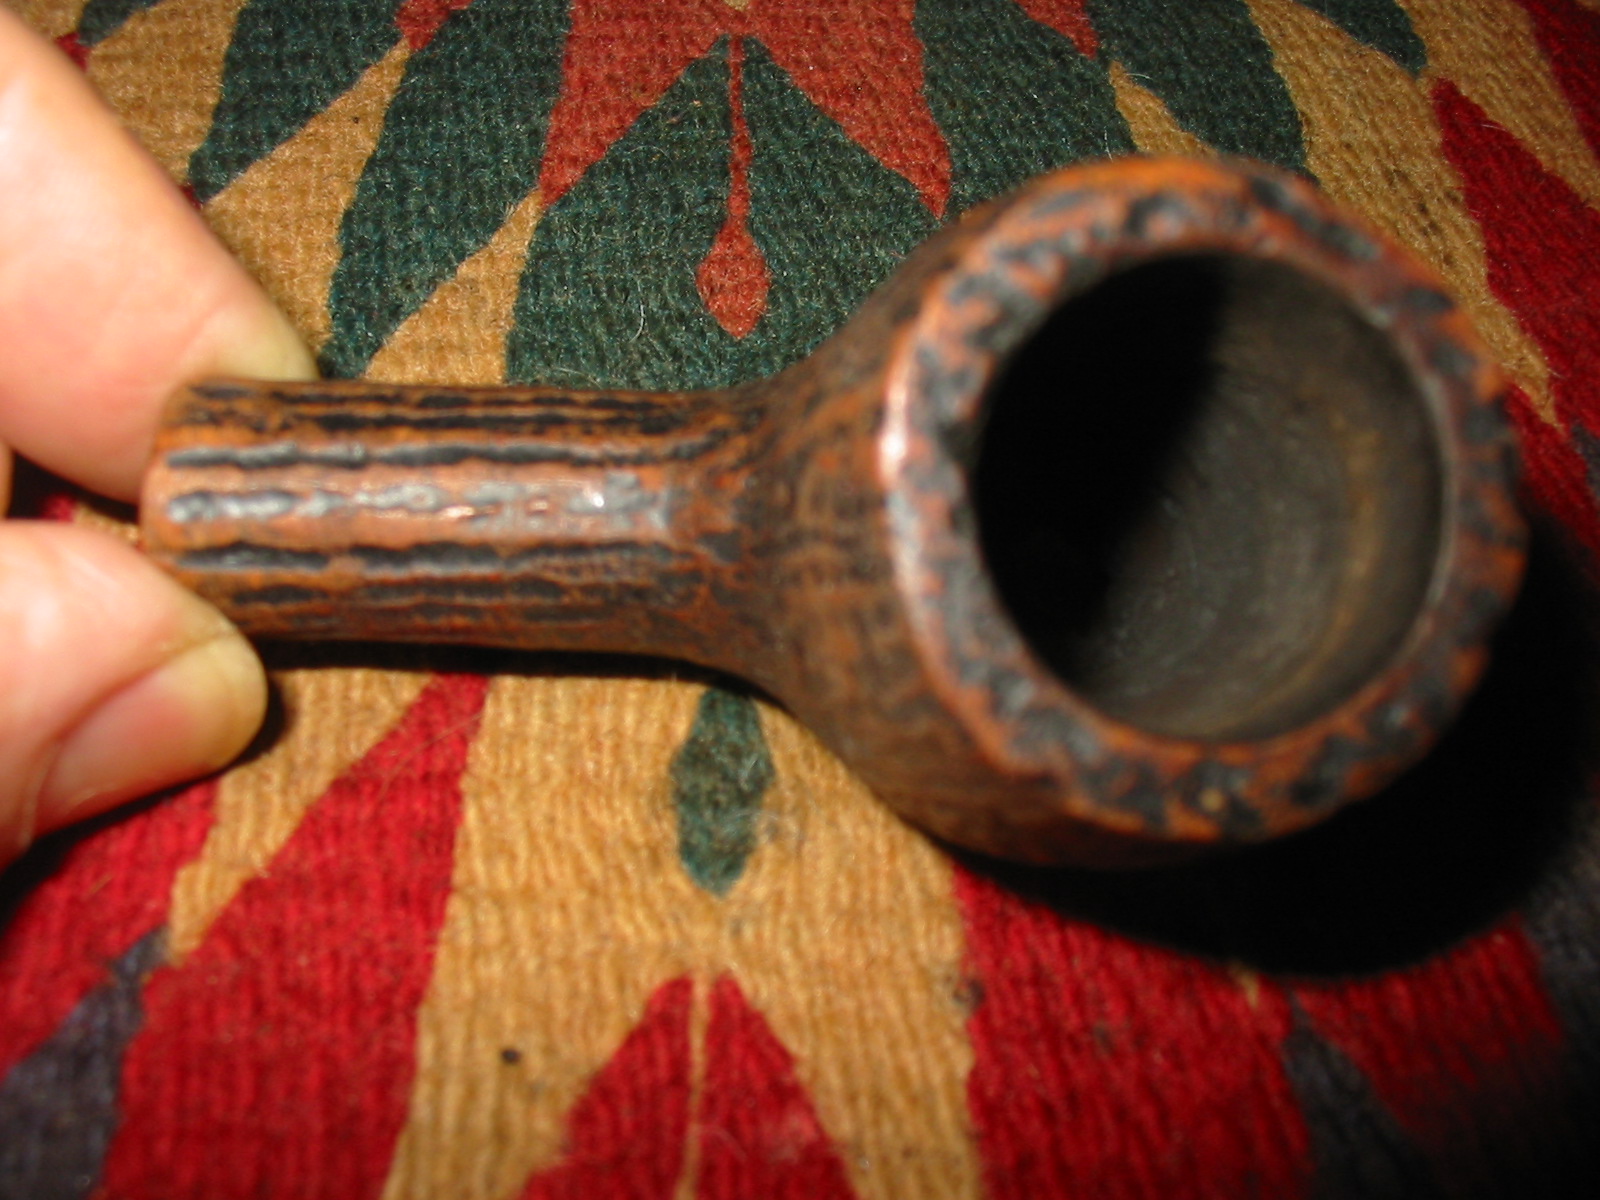
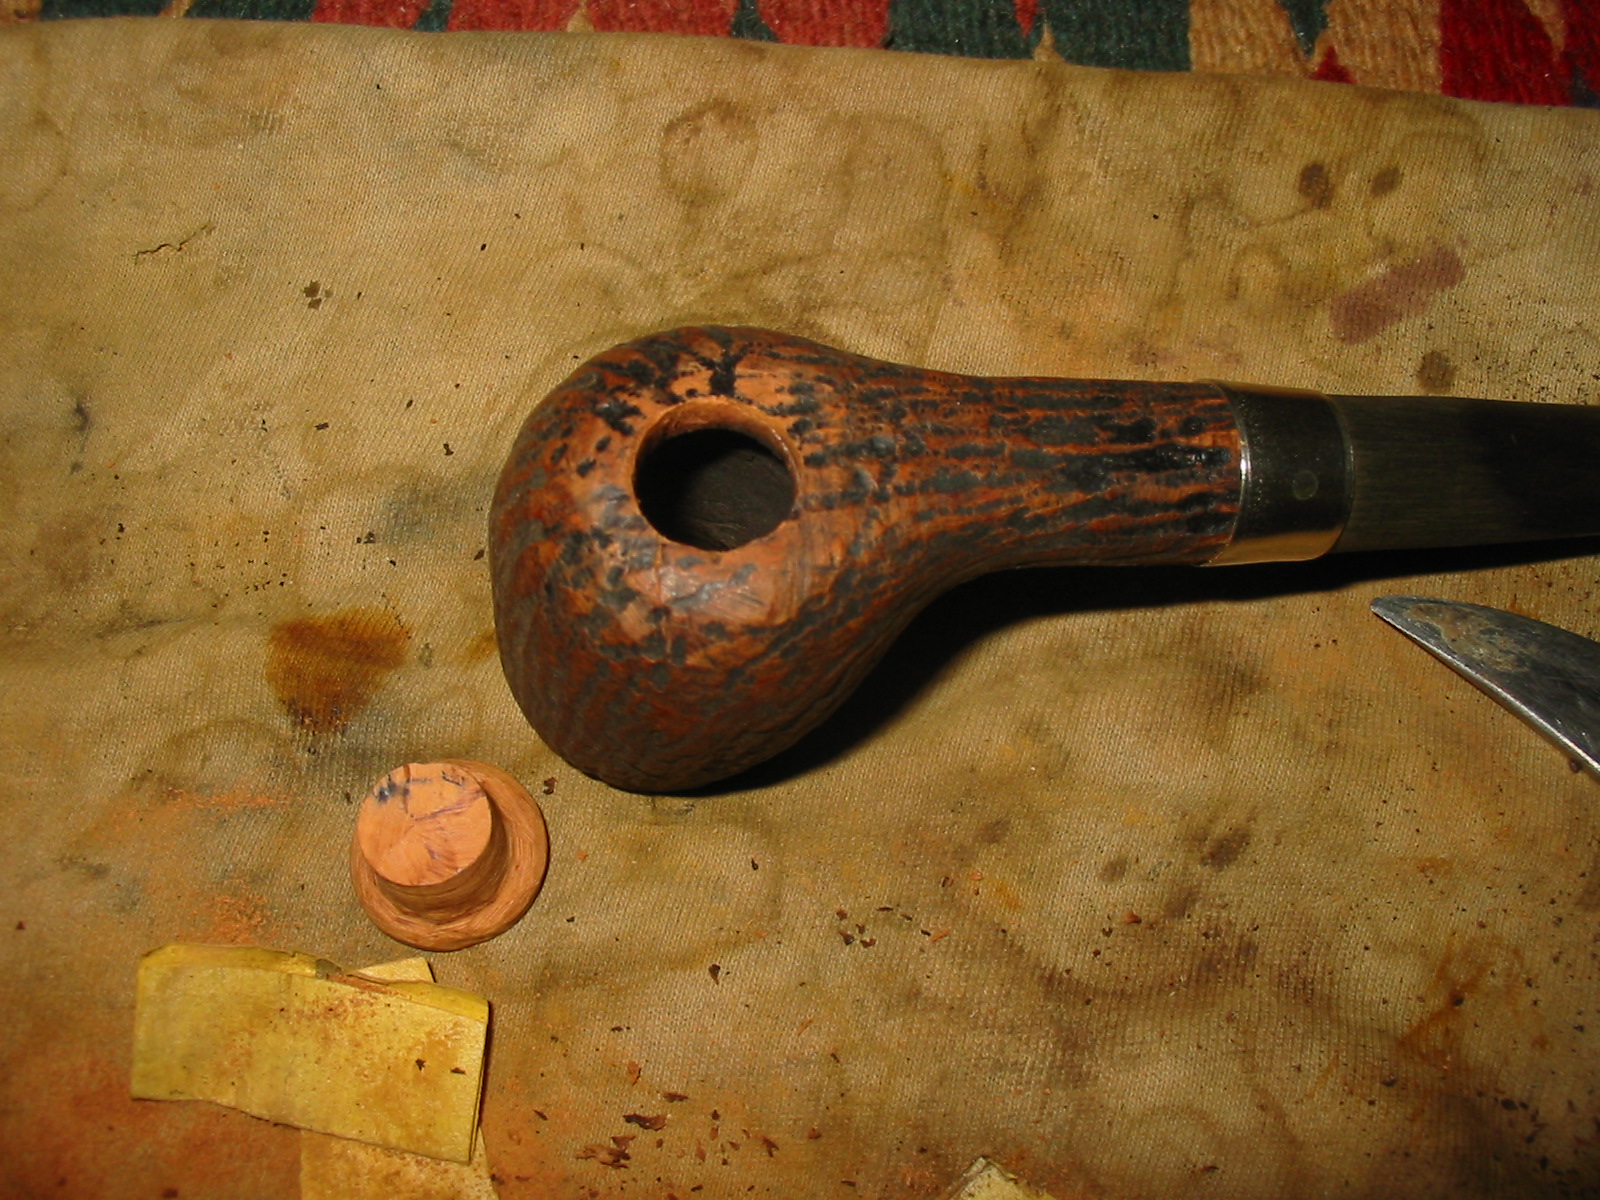
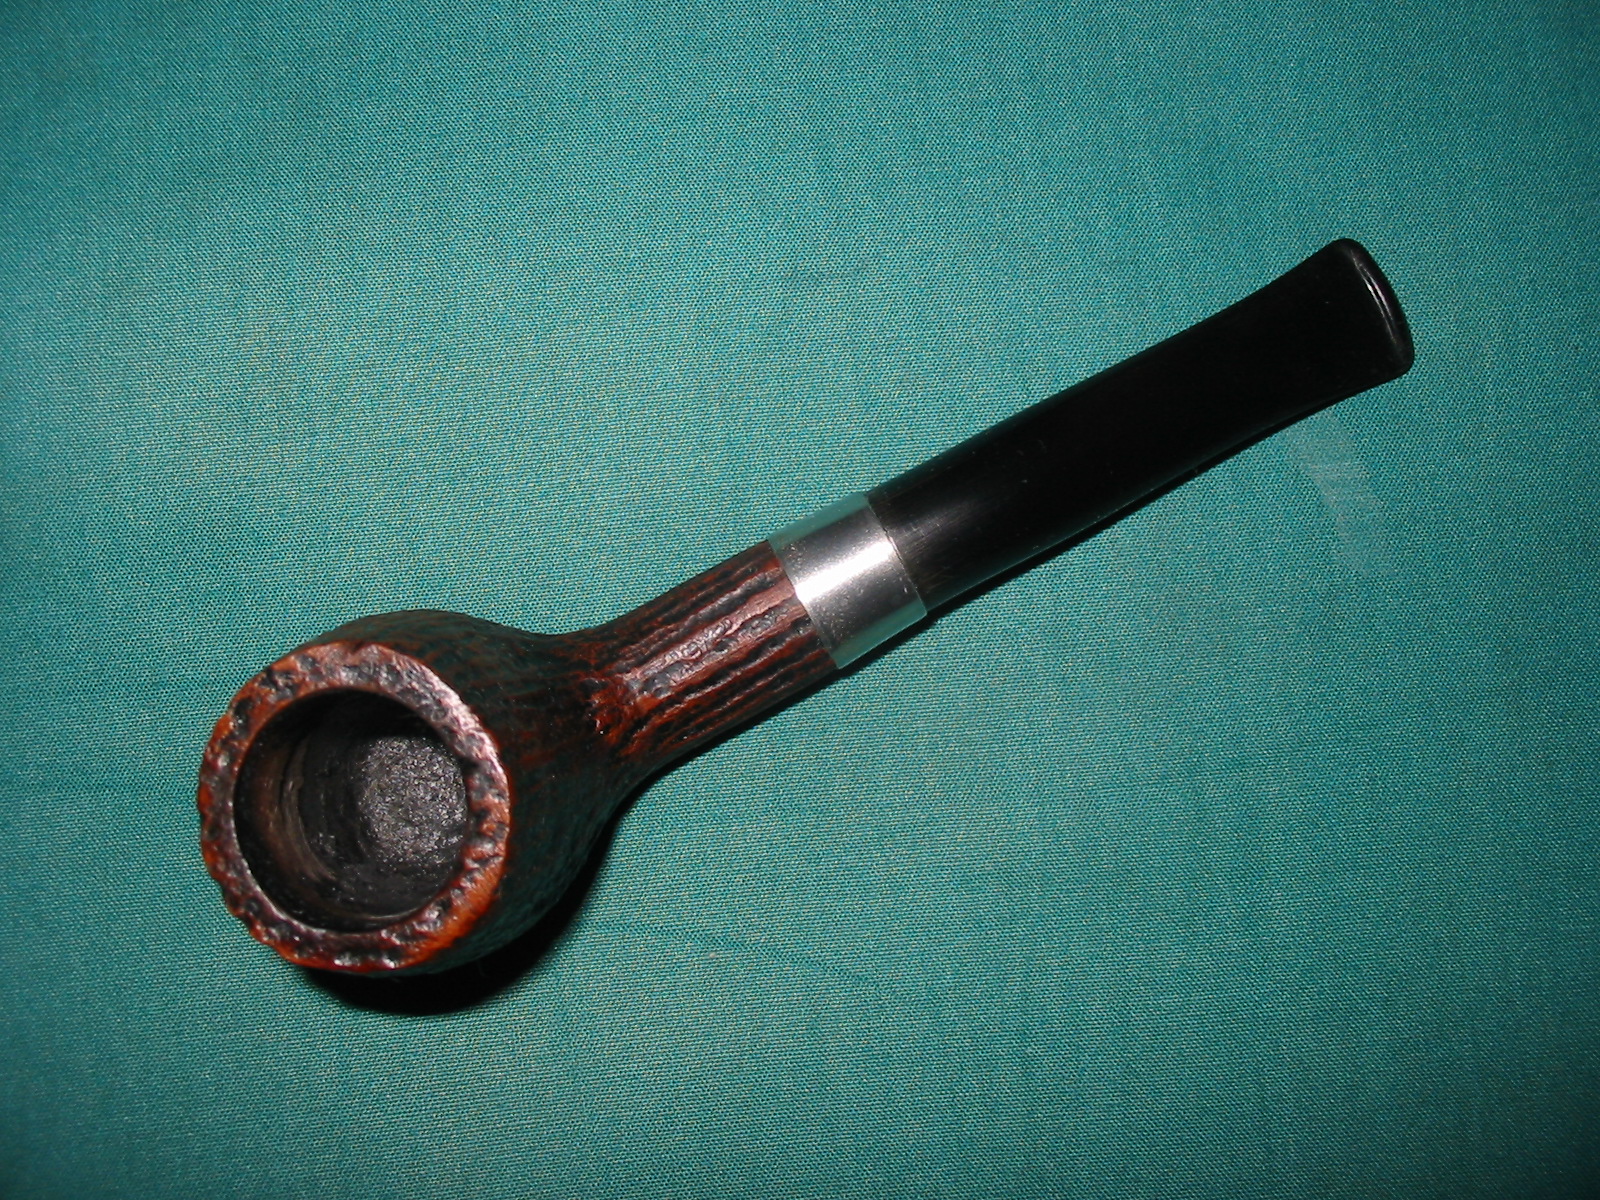
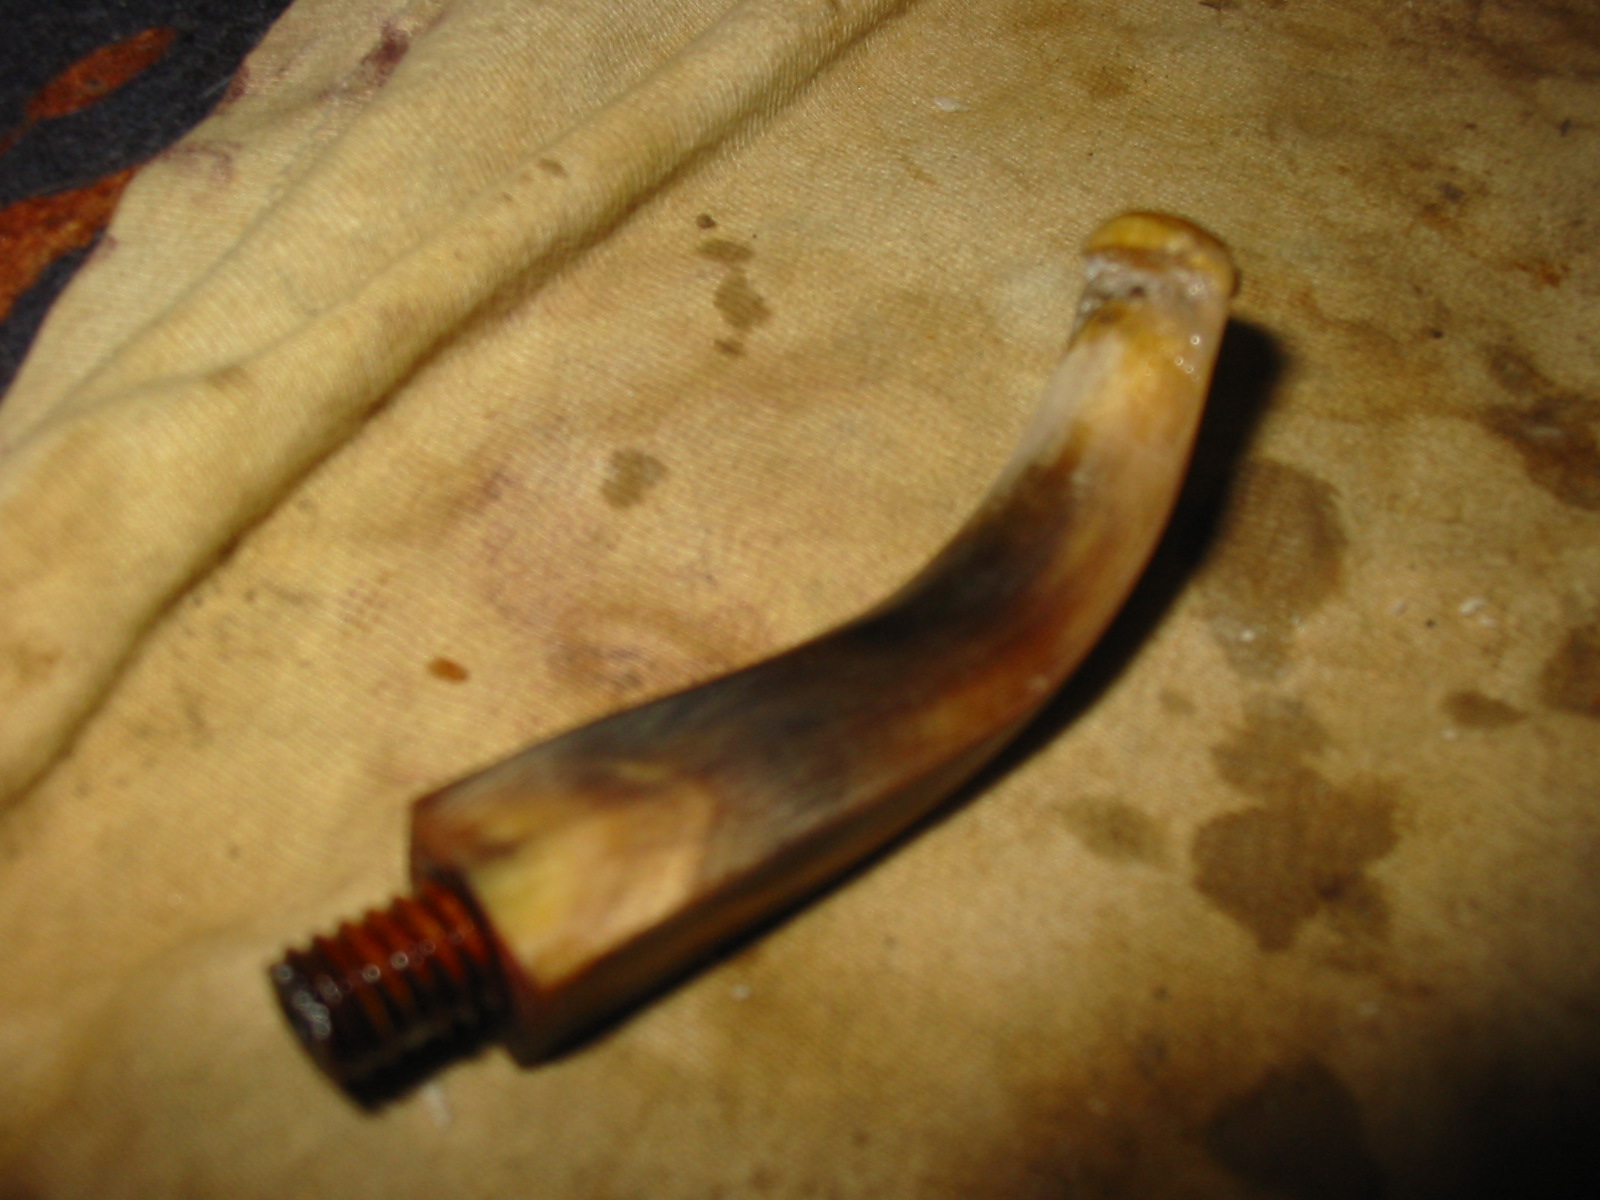
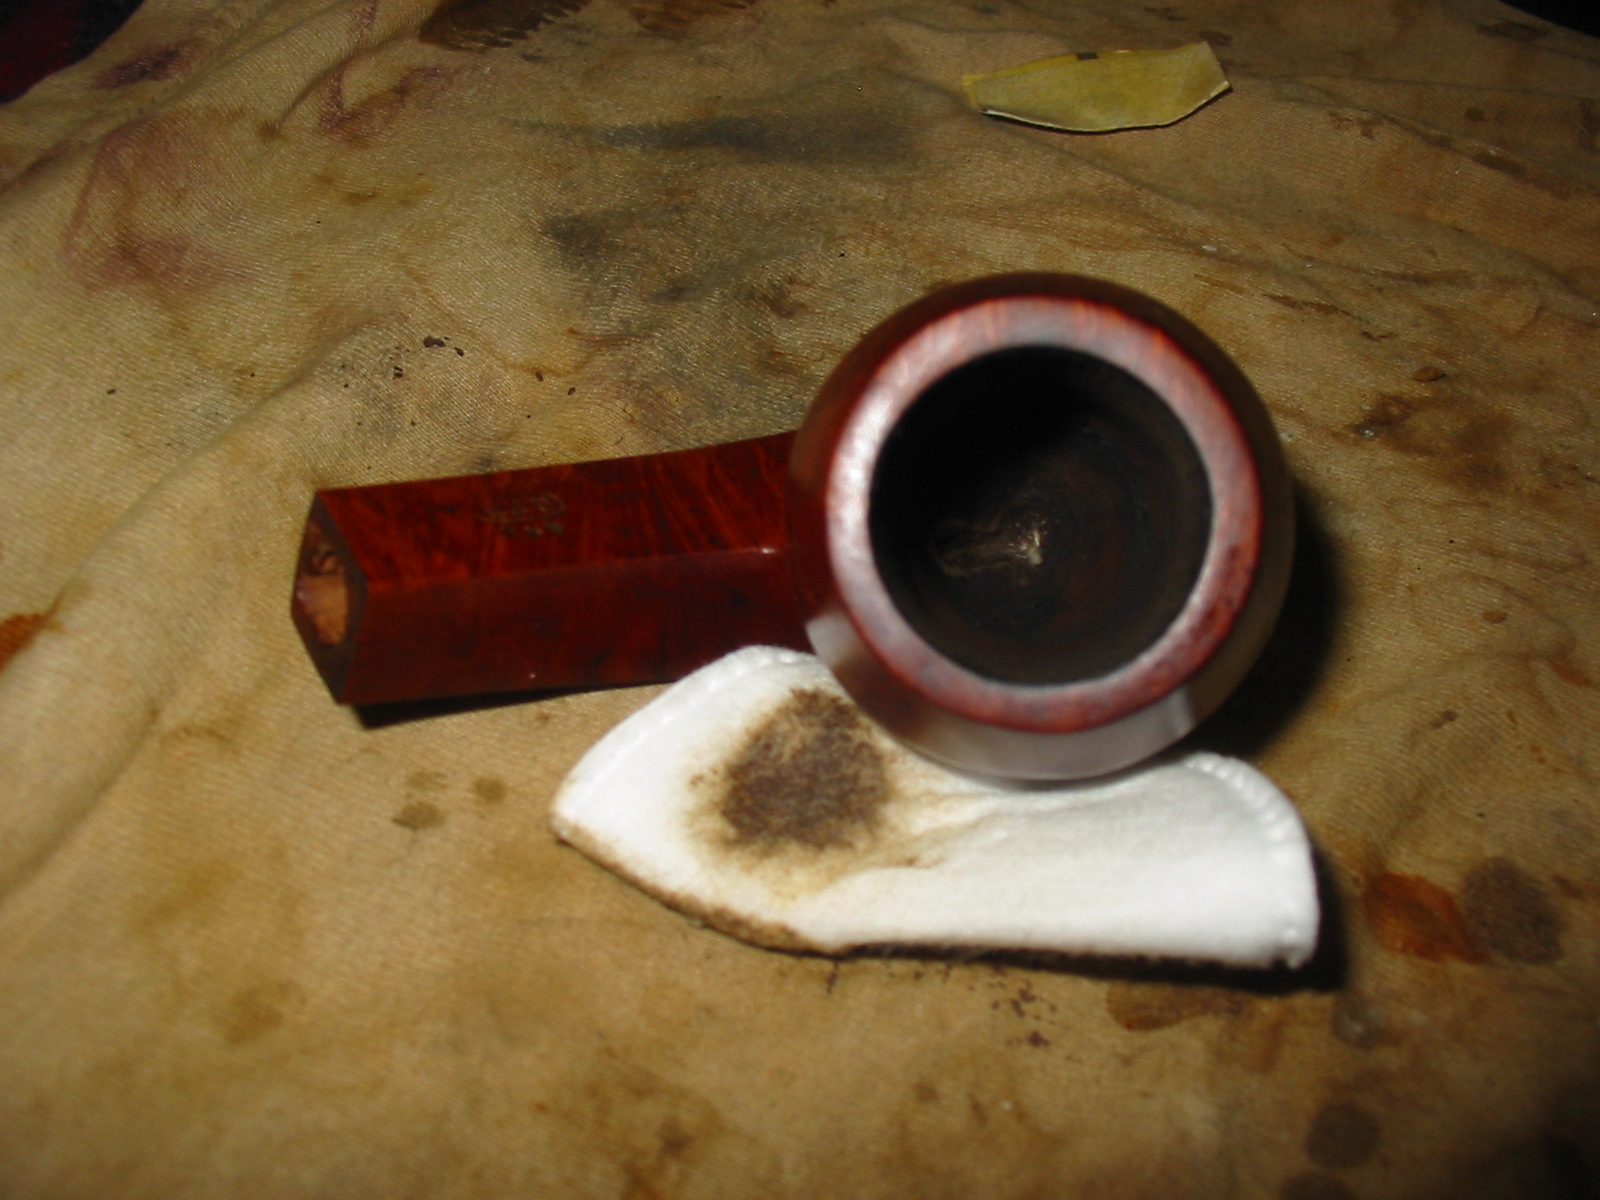
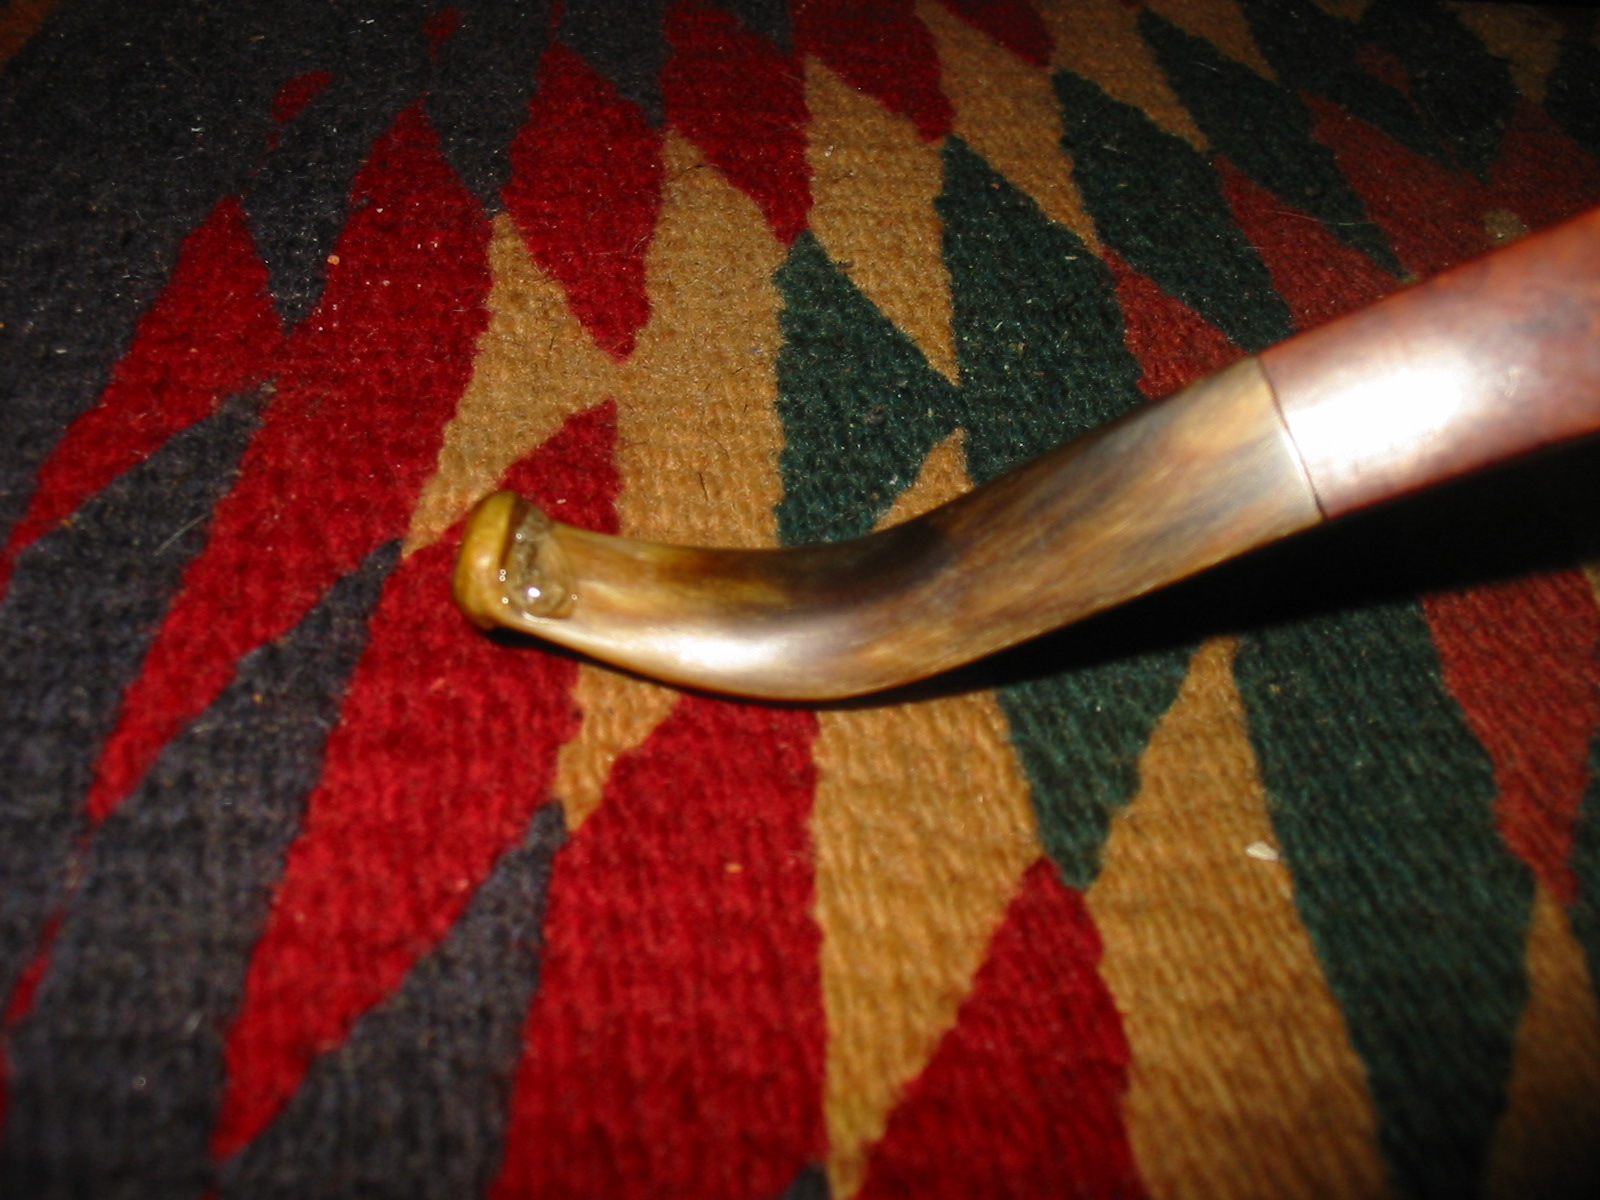
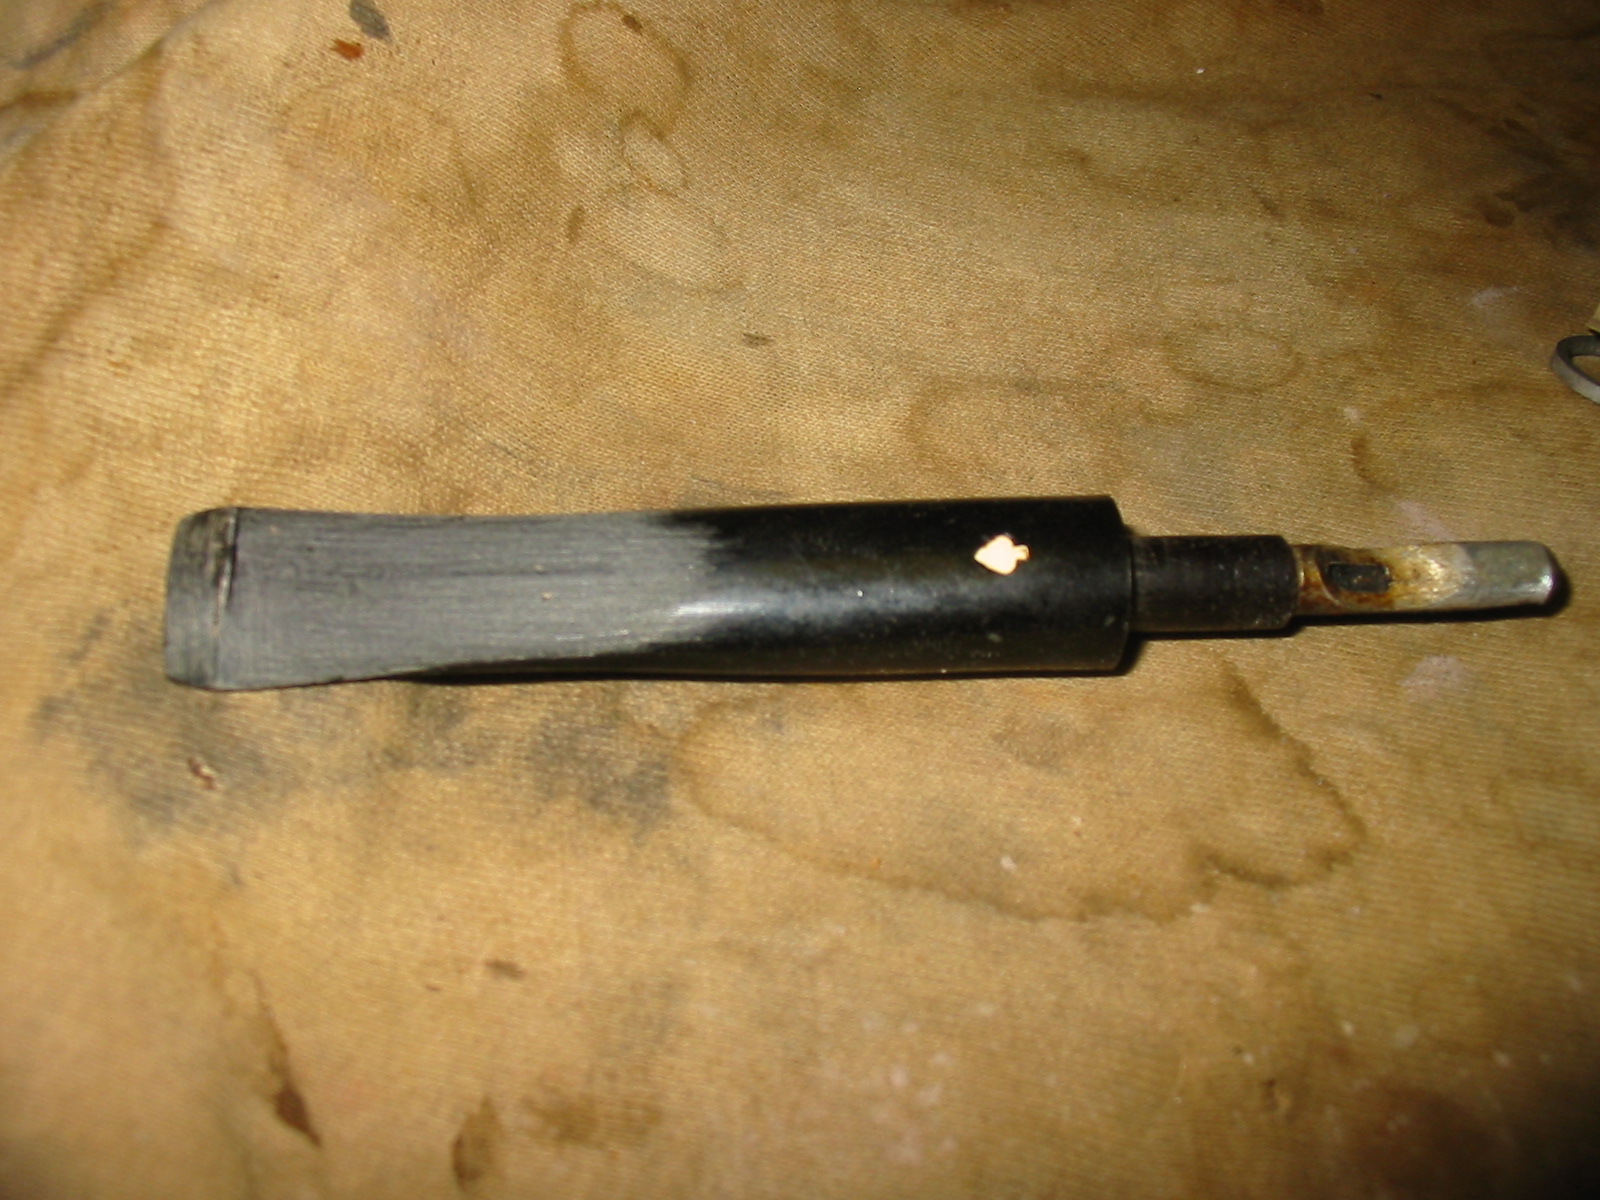
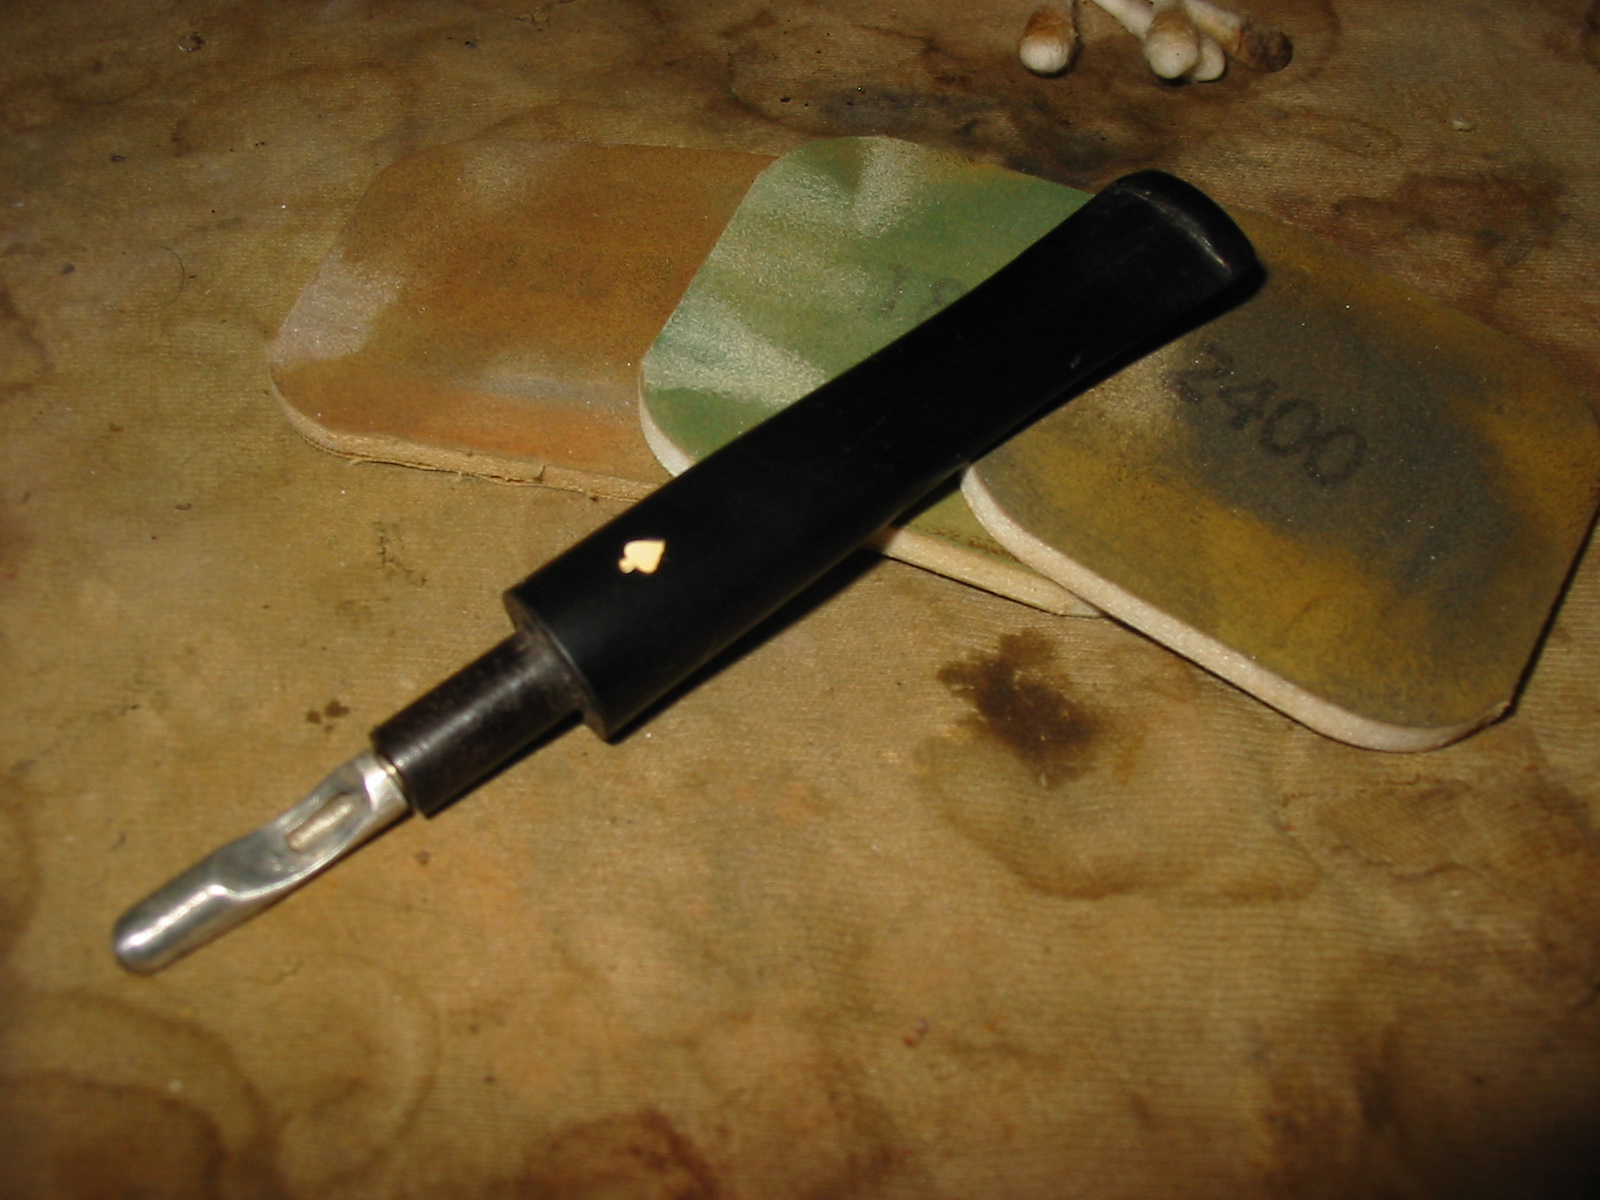
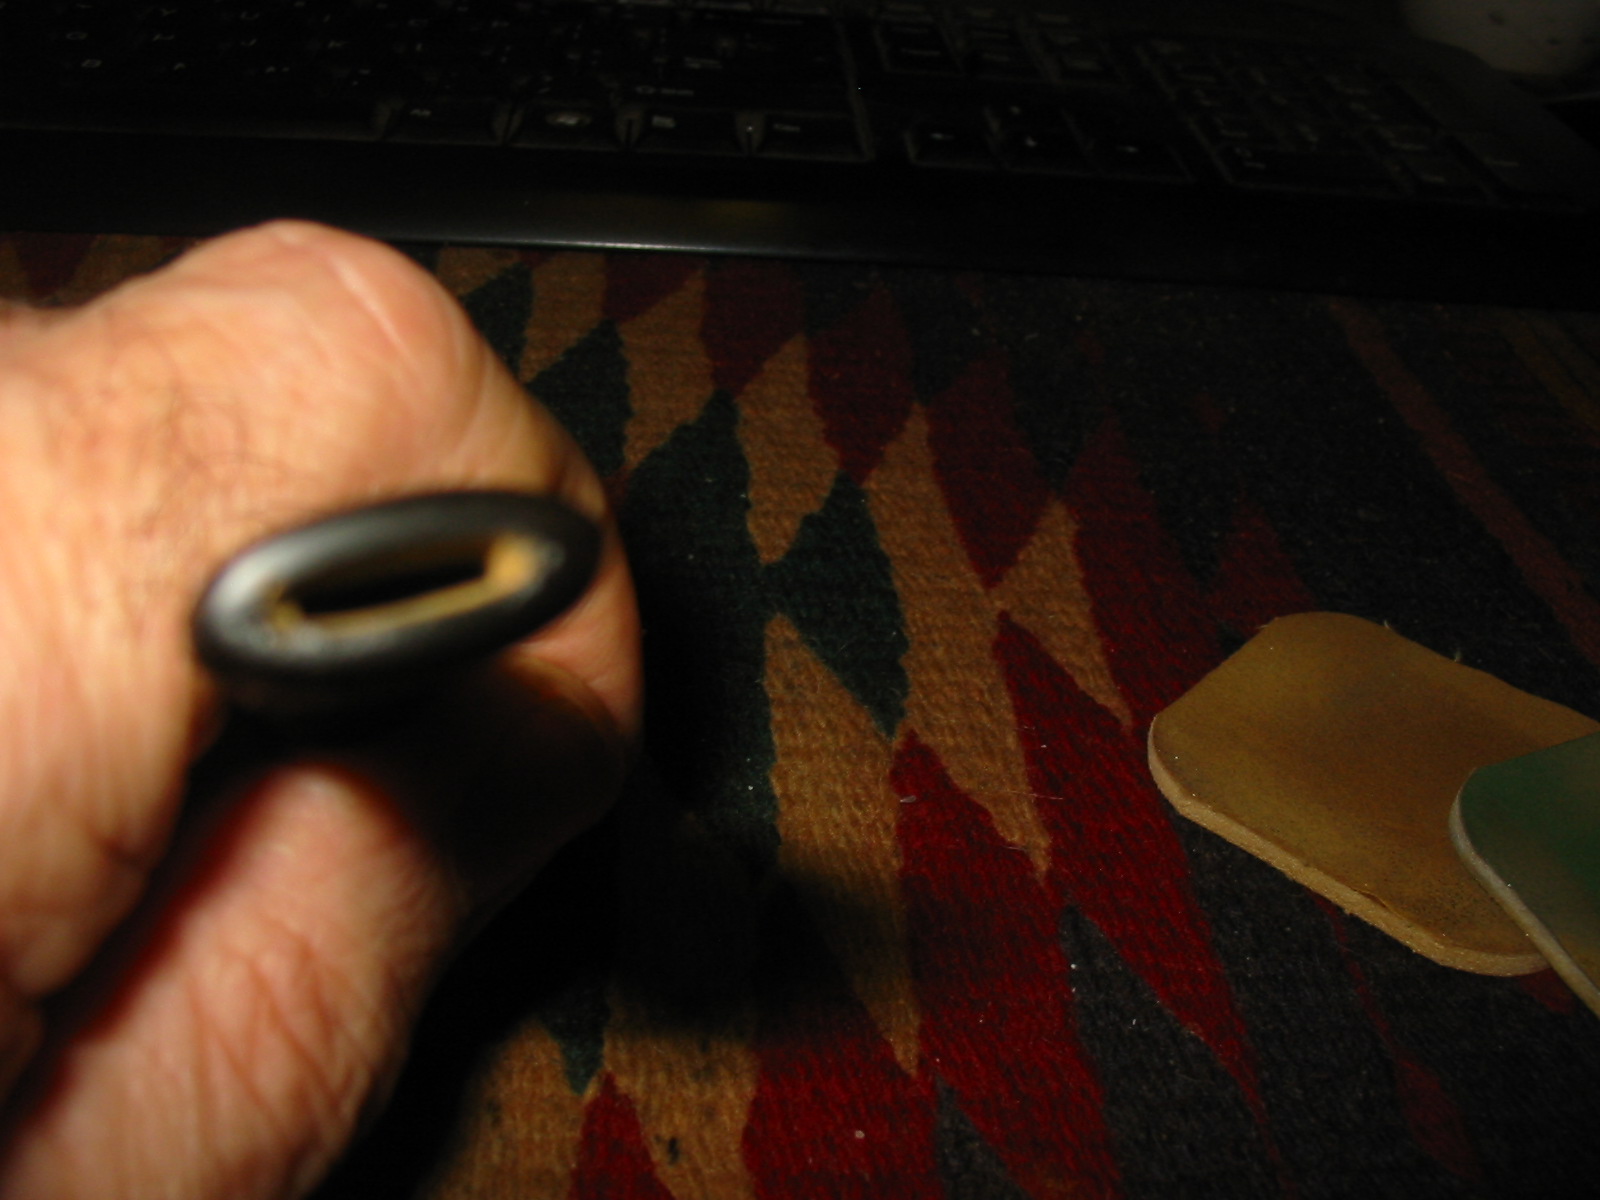
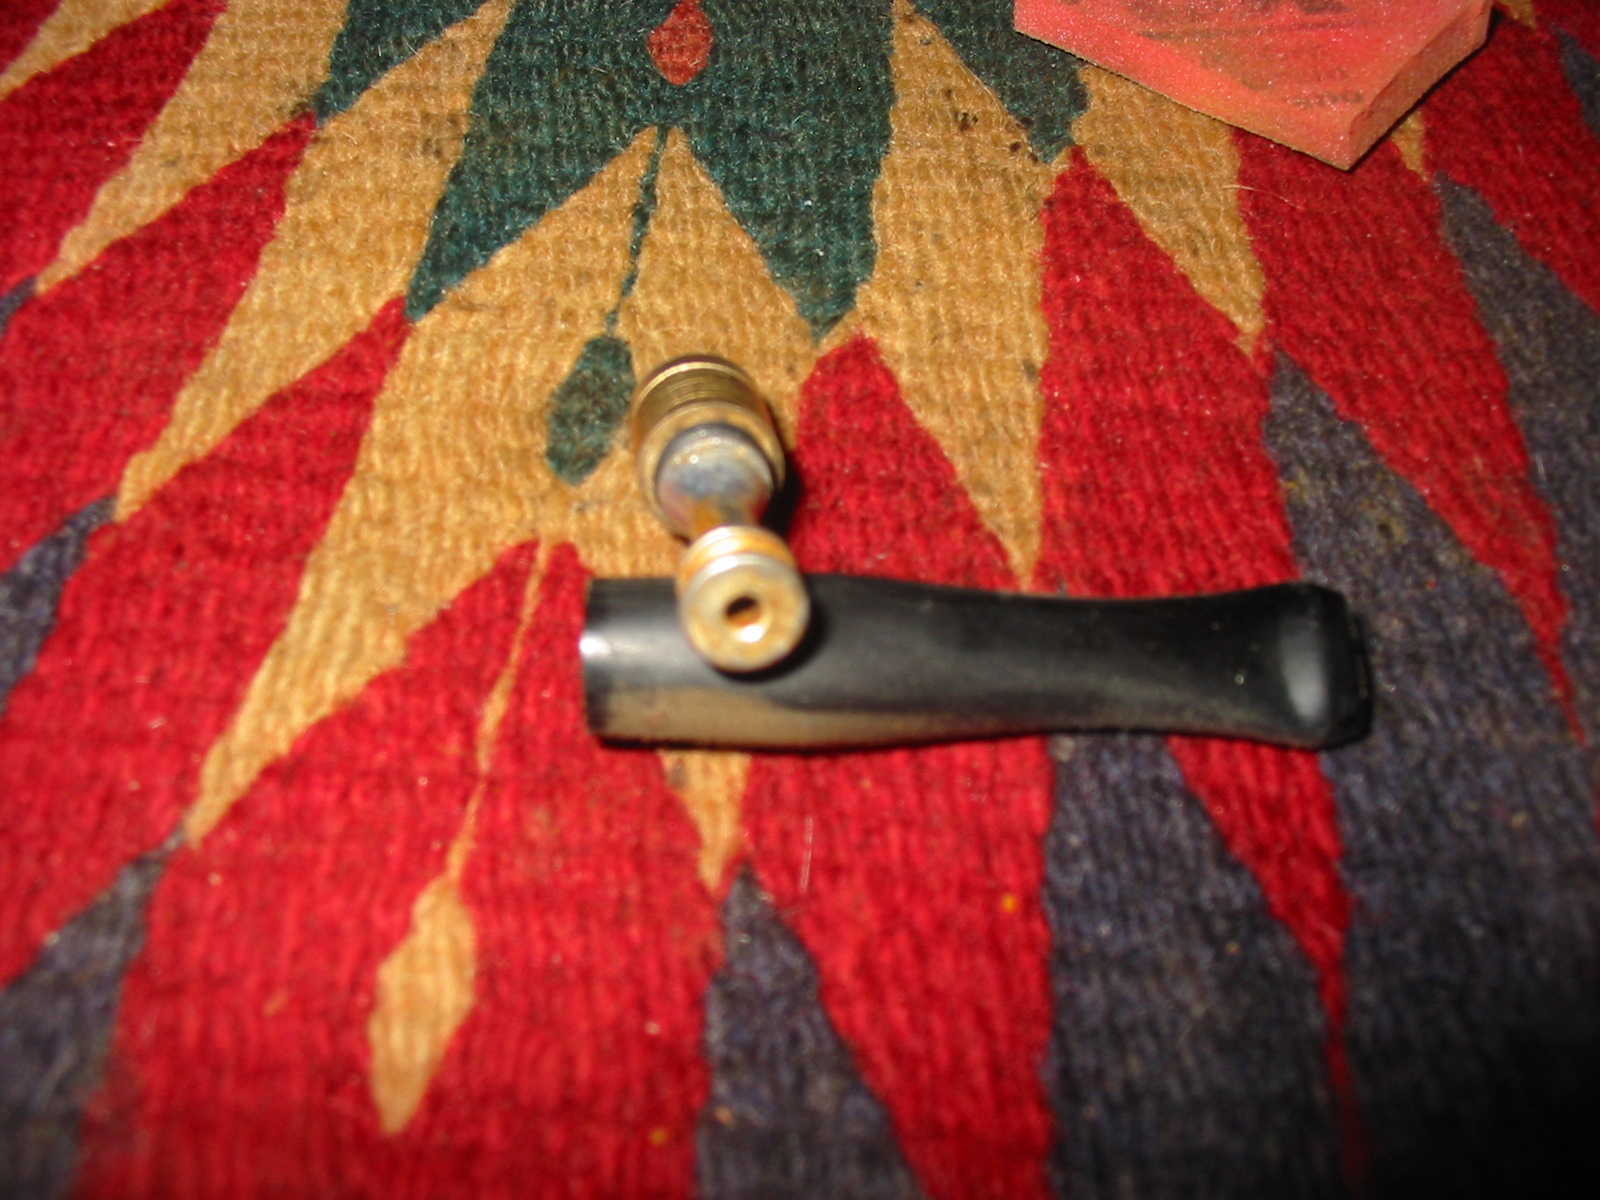
Once I had removed the apparatus from the stem the stinger design was visible. It extended half way down the shank of the stem. Behind the o-ring was a cut/slit half way through the aluminum of the stinger. It was clogged with tars and oils. In the middle of the slit was an opening. One on the o-ring side and one on the stem side of the slit. The aluminum then funneled down to tube that at first glance appeared to be solid. At the end of the tube were two solid rings around the tube. Between the rings there were holes on two sides in the groove. When it was inserted and clear the air would be pulled through the holder and into the stinger slit. It would circulate in the stem to cool and then move through the slit and down the tube and out the two holes. These would then disperse the smoke through the remainder of the stem and out the slot in the button. In many ways it was like an inverted stinger in shape and function to those found on pipes.
IMG_3177

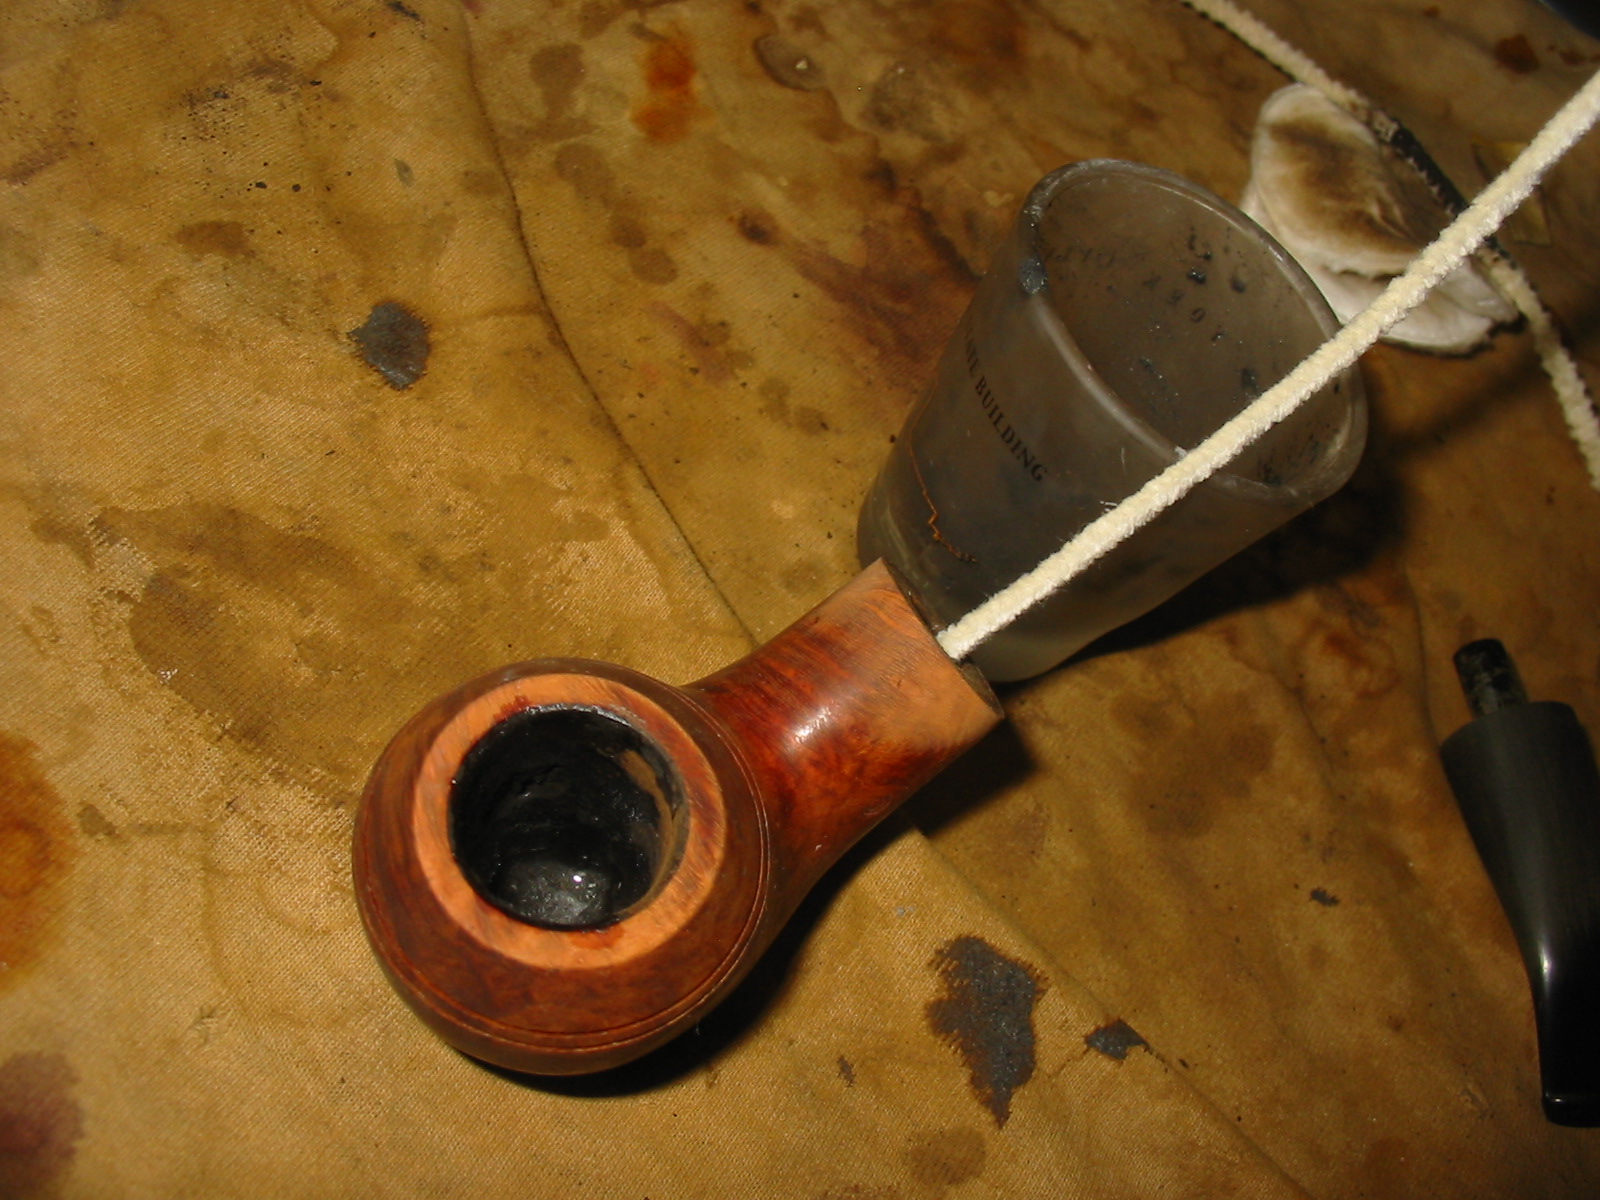
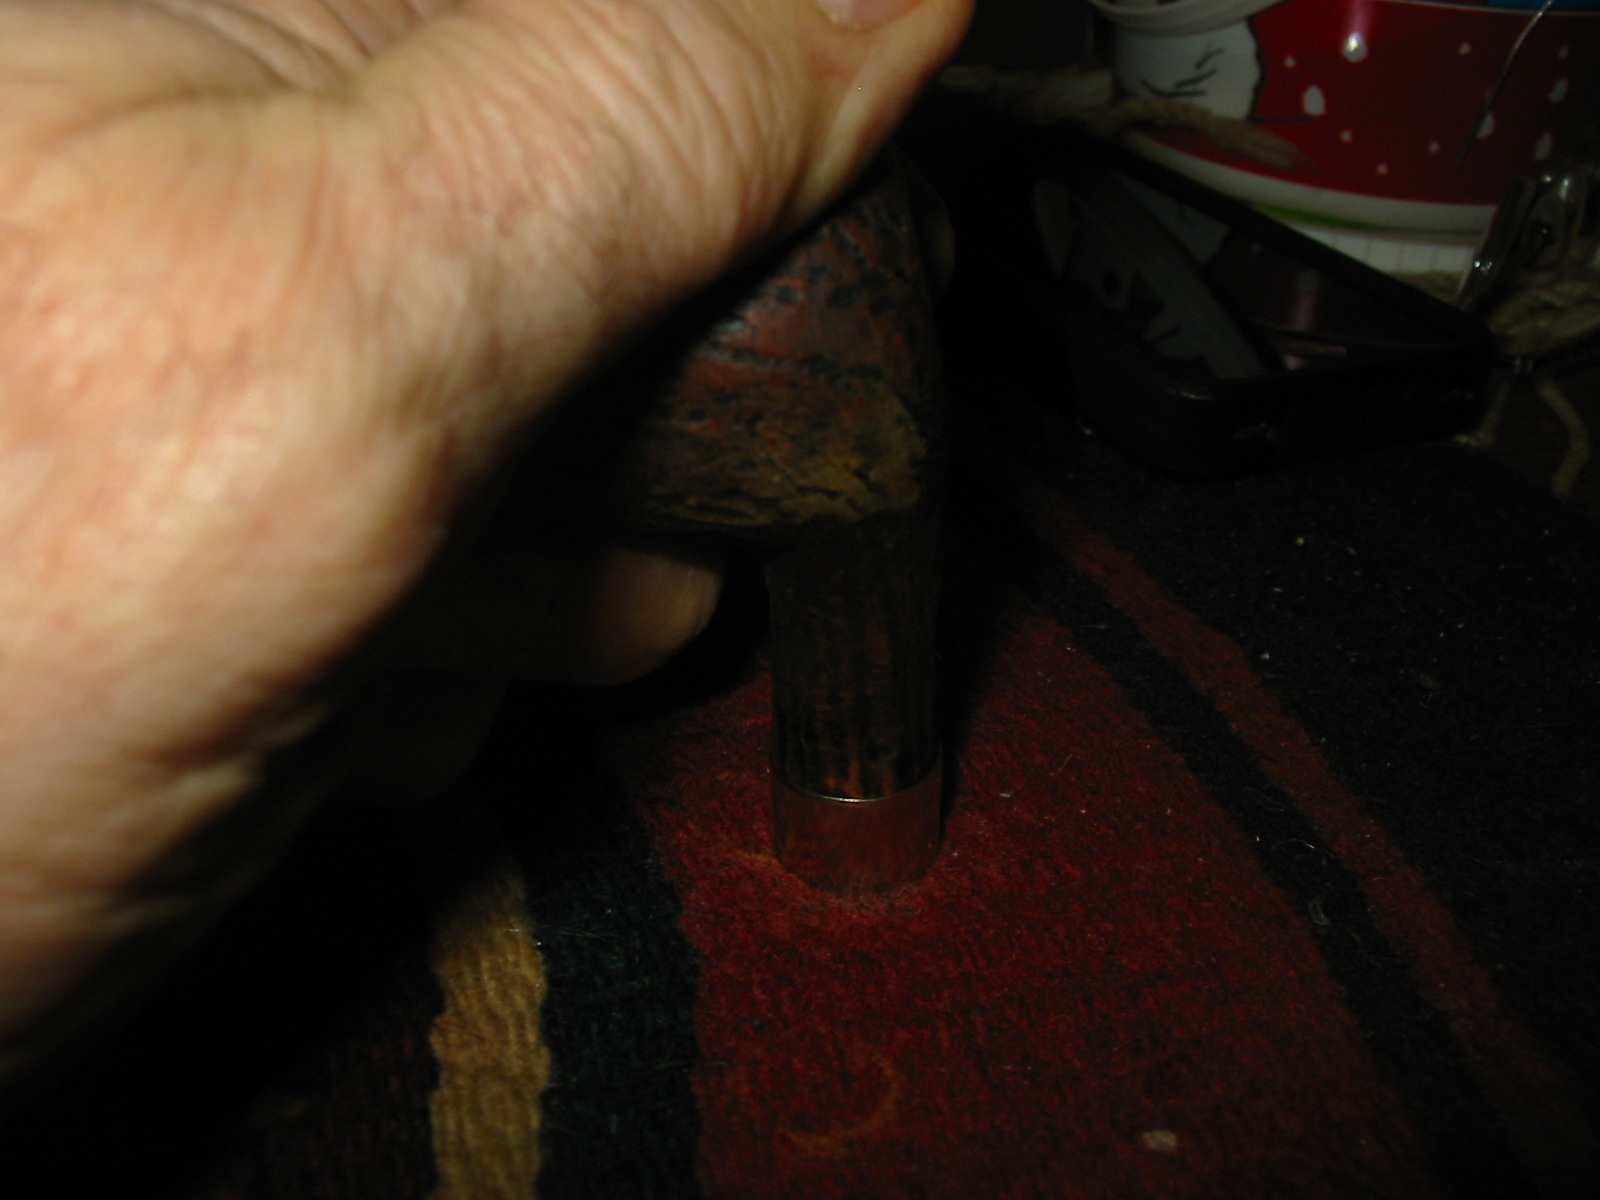
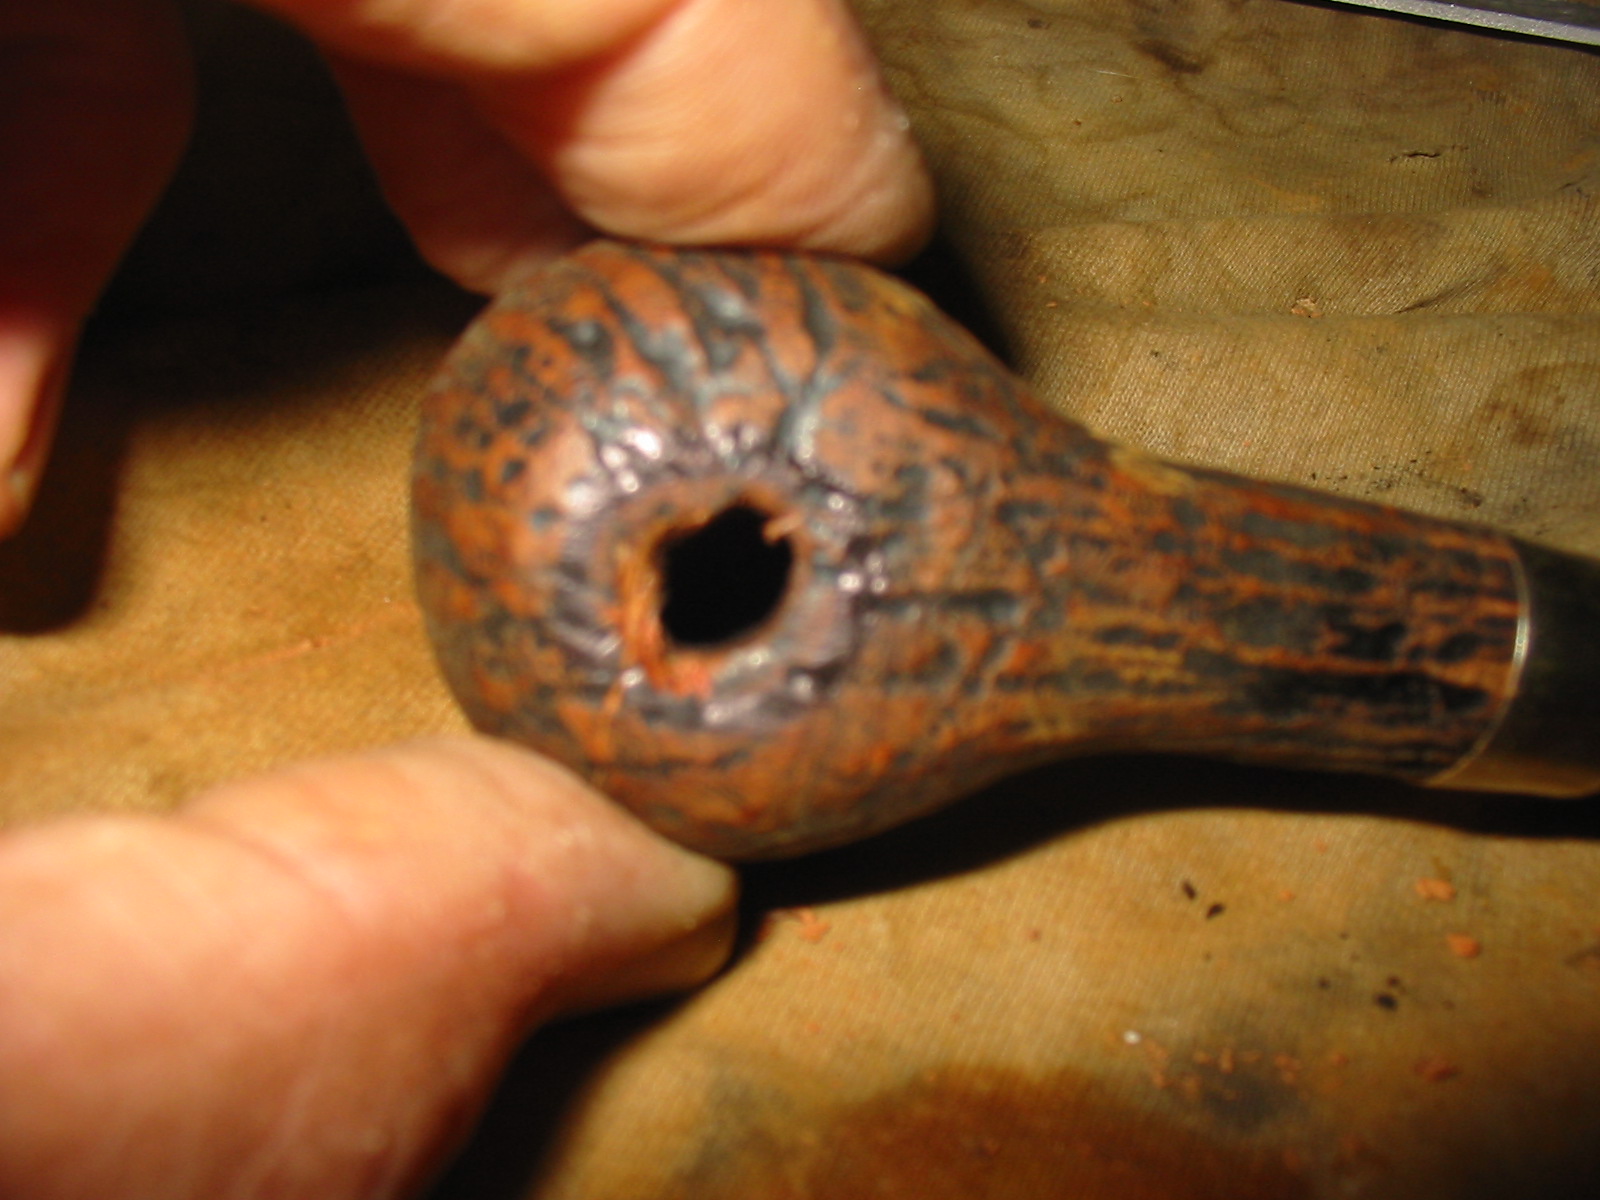
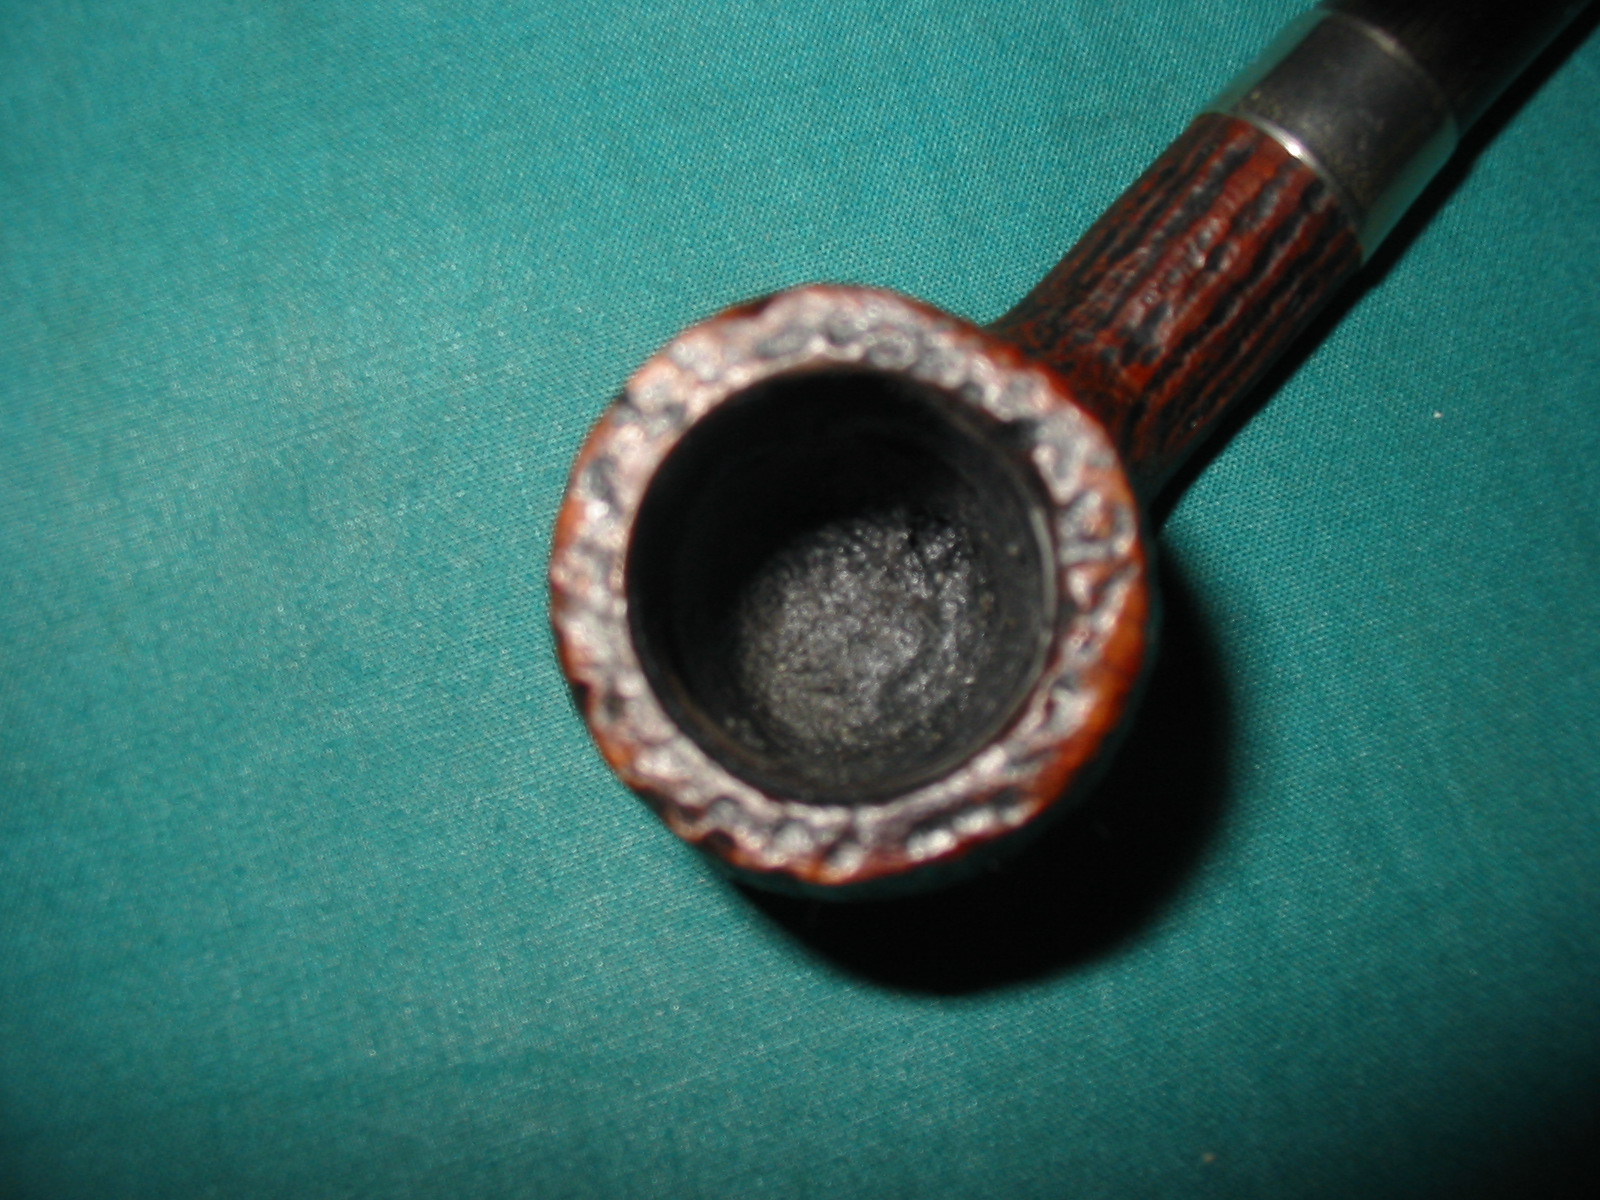
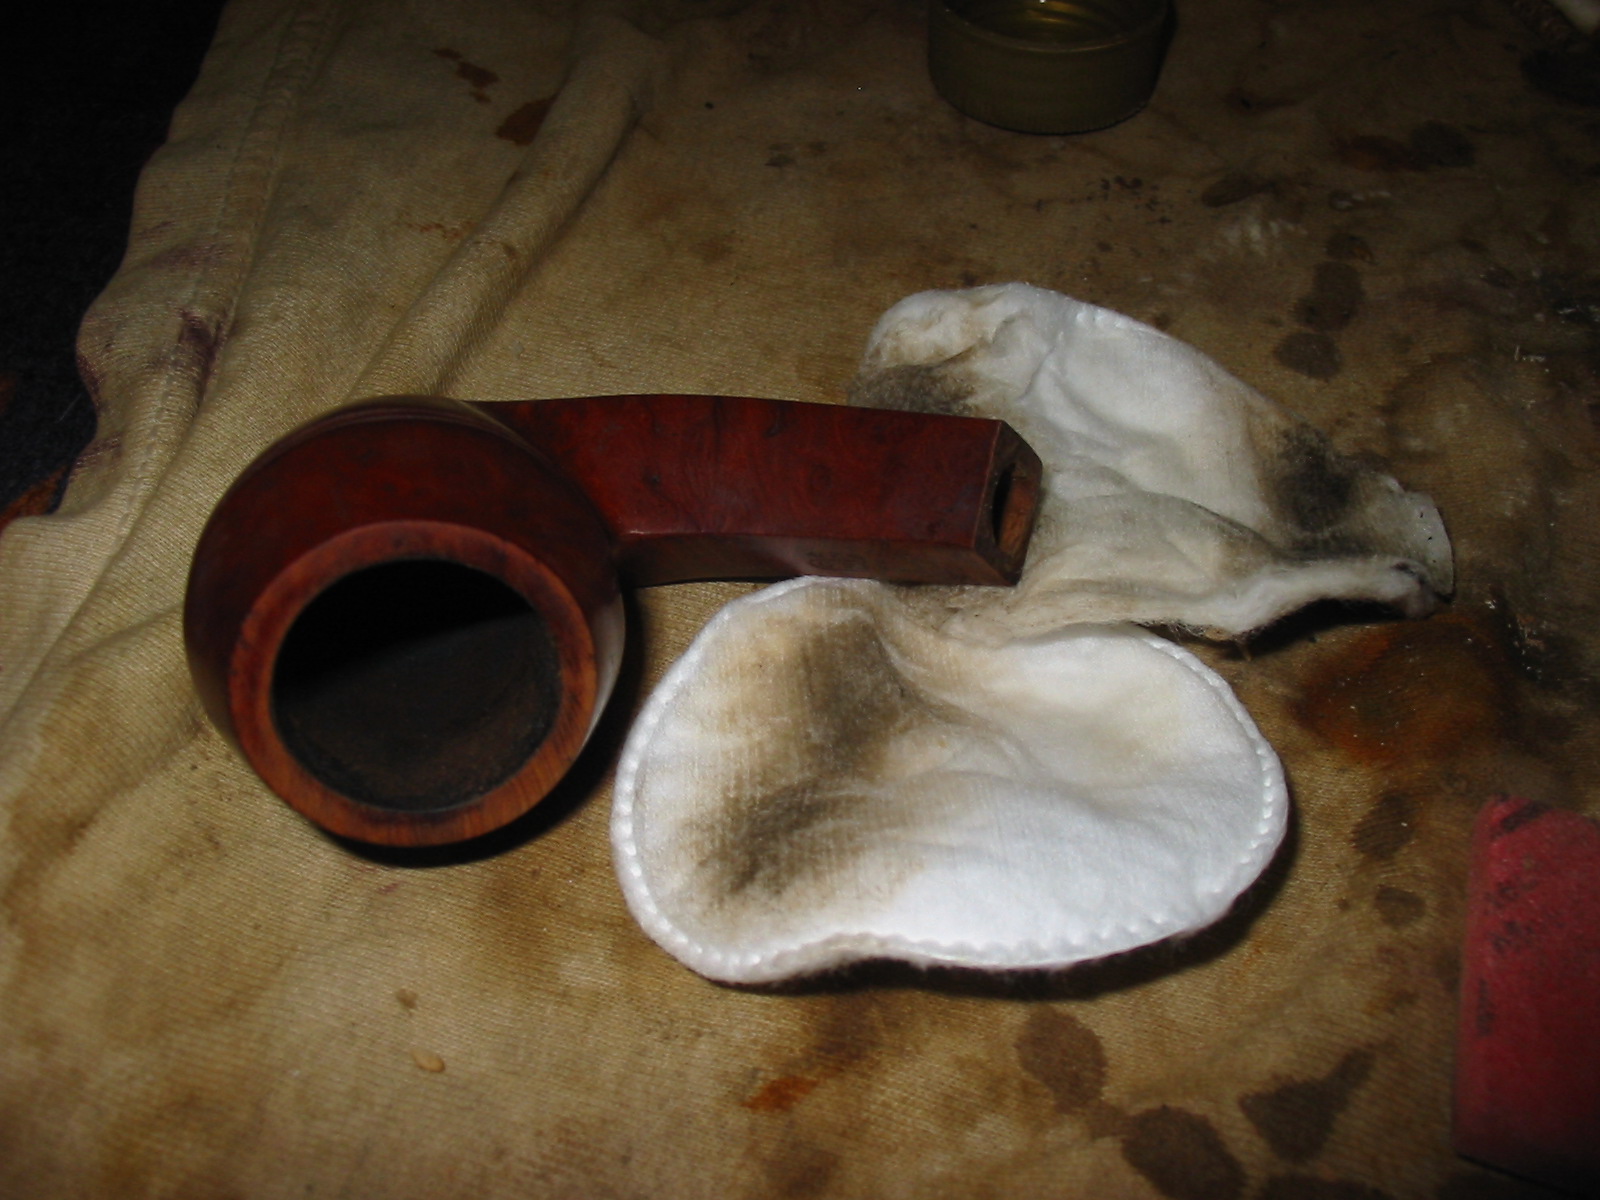
The hole in the end of the stinger does not go through the stinger but rather is like a small cup on the end. It was for collecting moisture and tars if the grime buildup was any indication.
IMG_3178

IMG_3180

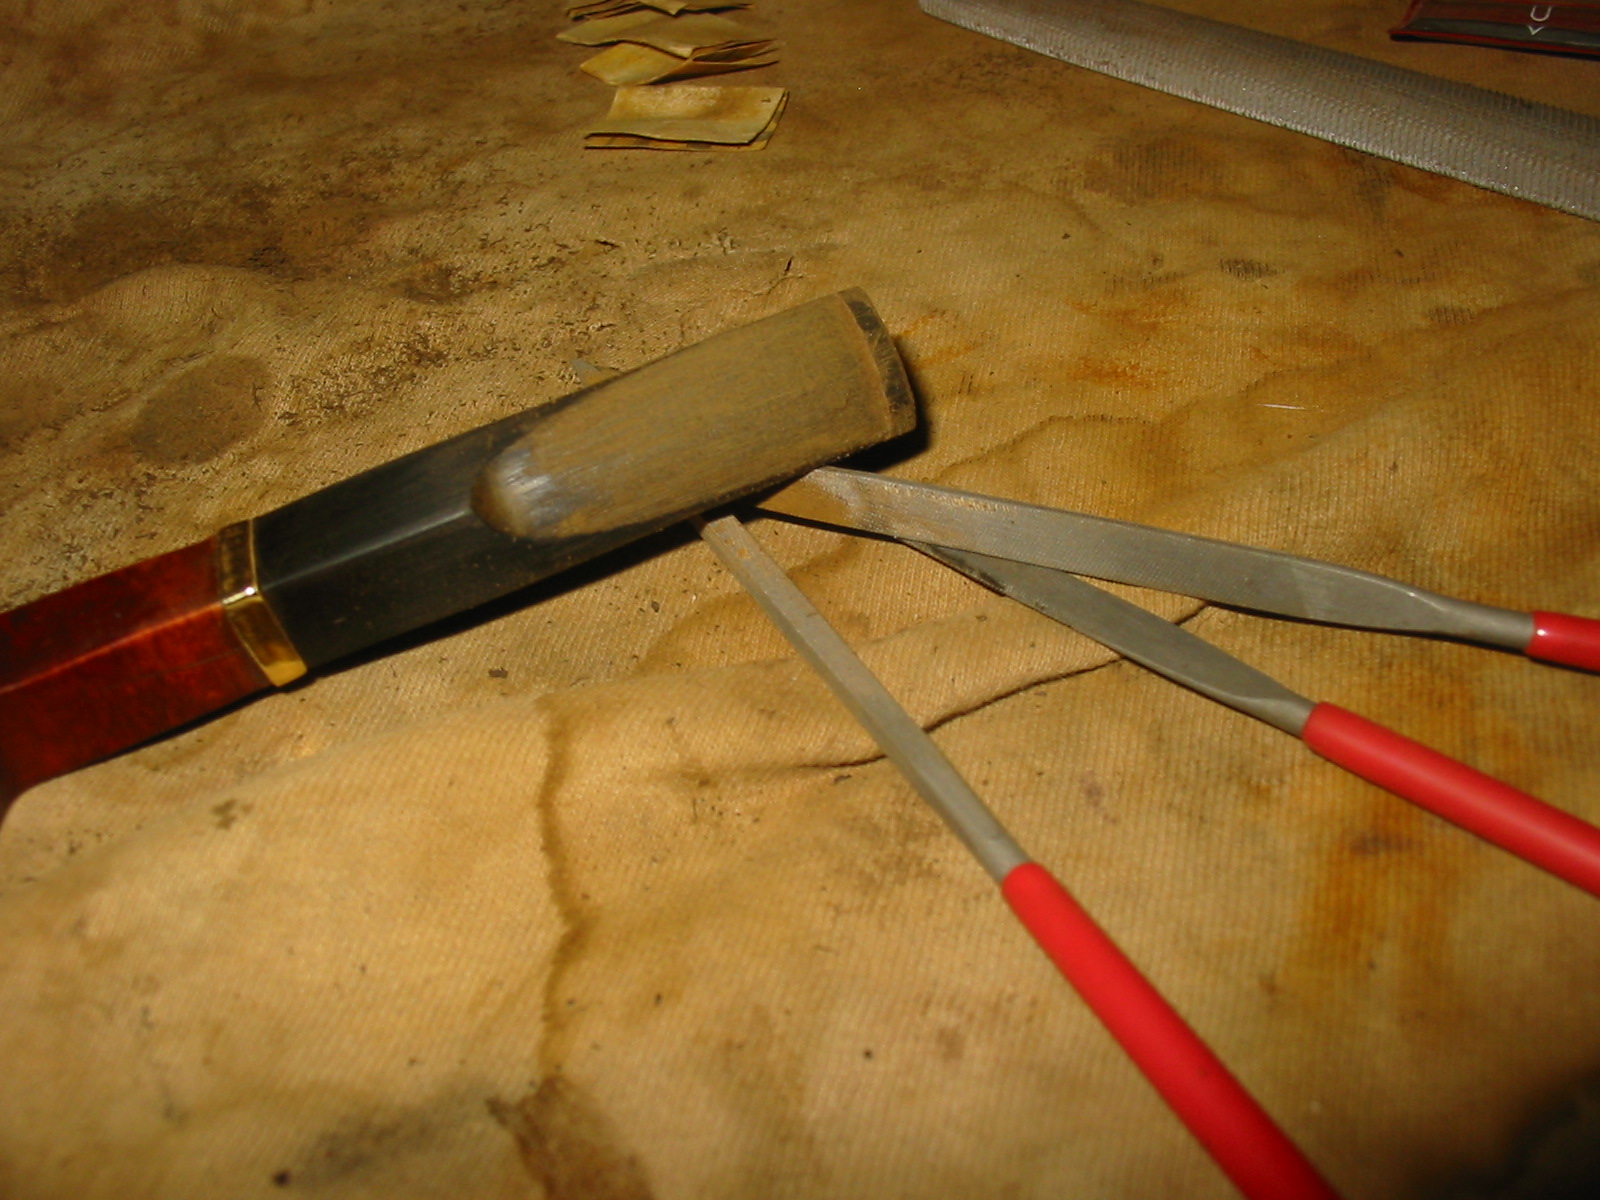
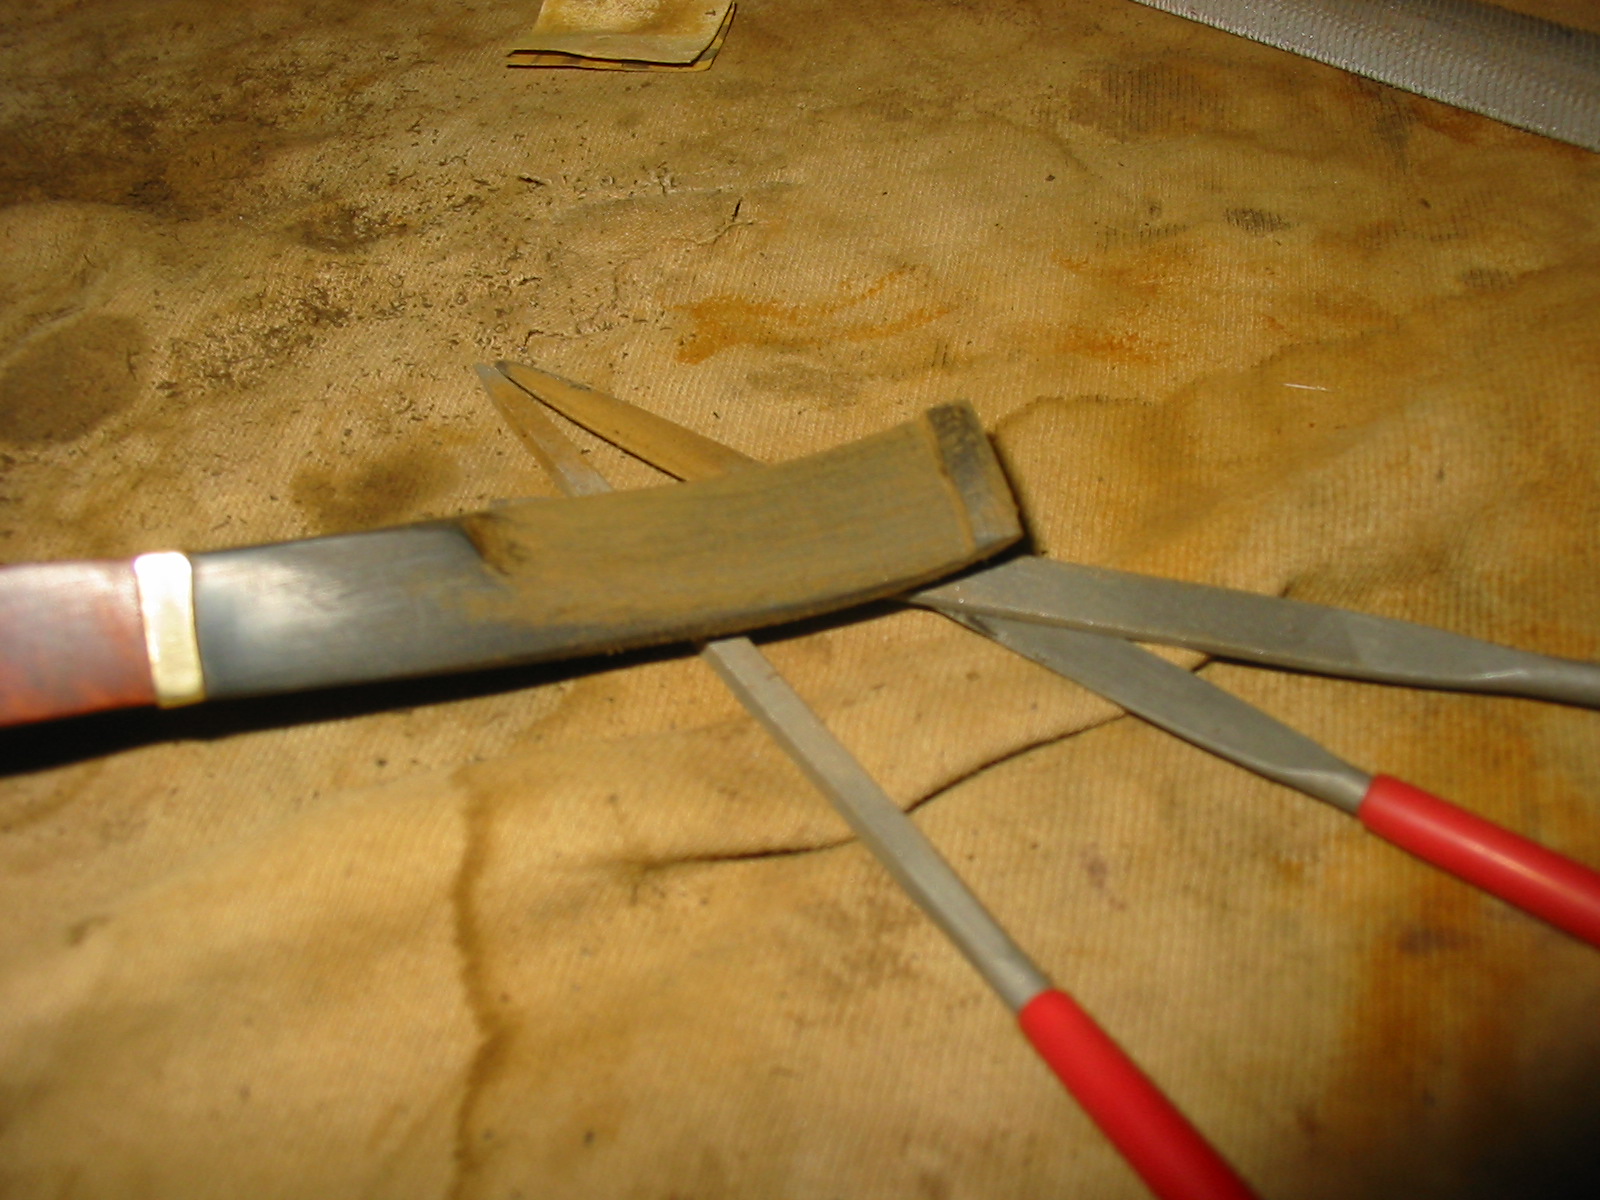
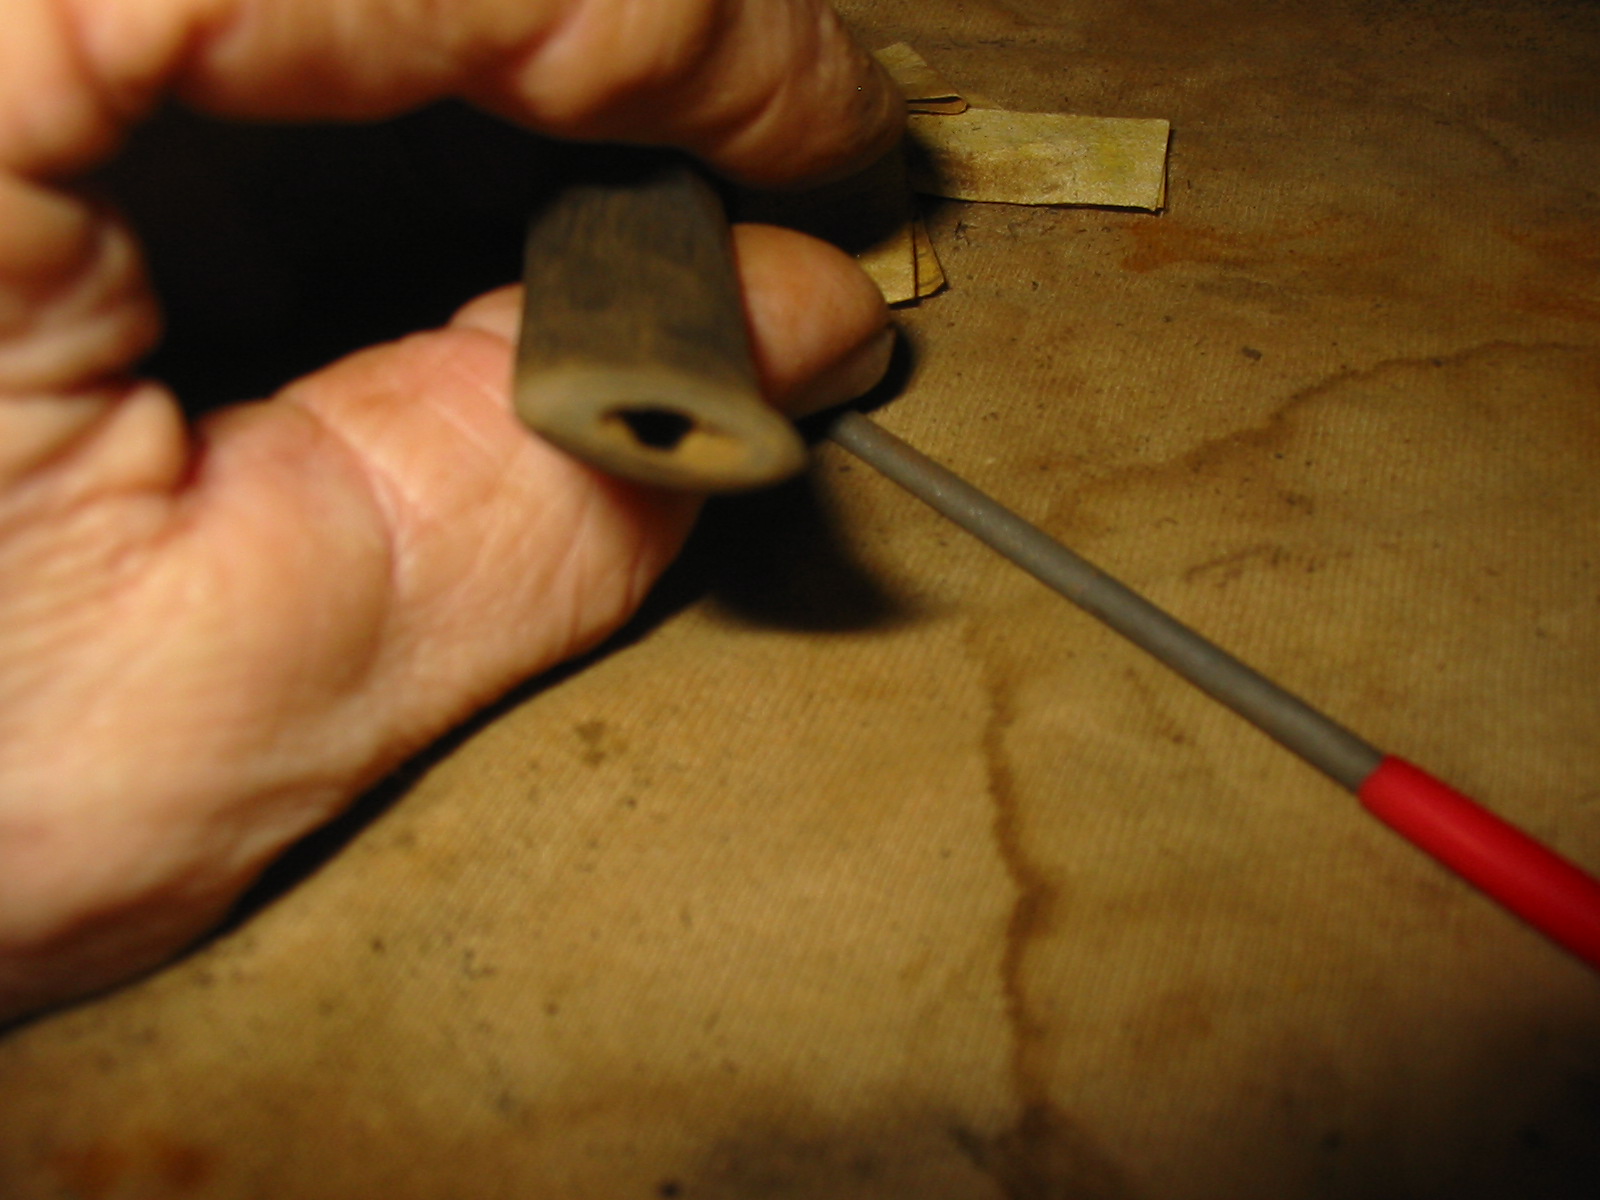
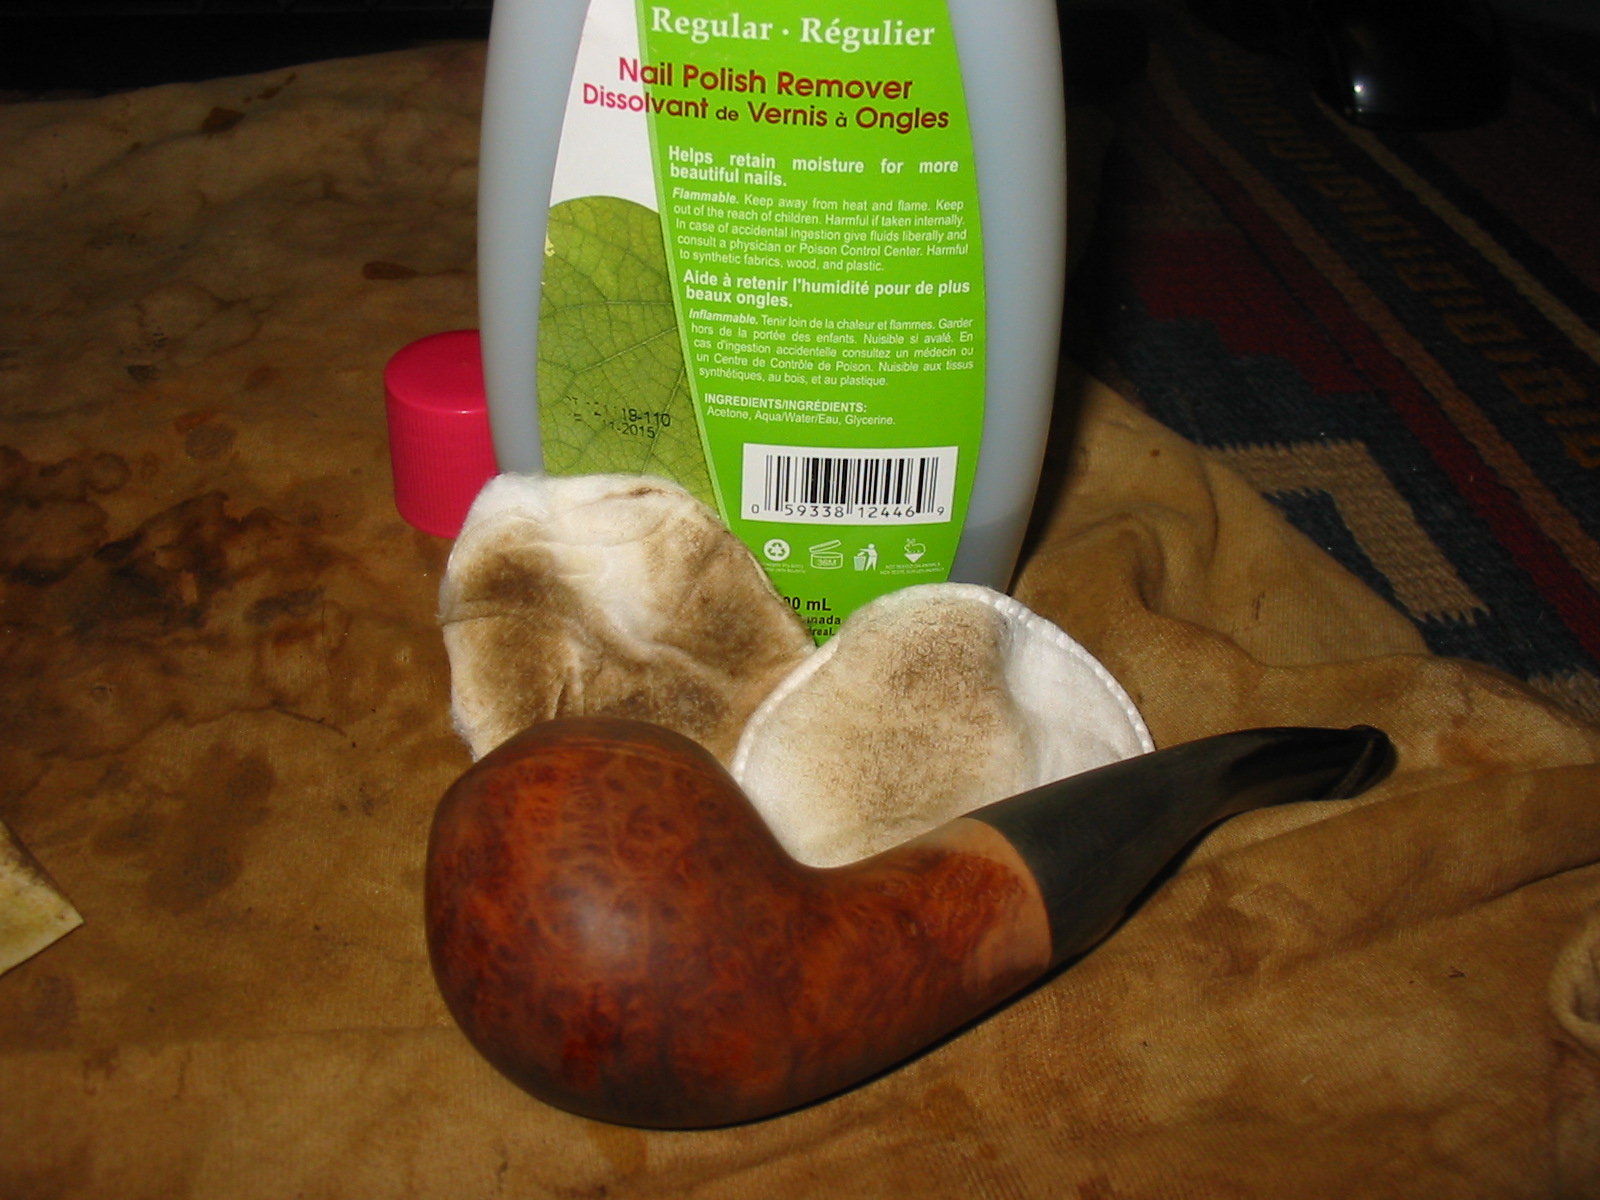
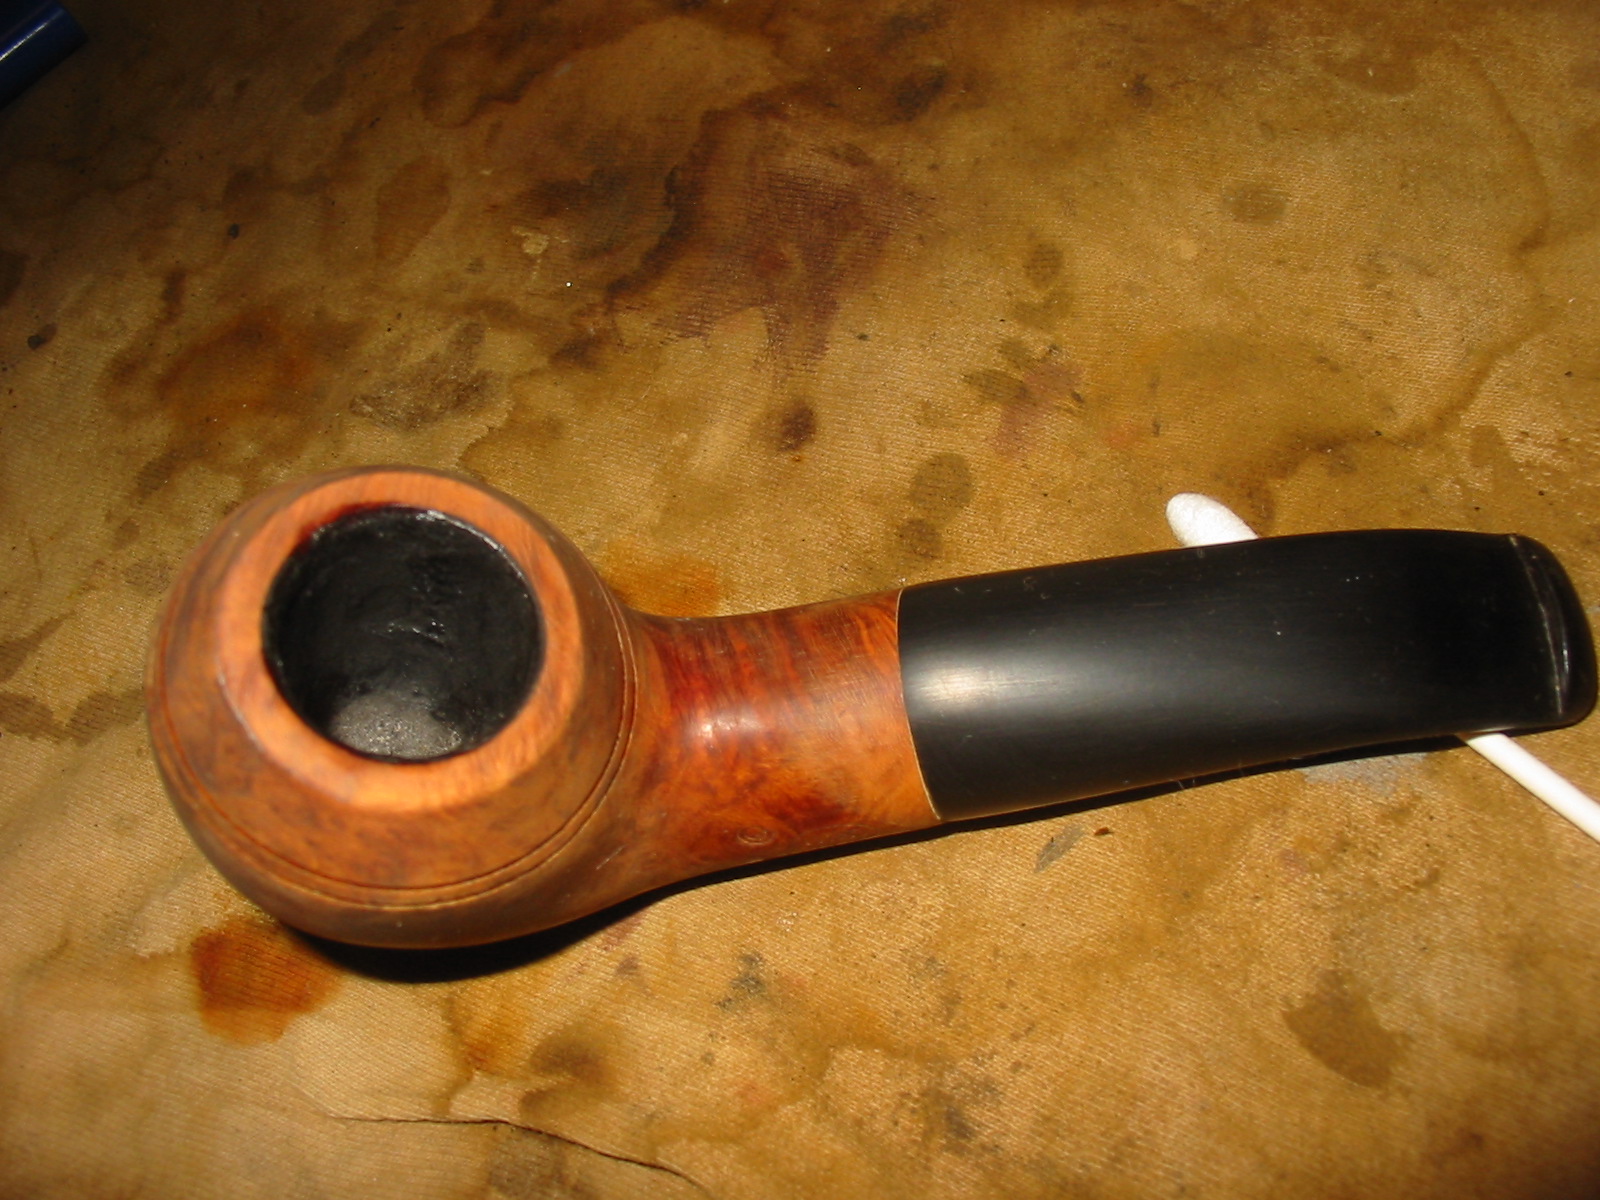
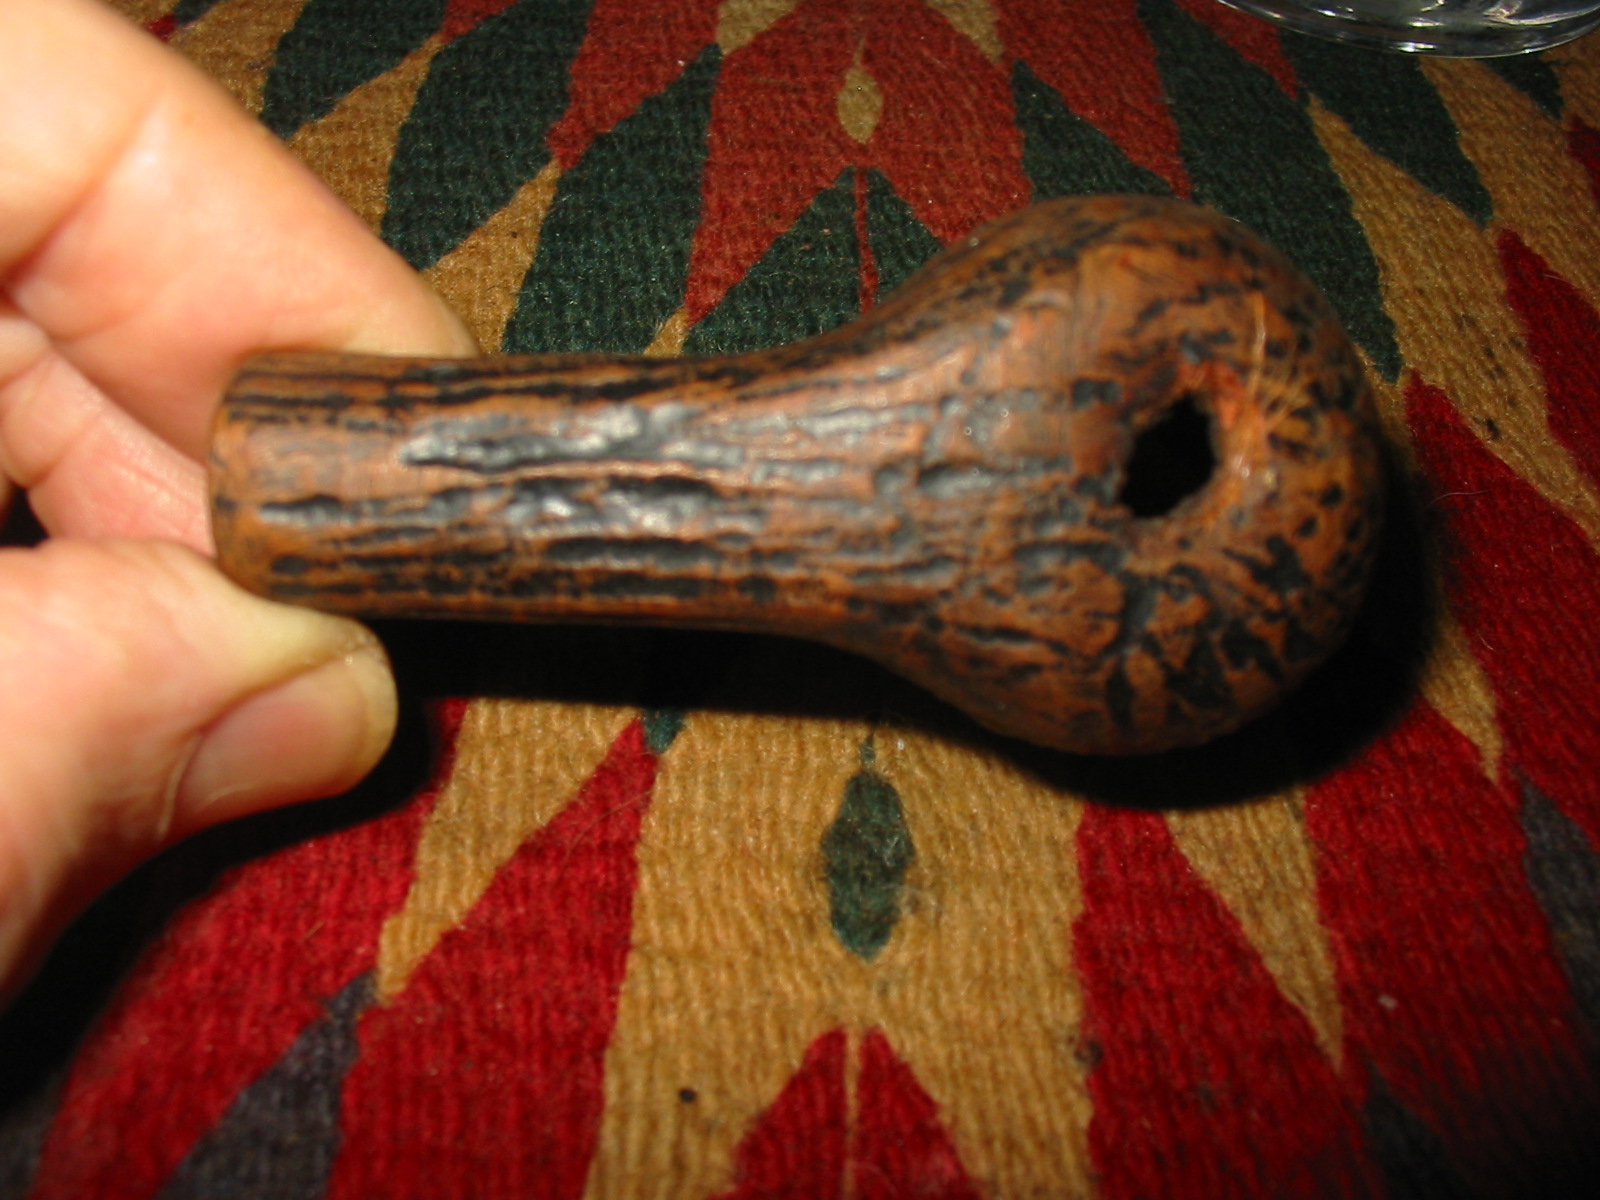
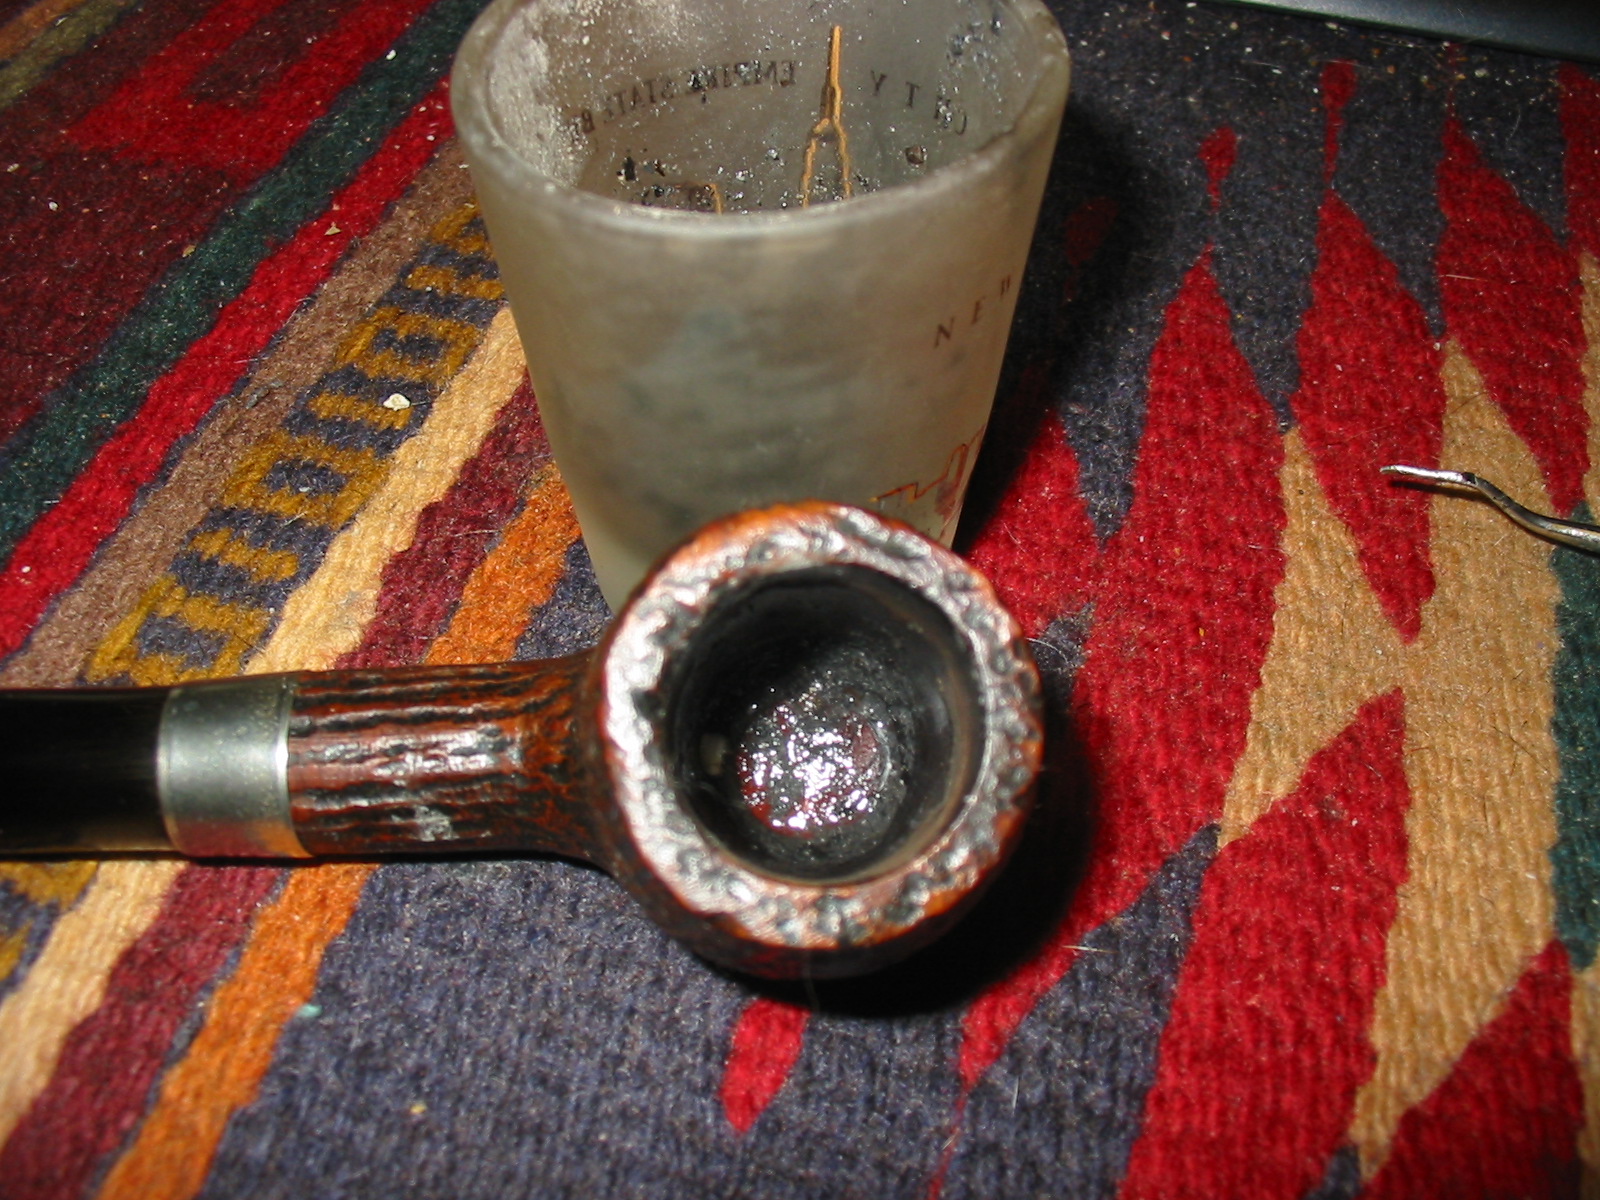
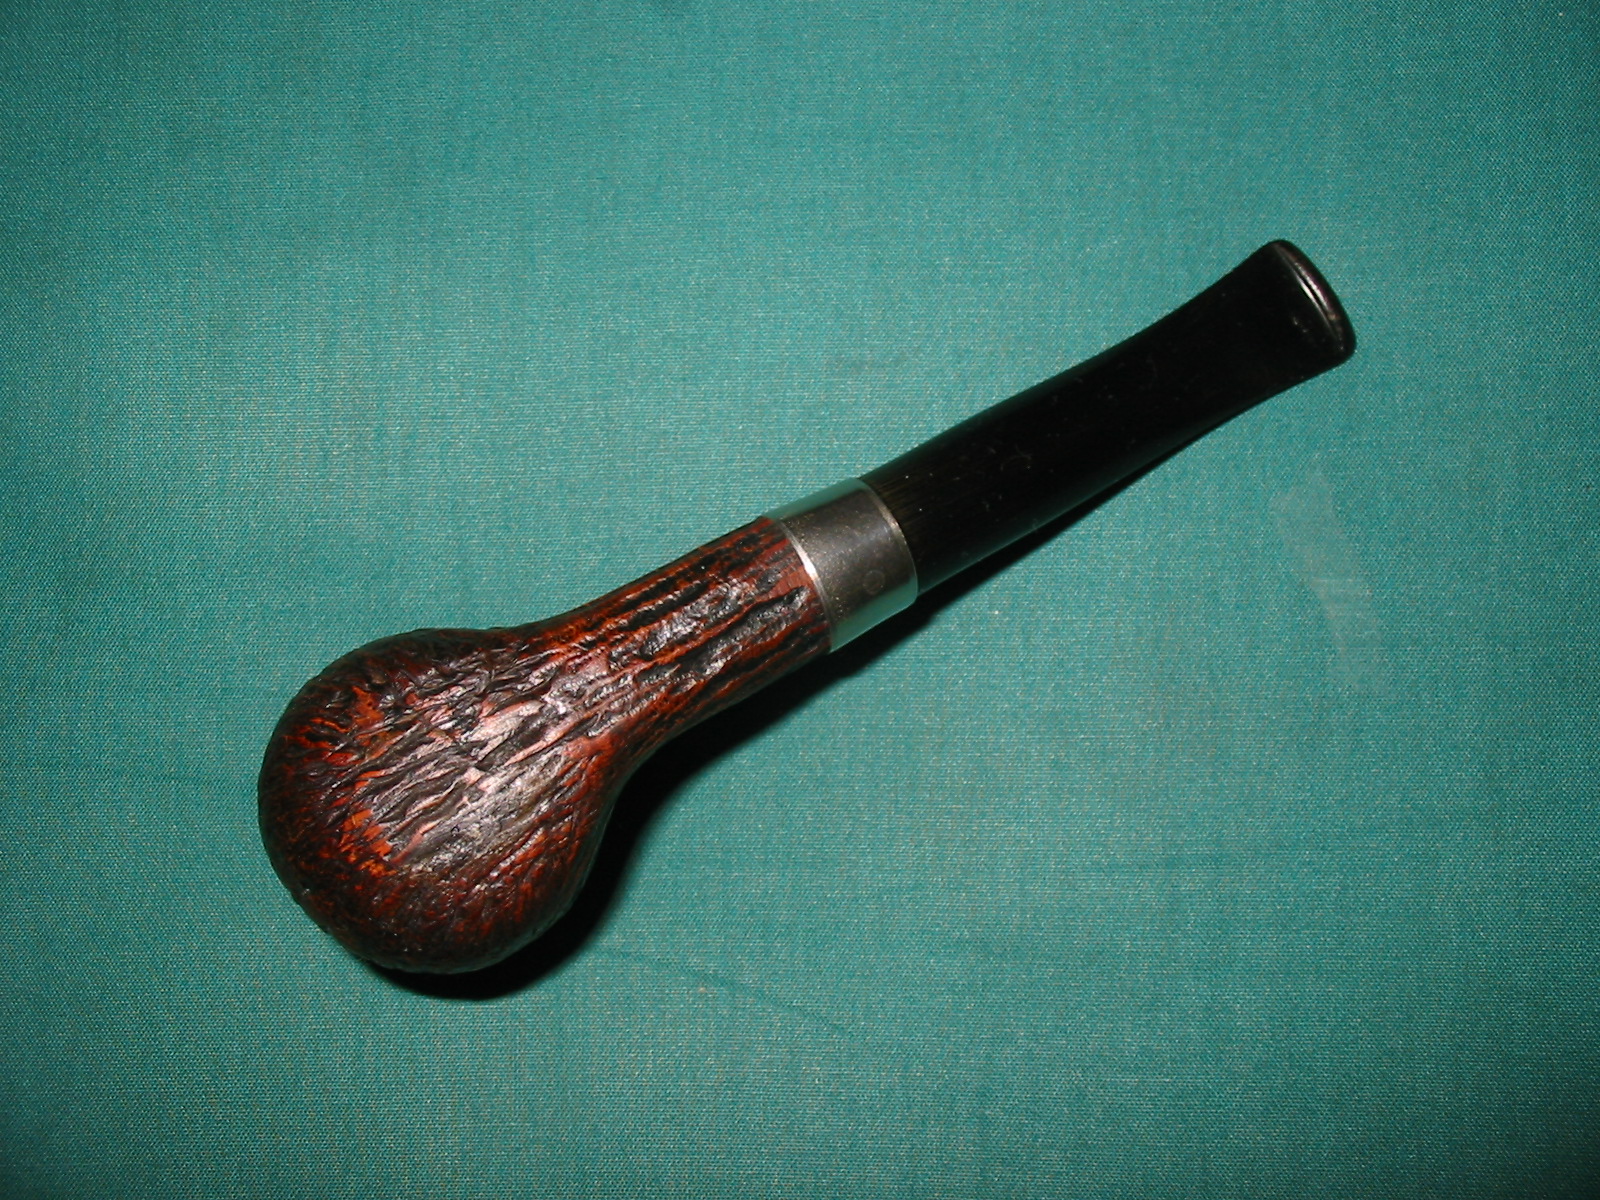
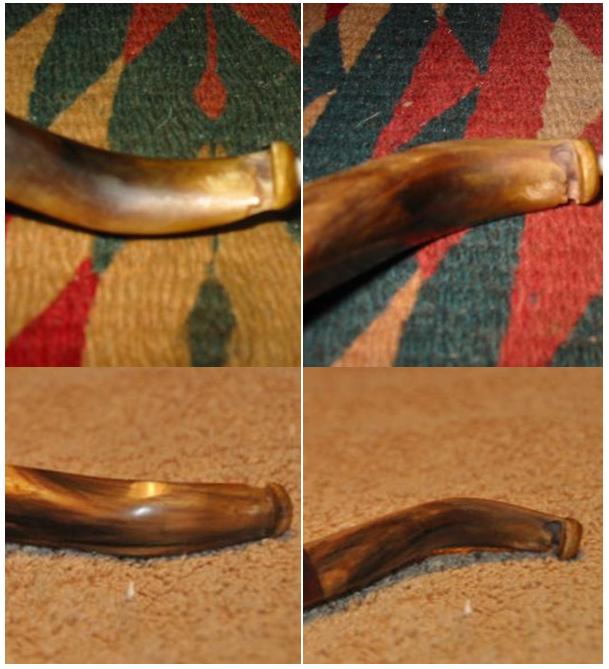
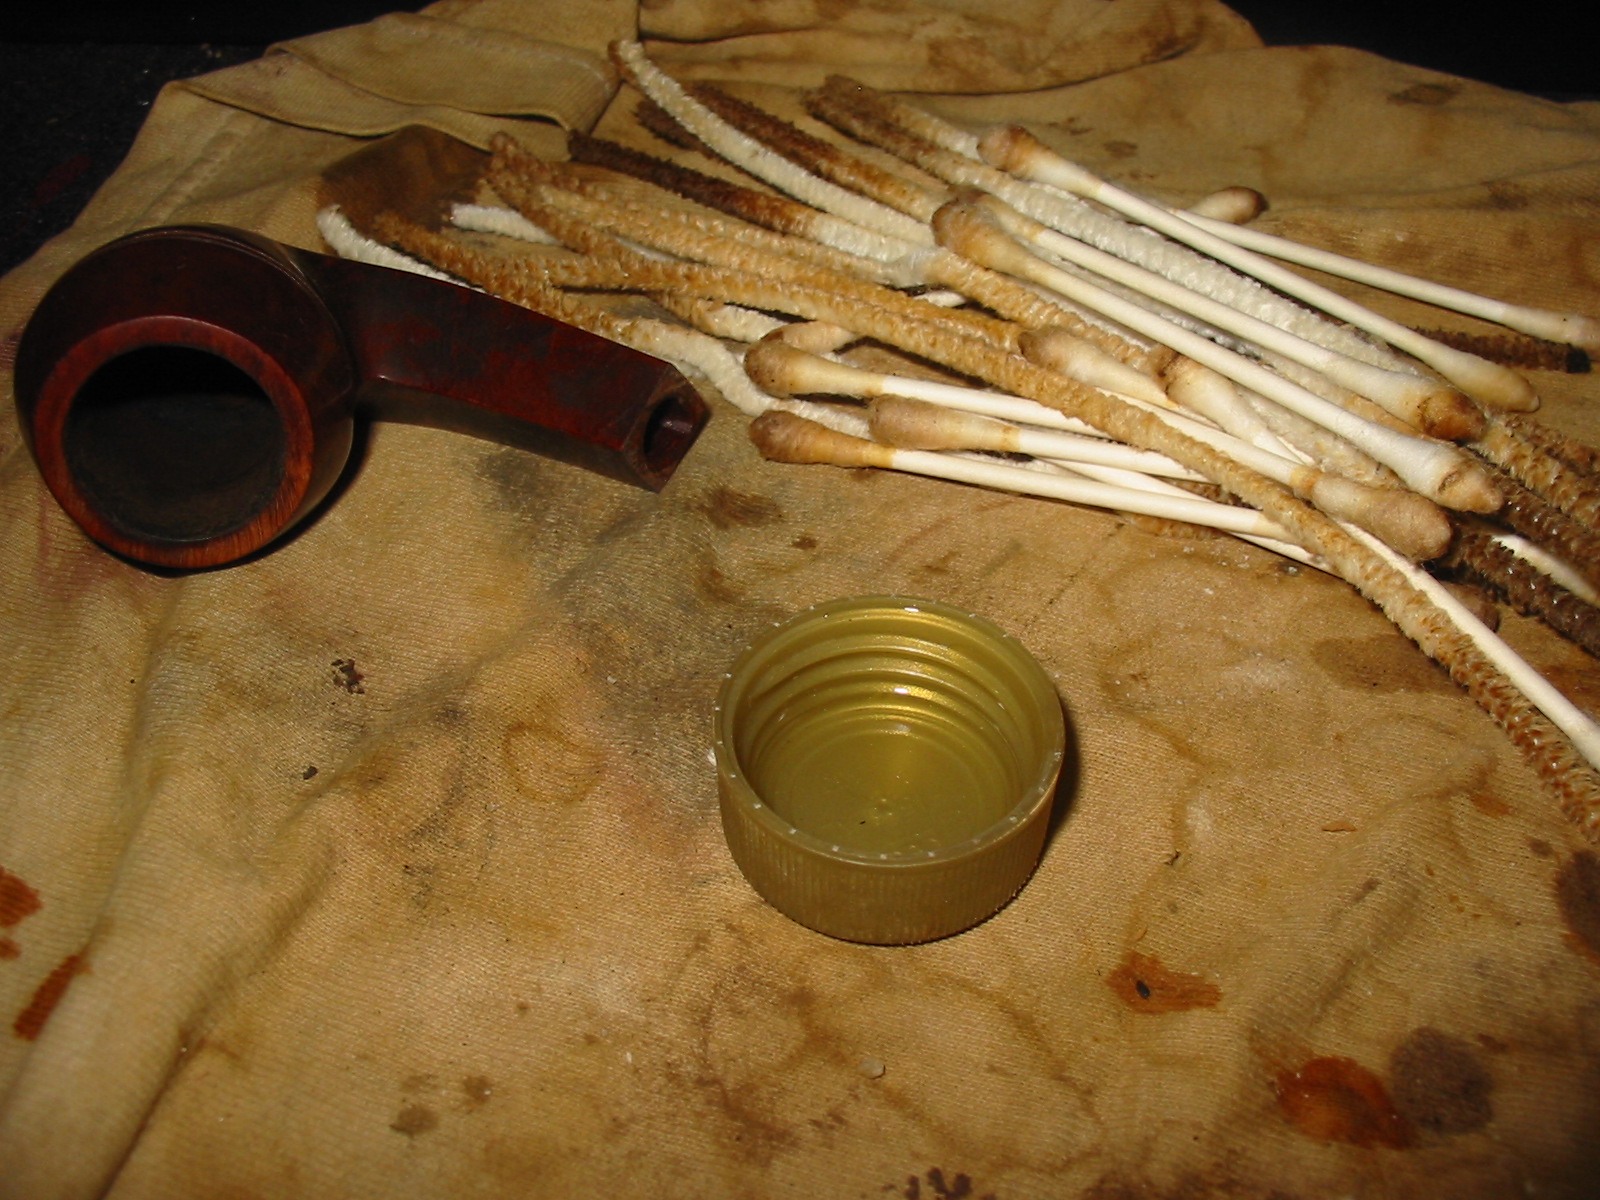
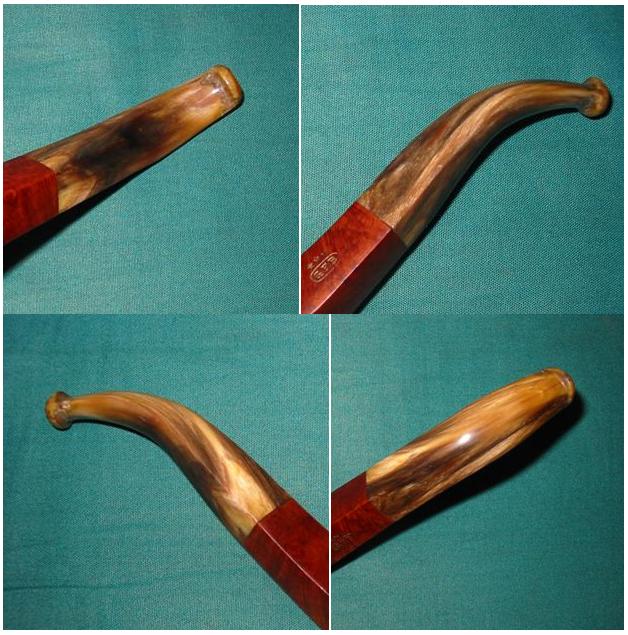
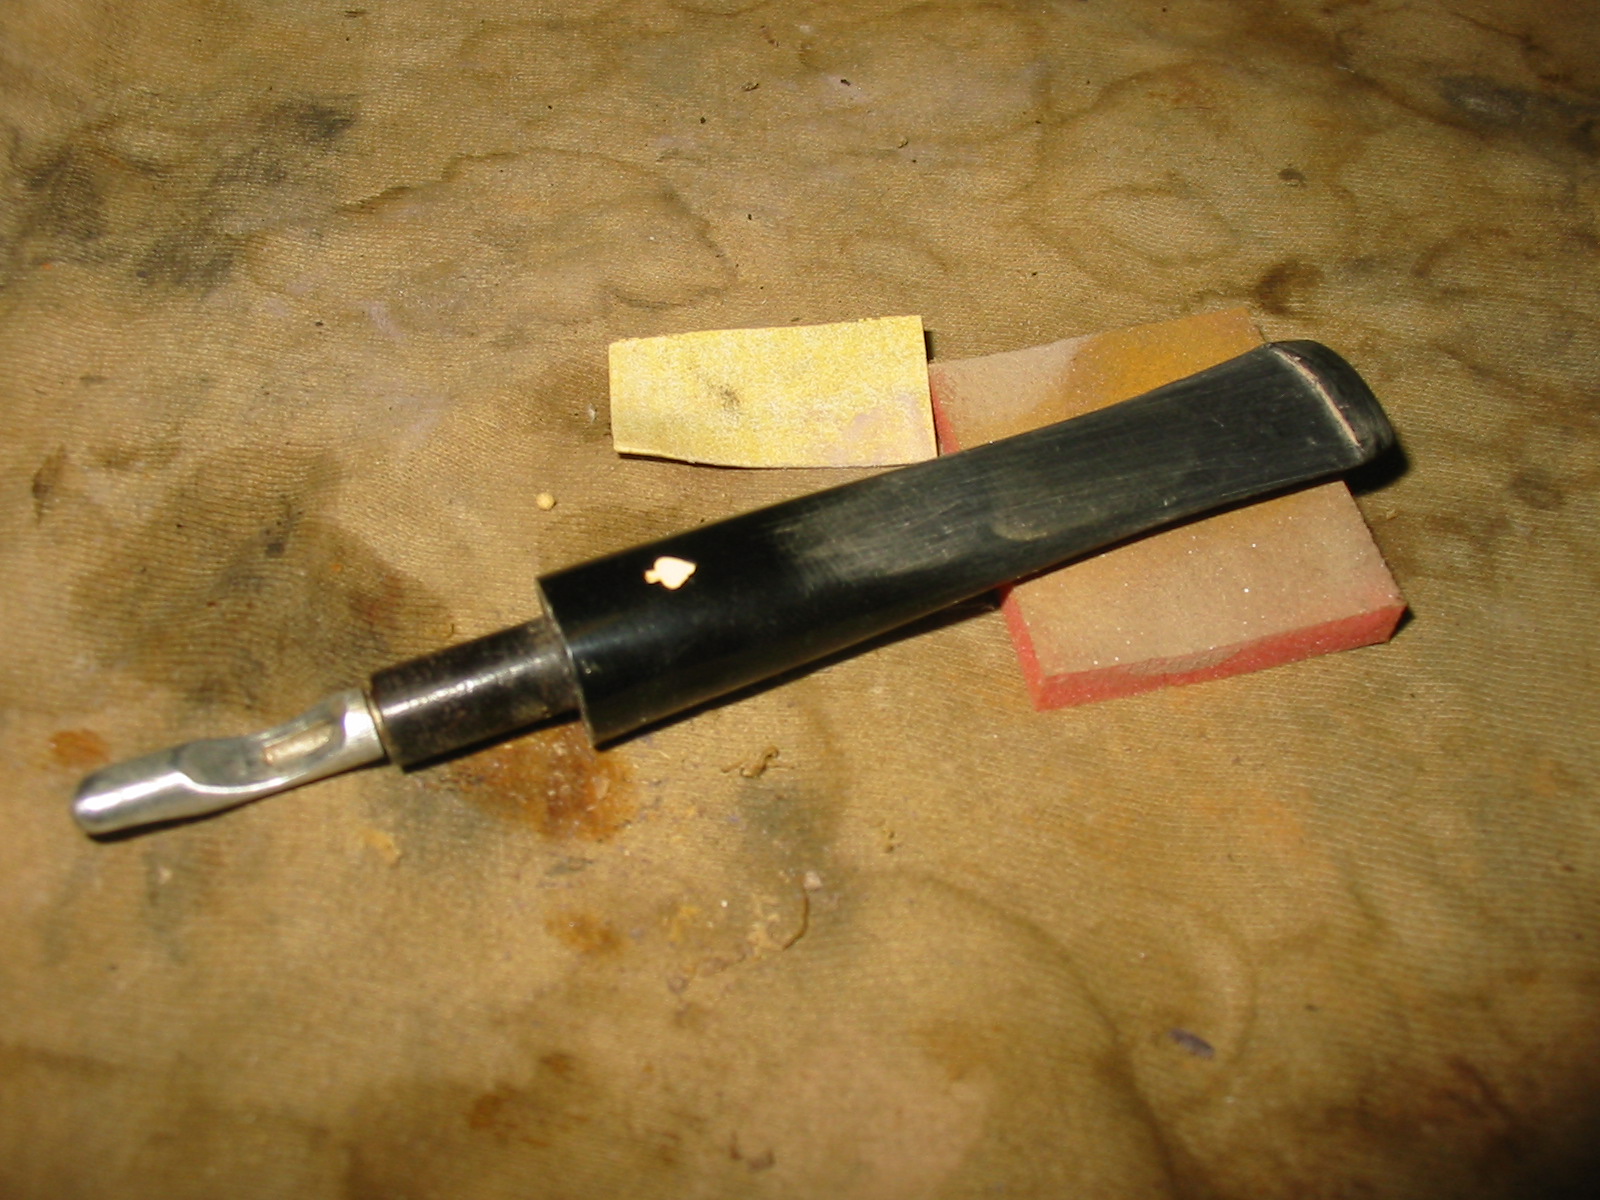
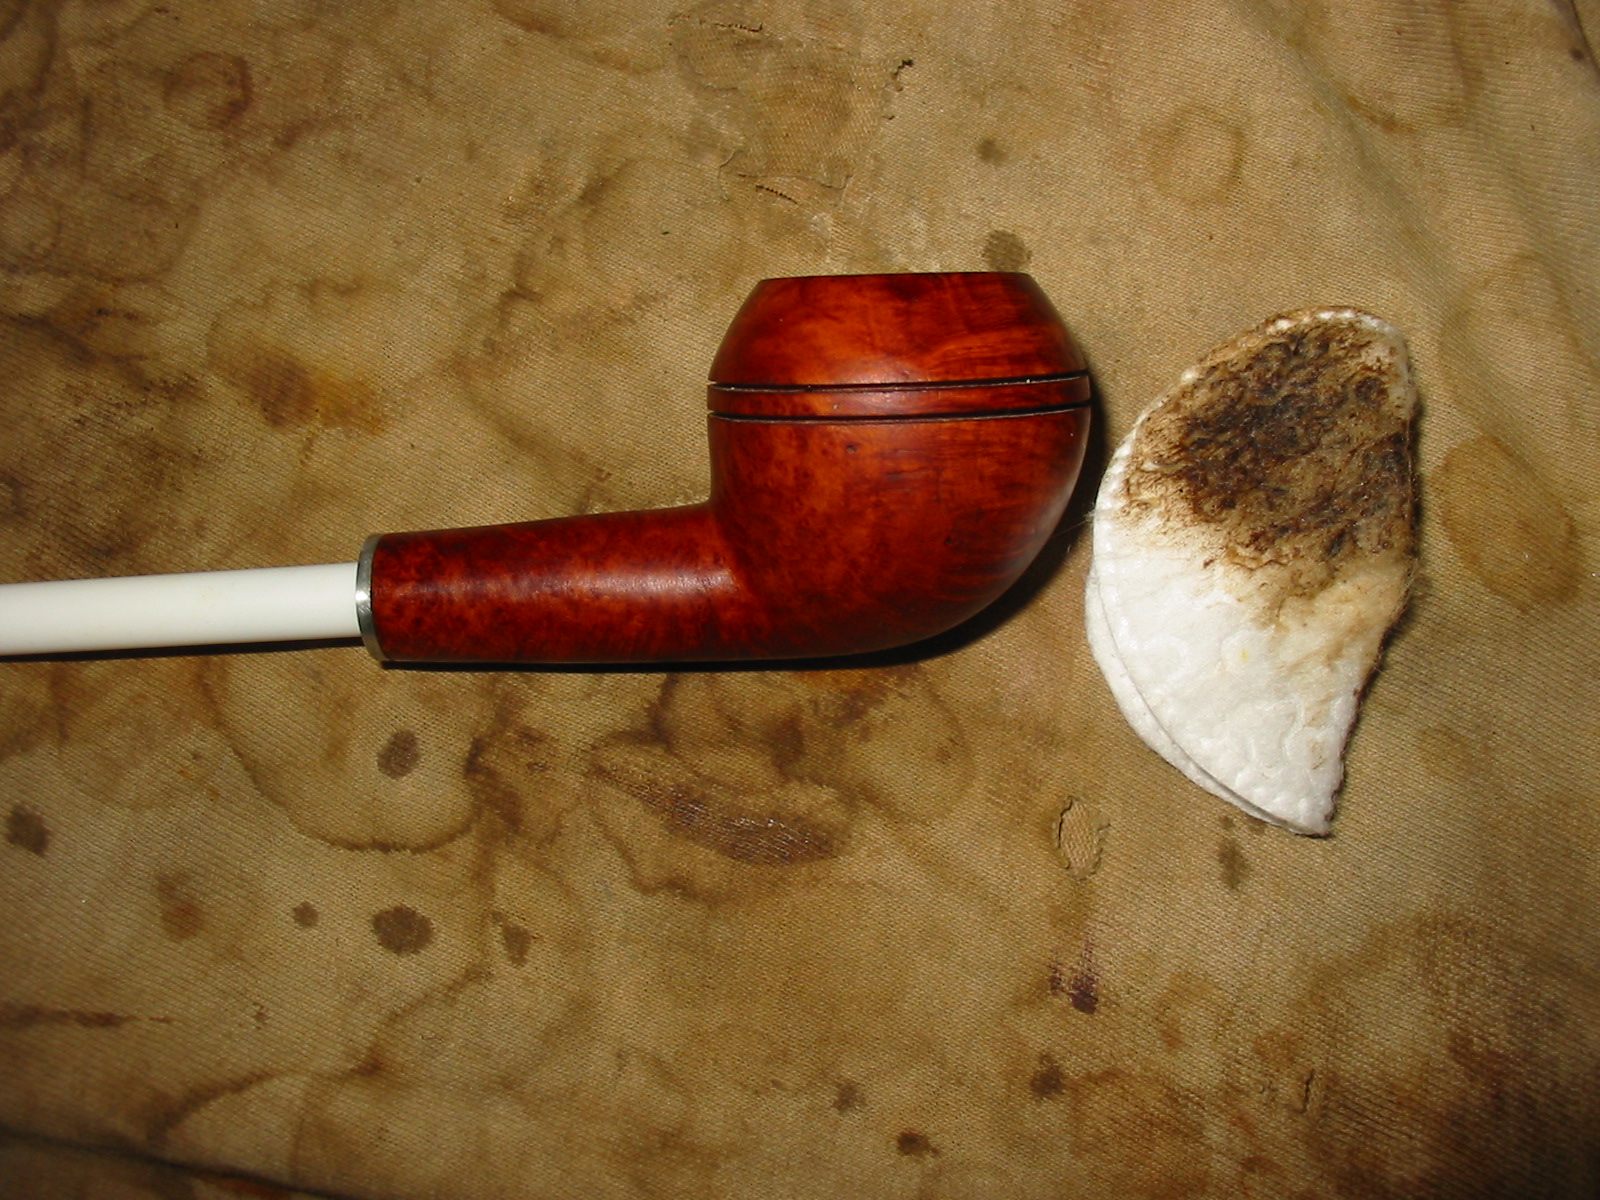
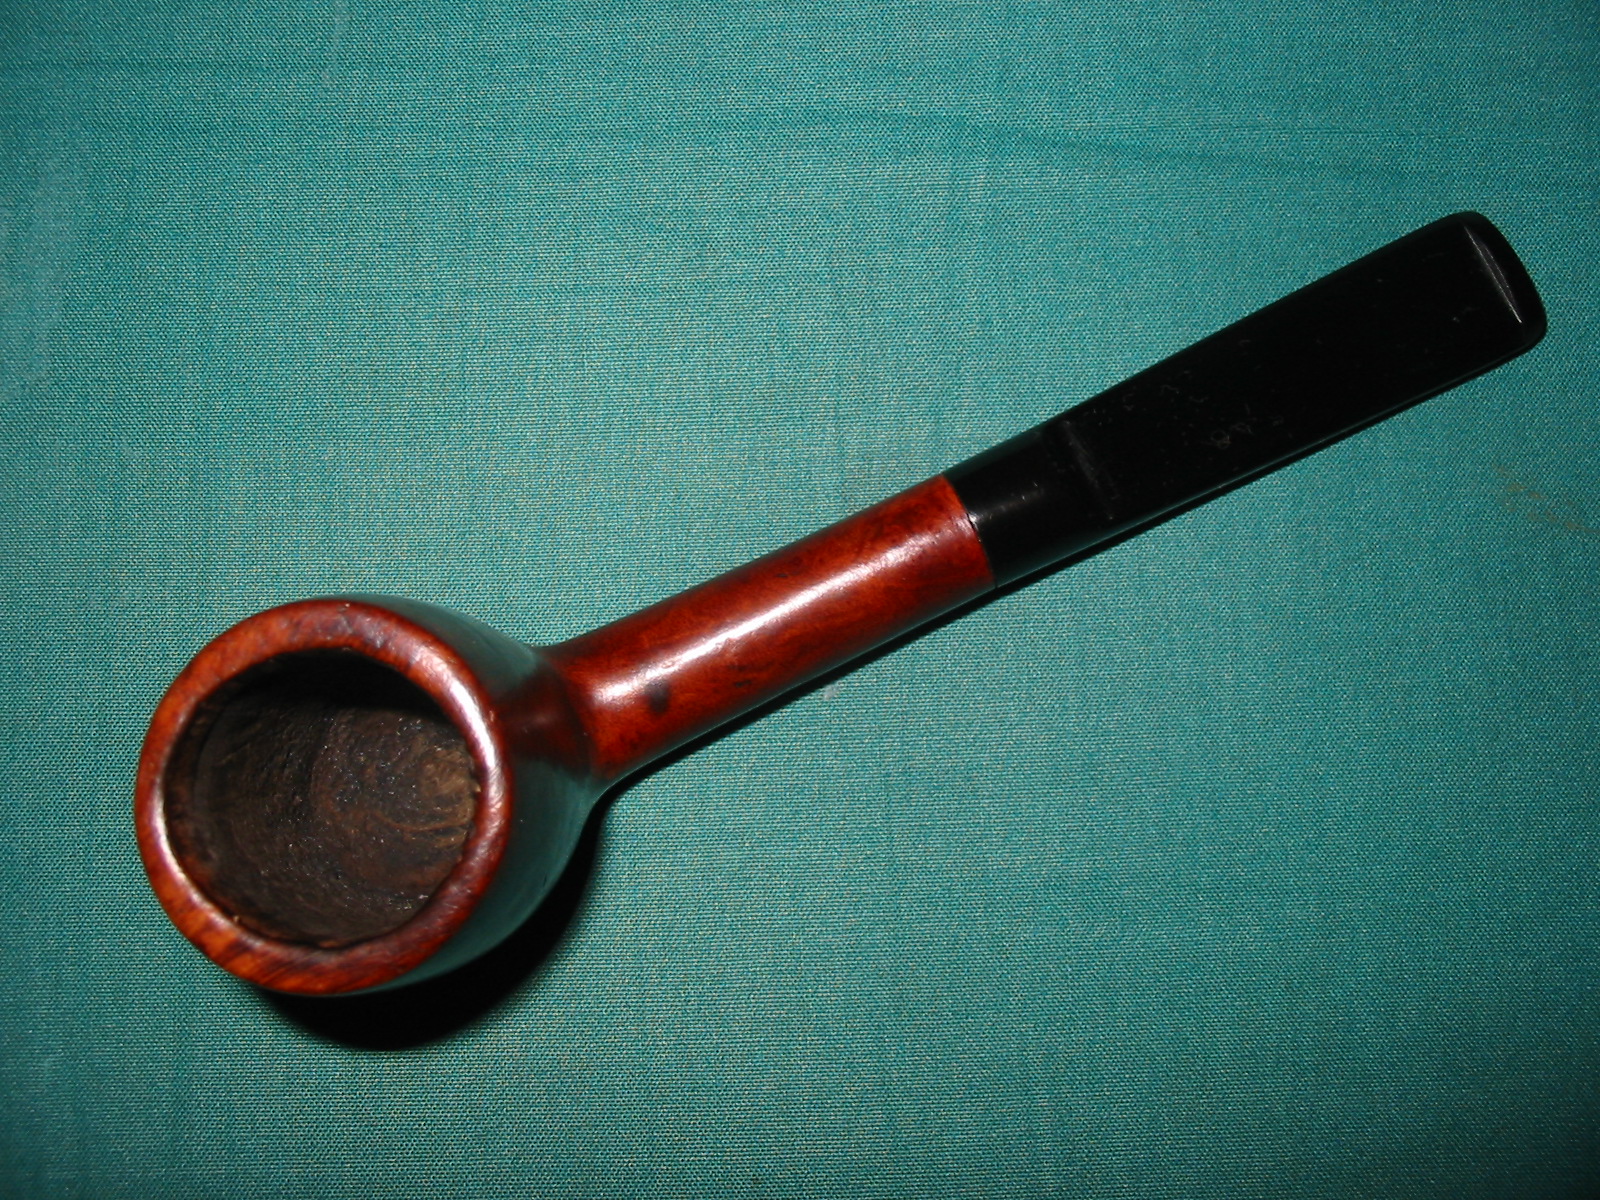
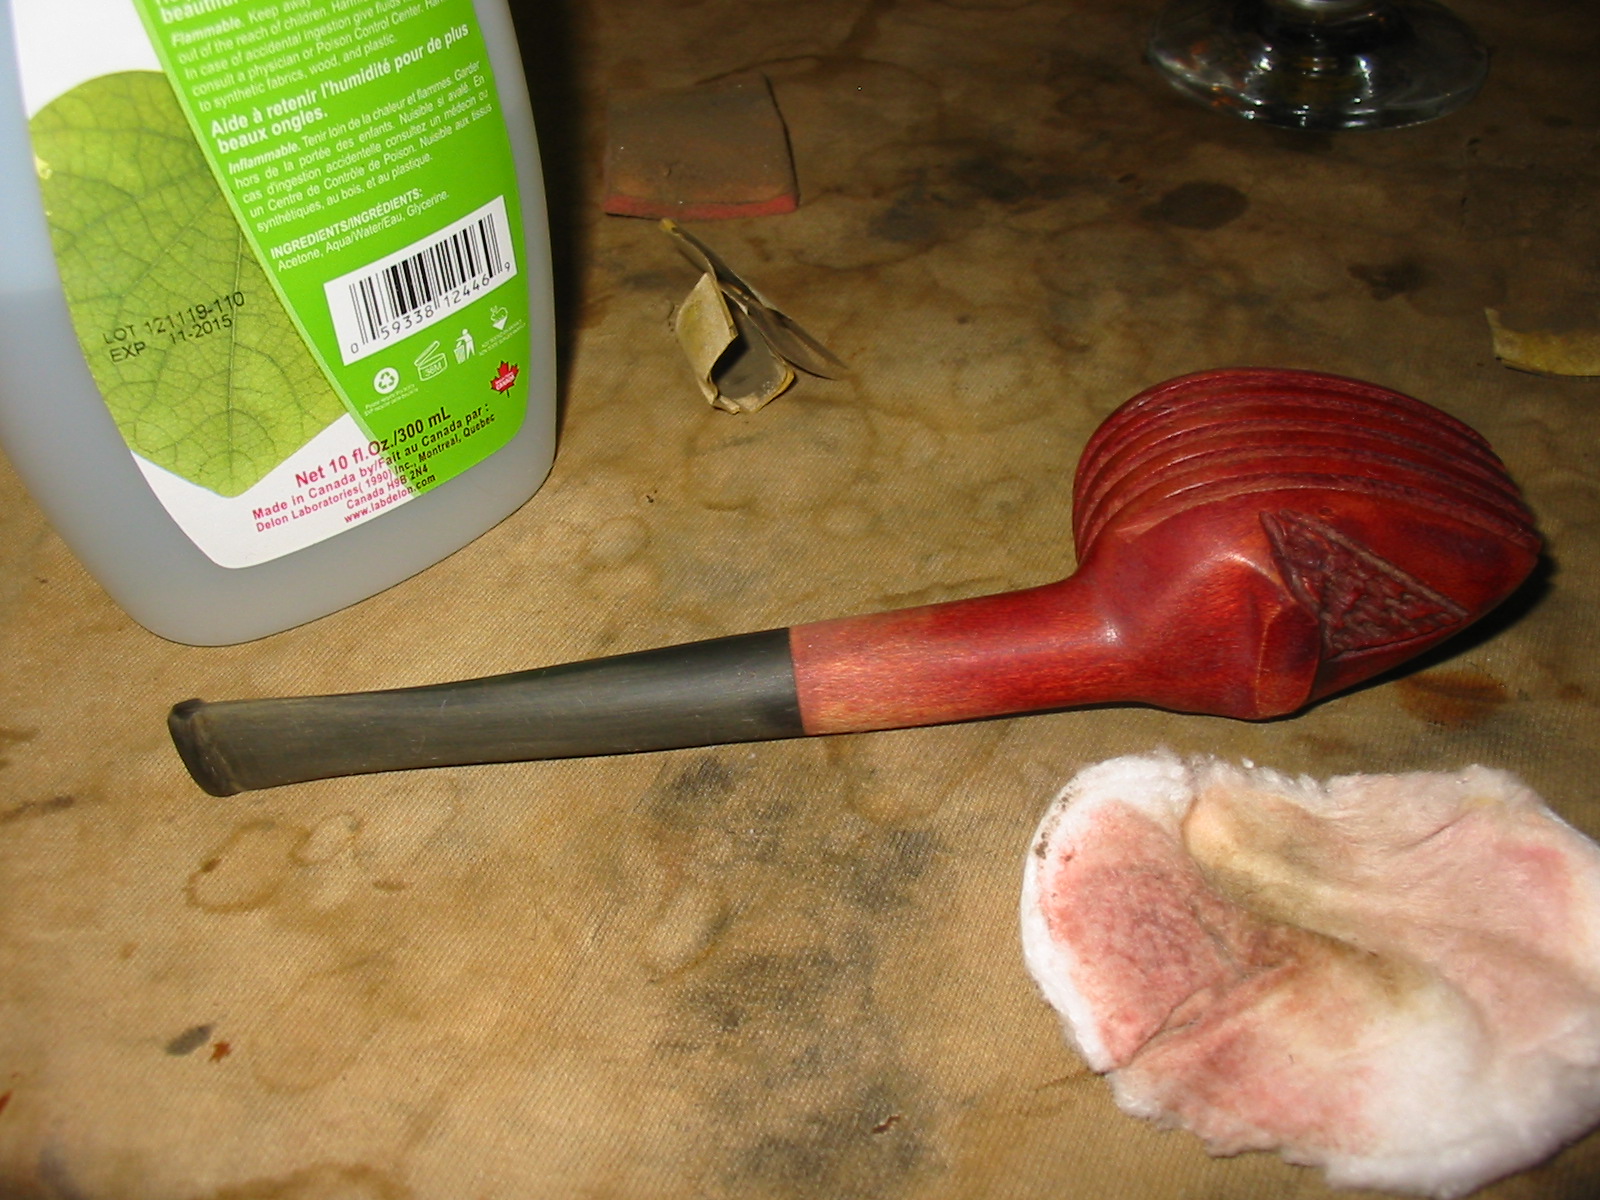
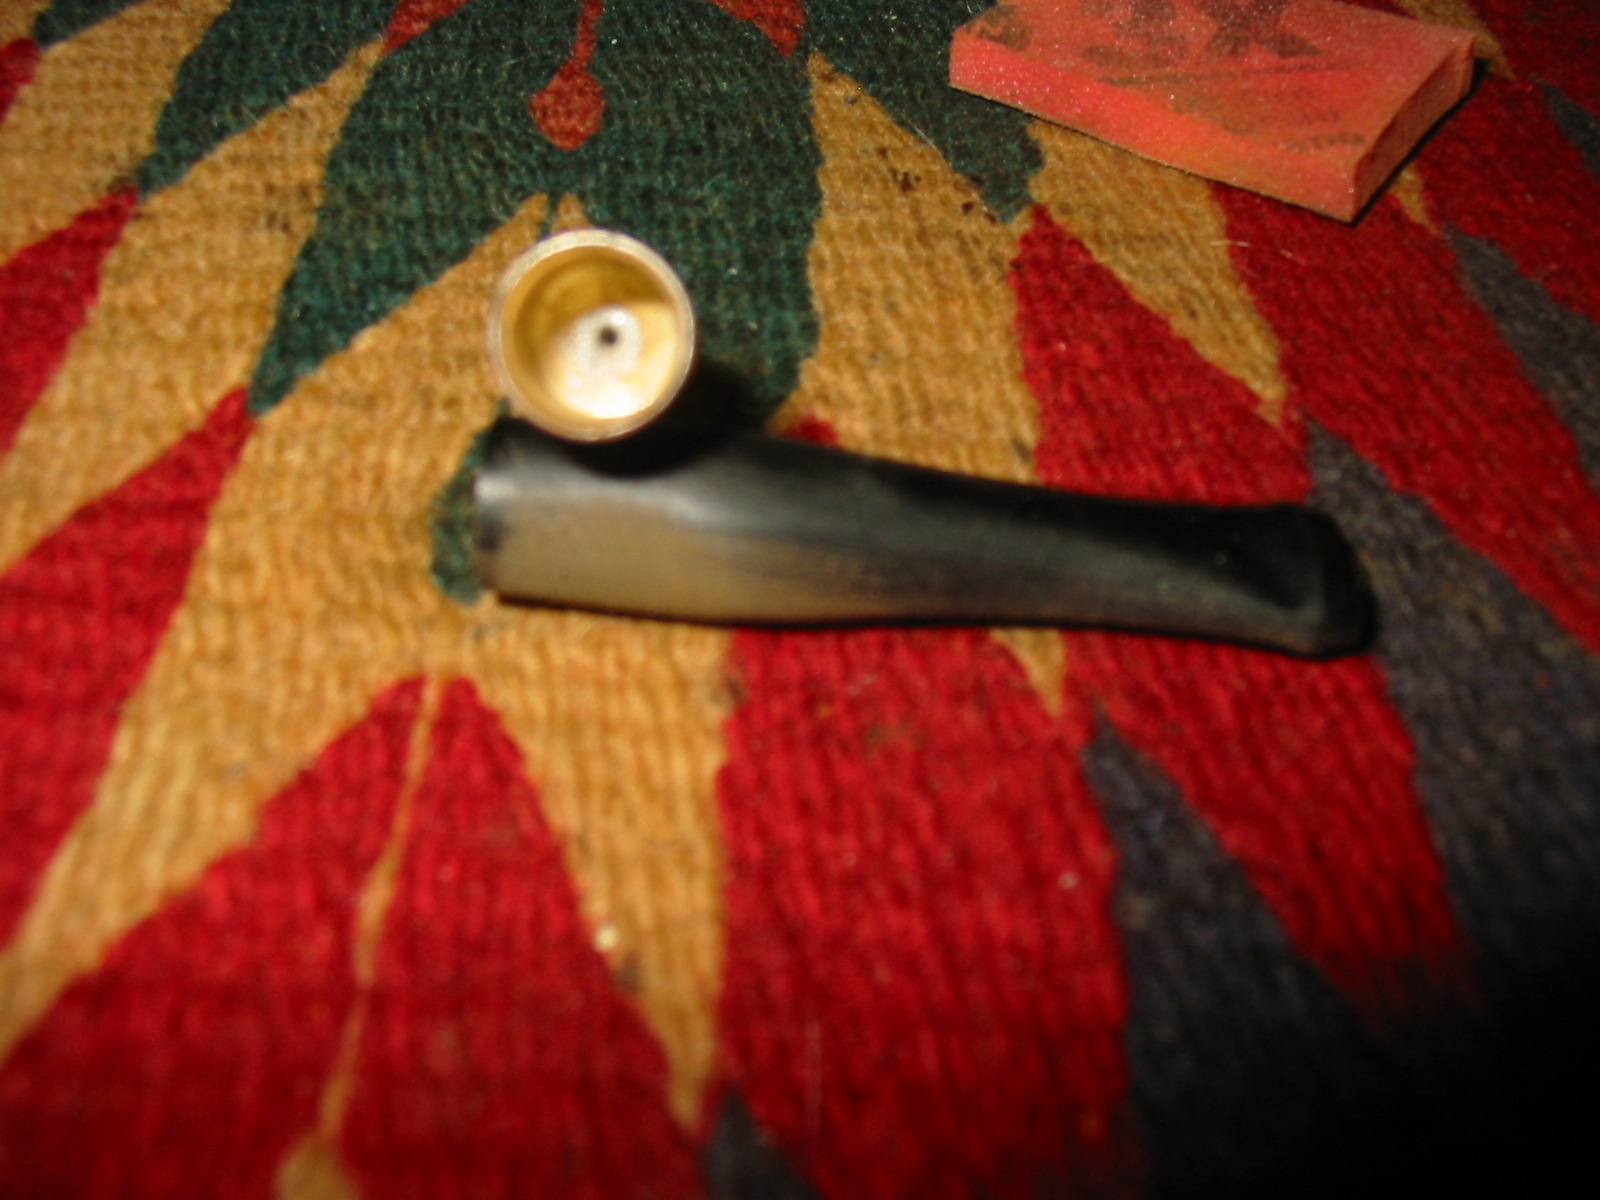
The holder cap pictured in the photo below is the depth of the filter on a modern cigarette and also the dame diameter as the end of the cigarette. I cleaned the entire apparatus and soaked it in a bath of Everclear to try to open the airway. I was able to clean out the cut in the aluminum, the holes in the end and in the cut itself using a dental pick. I scrubbed down the apparatus with a tooth brush and Everclear. I was unable to get air to pass through due to a clog in the end of the holder. In the photo below it is visible as a small hole in the bottom of the cup. It was plugged and the dental pick was too thick to go through it. I tried a thin paper clip and a needle with no success. I finally was able to open it with a tiny micro drill bit on the Dremel and pushed it through at a very slow speed. The bit came with a plastic guide that fit inside the cup perfectly and kept the drill straight as it opened the airway. Once it pushed the clog through I cleaned the inside of the airway with Everclear and was able to push air through with no effort.
IMG_3179

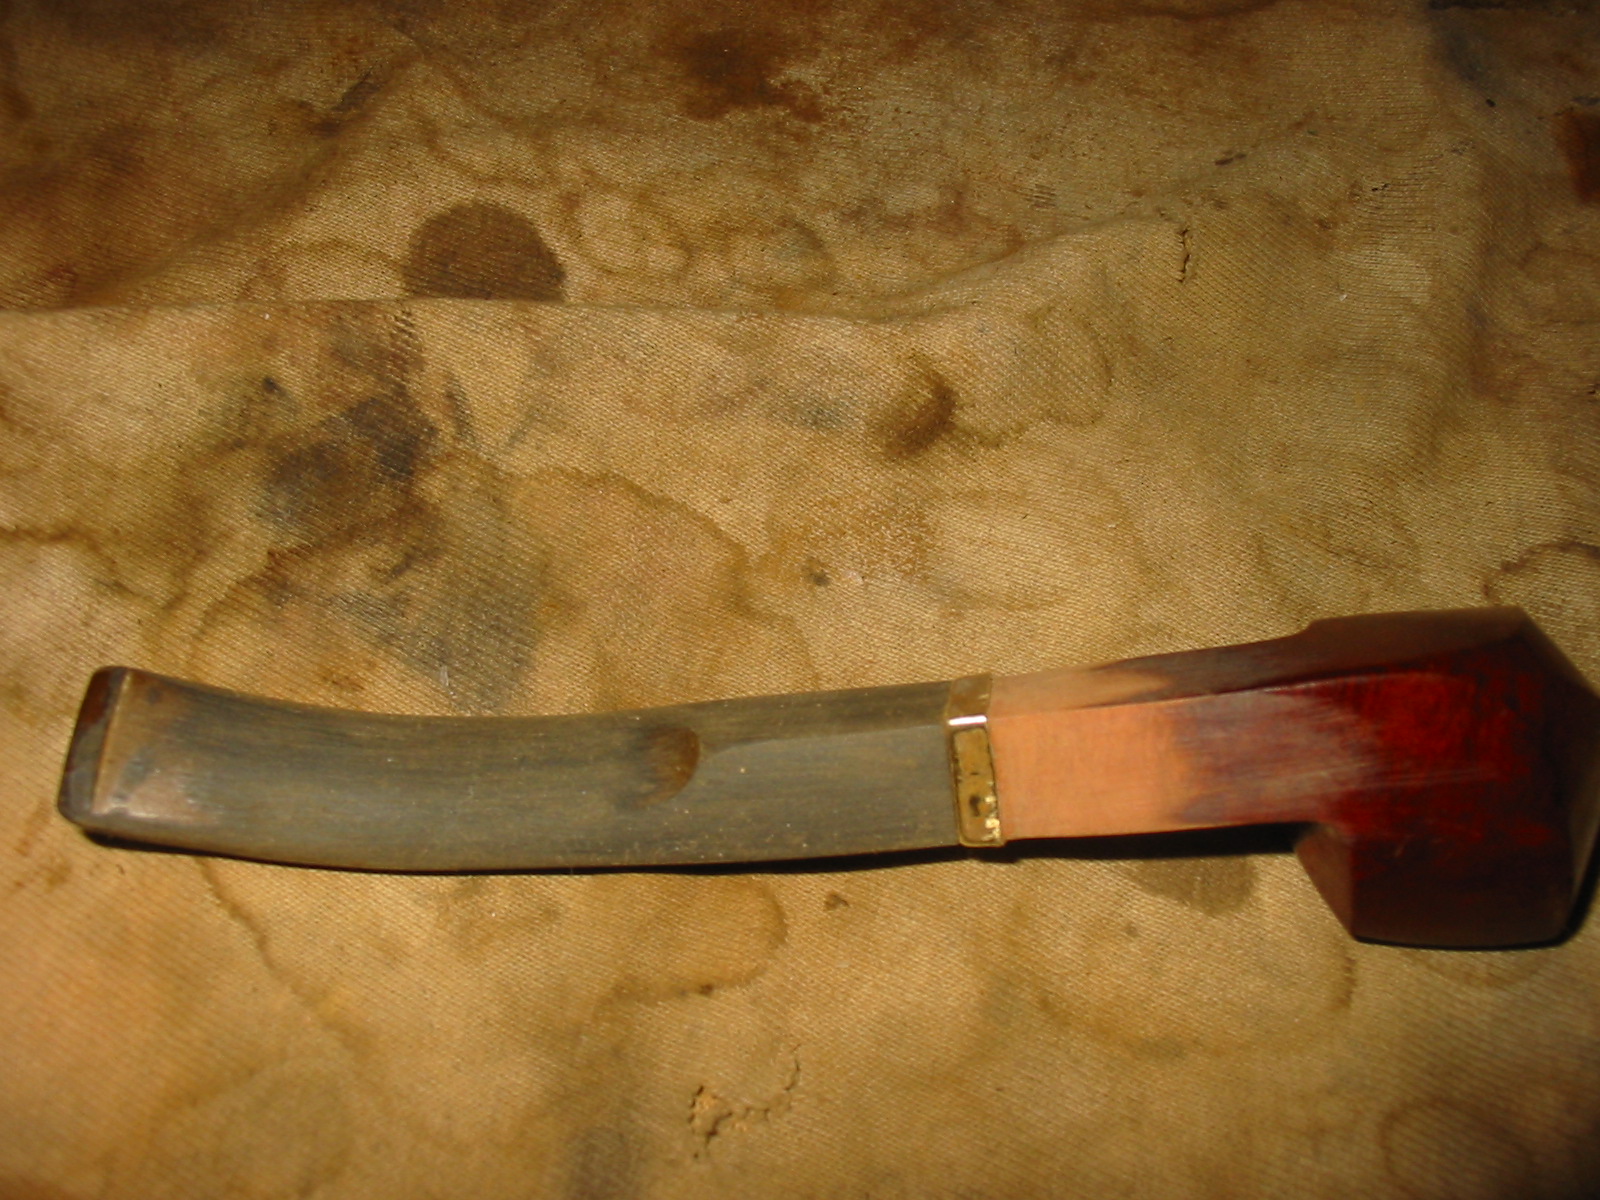
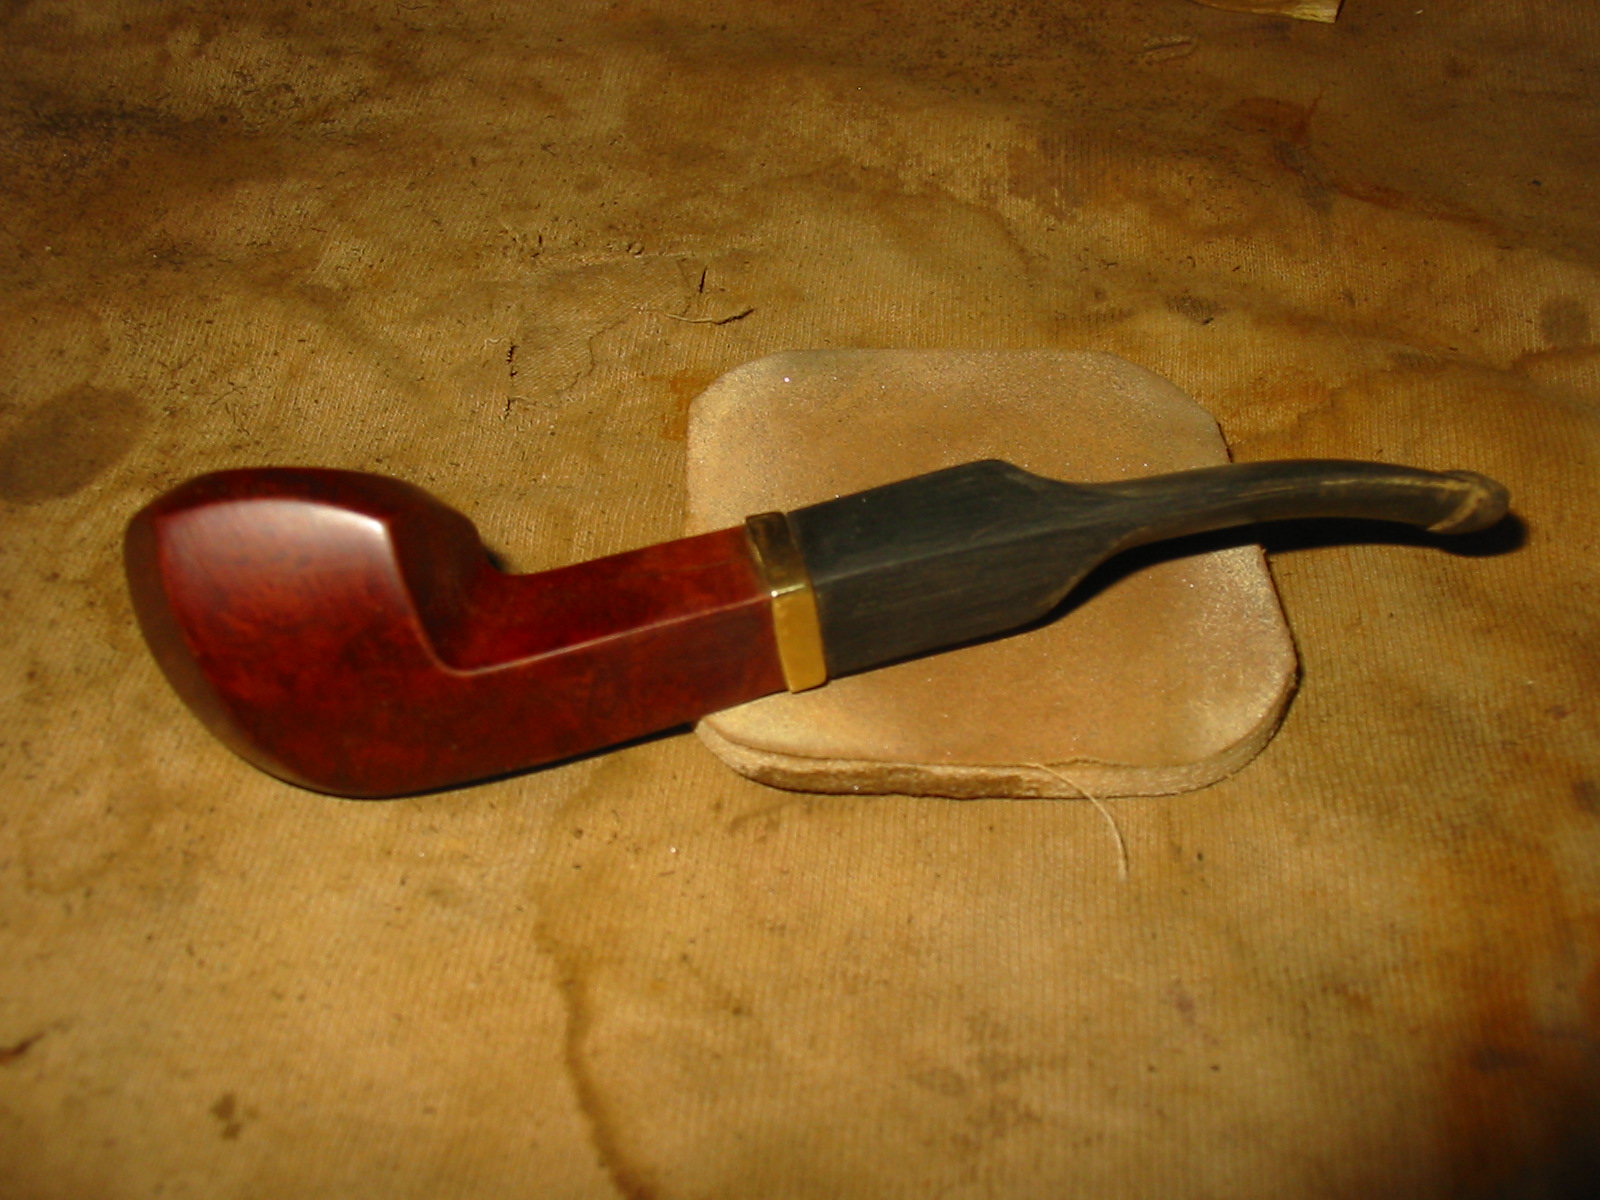
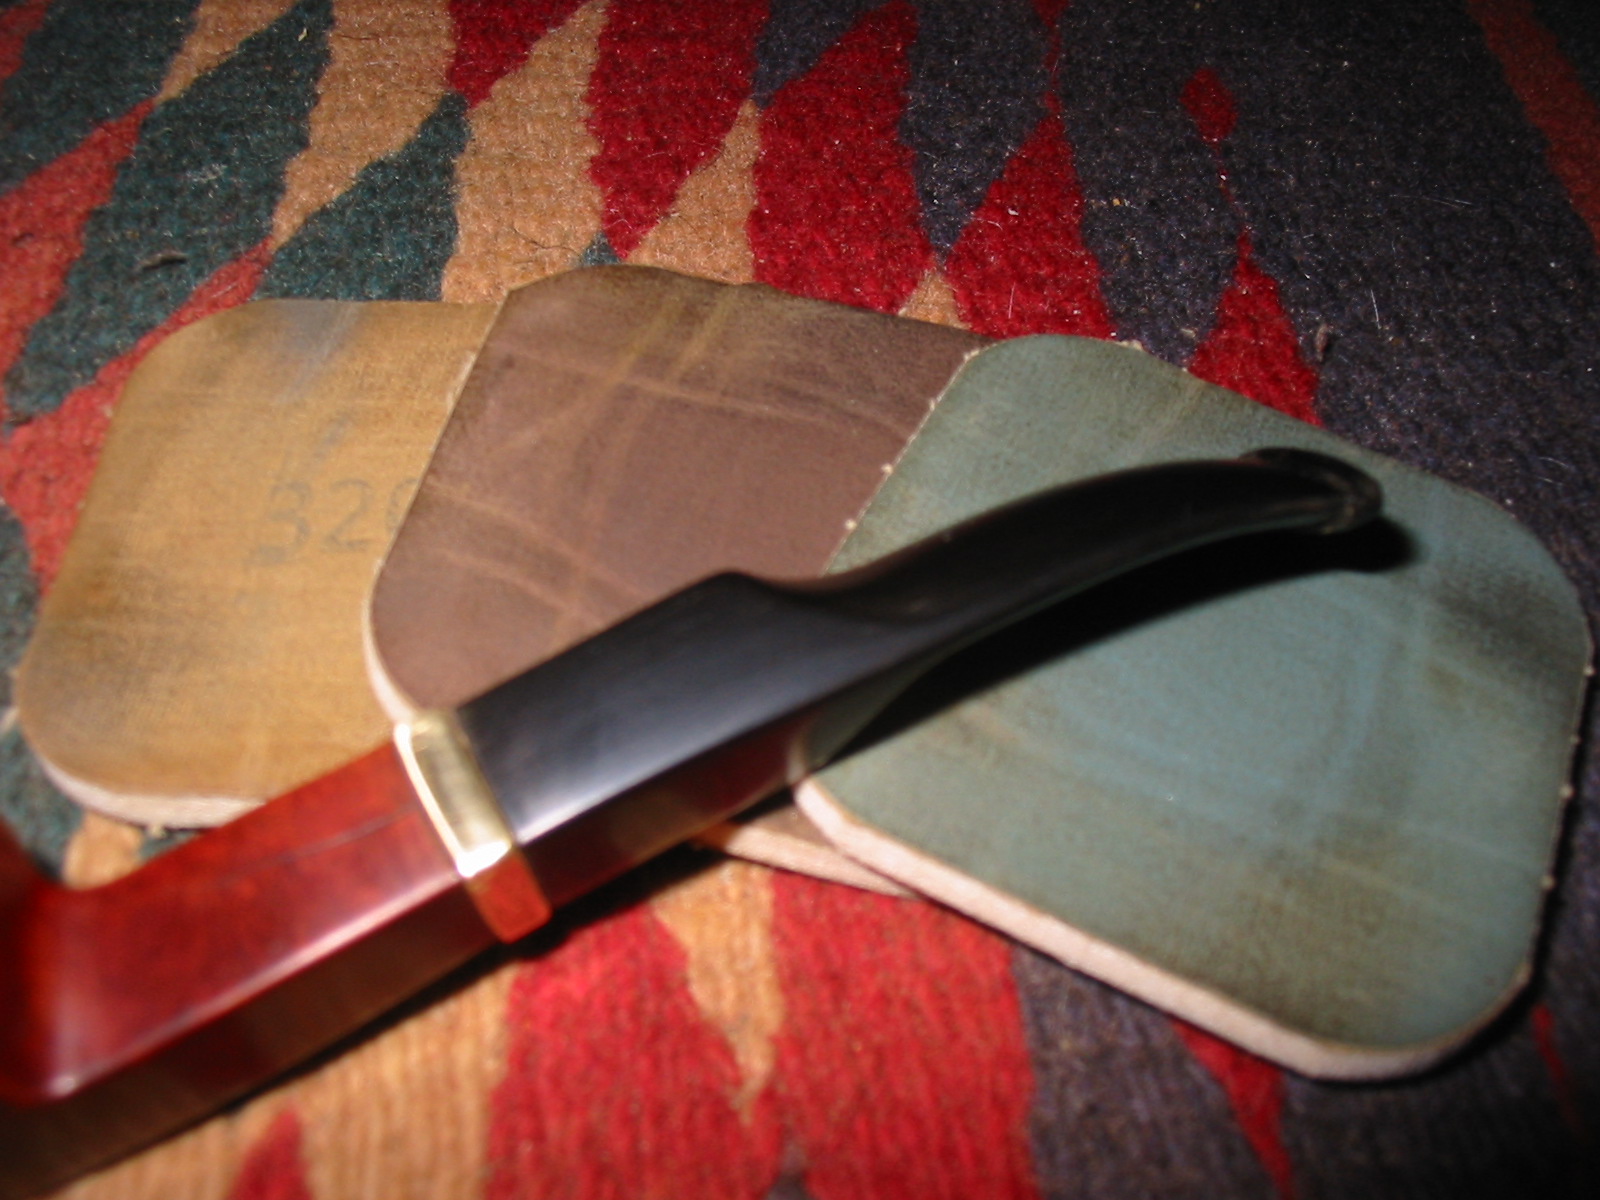
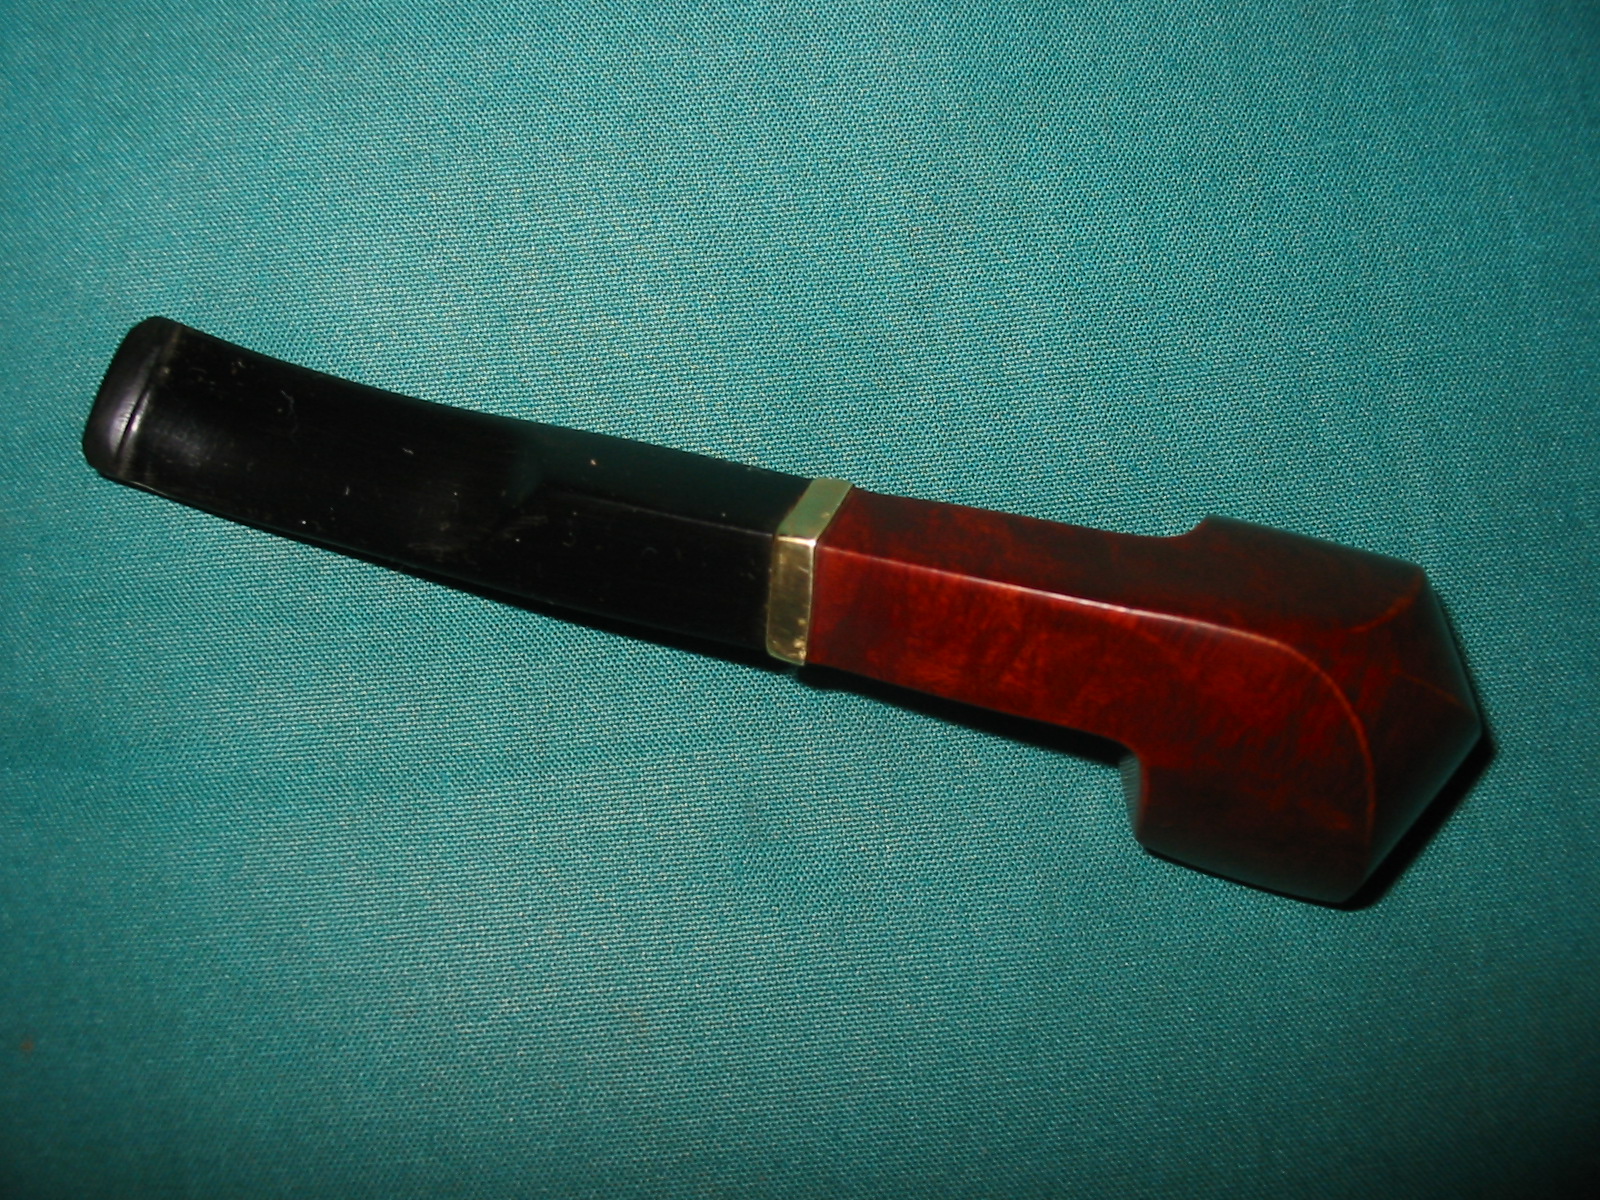
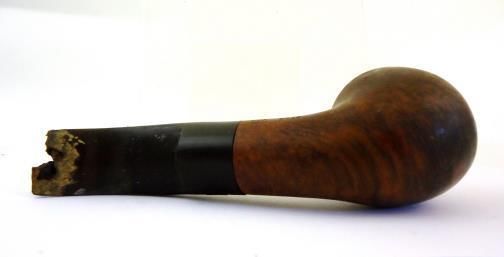
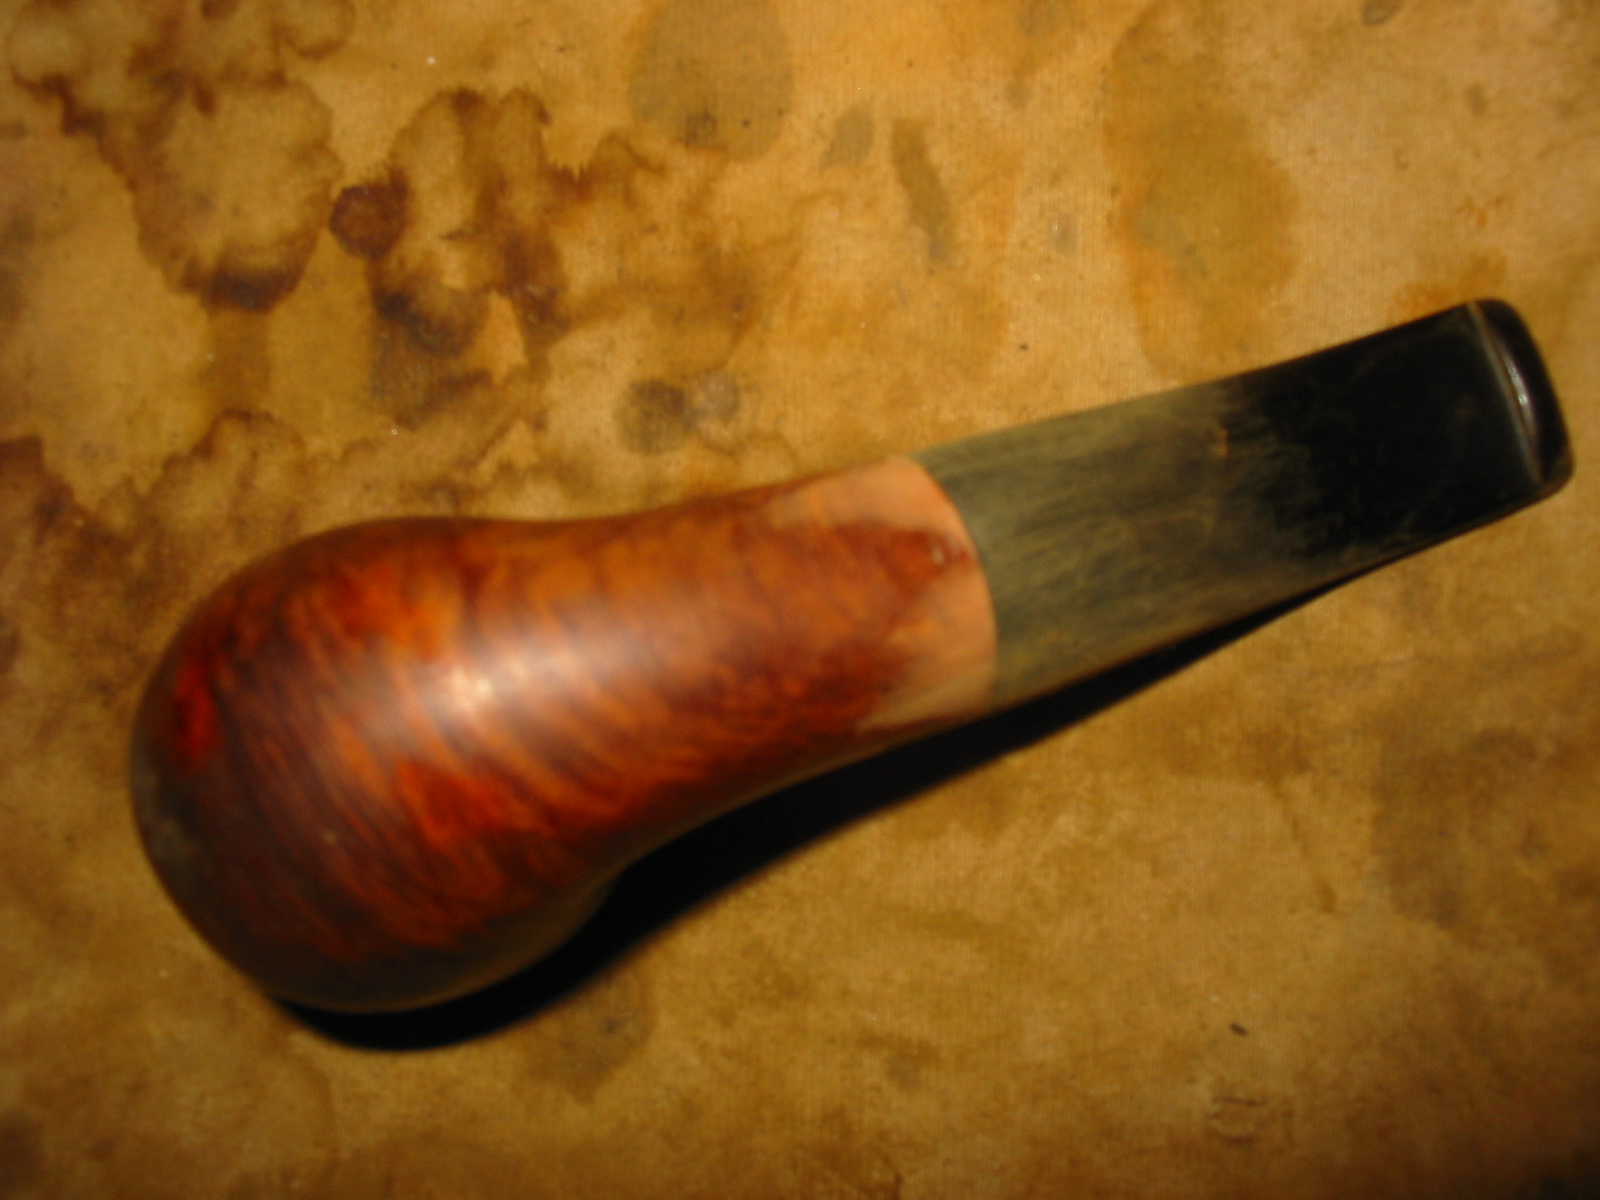
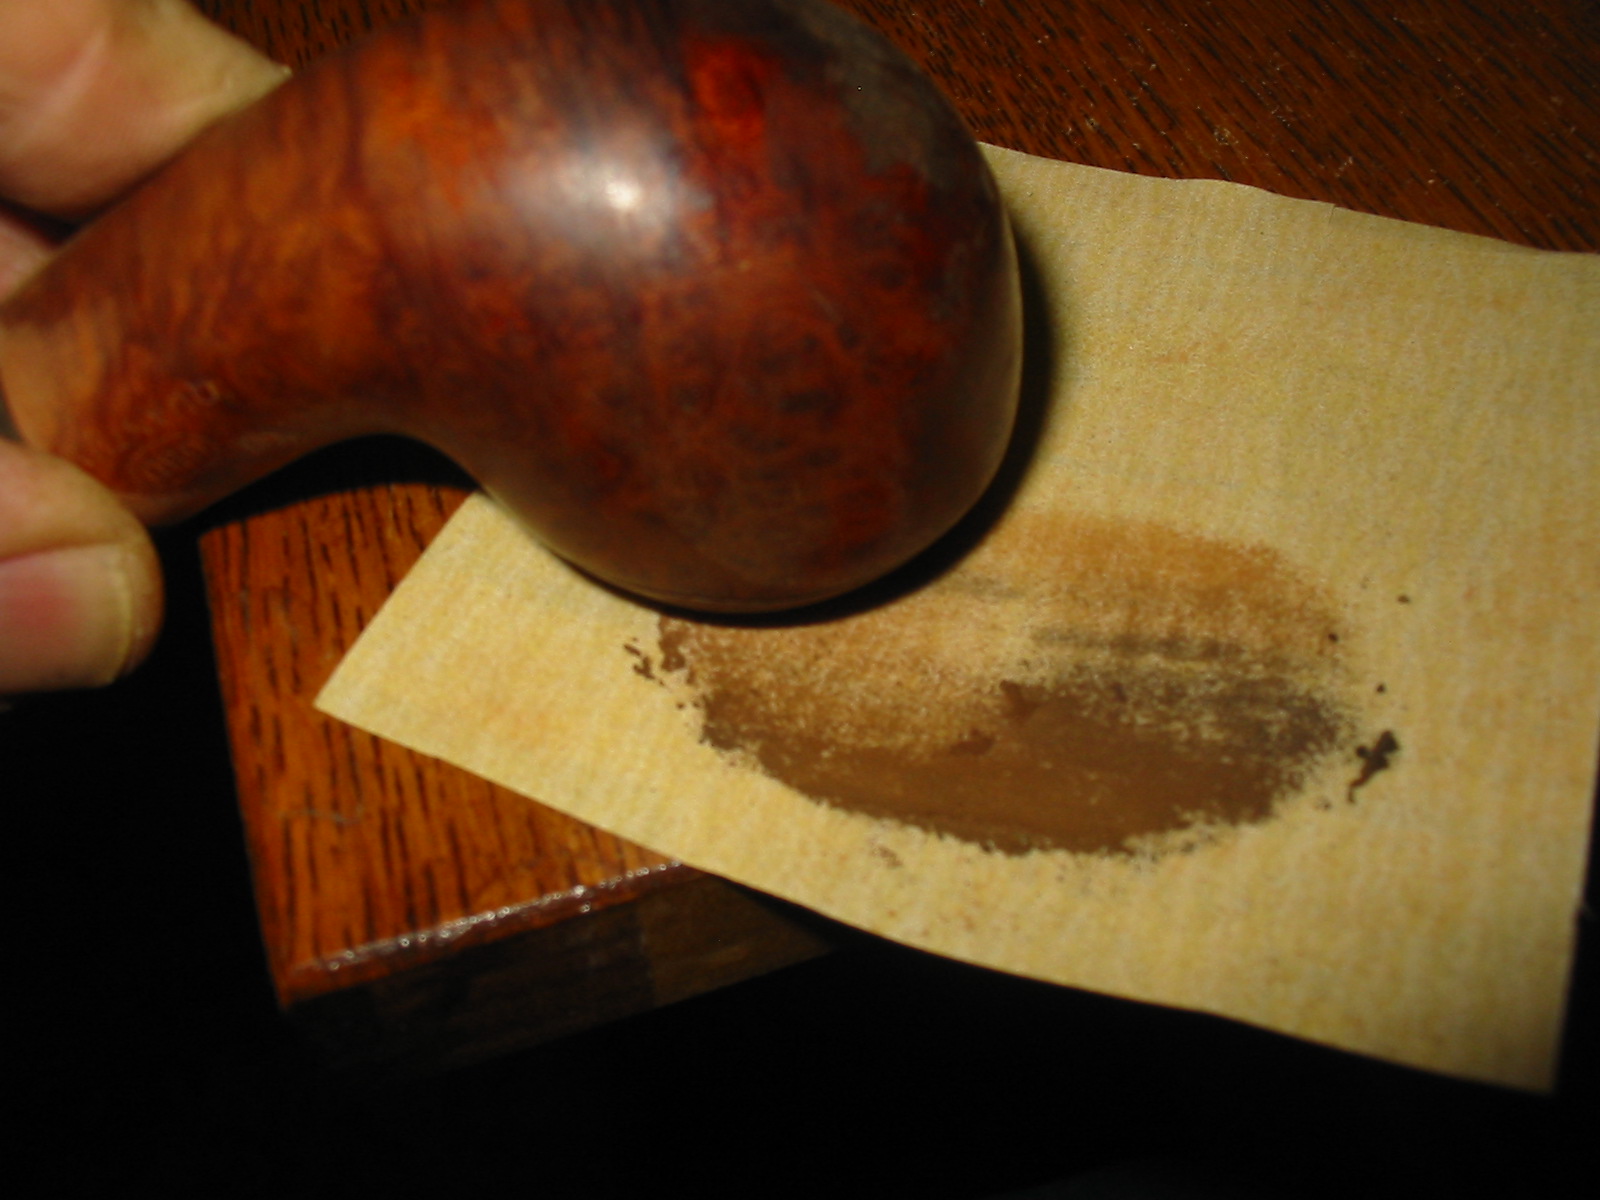
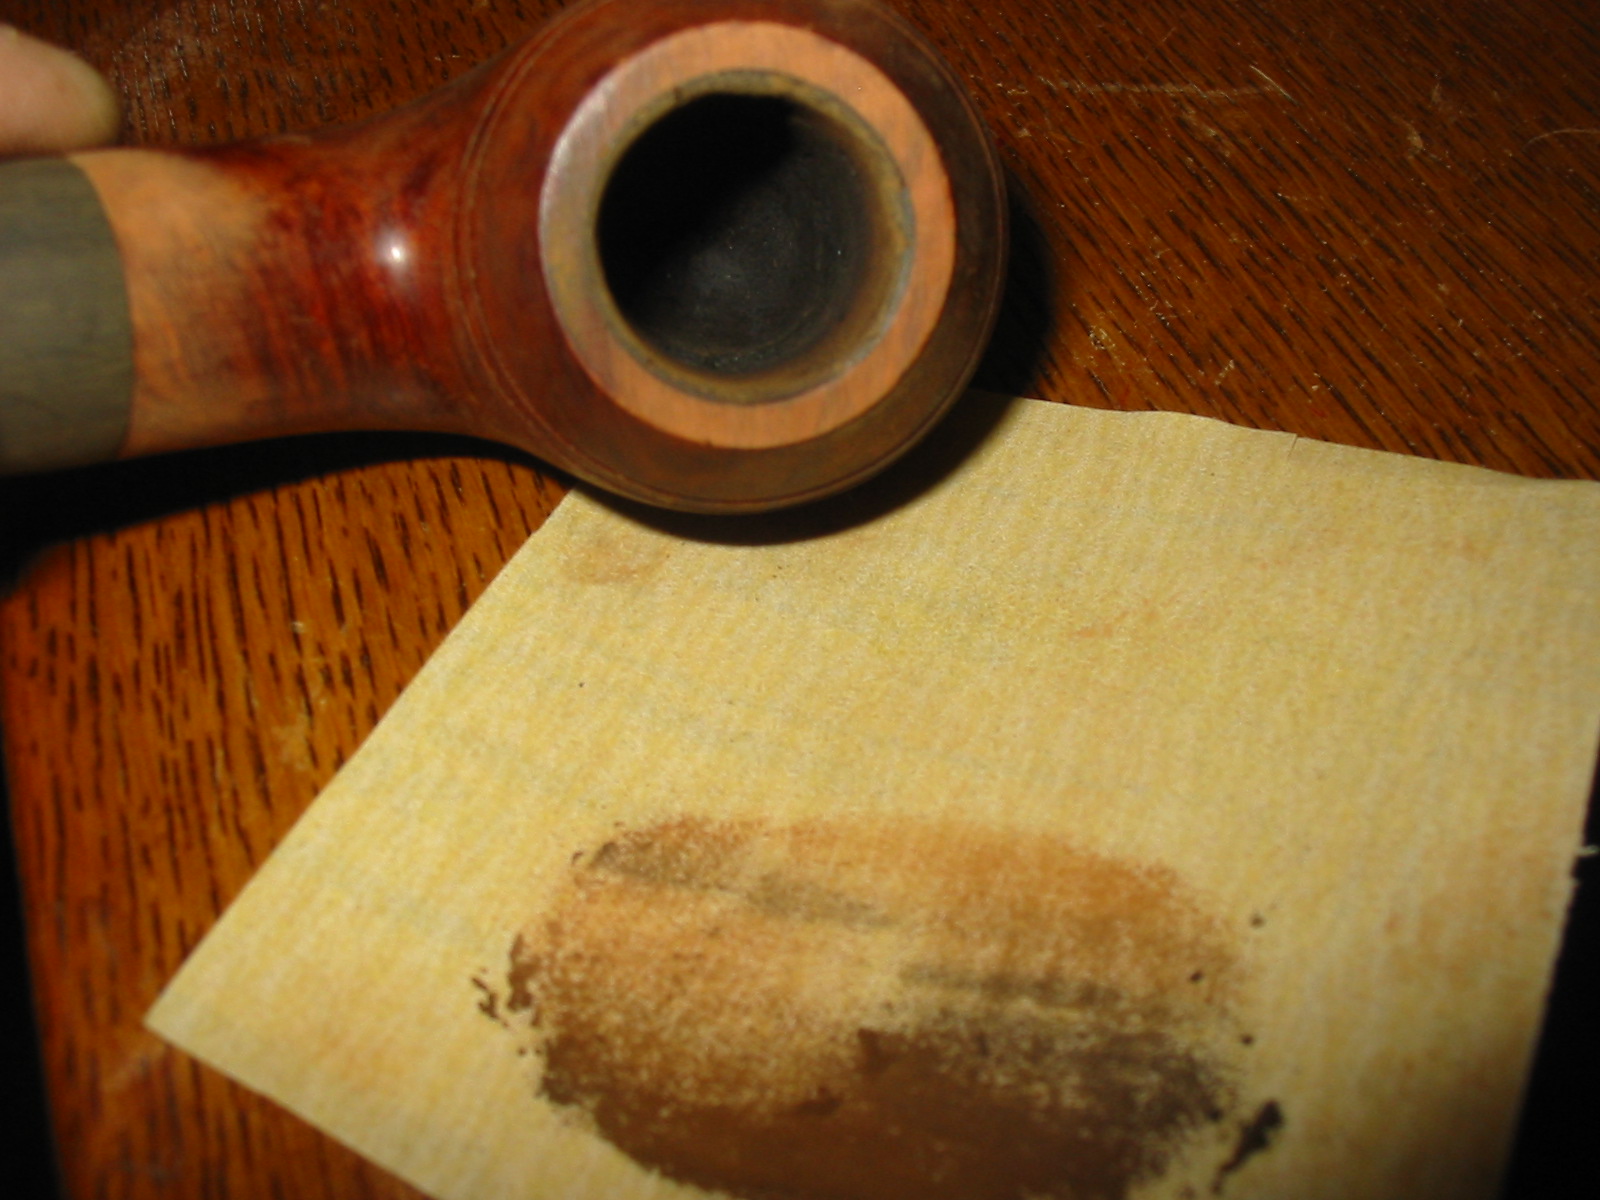
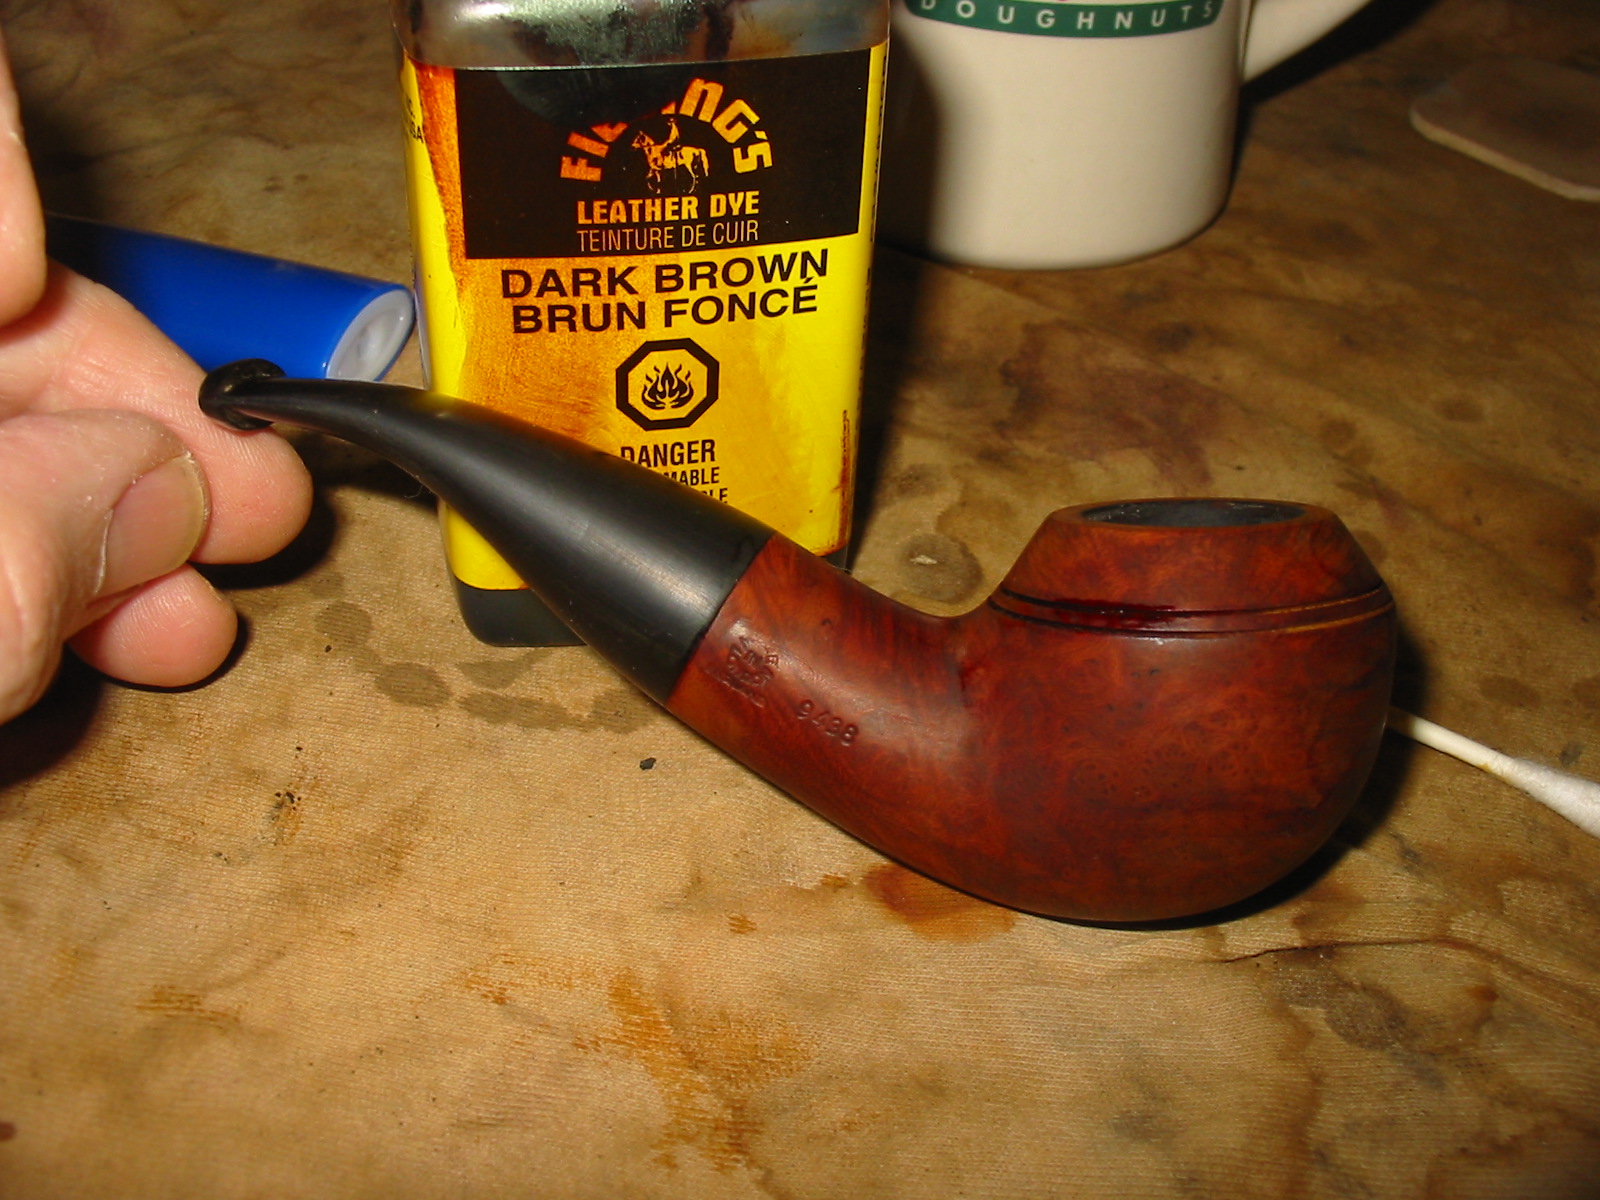
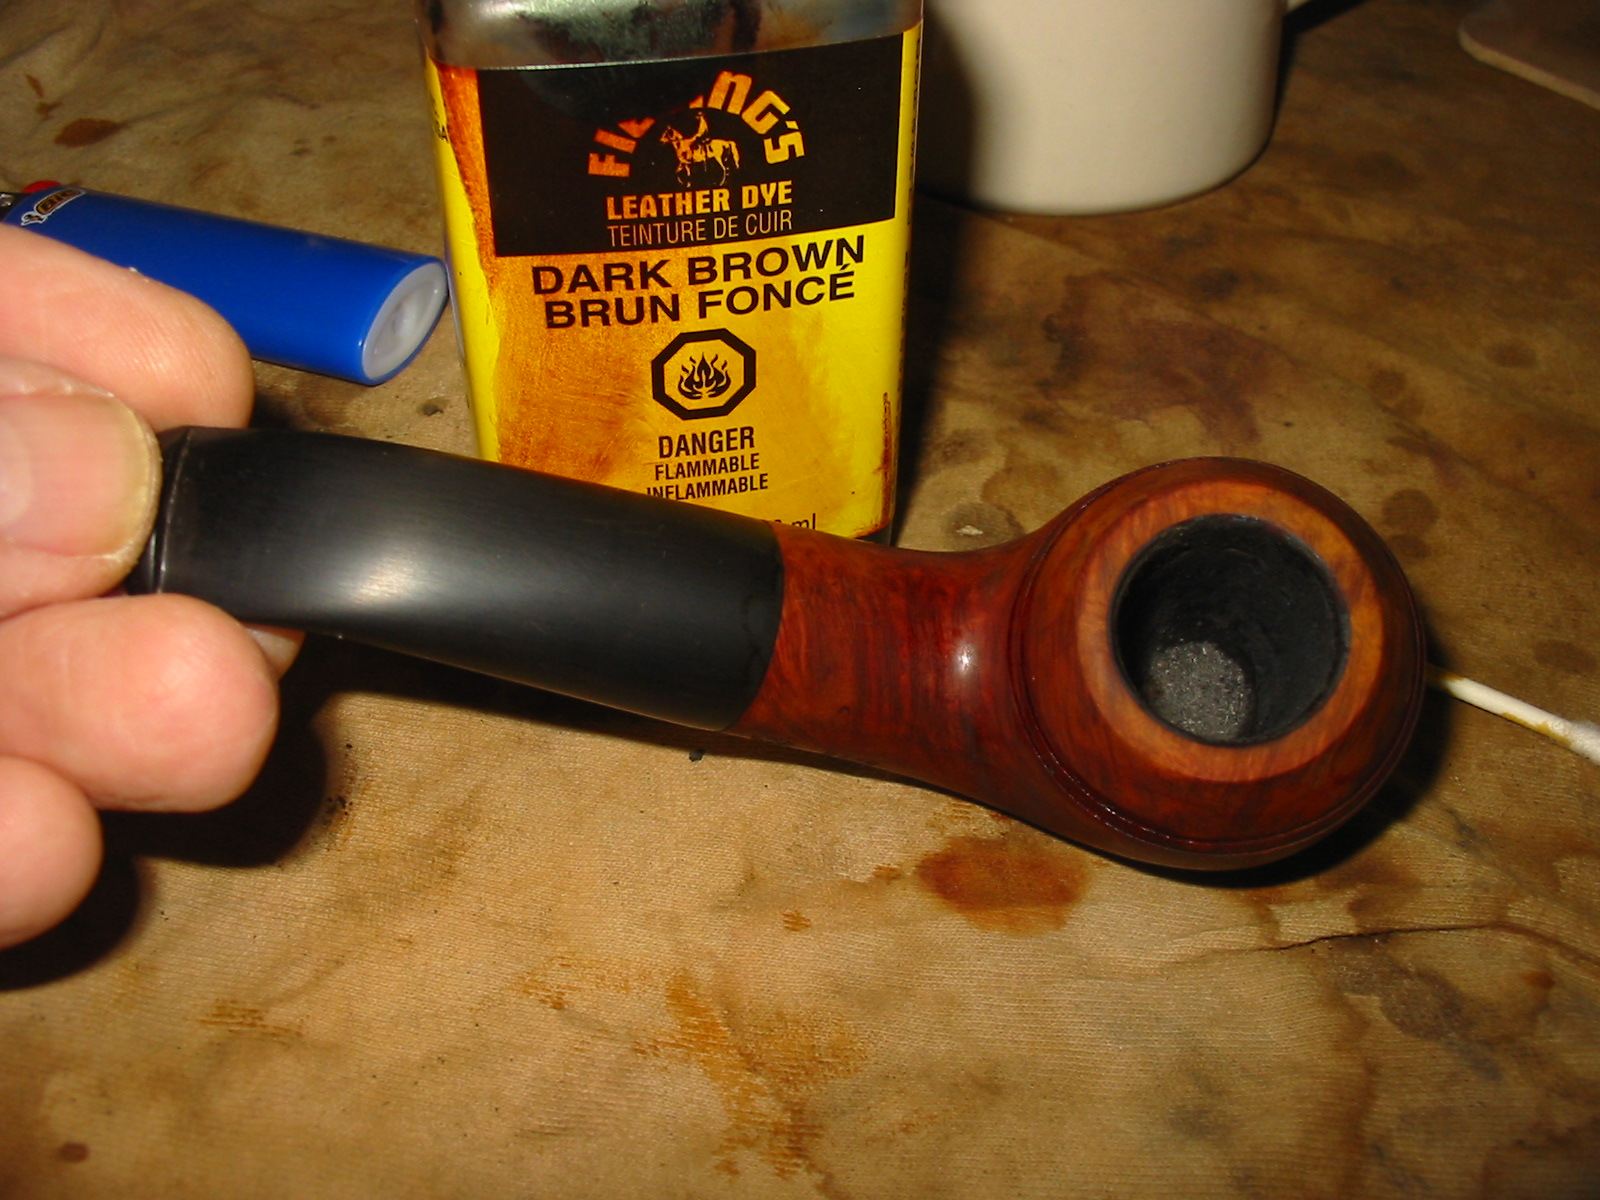
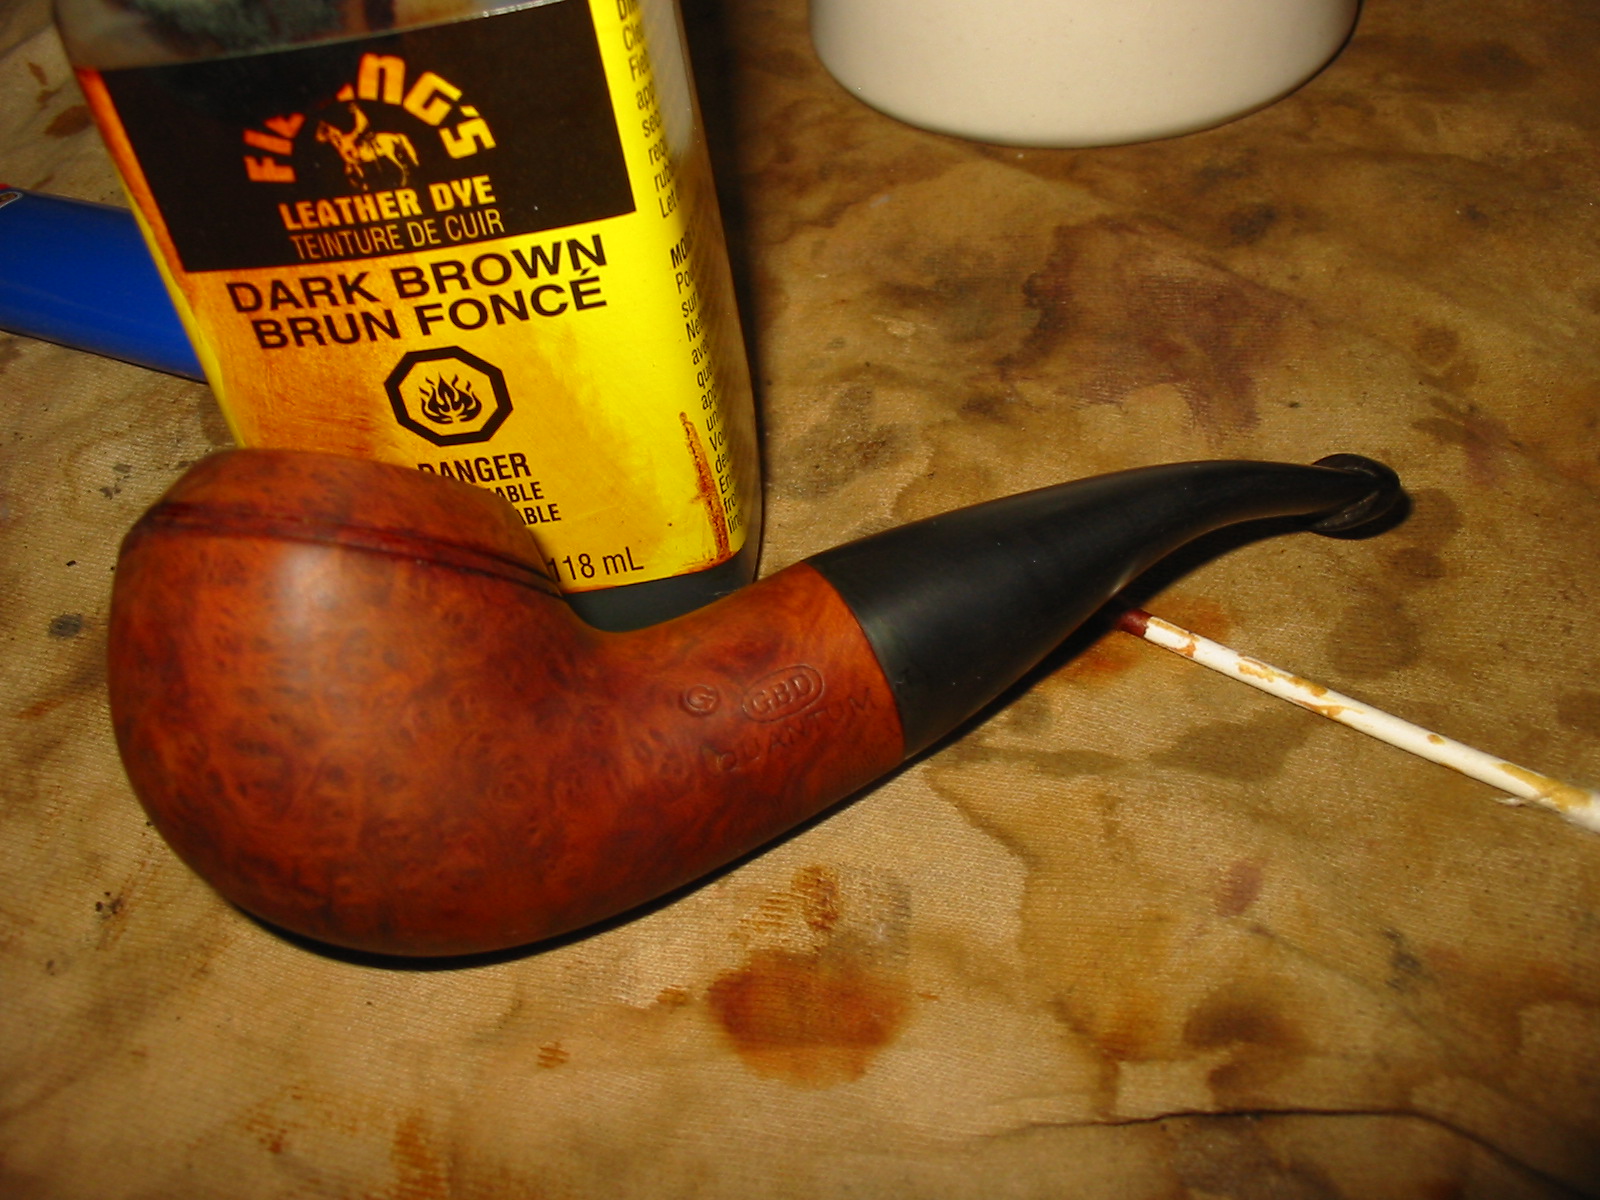
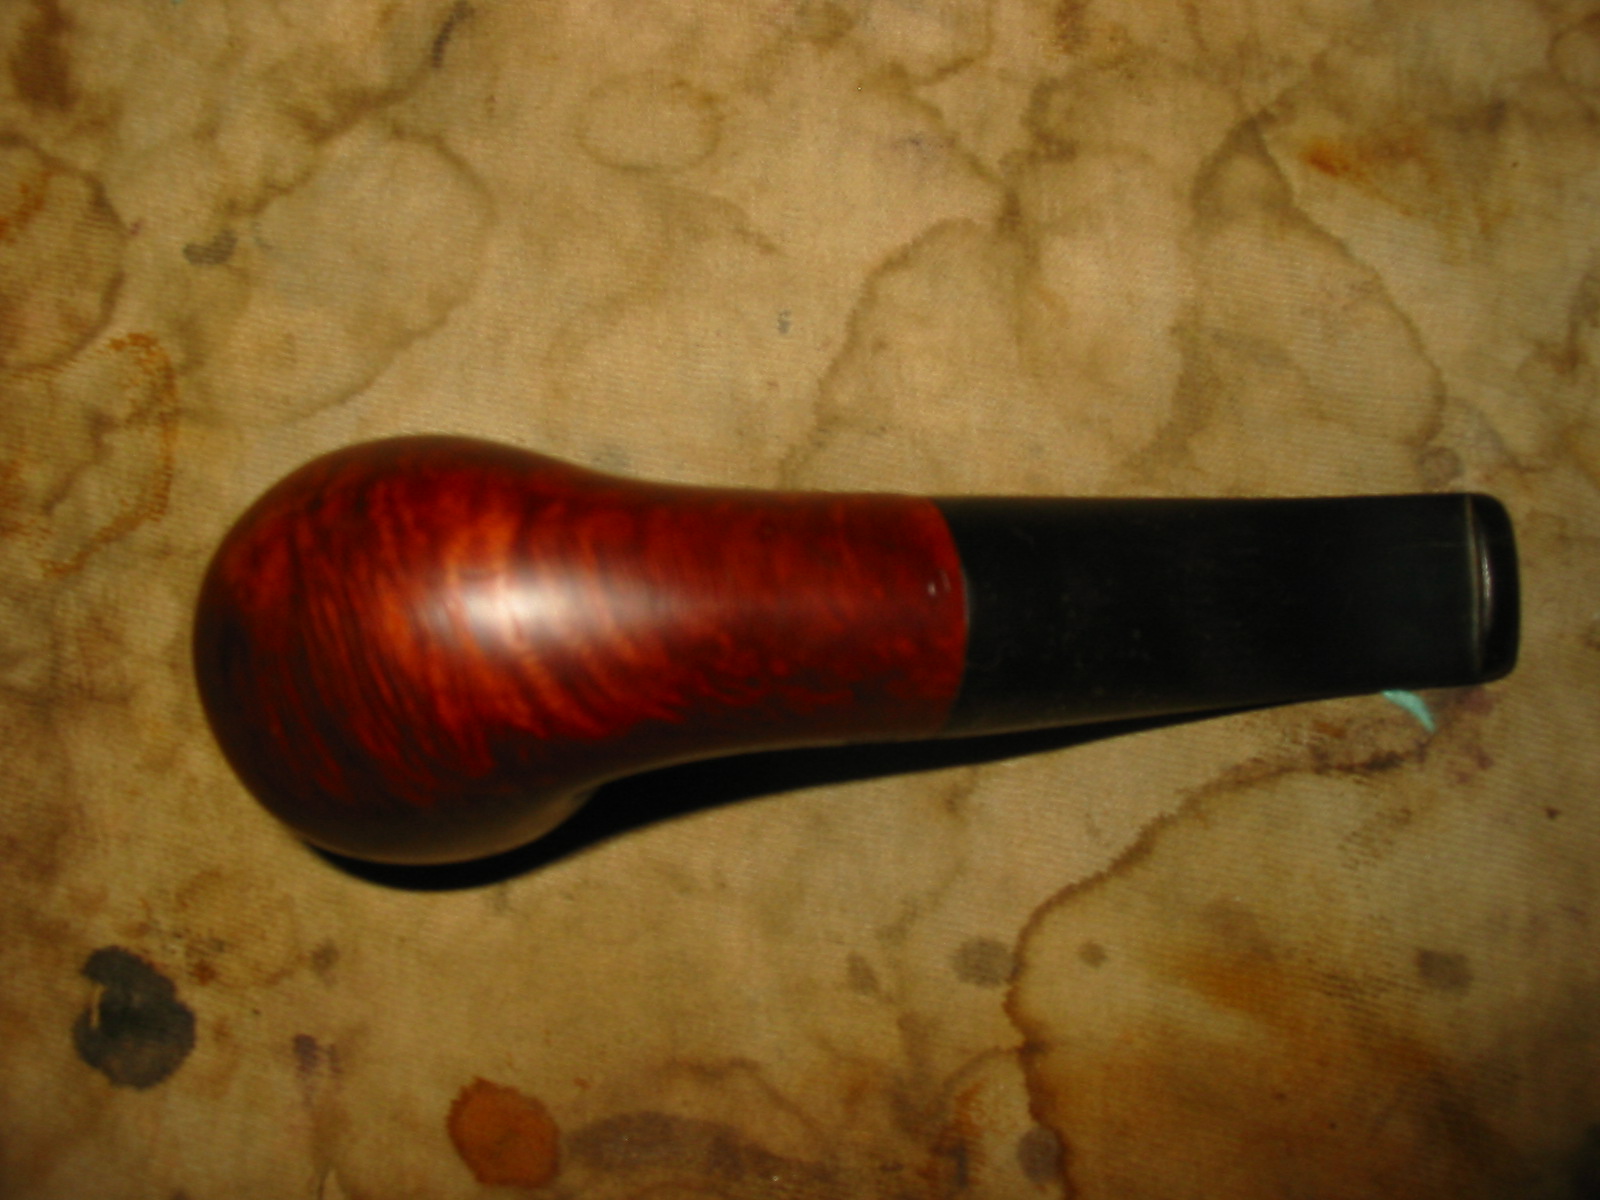
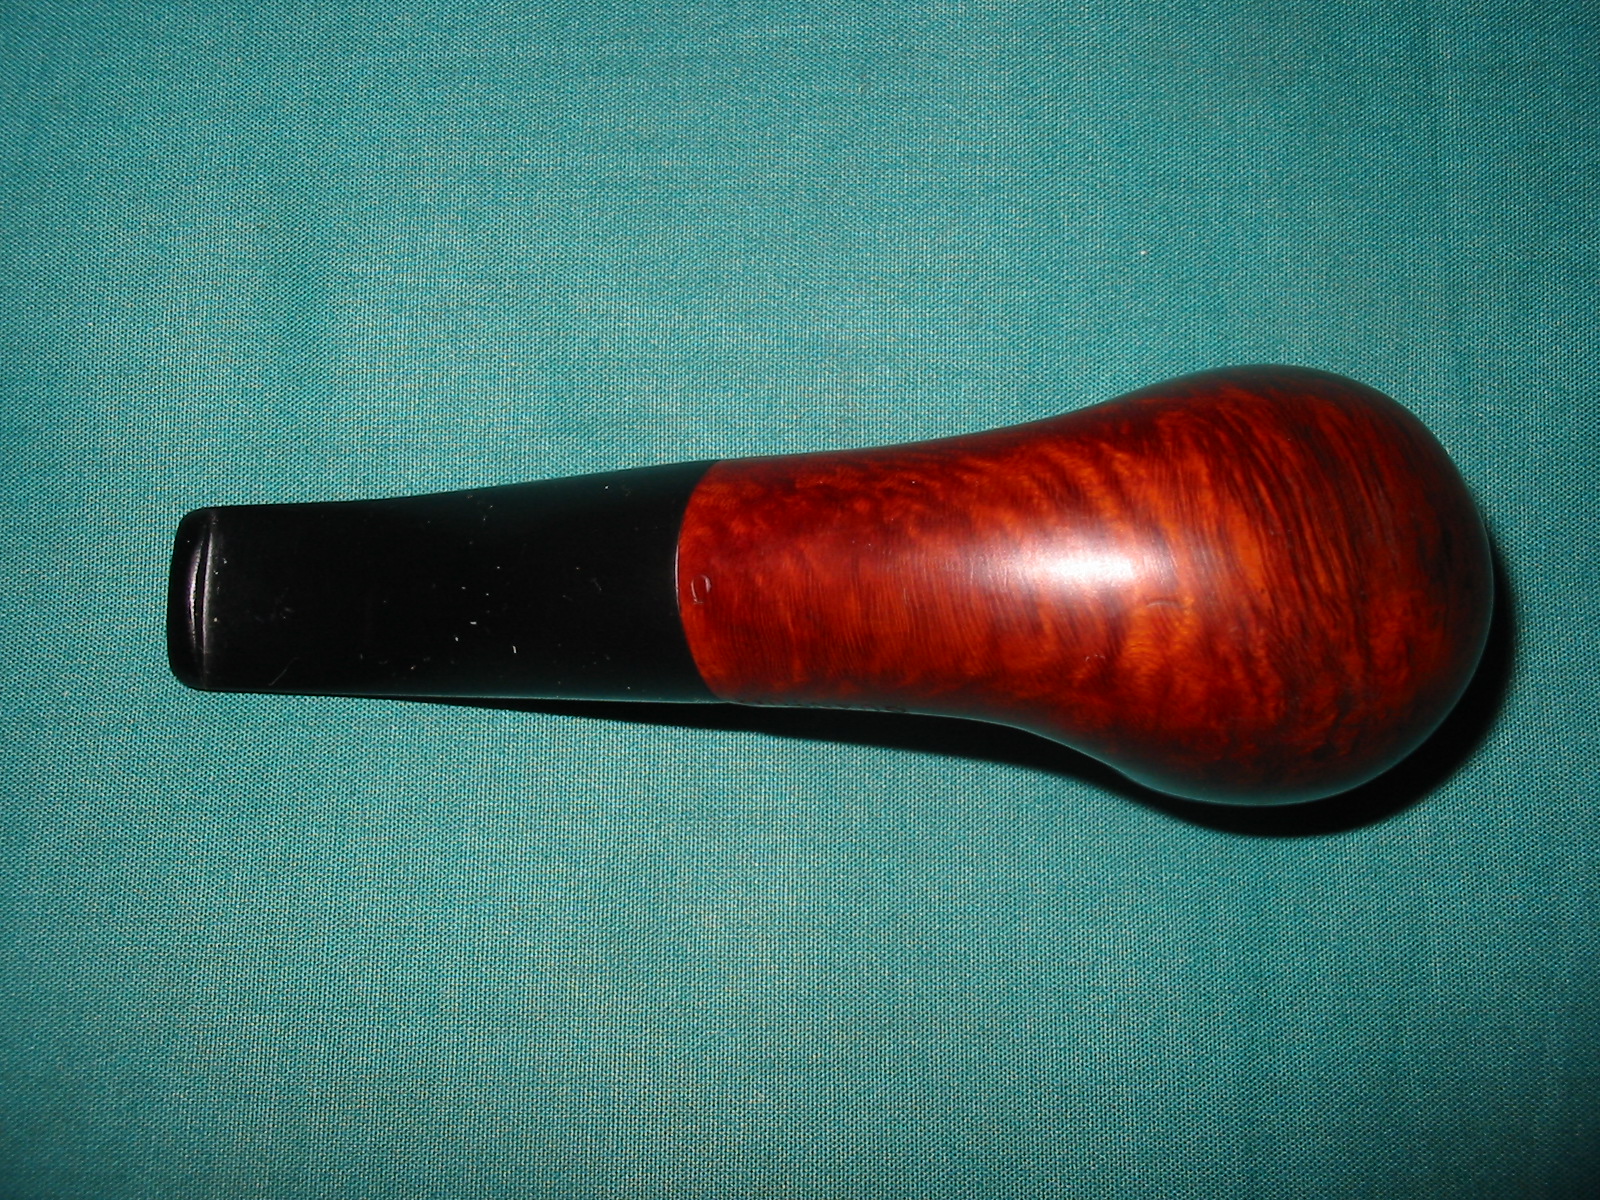
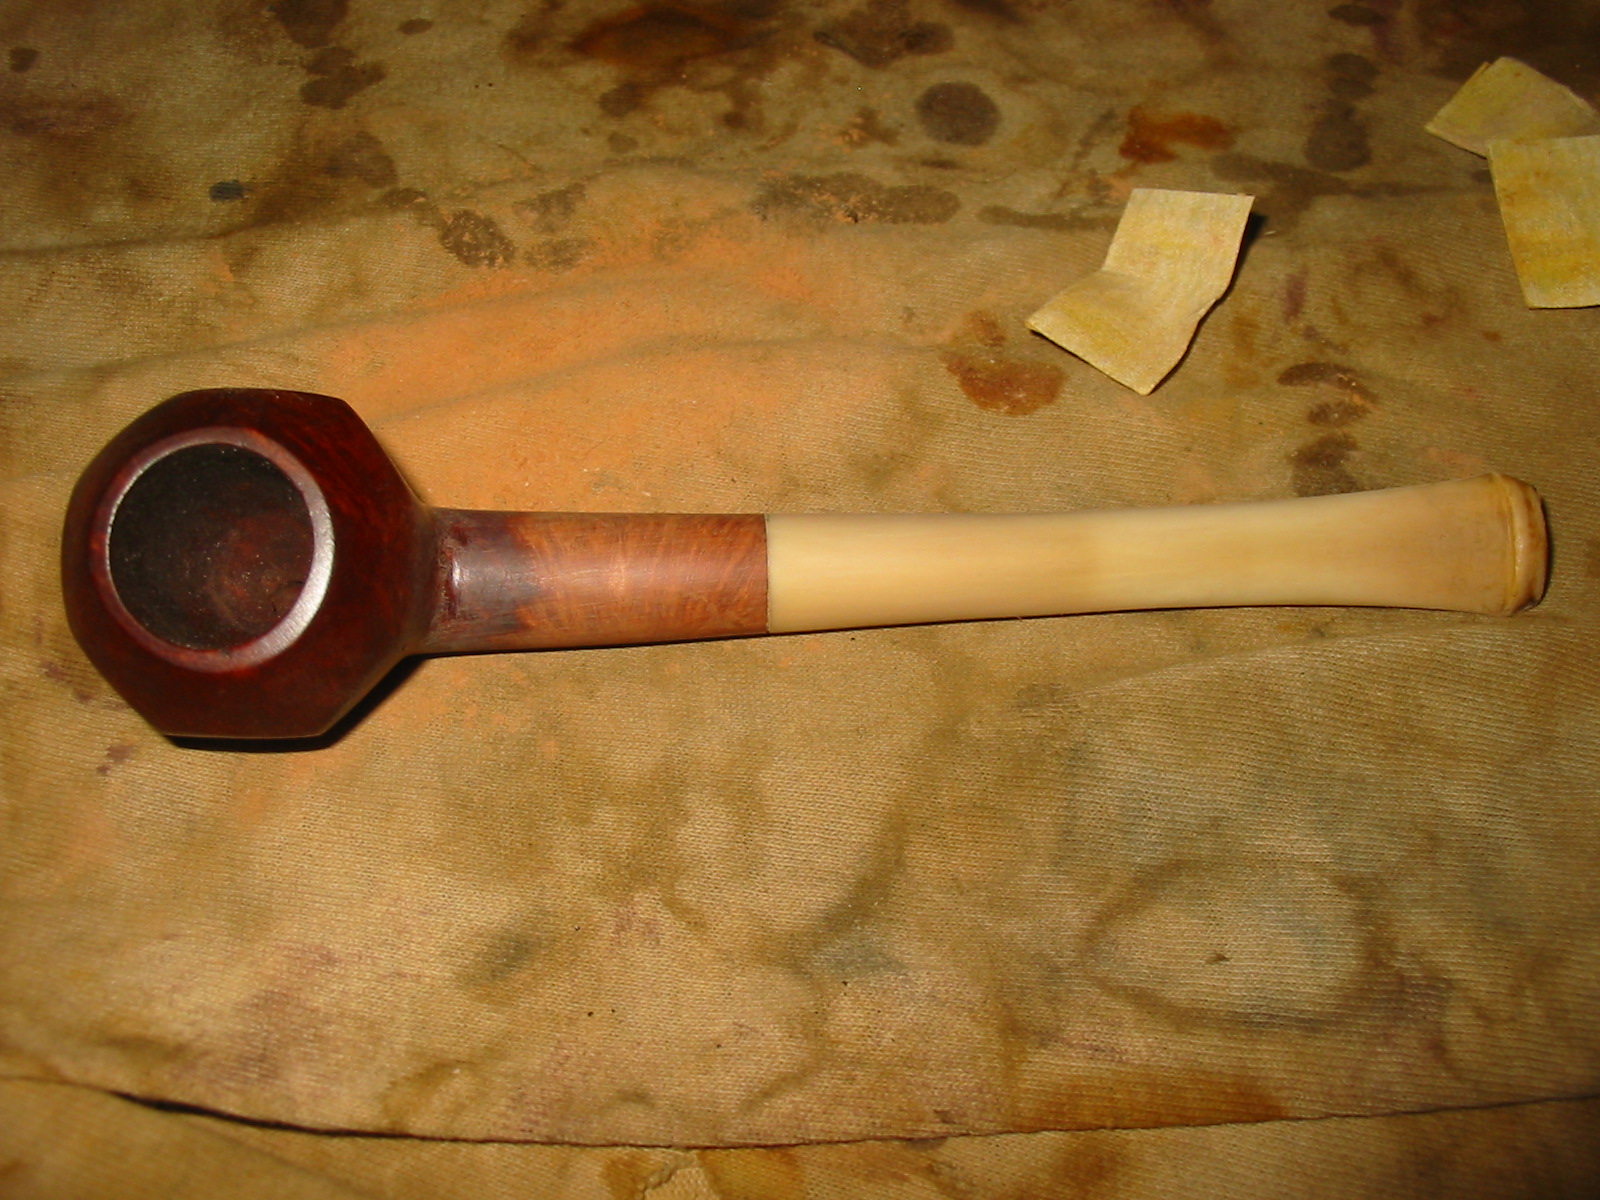
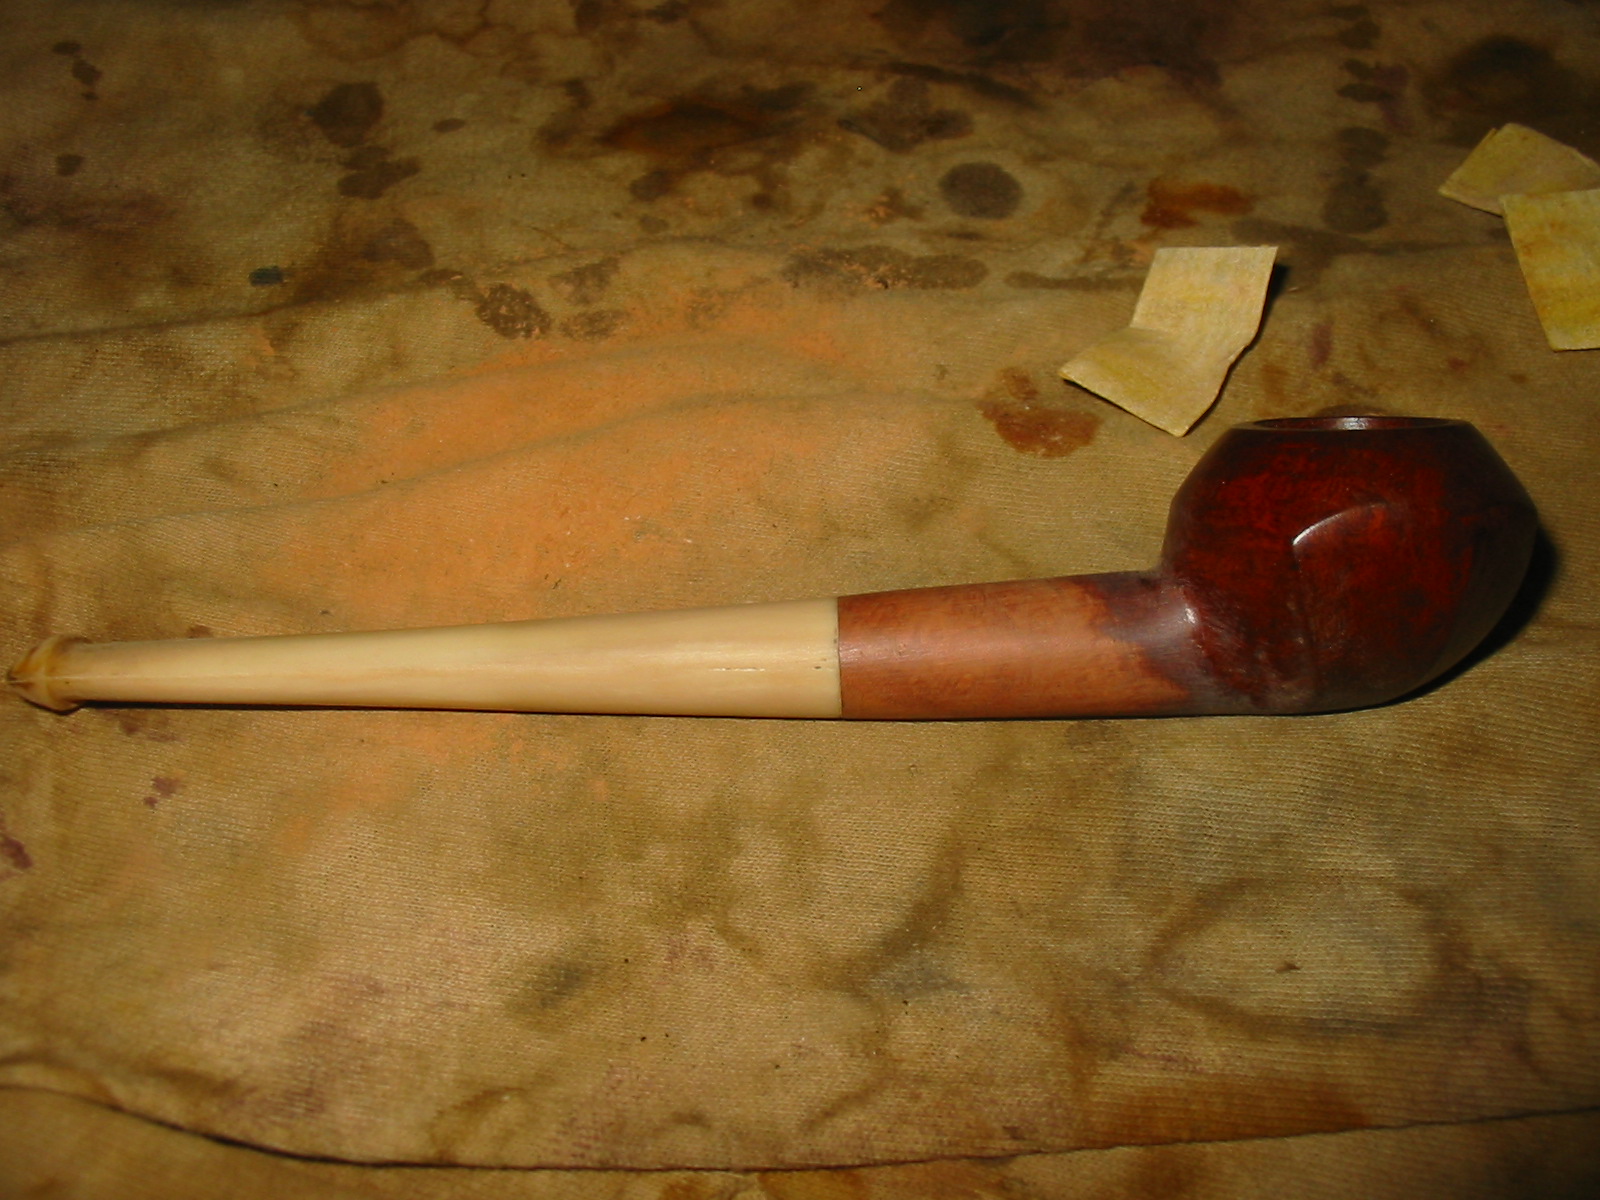
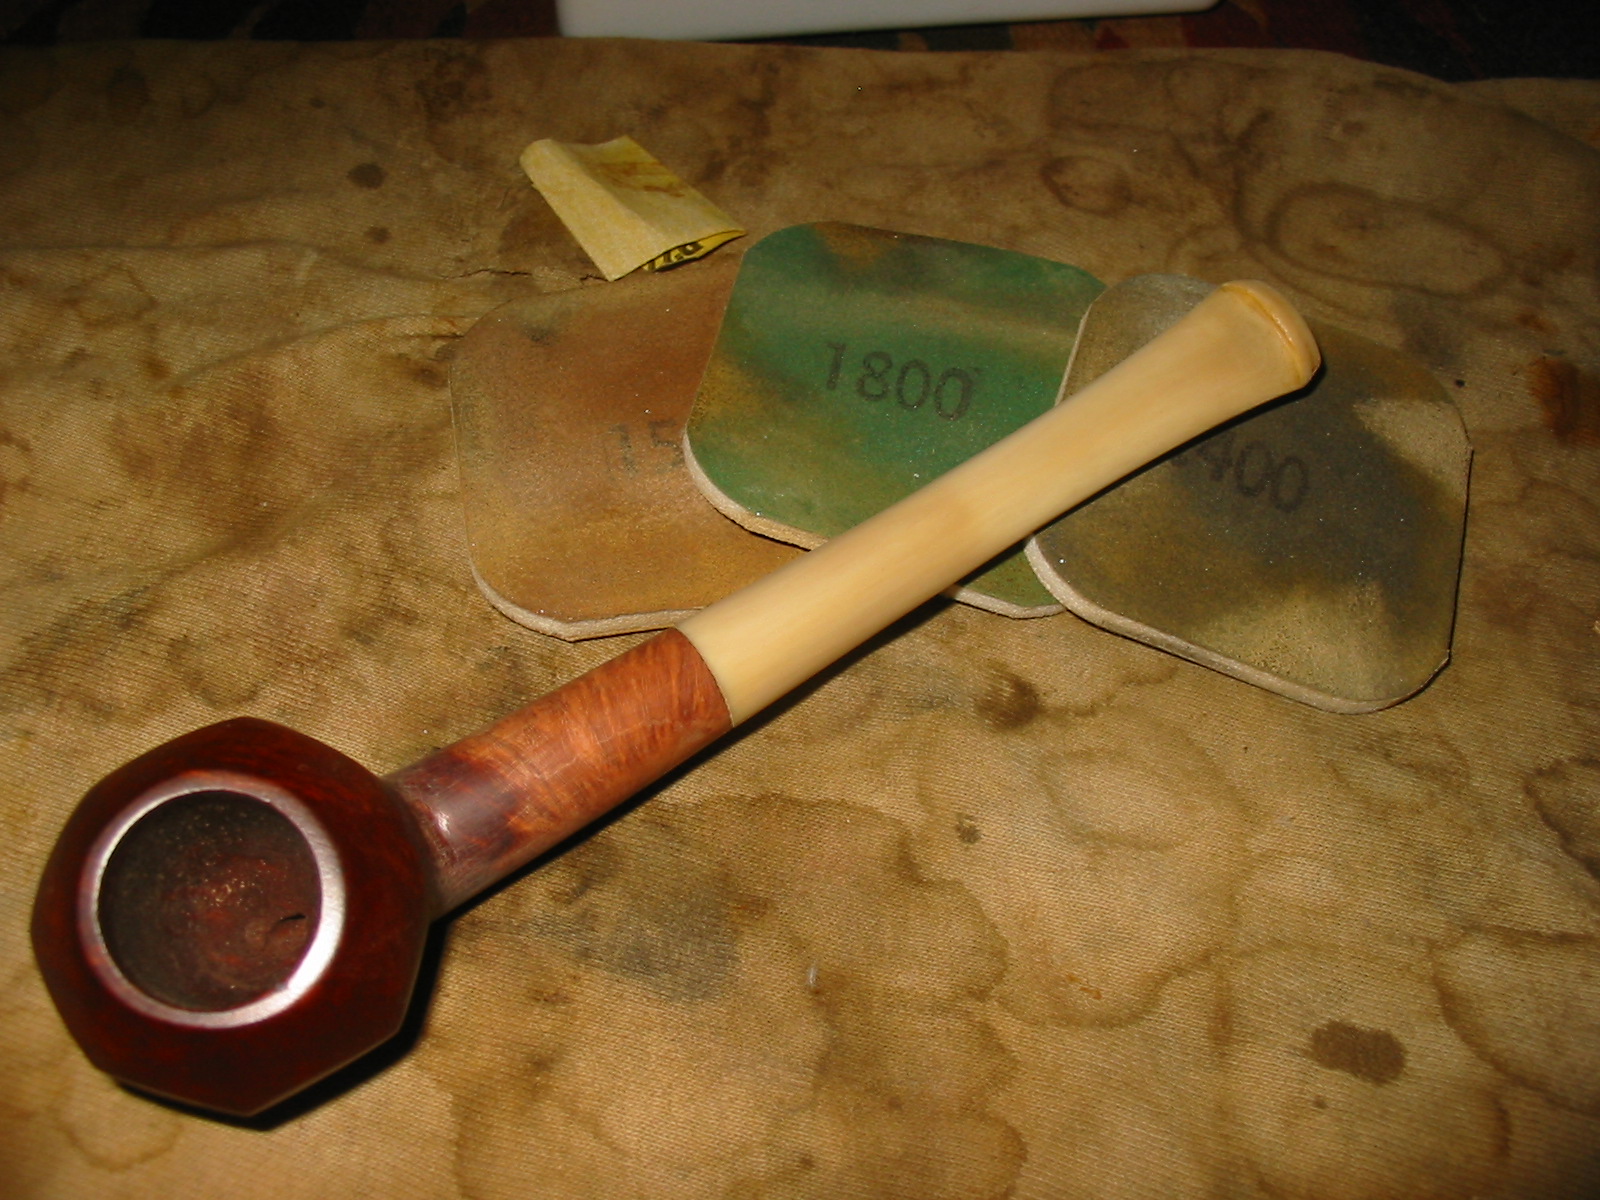
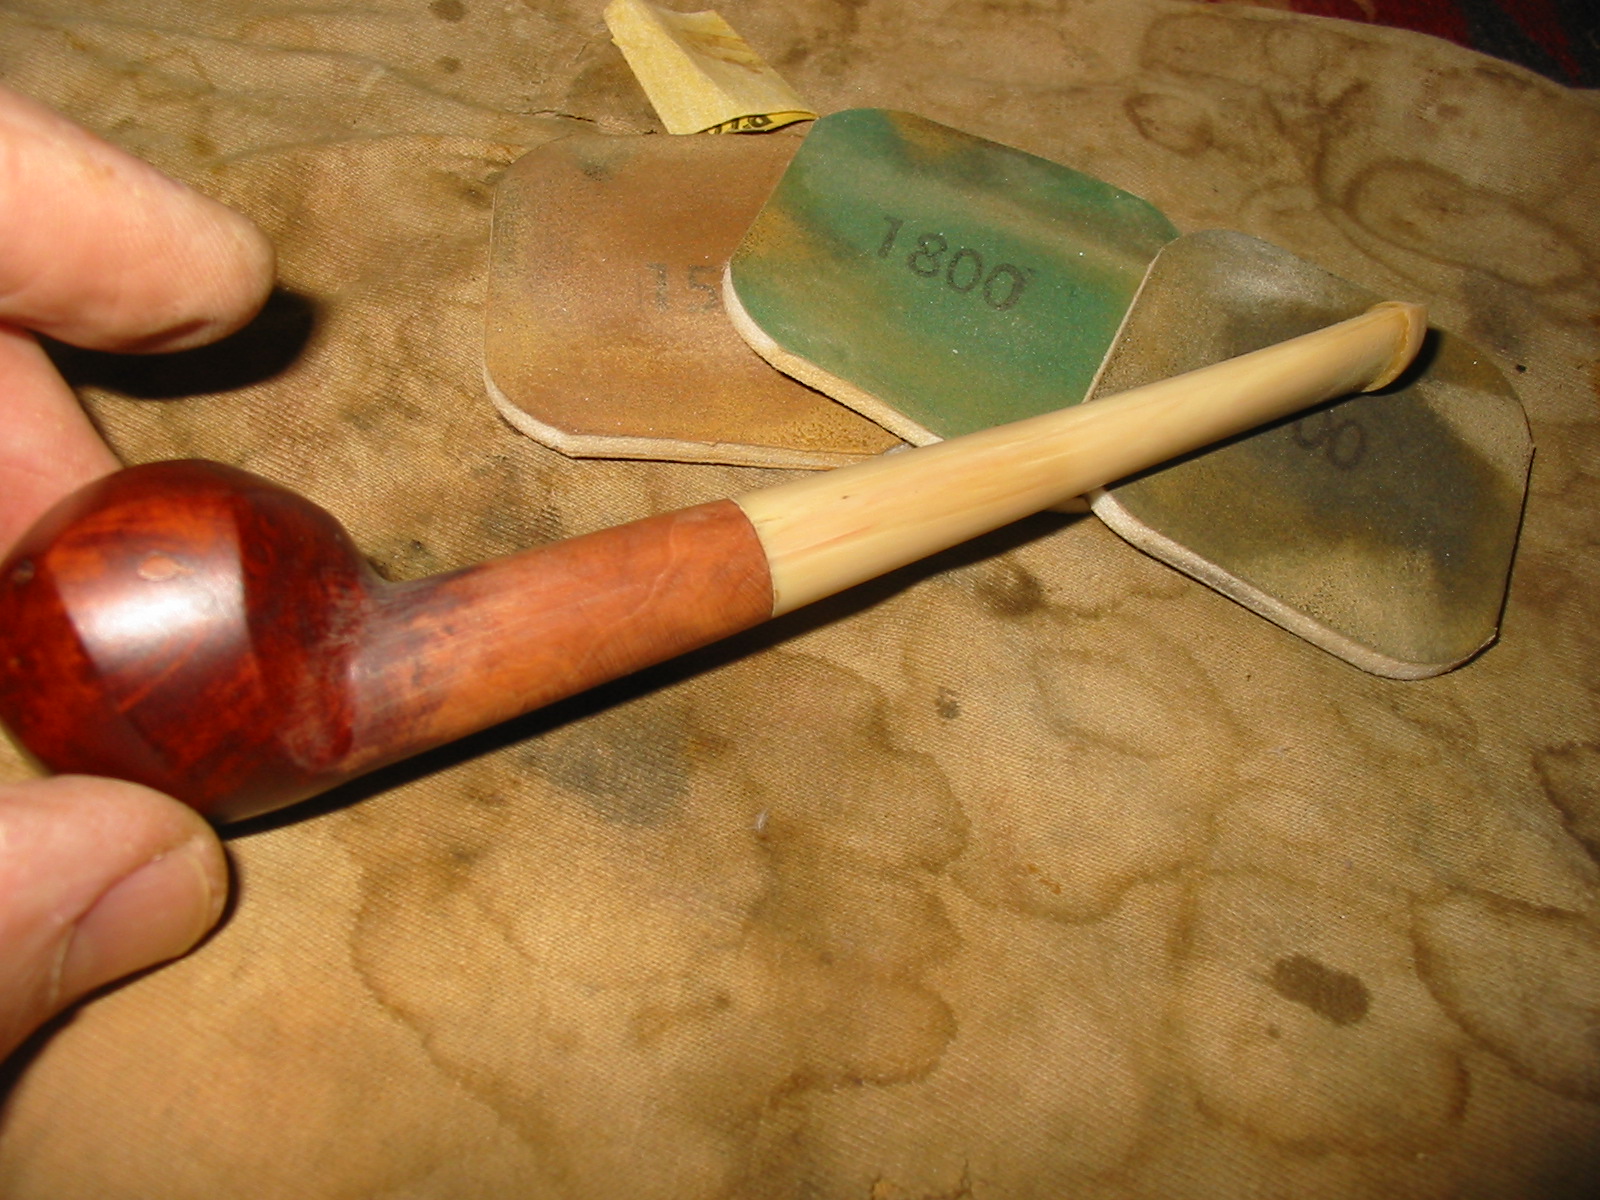
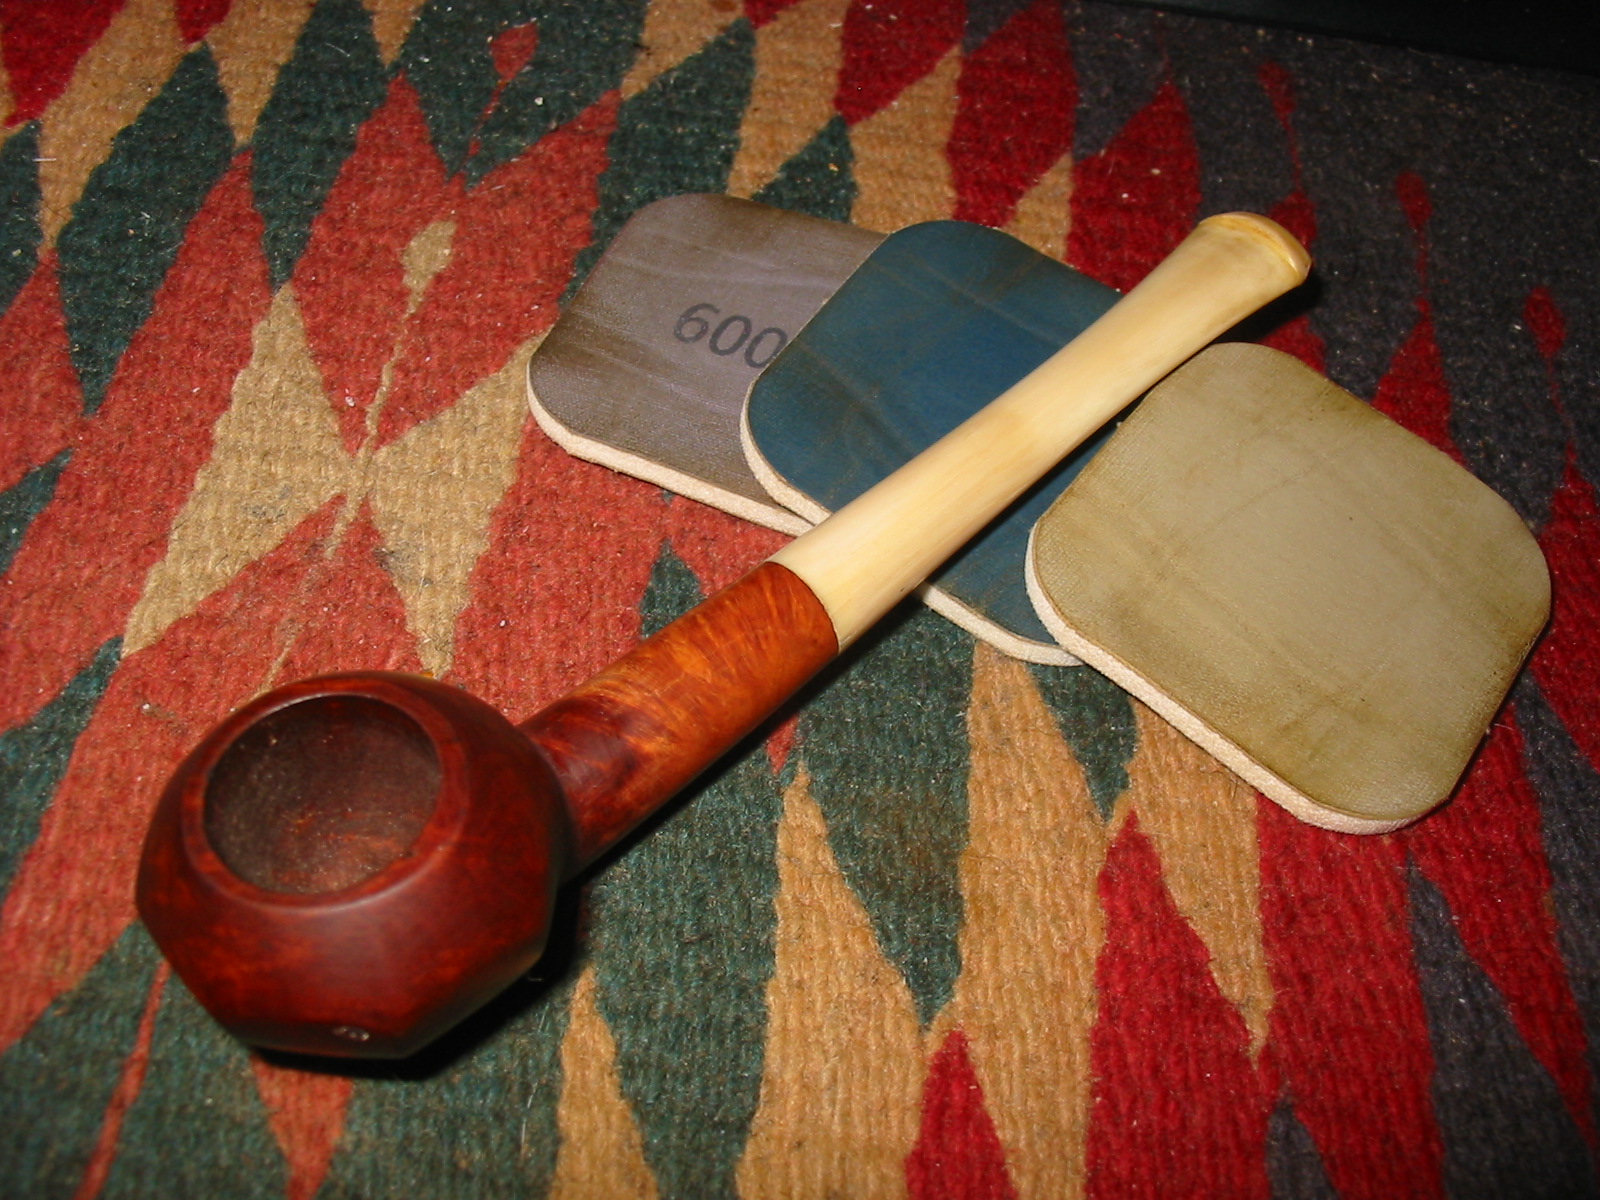
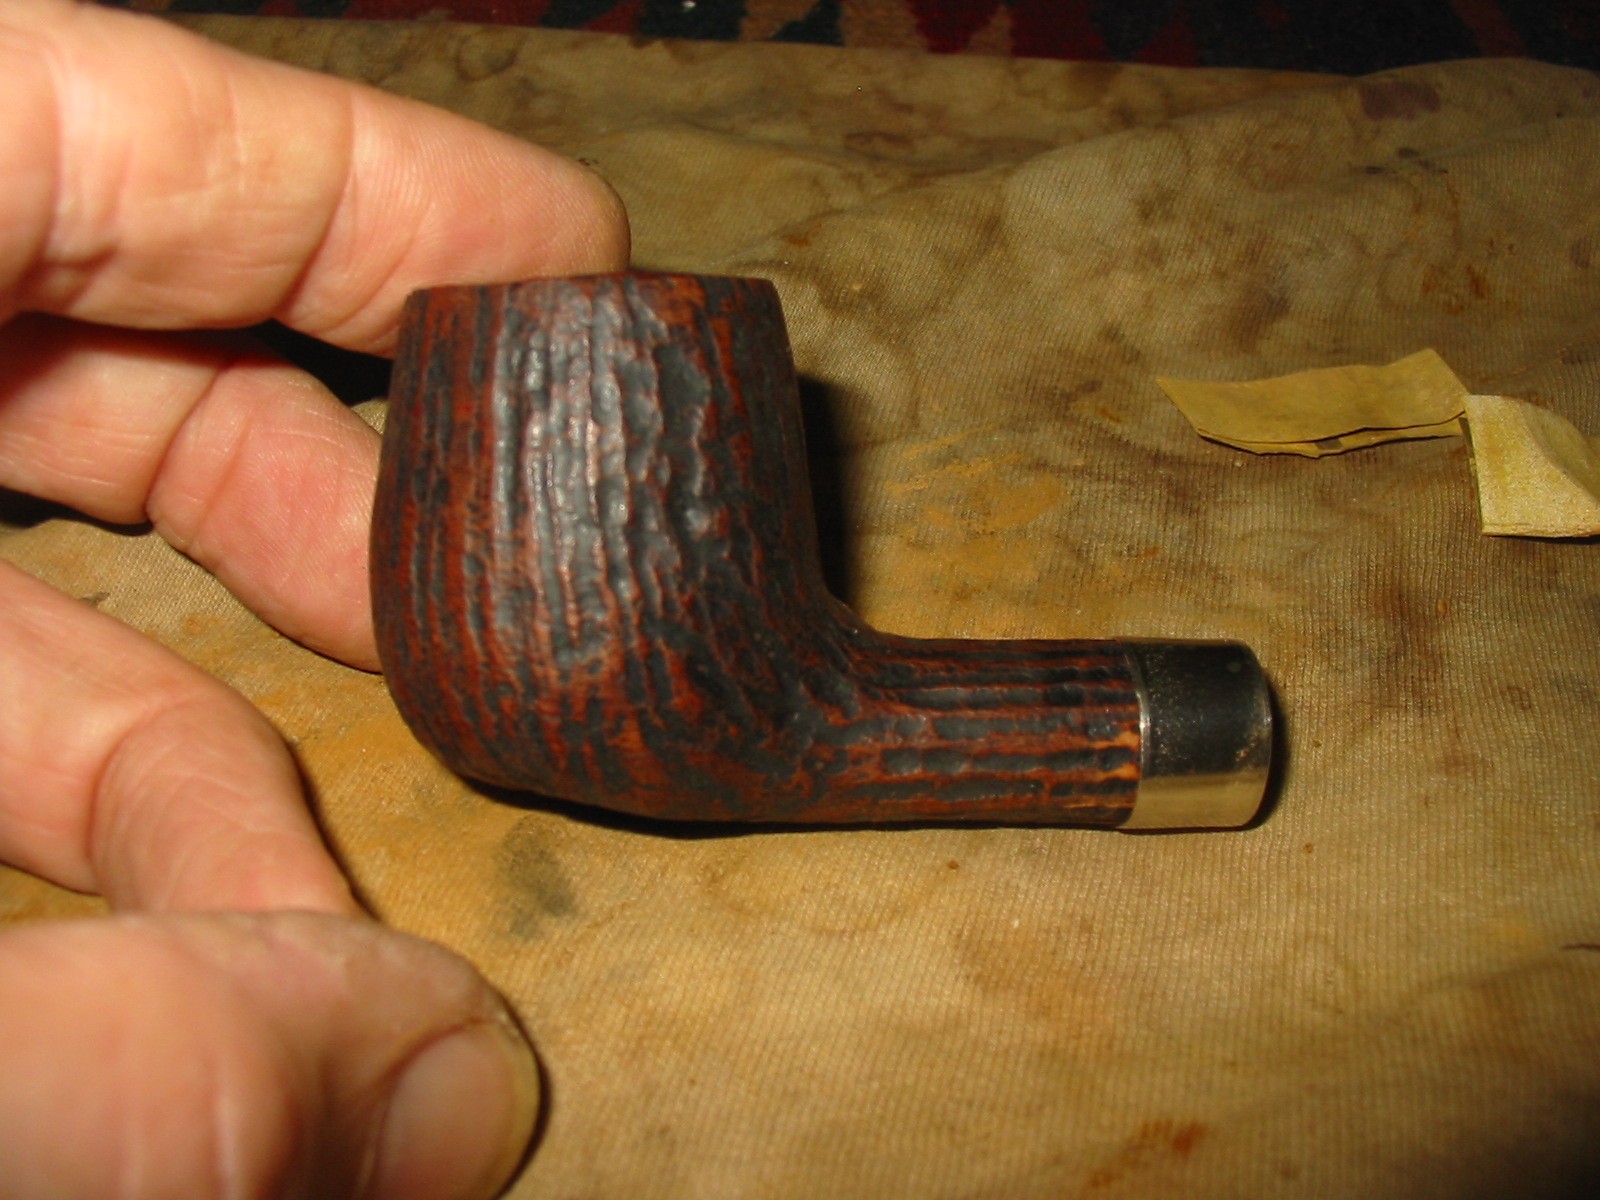
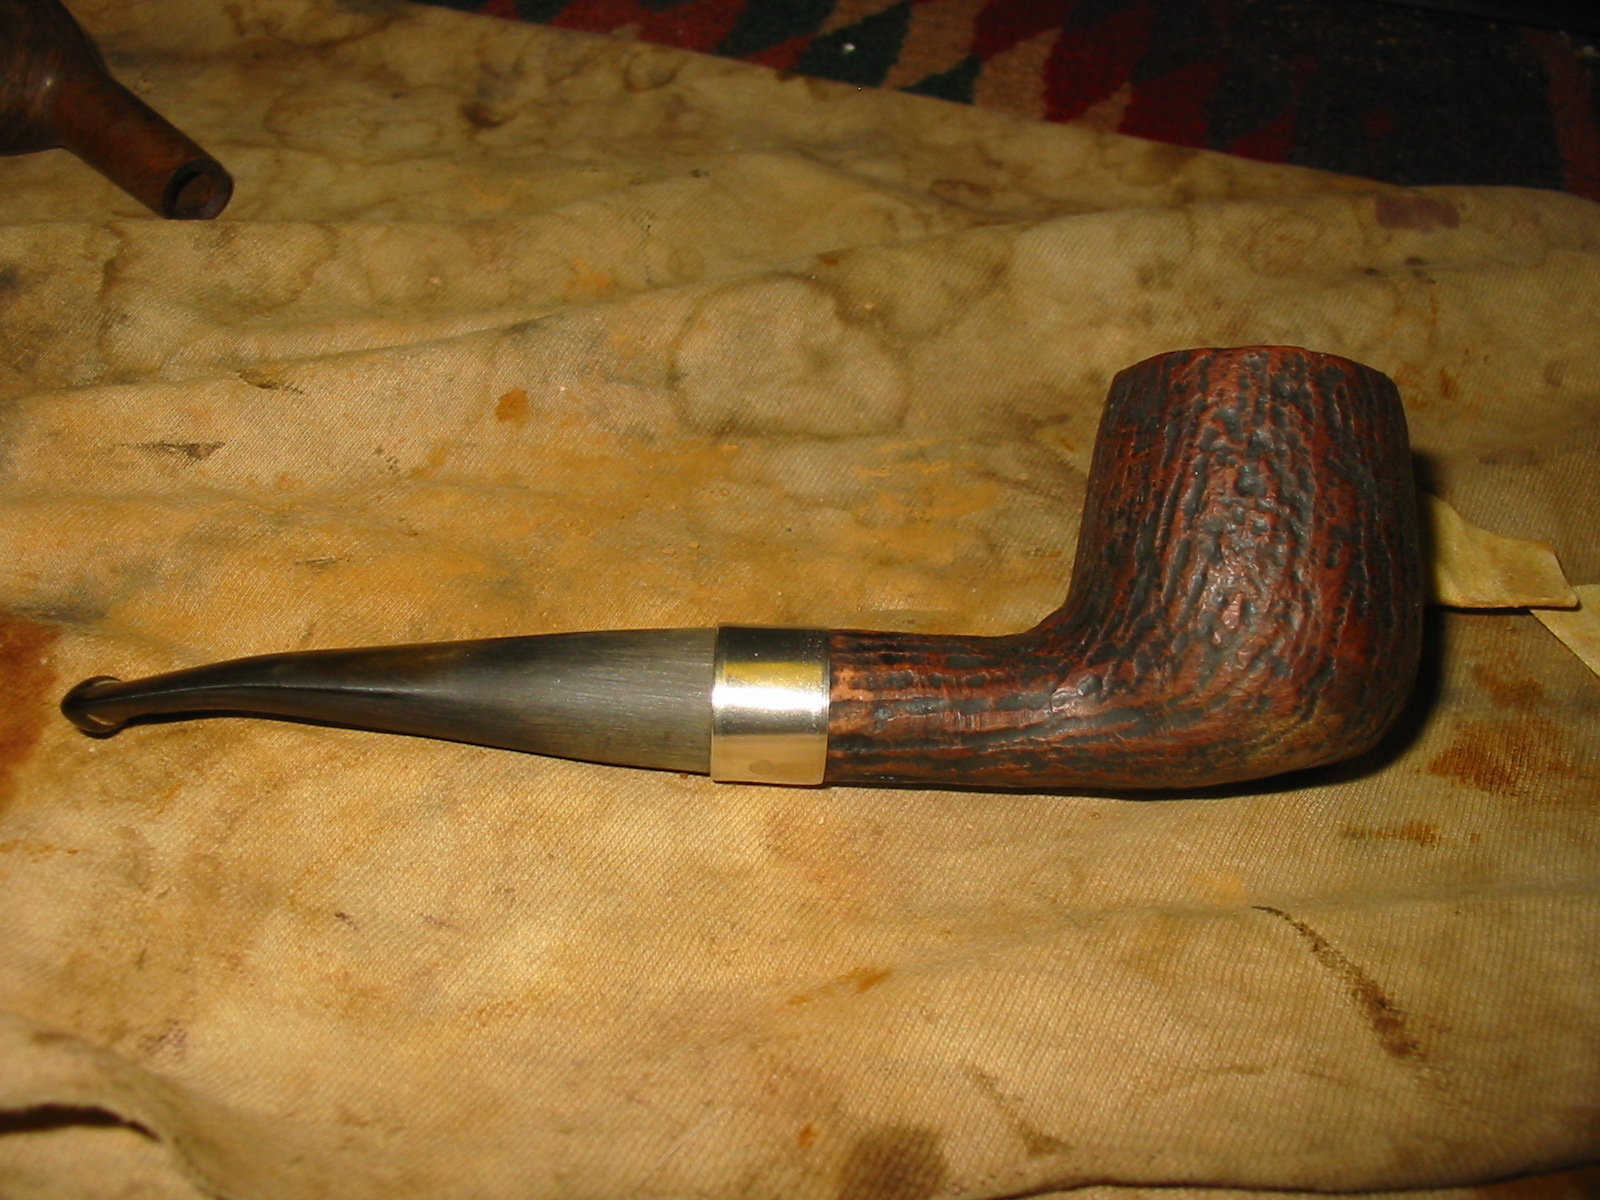
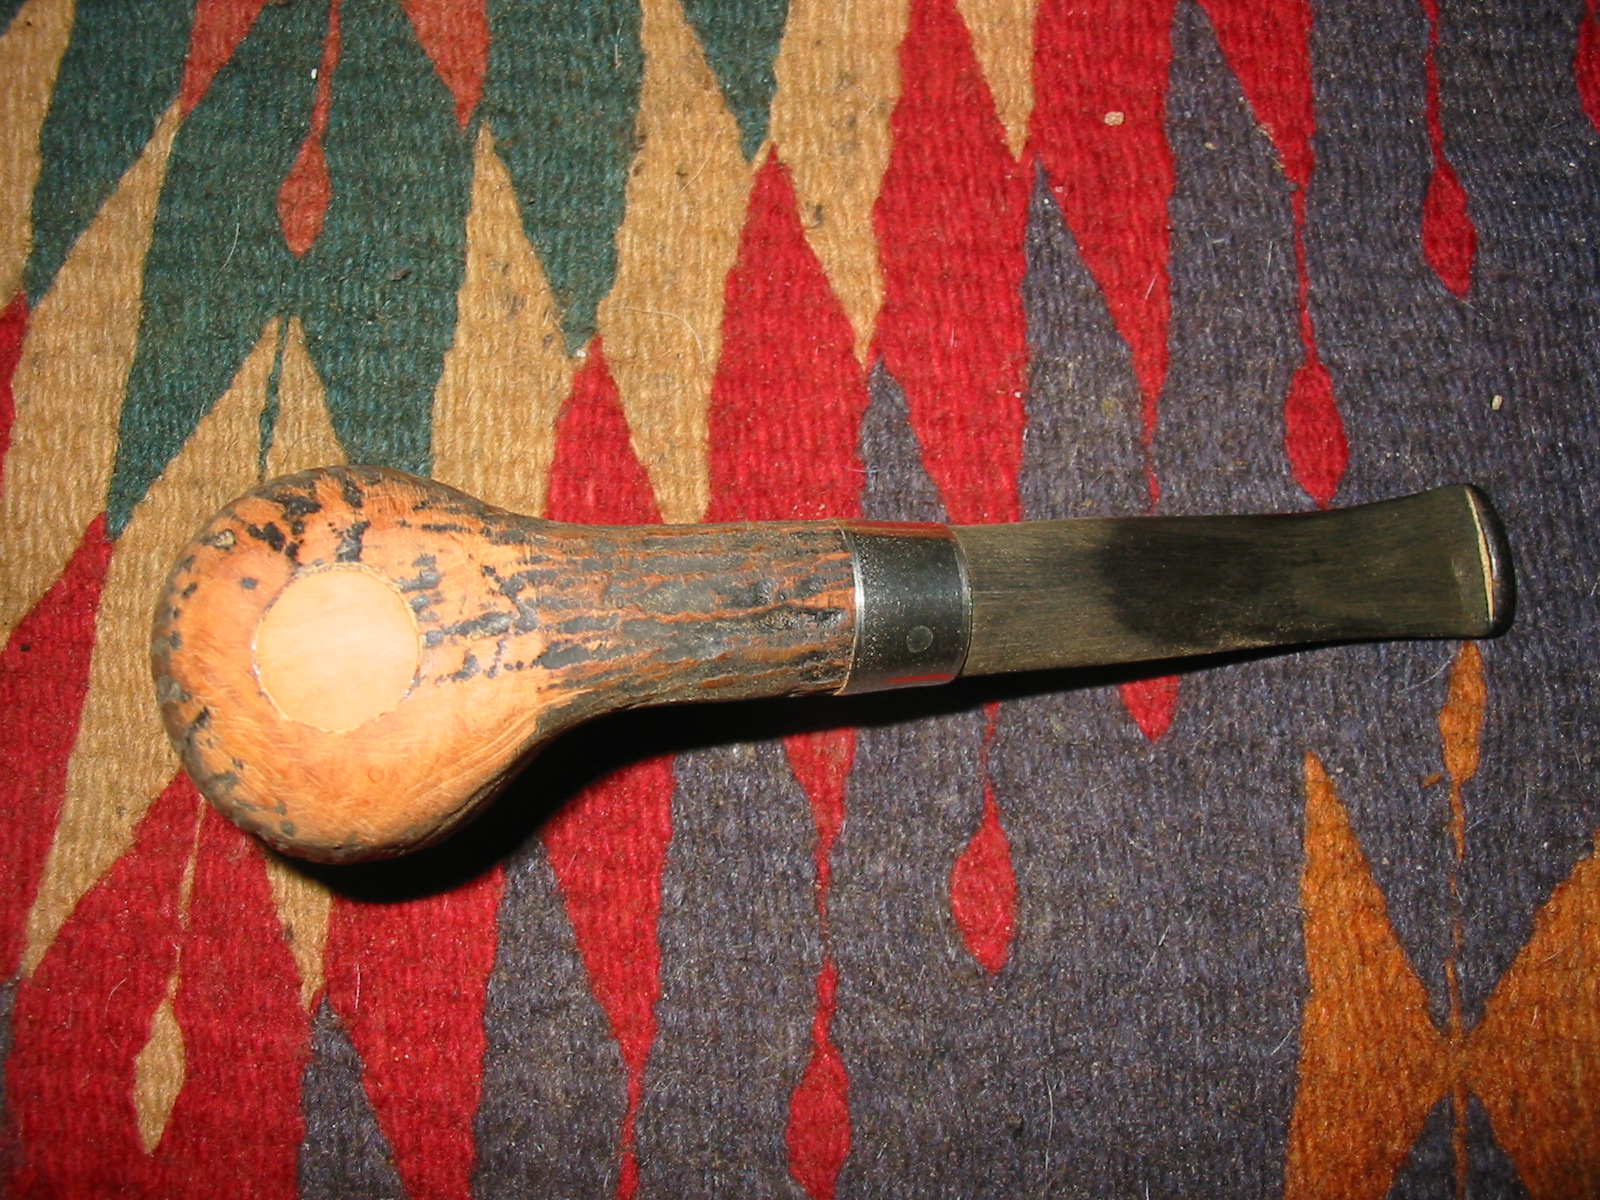
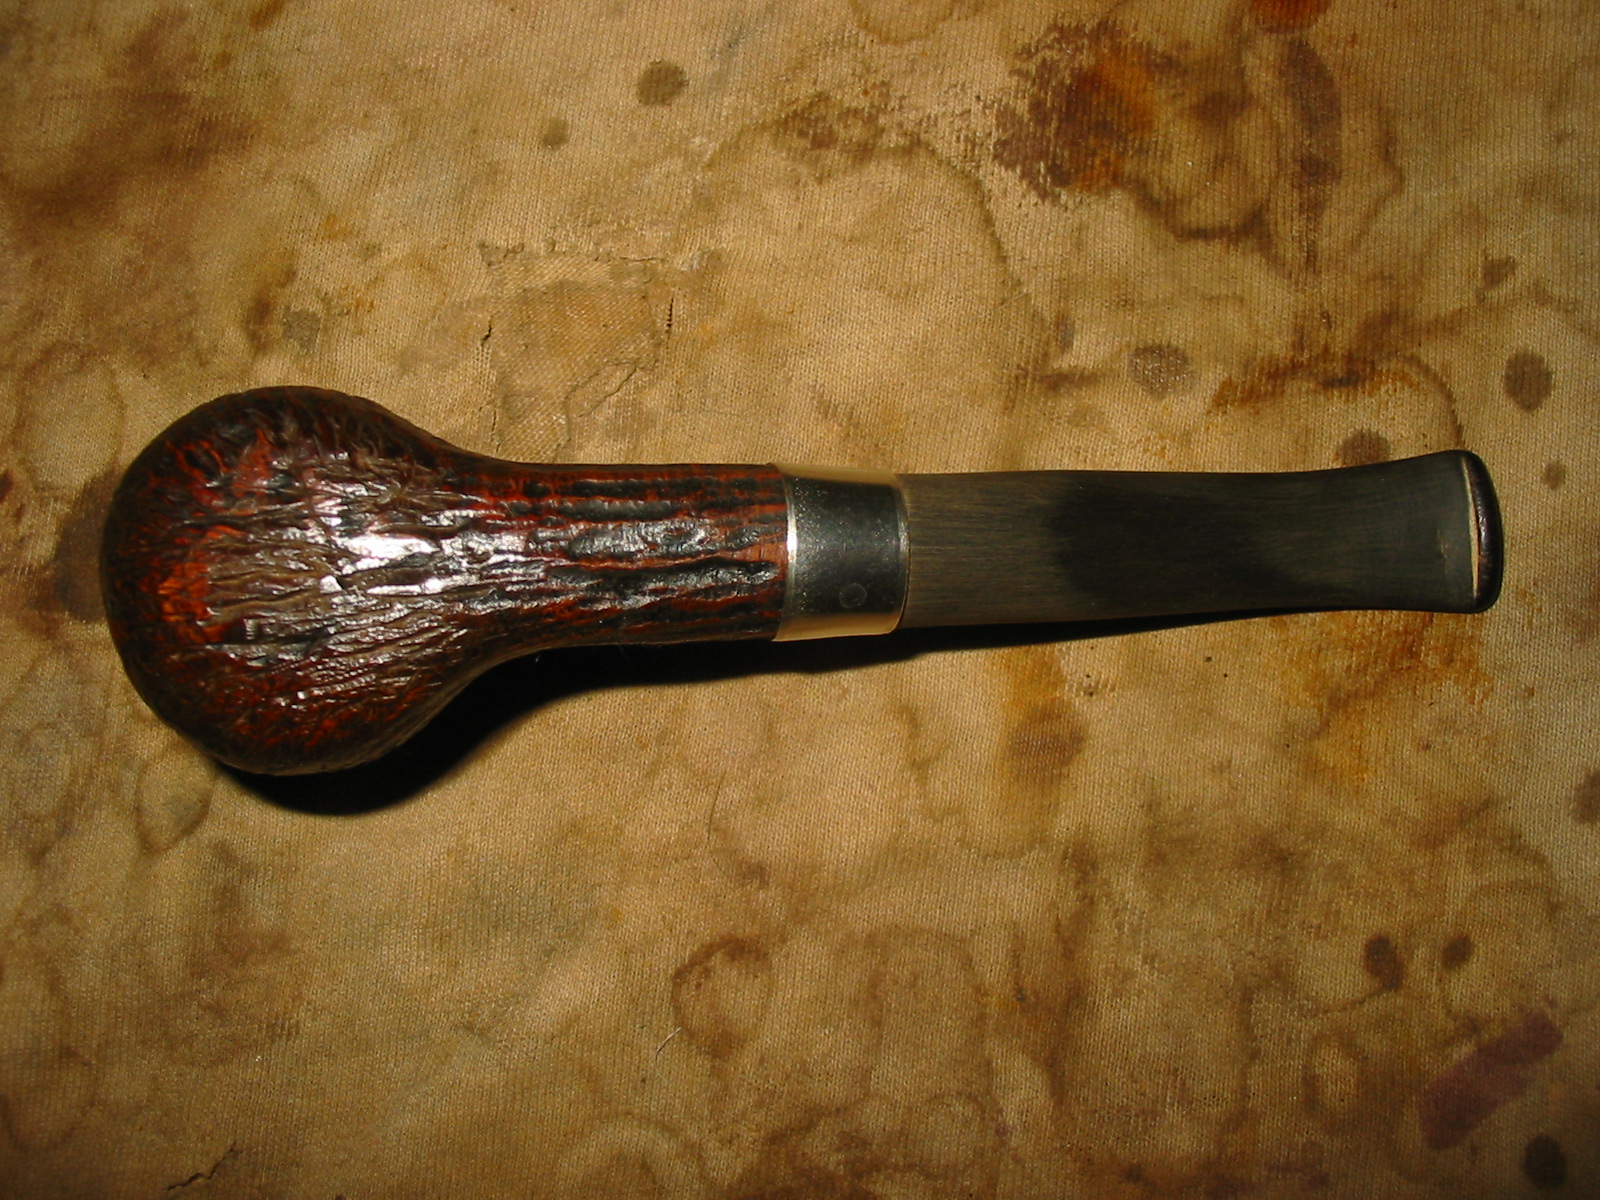
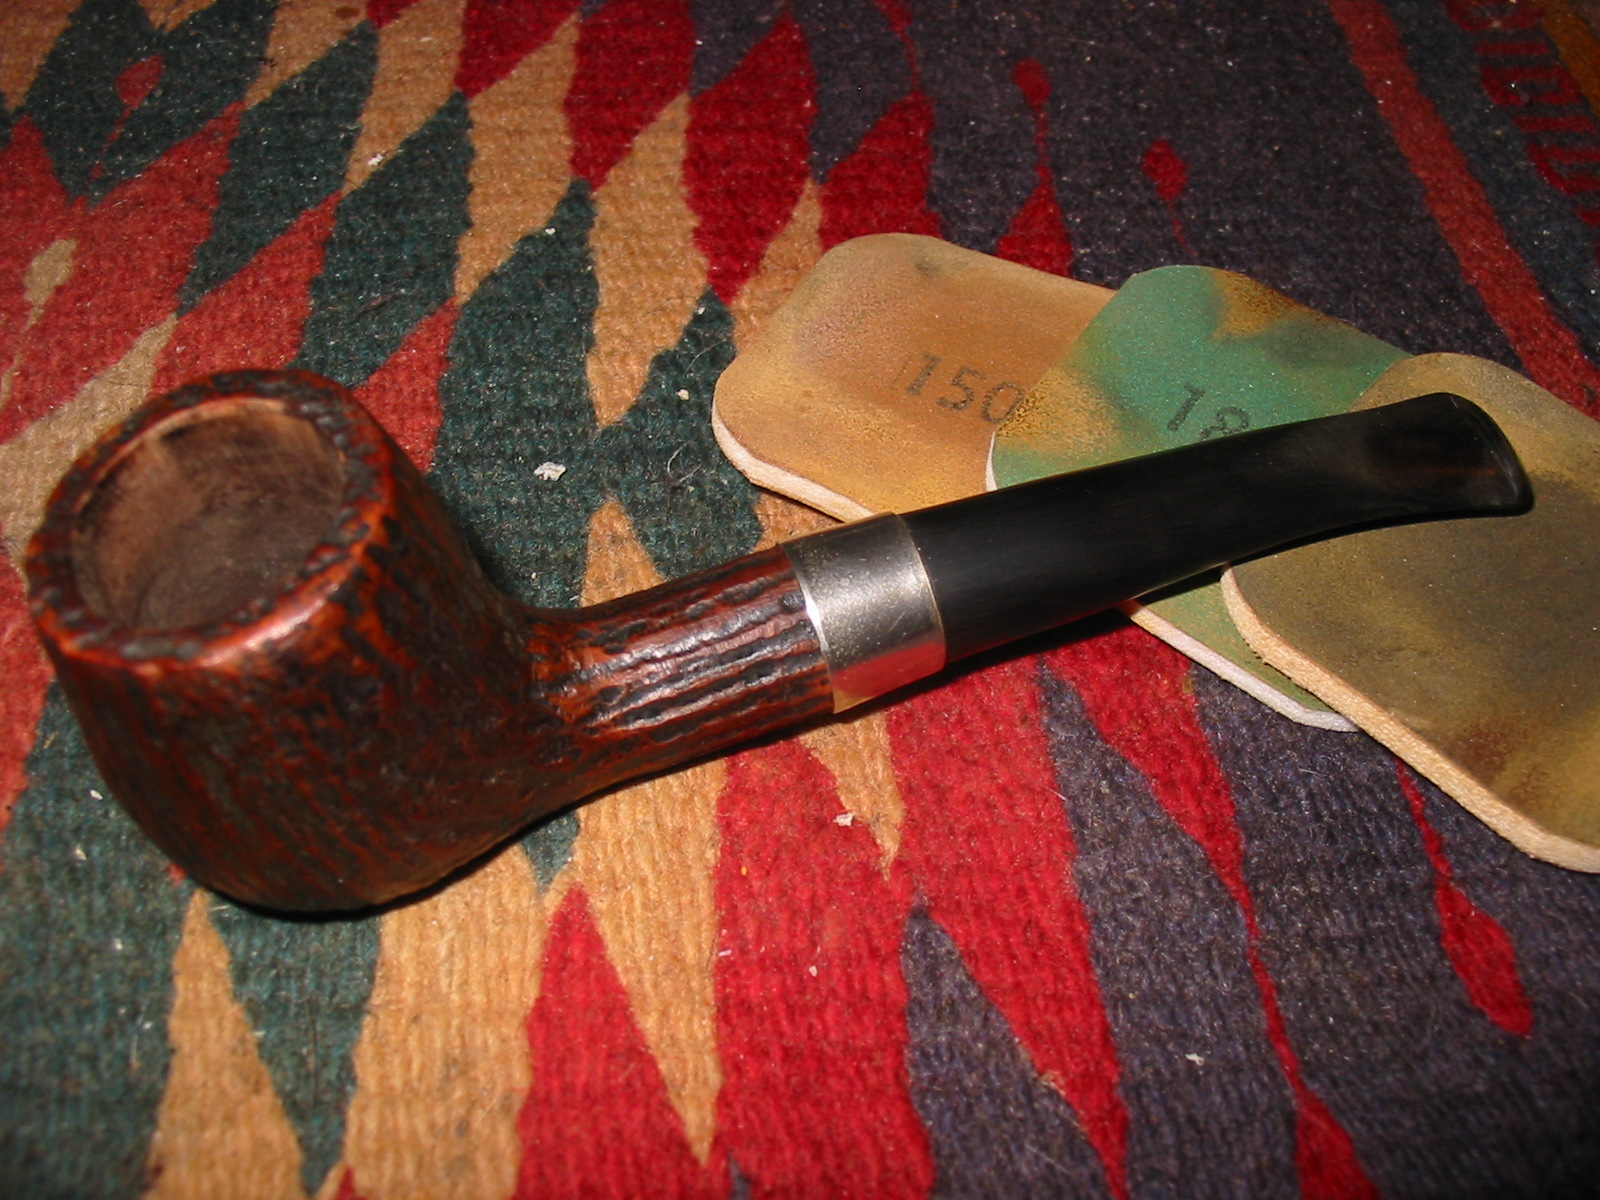
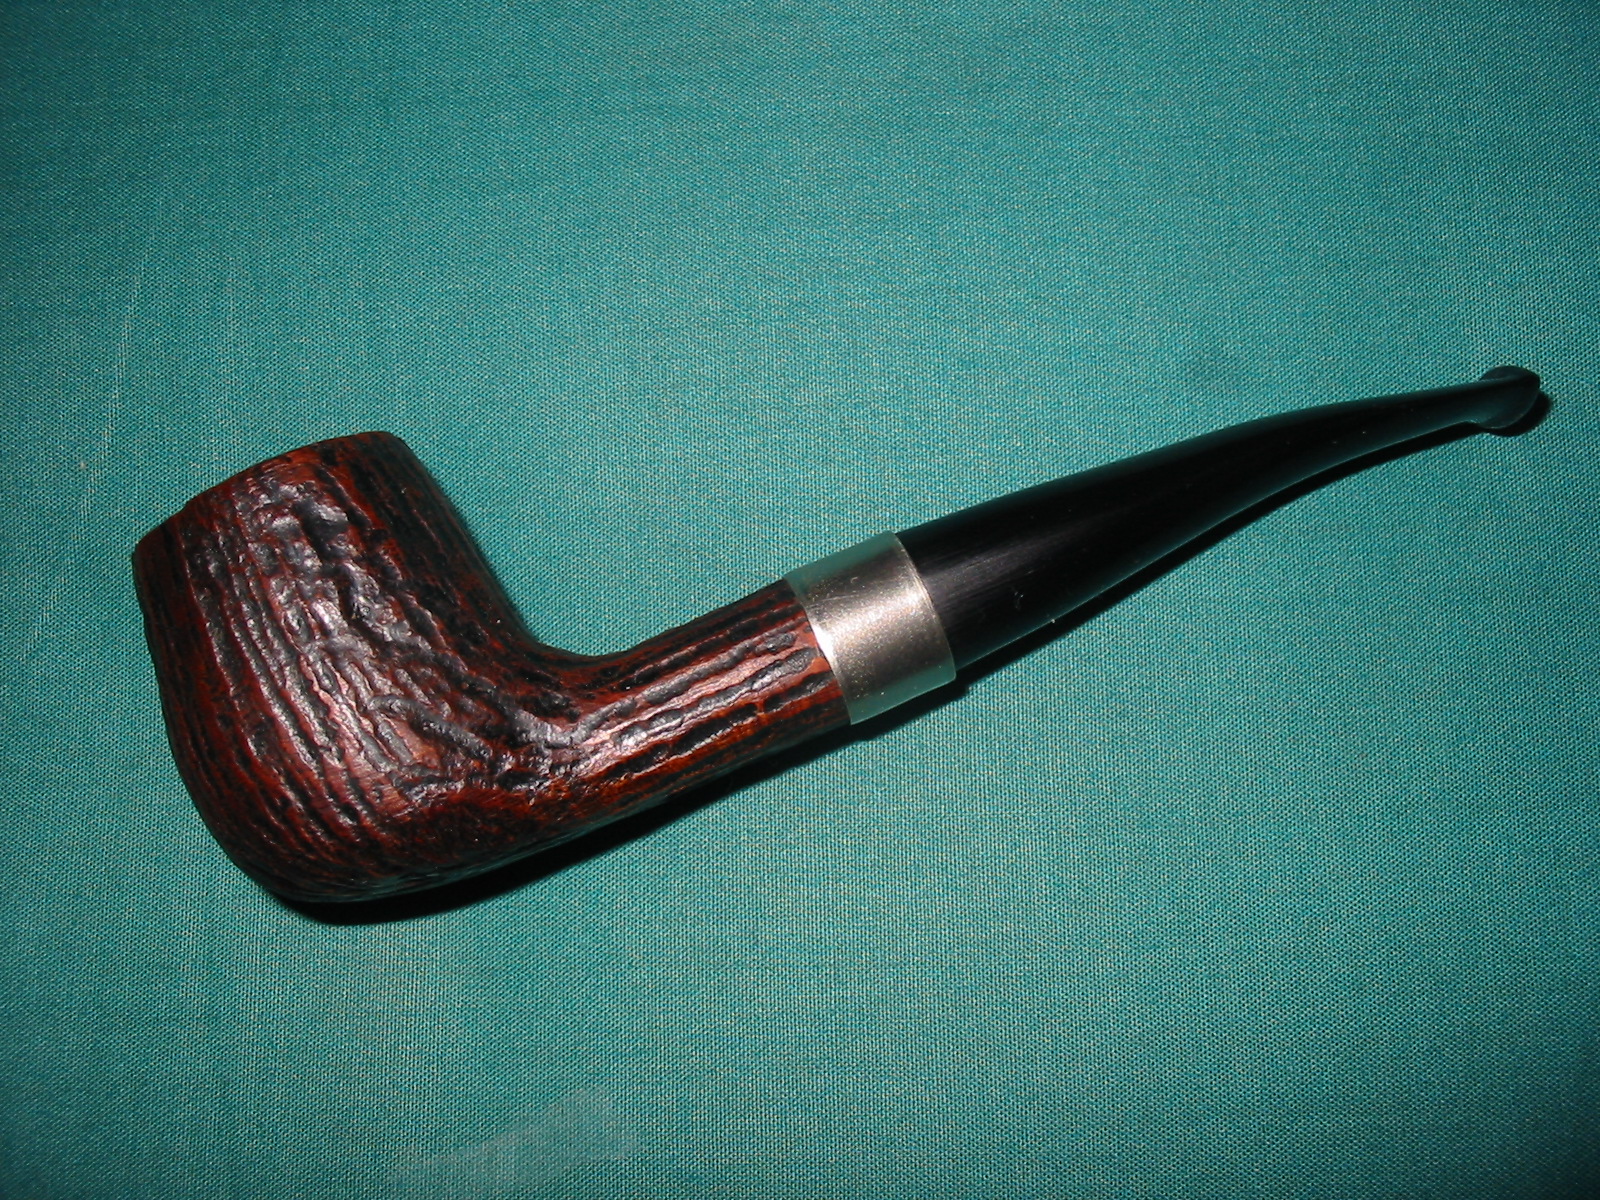
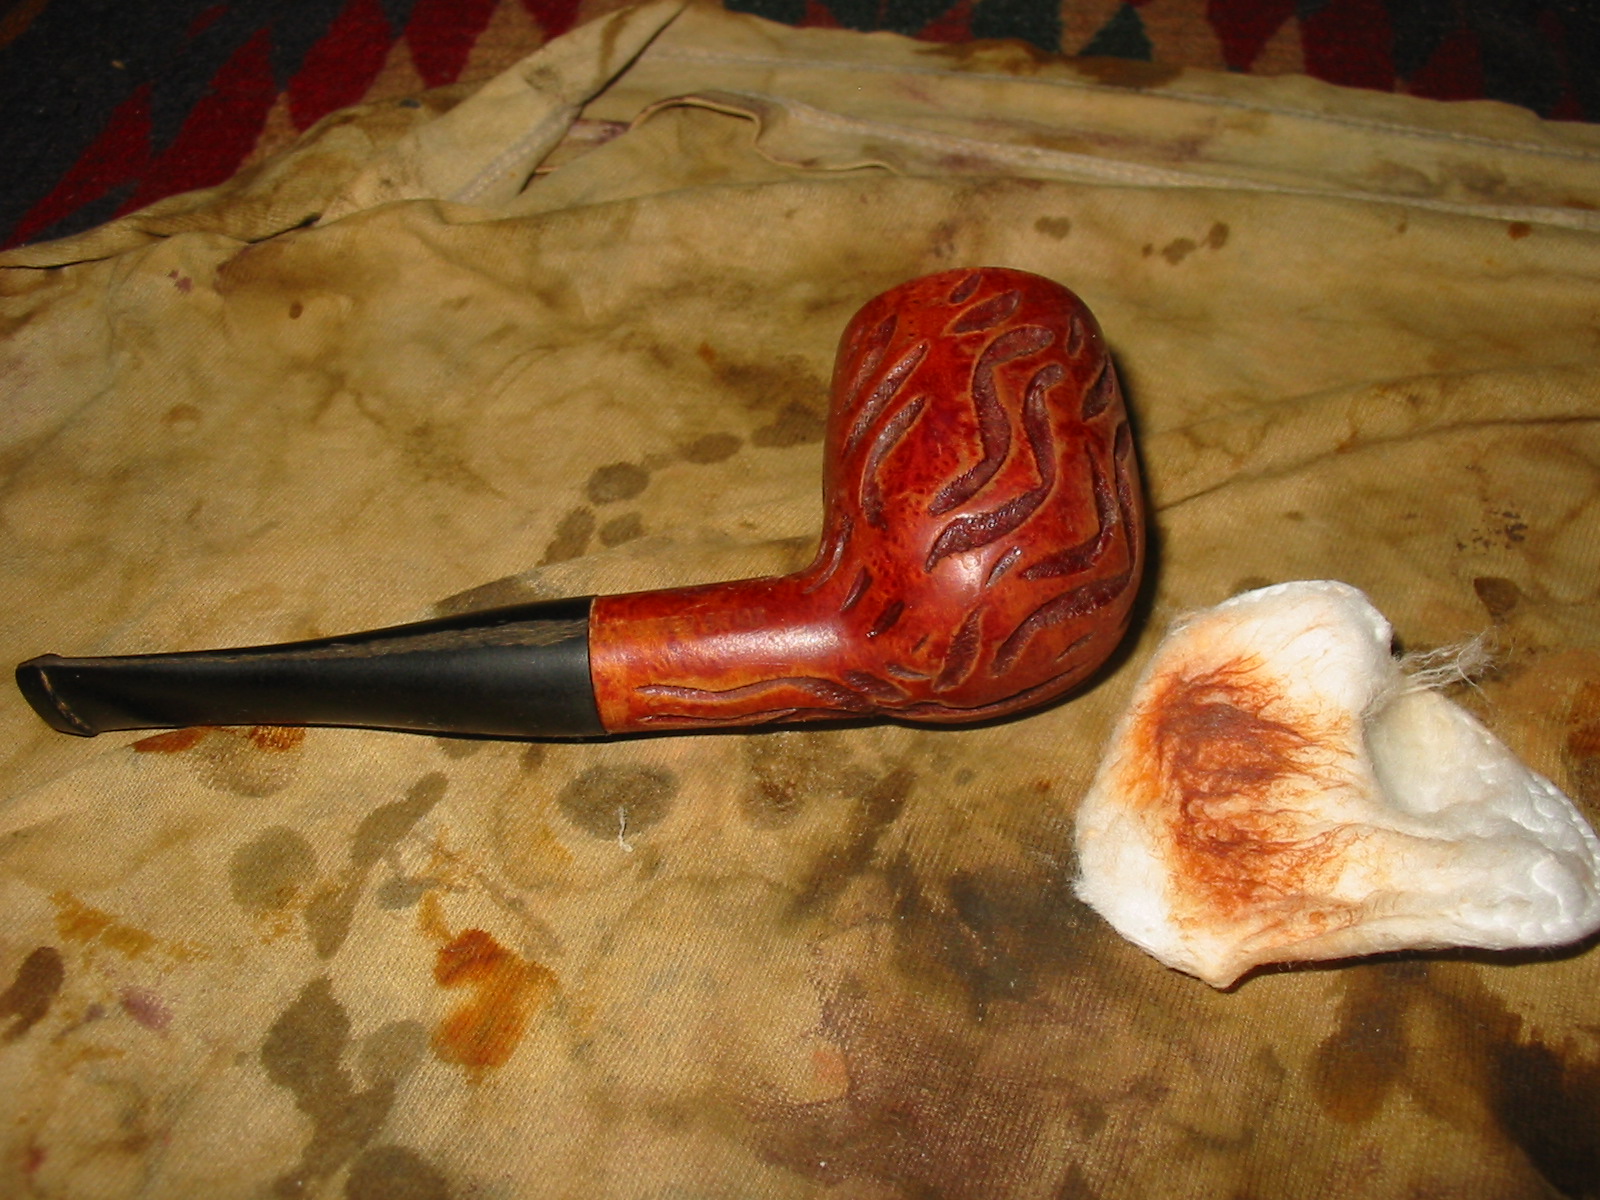
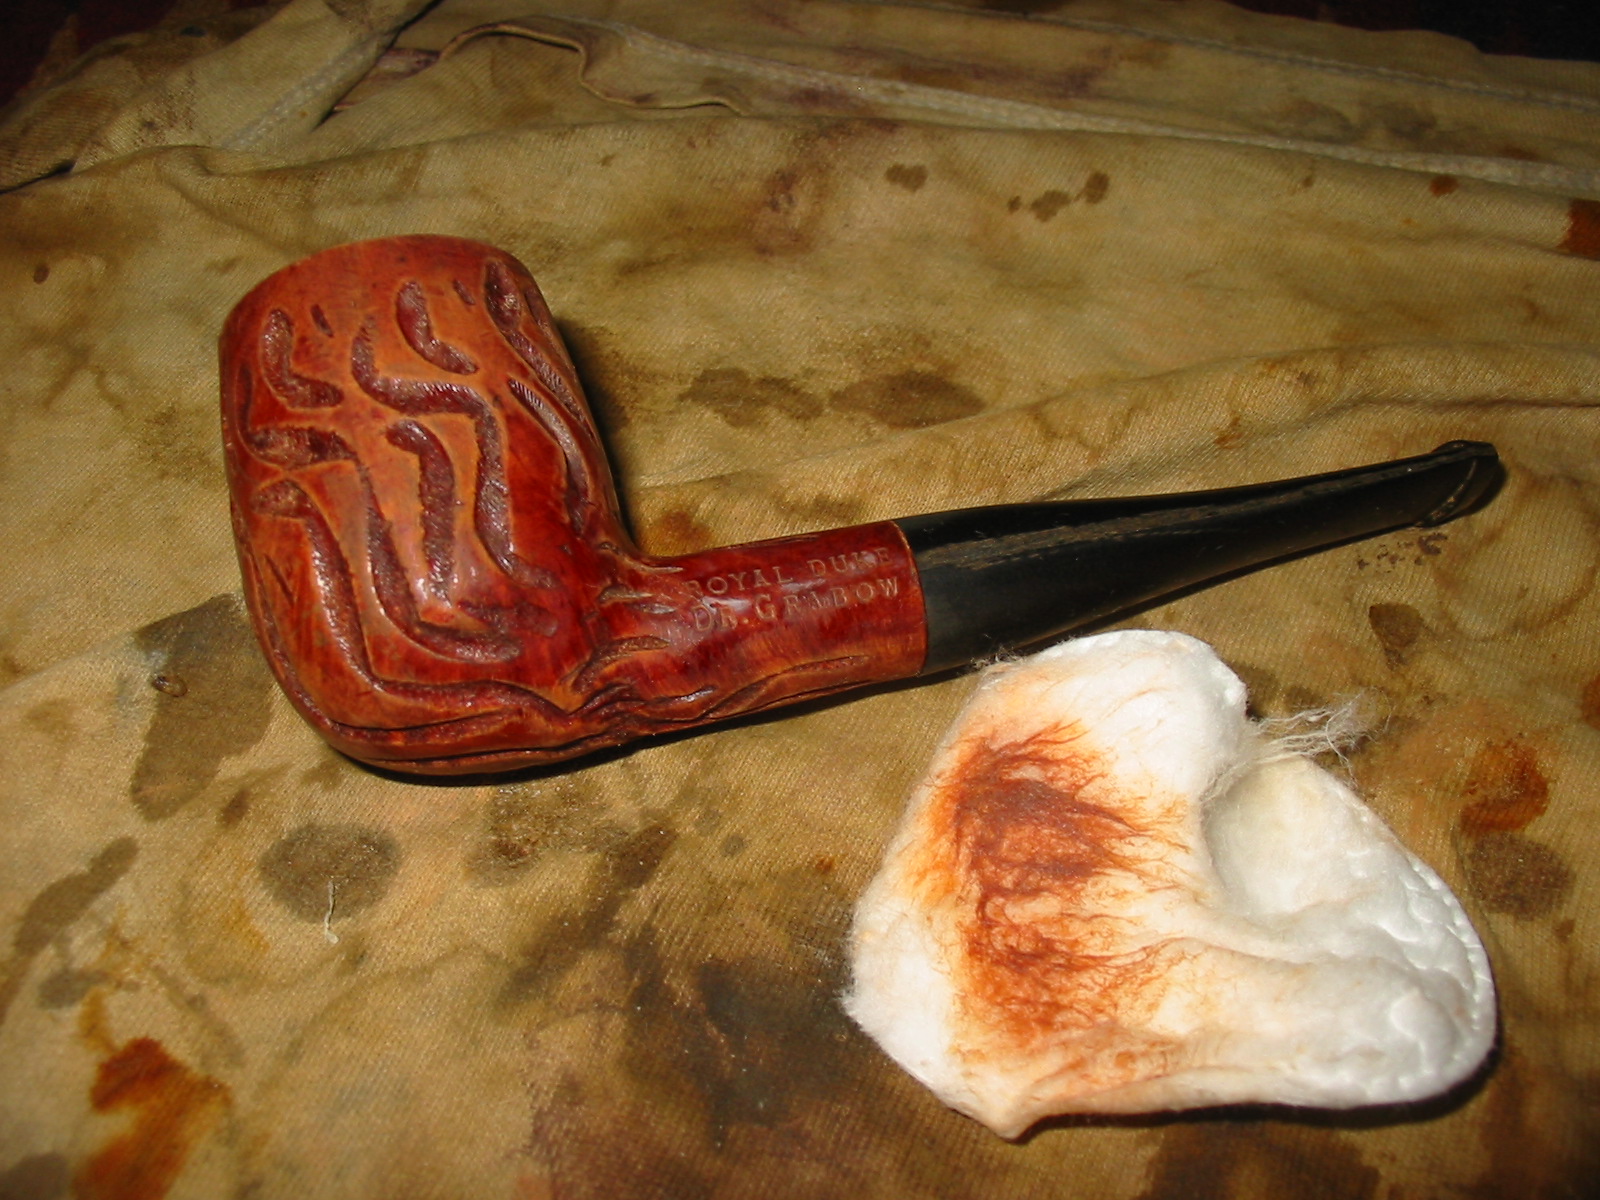
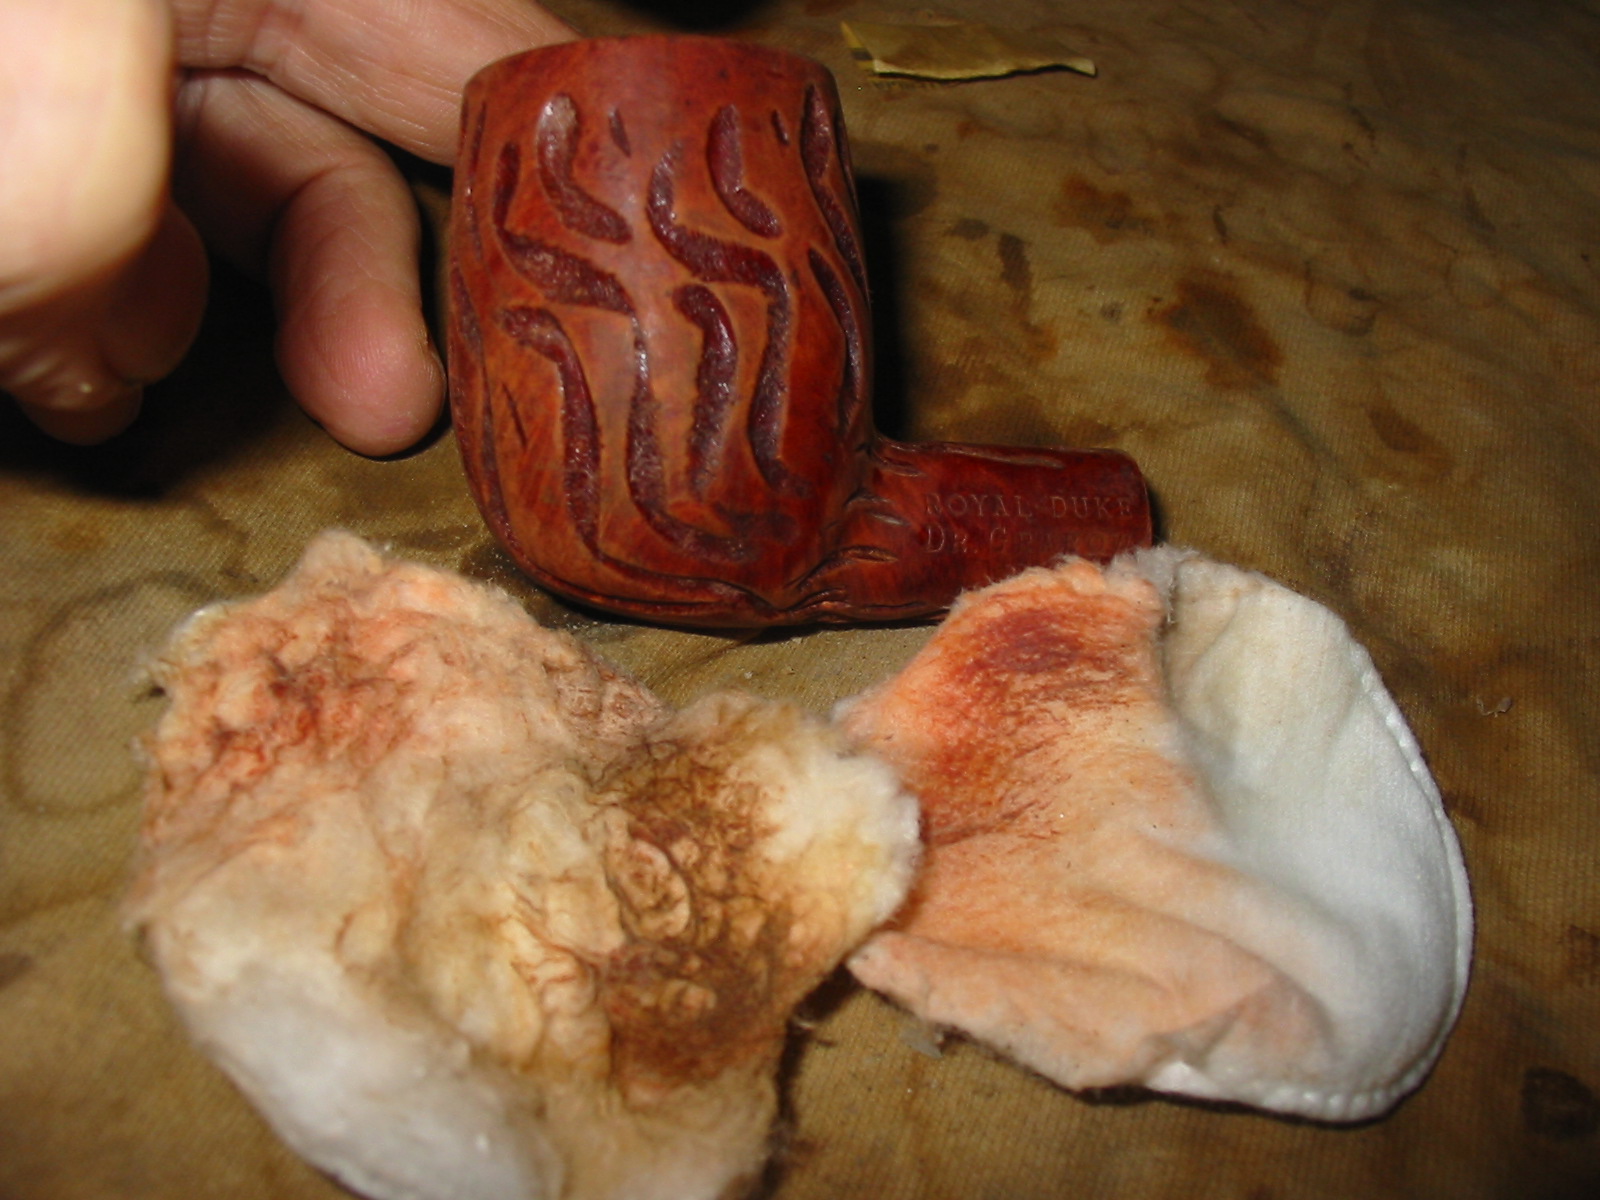
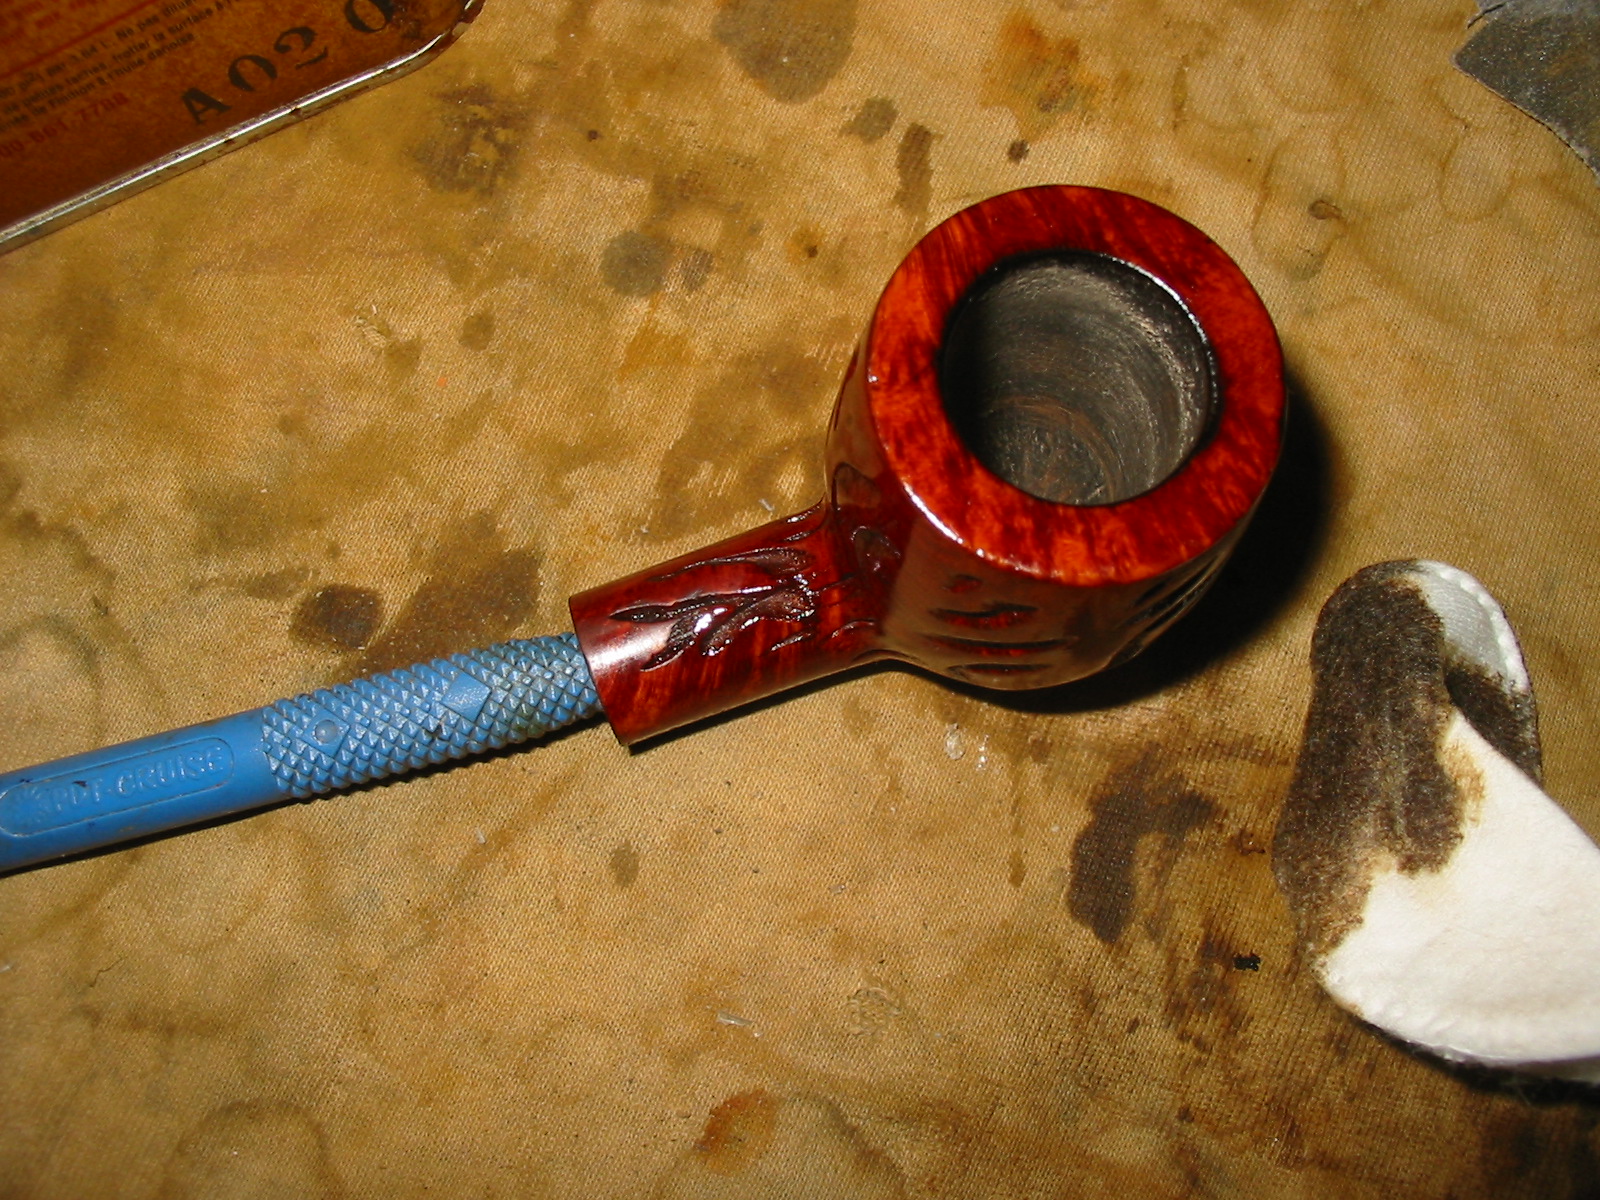
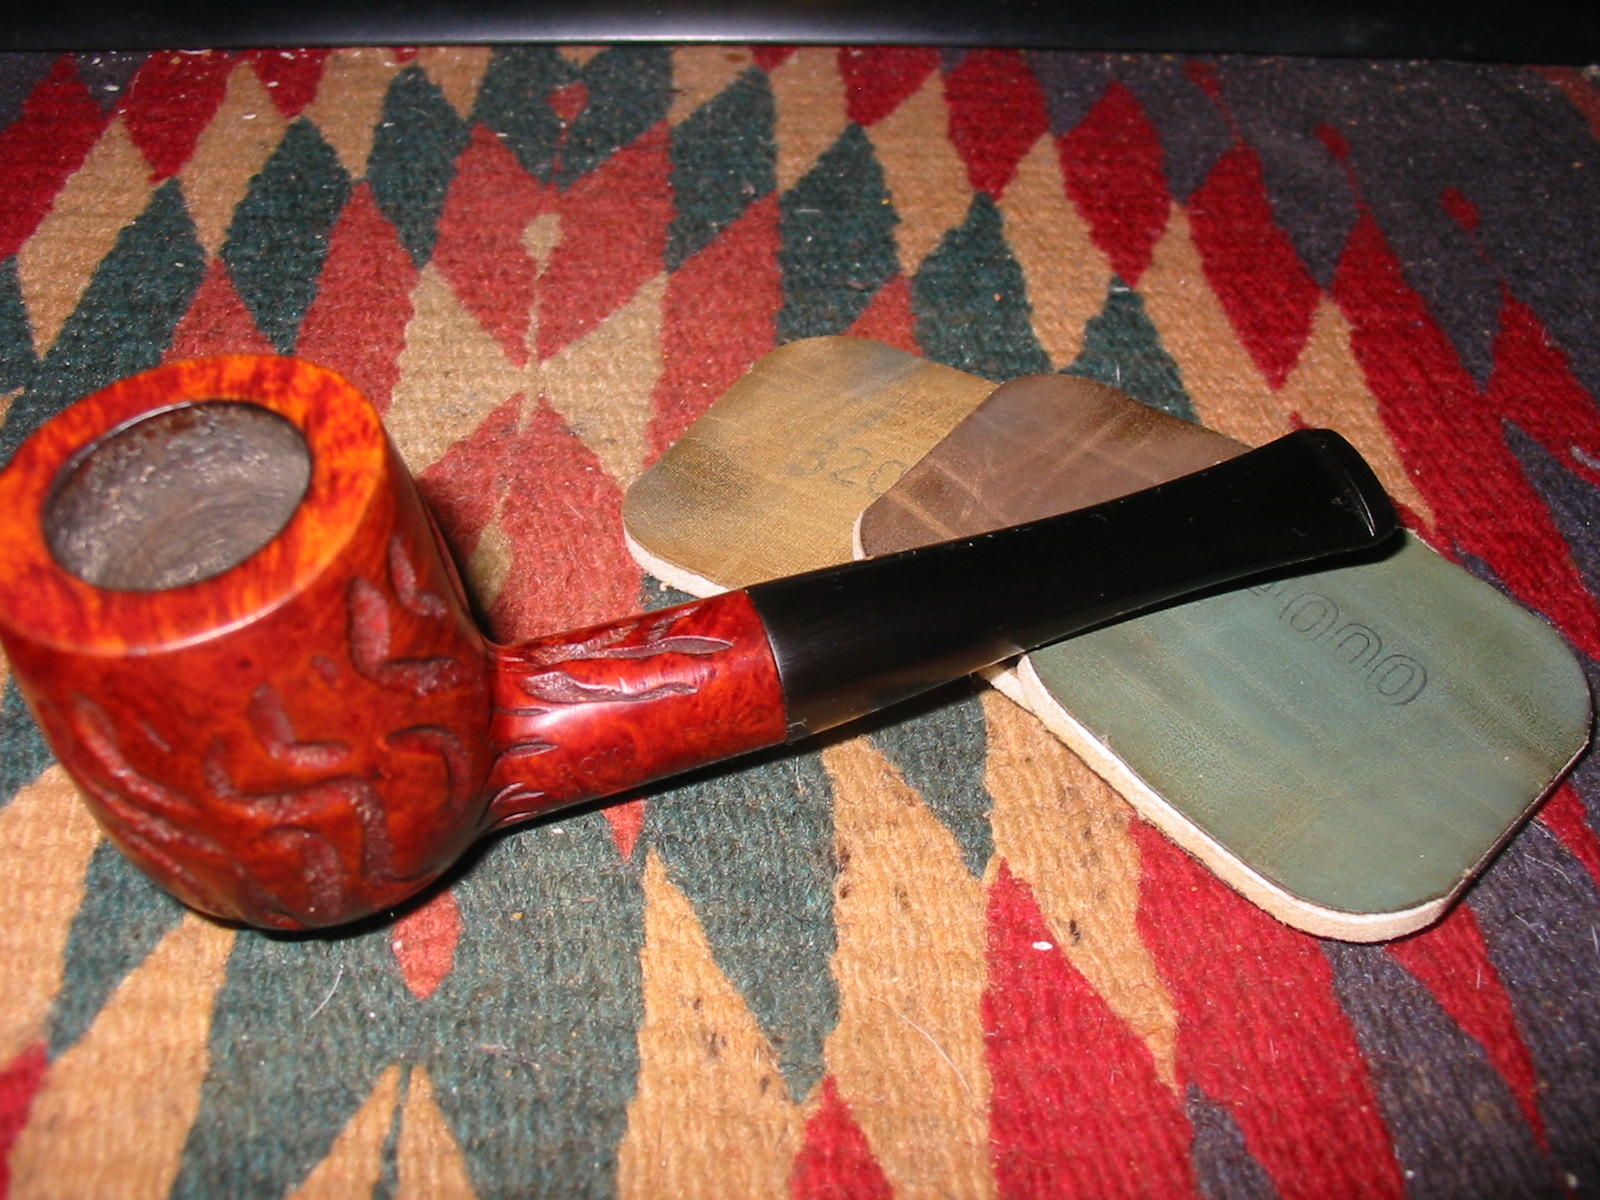
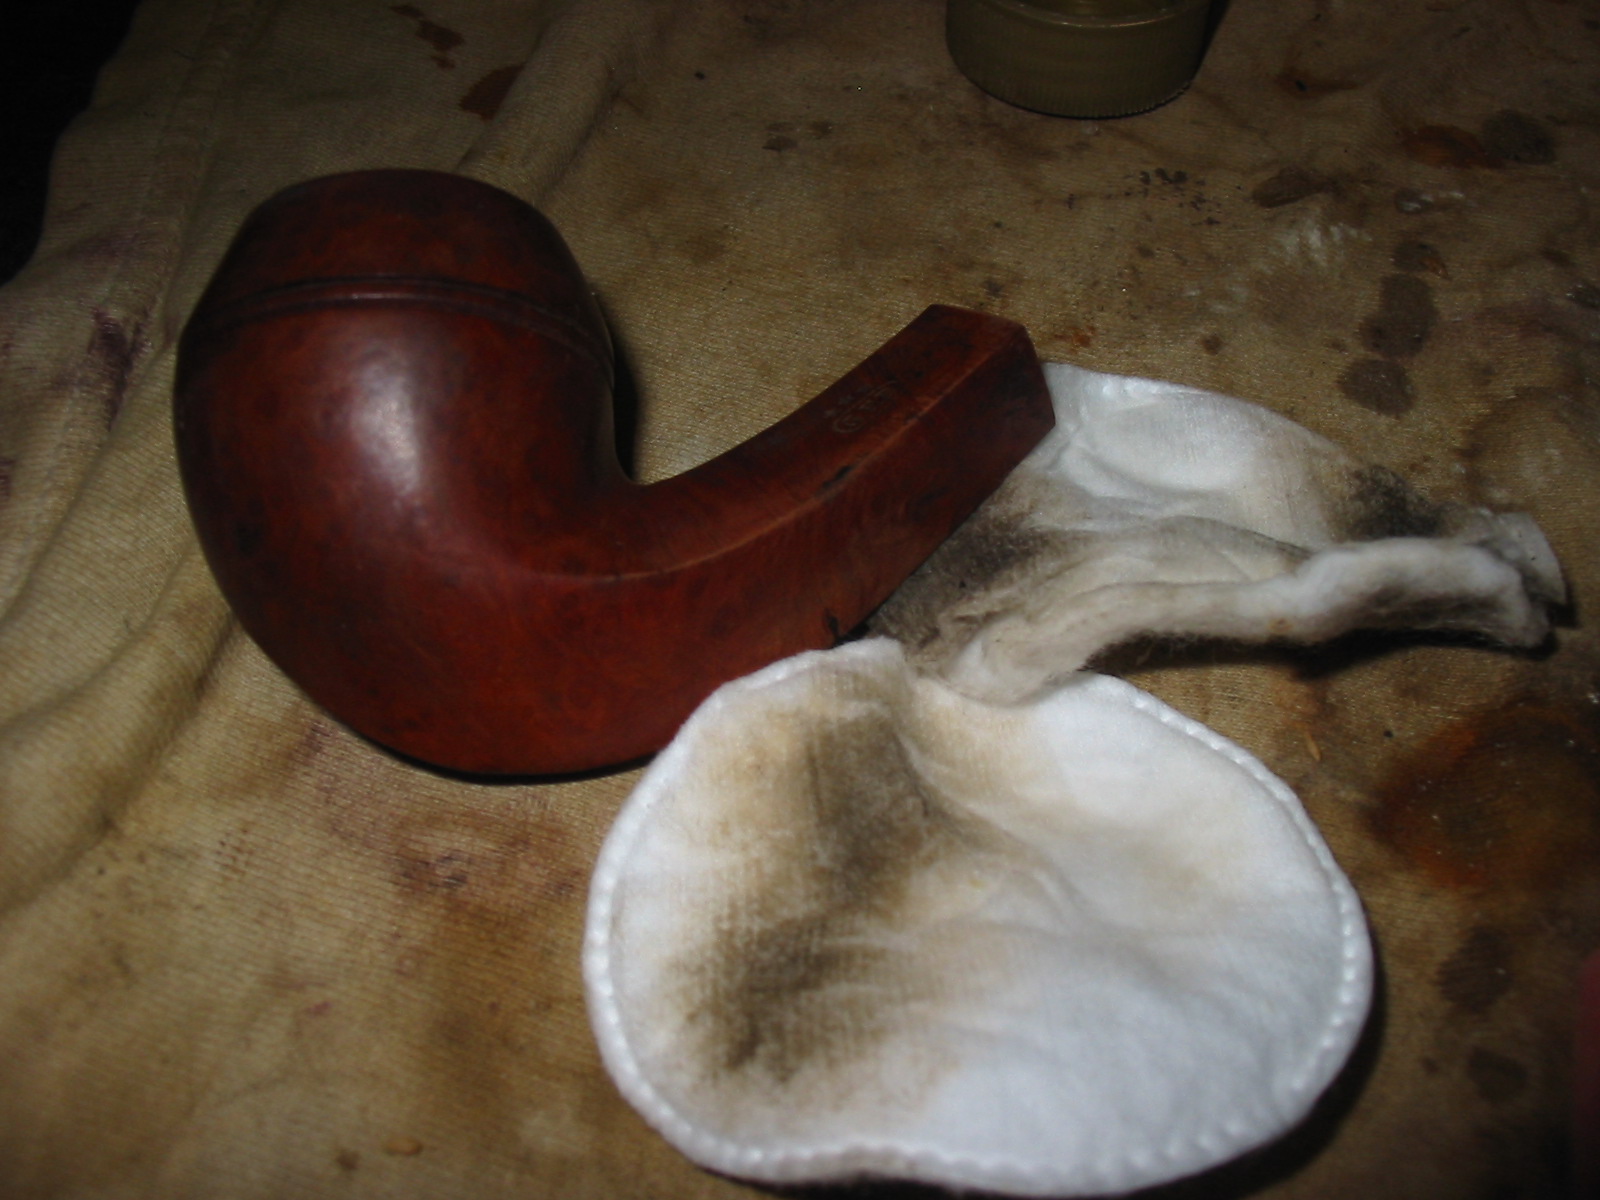
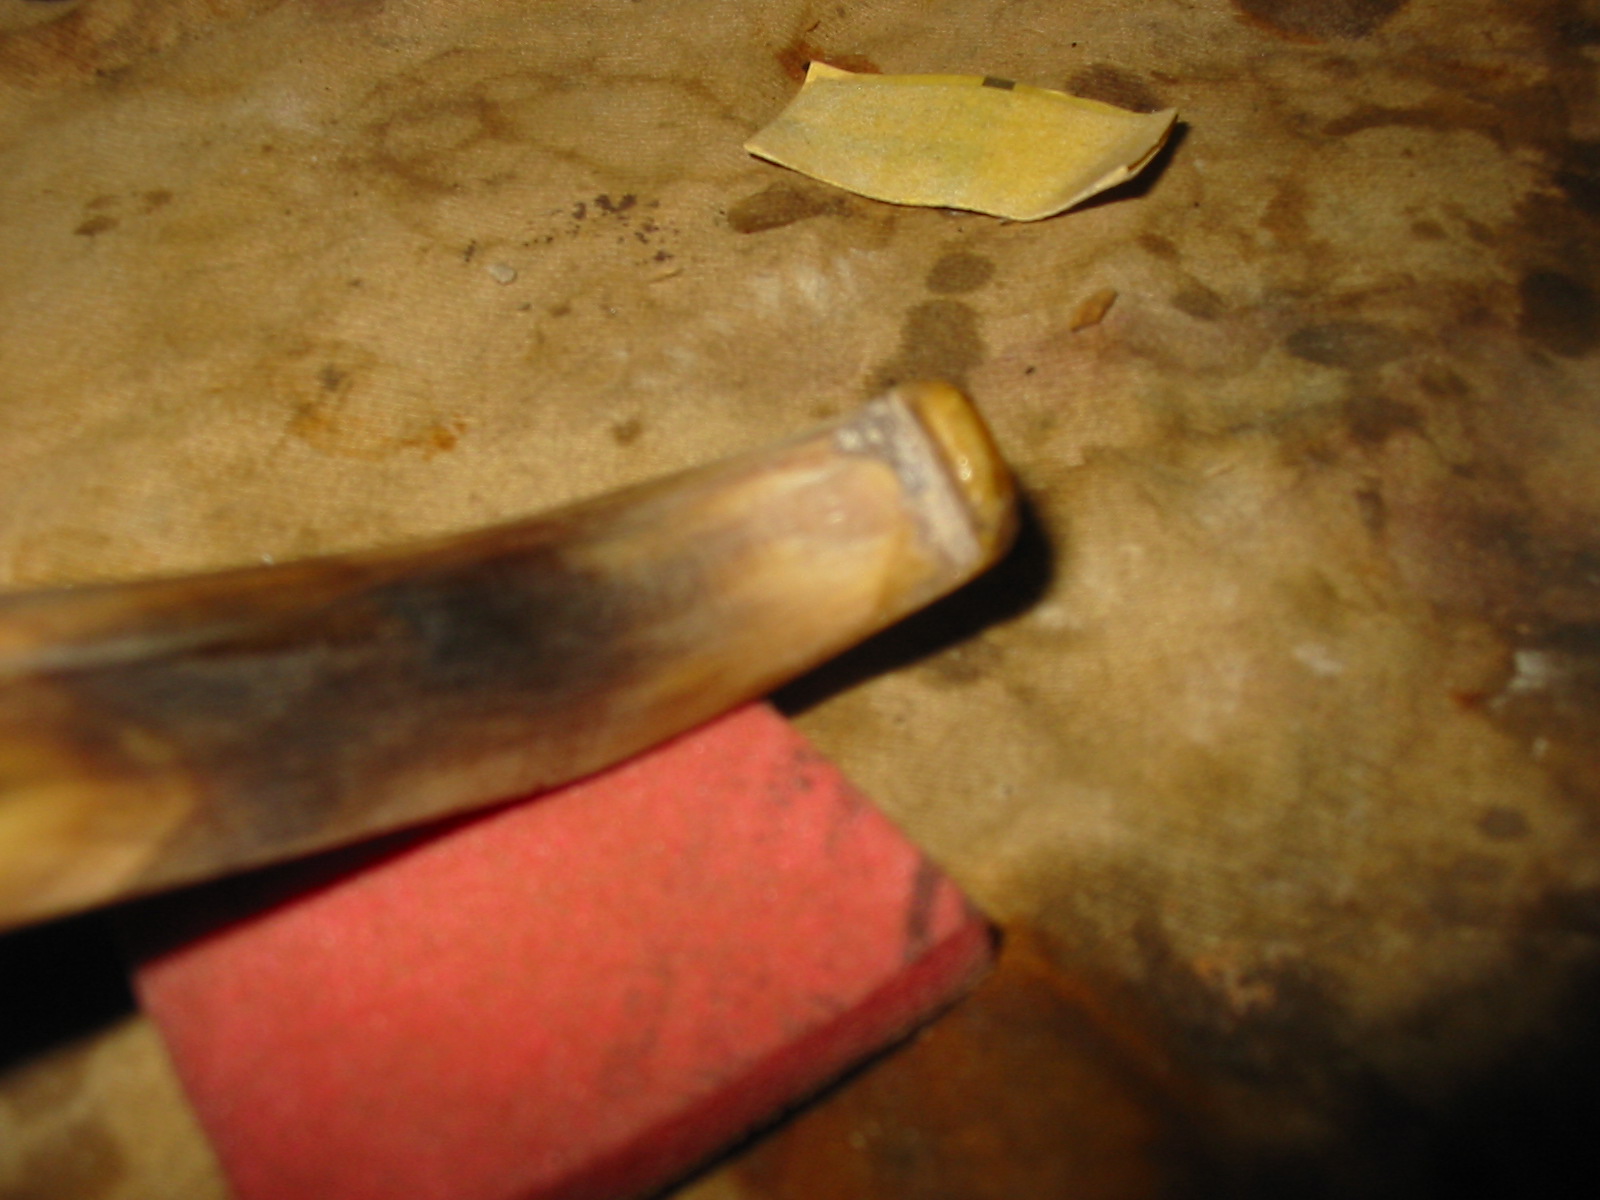
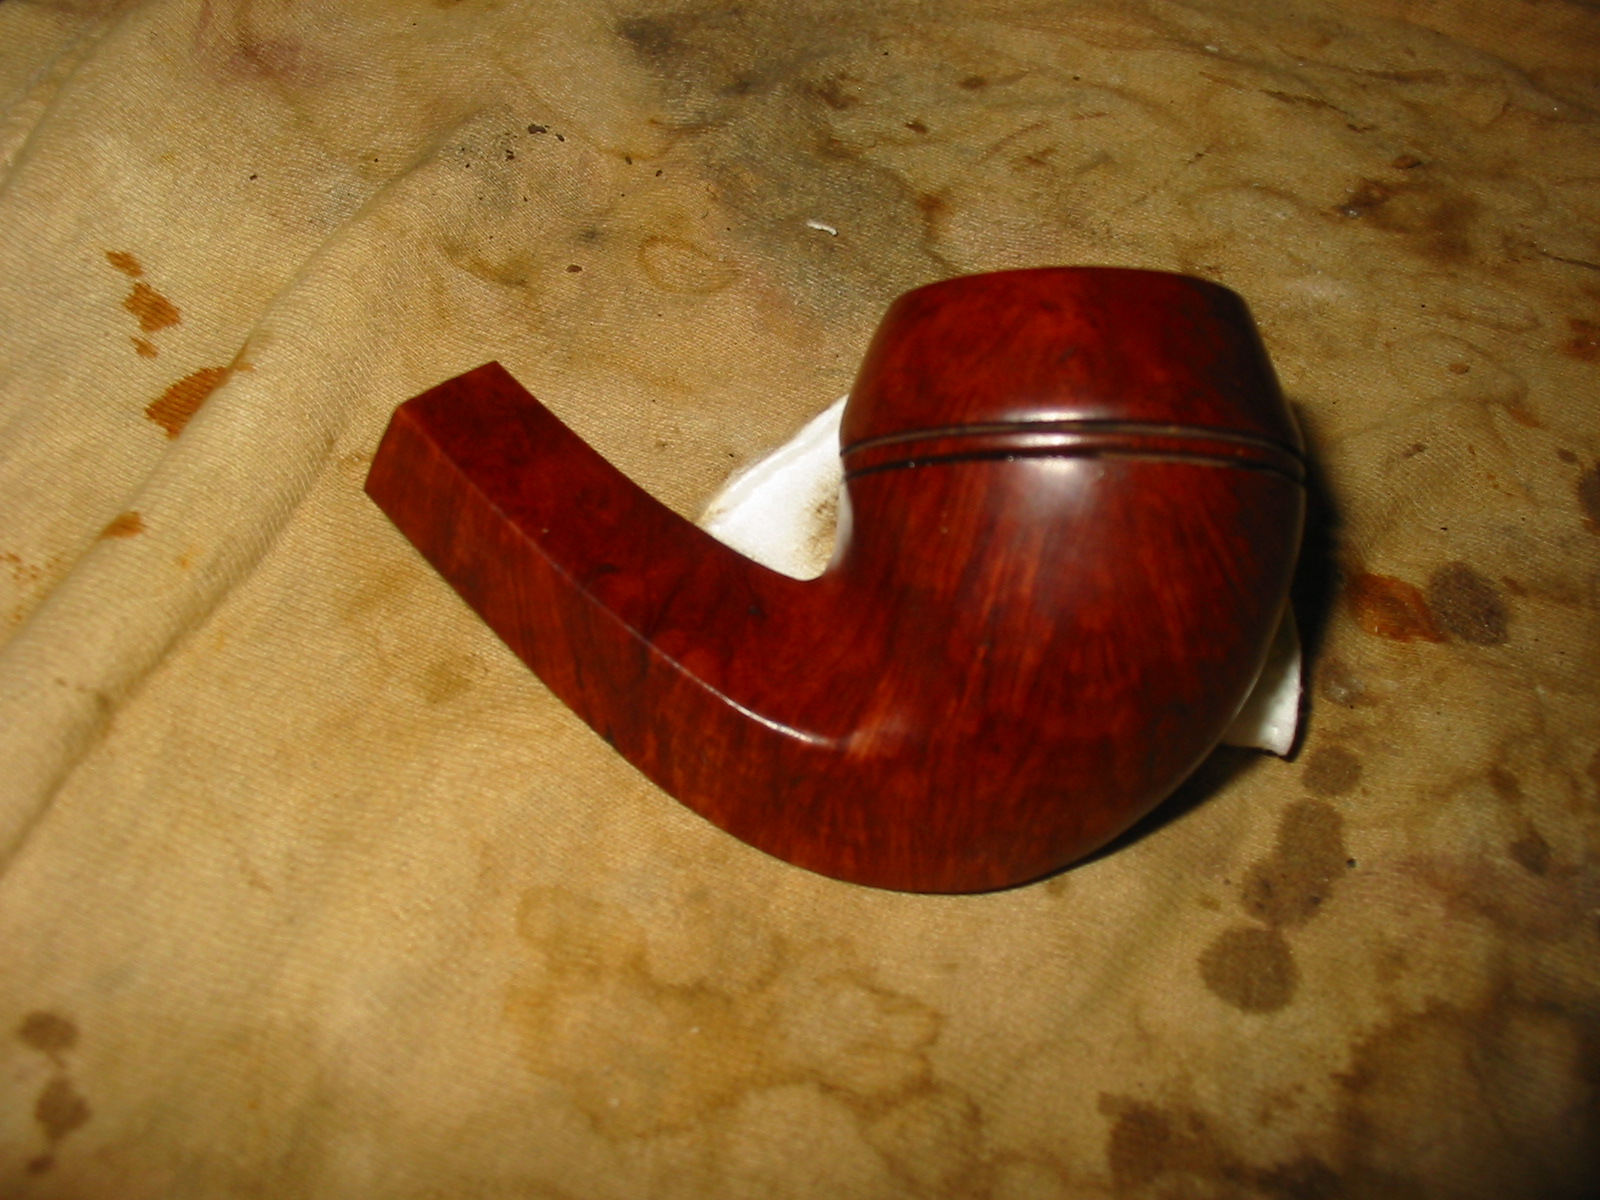
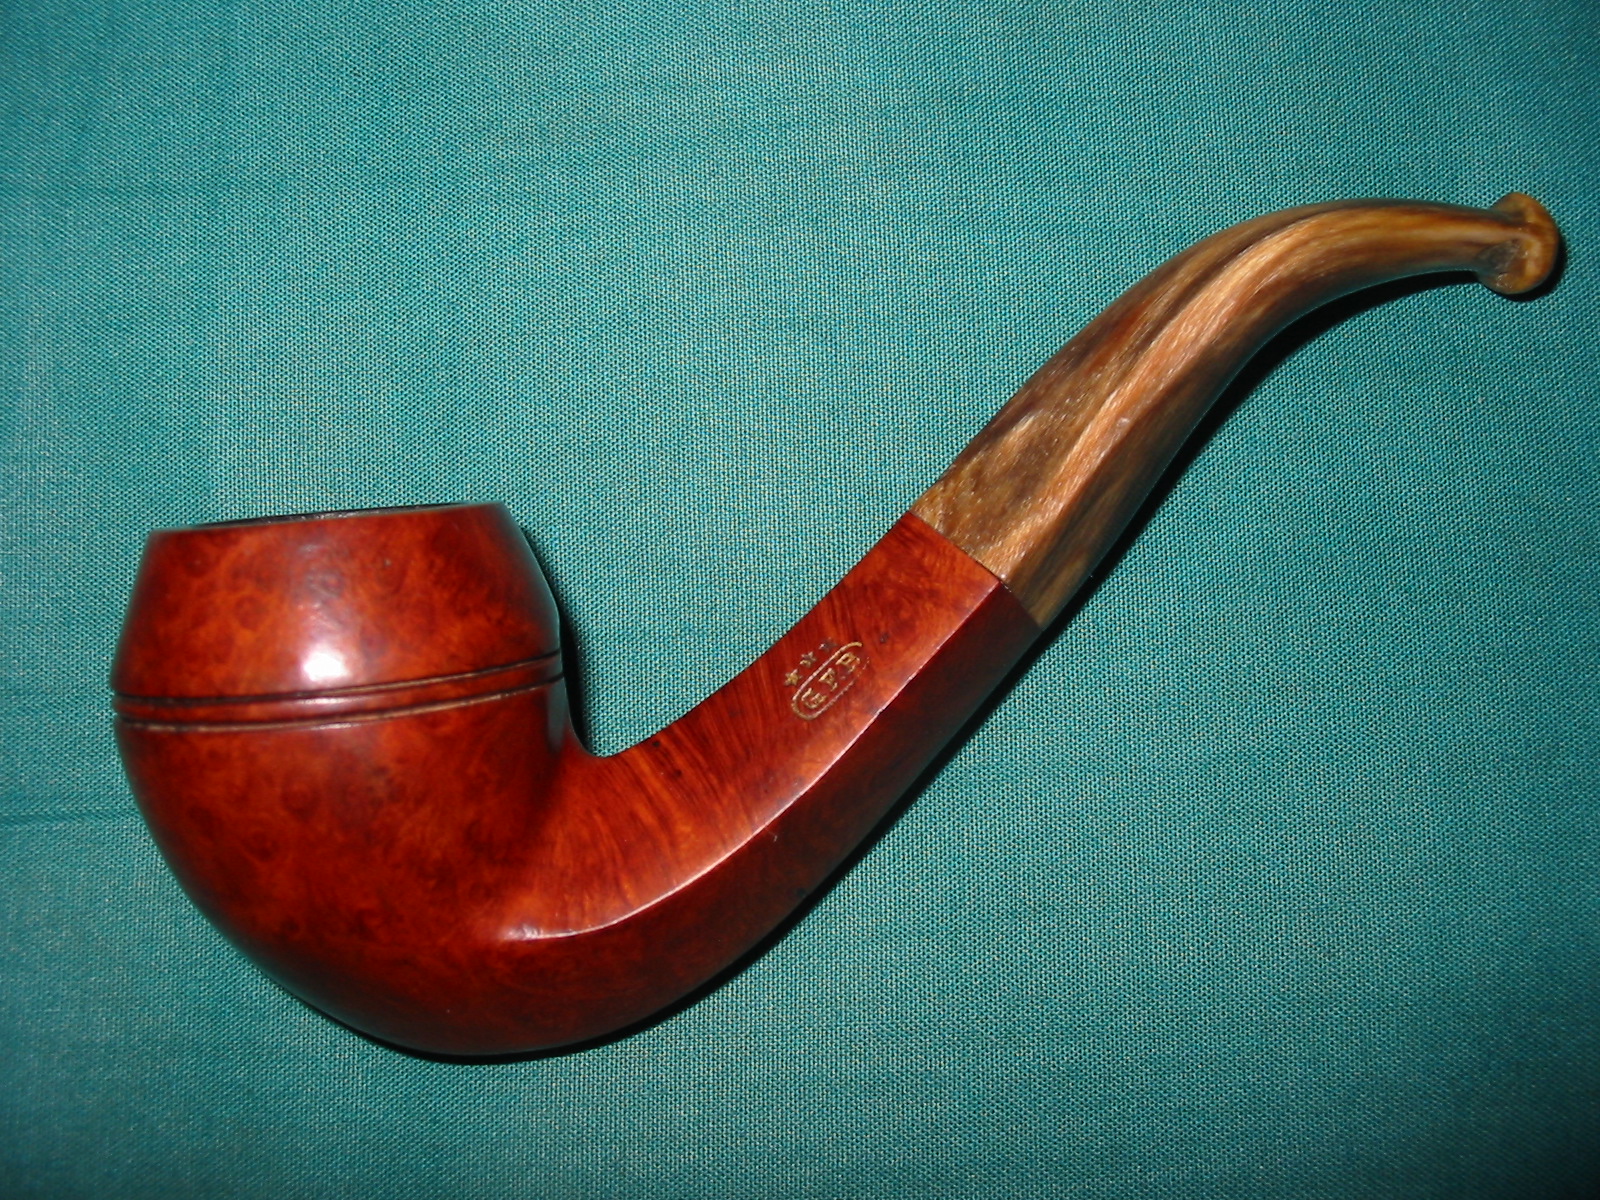
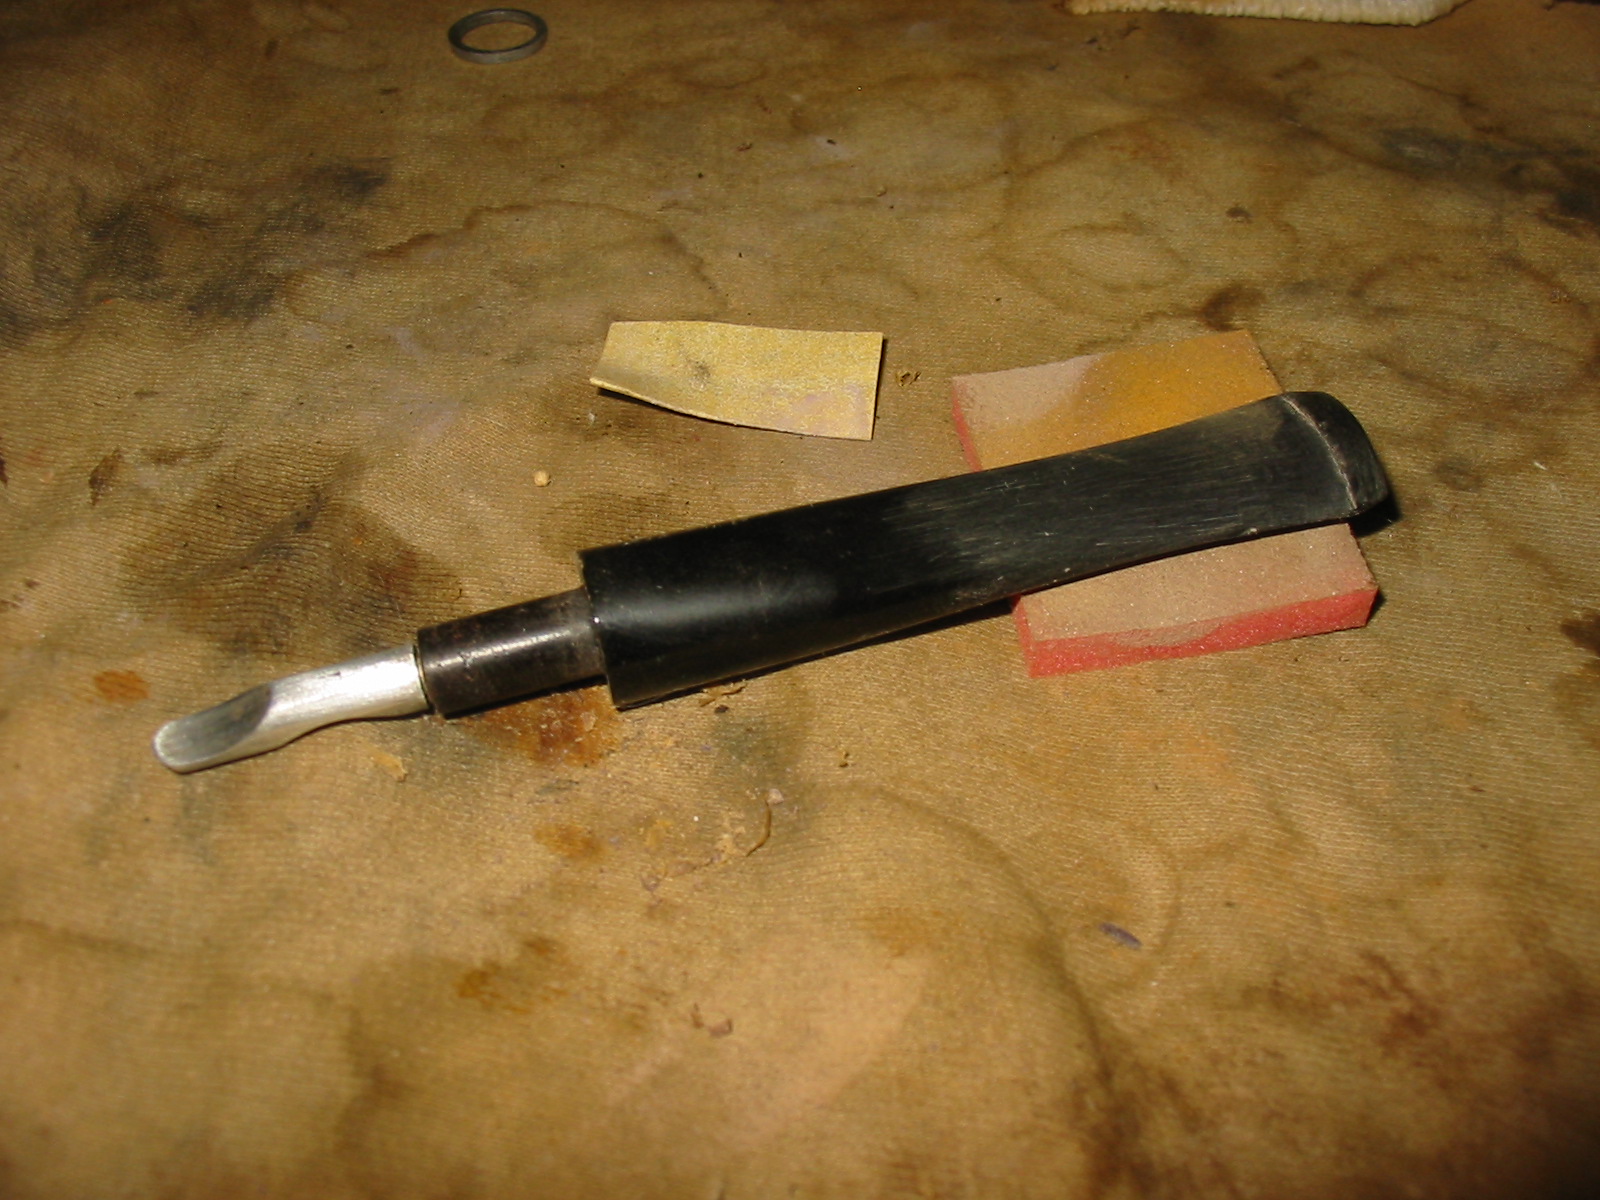
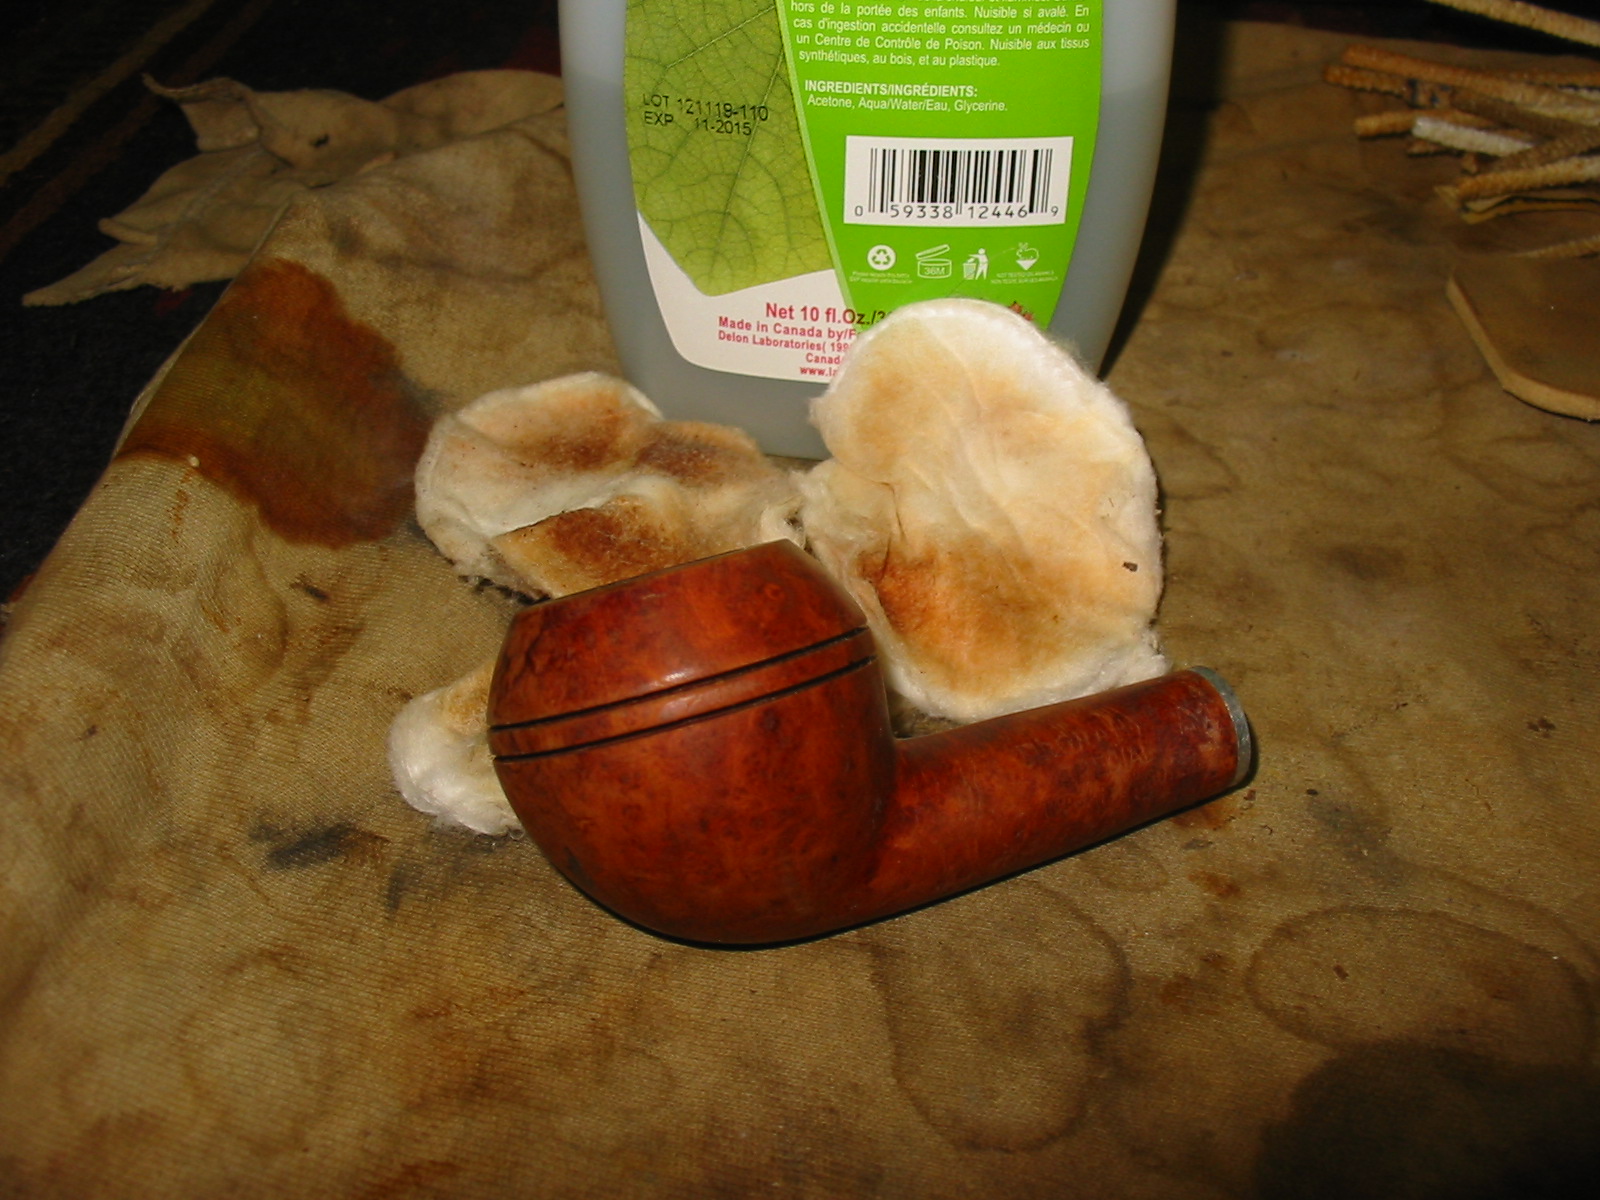
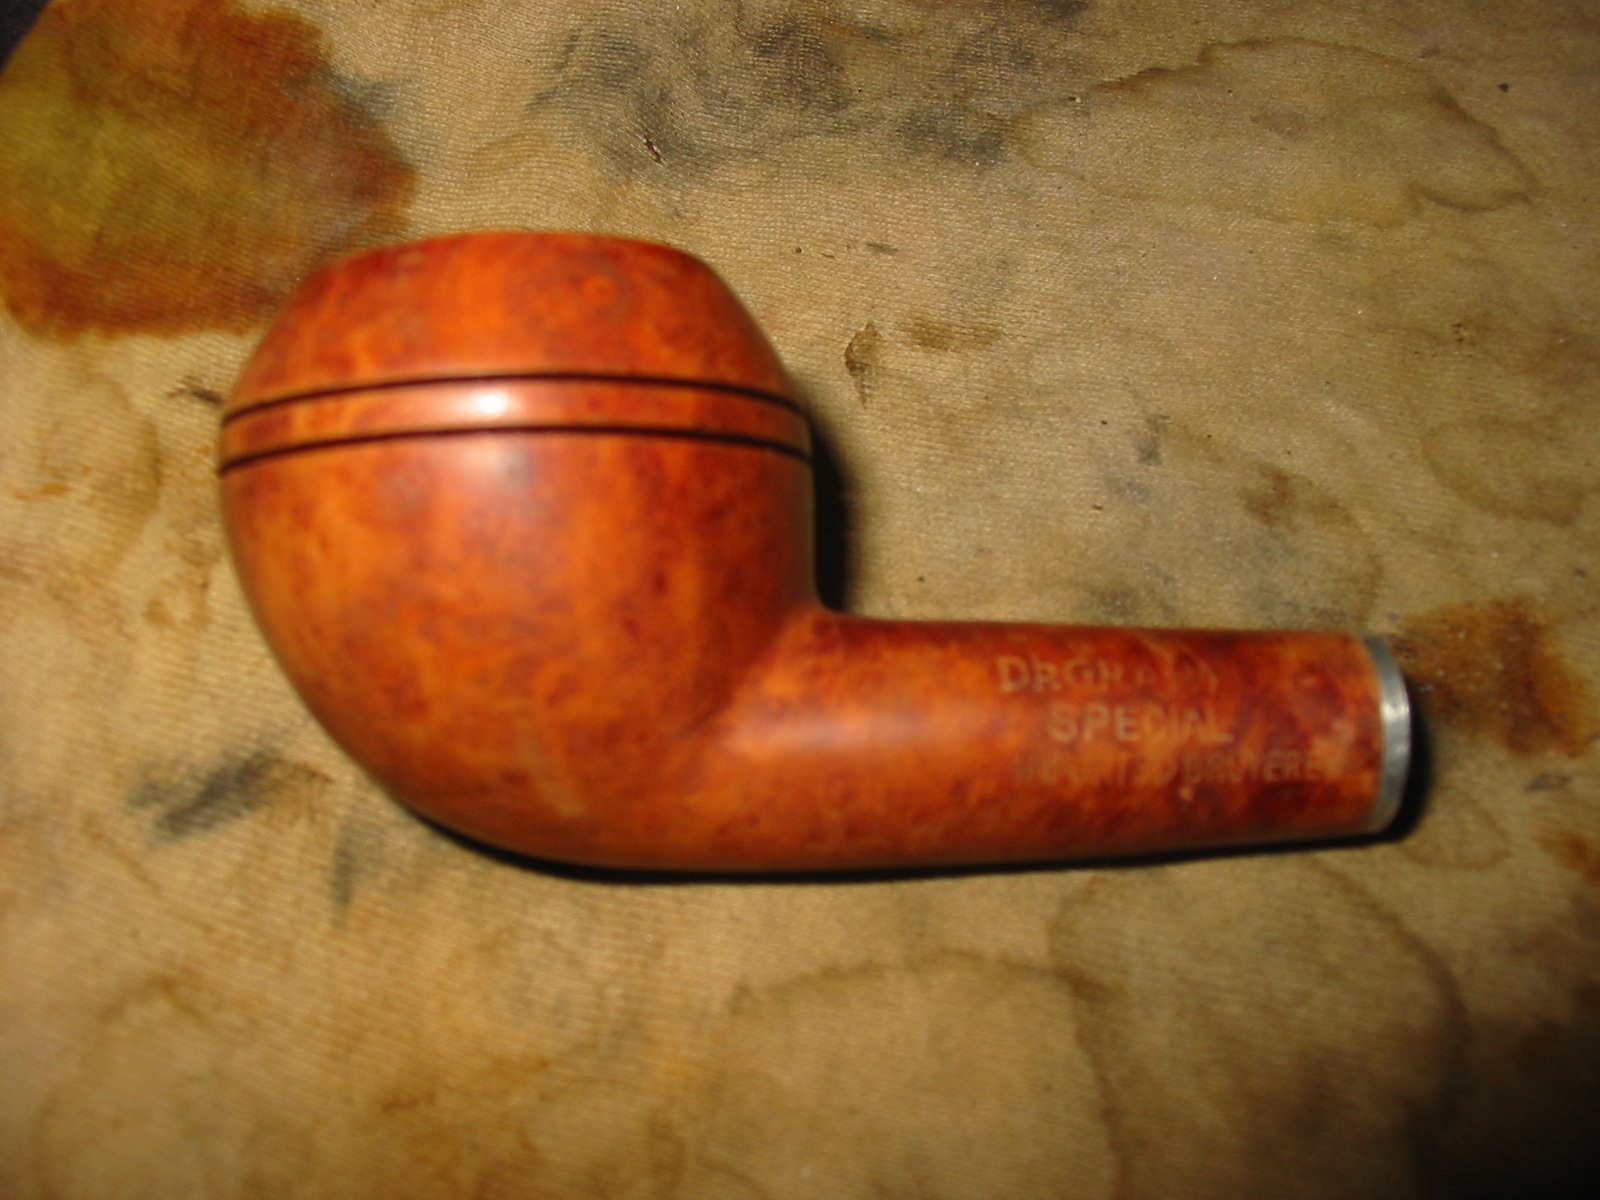
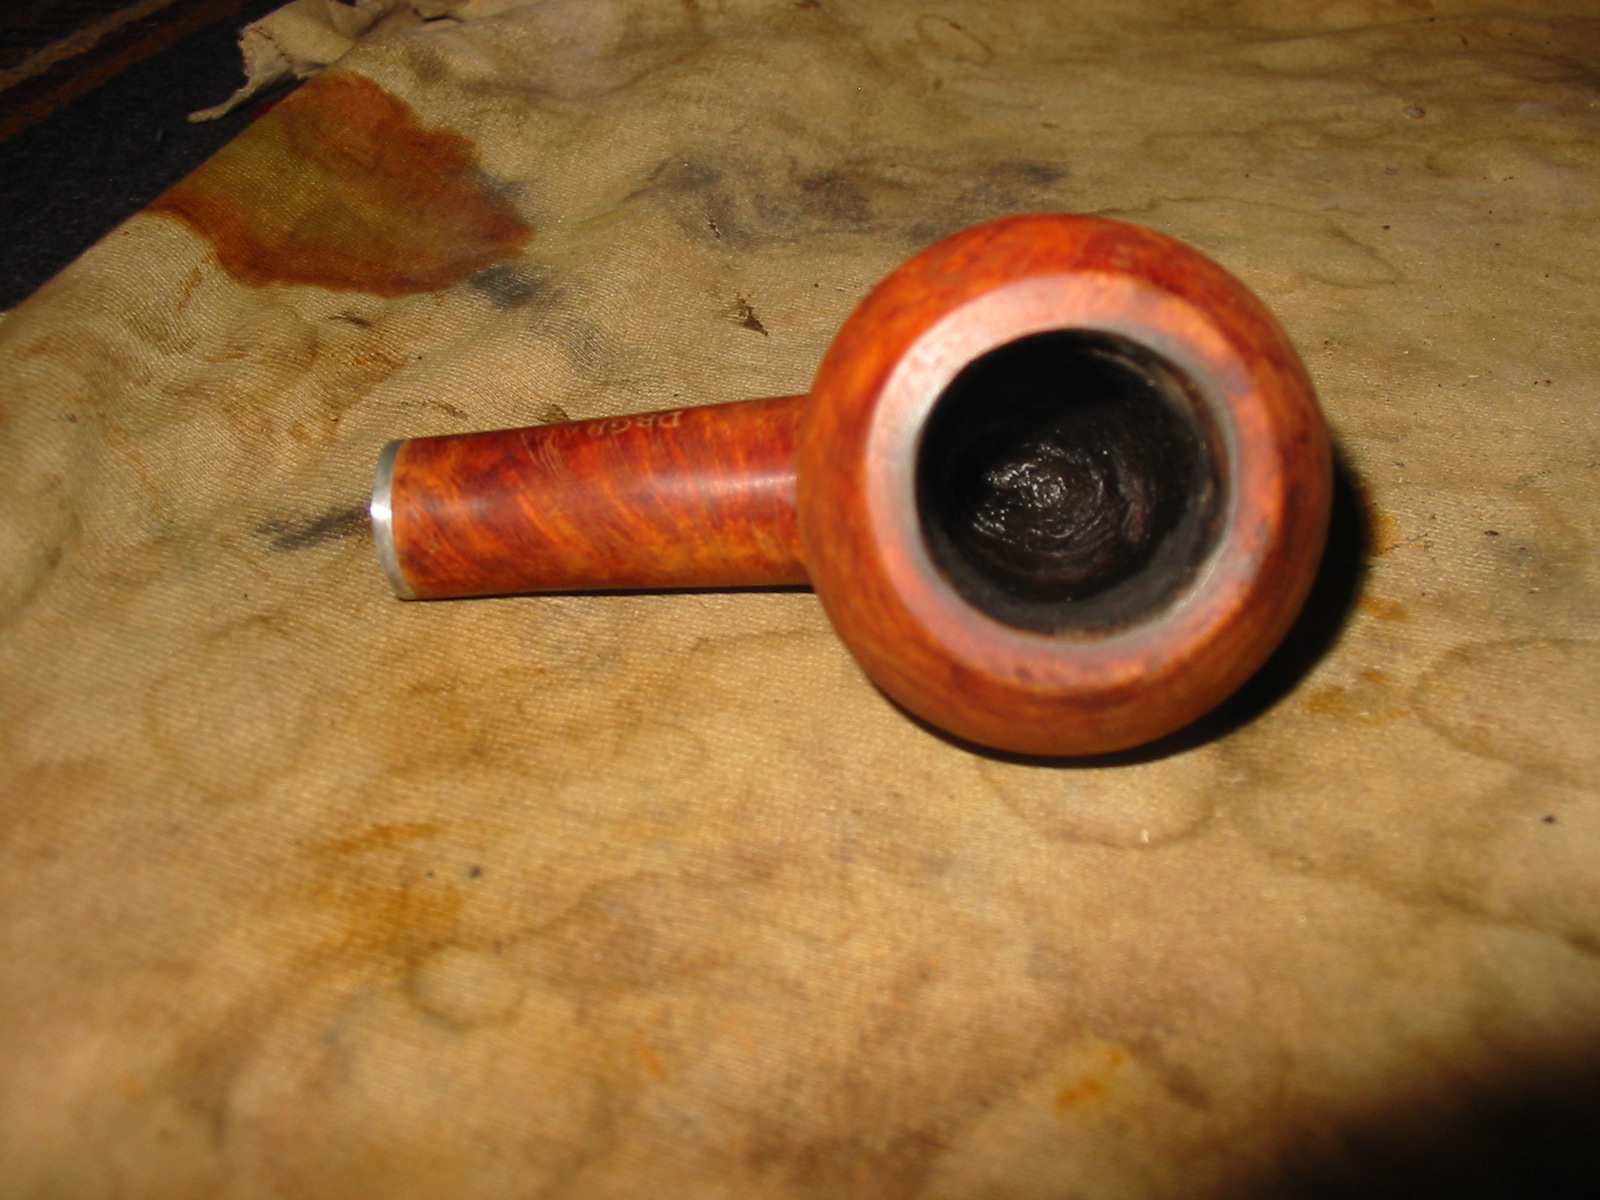
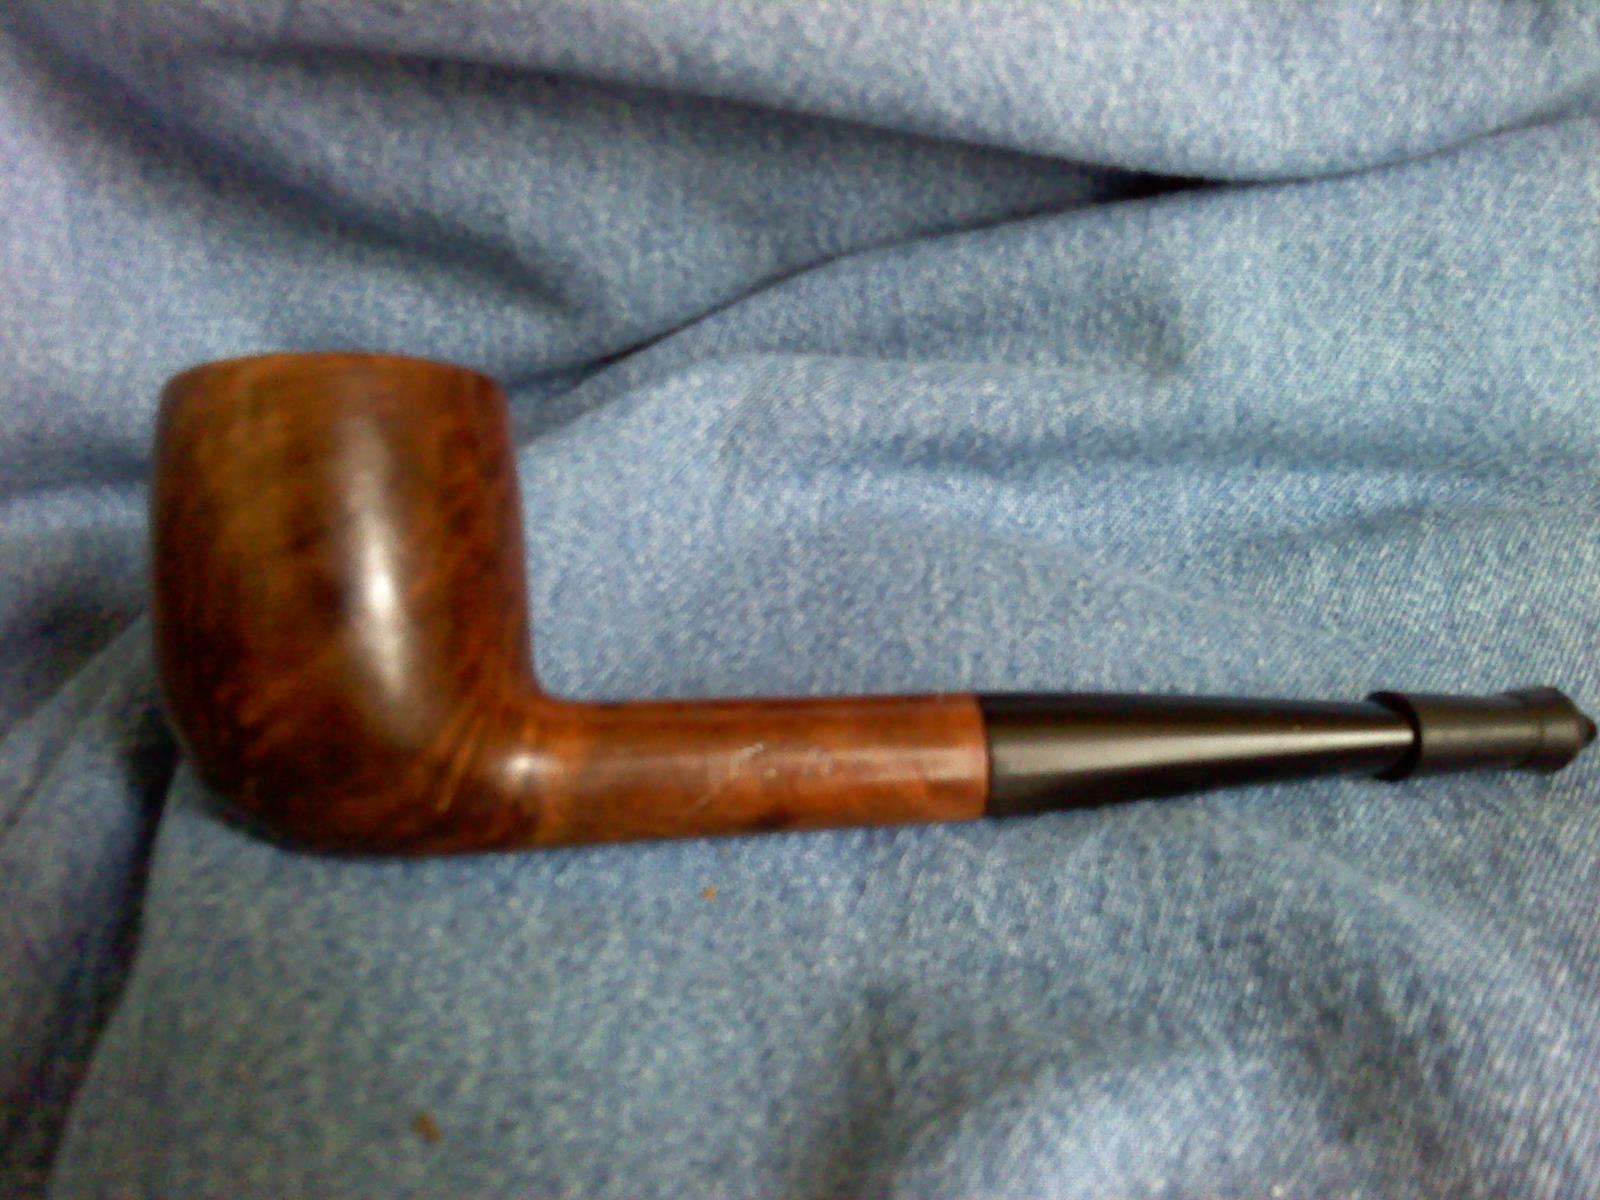
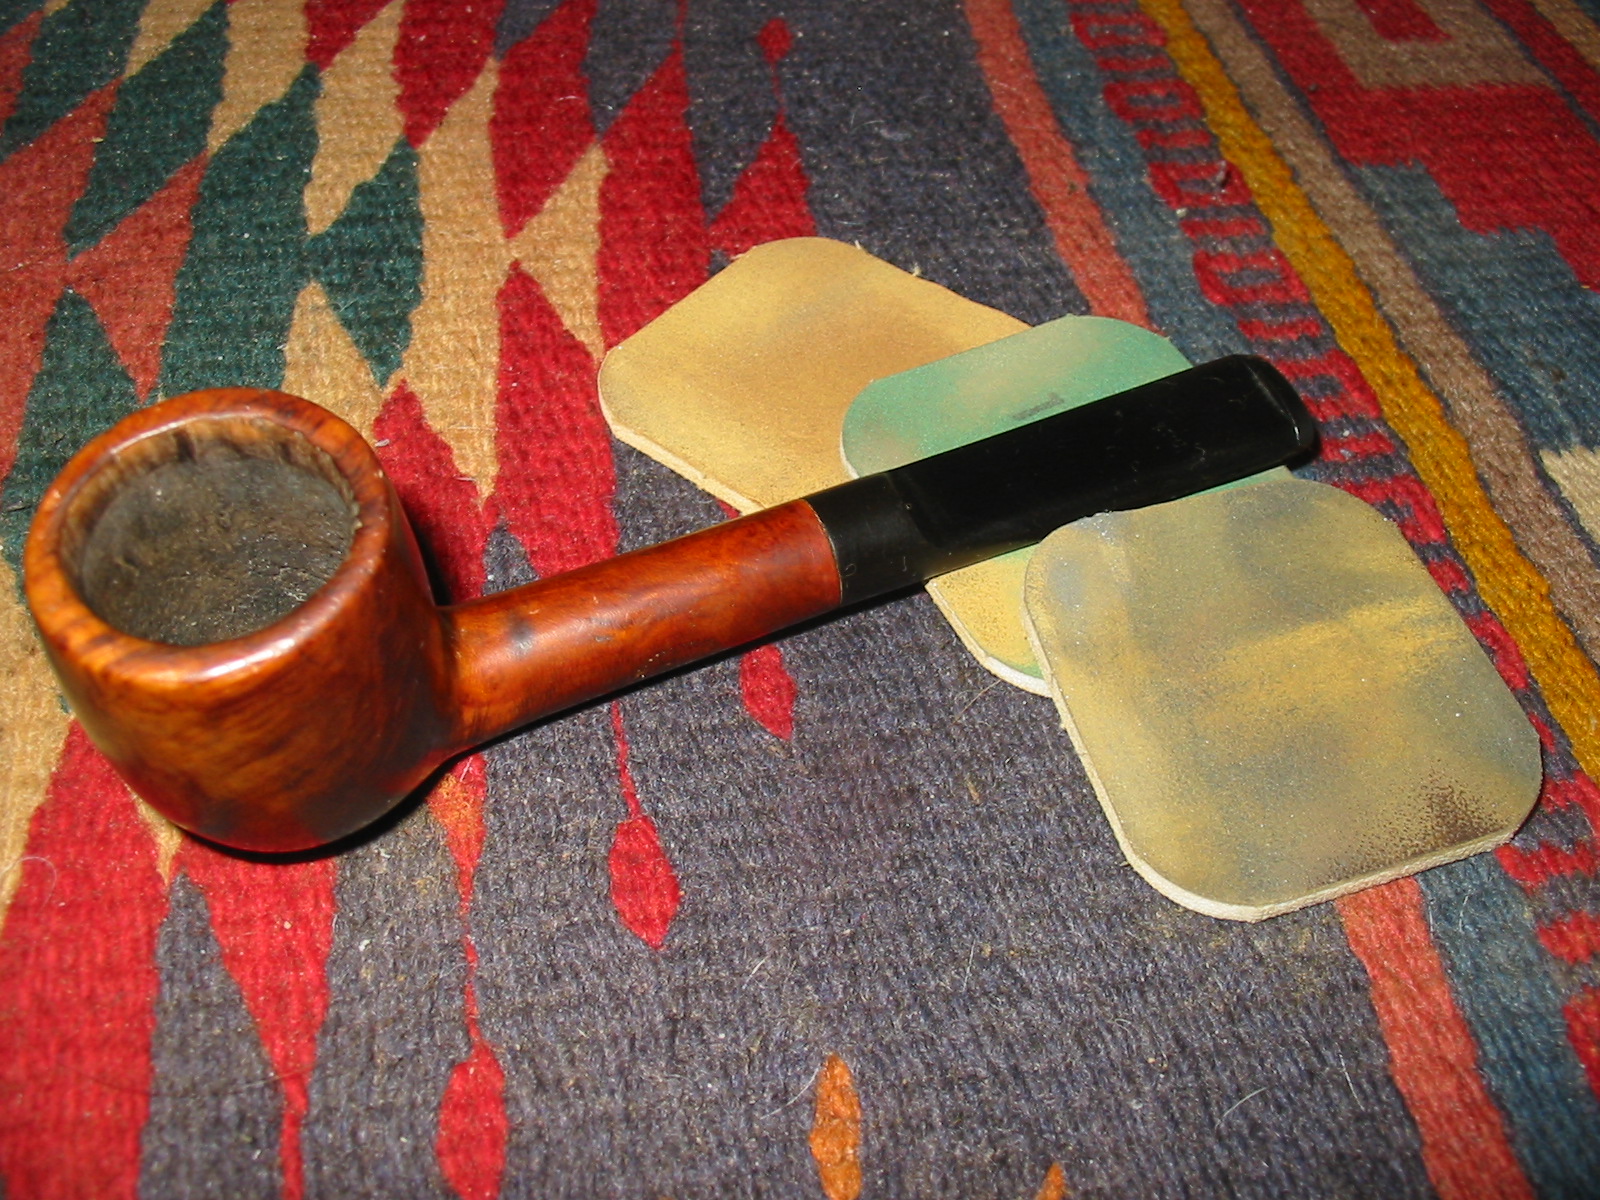
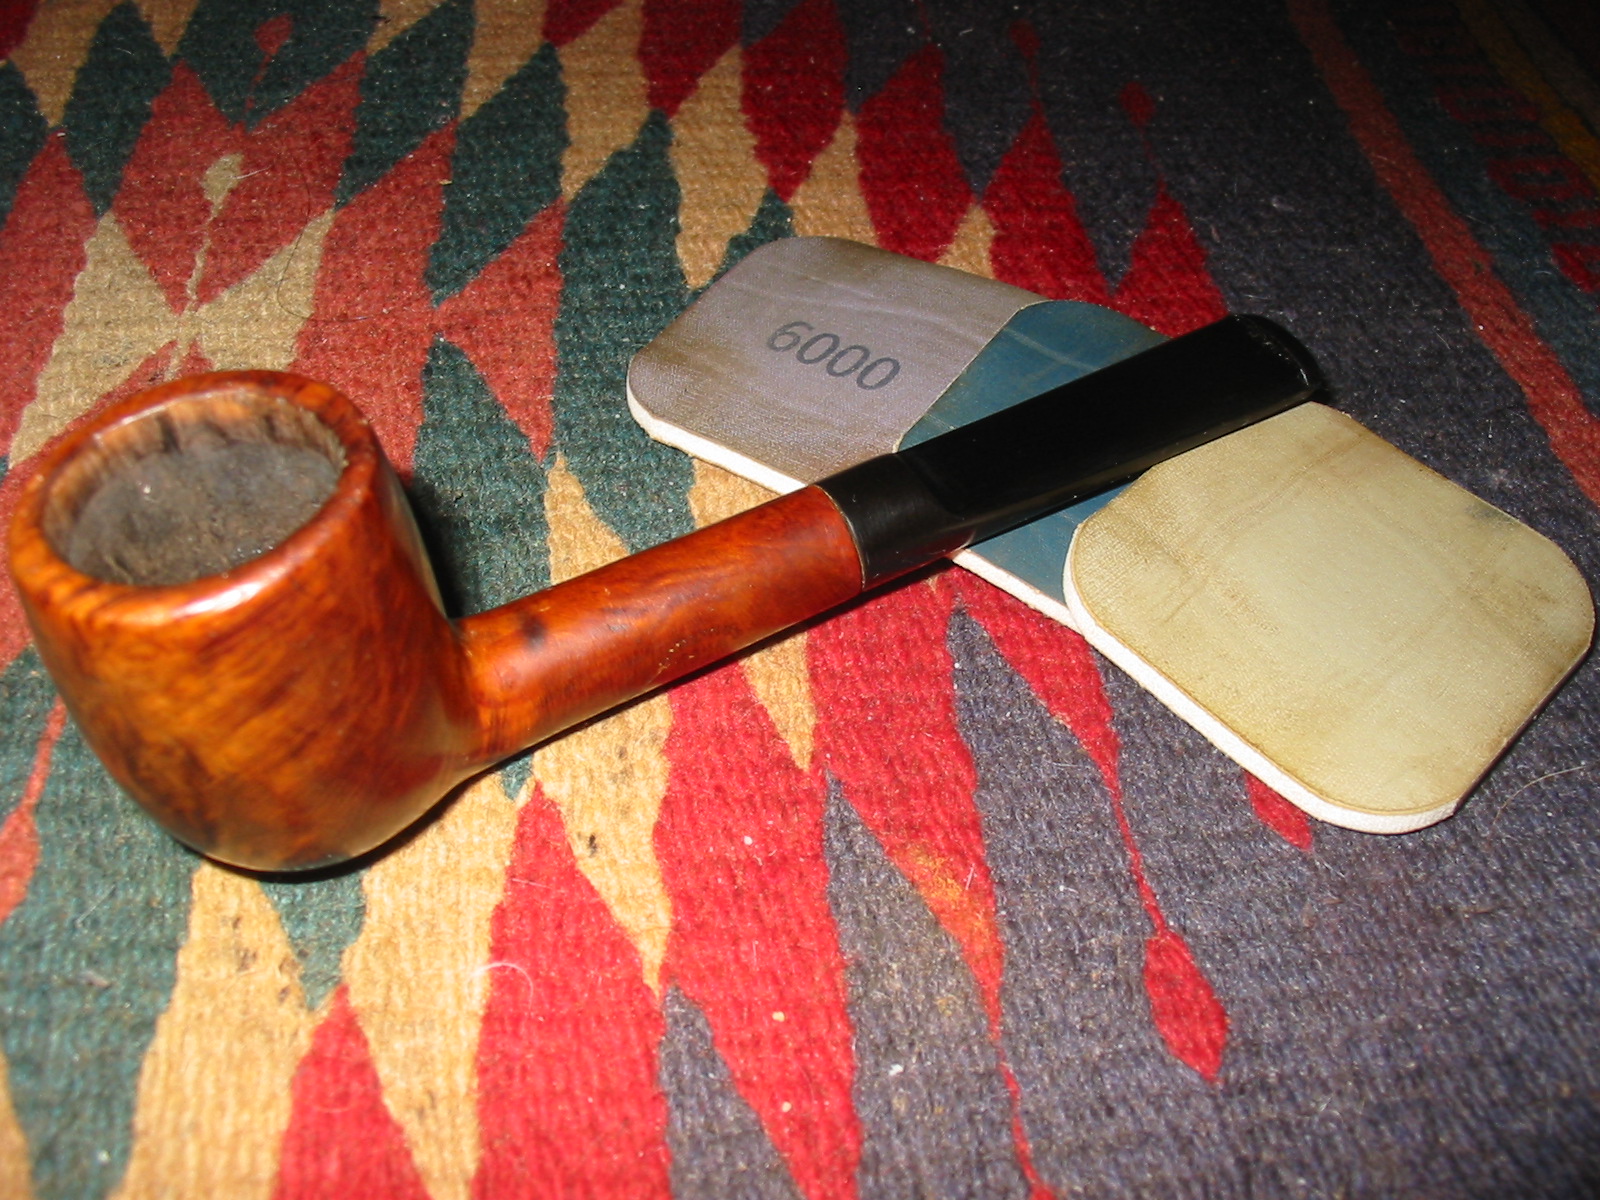
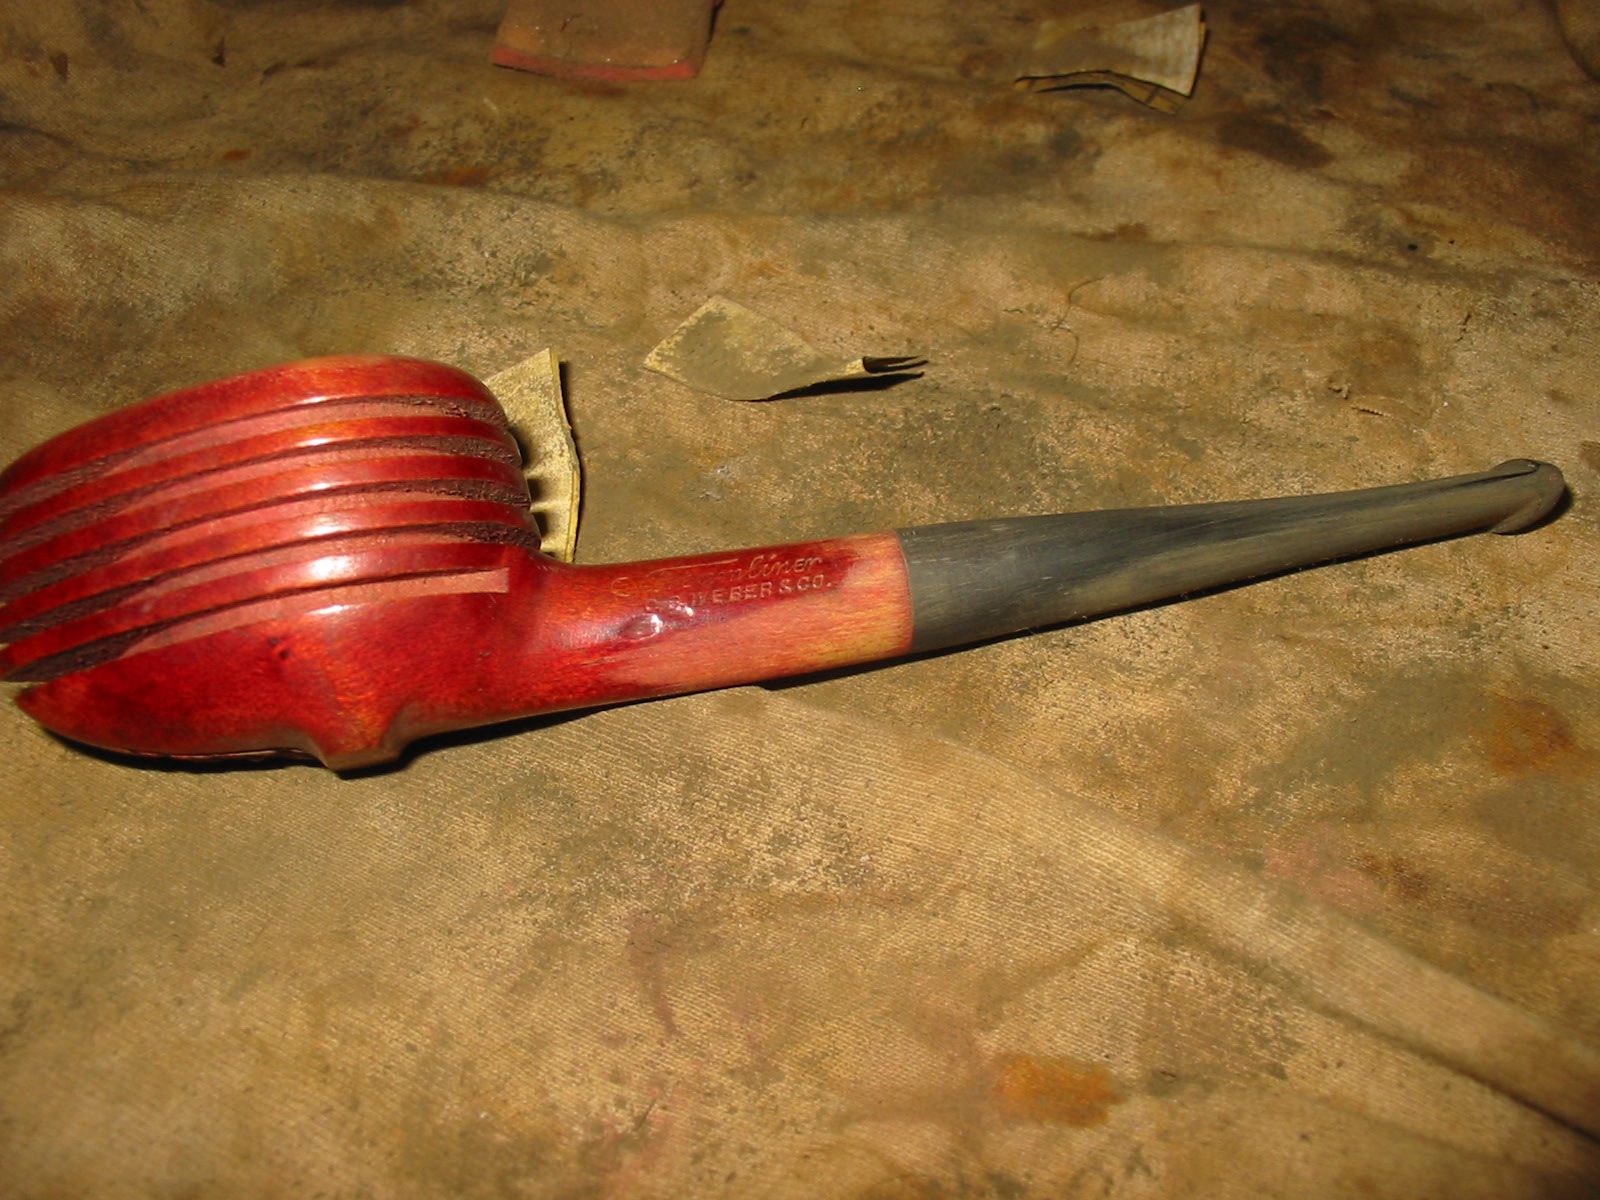
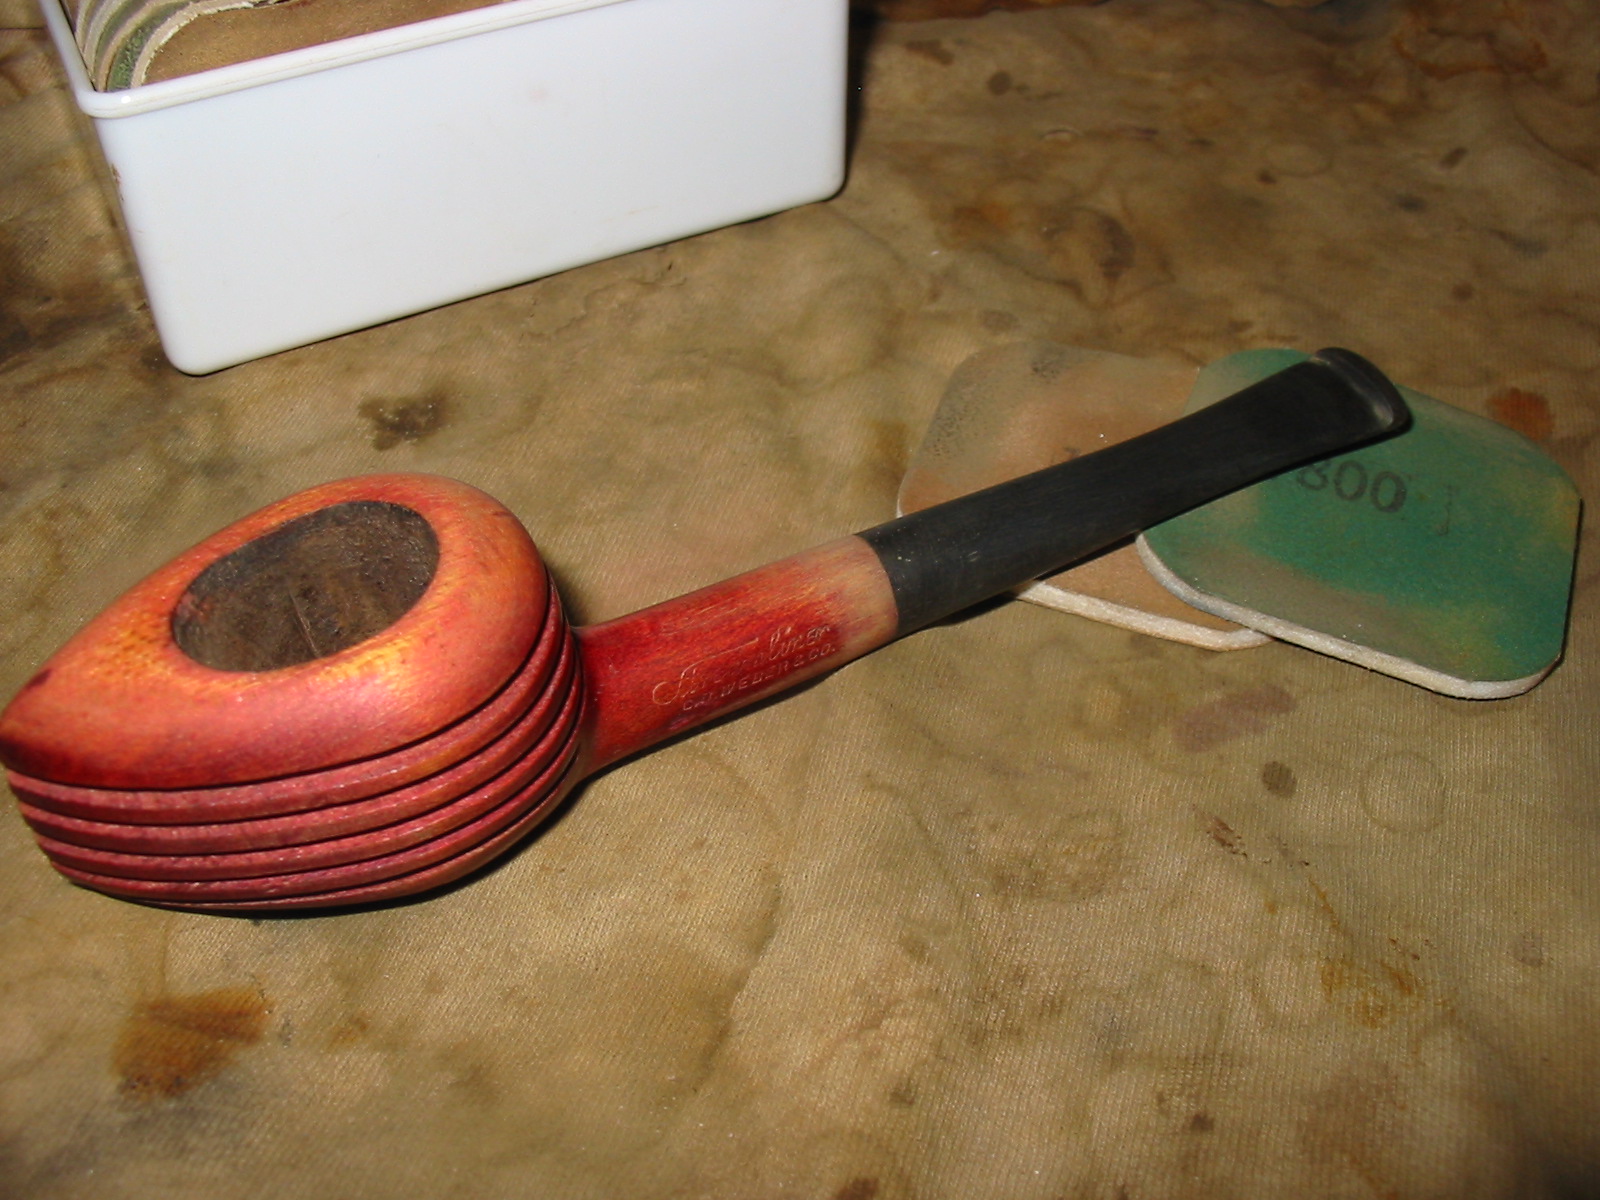
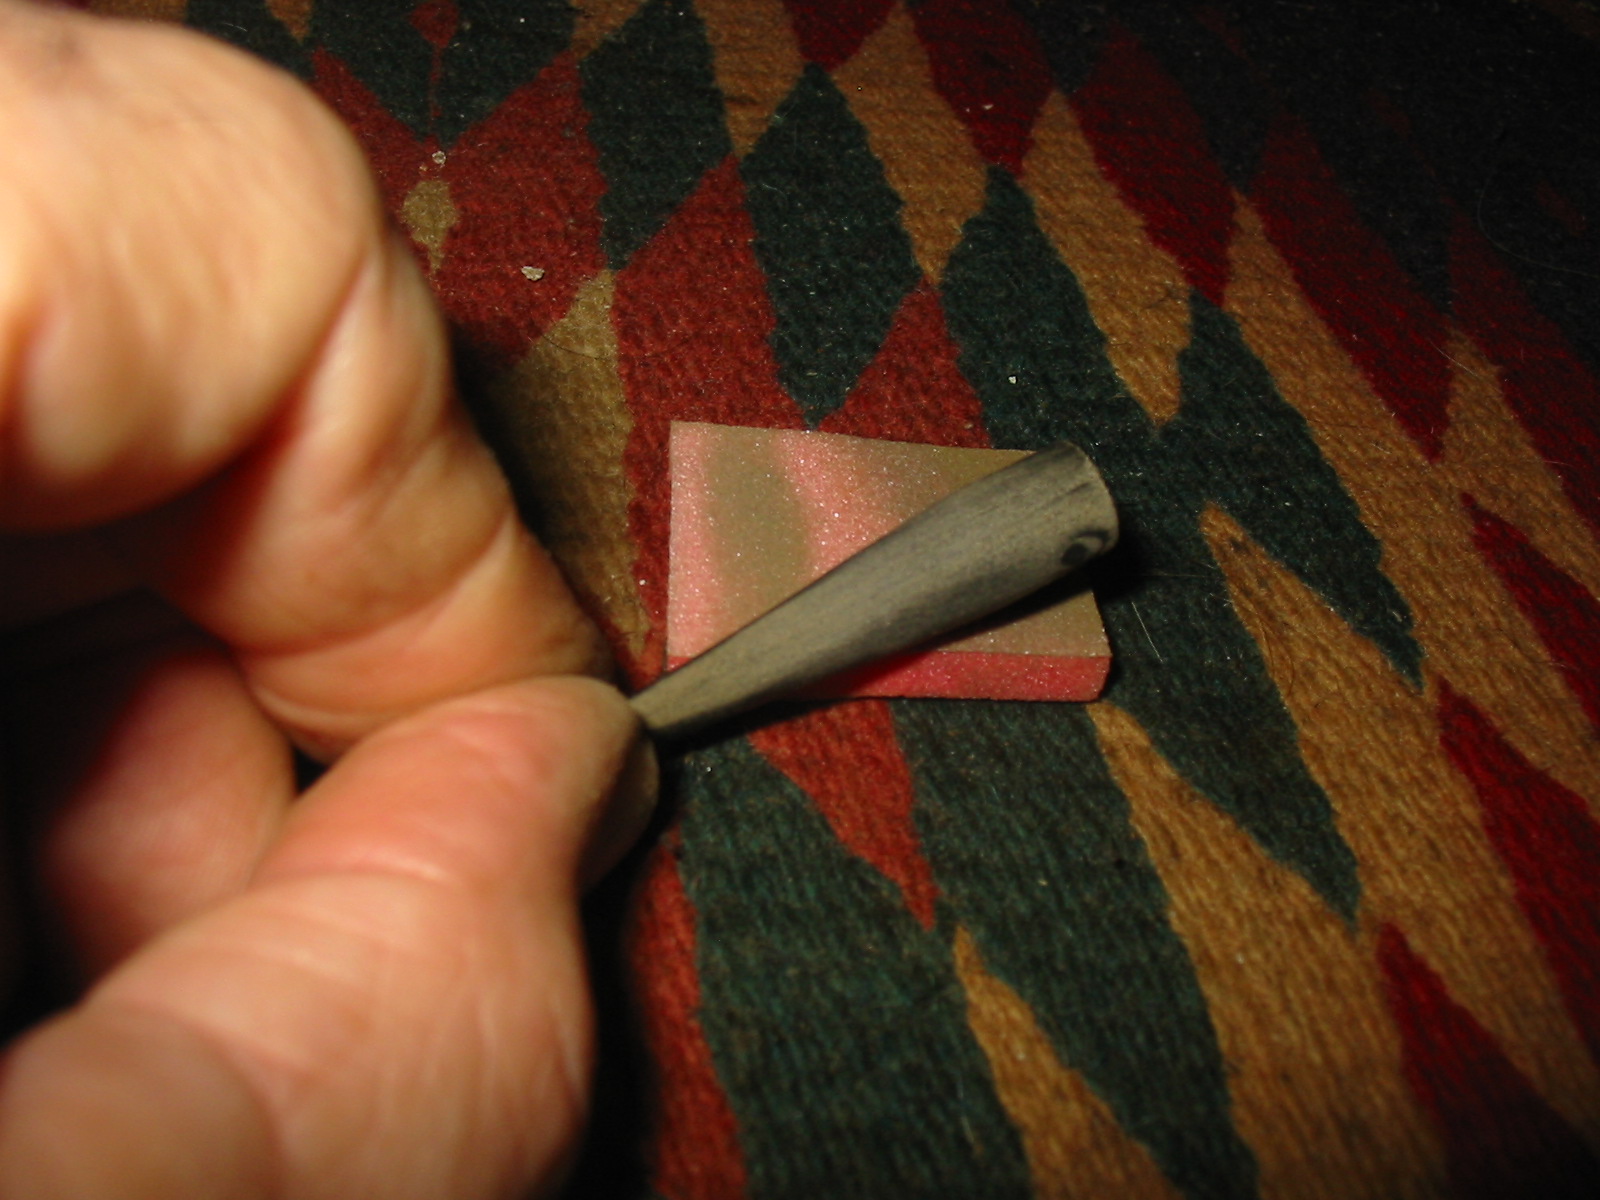
I repaired the burned spot on the stem with superglue and sanded the stem until the patch blended with the rest of the stem surface. I sanded the stem with 220 grit sandpaper and then with a medium grit sanding sponge to smooth out the scratches in the surface of the nylon stem.
IMG_3135

IMG_3136

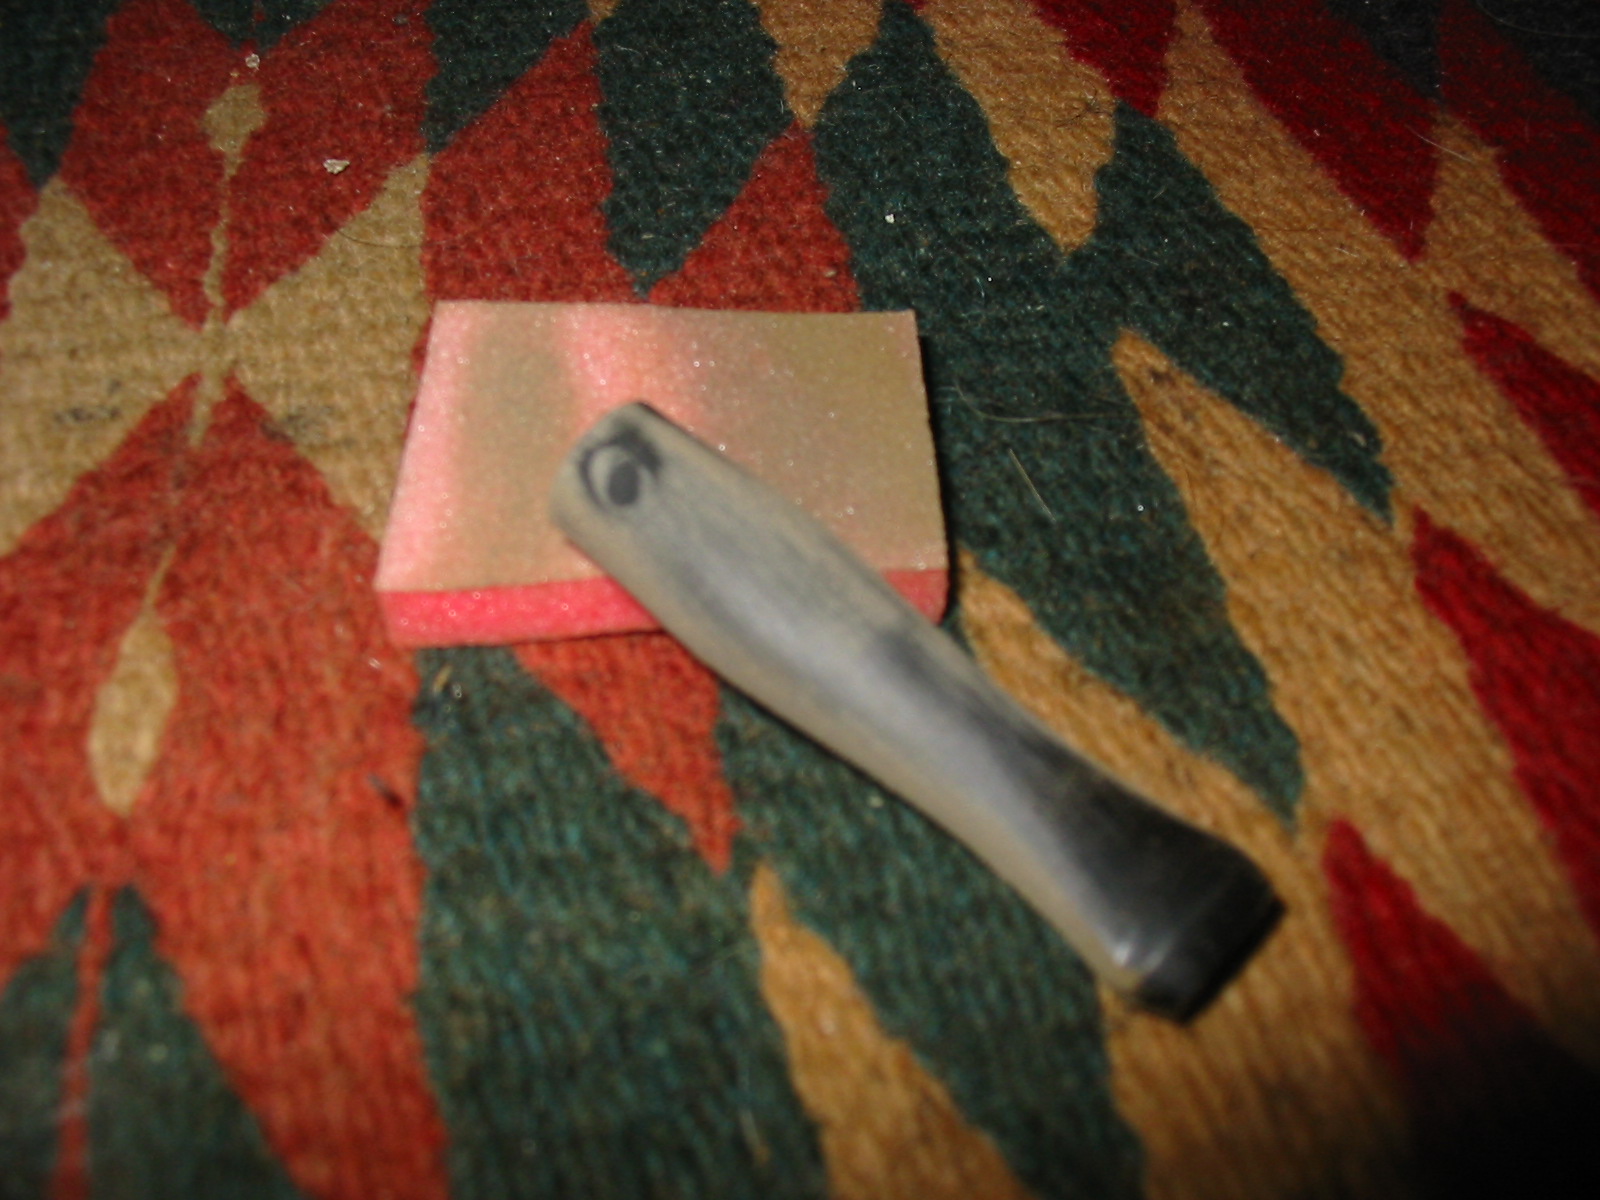
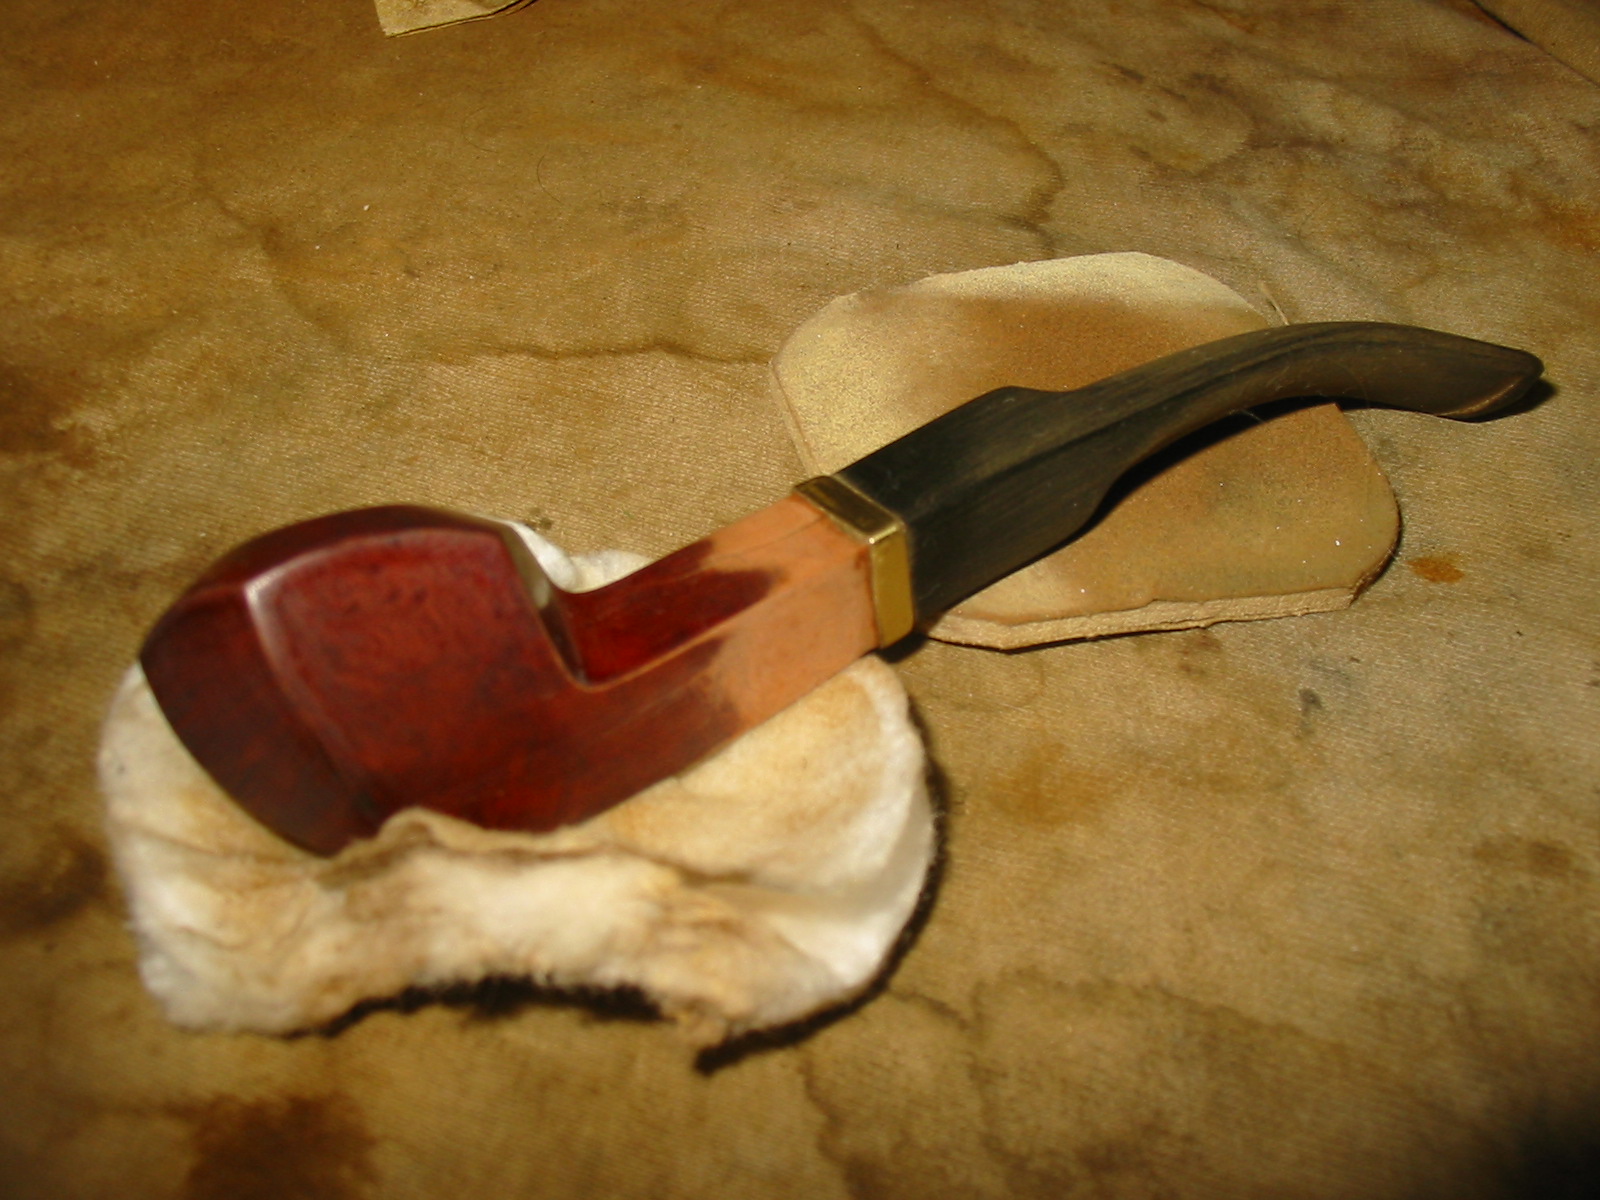
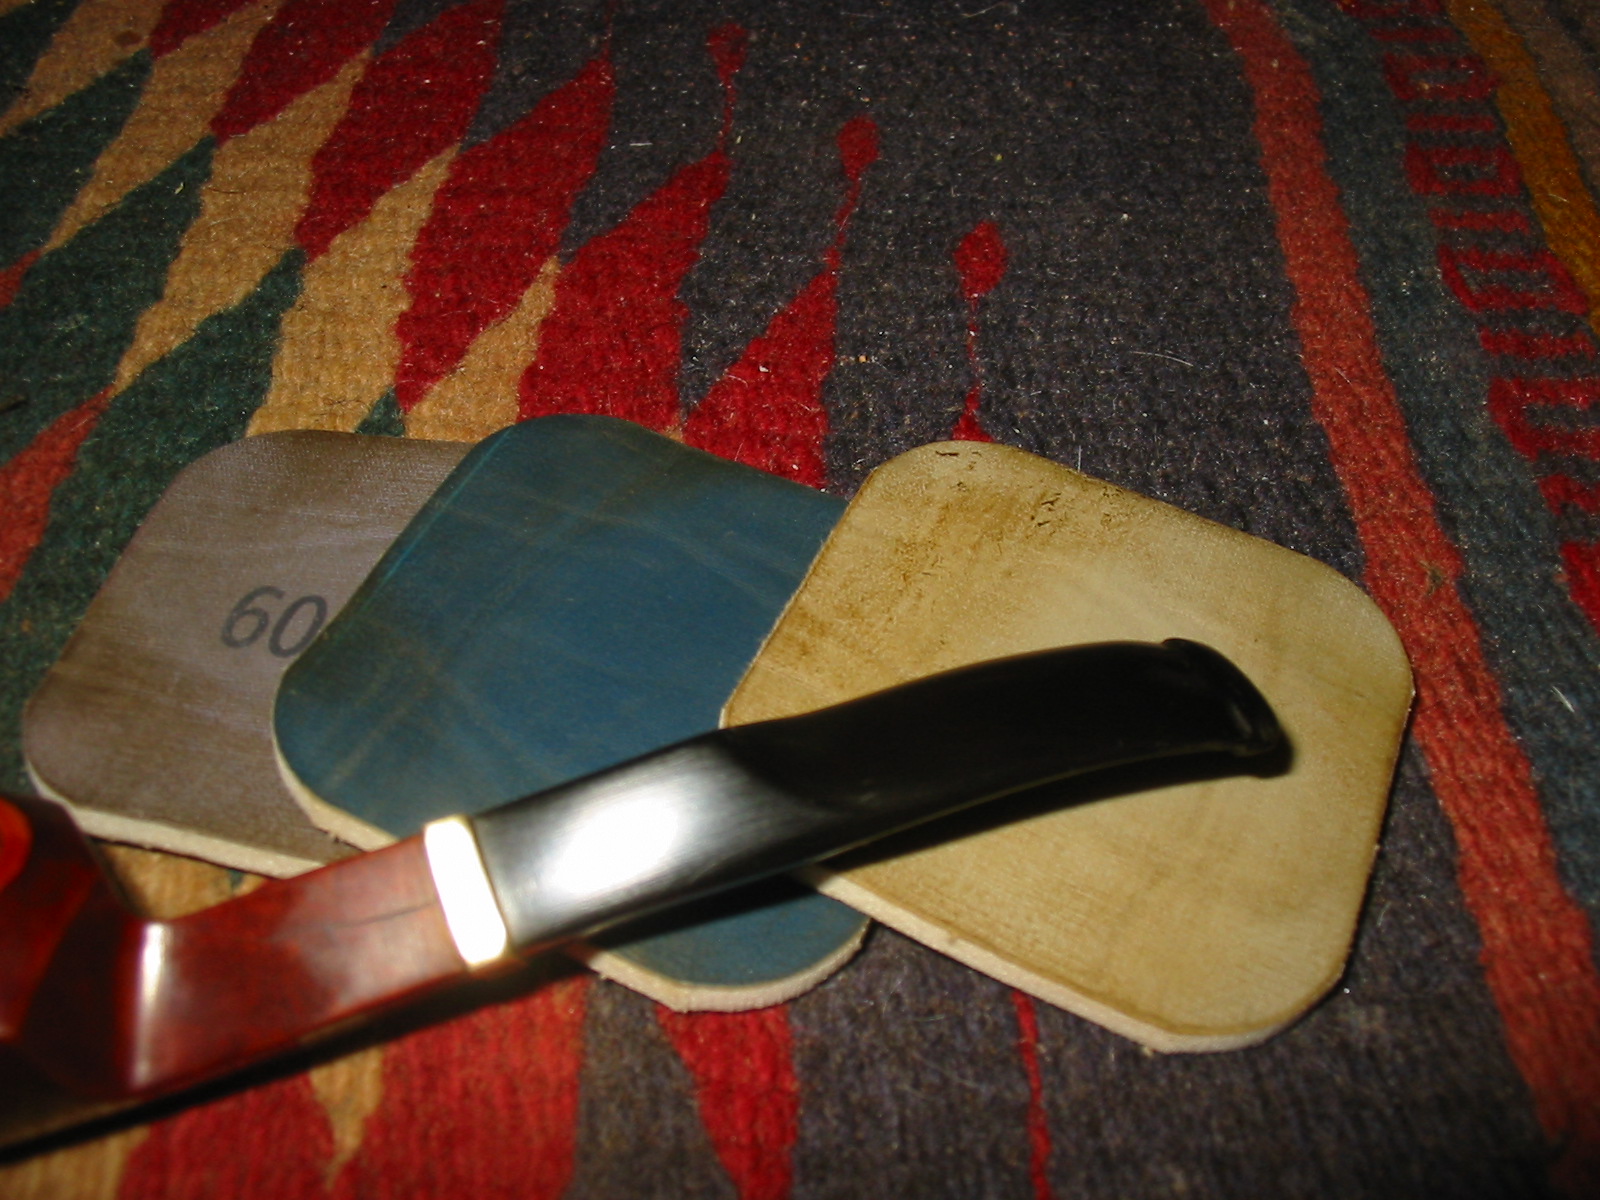
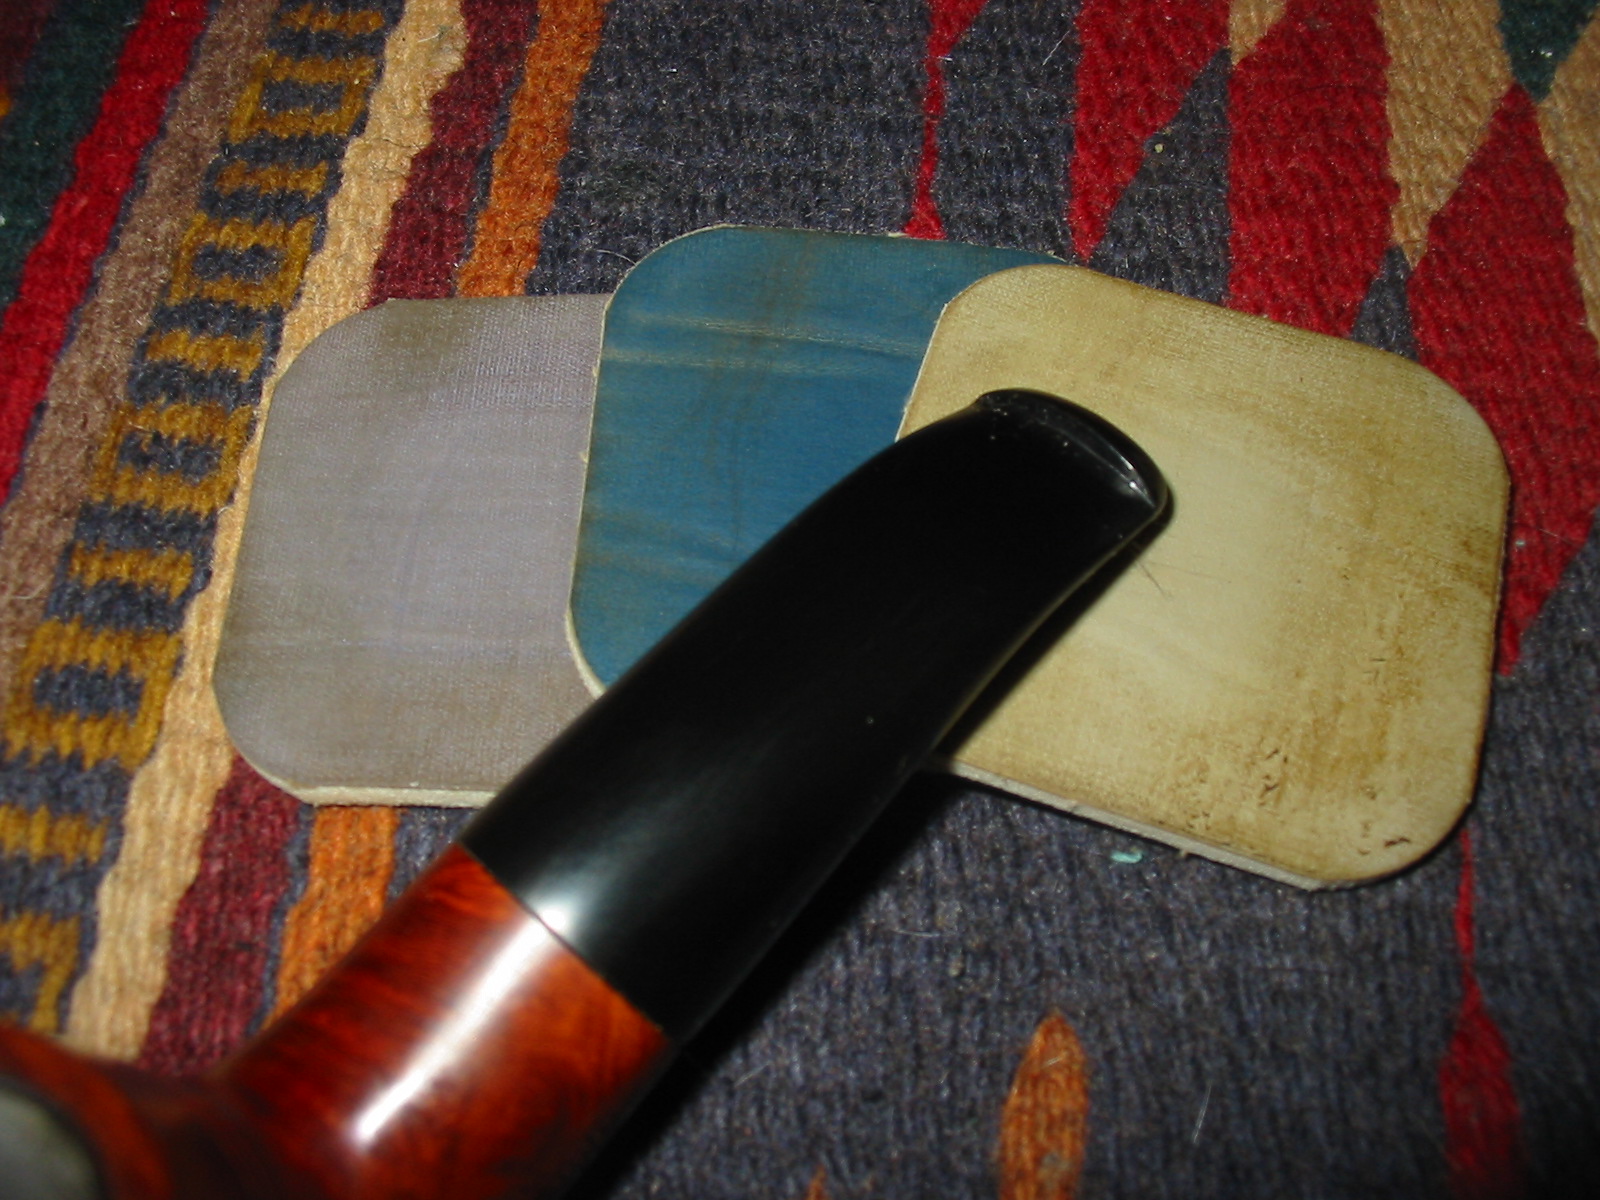
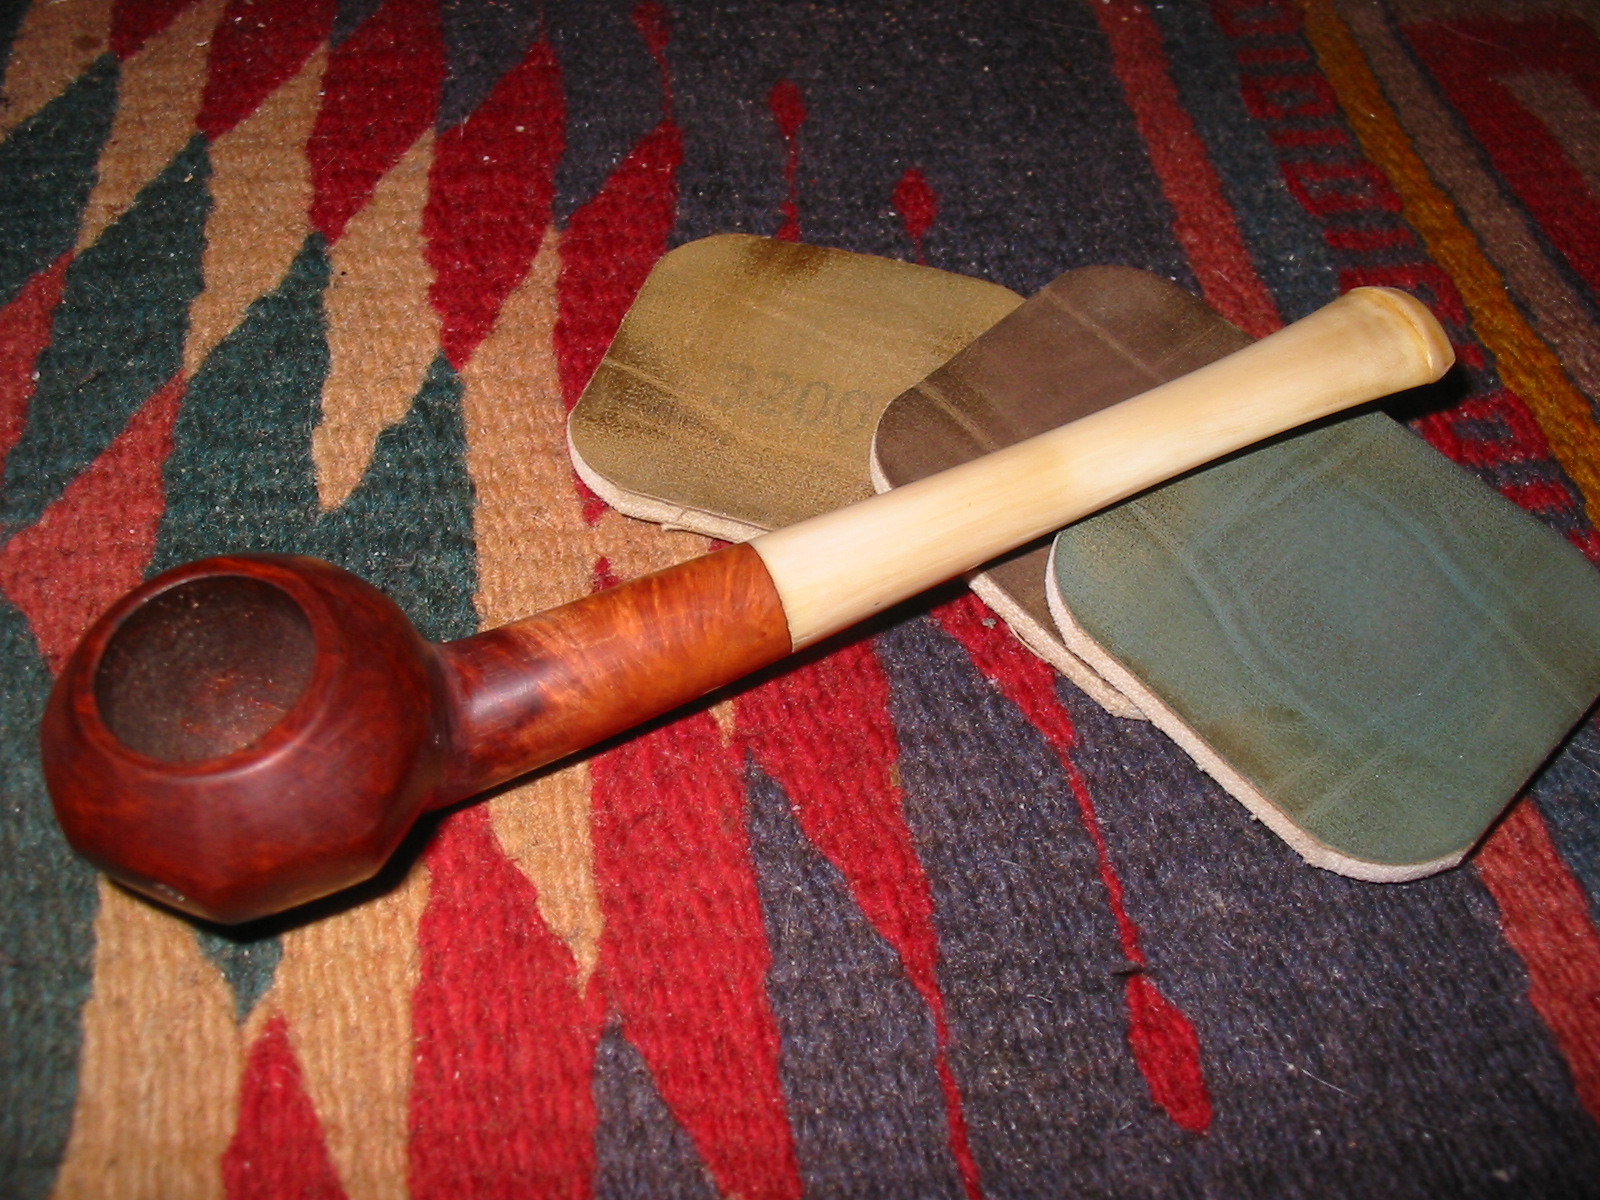
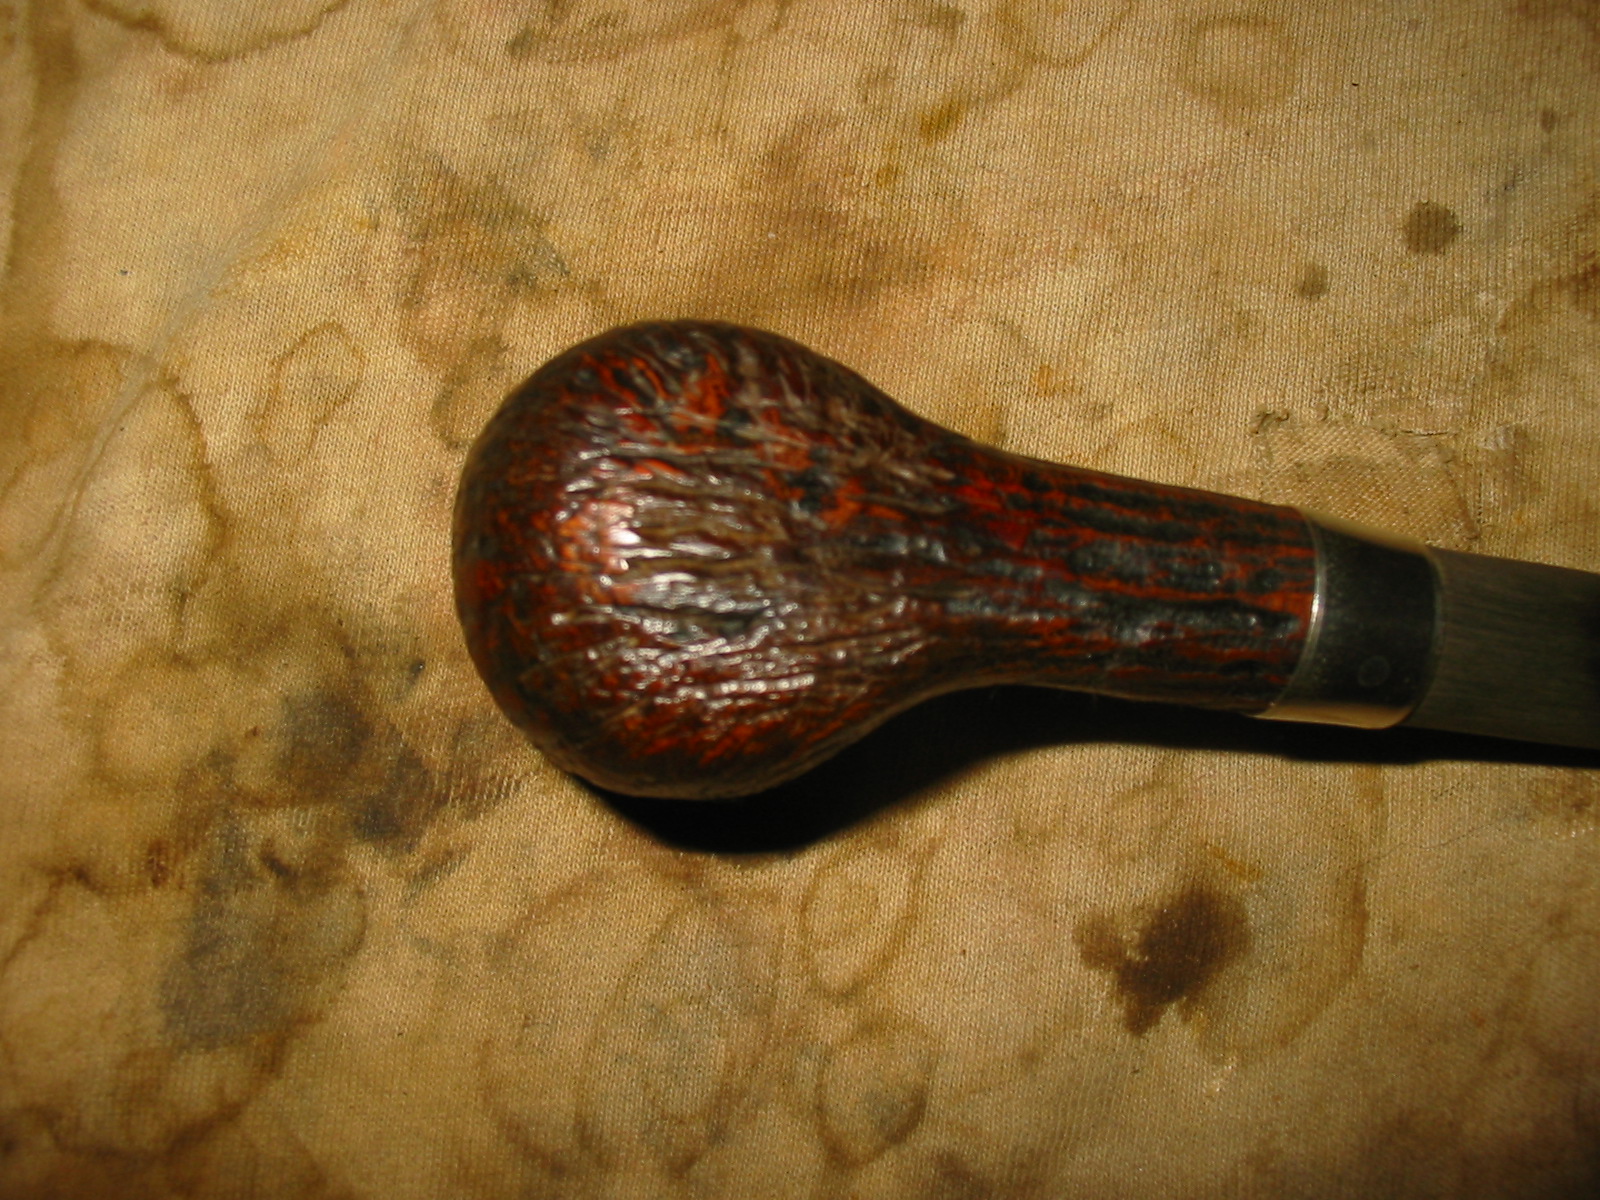
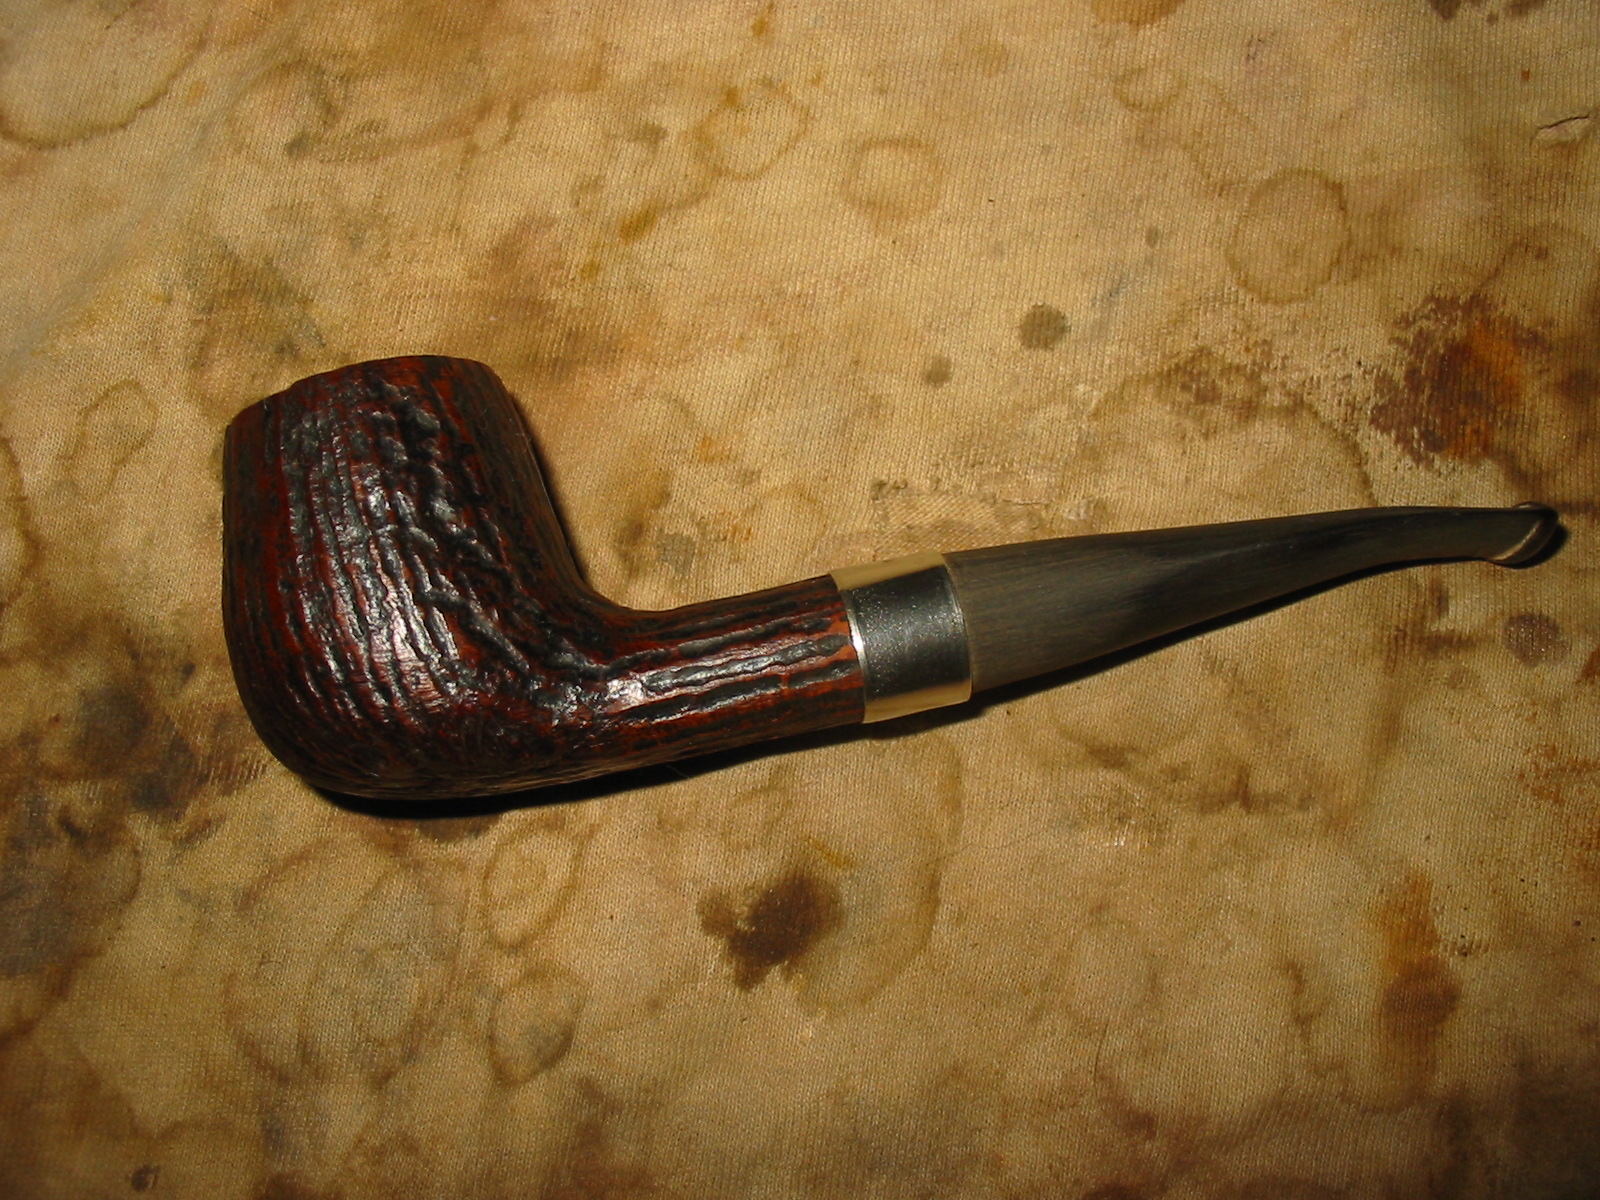
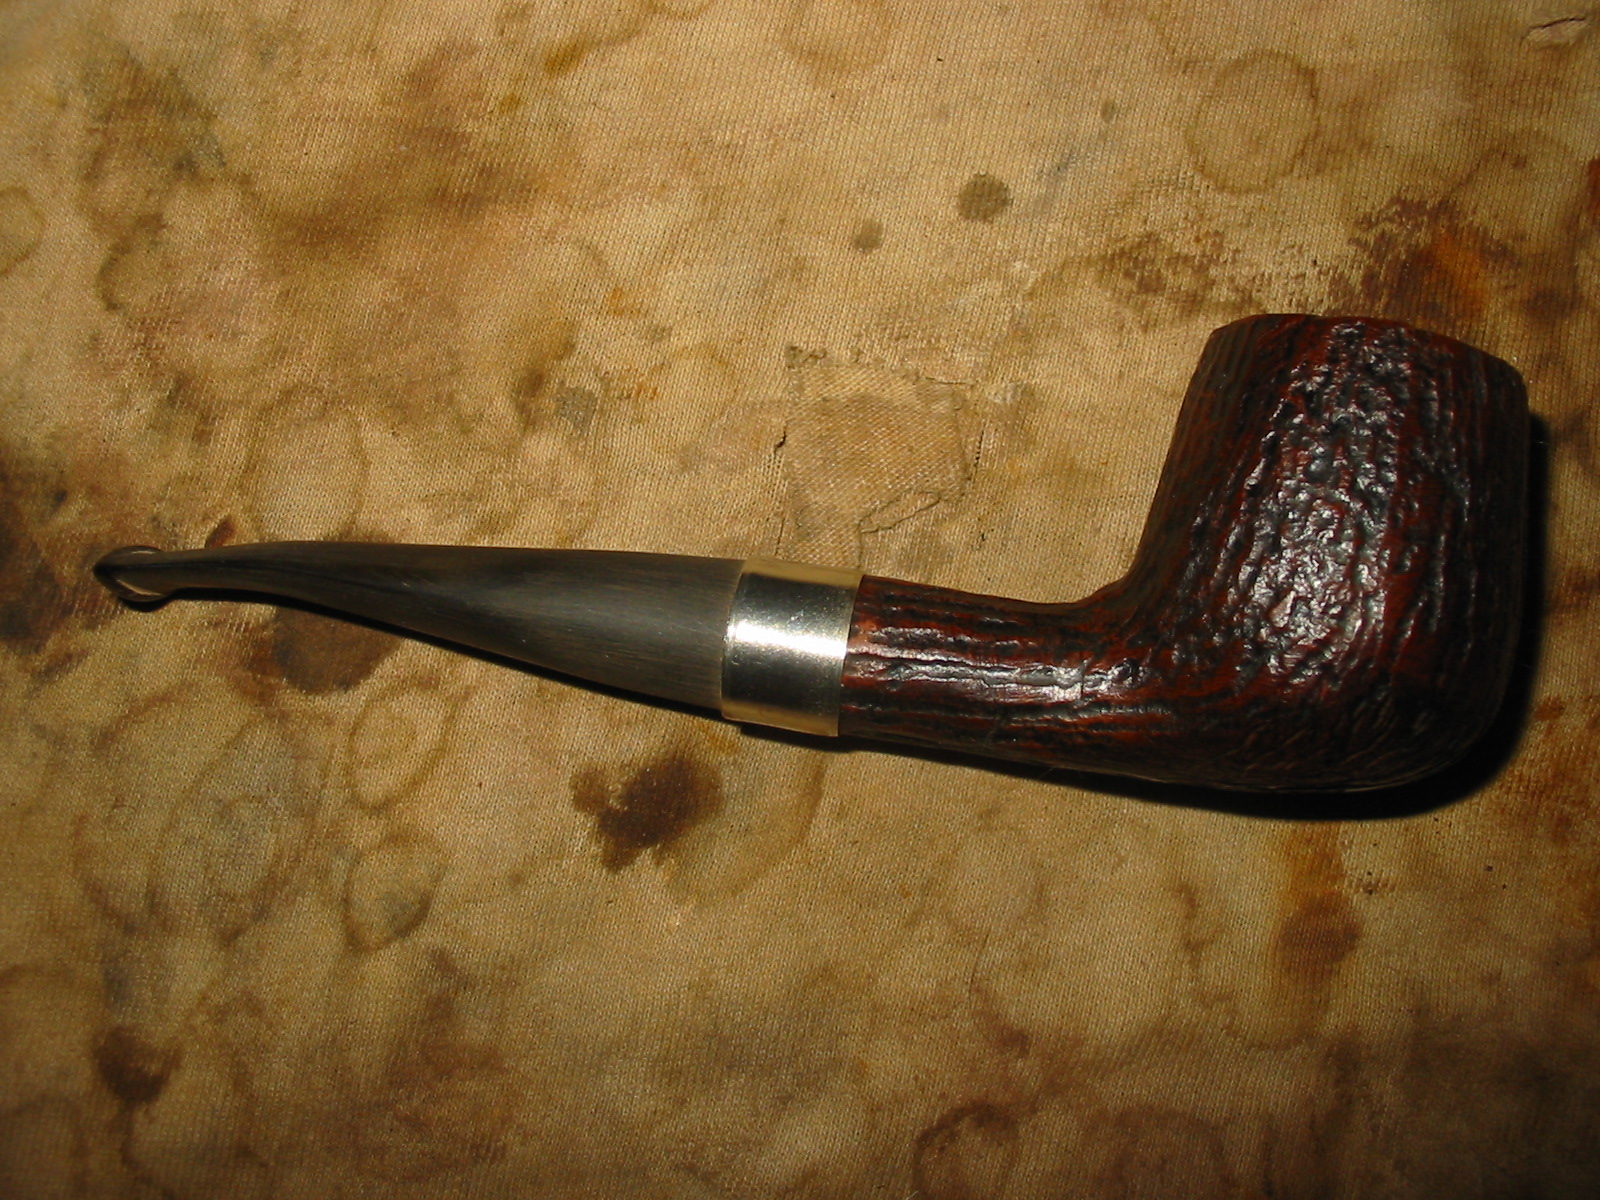
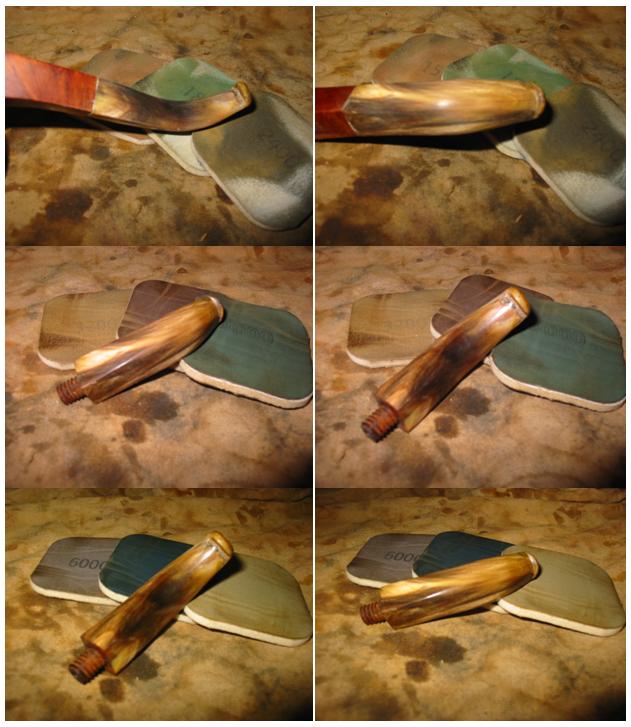
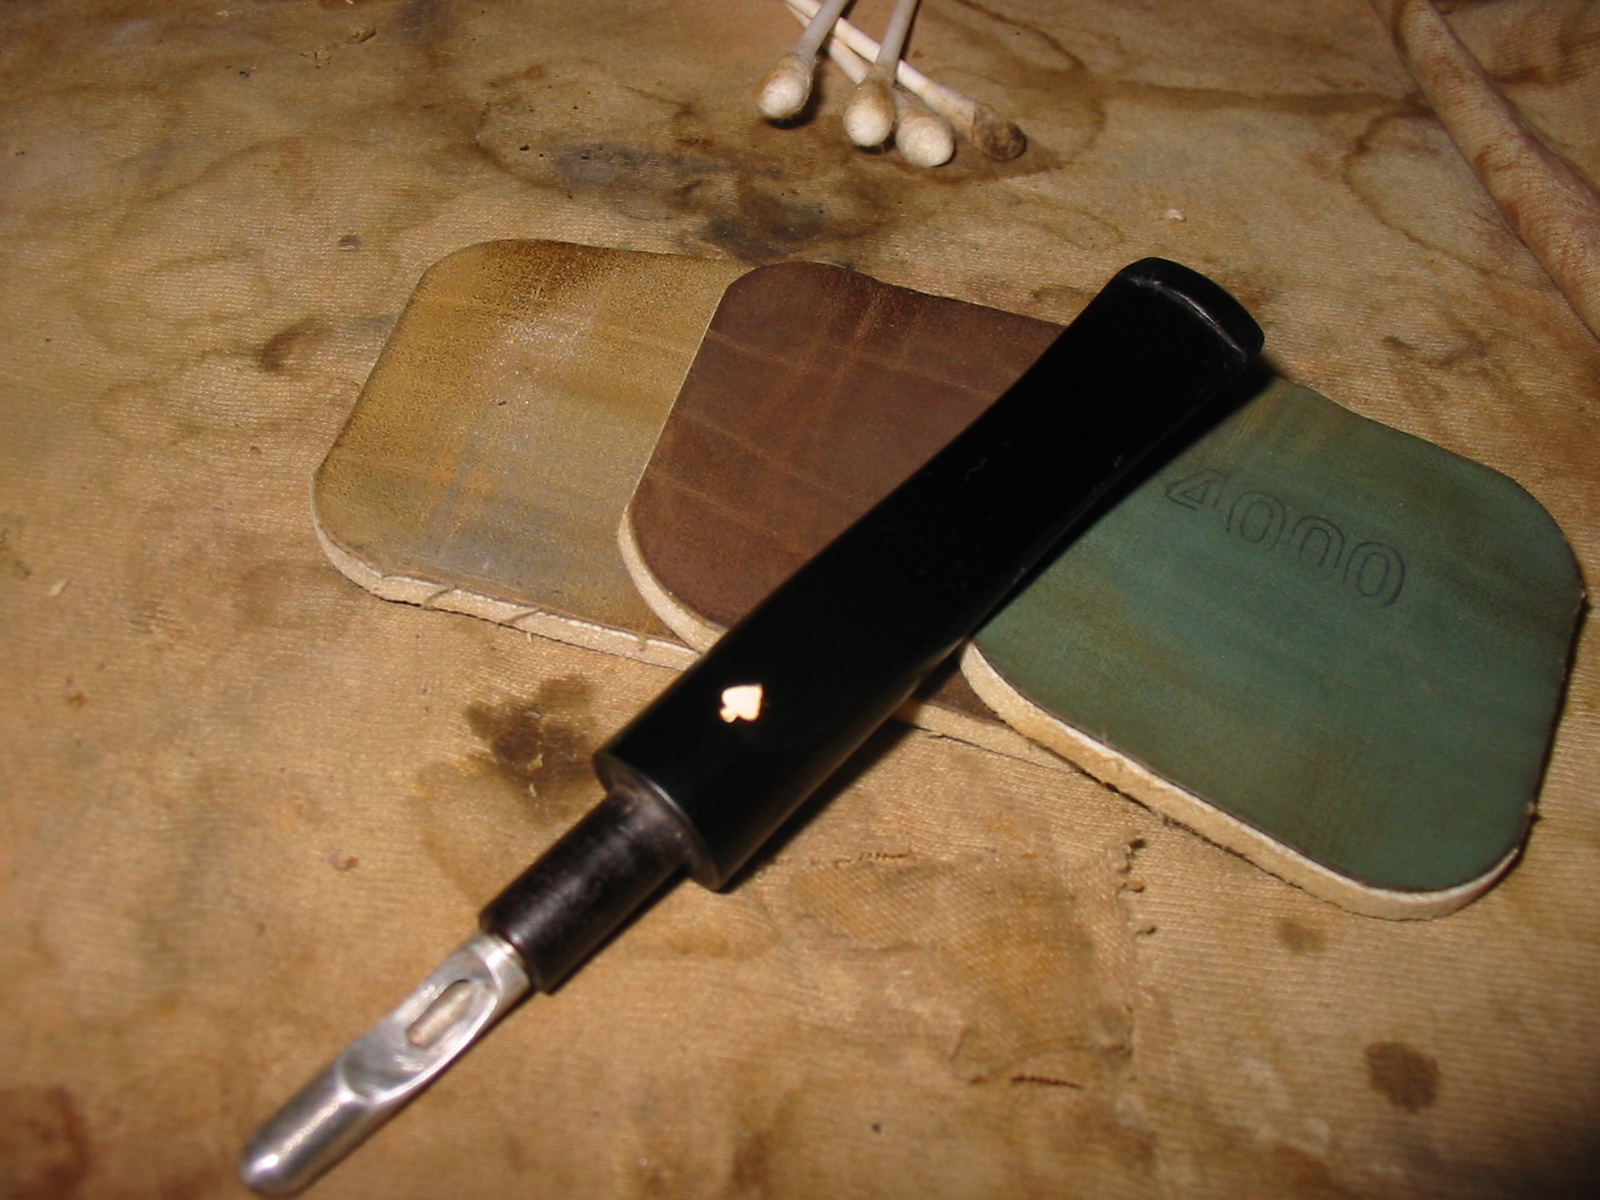
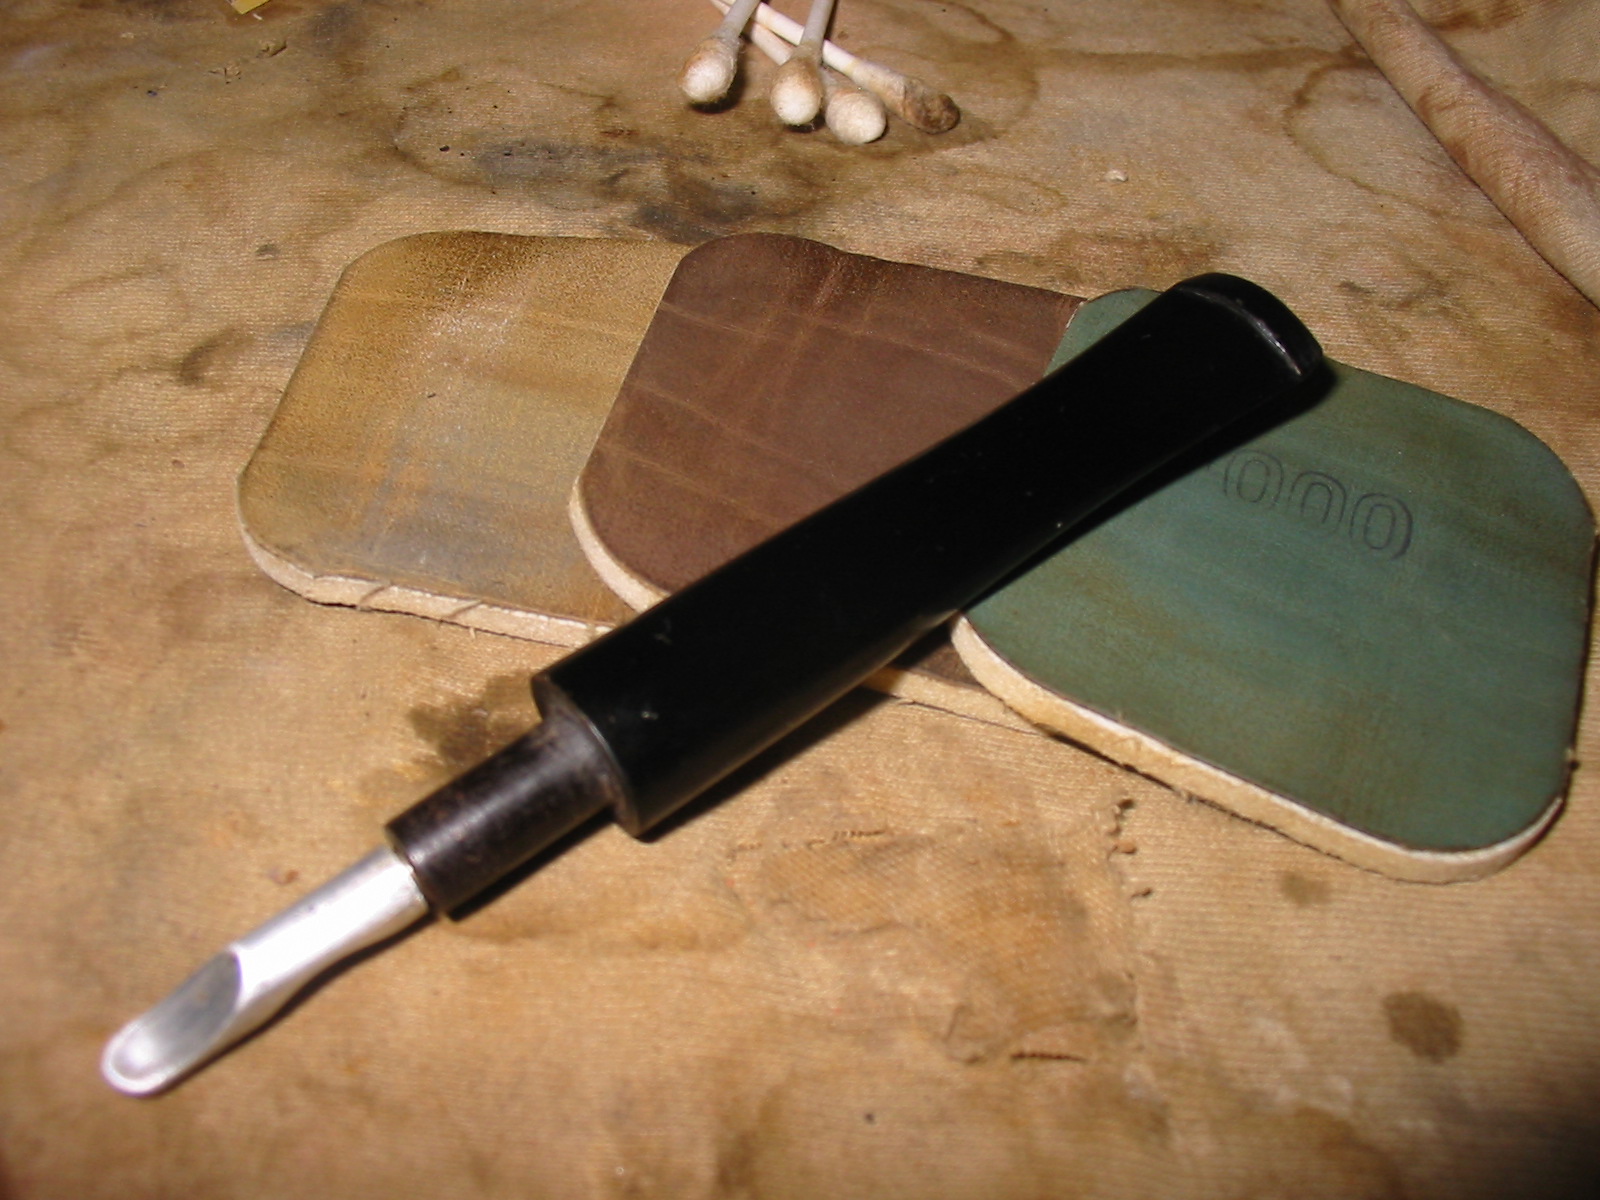
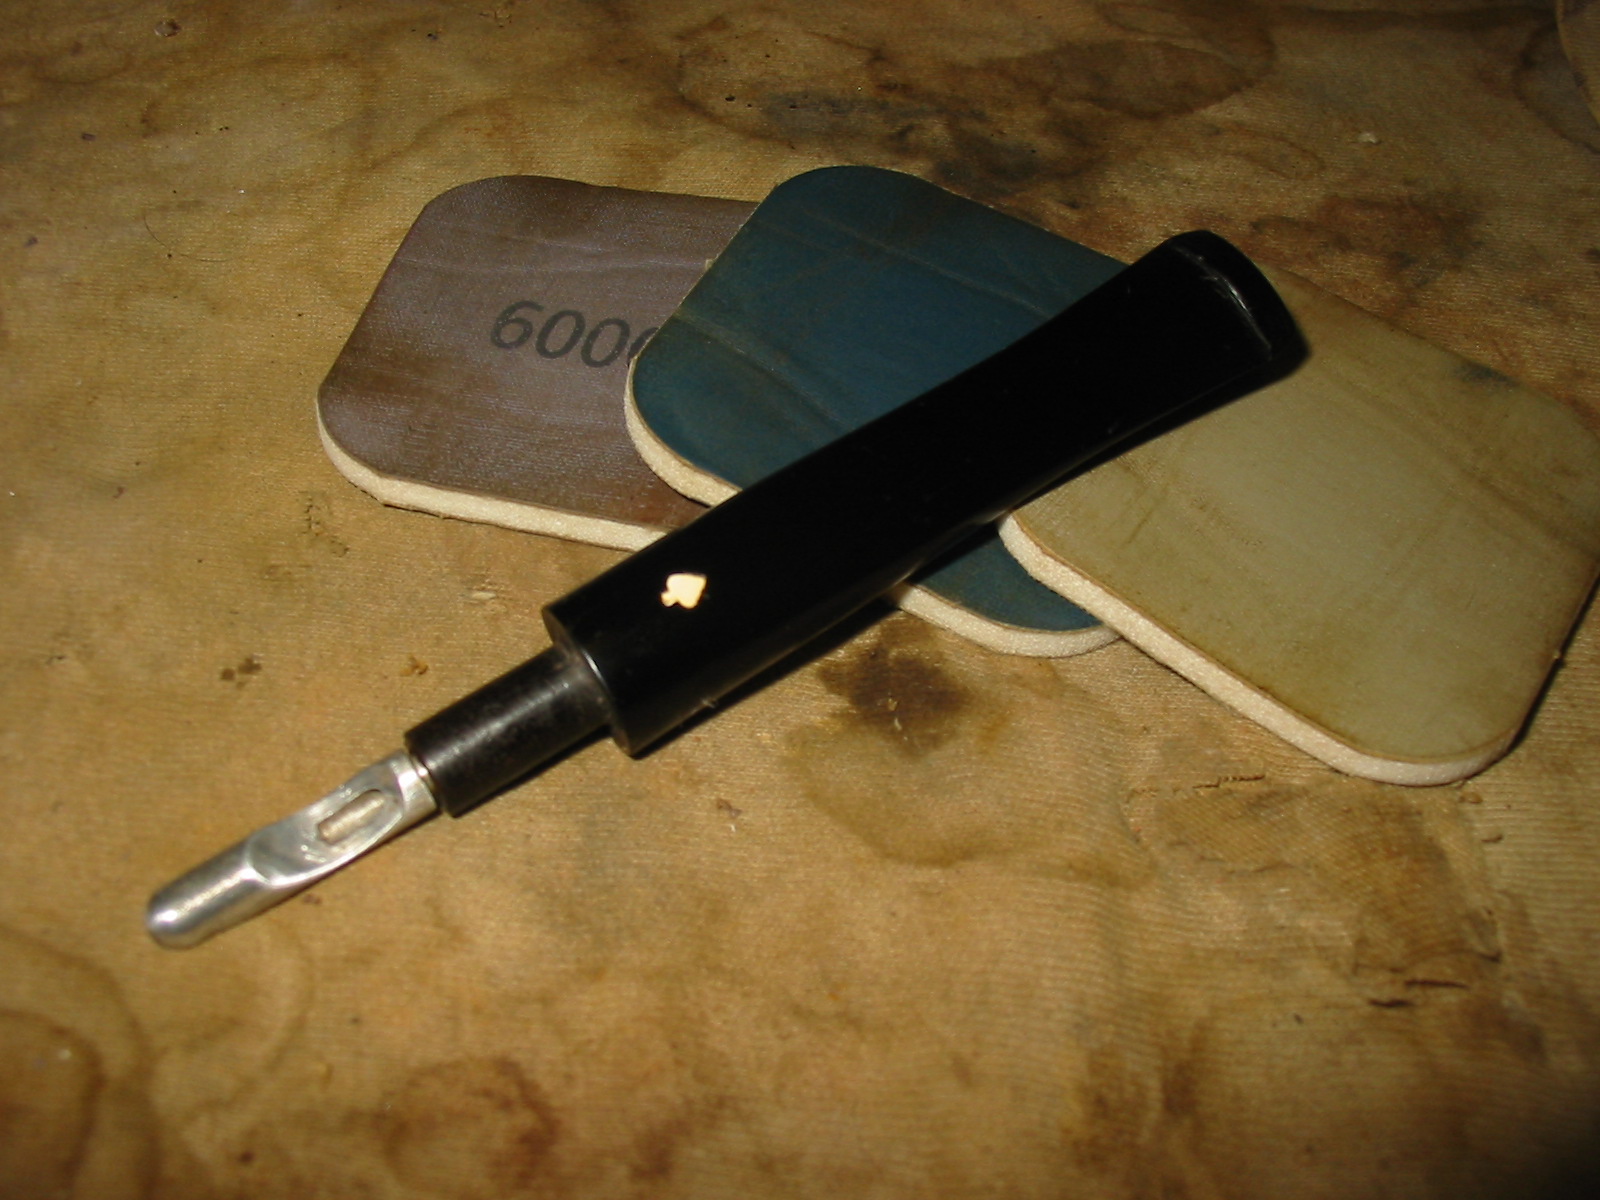
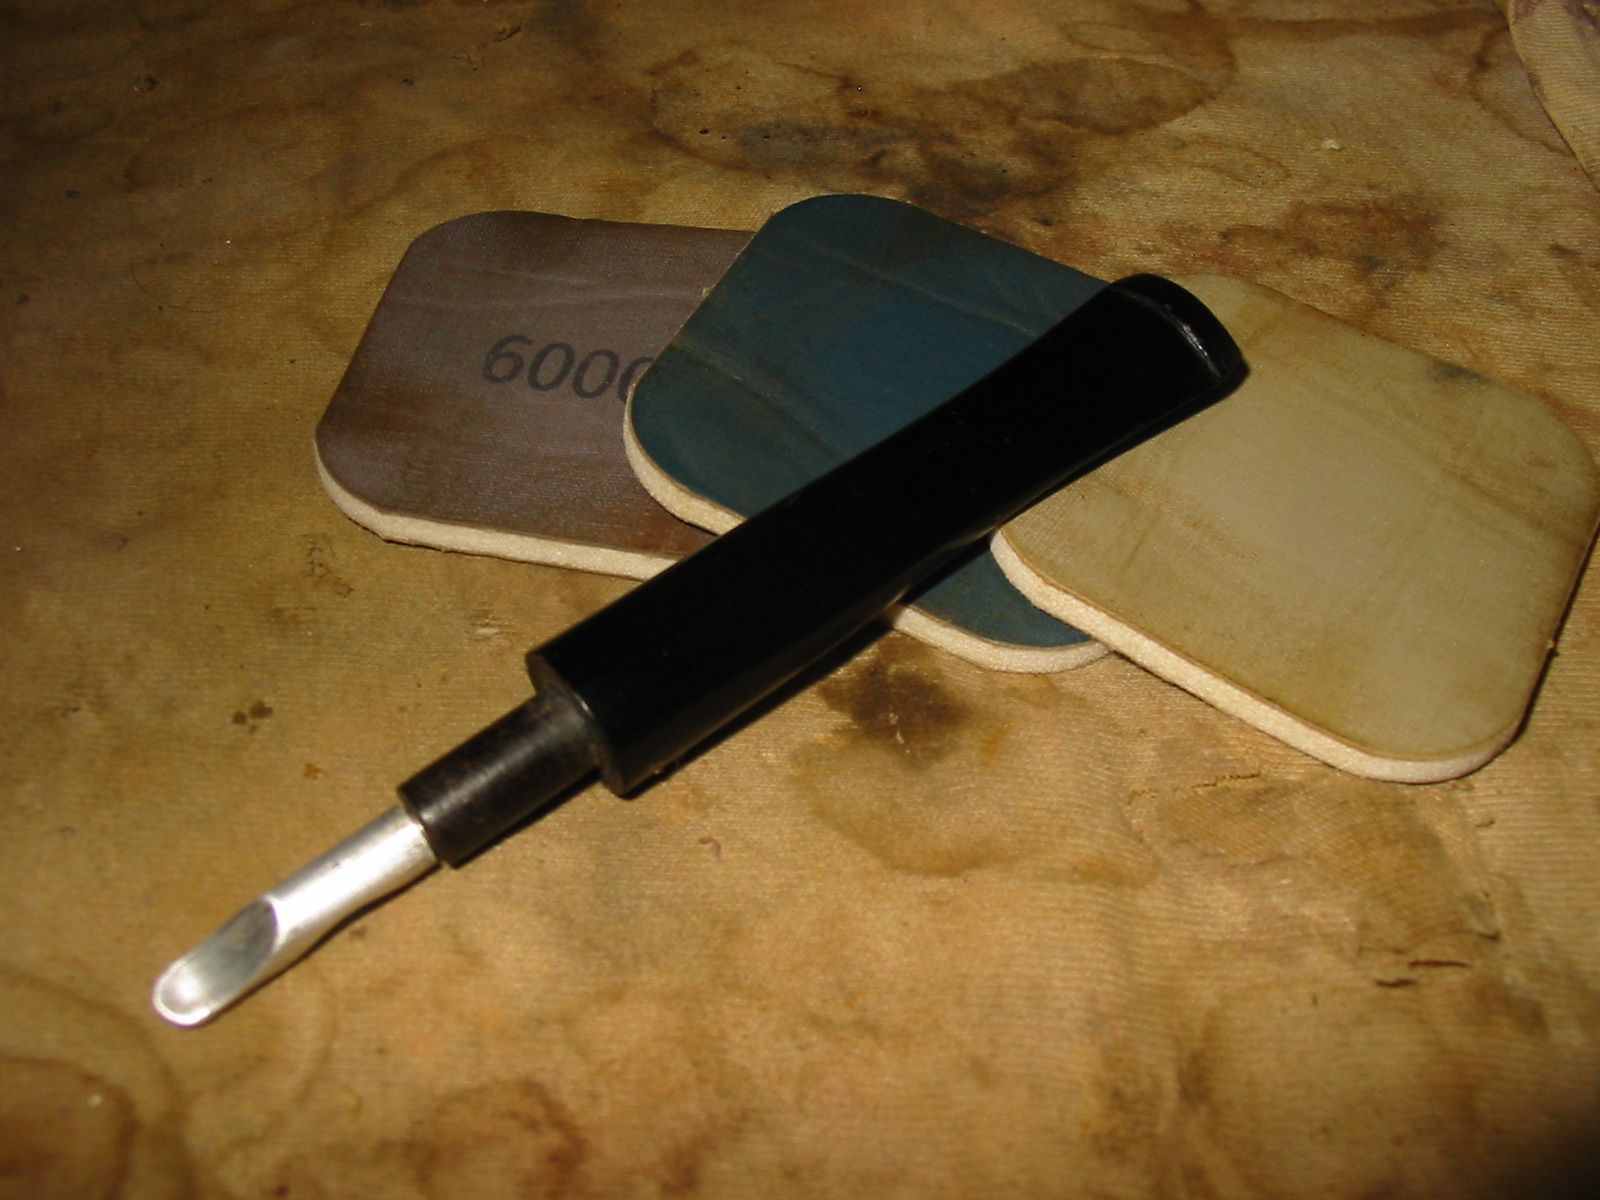
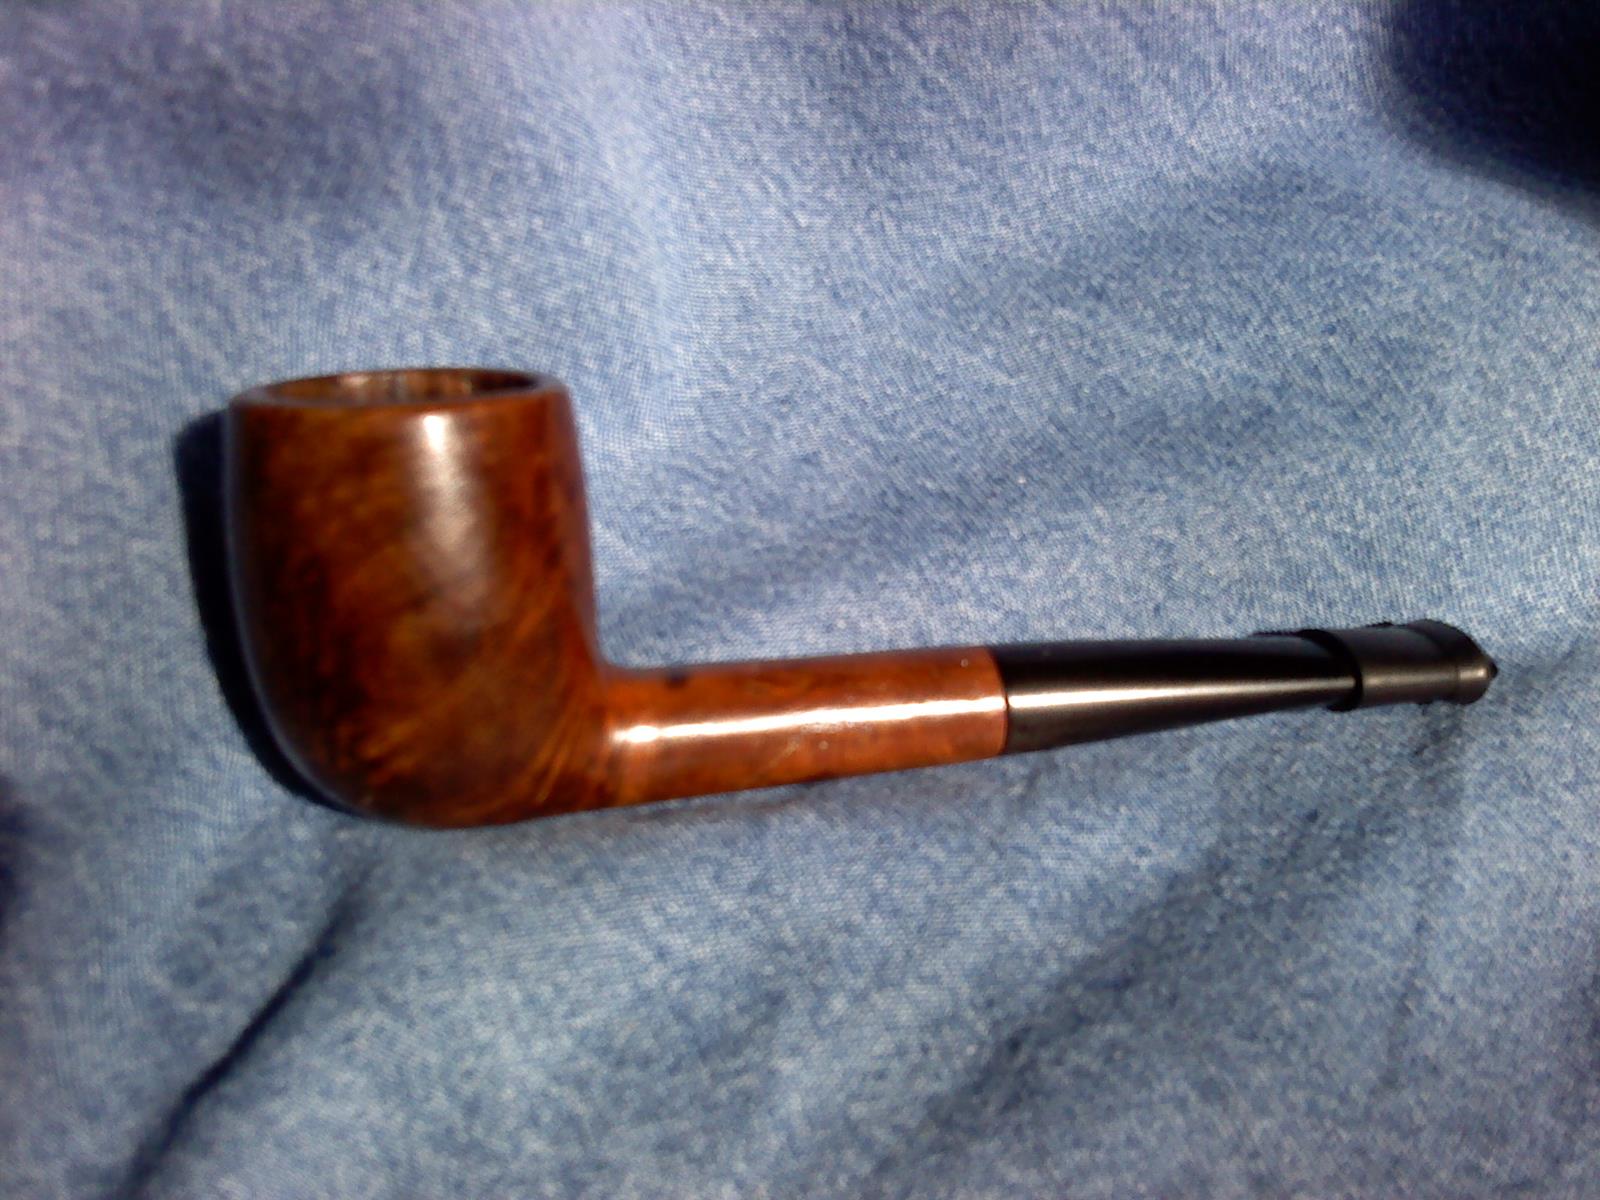
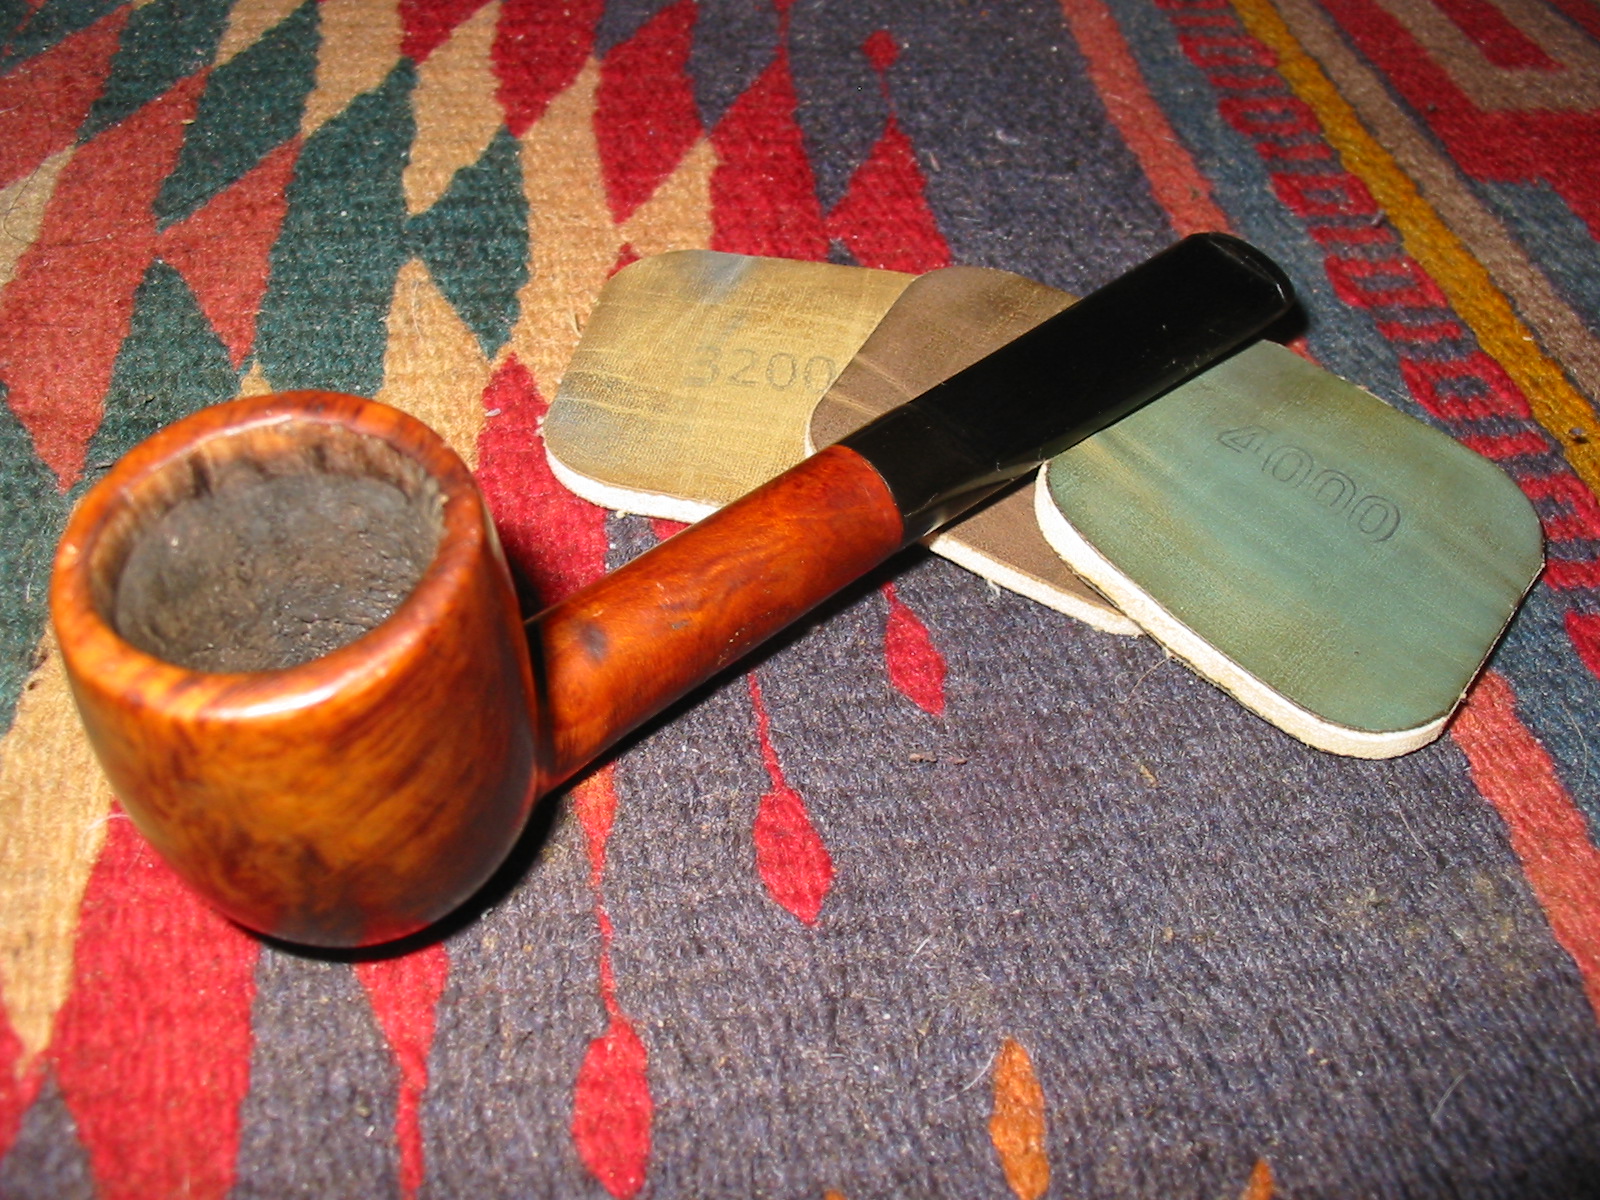
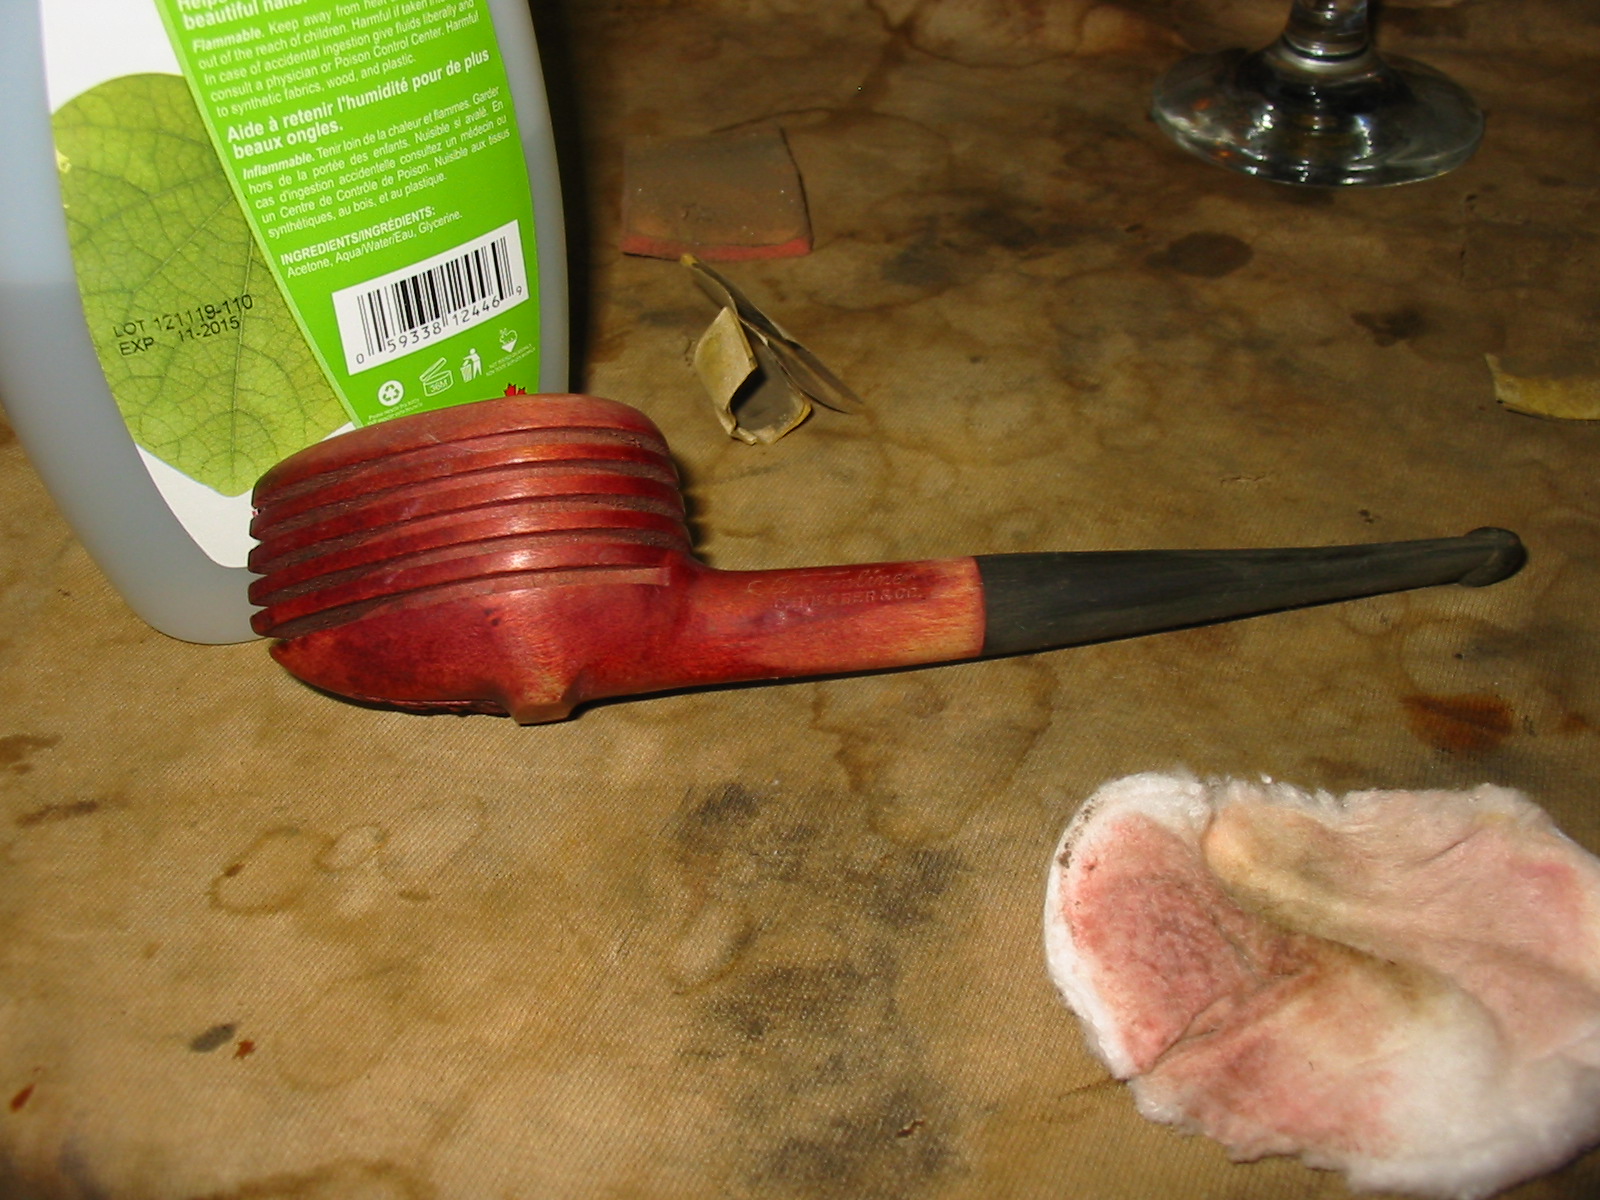
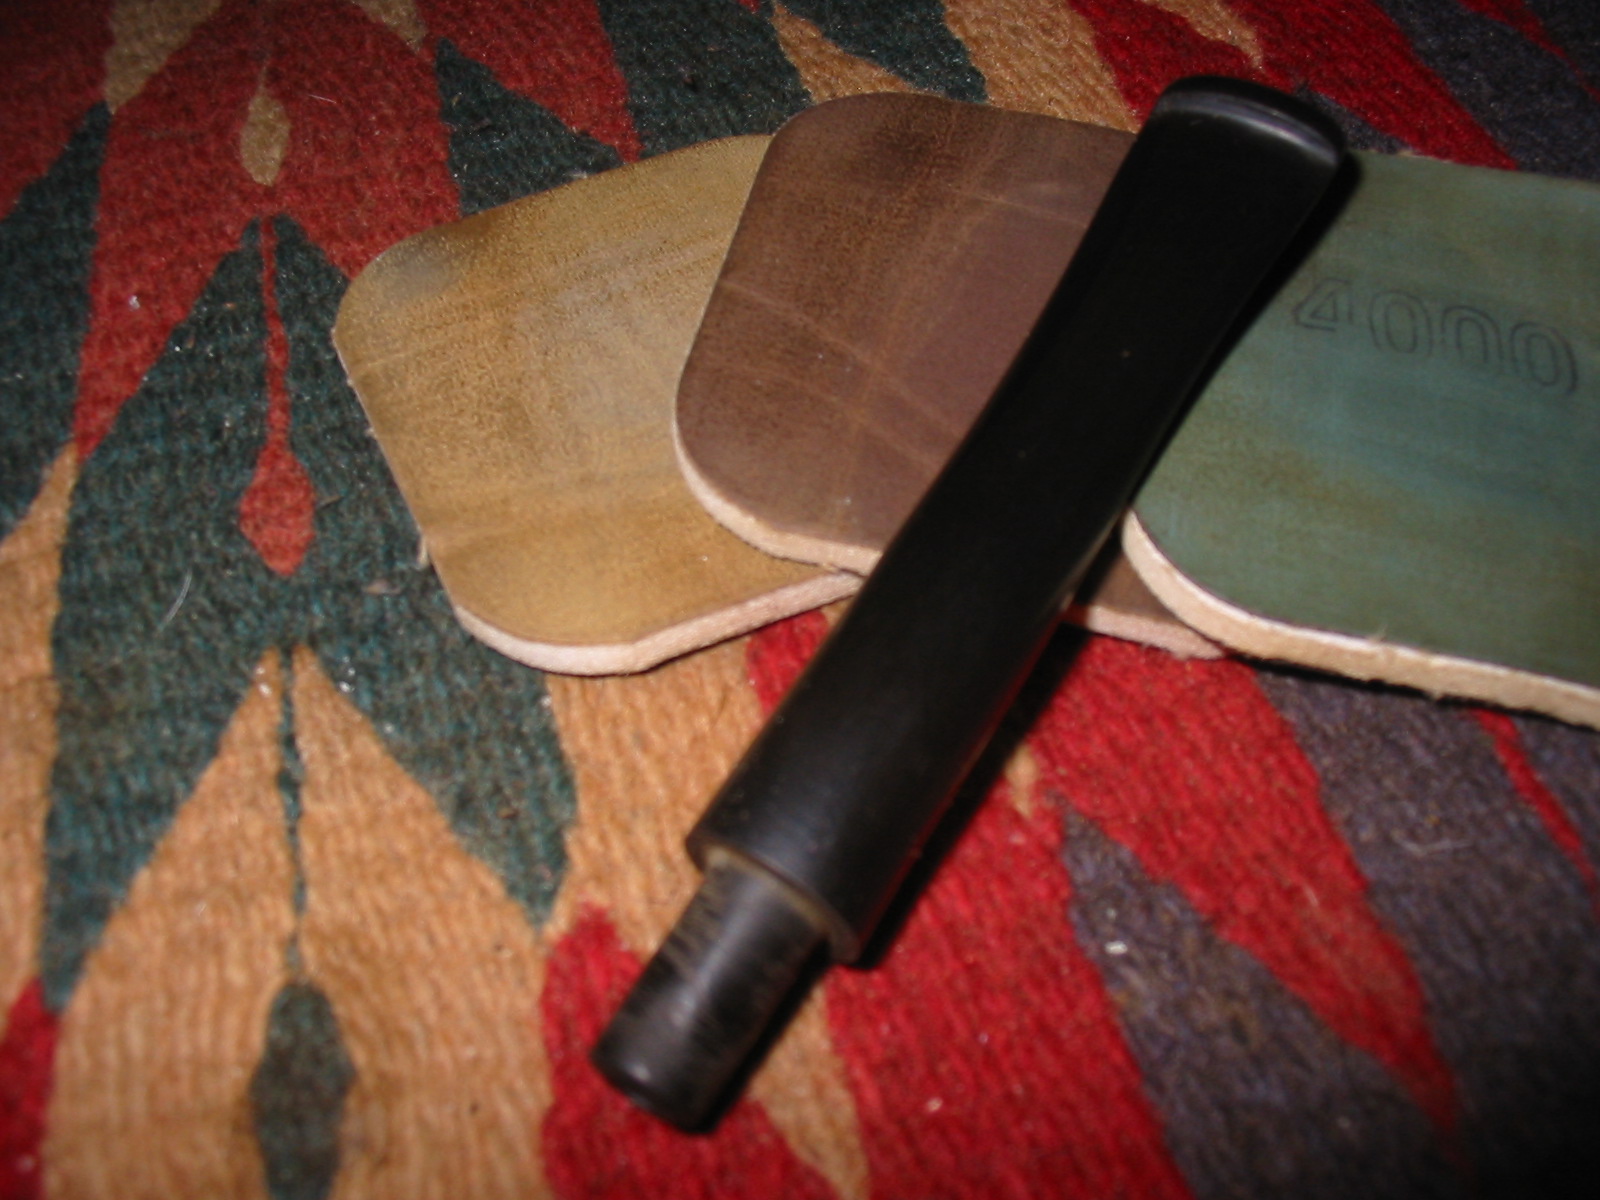
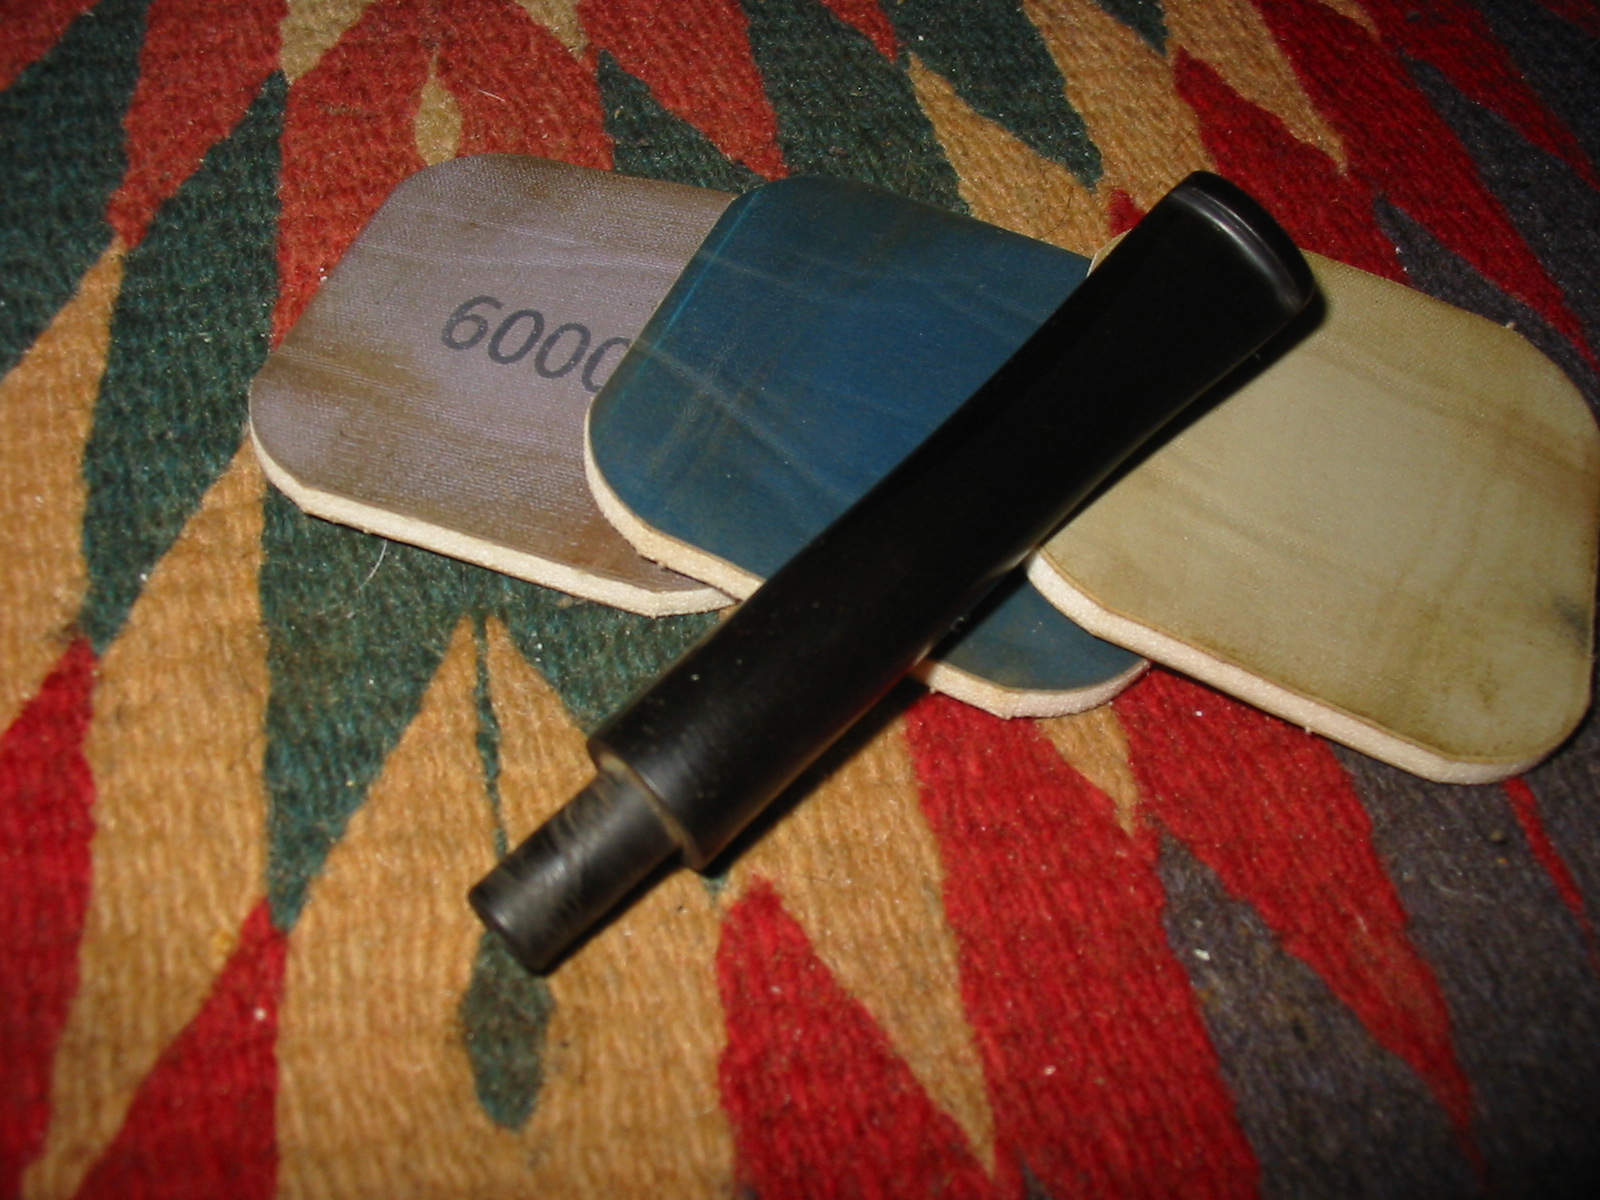
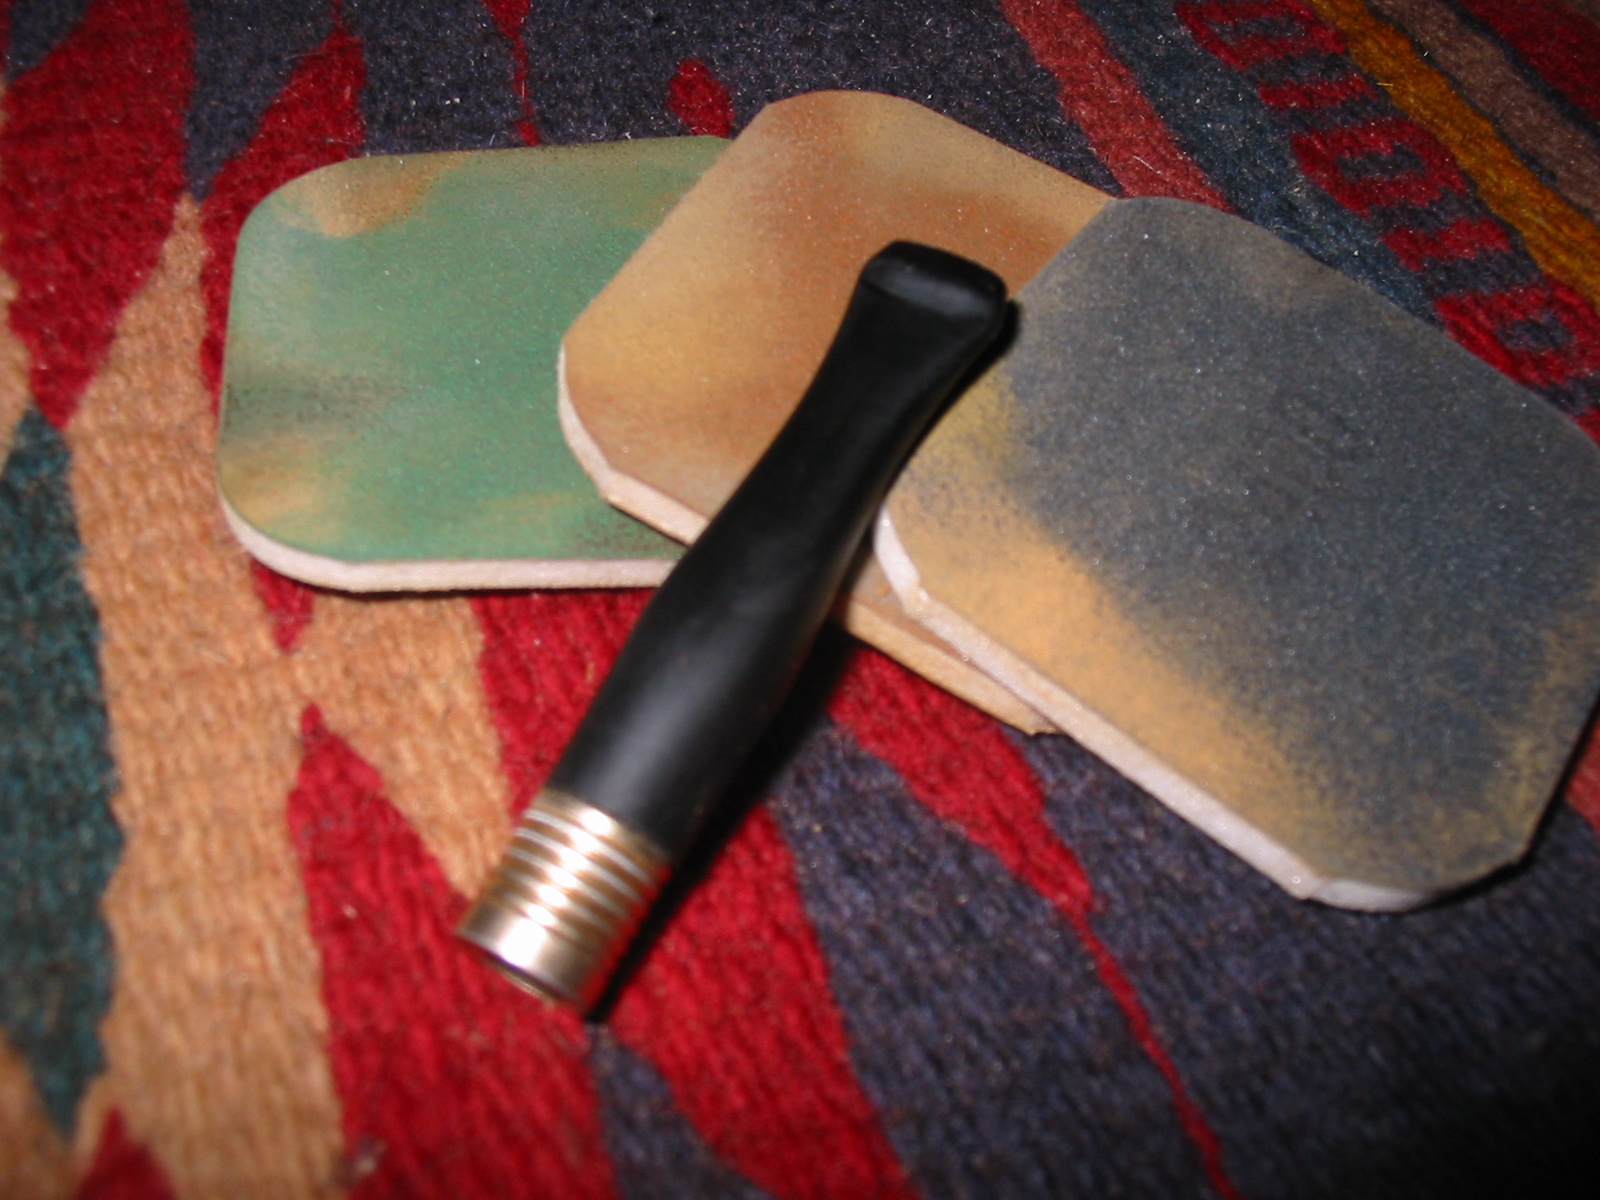
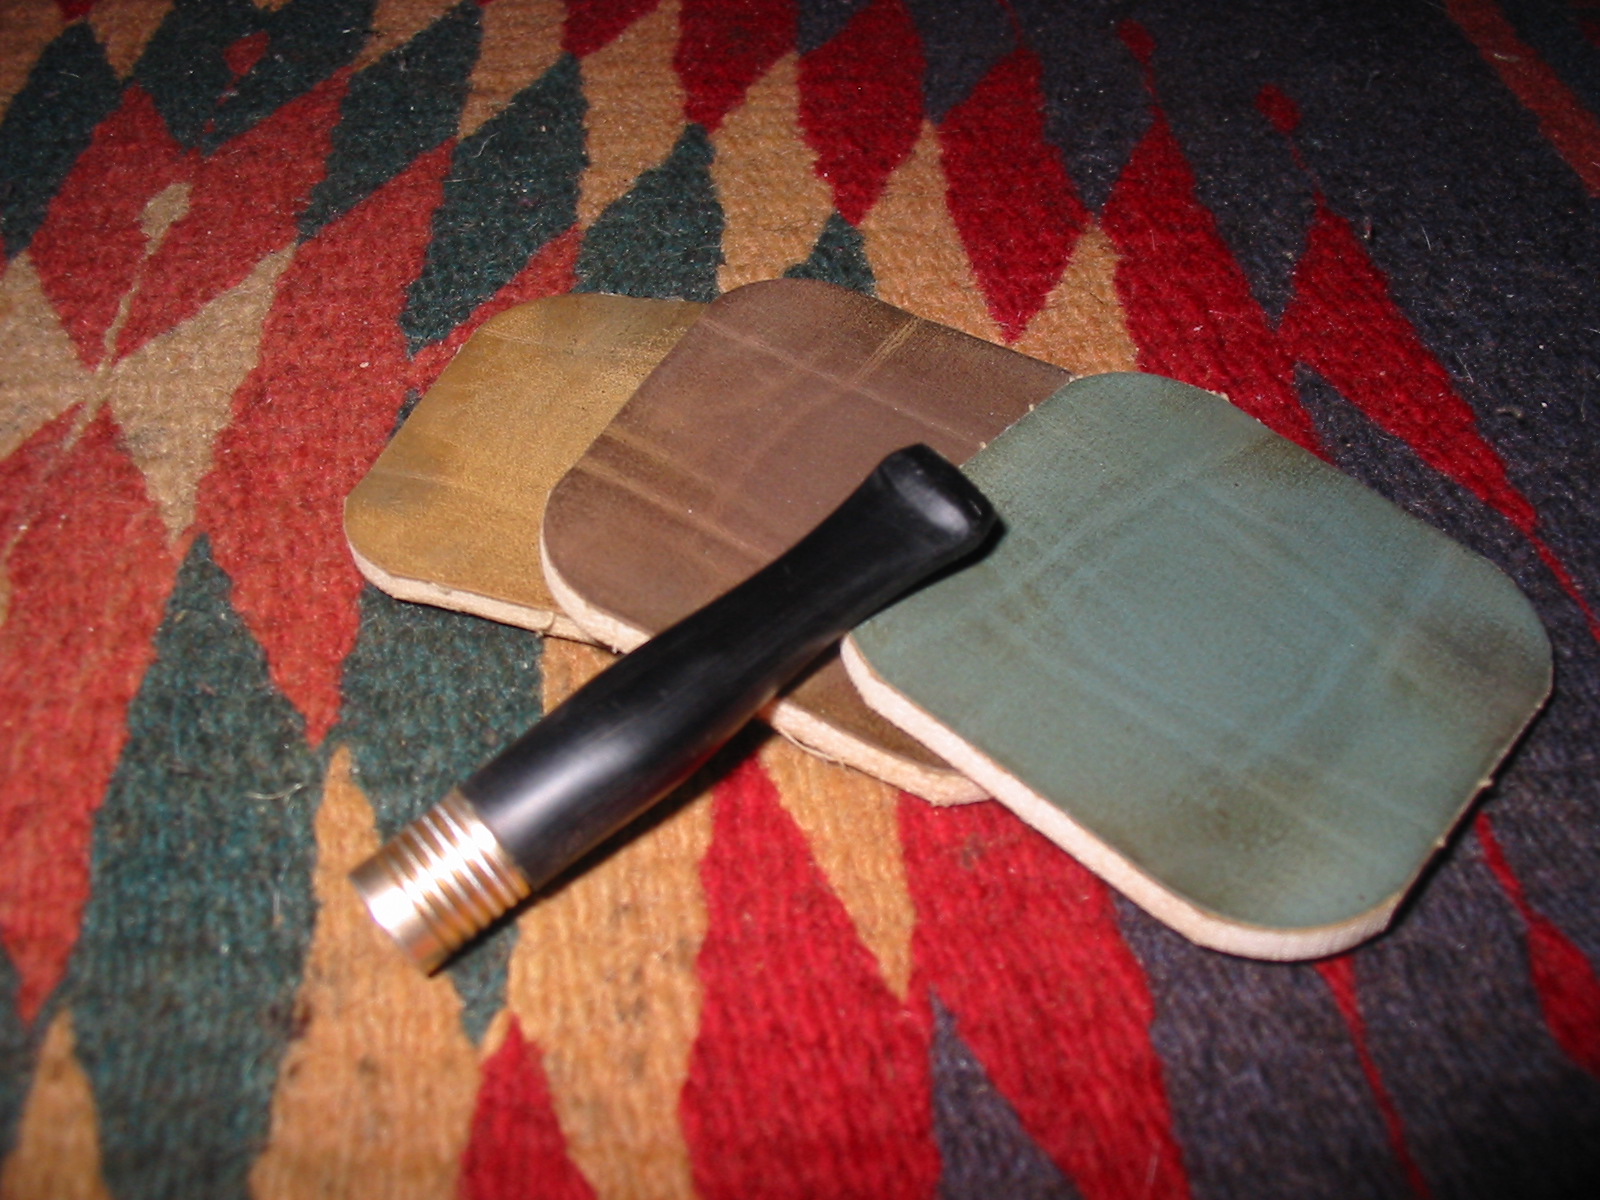
I wet sanded the stem with micromesh sanding pads from 1500-2400 grit and then dry sanded with 3200 – 12,000 grit sanding pads. I used a plastic polish to further shine the stem once I was finished with the micromesh pads.
IMG_3184

IMG_3185

IMG_3187

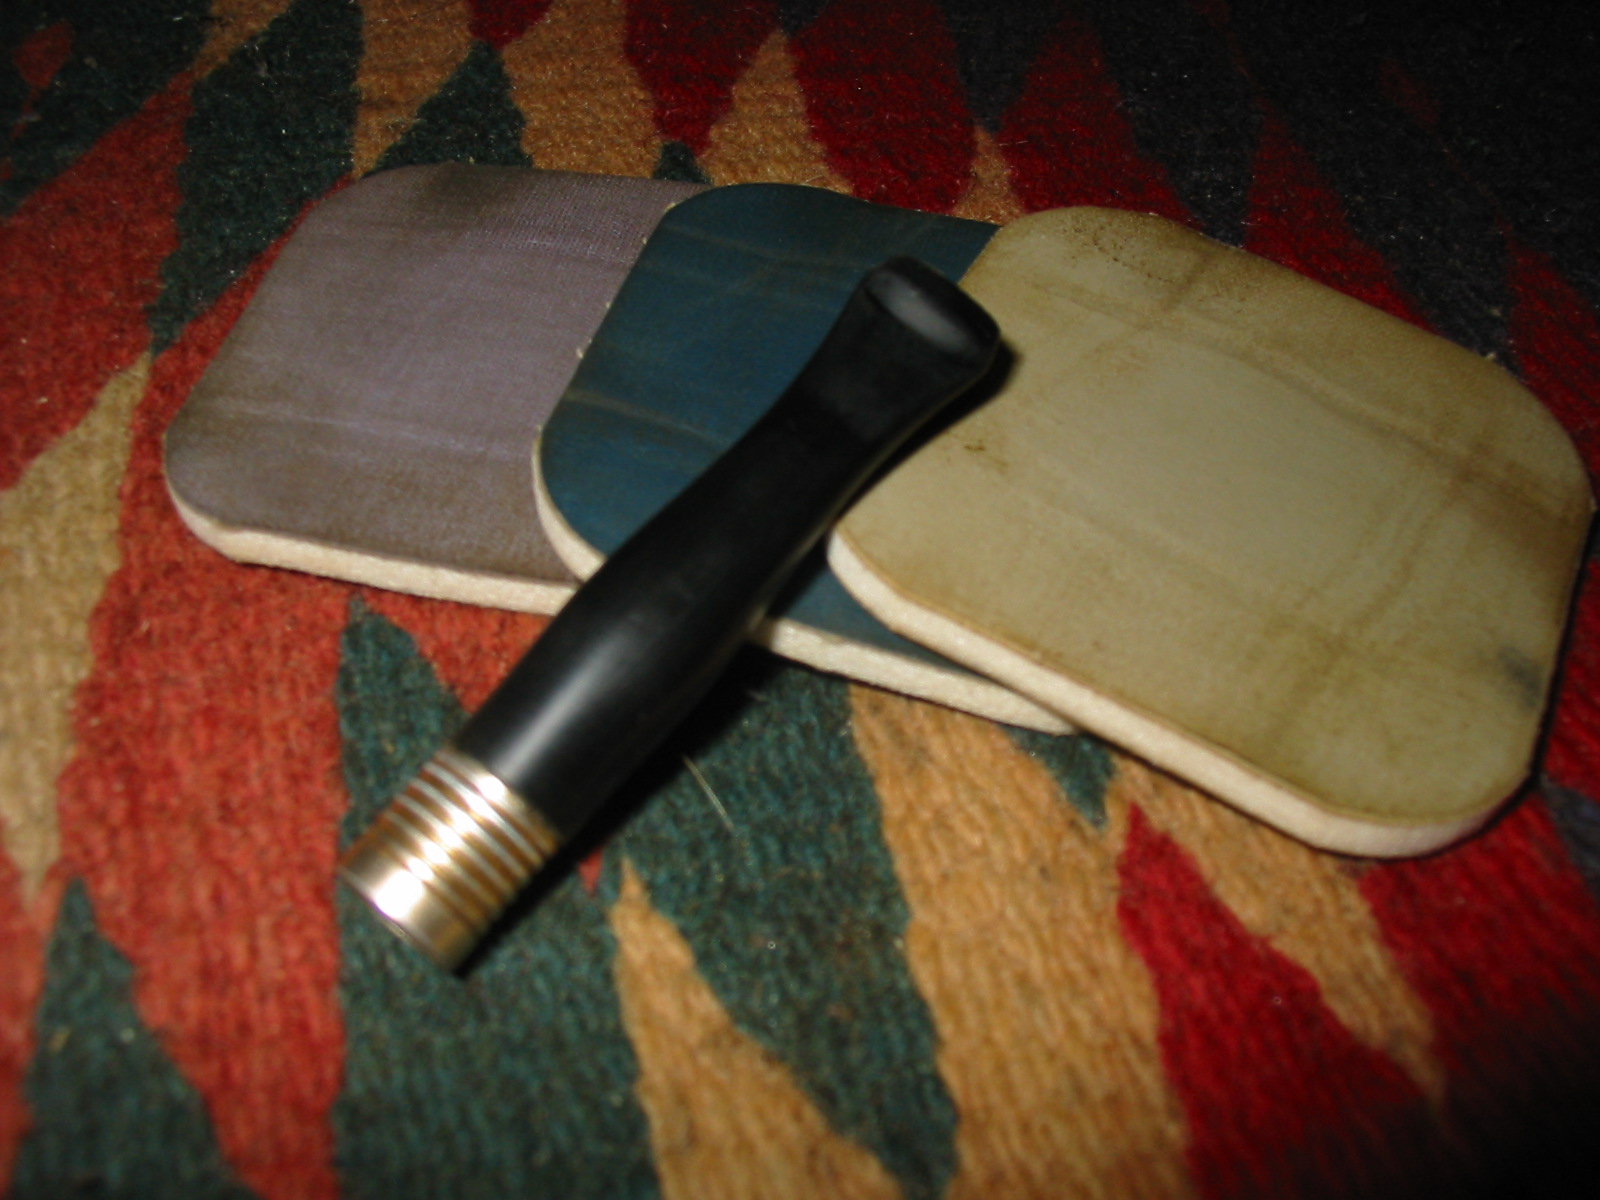
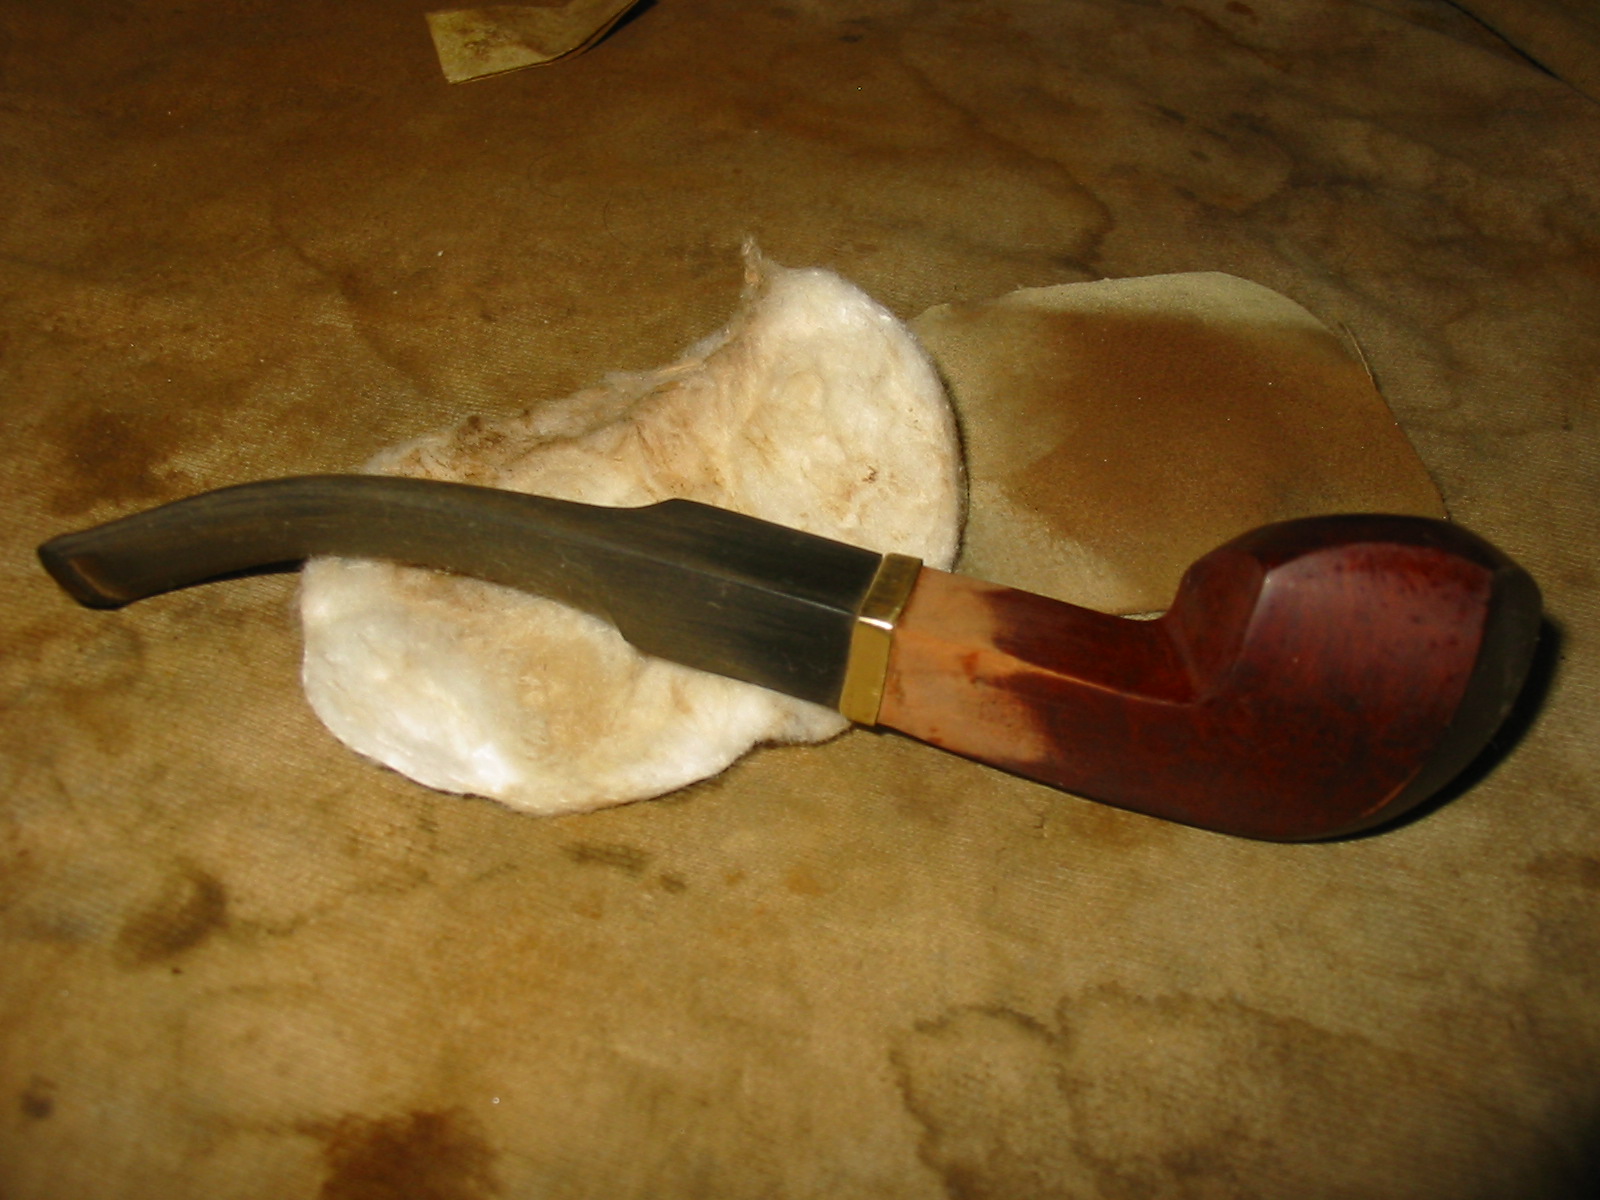
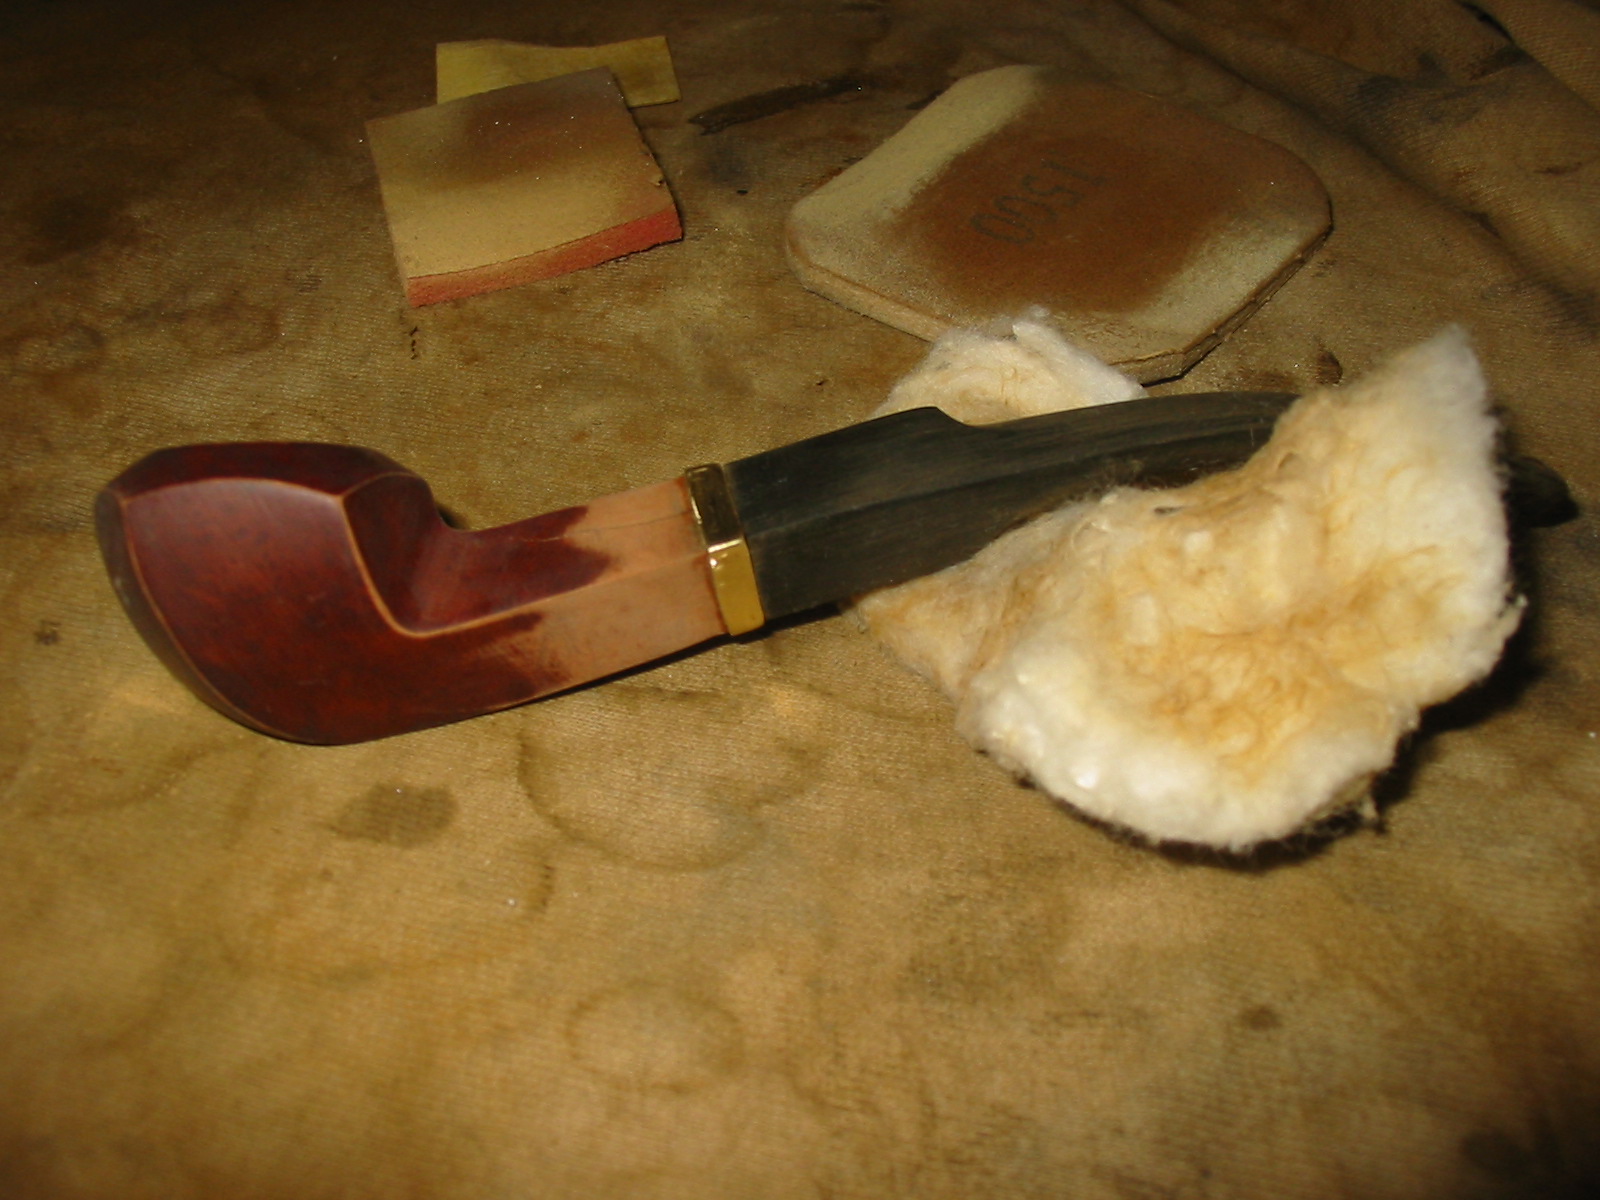
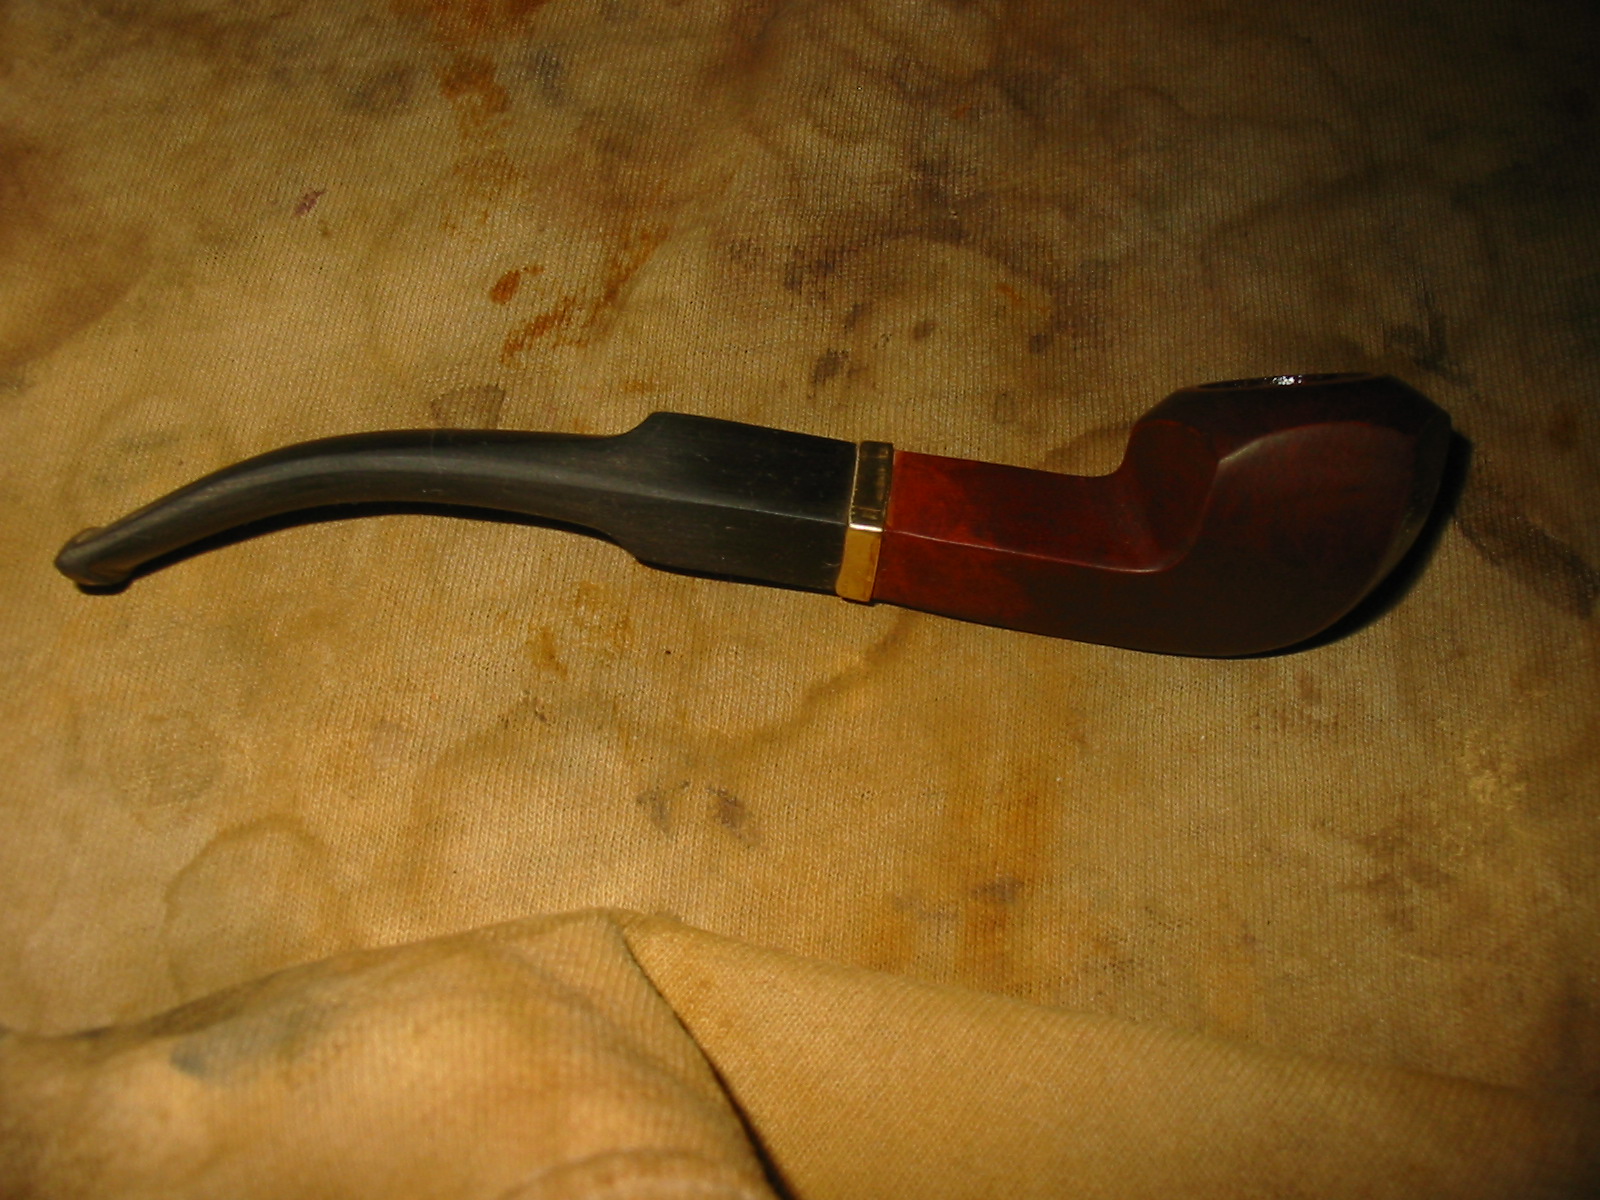
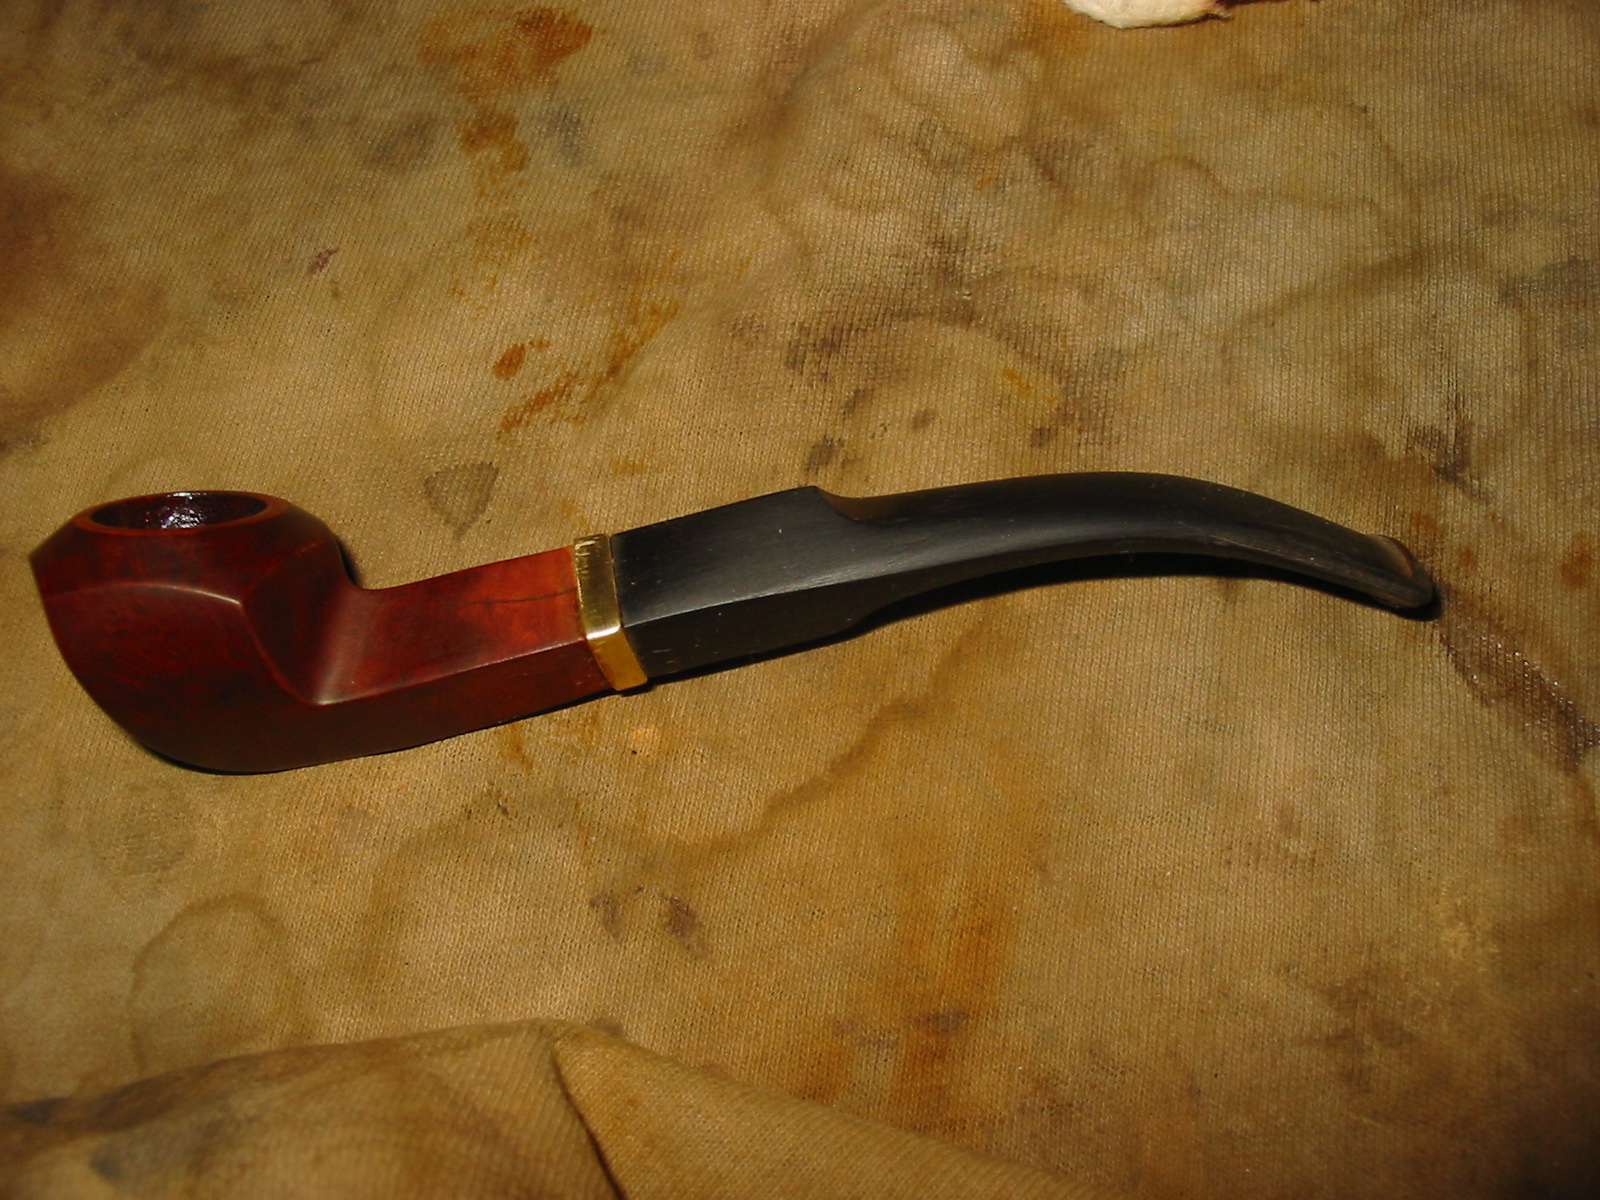
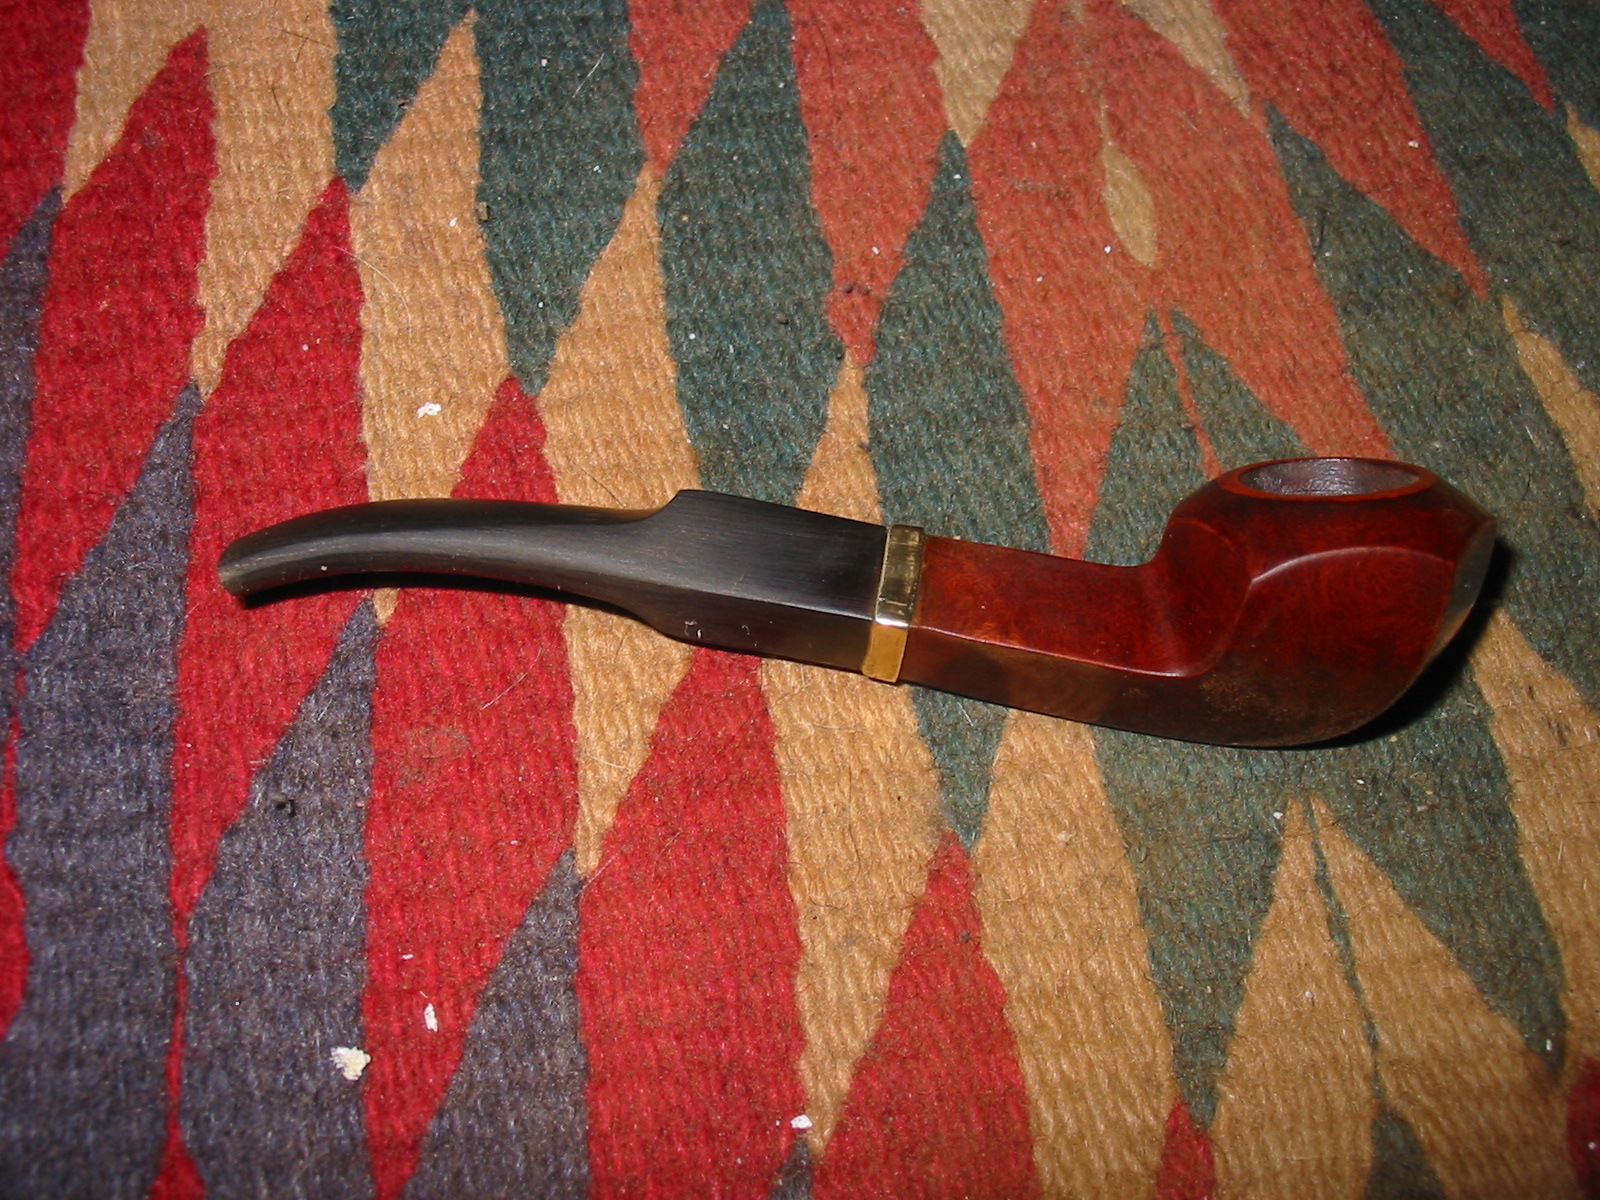
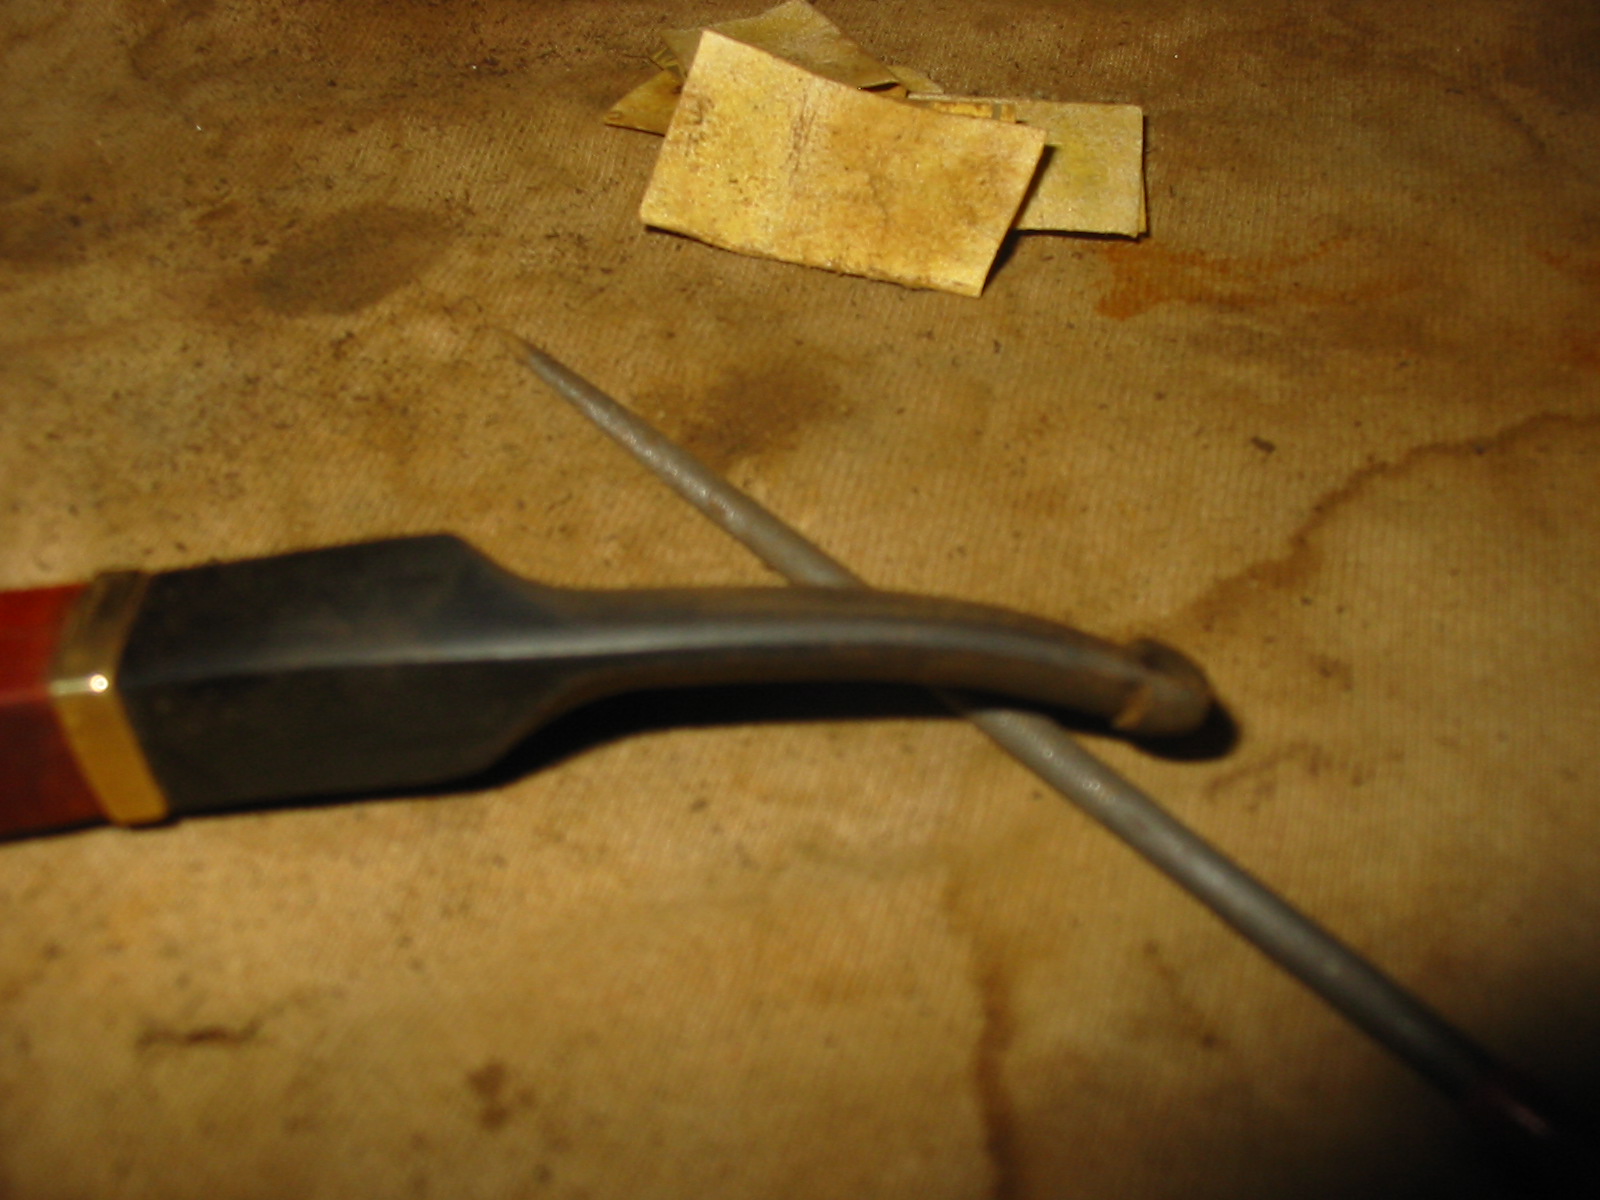
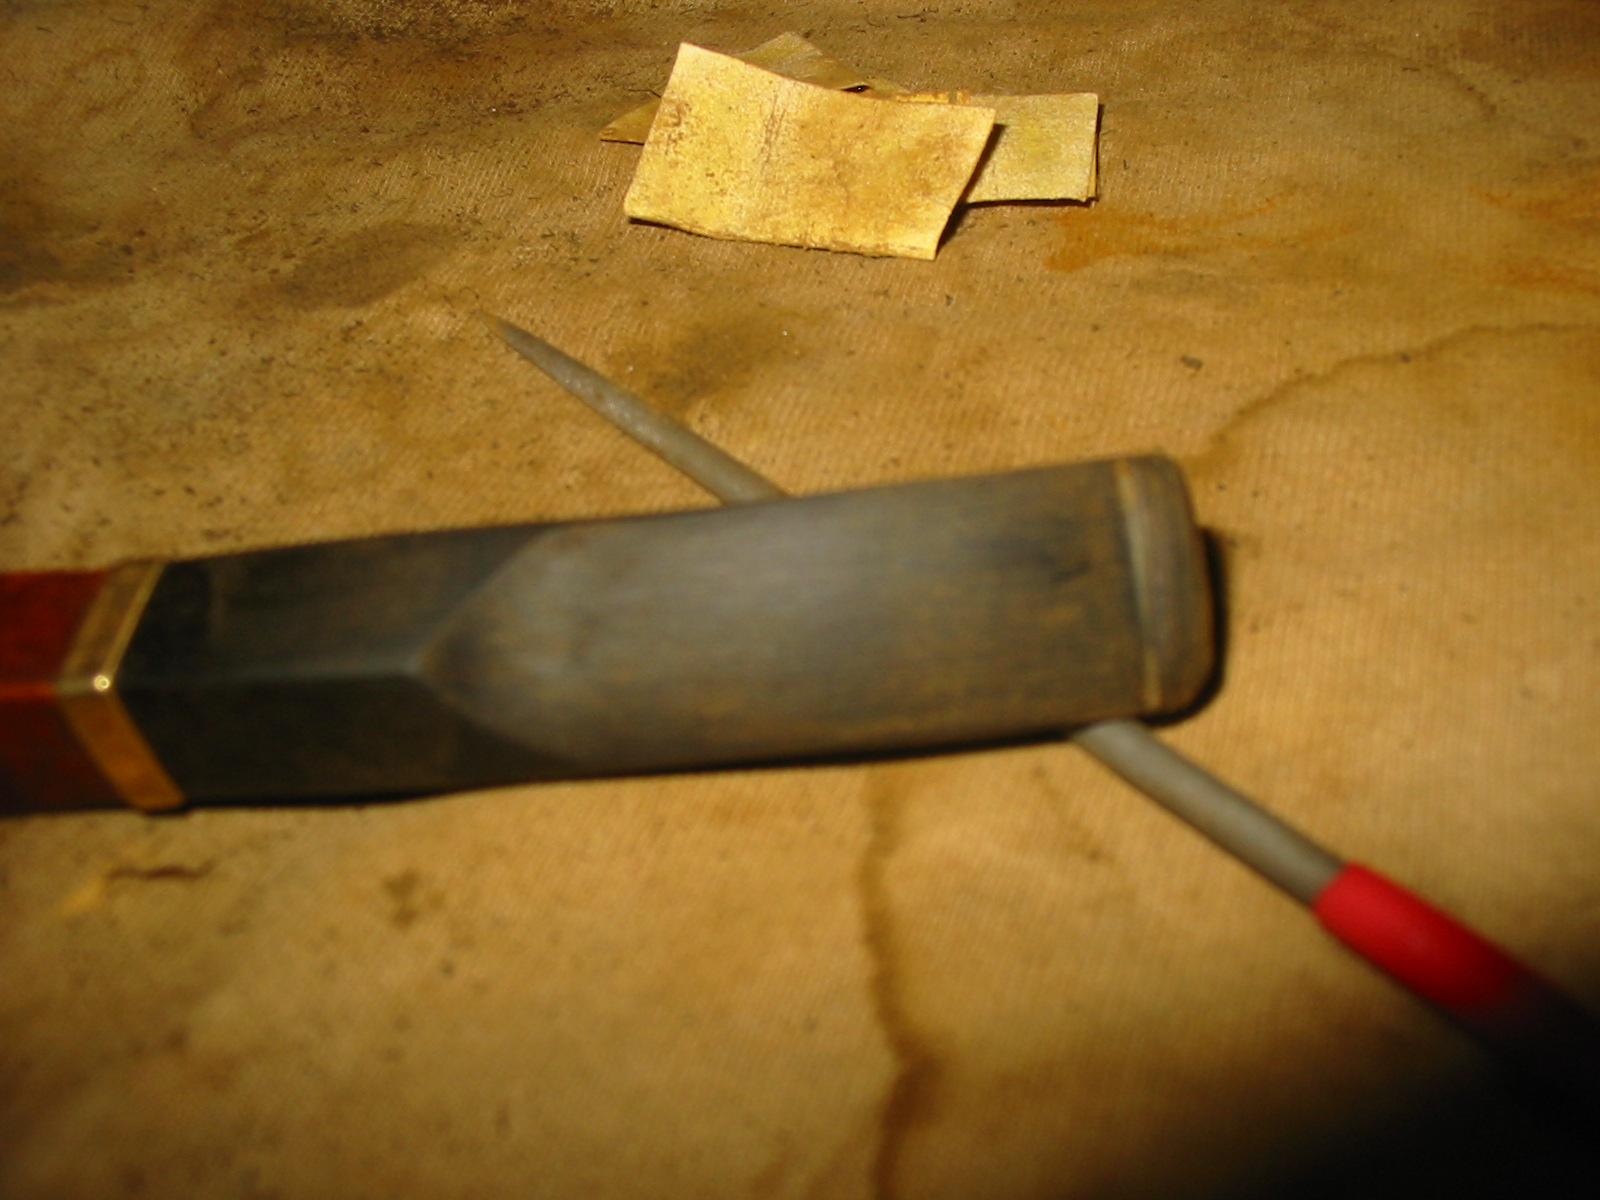
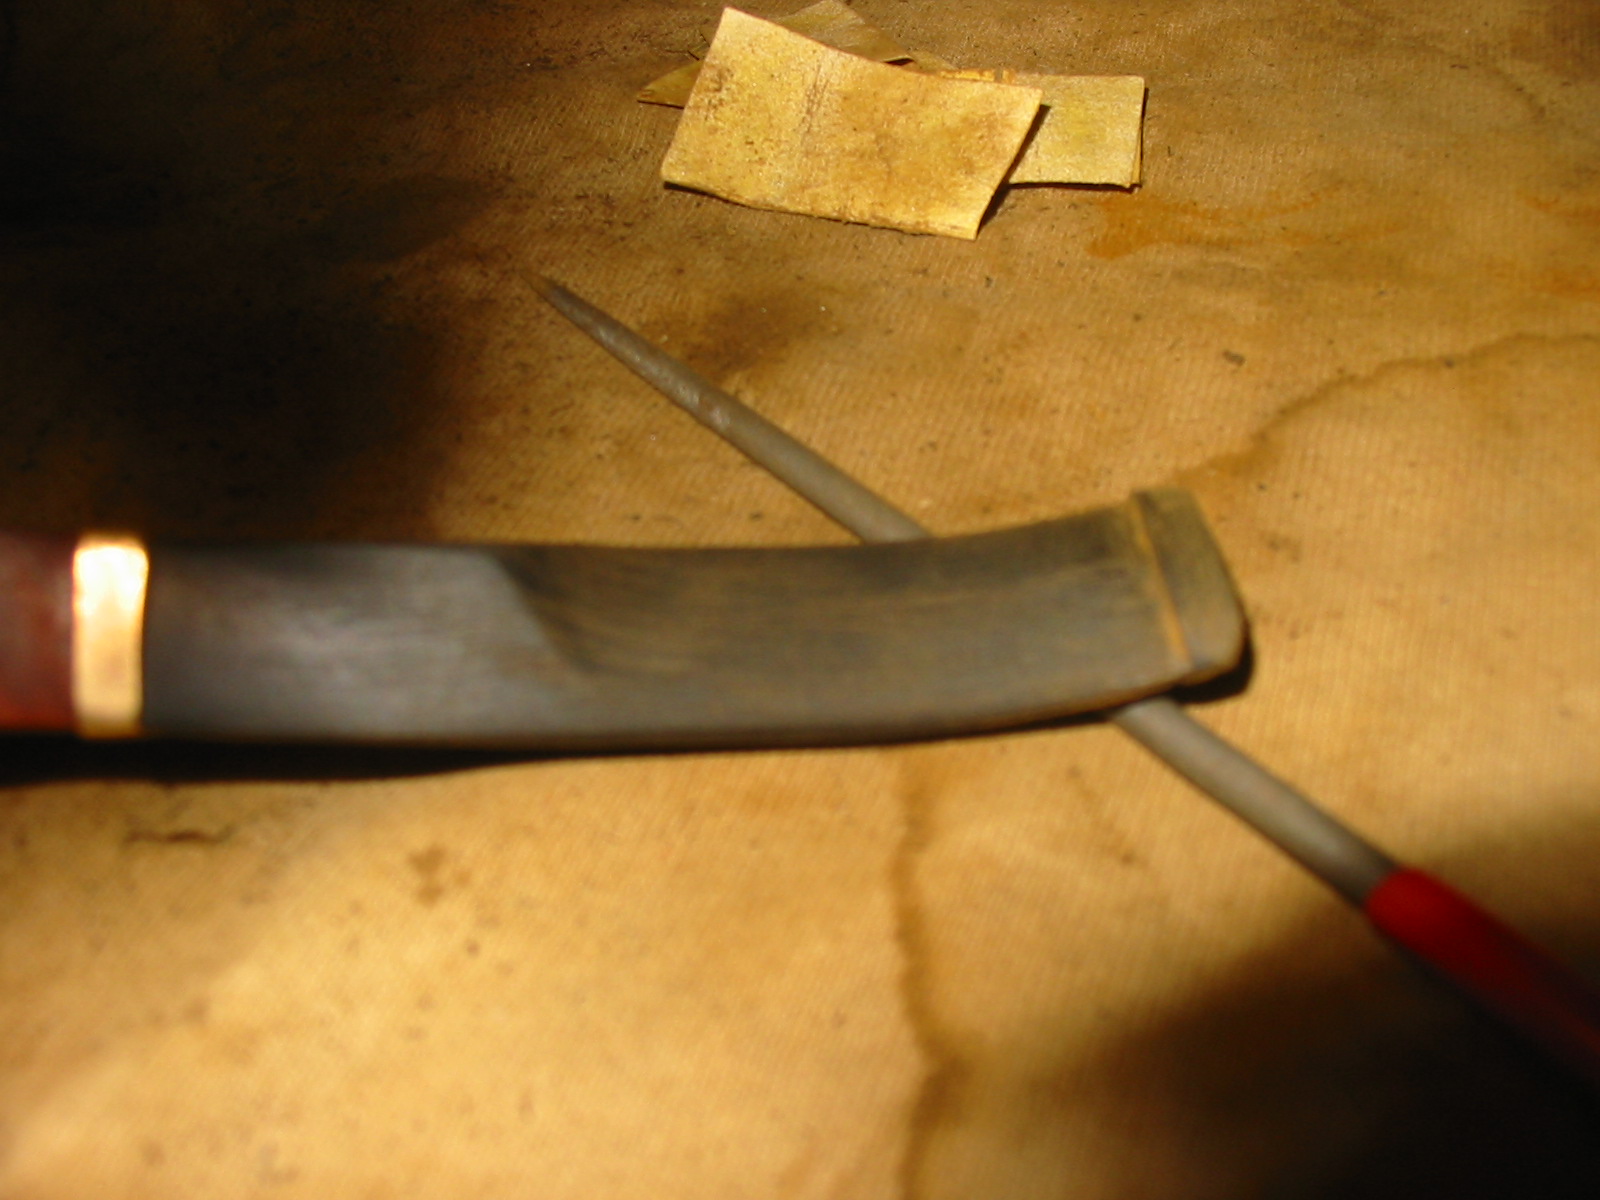
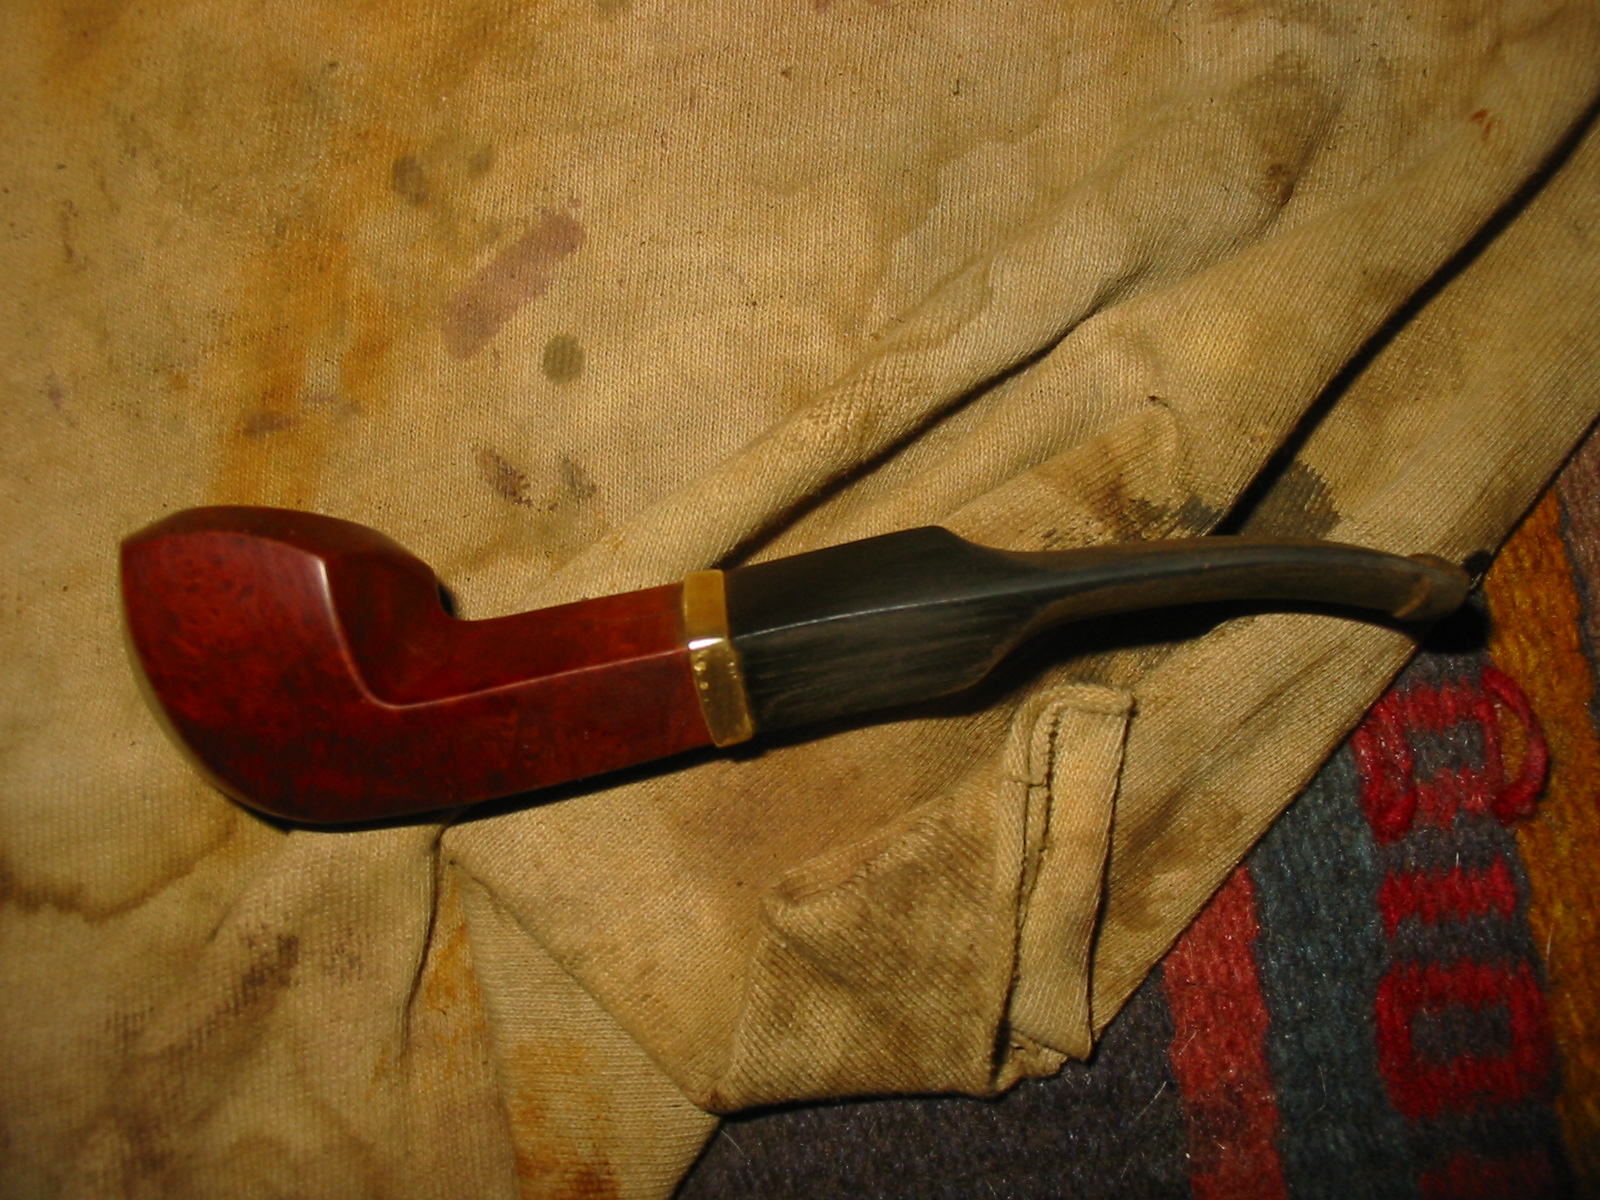
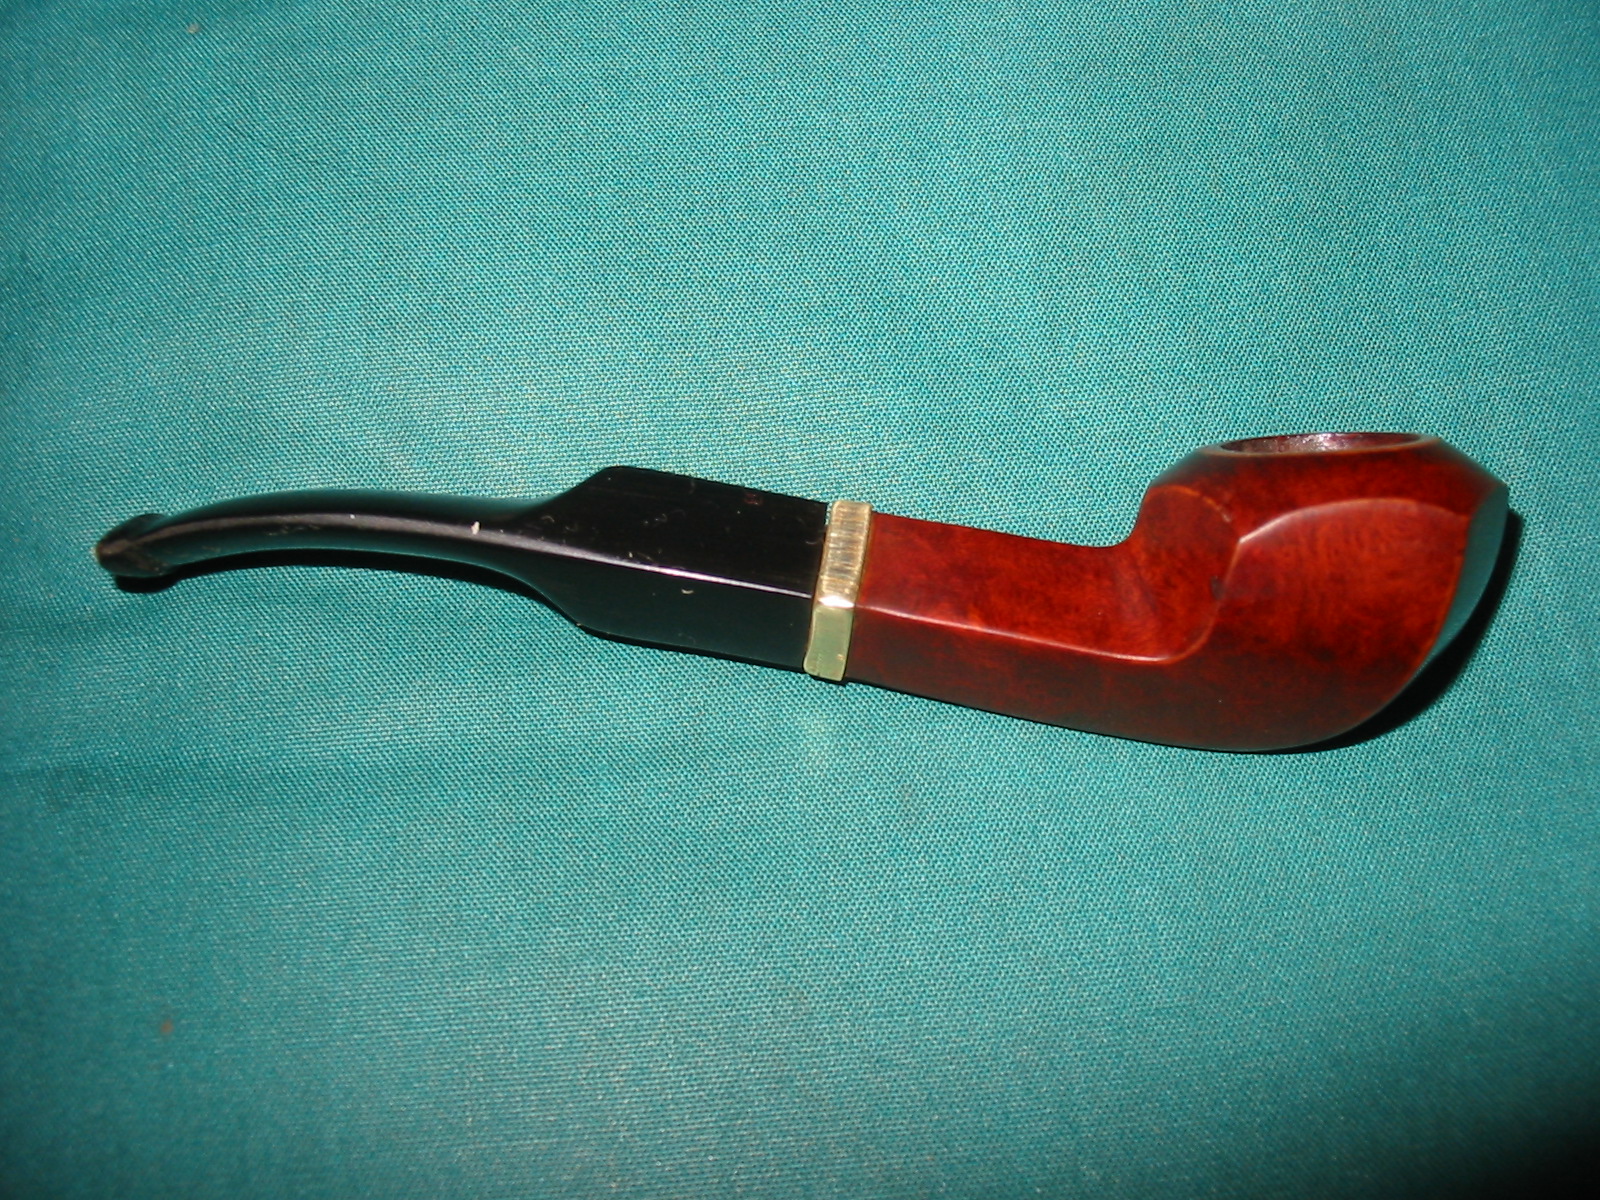
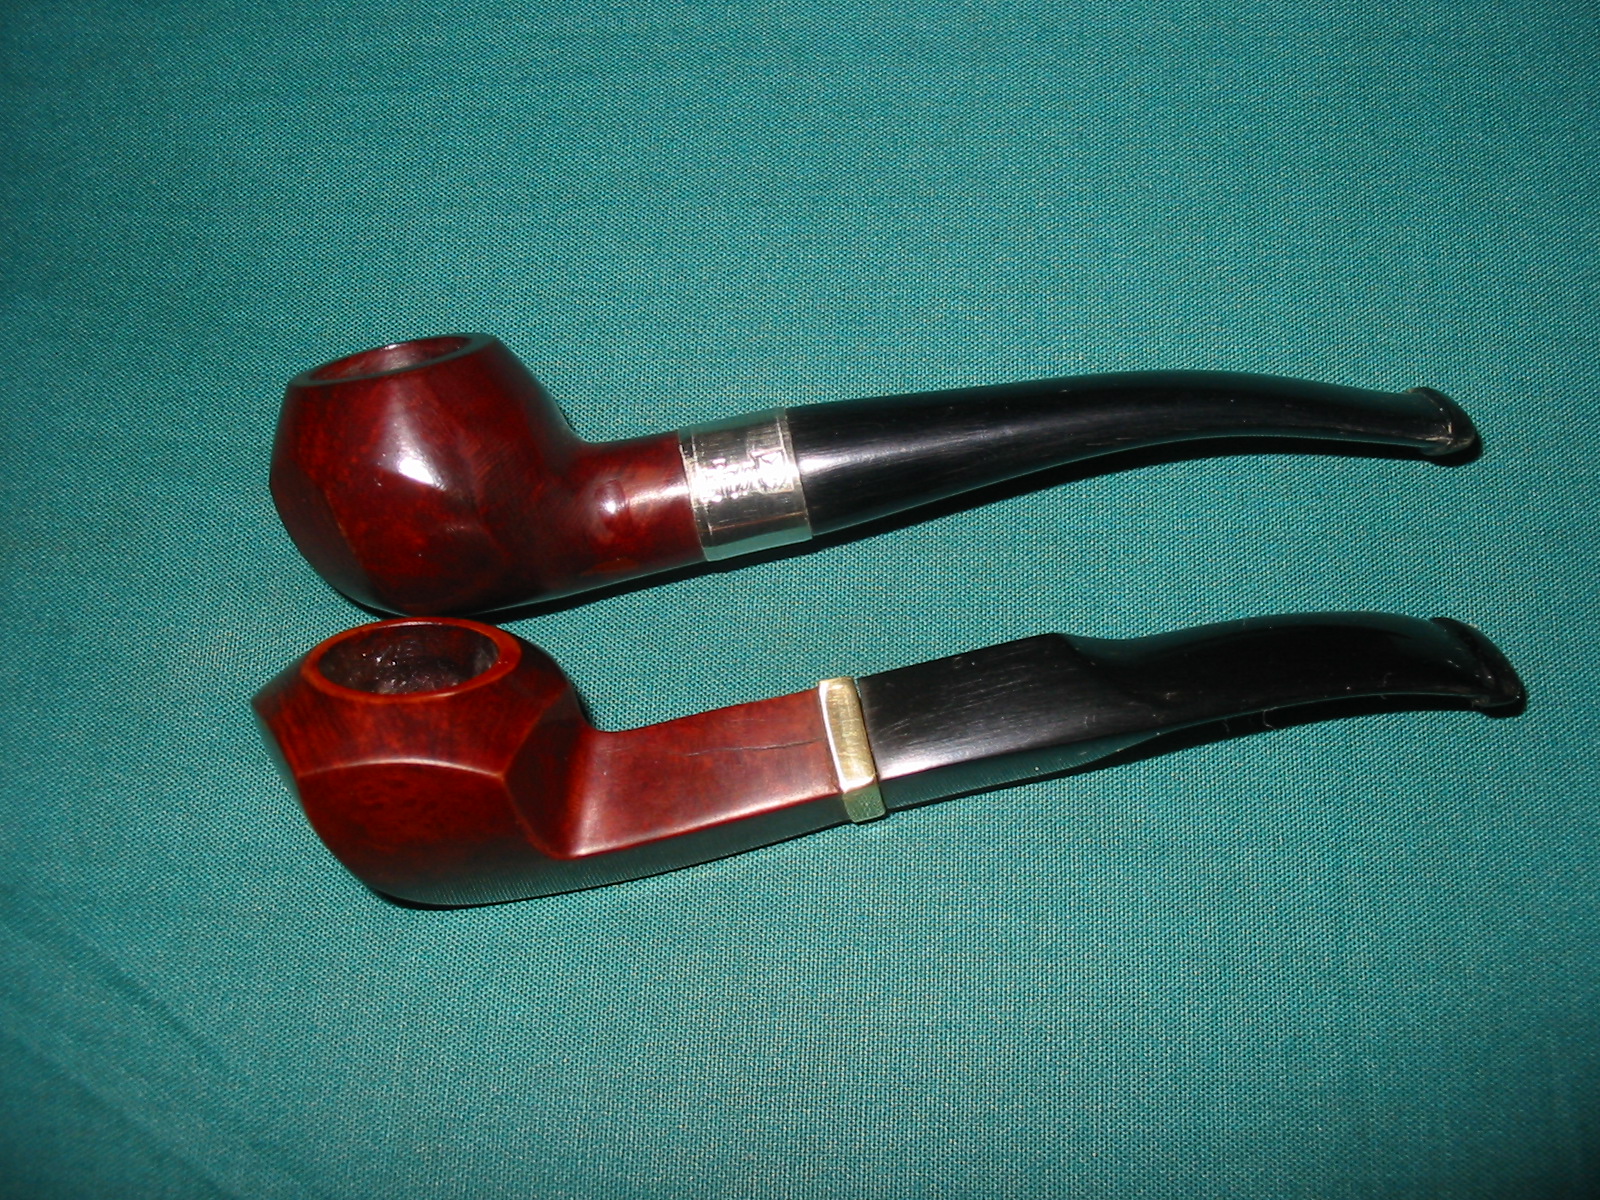
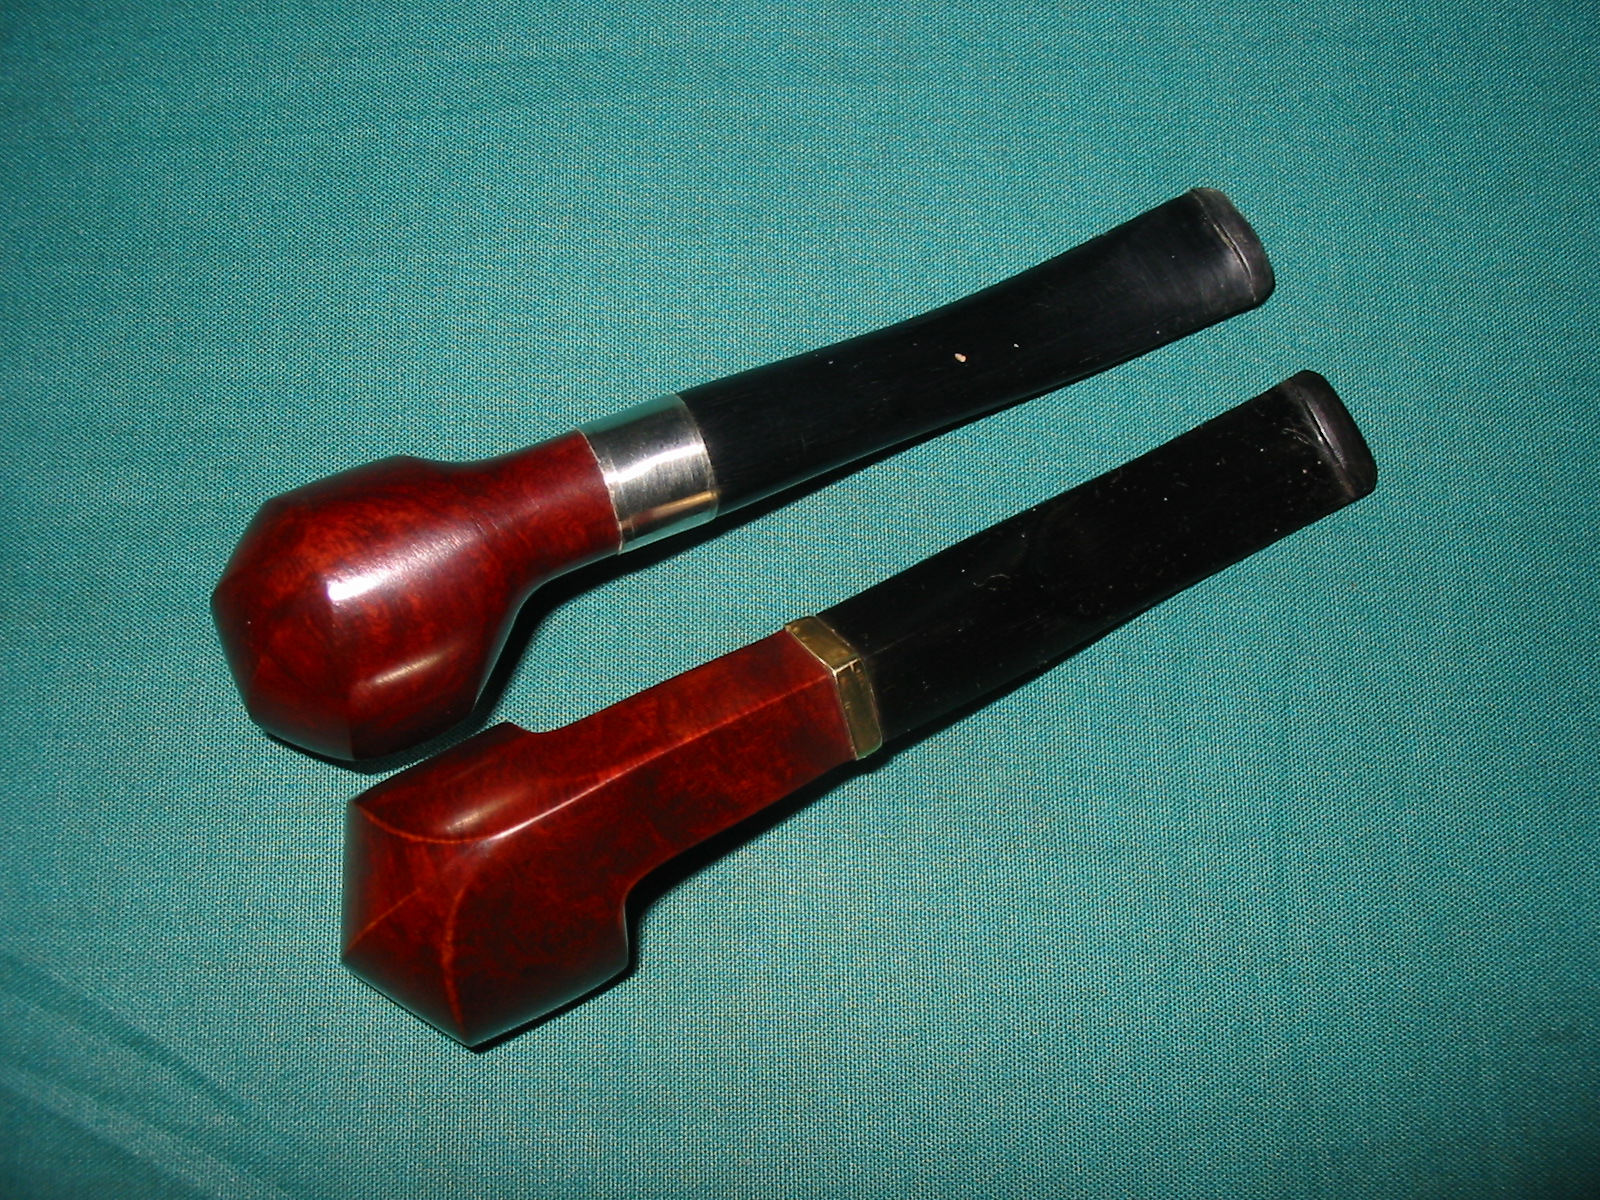
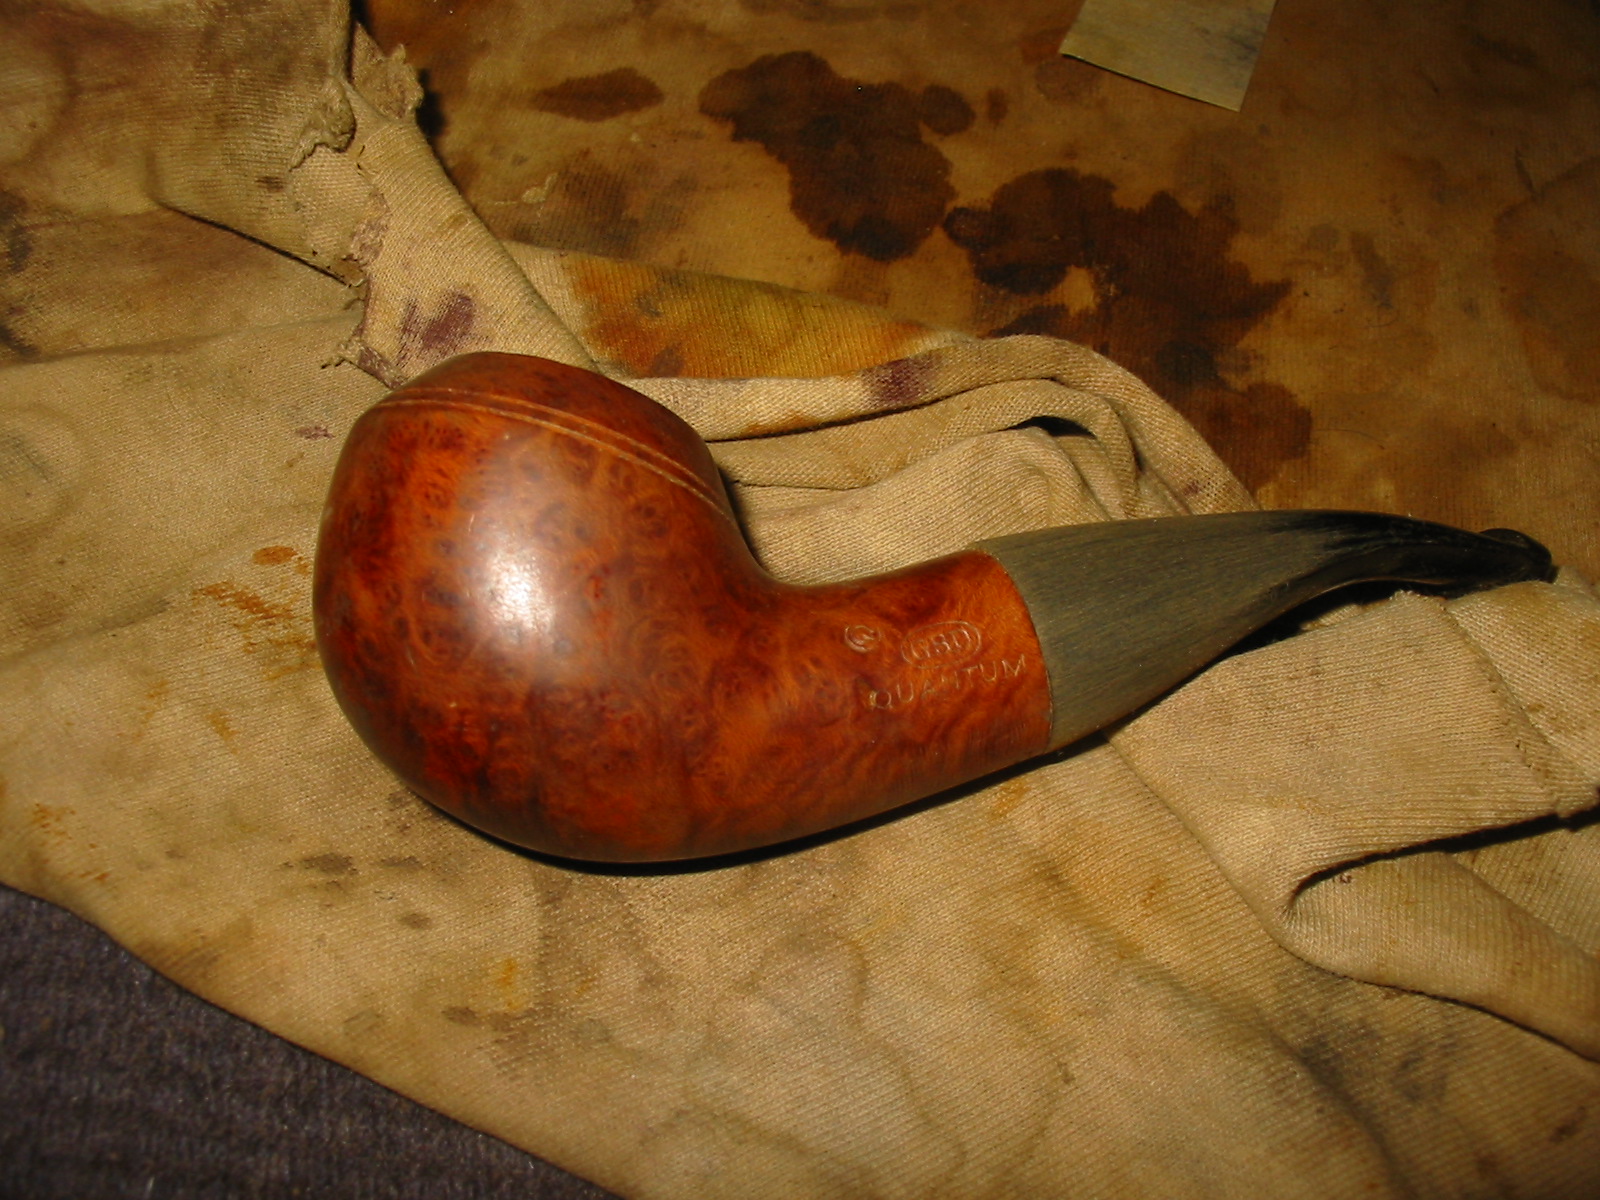
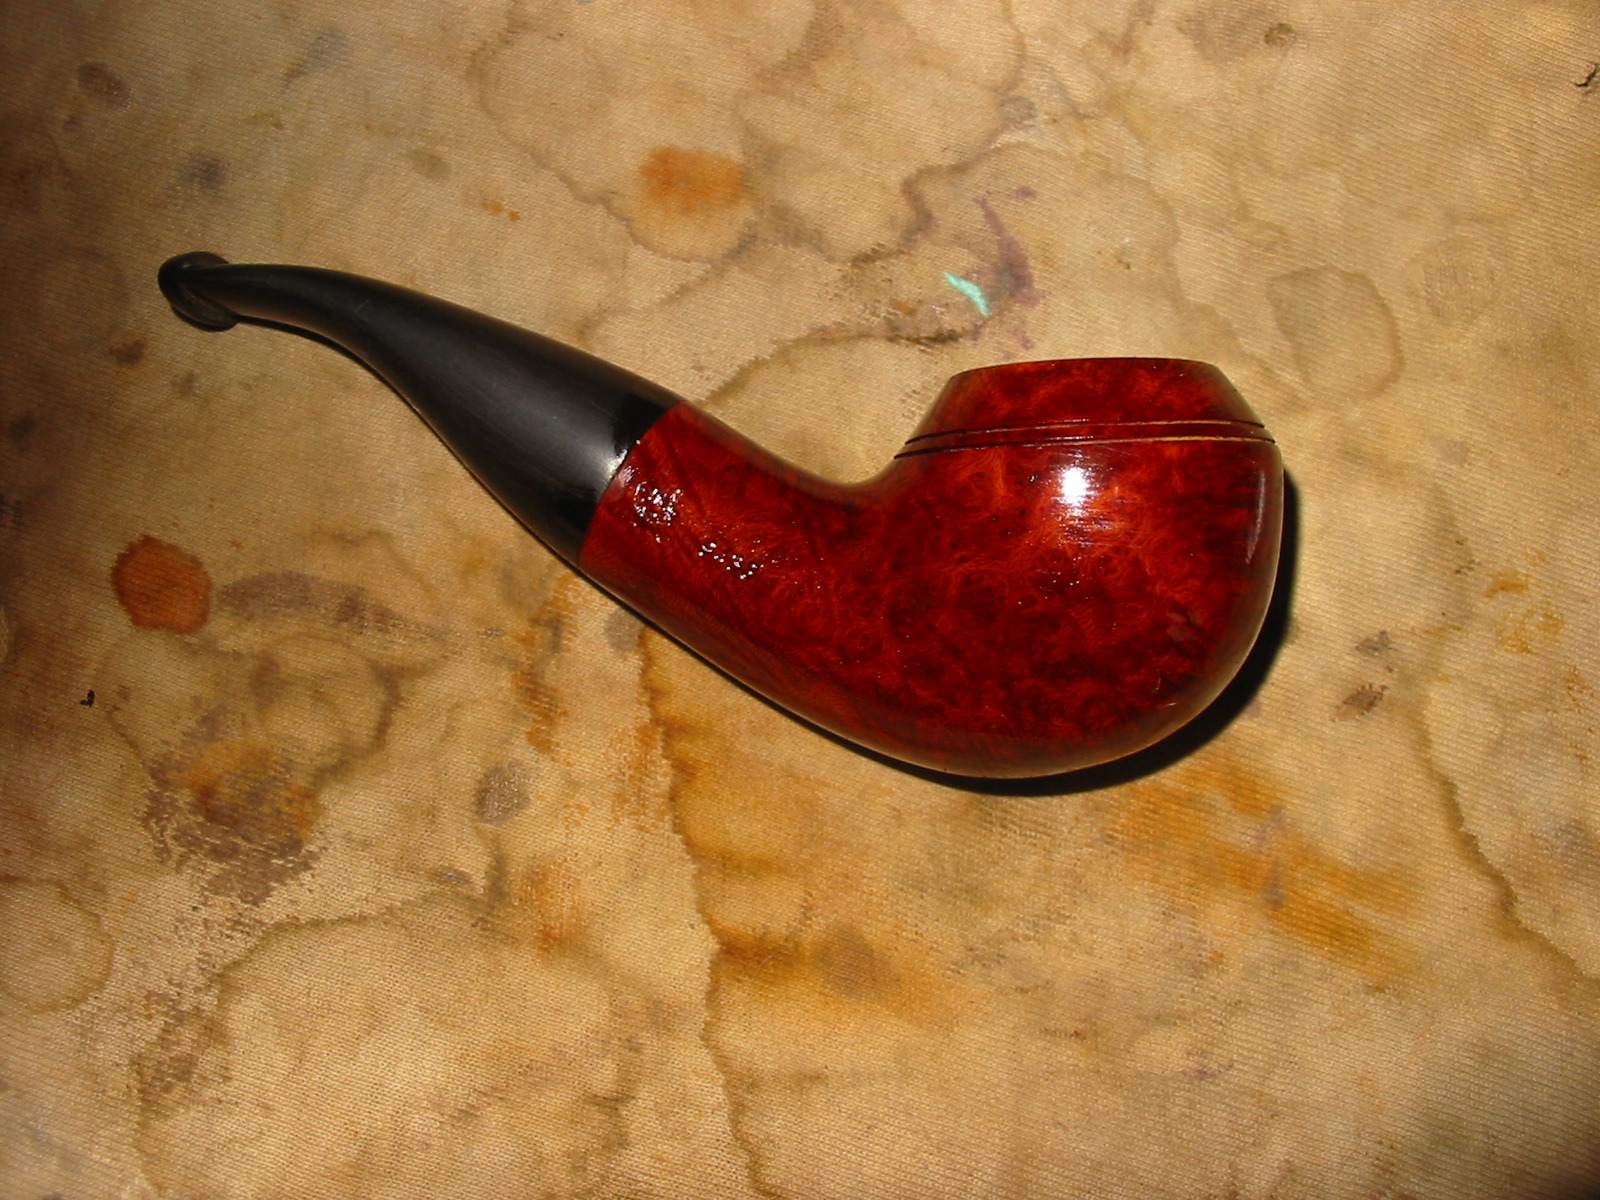
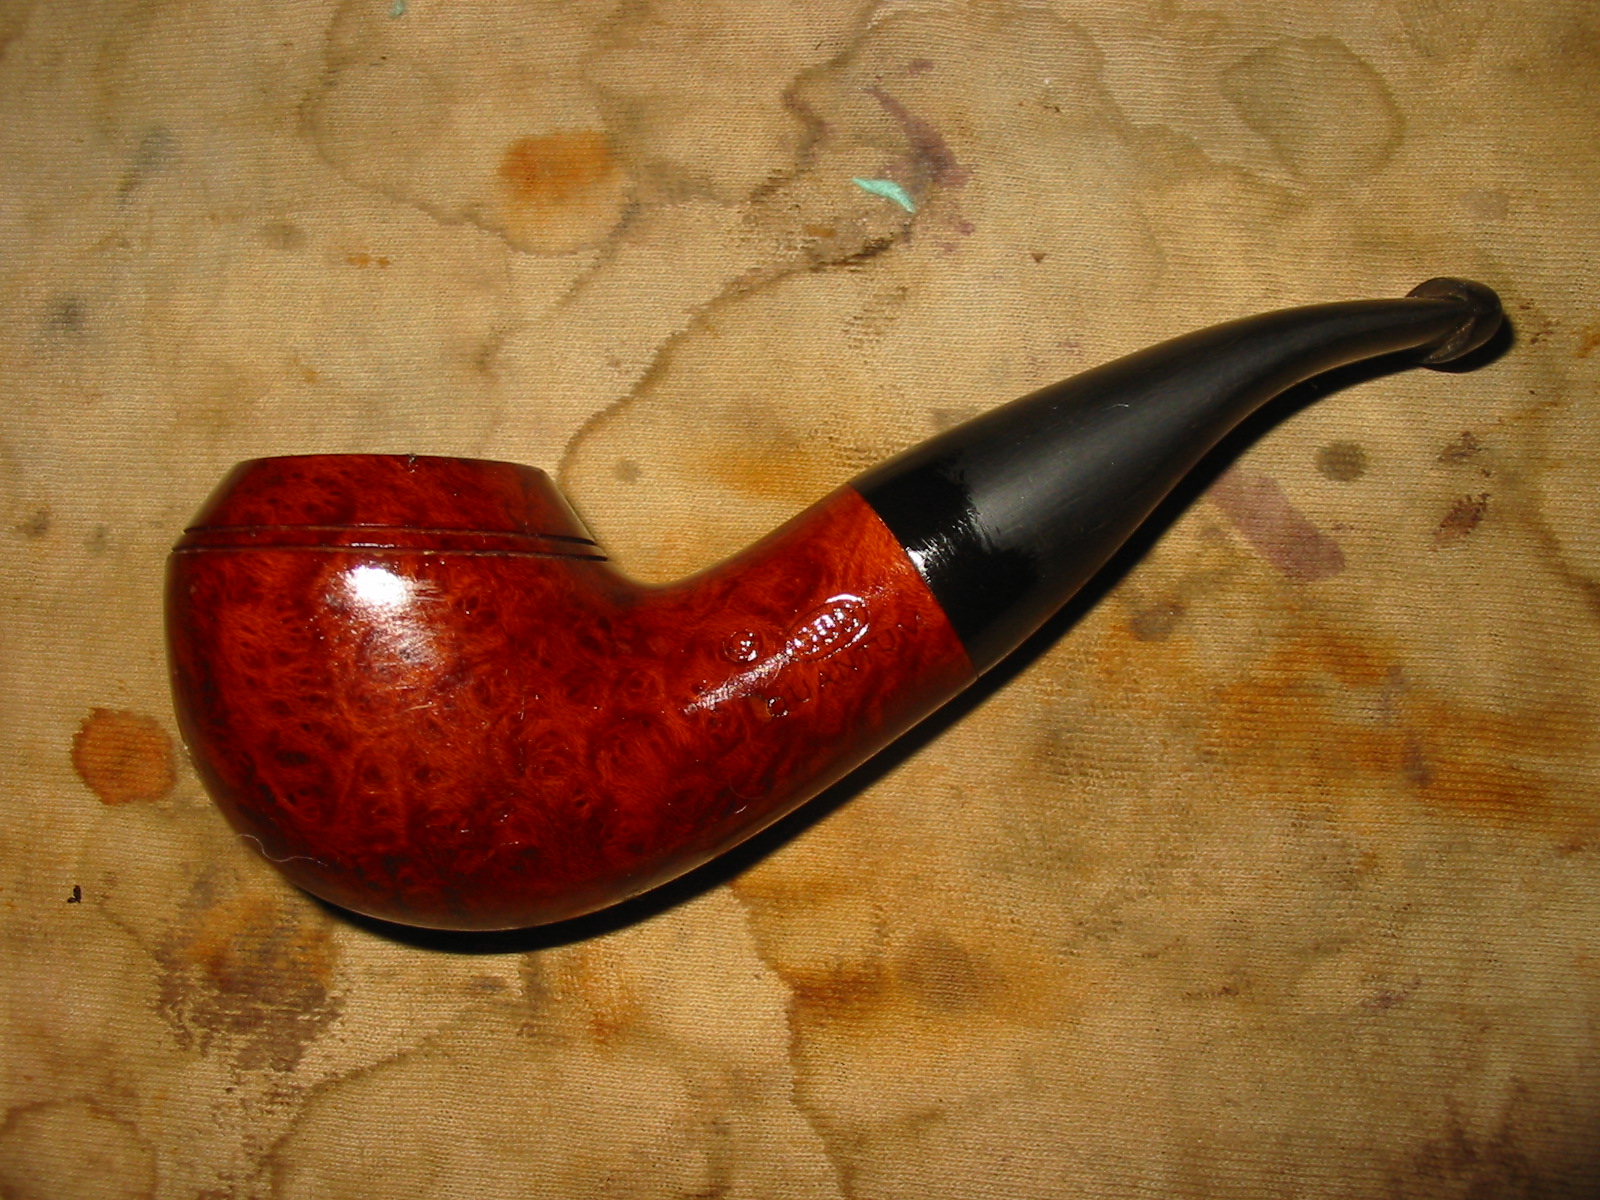
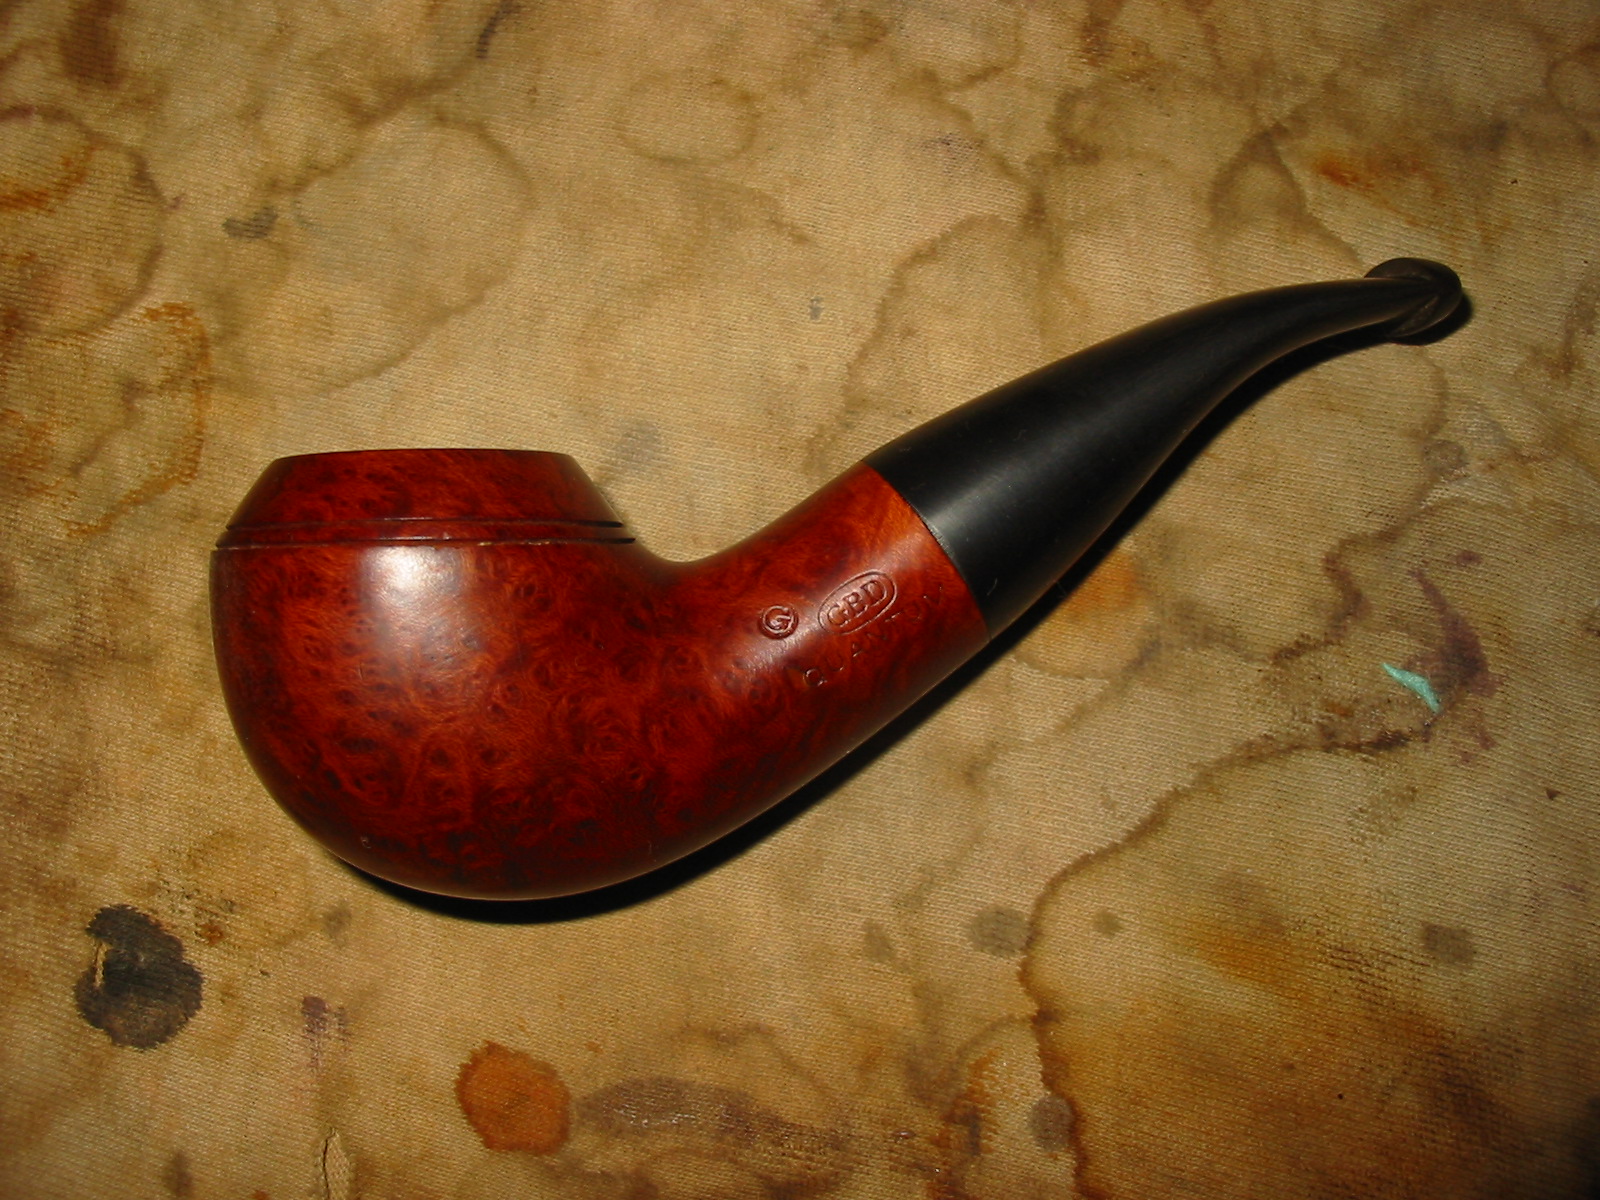
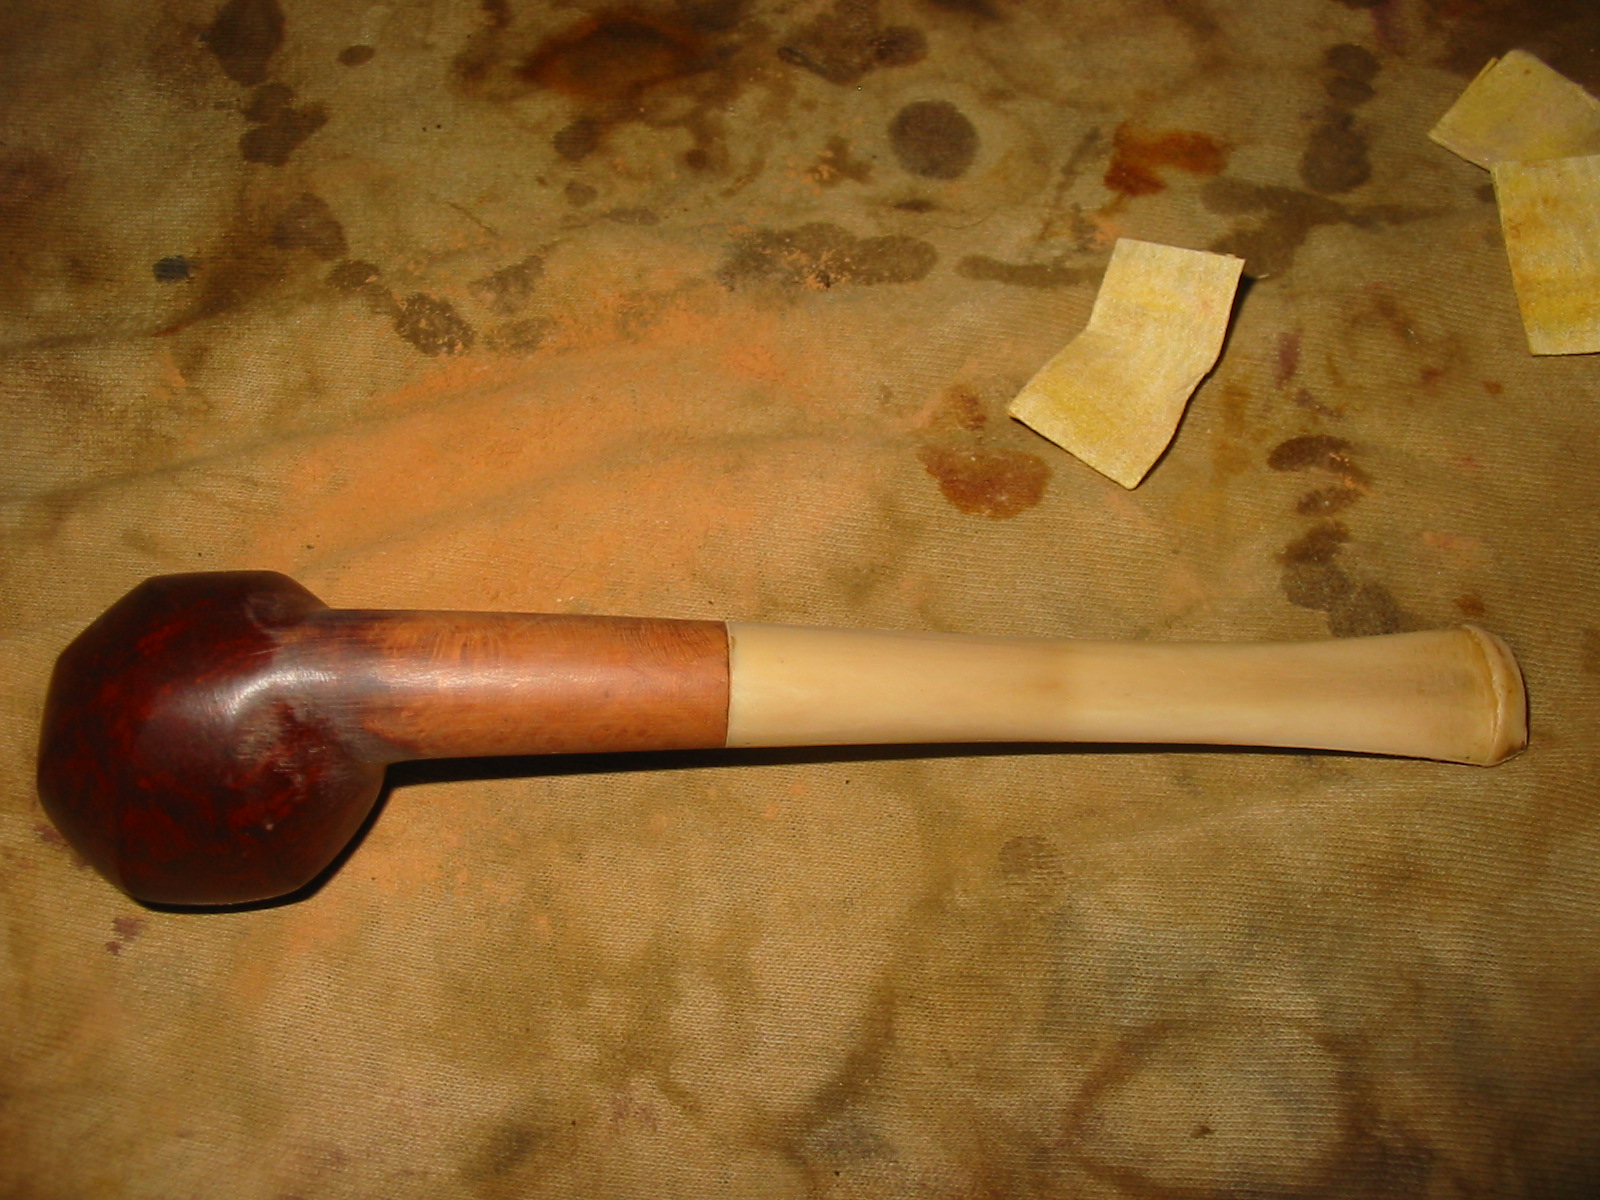
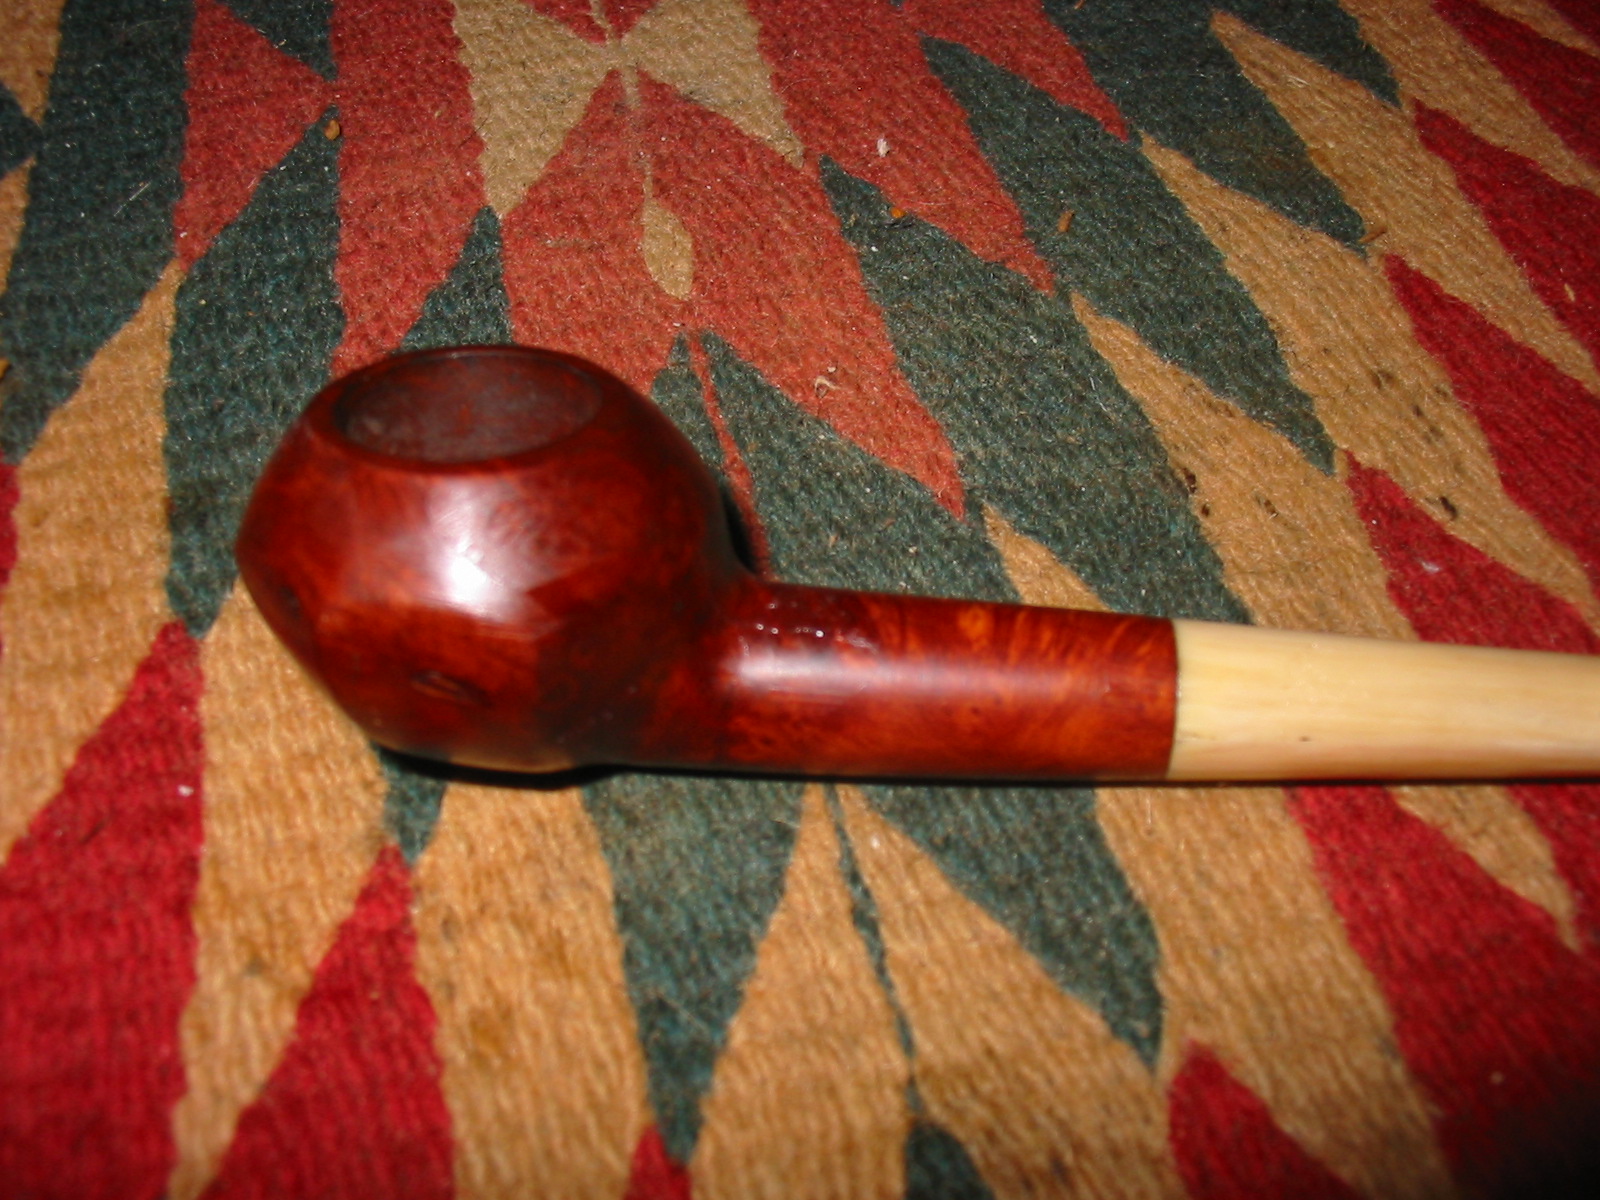
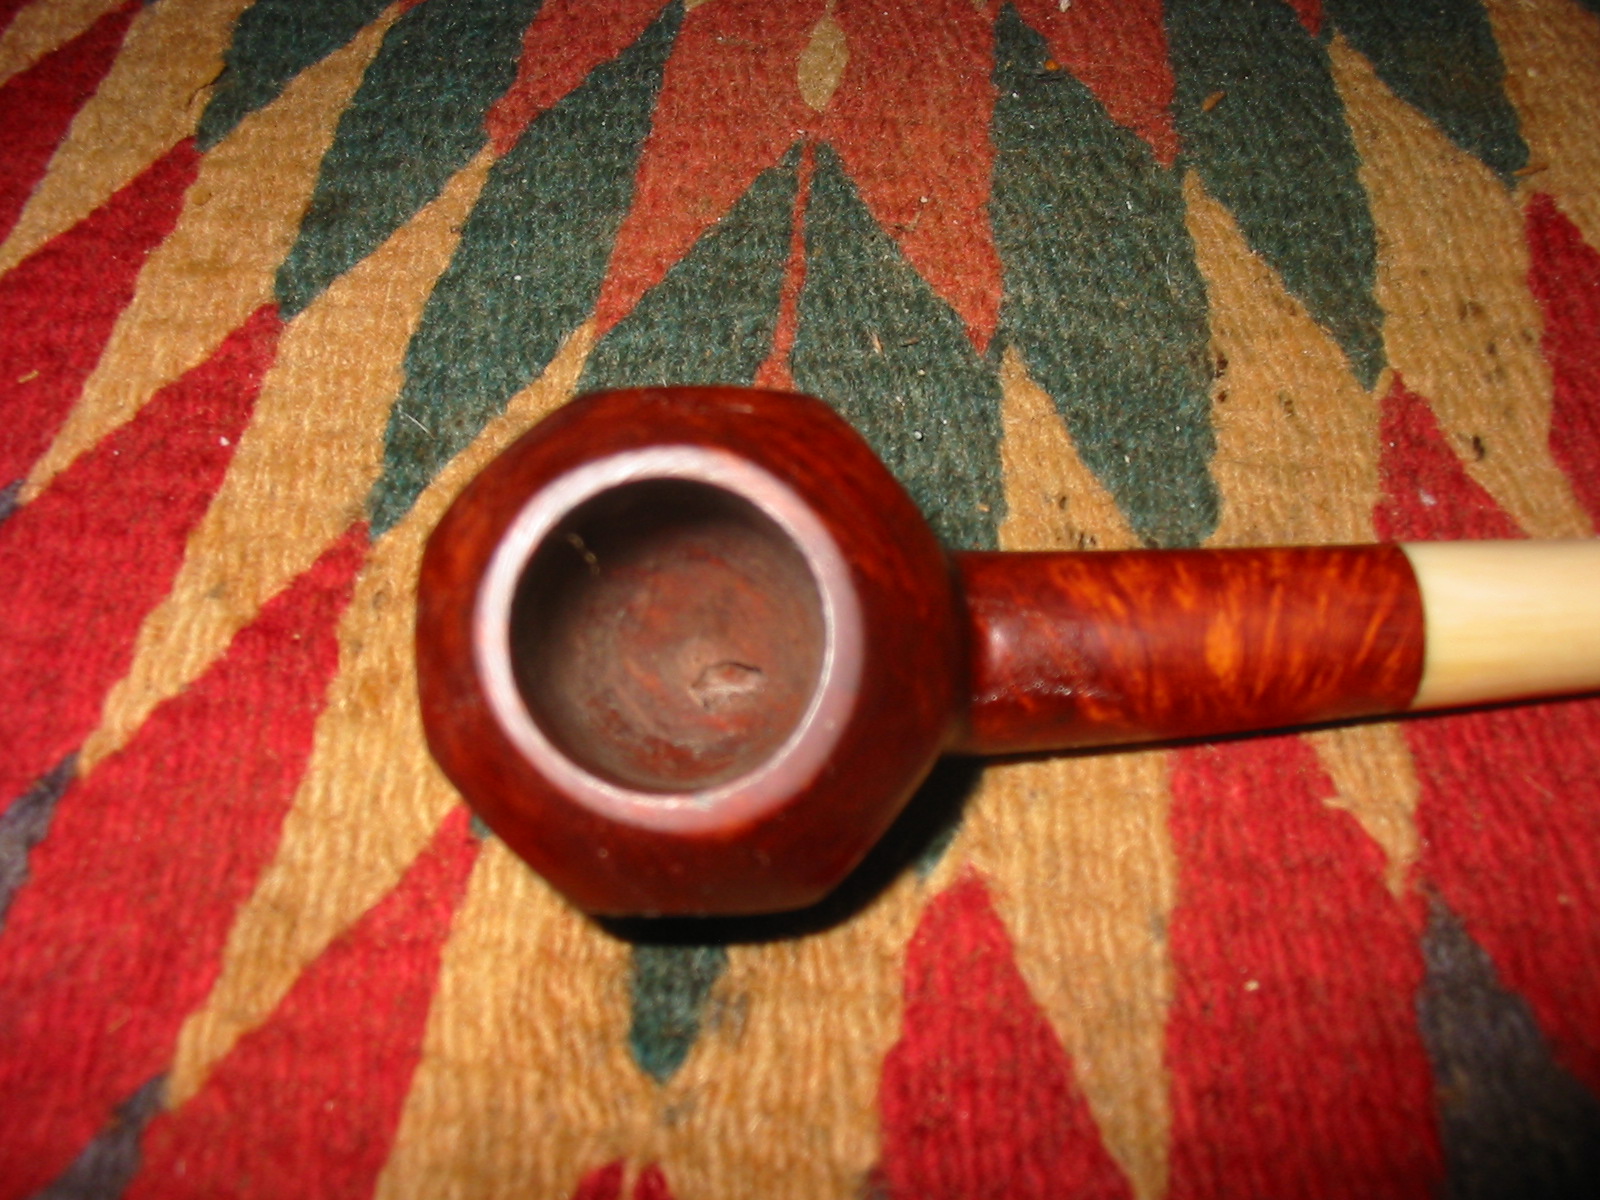
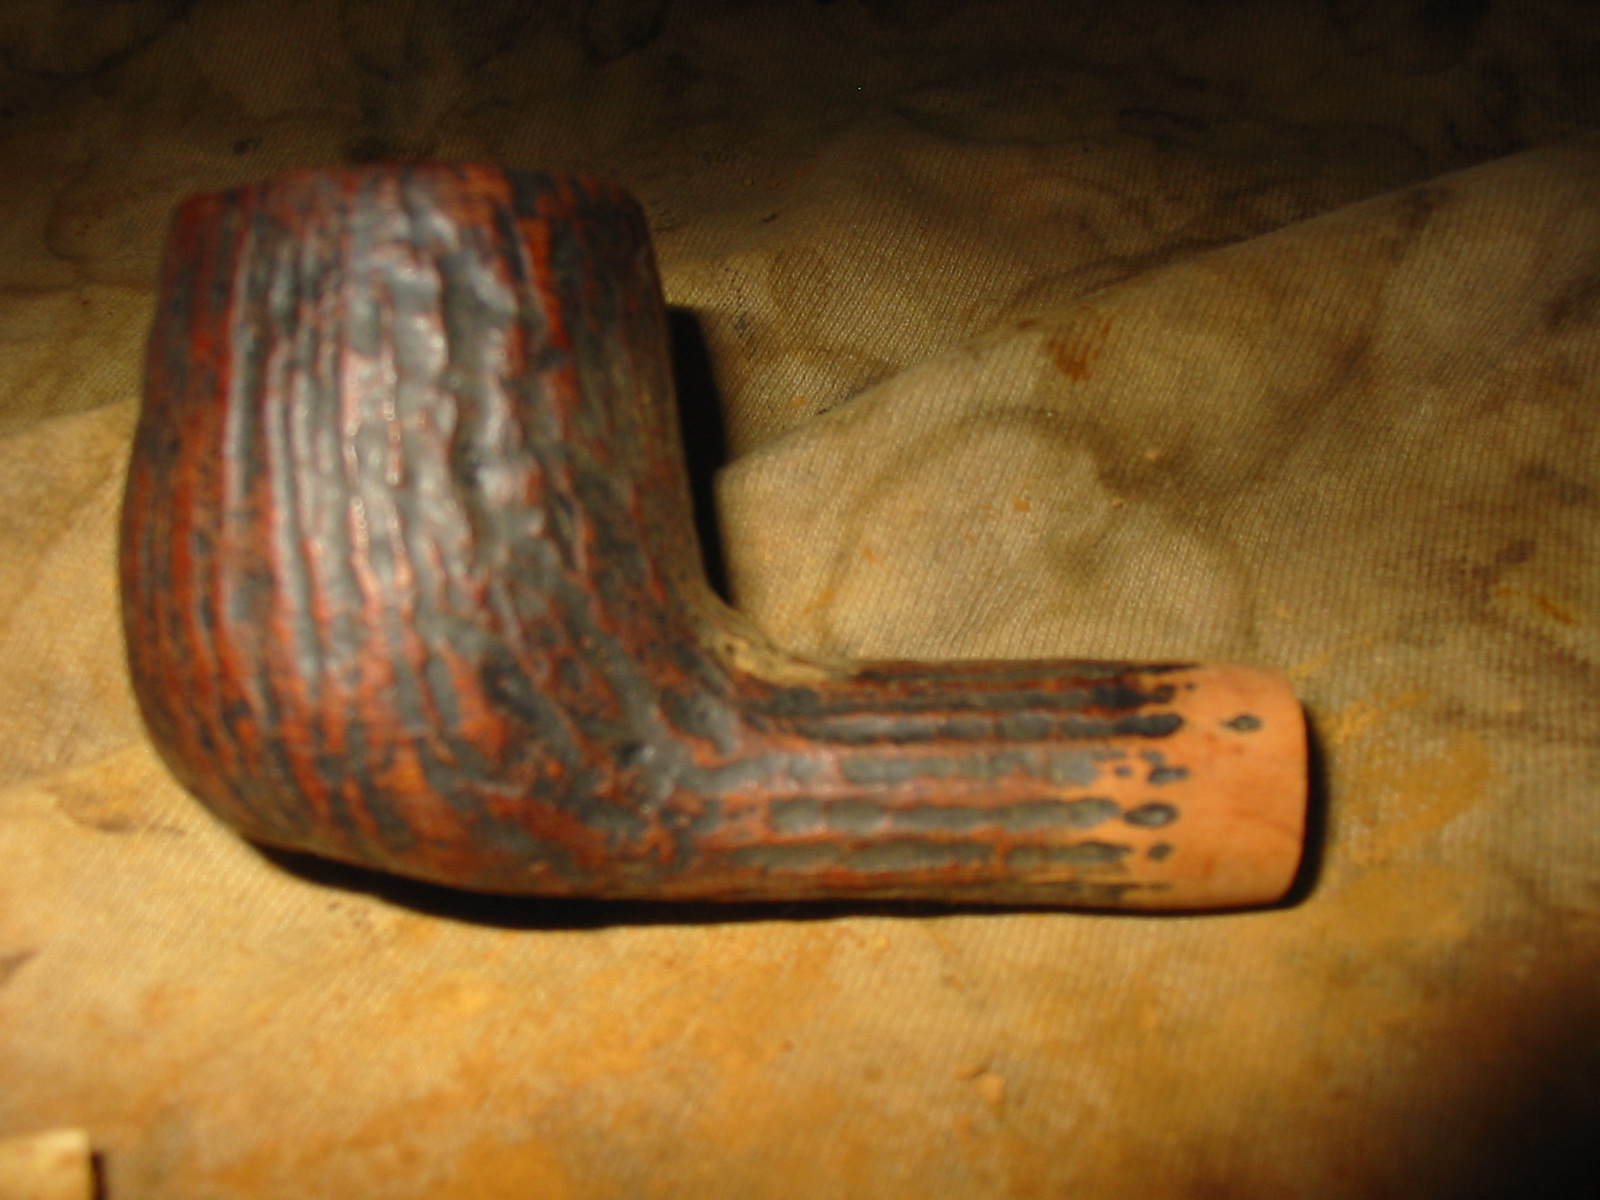
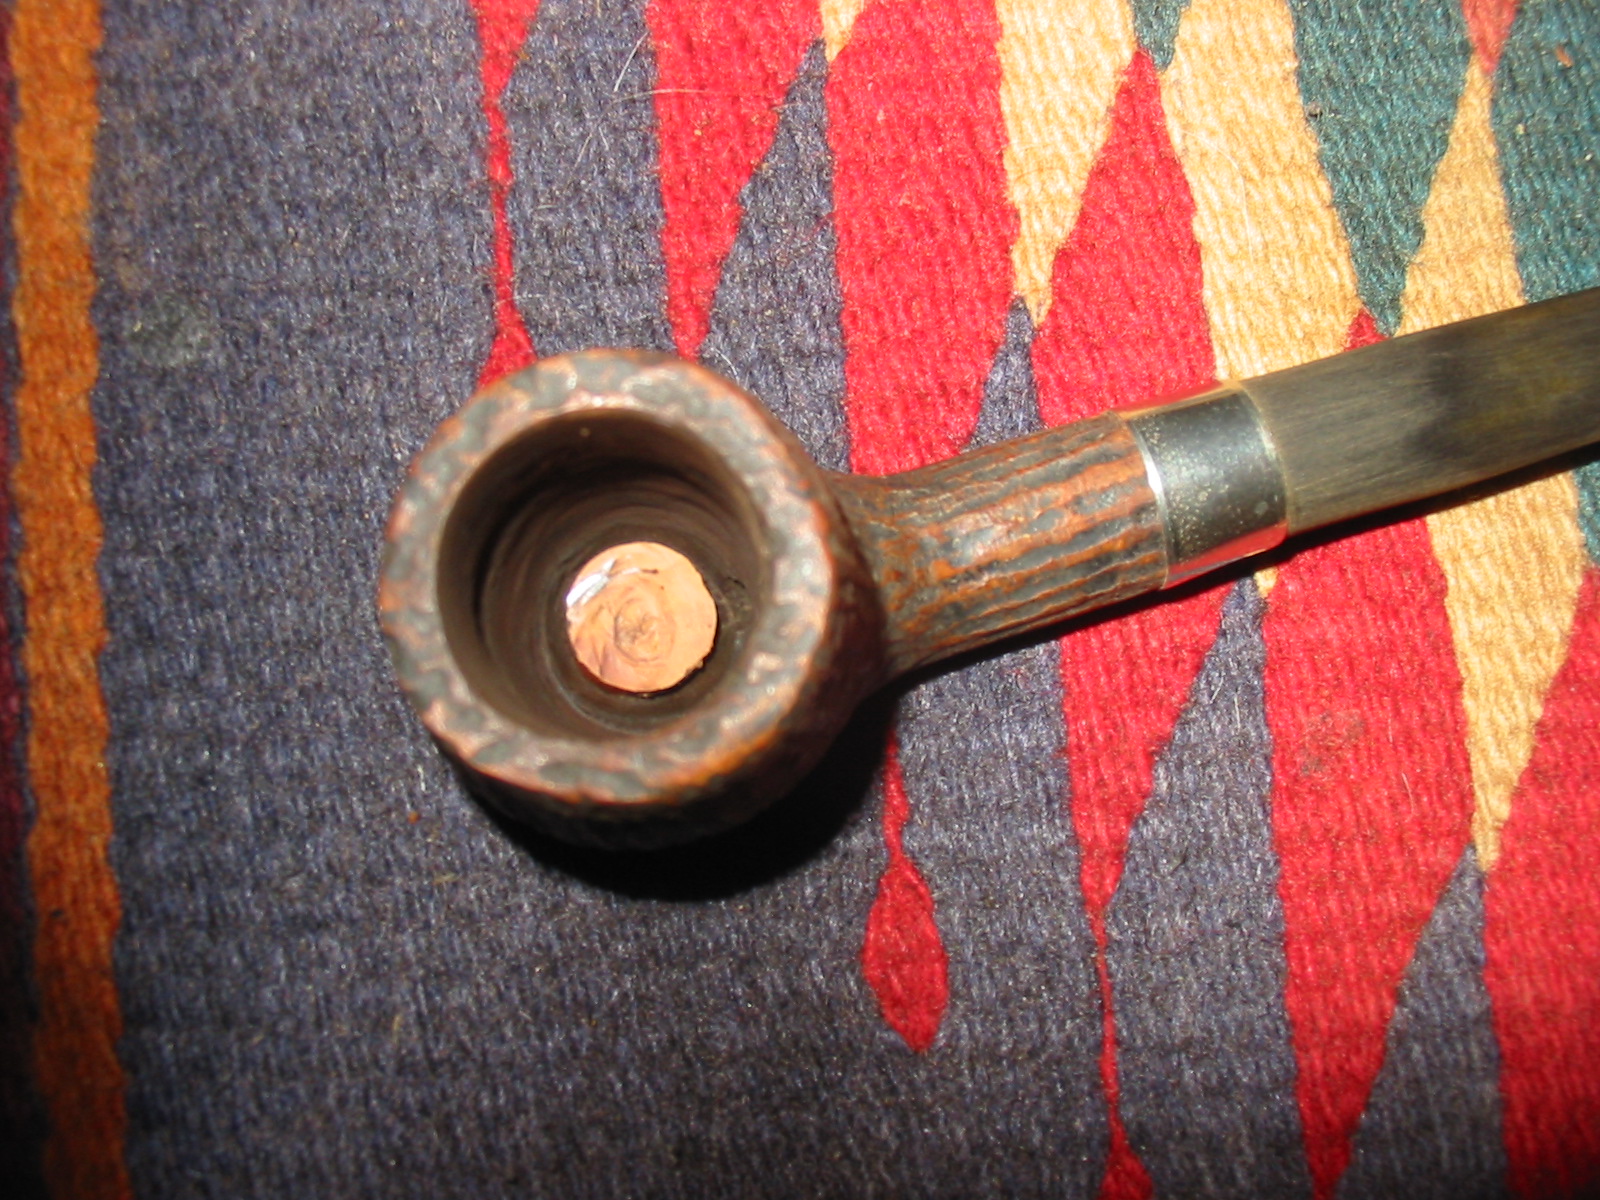
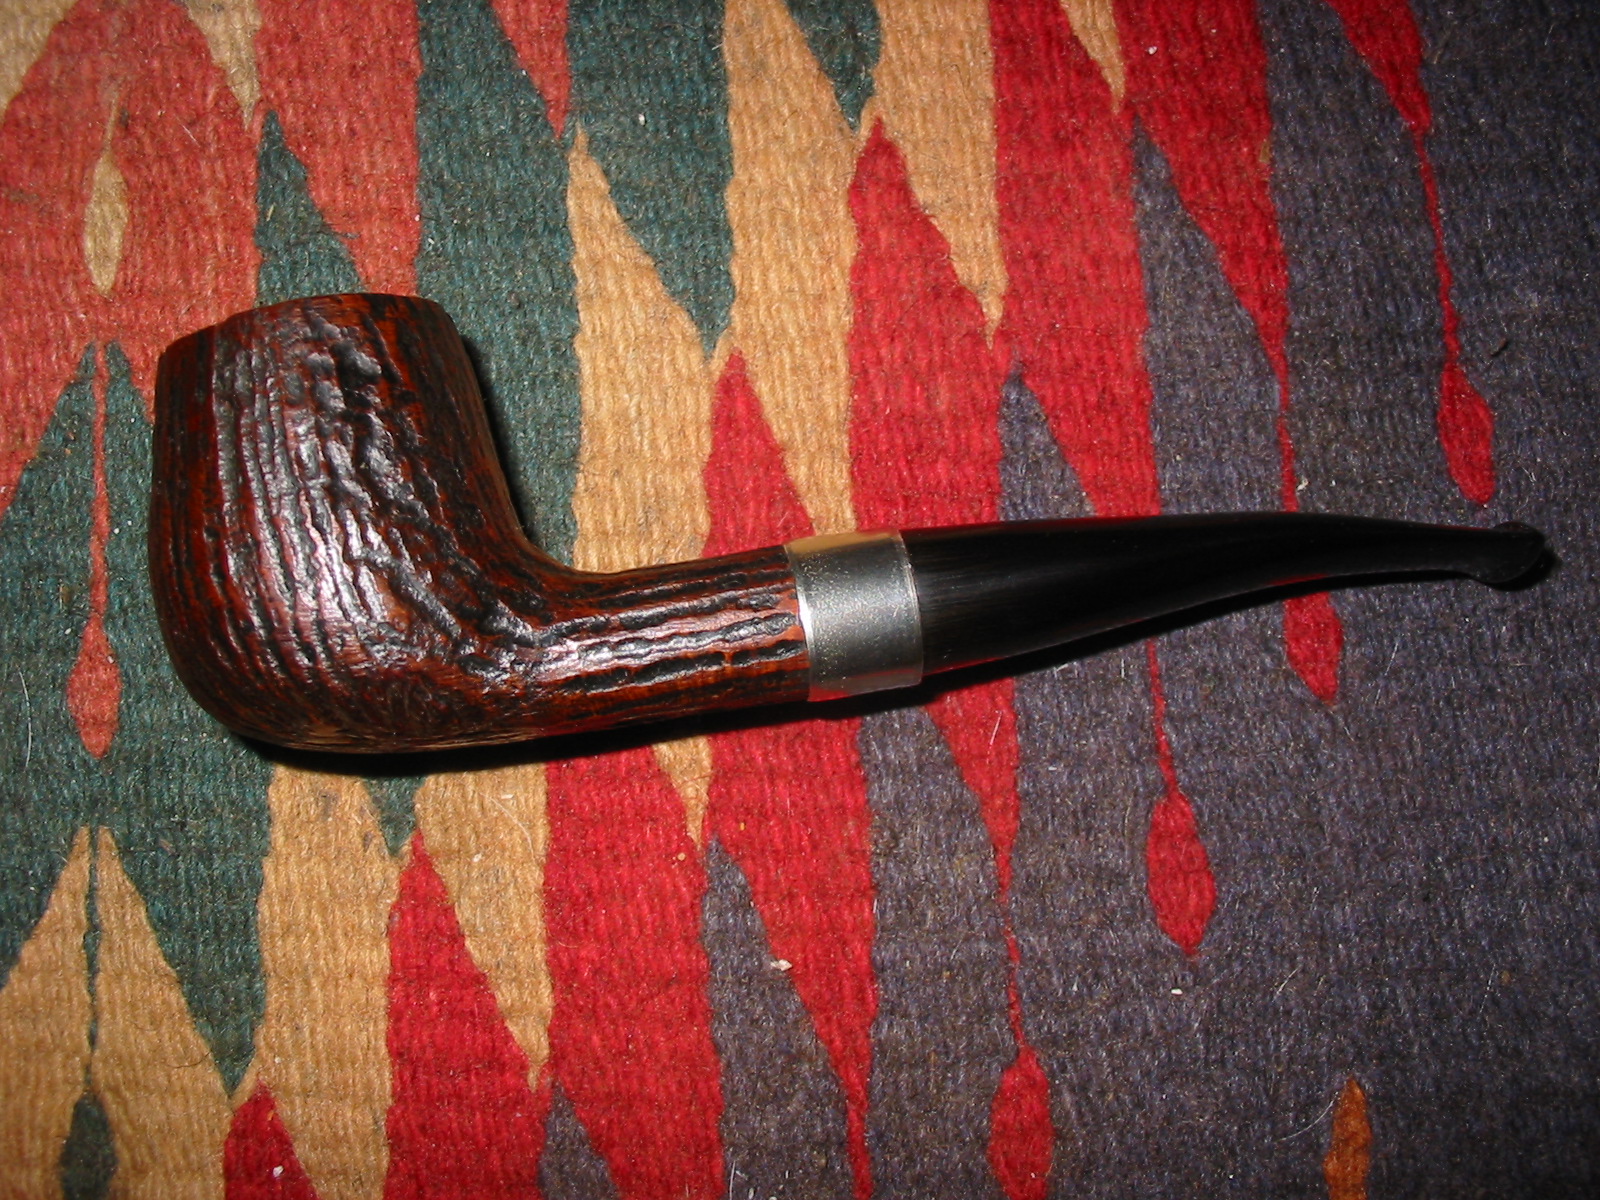
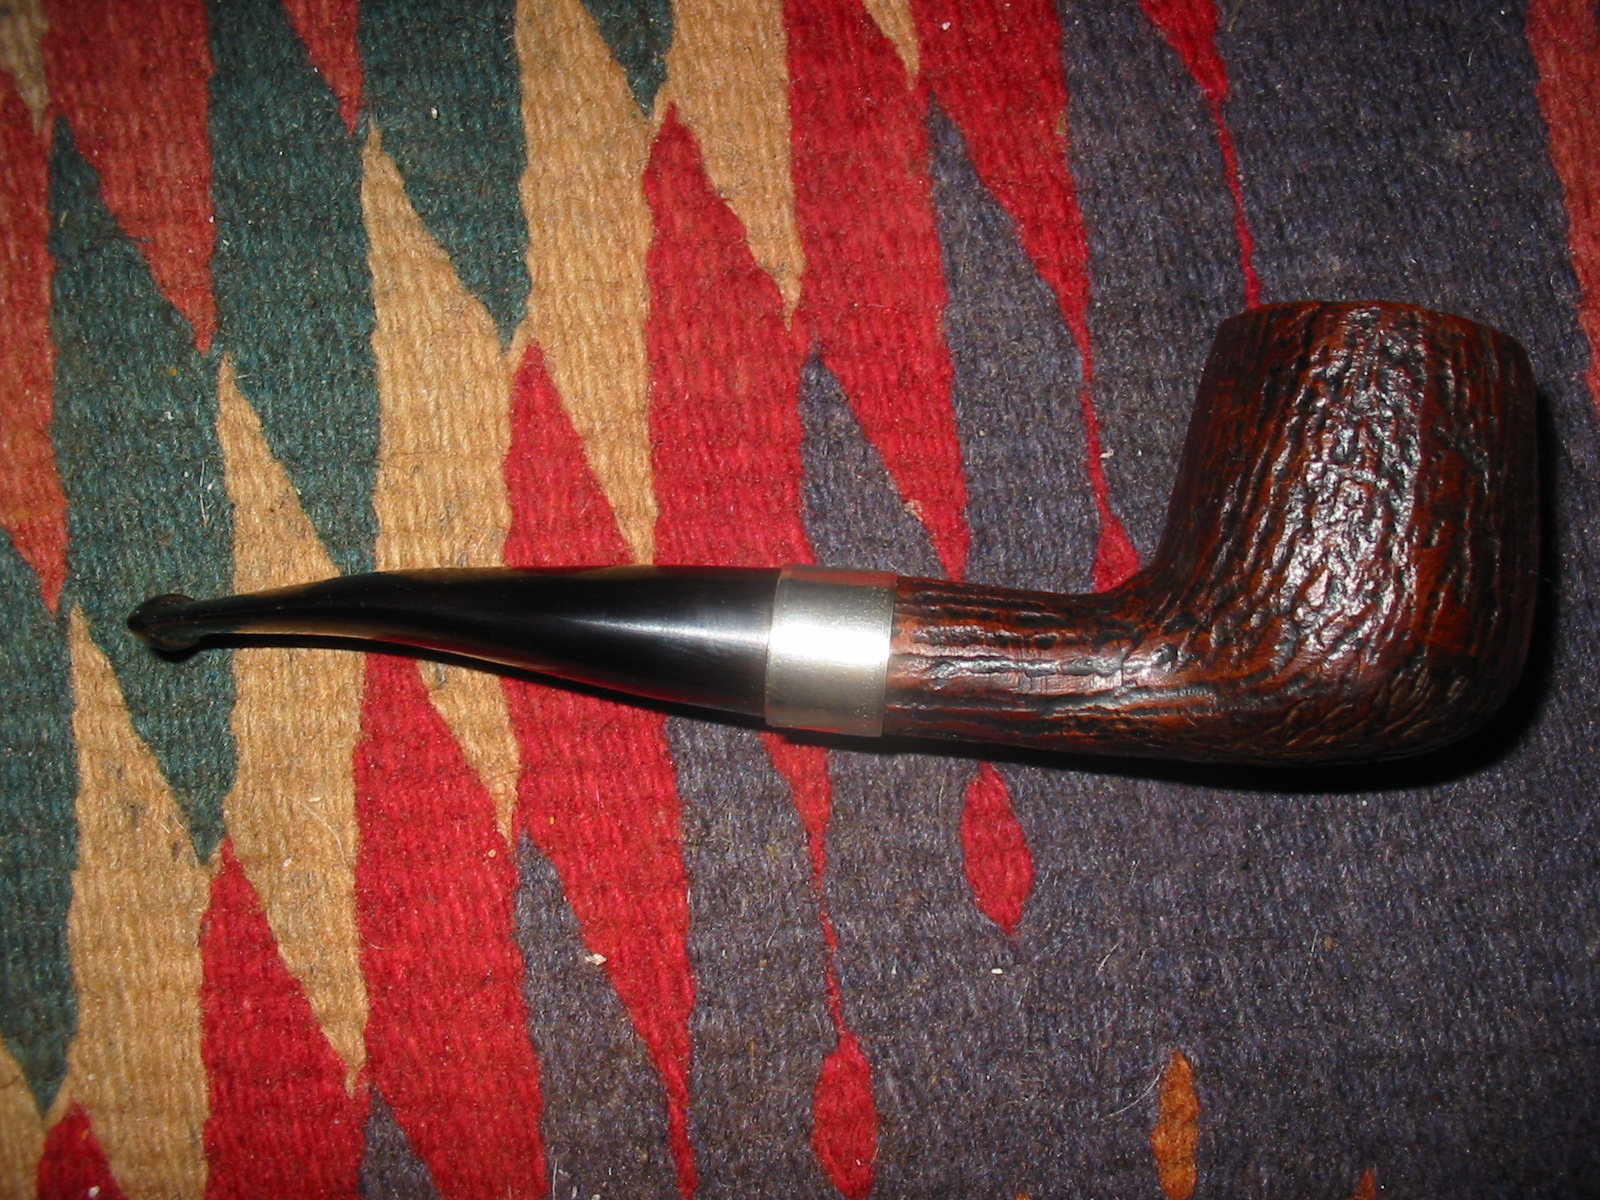
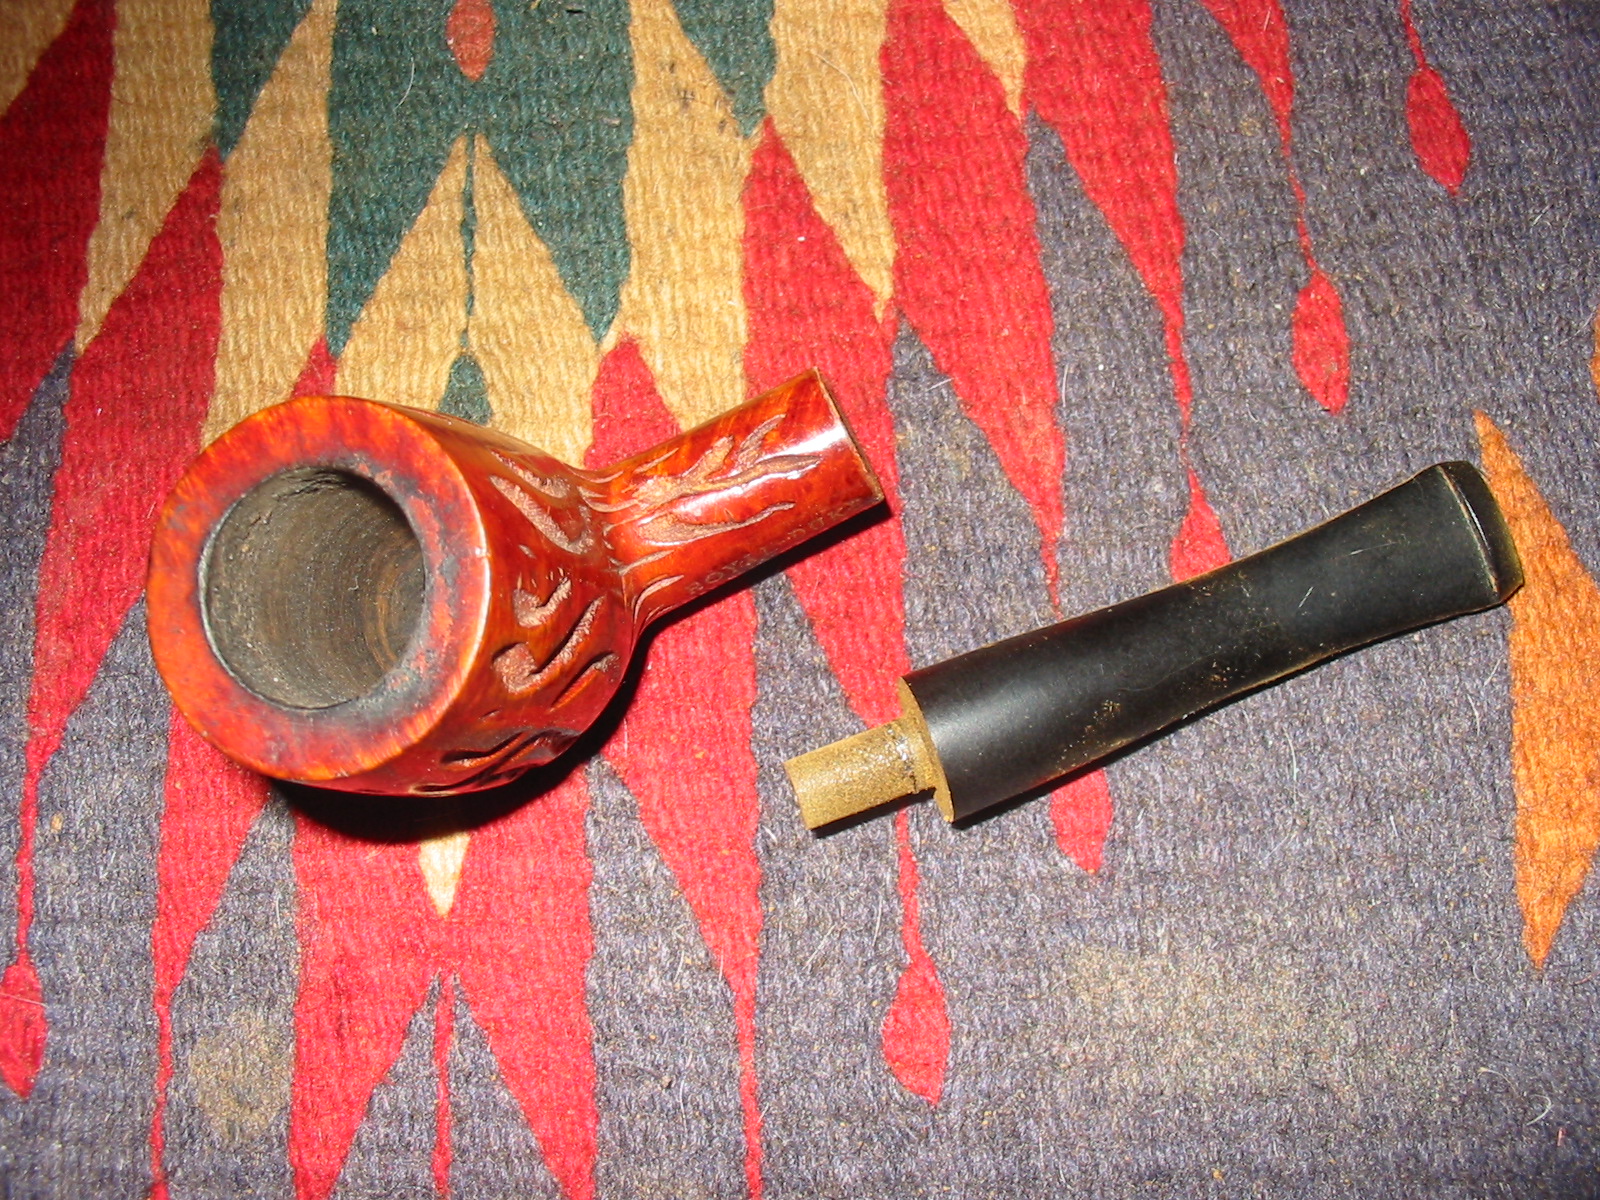
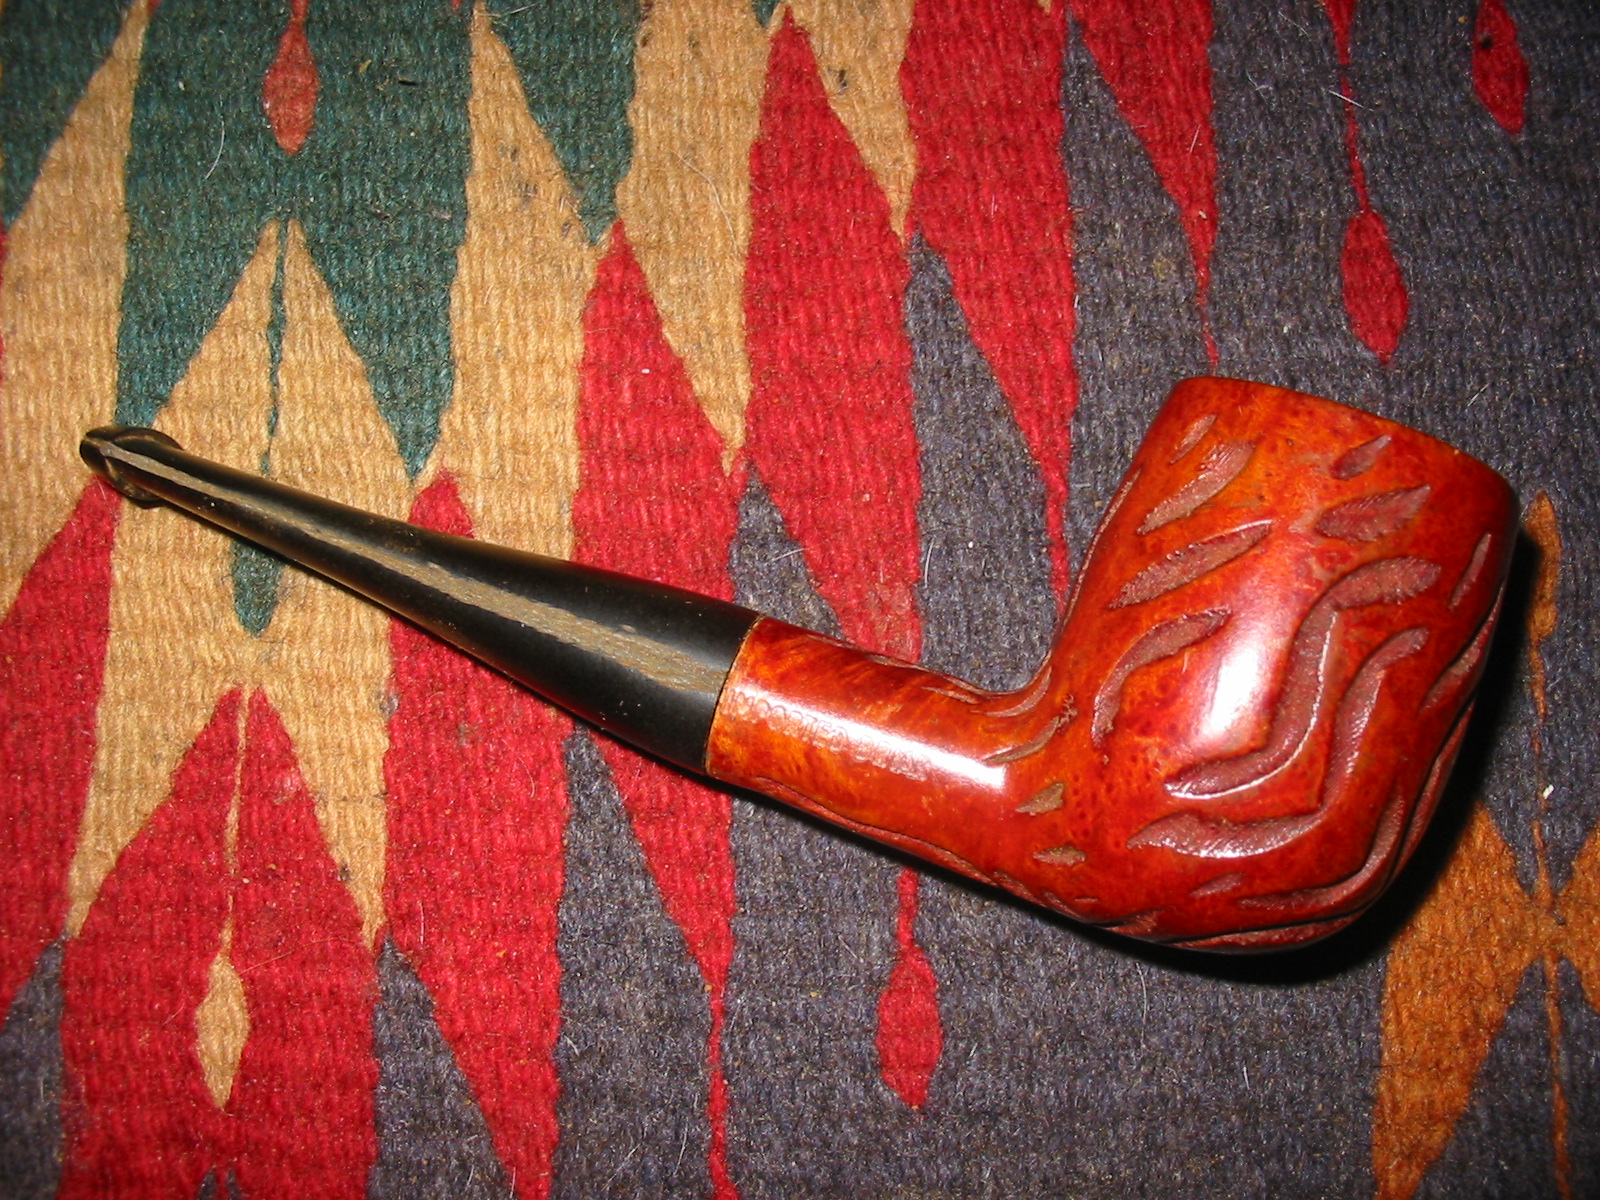
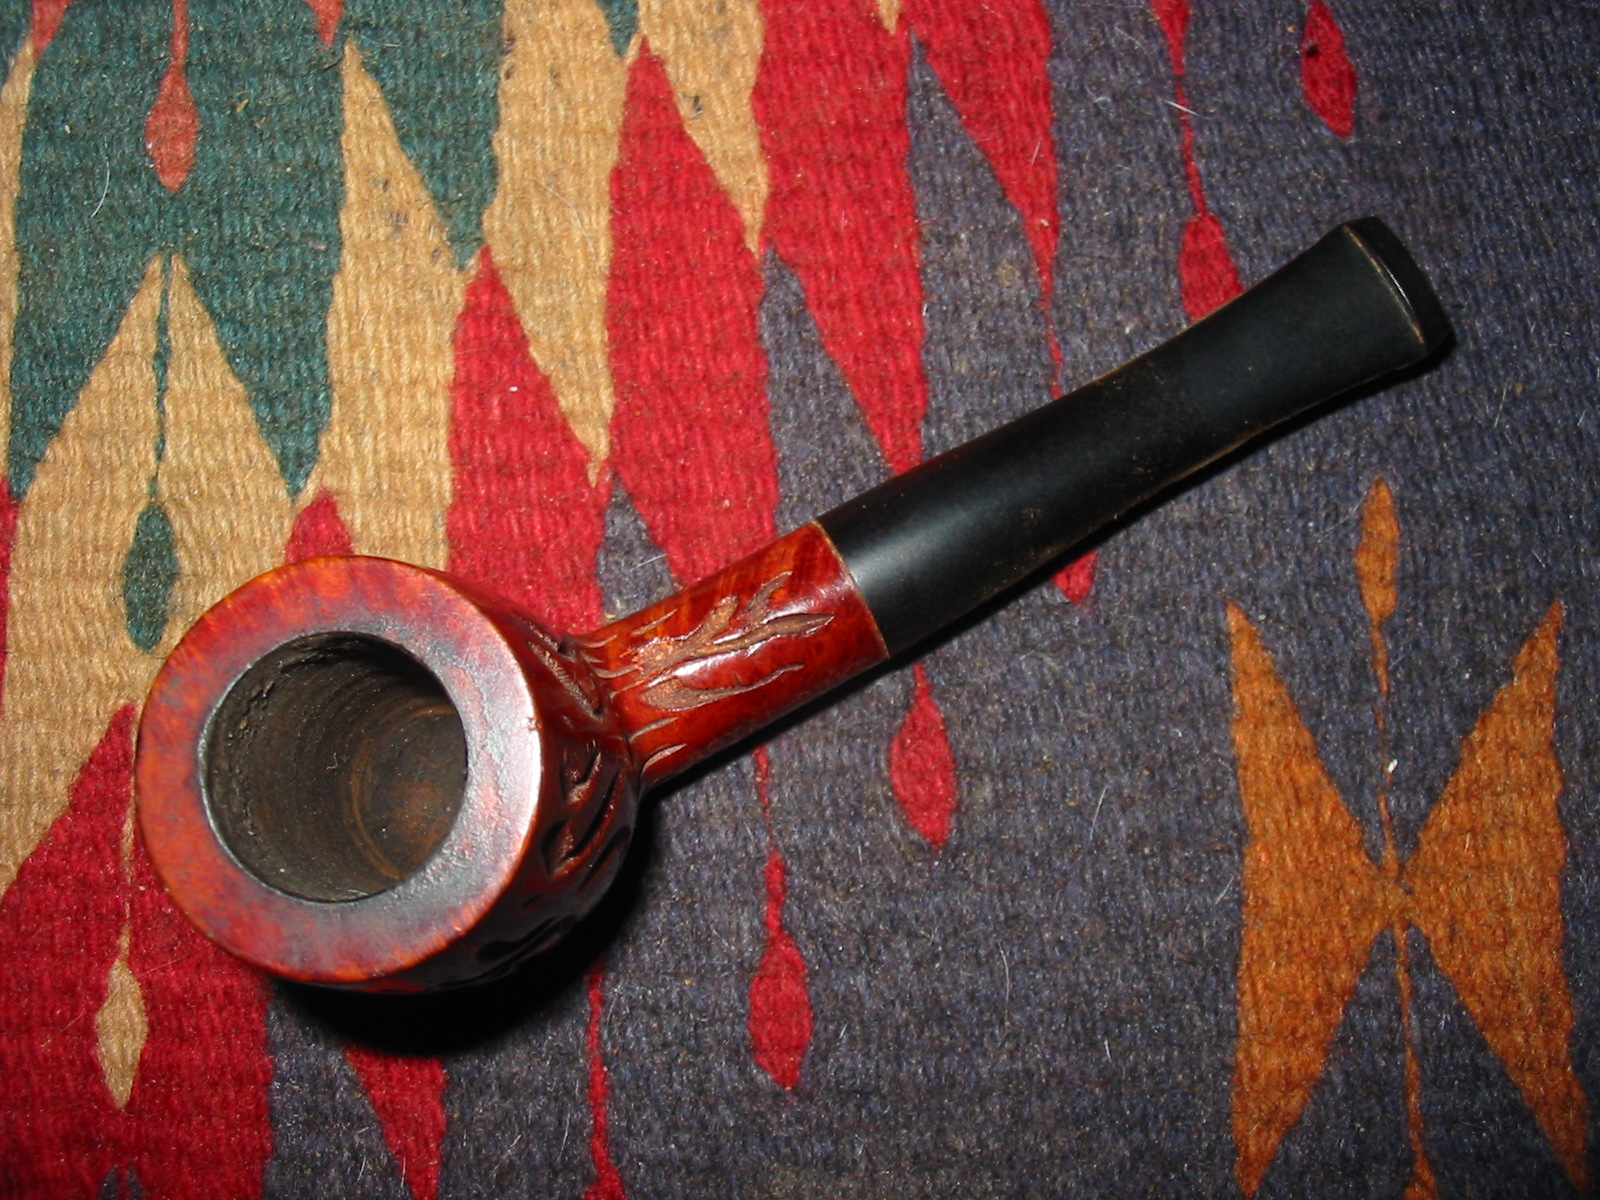
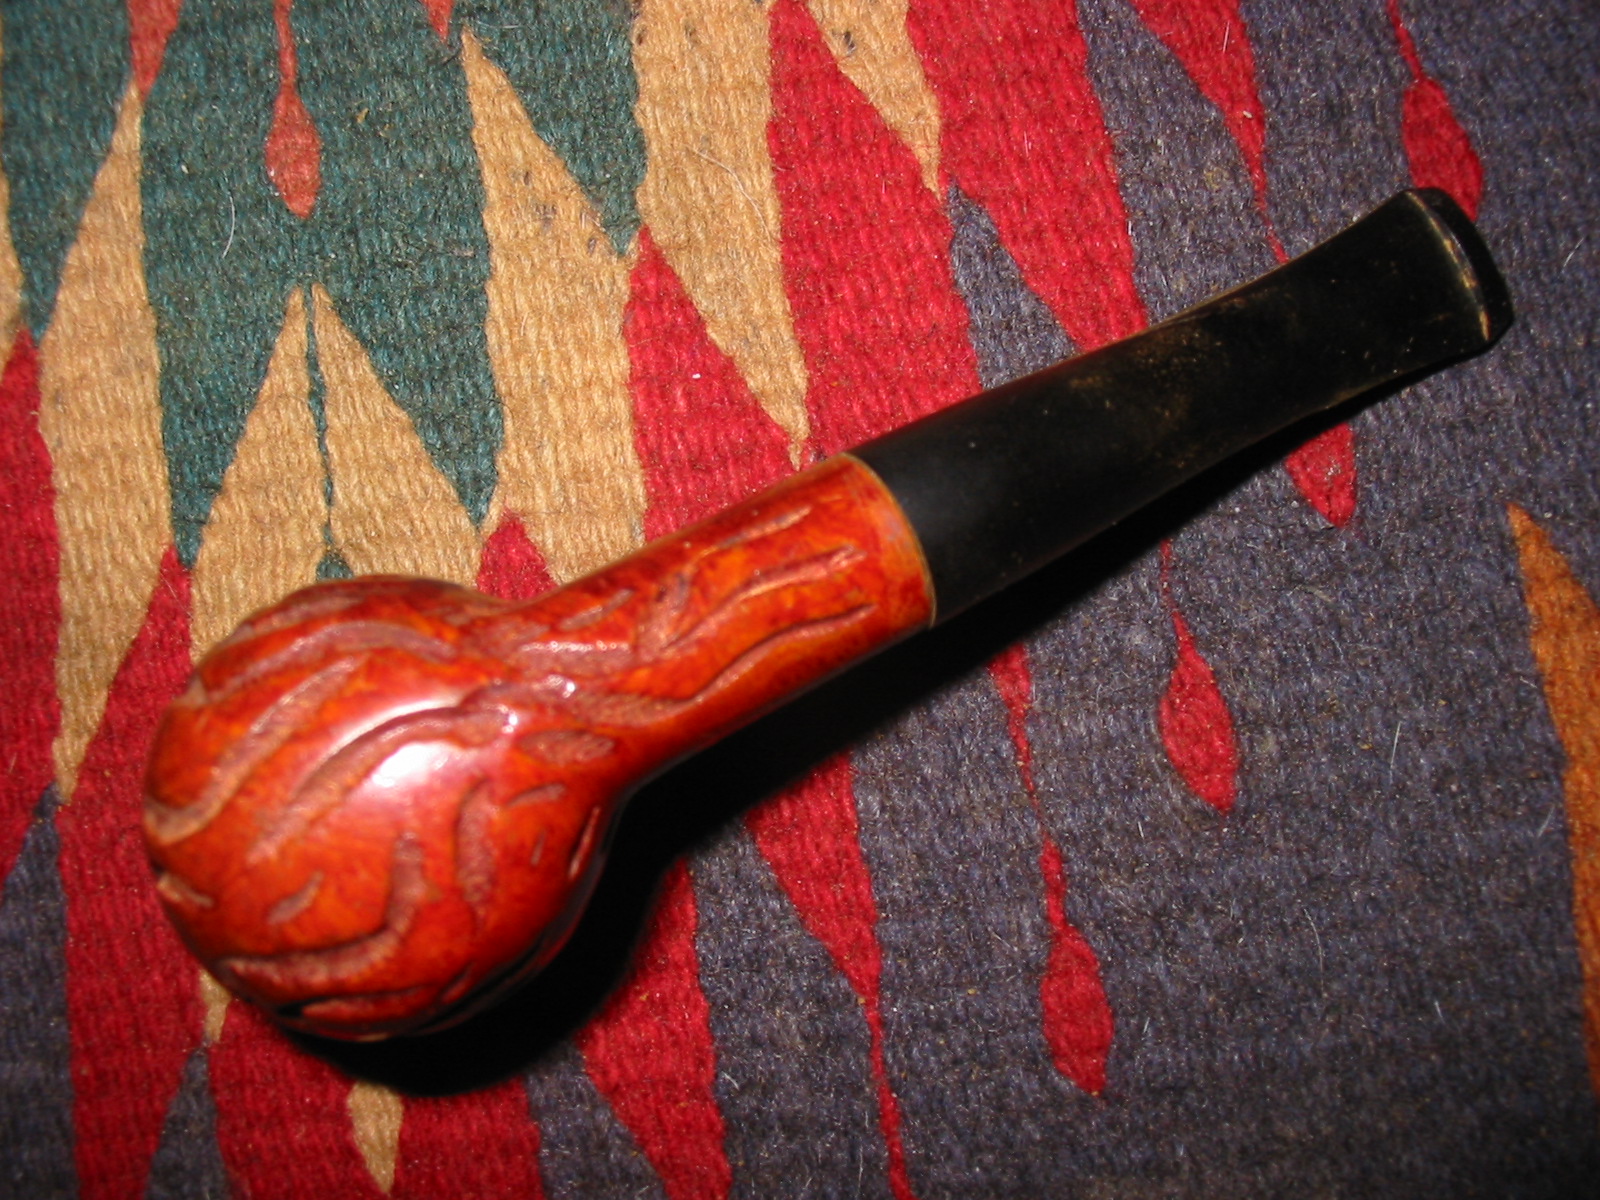
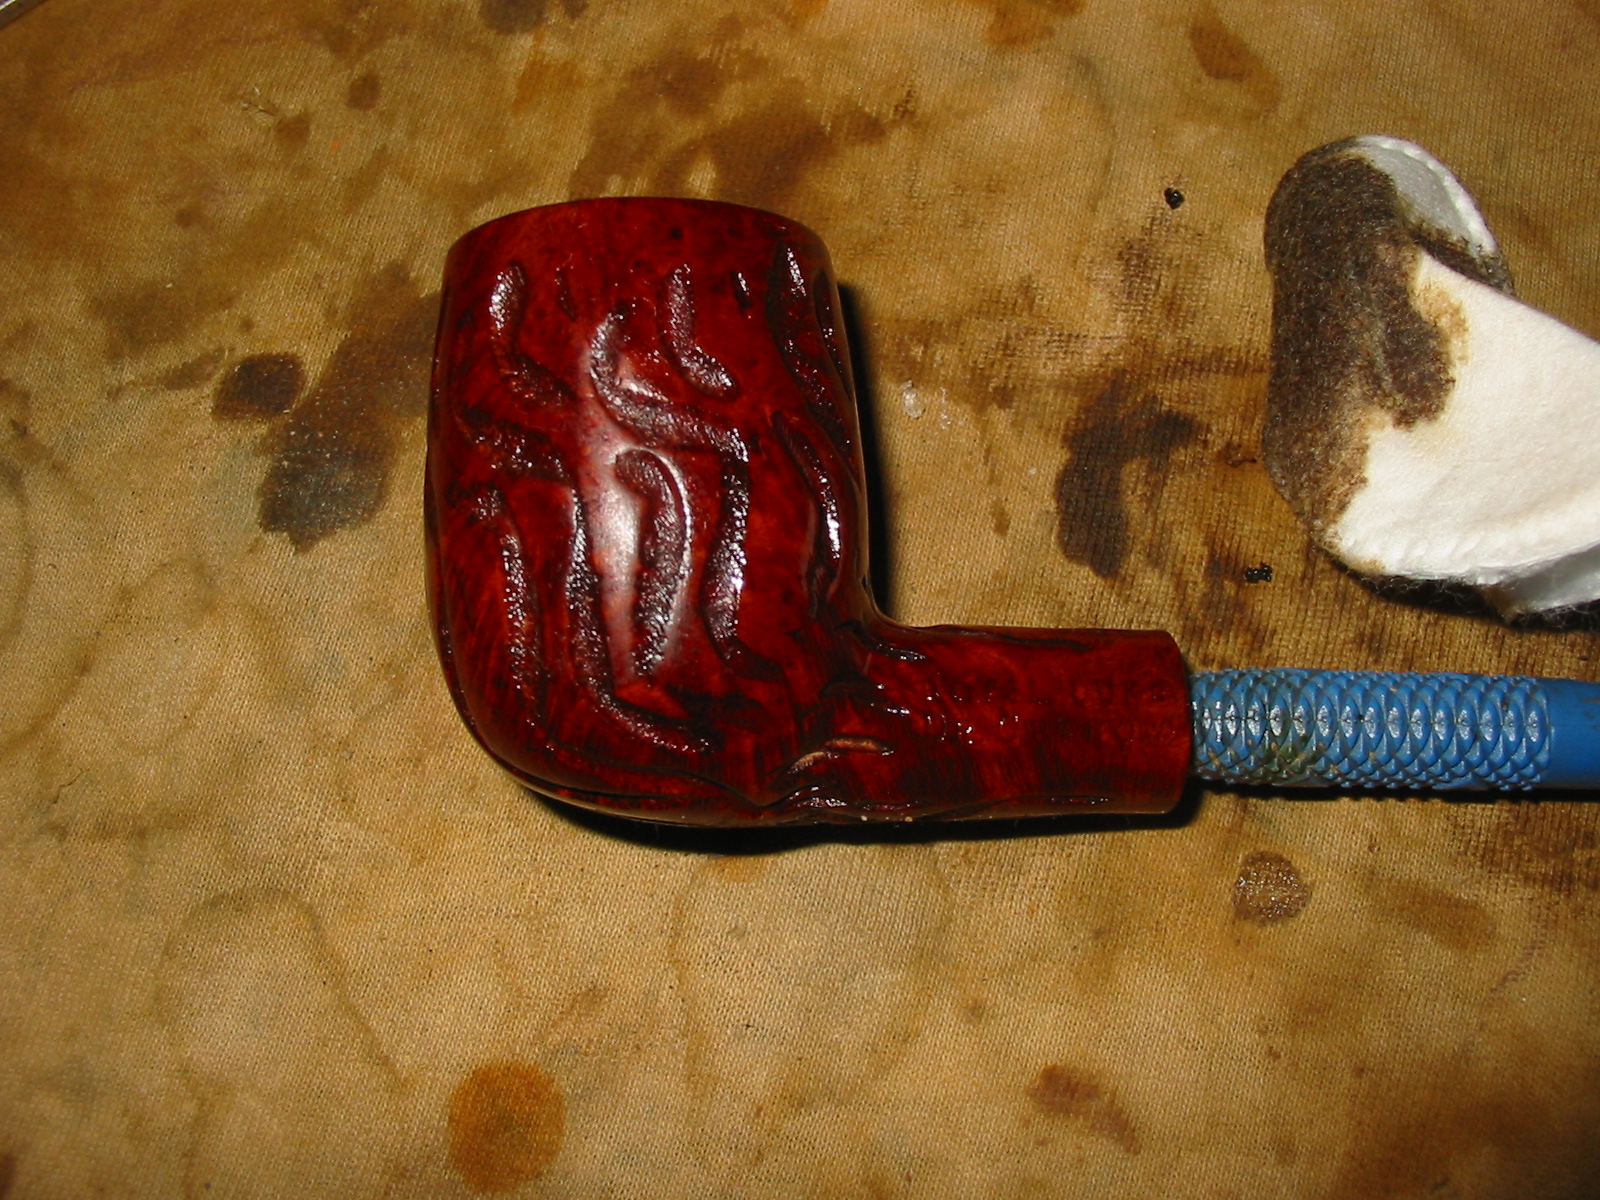
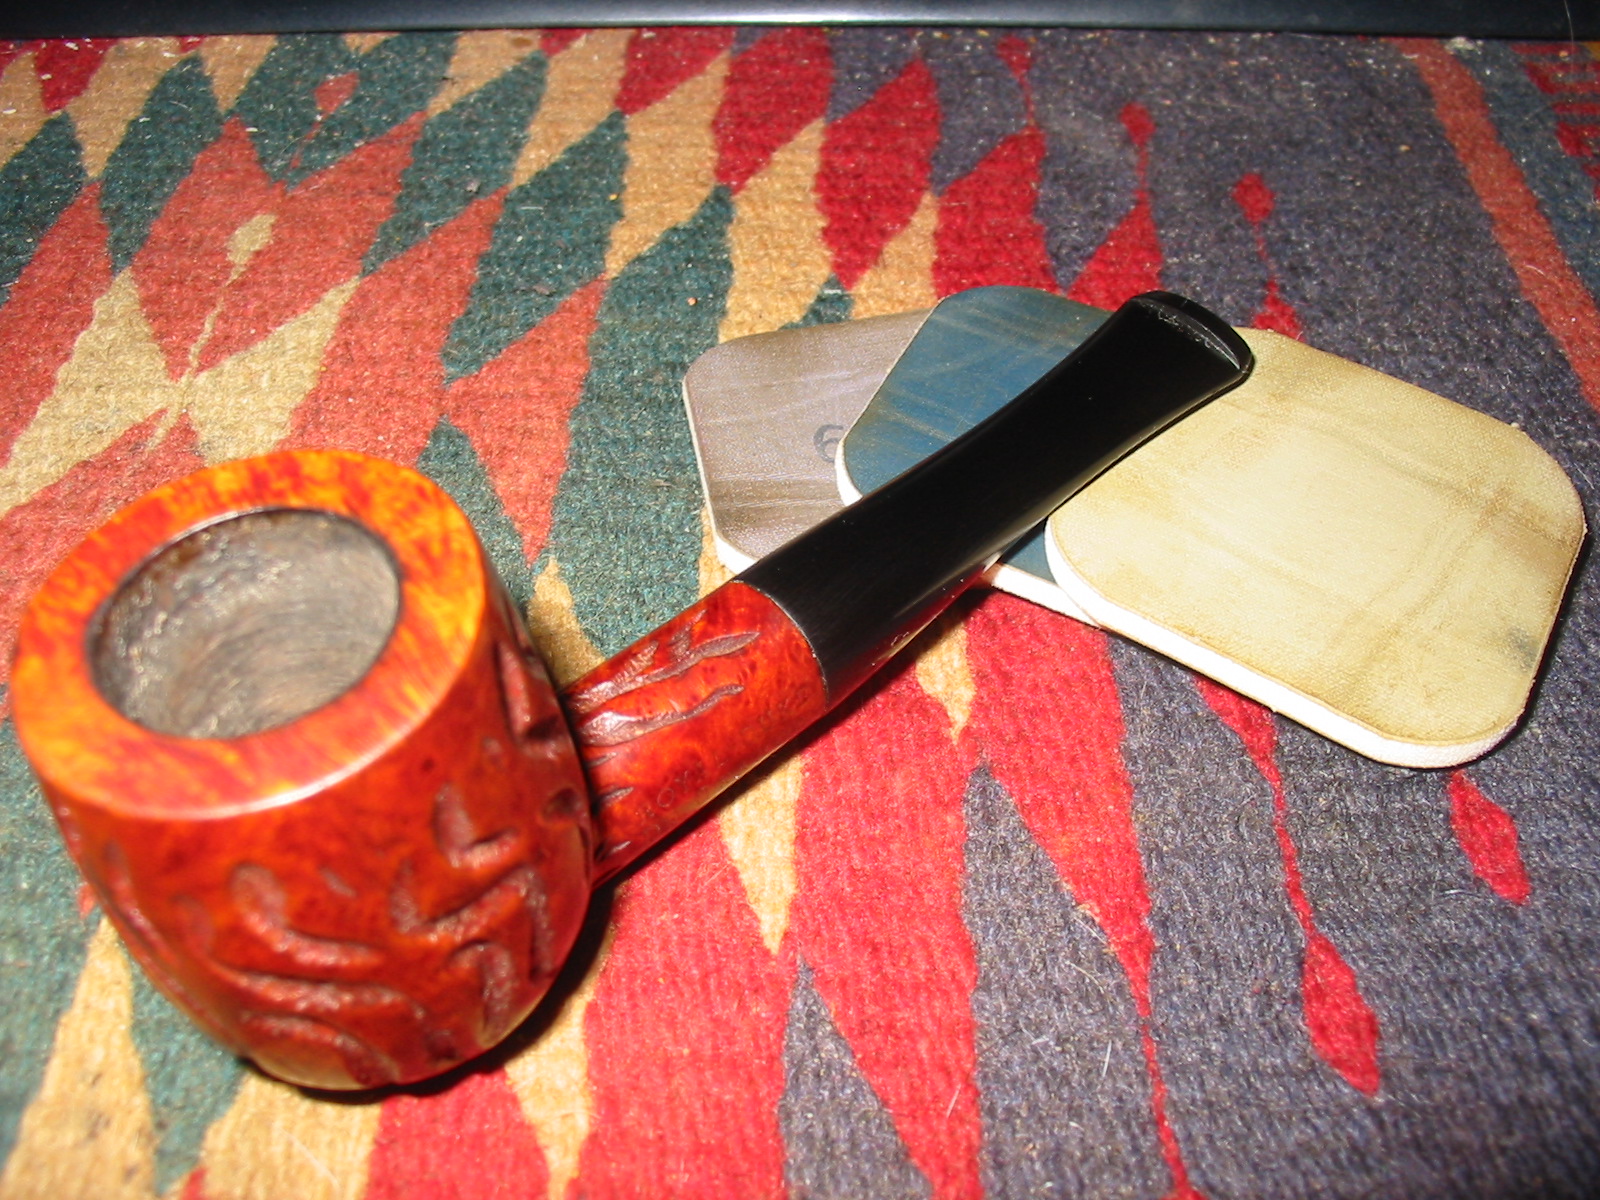
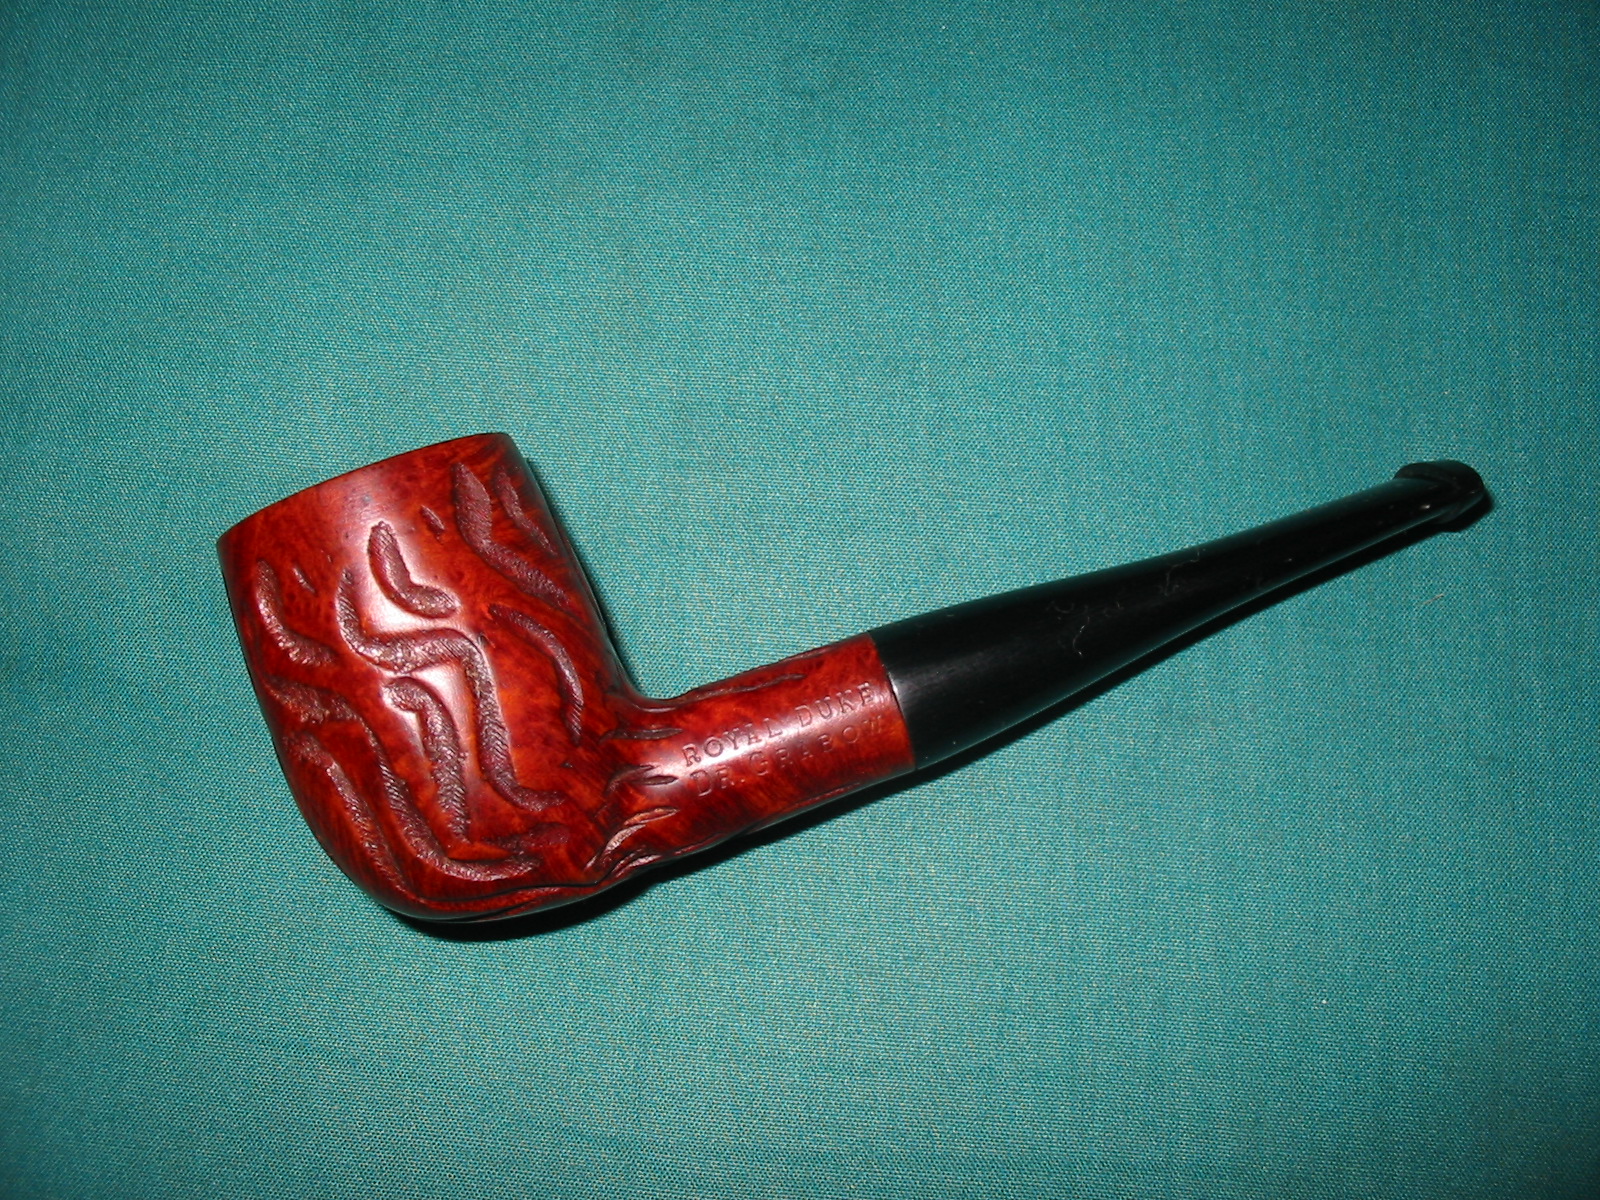
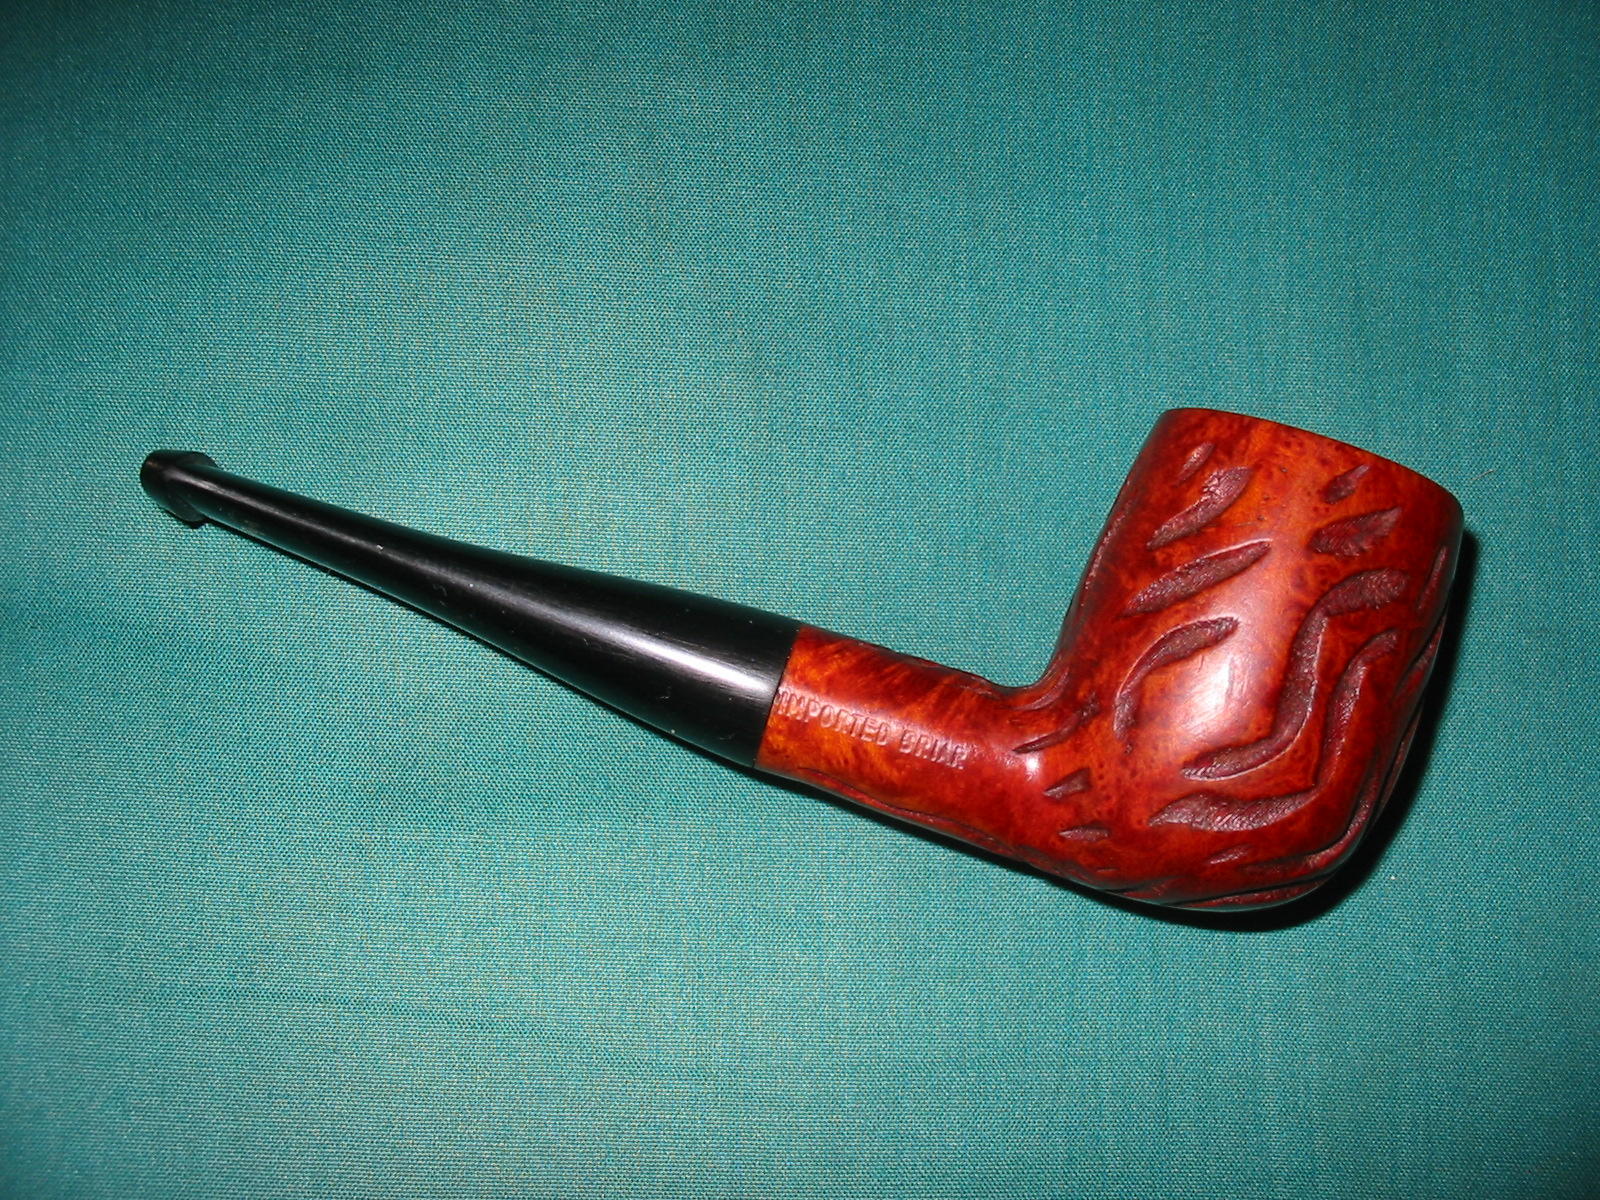
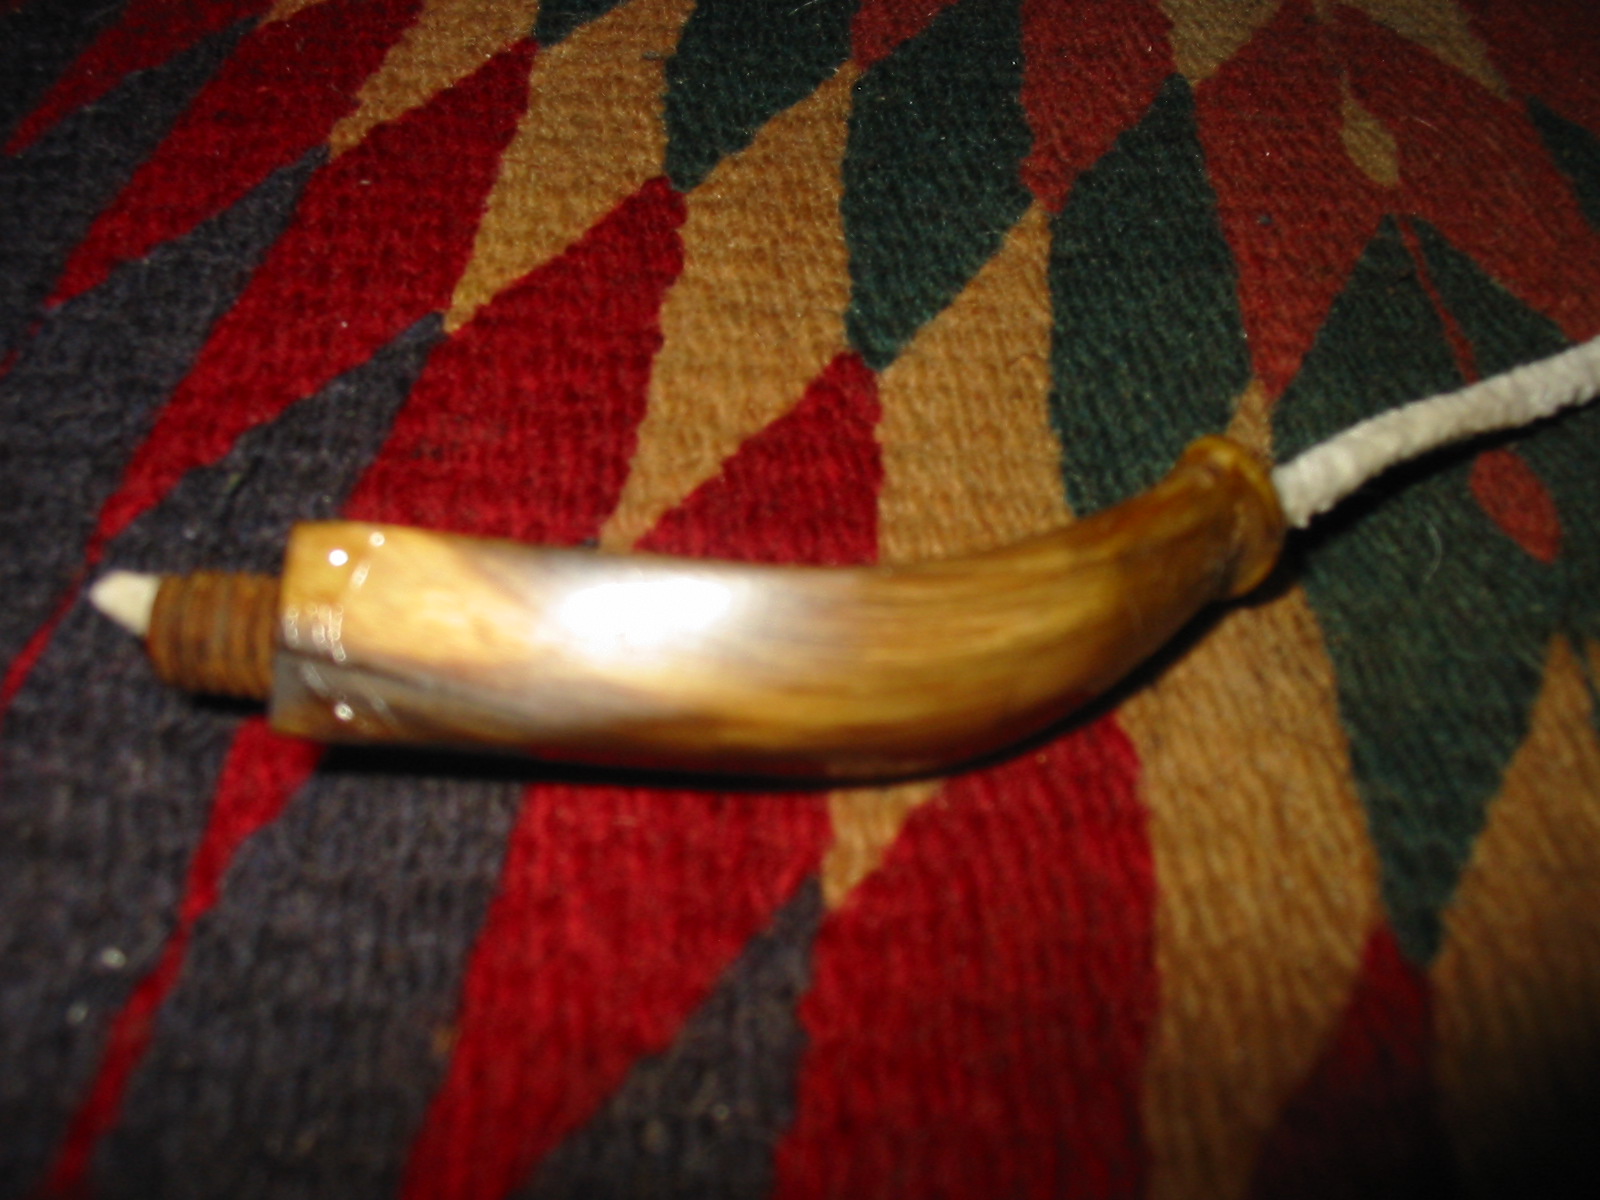
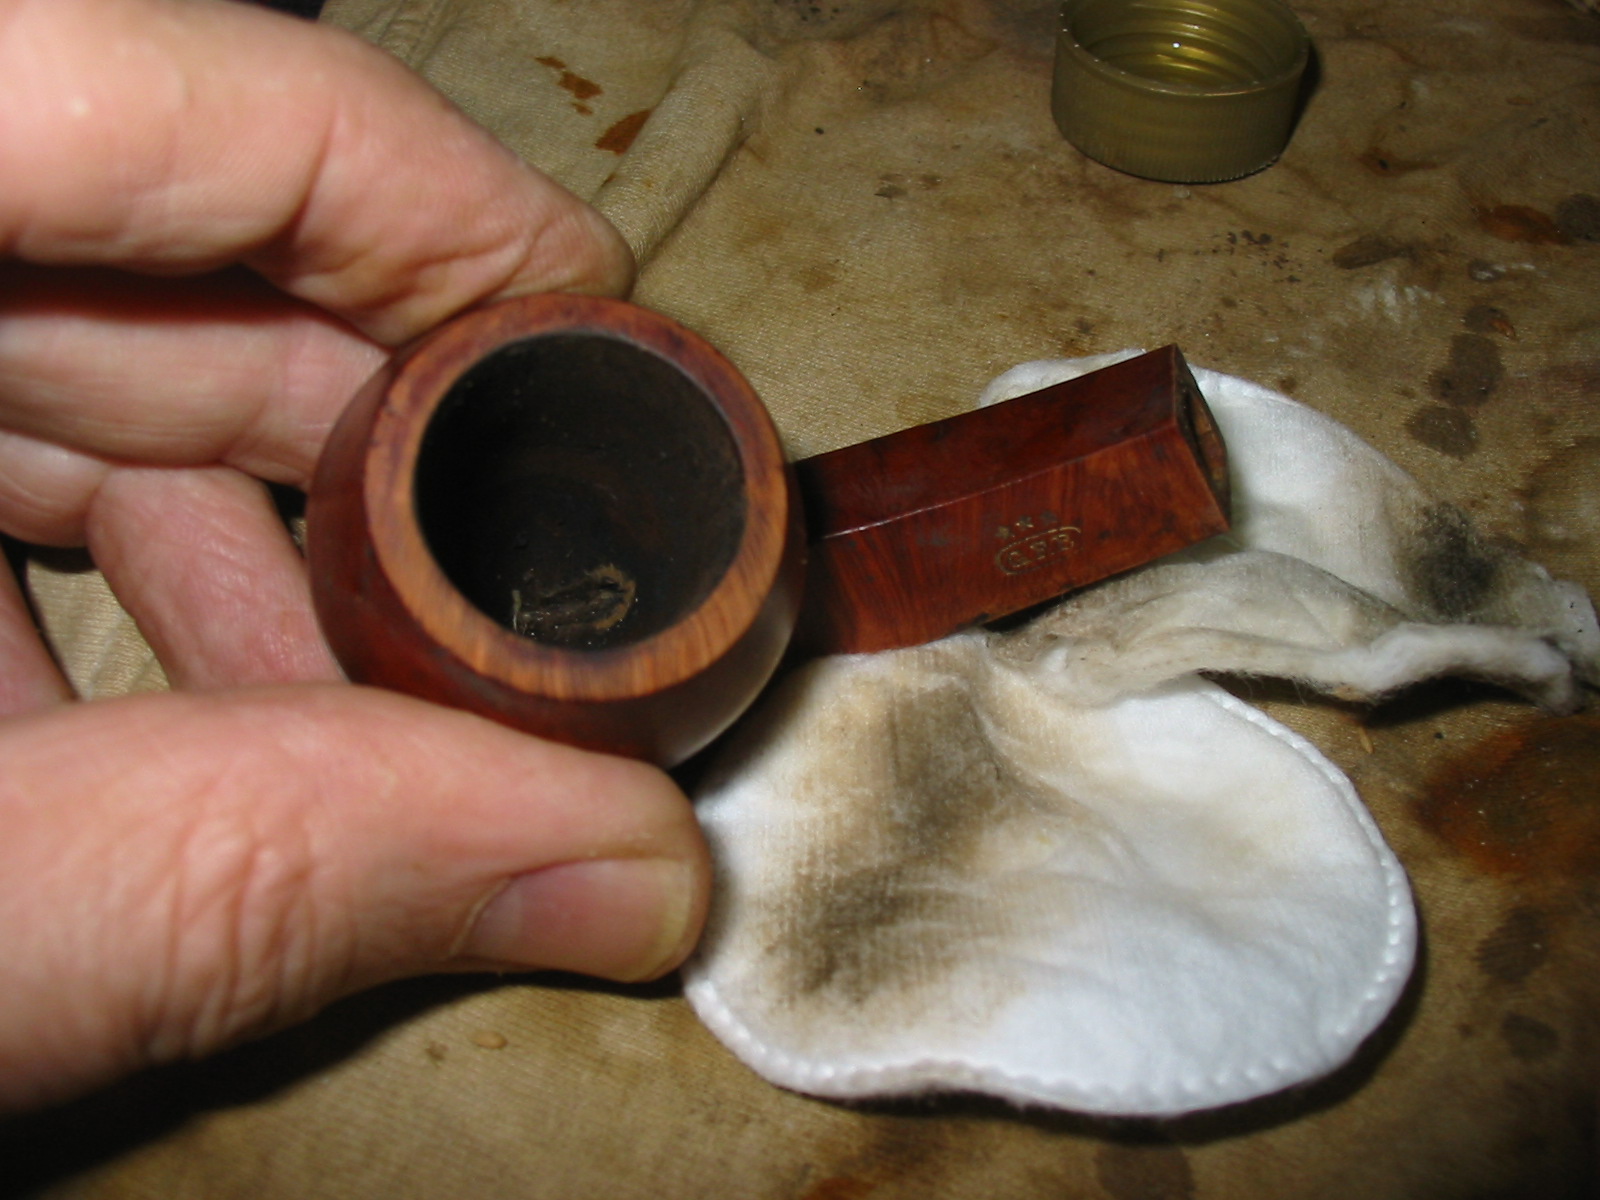
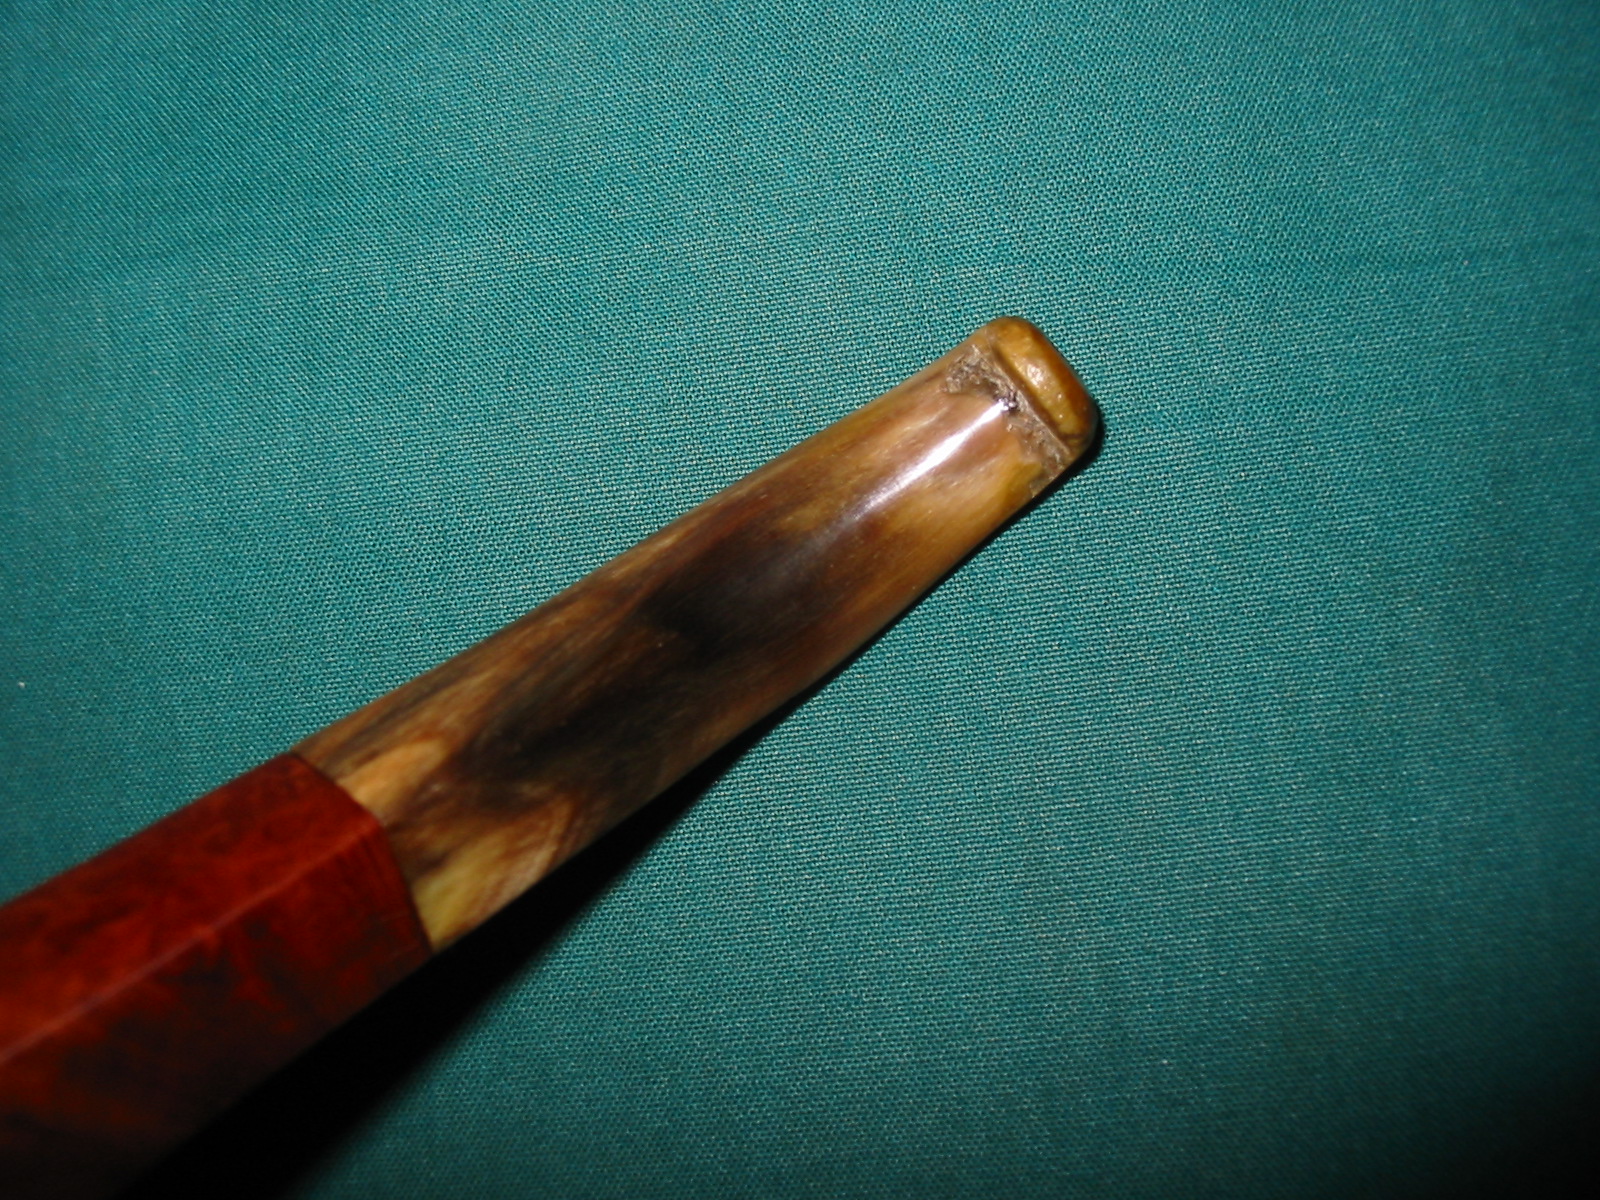
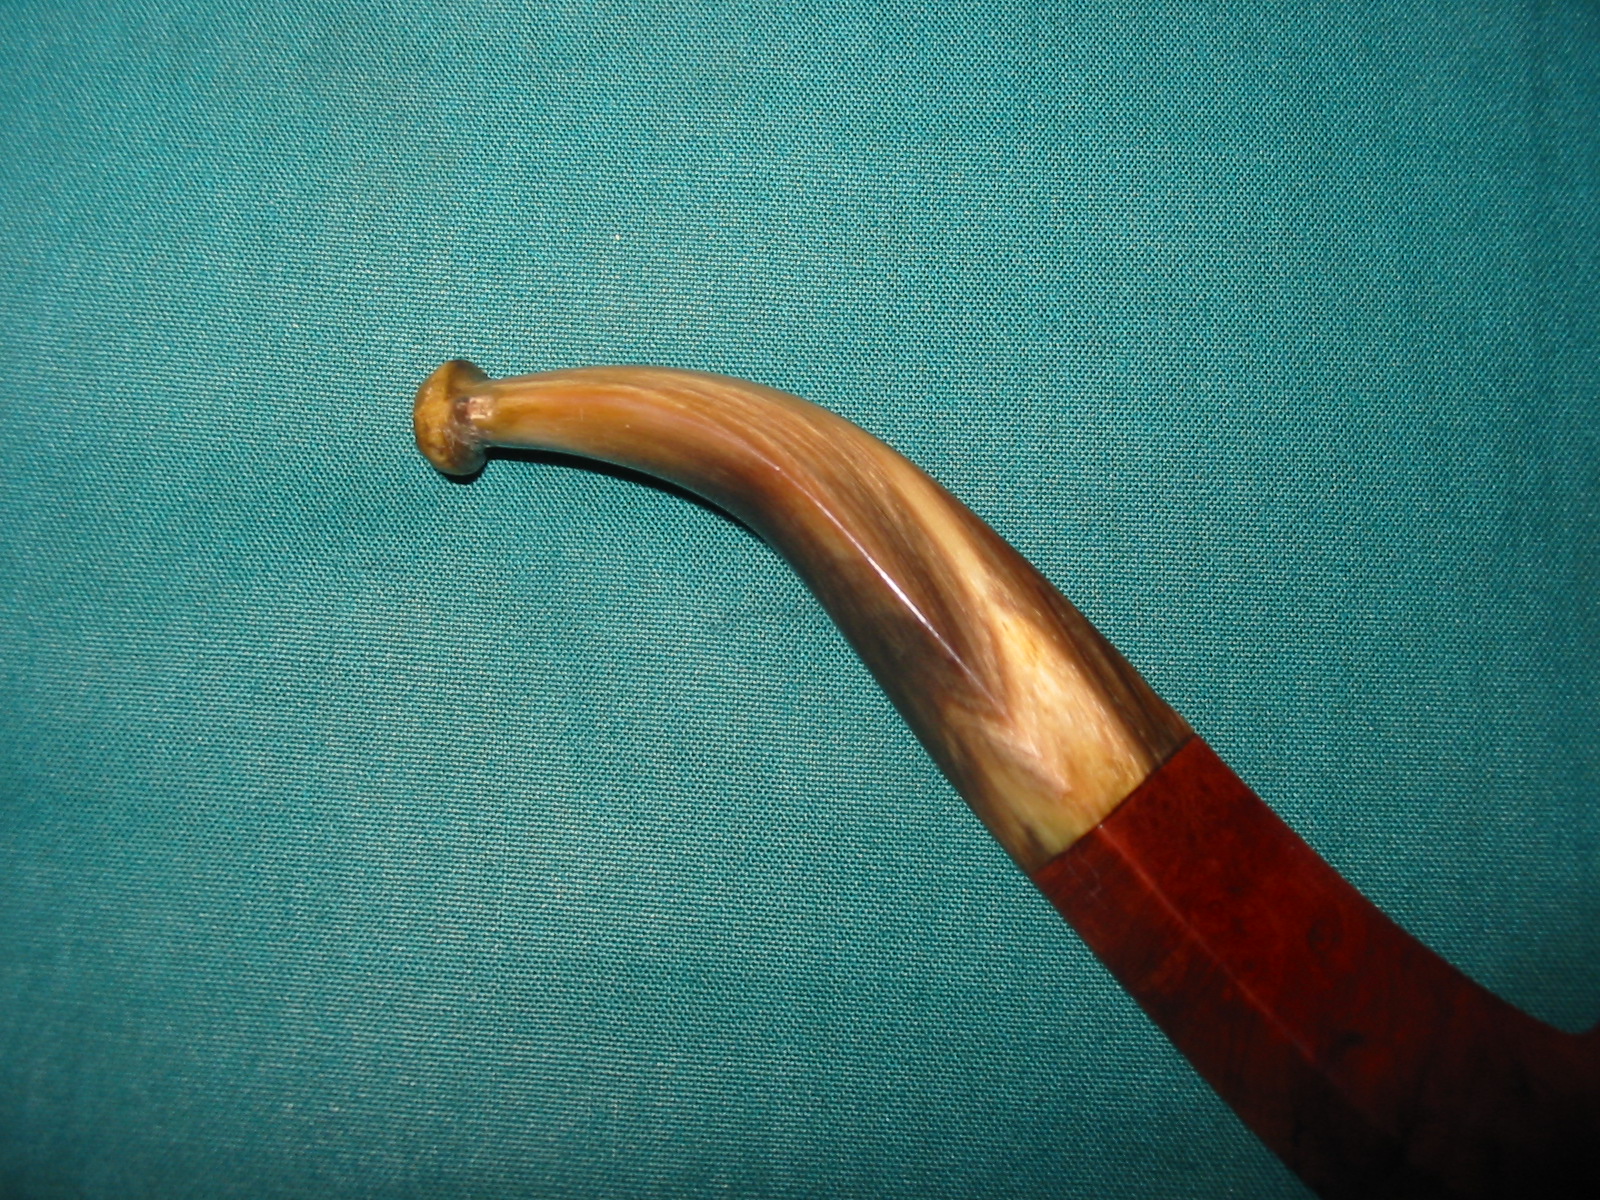
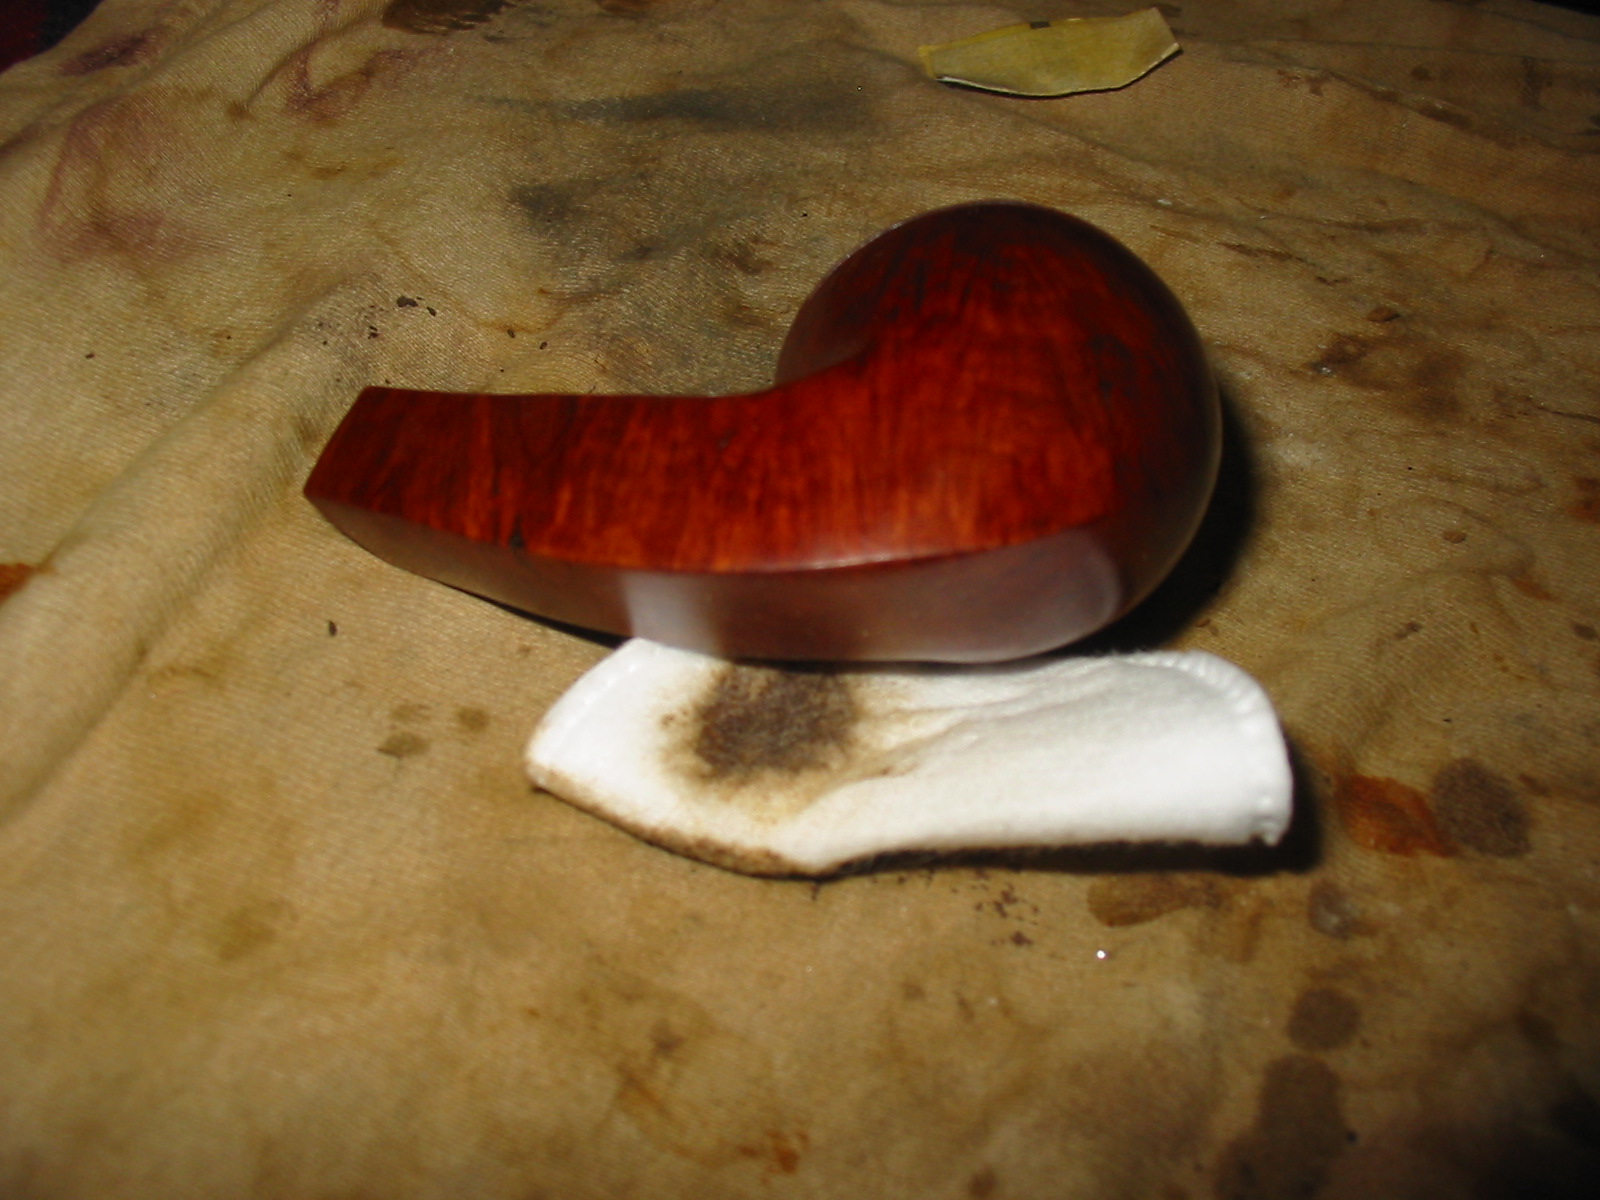
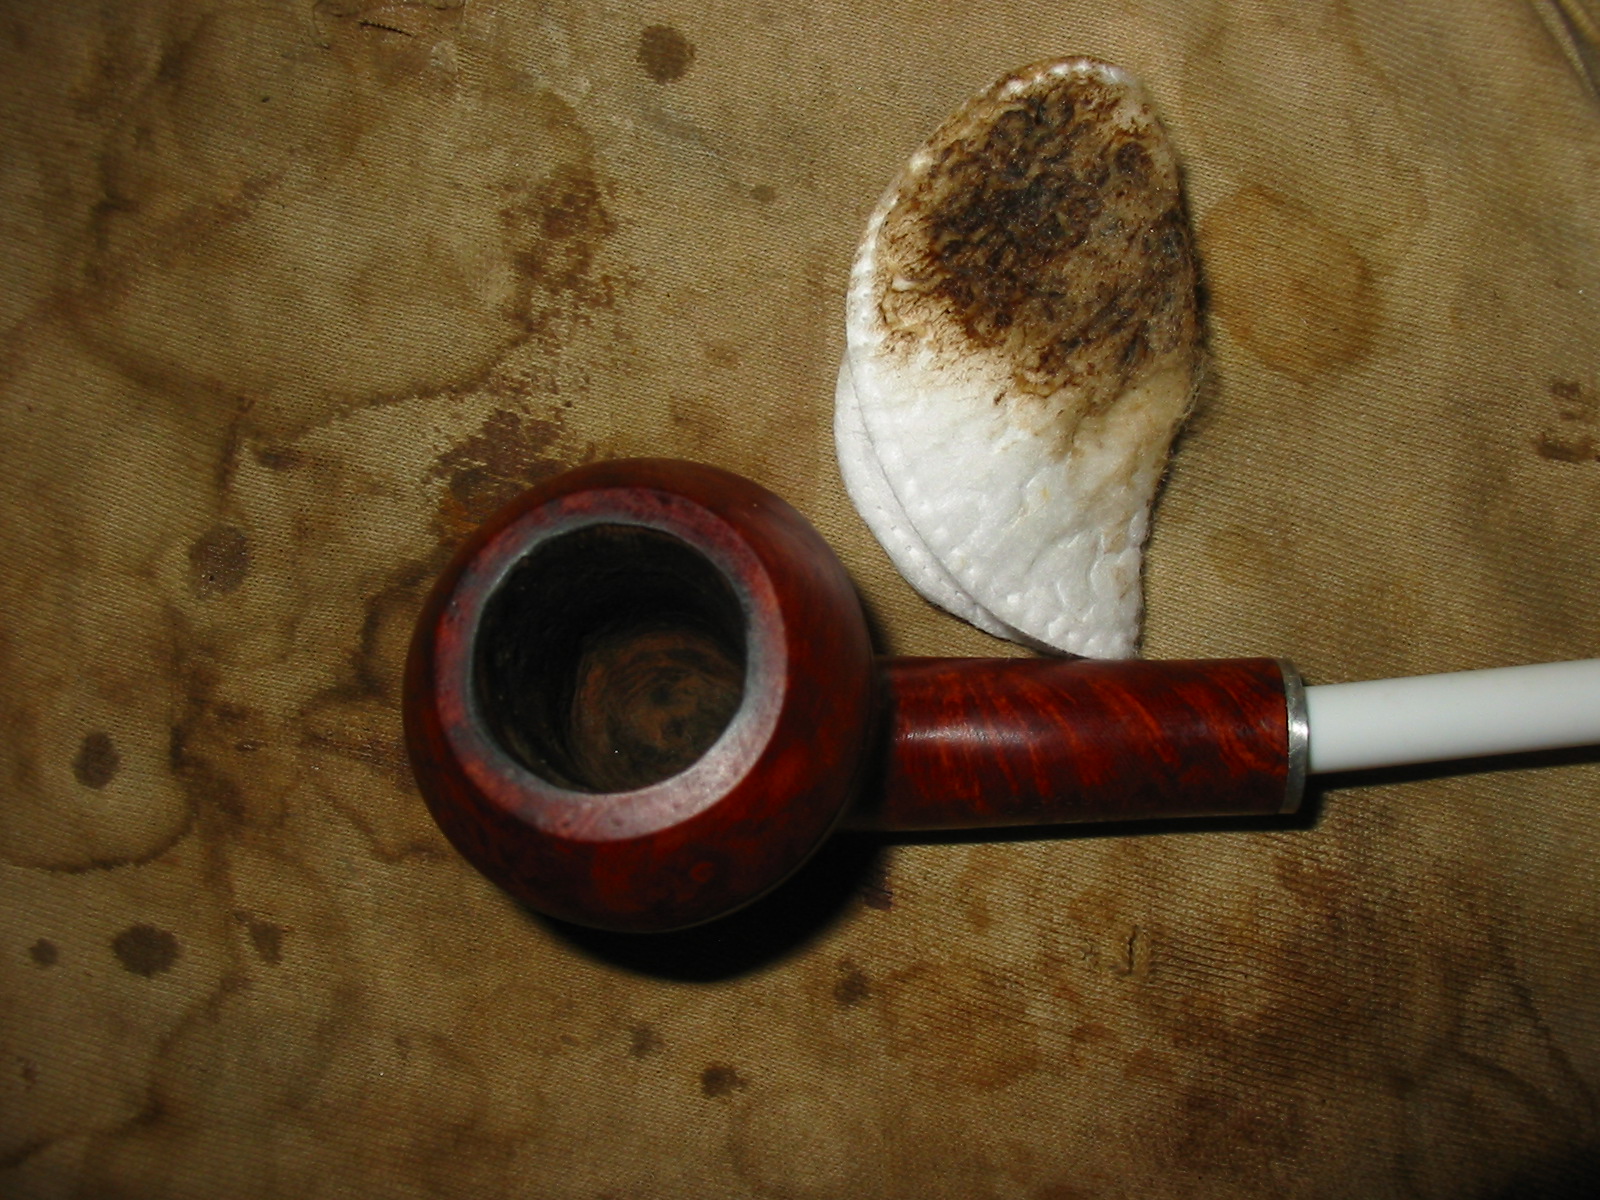
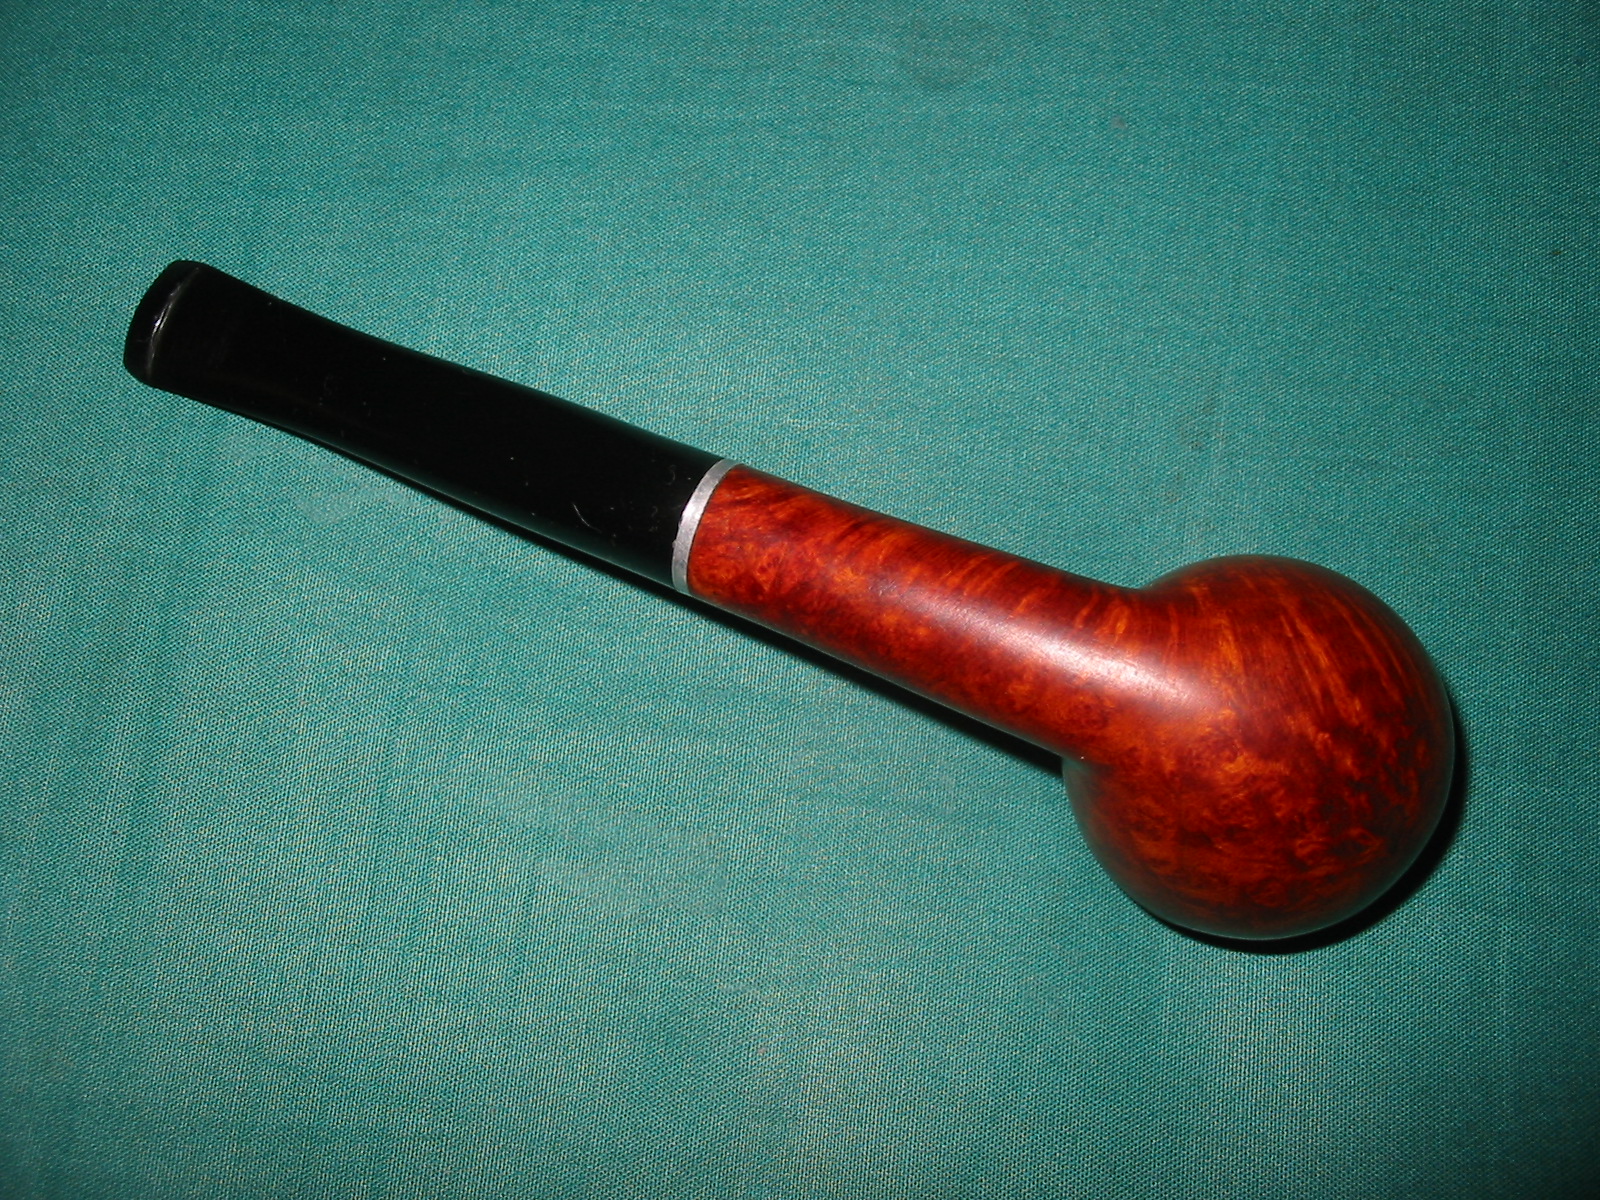
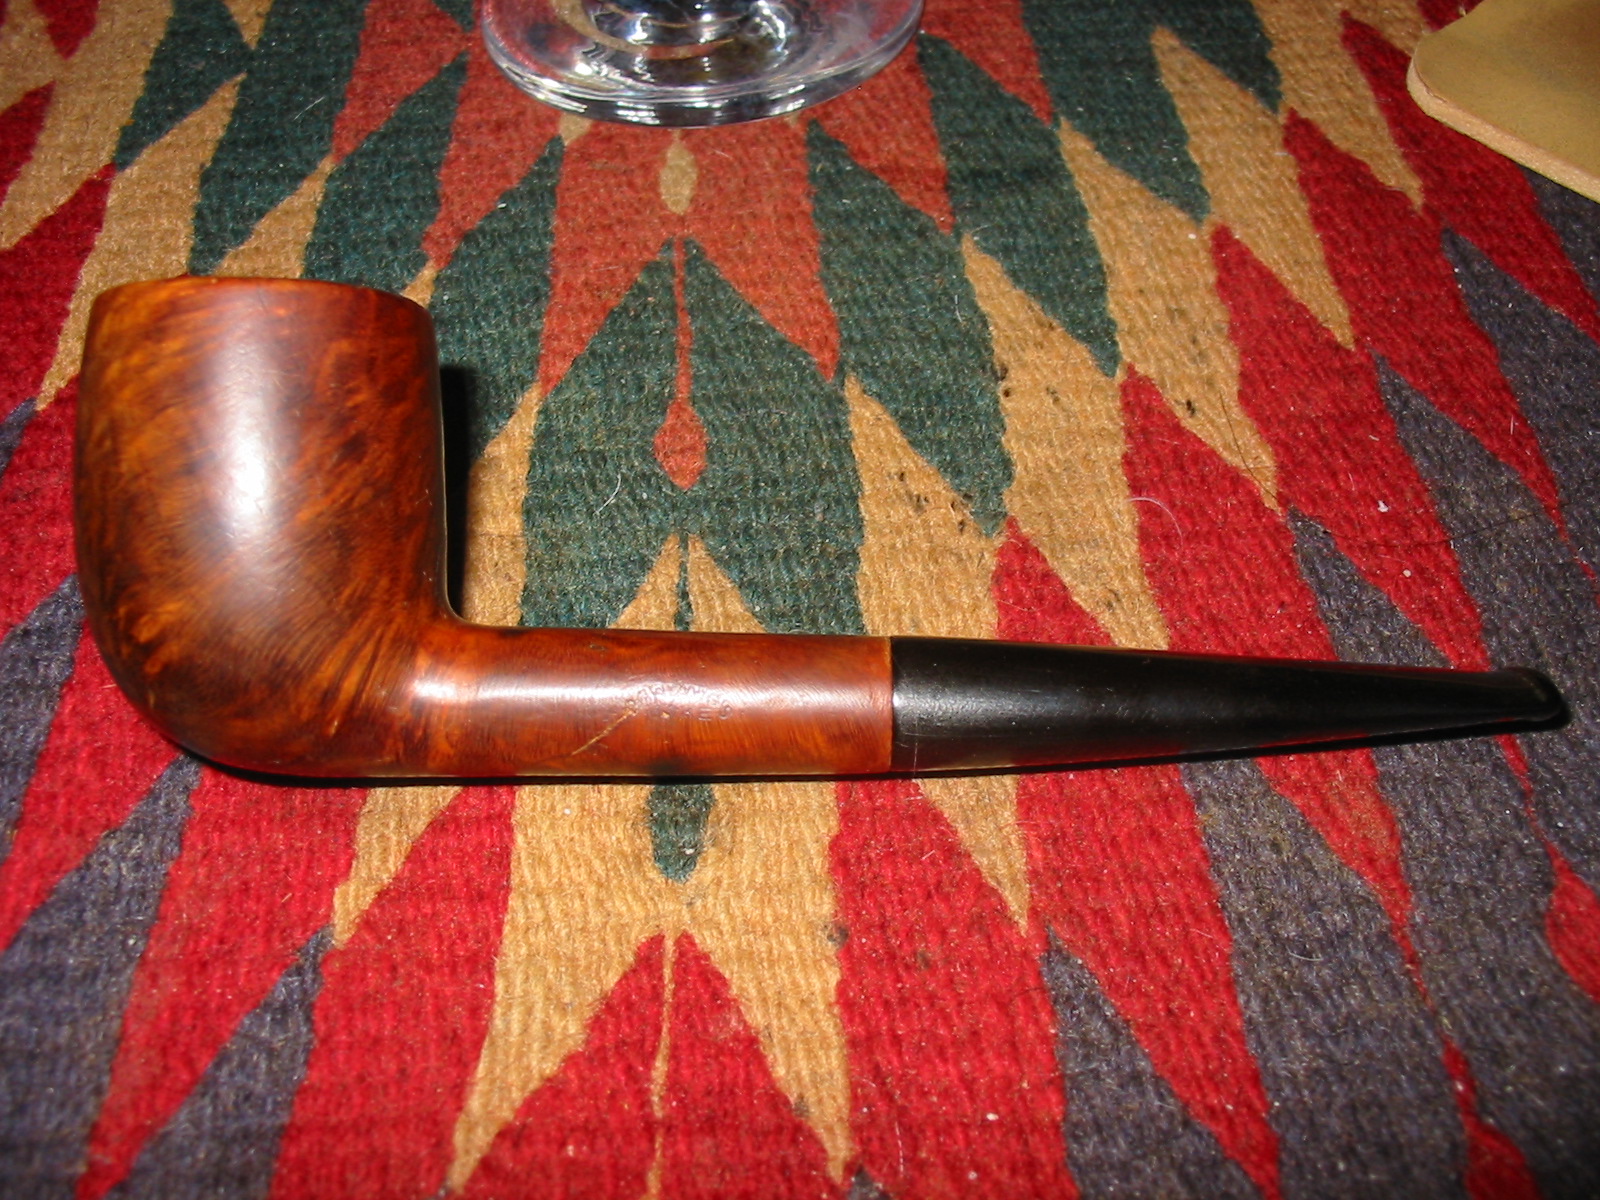
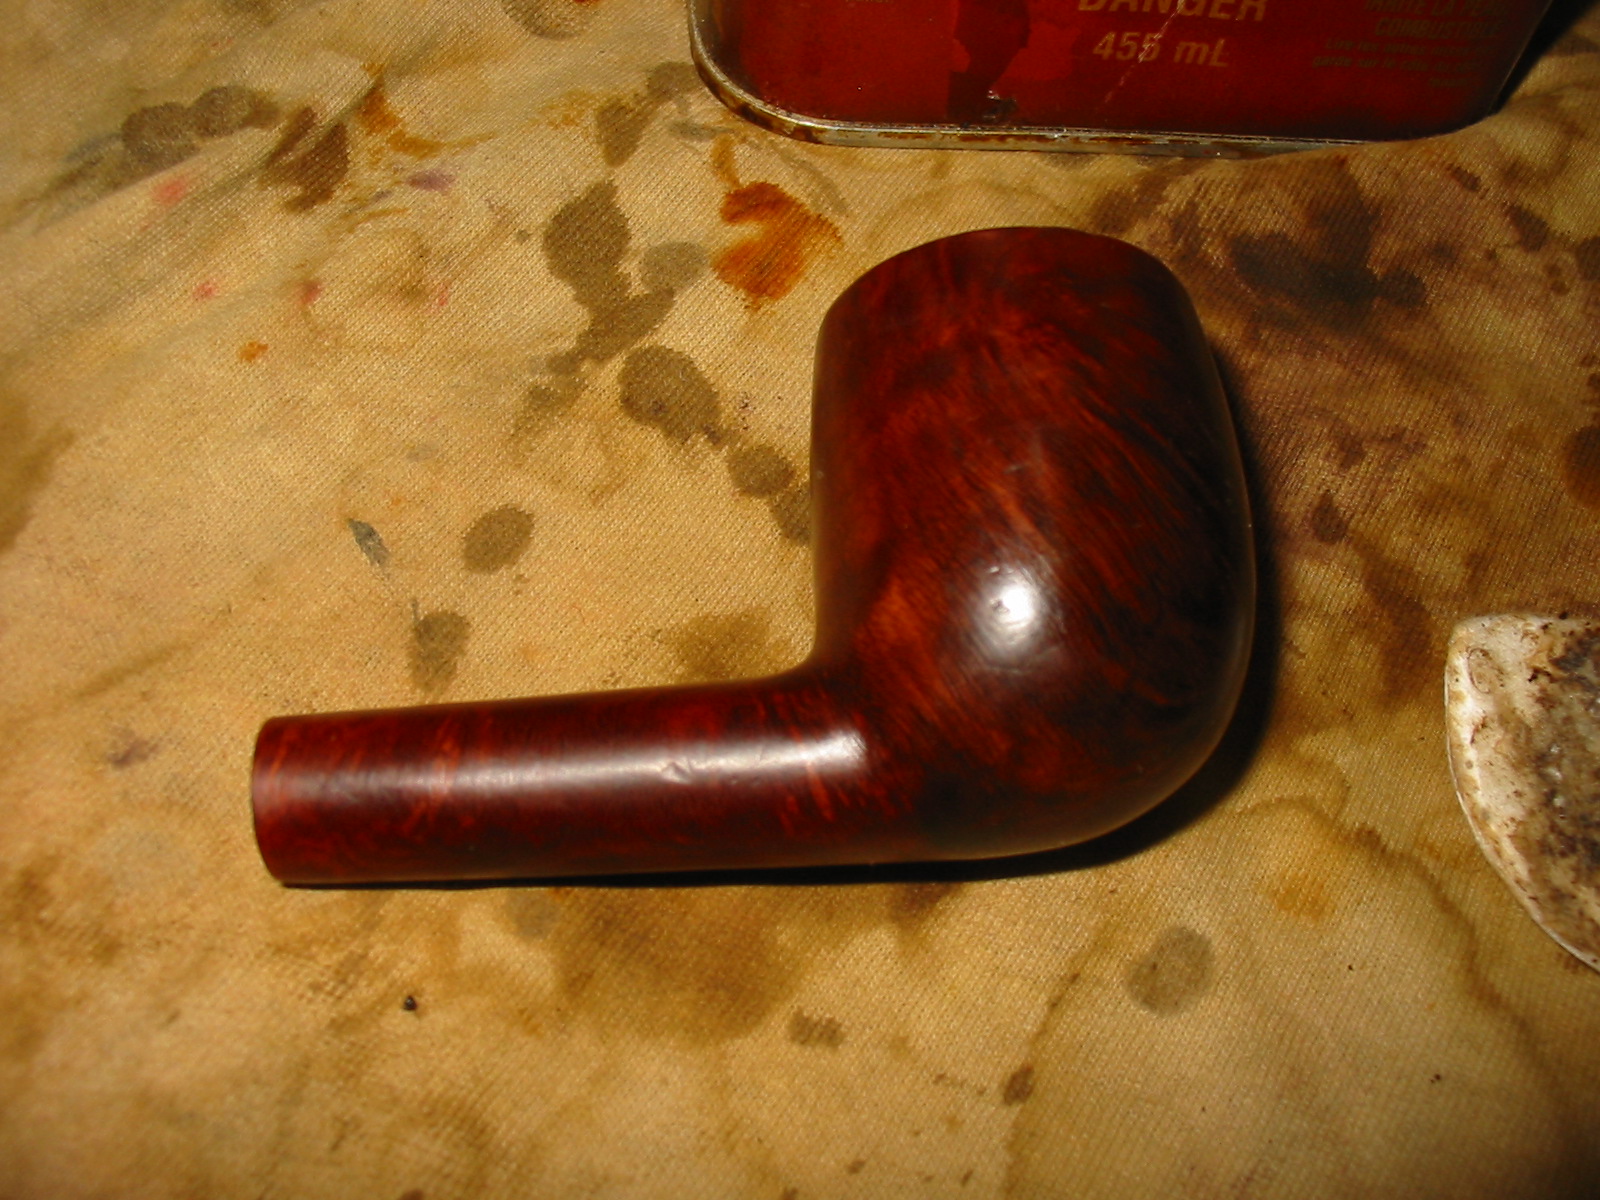
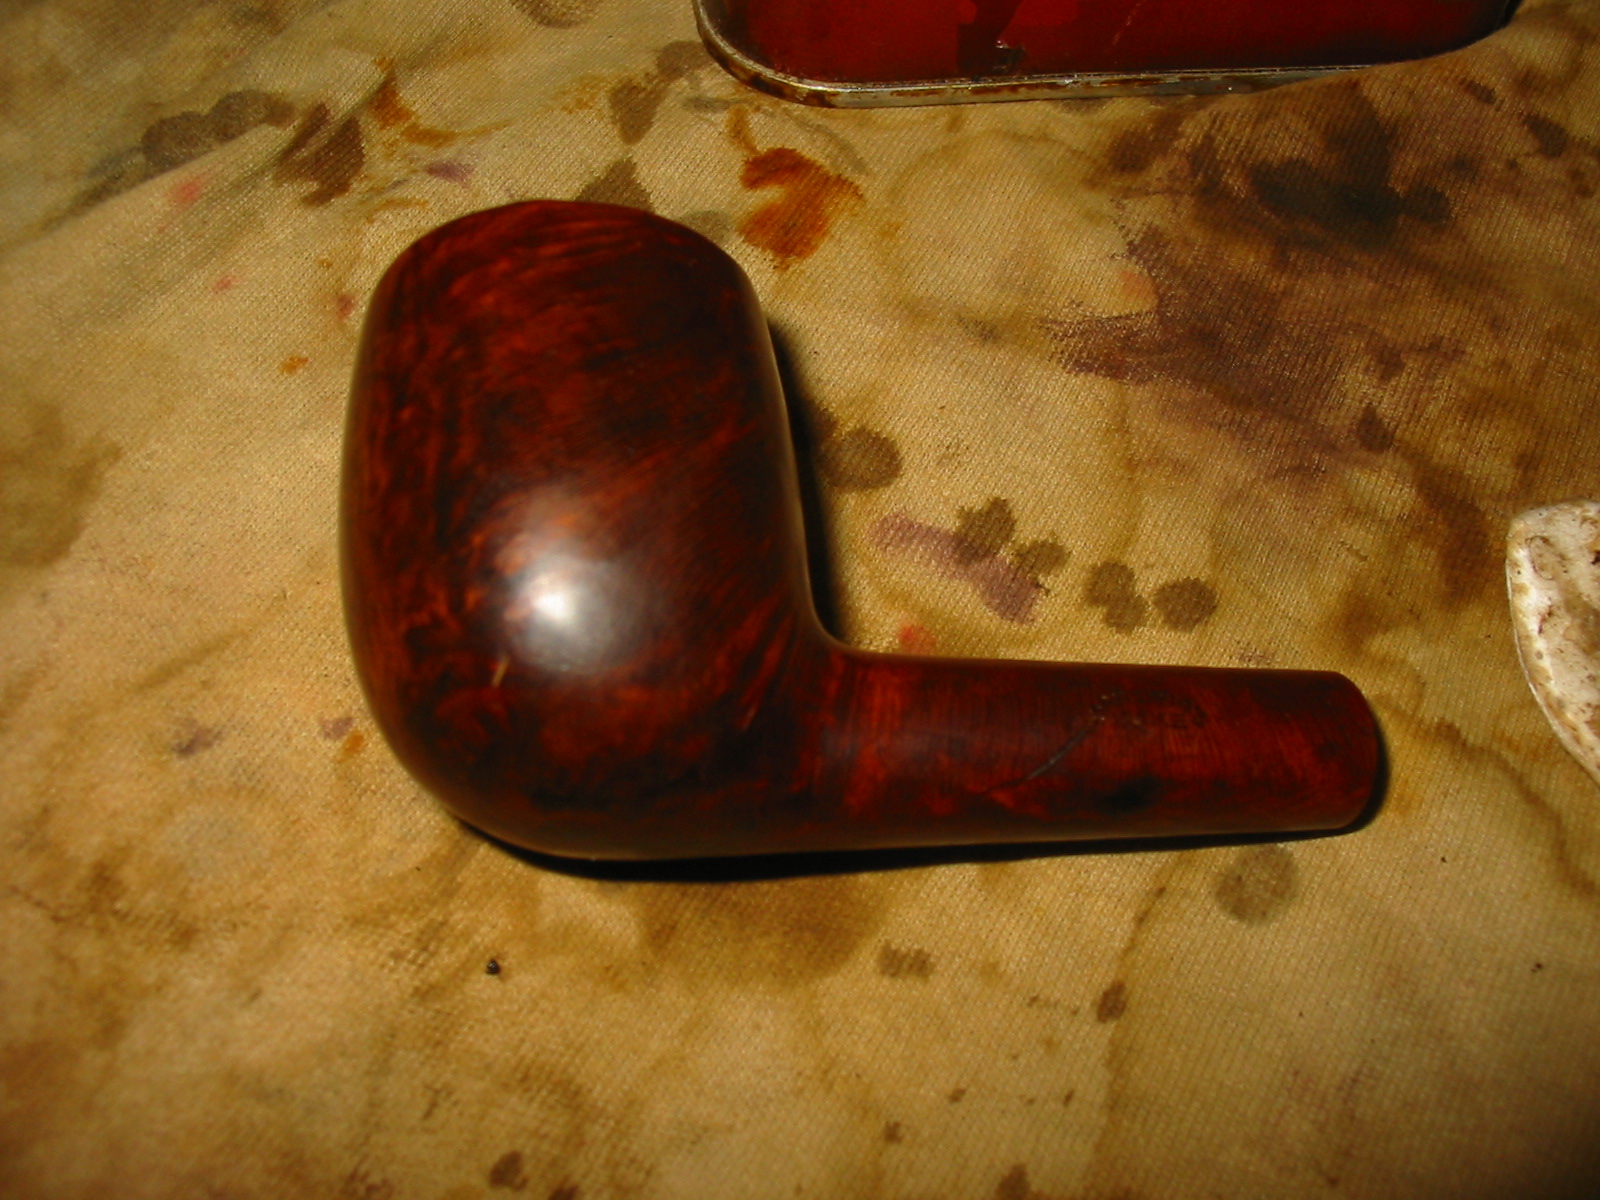
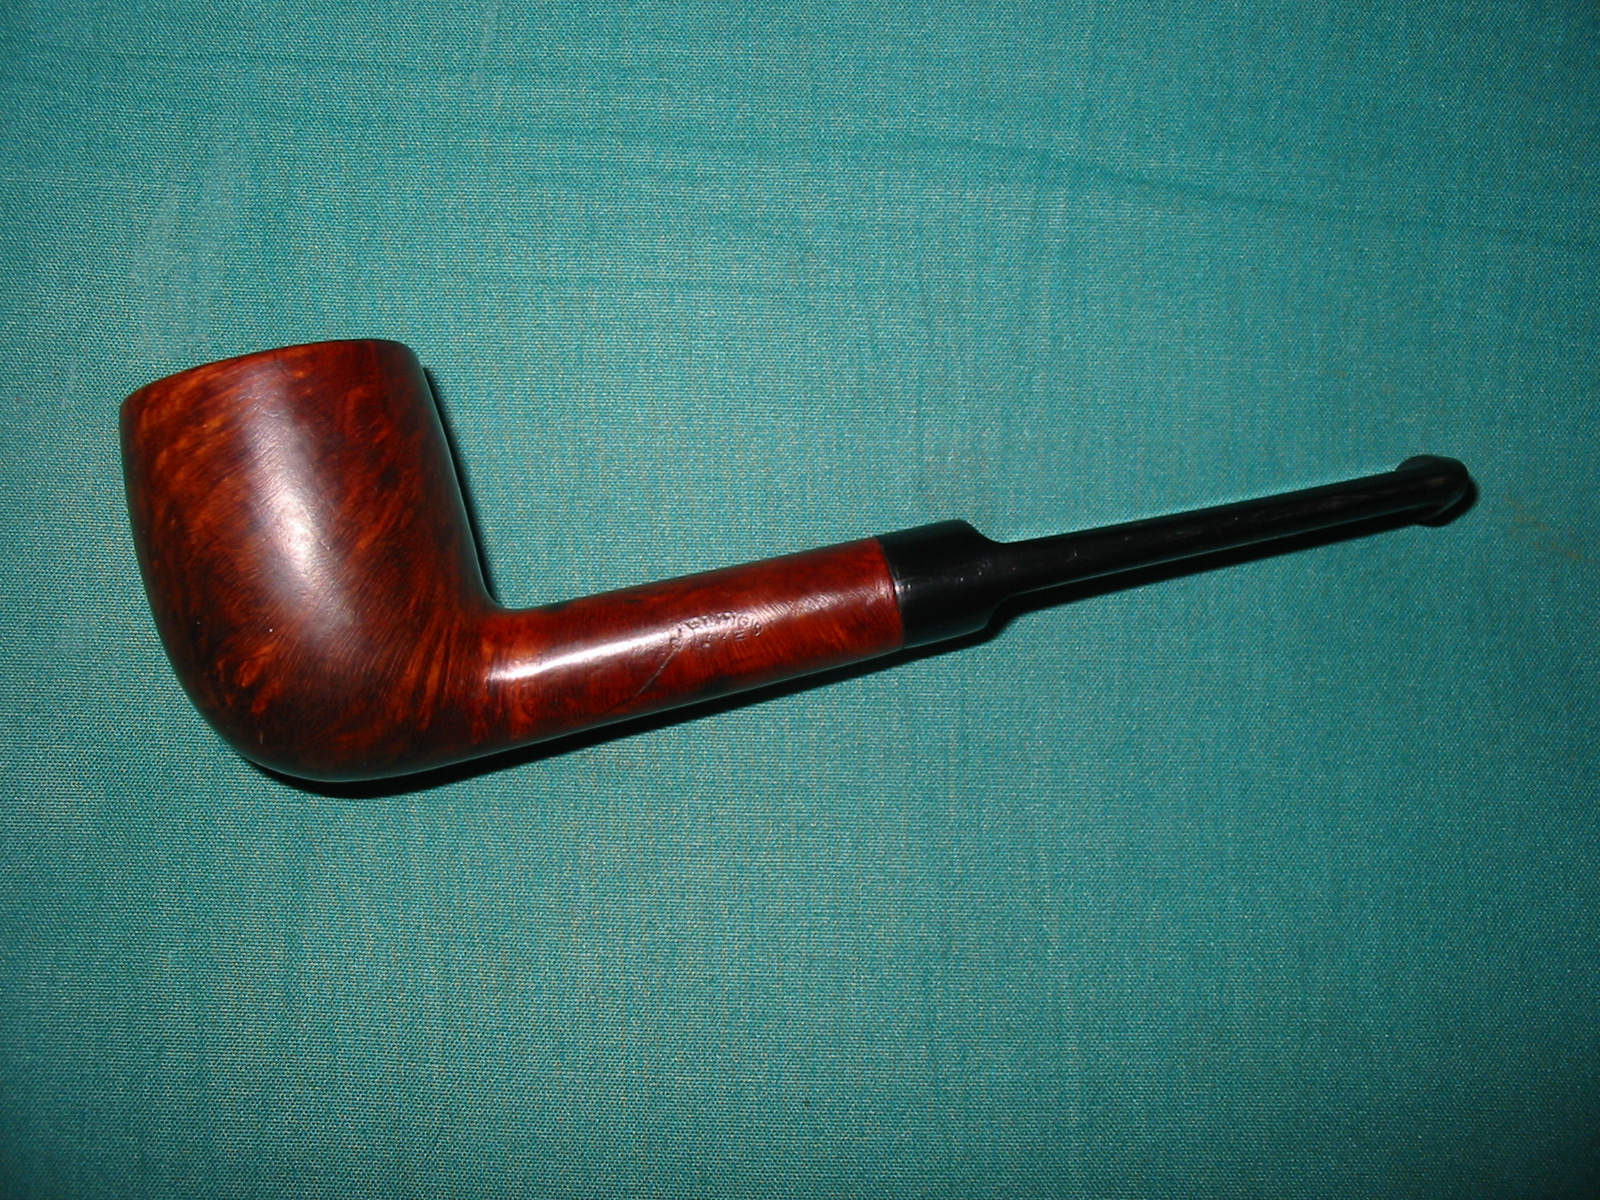
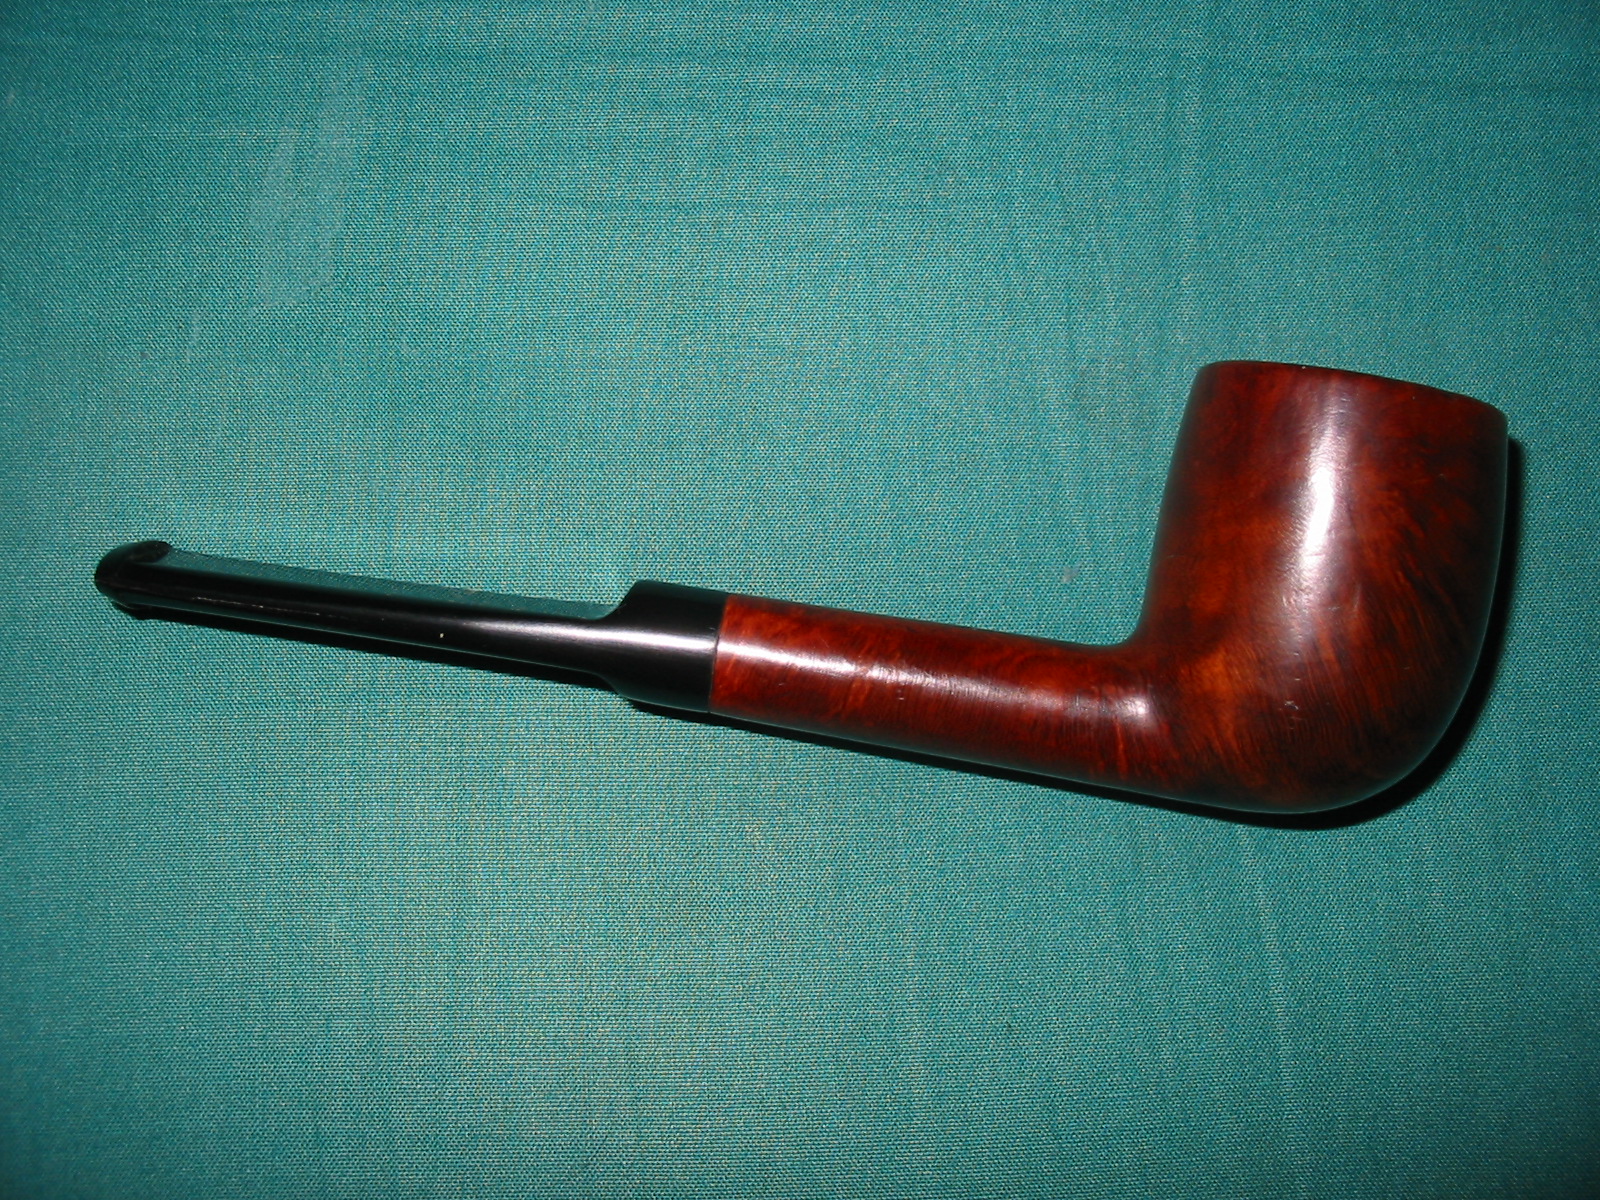
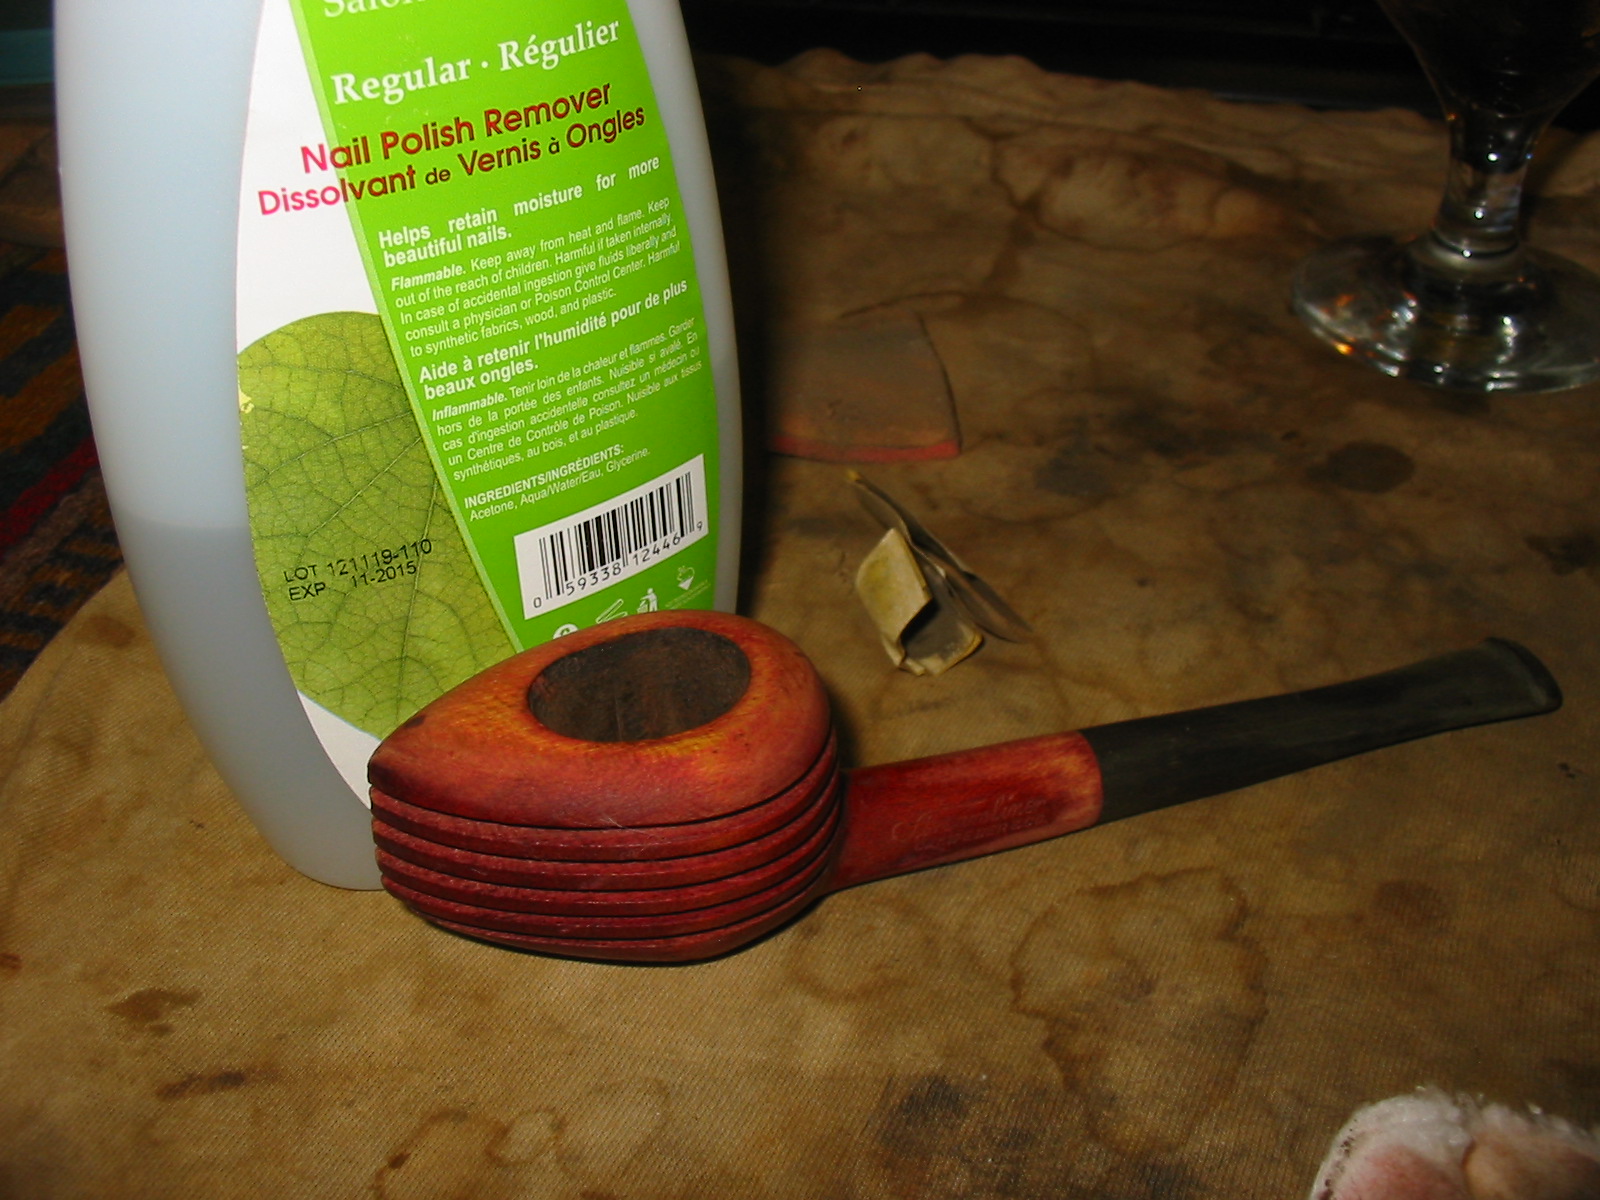
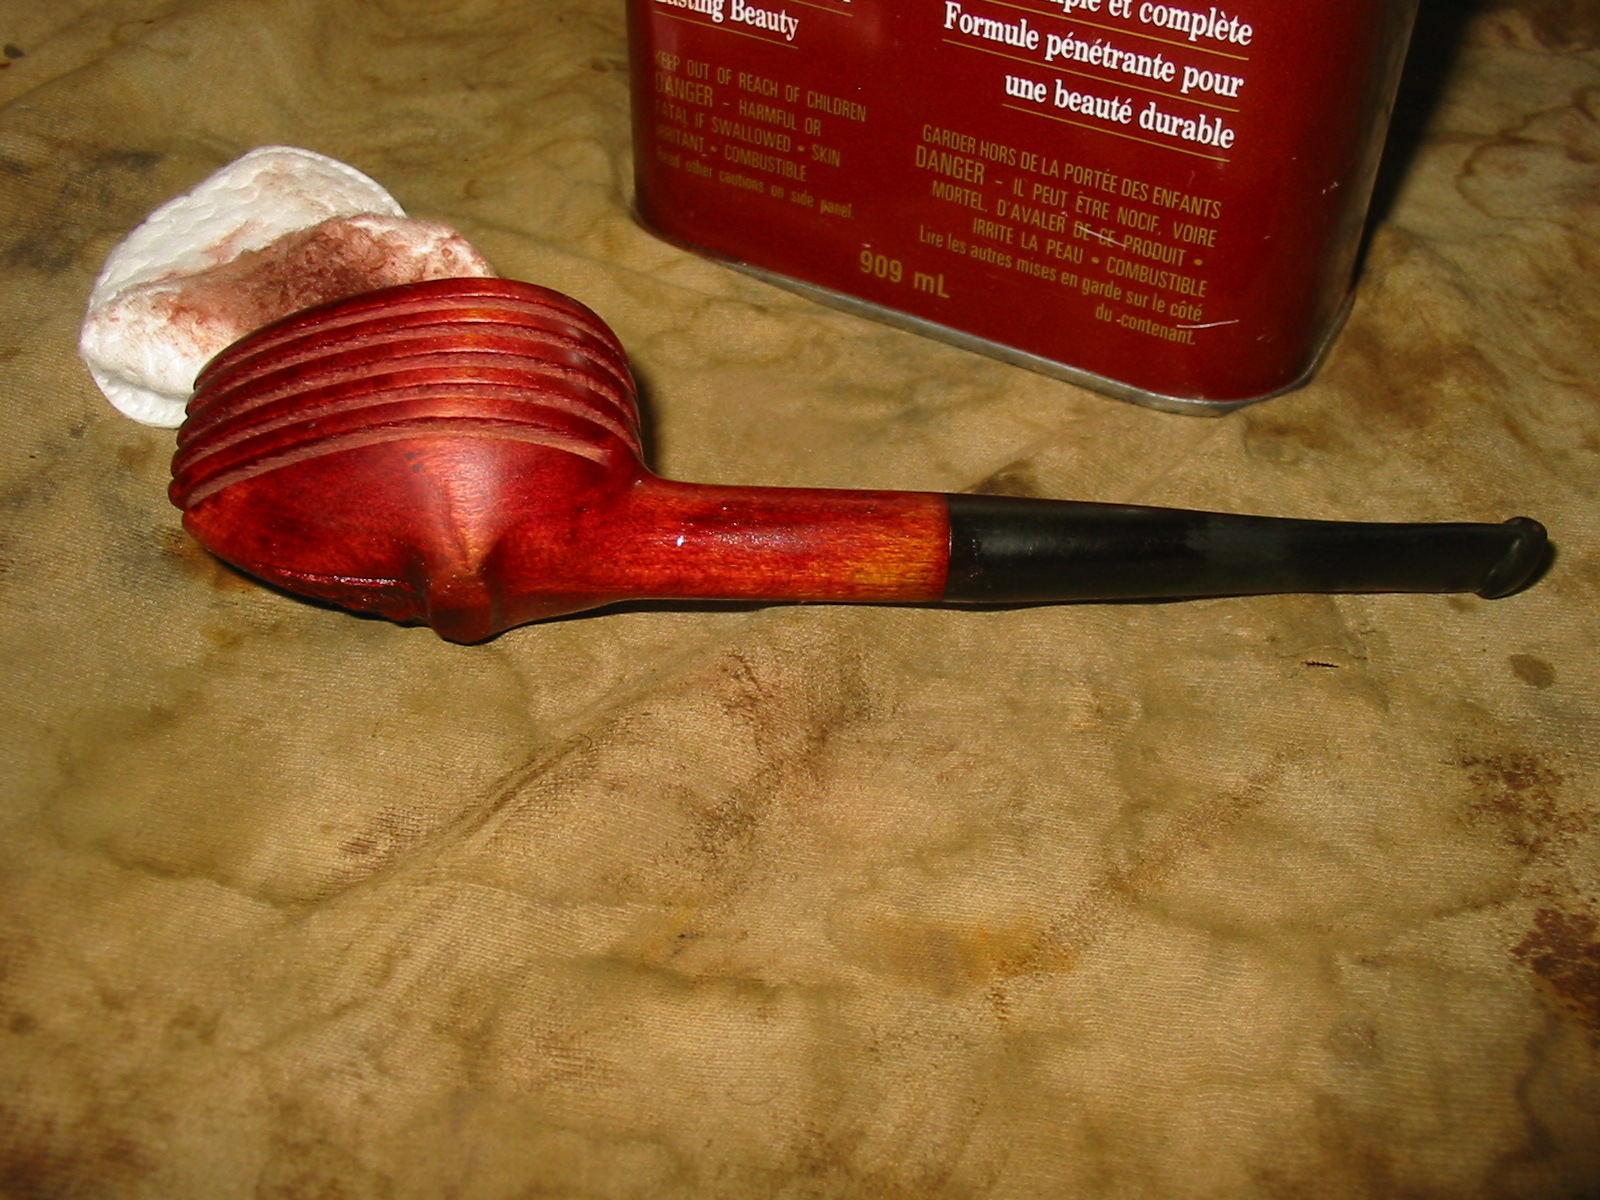
I rubbed down the stem with Obsidian Oil and gave it a very light buff with White Diamond. You have to exercise a very light touch when buffing nylon as it melts with the heat of the buffing wheel. I finished by giving the stem multiple coats of carnauba wax to give it a shine. I hand buffed the shine with a soft cotton cloth. The finish filter is pictured below in the final three photos. It is not something I will ever use but it is an interesting piece of tobacciana for the collection. I have no idea of the maker of the piece or of the age but I am fascinated by the ingenuity of the product.
IMG_3188

IMG_3189

IMG_3190

Restemming and Refinishing a Tiny Bulldog

I had one more miniature pipe bowl in my box of pipes for refurbishing and I thought I would finish up the third of the lot. It needed a diamond shaped saddle stem to match the shank on this little bulldog. The bowl was coated with a thick coat of varathane or some kind of plastic coat. It had a small crack in the shank under the brass band. I also was without a stem. The trouble with these little pipes is being able to turn a tenon down far enough to fit the shank.
IMG_2993

I went through my box of stems and found a diamond shank saddle stem that would do the trick. I turned the tenon down as far as possible with the PIMO tenon turning tool and then used the sanding drum on the Dremel to get the tenon size close. I hand finished the fit with 220 grit sandpaper until I had a snug fit on the stem. The stem was a regular sized stem to fit a group 4 bulldog so it was about ¾ inch per side. I reduced the diameter a side at a time with the Dremel until the stem sides were roughly 3/8 inch per side. The Dremel and sanding drum took off the majority of the excess material and then I hand sanded it to fine tune and adjust the angles of the stem and sides.
IMG_2994

The band was loose so I removed it while I sanded the stem to match the shank. Since I planned on stripping the finish off the pipe and refinishing it I sanded both the shank and the stem in the process. Once I had a clean smooth fit I reglued the band in place on the shank with wood glue and pressed it into place.
IMG_2995

IMG_2996

IMG_2997

IMG_2998

IMG_2999

IMG_3000

I wiped down the bowl with acetone on a cotton pad to try and break through plastic finish on the pipe. It did very little to break down the finish. I sanded the bowl and rim with 220 grit sandpaper and then with 1500 grit micromesh to remove the finish. I repeated the acetone wash after sanding and found that it was more effective once the plastic coat was broken down.
IMG_3001

IMG_3002

IMG_3003

IMG_3004

IMG_3006

I restained the bowl with a dark brown aniline stain and flamed it to set the stain. I repeated the process until the coverage was what I was aiming for with the undercoat of dark brown stain. I then gave it a top coat of oxblood aniline stain to get better coverage for the sanded bowl. There were still problems with the stain coat but I set it aside for the time being and turned my attention to the stem.
IMG_3007

IMG_3008

The stem was too long in the photos above and gave the pipe an awkward disproportionate look rather than refined look of a miniature bulldog so I cut it down with a sanding drum on the Dremel. I removed slightly over one inch of the length – cutting the stem back to the end of the bend. I cut it straight and made sure that the line of the end of the stem was squared both vertically and horizontally.
IMG_3009

IMG_3010

IMG_3011

IMG_3012

With the length cut back I then recut the button on the end of the stem with needle files. I began by cutting in the line of the button on the underside and the topside of the stem and then used the files to trim back the thickness of the stem from the saddle to the new line of the button. I used a rasp to thin down the thickness of the stem as well. I wanted a graceful flow to the taper of the blade of the stem so I worked it until it was thinner on both the top and bottom sides of the stem from the saddle to the button.
IMG_3013

IMG_3014

IMG_3015

The next series of seven photos show the gradual transformation of the thick and chunky stem after I had first cut the button to the sleeker look of the stem after the file work. I continue to shape the blade with the needle files until the flow looked right and the edges of the stem were tapered with the line of the diamond saddle.
IMG_3016

IMG_3017

IMG_3018

IMG_3020

IMG_3021

IMG_3022

IMG_3023

I reshaped the slot in the button with the needle files into an oval and opened up the airway into a funnel into the blade of the stem. I sanded the end of the button and the opened slot with a folded piece of sandpaper to smooth out the airway.
IMG_3019

IMG_3024

I sanded the stem with a fine grit sanding sponge to minimize the scratches left behind by the 220 grit sandpaper and to give shape and form to the button. The next series of four photos show the shortened and reshaped stem. The length now matches the proportion of the pipe and the angle of the bend and the shape of the button are finished. All that remains is to continue to sand and polish the stem.
IMG_3025

IMG_3026

IMG_3029

IMG_3030

I sanded the stem with micromesh sanding pads from 1500-12,000 grit to remove the scratches and fine tune the shape of the stem. Each grit of pad gave a more refined look to the newly formed stem and button.
IMG_3031

IMG_3032

IMG_3033

IMG_3034

IMG_3035

I sanded the bowl with the micromesh sanding pads at the same time as the stem and when finished I restained and flamed the bowl with the dark brown aniline stain until the coverage was better than previously. I buffed the pipe and the stem with White Diamond and then gave it multiple coats of carnauba wax. I buffed it with a soft flannel buffing wheel to bring up the finished shine. The final photos below show the finished pipe. It is finished and ready for its inaugural smoke.
IMG_3036

IMG_3037

IMG_3038

IMG_3039

I have included some pictures of the pair of tiny pipes that I restemmed – the little Rhodesian and now the little bulldog. They make a nice pair of little pipes.
IMG_3043

IMG_3044

IMG_3045

IMG_3046

A GBD Quantum 9438 Given a New Look and New Life

I am always on the lookout for Rhodesian shaped pipes and 9438s in particular. I have a few that I picked up before they became so sought after. So when I picked up this 9438 Rhodesian for $9.99 on Ebay recently I figured I had a deal. I am pretty sure that the reason for the low price was the condition of the stem and the look of the pipe in the photos on the sale. I was hoping that the bowl was actually in better shape than it looked. I knew that the stem was ruined and a real mess but the bowl looked like it had some life left in it. To me the price it was listed at made it worth bidding on and I won it. I had several possible solutions in mind for the pipe if the bowl was as salvageable as it looked. One possibility is that I have a terribly over reamed 9438 that I could salvage the stem from and utilize on this pipe. If that does not work, my second possibility is to make a new taper stem for it. At the moment I am leaning toward the taper stem. I have included the photos from the seller to give an idea of the pipe’s condition.
GBD1

GBD3

GBD5

GBD6

GBD7

When it arrived it was in worse shape than the photos alluded to, if that is possible. The bowl was badly caked and the rim was caked and slightly scorched. That part was actually not a big issue to me. I could easily take care of that. The finish was shot as expected so that was no surprise. But the stem was not only chewed and broken but also was quite brittle. It was almost as if it was rotted. To cut it off back to the solid material would make the stem very short and stubby. There were also no guarantees that the rest of the stem was not in the same condition once I removed the ruined portion. The shank was dirty and there was a lot of build up inside.

The stamping is actually quite unique. I have not seen a 9438 stamped this way. On the left side of the shank it is stamped with a letter G in a circle to the left of the GBD in the oval as normal. Underneath it is stamped QUANTUM, which is a line I am not familiar with in the GBD family. On the underside of the shank next to the stem is stamped with a J. On the right side it is stamped Made in London in a circle with the “in” inside the circle. Underneath it reads England. Next to that is the 9438 stamping. All of these stampings leave me with many questions. I know from previous study that the oval Made in London stamping, a Comoy’s like stamping, dates it as a Cadogan era pipe and that would likely put it in the 1980’s. The parts that leave me wondering are the G in a circle stamp on the left side and the line QUANTUM. I have never seen or heard of either of those stampings. I have included the next three photos to show the stamping on the shank for those of you who are interested.
GBD2

GBD4

GBD9

I checked my over reamed GBD 9438 to see if it would work on this pipe. It is a Perspex stem and would look quite nice. However, the stem was already a repair and the shank diameter was slightly smaller so that was a no go. I was left with my second option mentioned above – to fit a new taper stem on it. Since the pipe was already in need of a lot of work fitting a taper stem on it would not be an issue. I was pretty sure that I had a vulcanite taper stem that would be a close fit. I went through my stem box until I found the fat taper stem I was looking for. The tenon was too large so I turned it with the PIMO Tenon Turning Tool until it was a close fit to the shank and then took it back to the work table to hand sand it to a snug fit. The two photos below show the new stem. The first photo shows the new stem alone and the second one shows it in comparison with the damaged stem. It is slightly shorter and the shape of the end of the stem tapers more than the original chewed one.
IMG_2932

IMG_2934

The diameter of the stem at the shank was slightly larger than the shank so I sanded it with 220 grit sandpaper to get a good fit between the shank and the stem. I carefully sanded the shank to clean up the fit and make a smooth transition. I wanted to avoid all of the stamping to leave it as pristine as possible.
IMG_2935

IMG_2936

IMG_2938

IMG_2939

IMG_2940

IMG_2941

IMG_2942

IMG_2943

The next two photos show the extent of damage to the old stem. I wanted to have those photos for comparison purposes and to give an idea of how short I would have to cut back the original stem to remove the damage.
IMG_2944

IMG_2945

I reamed the bowl with the PipNet reamer until it was bare wood. In doing that I found that underneath the cake, on the right side about half way down the inside, there was some charring on the wall. It was the beginning of a burn through in that area. I cleaned up around the area with sandpaper and picked at it with the dental pick. In doing so I found that it was still solid and not too deeply damaged. It would require some damage control and protection so I coated it with some pipe mud. The airway entered the bowl a bit high as well so I raised the bottom of the bowl with the pipe mud at the same time. I may well give it a bowl coating to further protect it but will decide that in the future.
IMG_2946

IMG_2950

IMG_2951

The rim also needed to be lightly topped to remove some of the damage there that I could not steam out or repair. I did that with a piece of sandpaper on a board and lightly sanded the rim until it was smooth and the damage minimized. I used a folded piece of sandpaper to bevel the inner edge of the rim to match what remained in the undamaged portion of the rim.
IMG_2947

IMG_2948

I wiped the bowl down with acetone on a cotton pad to clean up the finish and remove the remaining stain. I have found that when I am planning to restain a bowl it is easier blend the sanded portions and the remainder of the bowl when I wash down the finish with acetone before restaining.
IMG_2949

I removed the GBD oval from the old stem with a dental pick. I am still deciding whether to insert it on the new stem or to save it for later use on another old pipe in need of one. Time will tell. I always scavenge as much as is usable before discarding old pipe parts.
IMG_2954

IMG_2955

I washed the pipe down with acetone another time to further clean it up and prepare it for staining. This final wash removed the rest of the finish nicely and I sanded the bowl with micromesh sanding pads 1500-2400 grit to further prepare it.
IMG_2957

IMG_2958

IMG_2959

I warmed the briar with a heat gun and then stained it with a dark brown aniline stain. I flamed it and reapplied the stain and reflamed it until it had an even coat of the brown stain. I mixed the aniline stain with isopropyl alcohol – 2 parts stain to 1 part alcohol. I wanted the grain on the pipe to show through the stain and I also was using it as the undercoat before giving it a slightly darker topcoat.
IMG_2960

IMG_2961

IMG_2962

IMG_2963

I buffed the pipe with White Diamond and then applied a Danish Oil Walnut stain as the top coat. It is a mixture of stain and linseed oil and gives a great finish when put over the top of the previous stain coat. The first three pictures below show the pipe while the stain is still wet. I wiped it down with a soft cotton cloth and hand buffed it to give it an initial shine (Photos 4-7).
IMG_2964

IMG_2965

IMG_2966

IMG_2968

IMG_2969

IMG_2970

IMG_2971

Once the bowl was finished I put it aside and worked on the stem. I had already sanded it with a fine grit sanding sponge so now it was time to sand with the micromesh sanding pads. I wet sanded with 1500-2400 grit pads and dry sanded with 3200-12,000 grit pads. Each successive grit of micromesh deepened the shine in the vulcanite.
IMG_2973

IMG_2974

IMG_2975

I wiped it down with Obsidian Oil, rubbed it down afterwards when it had dried and then buffed it lightly with White diamond. I reinserted it in the shank and then buffed the entire pipe with White Diamond and gave it multiple coats of carnauba to protect and give it a shine. I gave the bowl a second coat of pipe mud on the damage section to fill the shrinkage that had occurred as the pipe mud dried. It is drying and curing now but I look forward to firing up a bowl soon. I like the new look of the pipe and definitely like the taper stem. The shorter stem gives it a stubby look but it actually less than ¼ inch shorter than the saddle stem on my other 9438s.
IMG_2976

IMG_2977

IMG_2978

IMG_2979

Here are a couple of photos with the rondelle inserted in the stem and a bit more of a bend applied to the stem.
IMG_2991

IMG_2992

Refurbishing and Restemming an Unsmoked Small Paneled Rhodesian

I am scraping the bottom of the box for pipes to refurbish. It is clear that I am going to have to go on the hunt again soon. At the bottom of the box I have a few small/tiny pipe bowls that have come to me from a variety of sources. I believe this little one came from Mark Domingues as well. It is unsmoked and stemless. The bowl was in pretty fair shape though the finish coat was varnish of some sort. The stain was spotty under the varnish coat. There was one dominant fill on the left side of the bowl on one of the panels. The drilling is a bit of centre in the bottom of the bowl – slightly to the left of centre. The drilling was wide open and the draught on the bowl was very good. The bowl did not have a ring around the top before the bevel to the rim. It was a smooth transition. I have had several of these older Rhodesian and Bulldogs in the past and they generally had horn stems. This one did not have any stamping on it so I have no idea as to the maker. There was also no stem present. I had a smaller nylon stem in my box of stems that took very little work on the tenon to make for a snug fit in the shank.
IMG_2798

IMG_2799

Once the stem fit well in the shank I sanded the shank and stem to get a good smooth transition between stem and shank. I used 220 grit sandpaper to do the rough work and then used a medium grit sanding sponge to clean up the shank and stem. The stem had casting marks on both sides of the stem and also heavy tobacco stains around the button and in the slot. The airway was virtually clogged and I could barely get a straightened paper clip through before I worked on it with Everclear and bristle pipe cleaners.
IMG_2800

IMG_2801

IMG_2802

I decided to sand the stain off the shank and rework the taper on the pipe from button to bowl. I sanded it with 220 grit sandpaper to remove the excess briar and nylon and smooth out the taper. What I wanted was a clean smooth line from button to bowl. The next four photos show the shank and the stem after sanding with the 220 grit sandpaper. The flow is smooth and even and the lines are very graceful. The casting marks are gone from both sides of the stem and the button is cleaned of the majority of the stains.
IMG_2803

IMG_2804

IMG_2805

IMG_2806

I wiped the bowl and shank down with acetone on a cotton pad to remove the varnish finish and some of the stain on the bowl in order to make it easier to match the stain on the newly sanded shank and the bowl. I also sanded the bowl, shank and stem with a fine grit sanding sponge to remove scratches left behind by the sandpaper and to prepare the stem for sanding with micromesh sanding pads.
IMG_2807

IMG_2808

I sanded the entire pipe and stem with micromesh sanding pads. I wet sanded the stem and the bowl with 1500-2400 grit sanding pads and dry sanded the bowl alone with 3200-12,000 grit pads. I did not want to make the briar to smooth to take a good coat of the stain.
IMG_2809

IMG_2810

IMG_2811

IMG_2812

I stained the bowl with a medium brown aniline stain mixed 2 parts stain with 1 part isopropyl alcohol to get the colour I wanted. I was going for more of a wash than a deep coat. I wanted the grain on the shank and bowl to come through the colour. I used a black permanent mark to draw grain marks on the two fills and to make it easier for the stain coat to blend in and hide the putty marks.
IMG_2813

IMG_2814

IMG_2815

IMG_2816

Once the stain was dry I buffed the bowl with White Diamond to give it a shine and then reinserted the stem and lightly buffed the stem with White Diamond as well. The nylon stems take a very soft touch or they are easily damaged. I gave the bowl and stem several coats of carnauba wax to protect them and then lightly buffed the pipe a soft flannel buffing pad. The finished pipe is pictured below. It is not a big pipe in any sense but should be a great flake pipe. The second photo below gives an idea of proportion by the inclusion of my hand with the pipe. The yellow nylon stem approximates the unique colour and look of the horn stem that must have originally graced this little bowl. The stem is thin and the new taper gives a very delicate look to the new pipe.
IMG_2817

IMG_2818

IMG_2820

IMG_2821

Repairing a Burned Through Bowl

Blog by Steve Laug

There are many times I take on the challenge of repairing a pipe totally for the learning experience. When I begin working on it there is nothing of redeeming value in the pipe itself. It is not beautiful or worthy of keeping. Rather it provides a unique learning opportunity for me to work on a skill in my refurbishing hobby. The pipe below is exactly that kind of pipe. Mark Domigues sent it to me along with other bowls when I was working on the shank repair on his old Peterson pipe. It is a no name pipe with a rustication pattern that I did find particularly attractive. In fact I put off working on it as it just did not appeal to me. I can’t tell you how many times I picked the bowl up and carried it to the recycle bin (a bin I used for briar parts) and then carried it back to the “to be refurbished” box.
pipemud1

pipemud2

pipemud3

Finally, Monday the challenge called me. I took the bowl out of my box and looked it over. As I looked at it, the shape kind of grew on me. It is a brandy glass shape and the shank actually has a flare to it as well. The rustication is a bit striated but as I cleaned up the exterior it is a lot like tree bark. The stain is a contrast stain – a black undercoat in the grooves and a brown top coat. It was worn but could be salvaged. The shank stem junction was also worn but a band would clean up that part of the pipe. The interior bowl sides were clean and solid. The rim was in good shape. But the glaring problem is visible in the photo below – a large, ½ inch diameter burnout on the flat bottom of the pipe. The surrounding briar was solid. The burnout was very focused. The burn did not extend into the rest of the bottom of the pipe. In fact the wood around the edges of the hole was clean and solid. There was none of the darkening around edges of the burnout or on the bottom of the bowl. It looked like it might be a great candidate for practicing a repair. I have done one other repair on a burn out which involved inserting a briar plug and this looked like it was another candidate for that repair. The difference in this one was the solidness of the briar around the hole.
pipemud4

As I worked up the chutzpah to tackle this repair I decided to work on the shank. I sanded the shank smooth in preparation for the band. I like to have a smooth surface under the band rather than a rusticated pattern. I find it gives a good smooth fit to the band. I sanded out the rustication to the width of a nickel band. Once it was sanded smooth, I heated a band over a heat gun and then pressed it into place. I liked the finished look of the band.
pipemud5

pipemud6

pipemud7

pipemud8

pipemud9

pipemud10

I am sure that you can tell at this point that I am procrastinating in addressing the main issue of the bowl with all of the other random work on the pipe but that went on a little longer. I found a stem in my stem box that fit the shank quite well. The mortise had originally had a screw in fitment so it was threaded. The threads were well worn so I decided to use a regular style push stem. I sanded the tenon to get a good tight fit on the stem and then sanded the stem to get a good fit against the shank and band. The slight bend in the stem looked good but it was a bit crooked so I would address that issue later. The finished look of the stem and band with the bowl was quite nice…maybe there was something redeemable about the bowl after all.
pipemud11

pipemud12

I have a few pieces of scrap briar that I have scavenged from pipe maker friends that I had put away for this kind of repair. So I found one that had enough briar left that I could carve it into a plug for the bottom of the bowl. I trimmed it with a hack saw to reduce the size of the plug.
pipemud13

In the first photo below you can see what the hole looked like after I had cleaned it up with a pick and Everclear. I had also reamed the inside of the bowl to remove all of the cake from the sides and the bottom of the bowl. The second photo shows the hole after I had drilled it out. I used a cordless drill with a ½ inch drill bit to round out the damage area and remove any further damage around the burnout. I chose the ½ inch bit as that was the diameter of the hole at the widest part of the hole.
pipemud14

pipemud15

I shaped the briar plug with a Dremel and sanding drum. The next series of photos show the progress of the shaping. I took the rough briar from a wedge to a circular plug and then shortened it to a round plug. I shaped a cap on the plug to the inner diameter of the bowl. Also originally I envisioned pushing the plug through from the inside of the bowl and then cutting off the portion that extended beyond the bottom of the bowl. I would then redrill the airway to finish the repair.
pipemud16

pipemud17

pipemud18

pipemud19

I continued to reduce the diameter of the plug until it was the same size as the hole in the bowl. The inside bowl bottom was hard to match with the cap of the plug. I continued to shape it until it was cup shaped. It seemed no matter how I shaped it however, it would not fit in the bowl bottom as the burnout was not centered in the bowl bottom. It was toward the front of the bowl bottom. I finally decided to use a different tact. I would forgo inserting it from the inside and go the other direction. I would insert it from the outside in. I measured the thickness of the bowl bottom (which was actually in good shape other than the burned portion). I then shortened the plug until it was relatively flush with the bottom of the airway. I coated the plug with superglue gel which gives me a bit more time before it sets and pushed it into the drilled hole. I pressed it against the table top to get the plug in place solidly.
pipemud20

pipemud21

Once the glue set I sanded away the excess briar with a Dremel to match the surface of the bowl. I was not worried about the rustication as I would duplicate that after I finished working the plug into place. The next two photos show the plug and the bowl surface are smooth and the plug is tightly in place.
pipemud22

pipemud23

The next photo shows the interior of the bowl. The plug is even with the entrance of the airway. There is difference in bowl depth around the left edge. I plan to give the bottom of the bowl a thick coating of pipe mud to both protect the new plug and to even out the slight trough on the left front edge of the plug.
pipemud24

I rusticated the bottom of the bowl with the Dremel to match the tree bark look of the rustication on the bowl (Photo 1 below). I stained it with a dark brown aniline stain and then also gave the bottom of the bowl a second coat with black stain to emulate the effect of the stain coat on the rest of the bowl (Photos 2 and 3 below).
pipemud25

pipemud26

pipemud27

I stained the rest of the bowl with the dark brown stain to freshen it up and blend in the stain on the bottom of the bowl. I buffed it with red Tripoli and White Diamond to raise a shine and then gave it several coats of carnauba wax on the buffer. The finished exterior is visible in the first close up below and the following four photos of the pipe.
pipemud28

pipemud29

pipemud30

pipemud31

pipemud32

With the repair finished on the exterior of the pipe I worked on the stem. I sanded it with 220 grit sandpaper and then with a medium grit sanding sponge to clean up the oxidation and scratches on the vulcanite. I heated the stem with a heat gun to straighten it and then rebent it over a rolling-pin to give it a slight bend. I set the bend under cool water and then gave the stem a quick buff with Tripoli before taking it back to the work table to further sand the stem.
pipemud33

pipemud34

I continued to sand the stem with micromesh sanding pads from 1500-12,000 grit to bring a shine to the vulcanite. I wet sanded with 1500-2400 grit pads and dry sanded with 3200-12,000 grit sanding pads. When I finished sanding with the pads I rubbed the stem down with Obsidian Oil and let it dry then buffed it with White Diamond and gave it multiple coats of carnauba wax.
pipemud35

pipemud36

pipemud37

pipemud38

pipemud39

pipemud40

pipemud41

With the externals repaired and finished it was time to make up some pipe mud to coat the bottom of the bowl and give a protective coat over the bowl plug. I sacrificed a nice little Cohiba Cuban cigar for the purpose of making the mud of the ash. When the cigar was finished I had a nice bowl of clean ash.
pipemud42

I mixed the ash with a small amount of water to make a paste. I inserted a pipe cleaner into the airway and then applied it to the bottom of the bowl, tamping it into the crevices around the plug and building up the bowl bottom. As the pipe mud dried I added additional layers of mud to the bottom of the bowl and around the lower sides of the bowl. The next series of three photos show the progressive build up of the mud in the bottom of the bowl.
pipemud43

pipemud44

pipemud45

When the mud had dried to touch I buffed the pipe a final time with White Diamond and then gave the entire pipe several coats of carnauba wax to protect and give it a shine. I then used a clean flannel buff for the final buffing. The restored pipe is pictured below. I will let the pipe mud cure and harden for a few days before loading up the pipe and smoking the inaugural bowl.
pipemud46

pipemud47

pipemud48

pipemud49

Restemmed Dr. Grabow Royal Duke Billiard

Blog by Steve Laug

I am getting close to the bottom of the box of pipes to refurbish so I pulled out this Dr. Grabow bowl to restem and to refinish. It is stamped Royal Duke over Dr. Grabow on the left side of the shank and Imported Briar on the right side. I like taking the sealer coat of varnish off of these old Grabows and seeing what they look like refinished. I reamed the bowl with the PipNet reamer and cutting heads. I found a stem blank in my box and turned the tenon with a Pimo Tenon Turning Tool until it was close and then finnished the fit by hand. I ran a Dremel with a sanding drum on it down the sides where the overflow from the casting of the stem blanks left the sides and end rough. The next six photos show the fit of the new stem and the look of the pipe with its new stem.
IMG_2685

IMG_2686

IMG_2687

IMG_2688

IMG_2689

IMG_2690

I wiped the bowl down with acetone to remove the finish (photos 1-3 below). I then sanded the smooth surface of the bowl with a medium grit sanding sponge to break up the varnish finish on the rim and sides. I then wiped it down with acetone a second time and was more successful removing the varnish coat (photos 4-9 below). As can be seen from the progress of the photos the finish came off nicely and the rim darkening and bubbled varnish was also removed.
IMG_2691

IMG_2692

IMG_2693

IMG_2694

IMG_2695

IMG_2696

IMG_2697

IMG_2698

IMG_2699

I decided to stain the pipe with a medium walnut stain in a linseed oil mixture. I rubbed it on the bowl and rubbed it off until the colour was solid and even over the bowl. The next series of three photos show the freshly stained bowl of the pipe. I was able to get into the grooves of the rustication with the cotton pads dipped in stain so that all surfaces were covered.
IMG_2700

IMG_2701

IMG_2702

I rubbed off the stain and took the pipe to the buffer. I buffed it with White Diamond to polish the surface of the bowl and rim. The fibres from the pad also polished the grooves of the rustication as well. I put the stem back on the bowl and sanded it down with 220 grit sandpaper and a medium grit sanding sponge to remove the scratches left behind by the Dremel. I particularly worked on the shank stem union to make sure it was a smooth transition. I sanded the stem with micromesh sanding pads. I wet sanded with 1500-2400 grit and dry sanded with 3200-12,000 grit sanding pads. The progress of the sanding with micromesh pads is visible in the next series of three photos below. When I finished sanding the stem I wiped it down with Obsidian Oil and let it dry. I rubbed it down and buffed it with White Diamond on the buffing wheel.
IMG_2703

IMG_2704

IMG_2705

The finished pipe is pictured below. I buffed the pipe with multiple coats of carnauba wax and then polished it with a clean flannel buff. This old timer is ready to go back into service and will be a nice addition to someone’s pipe rack.
IMG_2706

IMG_2707

IMG_2712

IMG_2713

Restoring an Older GFB Three Star Horn Stem Bent Bulldog

Blog by Steve Laug

The pipe below is one I bought off EBay because it looked like a challenge, that and the fact that it was another GFB pipe. This is the third GFB that I have in my collection. I love the way they feel in the hand and the elegant look of the curves and angles they have. I went back and reread my previous two posts on the GFB pipes I had refurbished to remind myself of their history. There I described the process of hunting down information on the brand. I summarize that here for those may not have read the other two posts. (https://rebornpipes.wordpress.com/2013/06/07/restemming-and-reclaiming-an-older-unsmoked-gfb-briar-calabash/ , https://rebornpipes.wordpress.com/2013/04/01/restoring-a-gfb-bent-billiard-another-reclamation-project/)

The first thing I found was information that the GFB brand was an older French Trademark and that it came from Saint Claude, France. A more focused search for GFB French Briar Pipes led to information that the stamping GFB stood for Great French Briar – something about that did not seem right to me so I continued to look and finally came across the following advertisement from a Sears Catalogue. It shows a full page of GFB pipes and the header says GENUINE FRENCH BRIAR. That made much more sense to me, and all three of my GFB pipes match the pipes in the catalogue. It was good to be reminded of the old brand. I am pretty sure that all three of my GFB pipes come from either the late 1890’s or the early 1900’s.
genuine-french-briar-pipes-on-parade

This third pipe was a charmer to me. When I saw the photos I decided I would bid to win it. The elegance of the old pipe caught me. The bowl appeared to be in good shape and it had a horn stem. The striations and colour of the stem was beautiful even in its oxidized state. The three photos below were included in the EBay sale. The third photo shows the underside of the stem and the damage to the underside near the button. It looked to be more than tooth marks or chewing. It actually looked like “worm” damage. From the photos it appeared to be localized to that part of the stem and was worth a chance. Worst case scenario, I would sacrifice the stem and restem the old pipe with a vulcanite stem.
GFB1

GFB2

GFB3

I find that photographing stem damage is difficult and my photos can be out of focus. But I now have a tripod to help with the clarity of the photos (did not get it until after I had started the repairs on this stem. Ah well sorry about the clarity of some of these). When the pipe arrived I took it apart and examined the holes on the end of the stem. Under the lens it was clear that it was not a worm hole at all. Rather it had been bitten and the stem had crumbled in that area. It did not go through into the airway so I think that the previous owner had scraped out the crumbled area of the horn stem for cleanliness and just kept smoking it. That was encouraging to me as it meant that I could repair and not worry about an old “worm” somewhere in the horn stem chewing his way out later! The next two photos show the extent of the damage to the area
GFB4

I cleaned out the open area with cotton swabs and Everclear, careful to not use too much of the alcohol on the horn stem. Once it was clean of debris and dust I decided to fill the area with a superglue gel rather than the usual liquid superglue I generally use (Photo 1). My thinking was that the gel would sit better in the large area without running all over the stem. There were also nicks on the sharp edges near the shank that I also repaired with the superglue gel (Photo 2). I layered the glue into the hole to build it up gradually (Photo 3) as each previous layer dried.
GFB5

GFB6

GFB7

Once the glued cured over night I sanded the area with medium grit emery paper to remove the high spots and smooth out the surface (Photo 1). I refilled the low areas on the fill to further level out the area. There was also a deep nick on the sharp edge of the shank. I cleaned that out and used the superglue to fill that as well. It would dry black but with the staining of the bowl that could be minimized and I wanted it smooth to the touch rather than the sharp cut of the nick that was previously present (Photo 2).
GFB8

GFB10

With everything glued I set the bowl and stem aside and went to work for the day. I would work on the patched areas when I returned home in the evening.

When I returned in the evening, the patches were dry and the pipe was ready to be worked on. I reamed the bowl with the PipNet reamer. On this particular pipe the bowl was conical so it took three different cutting heads on the T handle to ream the bowl to the bottom. With down I cleaned the bowl, shank and stem with Everclear, pipe cleaners and cotton swabs. I wanted the pipe cleaned out before I worked on the exterior.
GFB11

GFB15

The next two photos show the stem after the patches had hardened. Though the photos are a bit blurry, the shininess of the spots where the superglue patches were applied is very clearly visible. Those areas would need to be sanded smooth to match the surface of the surrounding horn.
GFB12

GFB13

I sanded the patch on the shank of the pipe with 220 grit sandpaper and also medium grit sanding sponge to remove the excess glue from the patch. Then I wiped the bowl down with Everclear on a cotton pad. I decided not to use acetone as the stamping on the shank was filled with a gold paint and was still visible. I did not want to damage that stamping. I carefully worked the Everclear around the stamping so as not to get any in the grooves of the stars and GFB stamp.
GFB14

GFB16

GFB17

GFB18

I sanded the patch on the stem with 220 grit sandpaper and then a medium grit sanding sponge to smooth out the patch. I continued to sand it with the micromesh sanding pads. I wet sanded with 1500-2400 grit and dry sanded with the remaining grits up to 12,000.
IMG_2645

GFB19

I buffed the stem with White Diamond on the buffer and the finished stem is shown below. The patch still shows some small holes that need to be repaired with superglue. The sanding and polishing made them very apparent in the first photo below. The patch at the sharp edge near the shank came out very well and is invisible. The horn of the rest of the stem has a deep sheen to it after all the sanding and polishing.
GFB20

GFB21

I unscrewed the stem and set it aside while I stained the bowl. I used a medium walnut stain mixed with linseed oil to stain this pipe. The colour is a rich brown with a slight red in certain lights. It matches the colour of the other GFB pipes that are in my collection. I buffed the bowl with White Diamond on the buffing wheel. Then I gave it a coat of carnauba wax and set it aside to work some more on the stem.
GFB22

GFB23

GFB24

GFB25

I was not completely satisfied with the stem patch so I sanded it next to the button some more and cleaned it out. I put some more of the superglue in the low spots and set it aside to cure while I went to work for the day.
GFB26

GFB27

When I returned the glue was hard and the patch a solid bubble on the surface of the stem. I sanded it with the medium grit emery paper and then 220 grit sandpaper to remove the over fill. I always over fill the spots as the glue shrinks as it dries. I have learned that it is easier to remove the excess than to continue to fill and sand repeatedly. I sanded it with a medium grit sanding sponge and then went through the grits of micromesh sanding pads again from 1500-12,000 grit. When I had finished I rubbed the stem down with Obsidian Oil and set it aside to absorb. Once done I buffed it on the wheel with multiple coats of carnauba wax.
GFB28

After buffing and polishing the horn stem I buffed the entire pipe with White Diamond on the buffing wheel to polish it then gave it multiple coats of carnauba wax to restore and preserve the shine on the horn and the briar. The finished pipe is back to usable with the stem patch taking care of the deep holes that were previously in the stem. The striated horn stem looks like new and the colouration of the horn goes amazingly well with the medium brown walnut stain. Other than the slightly visible patch the pipe looks like new. I intend to enjoy a bowl of some aged tobacco in a pipe that is far older than I am. I look forward to the day when I pass it on in trust to the next pipeman who will care for and cherish it. Sentimental? I don’t think so, just a realist who knows that this pipe has lived and will live longer than I.
GFB29

GFB30

GFB31

GFB32

A Dr. Grabow Special Rhodesian/Bulldog – A Makeover

The last of the pipes from the Ebay lot below was the one in the bottom left corner of the photo. It was stamped Dr. Grabow over Special over Imported Bruyere on the left side of the shank. The finish was a varnish or polyurethane coat over the briar. It was bubbling and crackling. There was water damage on the edges of the rim. The briar itself was in good shape with no dents or roughening on the rim. The rim was slightly darkened but no dents or dings. The bowl was slightly out of round from poor reaming but very workable. The stem was a mess with chew marks on the top and the bottom for about an inch up the stem from the button. The stem was made of nylon and not vulcanite. The tenon was a push style and not a screw in stem. There was a shovel like stinger in the end of the tenon. The stem was loose in the shank and there was significant debris and buildup in the shank and in the stem. The second photo below shows the pipe as it was in the pictures from the seller.
pipes1

pipes3

I took it to my worktable this evening and went to work on it. I took the stem out and began to sand on the bite marks on the top and bottom of it. The next series of five photos show the progress of smoothing out the stem by sanding. I began with 220 grit sandpaper and worked up to a medium grit sanding sponge. By the fourth and fifth photo the bite marks are gone and some sanding scratches remain that will need to be worked out with micromesh sanding pads. I recut the edge of the button on the top and bottom with a needle file to clean up the angles. That is also visible in the last two photos. I also removed the stinger and cleaned it with 0000 steel wool and then polished it with micromesh sanding pads.
IMG_2564

IMG_2565

IMG_2566

IMG_2567

IMG_2568

While I worked on the stem the bowl had been soaking in an alcohol bath to help loosen the varnish or urethane finish. My plan was to remove the finish totally and sand and restain the pipe once it was cleaned and sanded.
IMG_2569

IMG_2570

IMG_2571

The alcohol bath softened the finish so when I dried it off the finish was cloudy. I have found that with this kind of finish I can use acetone on a cotton pad afterward to further remove the softened finish. The next two photos show the bowl with the finish removed. There is some nice looking birdseye grain coming through. Once the briar was clean I reglued the metal decorative band back on the shank and let it dry.
IMG_2572

IMG_2574

I sanded the bowl with the medium grit sanding sponge and then with 1500-2400 micromesh sanding pads. The next series of four photos are a little out of focus but the cleaned surface of the briar is visible and the grain that was underneath the finish is quite nice. I was also able to remove the water marks/damage that was along the outer edge of the rim and down the side of the bowl in the process of the sanding. I also cleaned out the shank with cotton swabs and Everclear. I did the stem as well and cleaned until the cleaners and swabs came out clean and white.
IMG_2575

IMG_2576

IMG_2577

IMG_2579

While the glue dried I worked on the nylon stem. I was able to remove all of the tooth damage. I wet sanded it with 1500-2400 micromesh sanding pads and removed the majority of the scratches left behind by the sanding sponge. I continued to rework the stem with these sanding pads until all of the scratches were gone and the stem began to take on a shine. (Photos 1-2 below show a top and bottom view of the stem).
IMG_2581

IMG_2582

I dry sanded with the remaining grits of micromesh sanding pads from 3200-12,000 grit. The stem took on its original shine. The next series of four photos show the stem as it moves through each level of polishing.
IMG_2583

IMG_2584

IMG_2585

IMG_2586

I wiped the bowl down a final time with acetone on a cotton pad to remove the sanding dust and grit. I dried it carefully and then it was ready to stain. I decided to use a linseed oil and medium walnut stain on this pipe. I felt it would make the grain show well and give the bowl a good protective coat. I applied the stain and wiped it off, reapplied and wiped it until I got the coverage I wanted on the bowl. The next series of four photos show the stained bowl.
IMG_2587

IMG_2588

IMG_2589

IMG_2590

I buffed the bowl and shank on the buffing wheel lightly with Tripoli and then with White Diamond to give it a shine. I then buffed it with carnauba wax and gave it several coats to protect the wood. I did not buff the stem on the wheel as the nylon heats too quickly on the buffing wheel and melts. I have made a mess out of more than one nylon stem. It does not seem to matter how light a touch I use the wheel and the nylon stems do not work well together. I gave the stem a coating of Obsidian Oil and rubbed it into the stem. I then hand applied several coats of carnauba wax and hand buffed the stem with a shoe brush and a soft cotton cloth. The finished pipe is pictured below. All in all it is not a bad looking old Grabow. It is clean and should smoke very well.
IMG_2591

IMG_2592

IMG_2593

IMG_2594

A New Stem for a Barling’s Make Billiard

Blog by Steve Laug

In talking with a friend a few days ago via email she mentioned that she had come across an old Barling pipe on US Ebay. She described it as a small billiard with nice grain, a few scratches and some over reaming in the bowl. The stem had a faded “W” or a crown on it the top. The stamping is Barling’s arched over Make on the left side and possibly a faint EL and a 3 near the bowl on the right side. She sent me the following two photos for me to have a look at the pipe.
BARLING MAKE PIPE PIC.1

BARLING MAKE PIPE PIC.2

From the photos and her description I was pretty certain the pipe stem was not original. It just did not look right in the photos above – the fit was off on the shank and the length was too short. I was pretty sure she had a replacement stem on the pipe. She packed it up and sent it off to me. I received it yesterday and took it to the work table. My assessment is below.

The pipe is old and very worn. The scratches that she mentioned were deeper than I expected from the photos. The finish was worn on the underside of the shank and in places on the sides of the bowl. There were some dark spots on the top and bottom of the shank that looked like stains from moisture or something sitting against the shank in a box. Several of the scratches had white markings in them. As she noted the bowl was over reamed but that too was worse than I expected. It had been reamed to the point that the walls were very thin all the way around and the inner edge of the bowl was out of round. In examining the tapered stem up close it indeed seems to be proportionally short in comparison to the length of the bowl and shank. The shoulders at the shank/stem union are rounded and the fit is not tight. The crown or “W” stamping she mentioned is very hard to see and I am not sure of the actual stamp. There were deep scratches on the vulcanite of the stem as well. In my opinion the pipe needed to be restemmed. The next three photos below show the pipe on my work table before I started fitting a new stem.
IMG_2505

IMG_2506

IMG_2507

I had a slab cut stem blank in my box of stems that had a Barling like look to it. The tenon needed to be turned slightly and hand sanded to fit the shank well. The diameter of the stem at the joint of the shank and stem was larger and needed to be trimmed to fit well. The slab blank had casting seams along the edges, a tight slot and an unfinished look to the edges. I used a Dremel with a sanding drum to cut back the diameter of the stem at the shank. I also used it to sand away the casting marks and to smooth out the edges of the slab to give it a more finished looked. I took it back to the work table and sanded the saddle and slab with medium grit emery cloth to reduce the scratches left behind by the Dremel and to smooth out the fit to the shank. The next four photos show the state of the pipe after fitting the stem, using the Dremel and the emery cloth. The saddle still shows the marks of the sanding drum and needs more fine tuning to be a good tight fit but it is getting there. To me this stem looks more fitting to the old Barling’s Make billiard.
IMG_2501

IMG_2502

IMG_2503

IMG_2504

I sanded the stem with 220 grit sandpaper and a medium grit sanding sponge to fine tune the fit and to remove the scratches. I then sanded the stem with micromesh sanding pads. I wet sanded the stem with 1500-2400 grit pads and used needle files to open up the slot in the button. I used the round, oval and flattened files to open and shape the slot. I sanded it with a folded piece of 220 grit sandpaper to smooth out the newly shaped slot. I then dry sanded with the remaining grits of micromesh from 3200-12,000 grit. The photos below show the progress of the sanding.
IMG_2508

IMG_2509

IMG_2510

IMG_2511

I rubbed the stem down with Obsidian Oil and set it aside to dry while I worked on giving the bowl a new coat of stain to bring it back to life. I gave it a coating of Medium Walnut aniline stain and flamed it. I took it to the buffer and gave it a light buff with White Diamond on the buffing pad. I was careful around the faint stampings on the shank and hand buffed the shank.
IMG_2512

IMG_2513

IMG_2514

IMG_2515

I reinserted the new stem and gave the stem a buff with White Diamond and then waxed the entire pipe with carnauba wax. I applied several coats of the wax and the buffed it with a clean flannel buff to bring up the shine. The finished pipe is pictured in the four photos below. The new stem gives the pipe a much more dignified new look. I can’t wait to get it back to the owner and see what she thinks of the “new” look her pipe now sports!
IMG_2516

IMG_2517

IMG_2518

IMG_2519

Restoring An Interesting Piece of Pipe History – An Art Deco C.B. Weber Streamliner

Blog by Steve Laug

In a recent EBay purchase I picked up a unique pipe that has a flowing look to it. I was intrigued to figure out the history and any information I could find regarding it so I went on a hunt on the web. One of the first articles I came across is found in the link below. http://streamlinesdeluxe.wordpress.com/2012/06/01/weber-streamliner-pipe-2/ The author of the blog makes a brief reference the pipe I found and even has a picture of it. He speaks of the stem being made of something other than vulcanite. Other references I found in online pipe forums spoke of the fact that the bowl was not made of briar but of some composite material. Others said that the bowls were made of American hardwoods. Interestingly no one spoke of what hardwoods were used. I have hunted high and low on the web and can find nothing definitive on the pipe’s manufacture or composition.

I broadened my search to information on finned pipes. I did not want information on Porsche design pipes or metal finned pipes but was looking for anything on wooden finned pipes. I came across the following information on a patent taken by a carver/designer named Wayne Leser. His diagrams and patent application is included below and it can be seen that it is actually very close to CB Weber’s Streamliner. His patent was applied for through the US Patent Office in January of 1941. I assume the patent was granted as it is on the Patent website. Weber’s design seems to be elongated a bit more than the Leser design but the tear drop shape of the outer bowl and the similarly tear drop shape of the drilling match quite well.

I can find no further information on Wayne Leser so I have no idea if he sold his concept to Weber, or worked for Weber. If anyone has further information on that connection it would be great to learn about it. Please post a response below.
Leser Patent Drawings

Leser Patent Application

The pipe I picked up is pictured below in photos from the EBay seller. The photos were not very clear so I could not see the condition of the pipe very well but I was intrigued by it nonetheless. It looked like the bowl was in good condition. The stem however, appeared to be a replacement stem and the fit was poorly done. In the second photo below it is evident that the junction of the stem and shank does not meet.
pipes2

Streamliner

When the package arrived from the seller I took the pipe to my worktable and photographed the condition of the pipe. The pipe was in fairly decent condition. The left side of the bowl was clean. It is stamped Streamliner in script over C.B. Weber & Co.
Streamliner logo3

Streamlinerlogo2
There were two small divots in the shank just below the stamping. I thought at first these might be dents but they are actually spots where the wood is missing. The right side of the bowl is also in good shape. The fins are intact all the way around the bowl with no chips or breakage. The rim was tarred and had a small burn spot on the point at the front of the bowl. The stem was definitely a replacement stem. In my reading I had found copies of the logo that was originally on the stem and also the fact that the stem had a stinger apparatus as part of the fitments. This stem had neither and the fit was wrong. The diameter of the stem was bigger; the tenon was off center therefore the fit was out of line with the left side being too large and the right side too small. The length of the stem was also too long and did not match the dimensions that I had found online regarding the overall length of the pipe. The bowl was in pretty decent shape though there was some kind of bowl coating on it that had broken free of the walls. It is a tear drop shaped bowl with a downward angle on the front portion so reaming it would be tricky. The wood on this one was definitely not briar. The bottom of the bowl has a foot that makes it a sitter and there is a rusticated pattern on the bottom of the bowl.
IMG_2425

IMG_2426

IMG_2427

IMG_2428

IMG_2429

I carefully reamed the bowl to remove the bowl coating and the slight cake that was there. I used two different cutting heads on the PipNet reamer. The first head was the same diameter as the main portion of the bowl. For the angle teardrop end I used the smallest cutting head. Between the two of them I was able to clean up the bowl and remove all of the coating.
IMG_2430

IMG_2431

Removing the tars from the rim was a bit of a challenge and combined with burn mark on the point I decided to sand off the rim with a medium grit sanding sponge. I would then have to restain the bowl. I sanded it with the medium grit sponge and then with a fine grit sanding block to work on the burn mark and the darkening of the rim.
IMG_2432

IMG_2433

IMG_2434

IMG_2435

I finished the sanding by wiping down the bowl with acetone on a cotton pad. I was able to even out the finish on the bowl and rim so matching stain would be much easier to do. I was also able to lighten the burn spot with the same process to the point that a good coat of oxblood stain would make it fade into the surface of the rim.

I then set the bowl aside and went to work on fitting a new stem to the bowl and shank. In the first photo below I have the new stem blank fit to the shank. It still needs work to make the diameters match. The stem is about an inch shorter and brings the pipe back to the original length as noted from my online work. I also think that proportionally it works better with the elongated bowl and shank than the one that came with it.
IMG_2436

In order to get the fit good and tight I used a sanding block to make sure that the transition between the bowl and shank was smooth. This entailed sanding the shank slightly in the process. In the next series of four photos below the fit is finished. The transition is smooth and the fit is good and tight.
IMG_2437

IMG_2438

IMG_2439

IMG_2440

I wiped the pipe down with acetone once again to even out the finish on the shank. The grain in the original wood is quite visible in these photos and it is not briar.
IMG_2441

IMG_2442

IMG_2443

The flow of the taper on the stem was still too chunky in my opinion to match the Streamline concept of the pipe. I used 220 grit sandpaper and files to change the slope of the stem. When I had it the way I envisioned I sanded it with 220 grit sandpaper, a medium grit sanding sponge and also a fine grit sanding block. The angle was right and the profile looked much more “streamlined”.
IMG_2445

IMG_2446

I sanded the stem, bowl and shank with micromesh sanding pads. I wet sanded them with 1500-2400 grit sanding pads and dry sanded with 3200-12,000 grit pads.
IMG_2447

I decided to try to match the original stain using a Danish Oil (linseed oil with a cherry stain). I applied the stain with a cotton pad and wiped it down. When it had dried I was not happy with the coverage and appearance so I removed the stain with acetone to try a different stain.
IMG_2448

IMG_2449

IMG_2450

Once I had the finish removed I restained it with an oxblood aniline stain. I had to apply it and flame it several times to the top of the bowl and shank to get the stain to set deeply and match the rest of the bowl. This was a hard one to get a good stain on. I decided to not apply the stain in the grooves of the fins but just on the surface of the bowl. It worked quite well with the original stain in the fins matching the surface colour really well.
IMG_2452

IMG_2453

IMG_2454

IMG_2455

I did some further polishing on the stem with the higher grits of micromesh from 3600-12,000. Once I had finished the sanding I polished the stem with Maguiar’s Scratch X2.0 to deepen the shine. I coated the stem with Obsidian Oil and then buffed it with carnauba wax to seal it and protect it. The final buff on the stem was done with a soft flannel pad.
IMG_2457

IMG_2458

I reinserted the stem and gave the pipe a final buff with carnauba wax and a soft flannel buffing pad. The finished pipe clearly shows some of the grain pattern of the alternative wood on the shank and the top and bottom of the bowl. The stem came out fitting nicely and giving the overall pipe a new “streamlined” appearance more accurately approximating the original stem. The bowl feels great in the hand and is uniquely attractive as a piece of pipe history. Time will tell if I smoke this one or just keep it around for display purposes. Below are photos of the finished pipe.
IMG_2463

IMG_2464

IMG_2465

IMG_2466