Blog by Paresh Deshpande
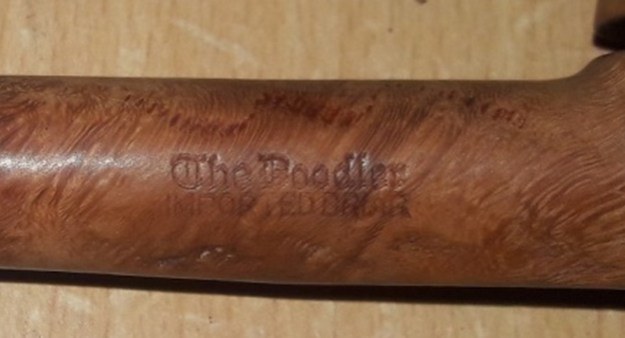
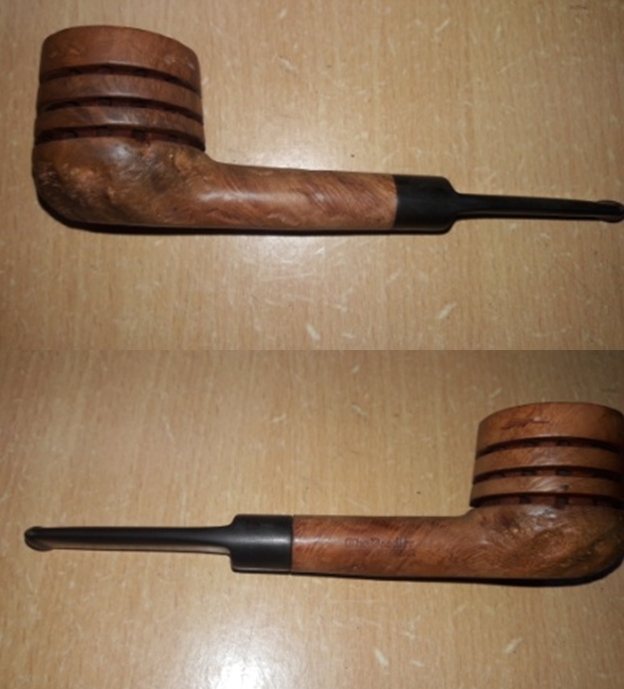
I had just finished restoring three pipes from my inheritance; a WDC Stratford, The Doodler and a Barling # 2639. Save for the WDC, these were easy projects and it helped that Abha, my wife, had done all the initial cleaning. I finished these pipes in real quick time.
Now I turned my attention once again to the pipes from my “Mumbai Bonanza”. I have restored three pipes; two Dunhill and a Stefano Exclusive from this lot of 30 and each one has been, well, to put it mildly a royal pain where you wouldn’t like it!! How did I land up with this lot makes for an interesting read and about one which I have written in the restoration of the Stefano Exclusive (https://rebornpipes.com/2019/03/11/mumbai-bonanza-stefano-exclusive-restorationa-month-long-project/).
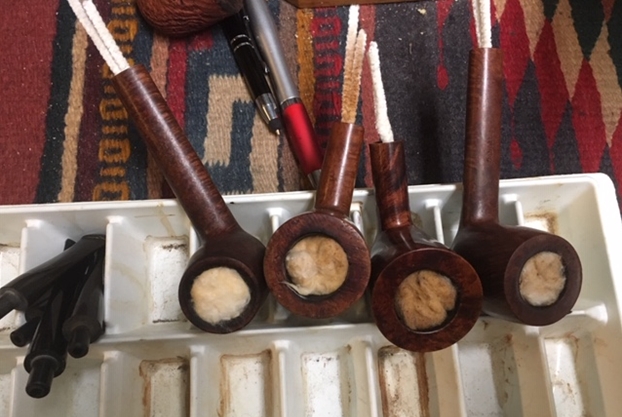
Here are pictures of the pipes that I received in this lot.

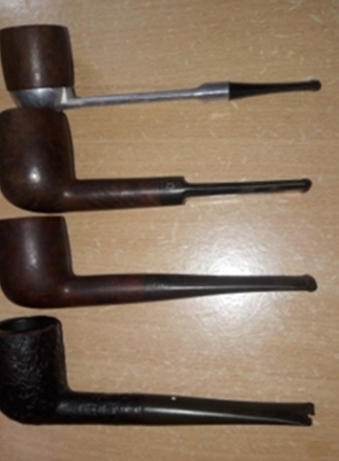 This lot contains some very nice collectible pipes, a few well known brand pipes and some mediocre pipe brands. Overall, with seven Dunhills, a Preben Holm #1, a couple of “Made in England” Pete System pipes, Charatan’s and other assorted pipes, I would say that I had hit a huge jack pot!!! Hence, I like to call this find as “Mumbai Bonanza”.
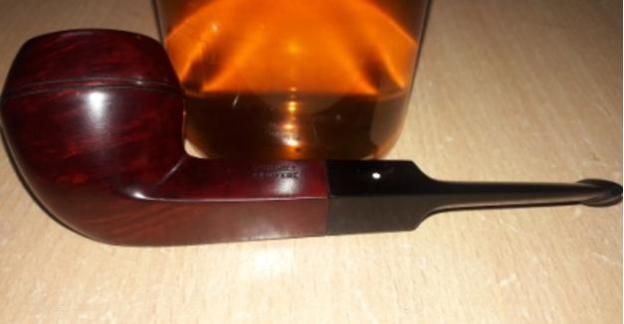
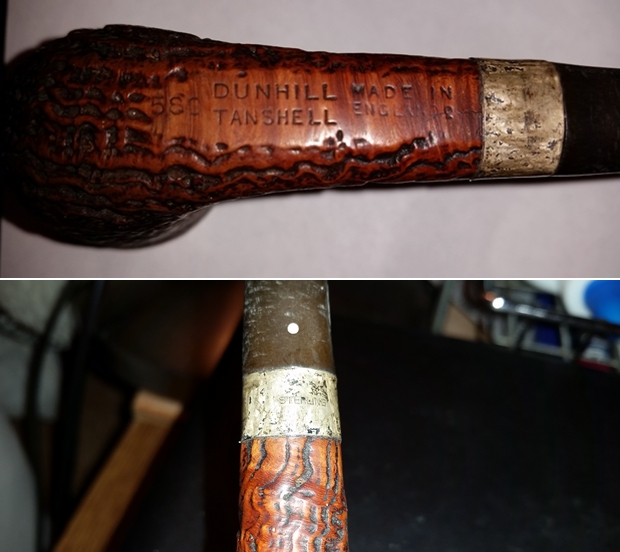
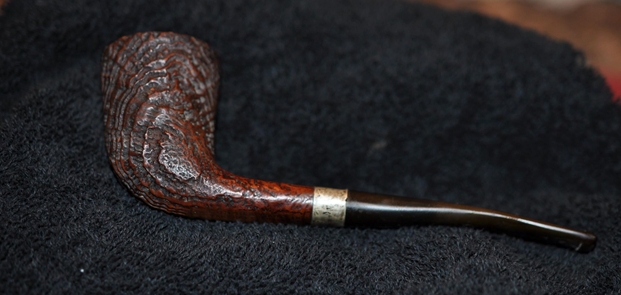
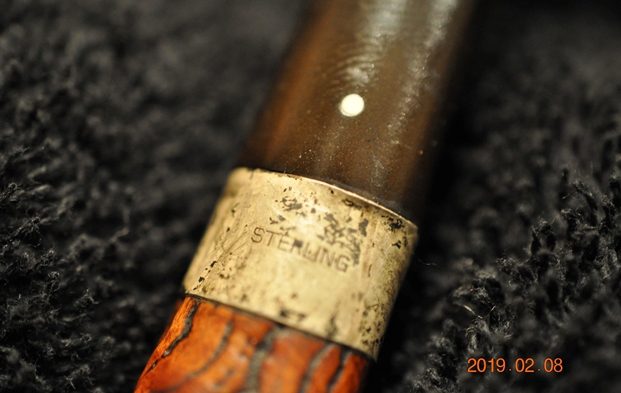
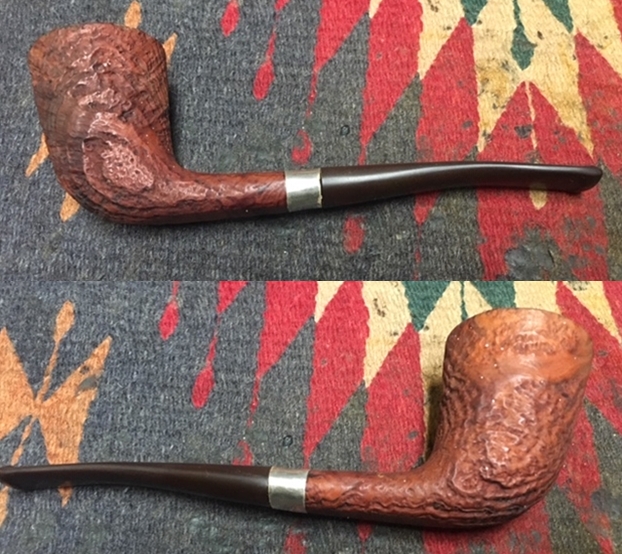
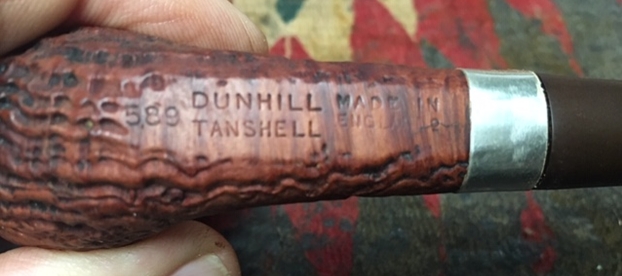
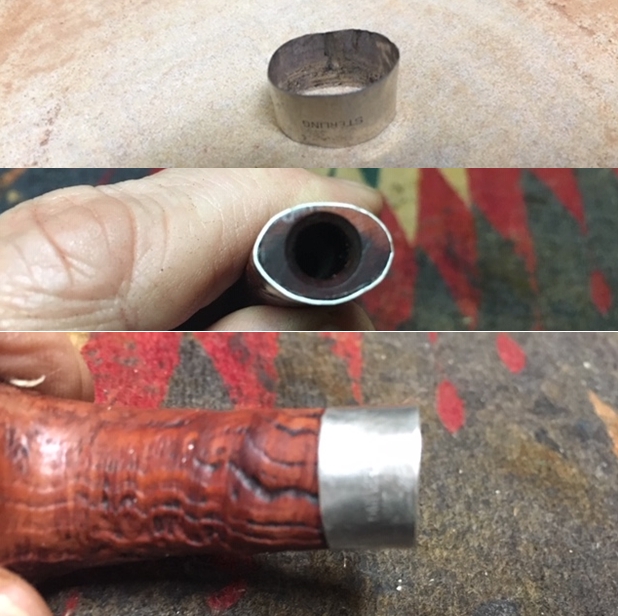
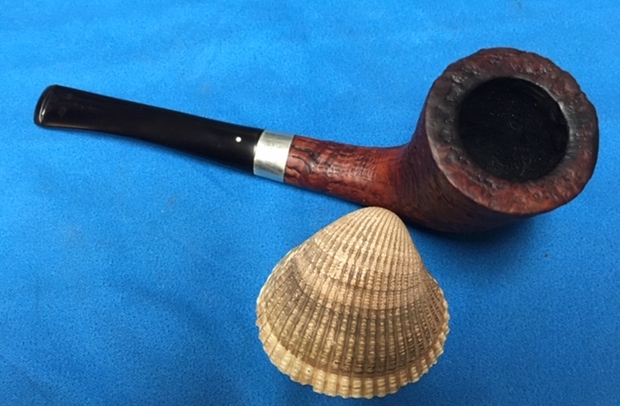
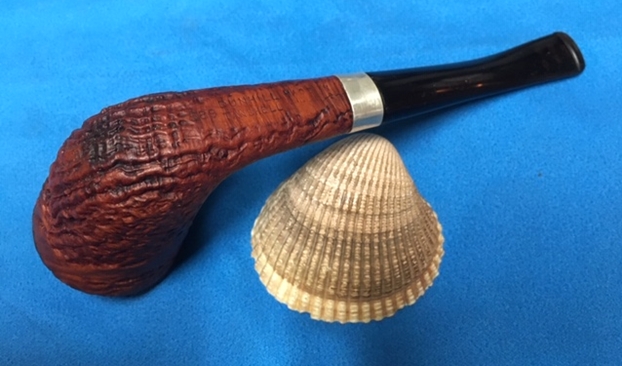
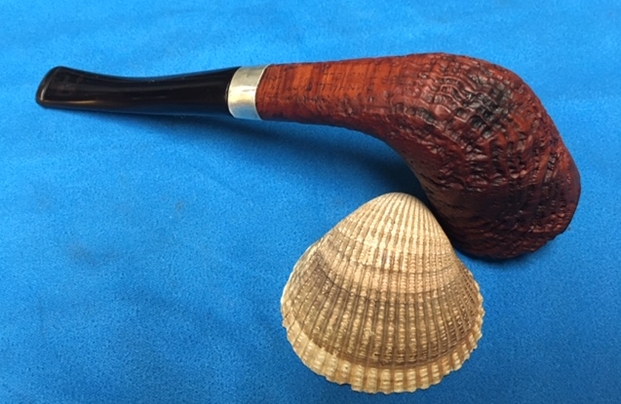
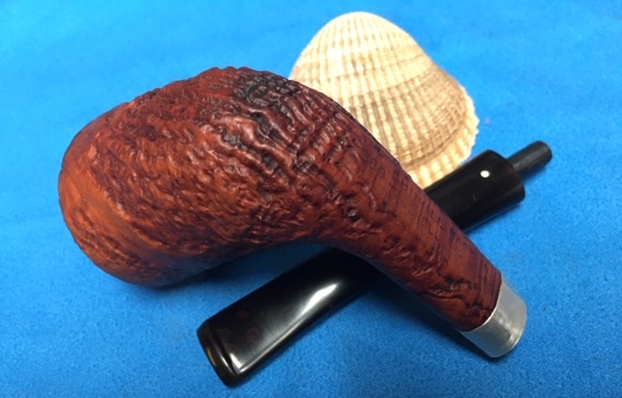
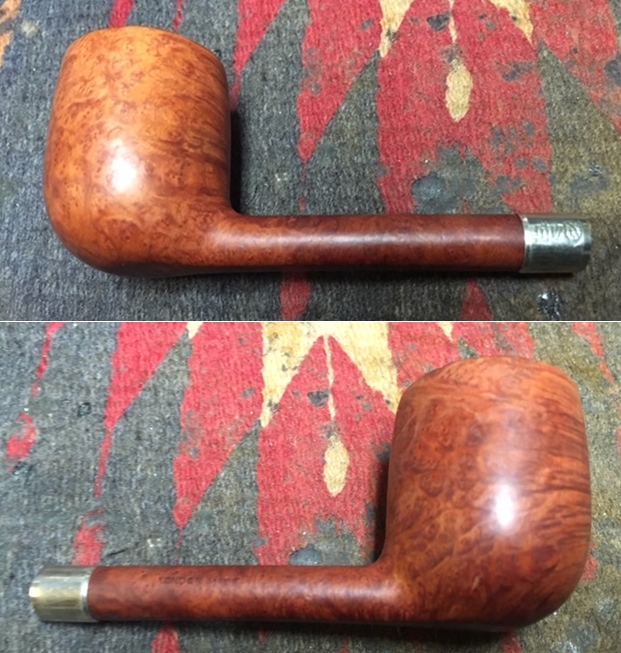
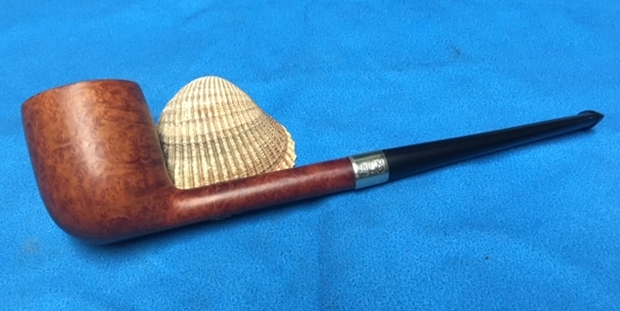
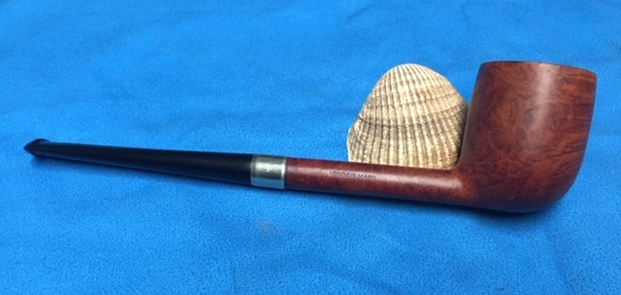
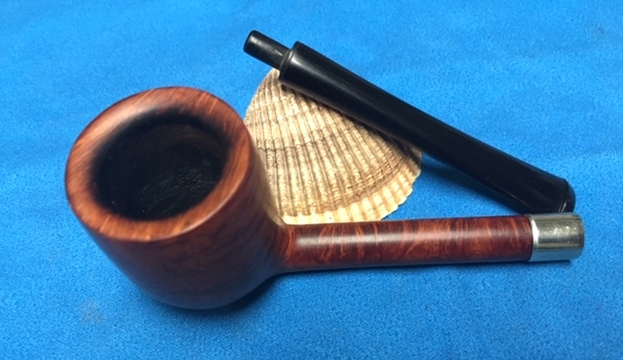
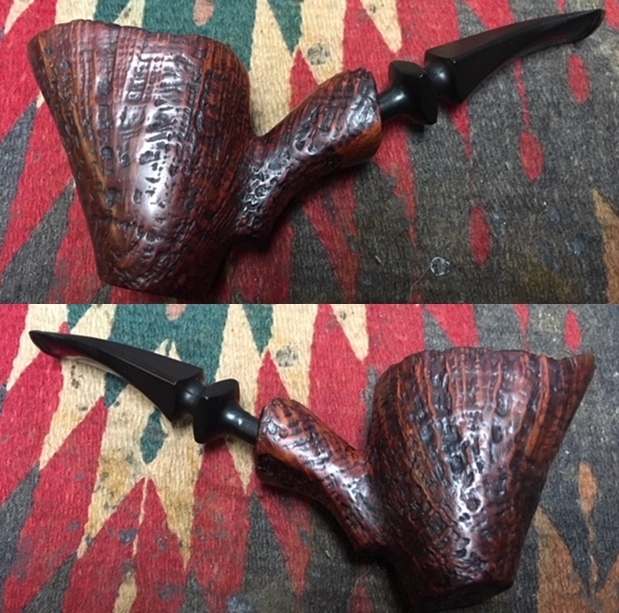
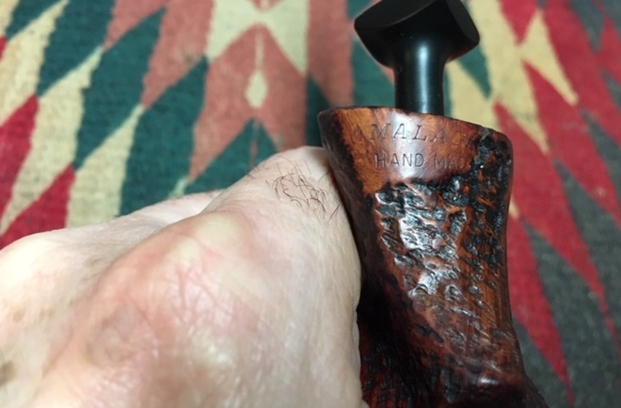
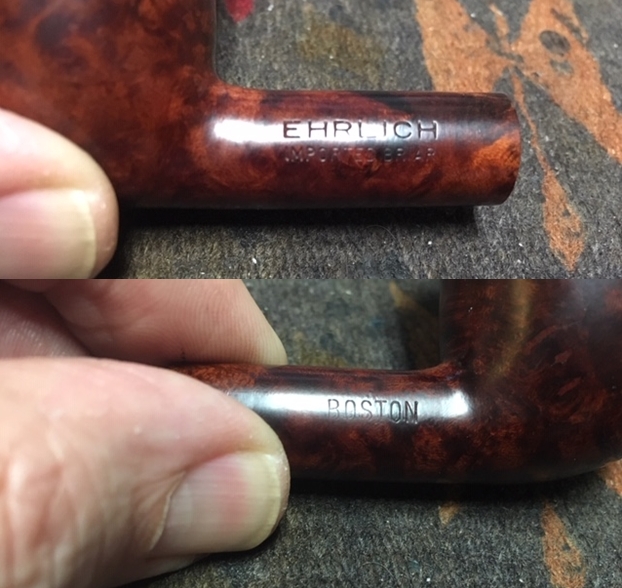
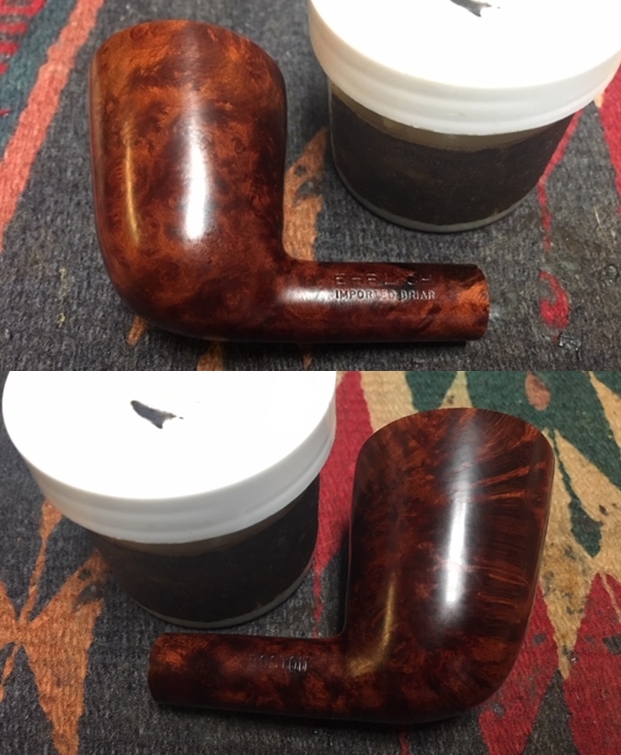
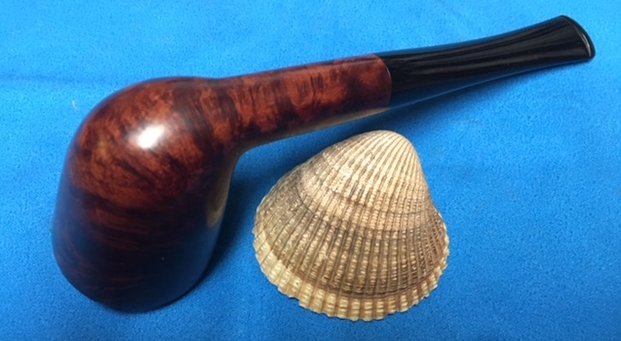
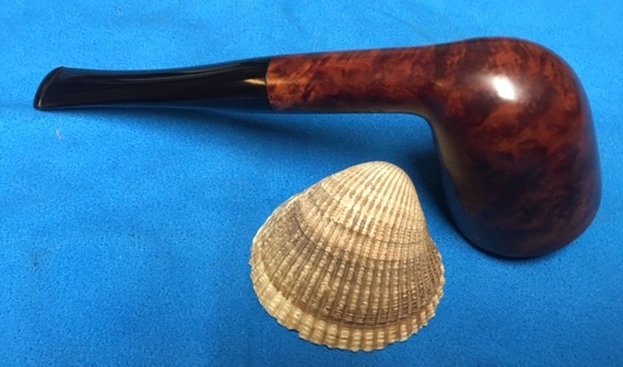
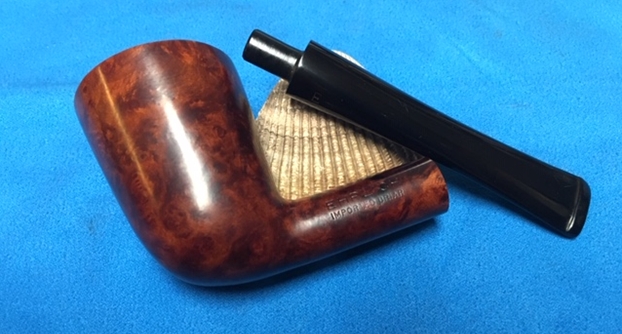
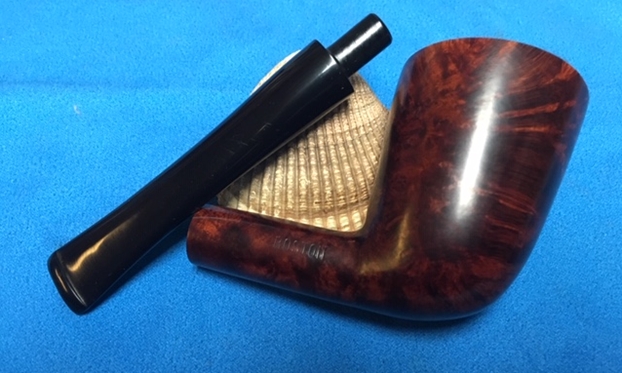
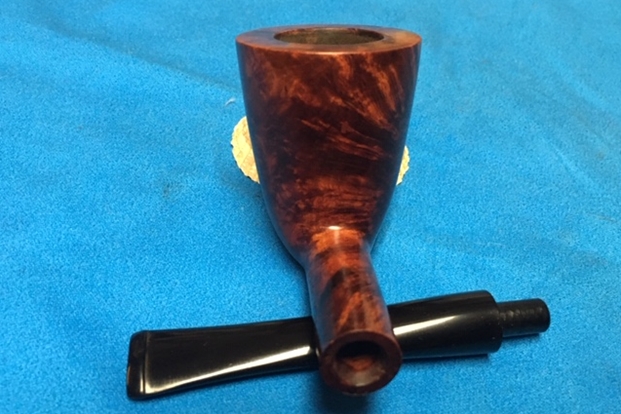
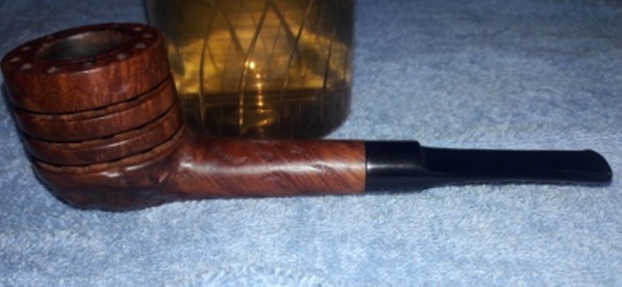
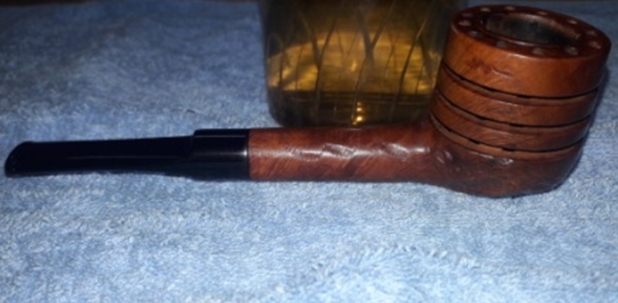
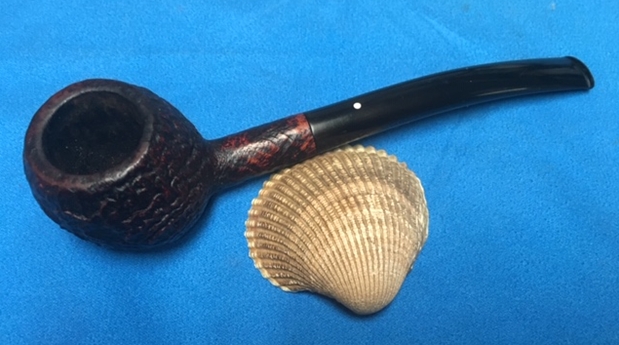
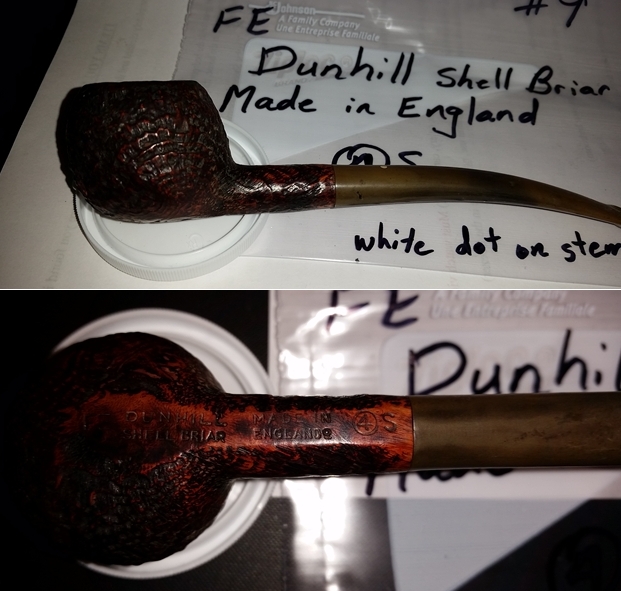
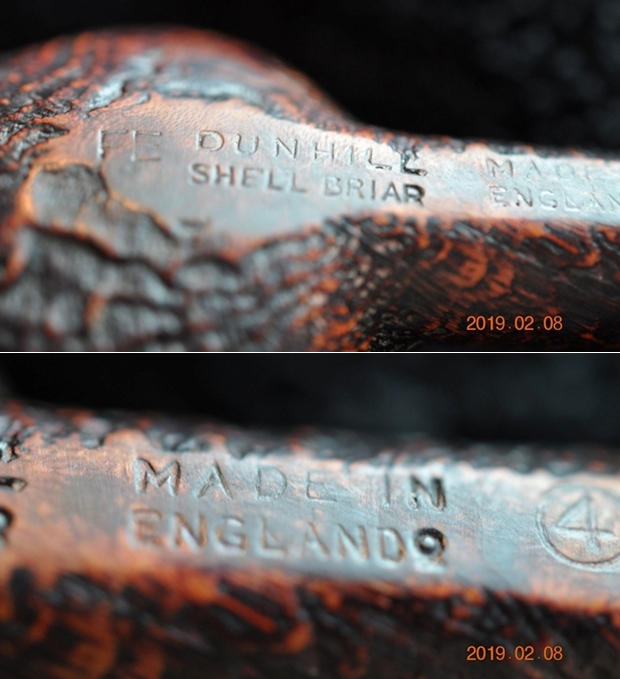
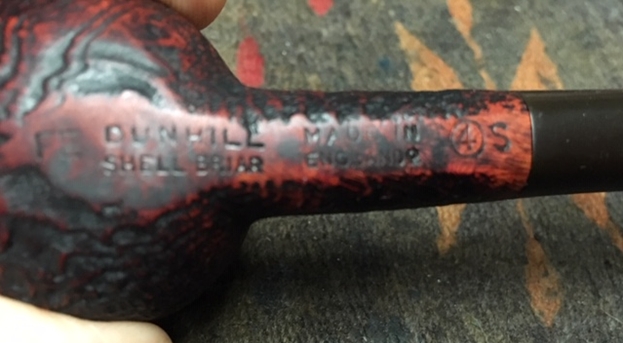
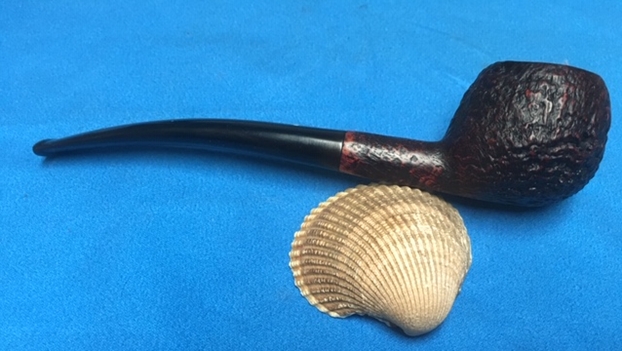
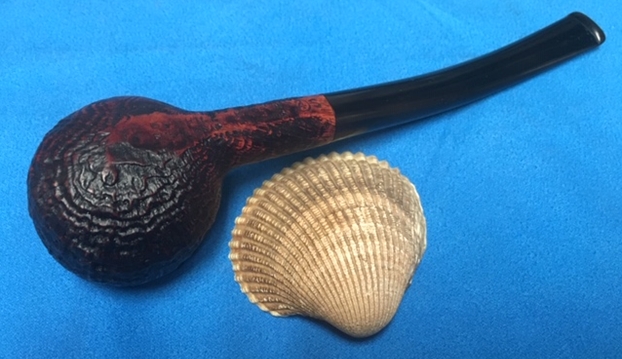
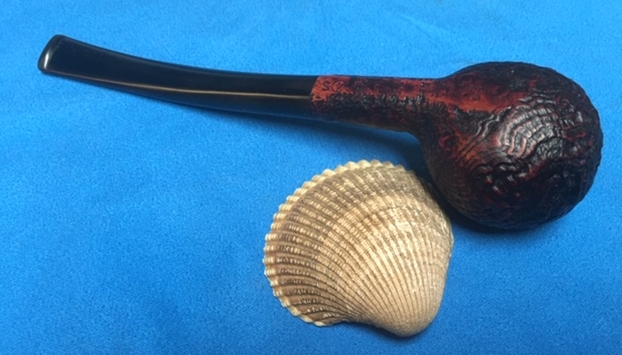
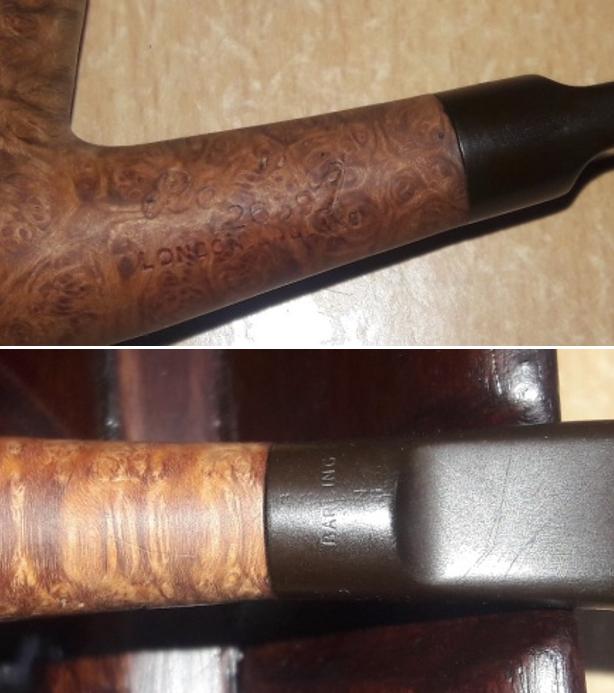
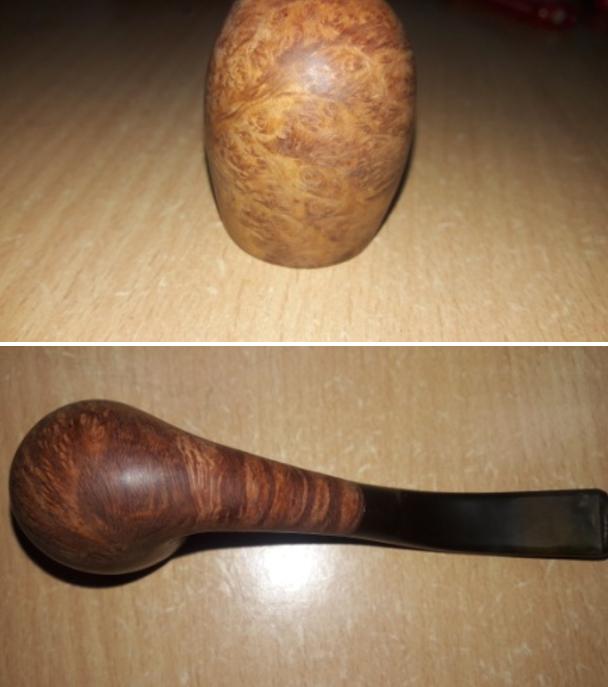
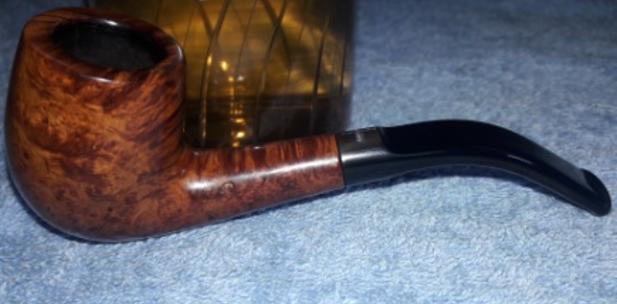
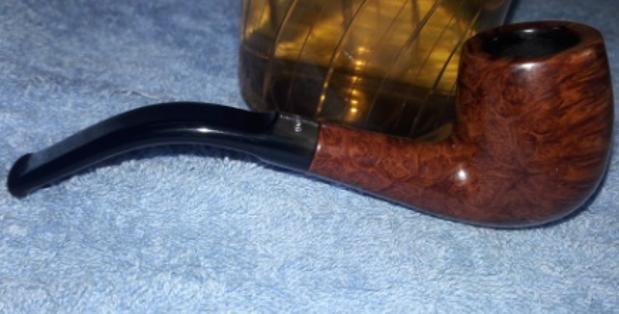
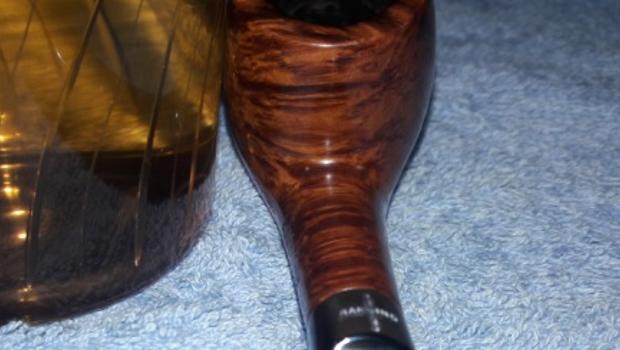
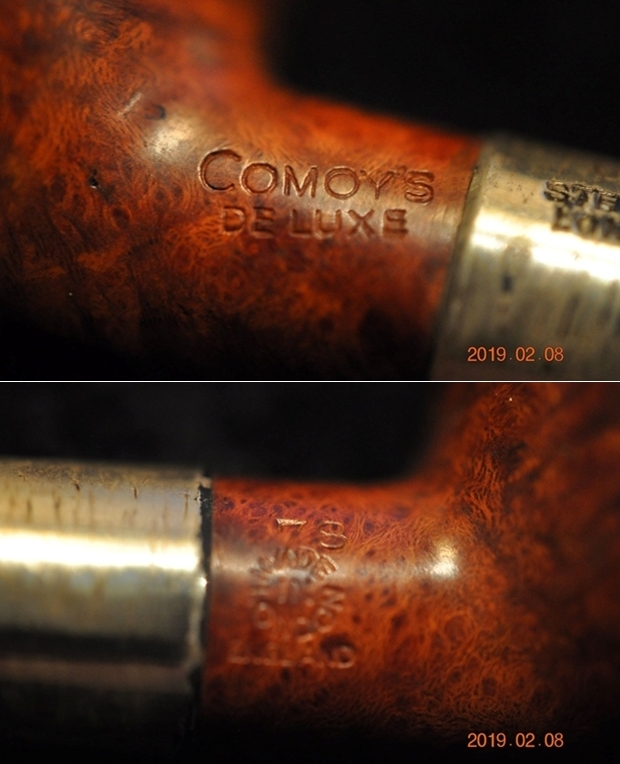
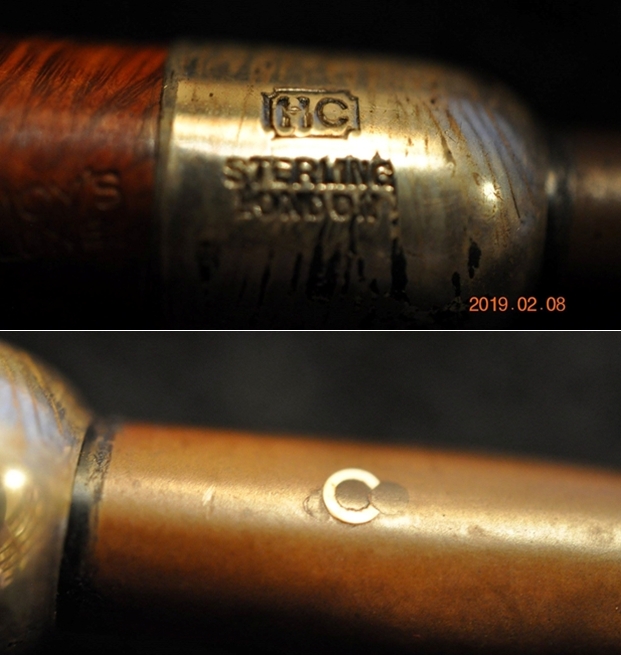
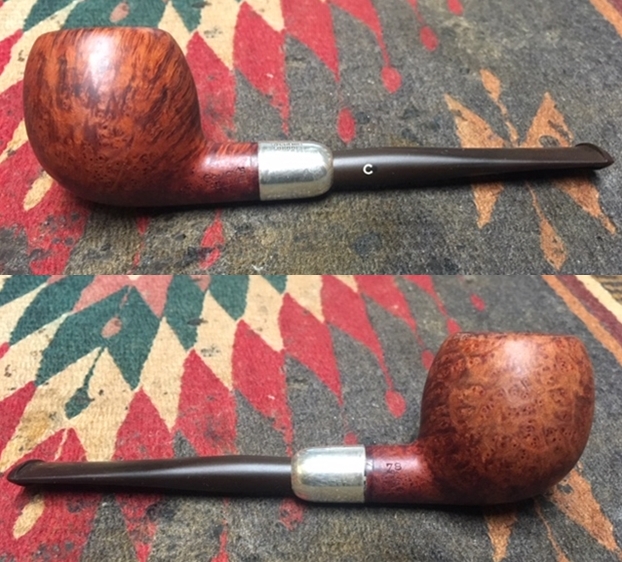
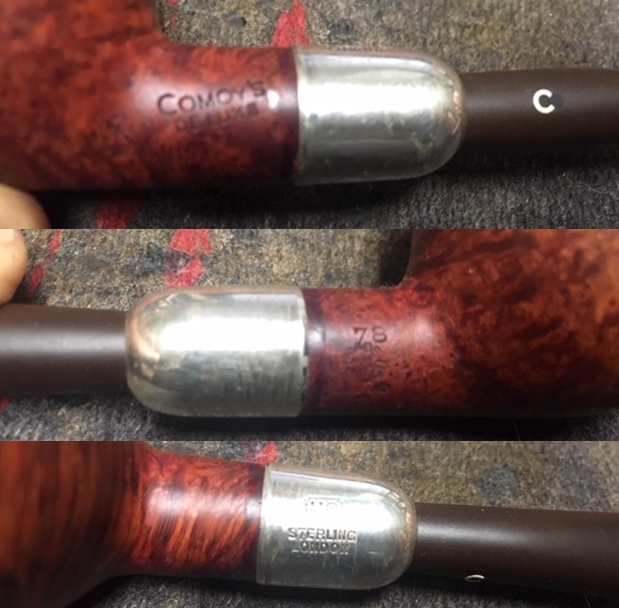
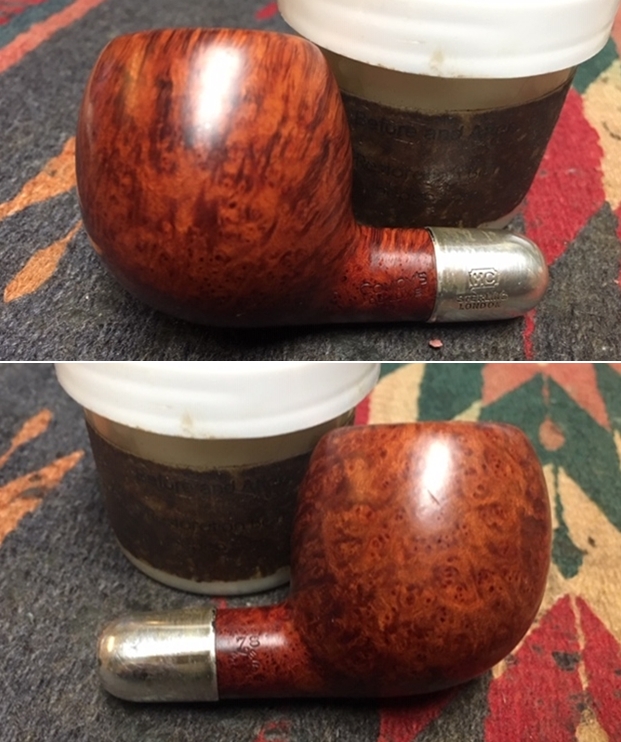
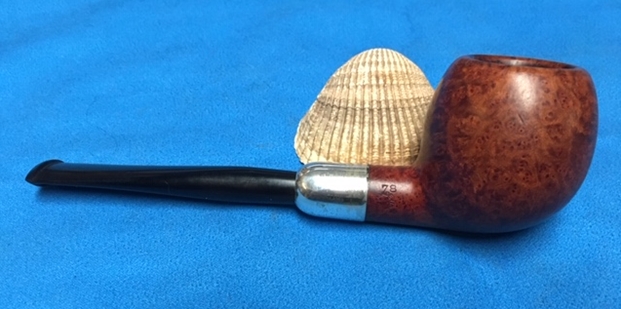
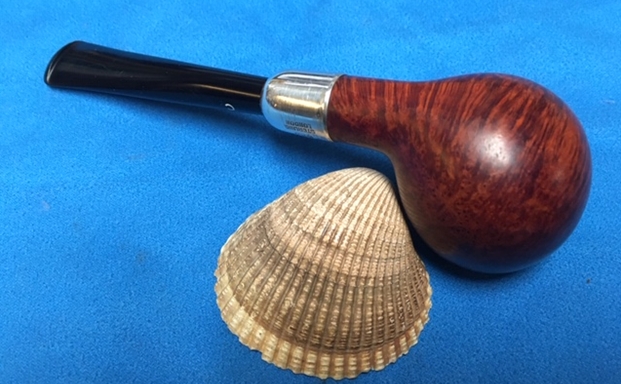
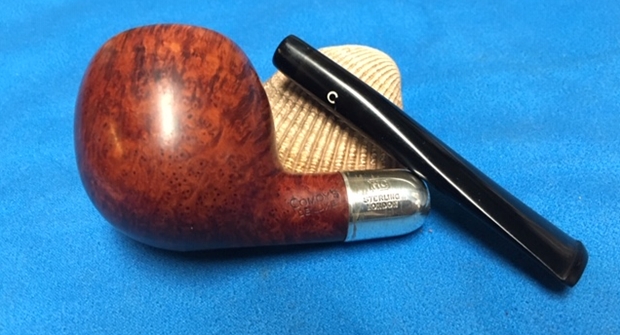
The pipe that I decided to work on is from this find and is marked in a red circle in the picture below. It’s the third Dunhill from this lot, a Bruyere in a classic bulldog shape. The stummel surface boasts of some beautiful densely packed cross grain on the stummel, cap and also the shank top, bottom and side surfaces. It is stamped with “# 32041” towards the bowl and followed by “DUNHILL” over “BRUYERE” on the left side of the shank while the right side bears the COM stamp “MADE IN” over “ENGLAND” followed by underlined numeral “18”. Dunhill White Dot adorns the top of the vulcanite stem. The stampings on either side is deep, crisp and clear.
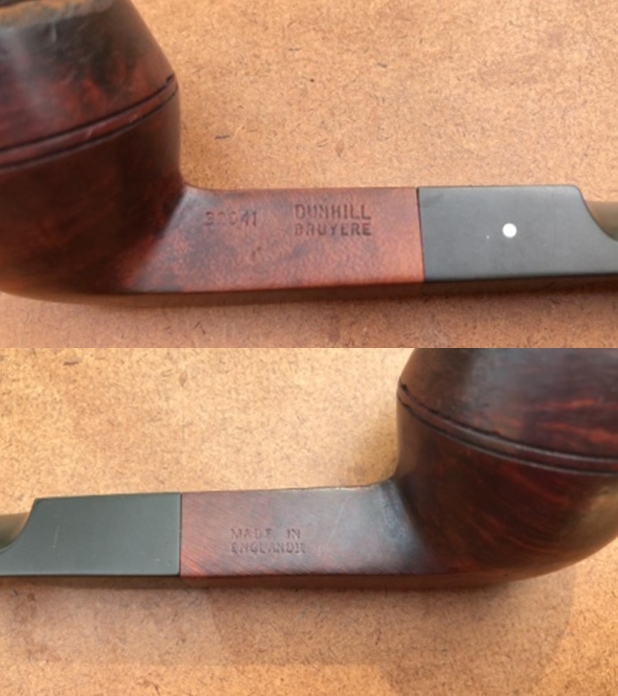 The dating of this pipe is very straight forward and dates to 1978 (1960+18). Deciphering the shape code, “32041” is equally straight forward with the first digit 3 identifying this pipe as being Group size 3, second numeral, 2, identifies the style of mouthpiece as being a saddle stem and the digits 04 indicates Bulldog shape. With this information, I proceed ahead with the restoration of this handsome pipe.
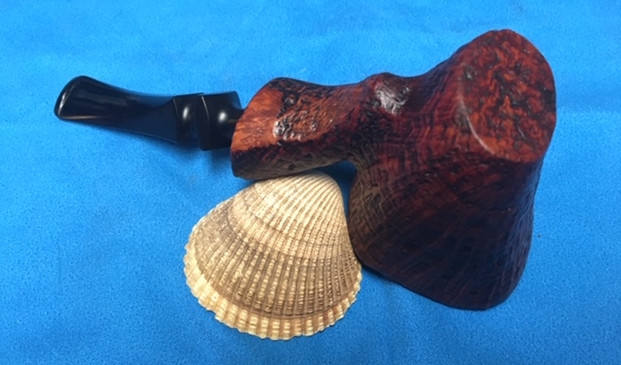
INITIAL VISUAL INSPECTION
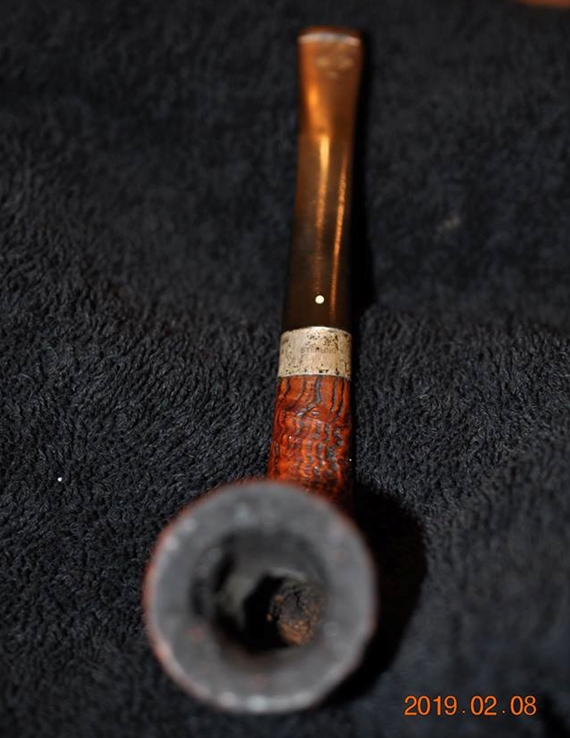
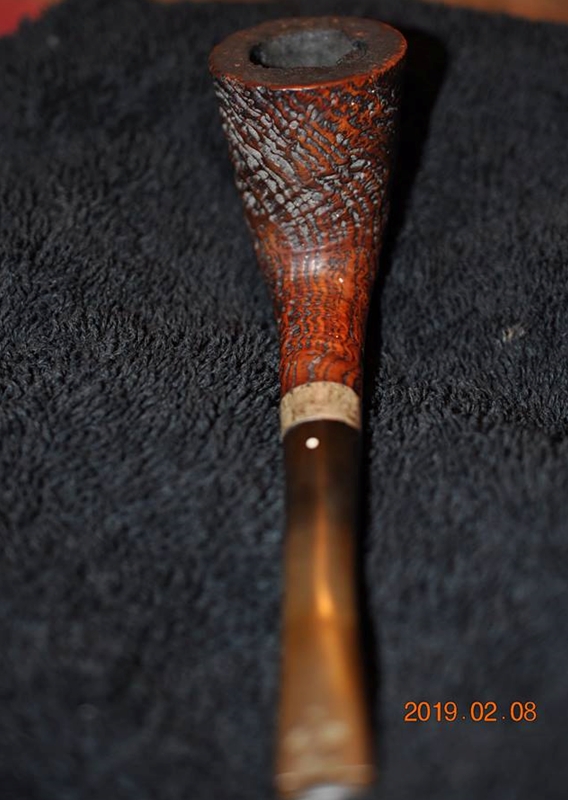
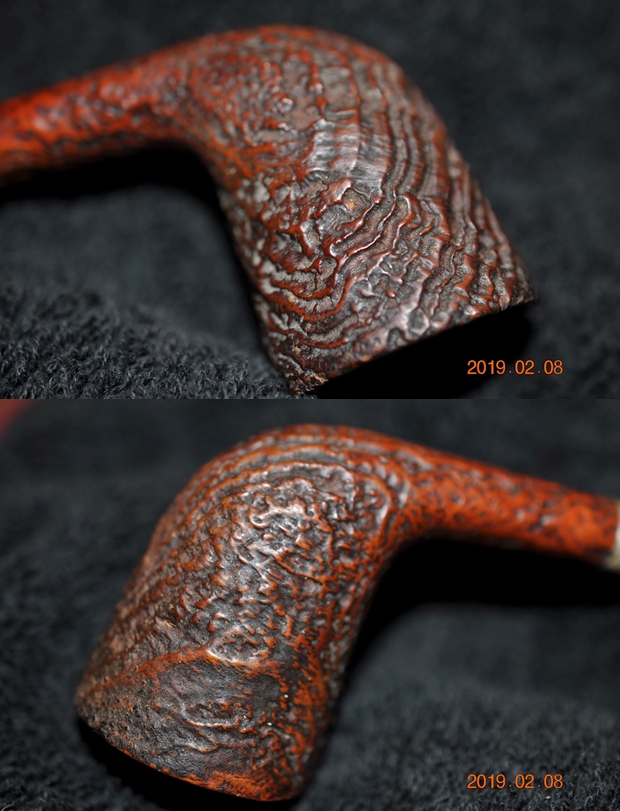
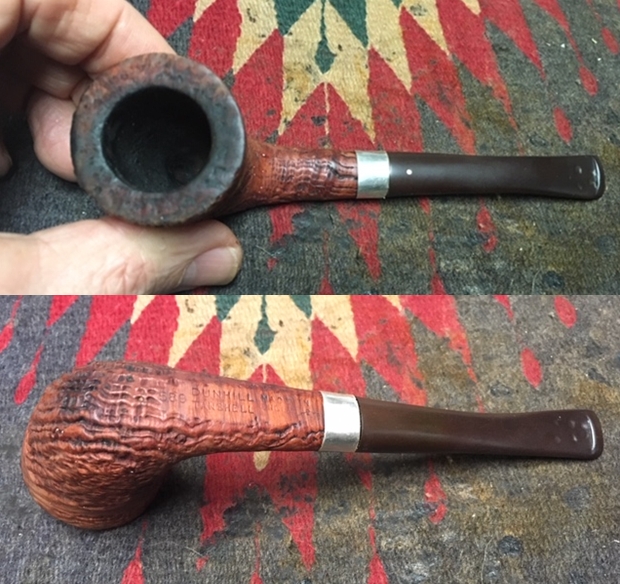
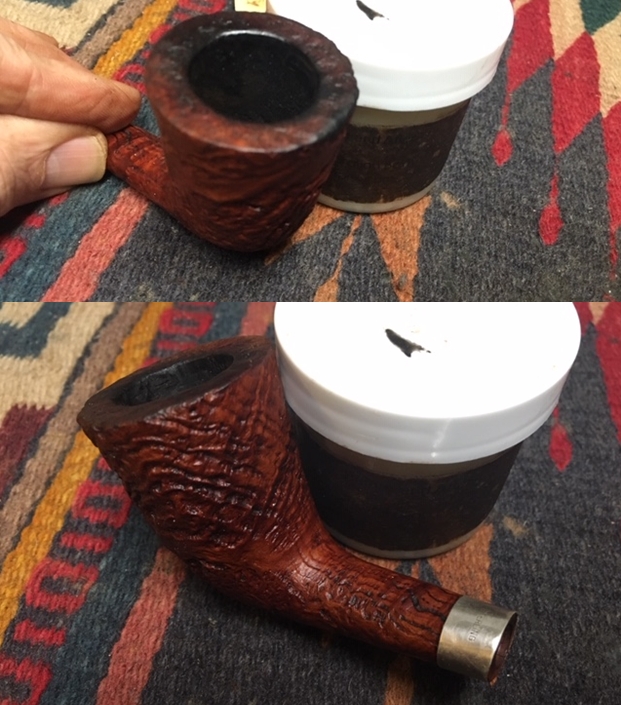
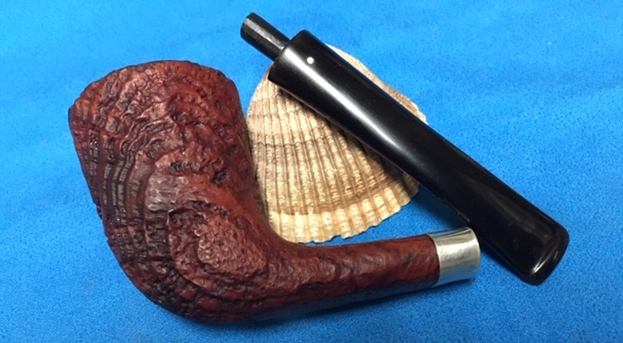
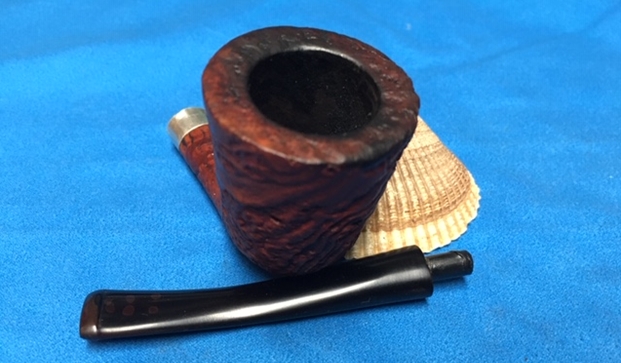
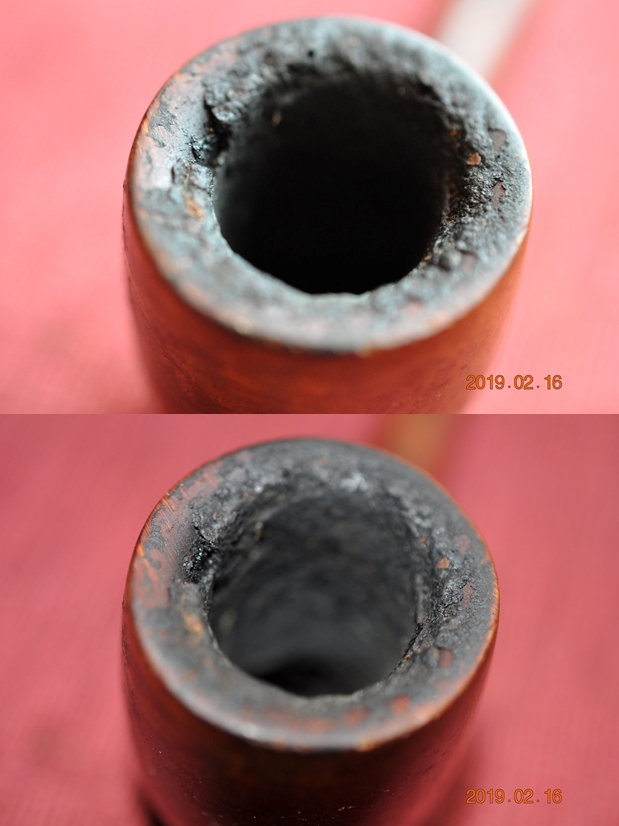
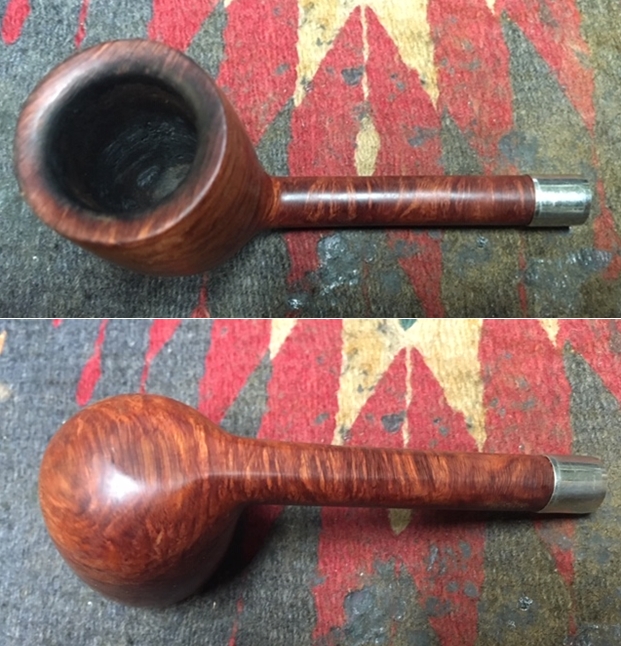
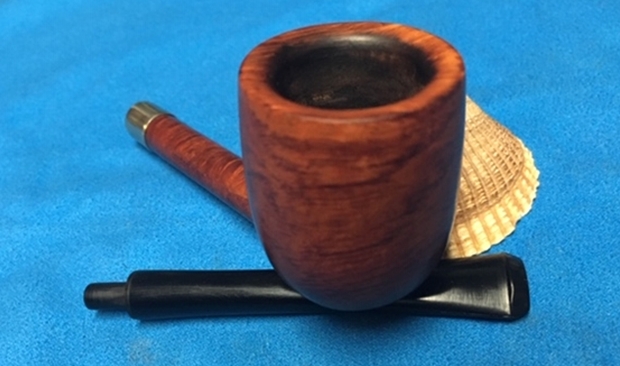
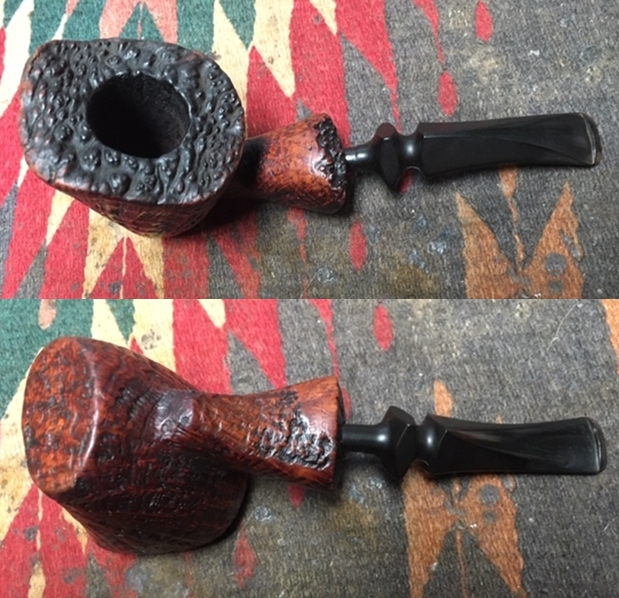
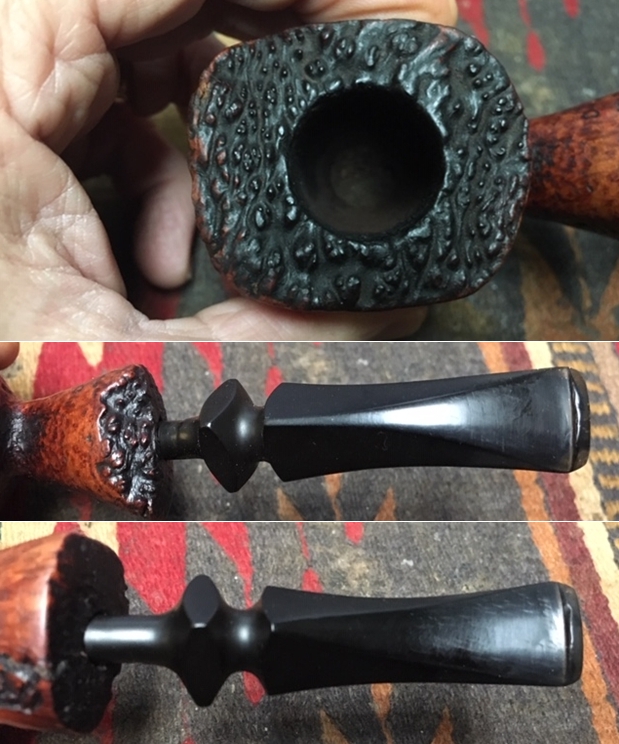
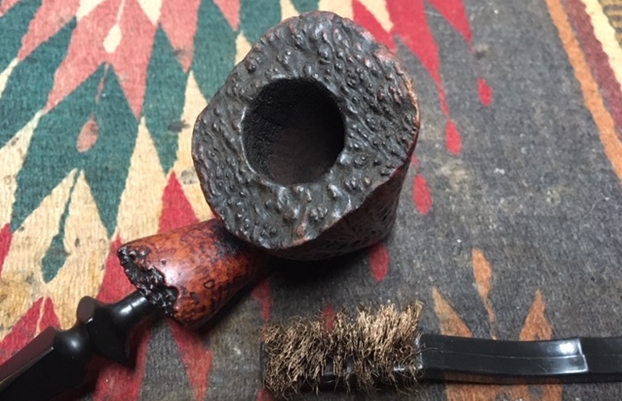
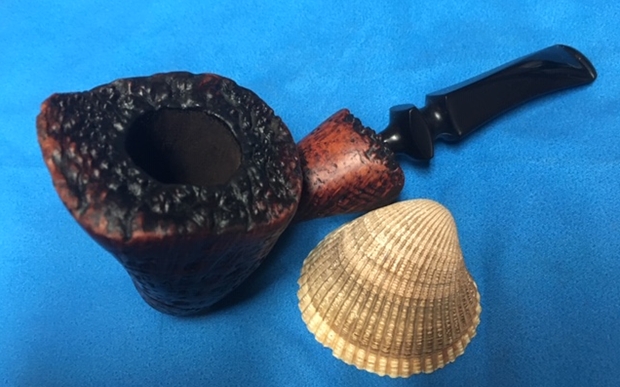
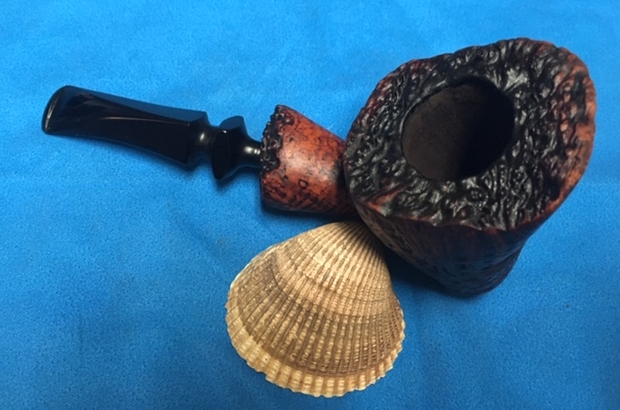
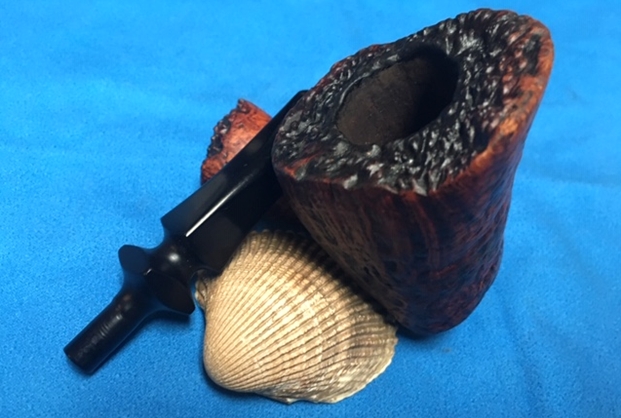
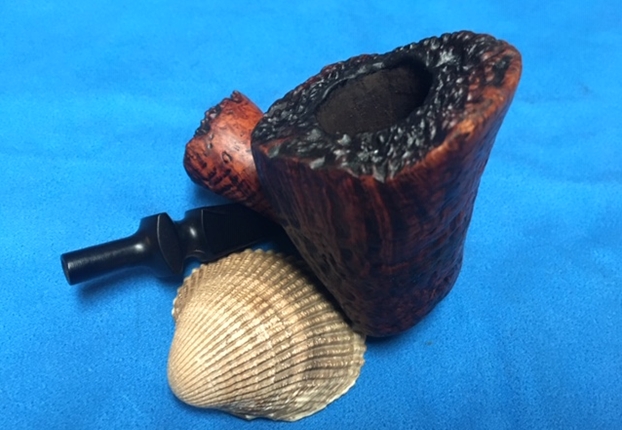
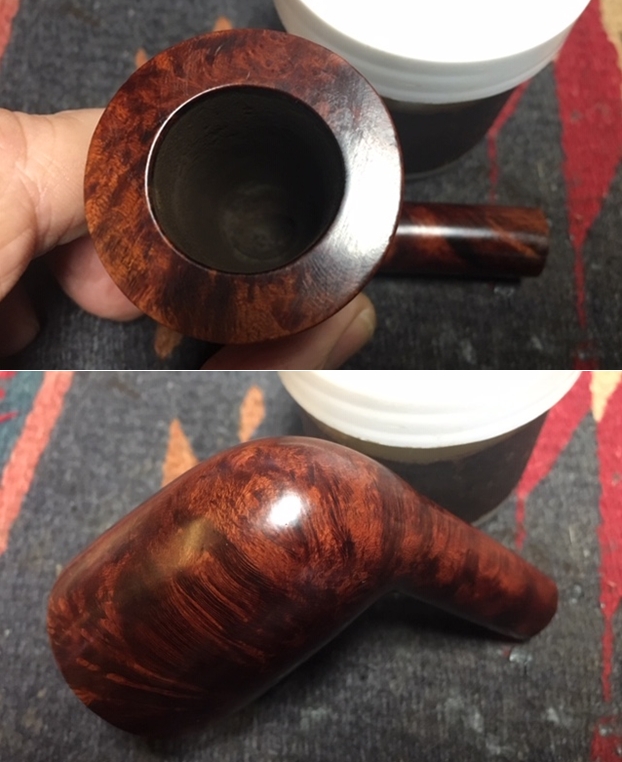
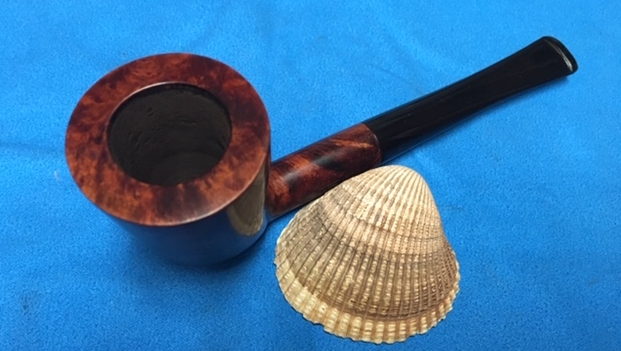
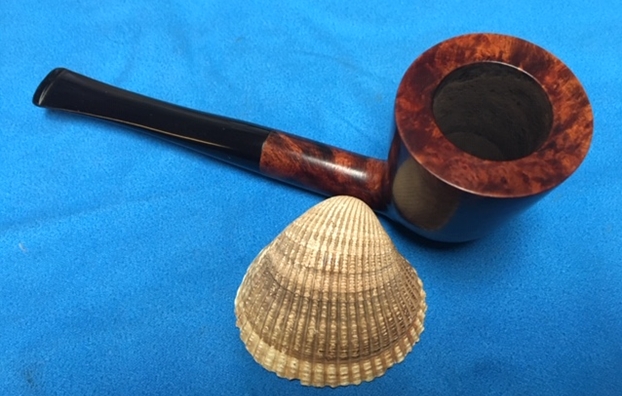
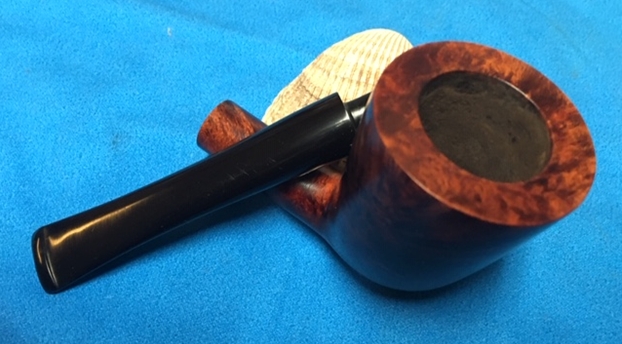
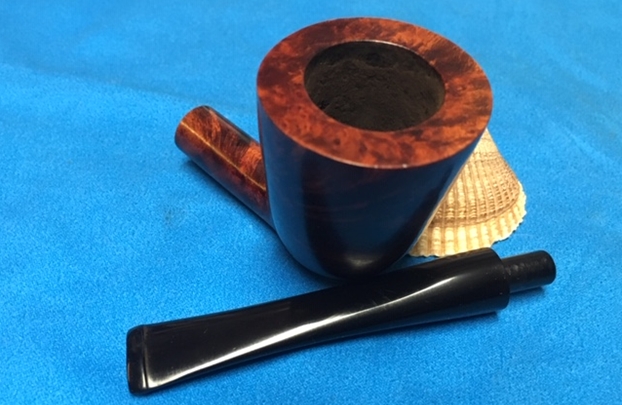
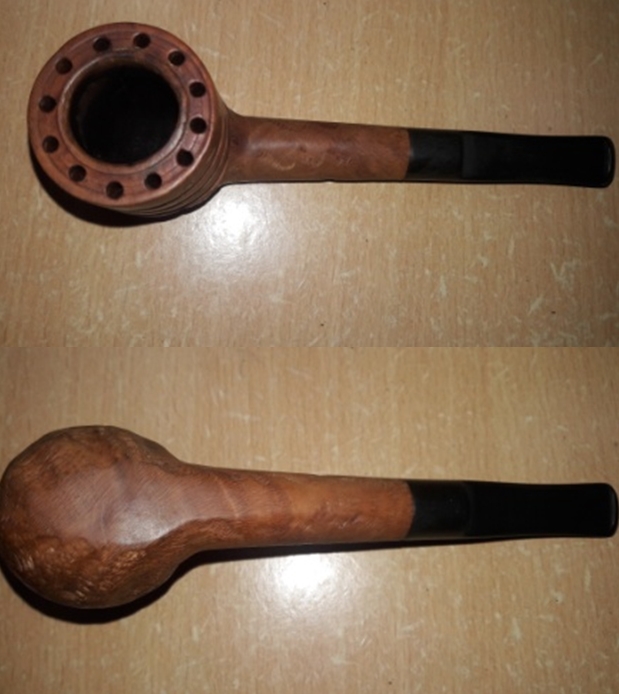
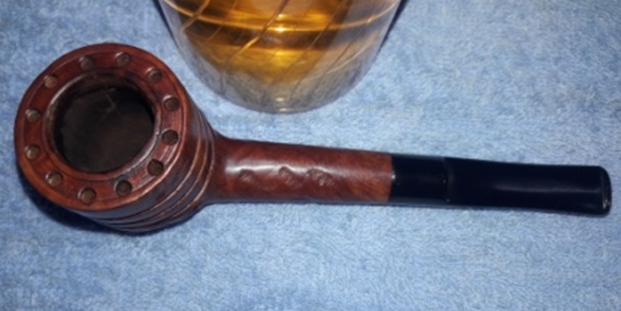
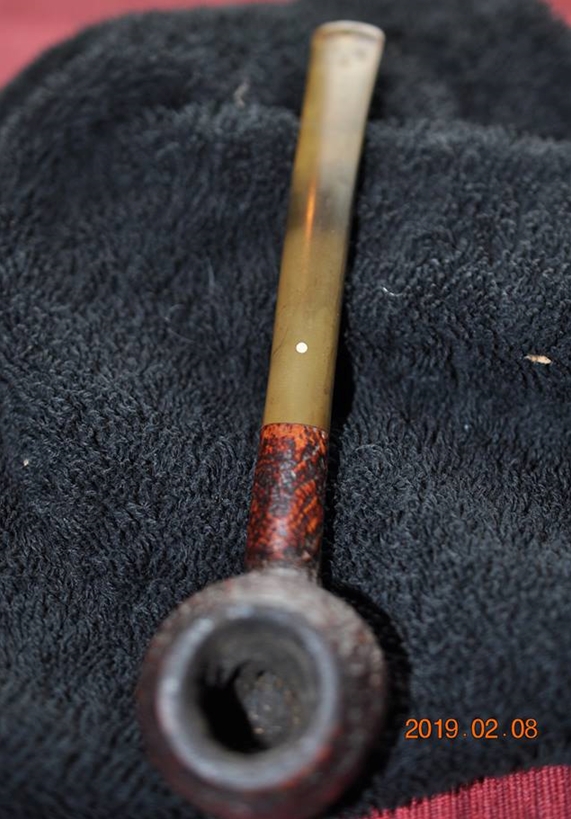
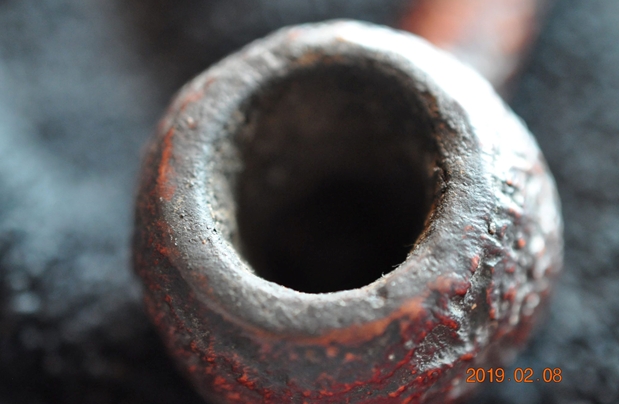
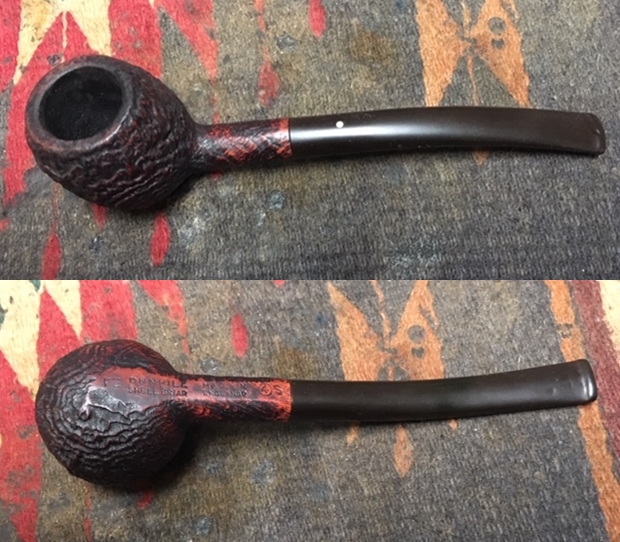
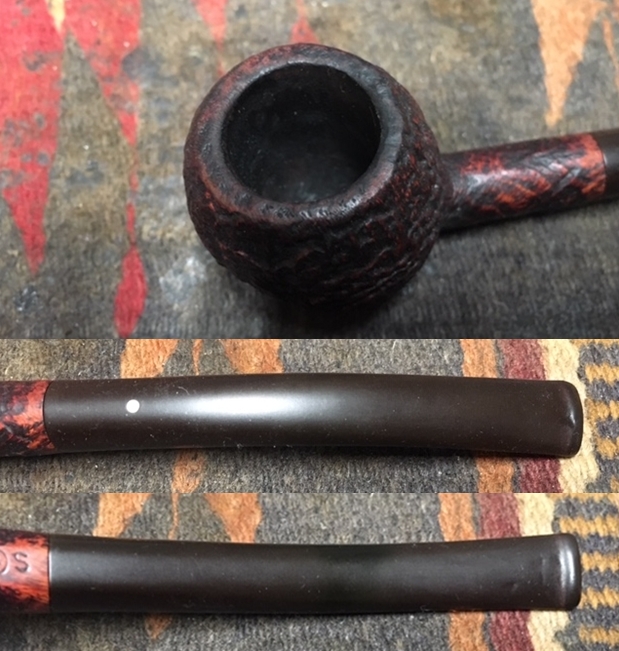
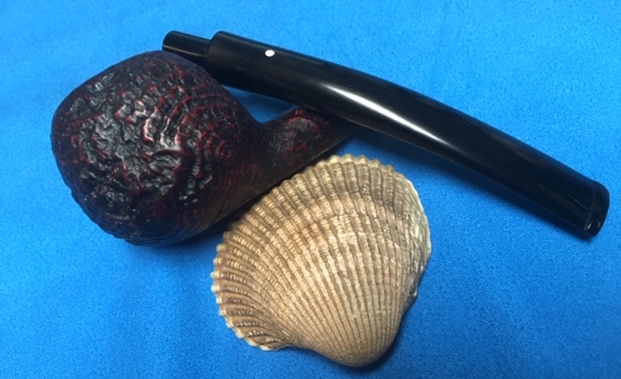
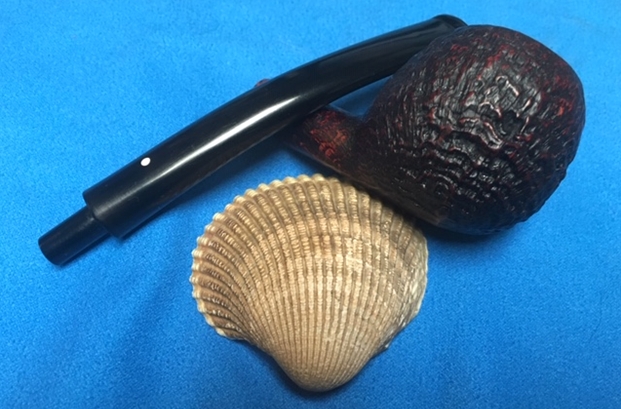
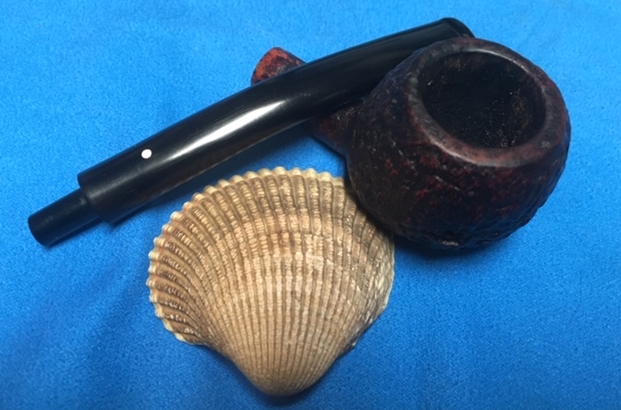
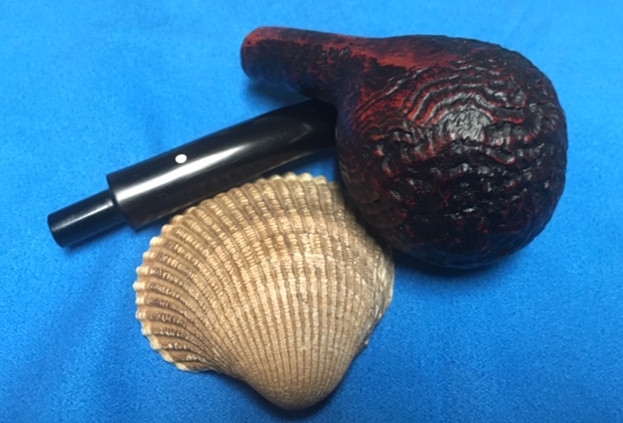
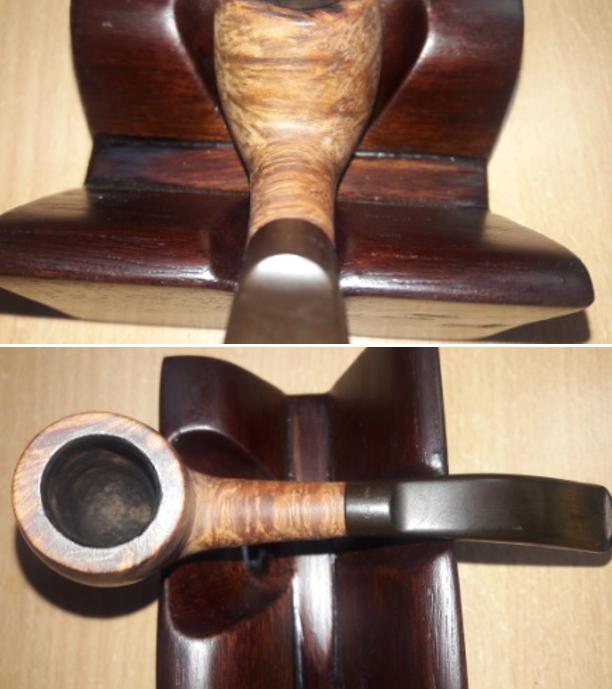
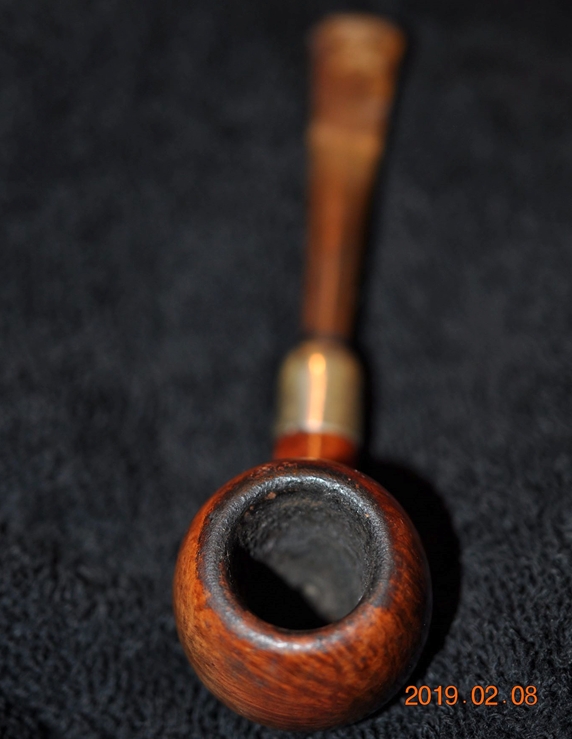
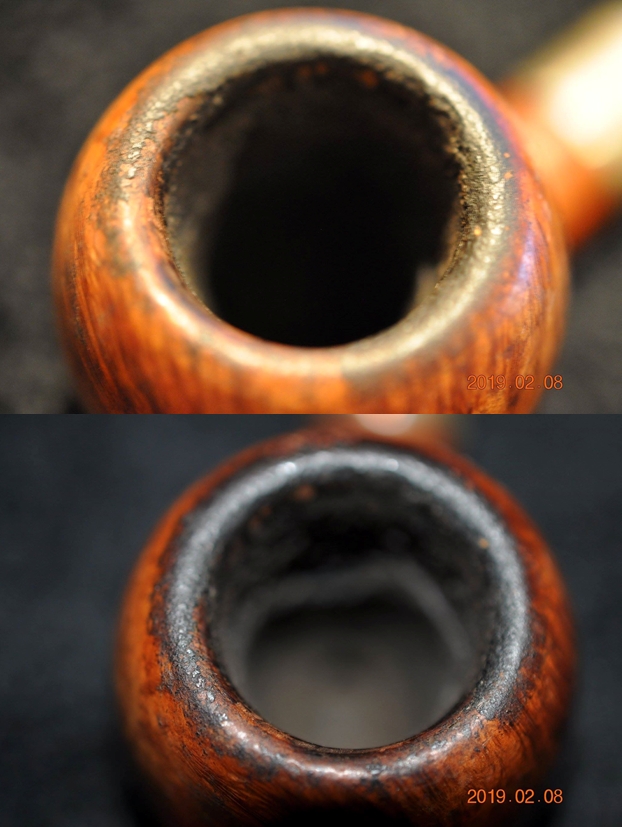
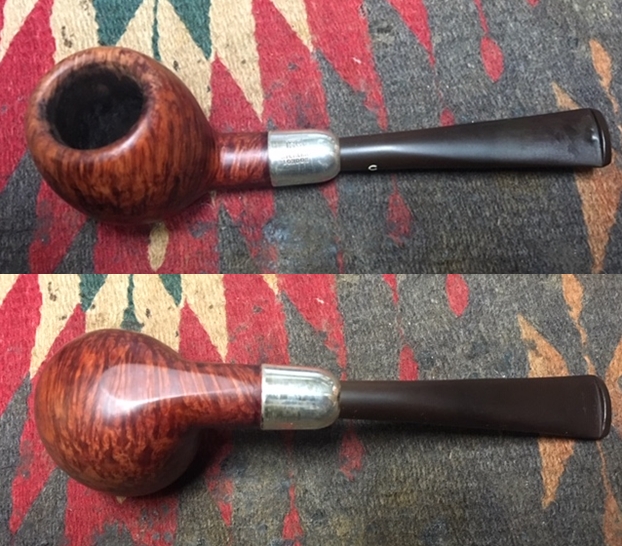
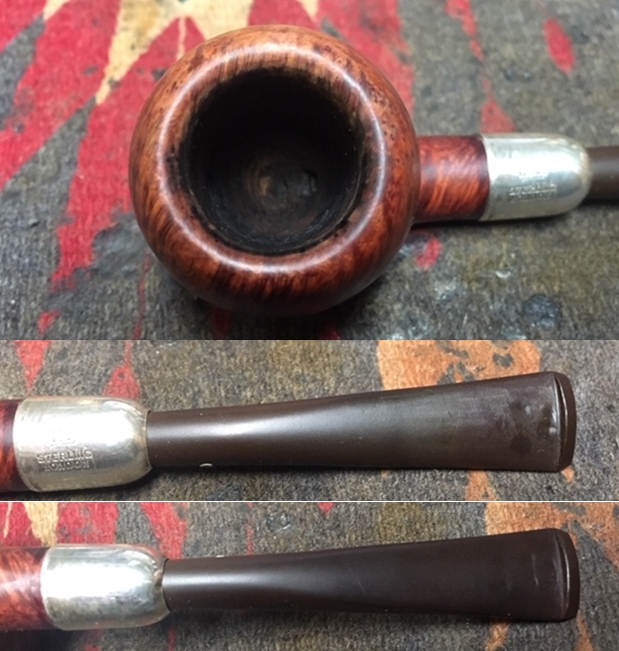
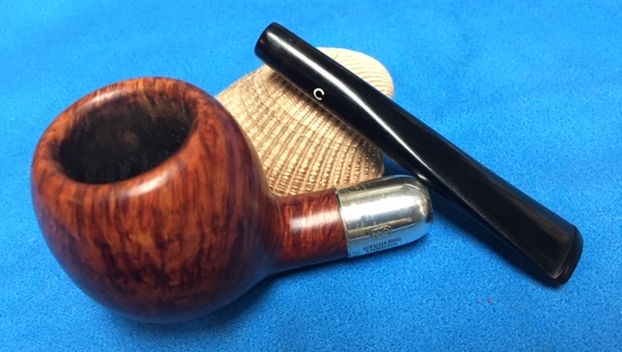
The chamber is clean with a thin layer of cake which indicates that the pipe has been kept clean by its previous Steward; however, the reaming has been done unevenly. From what I can see, the chamber walls appear to be without any damage. The chamber is odorless. It is the rim top, including the outer and inner rim edge that shows significant damage on the left side in 11 o’clock and 7 o’clock directions. This must have been caused due to hammering of the edge against a hard surface to remove dottle!! There is not even a millimeter of surface on the rim top surface which does not show signs of severe damage. All in all, it appears like this pipe’s rim top was used by the previous Steward as a hammer while giving vent to his/ her anger, and if this is true by any stretch of imagination, HE/ SHE SHOULD ENROLL FOR ANGER MANAGEMENT TREATMENT!! Darkening of the outer rim edge is also seen all along the left half of the rim top, most significantly in 11 o’clock and 7 o’clock directions. I just hope that it does not go deep in to the briar!! 

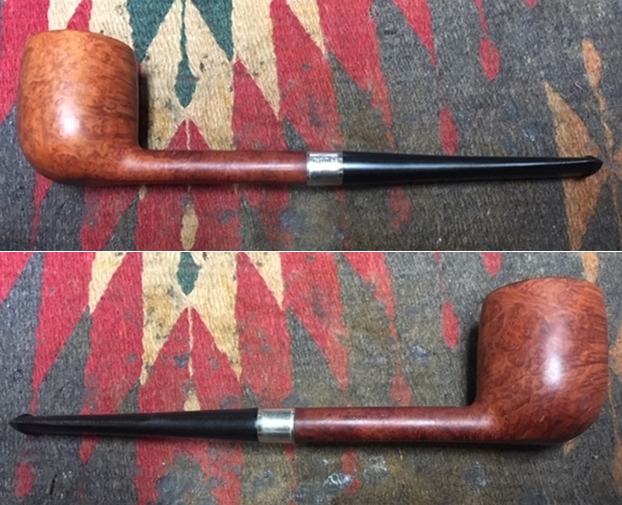
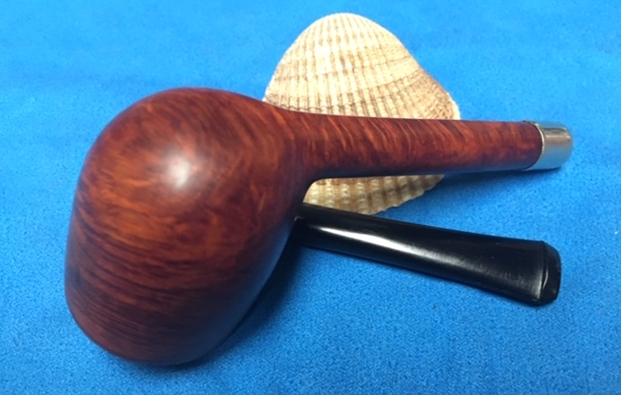
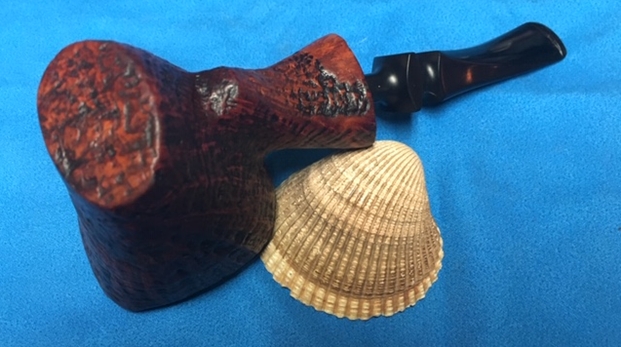
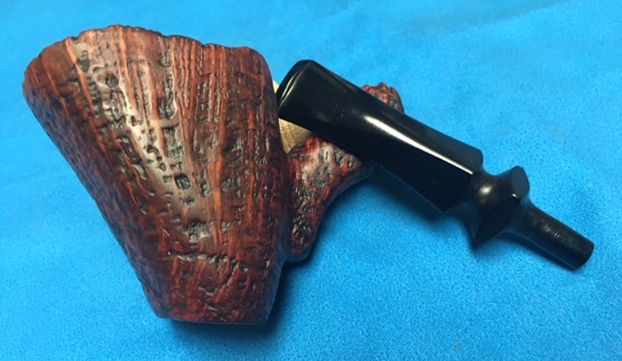
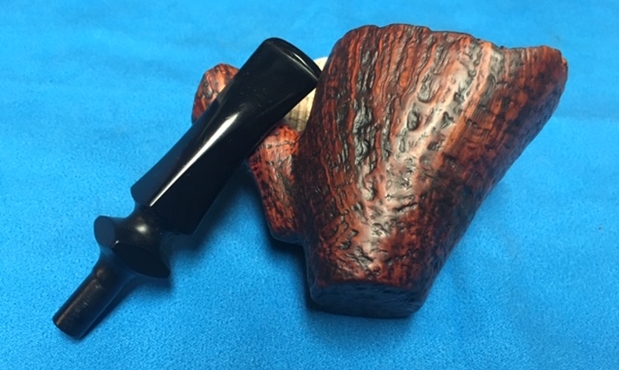
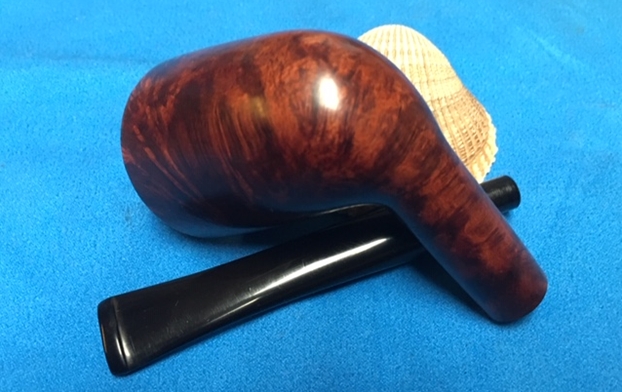
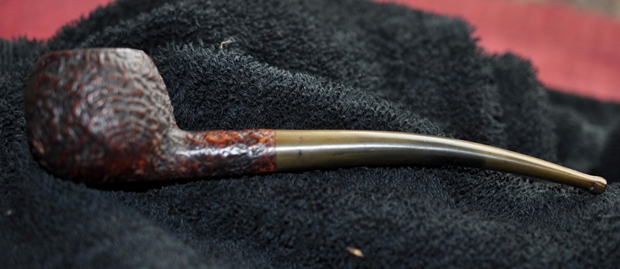
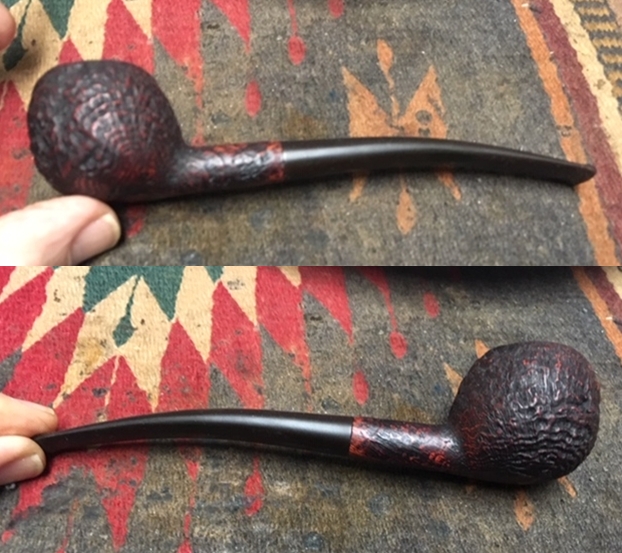
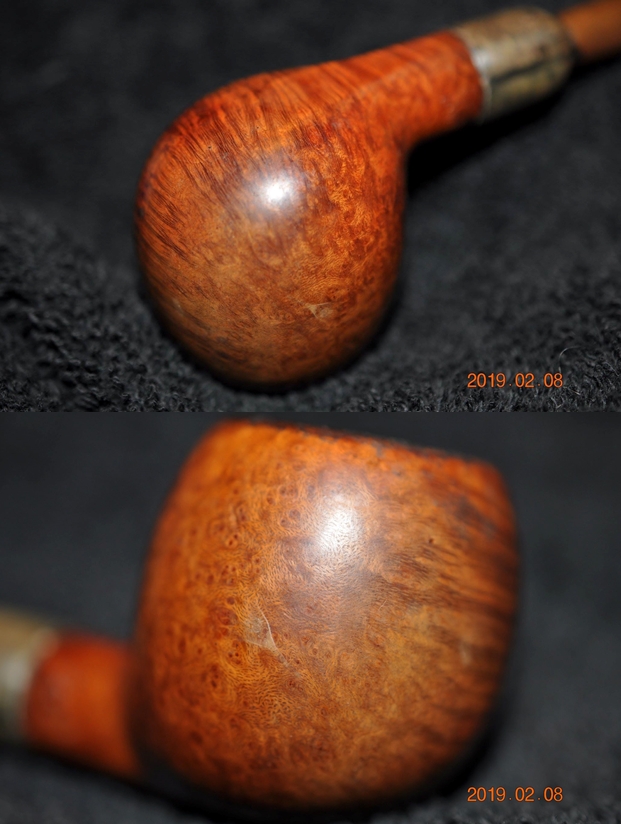
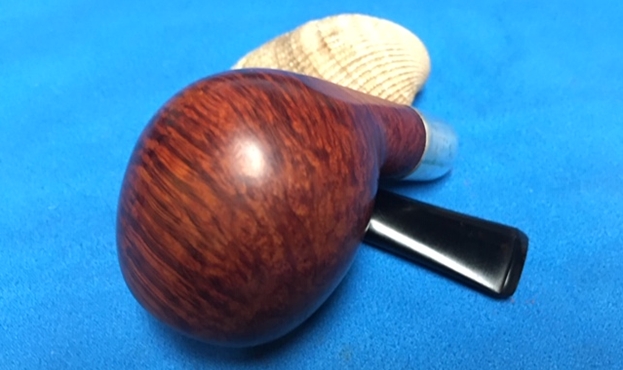
 Being a Dunhill, any issue of fills is never to be expected and hold true for this pipe too. However, there are a number of scratches and dents that can be seen on the stummel surface. These dents and ding are probably caused due to uncared for storage by the previous Steward and further contributed to by the trash collector who had sold the pipes to me. The stummel is covered in dirt and grime. The briar looks lifeless and dull which is nothing serious to address.
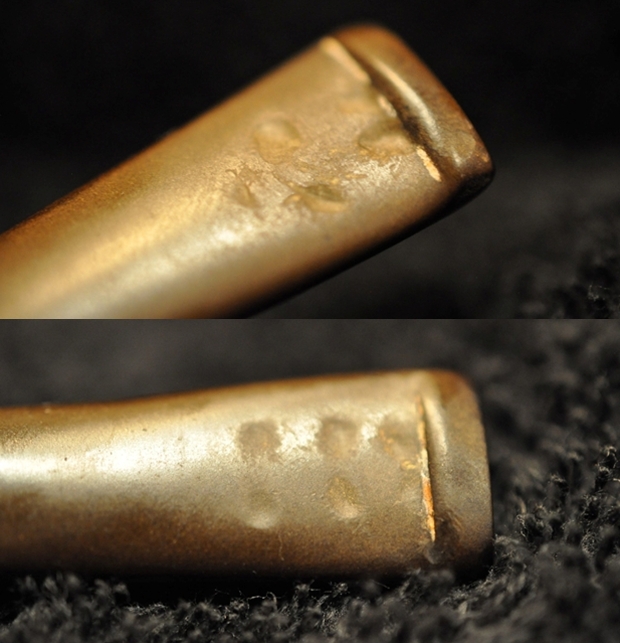
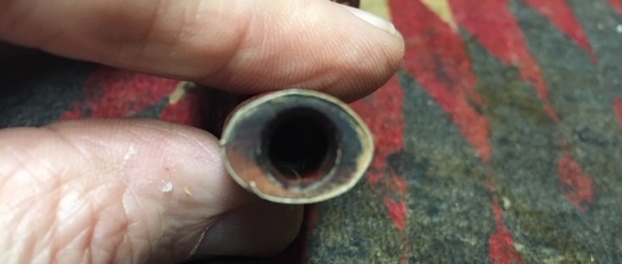
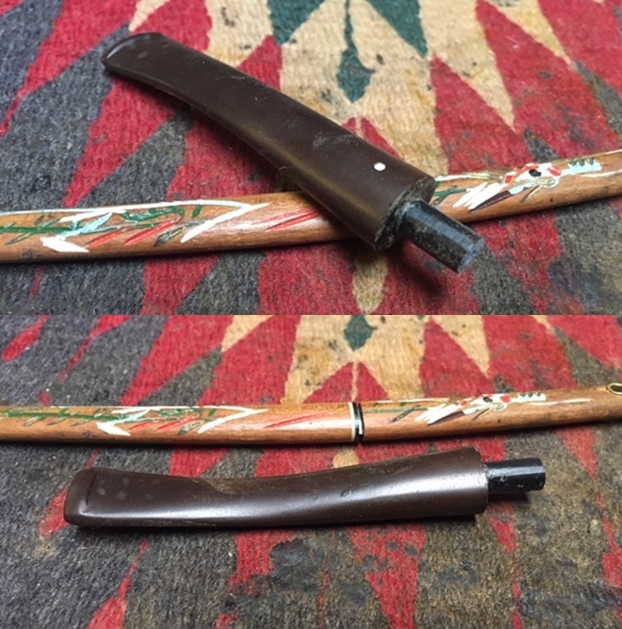
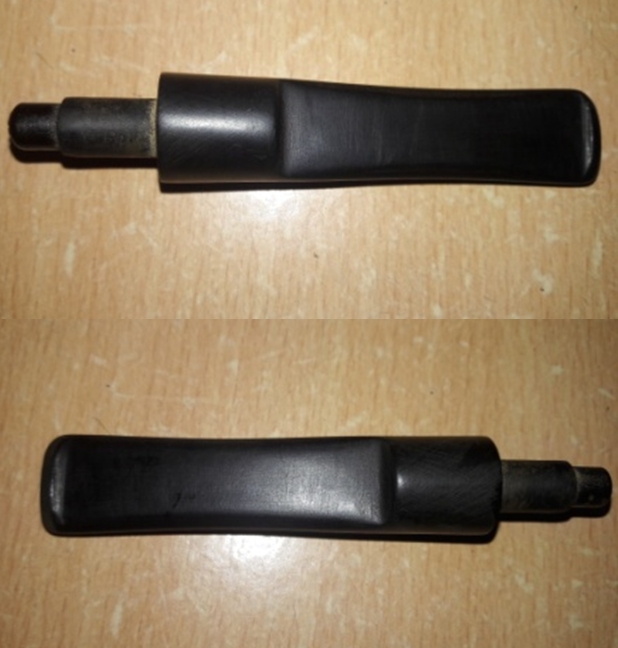
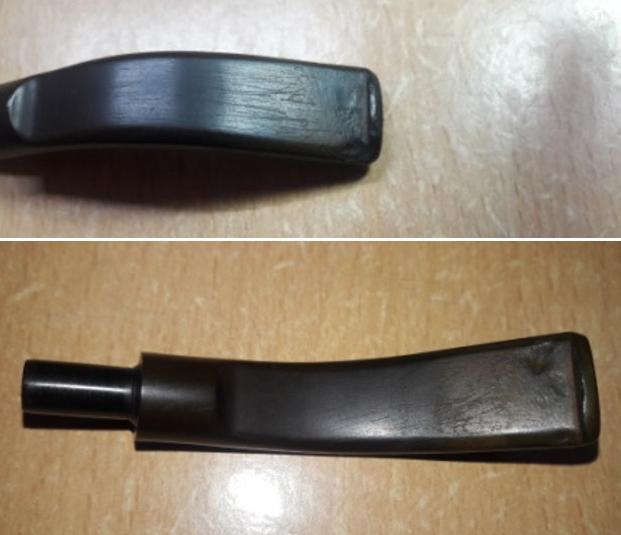
 I am very pleased with the condition of the stem. The diamond saddle type vulcanite stem shows minor damage to the button end and the lip edges. Light scratches can be seen extending upwards from the button end towards the saddle. The quality of vulcanite is good. These issues should be an easy fix. The mortise is clogged and will have to be cleaned.
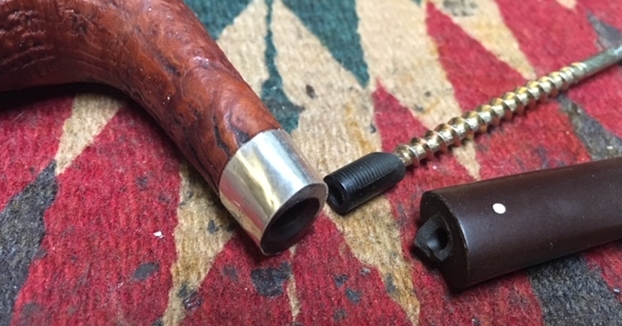
 In this project, repairs to the damaged outer edge and rim top surface will be a major challenge. While restoring the Dunhill Bruyere # 51671 (https://rebornpipes.com/2019/03/13/reconstructing-a-broken-stem-on-dunhill-bruyere-51671/), I had faced difficulties in blending the repairs to the outer rim edges and these could be seen even after I had stained the stummel. Similar set of difficulties are envisaged on this pipe too!!!! I have learned my lesson and will follow the advice and suggestion received from readers of rebornpipes.com.
THE PROCESS
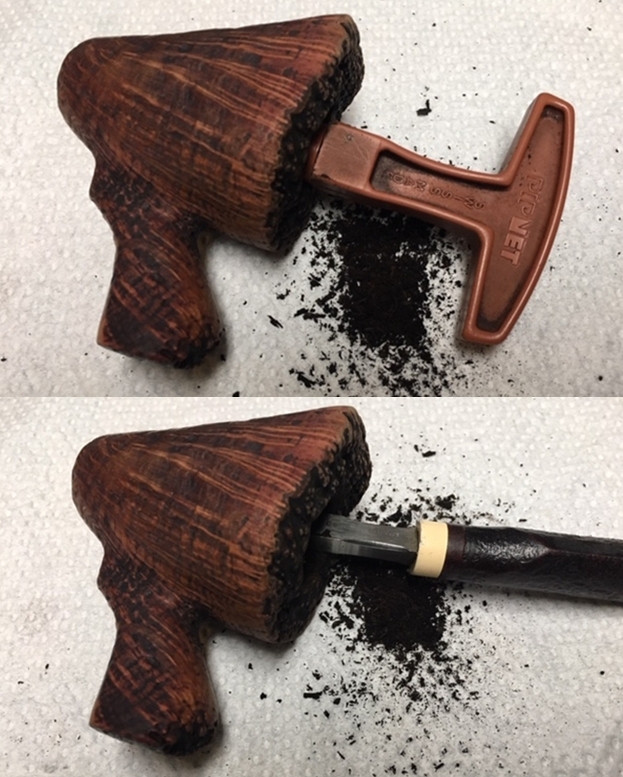
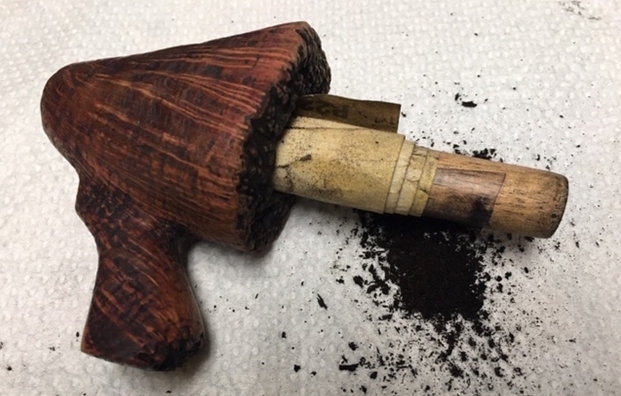
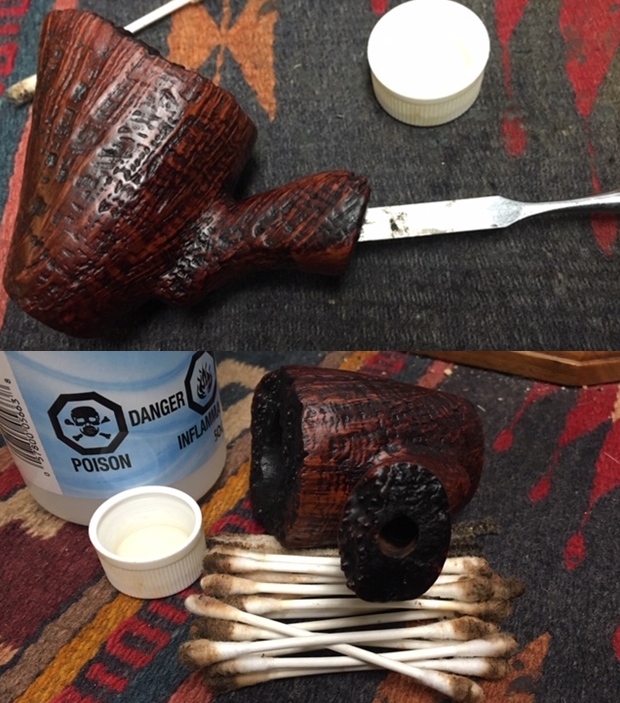
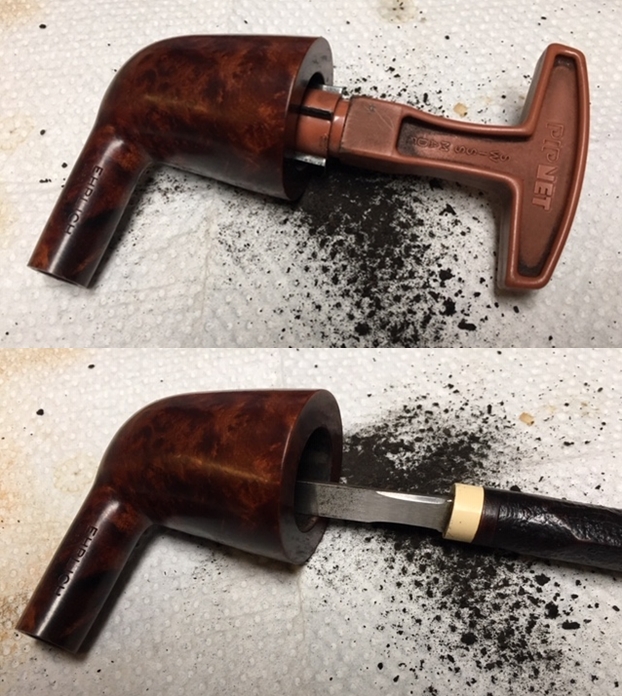
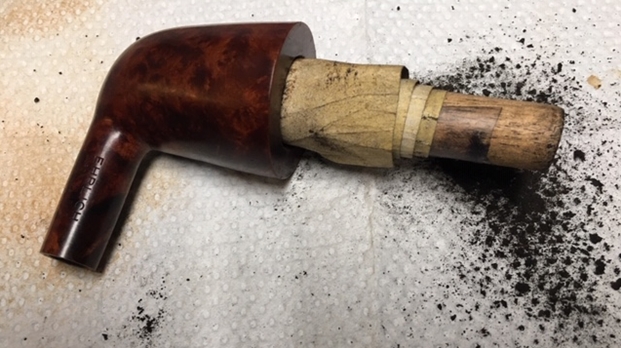
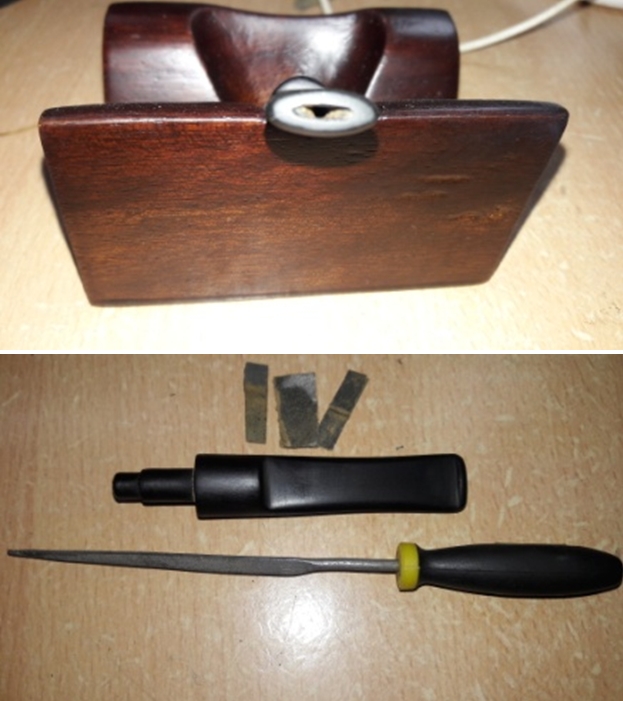
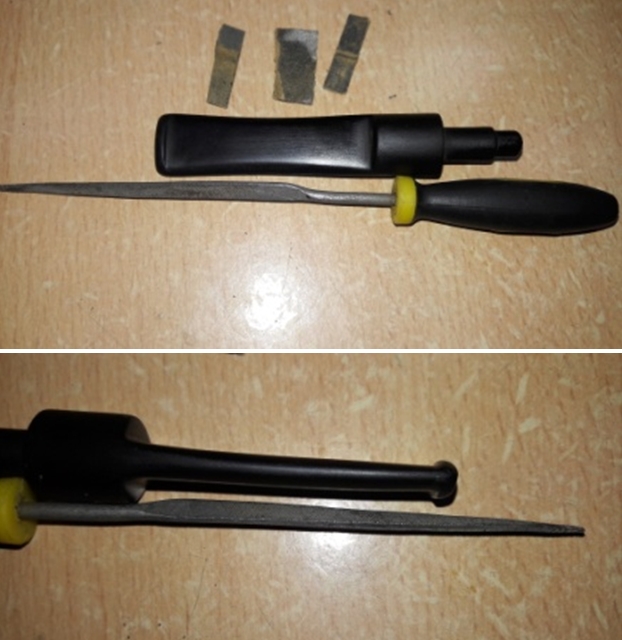
Since the stummel has significant damage, I start this project by tackling the stummel repairs first. I reamed the chamber with size 2 head of a PipNet reamer. The cake was thicker at the bottom and using my fabricated knife, I scraped out all the remaining cake. I further used one folded piece of 180 grit sand paper to sand out the last traces of remaining cake and expose the walls of the chamber to ascertain that there are no cracks/ heat fissures. I wiped the chamber with a cotton pad dipped in isopropyl alcohol to remove the carbon dust left behind by all the reaming and sanding process. The walls of the chamber were solid with just very fine superficial web of lines seen on one side. This was followed by cleaning the mortise by scraping away at the dried gunk with my fabricated spatula and followed it up with further cleaning using cue tips, pipe cleaners and shank brush dipped in isopropyl alcohol. With the thin sharp edge of my fabricated spatula, I cleaned in between the edges of the cap ring separating the cap from the rest of the stummel.

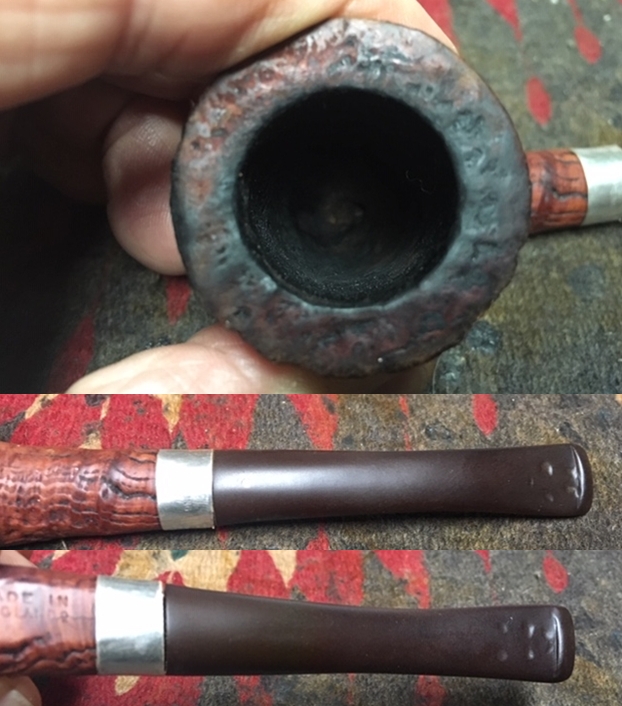
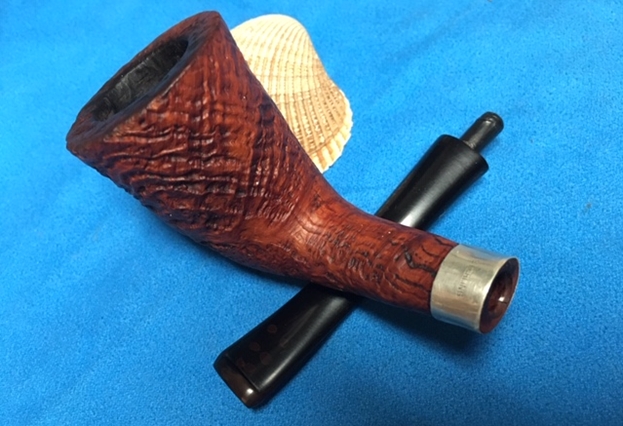
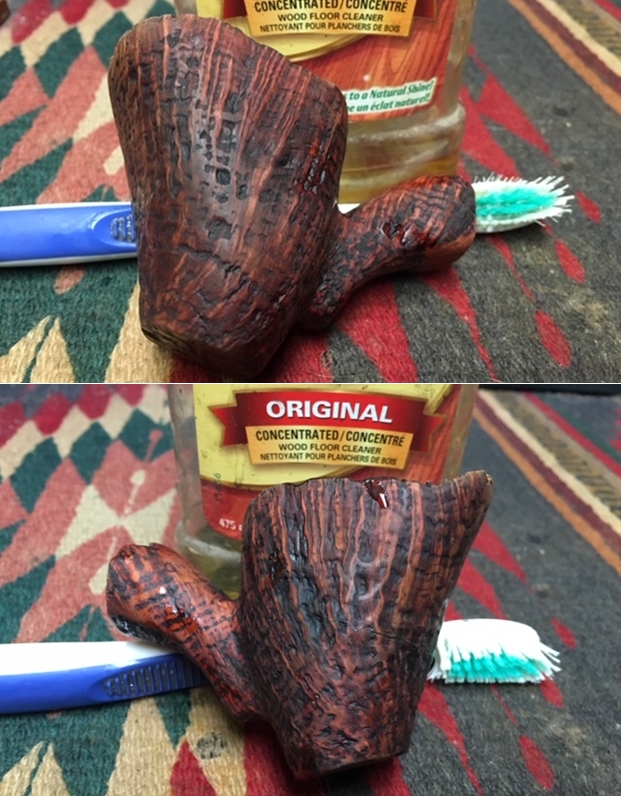
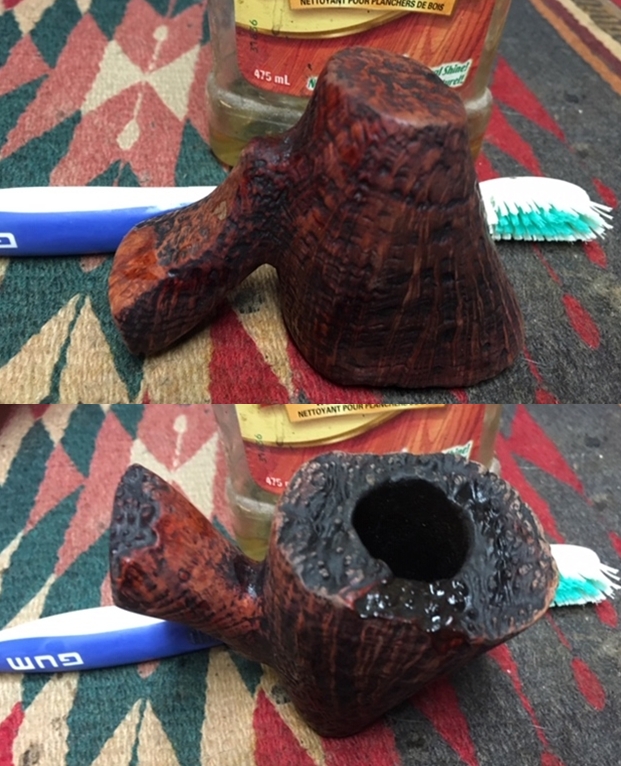
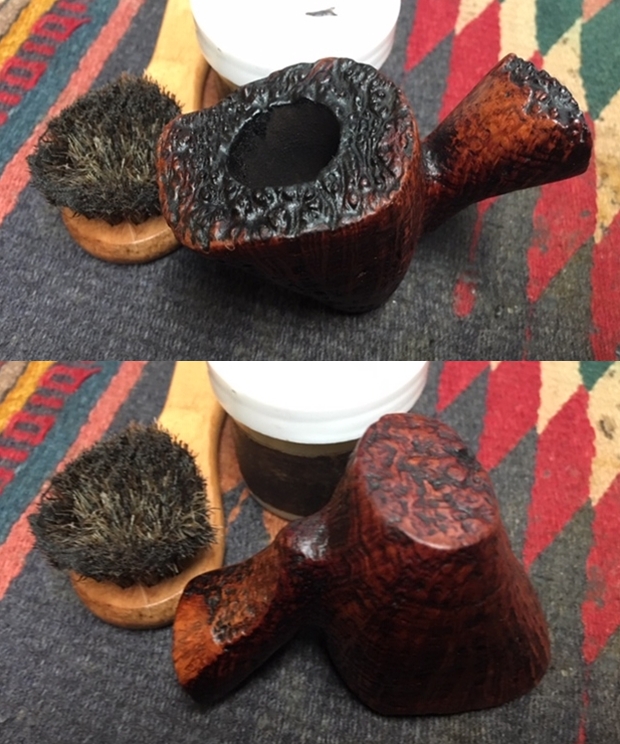
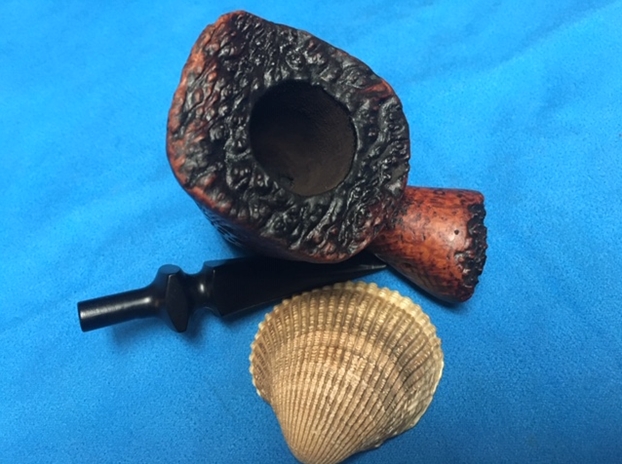
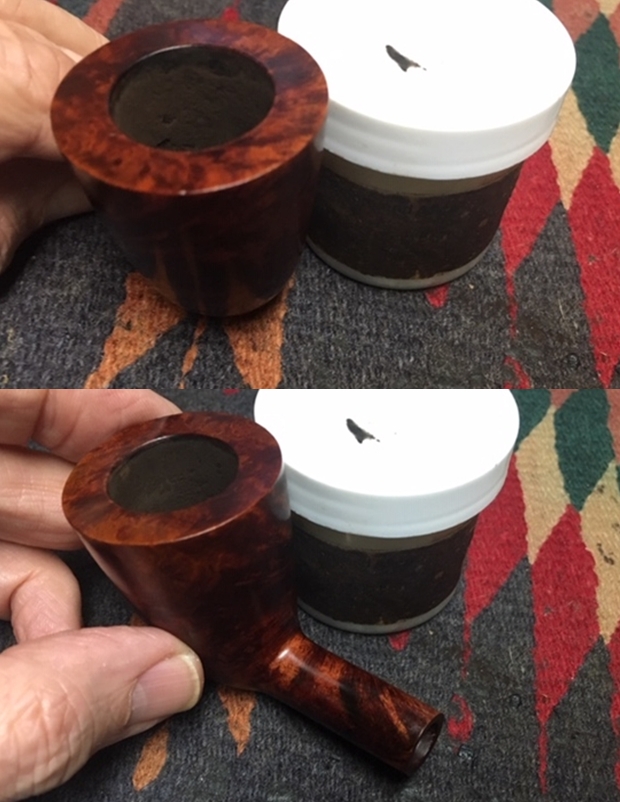
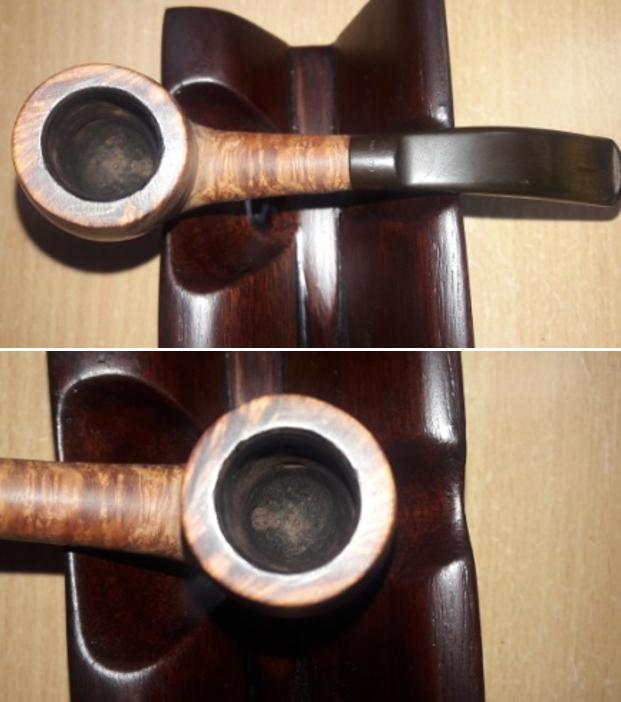
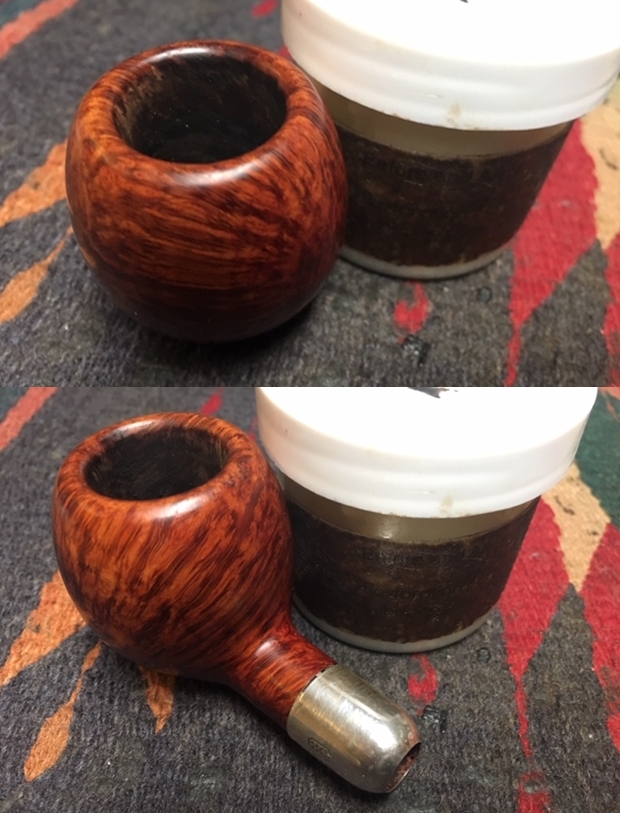
 Continuing with the cleaning regime, using a hard bristled tooth brush dipped in undiluted Murphy’s oil soap, I very deliberately scrubbed the surface of the stummel and the rim top. The original reddish dye was also washed away to some extent. The dirt and grime on the stummel surface was so stubborn that I had to resort to using a scotch-brite pad to get rid of it. While scrubbing the stummel, I paid special attention to areas where significant darkening was seen just below the rim outer edge. Thankfully, the burn marks were superficial and cleaned out nicely. However, a dark spot was revealed just below the cap ring and is marked in a red circle.

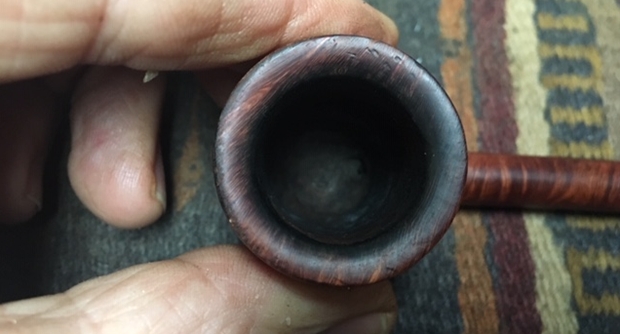
 The damages to the outer rim edge, uneven inner rim edge and stummel dents and dings are now clearly visible in the above pictures after the cleaning. I had a close, hard look at the darkened spot seen and marked in red. The briar on and around the spot was hard and solid with no deep heat fissures on the corresponding inner surface of the chamber. This ruled out the possibility of a burn out!!!! Phew, what a relief this was!!!! This external darkening, most probably, appears to have been caused when the pipe was placed in an ash tray alongside a smoldering cigarette butt, just a hypothesis!!! This will be addressed (hopefully!) when I sand the stummel surface to get rid of all the scratches and dents.
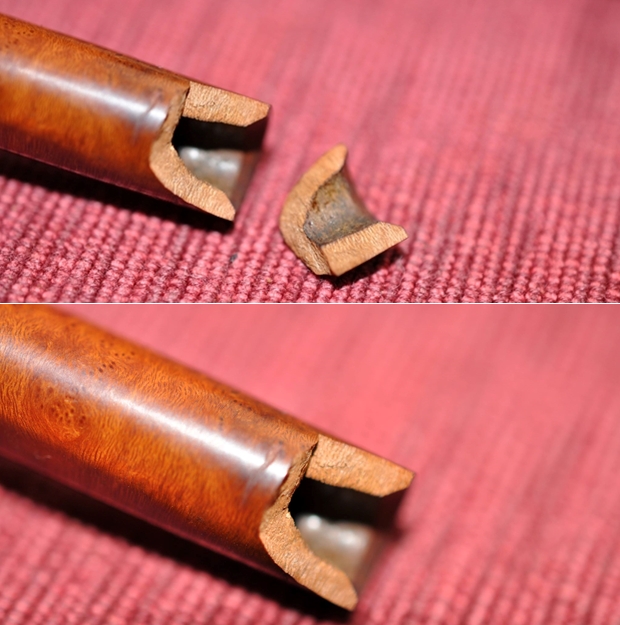
With the stummel now dried out, I got around to address the rim top and outer rim damage. The extent of the dip or trough caused due to banging the rim edge against a hard surface was deep and would necessitate heavy topping off of the rim surface, and I for one, absolutely wish to avoid any loss of briar!!!!! So, I decided to try out something different. I planned on first filling up the deep troughs on the rim edge using briar dust and superglue to roughly match the rim surface and some more and then topping it to achieve a smooth surface. Theoretically, this sounded logical.
I resorted to the layering method again; first I layered superglue over the damaged surfaces on the front and back outer rim edges, followed by sprinkling of briar dust, another layer of superglue followed by a final layer of briar dust. This final layer of briar dust reduces the probability of air pockets. In the last picture, you can see that the layering has been done to the level of the rim surface so that it sits evenly on a flat surface without showing any gaps. I set the stummel aside to cure.
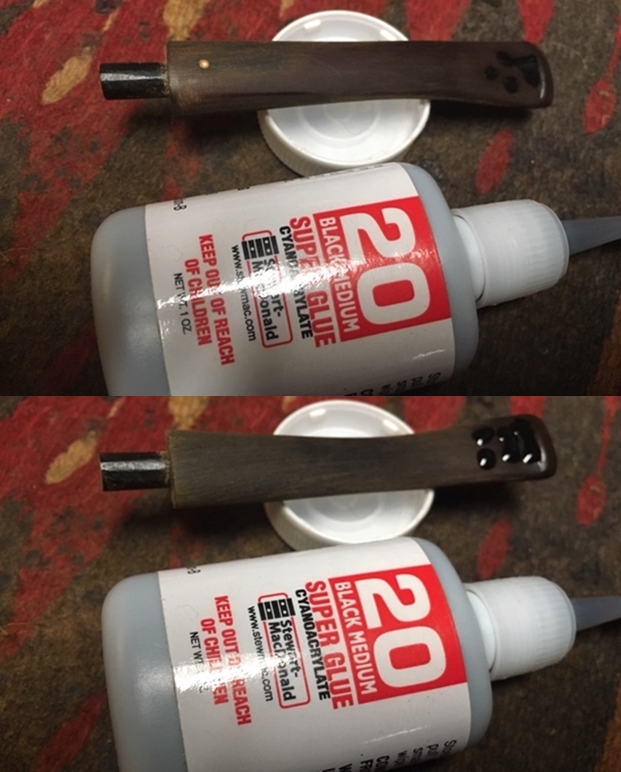
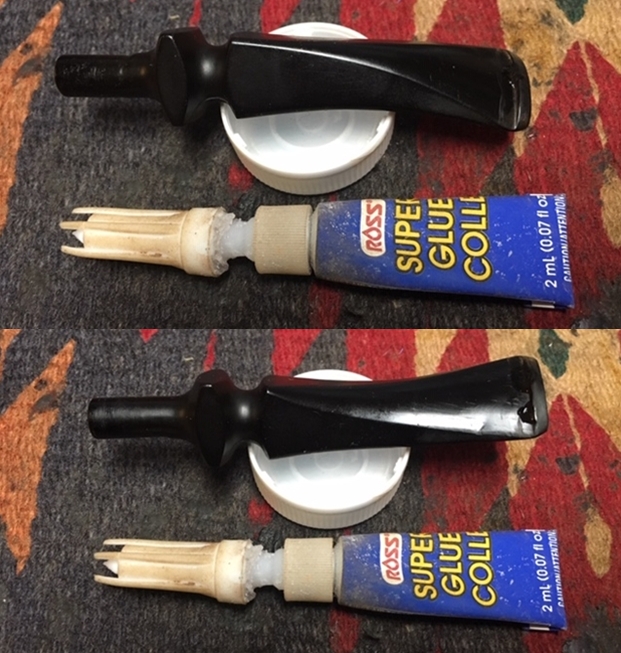
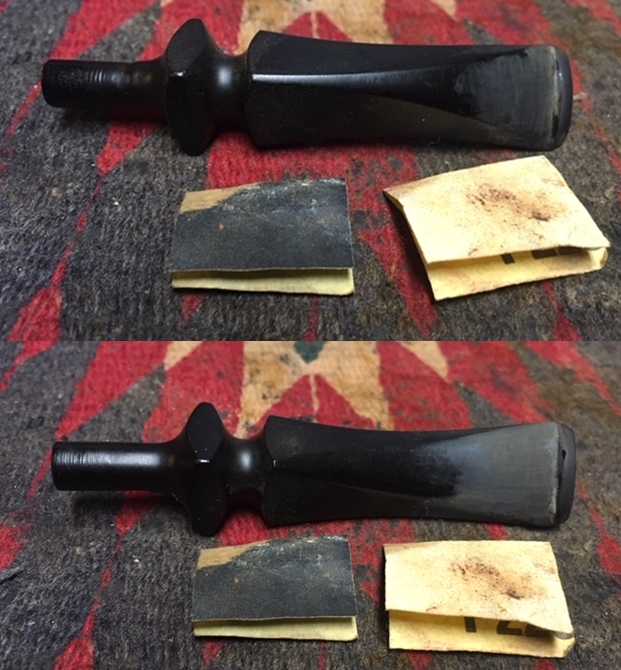
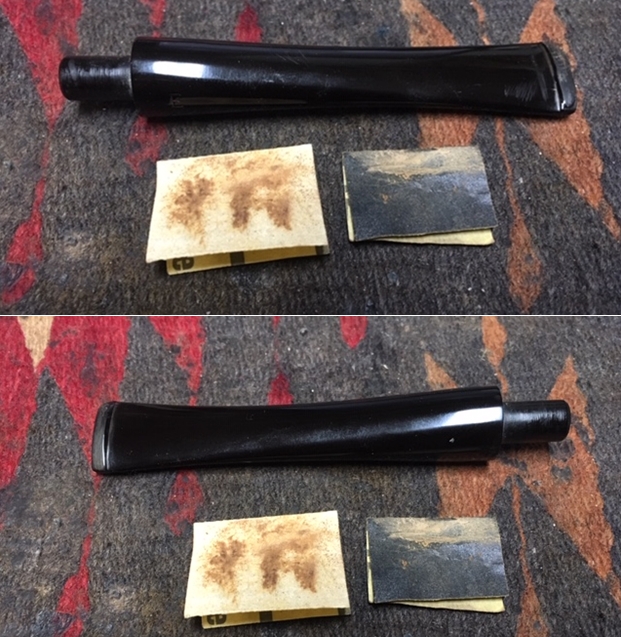
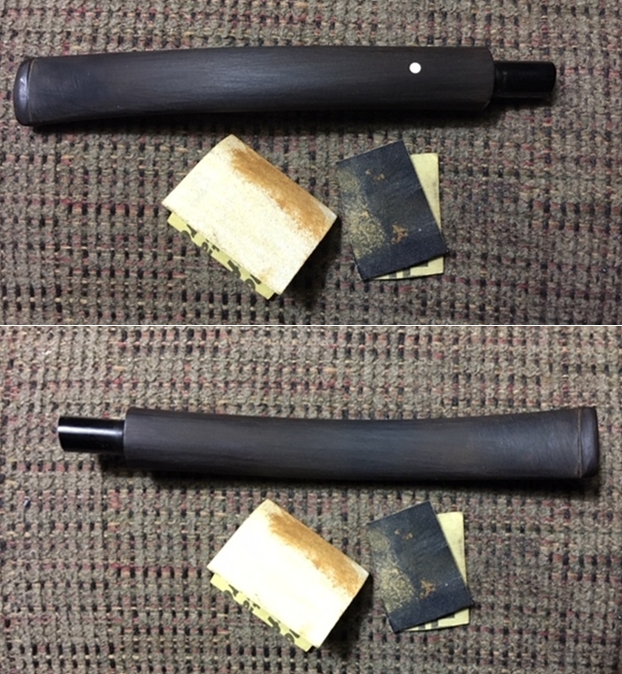
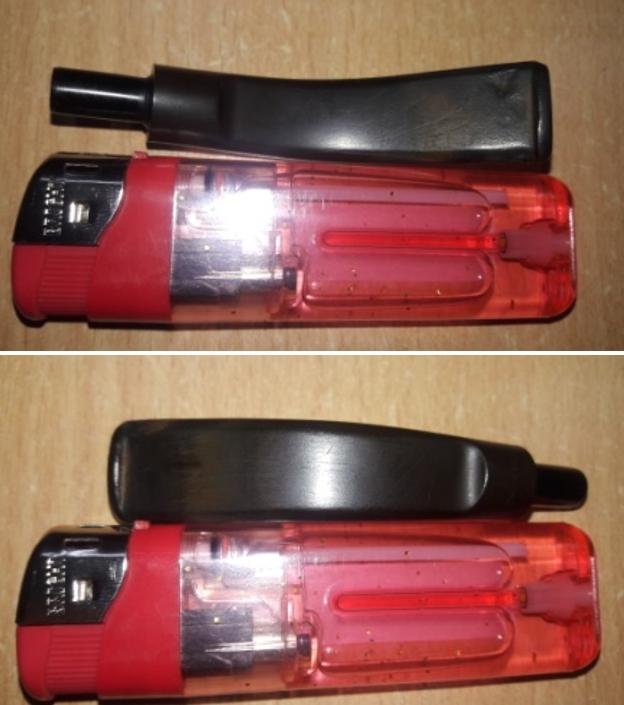
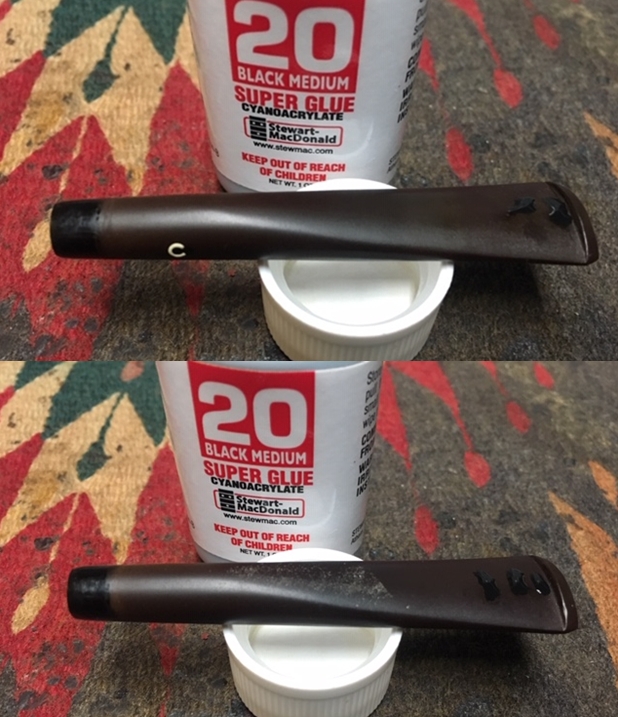
 While the stummel fill was being set aside to cure, I tackled the stem repairs by first flaming the surface with a Bic lighter flame to raise the bite marks to the surface. This was followed by sanding the stem surface with a folded piece of 220 grit sand paper. This step has a twofold purpose; firstly, it helps to roughly blend the raised bite marks with the rest of the stem surface and brings to fore the spots which require filling and secondly, it helps to rid the oxidation from the stem surface which helps subsequently in better finish after polishing. I cleaned out the surface with a cotton pad dipped in alcohol to remove all the dirt and grime. Once the surface was clean, the lip edges and the bite marks were filled with a superglue and activated charcoal mix and set aside to cure overnight.

 The fill repair to the outer rim edges had cured by this time and with a flat head needle file, I roughly sand the fills to match the surrounding surface. Using a folded piece of a 220 grit sand paper, I further blended the outer filled edges with the rest of the edge and created a slight bevel to mask the uneven inner rim edges. The rim top surface was topped on a piece of 220 grit sand paper to further blend and even out the rim top, checking frequently the progress being made. Personally, I prefer to avoid topping as I do not appreciate loosing even one mm of briar estate, but in this instance, I was left with no recourse but to top the rim. I lightly top it on 600 grit sand paper to reduce the sanding marks left behind by the 220. However, a few air pockets revealed themselves (marked in red-orange circle) at this stage which necessitated reapplication of briar dust and super glue. Sorry, missed out taking pictures of this stage!!

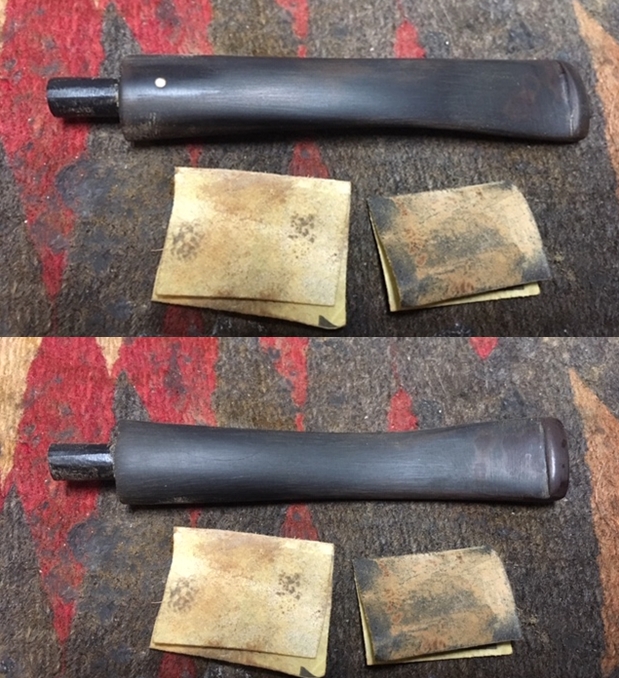
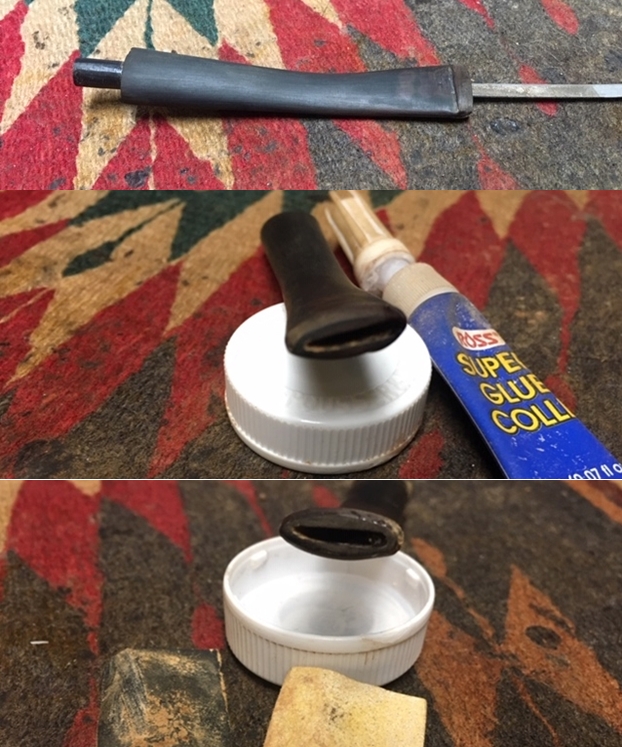
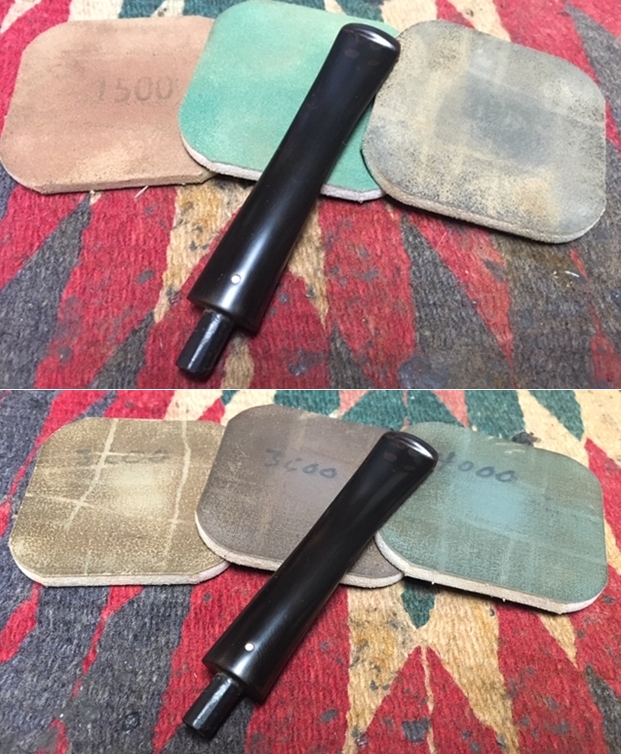
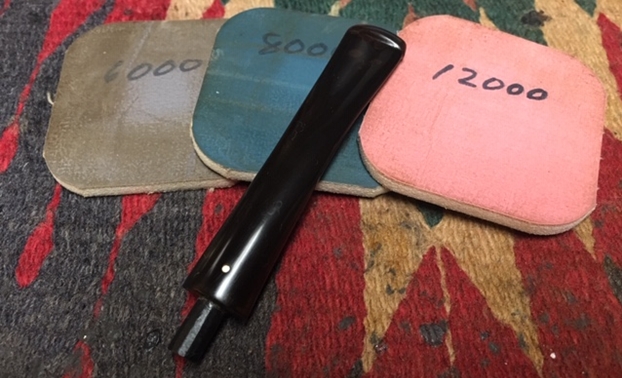
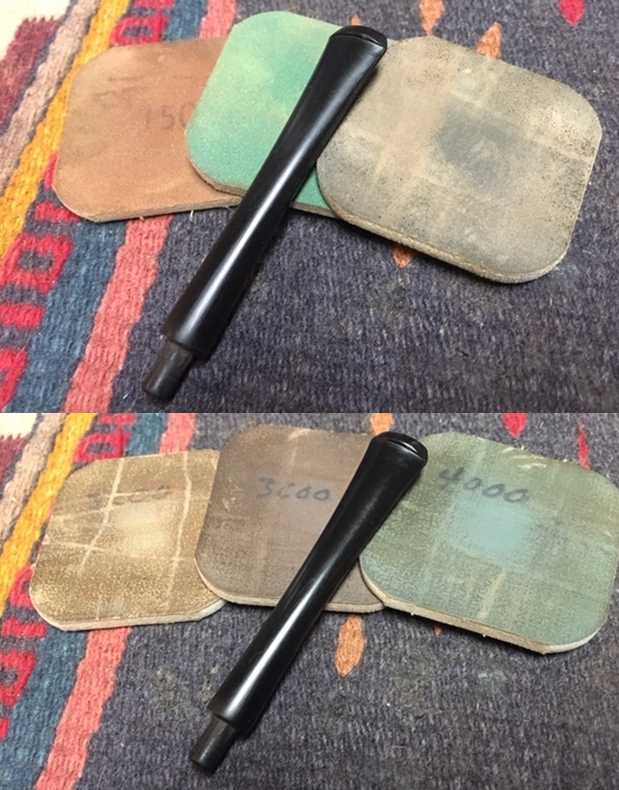
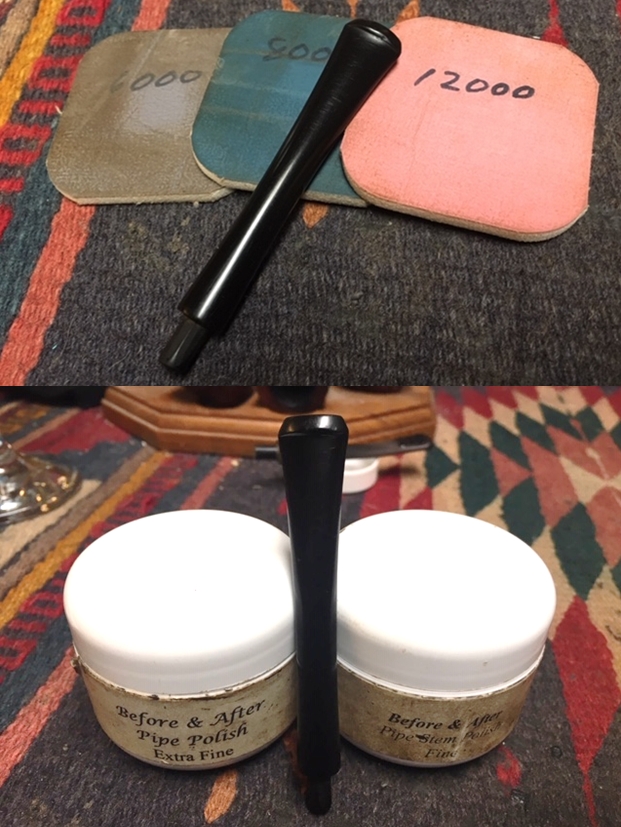
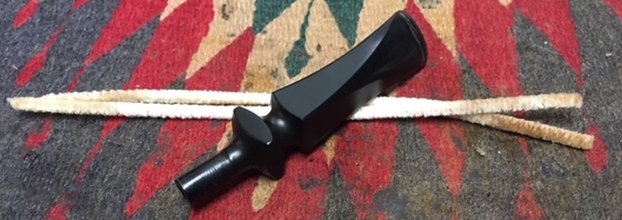
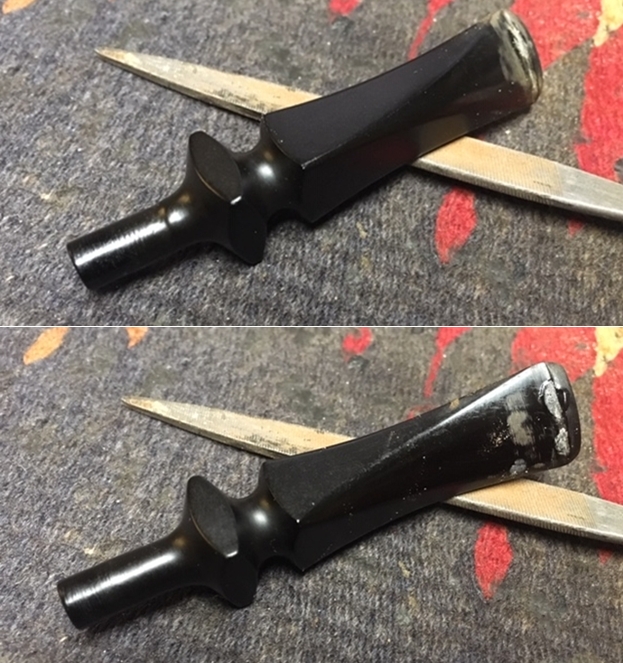
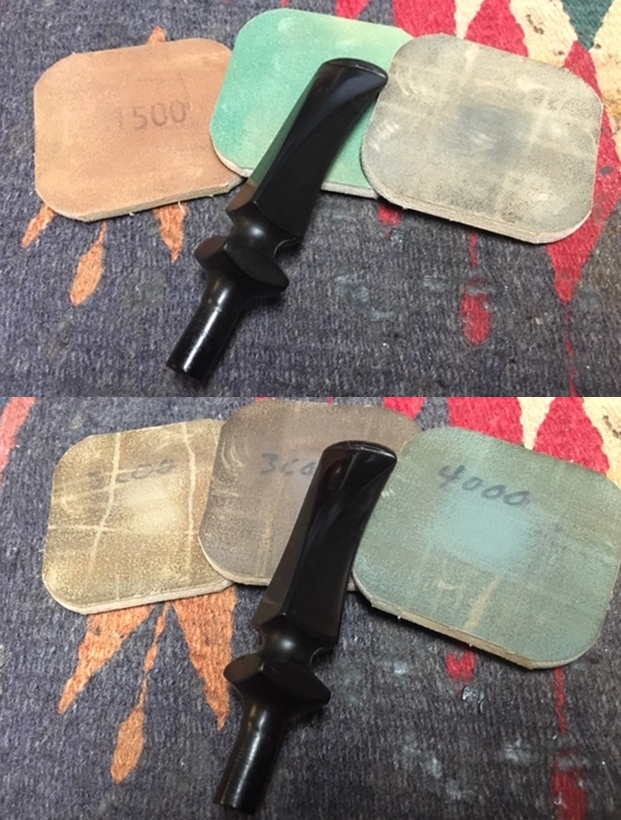
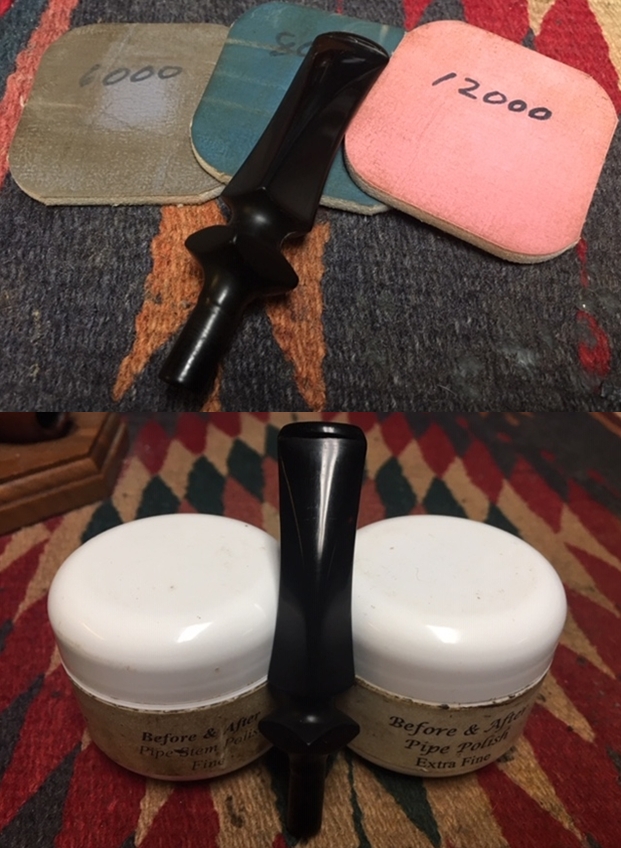
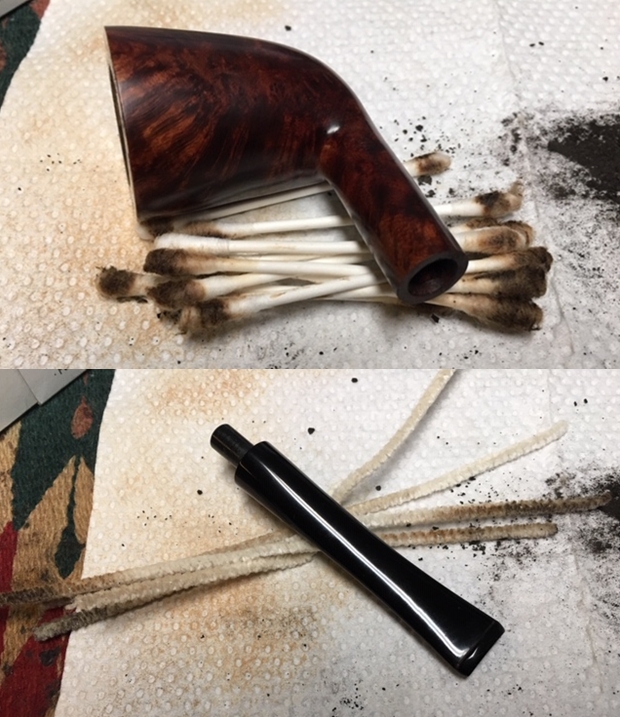
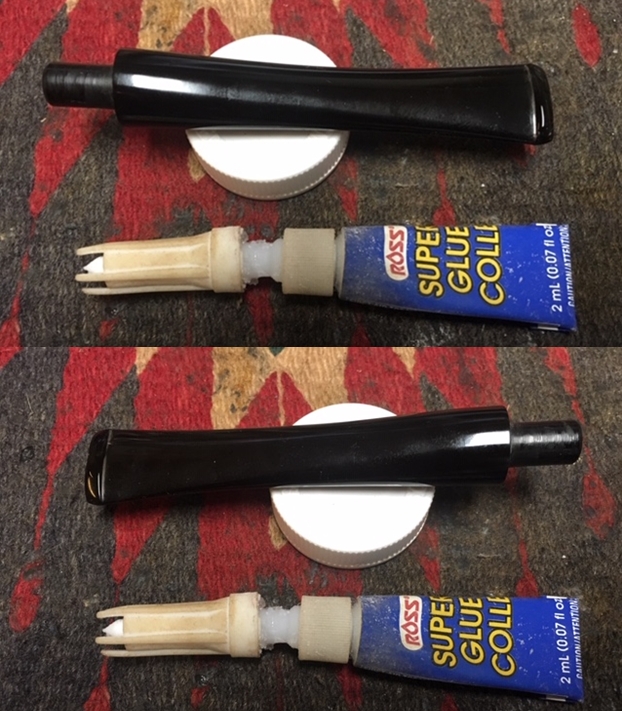
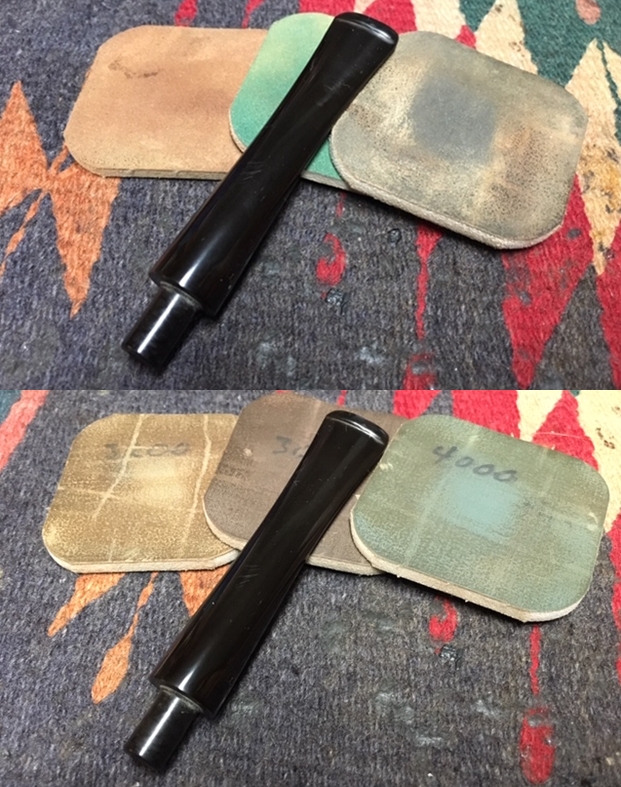
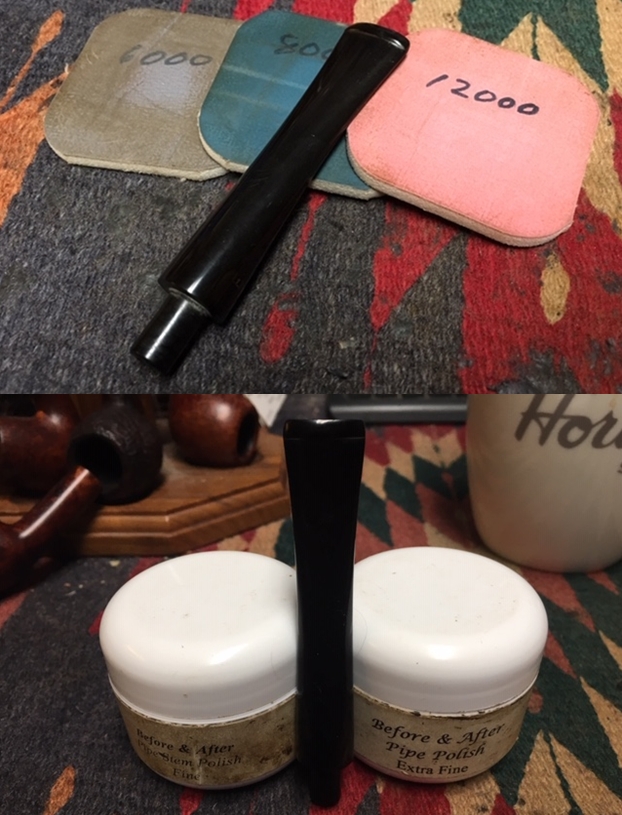
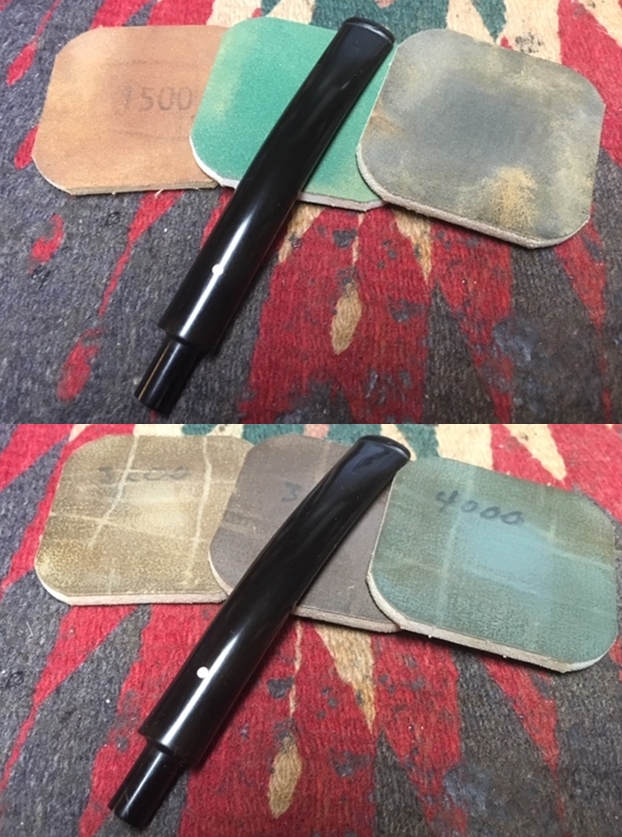
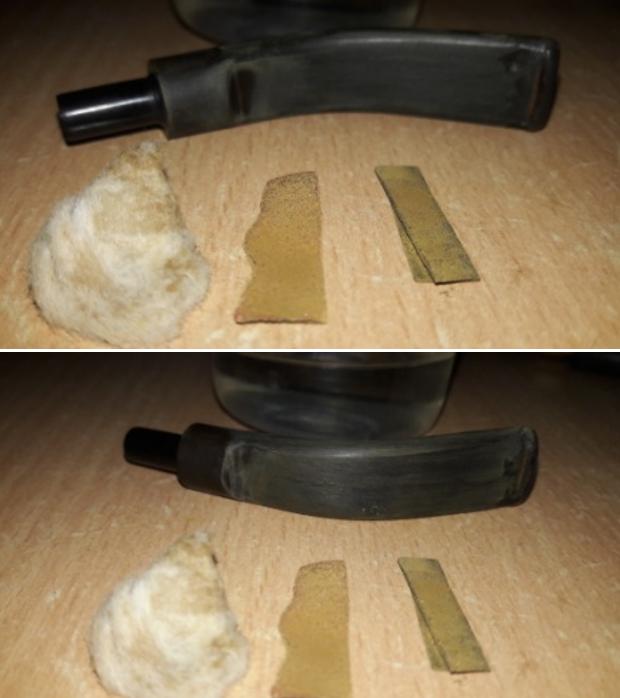
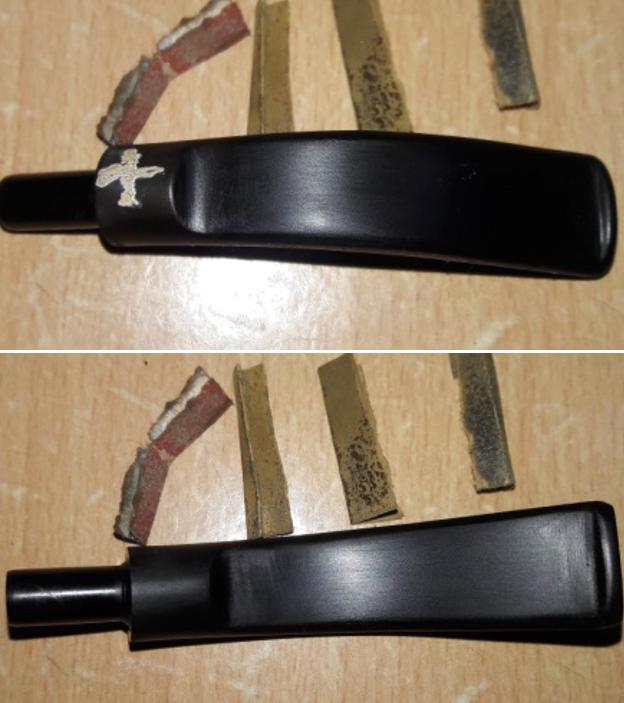
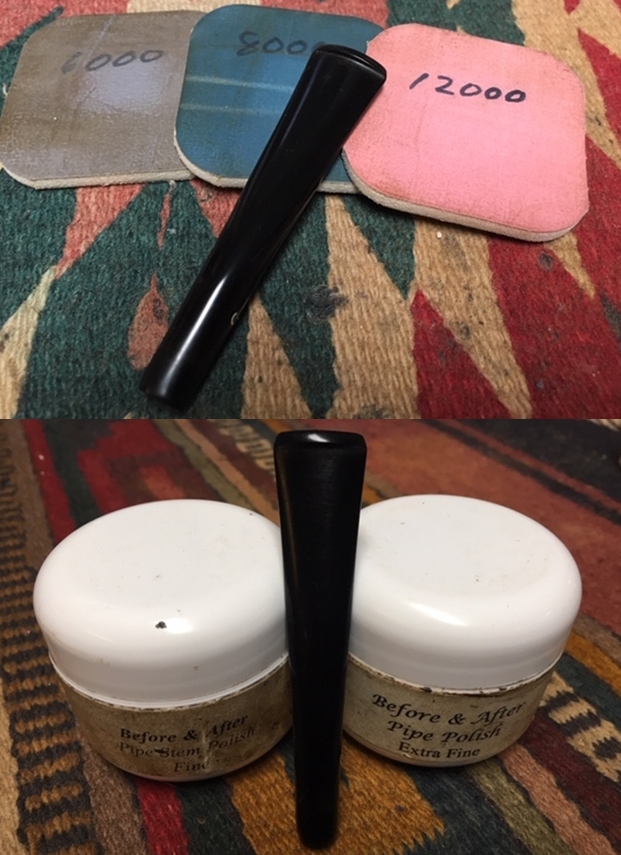
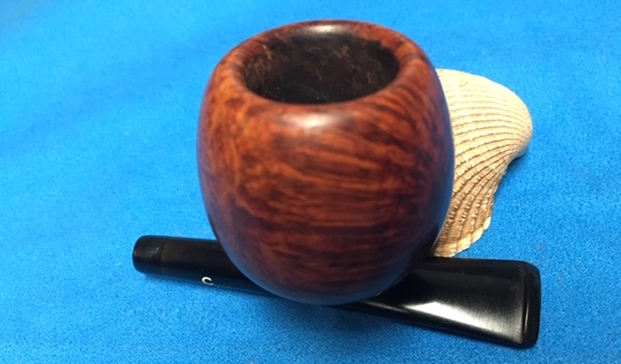
 While the second fill to the rim outer edge was curing, I turned my attention to work on the cured stem fills. Using a flat head needle file, I roughly matched the fills with the rest of the stem surface. For a better blending, I further sanded the entire stem with 220 followed by 400, 600 and 800 grit sand paper. This helps to reduce the sanding marks left behind by the more abrasive 220 grit paper. To bring a deep shine to the vulcanite stem, I went through the complete set of micromesh pads, wet sanding with 1500 to 2400 grit pads and dry sanding with 3200 to 12000 grit pads. I wiped the stem with alcohol after each pad and rubbed it down with Extra Virgin Olive oil to rehydrate the vulcanite. The repairs have blended in very well and the stem now looks a shiny black and beautiful. The internals of the stem was cleaned out using alcohol and pipe cleaners. The finished stem is shown below.

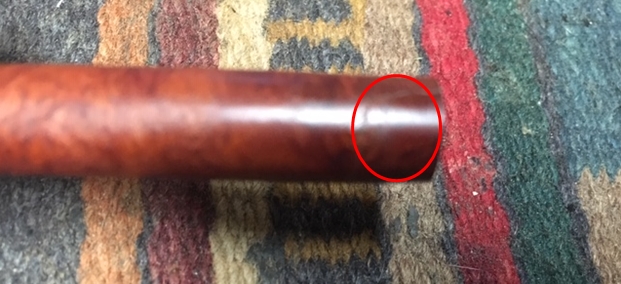
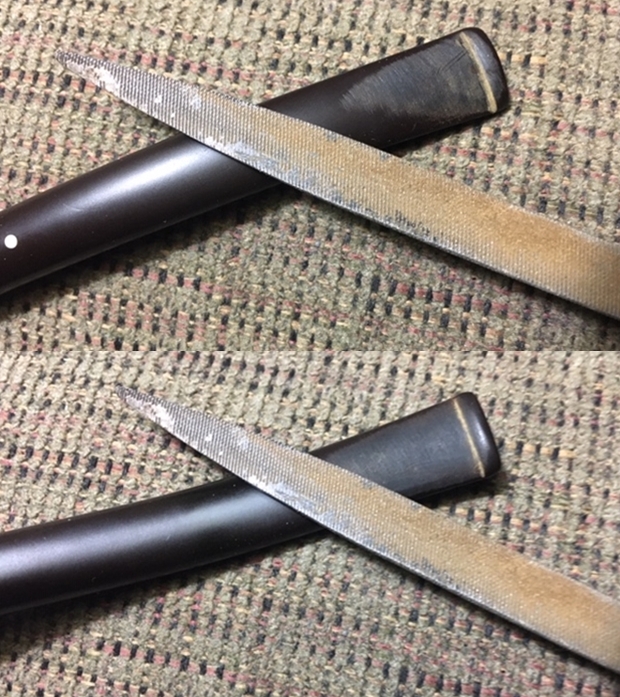
 The next evening, the repairs to the edge had completely cured and I move ahead by filing and rough shaping with a flat head needle file. I further fine tune the blending by sanding it down with 220, 320, 600 and 800 grit sand papers. Here is how the repaired area appears at this stage. I am very pleased with the way this repair progressed.
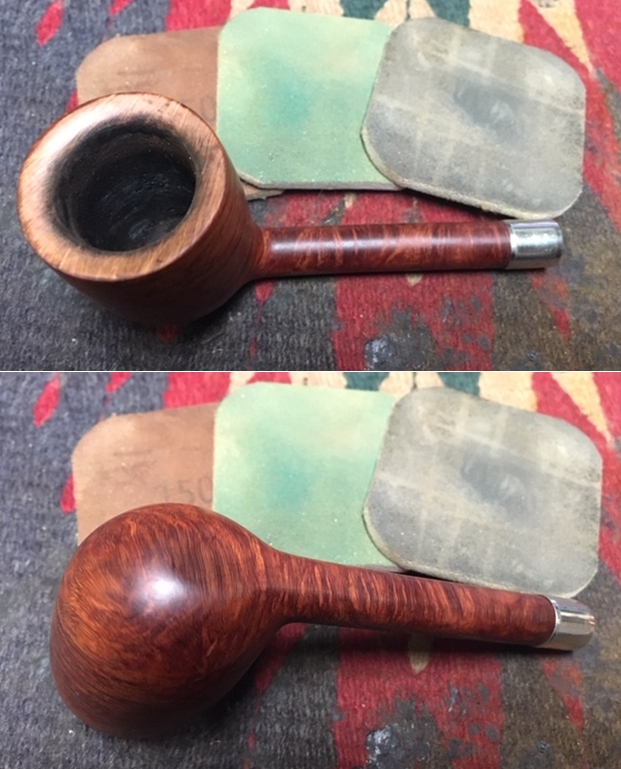
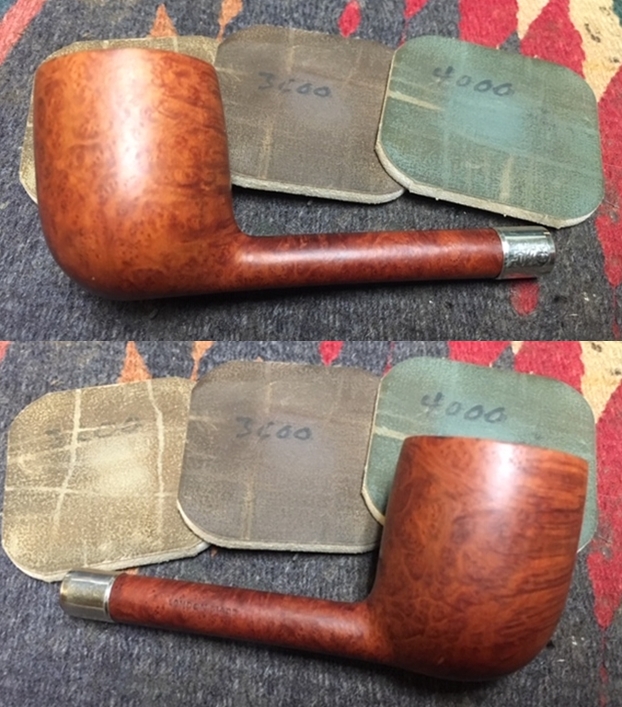
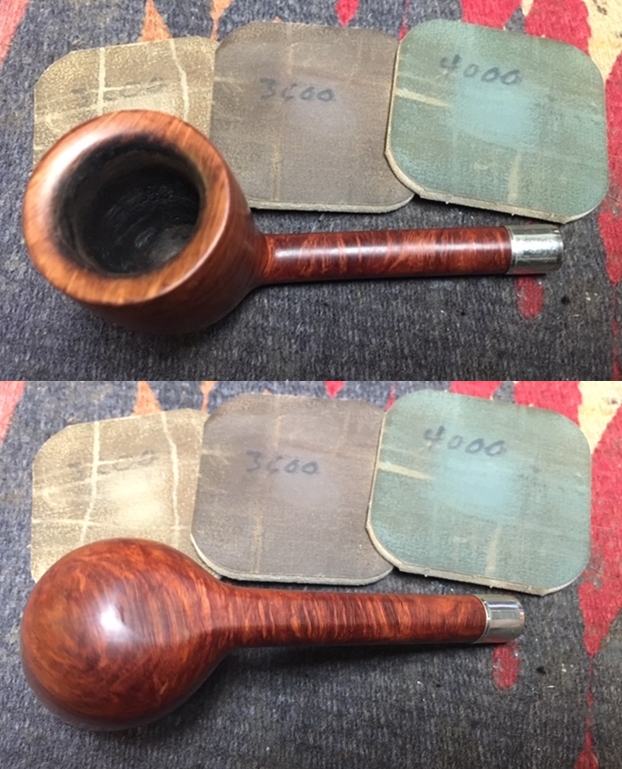
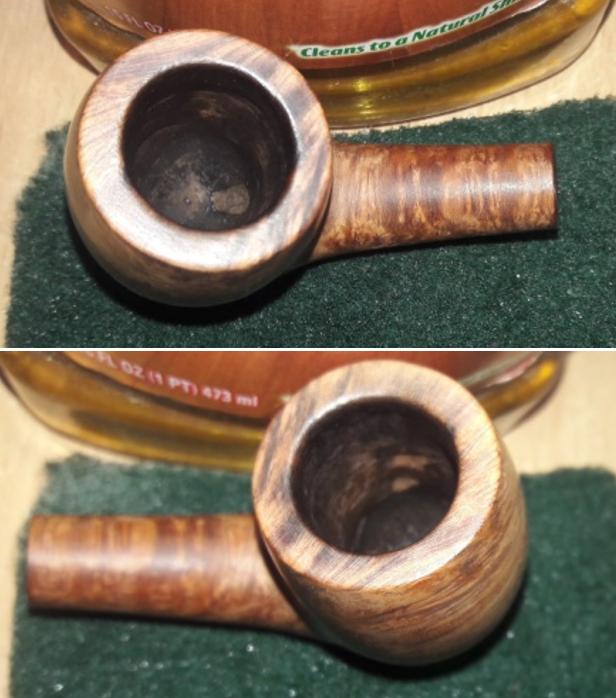
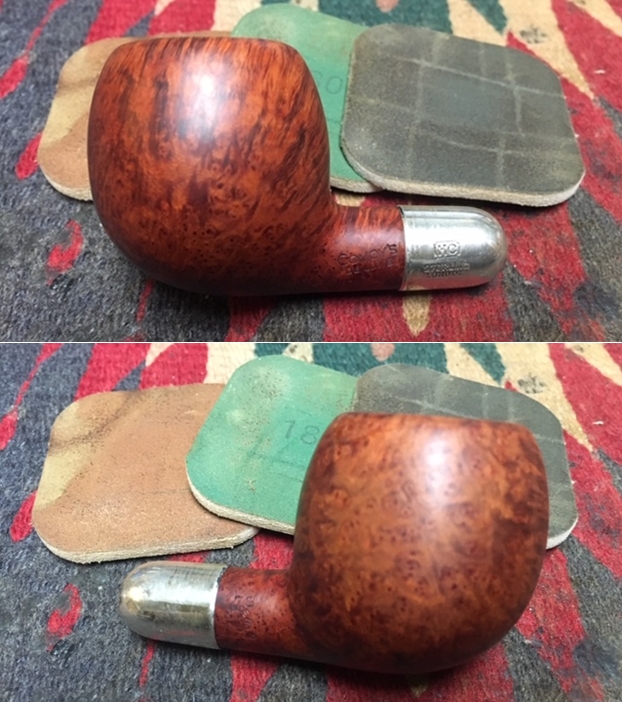
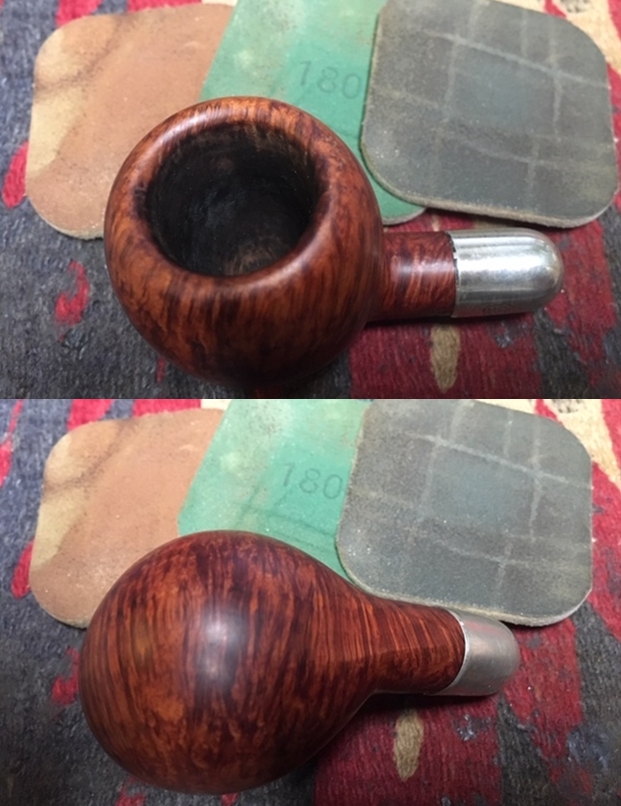
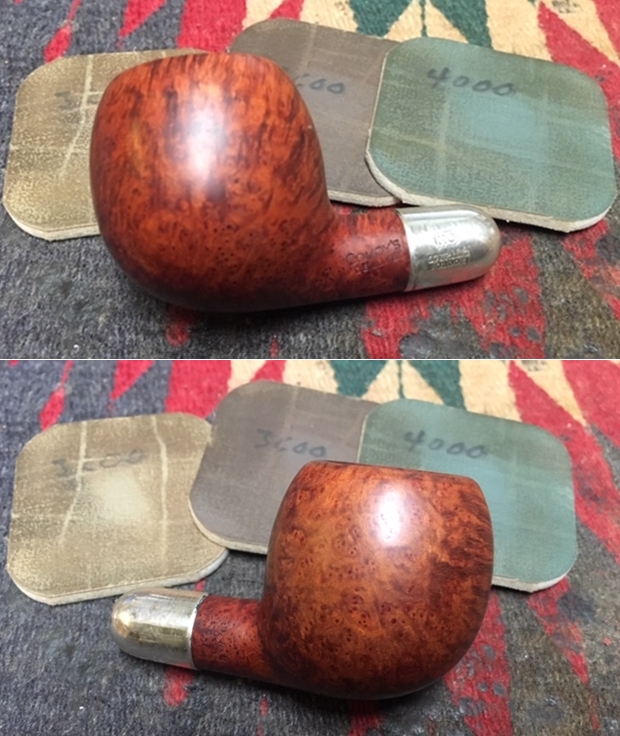
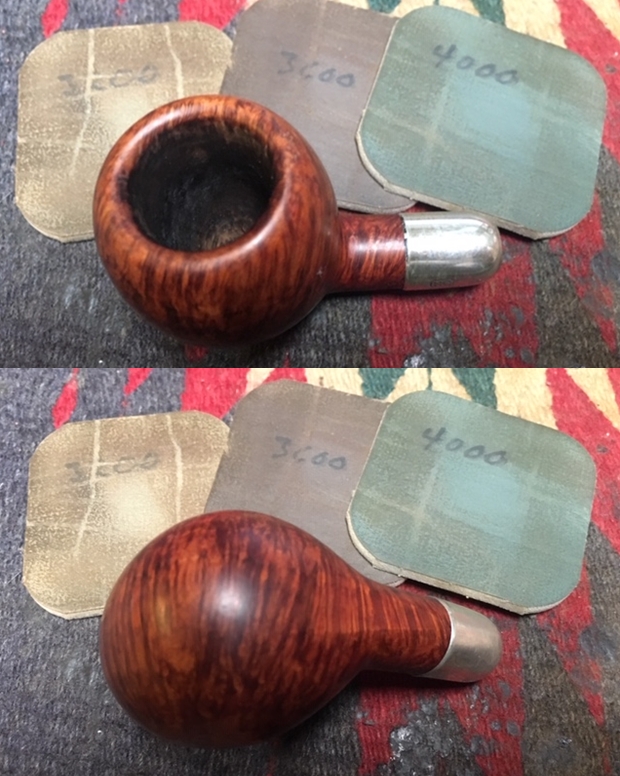
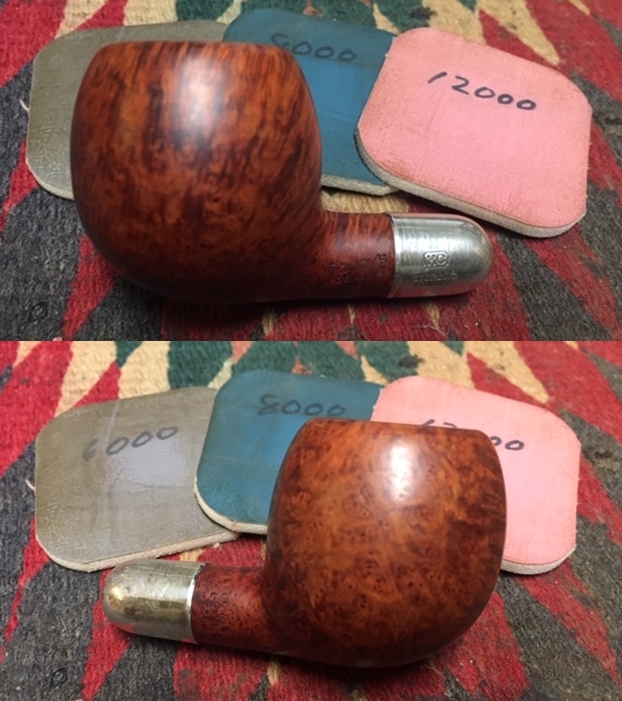
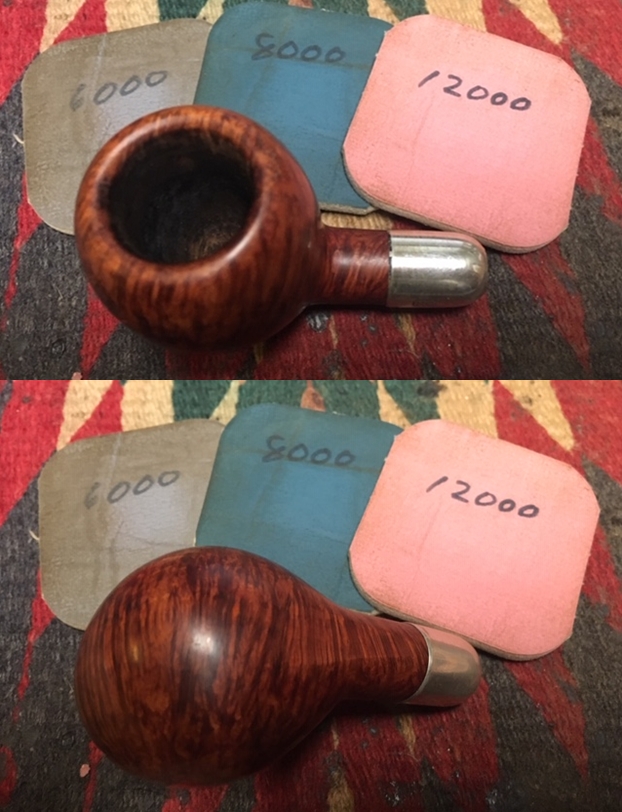
 I sand the entire stummel using 220, 400, 600 and 800 grit sand papers. The little dents and dings that remained on the stummel and outer rim edge were also evened out under this sanding process. This was followed by polishing with micromesh pads. I wet sand the stummel with 1500 to 2400 grit pads and follow it up by dry sanding with 3200 to 12000 grit pads. I wiped the surface with a moist cotton cloth after every wet pad to check the progress. The repaired rim edge appears, in picture, as though it is patchy with air pockets. However, that is not the case. The fill is smooth and solid and should get masked after I have stained it.

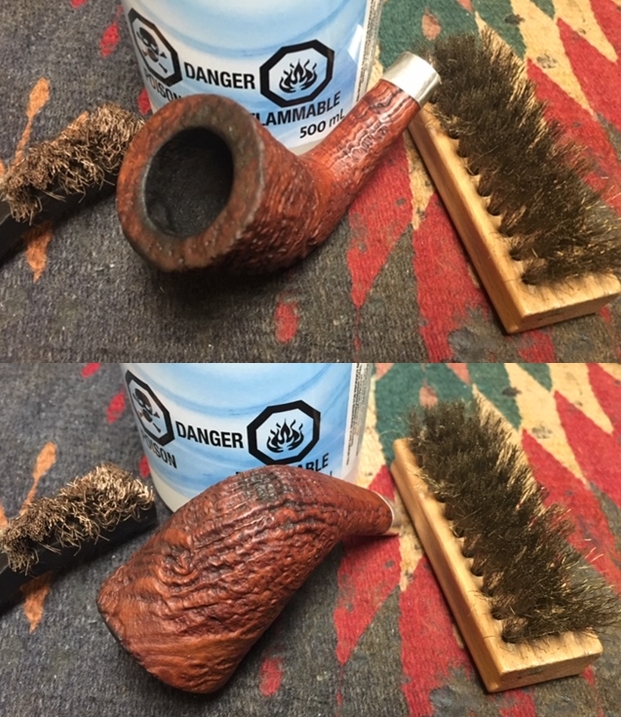
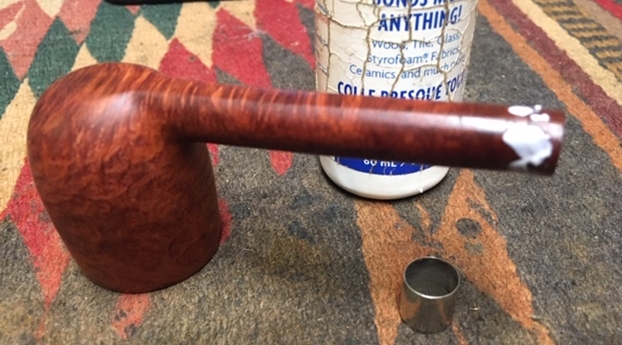
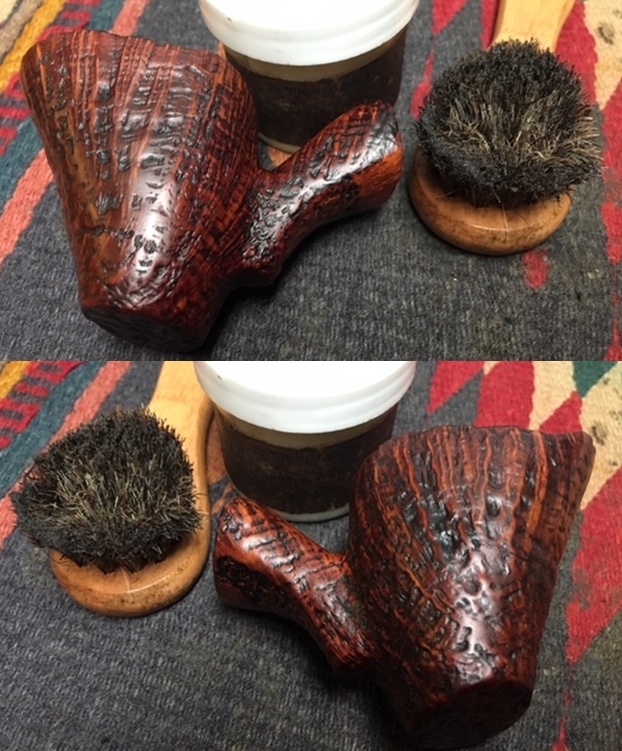
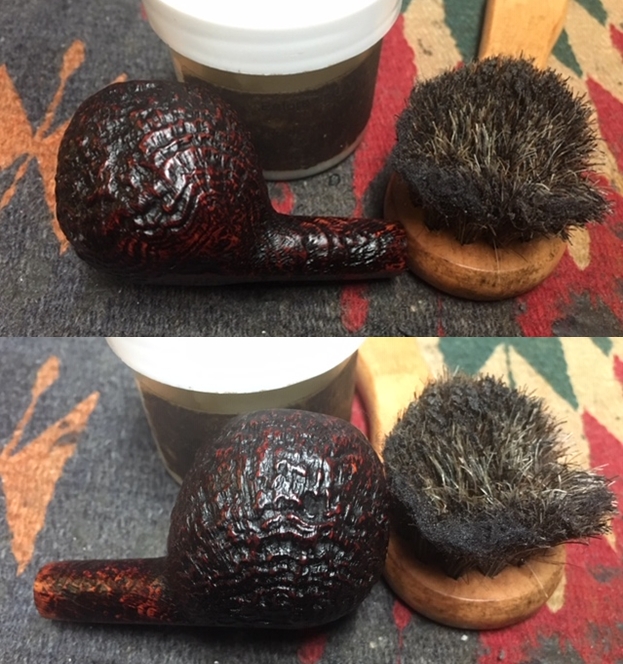
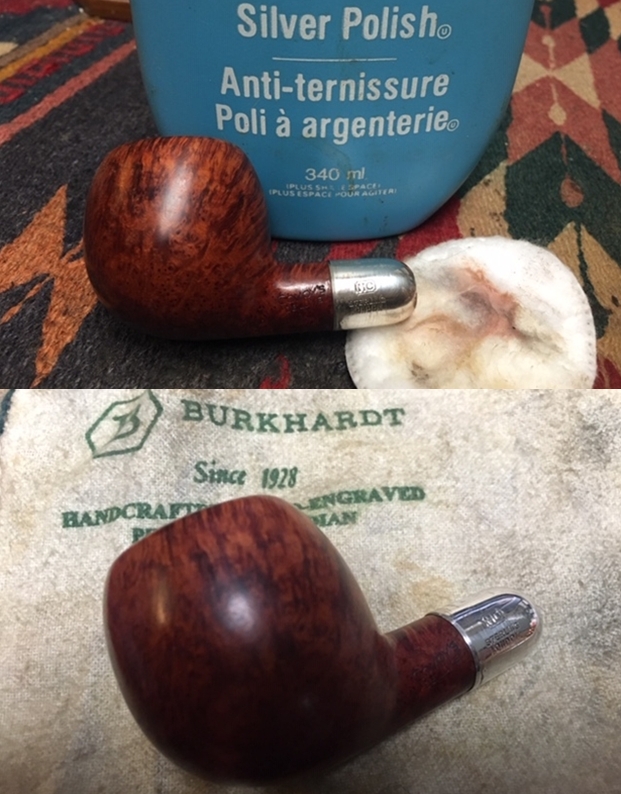
 I rub a small quantity of “Before and After Restoration Balm” in to the briar with my finger tips and let it rest for a few minutes. The balm almost immediately works its magic and the briar now has a nice vibrant appearance. I further buff it with a horse hair shoe brush. I had hoped that the balm would work its magic on the filled area and help in blending it a bit, and that did happen!! I am very pleased with the way these repairs have turned out. And now on to staining and polishing…

 After Mr. Steve had uploaded my write up on the Dunhill Bruyere Horn shaped pipe (https://rebornpipes.com/2019/03/13/reconstructing-a-broken-stem-on-dunhill-bruyere-51671/), the feedback and responses were very educative and I had decided to incorporate these suggestions while working this project. Mr. Roland Borchers brought out that the original color of Bruyere was achieved by first staining with Dark Brown stain followed by Cherry red stain. Mr. Steve also concurred and then there was no turning back!! I stained the stummel in DB stain first. I use the powder variety of stain and mix it with 99% isopropyl alcohol. I heated the stummel surface with a heat gun and applied the stain with a folded pipe cleaner. As I paint the stummel with stain over sections at a time, I burn the dye using a Bic lighter that combusts the alcohol in the aniline dye and sets the dye pigmentation in the wood. After fully saturating the stummel and covering the whole surface, including the rim top, I set the stummel aside to rest for several hours.
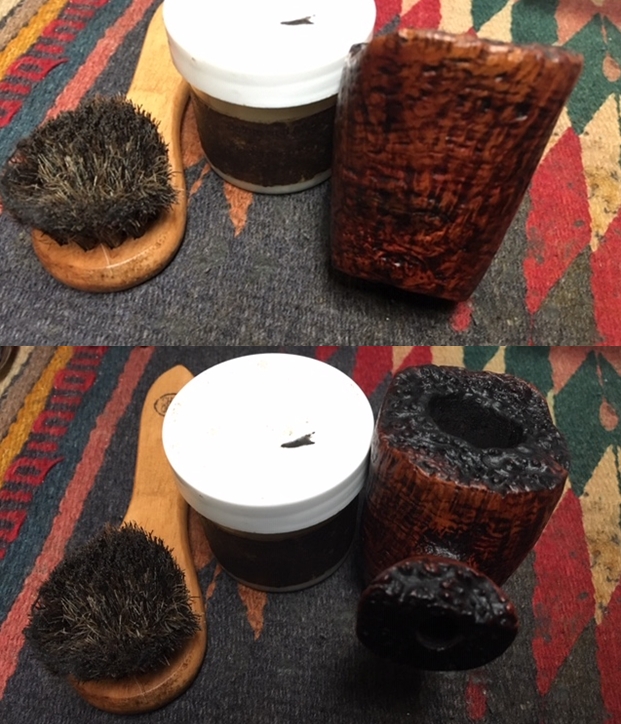
 By next evening, the stain had set nicely. I mount a cotton cloth buffing wheel (because I do not have felt cloth buffing wheels!!) on the Dremel and set the speed at about 40% of full RPM and apply white compound to the stummel. This does help in revealing the grains gradually. This time around, the repaired area had blended very nicely in to the rest of the stummel surface. Here is another lesson that I have learned; it is advisable to use white compound after staining and not red Tripoli as I used to, for the reason that the red Tripoli compound is more abrasive and does not make sense to use after polishing by 12000 grit micromesh pad!!
 I followed this polish by re-staining the stummel with Cherry red stain. I set it aside to let the briar pores absorb the stain pigments.
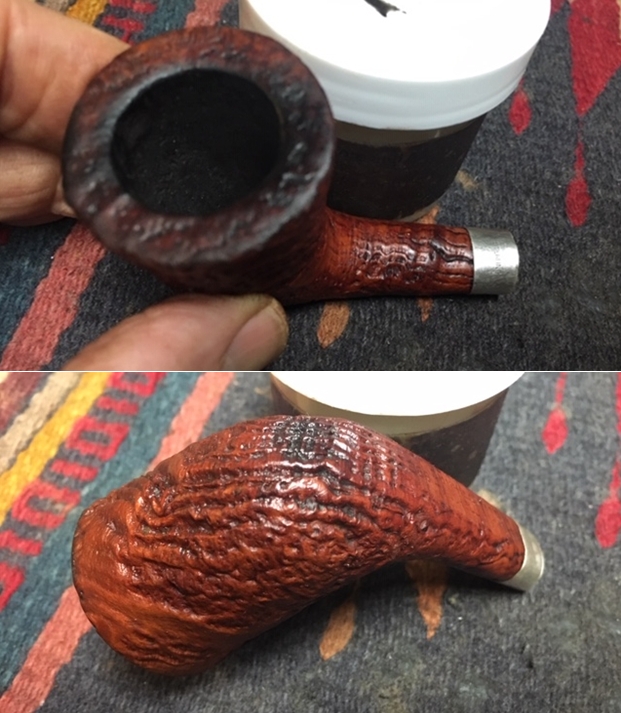
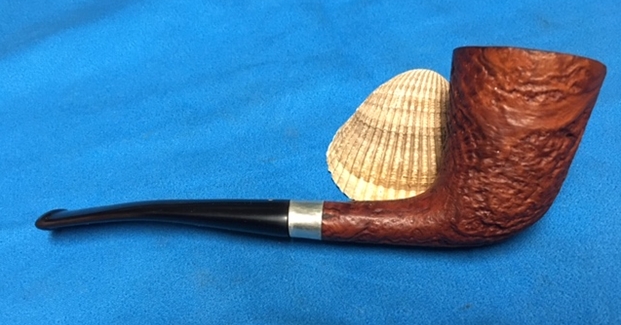
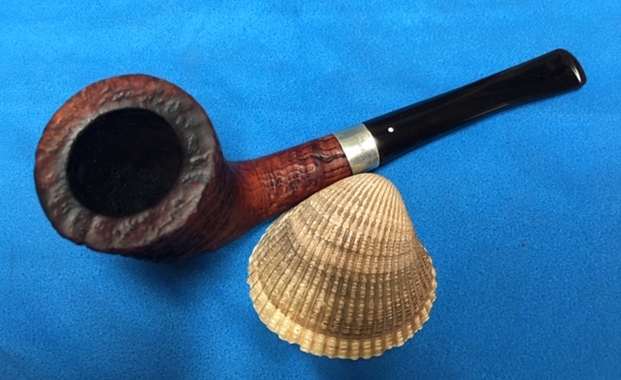
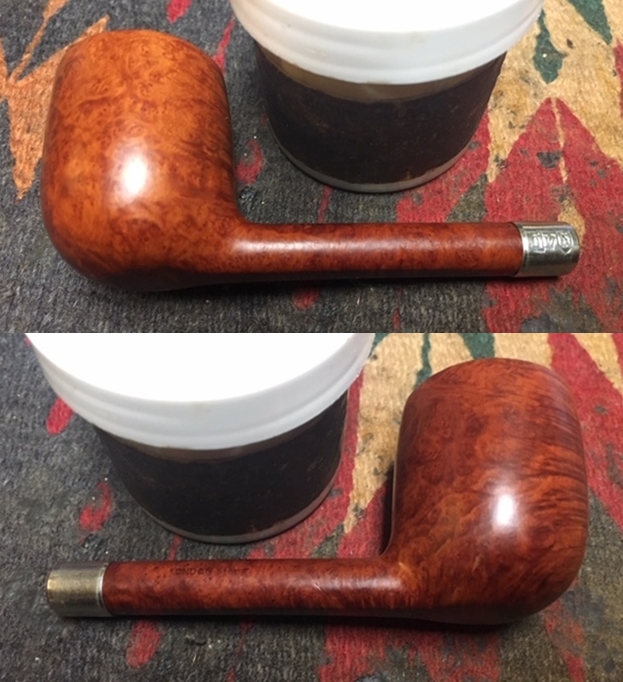
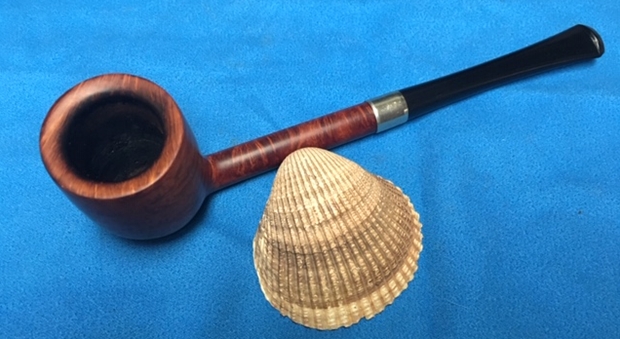
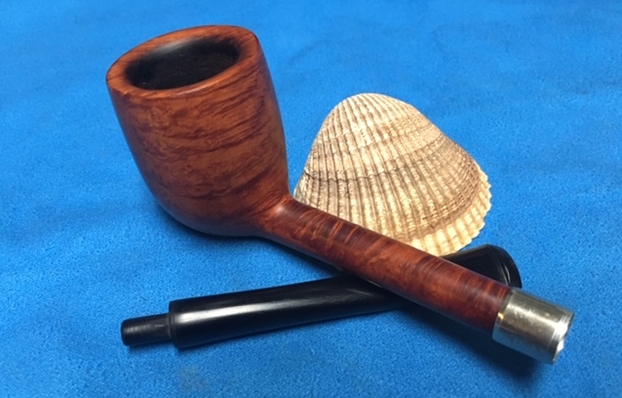
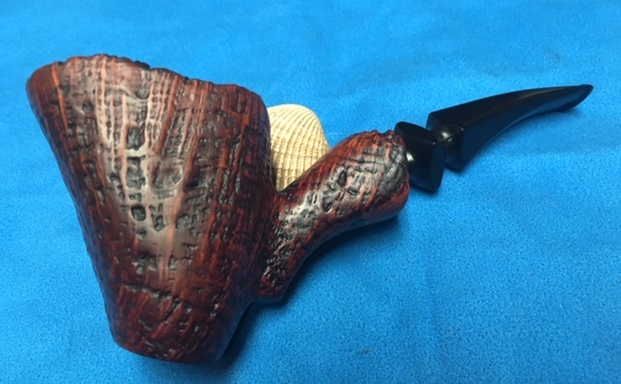
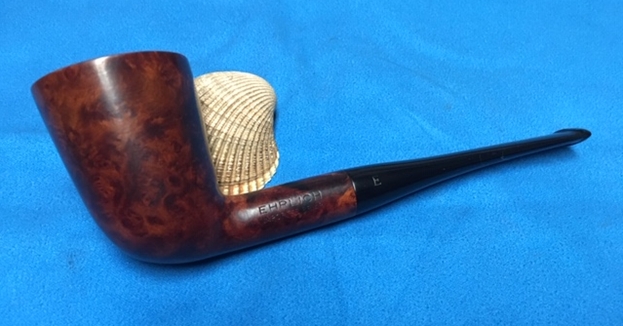
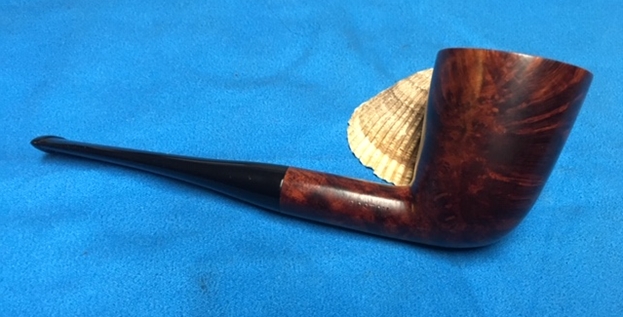
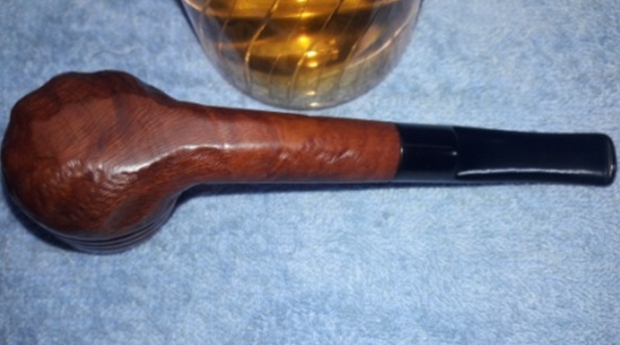
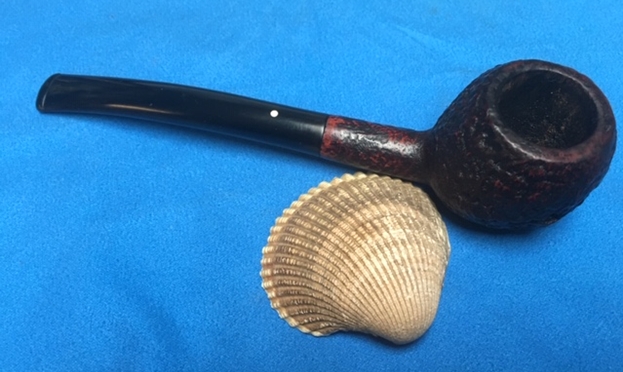
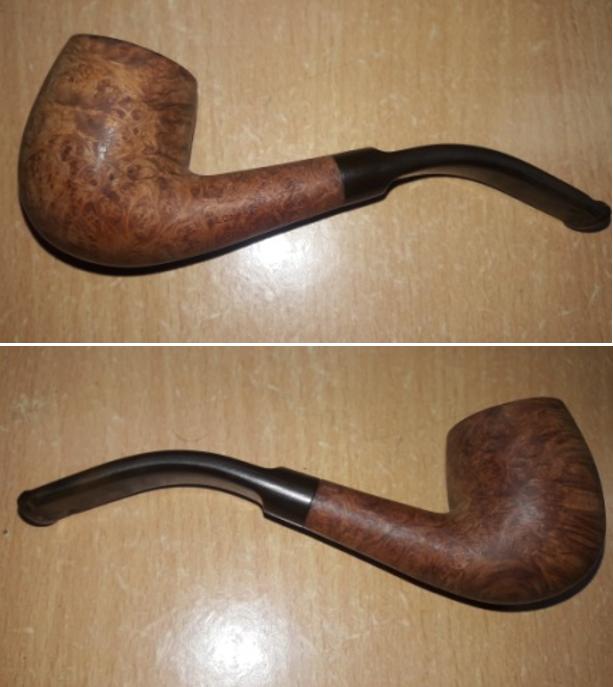
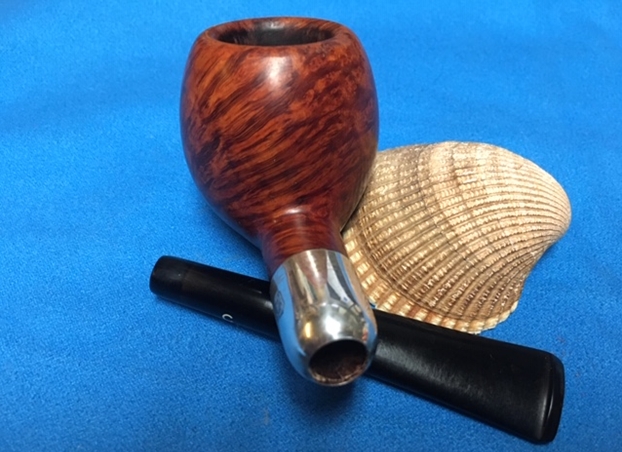
 To finish, I re-attach the stem with the stummel. I mounted a cotton cloth buffing wheel to my local machine which is similar to a Dremel, set the speed at about half of the full power and applied White Diamond compound to the entire pipe. I wiped/ buffed the pipe with a soft cotton cloth to clear it of any leftover compound dust. I then mounted another cotton cloth wheel on to the polishing machine and applied several coats of carnauba wax. I finished the restoration by giving the entire pipe a rigorous hand buffing using a microfiber cloth to raise the shine further. The completed pipe looks lovely, fresh and vibrant; the photographs in this case, do not do justice to the appearance of this beautiful pipe. I cannot thank enough my friends and gentlemen who painstakingly identified my mistakes and suggested remedial measures after reading the write up for helping me to hone my skills while gaining experience.


