Blog by Dal Stanton
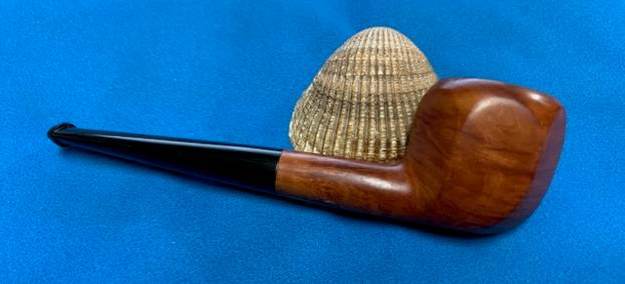
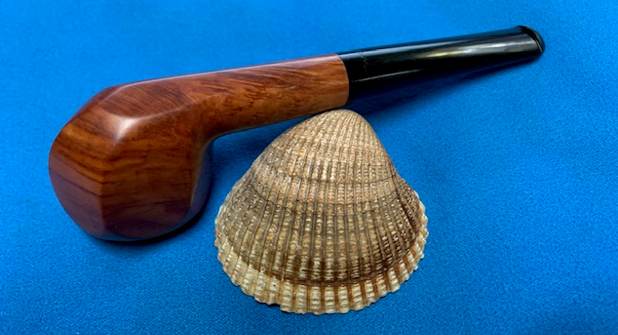
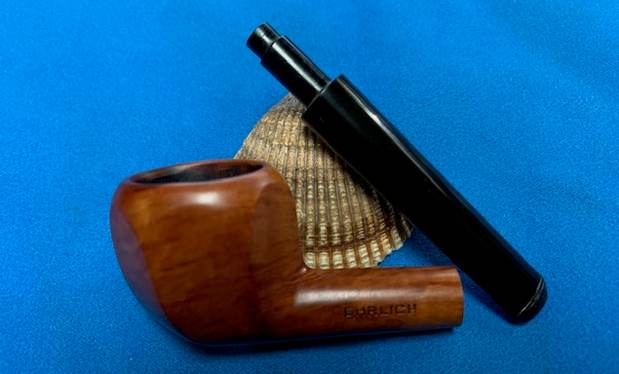
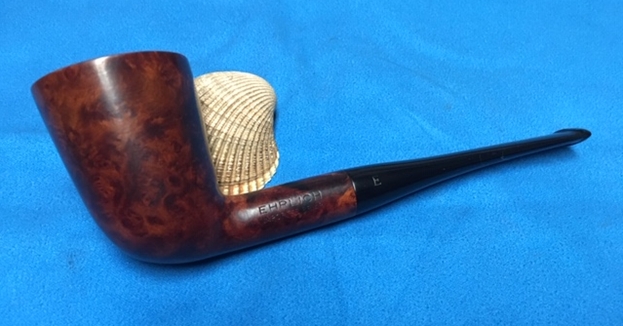
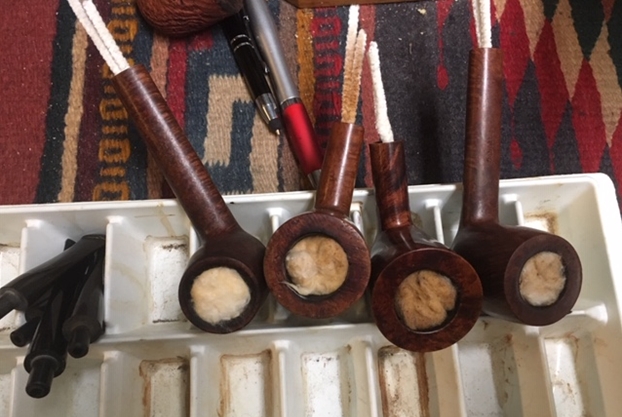
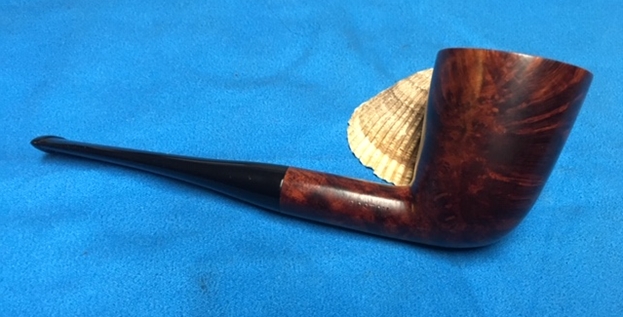
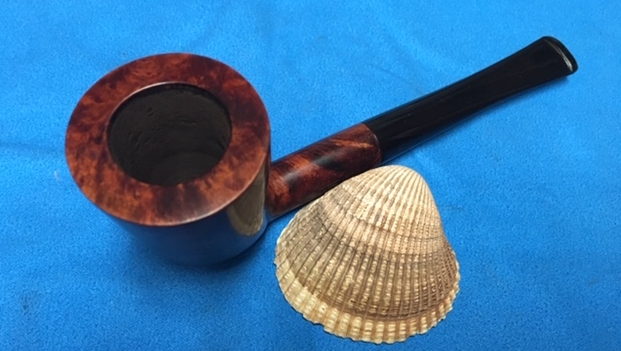
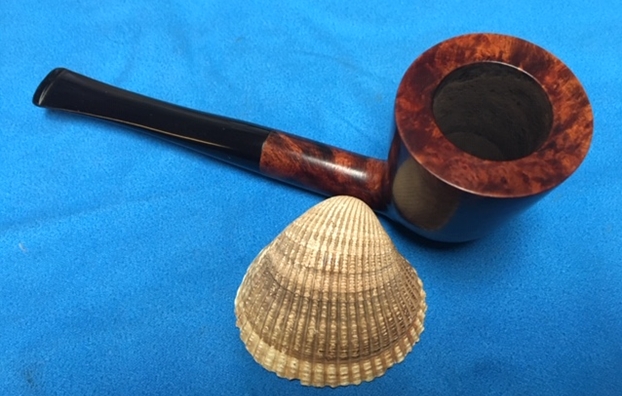
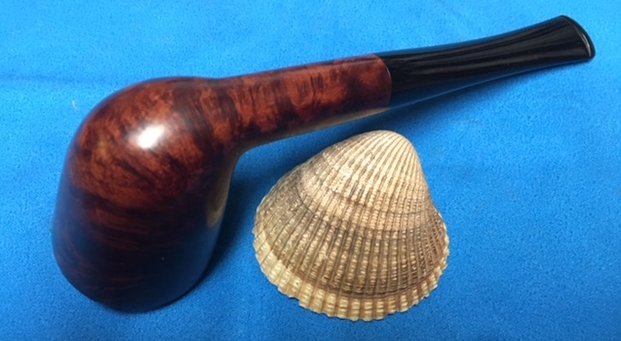
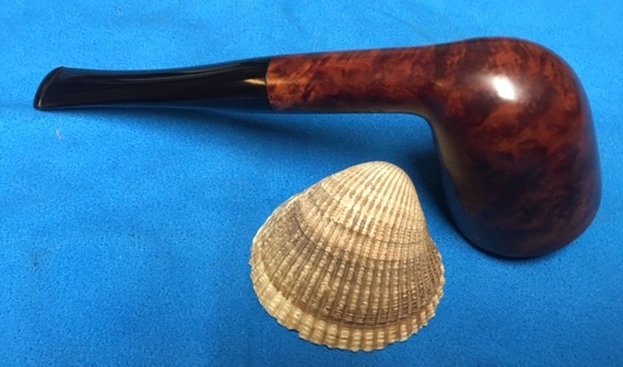
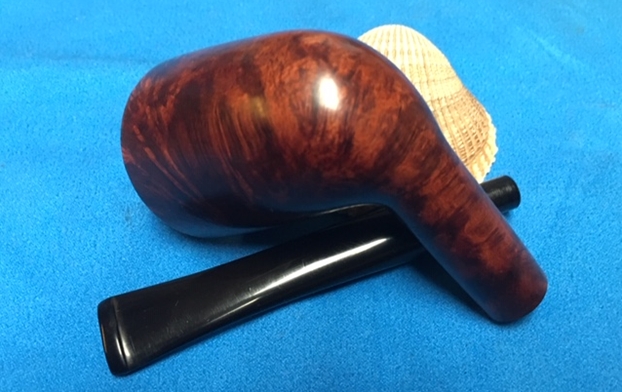
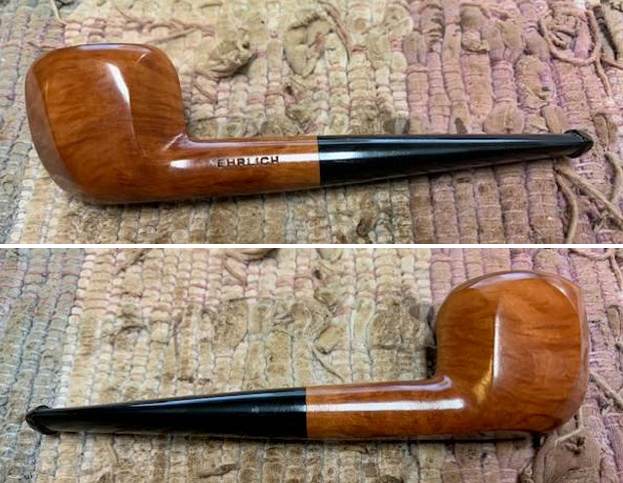
I saw this pipe on eBay from a seller in the New England state of Connecticut. What drew my attention was the tall bowl – a Chimney shape. There’s something about ‘Chimneys’ that I like. They have the basic Billiard workhorse air about them, but with the tall Chimney – it’s like a challenge: pack it high and tight! My bid held firm and the Ehrlich, which I assumed had a German COM, was added to the online collection, For “Pipe Dreamers” Only! for a pipe man or women to see, ‘dream’ of the possibilities, and commission to benefit the Daughters of Bulgaria – women and girls who have been trafficked and sexually exploited. Todd saw this Ehrlich and commissioned him along with two other pipes – a Borge Mortensen Handmade of Denmark (see: Link for the restoration) and a Heritage Blasted Apple still in the queue – up next. Here are the pictures of the Ehrlich Special Chimney that got Todd’s attention.
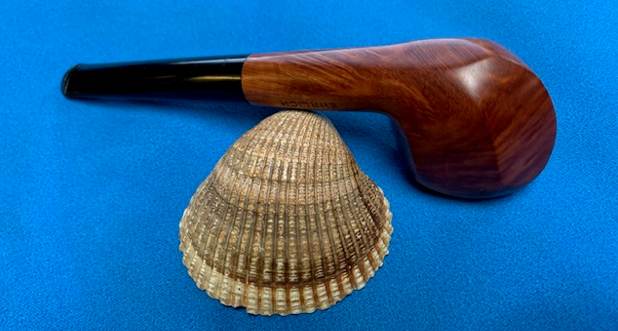
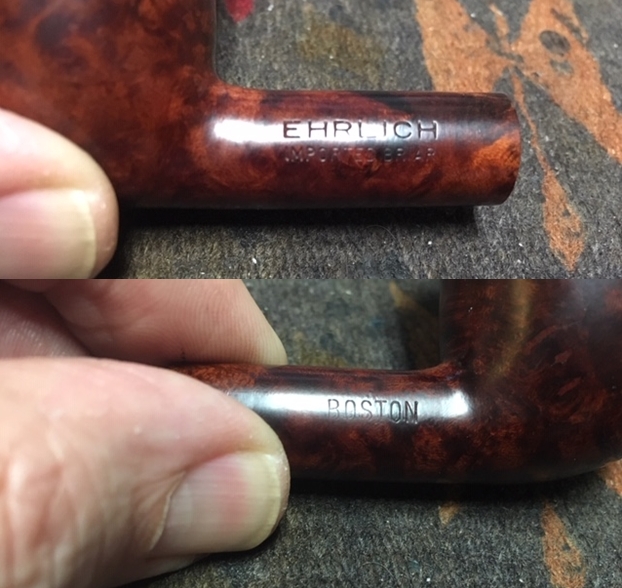
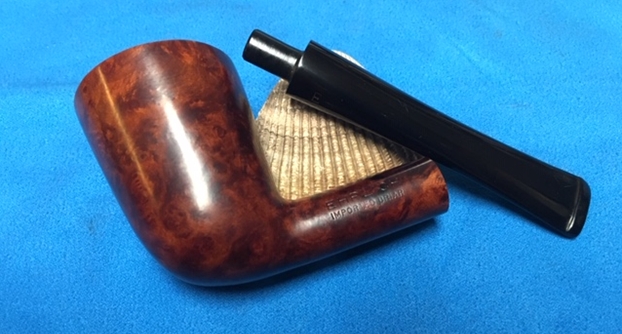
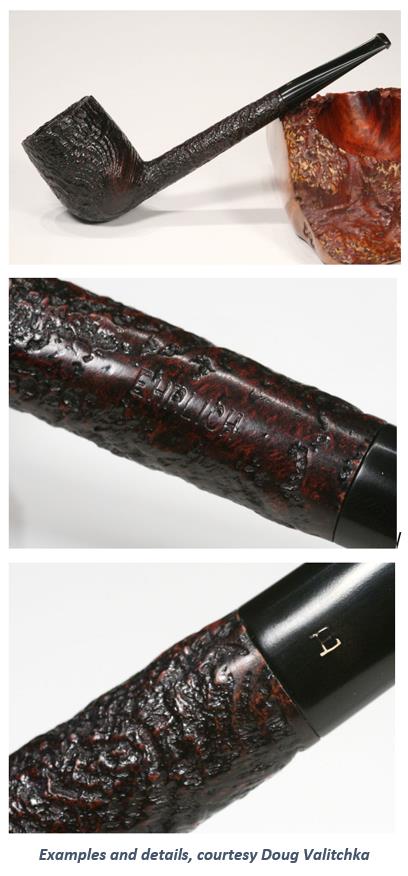
 The bowl is stamped with the nomenclature, EHRLICH, on the left shank. On the upper right-hand side of the shank is stamped, SPECIAL [over] ALGERIAN BRIAR, which is dropped lower on the shank. The stem is stamped with ‘E’
 I had assumed that ‘Ehrlich’ was a German name and I had assumed, wrongly, that the Country of Manufacturing was Germany as well. I was fully surprised to discover in my initial research that Ehrlich was a tobacconist located in one of my favorite cities, Boston. This was a pleasant surprise because I have long appreciated the story of the US’s second oldest Tobacconist shop also located in Boston – the L. J. Peretti Co., still in operation and one of the few establishments remaining that mix blends while you test blends as you wait. My son used to live in Boston and the city has had an attraction to me for its history, its character and yes, its sports team – Boston Red Sox and Bruins – sorry, as a long-time Miami Dolphins fan, I cannot stomach New England’s version of NFL! My discovery of L. J. Peretti shop pipes, most of which were manufactured in NYC and some in London, started for me a fun advocation of collecting them. I had never heard of Ehrlich of Boston until finding the article in Pipedia on the Ehrlich name. I include it here because I enjoy adding to the opus of information, of especially Boston tobacconist shops.
The David P. Ehrlich story
Pipemakers and Tobacconists for a Hundred Years, 1868-1968.
 The David P. Ehrlich Company has remained solely in the hands of one family during its century of business, yet it has had several firm names and locations. David P. Ehrlich went to work in 1881 at the age of twenty for Ferdinand Abraham, who dealt in cigars and tobacco and who had begun business in 1868 at 1188 Washington Street in the South End, but in 1880 moved to the center of the city, where the firm has been ever since. David Ehrlich married the boss’s daughter. In 1916 the name became the David P. Ehrlich Company and Mr. Ehrlich devoted the rest of his life to this business. Since David’s death in 1912 it has been owned by – his nieces and nephews including Richard A. and William Ehrlich.
Ehrlich shop has since 1880 had a predilection for historic sites. 25 Court Street was close to the spot where from 1721-1726 James Franklin had, with the assistance of his brother Benjamin, published The New-England Courant. In 1908 the firm moved a few doors up Court Street to number 37, on the opposite corner of the alley that is grandiloquently named Franklin Avenue. This new locution was on the site of the one-time printing office of Edes and Gill, publishers of the Boston Gazette, in whose back room some of the “Indians” of the Boston Tea Party assumed their disguises. Soon after the end of World War II at which time the store was located at 33 Court Street a move around the corner to 207 Washington Street brought the shop diagonally across from the Old State House and onto the site occupied from 1610-1808 by the First Church of Boston. The demolition of 207 Washington Street in 1967 caused still another move to 32 Tremont Street, adjoining King’s Chapel burying Ground, which is the oldest cemetery in Boston.
The David P. Ehrlich Co. has not just occupied sites intimately associated with Boston history and institutions; it has in the past century become a Boston institution in its own right. It has specialized in fine cigars, pipes, and pipe tobacco. In addition to the retail business, the firm has long specialized in the manufacture of pipes, both from Algerian briar root and from meerschaum, a beautiful white fossilized substance, mined from the earth in Turkish Asia Minor. Meerschaum lends itself to carving, and in the nineteenth century there developed in Austria a fashion for carving pipes from it with formidably intricate decoration.
 The Ehrlichs have long had meerschaum carvers, who ply their craft in the shop window to the delight of passersby. For years the bearded Gustav Fischer was a familiar figure in the window at 33 Court Street. A succession of craftsmen have continued the tradition. and still make and repair pipes in the window of the new Tremont Street shop. They still turn their meerschaum pipes by hand on a foot operated wooden lathe made in Austria about 1871. Although briars are today turned on power lathes, meerschaum can only be turned on a foot-operated lathe.
As amber was used for the bits in his better pipes, David P. Ehrlich found himself in the amber business as a side line. For years the firm has been noted for amber jewelry in its many types and forms, often purchasing old examples from estates to maintain its large and varied assortment. And with the meerschaum and die amber as a nucleus, a variety of artifacts dealing with tobacco and smoking, as well as prints of Boston have come to decorate the shop. There is a display case in the Boston Museum of Science donated by David P. Ehrlich Company which outlines the story of amber.
Many of the mahogany display cases that were installed in Court Street early in the century have been transplanted to Washington and then to Tremont Streets, so that the present premises, although new, have a strong family resemblance to those that we knew on our earliest visits to Ehrlich’s. This is good sense in Boston, where people do not welcome needless change for its own sake.
In 1956 when the old Harvard Square firm of Leavitt and Peirce was offered for sale, the Ehrlich brothers, because of their Harvard connections, could not resist acquiring it. Richard A. Ehrlich was a member of the class of 1922; his brother William of 1925. As they had known for years this seventy-year-old establishment, which had done business in the same location in Harvard Square longer than any except the College itself, they took it over, with the idea of keeping it as it was, even to the metal ceiling. In 1958, to celebrate its 75th anniversary, David McCord edited for them an engaging volume entitled 75 Aromatic Years of Leavitt & Peirce in the Recollection of 31 Harvard Men . And as Leavitt & Peirce is to Harvard College, so is the even older David P. Ehrlich Co. to Boston – the purveyor of “a brand of special knowledge” built up over a century of honest dealing.
The January 1968 issue of Antiques Magazine carried a feature by Wendell D. Garrett titled “Paraphernalia of smokers and snuffers” describing in considerable detail the impressive collection of paraphernalia and smokers articles from many countries and centuries on permanent exhibit in their Leavitt & Peirce Cambridge tobacco shop. The Boston Public Library in Copley Square devoted twenty-five display cases during the month of January to the David P. Ehrlich Company Centennial Exhibition of Tobacciana made up of the Leavitt & Peirce antique collection, the David P. Ehrlich collection of carved meerschaum pipes and their two venerable Cigar Store Indians.
There are pipes of every price and size and shape, from good ordinary smoking pipes up to briars of the finest grain and meerschaums band cut, turned and polished front the best Turkish blocks. This is in keeping with a catalogue statement: “we have never ceased to regard smoking as an exquisite pleasure, rather than a mere habit.” Another of the principles of the firm is embodied in the observation: “we are pipe makers – not plumbers. There are no tricky gadgets in Ehrlich pipes.” But when a man drops his pipe, the makers will transform themselves into repairmen in a highly efficient manner. All this has been going on for a century, and we confidently trust that it will outlast our time, and then some.
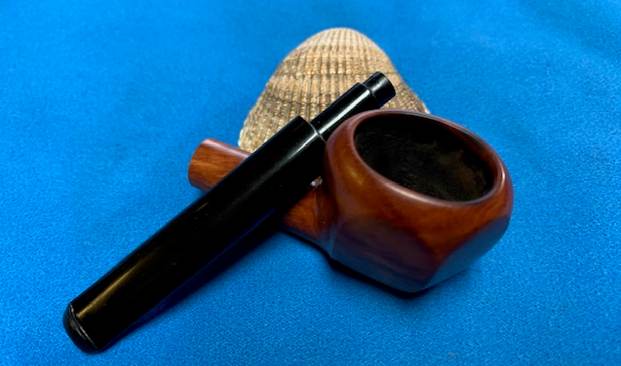
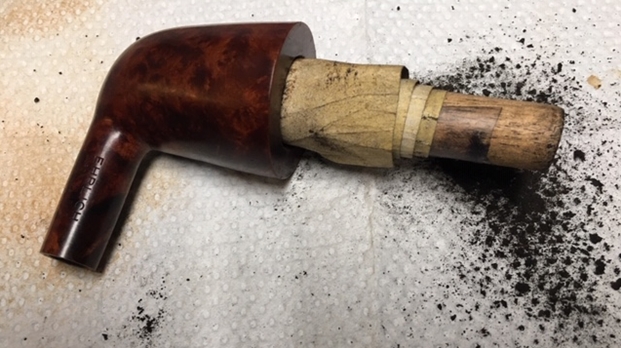
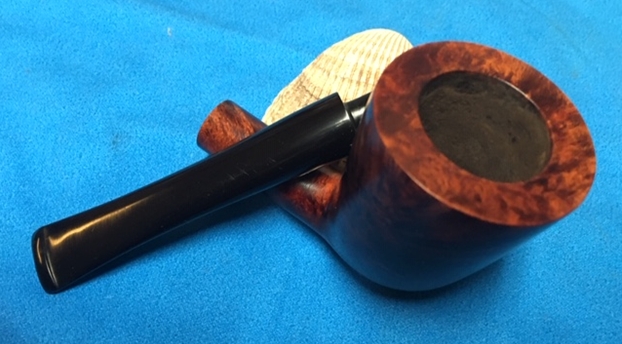
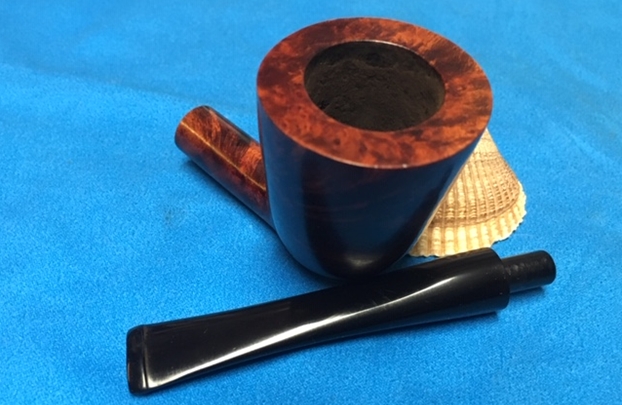
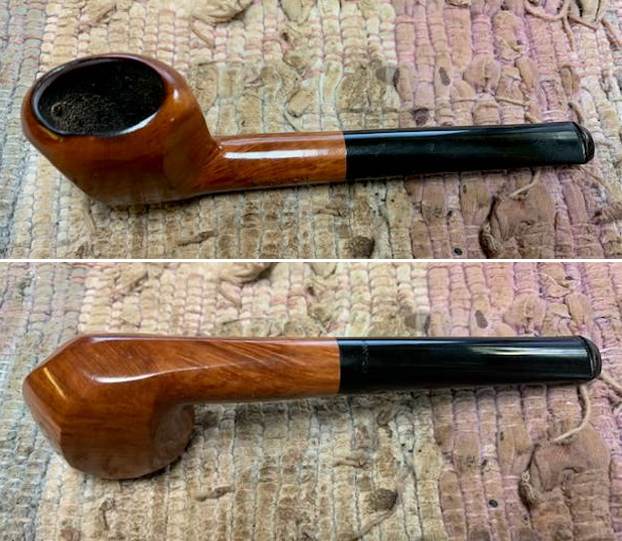
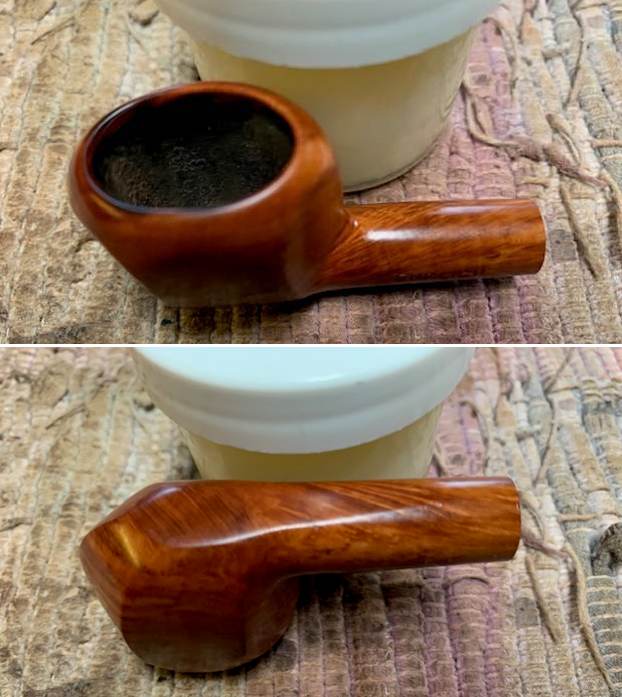
With the information included above, the Ehrlich Chimney now on my worktable dates to at least the late 60s. With a greater appreciation for the Ehrlich name and the richness of its story, I begin the restoration first with an assessment of its condition. This old boy is in rough shape. The chamber has thick cake build up which needs to be removed to expose fresh briar for a new start. The rim is caked with lava. The rim has notches and divots on the lip aft and forward areas.
 Generally, the briar surface is scratched and dinged a good bit. The finish is darkened and needs cleaning to remove the surface dirt that has collected.
 The original stem with the Ehrlich ‘E’ reveals that this pipe was well loved and driven into the ground! The calcium build-up on the bit is thick along with the oxidation. The tooth chatter seems to reveal a lot of possible New England winters with the former steward’s teeth chattering as he clinched the stem. The lower button has disintegrated from biting. I’m concerned that it’s too damaged for a normal button rebuild. I love to salvage original stems but this one presents some challenges. The lower vulcanite surface looks suspect – that there may be a crack in the vulcanite.
 To start, using a pipe cleaner wetted with isopropyl 95%, the stem’s airway is cleaned.
 To address the oxidation, a new batch of Before & After Deoxidizer is ready to go to work. The other pipe’s stem that Todd commissioned, the Heritage Blasted Apple, joins the Ehrlich for a bath. The fluid is eerie as it swallows the stems!
 After a few hours of the soak, I use a stiff wire to snag the stem and to allow the B&A Deoxidizer to drain. I then squeegee more fluid off with my fingers then wipe with cotton pads wetted with alcohol to remove the raised oxidation. Another pipe cleaner helps to clear liquid from the airway.
 The B&A Deoxidizer seemed to do an adequate job. I add paraffin oil to the vulcanite with a cotton pad to further the rejuvenation of the stem.
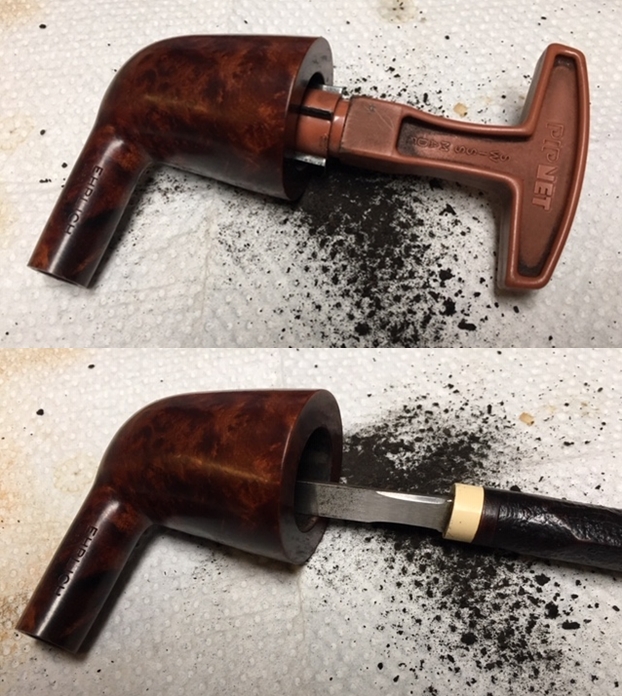
 Turning now to the Ehrlich Chimney bowl, I ream the chamber using the Pipnet Reaming Kit. I use the 2 smaller of 4 blades available in the Kit to navigate the Chimney chamber. Following this, the Savinelli Fitsall Tool continues the scraping and finally sanding with 240 paper wrapped around a Sharpie Pen cleans the remaining cake.
 After wiping the chamber with a cotton pad wetted with alcohol to remove the carbon dust, an inspection of the chamber reveals no problems with heating or cracking. I also scraped the rim with the Savinelli Fitsall tool to remove the crusting lava flow.
 Next, the external briar surface is dark and dirty.
  I use undiluted Murphy’s Oil Soap on a cotton pad to clean the briar surface. I also use a brass wire brush to clean the rim. The brass brush does not damage the wood surface. After scrubbing, I transfer the bowl to the sink and continue cleaning using hot water and shank brushes. Using anti-oil dish soap, the shank brushes reach into the mortise and after scrubbing and rinsing thoroughly, I bring the bowl back to the worktable.
 The cleaning does a good job. The briar is lighter, but the rim is still discolored.
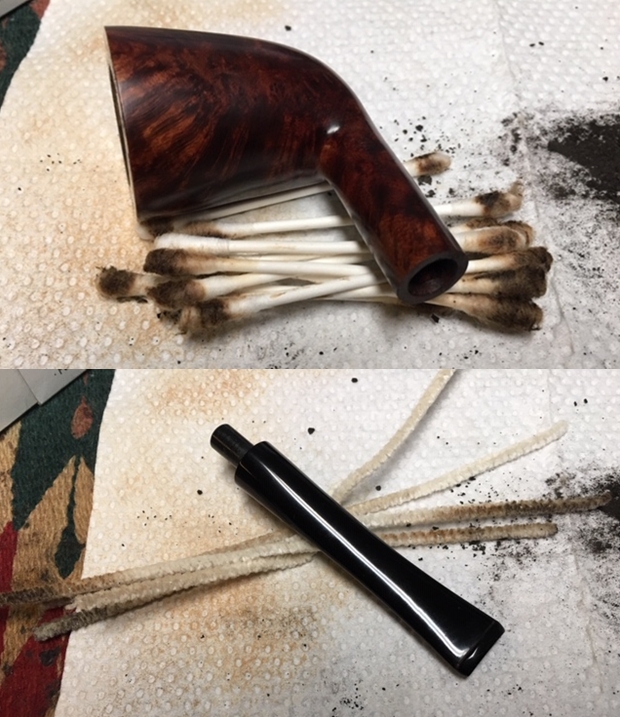
 It doesn’t happen often but returning to the internal cleaning with pipe cleaners and cotton buds reveals a clean pipe!
 To clean the rim, I use the topping board covered with 240 grade paper to begin. The topping board will remove the discoloration with fresh briar, and it will help remove the divot damage on the rim edge. The next pictures show the progression of the topping.
 Next, the 240 grade paper is replaced with 600 grade paper and several more rotations follow. What emerges on the rim are round bird’s eye patterns of grain.
 I decide to stop the topping not to lose more briar real estate off the rim. There remain some divots on the edge of the rim.
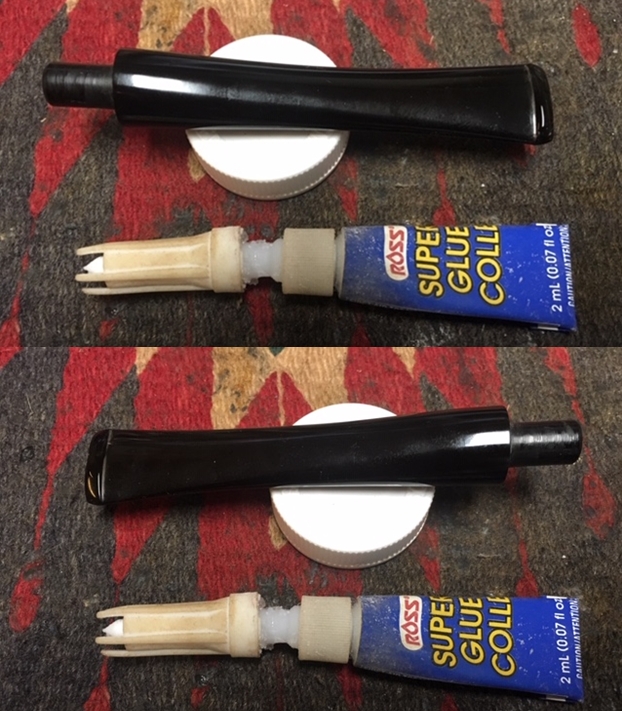
 To remedy this, instead of taking off more briar to remove the divots, I mix Thick CA glue with briar dust to form a putty to fill the divots. After putting a small amount of briar dust on the plastic disc, covered with scotch tape for easier cleanup, a few drops of CA glue are placed next to the dust and then mixed with a toothpick. Gradually, briar dust is pulled into the CA glue and mixed until it thickens to the consistency of molasses.
  Using the toothpick as a trowel, putty is placed on the divots. When sufficiently covered, I put the stummel aside for the putty to cure.
 After some time, the briar dust putty has cured. I first use a flat needle file to remove the excess putty until it is flush with the rim surface. I also use 240 grade paper to smooth the patch further.
 I also sand the side of the patch with 240 paper. Finally, using 240 sanding paper tightly rolled, I cut a small bevel around the circumference of the rim to remove smaller cuts and divots and to blend the rim patch. After the 240 paper, 600 grade paper is used to further smooth and blend. The rim looks good. I move on.
 To further clean the briar surface of nicks and scratches, I utilize sanding sponges. Before applying the sanding sponges, I cover the Ehrlich Special nomenclature with masking tape.
 With the tape protecting the nomenclature, I first apply a coarse sanding sponge followed by a medium grade then a light grade. Sanding sponges address the minor blemishes on the briar surface well without too much invasion.
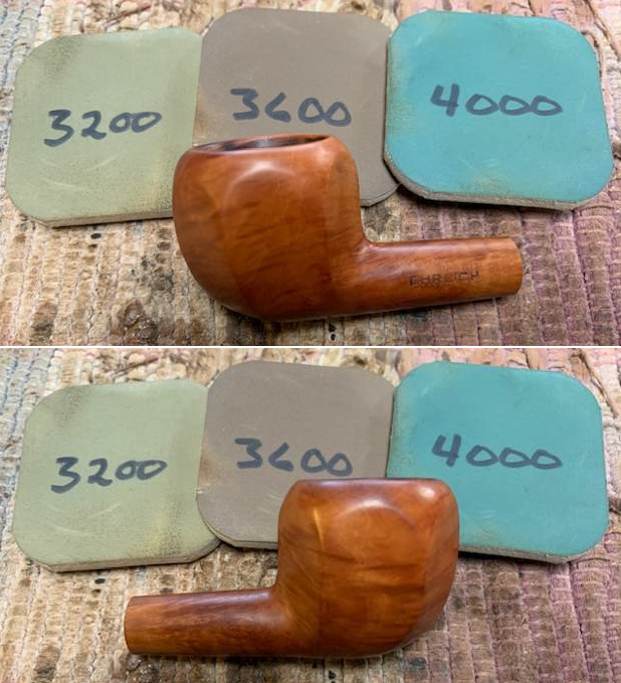
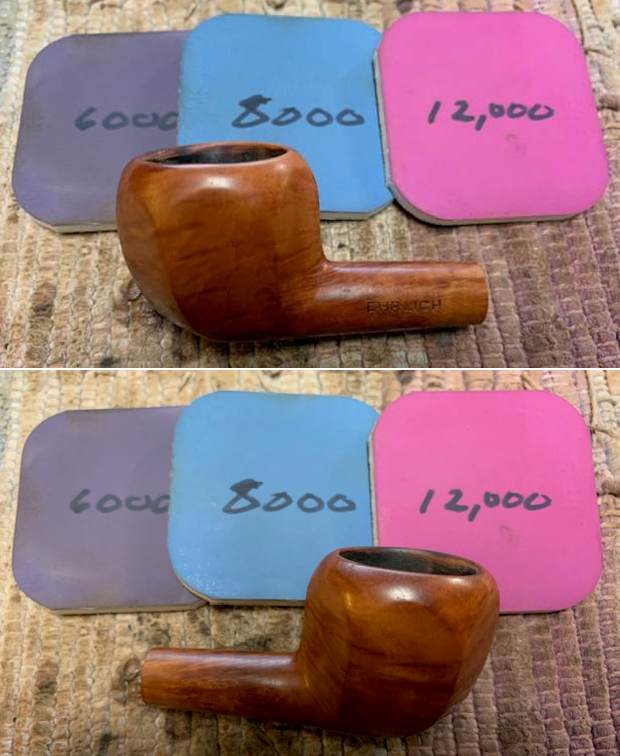
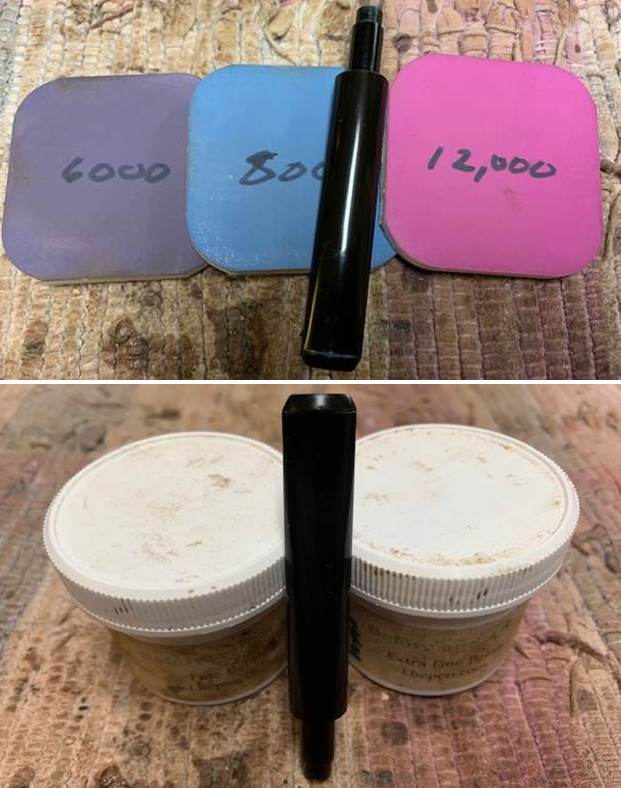
 On a roll, I also apply the full regimen of micromesh pads beginning with wet sanding with pads 1500 to 2400. Following this I dry sand with pads 3200 to 4000 and 6000 to 12000. The grain comes out well through the micromesh process.
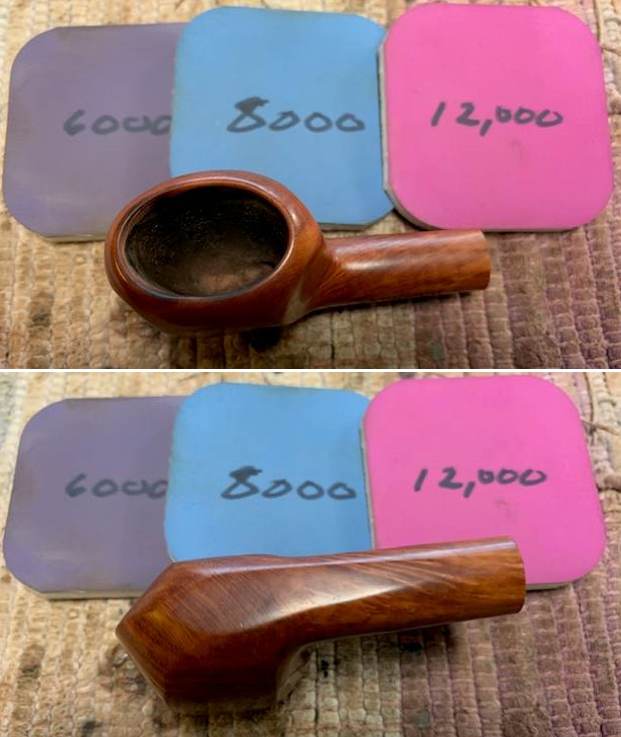
 One more step before putting the stummel aside to focus on the stem. Applying Before & After Restoration Balm teases out the subtle hues of the briar grain. Whenever possible, the natural briar is my preferred presentation of a pipe. The Balm does a great job. After placing some of the Balm on my fingers, I work it into the briar surface. The Balm starts with a crème-like consistency but thickens to a waxy feel as the Balm is worked. After applying the Balm, I put the bowl aside for 10 to 15 minutes then wipe off the excess Balm with a cloth and buff up the surface.
 Turning now to the stem, I take another long, focused look at the condition of especially the underside of the bit and button, but the upper bit has some issues too. First the upper side. The tooth chatter is profound and there are two compressions that are in the center of the stem. The one closest to the button is rounded, resembling an eye-tooth compression. The other one is interesting as it runs parallel with the length of the stem. The angle makes it difficult to imagine it to be a bite, unless it’s a back molar…. That could be, but the compression appears to run parallel to the airway tunnel directly below. For the upper bit, I’ll attempt to raise the compressions using the heating method and follow by sanding out the chatter. Fortunately, the upper button lip is in good shape.
 When I first examined the stem, before cleaning, I was concerned that there might be a crack running down the stem coming from the button break. Looking at it now, even under a magnifying glass, thankfully, there is no sign of a crack. That good news barely tempers the catastrophic break of the bit and lower button. Interestingly, the lower bit shows evidence of also having parallel compression as the top side. The area extending to the immediate left (in the picture below) of the break is compressed. The forensics it seems, point to the former steward clinching the stem between his molars for a hands-free mode. It worked until the force of the clinching on the underside faulted – the rest is history. To repair, I will first attempt to raise as much of the compression through the heating method, then rebuild the button with a mixture of CA glue and activated charcoal dust. The new steward will need to treat the button with some TLC because a rebuild is not as strong as an original surface.
  The heating method is painting the compressions with the flame of a Bic lighter. With the heating of the vulcanite, a rubber compound, the rubber expands to retake its original condition, or closer to it. After painting the upper and lower with the flame, the compressions are noticeably less pronounced but still evident.
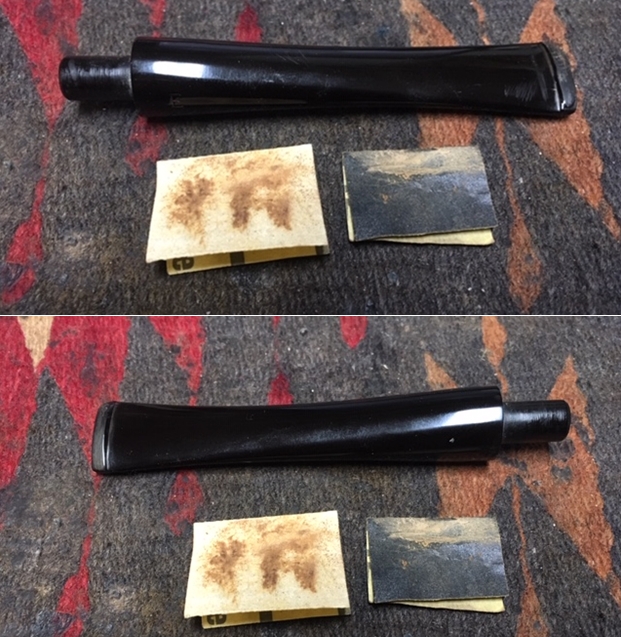
 Next, using 240 grade sanding paper, I sand out the residual compressions on the upper and lower bit. The paper also removes the tooth chatter very nicely.
  With the button rebuild now before me, I first clean the area with a cotton pad wetted with alcohol.
 A piece of index card stock serves well to create a wedge to serve as a form. The wedge fits into the airway to form the mold that will allow the patch material to fill the cavity yet keep the airway open.
 After covering the wedge with scotch tape, I place some petroleum jelly on the tape to keep the patch material from bonding onto the wedge – allowing the wedge to be removed without problems.
 The patch material is a putty created from mixing Extra Thick CA glue with activated charcoal dust. A small mound of the charcoal is placed on the plastic disk which acts as my mixing pallet. I also put scotch tape down on the disk to help in the cleaning. Next to the mound of charcoal dust, a small puddle of CA glue is placed.
 I use a toothpick to gradually pull charcoal into the CA glue mixing as I go. When the putty forms and reaches the viscosity of molasses, I use the toothpick to trowel the putty onto the wedge, filling the damaged area with patch material.
 I build a mound of the patch material to be more than is needed. This allows filing to shape the new button by removing the excess and shaping as I go.
 The wedge is removed easily with a tug.
 Next, the filing process begins. I start from the end of the stem to remove the excess to first form the slot facing.
 With the slot facing flat and flush with the surviving upper button lip, starting with the upper bit, I use the flat needle file to refresh the surviving upper button lip.
 Next, flipping over to the lower bit, the flat needle file begins to shape the lower button lip. The next few pictures show this progress.
 The process is slow, but patience pays off nicely. The lower button looks good. A few air pockets show up in the patch area. I’ll sand and work on removing these as I go.
 Using 240 grade paper first on the upper bit, the residual chatter and compressions are fully erased.
 Next, focusing on sanding the lower bit area, 240 paper does well in smoothing out the scratches left by the needle file. Shaping the button is coming along well.
 Next, using 600 grade paper, I wet sand the entire stem upper and lower. Following this, 000 steel wool is applied to smooth the surface further. The repair is looking great.
 Some air pockets remain on the lower bit and button lip repair. I paint a small amount of acrylic nail polish to fill these microscopic pockets. Again, I apply the 000-steel wool to the acrylic patch.
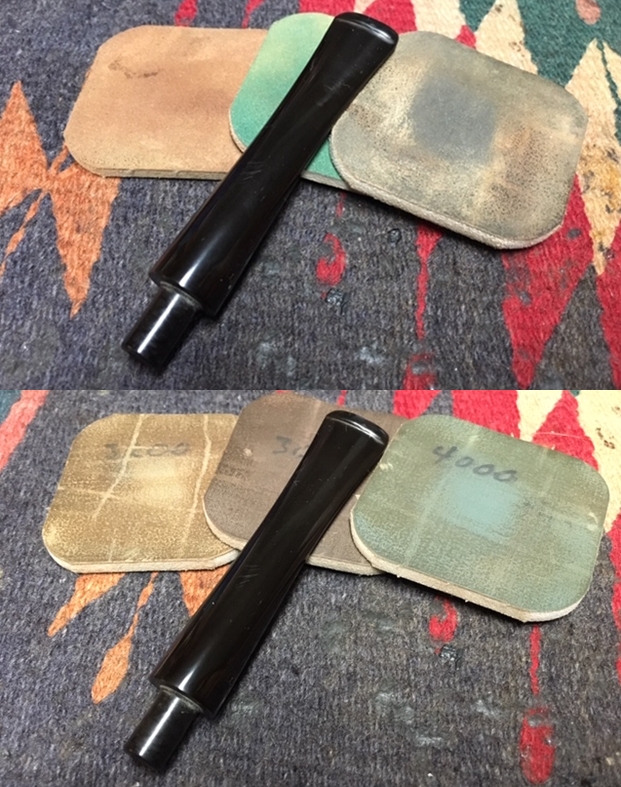
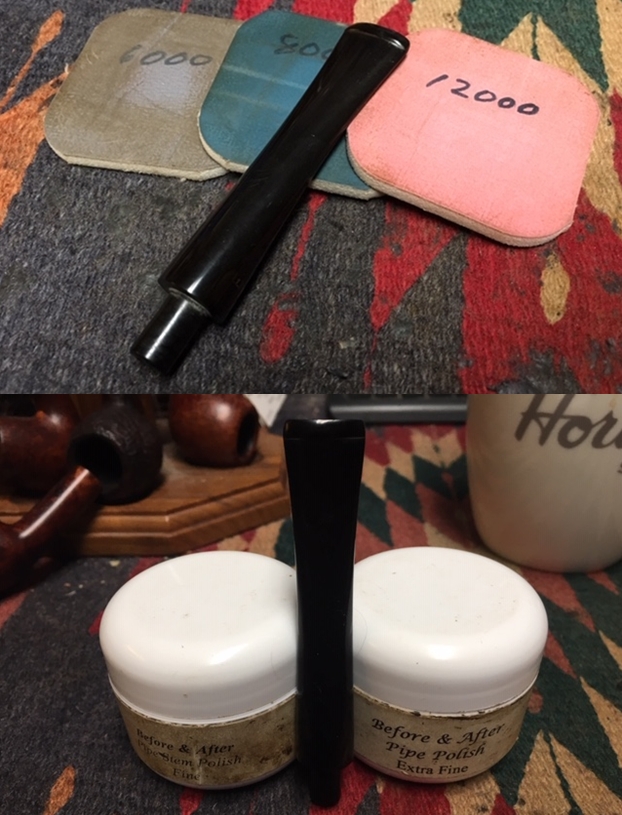
 With the stem repair complete, I move on to the full regimen of micromesh pads. Using pads 1500 to 2400, I wet sand followed by dry sanding with pads 3200 to 4000 and 6000 to 12000. Between each set of 3 pads, Obsidian Oil is applied to the stem to rejuvenate it and to retard the growth of oxidation.
 Now on the home stretch. I rejoin the stem and Ehrlich Chimney stummel after a small amount of sanding on the tenon. After the cleaning, the fit was a bit tight. After the sanding, the tenon engaged the mortise nicely. After mounting a cotton cloth buffing wheel to the Dremel, and setting the speed to about 40% full power, Blue Diamond compound is applied. After completing the application of the compound, I buff the pipe with a felt cloth to remove the compound dust in preparation for the wax. Before applying carnauba wax, I have one more project to complete. The Boston tobacconist Ehrlich ‘E’ needs some attention on the stem. Using white acrylic paint, I put a small drop of paint over the ‘E’ and then tamp the wet paint with a cotton pad. This flattens the paint and dries it. I then gently rub the surface with the side edge of a toothpick which clears away the excess paint leaving the ‘E’ filled. I repeat this process twice to render the finished product. It looks great.
 After mounting another cotton cloth buffing wheel to the Dremel leaving it at the same speed, I apply carnauba wax to the entire pipe. To finish, a microfiber cloth is used to give the pipe a rigorous hand buffing to raise the shine.
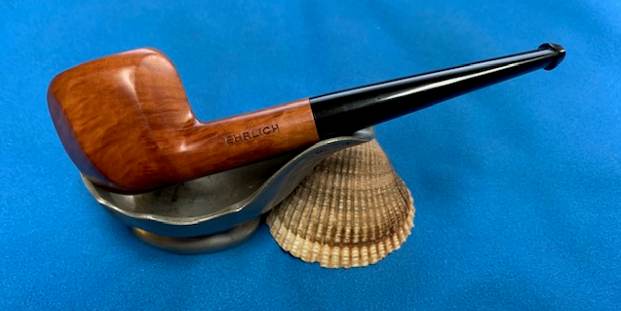
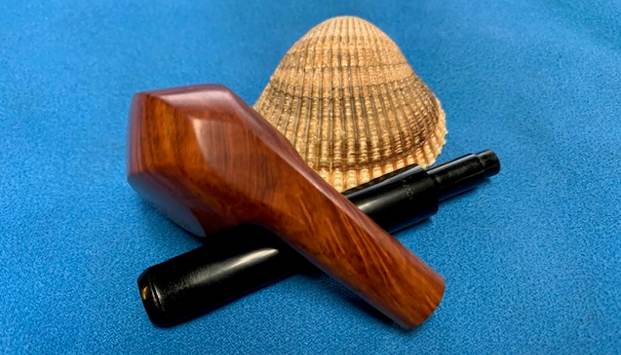
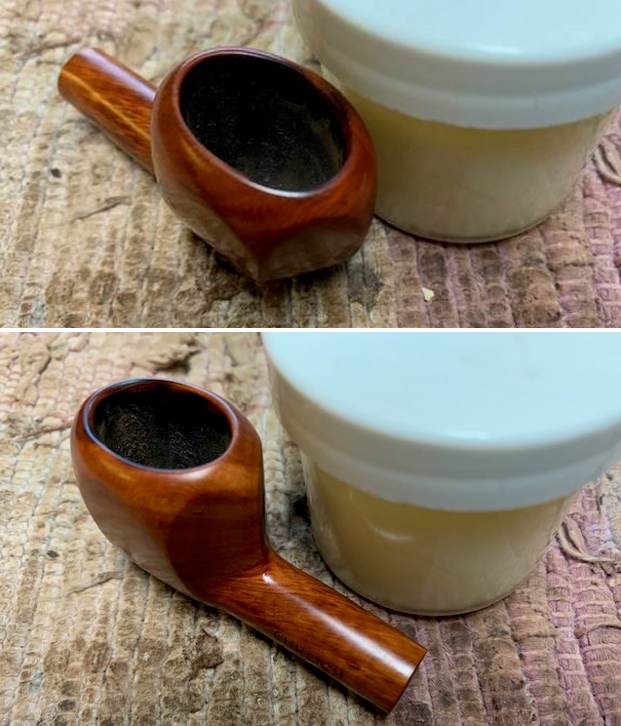
This Ehrlich Special Chimney turned out well. I appreciated learning about the history of the Ehrlich name as one of Boston’s Tobacconist shops. The button repair looks good and what a change from the molar damage with which the restoration began. The vertical fire grain on the left side of the Chimney is nice and the bird’s eye grain on the right completes the ensemble. Without doubt, the pipe fits nicely in the palm. I enjoyed this restoration and Todd who commissioned the Ehrlich Special Chimney, will also have the first opportunity to secure him from The Pipe Steward Store. This pipe benefits the Daughters of Bulgaria – women and girls who have been trafficked and sexually exploited. Thanks for joining me!


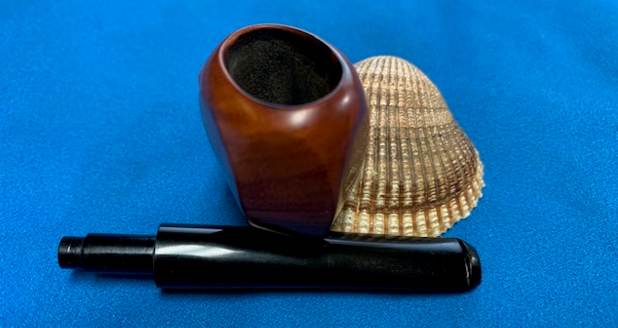
 I took a photo of the bowl and rim top to verify the description above. I also took photos of the stem surface showing the light chatter and tooth marks on both side.
 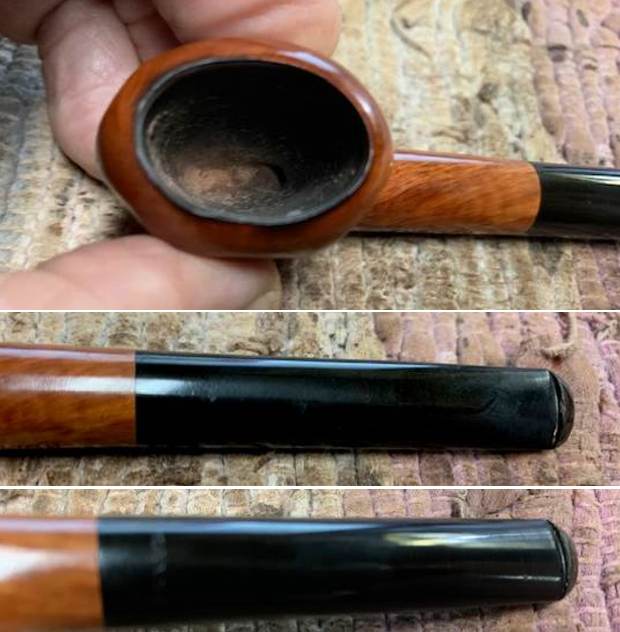 I took a photo of the stamping on the left side of the shank and the underside of the stem. It is clear and readable as noted above.
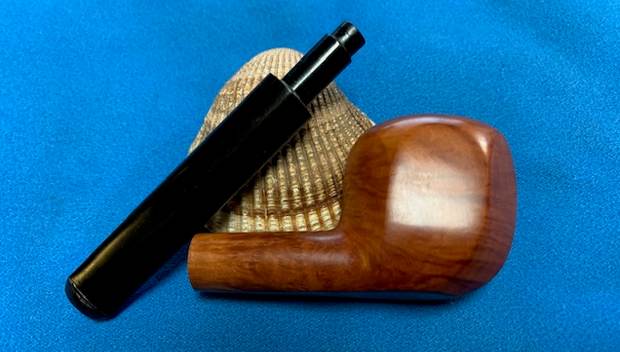
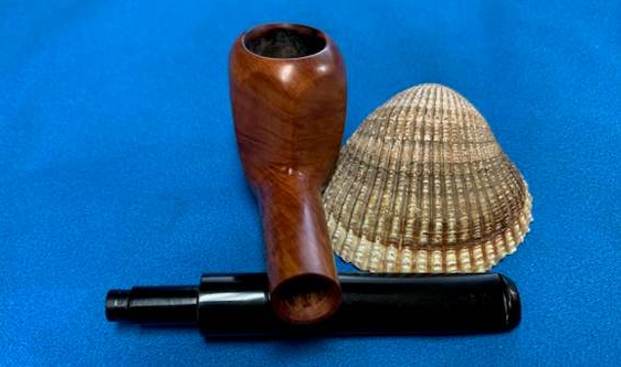
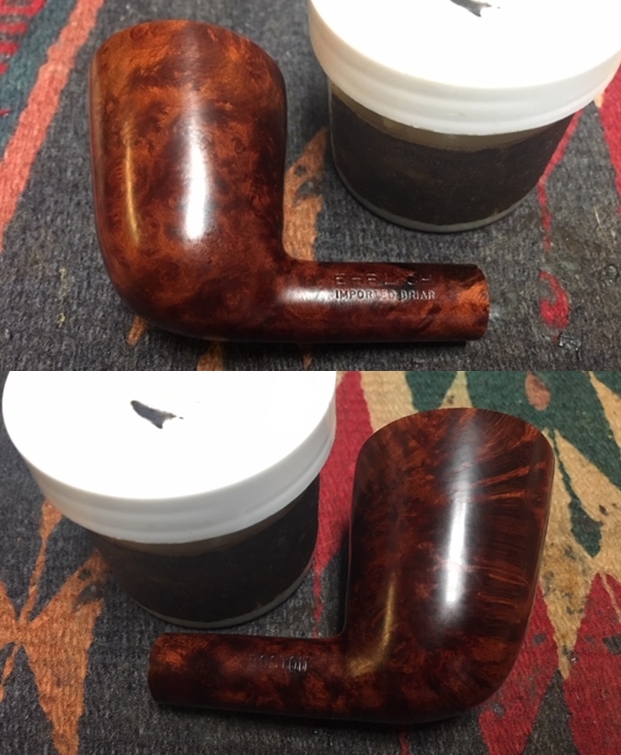
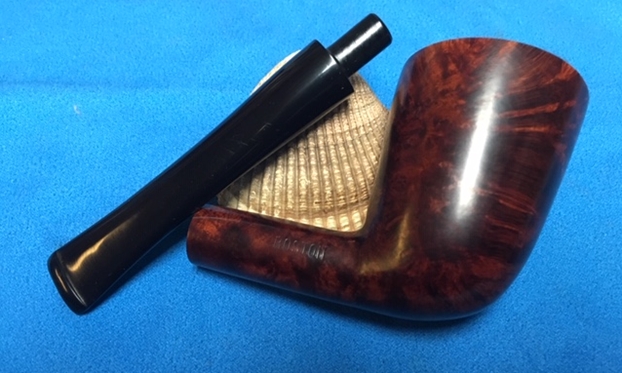
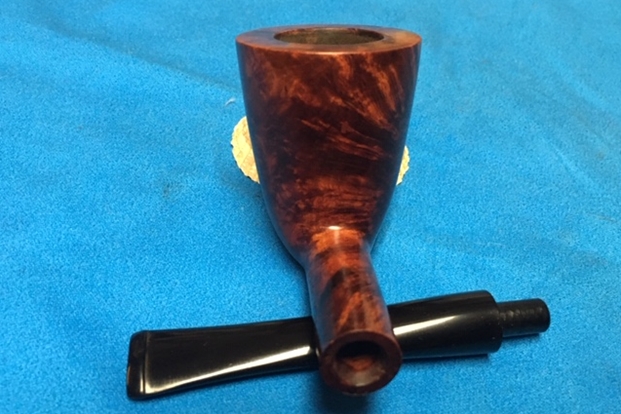
 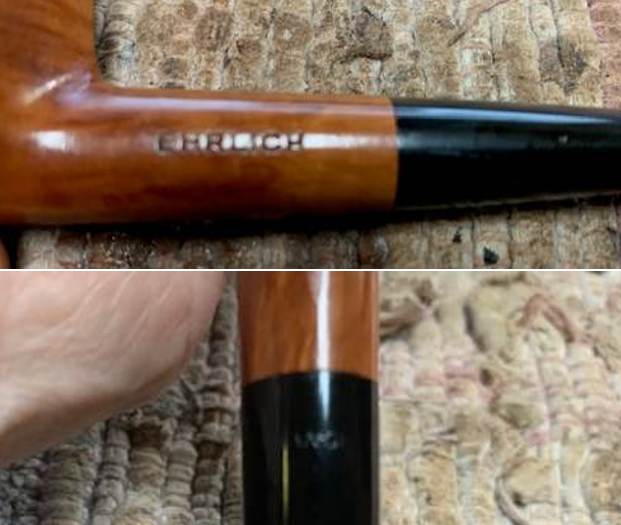 I took the stem off the bowl and took a photo of the pipe to give a sense of proportion of the pipe. You can also see the grain around the side of bowl and the shank and it is a beauty.
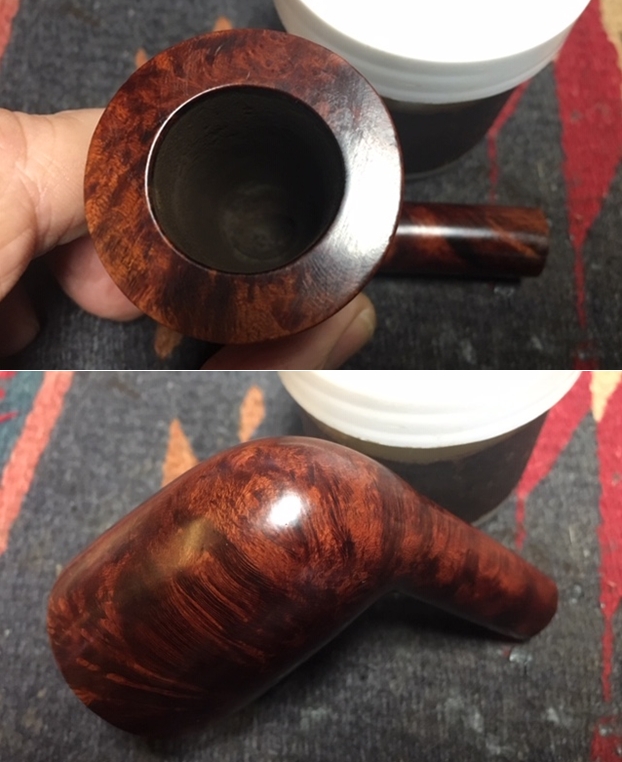
 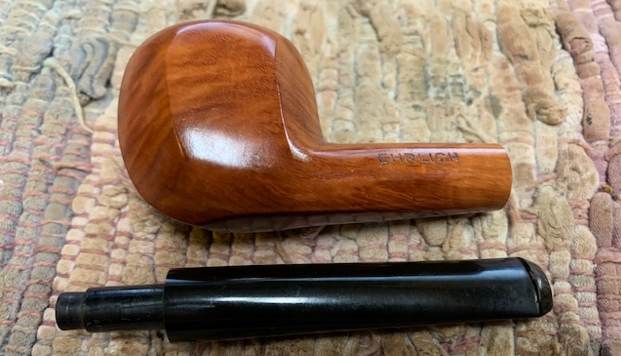 Now it was time to work on the pipe. I worked on the inner edge of the bowl 220 grit sandpaper to give the inner edge a slight bevel and clean up the damage that was present there. I used a ball and a piece of 220 grit sandpaper to smooth it out. The rim came out looking quite good.
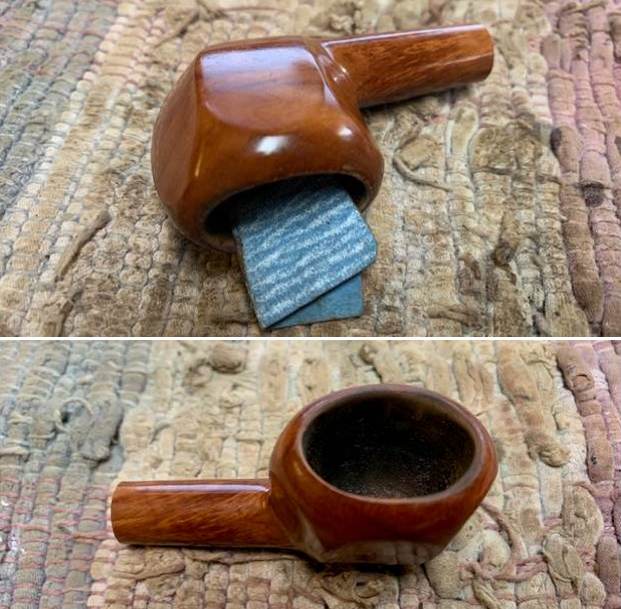 I wiped the bowl down with a cotton pad and acetone to remove the varnish coat on the briar. I find that once the varnish is removed the grain really stands out and can be appreciated. That was certainly true with this one.
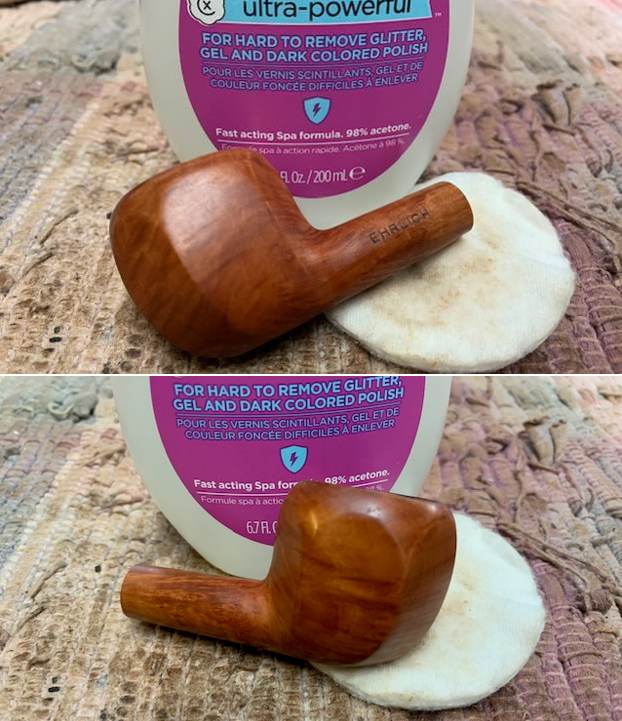
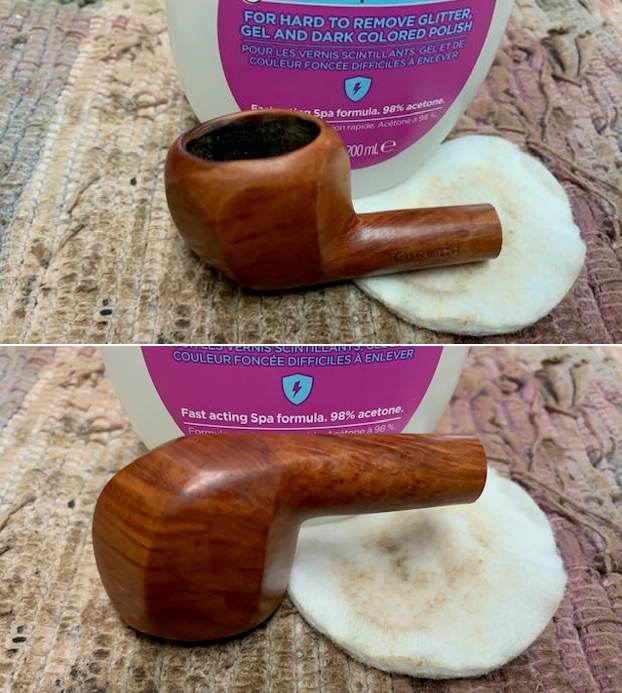 I polished the rim top and the briar with micromesh sanding pads – dry sanding with 1500-12000 grit pads. I wiped the bowl down with a damp cloth after each sanding pad to remove the dust and debris. The rim top polished out and matched the oil cured look of the bowl and shank.
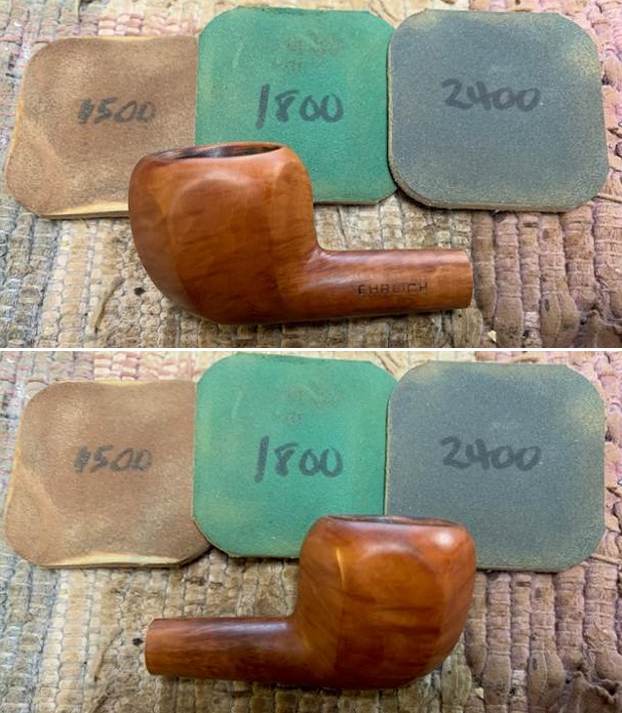


 I cleaned the mortise and airways in the shank and stem with cotton swabs, pipe cleaners and isopropyl alcohol to remove the debris and tars from my smoking. You can see that it was not too bad as I tend to keep my pipes clean.
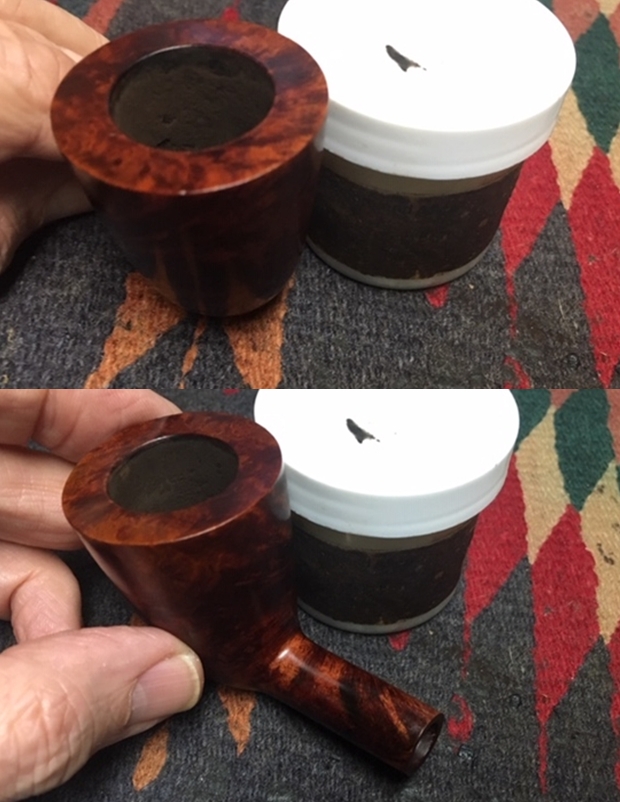
 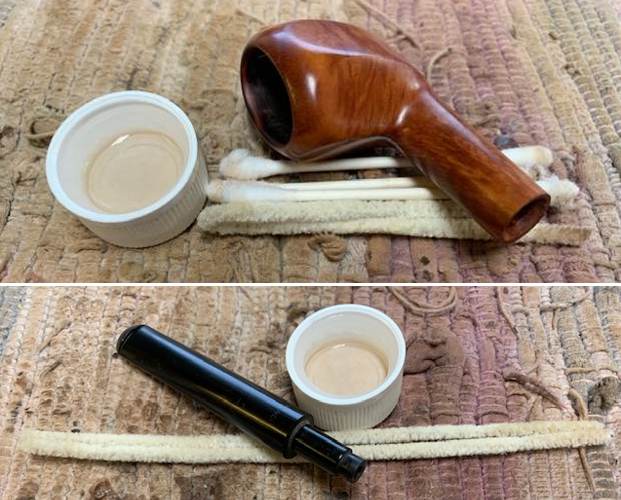 The bowl was in such good condition that decided to give the bowl and shank a coating of Before & After Restoration Balm. I worked it into the surface of the briar with my fingertips and a horsehair shoe brush to clean, enliven and protect the briar. I let the balm sit for 15 minutes and then buffed with a cotton cloth to raise the shine. The photos show the bowl at this point in the restoration process.
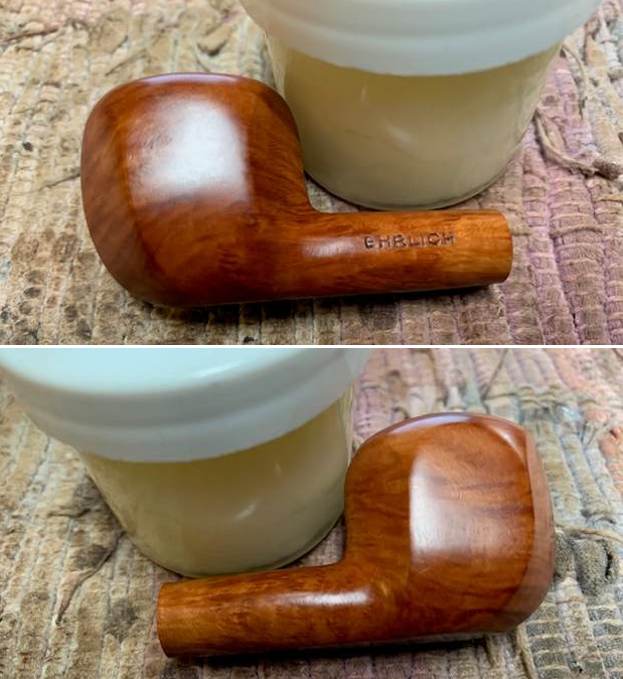
 I set the bowl aside and turned my attention to the stem. I polished it with micromesh sanding pads – dry sanding with 1500-12000 grit pads. I rubbed it down between pads with Obsidian Oil. I polished it with Before & After Fine and Extra Fine Pipe Stem Polish. I wiped it down with some Obsidian Oil and buffed it off. It is a beautiful stem.
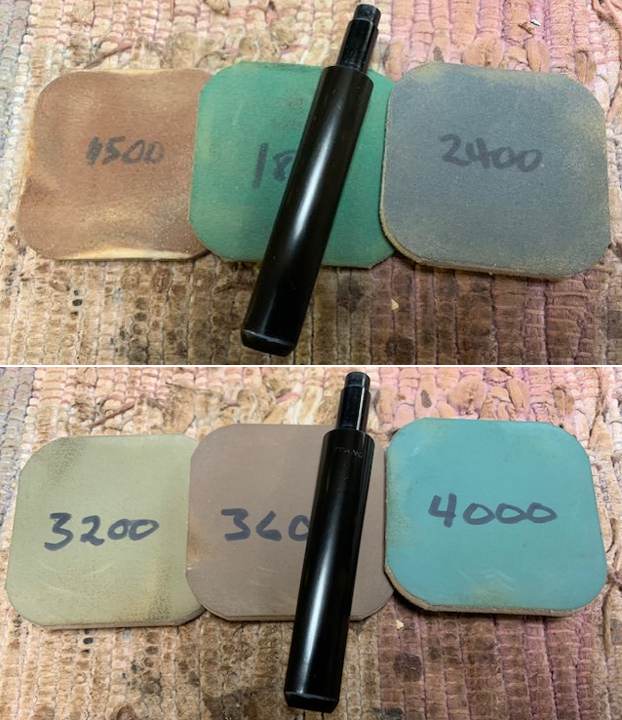
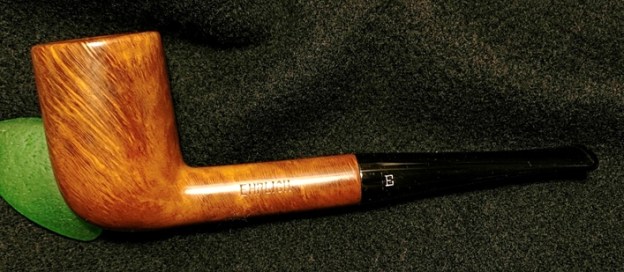
 It is good to put the final touches on another of my own pipes that I am selling – Ehrlich Hexagonal Bowl Straight Opera Pipe. I put the pipe back together and buffed the stem with Blue Diamond on the buffing wheel. I gave the bowl and the stem multiple coats of carnauba wax. I hand buffed the pipe with a clean buffing pad to raise the shine. It is fun to see what the polished bowl looks like with the beautiful grain and the polished vulcanite saddle stem. This smooth Ehrlich Opera Pipe is great looking and the pipe feels great in my hand. It is light and well balanced. Have a look at it with the photos below. The dimensions are Length: 5 inches, Height: 1 ¼ inches, Outside diameter of the bowl: 1 inch x 1 ½ inches, Chamber diameter: ¾ of an inch x 1 inch. The weight of the pipe is 22 grams/.78 ounces. It is a beautiful pipe that I will soon be putting on the rebornpipes store in the American Pipe Makers Section. If you are interested in adding it to your collection send me an email or a message. Thanks for walking through the restoration with me as I worked over this pipe. Thanks to each of you who are reading this blog.