Blog by Paresh Deshpande
I am a big fan of Free Hand pipes!!! I love the way these pipes fit in to the hand and the creativity of the carver can be really appreciated in these pipes. And a freehand pipe made by the renowned Danish pipe carver, Preben Holm, is my dream come true. To be very honest to you all, the PH estate pipes that are available nowadays on eBay are very expensive and well nigh out of my reach. So when Abha, my wife, sent me pictures of the Mumbai Bonanza lot, I was immediately attracted to one free hand pipe that screamed PREBEN HOLM and when she confirmed that it was indeed one, I knew I was lucky. I say lucky because of the circumstances in which I made a purchase of this lot of 30 pipes and thereafter, the pipes that I received in this lot. I have given a gist of this purchase in the paragraph below. Well, the PREBEN HOLM is finally on my work table now!
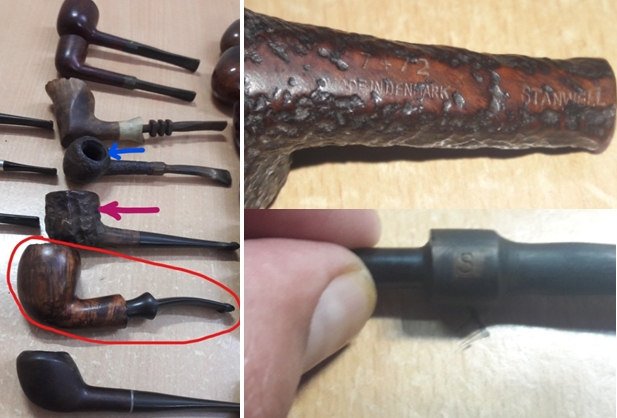
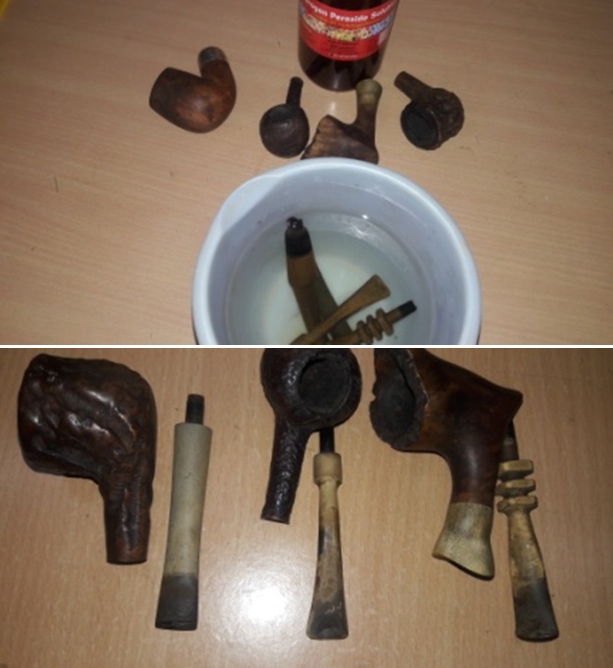
I was fortunate enough to have heeded the advice of my dear friend and mentor, Steve, and struck a deal with a junk collector from Mumbai. He did not know what he was selling and I did not know what I was buying as we reside in different cities!! The argument that Mr. Steve presented was that if not anything, I shall at least have some spares and this was logical. I struck a deal and here are pictures of the pipes that I received in this lot. 

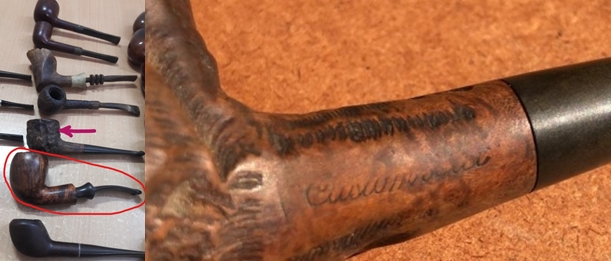
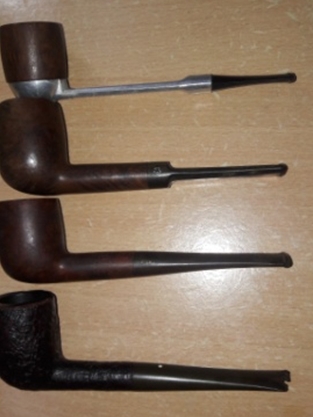 This lot contains some very nice collectible pipes, a few well known brands and some mediocre brands. Overall, with seven Dunhill pipes, a Preben Holm #1 FH, a couple of “Made in England” Pete System pipes, a couple of Charatan’s Belvedere, Custom-Bilt, Stanwell and other assorted pipes, I would say that I had struck a decent haul!!! This is indeed my “Mumbai Bonanza”.
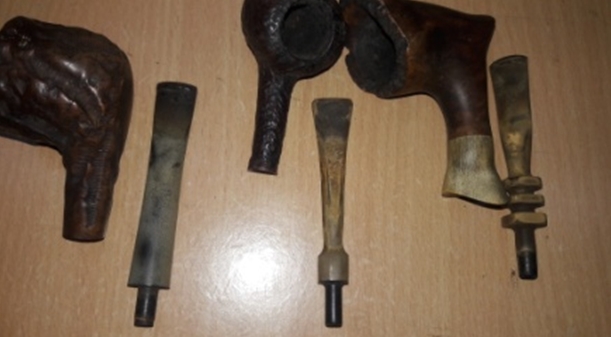
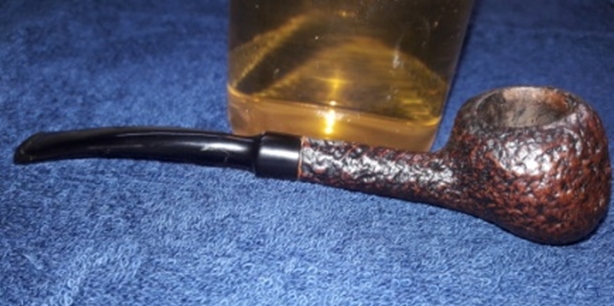
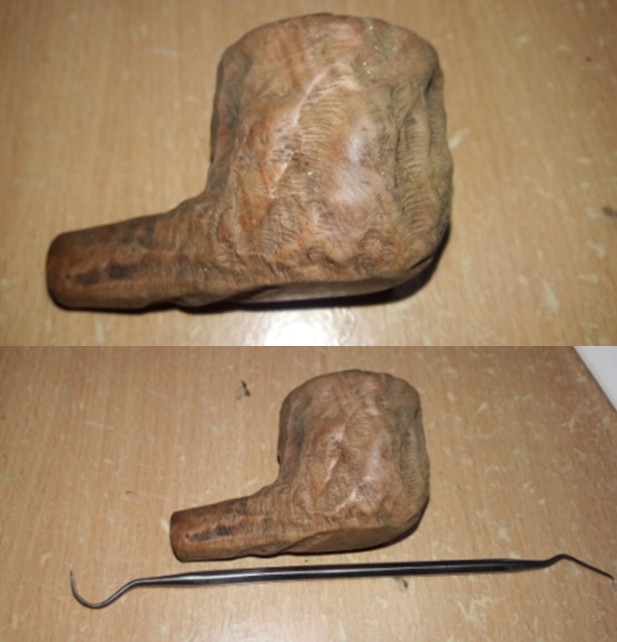
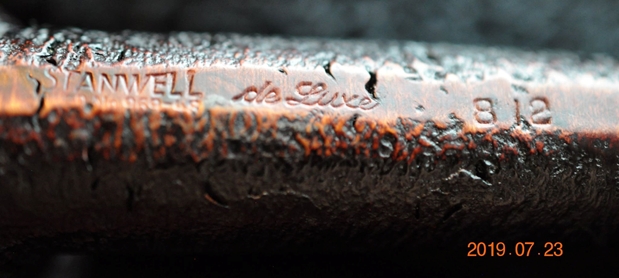
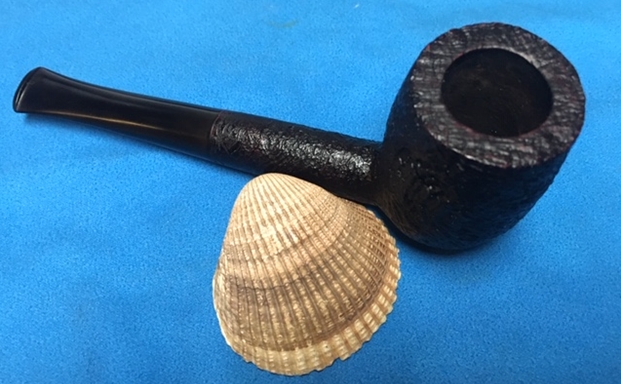
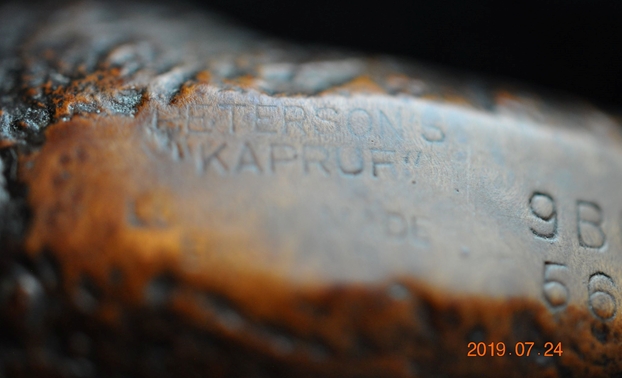
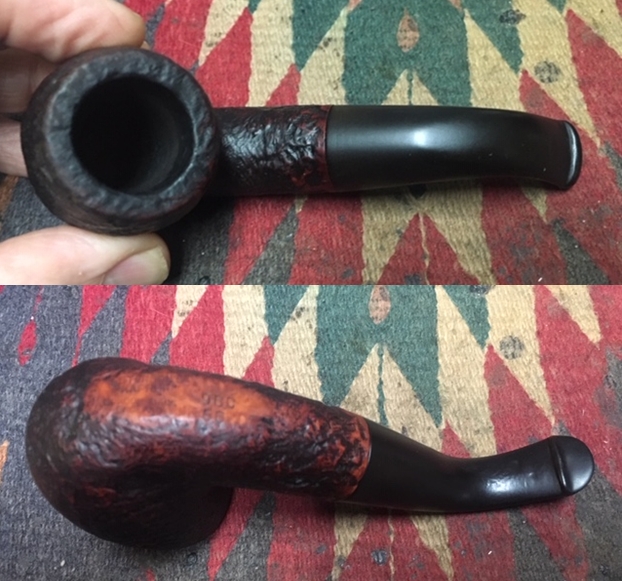
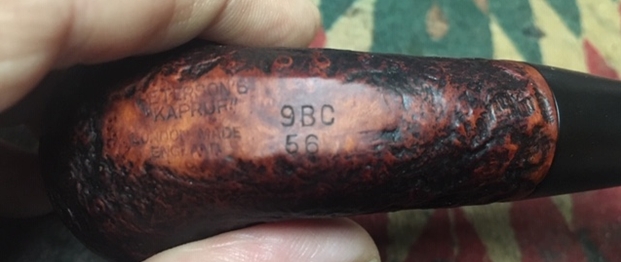
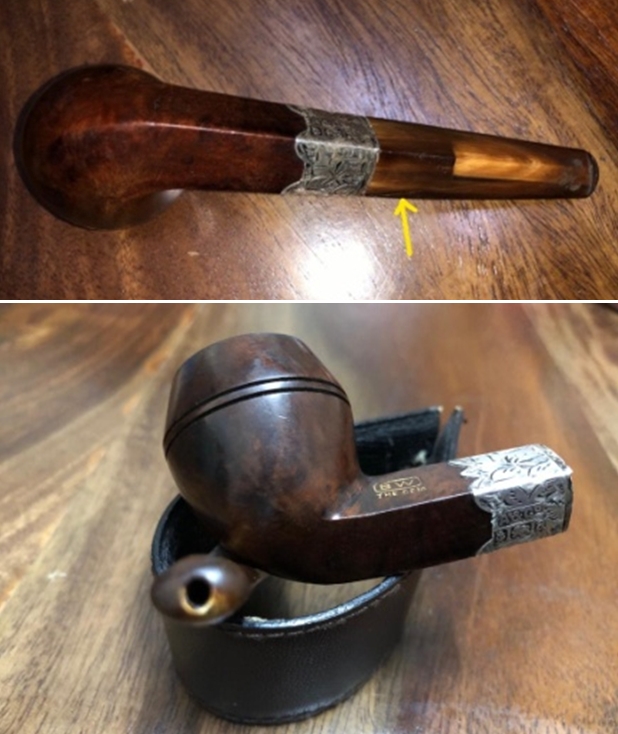
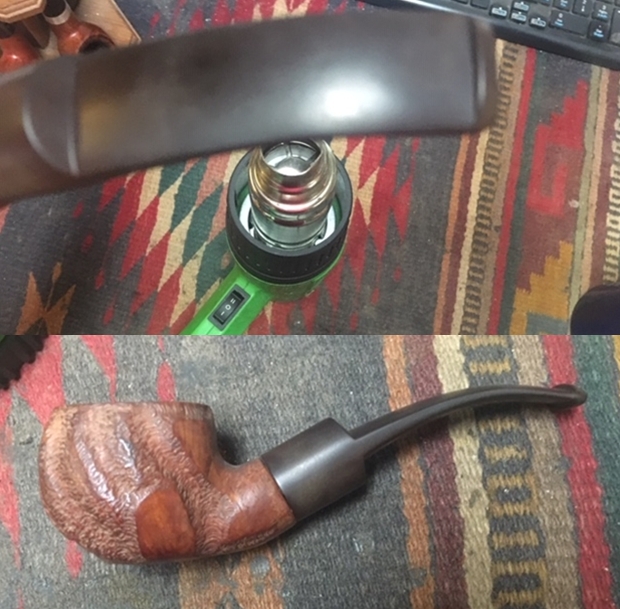
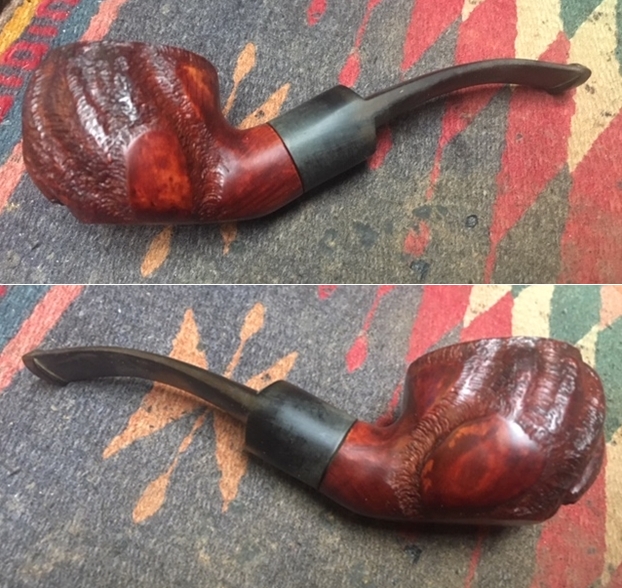
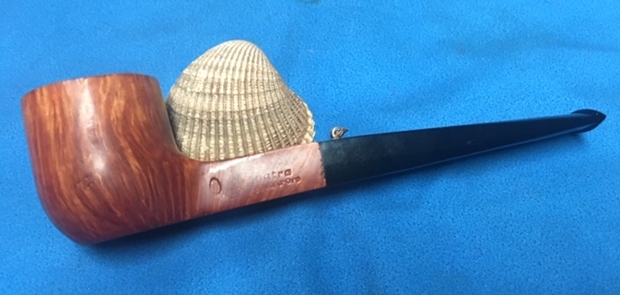
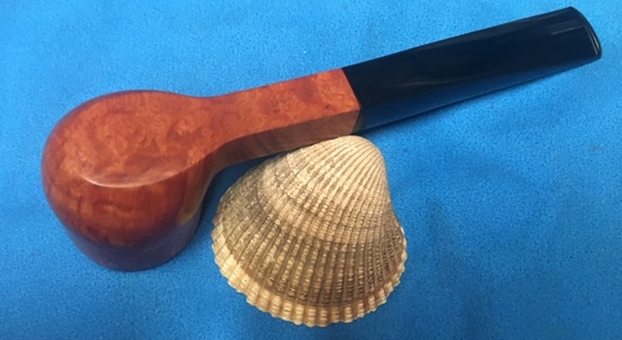
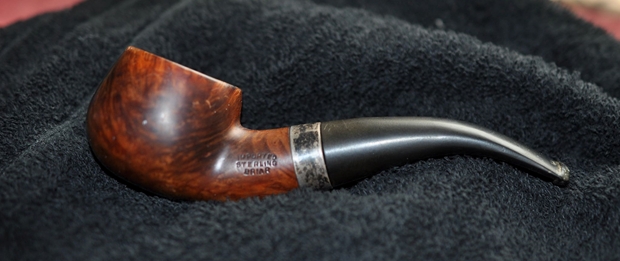
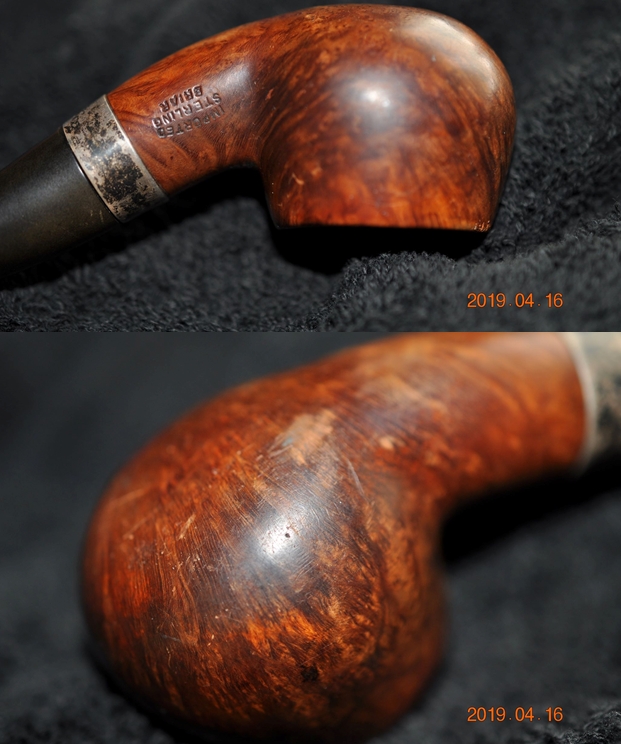
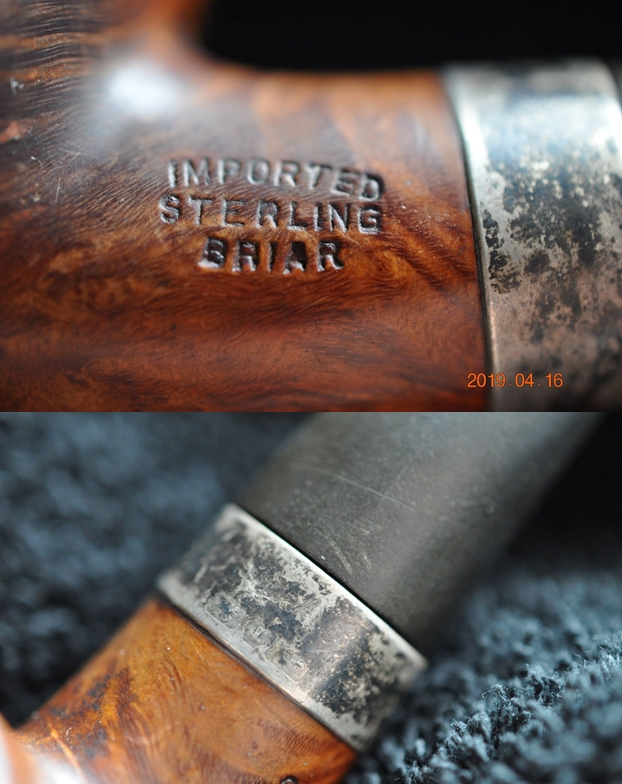
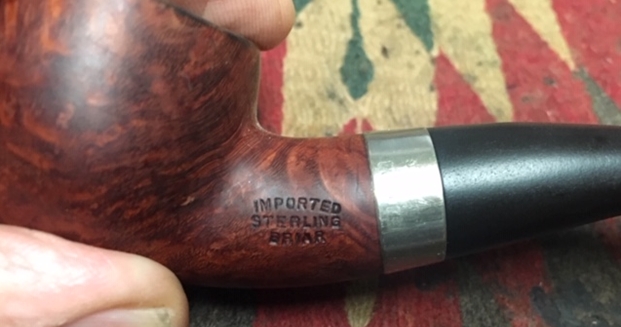
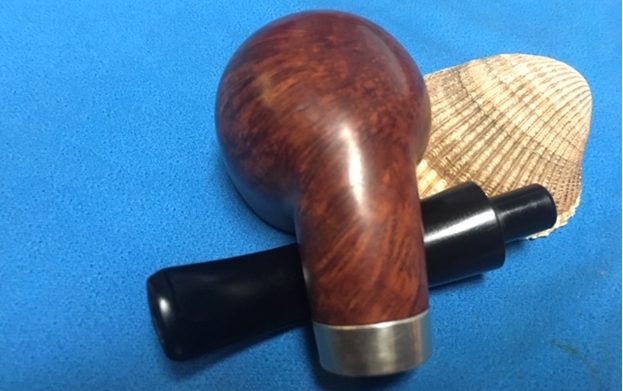
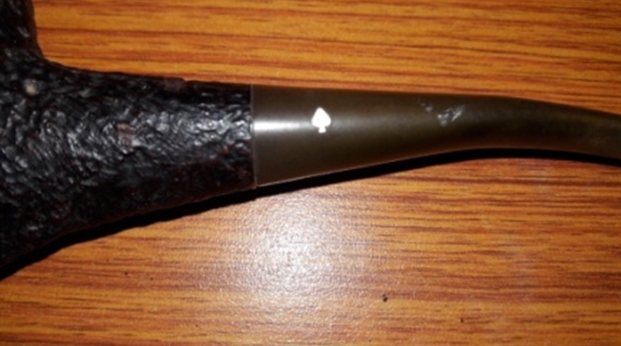
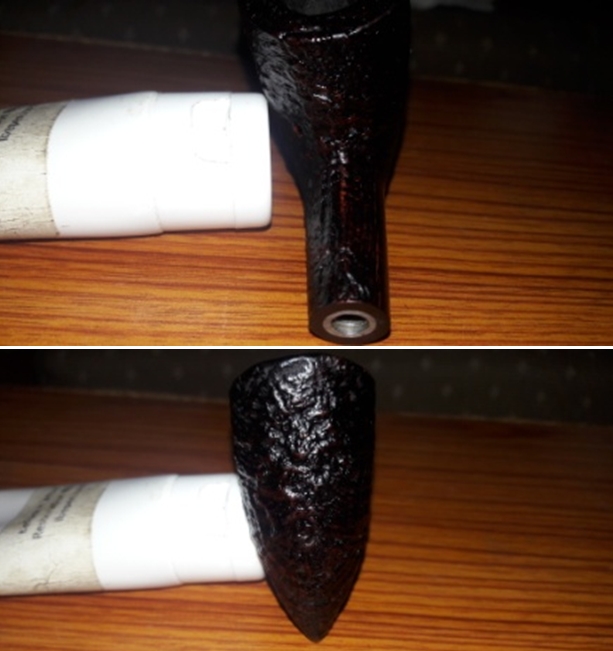
This 14th pipe that I decided to work on from this find, is a smallish Free Hand pipe with a bone shank extension and is indicated in yellow colored arrow in the picture below. It is stamped on the bottom of the shank towards the shank end as “PREBEN HOLM” in block capital letters over “HAND CUT” in a fancy script over “COPENHAGEN” over “DENMARK” again in block capital letters. The left side of the shank is stamped with an encircled numeral “1”. All the stampings are crisp and easily readable. The stem is devoid of any logo.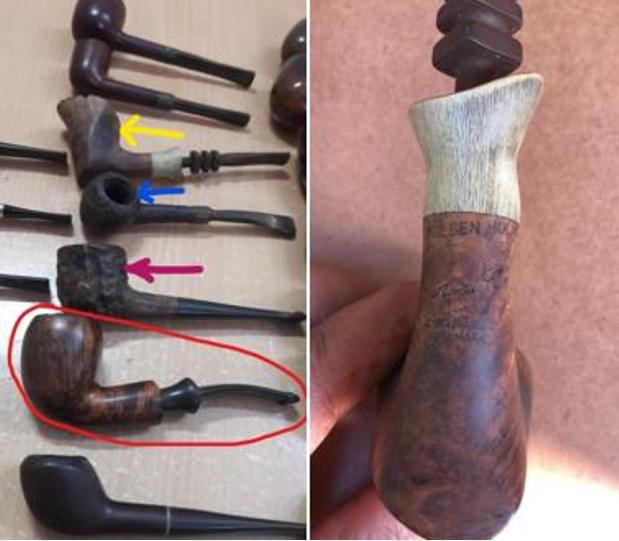 To research this brand and line/ model in specific, I referred to pipedia.org in an attempt to date this pipe and understand the significance of the numeral # 1, if it was a shape code or grading code. However, there is nothing on this numbering system, except on Preben Holm “Private Collection” where the grading system starts with 101, 202 up to 808 in ascending order. And this is definitely not from “Private Collection” line!! I even visited rebornpipes.com in the hope that I would be able to unravel the mystery shrouding this pipe, but to no avail.
But nonetheless this is a PREBEN HOLM and is staying with me. Any reader who has any information or knowledge about this pipe is earnestly requested to share it with us on rebornpipes!
INITIAL VISUAL INSPECTION
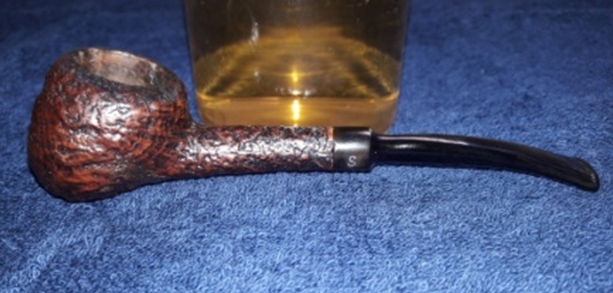
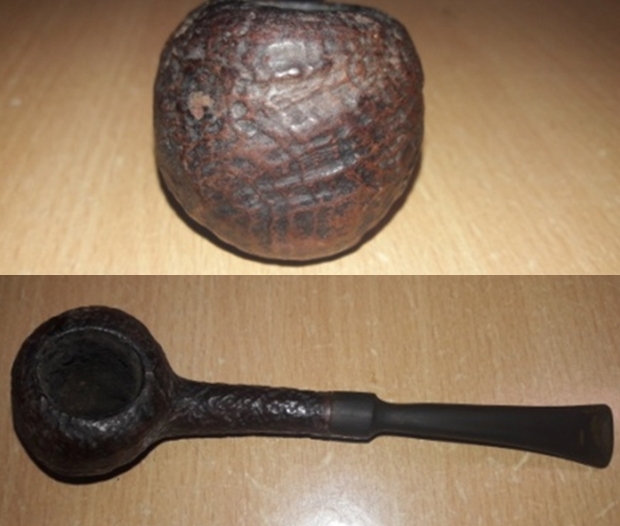
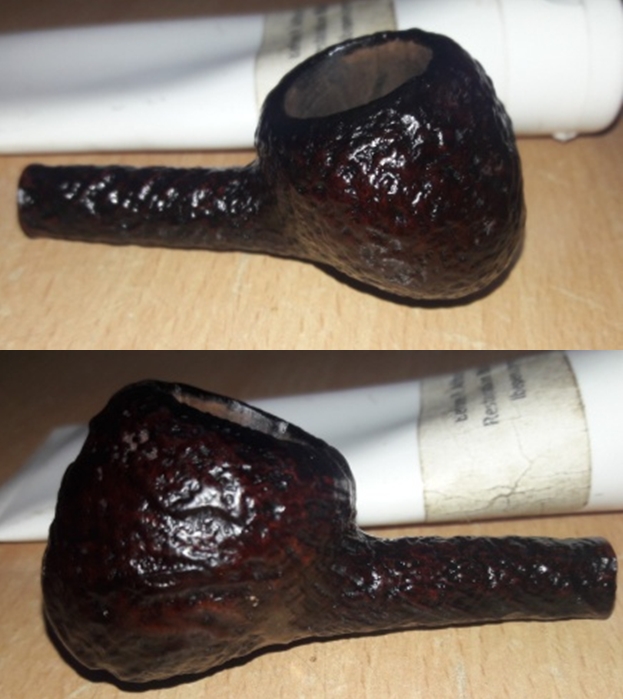
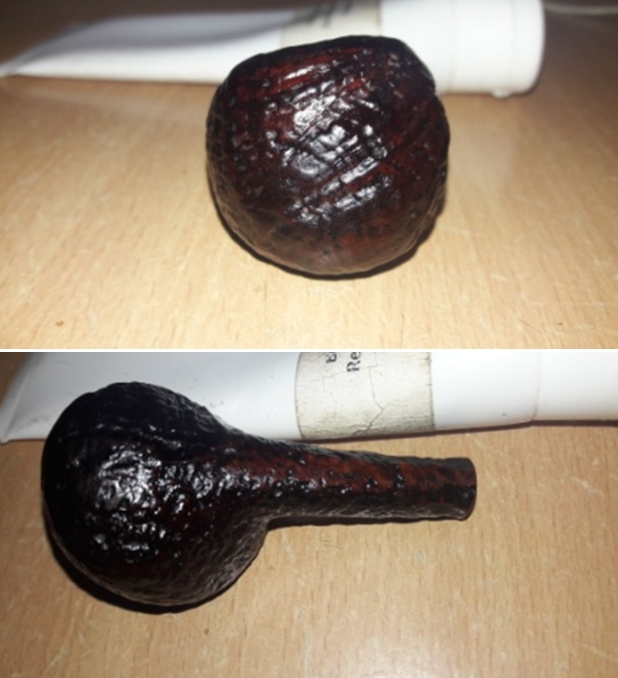
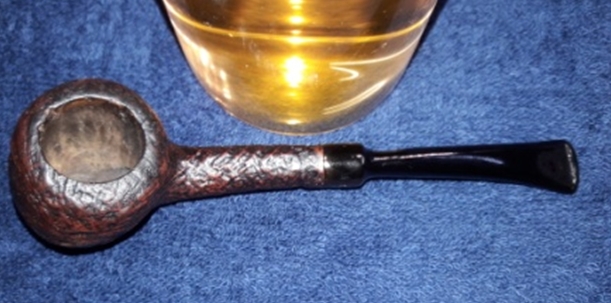
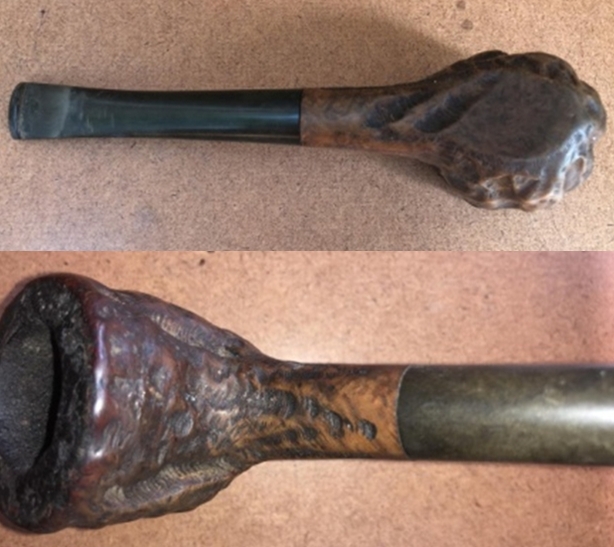
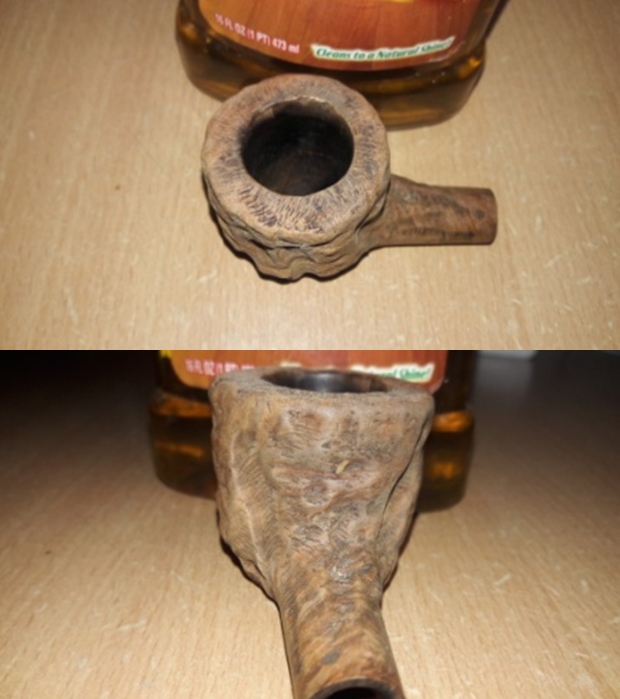
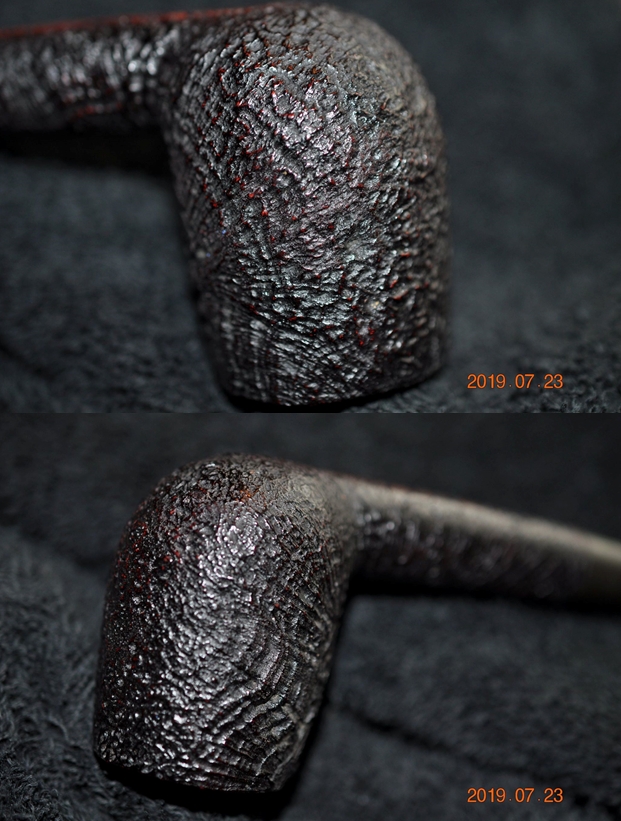
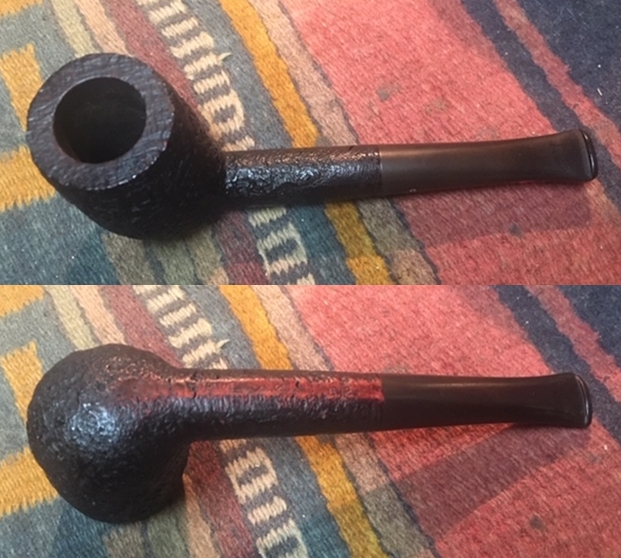
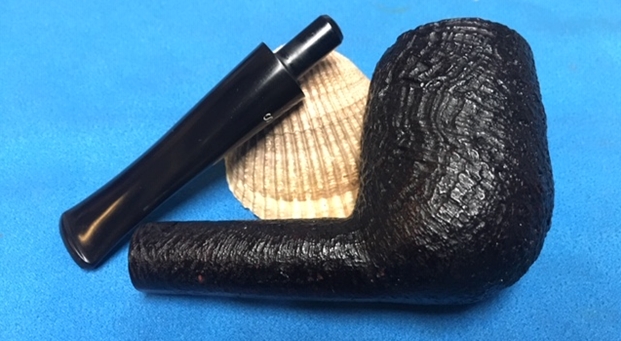
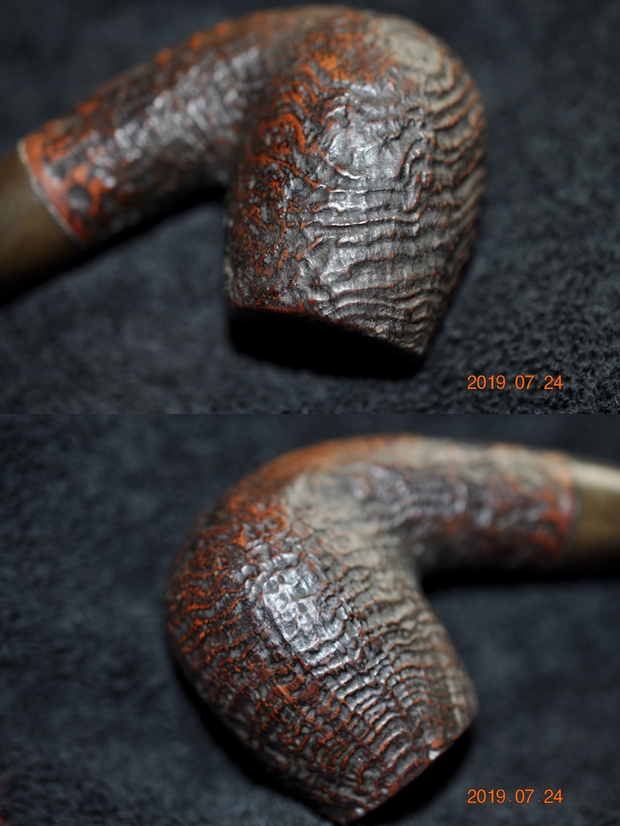
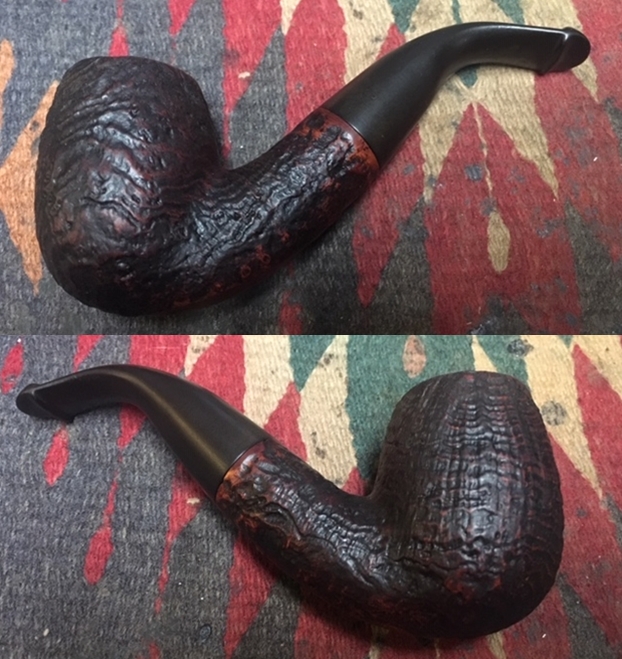
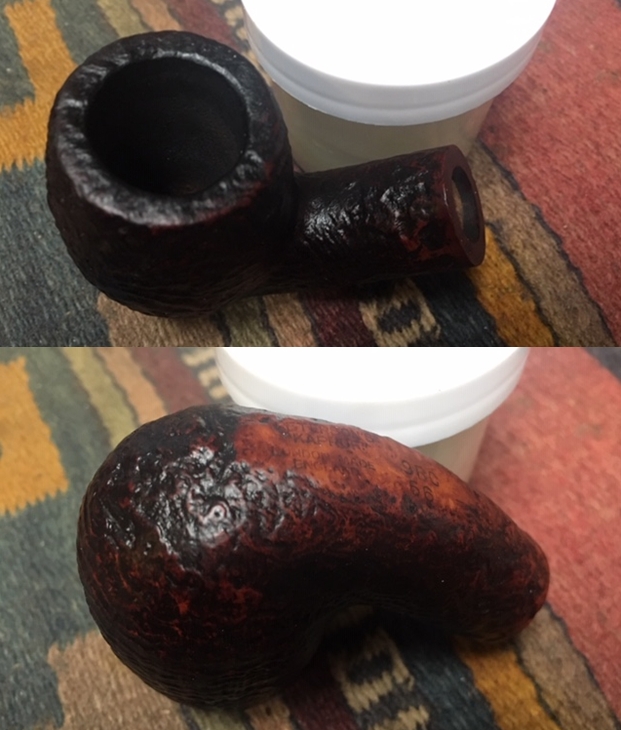
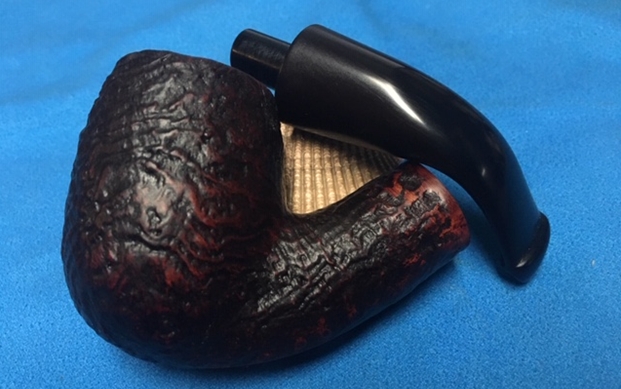
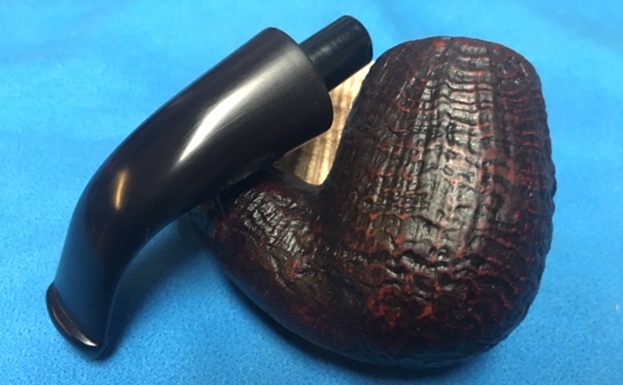
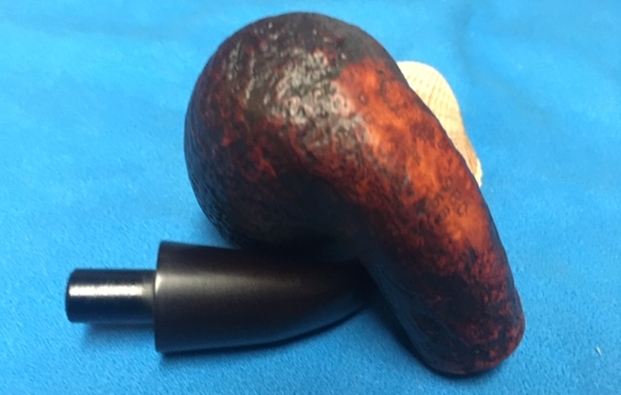
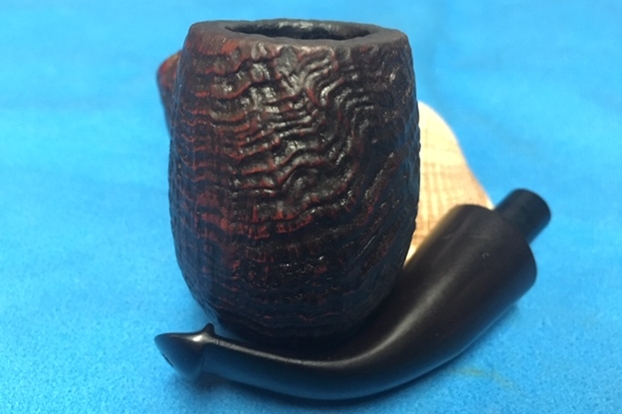
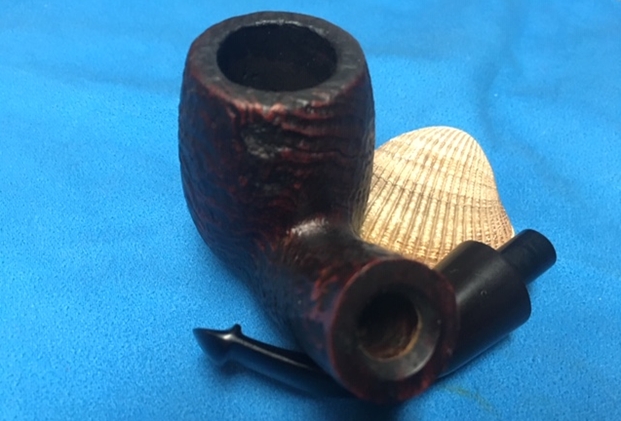
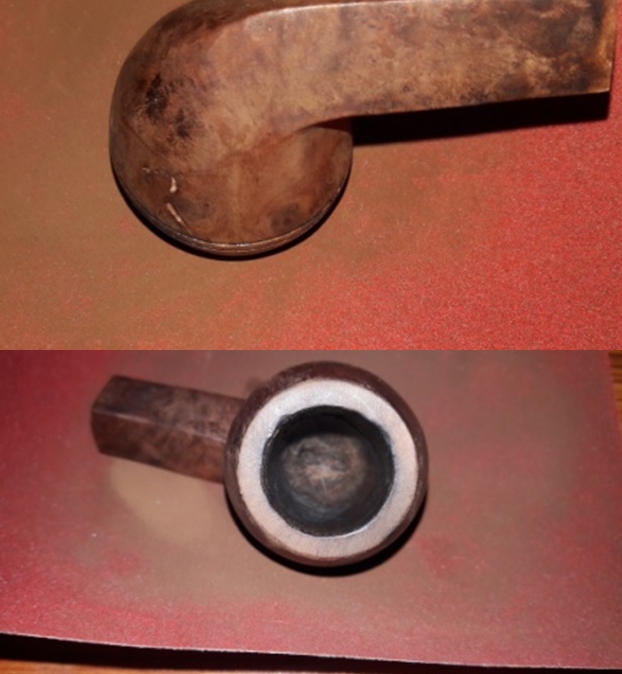
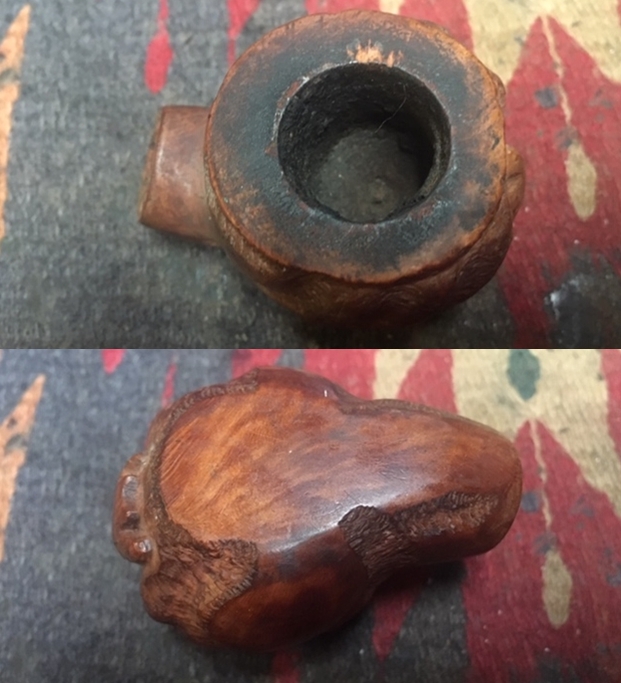
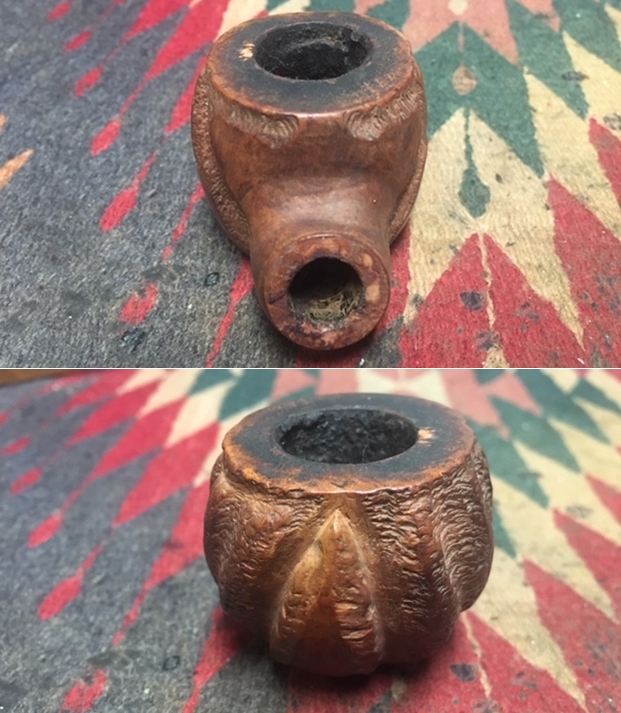
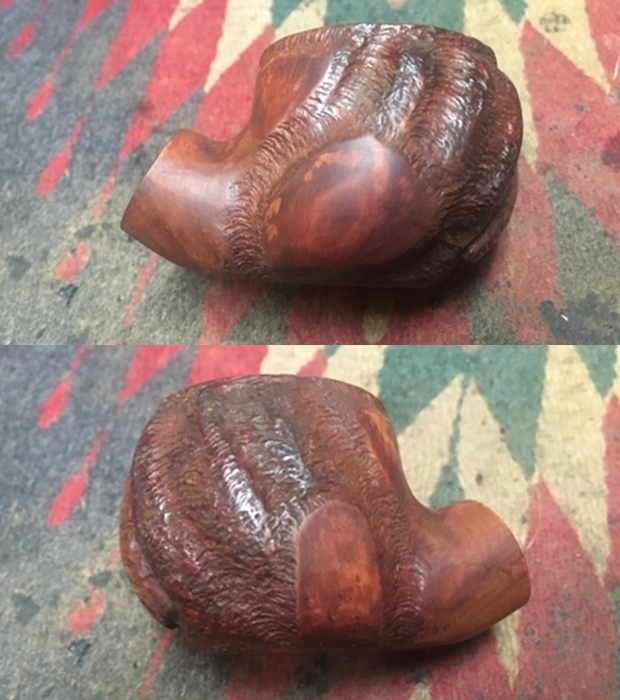
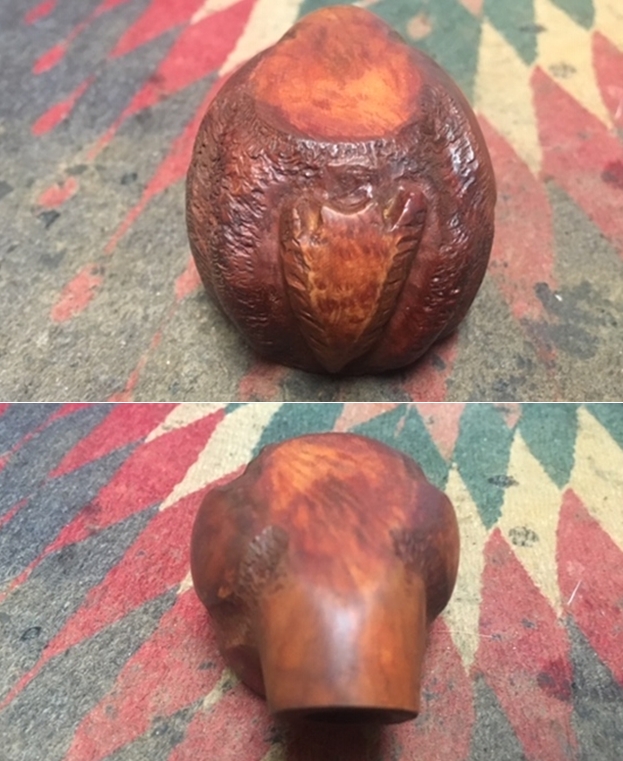
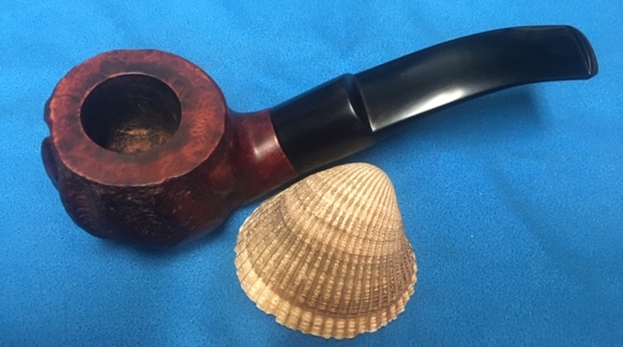
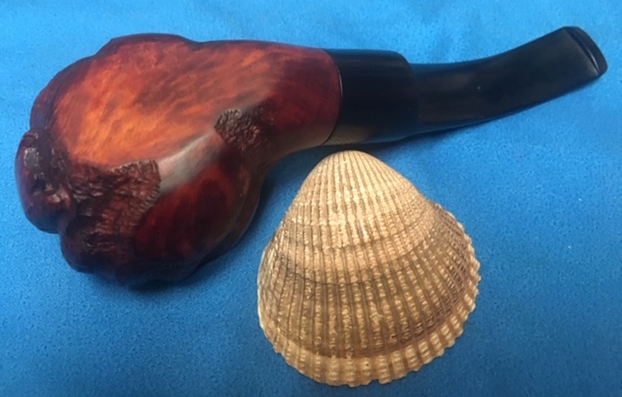
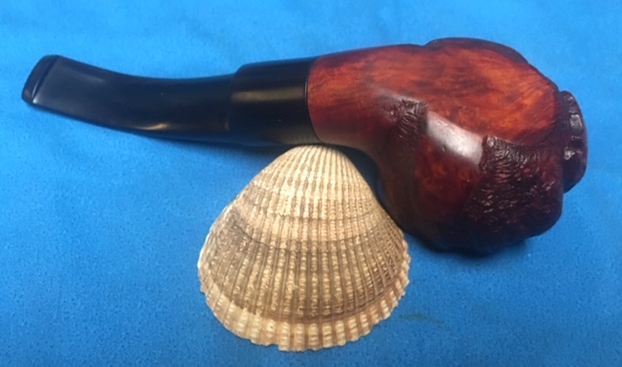
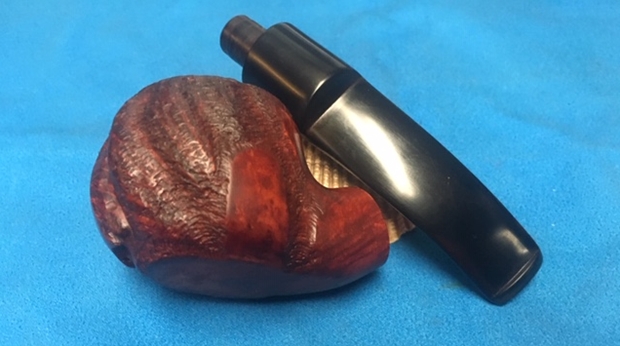
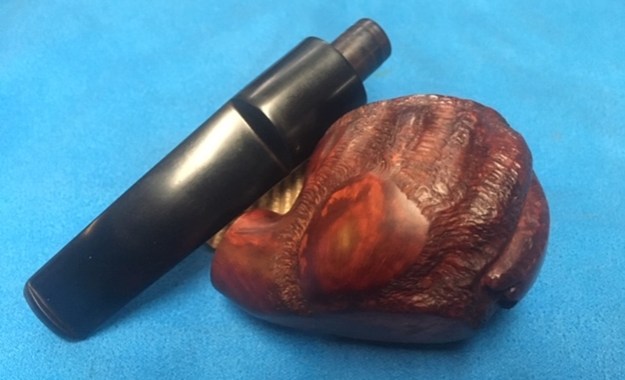
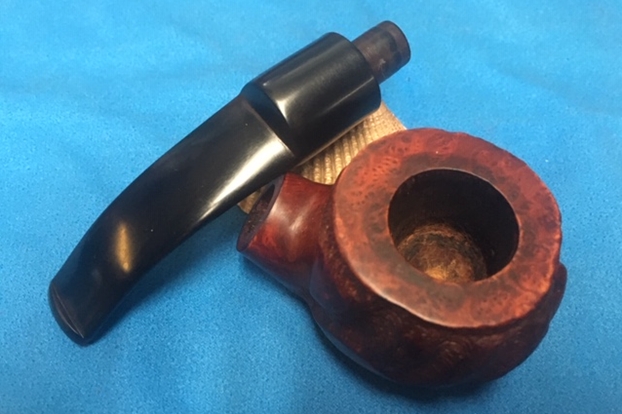
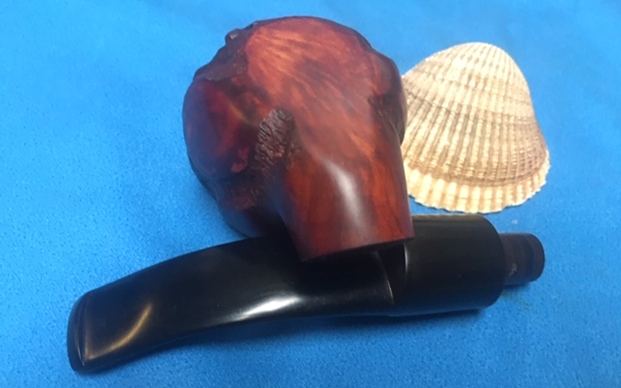
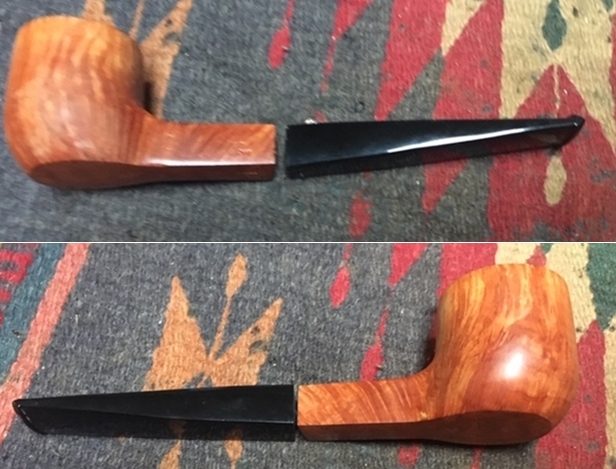
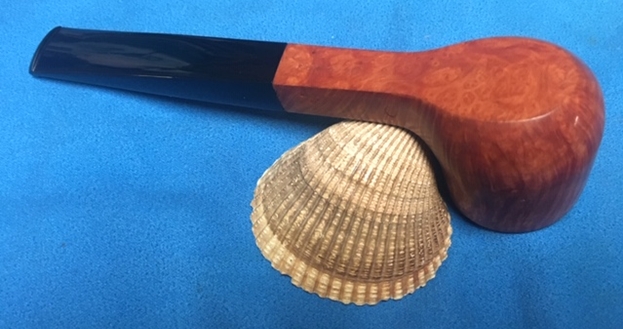
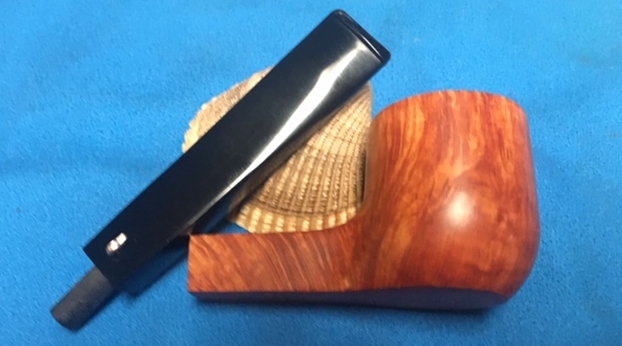
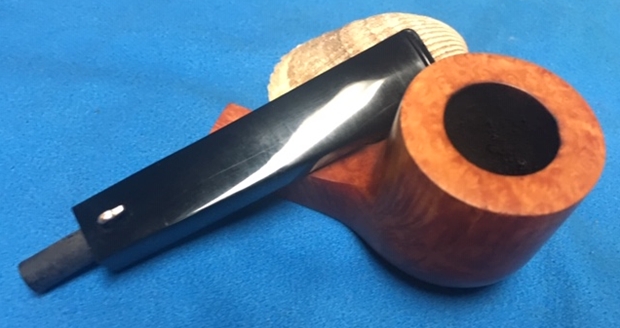
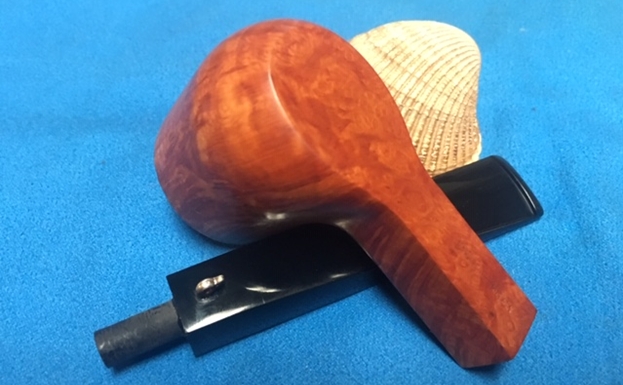
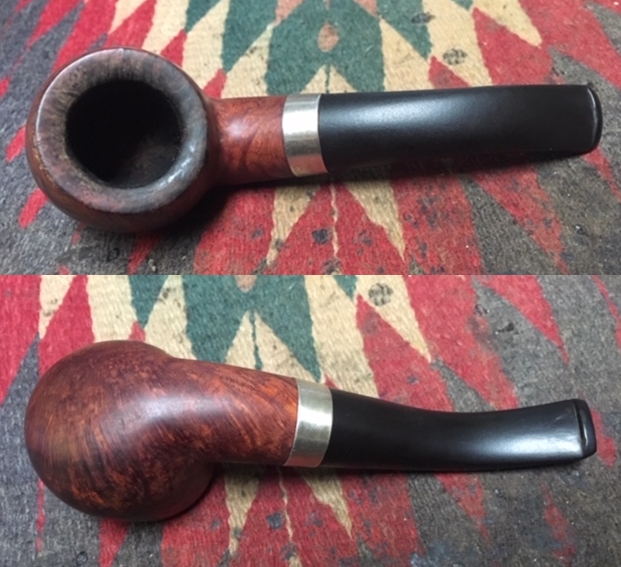
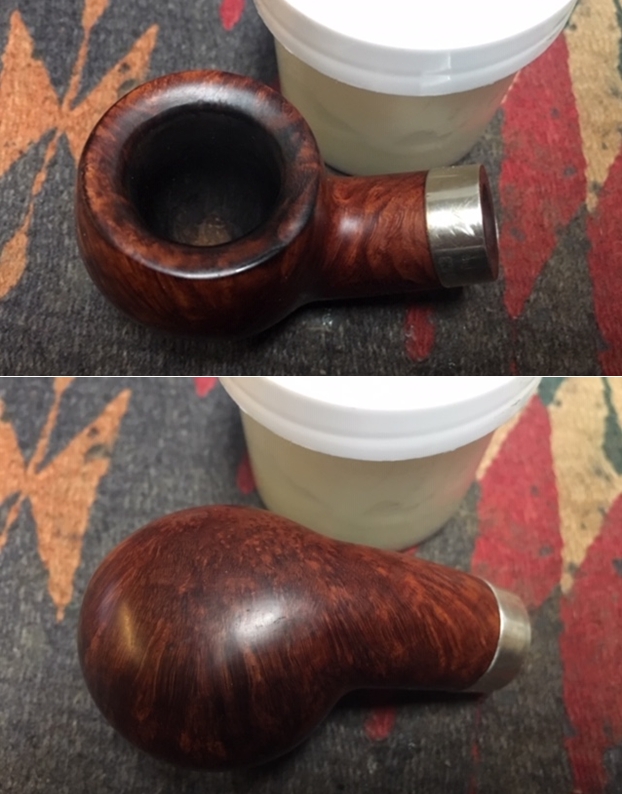
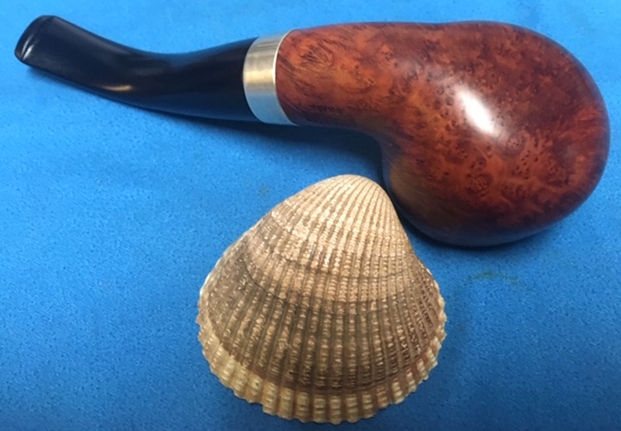
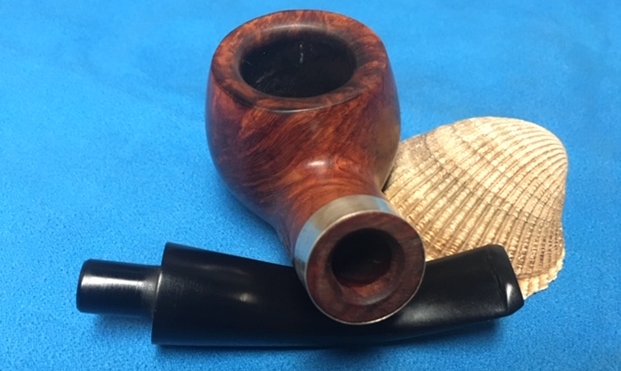
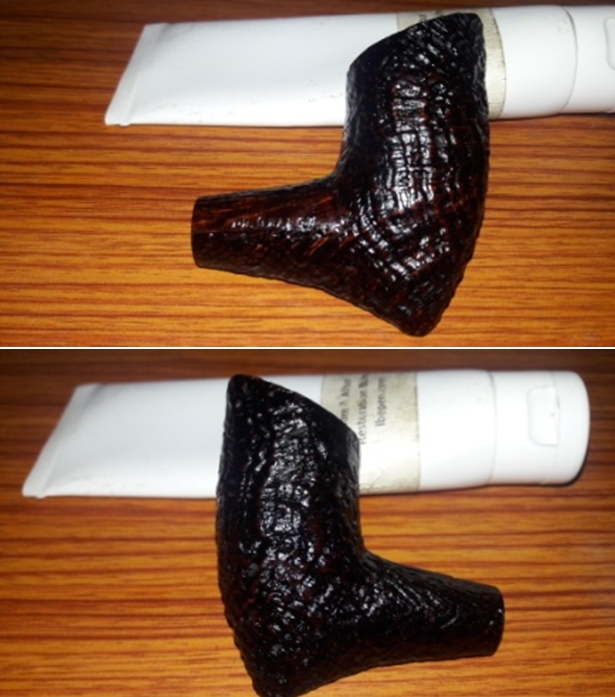
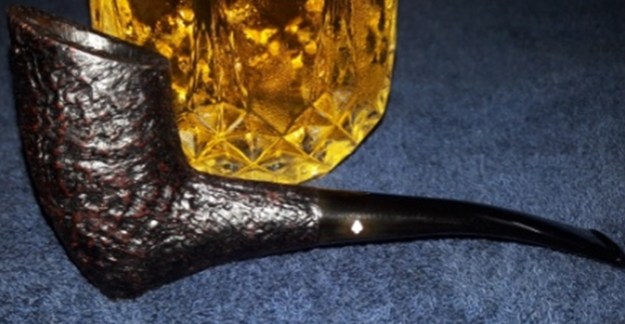
The smooth stummel has some beautiful straight grains on the front, back and sides of the stummel. On either side of the stummel, is an elegantly contoured elevation which makes for a nice and comfortable hold with the thumb and the middle finger while smoking. The front of the stummel rises above the back making for a downward sloping rim top surface. The upper portion of the rim top flares out in a typical PH design and adds a distinct feature to the appearance of the pipe. The stummel surface is covered in dirt and grime giving the stummel a dull and lackluster appearance. There are a one/ two likely fills, noticeably on either side near the shank and stummel junction and another couple near the foot. These will be clear when the stummel is cleaned of all the grime.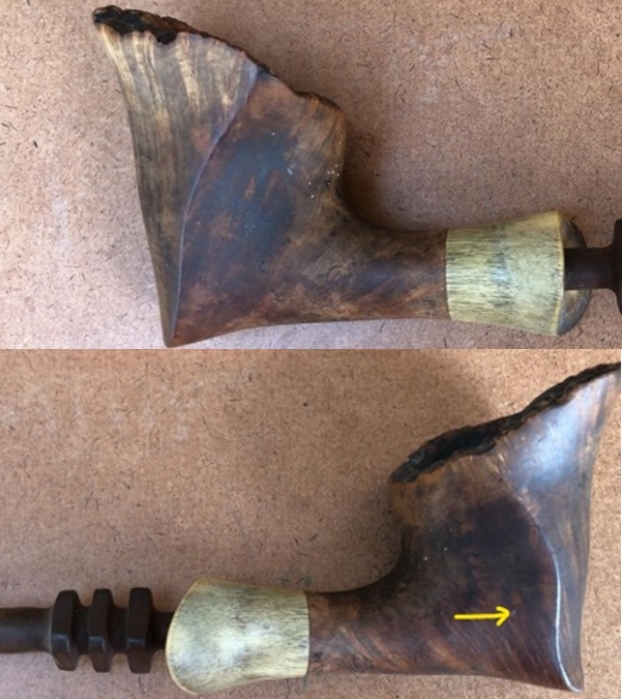

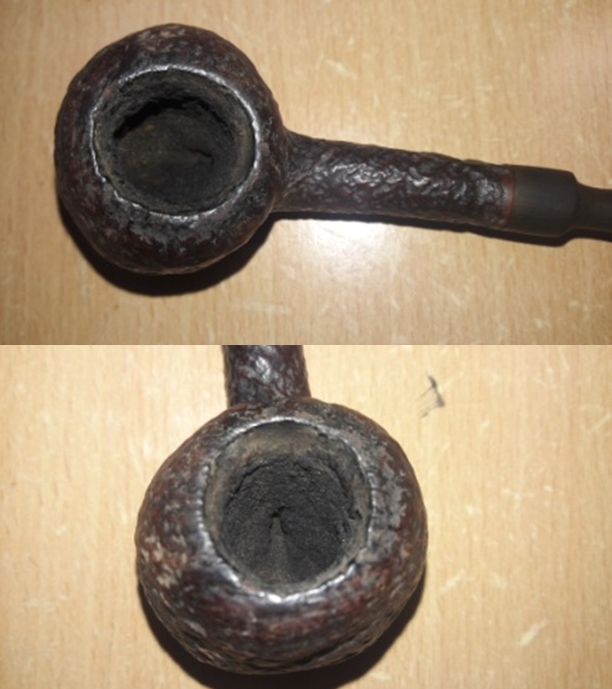
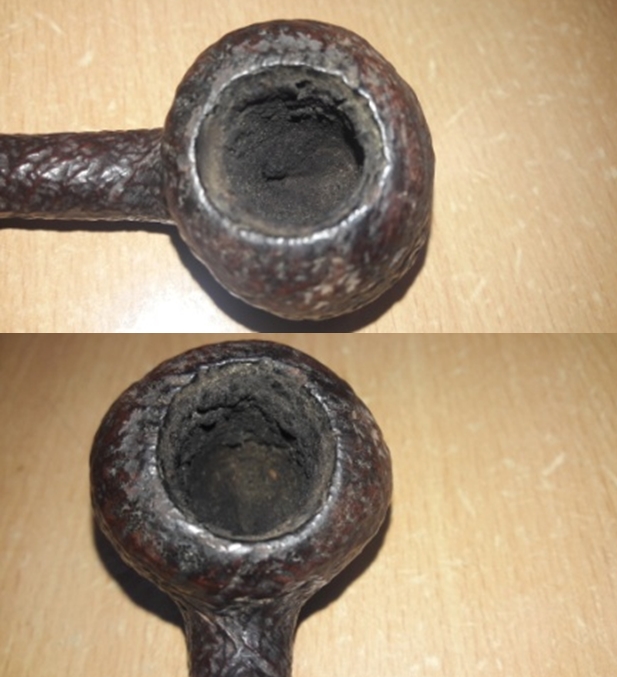
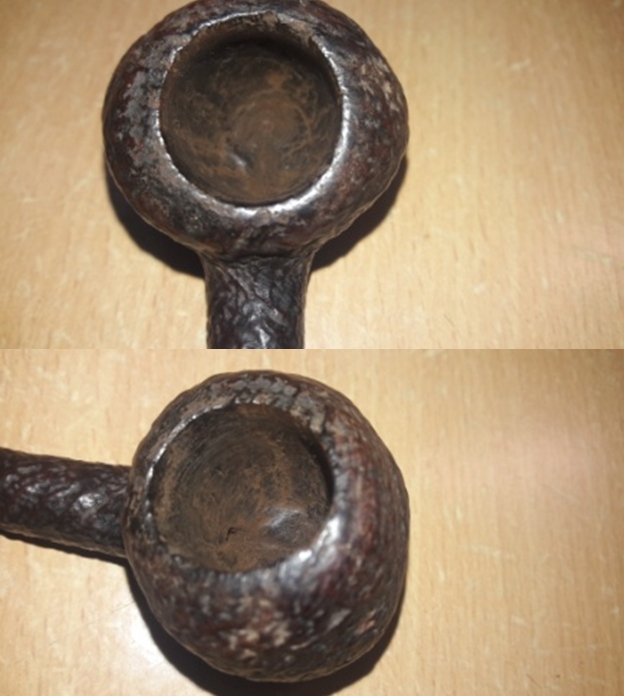
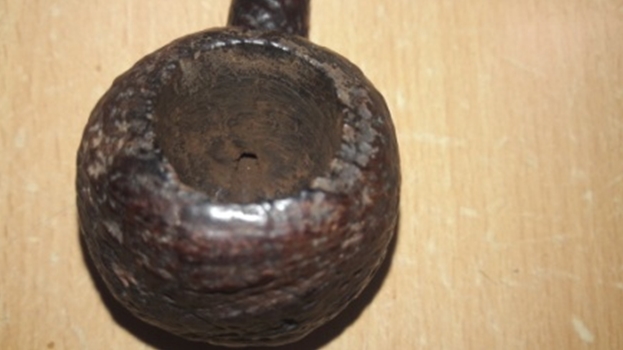
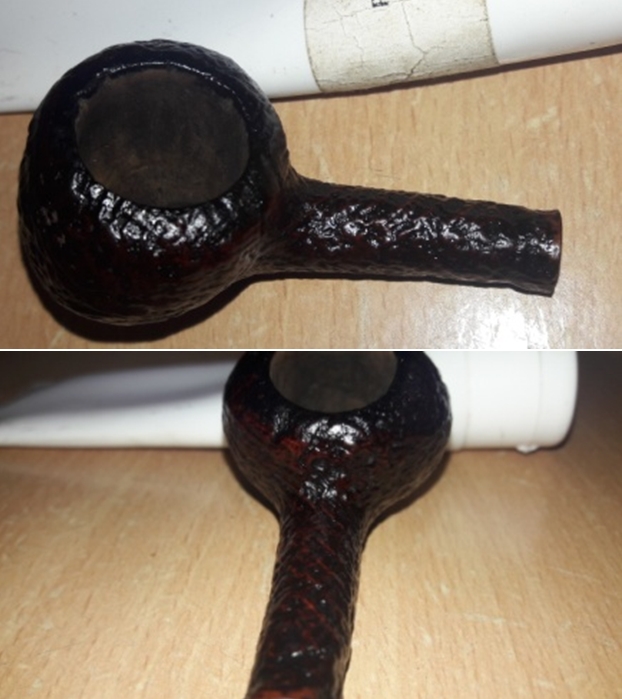
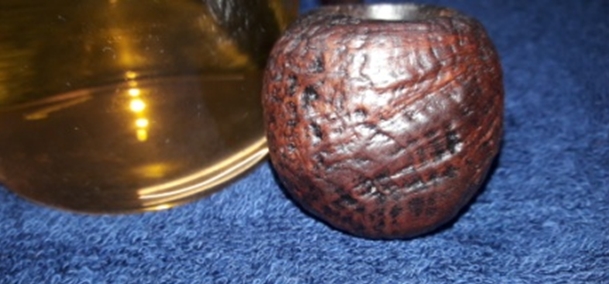
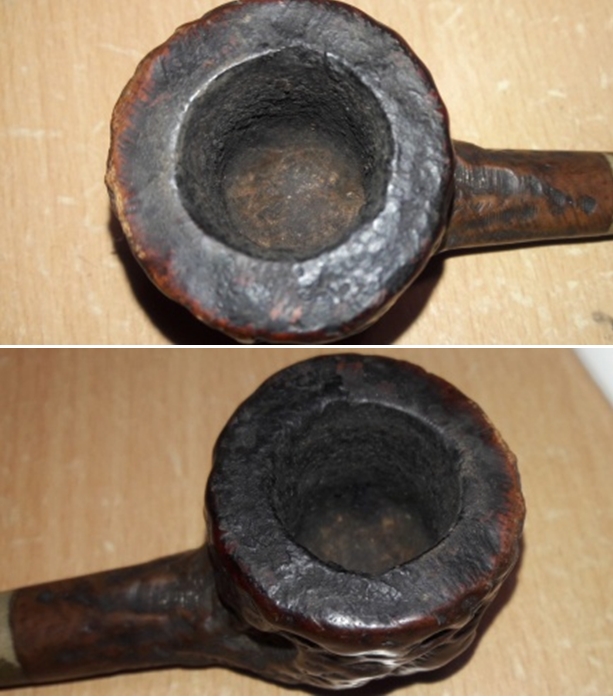
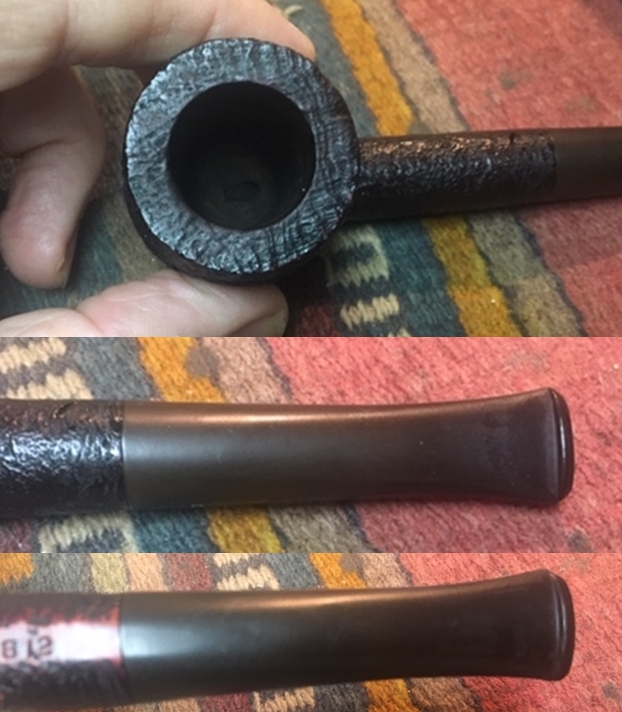
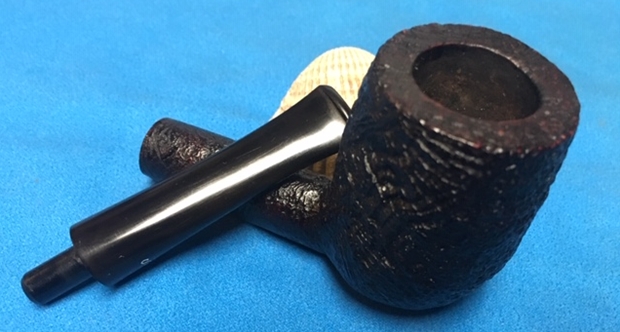
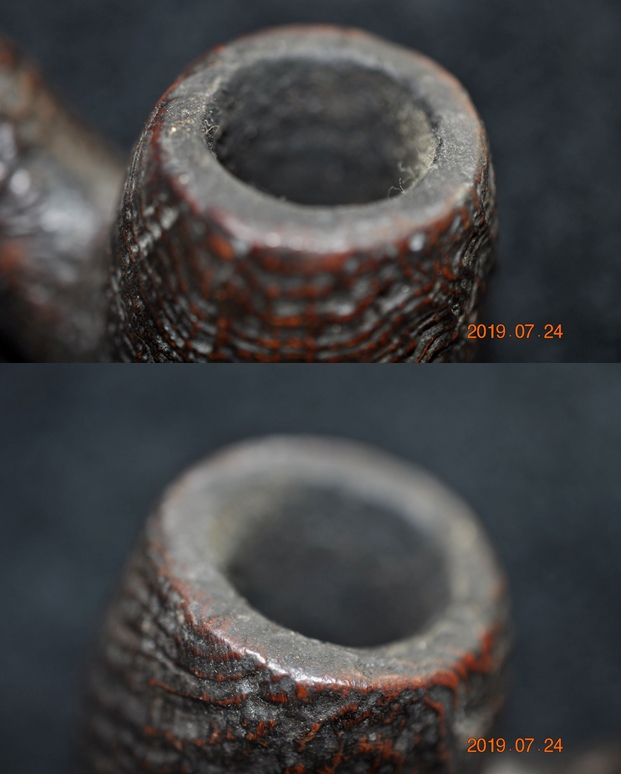
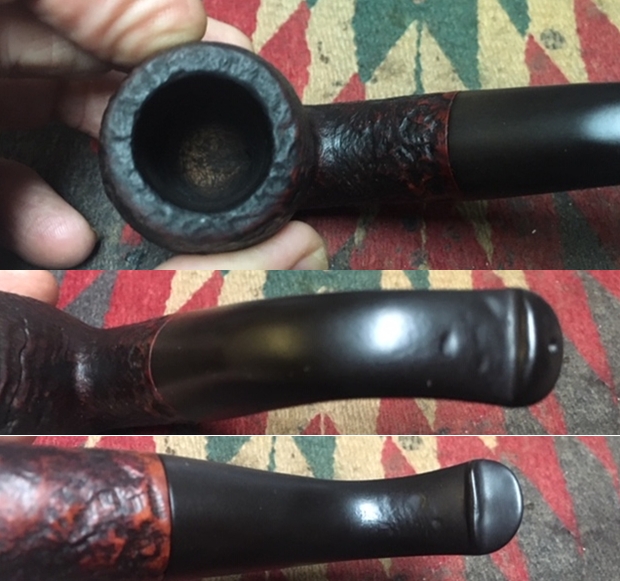
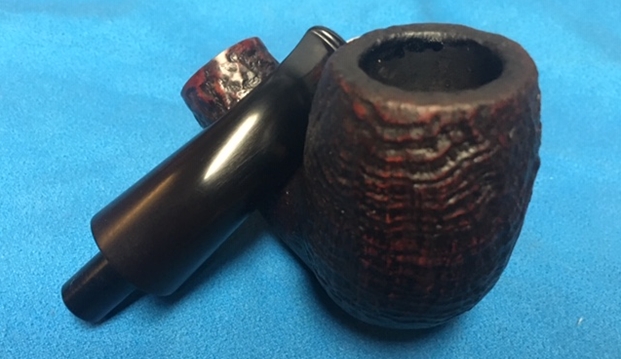
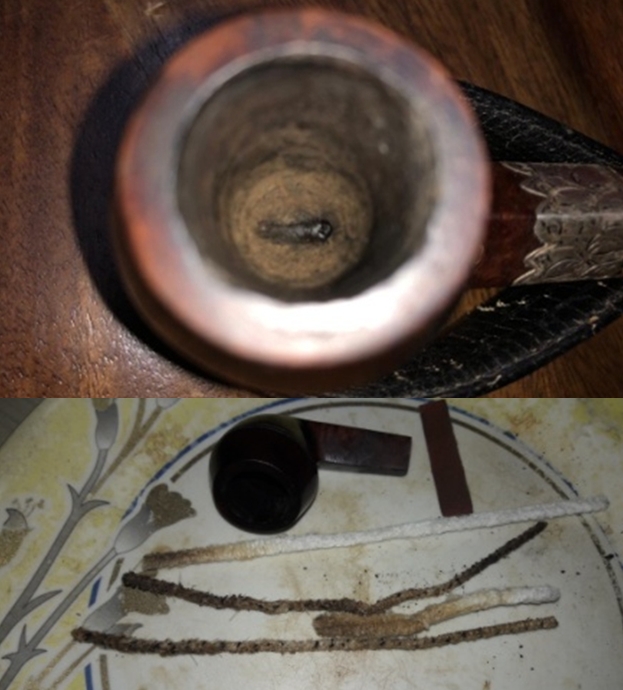
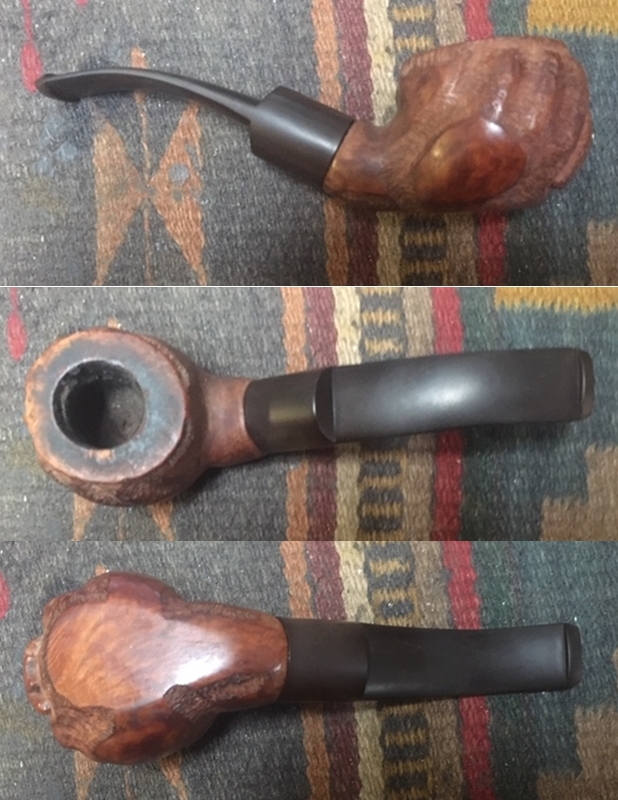
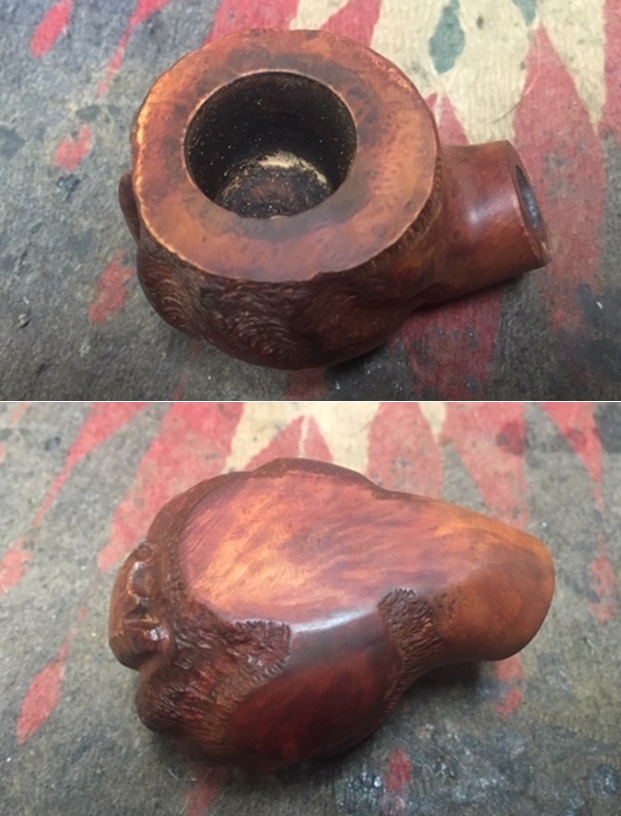
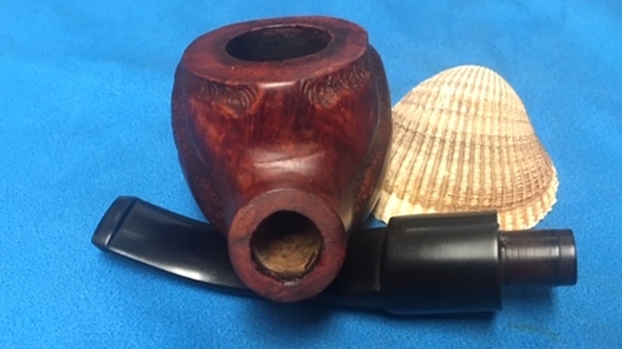
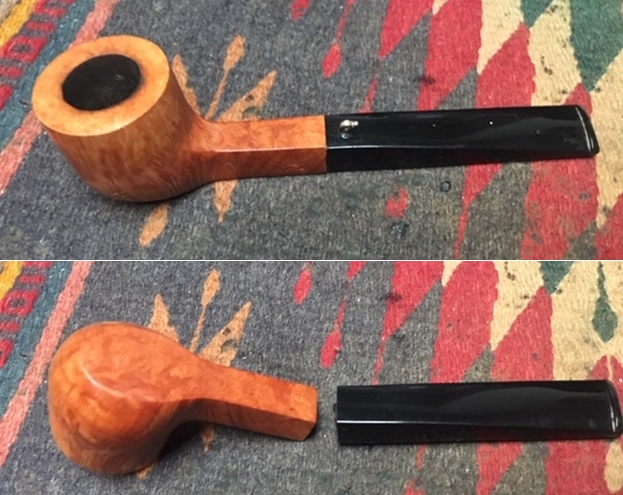
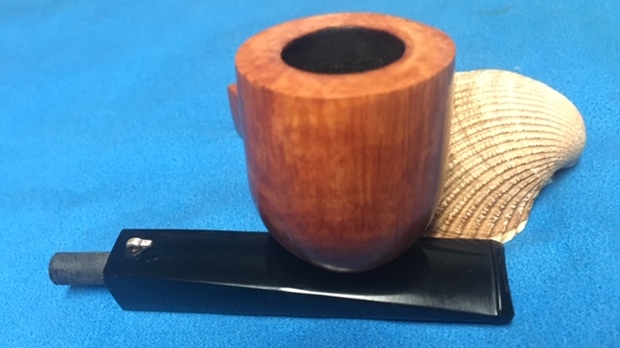
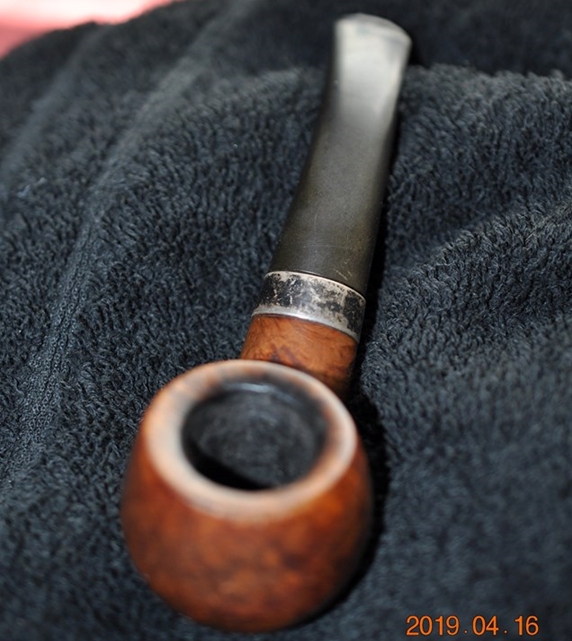
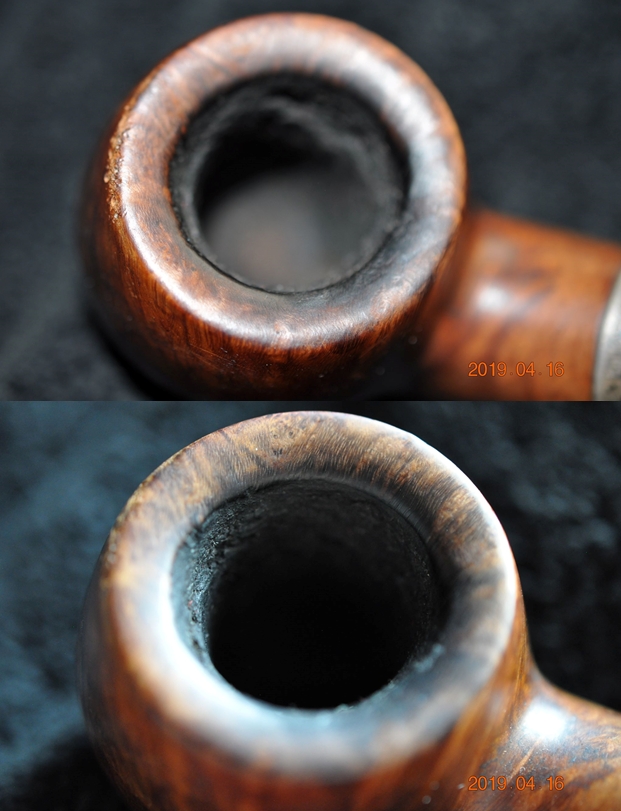
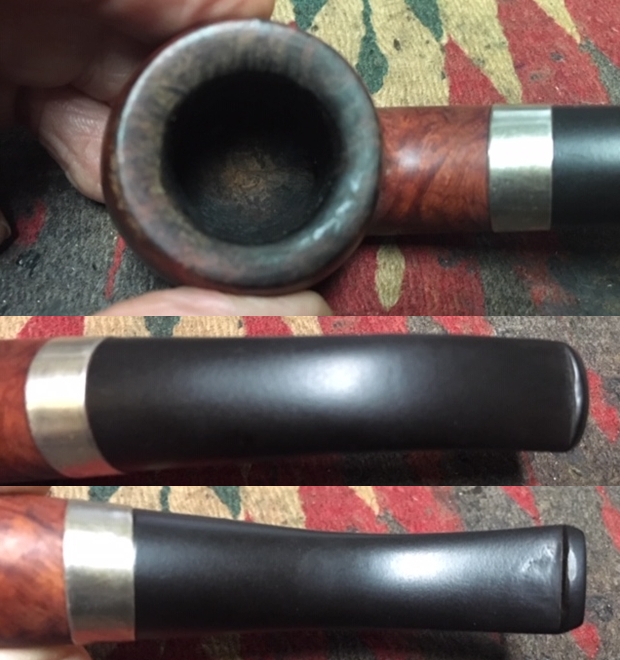
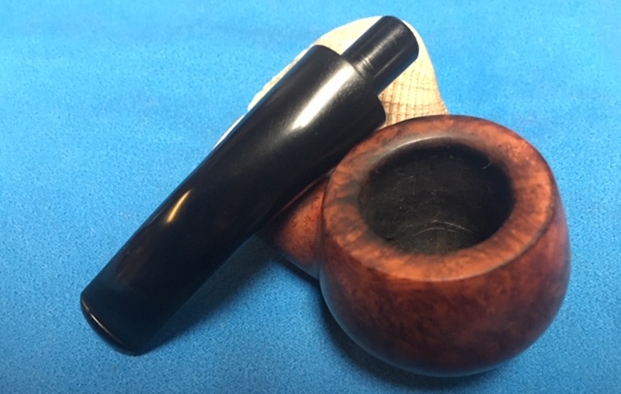
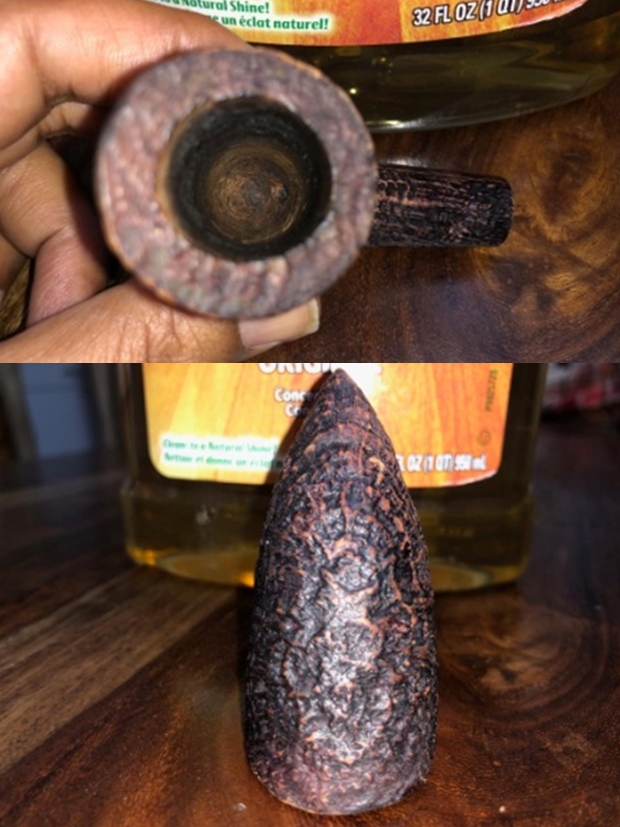
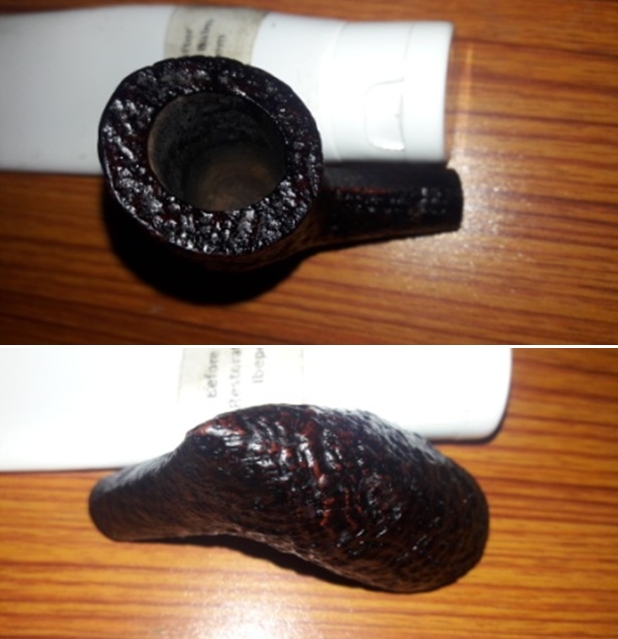
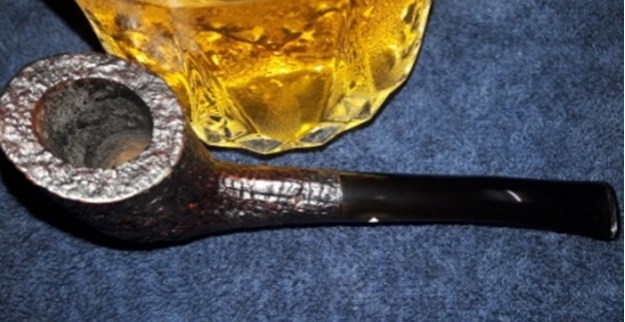
 A thick layer of cake can be seen in the chamber. The backwards sloping plateau rim top surface has nice knobby raised portions and the portion of crevices formed, is covered in thick overflow of lava, dirt, dust and grime. The condition of the inner walls of the chamber and rim top surface will be known once the cake has been taken down to bare briar and the rim top crud has been scraped off completely. The inner rim condition appears to be in good condition with no burn/ charred surfaces. Only once the stummel has been thoroughly cleaned that I can be sure of my initial appreciation. In spite of the thick cake, the chamber odor is, surprisingly, not strong and should be addressed once the cake has been taken down to the bare briar and the shank internals have been thoroughly cleaned. The draught hole is dead center at the bottom of the chamber and should be a great smoker.
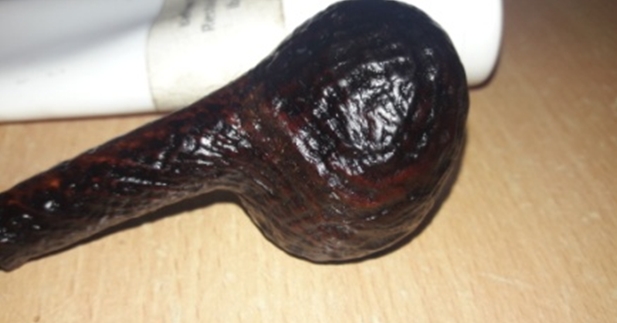
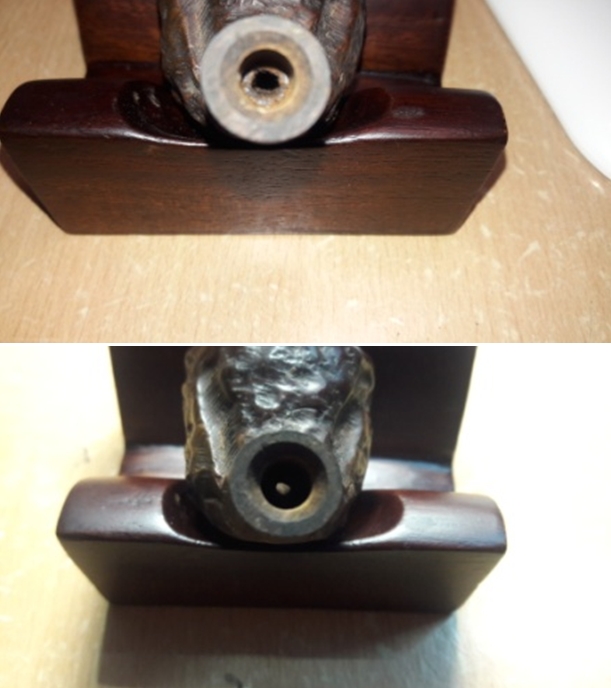
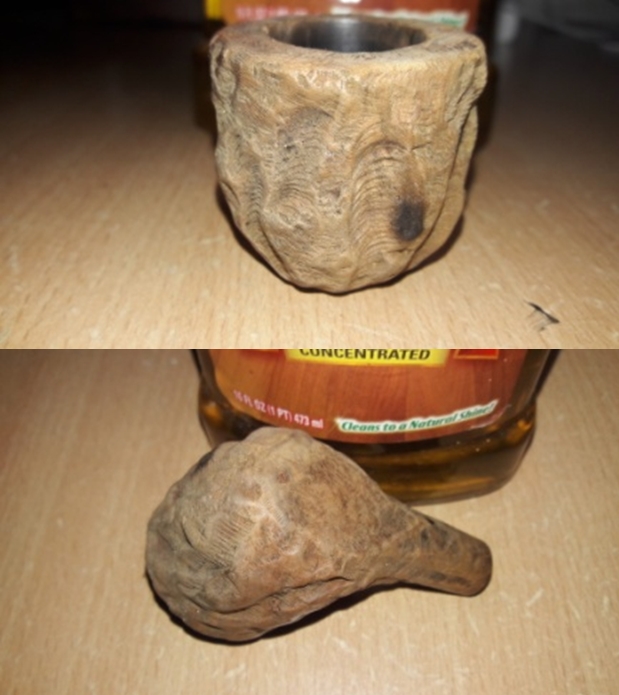
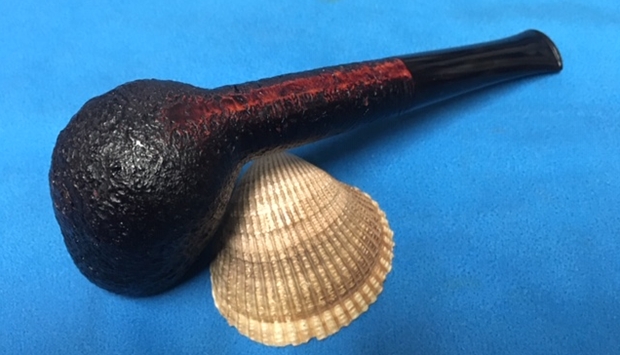
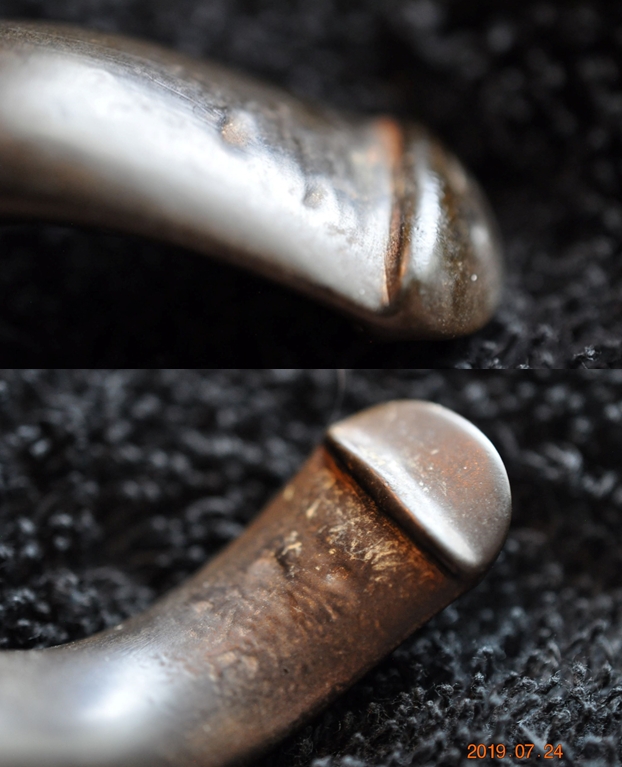
 The shank end is adorned with a horn shank end extension which is pinched in the middle and then flares outwards matching in profile with the rim top. The shank extension is dry and has darkened nicely due to absorption of all the oils over the years of smoking. This will add a nice classy touch to the overall appearance of the pipe once cleaned and hydrated. The shank extension end and mortise are blocked with accumulated dried gunk, adversely affecting the airflow.

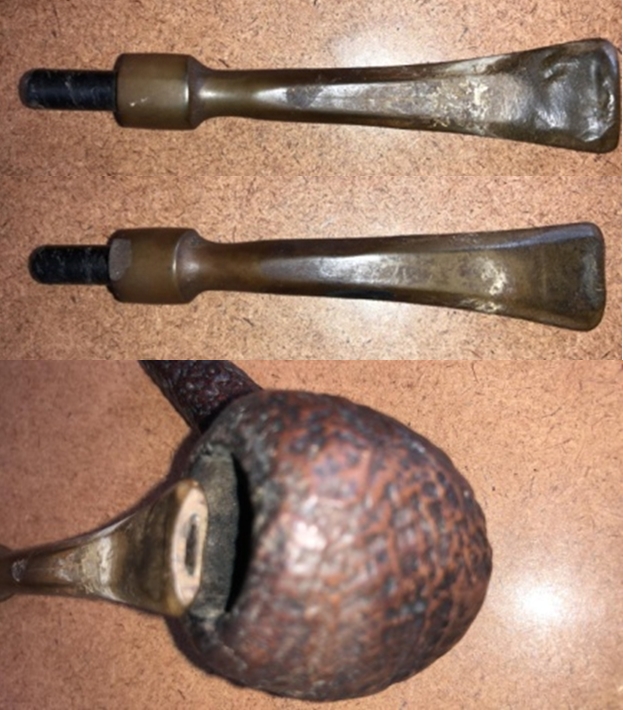
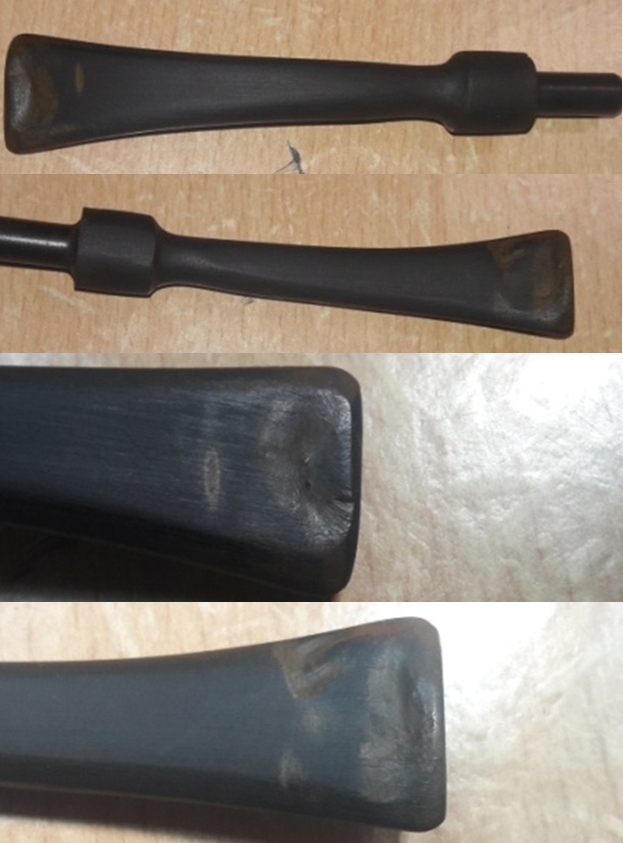
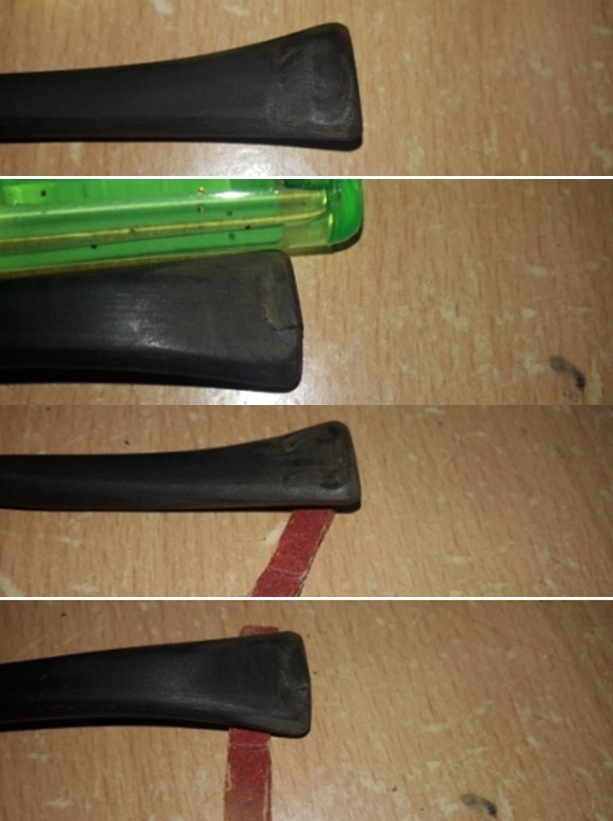
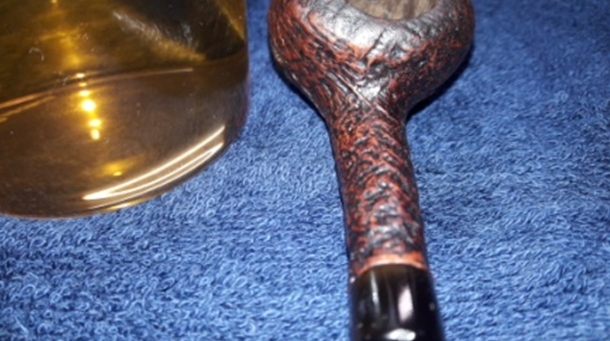
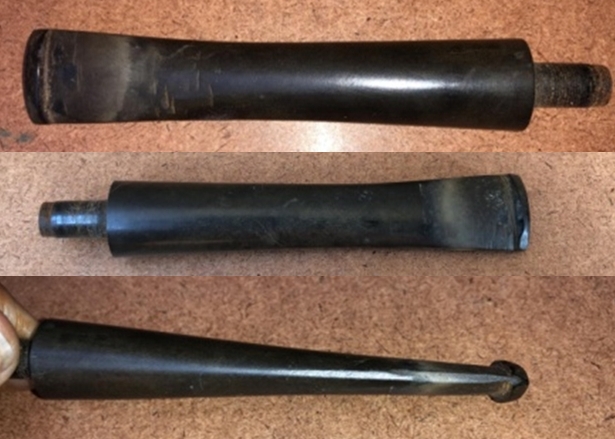
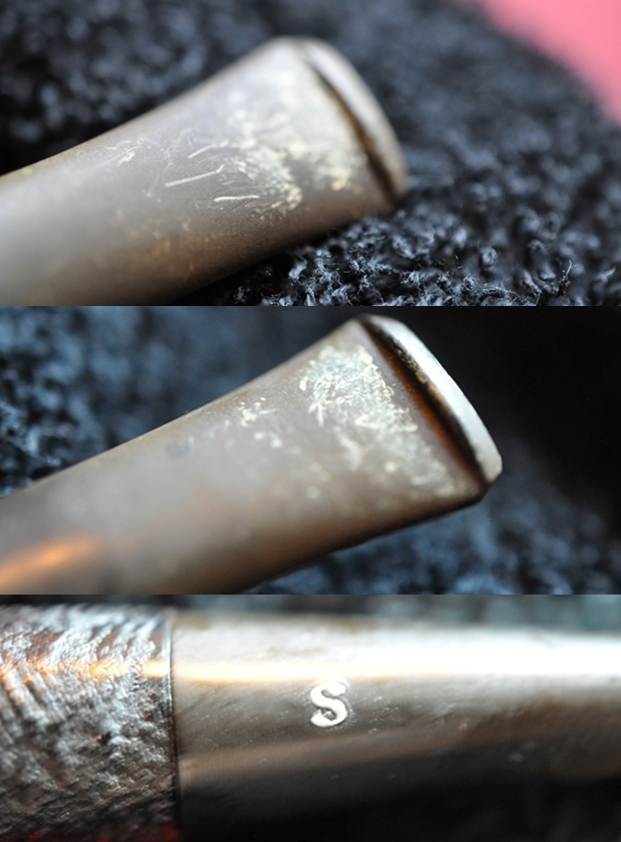
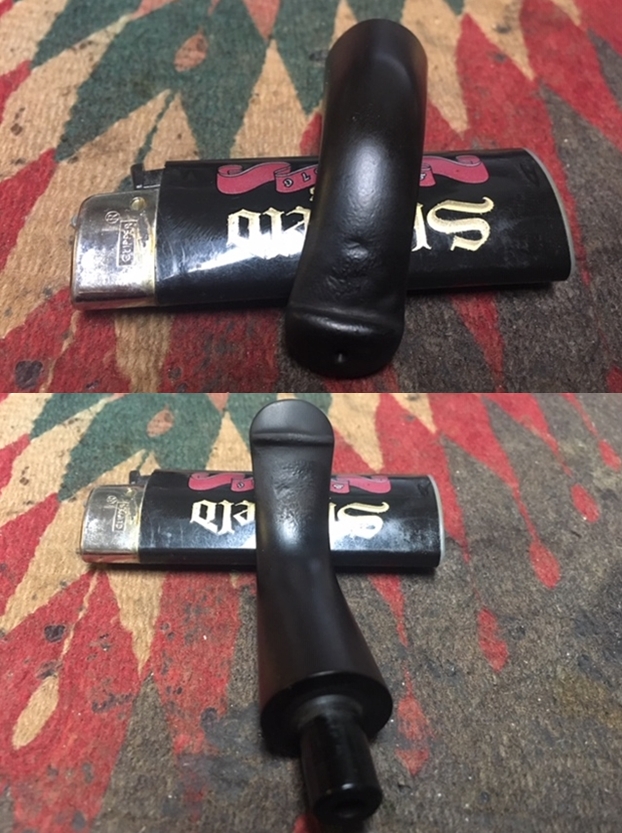
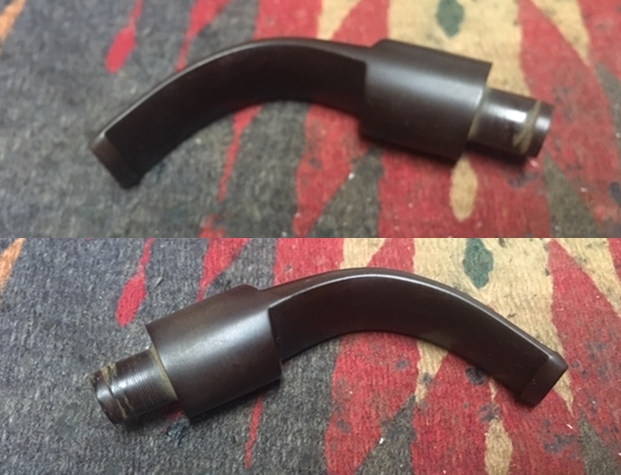
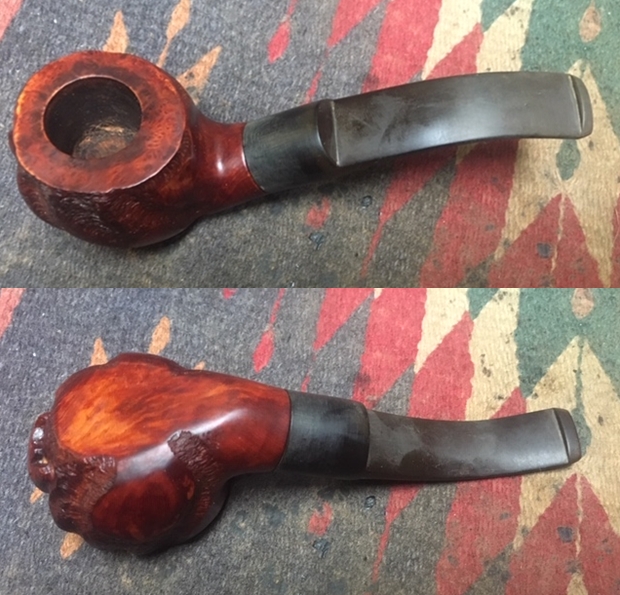
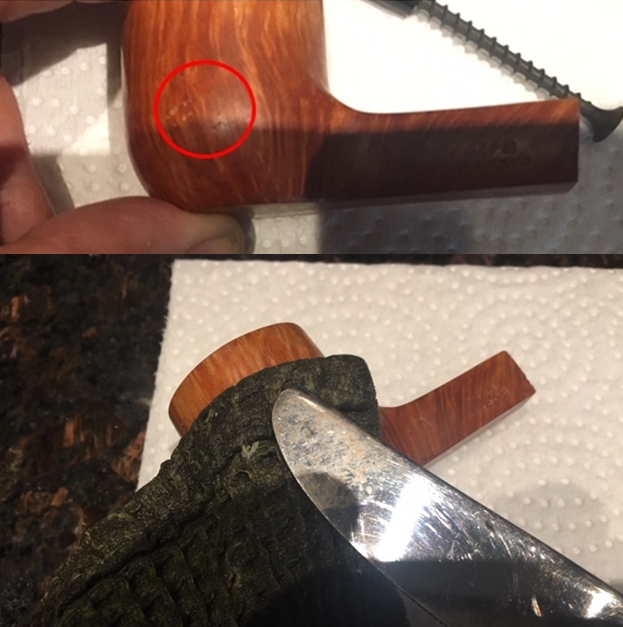
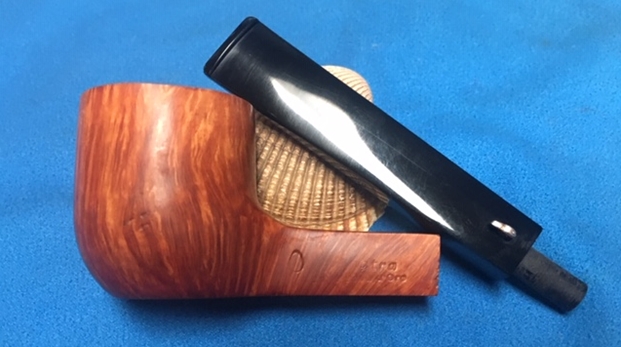
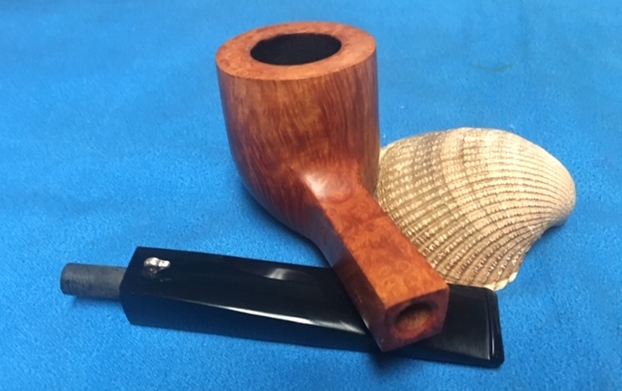
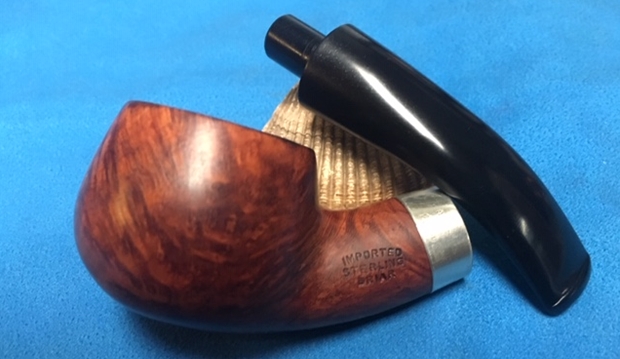
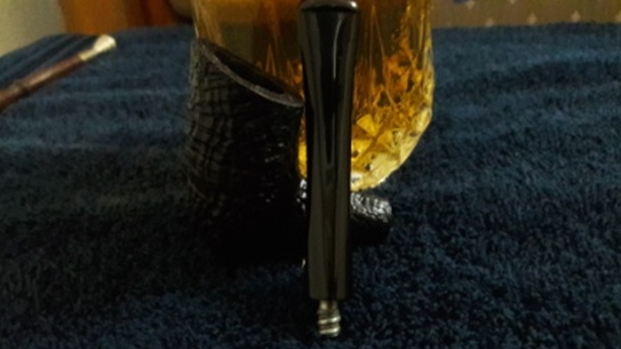
 The fancy vulcanite stem is heavily oxidized and has calcification deposits towards the button end. There are deep tooth marks on the lower and upper stem surface in the bite zone and appears that the previous owner has literally chomped on the bite zone of the stem. The lower stem surface is cracked near the button edge and is circled in red. The button edges also have bite marks, in fact, they are badly worn out. The tenon and horizontal slot shows accumulated oils and tars. The oxidation in the space between the three squares, in descending size from the tenon end to slot end, is going to be a bear to get rid of but once nice and shiny will elevate the appearance of the overall pipe manifold times.
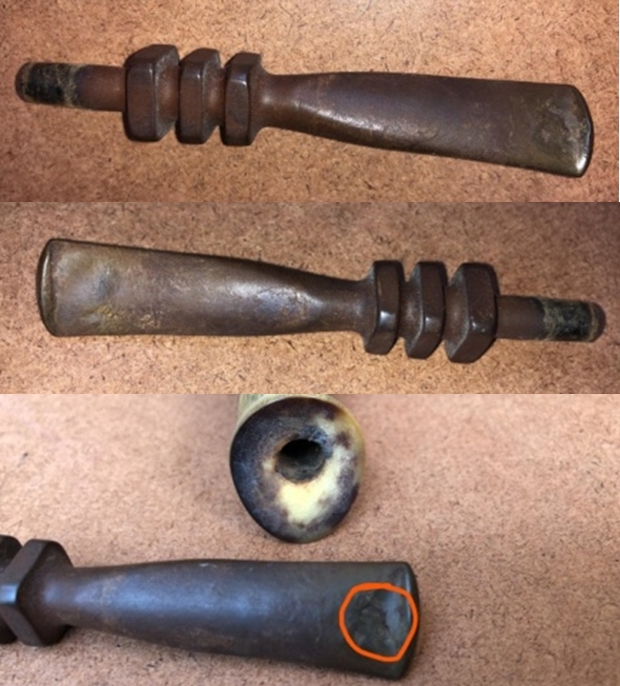
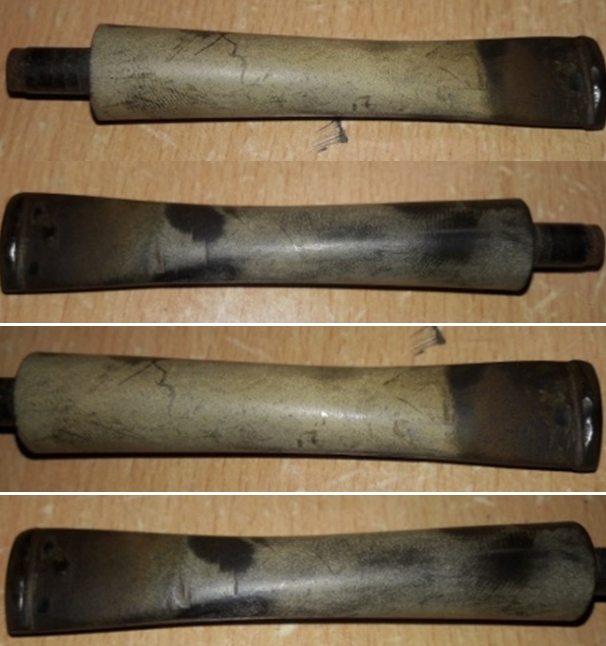
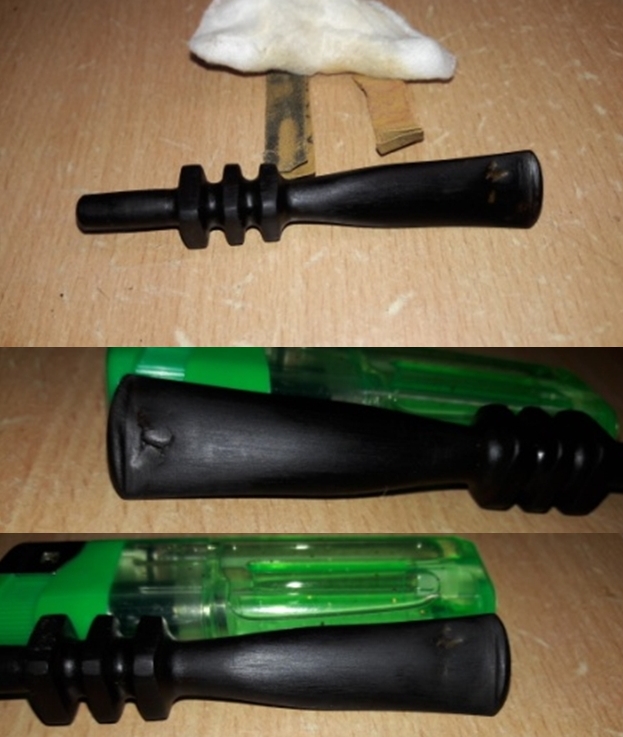
 Along with the stems of other pipes in line for restoration, I immersed the stem of this Preben Holm in a mix of one part Hydrogen Peroxide 20% with one part hot water after I ran a couple of pipe cleaners dipped in alcohol through the stem air way. A couple of hours later, the stem oxidation on all these stems were raised to the surface. The pictures below show the stem after it was removed from this bath. The appearance is definitely not for the fainthearted, to say the least!!
 After I had fished out the stem from the Hydrogen Peroxide bath, I scrubbed it with Magiclean sponge and followed it up with a wipe of cotton swab and alcohol. I further scrubbed the stem surface with 0000 grade steel wool. The loosened and superficial layer of oxidation was easily removed and revealed the condition of the stem.. There are deep bite marks in both the upper and lower bite zone. The bite marks are deep enough to cause significant thinning of the surface and complete disfigurement of the button edges. The deeper oxidation that was pulled to the surface would require more abrasive techniques.
THE PROCESS
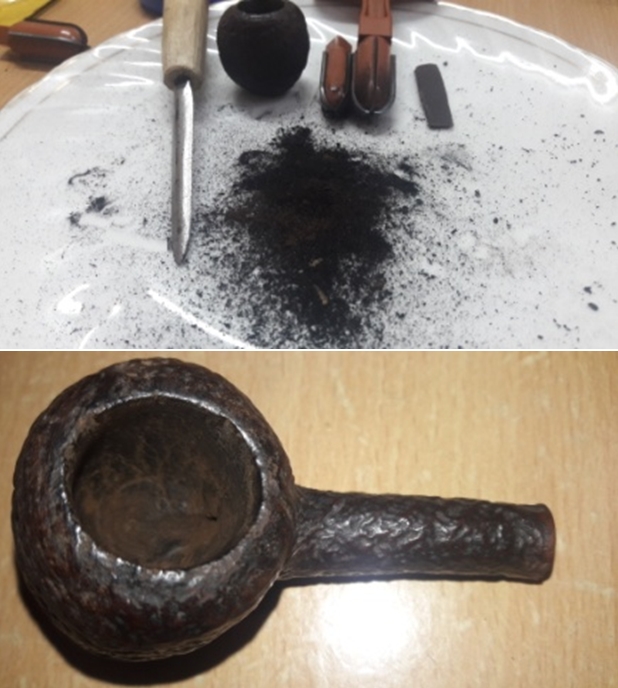
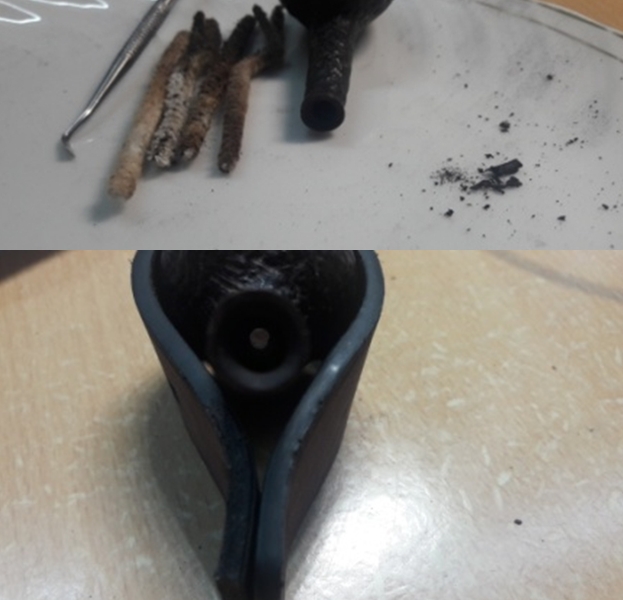
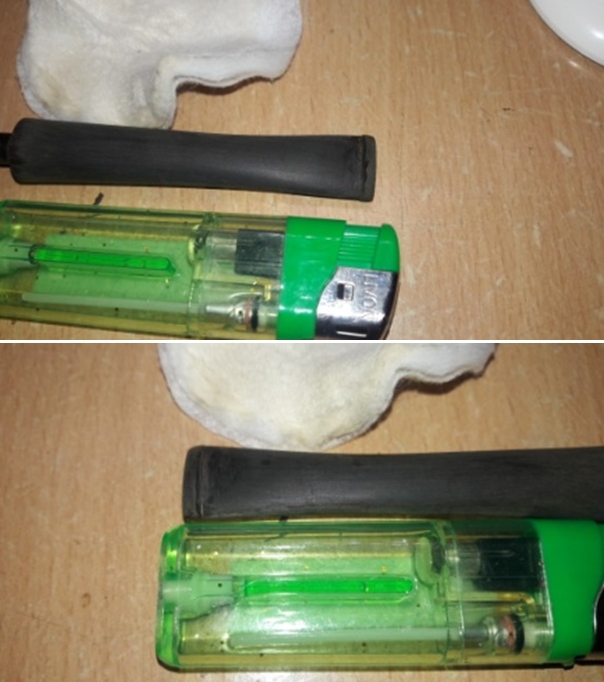
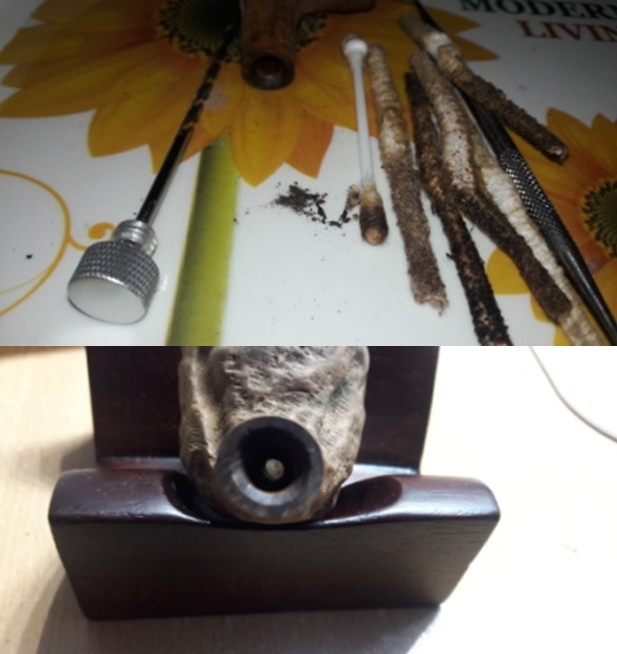
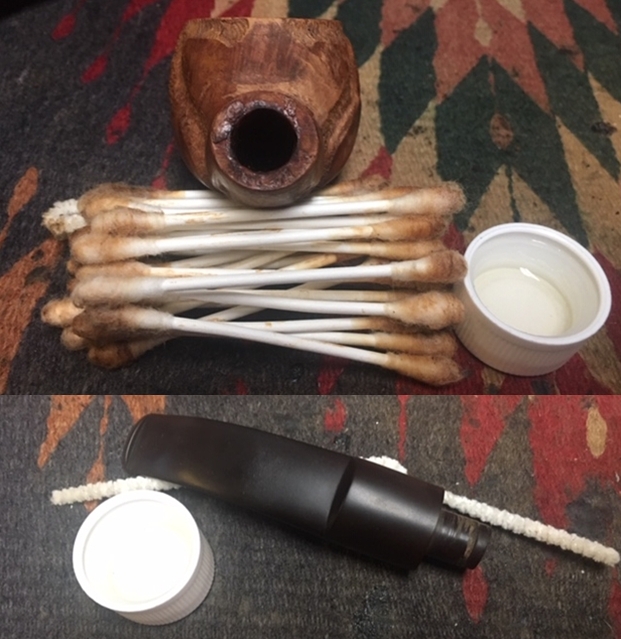
I started the restoration with the stem repairs as this would take the maximum of my time to clean, repair and spruce up the stem. I cleaned the internals of the stem using hard and normal bristled pipe cleaners and isopropyl alcohol. The heap of pipe cleaners tells the sordid tale of the stem condition. With a pointed dental tool, I scraped out the entire dried gunk from the slot. I addressed the deeper oxidation by sanding the entire stem with a folded piece of 150 and followed by 220 grit sand paper. Once the oxidation was completely removed, I wiped the surface clean with a cotton swab and alcohol and rubbed a little Extra Virigin Olive oil to hydrate the stem. I flamed the damaged button edge and the nicks and dents with the flame of a lighter. This helps the vulcanite to rise to the surface as it has an inherent property to regain its original shape when heated. At this stage, I could clearly make out the extent of damage to the lower surface and the extent of the crack in the bite zone. This was further accentuated due to heating with the flame of a lighter. The upper surface too has a couple of deep tooth marks. Just for the information of statistically oriented reader, to get the stem to this stage it took better part of the afternoon and well past mid night!!
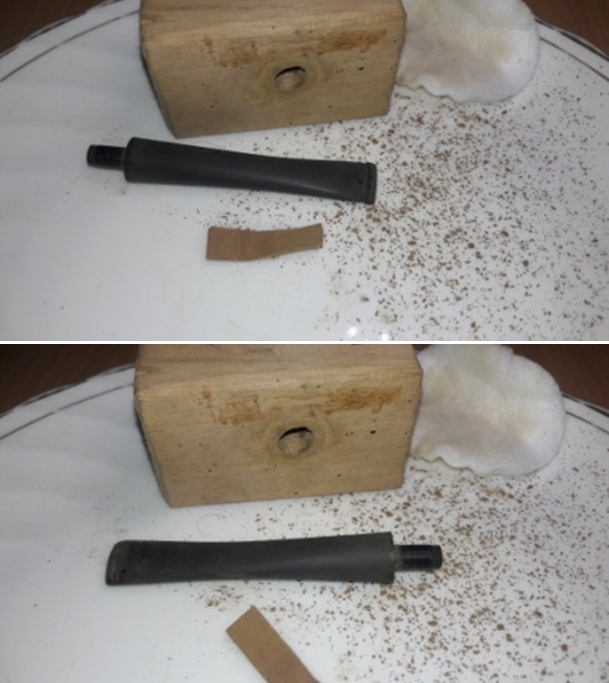
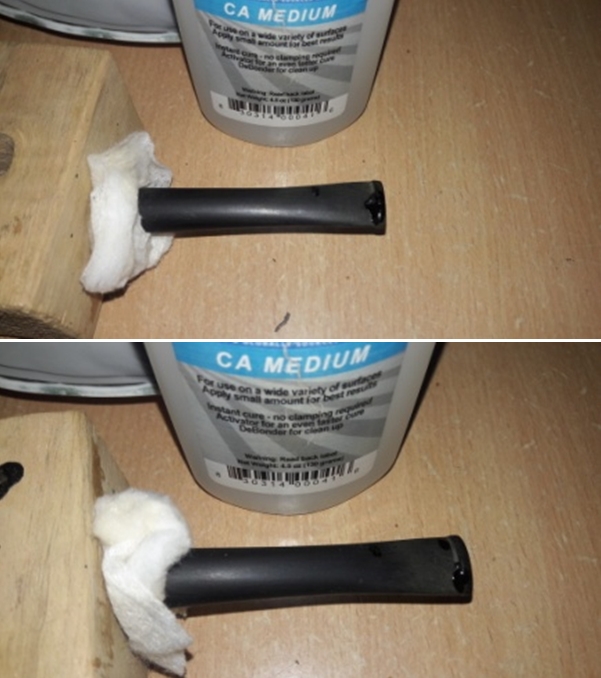
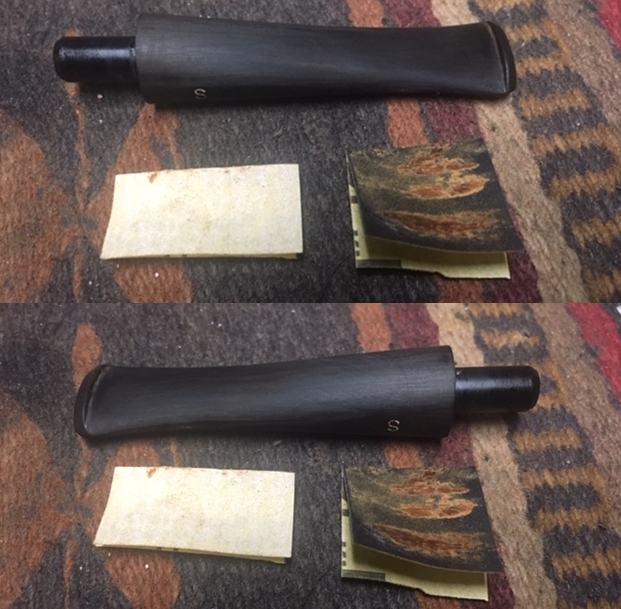
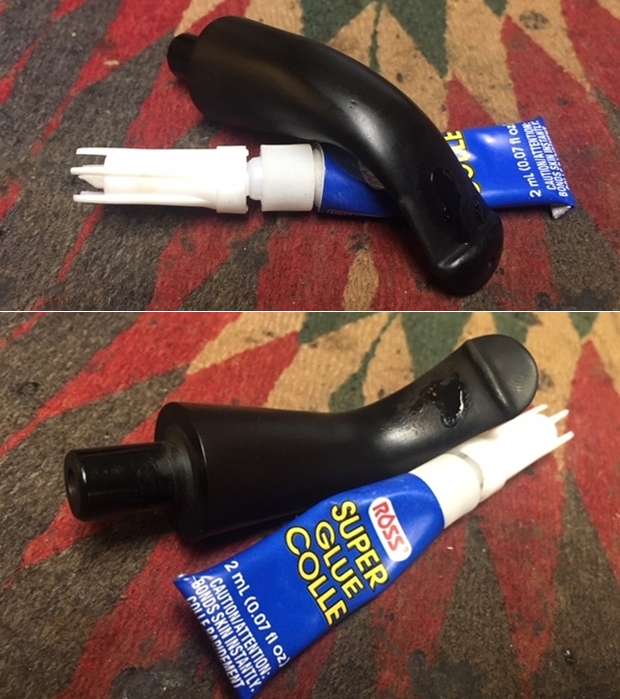
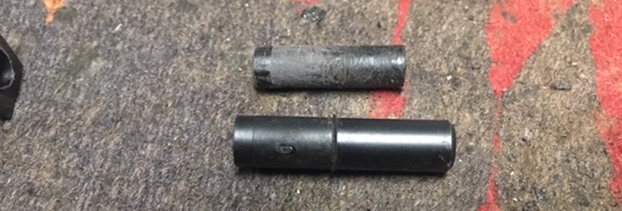
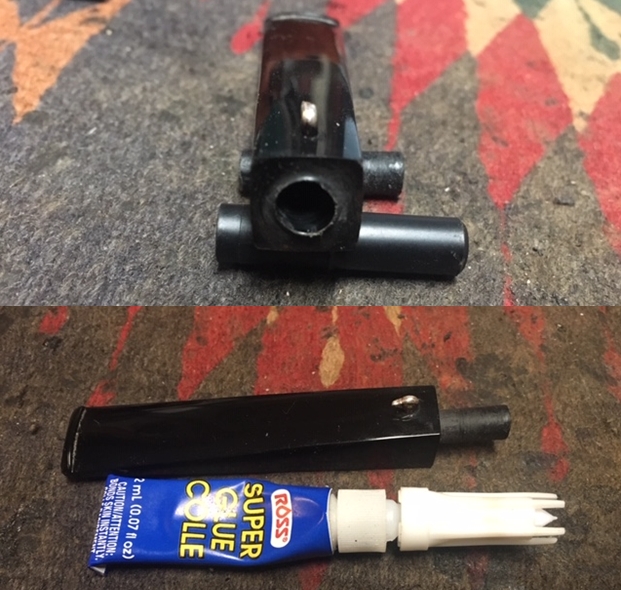
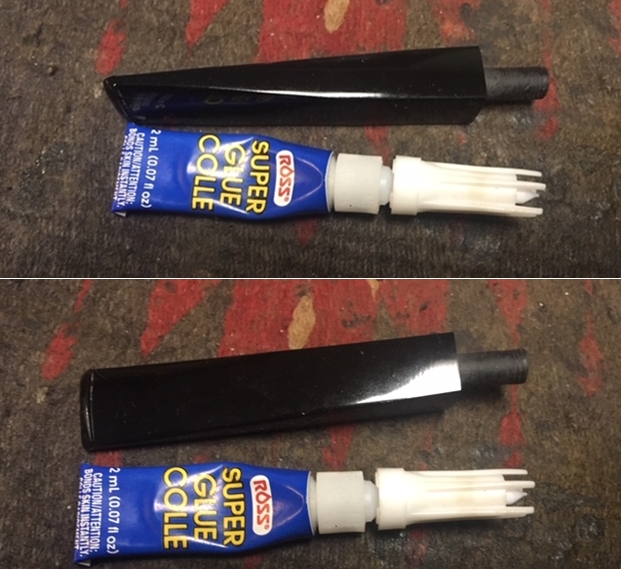
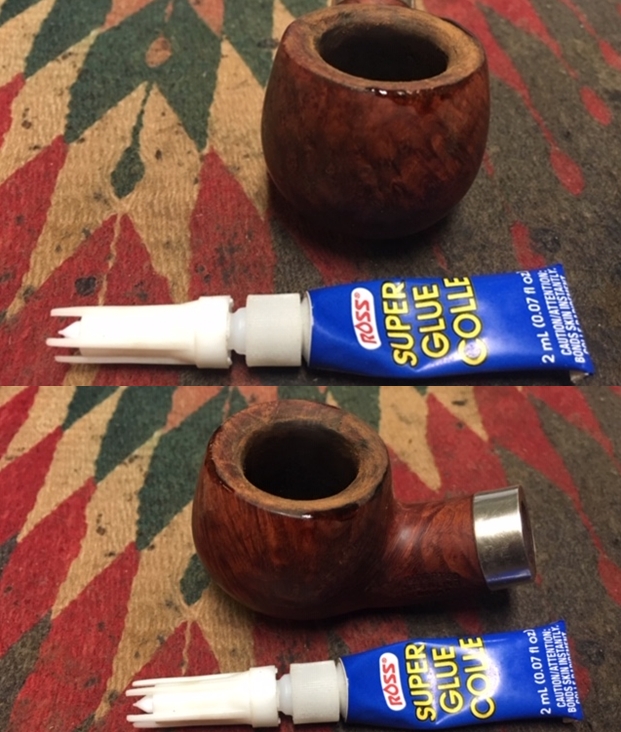
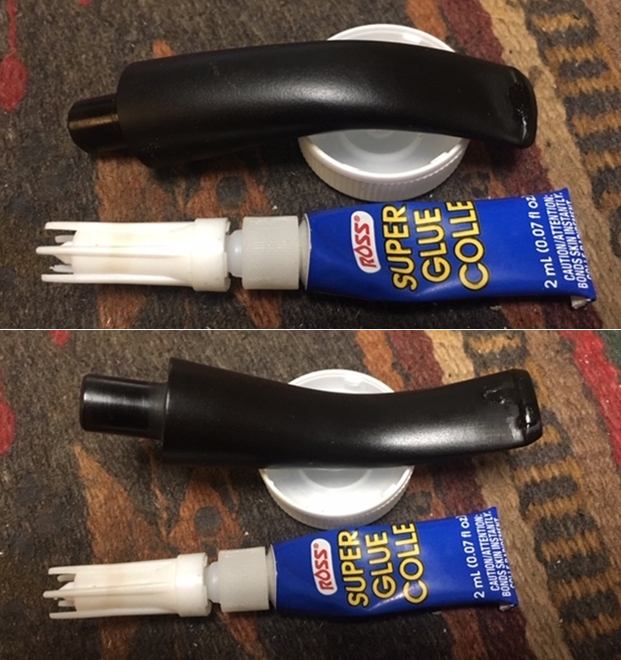
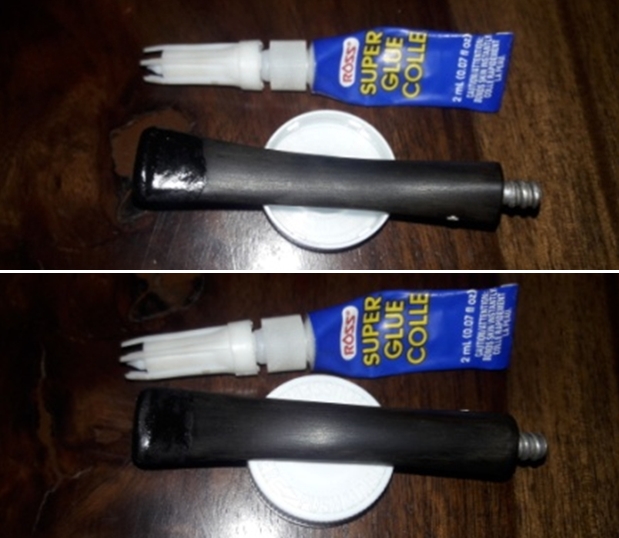
 Continuing with the stem repair, with a dental spatula, I probed the area around crack from inside the slot end with the aim of dislodging only the thin and loosened stem surface. Once the thin and loose stem surface was removed, I was certain that the rest of the stem surface around the crack was solid. I inserted a triangulated index card covered in transparent tape in to the slot. The tape prevents the mix of superglue and charcoal from sticking to the index card. I mixed superglue and activated charcoal powder and generously applied it over the bite zone on either side, including over the button and set it aside to cure.
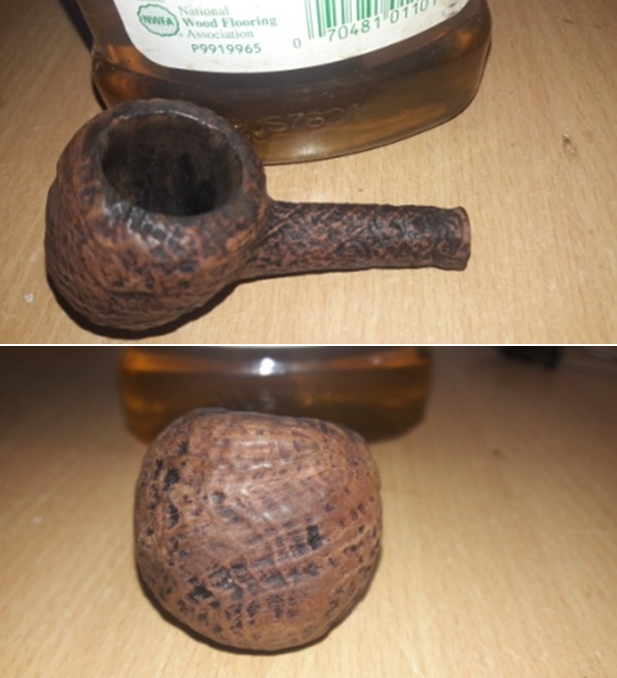
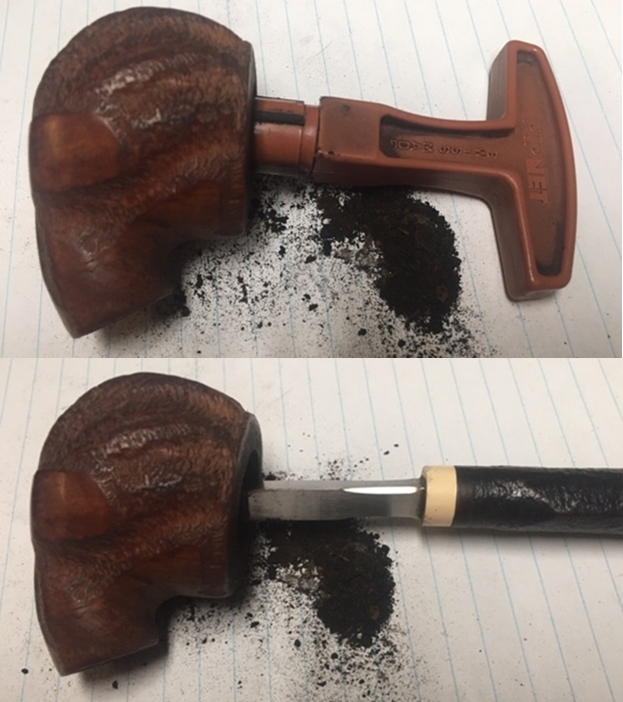
 While the stem fill was set aside to cure, I started with cleaning of the stummel as I was keen to know the condition of the walls of the chamber. With size 1 head followed by head size 2 of a PipNet pipe reamer, I took the cake down to bare briar. Using a folded piece of 180 grit sand paper, I sand out the last traces of cake and expose the walls of the chamber. I wiped the chamber with a cotton pad dipped in isopropyl alcohol to remove the carbon dust left behind by all the reaming and sanding process. Once the chamber walls were cleaned out, I was pleased to note a pristine chamber with no signs of heat fissures/lines/pits.

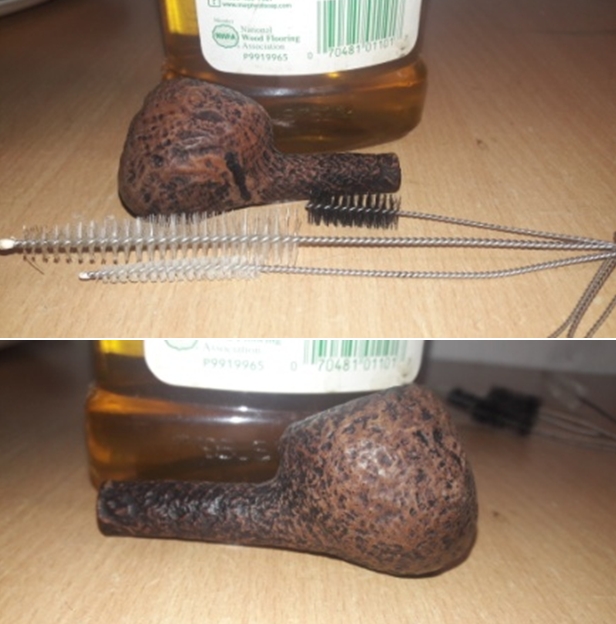
 Next, I cleaned out the internals of the shank and mortise. Using my dental tool, I scraped out all the dried oils, tars and gunk that had accumulated in the shank airway and mortise. The amount of crud that was scrapped out and the condition of the pipe cleaners that were used leaves no surprise why air flow through it was restricted. I finished the cleaning by running a few pipe cleaners dipped in isopropyl alcohol. I also wiped the shank with cotton buds and alcohol. With this cleaning, all old smells in the pipe are history. The pipe now smells clean and fresh.
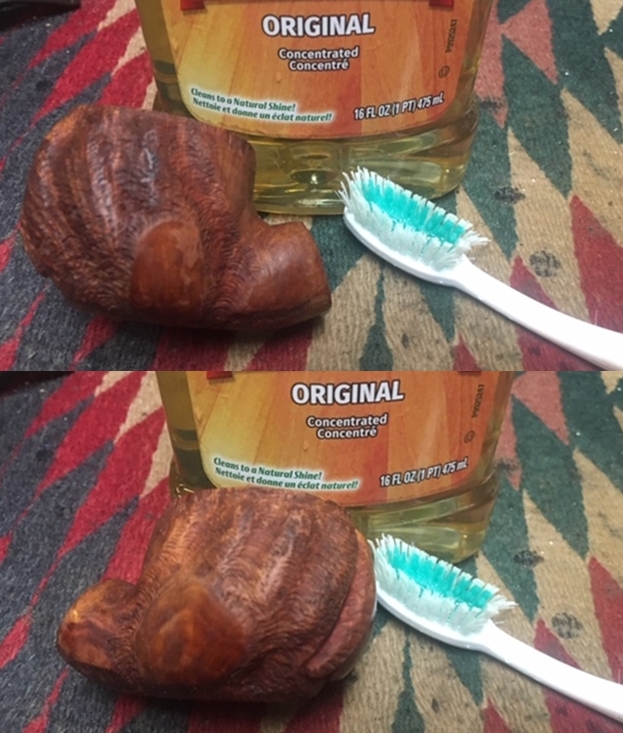
 With the internals of the stummel now clean, I cleaned the external surface using a hard bristled toothbrush and Murphy’s Oil Soap. I diligently scrubbed the rim top surface to remove the entire dust, dirt and lava overflow that was embedded in the crevices of the plateau rim top surface. With a soft bristled brass wired brush, I removed the overflowing lava from the rim top surface and cleaned the internals of the shank with a shank brush and dish washing soap to remove what little crud remained in the shank. I rinsed it under running tap water and wiped the stummel dry with an absorbent soft cotton cloth.


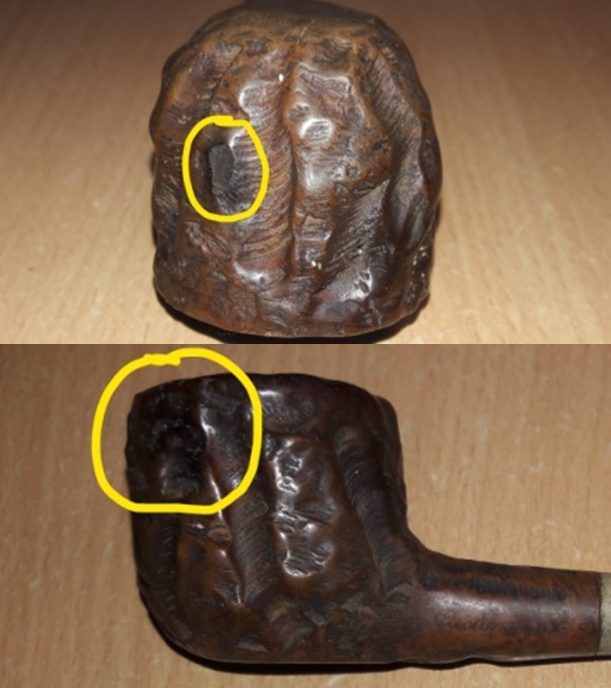
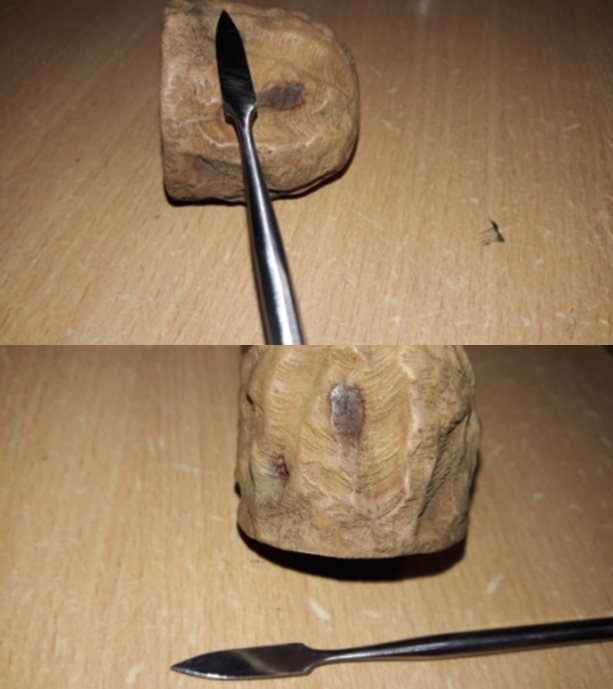
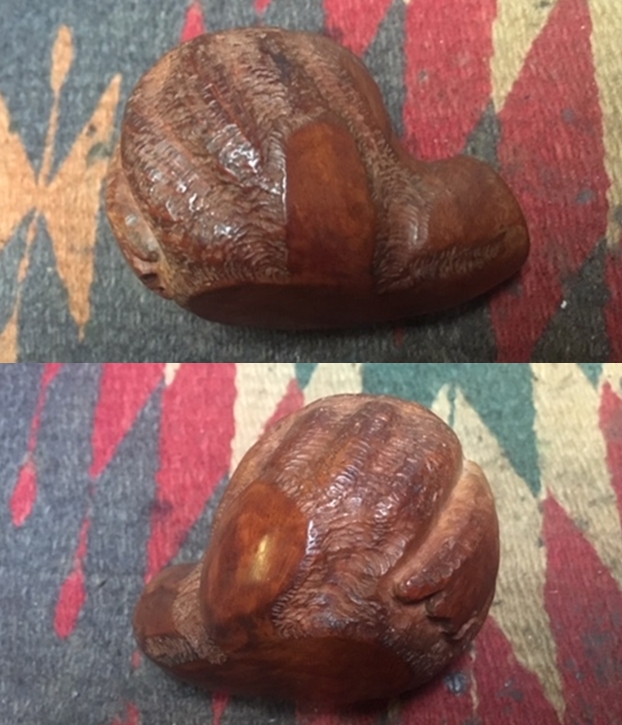
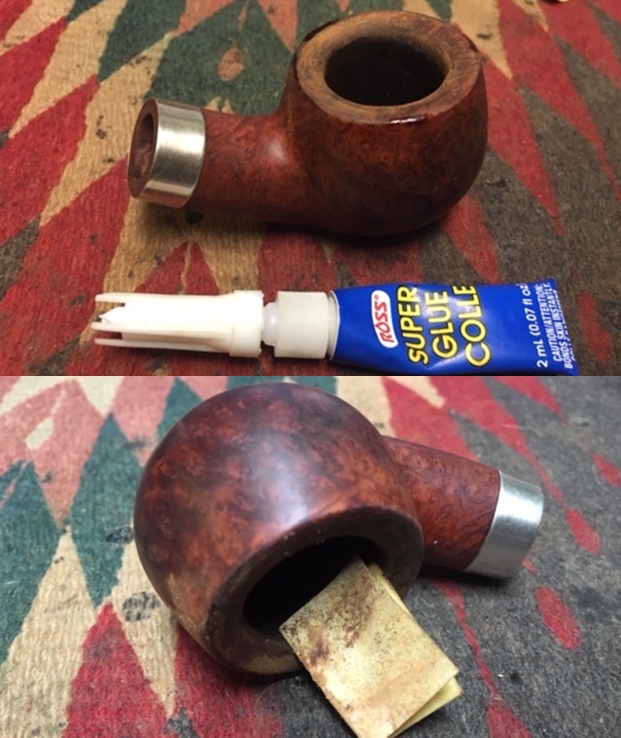
 Once I had wiped the stummel dry with paper towels and soft cotton cloth, I saw a couple of small and superficial fills on the left side of the bowl, near the bowl and shank joint and one at the foot of the stummel. These fills are marked in yellow circle. Very carefully and painstakingly, I completely removed the old fill with a pointed dental pick. I cleaned the fill of all the debris of old fill material, wiped it with alcohol and refreshed the fill with a drop of clear CA superglue in each fill and set it aside to cure overnight.
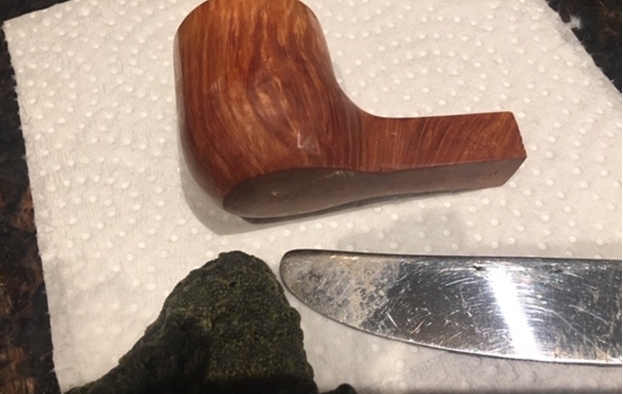
 By next day, the fill was nice, hard and well set. With a folded piece of 220 grit sand paper, I worked the fill till I had achieved a nice blend with the rest of the stummel surface. It turned out much better than I had anticipated. I further sand the entire stummel surface with the same grit sand paper to address the minor scratches and further smooth the stummel surface in preparation for a polish by micromesh pads.

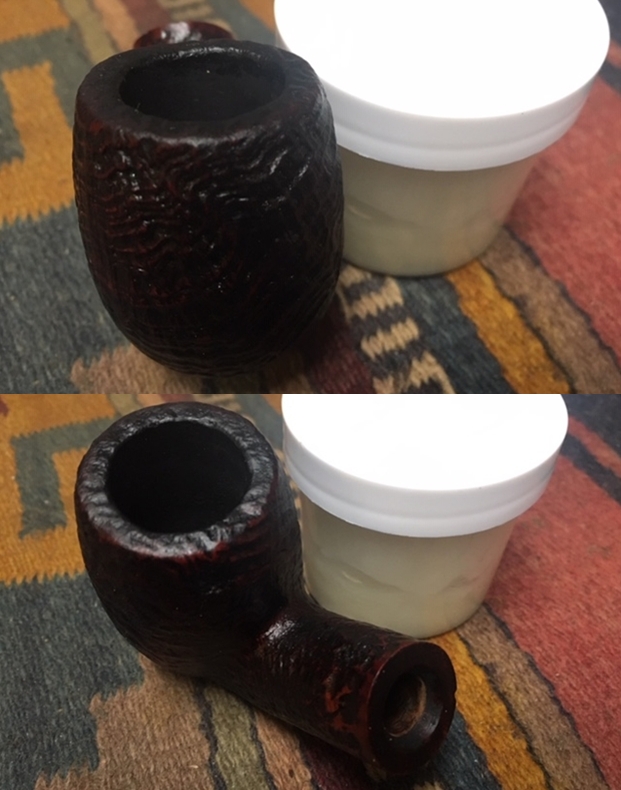
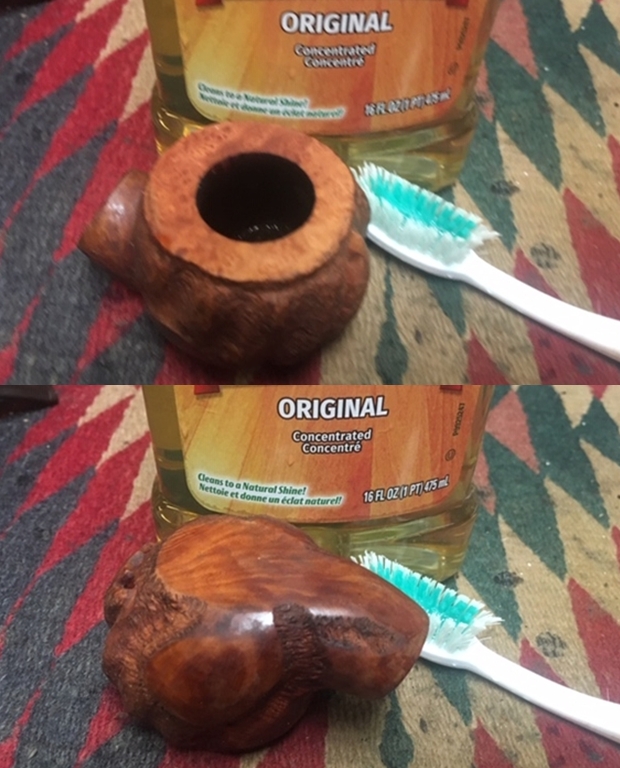
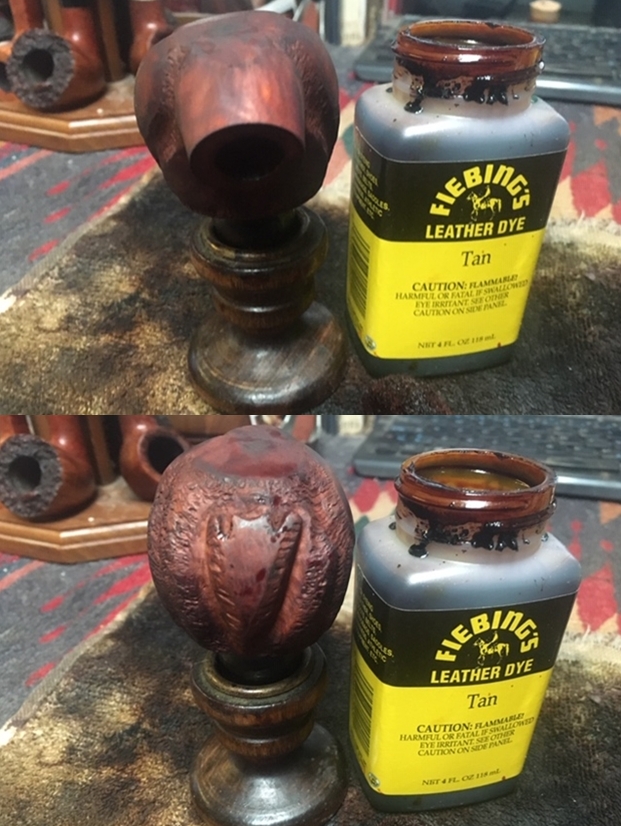
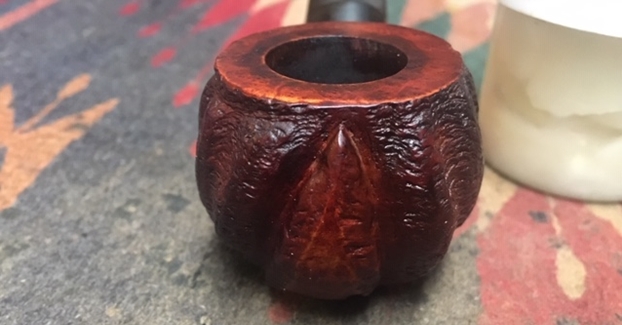
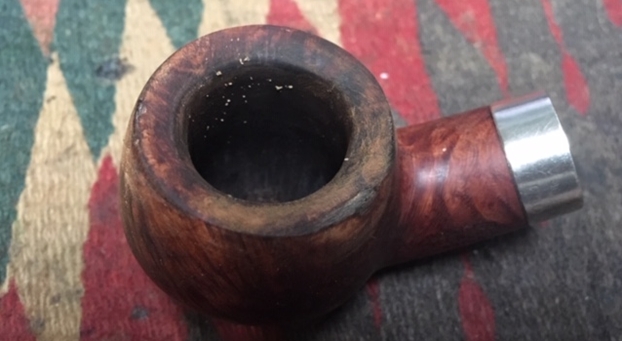
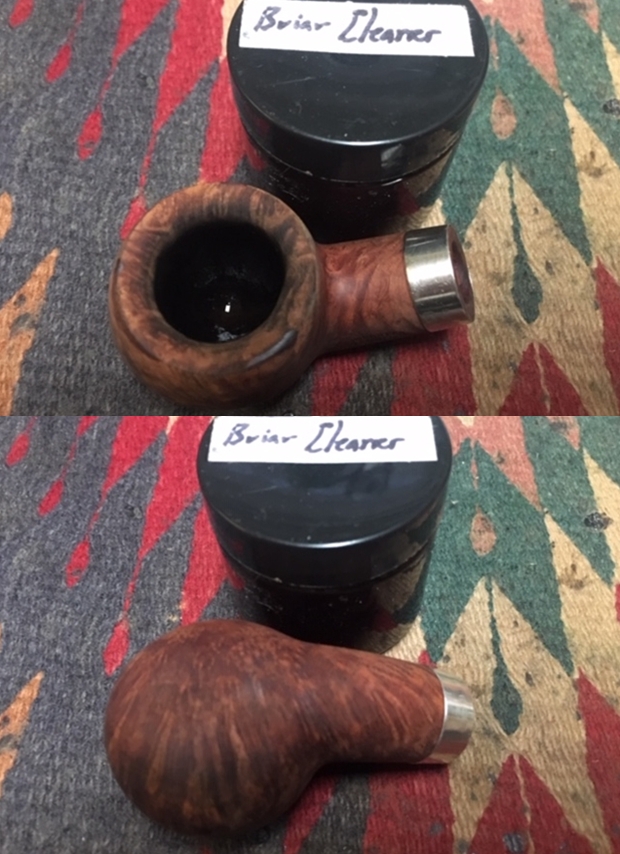
 The plateau rim top surface still did show areas where the overflow of lava was still embedded in the crevices. With a dental pick, I diligently scraped each and every spot to remove the deposit of lava. I am now pleased with the cleaning of the rim top surface.
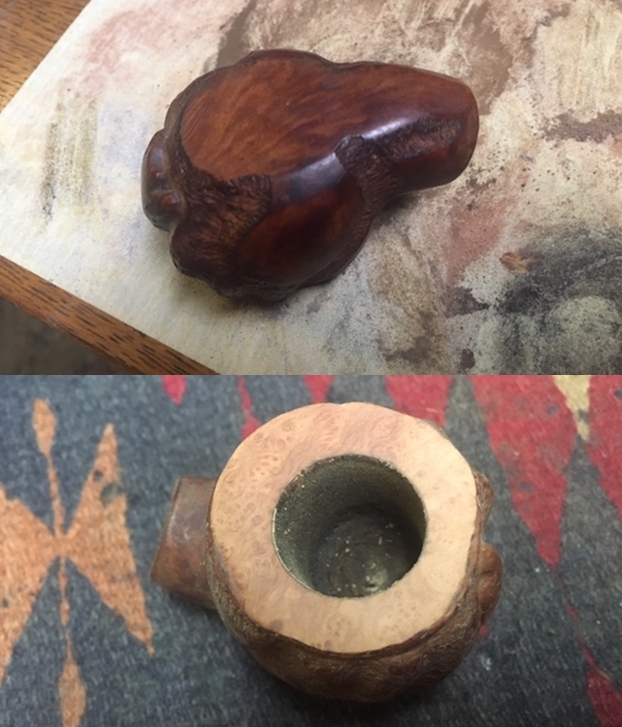
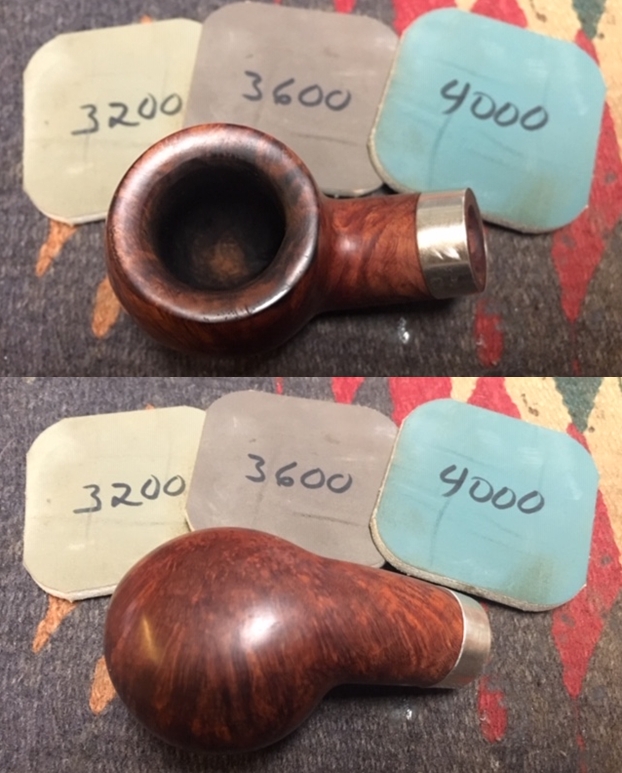
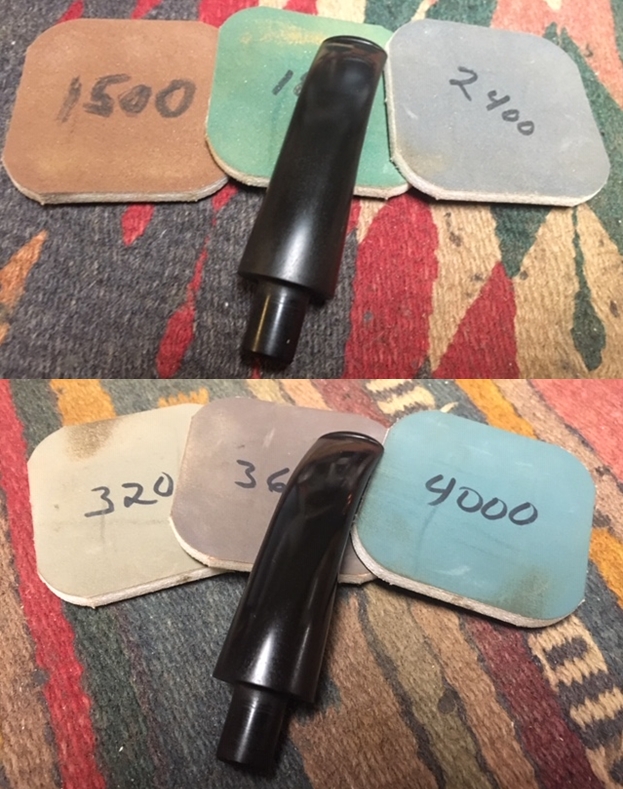
 I subjected the stummel, including the bone shank extension, to a complete cycle of micromesh polish, wet sanding with 1500 to 12000 grit pads. I wiped the stummel with a moist cloth after every grit pad to remove the sanding dust left behind by the pads. This also helps in monitoring the progress being made and ensures early corrective action. I am happy with the progress being made till now.

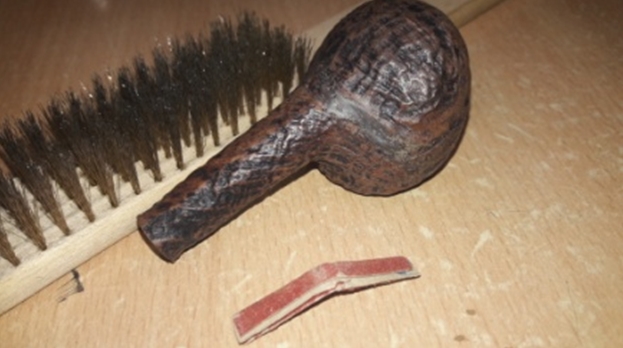
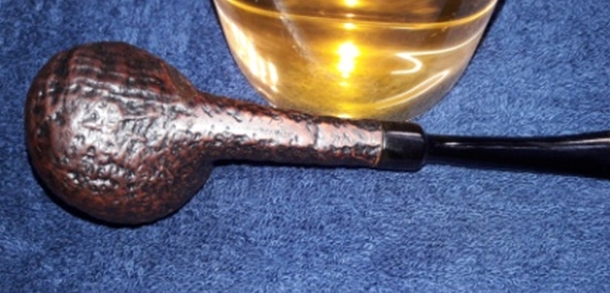
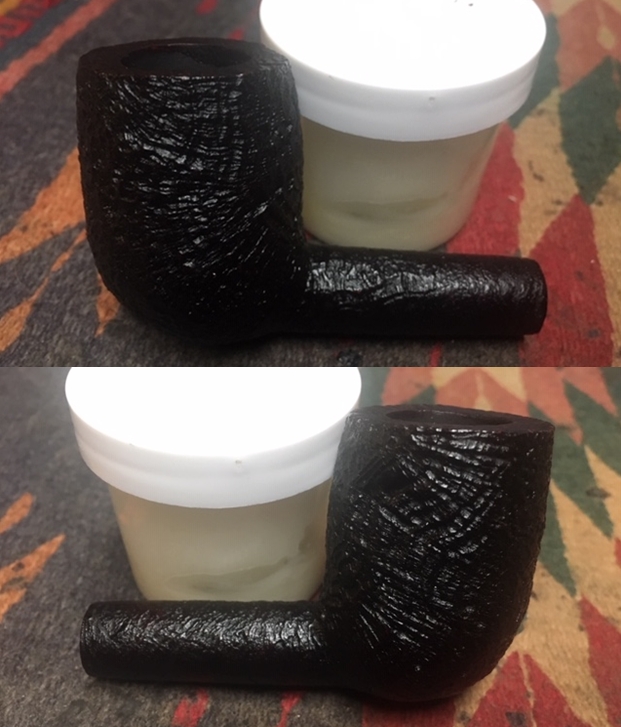
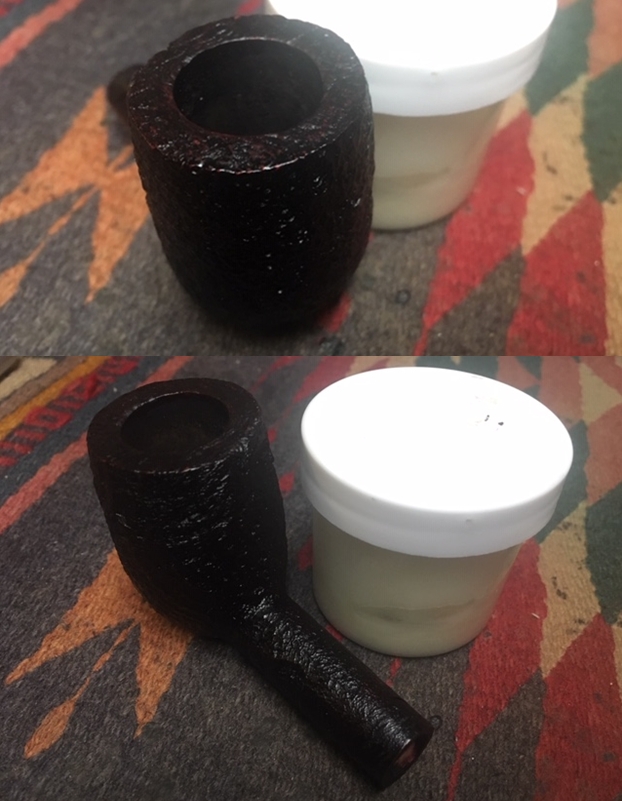
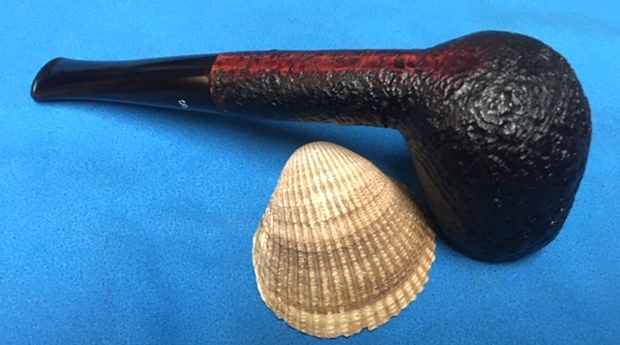
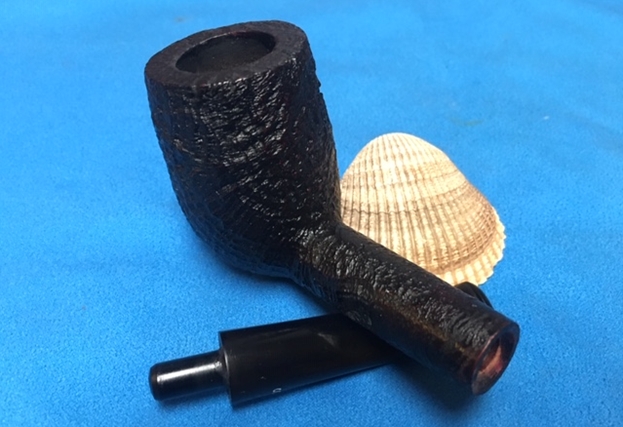
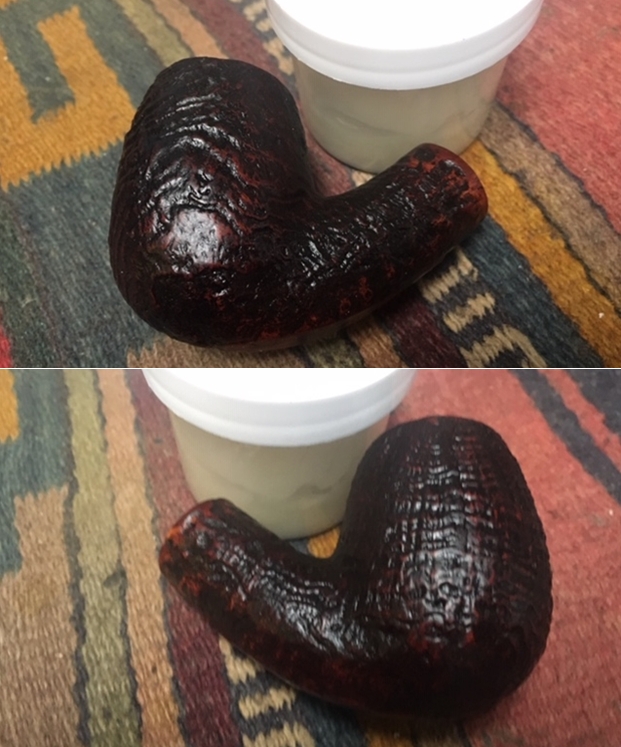
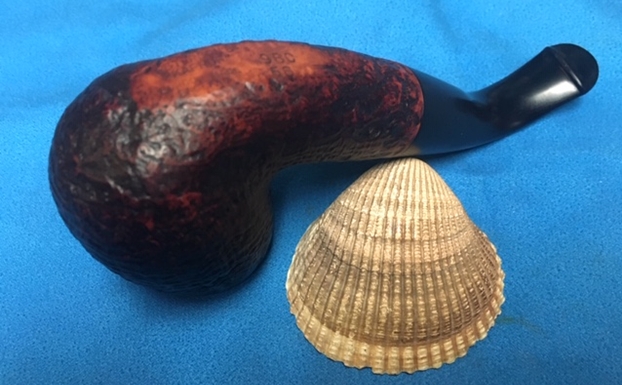
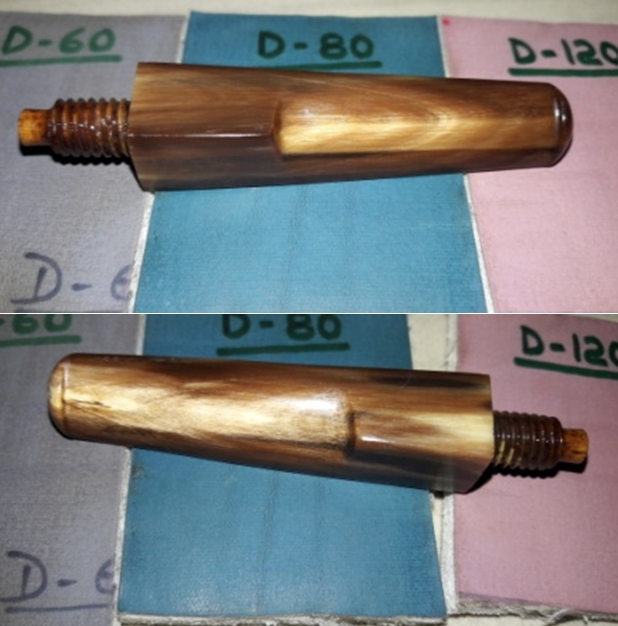
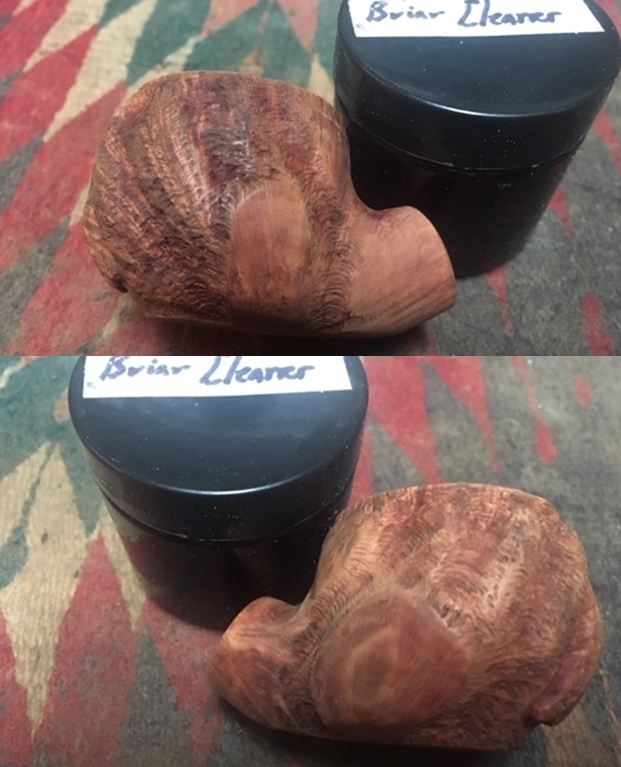
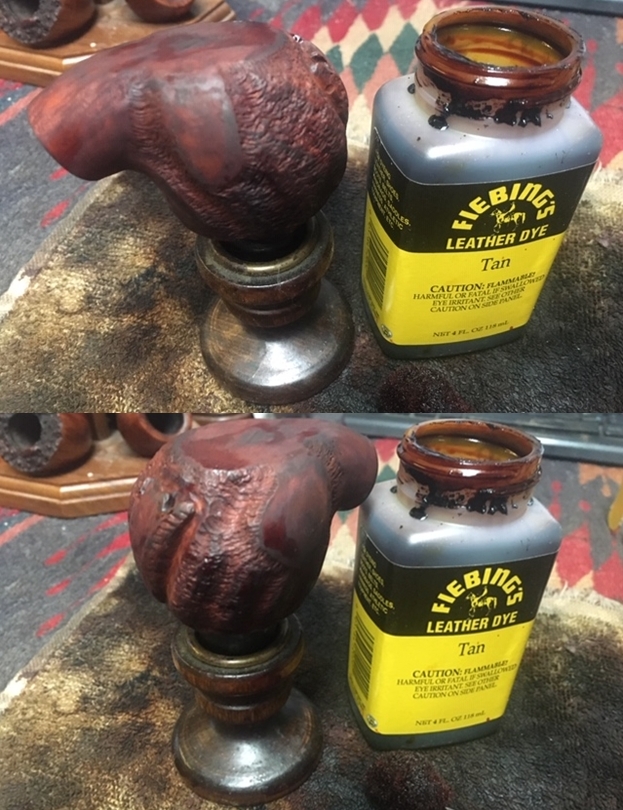
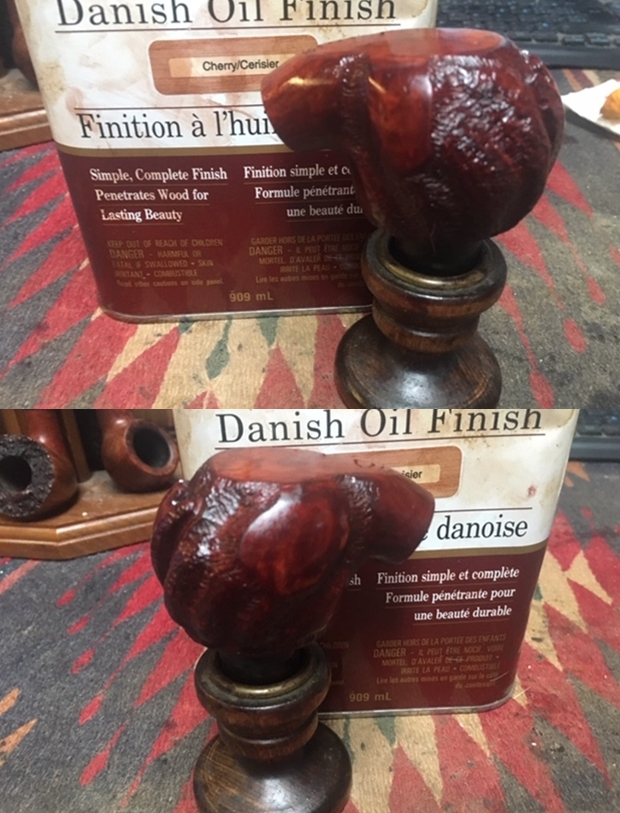
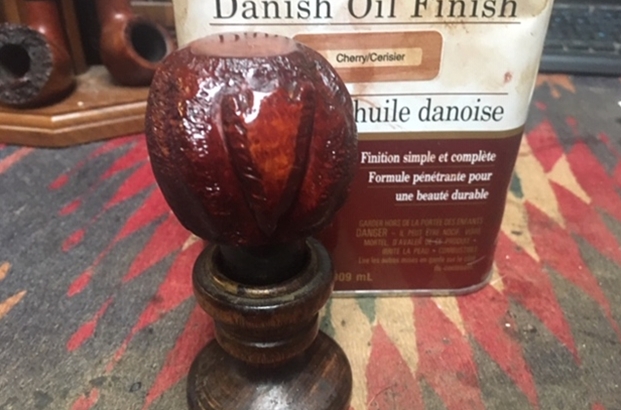
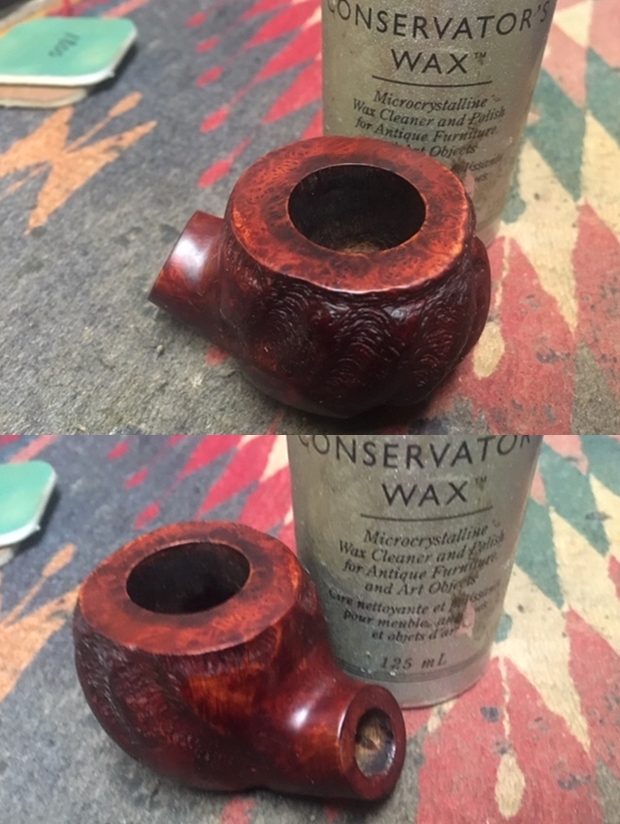
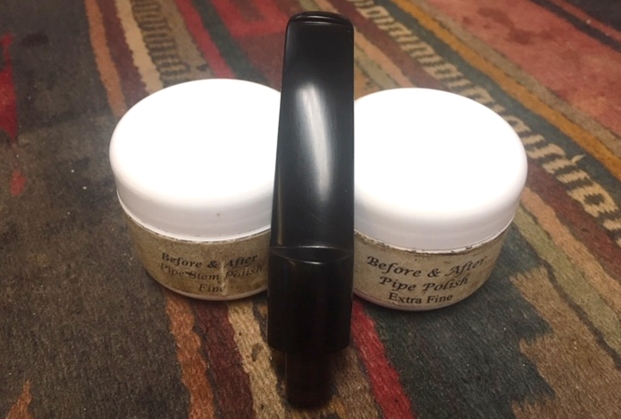
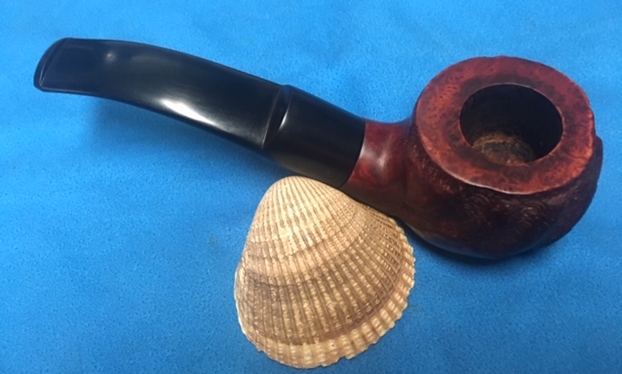
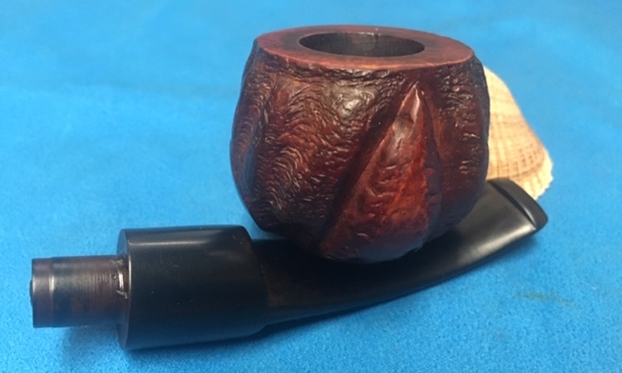
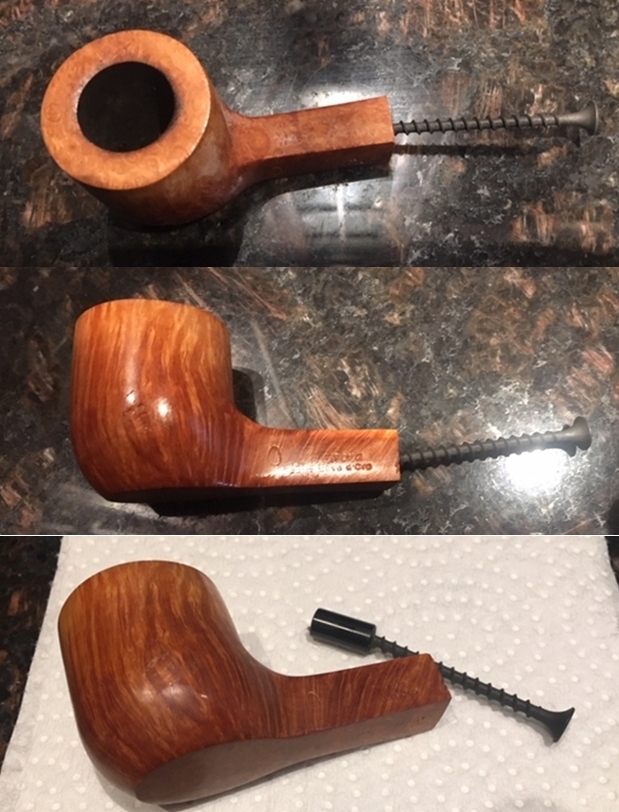
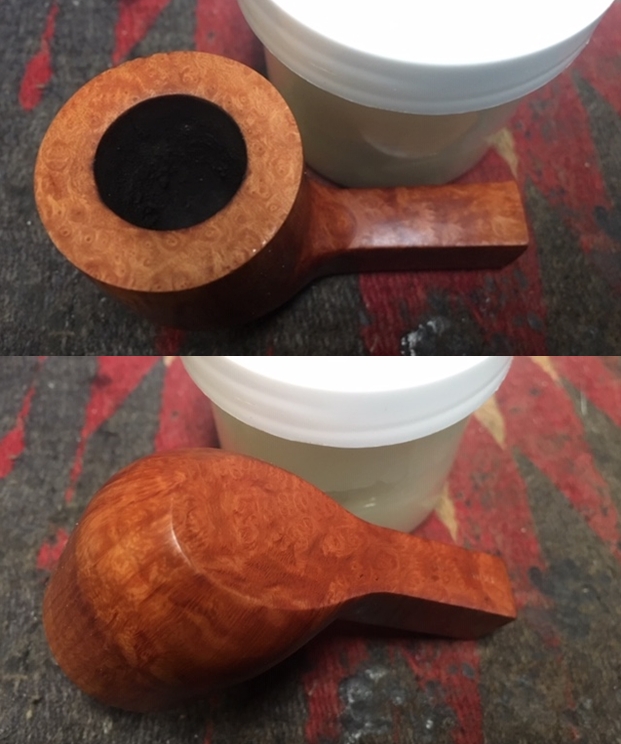
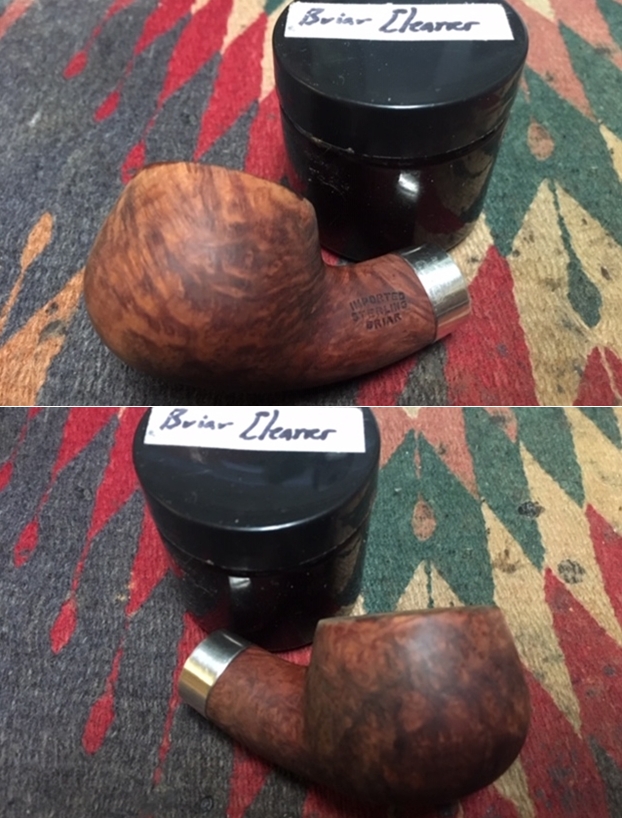
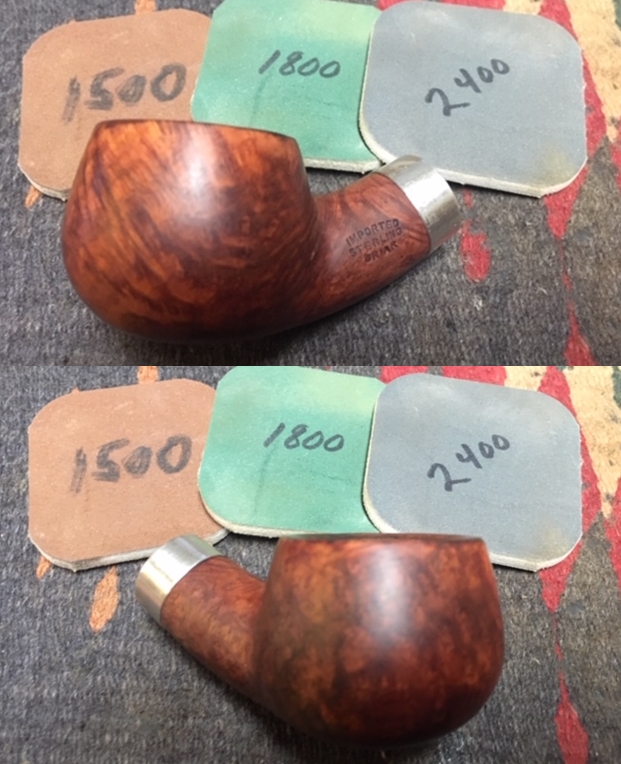
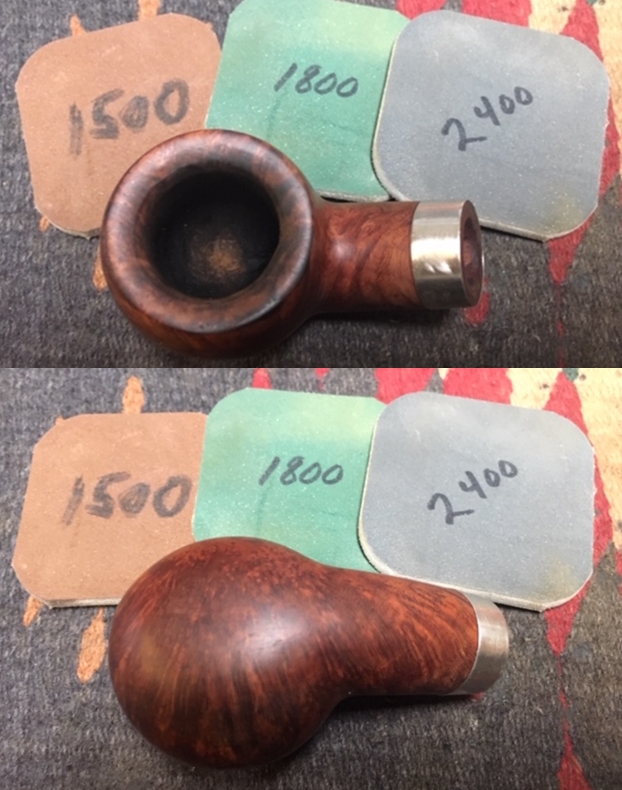
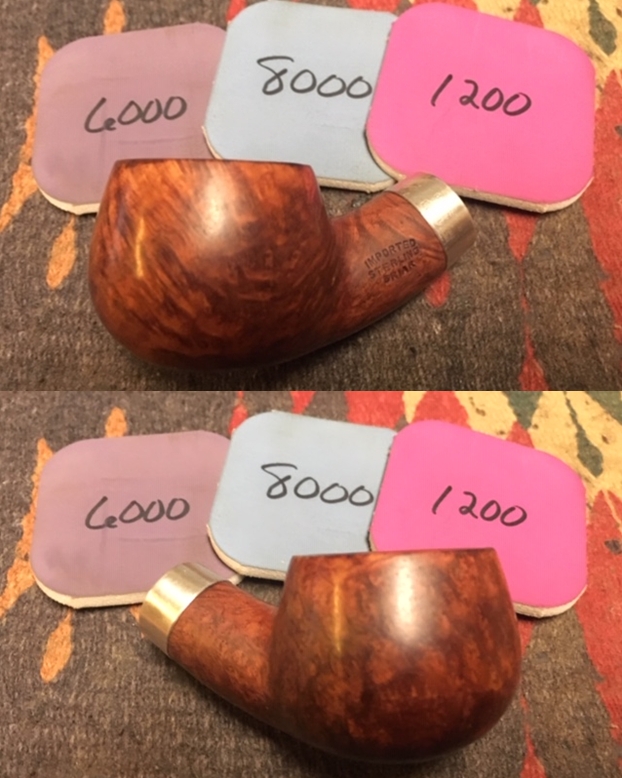
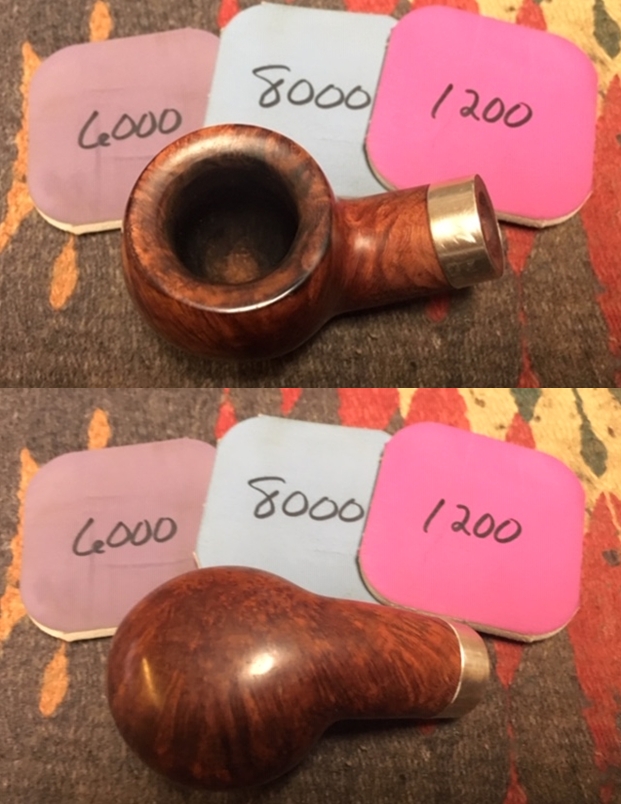
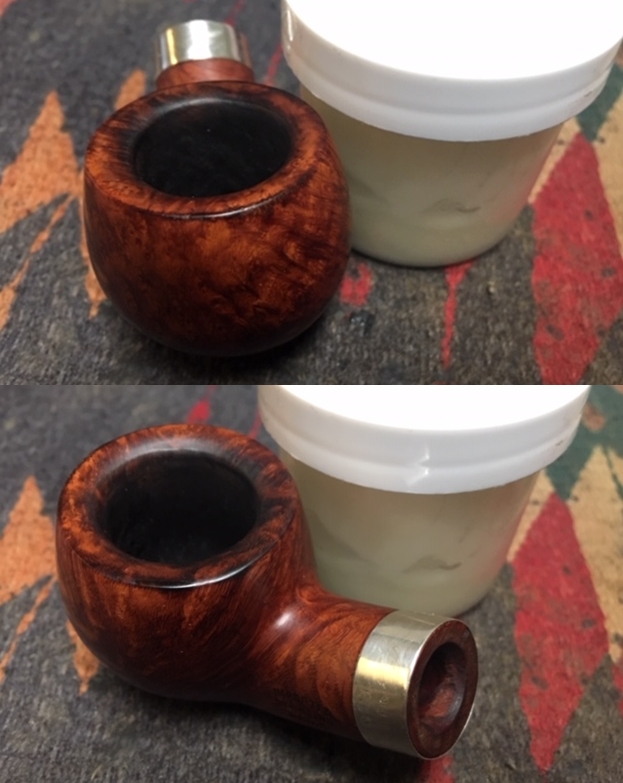
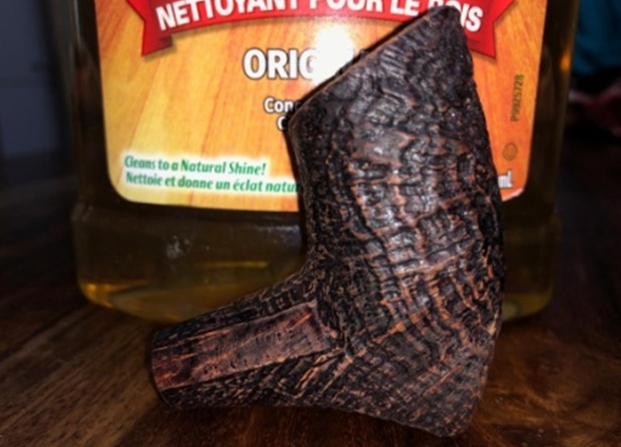
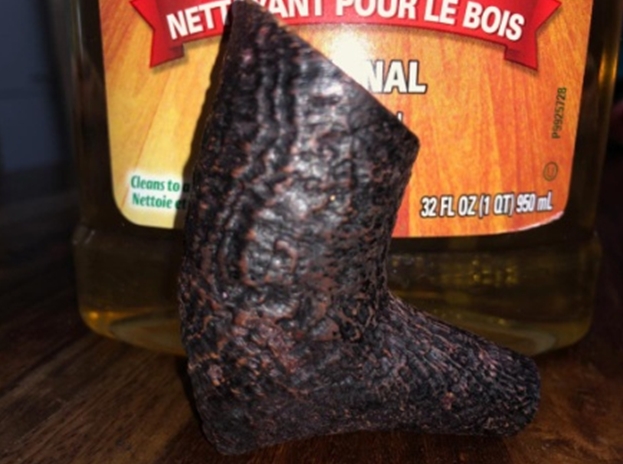
 Next, I rub a small quantity of “Before and After Restoration Balm” in to the briar, the bone shank extension and the plateau rim top surface with my finger tips and work it deep in to the surface and let it rest for a few minutes. The balm almost immediately works its magic and the briar now has a nice vibrant appearance with the beautiful straight grain patterns on full display. The contrast of the dark browns of the grain with the light hues of the rest of the stummel adds an interesting dimension to the appearance of the stummel. I further buffed it with a horse hair brush to further deepen the shine.

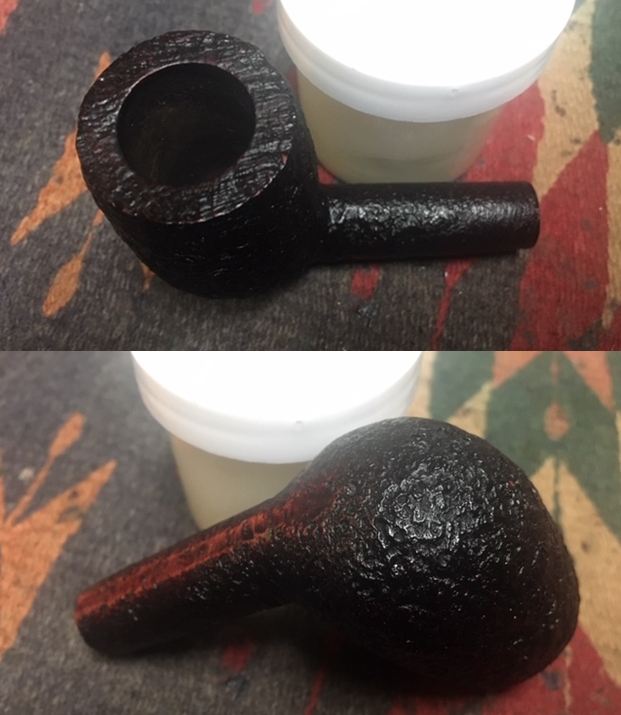
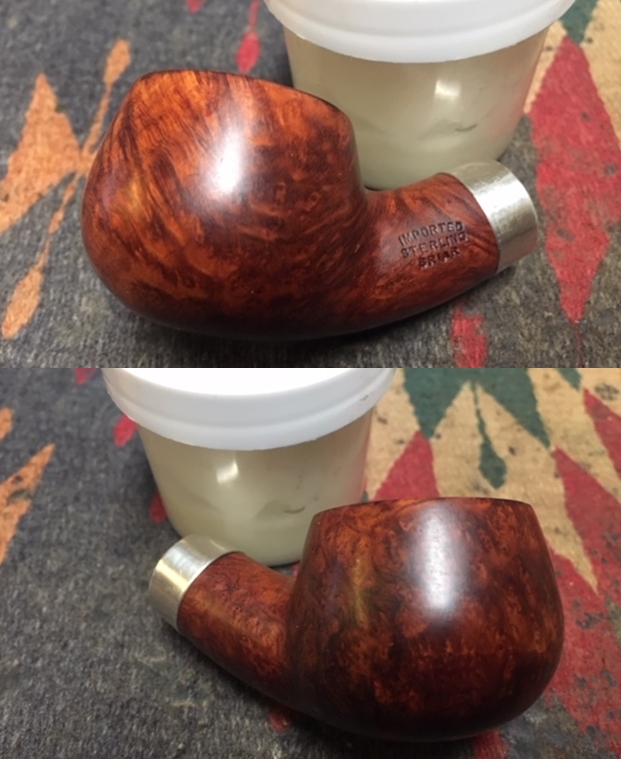
 I was slightly perturbed by the dark coloration taken on by the bone shank extension and shared pictures of the same with my mentor, Steve, who reassured me that this phenomenon is normal and should be good when the balm has been completely absorbed and polished subsequently. With this assurance, I move ahead with the stem repairs.
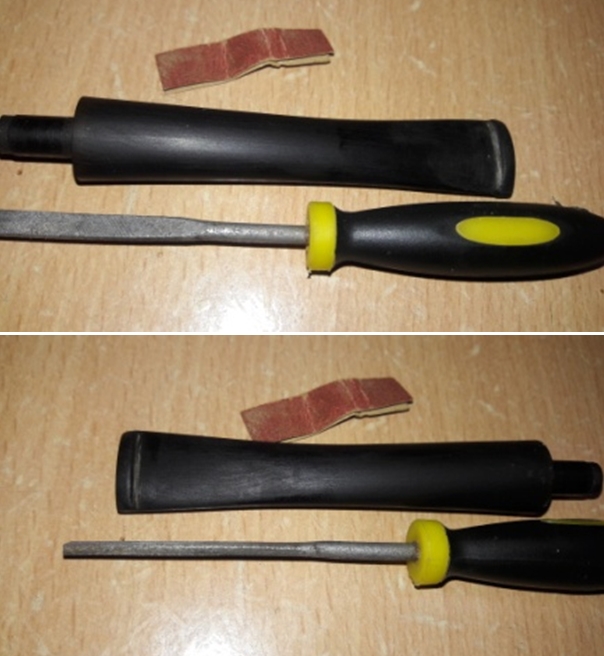
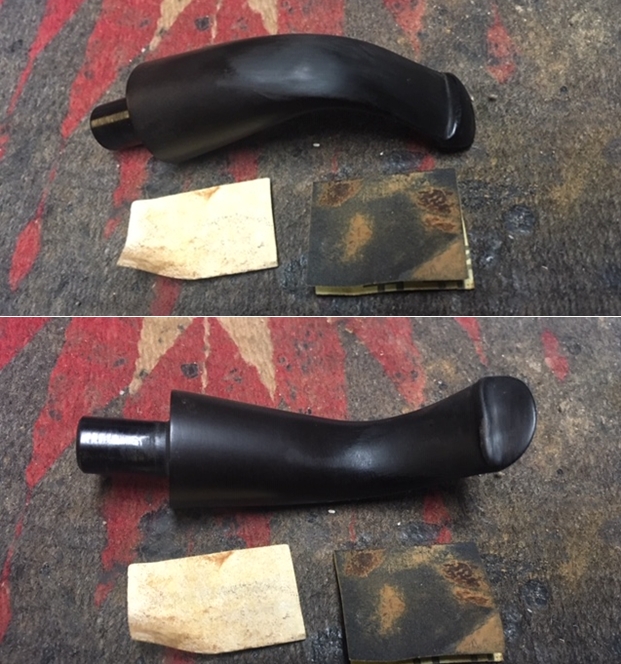
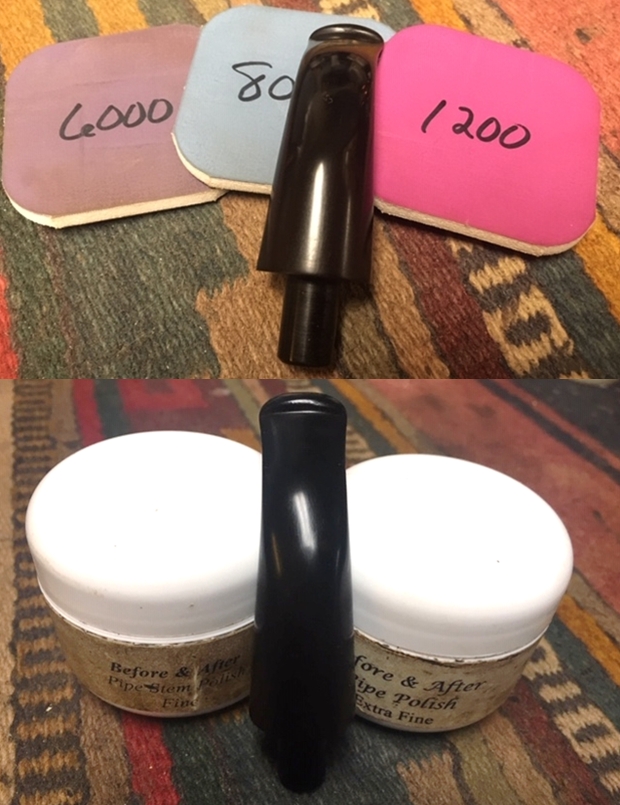
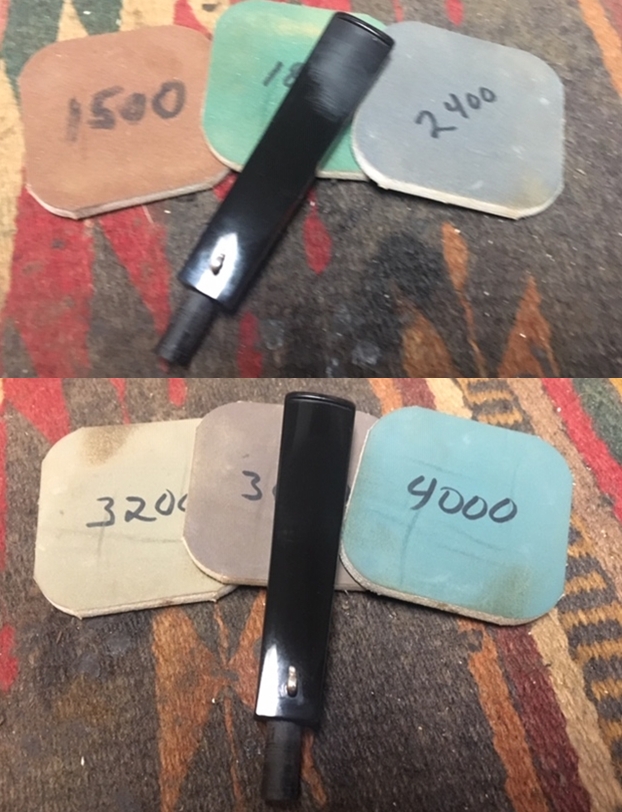
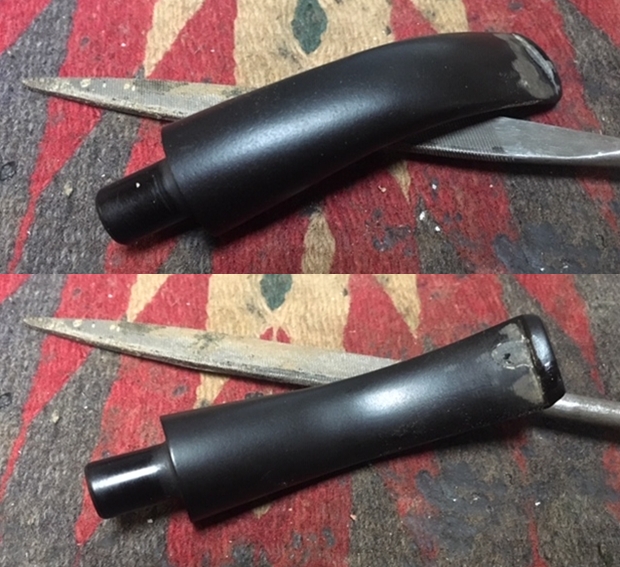
Using a flat head needle file, I reshaped the button and roughly matched the fills with the rest of the stem surface. I sanded the fills with a folded piece of 180 grit sand paper and followed it up by further sanding the stem with 320, 600 and 800 grit sand papers to achieve a perfect blending of the fills with the stem surface and a crisp button edge on either side of the stem. In my exuberance to cross the finish line, I completely missed out on taking pictures of this stage in restoration. My sincere apologies for this miss….
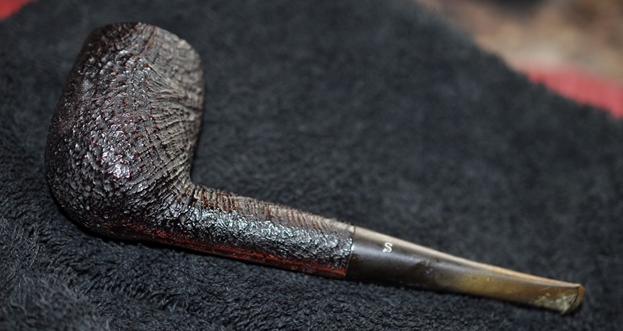
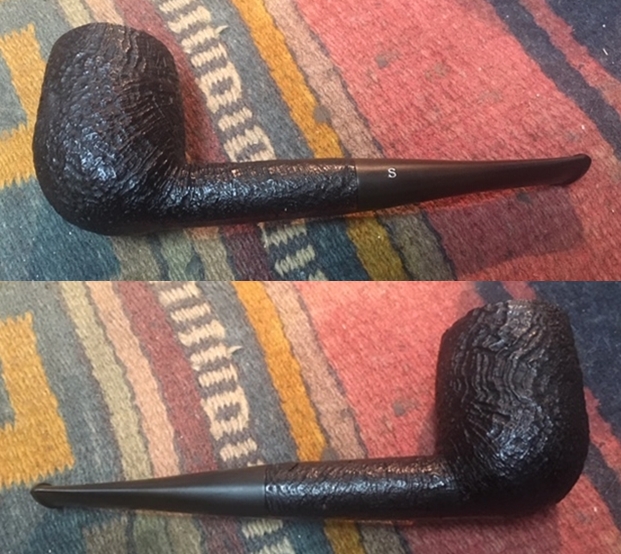
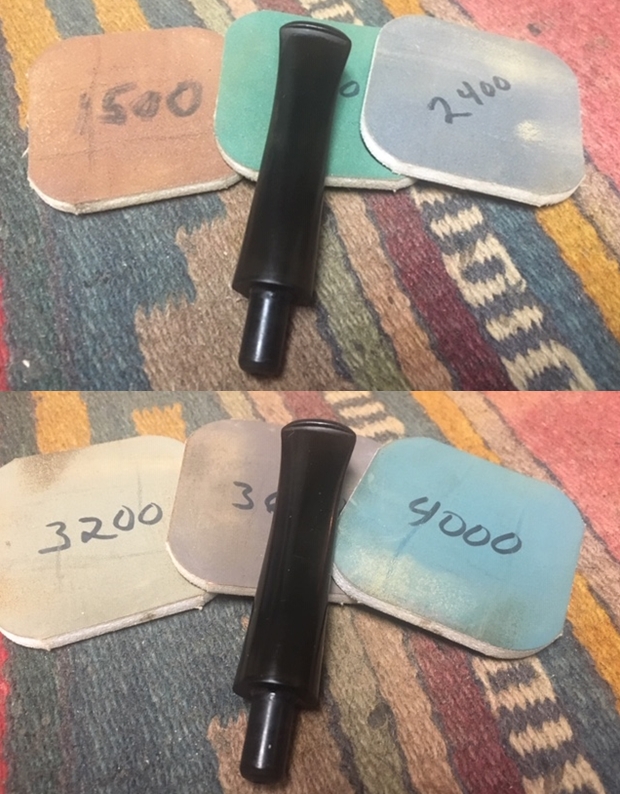
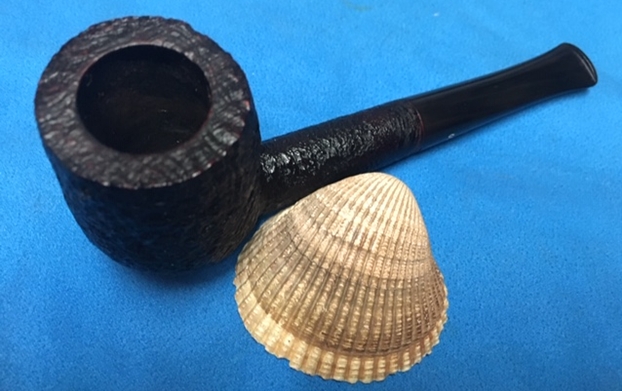
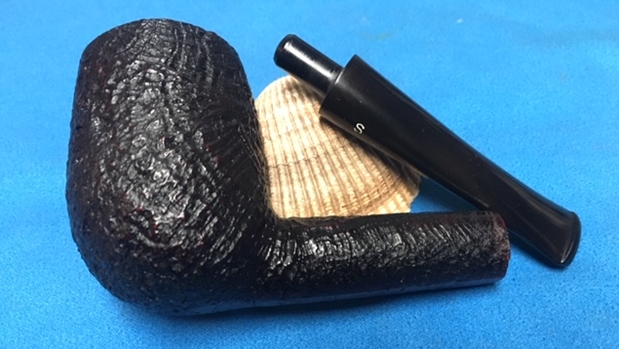
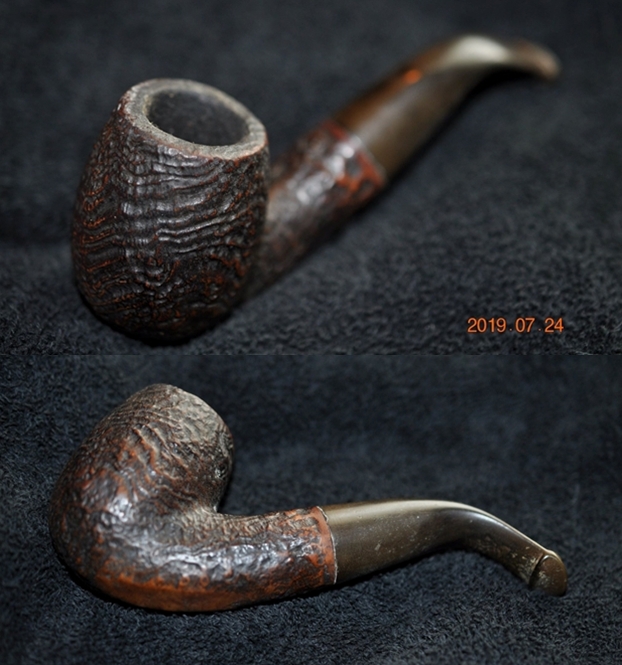
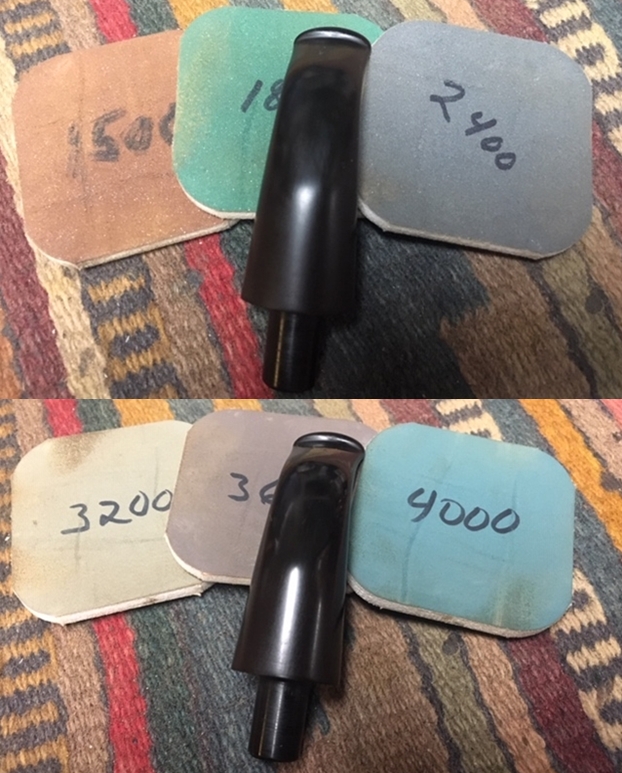
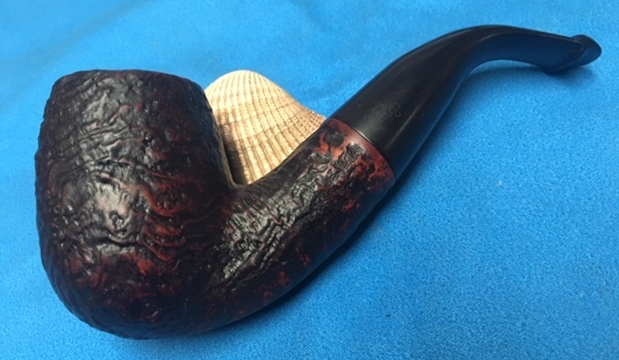
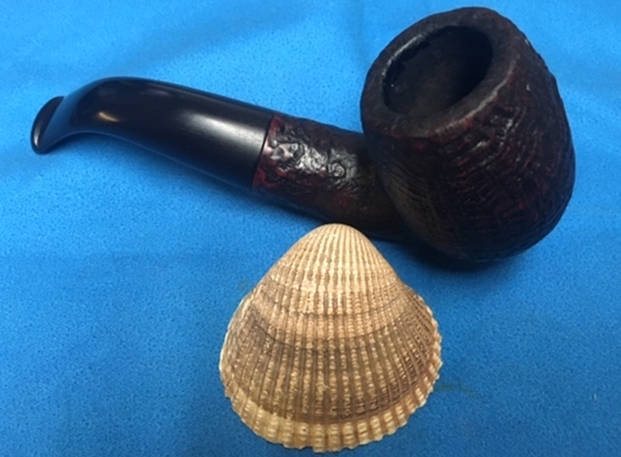
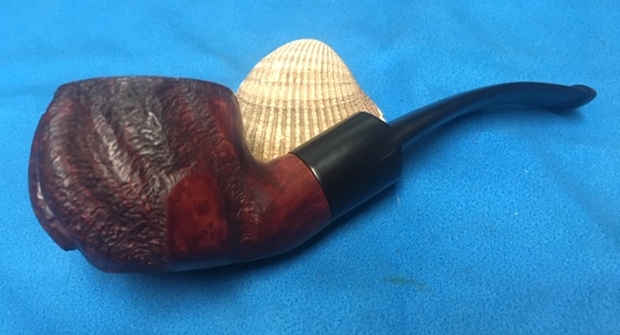
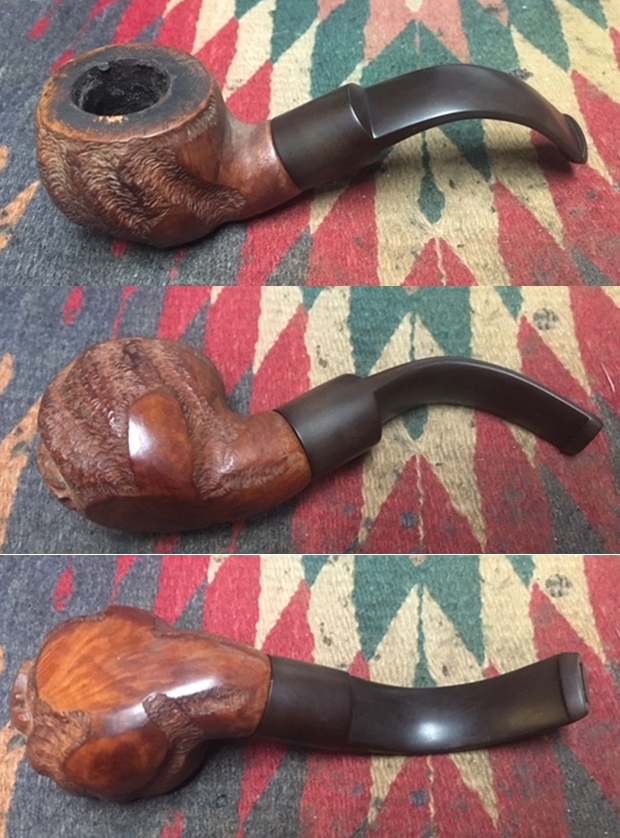
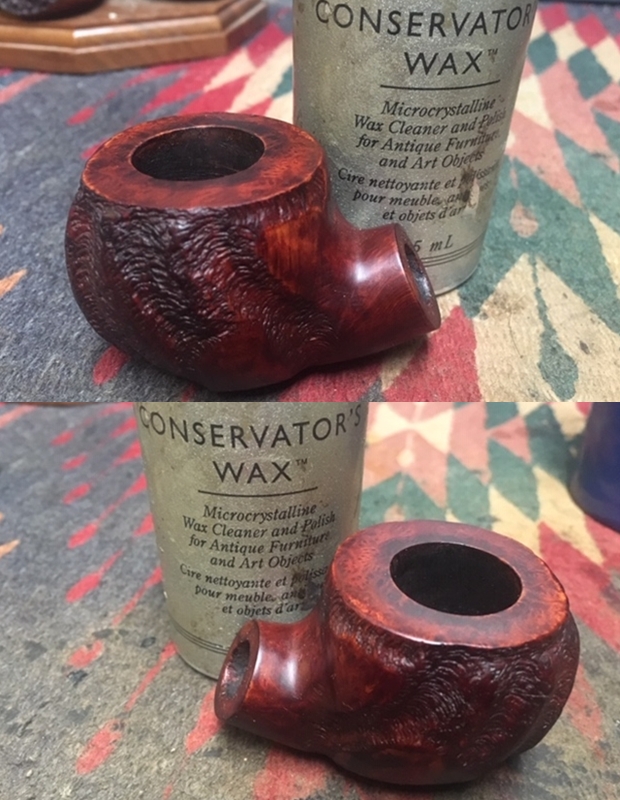
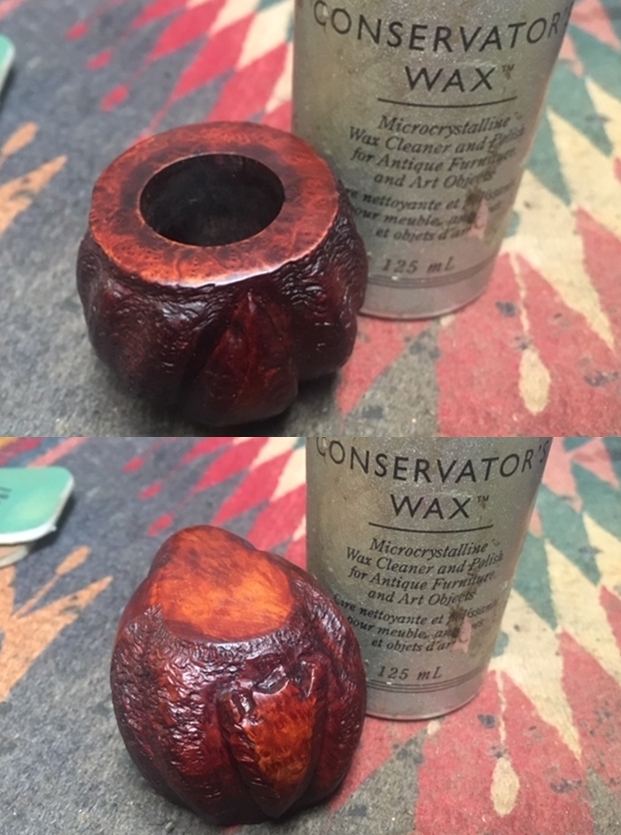
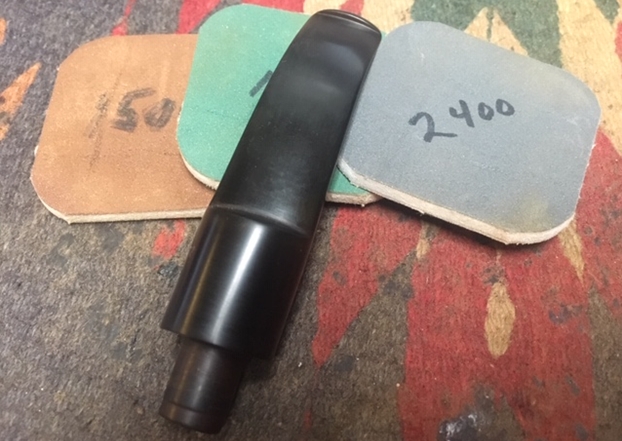
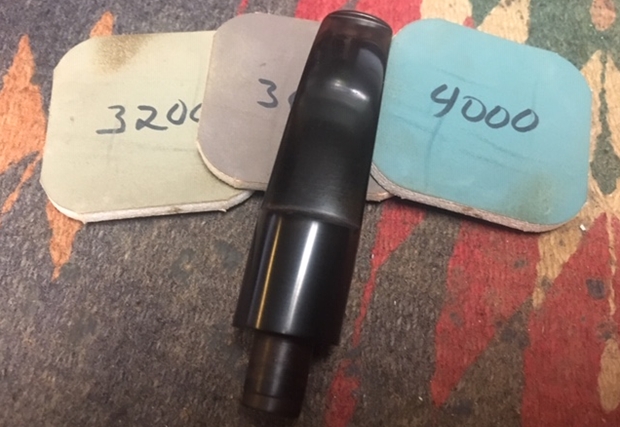
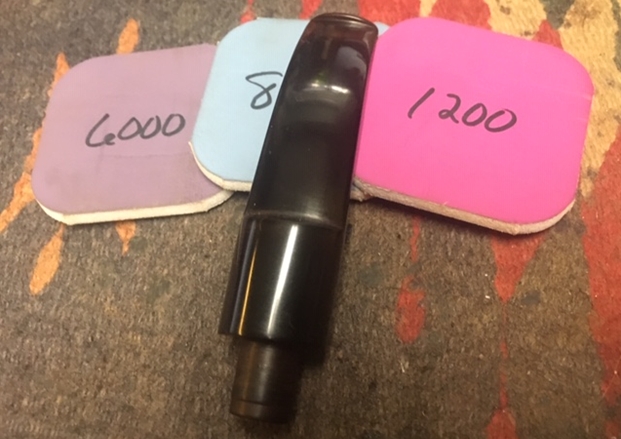
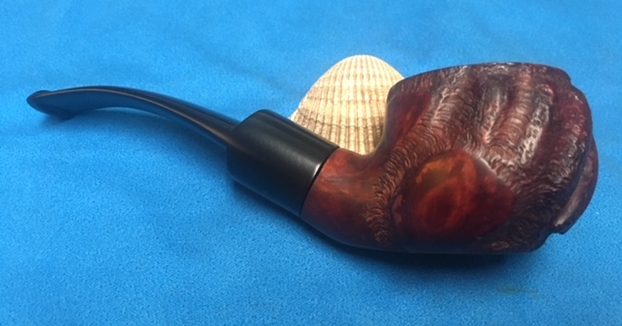
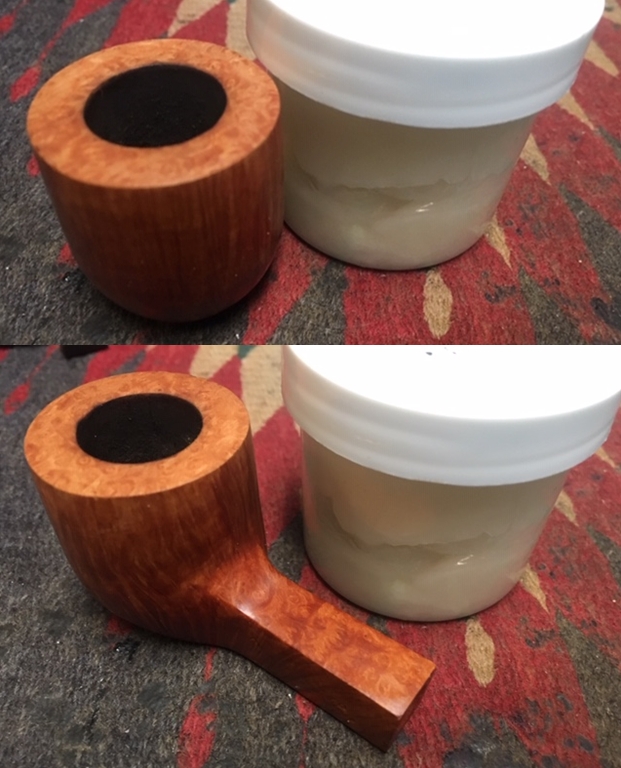
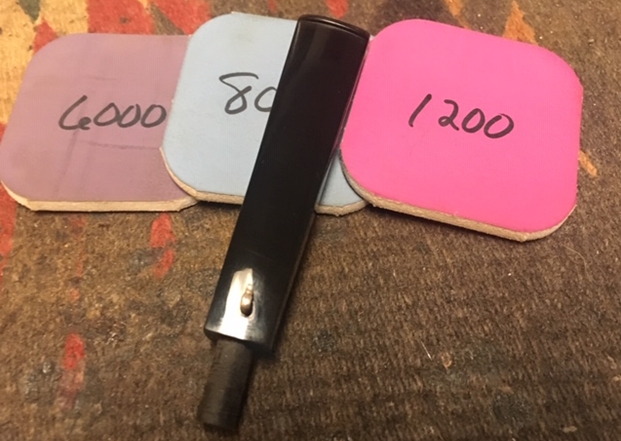
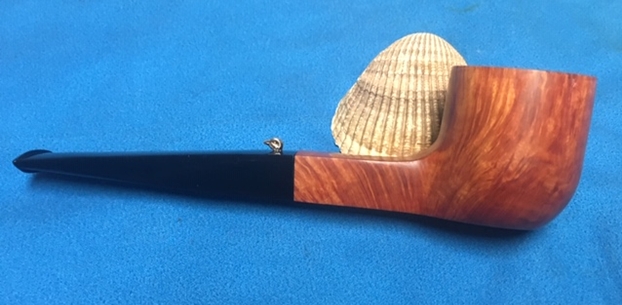
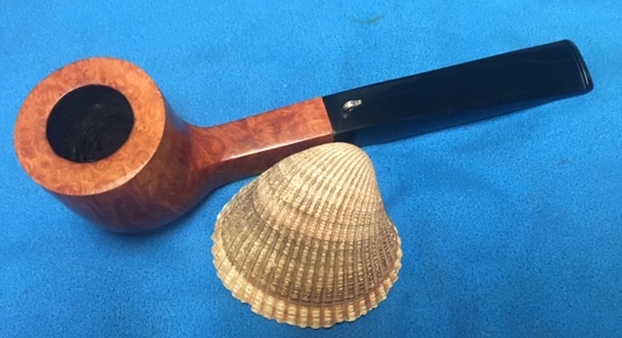
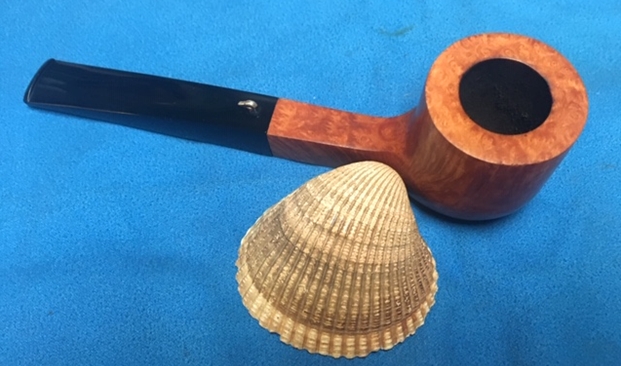
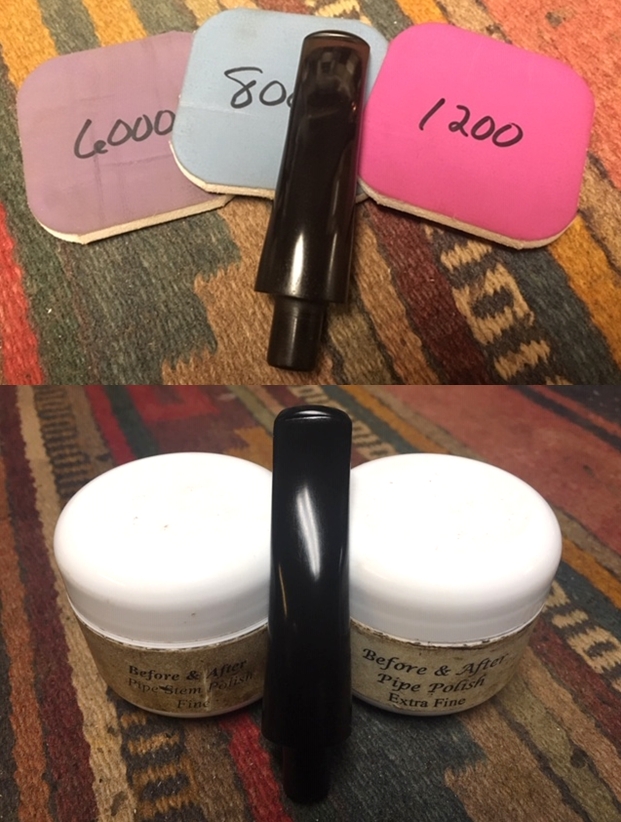
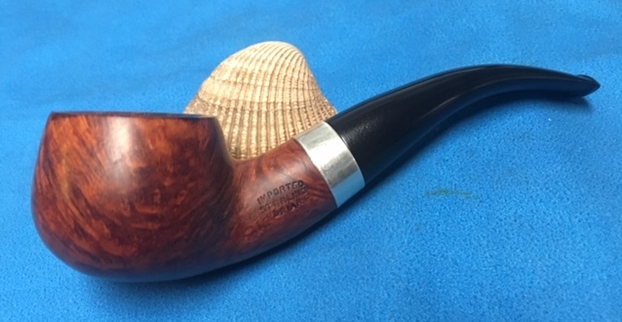
Using the micromesh pads, I completed the polishing cycle by wet sanding the surface with 1500 to 3200 girt pads. I had read that White diamond polish is between 3600 and 4000 grit of micromesh pads and best used between these two. I decided to give this a try to see if there is any difference in the final stem finish. I mount a fresh cotton buffing wheel on to my hand held rotary tool and apply white diamond polish and buffed the stem. I wiped the stem with microfiber cloth and go through the remaining pads, dry sanding with 4000 to 12000 grit pads. The stem looks great with the fills nicely matched with the rest of the surface. I rub a little quantity of Extra Virgin Olive oil in to the stem surface and set it aside to be absorbed by the vulcanite. To complete the restoration, I mount a cotton cloth buffing wheel on to my hand held rotary tool and applied several coats of carnauba wax. I finished the restoration by giving the entire pipe a rigorous hand buffing using a microfiber cloth to raise the shine further and remove any residual wax from in between the plateaus of the rim top surface. The finished pipe looks amazingly beautiful and is now ready for its long second innings with me. I only wish it could share with me its life story of the past years while I enjoy smoking my favorite Virginia blend in it or maybe an English blend!!
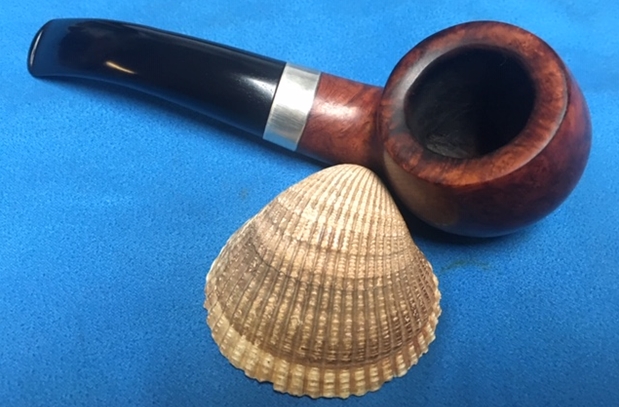


 P.S. I earnestly would like to request all the readers to help me with the grading and dating this pipe. The only thing that is confirmed is that this is definitely not one of the high grade pipes from Preben Holm what with the fills that were seen on the stummel, but nevertheless, it’s a PH!!!!
There is only one more pending write ups which I shall be tackling before I undertake to restore a pipe which my dear friend and mentor, Steve, had sent me about a year back with the intention of providing me an opportunity to test my own skills. I wish to thank each one for sparing their valuable time to read through this write up and sharing this journey with me.