Blog by Dal Stanton
This story begins in October of 2017 and concludes less than a week ago with the graduation of my son who received a master’s degree in counseling. My wife and I have lived in Europe over 
 25 years and periodically we return to the US for several months from Bulgaria, to visit friends, family, and supporters of our work in Bulgaria. It’s a great time renewing relationships and we travel a lot during these visits – often very tiring! One of our favorite things to do as we travel (when we’re not flying over America from airport to airport) is to rent a car and drive off the interstates on the ‘Old Roads’ when we are visiting and speaking about Bulgaria.
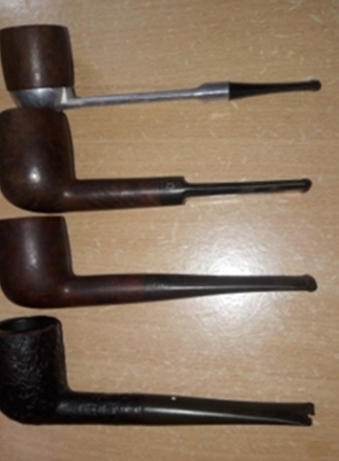
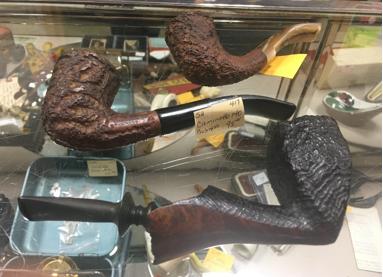
On one such road trip, we were traveling from visiting our son (in St. Louis) and our daughter and her husband (in Nashville) and we were returning to home base near Atlanta, Georgia – to a little hamlet railroad stop called, Palmetto. As often as possible when time allows, we break off from the interstates and cling to two lane highways that trace our path through small towns and villages. Of course, I’m always looking for the antique and second-hand shops along the way to do pipe-picking! We came across one such place in a small crossroads town of Alabama which was a great place to stop and rest and to search for pipe treasures!
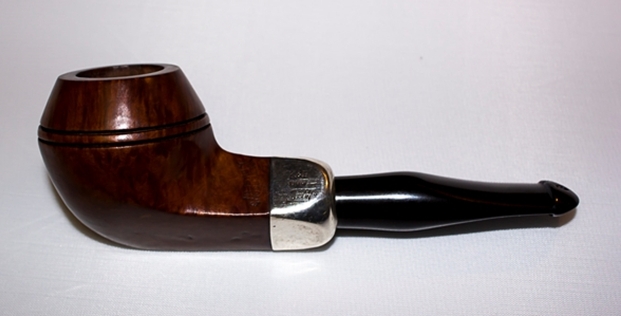
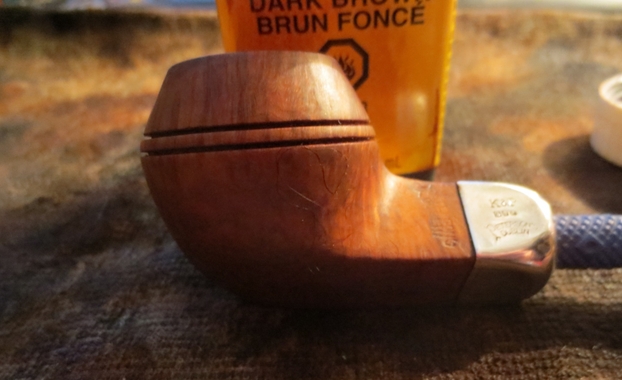
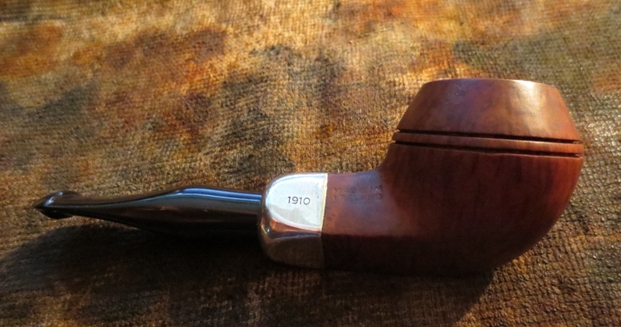
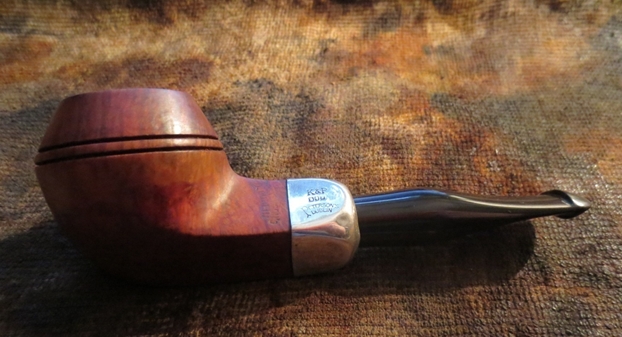
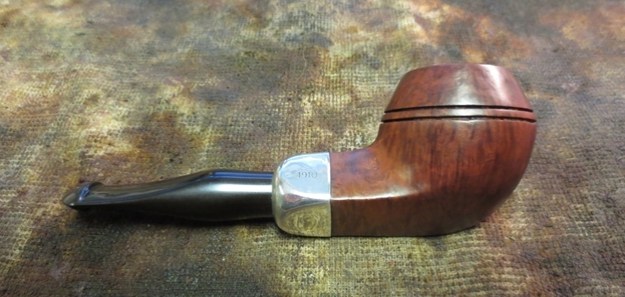
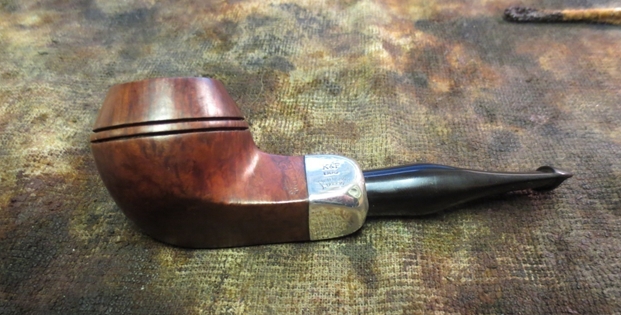
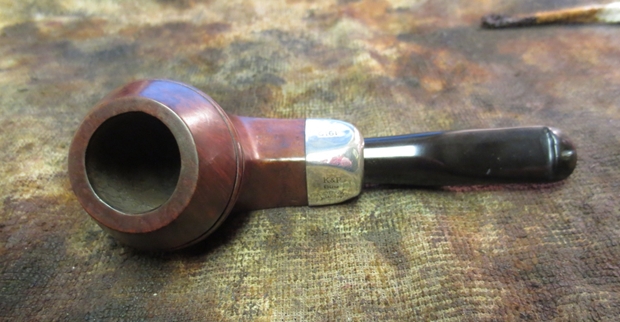
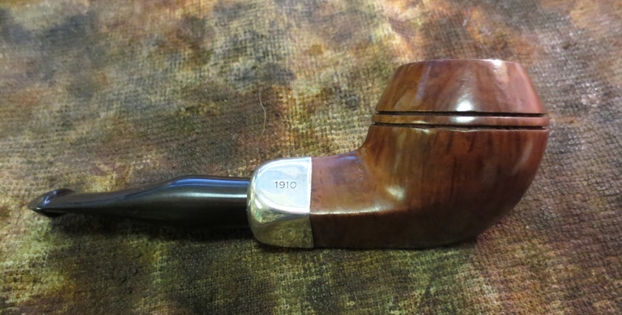
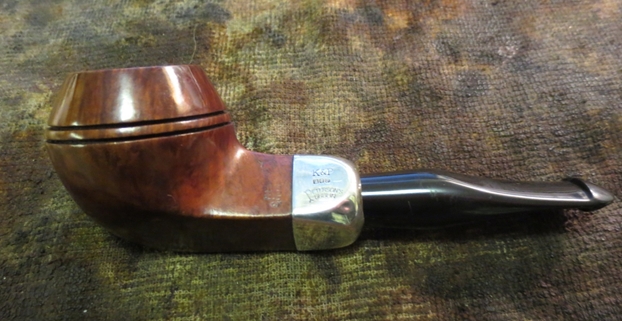
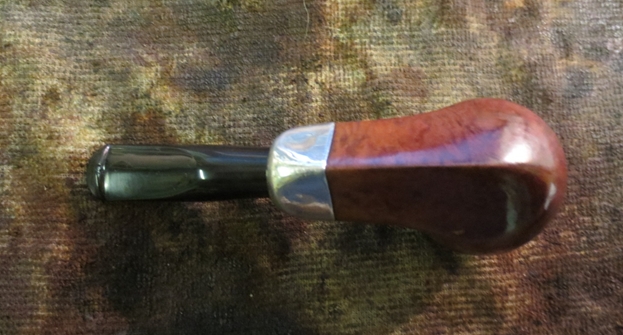
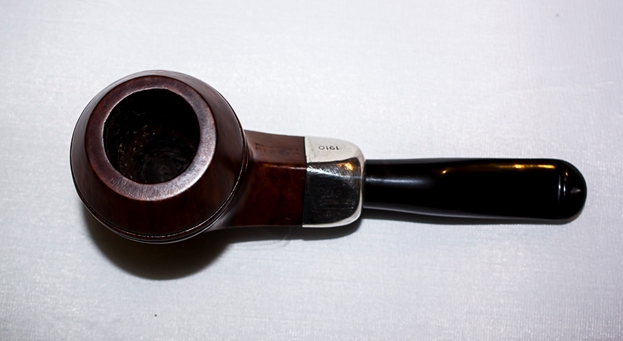
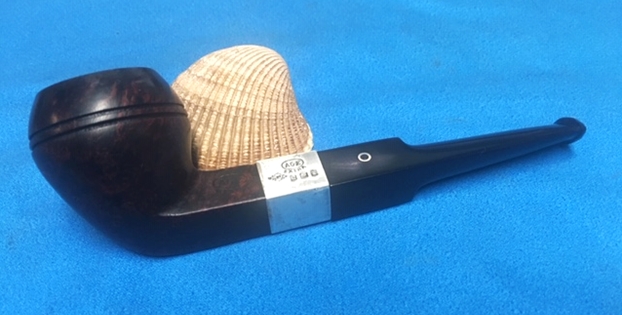
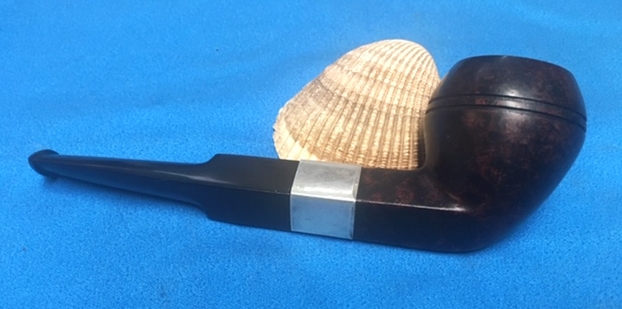
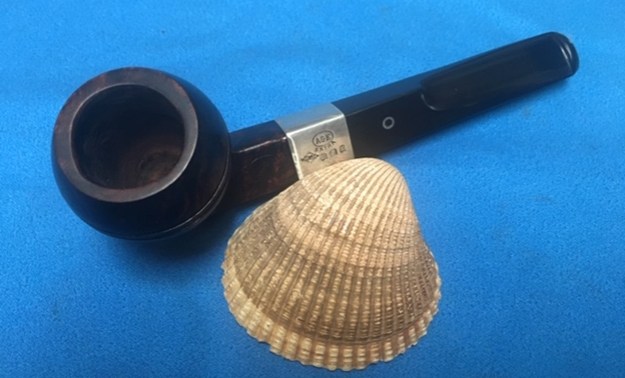
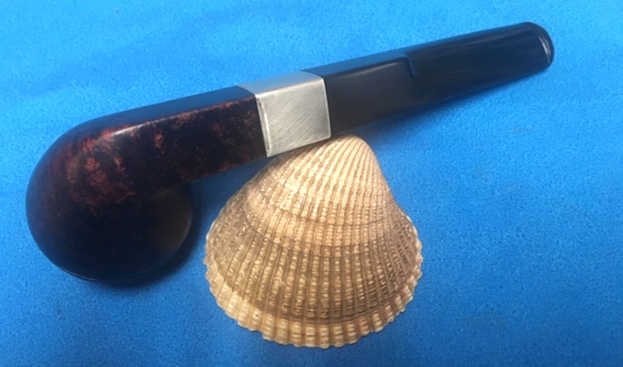
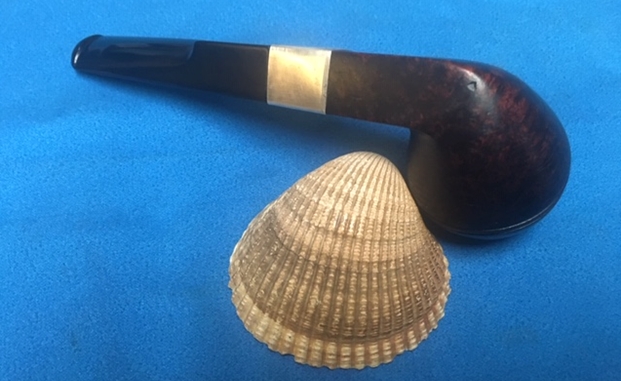
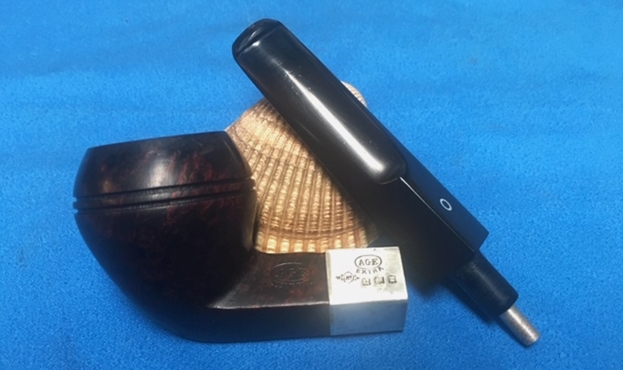
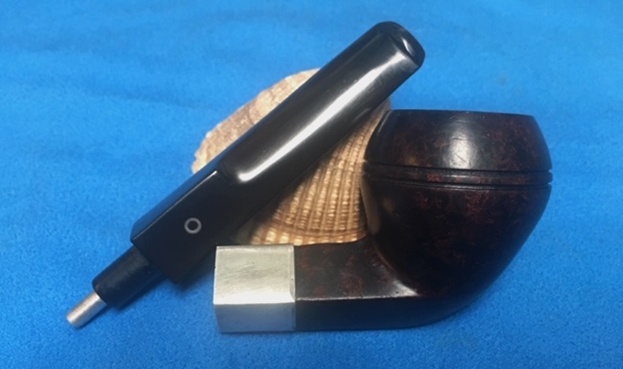
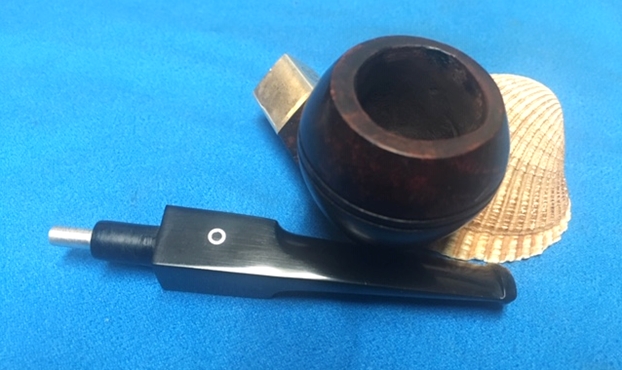
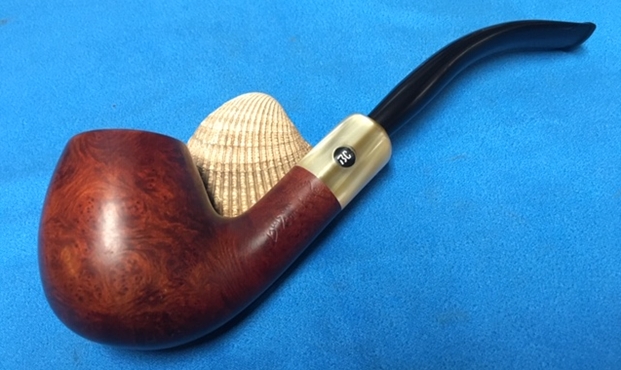
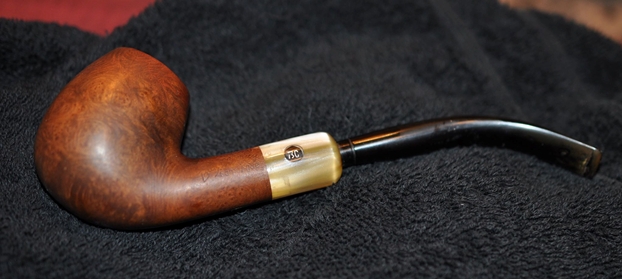
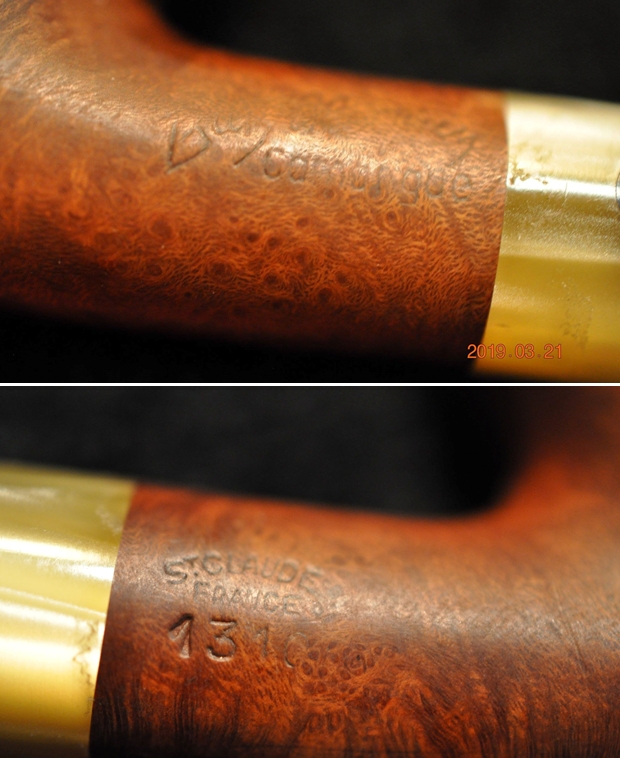
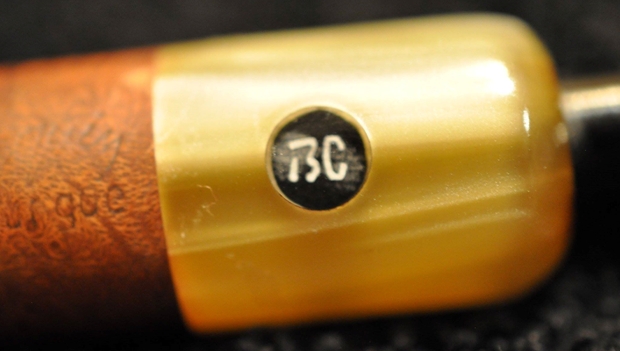
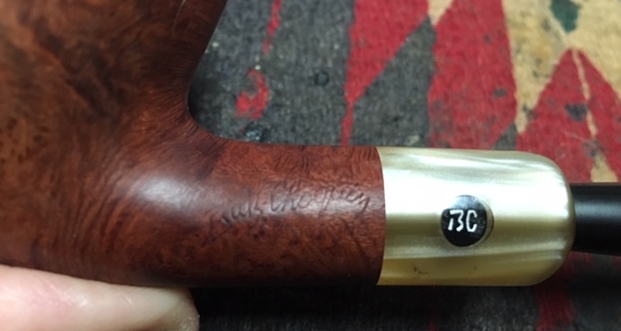
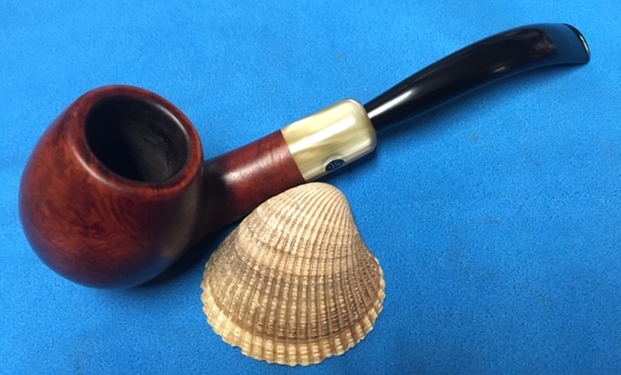
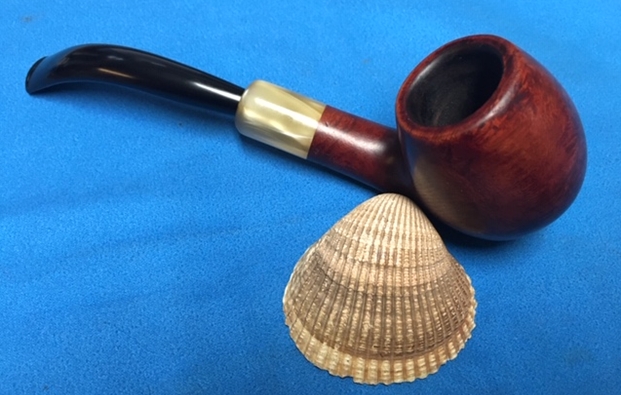
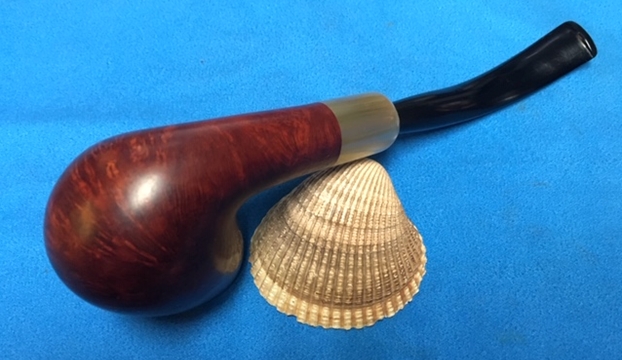
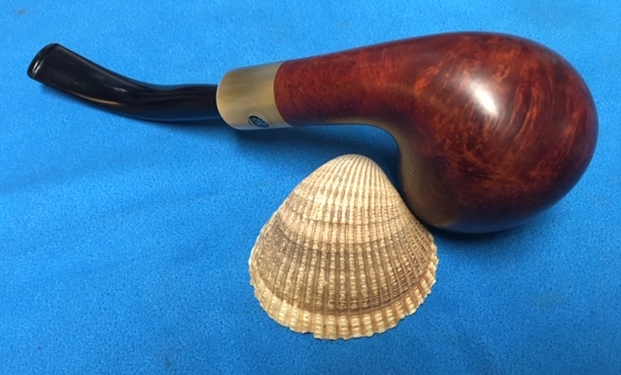
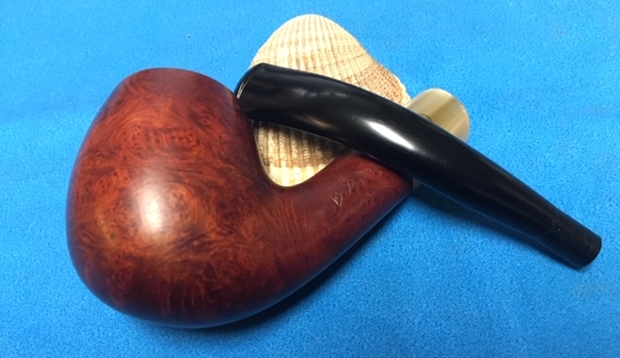
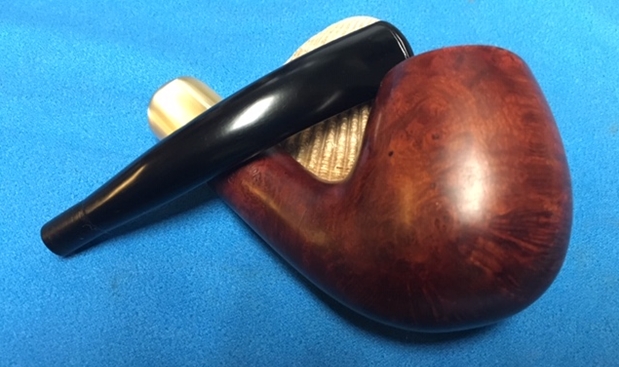
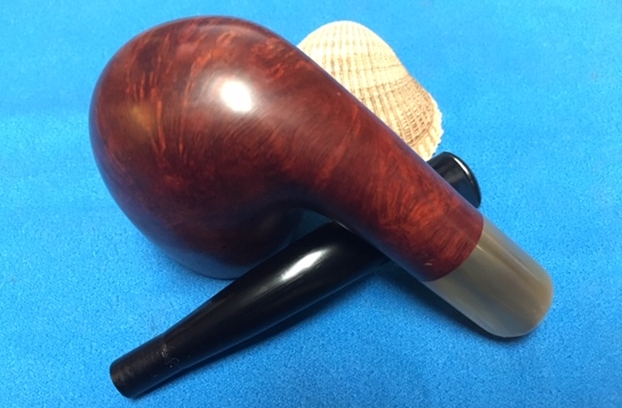
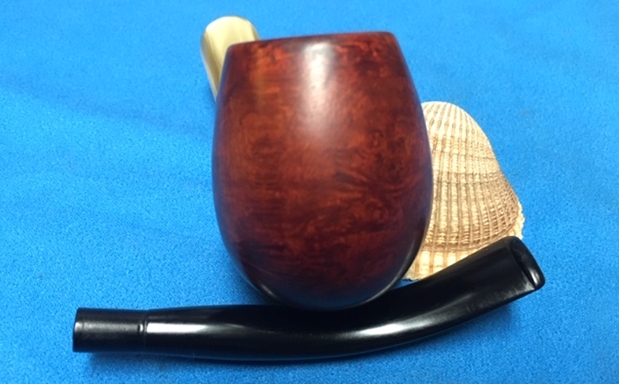
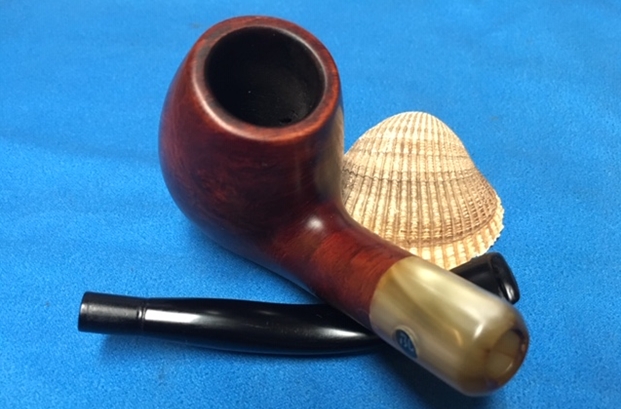
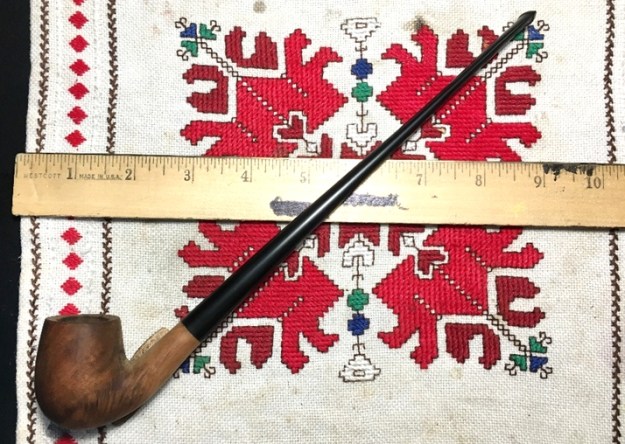
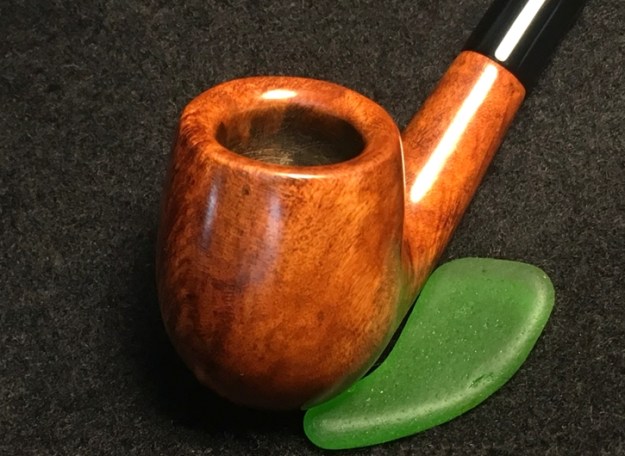
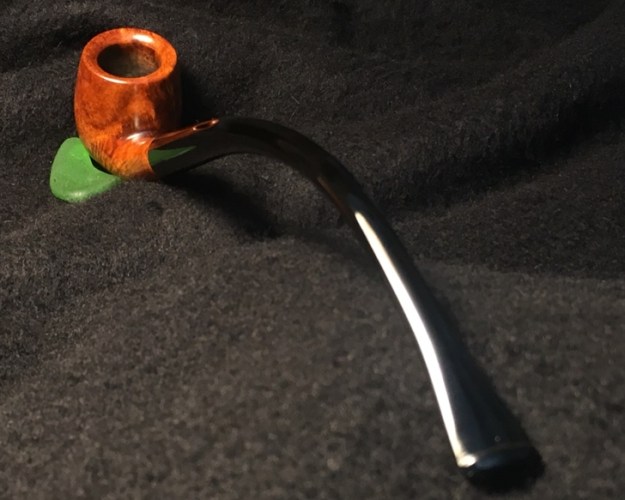
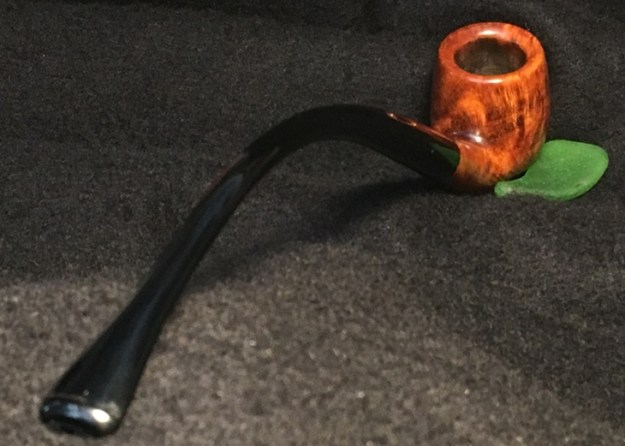
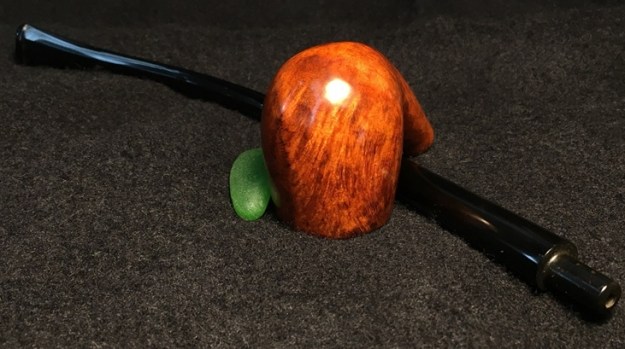
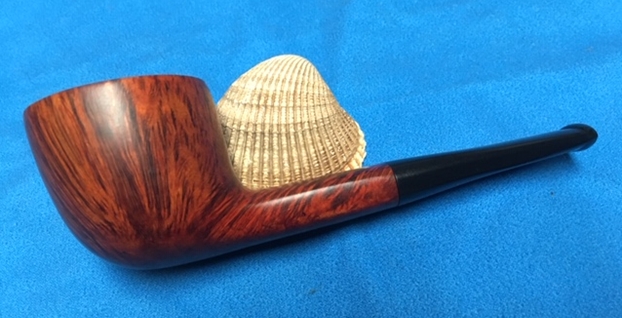
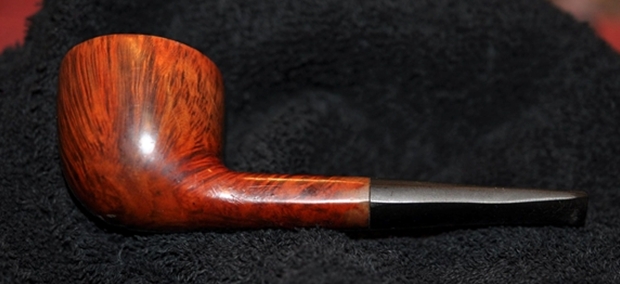
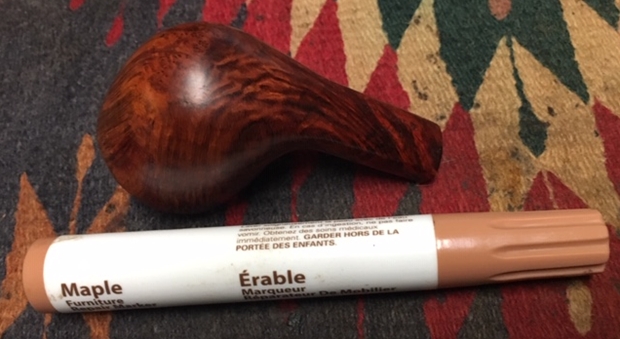
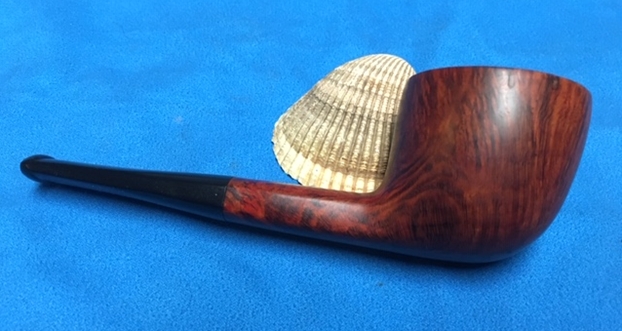
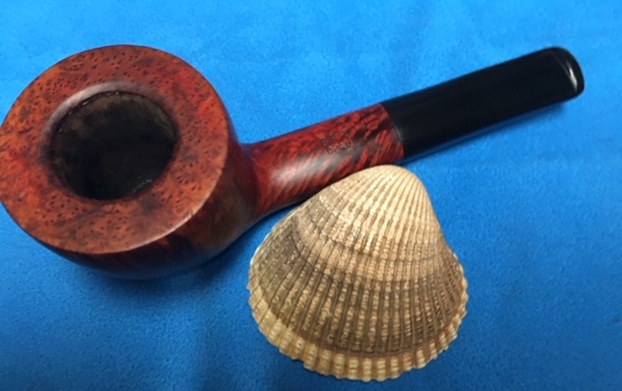
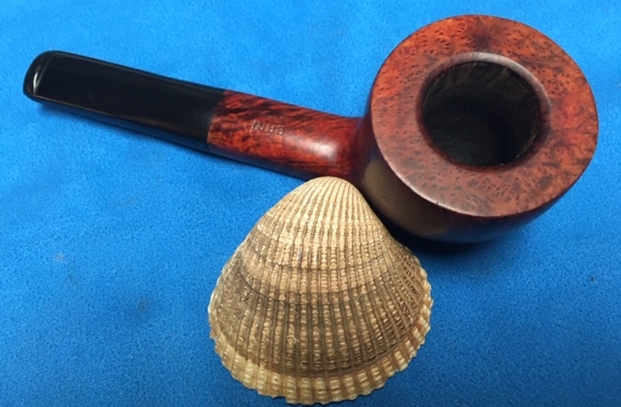
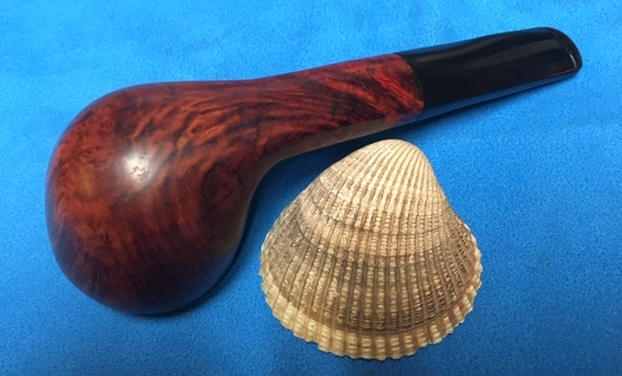
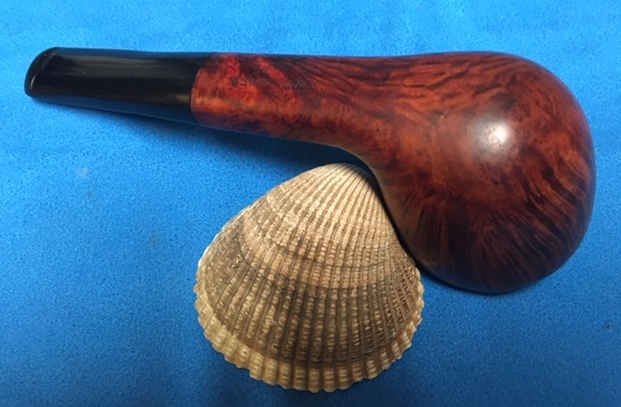
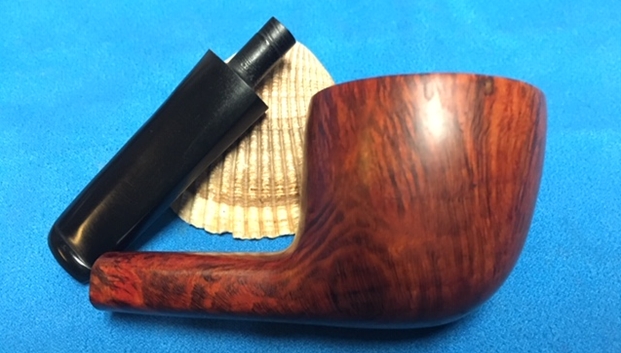
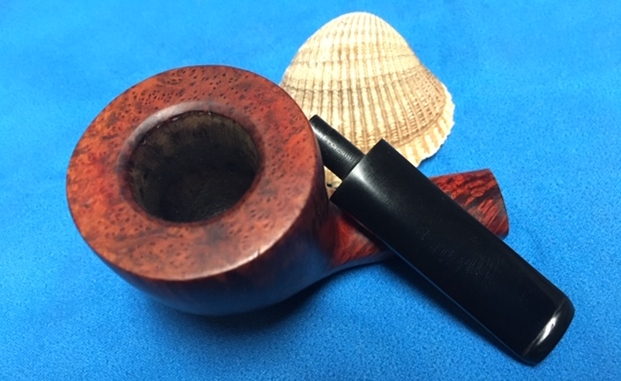
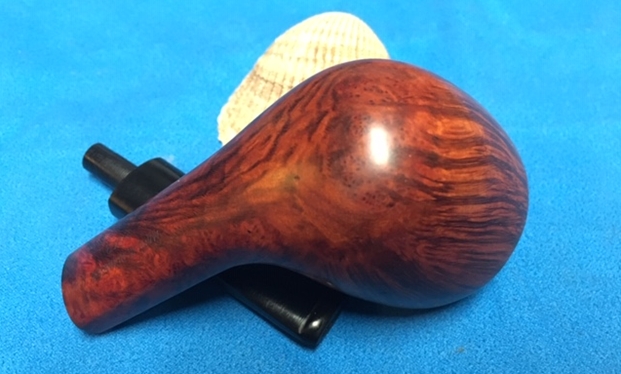
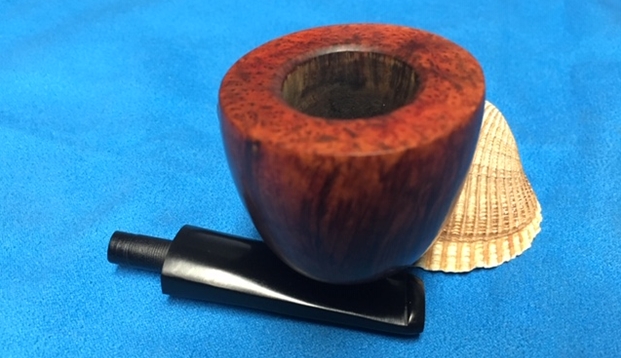
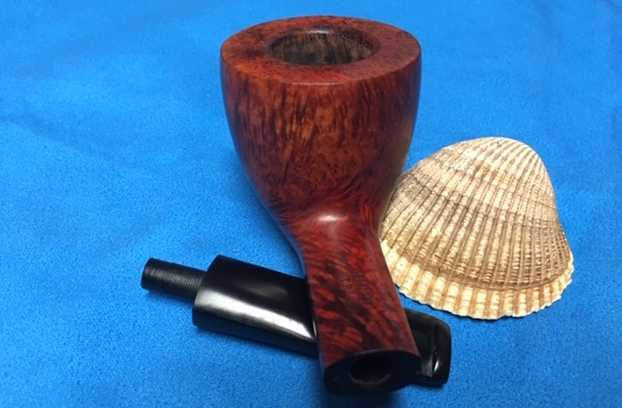
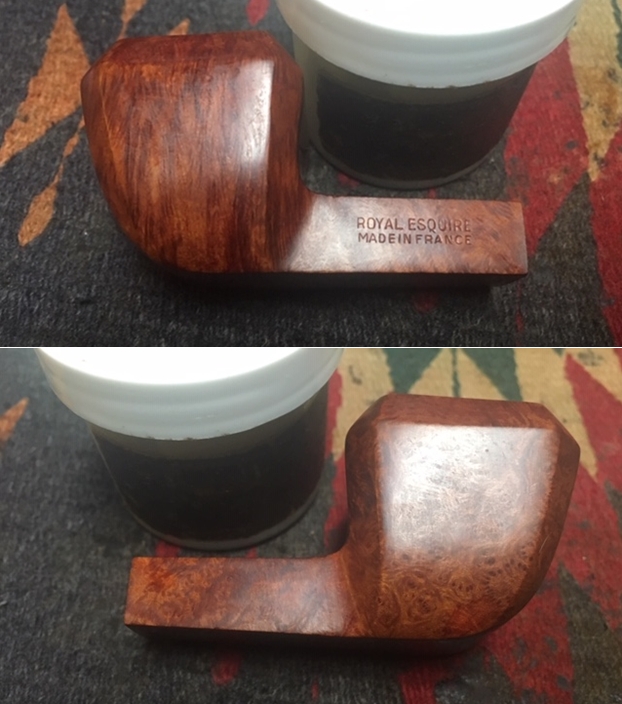
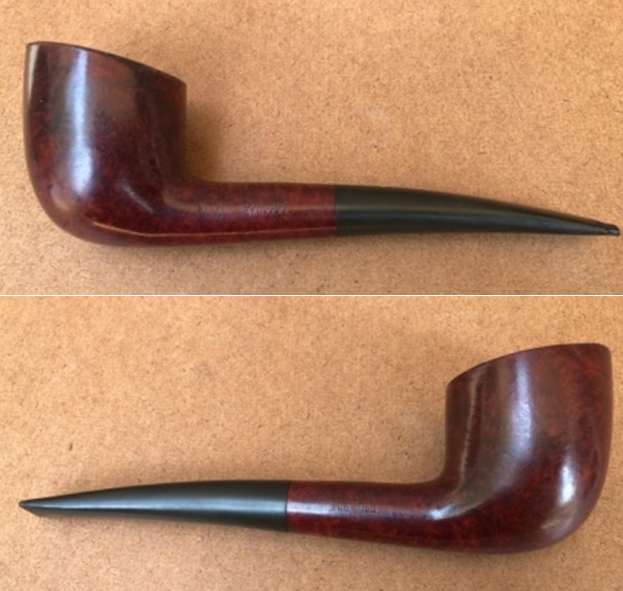
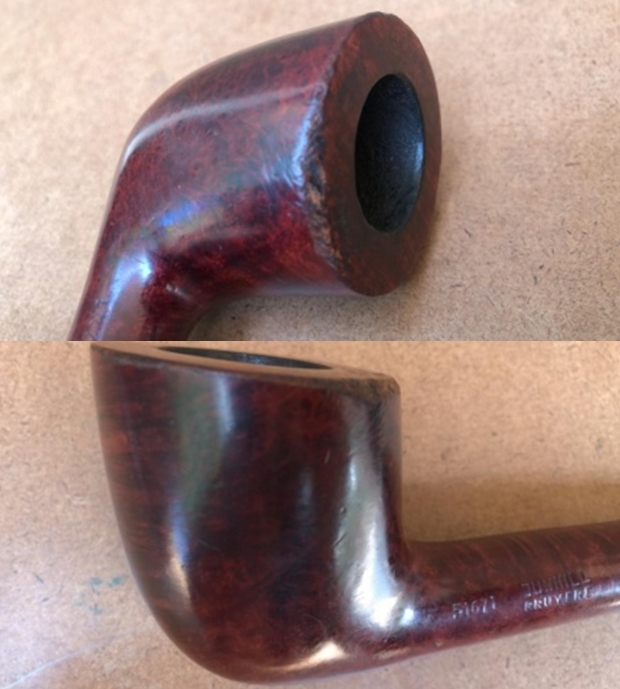
I found 3 pipes that were candidates, but the one that received the lion’s share of my attention was the Knute of Denmark, a stout Freehand that had a beautiful balance of upper blasted briar and a large underside shank of smooth briar that encased the Danish nomenclature. The bowl’s plateau was striking but the shank plateau facing sloping toward and tying in the fancy stem was frosting on an already nice-looking cake! I was fully present in the moment of this exceptional find – a find that I would keep for myself and add the first freehand to my collection of vintage pipes.
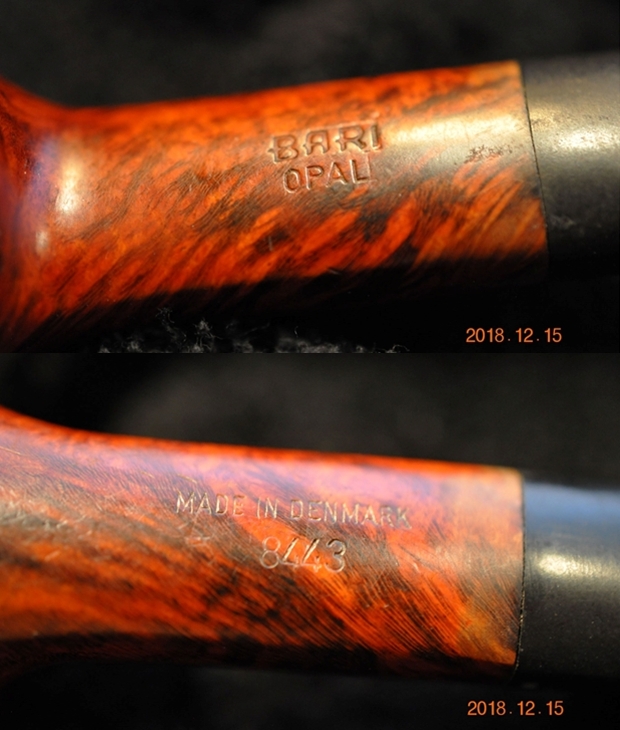
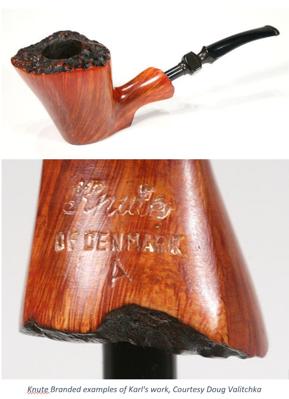
I left the 3 at the front of the shop while I did a walk about through the shop. While doing this, I was also researching the ‘Knute of Denmark’, the sole marks on the pipe. I discovered that ‘Knute’ was a second of well-known Danish Freehand pipe maker and manufacturer, Karl Erik Ottendahl – this sweetened the pot considerably!
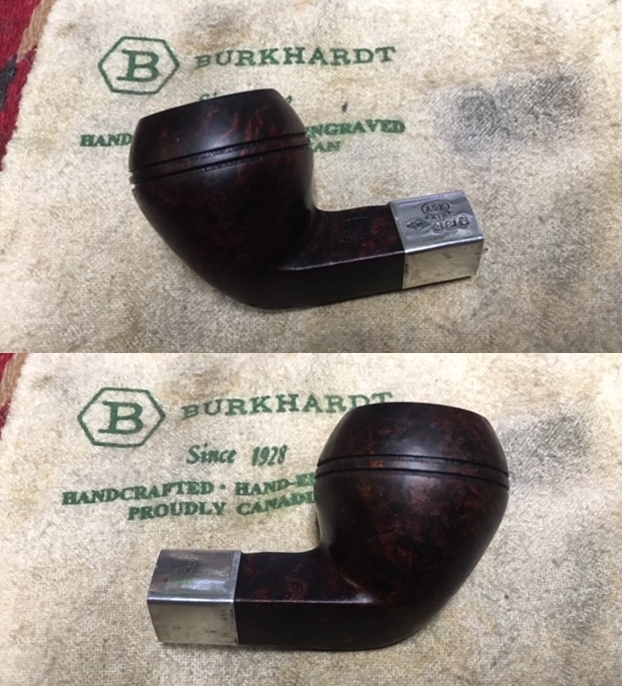
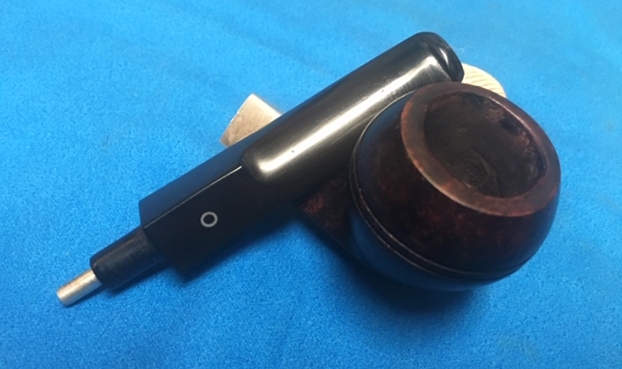
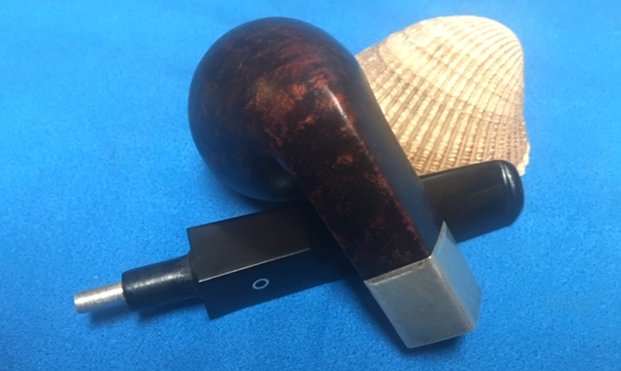
Dave’s Antiques was primarily a consignment shop and the desk person, perhaps it was Dave, had the number of the owner of the Knute and called him with my counter offer. To my surprise and gratification, the owner accepted my offer. The Knute Freehand joined me when my wife and I returned to Bulgaria and has waited patiently in my own personal “Help Me!” basket for his turn on the work table. Here are some pictures of the Knute of Denmark I took while still in the US on that trip.


 Pipedia’s listing for Knute provided helpful information to appreciate more my newest acquisition and the Karl Erik name behind it:
 Karl Erik Ottendahl
Knute of Denmark pipes are said to be made by Karl Erik, see his listing herein. Karl Erik Ottendahl was born in Aalborg in 1942, just a few miles from the very northernmost tip of Denmark. He began his career as a Lithographer as an apprentice in the craft at the age of 16. While working as an apprentice he began hand carving pipes as a hobby and to give as gifts to his more senior colleagues. He began his career making pipes for various labels in Denmark and the United States. Often, he would make the higher-grade pipes for a well-known brand that was known for their midrange or low-end pieces such as Wally Frank. While doing this he administered a factory of fifteen craftsmen. During this period, he did make some of his own handmade pipes, but he felt that the responsibility of managing the factory did not give him the freedom he wished he had.
Other brands confirmed to be from Karl Erik are: Champ of Denmark, HTL, Jobey Dansk, Knute, Golden Danish, Lars of Denmark, Larsen & Stigart (Copenhagen pipe shop), Shelburne, Sven Eghold and Wenhall (for Wenhall Pipes, New York), some Ben Wade and pipes marked IS and IIS.
One other paragraph from the Karl Erik article in Pipedia referenced above is noteworthy in understanding this pipe man who died in 2004:
As one of the few notable Danes Karl Erik Ottendahl dedicated himself to the needs of the normal pipe smoker with a normal income. In the end he was one of the last of this tier. He never made any pretense of the fact that his “hand mades” were prefabricated to a large extent on automated machines and only the last steps of fine-shaping and finishing were carefully made by hand. But he never employed a copy milling, so many KE pipes may look very similar but no two are identical. As well the bulk of the stems was supplied by Stanwell in a close-to-finished state. Stanwell also did the sand blasting for KE to a large extent.
I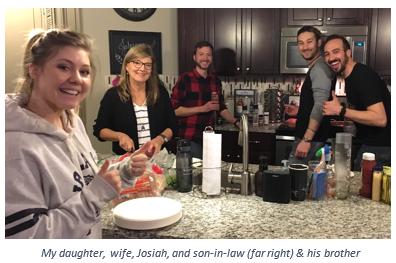 ’m thankful for my family. We’ve been spread out all over the world for many years, but we stay close. My son, Josiah, is number 4 of our 5 children. He’s pictured to the right of his baby sister and my wife, when we were in Nashville during our Christmas visit to the States last year. Soon, we’ll be heading to the US again in May to join Josiah with other gathered family members as he graduates with a master’s degree in counseling from Covenant Seminary in St. Louis. During his years in college and seminary, as a younger pipe man, he has enjoyed a bowl now and again. He has gifted me with pipes that are special to me because they came from him AND they are very nice pipes as well after restoring them! My first Peretti came from Josiah. I have gifted all my kids, sons and daughters, with pipes that I’ve restored. It gives me joy to pass pipes on which then become family heirlooms because ‘the ole man’ restored them.
I had been thinking for some time which pipe I could give to Josiah commemorating this great milestone accomplishment in his life. The Knute of Denmark waiting for restoration came to mind. Several weeks ago, when Josiah and I were Face Timing, he in St. Louis and I in Sofia, I asked him if he would like this Freehand as a graduation present? His response did not take long! I have viewed that Knute somewhat as a ‘Pearl of Great Price’ – looking forward to restoring it and recommissioning it into my collection and service. Yet, for Josiah to have it to commemorate his graduation is something that will always be important. When he goes through the ritual of taking the pipe from the rack, methodically packing the bowl with his favorite blend, lighting and reflecting upon life and faith – he will remember his accomplishment as well as how proud his family is of him.
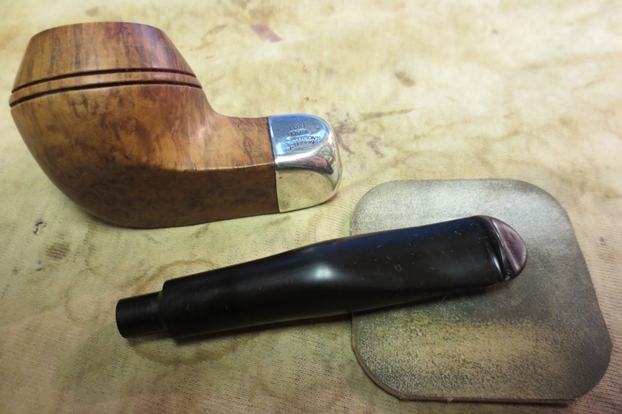
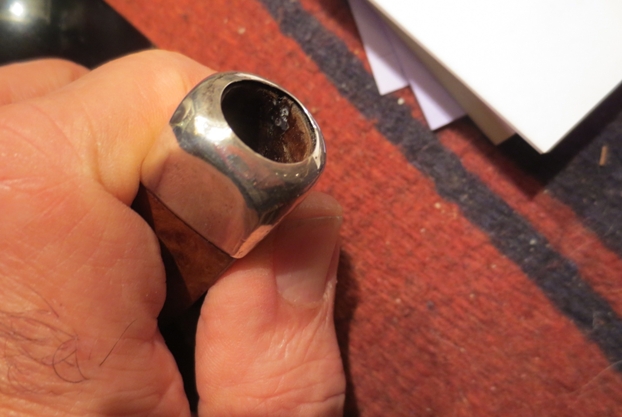
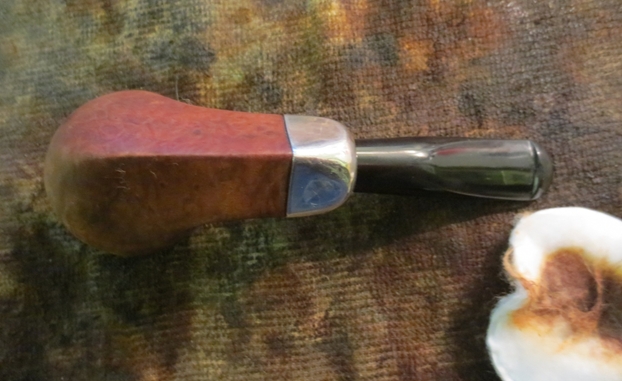
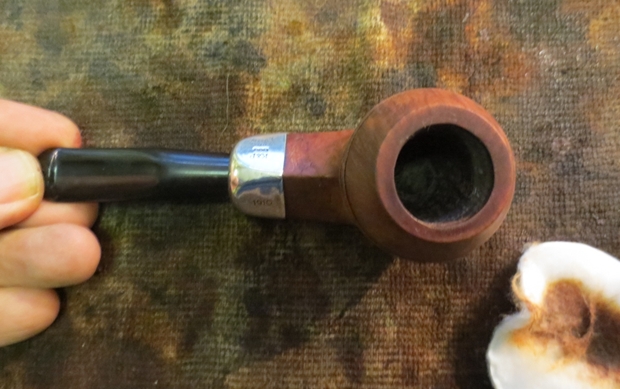
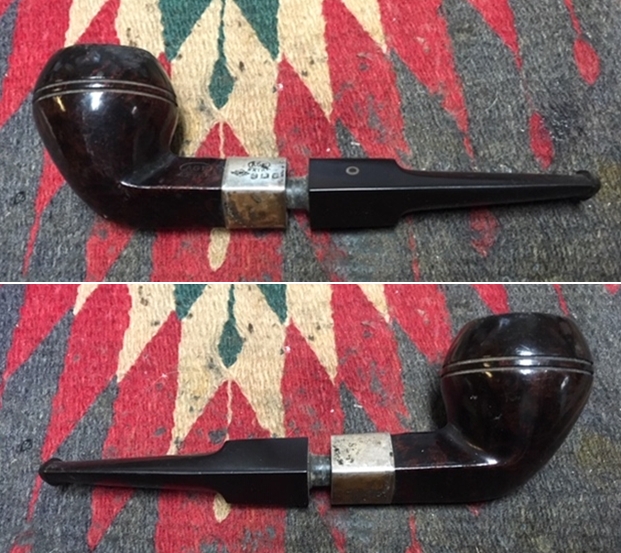
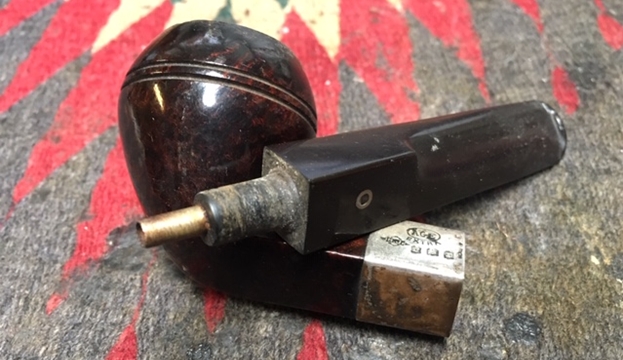
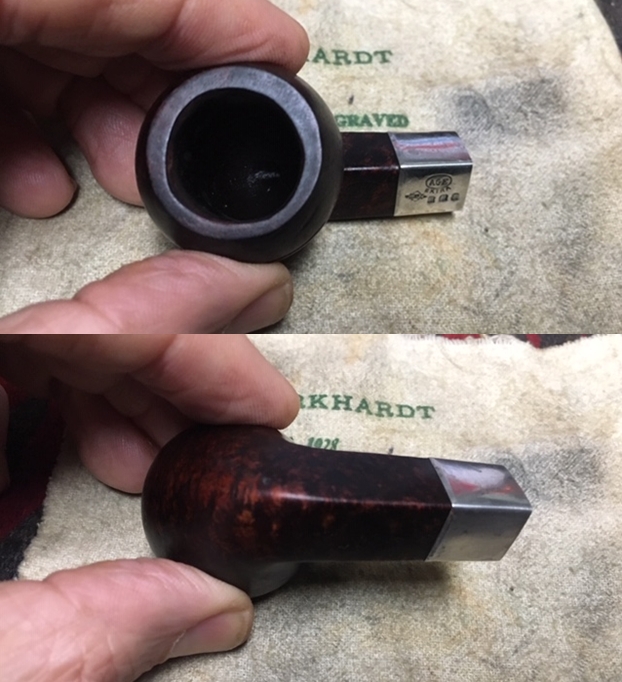
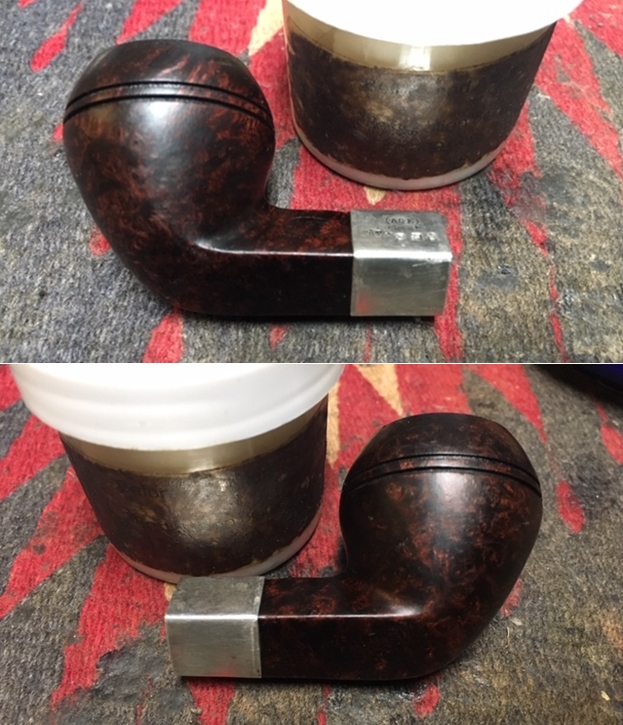
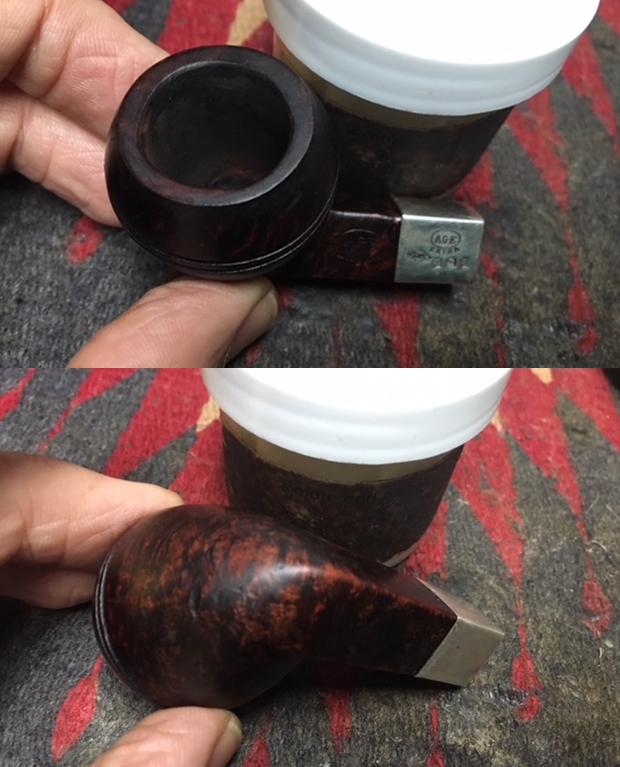
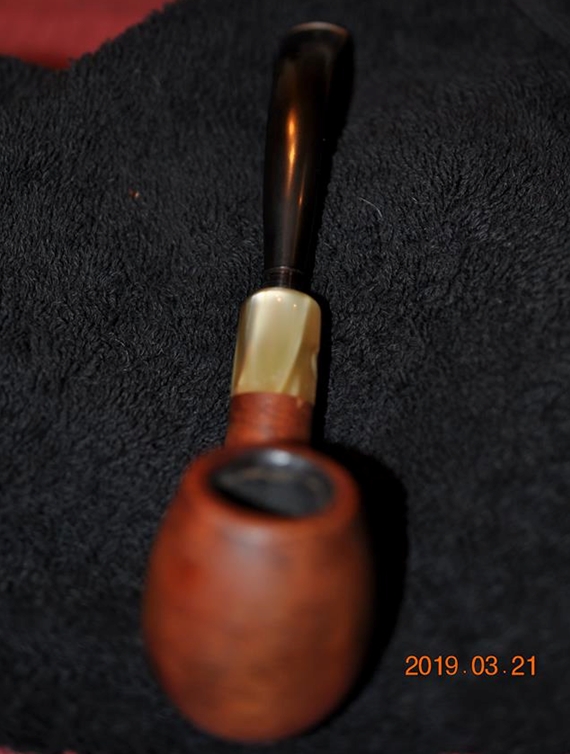
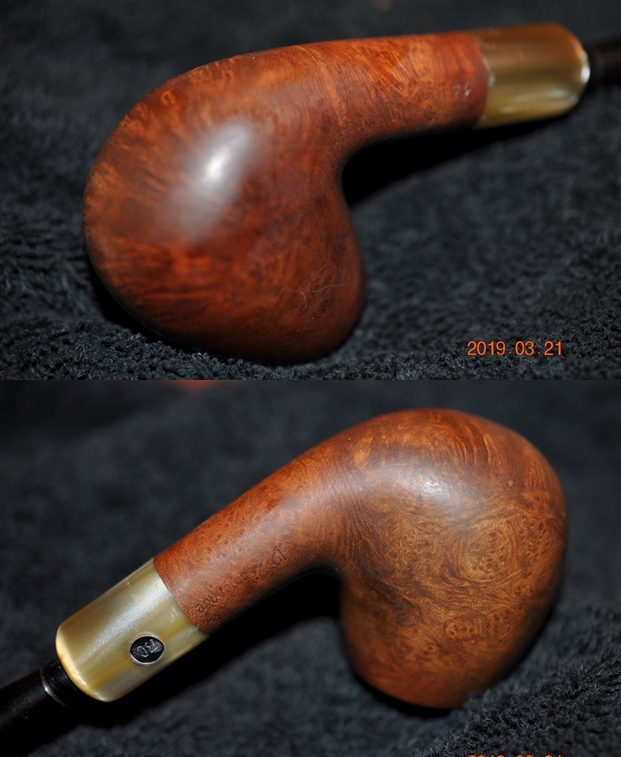
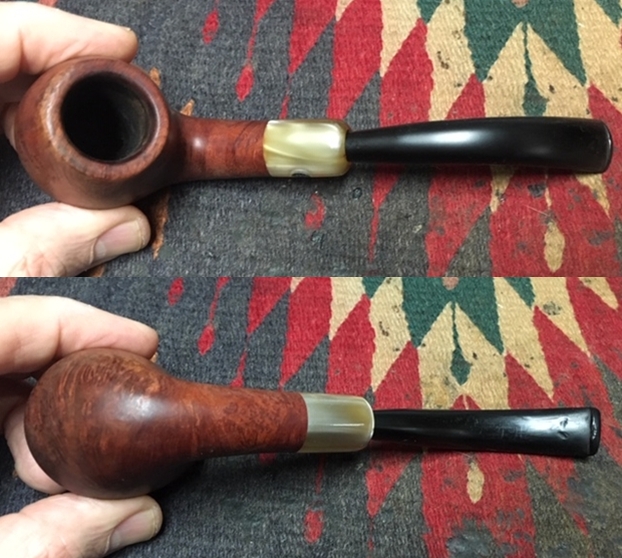
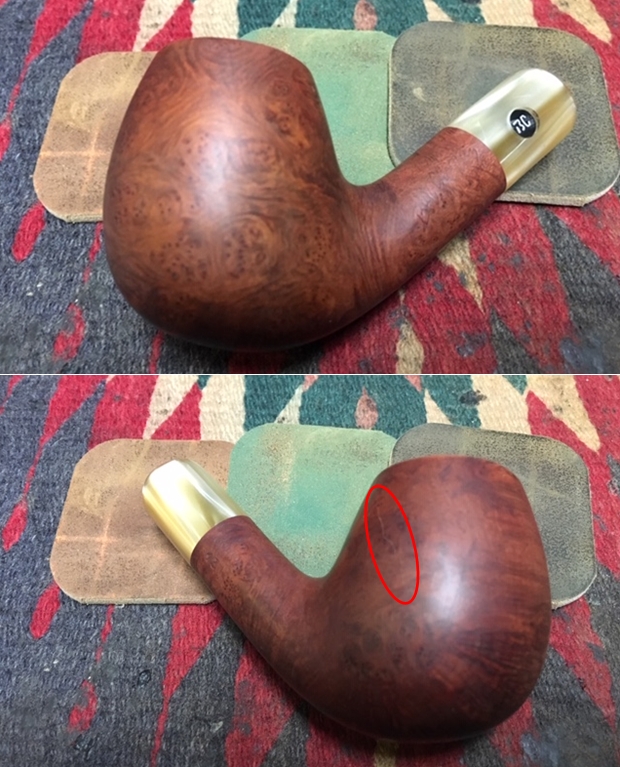
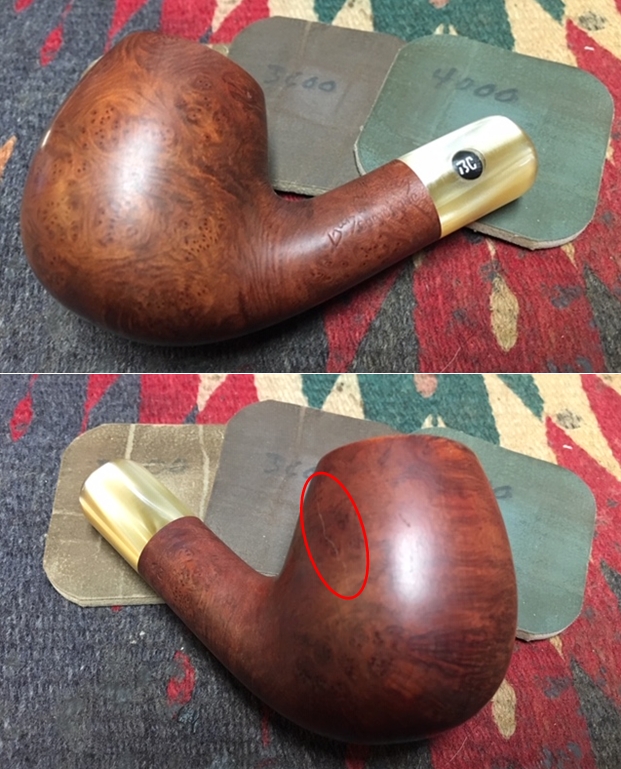
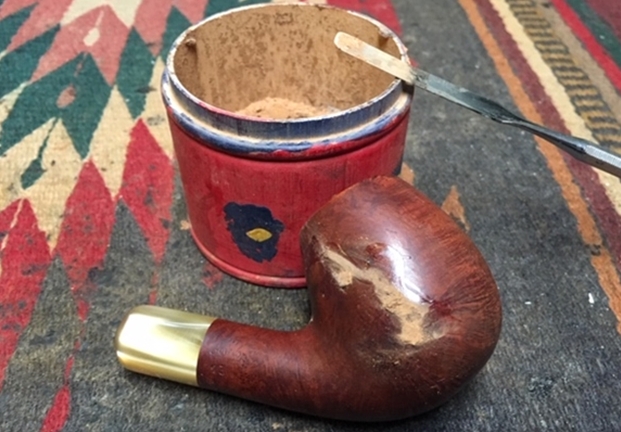
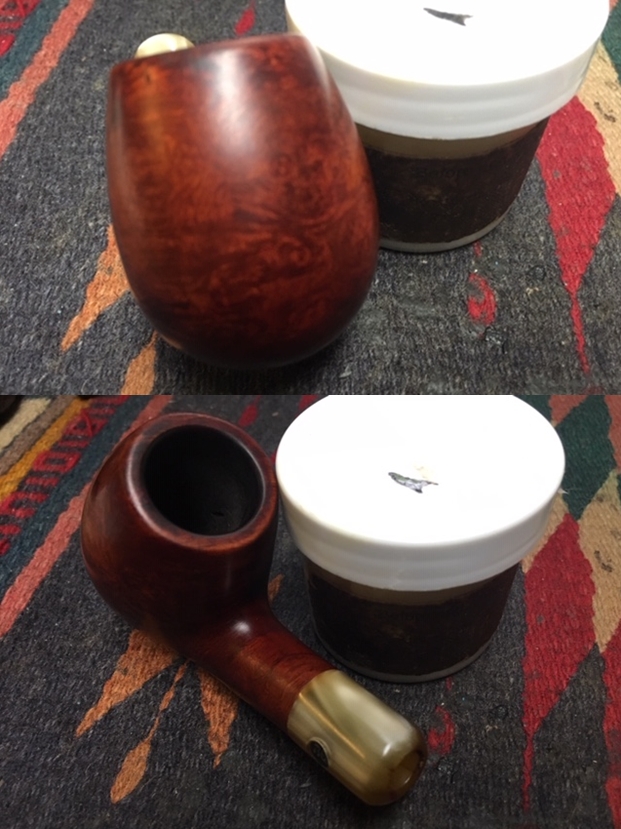
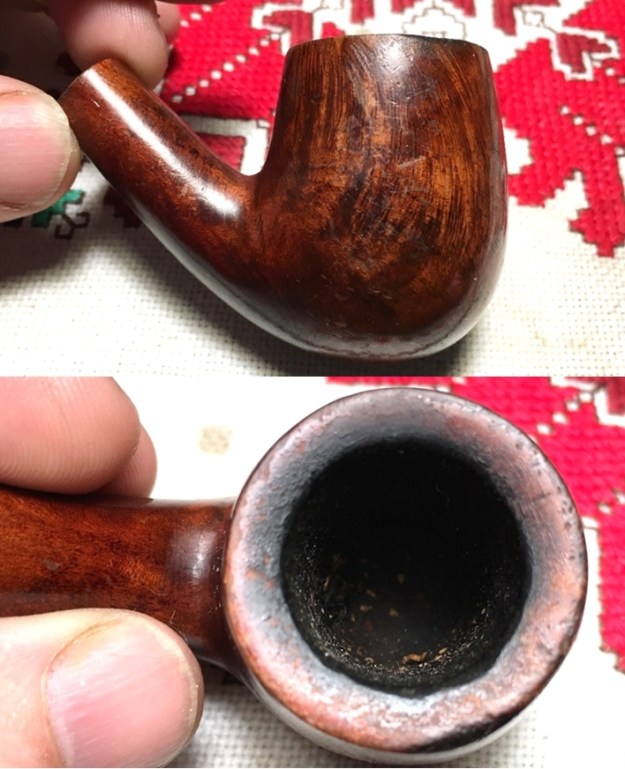
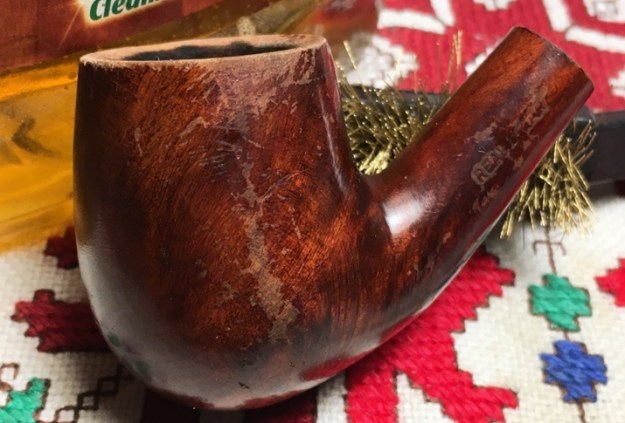
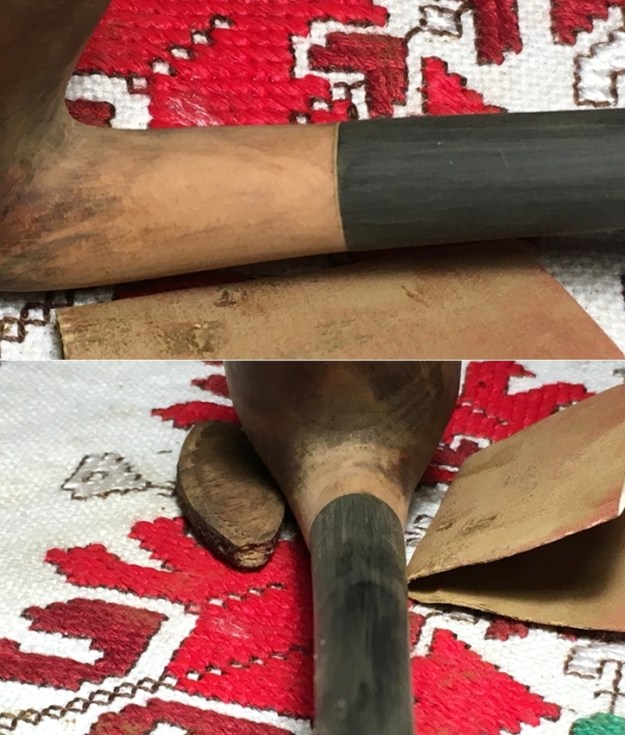
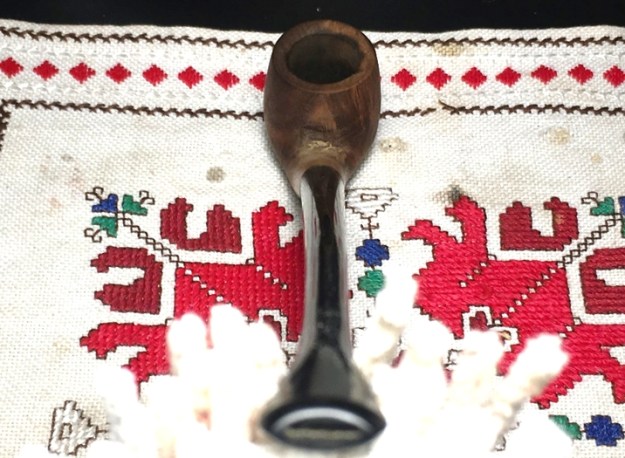
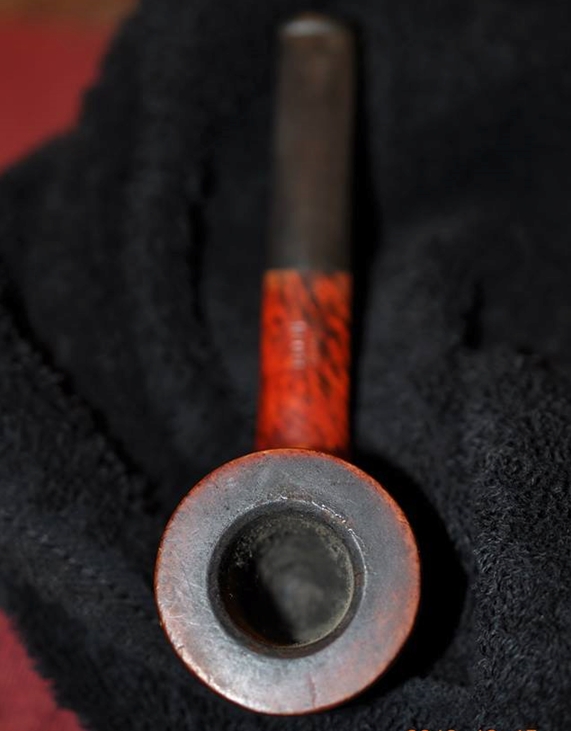
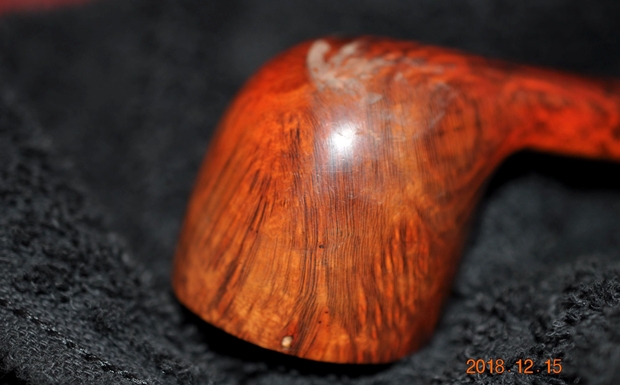
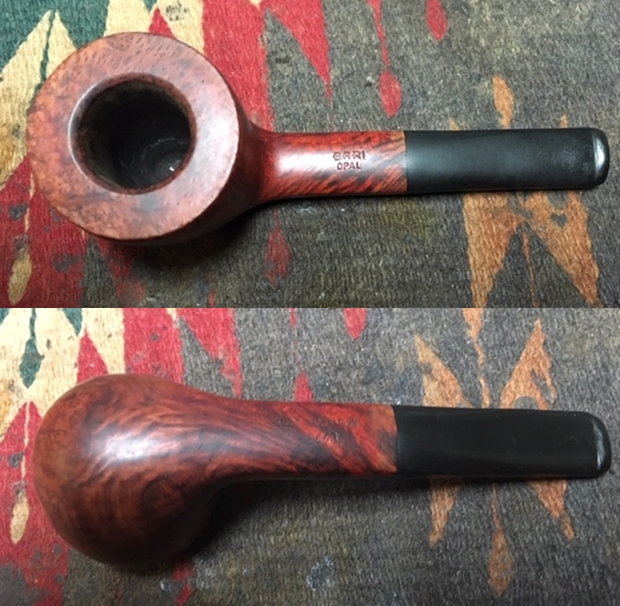
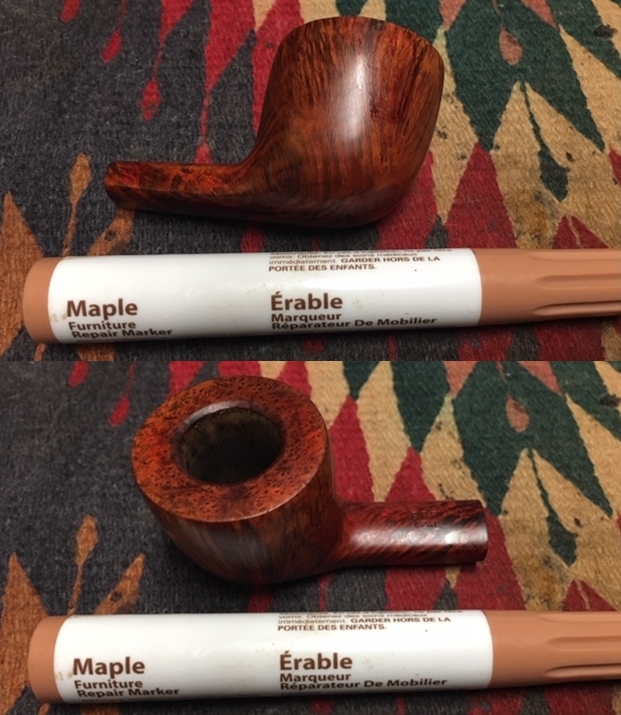
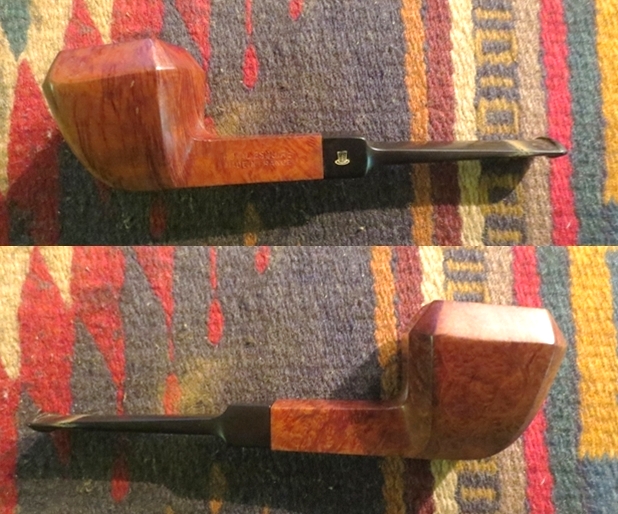
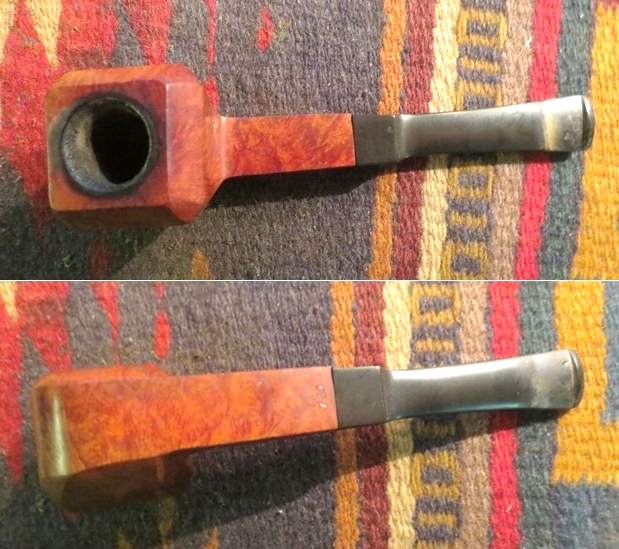
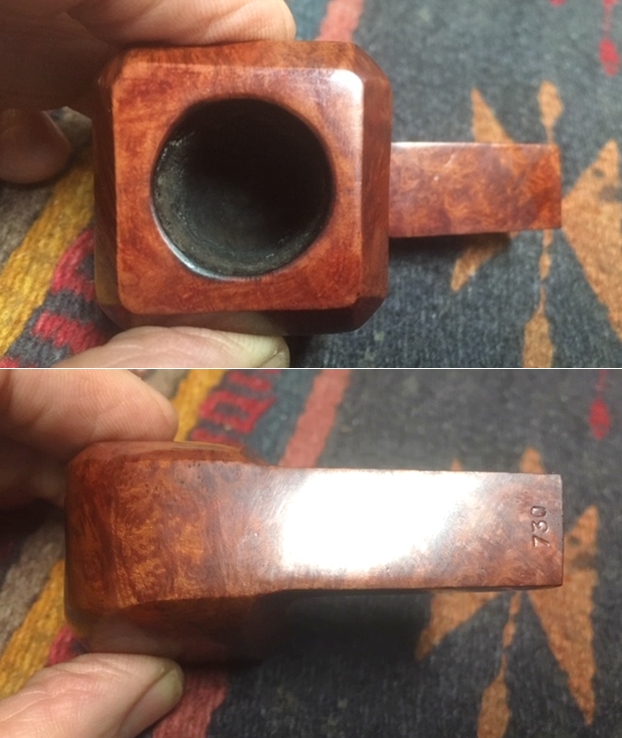
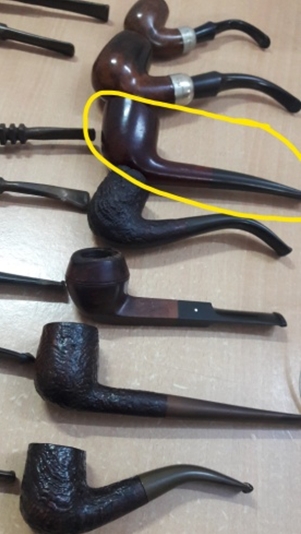
With Josiah’s master’s graduation present now on my worktable, I look more closely at the pipe itself to assess its needs and issues. The narrowing chamber has thick cake. The attractive squared plateau is covered with lava flow and there is much dirt and grime lodged in the valleys between the ridges. The sandblasted stummel is beautiful, but is also covered with grime, but I see no problems with the briar. The same observation of much needed cleaning is also true for the shank facing plateau. The lower side with the smooth briar is blotched because the finish seems thin and uneven. I also detect a few nicks where it looks like it was knocked on the edge of something – just to the lower right of the Knute of Denmark stamping. The fancy stem has some oxidation and tooth chatter and compressions show on the stem bit. I take a few fresh pictures to look more closely at the plateau and the smooth briar underside. 

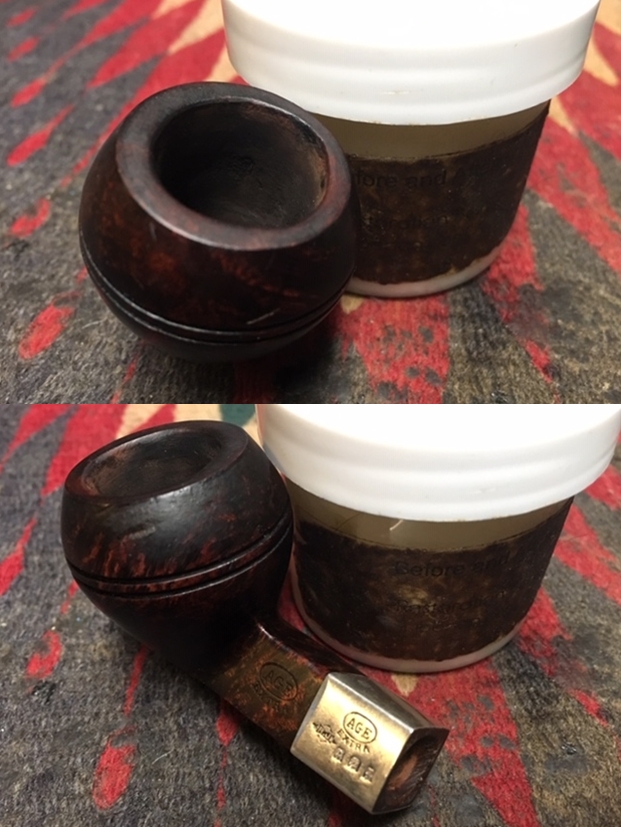
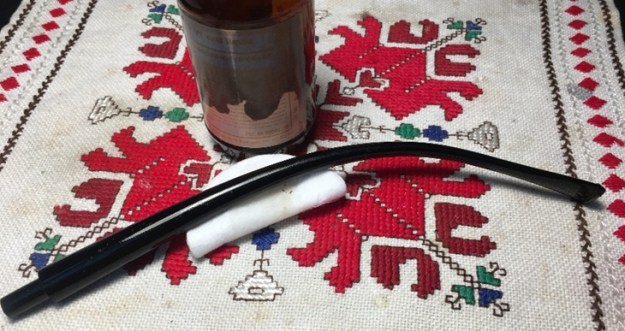
 I begin the restoration of the Knute of Denmark by using a pipe cleaner wetted with isopropyl 95% and cleaning the fancy stem’s airway. I then add the stem to a soak of Before & After Deoxidizer along with other pipes in the queue.
 After several hours soaking, I fish out the fancy stem and run another pipe cleaner wetted with isopropyl 95% and clear the airway of the Deoxidizer. I also use cotton pads wetted with alcohol and wipe off the raised oxidation. The Deoxidizer does a great job. The fancy stem looks good.
 To start the process of rejuvenating the vulcanite stem, I wipe it down with paraffin oil, a mineral oil, and set is aside to absorb and dry.
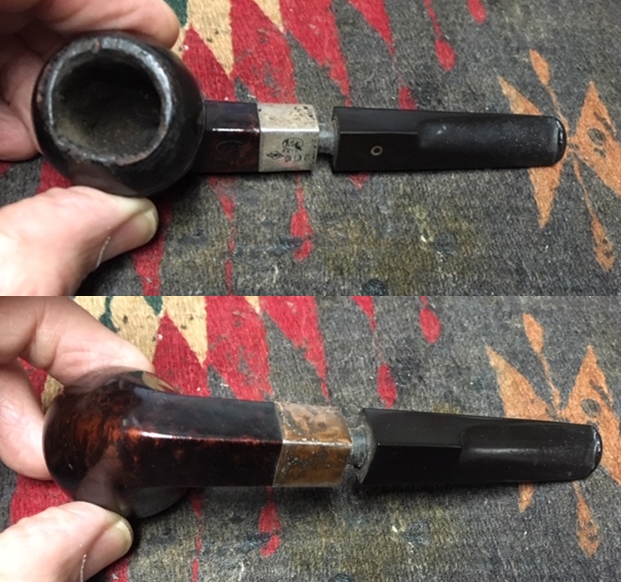
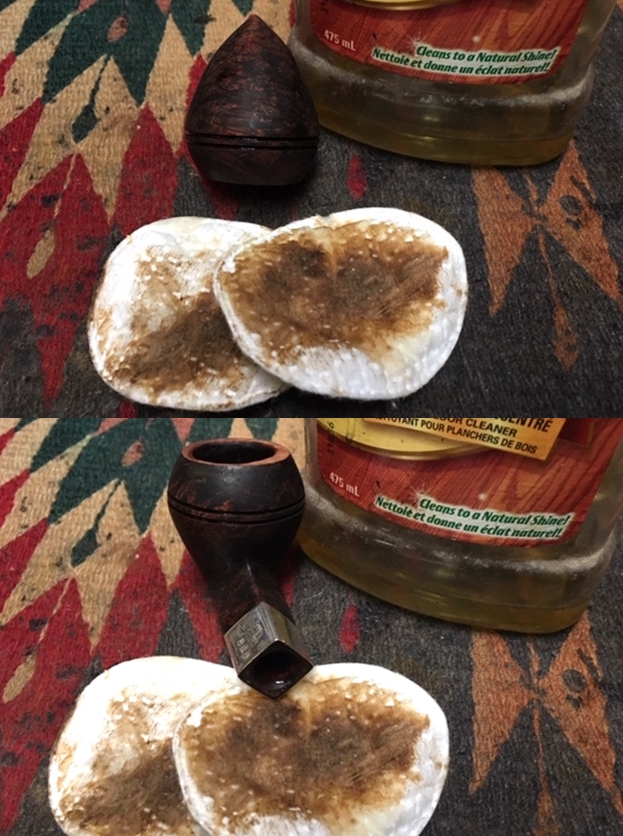
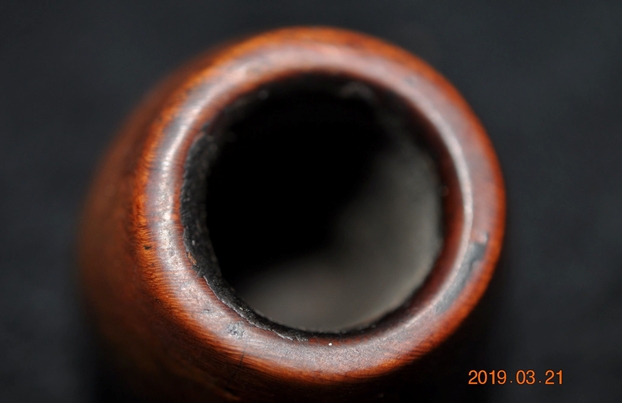
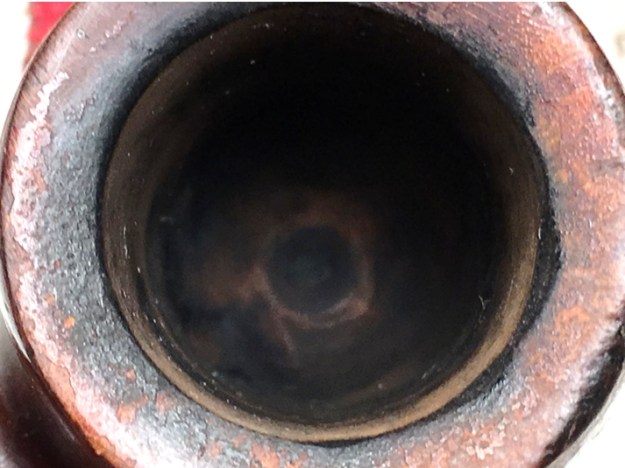
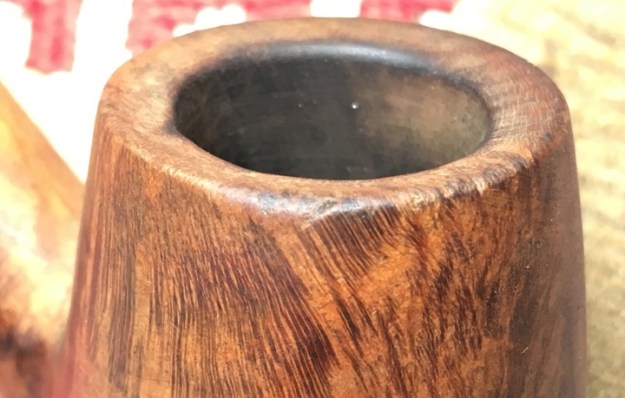
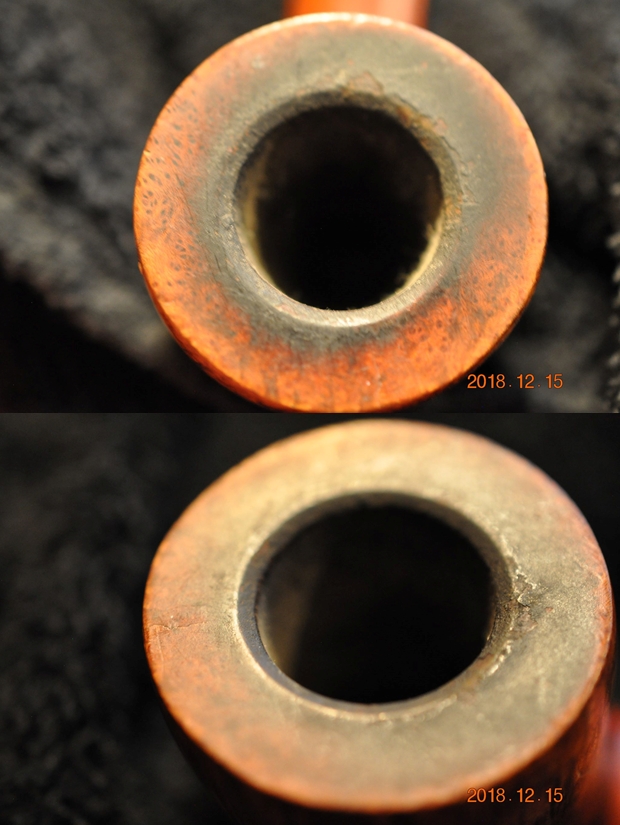
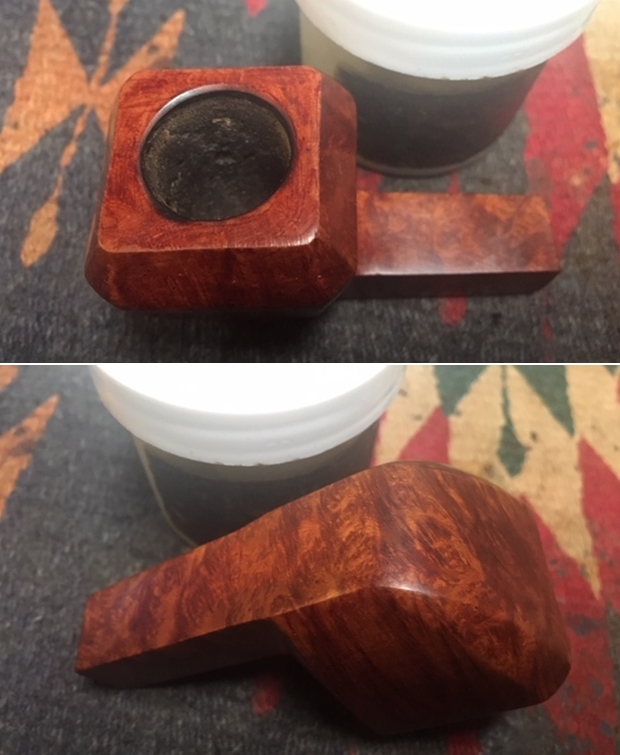
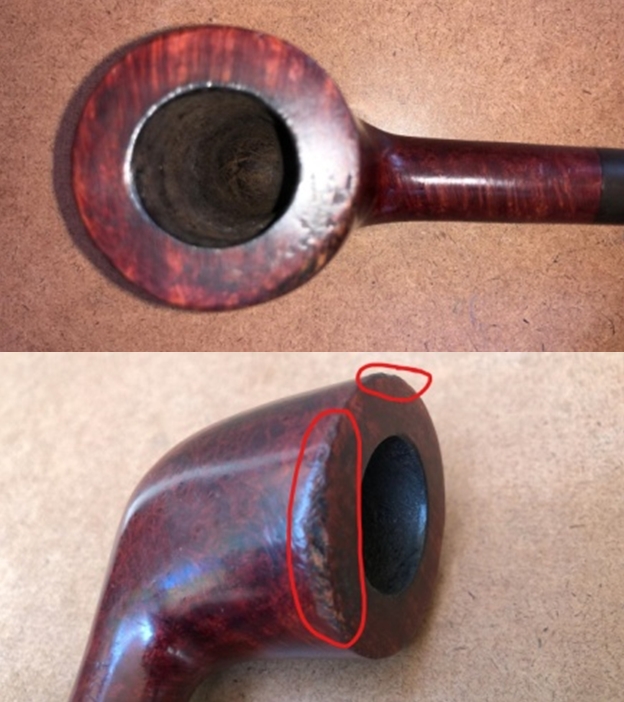
 Looking now at the Freehand stummel, I use the Pipnet Reaming Kit and start removing the thick cake in the chamber. I put down paper towel to catch the excavated carbon. Starting with the smallest blade head I begin reaming the chamber. Wow, the carbon cake is as hard as a brick! I’m careful not to force the blade head too much but allow the metal blades to crush the carbon cake gradually as I rotate the handle. I take a picture at the starting point and then about half way down the chamber that shows how the chamber has narrowed over time.
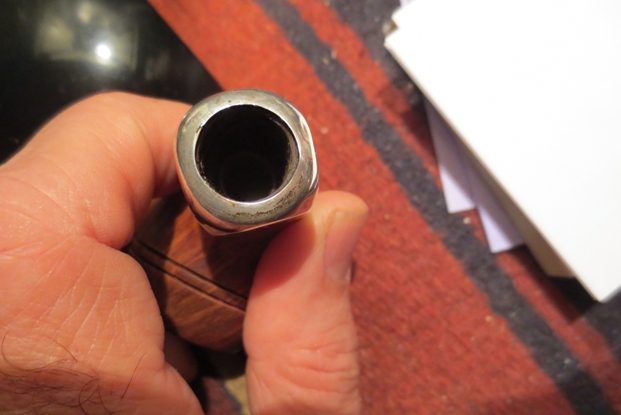
 I finally break through to the floor of the chamber and I’m careful not to over ream – to continue forcing the blade downwardly which would begin to damage the briar. I continue with the next two blade heads, using 3 of the four available in the kit.
 I then switch to the Savinelli Fitsall Tool – the name of this tool is apropos, as it not only scrapes the chamber walls further but also reaches down and works around the draft hole – removing cake that is hard to reach.
 To clean further I also sand the chamber using 240 grade paper which I wrap around a Sharpie Pen using it as a dowel rod. With this configuration I’m able to reach down into the huge chamber cavity and sand with some leverage. This does a great job cleaning the chamber and removing the last vestiges of cake.
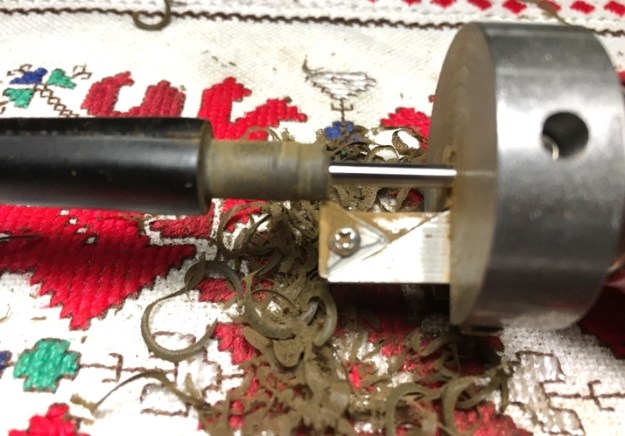
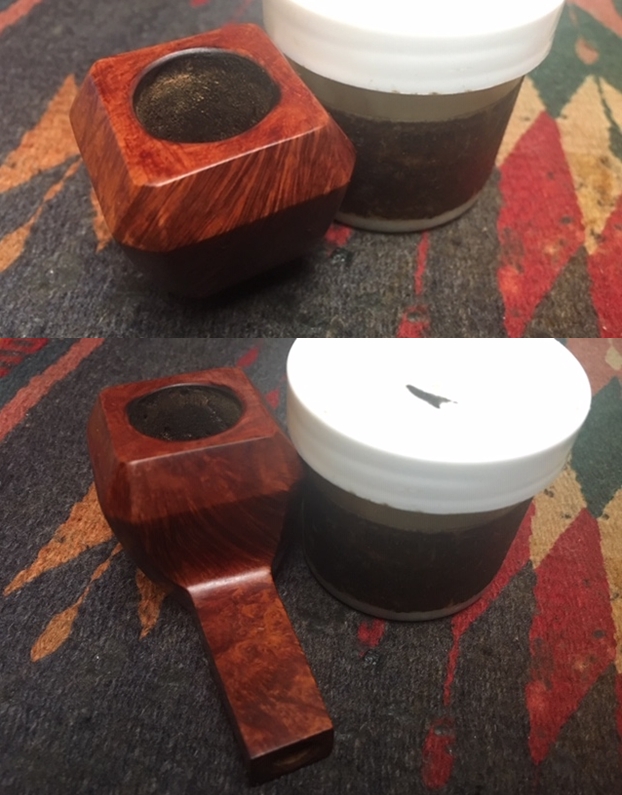
 Finally, I wipe the chamber with a cotton pad wetted with isopropyl 95% to remove the carbon dust left behind. I take a picture of the pile of carbon cake removed from the chamber and the full arsenal used.
 After the reaming, I inspect the chamber and it shows no problems with heating cracks or fissures. I move on!
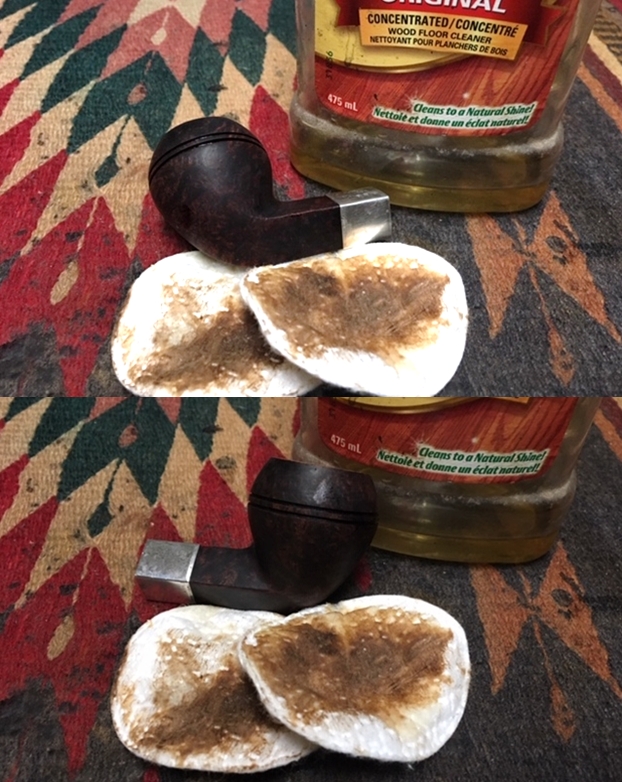
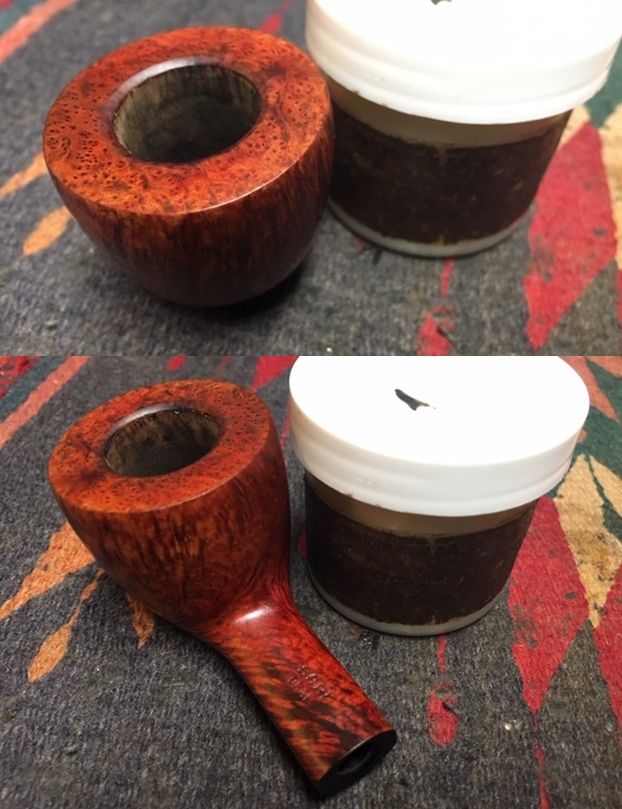
 I’m anxious to see how the external blasted surface cleans up as well as the smooth briar – will the cleaning remove the thin finish? The plateaus are full of grime as well. I use undiluted Murphy’s Oil Soap on a cotton pad to begin the scrubbing. I use a bristled tooth brush as well on the blasted surface and the plateaus. To help clean the lava on the rim plateau I also employ a brass wire brush that will not damage the briar. The cleaning did well. The rim plateau cleaned up but also lightened in the process – not unexpected. The rest of the blasted stummel looks good.


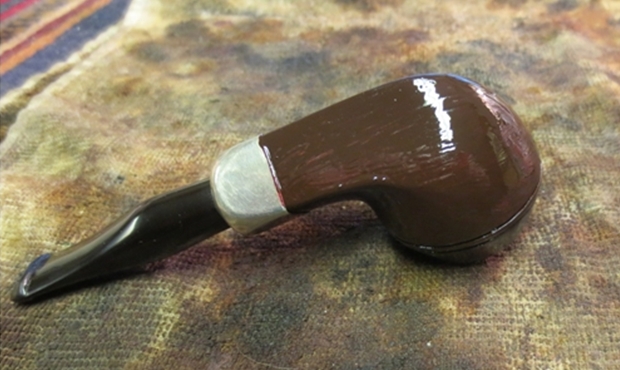
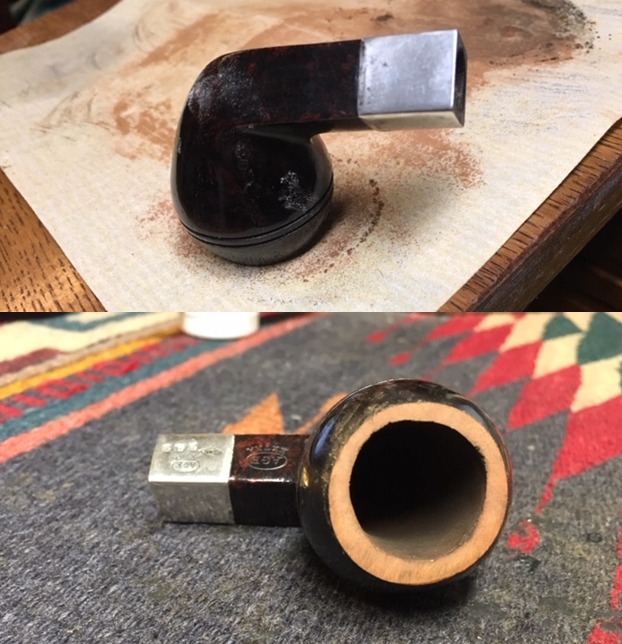
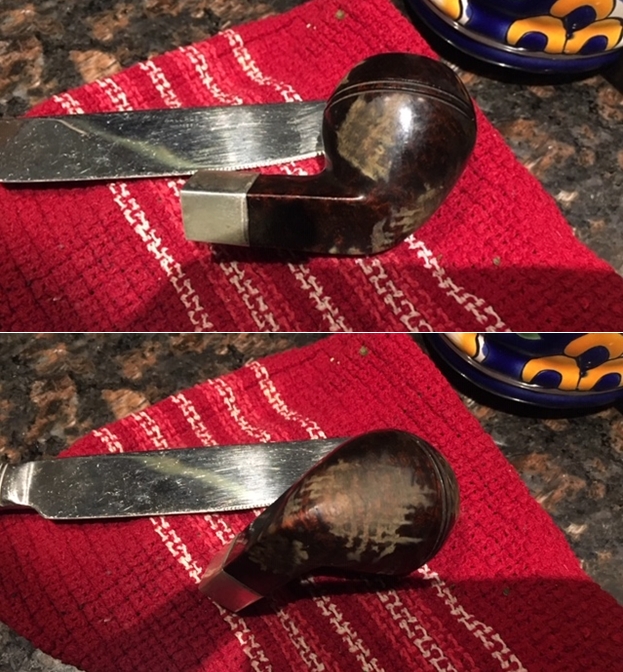
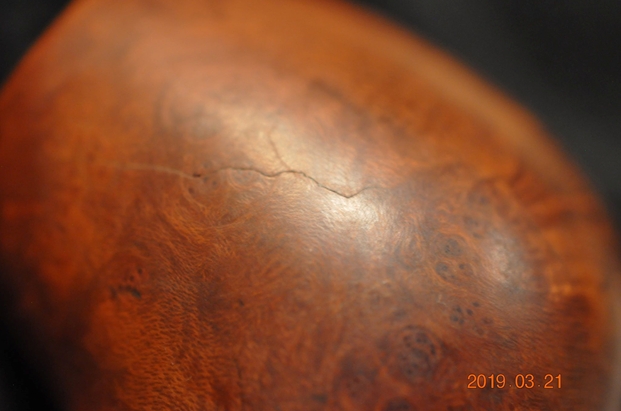
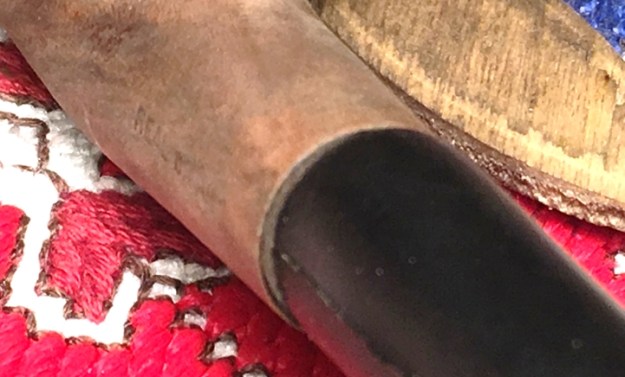
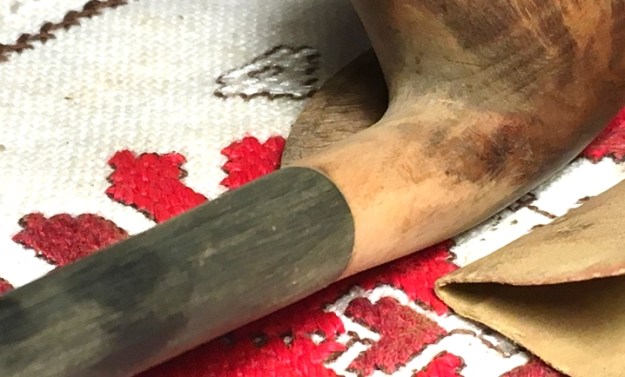
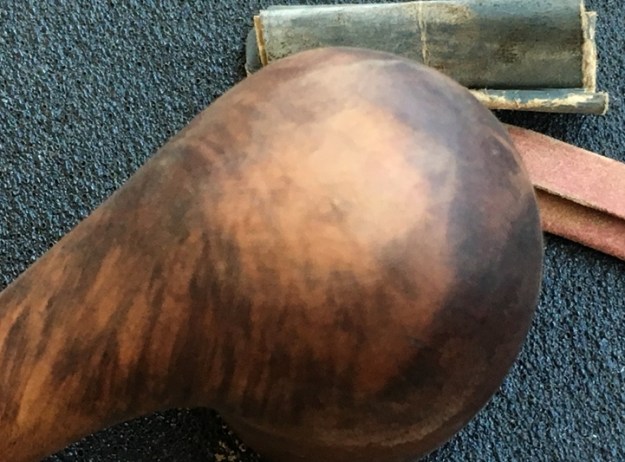
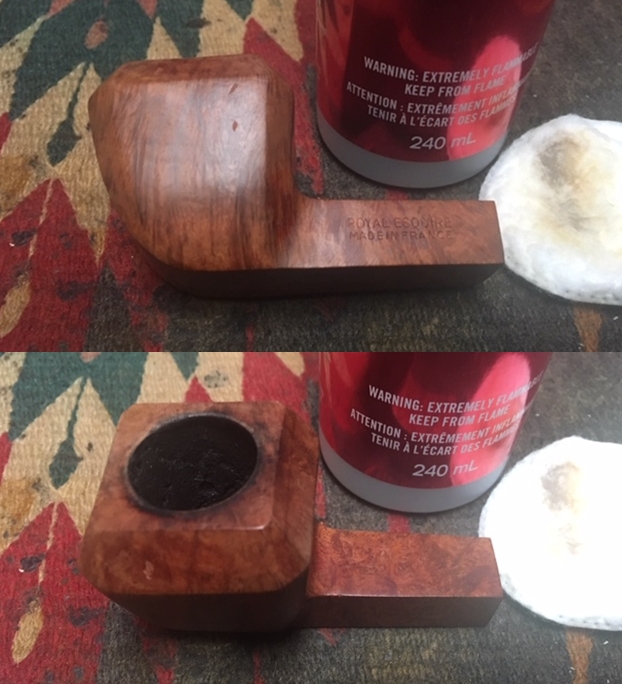
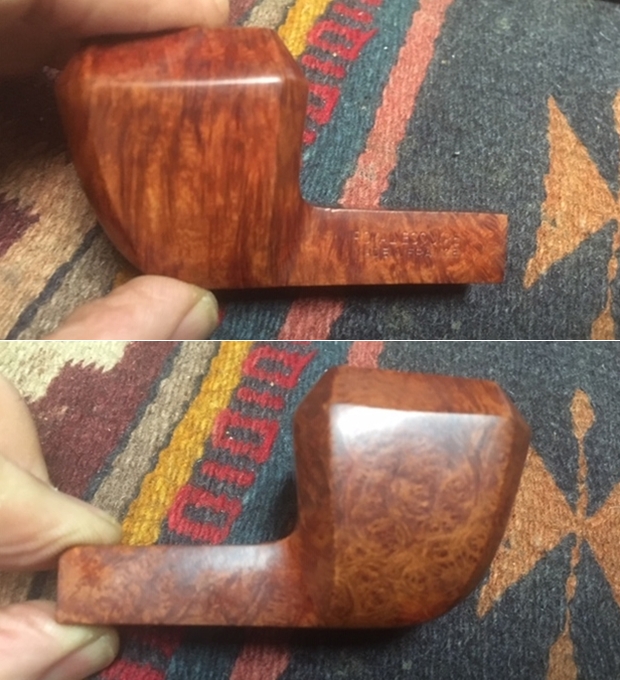
 The picture below shows the blotch of old, thin finish. The cleaning with Murphy’s did not remove it. To clean it off and give the smooth briar under-panel a cleaned surface, I use a cotton pad wetted with alcohol to do the job. I wipe it and it comes off. The surface looks good now.
 With the external briar surface cleaned, I now start working on the internals. Using pipe cleaners and cotton buds I go to work…, and I work! The internals are very dirty and there seems to be no end to the cotton buds coming out looking like nothing was happening. I also use a smaller, dental spoon to reach into the mortise to scrape the tars and oils which have accumulated on the internal briar surface. I continue until the hour of the night is too late and I decide to change gears.
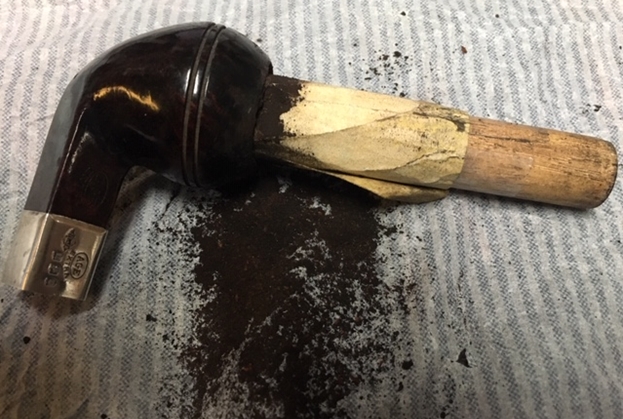
 Before going to bed I continue the cleaning effort on the internals by using a kosher salt and alcohol soak. To do this I first create a cotton mortise wick by pulling and twisting a cotton ball and then stuffing it down the airway with the help of a stiff hanger wire. I then fill the ample bowl with kosher salt and place it securely in an egg crate. Then, using a large eye dropper, I fill the internal chamber with isopropyl 95% until it surfaces over the salt in the chamber. After waiting a few more minutes, I top off the alcohol once more and turn out the lights! Hopefully, through the night progress will be made as the cotton wick and salt draw the tars and oils from the internal briar.
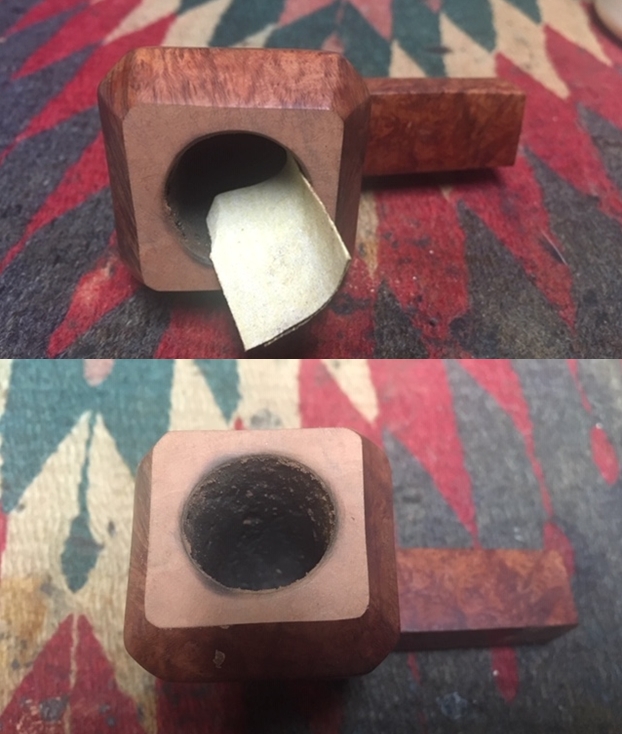
 The next morning, the cotton wick was very soiled showing that progress was made through the night. I remove the soiled and expended salt from the chamber to the waste and clean the remaining salt crystals using paper towels and blowing though the mortise.
  I follow with more pipe cleaners and cotton buds wetted with isopropyl 95% and at first, I was worried that I still had a ways to go! But after a few times through, the cotton buds removed the remaining tars and oils drawn from the briar and started to emerge much lighter! Success in hand, I move on.
 Looking at the external stummel, I have essentially 2 projects to consider, the sanding of smooth briar and color repair to both rim and shank plateaus. After the cleaning process to the plateaus, the wood has lightened and there are bald spots that need to be colored to blend. I decide to do this after sanding. The large underside of the Freehand is beautiful and has a few very minor nicks.
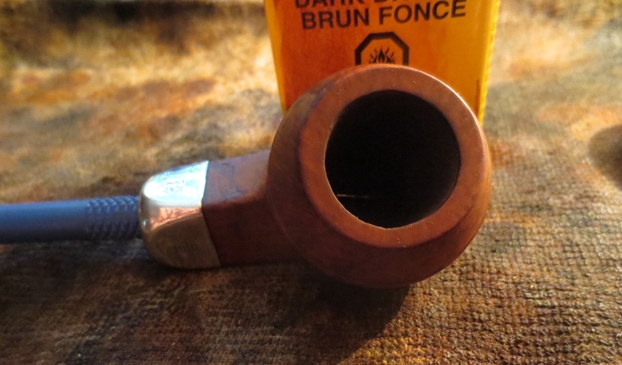
  The other sanding needed is to clean up the internal chamber wall that rises to form the forward crest of the rim plateau. This will clean up very nicely and should provide a striking contrast to the rough, rusticated plateau. This ridge rise continues around the circumference of the upper chamber.
 I start by using a coarse 120 grade paper to work on mainly the gouges and scratches to the upper chamber wall where it appears that cleaning tools were a little too anxious! This injury is primarily on the shorter rise on the back of the chamber (picture immediately above, to the left a bit). After I work out these larger gouges, I switch to 240 grade paper and work it around the entire upper chamber area. Then, I finalize the inner upper chamber with 470 then 600 grade papers. I like it!

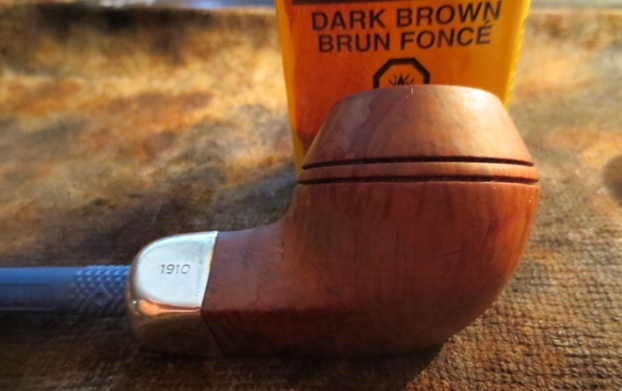
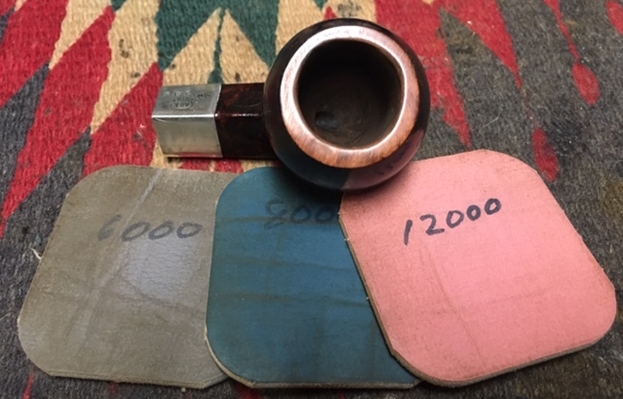
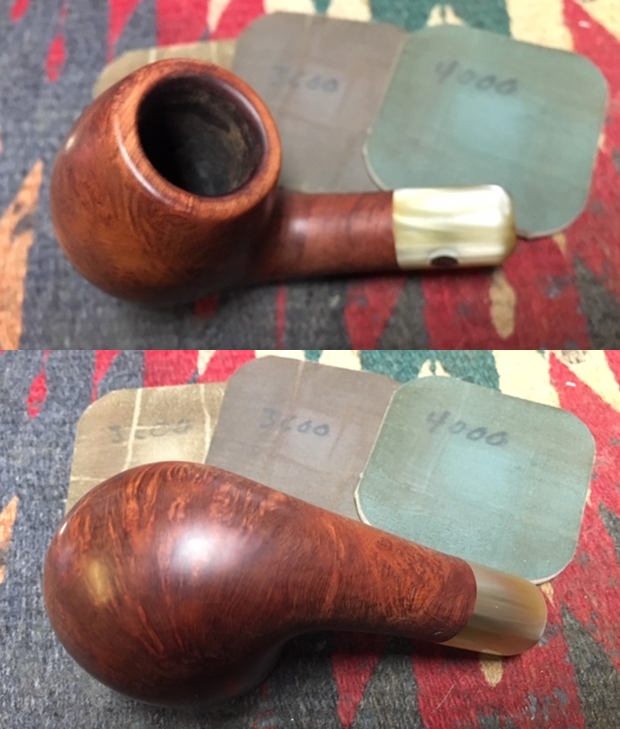
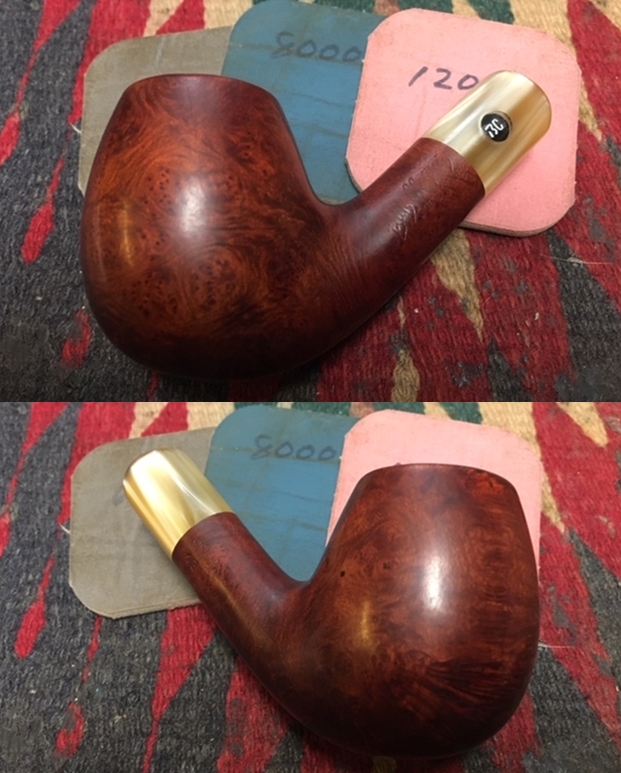
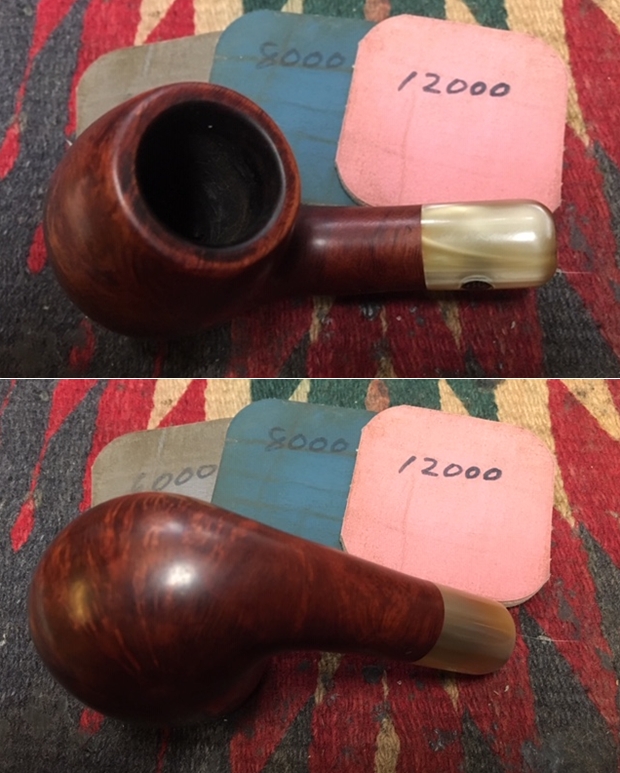
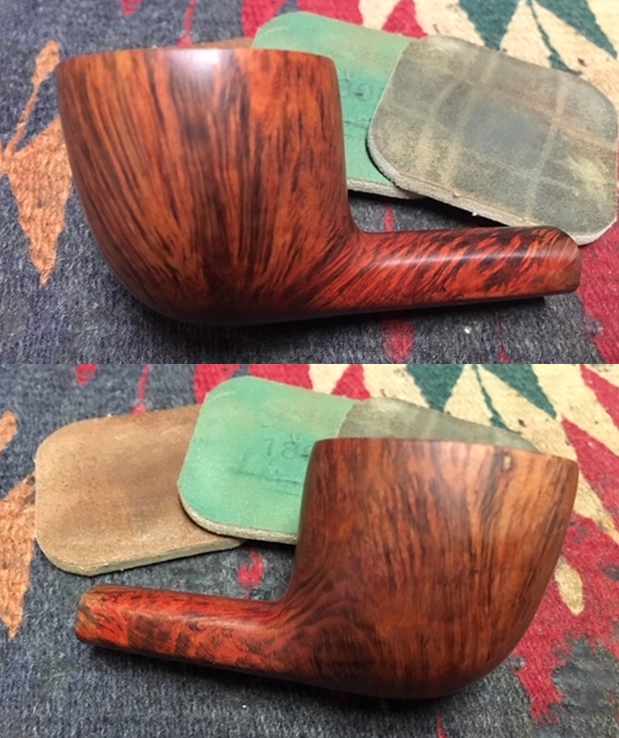
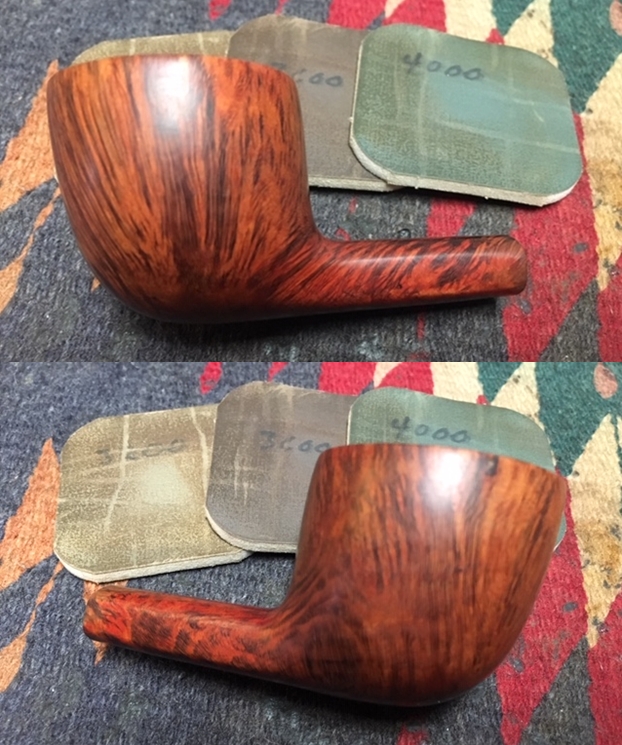
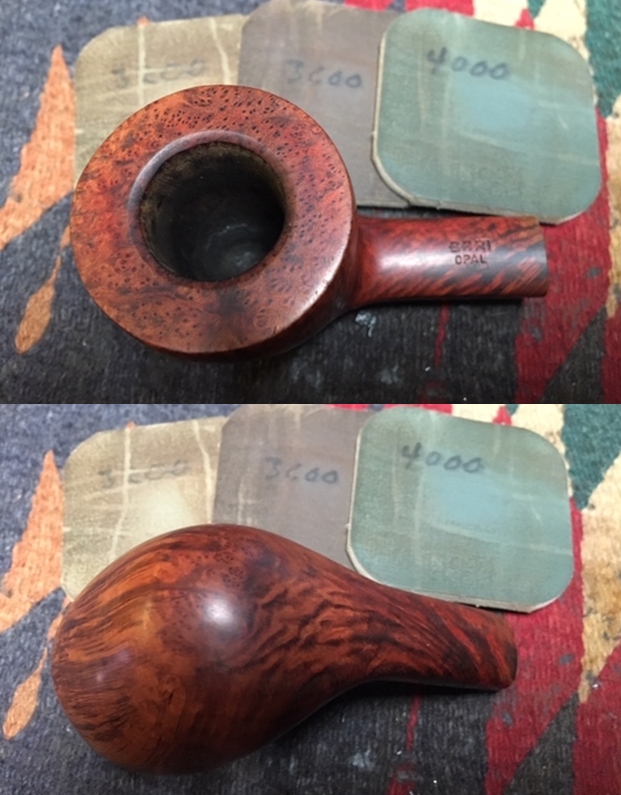
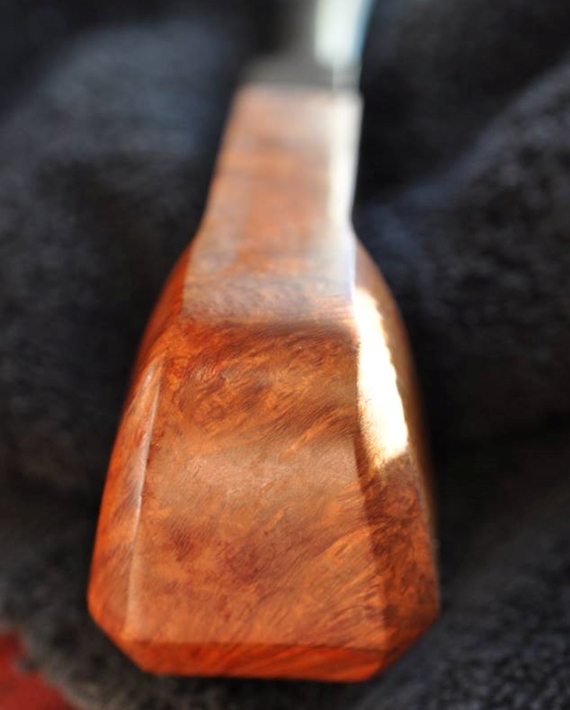
 Switching to the underside, but also including the upper chamber, I go directly to using micromesh pads by wet sanding with pads 1500 to 2400 followed by dry sanding with pads 3200 to 4000 then 6000 to 12000. I’m careful to keep my thumb over the nomenclature stamping, Knute of Denmark on the underside. Wow! The smooth briar contrasts are taking shape and I like what I’m seeing.

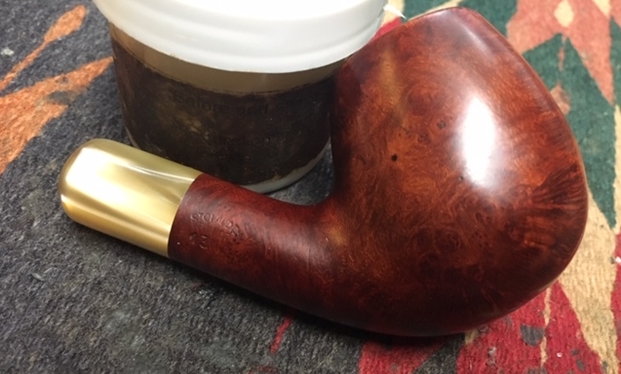
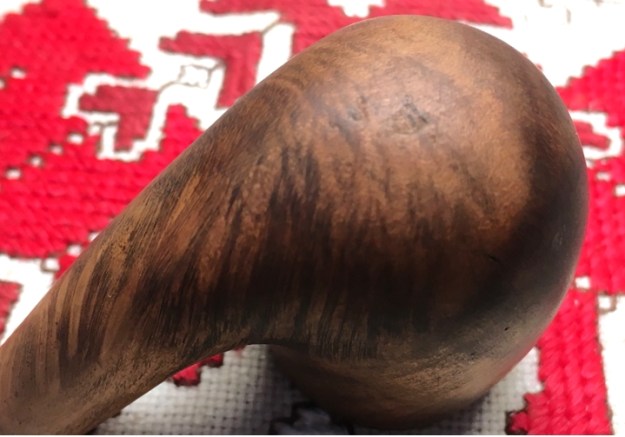
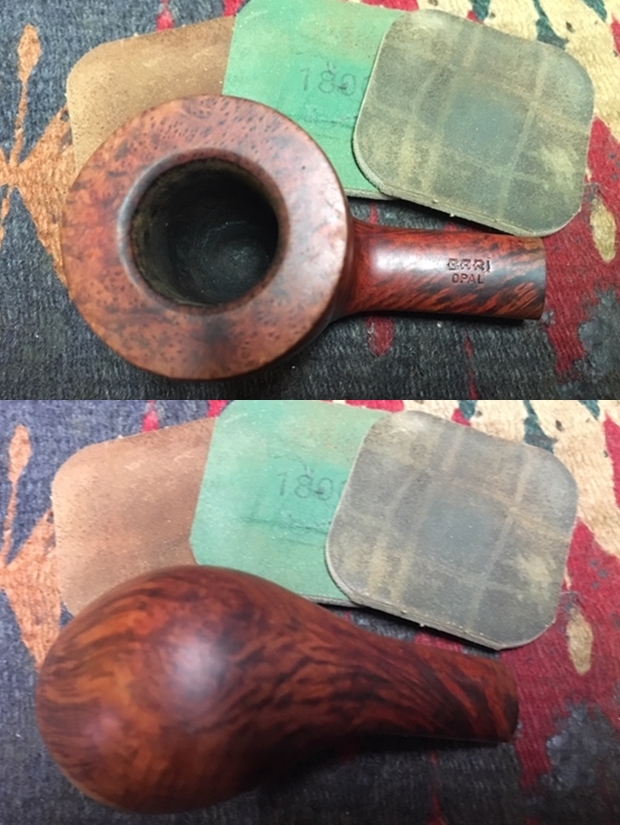
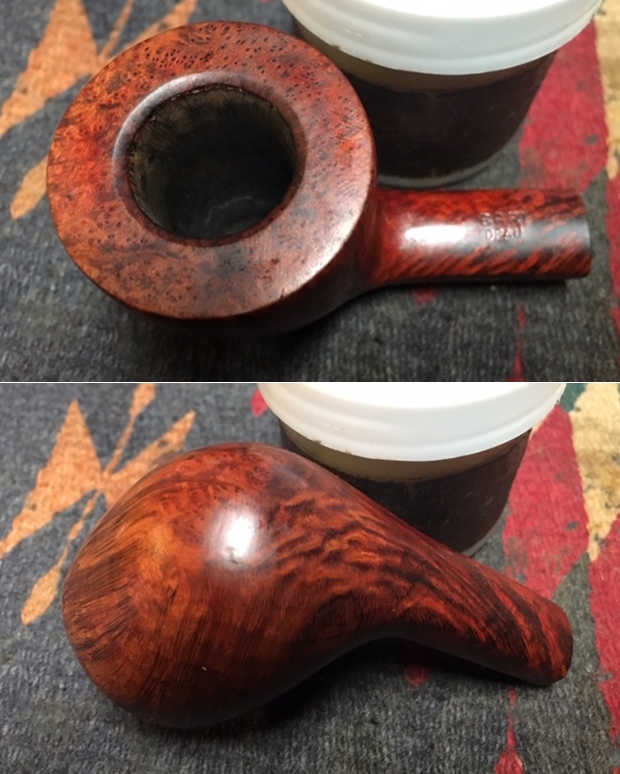
 Now, the second project – repairing the briar coloration on the plateaus. I take a few close ups of both the rim and shank facing plateaus. I have been thinking a lot about my approach to this. I’m satisfied with the condition of the color of the blasted surface – it has a classy looking weathered and rustic appearance with the dark stain that appears to have an oxblood or mahogany lean and is flecked with reds. I also take a closeup of the stummel surface to show what I’m seeing.
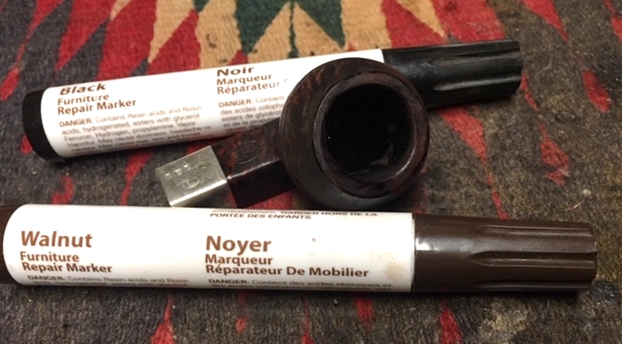
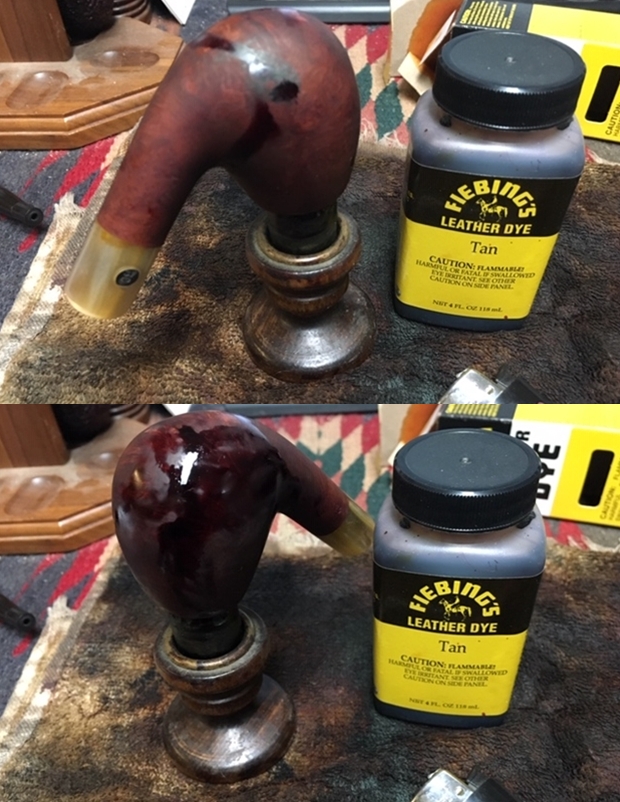
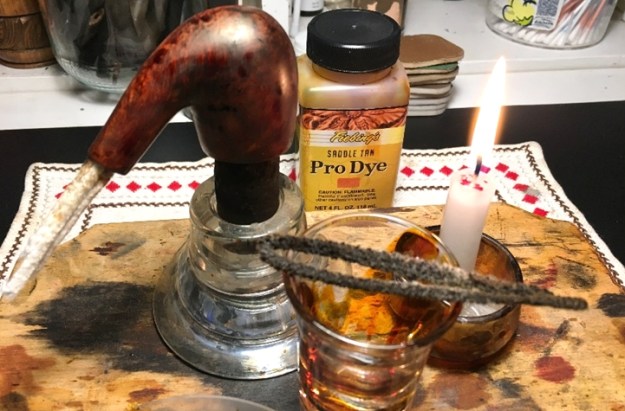
 I begin by cleaning each plateau with alcohol using a cotton bud – careful not to spread alcohol on the stummel surface. Color matching is more of a dance or an artform rather than a science. I use a cotton pad as a canvas and use different dye sticks to identify the best match for the darker overcoat color. I have two brands of mahogany that are the two marks – the upper one is darker, and I like it better. The cotton bud on the top is Fiebing’s Oxblood Leather Dye. I like this for the undercoat.
 With a cotton bud I apply Fiebing’s Oxblood to both plateaus which serve as the undercoat.
 After waiting about 15 minutes to make sure that Oxblood was dry, I then use the Mahogany Dye Stick and go over the Oxblood application. I do this for both plateaus.
 In the next picture it shows the Oxblood colored edge which is not the finished product! I will address this.
 To help erase this edge line, as well as to lightly sand the plateaus to bring out the oxblood flecks, I use a 3200 grade micromesh pad and sand over the tops of the ridges of the rusticated plateaus. This removes a bit of the darker overcoat and exposes the oxblood undercoat. I also use the micromesh pad to reestablish the line of the smooth upper chamber briar helping to remove the line of oxblood. I follow the 3200 grade pad and go through the remaining 5 pads to sand and polish the smooth upper chamber briar. Lastly, I do a light wipe with a cotton pad wetted with alcohol to remove excess and blend the dyes on the plateaus.
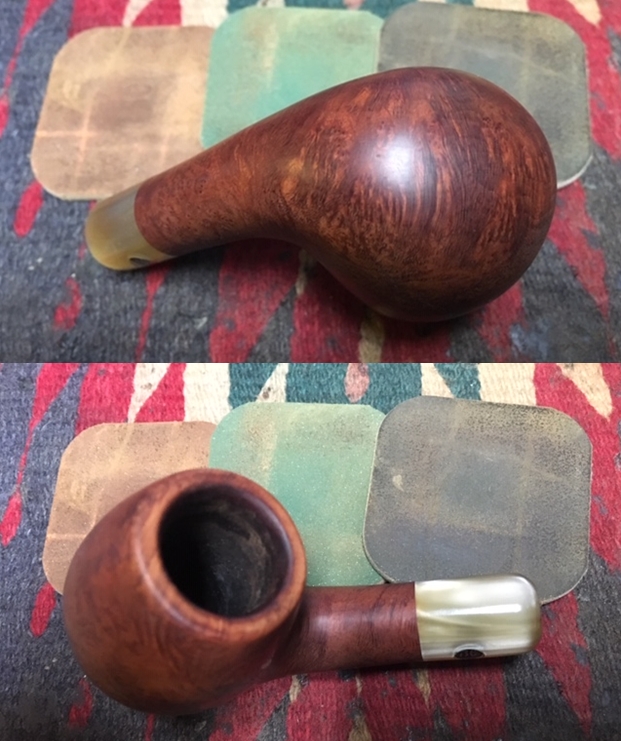
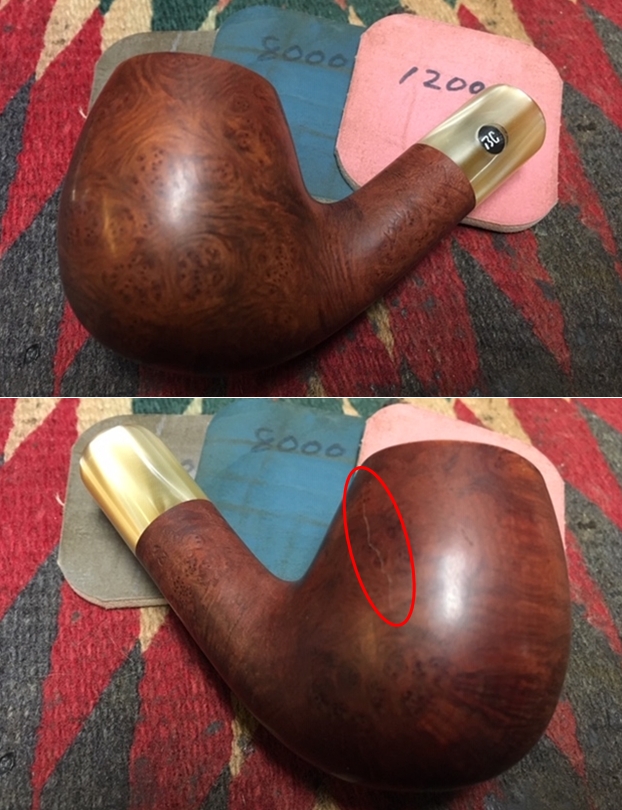
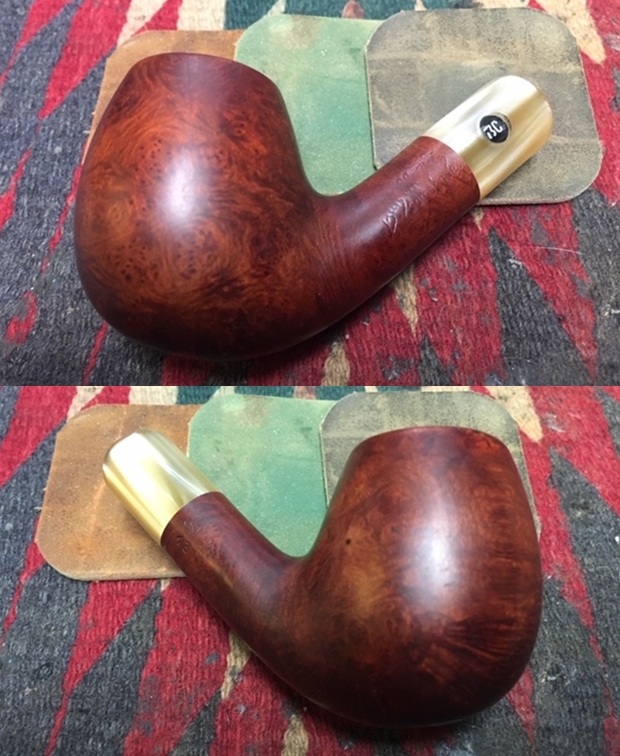
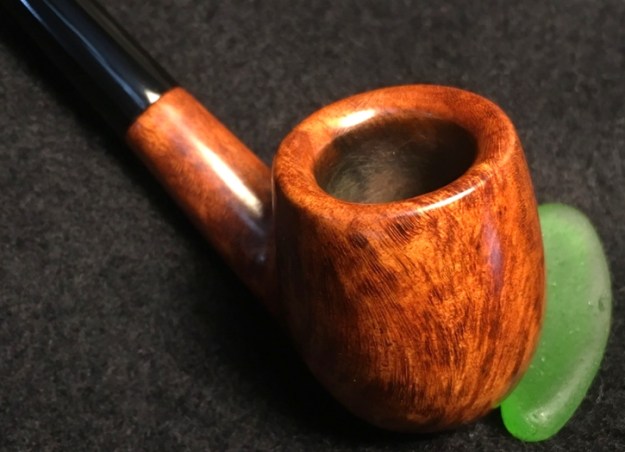
 I like the results! Both rim plateau and shank facing plateau look refreshed and emulate the flecking that is evident on the Knute stummel.
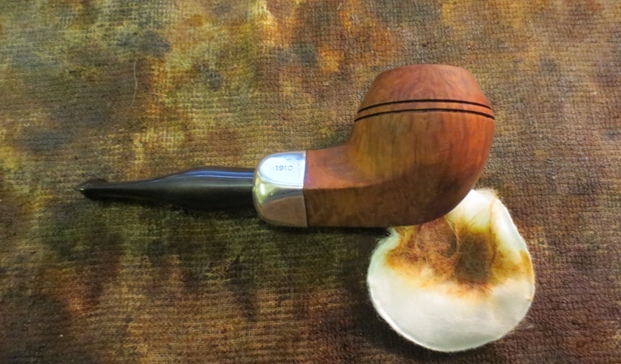
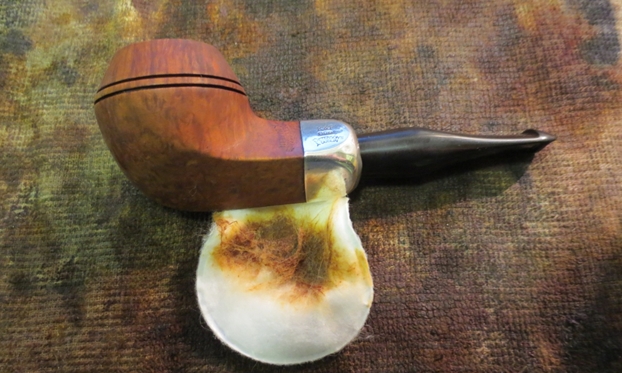
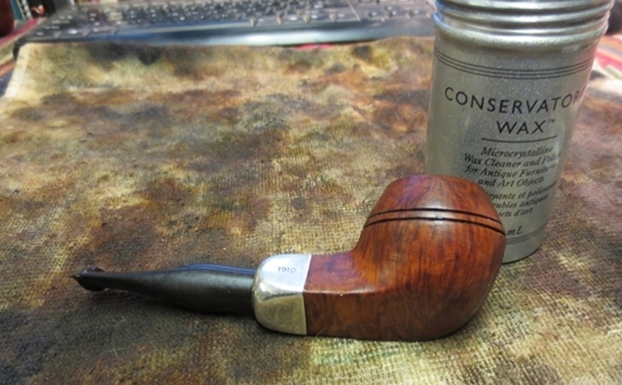
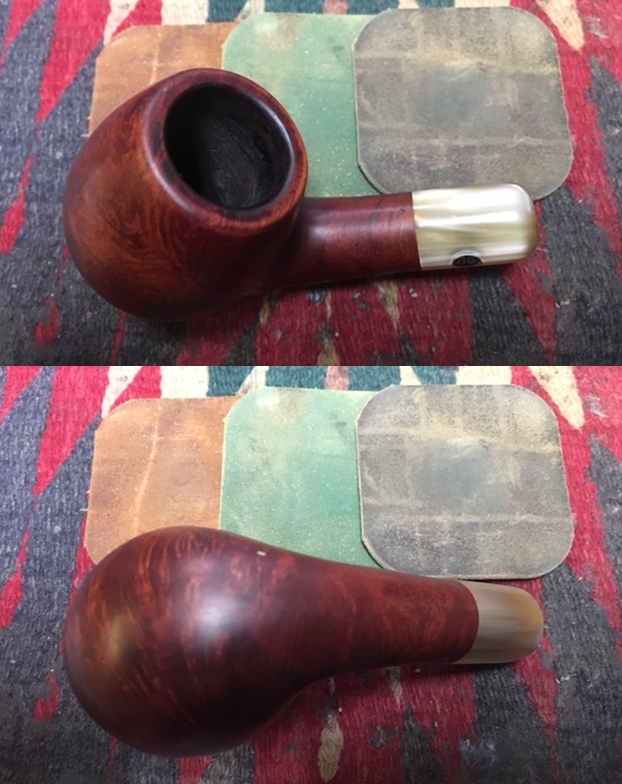
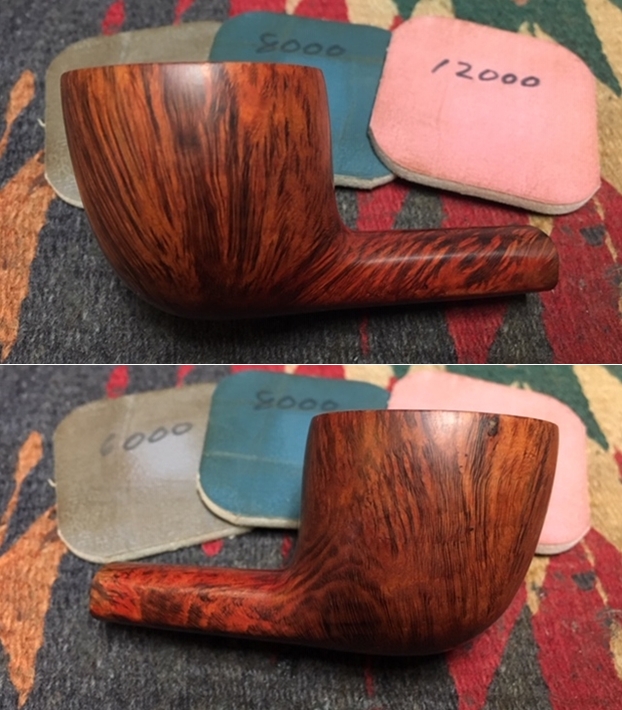
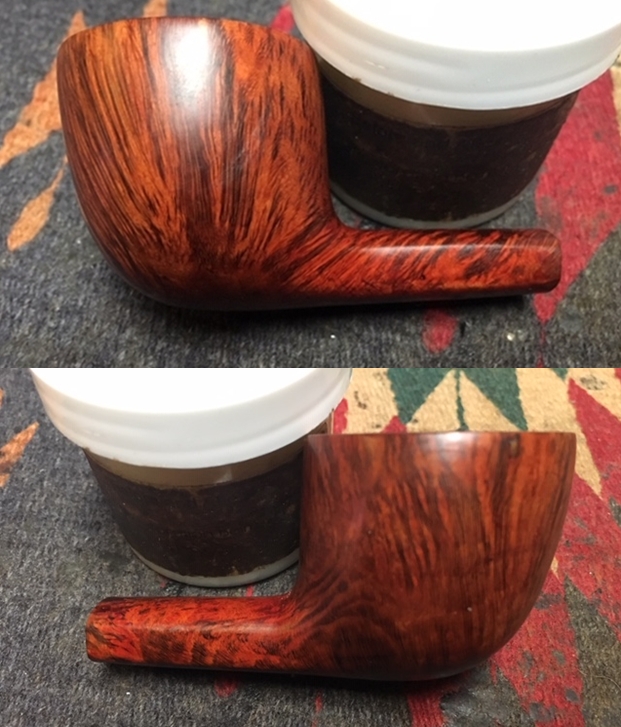
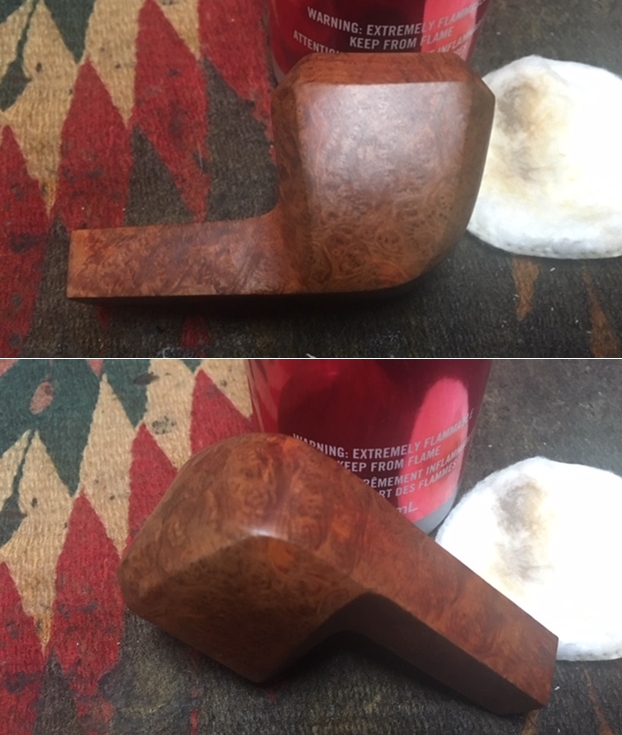
 With the plateaus completed, I condition the rest of the stummel using Before & After Restoration Balm aiming to bring the rest of the stummel into a harmonious alignment with the refreshed plateaus. My hope and expectation are that it will deepen and darken the beautiful blasted surface. It will be equally enriching to the smooth briar patches. I take ‘before’ pictures to compare, but I doubt whether the pictures will detect the darkened tones. We’ll see.


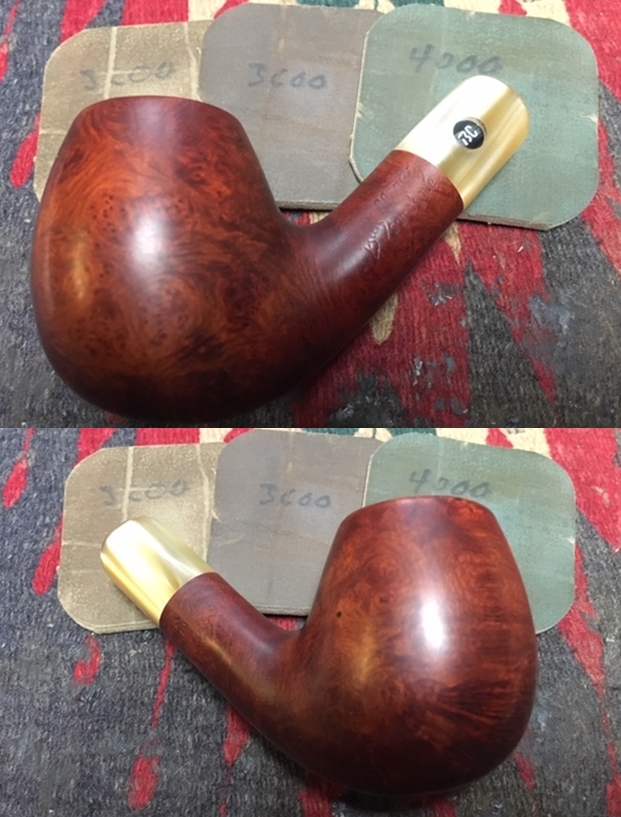
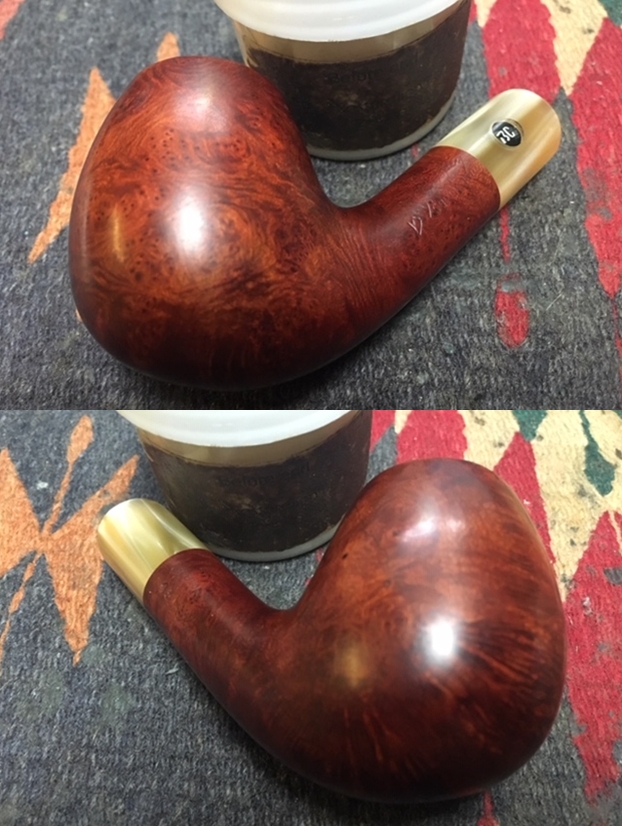
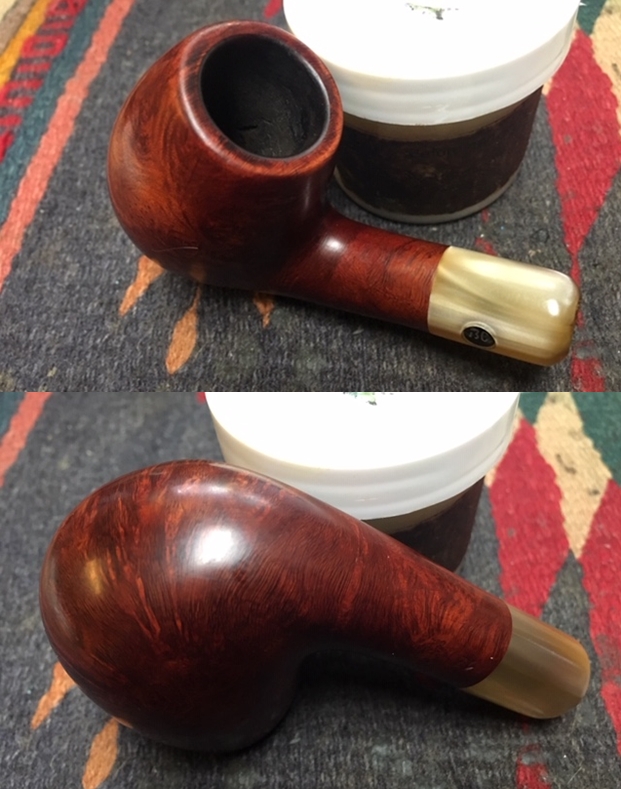
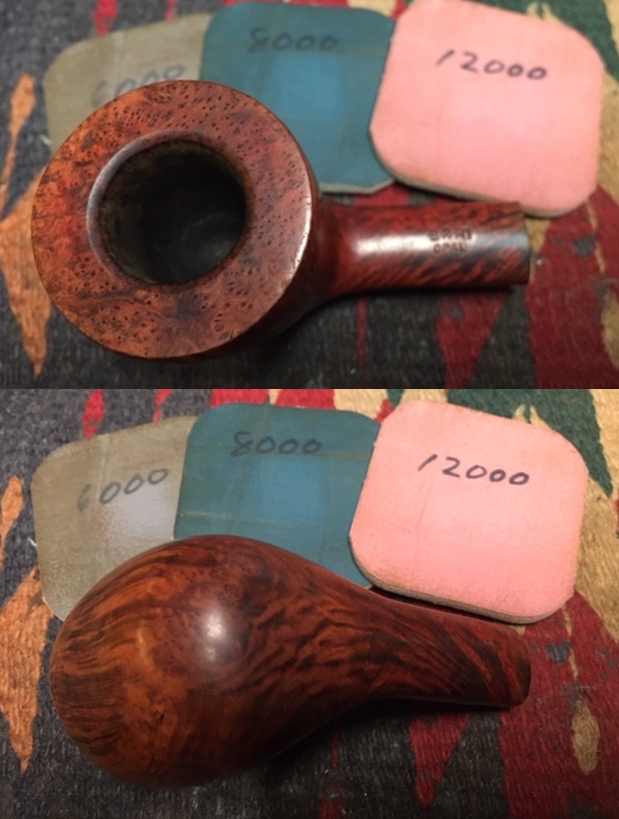
 I put a generous amount of the Balm on my fingers and work it into the blasted stummel surface, the rusticated plateaus and on the smooth briar patches. I can immediately see the briar responding to the Balm. Josiah is going to love this beautiful Karl Erik Knute Freehand! After saturating the surface with the Balm, it gradually thickens to a wax-like viscosity as I work it in. Finally, I place it on the pedestal to allow the Balm to do its thing as the briar absorbs it. I take this picture during this period. After about 15 or 20 minutes, I use a microfiber cloth to wipe off the excess Balm and buff the stummel rigorously making sure the excess balm has been removed from the nooks and crannies of the rustication and blasted surface. I love it! As hoped, the stummel’s enrichment with the Balm darkened it and both plateaus and stummel are closer in shade, but the plateaus, by design, just a wee bit darker. Yes!
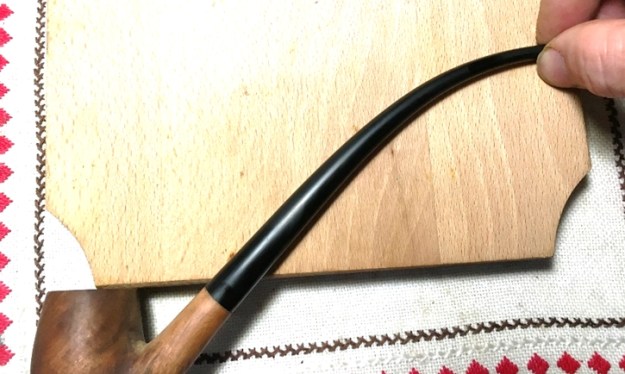
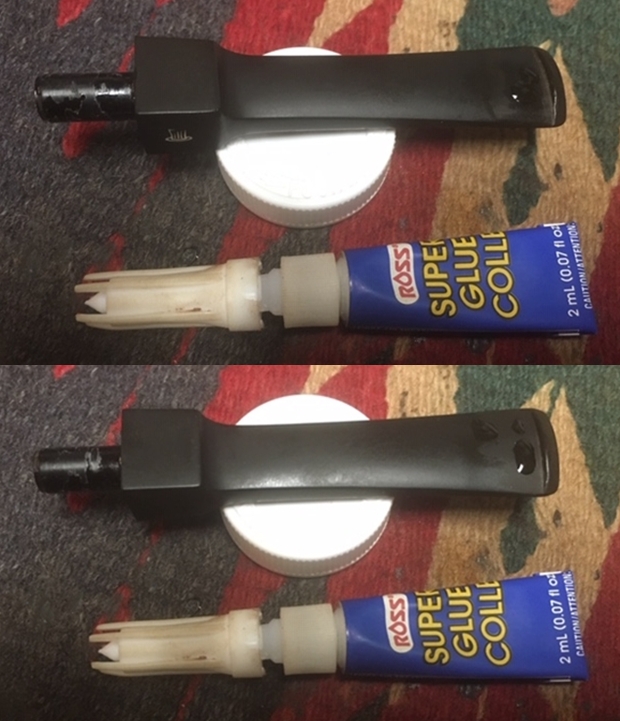
 The fancy stem is waiting in the wings. The Before & After Deoxidizer did a great job removing the oxidation. Now to address the tooth chatter and bites on the button. The stem has a very slight bend to it to mark the orientation. The upper bit has tooth chatter and a compression, but also long scratches along the length. The Lower bit also has tooth chatter and compressions – the button is chewed as well. When you freehand it with a Freehand you’re bound to see evidences of clamping.
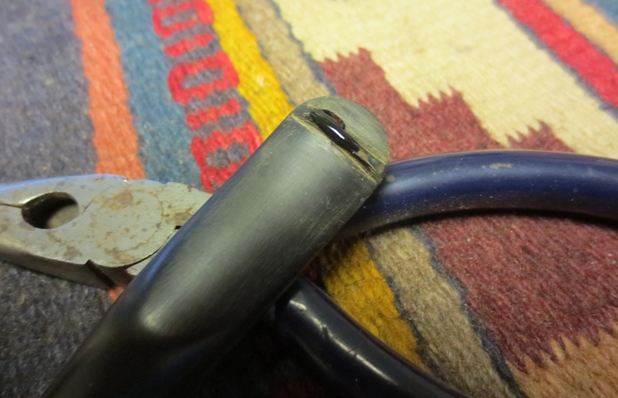
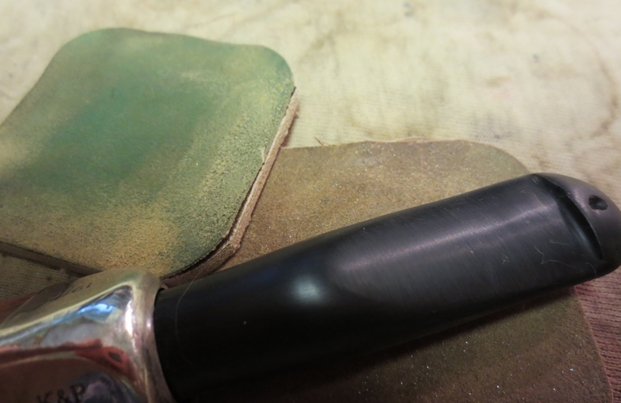
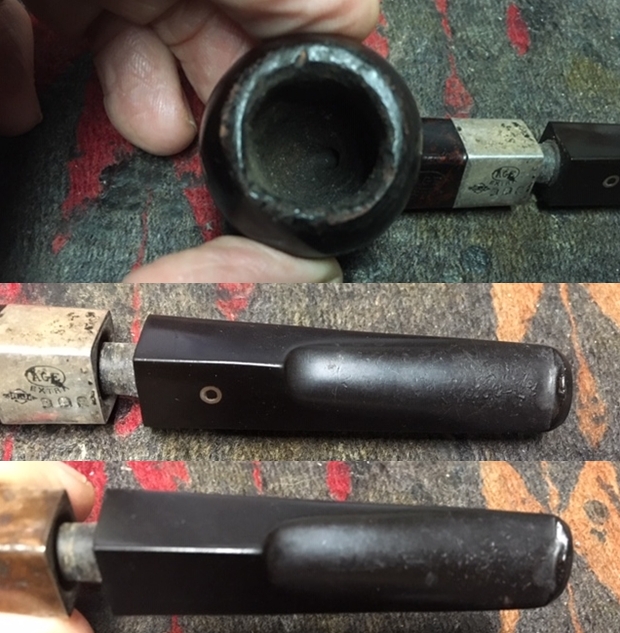
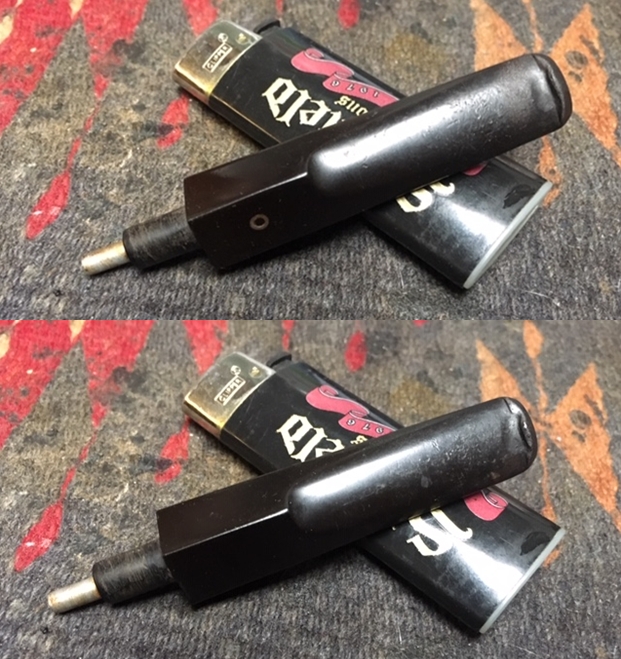
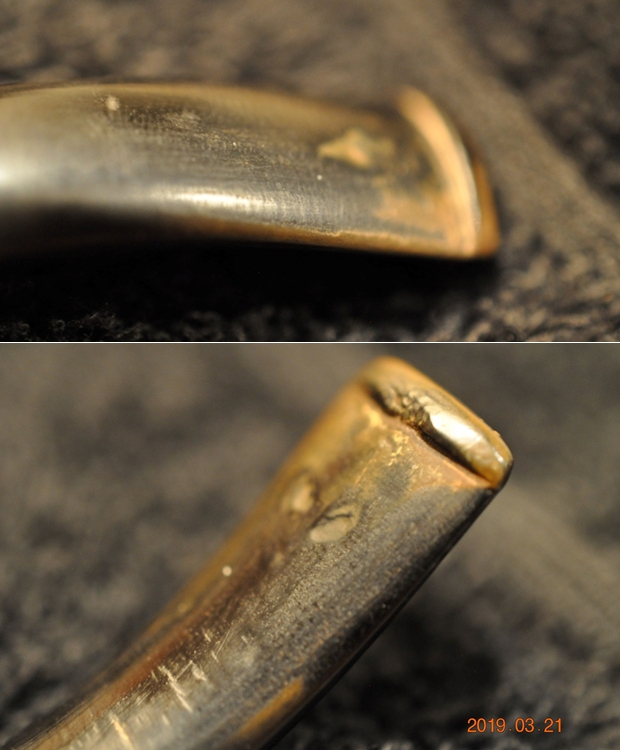
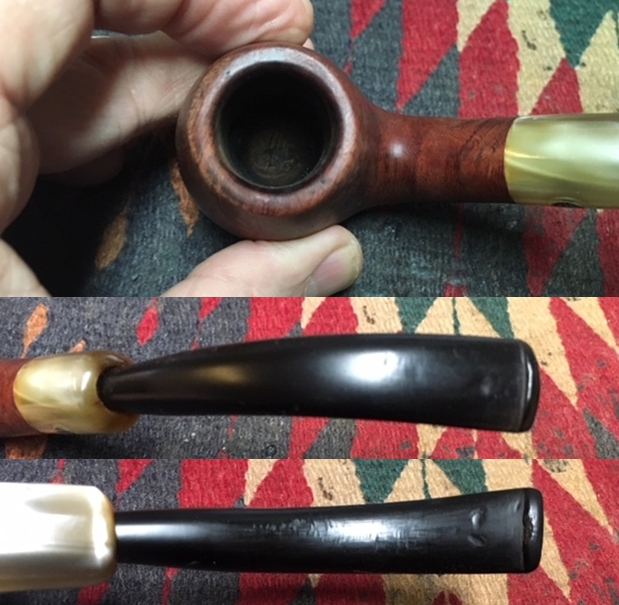
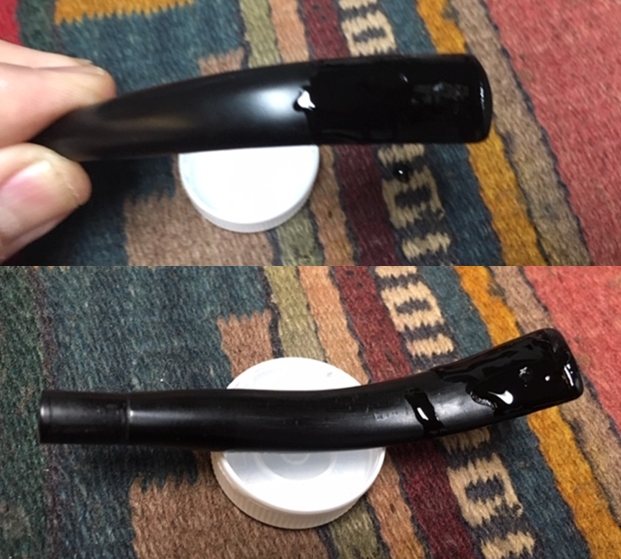
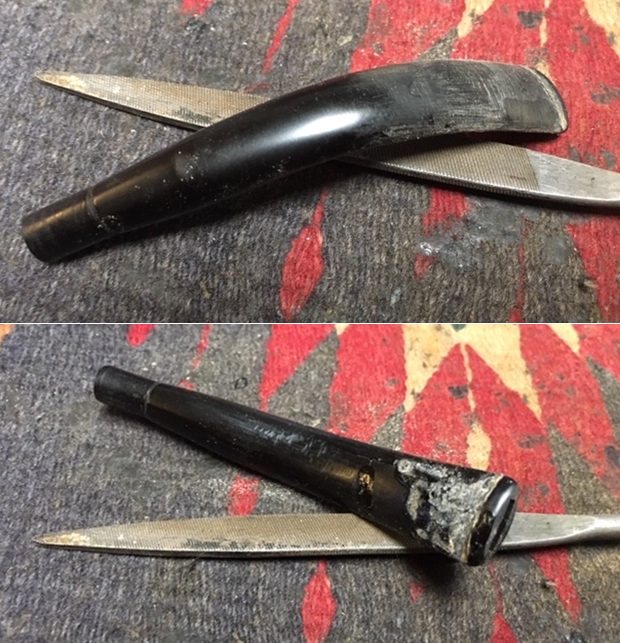
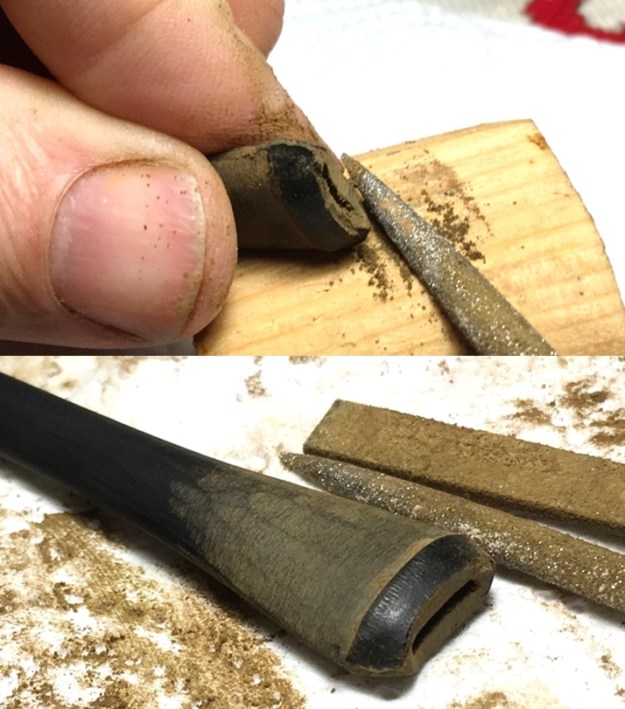
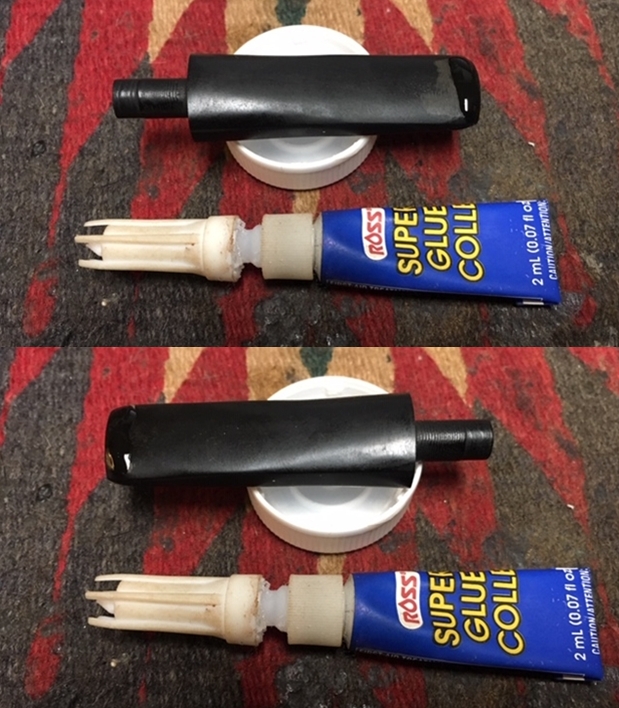
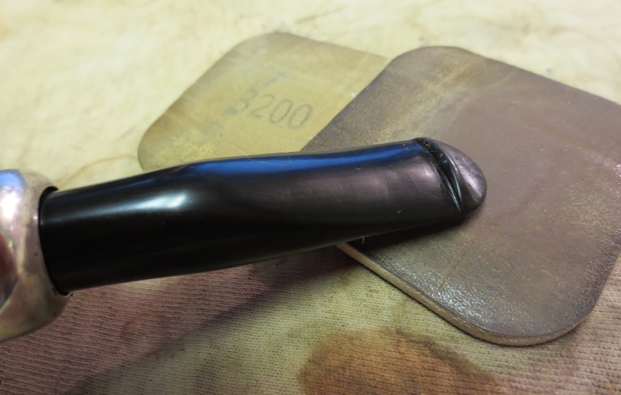
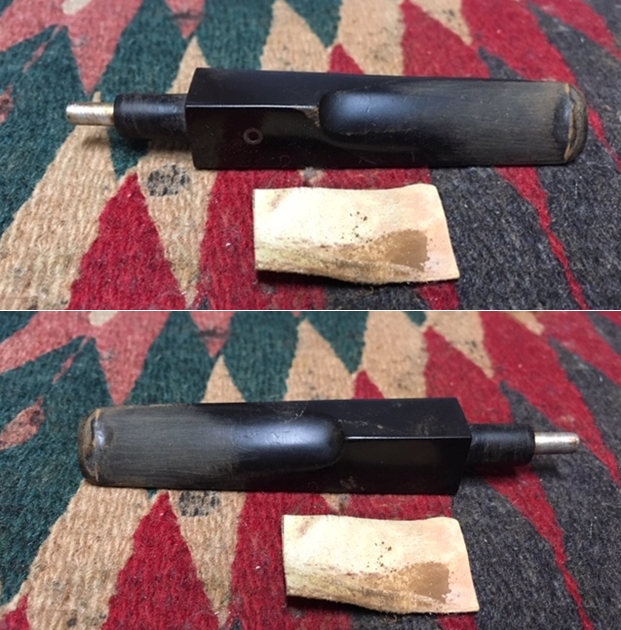
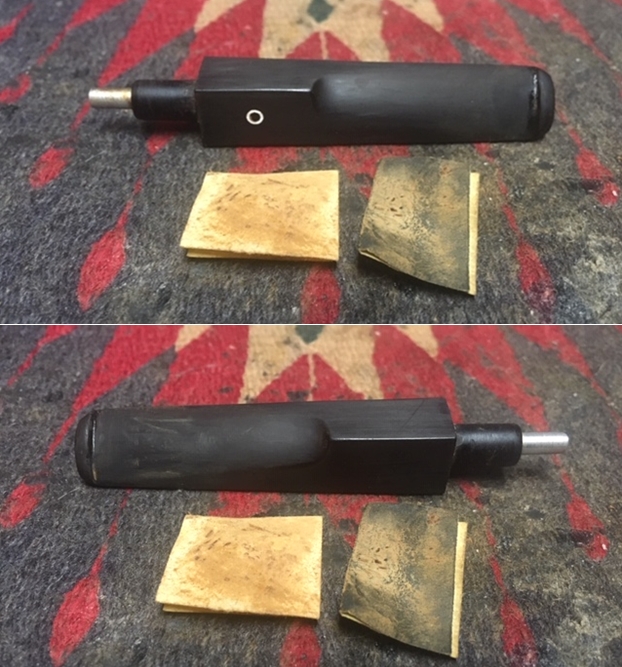
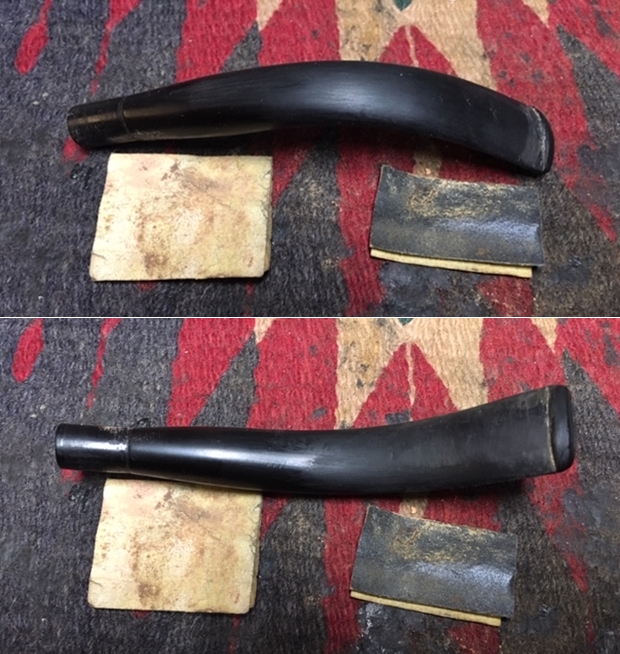
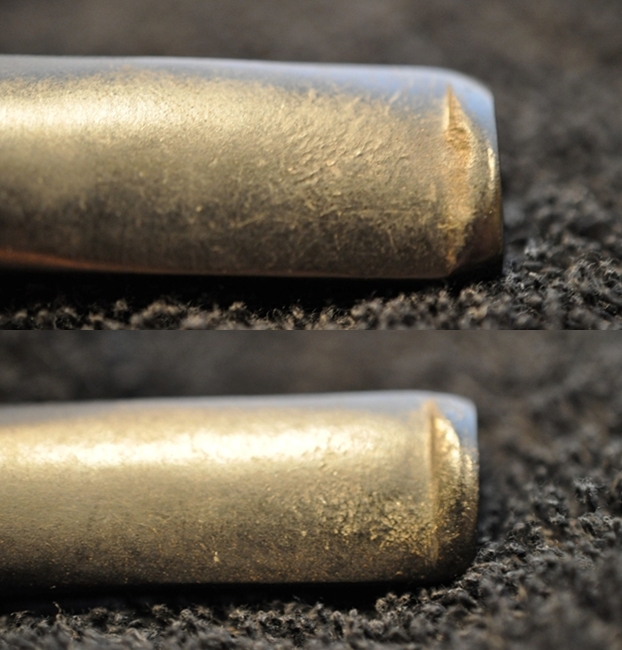
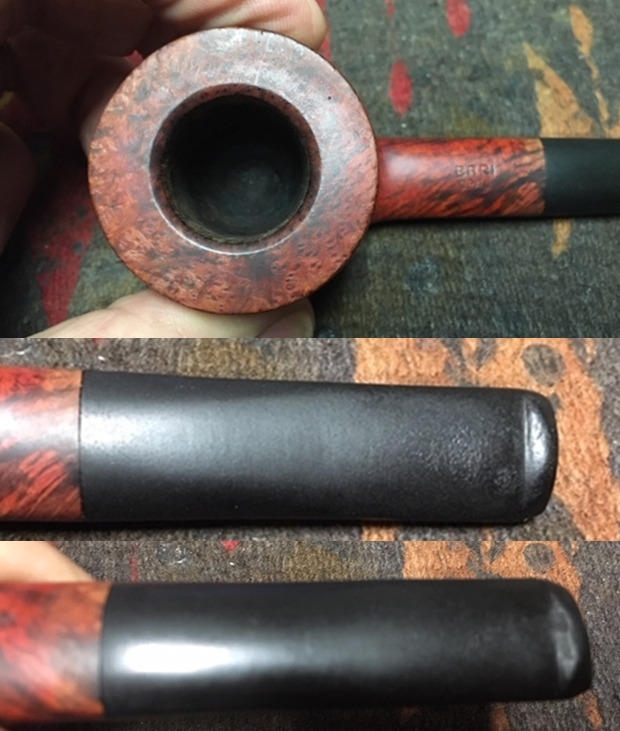
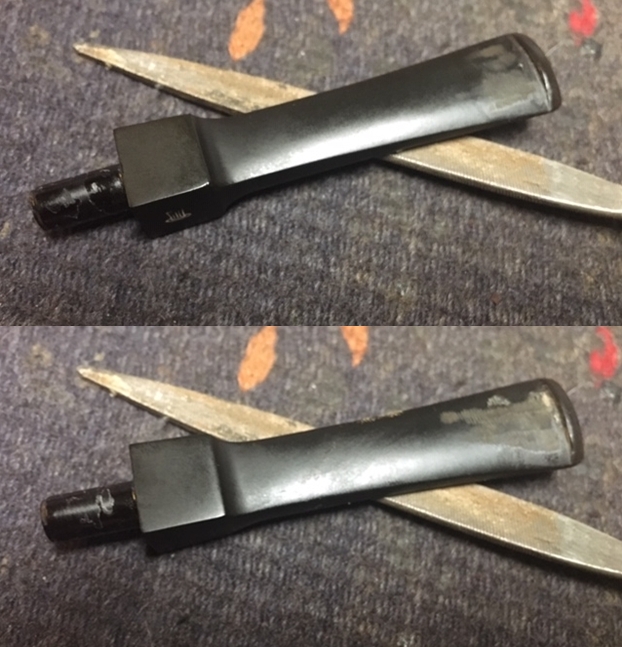
 To begin to address these issues, I use the heating method to see if the compressions will lessen. Using a Bic lighter, I paint the areas with the flame. As the vulcanite heats, it expands, and the hope is that the compressions disappear or are much lessened. I apply the flame on both sides, and it does make a difference in lessening the compressions. I move on to using 240 grade paper to sand both the upper and lower sides. I also use the flat needle file to freshen the button lips edges. The compressions sand out nicely. The pictures show the results with the upper and lower bit.
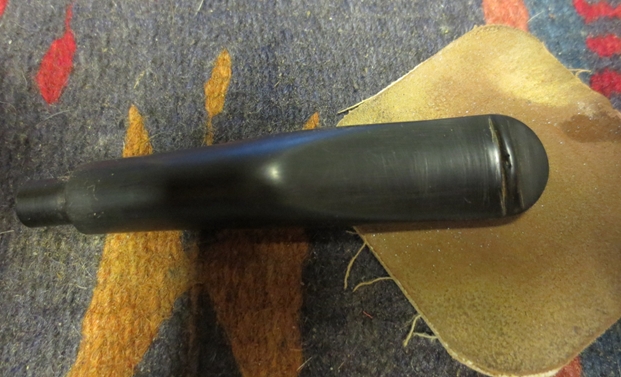
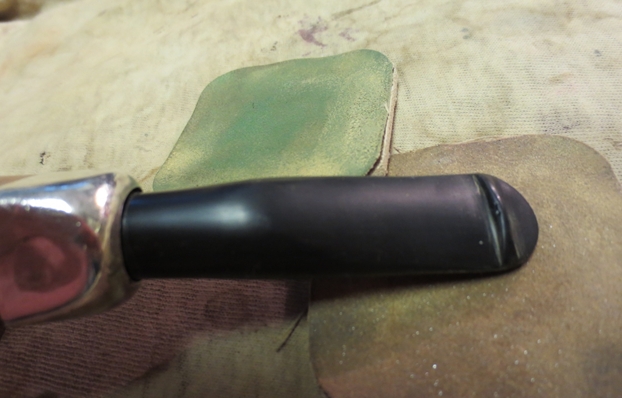
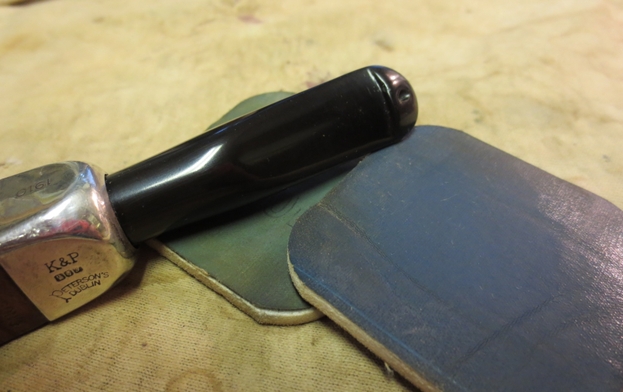
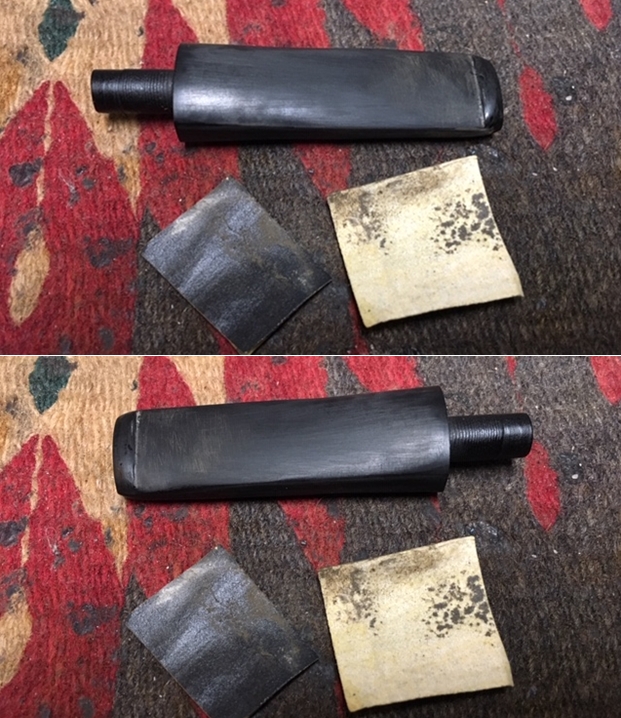
 Next, I wet sand the entire stem using 600 grade paper. I then buff the stem with 0000 steel wool.
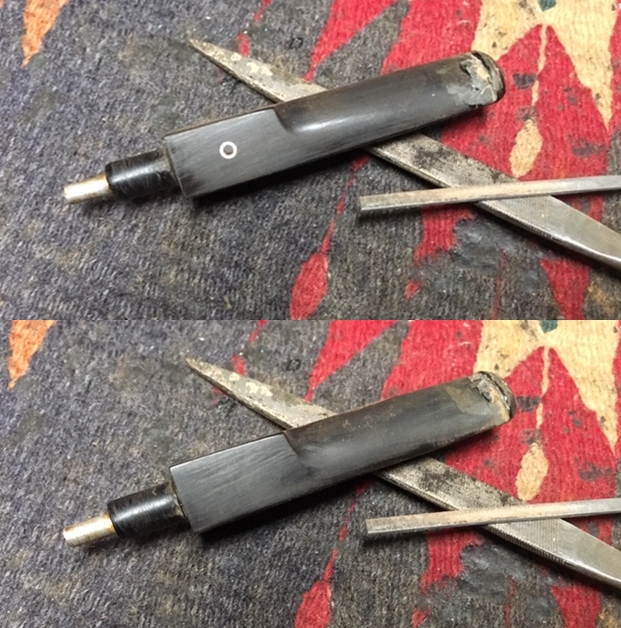
 I see that the slot is not smooth, and I use rounded needle file to file the edges.
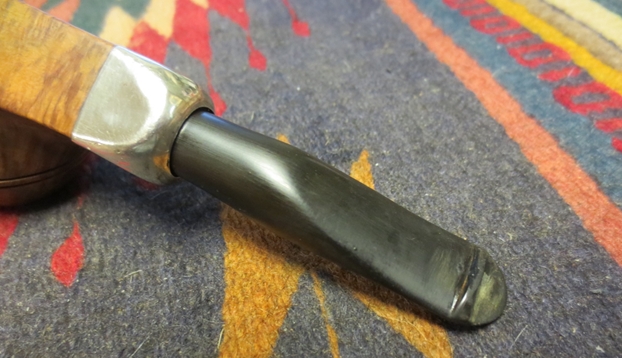
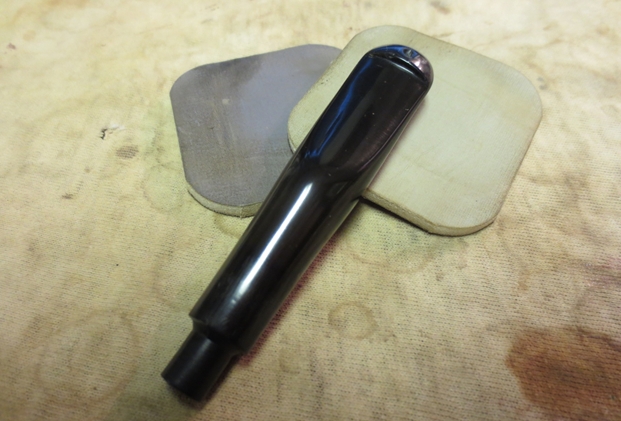
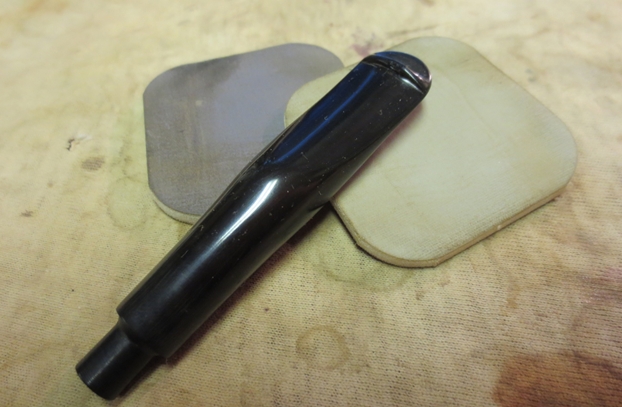
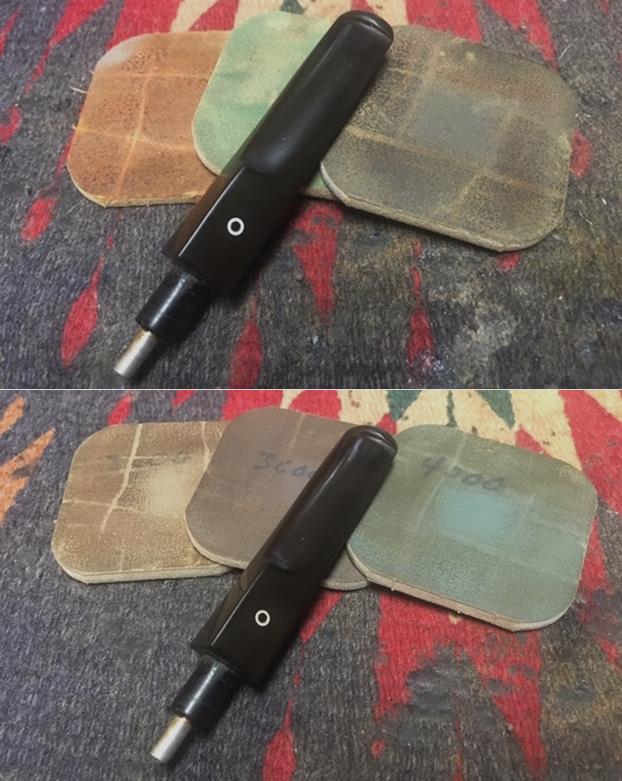
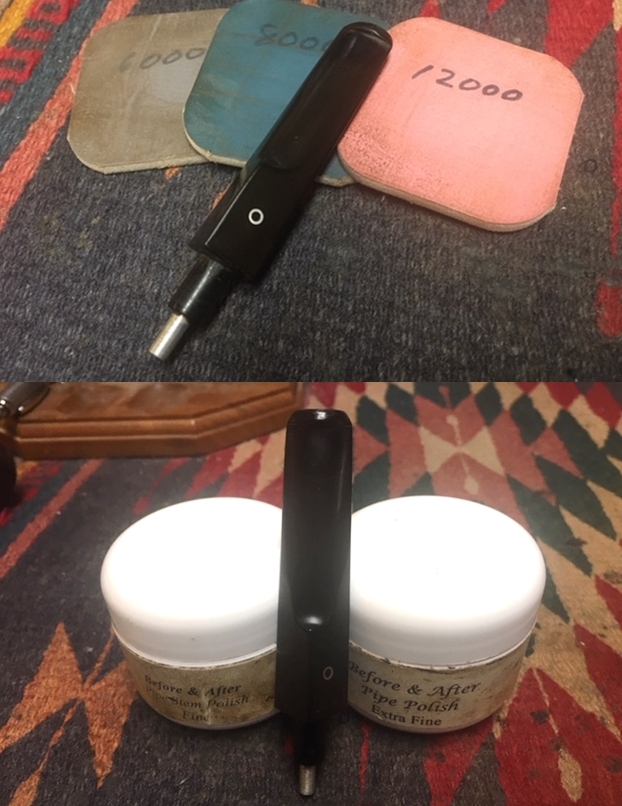
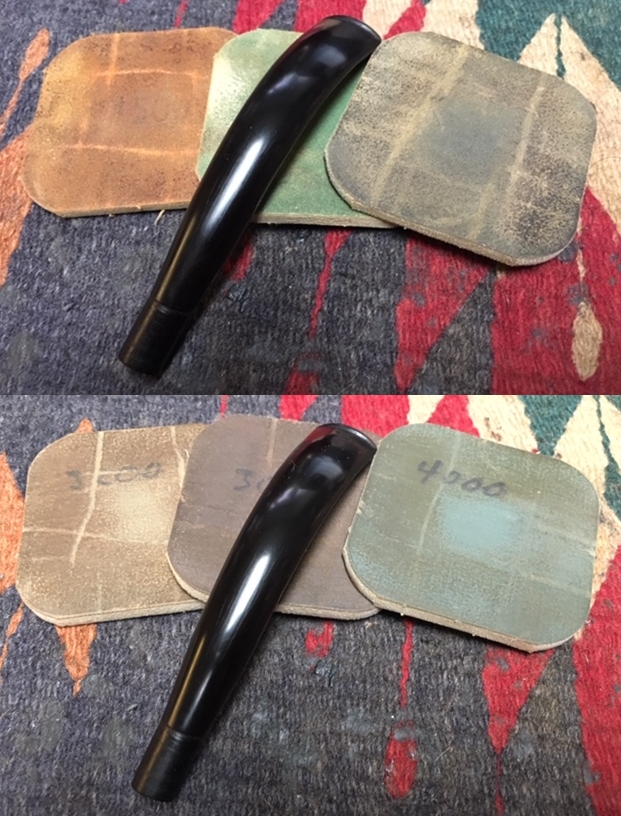
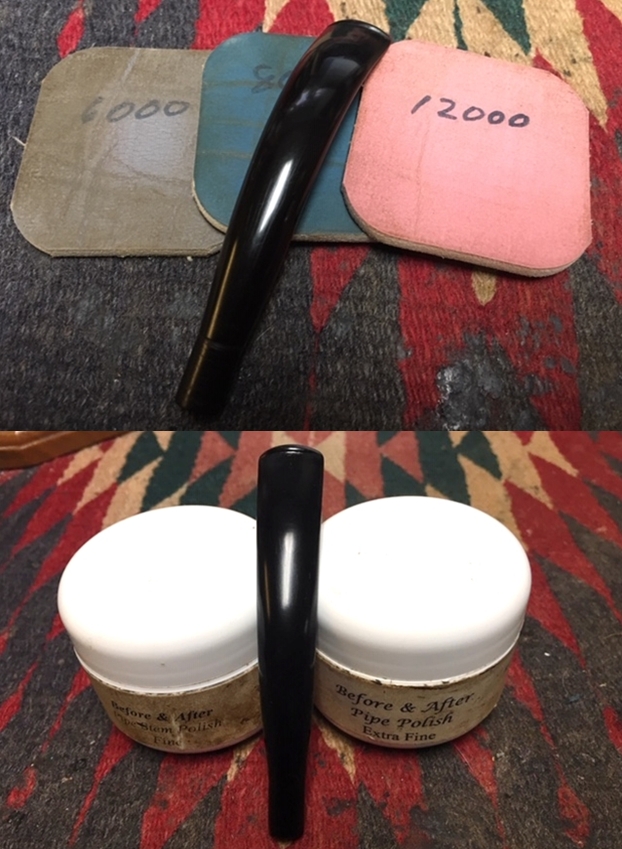
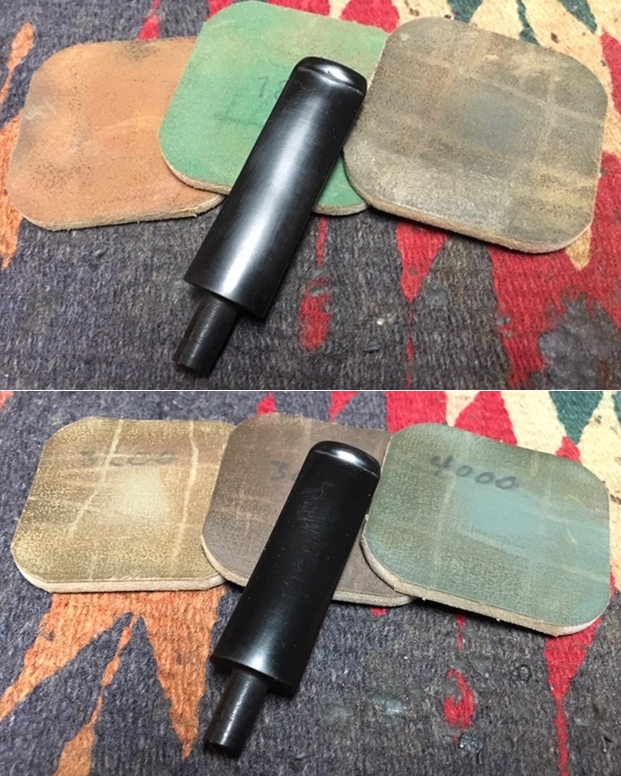
 Next, I apply the full regimen of micromesh pads to the stem. I begin by wet sanding with pads 1500 to 2400 and then dry sanding with pads 3200 to 4000 and 6000 to 12000. After each set of 3 pads, I apply a coat of Obsidian Oil to revitalize the vulcanite. As expected, the Knute fancy stem now has that glossy shine – like new and better.
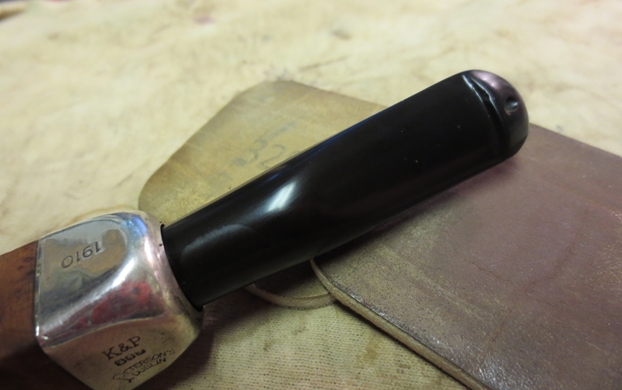
 I’m in the home stretch. I keep the stem and Freehand stummel separated for now as I apply Blue Diamond compound and wax. It’s easier this way to manipulate the pieces. I mount a cotton cloth buffing wheel on to the Dremel, set the speed at 40% of full power, and I apply Blue Diamond compound to both stummel and stem. When finished, I buff both with a felt cloth to remove compound dust from the surfaces. I use a bristled brush as well to make sure the rusticated and blasted areas are free of dust. I use the felt cloth again. I don’t usually have these action pictures, but with my wife’s help here are a few.
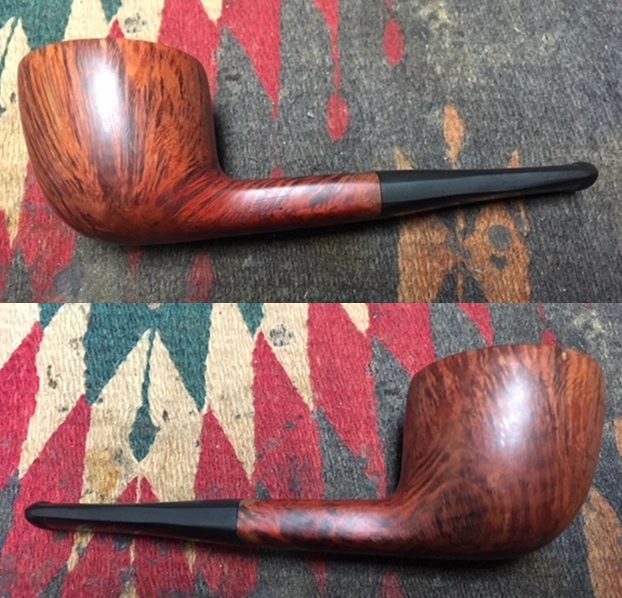
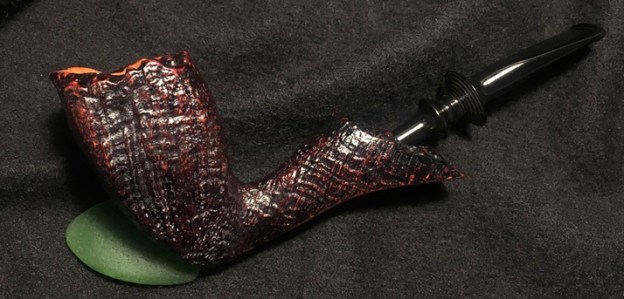
 Then I change buffing wheels on the Dremel, maintain the same speed, and apply a few coats of carnauba wax to the Knute stummel and stem. I then hand buff the stummel and stem with a microfiber cloth to blend and collect any excess wax and raise the shine more. Again my wife provides the picture and a good shot of The Pipe Steward workstation on the 10th floor of a formerly Communist apartment complex ‘block.’ All the tools of the trade! I finish the restoration of the Karl Erik Knute, by rejoining the stem and stummel.
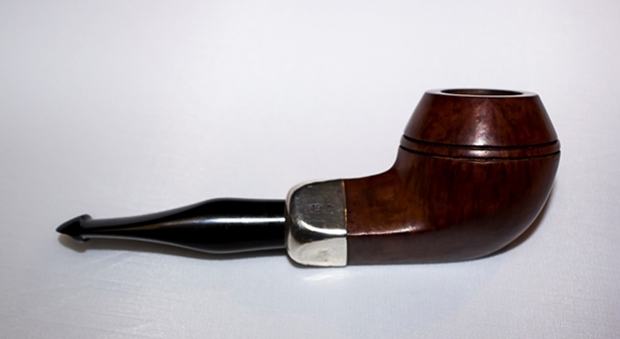
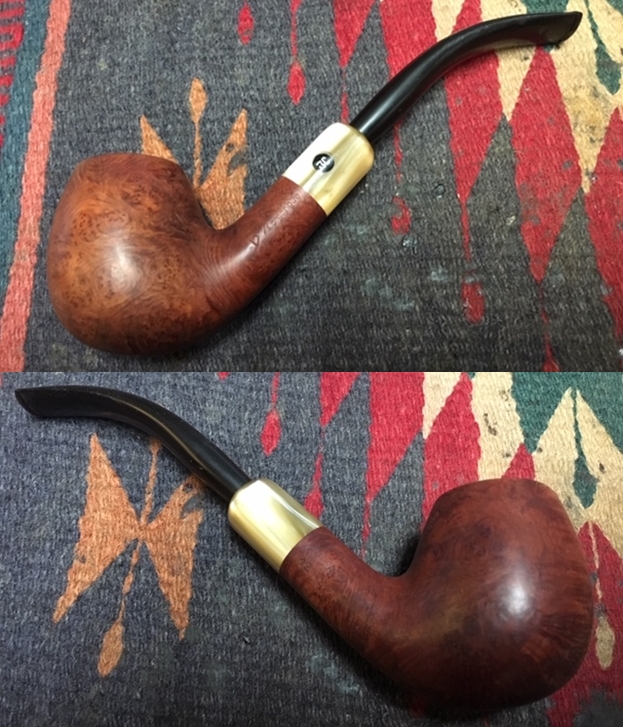
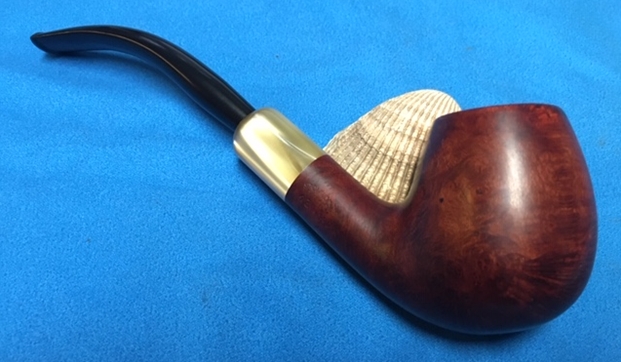
 After completing the Knute of Denmark, I slipped it into a black, pull string pipe sock and placed it in a Bulgarian ornate lidded wooden box to serve as the protector of the Knute of Denmark and the gift box for my son’s graduation gift. When my wife and I flew to St. Louis from Bulgaria for the graduation ceremony, the pipe was safely stowed in my backpack. Most of our family was able to gather from all over the United States to celebrate Josiah’s achievement. Family is special – a gift from God to remind us of the way He created us – to be in loving and supportive relationships. Our family gathering around Josiah’s celebration was rich blessing for me and my wife since we live so far away. Admittedly, often words fail to express the depths of a father’s pride for his son – for all his children and grandchildren. They fail me now. During the ceremony we watched as Josiah was donned by his professors with his master’s degree hood. Afterwards, we gathered together as a family in our hotel room where we enjoyed the precious moments and gifts were given. Among them was the Knute of Denmark which met his new steward – a gift expressing the pride and love of a father for his son, and carrying a blessing of, “Well done, son!”
Thanks for joining me!