Blog by Steve Laug
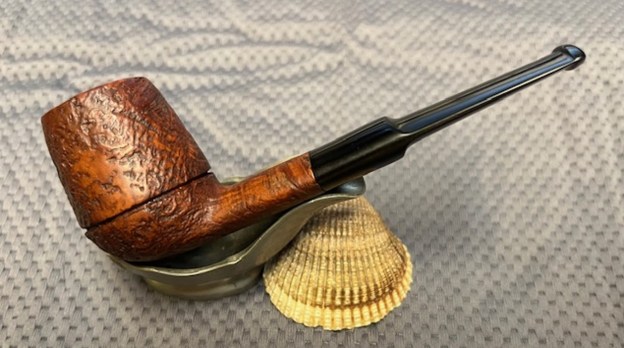
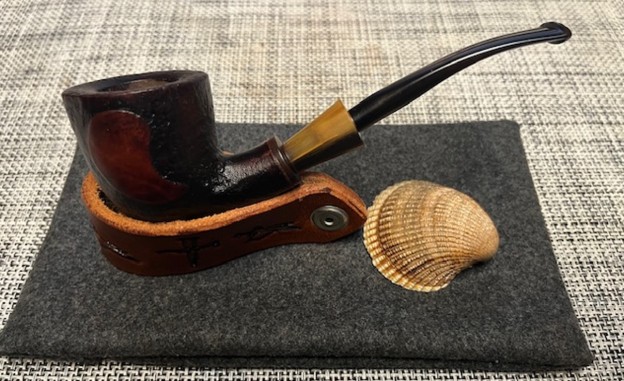
The next pipe is one that Jeff and I picked up off eBay way back on 04/19/2016. It is another pipe that has been in my box of pipes to work on for a very long time. The pipe, like the previous 992 was similar to the Stanwell Vario Finish with sandblast finish around the bowl and shank and a smooth panel on the left and right sides of the bowl. The stamping on the bowl is readable. On the underside of the shank it reads 992, the shape number [followed by] Royal Danish in script [over] Made in Denmark. The shape is quite unique and beautiful with great grain on the smooth panels and deep sandblast grooves around the bowl sides. The sandblast and on the smooth panels looked very good. The rim top and inner edges were in great condition. The vulcanite saddle stem was lacking the Royal Danish logo on the topside. The stem was heavily oxidized and had some tooth marks on the top and underside of the stem. Jeff took very few photos of the pipe in these early days but the one below shows you what it looked like before he started his cleanup. Jeff took a photo of the bowl and rim top. The bowl had been reamed somewhere along the way and the bowl was quite clean. It also seemed to be quite clean on the finish as well. The vulcanite stem was heavily oxidized on both sides of the stem. There were tooth marks and chatter on both sides ahead of the button. Jeff took a close up of the rim and bowl and the topside of the stem.
 Regardless of when this specific briar was made, the shape is very much a 1960s Danish one. I turned to Pipephil’s site and quickly scanned the article on Stanwell getting a great overview of the history. I went through the photos and did not find the shape of the pipe that I was working on (http://pipephil.eu/logos/en/logo-r6.html). There was one that showed the mixed finish of the Royal Danish line – sandblast with smooth patches on each side of the bowl. I have included a screen capture of that section below.
 I then turned to Pipedia and found that the Royal Danish was also listed as a second or a sub-brand made by Stanwell (https://pipedia.org/wiki/Stanwell#Sub-brands_.2F_Seconds). I have included the list of seconds from the site below. I have highlighted the Royal Danish in blue in the text.
Sub-brands / Seconds – Bijou (discontinued), Danish Quaint, Danish Sovereign, Danske Club, Henley (discontinued), Kong Christian (discontinued), Majestic, Reddish (discontinued), Royal Danish, Royal Guard, Royal Sovereign, Sailor (discontinued), Scandia, Sorn (discontinued), Svendson.
There was also an interesting advertising page on the Danish Briars by Stanwell. The first one on the list was the Royal Danish. The description of the line is clear and concise, be sure to read it below. I followed one of the links at the end of the site to an article on rebornpipes written by Bas Stevens on the shape numbers and the designers who originally carved those shapes for Stanwell (https://pipedia.org/wiki/Stanwell_Shape_Numbers_and_Designers). The Royal Danish line adds a 9 before the 92 making the number 992. I quote from it as it specifically refers to the shape 92 as being a design by Sixten Ivarsson.
- 92. Same as shape 91 but smaller by Sixten Ivarsson.
I have also included the information on the shape 91 and 91 R as referred to in the quote above.

- 91. Slightly bent wide, flattened volcano with an oval shank and a short, standard saddle, trapezoidal saddle, or tapered stem, by Sixten Ivarsson. Nicknamed the ‘Ukulele’ (pictured, leftt, in its reissued design).
- Sixten Ivarsson’s shape 91 ‘Ukulele’ for Stanwell, seen here in its reissued form as the 91R. Another signature design in the Danish style from Ivarsson, and a pioneering exploration of the limits of horizontality. Image courtesy Mike at Pipes Pens and More.
- 91R. A reissue of the shape 91 ‘Ukulele,’ marketed as part of Stanwell’s ‘Giants’ line (see 1960s catalog on the site link above).
I now knew that the shape 992 was another Sixteen Ivarsson design. It was a flattened volcano that was nicknamed the Ukulele. It is an interesting shape. Now it was time to work on the pipe.
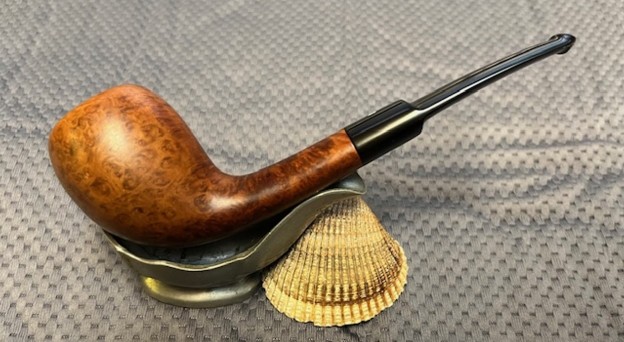
Jeff had cleaned up the bowl with a PipNet pipe reamer and cleaned up the reaming with a Savinelli Fitsall Pipe Knife. He scrubbed the bowl with undiluted Murphy’s Oil Soap with a tooth brush. He worked over the lava and debris on the rim top and was able to remove it. He rinsed it under running warm water to remove the soap and grime. He cleaned out the inside of the shank and the airway in the stem with alcohol, cotton swabs and pipe cleaners. This was in the early years when Jeff did not do his now very thorough clean up. The stem was still very oxidized. I took photos of the pipe when it arrived. 
 I took a close up photo of the rim top and stem surface to show the condition when I started my work on it. The bowl was in good condition though the rim top showed some damage toward the front of the bowl. It was worn and had some darkening at the front. The stem surface showed the tooth marks on both sides. They were quite deep on the surface and on the button edge itself.
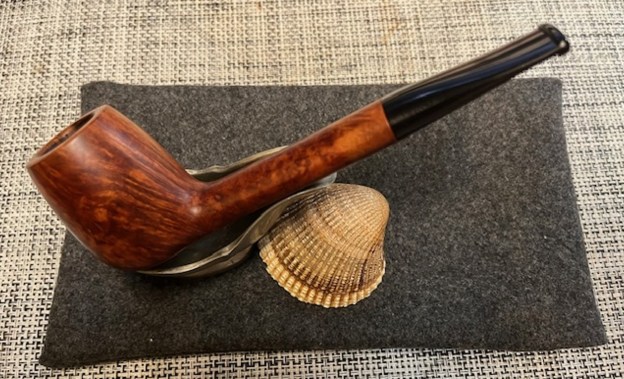
 The stamping on the shank was readable as noted above. The stem did not have the Danish Royal Crown logo on the top of the saddle. I took the stem off the pipe and took a photo of the pipe in proportion. It is a beautiful pipe.
 Now it was time to work on the pipe. I polished the smooth panels on the bowl sides with micromesh sanding pads – dry sanding with 1500-12000 grit sanding pads. I wiped it down after each sanding pad to remove the sanding debris.

 I rubbed the bowl down with Before & After Restoration Balm working it into the briar with my fingertips and a horsehair shoe brush to clean, enliven and protect it. I let the balm sit for 15 minutes and then buffed with a cotton cloth to raise the shine. Mark Hoover’s Balm is a product that I have come to appreciate and one I use on every pipe I have been working on.

 I set the bowl aside and turned my attention to the stem. I scrubbed the surface down with Soft Scrub to remove the oxidation from the surface and particularly from the deep tooth marks on the stem.
 I “painted” the tooth marks on both sides ahead of the button with the flame of the lighter. I was able to lift them significantly but there were still tooth marks left in the edge of the button and on the surface. I filled in the remaining marks with black CA glue. I set it aside to cure overnight.
 In the morning I used a small file to recut the edge of the button and to flatten the repairs on the surface of the stem. I smoothed out the repairs further with a folded piece of 220 grit sandpaper. It was starting to look better.
 I used the sanding pads I purchased recently – 320-3500 grit regular pads to smooth out the finish and remove the light tooth and chatter marks in the stem. I wiped the stem down with Obsidian Oil to finish the preliminary work after the 3500 grit pad.
 I polished the stem with micromesh sanding pads – dry sanding with 1500-12000 grit pads. I wiped the stem down after each sanding pad with Obsidian Oil.
 I finished polishing it with Before & After Pipe Stem Polish – both Fine and Extra Fine. Once I had finished the polishing I gave it final coat of oil and set it aside to dry.
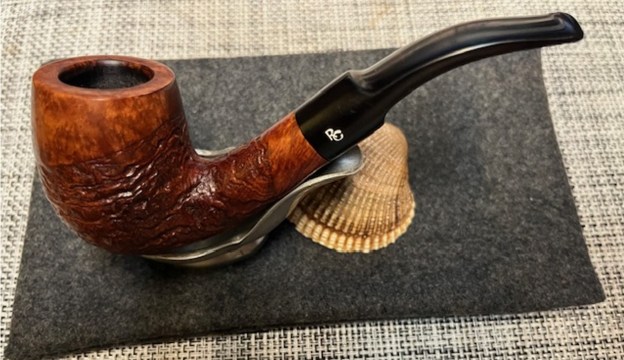
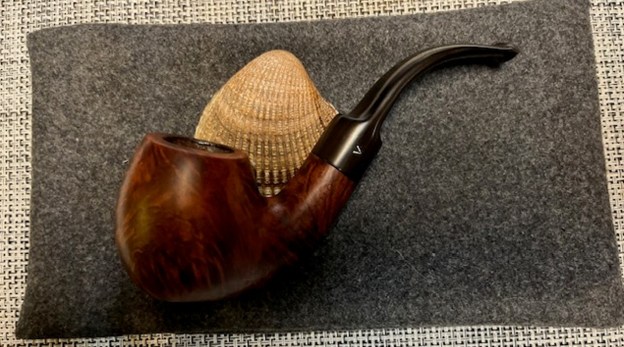
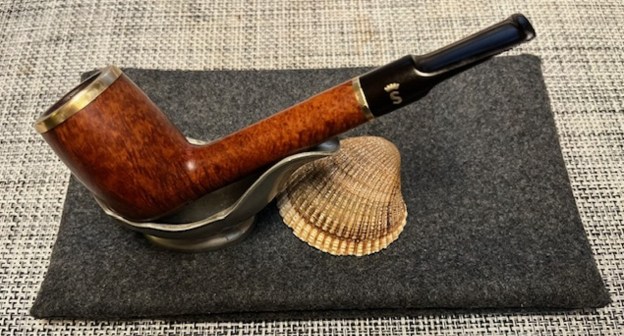
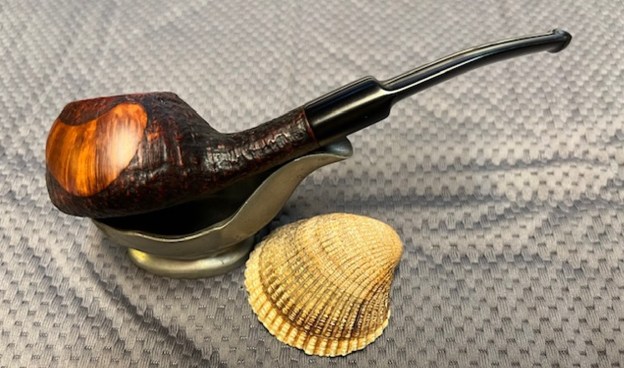
 As usual at this point in the restoration process I am excited to be on the homestretch. I look forward to the final look when it is put back together, polished and waxed. I put the Sixten Ivarsson design Stanwell Royal Danish Made in Denmark 992 Ukulele back together and it is a beauty. I polished the bowl and stem with Blue Diamond to polish the briar and the vulcanite. I gave the bowl and the stem multiple coats of carnauba wax. I buffed the pipe with a clean buffing pad to raise the shine. I hand buffed it with a microfiber cloth to deepen the shine. The pipe polished up pretty nicely. The grain really pops with the wax and polish. The shiny black vulcanite stem is a beautiful contrast to the browns of the bowl. This Royal Danish 992 Ukulele was a great pipe to spruce up. It is a very comfortable pipe to hold in the hand. The finished pipe is shown in the photos below. The dimensions of the pipe are Length: 5 ½ inches, Height: 1 ¼ inches, Outside diameter of the bowl: 1 ¼ inches, Chamber diameter: 7/8 of an inch. The weight of the pipe is 40 grams/1.41 ounces. I will be putting this pipe on the Danish Pipe Making Companies Section of the rebornpipes store. If you are interested in adding it to your collection let me know by email or message. Thanks for reading this blog and my reflections on the pipe while I worked on it. This is an interesting estate to bring back to life.