Blog by Robert M. Boughton
Copyright © Reborn Pipes and the Author except as cited
https://www.roadrunnerpipes2k.com/
https://www.facebook.com/roadrunnerpipes/
Member, North American Society of Pipe Collectors
There’s an old saying in Tennessee, I know it’s in Texas, probably in Tennessee, it says, ‘Fool me once [long pause, forgetting where he’s going; laughter from the audience; continues, trying to recover] shame on — shame on you. [More laughter] Fool me, you can’t get fooled again!”
— George W. Bush, 43rd president of the United States, September 17, 2002, before an audience of schoolchildren, parents and teachers in Nashville
INTRODUCTION
The vicarious embarrassment experienced by rational Americans who were alive and old enough to witness the poignant catalog of Bushisms (and it was longer than any forgiving person would care to remember) was at once painful and hilarious to behold, providing a sort of release valve for the intense pressures of events that were still fresh, burning sores on our collective psyche. The list needs no new punditry. It’s all been said, after all, but I would like to make one note of commiseration relevant to the above quote and this blog. I was going to begin my account of this restoration with the words the president no doubt meant to use in his speech: “Fool me once, shame on you. Fool me twice, shame on me.”* Then I flashed on the great gaff from the turn of the millennium and decided to go with it, as the president’s graceful attempt to regain his oratory footing, reminiscent of a cornered badger, mirrors my own feelings after helping my roommate to choose a lion’s head meerschaum online.
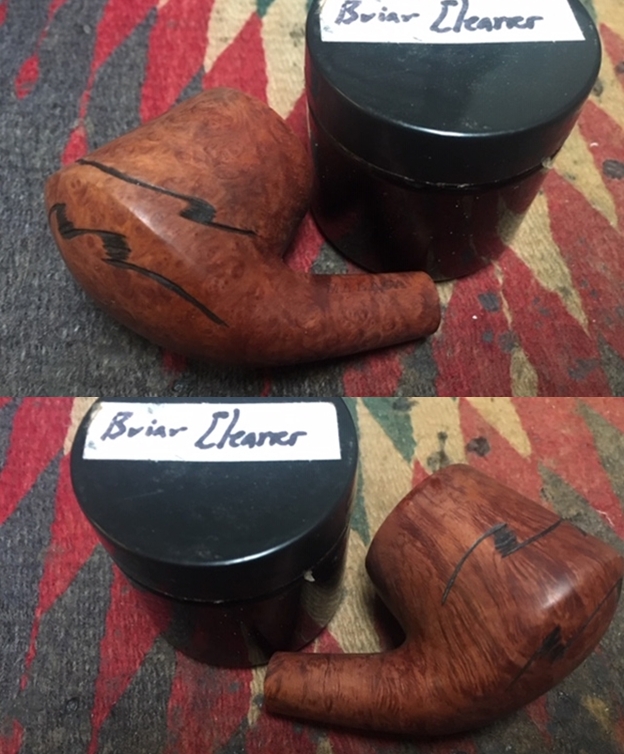
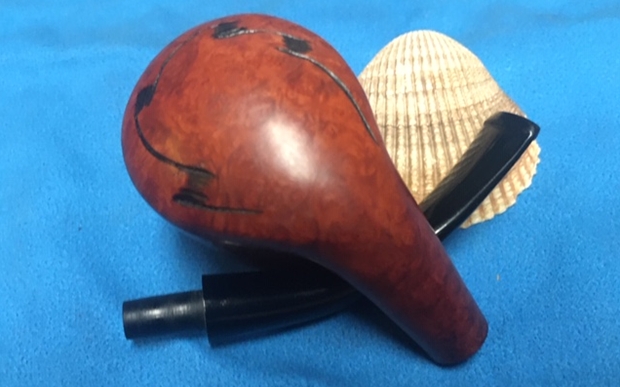
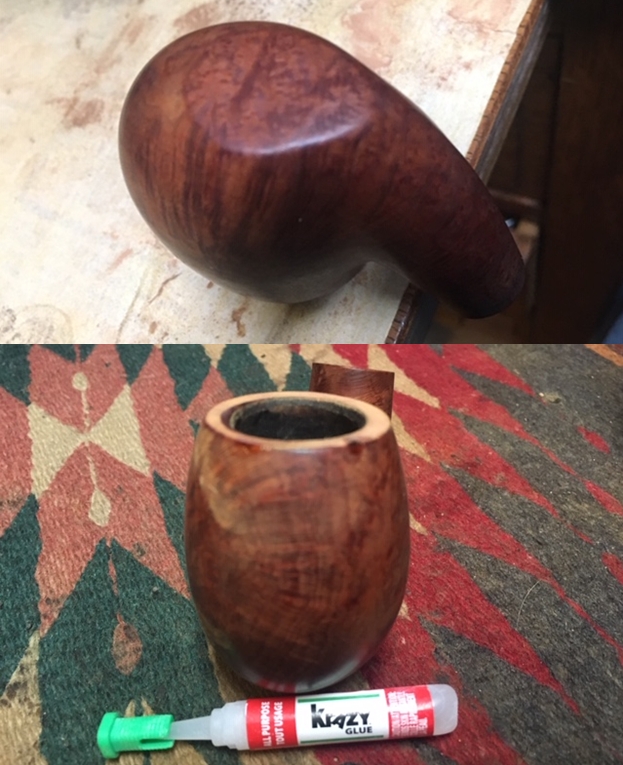
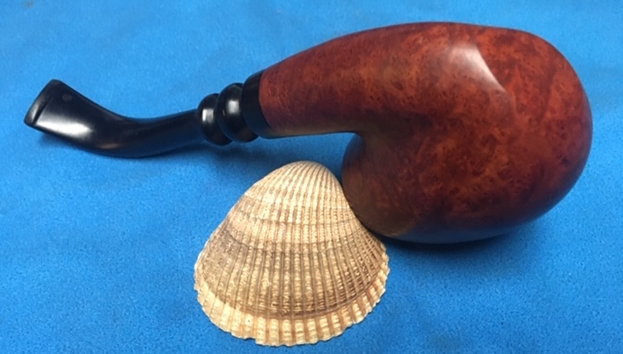
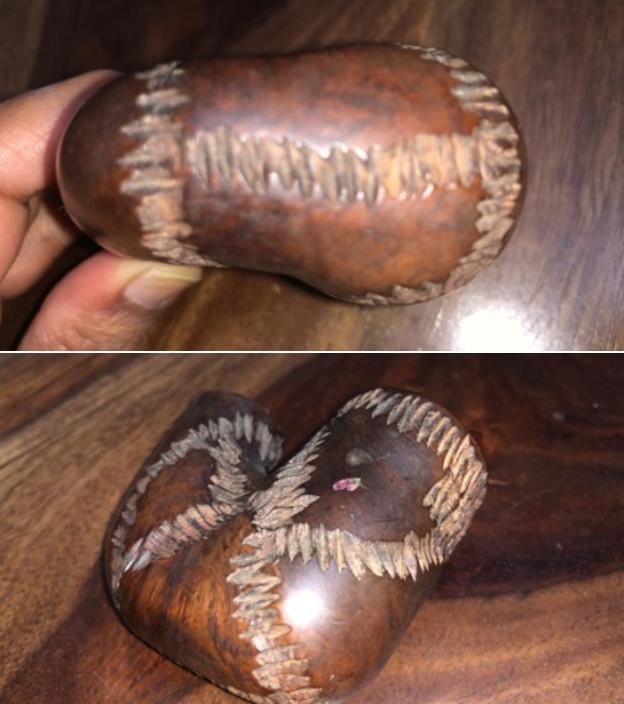
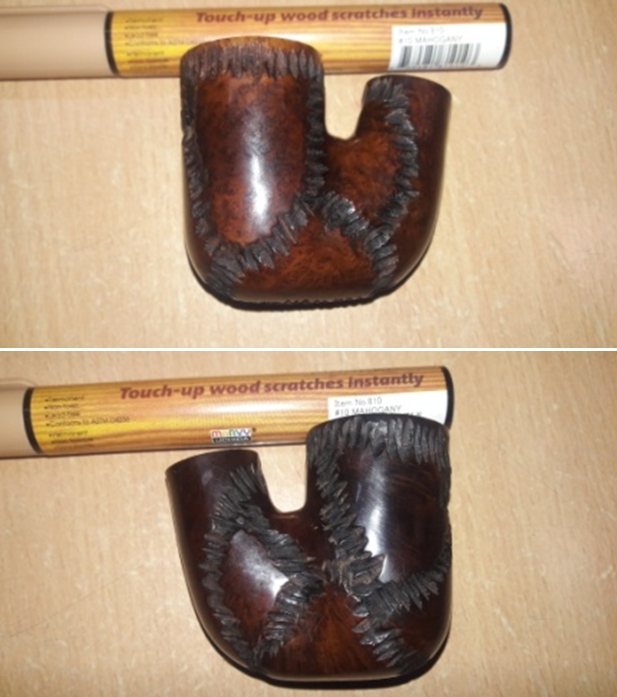
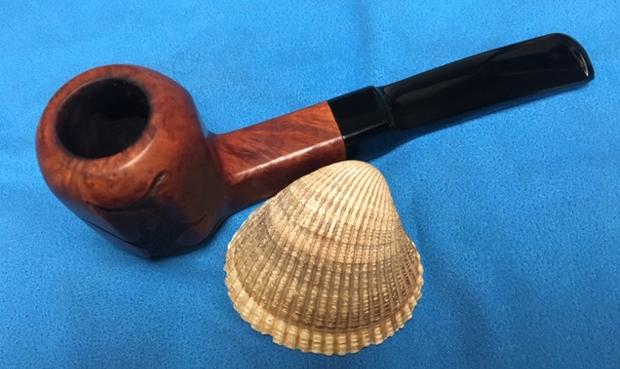
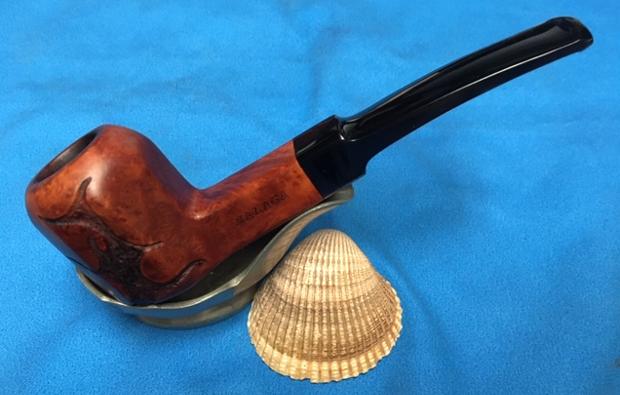
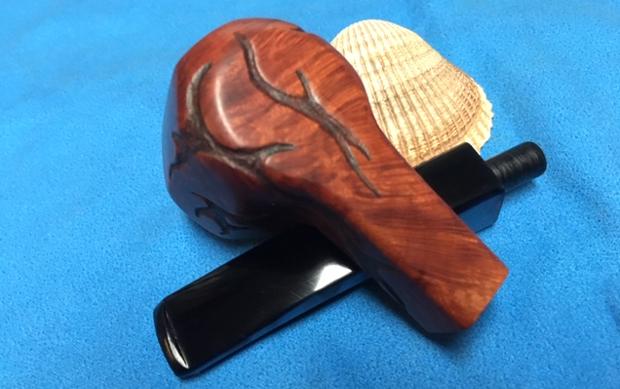
You see, my roommate, Howard, is computer and cyber illiterate. I mean no disrespect, it’s just a fact. He’s the first to admit it, to everyone with whom he has business contact, going so far as denying having an email address until I signal him to tell the truth because it makes everything so much easier. I’m the one who has to figure out and fix his problems, and I don’t mind that either. In the interest of equal disclosure, I have my own deficiencies, including, it seems, not taking into consideration the one veritable litmus test of a problematic pipe and advocating its purchase anyway. When my searches found eBay didn’t have anything the day I looked for a lion’s head meerschaum Howard would like, there were several choices from Etsy sellers. All of them looked nice, but one stood out. The title was “Genuine Meerschaum Warrantied Antique 19th Century Lion Head Pipe,” and the photo looked more or less like the following, which I took after it arrived. Two key points may already be obvious: that I indicated there was only one picture of the pipe, and, considering again that I took the shot above, my roommate bought it anyway. The only explanation I can offer is the distracting pleasure and surprise I felt at Howard’s unusual excitement from the prospect of making his first pipe purchase that was a) online, b) from someone other than me and c) meerschaum. Then there was his repeated instruction to me to order the pipe. As I’m sure you can imagine, when Howard received his awaited package in the mail, soon after I placed the order, and discovered certain – well, for now I’ll just call them short-fallings – I was quick to point a finger of blame. After all, the Etsy seller was culpable for the rather shabby way that the “short-fallings” were, no doubt on purpose, concealed and not mentioned anywhere in the description.
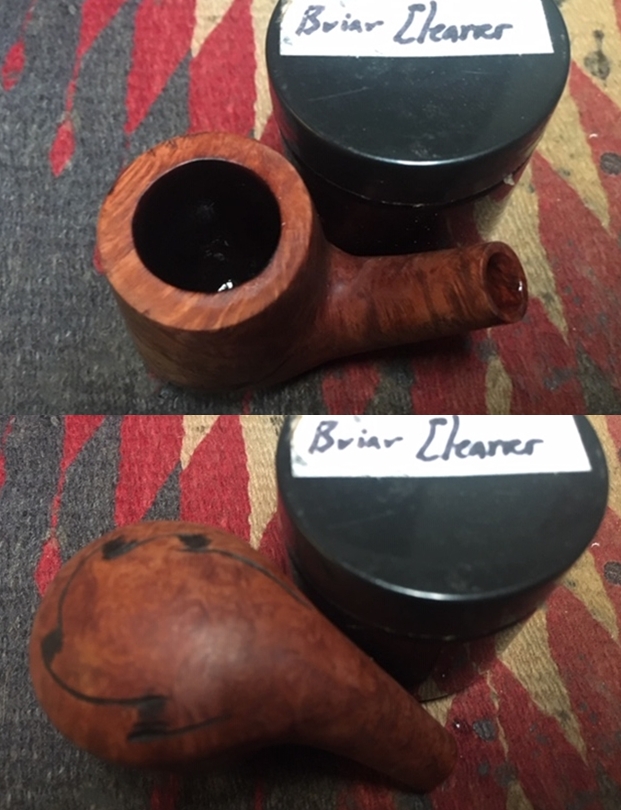
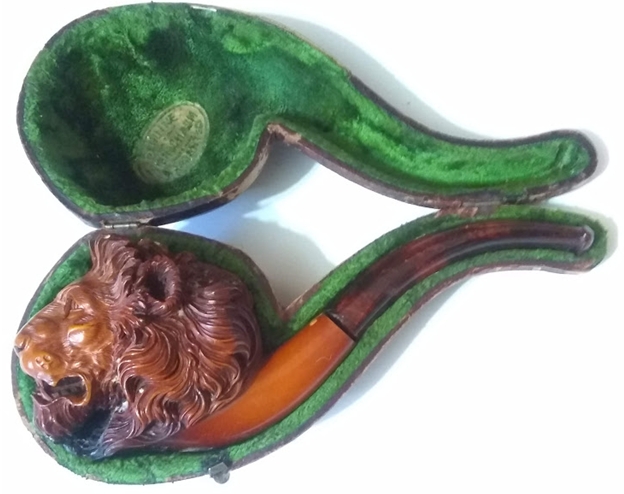
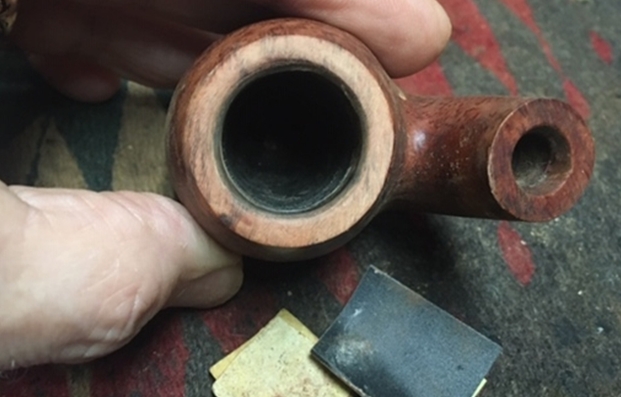
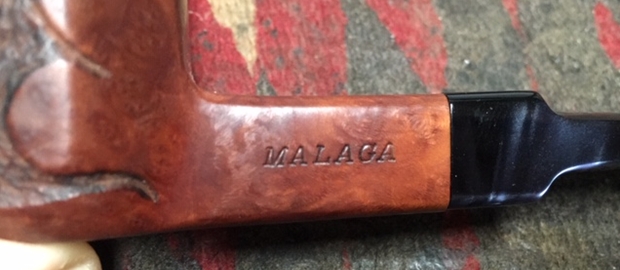
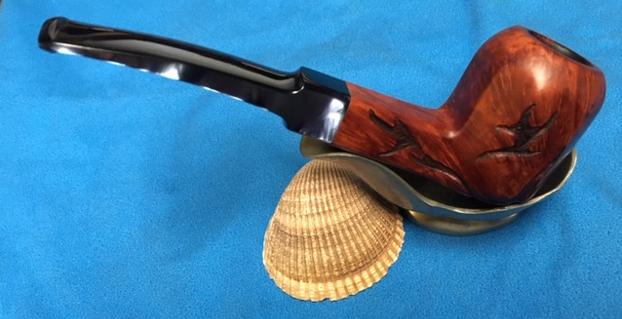
Still, I have to accept the blame not only because I should know by now never to order a pipe based on one photo, all the more so with someone else’s money, but I also made a close enough inspection of the single picture to question whether the pipe might be constructed of wood. Ornate pipes, after all, were not limited to meerschaum. I have a briar CPF tiger’s head medium churchwarden made from a very dark form of briar, and something about the shiny, deep, complete uniformity of the lion’s brown color was wrong. I just didn’t yet get what it is, a subject to which I will return in a moment. The most striking oddity was the clean and smooth chamber, which was the exact same brown as the outside of the stummel. I mentioned to Howard the possibility the pipe was wood, but we agreed the overall quality appeared good enough that it didn’t matter. Final examination of the lone photo revealed the perfect fit of the pipe in the case and the fading words “Genuine Meerschaum Warrantied” on the lining. I take those words as a legal stipulation to the quality of the pipe’s main material rather than the name of an importer, although clever scammers abounded in the good old days as they do now. But to me, the best, rarest detail is what appears to be the apparent original, hand-written price tag for $2.95 on a tiny scrap of paper preserved within the narrow curve of the case where the shank meets the stem. In hindsight, the lack of any grain, at least along the smooth shank, should have been the only sign needed that the lion’s head isn’t wood, but at last month’s meeting of my pipe club, one of two of my well-known pipe maker friends suggested the extreme, shellac- or varnish-like shininess made the stummel appear to be cast resin of some sort while the other said it resembled a precise kind of synthetic plastic the name of which I forget. They both pointed out the obvious, that I could determine if the pipe was meerschaum by making a small test cut somewhere safe. In most cases, no such location exists, but I chose the top stem end of the shank since it needed to be banded, which is a magnanimous way of describing the situation upon which I’m about to expand. With my pen knife, I made a small scrape that revealed bright white meerschaum. So that was the end of that unpleasant but necessary question to resolve.
Now, returning to the subject of what this pipe, which indeed is meerschaum, represents, and what my mind could not grasp because I had never seen an example of the phenomenon before. It is a perfect example of the practice called “aging” meerschaum pipes by artificial means, a contradiction in terms of the vilest type. I will never forget reading on one leading if self-styled meerschaum “ager’s” website of his special and so-called safe method of transferring a good, healthy, normal meerschaum pipe into one that, in his mind if no knowledgeable person’s, appears to have been colored to its fullest “antique” condition. The rationale, to paraphrase with complete accuracy, was that all serious meerschaum collectors prize the rich colors that are produced over time by smoking meerschaum pipes, so why wait? Well, there’s the rub! Every serious collector I’ve ever known or heard from online cherishes above all else the slow, personal process of coloring the pipe that starts out bright white and turns yellow, gold, brown and, after many years of much use, a deep burgundy color. The meerschaum ager fellow must have gotten his hands on the pipe that is now Howard’s. That is the only explanation I can imagine why I thought of wood and my two well-known pipe-maker friends saw cast resin or synthetic plastic. [NOTE THAT I DO NOT INCLUDE IN MY DISTASTE THE USE OF COLORING BOWLS, WHICH HAVE BEEN AROUND SINCE AT LEAST 1892, ALTHOUGH I HAVEN’T TRIED ONE YET, TO HELP MAKE THE PROCESS EVEN. SEE THE LAST LINK IN SOURCES BELOW.]
For a description of a very old method of faking the color of antique pipes, see the chart at the end of the second link in Sources.
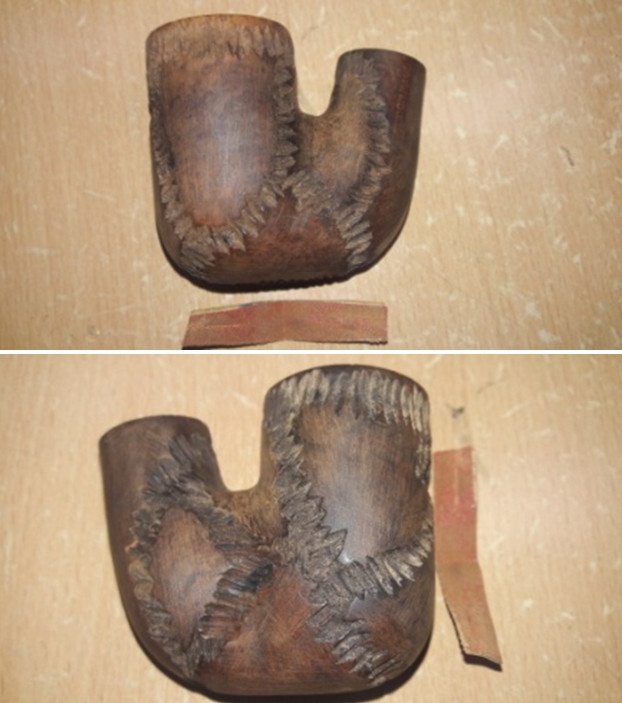
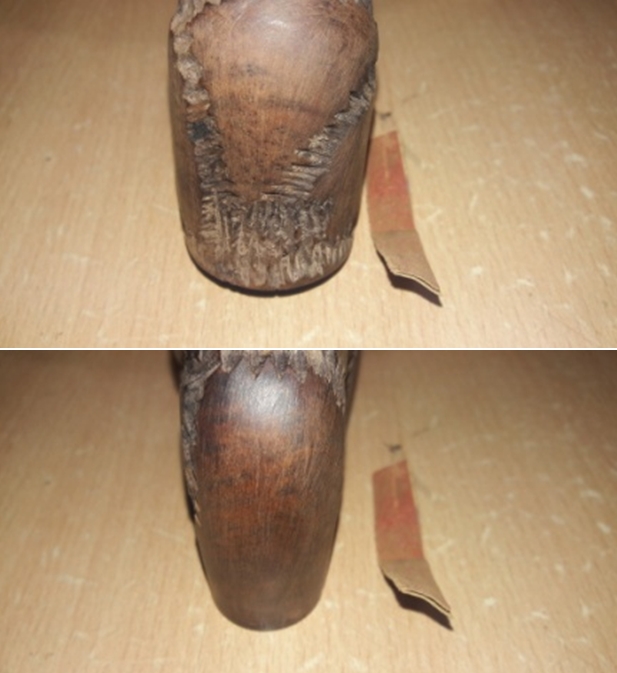
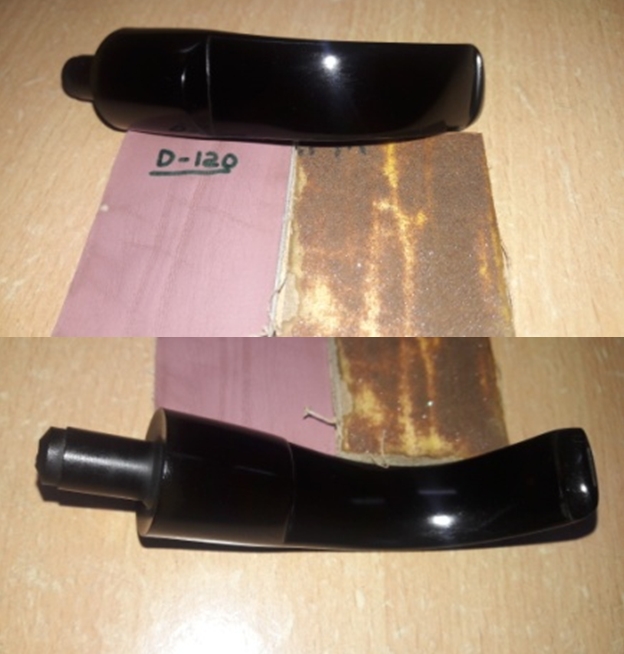
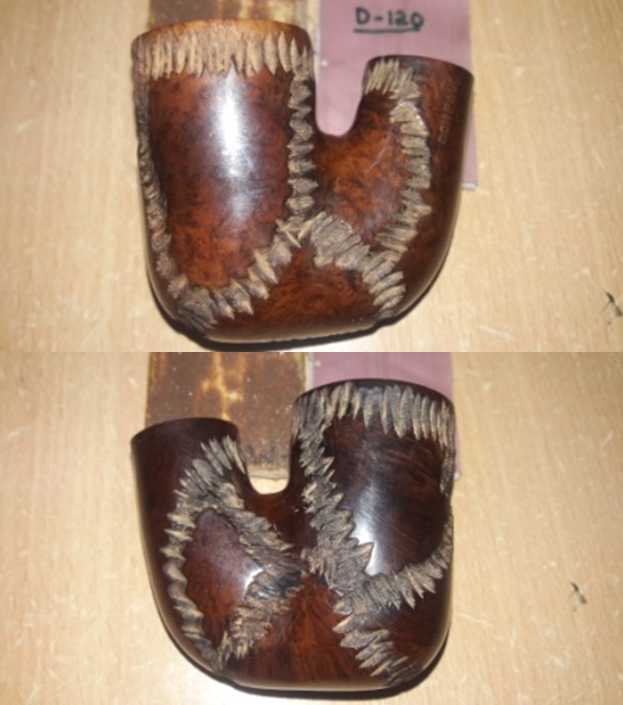
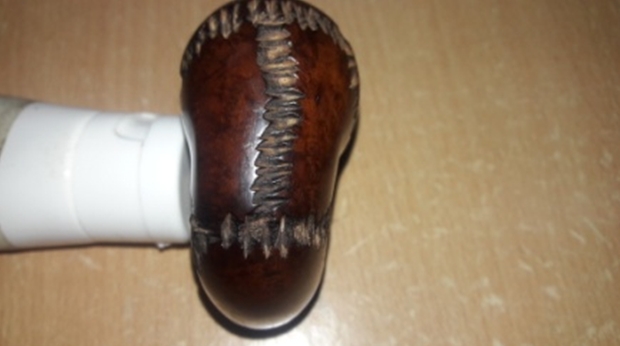
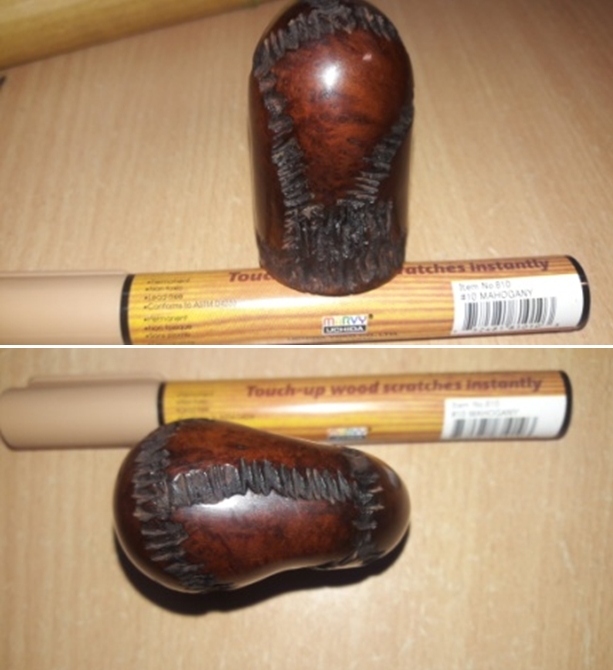
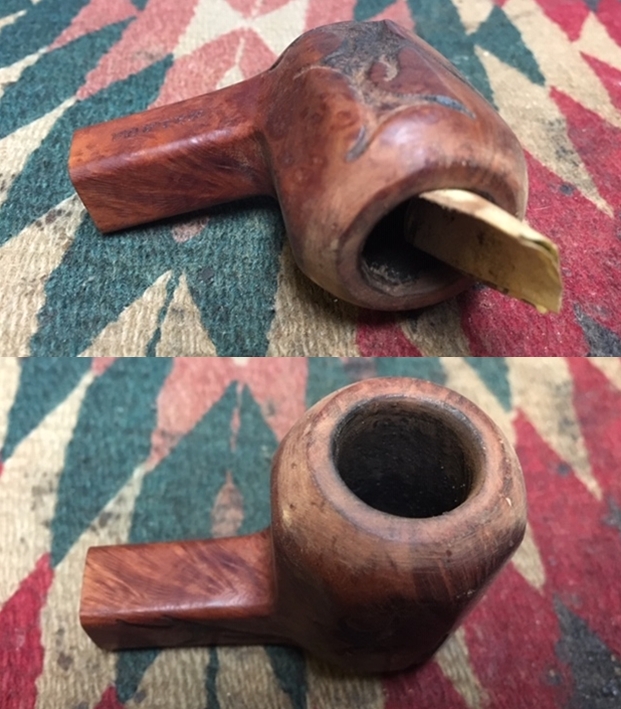
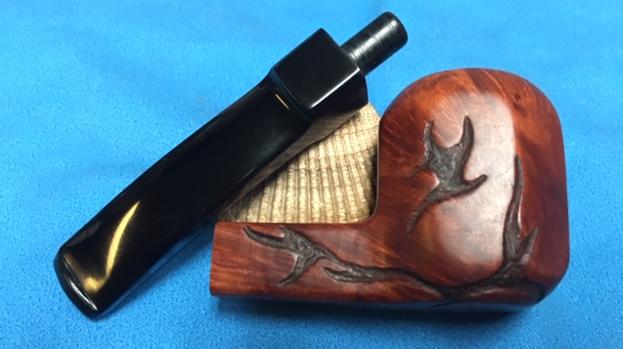
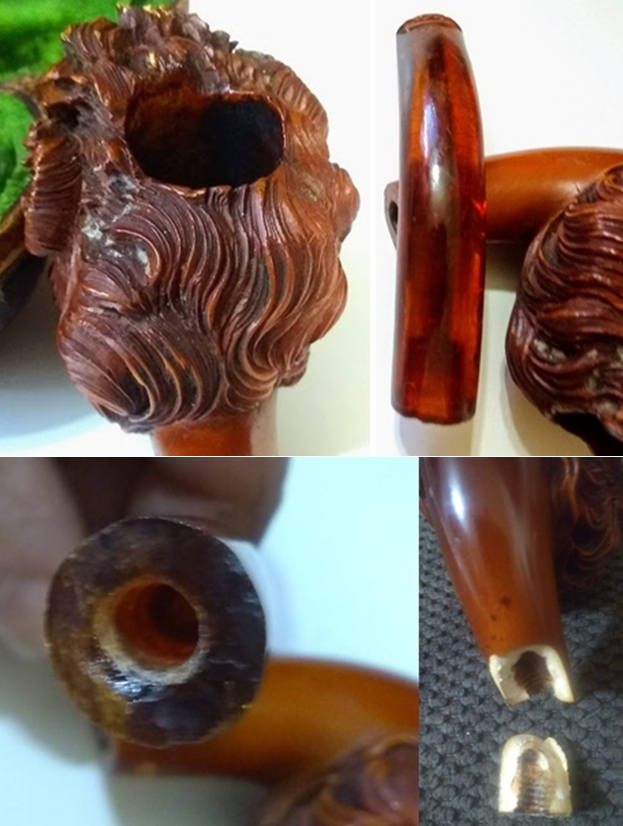
The opening shots of the meerschaum as it looked upon arrival will show both the slick attempt by its seller to hide the grave visible problems, not to mention the internal damage, and the actual outer calamities inflicted upon the still lovely pipe. The list of damages I tallied with a quick look-see at the lion’s head involved:
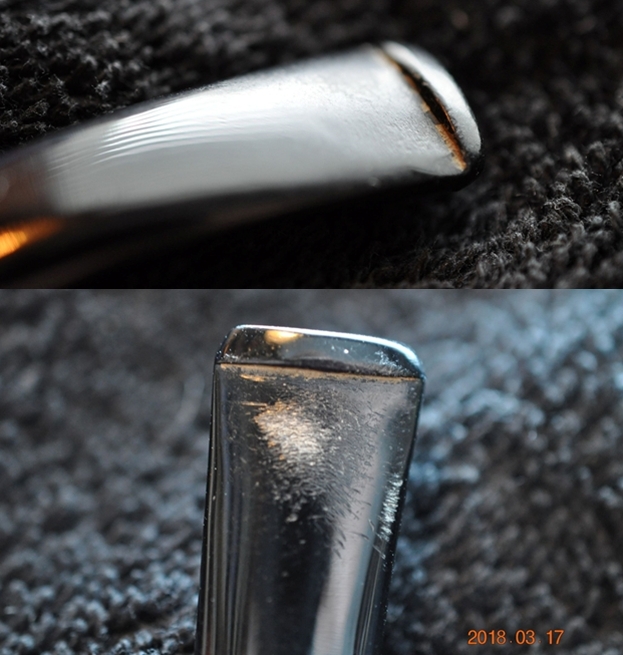
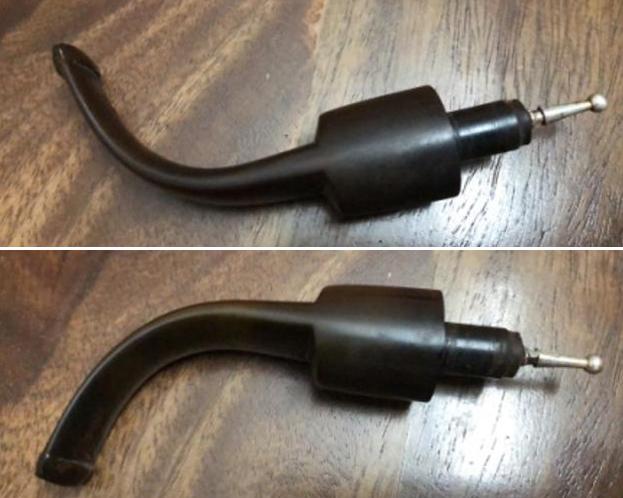
- The broken red amber stem and bone tenon, with the stem face roughened by whatever accident caused the damage
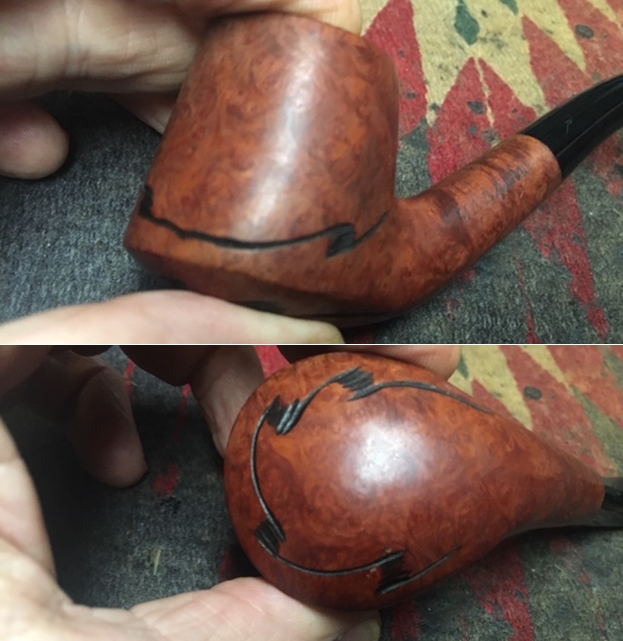
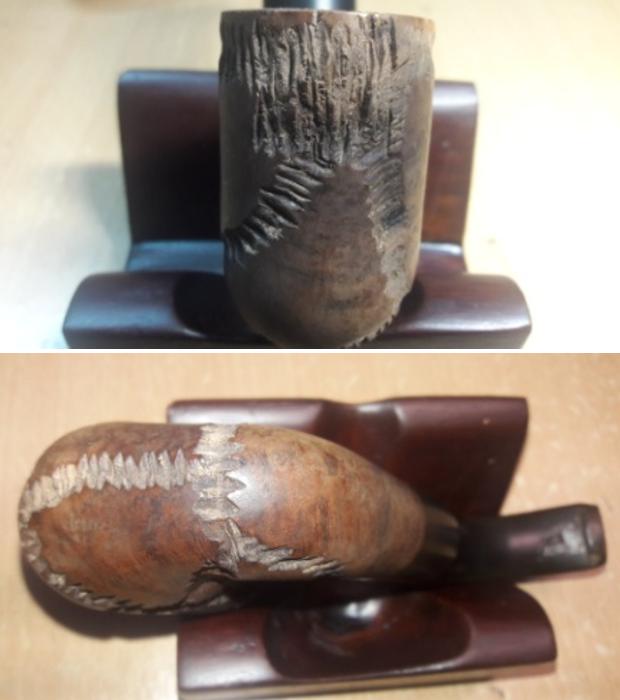
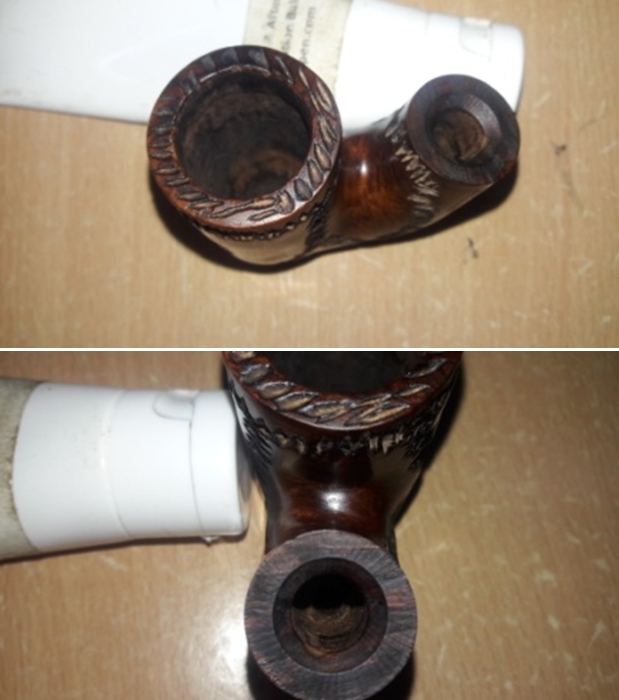
- A perfect, seamless break on the bottom of the shank extending from the opening most of the way to the draught hole and somehow stayed in place until the pipe was fully removed from its case
- An old break in the bottom of the bowl that looked to be well-patched
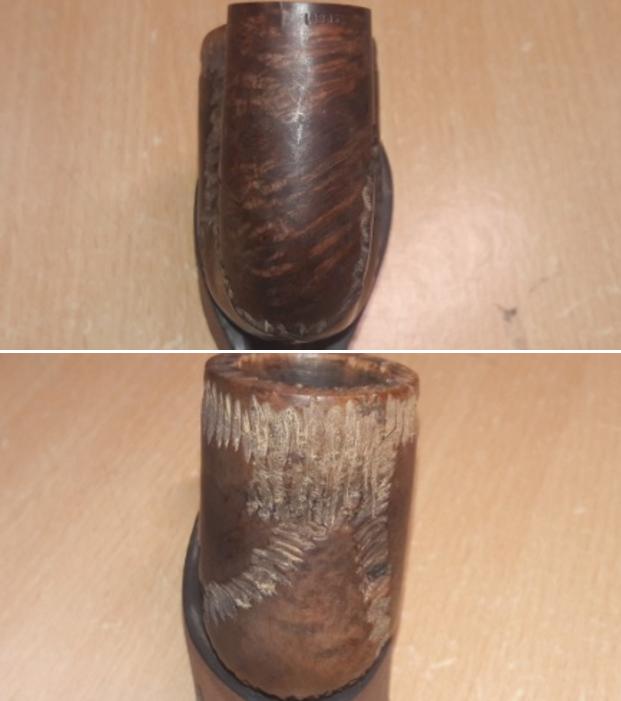
- Assorted white spots on the lion’s head where the meerschaum showed from chips
- An adamant blockage of the draught hole from an unknown source I suspected was 100+ years of solidified bone tenon bits, tar, saliva and other nasty detritus (all of it hidden and absent from the seller’s description)
To determine that the stem is amber rather than Bakelite, or Redmanol, I used the simple two-step method described at the link in the Sources below: the material is warm to the touch and is luminescent when held under a black light.
That the pipe in this blog is antique is certain. My belief that it dates to the late 19th century because of the intricacy of the carving and my personal observation that animals such as lions were on their way out by the turn of the 20th century, as well as the stem material being amber, is just that.
I will end this intro with the admission that, despite my stated certainty I could repair all of the problems with the pipe, Howard was the one of us who really believed it.
* The first known written record read, “When a man deceives me once, says the Italian proverb, it is his fault; when twice, it is mine.” George Home, 1786, in the Pennsylvania Gazette, quoted in Breig, James, “Out, Damn’d Proverbs,” Colonial Williamsburg Journal, Winter 2002-2003. https://www.history.org/foundation/journal/winter02-03/proverbs.cfm.
RESTORATION
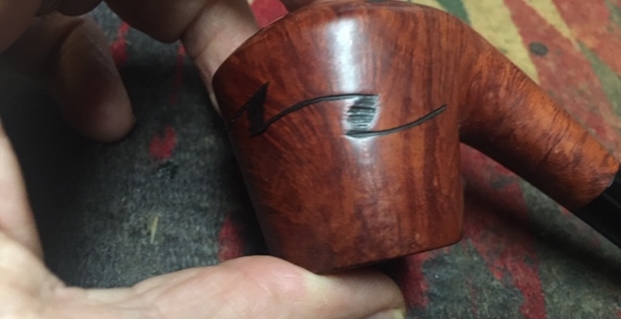
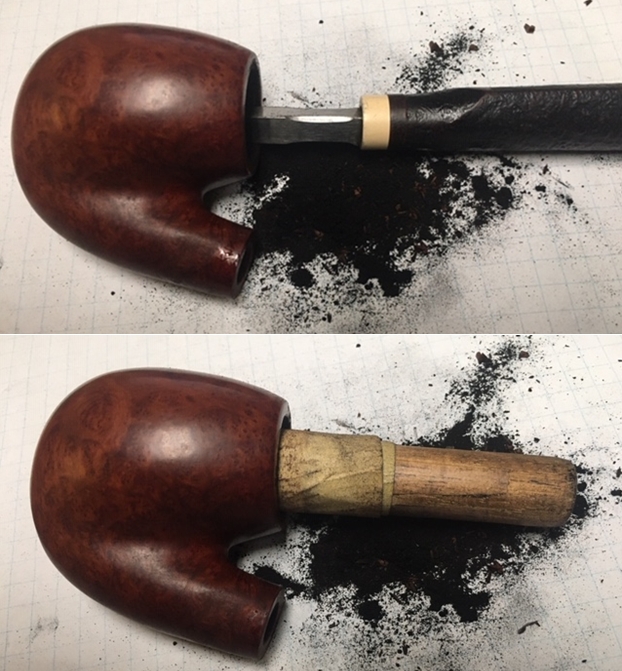
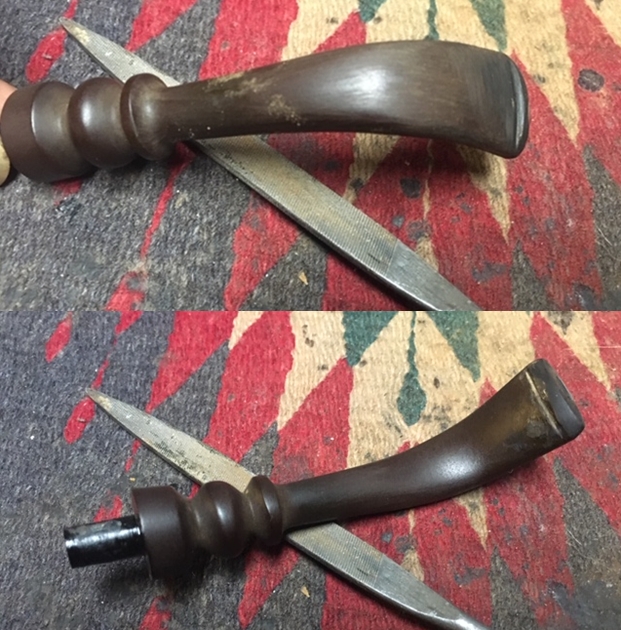
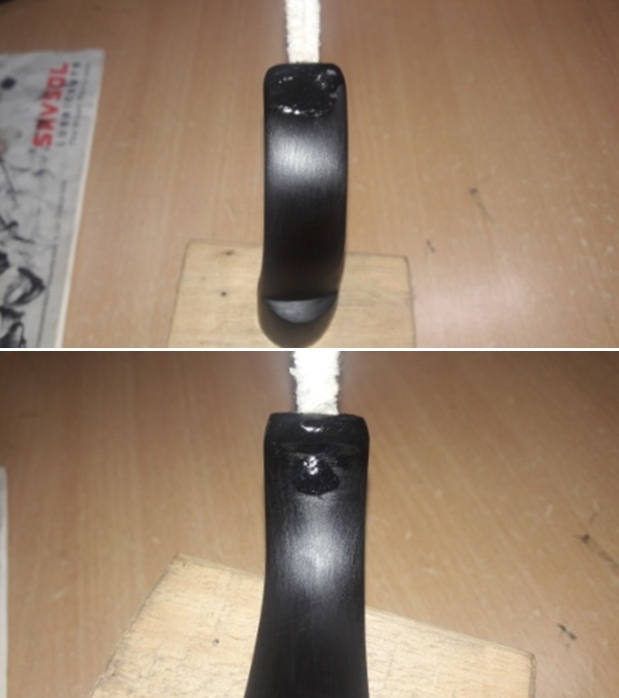
 I snapped the last shot above, showing the broken shank, after wheedling out the antique bone tenon.
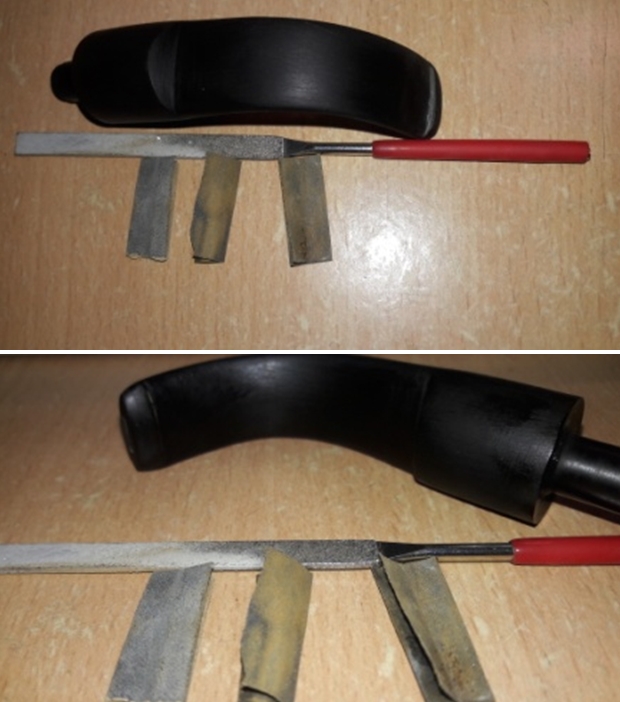
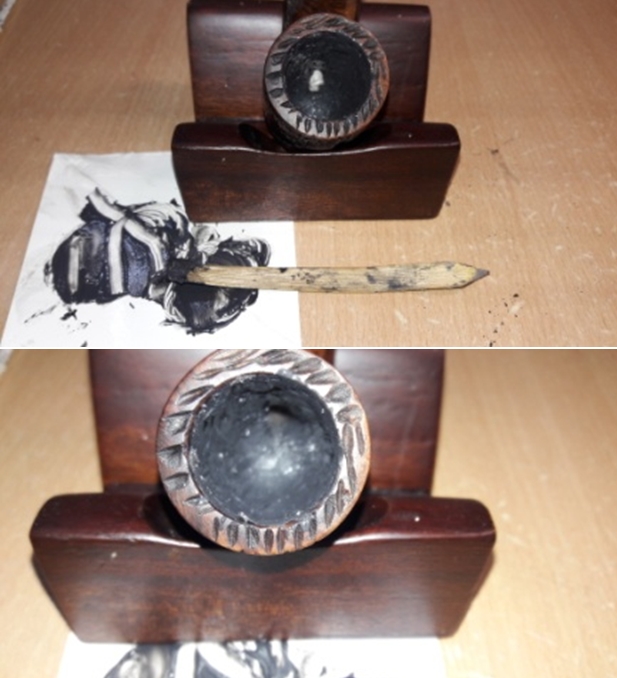
To remove the extreme blockage in the vicinity of the draught hole, I tried an old trick of straightening a paper clip, then bending an end and working it into the entrance of the draught hole at the bottom of the chamber. Alternating that approach with assaults from the other side (meaning through the shank) using various very thin metal objects, I realized I was getting nowhere. And so I began this phase in earnest by diluting about one part isopropyl alcohol with five parts purified water and pouring the solution into the pipe chamber with the shank plugged. I let it soak a couple of hours and turned to my bizarre set of tools. Some of the tools and other devices I employed for the extraction were a thin screw driver, the shank-clearing part of a three-piece pipe tool, the paper clip again and, taking a cue from Laurence Olivier’s evil Nazi dentist in The Marathon Man, some wicked-looking implements that could pass at a glance for dental tools. In fact, as many of you will recognize, they are for carving, although the broken bits of bullheaded bone resembled rotted teeth. However, the final push in the process was another alcohol-water soak of the chamber, but overnight that time. After that, the metal shank part of the pipe tool pushed on through to the other side, dislodging one small chunk of dark old bone. A good, strong blow through the shank with my fingers covering the rim sent the last five scraps blasting free with a whistle.
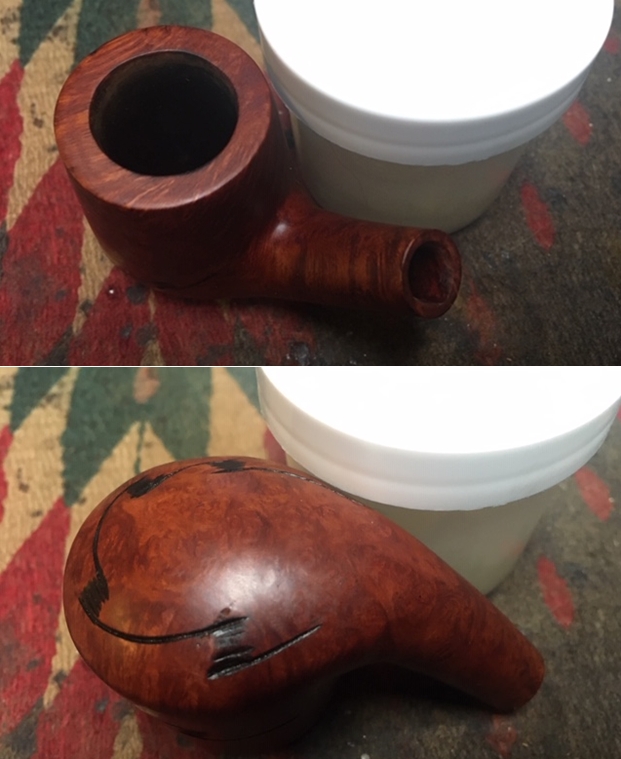
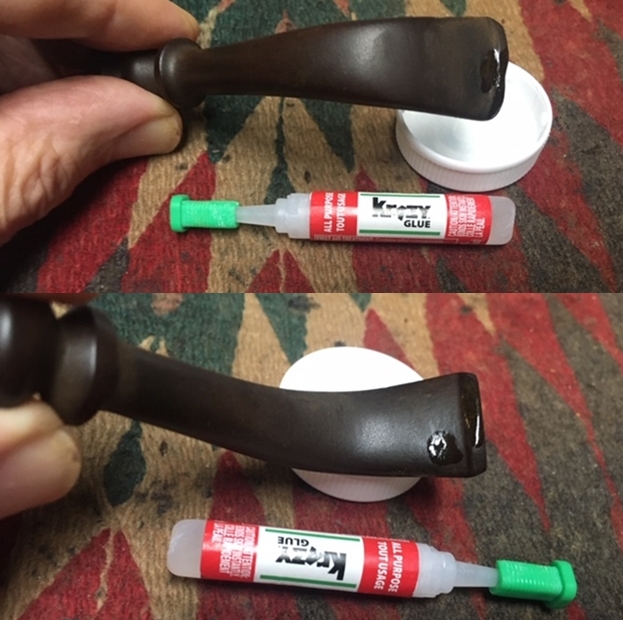
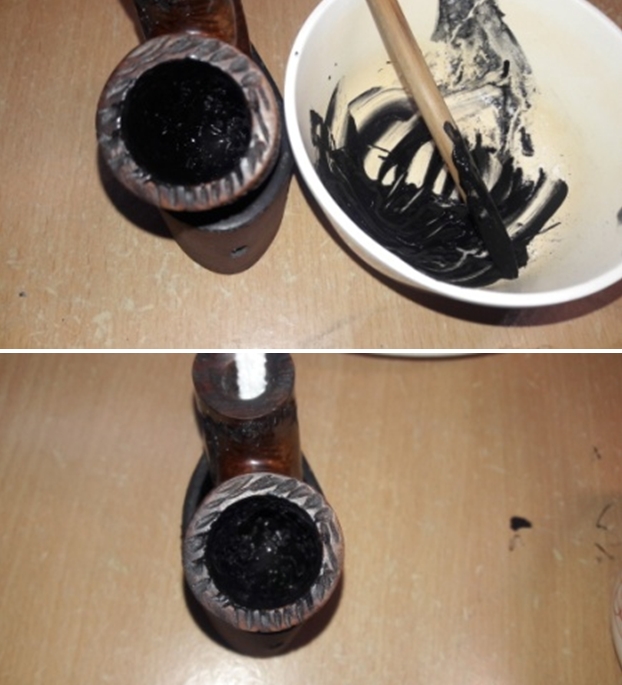
“This shank is clear,” I said to Howard, doing my best Zelda Rubinstein. Howard, sitting across the living room table from me, smiled at the joke, but really, it was one of the most rewarding moments of my pipe cleaning life. Here are the pieces from the stem, shank and, much later but included now as a sort of class photo, the remains I had to use way more force than I ever imagined possible on a meerschaum to dislodge from their long-held stronghold in the draught hole. The extraction took about a week, but until it was accomplished – if I could pull it off without shattering the meerschaum into perhaps a thousand fragments – I wasn’t about to pend any more time on restoring this sorely abused work of art. I had come to the green light for reattaching the broken piece of the shank. Pouring a small amount of shaved wood onto a business card, I added a few drops of Gorilla Super Glue and, using the spoon of my pipe tool to mix the two as fast as possible before they set, applied a thin layer to the exposed white meerschaum on the shank and returned the separated piece to its place with a firm push. Somehow I didn’t get a pic of this step, but it looked just as natural as it did when it arrived held together by the forces of nature. I stained the bottom of the lion’s mane black as it had been. A lucky guess of moccasin brown for the shank and various white spots on the rest of the stummel was right on. I flamed those areas with a Bic.
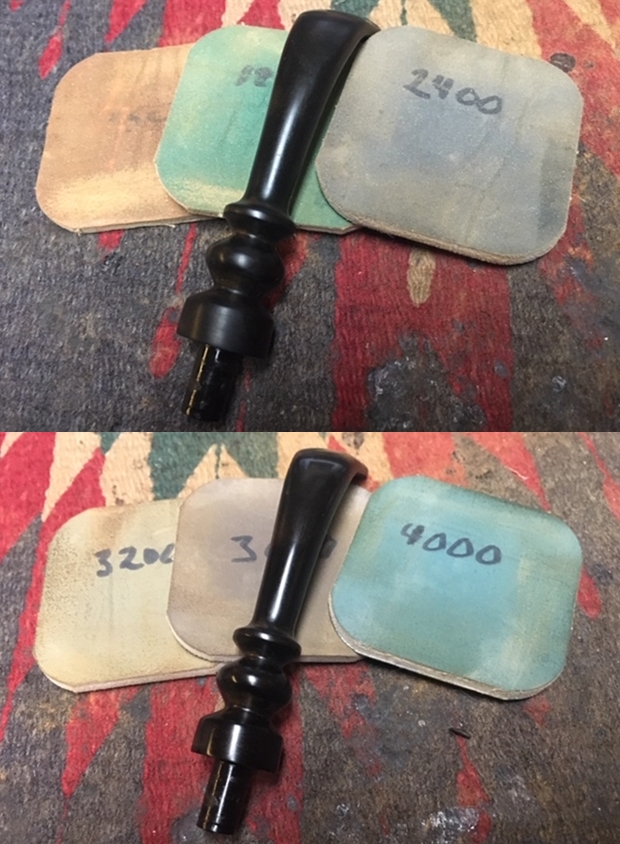
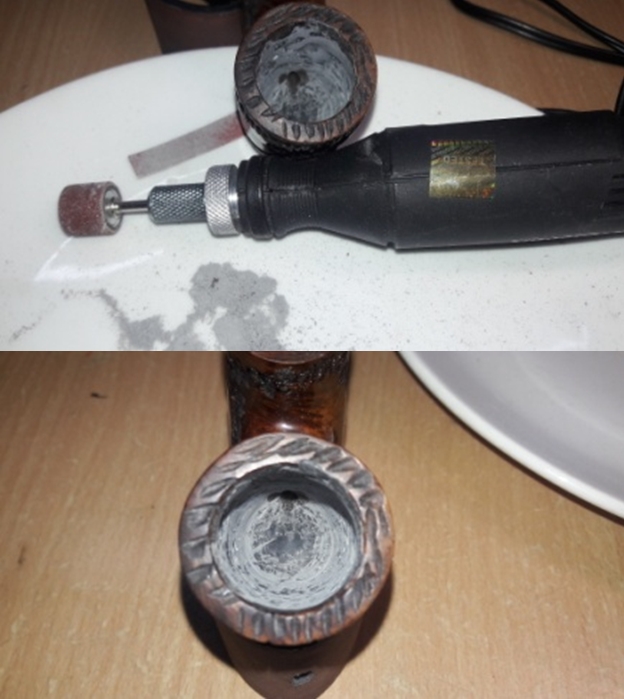
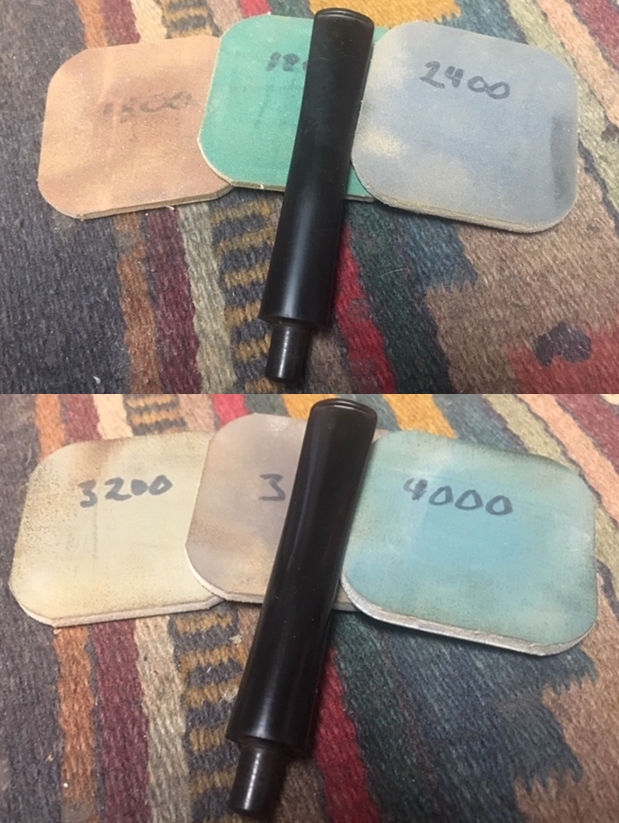
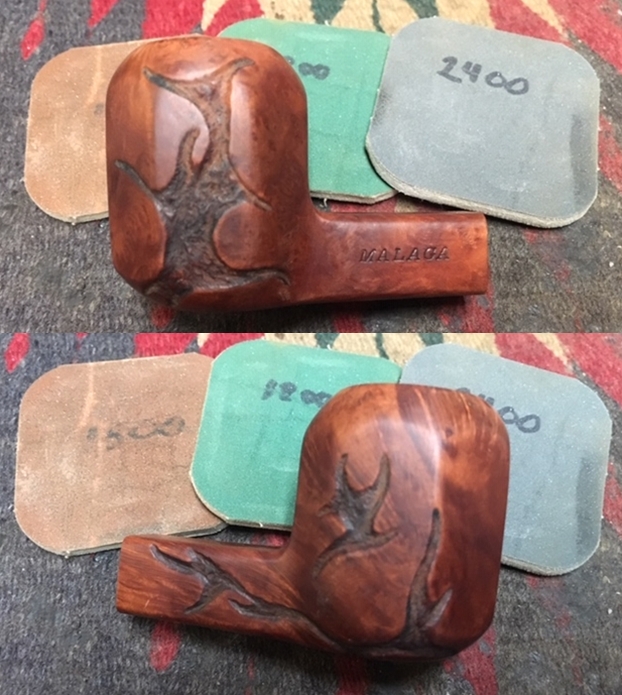
 The char buffed off without problem using 4000-12000 micro mesh pads. I decided to carpe diem, and used super fine “0000” steel wool to remove the respiratory inhibiting coat of shellac or varnish or whatever was used to make the natural beauty of the meerschaum abnormally shiny everywhere except for the lion’s proud face and the underside. I experienced an intense wave of relief.
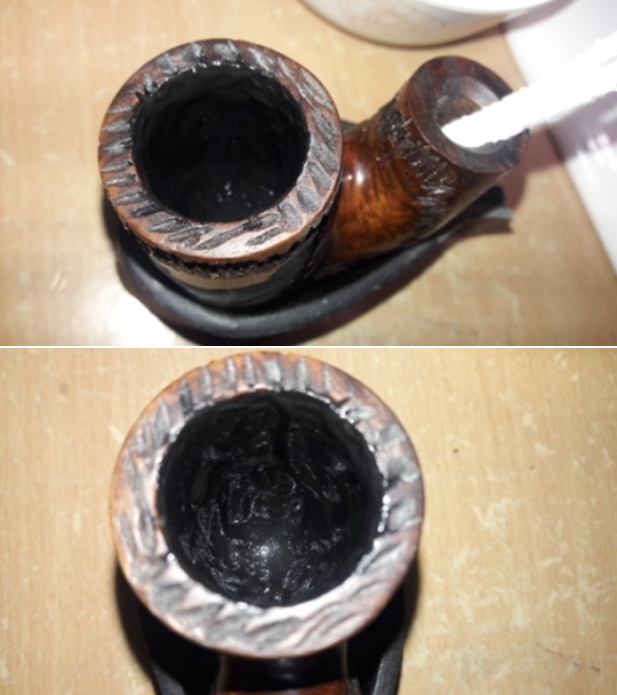
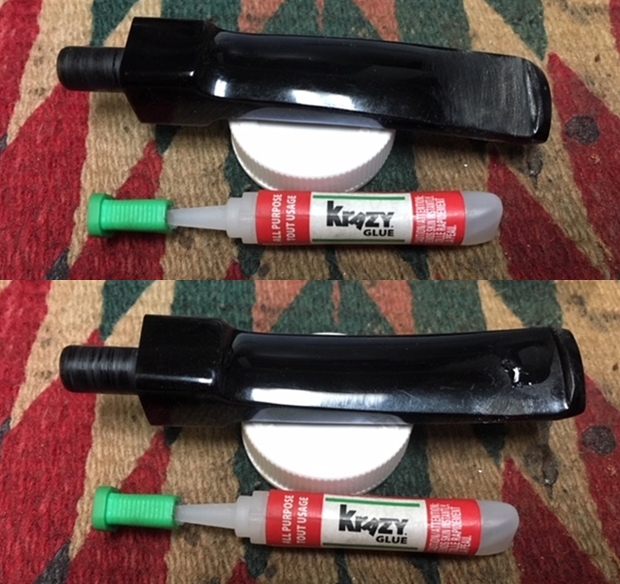
One good thing about this pipe is that the threads of the stem and shank remained intact throughout more than a century of outrages perpetrated against the other limbs and sinews of its intricate feline features. From an assortment of new bone tenons I have, and which seem well-named for this feral example of pipe carving, I chose one that screwed into the shank just right but needed to be glued into the stem. For chemical reasons of which I have no understanding but do possess some practical experience with briar and meerschaum, sinking a loose tenon into a shank is best accomplished with an Epoxy/wood shavings mixture. The one drawback to this method is the necessary full setting period of at least two days and sometimes more, depending on the gap in the shank. On the other hand, sinking a tenon that is barely loose into a stem works fine with a Super Glue/shavings mix and of course dries far faster – so fast, in fact, that the difficulty with that path is mixing, applying and inserting the tenon into the stem before the mix dries. Isn’t it just God’s honest truth that everything comes with a test?
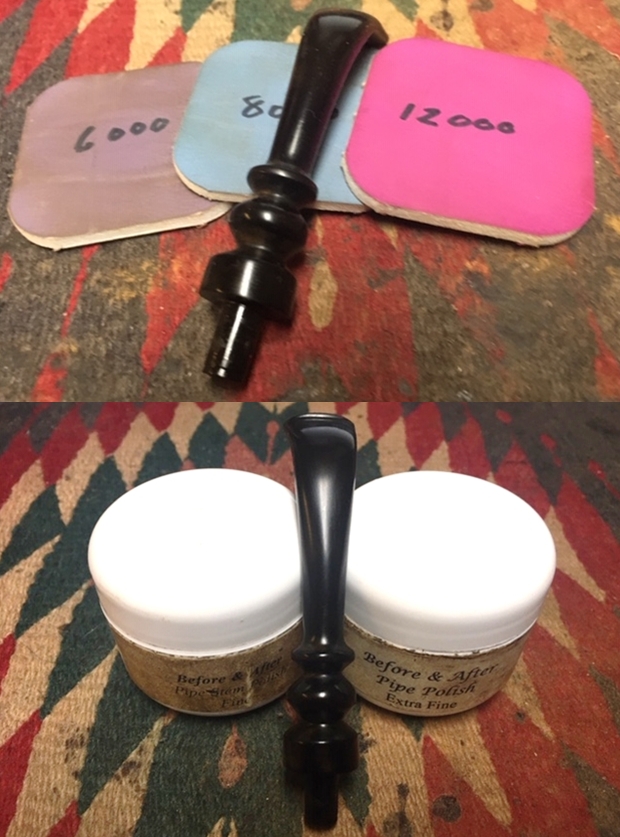
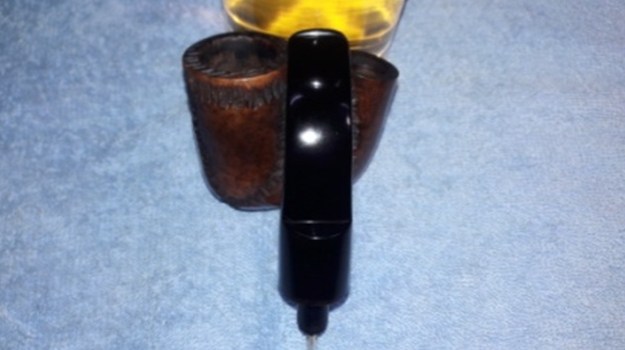
My next task was to sink a crisp new bone tenon into the well-preserved amber stem that was a close enough fit to feel the grooves of the tenon and stem trying to connect. I did so with the Super Glue/shavings mix. For anyone who has never done anything like this before, I ran a pipe cleaner through the stem and tenon before stirring together the ingredients and applying the mix to the tenon, then inserting into the stem, again, all as fast as possible to avoid drying before the whole process was done. As soon as the tenon was in place, I wiggled the cleaner back and forth a little to assure it wasn’t sticky with glue and pulled it out. This can take a little practice. At least it did in my case, which was another benefit of using the Epoxy/shaving mix that takes longer to solidify. As I noted, the stem was in great shape for any pipe that has been used even for a short time, much less more than a century ago before moving it around, hiding it away in attics, storage spaces or wherever and of course taking it out of its case now and then to show off to friends without having a clue about its value to collectors. As a result, I only needed to sand with 400- to 1000-grit paper before micro meshing from 1500-12000. I finished the stem by buffing on the electric wheels with Red Tripoli and Carnauba wax.
 The last part of the official job was to fit a sterling silver band, per Howard’s specification, to support the crack. What the photo of that particular damage doesn’t show is the length, which extended in a half-oval- about three-quarters of an inch. That’s an impossible chunk to cover with anything but a home- or custom-made band. Maybe if I had the skill of some I would have cut off the violated space and replaced it with a fancy ferrule, but as I’ve written in the past, shoulda-coulda-woulda. I’ll save that procedure for another operation sometime in the future.
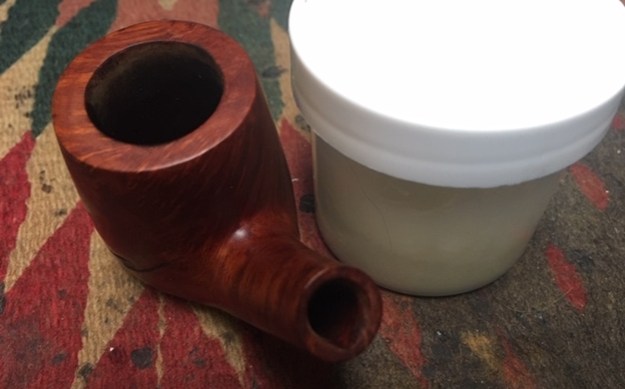
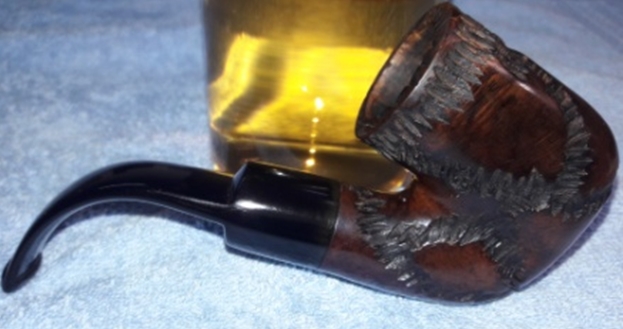
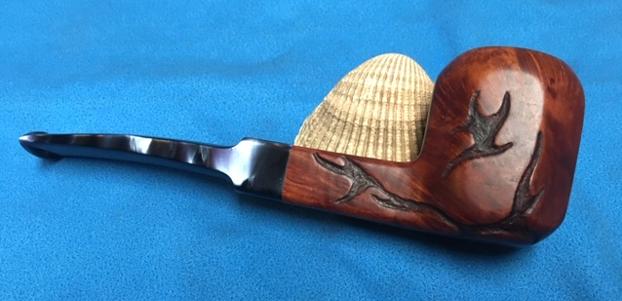
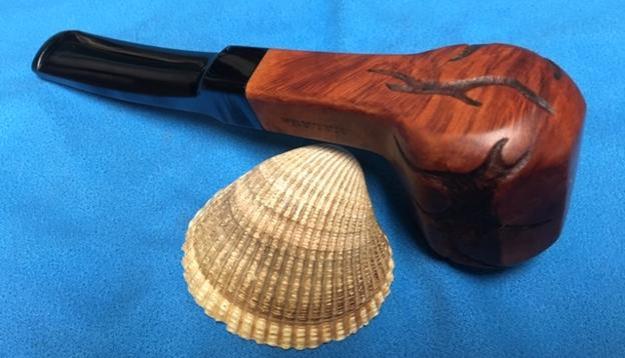
For the time being, I satisfied myself by measuring the shank and finding that between the stem opening and the far end of the crack it tapered from 15-15.5mm in diameter. Vermont Freehand had sterling bands at half-millimeter intervals. I decided 16mm would be too big and the exact fit of 15.5mm would require an adjustment to the shank. Based on a gold band I ordered from the same source not long ago for another meerschaum repair, I also had reason to suspect the automatic length would be a quarter-inch. Therefore, I ordered the 15.5mm band (as well as a tenon turning tool for my new drill press) and emailed Steve Norse, owner of VF, that I’d like a half-inch or even longer band if possible. He came through with a half-incher that covered two-thirds of the crack, and if I could give him a BBB rating, it would be AAA. When the band arrived, as predicted, I had to take a little meerschaum off the shank opening end using a 180-grit pad. After gluing the band onto the shank, which was still a very tight fit, I sanded the outer edge of the band with a 220-grit pad to even it as much as possible without off-setting the stem fit. Someday I’ll develop my eyes to spot the alignment problem before I Super Glue a new band onto the shank so I can even the shank instead! Instead of crying over spilt milk, I touched up the uncovered sanded area with more moccasin brown stain, flamed and micro meshed. The last third of the wicked crack is visible in the shot below.
 I would have been finished, except that Howard decided he wanted the dull black and scuffed pipe case cleaned up – meaning stained. Being perhaps a bit old fashioned, my initial silent reaction was opposed to the idea of altering the natural aged look of the case. After a moment’s thought, however, I realized not only that the pipe and its case didn’t belong to me, but that I could indeed make the case look much better than it did. Besides, I had never restored a case before. Here it was before.
 And here’s the case after staining with black leather dye and flaming with a Bic.
 That’s it, other than the finished pipe.
 And finally, the case is closed – buffed with Carnauba. The sides where it clasps shut are flaking, so I didn’t stain them brown.
 CONCLUSION
I have faults like everyone, but honesty isn’t one of them. If anything, my openness has been to my detriment. That said, as I admitted my responsibility for Howard’s purchase of this challenged but nevertheless wonderful pipe that is a series of contradictions – complex and straight-forward, delicate but powerful, strengthened by its injuries, beautiful in part from its rough-weathered time in our world – I also admit my restoration has flaws. At least I am confident I returned some pride to the old lion as another winter approaches and made him of use and value again. Howard loves the venerable example of old world carving skill because of its quality and freshness of taste but also its longness of tooth and attendant need for care. He wouldn’t object in the least if it were made of wood, even a kind other than briar. All Howard knows is that it looks good, feels rugged and fits right in his hand and even makes his tobacco taste better.
What more could anyone want?
SOURCES
https://preadored.com/the-notebook/how-to-test-amber-and-bakelite/
http://tobaccopipeartistory.blogspot.com/p/collecting.html
https://www.paykocimports.com/blog/how-your-meerschaum-pipe-was-created-and-what-makes-it-better-than-other-pipes/
https://www.smokingpipes.com/smokingpipesblog/single.cfm/post/meerschaum-coloring
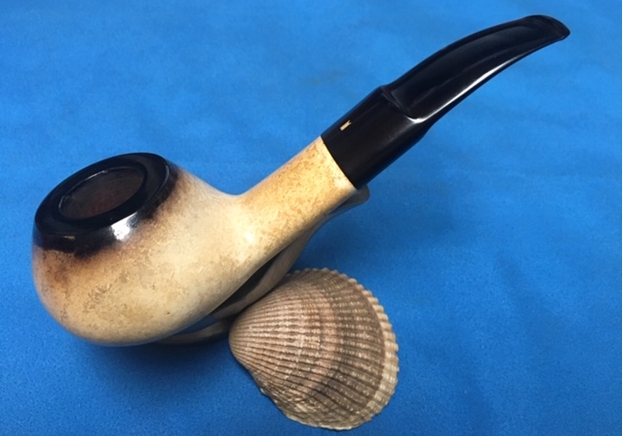

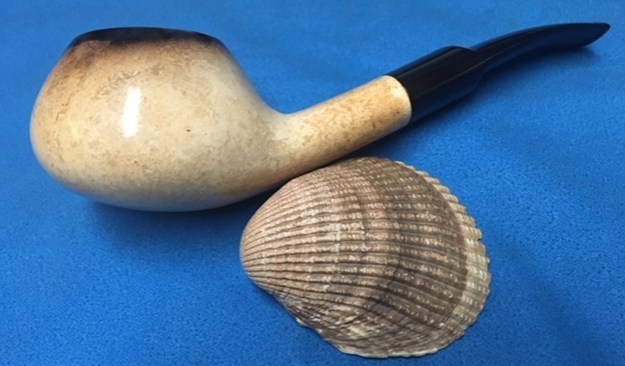
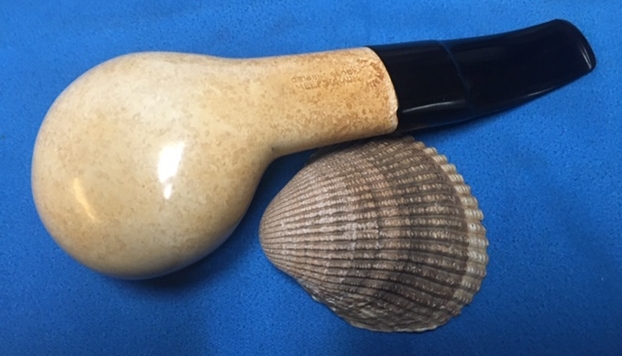
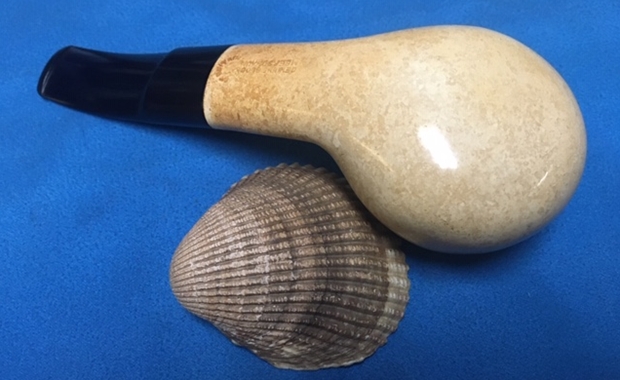
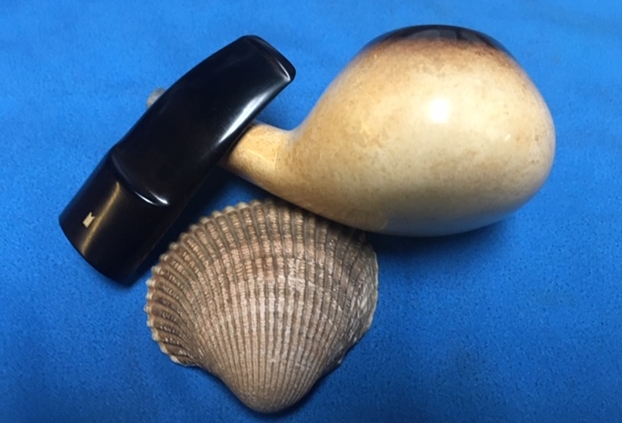
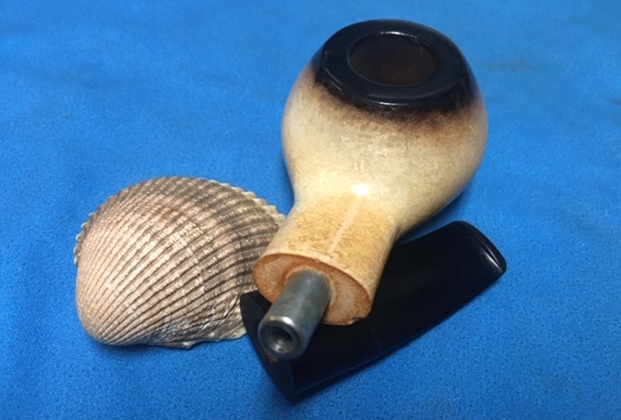
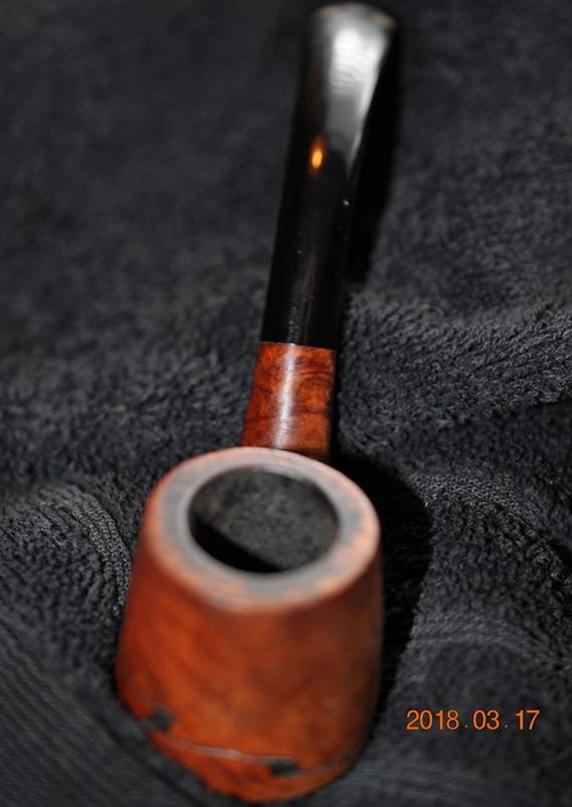
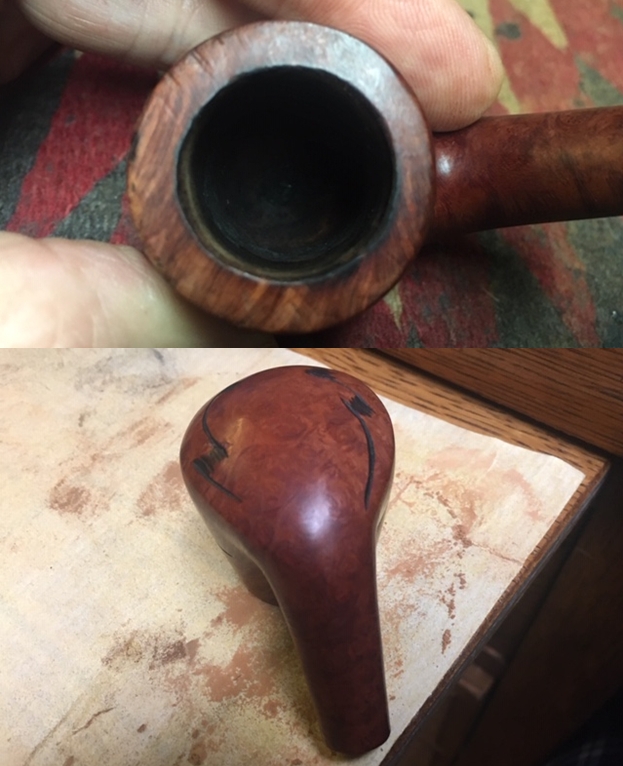
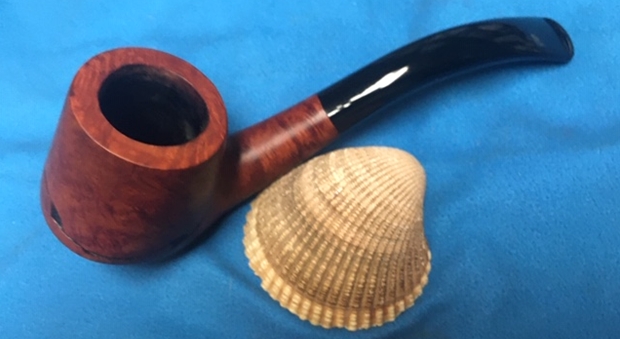
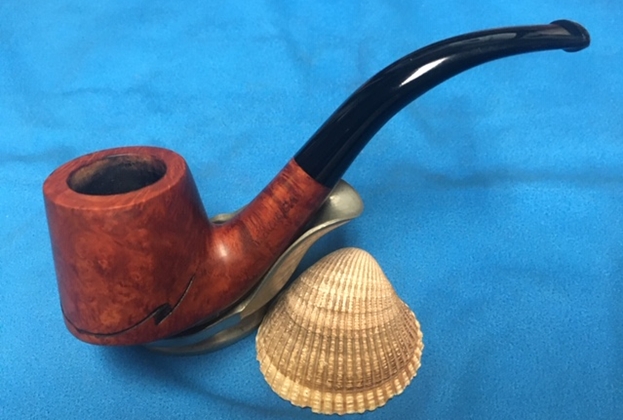
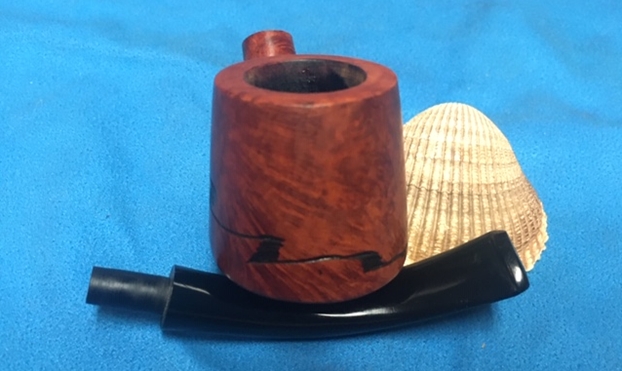
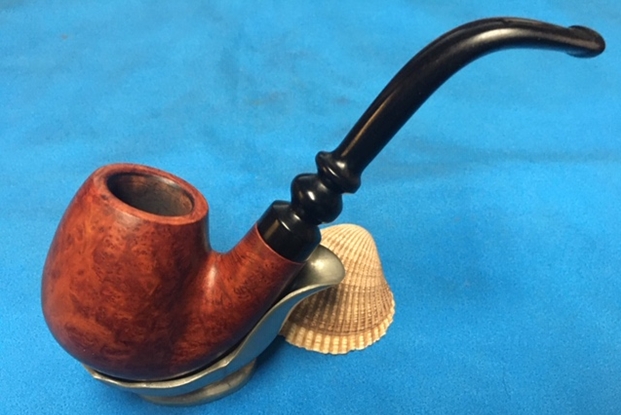
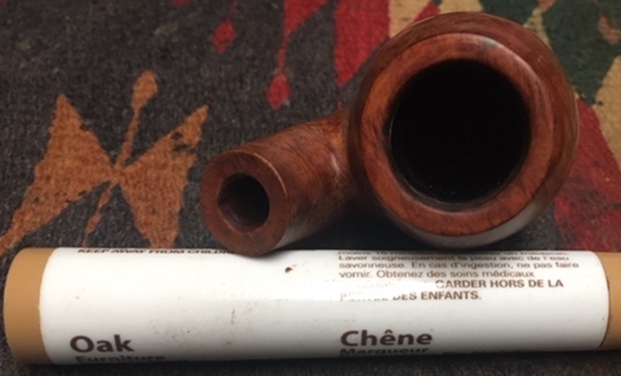
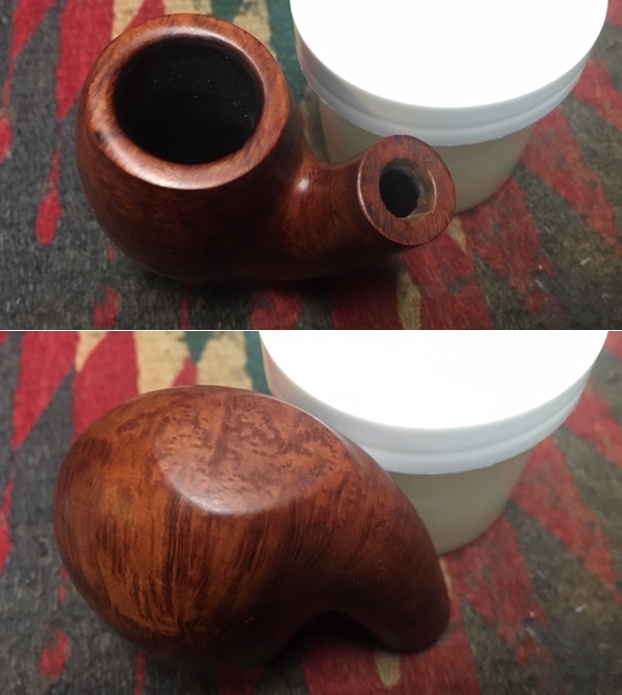
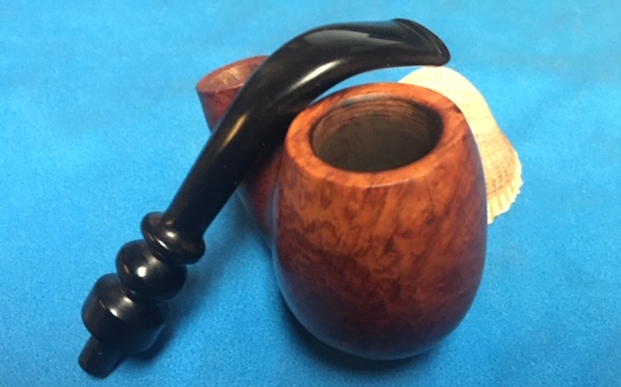
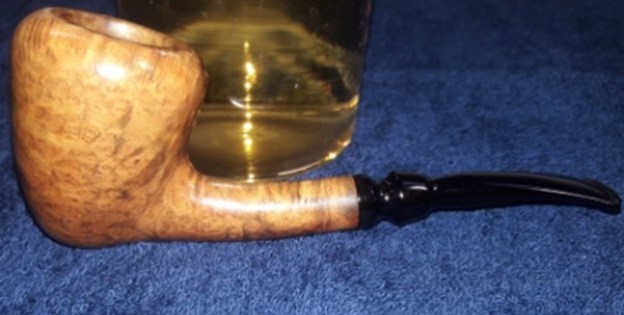
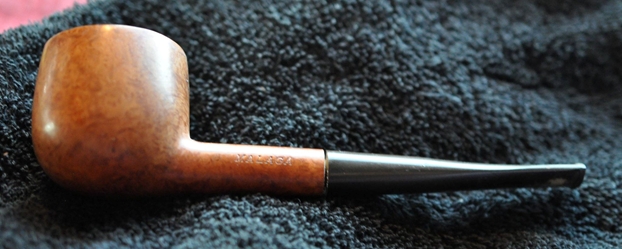
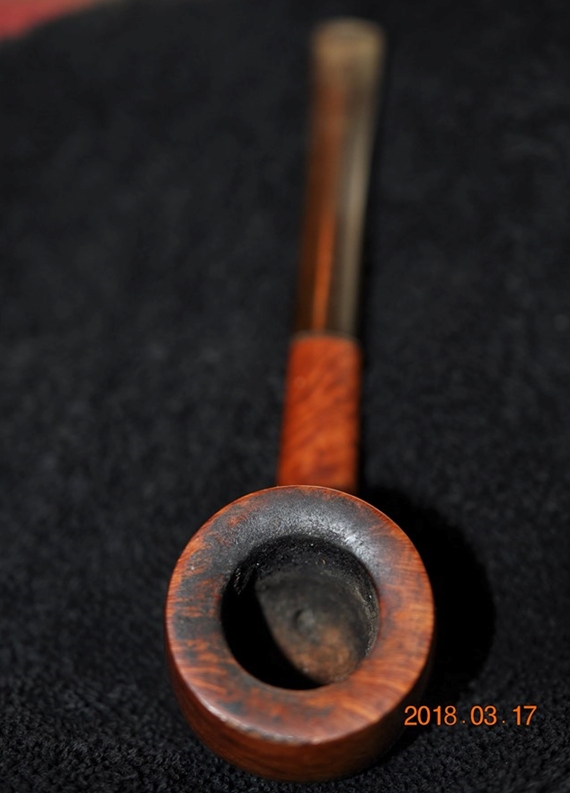
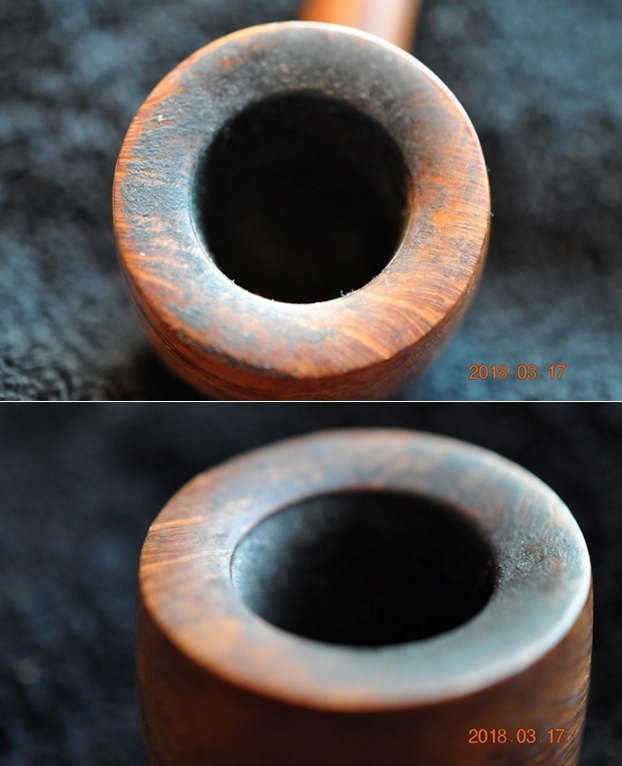
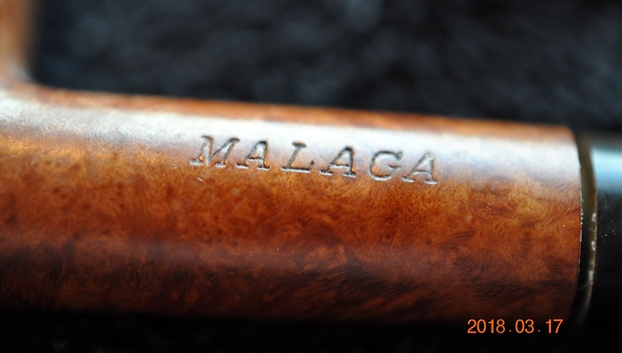
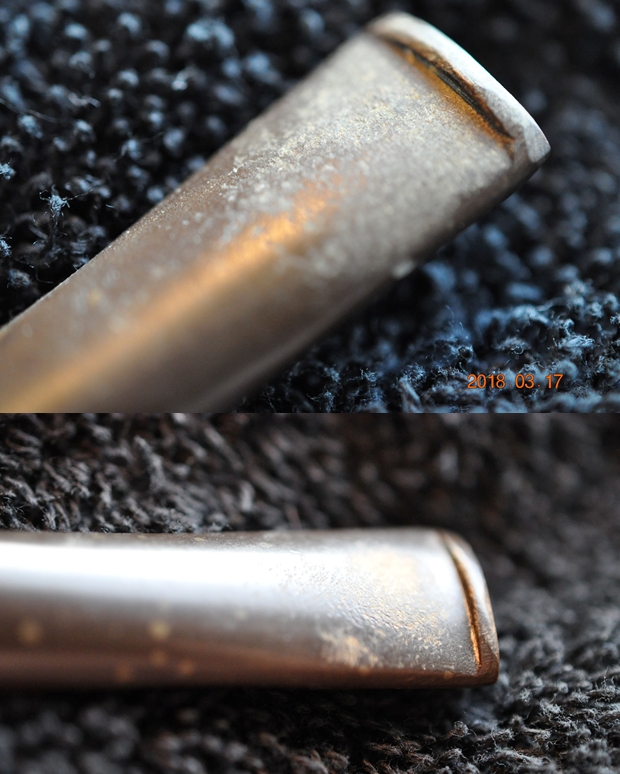
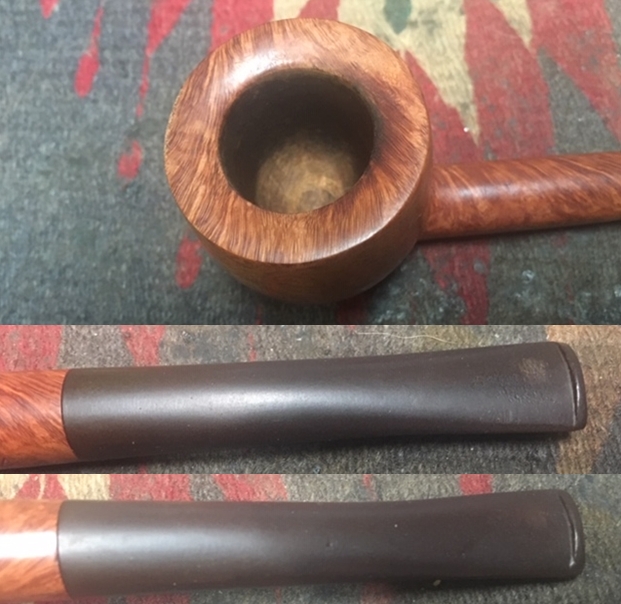
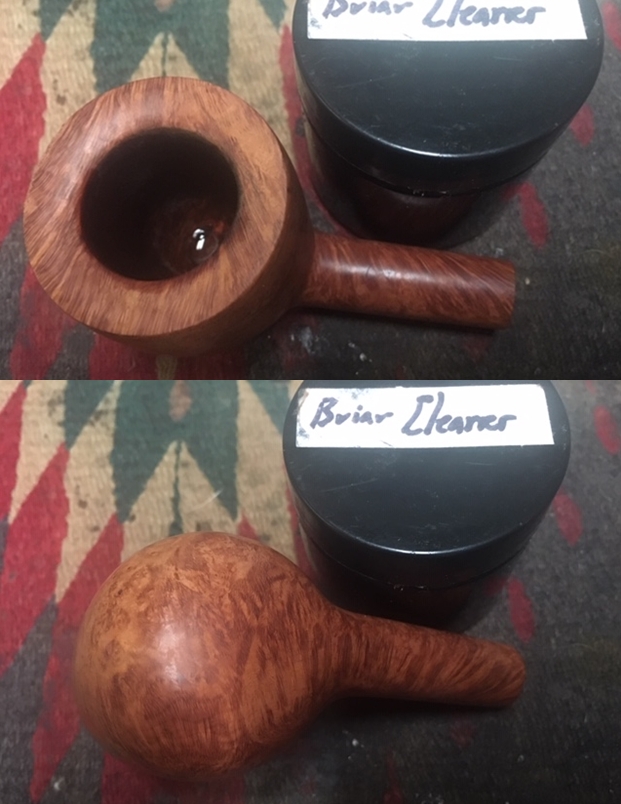
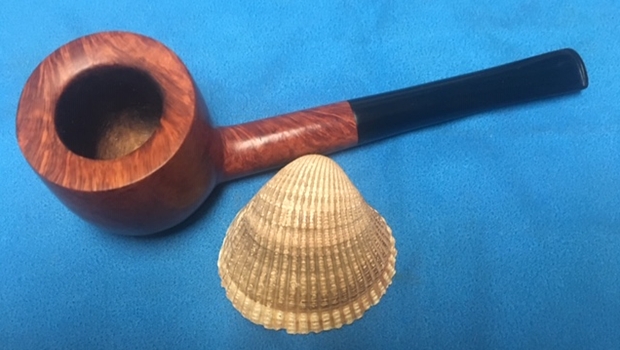
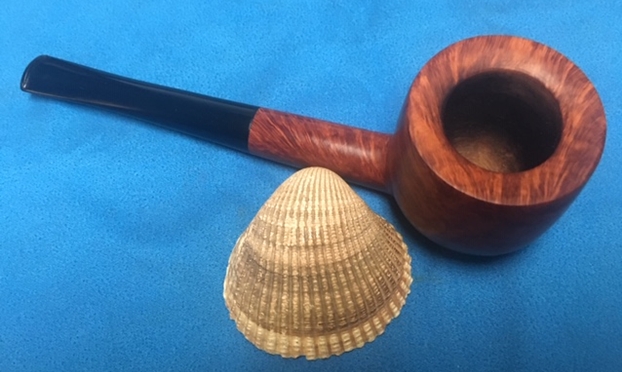
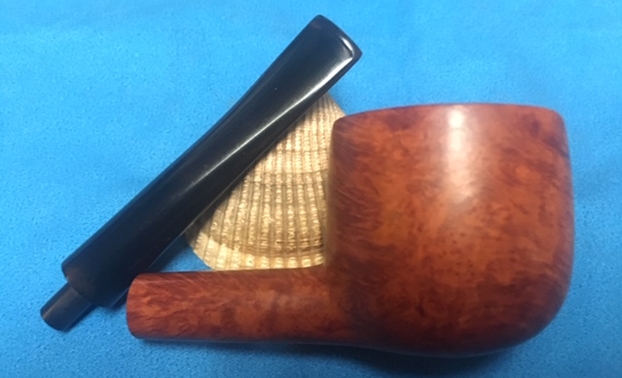
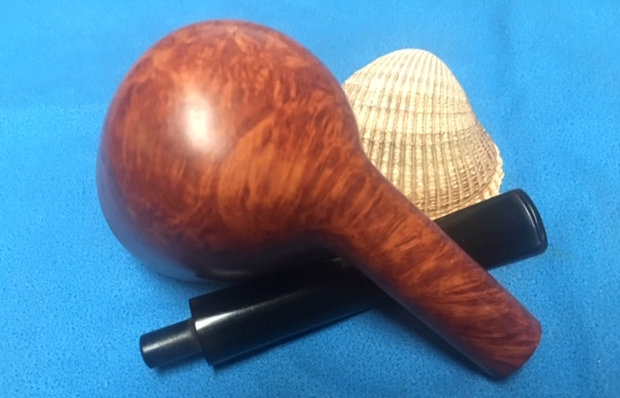
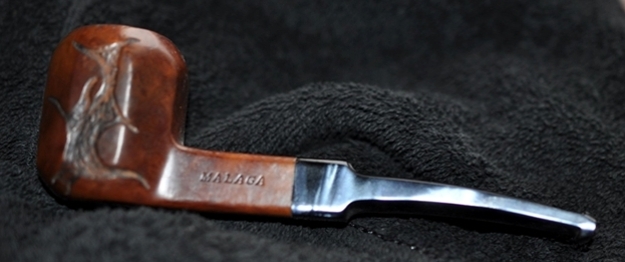
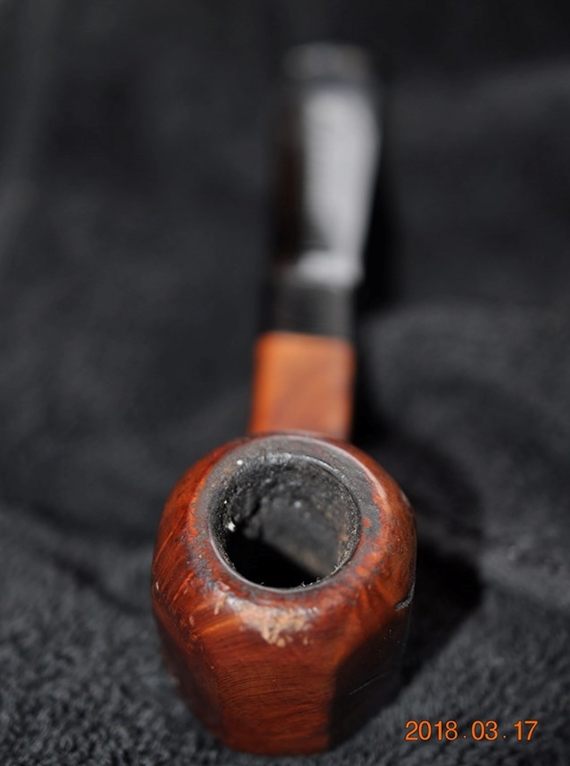
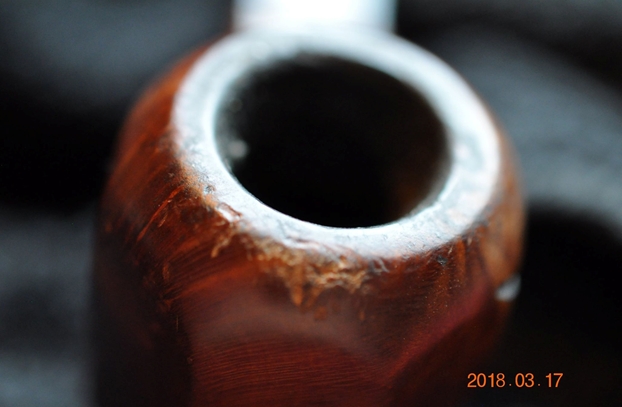
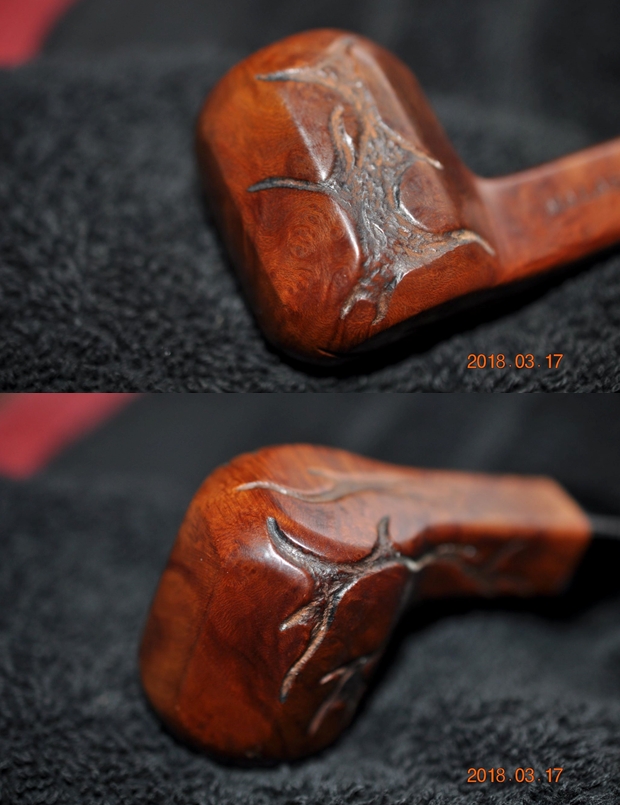
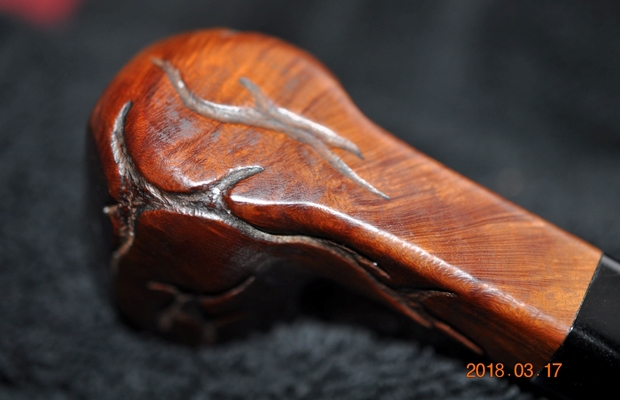
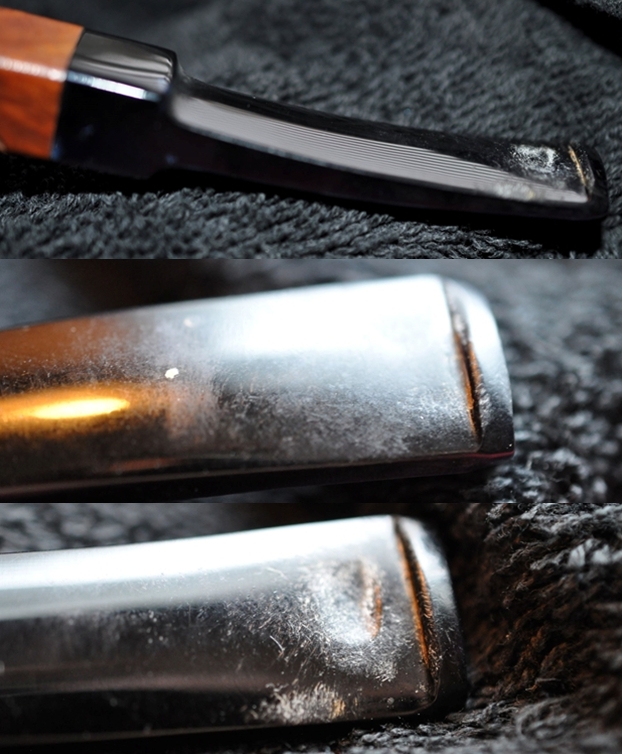
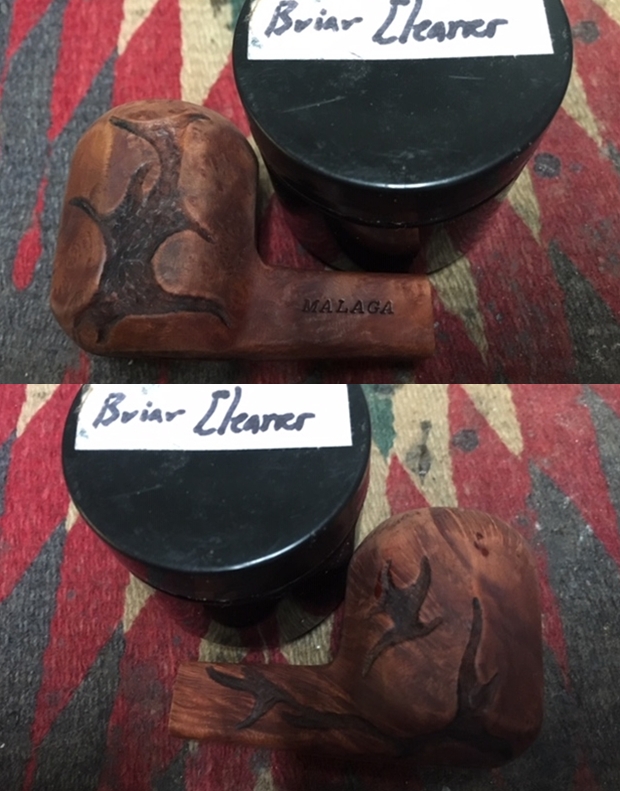
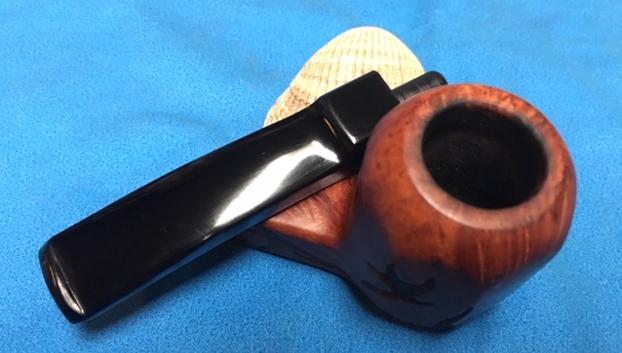
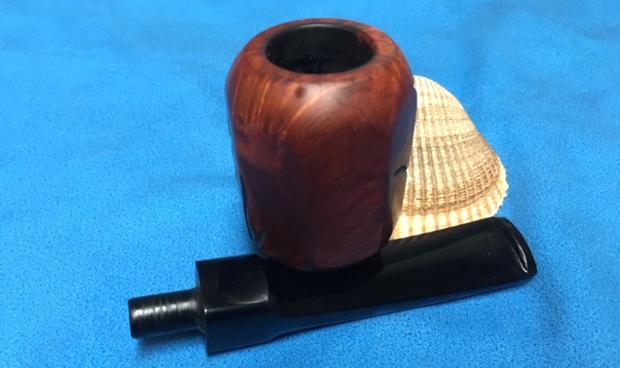
 I took close up photos of the bowl and rim to capture the condition of the pipe before I started my cleanup work. The rim top had some lava and a few nicks on the inner edge. Other than being so dirty it appeared to be in great condition. The stem was dirty and there was tooth chatter on the top and underside near the button and on the button surface itself. The stem was lightly oxidized.
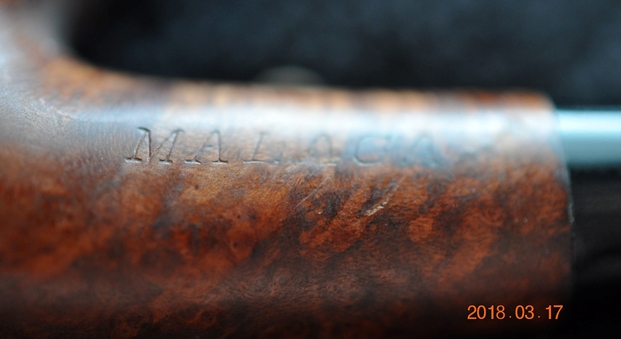
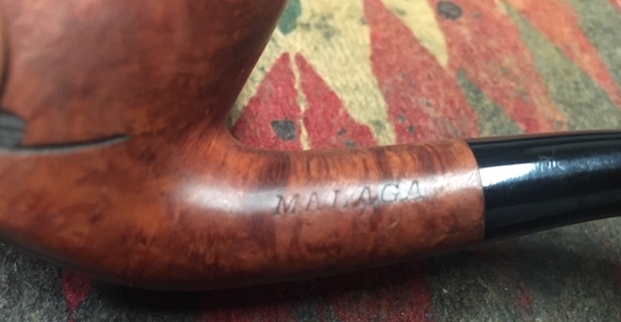
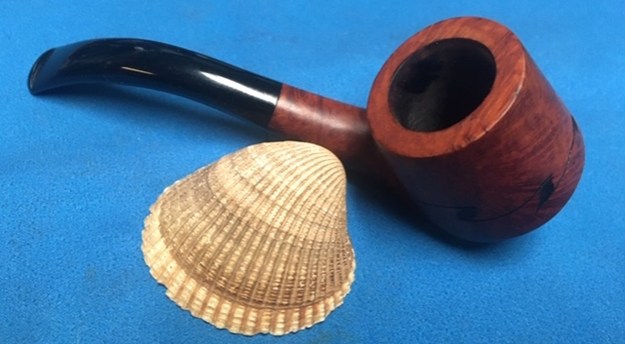
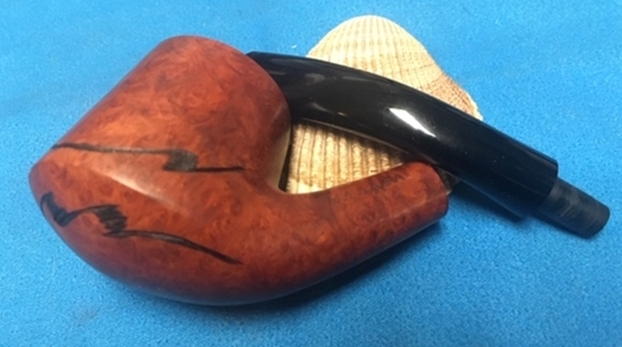
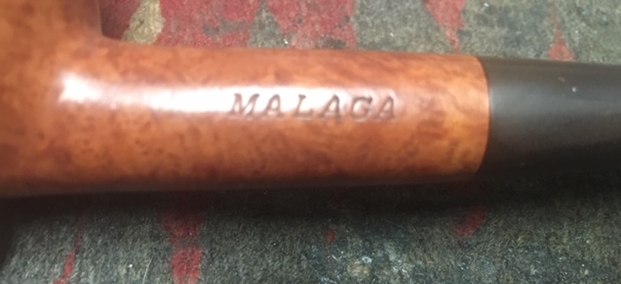
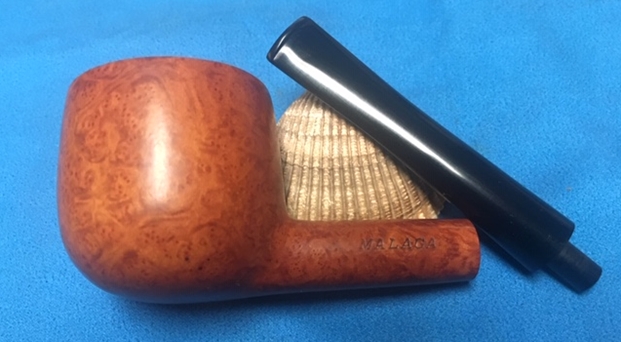
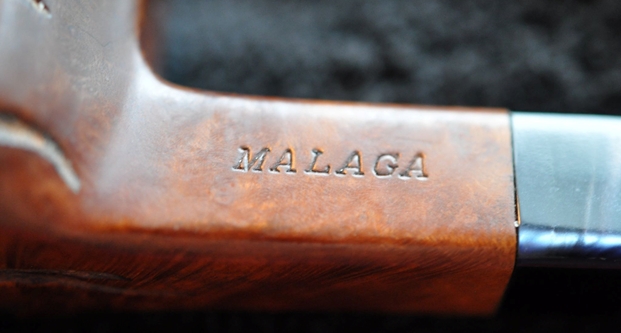
 I took a photo to capture the stamping on the underside of the shank near the stem/shank joint. The photo shows the stamping Genuine Block over Meerschaum. Next to that there was an arched stamp that read GT BRITAIN. There was a small nick in the underside of the meerschaum next to the vulcanite stem.
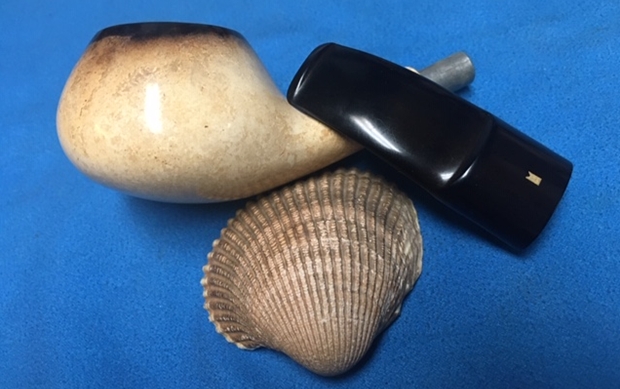
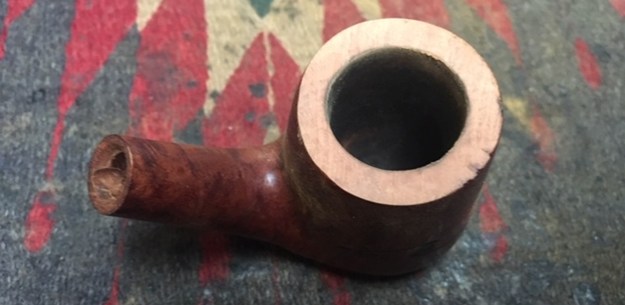
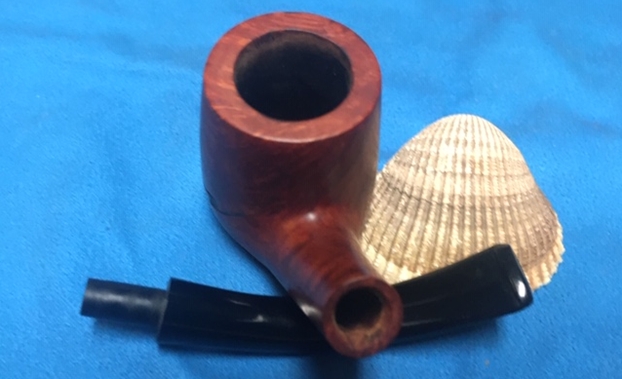
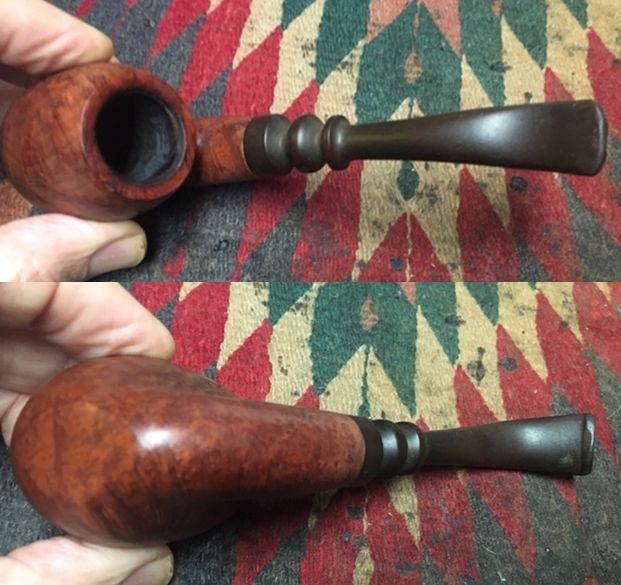
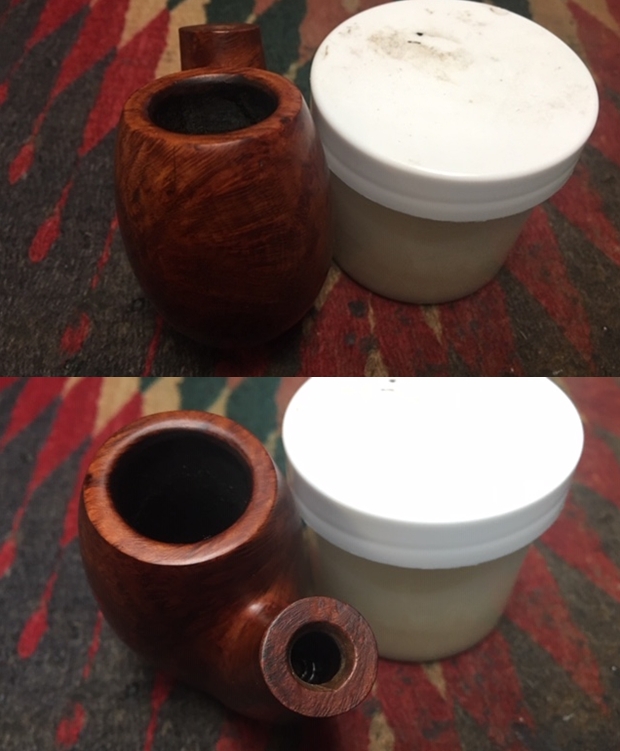
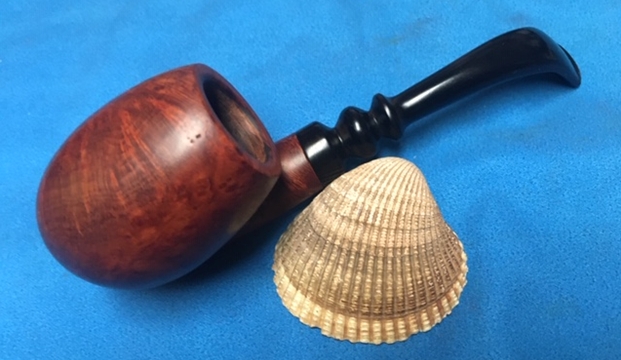
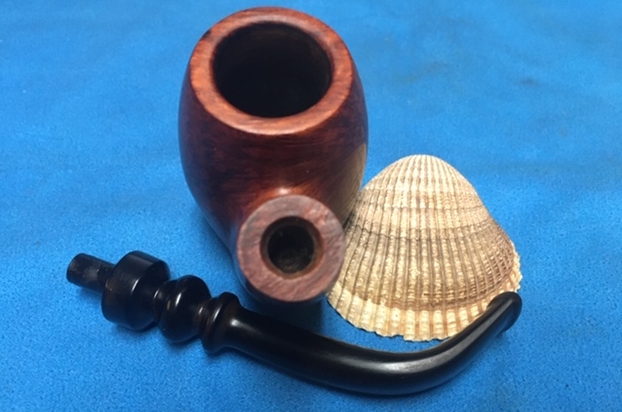
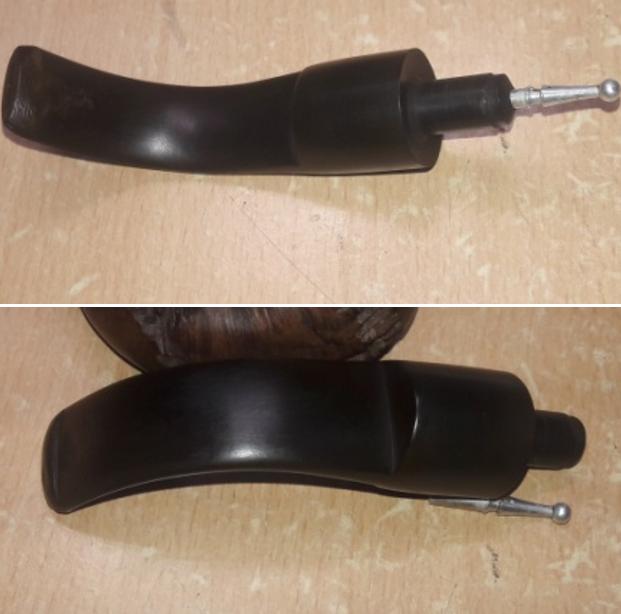
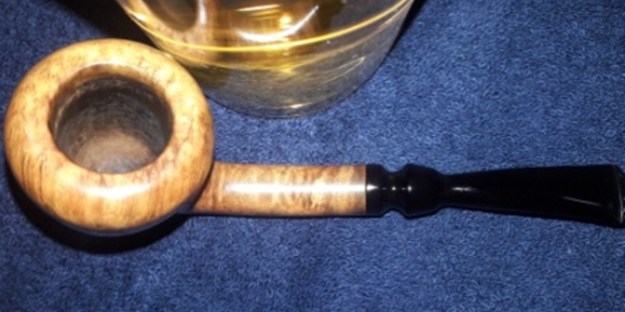
 While we were traveling I decided to do a bit of work on some of the pipes that we had found. I scraped the inside of the bowl with a sharp knife. I scraped the tars and lava off the top of the rim with the same knife. I took the stem off and you can see the metal tenon set in the shank of the pipe. It is anchored firmly and the stem pressure fit over the top of the tenon.
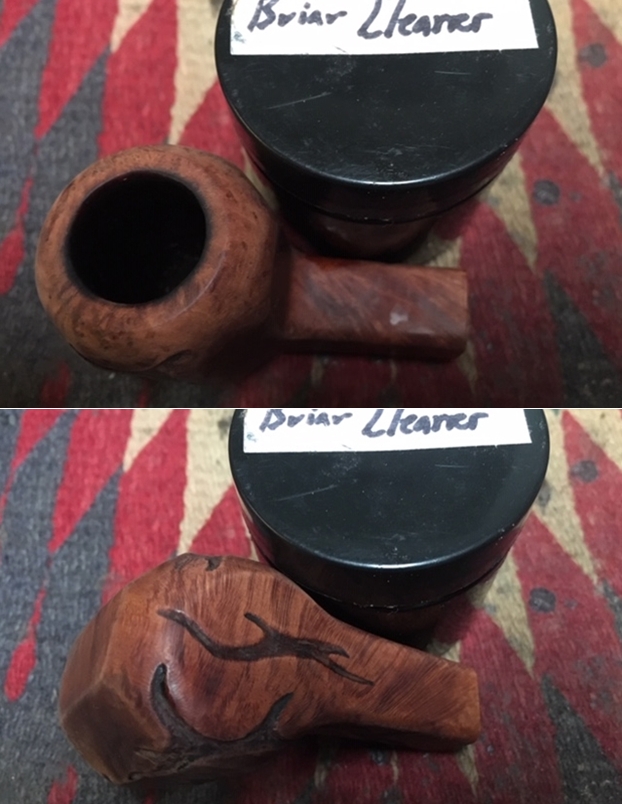
 I scrubbed the exterior of the bowl with warm water and some Dawn Dish Soap to remove the buildup of grime around the bowl and on the rim top. I rinsed it well and wiped the bowl down with a clean paper towel to polish the finish on the bowl.
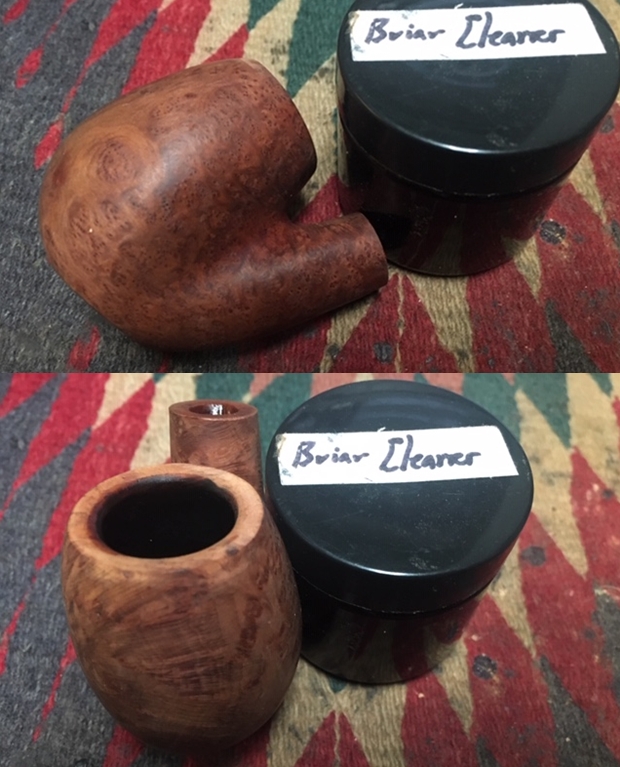
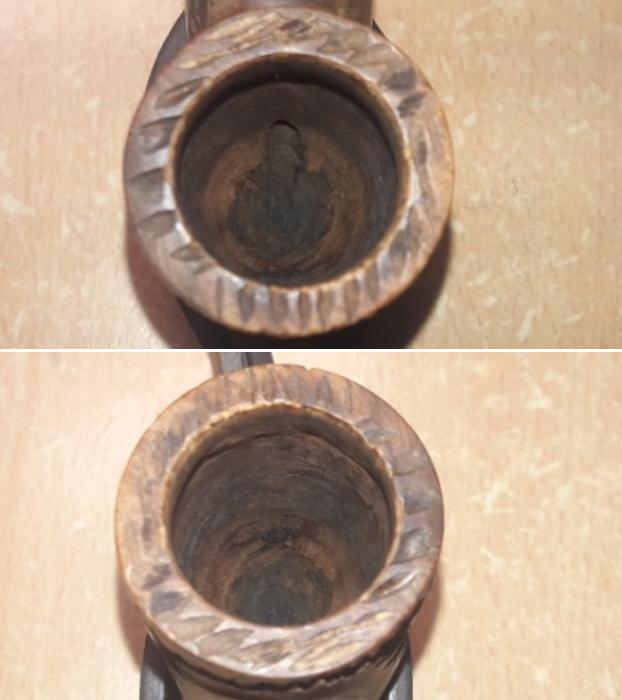
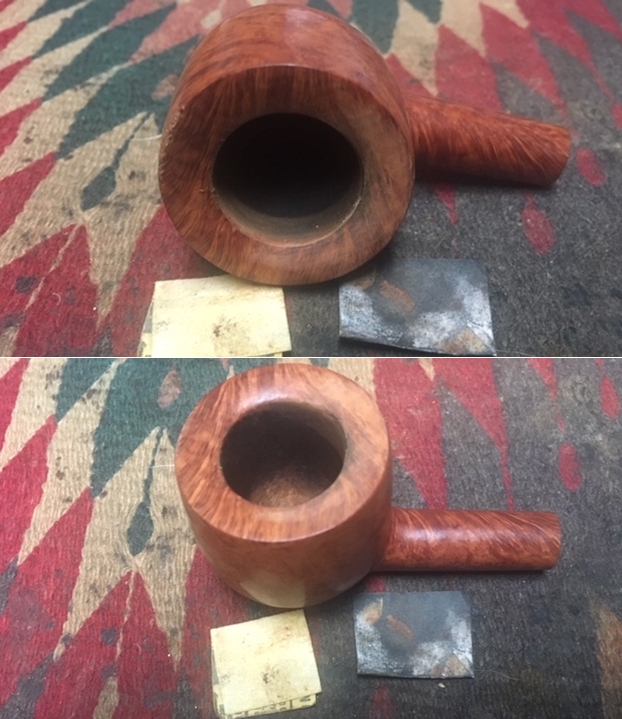
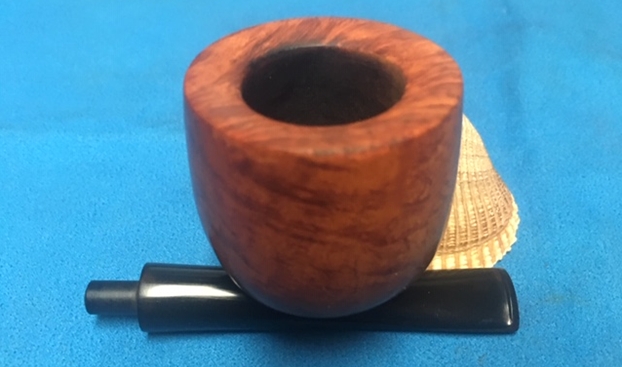
 I decided to follow up on my initial cleaning of the bowl and shank. I reamed the bowl with a Savinelli Fitsall pipe knife to remove the remnants of the cake in the bowl. I sanded the bowl with 220 grit sandpaper wrapped around a piece of dowel to smooth out the inside walls of the bowl.
 I scrubbed out the mortise and the airway in the shank, the metal mortise and the stem with alcohol, cotton swabs and pipe cleaners.
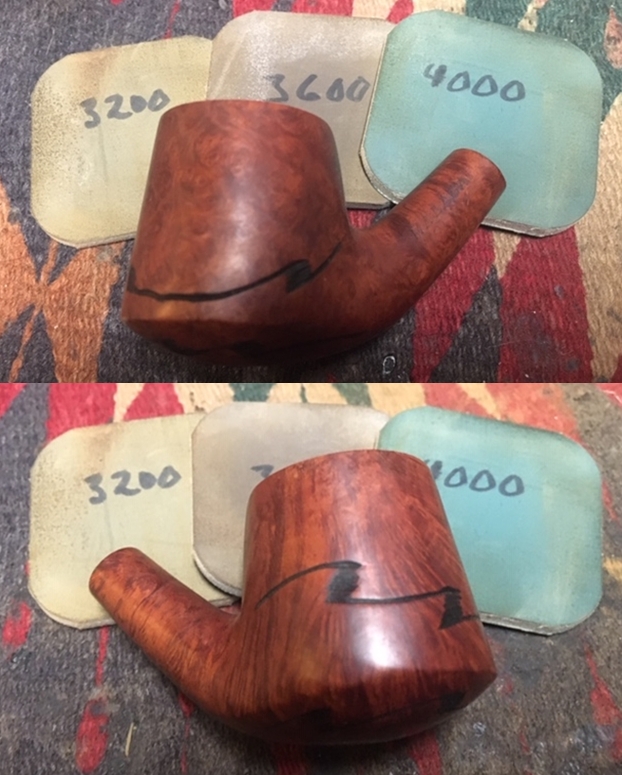
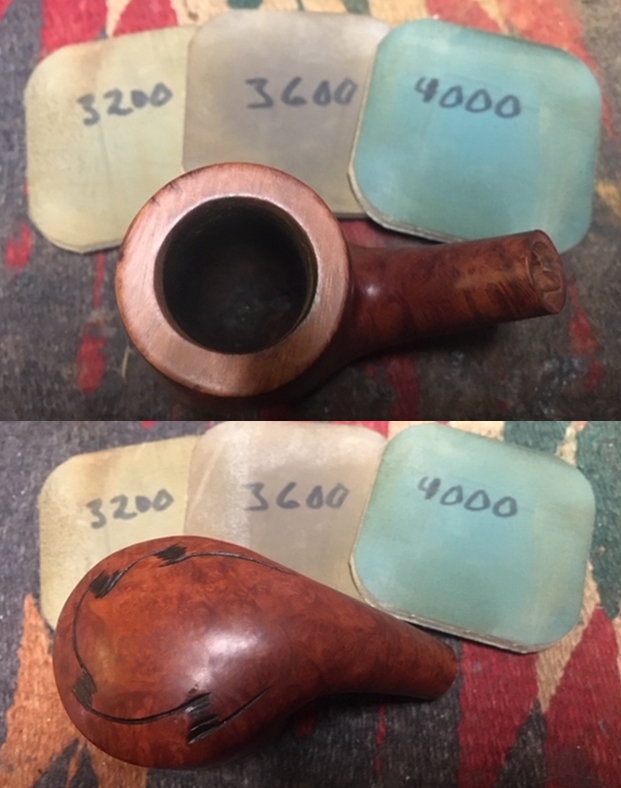
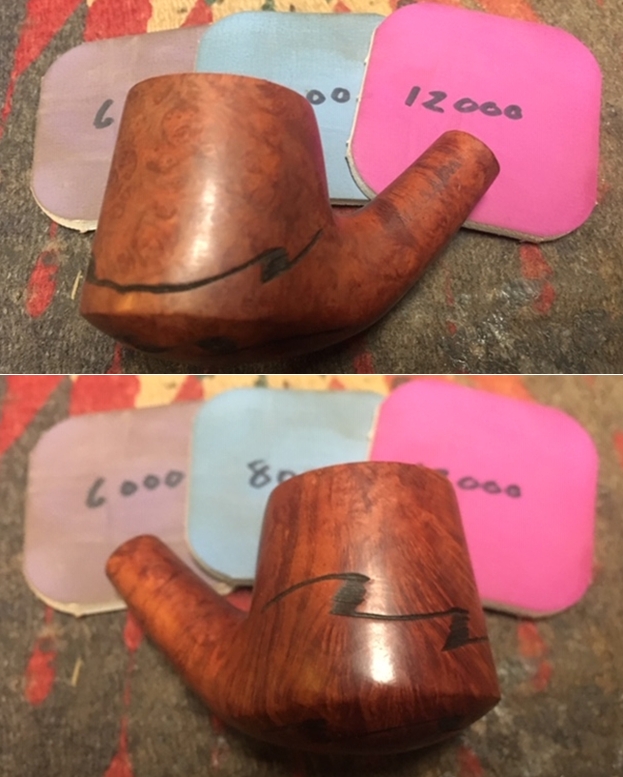
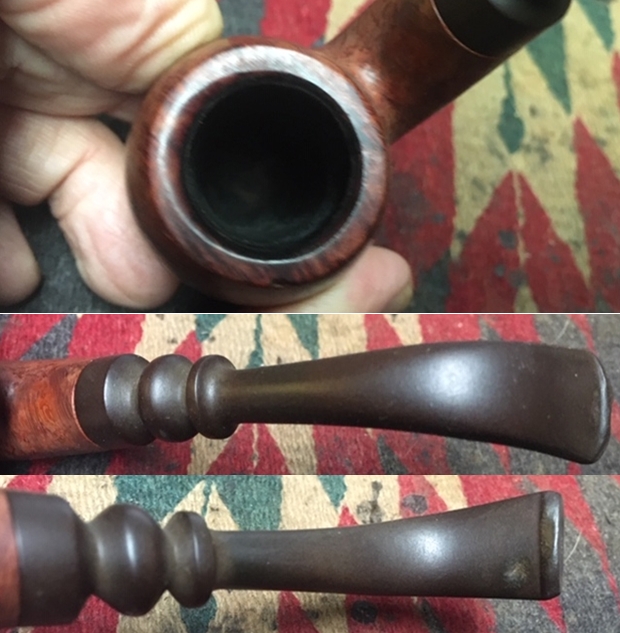
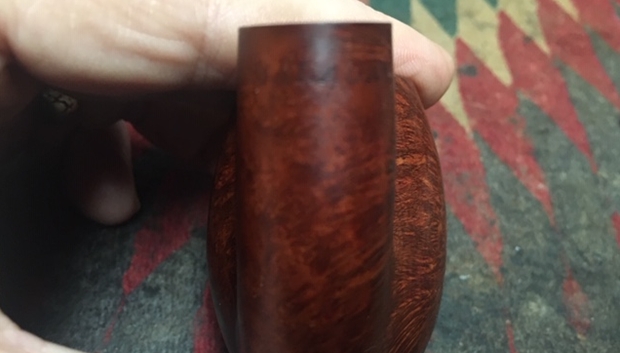
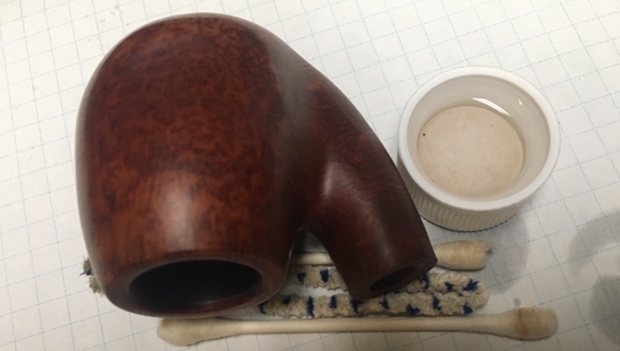
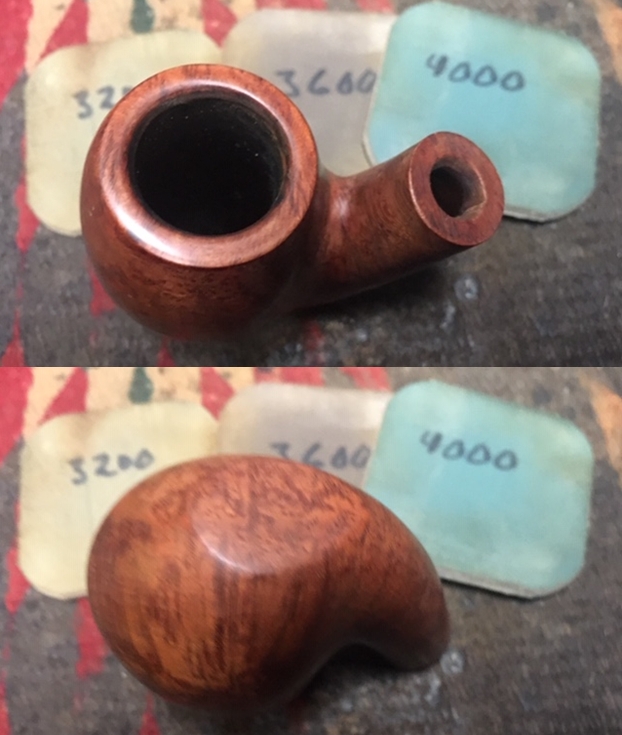
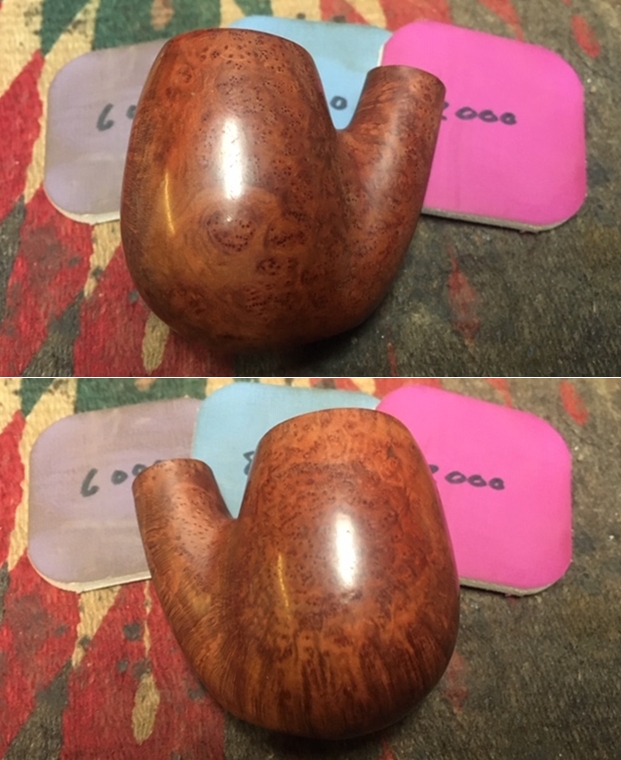
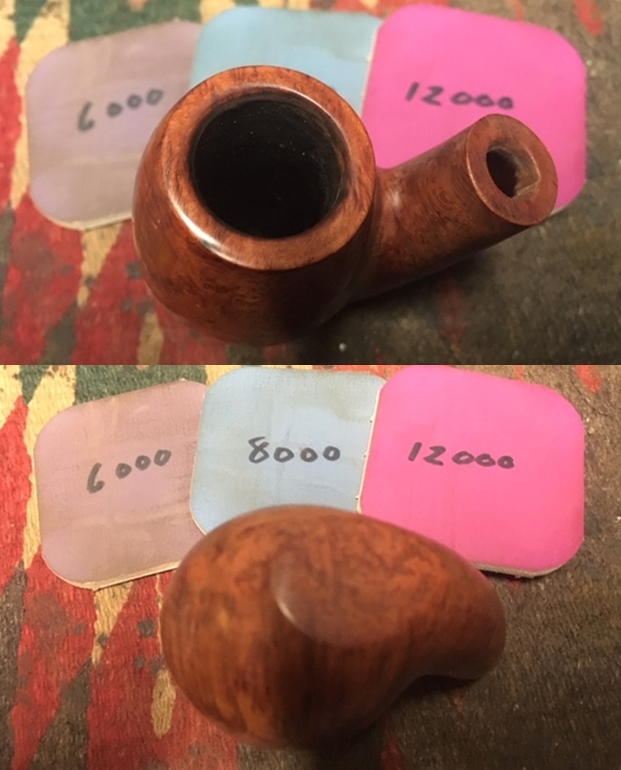
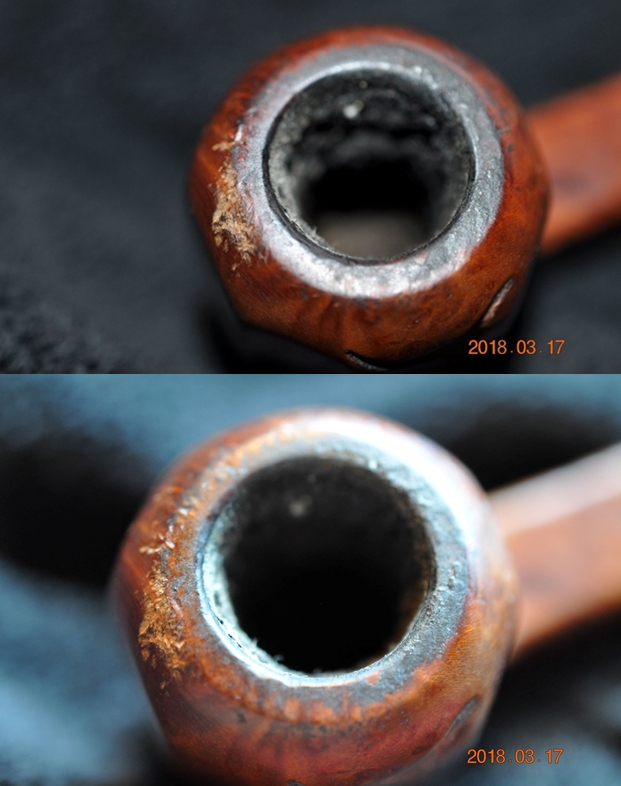
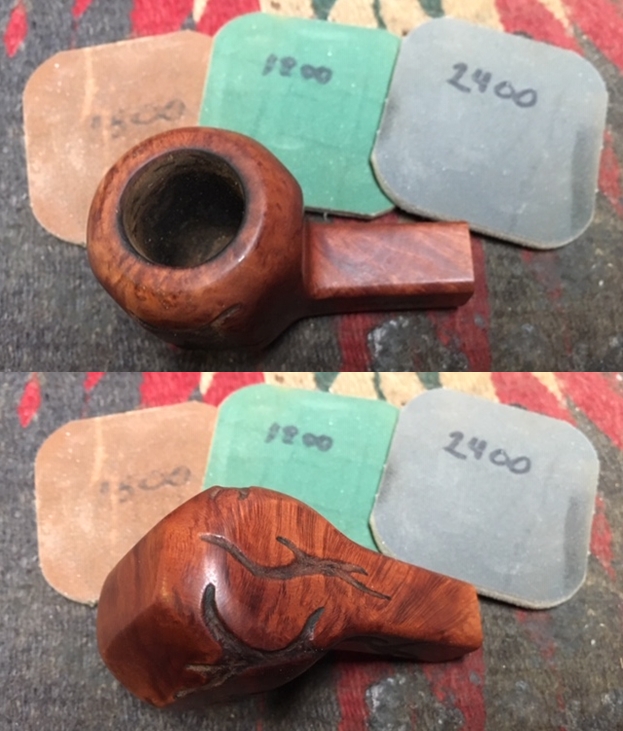
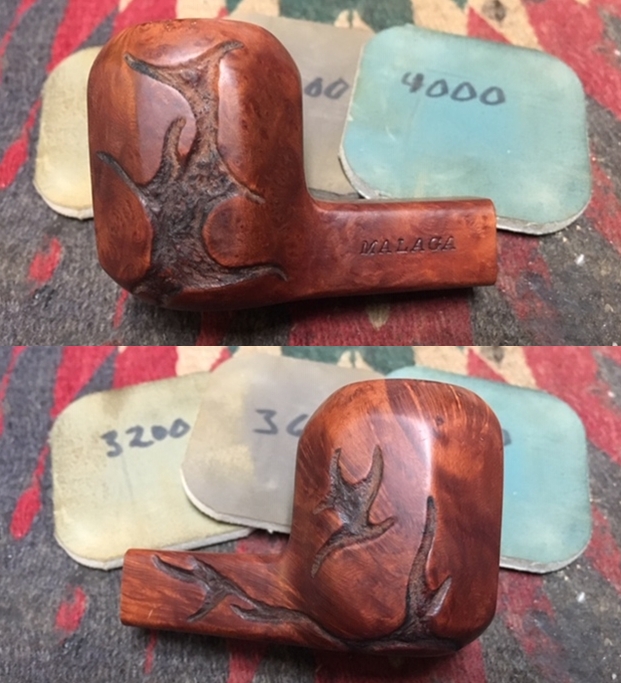
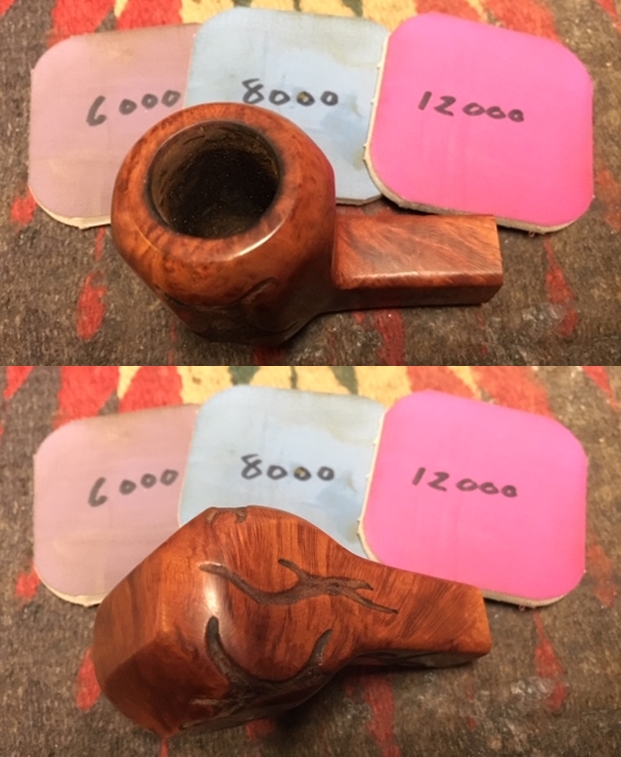
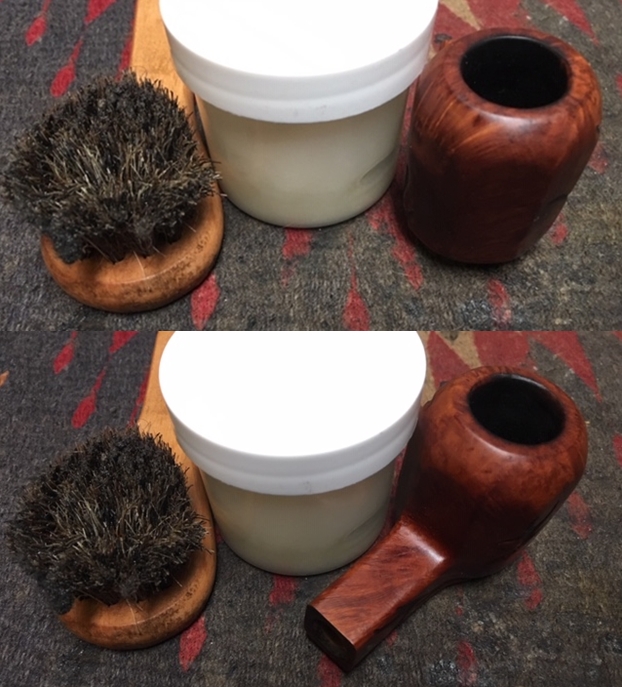
 I polished the meerschaum with micromesh sanding pads – wet sanding the bowl walls and rim top with 1500-12000 grit pads. I wiped the bowl down after each sanding pad with a damp cloth to wipe of the dust.


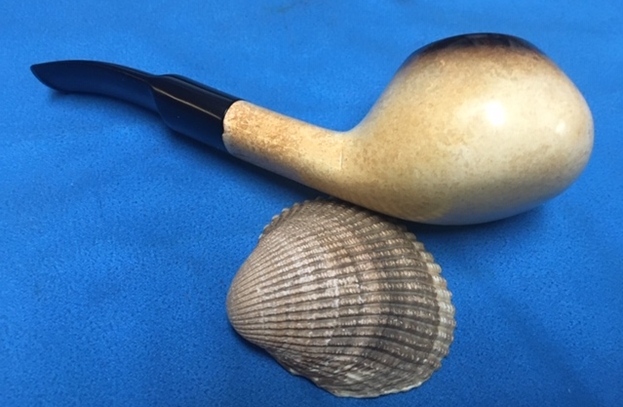
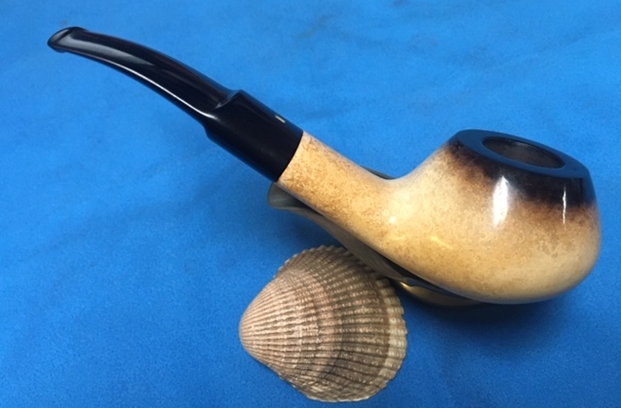
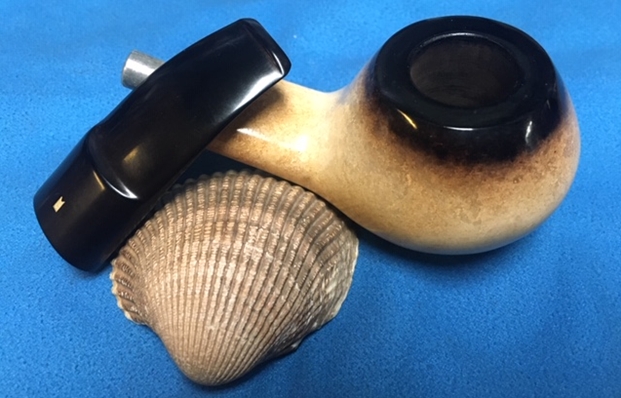
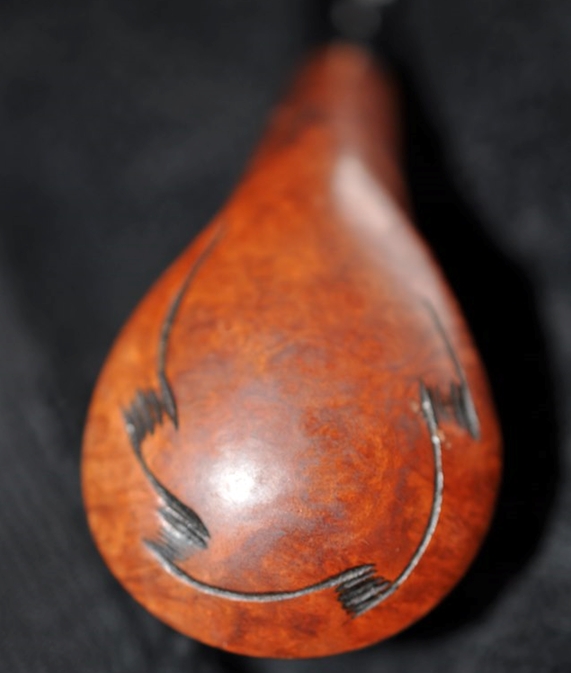
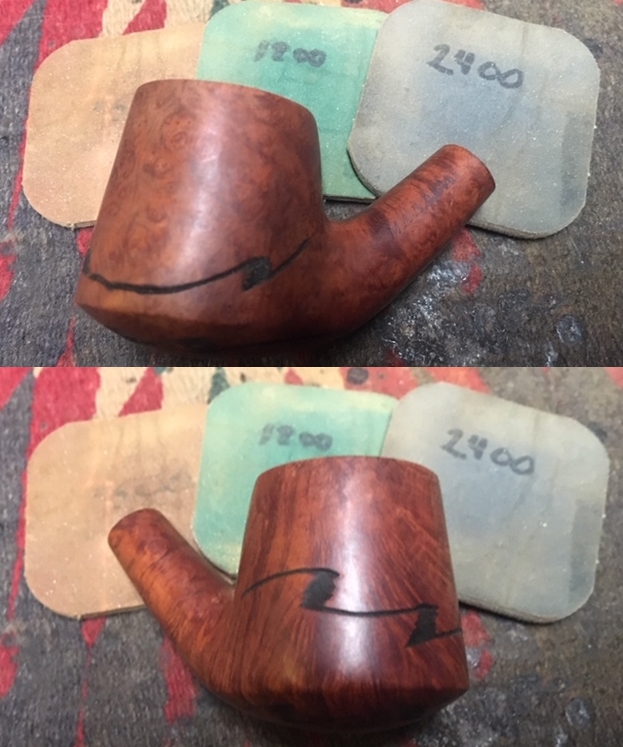
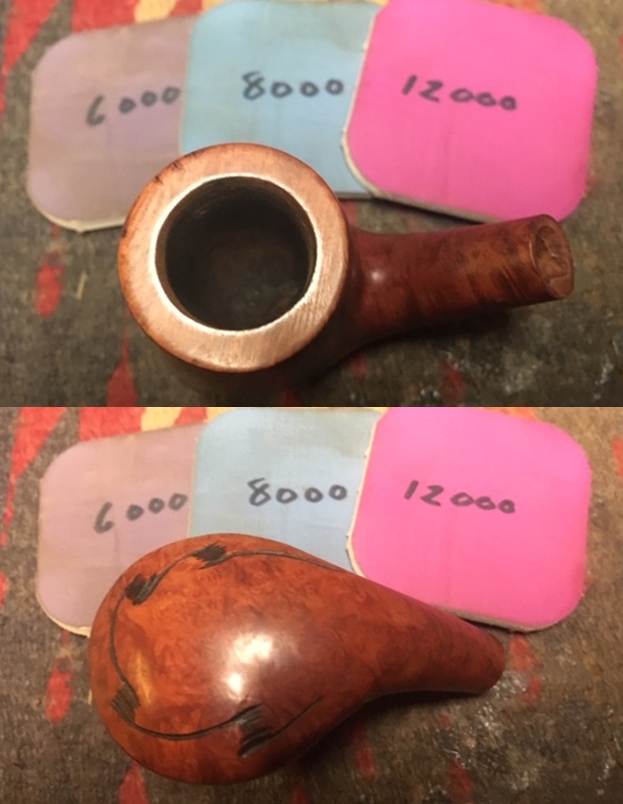
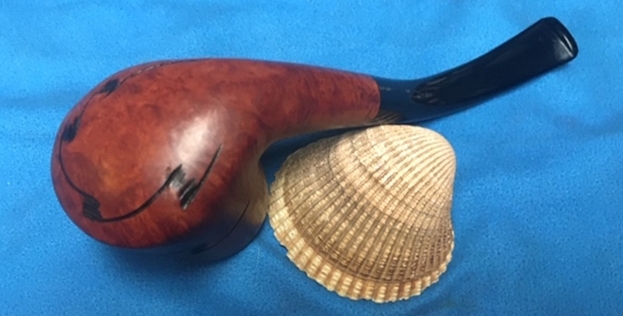
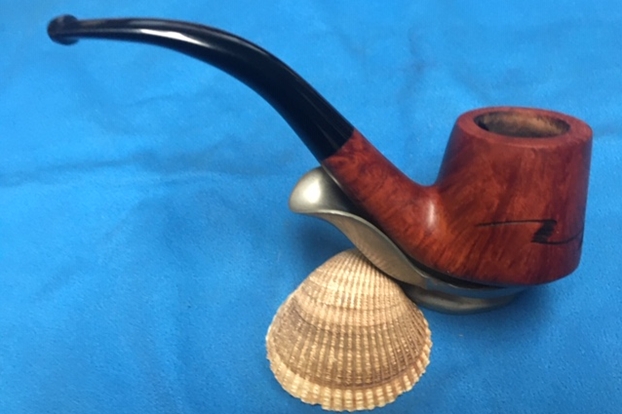
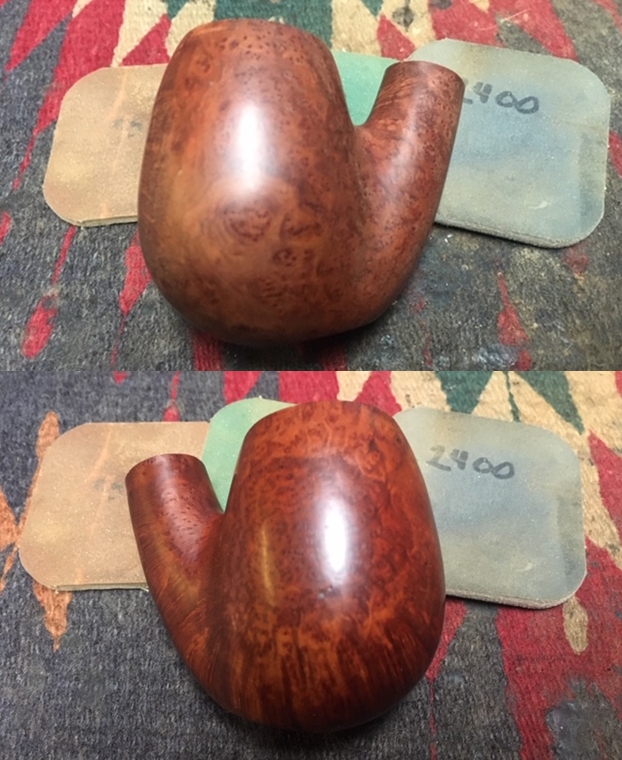
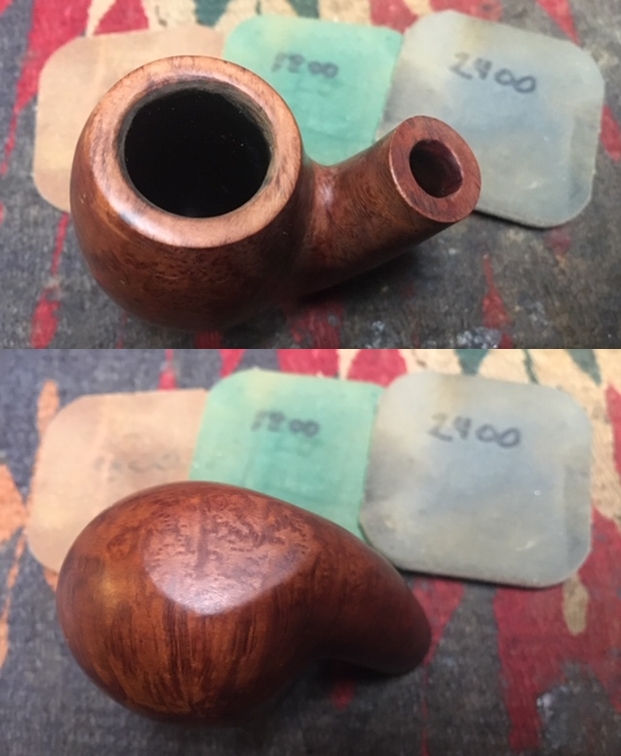
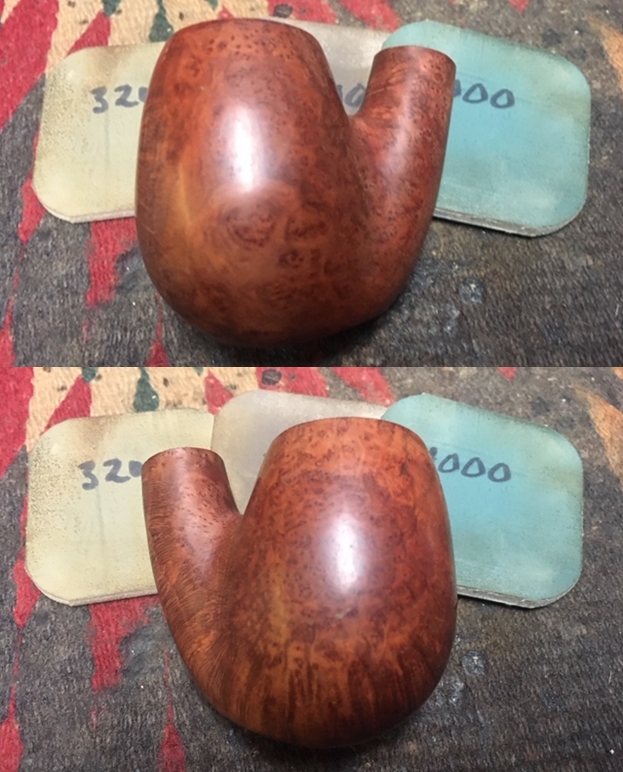
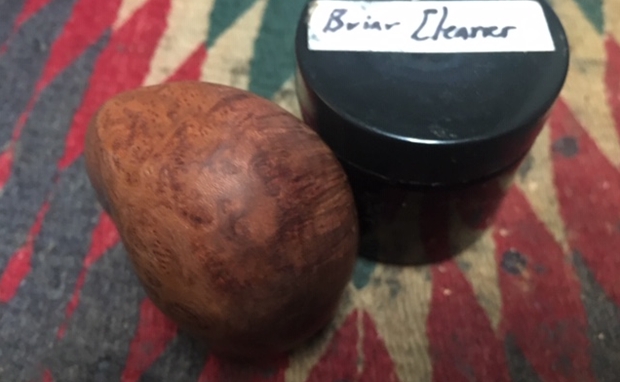
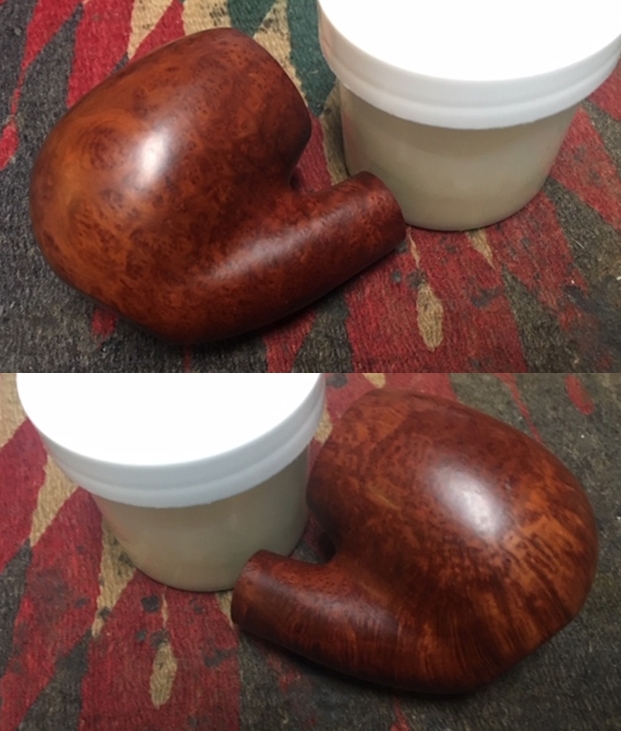
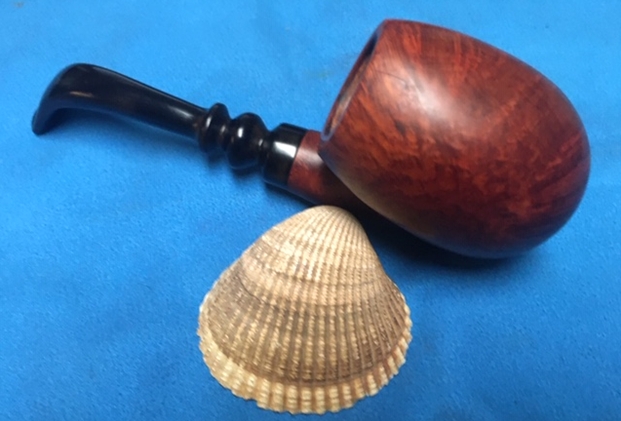
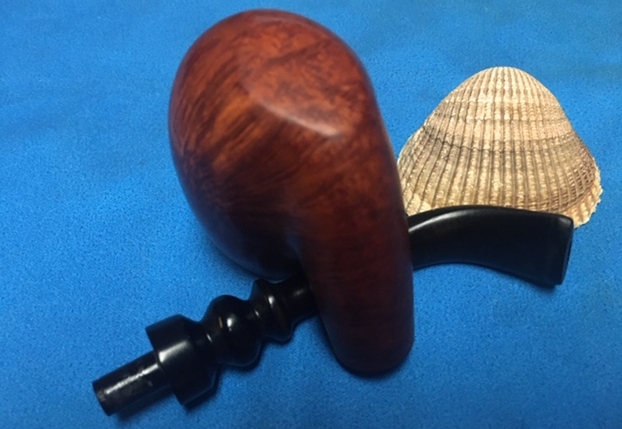
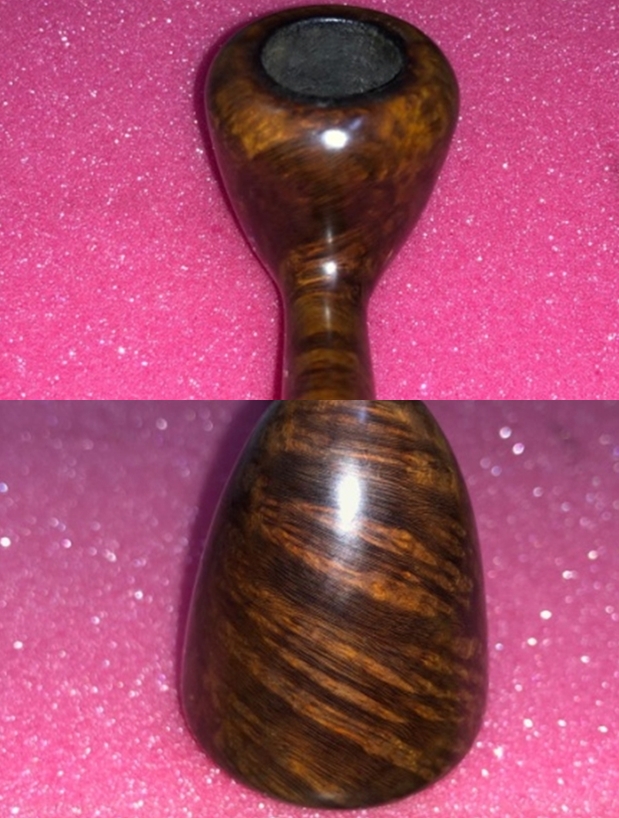
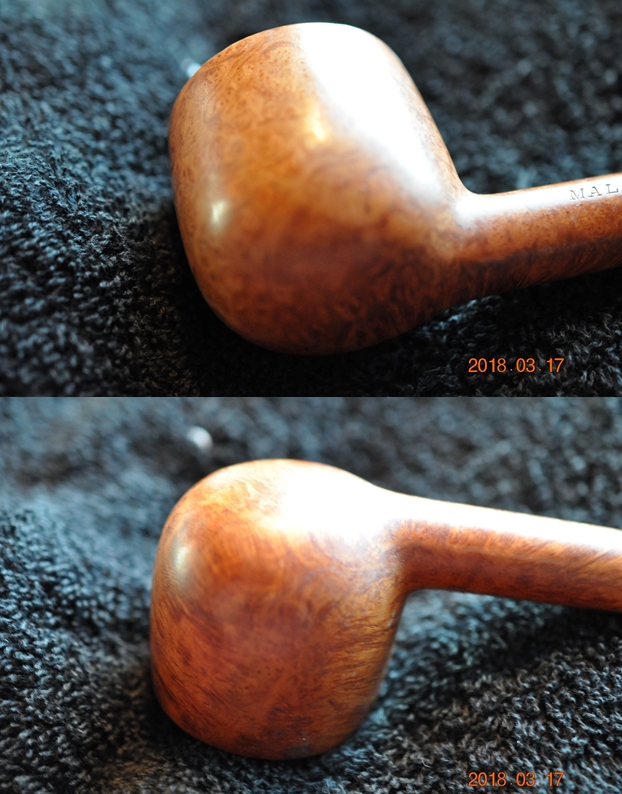
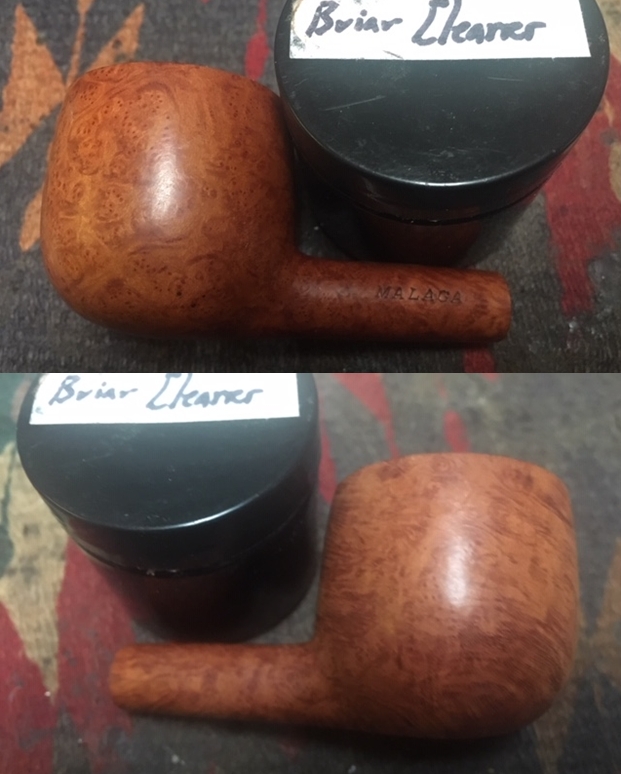
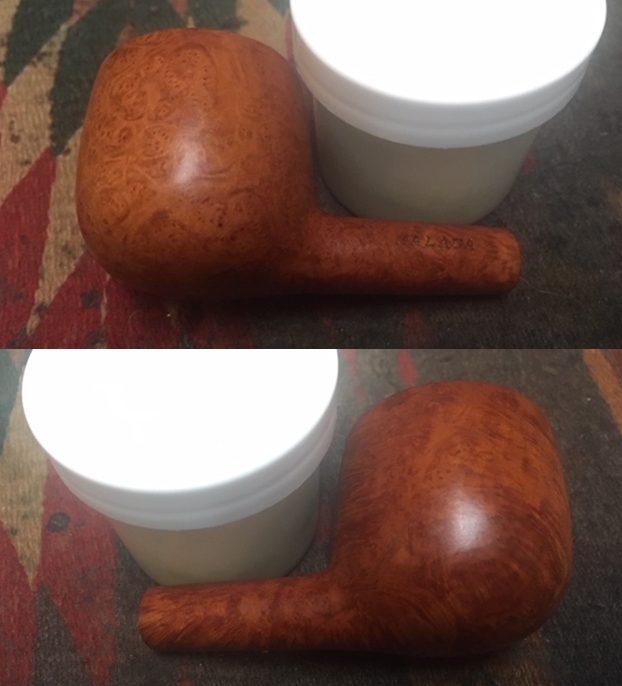
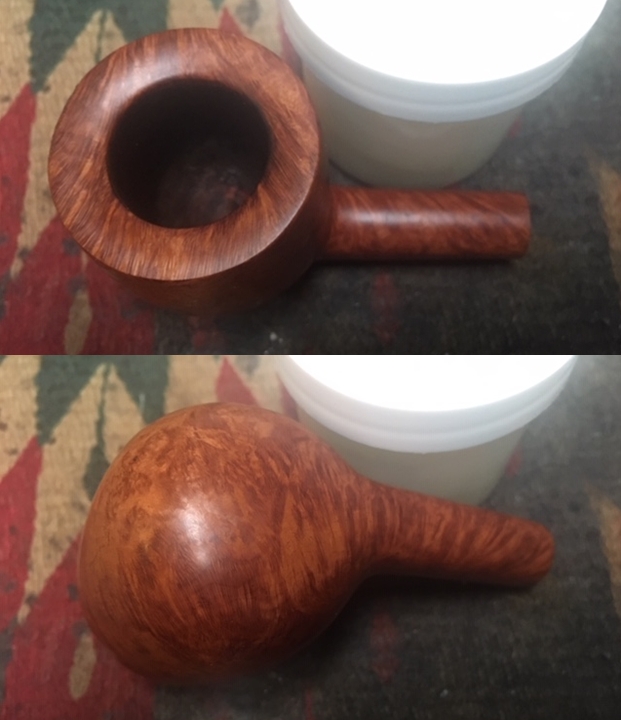
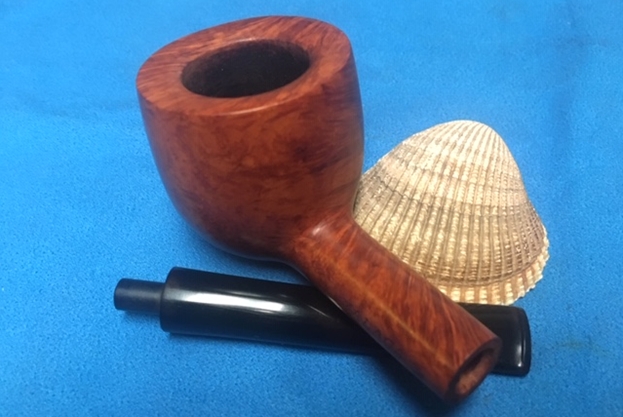
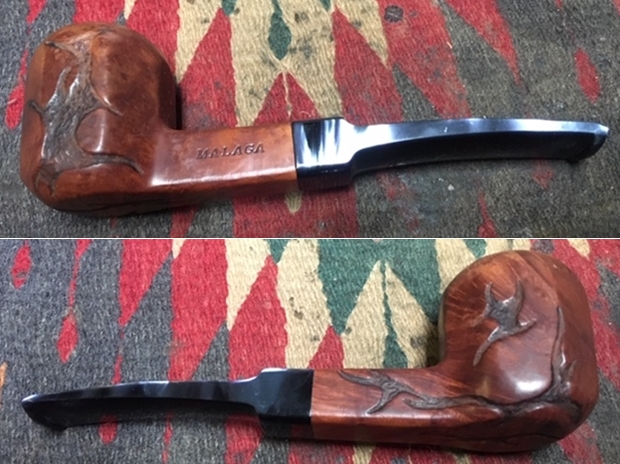
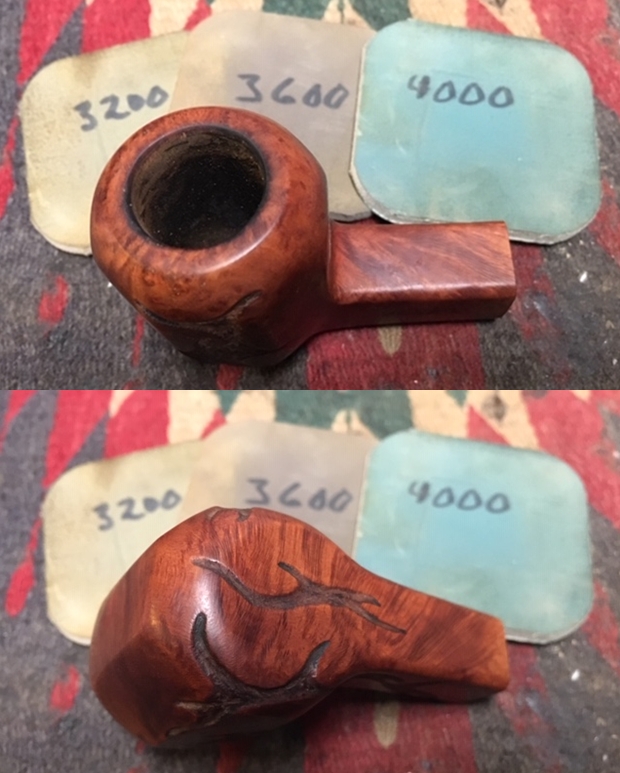
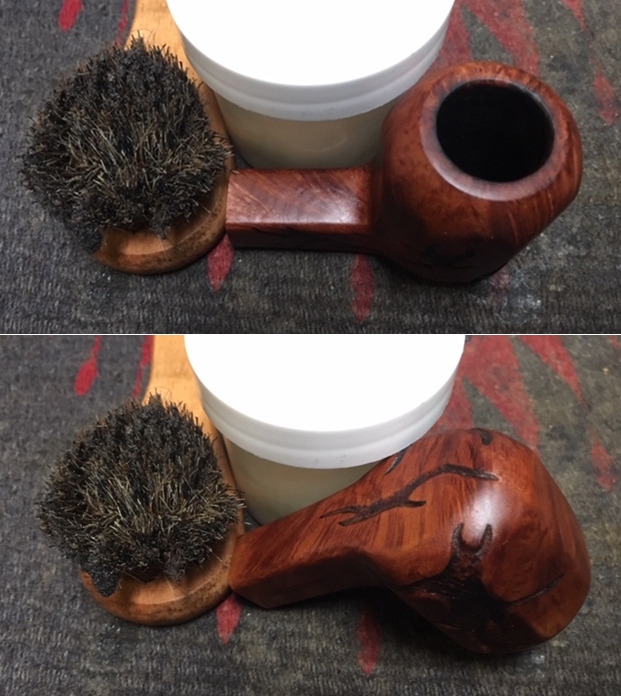
 I worked some Before & After Restoration Balm into the surface of the meerschaum with my fingertips to clean, enliven and protect it. I let the balm sit for a little while and then buffed with a cotton cloth to raise the shine. The photos show the bowl at this point in the restoration process.

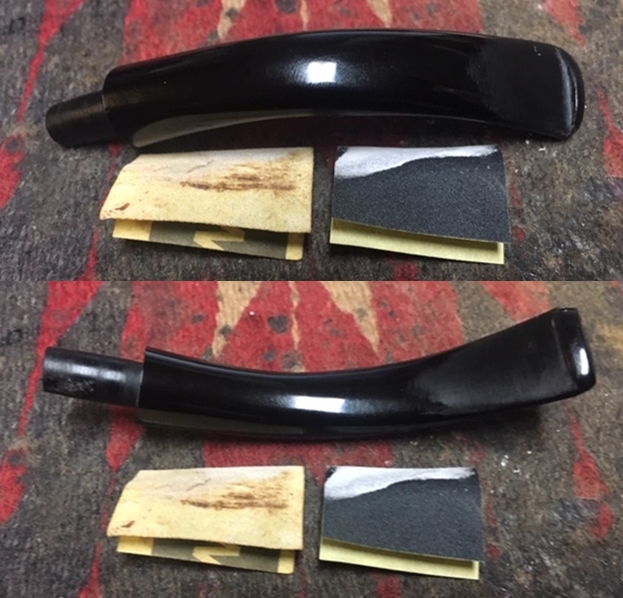
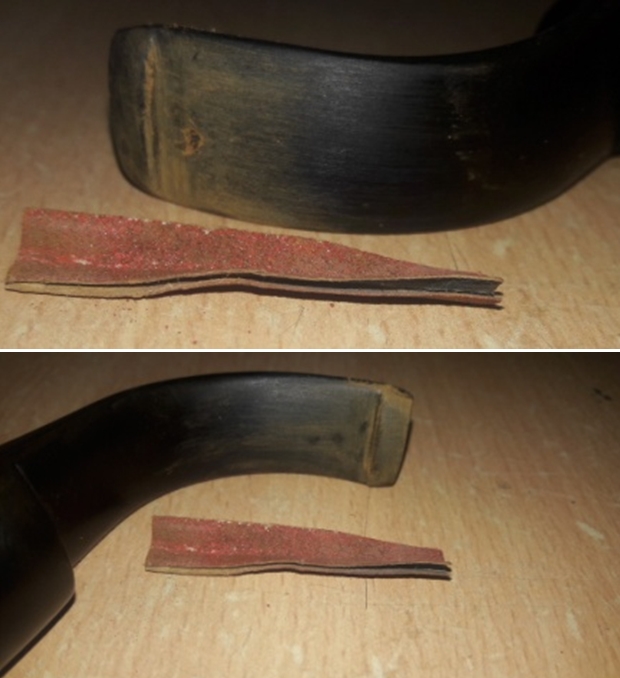
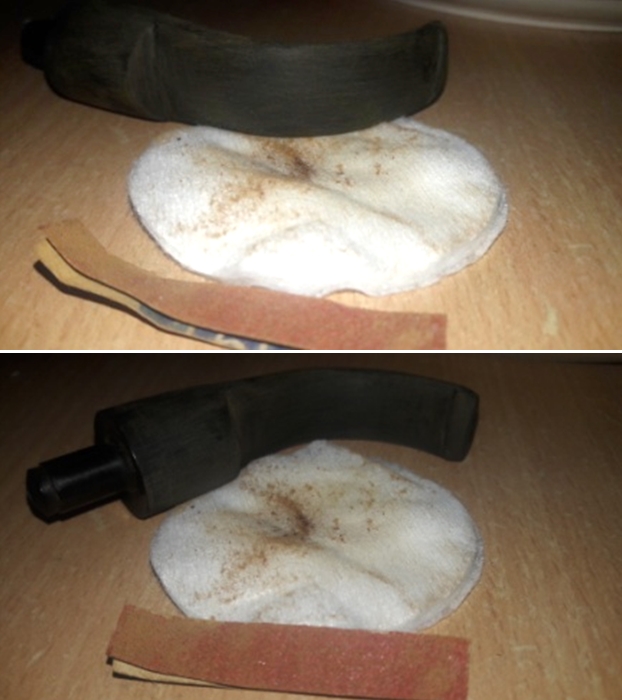
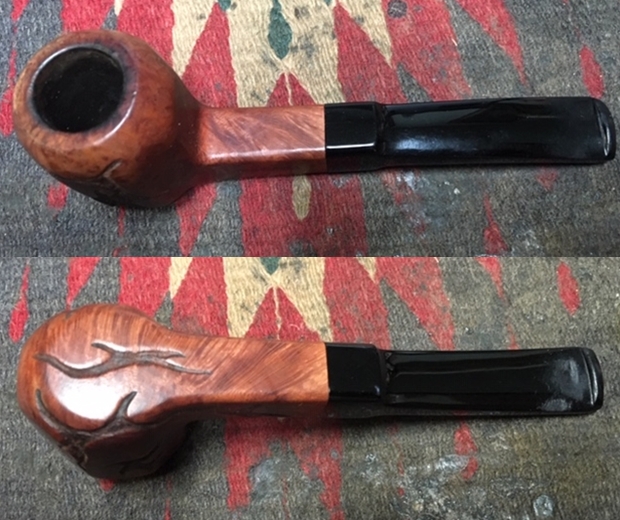
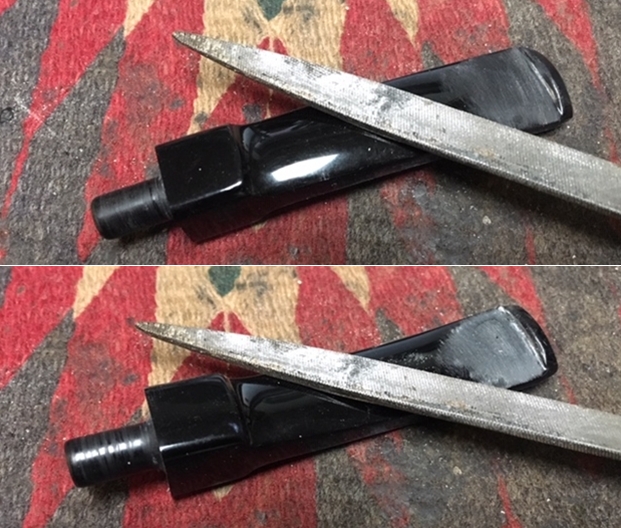
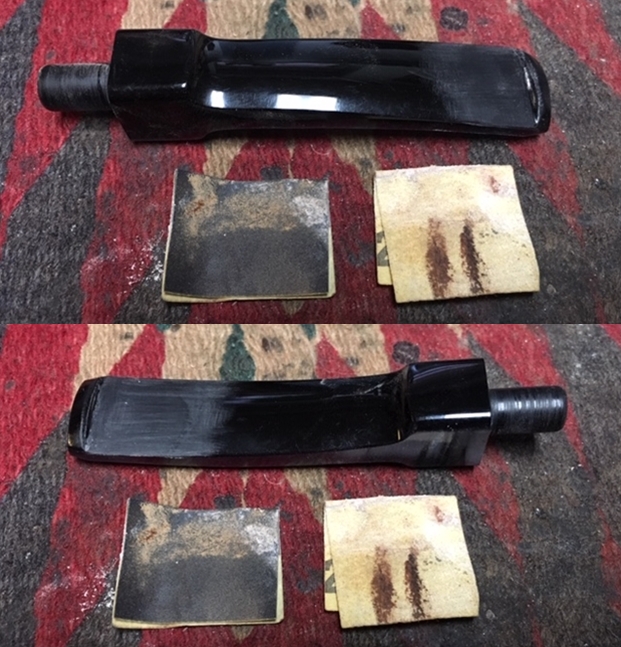
 I set the bowl aside and turned my attention to the stem. I sanded out the tooth chatter with 220 grit sand paper and started to polish it with a folded piece of 400 wet dry sandpaper. Once it was finished it began to shine.
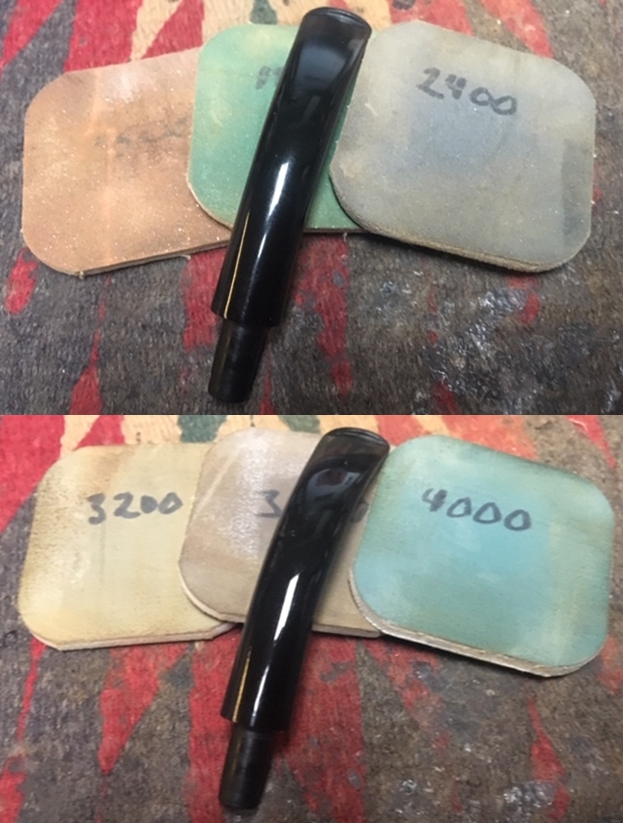
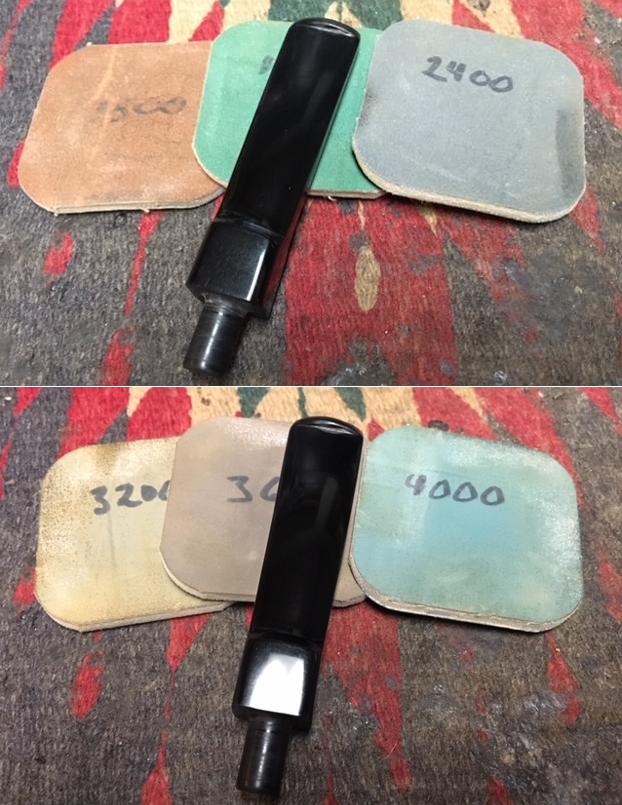
 I polished the stem with micromesh sanding pads – wet sanding with 1500-12000 grit sanding pads. I wiped it down after each sanding pad with a damp cloth. I polished it with Before & After Pipe Stem Polish – both Fine and Extra Fine and buffed it off with a cotton cloth.
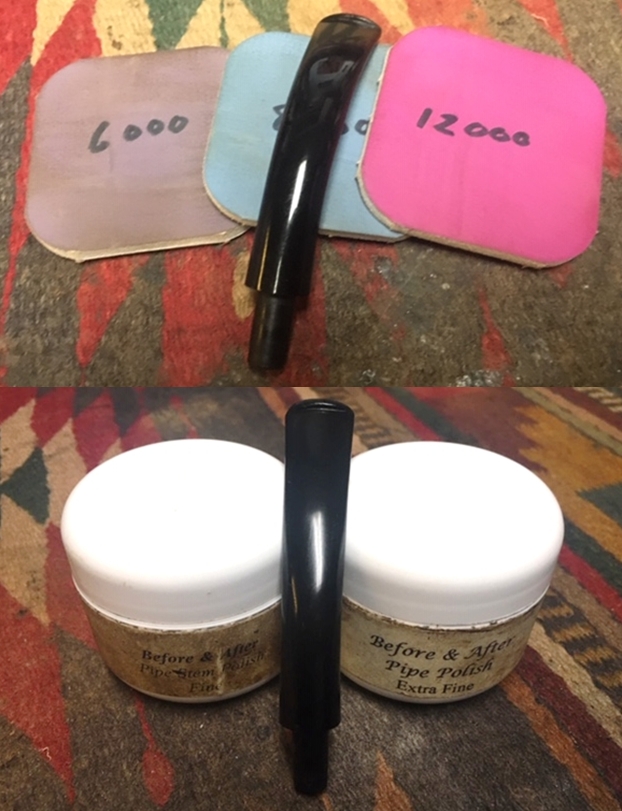
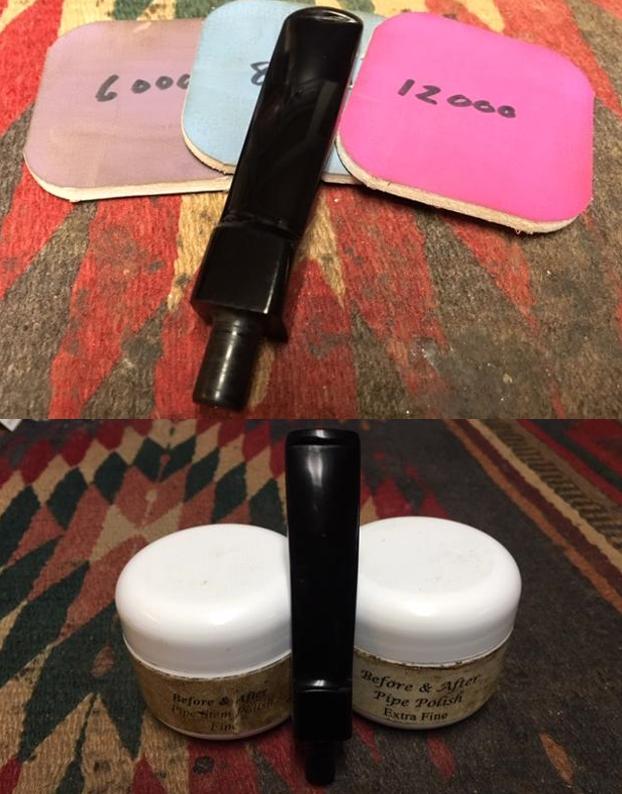
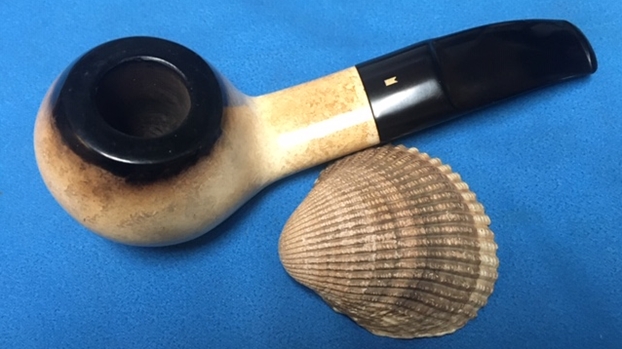
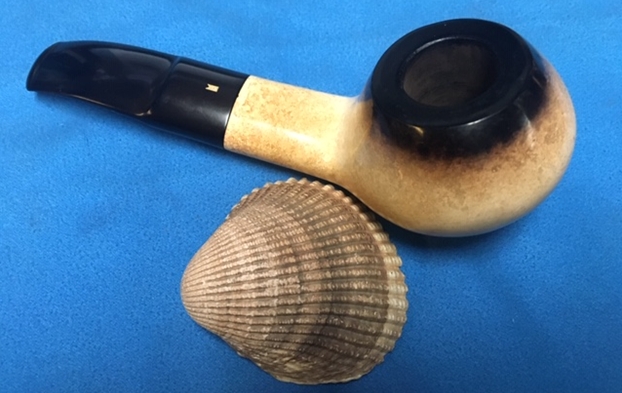
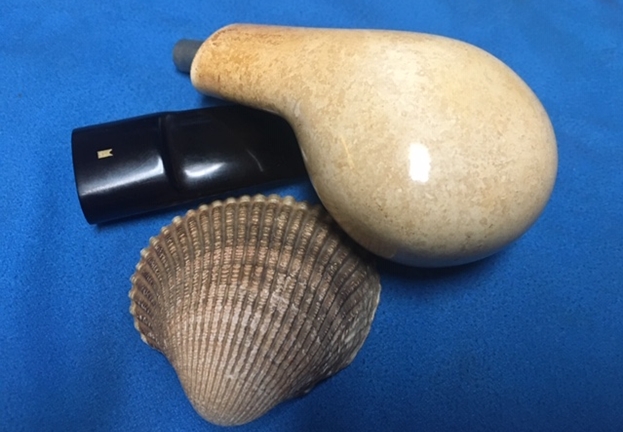
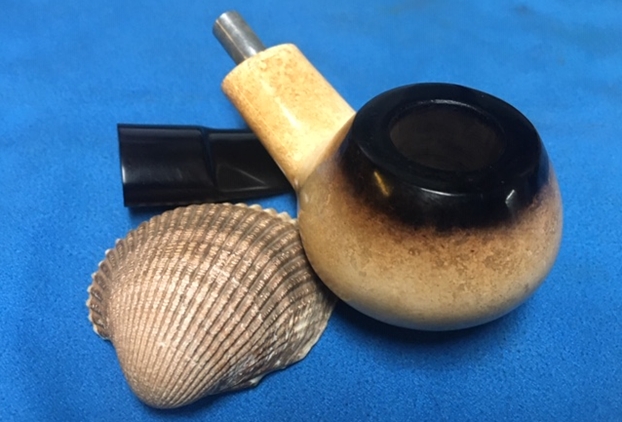
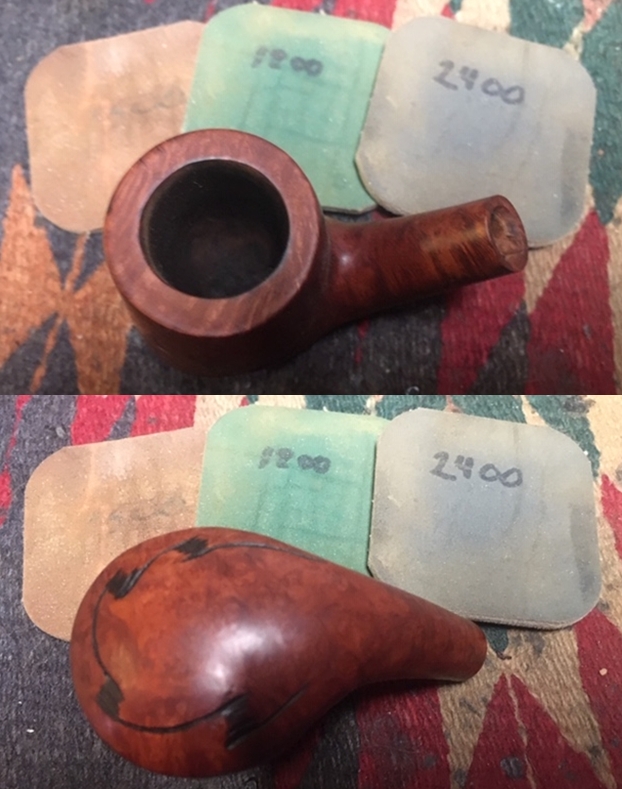
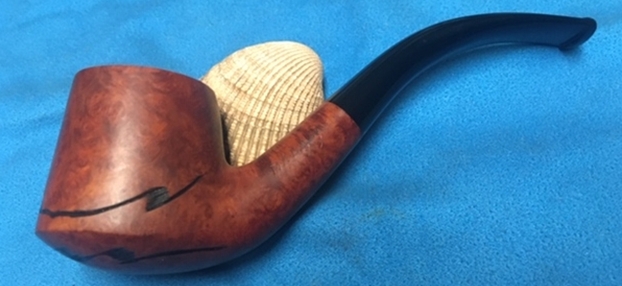
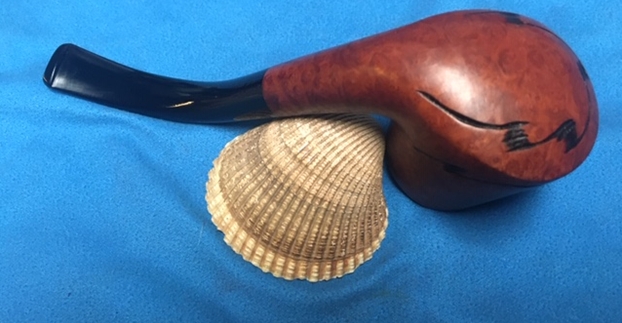
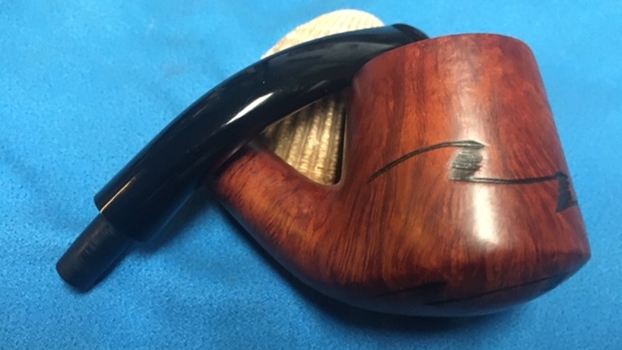
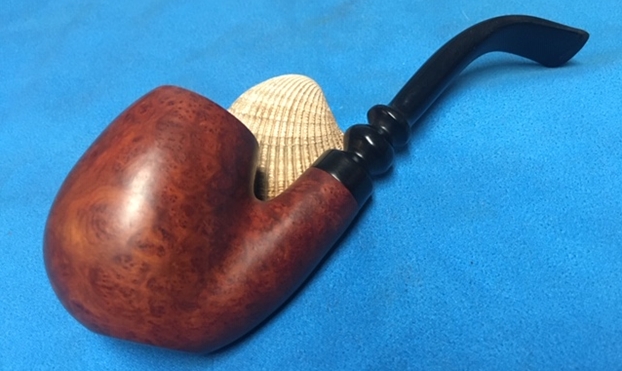
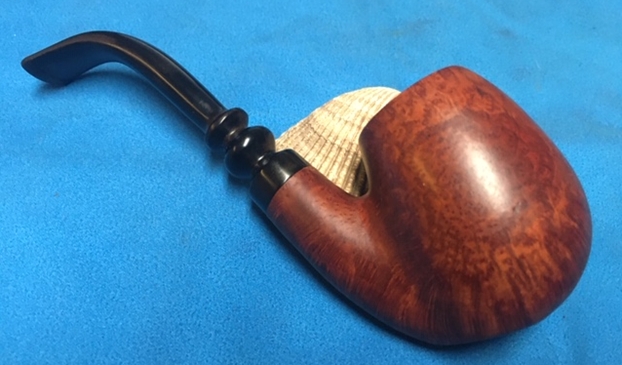
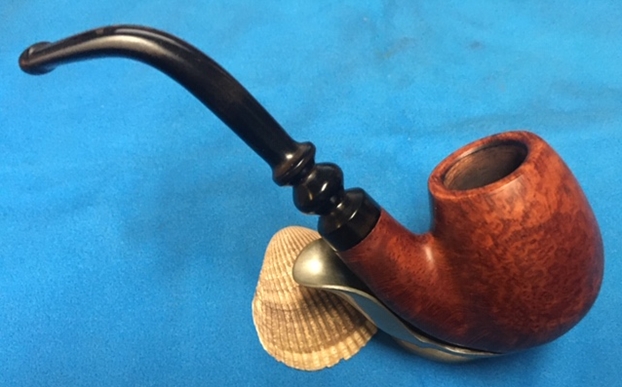
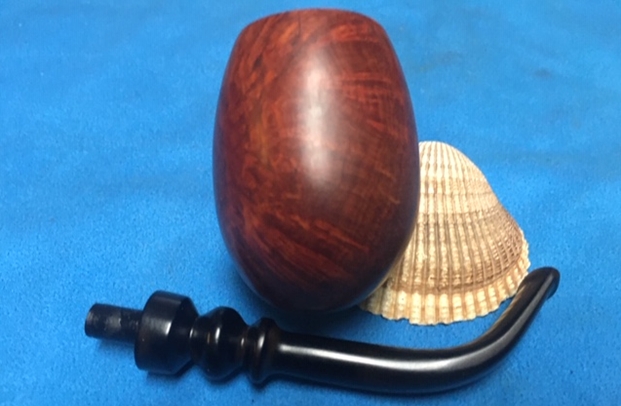
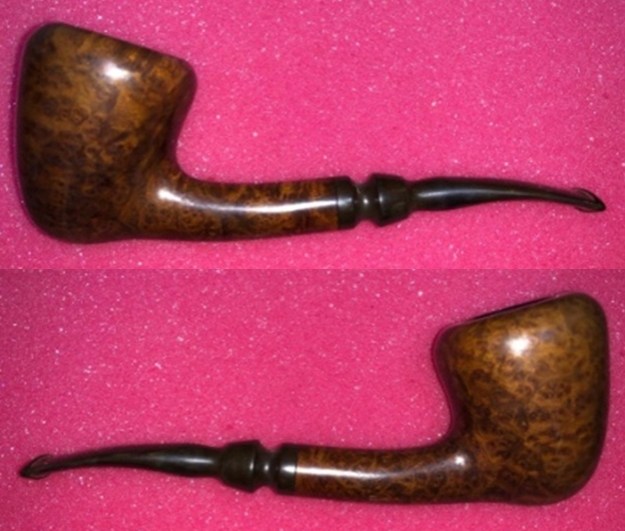
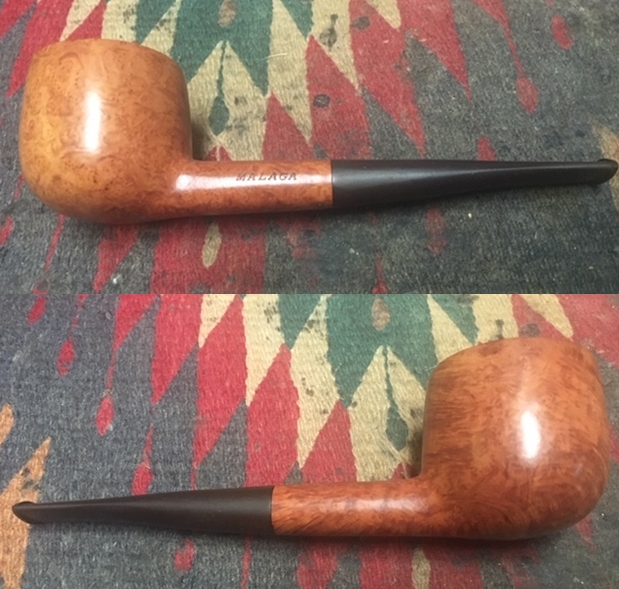
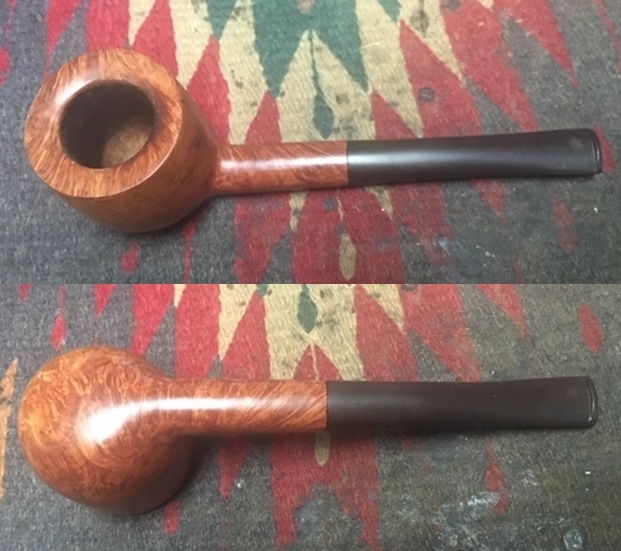
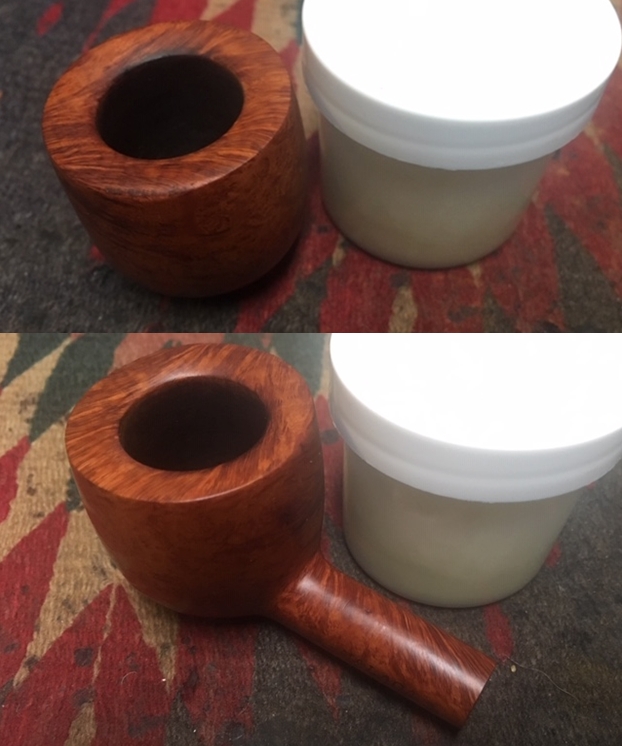
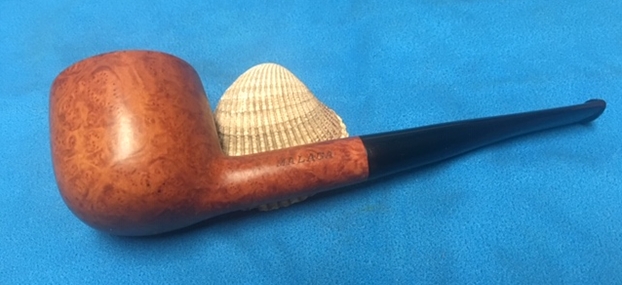
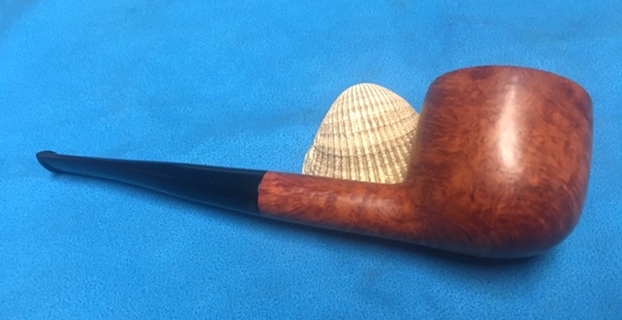
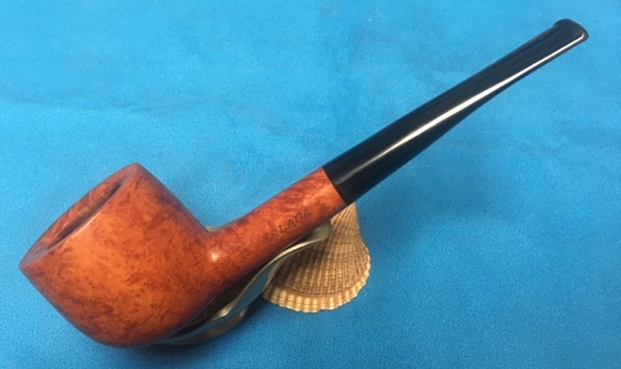
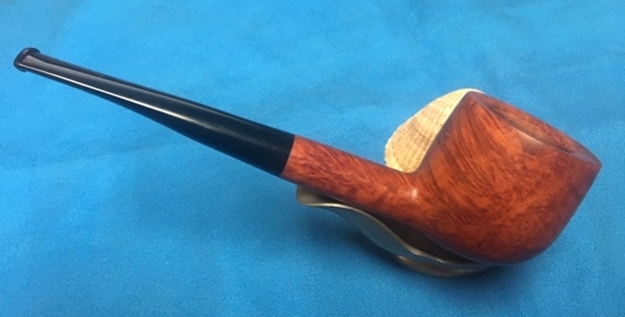
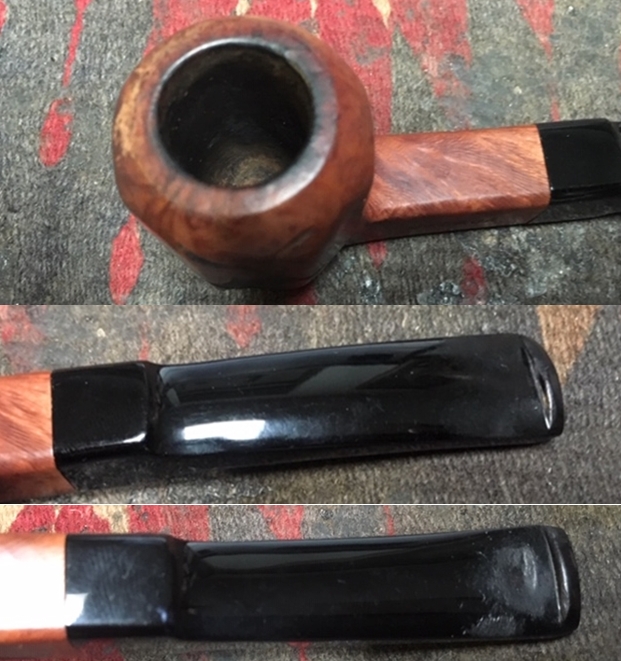
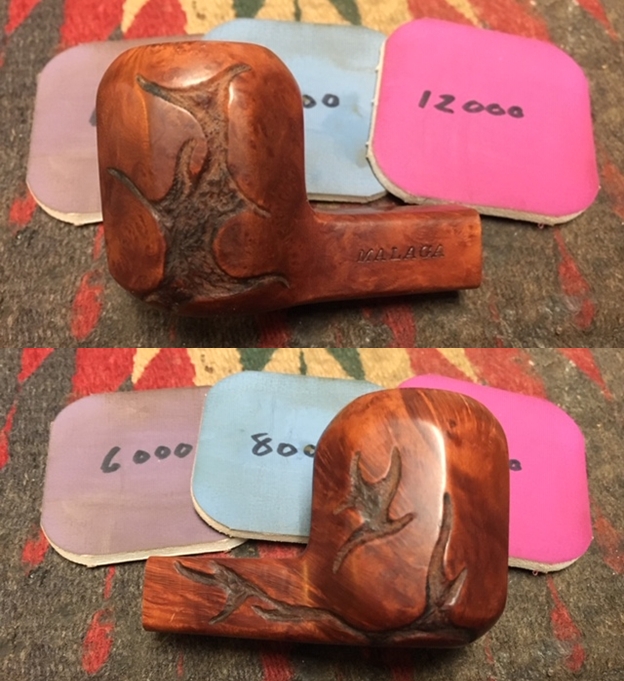
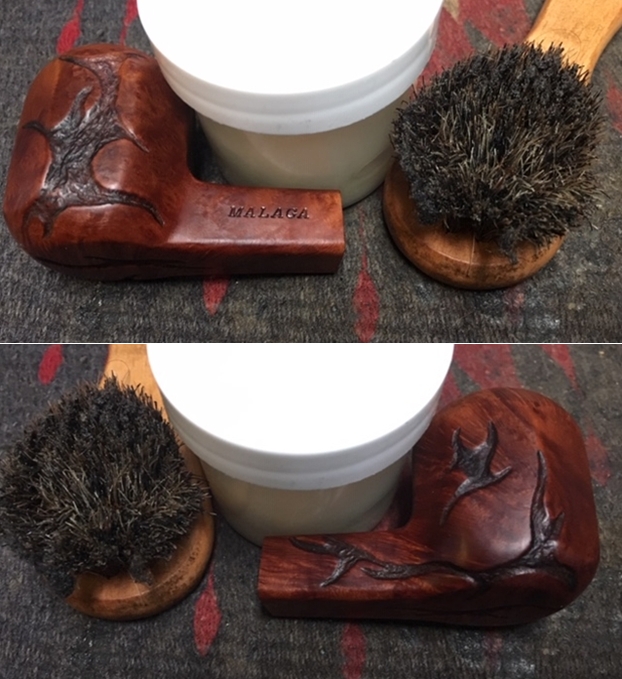
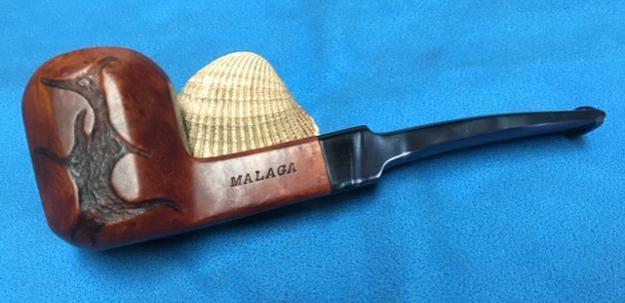
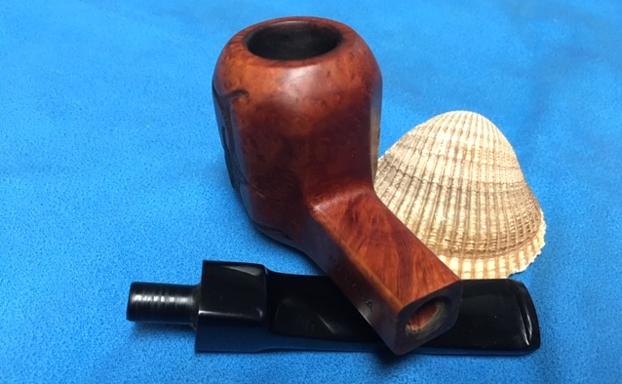
 This is a beautiful Flumed top Block Meerschaum Oval Shank Author with a black saddle vulcanite stem. It has a great look and feel. The shape is very tactile and is a beauty. I polished stem and the bowl with Blue Diamond polish on the buffing wheel. I gave the bowl and the stem multiple coats of carnauba wax. I buffed the pipe with a clean buffing pad to raise the shine. I hand buffed it with a microfiber cloth to deepen the shine. The pipe polished up pretty nicely. The meerschaum had already begun to take on a patina and it came alive with the buffing. The rich mottled browns of the meerschaum colour works well with the polished vulcanite stem. The finished pipe has a rich look that is quite catching. Have a look at it with the photos below. The shape, finish and flow of the pipe and stem are very well done. The dimensions are Length: 5 ¼ inches, Height: 1 ½ inches, Outside diameter of the bowl: 1 ½ inches, Chamber diameter: ¾ of an inch. I will be adding the pipe to the rebornpipes store shortly. If you are interested in adding this block meerschaum, English made Author to your collection let me know. Thanks for walking through the restoration with me as I worked over the first of the finds of Jeff and my Alberta pipe hunt.