by Steve Laug
On November 29 I received an email from a fellow regarding a Moretti that came to him from a dear friend. He stated that it had a burnout and that he had someone ream it for him. I have included his first email below.
Steve, I have a Moretti pipe that belonged to a dear friend. It had a burnout and I had the bowl reamed, but I’m afraid to smoke it. Can you offer a suggestion of how the inside of the bowl can be treated against possible future burnout, or can you fit the bowl with either a meerschaum or graphite liner? – Michael
We talked back and forth regarding the pipe and various options for repair. I agreed to work on them and told him to mail it to me. Once he packed it he added another three pipes to the box that he was sure had the same issues. He mailed them to me on December 8 and sent me another email.
You have convinced me that you’re the person who can help restore my pipes! I shipped 4 pipes to you today by USPS, and declared their value at $5 each for a total of $20 as you requested. I’m embarrassed to admit it, but all four have had burnout issues and I’m hoping that you can clean them out and coat the inside of the bowls as you described. If you feel that more effort is needed, please let me know.
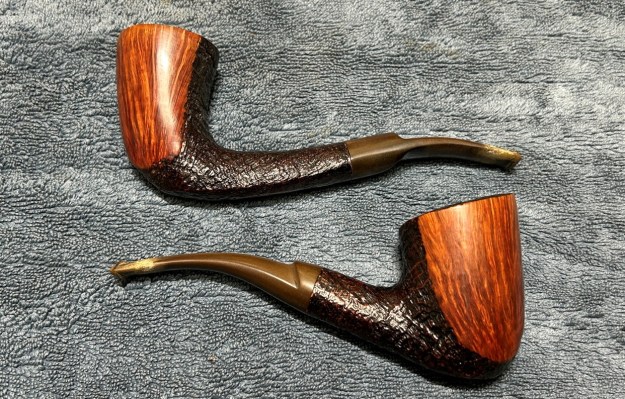
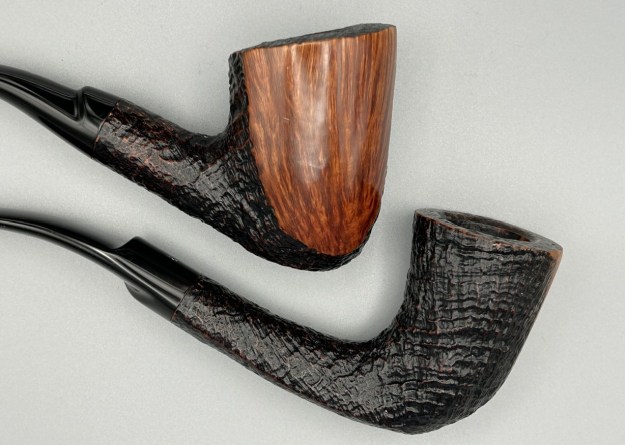
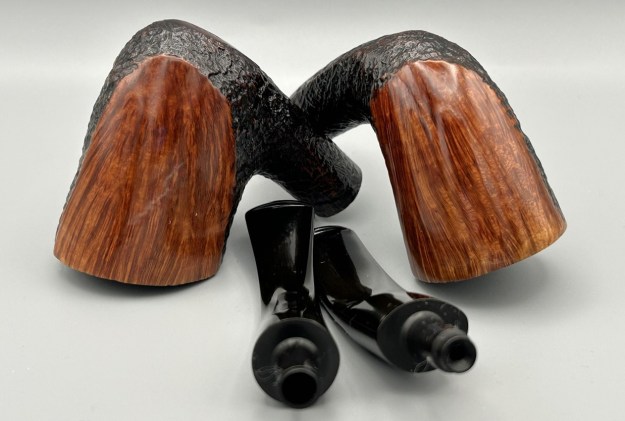
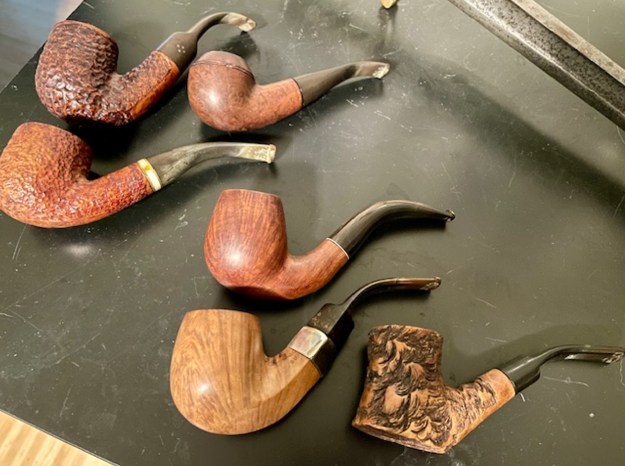
On December 28th I received the package from Michael. I opened the box and inside there were four beautiful Italian Made pipes. I have listed them below and included photos of the pipes.
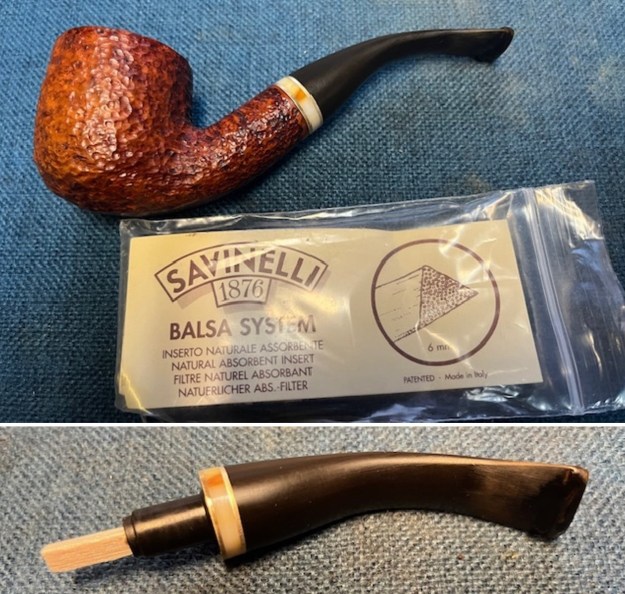
Savinelli Autograph Sandblast Bent Cherrywood
2008 Ardor DR bent Dublin
Mastro Beraldi 2 Bent Dublin
2005 Moretti 1 Bent Rhodesian
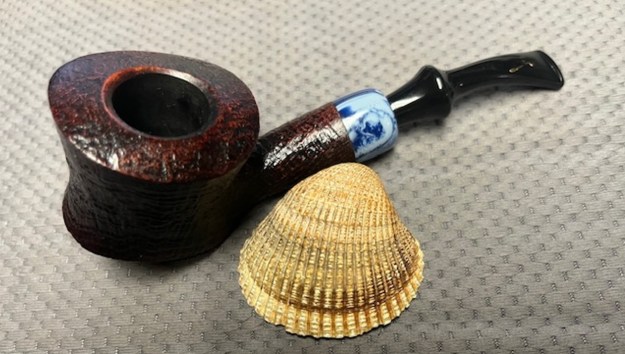
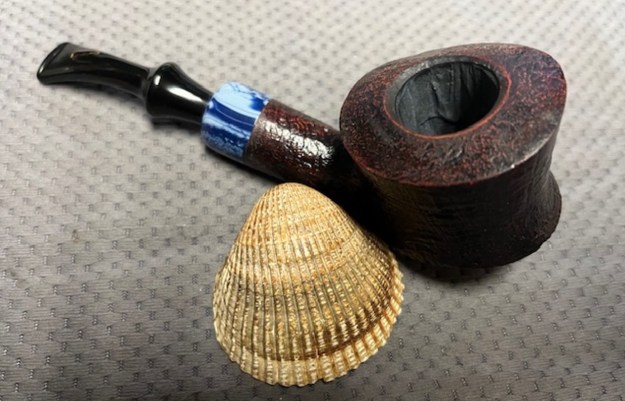
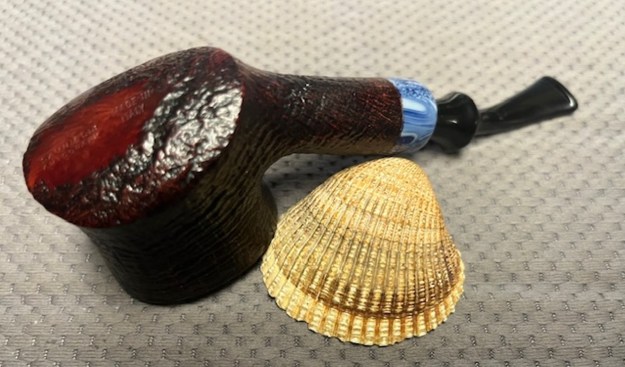
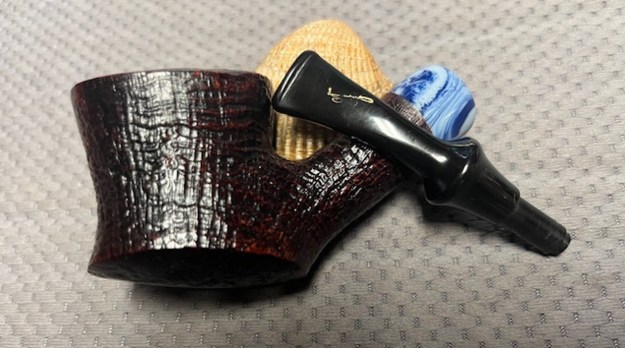
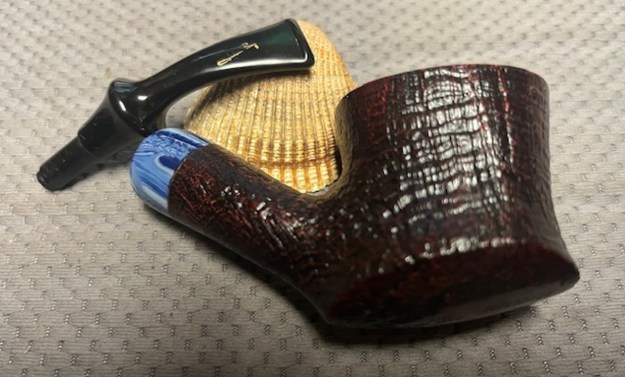
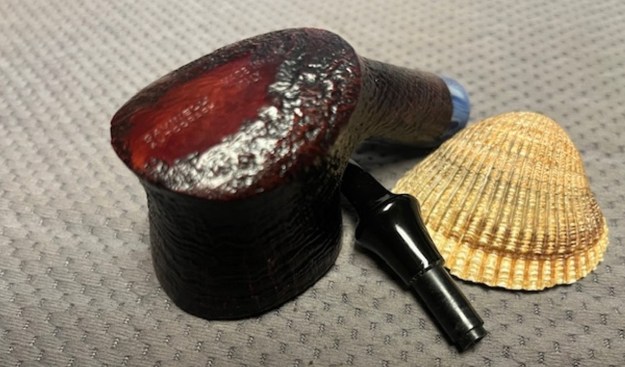
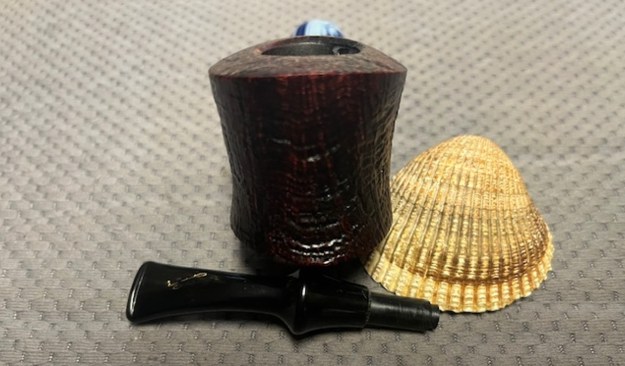
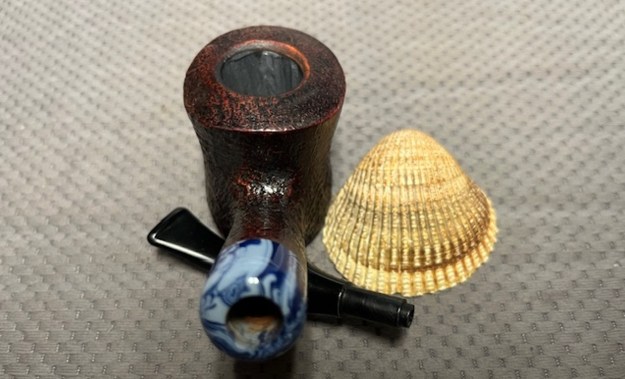
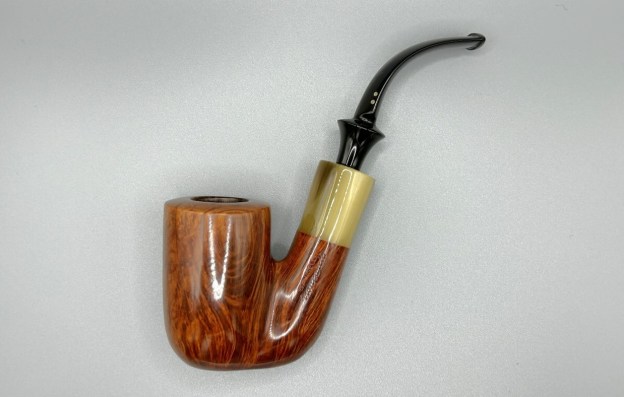
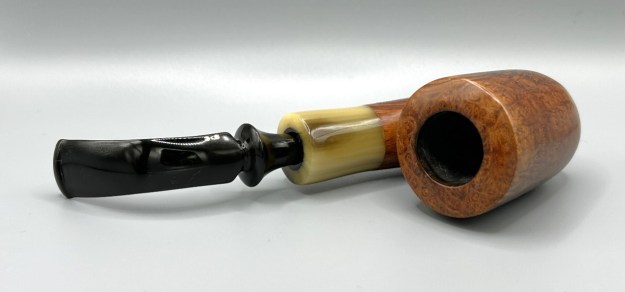
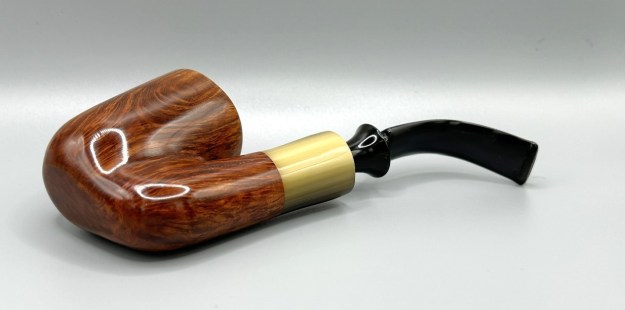
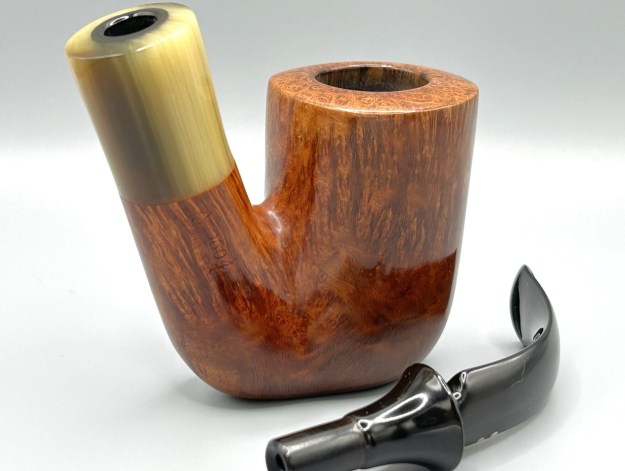
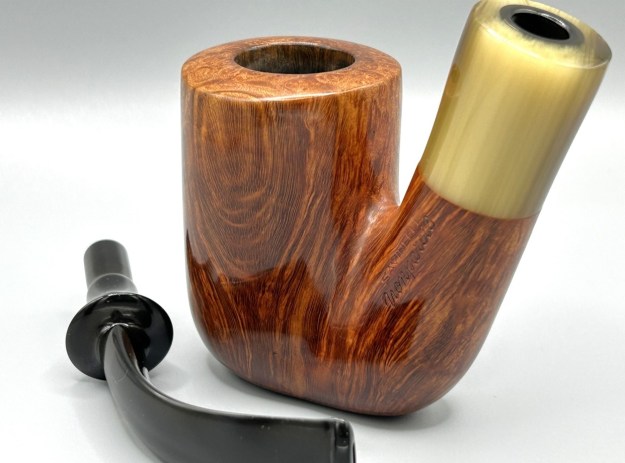
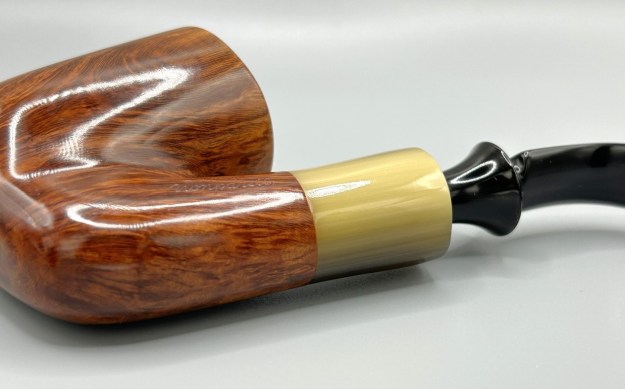
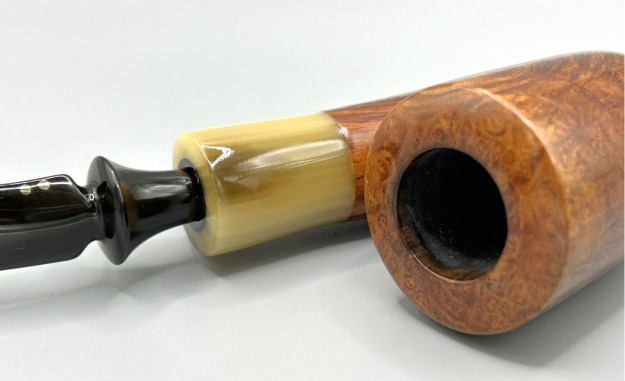
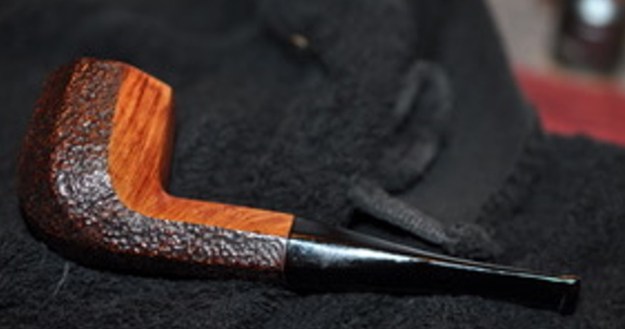
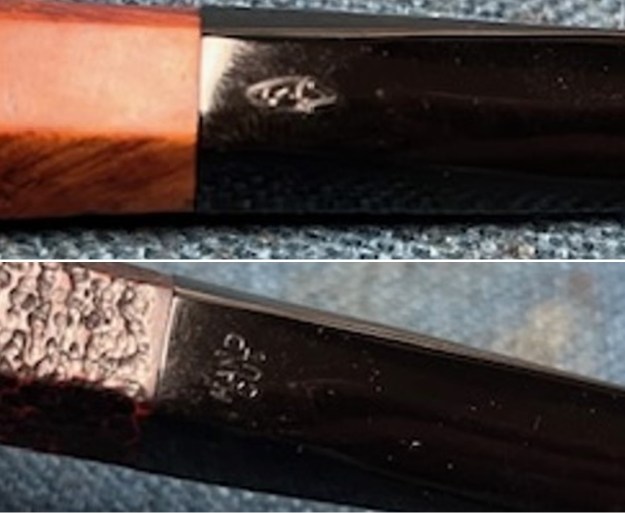
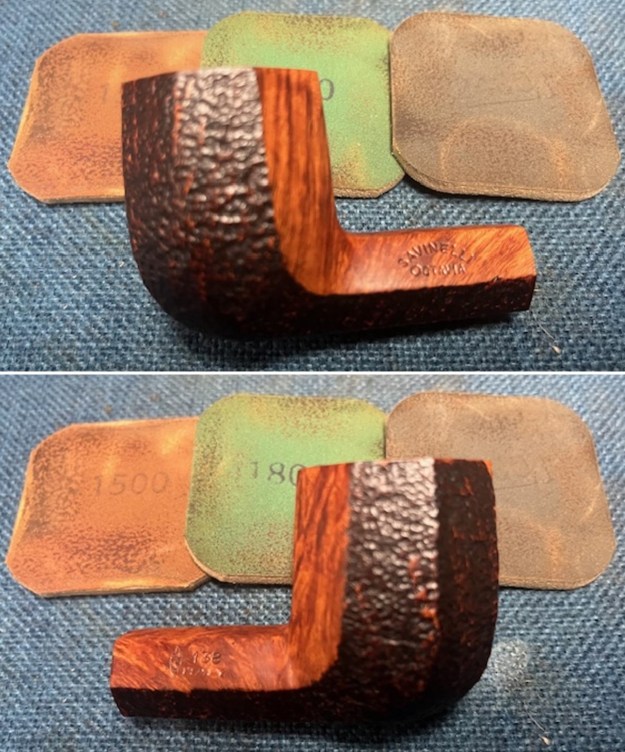
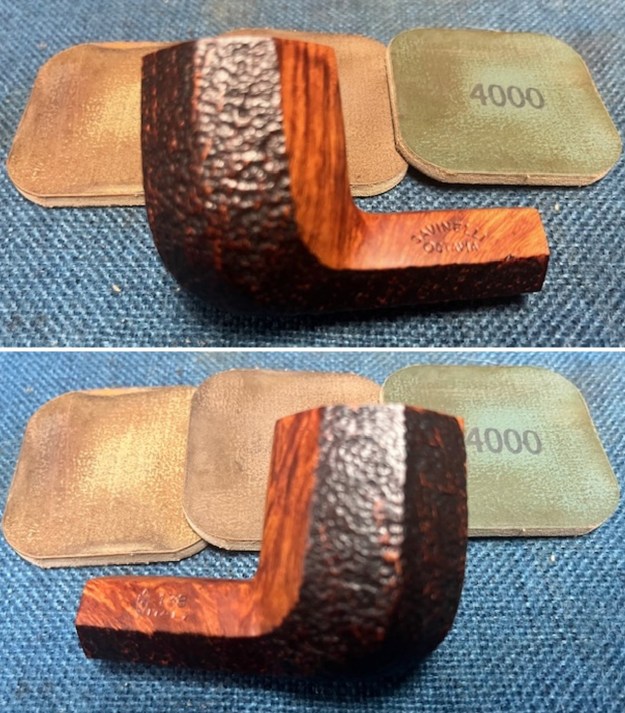
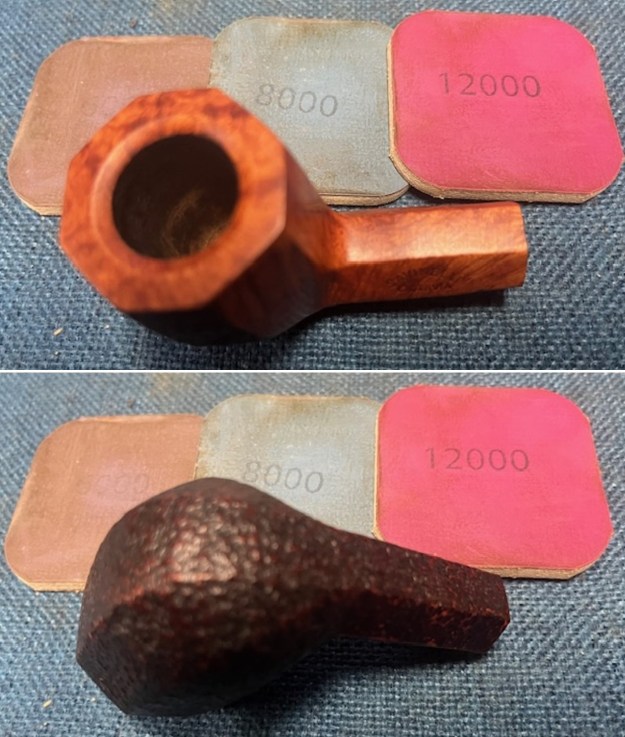
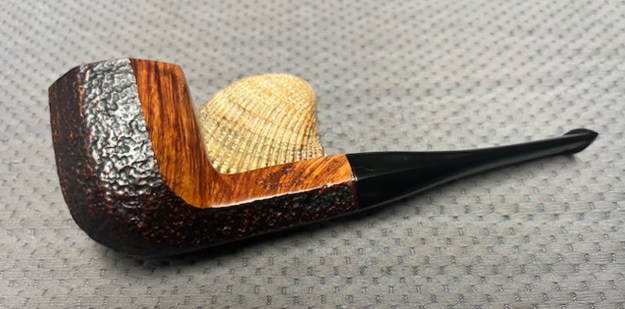
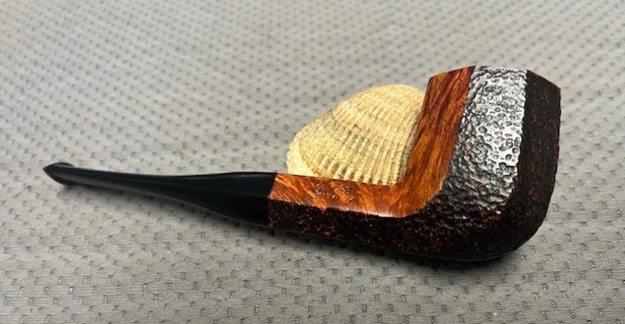
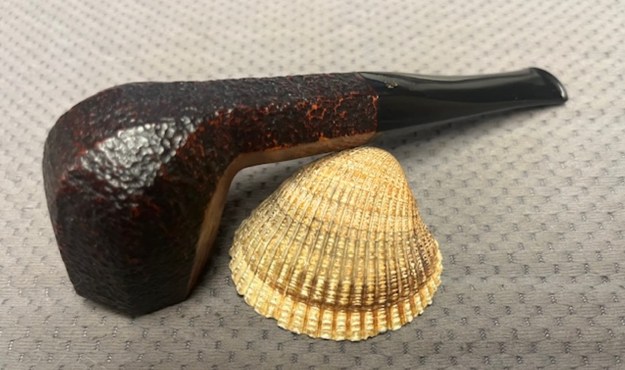
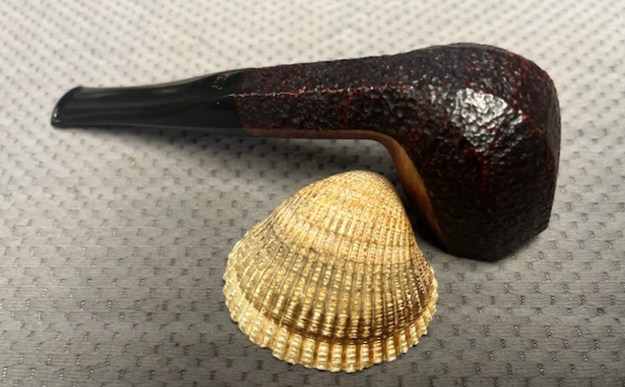
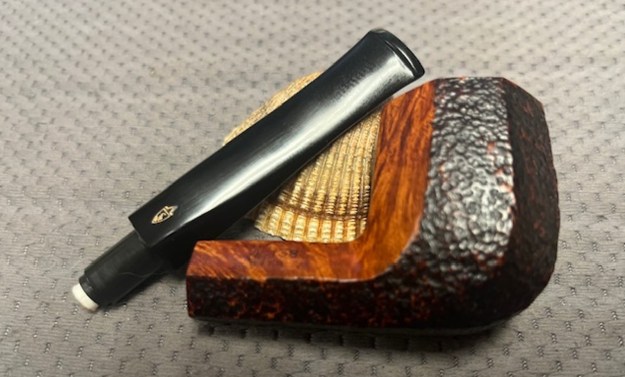
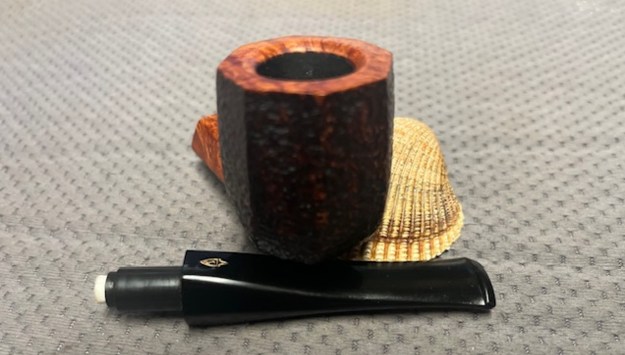
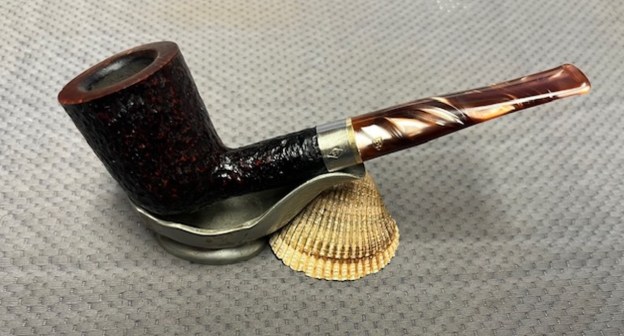
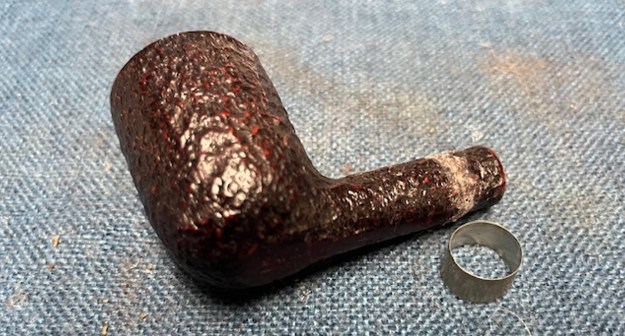
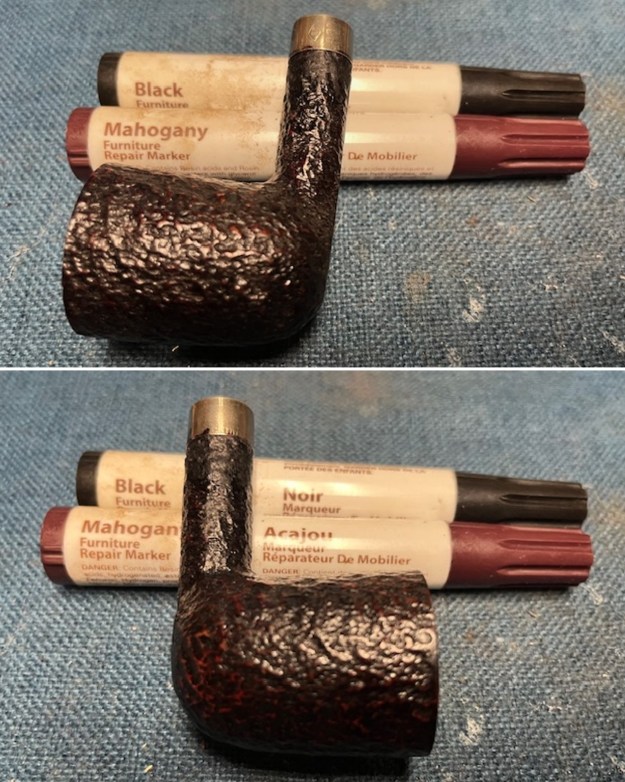
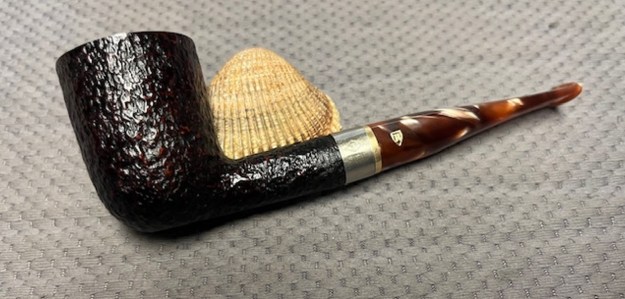
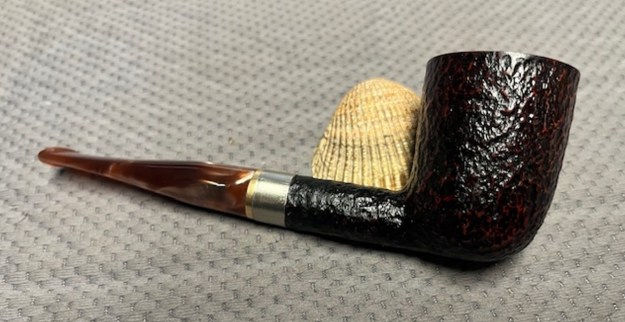
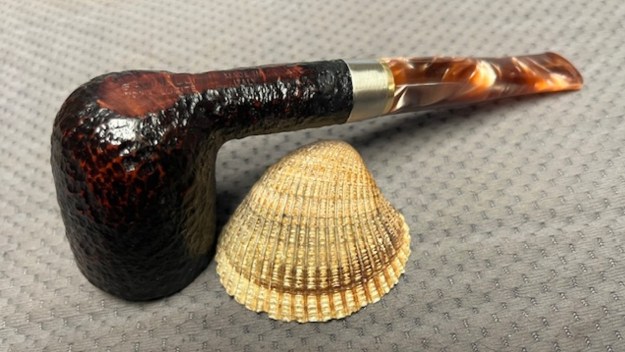
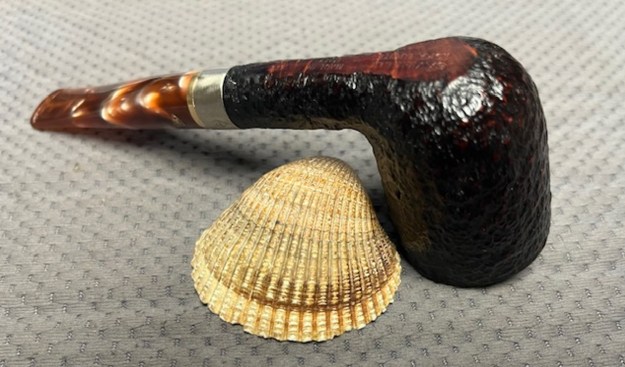
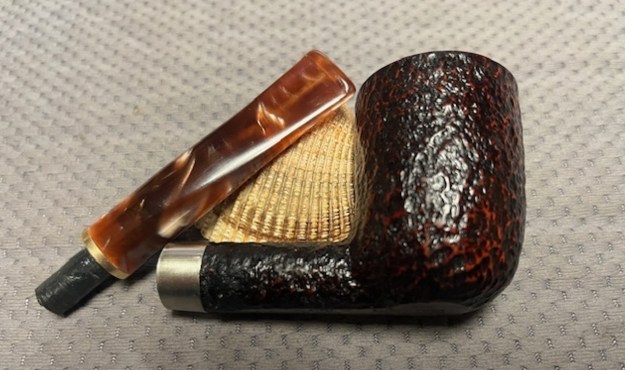
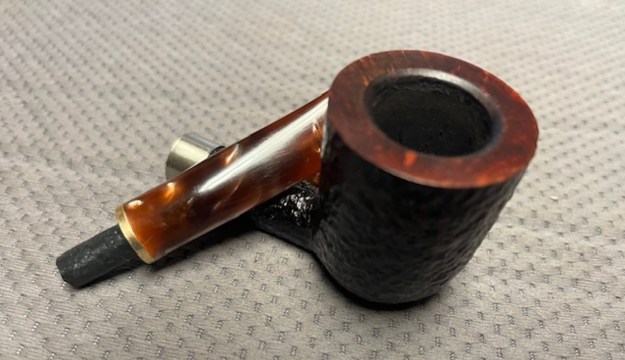
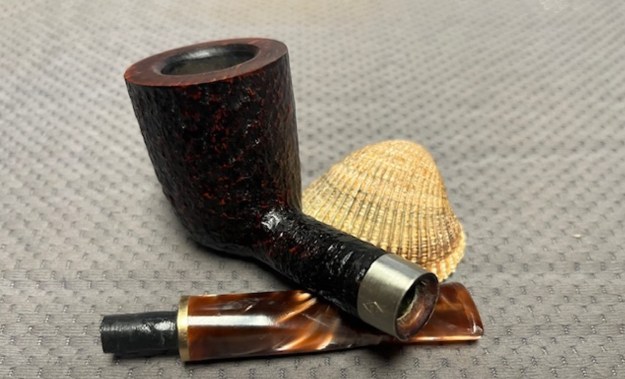
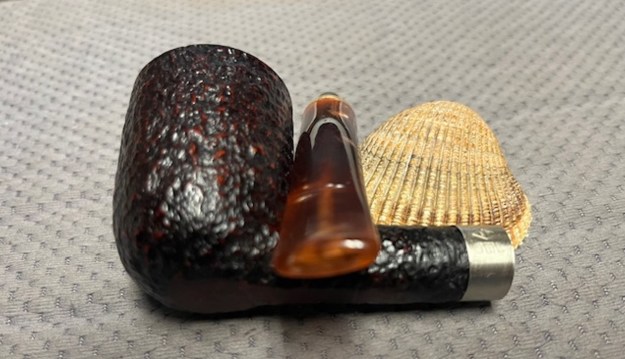
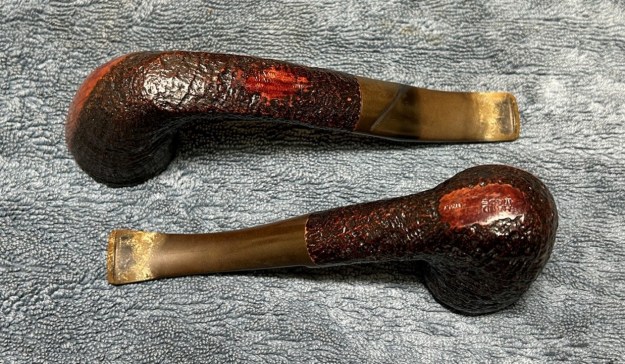
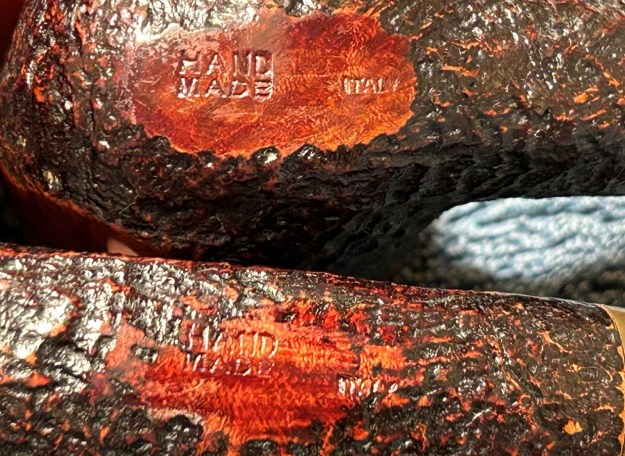
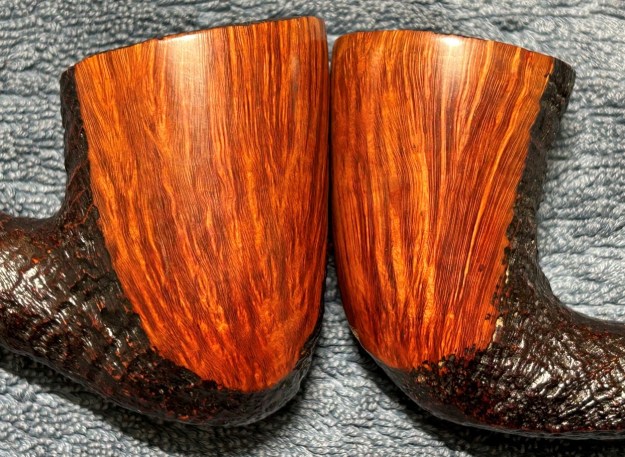
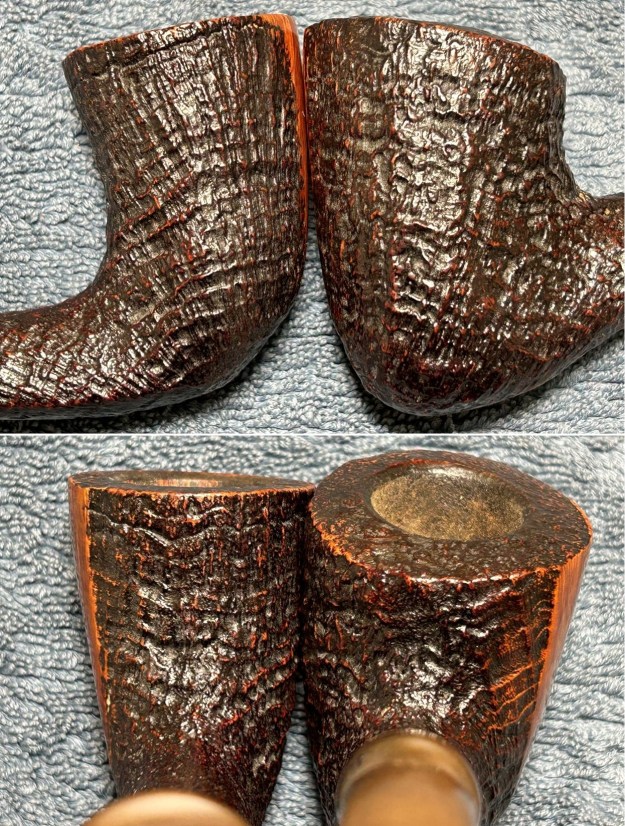
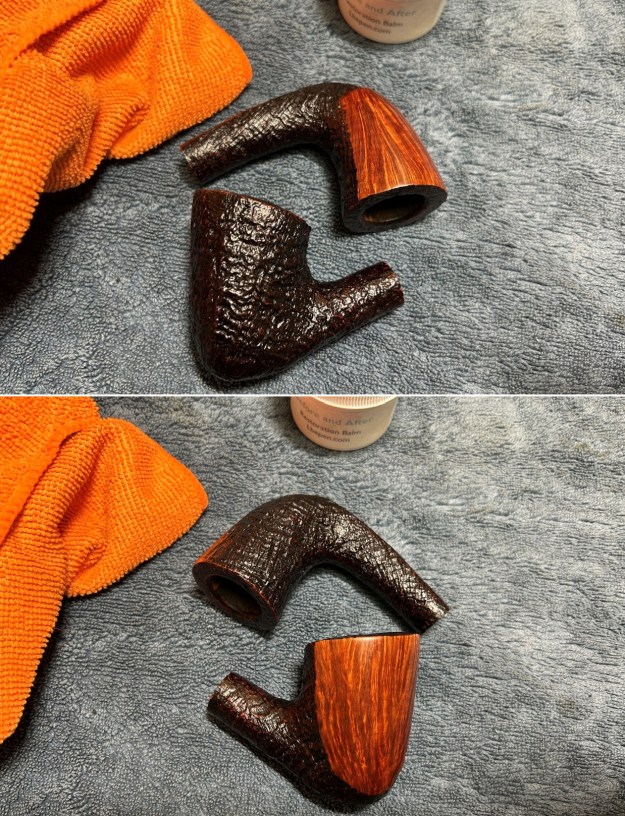
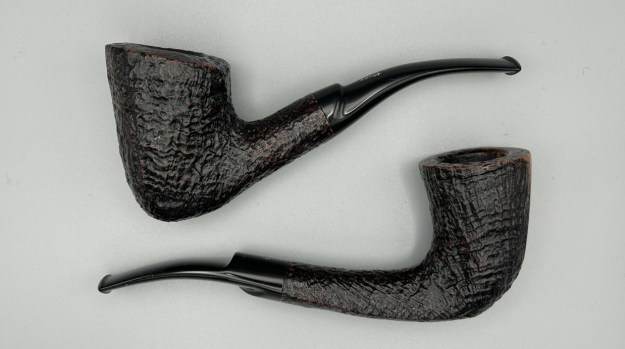
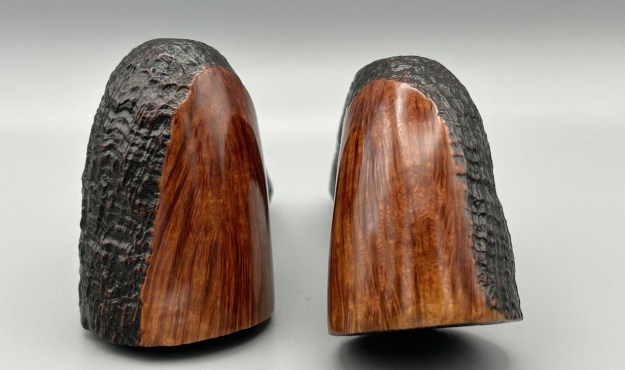
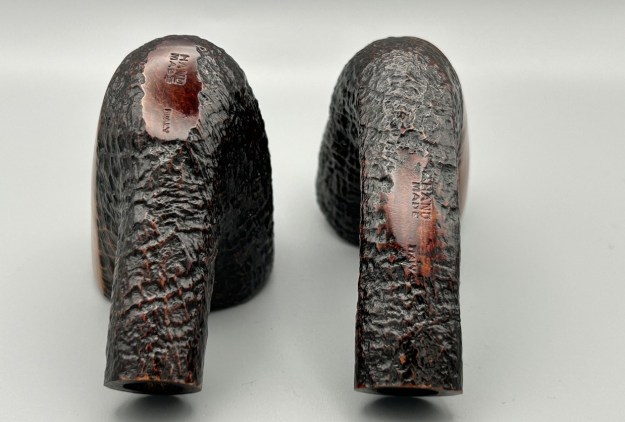
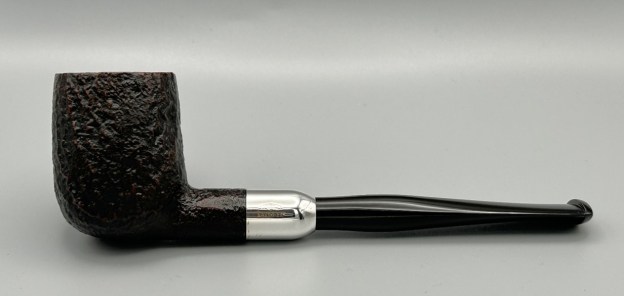
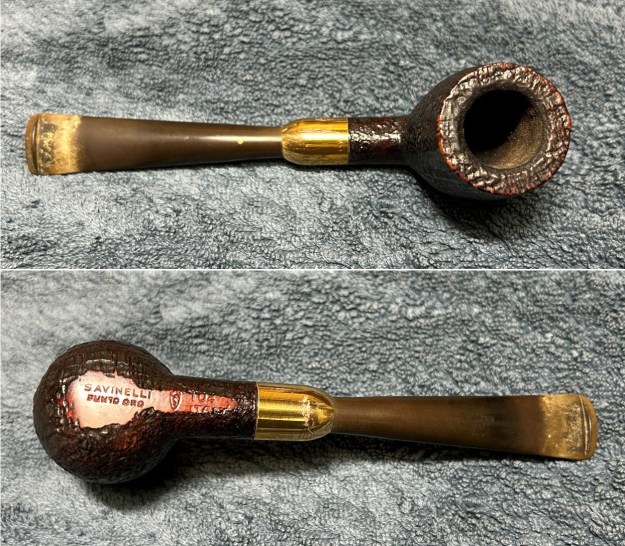
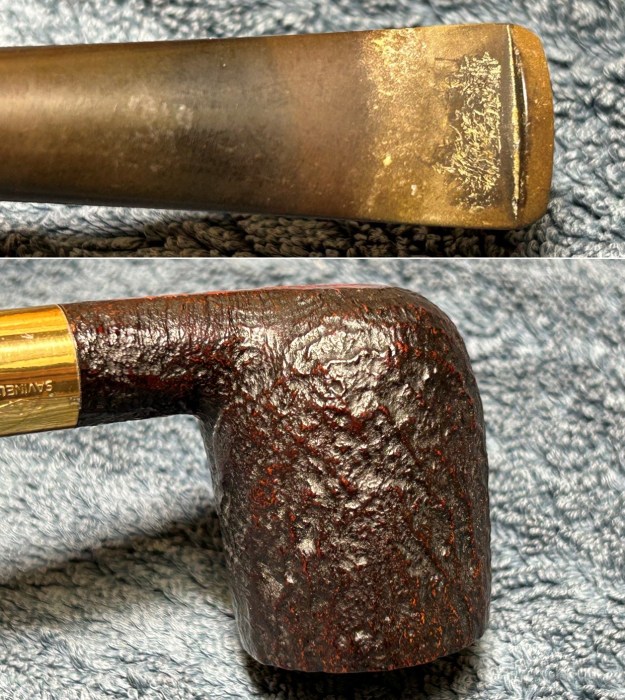
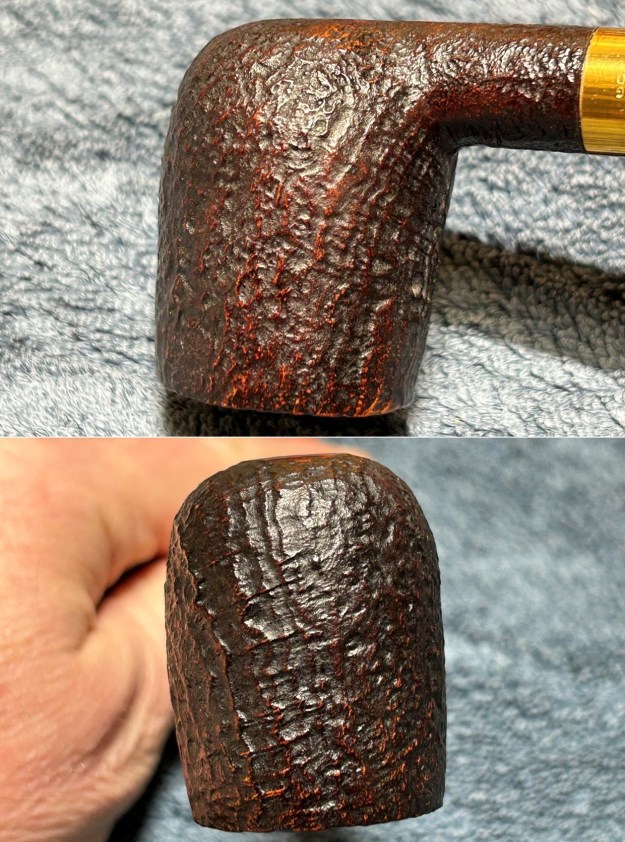
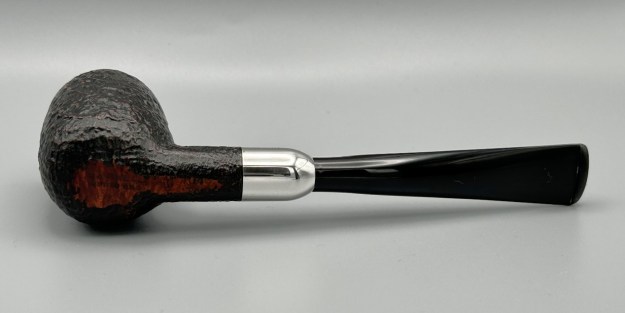
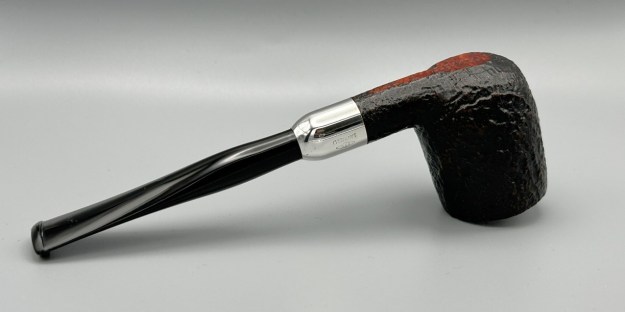
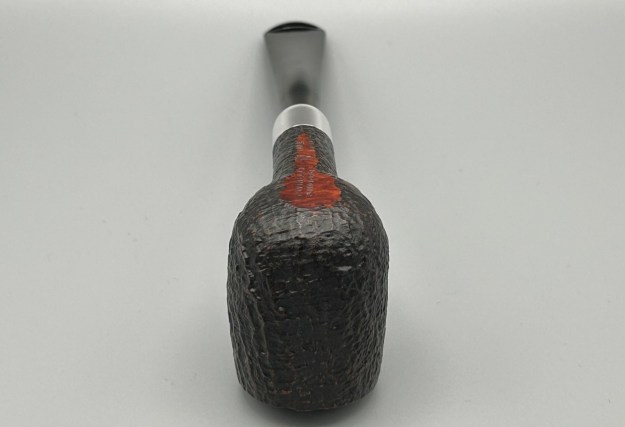
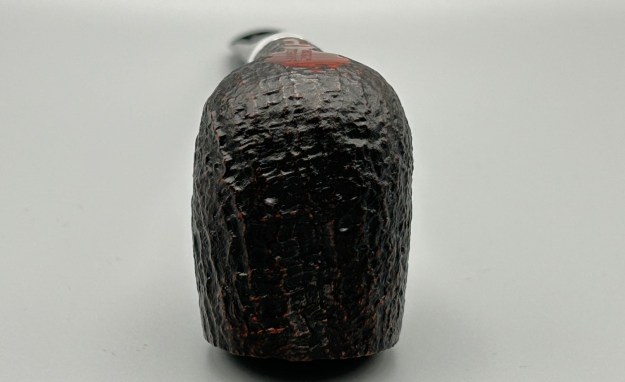
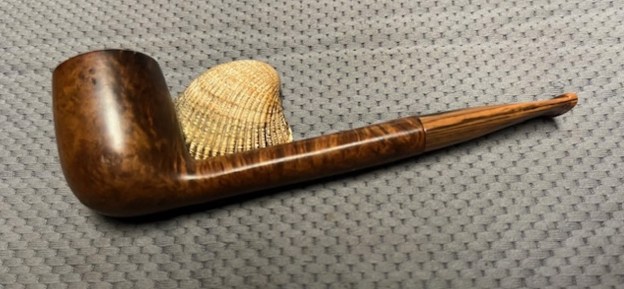
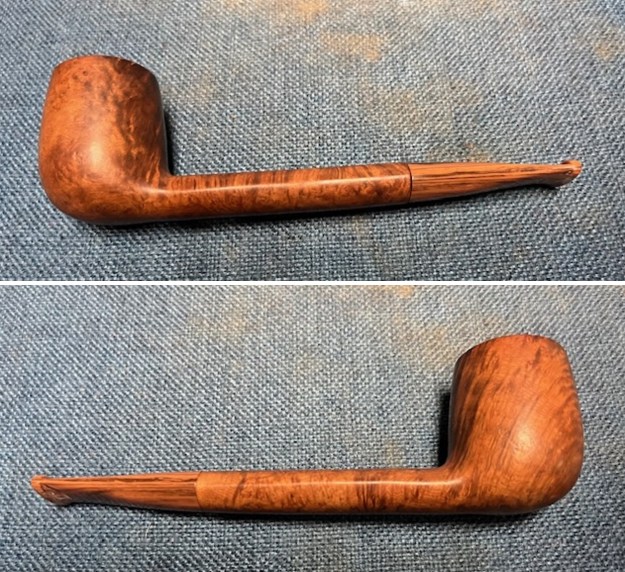
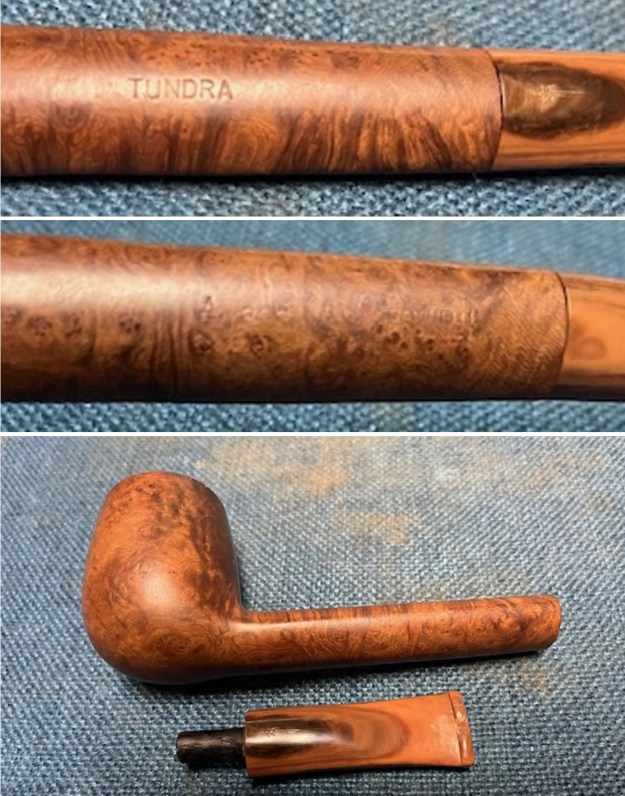
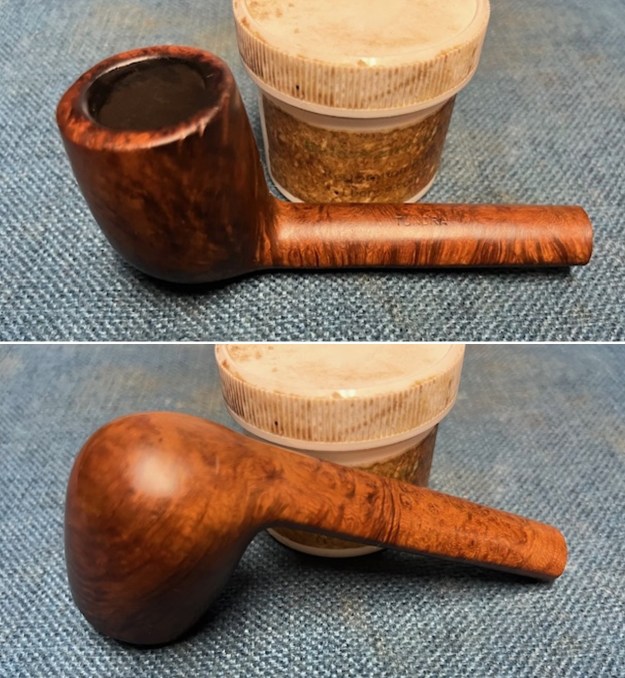
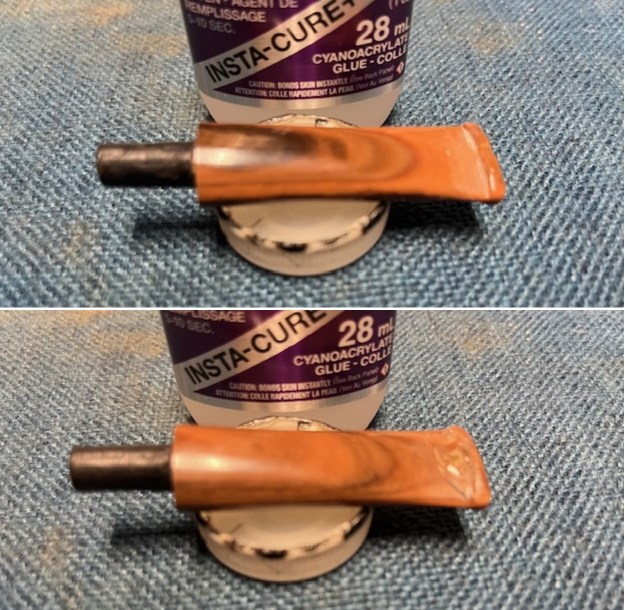
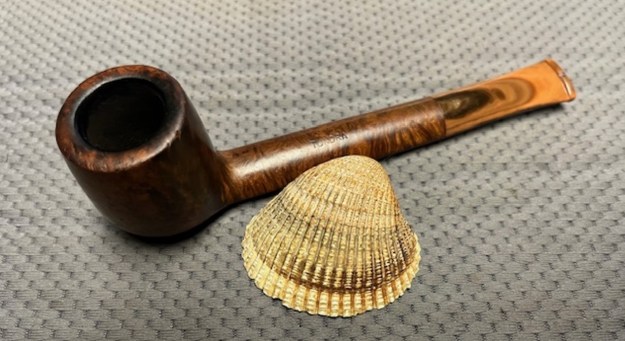
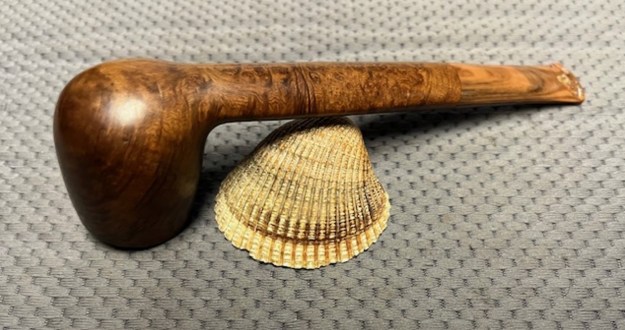
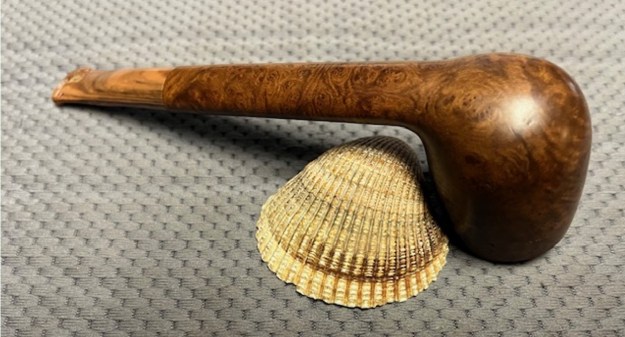
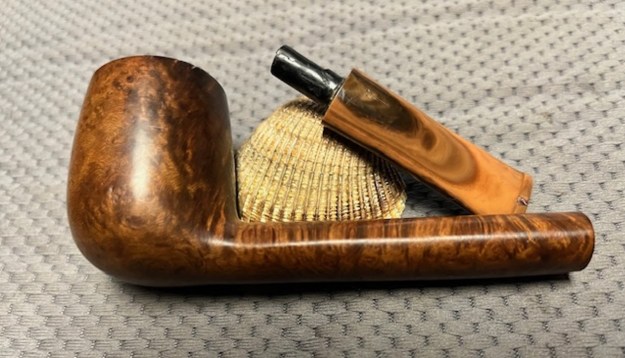
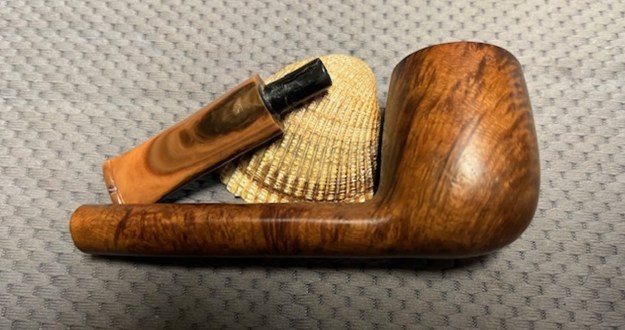
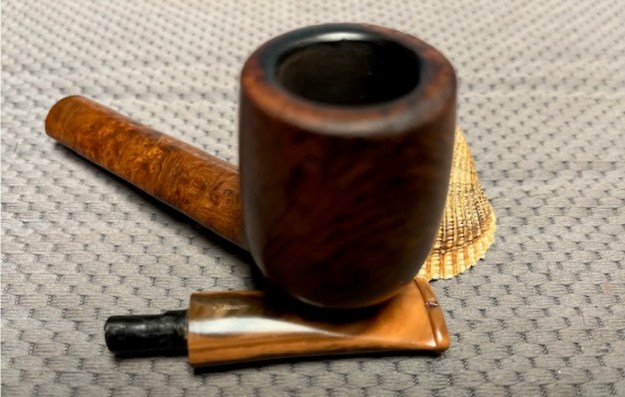
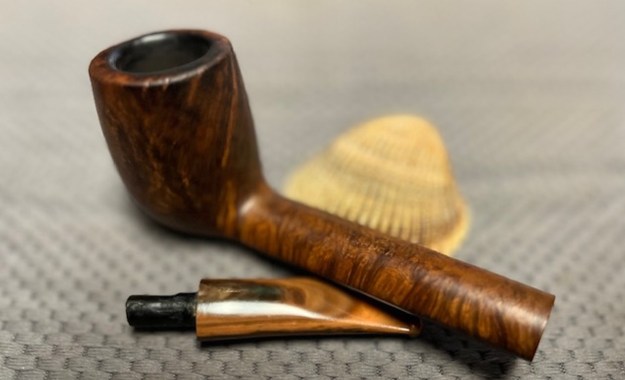
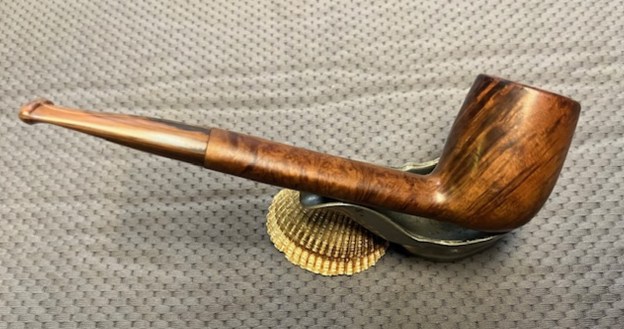
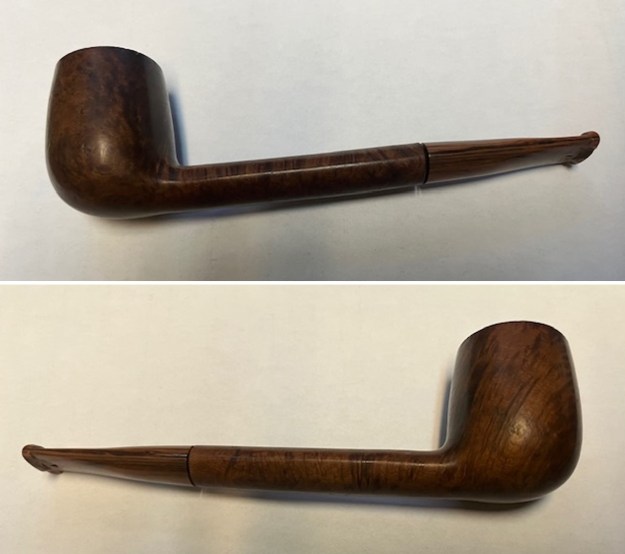
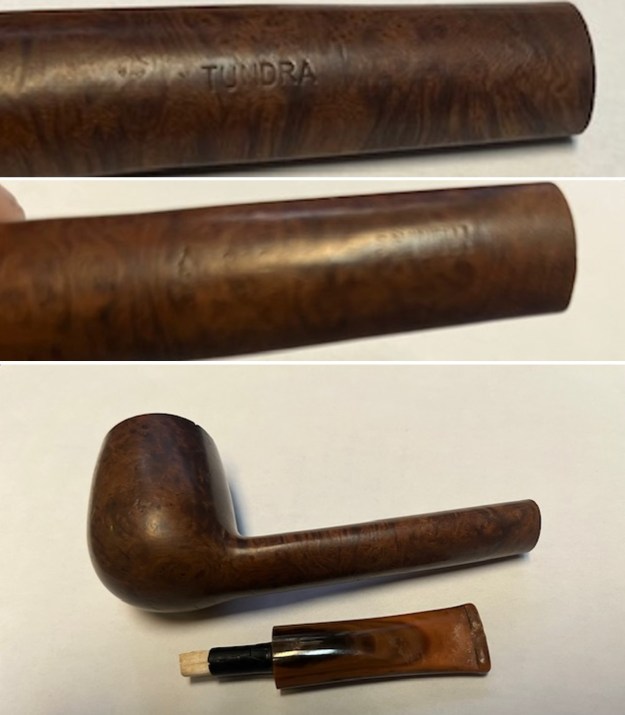
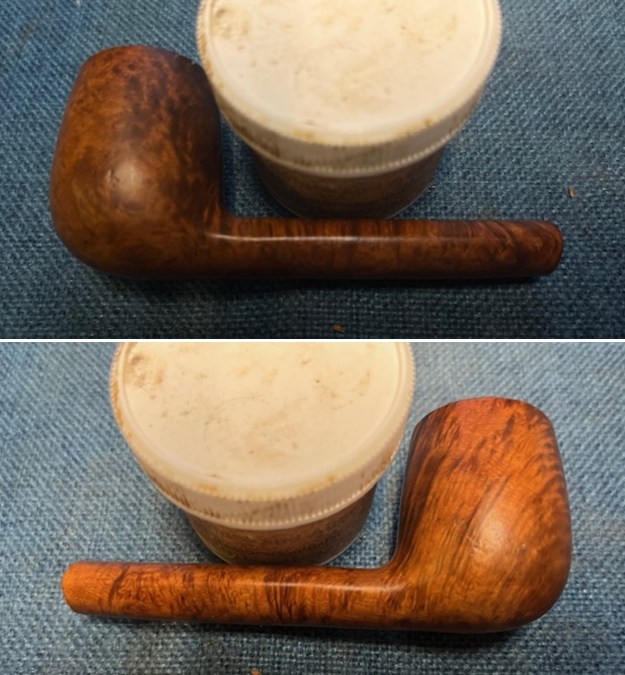
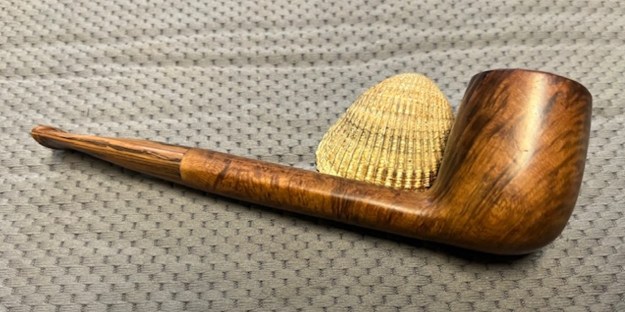
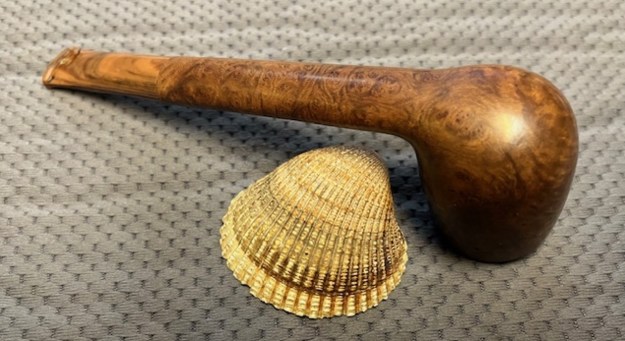
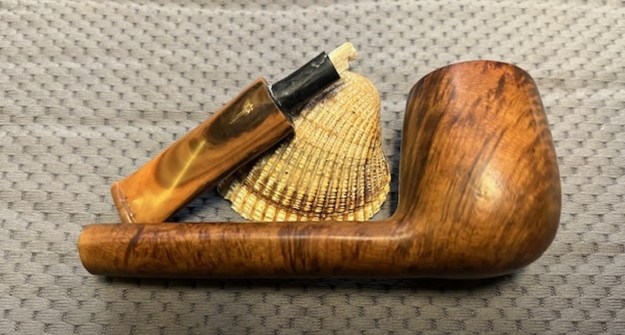
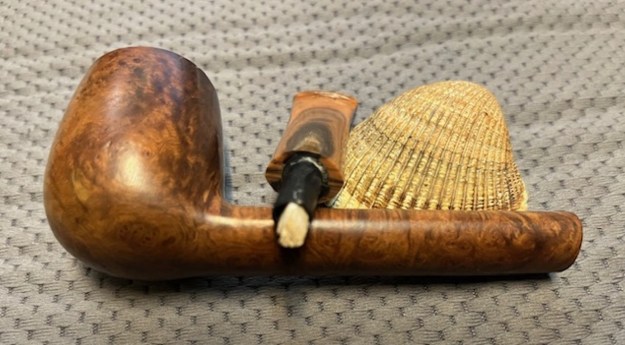
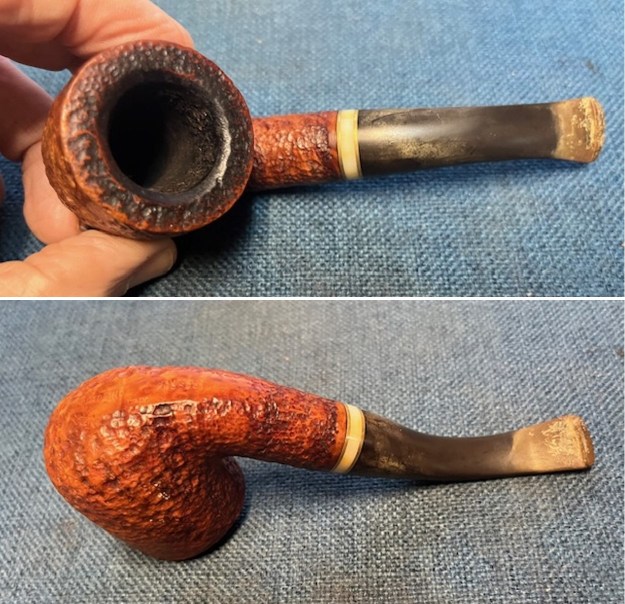
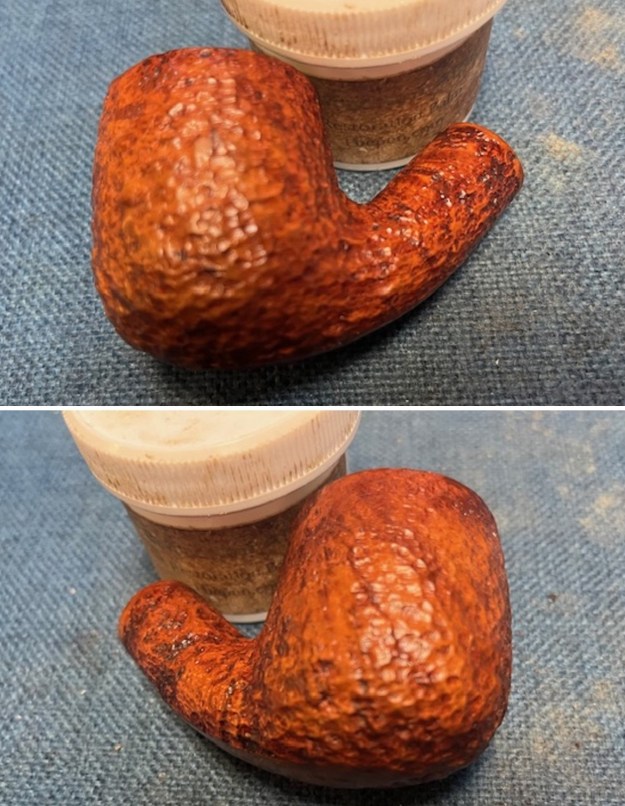
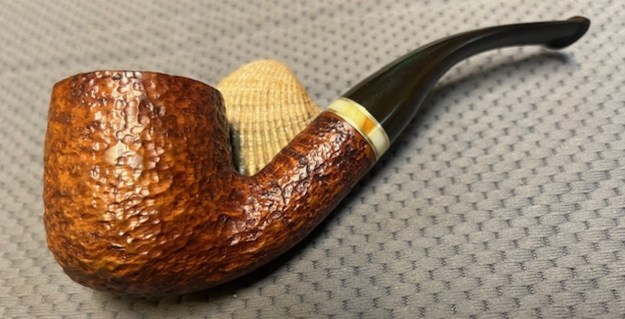
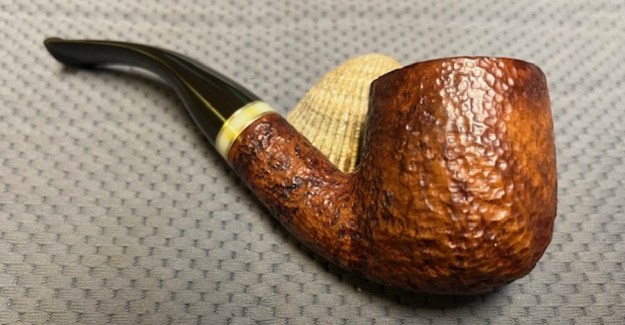
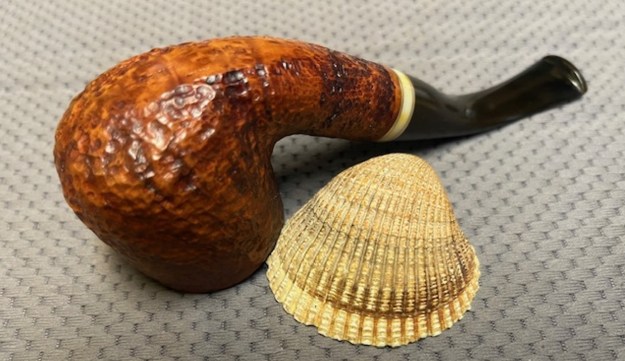
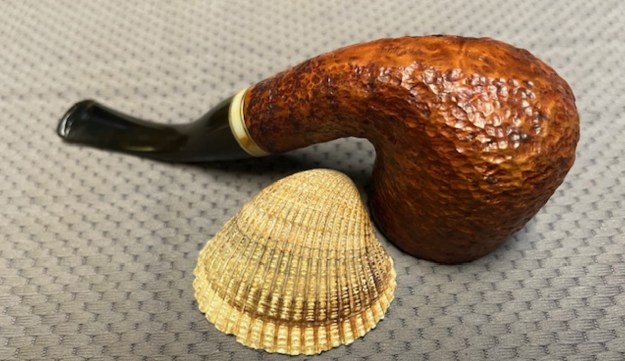
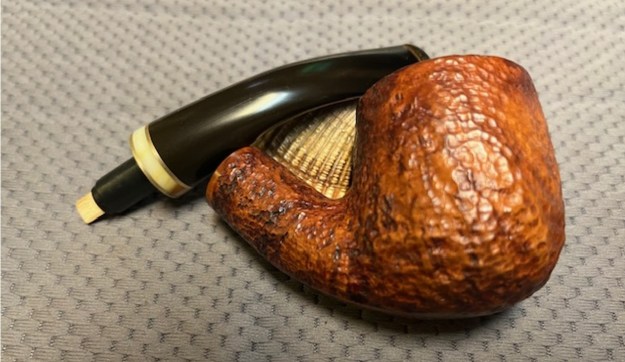
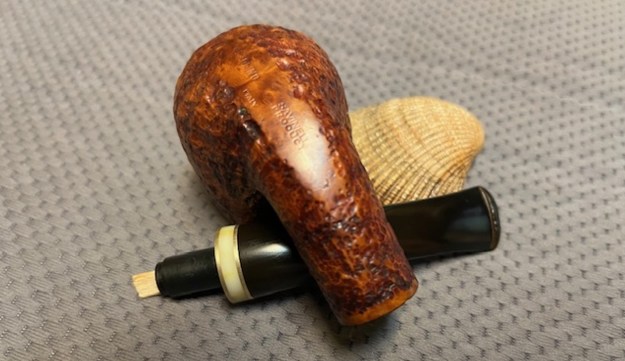
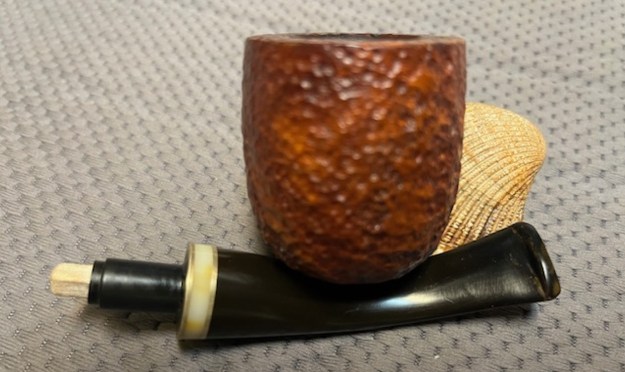
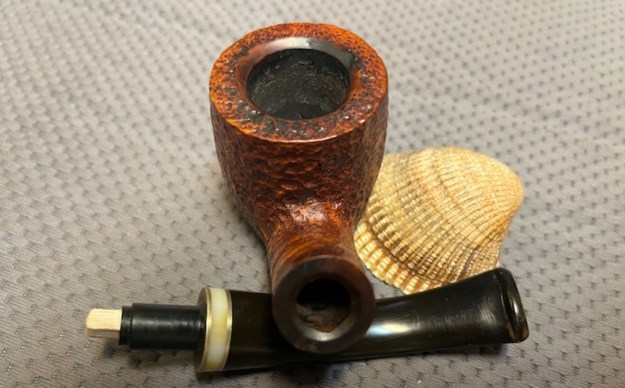
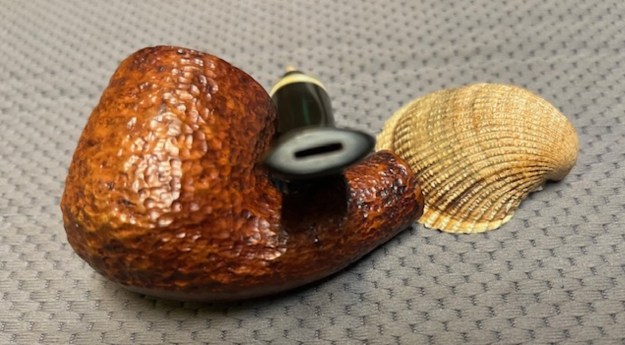
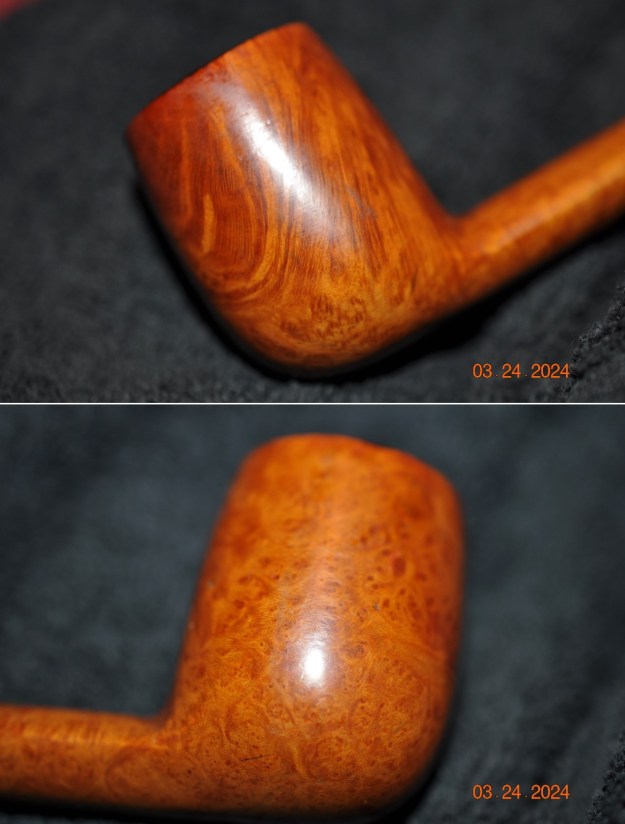
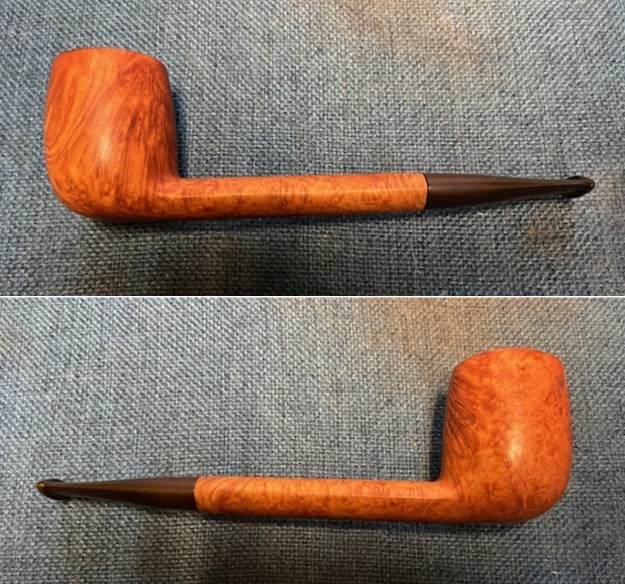
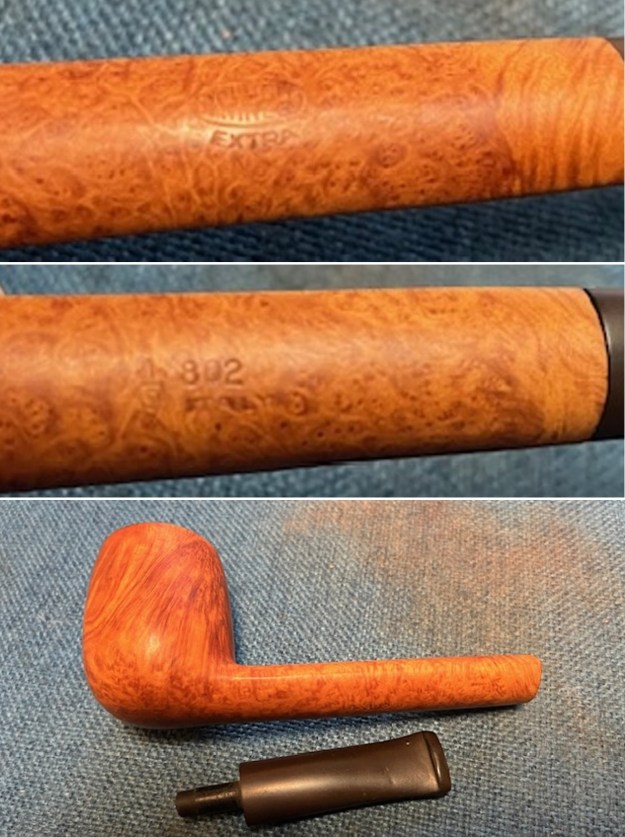
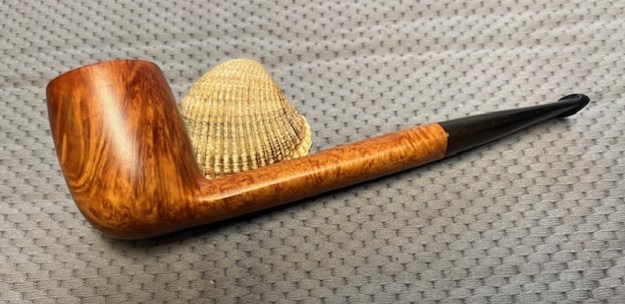
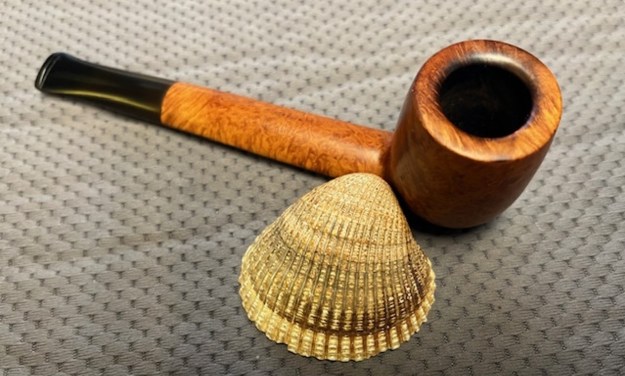
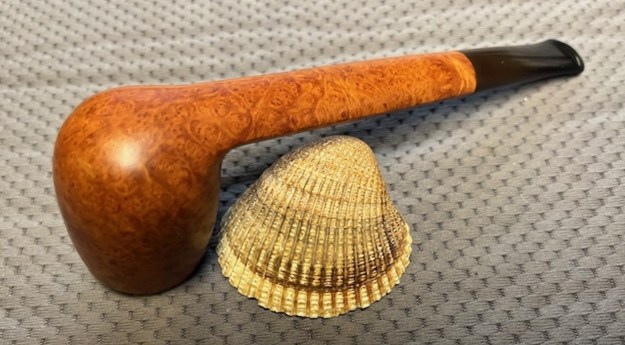
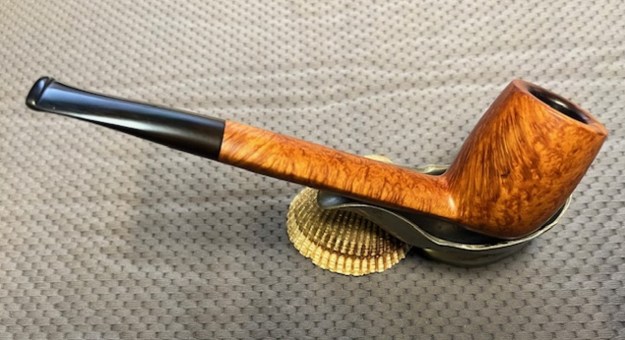
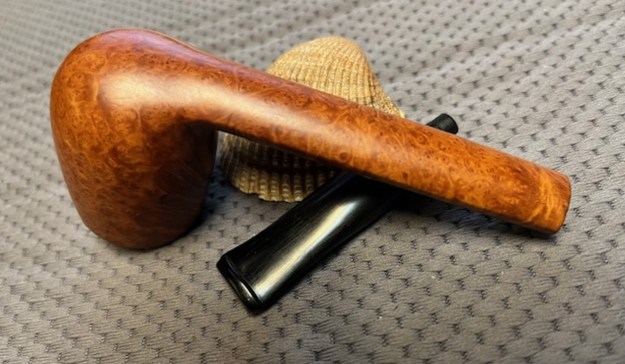
 The third pipe I brought to the table is a Savinelli Autograph Sandblast Bent Cherrywood. Overall it looks very good. It is stamped on smooth heel of the bowl and reads Savinelli [over] Autograph [followed by] Made in [over] Italy and to the right it is stamped with a 2. The stamping is clear and very readable. The pipe has a mix of black, brown and oxblood stains on a sandblast finish and the blast shows amazing grain that the shape follows well. The crowned rim cap is also sandblast and the heel of the bowl is smooth in a patch that bears the stamping. The shank end is a blue/white acrylic. The finish was very clean and the bowl had a light cake on the walls but the rim top was clean. I inspected the walls of the bowl and could not find any issues or divots in the walls. I spoke with Michael and he mentioned that it looked like it had some small checking/cracking on the walls of the bowl. Initial inspection reveals that the light cracking in the cake on the bowl walls. I would need to examine it further once it had been reamed and cleaned. The acrylic black original saddle stem is on the pipe and has an autograph on the top of the taper. The stem showed light tooth marks or chatter on both sides. I took photos of the pipe to show what it looked like before I started working on it.
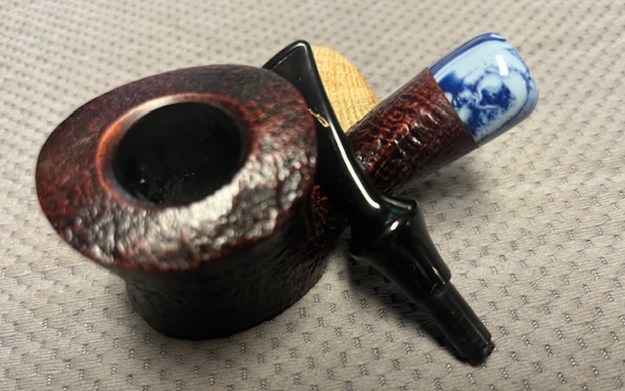
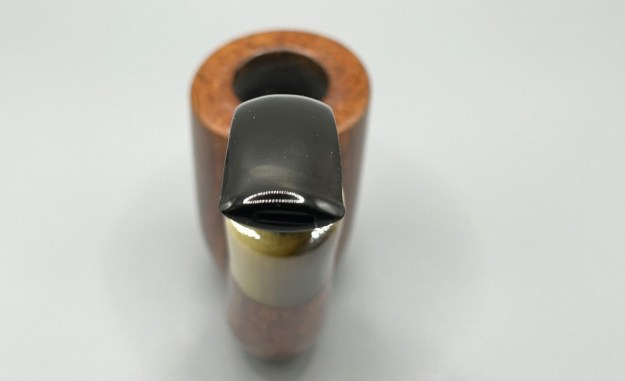
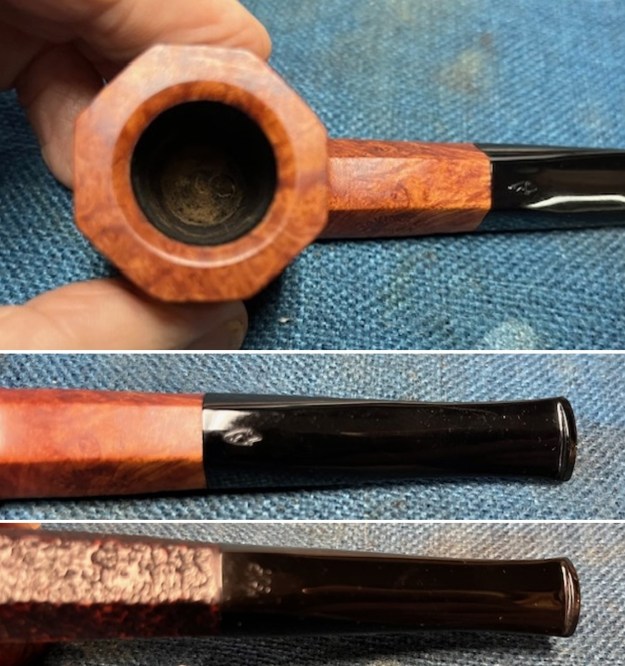
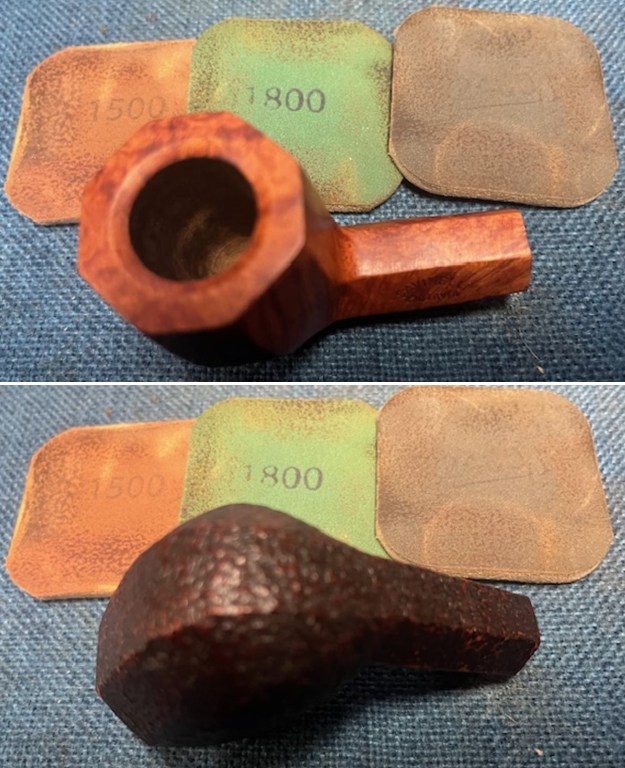
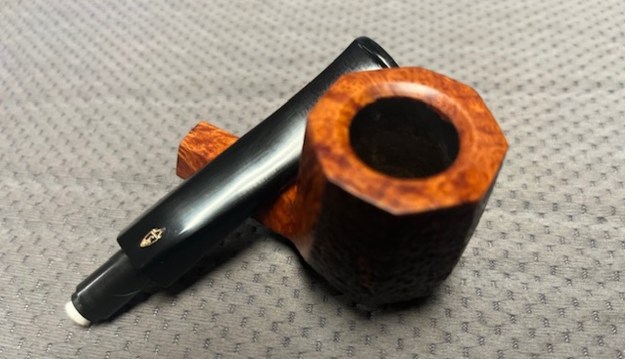
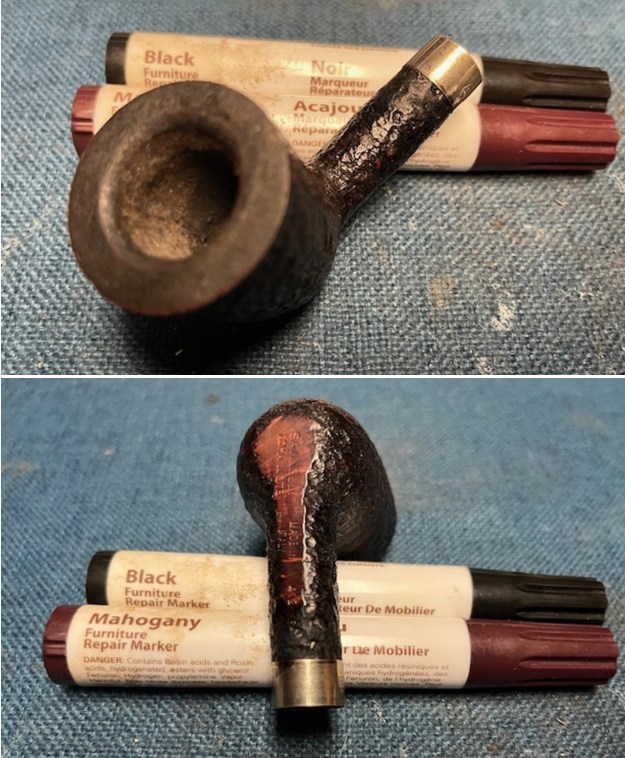
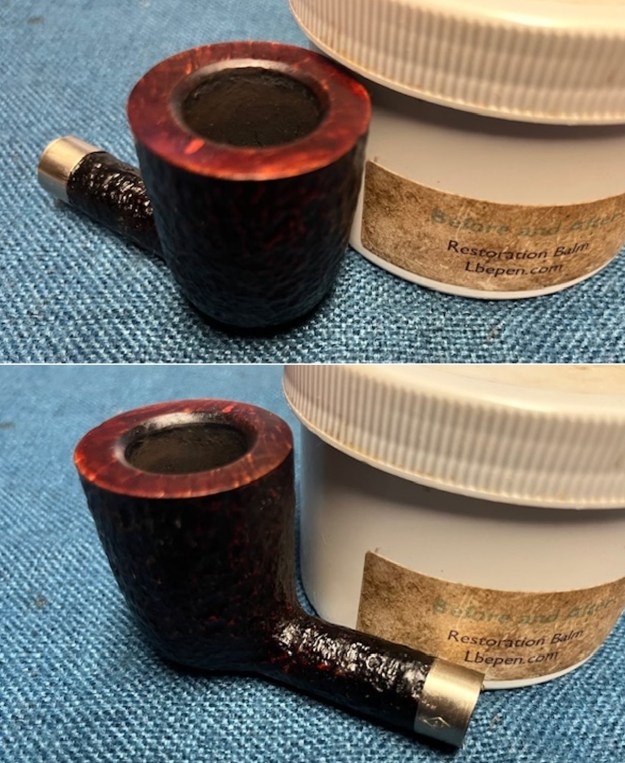
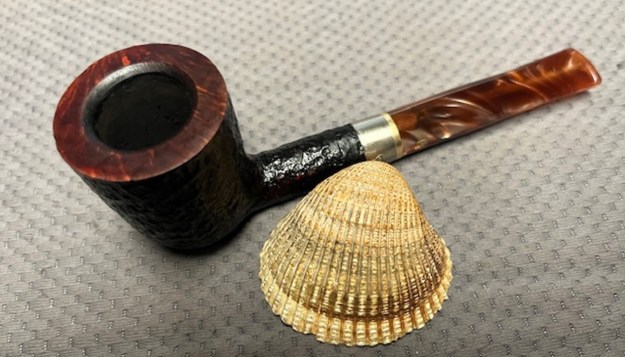
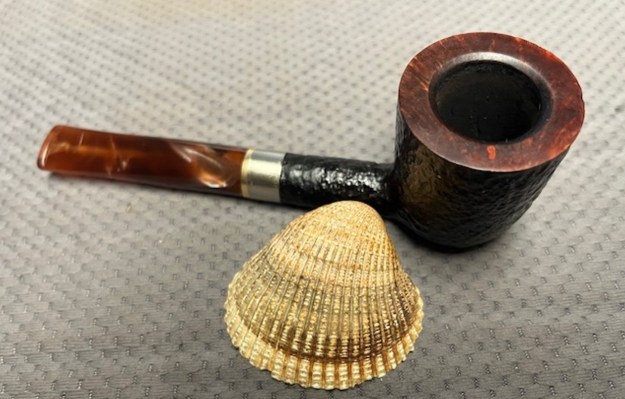
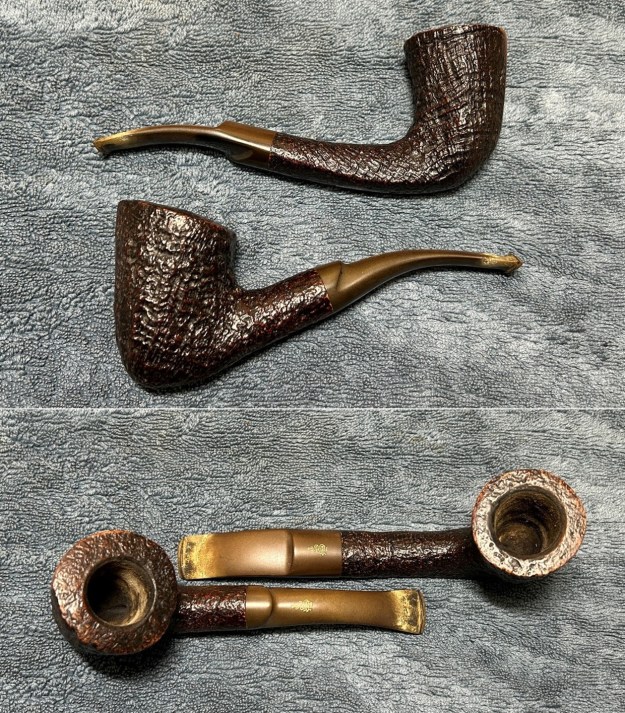
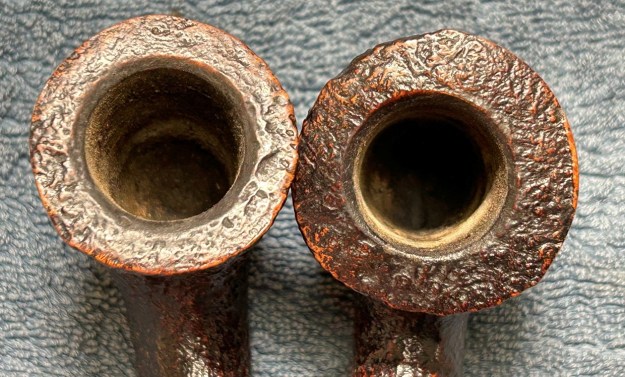
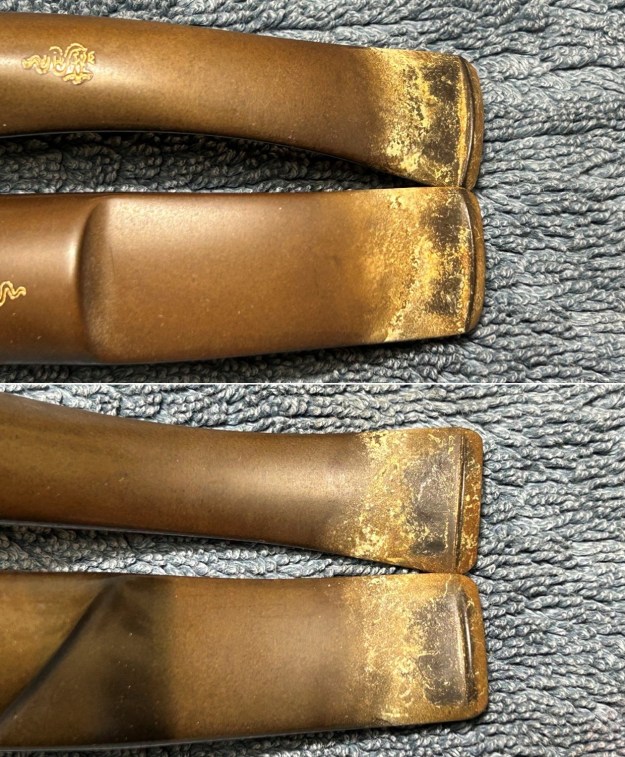
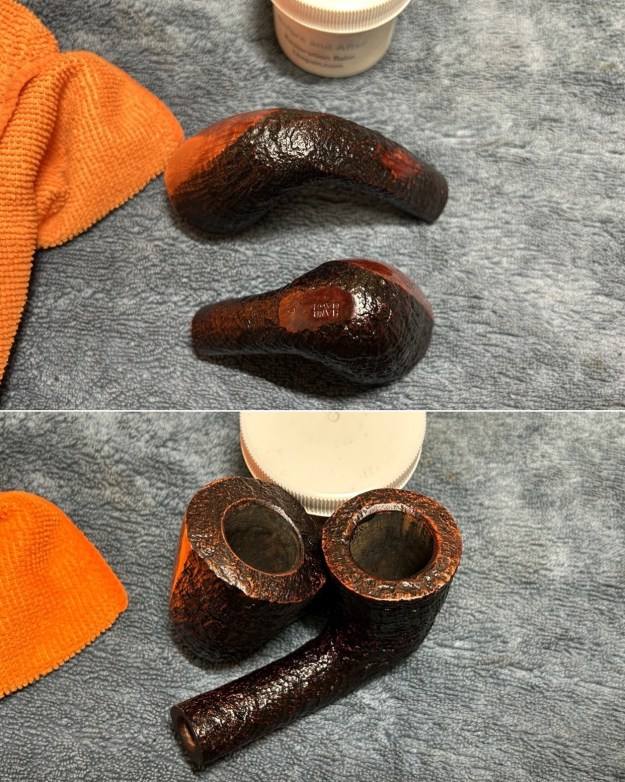
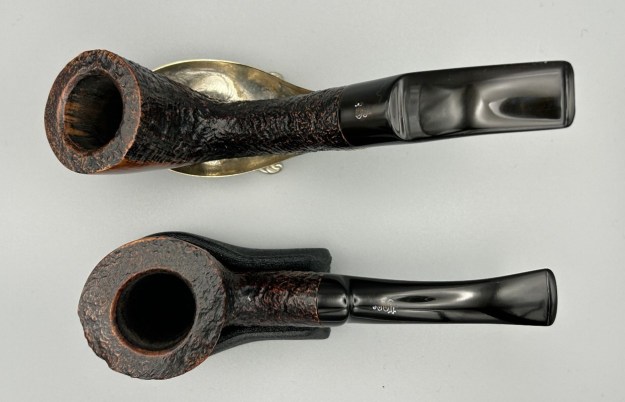
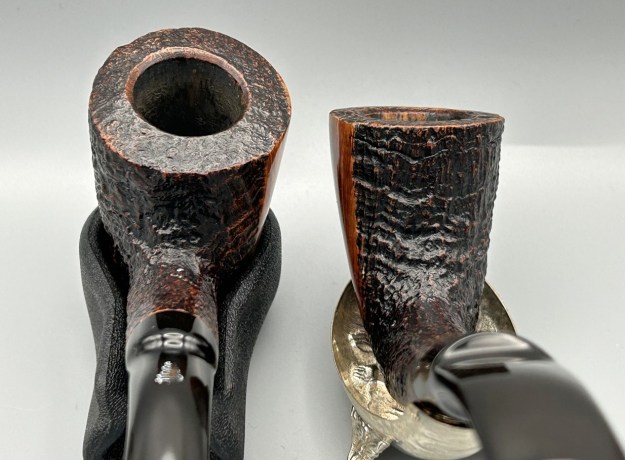
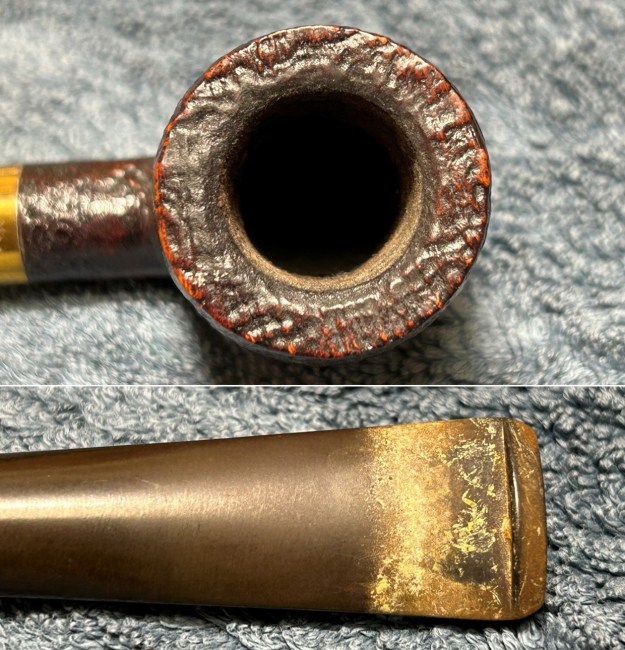
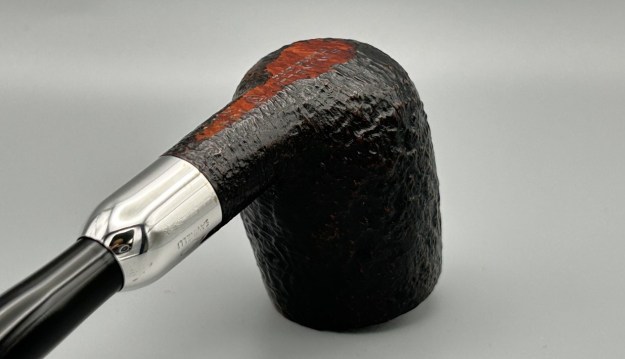
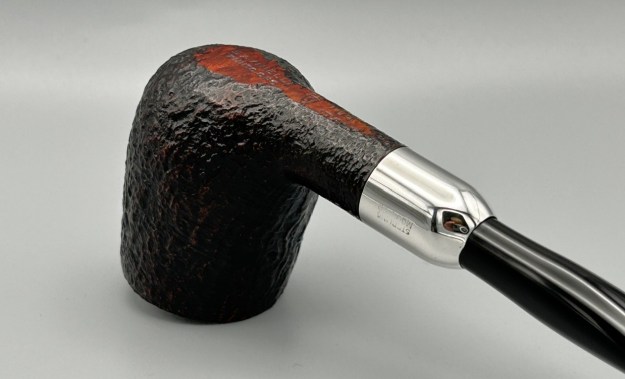
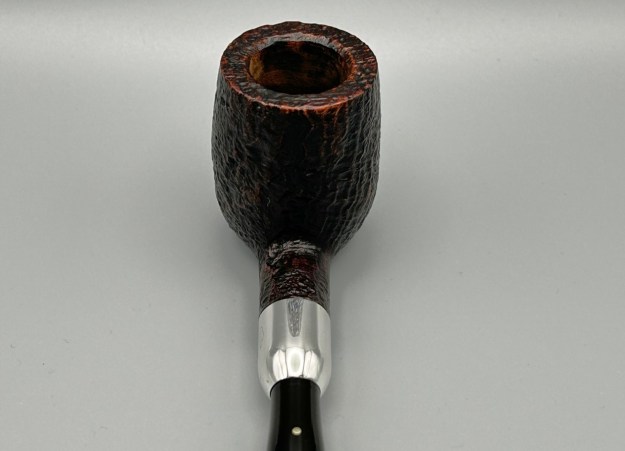
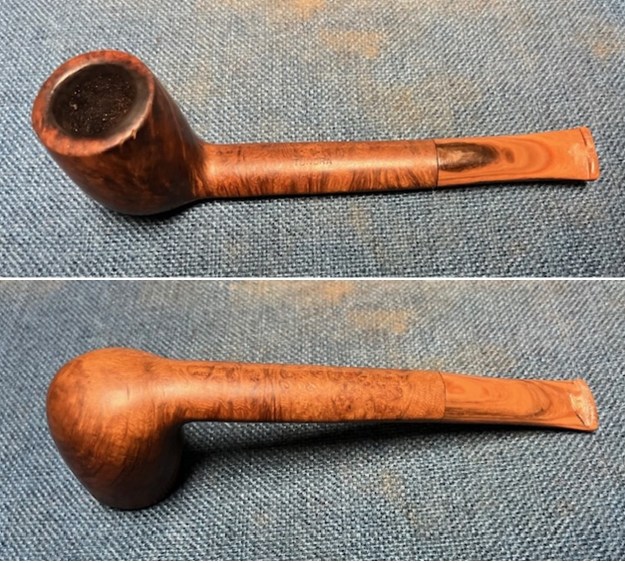
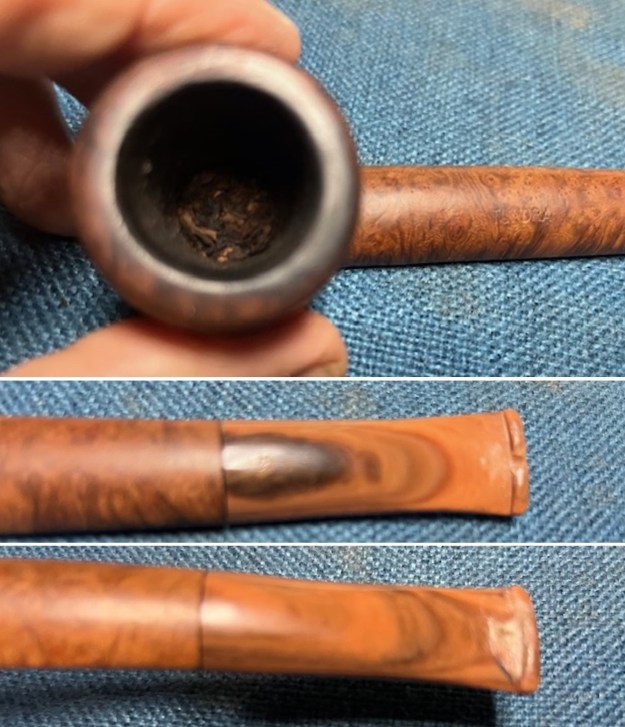
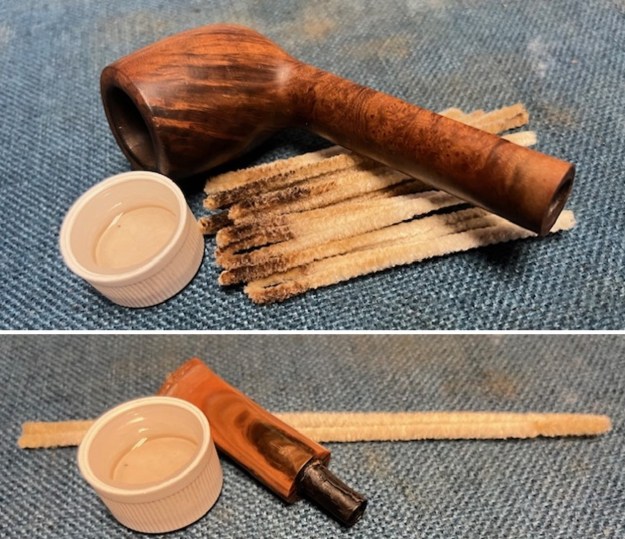
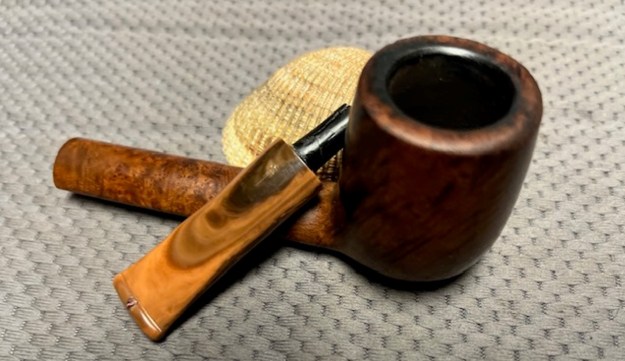
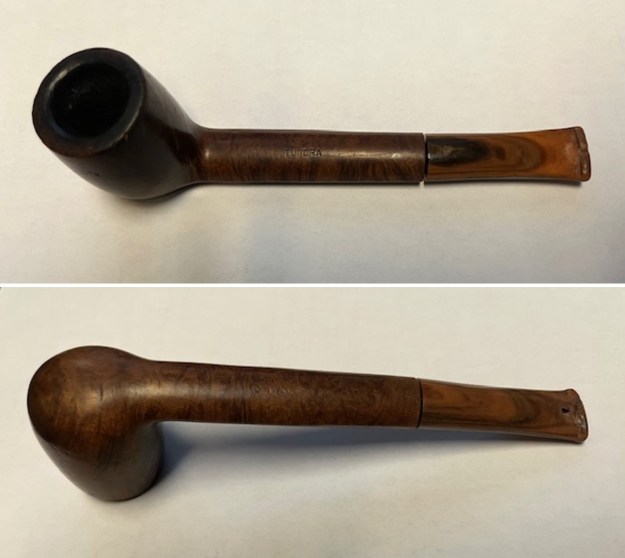
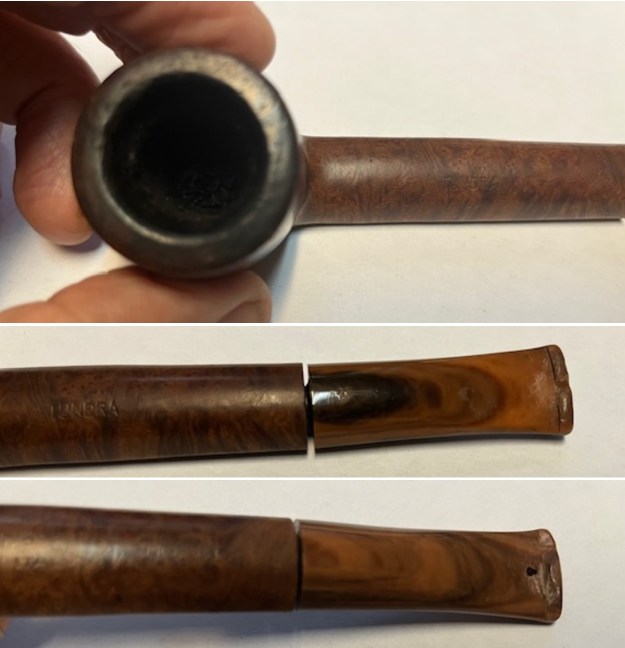
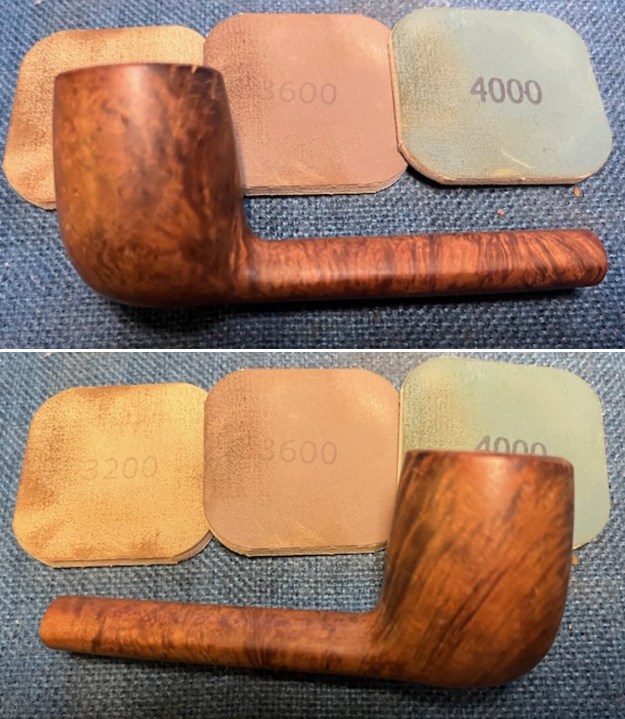
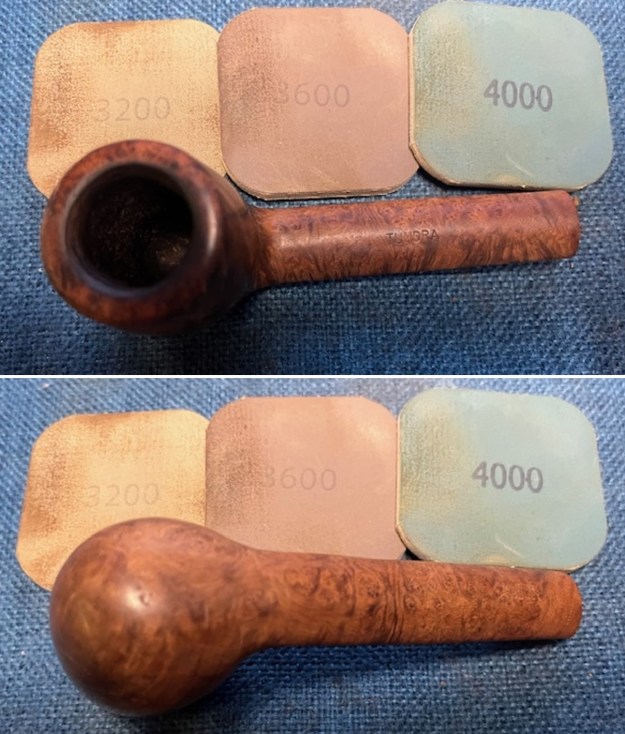
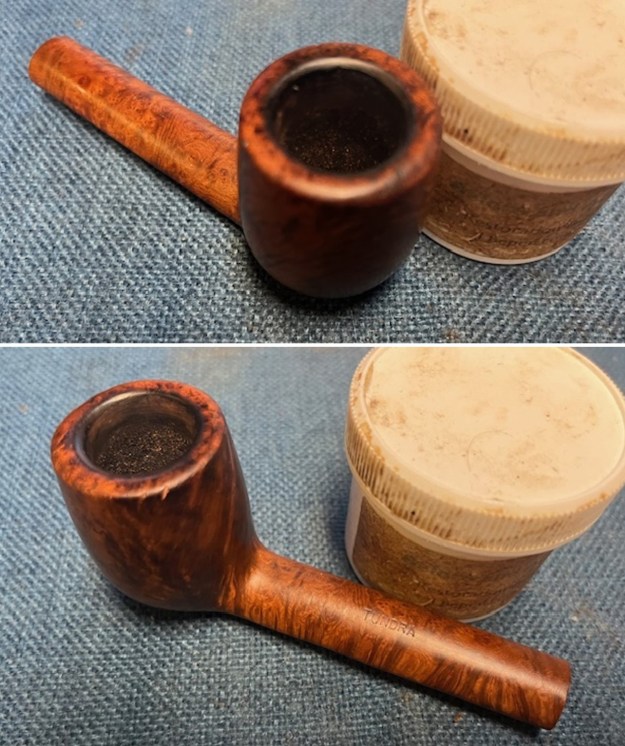
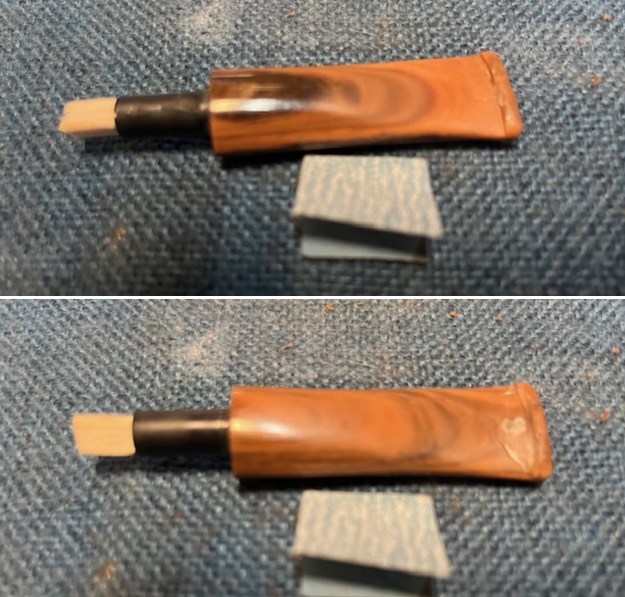
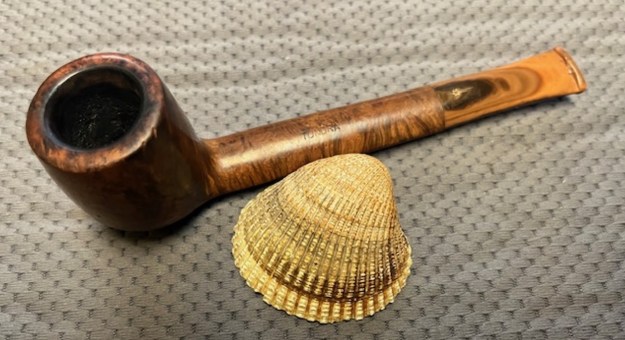
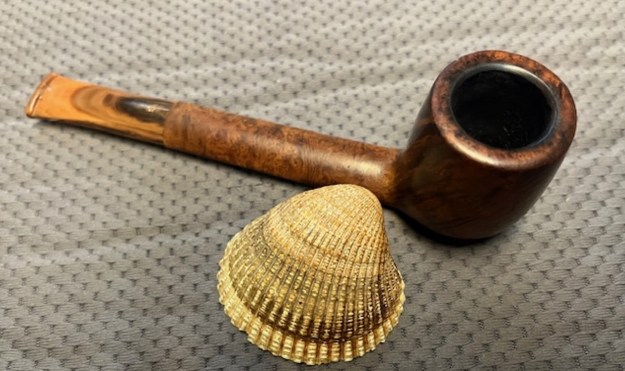
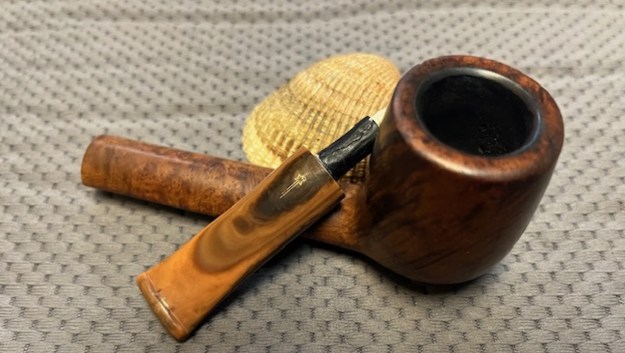
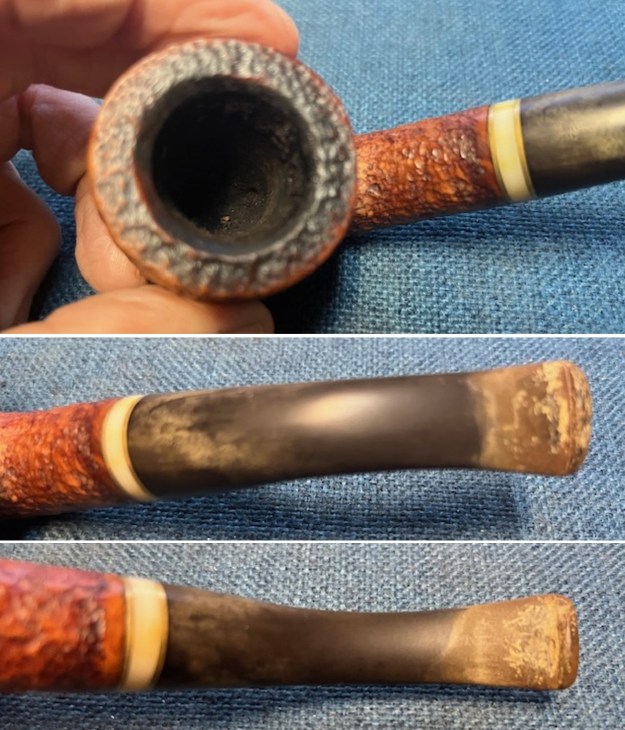
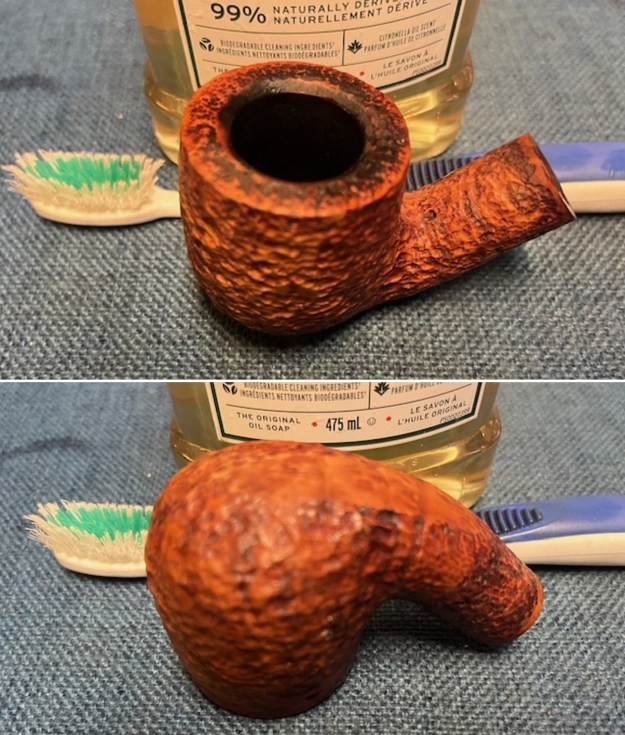
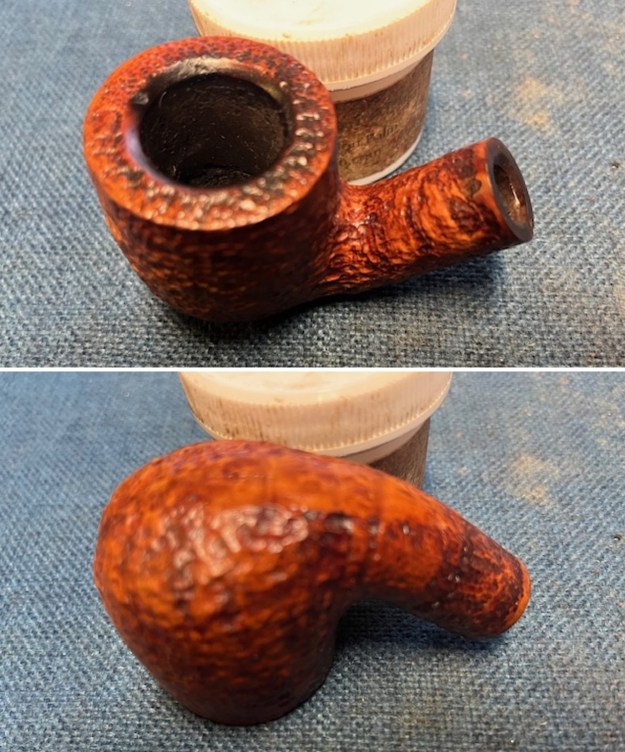
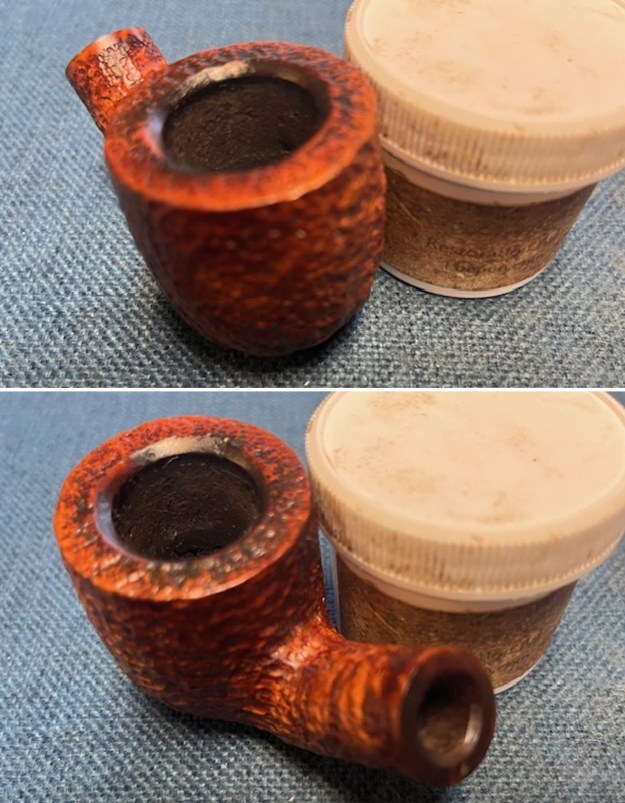
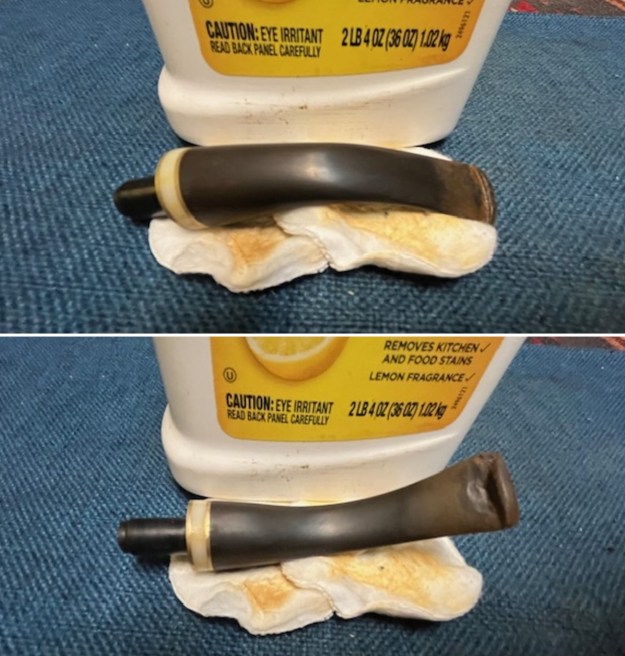
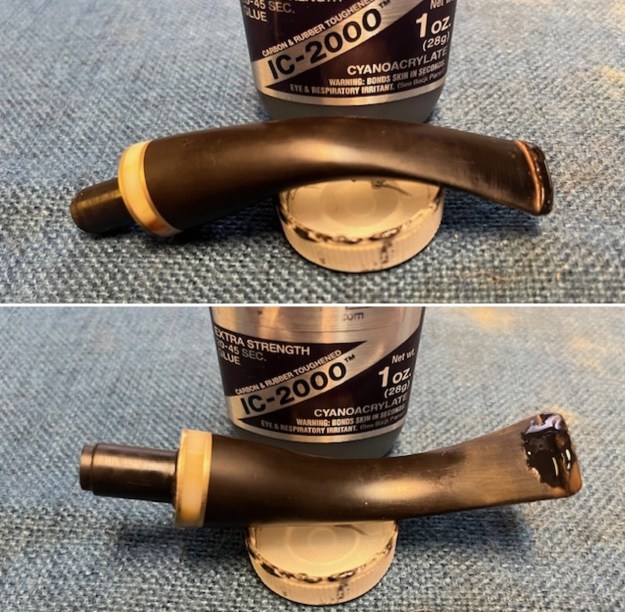
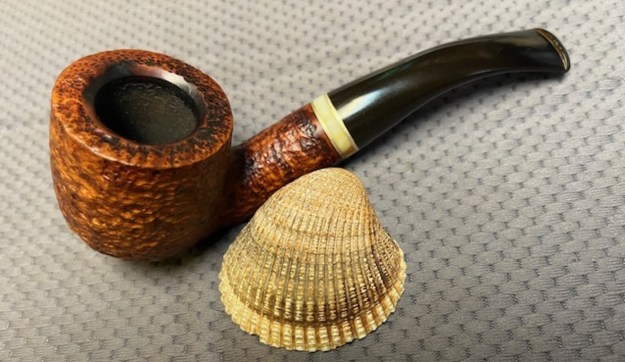
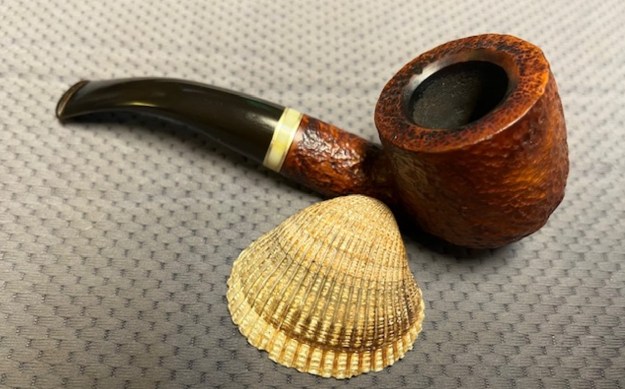
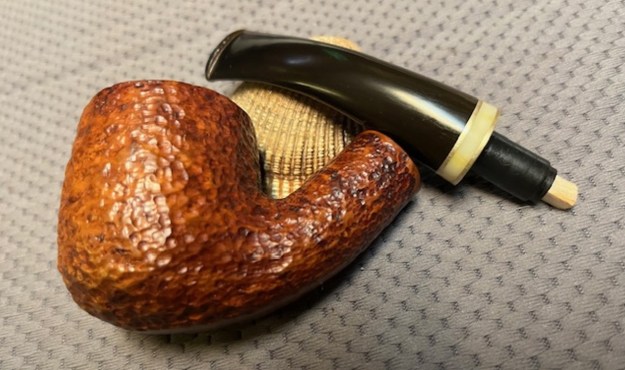
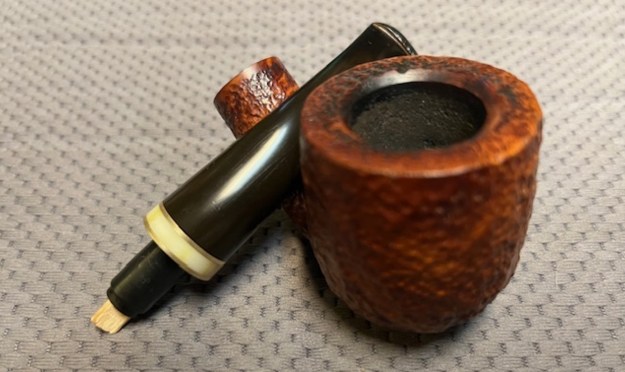
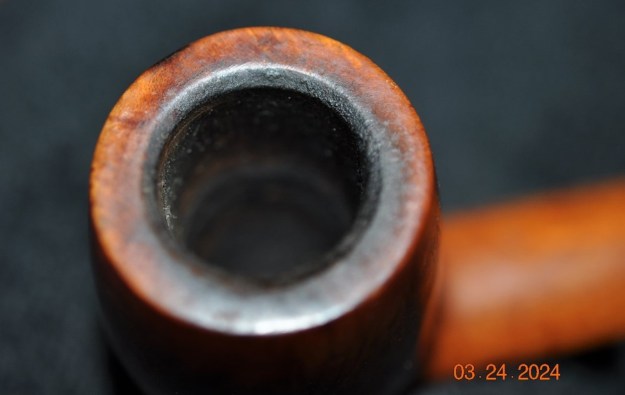
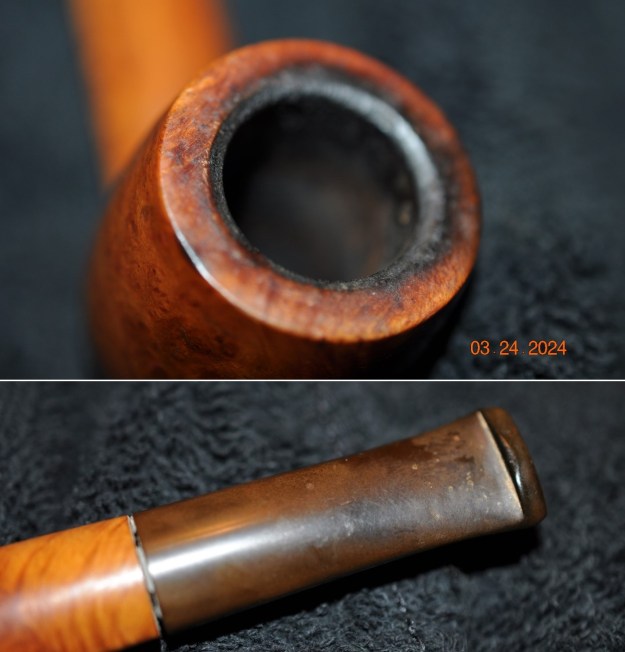
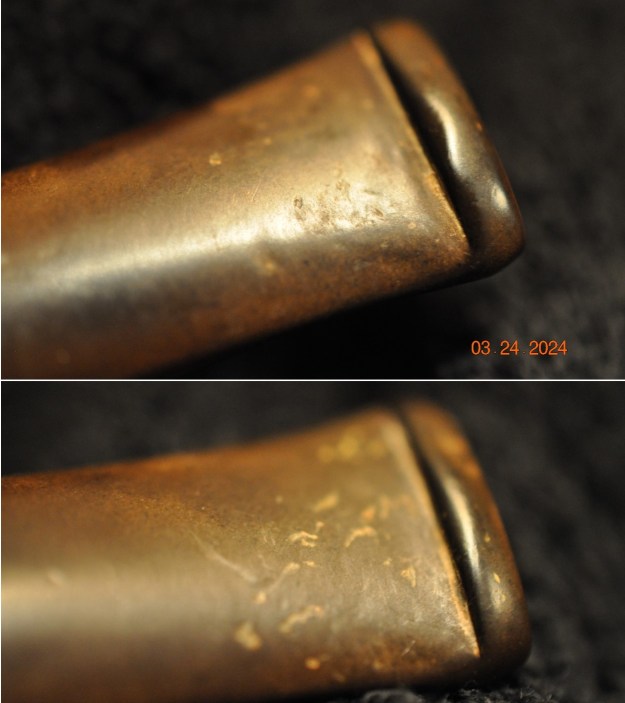
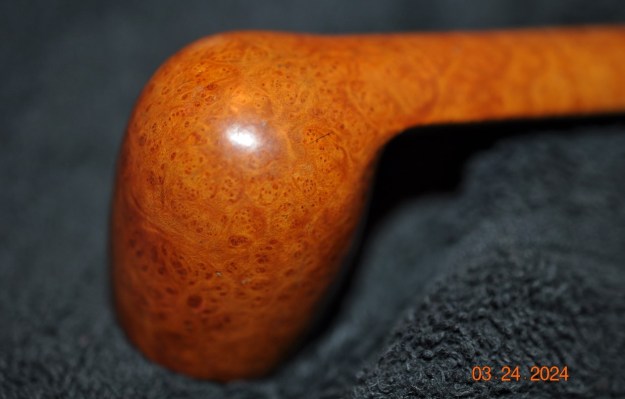
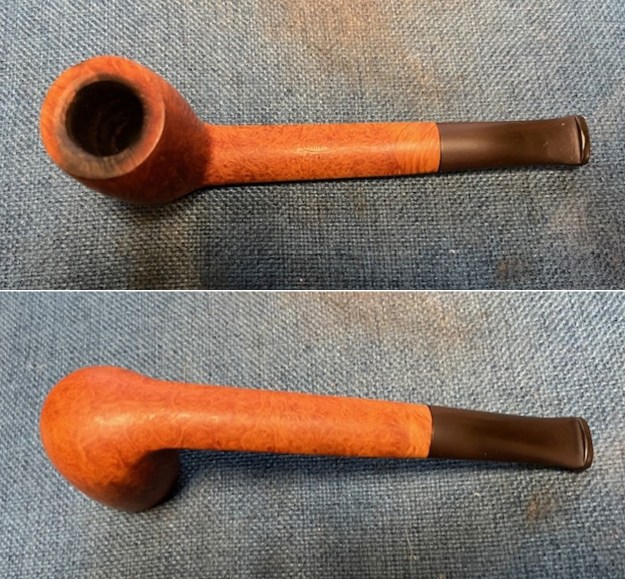
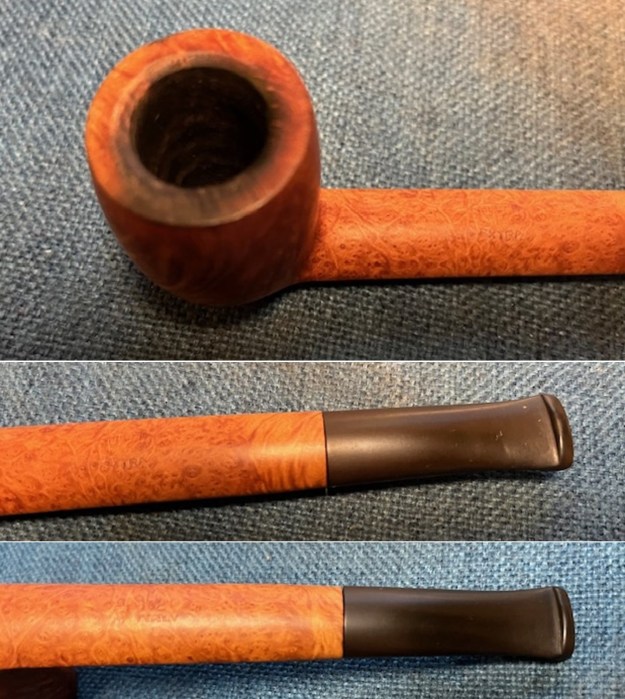
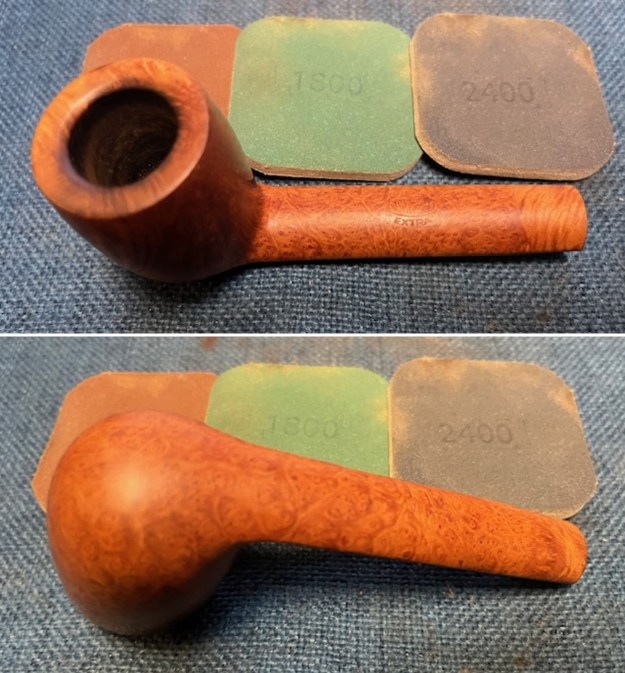
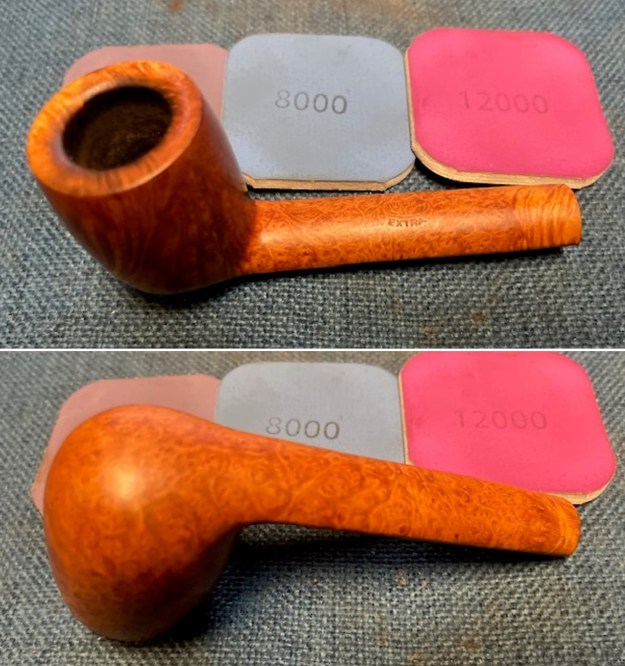
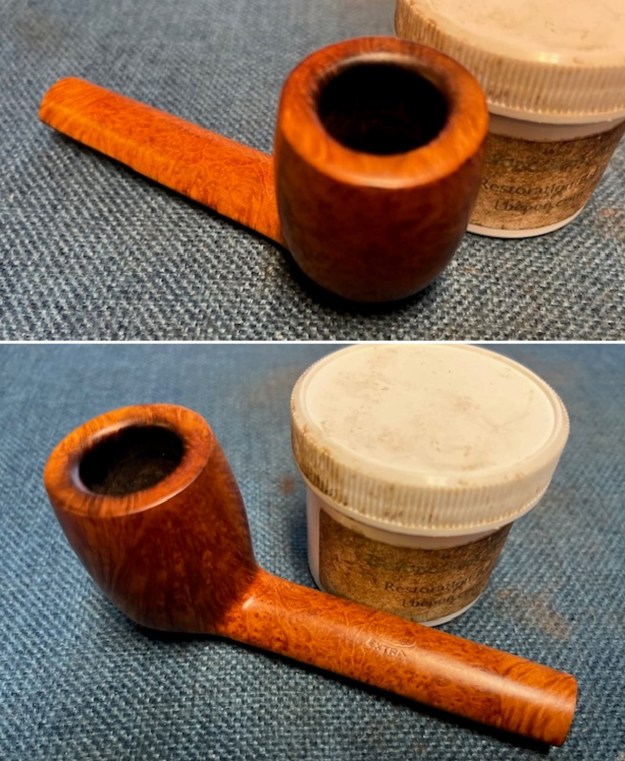
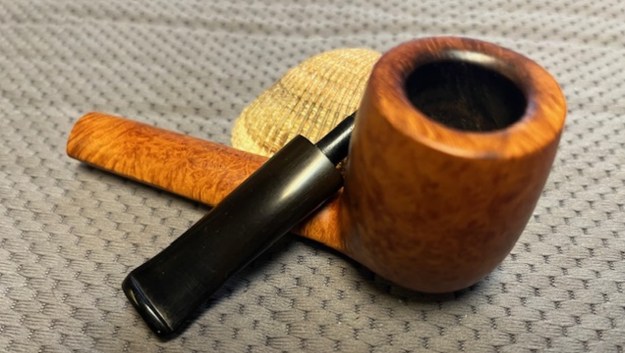
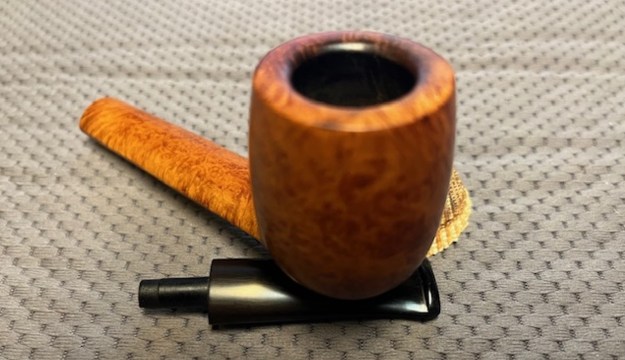
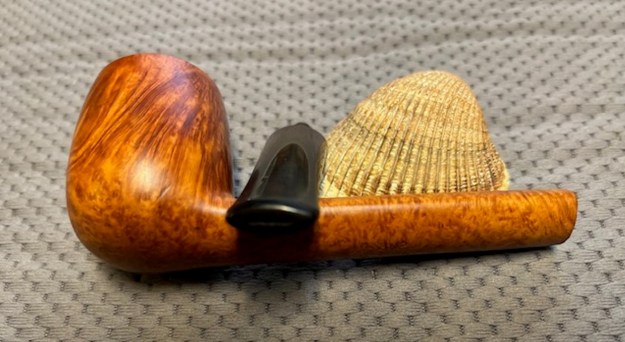
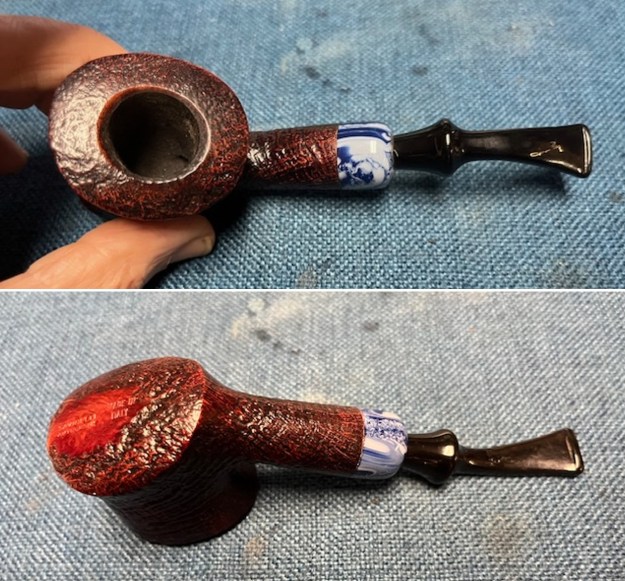 I took photos of the bowl and rim top to show the clean finish on the bowl. The photos show a moderate cake in the bowl and a very clean rim top. The stem photos show the condition of the taper stem ahead of the button.
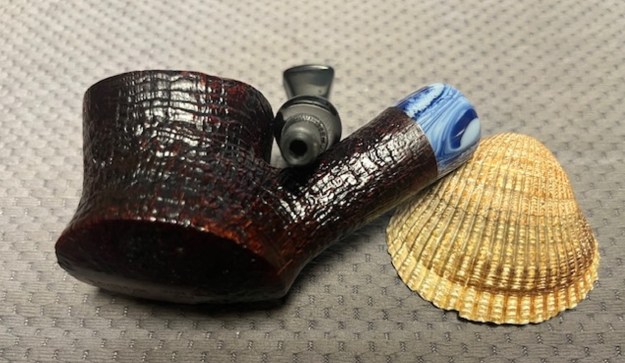
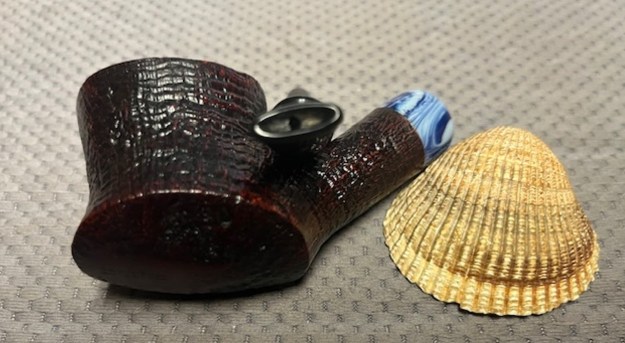
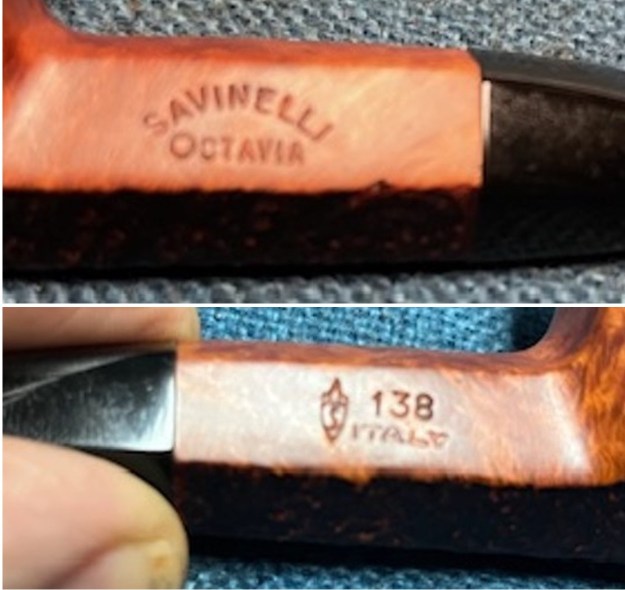
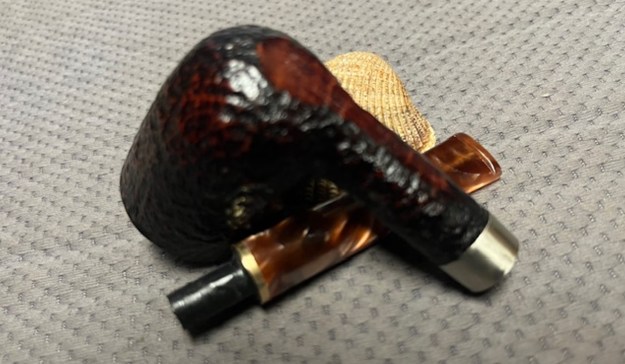
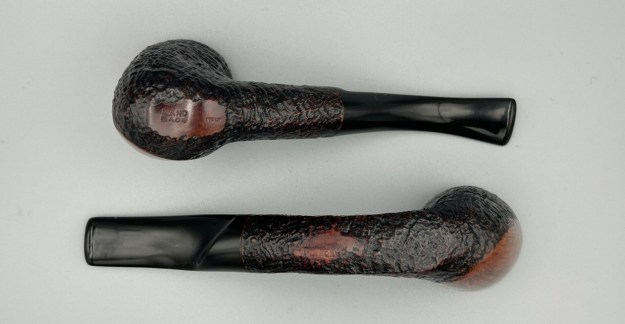
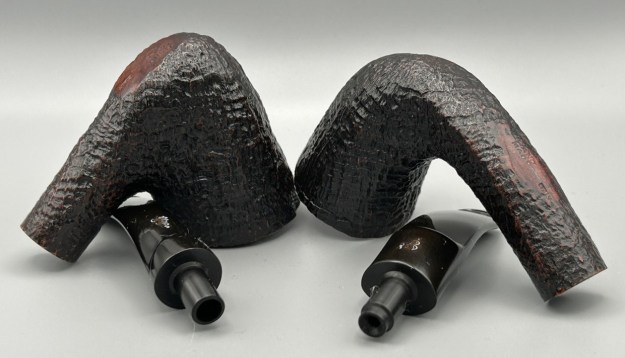
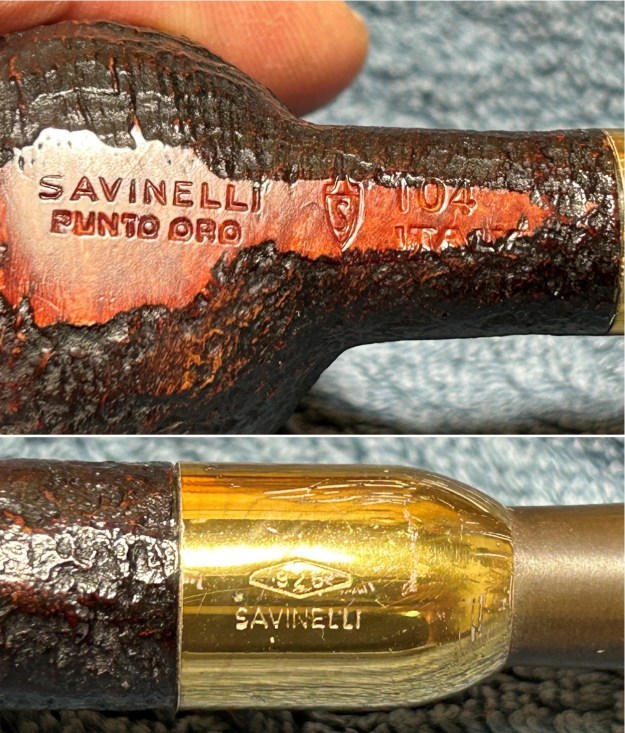
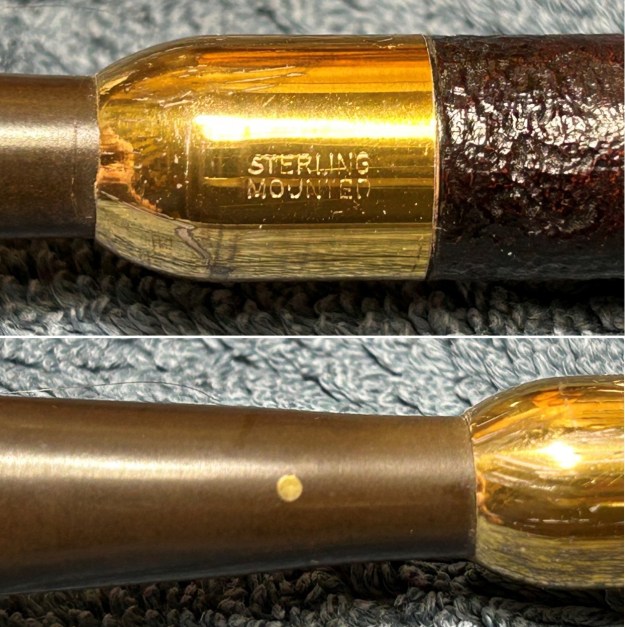
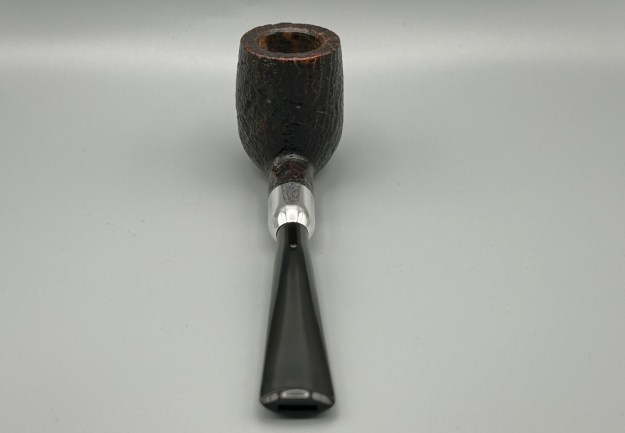
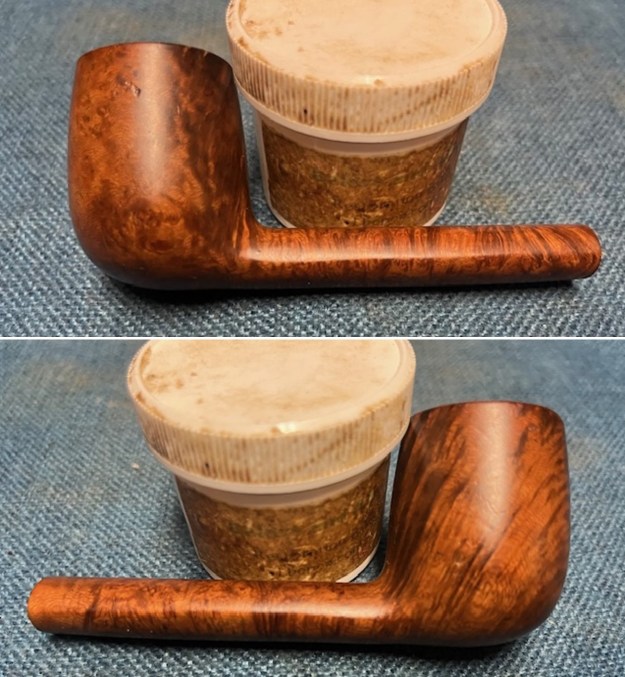
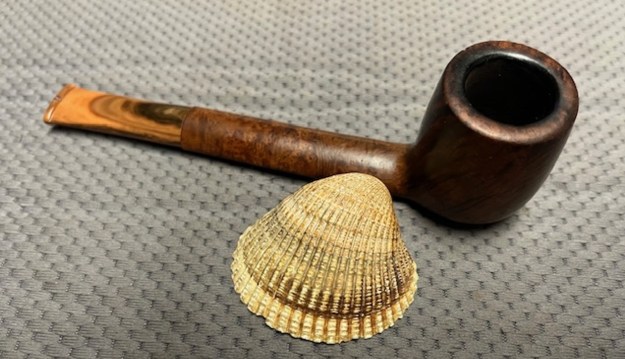
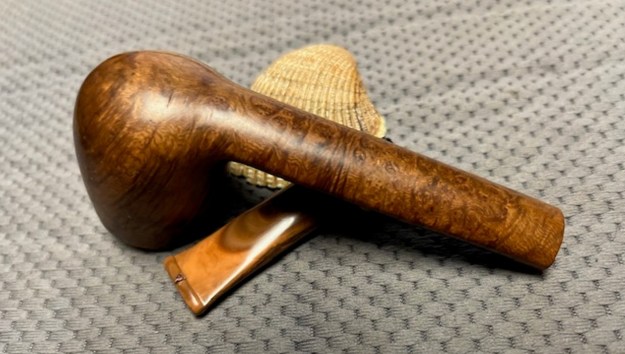
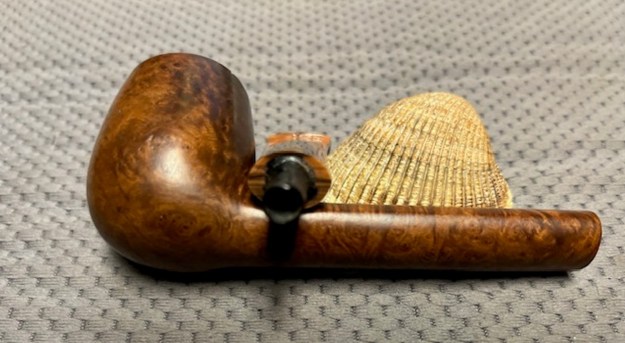
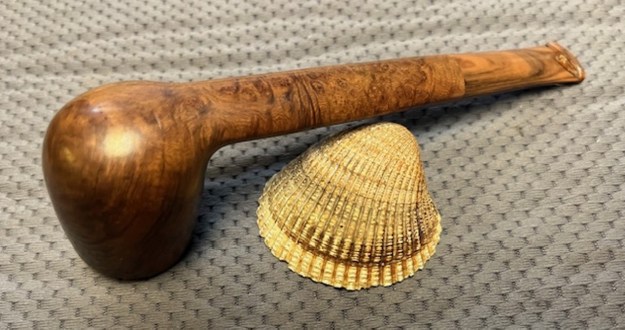
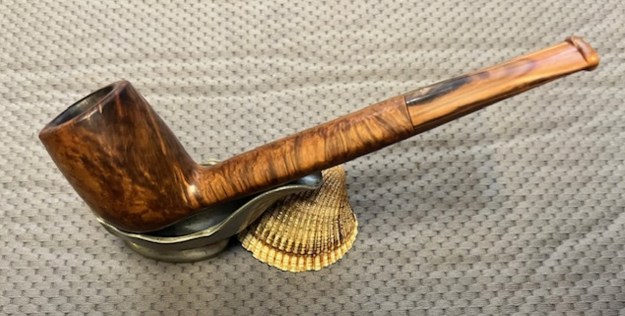
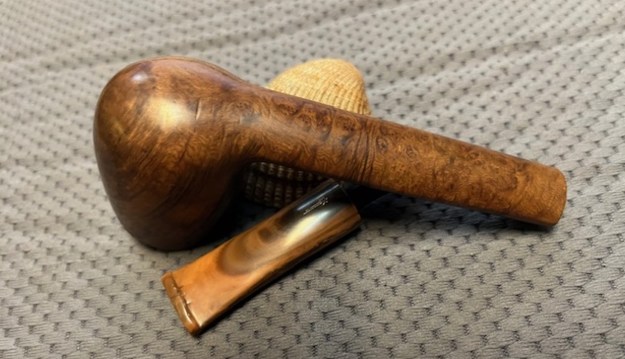
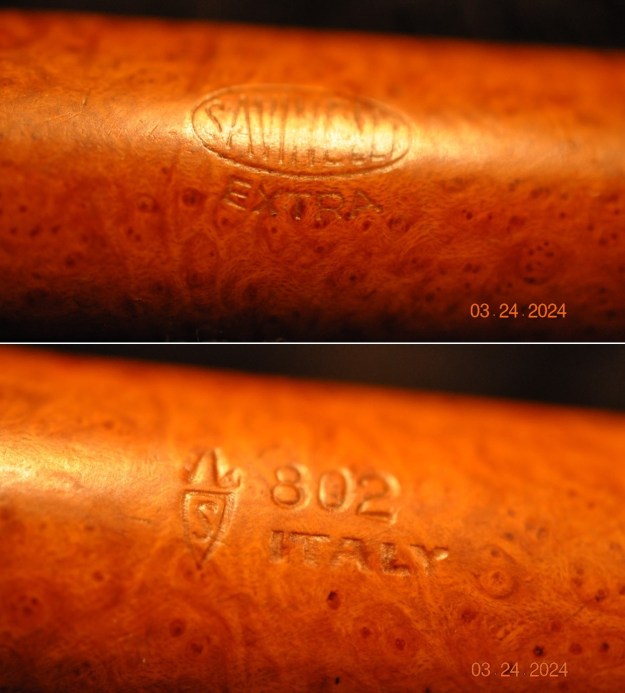
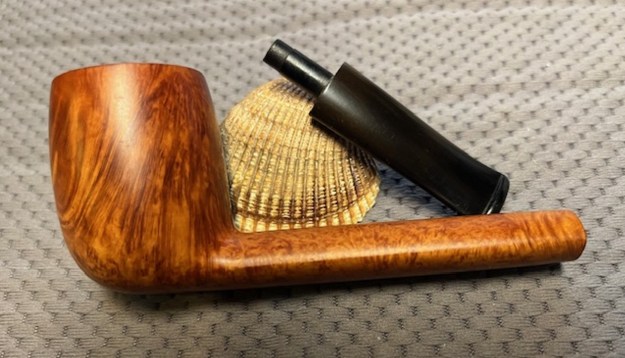
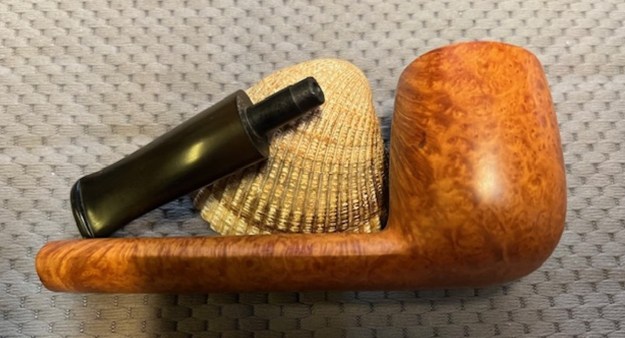
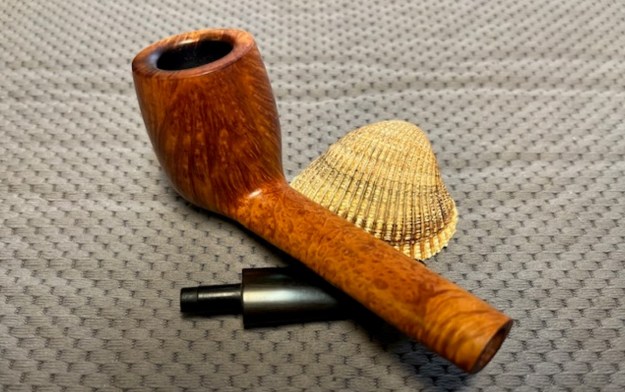
 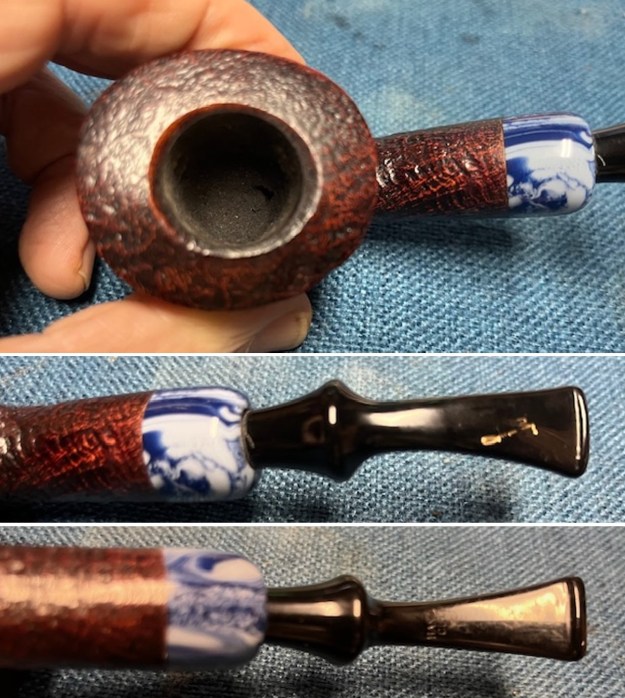 I took photos of the stamping on the left and underside of the shank. It is clear and readable as noted above. I removed the stem and took a photo of the pipe to give a sense of the proportions of the pipe.
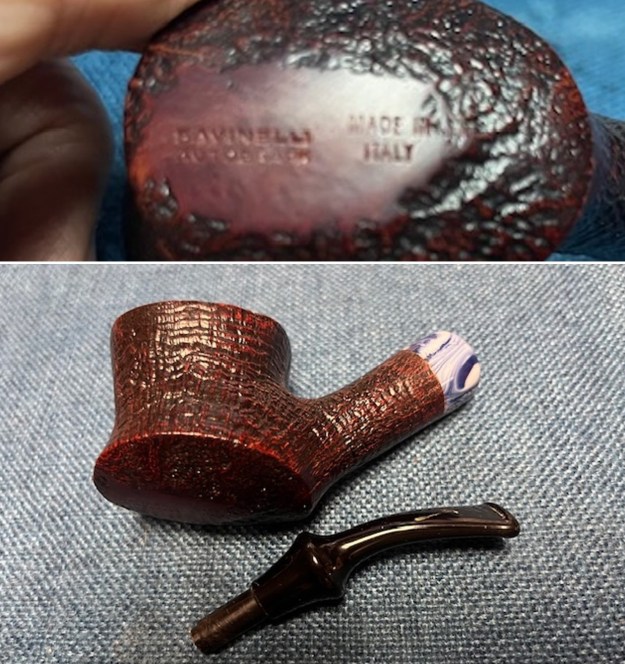 I wanted to remind myself a bit about the Autograph line from Savinelli so I reread a blog I had written on a previous Autograph restoration (https://rebornpipes.com/2019/01/05/restoring-a-savinelli-autograph-3-rhodesian-dublin-long-shank/). I quote a portion of the blog now:
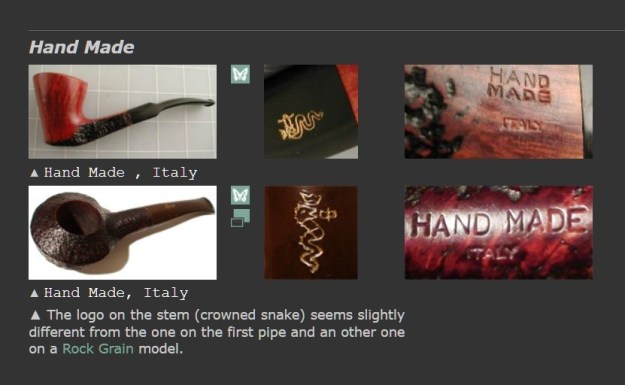
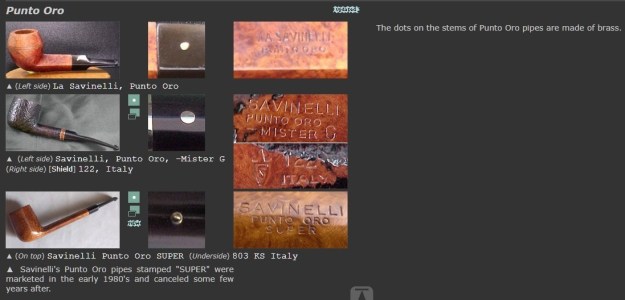
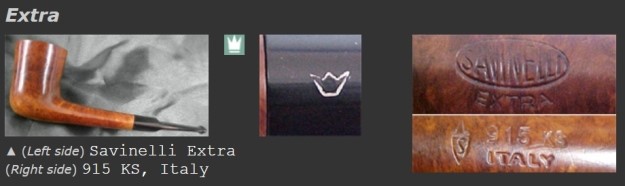
I turned first to the Pipephil website (http://www.pipephil.eu/logos/en/logo-savinelli1.html) to get a brief overview of the Autograph line. There I found out that the Autographs were hand made and unique. The Autograph Grading system is ascending: 3, 4, … 8, 0, 00, 000.
I turned then to Pipedia to get a more background on the Autograph line. I had the outline I needed from pipephil for the pipe but wanted more (https://pipedia.org/wiki/Savinelli). I quote in part from the article on that site.
While Savinelli’s serially produced pipes account for around 98% of annual production, the marque also creates a number of artisanal, handmade pieces as well. The Autographs, the Creativity line, and the Mr. A. line are all the result of Savinelli’s unique handmade process, with the Autographs reflecting the larger Freehand aesthetic, the Creativity line delving into more complex hand carving, and the Mr. A. line sidestepping the standard shape chart for remarkable and unusual pipes.
 All of the briar for Savinelli’s Autographs and other freehand pipes is sourced specifically for those pieces. While the majority of the marque’s serial production is made from extra grade ebauchon blocks, Savinelli keeps a separate supply of Extra Extra plateau blocks for Freehands. This variety of briar is much larger, and of a higher quality, which explains why so many Autographs and Savinelli handmades are naturally larger designs.
These handmade pieces are shaped much like traditional Danish Freehands: they are shaped first and drilled second. Using this method, Savinelli’s team of artisans is able to showcase their own creativity, as it maximizes flexibility and facilitates a more grain-centric approach to shaping. The resulting Freehand designs are at once both a departure from the marque’s classical standard shapes, yet very much still “Savinelli” in their nature—i.e. proportioned so that the bowl is the visual focus when viewed from the profile, juxtaposed by the comparatively trim lines of the shank and stem. To provide a little more insight into the differences between Savinelli’s standard production and freehand lines, Luisa Bozzetti comments:
“When we choose to make Freehand pipes we must stop production on the standard shapes. The process for Freehands is much more involved and takes much more time. Finding the best people from the production line and pulling them to make Freehands is challenging since it’s not an assembly line, but rather a one or two man operation.
After the rough shaping of the stummel, we must get together and brainstorm which style of stem will be paired before the pipe can be finished since we do not use pre-shaped stems. All accents and stems for the Freehands are cut from rod here in the factory. A lot of care goes into the few pieces lucky enough to make the cut; to end up with a certain number of Autographs, for instance, means that many, many more will be made, and only the few will be selected.”
The quality control process for Savinelli handmades is even more rigorous than that employed in the standard lineup. Many blocks are started and later discarded because of pits or defects. While Savinelli’s briar sourcing is a constant process, working with some of Italy’s top cutters to ensure only the finest and most suitable blocks make their way to the factory, it’s impossible to source plateau briar that’s completely free from flaws. That’s just nature. Savinelli creates the standard for quality by working through the rough (a very high-quality rough, mind you) to find that shining diamond with the potential to become a Savinelli handmade.
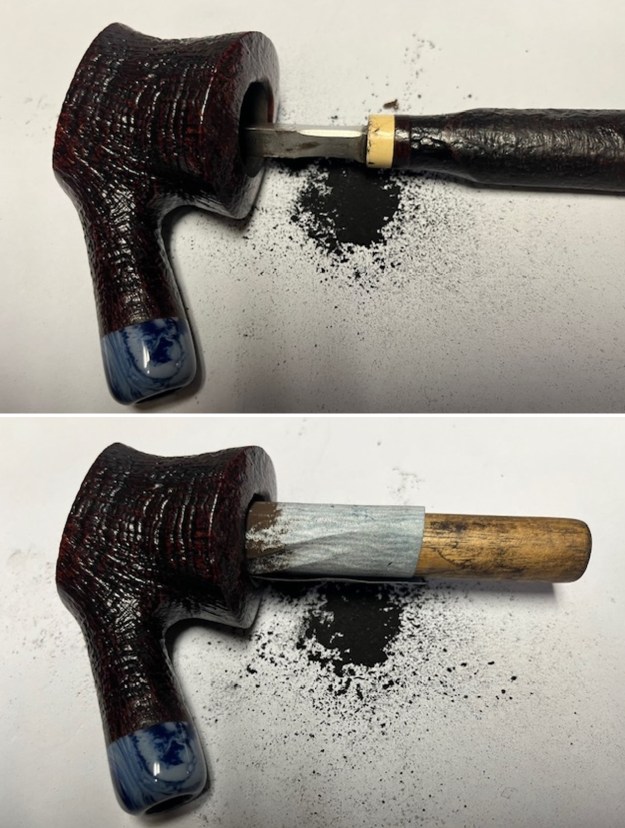
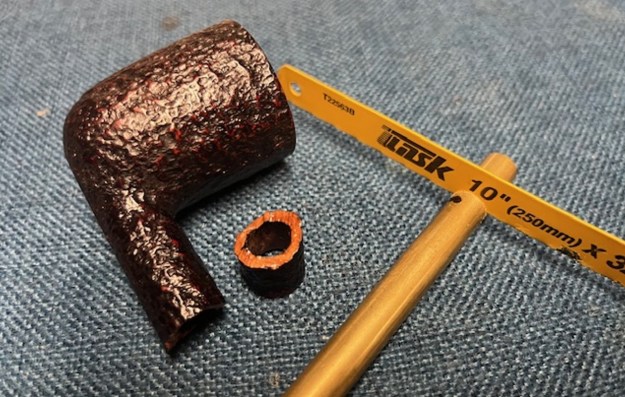
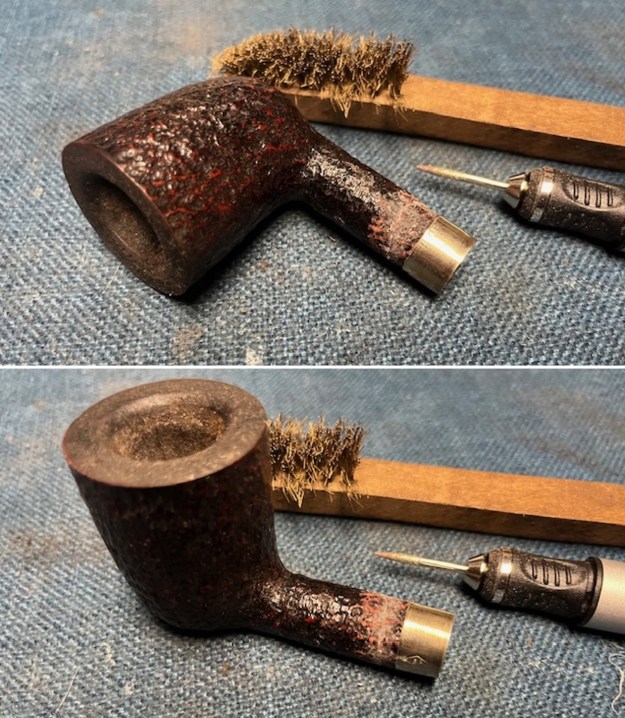
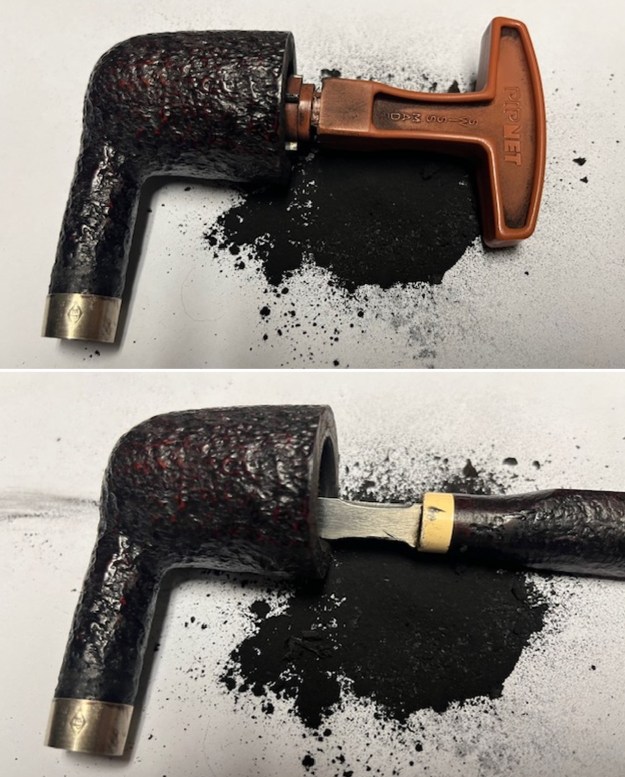
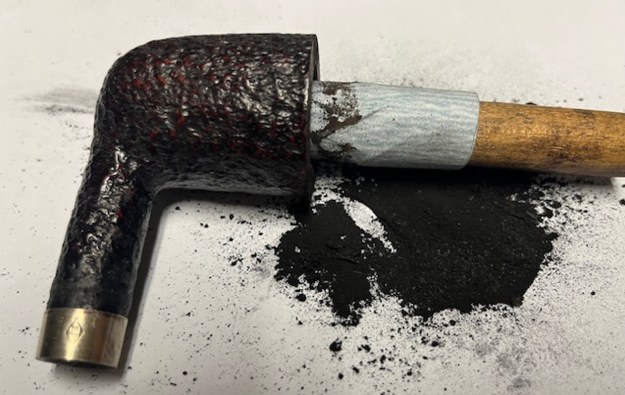
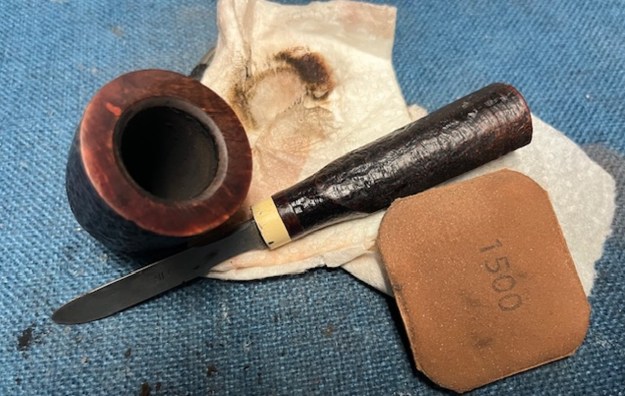
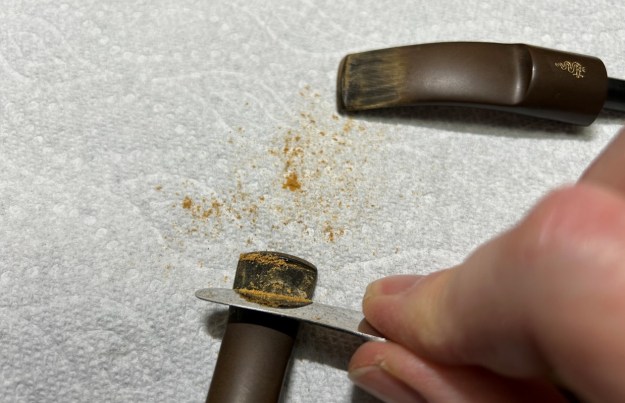
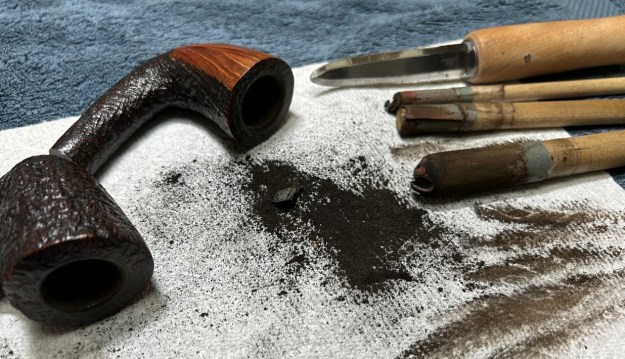
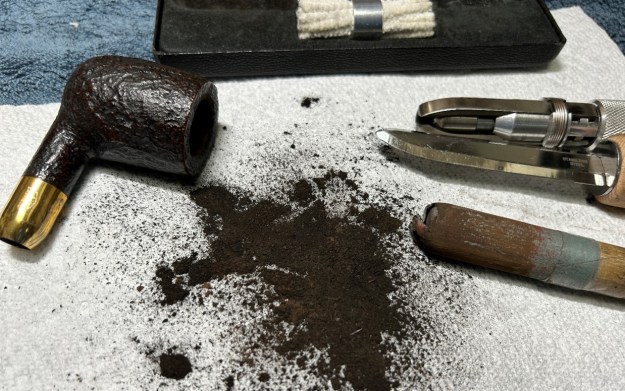
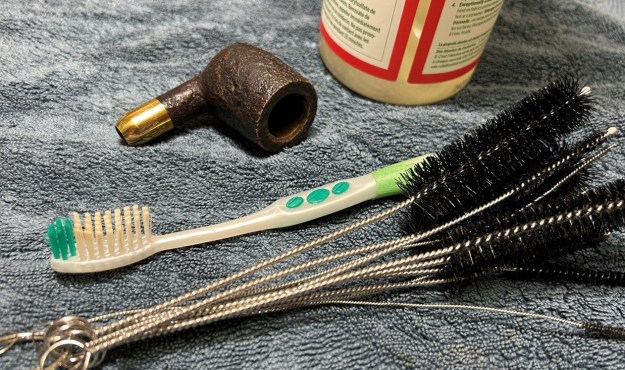
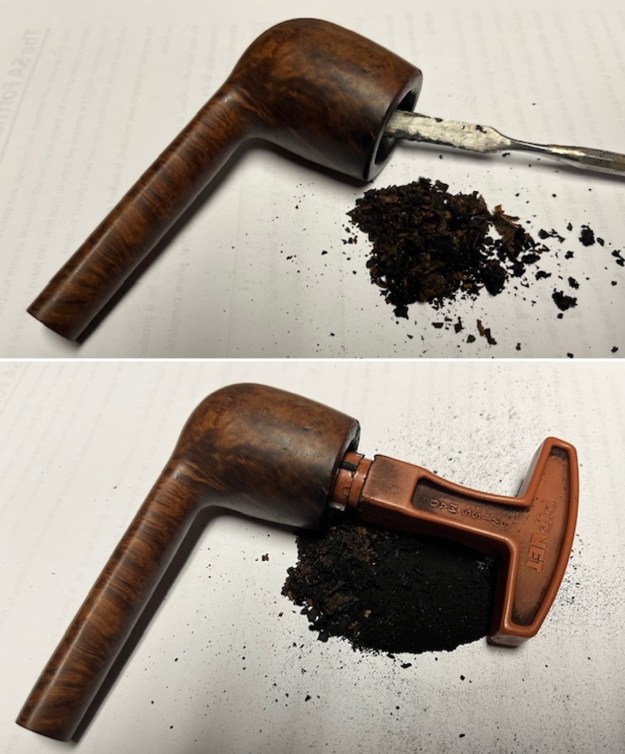
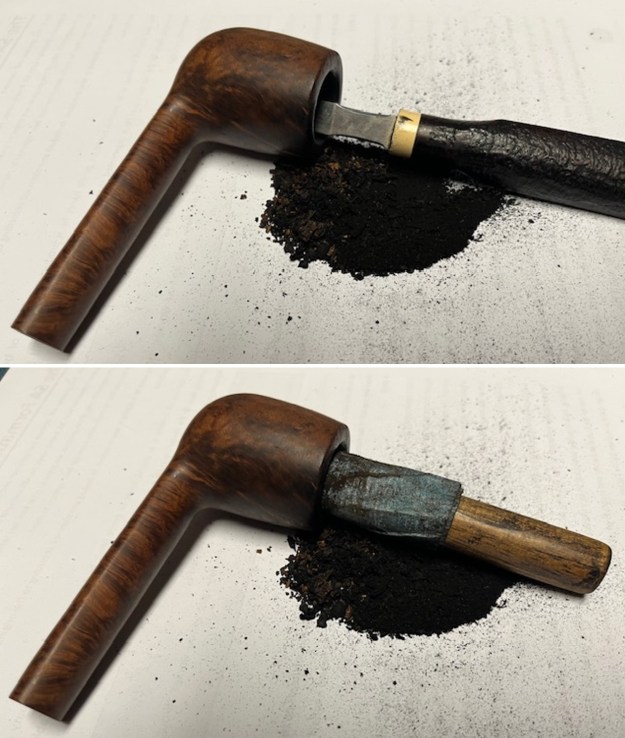
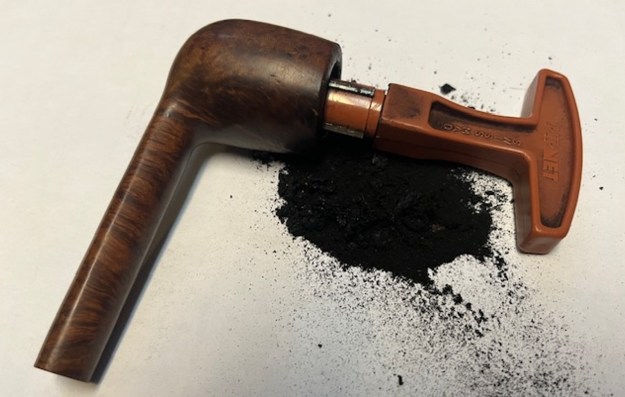
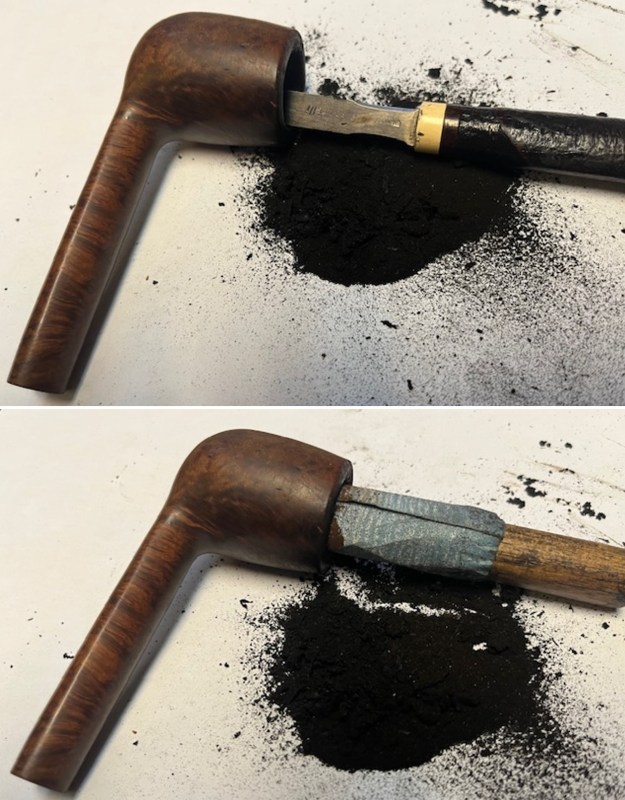
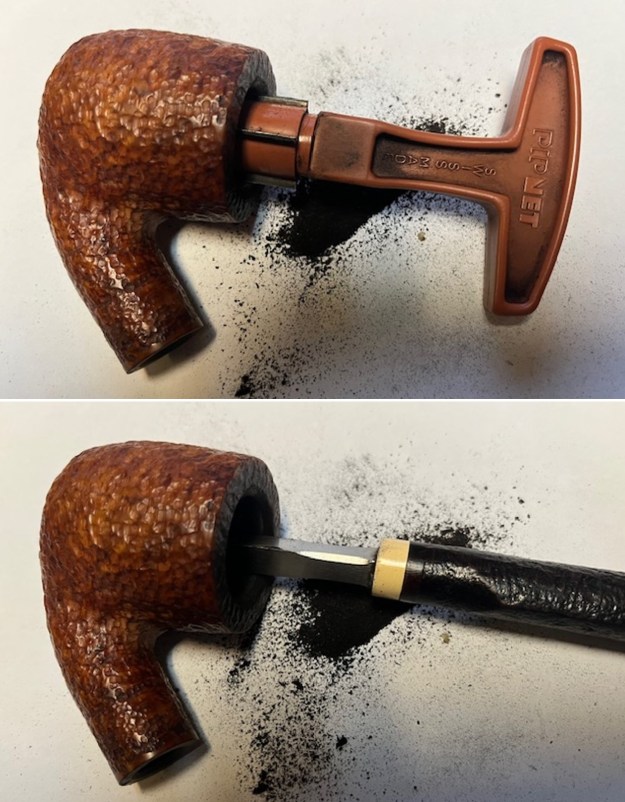
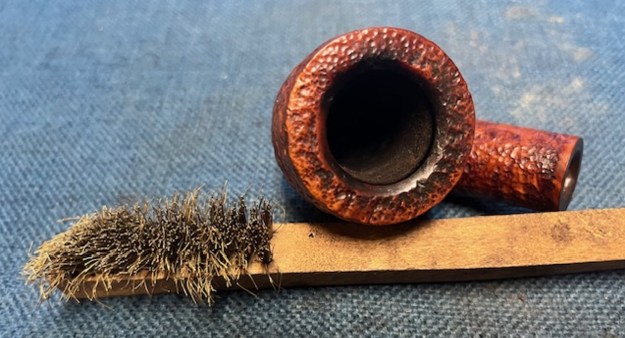
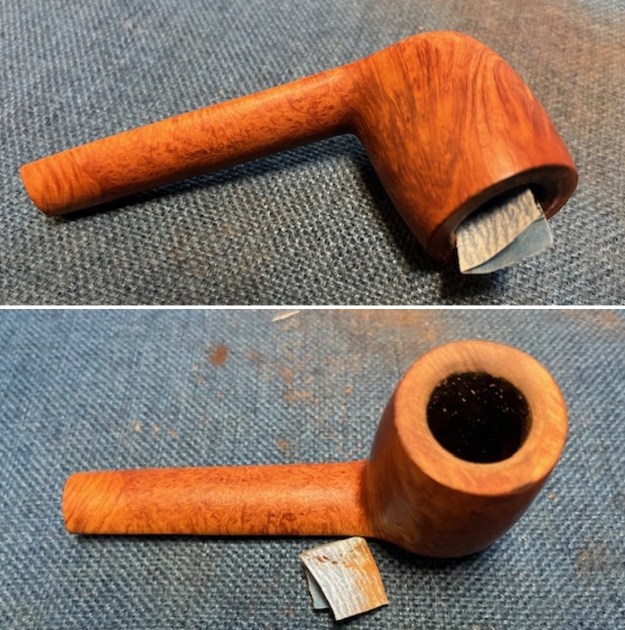
I turned to work on the pipe itself. I reamed the bowl with a PipNet pipe reamer using the cutting heads 2 and 3. I finished the reaming with a Savinelli Fitsall Pipe Knife. I sanded the walls of the bowl with 220 grit sandpaper wrapped around a piece of dowel. I turned to work on the pipe itself. I reamed the bowl with a PipNet pipe reamer using the cutting heads 2 and 3. I finished the reaming with a Savinelli Fitsall Pipe Knife. I sanded the walls of the bowl with 220 grit sandpaper wrapped around a piece of dowel.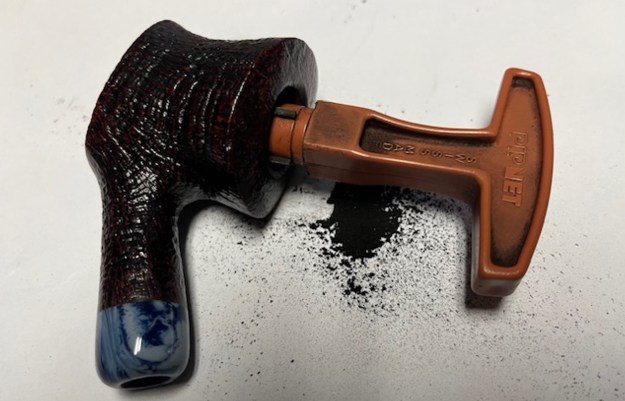
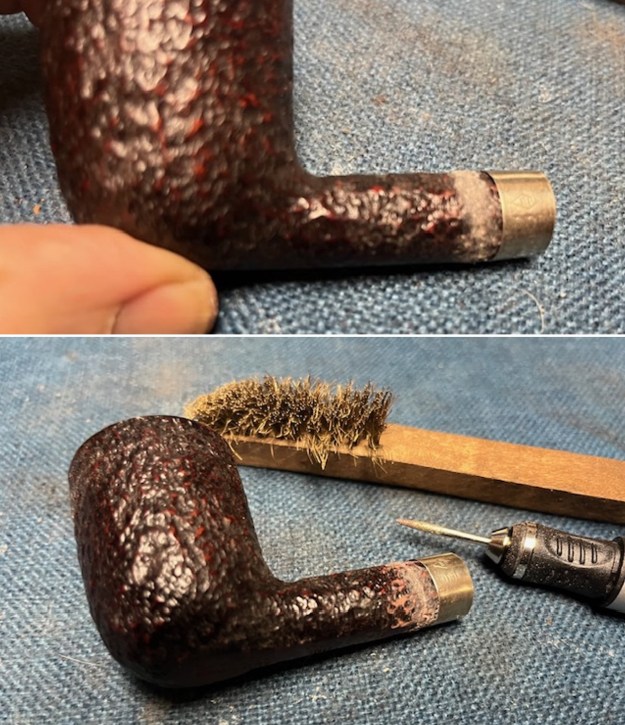
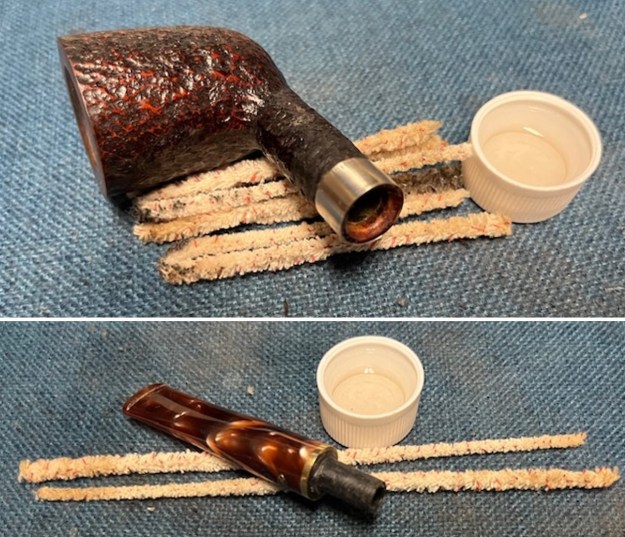
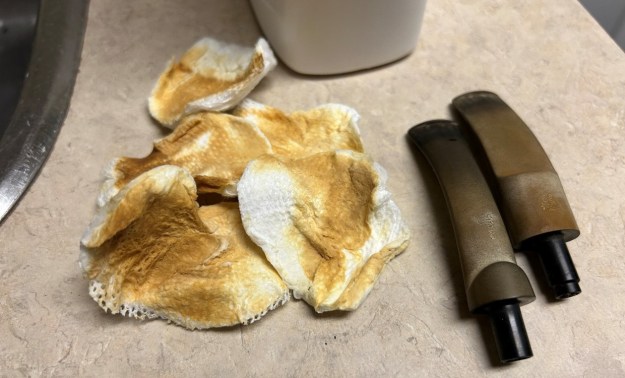
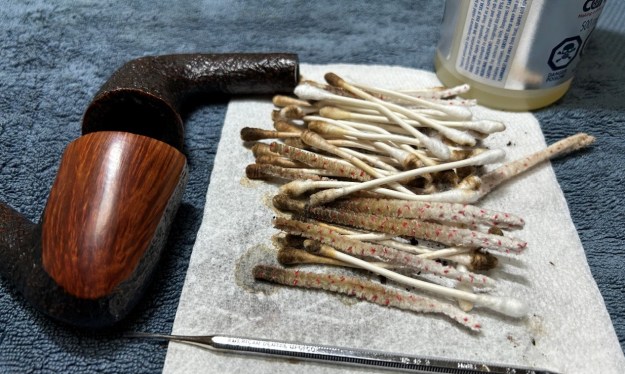
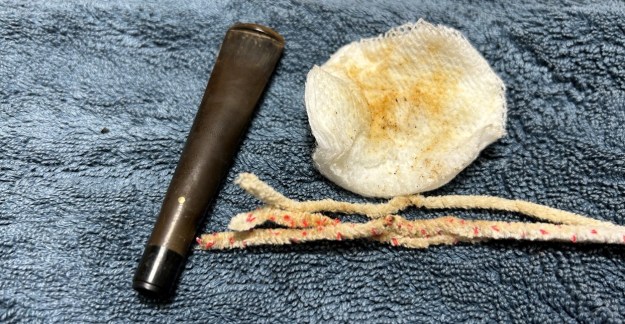
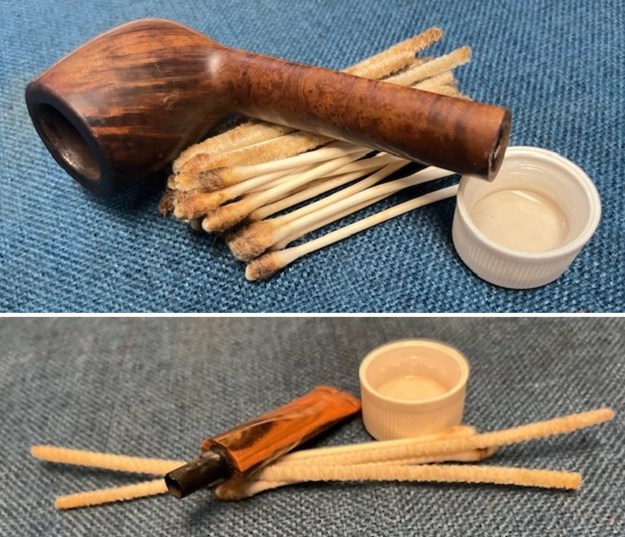
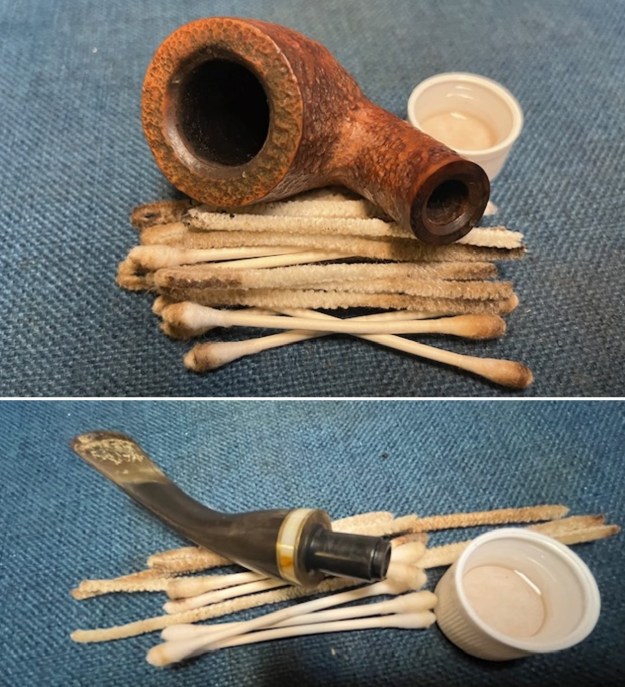
 I then thoroughly cleaned the bowl walls, shank and the airway in the stem. I used cotton swabs, pipe cleaners (both bristle and regular) and Isopropyl alcohol.
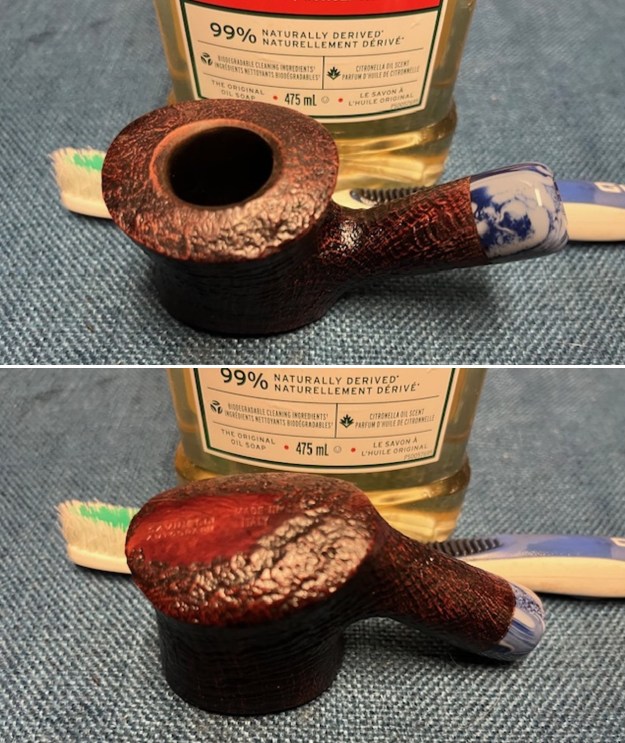
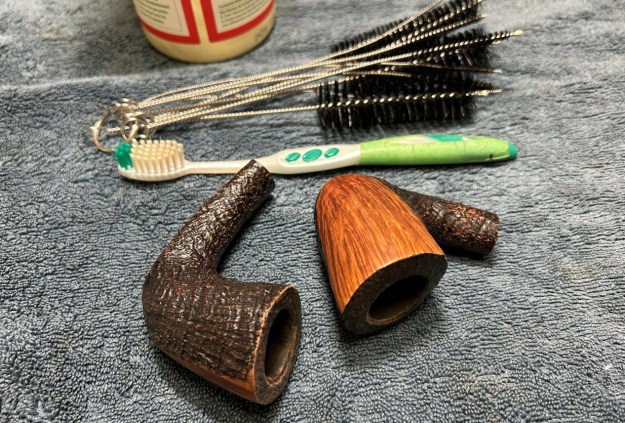
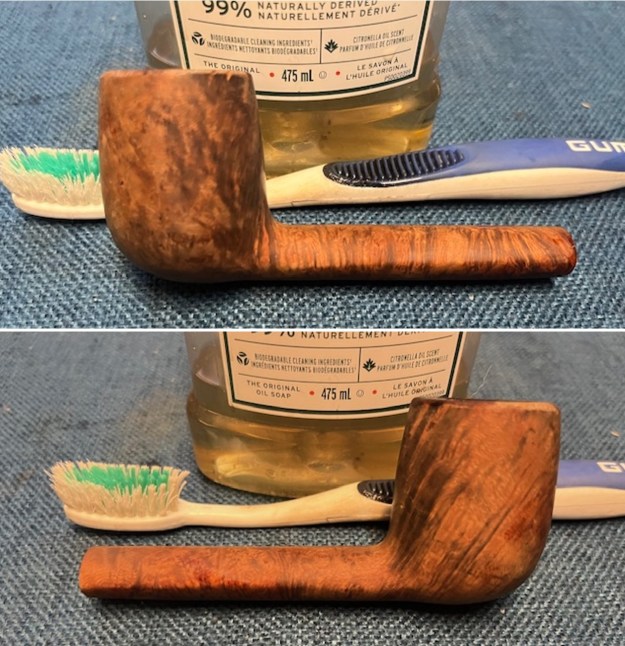
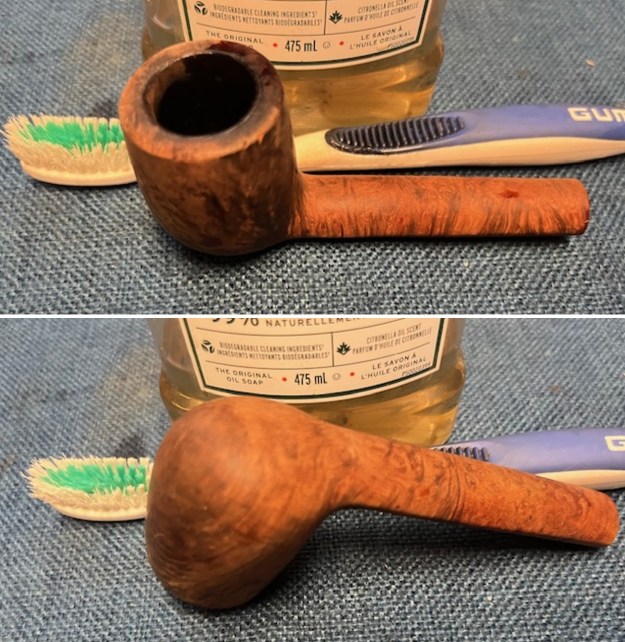
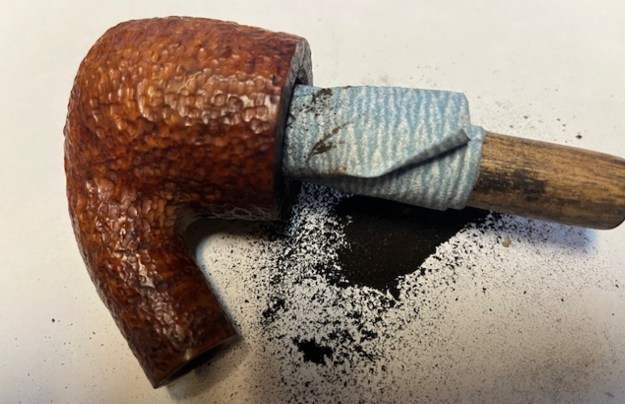
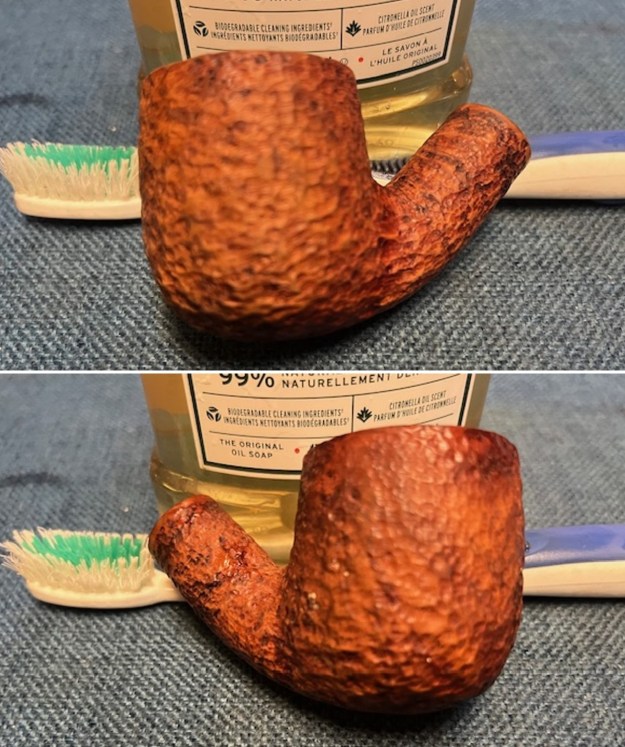
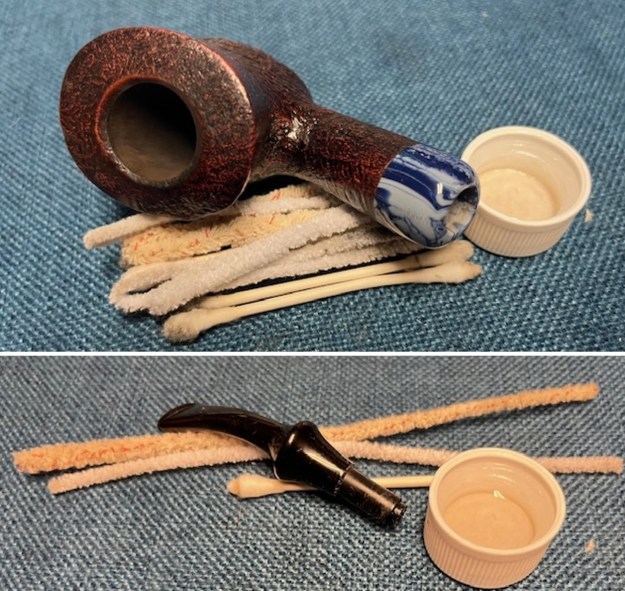 I scrubbed the bowl and shank with a tooth brush and some undiluted Murphy’s Oil Soap. I rinsed it off with warm water to remove the dust and soap from the finish. I dried it off with a soft cloth and it looked much better.
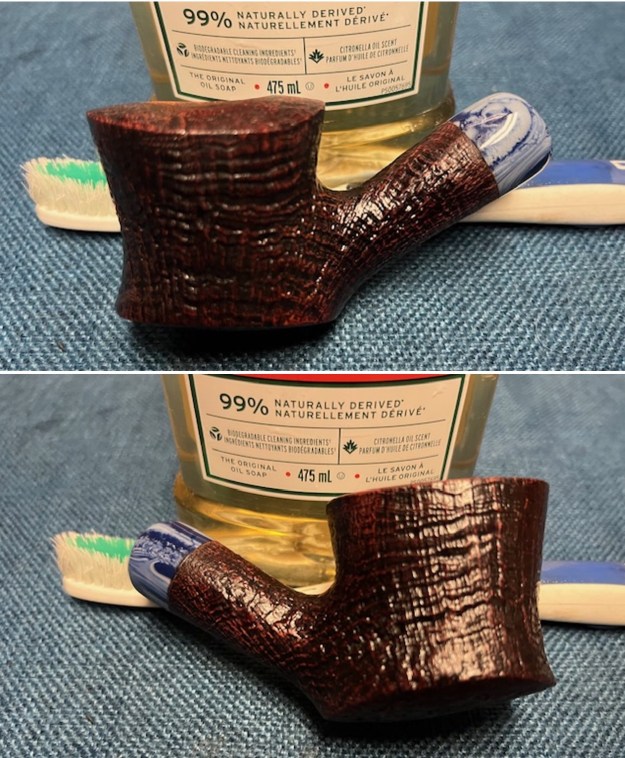
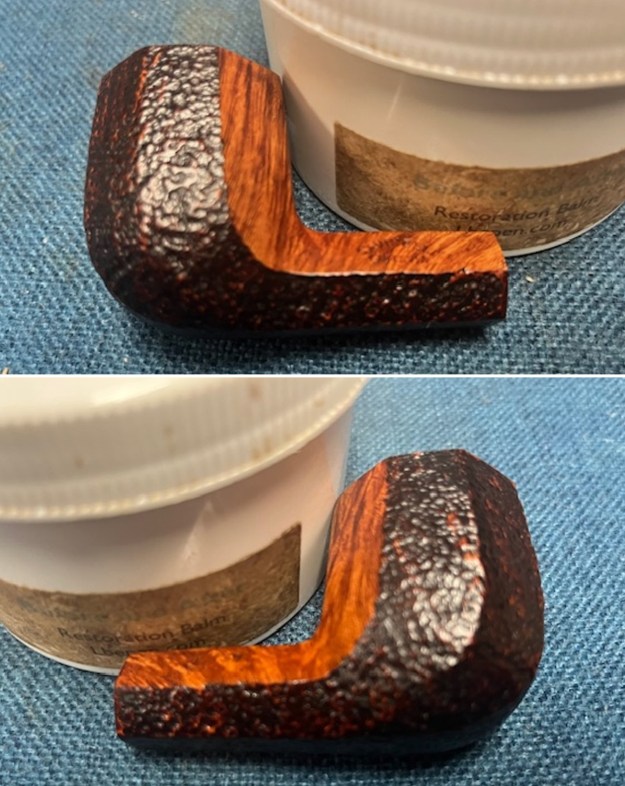
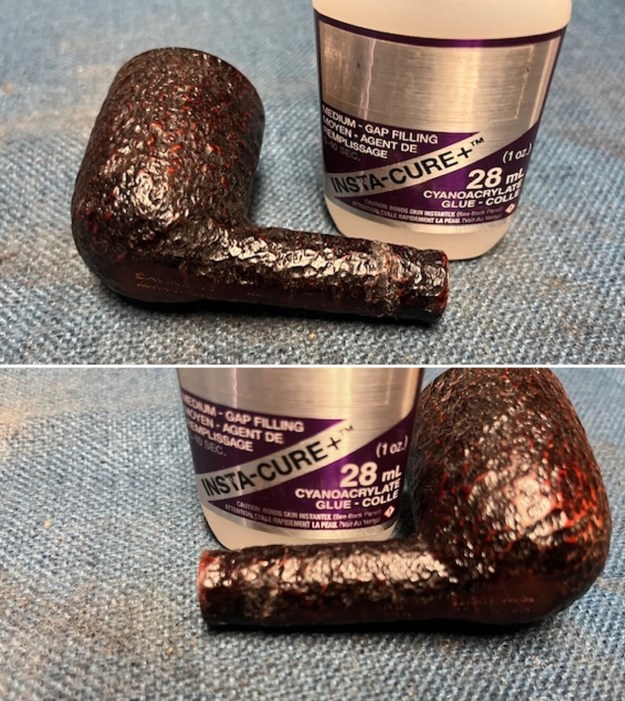
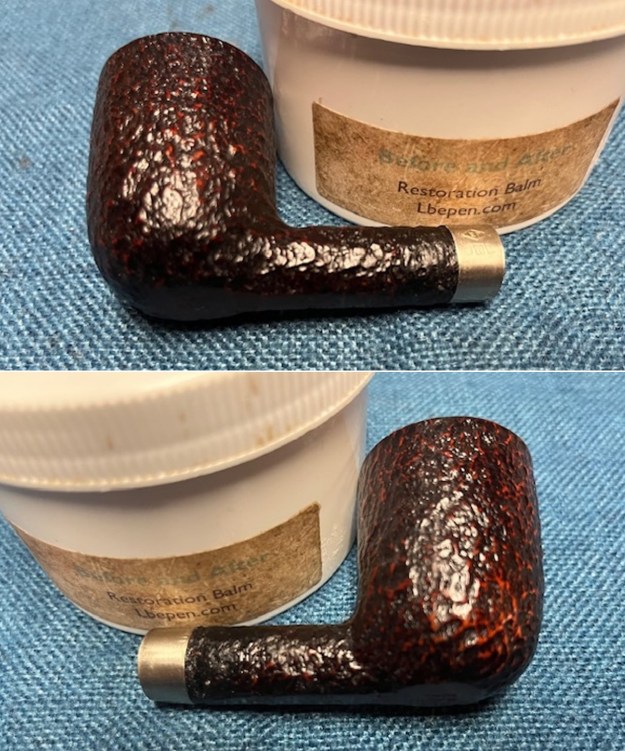
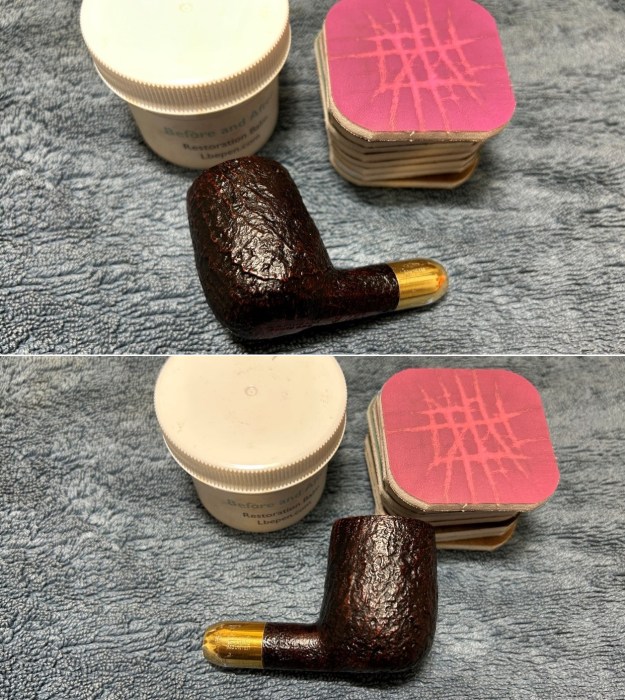
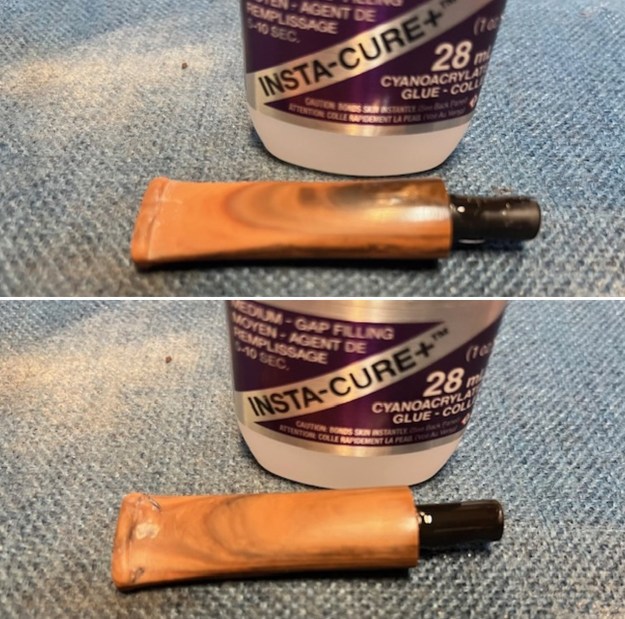
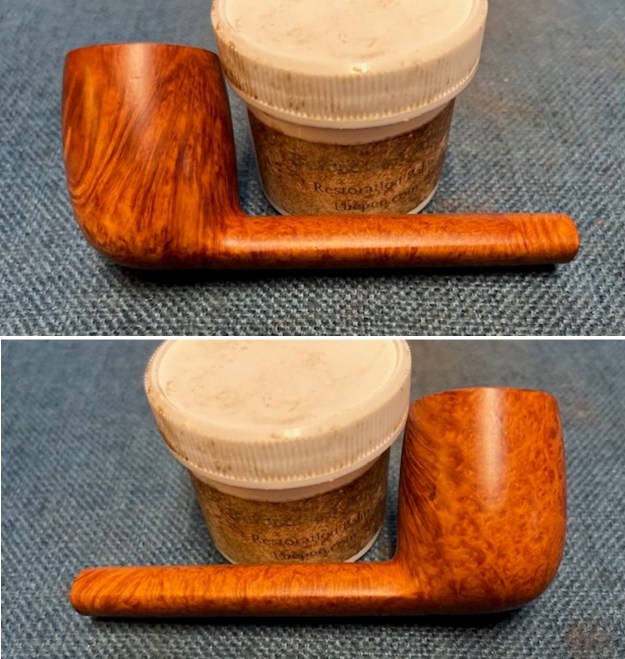
 I rubbed the briar down with Before & After Restoration Balm. I worked it into the briar with my fingertips to work it into the finish. The product works to clean, enliven and preserve the briar. I let it sit for 10 minutes then I buffed it with a cotton cloth to deepen the shine. The briar really comes alive with the balm.
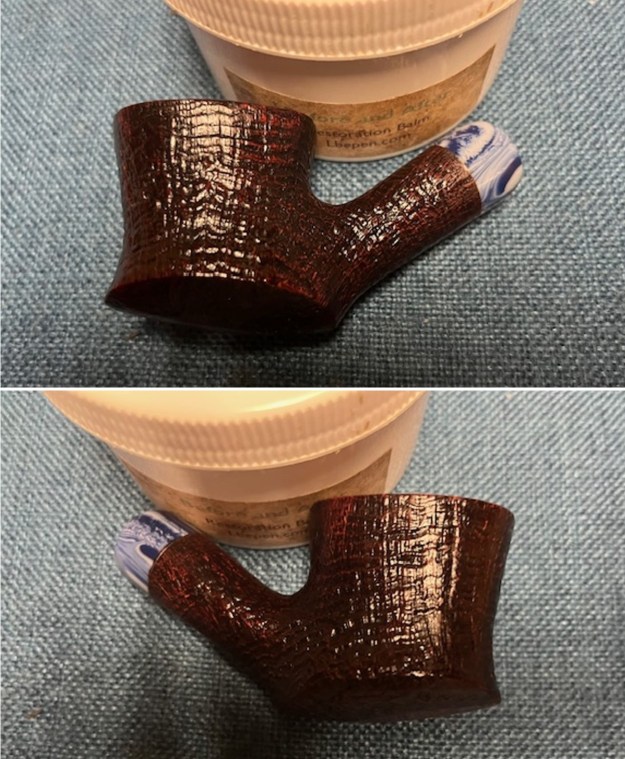
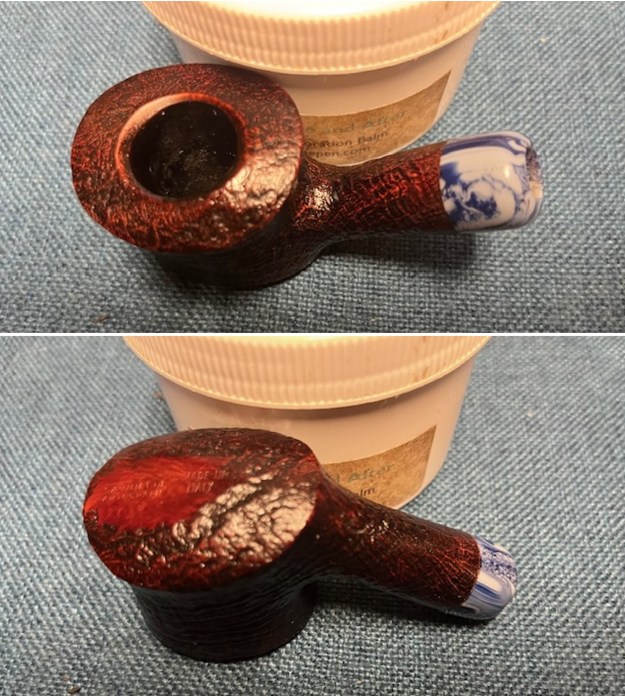
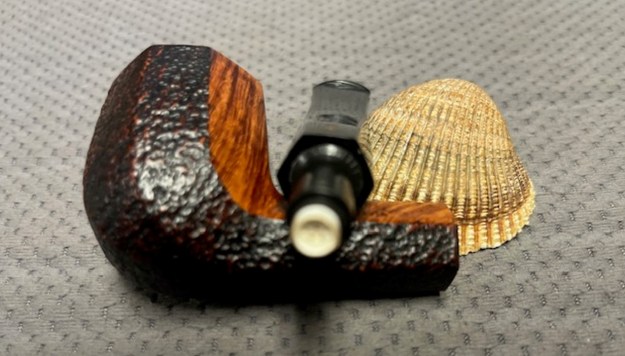
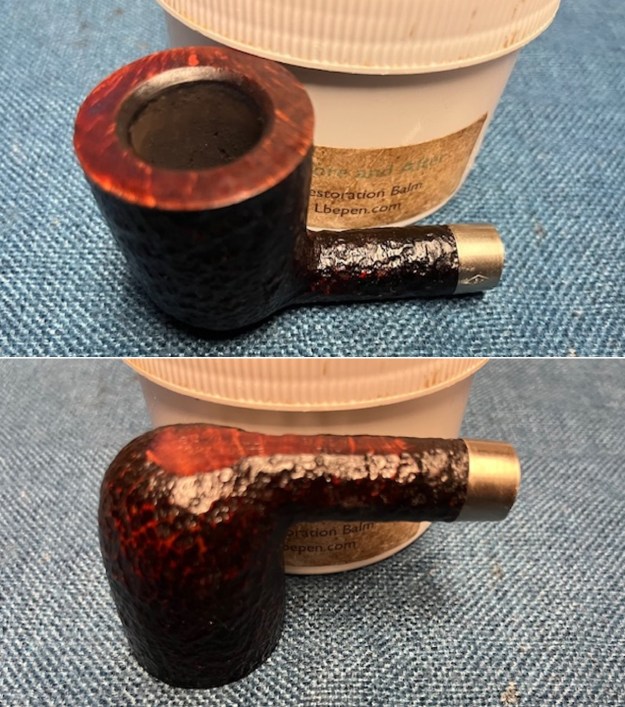
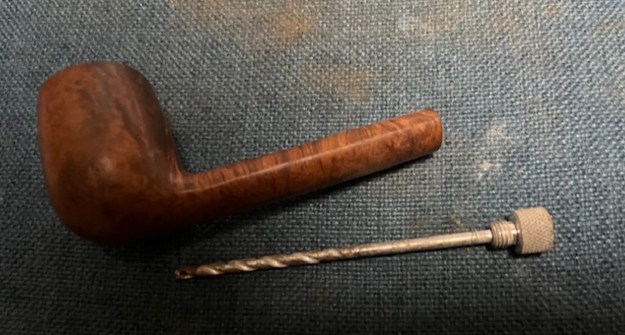
 I examined the cleaned walls of the bowl and found a divot on the left side of the bowl half way down across the side. I could feel it with my fingers. I wiped the bowl clean with a cotton pad and alcohol to remove any debris on the surface. I mixed a batch of JB Weld to repair the divot on the bowl wall. I pressed it into the damaged area with a tooth pick and a dental spatula. I set the bowl aside for the repair to cure.
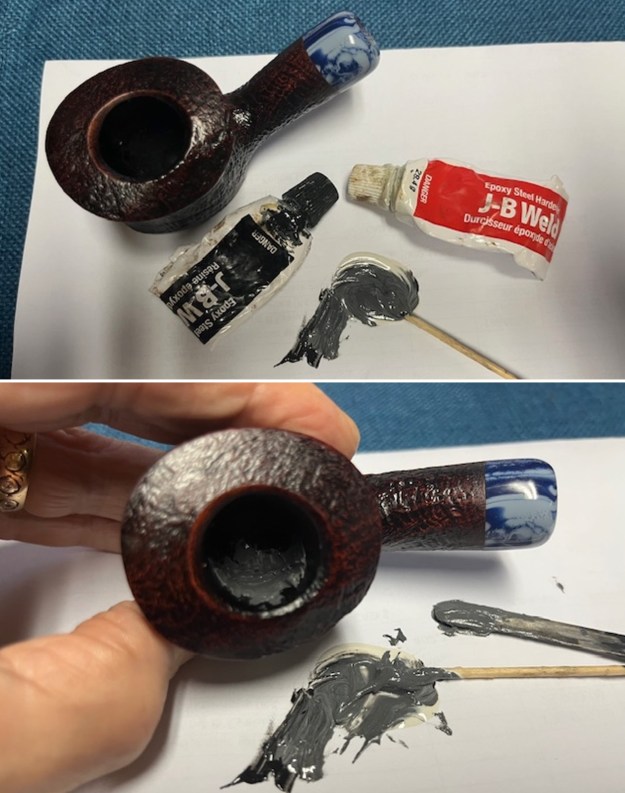
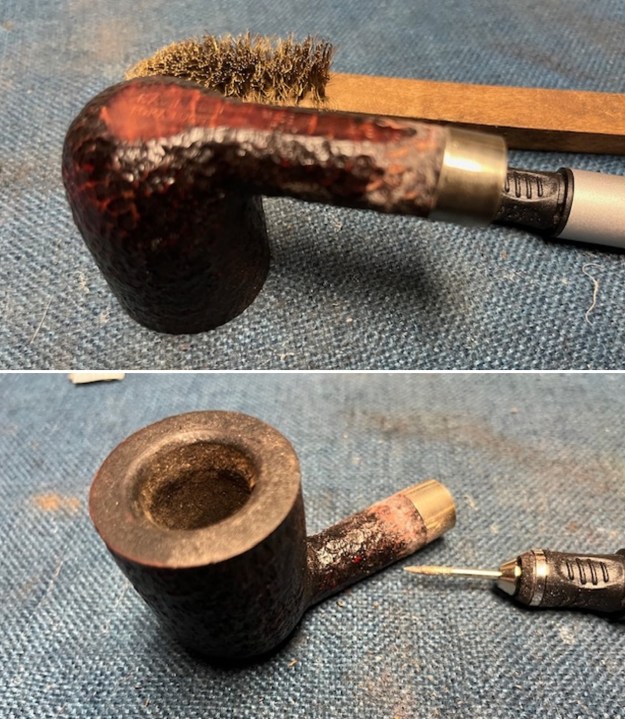
 Once it cured I sanded it smooth with a piece of 220 grit sandpaper wrapped around a piece of dowel to smooth out the repair. I wiped it down with a damp pad to remove the sanding debris.
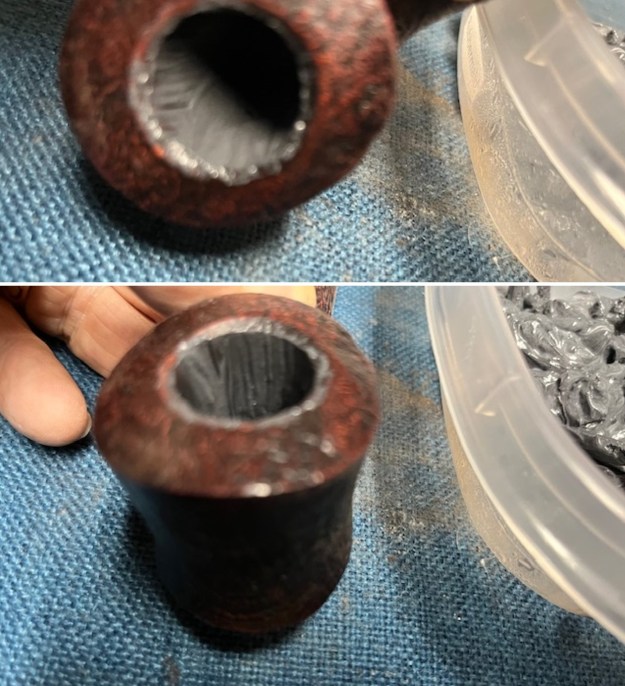
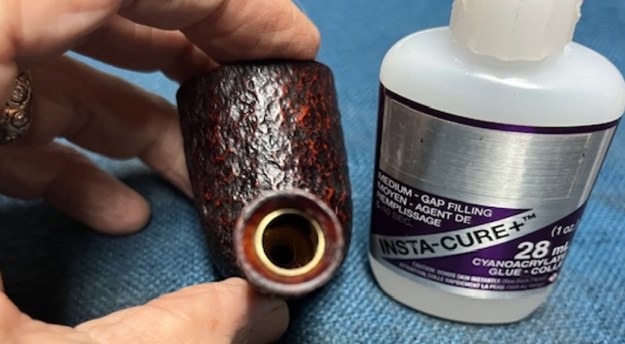
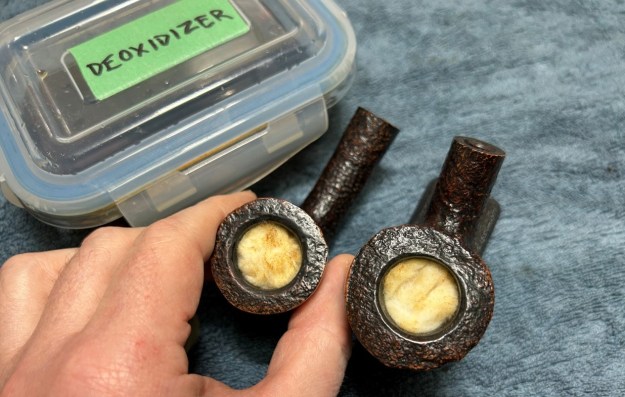
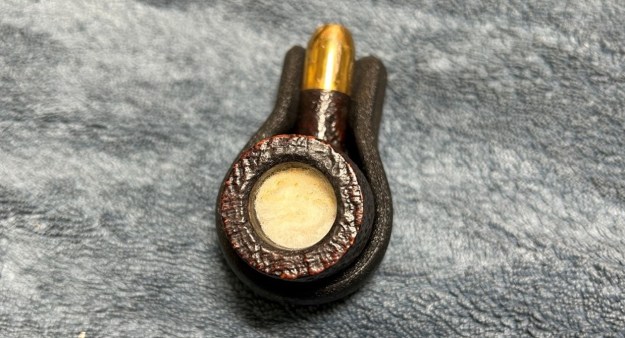
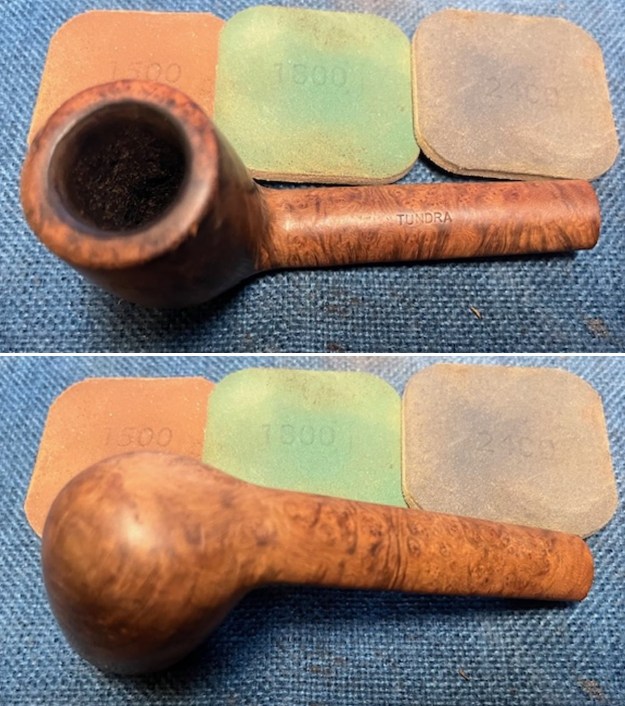
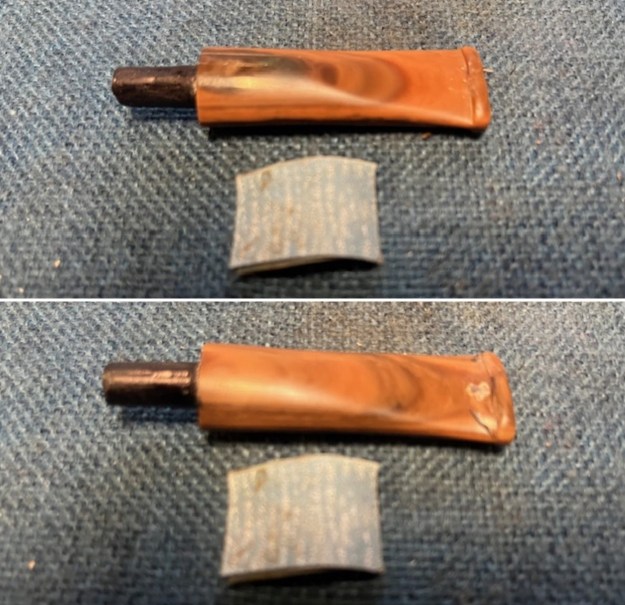
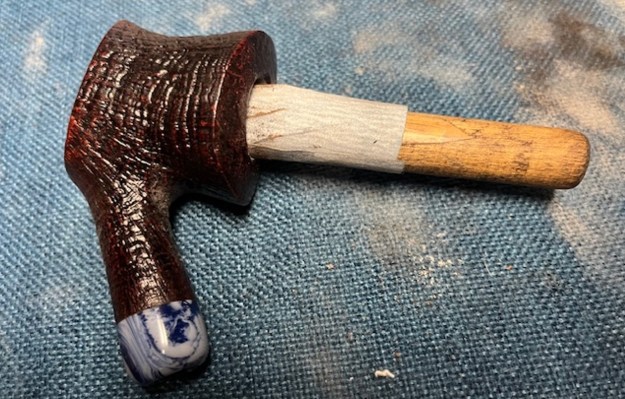 I mixed a bowl coating of sour cream and activated charcoal powder. I inserted a pipe cleaner in the airway entrance to the bowl to keep it open. I applied it to the walls of the pipe with a folded pipe cleaner and repeated it until I had the walls thoroughly covered.
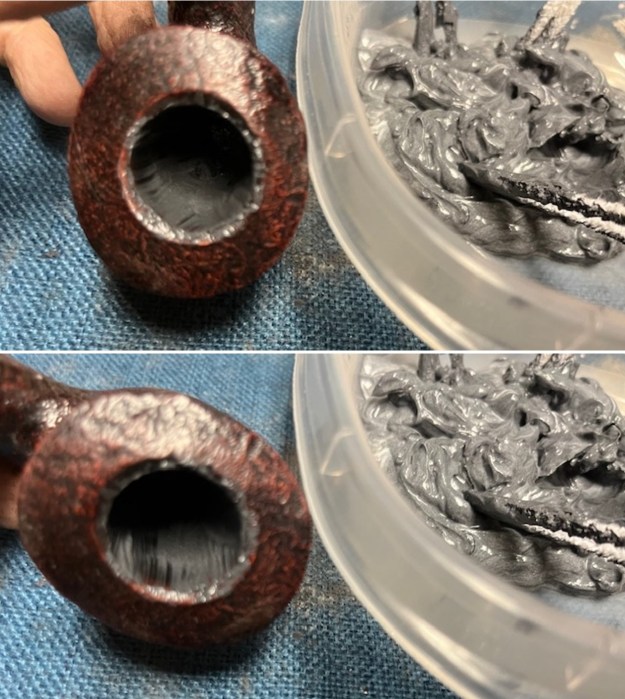
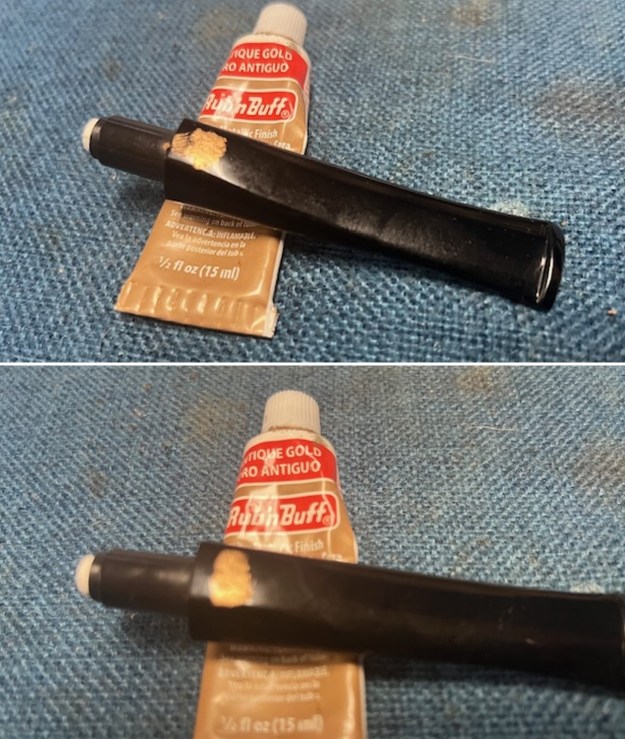
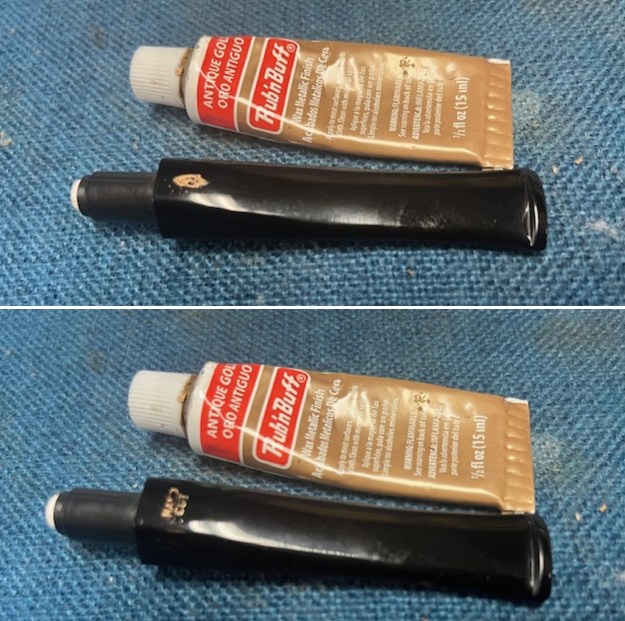
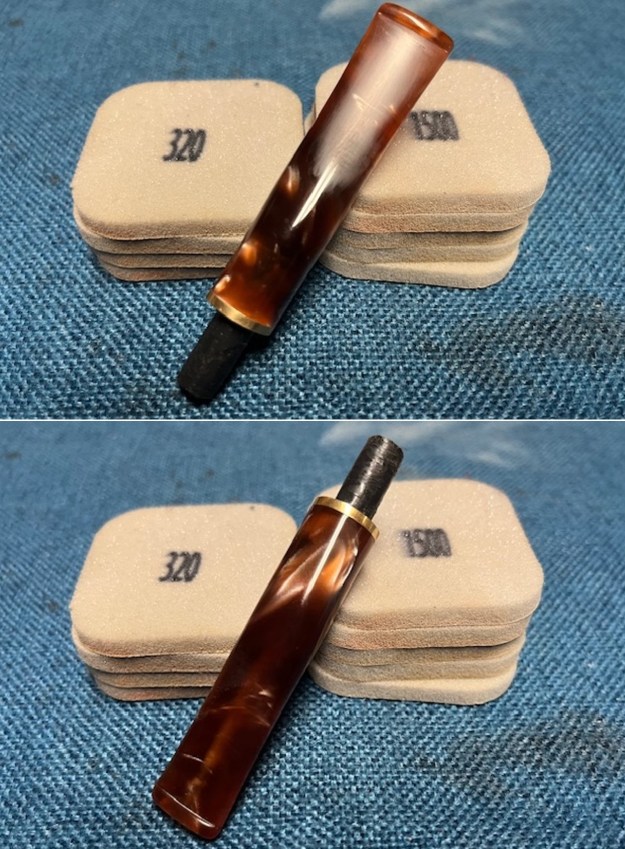
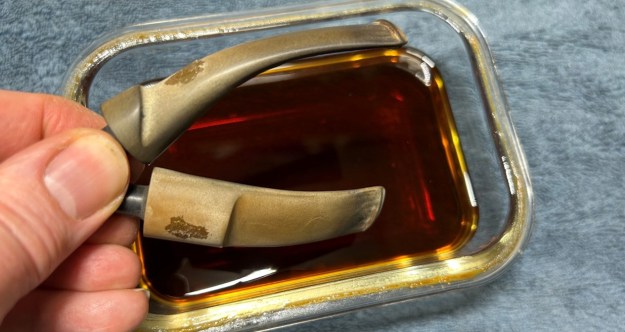
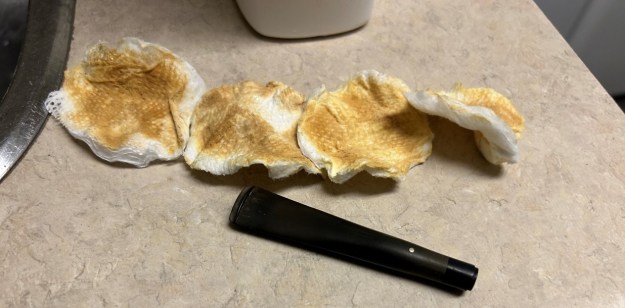
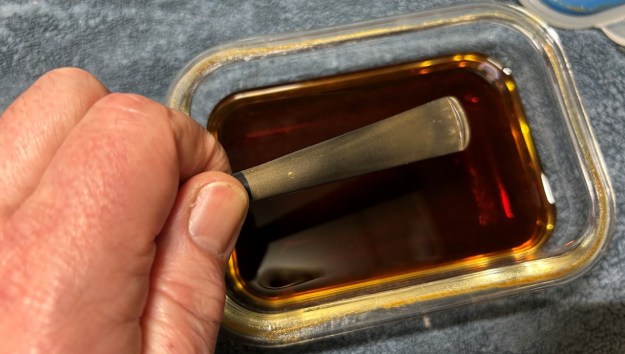
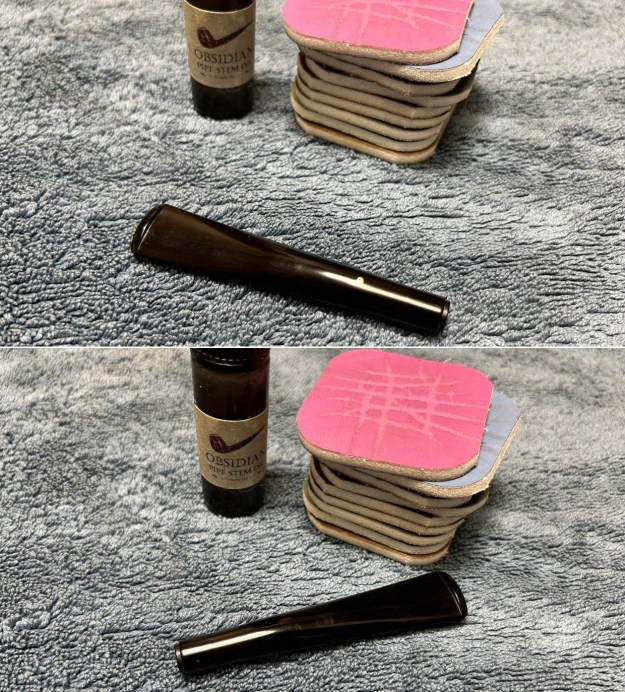
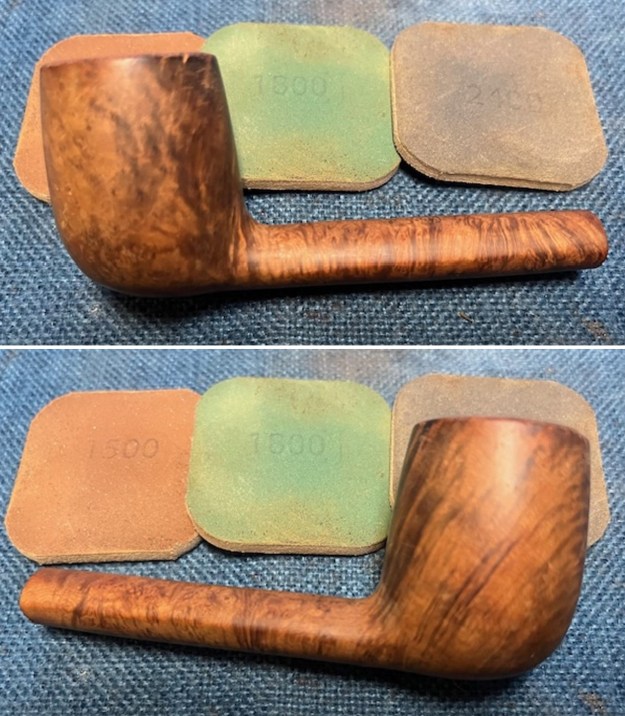
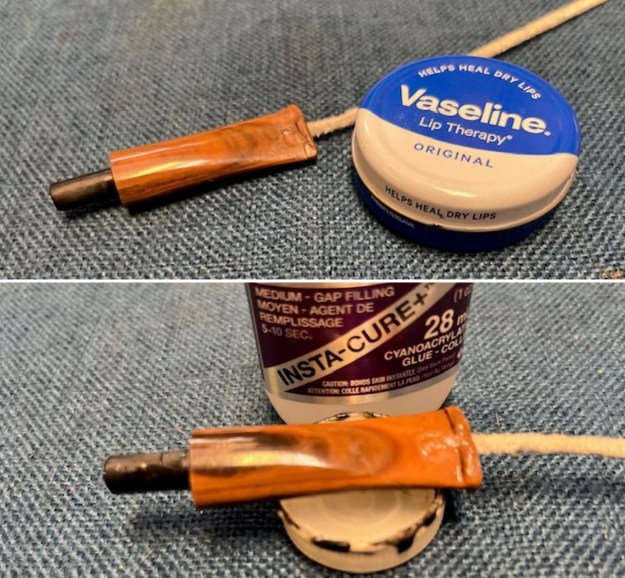
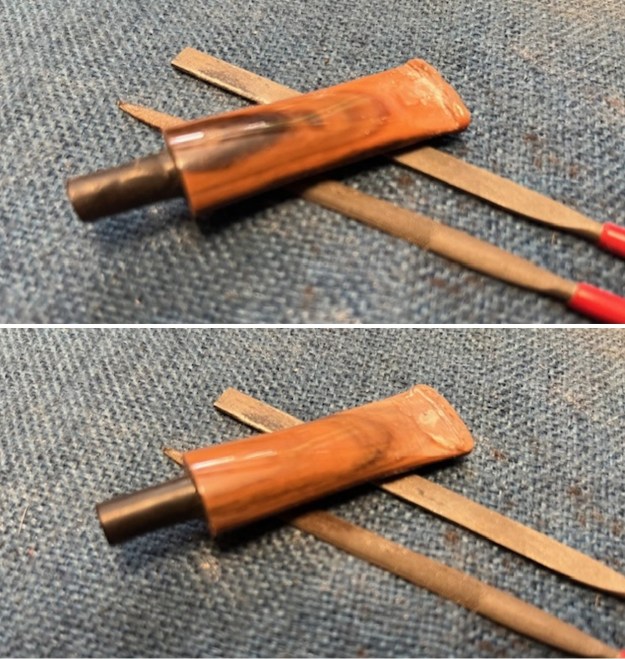
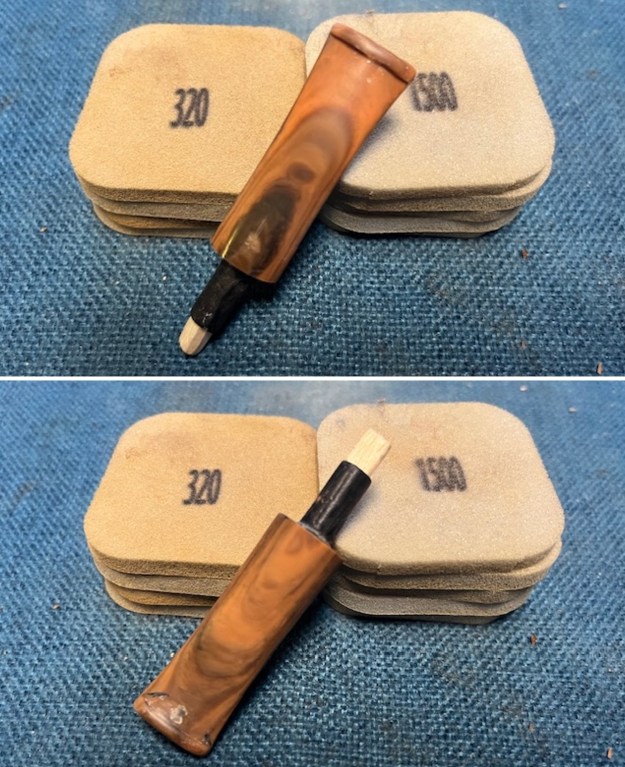
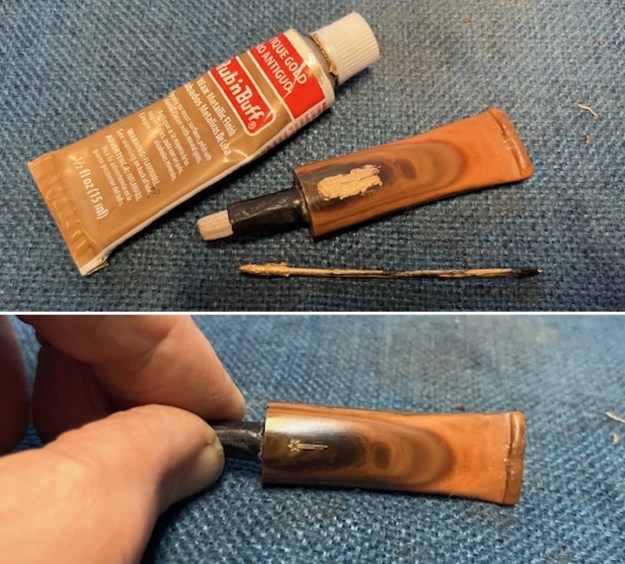
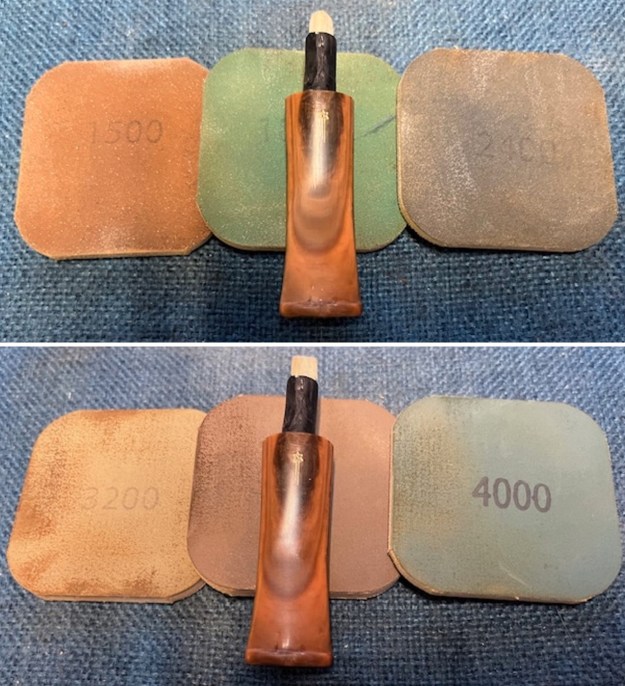
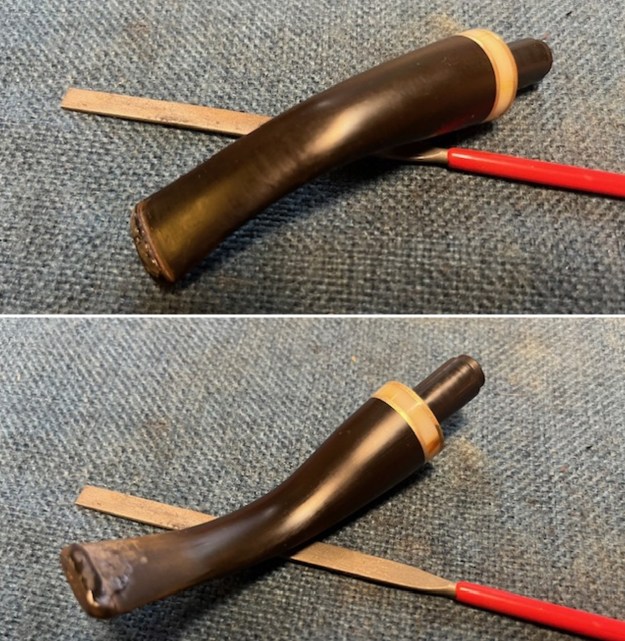
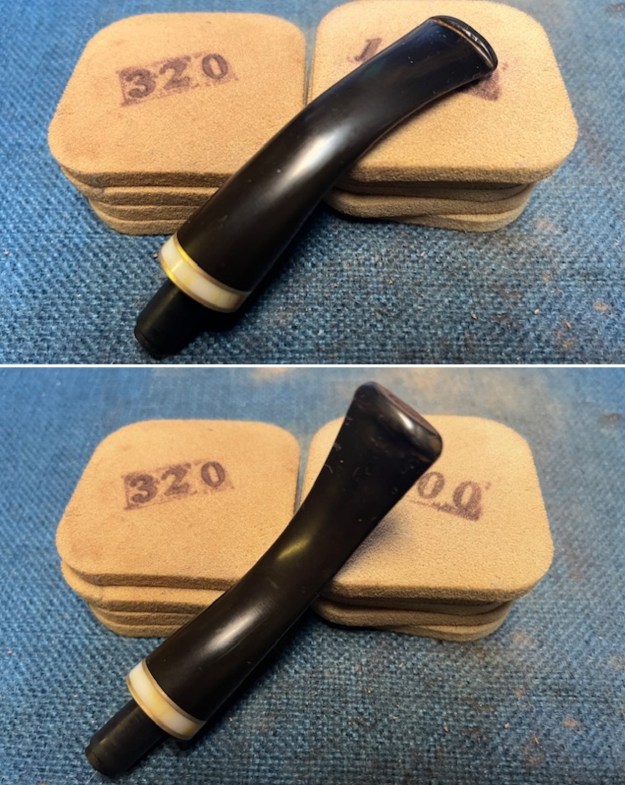
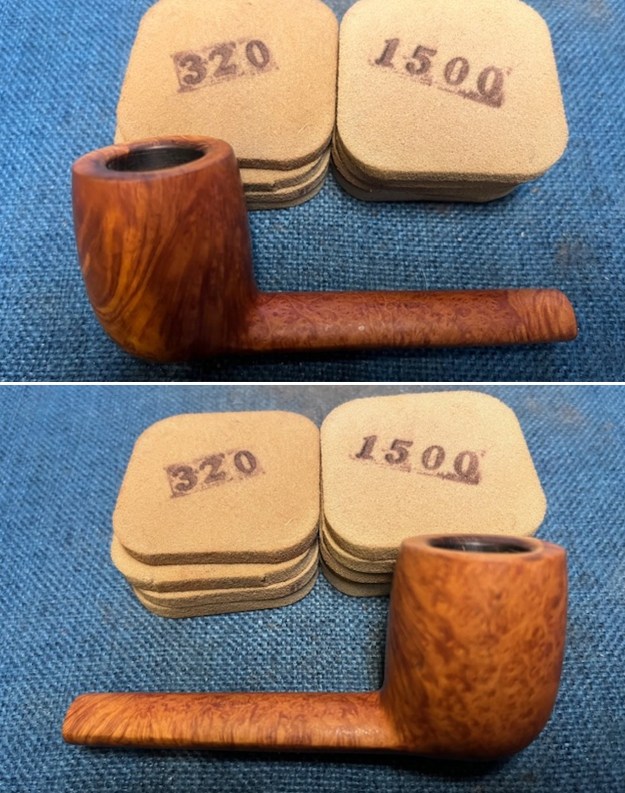
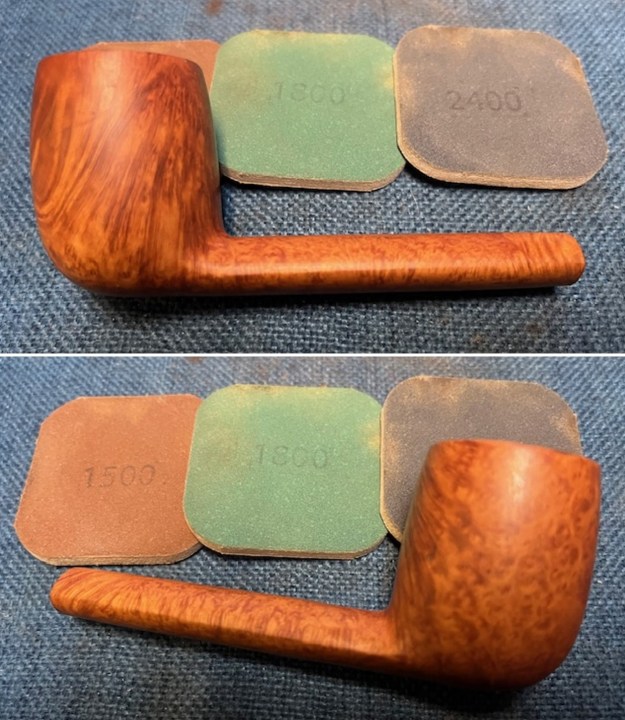
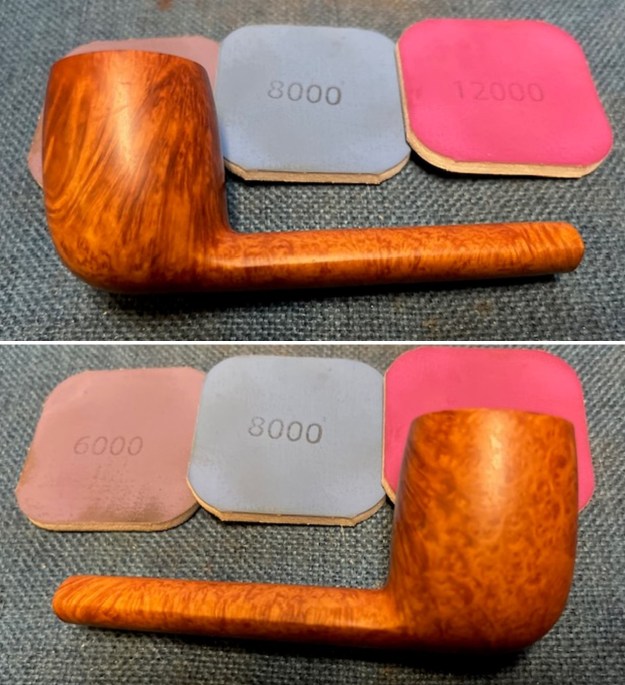
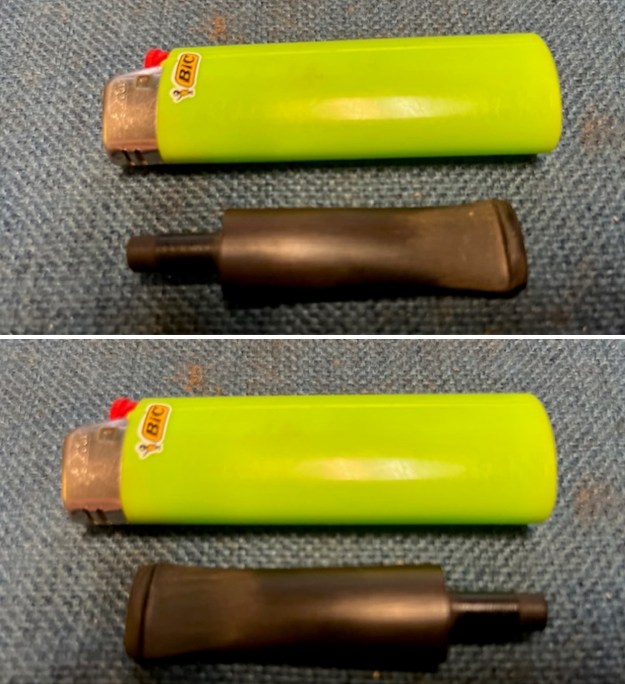
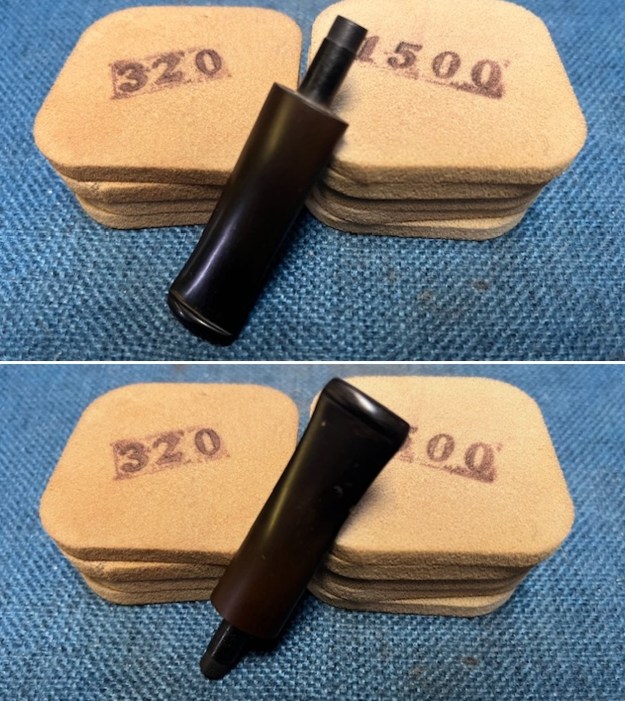
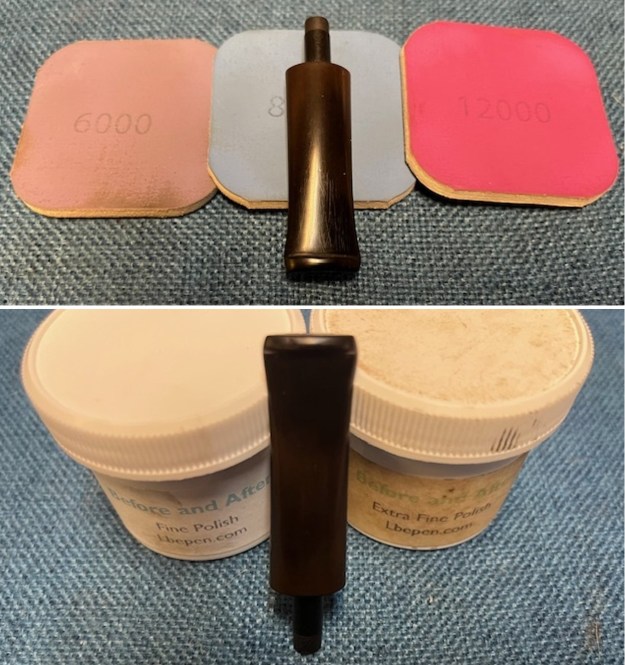
 I set the bowl aside and worked on the stem. I sanded the stem with 320-3500 grit 2×2 inch pads. I wiped the stem down with an Obsidian Oil cloth after each sanding pad.
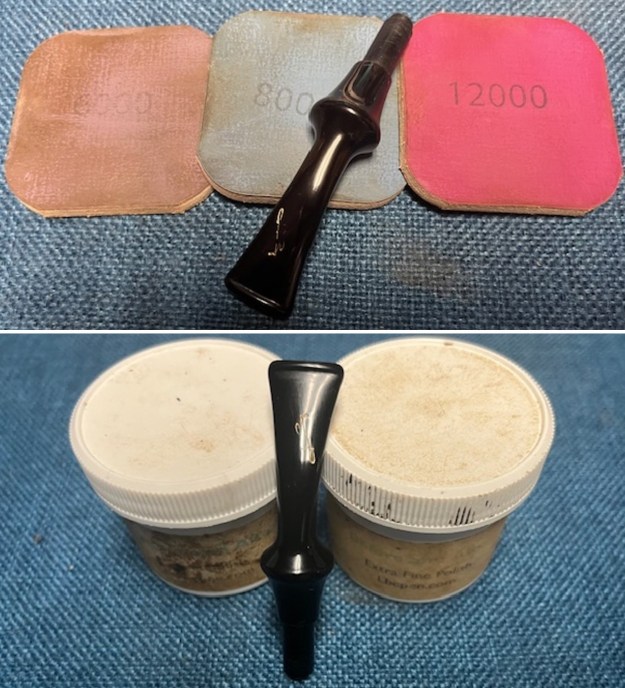
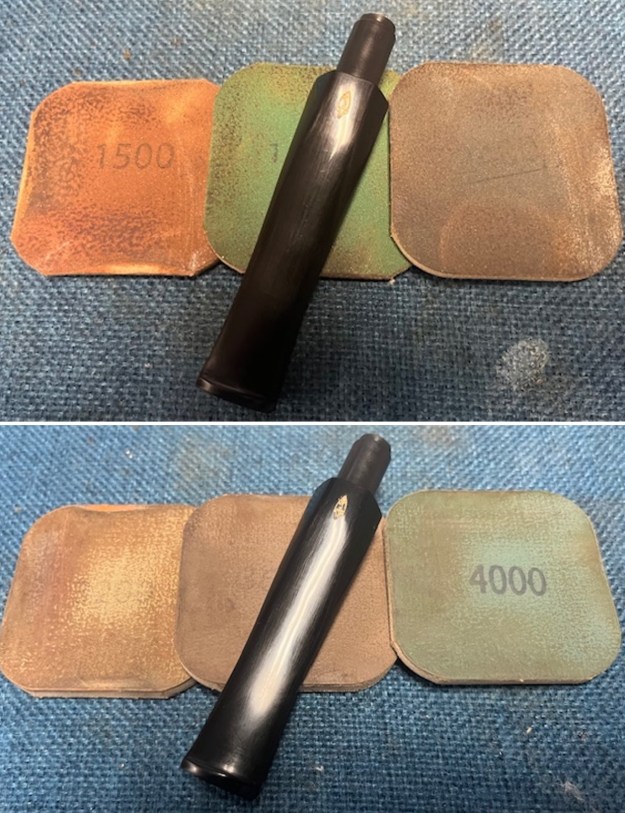
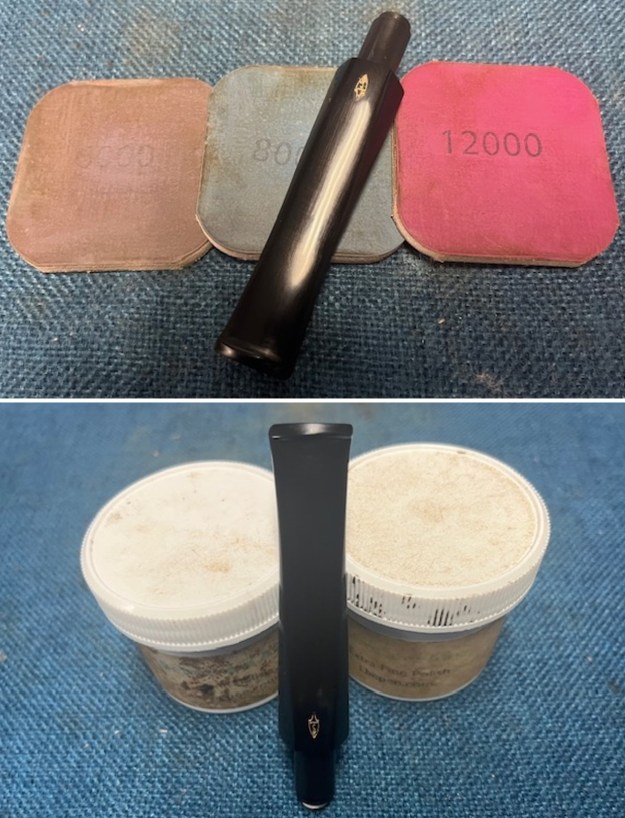
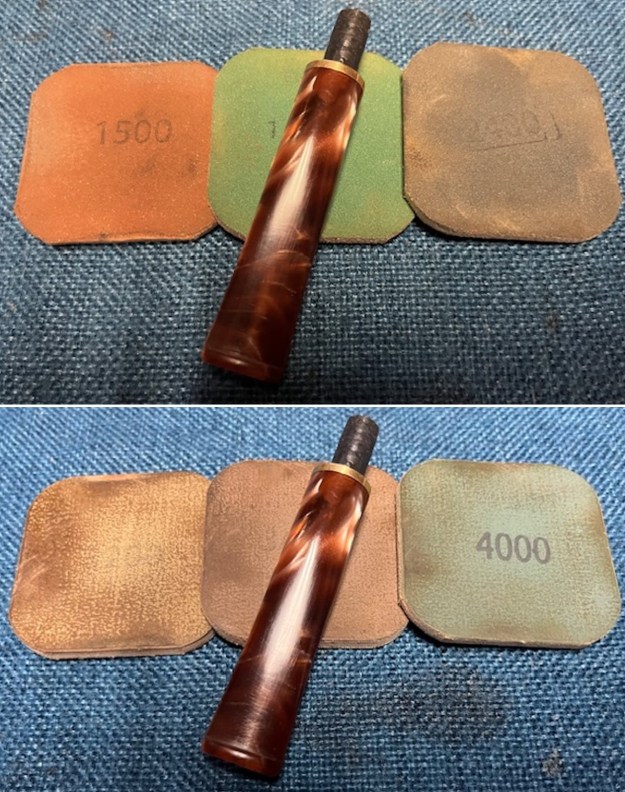
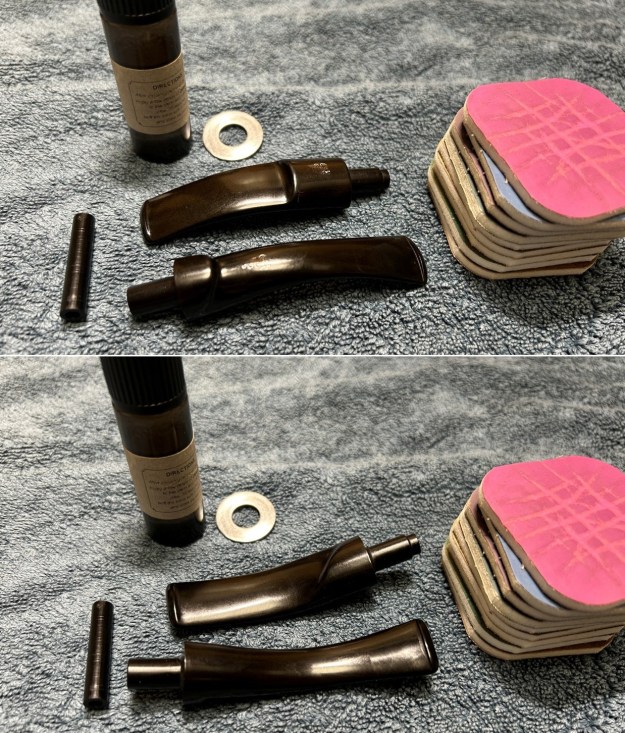
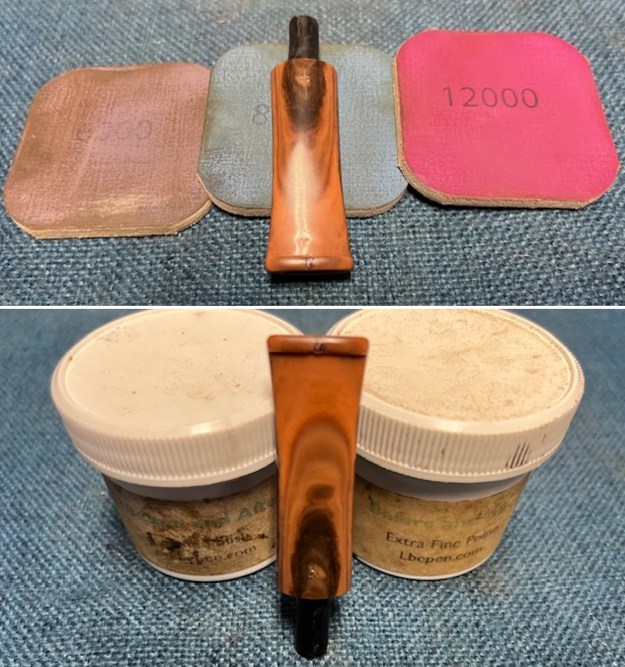
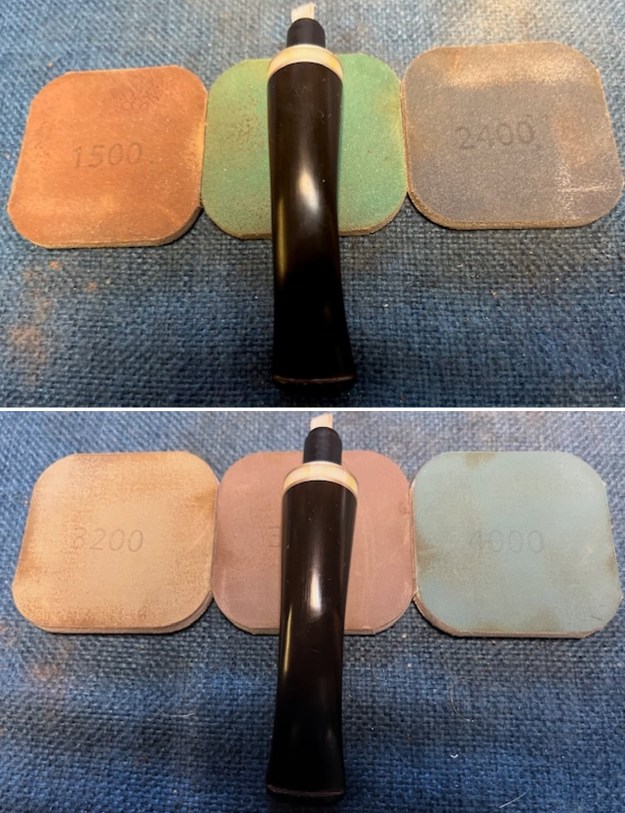
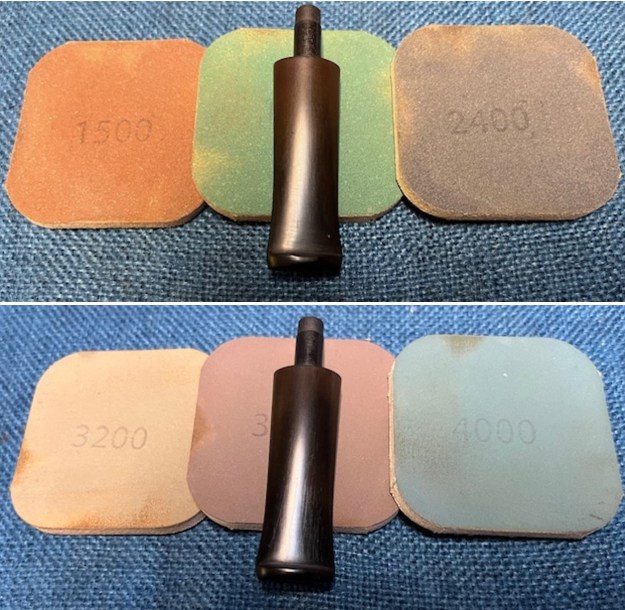
 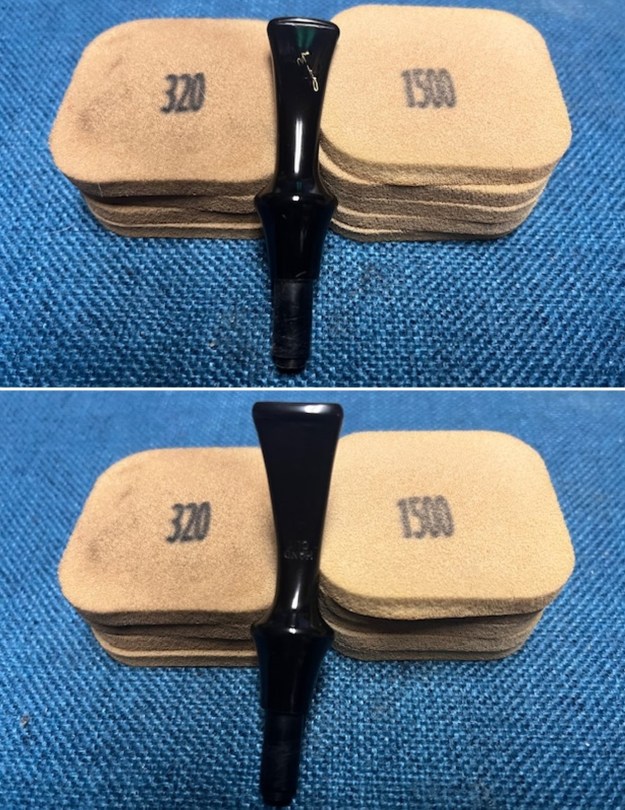 I polished the acrylic with micromesh sanding pads – 1500-12000 grit pads. I wiped it down with Obsidian Oil after each sanding pad. I used Before & After Pipe Polish – both Fine and Extra Fine to further polish the stem.
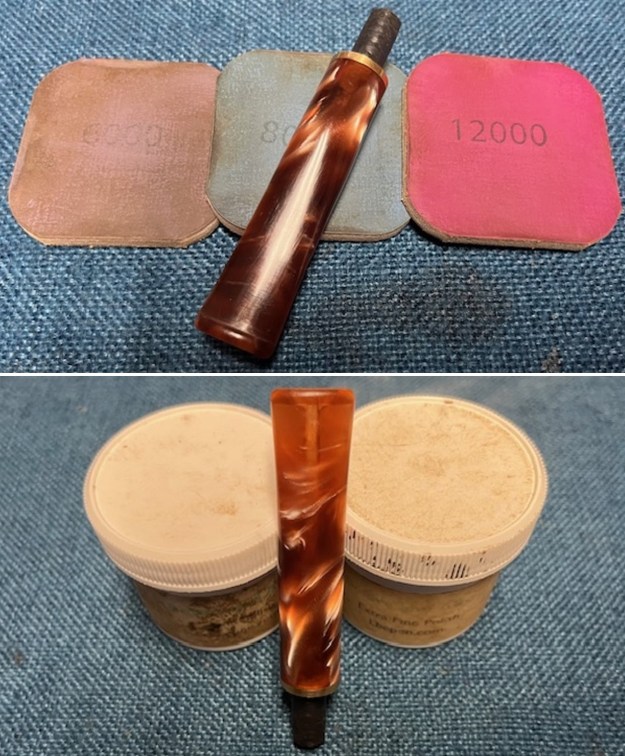
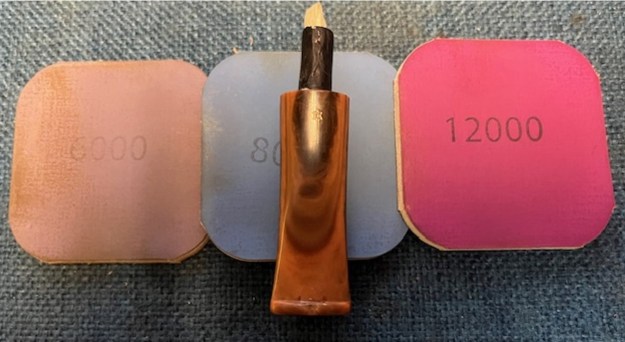
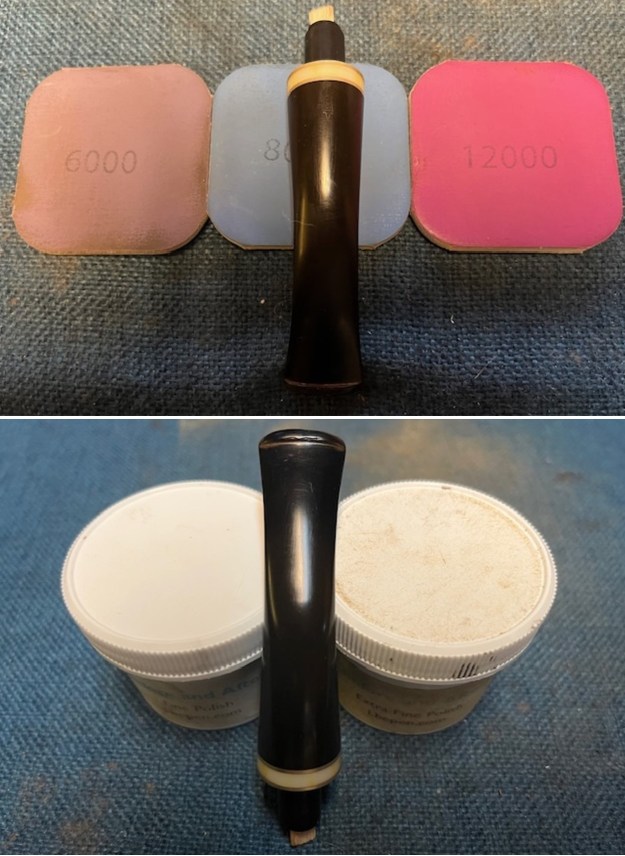
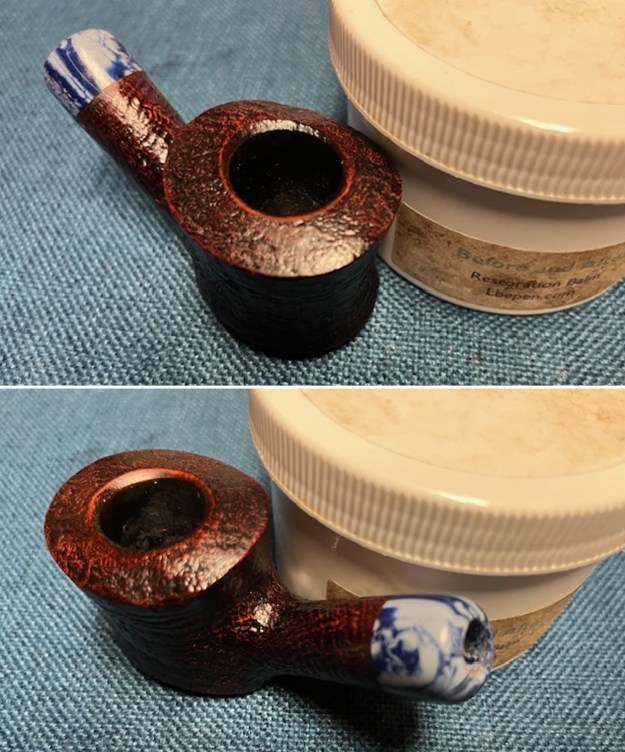
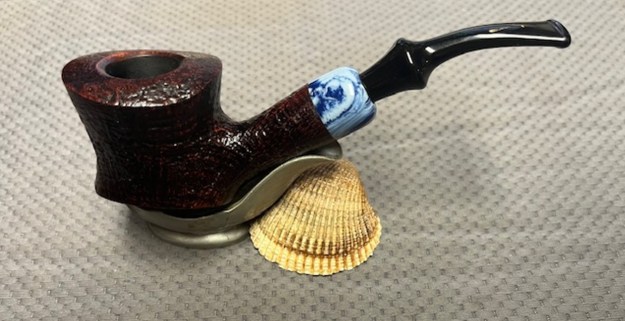
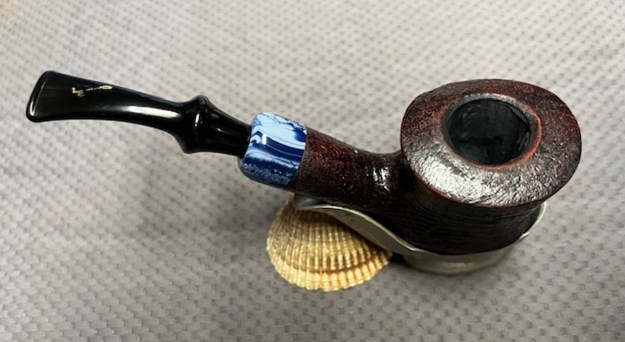
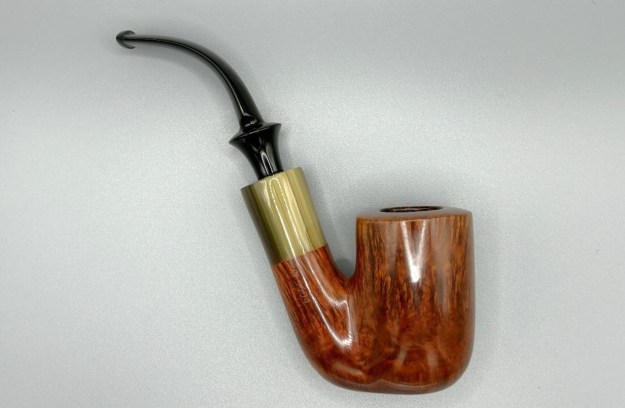
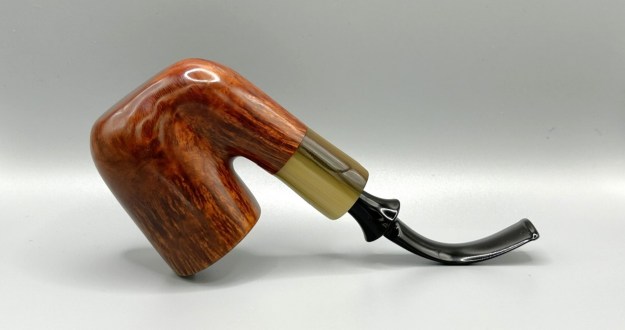
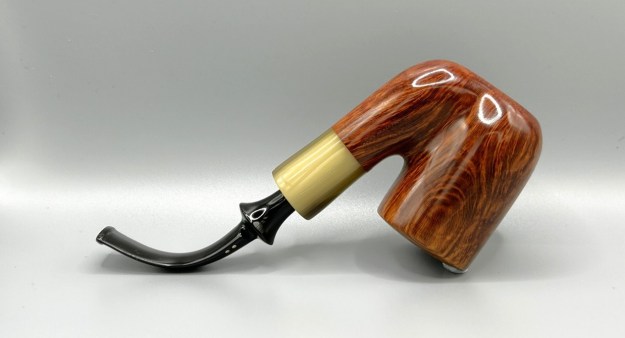
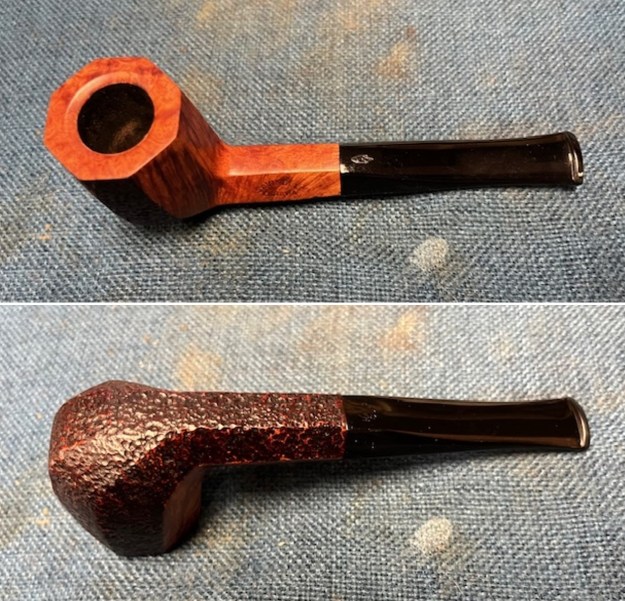
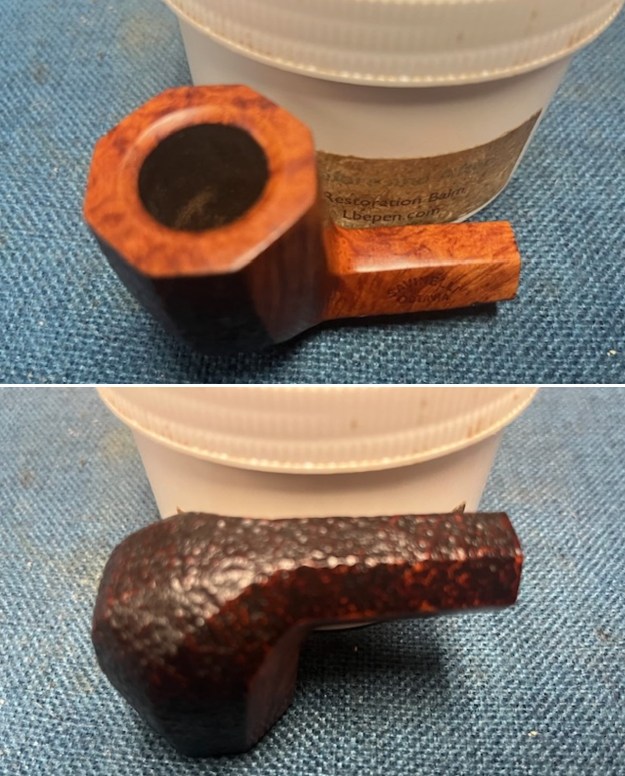
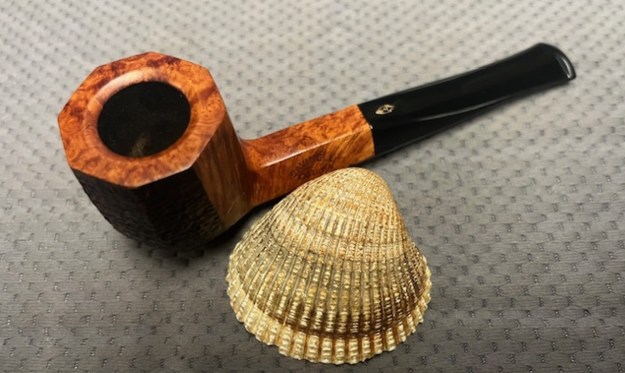
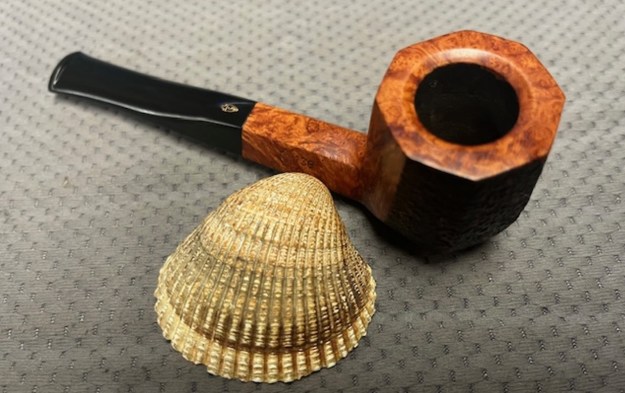
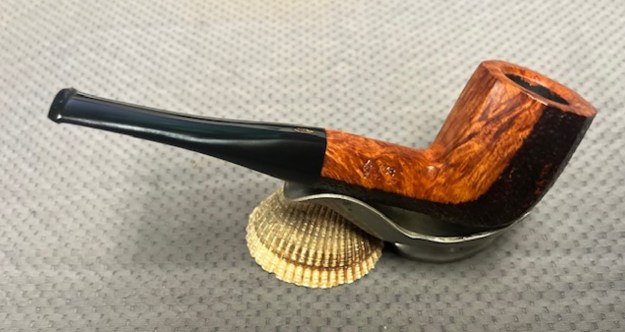
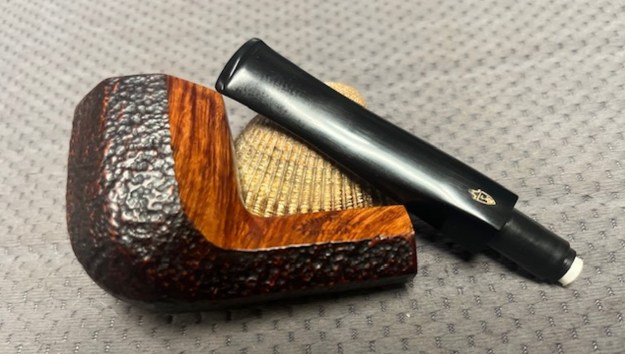
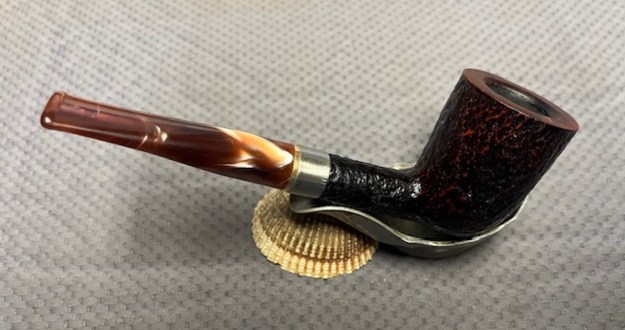
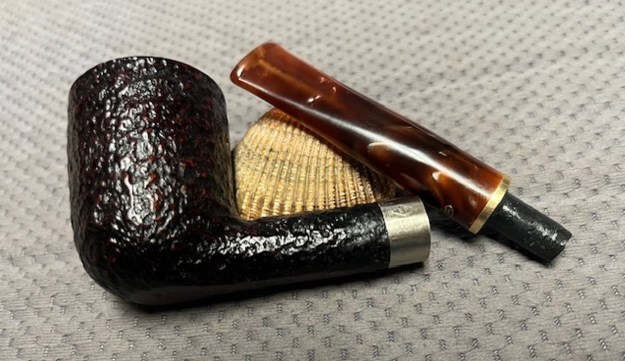
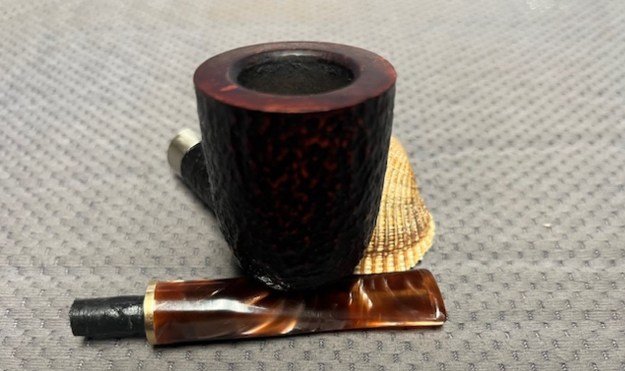
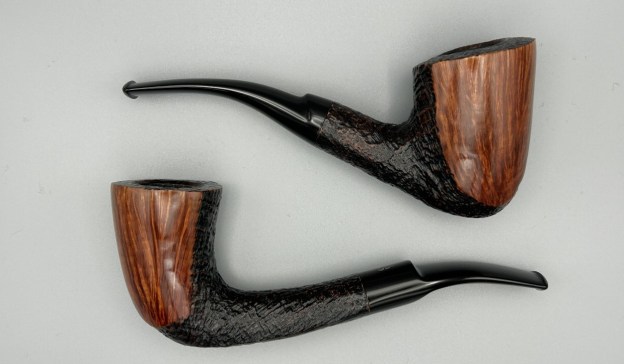
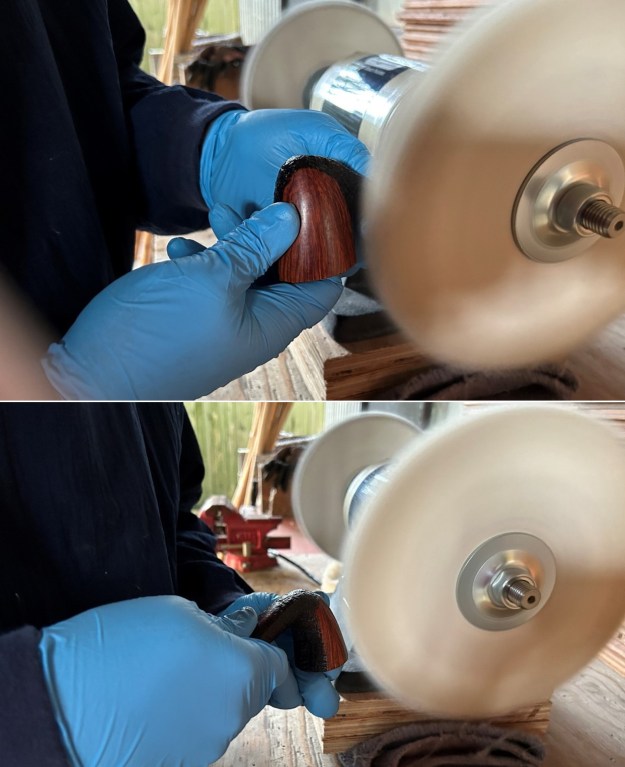
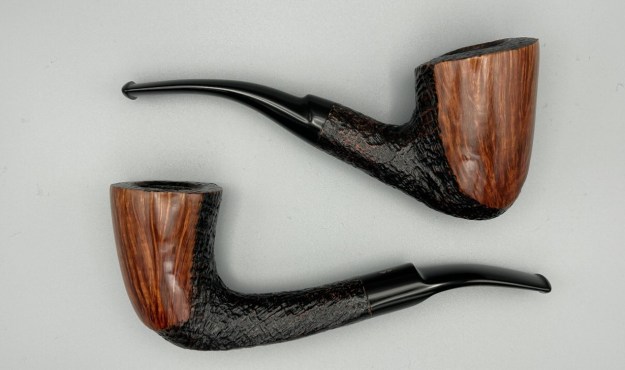
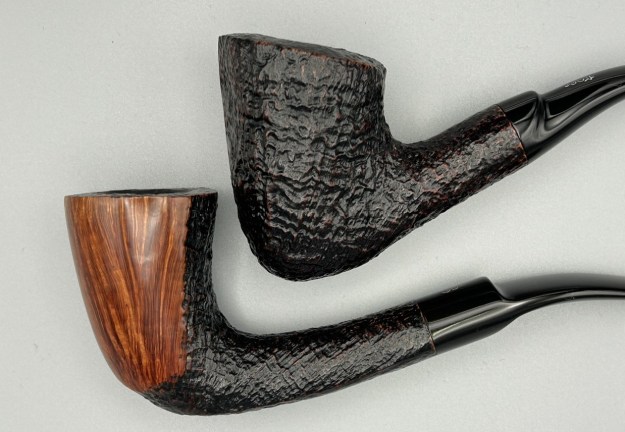
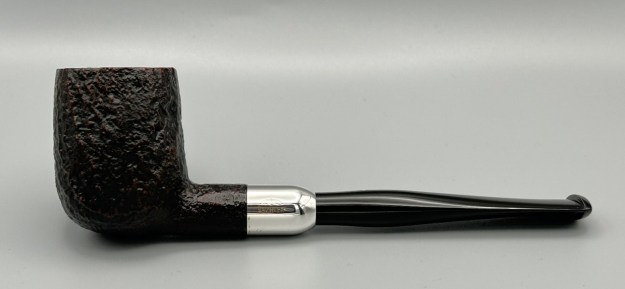
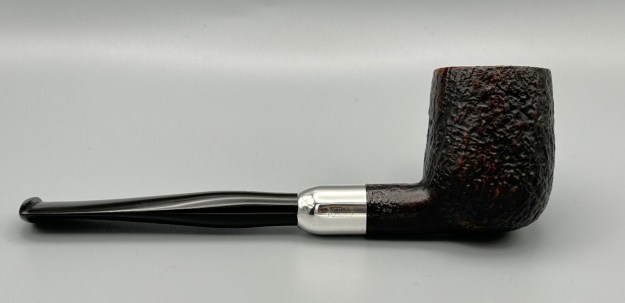
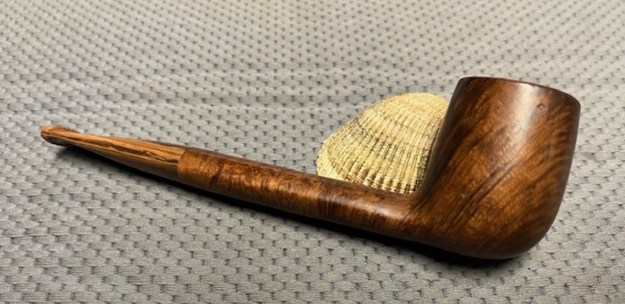
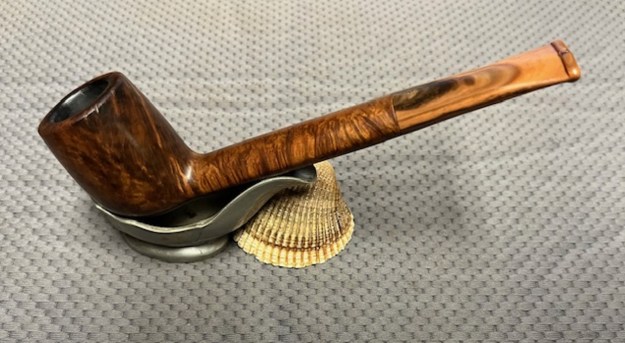
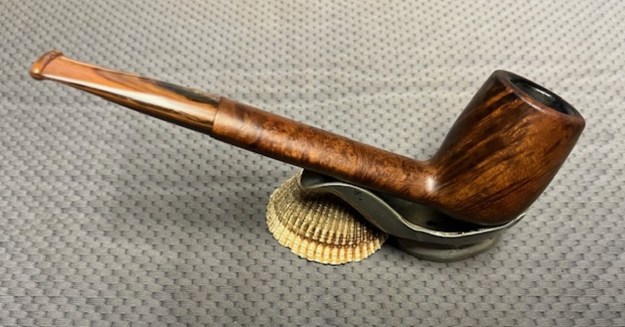
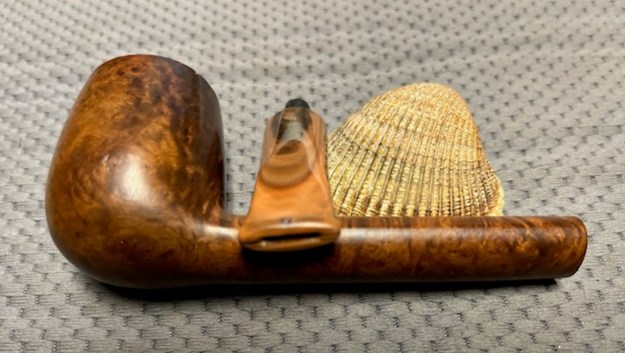
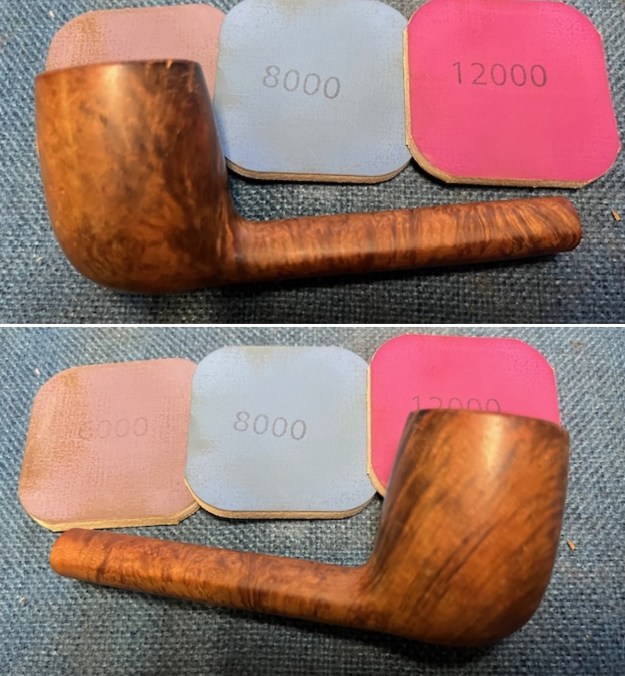
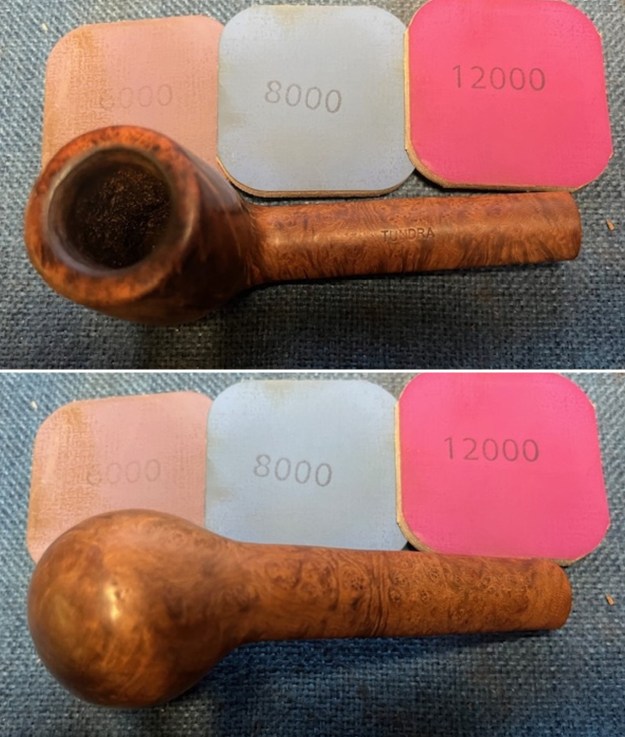
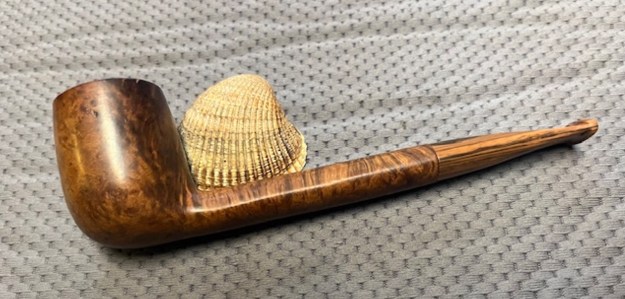
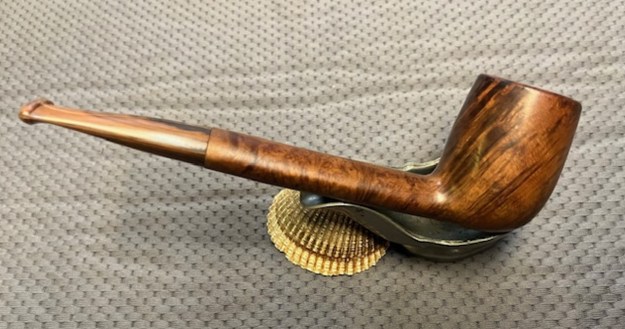
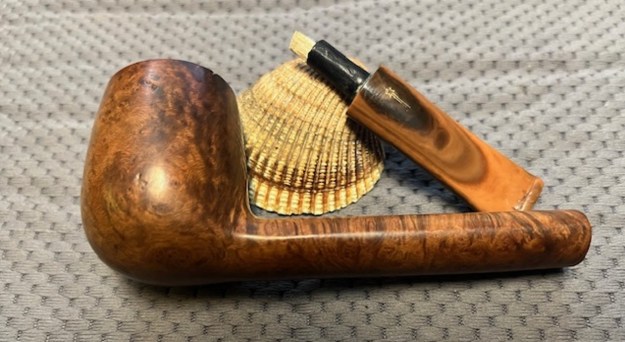
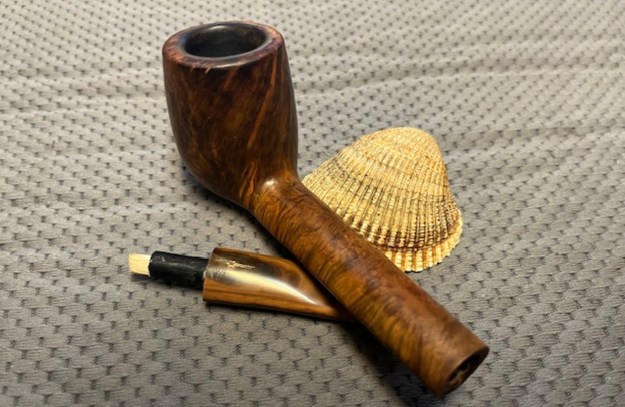
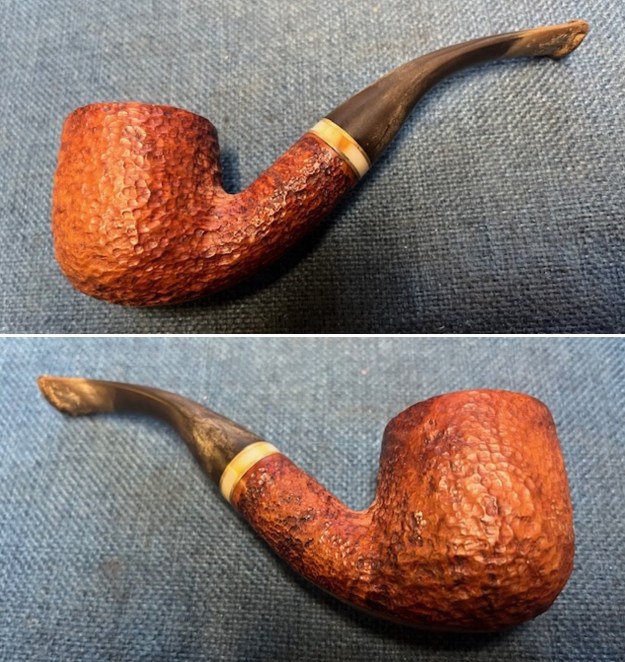
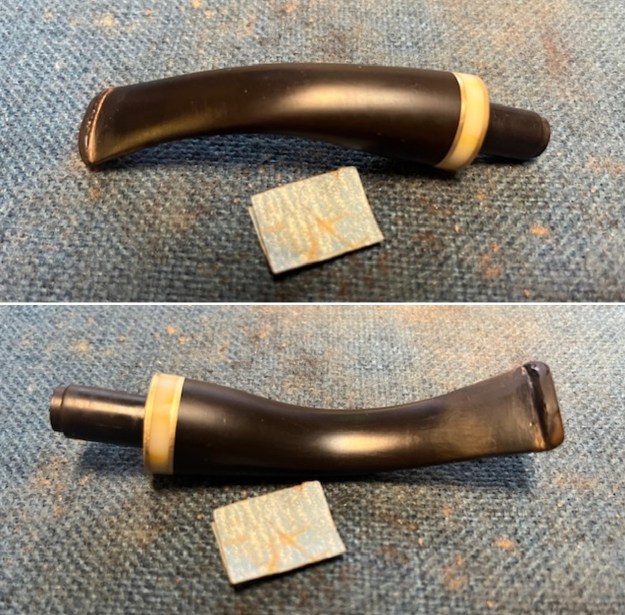
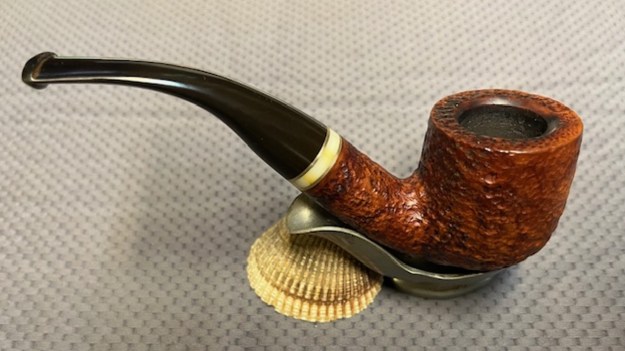
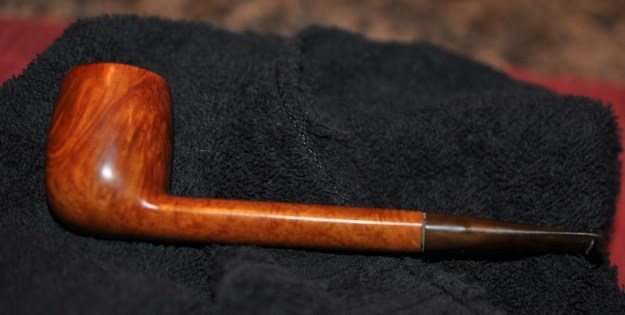
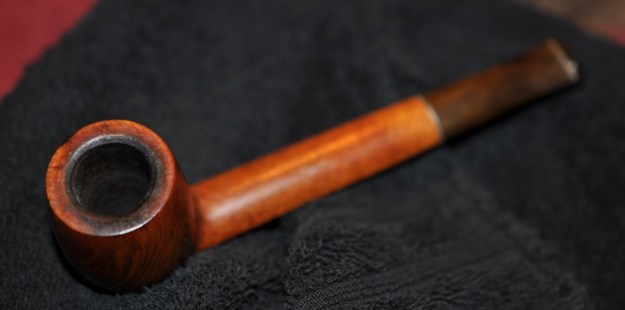
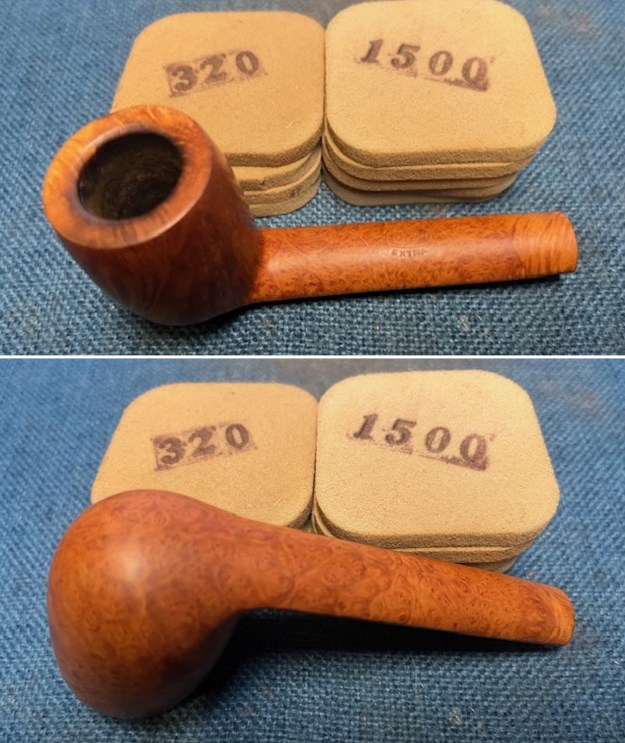
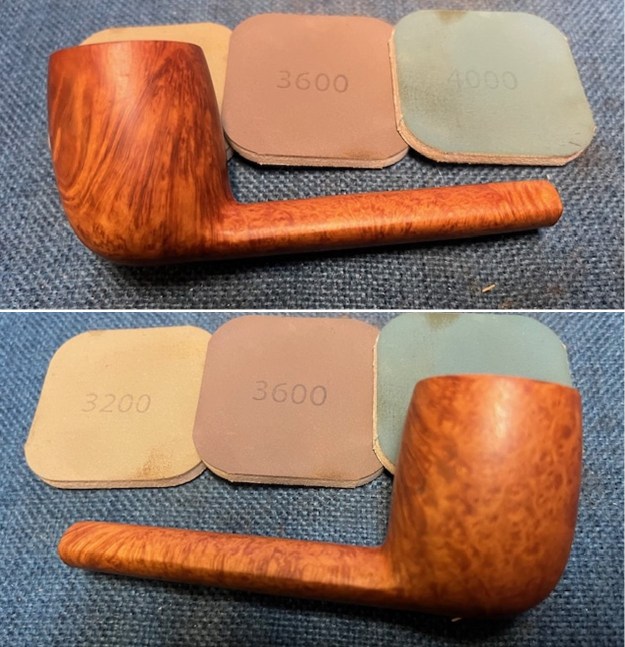
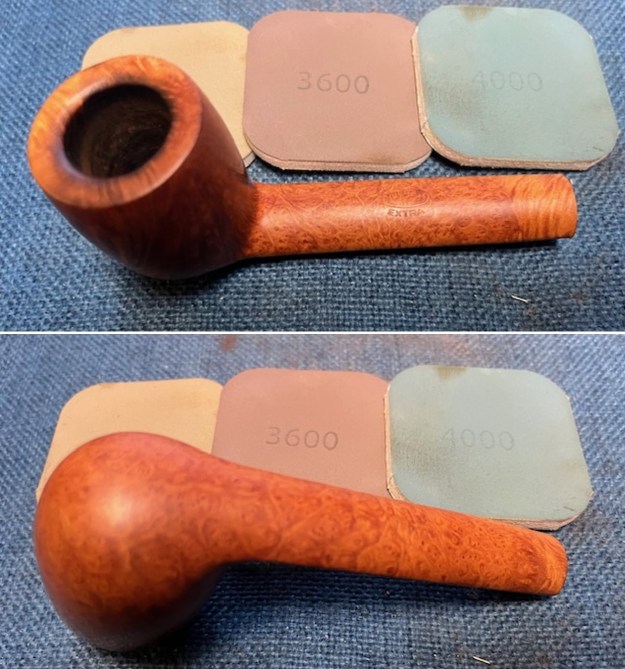
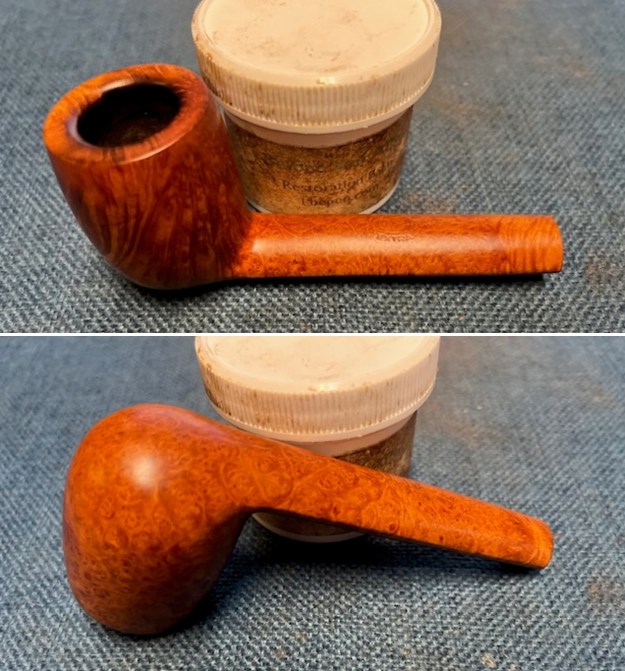
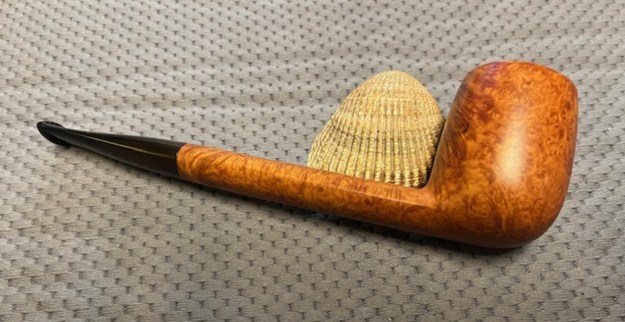
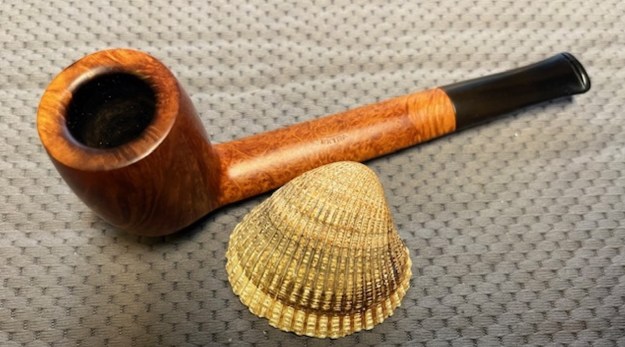
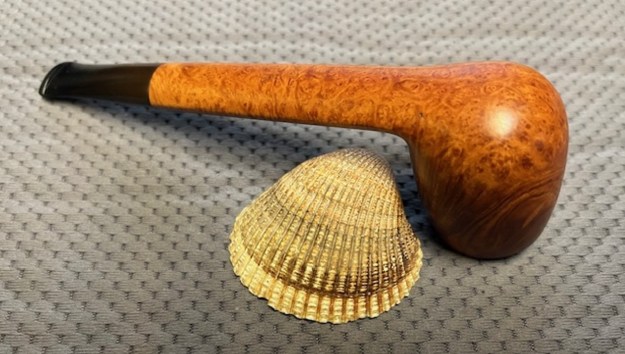
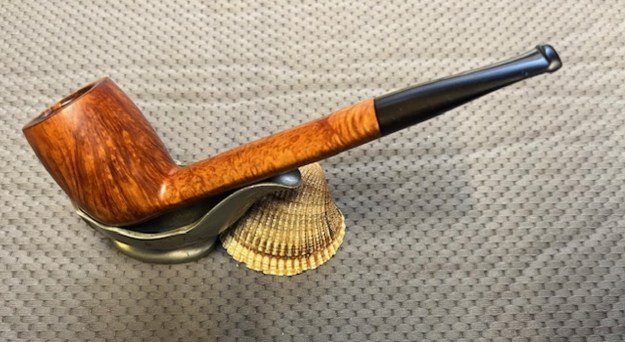
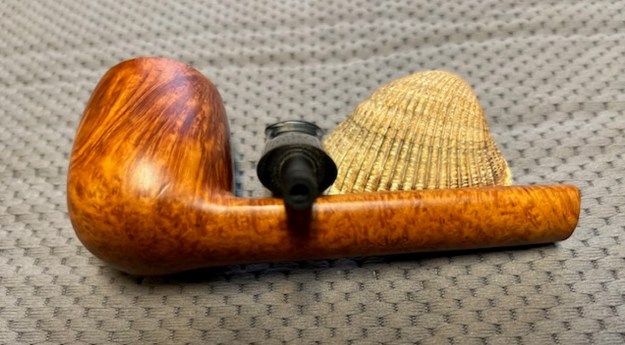
 I the polished mottled brown acrylic taper stem and the Savinelli Autograph 2 Cherrywood bowl with Blue Diamond to polish out the remaining small scratches and raise the shine. I gave the stem and the bowl several coats of Carnauba Wax then buffed the pipe with a clean buffing pad to raise the shine. I hand buffed it with a microfiber cloth to deepen the shine. The pipe polished up pretty nicely. This turned out to be a beautiful Savinelli Autograph 2 with a black acrylic saddle stem. The finished pipe is shown in the photos below. The dimensions are Length: 5 ½ inches, Height: 1 ¾ inches, Outside diameter of the bowl: 1 ½ inches wide x 1 ¾ inches long, Chamber diameter: ¾ of an inch. The weight of the pipe is 2.08 ounces/58 grams. Thanks for walking through the restoration with me as I worked this beautiful Bent Dublin. This one will join the first one I restored both will await my completion of the work on the other two pipes Michael sent me. Thanks for looking.
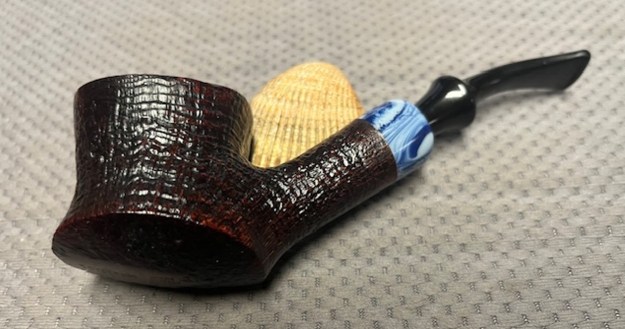


 This Savinelli Nonpareil 9604 Oom Paul is ready to be enjoyed by its next owner. I am pleased to announce that this pipe is for sale! If you are interested in acquiring it for your collection, please have a look in the ‘Italian’ section of the store here on Steve’s website. You can also email me directly at kenneth@knightsofthepipe.com. The approximate dimensions of the pipe are as follows: length 4⅜ in. (159 mm); height 4¾ in. (120 mm); bowl diameter 1½ in. (37 mm); chamber diameter ¾ in. (20 mm). The weight of the pipe is 2½ oz. (71 g). I hope you enjoyed reading the story of this pipe’s restoration as much as I enjoyed restoring it. If you are interested in more of my work, please follow me here on Steve’s website or send me an email. Thank you very much for reading and, as always, I welcome and encourage your comments.
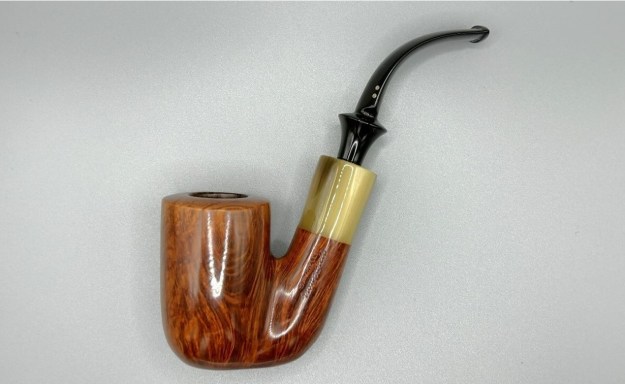


