Tag Archives: sanding a stem

Reworking Rustication on a Savinelli Extra Lumberman


Blog by Steve Laug

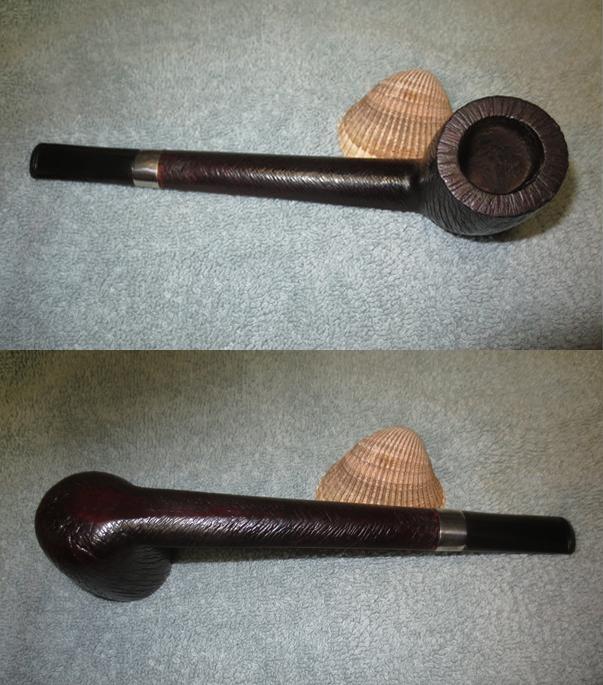
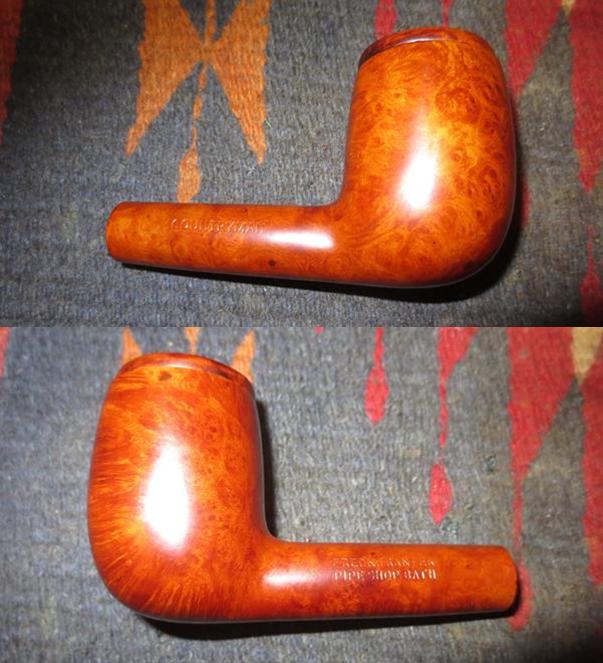
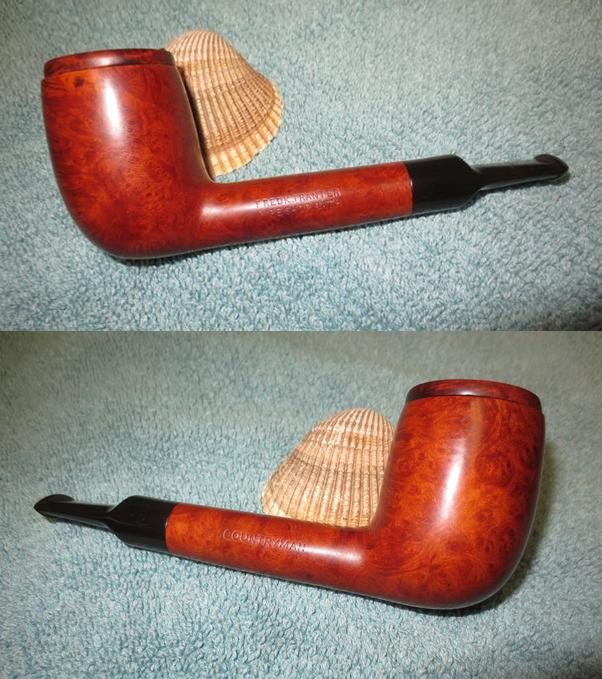
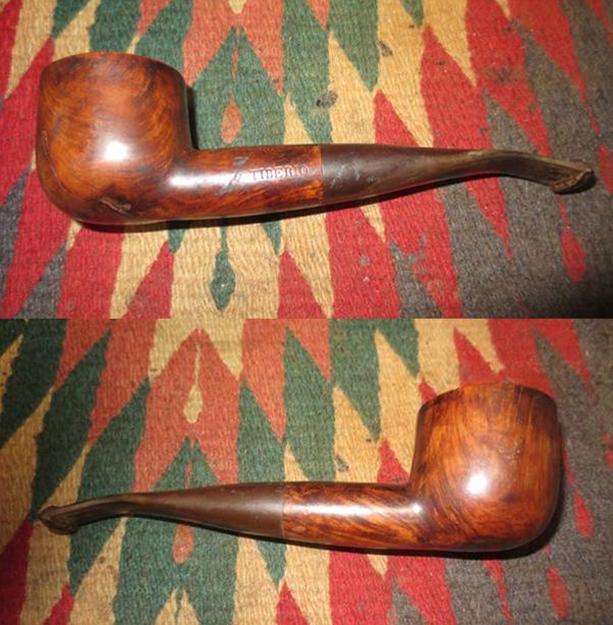
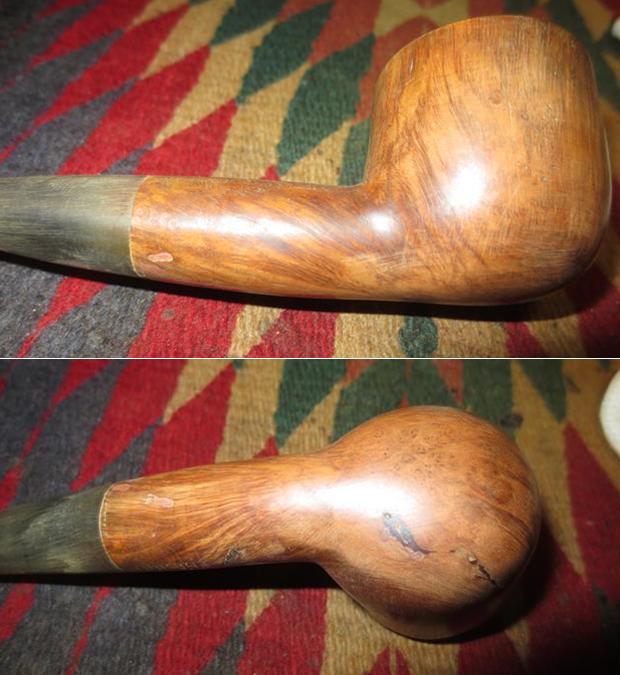
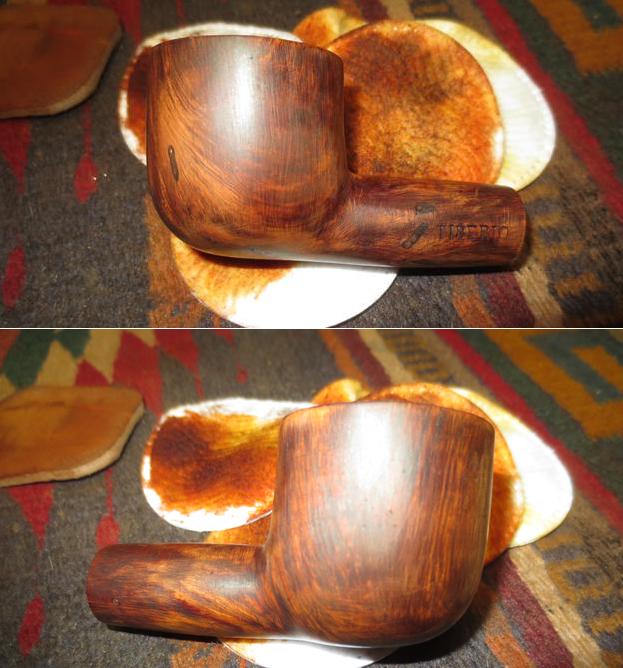
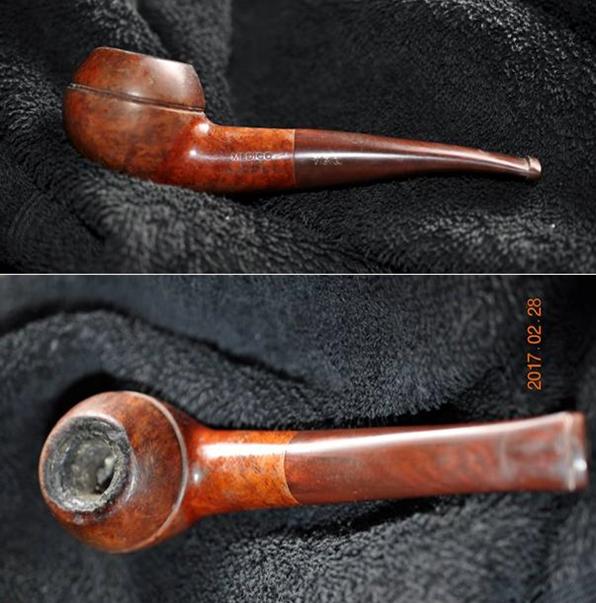
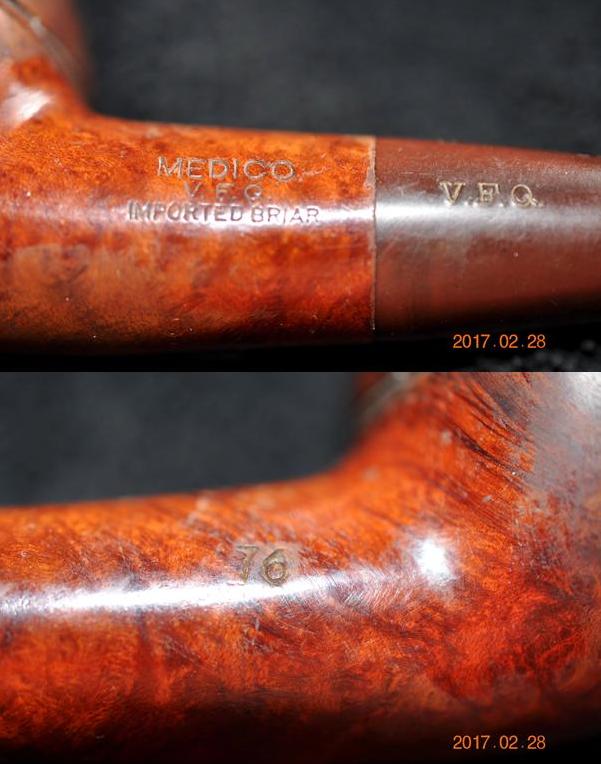
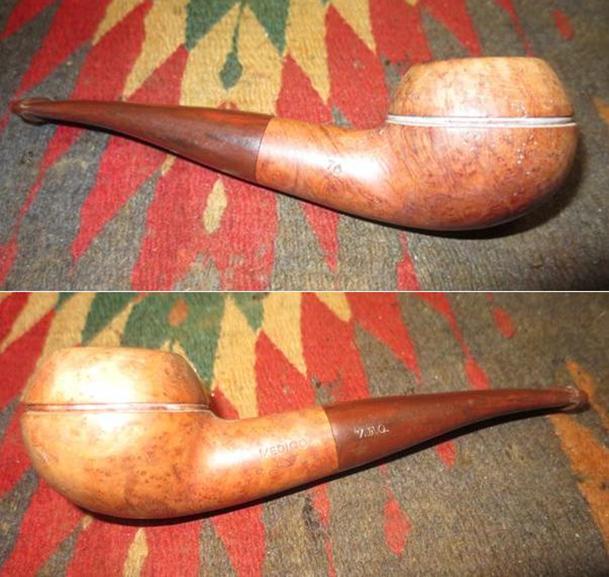
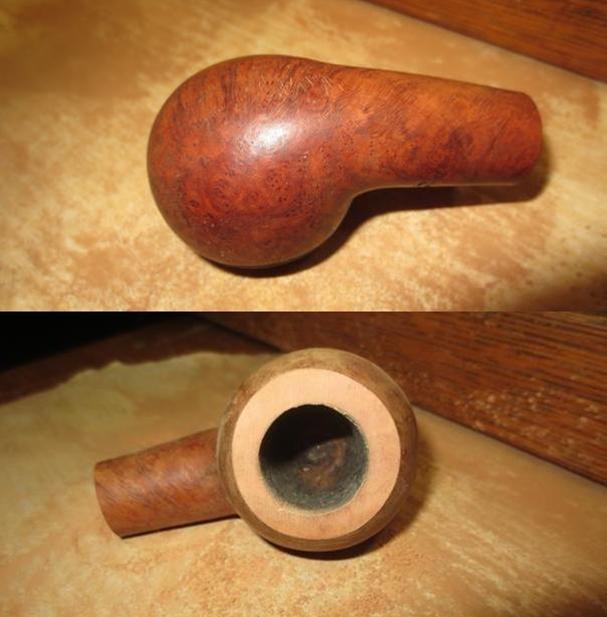
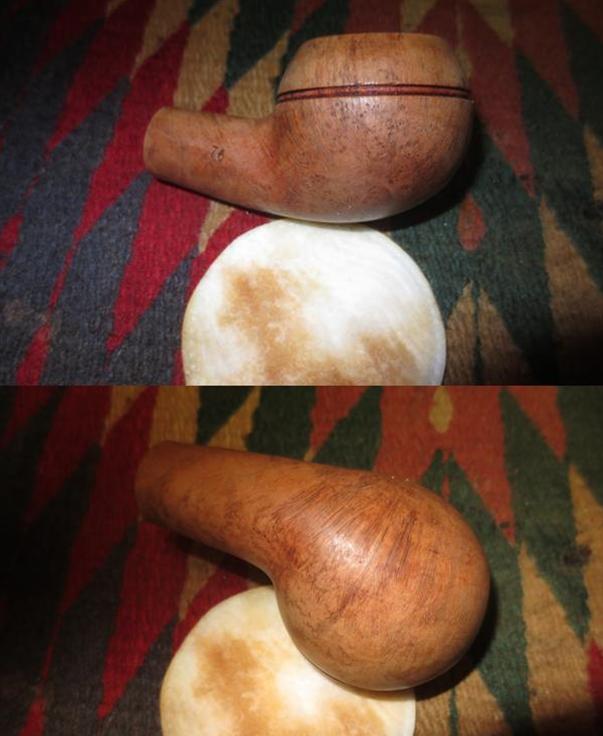
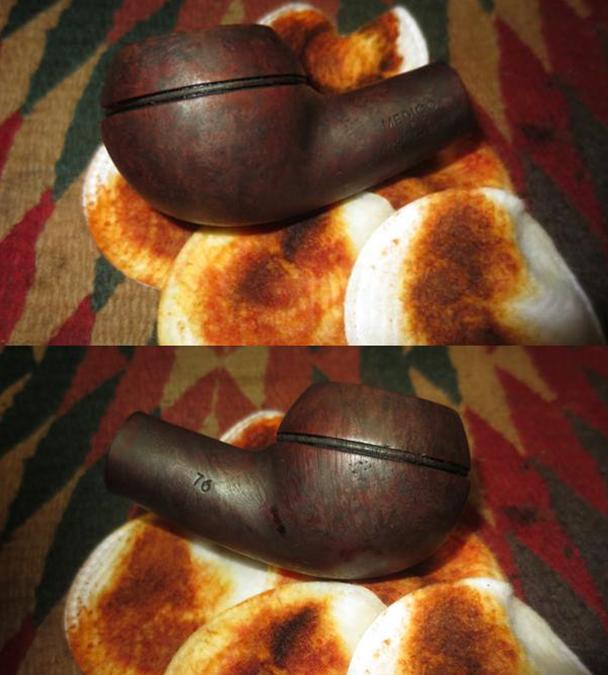
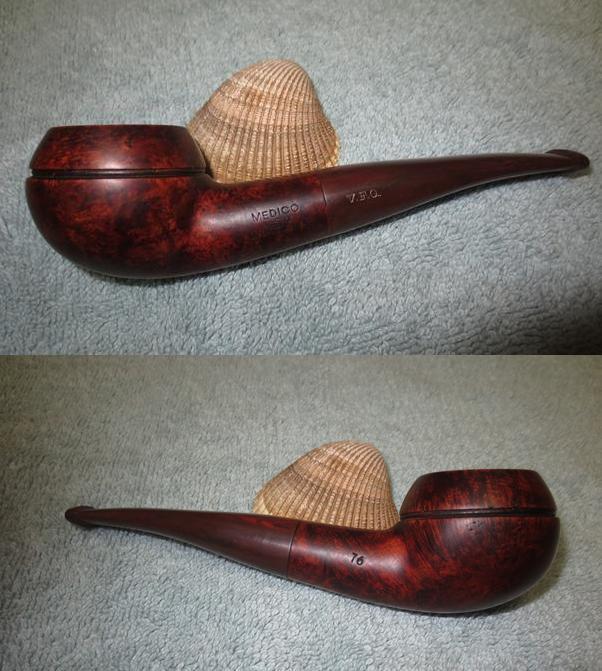
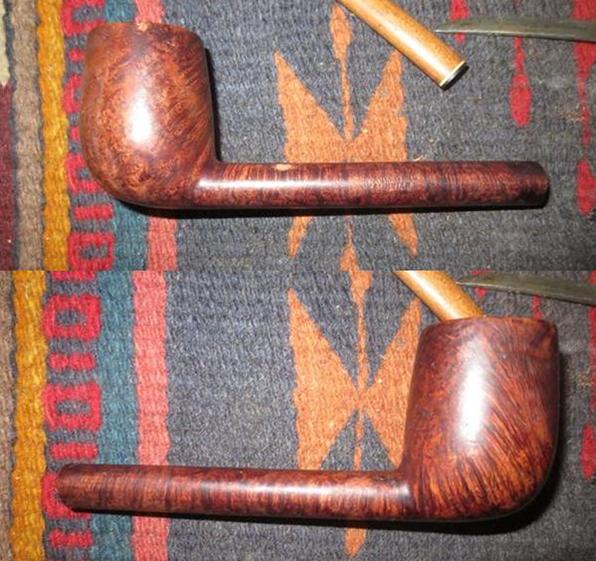
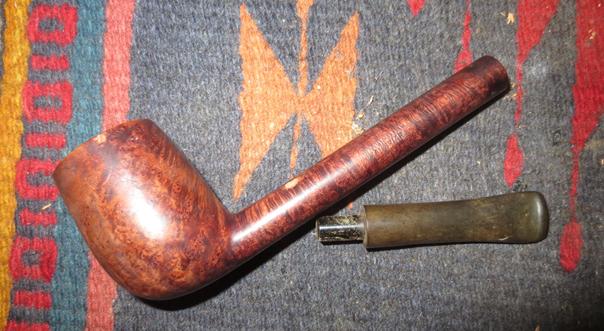
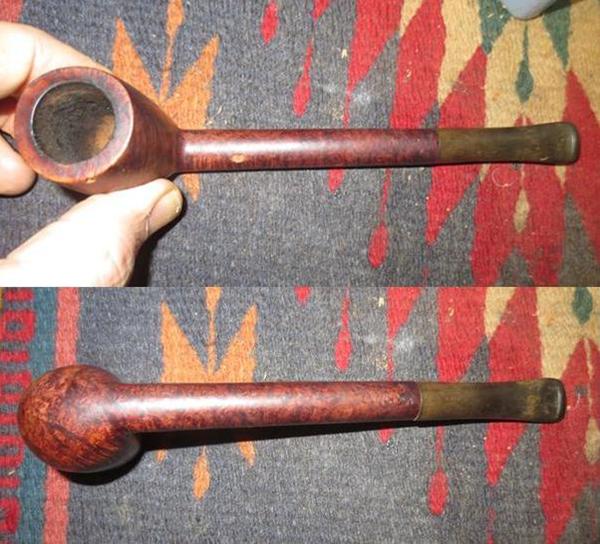
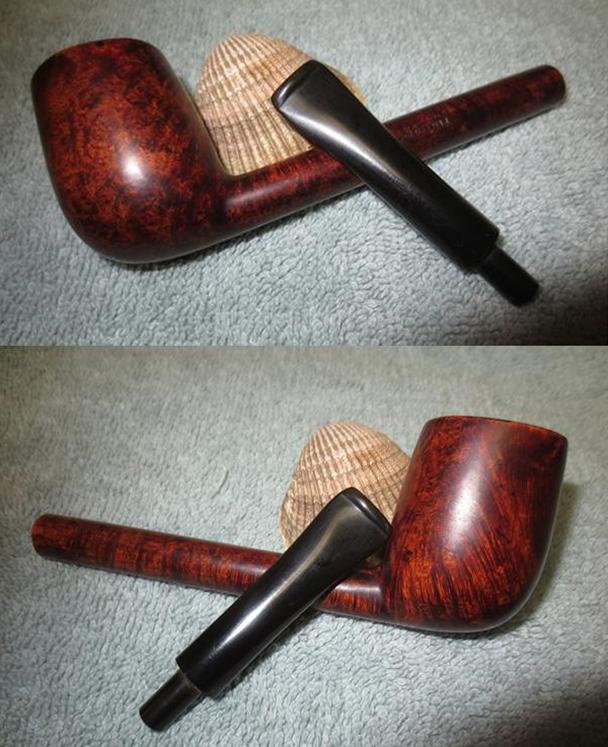
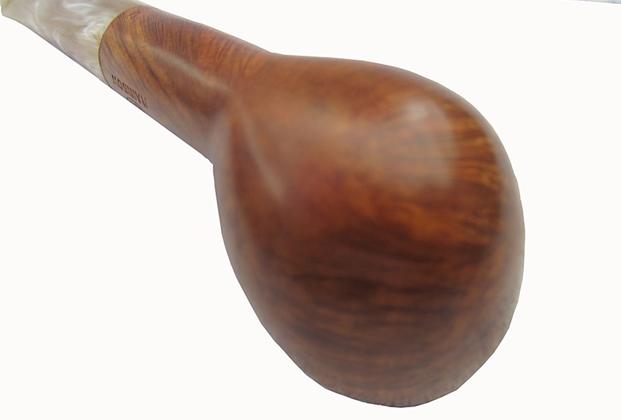
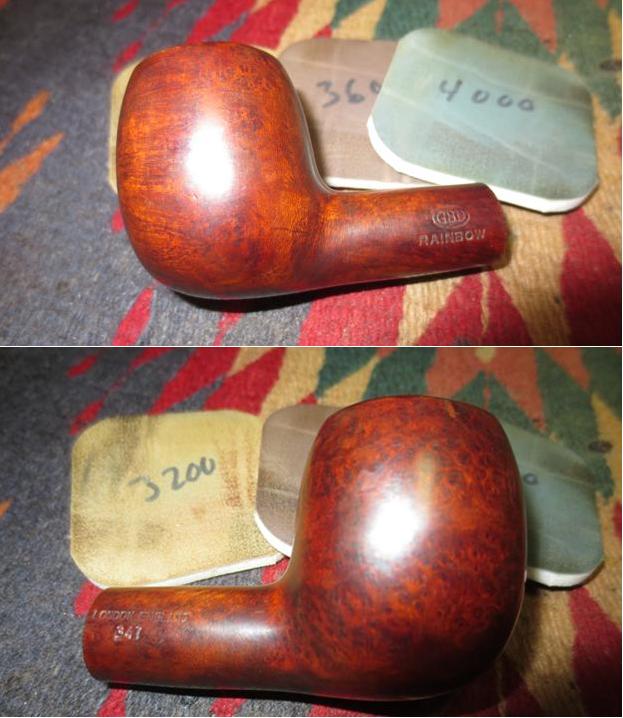
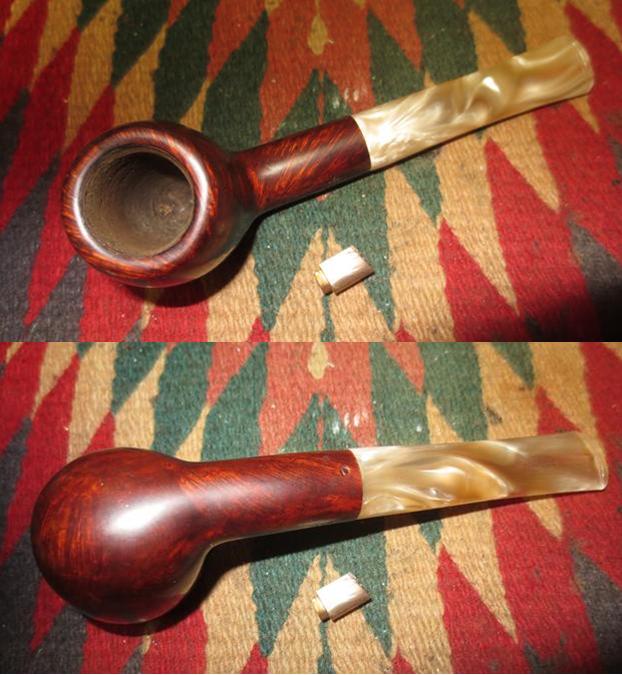
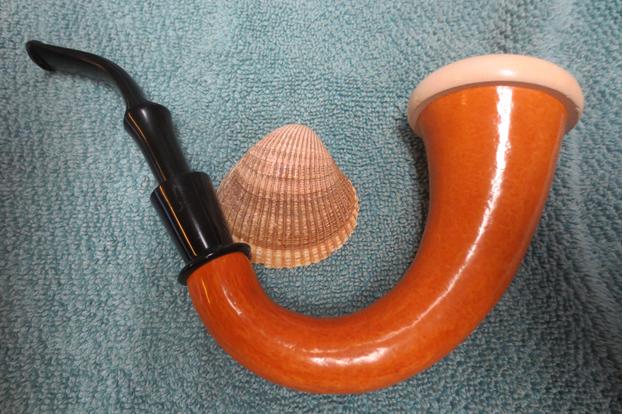
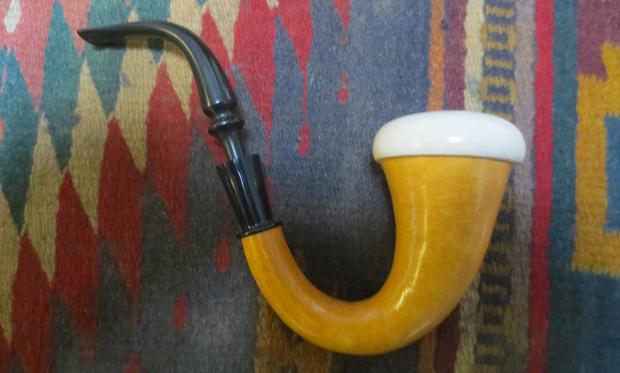
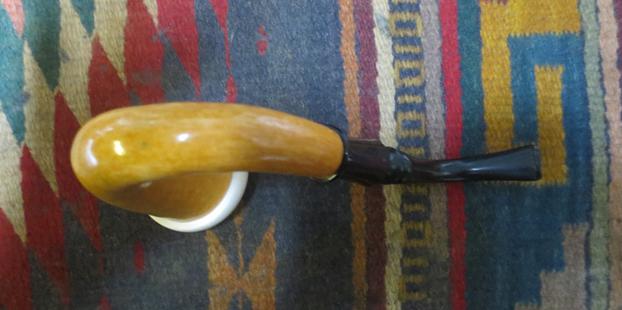
My brother and I picked up this long shanked Canadian when I was in Idaho. We bought it from the same seller that had all of the Calabash pipes. It is a wire wheel rustication that follows the bowl at an angle and runs almost chevron like on the top and bottom of the shank. It is a large pipe. The dimensions are: length – 7 ½ inches, height – 2 inches, external diameter – 1 ½ inches, inner bowl diameter – ¾ inches. There were some obvious issues with the pipe that I will point out through the following photos. First of all the big picture look at the pipe. It is stamped Savinelli Extra Lumberman on the underside of the shank. Next to that it is stamped Italy. In the second photo below you can see the line where the two sections of shank are joined. 
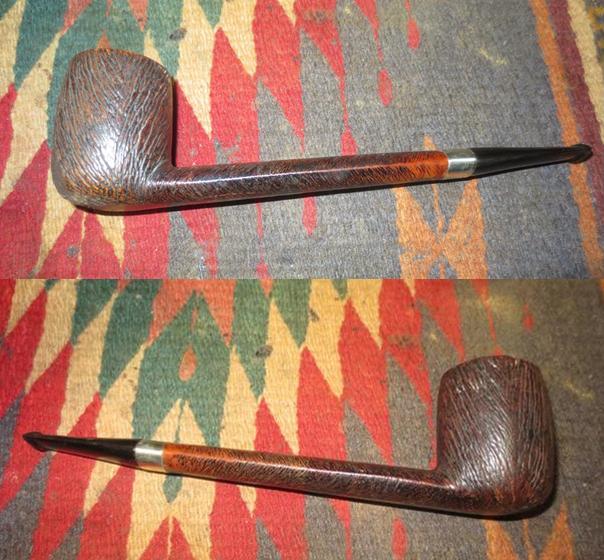
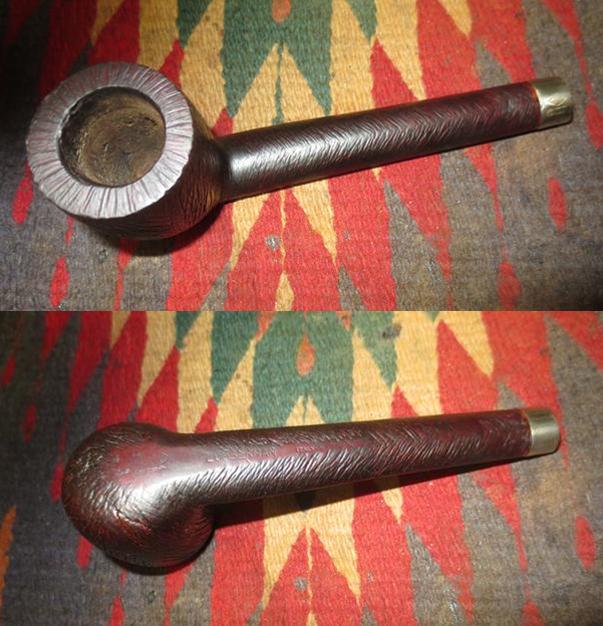
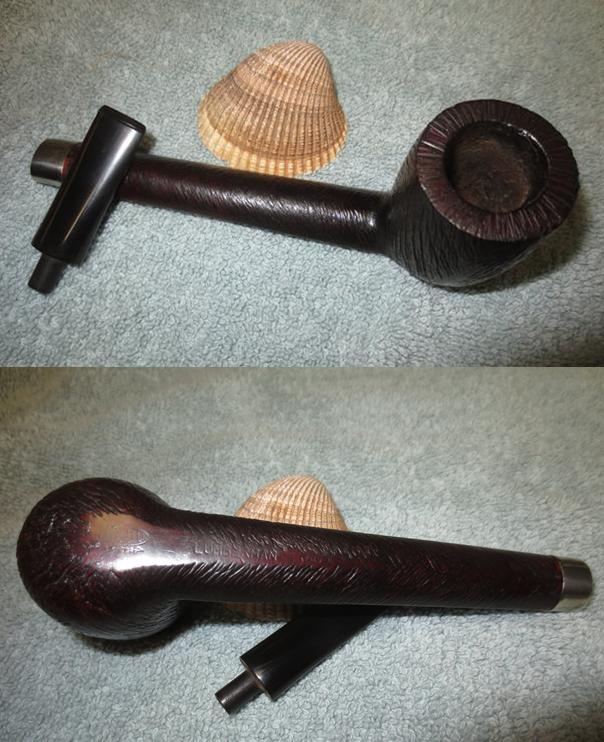
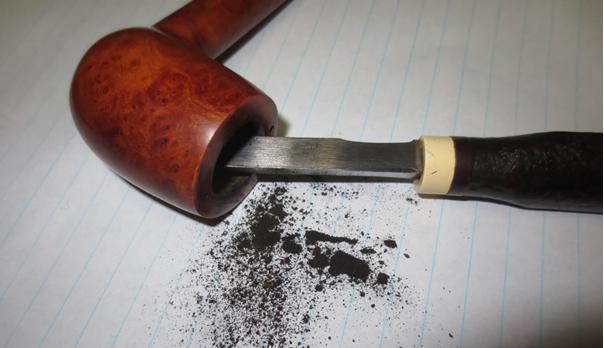
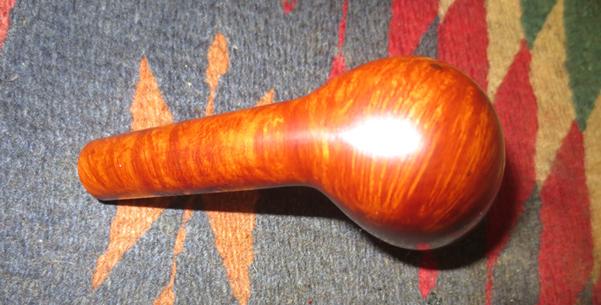
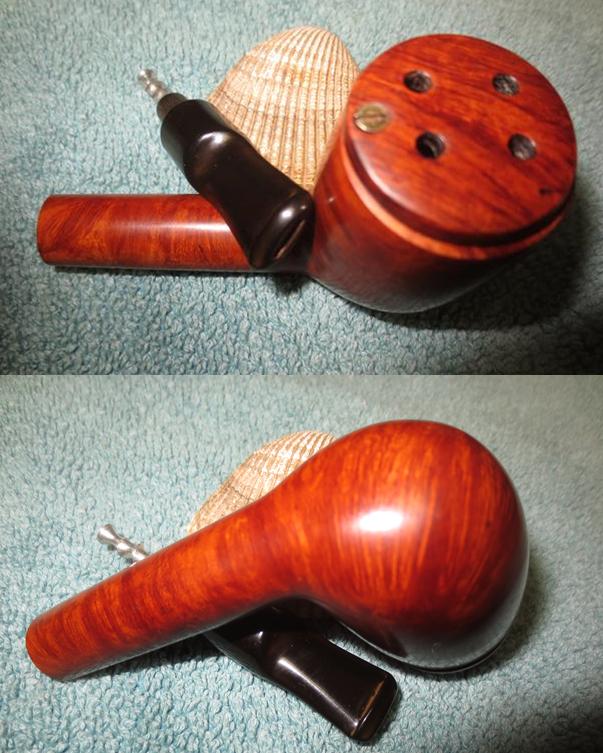
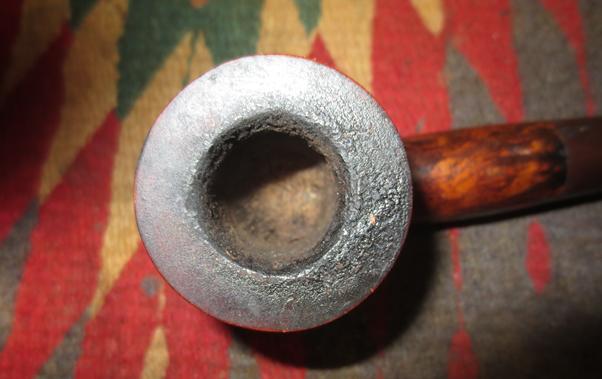
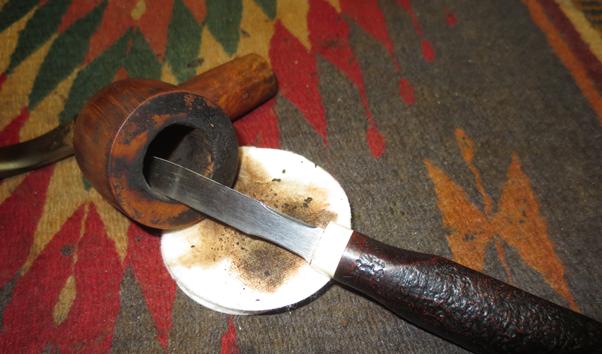
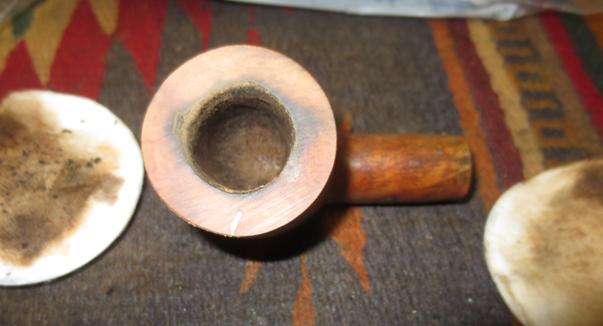
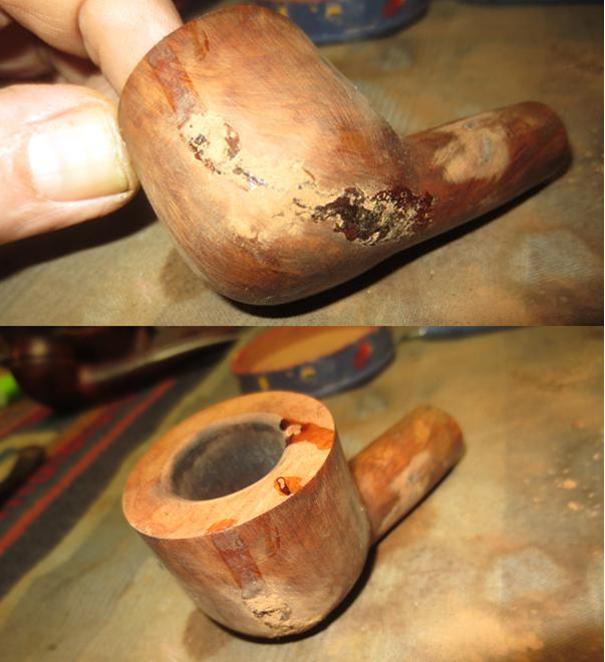
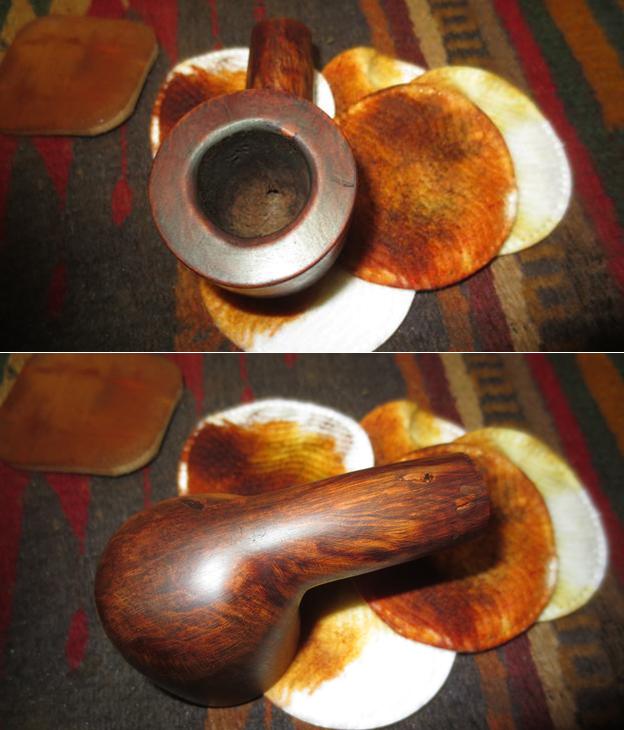
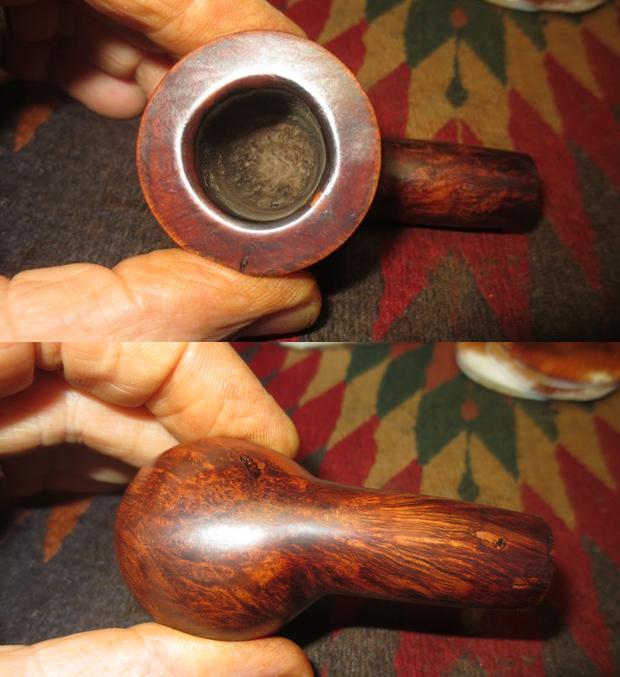
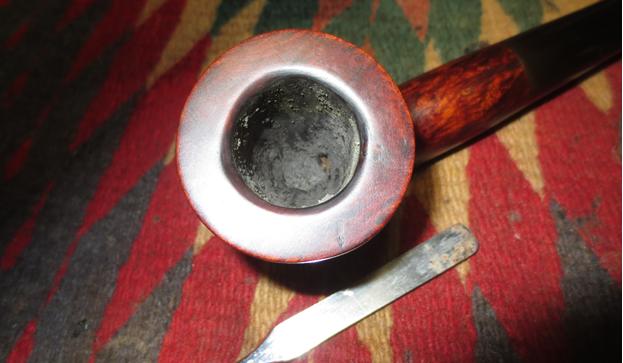
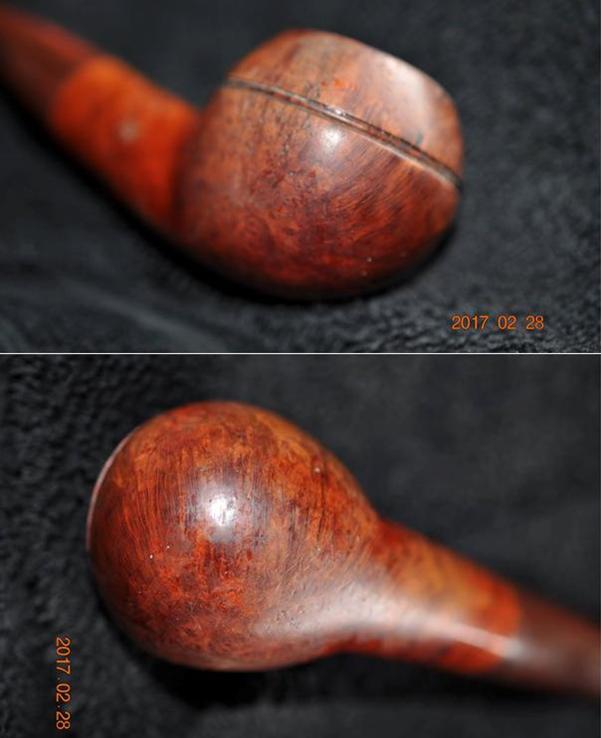
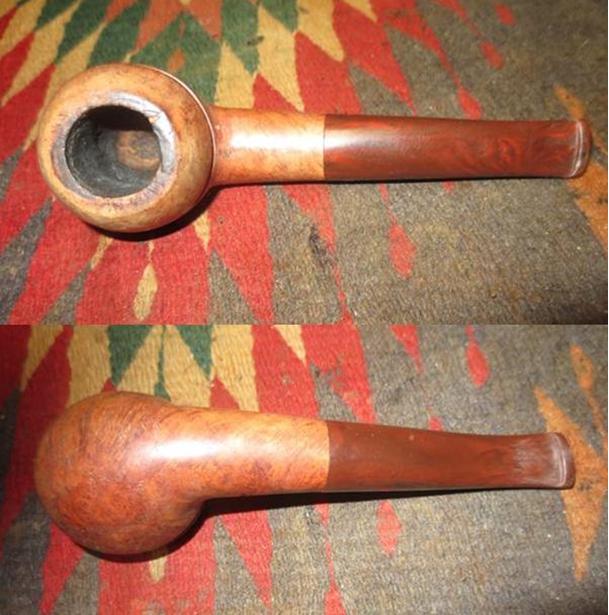
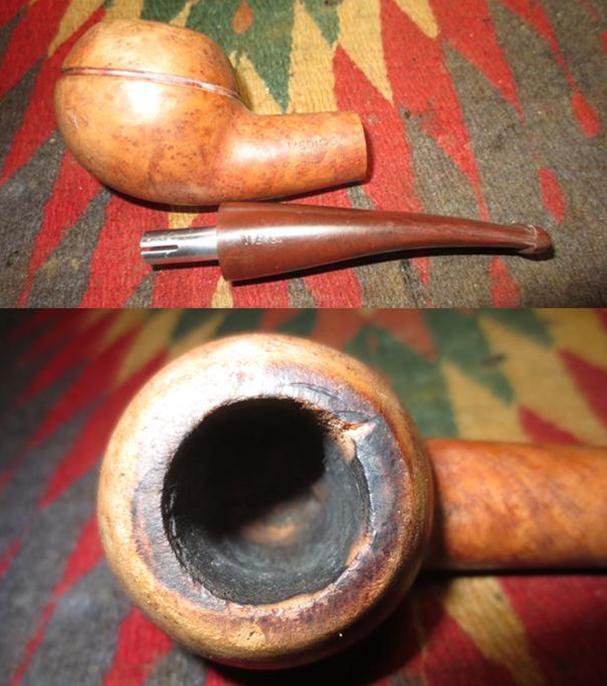
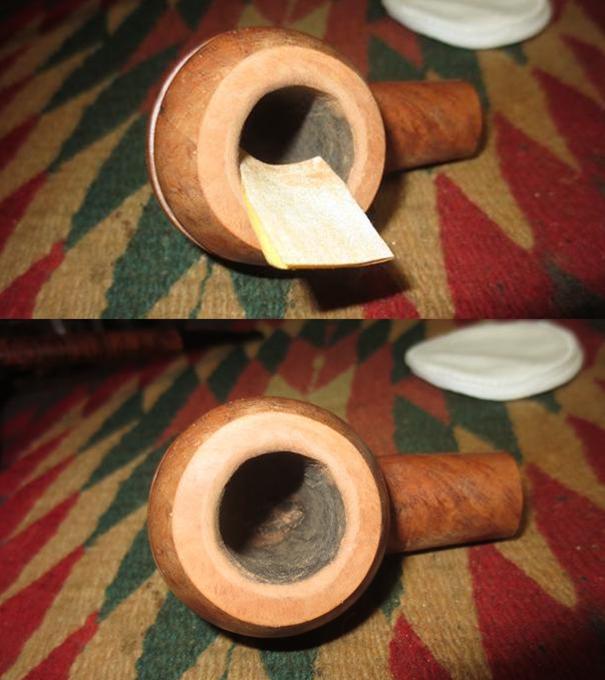
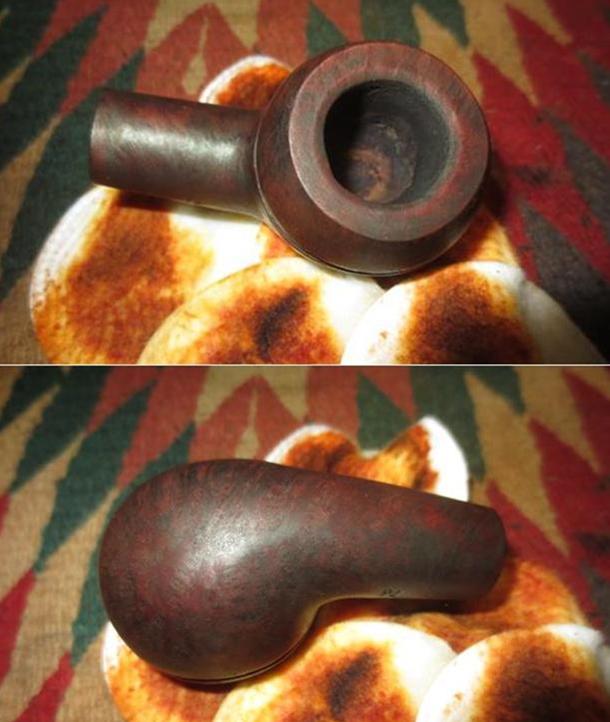
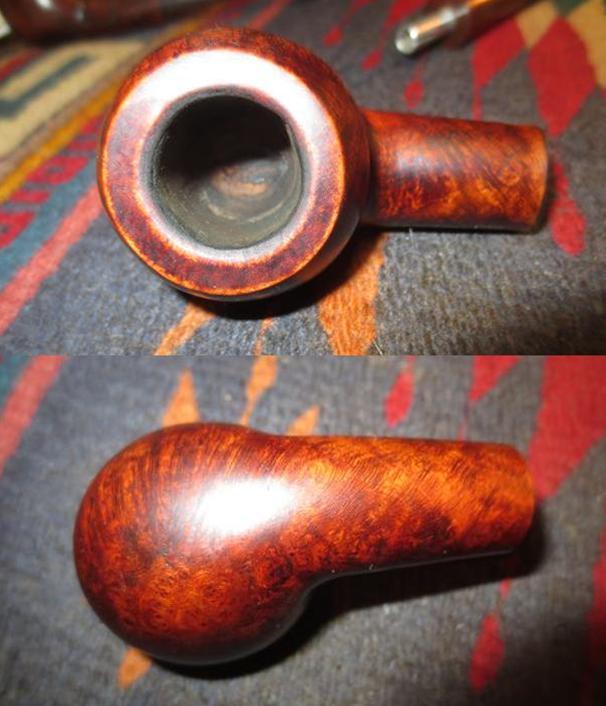
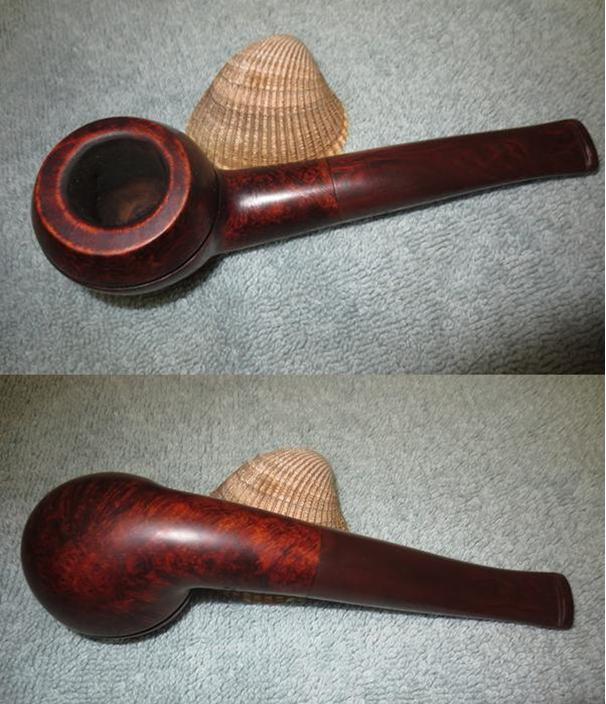
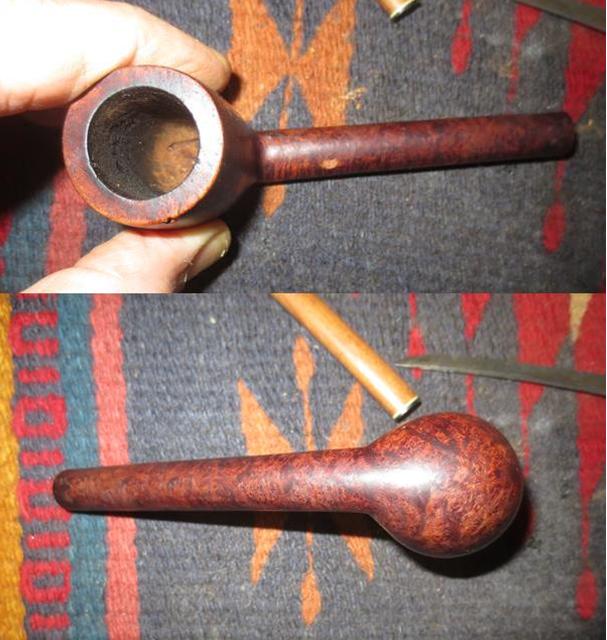
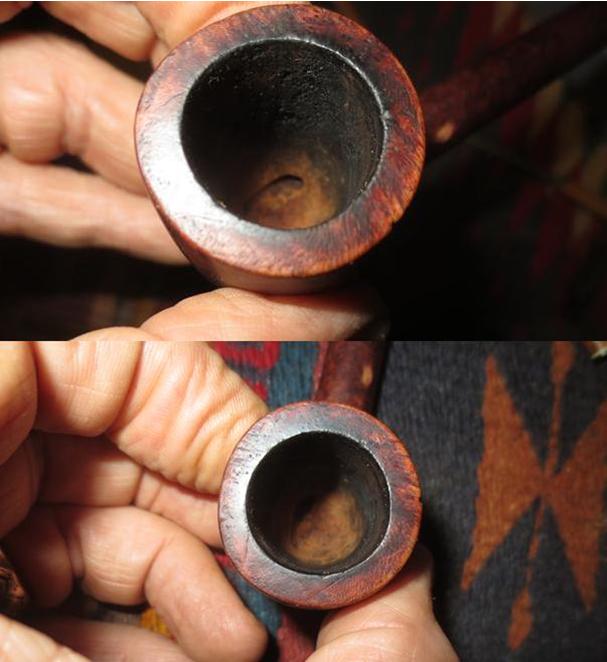
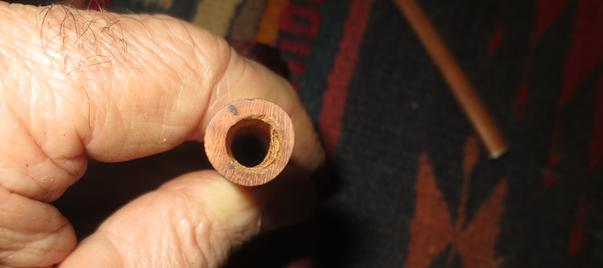
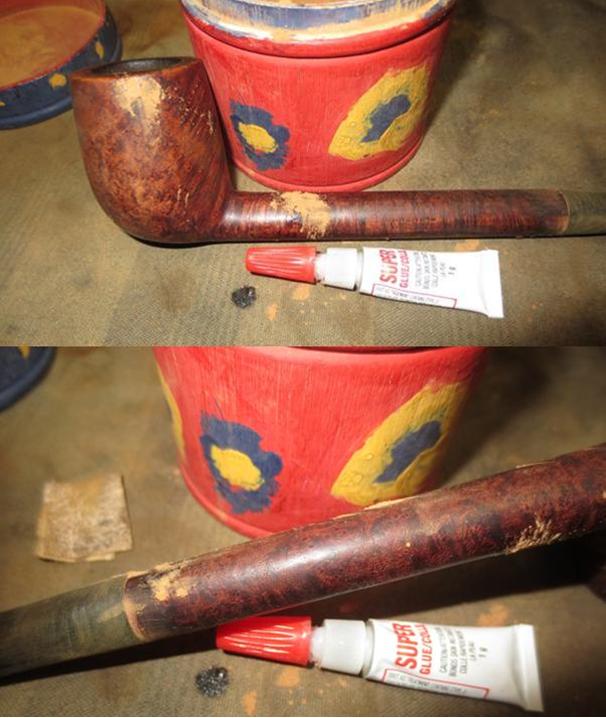
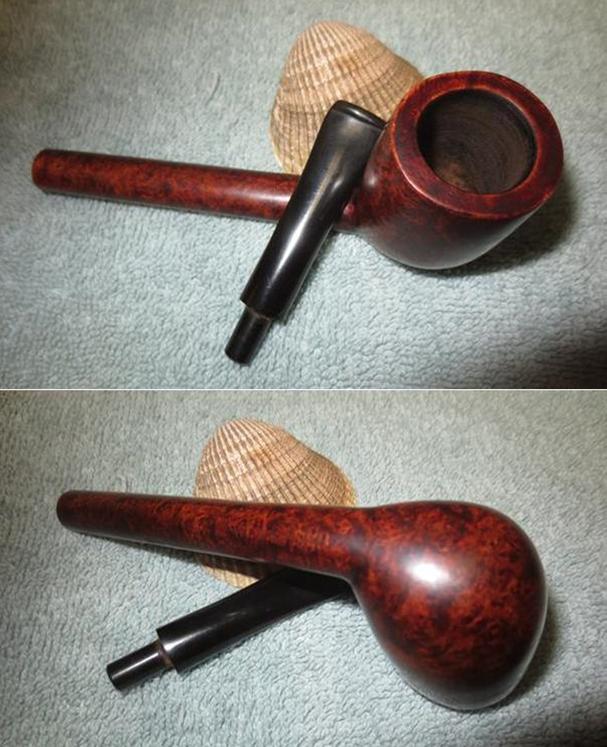
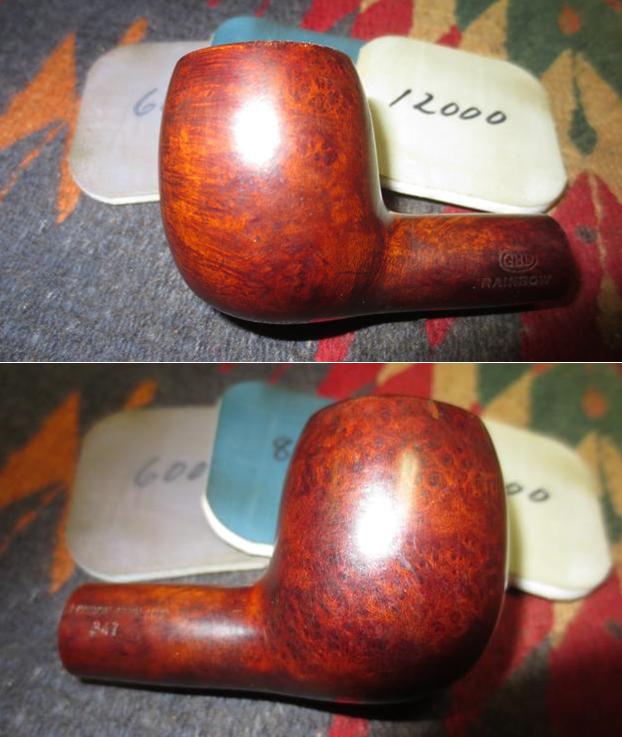
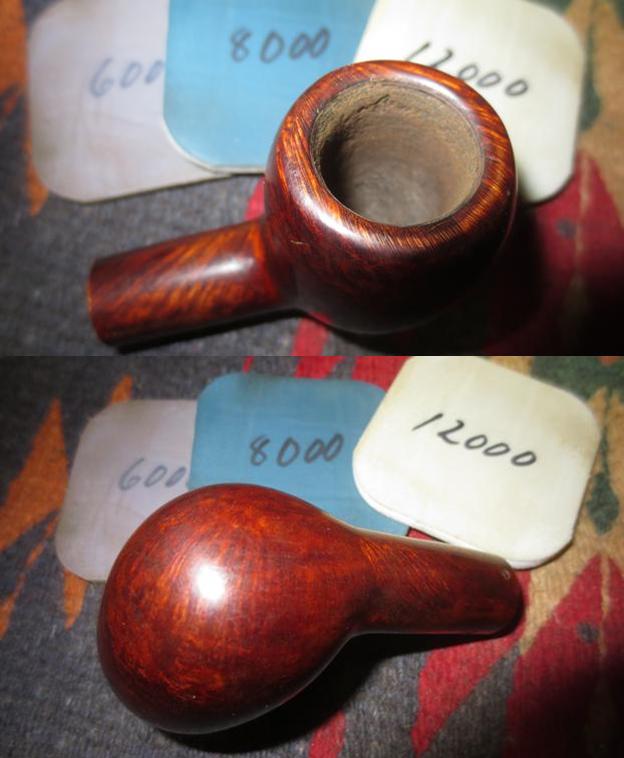
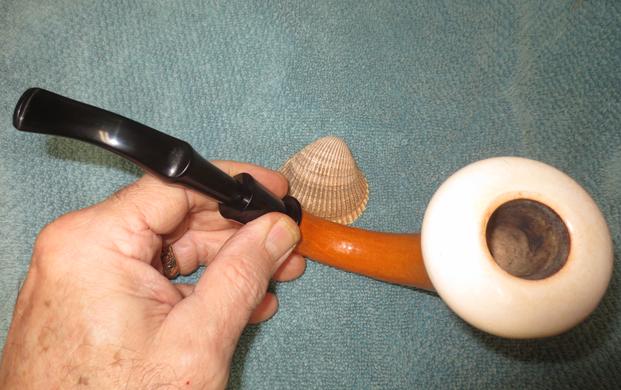
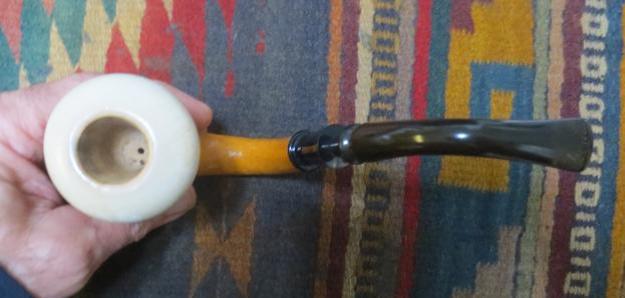
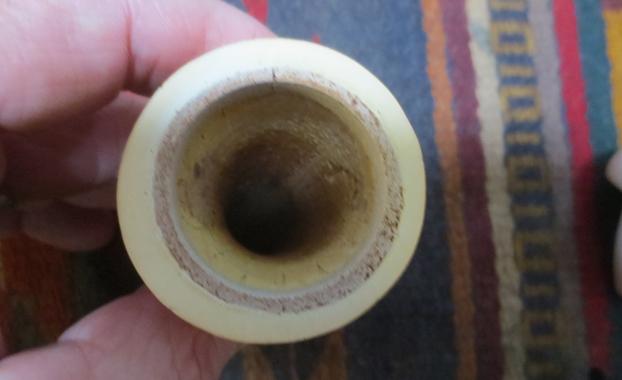
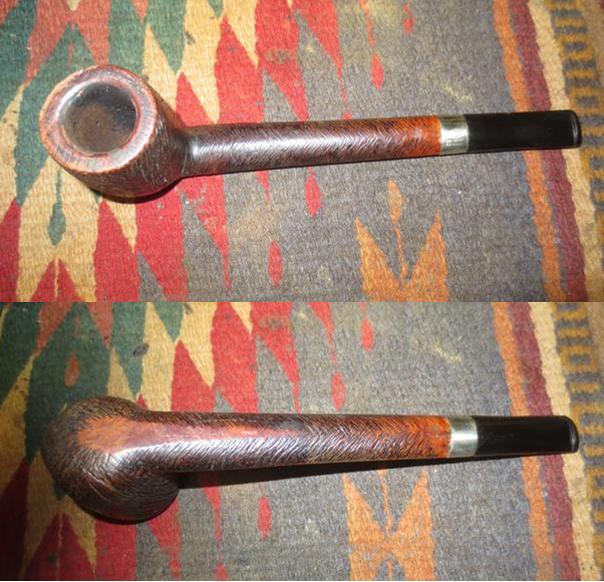
The next two photos of the rim top and the underside of the bowl and shank show some of the other issues. The rim top was worn smooth in places and the front right outer edge was rough from knocking the pipe out on hard objects. There was also some cake on the wall that needed to come out on the front right of the inner edge. The underside of the shank shows a hairline crack above the Lumberman and Italy stamping and another at the edge of the bowl just above my thumb. There was also a hard patch of something stuck to the bottom front of the bowl that was hard and rough. I am not sure if it is a repair or what but it will need to be addressed.
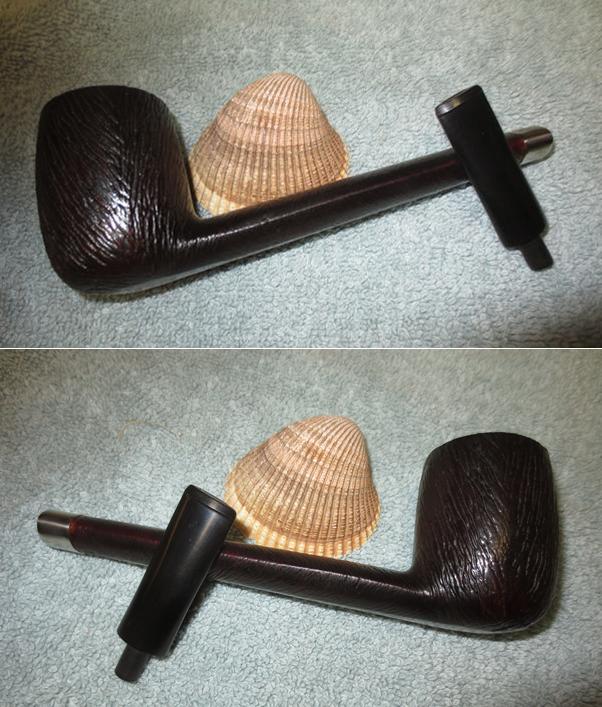
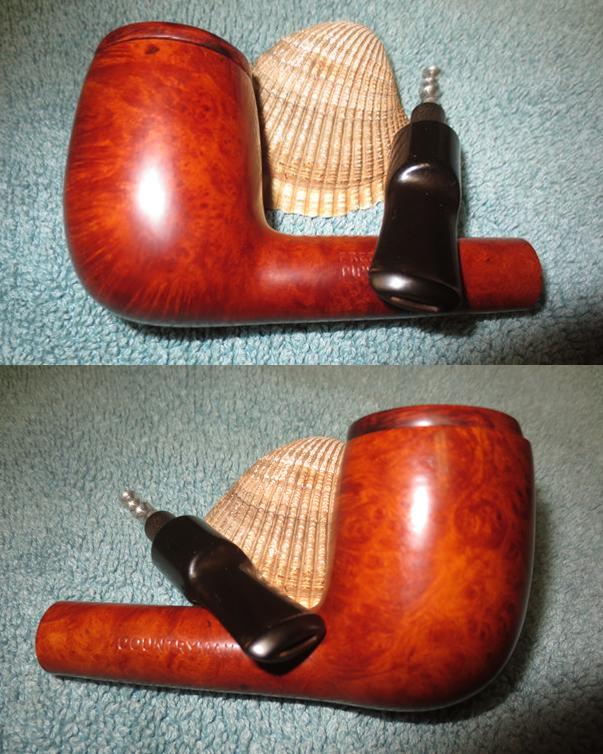
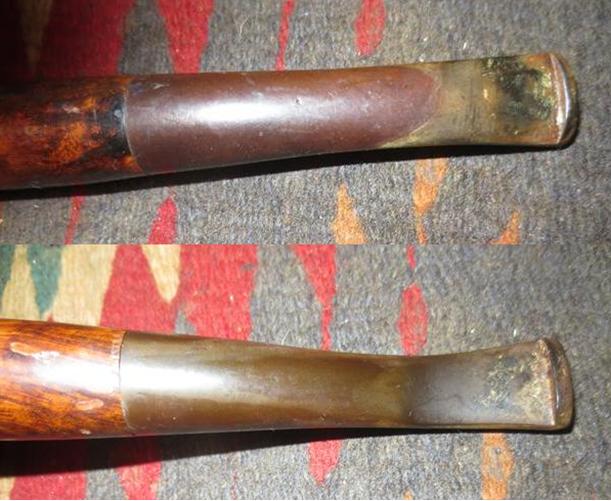
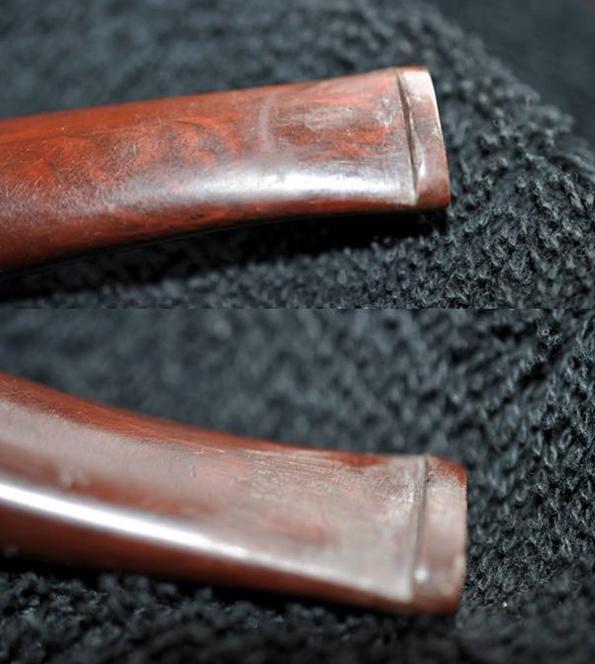
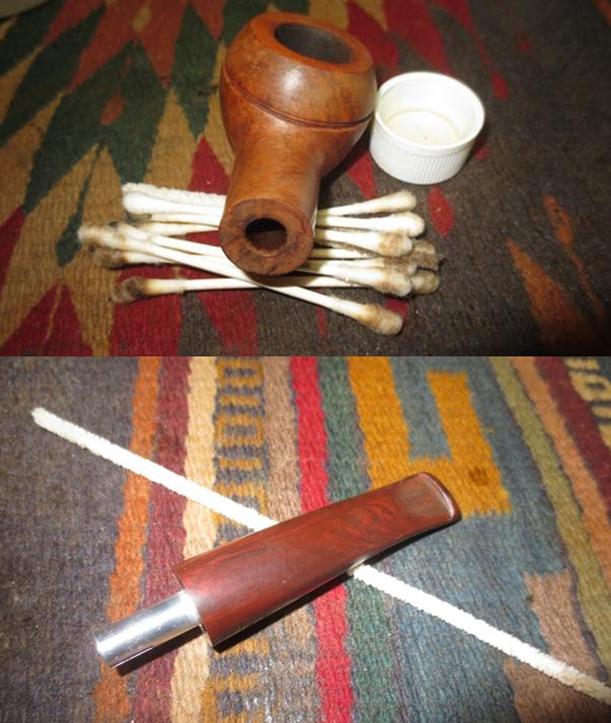
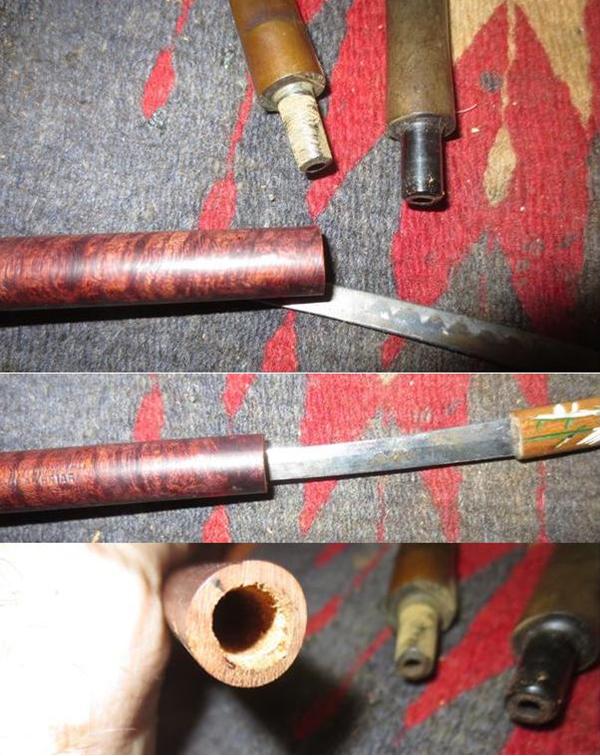
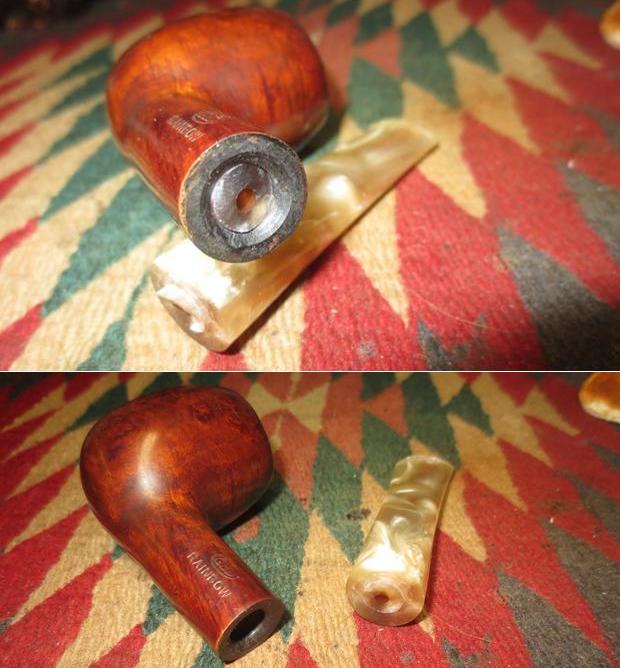
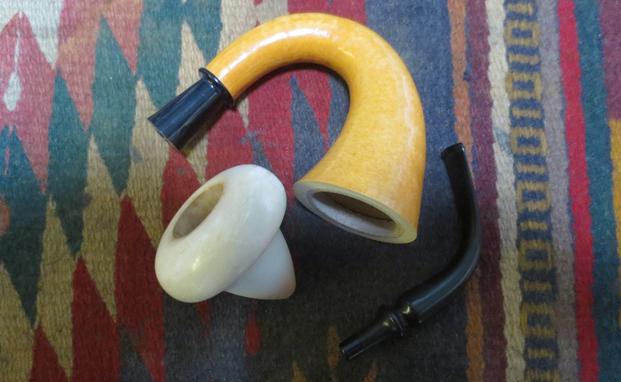
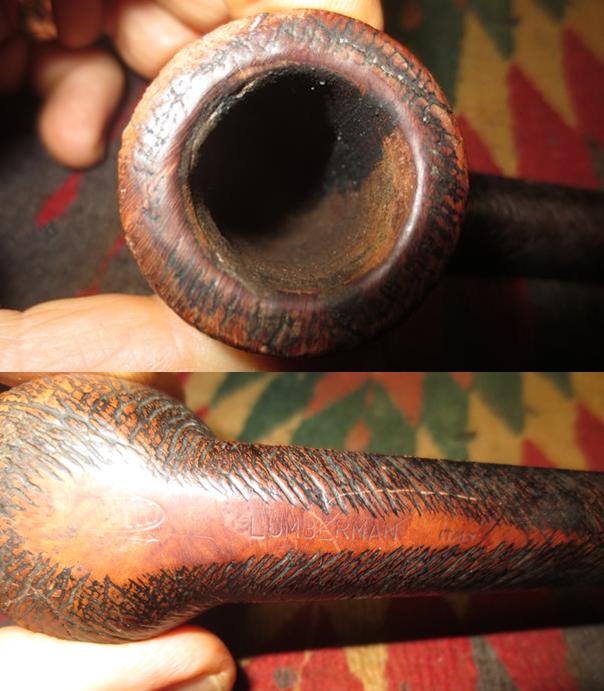
The band on the shank is part of a shank repair that had been done on the pipe. The shank had been smoothed out and most of the rustication removed under and in front of the band. There was a repaired crack on the underside of the shank. The band was loose on the shank as the glue had dried. The band is an aftermarket repair band and not original. The replacement stem has been poorly fitted to the shank end. The diameter of the oval stem does not match that of the shank and band.
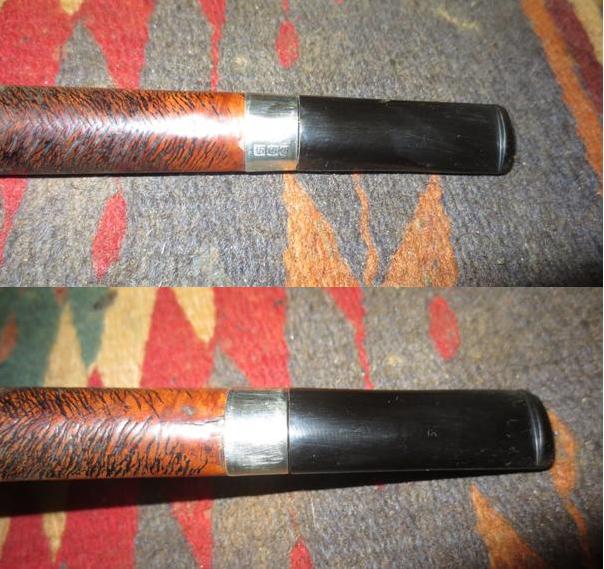
There were definitely a lot of little issues that needed to be addressed on this long shanked Canadian but there was something about it that attracted me to its potential. I topped the bowl on a topping board with 220 grit sandpaper and removed the damage to the outer and inner edges of the rim.
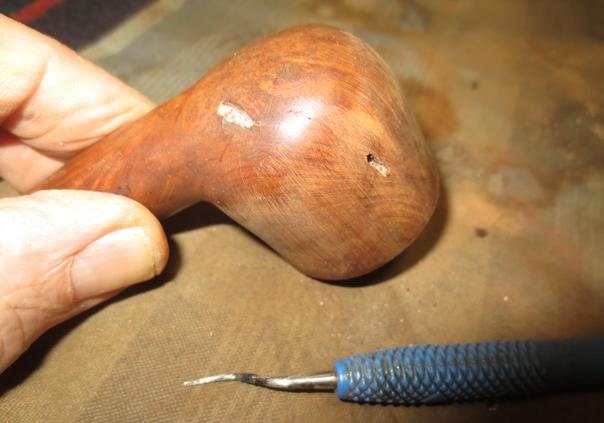
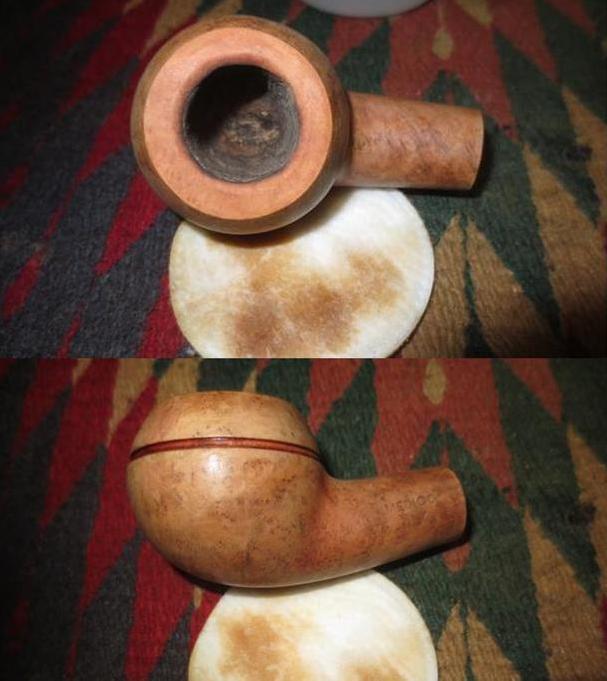
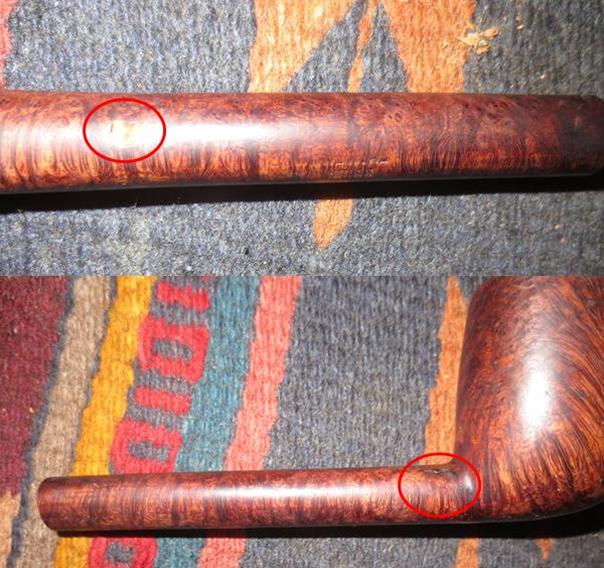
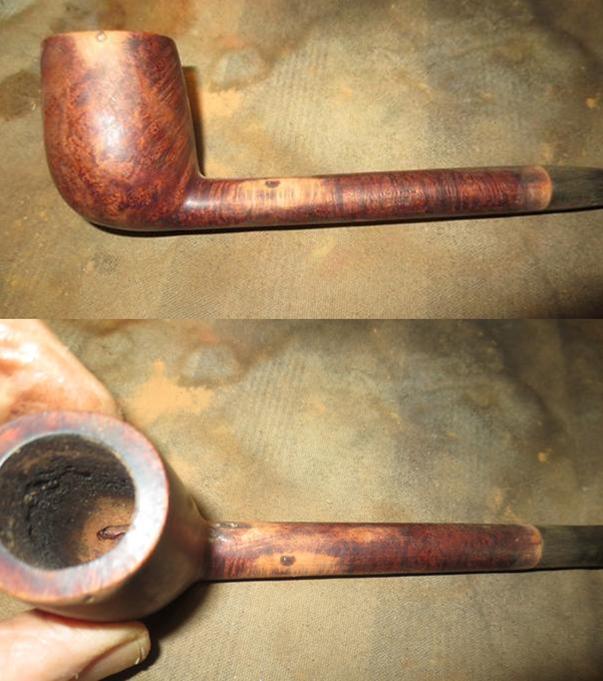
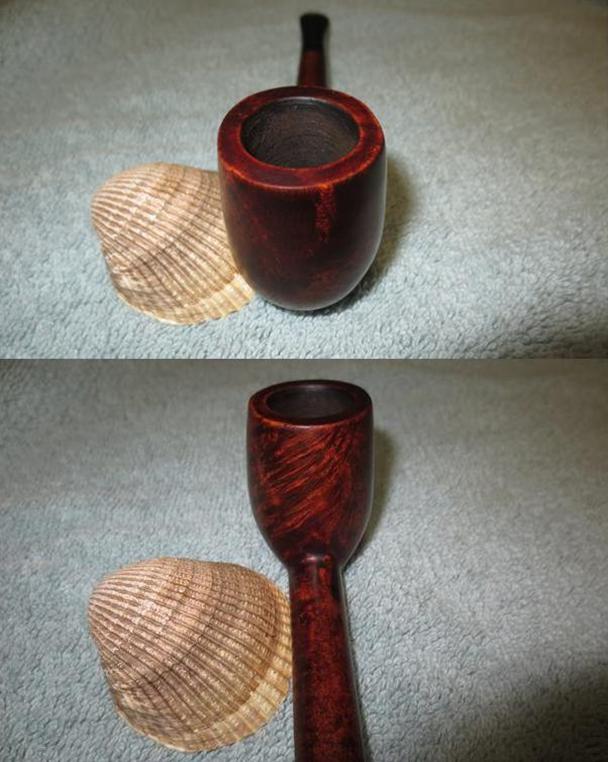
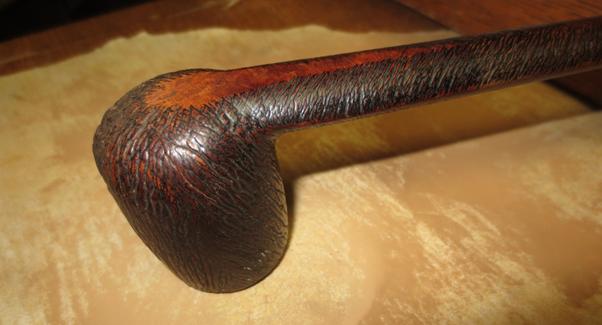
I pressed some briar dust into the small crack on the right side of the bowl toward the bottom and added some clear superglue. I repaired the hairline crack on the shank and on the lower left side of the bowl – drilling the ends carefully with a microdrill and then filling in the crack with briar dust and super glue. I circled the small cracks in red in the photos below.
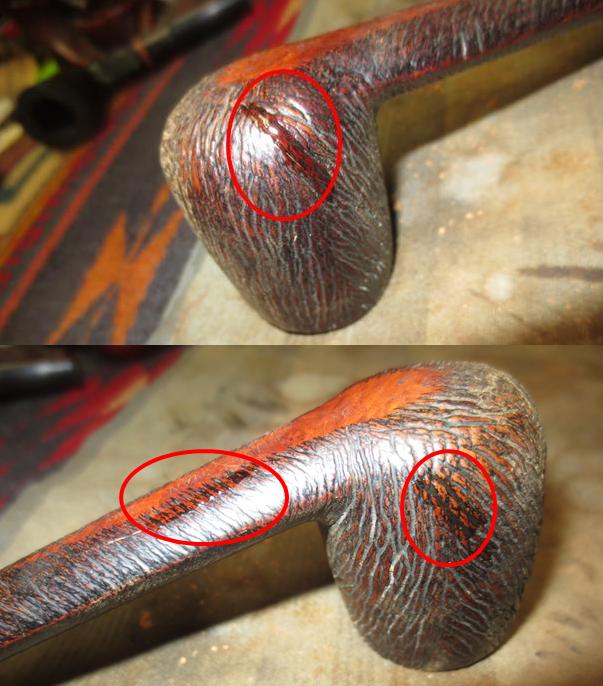
I used a series of dental burrs and drill bits on the Dremel to replicate the striated pattern of the wire rustication on the bowl and shank. It took some slow and careful handwork. I ran the Dremel at a speed of 5 so that I could easily maneuver it around the bowl and shank to match the pattern of the rustication. I used it to remove most of the thick, hard spot on the front of the bowl and match the rustication pattern surrounding it. I reworked the rustication on the rim of the pipe. I repaired the rustication under and against the band on the end of the shank and the repair on the underside of the shank. The first go at it I used the dental burrs but would later have to use files and rasps to cut the proper pattern in the briar. The next photos show the progress of the rustication. 
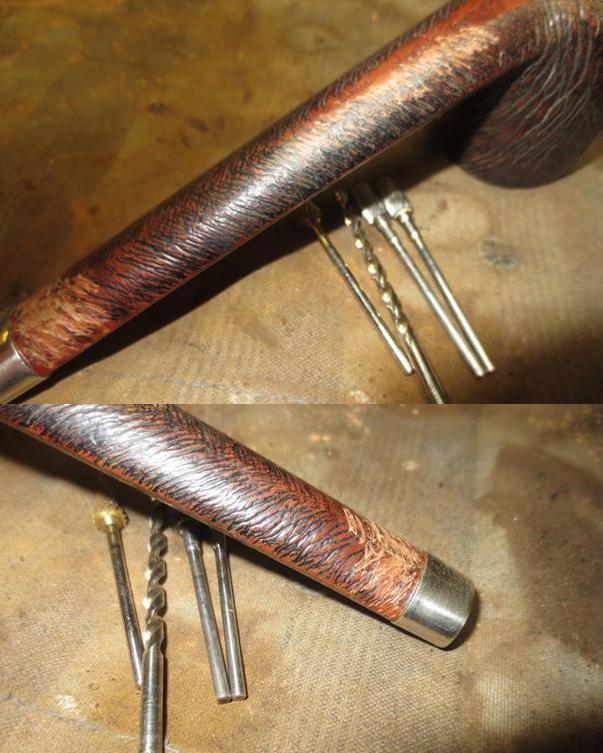
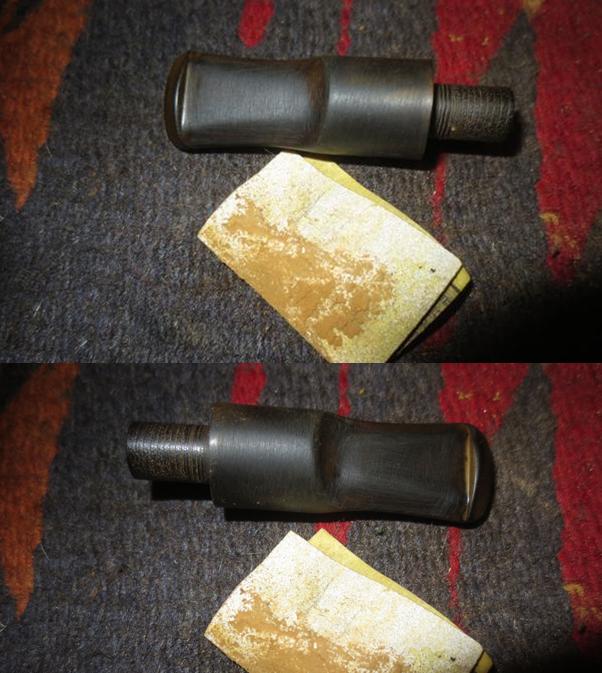
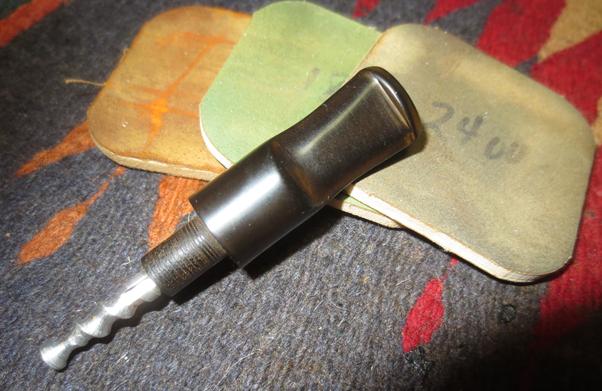
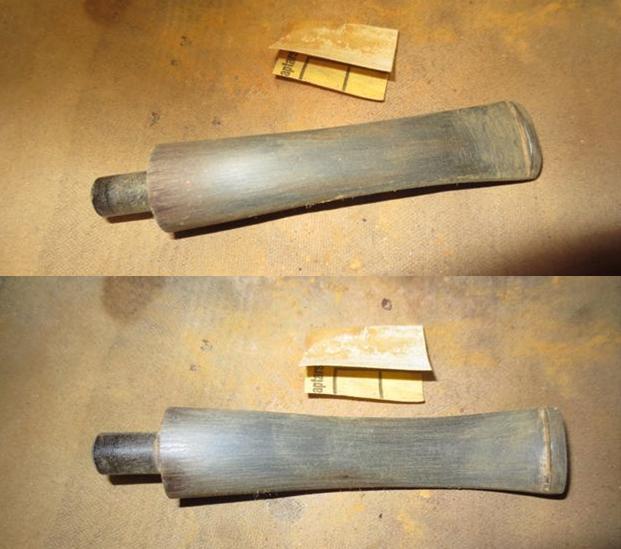
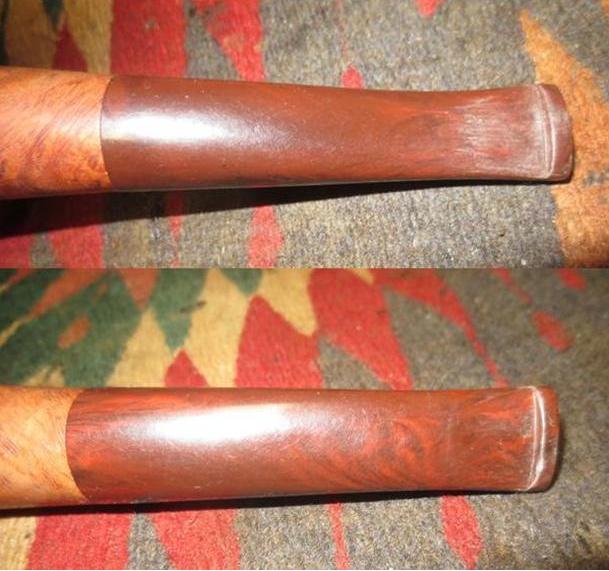
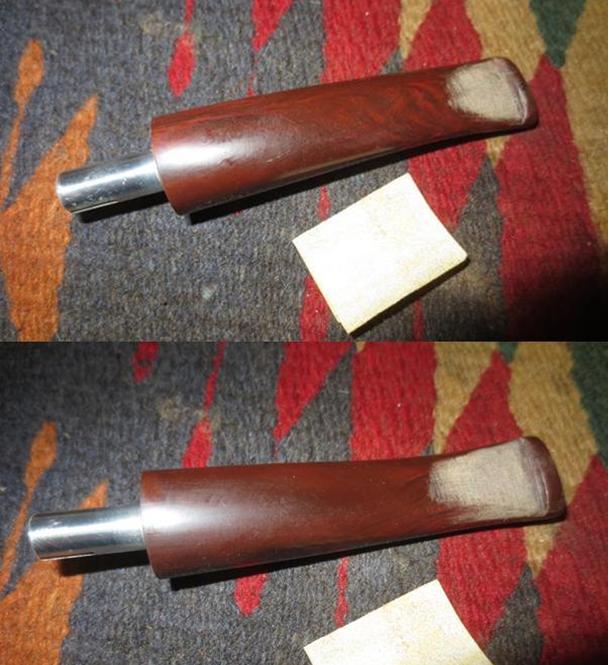
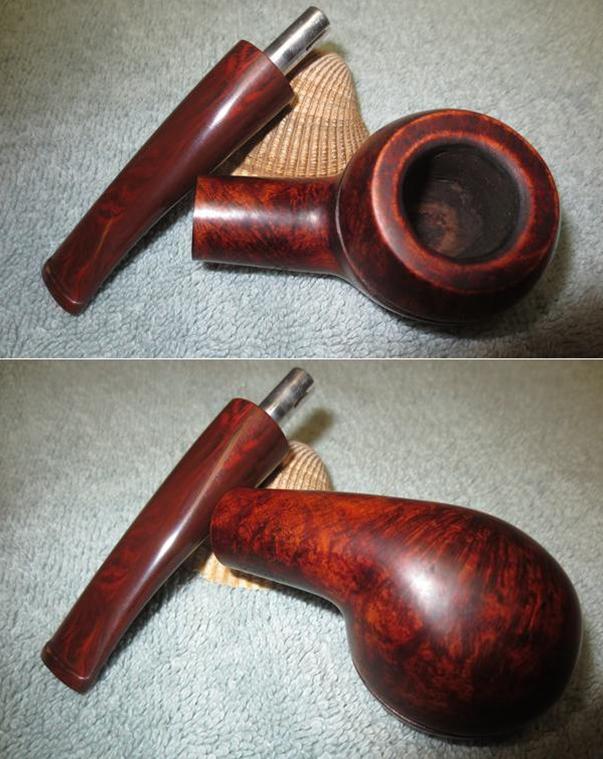
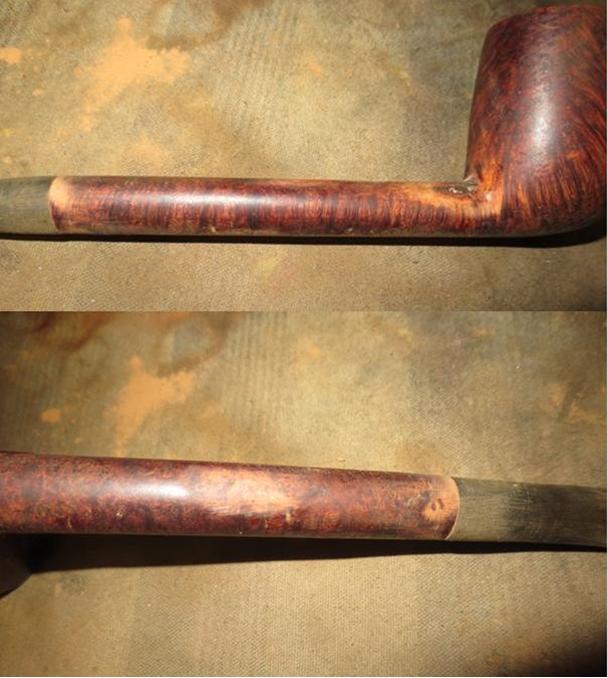
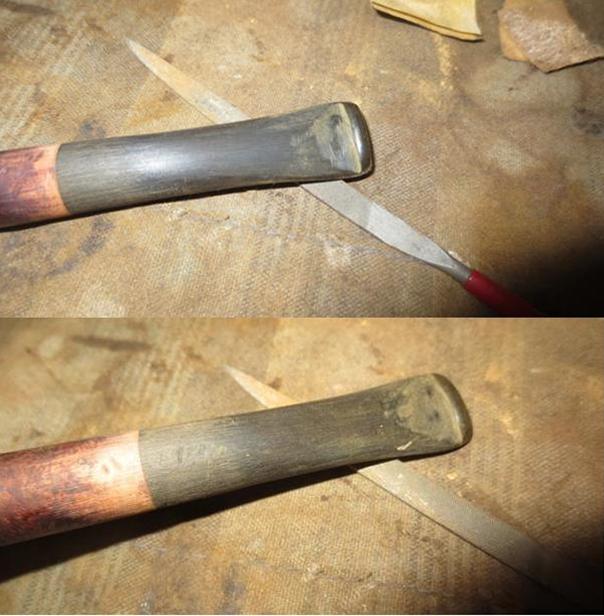
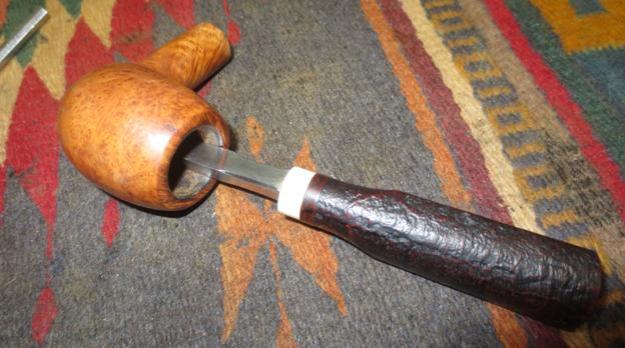
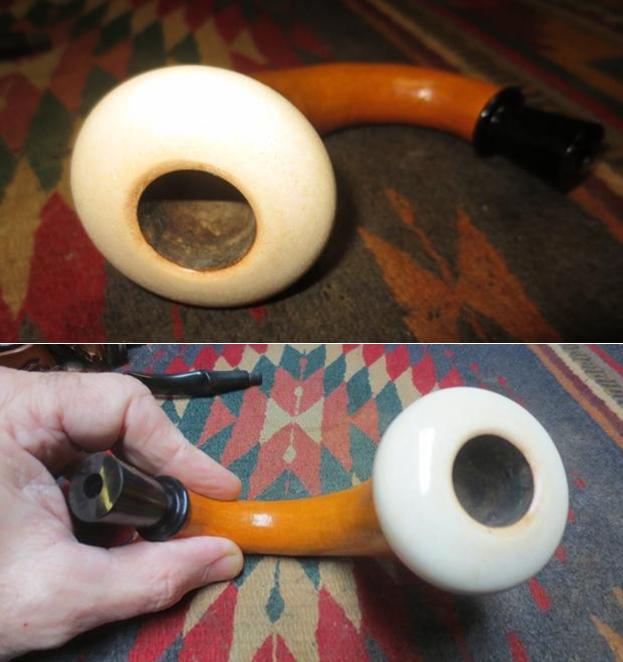
I slid the band off the shank, put the stem in place and shaped the stem to fit the curvature of the shank. I worked on it with 220 grit sandpaper until the flow of the shank and the stem matched. I personally like a smooth junction between the stem and the shank and the only way to do that correctly is to remove the band and rework that area before gluing the band back in place. The next two photos show the fit of the stem to the band and also the striated rustication pattern. Progress is being made.
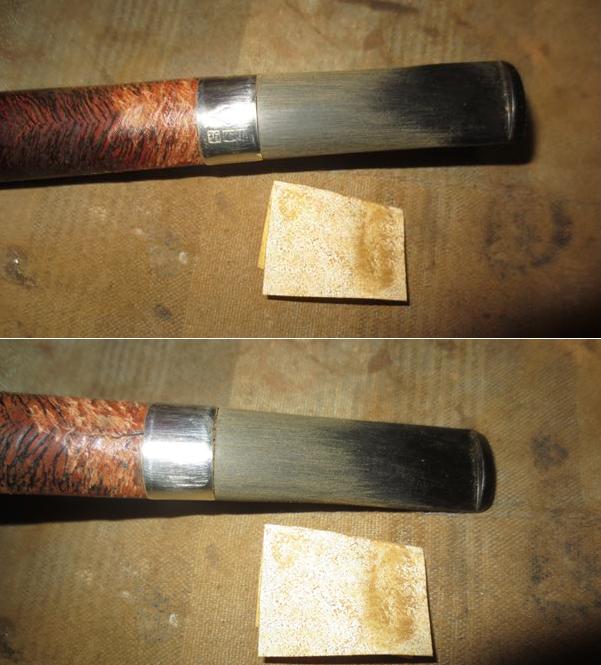
I slid the band off and put white all-purpose glue around the shank where the band would go. I pressed the band in place and wiped away the excess glue. I let the glue under the band set until the band was tight against the shank.
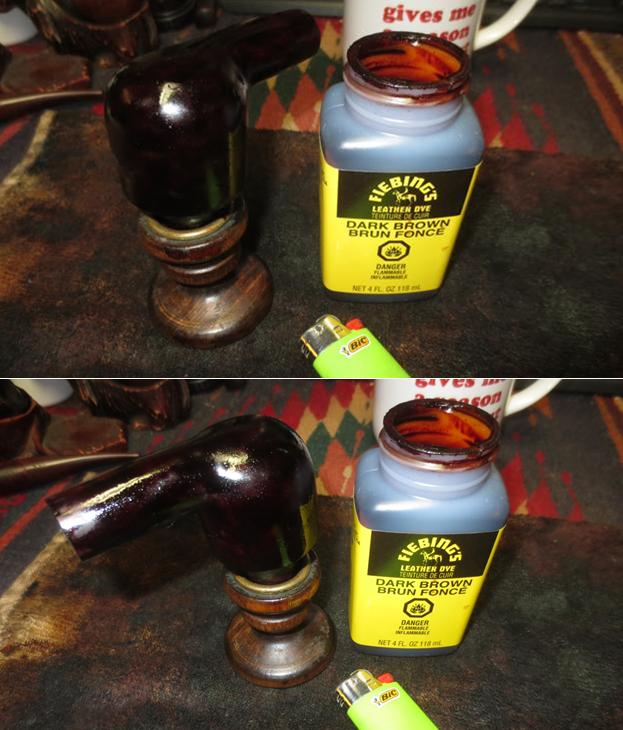
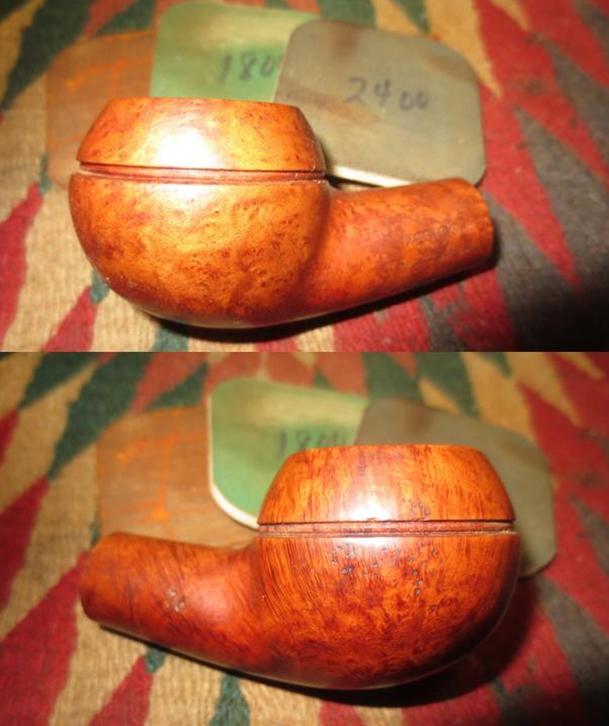
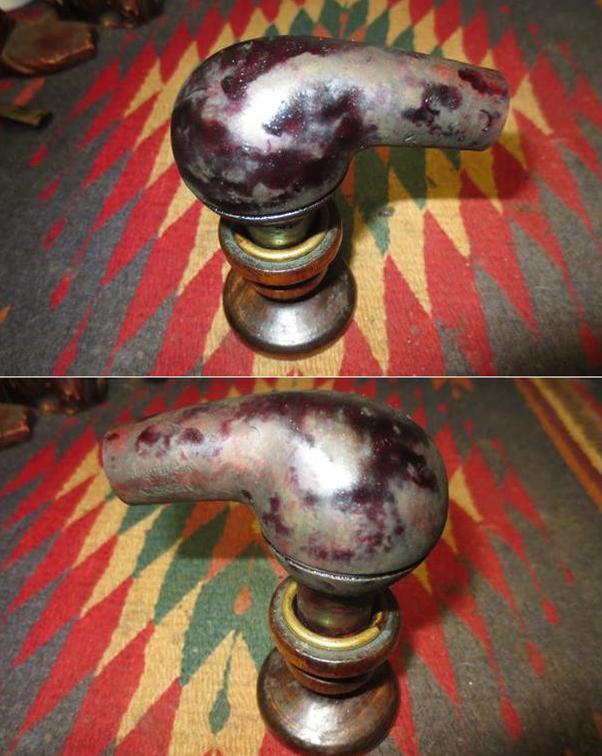
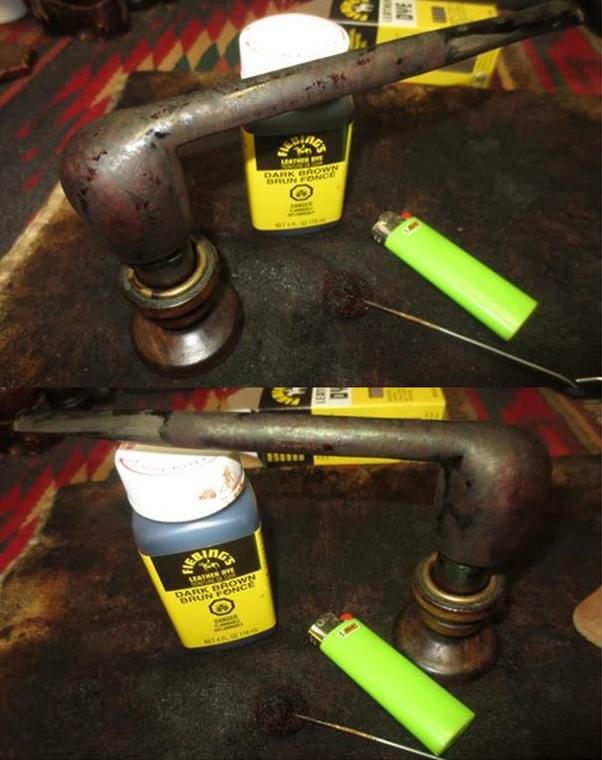
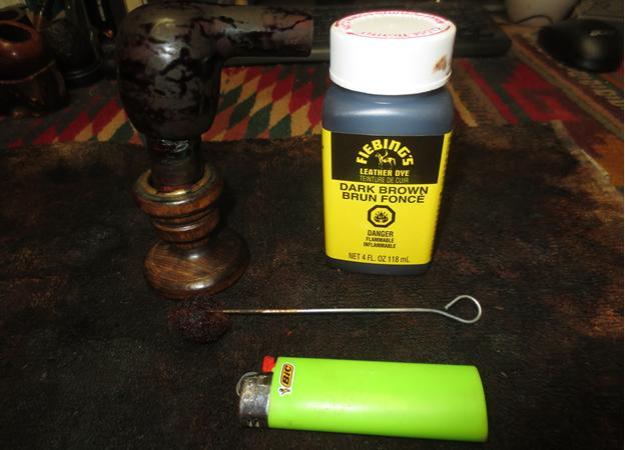
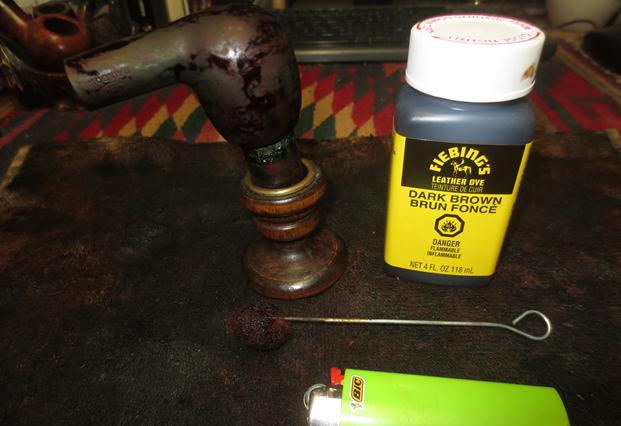
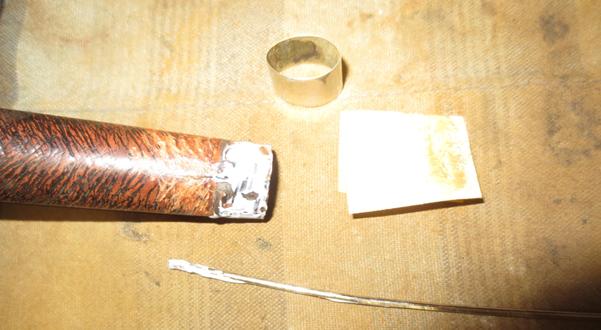
I gave the bowl and shank an under stain of dark brown aniline based stain. I applied it and flamed it to set it in the briar. I repeated the process until the coverage was what I wanted.
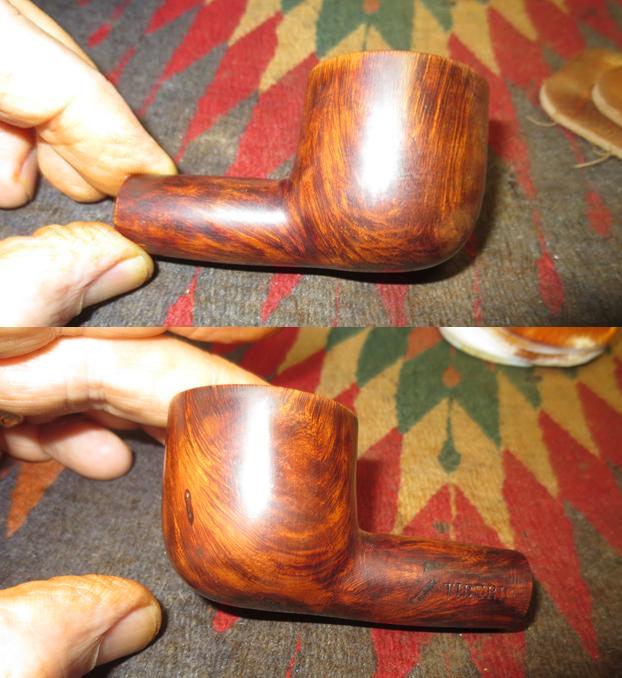
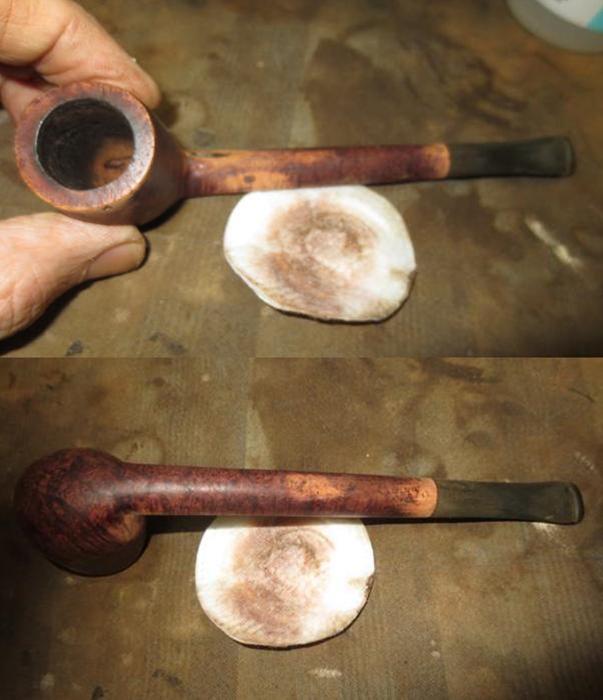
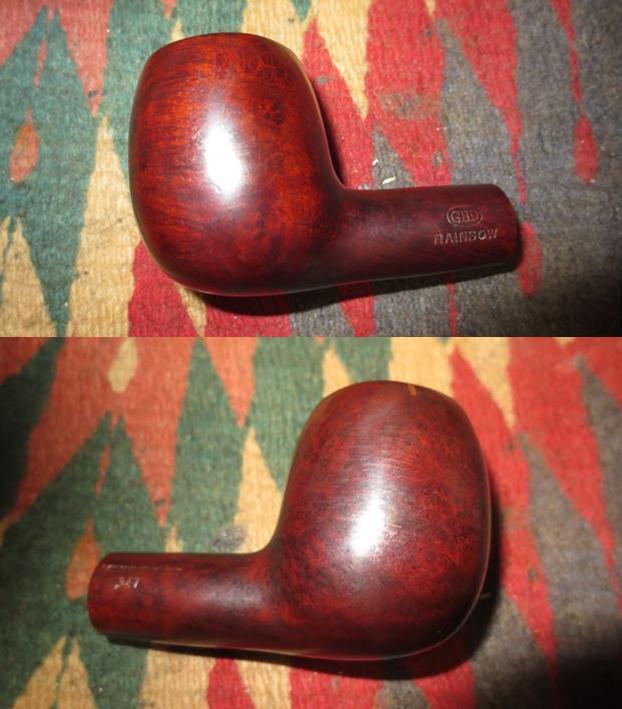
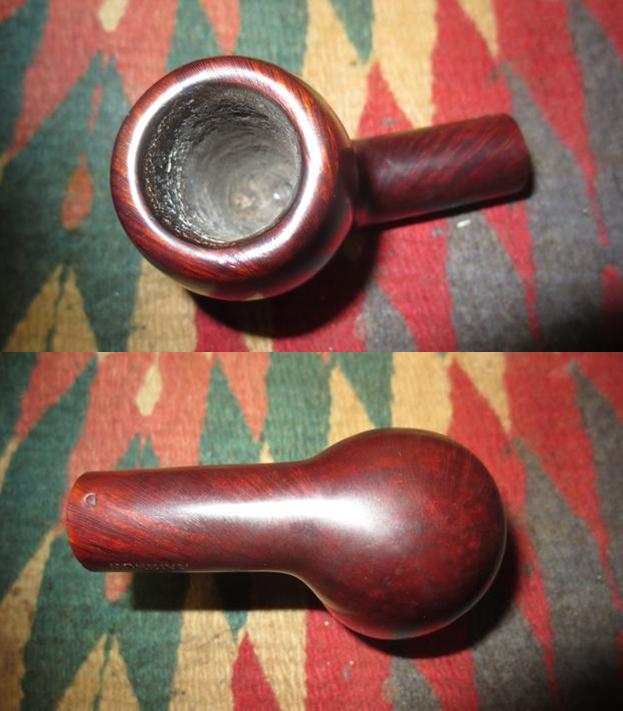
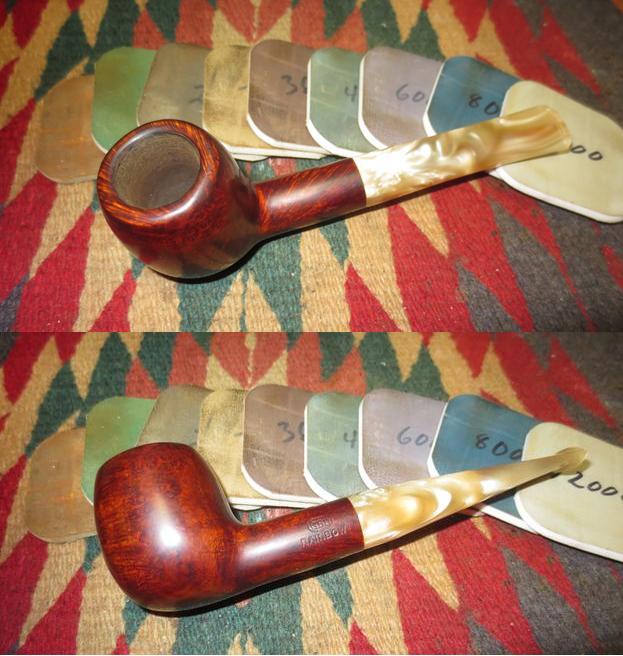
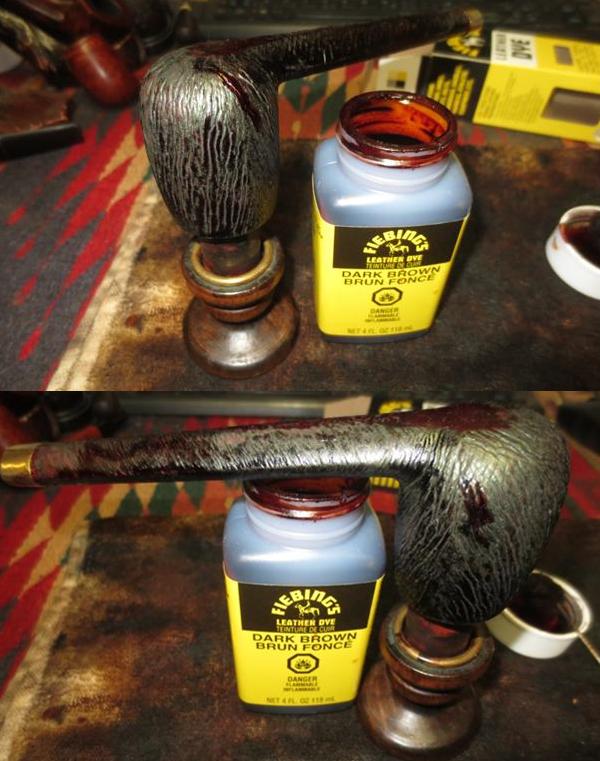
I hand buffed the pipe with a cotton cloth to give it a basic polish. I wanted to see what the coverage looked like once the stain had dried. I took photos to show how the pipe looked once I had gotten to this point in the restoration. 
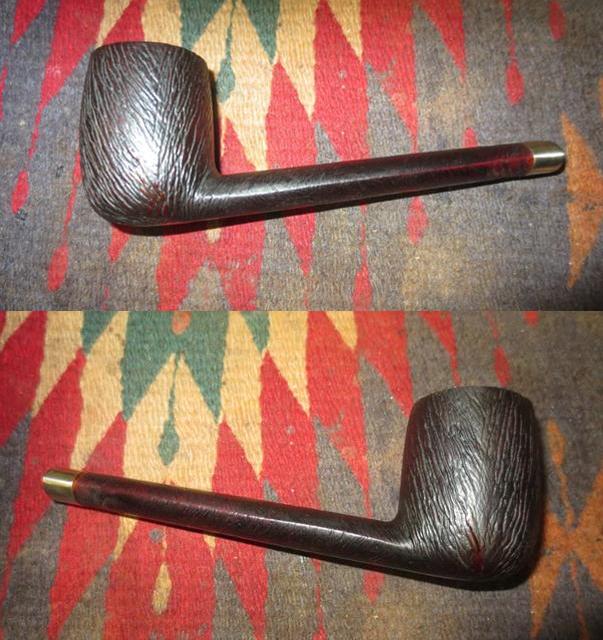
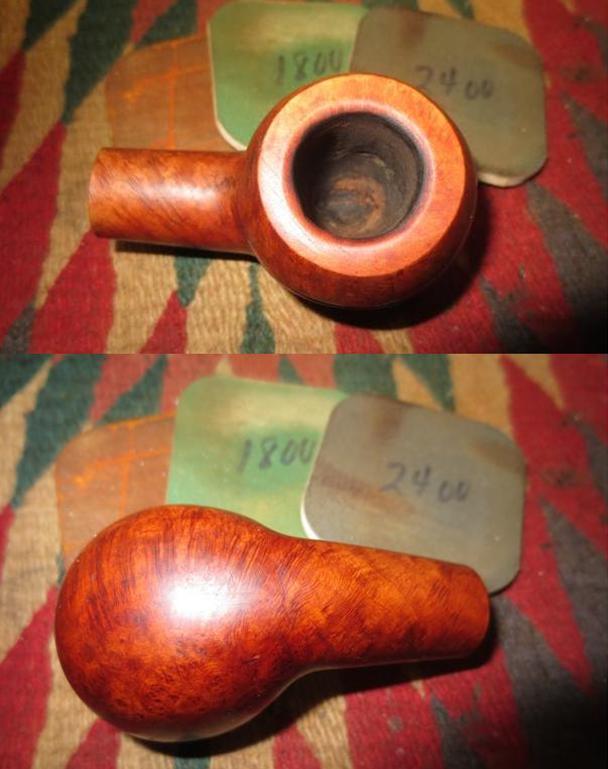
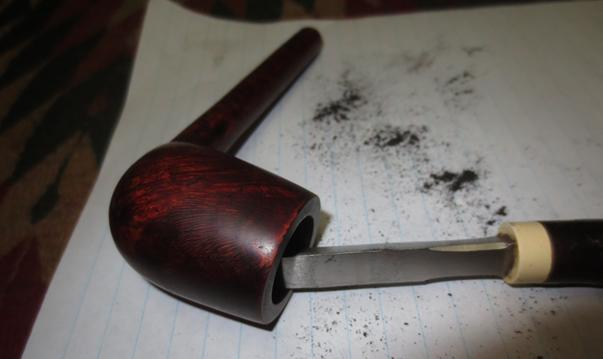
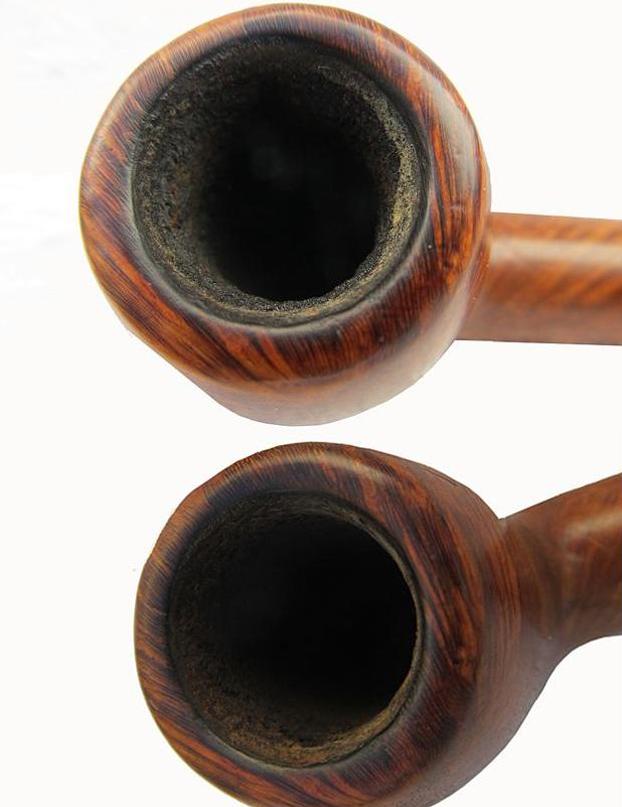
The rim did not look right to me so I used a file to cut lines into the rim top. I used a large rasp and also a set of needle files to hand cut the lines. The photo below shows the lines after I used the wood rasp. I stained the rim top again with dark brown stain to have a look.
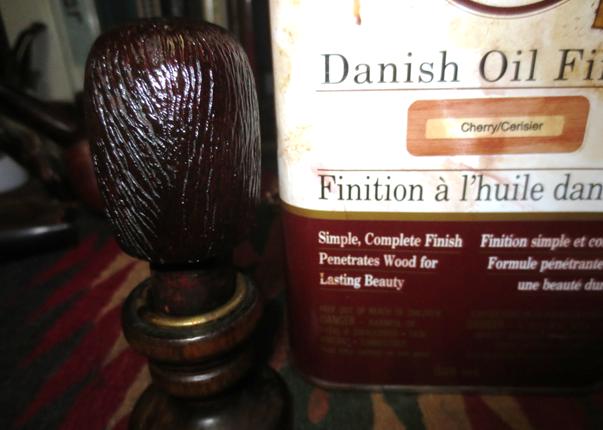
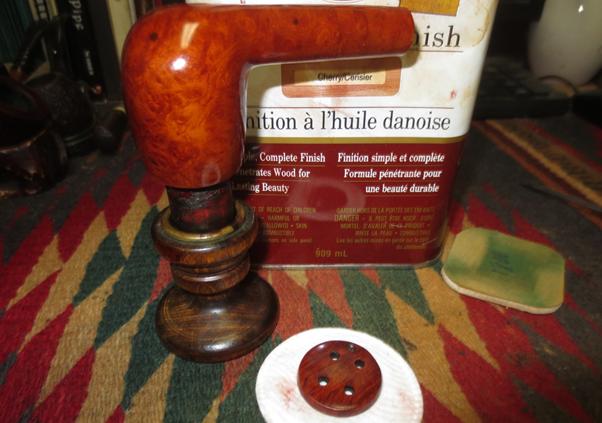
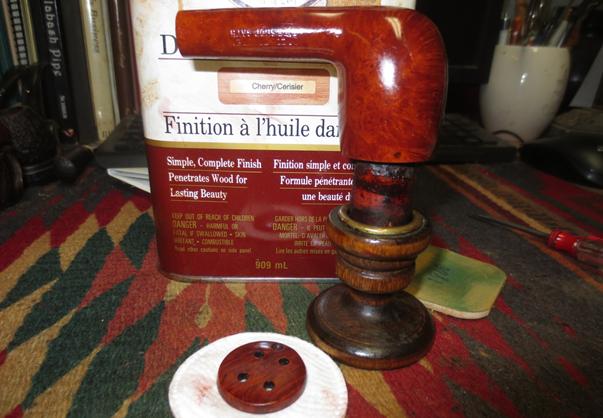
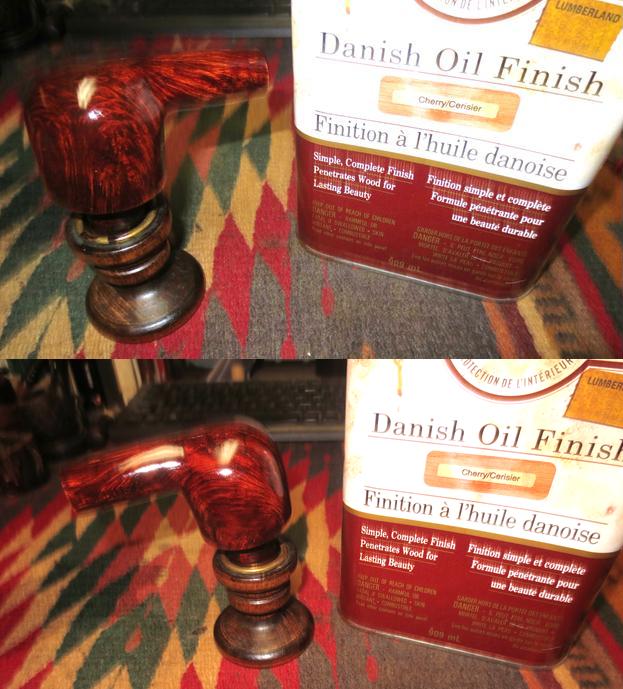
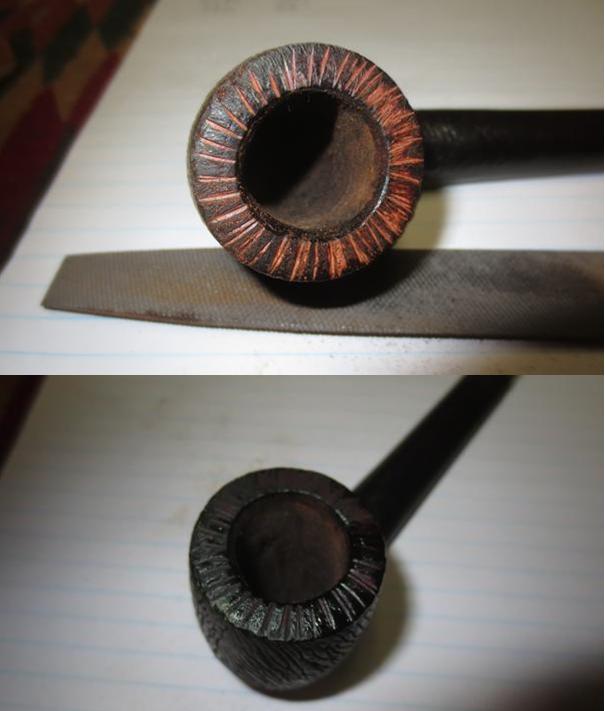
I used some smaller needle files to cut lines between the lines that were already on the rim from the rasp. I wanted the pattern to look more like the patterns on the bowl sides and shank. I restained it with a dark brown stain. Once the stain was flamed and dried I gave the bowl a coat of cherry Danish Oil as a top coat that would add some contrast to the look of the briar and blend the all the repairs and the joint of the two parts of the shank into one cohesive looking piece. 
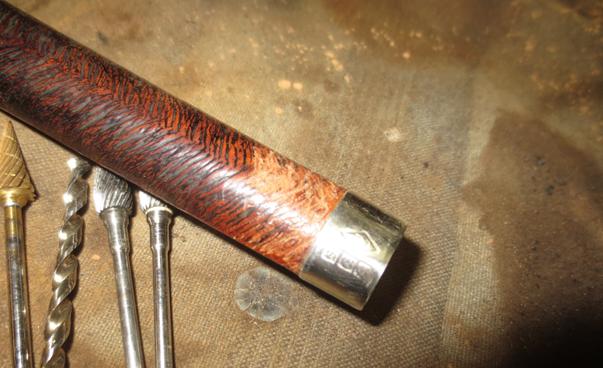
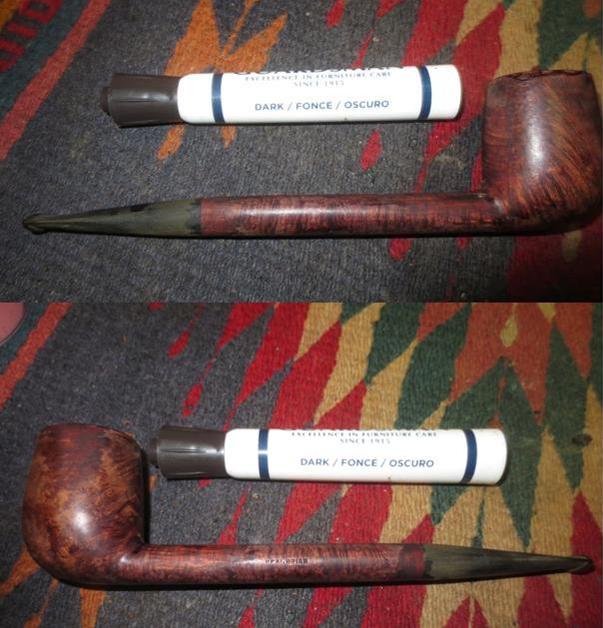
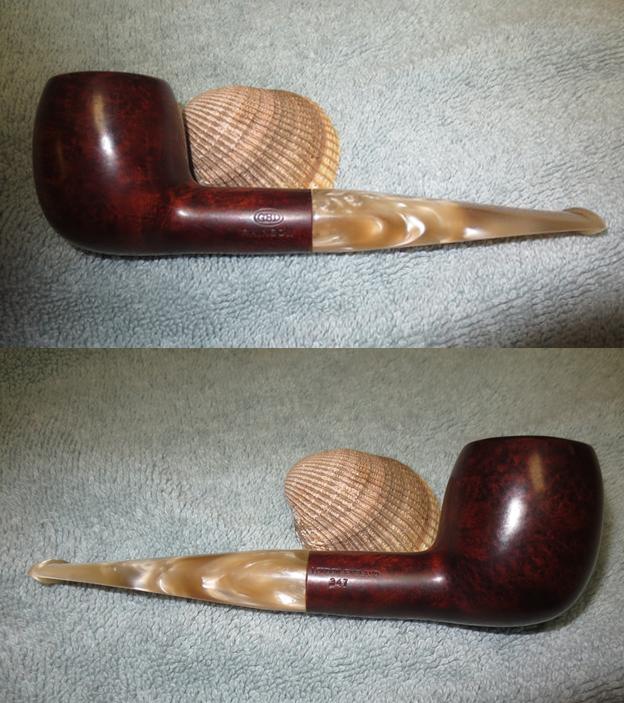
I hand buffed the bowl and shank with a soft cloth and then gave it a light buff with Blue Diamond on the buffing wheel. The contrast looks really good and the coverage makes the repairs blend in really well with the rest of the bowl and shank. 
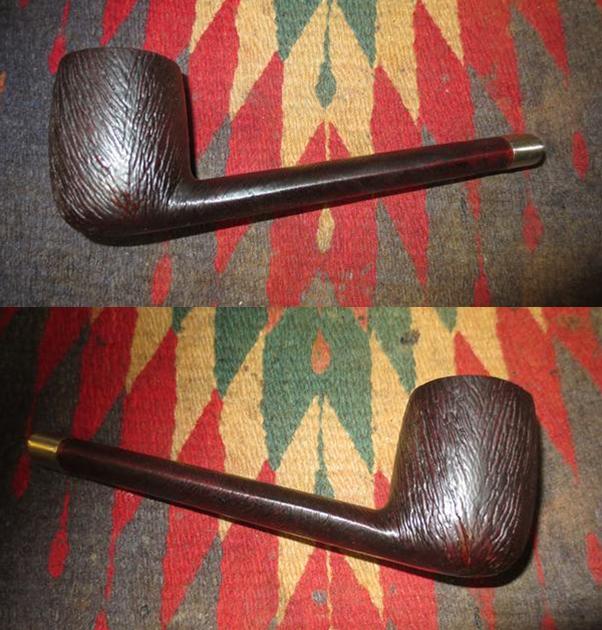
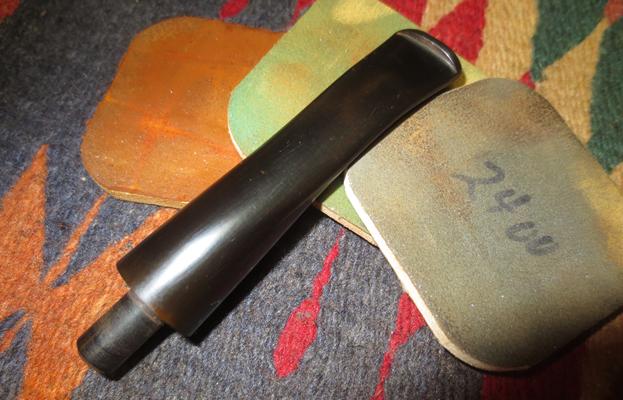
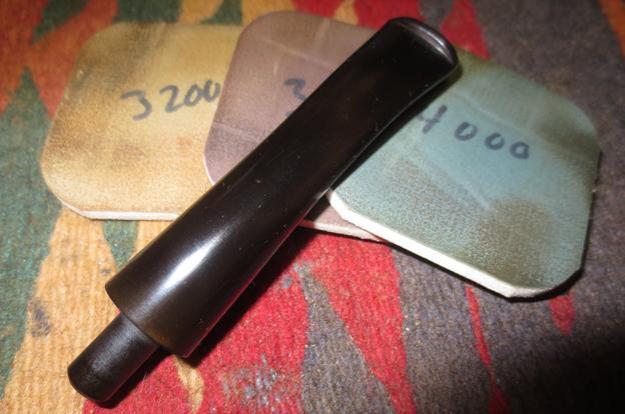
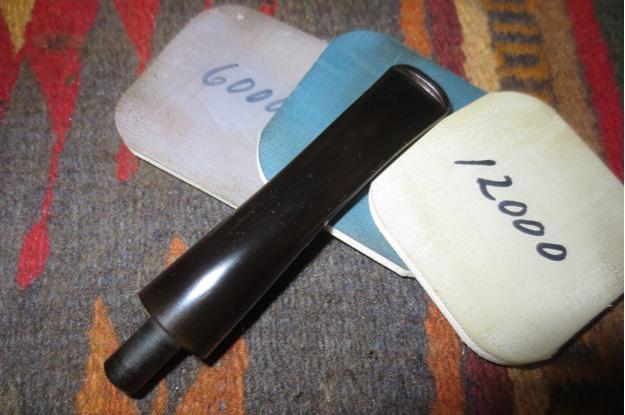
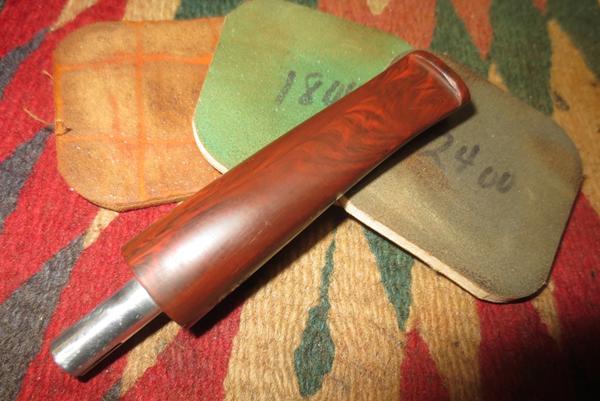
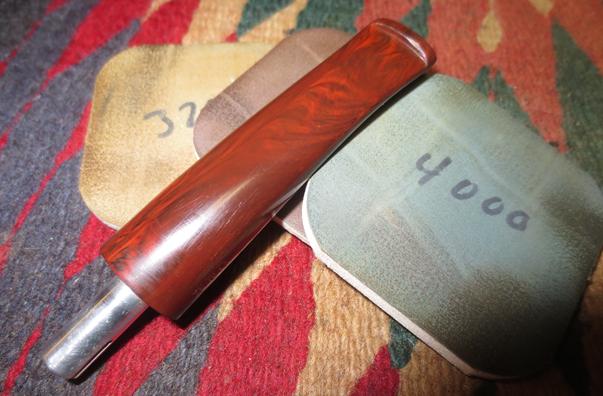
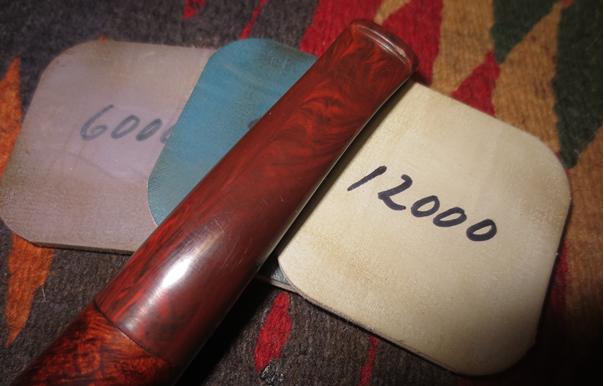
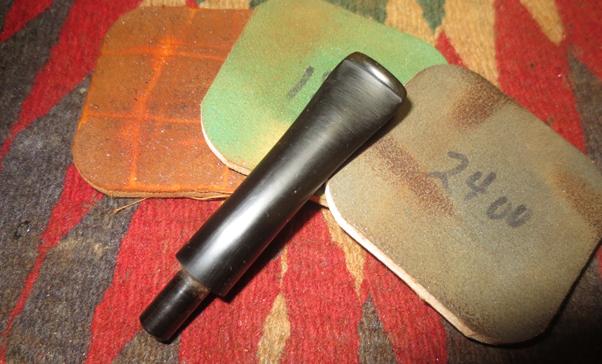
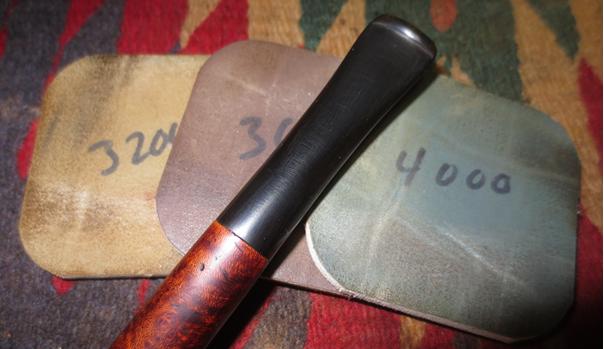
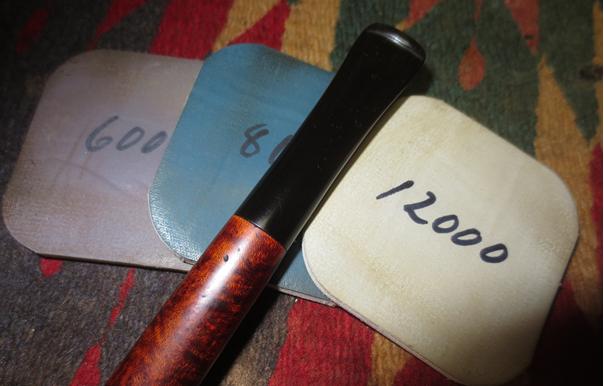
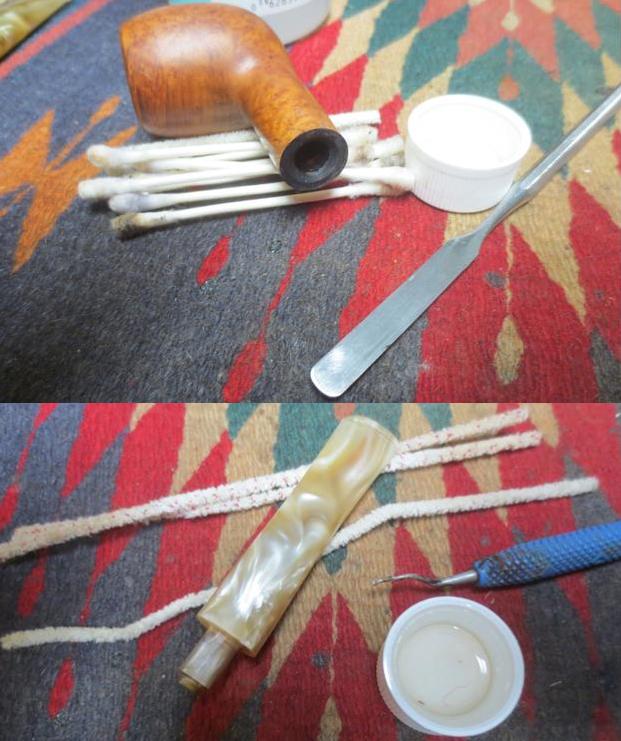
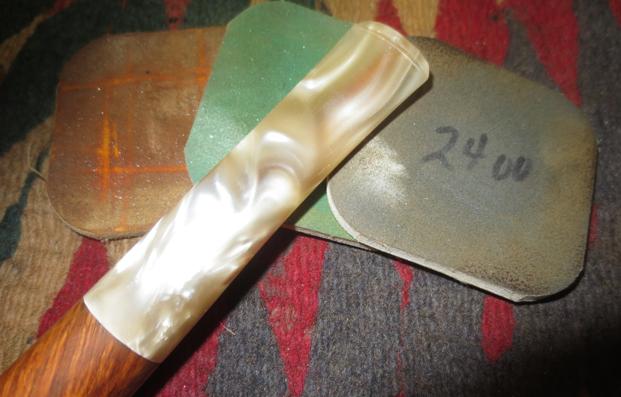
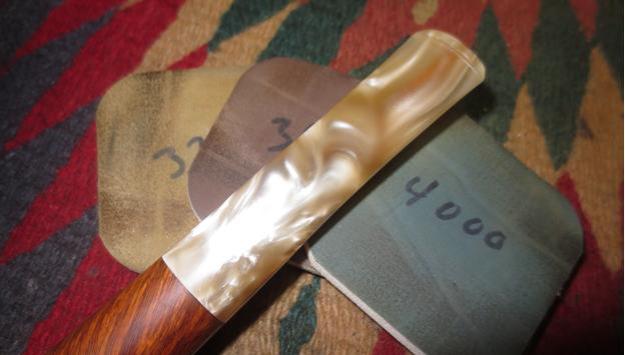
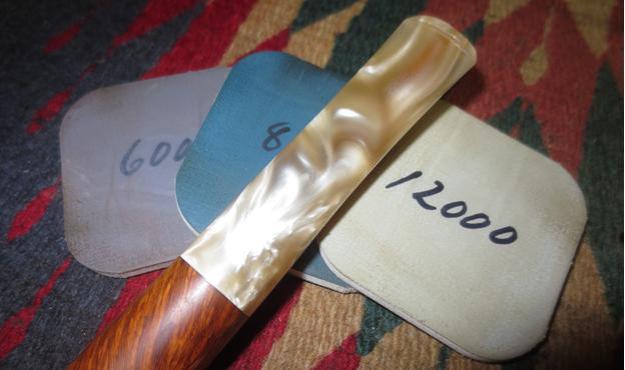
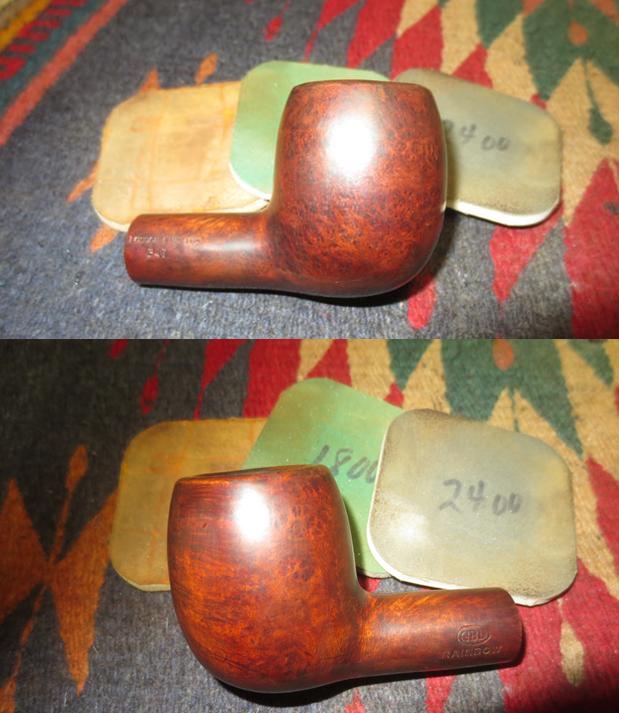
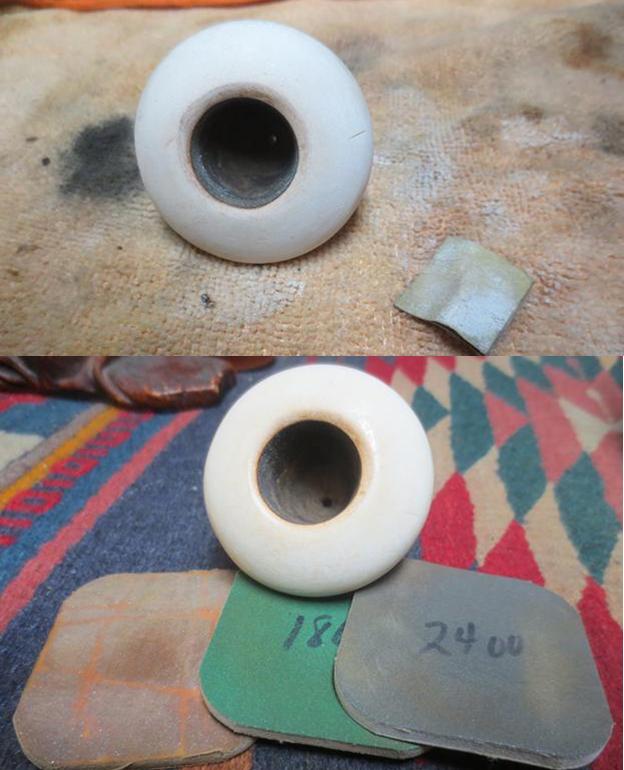
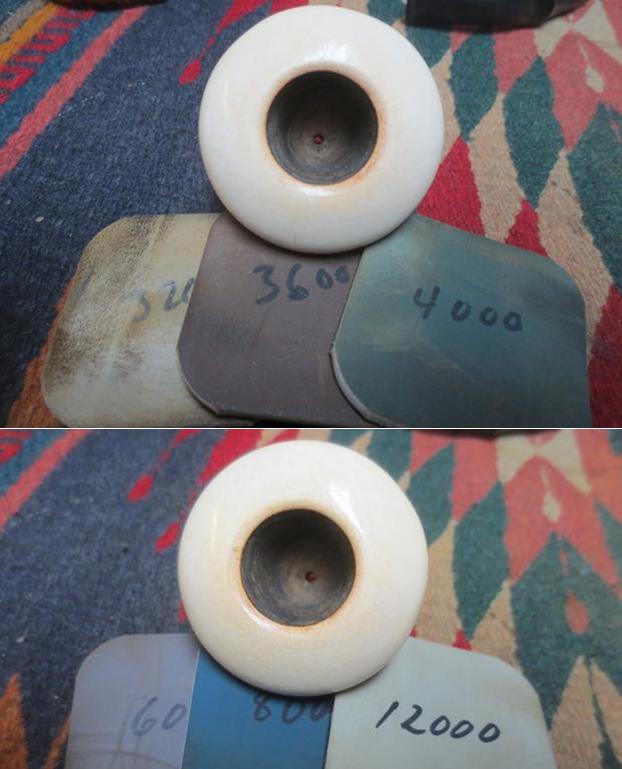
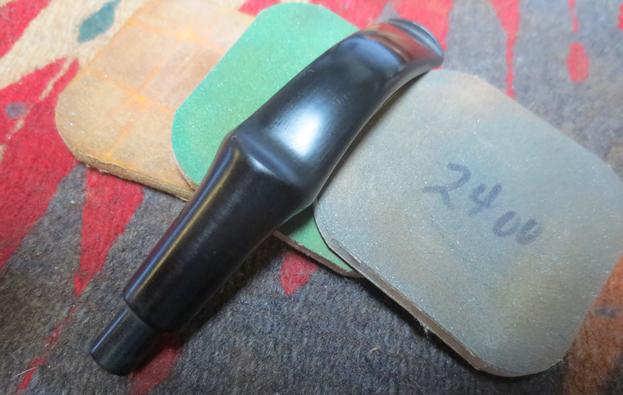
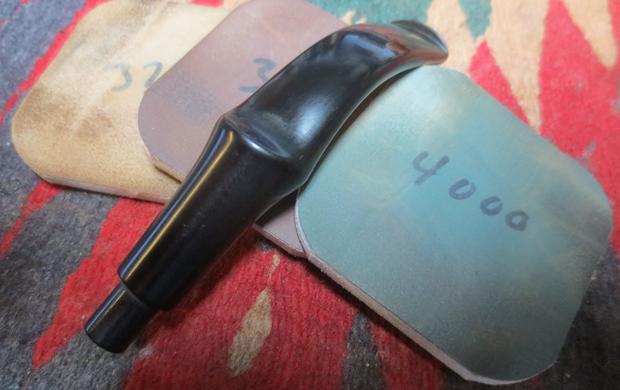
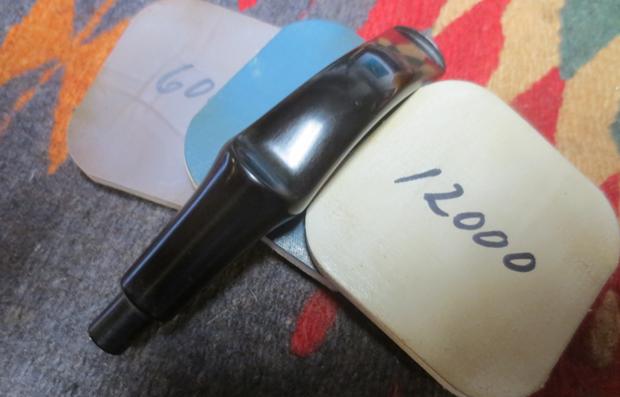
I polished the stem with micromesh sanding pads – wetsanding with 1500-2400 grit pads and dry sanding with 3200-12000 grit pads. I buffed the stem between the 2400-3200 grit pads and then finished with the pads. I rubbed the stem down with Obsidian Oil after each grit of pad and then a final time after the 12000 grit pad. I set the stem aside to dry. 
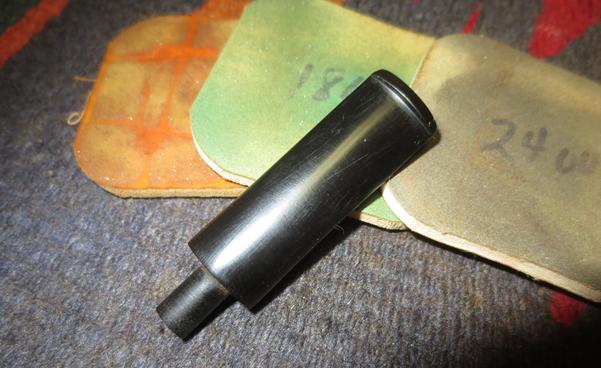
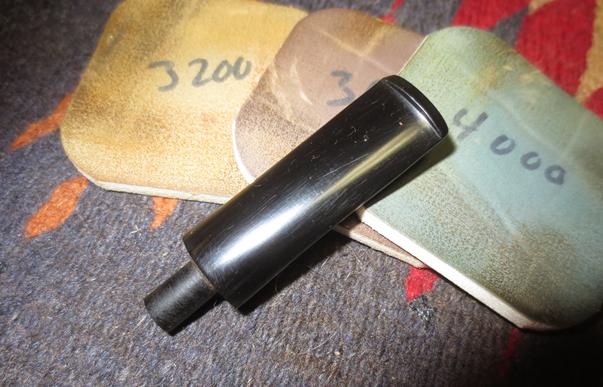
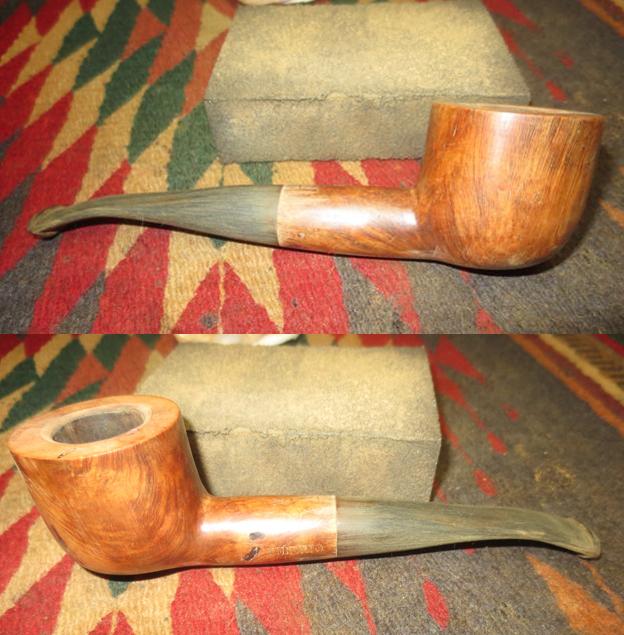
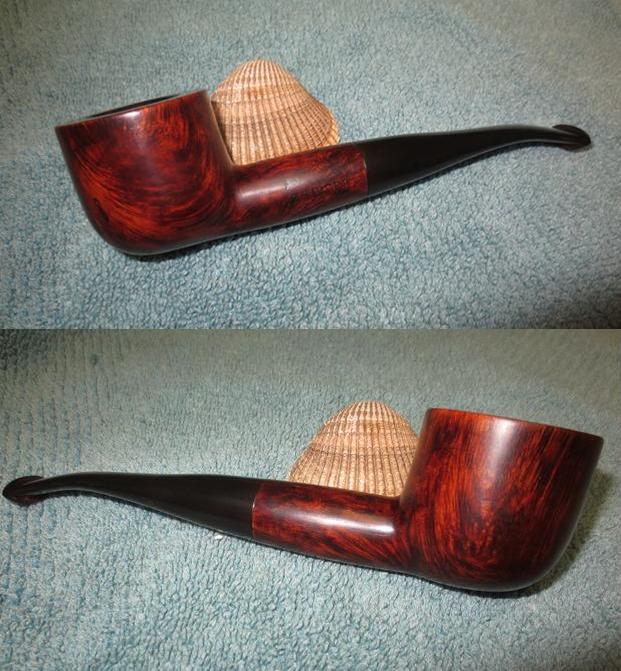
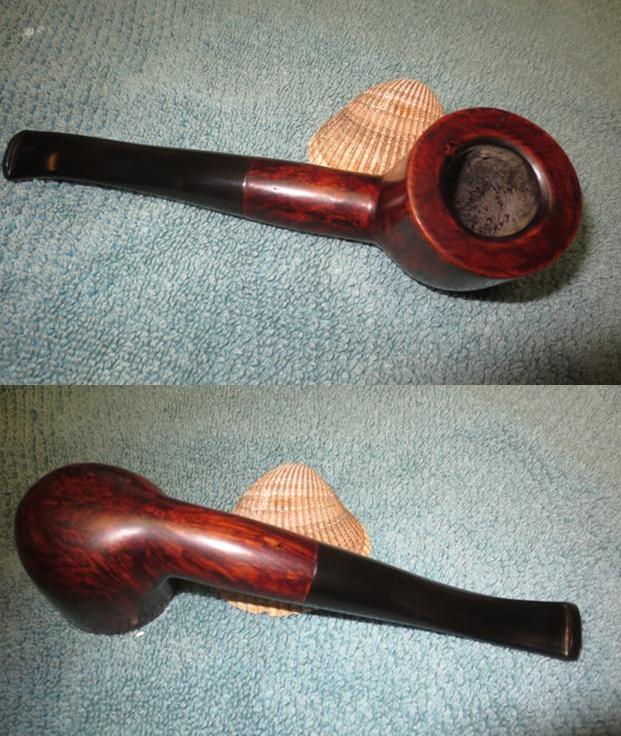
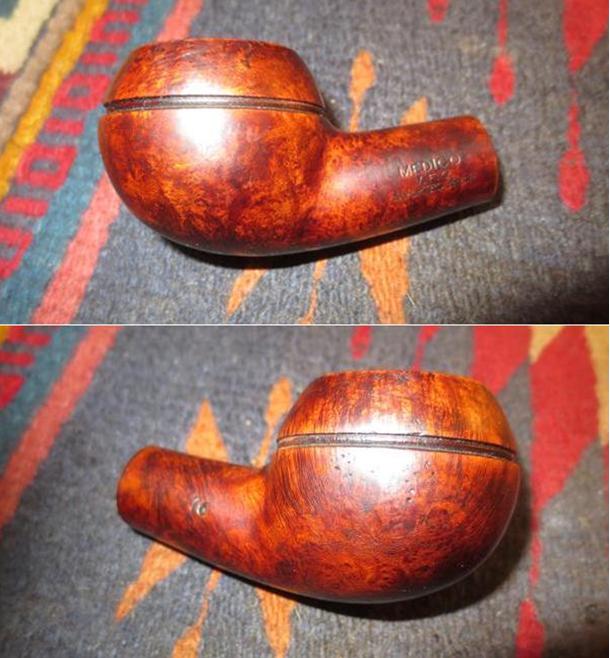
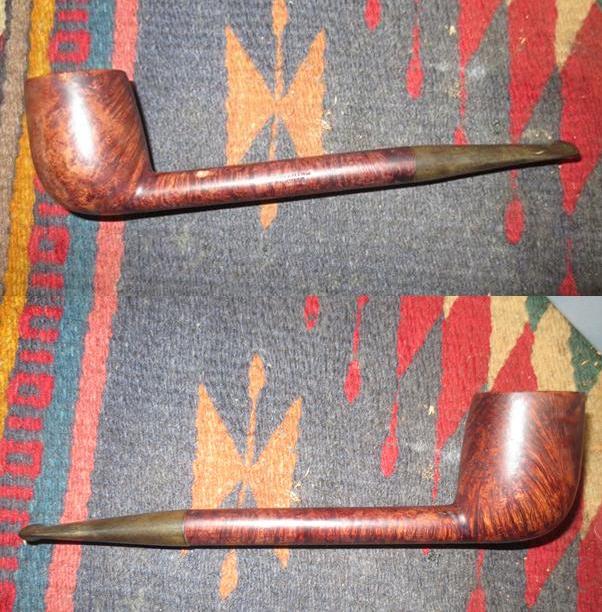
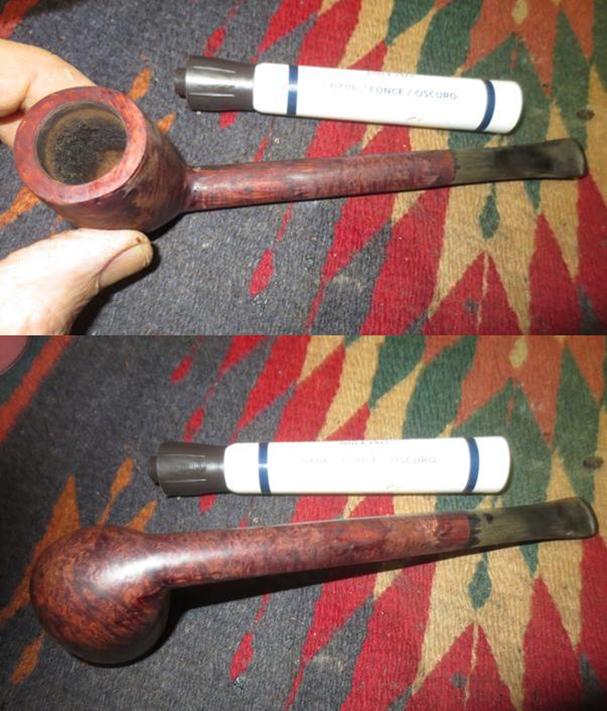
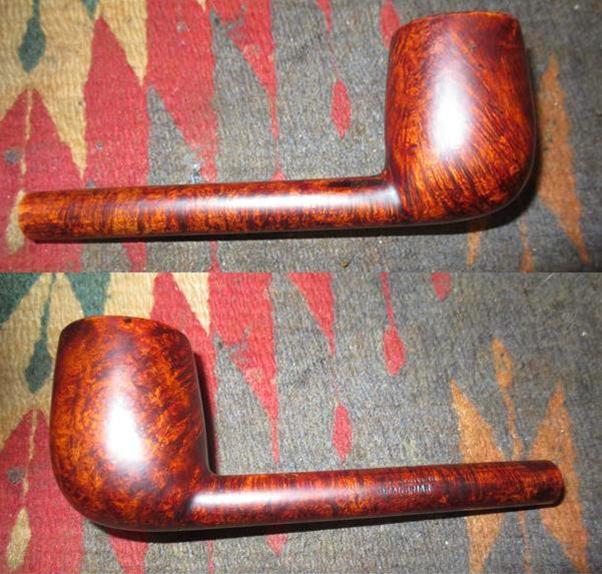
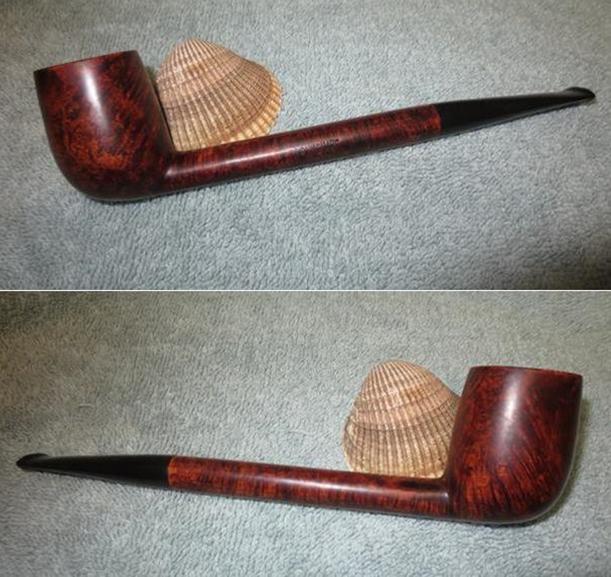
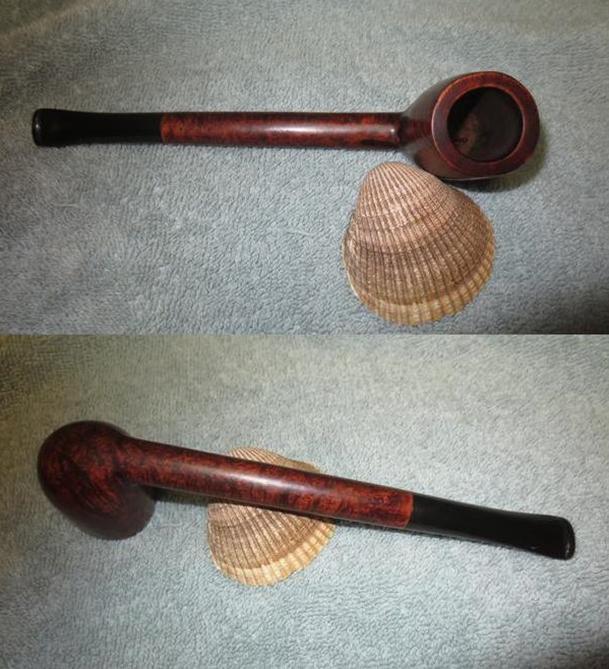
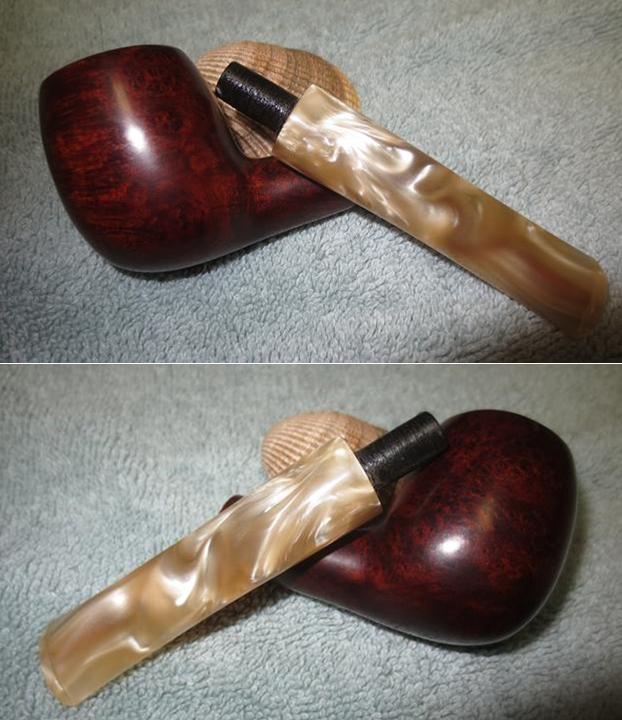
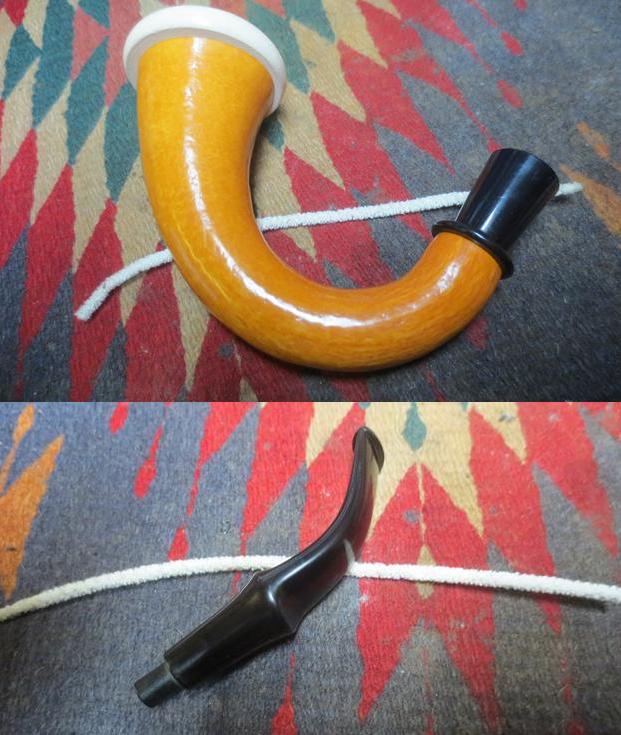
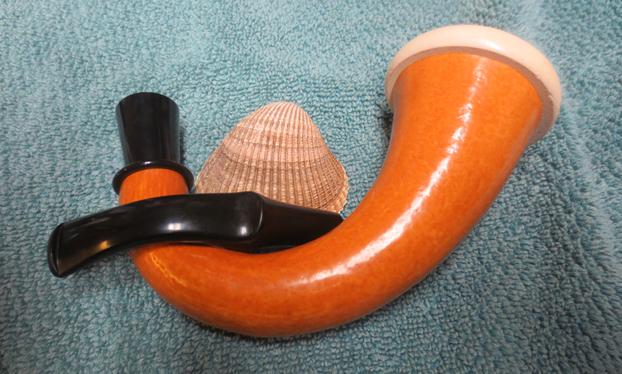
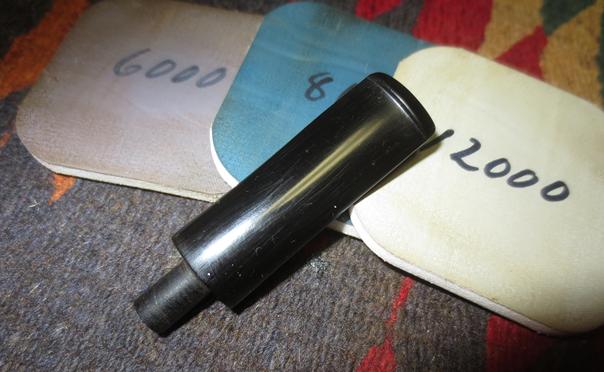
There were still some faint sanding marks on the stem showing so I buffed the stem with Red Tripoli and then carefully buffed out the scratches with Blue Diamond on the wheel. I was able to polish the stem and it shone nicely. I buffed the nickel band and then lightly buffed the bowl with Blue Diamond. I gave the stem multiple coats of carnauba wax and gave the bowl and shank several coats of Conservator’s wax. I buffed the pipe with a clean buffing pad to raise a shine and hand buffed it with a microfibre cloth to deepen the shine. The finished pipe is shown in the photos below. It is a beauty and should provide a cool smoke to whoever wants to add it to their collection. I will be posting it in the rebornpipes store soon. Thanks for looking.
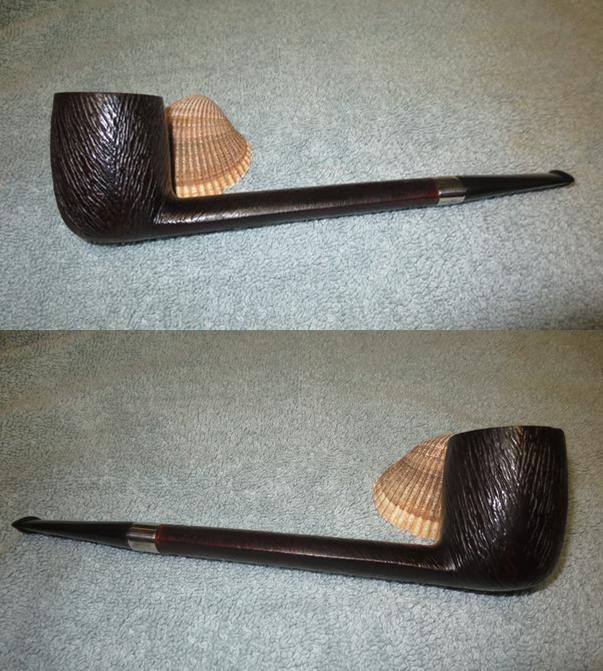
Restoring a Frederick Tranter Pipe Shop Bath Lovat


Blog by Steve Laug

In 2002 my wife and I celebrated our 25th Wedding Anniversary and were gifted a trip to the United Kingdom. We landed at Gatwick Airport in London and took the train on a loop around the UK. We stopped in Cambridge and York for a few days. We traveled up to Edinburgh and then back to Oxford and Bath. We returned to London and spent a few days there. At each spot we stopped along the way we hunted down various tobacco shops. It was a real treat to visit shops around the UK. As I visited each one I was fairly certain that many of them would disappear over the years ahead. I was not sure when we would get back for another visit so I wanted to visit as many as possible (as of 2017 that turns out to be true). One of my favourite shops was the Frederick Tranter shop in Bath. It was not a big shop but it was packed with pipes and tobacco. It smelled and looked like a proper tobacco shop. I have written about it previously on the blog. Here is the link: https://rebornpipes.com/2014/03/01/remembering-my-trip-to-frederick-tranters-in-bath-england-in-2002/. I have included two photos of the shop that I took when I visited there. It really was a quaint shop and one in which I would enjoy spending a lot of time smoking a bowl and enjoying wares.Since the day I visited the shop and bought my first Tranter pipe, I have kept an eye out for Frederick Tranter Pipe Shop Bath pipes. When I saw this one on Ebay I liked it. It was a nicely shaped Lovat with a briar wind cap attached to the rim by a brass screw. The cap swivels right and left so that the pipe can be filled and lit. I put a bid on it and won. The next two photos are ones that the seller included. The pipe looked to be in good shape. The cap is not exactly the same diameter as the bowl but it does cover the bowl.The stamping on the shank of the pipe is very clear and sharp. On the left side it reads Frederick Tranter over Pipe Shop Bath. On the right side it reads Countryman. There are no shape numbers or other identification marks on the pipe. From my previous interaction with the shop and researching the brand I found that Cadogan made many of the pipes for them. I am not sure what the age is on this one but it is a great shaped Lovat. I took some close up photos of the wind cap on the top of the bowl. The first shows the cap in place over the top of the bowl. The brass screw in on the back side about middle of the rim top. There were four equal sized holes on the top and the edges crowned. The second photo shows the bowl with the cap removed by unscrewing the brass screw. The top of the rim had some tarry buildup and there was a light cake in the bowl. The inner and outer edge of the bowl were in perfect shape.I took a close up photo of the outside and the inside of the cap. The inside is slightly indented and had a carbon buildup. At first I thought it was burned however when I cleaned it up I found that it was only covered with carbon.I took photos of the stem surface on both top and bottom sides. It was oxidized and there was some gummy substance on the stem from what appeared to be a price tag.I scrubbed the surface of the bowl with alcohol on cotton pads to remove the grime. I scrubbed the rim top as well and I was able to remove all of the buildup. This was a nice looking piece of briar with birdseye and cross grain around the bowl.I reamed all of the cake out of the bowl with a Savinelli Fitsall Pipe Knife. I took it back to bare briar. I scrubbed out the mortise and the airway in the shank and stem with pipe cleaners, cotton swabs and alcohol until they were clean. I was surprised that the overall condition of the airways and shank were so clean.I rubbed the bowl and shank with Cherry Stain mixed with Danish Oil. I wiped it off and polished it by hand. The hand polished bowl is shown in the photos below. The stain made the grain really stand out and gave the pipe a fresh look. The stem needed a lot of work to remove the oxidation. I sanded the stem down with 220 grit sandpaper to remove the heaviest oxidation. The tenon had marks on it that I would need to leave to keep the snug fit in the mortise.I cleaned up the metal twisted stinger to remove all of the oils and tars that had collected there. I polished it on the buffing wheel and with a microfibre cloth. I put it back in the tenon. I polished the stem with micromesh sanding pads – wet sanding with 1500-2400 grit pads and buffing it with red Tripoli. I reloaded the buffing pads with the Tripoli and worked over the angles of the stem and saddle to get as much of the oxidation out of those spots as possible. I dry sanded the stem with 3200-12000 grit pads. I rubbed the stem down repeatedly with Obsidian Oil and after the final pad I left it to dry. There was still some oxidation remaining on the stem so I reworked it with the buffing pads and Tripoli. I worked on it until I had removed the remaining oxidation. I buffed it with Blue Diamond to polish it further. In the final photos there are still spots where the Tripoli showed up under the bright light of the flash but the stem now glows. The finished pipe is shown in the photos below. It is a beautiful looking older Lovat. The rounded button end and slot were smooth and comfortable. The vulcanite shone and the briar really looked good. I buffed the pipe with carnauba wax and then with a clean buffing pad to give it a shine. I took it back to the work table and hand buffed it with a microfibre cloth to deepen the shine. Thanks for walking with me through the refurb on this pipe.


Cleaning up a Dr. Grabow Westbrook 44


Blog by Steve Laug

Not long ago I received and email from Dave, a reader of the blog, asking about a couple of pipes that he had picked up. I have included his email below. He gives his assessment regarding the pipes and what he wanted done. He had also done a bit of research on the Dr. Grabow pipe for me. I really like this kind of information.

Steve… I have recently been gifted 2 estate pipes that I would love to have reincarnated by your hands. I am not sure of the cost and wanted to speak with you first. One because I have never shipped anything to Canada and I am not sure if there would be any issues. Two, I also wanted to get an estimate of cost before going forward. The 2 pipes in question are not in bad shape, just have some age, cake and minimal wear; one is a Whitehall rusticated with saddle stem and the other a Pear shaped Dr. Grabow Westbrook. The Dr. Grabow from what I can find is a special R J Reynolds model which has the orange spade on the side of the stem. I have attached some images with this email so that you have some idea of how they look. If you need additional images please let me know. Thank you for your time and consideration.
Regards, Dave The first that I chose to work on was the Dr. Grabow Westbrook Pear Shaped pipe. The pear shape came in both a slim pear (#74) and a medium pear (#44). The chart below is taken from https://pipedia.org/wiki/File:1960sDrGrabowFlyer5.jpg. It shows the shape of the pipe I was working on. I believe that I am working on a shape 44, Medium Pear.I examined the shank with a lens and I could see that the left side of the shank was stamped Westbrook over Dr. Grabow. The right side of the shank was stamped Imported Briar over PAT. The number that follows the PAT. stamp is illegible. It is very faint. From this I can extrapolate that the pipe is an early version of the Dr. Grabow Westbrook line. It came out in the early 1960s. https://pipedia.org/wiki/Dr._Grabow

I found an article on Pipedia about the RJ Reynolds pipes and when and how they were offered through pipe coupons. I have included the majority of the article as well as the link.

https://pipedia.org/wiki/RJR_Grabow_information

R.J. Reynolds Tobacco Company had two other pipe tobaccos which were George Washington and Carter Hall that shared a good hunk of the pipe tobacco market left over from Prince Albert and Sir Walter Raleigh. Thus sets the stage for a coupon to be placed in each package or can of these tobacco products. The pipes presented to the American public were the very finest mass produced pipes ever created by man, or in all probability will ever be created by man. Pipes were presented with either a metal filter or a paper filter. The highest quality pipes were presented with only a metal filter. The Westbrook model came either in a rustic or matte finish and had metal filters along with the Berwyck that presented the same choice with paper filters. These pipes could be purchased only by mailing five coupons and three dollars to Sparta, North Carolina. The classic of the series was a natural grain Emperor with only the metal filters and its cost was five dollars and required twenty five coupons. About half way through the duration of the offer the Sculptura was introduced as demand was high for a quality sandblast grain pipe. So, R. J. Reynolds Tobacco Company set out to produce the perfect sandblast grain pipe and boasted that no finer sandblast pipe had ever been produced by man nor ever would be produced by man than its Sculptura that could only be purchased by collecting five coupons and sending that along with four dollars to Sparta, North Carolina.

Each order that was filled for every pipe ordered throughout America came in a neat box with a full set of literature including a shape chart that actually gave a pipe smoker an immediate choice to choose from far greater than any pipe store or other outlet that America has ever seen or probably will ever see.

This mail order offer that began sometimes in the early 1950’s would end in 1987 when R. J. Reynolds Tobacco Company sold its tobacco products to John Middleton, Inc. At that time it was announced that this mail order offer was the longest running mail order offer in duration of time of any mail order offer of any product on the American market. Thus, an era ended eighteen years ago or so and as each year turns over these pipes become less available and thus more valuable.

The argument about a good smoking pipe so prevalent today among pipe smokers is not applicable to these pipes for the simple reason that they all smoke good and they all smoke just alike with no discernable differentiation that any one pipe is any better or worse than any of the others. These pipes came from the top twenty percent of Briar obtainable and were constructed with the quality control standards of a Zippo lighter. The only difference was in the shape and this was presented in a very large number of choices. The Dr. Grabow pipe is clearly stamped as such, but was never ever retailed. It was admitted by all that these pipes were superior to the retail Dr. Grabow pipe. Those with the metal filter are no longer obtainable from any source. Those with the paper filter, although similar to the present Dr. Grabow, is of a superior quality. Since those with the paper filter were not nearly so popular as the metal filter in those old days it is rather difficult to find one these days. There will not be many days until those with the metal filter are gone forever never to be replaced and it is likely that anyone who possesses such a pipe has a very valuable piece of Briar or to become such in not very many years. One other point, also like a Zippo, these pipes are virtually indestructible…

I took some photos of the pipe when it arrived. Overall impressions of the pipe were good. The briar was a beautifully grained piece; the stamping was faint on the left side of the shank and not readable on the right. The bowl had a light cake with overflow and darkening on the crowned rim. The stem was oxidized and appeared to have been clipped off. The new button was thin and the slot was sloppy. Work would need to be done with that end of the stem. I took a close up photo of the rim top and bowl to show the overall condition. It was in great shape for a pipe this age. It had been pretty well cared for over the years. I also took photos of the stem to show the thinness of the button. I am pretty certain it was reshaped somewhere along the way. The stinger apparatus was different from other Grabows that I have worked on. It was pressure fit into the threaded tenon and was a tube rather that the shovel stinger I was expecting.I scrubbed the top of the rim with a cotton pad and saliva to try to remove the buildup and darkening that was there. It actually worked very well. I sanded it with 1500 grit micromesh to further smooth things out. I reamed the bowl with a Savinelli Fitsall Pipe Knife and took the cake back to bare briar.I built up the button top and bottom with black super glue. I did not need to build it up too much so I decided to just use the glue and not add charcoal powder. I set the repaired stem aside to let the glue cure.I sanded the bowl with 1500-6000 grit micromesh sanding pads and wiped it down with a damp cotton pad to remove the sanding dust. The photos below show the bowl after sanding it with 1500-2400 grit pads. I scrubbed out the shank and the metal mortise with alcohol, pipe cleaners and cotton swabs until they came out clean. The interior of the shank was really dirty. Many pipe cleaners and cotton swabs later the shank was clean and the metal mortise was shiny.In the past I have used a Cherry Danish Oil Stain that matches the colour of these older Grabow Westbrook pipes really well. It is the kind of stain that you rub on, let sit and rub off. Since the finish on the Westbrook smooth pipes was smooth, once the stain was dry I would rub it down to a matte gloss look.I hand rubbed the finish once it had been sitting for a short time. The photos below show what the bowl looked like after it had been rubbed down. The grain really stands out now – showing a combination of birdseye and cross grain. I love the look of the briar on this old pipe. Once the repair had dried I reshaped the button with needle files. I worked on the slot with needle files. The third photo shows what the slot looked like at this point. I will need to smooth it out but it is looking better.I sanded down the file marks and the oxidation on the stem with 220 grit sandpaper. I folded a piece of 220 grit sandpaper and worked on the slot to smooth out the file marks. I sanded the flat end of the button. I cleaned out the airway in the stem with a pipe cleaner and alcohol. I polished the stem with micromesh sanding pads – wet sanding with 1500-2400 grit pads and dry sanding with 3200-12000 grit pads. I carefully buffed the stem with red Tripoli between the 2400-3200 grit pads. I finished with the pads. I rubbed the stem down with Obsidian Oil after each set of three pads. I gave it a final rubdown with oil and set it aside to dry. After I saw the oxidation still showing in the above photo I buffed the stem again with red Tripoli. I started the sanding process over and sanded the stem with the earlier micromesh sanding pads. I buffed it with Blue Diamond on the buffing pad.I worked some more on the stem to get out the hard to remove oxidation. It took time but I think it is gone for the most part. I polished the end of the stem with micromesh sanding pads to smooth out some of the scratches. The stem looks much better. I buffed the bowl and stem with Blue Diamond, carefully avoiding the Dr. Grabow spade logo so as not to damage it. I gave the bowl and stem multiple coats of carnauba wax to protect it. I buffed it with a clean buffing pad to raise the shine and by hand with a microfibre cloth to deepen the shine. I took the following photos of the finished pipe. It is truly a beautiful piece of briar – hard to believe it is a coupon pipe it is such nice wood. The pipe is ready to go back to Dave. Now I have to finish up the second pipe he sent to me. Thanks for looking.

Restoring a Pipeman’s First Pipe


Sometimes I get requests to restore pipes that touch a sentimental chord for me. When that happens it brings back all kinds of memories and thoughts for me. A while ago I received an email from Phil regarding a pipe he had that he wanted some help with. He explained that it was not an expensive pipe but that was his very first when he started as a pipeman. We emailed back and forth for a bit and then he sent it up to me in Vancouver to assess and see if it was worth restoring. It came in the mail last week and I opened the package to have a good look at it. I went over it slowly and carefully and found some issues that needed to be addressed. To me the pipe was very restorable and I was willing to take it on.

Here is what I saw as I looked at the pipe. I put together a list for Phil and emailed it back to him. I would say it is well worth a cleanup, repairs, refinishing and polishing. I think that it has a pretty long life ahead of it.

  1. He was concerned with the overall condition of the pipe. It was a basic basket pipe and had a lot of fills in the bowl and shank. The bowl had never been smoked to the bottom so the briar is raw. It is a little smoky looking but is basically sound. The pipe can be smoked for a long time.
  1. The little lines in the bottom of the bowl are called checking. They happen to the inside of almost all pipes and are caused by heating and cooling. In this case it appears that the pipe had never been smoked to the bottom. I recommended a complete reaming and then some pipe mud (cigar ash and water) to fill in the little fissures and then a simple bowl coating to protect the bowl while he built a cake.
  1. He had mentioned a crack on the left side of the bowl. The noted crack was definitely there. It was on the left side toward the front. It is a hairline crack that starts at a putty fill toward the top of the bowl and ran down to another putty fill on the bottom of the bowl. This is one time where fills actually worked in my favour. I repair cracks all the time by drilling a small pin hole at each end to stop the crack from spreading. In this case the fills did just that for me. Go figure. I would need to simply pick out the old putty and repair the fills or top them up with super glue and briar dust.
  1. The rim looked like it had several fills on the top and the inner edge. It was hard to be certain as there was a thick coat tarry lava. It would need to be cleaned off and the fills check for stability and repaired if not.
  1. The stem was in good shape but was oxidized and had tooth chatter. It would need to be cleaned and polished to remove the oxidation and make the vulcanite shine.
  1. Looking in the shank the mortise and airway are also sound.

Here is what the pipe looked like when it arrived in Vancouver. I took photos to set the base for what it looked like before I started. Note the fills on the shank sides, bottom and bowl sides and bottom. I took a close up photo of the rim top to show the condition of the bowl and the rim. The front inner edge of the rim appears to be burned and it is out of round. It is hard to know if there was any other damage on the rim top.I took some close up photos of the fills and crack on the left side of the bowl running between the two large fills. It is circled in red in the photos below. The crack is hairline and is fairly tight. The fills show some shrinkage in the putty and will need to be removed and replaced.I took a close up photo of both sides of the stem to show the tooth marks and chatter on both sides near the button.I reamed the bowl with a Savinelli Fitsall Pipe Knife to scrape out the cake to the bare briar. I used the sharp edge to scrape off some of the heavy cake on the rim top.I scrubbed the top of the rim with alcohol and cotton pads. I was able to remove most of it. The inner edge of the bowl showed a lot of damage. The front edge had a fairly deep burn mark that covered the surface of the rim at that point but did not go too deep.I cleaned up the inner edge of the rim and the sides of the bowl with the PipNet reamer. I used it to remove some of the damaged edge.I topped the bowl to deal with the burn mark that is visible in the above photo. After I topped it  I repaired the damaged fills on the rim and bowl sides that way I could top the repaired portions at the same times. I picked out the fills with a dental pick and removed the putty. The two that joined the crack were quite large and deep. I repaired them by tamping briar dust into the pits and then pushing clear super glue into the dust. I repeated the process leave a thick bubble of glue and dust on the surface of the repair. I did the same on the rim top, inner edge and the shank sides and bottom to repair the fills there.I sanded the fills smooth with 220 grit sandpaper to blend them into the surrounding briar. I added a little more super glue to some pits in the repairs and sanded them once the glue had dried. I sanded the oxidation and tooth chatter off the stem with 220 grit sandpaper. I was able to remove all of the chatter and even the tooth marks as they were not too deep in the vulcanite.I sanded the bowl and stem with a medium and a fine grit sanding sponge to begin to smooth out the scratches and sanding marks. I sanded the bowl with 1500-4000 grit micromesh sanding pads in preparation for staining the bowl. I planned on giving the pipe a contrast stain so I started with a dark brown aniline based stain. I applied the stain, flamed it and repeated the process until I was satisfied with the coverage.I wiped the bowl down with alcohol on a cotton pad to remove the heavy dark finish and make it more transparent. I wanted the dark brown deep in the grain once I had removed it from the lighter portions of the briar. I sanded the bowl with 1500 grit micromesh pads. I continued to sand the bowl with 1500-2400 grit micromesh pads to get the transparency that I wanted on the bowl. The next photos show what it looked like once I had finished sanding it. I gave the bowl a top coat of Danish Oil with a Cherry Stain. I rub the oil onto the bowl and rub it off and buff it. The next two photos are a little blurred but you can clearly see the cherry colour that is coming to the surface of the bowl. It works really well to blend in the fills.I set the bowl aside to dry and turned to the internals. I cleaned out the mortise and the airway in the shank and stem with alcohol, pipe cleaners and cotton swabs.I polished the stem with micromesh sanding pads – wet sanding with 1500-2400 and dry sanding with 3200-120000 grit pads. I buffed the stem with red Tripoli on the buffing wheel after the 4000 grit pad and then finish sanding it with the 6000-12000 grit pads. I gave the stem multiple rub downs with Obsidian Oil after each few pads to see if the oxidation at the shank end was getting better. By the time I was finished with the final pads the stem looked much better. I would give entire pipe a buff before I finished the restoration. I mixed a batch of pipe mud – cigar ash and water – to form a paste and applied it to the bowl bottom and sides with a folded pipe cleaner. I pressed the mud into the small checking that was around the bowl bottom with a dental spatula. The pipe mud will protect the bowl while a cake is formed.I buffed the bowl and stem with Blue Diamond on the buffing wheel to raise the shine and highlight the grain on the bowl. The fills are still visible but they blend into the surface of the briar better than they did before. I gave the pipe multiple coats of carnauba wax and buffed it with a clean buffing pad to raise the shine. I hand buffed it with a microfibre cloth to deepen the shine. The finished pipe is shown in the photos below. I will be packing it up and mailing it back to Phil once I give it a bowl coating. I am hoping he enjoys this piece of his personal pipe history. It should provide many more years of enjoyment for him.

A Medico VFQ Rhodesian with a Cumberland Stem


Blog by Steve Laug

My brother Jeff and I visited an antique mall that was in an old grainery along a railroad track not too long ago. We went through the display cases and booths on two floors and found a few pipes. This was one of them – an old Medico VFQ Rhodesian. I have been told that VFQ means Very Fine Quality and underneath the grime it appeared that this one may have lived up to the stamping. The stem is a Cumberland like material with swirls and striations in a mahogany coloured stem. In classic Medico style the pipe was made for their paper filter and had a hollow, adjustable tenon. The tenon has a split on both sides that can be expanded should the stem become loose in the shank.The pipe was in rough shape. The bowl was thickly caked and had remnants of tobacco in it. The rim top was covered with overflow from the bowl and there were some large chips on the top and inner edge of the bowl on the right side. The finish was shot with the top varnish coat peeling all over the bowl. The ring around the bowl was dirty but was undamaged.The pipe was stamped Medico over V.F.Q. over Imported Briar on the left side of the shank. It also was stamped with the shape number 76 on the right side. The stem bore the V.F.Q. stamp on the left side as well.The stem was oxidized, dirty and had tooth chatter on both sides at the button. There was an old paper filter still in the tenon and the inside of the shank and stem were filthy.When we got back to my brother’s place we reamed the pipe and scrubbed it down with acetone on a cotton pad to remove the damage finish. We scrubbed the mortise, airway into the bowl and the stem with pipe cleaners, cotton swabs and alcohol. I took photos of the cleaned pipe when I finally brought it to my work table in Vancouver. (Notice the angle of the rim top on the bowl. It was not flat and the damage had left the front higher than the back.) The next two photos show the condition of the tenon and bowl when taken apart and the damaged rim once all the cake had been removed. The rim had damage all the way around but the biggest damage was on the rear right side where there was a large chip missing.The stem shows some wear in the next photos and the striations of colour are almost not visible due to oxidation.I decided to even out the height of the rim cap by carefully topping the bowl. Since the back side was higher than the front I was pretty sure I could remove most if not all of the chipped area on the rear right. I topped it on a board with 220 grit sandpaper and carefully leveled the bowl by applying more pressure to the rear of the bowl than the front and lifting the front edge off the paper as I remove the damaged and excess on the read of the bowl. It took some work to level the bowl properly and end up with an even top both from a vertical and horizontal view.I used a folded piece of 220 grit sandpaper to bevel out the inner edge of the rim to remove the remaining rim damage and clean up the appearance of the rim.I sanded the rim with a medium and fine grit sanding sponge and with 1500-4000 grit micromesh sanding pads to remove the scratches. I wiped the bowl down with acetone on a cotton pad to remove the remaining finish and stain on the bowl in preparation for matching the newly topped rim with the colour of the rest of the bowl. I did a more thorough cleanup of the mortise and airway into the bowl to remove all of the sanding dust and remaining debris that was there. I scrubbed it out with cotton swabs, pipe cleaners and alcohol. I also ran pipe cleaners through the airway in the stem and cleaned the mortise with cotton swabs.The bowl had many nicks and scratches. I sanded it with micromesh pads to remove the majority of them but decided to leave some of the deeper ones as beauty marks of the old pipe. In the photos the bowl looks pretty richly coloured but in reality it was faded and apart from the flash the grain did not stand out. I stained the bowl with a dark brown aniline stain, flamed it and repeated the process until I was happy with the coverage on the bowl. The look of the bowl in the next two photos is really odd. I think that it is a phenomenon of the flash because it did not look like this in person.I wiped the bowl down with alcohol on cotton pads to remove some of the opacity of the stain and make it more transparent. In the photos below you can see that it is lighter but still to heavy to show the grain to my liking. I buffed the bowl with red Tripoli, sanded it with a medium and a fine grit sanding sponge, then polished it with 1500-2400 grit micromesh pads to remove some more of the dark stain and leave behind some nice contrasts in the grain of the bowl. The next photos show it after I had buffed it with Blue Diamond to polish it. I set the bowl aside for now and turned my attention to the stem. I have found that these Medico stems are not fully vulcanite and are a bit of a bear to polish. I have often been left to do the polishing by hand as the buffer can generate too much heat if I am not careful. The heat damages the material of the stem and forces you to start over. I sanded out the tooth chatter and marks on both sides of the stem and reshaped the button edges with 220 grit sandpaper.  The flow of the top of the shank to the top of the stem was interrupted in that the height of the stem at that point was higher than that of the shank so I sanded the top half of the stem to make that transition smoother.I polished the stem with micromesh sanding pads – wet sanding it with 1500-2400 until I removed the scratches left behind by the sandpaper. I dry sanded with 3200-12000 grit pads. I rubbed the stem down with Obsidian Oil between each sanding pad to give the pads more bite and allow them to really polish the stem. Between the 4000 and 6000 grit pads I buffed the stem very carefully (you have to have a light touch against the wheel). I gave it a final rub down of oil after the 12000 grit pad. I put the stem back on the bowl and buffed bowl and stem with Blue Diamond a final time. It really polishes the briar and with a careful/light touch can polish these older Medico stems. I gave the bowl and stem multiple coats of carnauba wax and buffed it with a clean buffing pad to raise the shine. I hand buffed it with a microfibre cloth to deepen the shine.The finished pipe is shown in the photos below. To me the stain goes really well with the polished Cumberland like stem. They play off each other very well. The contrast on the bowl raises the highlights in the stem and vice versa. This pipe will soon be on the rebornpipes store if you wold like to add it to your rack. It is very lightweight and comfortable in the hand. I think, judging from the condition of the pipe when I got it, that it will be a great smoking pipe, with or without the Medico filter.

Rebirth: a Liverpool Stummel with Beautiful Grain and Miserable Drilling


Blog by Steve Laug

I found this long shank Liverpool pipe sans stem at an antique mall in Idaho when I was visiting my brother. I did not look at it too closely but noticed it was lightly smoked and had some really nice looking grain. I bought it as I figured it would not be too big a deal to make a stem for it. Besides the price was only $4. Looking at the next four photos you can see why the grain got my attention. It is a mix of birdseye, flame and cross grain. The stain that was used really highlights the grain. In the first photo you can see the chip out of the top of the bowl on the left side as well as the chip out of the shank top between the bowl junction and the stamping on the shank side. When I got back to my brother’s place he looked it over and just shook his head. He pointed out the issues with the bowl. The airway entered the bowl at the far right side. The bowl was hardly smoked and this may well have been a reason. Externally the bowl was not round it was entirely lopsided. It was wrong both inside and out in more ways than I had noticed in my quick decision to purchase it. This one was going to be a challenge in more ways than one to restem and make usable once more. I was looking forward to seeing what I could do. The next two photos show the misdrilling and the misshapen out of round external bowl.There were some deep gouges on the left side of the pipe – one had the top of the bowl and one on the shank just ahead of the stamping. There were also some pits and gouges on the underside of the shank and on the end on both top and bottom. I have circled the large one in the first photo below. It is a bright spot circled in red. Then I looked closer at the overall bowl and shank. What a mess. It had been drilled at quite an angle. It appeared that the drill had gone through the right side of the shank just before the bowl. It had been repaired with a fill that was pitted. It is circled in red in the second photo below. The third photo shows the shank from the mortise end. It is obvious that the shank was not round and the mortise was off to the right. This was going to be an interesting pipe to restem. As I looked at the left side of the shank with a magnifying lens I could see that first line of stamping (faint on the top and better at the bottom side of the words read CONTINENTAL. The second line of stamping was clearer and read REAL BRIAR. In examining the rest of the shank, I could see that it was all that was stamped on the pipe. I did some searching for the brand name and found one on Pipedia. The Continental Briar Pipe Co. Inc. manufactured briar pipes in Brooklyn, New York. The address on York and Adams Streets was taken from a letter sent to a Henry T. Rice dated July 28, 1941.

I went through my stem can and found two prospects for stems. Because the shank was misdrilled and out of round and the mortise was also off to the side I needed to have a stem slightly larger in diameter than the shank.  One of the stems was a saddle stem and the other a taper stem. The saddle stem was not quite large enough so I opted for the taper. I used a pen knife to open the mortise and make it more round. I worked to remove briar from the left side of the mortise and make the shank end round. In the third photo below you can see the finished mortise.When I finished the work on the mortise I sanded it with a rolled piece of sandpaper to smooth things out.I pushed the taper stem into the mortise and the fit against the shank was a good fit. The right side where the shank was out of round needed to have some vulcanite removed to make the flow of the stem and shank correct but it would work. The taper stem makes the pipe a Liverpool. If I had used the saddle stem it would have been a lumberman. I like the promising look of the new pipe. There were many on the top and the bottom of the shank and along the right side of the top of the bowl. There was also a place on the right side of the shank at the bowl shank junction that had been filled to repair a drill through. It had been patched with putty but was pitted and rough. I wiped the shank and bowl edge down with alcohol. I filled all of the pits and the repaired area with briar dust and then put drops of super glue on top of the dust fills. The photos below show the patched and repaired areas.When the repairs dried I sanded the repairs smooth to match the briar around them. The photos below show the freshly sanded areas on the pipe. The repairs are dark spots in the middle of the sanded areas. They will be blended in once I stain the bowl and shank. I used a needle file to reshape the button edges on both sides of the stem. They were worn down and the sharp edge was indistinct. I redefined the edges and smoothed out the surface in front of the button.I wiped the bowl and shank down with alcohol to remove the remaining finish on the bowl and to clean off the dust in preparation for restaining the pipe. I sanded the surface of the stem with 220 grit sandpaper to remove the oxidation and smooth out the file marks and tooth marks that remained. I lightly topped the bowl on the topping board to remove the damaged areas on the rim and created a smooth well defined edge on both the inner and outer parts of the bowl. I used a folded piece of 220 grit sandpaper to clean the inner edge and remove the darkening there.I wiped it down another time to clean off the rim and the edges of dust. I used a dark brown stain touch up pen to stain the sanded areas on the rim, bowl side, shank top and bottom and shank end. I was not too worried about coverage at this point rather providing a base coat before I stained the bowl in its entirety. My thinking was that the base coat would blend in with the existing stain and then the top coat would tie it all together. I stained the pipe with a dark brown aniline stain and flamed it with a lighter. I repeated the process of staining and flaming until the coverage was even around the bowl. I set the pipe aside to dry for a few hours and worked on the stem.I wiped the bowl down with alcohol on cotton pads to remove the dark crusty finish. I wanted the stain to be more transparent to let the grain show through. I sanded it with micromesh sanding pads to polish the bowl and shank. The grain really shown through now and the flame grain, birdseye and cross grain were beautiful. The fills have blended in on most of the bowl while the repair on the right side of the shank at the bowl is dark but smooth. I scraped out the remnants of cake that remained inside of the bowl with the Savinelli Fitsall Pipe Knife and sanded the walls with 180 grit sandpaper to smooth them out.I polished the stem with micromesh sanding pads – wet sanding with 1500-2400 grit pads and dry sanding with 3200-12000 grit pads. I rubbed the stem down with Obsidian Oil between each set of three pads. I took it and buffed it with Tripoli after the 2400 grit pad and followed that with Blue Diamond. Then I went on to continue polishing it with the higher grits of micromesh pads. I buffed the pipe and stem with Blue Diamond on the buffing wheel and carefully buffed around the stamping. I did not want to damage it any further than before. I gave the pipe and stem multiple coats of carnauba wax and buffed the pipe with a clean buffing pad. I hand buffed it with a microfibre cloth to deepen the shine on the briar and the vulcanite. The finished pipe is shown in the photos below. It is a long pipe that is just under 7 inches long and the bowl is 1 ¾ inches tall. The bowl exterior is 1 1/8 inches in diameter and the bowl chamber is ¾ inch in diameter. What started out as a major mess came out looking like a fine pipe. Even though the airway enters the bowl on the far right the draw is still very good. I think it should smoke fairly well and provide a decent looking long pipe for someone who wants to add it to his collection. Thanks for walking through the challenge with me.

Making Work for myself – Restoring a GDB Rainbow 347


Blog by Steve Laug

I have worked on and collected many GBD pipes over the past 20 years. I have some great resources that I use to identify the nomenclature, shape and date of the various lines that GBD issued. However, all of my sources and resources regarding GBD are from the time prior to the merger (Cadogan) or shortly thereafter. The Rainbow Line is not mentioned in any of them. I also looked on the pipephil Logos and Stampings site and Pipedia and again there is no mention of the line. In my online research, I found several people who think that it is probable that the pipe was made during the 70’s through 90’s. Several things point to this – the chunky Lucite stem, the name of the line itself and the brightly coloured stems used. One fellow on Pipes Magazine’s online forum had a great quote that caught my attention. He said, “If you’re old enough you might remember that Rainbow was a popular theme in the late 70’s to early 90’s due to Sesame Street, “The Rainbow Connection,” The Rainbow Reading Room, etc.” http://pipesmagazine.com/forums/topic/help-with-info-on-a-gbd-pipe I think this is as close as I am going to get to a time period when the pipe was made.

The pipe I picked up on a recent trip to Idaho is a nicely shape apple that was in pretty decent shape. I figured it would be an easy clean up. But things happened along the way and I made more work for myself. It is stamped GBD in an oval over Rainbow on the left side of the shank. On the right side stamped London, England in a straight line over 347 (shape number). On the underside of the shank near the stem/shank junction it is stamped D. The faint painted GBD in an Oval on the left side of the stem also suggests a later GBD. The nomenclature is consistent with usual smooth GBD markings (GBD over Grade (left side) and London England over style number on the right side.) The photos below came from the person I purchased the pipe from and show the general condition.He provided some close up photos of the bowl and rim. He said that the pipe had been reamed and clean. However, it was not reamed and clean to my liking. The bowl had a thick cake that I will need to remove, some rim darkening and some dents in the rim. My guess was that like the bowl, the shank and mortise would need some attention. The stamping on the shank was very clear. The first photo below shows that. Next to the shank/stem junction in the first photo, there is also the remnant of the GBD oval logo that had been originally painted on the stem. The stem had a lot of tooth chatter and some shallow tooth marks in the Lucite.While I was staying with my brother, I cleaned and reamed the pipe. I used the PipeNet reamer and took it back to the walls. I would need to clean it up more once I got home but it was better than when I started. Last evening I took the pipe out of the box to finish the clean up and restoration. I took some photos of it before I started to have a benchmark. I took a close up of the bowl and rim. It was better than when I started but still needed to be cleaned up some more. The rim had some darkening that I could reduce some more as well.I used the Savinelli Fitsall Reamer to scrape the remaining thin cake from the walls of the bowl. I personally like to remove all of the cake when cleaning up a bowl. I will sand a bowl interior a bit later to smooth things out. Little did I know at this point that the decision to sand the bowl would send me on a repair detour.I scrubbed out the mortise, airway in the bowl and in the stem with alcohol, cotton swabs and pipe cleaners. I used the dental spatula to scrape the walls of the shank and remove the hard tars that had built up there. The airway in the stem was also dirty and had some darkening at the button and in the first few inches of the stem. I cleaned it with bristle pipe cleaners and picked the debris out of the button and from around the stem down tenon with a dental pick.The stem not only had tooth chatter but also some stickiness from a price tag on the top surface. The edge of the button also had some chatter. I sanded the tooth marks out with 220 grit sandpaper and reshaped the button at the same time. The stem was smooth when I finished. It was dull and needed a good polishing.I polished it with micromesh sanding pads – wet sanding with 1500-2400 grit pads and dry sanded with 3200-12000 grit pads. I wiped the stem down with a damp cotton pad to remove the dust after each pad. I was finished with the stem at this point so I set it aside to work on the bowl. I had decided to use a dark brown aniline stain thinned by 50% with alcohol to darken the grain on the pipe and hide a couple of small fills. I applied the stain, flamed it and repeated the process until the  bowl was covered evenly. I wiped the bowl down with cotton pads and alcohol to make it more transparent. I hand buffed it and took the following photos. It was still too dark to my liking. I sanded the bowl with micromesh sanding pads to make it more transparent and to see if I could make the grain pop. I sanded it with 1500-2400 and took these photos. It was getting there. I continued to sand it with 3200-12000 grit pads to polish it and give it a shine. The next photos tell the story. The bowl was looking better and better. It is at this point that I made a decision that would inevitably cost me. That results of that decision turned out to be a mistake that made a lot more work for me! I put the stem on and decided to work on sanding out the inside of the bowl to remove the polishing compound and remnants of cake. Stupidly, I put the stem on the pipe to enjoy the look of the combination while I worked. Wrong thing to do! Understand, I was sitting at my work table, the top of which is a meter above the floor. I was carefully sanding the bowl interior so as not to damage the nice stain on the rim. Somehow, the pipe wiggled free from my hands and fell to the floor. If you could have watched it and my face at the same time you would have seen the look of horror on my face as it dropped to the floor. That horror changed to a moment of dread as I watched it bounce and heard a snap and watched as the bowl and stem went in opposite directions. I quietly picked up the bowl and stem. The tenon had snapped off in the mortise. It was a clean break. I don’t know about you but I find Lucite is much less forgiving than vulcanite. I have had pipes with vulcanite stem hit the floor with not breakage but not so with Lucite. It seems that the tenon inevitably snaps. Well this one certainly did.I sat and looked at it for a long time just sick at the thought that a pipe I was basically finished with was in pieces on my table. I know how to replace a tenon; that is not a problem. I just did not want to have to do that on this pipe. However, my own stupidity and carelessness had successfully sent me back to work on this pipe. Ahh well… just as well call it a night. Perhaps a good night’s sleep would give me better perspective on this new problem!

I woke up early this morning and dragged my feet about going back to work on the pipe. I think I was hoping at some level that it had not actually happened. I sipped my coffee as long as possible postponing the inevitable. I talked with my eldest daughter who is in Kathmandu for work. I took the dog for a walk around the yard… but finally I made to the basement and the work table. It was not a dream the tenonless stem and the bowl was sitting waiting for me.

I used the Dremel to remove the remnants of the old tenon that were on the face of the stem. I flattened it against the topping board. I went through my assortment of threaded Delrin tenons until I found one that was slightly larger than the broken one. I needed to reduce the diameter slightly to make it work but it would do!I set up my cordless drill and put in a bit slightly larger than the airway and turned the stem onto it by hand. The first photo below shows the bits I used as I repeated the process until the hole was large enough for me to use a tap to thread it to match the tenon. The second photo below shows the last drill bit I used the piece of tape on the bit is to show me how deep I needed to go with the bit to accommodate the new tenon threads.I roughened the tenon surface so I could grip it enough to turn it into the newly drilled stem end. It was a good fit. I painted the end with some epoxy and turned it back in place and set it aside to cure and harden.Once the tenon was set firmly in place I used the Dremel and sanding drum to reduce the diameter to a close fit. I finished the fitting with 180 and 220 grit sandpaper. I polished the new tenon with micromesh sanding pads. Now came the telling moment. Would the stem match up with the shank? Would the fit be tight against the shank end? Even though I have done this many times I always have the same questions. I placed the new tenon in the mortise and carefully pushed the stem against the shank end. It was a very close fit and all I would need to do was sand the left side and top a little bit to make the fit even better. I was relieved and happy. I sanded the stem with 220 grit sandpaper and cleaned up the fit. I was almost back to where I was last night before the pipe dropped and the tenon broke. I have to polish the stem once again but the stem fits well. I took photos of the pipe at this point to check it out. The newly fit stem and the stain on the pipe worked well together. Now to polish it all and get it finished. I polished the bowl and stem with micromesh sanding pads – dry sanding with 1500-12000 grit pads to raise the shine.I buffed the pipe and stem with Blue Diamond on the buffing wheel. I gave it multiple coats of carnauba wax and buffed it with a clean buffing pad to raise the shine. I hand buffed it with a microfibre cloth to deepen that shine. The finished pipe is shown in the photos below. I am pretty happy with the way it turned out – even with the detour. The stain accomplished what I hope it would in making the grain pop. The grain stands out like it never did in the pipe when I received it. Now it is visible. It is a nice looking pipe that feels good in the hand. Thanks for looking.


Sandblast Reveals Stunning Grain on a GBD Concorde 9438


Blog by Steve Laug

The next pipe I brought to the table had two major attributes that piqued my interest. The first was that it has an amazing sandblast (or is it a combination blast and rustication?). The second thing was that it was a pipe in my favourite GBD shape that I think nobody does as well as they do – the 9438 Rhodesian.  The pipe is stamped on the smooth underside of the shank GBD in an oval and next to that Concorde. Running along the shank stem junction it reads 9438 and Made in France. The logo is stamped into the left side of the saddle portion of the stem. The next photos show what the pipe looked like when it arrived in Idaho before my brother started cleaning it for me.Jeff took some close up photos of the bowl, rim and stamping to show the condition and the brand of the pipe. Those of you who love the 9438 did not need to see the stamping to confirm the shape but here it is. The finish was dirty with lots of debris in the grooves and crevices on the bowl and shank. The rim had a tarry build up on the back half where the cake was overflowing the bowl. The mortise was so dirty that the stem no longer seated against the shank. The GBD oval was stamped on the side of the stem and did not have a brass roundel as some of the earlier ones did.The stem was oxidized and there was tooth chatter on both the top and bottom sides near the button.The finish was a new one to me. I have not worked on a Concorde before so I wanted to learn a bit about it. I was not sure if it was a sandblast or a rustication or both. I did some searching online and found some things about it however. The GBD Concorde was made in France and was a lower priced GBD. It sported what GBD called a “take-off” brown/black stained sandblast. The top three pipes (ABC) in the photo below are from a 1976 Tinderbox Catalog I located on Chris’ Pipepages. The weblink for the pages is shown in the link that follows: http://pipepages.com/2tinderbox3.htm

The pipe I was working on was “B” in the photo below. The finish on mine was very similar but mine did not have the brass roundel on the stem as the one in the photo does. On the second page of the catalogue there is a description of the pipe. It is a little hard to read but here is the text: “GBD Breaks with Tradition and Forges Bold New Designs. A.B.C. Concorde – This latest innovation from GBD’s French factory, the Concorde, offers exceptional value in the popular price range and features a most novel “take-off” process.” The catalogue lists the retail price in 1976 at $12.50. I have a sense of what they mean by the take of process in looking at the finish. It appears that the pipe has a dark brown stain applied to the bowl. It is buffed off the high spots on the pipe giving it a contrasting appearance. At least that is what I think is meant by the take-off process. When I received the pipe it was clean inside and out. My brother had done a great job cleaning out the grime and debris. The stem fit in the mortise perfectly and all looked good. The finish was clean and faded and the oxidation on the stem had come to the surface so it was ready for me to move ahead with the restoration. I took a few photos of the pipe so you could see what it looked like when it arrived in Vancouver. The rim looked much better but still had a bit of debris on the back side. It was nothing that a little sanding with micromesh could not cure. There is some stunning grain on the rounded rim top and on the smooth parts of the bowl. There is also some peeking through the sandblast. This is a beautiful pipe and one I may well hold onto.The oxidation on the stem had been brought to the surface by the cleanup. It definitely appears worse than it did in the earlier pictures but the difference is that the oxidation is on top now and easier to deal with. The tooth marks and chatter on the stem are visible in both photos.I polished the rim and the high surfaces of the bowl with a fine grit sanding block and with 1500-4000 grit micromesh pads to raise a shine. I gave it a coat of Conservator’s Wax and  hand buffed it with a shoe brush and cloth. The photos below show the bowl after that simple treatment. I sanded the stem with 220 grit sandpaper, carefully avoiding the area around the GBD Oval stamping. I did not want to damage that. I polished the stem with 1500-2400 grit micromesh to begin bringing the shine to the stem.I rubbed the stem down with Obsidian Oil and did something I probably should have waited to do. I cleaned around the area of the stamp with a damp cotton pad. I applied some Rub’n Buff European Gold to the stamping and rubbed it off the surface with a cotton pad. The second photo below shows the stamp when I had finished the first application. I can justify this step by saying it is actually easier to see the stamp with a little gold in place so that I can carefully polish around it. I repeated sanding the stem with 1800-2400 grit micromesh sanding pads.I polished it with 3200-12000 grit pads and gave it a coat of Obsidian Oil after each set of three pads. The shine was beginning to come through. I gave it a final coat of oil after the 12000 grit pad and set it aside to dry. I buffed the pipe with Blue Diamond to polish the stem and remove the scratches that still remained on the stem. I lightly buffed the bowl to raise a shine. I gave the stem several coats of carnauba wax and the bowl several coats of Conservator’s Wax and buffed the pipe with a clean buffing pad. The pipe began to truly shine. I hand buffed it with a microfibre cloth to deepen that shine. The finished pipe is shown in the photos below. It is really a beauty and one I am thinking seriously of adding to my own collection… ahh well… we shall see. Thanks for looking.

Cleaning up the last of the five Gourd Calabashes


Blog by Steve Laug

Well, I have come to the end of restoring the five gourd calabashes that my brother and I picked up on my recent trip to Idaho. This final one is very similar to the previous one that I cleaned up. I think it may also be a Pioneer Gourd Calabash but I have no way of proving it one way or another. The gourd on this one is a bit longer and has a slightly different bend than the previous one. The shank cap and extension is identical. The stem is different and it may well be a replacement. The pipe had been lightly smoked as is evidenced by the internals of the bowl and shank. However, it has been roughly handled. The bowl was darkened and scratched and there were chips missing on the outside edge. Fortunately they were not too deep and could be addressed but they were present nonetheless. This calabash was externally in the worst shape of the five but as I looked it over I could see that there was a lot of promise left in it and the bowl could be polished and smoothed out. The next four photos show the condition of the pipe when I brought it to the work table. I took the pipe apart to get a look at the parts. The inside of the gourd was surprisingly clean. In fact it looked barely smoked. This made me wonder if the bowl was not a used replacement bowl from another pipe. The cork gasket was also new and had been replaced. It was dry and hardened but still had not cracked or broken. The top of the bowl was in rough shape. There were some scratches and the burn marks were all around the inner edge of the bowl. I took a close up photo of the bowl top and edges to show more clearly the kind of damage that would need to be addressed in cleaning this one up. You can see the nicks on the inner edge of the bowl and on the top. The burn marks went all the way around and out into the surface of the bowl. The scratches on the top are visible and many. The second and third photo below show the nicks in the out edge of the bowl. It looked to me that the bowl had been dropped some time in its life. There were two missing pieces and there were also a lot of scratches all the way around the outer edge of the bowl. I sanded out the as many of the scratches as possible with 220 grit sandpaper. I smooth out the missing chips on the edge of the bowl and reshaped the rounded edge of the bowl so that the chips were no long visible. I polished the meerschaum with micromesh sanding pads – wet sanding with 1500-2400 grit pads and dry sanding with 3200-12000 grit pads. I buffed the bowl with Blue Diamond to polish it to a shine. By the time I was finished most of the scratches and damage had been repaired and the bowl looked far better. I greased the cork with Vaseline to revitalize it and soften it. I rubbed it down and let it absorb before giving it another coat. Once it had been absorbed the cork was softer and more flexible. The bowl seated very well when pressed into place.I waxed the gourd with Conservator’s Wax and buffed it by hand with a soft cloth. I repeated the process and after buffing it with the cloth hand buffed it a final time with a microfibre cloth.I pressed the bowl into the gourd and it fit really well. The next two photos show the polished bowl and gourd. The pipe is already looking far better than it did when I started the refurbish on it. There is a shine to it now.I cleaned out the shank, the mortise and the airway in the stem with pipe cleaners, cotton swabs and alcohol. It was remarkably clean which made me more certain that the pipe itself was unsmoked and a used replacement bowl had been added later.I polished the unused stem with micromesh sanding pads – wet sanding with 1500-2400 grit pads. I buffed the stem with red Tripoli to remove the light oxidation and then finished dry sanding with 3200-12000 grit pads. I gave the stem repeated coats of Obsidian Oil after the first set of pads and the buffing and after each set of three pads after that. I gave it a final coat after the sanding with the 12000 grit pad and then set it aside to dry. I gave the stem multiple coats of carnauba wax and buffed it with a clean buffing pad to raise the shine. I removed the bowl and carefully buffed the gourd with a clean buffing pad to raise the wax shine on it as well. I put the pipe back together and hand buffed it with a microfiber cloth to deepen the shine. The pipe looks really good now that it is finished. You would be hard pressed to find the damaged areas on the bowl sides and the scratches on the rim top look really quite good. The bowl has a light patina that remained after I waxed it with beeswax. It is a beauty and will serve someone well. It will be available on the rebornpipes store shortly. If you have been looking for a gourd calabash this one may well fit the bill. Thanks for looking.

Breathing New Life into a No Name Gourd Calabash


Blog by Steve Laug

Having finished the first three gourd calabashes that my brother and I picked up on my recent trip to Idaho I move on to the fourth one. I purposely left the fourth and fifth pipes for last because they came to me in used condition. The bowls and gourds are original. I am not convinced that the stems for either one is original but I will probably never know. The gourd on this one is in great shape. It is significantly lighter in colour and weight than the previous three. The calabash does not have the patina that age and time adds to it. The shank end is made of plastic and includes a cap that covers the end of the gourd and an extension that forms the mortise for a push tenon. It appears that the shank extension is inserted with a plug and glued into the calabash end. I took the pipe apart and took the photo below.  The stem was oxidized and there were tooth marks and chatter on the surface of the stem at the button on both sides. The meerschaum cup/bowl had been used. There was darkening on the underside of the bowl and the inside of the bowl had some darkening from smoking. The top of the cup was scratched and nicked from being knocked against hard objects. There was some tar and smoke damage on the inner edge of the rim and the top.The inside of the gourd had been cleaned and showed little wear and tear. There was a new cork gasket on the top inner edge of the gourd. It was dry and hard but undamaged. The shank extension had been well drilled as a mortise for the push tenon stem. It was plastic and was in excellent condition. I took a close up photo of the meerschaum bowl. You can see the darkening from the lighting of the pipe and the scratches in the surface of the bowl top. The inside of the bowl is darkened. The second photo shows the underside of the bowl. It is also slightly darkened. Overall the bowl looks to be in decent shape. The stem on this one was well used. It was oxidized and the tooth marks and chatter were on both sides near the button. Of the four calabashes I have worked on to this point this one has the most used stem. None of the marks are too deep so it should not take too much work to smooth things out.I started by working on the meerschaum bowl. I sanded out the scratches and marks with a well-worn piece of 220 grit sandpaper and then polished it with micromesh sanding pads. I wet sanded the bowl top and edges with 1500-2400 grit sanding pads. I dry sanded it with 3200-12000 grit pads. I buffed it with Blue Diamond on the buffing wheel to polish out the remaining scratches. When I finished polishing the bowl I gave it several coats of beeswax polish and buffed it with a soft cloth and a shoe brush.I rubbed the cork gasket down with Vaseline to soften and enliven it. I let it absorb into the cork and repeated the process until the cork was soft.I waxed the gourd with Conservator’s Wax and when it dried I buffed it and gave it repeated coats of wax. I buffed it with a shoe brush and then with a microfiber cloth to deepen the shine. I cleaned out the mortise and the inside of the shank and stem with pipe cleaners, cotton swabs and alcohol. It did not take too many swabs or cleaners to remove the debris in the gourd and the stem. Inside was in far better condition that the outside of the shank and bowl. I sanded out the tooth chatter and the tooth marks with 220 grit sandpaper until the surface was smooth. I polished the stem with micromesh sanding pads – wet sanding it with 1500-2400 grit pads and dry sanding with 3200-12000 grit pads. I rubbed the stem down with Obsidian Oil after each set of three pads and gave the stem a final coat of oil after the last pad. I set it aside to dry. I buffed the stem with Blue Diamond to polish out the last of the oxidation in the grooves of the stem and also to polish out the remaining scratches. I buffed the gourd and the stem with carnauba wax and a clean buffing pad to raise the shine. I avoided buffing the plastic shank extension and merely buffed it by hand with a microfiber cloth. I buffed the entire pipe by hand with the microfiber cloth. The finished pipe is shown in the photos below. It is a smaller pipe than the others I have posted and is comfortable in the mouth and the hand. It will soon join the previous three calabashes on the rebornpipes store. Feel free to contact me if you are interested in adding this one to your collection. Thanks for looking.