Blog by Dal Stanton
A few years ago, I acquired the Jeantet Superior Chimney now on the worktable in the ‘French Lot of 50’ which demanded my attention on the French eBay auction block. It has provided several treasures that are now in the care of new stewards benefiting the Daughters of Bulgaria. Another from this Parisian Lot, is now in the offering. Skeet saw the Jeantet in the online inventory, ‘For “Pipe Dreamers” Only!’ along with a few other pipes and reached out to me with questions about the possibility of commissioning some. Part of why I love restoring pipes is not only their innate beauty and intrigue delving into their pedigrees and stories, but also when I can learn about their former stewards or potentially in this case, their future stewards. Here is a portion of Skeets initial email to me:
Greetings Dal,
I have been looking through your collection of “Help Me!” Baskets and I am overwhelmed! There are so many beautiful pipes in this group! I have received a little extra money in recent days and I am finally going to commission a pipe or two. I am (sadly) clueless on the basic expense of this and the basic value of pipe brands. I found a dozen pipes I would cherish if I had them but have cut the number down significantly. I usually tend to buy full or half bent styles, but as I looked, I was drawn to mostly “slightly bent” or even straight models. I am a newbie still even though I am 66. I don’t automatically know the relative values of each of these pipes so I may be very interested in a pipe I cannot afford. This is the primary reason for my exploratory email.
Below I have listed 5 pipes (cut down from many more!) If you could supply me with a general idea of what these might cost to commission and eventually purchase, I would be quite appreciative. I intend to commission at least one and hopefully two if I can afford it.
I appreciate your willingness to support the Daughters of Bulgaria. What a wonderful cause! Thank you for your compassion.
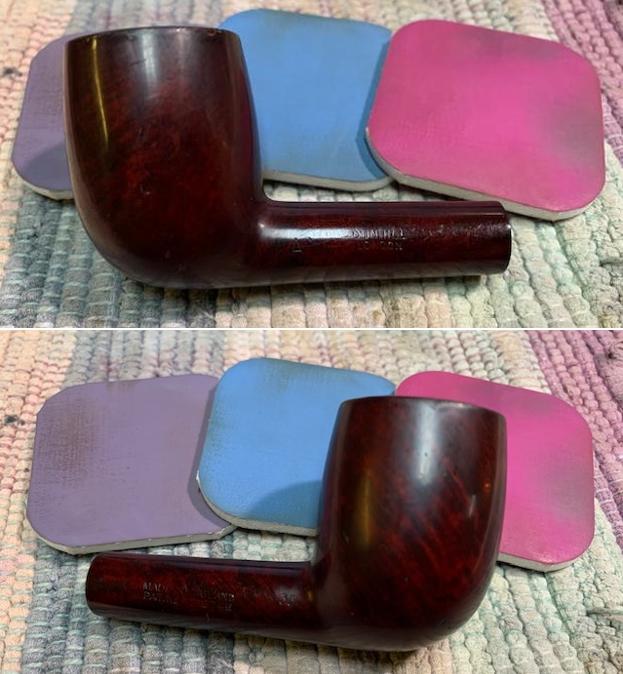
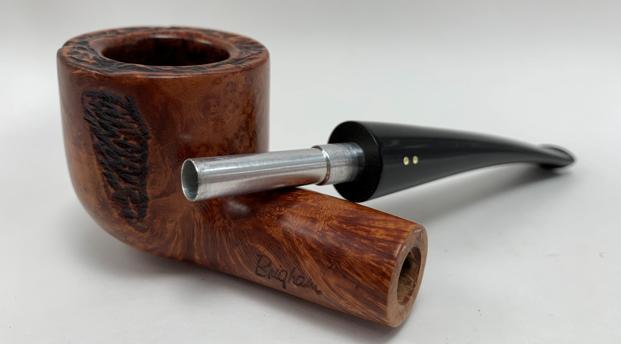
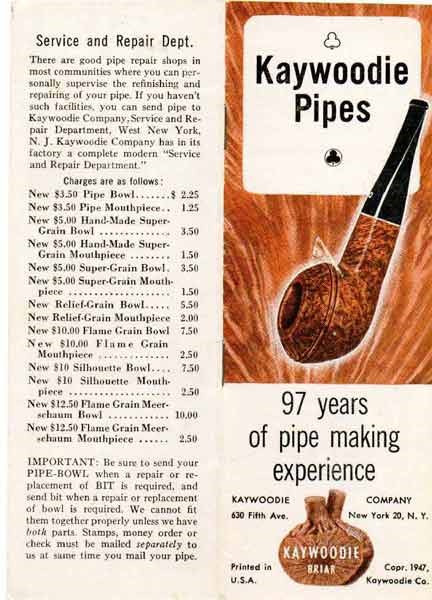
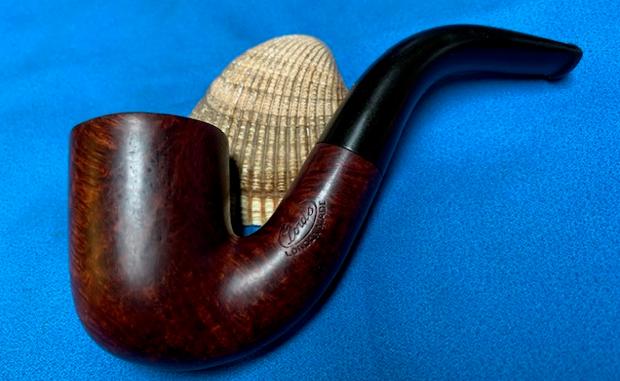
 After communicating back and forth, Skeet’s starting point with the consideration 5 pipes was whittled down to commissioning 3. Along with the Jeantet, Skeet commissioned an interesting Kaywoodie Flame grain 09B Pear and a Butz-Choquin Regate St. Claude France 1275 shown here.
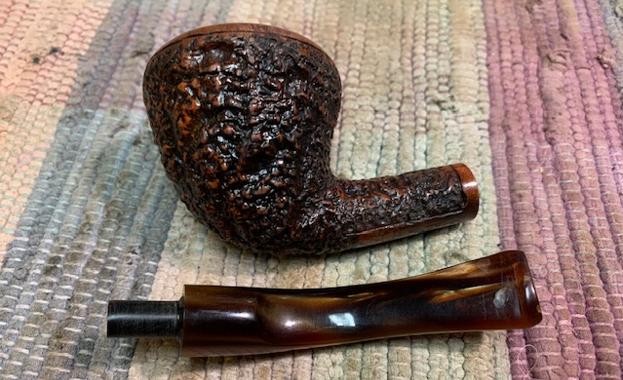
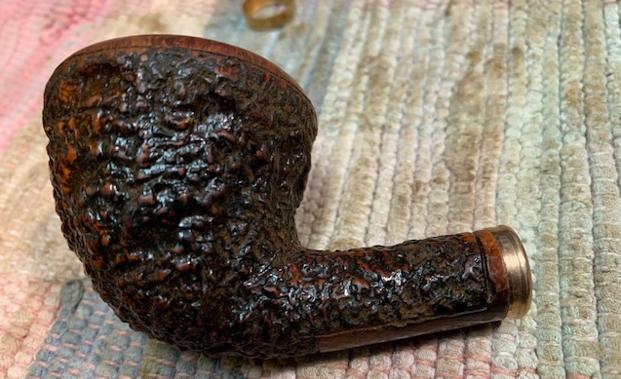
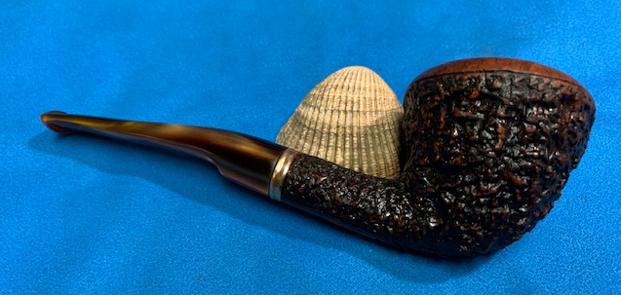
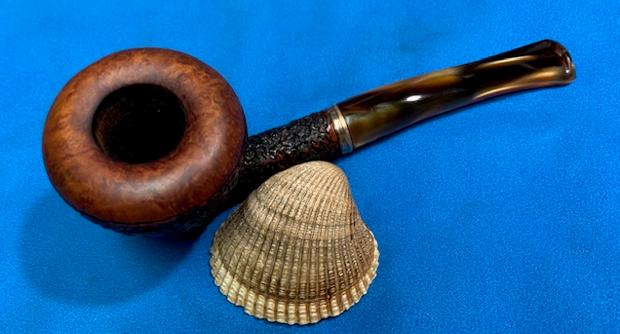
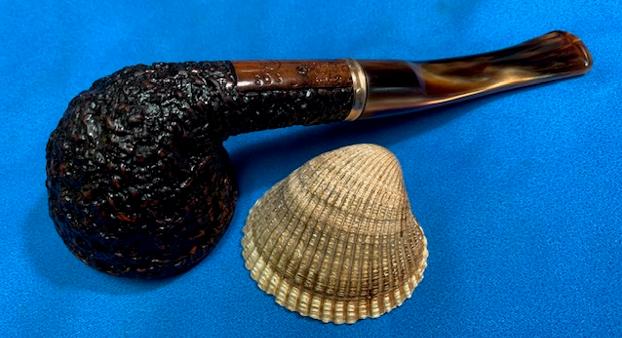
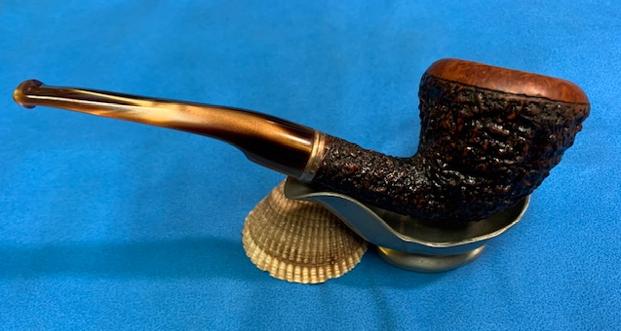
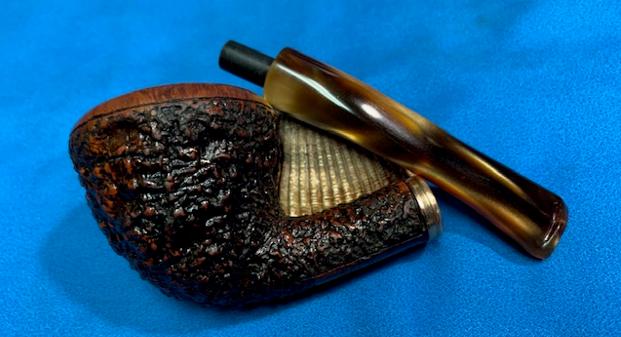
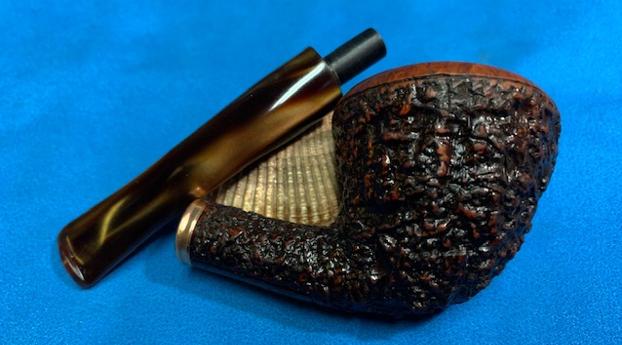
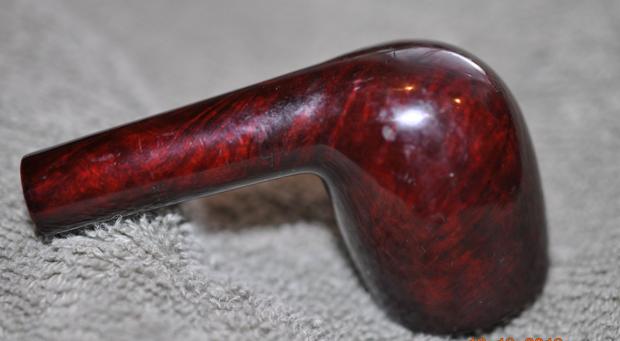
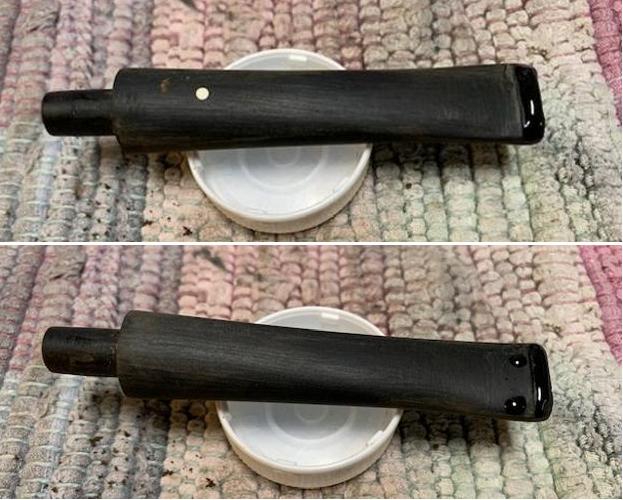
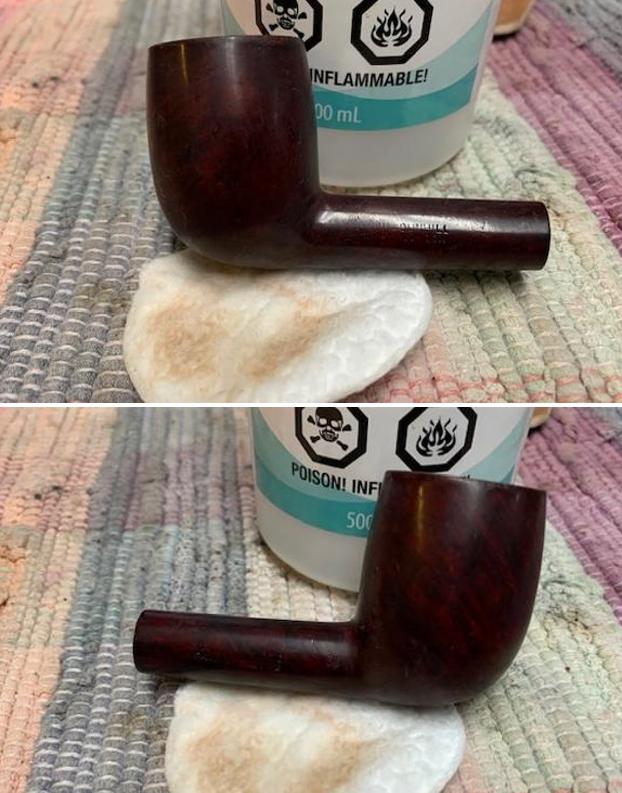
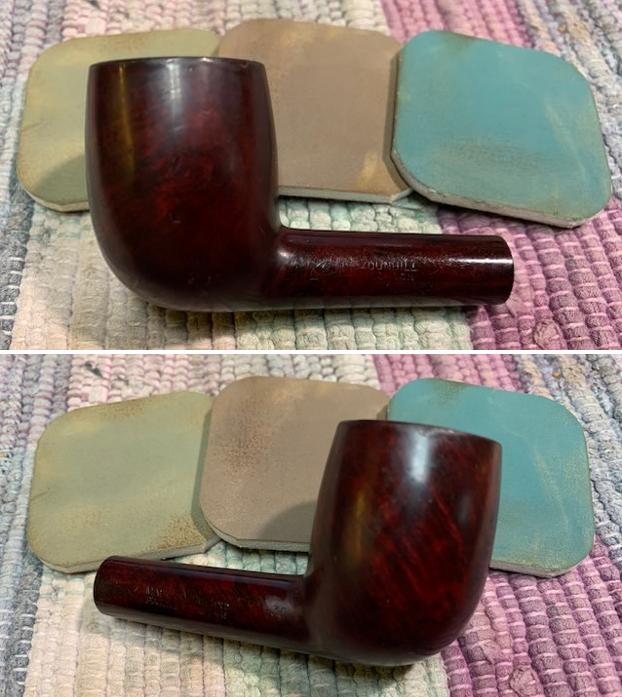
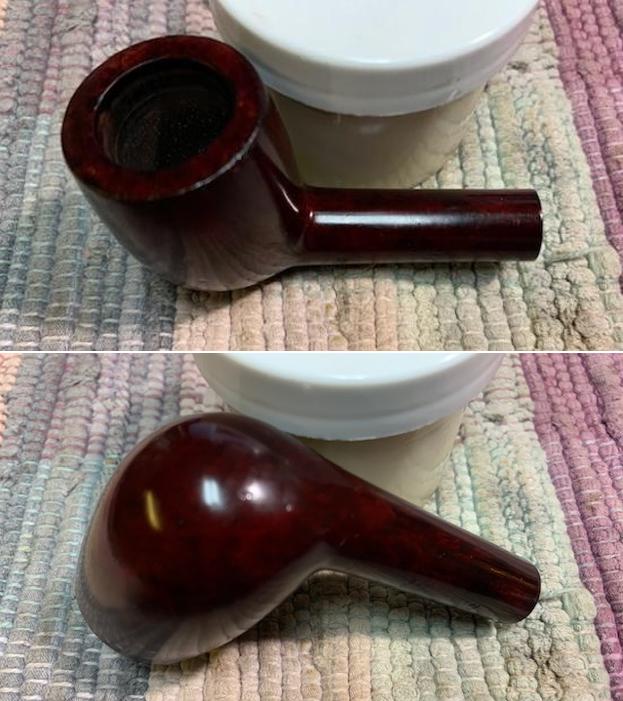
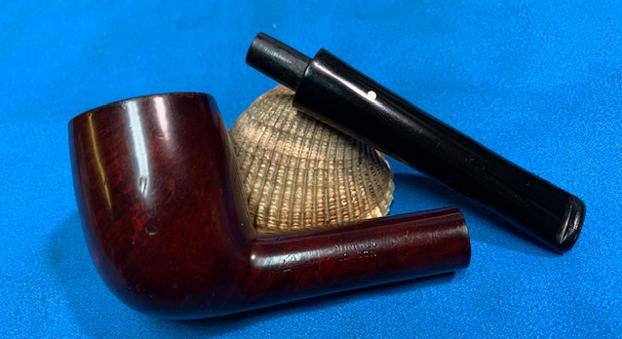
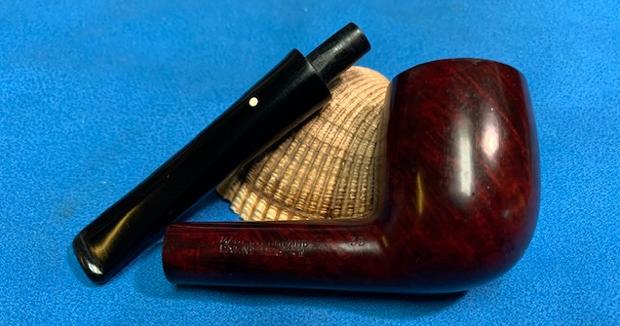
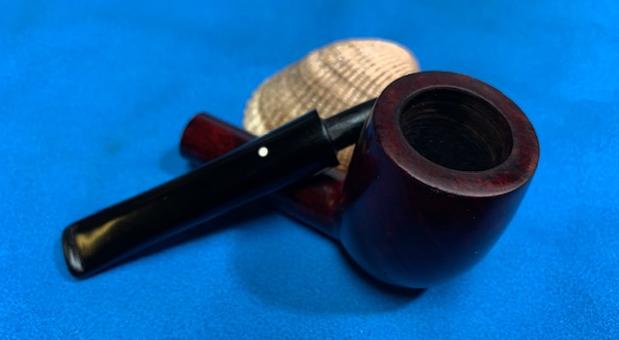
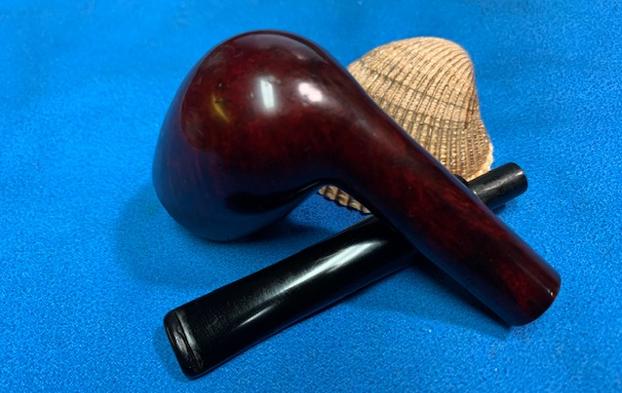
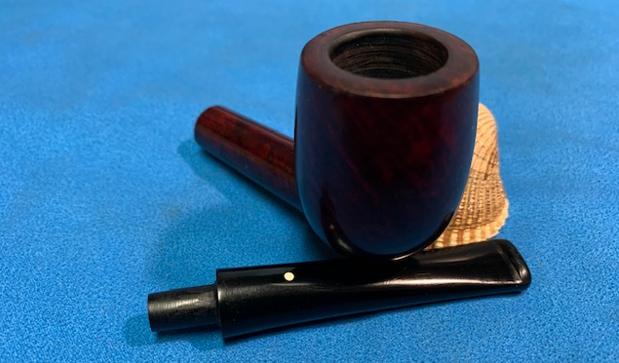
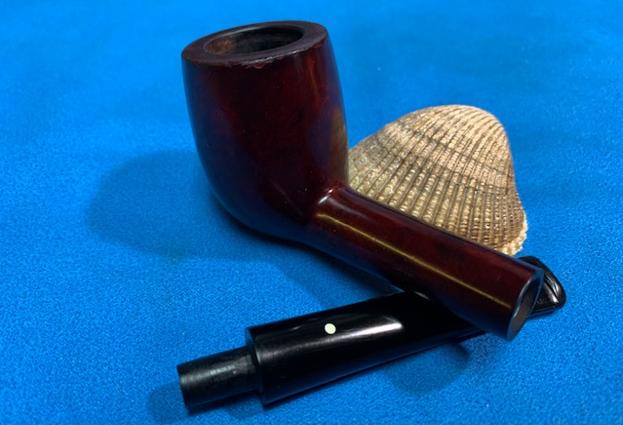
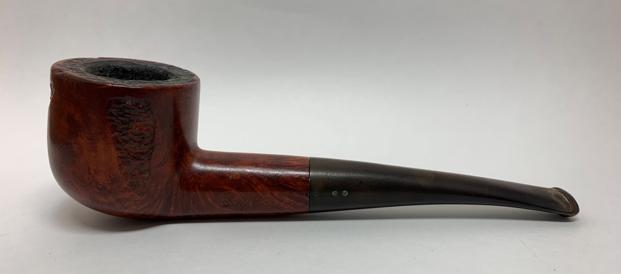
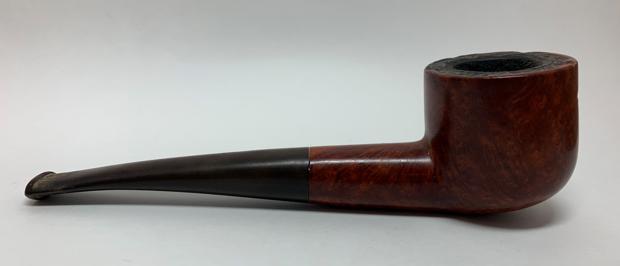
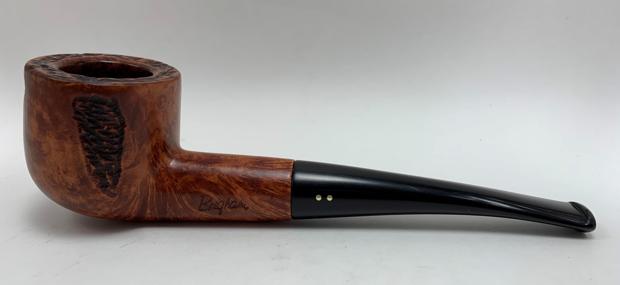
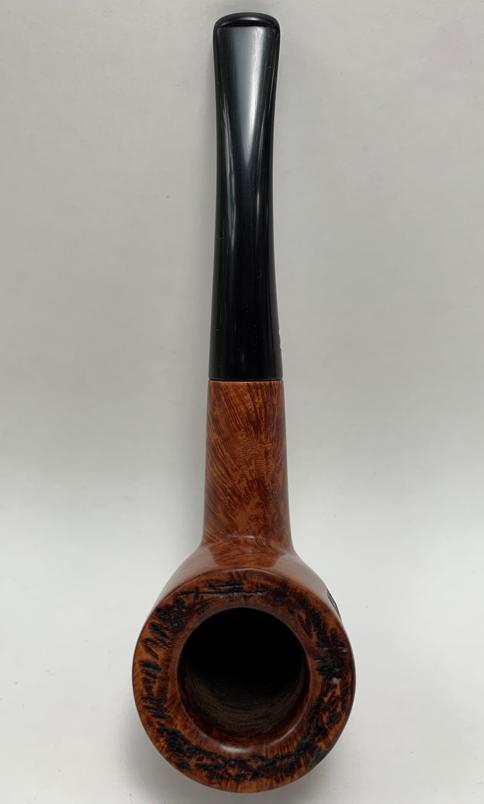
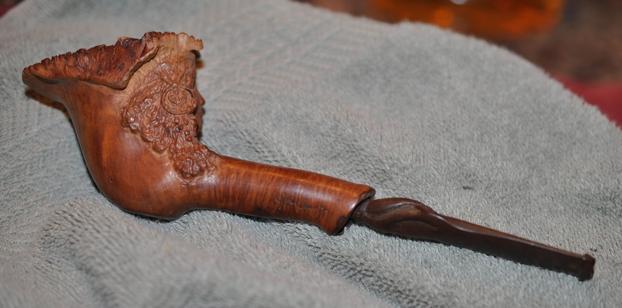
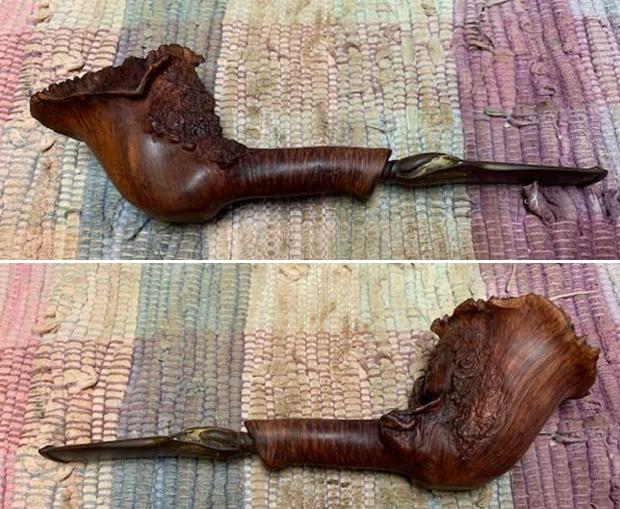
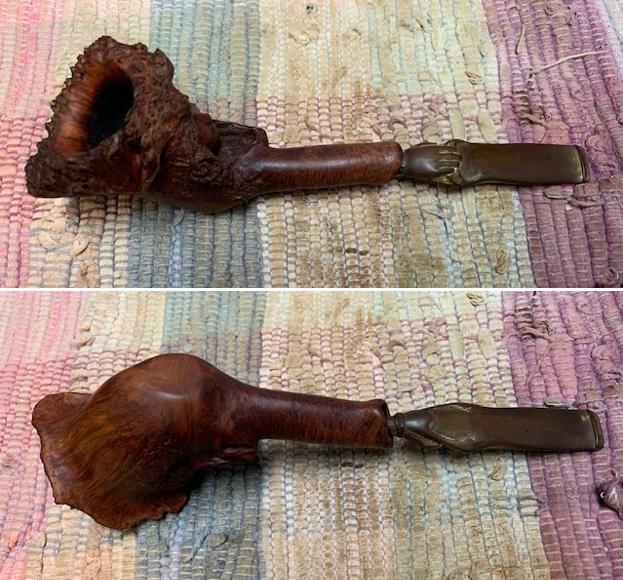
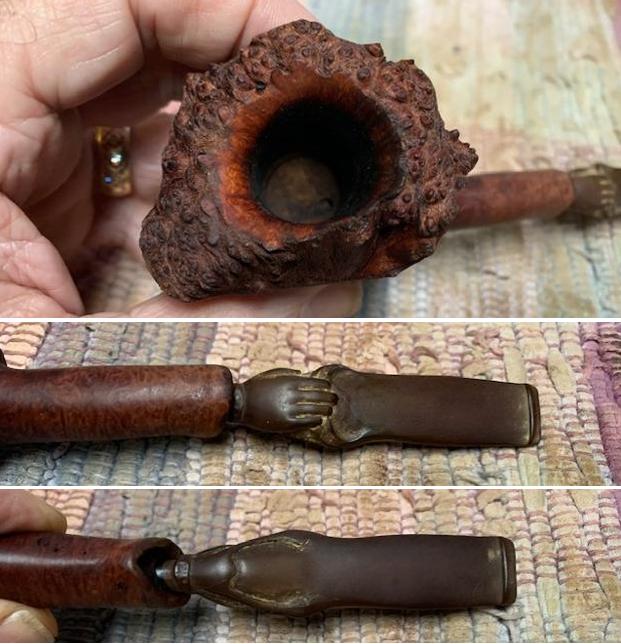
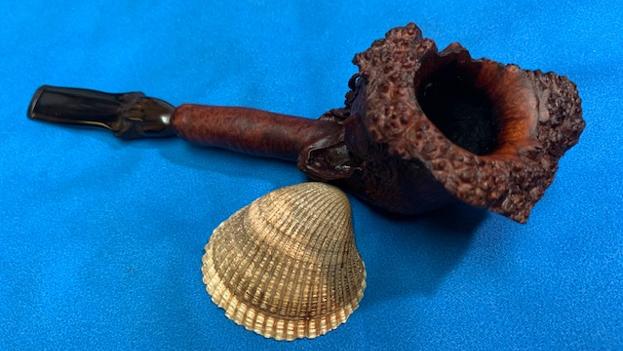
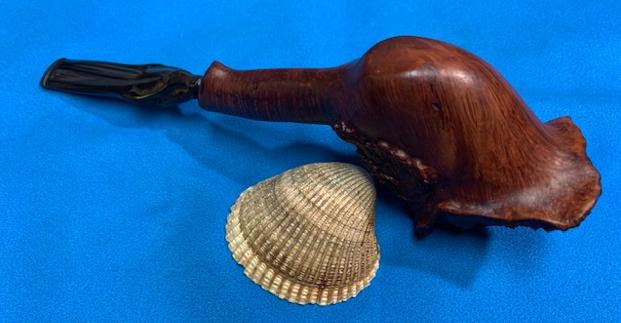
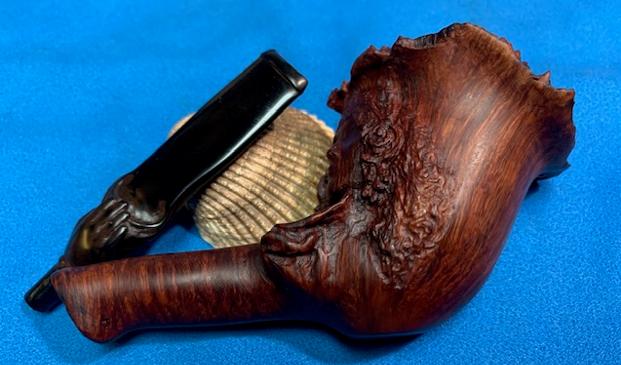
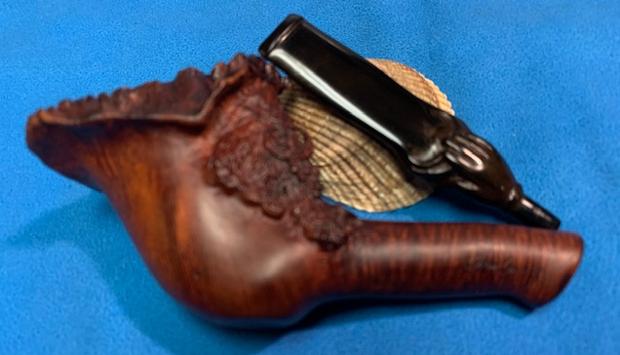
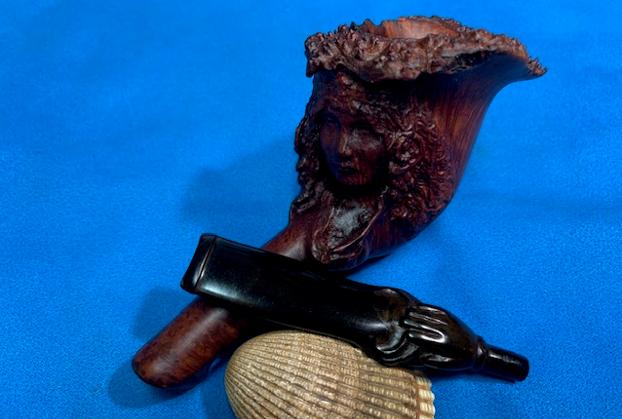
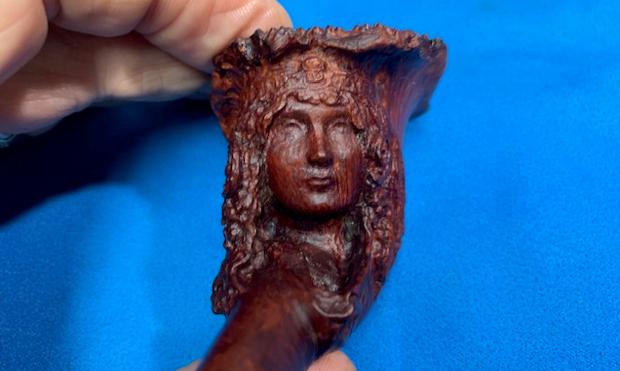
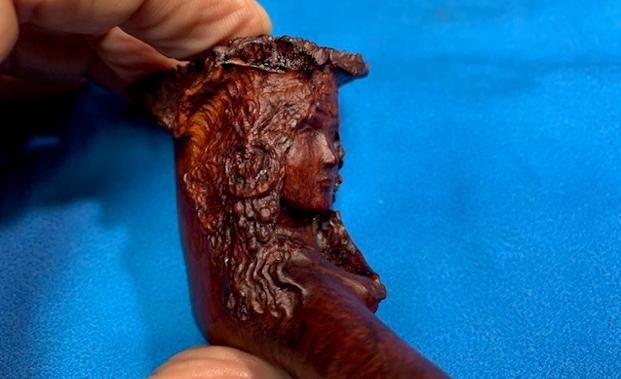
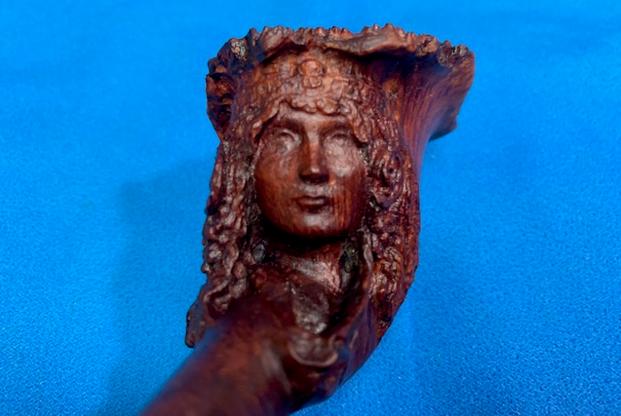
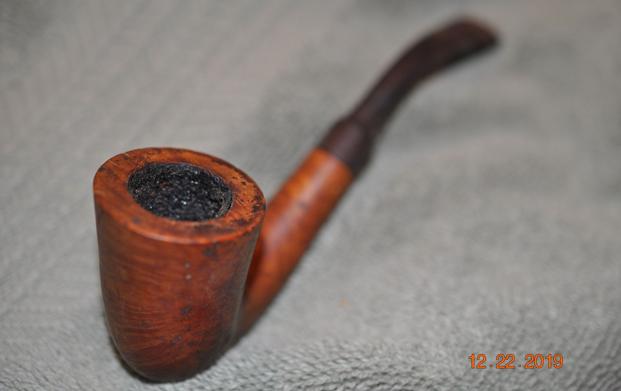
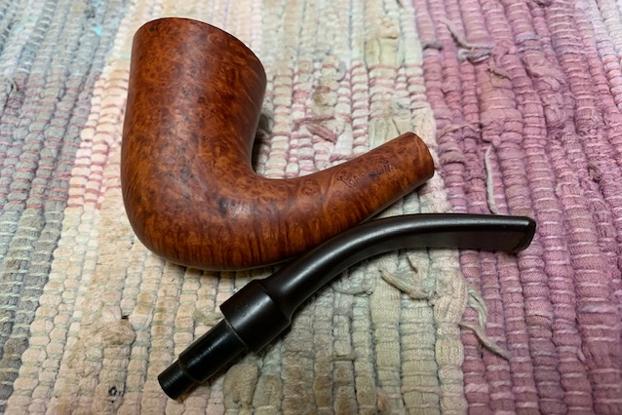
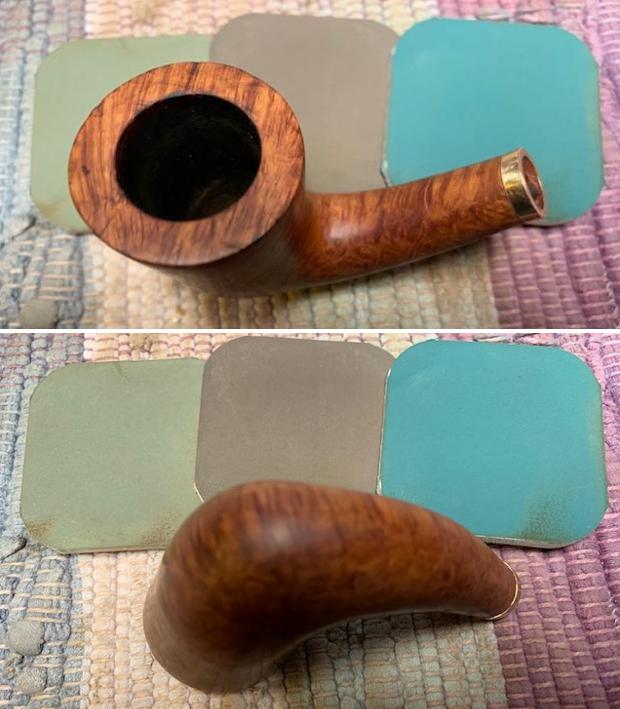
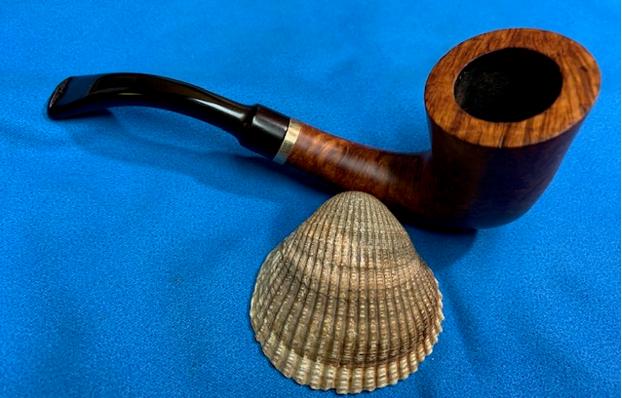
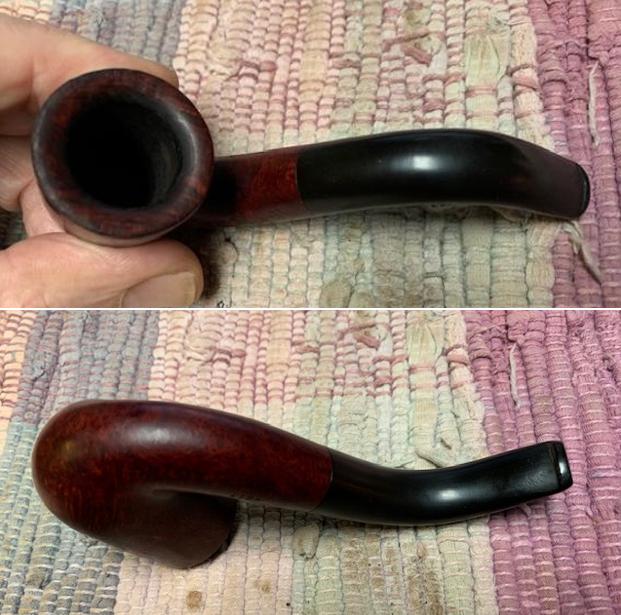
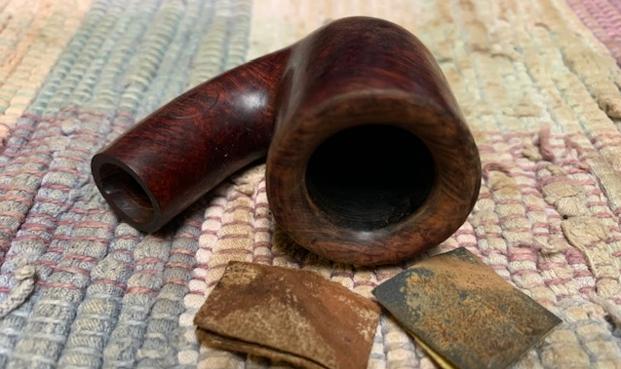
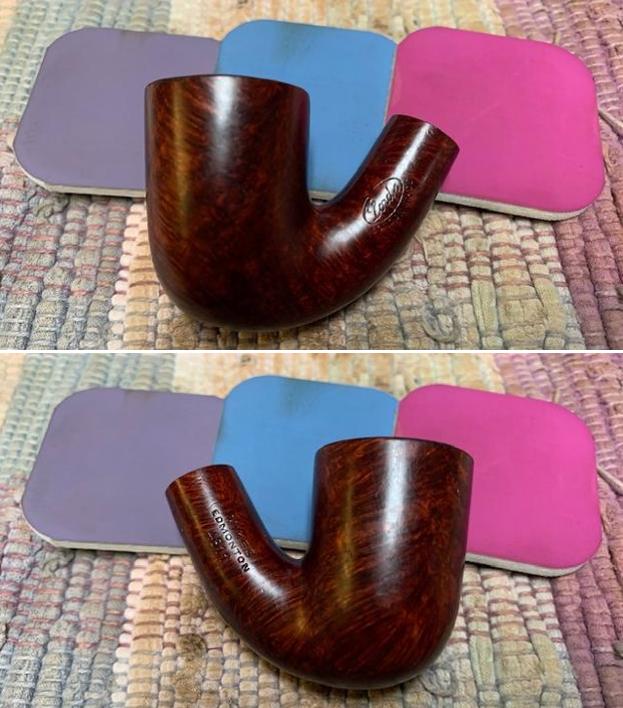
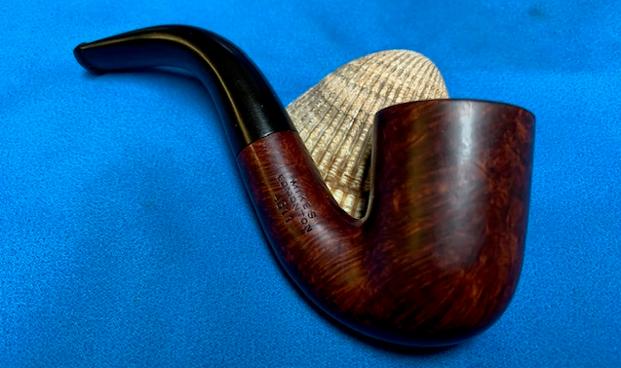
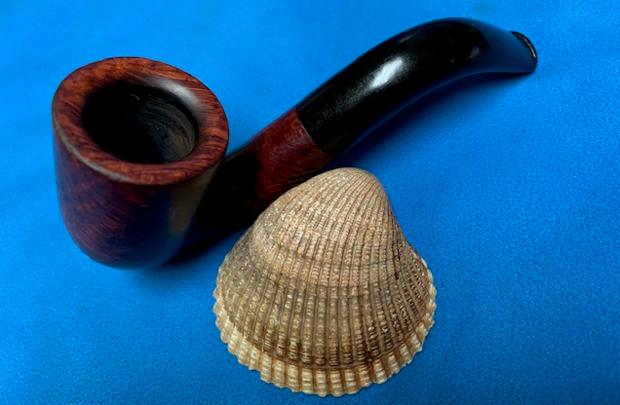
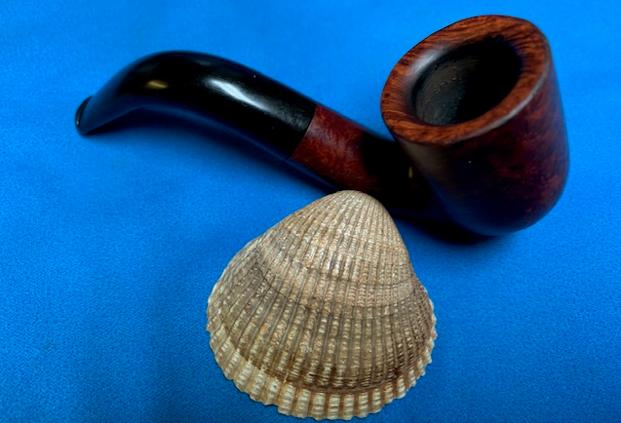
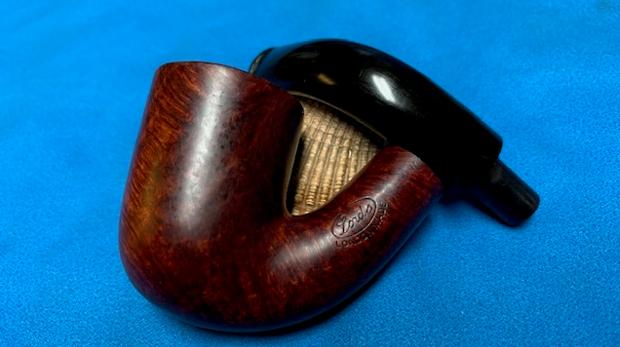
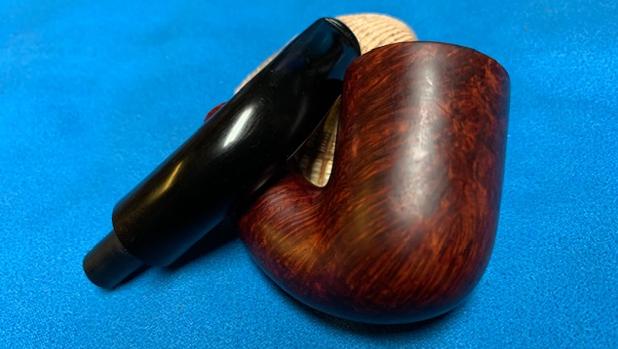
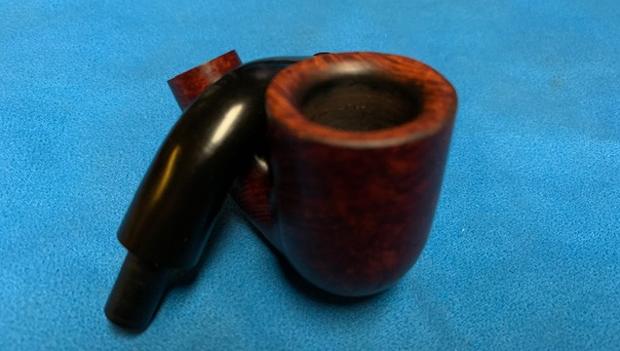
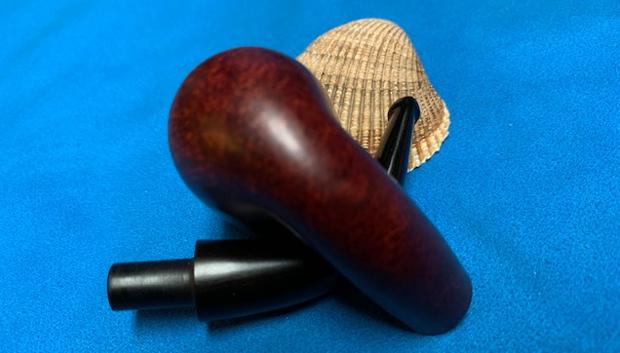
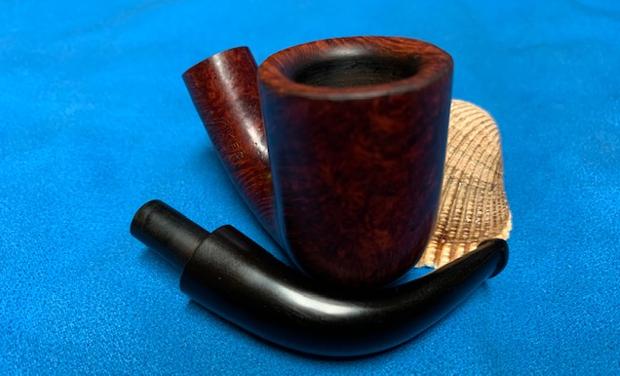
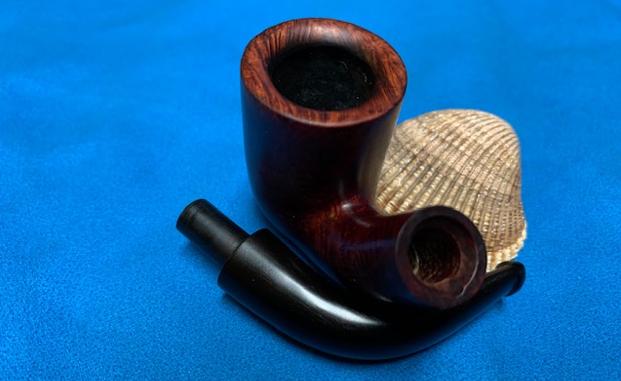
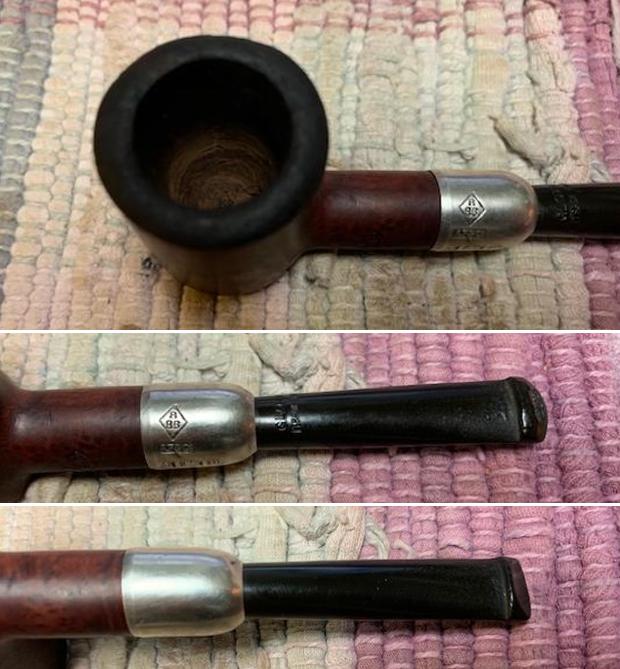
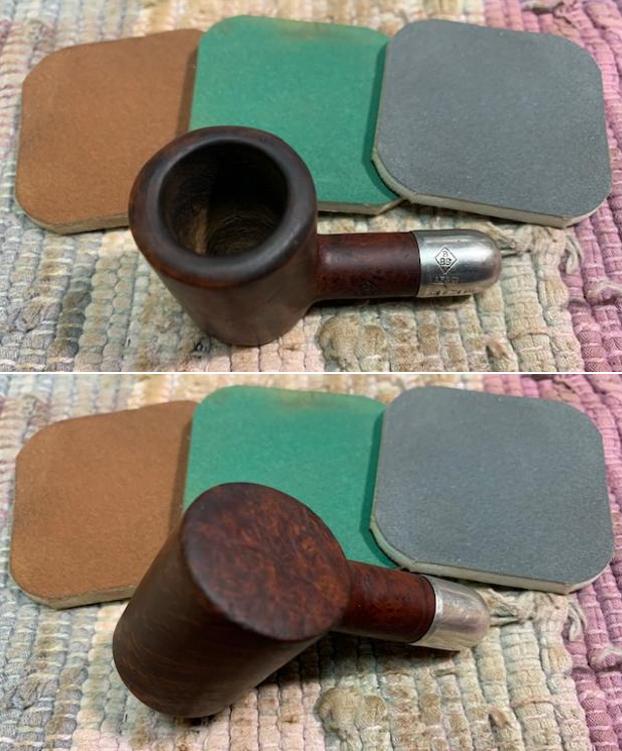
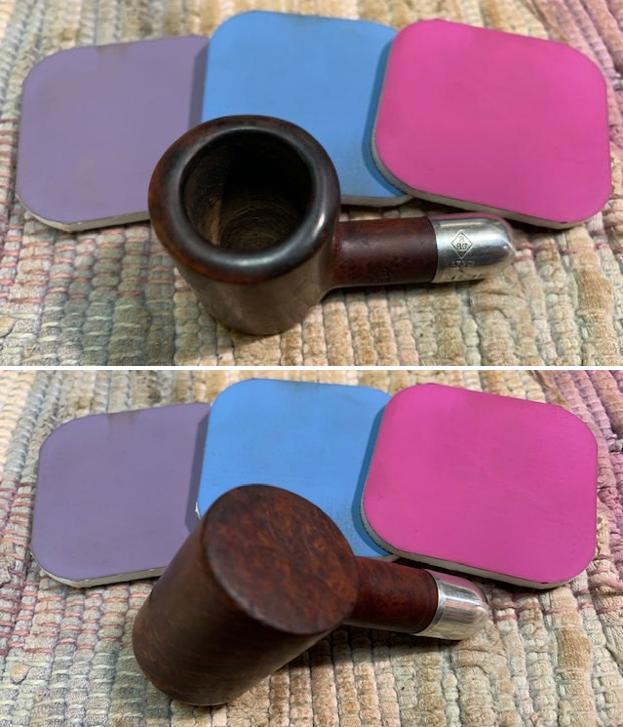
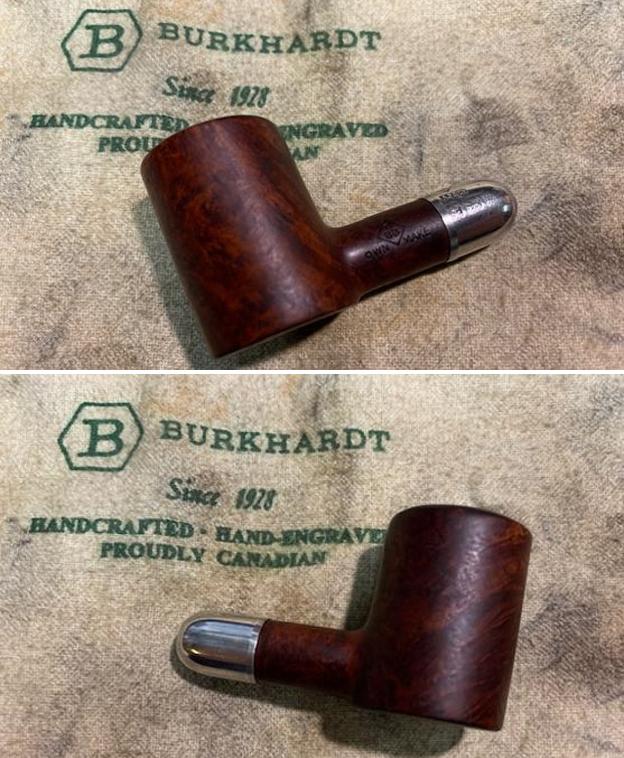
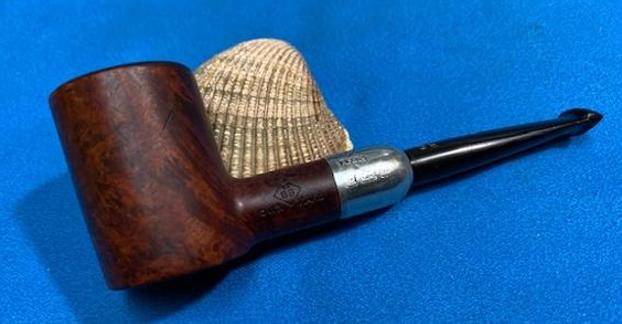
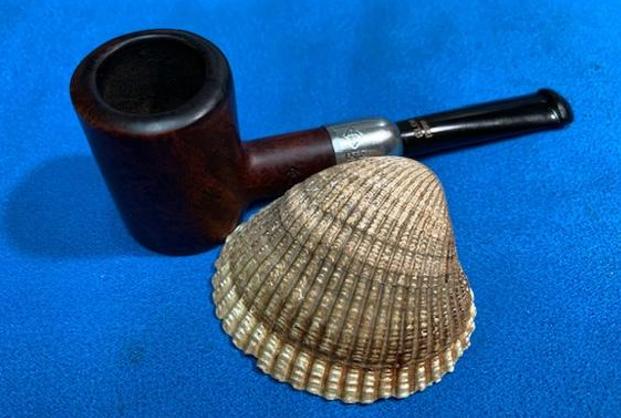
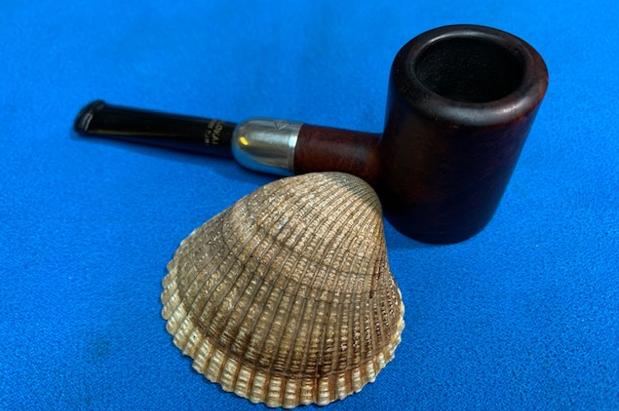
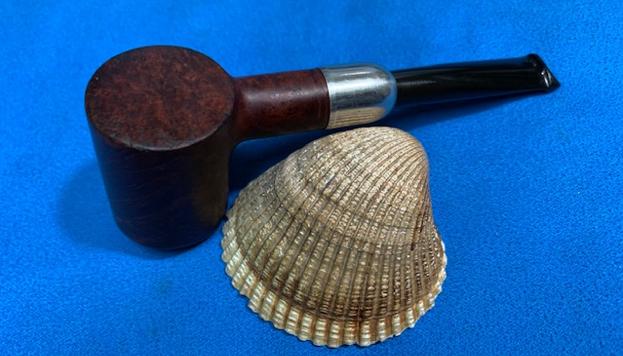
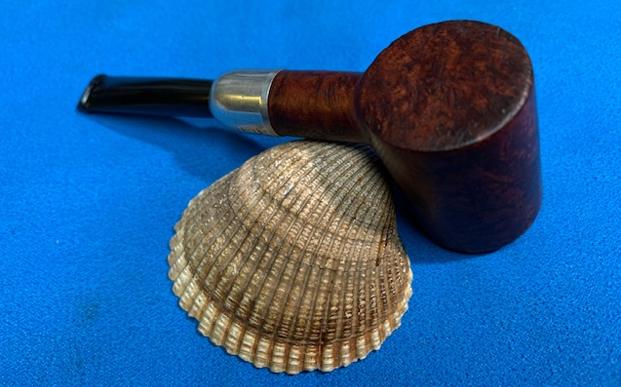
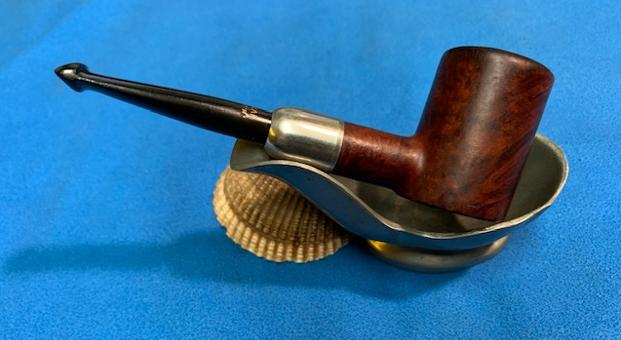
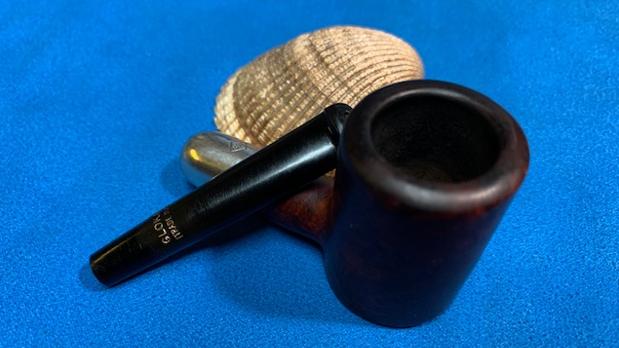
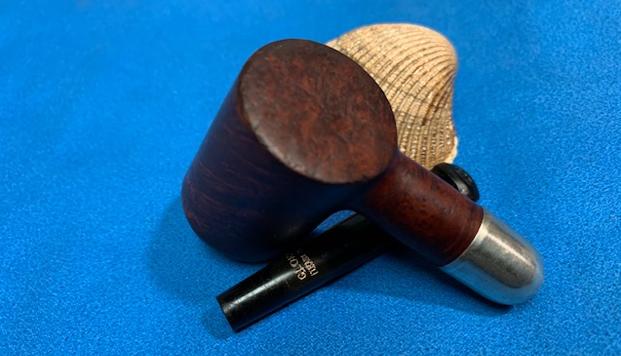
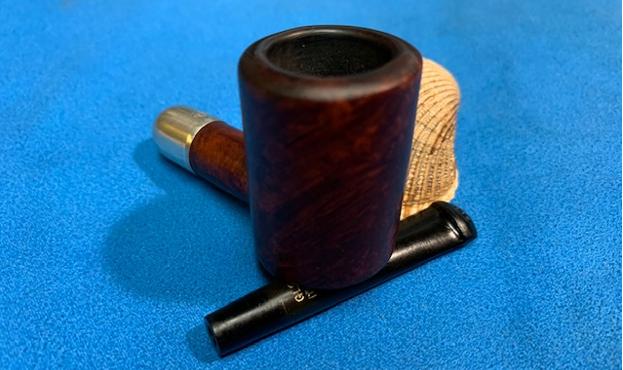
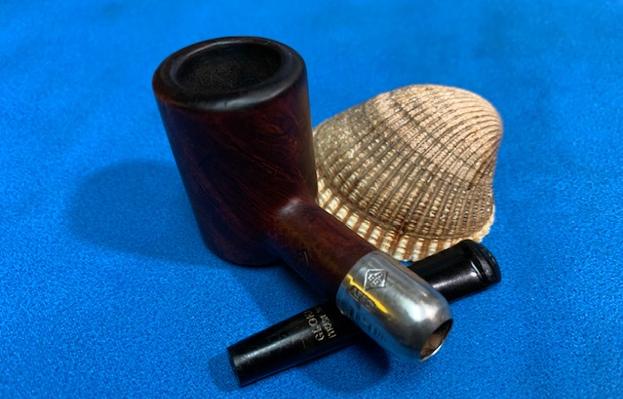
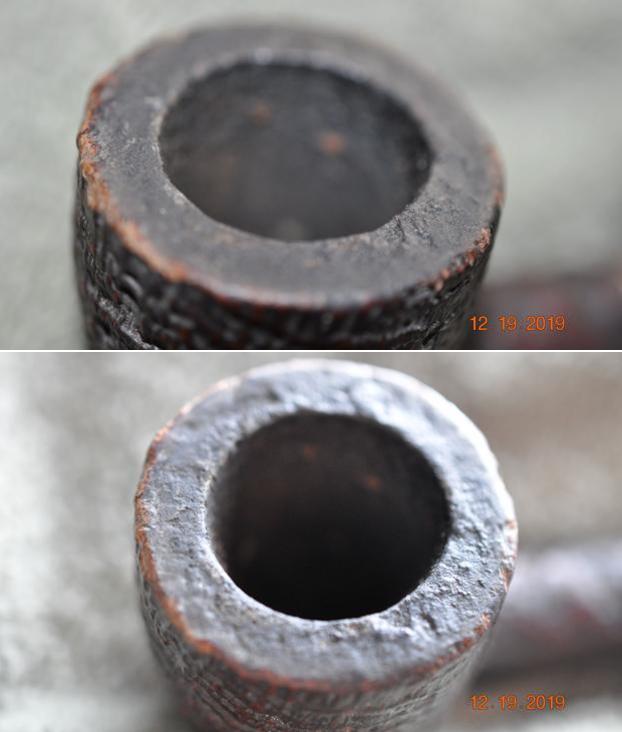
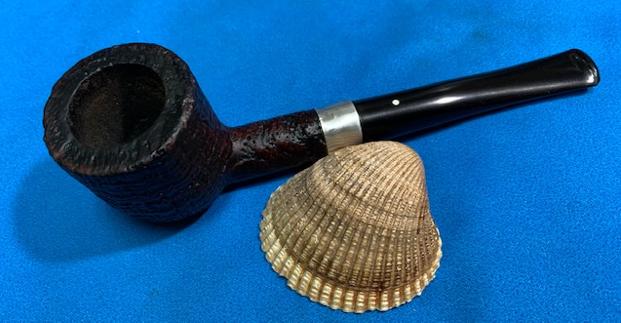
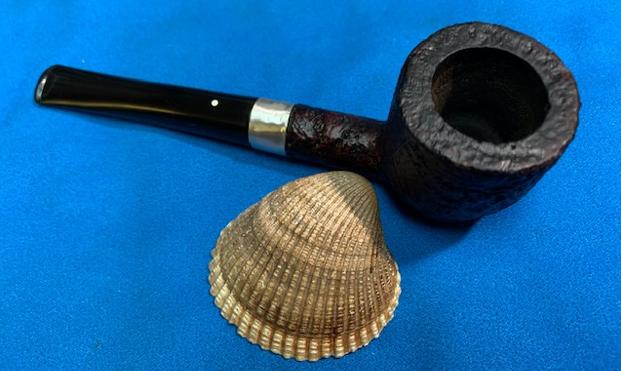
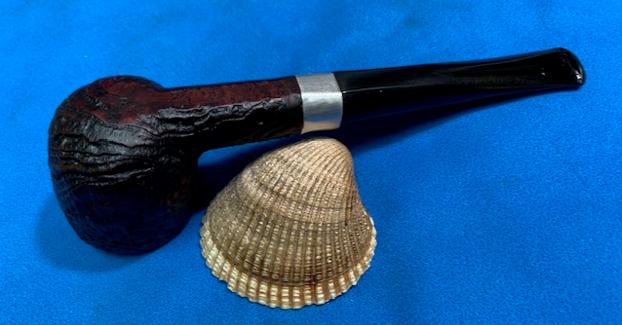
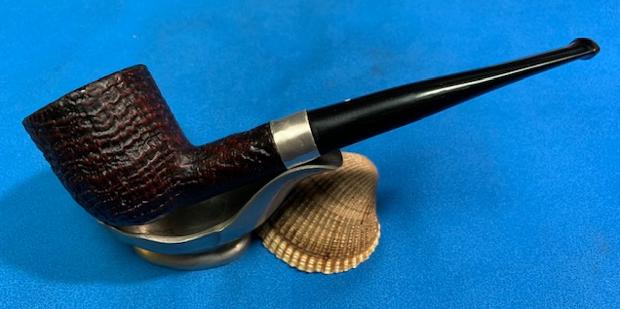
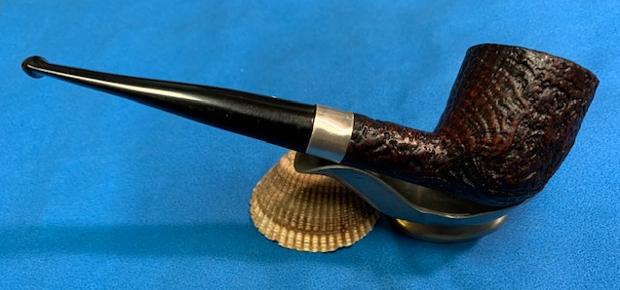
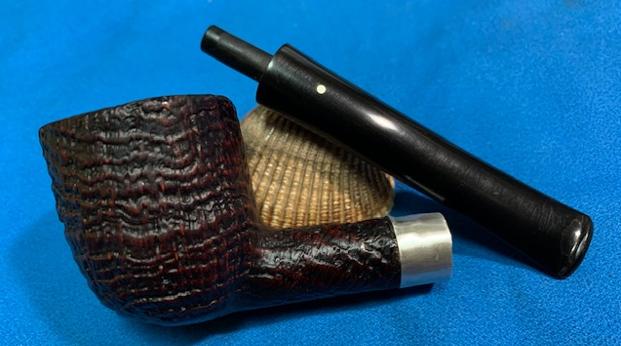
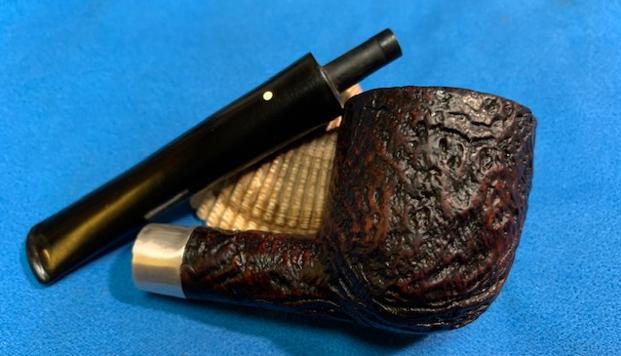
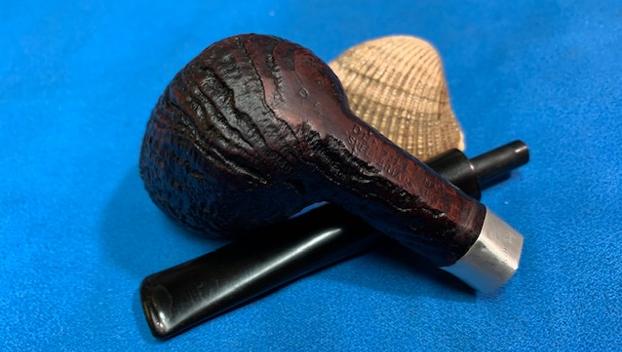
With all who commission pipes, the one condition I ask of them is patience as the pipes work through my deliberate but often slow worktable! A few months ago, before the holidays, I reached out to Skeet thanking him for his patience and letting him know that his pipes were close to the worktable. Now, the Jeantet Superior Chimney is on the table. With the 1 7/8-inch-tall bowl, which tightens and tapers toward the rim – sharp looking, I’m calling it a Chimney shape. To complete the dimensions, the length is 5 1/2 inches, the rim is 7/8 inches wide with a chamber width of 5/8 inches and depth of 1 11/16 inches. Here are a few pictures to take a closer look.
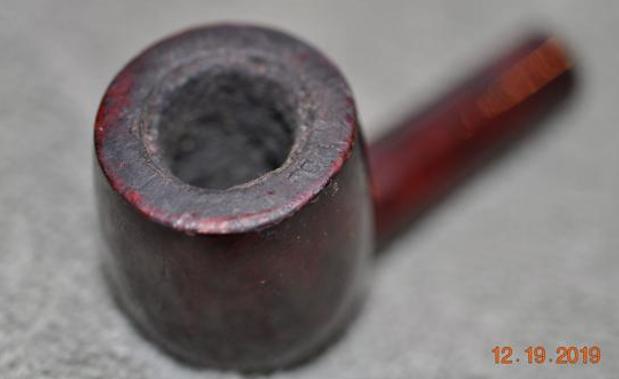
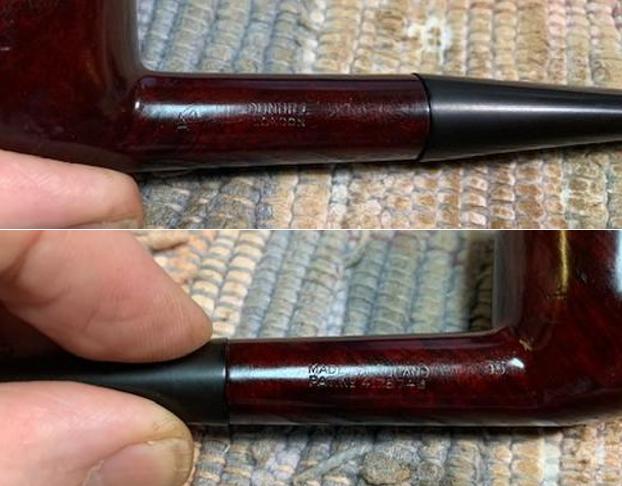
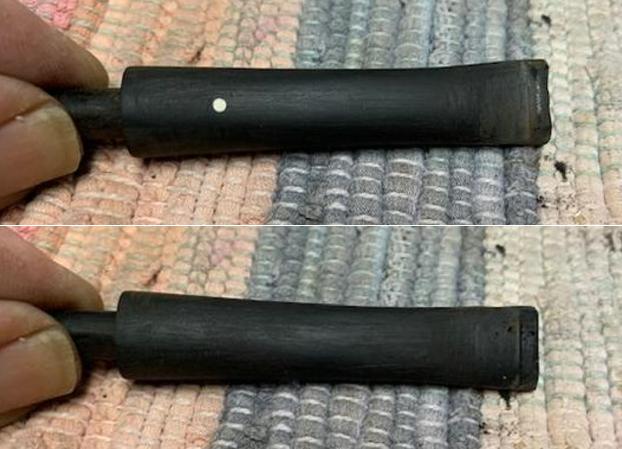
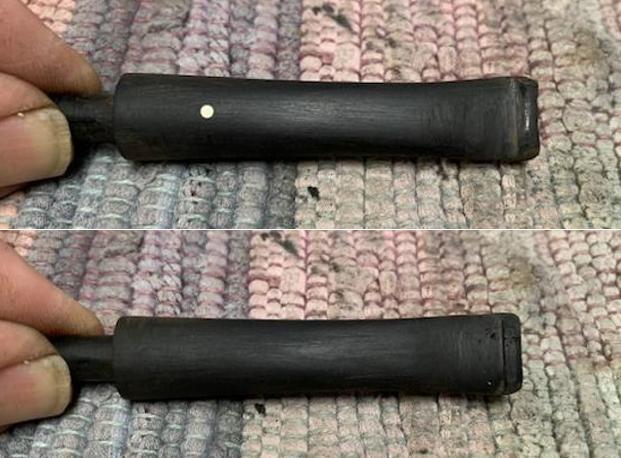
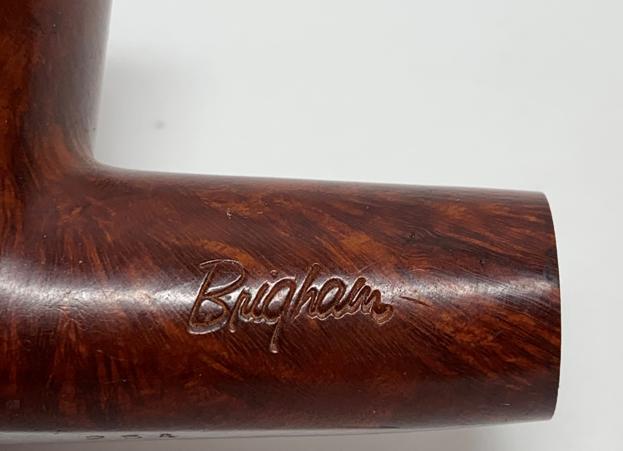
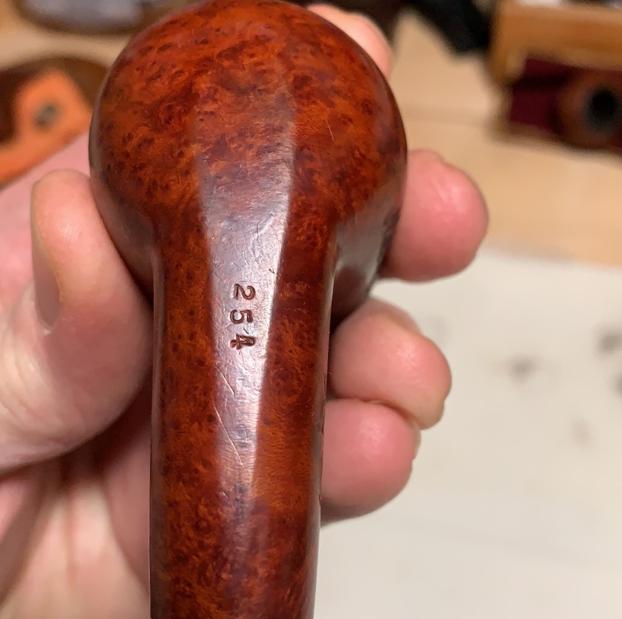
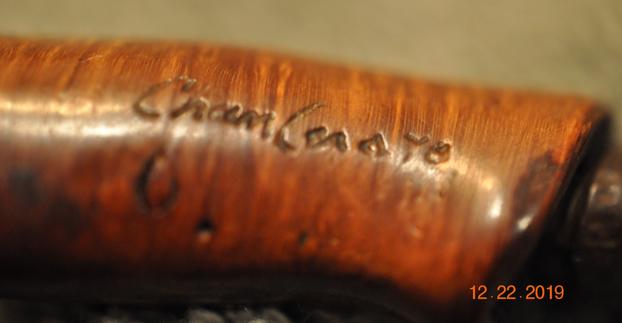
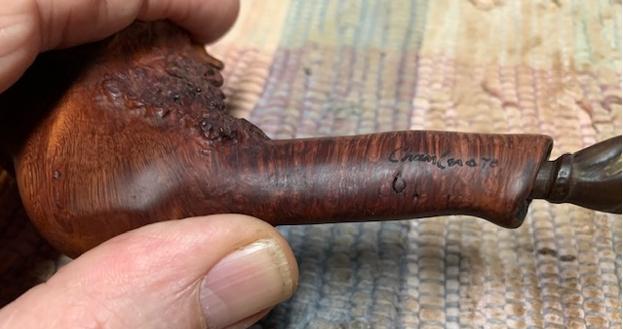
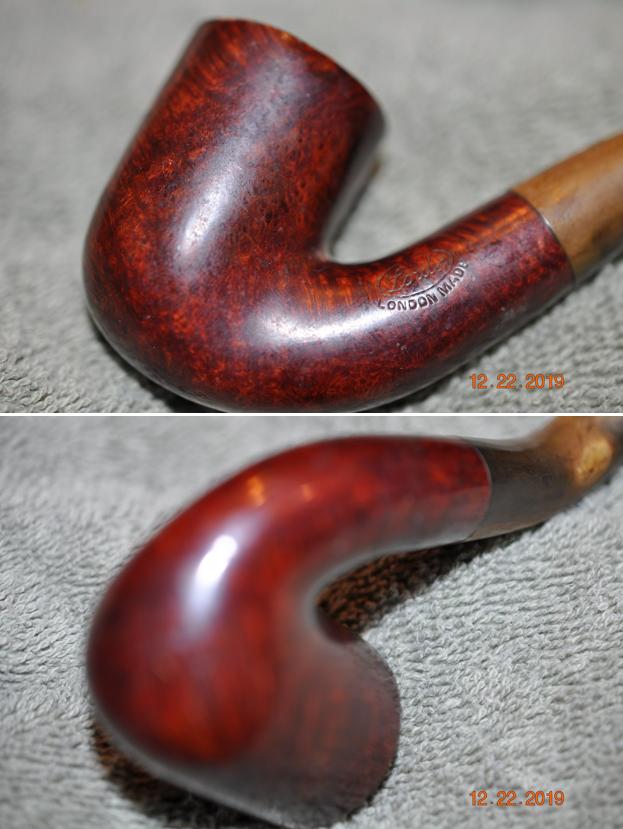
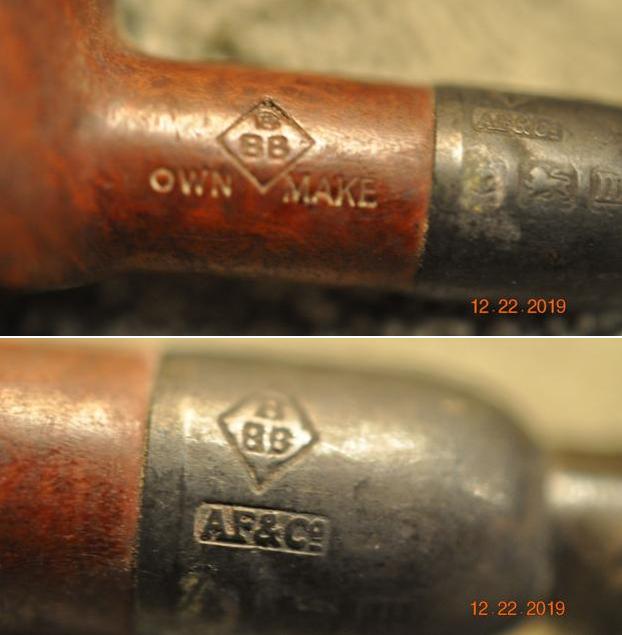
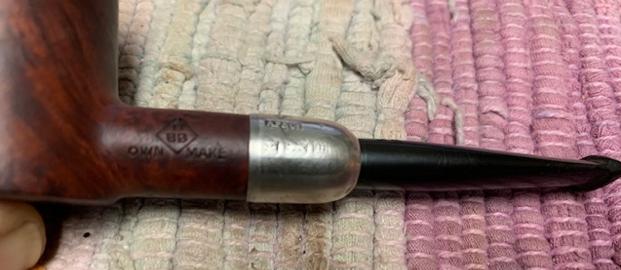
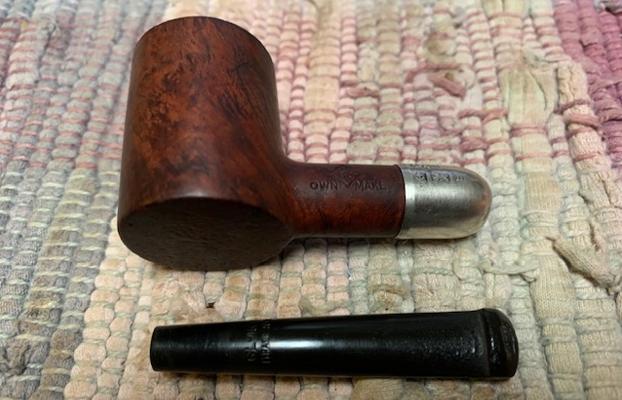
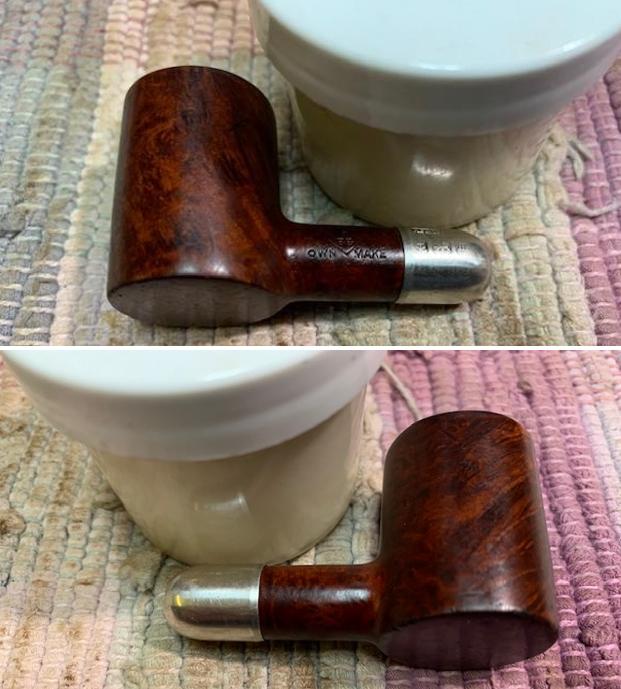
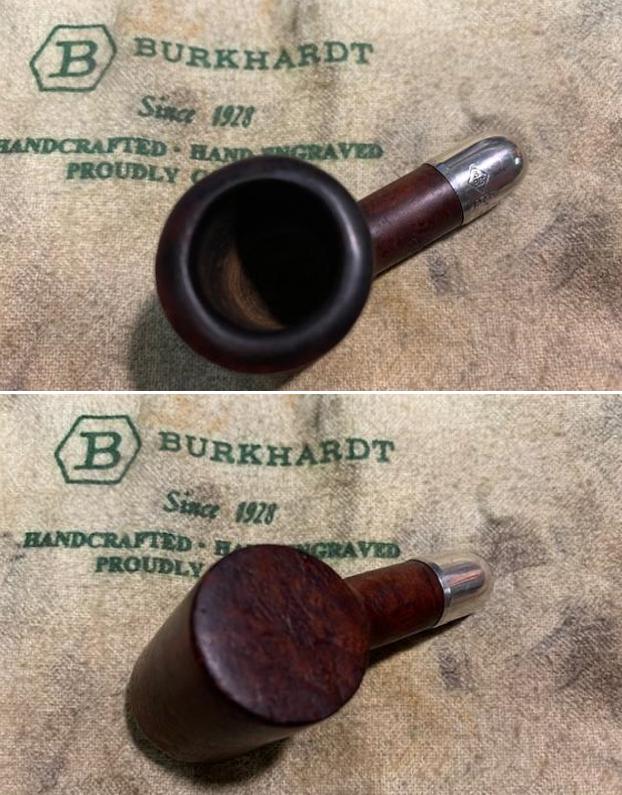
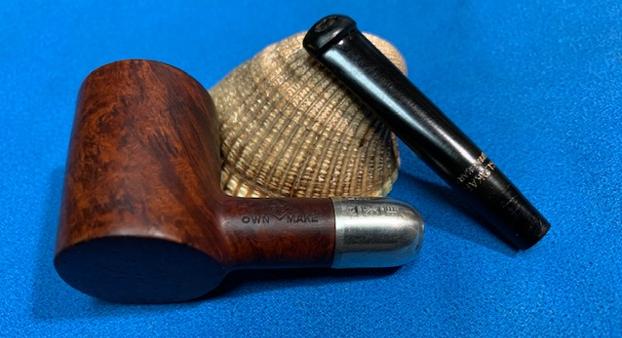
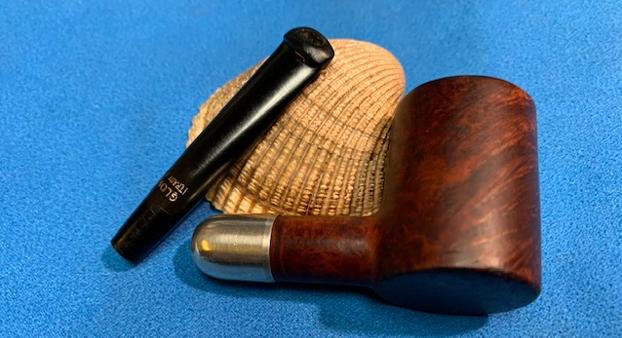
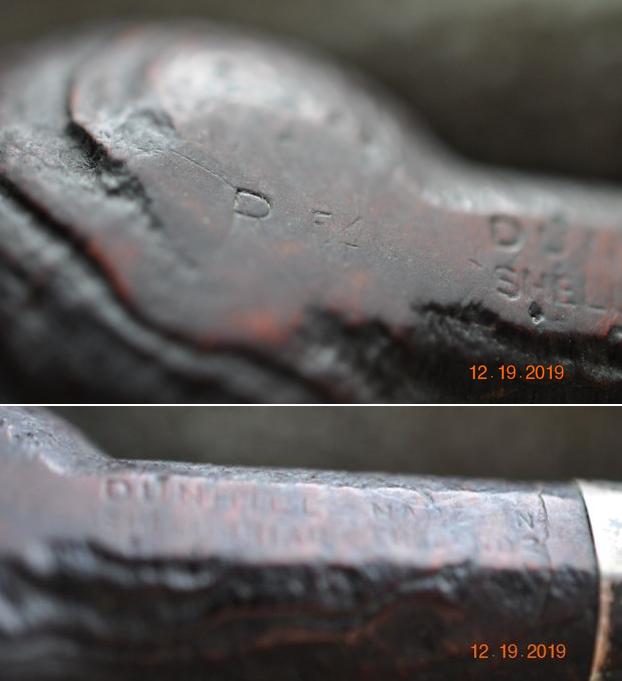
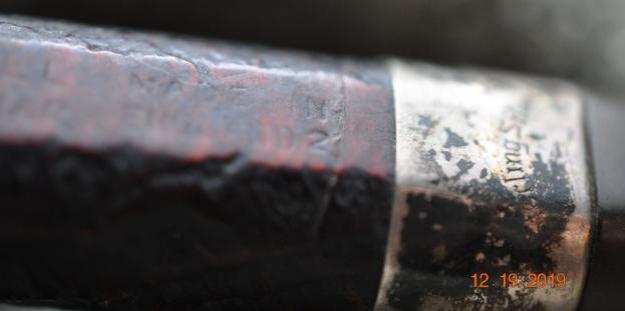
 The stampings on the left side of the shank are JEANTET [over] SUPERIOR. The stem has stamped a ‘J’ with an oval encircled around it.
 One of the first pipes I restored several years ago was a Jeantet Fleuron which I found in one of my favorite antique – second-hand shops located in downtown, Sofia, Bulgaria, which I affectionately called the, ‘Hole in the Wall’. That restoration was my first dive into the labyrinth of French pipe makers and the historic center of pipe making in Saint Claude, France. I was fascinated by all the relationships and machinations of figuring out the histories of pipe names, datings, and the fluctuations caused by business deals between UK and France…. I enjoyed the research of that first French pipe on my worktable and you can take a look and read it at this link: Another nice find at the ‘Hole in the Wall’ – Jeantet Fleuron 70-7. The history of the Jeantet name in Saint Claude spans back into the 1700s. The first part of Pipedia’s Jeantet article starts by looking at the history up to WW2 – as a refresher I repeat it here:
 The firm of the Jeantet family in Saint-Claude is first mentioned as early as 1775. By 1807 the Jeantets operated a turnery producing in particular wooden shanks for porcelain pipes and wild cherry wood pipes. The firm was named Jeantet-David in 1816, and in 1837 the enterprise was transformed into a corporation as collective name for numerous workshops scattered all over the city.
The manufacturing of briar pipes and began in 1858. 51 persons were employed by 1890. Desirous to concentrate the workers at a single site, the corporation began to construct a factory edifying integrated buildings about 1891 at Rue de Bonneville 12 – 14. In 1898 Maurice Jeantet restructured the business. He is also presumed to enlarge Jeantet factory purchasing a workshop adjoining southerly. It belonged to the family Genoud, who were specialized in rough shaping of stummels and polishing finished pipes. (In these times it was a most common procedure to carry goods from here to there and back again often for certain steps of the production executed by dependent family based subcontractors. Manpower was cheap.)
Jeantet was transformed to a corporation with limited liability in 1938. By that time a branch workshop was operated in Montréal-la-Cluse (Ain), where mainly the less expensive pipes were finished. 107 employees – 26 of them working from their homes – were counted in Saint-Claude in 1948 and 18 in the Ain facility.
According to the Pipedia article, the Jeantet production continued to expand through the 50s with new equipment and more employees. But in 1969 production reached its zenith with the production of 30 to 35,000 dozen pipes per year with 72 workers shrinking to 1987 with 6 to 7000 dozen pipes per year with 22 workers on the payroll. The final years of the Jeantet name are described in the same Pipedia article:
Yves Grenard, formerly Jeantet’s chief designer and a great cousin of Pierre Comoy, had taken over the management of Chapuis-Comoy in 1971. Now, to preserve the brand, the Jeantet family went into negotiations with him, and resulting from that Jeantet was merged in the Cuty Fort Group (est. 1987 and headed by Chacom) in 1988 along with the pipe brands of John Lacroix and Emile Vuillard. Chacom closed the Jeantet plant, and the City of Saint-Claude purchased it in 1989. After alternative plans failed, the buildings were devoted to wrecking. The southerly workshop was wrecked before 1992.
Today Jeantet pipes were produced as a sub-brand by Chapuis-Comoy who’s mainstay is Chacom of course.
Looking at Pipephil.eu, I hoped to find more information about the Jeantet on my table in the listing. The ‘Superior’ line was not among the listings, but what was added was later information about the fate of the Jeantet name:
The company joined the Cuty-Fort Entreprises group (Chacom, Ropp, Vuillard, Jean Lacroix…) in 1992. In 2010 it dropped out and the brand isn’t part of the group any more. The label is owned by the Jeantet family (Dominique Jeantet) again. The pipe production is discontinued. Dominique Jeantet retired in 2000.
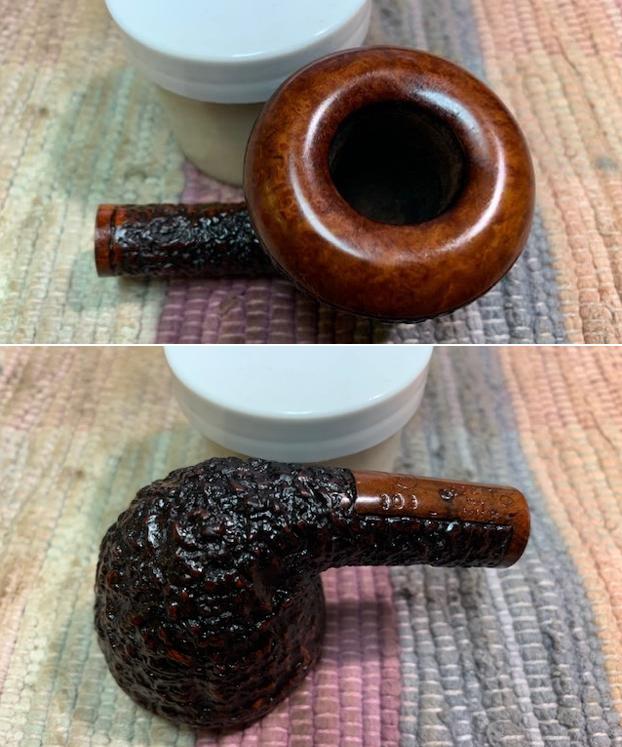
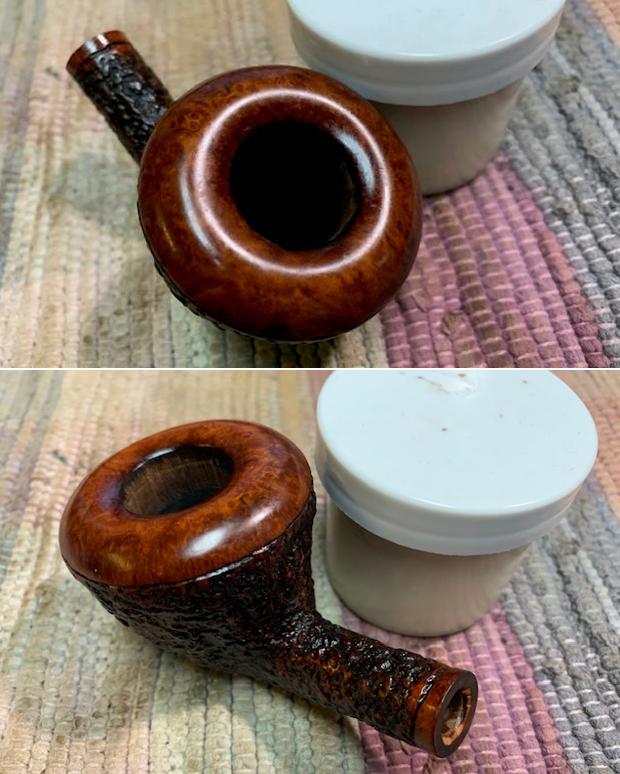
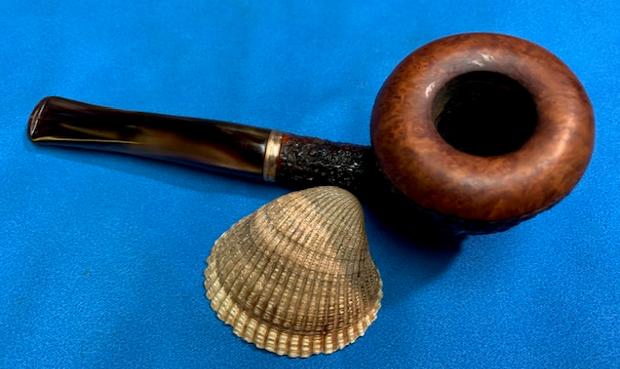
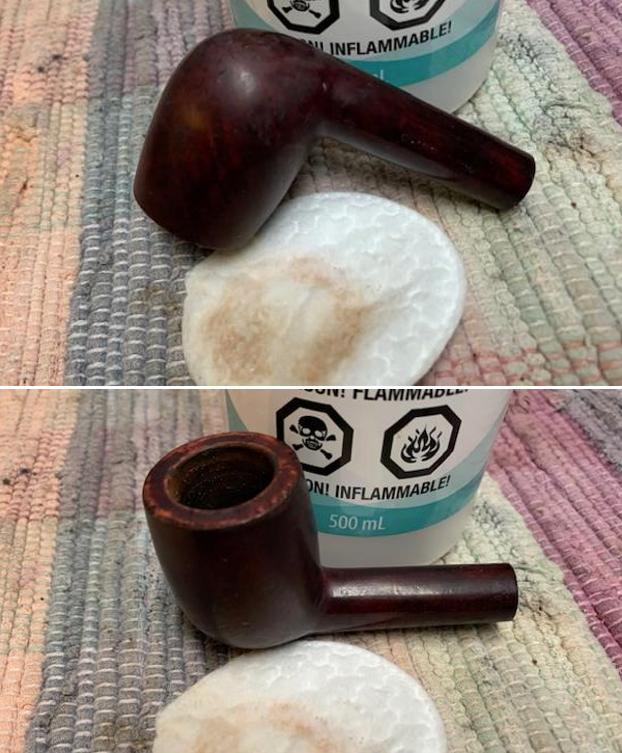
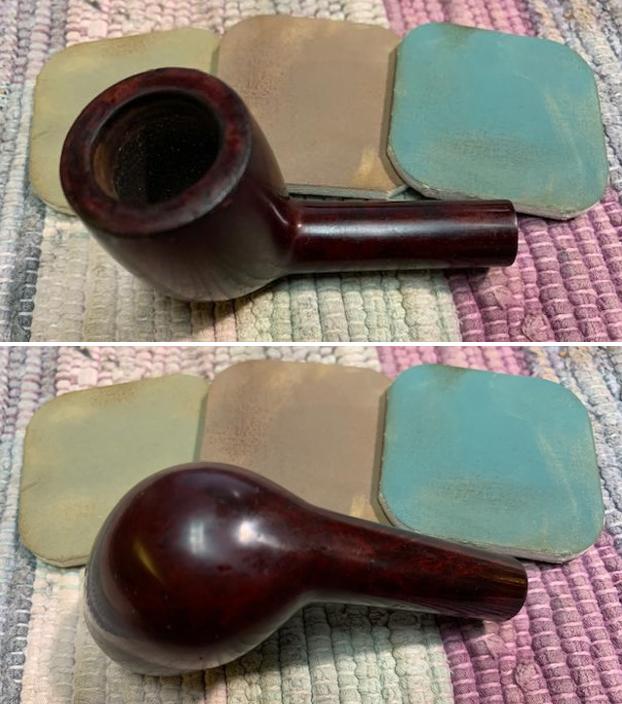
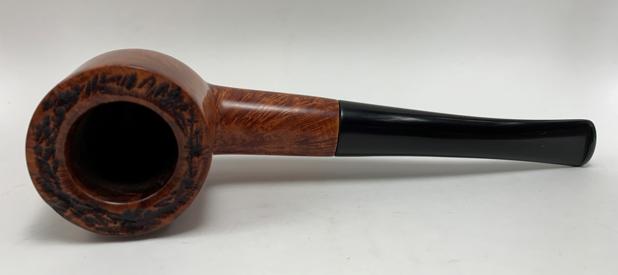
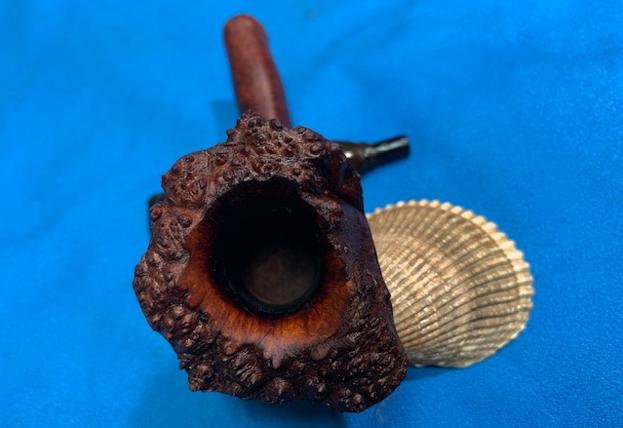
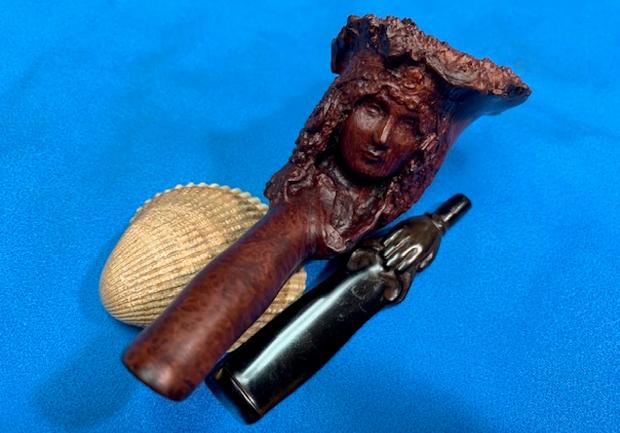
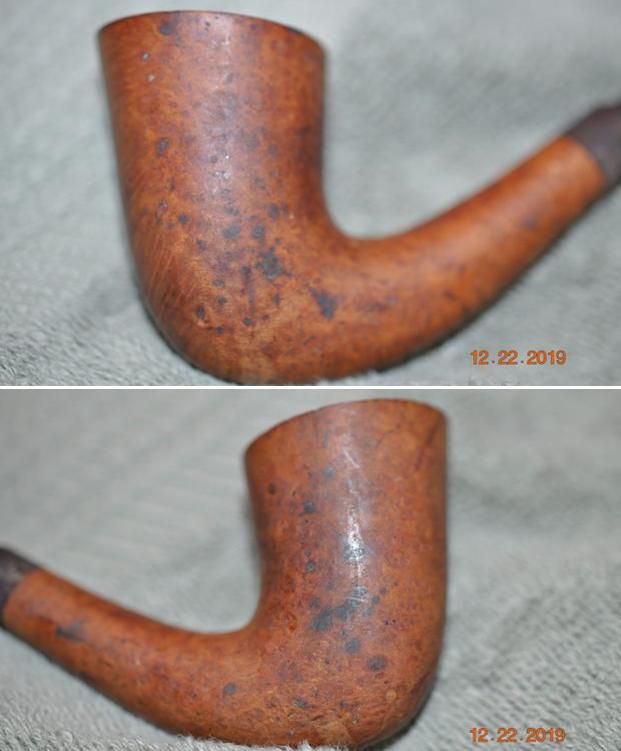
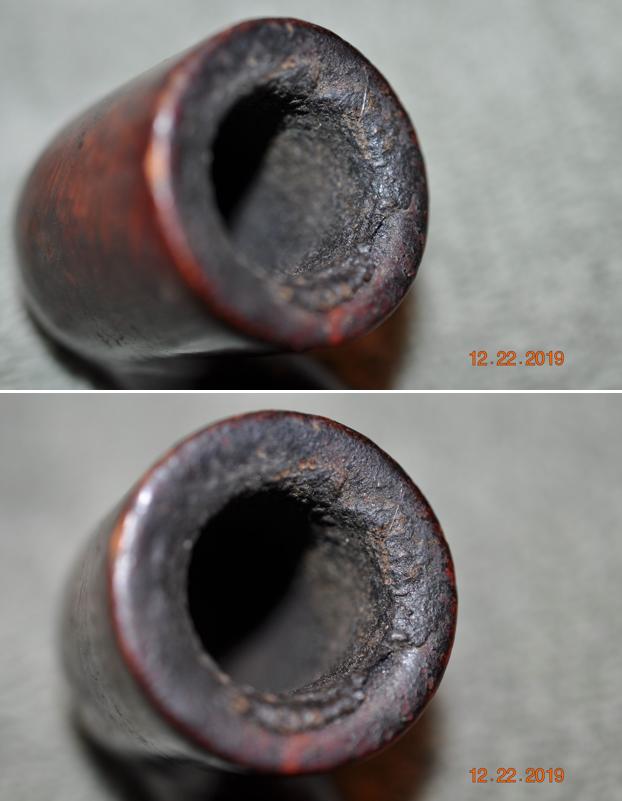
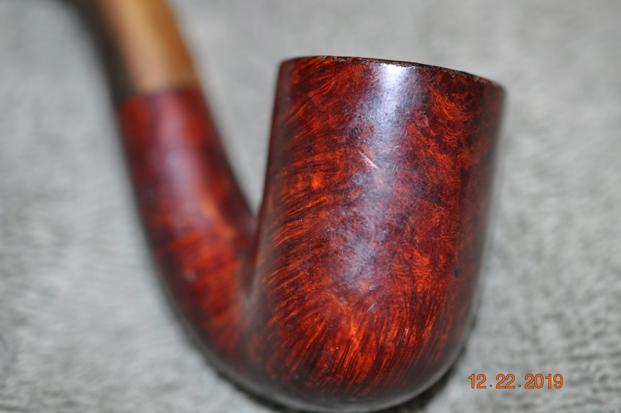
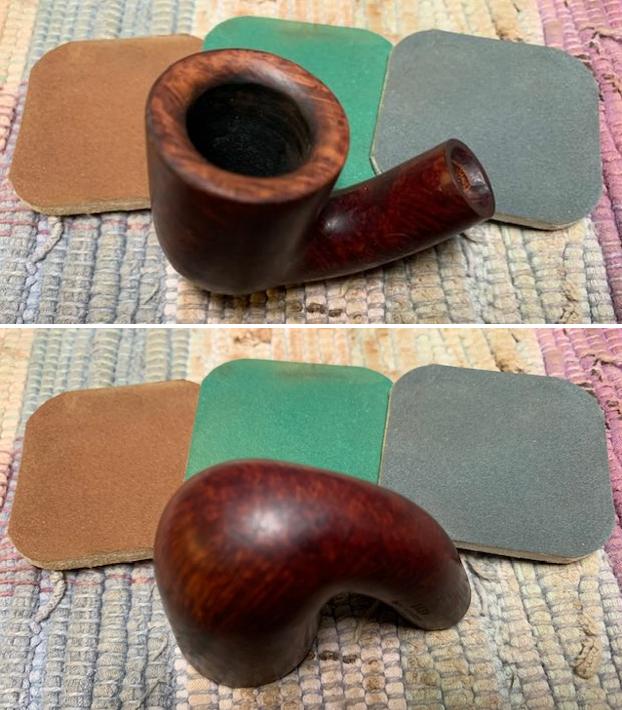
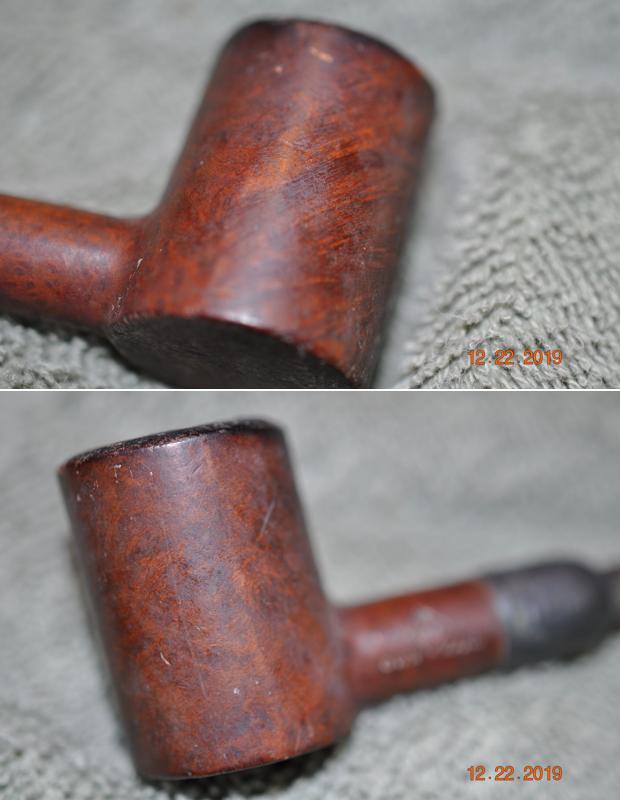
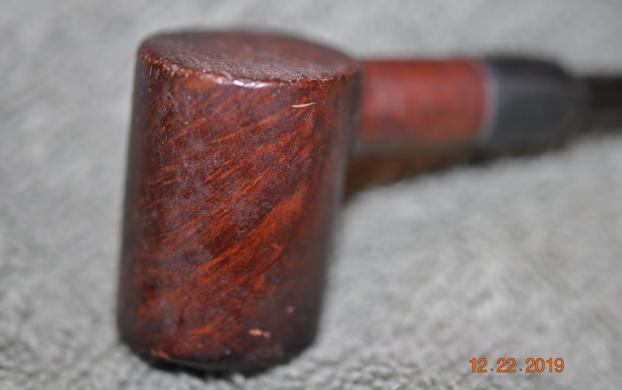
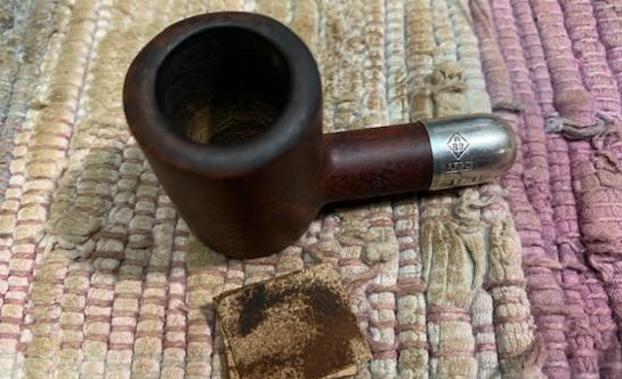
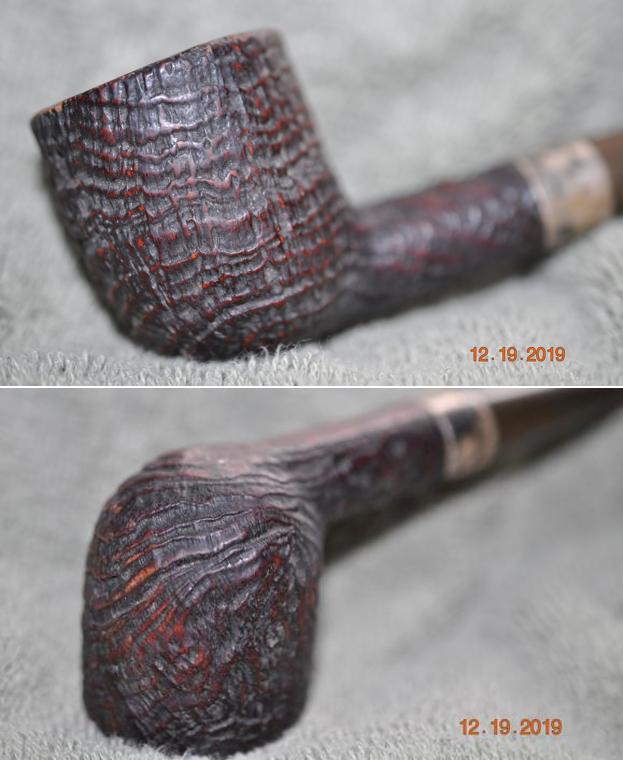
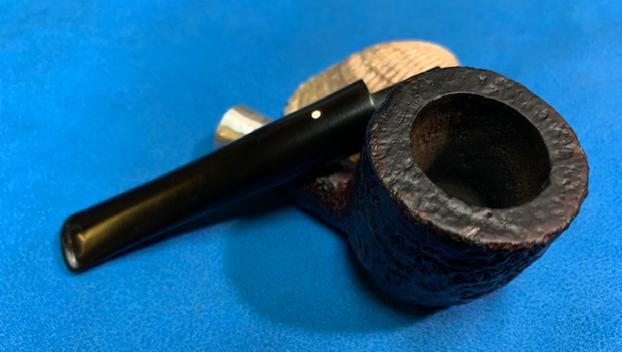
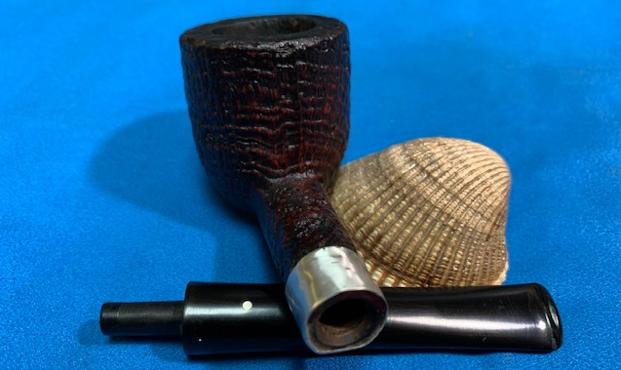
With a renewed appreciation for the legacy of the Jeantet pipe on my table, I look more closely at the pipe. The chamber needs cleaning to give the briar a fresh start. The carbon buildup is minor. There is some darkening on the rim from lighting, but hopefully, this should clean easily.  The stummel has attractive and expressive random grain and fire grain that wraps the bowl. Looking closely at the bowl several fills are visible which may need attention later.
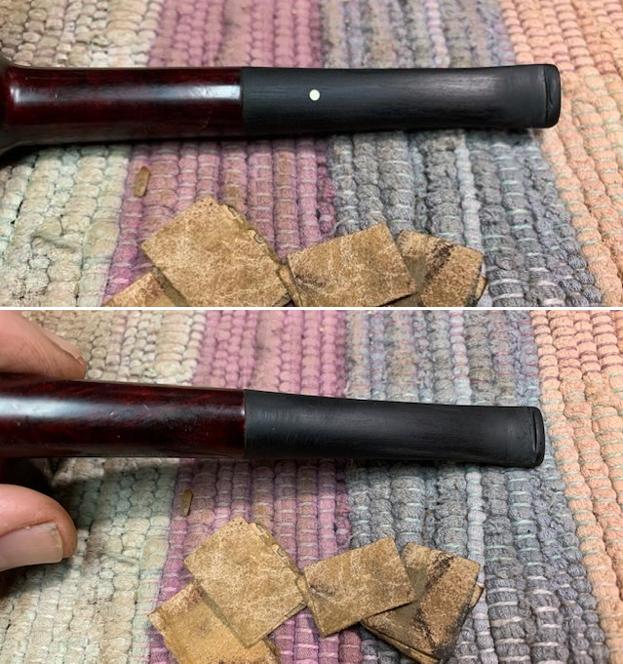
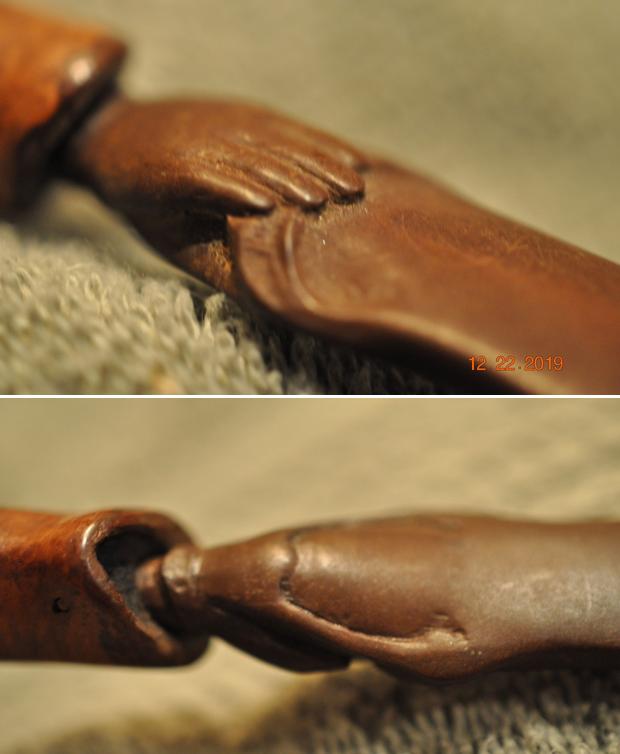
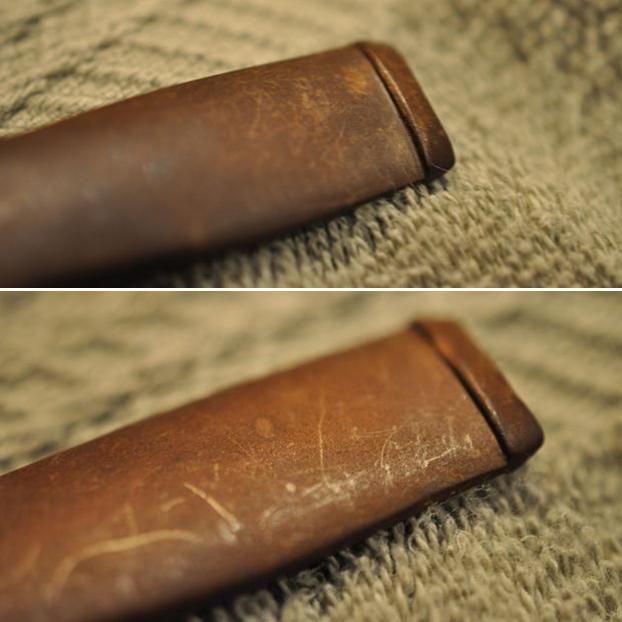
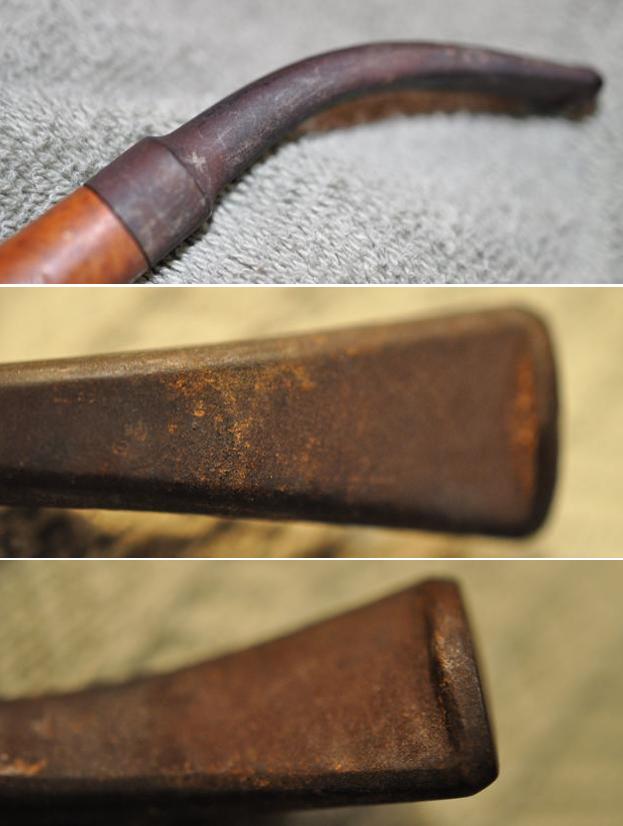
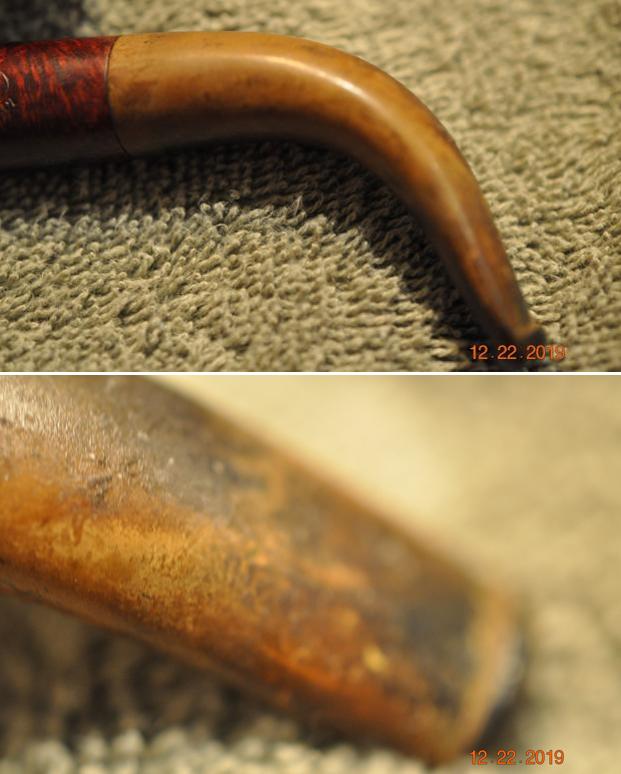
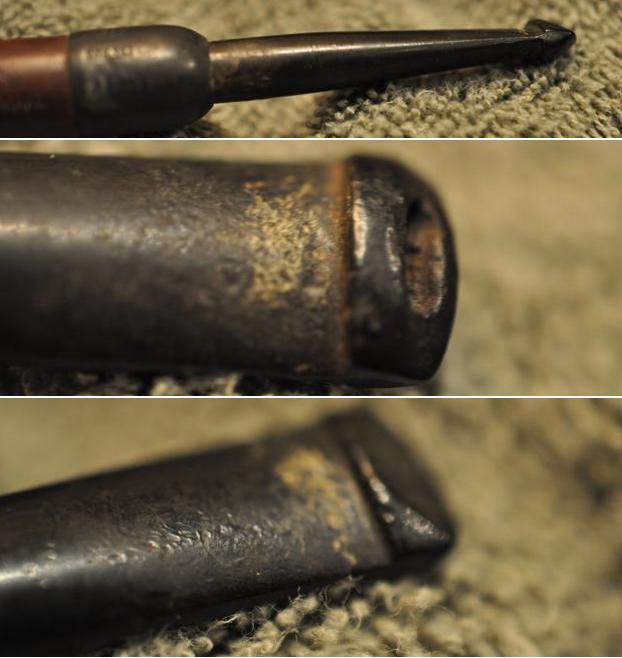
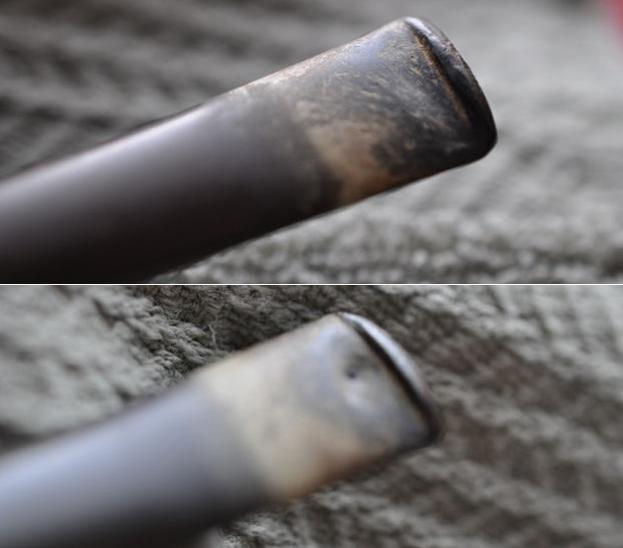
  The slightly bent saddle stem shows some thick oxidation and light roughness on the bit.
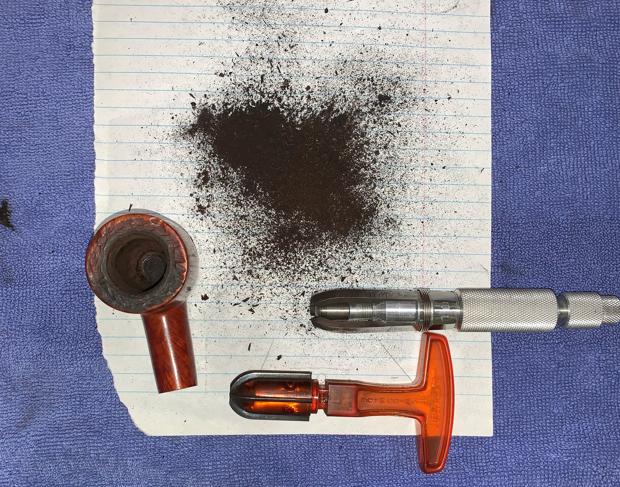
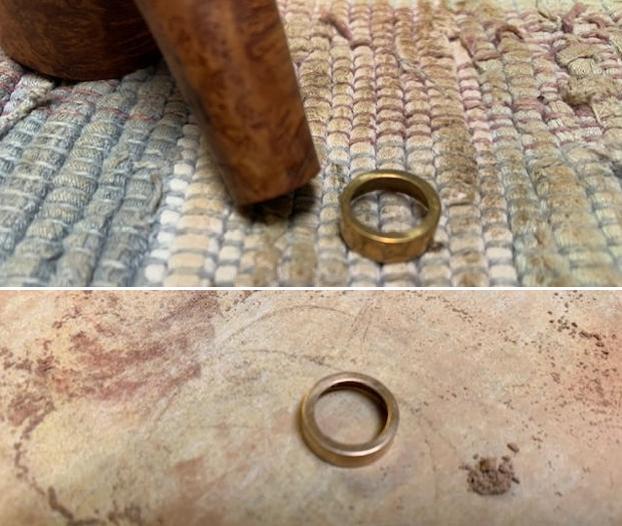
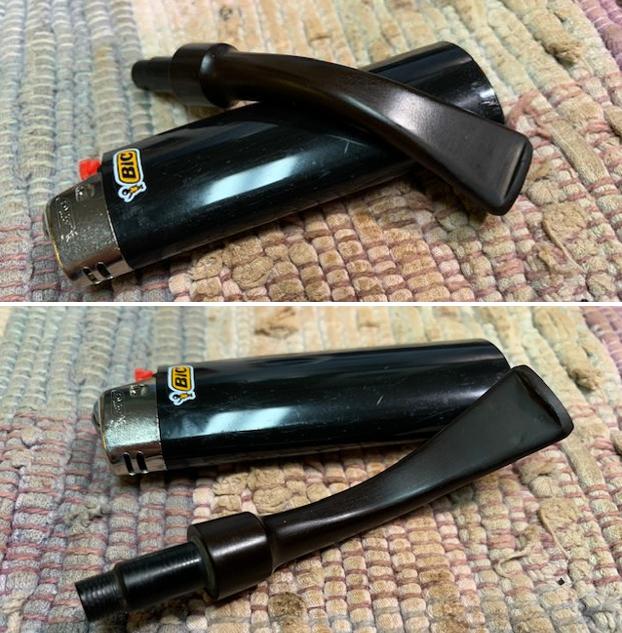
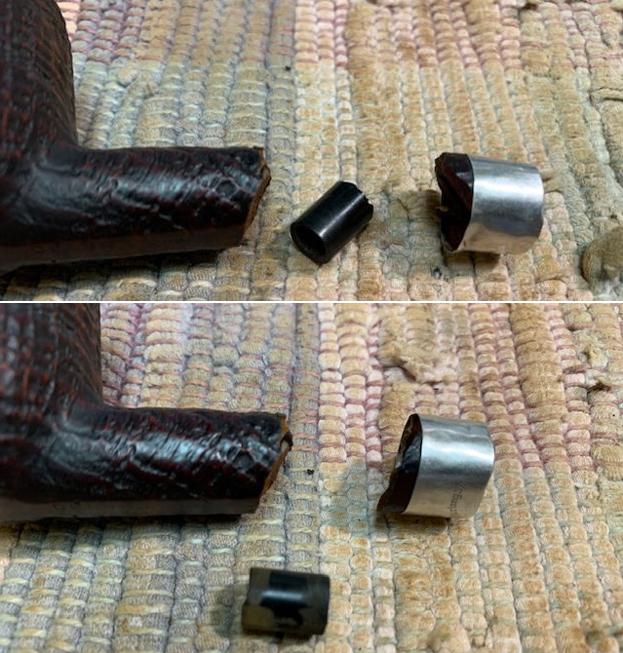
 Starting with the stem, the original Jeantet nickel stinger is lodged in the tenon. It is debated whether stingers help or hinder the smoking experience. I personally do not prefer stingers. Yet, as part of the historicity of a pipe, if it has a stinger as a part of its original production, I like to save it and allow the future steward to make his own decisions.
  To remove the stinger, a cloth is used to wrap the stinger to protect it from ‘teeth marks’ as it’s removed. With the cloth wrapped around the stinger, the needle nose pliers lightly grab the stinger while I gently rotate the stem to dislodge the stinger. This works well. I put the stinger in some alcohol to soak and to later clean with steel wool.
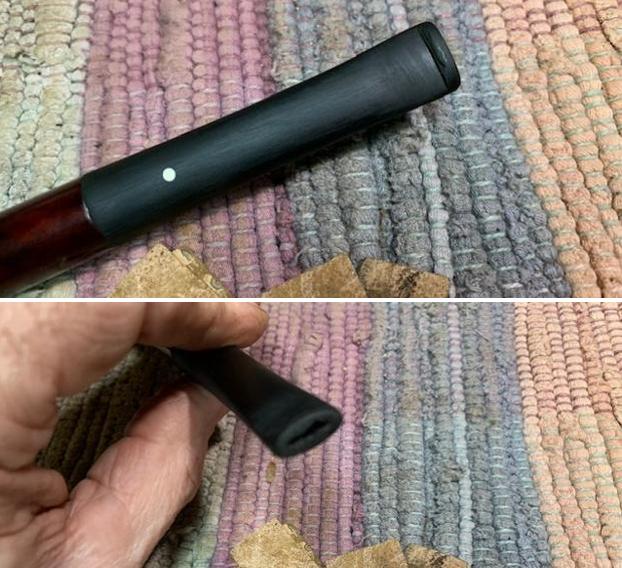
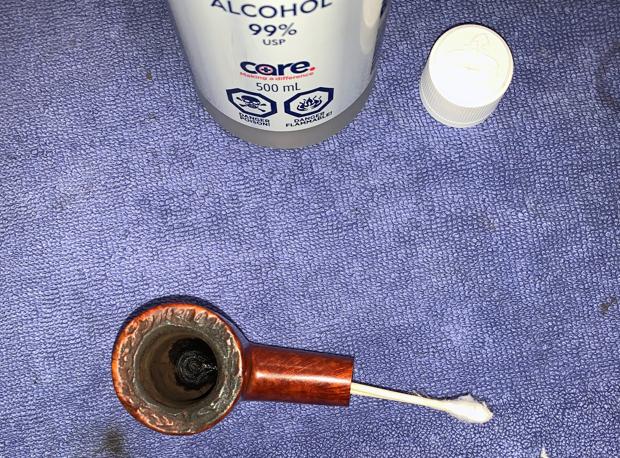
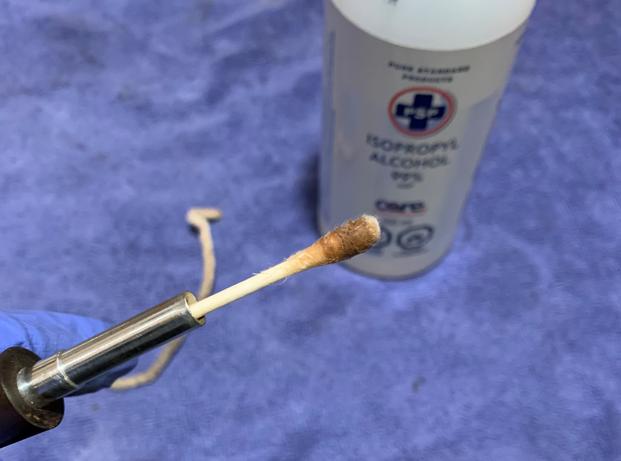
 Next, the airway is cleaned with a few pipe cleaners wetted with isopropyl 99%.
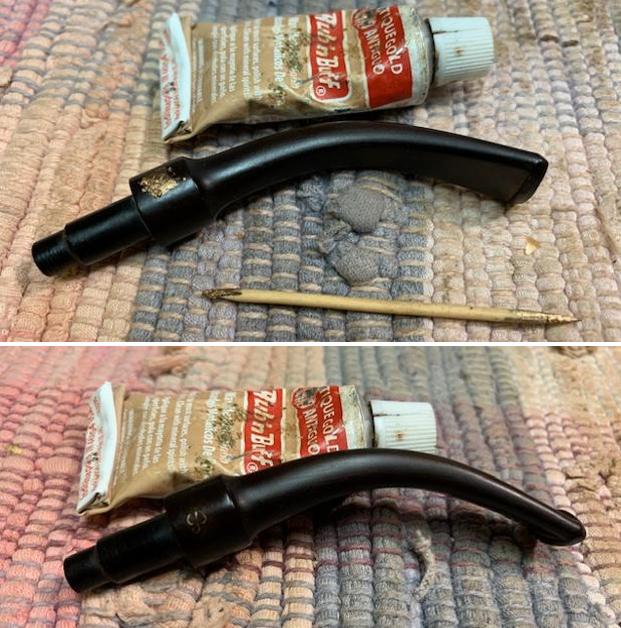
 I can see some significant deposits of oxidation in the vulcanite stem. While protecting the circled ‘J’, I go work on the oxidation before putting the stem into a soak of Before & After Deoxidizer.
 I use Soft Scrub and steel wool to try to break up the oxidation – avoiding the stem stamping.
 After rinsing the stem, it is then placed in the Before & After Deoxidizer to soak through the night along with the other pipes that Skeet has commissioned.
 The next day, the stem is fished out of the Deoxidizer and drained. With latex surgical gloves on my hands, I squeegee the liquid off the stem.
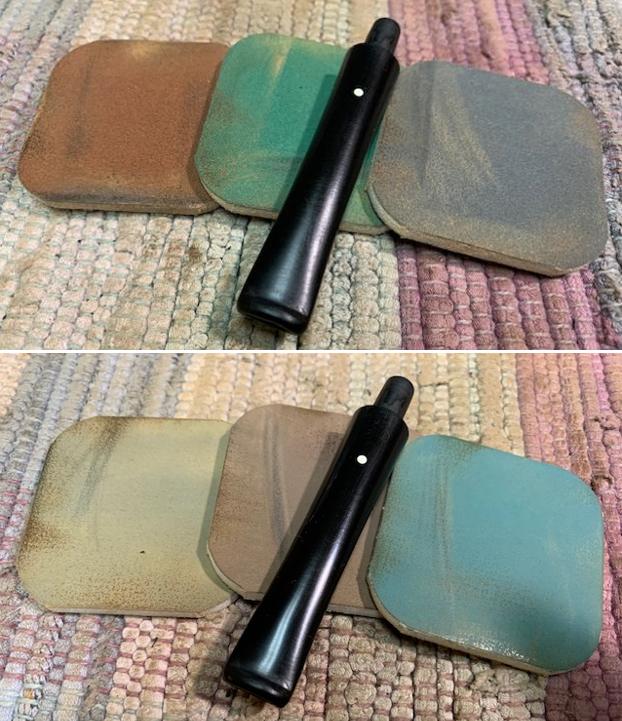
 I then use a pipe cleaner wetted with isopropyl 99% to clear the Deoxidizer from the airway. Cotton pads and alcohol are also used to wipe off the raised oxidation from the stem.
 To help condition the vulcanite, paraffin oil, a mineral oil, is applied to the stem.
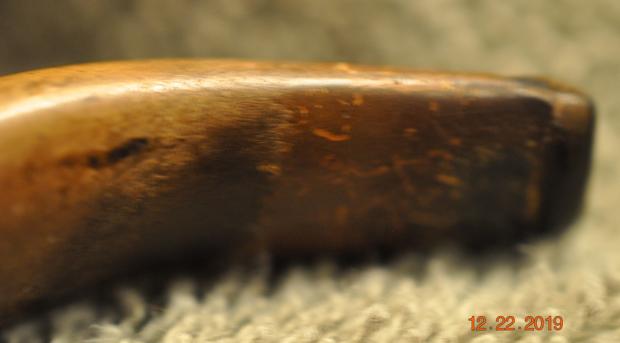
  Looking more closely at the stem with the oil on it, and with the help of a lightened picture, residual oxidation is visible. Ugh! The greatest concentration is on the bit and on the horn of the saddle stem. I have found that the Before & After Deoxidizer does not work as well with deep oxidation. The question that has been discussed is, does this product remove oxidation or mask it? I’ll need to ask Mark Hoover about this who produces the product (www.Lpen.com)! The Deoxidizer seems to do great with stems with light oxidation, but for this stem, sanding will be needed to continue the oxidation removal.
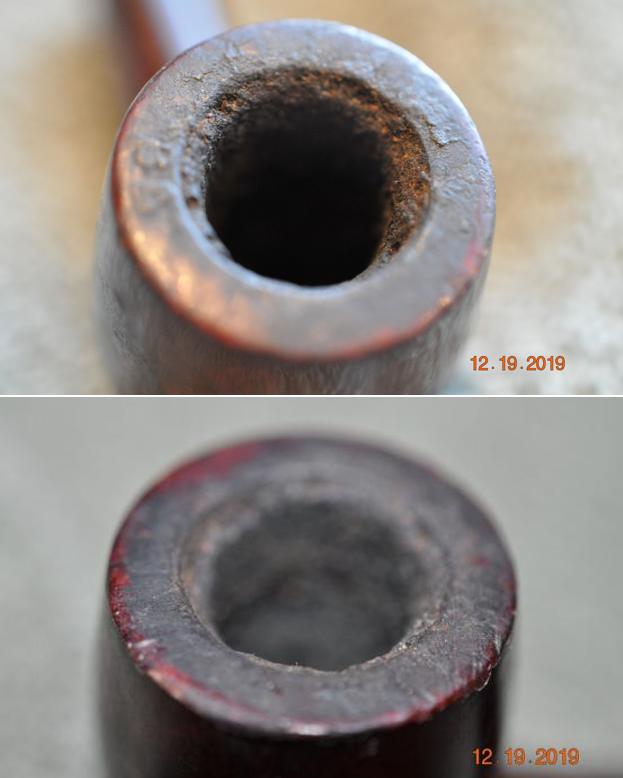
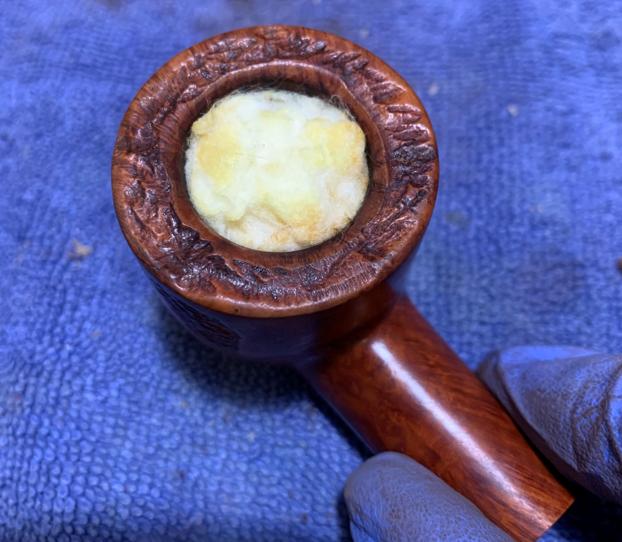
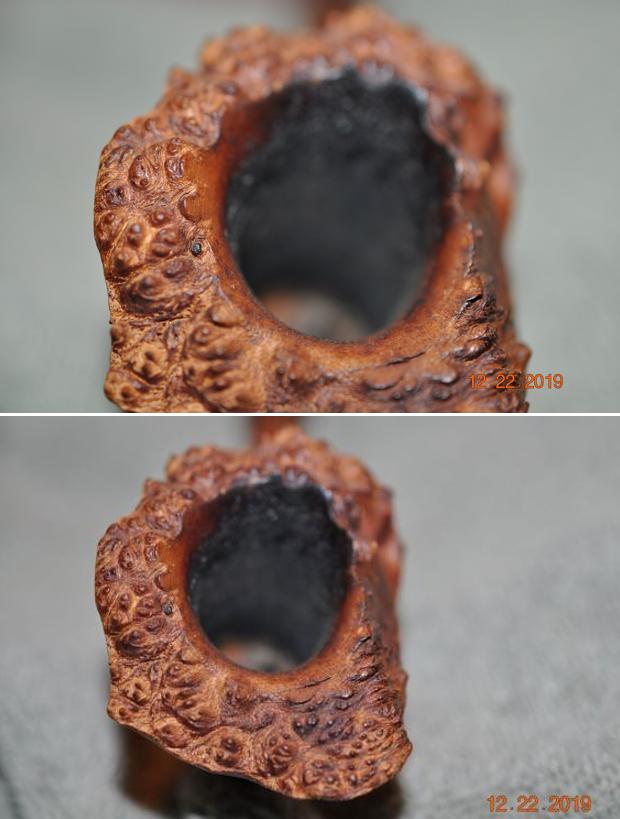
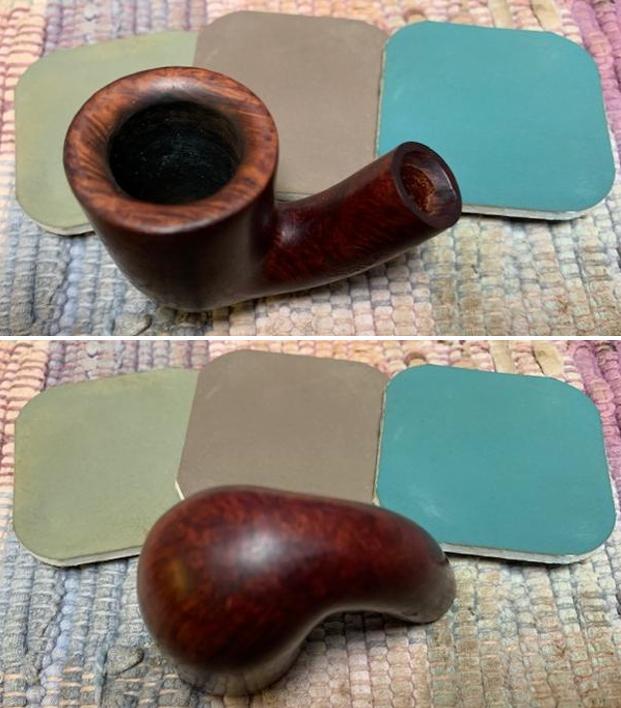
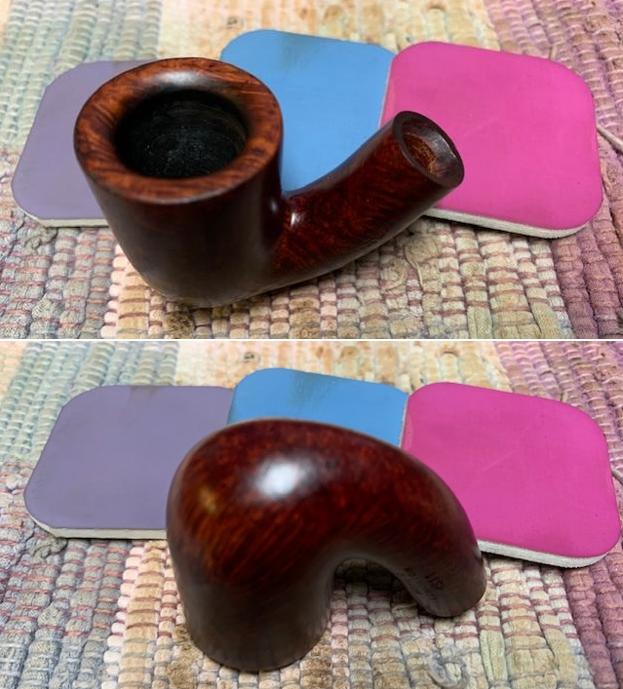
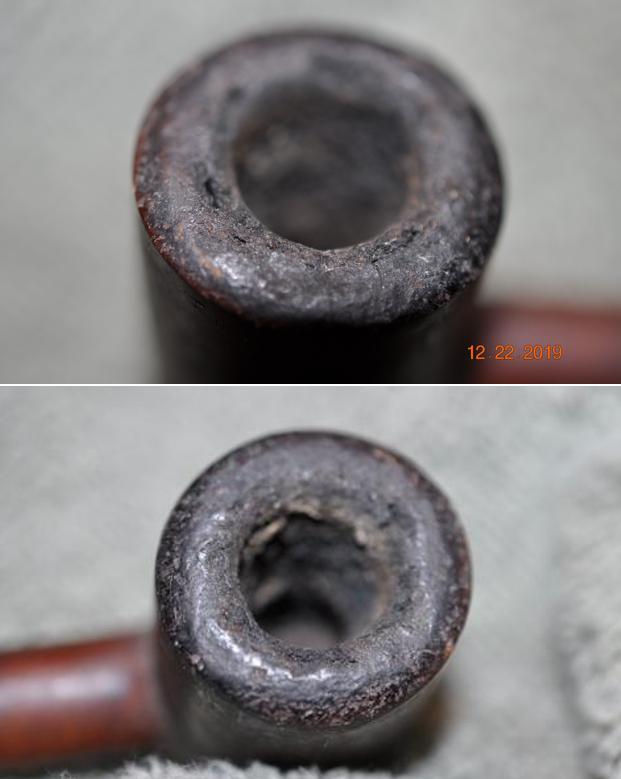
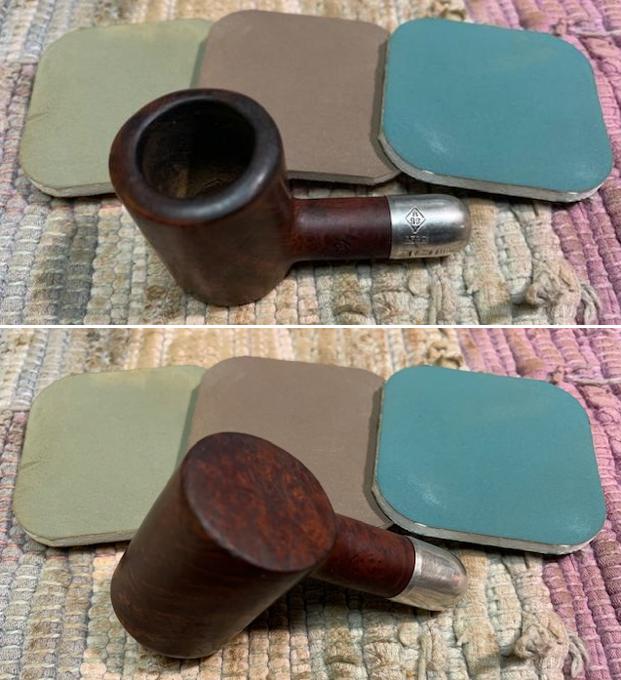
  Turning now to the Chimney stummel, a fresh picture shows the chamber and the light cake build up.
 I am only able to use the smallest diameter blade head in the Pipnet Reaming Kit to ream the chamber. The narrow chamber shaft will not accommodate more!
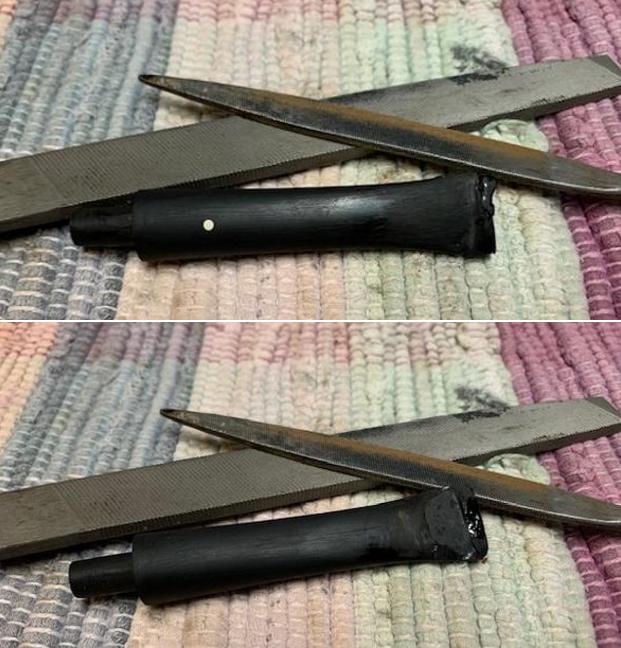
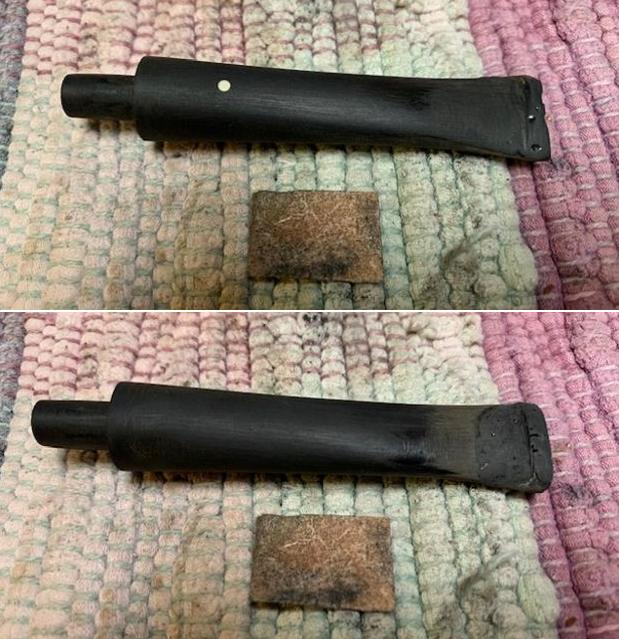
 The Savinelli Fitsall Tool follows by scraping the chamber wall and can reach down to the floor of the chamber and navigate the tight angles. The chamber cleaning is completed with a sanding with 240 paper wrapped around a Sharpie Pen.
  After wiping out the chamber with a cotton pad, an inspection reveals healthy briar – no heating or cracking problems.
  The cleaning continues with undiluted Murphy’s Oil Soap and a cotton pad. Using the cotton pad, the outer stummel is scrubbed. The darkened char on the aft of the rim is stubborn. I scrub the rim with my thumbnail and Murphy’s. The brass wired brush also is used and a careful scraping using a pocketknife. I’m extremely careful working on the rim because the rim top of the chimney bowl is very thin, and I do not want it damaged or worn down inadvertently.
  To continue the cleaning the stummel is transferred to the sink where using anti-oil liquid dishwashing soap and warm water, the mortise is scrubbed using shank brushes. After scrubbing, the stummel is thoroughly rinsed and transferred back to the worktable.
  The rim cleaned up more but burn damage is there. The aft quadrant shows where most of the lighting activity has transpired – over the rim. The front shows some burns as well, but more localized. I’m an old school match user – over the bacca and draw down not over! This rim damage will be addressed later.
 During the external surface cleaning process, weakened patches, probably made of water-based fill material, filling the pitting in the briar are revealed. I had noted these fills earlier. The beauty of highly active briar grain often has the downside of small imperfections in the briar that have to be filled with patch material. I count 5 patches in need of repair.
 While the old patch material is still damp, I use a dental probe to dig the remnant filler material.
 Before continuing with patching, the cleaning of the internals of the stummel need completion. I prefer working on clean pipes! It only takes a few cotton buds and pipe cleaners dipped in isopropyl 99% to finish the cleaning. I will further the cleaning later with a kosher salt and alcohol soak.
 With the pipe now clean, I will address the 5 pits that emerged through the cleaning process now emptied of old fill material.
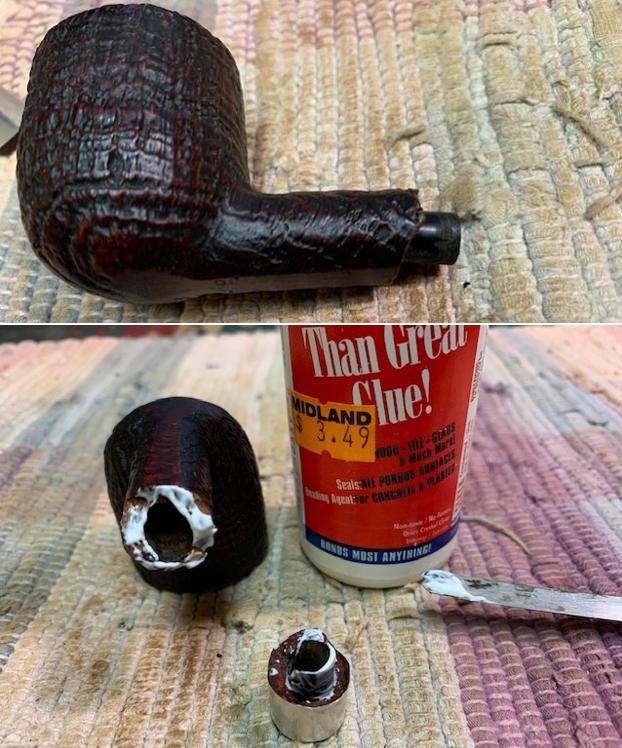
 To repair the briar, I refill the pits using a mixture of briar dust and CA glue. The mixture creates a ‘briar putty’ that is then applied to the pits. I first clean the surface with alcohol AND discover another pit or possibly a chip in the shank, just to the right of the nomenclature. Well, now there’s 6 patches to be made. I clean the area with a dental probe and alcohol. The appearance seems that it’s a chip and not a pit that lost its fill material.
 To make the briar putty, I use a plastic disk as the mixing palette. To help with clean up and to keep the CA glue pristine, a piece of clear packing tape covers the disk. To mix on a paper or an index card may change the viscosity of the CA glue during mixing and cause it to solidify too soon. A small pile of briar dust is placed on the palette, and then, beside this, a small puddle of extra thick CA glue is placed. The picture shows the set up before the mixing commences.
 Using the toothpick, briar dust is gradually pulled into the CA and mixed in with the toothpick. Additional briar dust is pulled into the thickening mixture until it reaches the viscosity of molasses.
 When the putty is thick enough and no longer runny, the toothpick is used to trowel the putty to spot place onto each pit. I use an accelerator to hold the patches in place and to quicken the curing process. The pictures below show the patches in place. While applying the putty, I saw another small pit – and then there were 7.
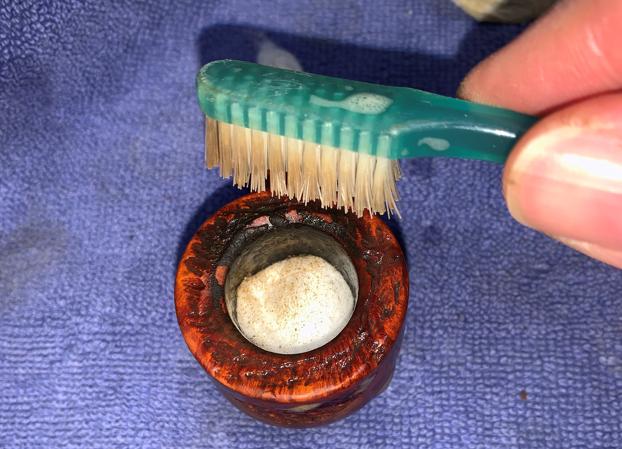
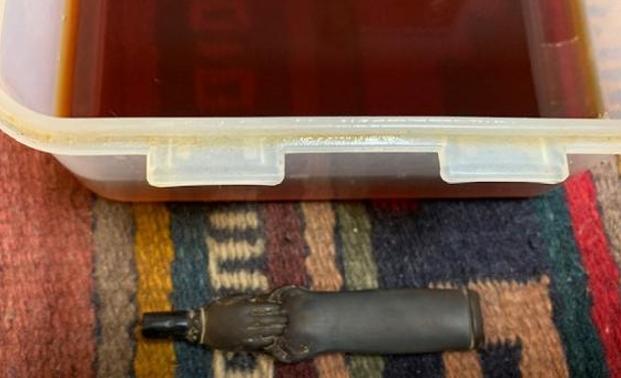
 The hour is late and with the patches on the stummel firm, I will do one last project before turning out the lights. A kosher salt and alcohol soak will continue the internal cleaning and refresh the pipe for the new steward. Starting with a cotton ball, it is pulled and twisted until it forms a ‘wick’ to help draw out the tars and oils from the internal briar.
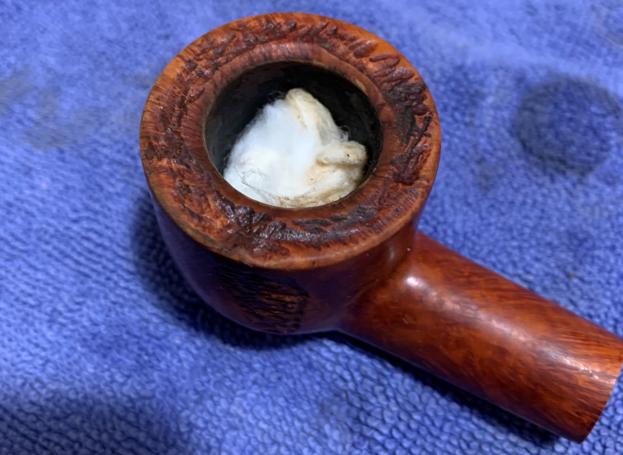
  The end of the cotton ball wick is guided with the help of a stiff wire down the mortise into the airway as far as the draft hole. The bowl is then filled with kosher salt and the stummel is placed in an egg crate to keep it stable and to maintain the proper angle – the top of the salt and end of the shank are parallel. Kosher salt is used because it leaves no aftertaste.
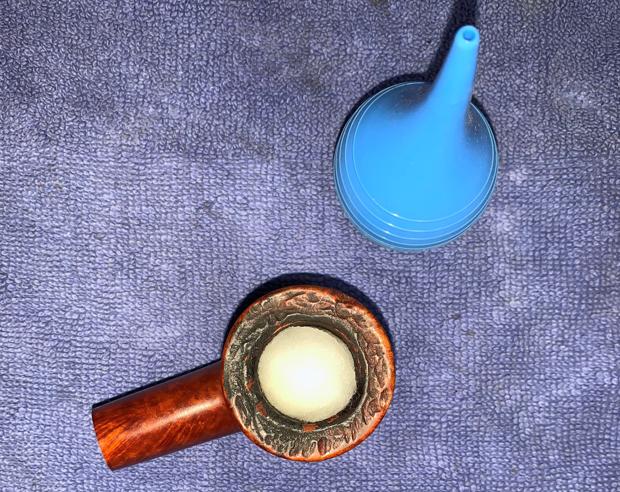
  With a large eye dropper, isopropyl 99% is introduced slowly into the bowl until the alcohol surfaces over the salt. After about 10 minutes, the alcohol is absorbed into the salt and cotton wick to some degree. The bowl is then topped off with additional alcohol until it surfaces once more above the salt. I set the crate stummel aside resting in the egg crate and turn out the lights.
  The next morning, the kosher salt and alcohol soak have been at work. The salt and the wick are soiled indicating a continued drawing out of the oils and tars from the internal briar.
  To make sure all is cleaned and refreshed, a cotton bud and pipe cleaner wetted with isopropyl 99% confirm all is good.
 With the stummel clean, next is the process of filing down all the briar putty patches. The basic approach for all the patches is to use a flat needle file with the goal to file exclusively on the patch mound and not to wander off the patch area onto the surrounding briar. The mounds are filed down close to the briar surface. These next few pictures give the idea.

 After all the mounds are filed down, 240 grade sandpaper is used to sand the patches further. The goal is to remove all the excess dried putty surrounding the patch itself. You can tell when excess glue is remaining as you sand – the glue is a powdery white whereas briar is not. A few more pictures showing sanding on different patches.

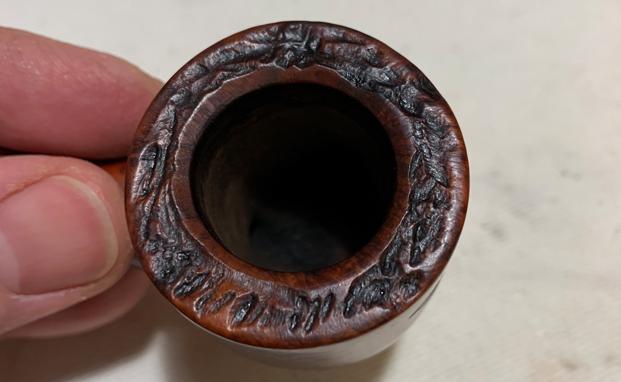
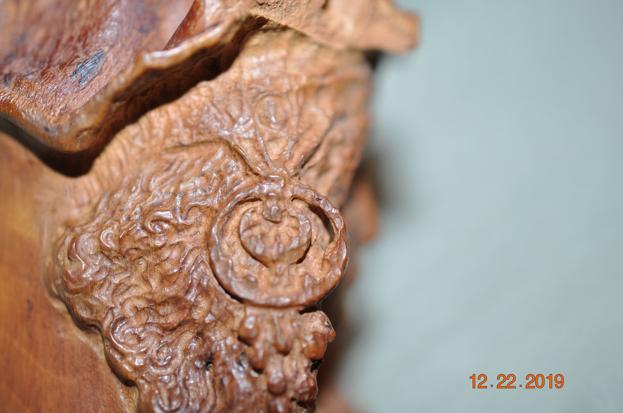
 With the patches filed and sanded down, I switch my focus to the rim. I like the design of the rim as it culminates. It is very compact as it crowns the coned taper of the bowl. The rim itself is a narrow 1/8 inch wide. The front and back of the rim have sustained charring and burn damage from lighting. The entire circumference of the inner rim is darkened.
  To clean and refresh the rim, I top the stummel – oh, but precious little! To begin, 240 paper is used on the top of a chopping board which serves as my topping board. After inverting the stummel on the paper, I give it a few rotations and check. The last thing I want to do is take off too much with such a tightly fashioned rim. A few rotations are enough it seems to me.
 Switching on the topping board now to 600 grade paper, several more rotations are given on the less abrasive paper. In the picture below after topping on the 600 paper, the rim looks better. There remains a burn mark on the front side that reaches into the rim. The back side damage to the rim, which appeared to be worse, has pretty much been erased except for the inner lip radius which still is darkened.
 Using a tightly rolled piece of 240 paper followed by 600 paper, the inside rim lip is gently sanded to remove the black char stain. I call the sanding ‘gentle’ because I don’t want to create a bevel on a rim this narrow. I only desire to clean and freshen it. The rim looks great – nice grain has emerged. The only quandary I have is that there is still a small bit of char darkening remaining (upper arrow), but I don’t want to take more off the rim. Another question is right next to the dark spot – when I run my finger over it, it is not smooth (lower arrow). This appears to be an imperfection in the briar and topping the stummel to remove it will probably require a good bit more briar to be removed. Briar is the most important real estate on a pipe, and one does not give it up unless necessary.
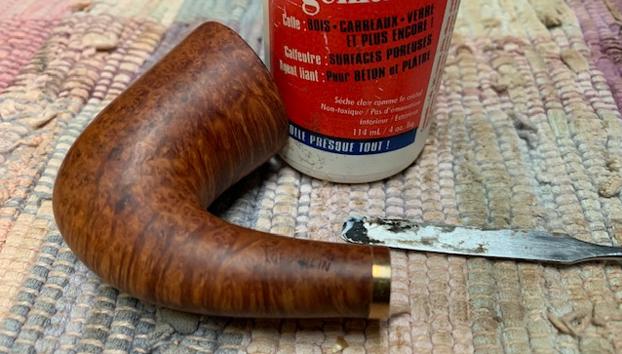
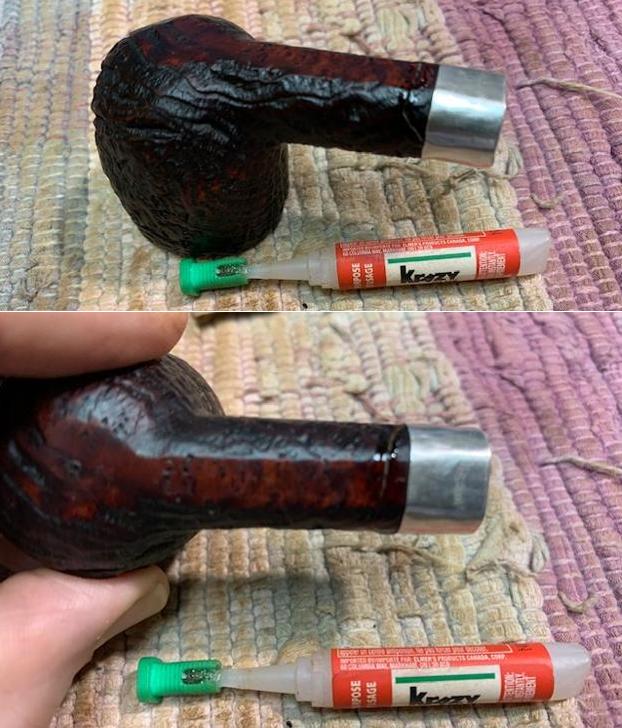
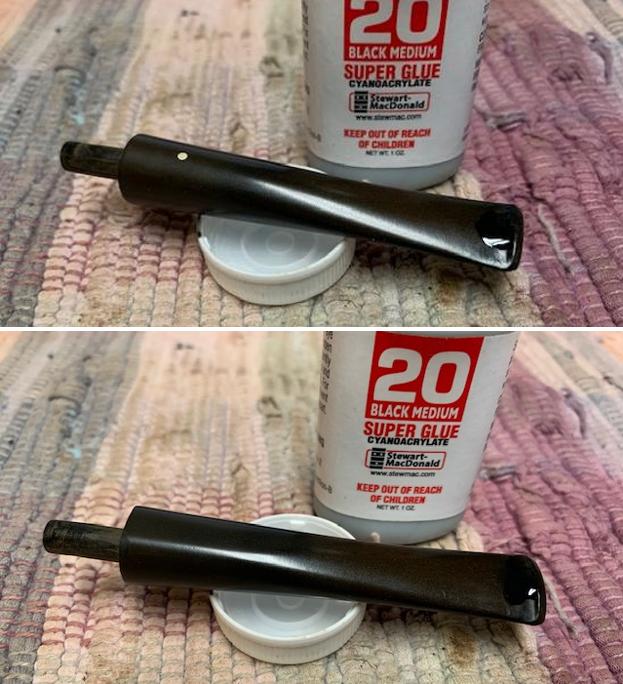
  To avoid topping more and sacrificing more briar off the rim, I spot drop CA glue to fill the small crevasse on the rim.
  After the CA is cured, a pointed half moon needle file works well to file down the excess CA on the inner curve of the chamber.
 Flipping the file over to the flat edge, it works well to remove the excess CA patch on the flat rim surface. I’m careful to keep the file on top of the patch mound so not to impact the surrounding briar.
 The rim patch is completed with 240 sanding paper followed by 600. The rim is now smooth to the touch and the patch blends well with the surrounding briar.
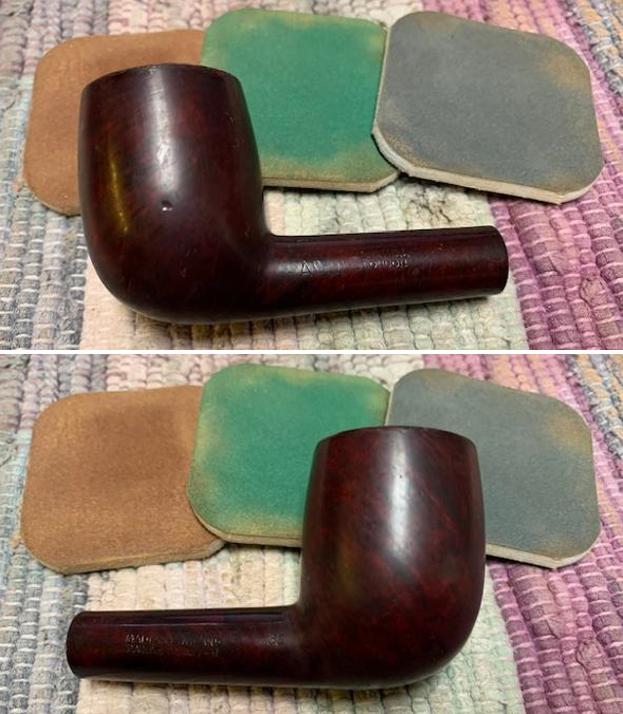
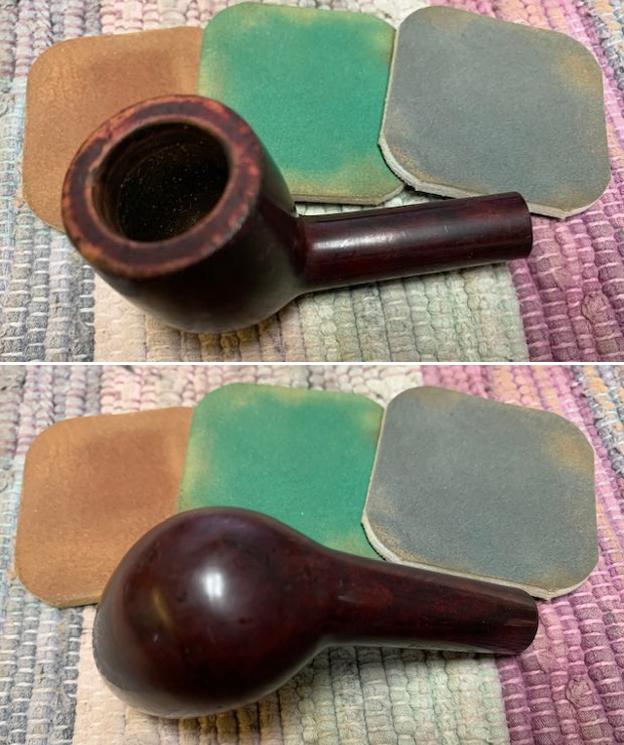
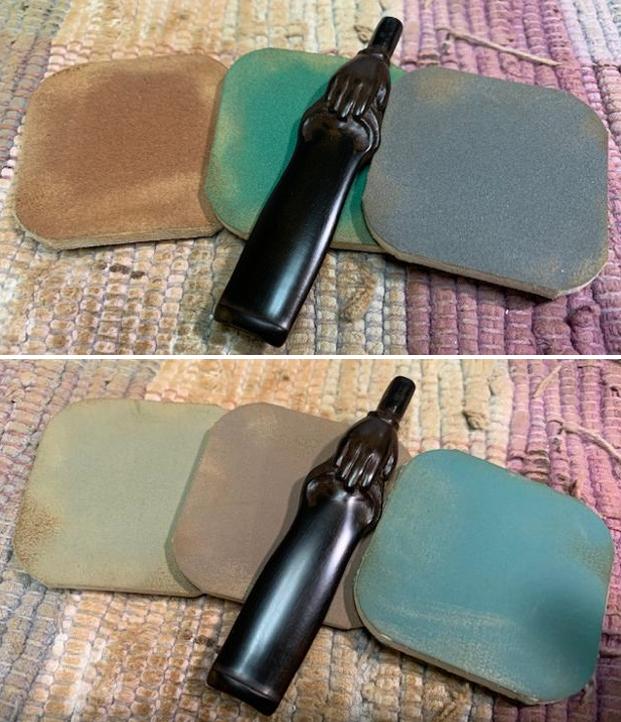
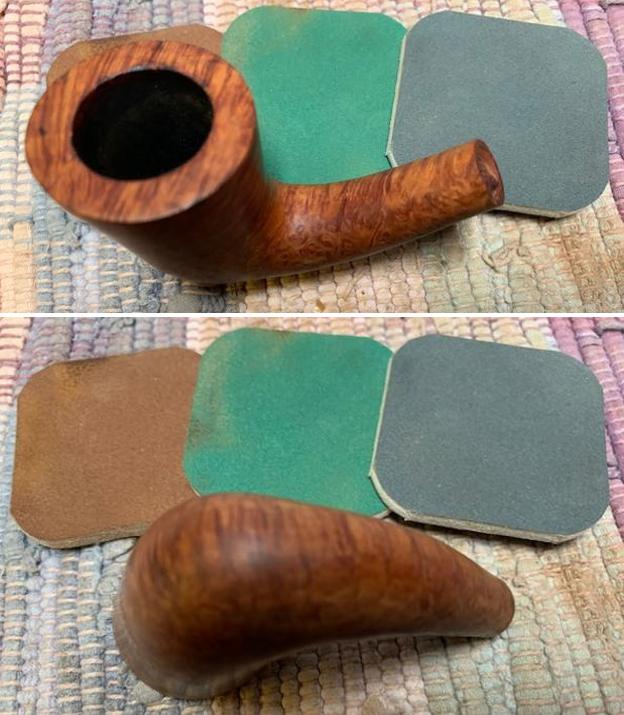
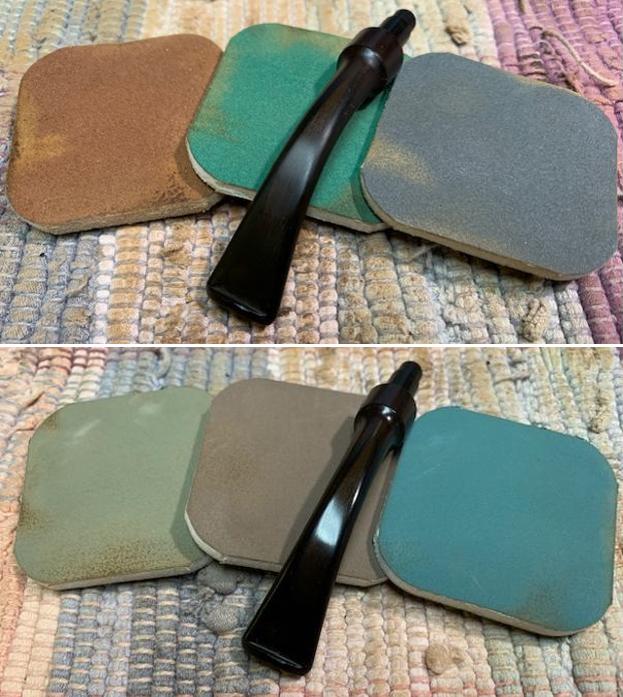
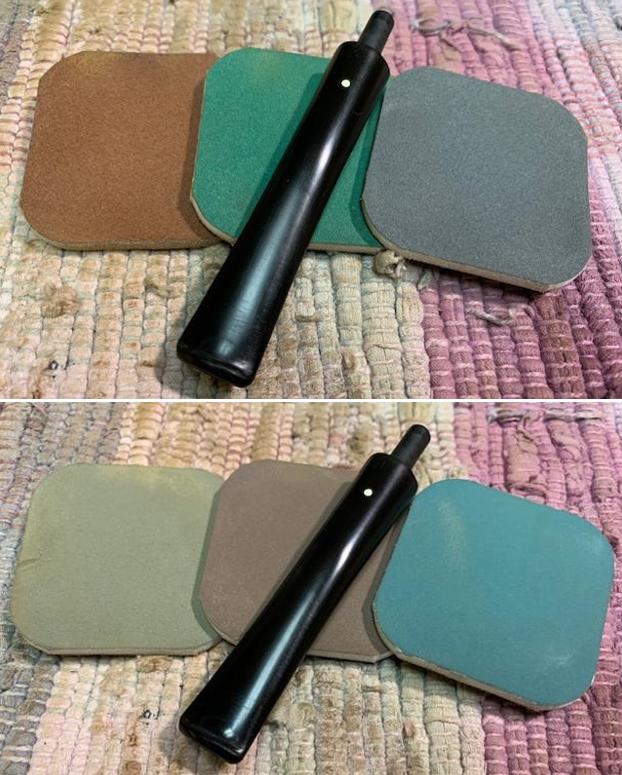
 Next, with the several patches required on the stummel surface, to blend these patches and to clean the surface, sanding sponges are used.
  I use a coarser grade sponge to start. Following this, a medium then a fine grade sponge to complete this phase.
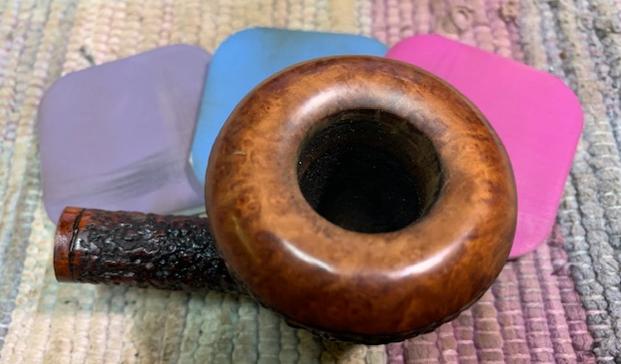
 Transitioning next to dry sanding with micromesh pads, pads 1500 to 2400 are followed by 3200 to 4000 and then 6000 to 12000. The grain emerges very nicely through the micromesh sanding process.
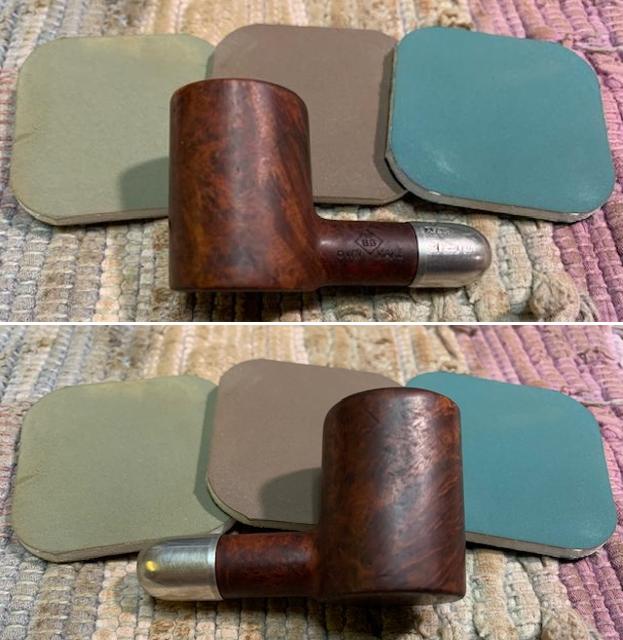
 Before putting the stummel aside to focus on the stem, Before & After Restoration Balm (www.Lpen.com) is applied to the stummel. The Balm does a great job bringing out the subtle hues of the natural briar. After placing some of the Balm on my fingers, the Balm is rubbed into the briar surface with a creamy consistency and it gradually thickens. Once the surface is thoroughly covered, the stummel is set aside for about 20 minutes for the Balm to do its work.
 After 20 minutes, the excess Balm is wiped off with a microfiber cloth and then buffed. It’s looking great!
 Turning now to the stem, the picture I took earlier after the Deoxidizer soak is a reminder of the deep oxidation the remained.
  Interestingly, as I look at the stem now, I am not able to see the oxidation as I was earlier…. Hmmm. Even so, I elect to sand the stem so that the oxidation doesn’t show itself later during the fine polishing phase.
  Using 240 sanding paper, the entire stem is sanded careful to guard against accidentally sanding over the Jeantet Circle ‘J’ stem stamping.
  Following the 240 grade coarser sanding, I wet sand using 600 grade paper and then finish after applying 0000 grade steel wool.
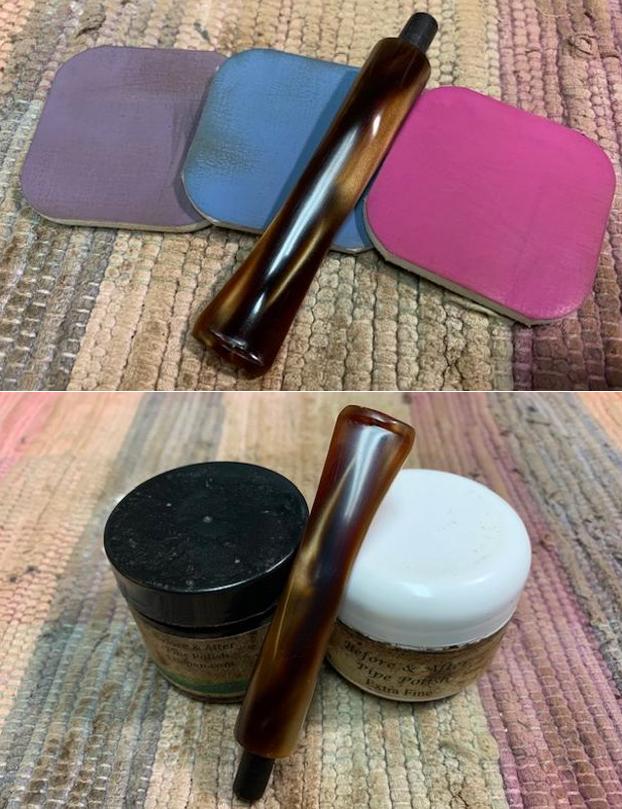
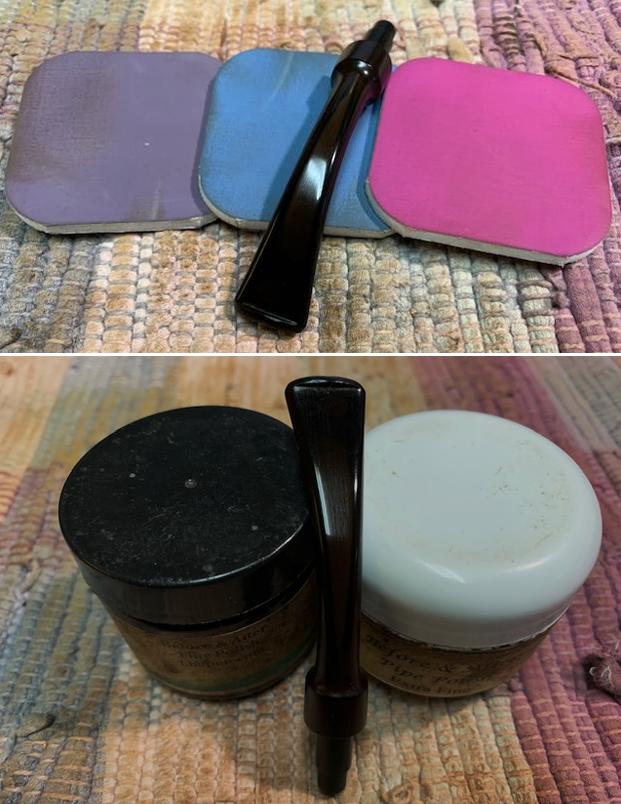
 Continuing with the stem using micromesh pads, the stem is wet sanded with pads 1500 to 2400. Following the wet sanding, I dry sand with pads 3200 to 4000 and 6000 to 12000. Between each set of 3 pads, Obsidian Oil is applied to further condition the stem and to guard it from future oxidation.
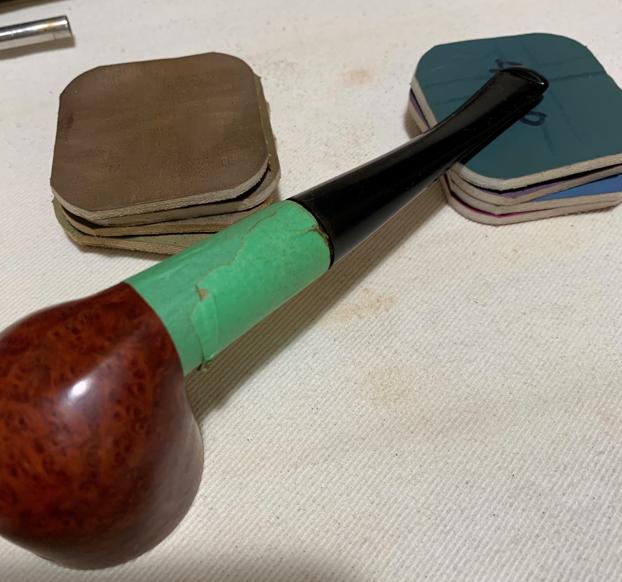
 After completing the sanding of the saddle stem, I reunite the stem and stummel to get an overall look at the progress. What I discover is that the fit of the tenon and mortise has tightened through the cleaning process – this happens. I do not risk forcing the stem and stummel together which could result in hearing that dreaded snap of a cracked shank.
  The remedy is to pinch 240 sanding paper around the tenon and rotate the stem to create the abrasion which gradually reduces the diameter of the tenon to fit the mortise.
  After several rotation sessions and fittings to test the size, the tenon gradually fits – snugly but not too tight. The Jeantet Superior Chimney is coming along very nicely.
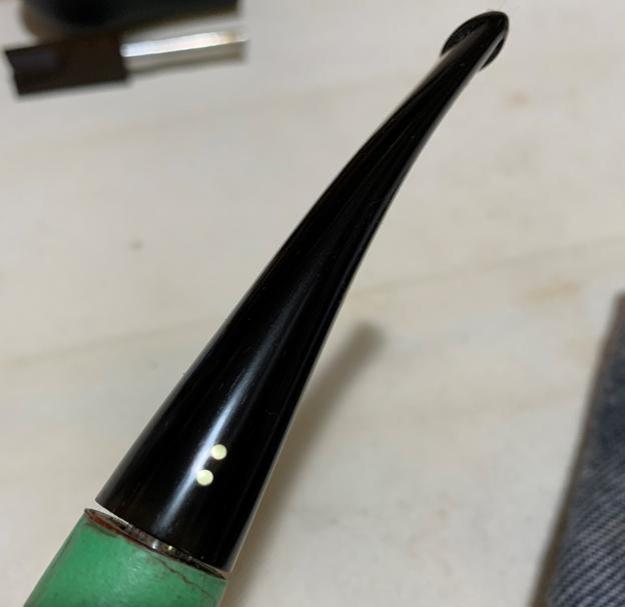
 The next step is to refresh the Circle ‘J’ stem stamping with white acrylic paint. It appears that there’s enough ‘tread’ left in the stamping to give the paint traction to be held in the imprint.
 The first step is to place a small drop of white acrylic paint over the stamping. The toothpick then is used to spread the paint over the lettering.
 I then daub the wet paint with a cotton pad to absorb the excess and to spread the paint evenly over the lettering. This also dries the paint quickly.
 I use both the flat edge of a toothpick and its point to clean the excess paint away and to sharpen the stamping. I use the side of the toothpick to scrape over the entire stamping removing most of the paint on the stem surface – leaving the paint in the troughs of the stamping. The point of the toothpick allows me to finish the edges of the stamping more closely. I repeat applying paint a couple times with daubing and then the toothpick finishing process until the Jeantet stamping looked good.
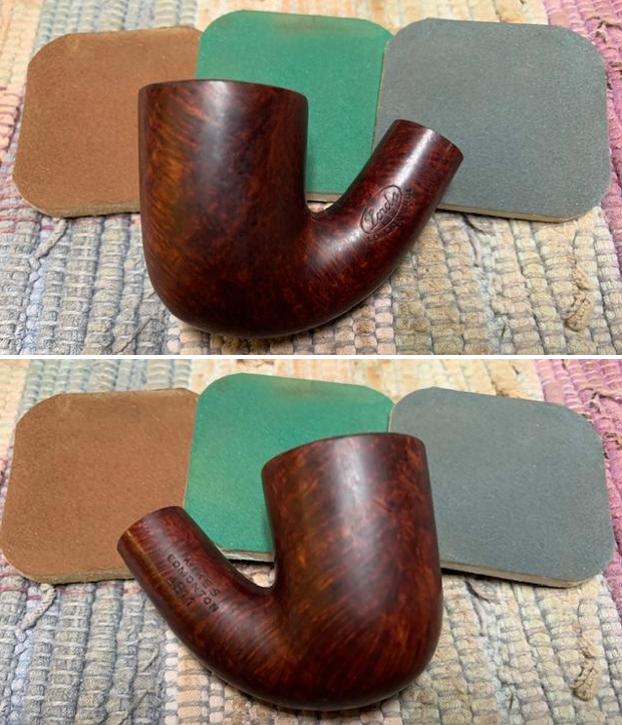
 Now on the home stretch. After remembering to replace the original nickel stinger after it was cleaned and polished with steel wool, and rejoining the stem and stummel, a cotton cloth buffing wheel is mounted onto the rotary tool to apply Blue Diamond compound to the stem and stummel. The speed is set at about 40% full power as I methodically apply the fine abrasive to the surface of the briar and vulcanite.
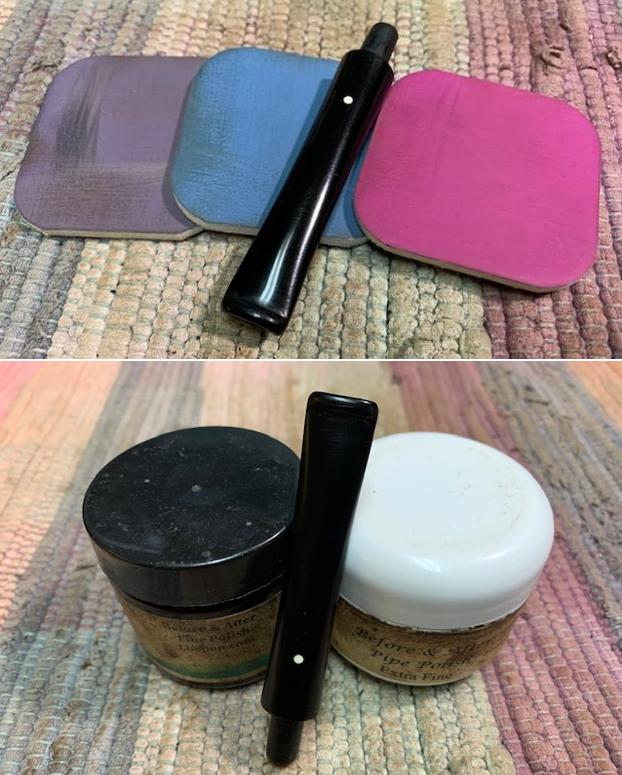
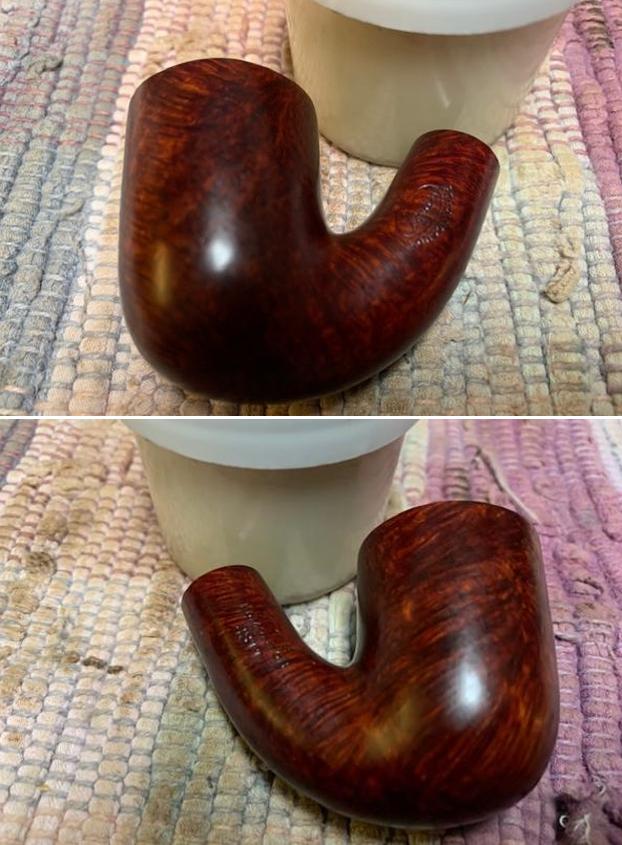
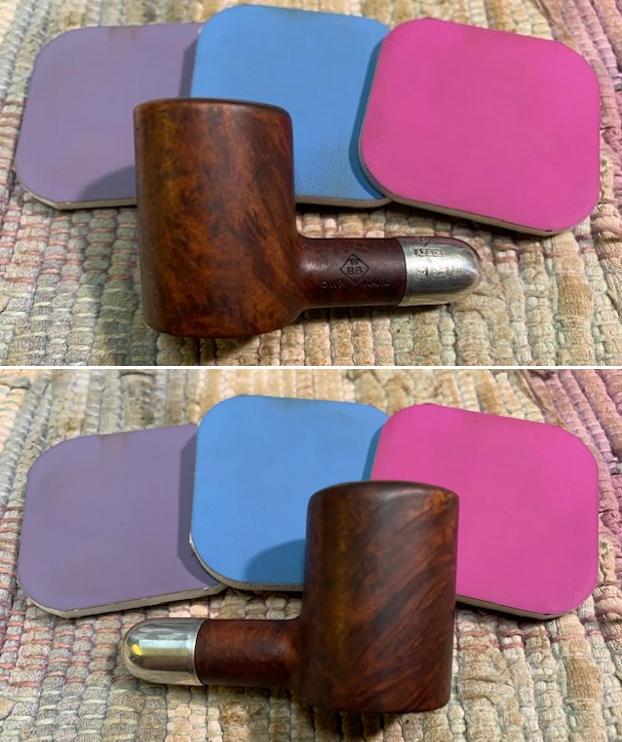
  After applying the compound, the pipe is wiped/buffed with a felt cloth to remove left over compound dust particles. I don’t want the abrasive particles to mix with the wax that comes next. Another wheel, dedicated to applying carnauba wax is mounted and with the speed remaining the same, wax is applied to the pipe. When this is completed, the pipe enjoys a rigorous hand buffing with a microfiber cloth to remove any excess wax from the surface and to raise the shine.
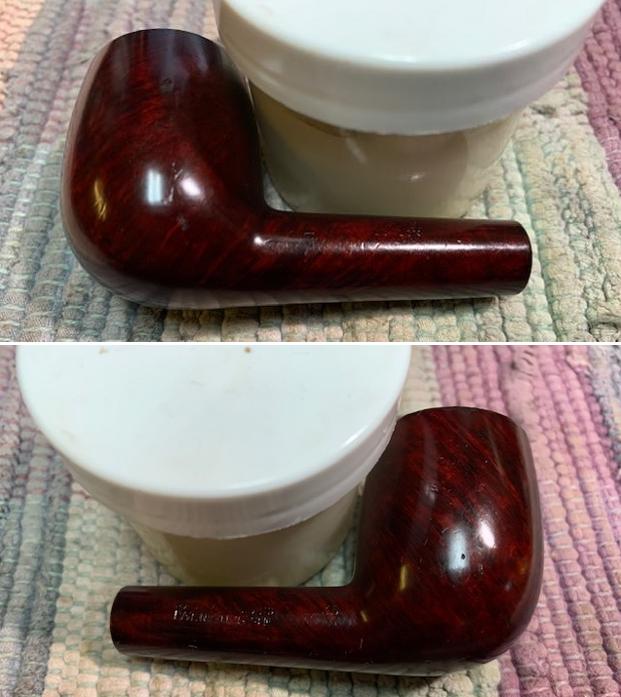
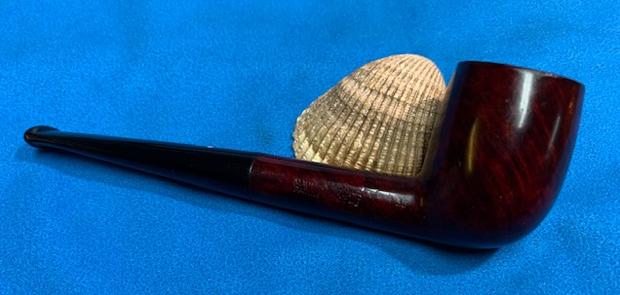
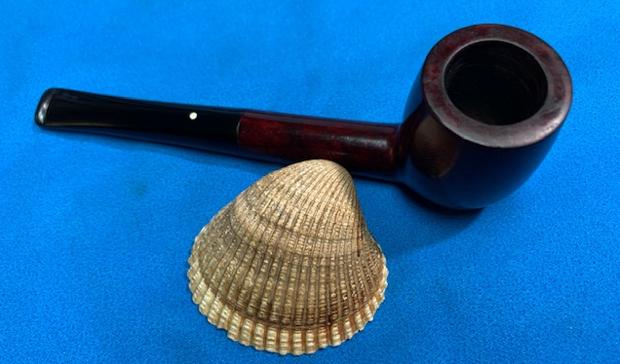
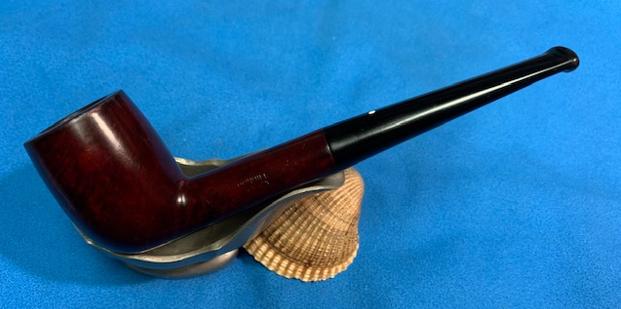
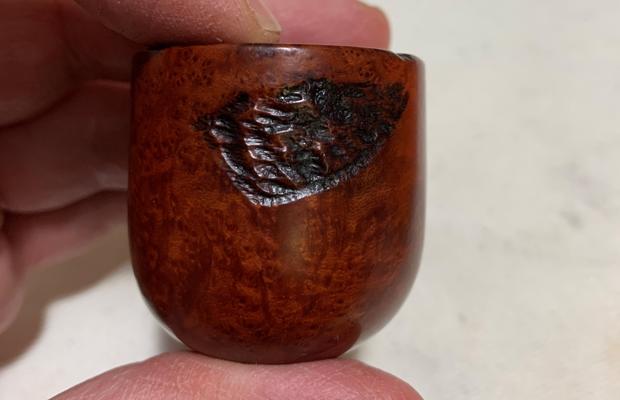
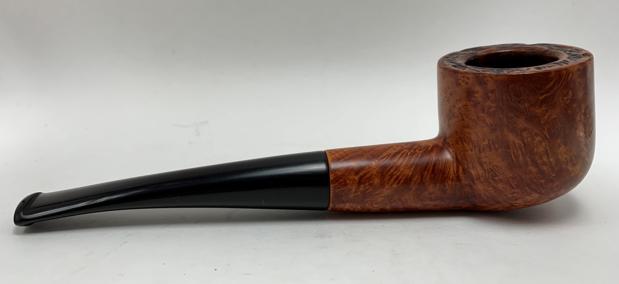
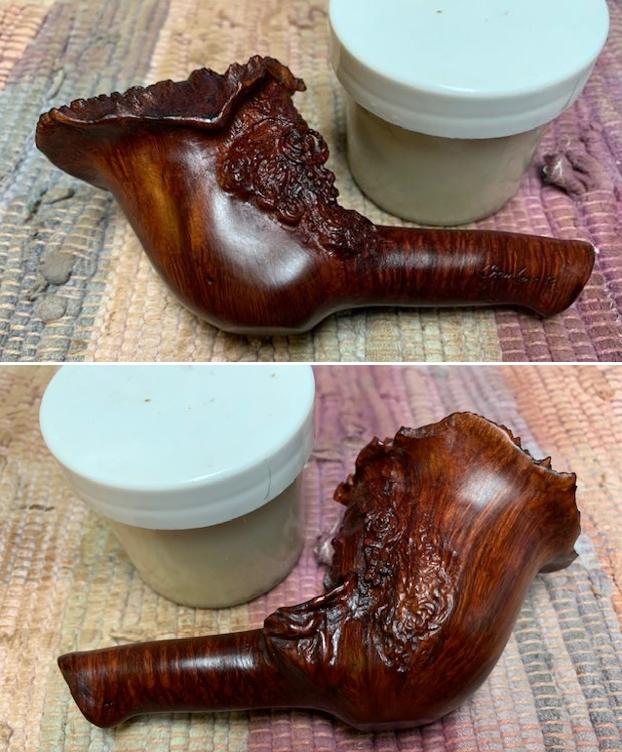
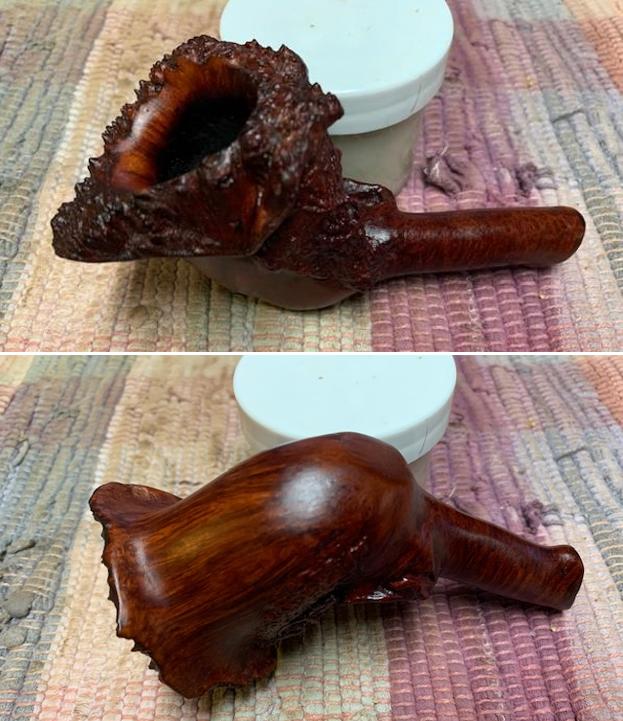
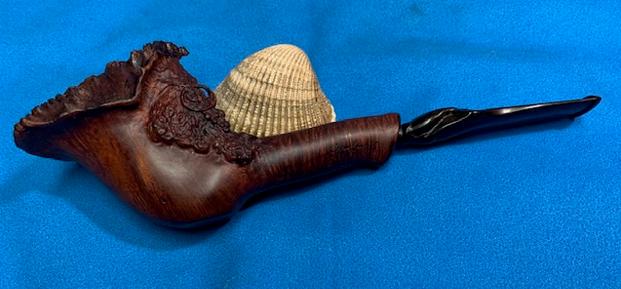
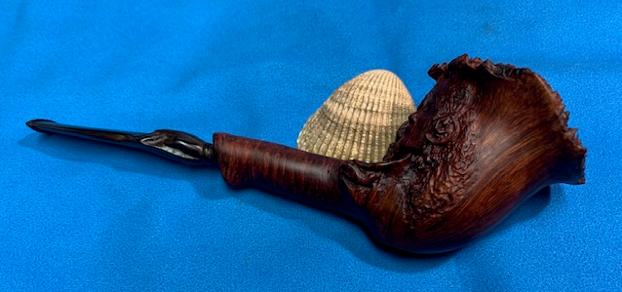
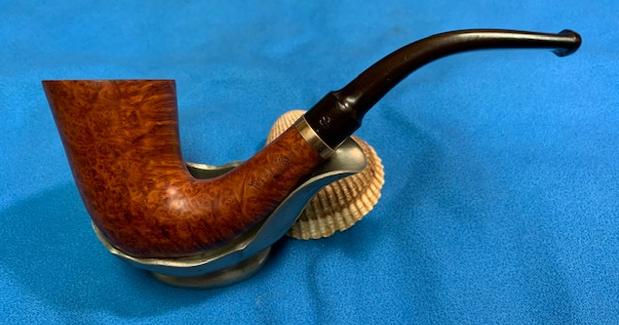
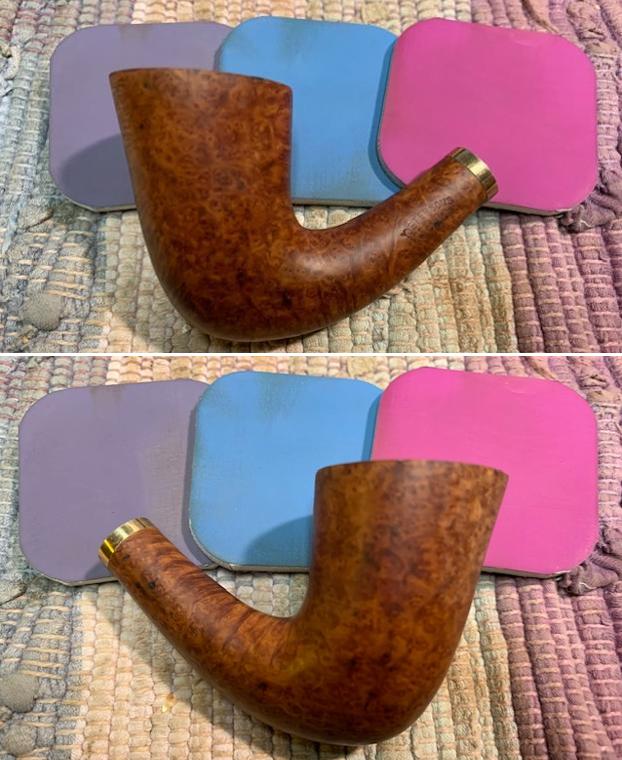
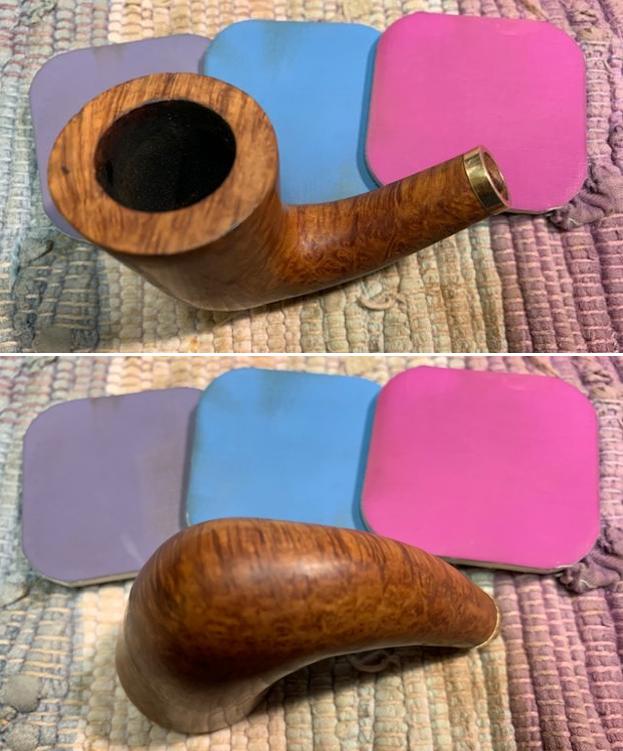
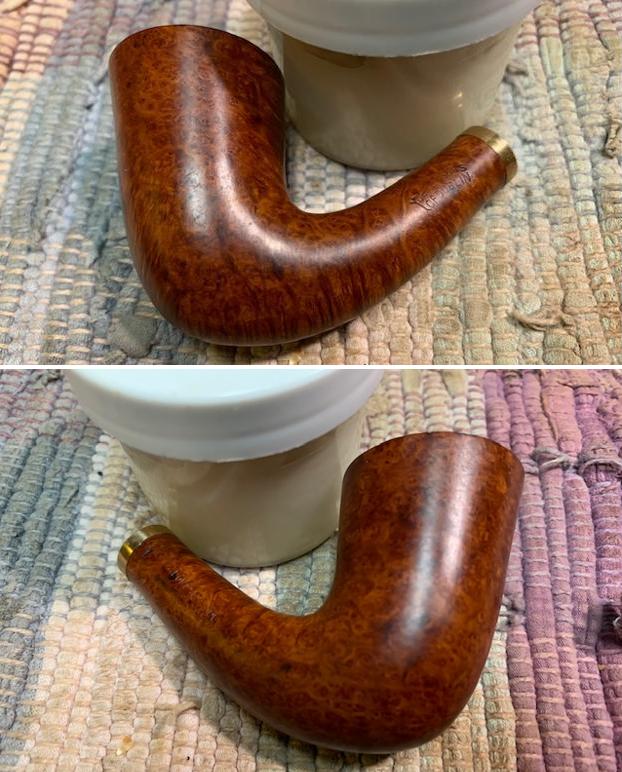
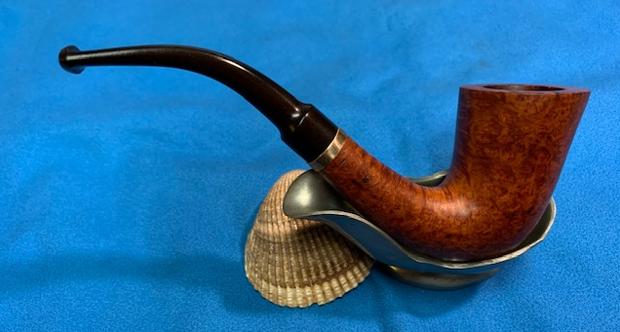
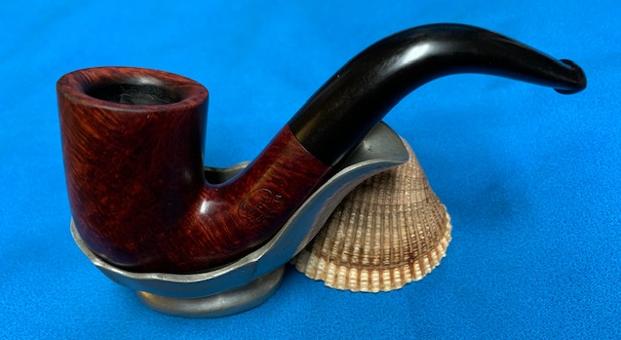
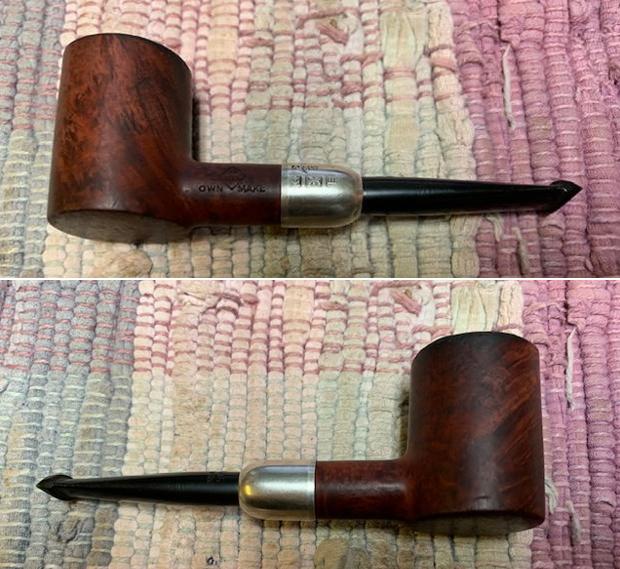
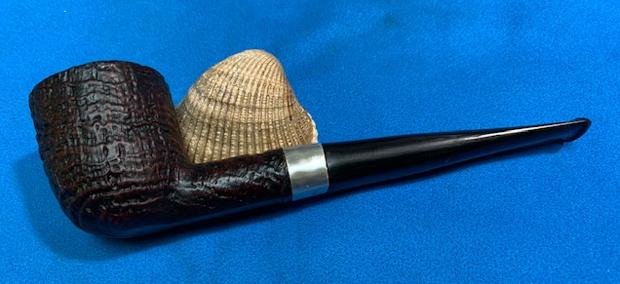
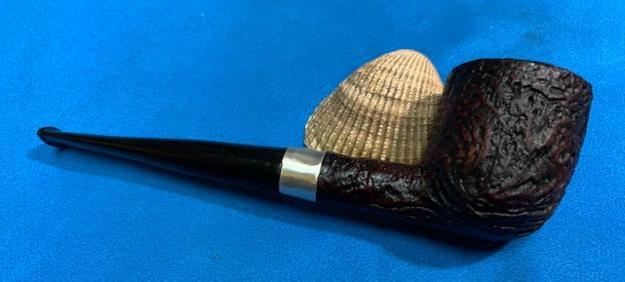
  Skeet commissioned this Jeantet Superior Chimney because he saw its potential. The Chimney shape gives a sharp, clean-cut look. This joined with the slightly bent saddle stem gives the pipe a comfortable symmetry. The briar required several repairs to fill pits, but the results were worth the effort! There is no such thing as a perfect piece of briar! The briar block appears to have been cut near the edge of the bole which manifests the beautiful, active briar seen in this stummel. The fire grain seems to hug and wrap around the bowl tightening into a spider web knot on the back side of the bowl. Without question, a striking landscape for a new steward to enjoy! Skeet will have the first opportunity to claim this Jeantet Superior Chimney from The Pipe Steward Store benefitting the Daughters of Bulgaria – helping women and girls who have been trafficked and sexually exploited. Thanks for joining me!


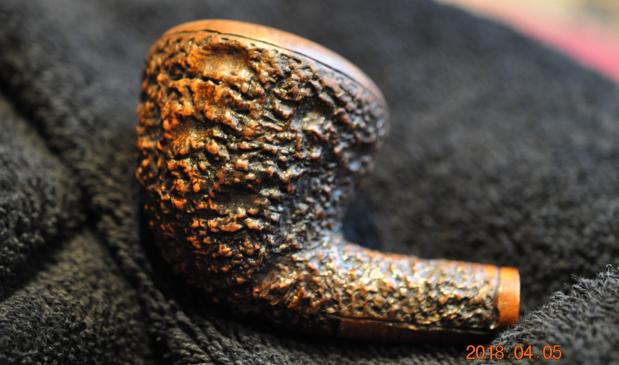
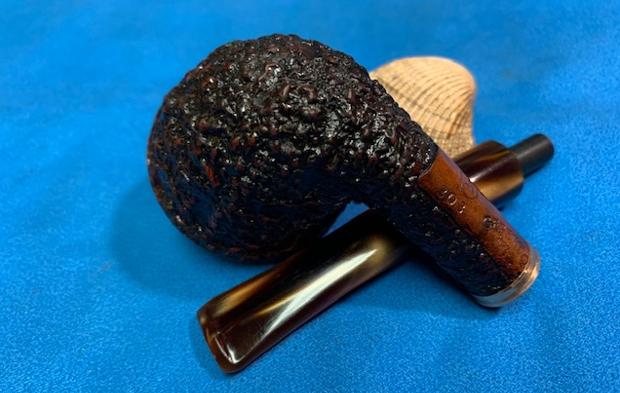
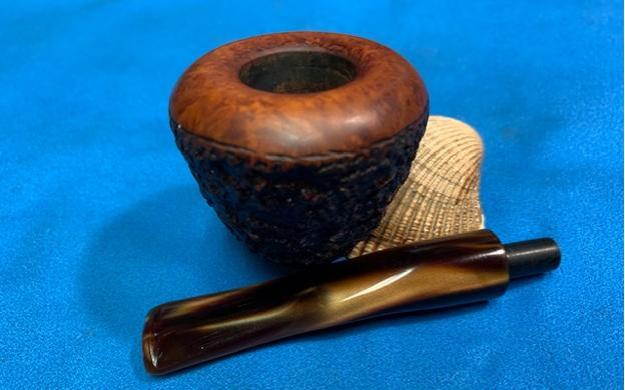
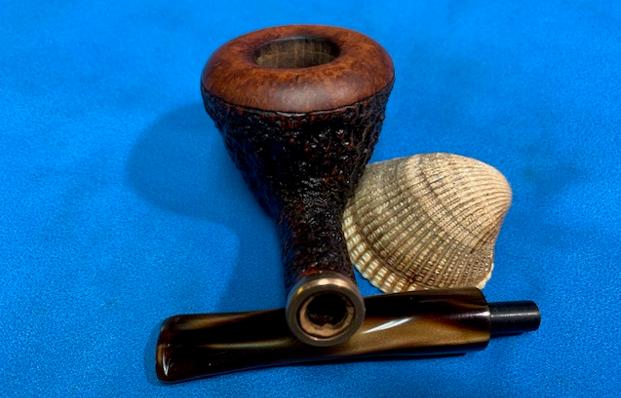
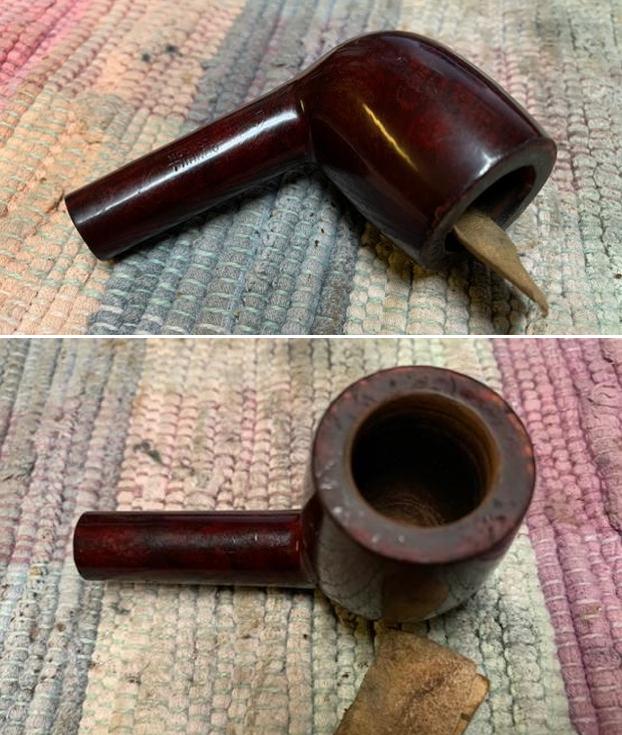
 The next two close up photos show the condition of the bowl and rim top. You can see the thick lava coat on the top and you can see the reamed bowl sides on the left rear. It would need to be cleaned up but it was surprisingly clean for the condition of the rim top.
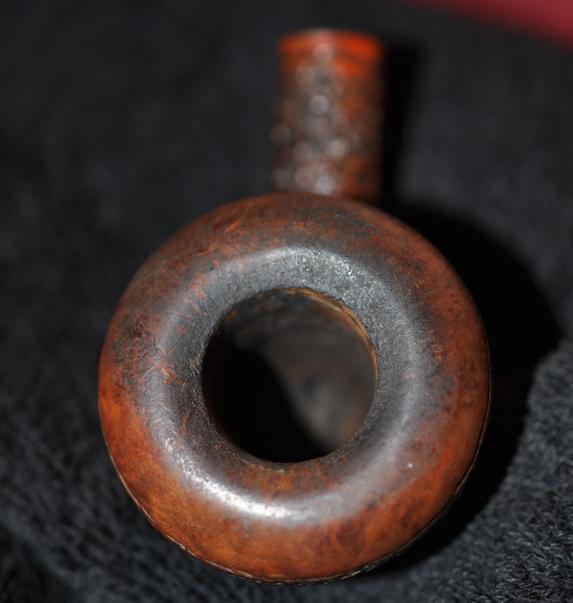
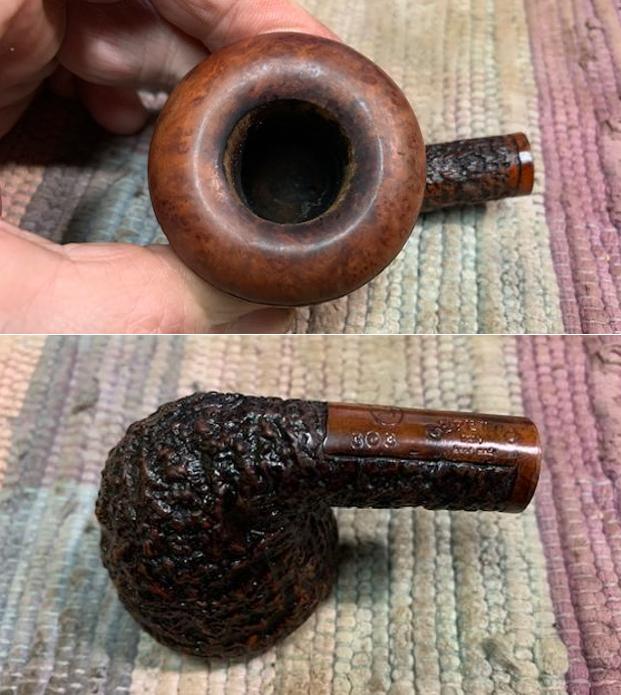
 Jeff took a photo of the stamping on the underside of the shank. It read as noted above and is clear and readable.
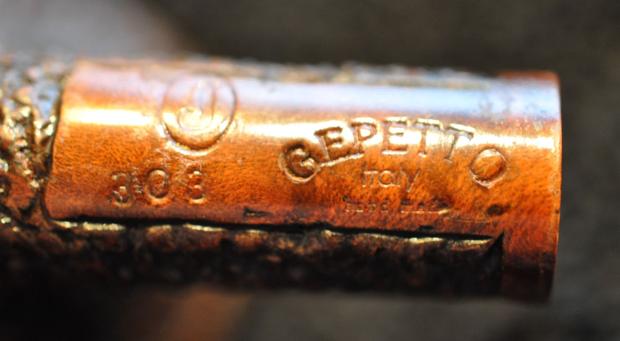 I decided to confirm my thinking that the pipe was connected with Ser Jacopo. I turned to Pipephil’s site to get a read on the brand (http://pipephil.eu/logos/en/logo-g2.html). Sure enough the Gepetto line is called a second of Ser Jacopo. I did a screen capture of the section on Pipephil on both the Gepetto line and the informative side bar from the Ser Jacopo section that also states that the line is a second. I have included them below.
 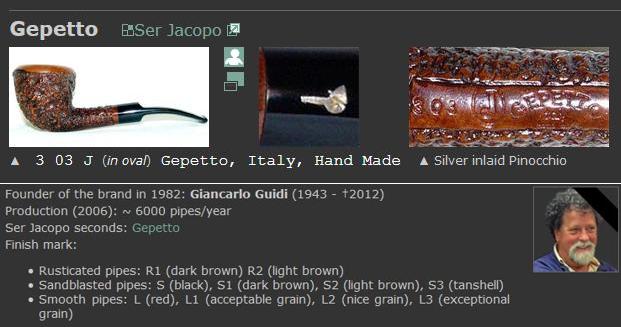 There were also photos that were included on Pipephil of what this particular pipe looked like when it had left Italy. The rustication around the bowl and shank is very similar though the stain on this one is darker and the grain on the smooth rim cap much more prominent. The pipe originally had an acrylic saddle stem with a silver inlaid Pinnochio on the top of the stem. The stem was long gone when Jeff picked it up so I had some decisions to make about the stem I would use to restem it.
 I turned to work on the pipe itself. Jeff had carried out his usual thorough cleanup of the pipe. He had reamed it with a PipNet reamer to remove the cake and cleaned the reaming up with a Savinelli Fitsall Pipe Knife. He scrubbed the internals of the bowl and stem with alcohol, cotton swabs and pipe cleaners. He scrubbed the externals with undiluted Murphy’s Oil Soap and rinsed the bowl off with running water. The pipe looked very clean when I received it. The rim top looked better but still needed a lot of work.
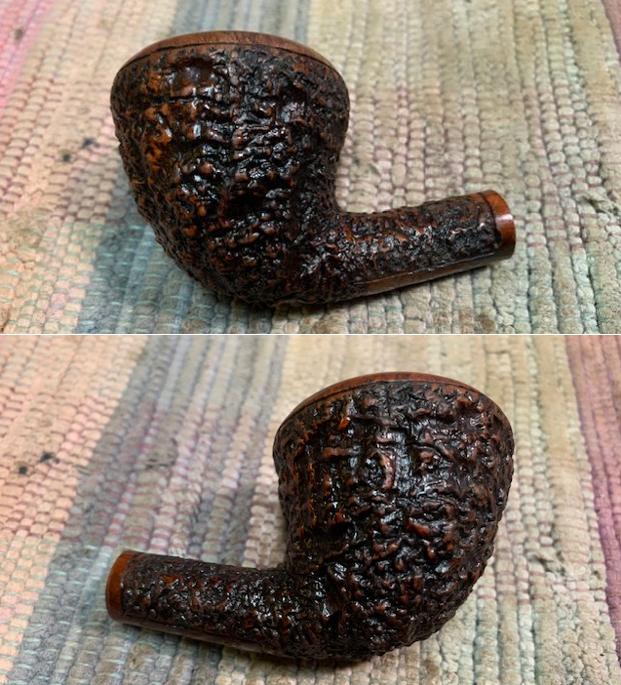
 I went through my can of stems and found an acrylic one that had the right colour combination of browns and golds to work with the finish on the bowl. It was a little too bent but that would not be an issue. There were also tooth marks in the top and underside of the stem at the button that would need to be dealt with in the restoration.
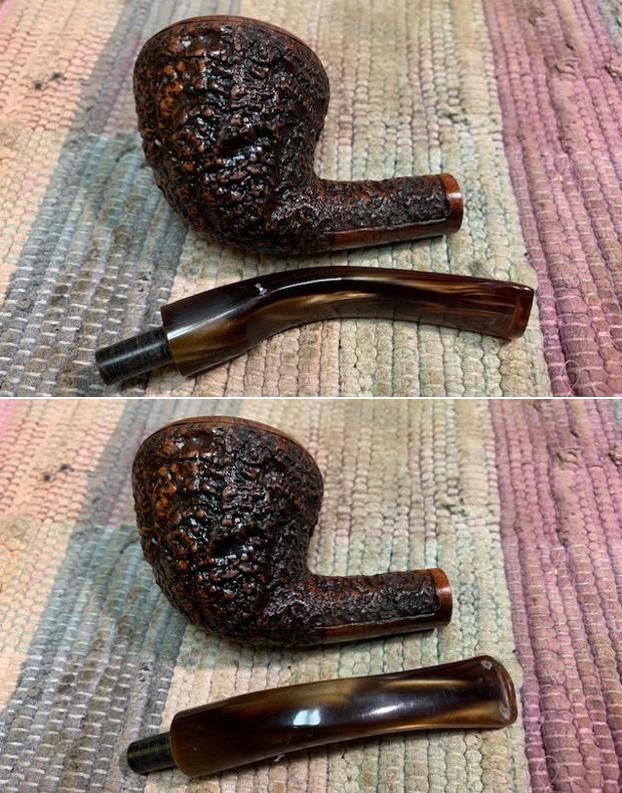
 I fit the stem in the shank and took a picture of the pipe. The stem is a little larger in diameter than the shank. I will need to sand it down to match the shank. I will also need to straighten the stem.
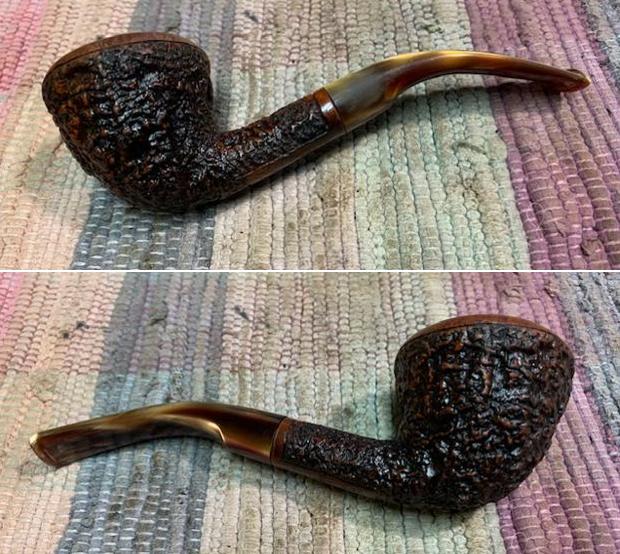
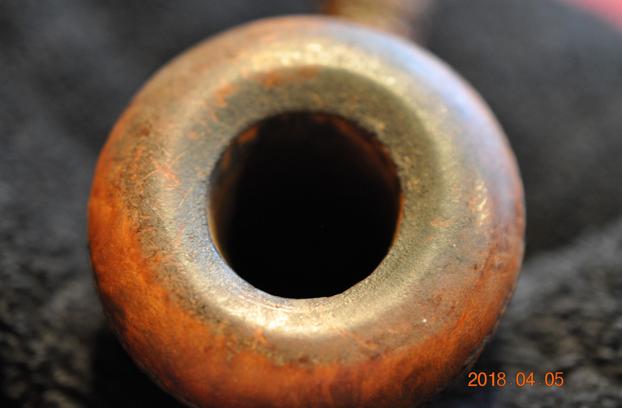
 I took a close up photo of the rim top. You can see the cleanness of the bowl and rim. There is darkening around inner edge of the rim and crown top. You can also see the stem is a little larger in diameter than the shank in the photos below. You can also see the tooth marks in the second and third photos below.
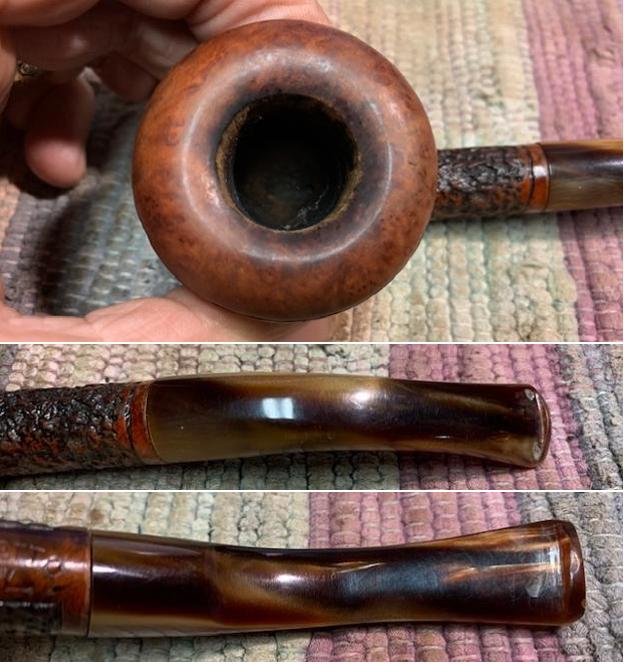 I straightened the stem over my heat gun. I put a pipe cleaner in the shank and heated it until the stem was flexible and I was able to straighten it to match the bend in the stem. I took photos of the pipe and stem after the straightening.
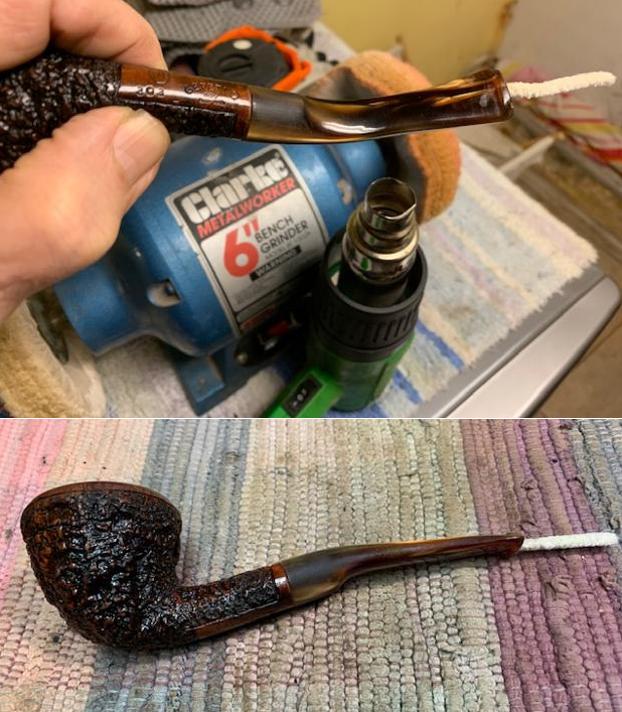 I set the stem aside and worked on the rim edges and top with a folded piece of 220 grit sandpaper. I was able to remove the damage to the rim edges and top.
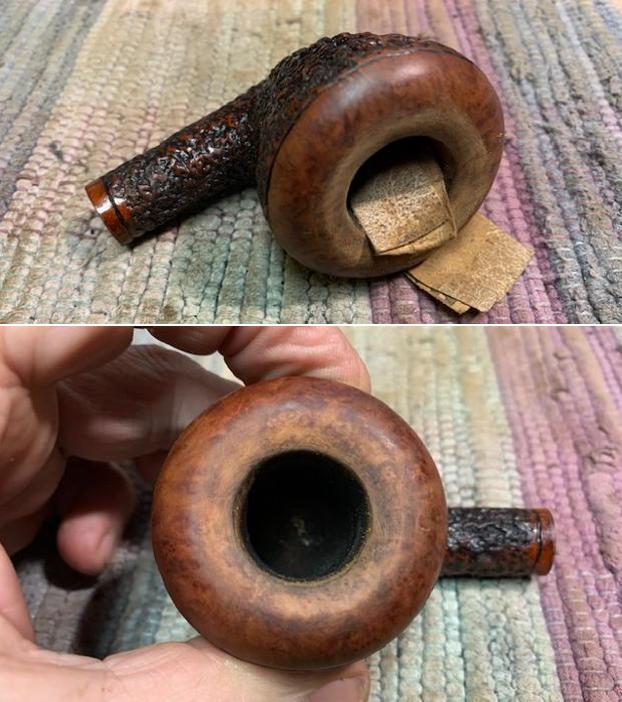 I polished the rim top with micromesh sanding pads and wiped it down with a damp cloth to remove the sanding dust. The crown took on a rich shine.
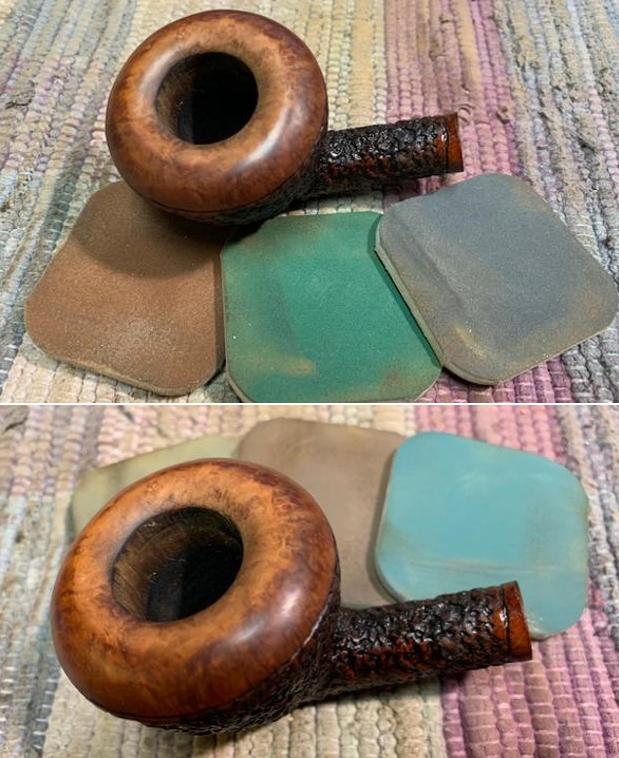
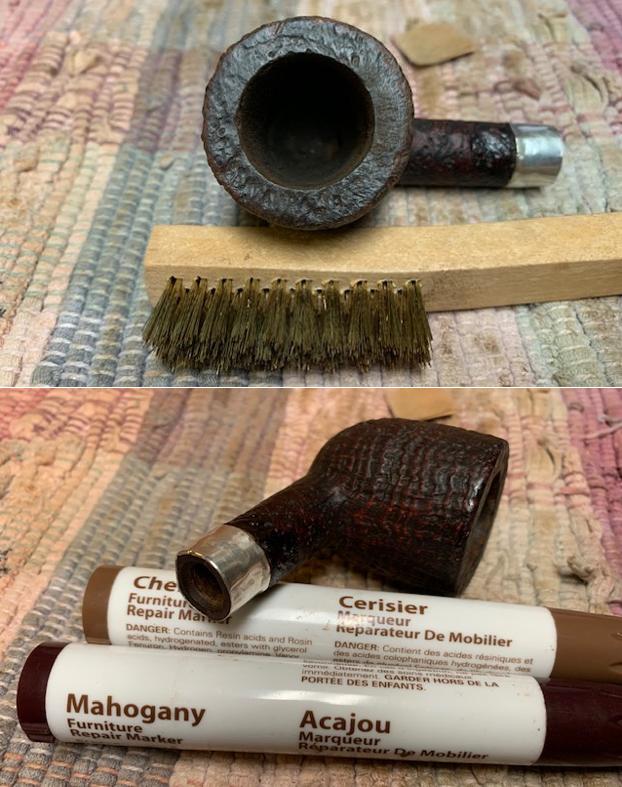
 I stained the rim top with a Maple and Cherry stain pen to match the finish on the smooth portions on the bowl.
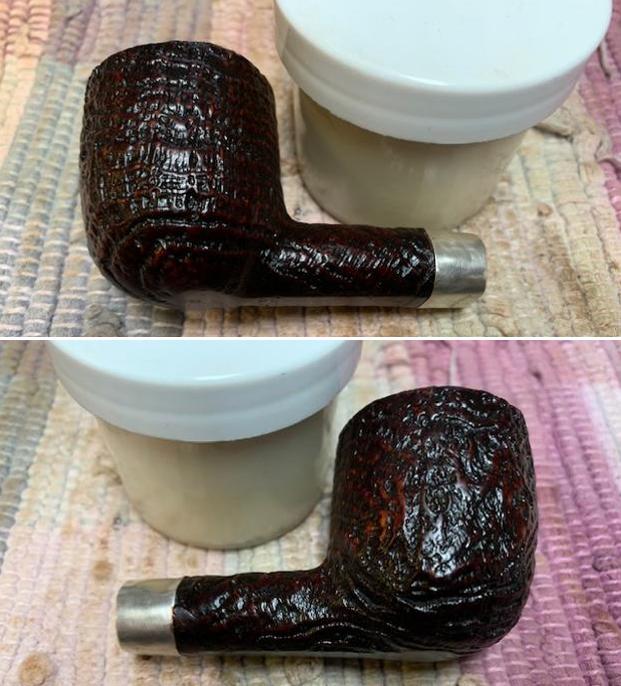
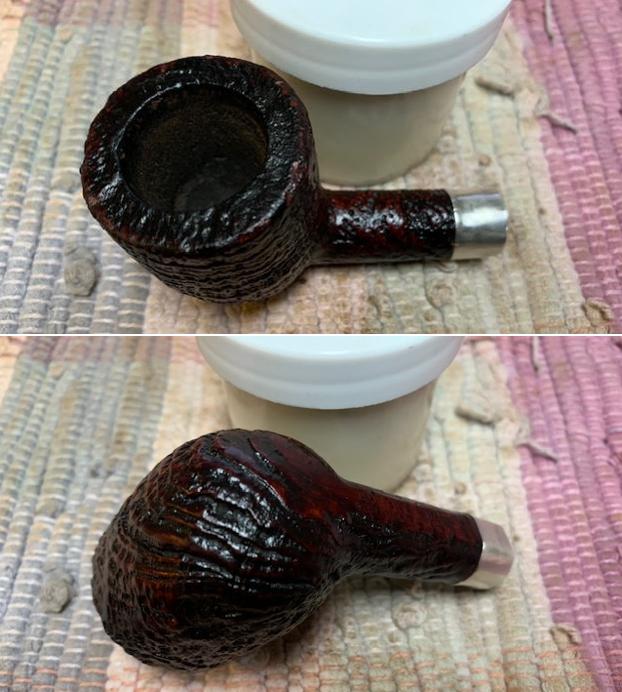
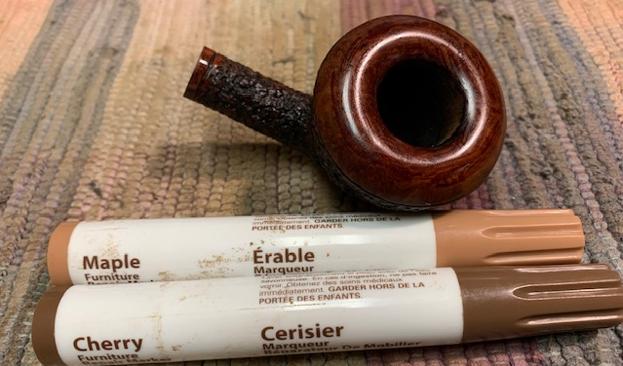 With the repair completed I rubbed the briar down with Before & After Restoration Balm. I worked it into the briar with my fingertips and a horsehair shoe brush. The product works to clean, enliven and preserve the briar. I let it sit for 15 minutes while I worked on the stem. After the time passed I buffed it with a cotton cloth to deepen the shine. The briar really comes alive with the balm.
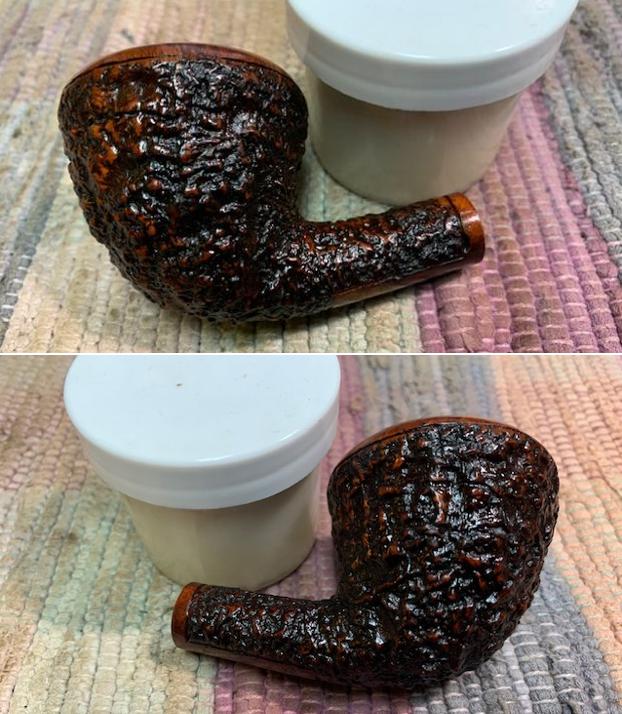
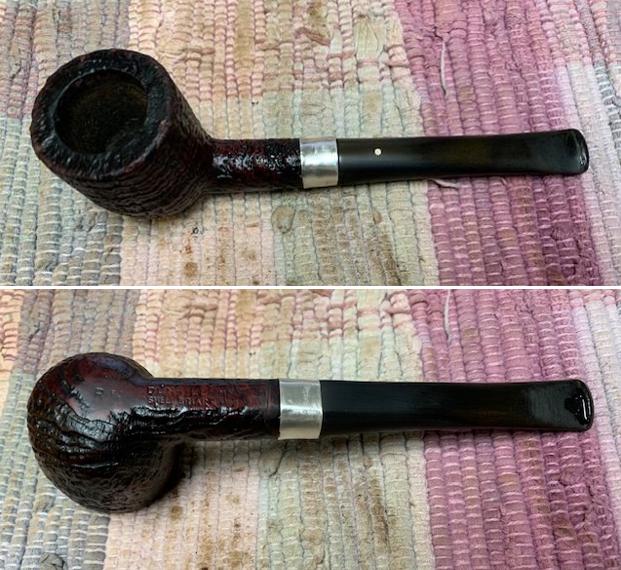
 In the process of rubbing the bowl down with Before & After Balm I noticed a hairline crack in the underside of shank that needed to be addressed. I don’t know if it was present or if it cracked when I fitted the new stem. Either way it needed to be repaired. I sanded the smooth area on the shank end down with 220 grit sandpaper in preparation for the band I wanted to put on it. I found a nice brass band that was grooved to look like a double band. I heated the band and pressed it in place. The band looked very good on the shank.
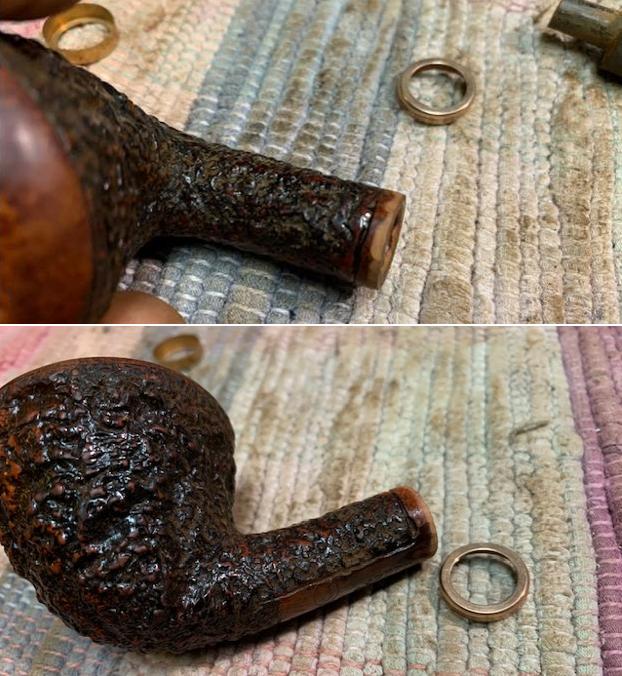
 I filled in the tooth marks on the stem with clear super glue and set it aside to cure. Once it had cured I sanded it down with 220 grit sandpaper. I also sanded the diameter of the stem to match the diameter of the shank.
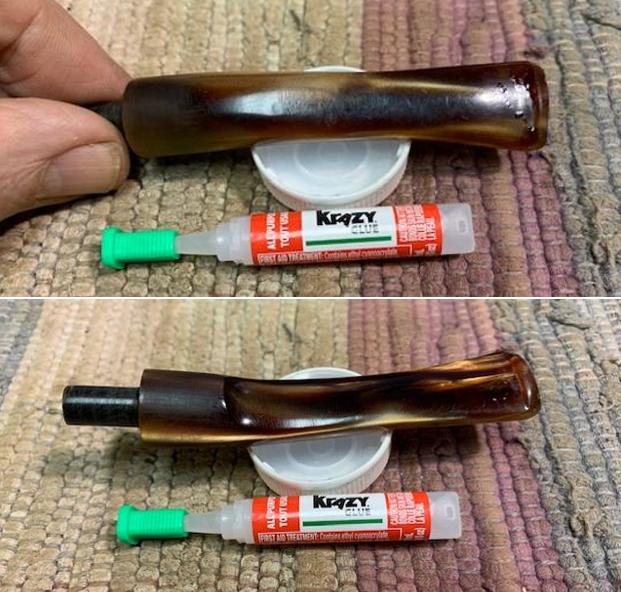
 I set the bowl aside and turned my attention to the stem. I polished the acrylic stem with micromesh sanding pads – 1500-12000 grit pads. I wiped it down with Obsidian Oil after each sanding pad. I used Before & After Pipe Polish – both Fine and Extra Fine to further polish the stem.
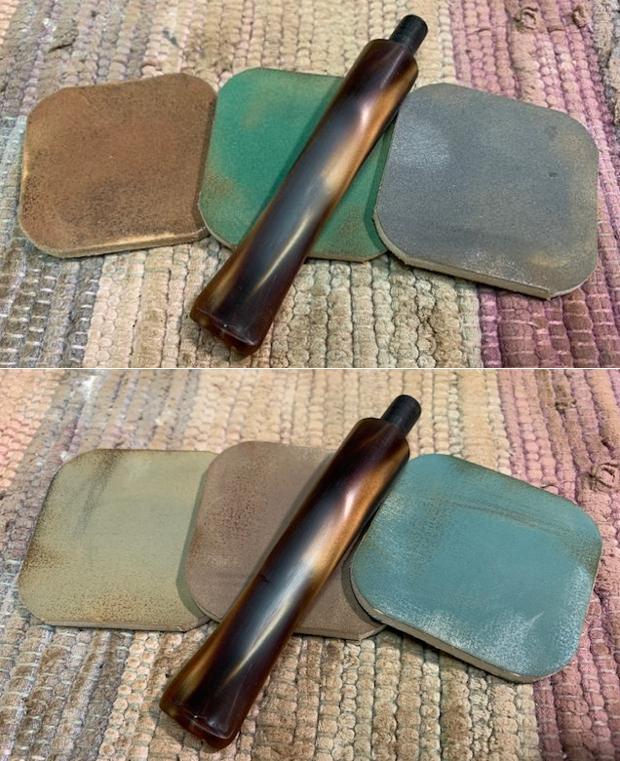
 This restemmed, rusticated Gepetto 303 Rhodesian is a beautiful looking pipe that combines a smooth rim cap and rusticated bowl and shank. The brown stains on the bowl work well to highlight the grain. The polished variegated brown/gold half saddle acrylic stem adds to the mix. I put the finished stem on the bowl and buffed the pipe with Blue Diamond on the buffing wheel being careful to not buff the stamping. I gave the bowl multiple coats of Conservator’s Wax and the stem multiple coats of carnauba wax on the buffing wheel and followed that by buffing it with a clean buffing pad. I hand buffed the pipe with a microfiber cloth to deepen the shine. The rusticated pipe is quite nice and feels great in the hand. Give the finished pipe a look in the photos below. I can only tell you that like the other pipes I am working that it is much prettier in person than the photos capture. The dimensions of the pipe are Length: 6 ½ inches, Height: 2 inches, Outside diameter of the bowl: 2 inches, Chamber diameter: 7/8 of an inch. The weight of the pipe is 57grams/2.05oz. It will soon be added to the Italian Pipe Makers section on the rebornpipes store. Thanks for walking through the restoration with me as I worked over another beautiful pipe. Remember we are not pipe owners; we are pipemen and women who hold our pipes in trust until they pass on into the trust of the next generation.
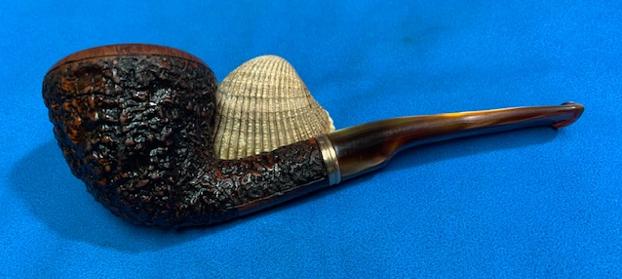


