Tag Archives: restemming a pipe

A Phoenix Rises – Reworking a Pipe


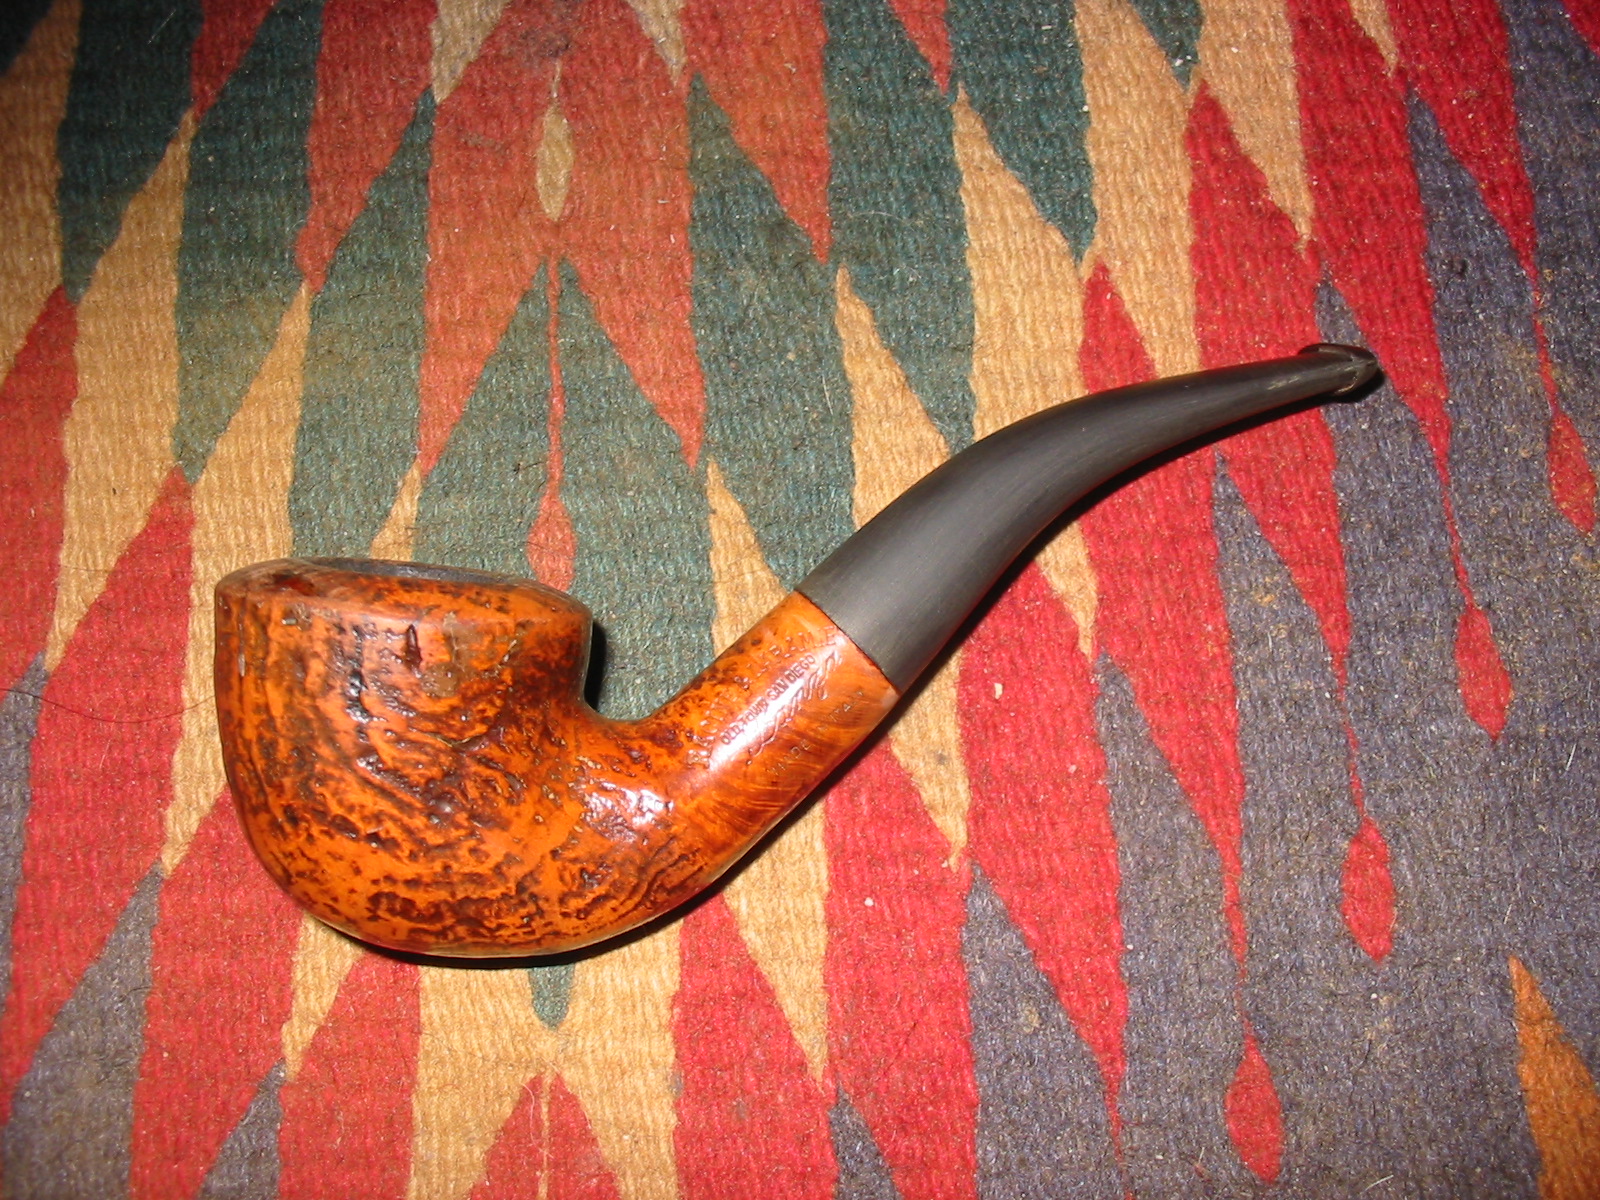
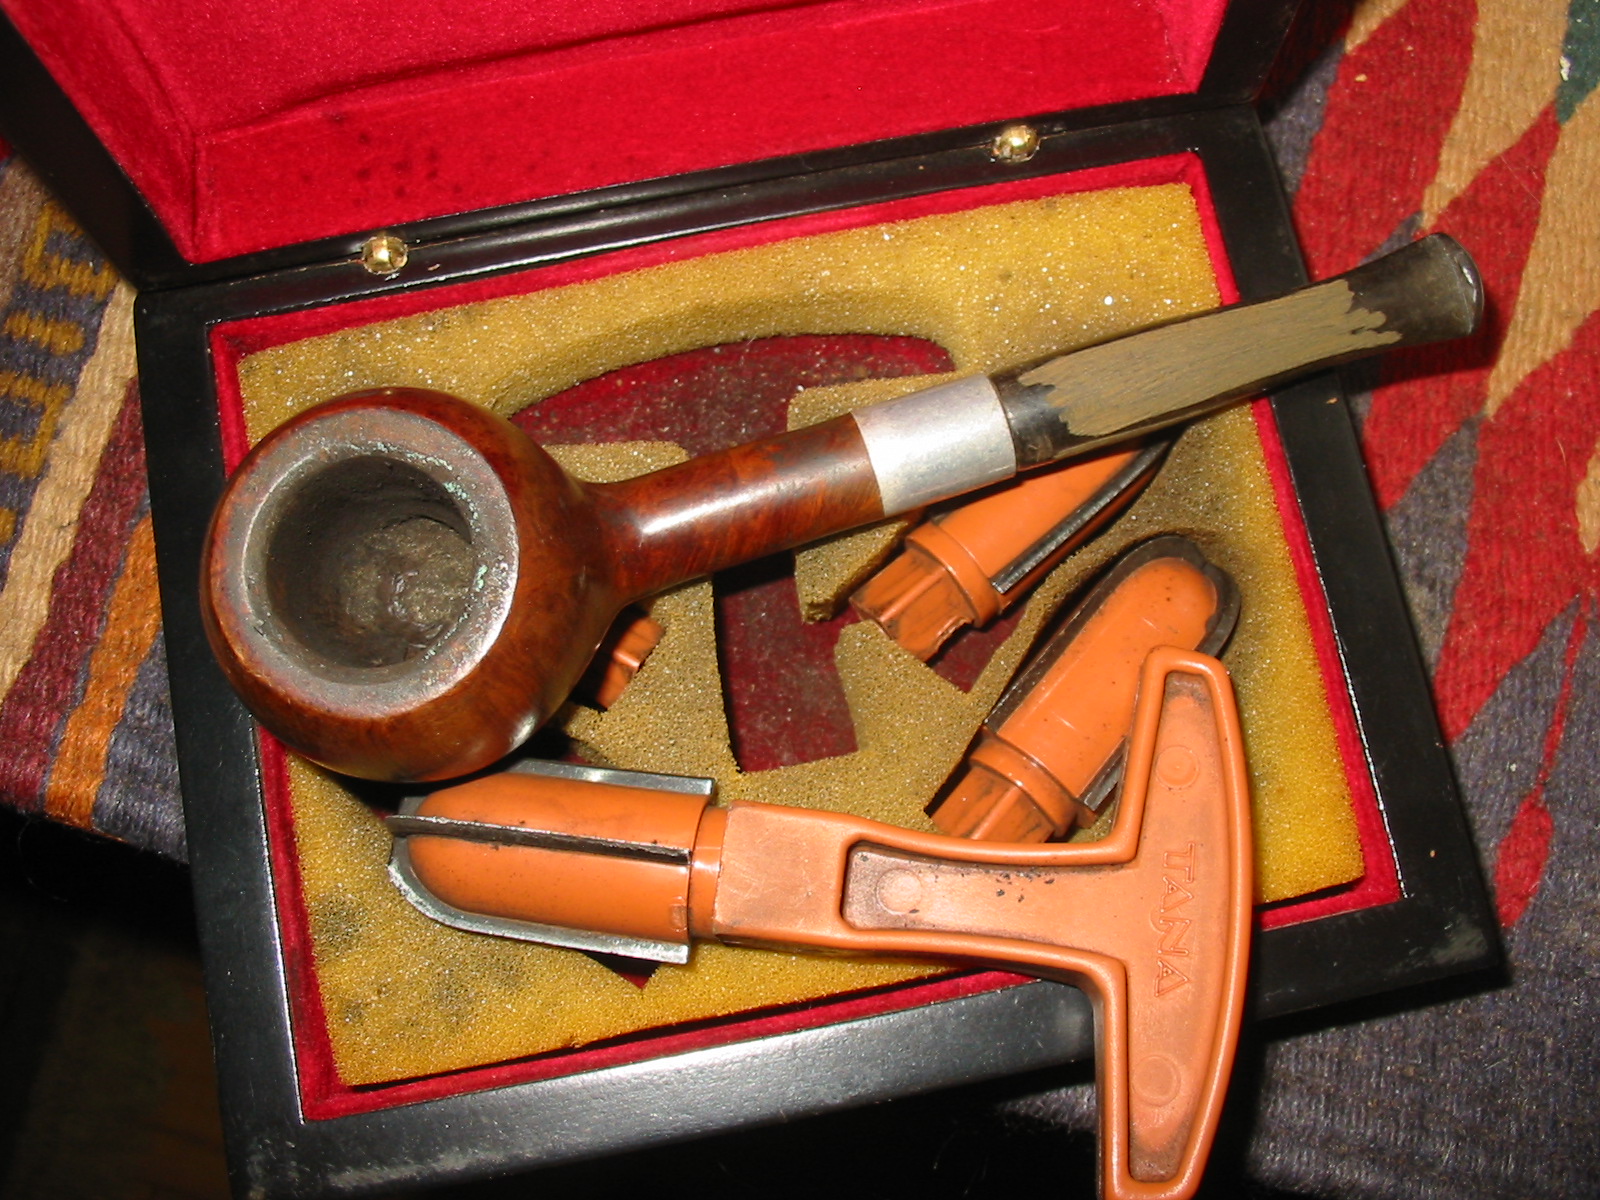
This post may be controversial to some folks as it is about the reworking of a pipe from a living artisan. I know that many would never do such a thing and would either sell the pipe or leave it in the collection. I chose to do neither of those things. Knowing that when Stephen gave it to me it was not one that he was going to sell and that in some ways he saw as problematic made this adaptation an easy choice for me.

Quite a few years ago now – enough years have passed that I am not sure when – I used to visit Stephen Downie when he lived in Vancouver. We had connected through the Vancouver Pipe Club and I enjoyed his company. When I visited I would pick up tips on pipe making that I could use in my pipe refurbishing – stem making, sanding techniques, staining processes, etc. I enjoyed looking through his box of throw away stummels that for one reason or another had problems and did not make the grade. He would often give me one or two to use to practice carving. I enjoyed the process of working with these blocks just to learn about briar and how it responds when cut and sanded. I learned about sand pits and flaws in the block and got to play around with the tools to remove the flaws as much as possible and craft a passable pipe for me to smoke.

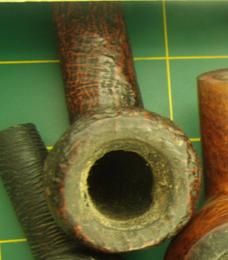
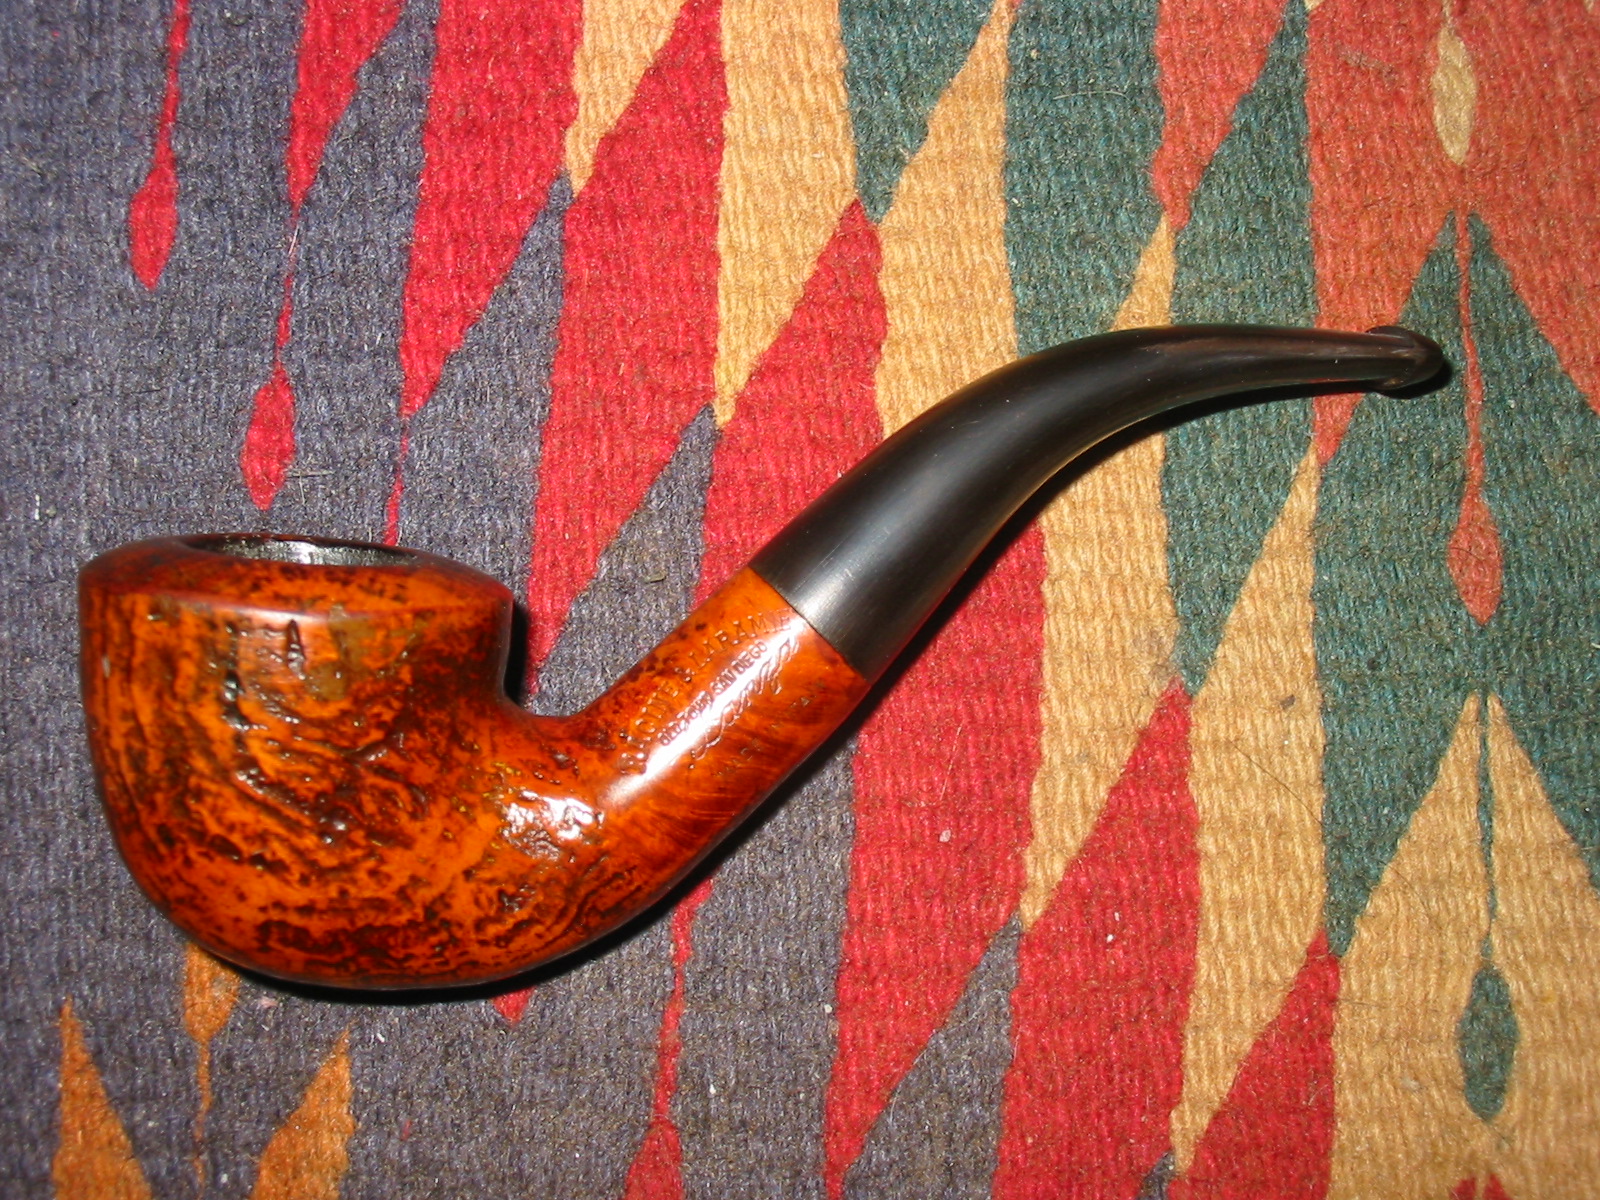
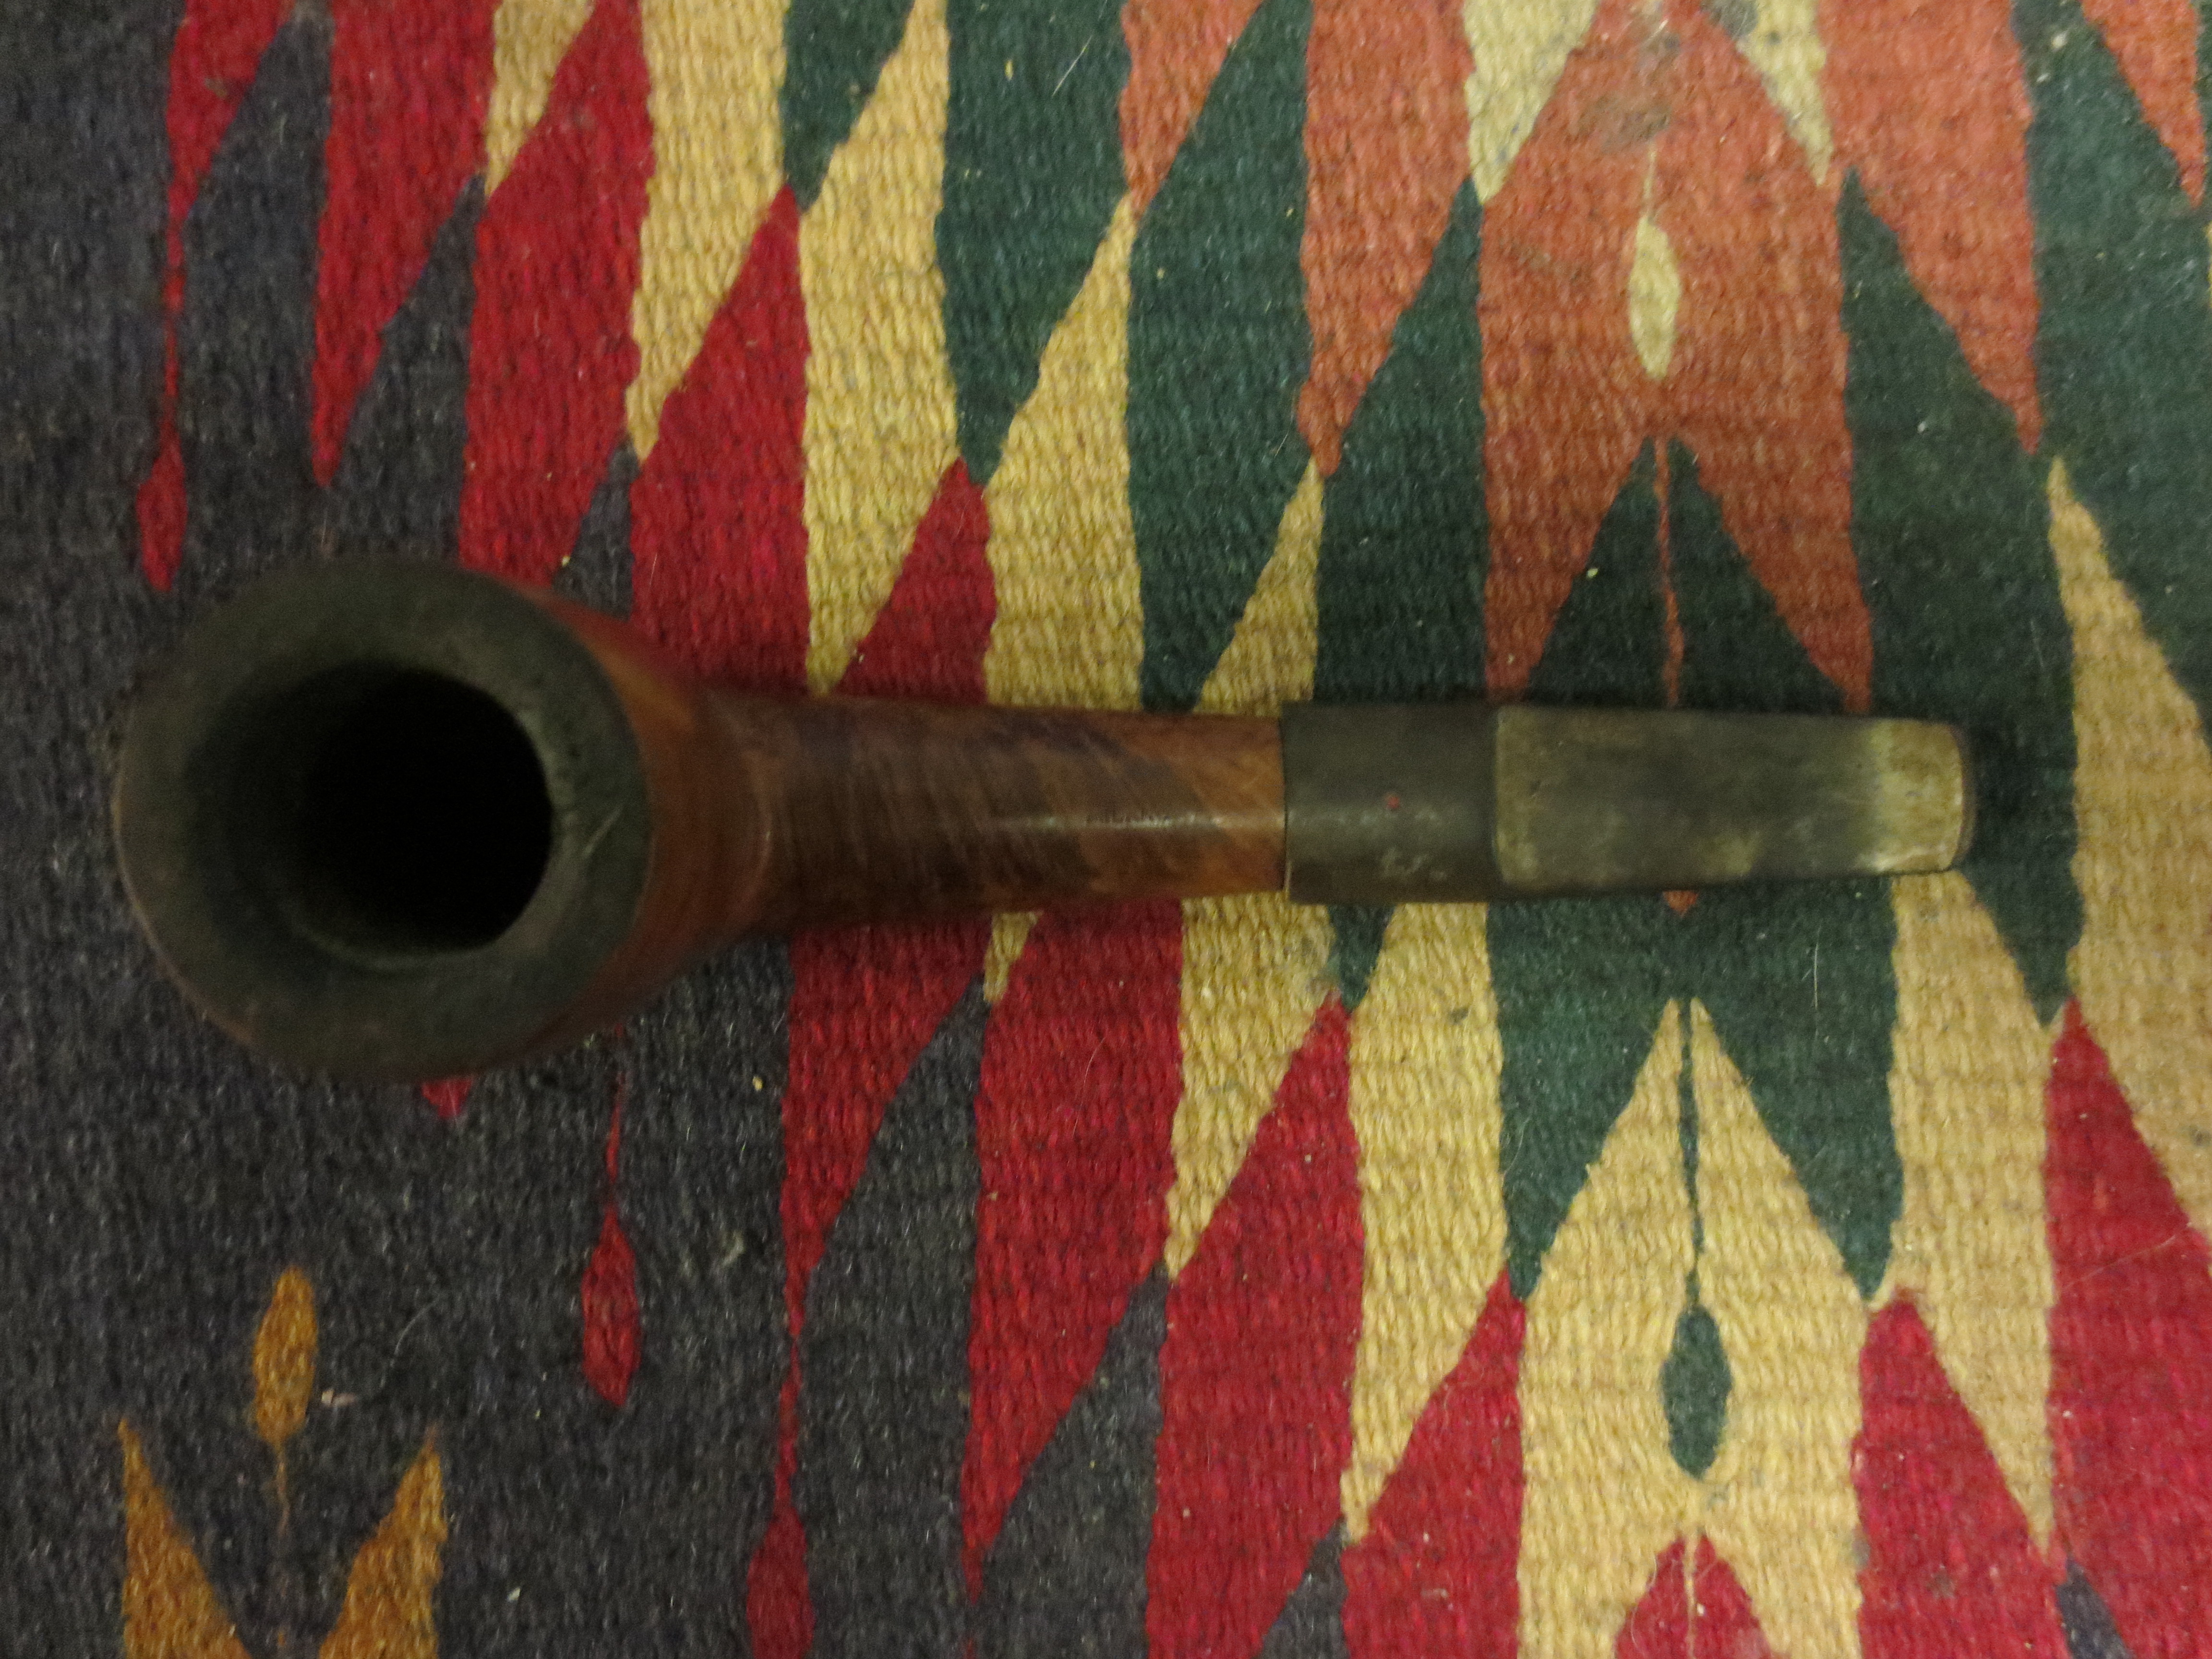
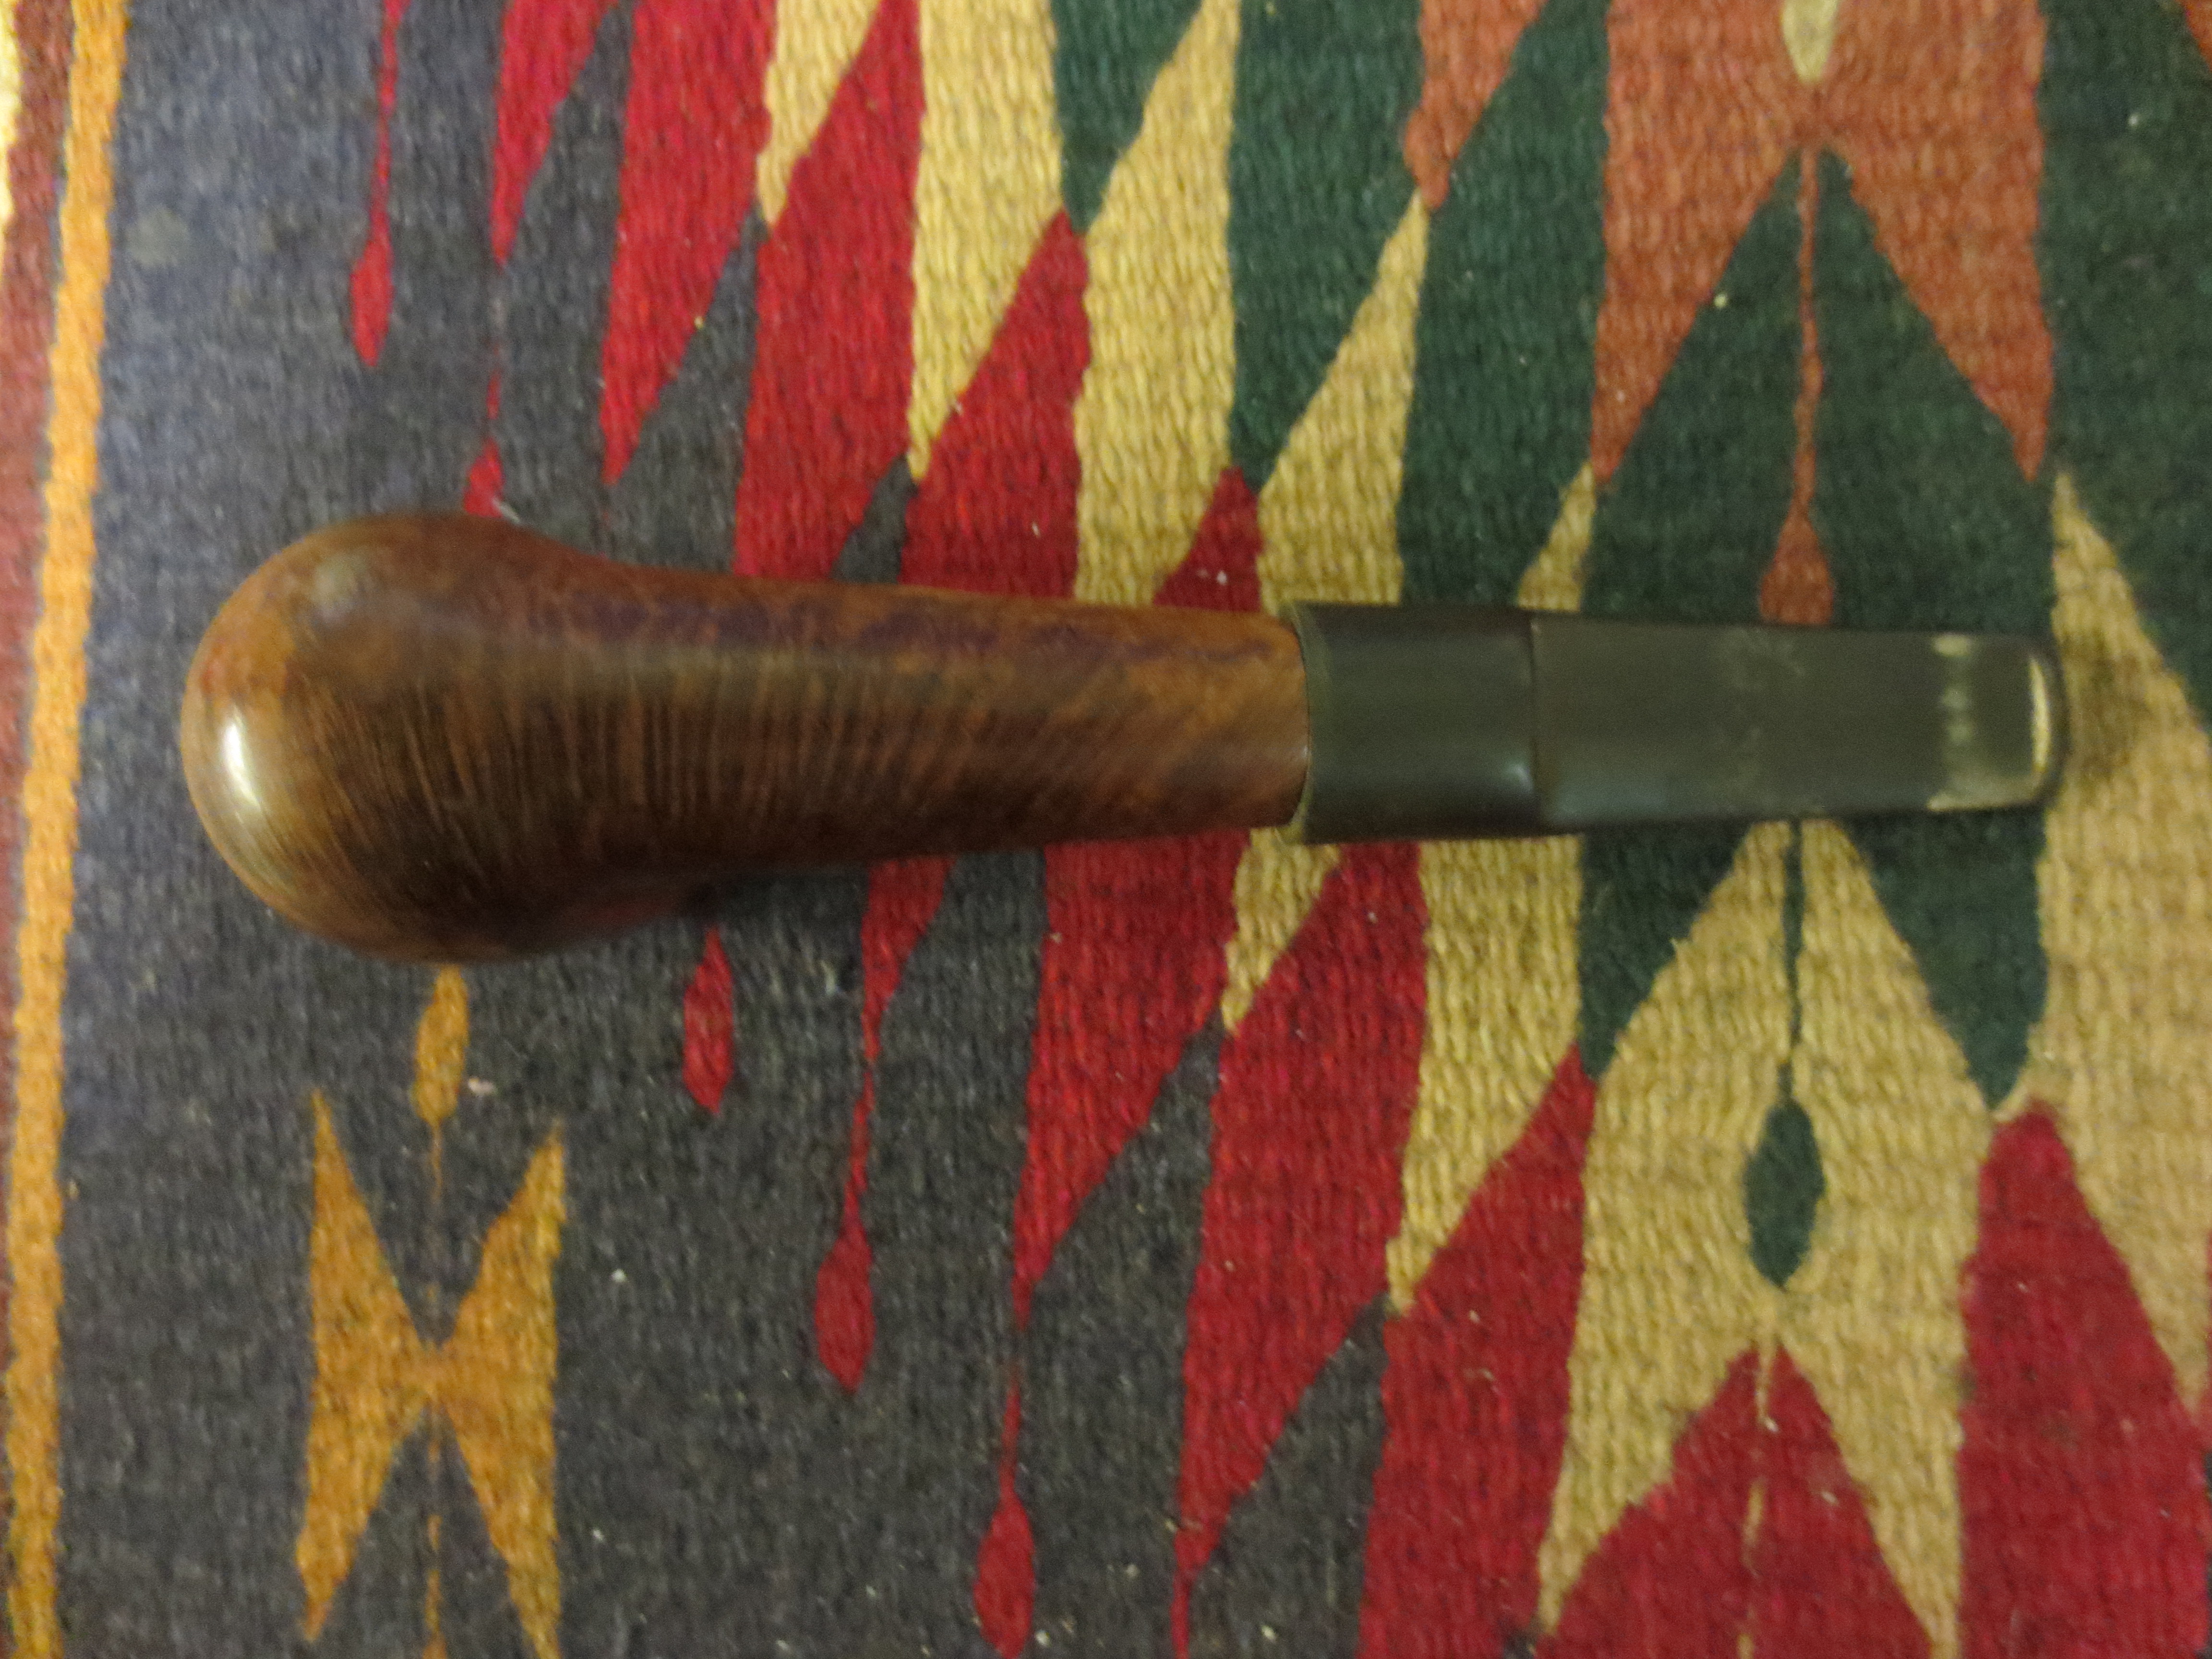
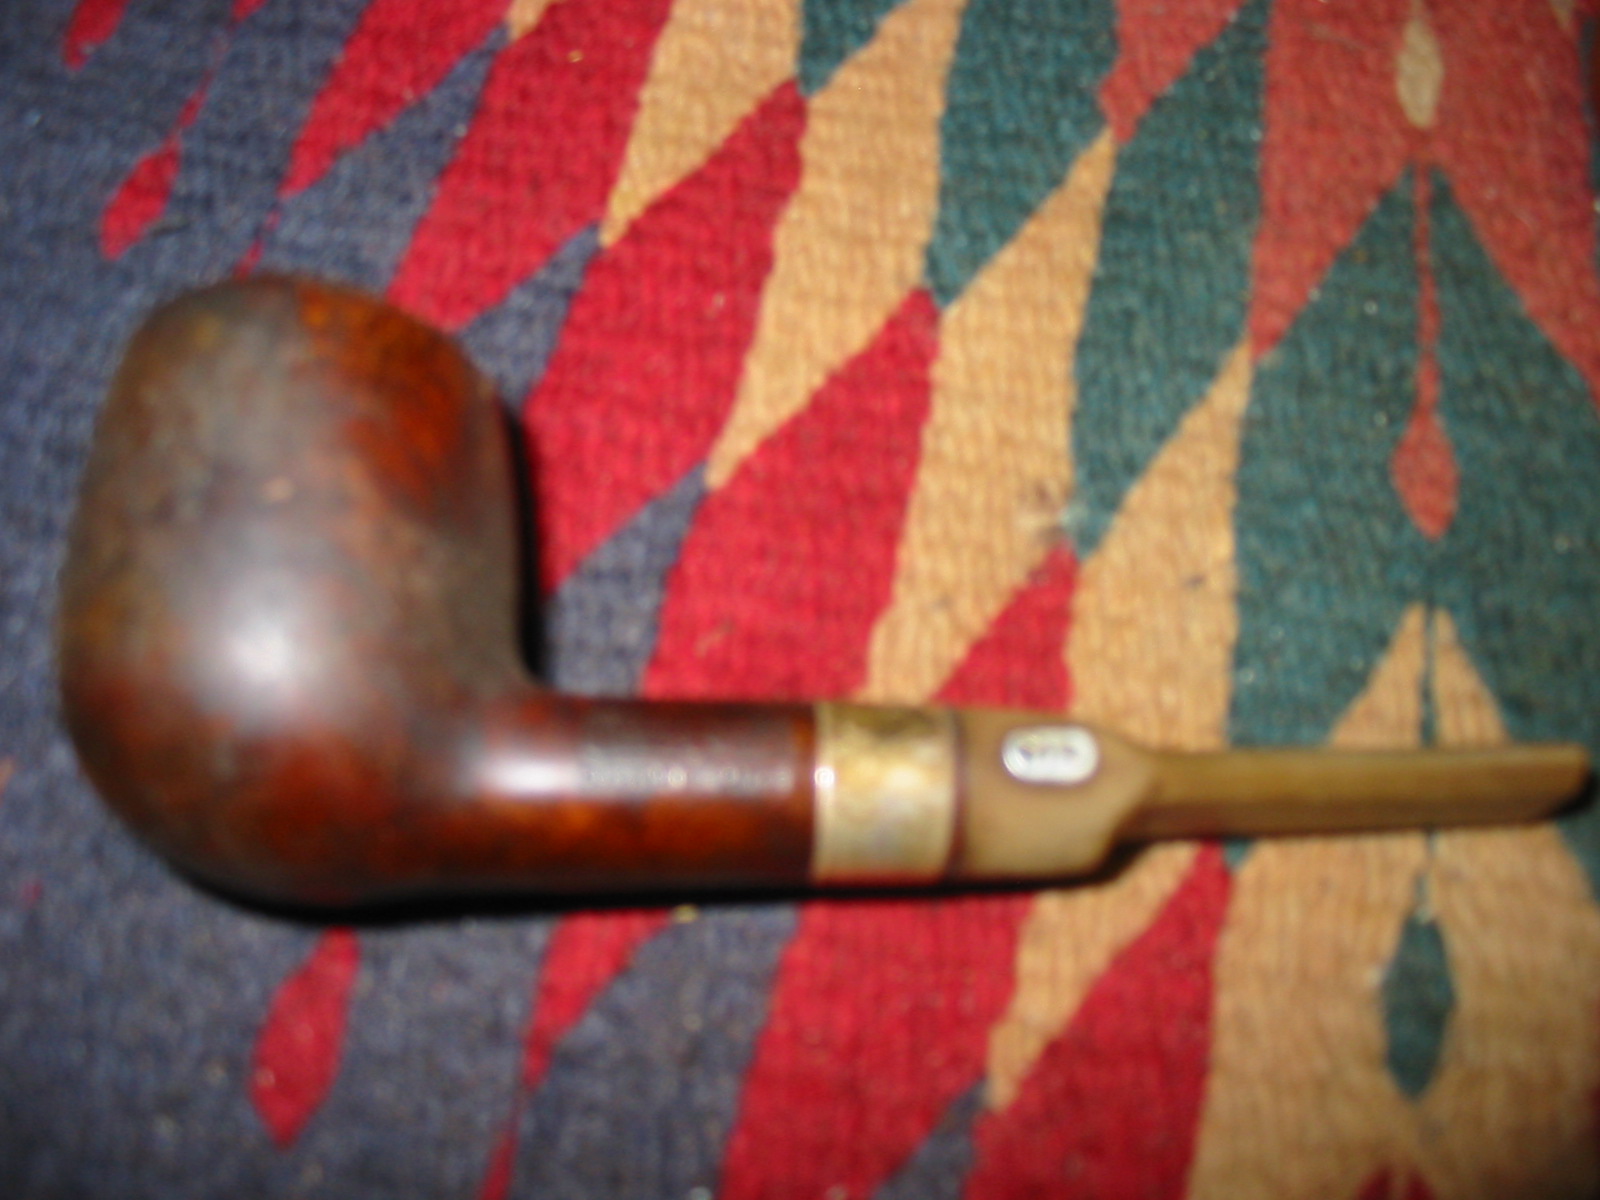
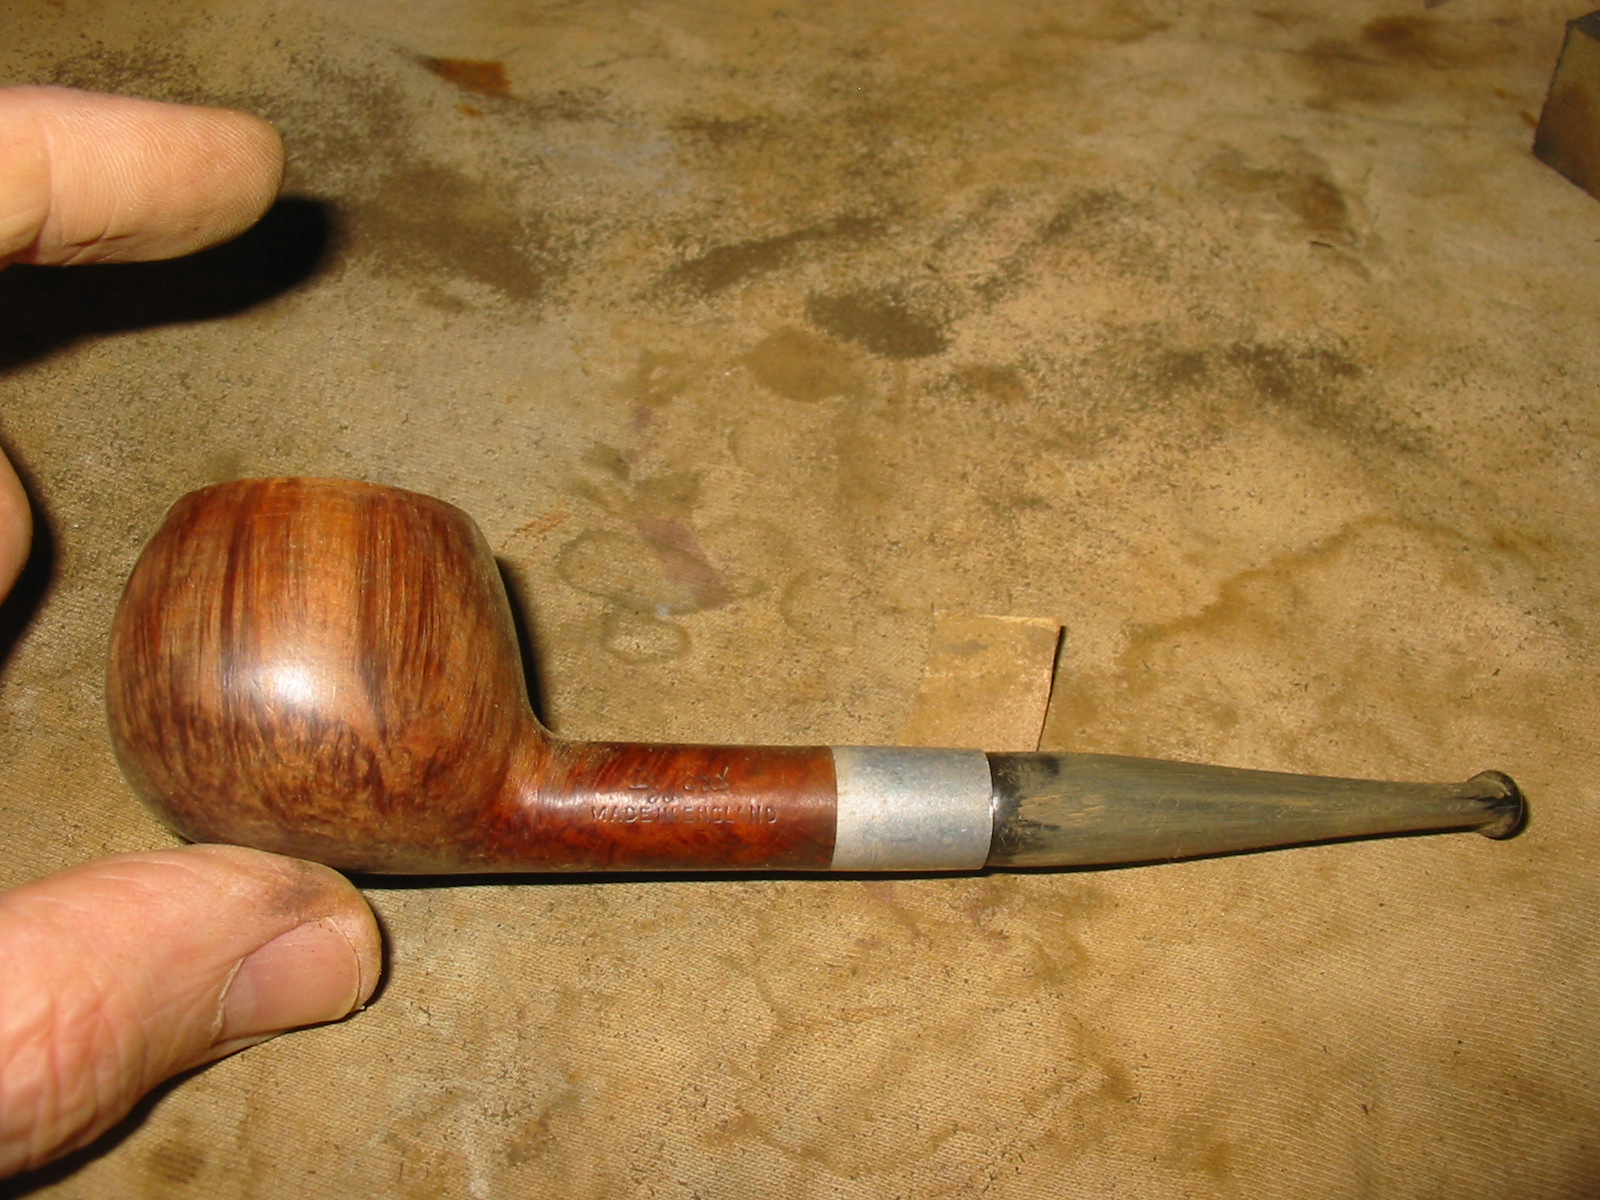
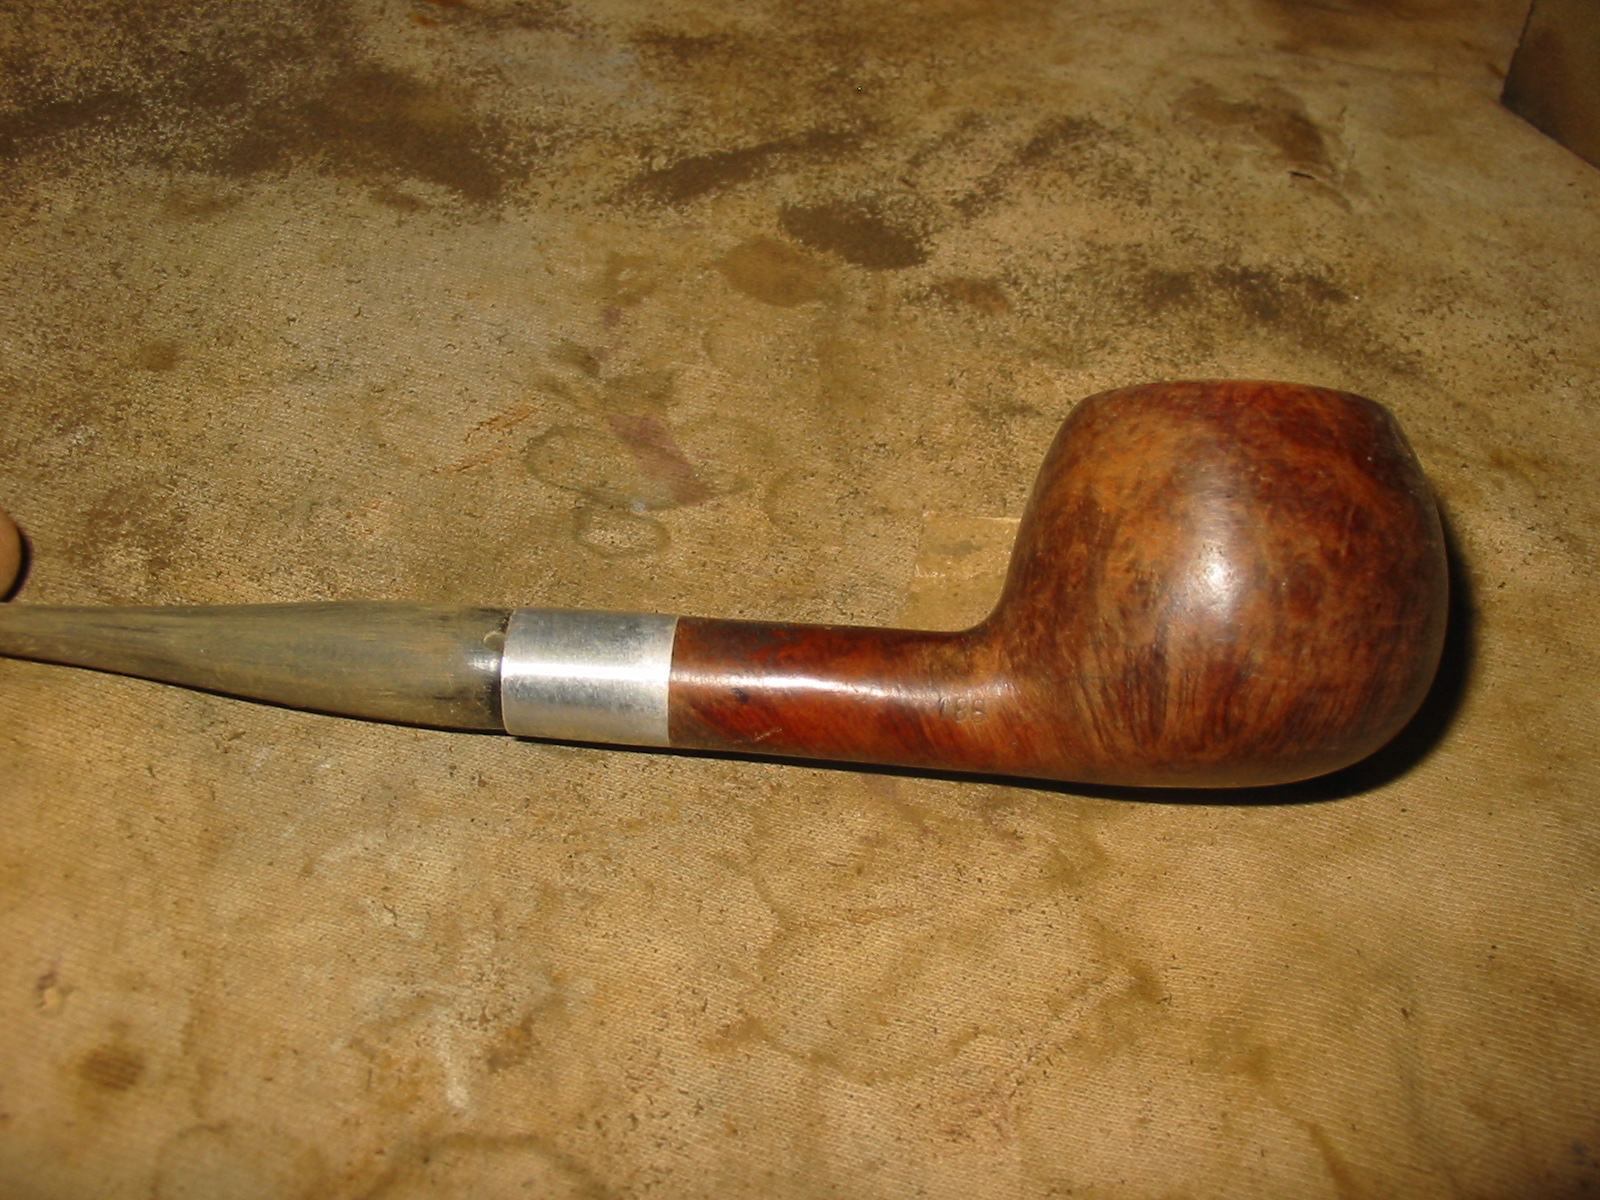
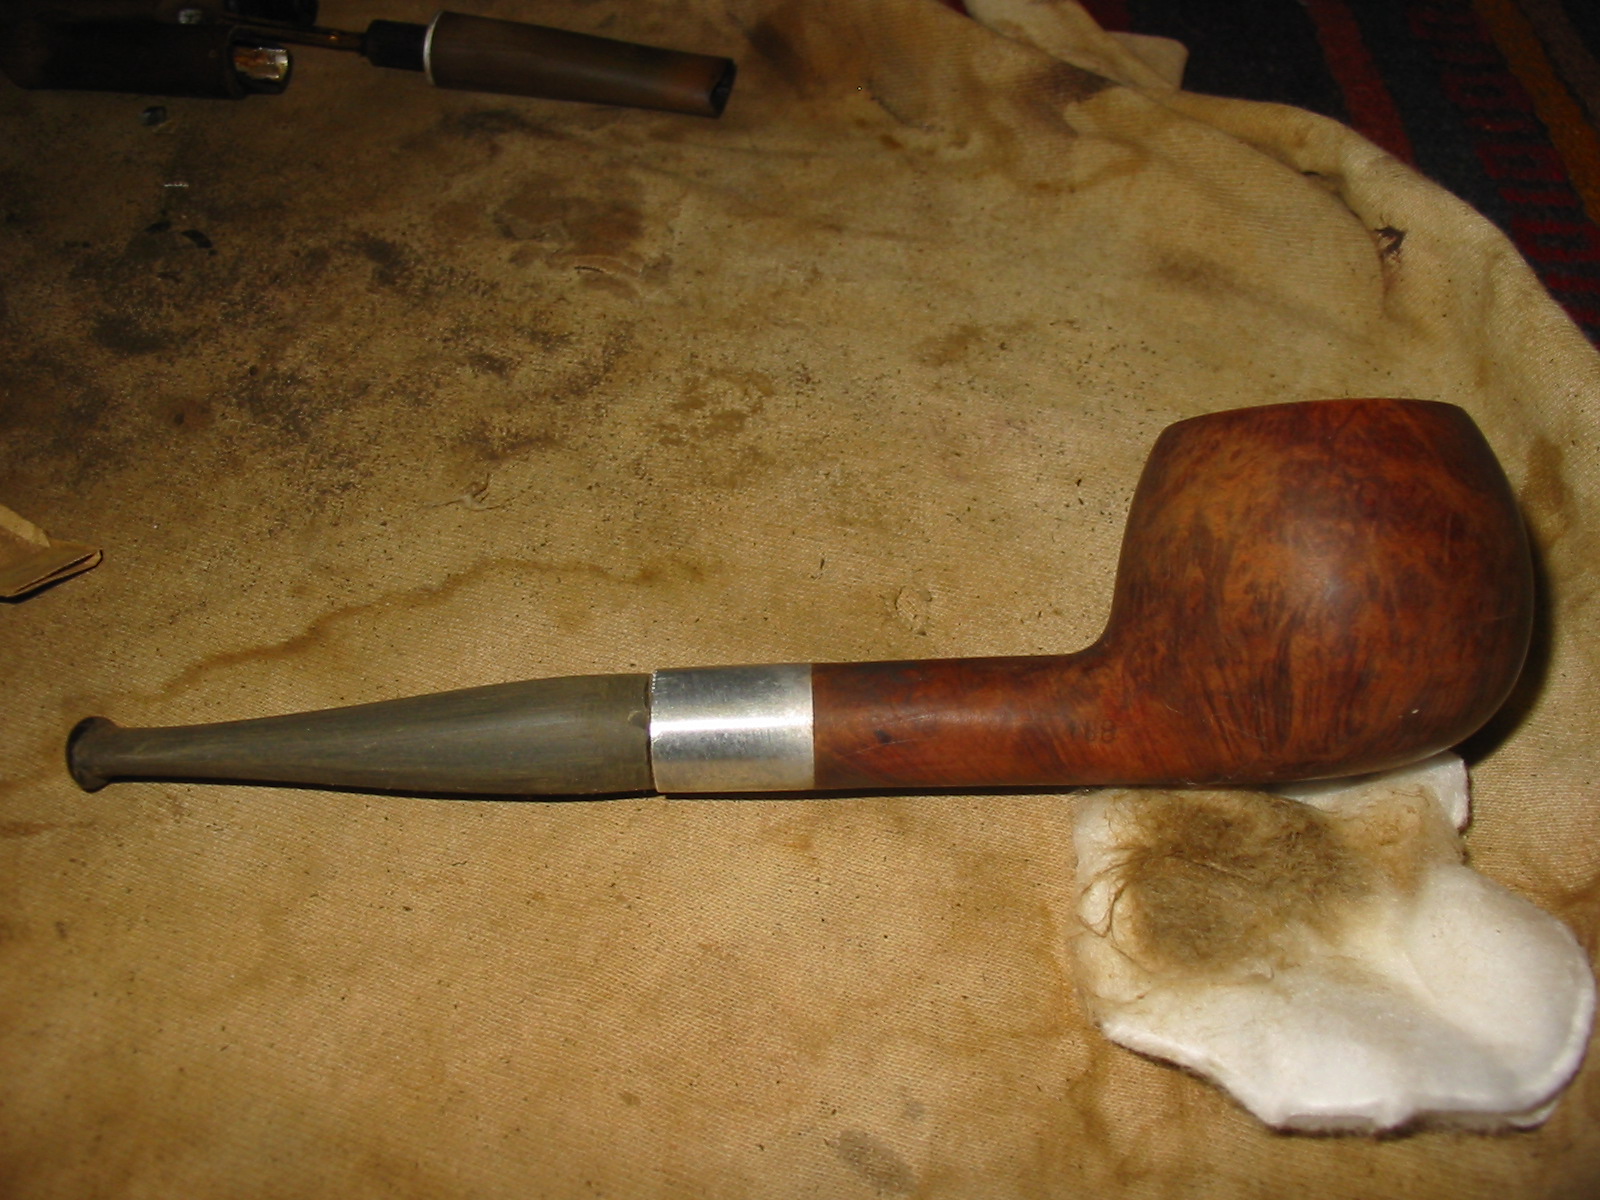
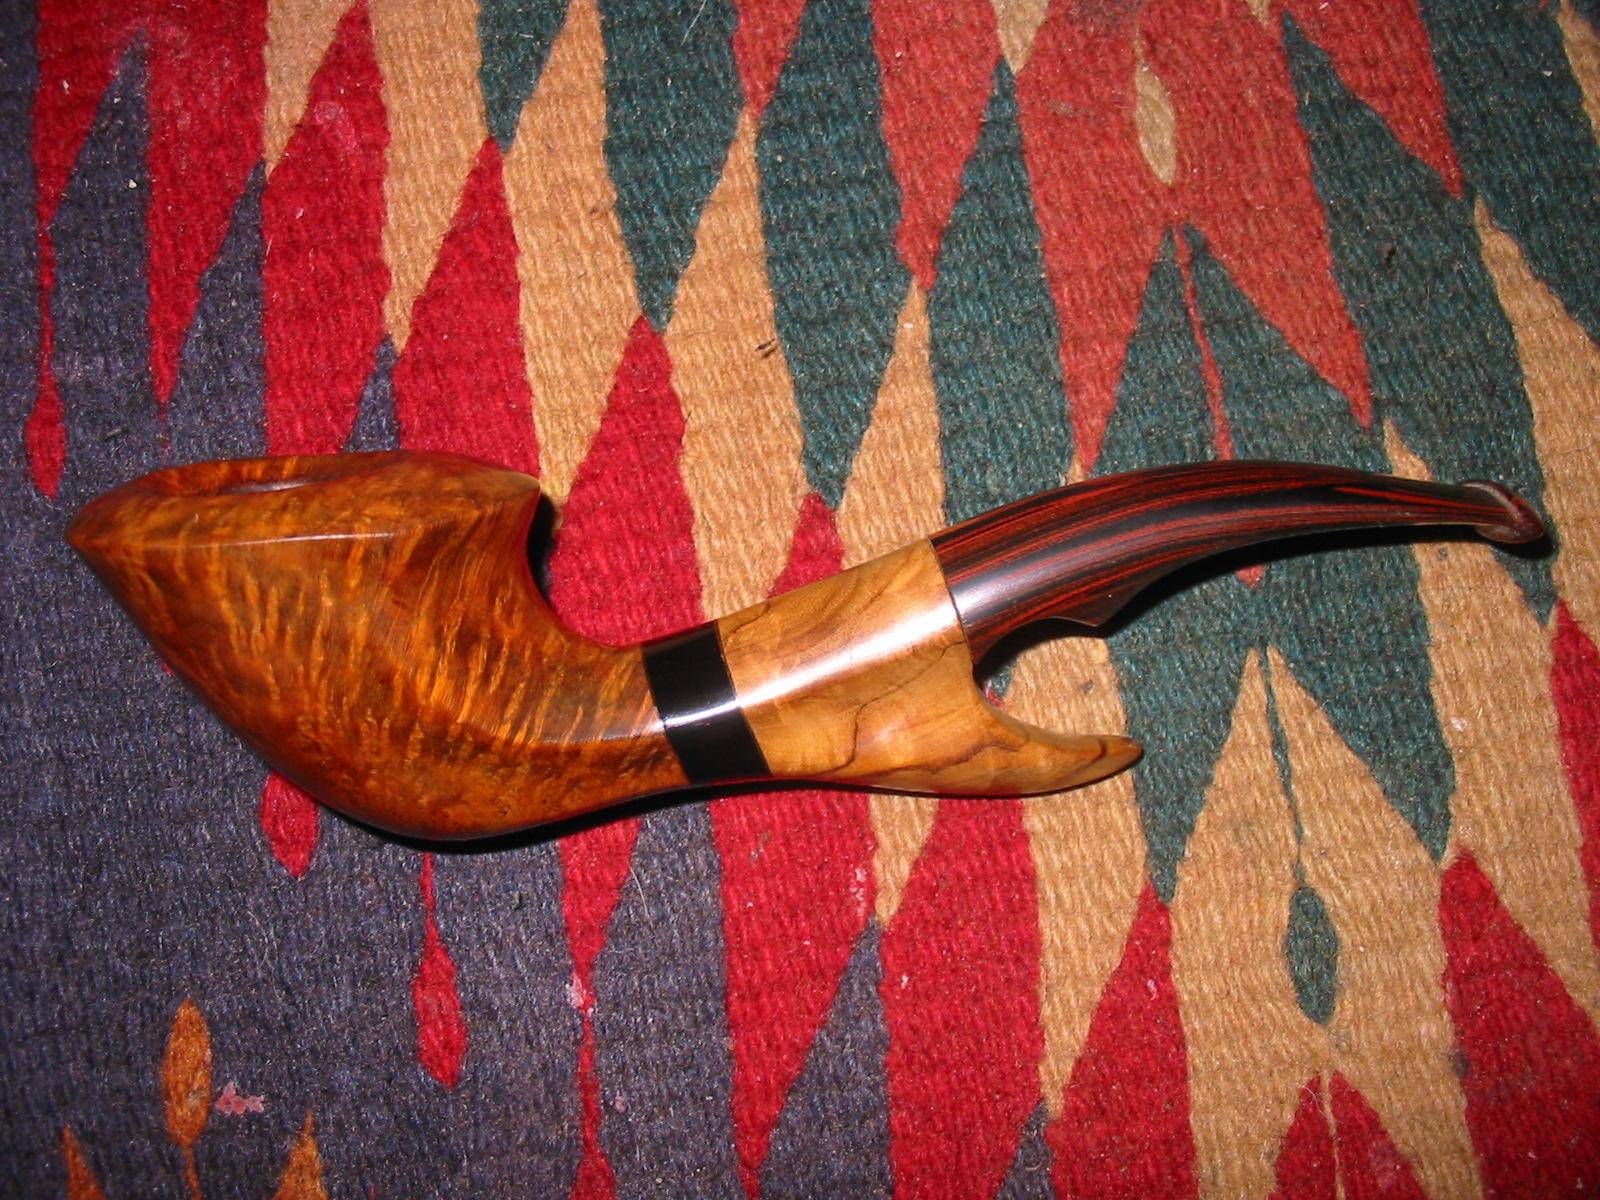
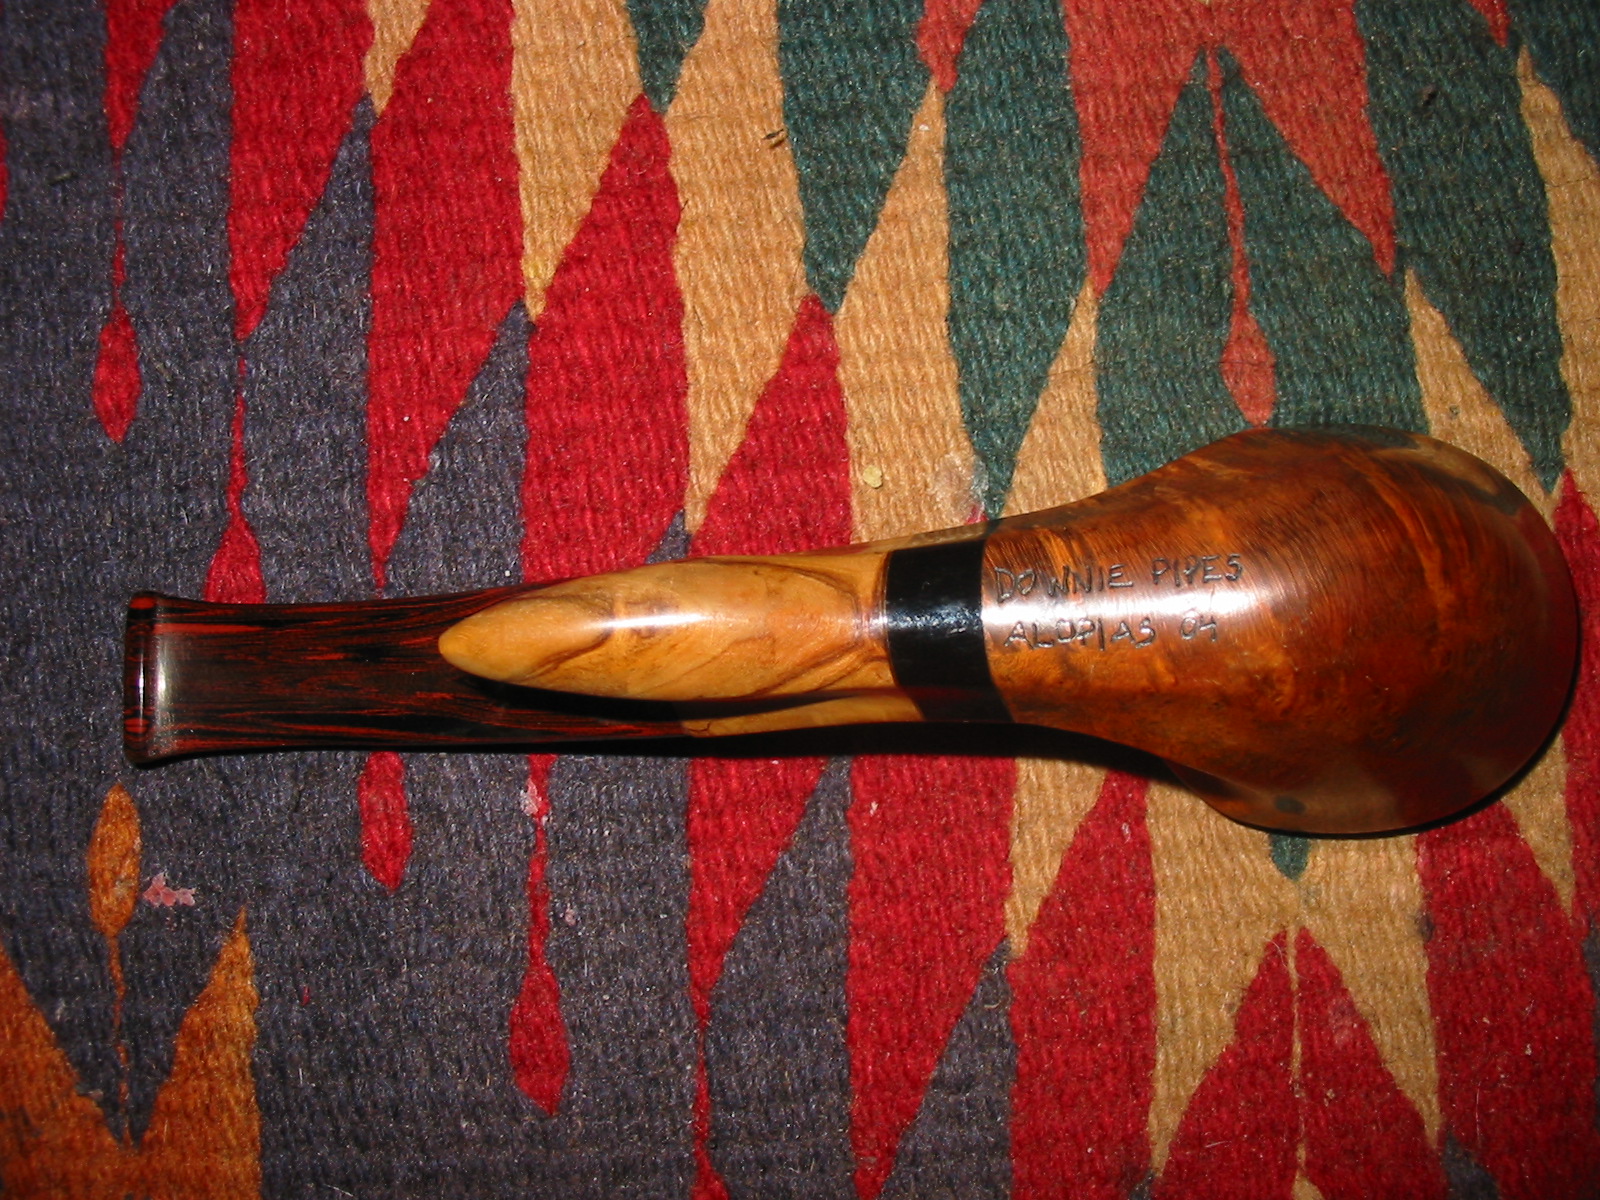
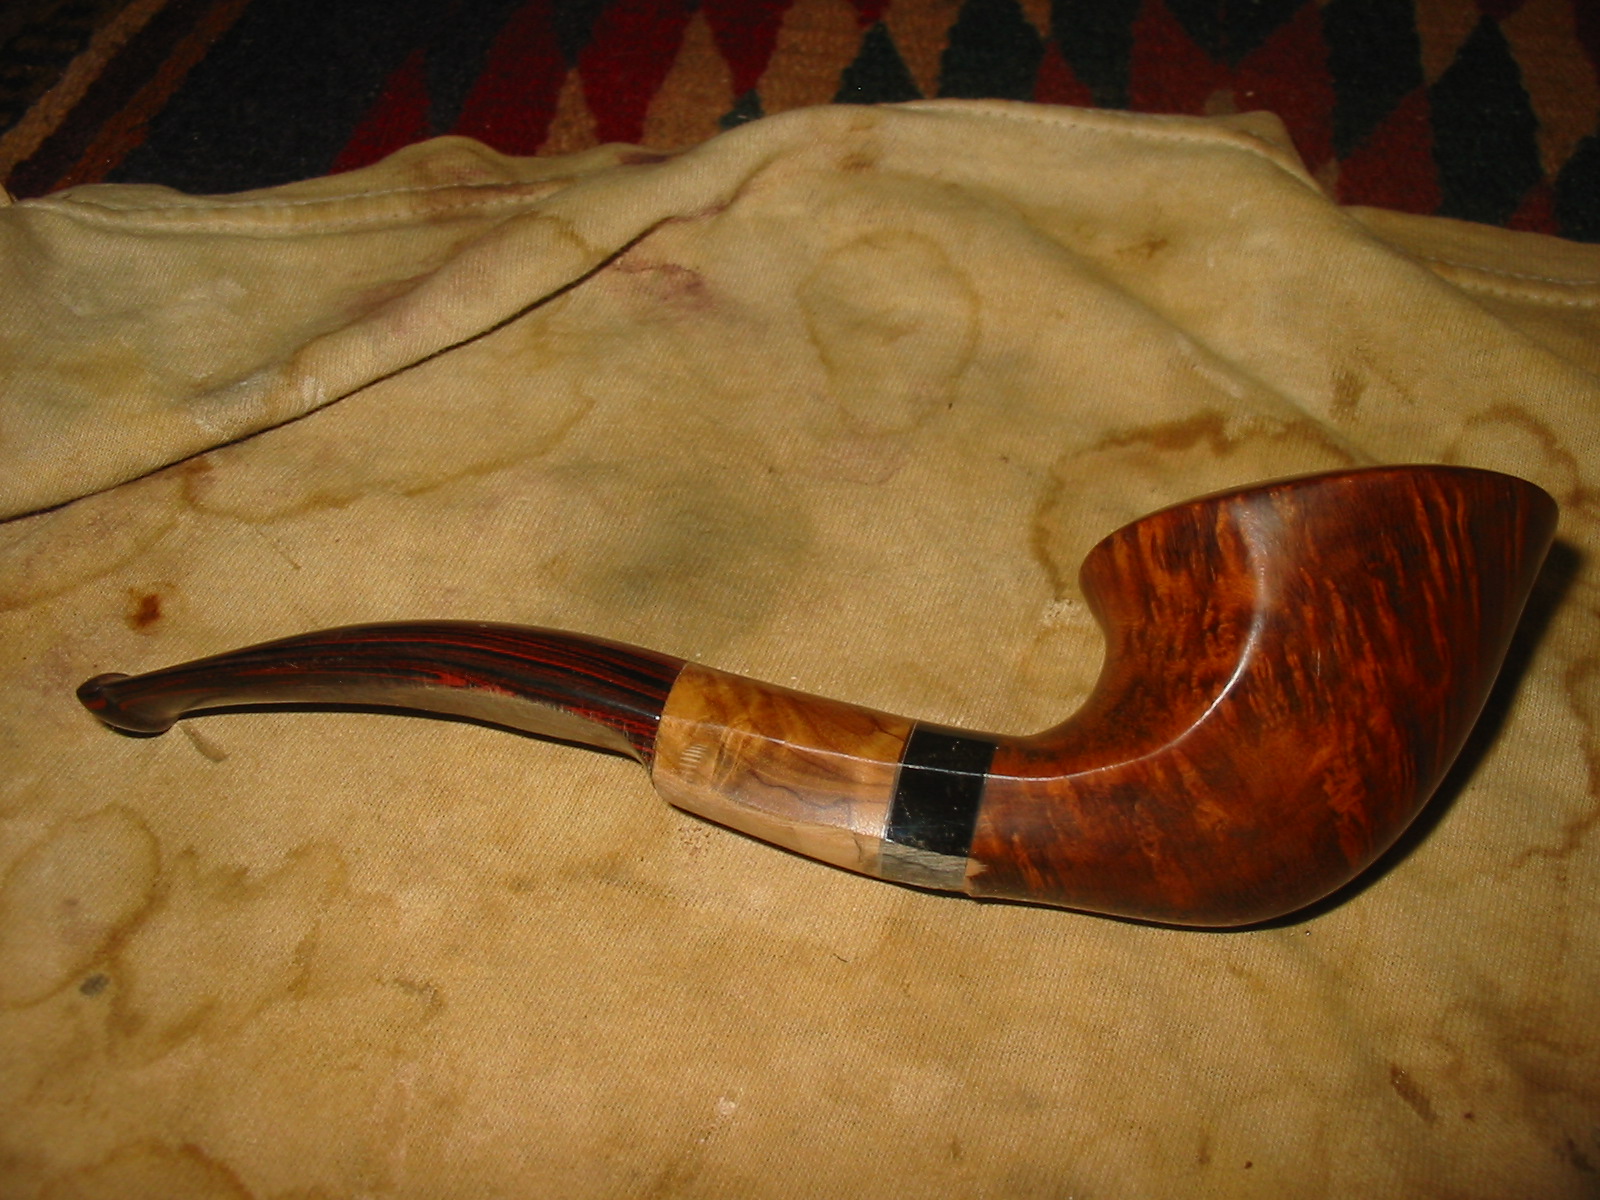
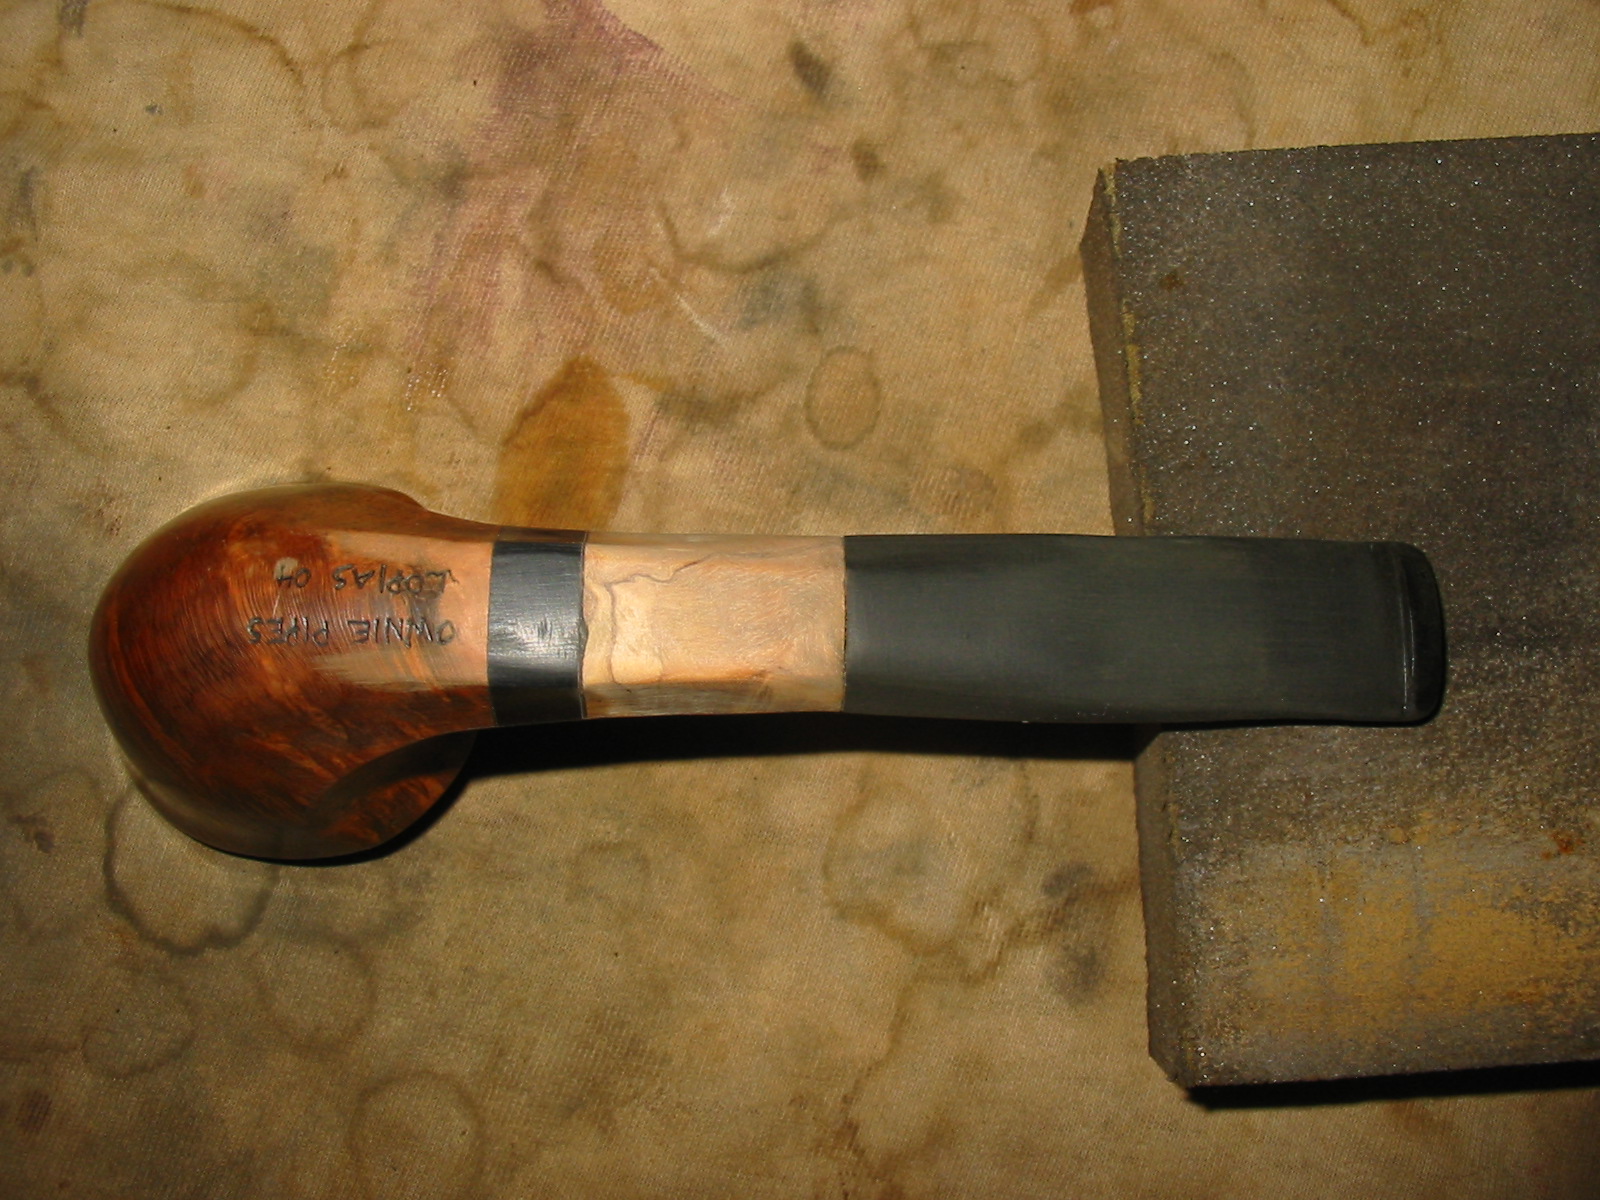
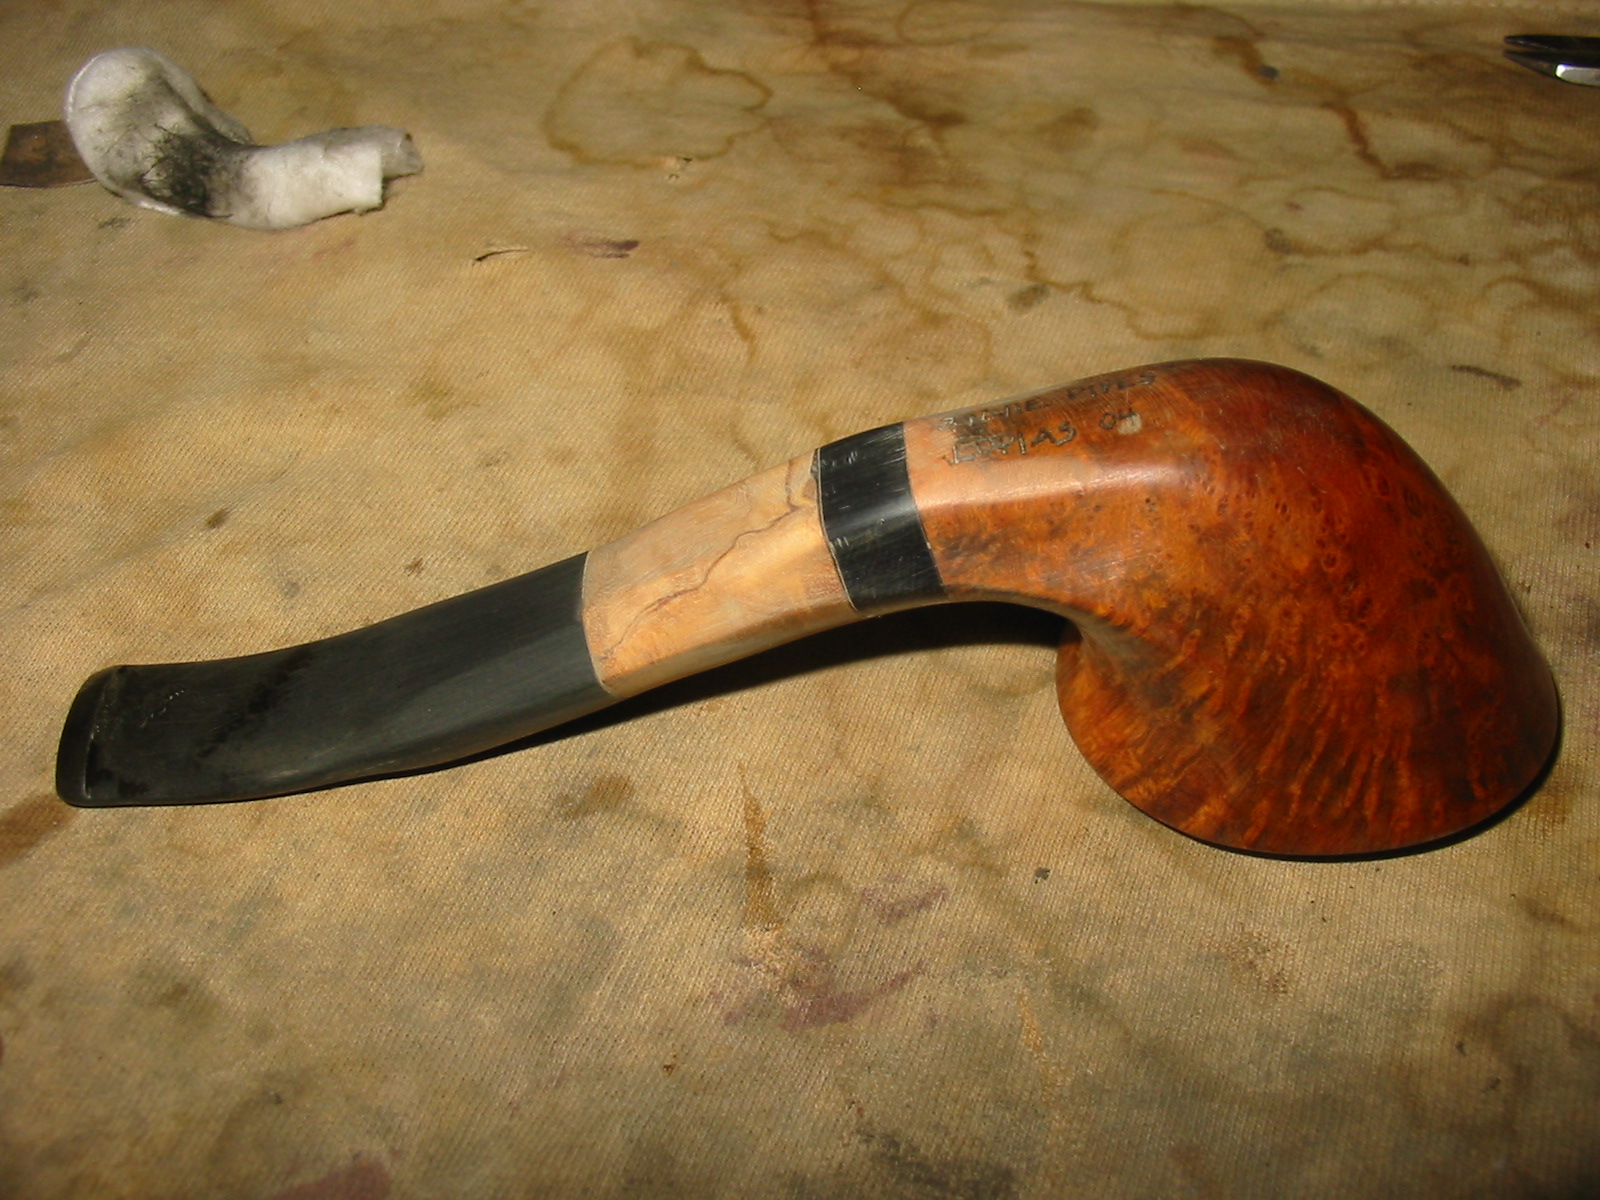
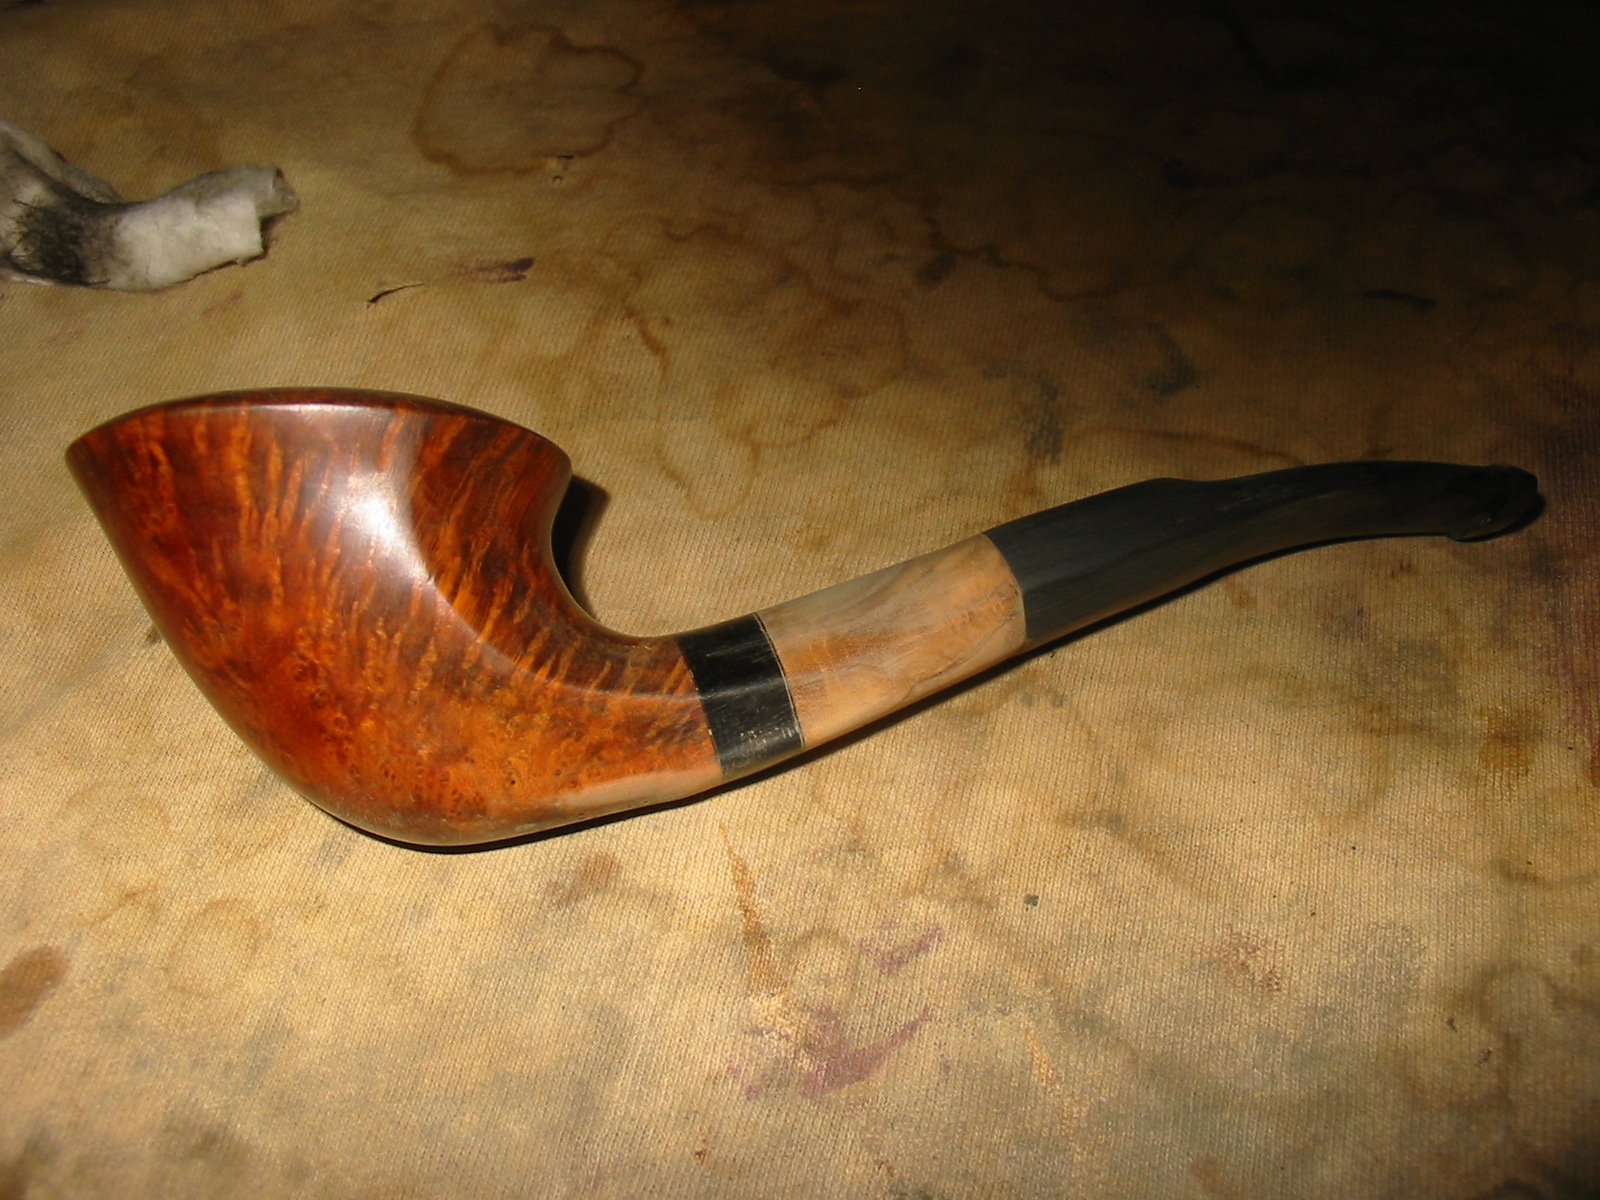
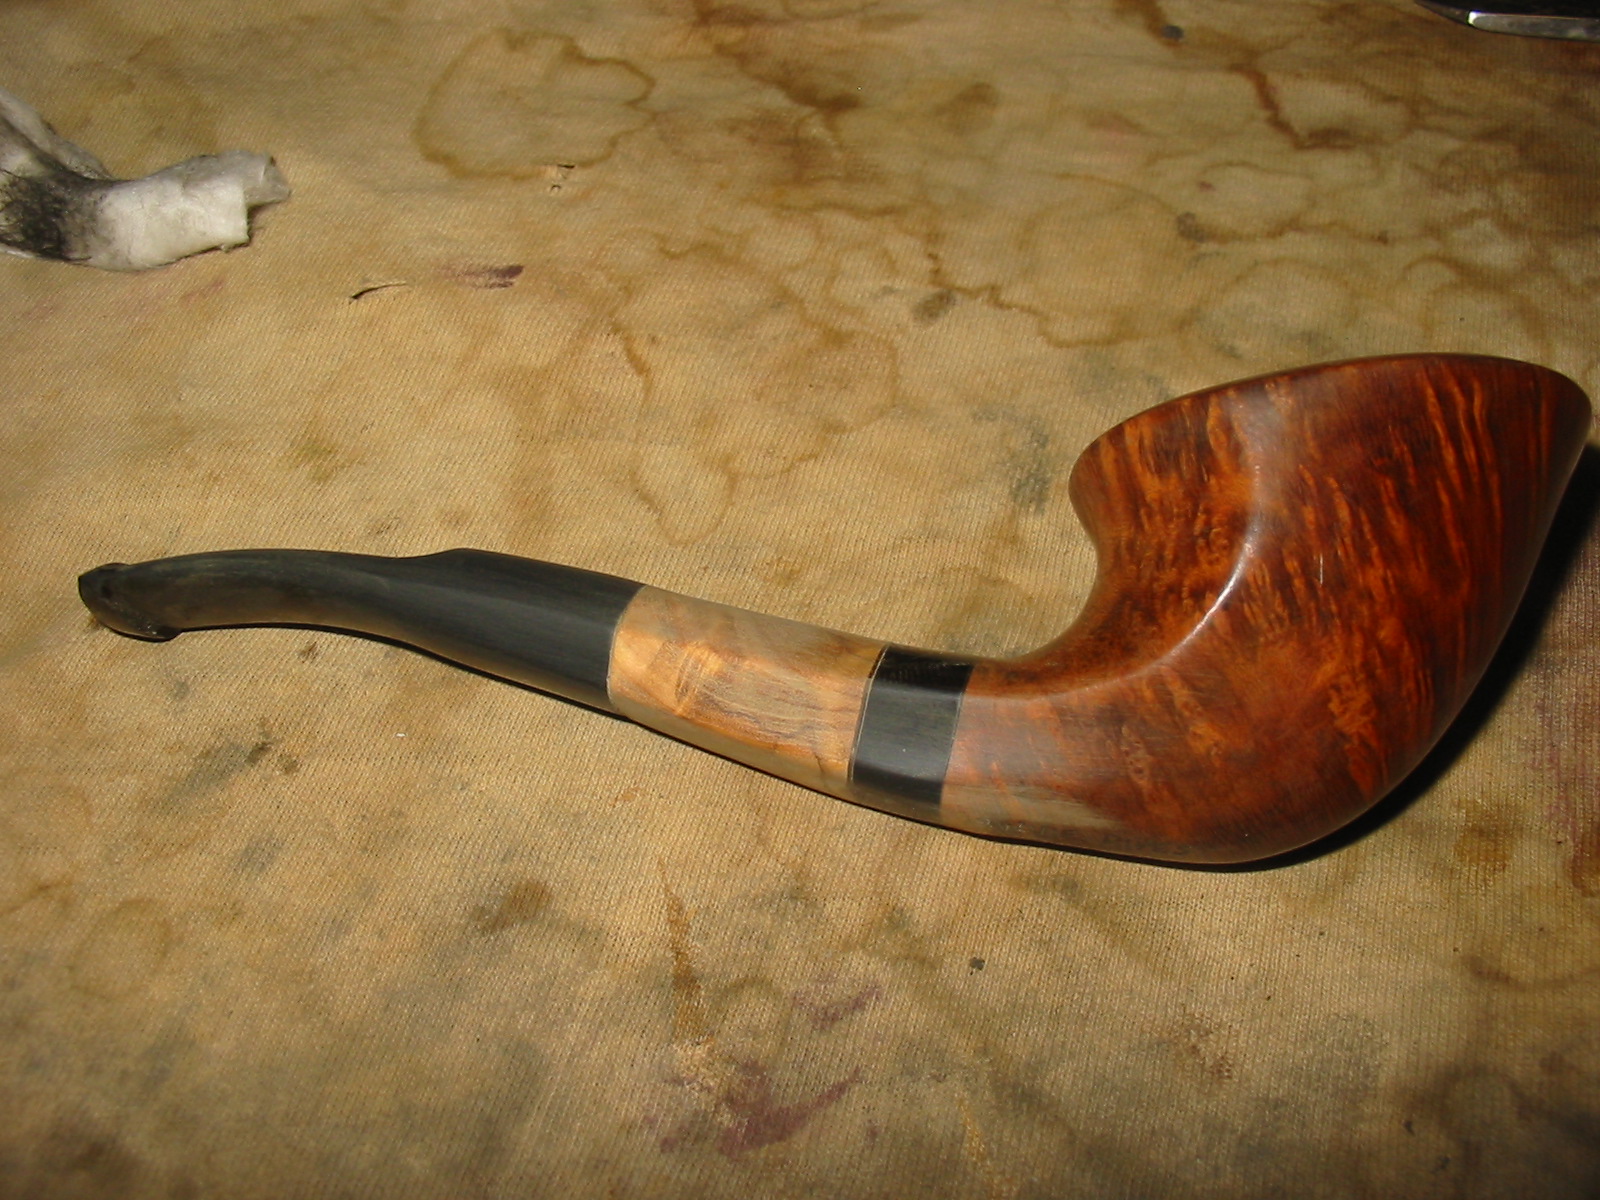
One day when I was going through the box he gave me this pipe that he had made in 2004. If memory serves me correctly, Stephen said that he thought that the drilling of the bowl had left it too thin in the bottom front. As such he would not place it on his site for sale. He figured that it would still smoke well if broken in carefully. I gladly took it home with me, smoked a few bowls and then put it in the pipe cupboard. Over the years I have rarely smoked it much as I found the hanging tail fin on the underside very uncomfortable to hold. I took it out of the cupboard when I was choosing a pipe to smoke. Sometimes I picked it up and smoked it but it never quite made it into the rotation. The pipe smokes very well so it was not a matter of mechanics that kept me from picking it up more often, but it just seemed that the fin was in the way.

Fast forward to a wedding I did just a few months ago (2013) for a couple of good friends of mine here in Vancouver. At the reception dinner I connected with Stephen and his wife. We talked about life in general, books we were reading and writing and pipes we were enjoying. We talked of the pipes Stephen was carving and the ones I was refurbishing. We laughed over different details of the work while we sipped our drinks and ate the buffet supper.During the course of our conversation Stephen talked about an idea he had about reworking pipes for people and giving them new looks and improved feel. If they had a pipe in their collection that just did not get smoked often for whatever reason he would reimagine and rework it for them. He called his idea a Phoenix pipe. As we talked about it I found that I liked the idea a lot. When I went home that evening I could not get it out of my mind. I looked over some of my old pipes that for one reason or another have not seen the use they deserve. I sorted through them to see if one of them might be a candidate for this idea of his. I picked up the old finned pipe that he had given me many years before. As I looked it over I had several ideas of how to rework it. I put it back in the cupboard and let it sit for several months while I thought about what do about it.

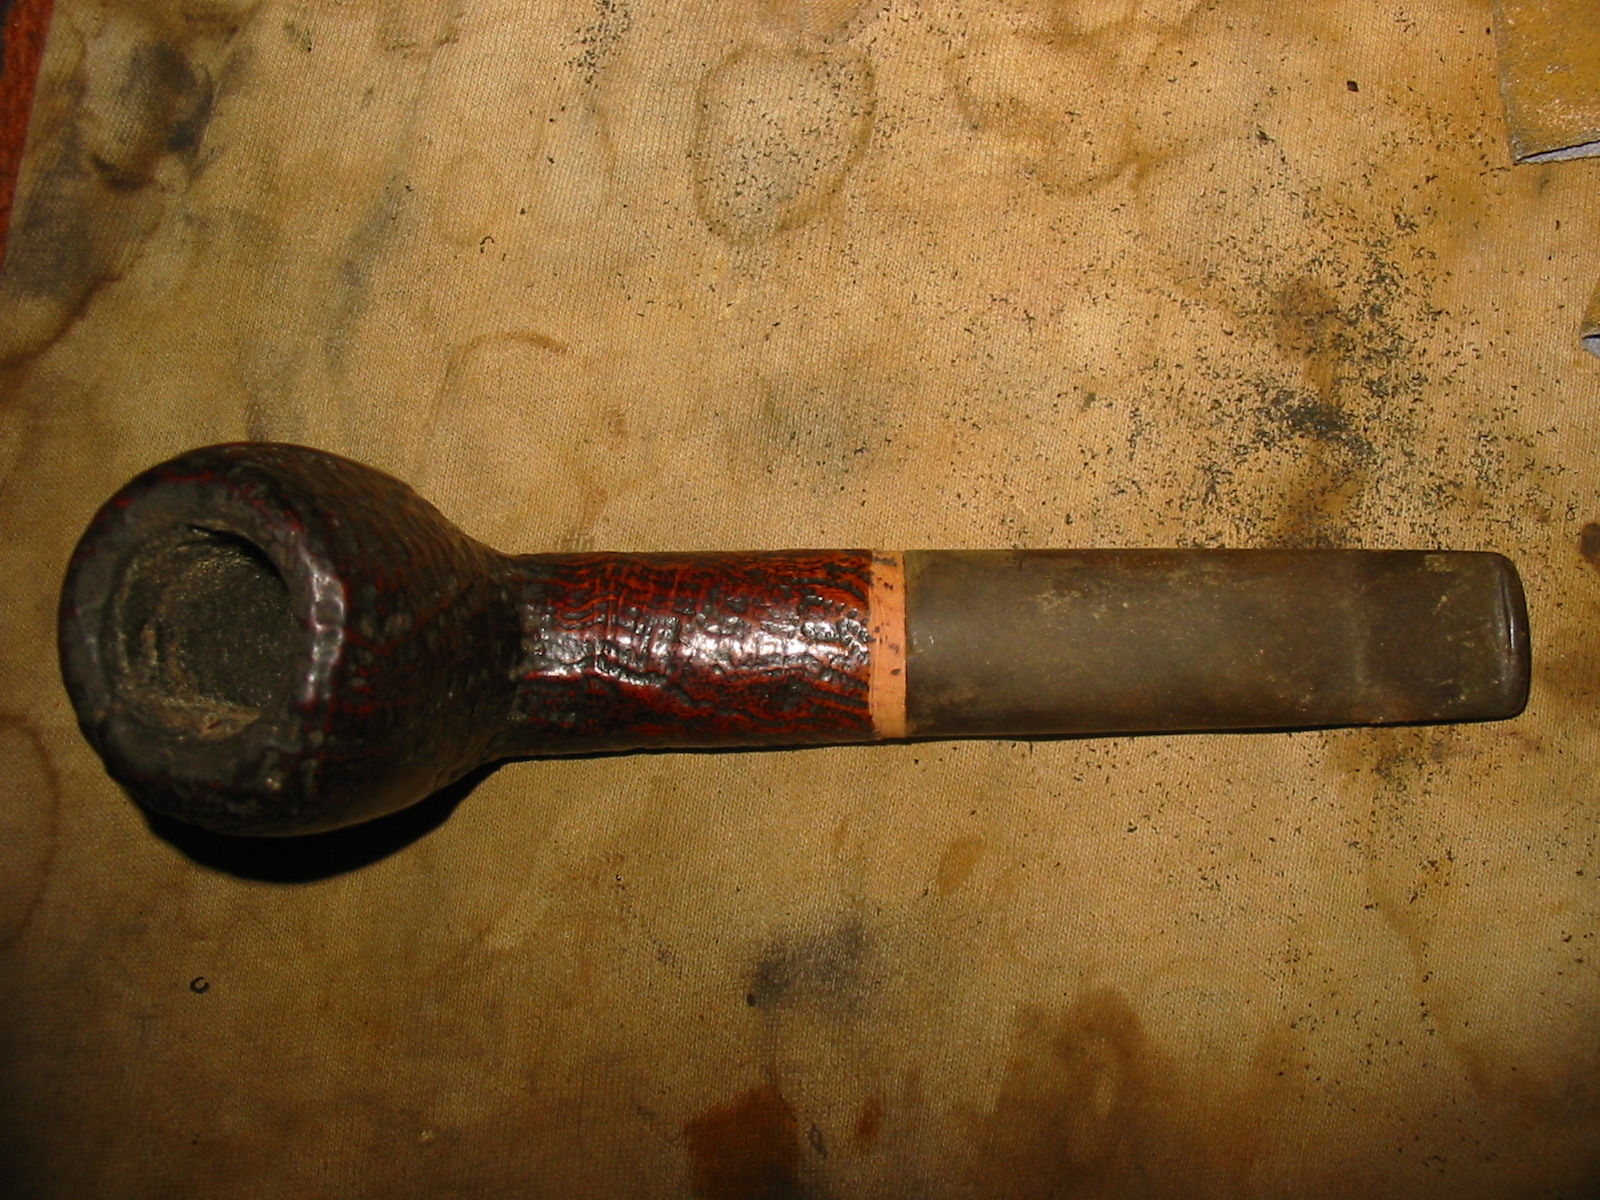
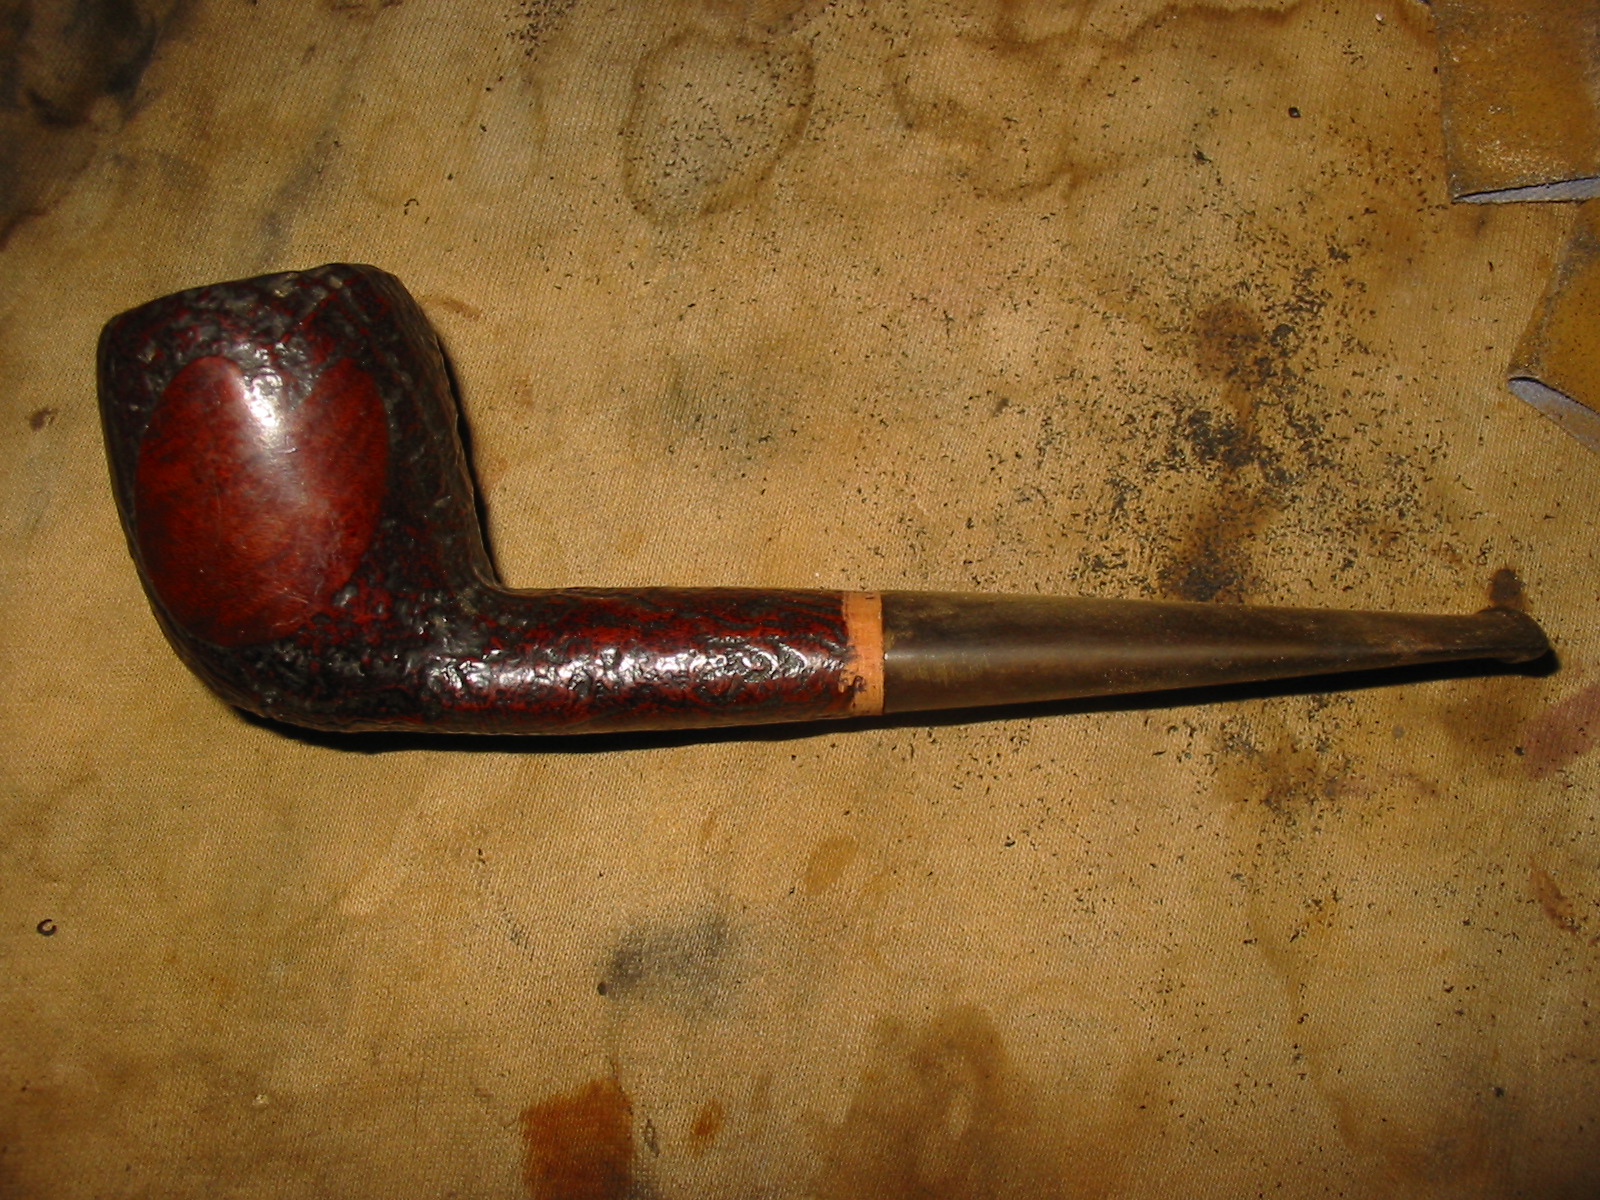
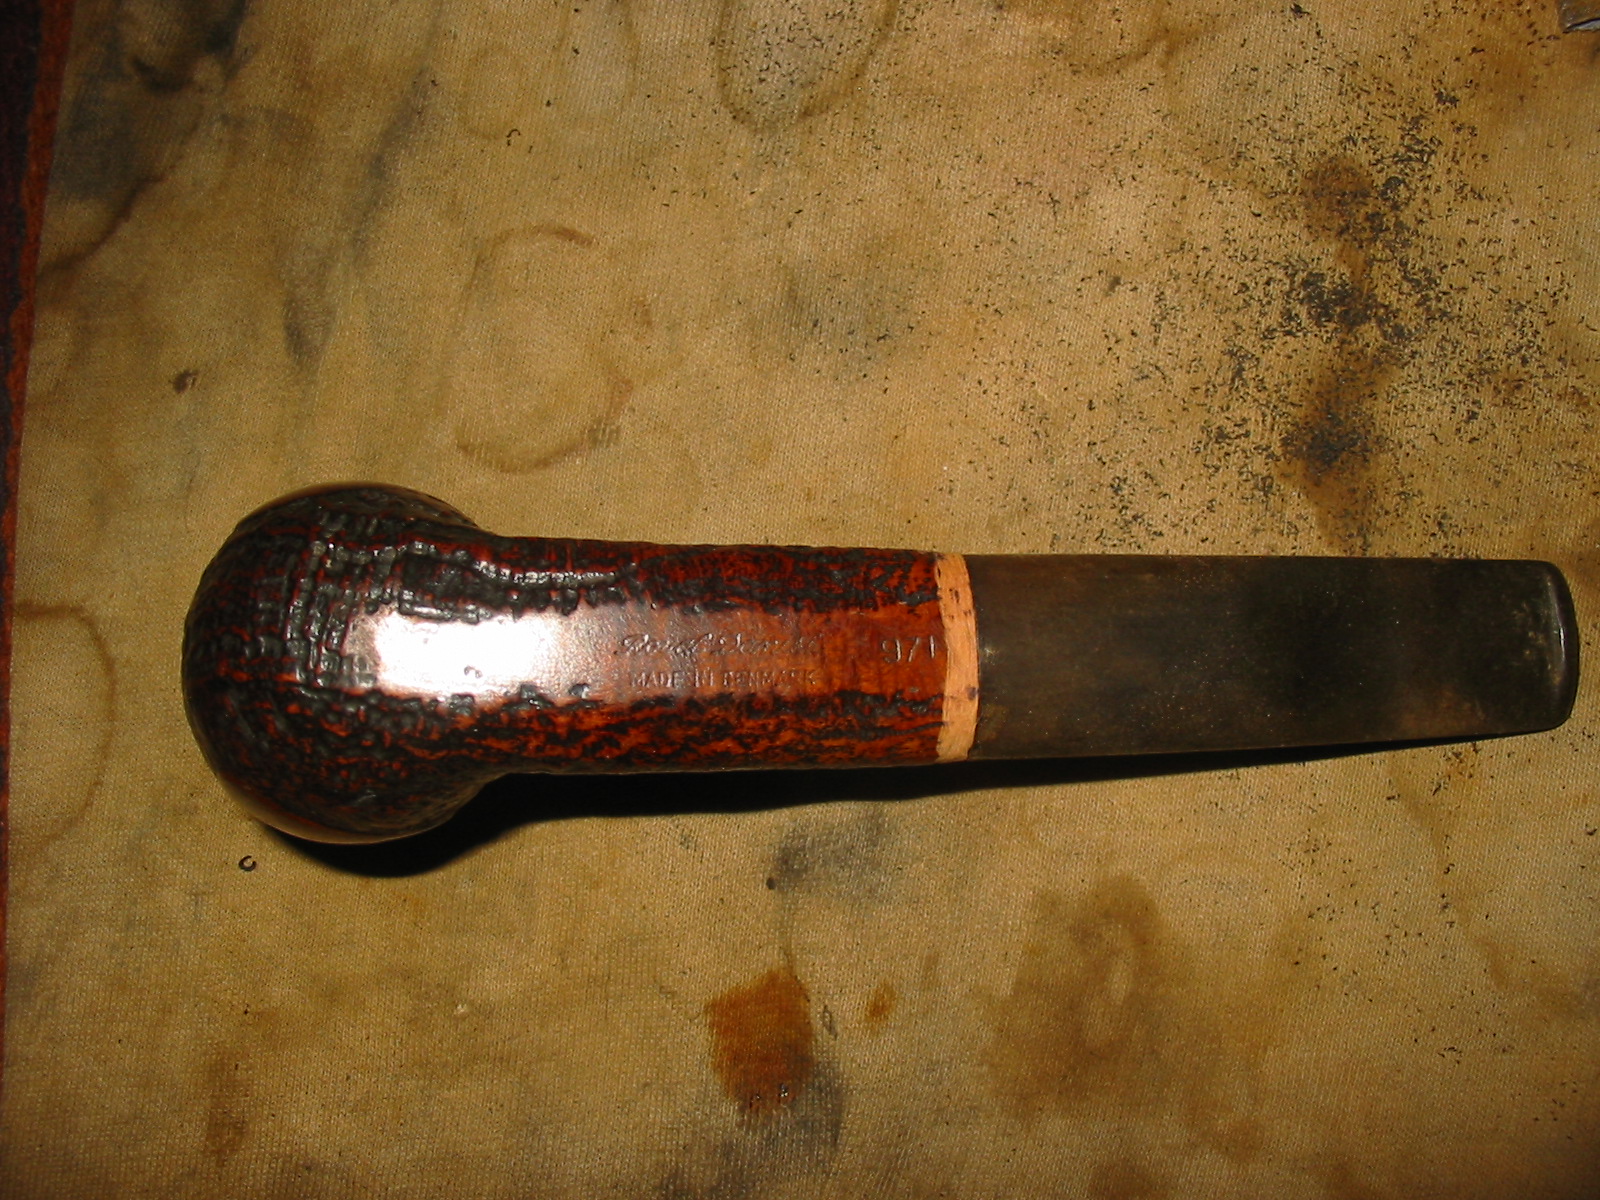
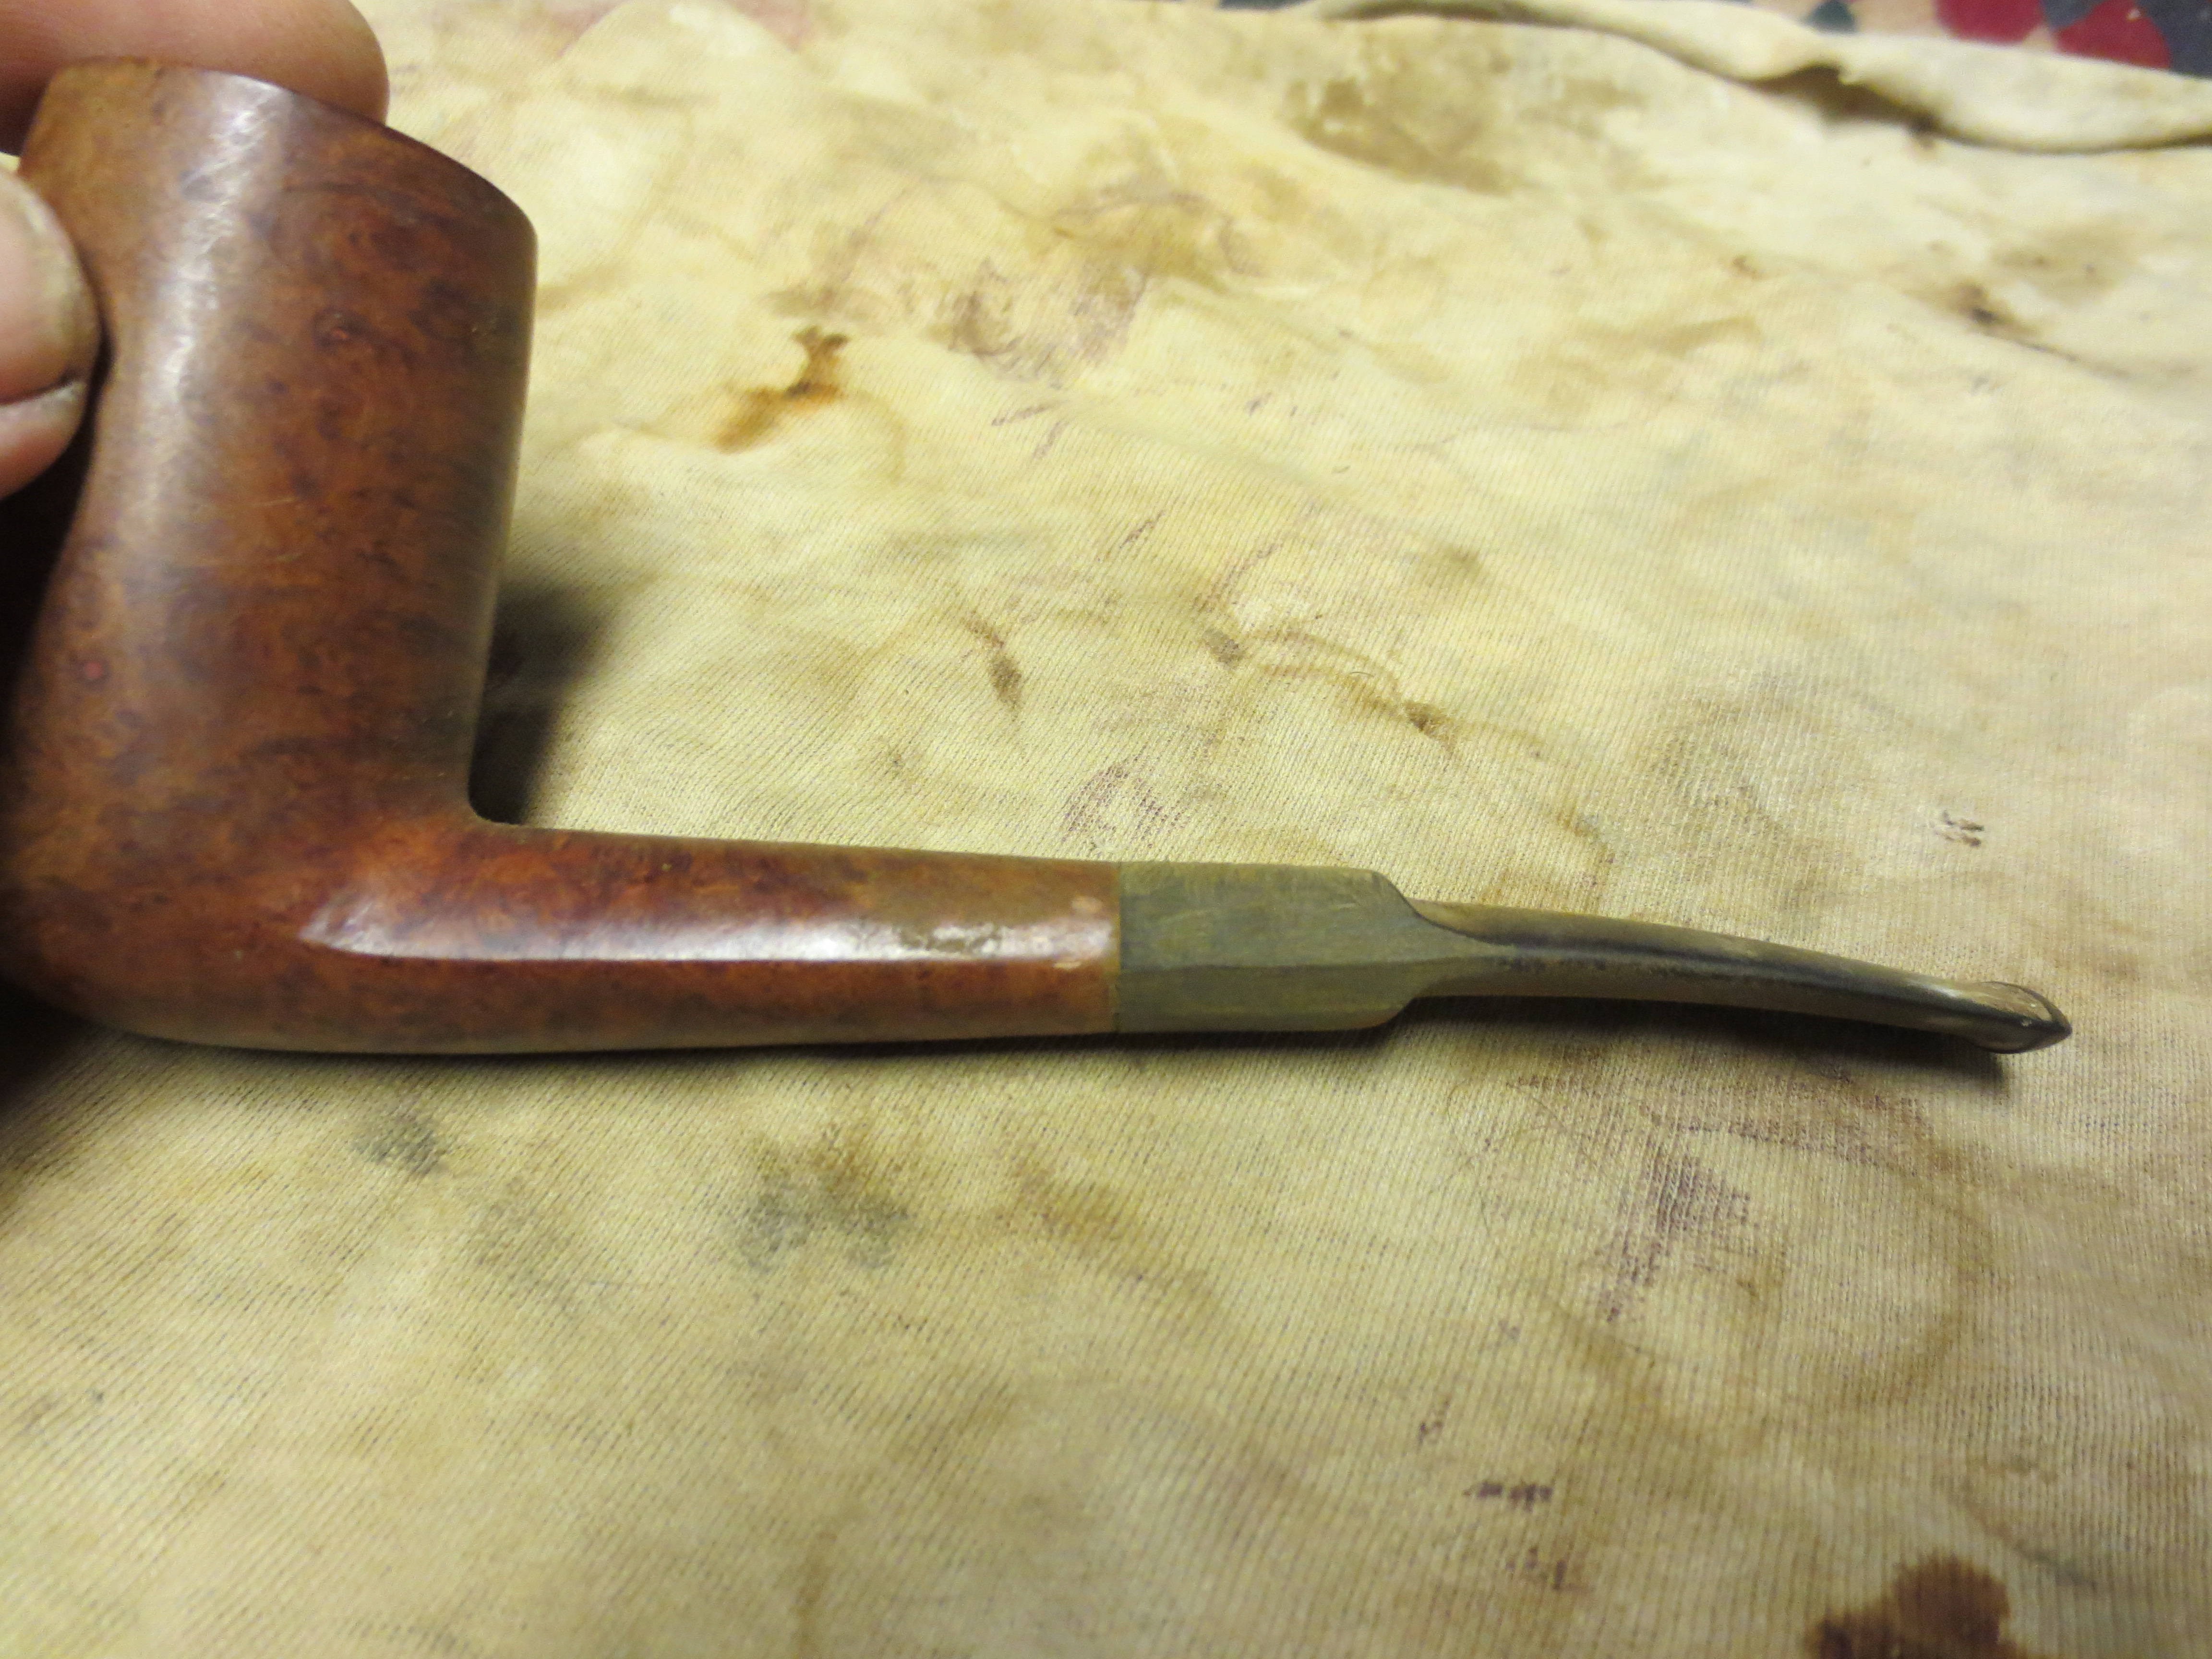
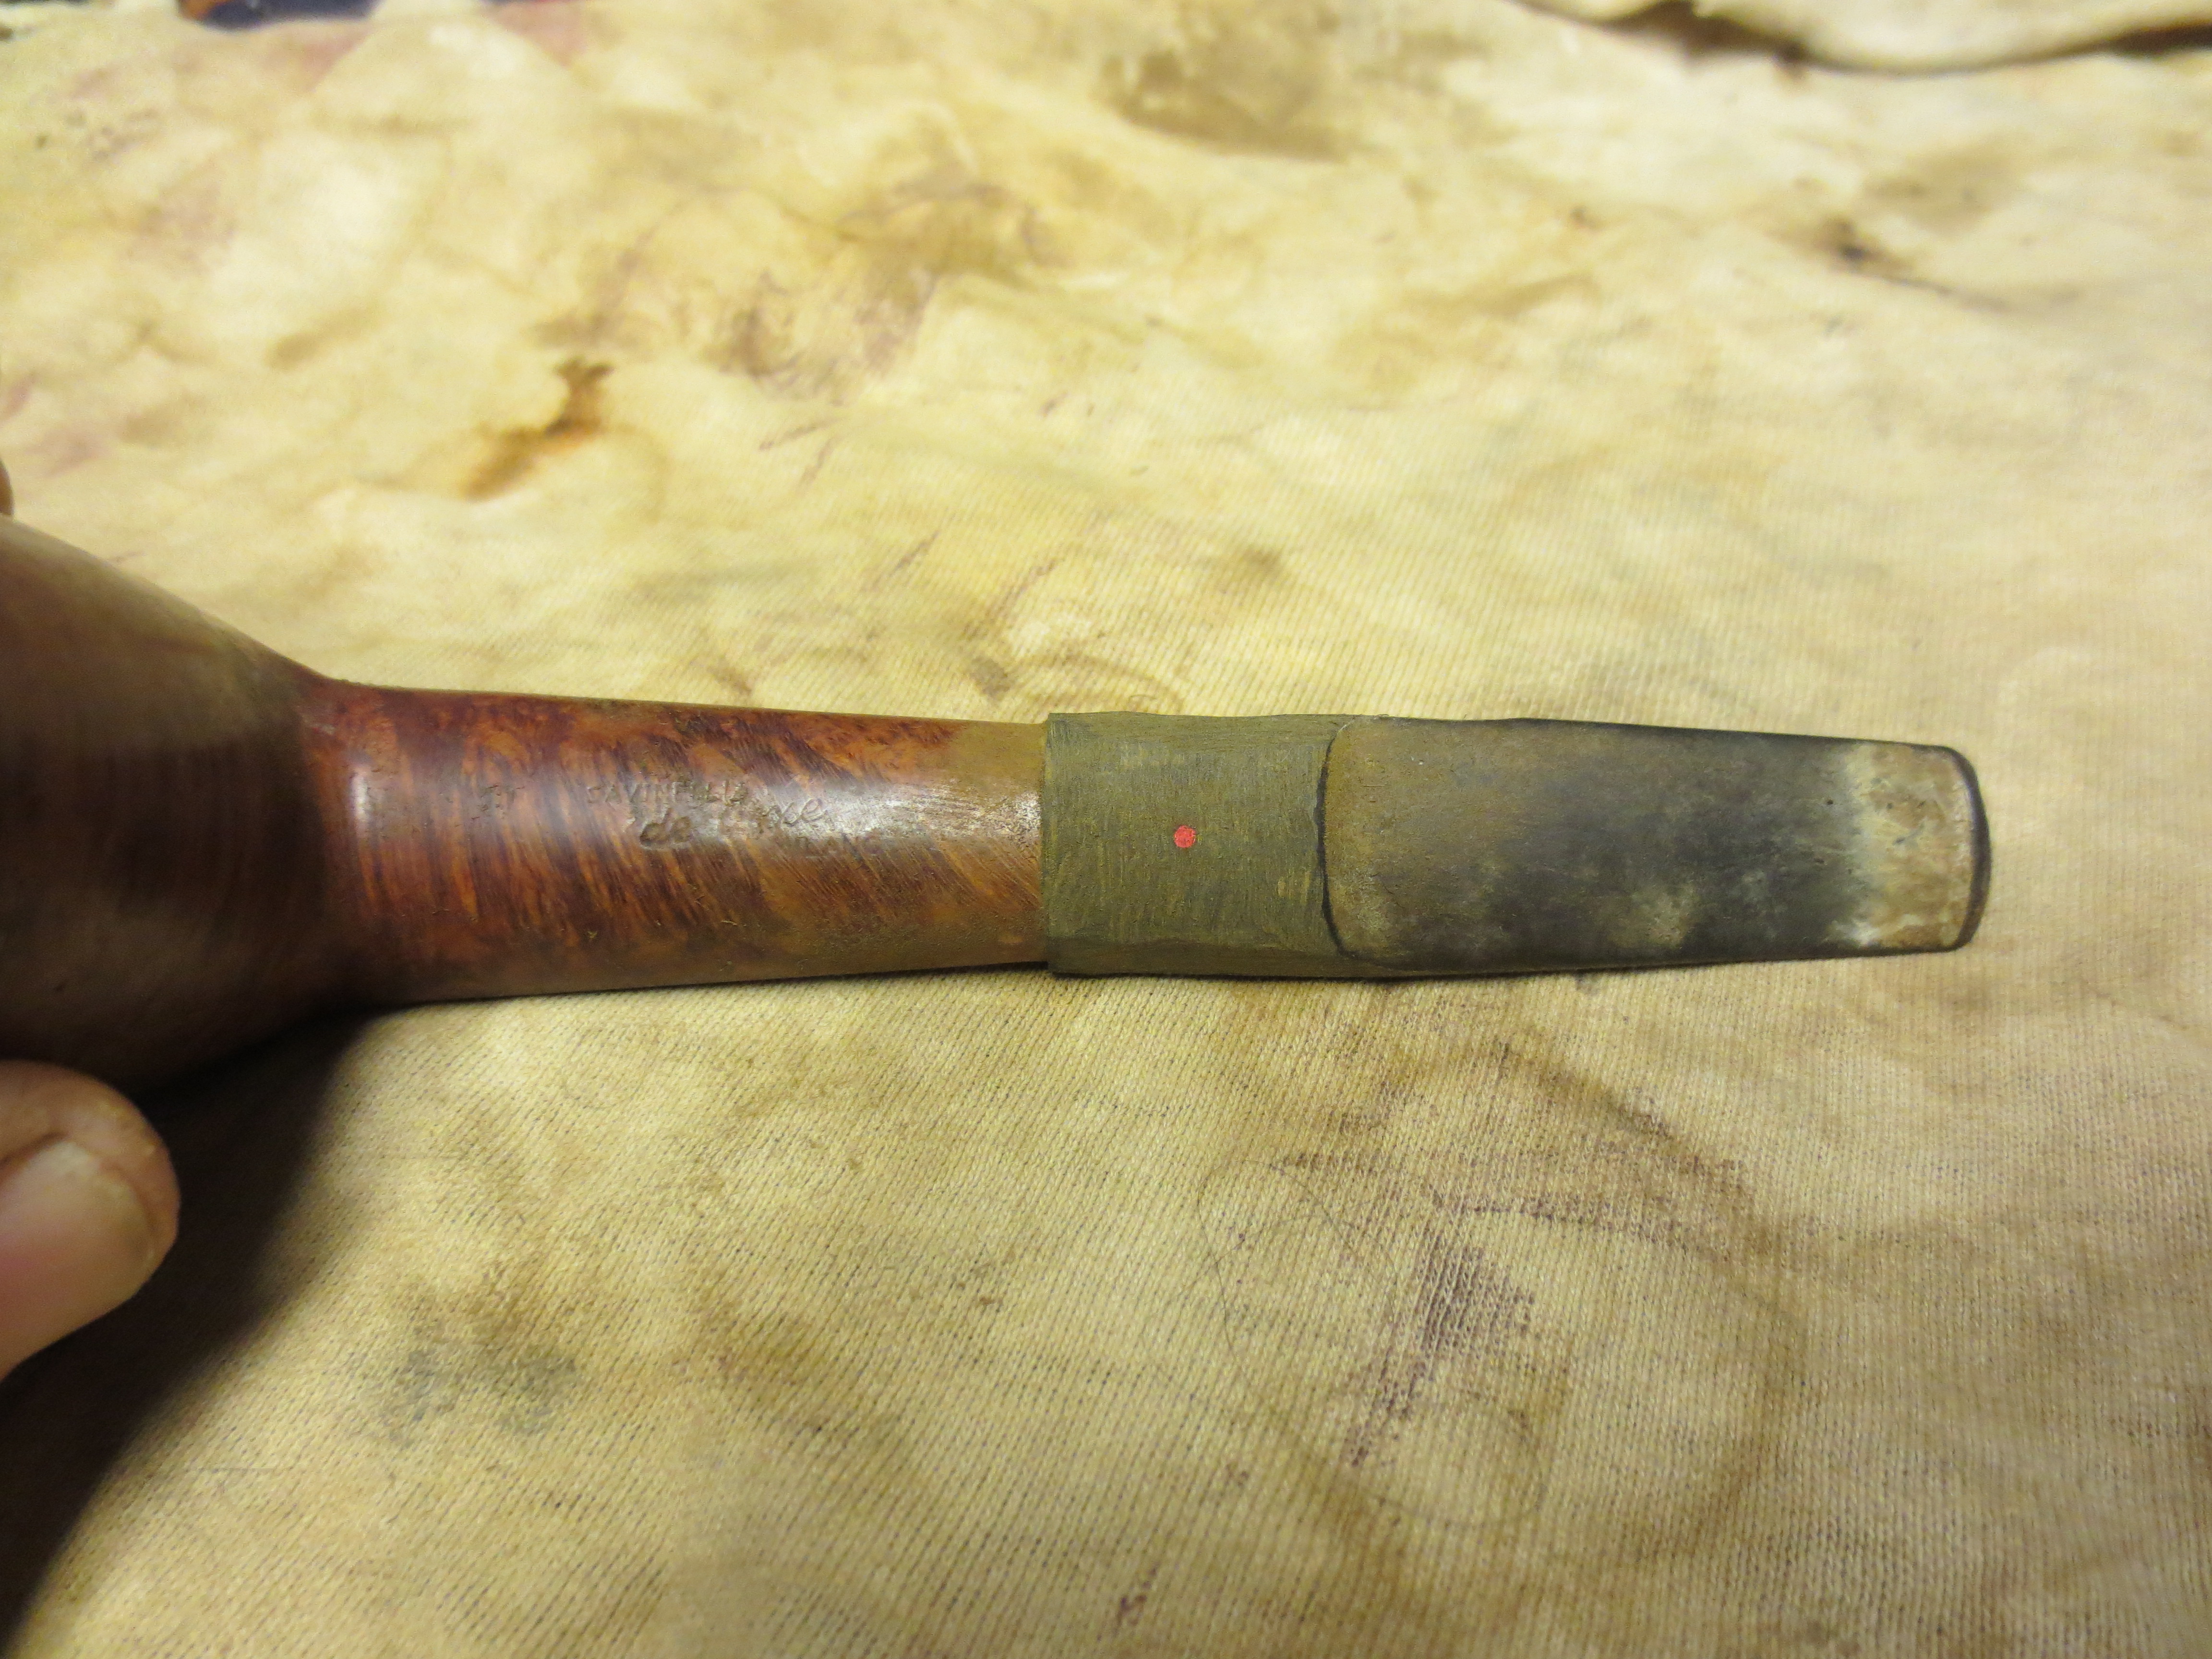
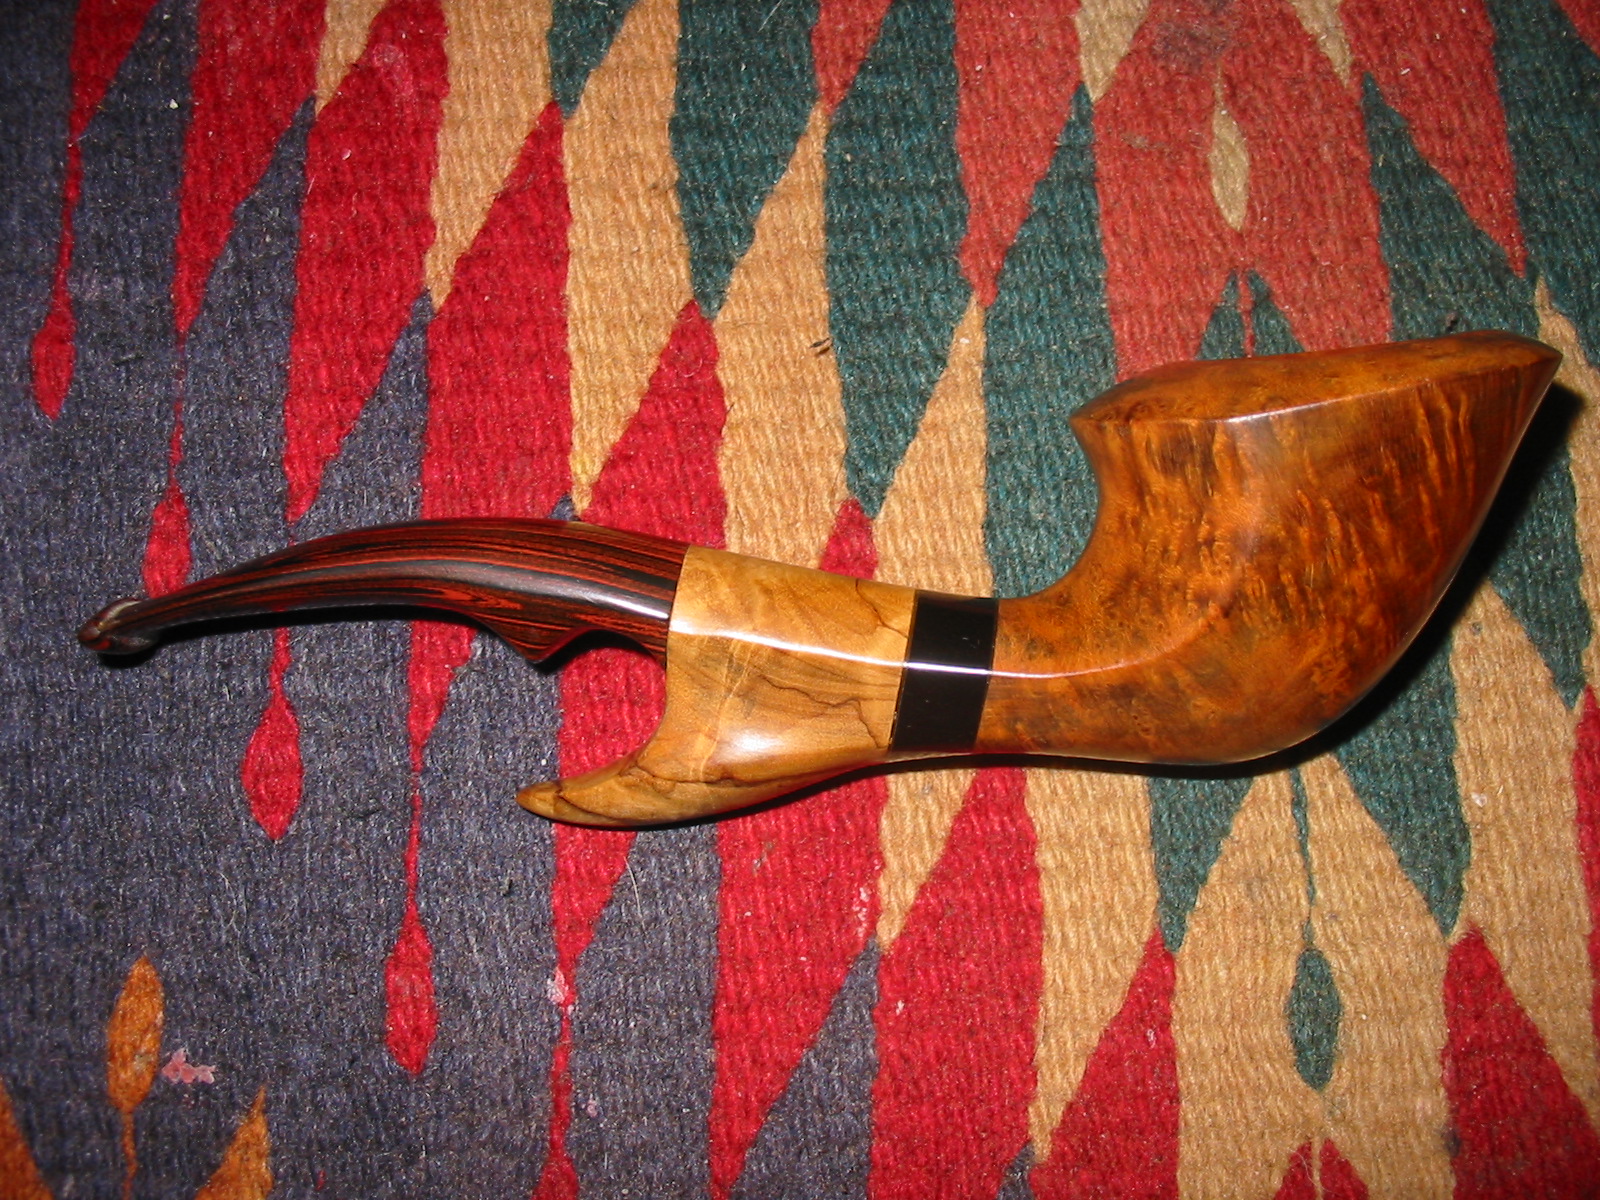
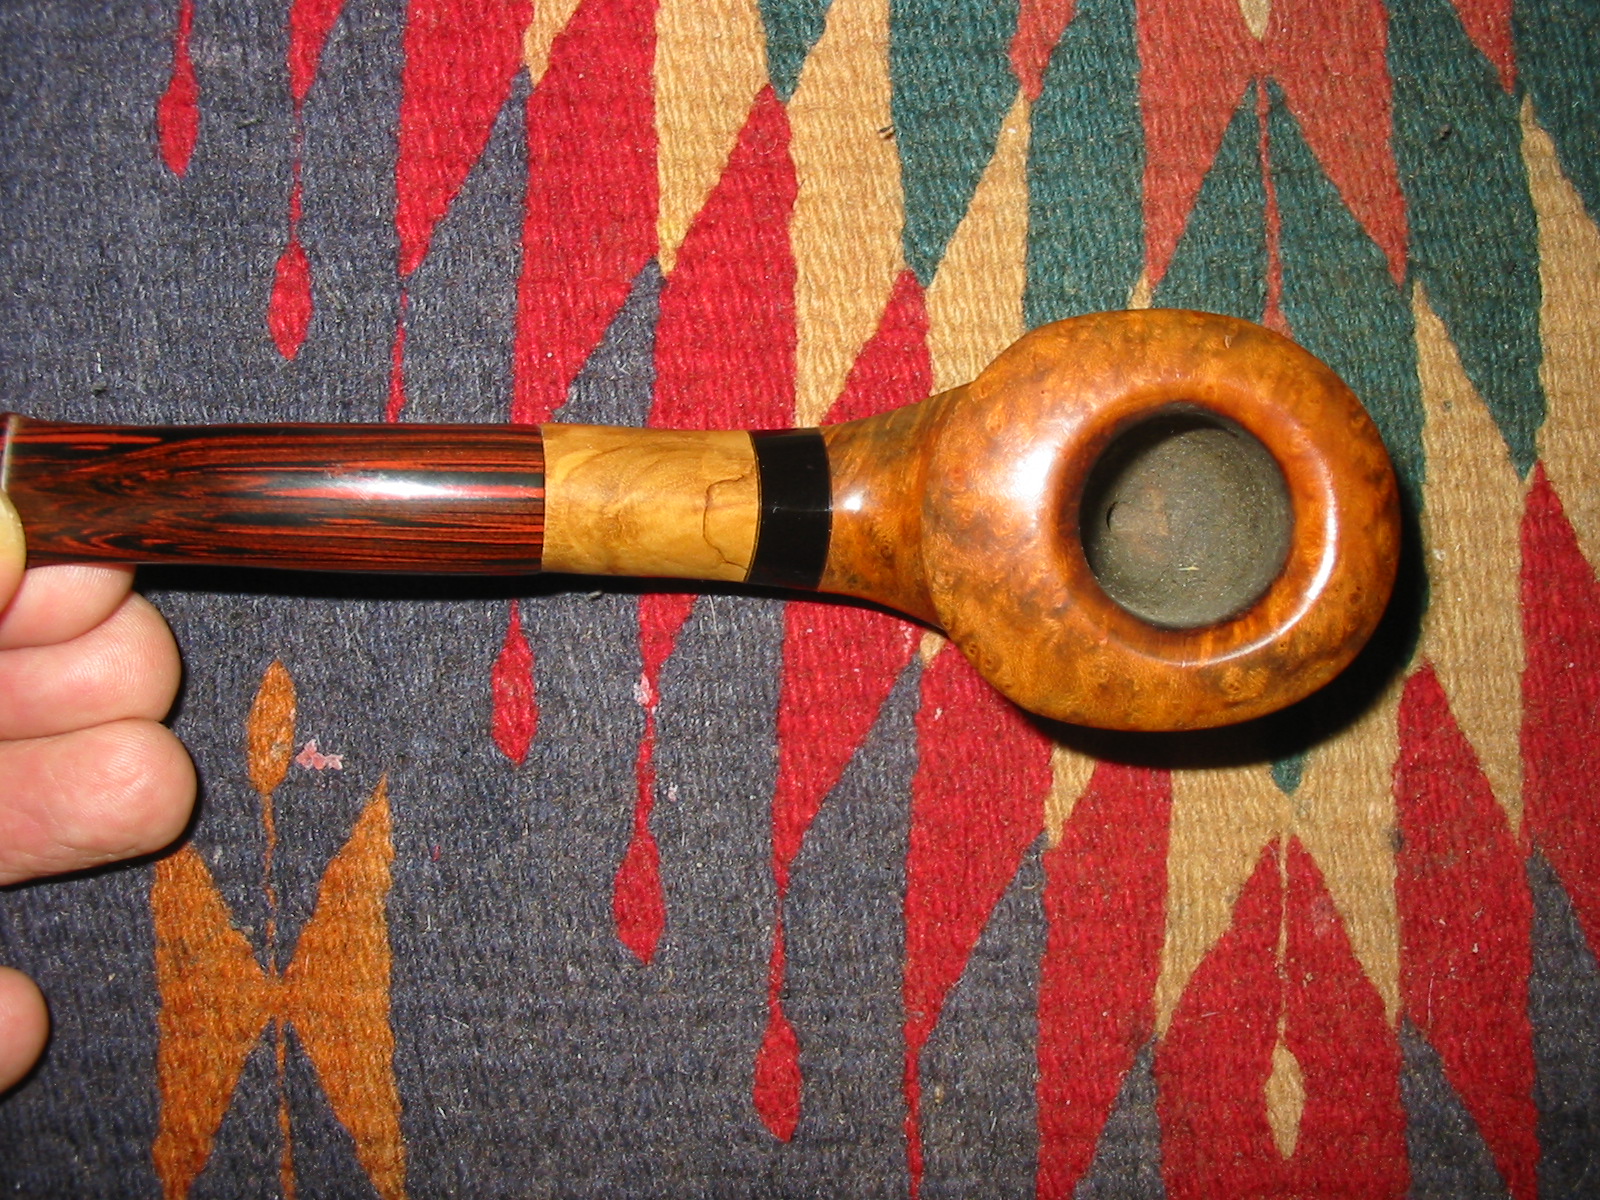
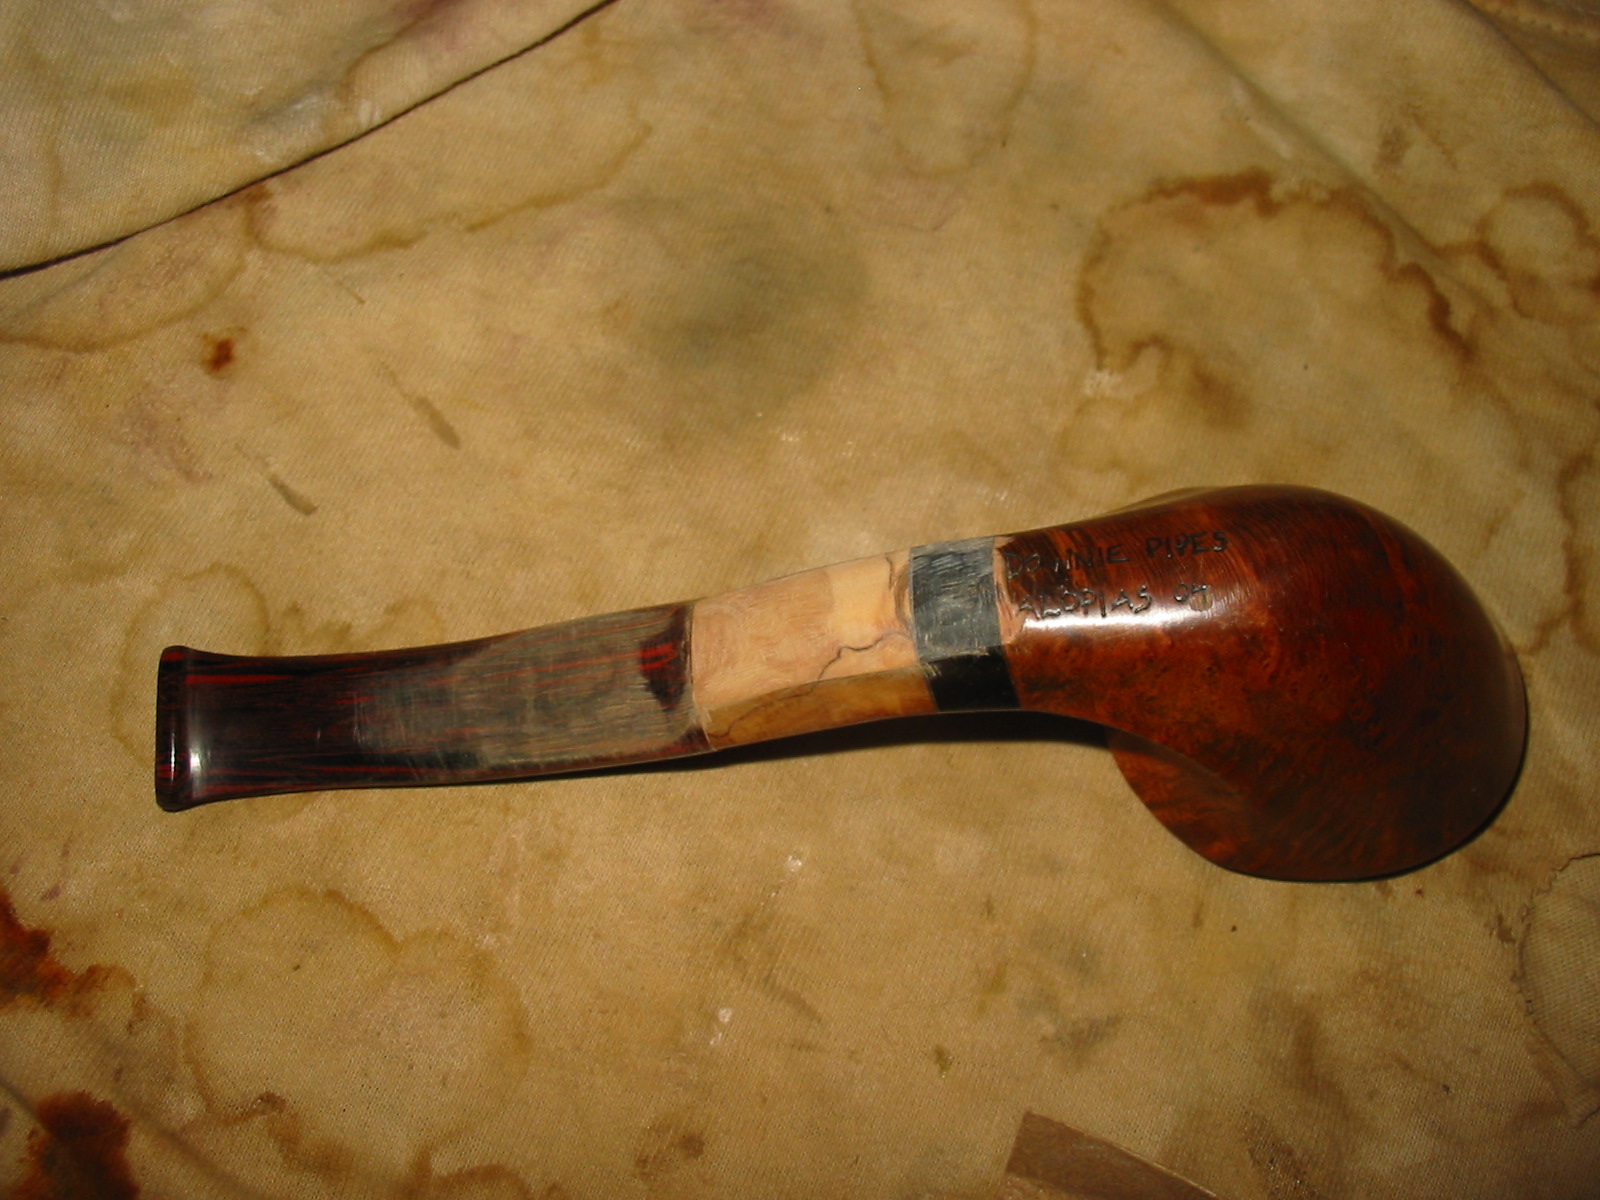
I picked it up again several days ago and looked it over. I like colour of the stain but wondered what it would look like if I darkened it. I like the feel of the bowl in the hand. I liked the curves of the rim and the bowl to the shank. I liked the flow of the curve to the stem. I liked the shape of the shank and the black acrylic insert and the olive wood extension on the shank. The mortise was Delrin lined and the drilling was vintage Downie – well drilled, straight and clean. The fit of the stem was stellar. The stem was also comfortable and the button thin as is my preference. The Cumberland colour and material suited the pipe well. There were many things I liked about it. I turned the ideas over in my mind of what I might do to rework it. I thought that I would remove the fin on the bottom of the shank and the nob on the bottom of the stem and I would have it done. I thought about calling Stephen and setting up a meeting to drop the pipe off for him to reimagine – do his Phoenix work on it and see what he could do with it. But after looking it over for a while I decided rather than sending it to him I would do a Phoenix rework on it myself.

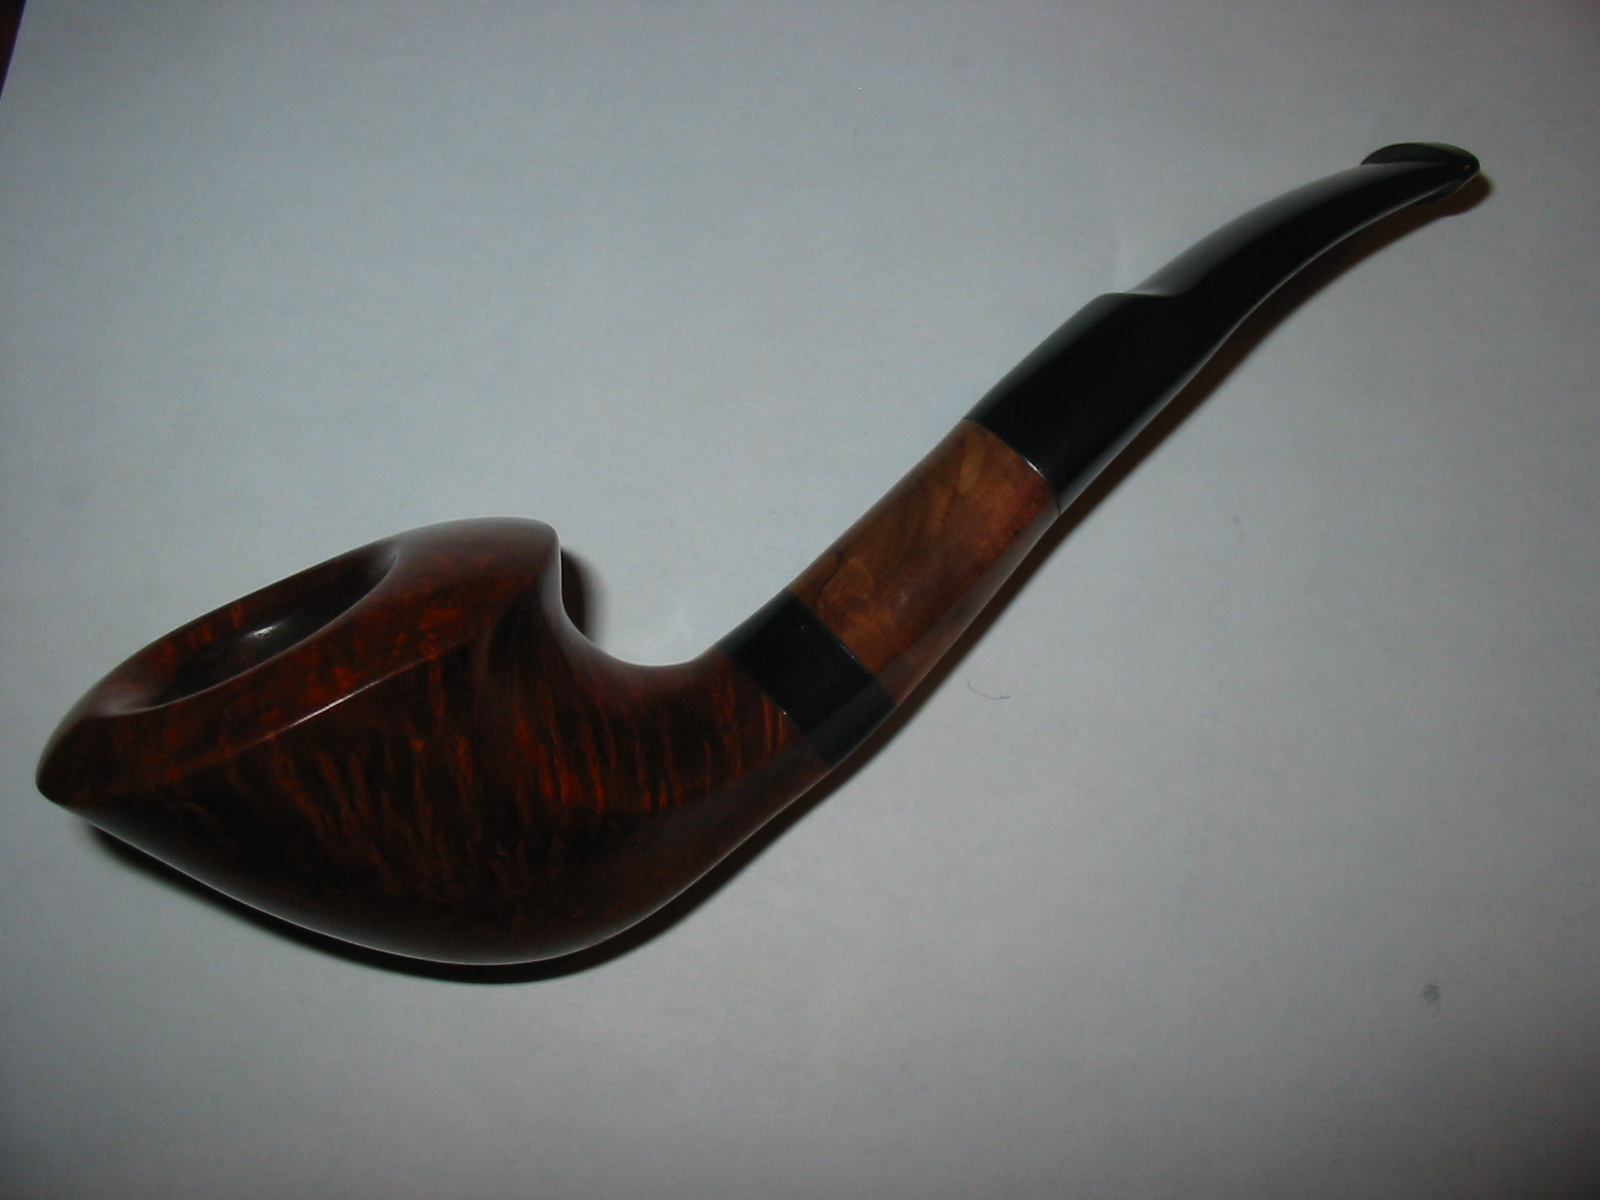
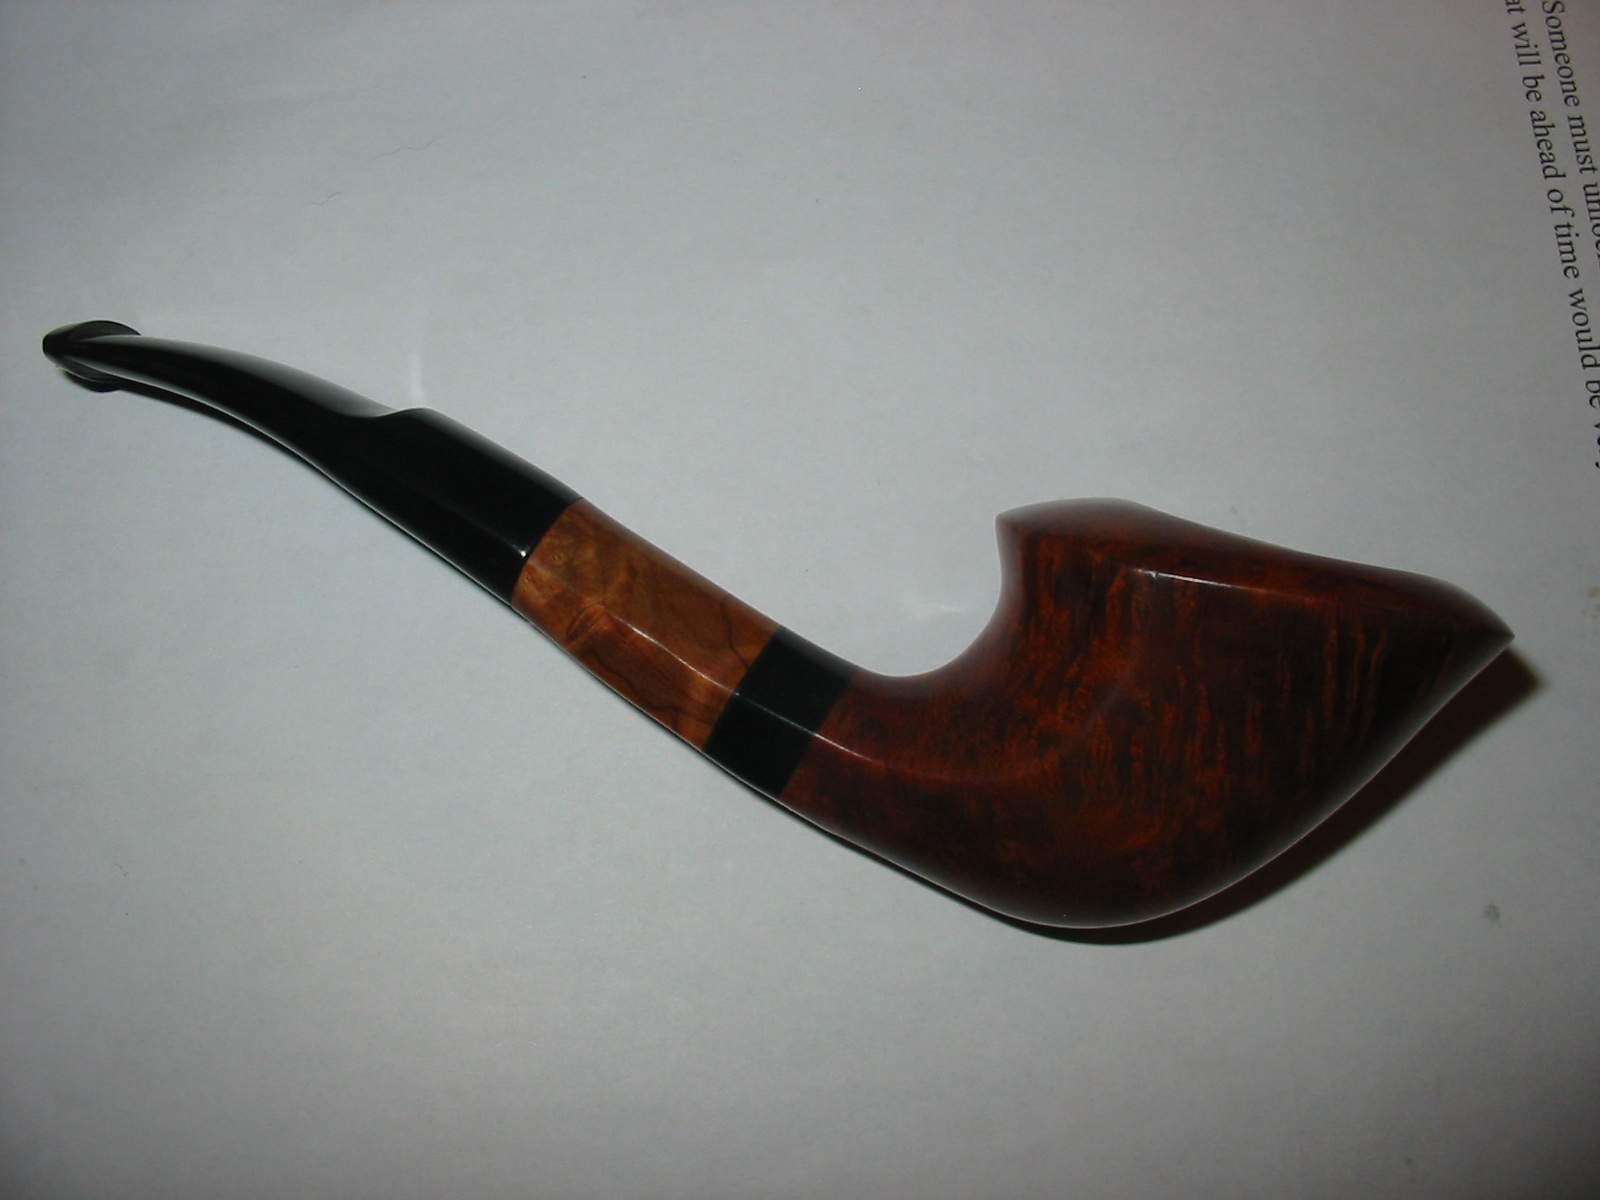
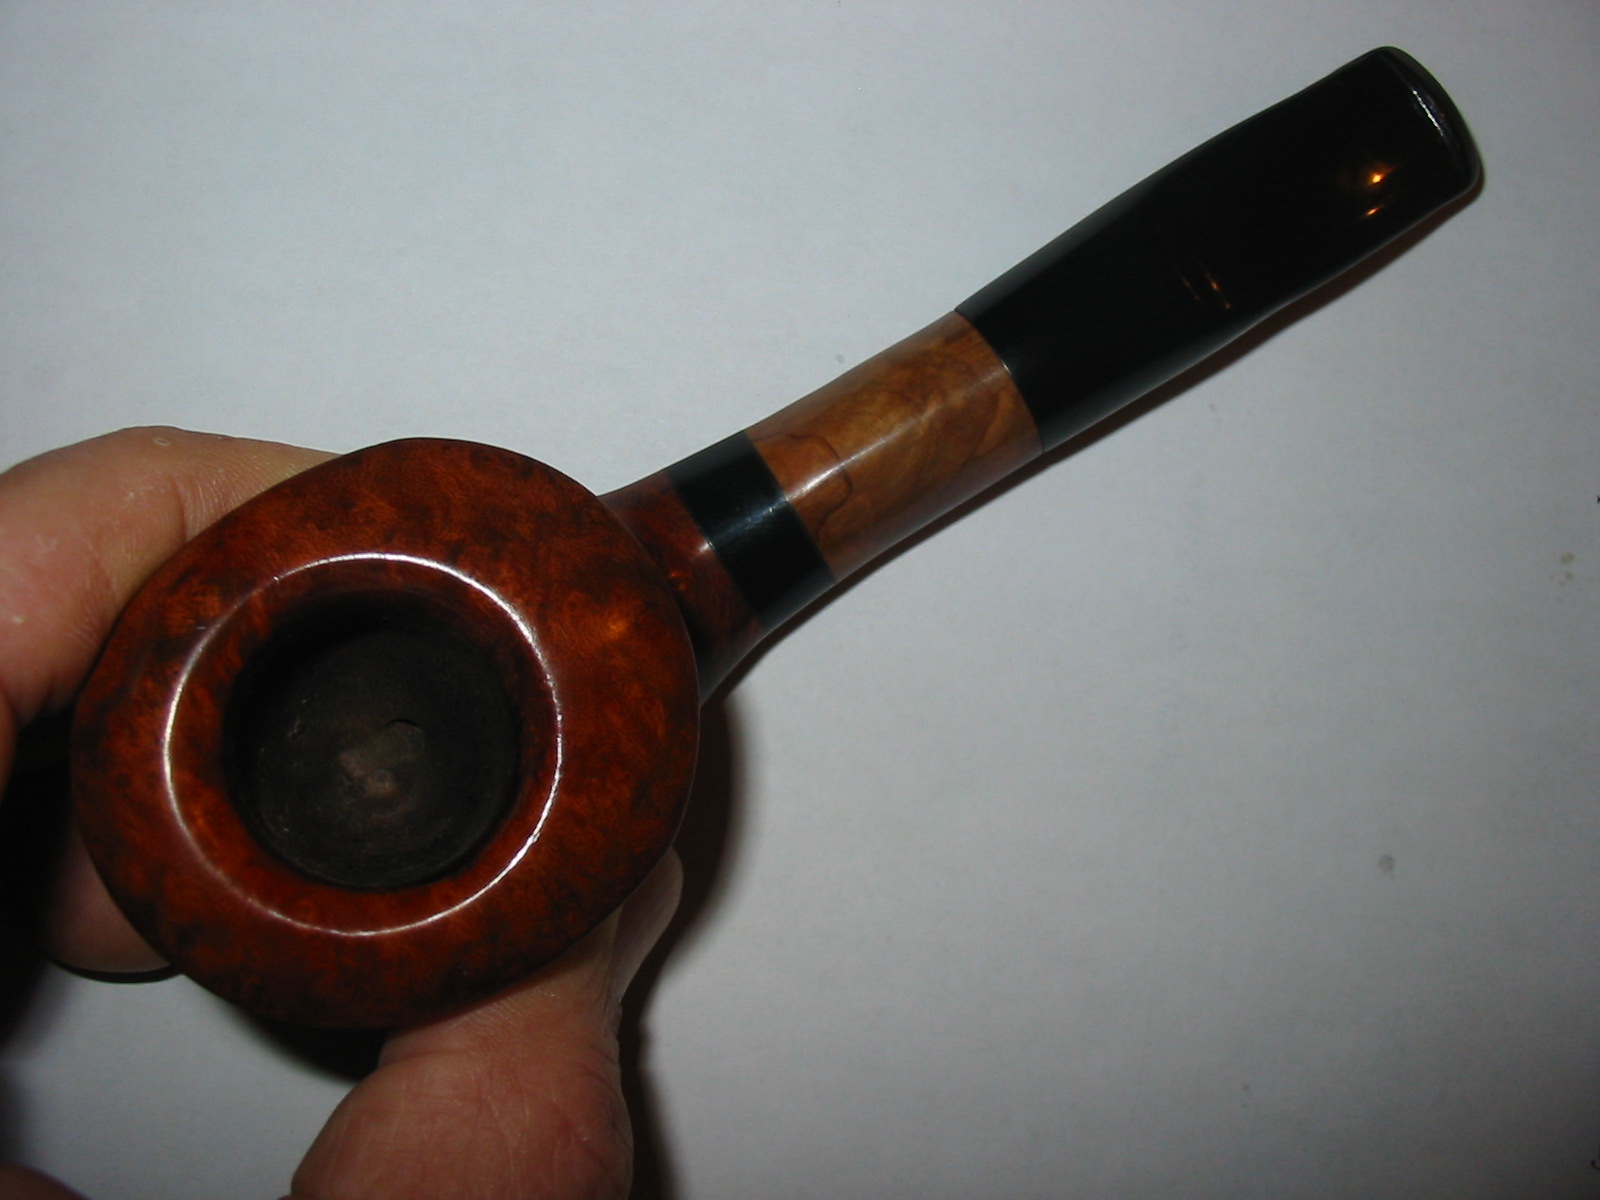
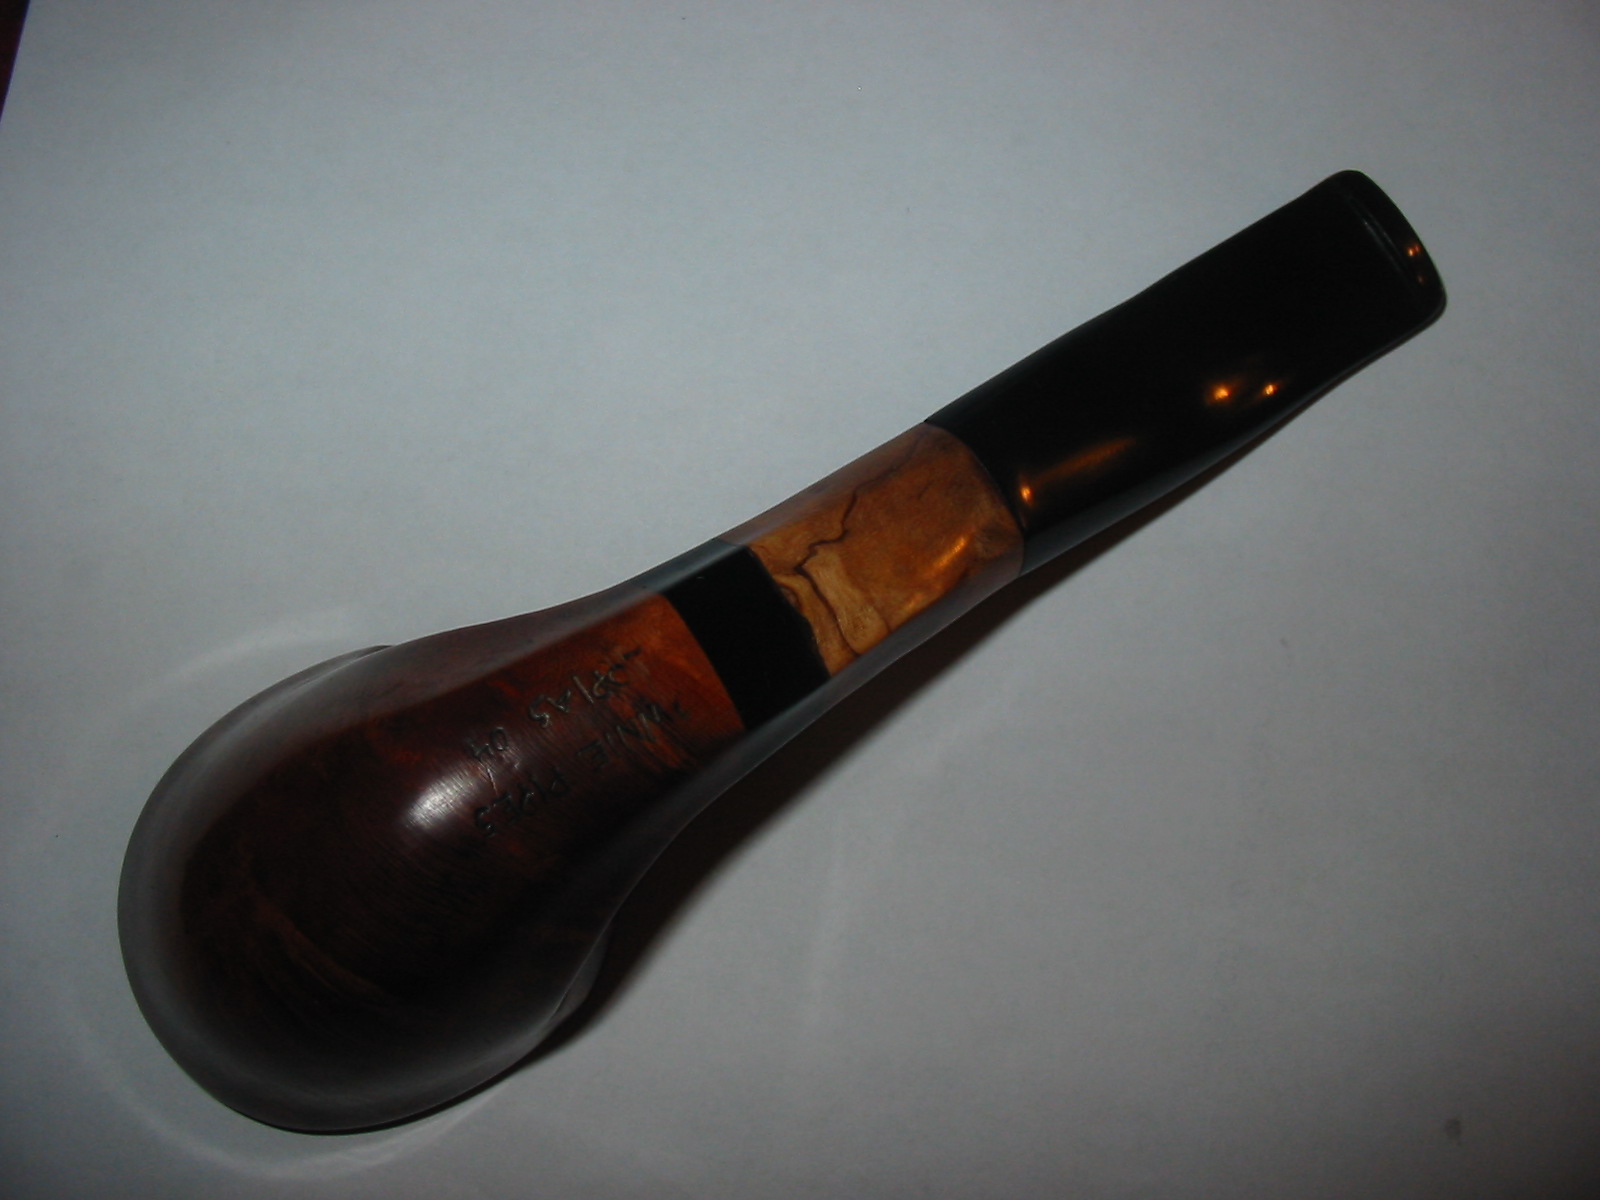
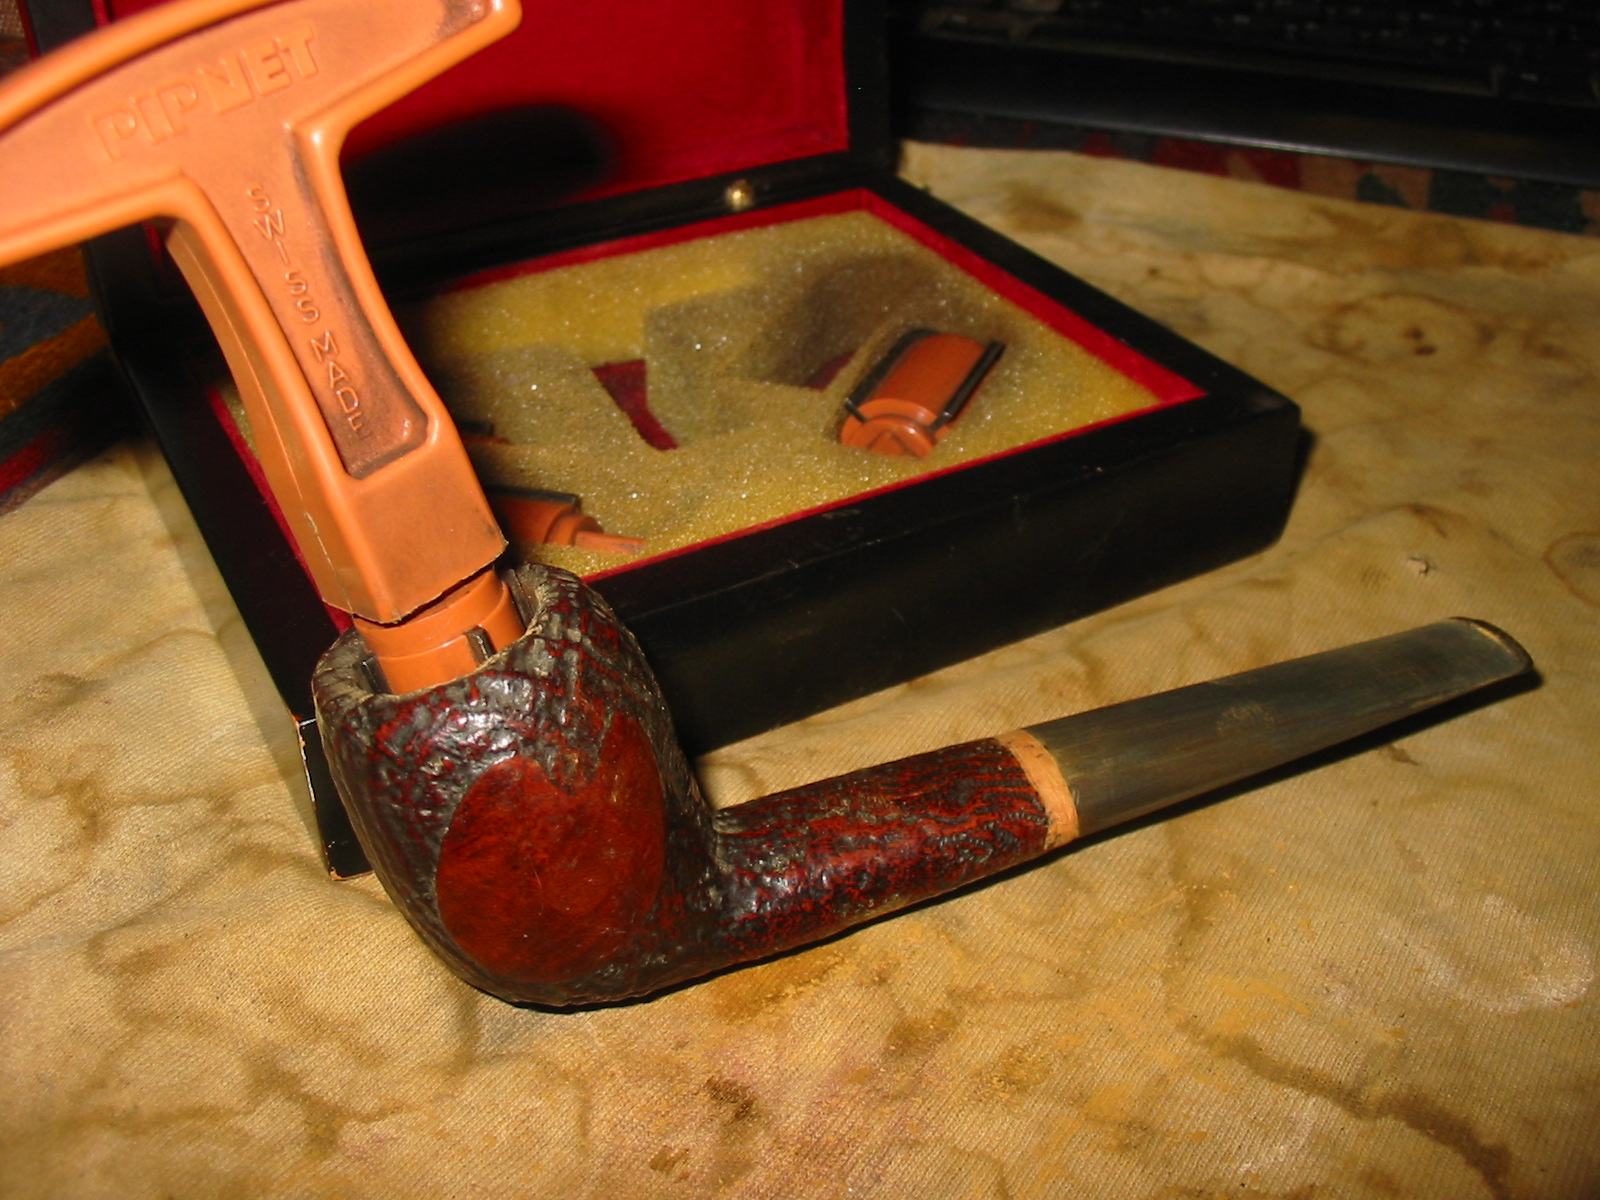
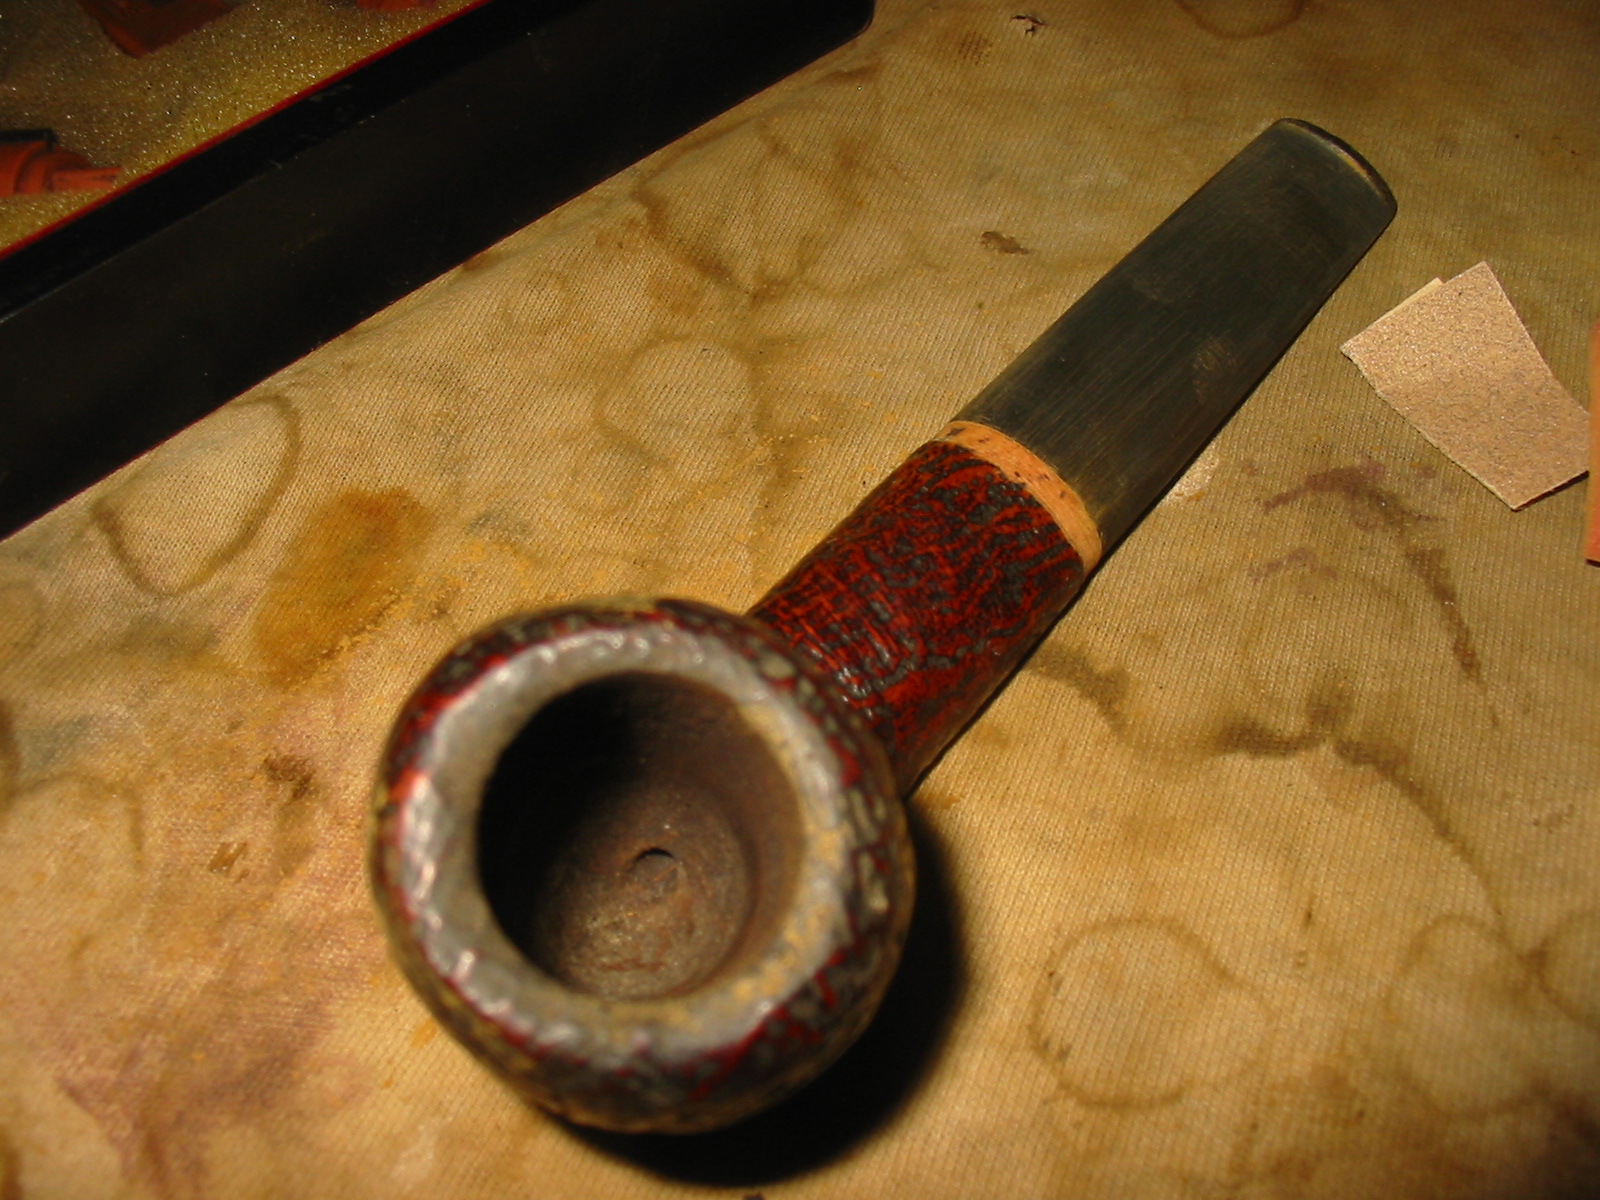
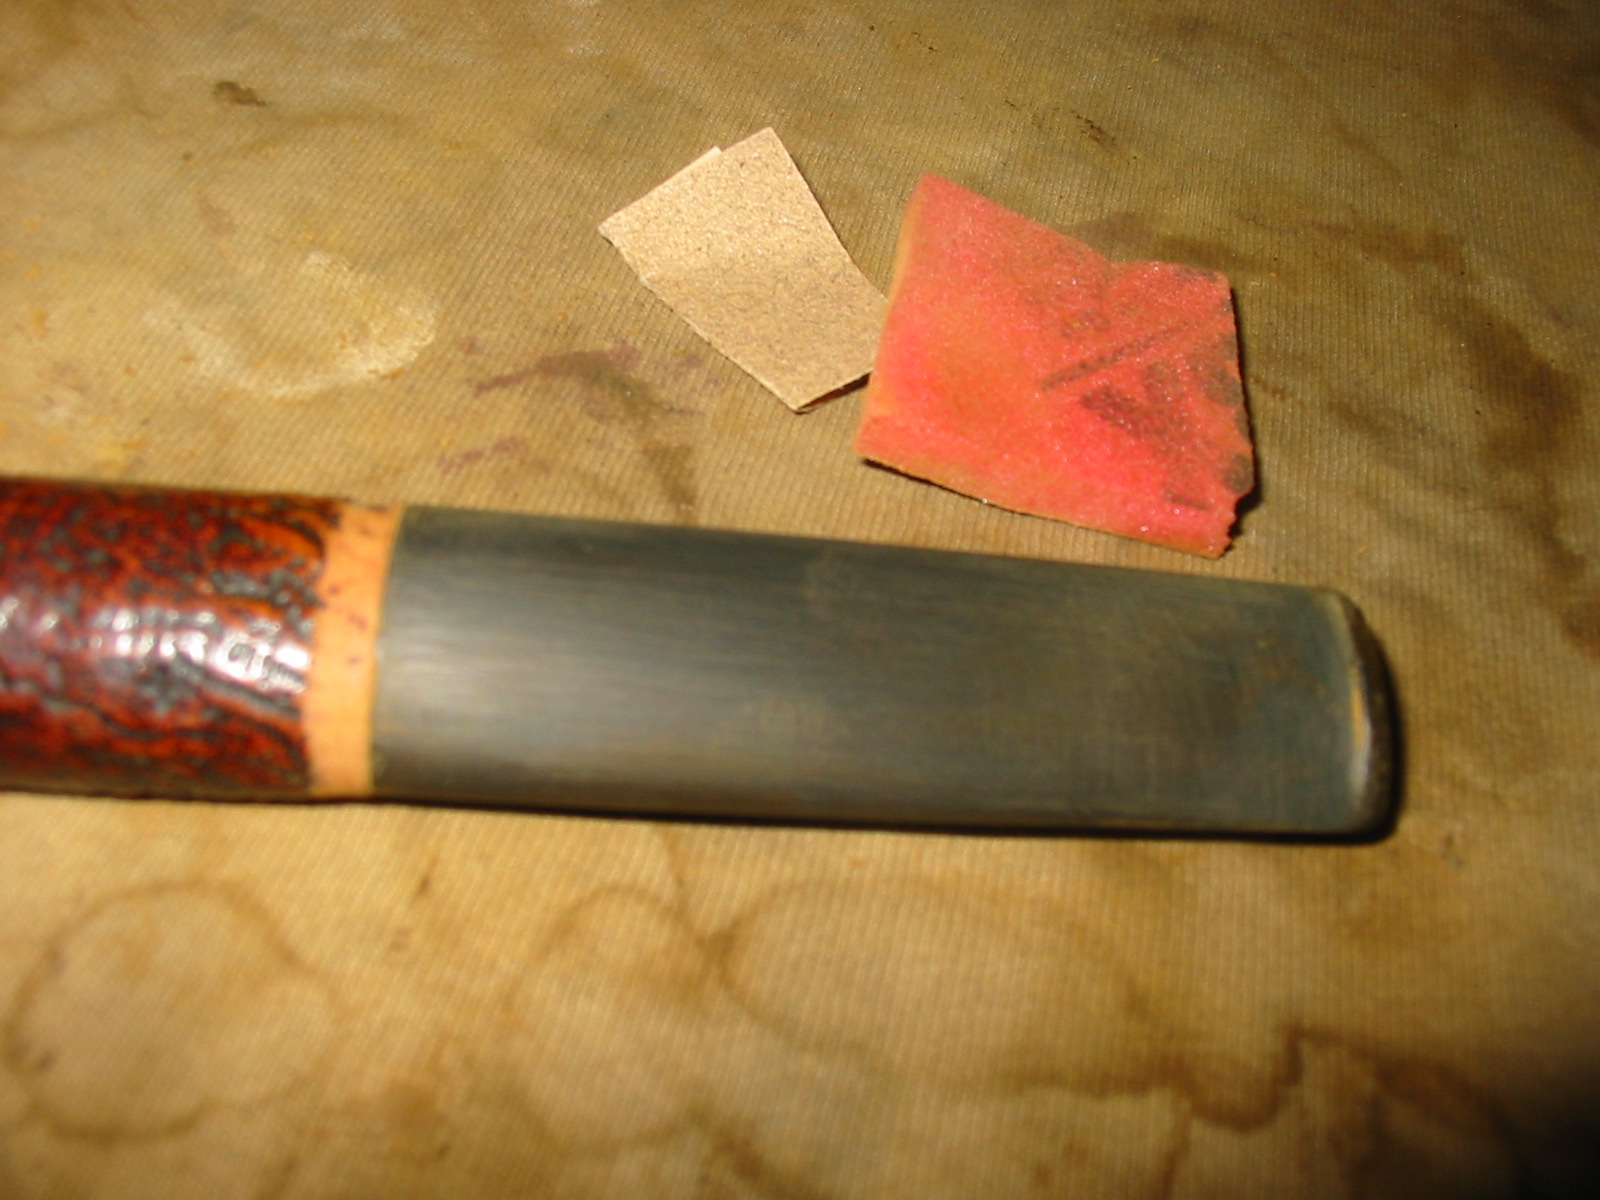
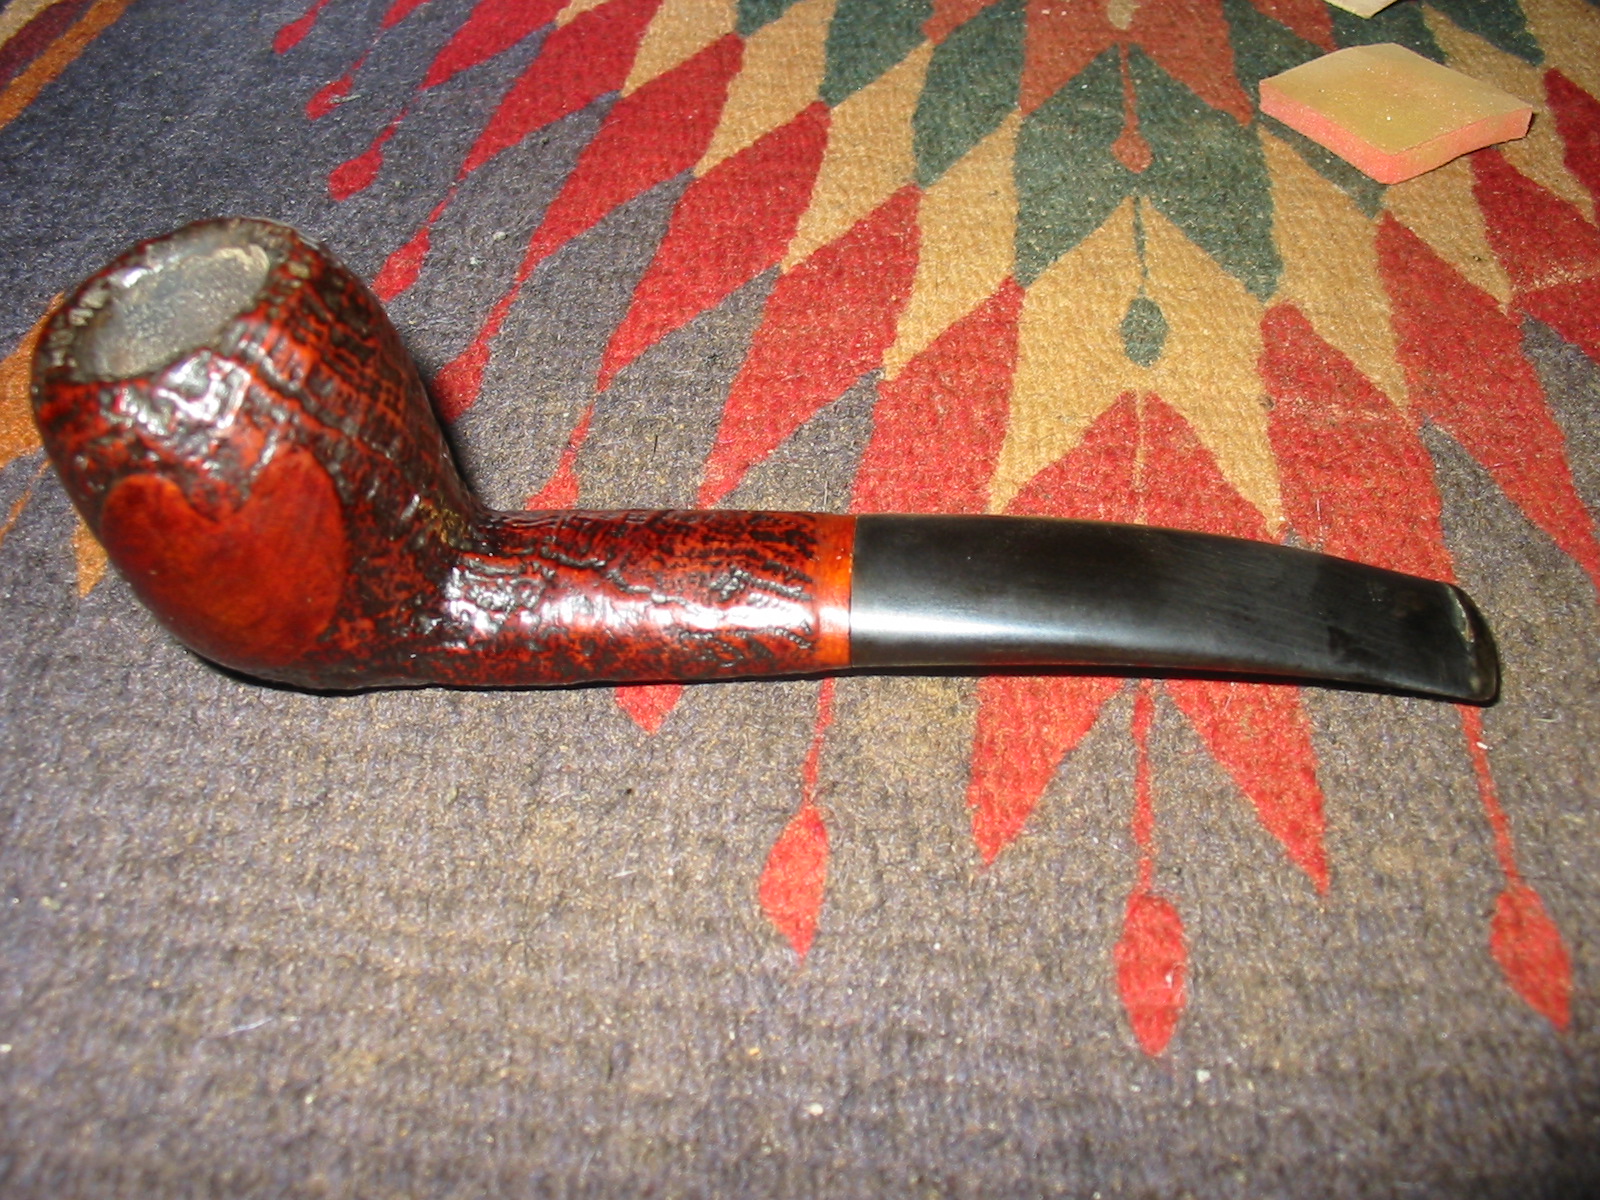
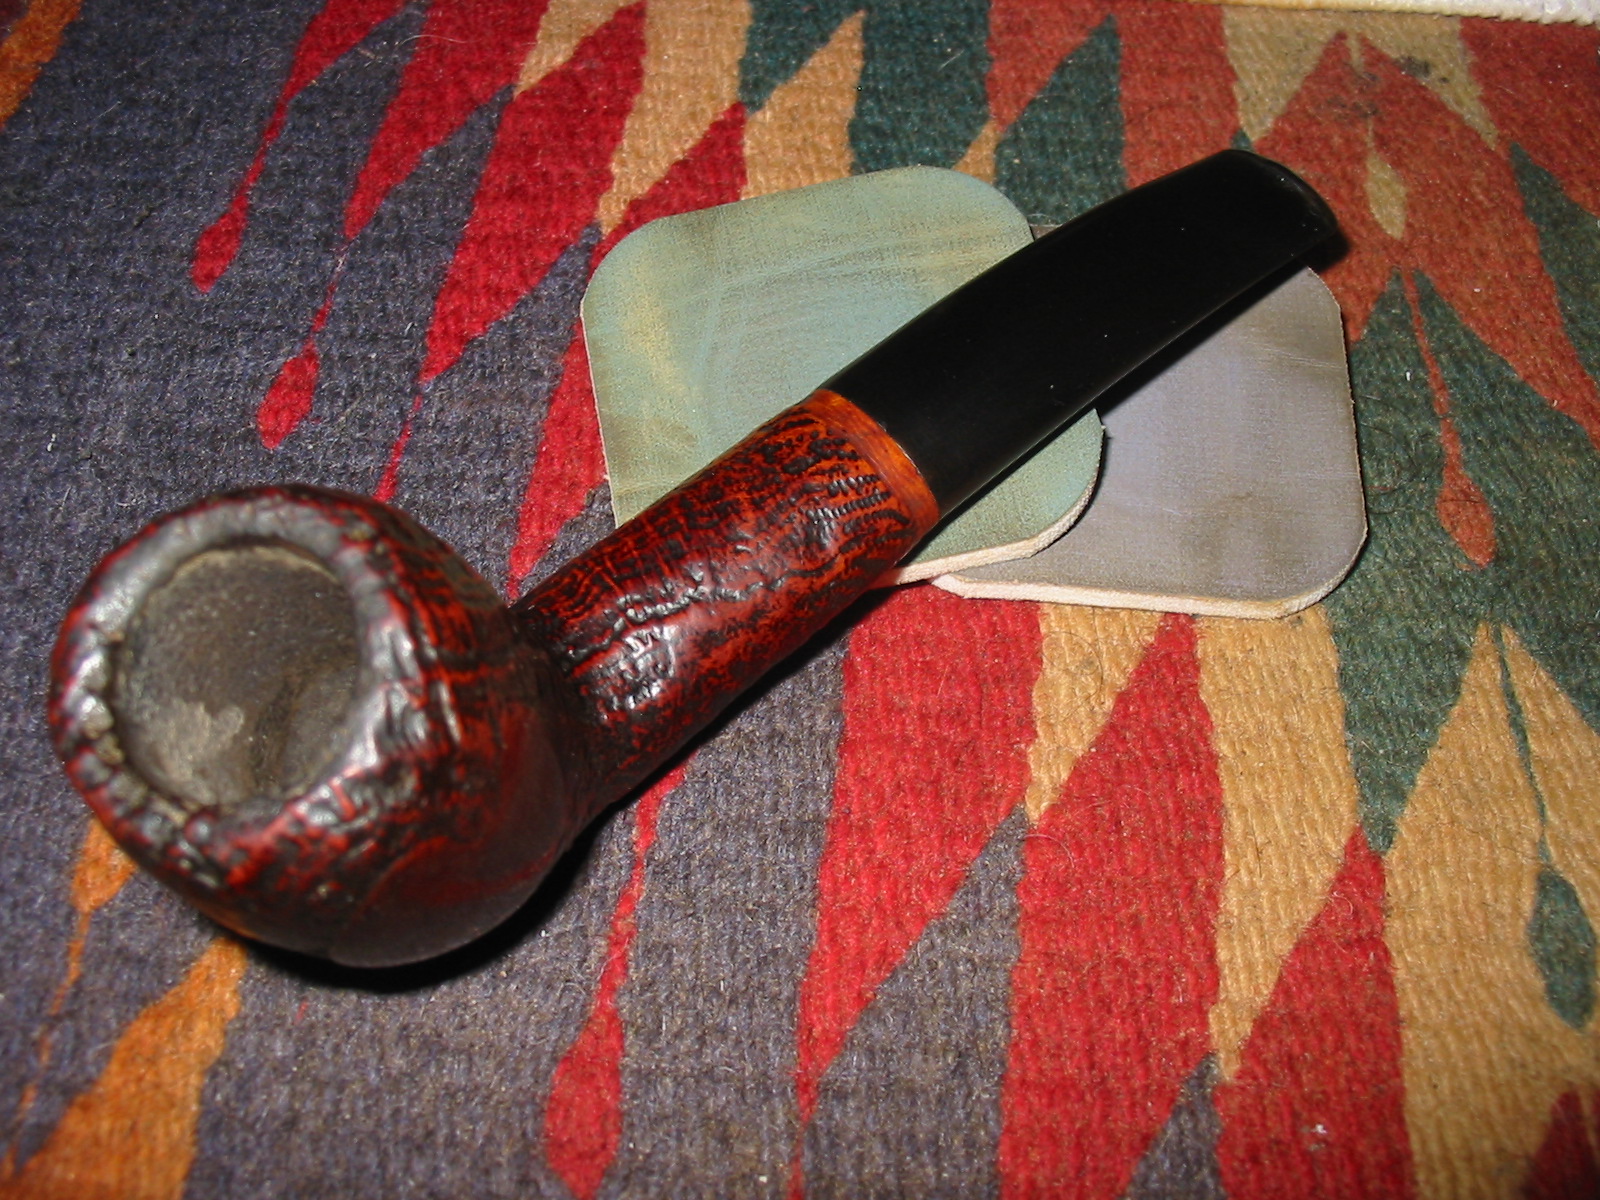
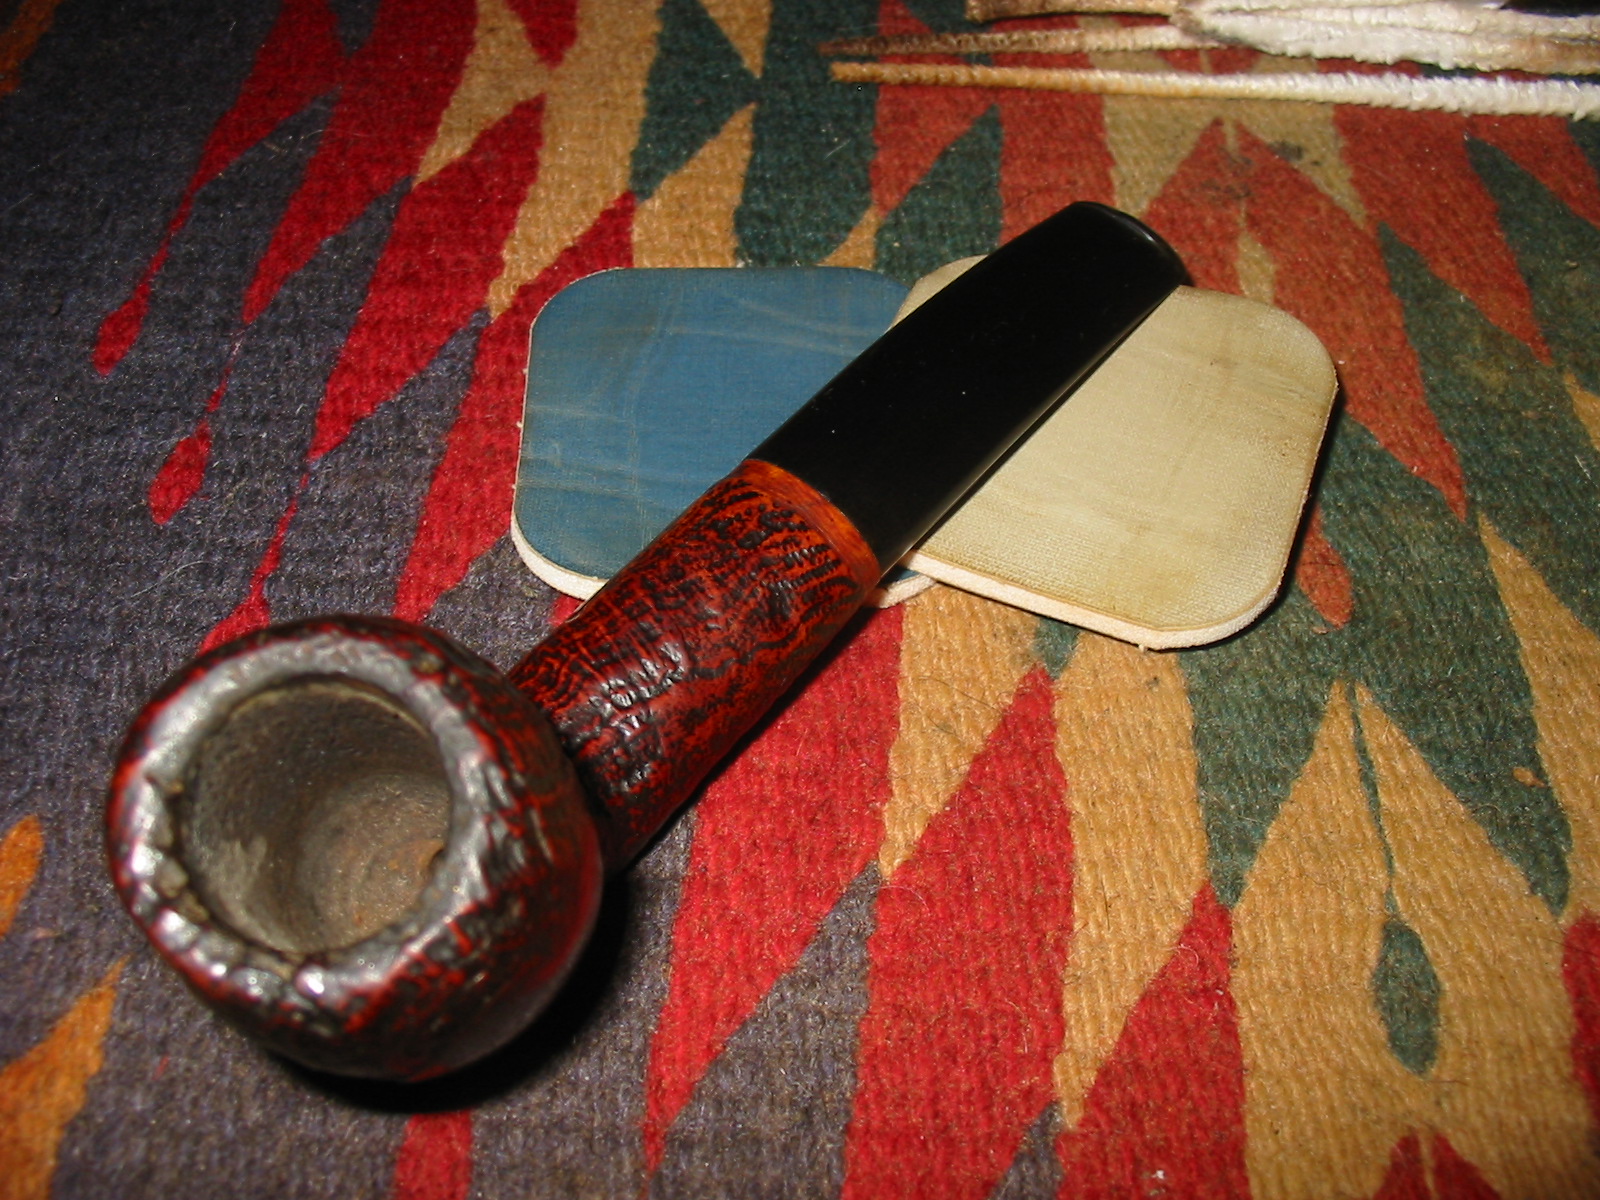
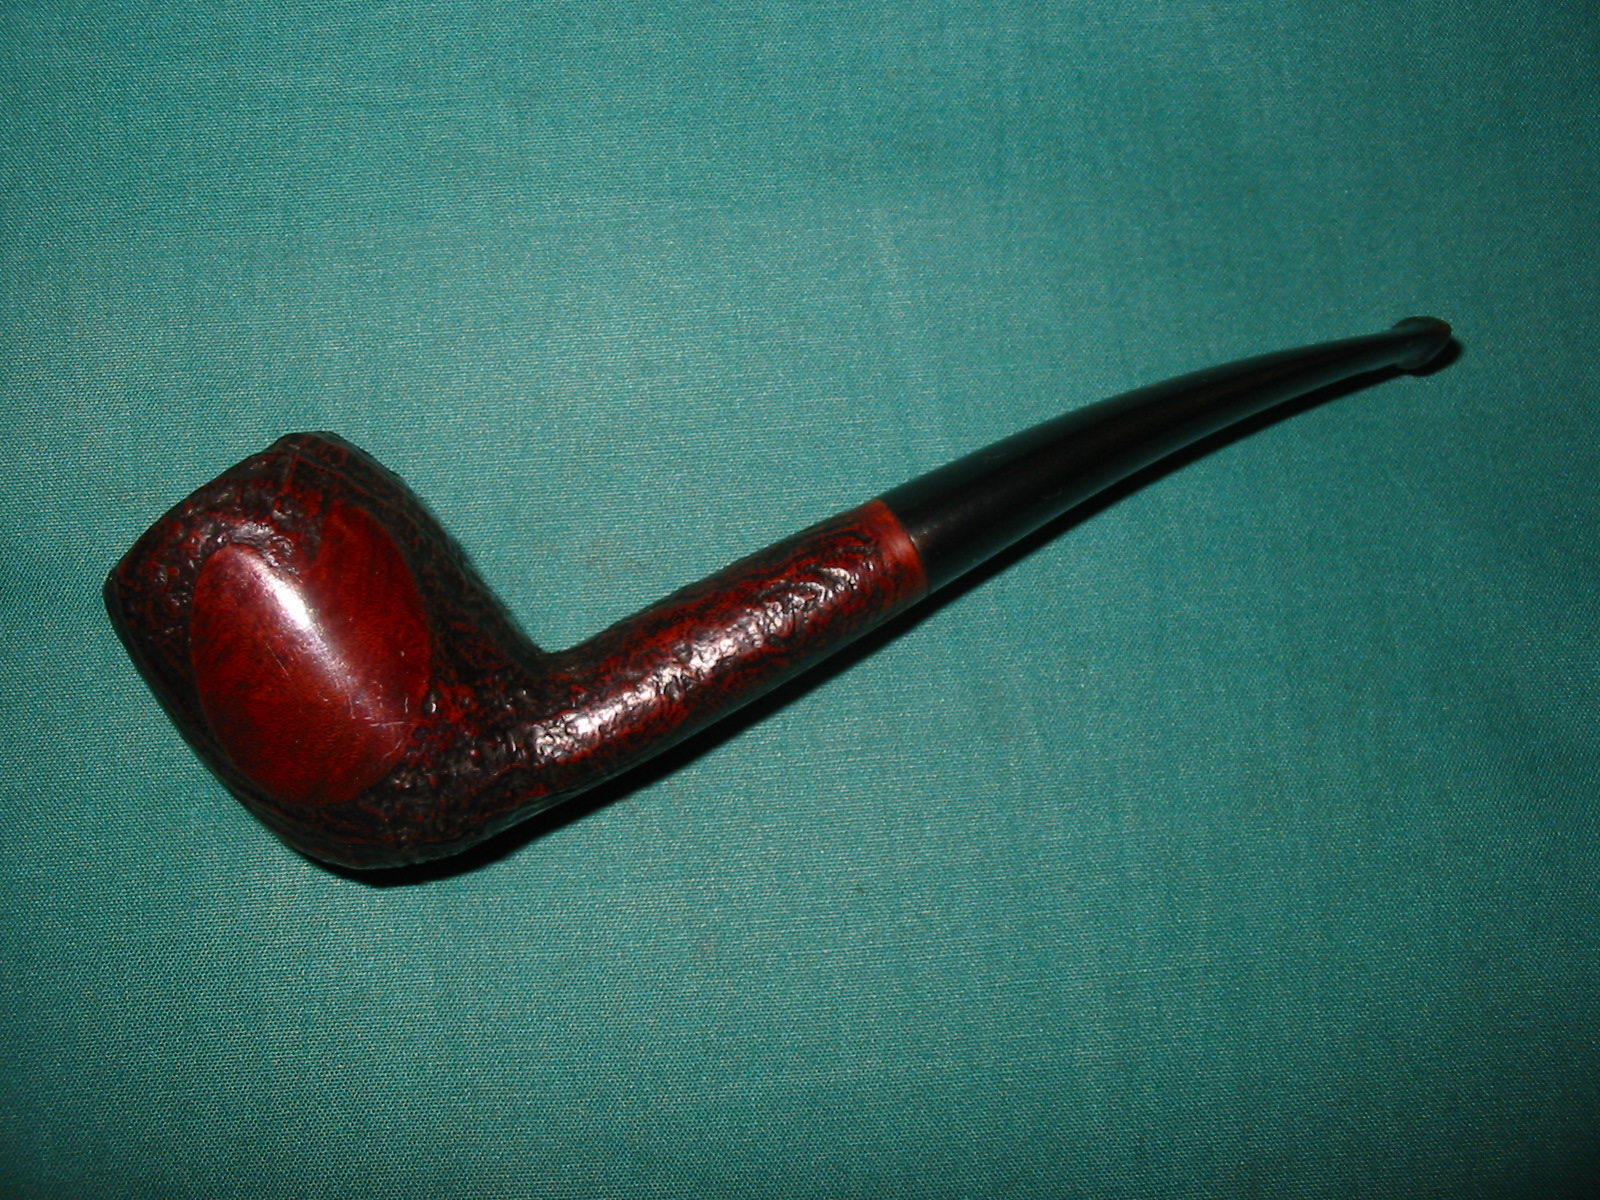
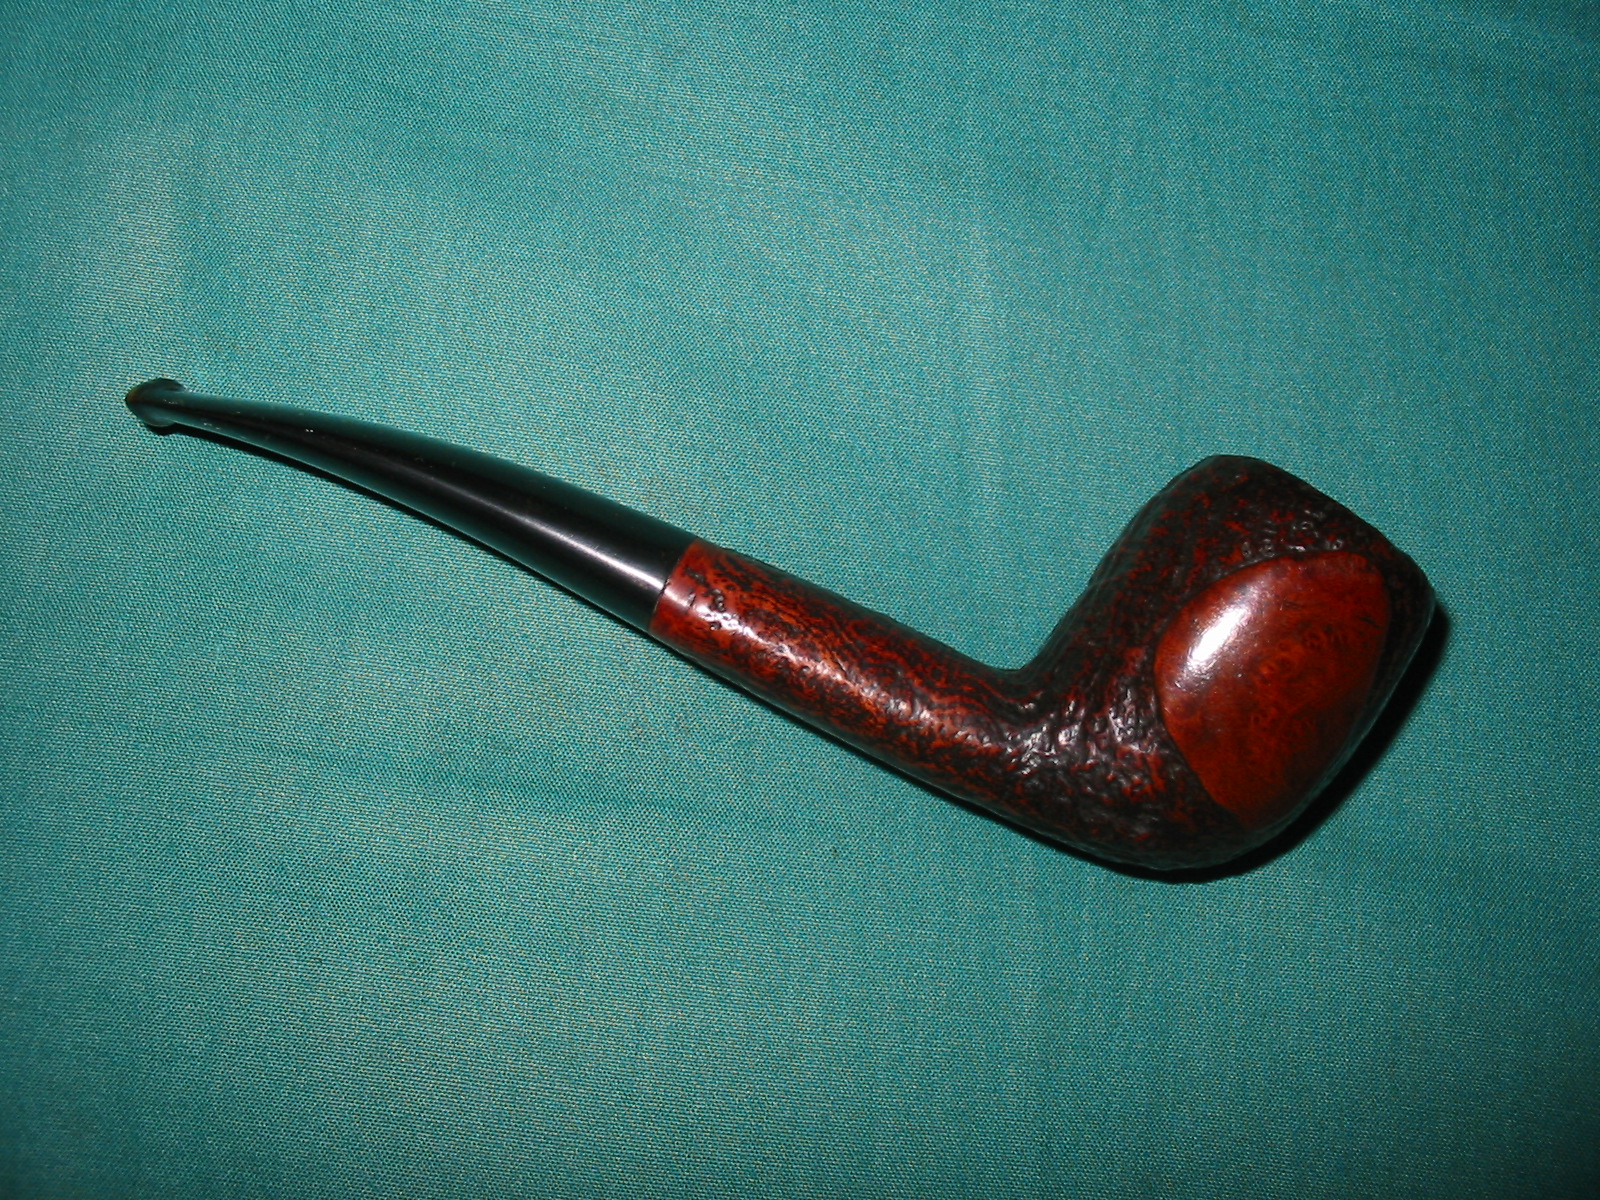
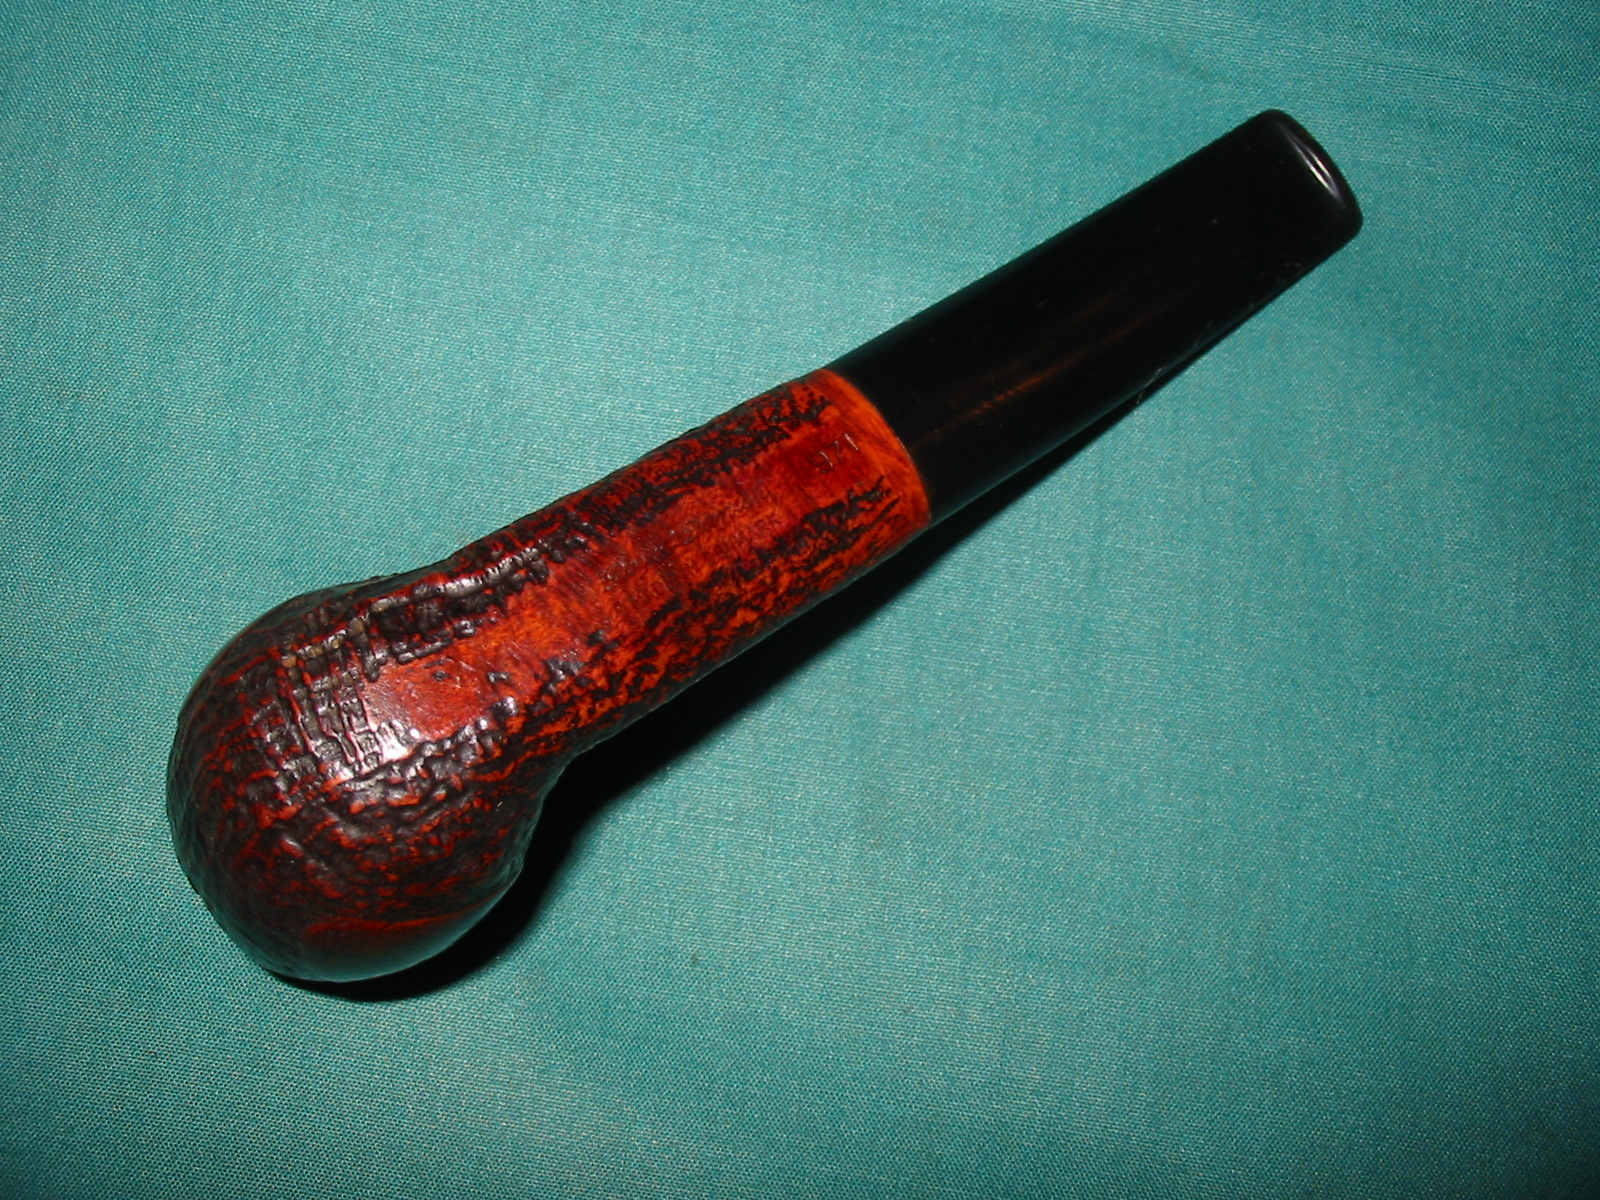
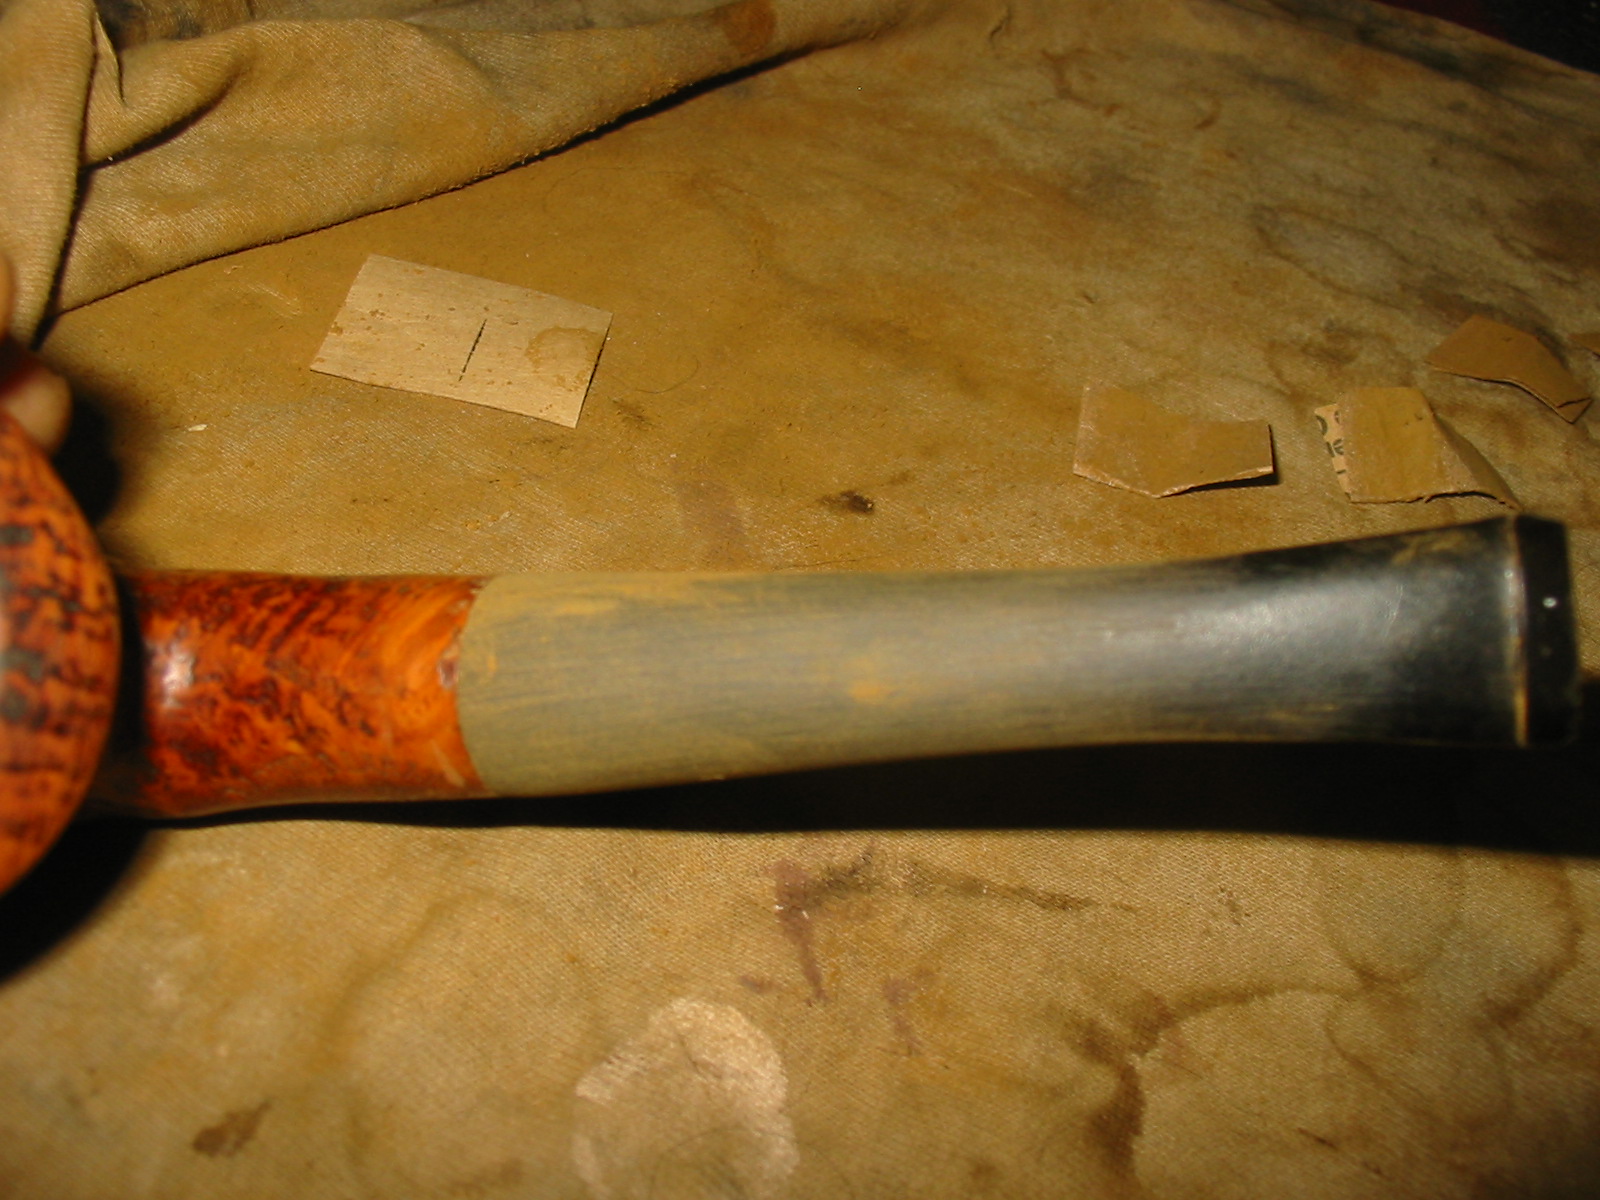
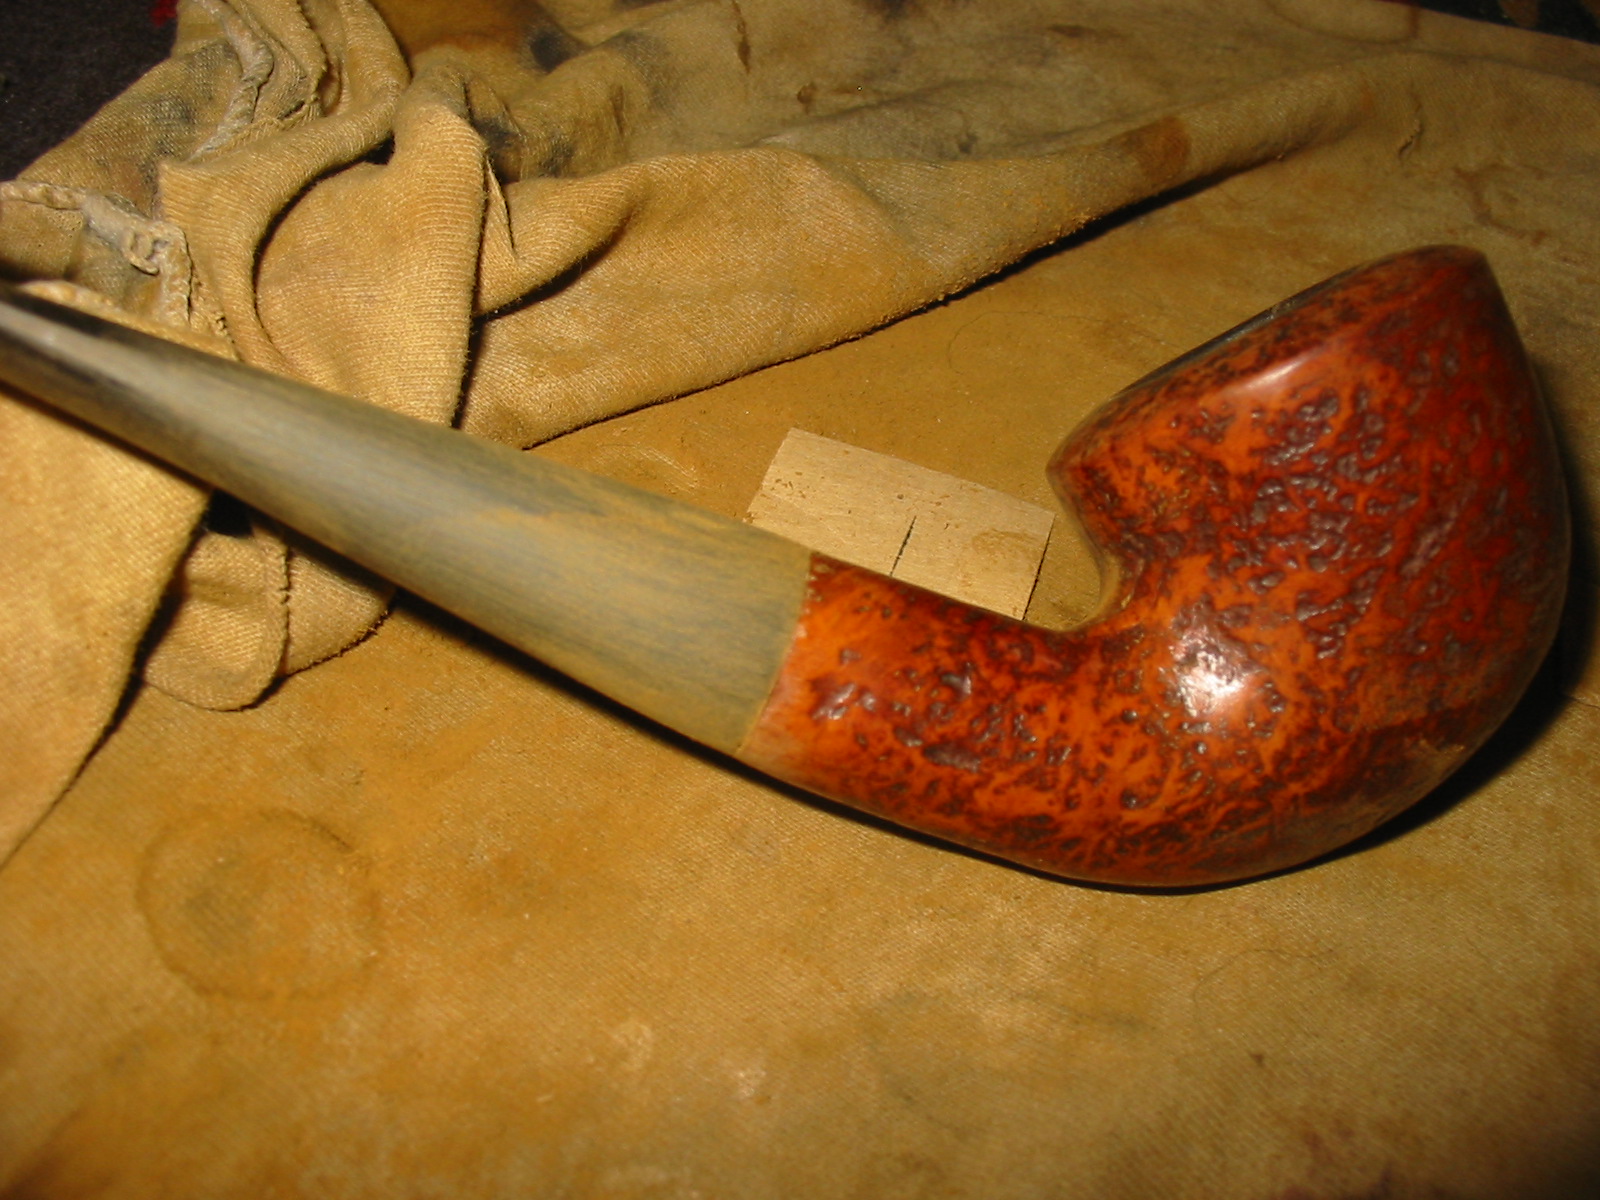
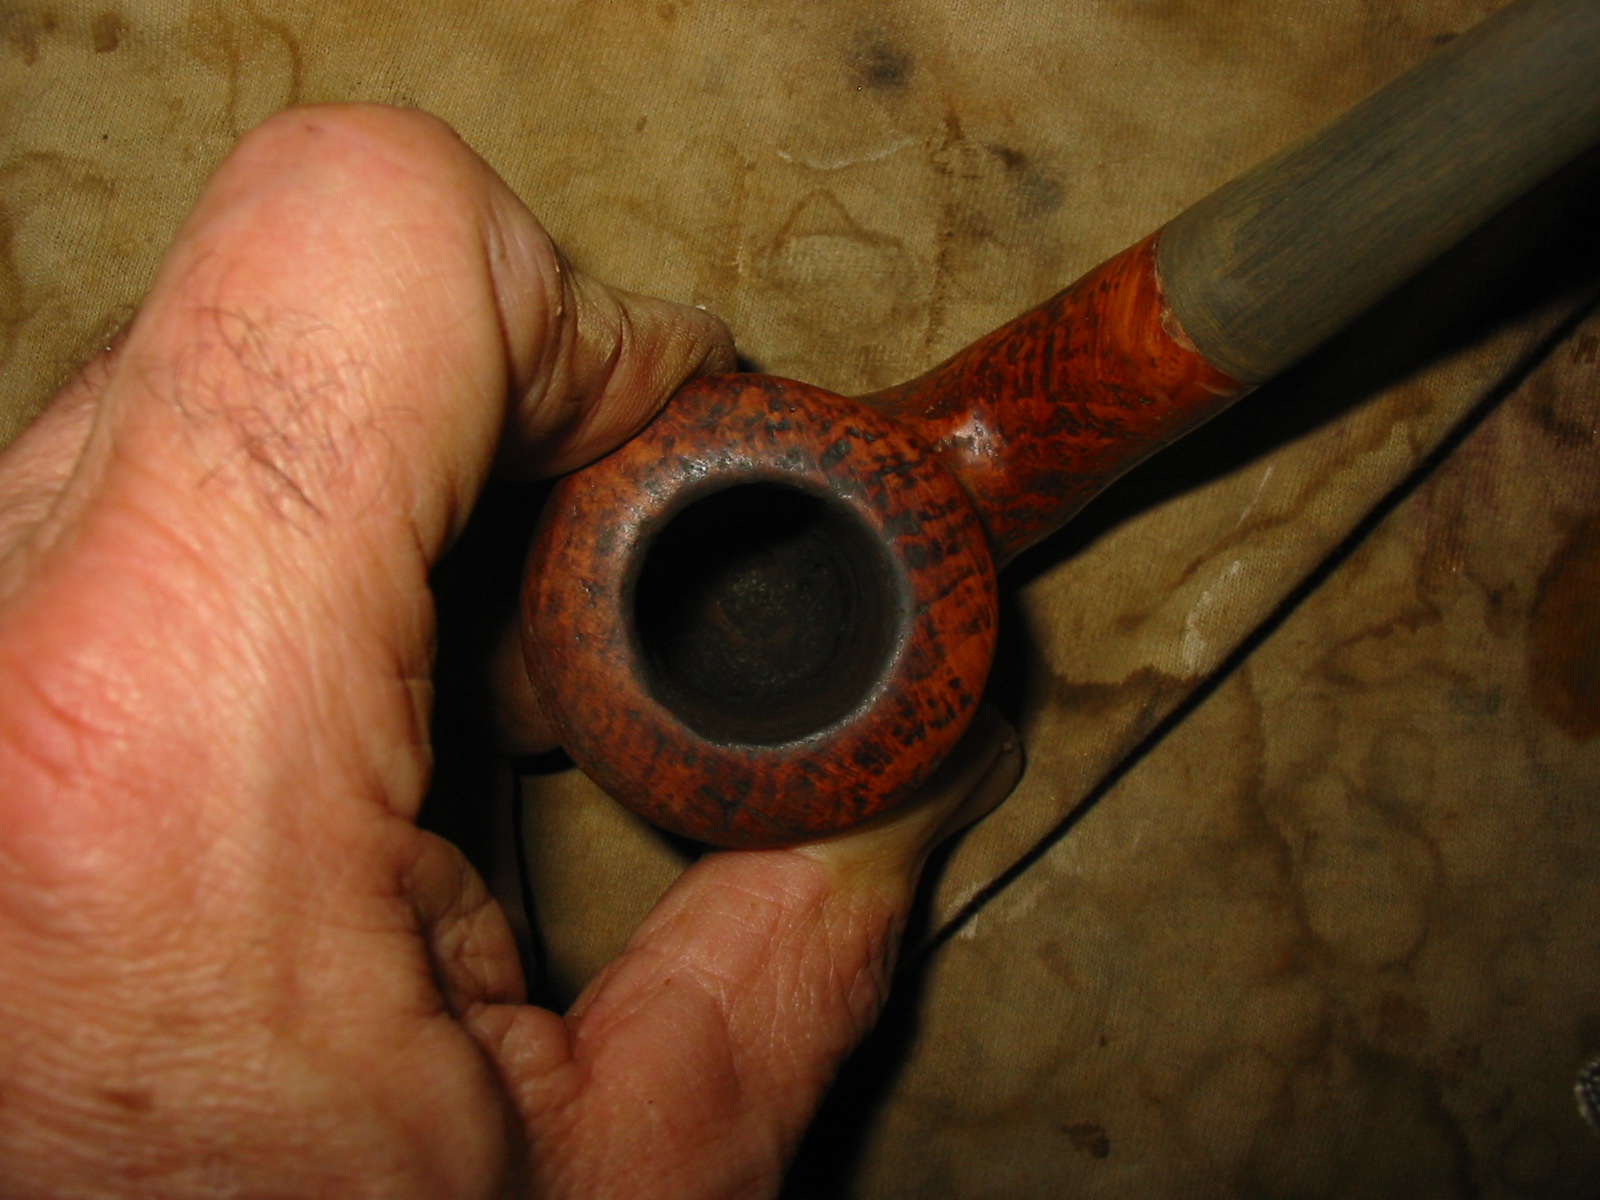
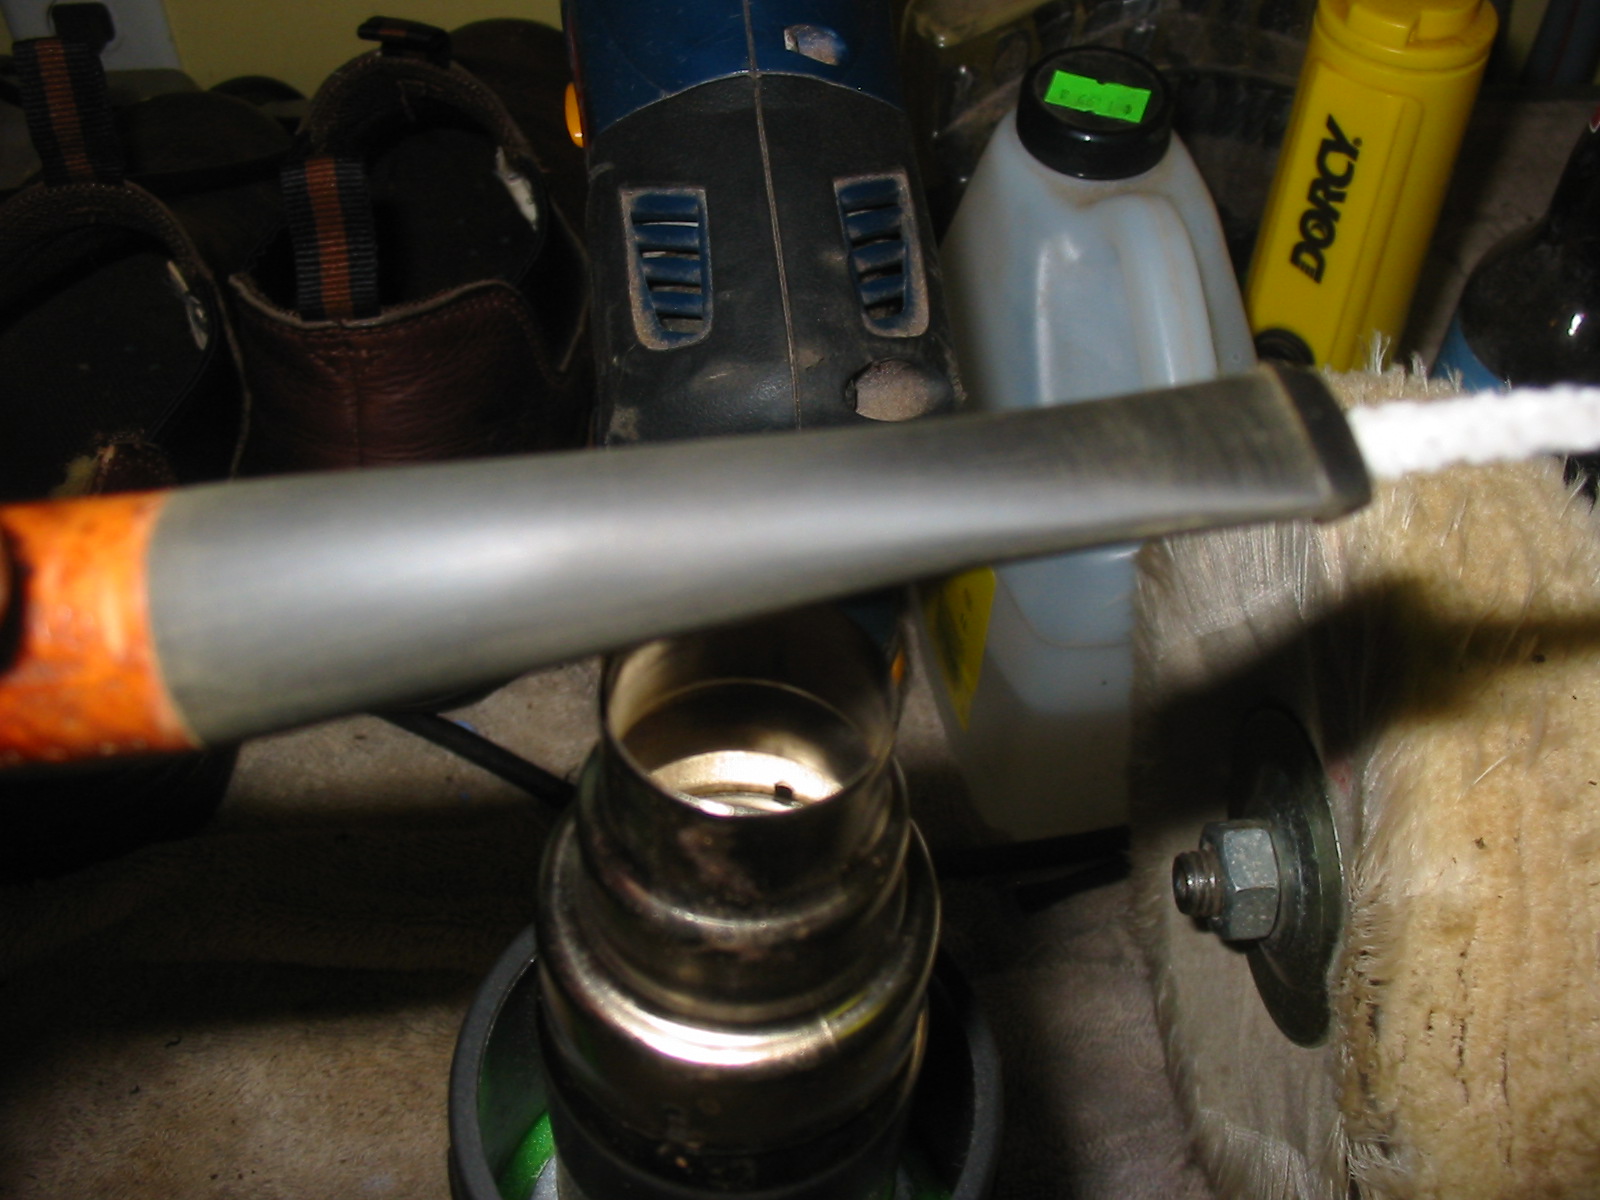
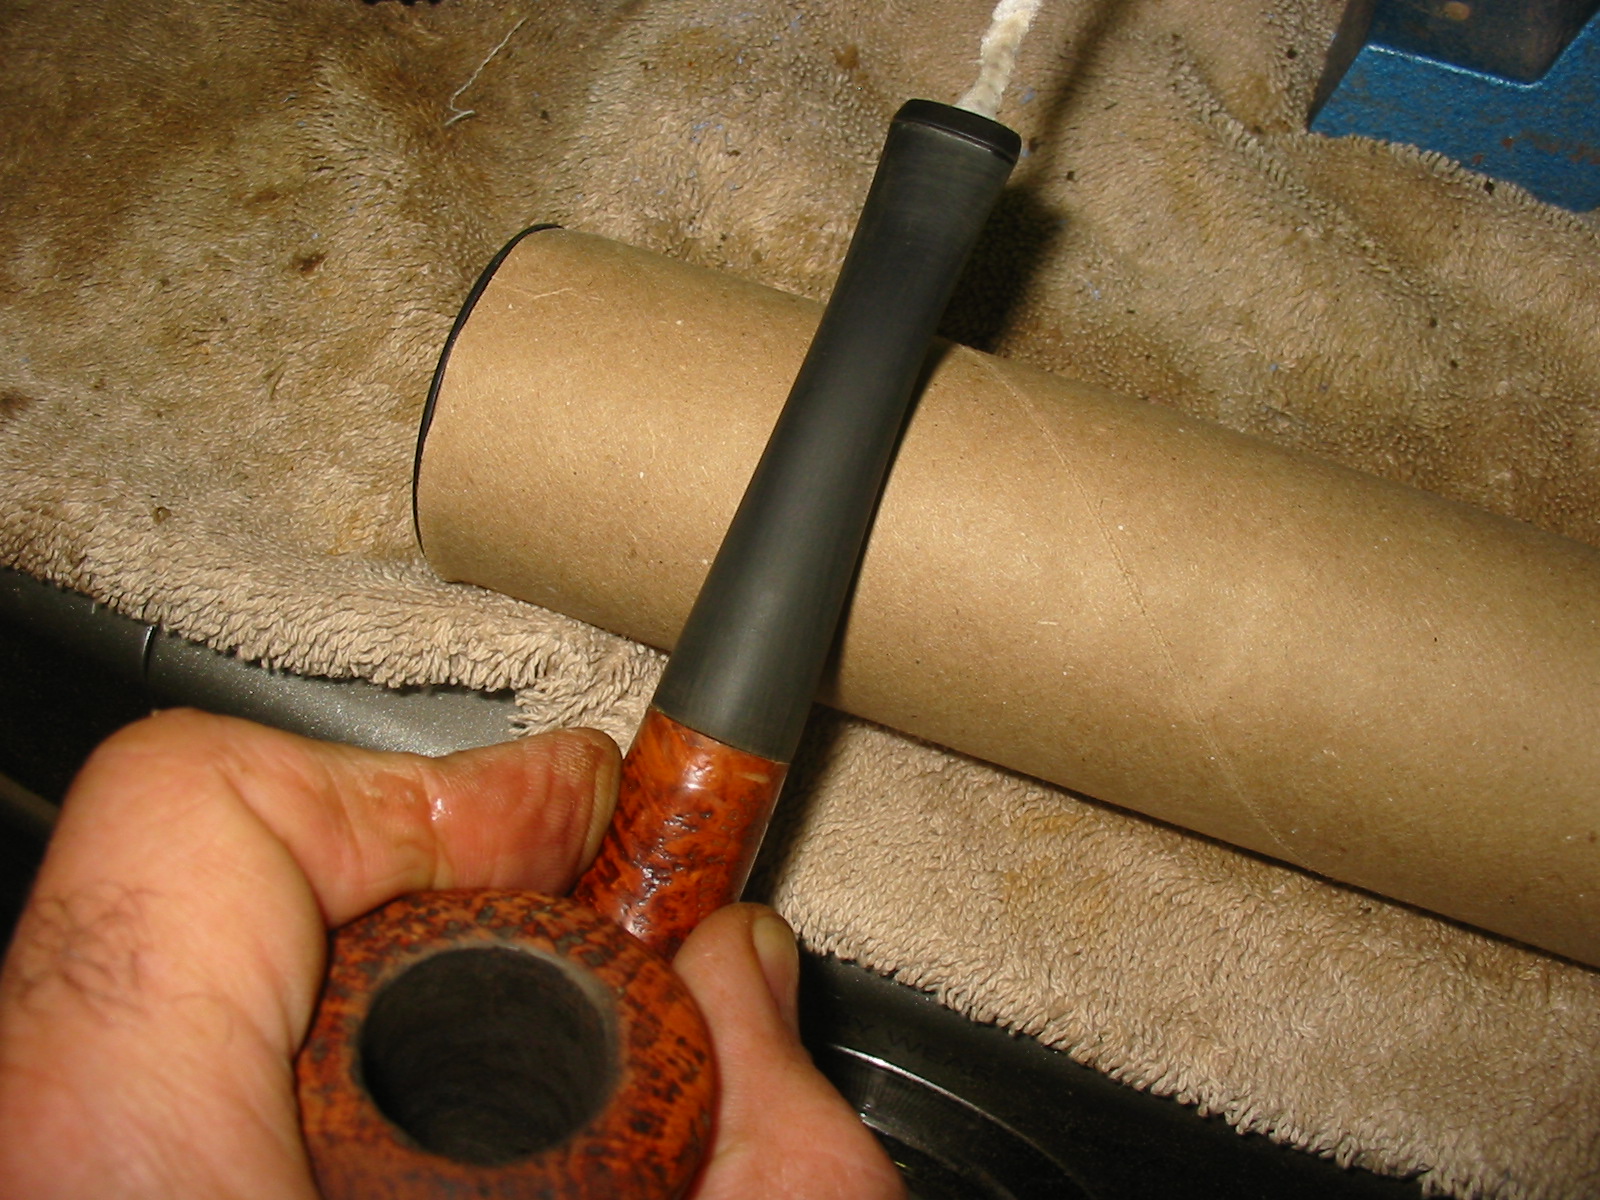
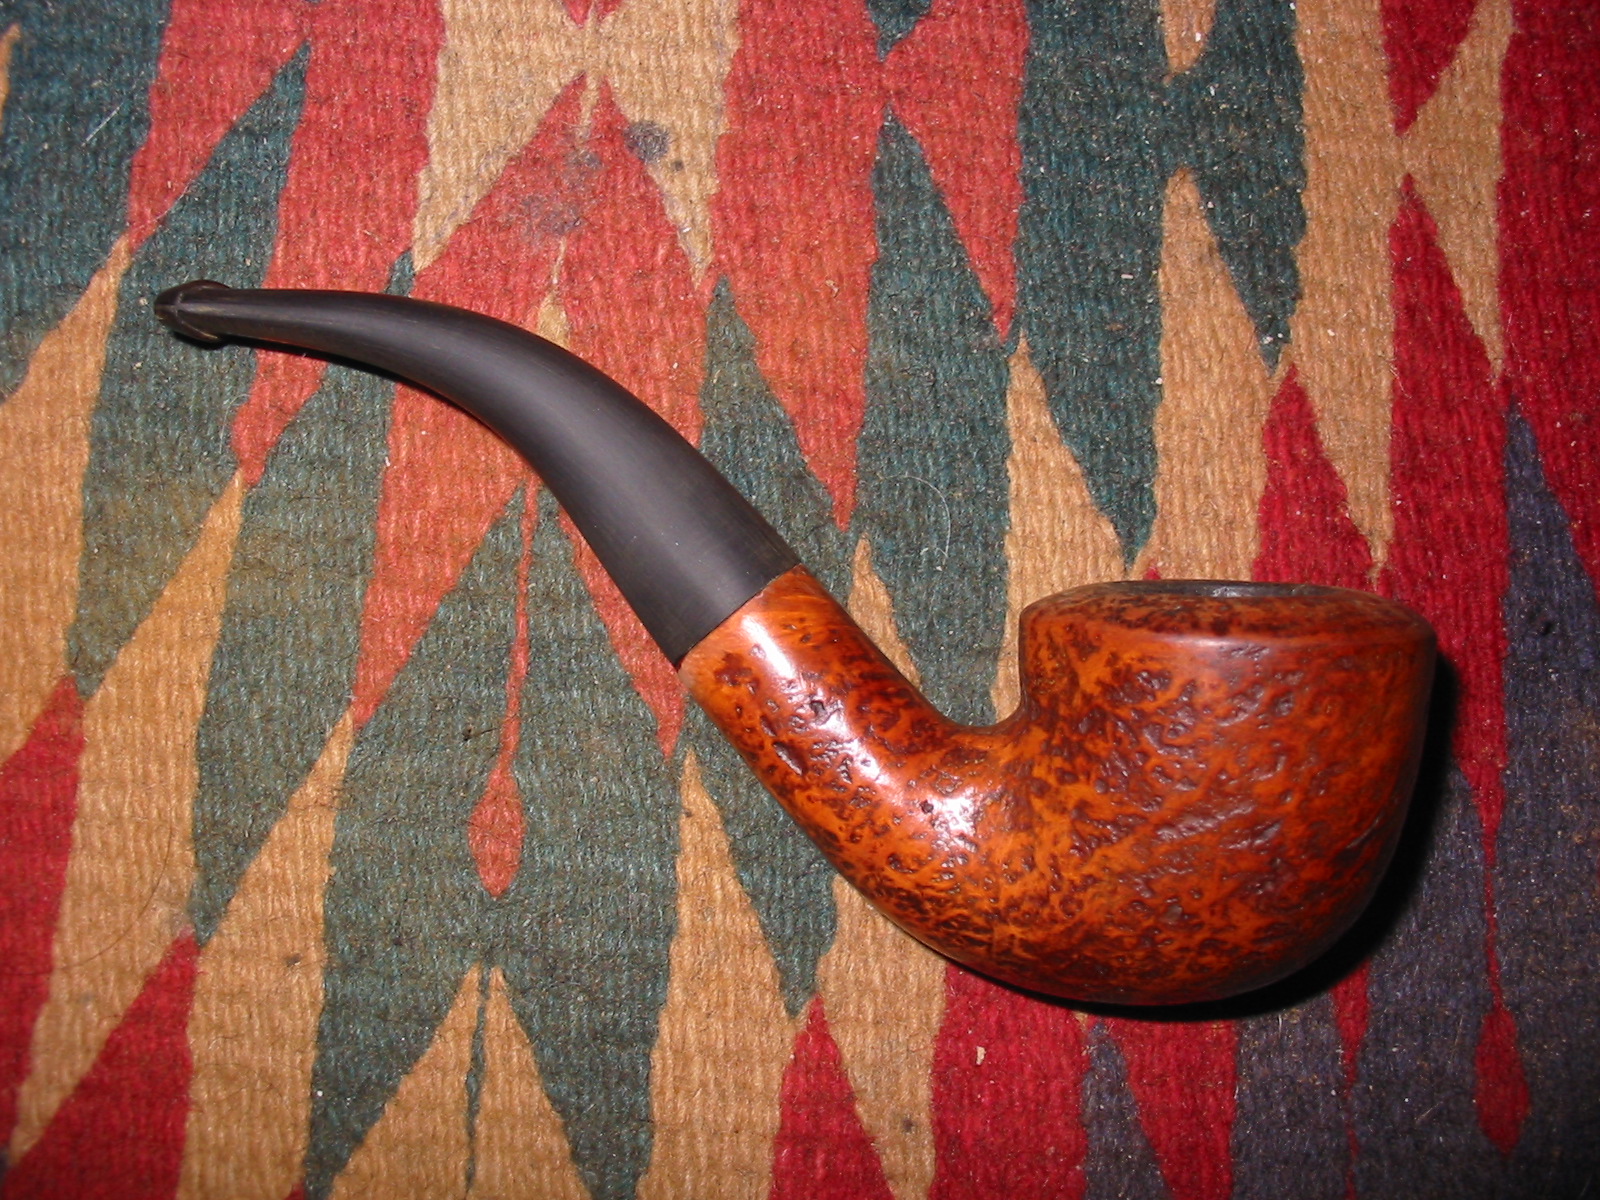
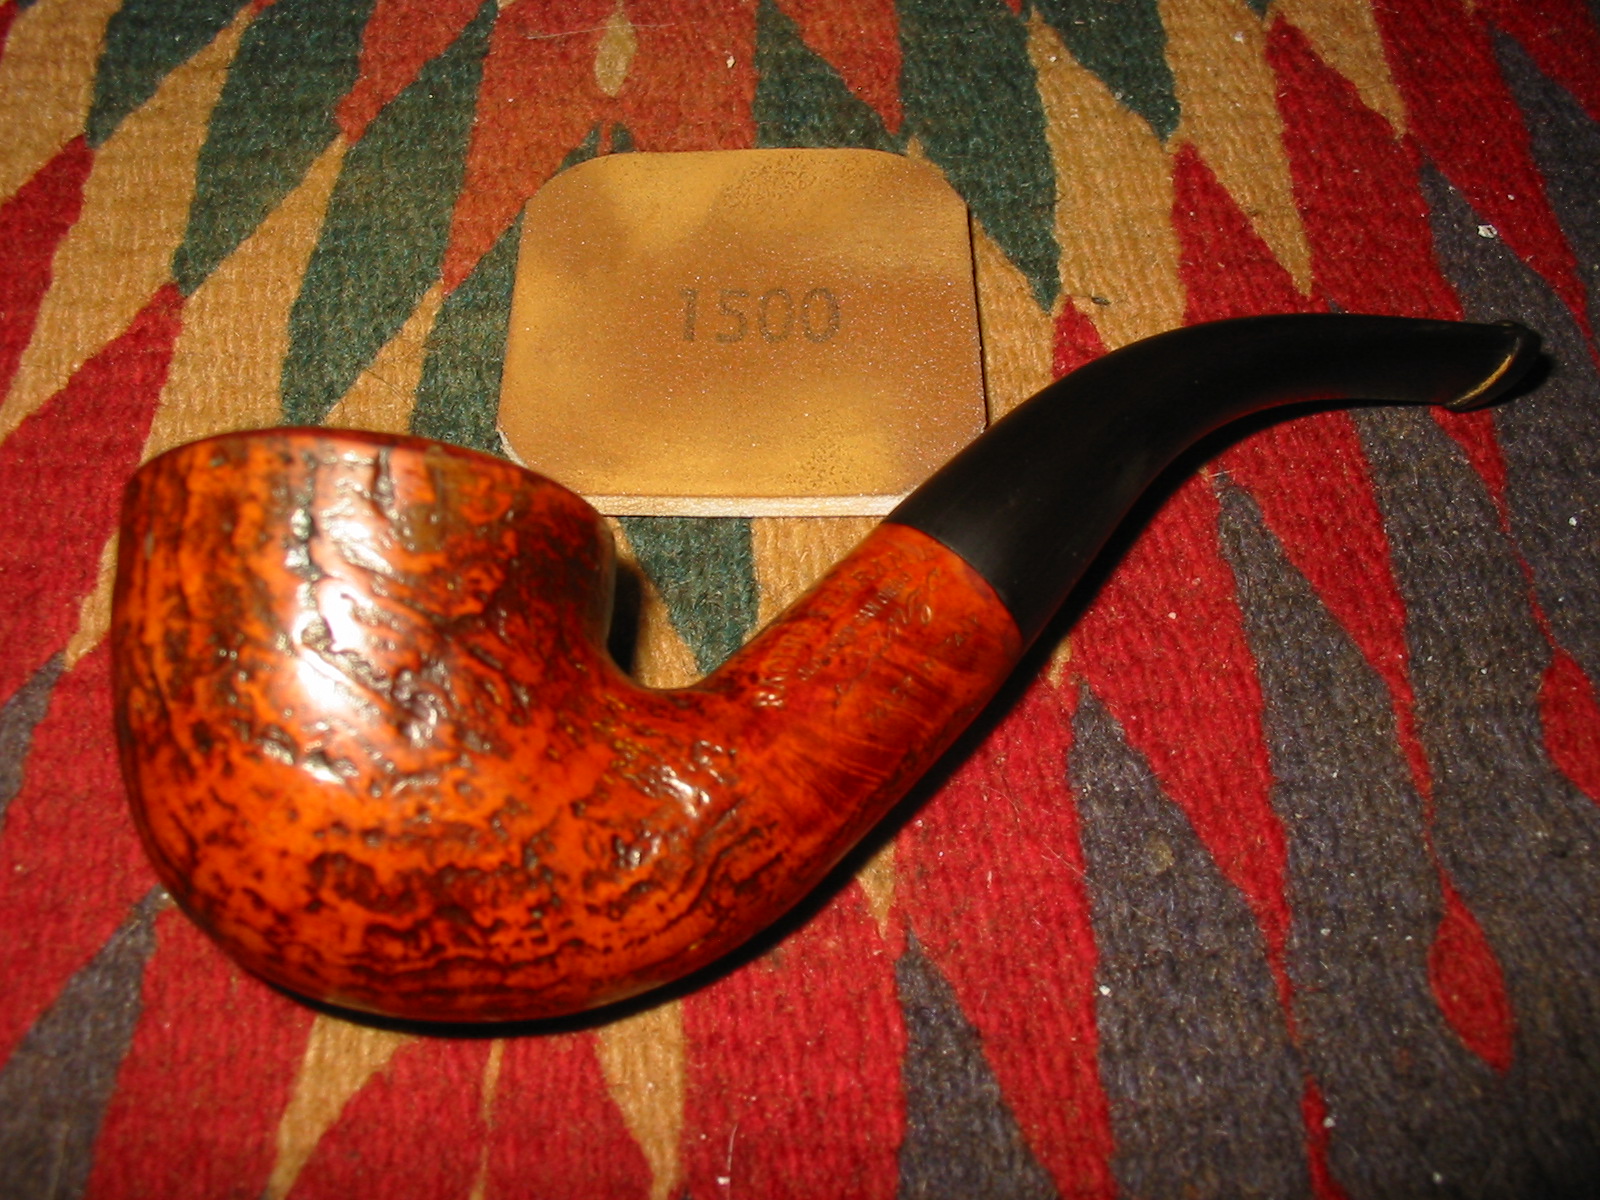
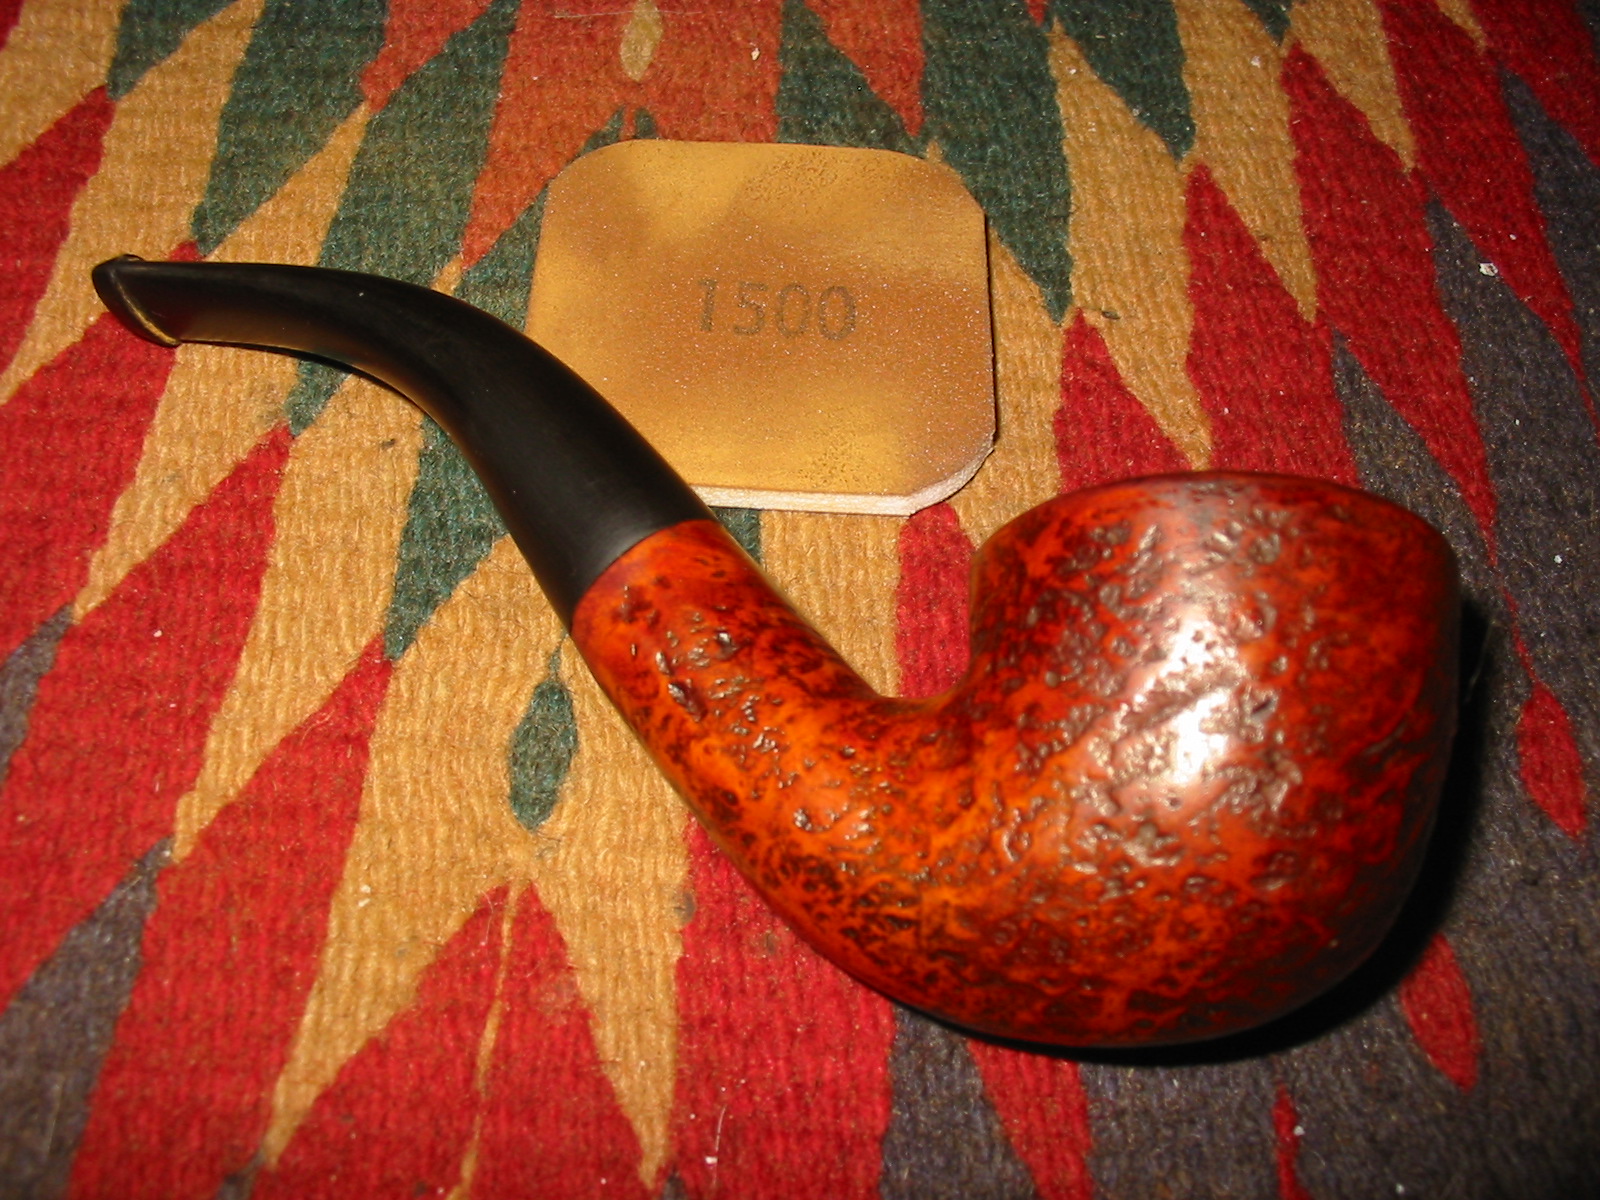
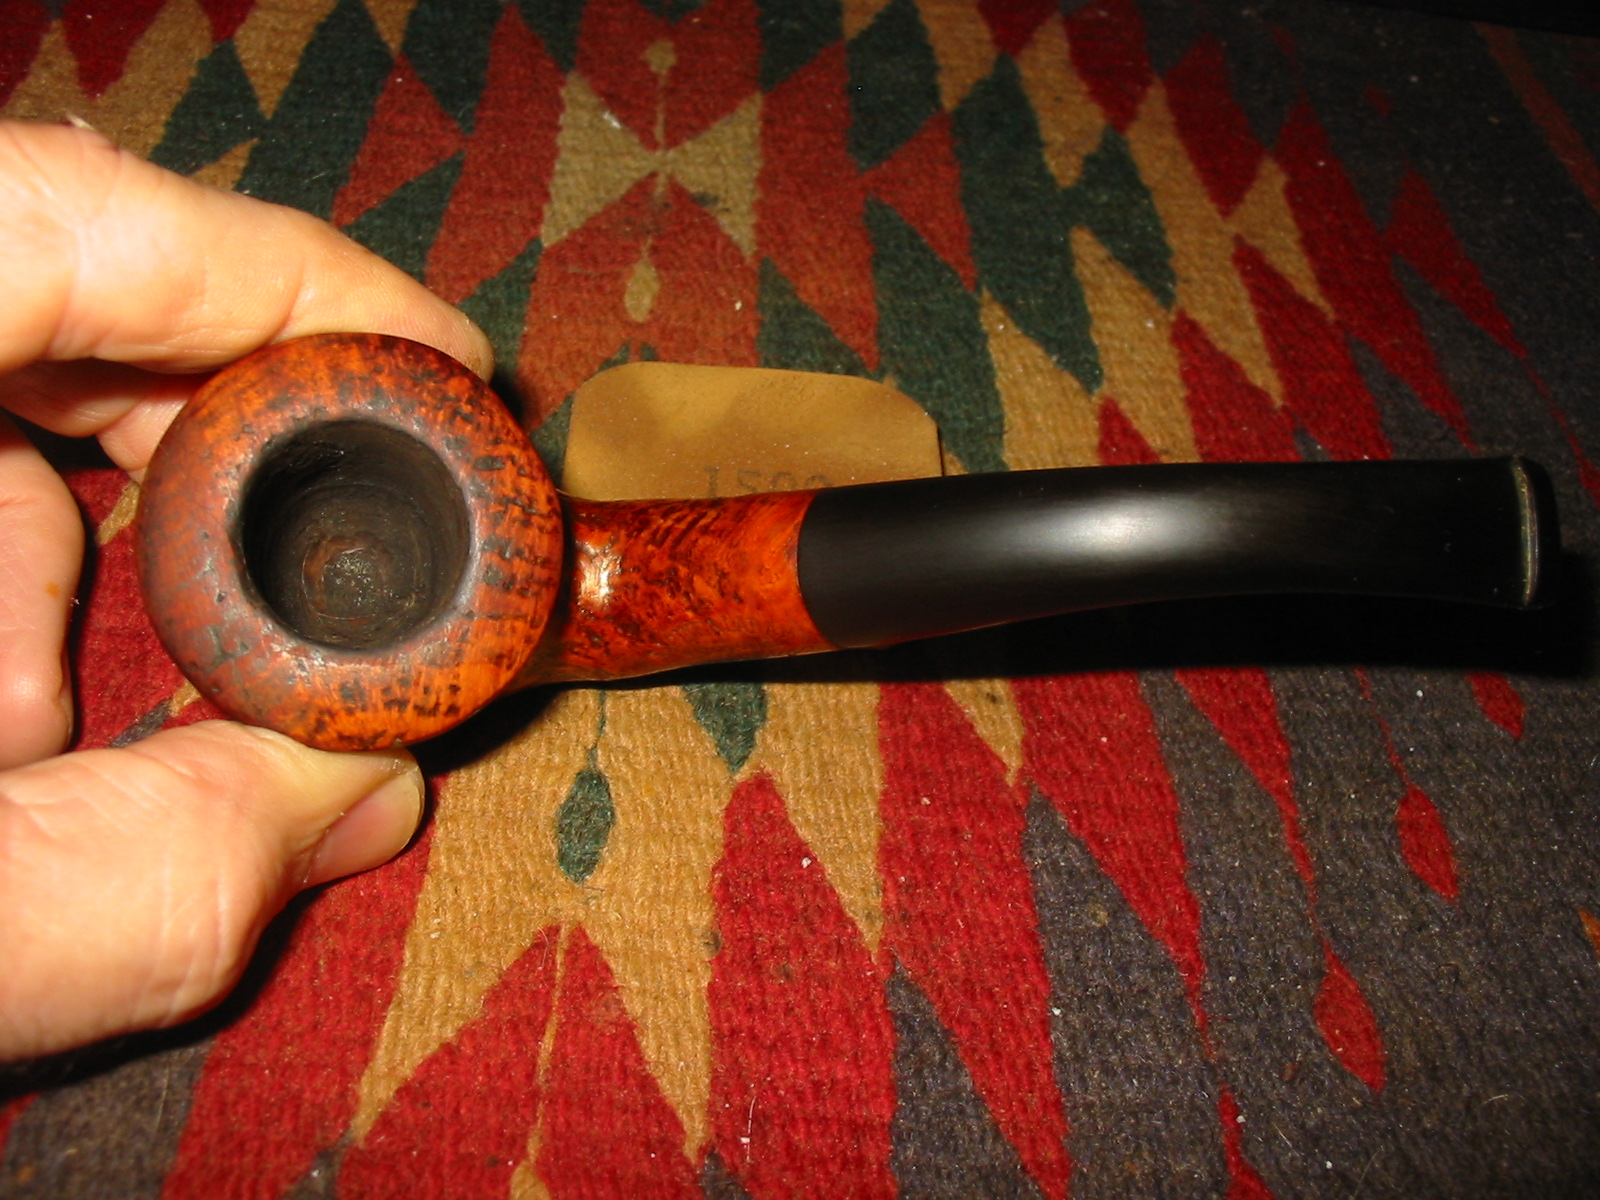
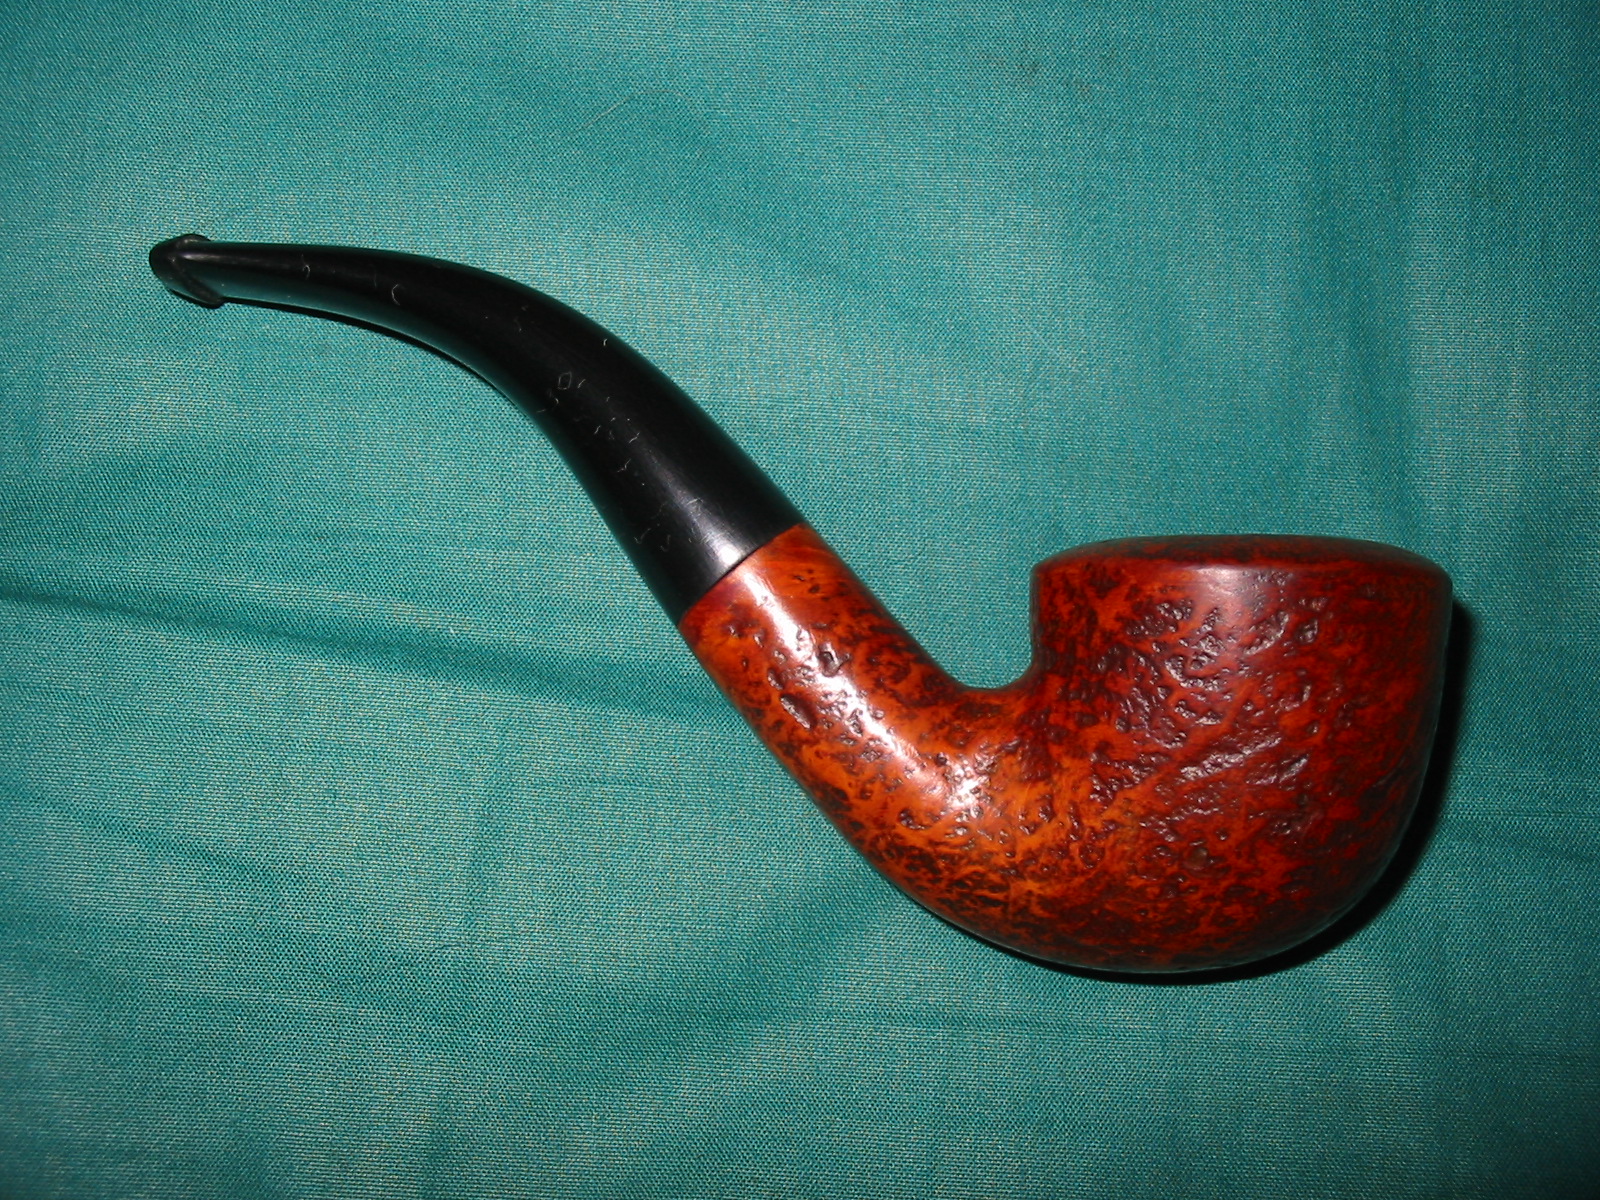
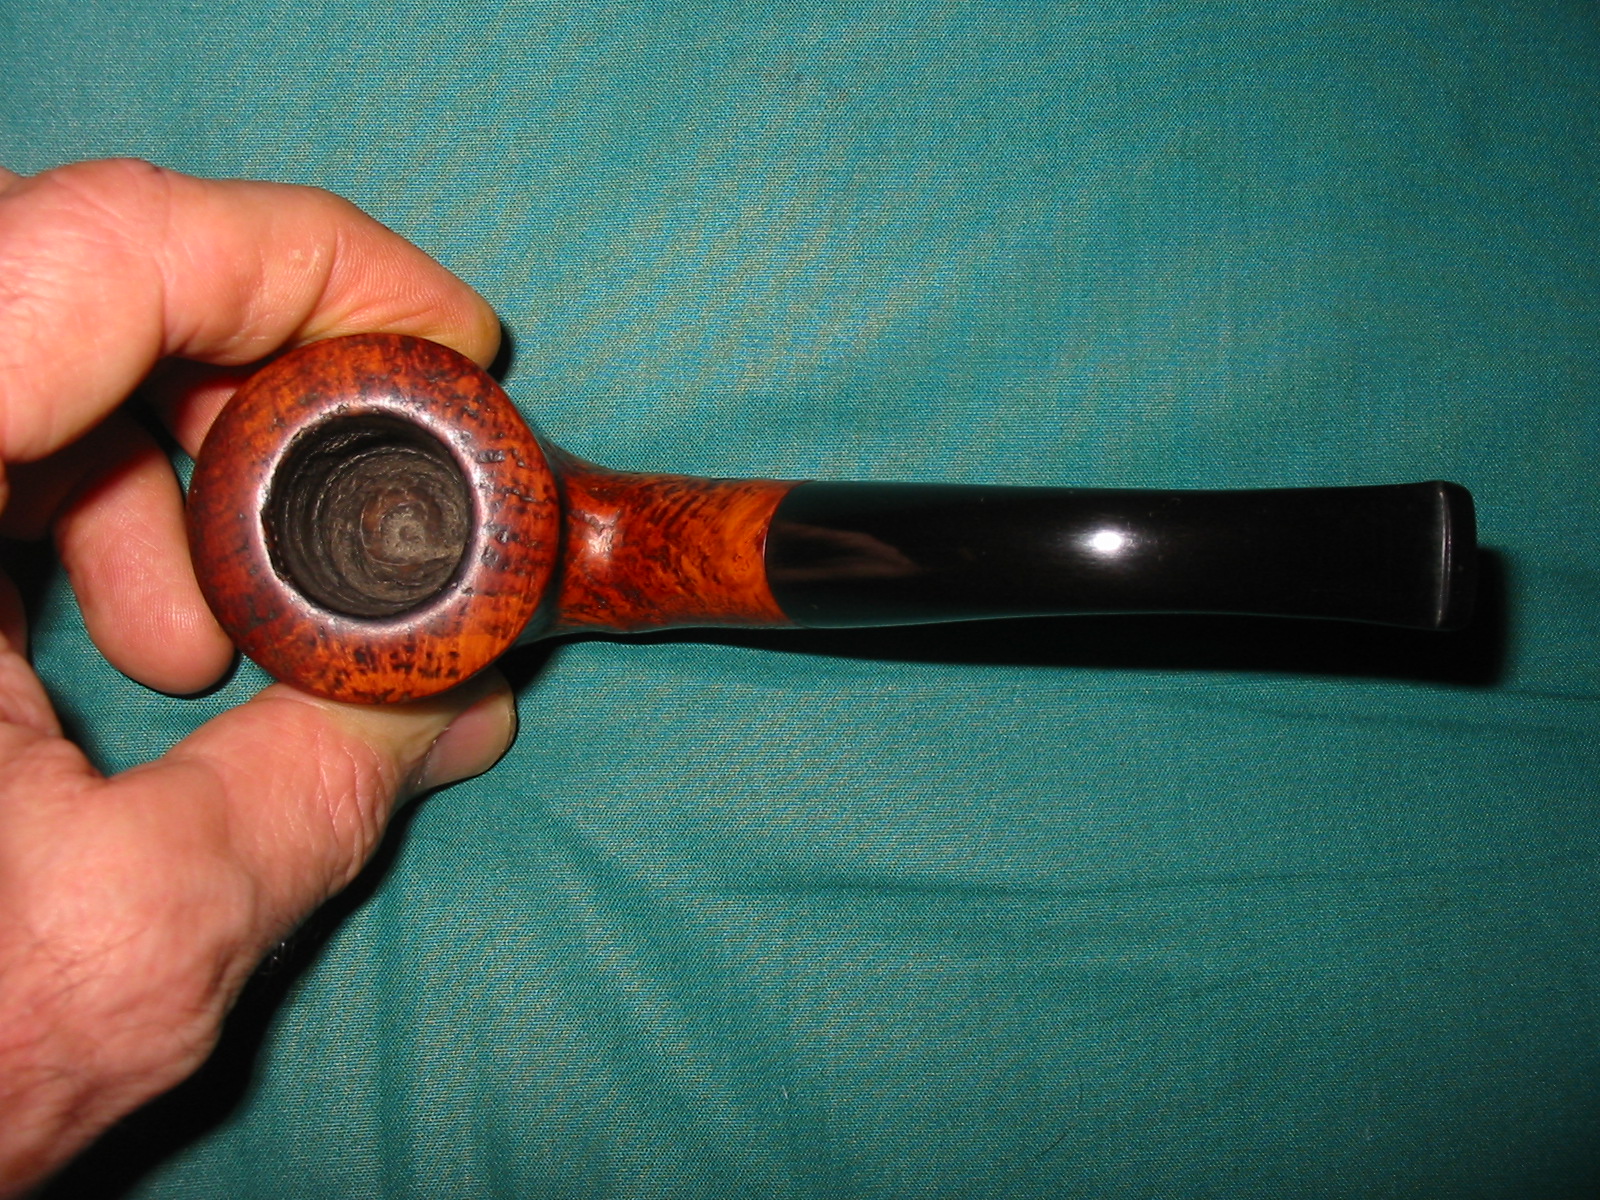
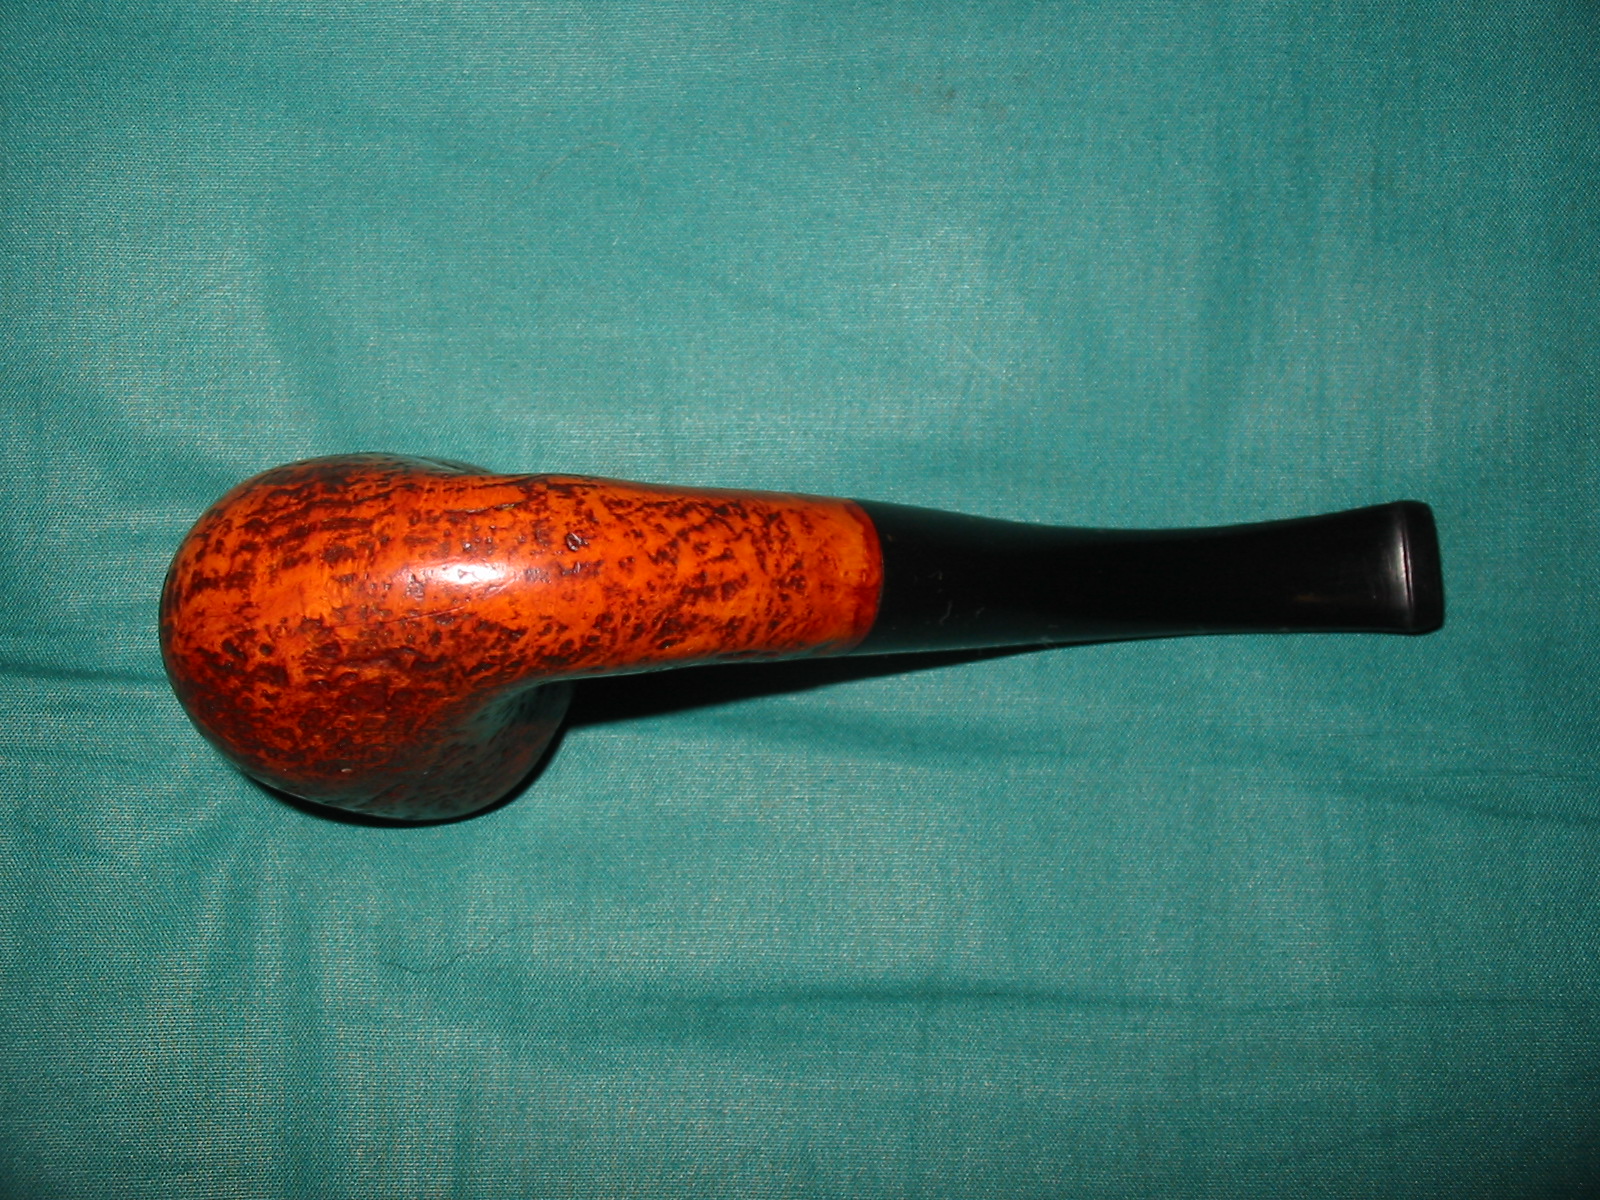
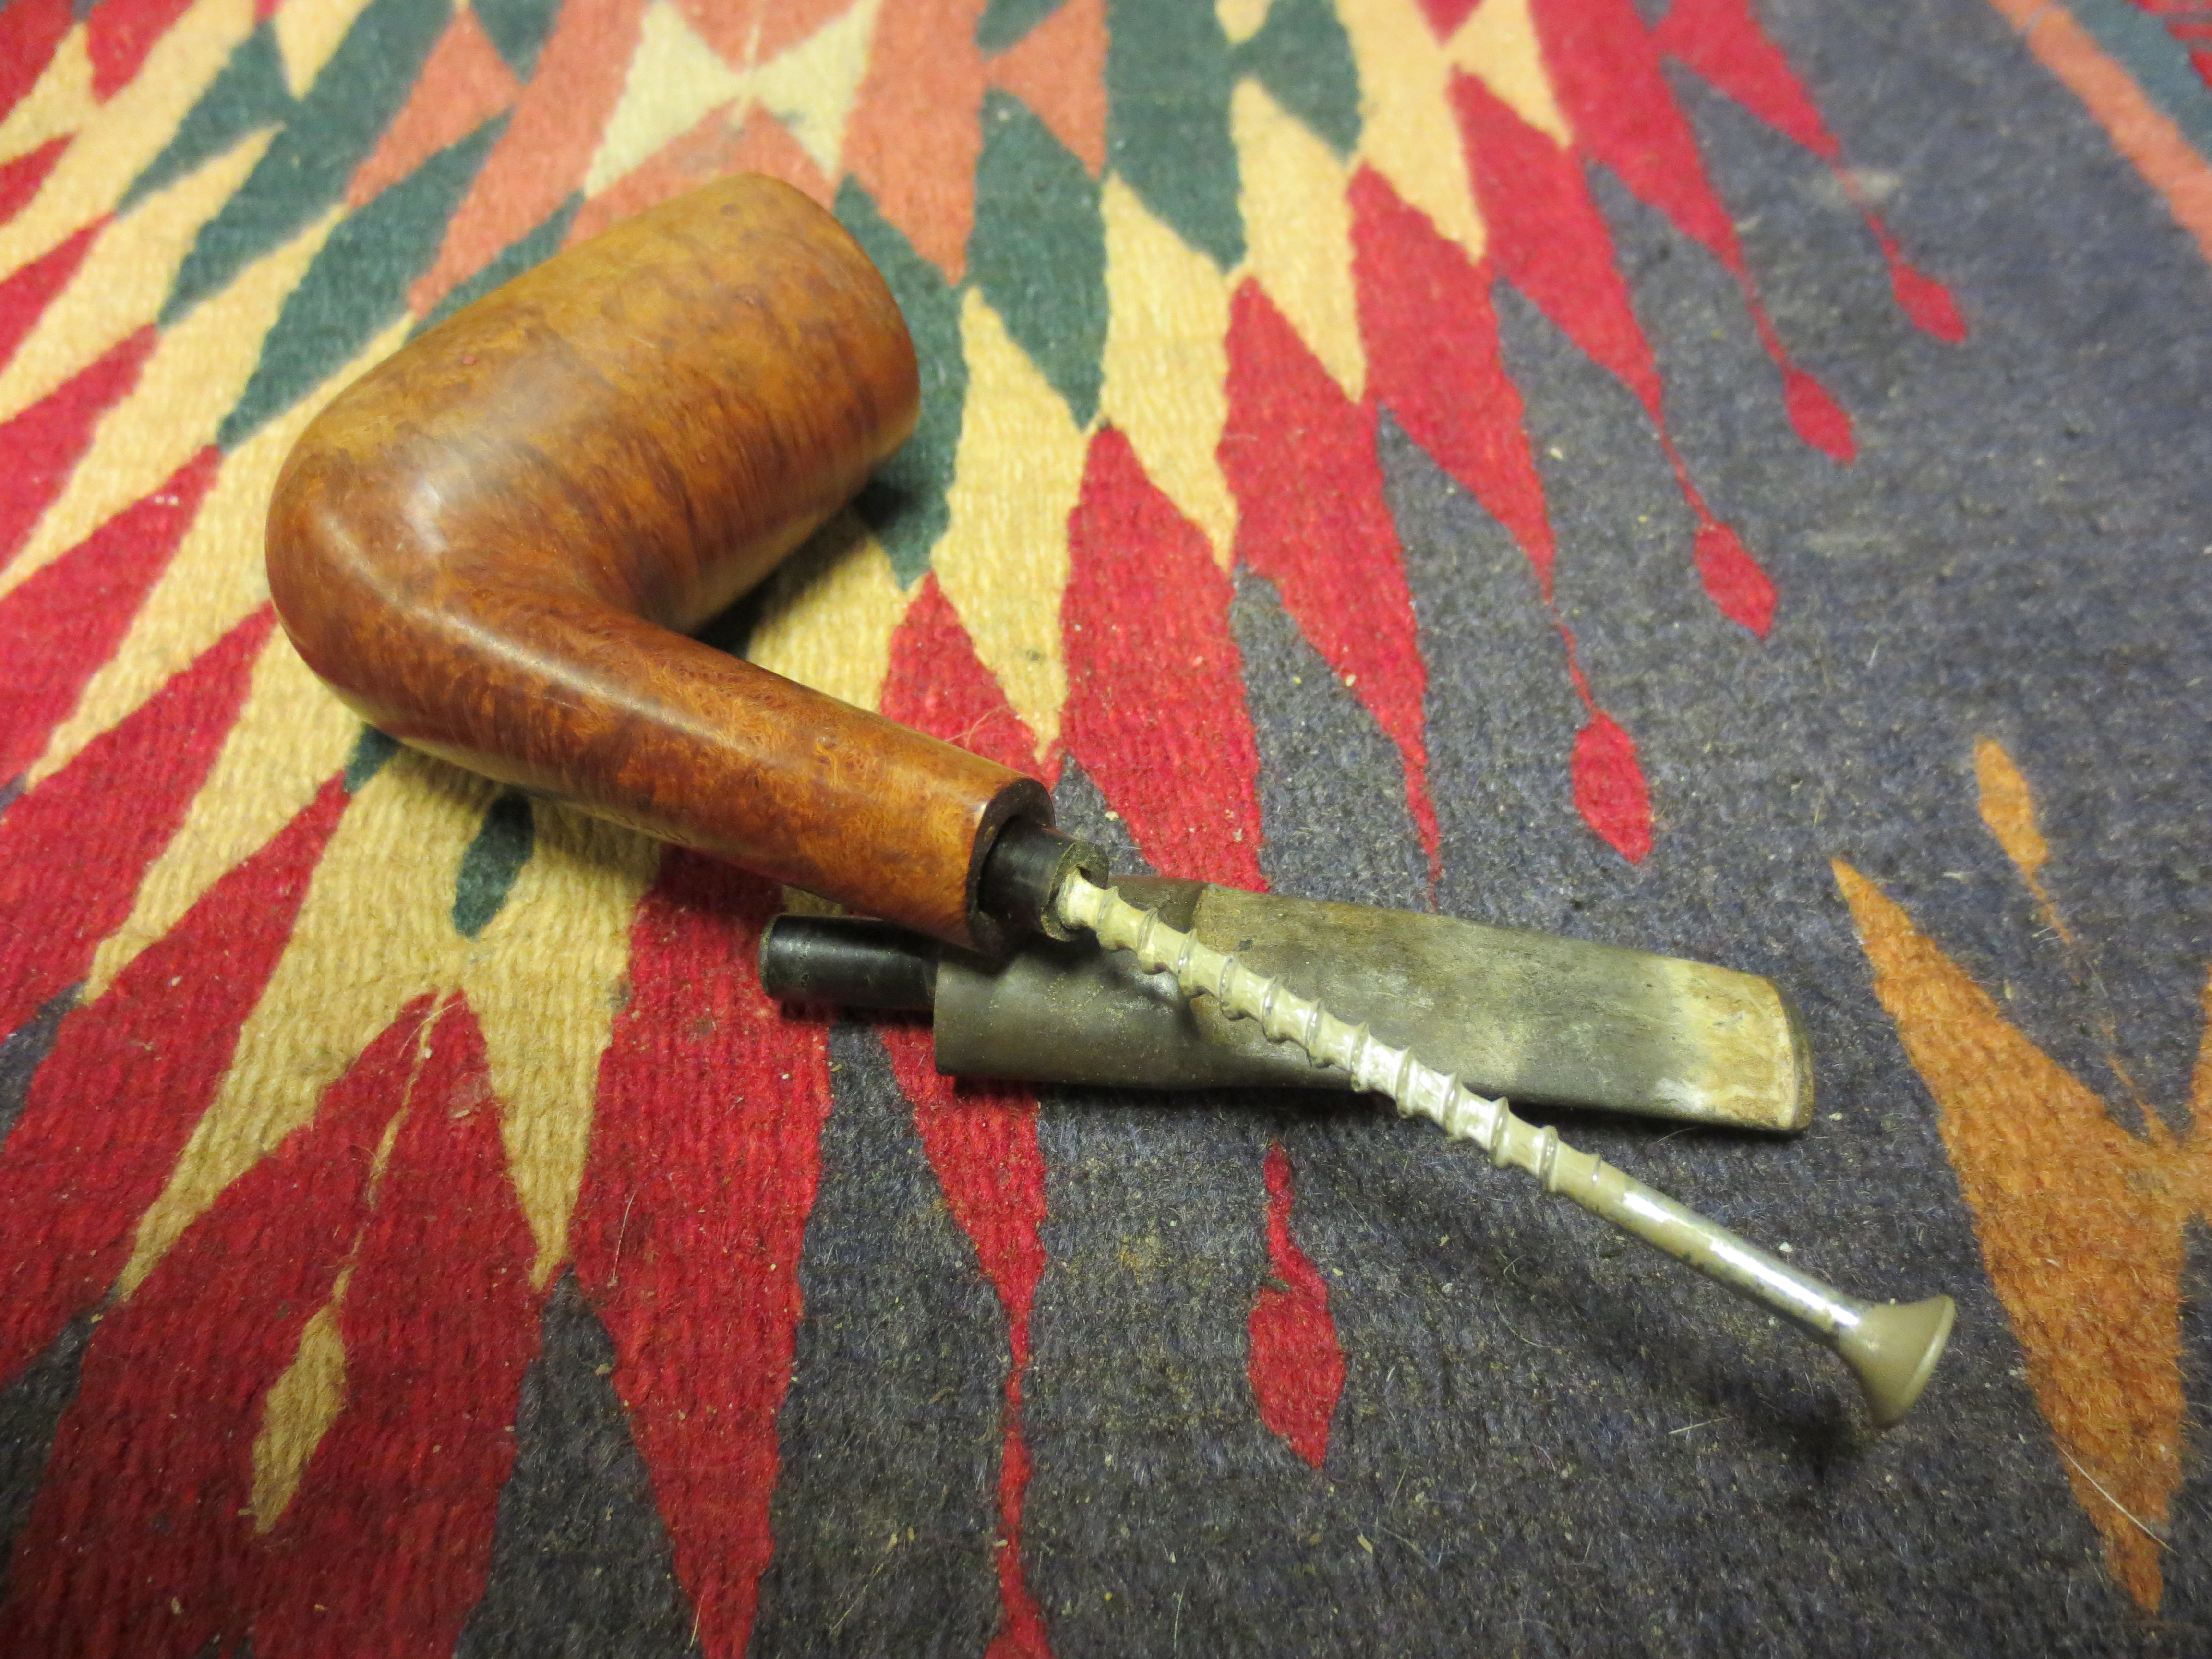
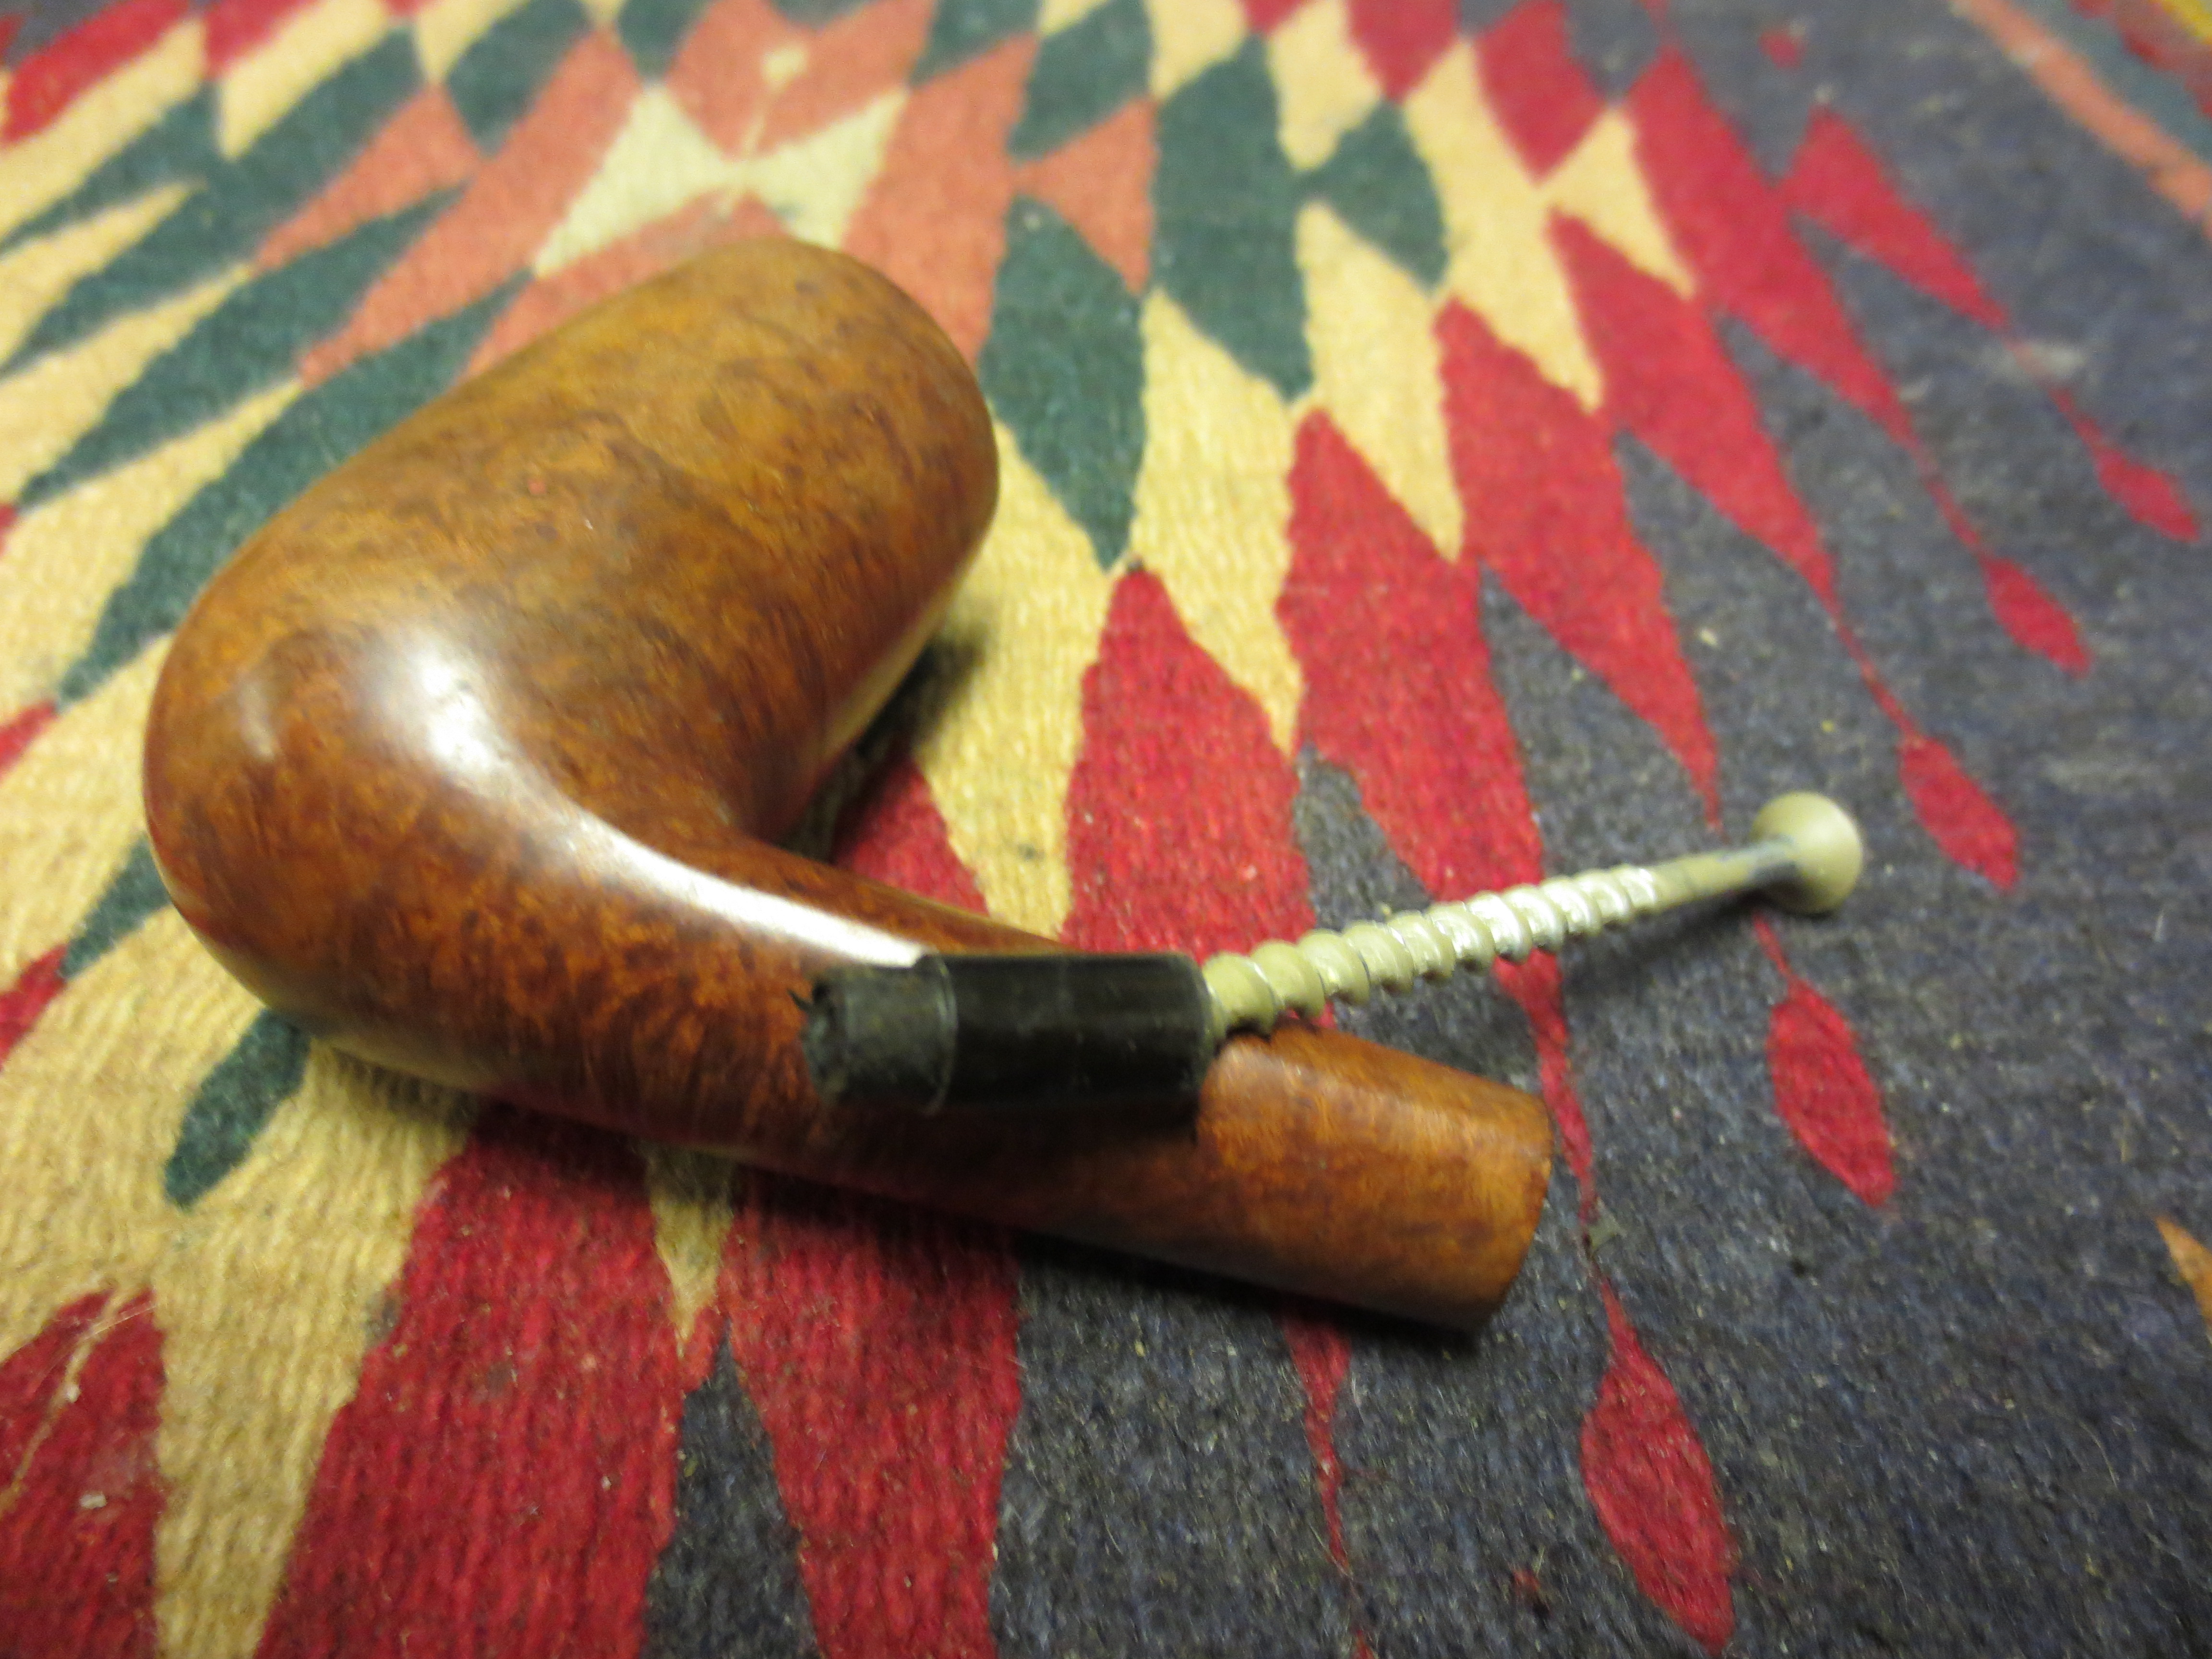
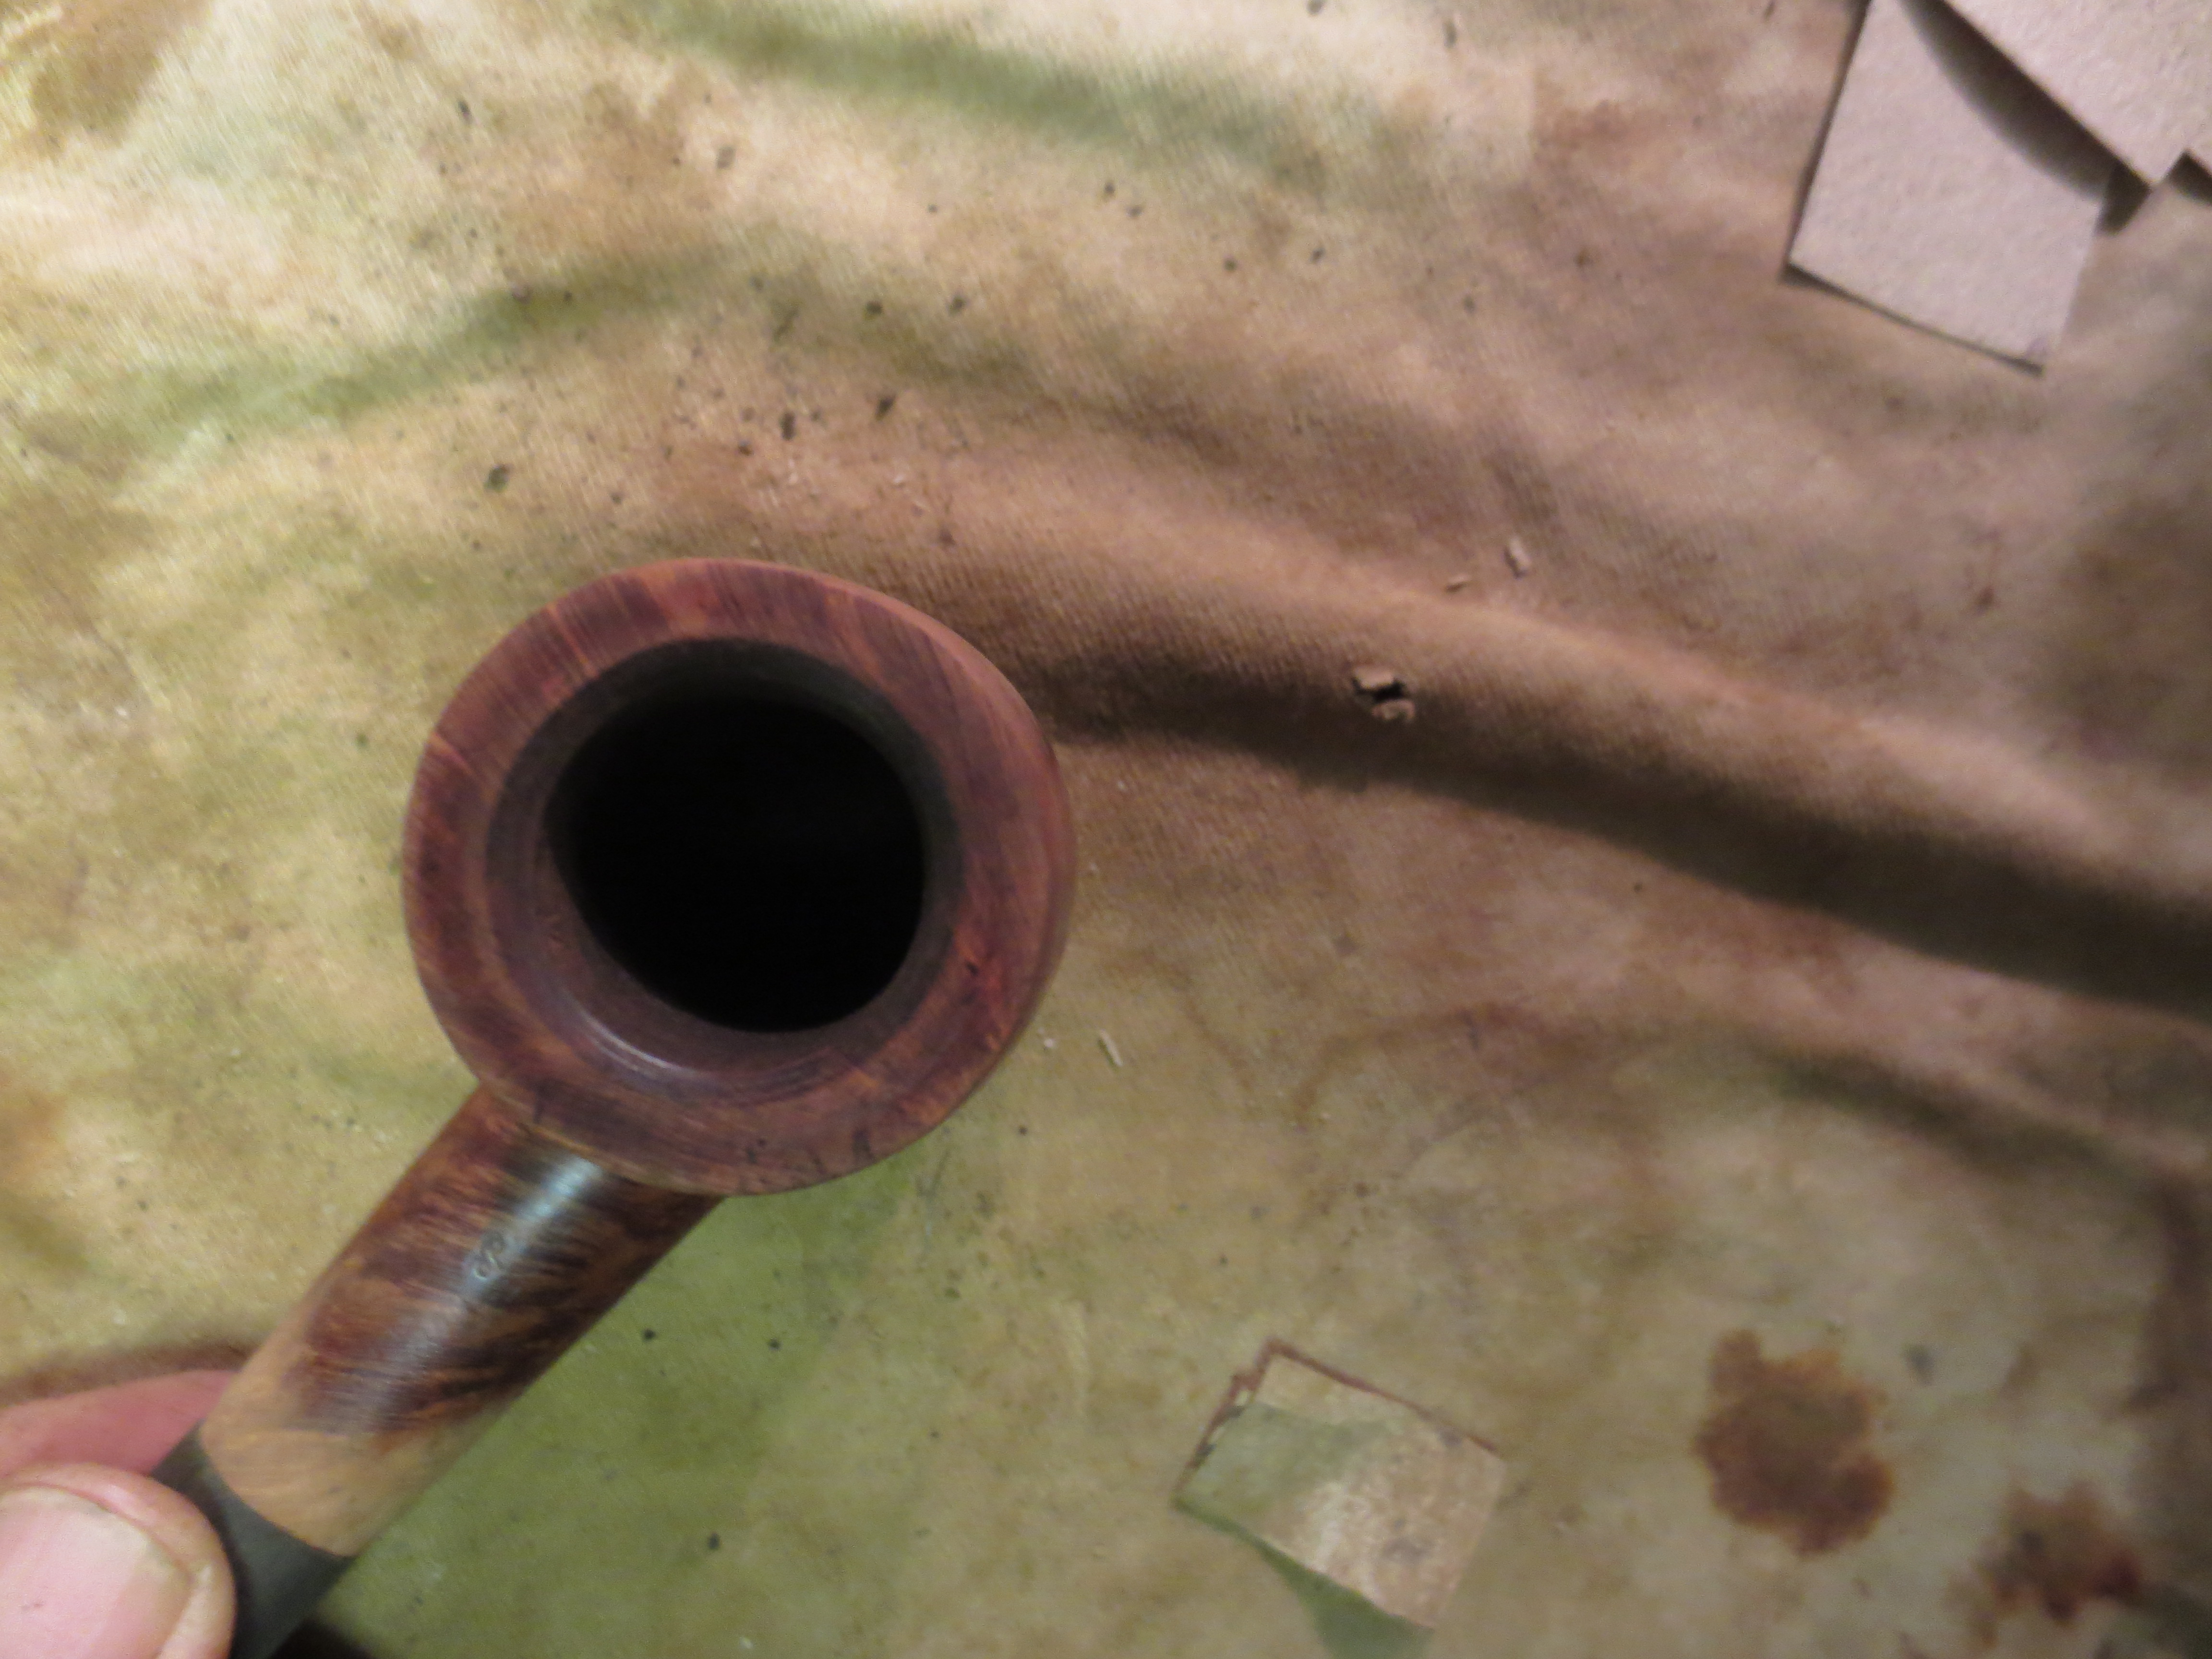
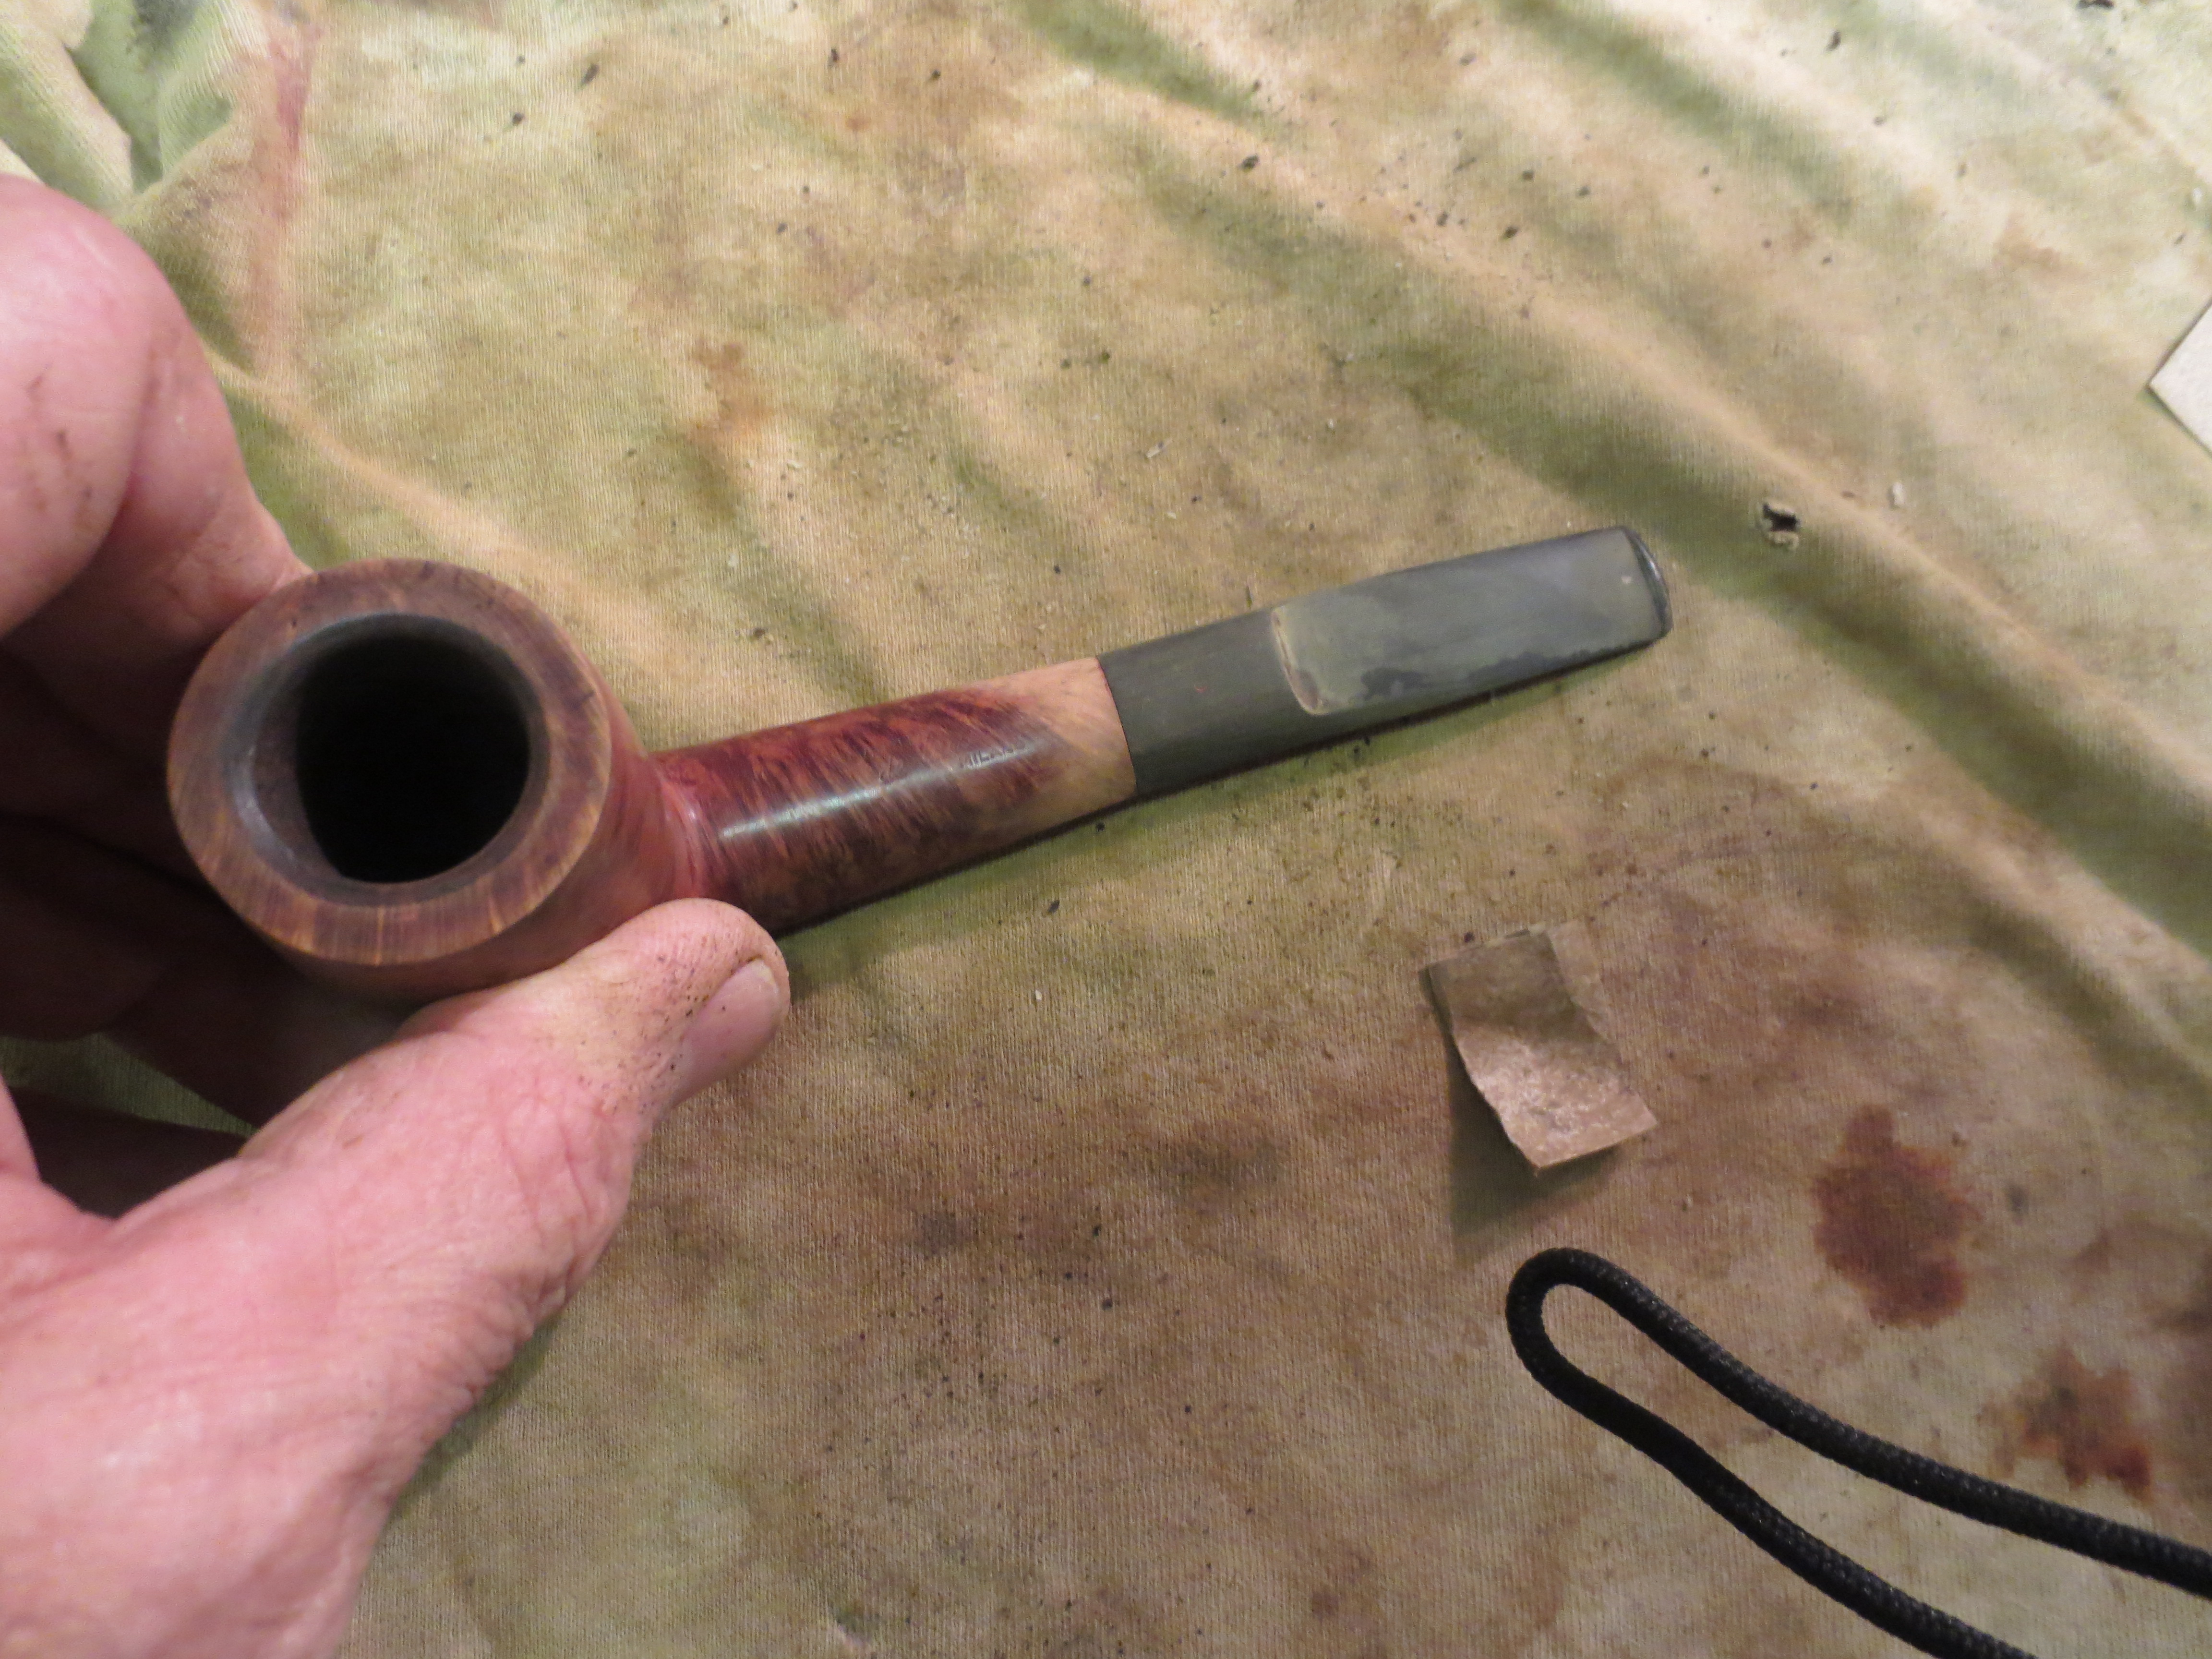
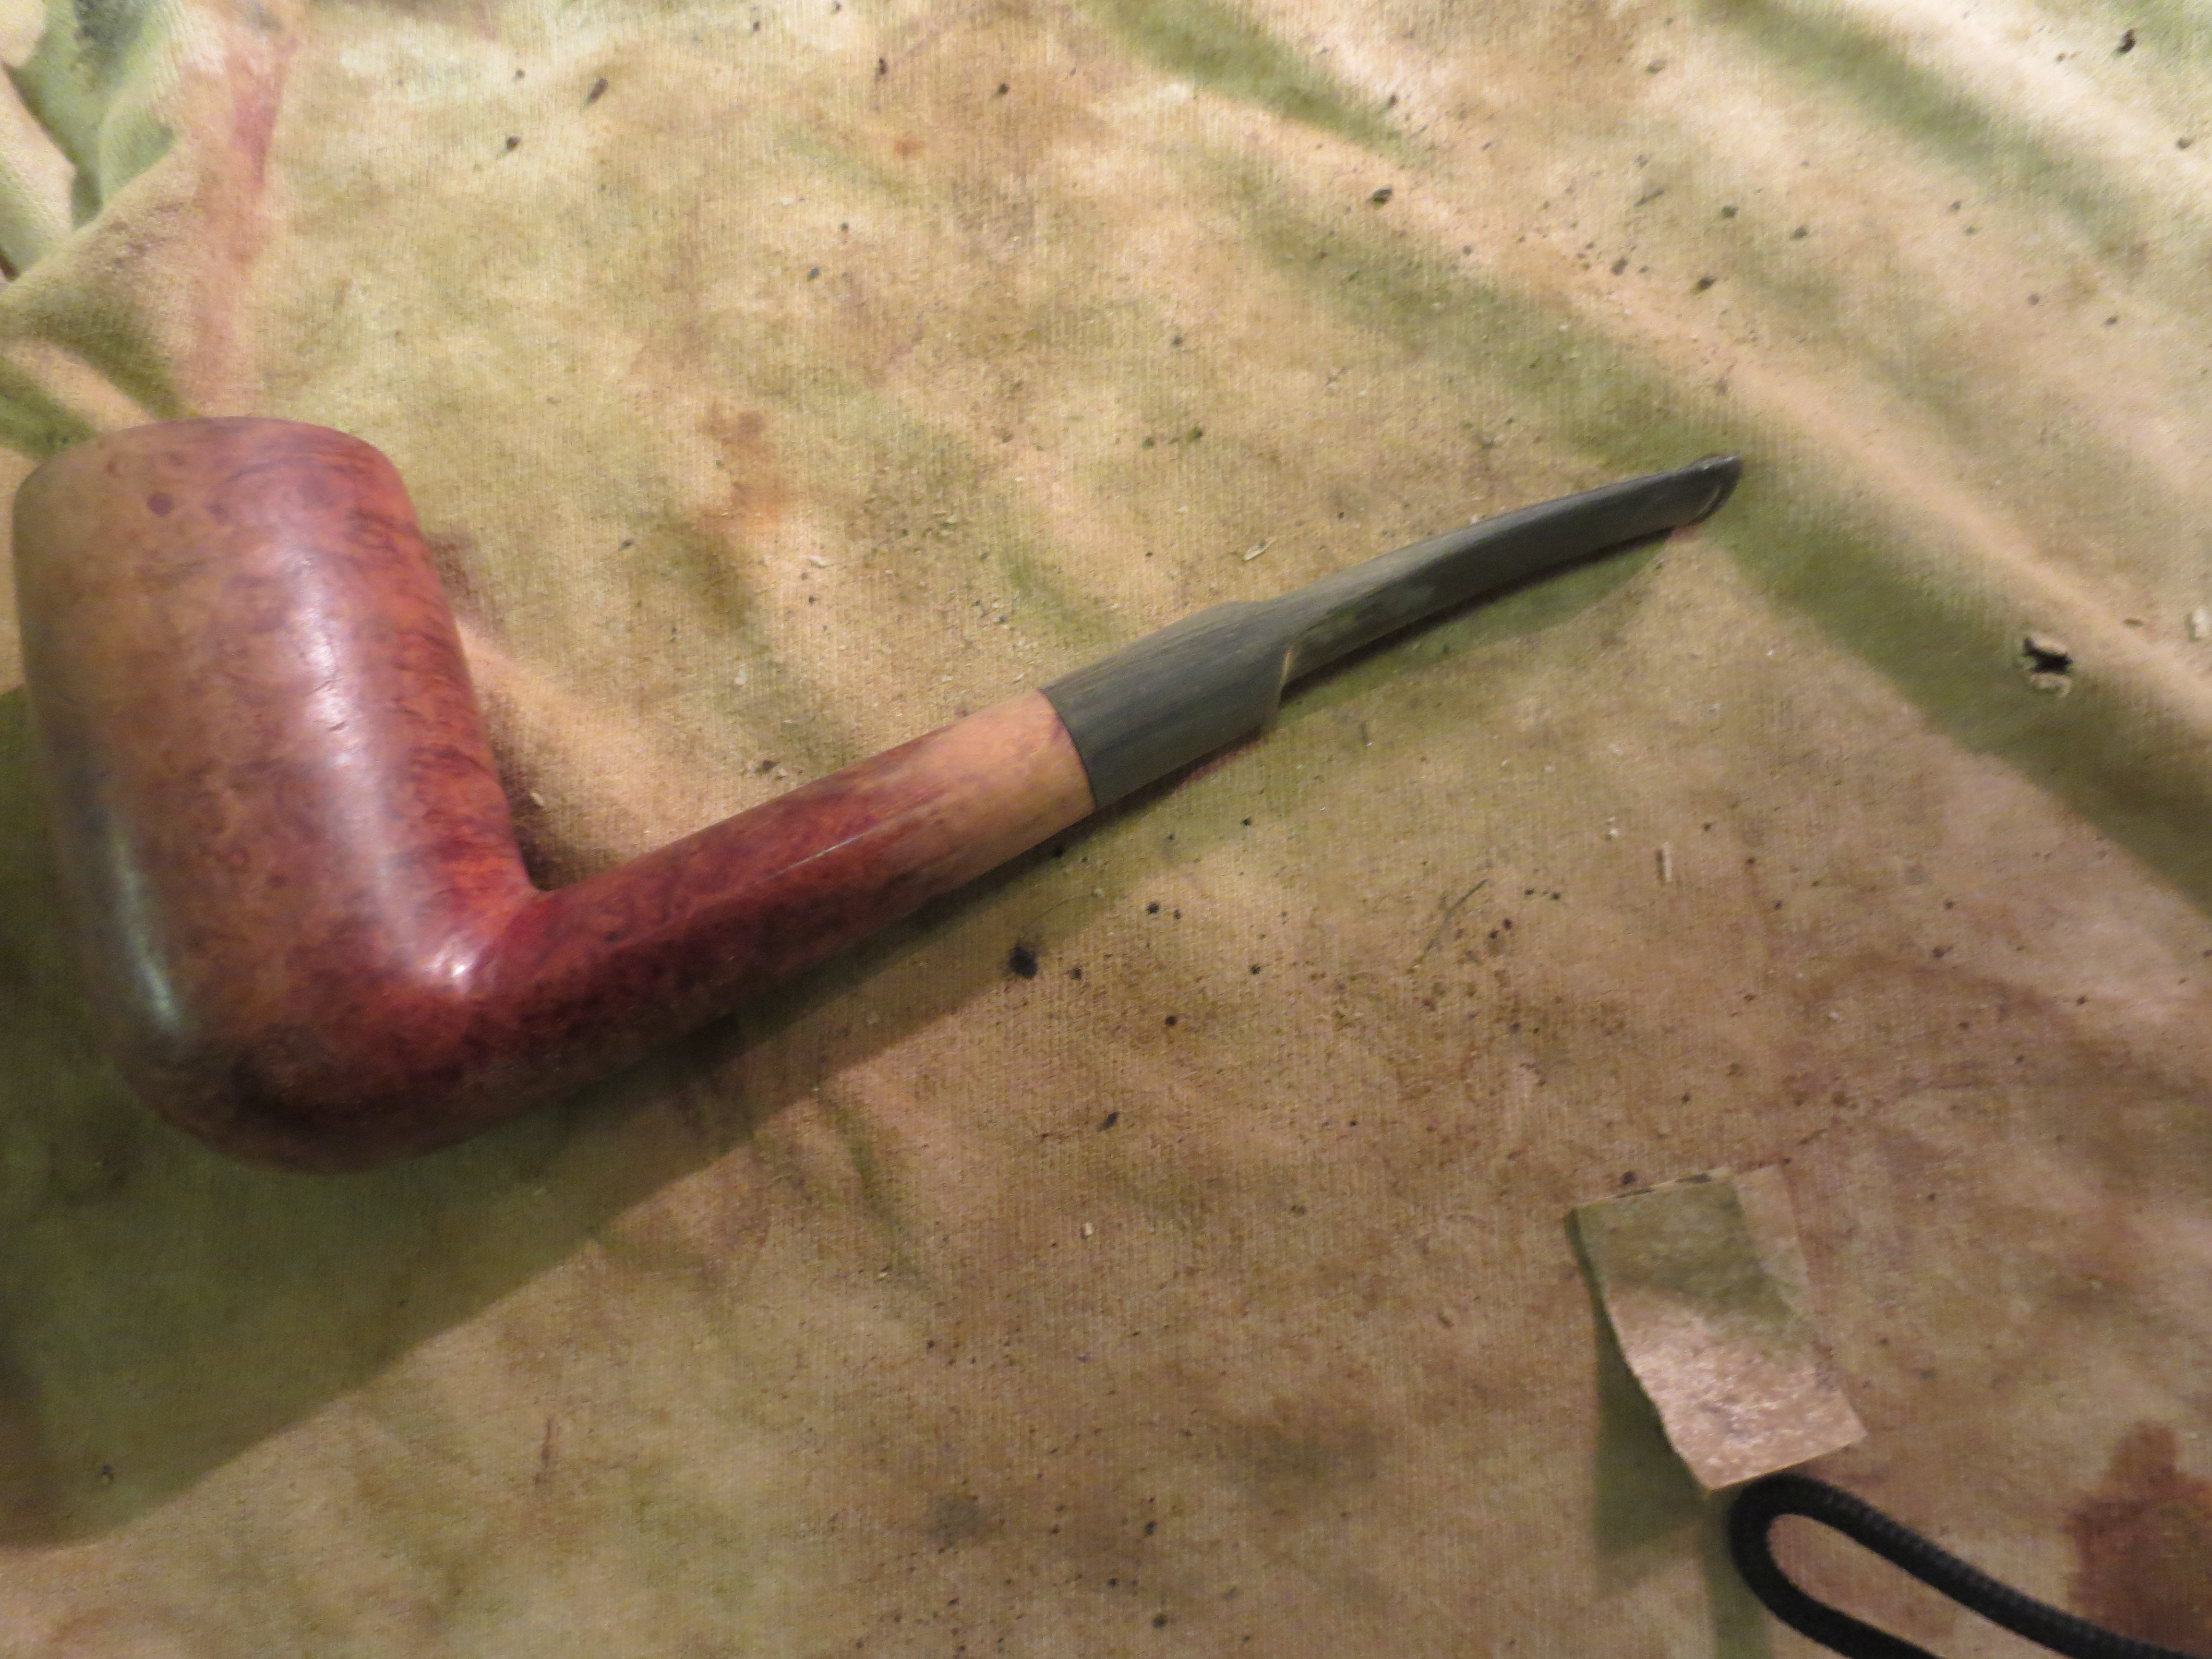
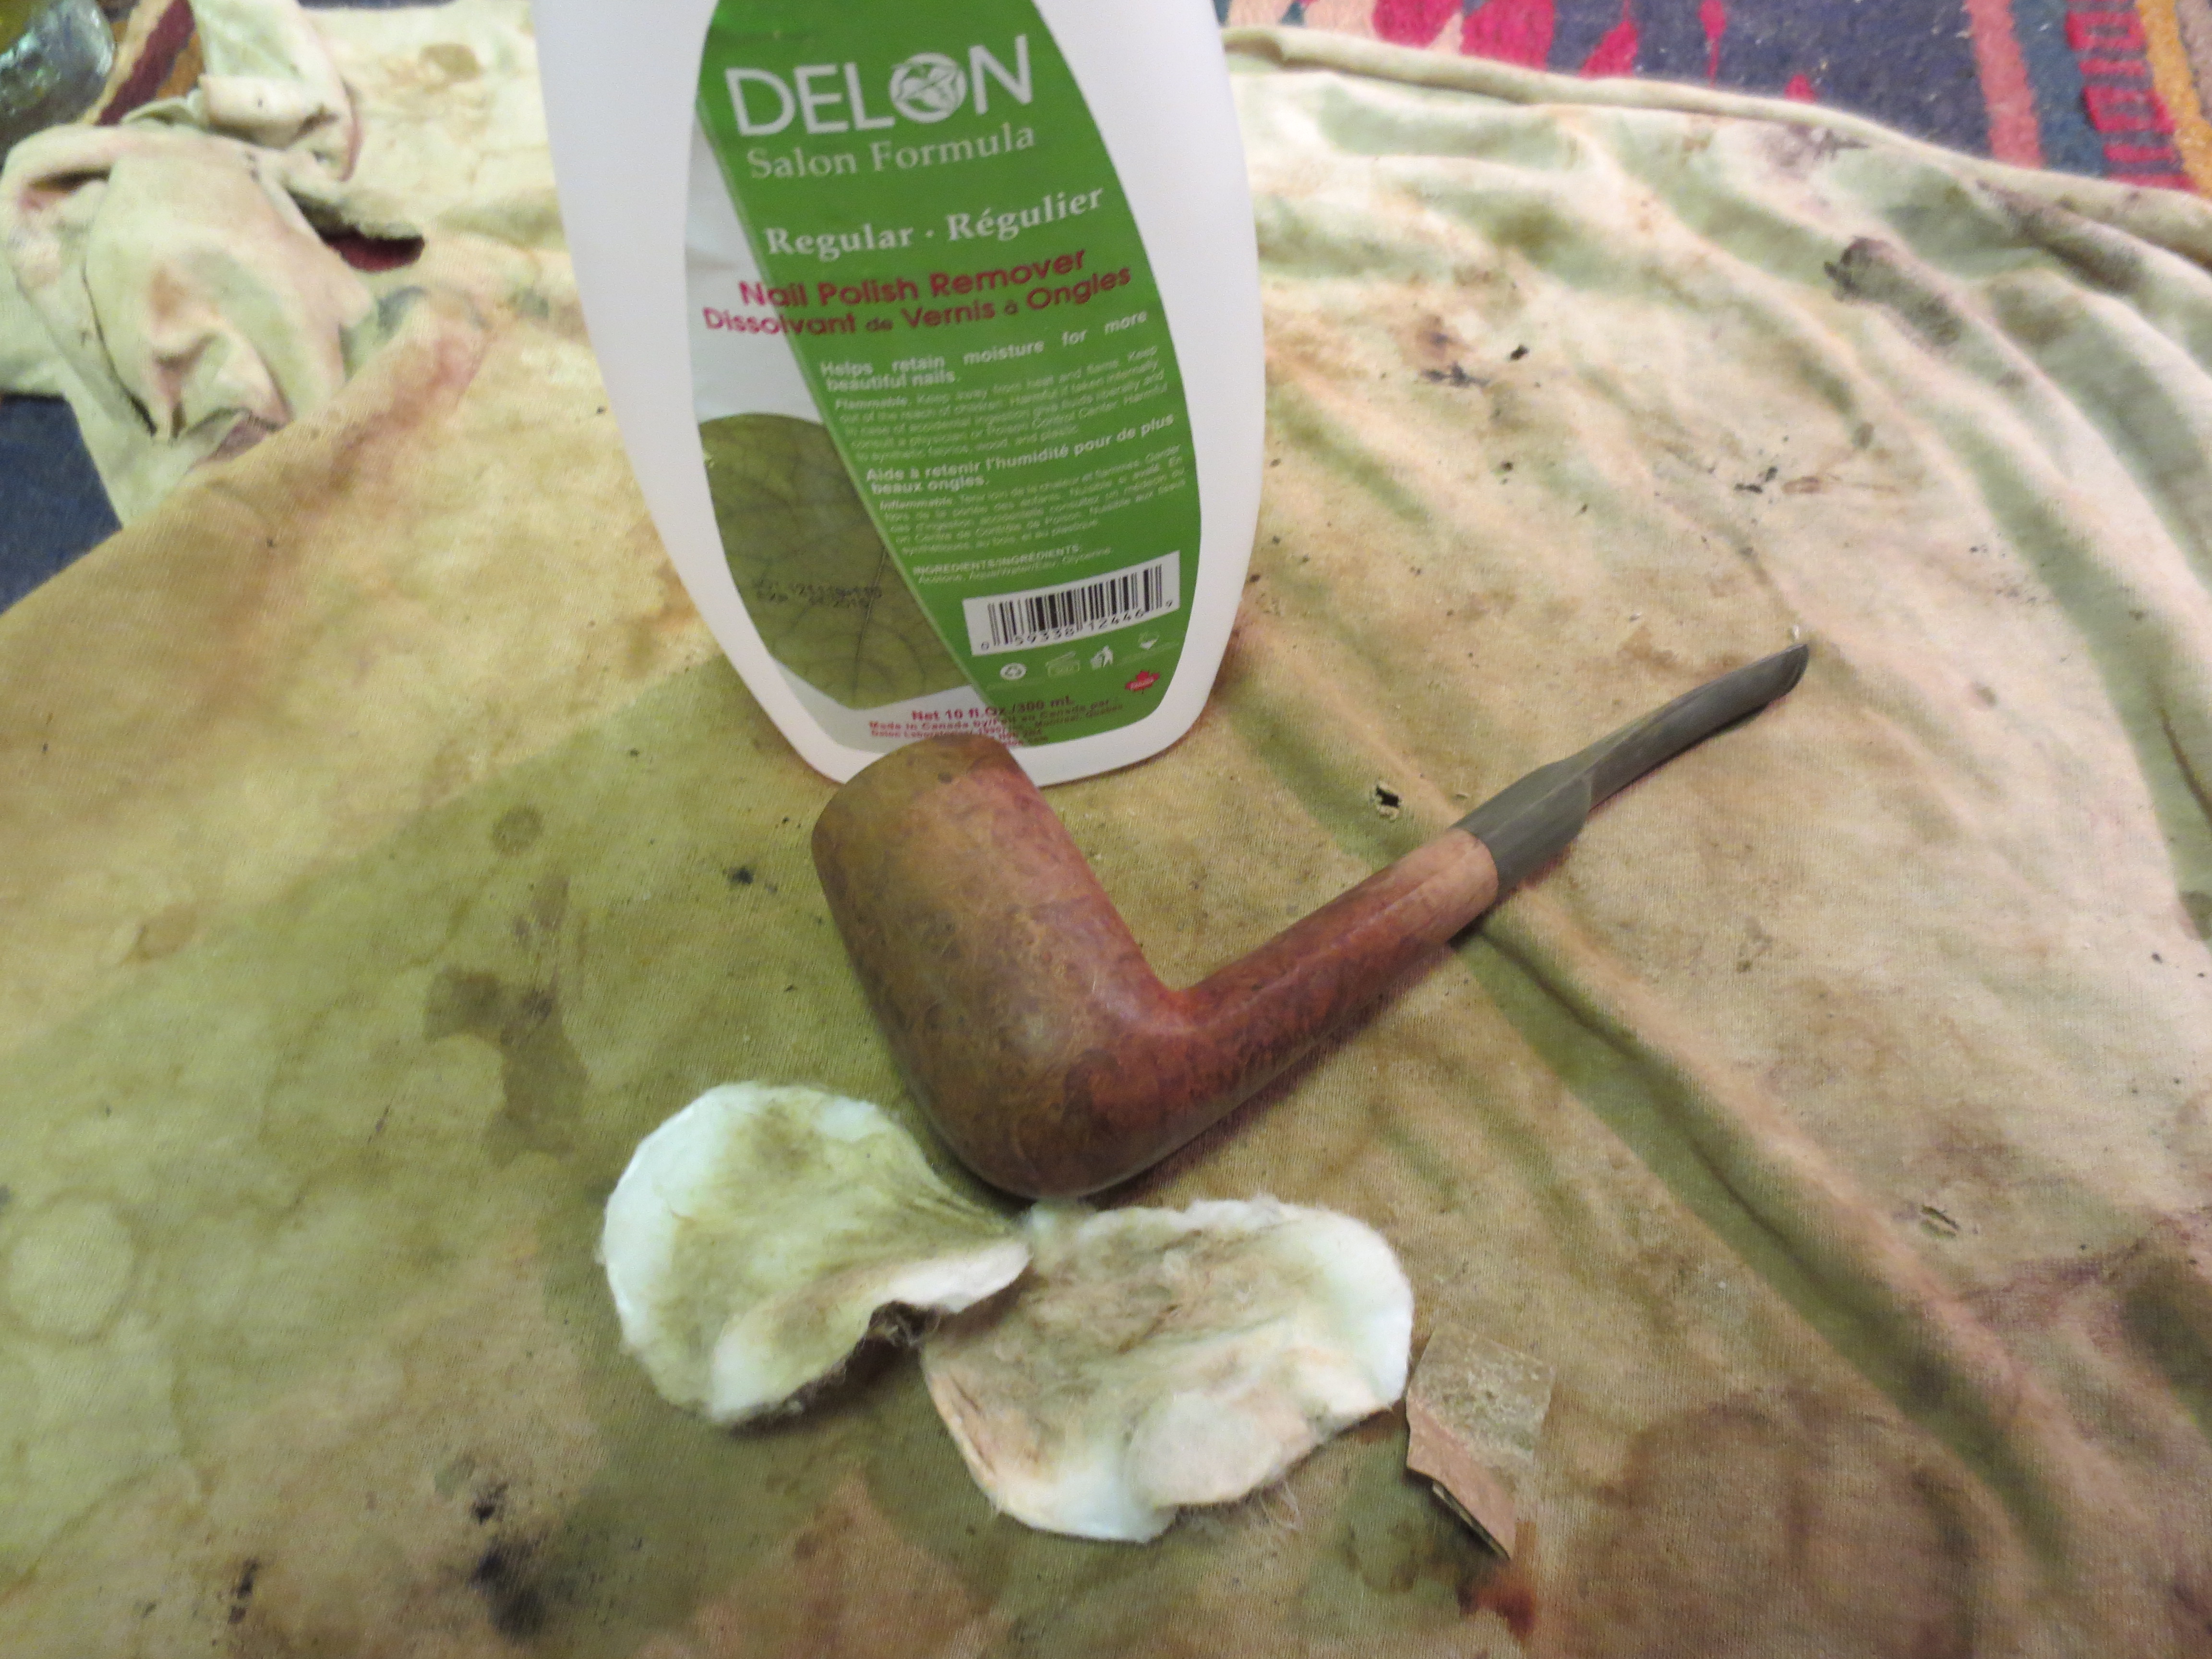
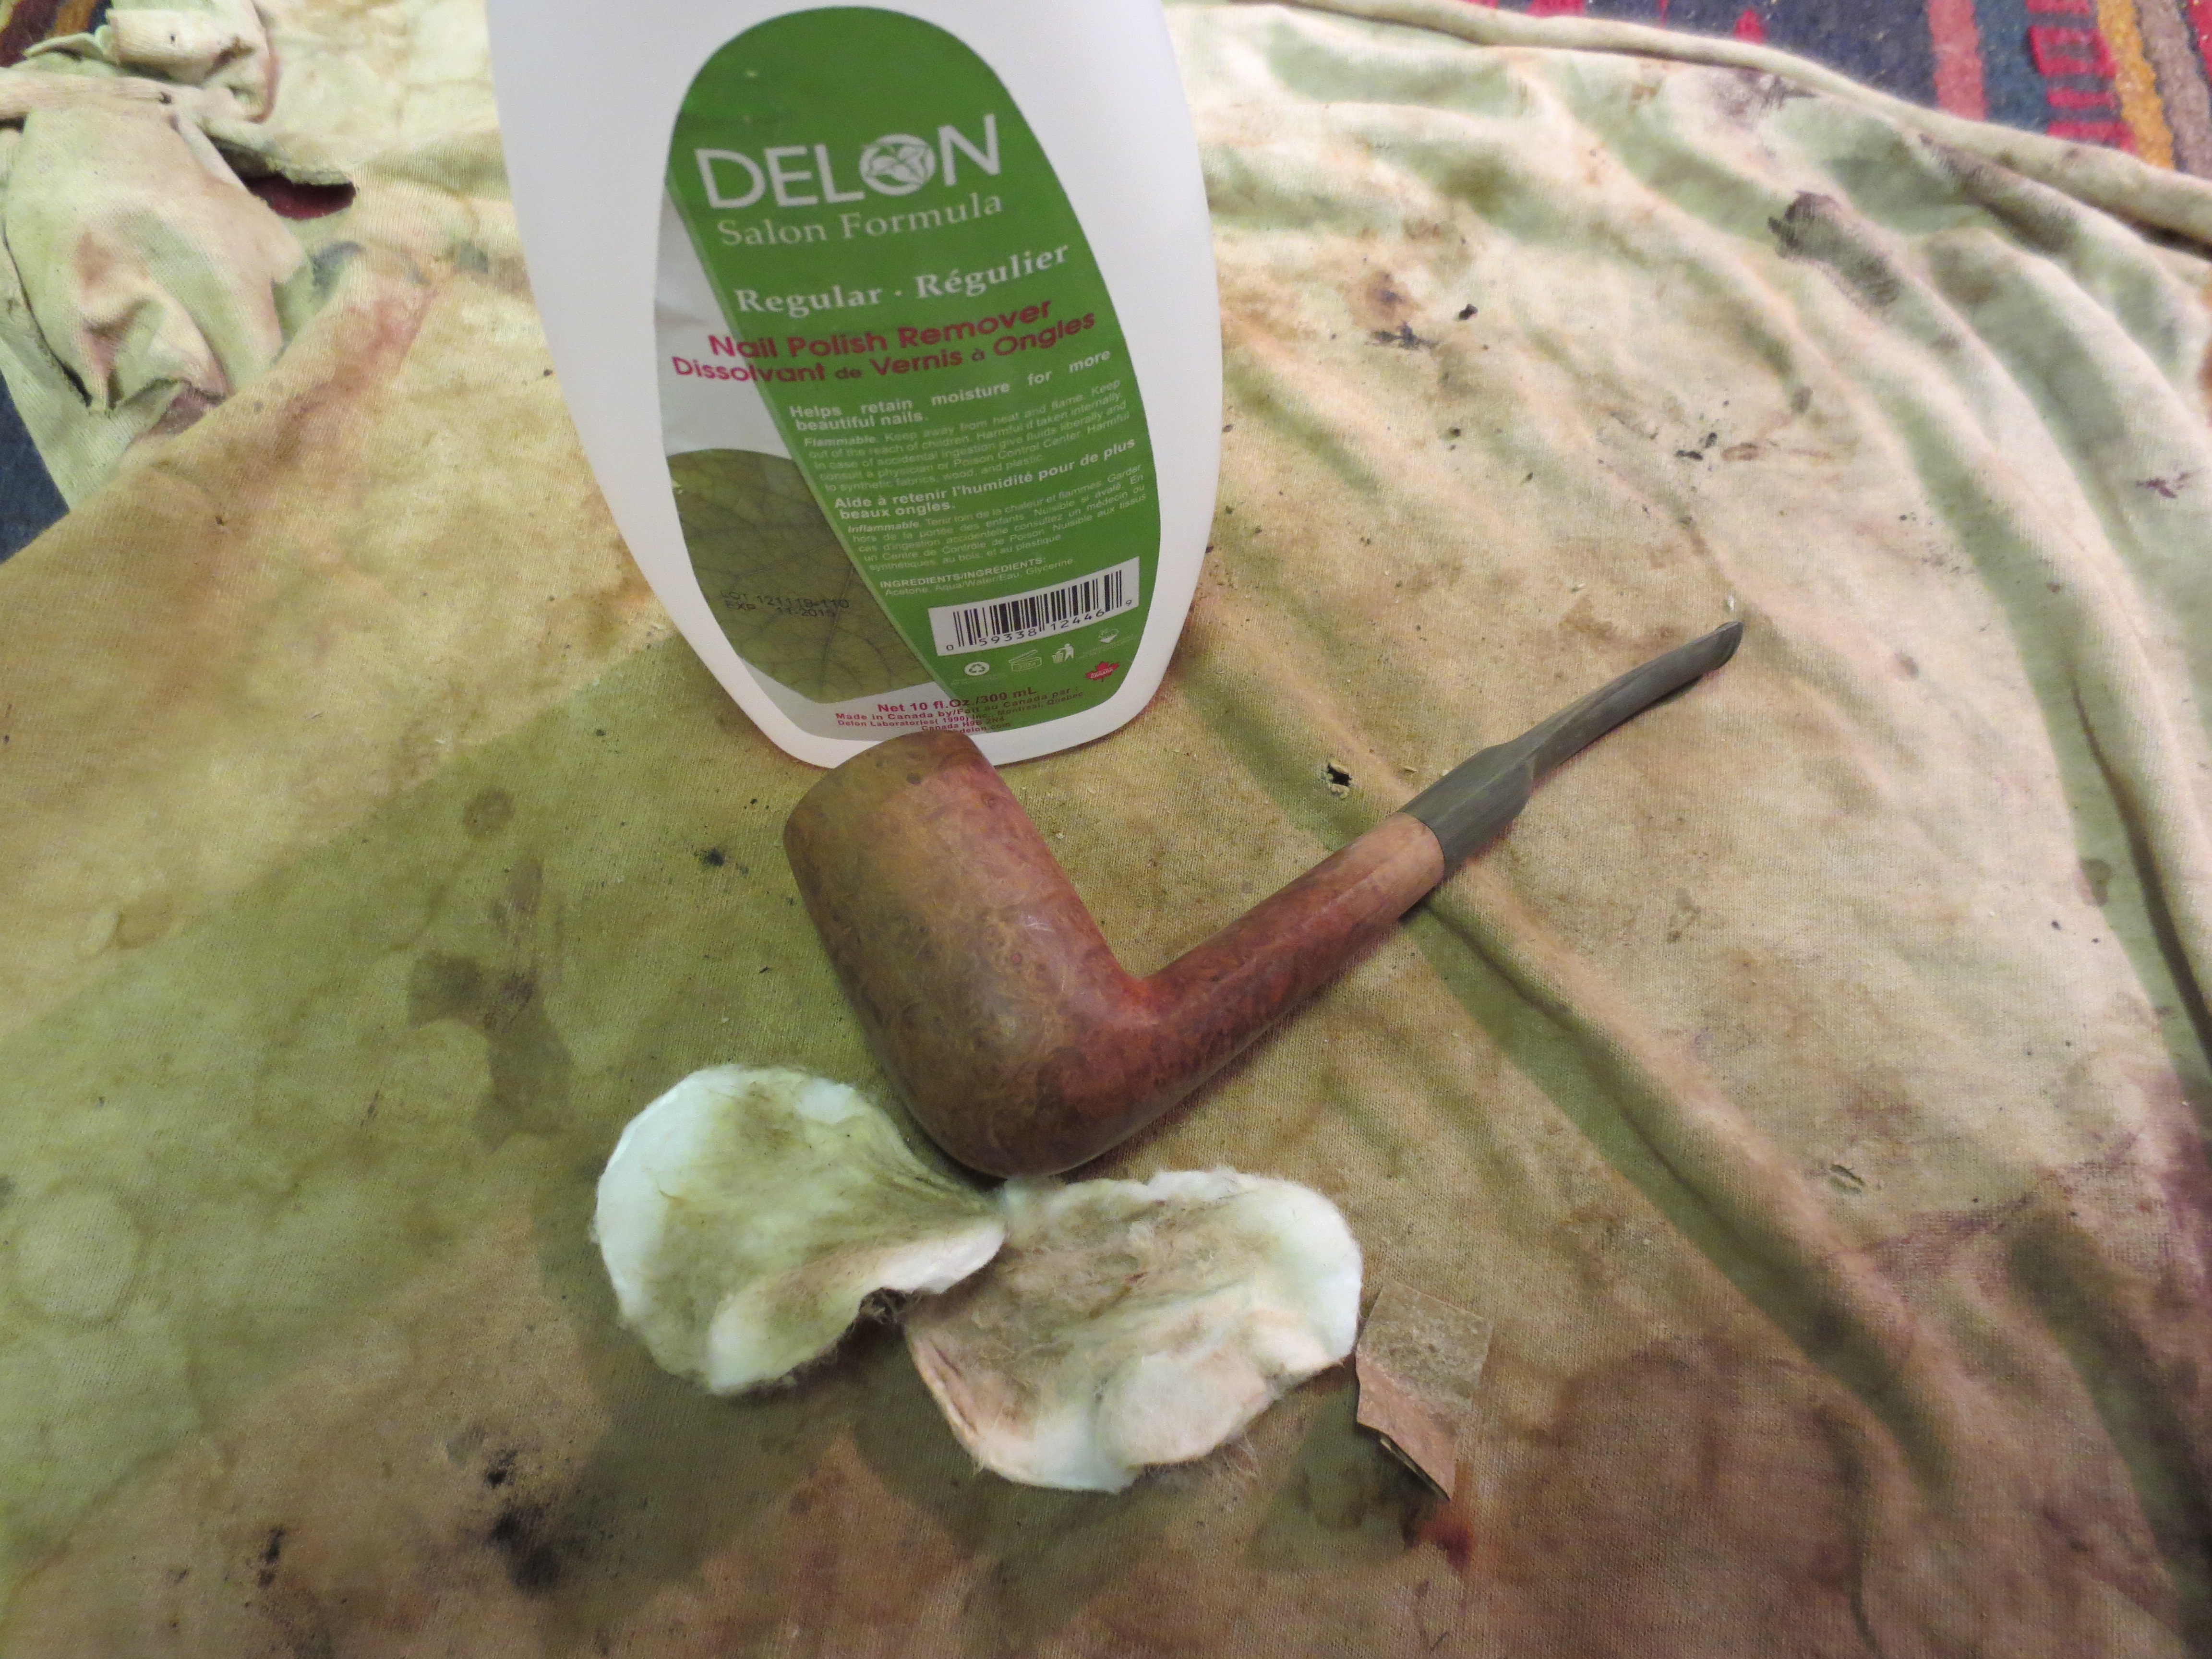
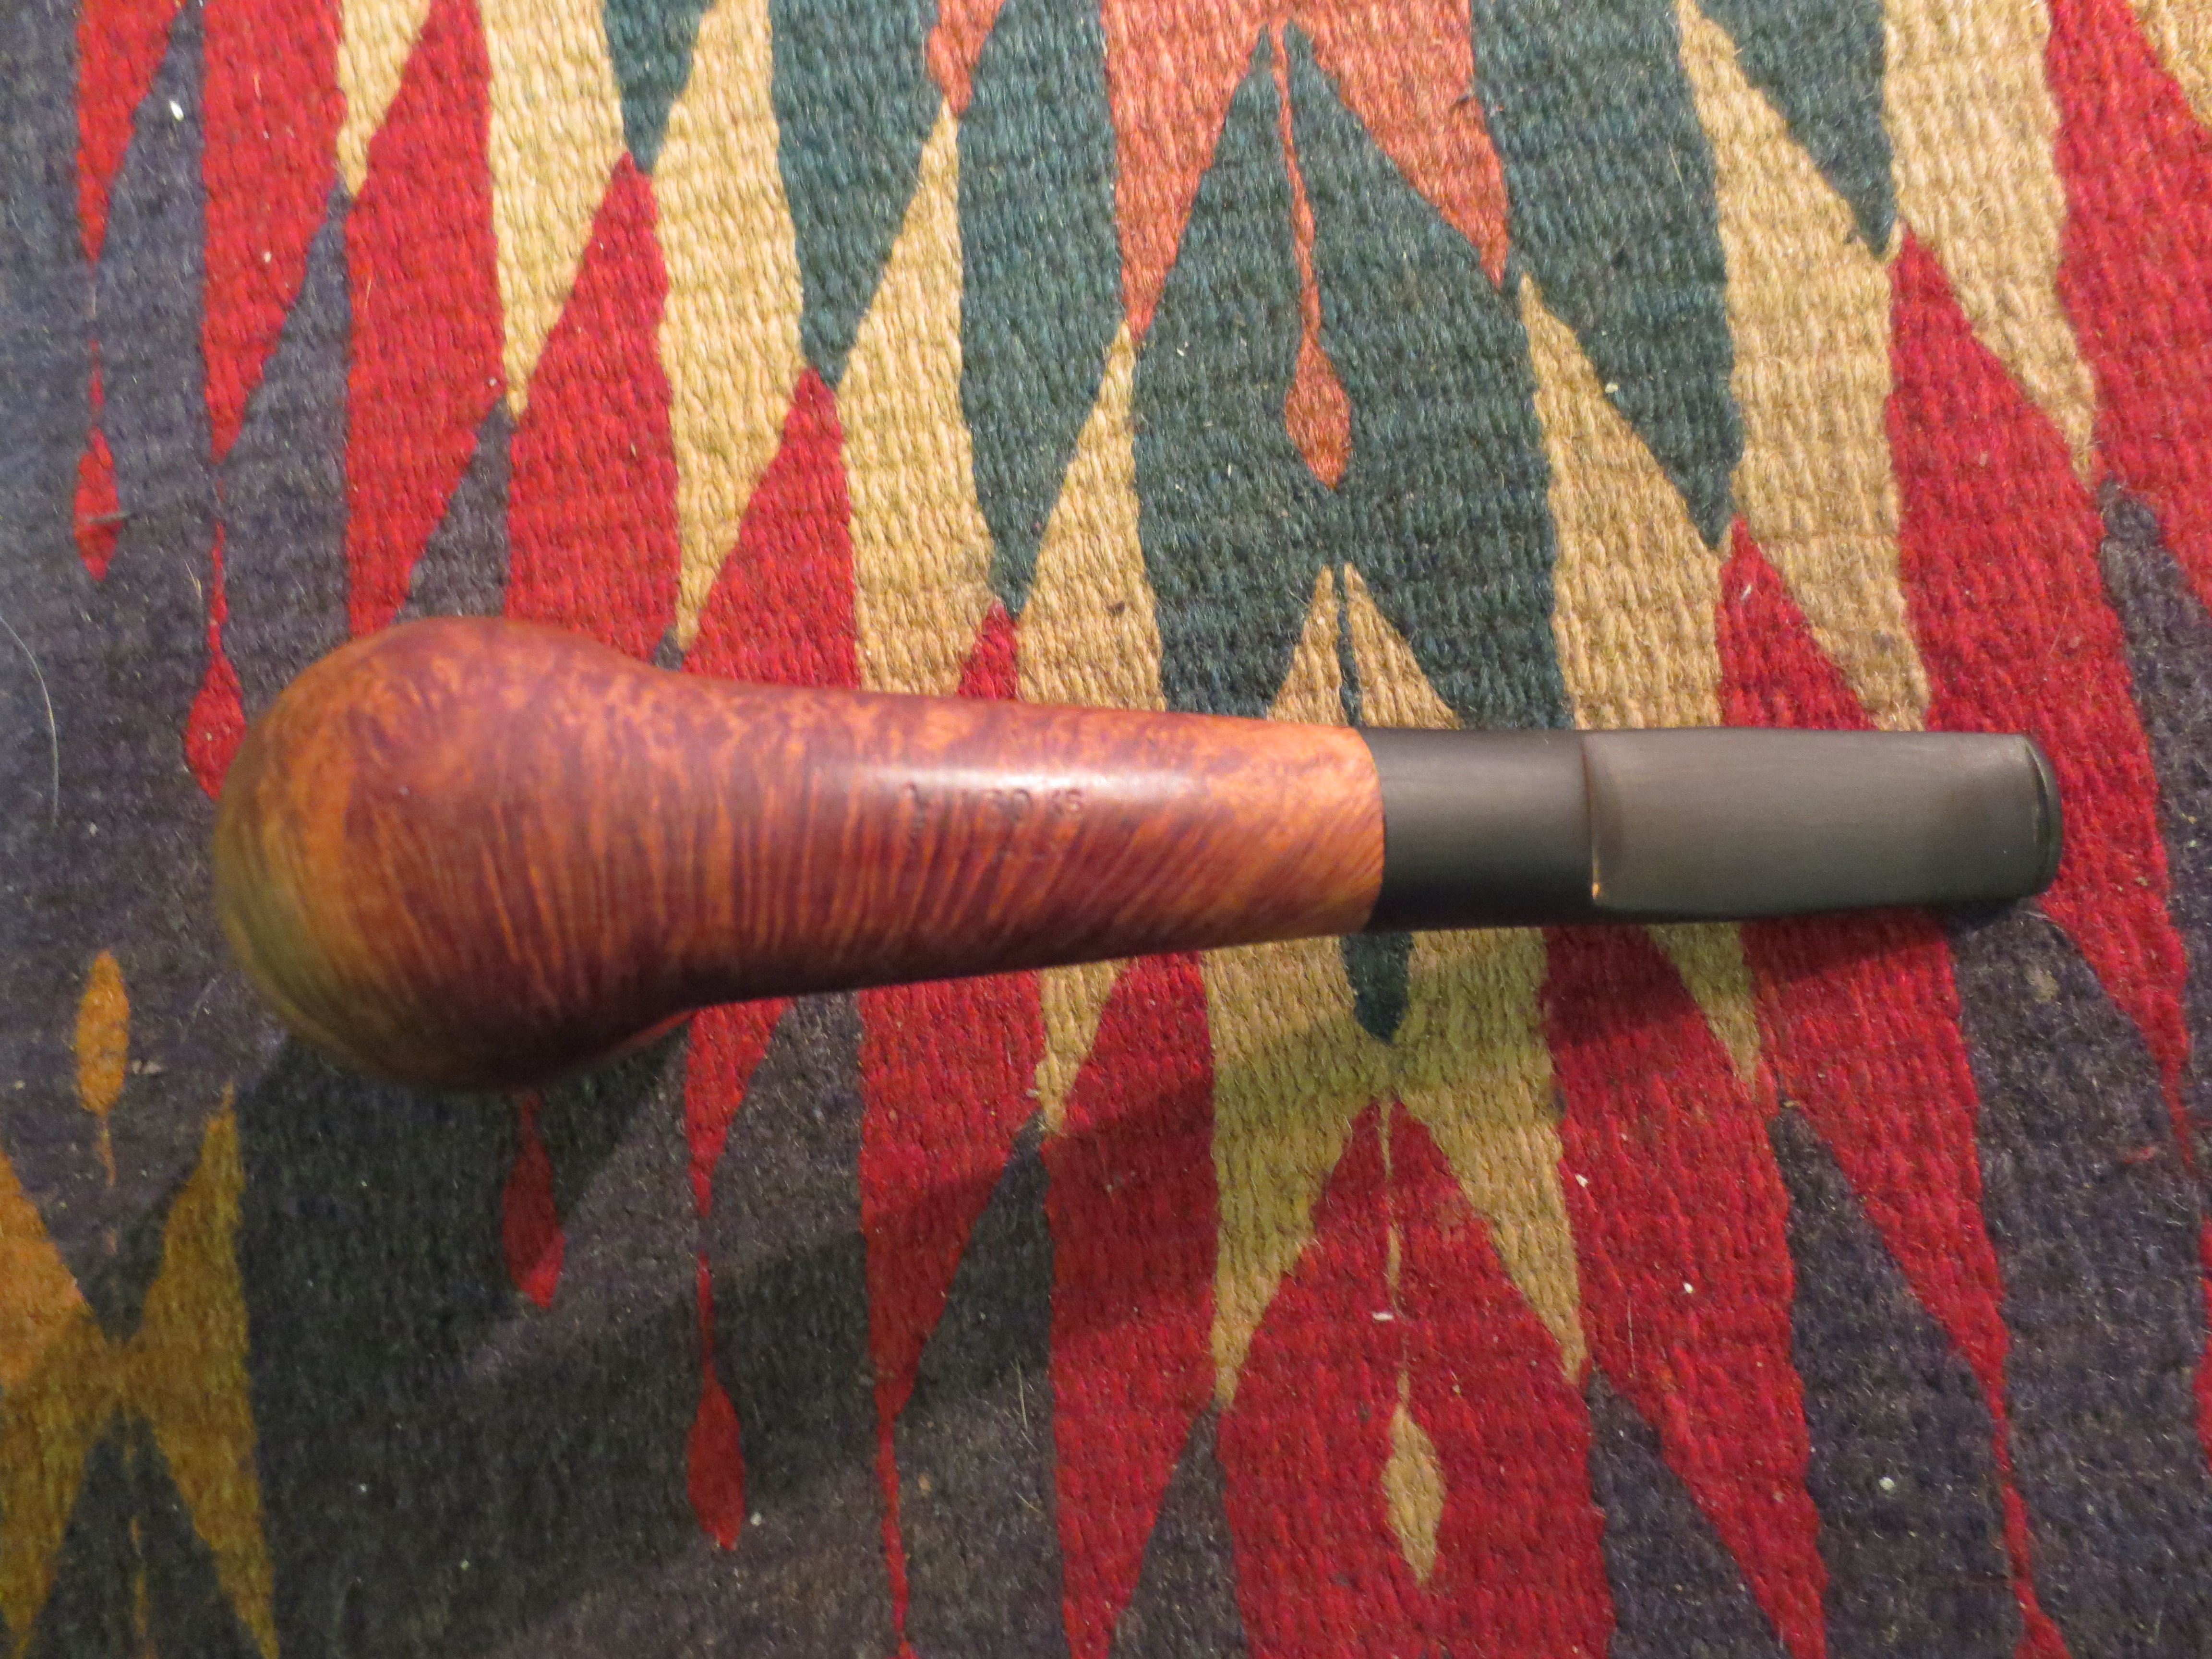
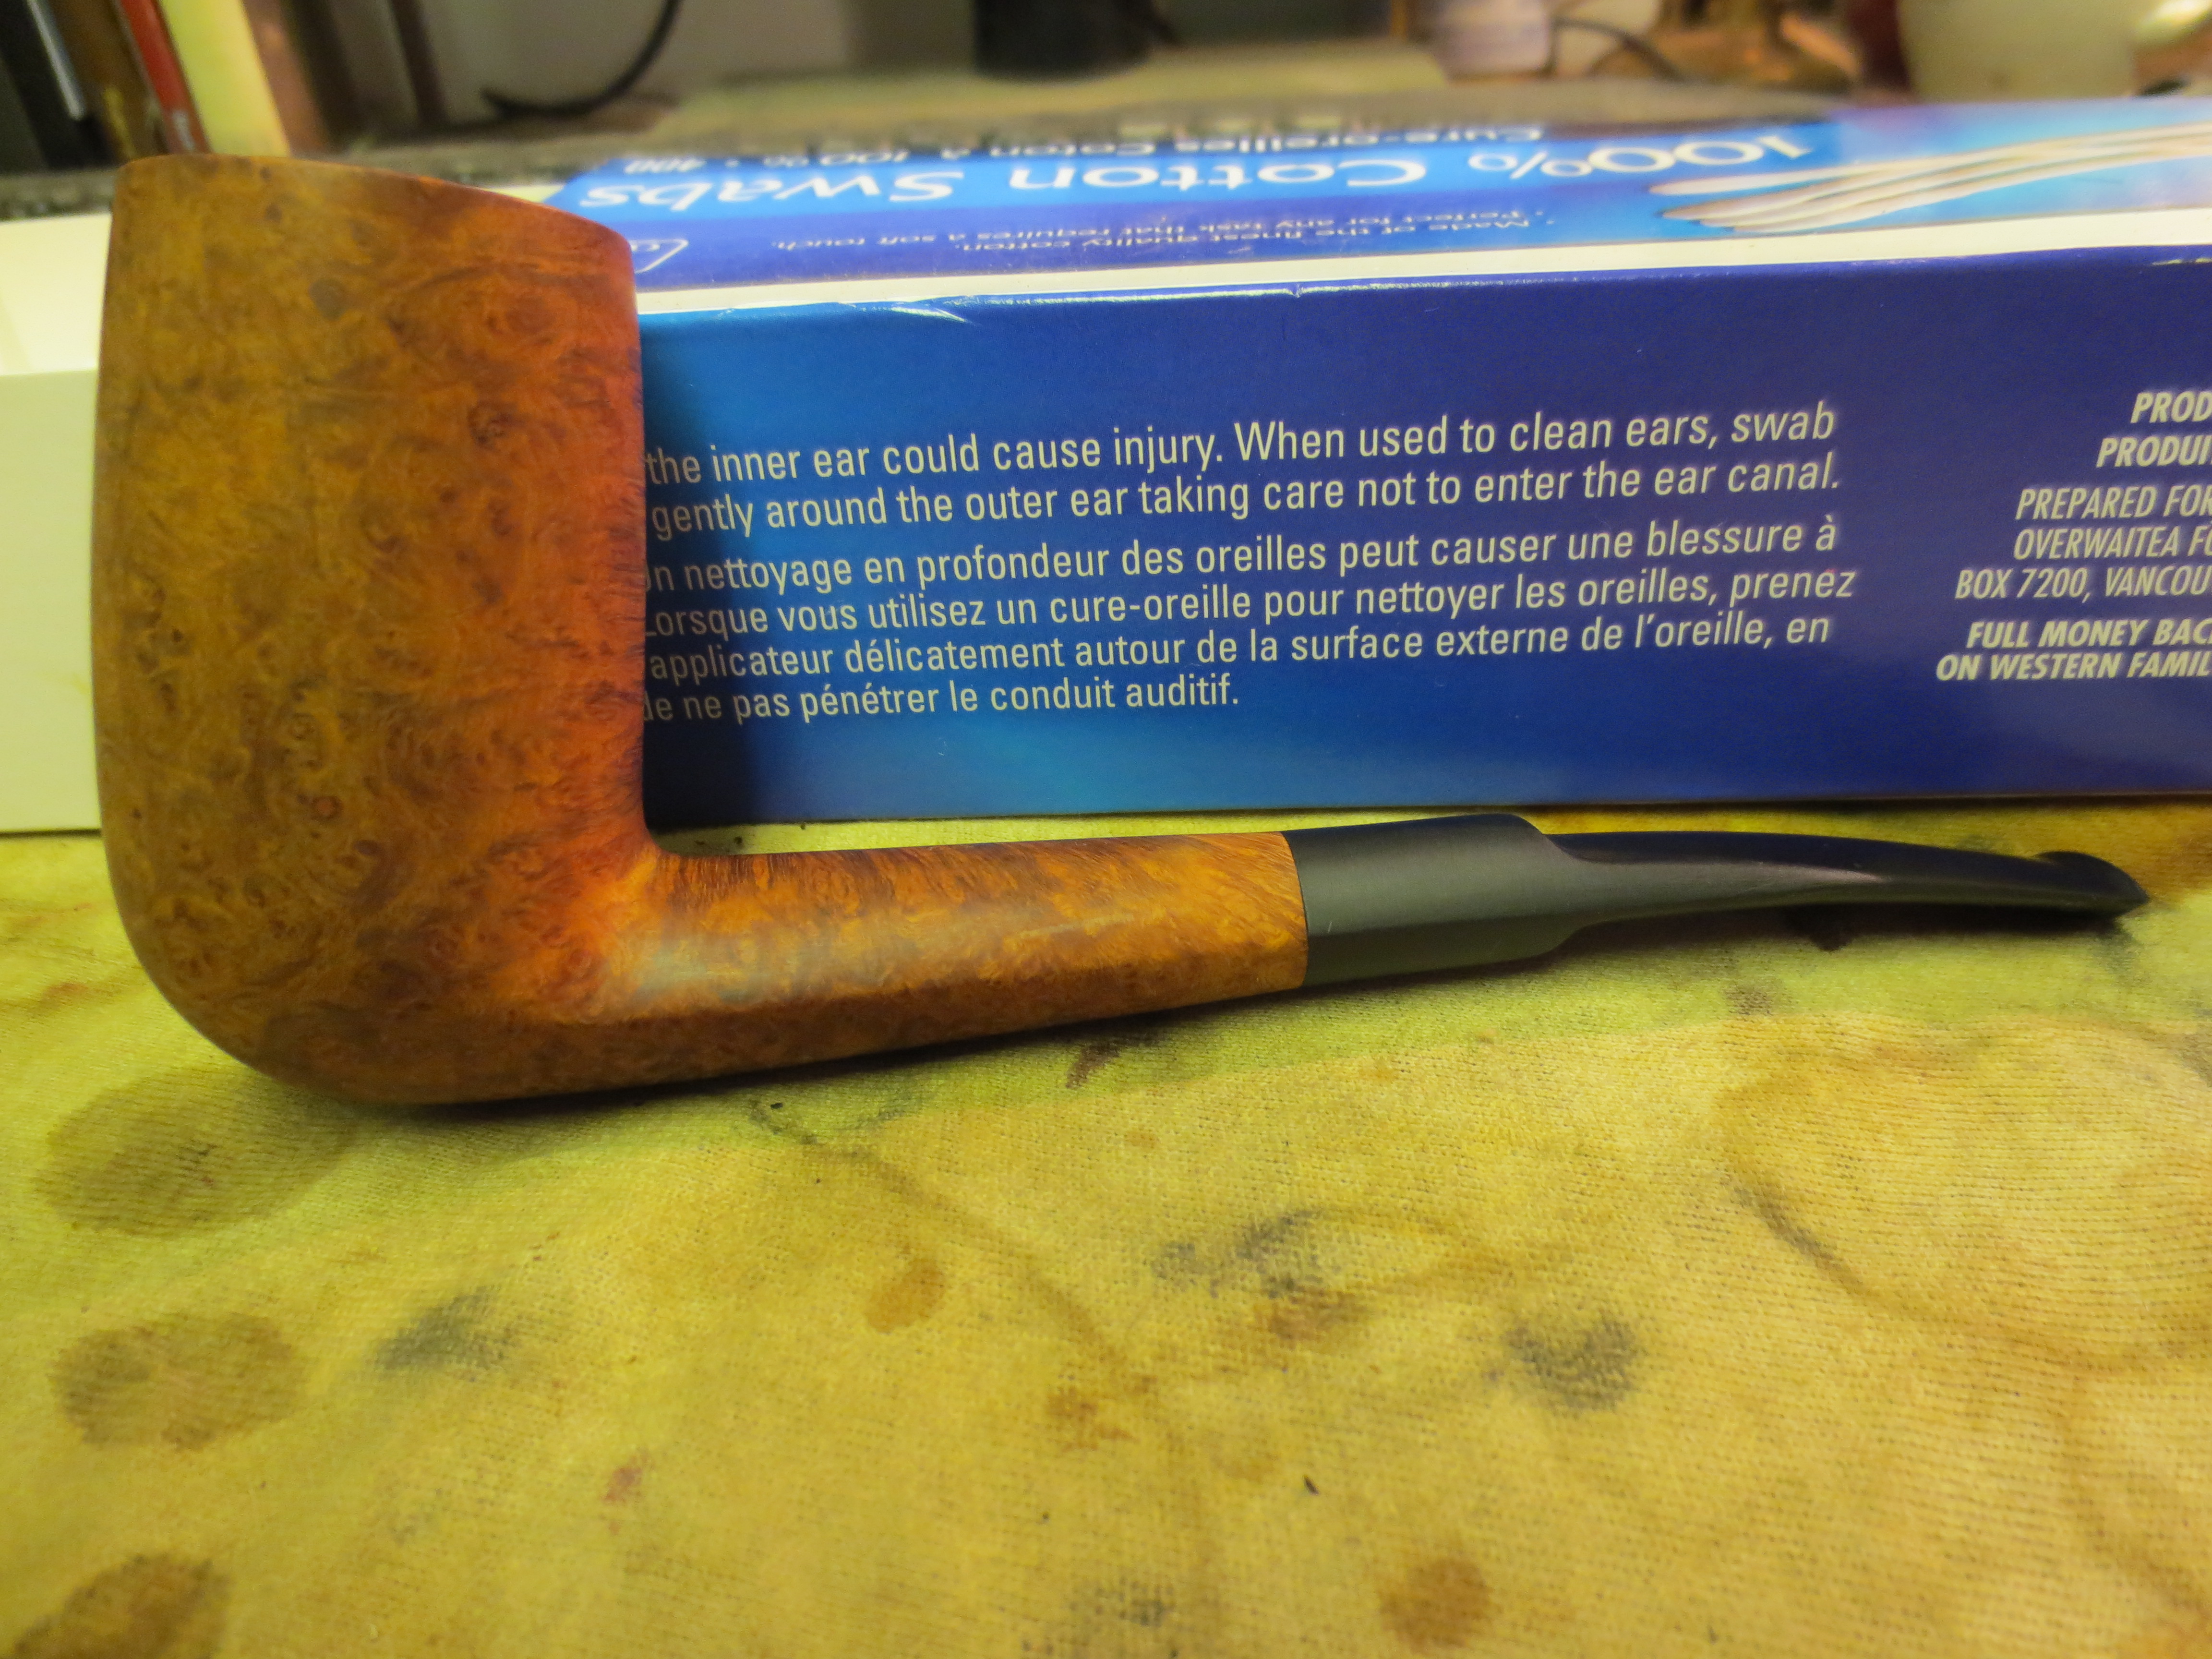
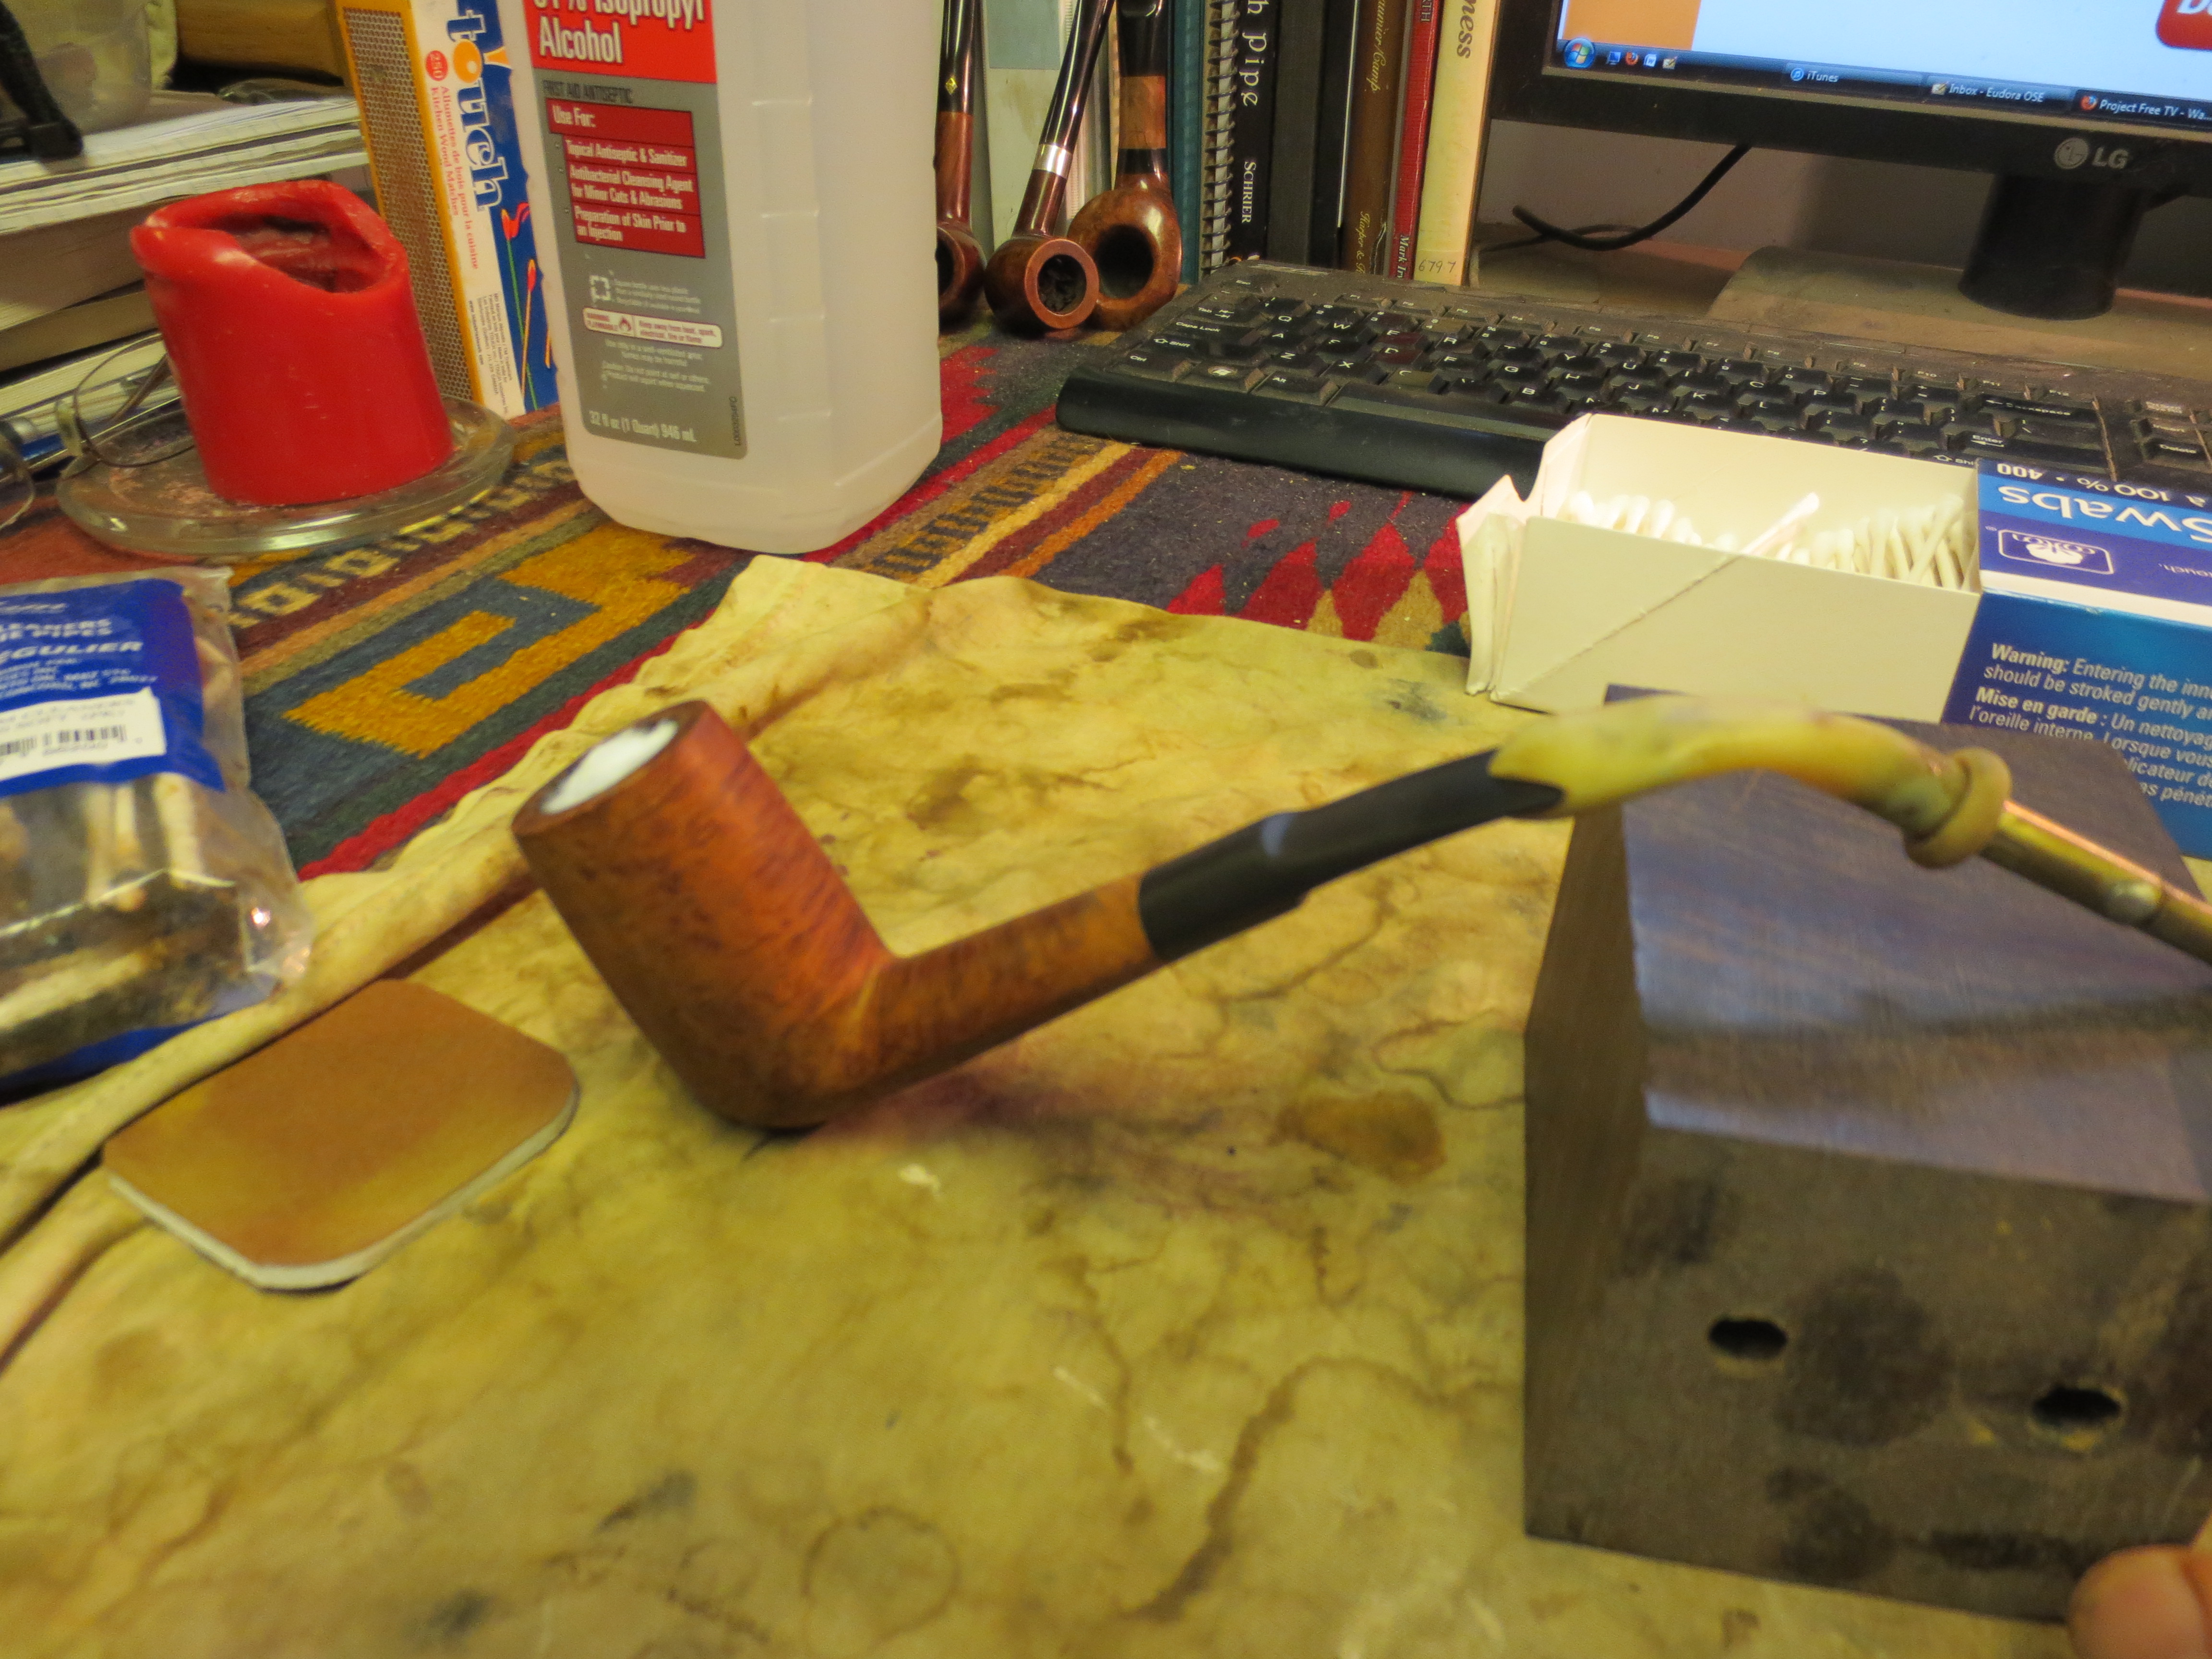
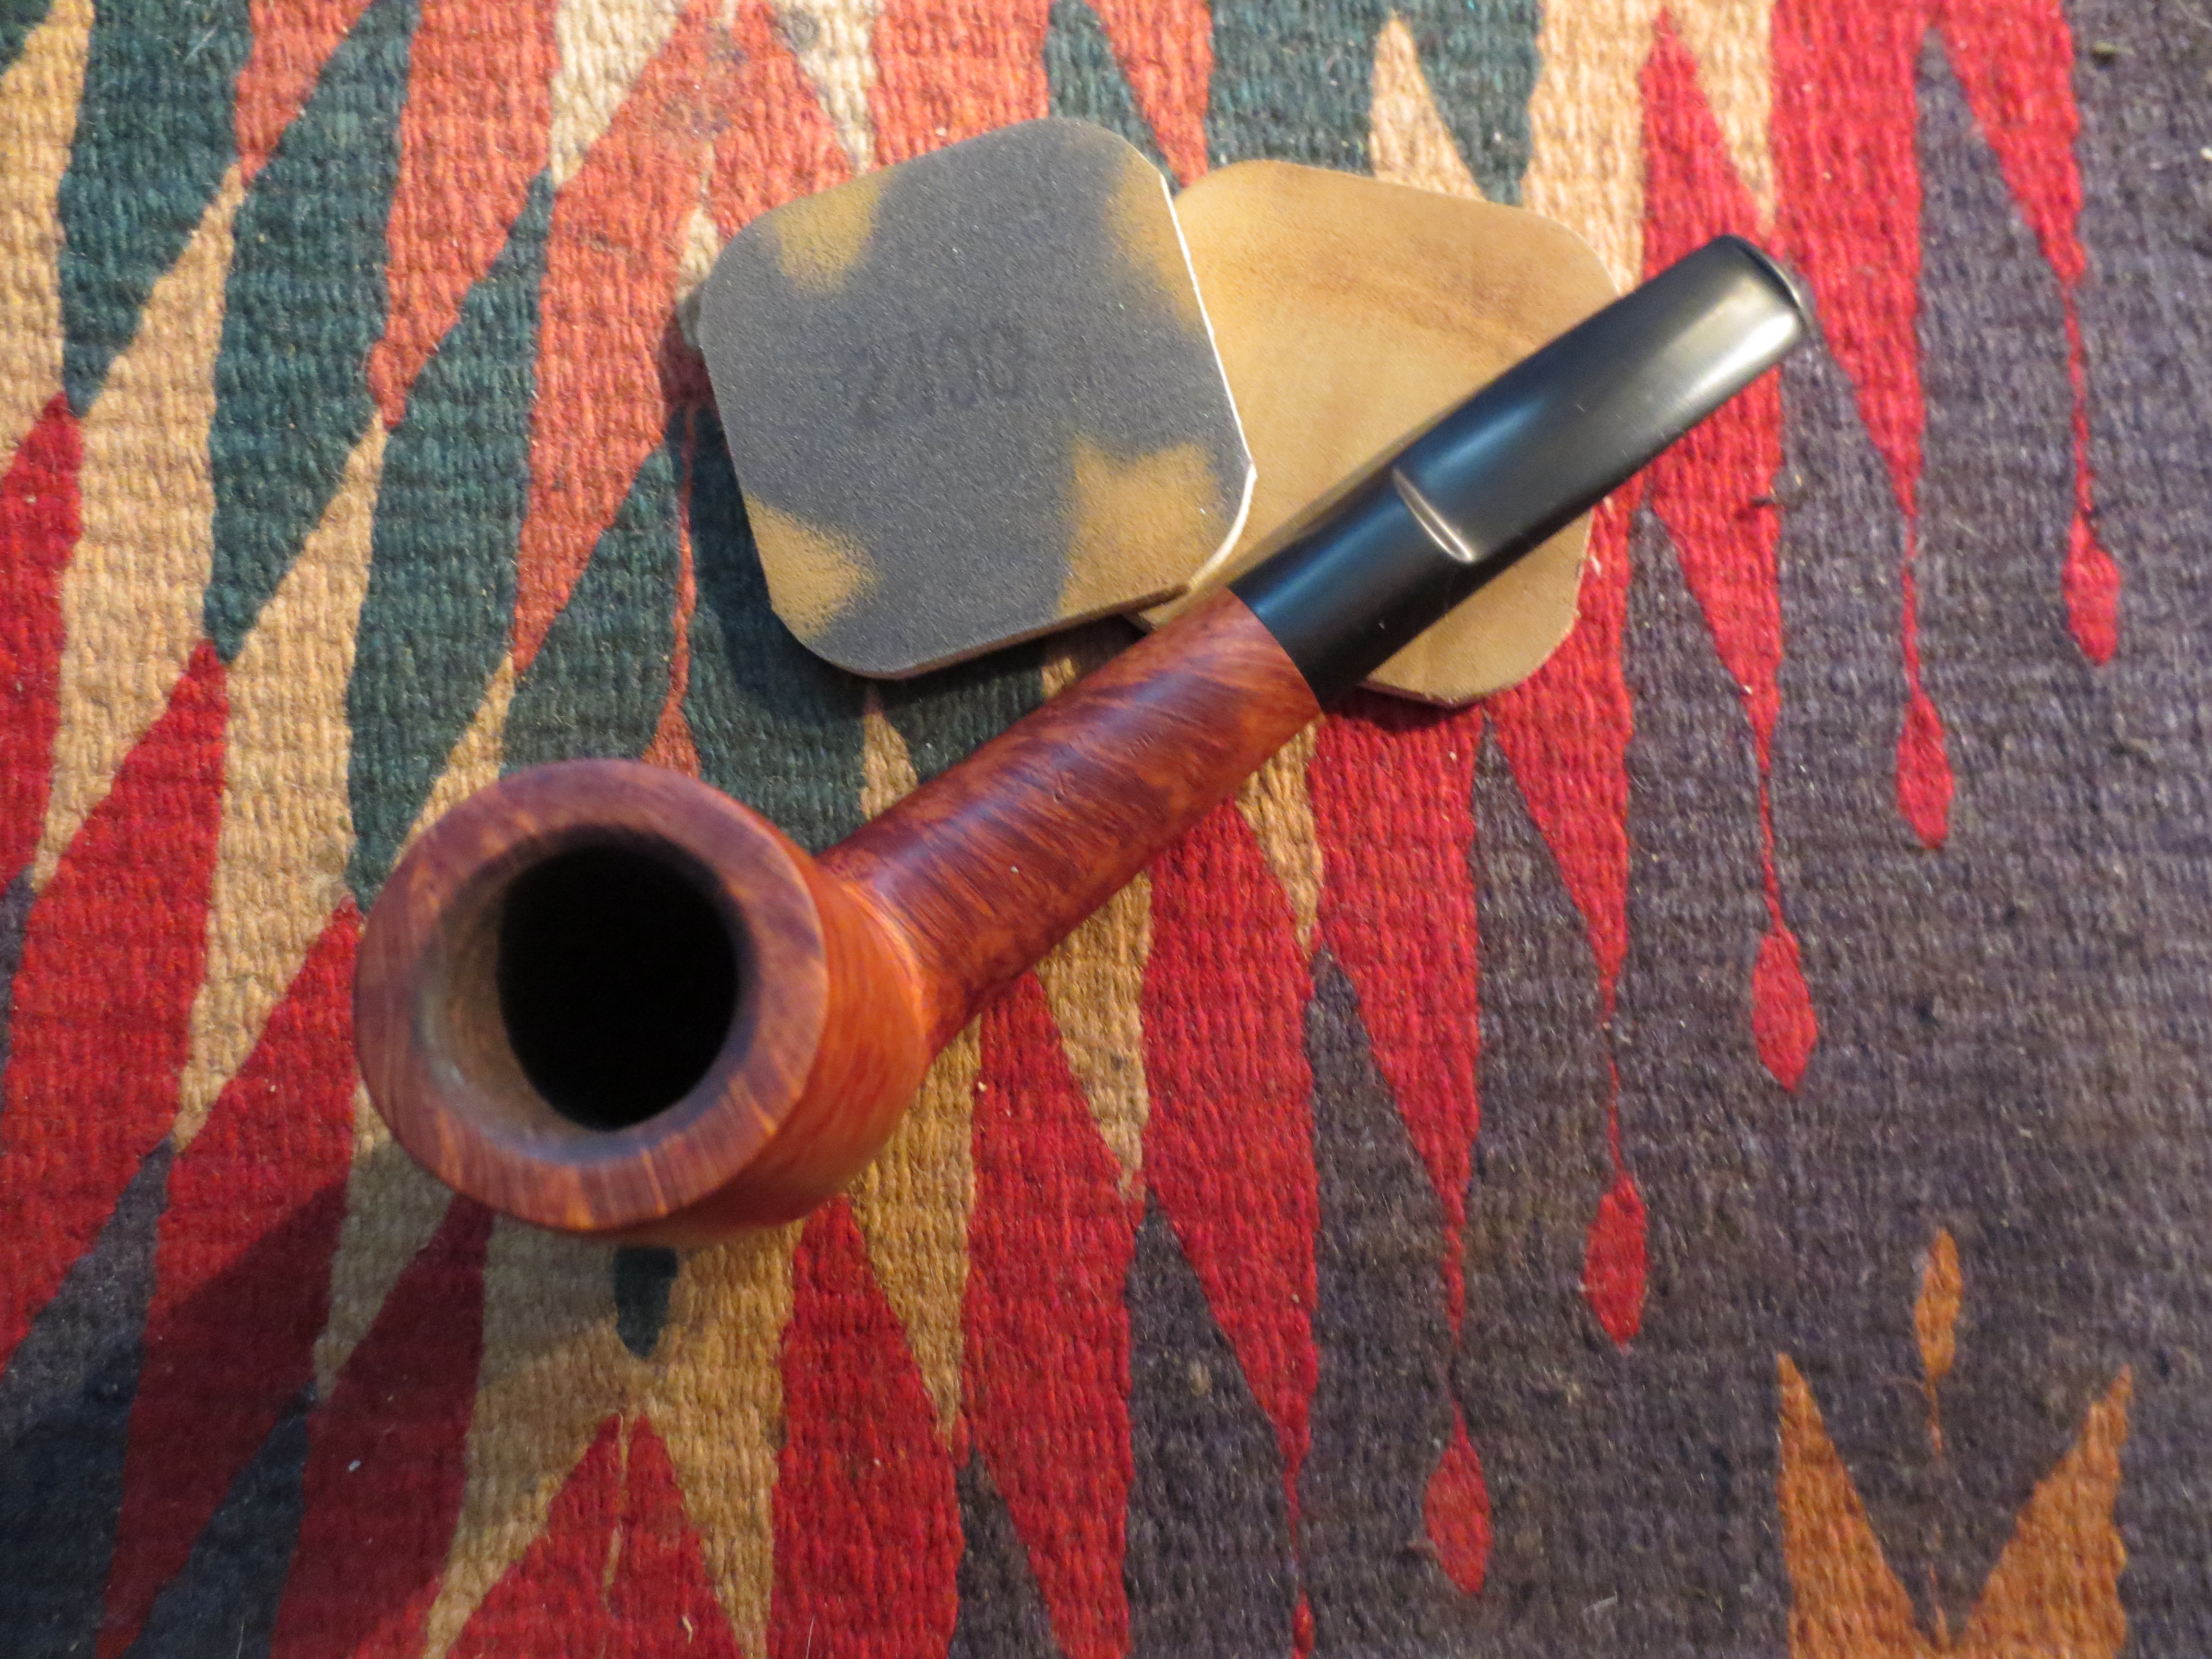
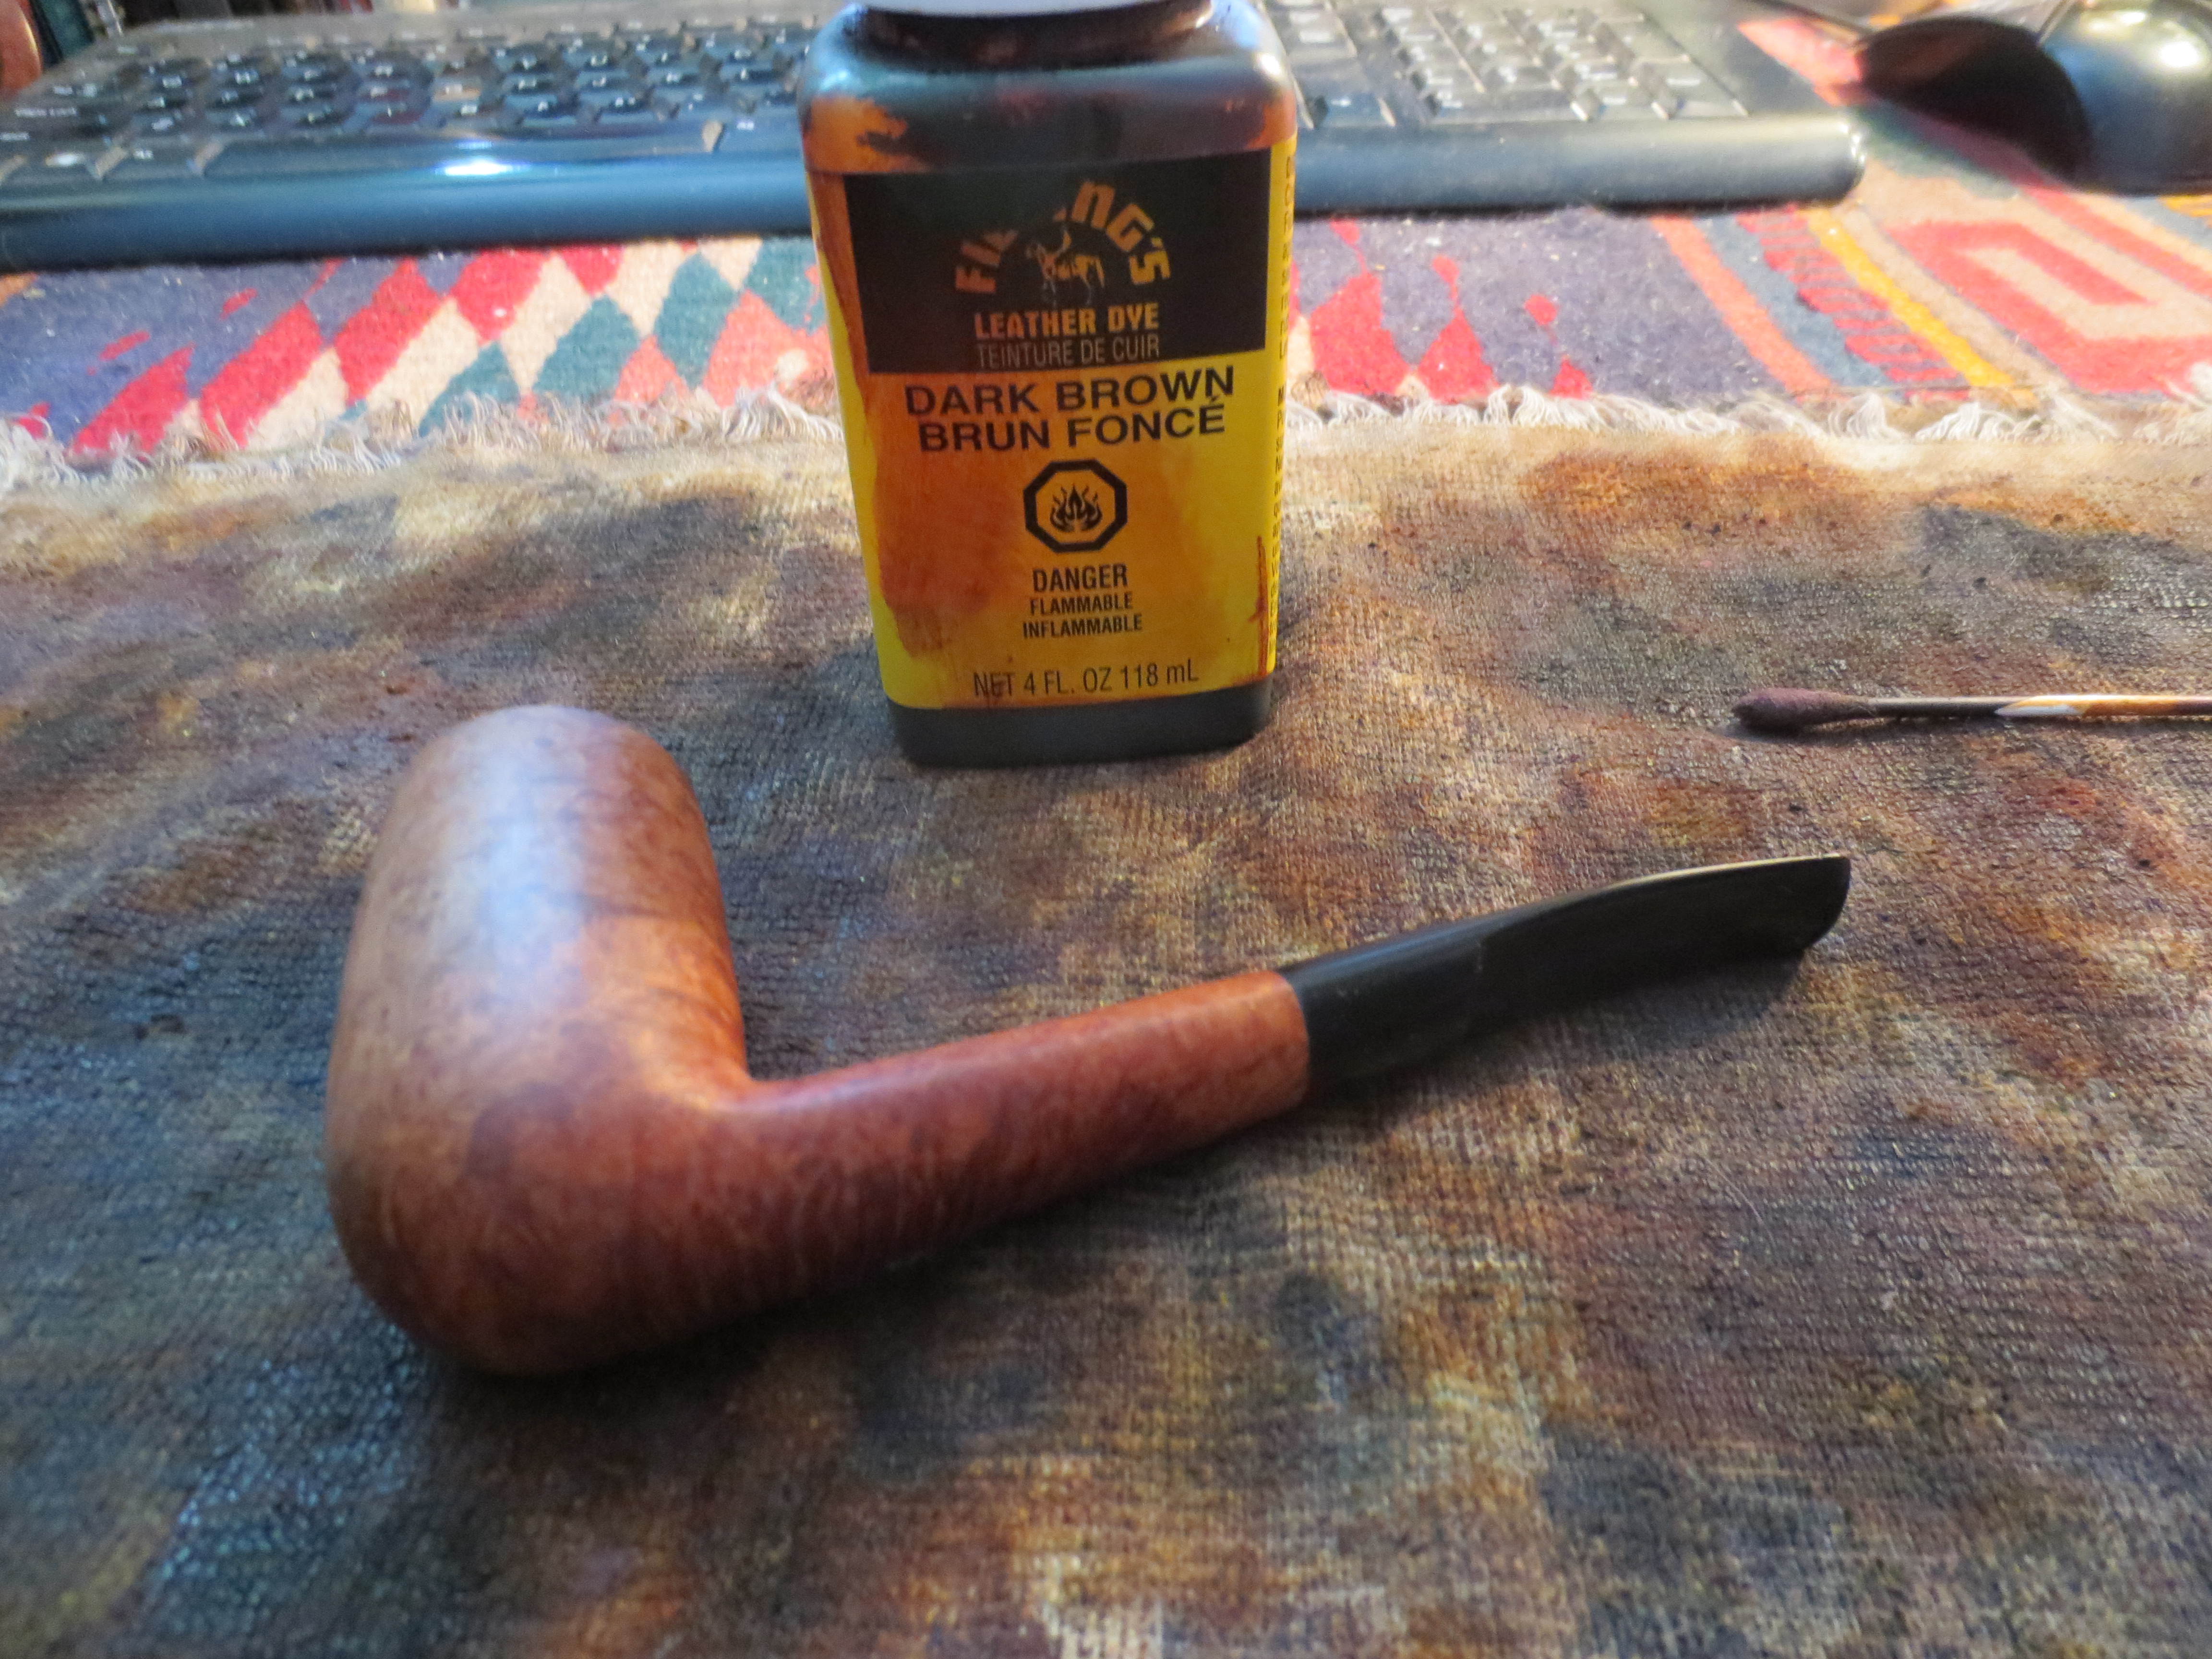
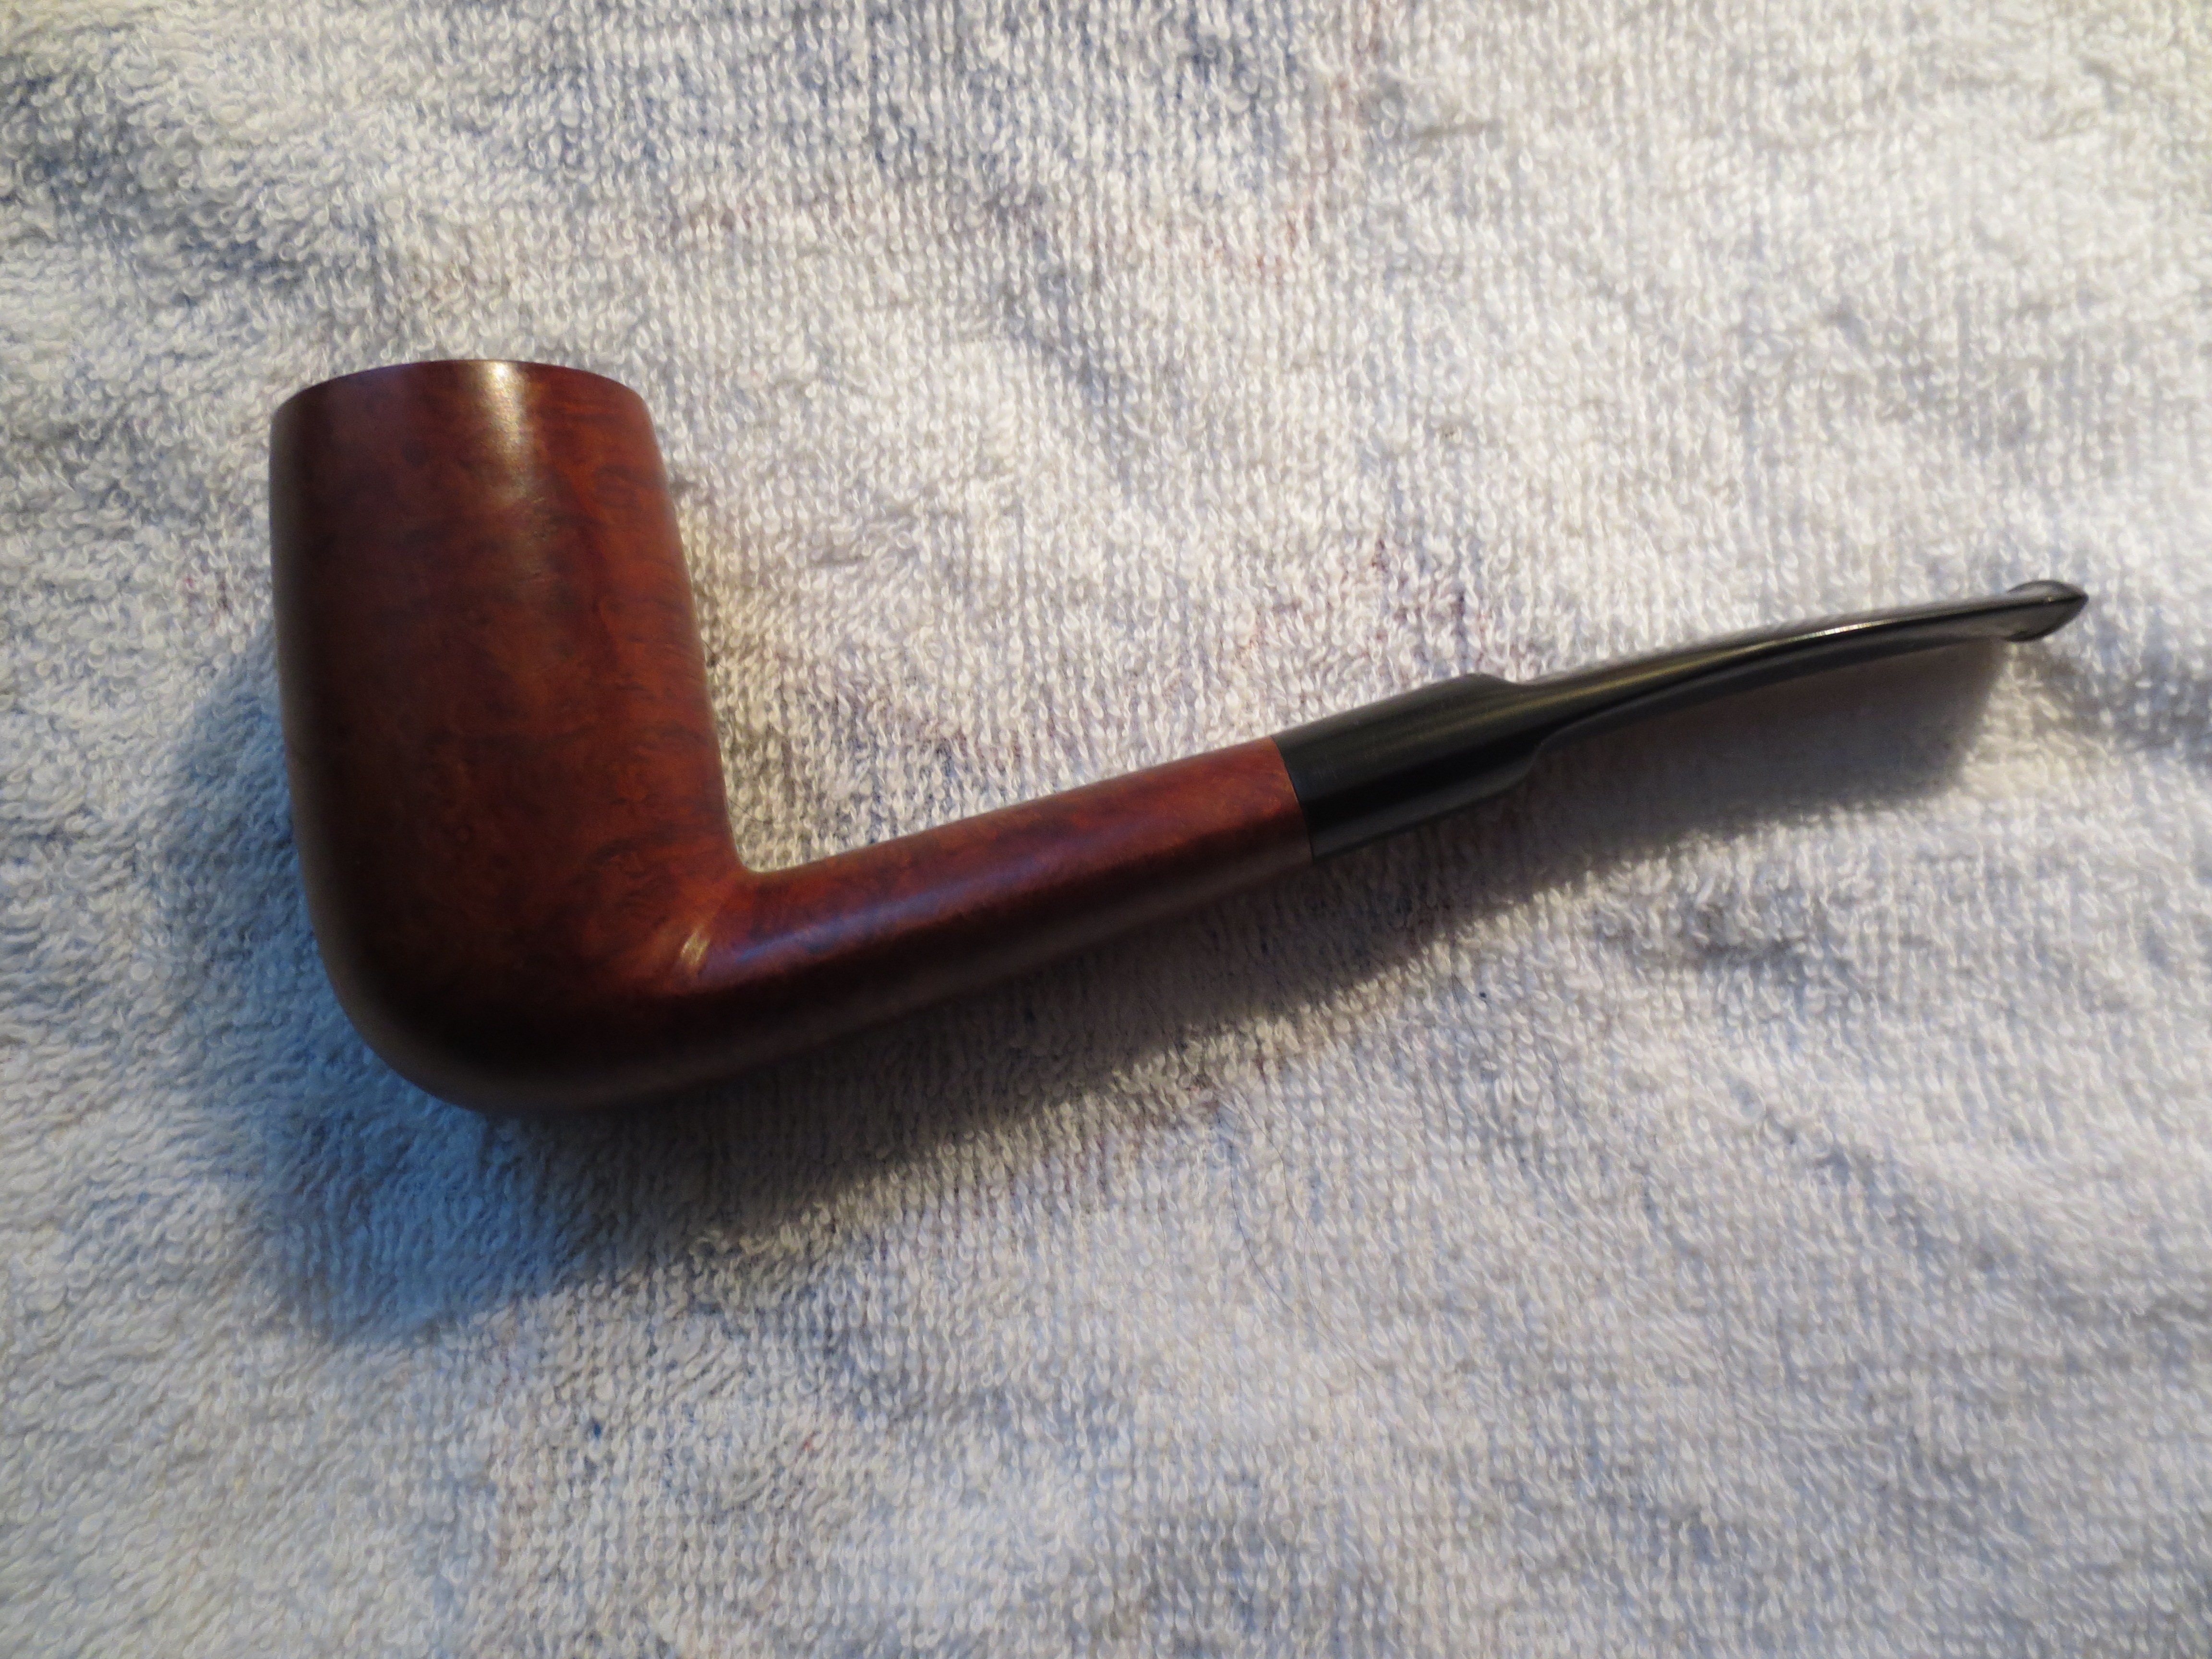
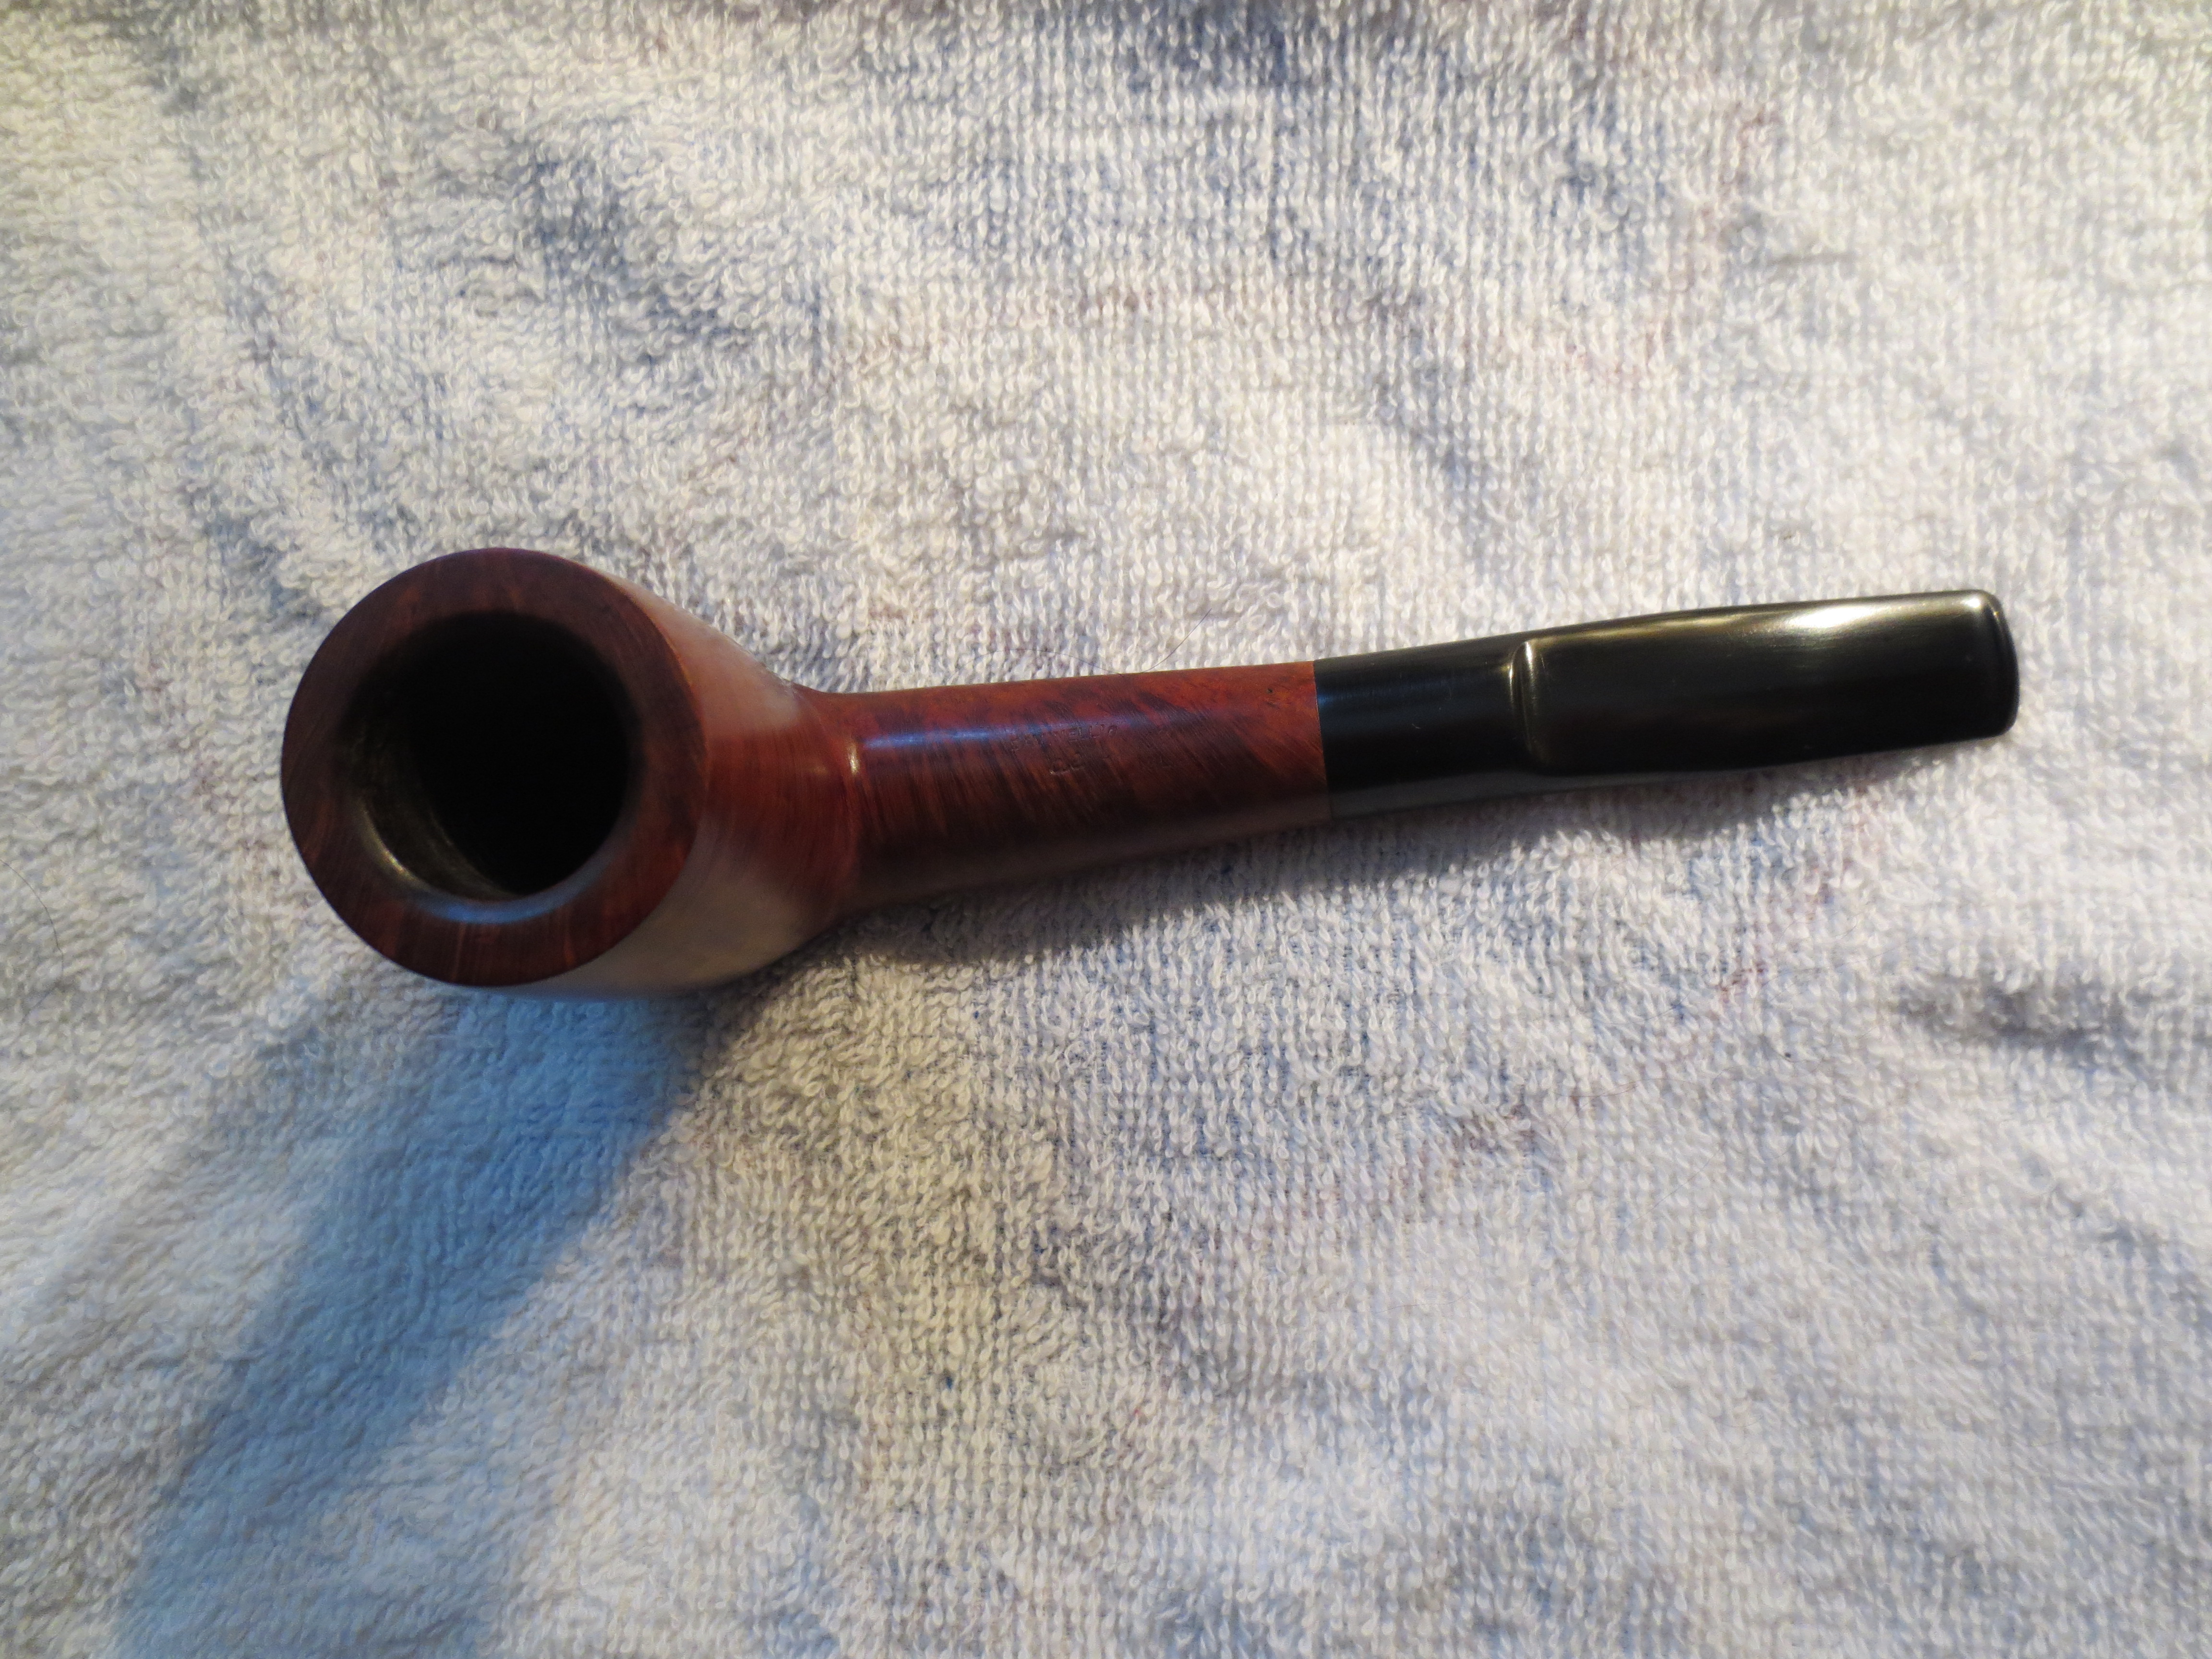
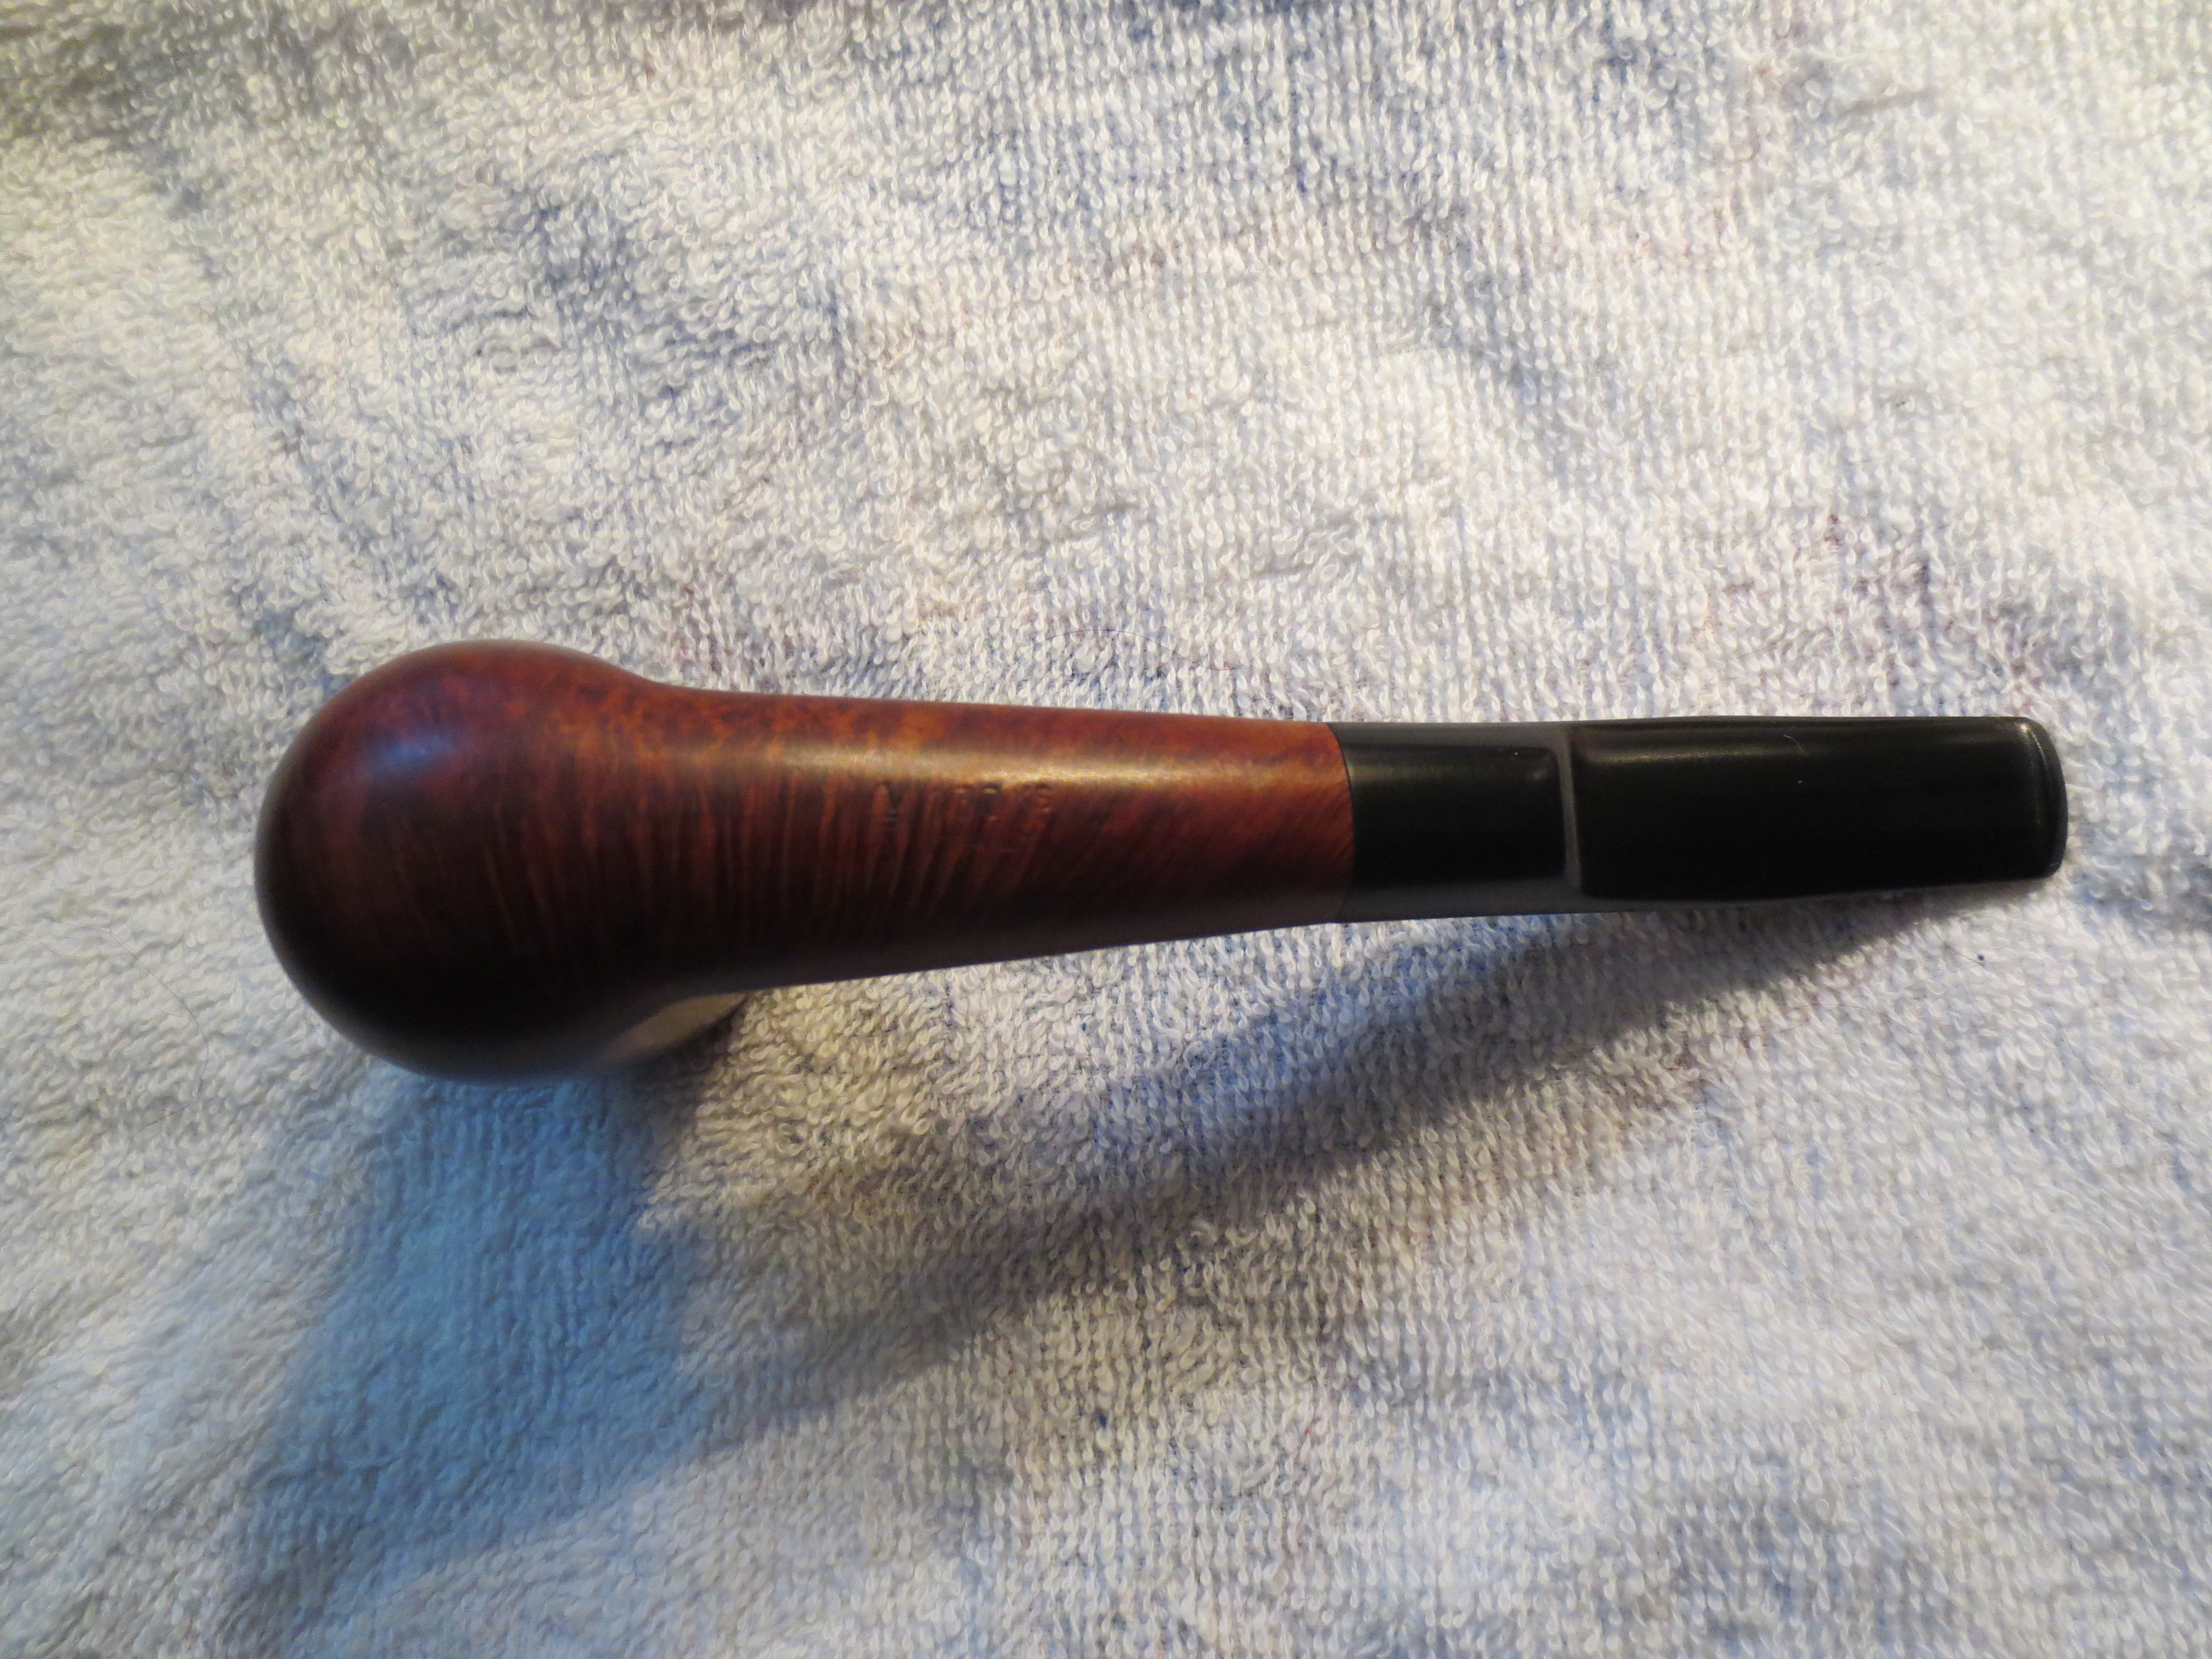
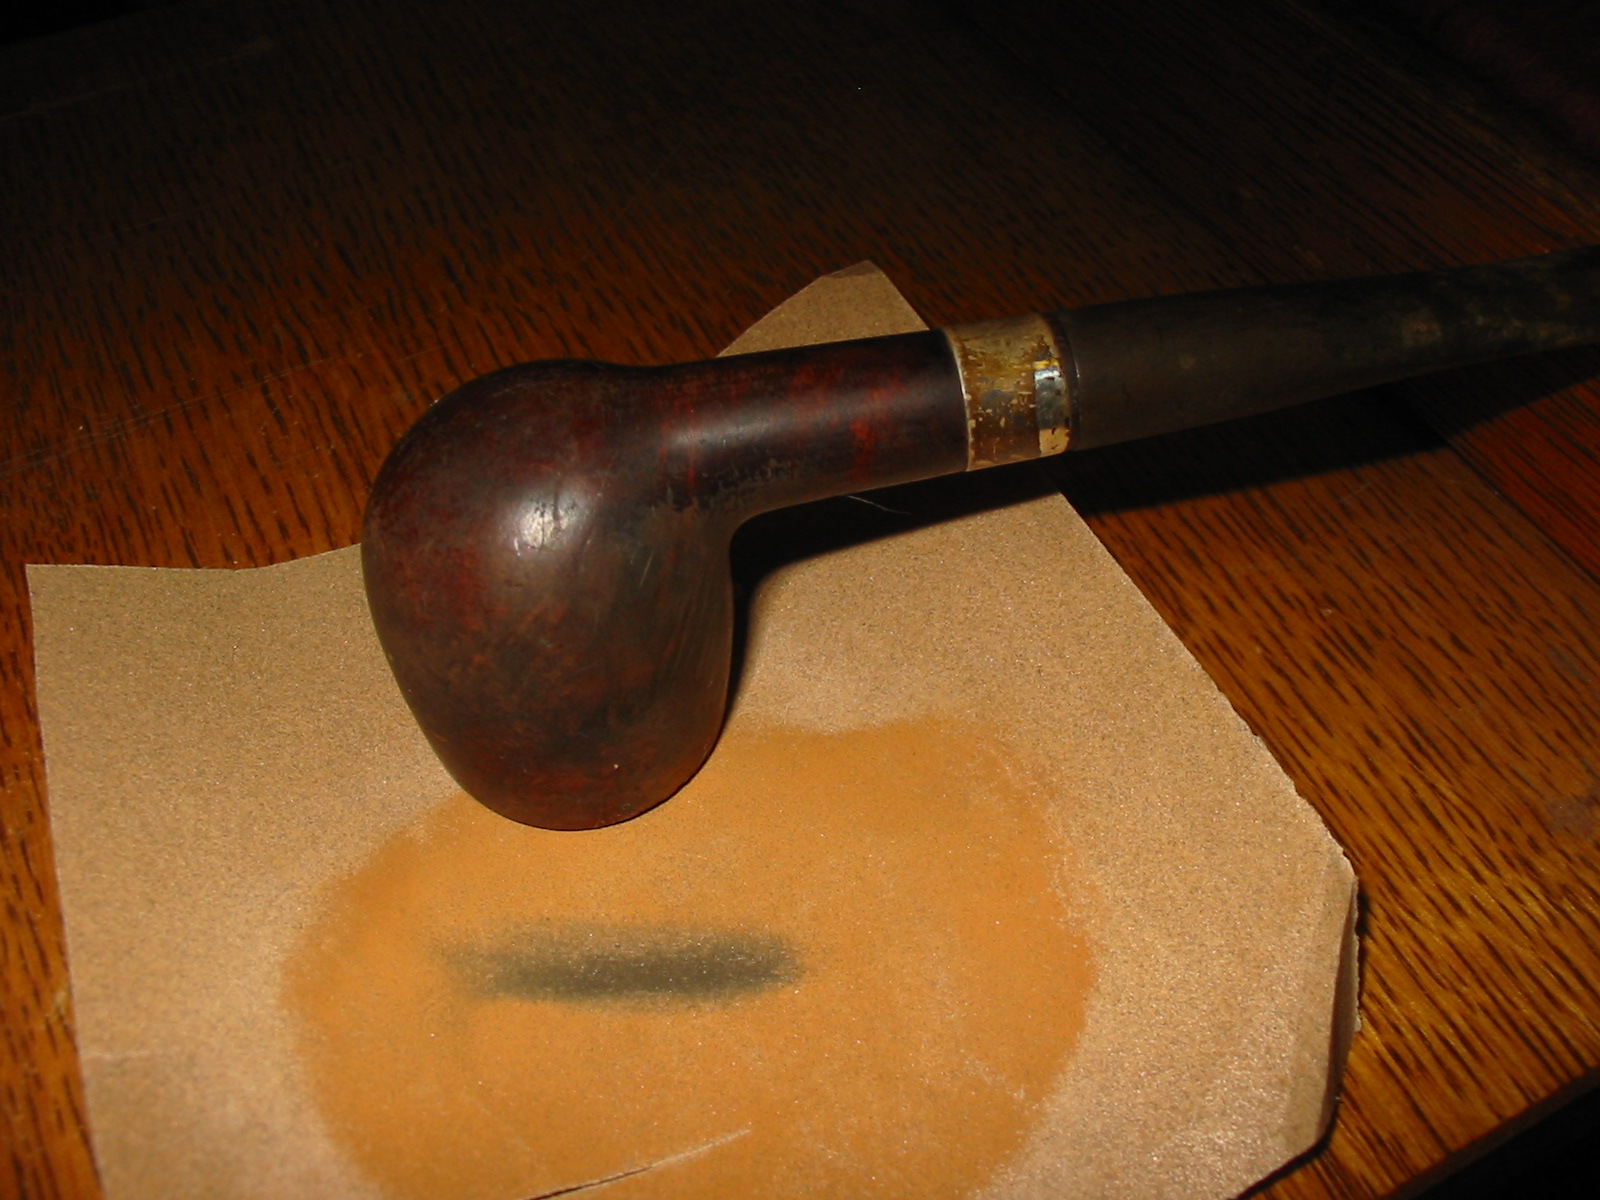
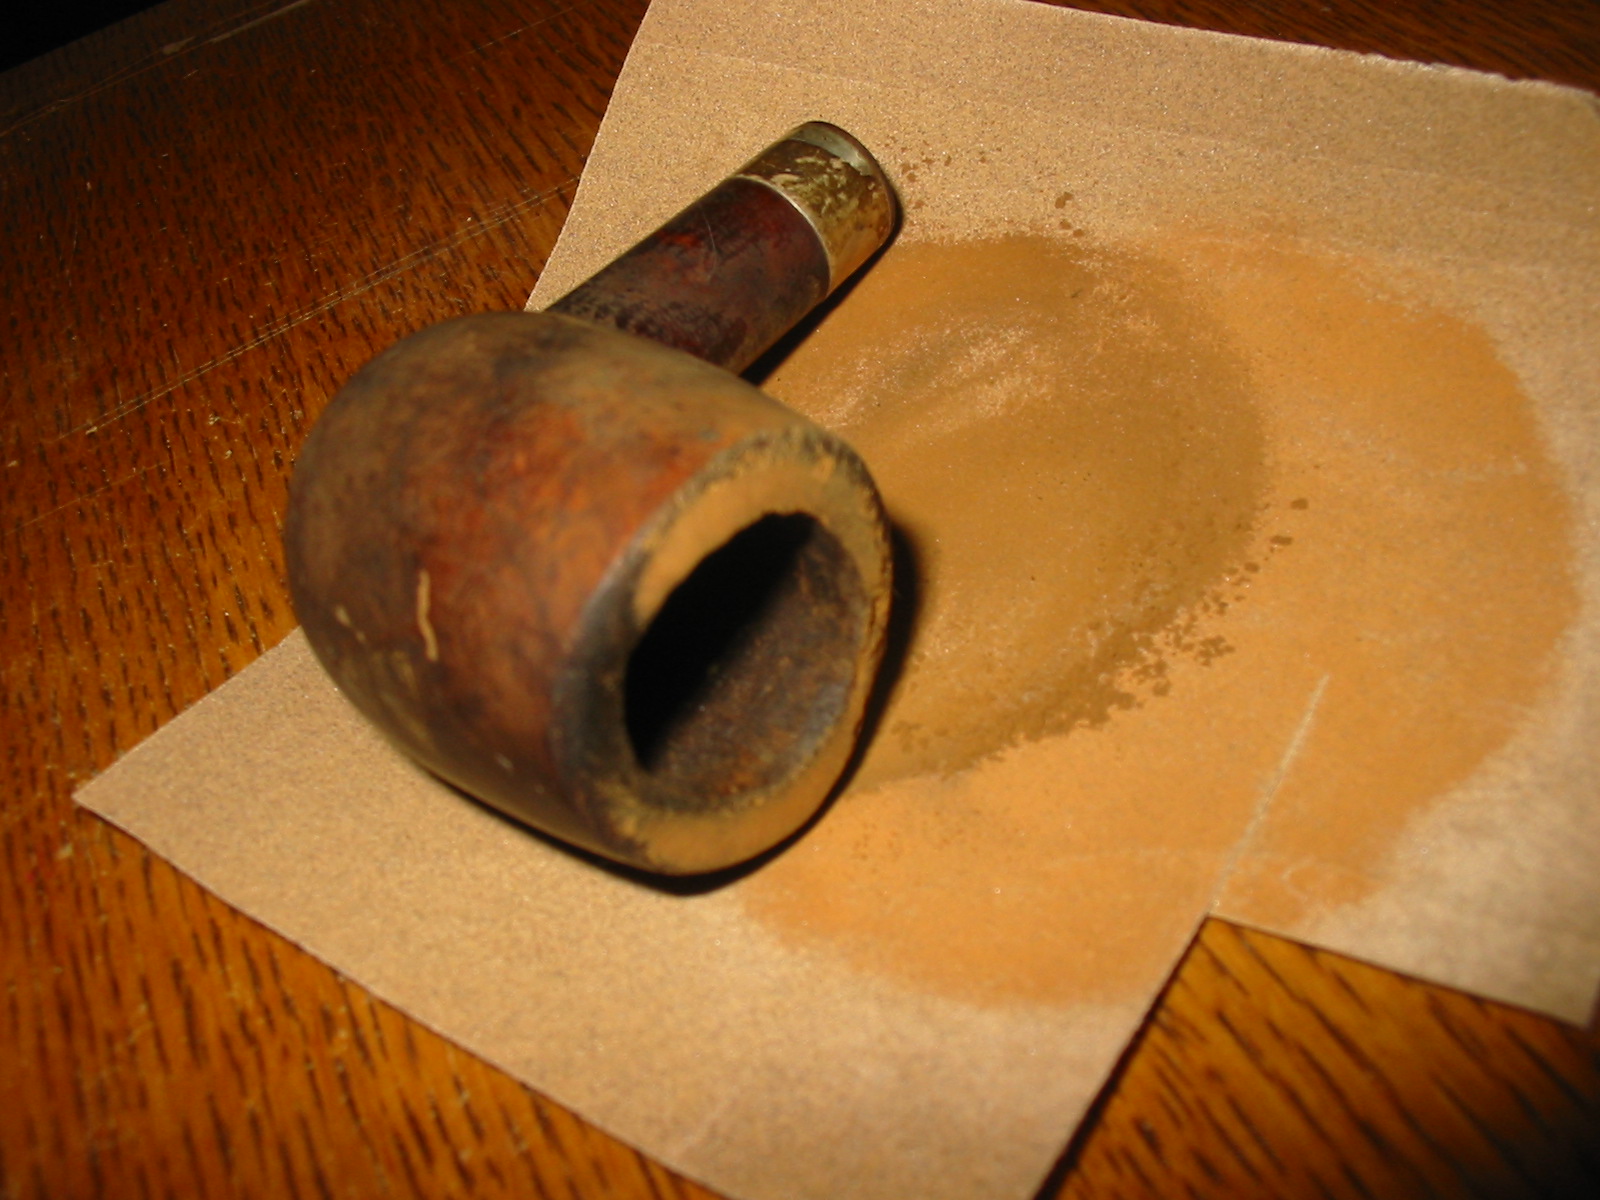
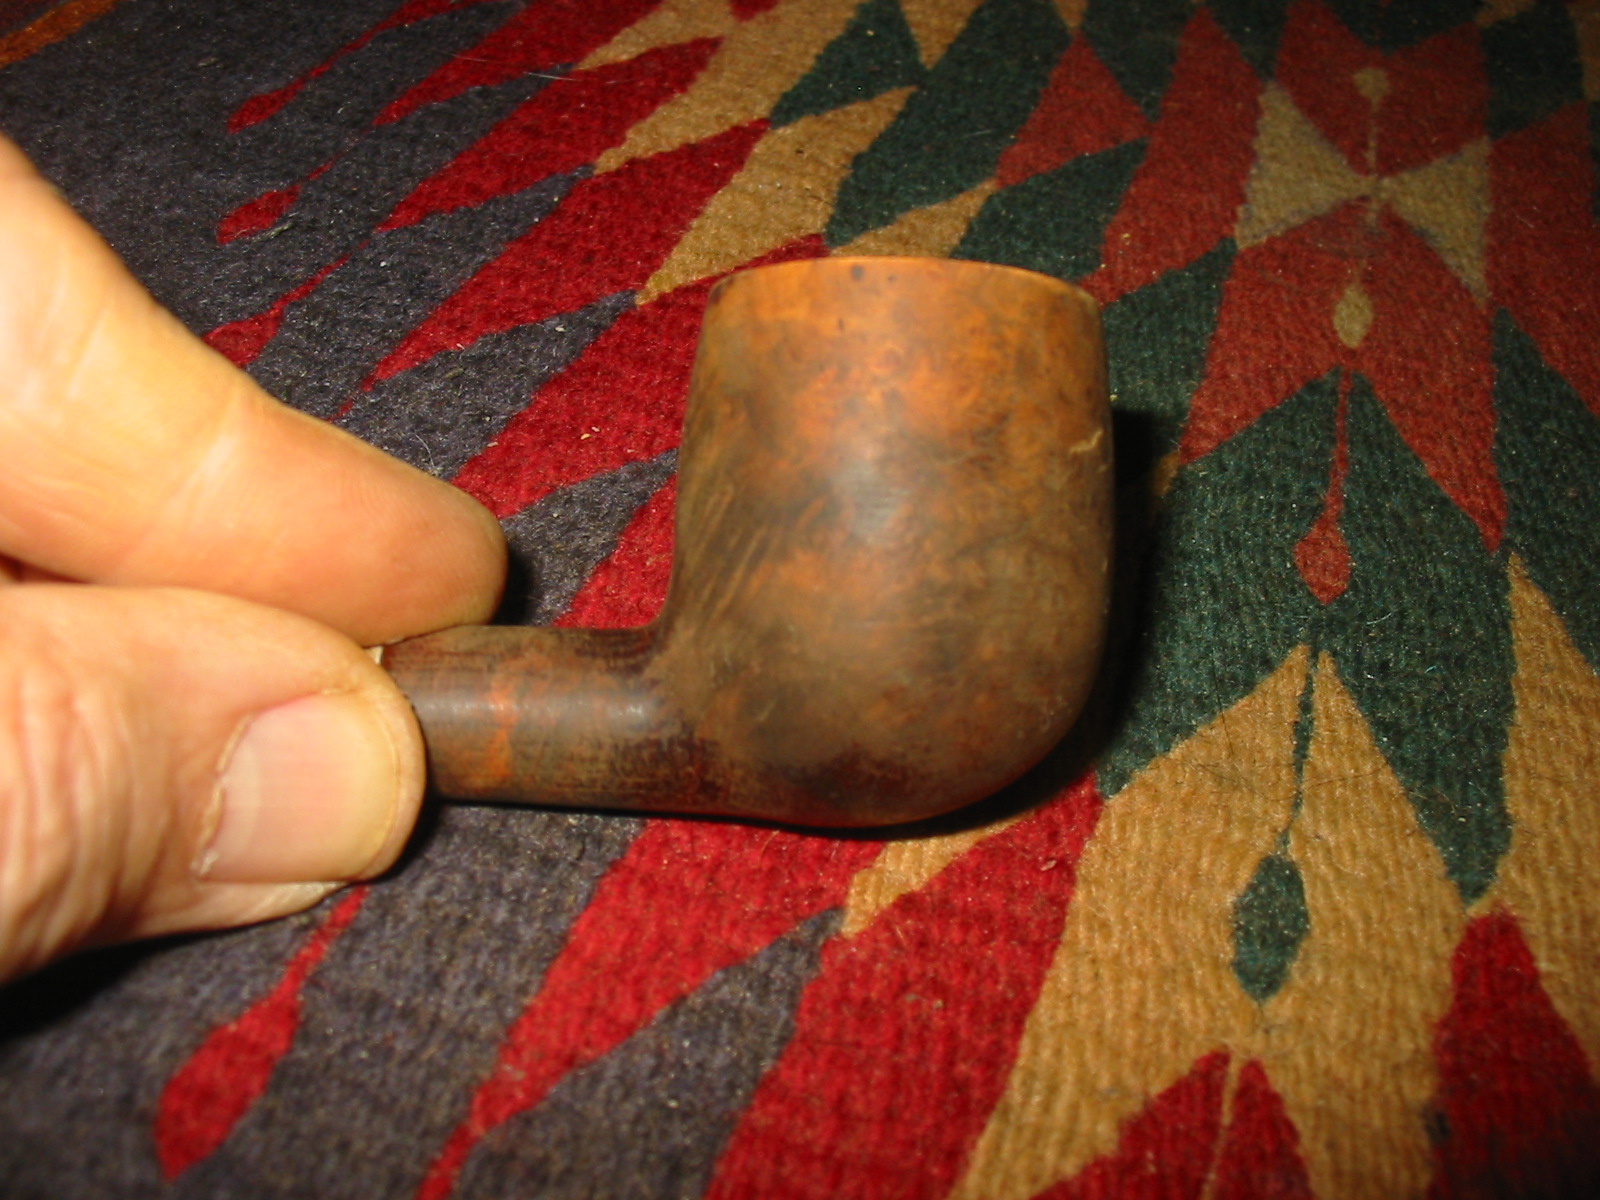
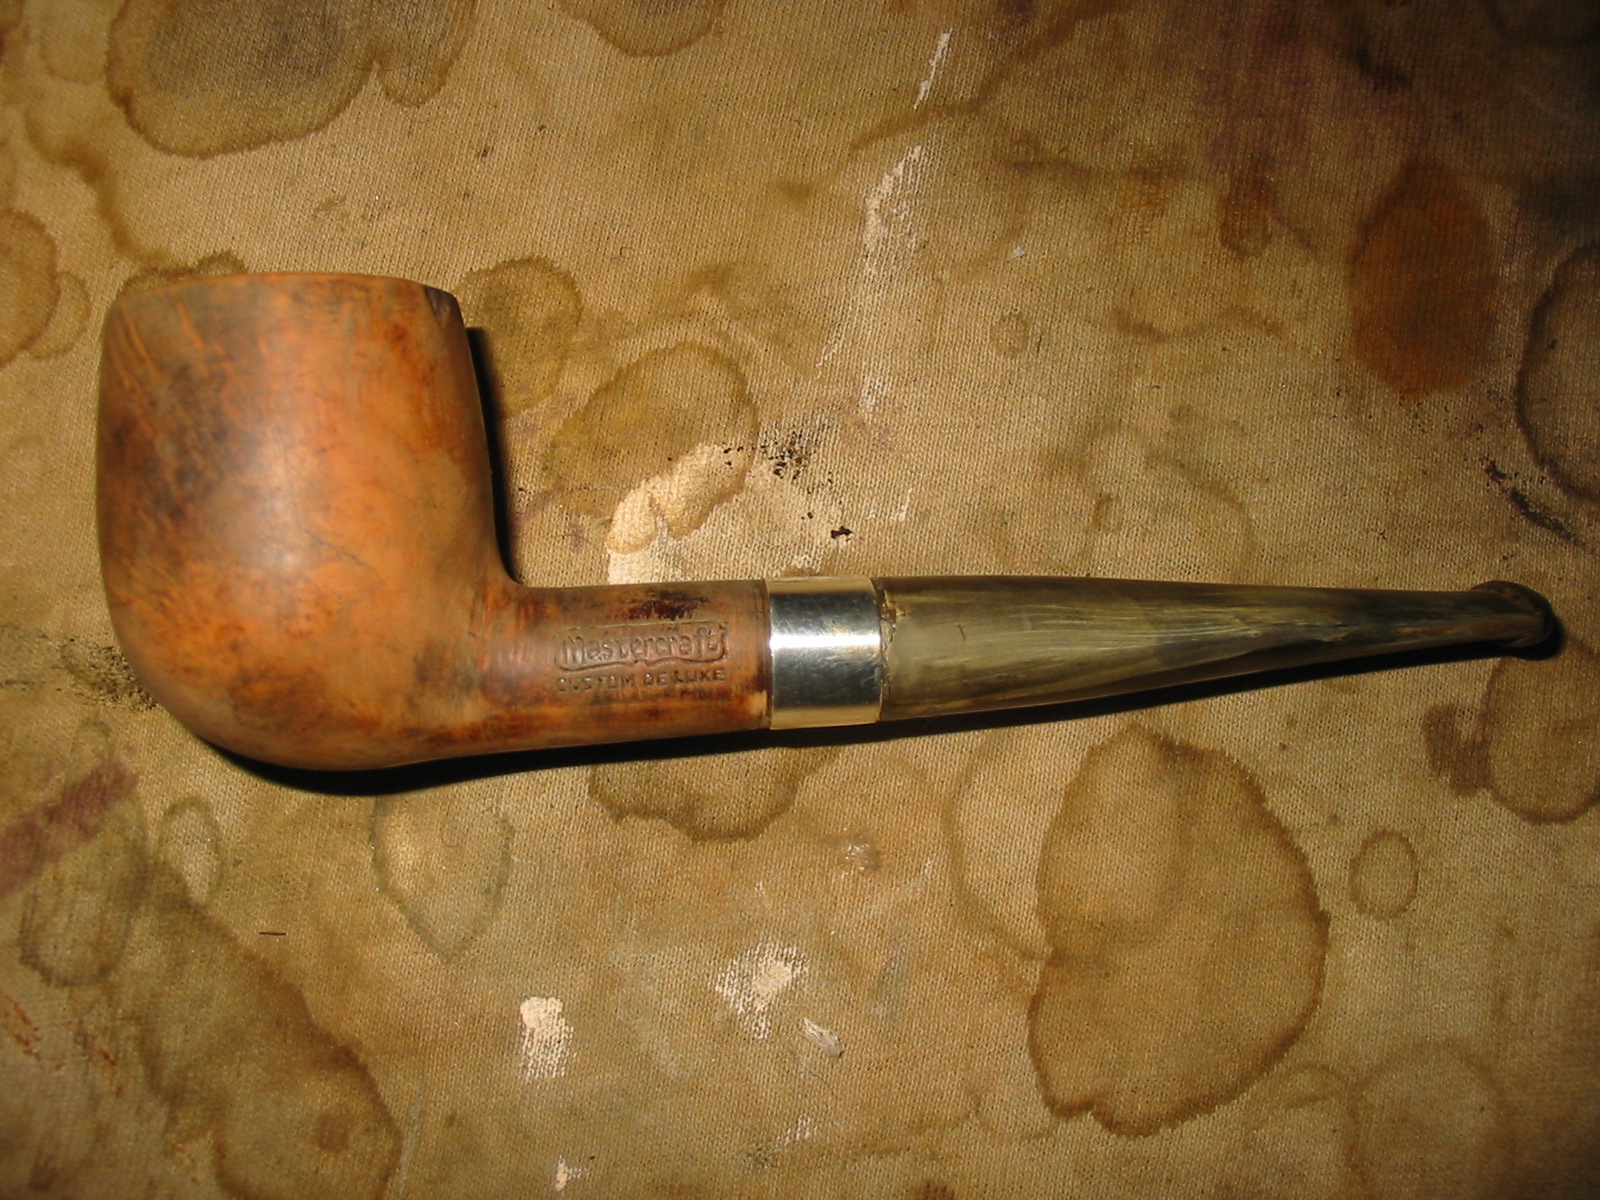
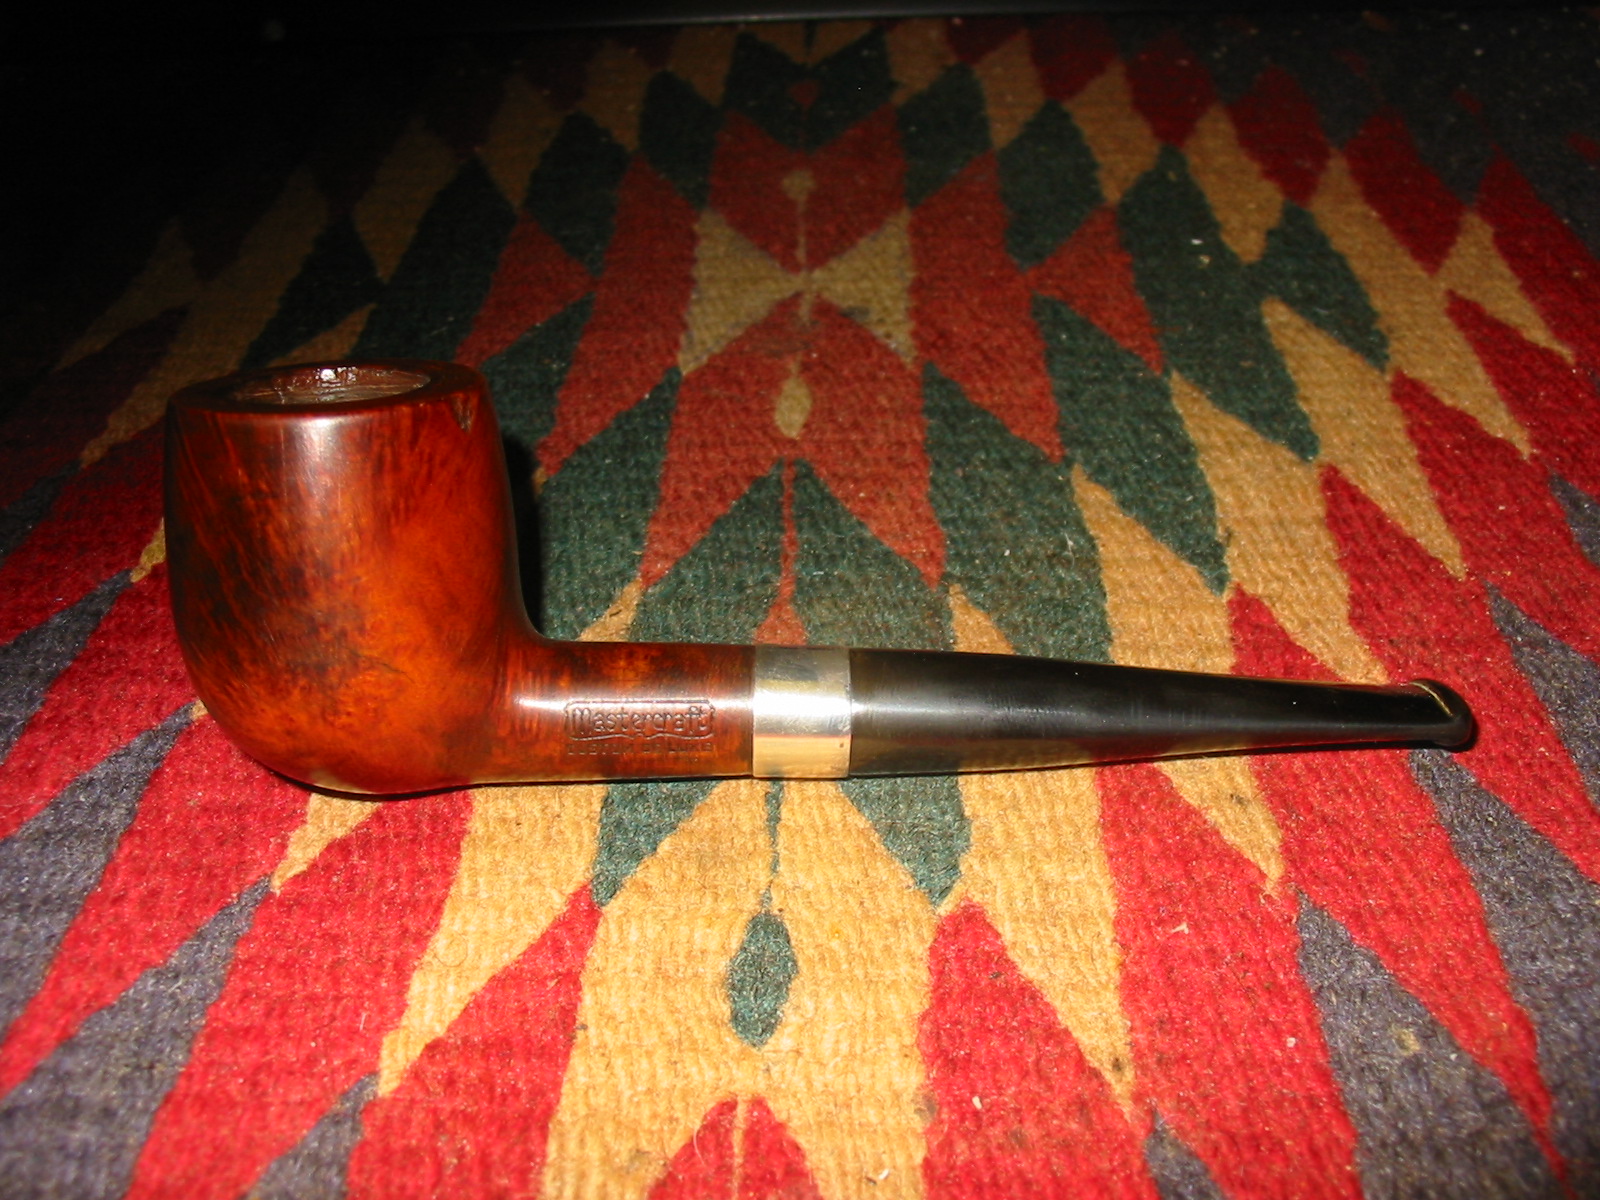
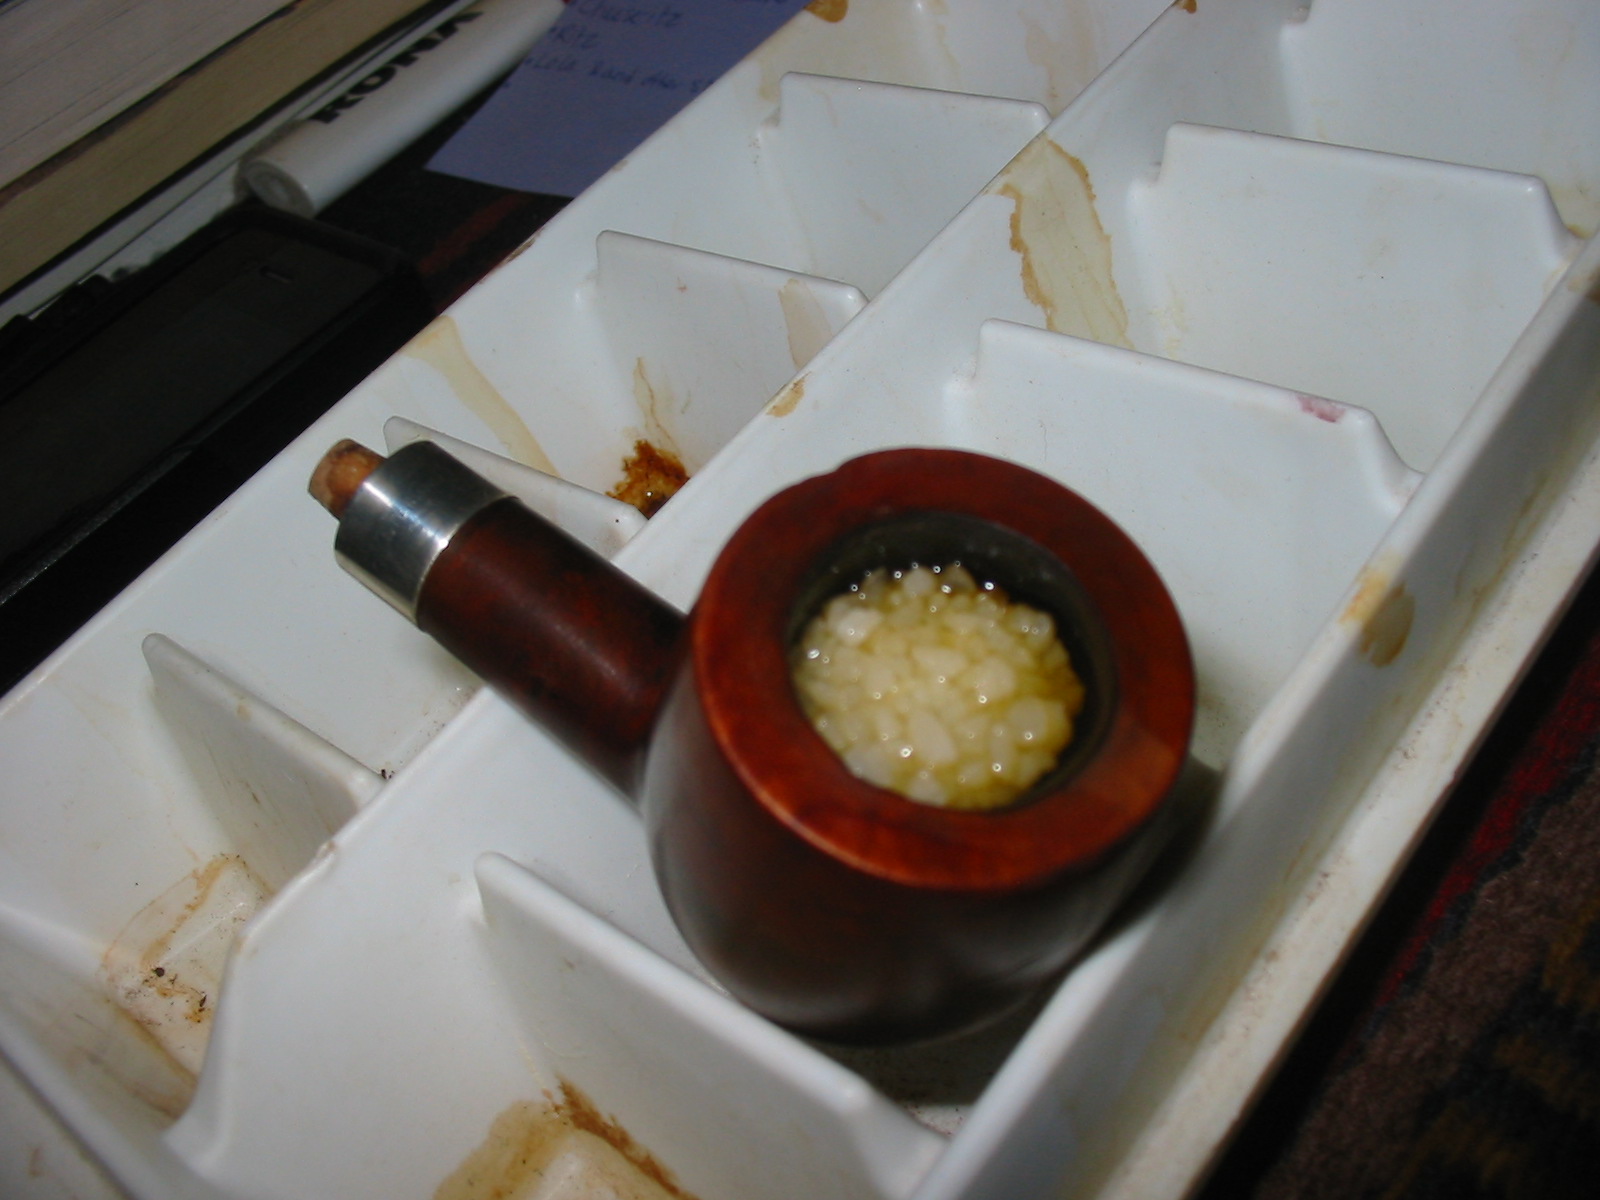
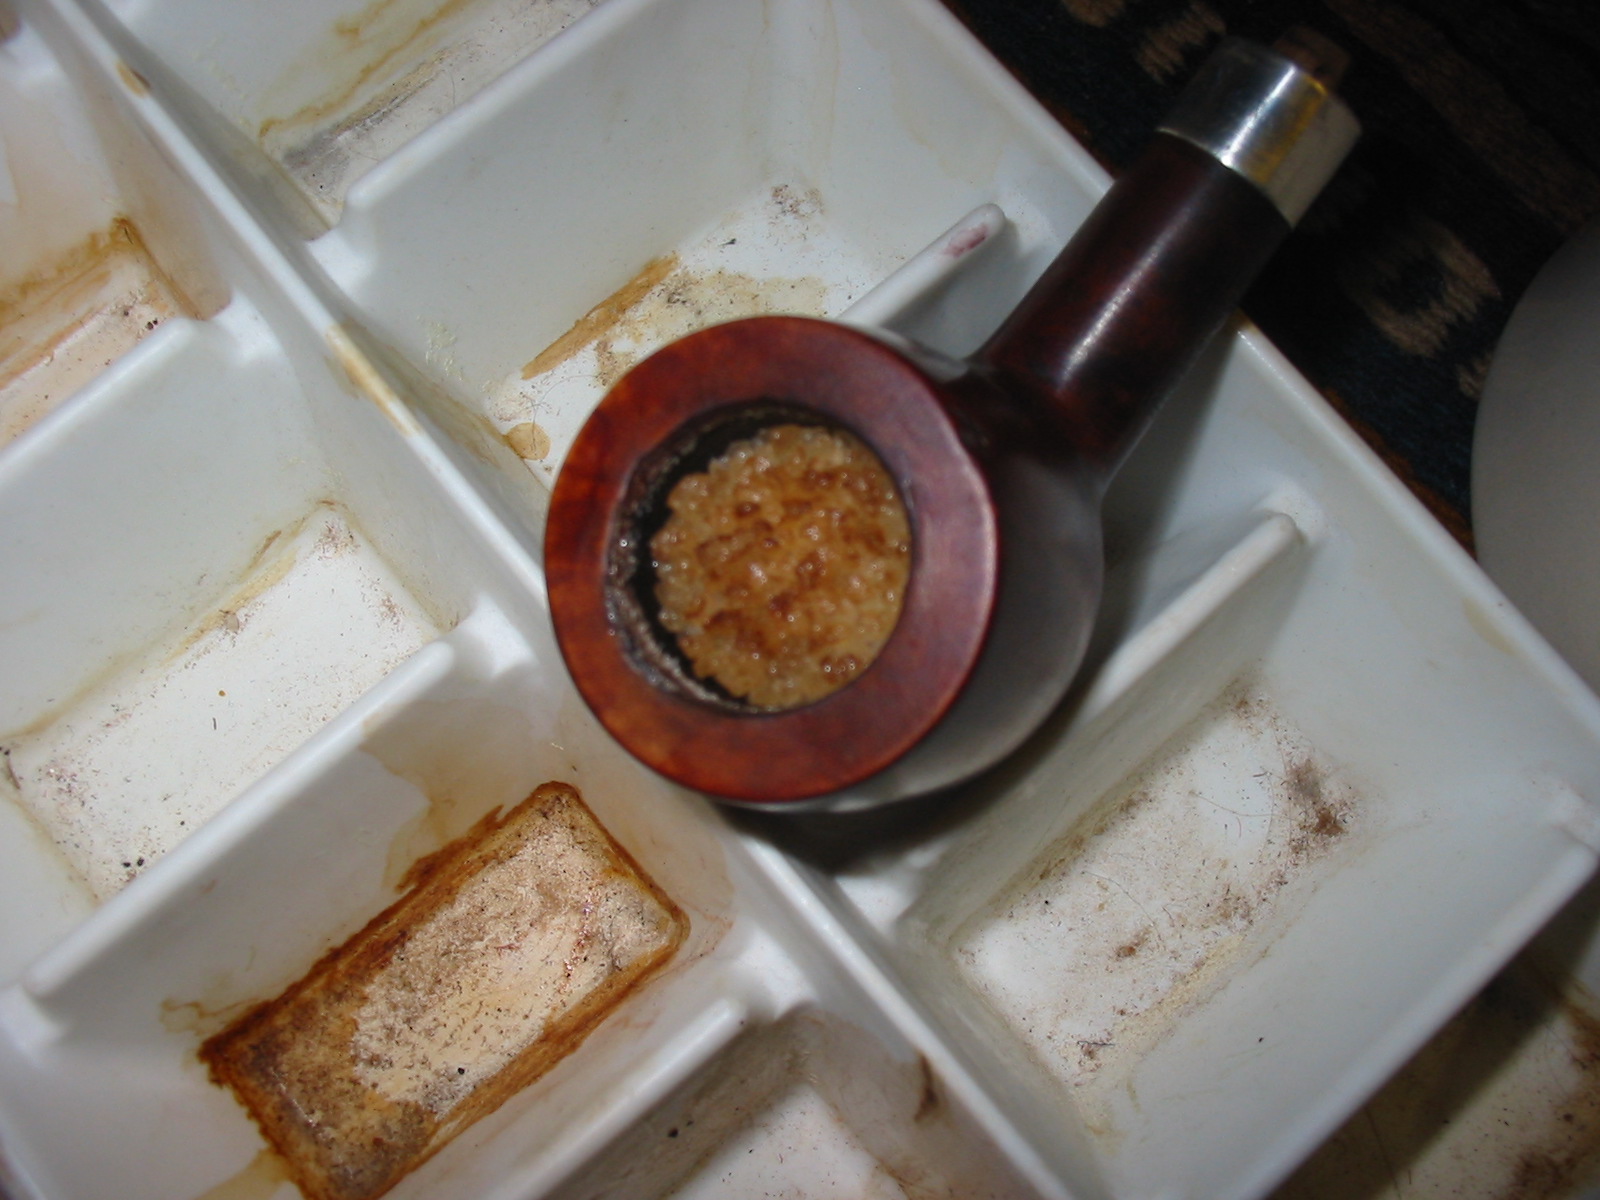
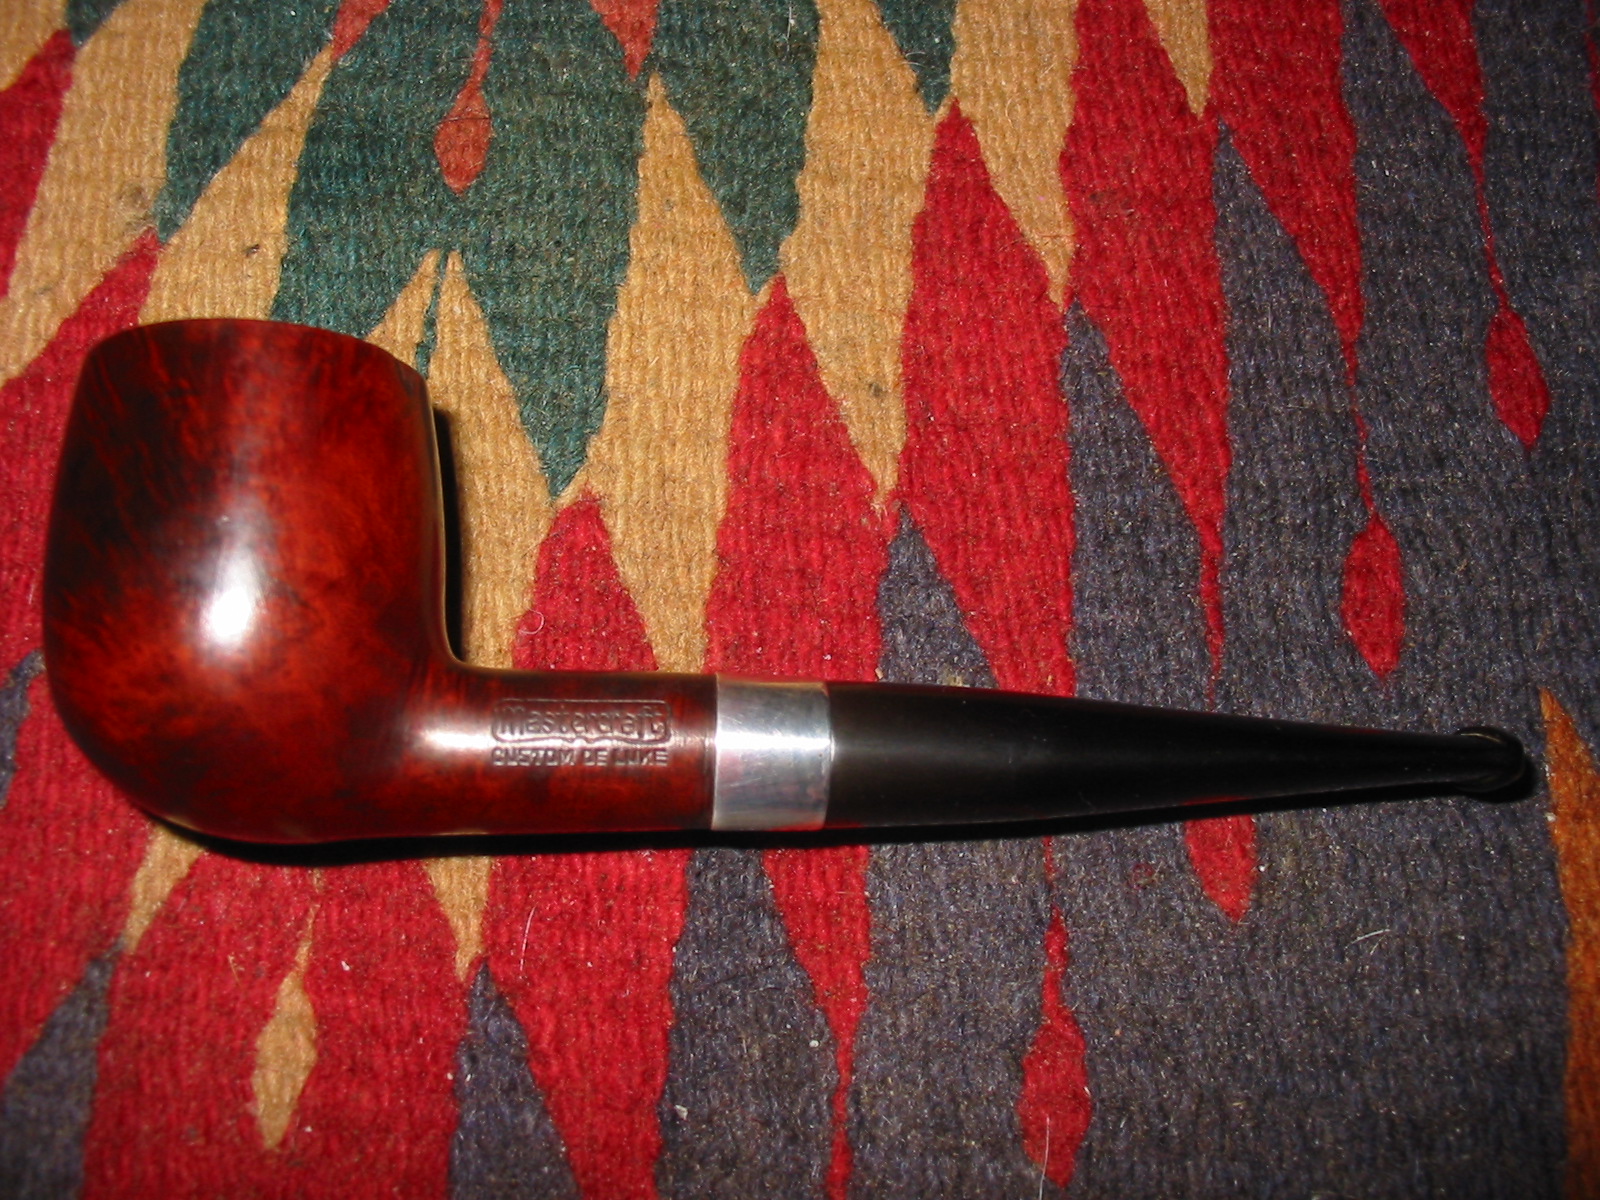
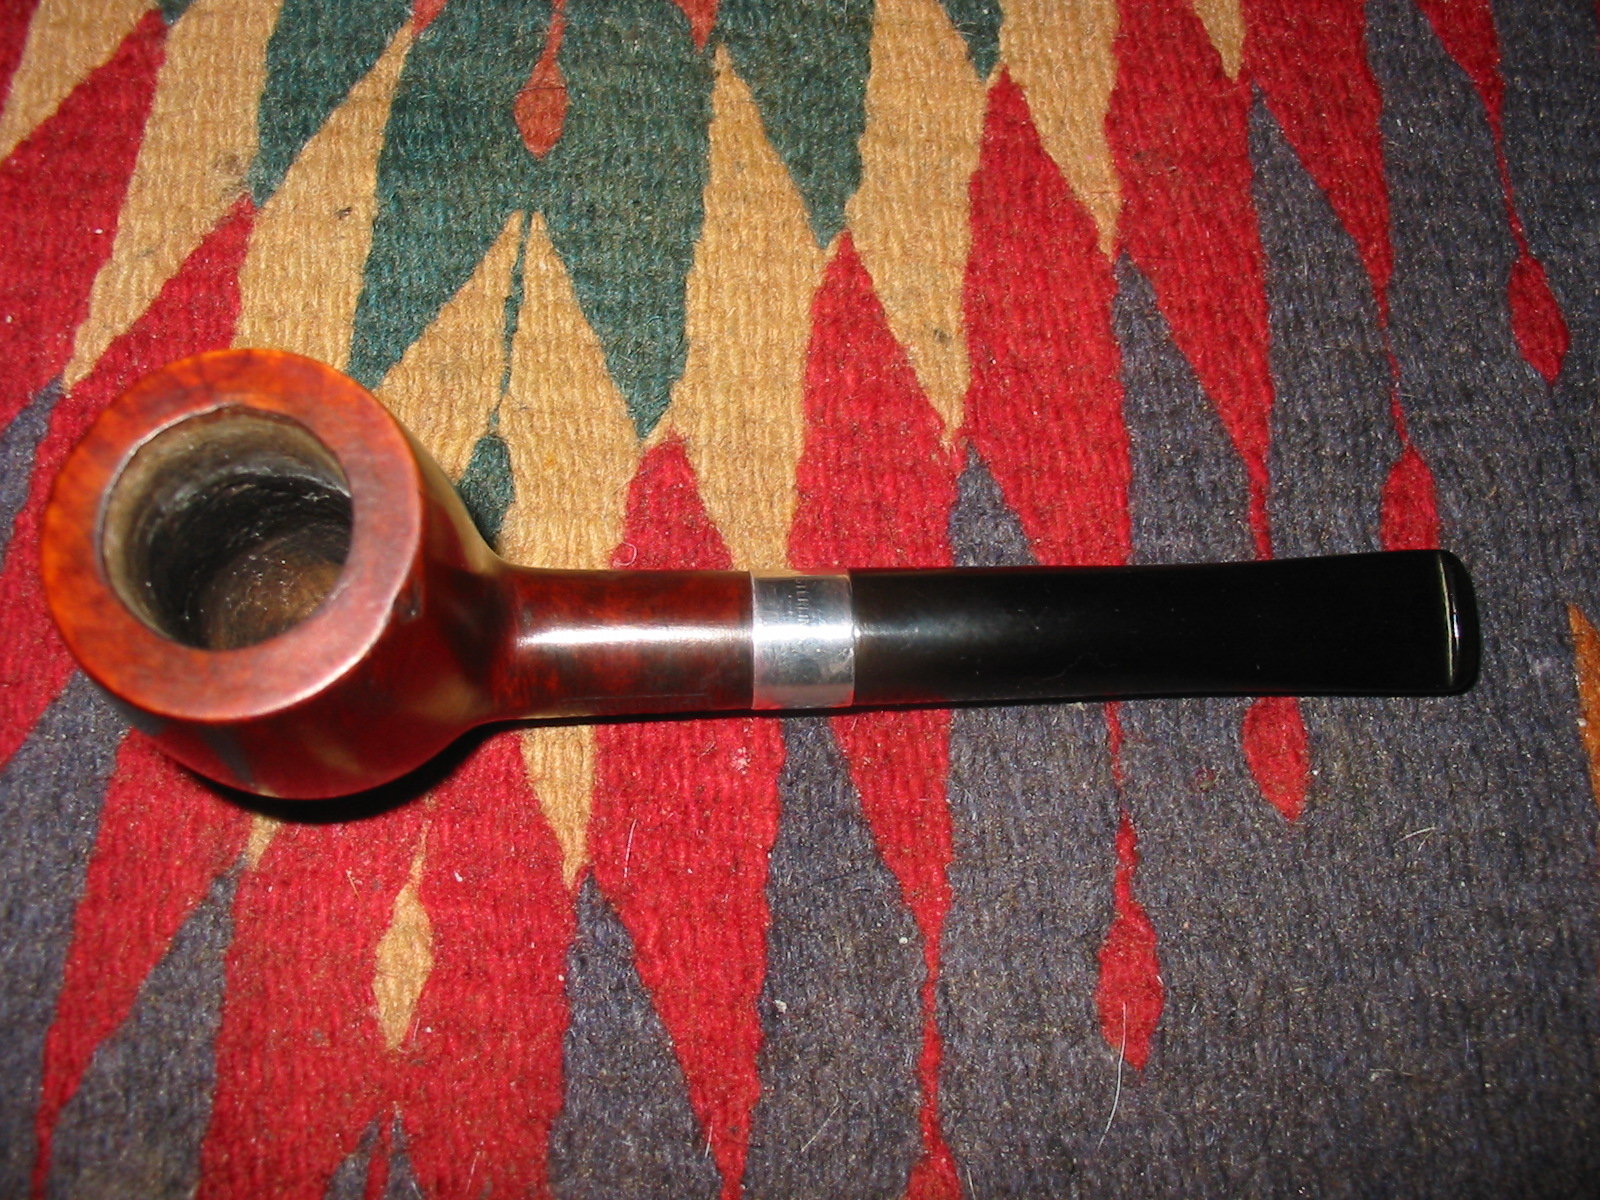
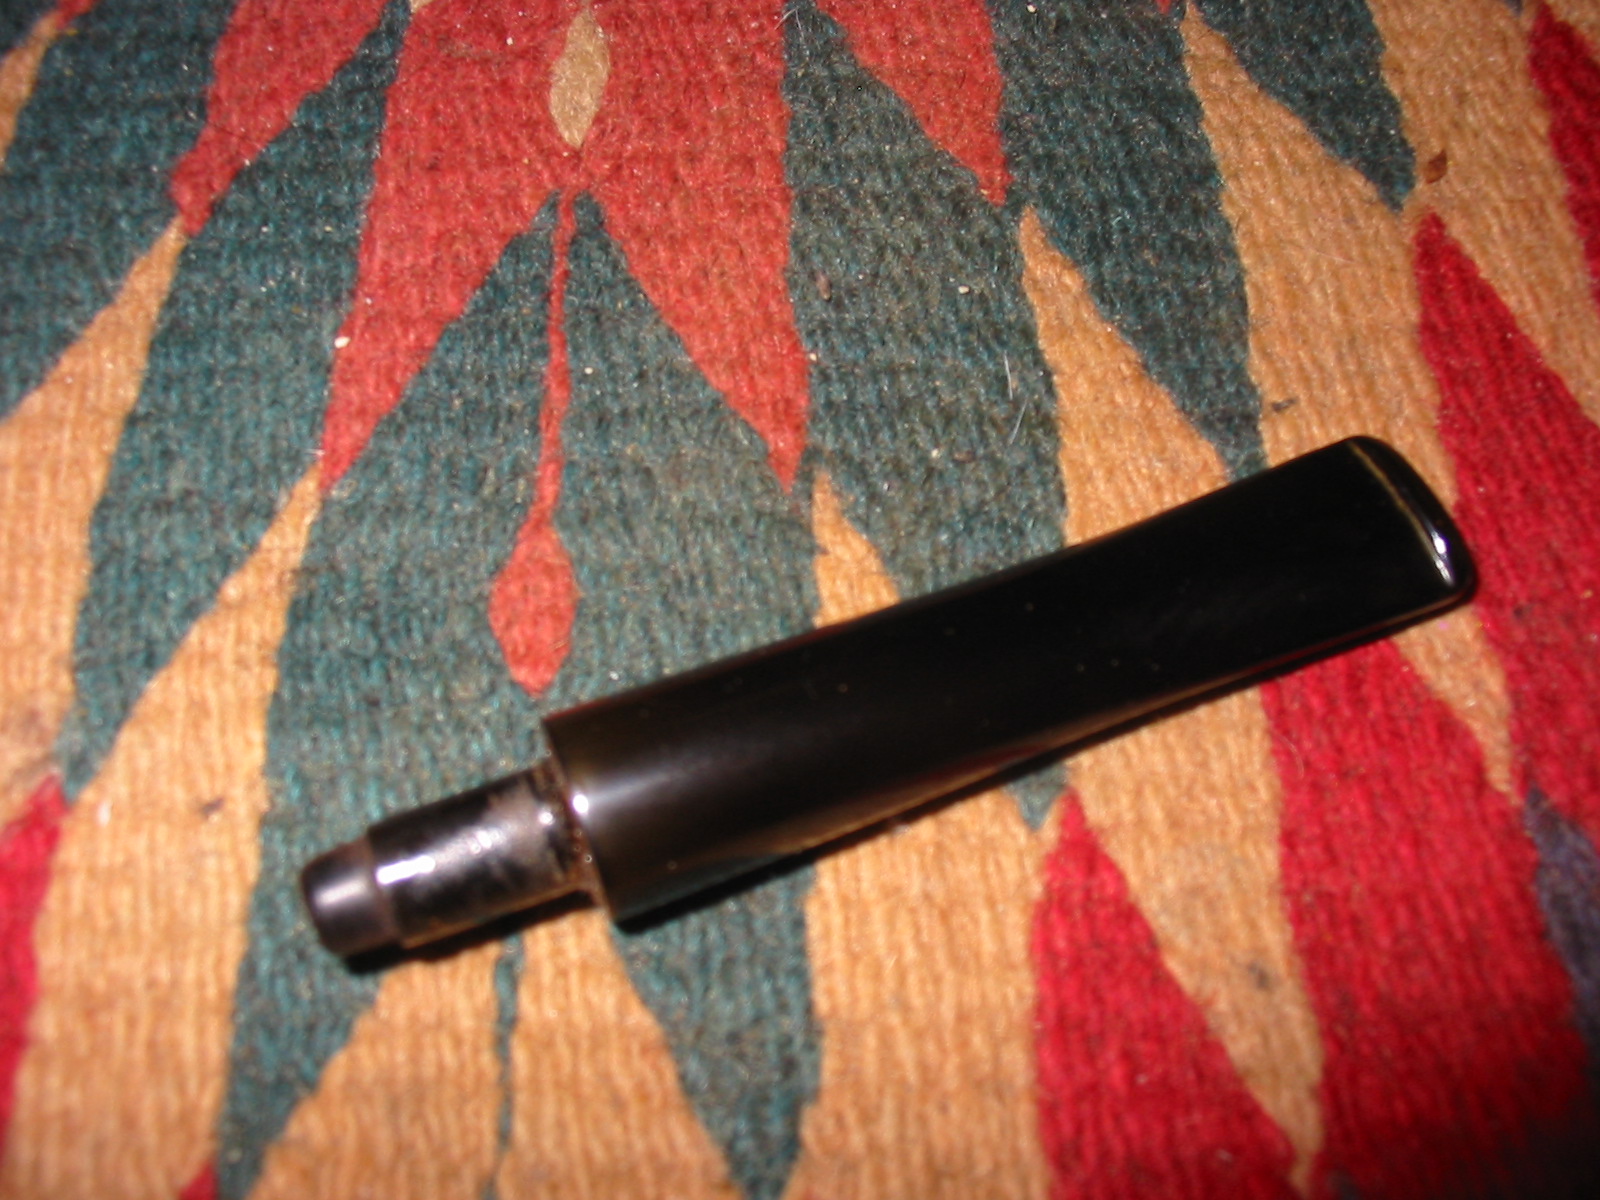
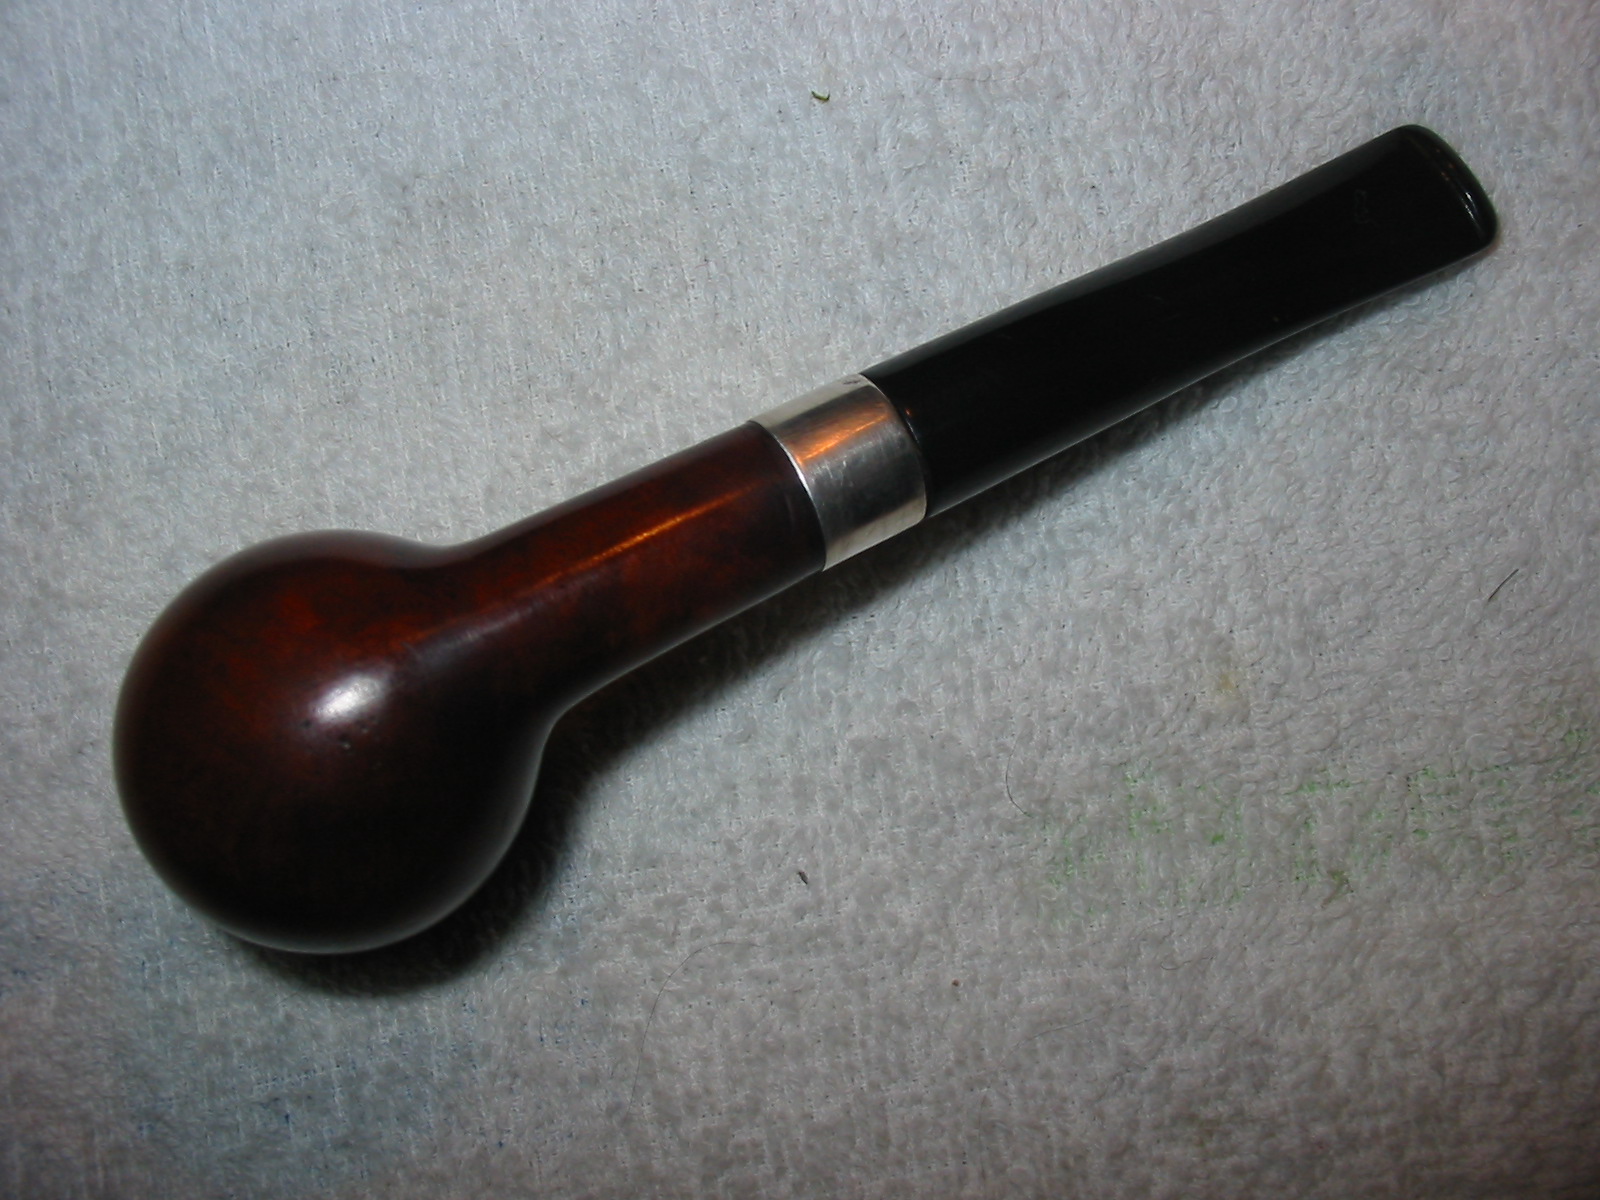
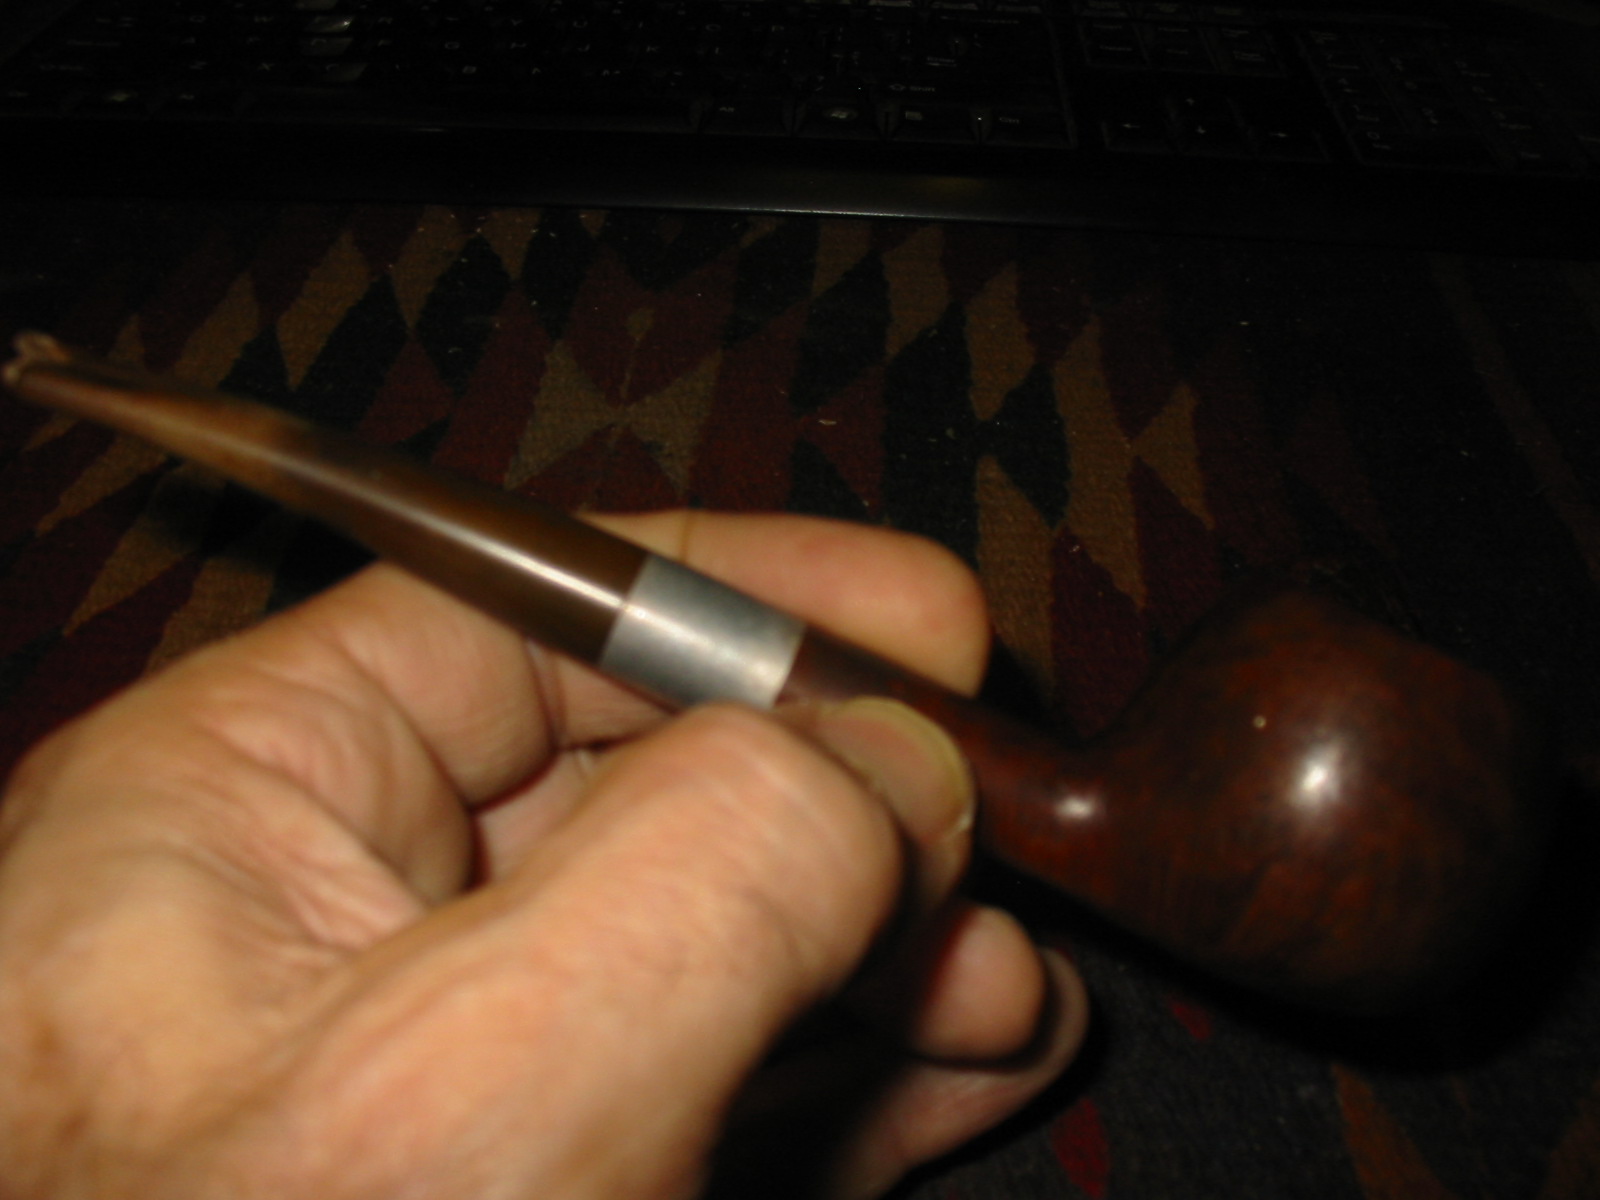
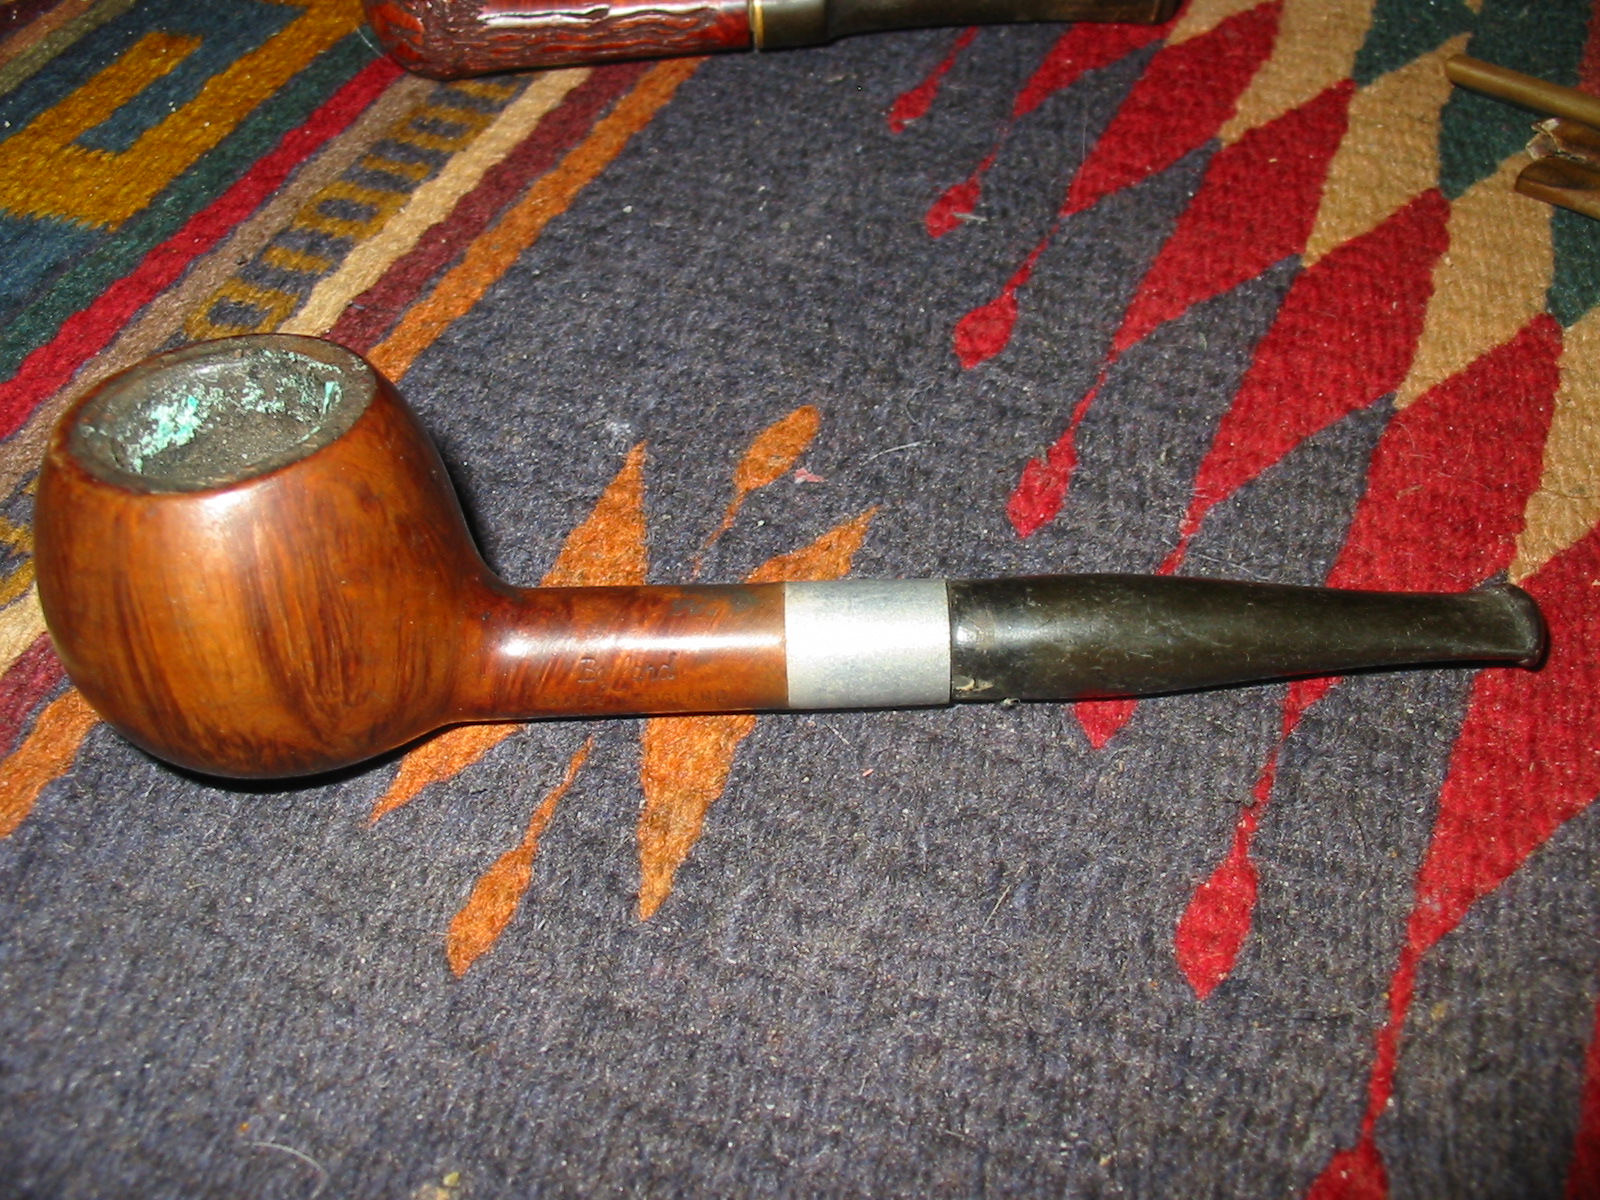
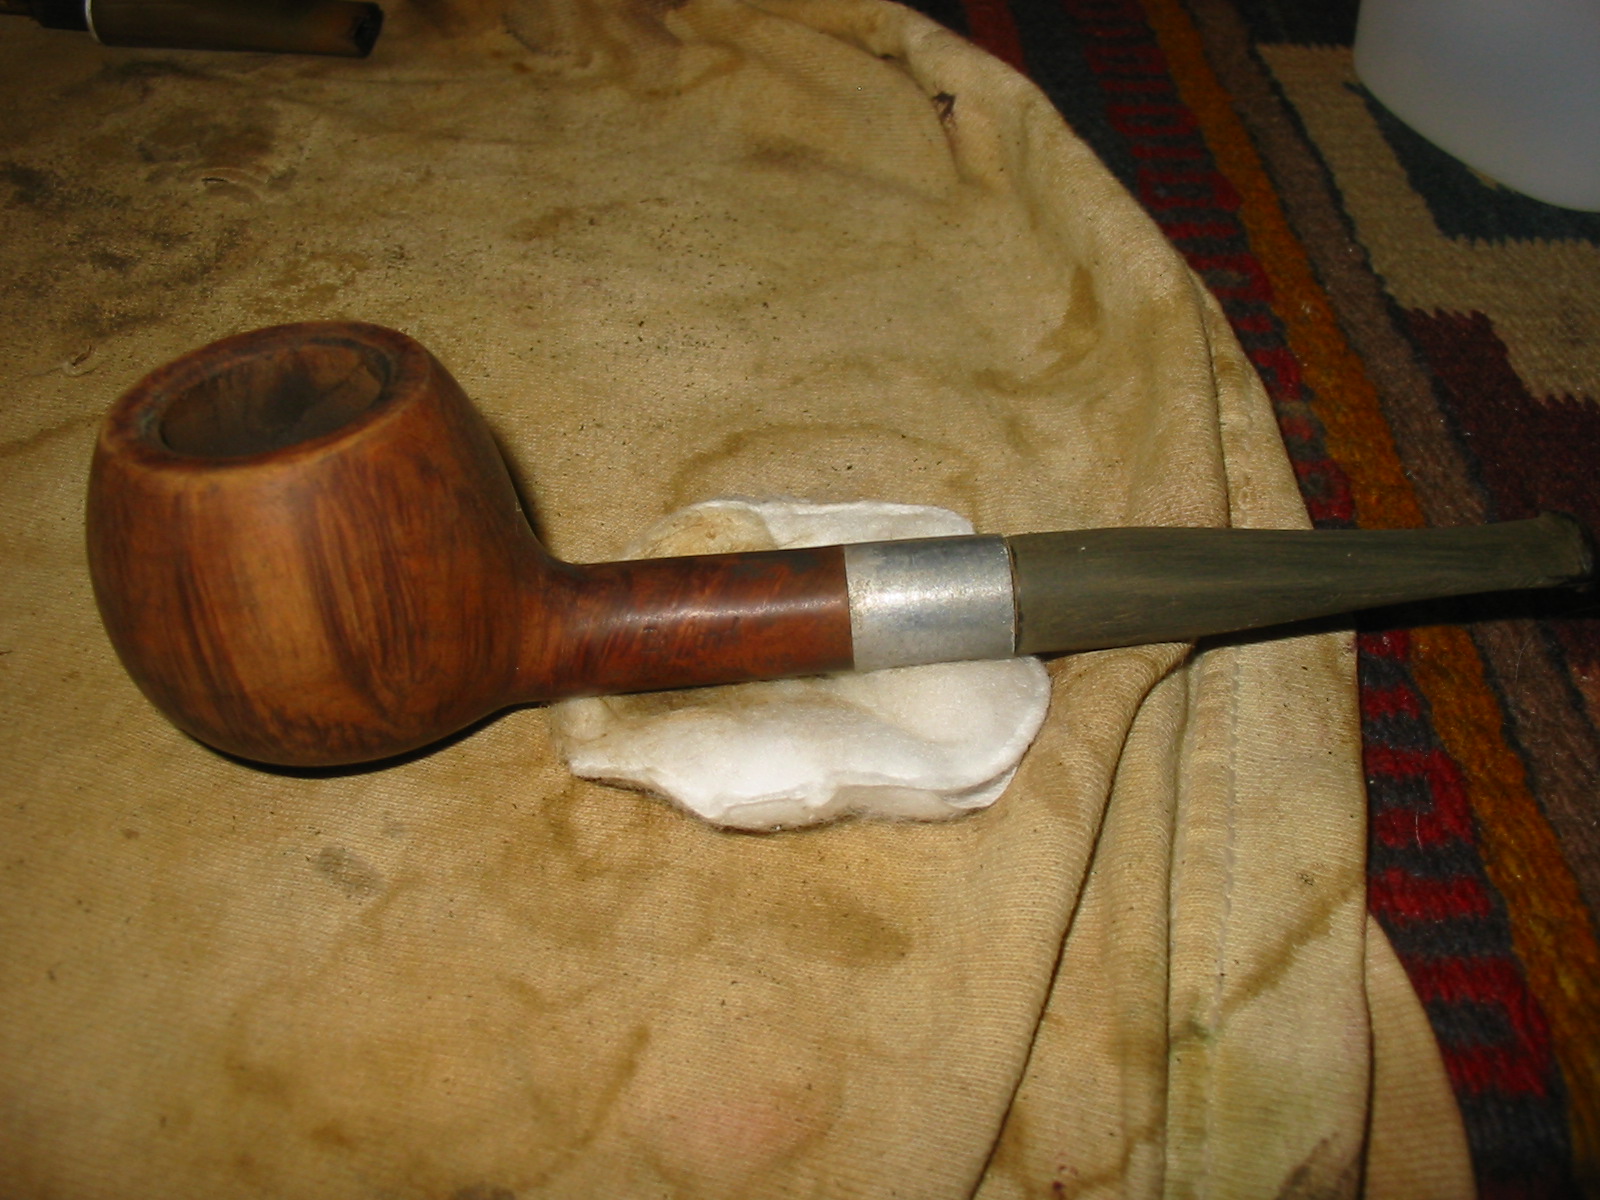
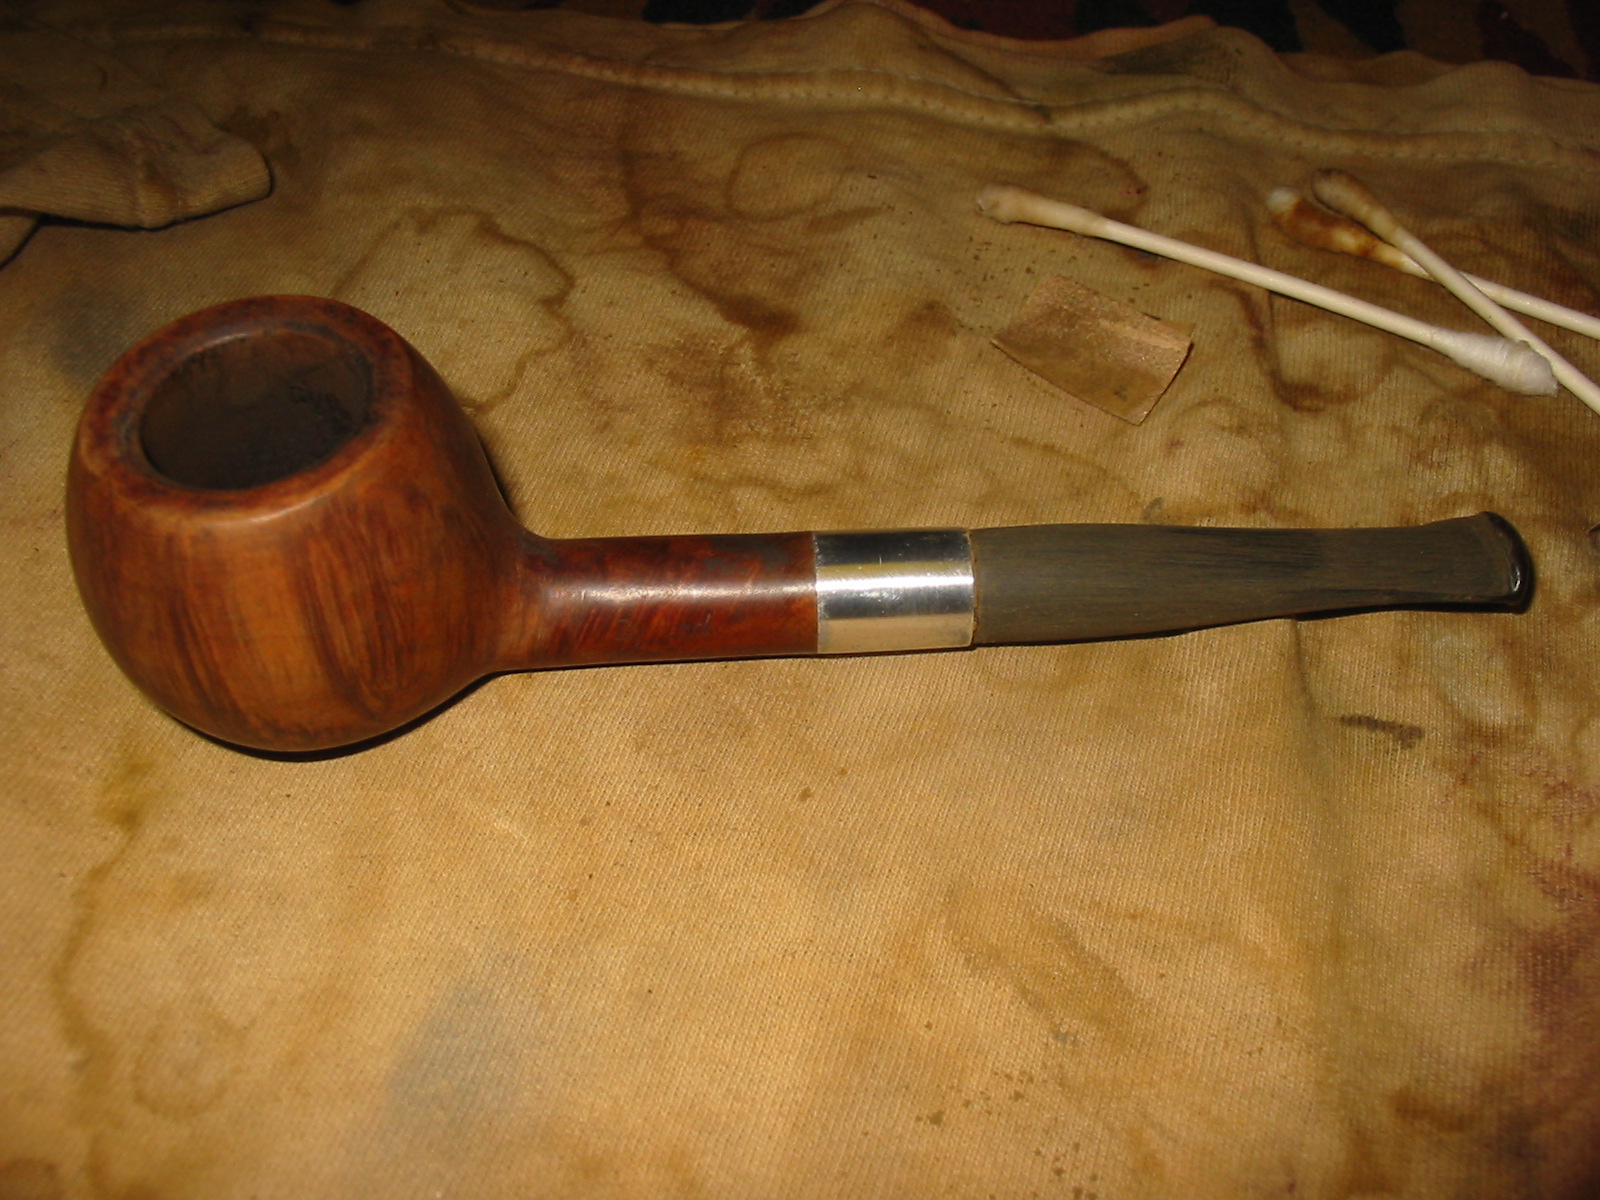
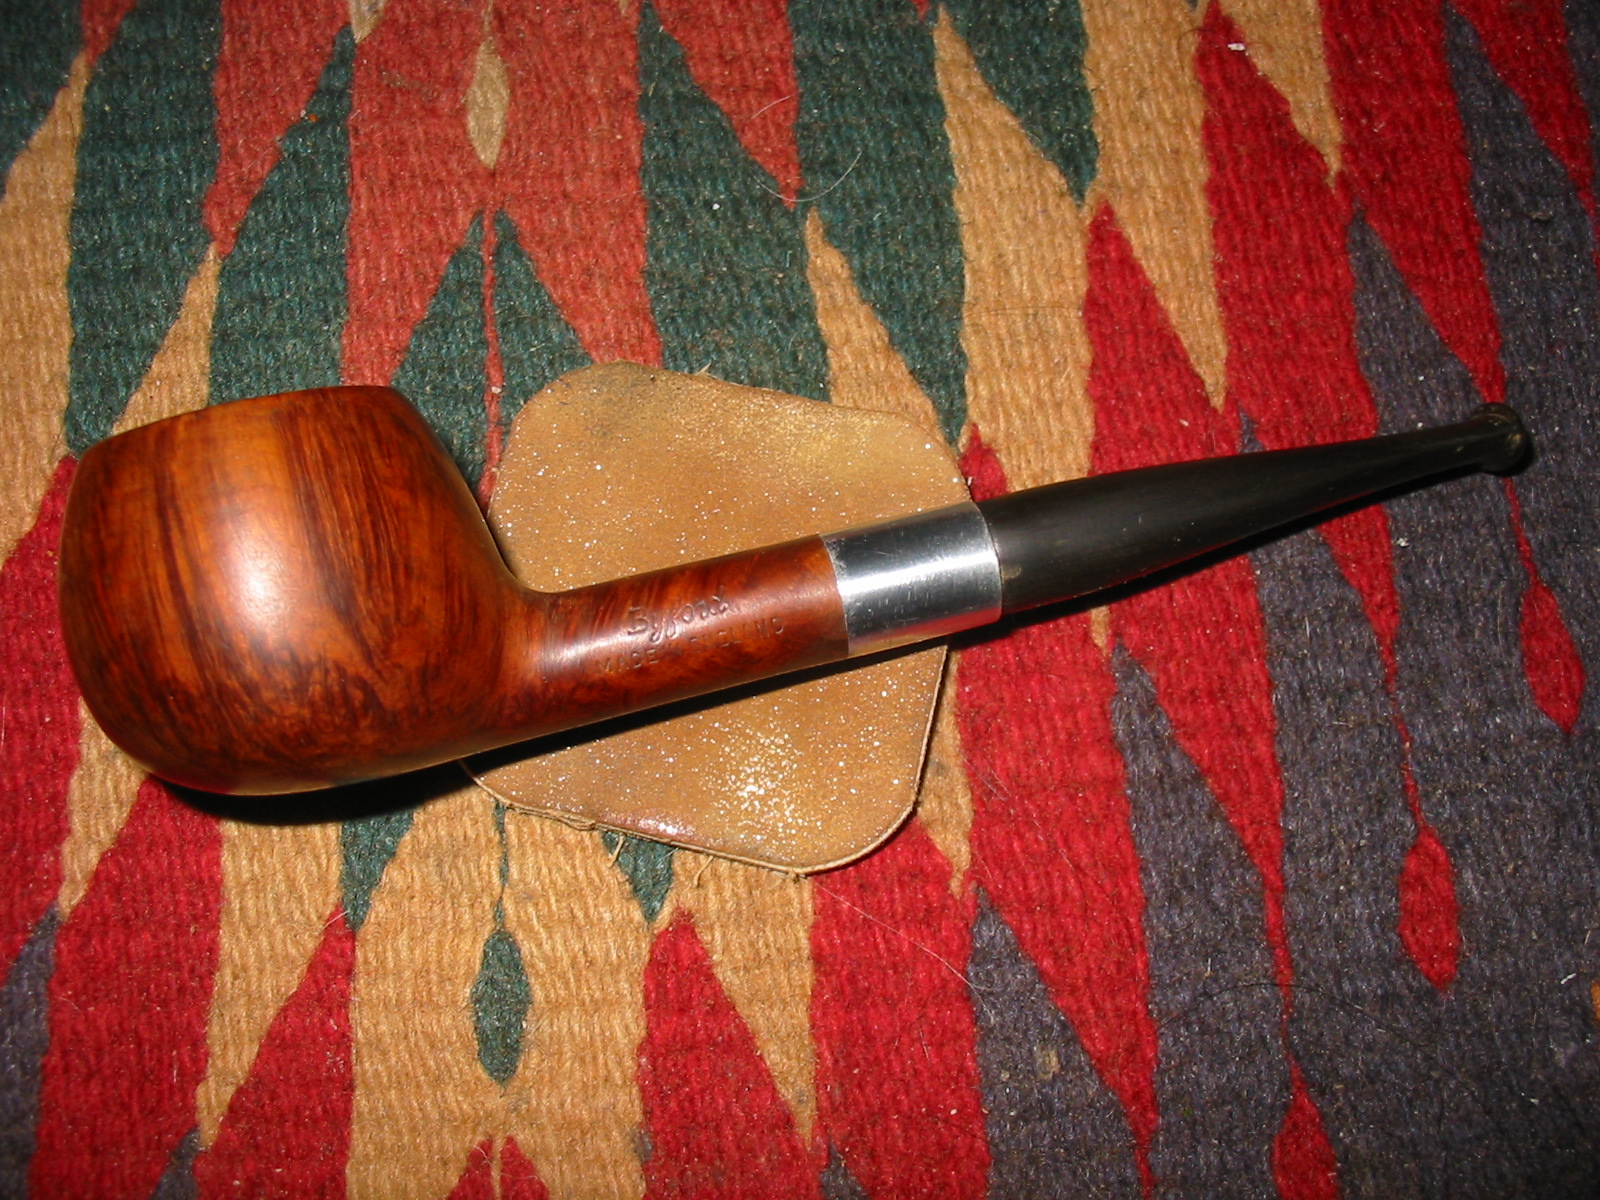
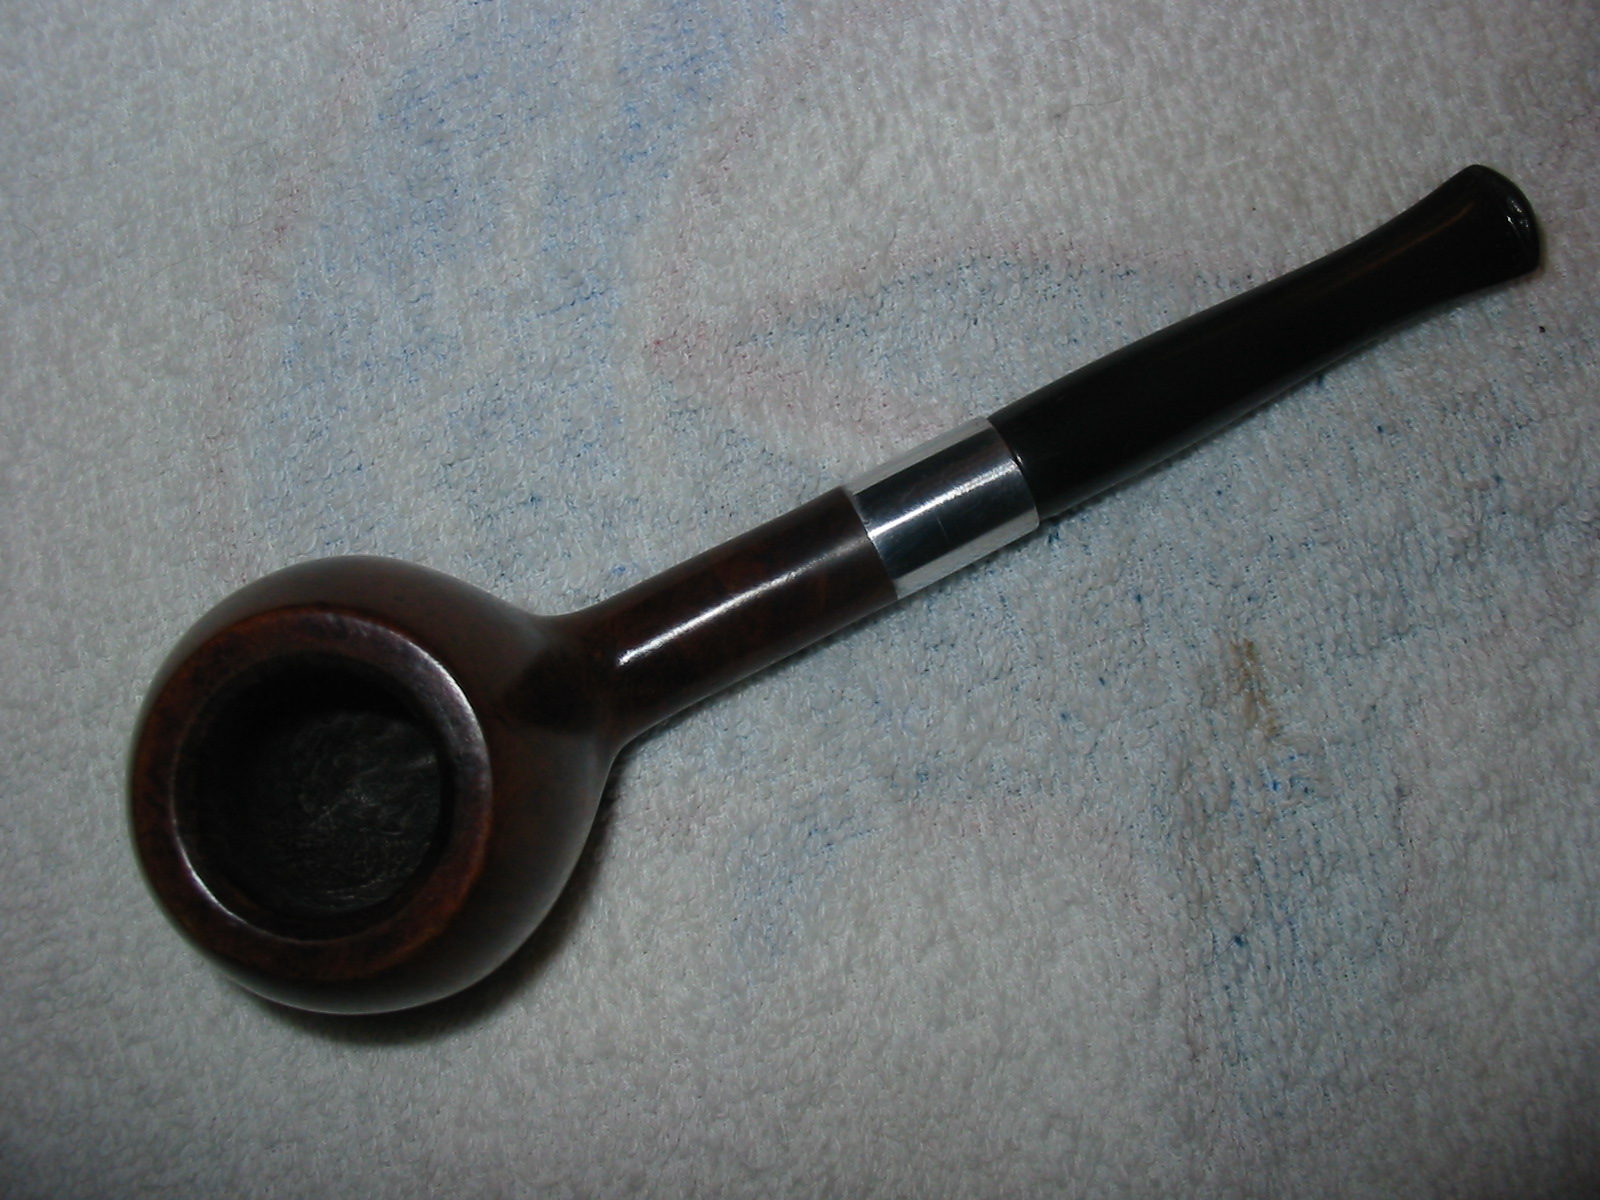
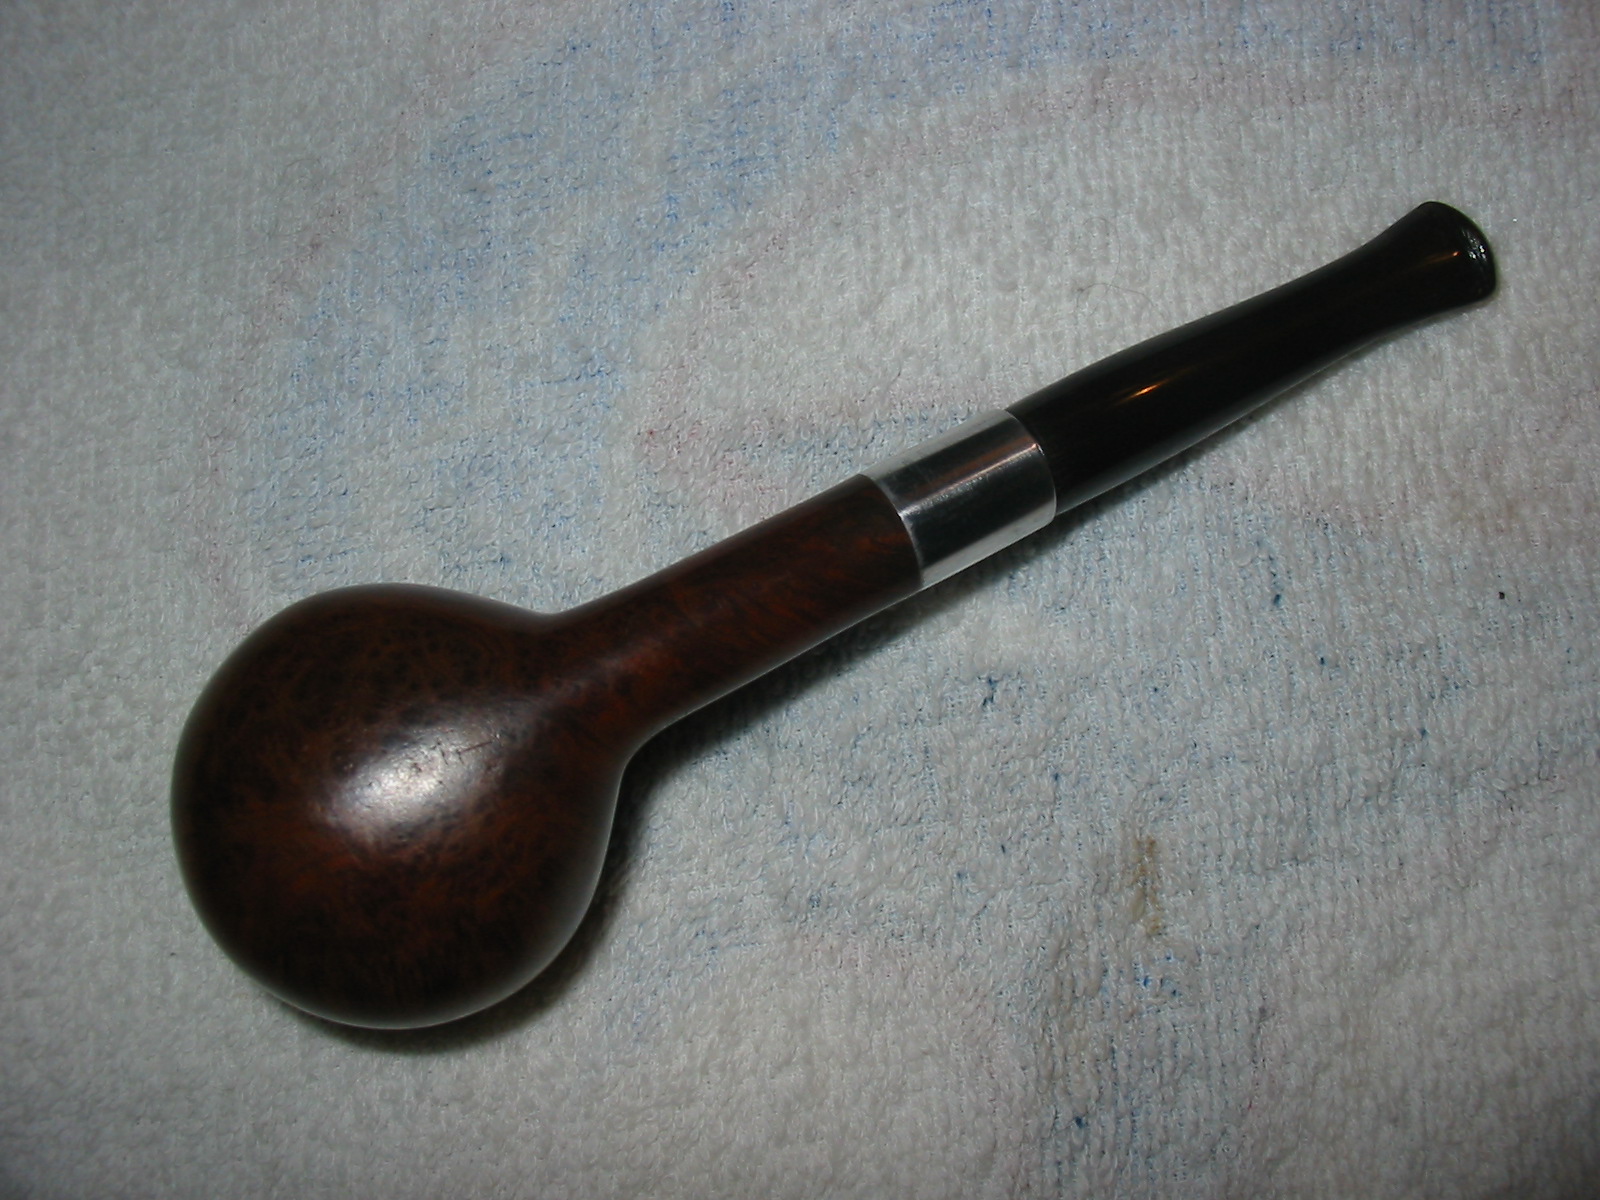
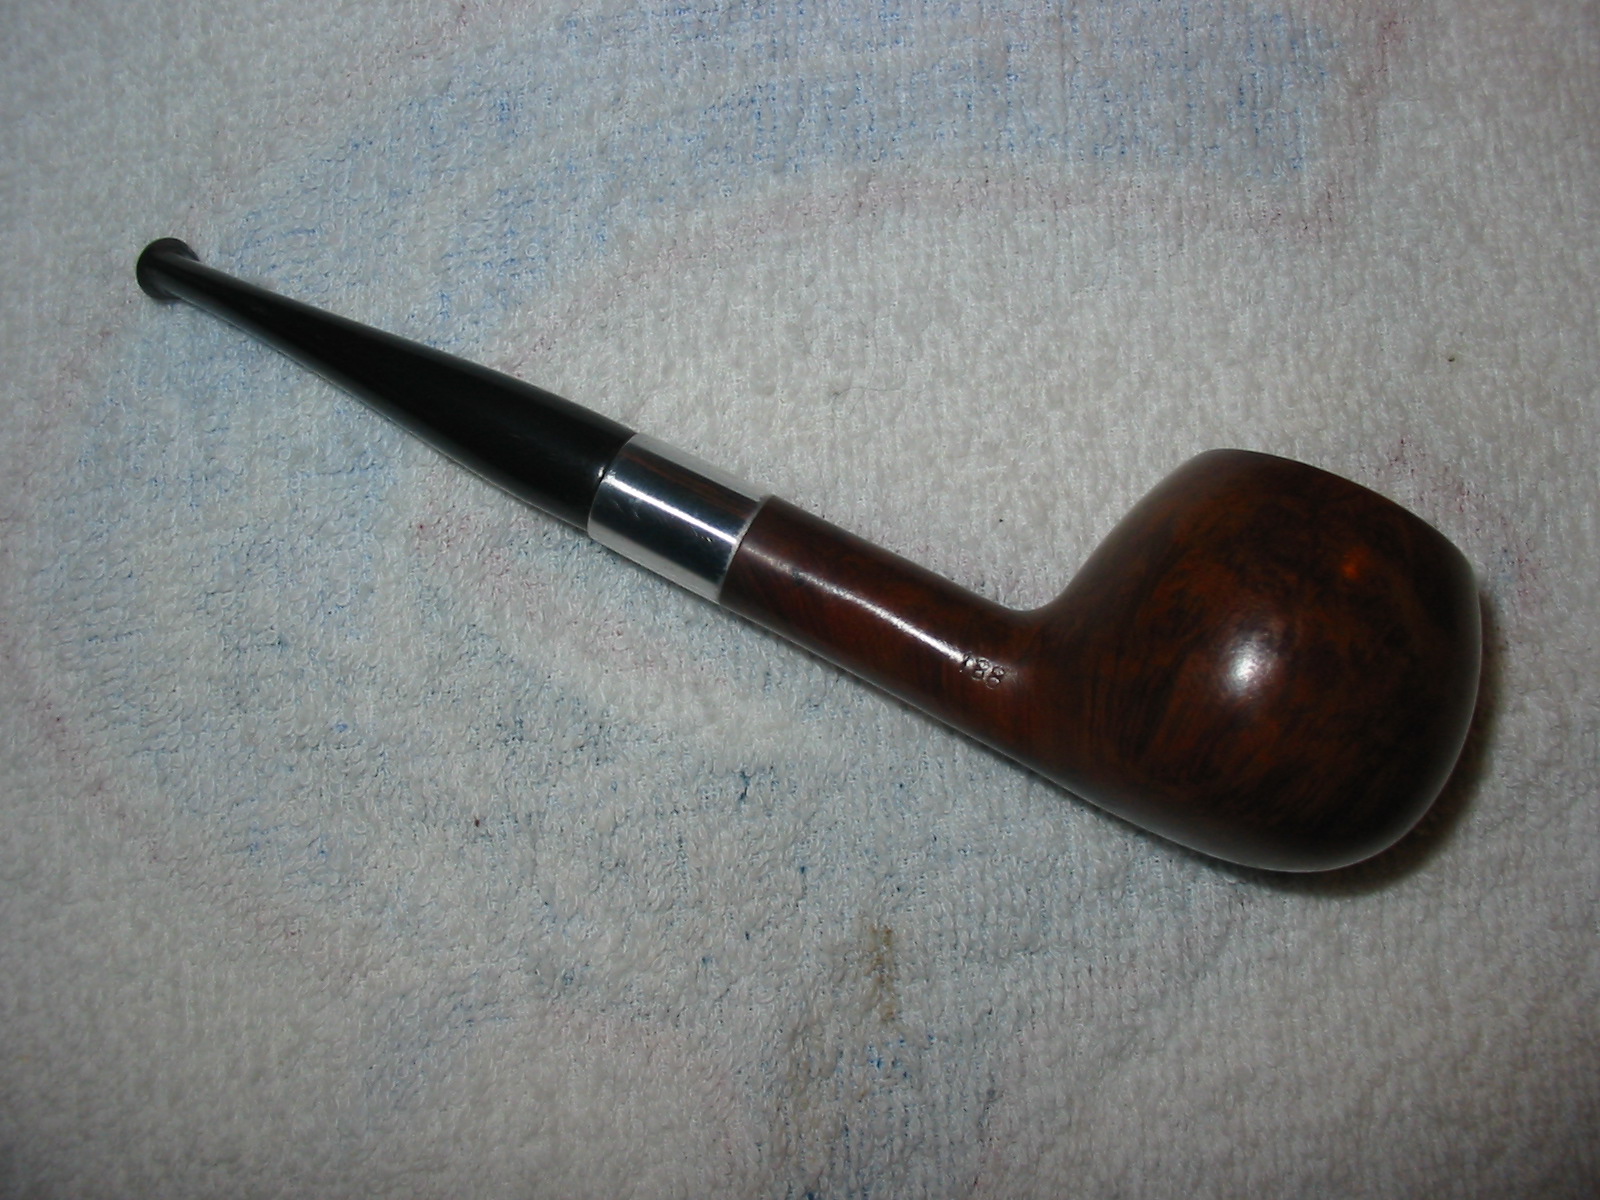
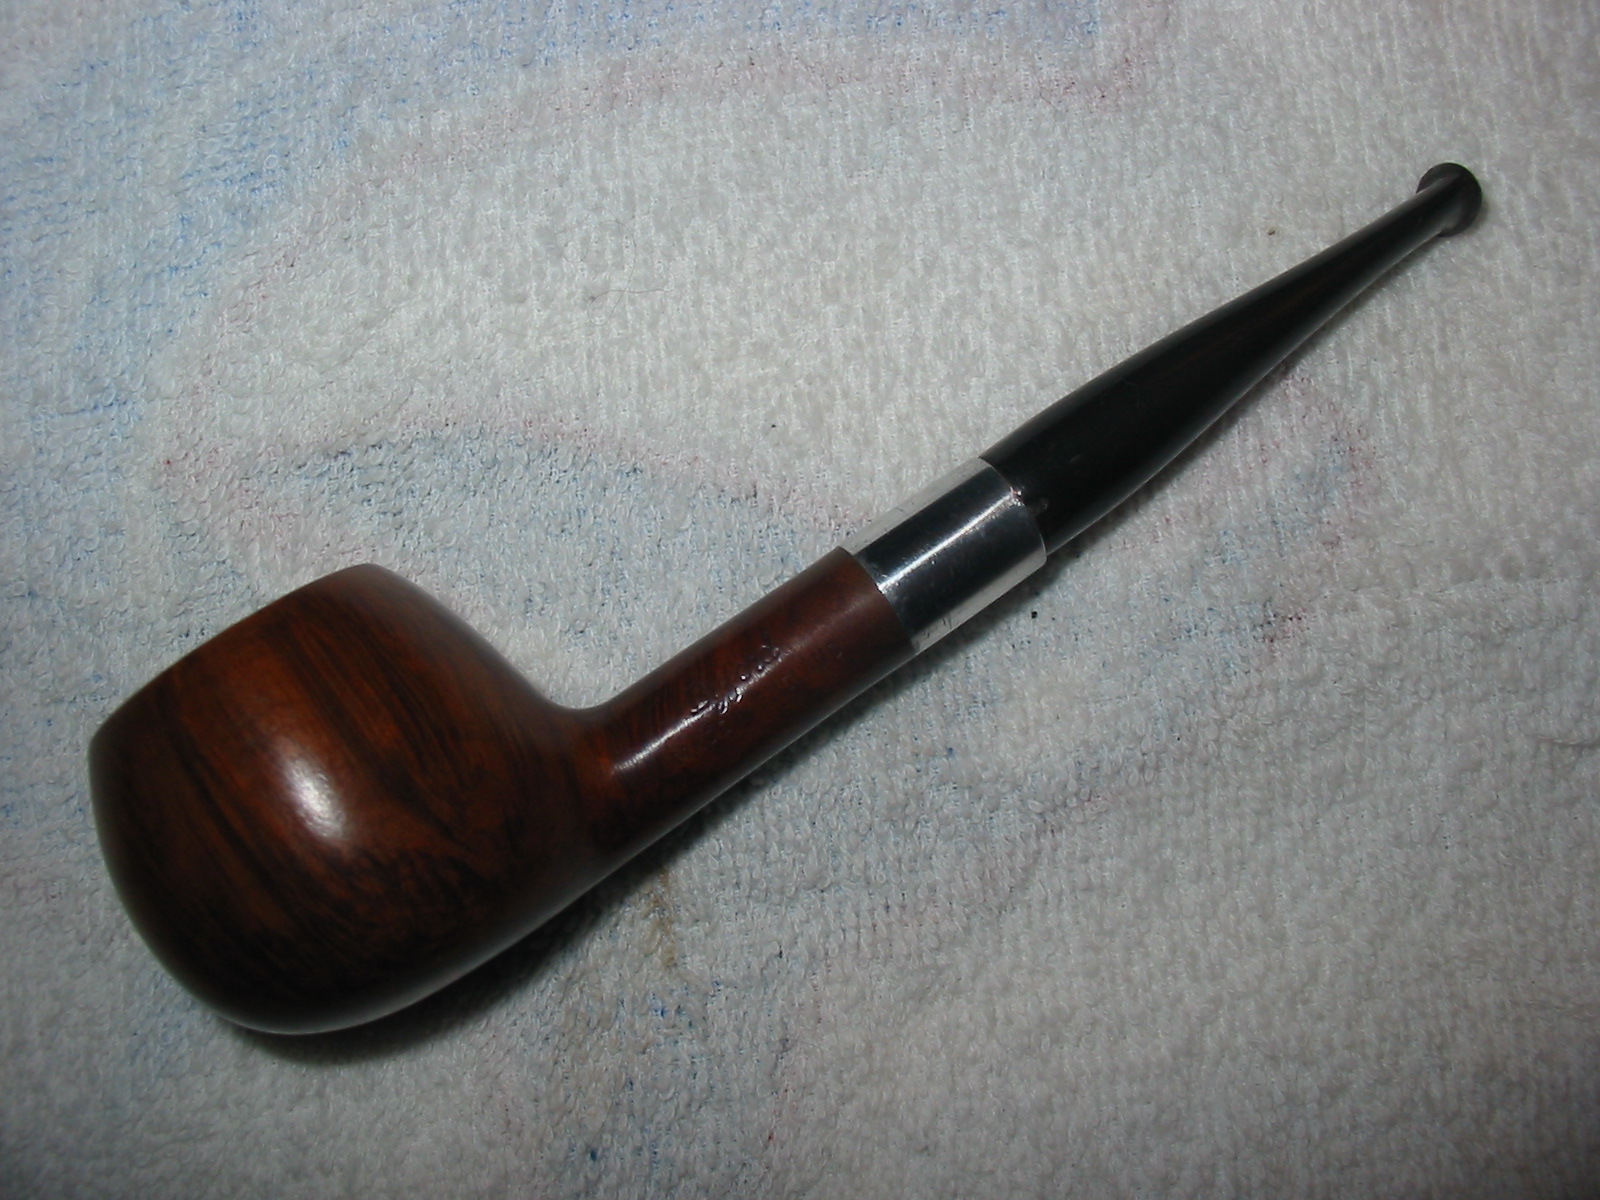
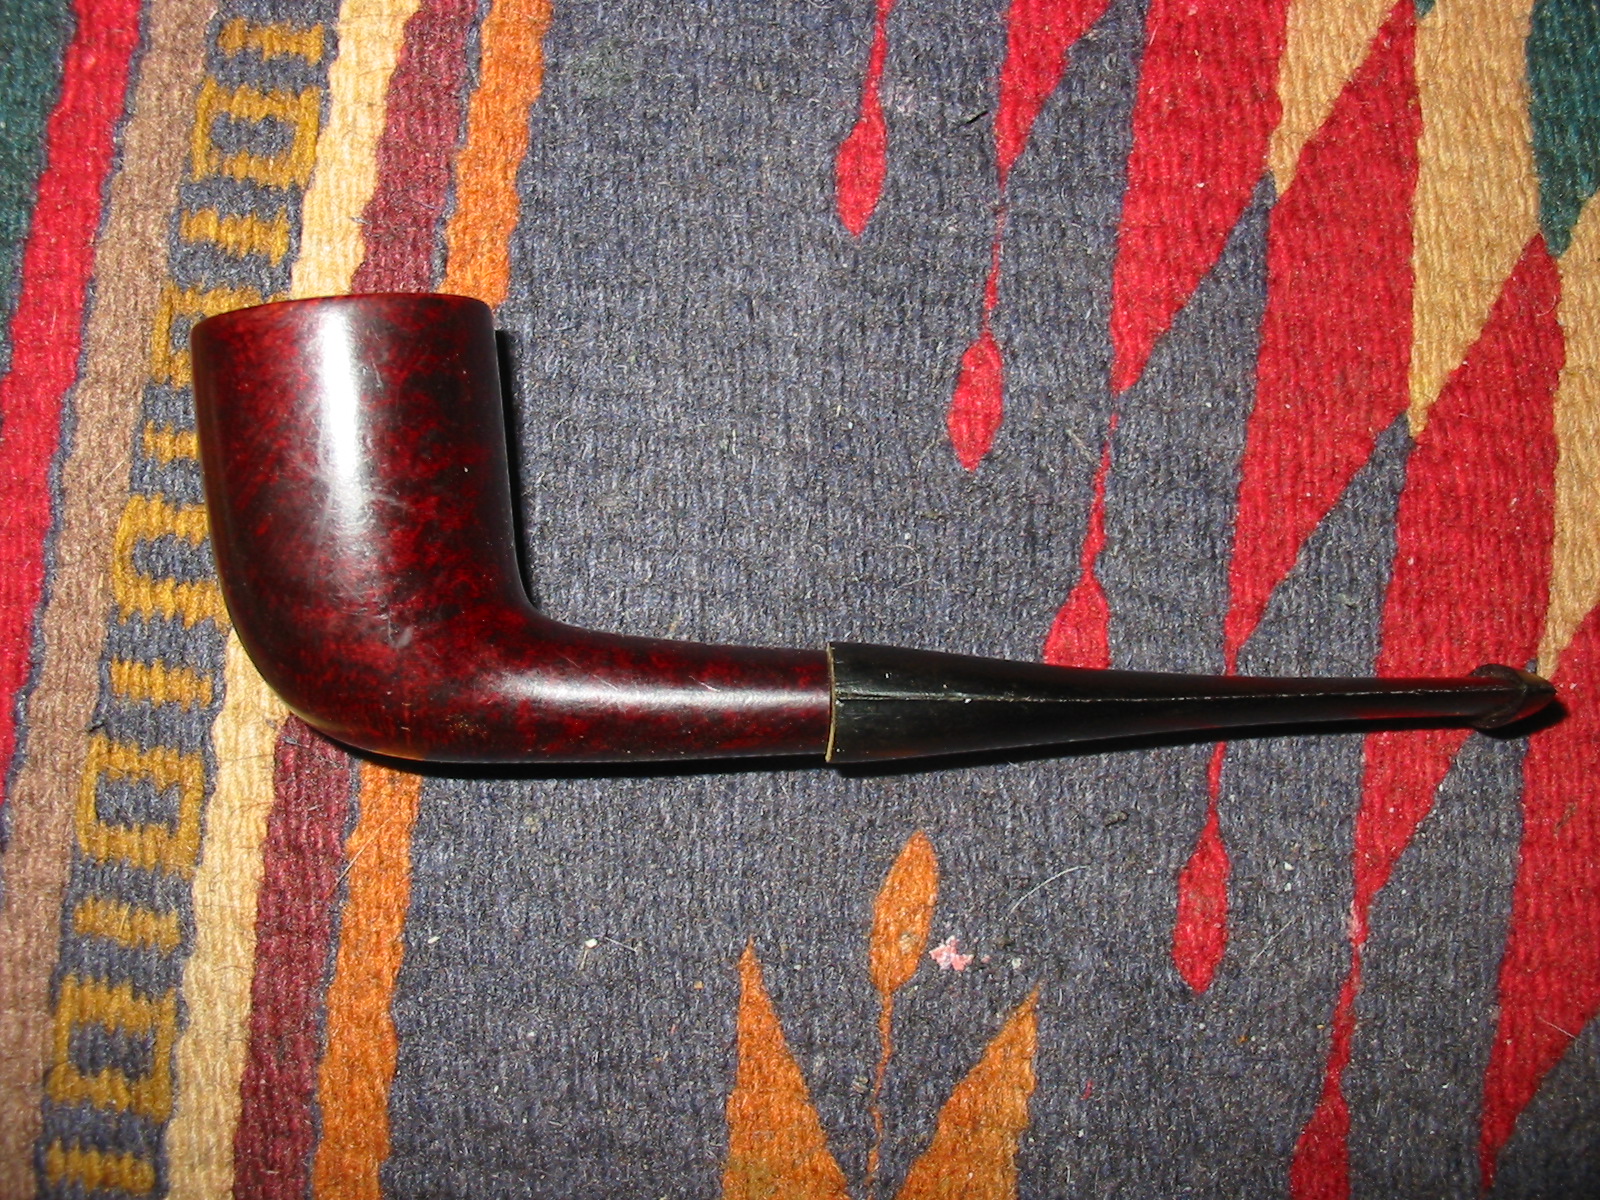
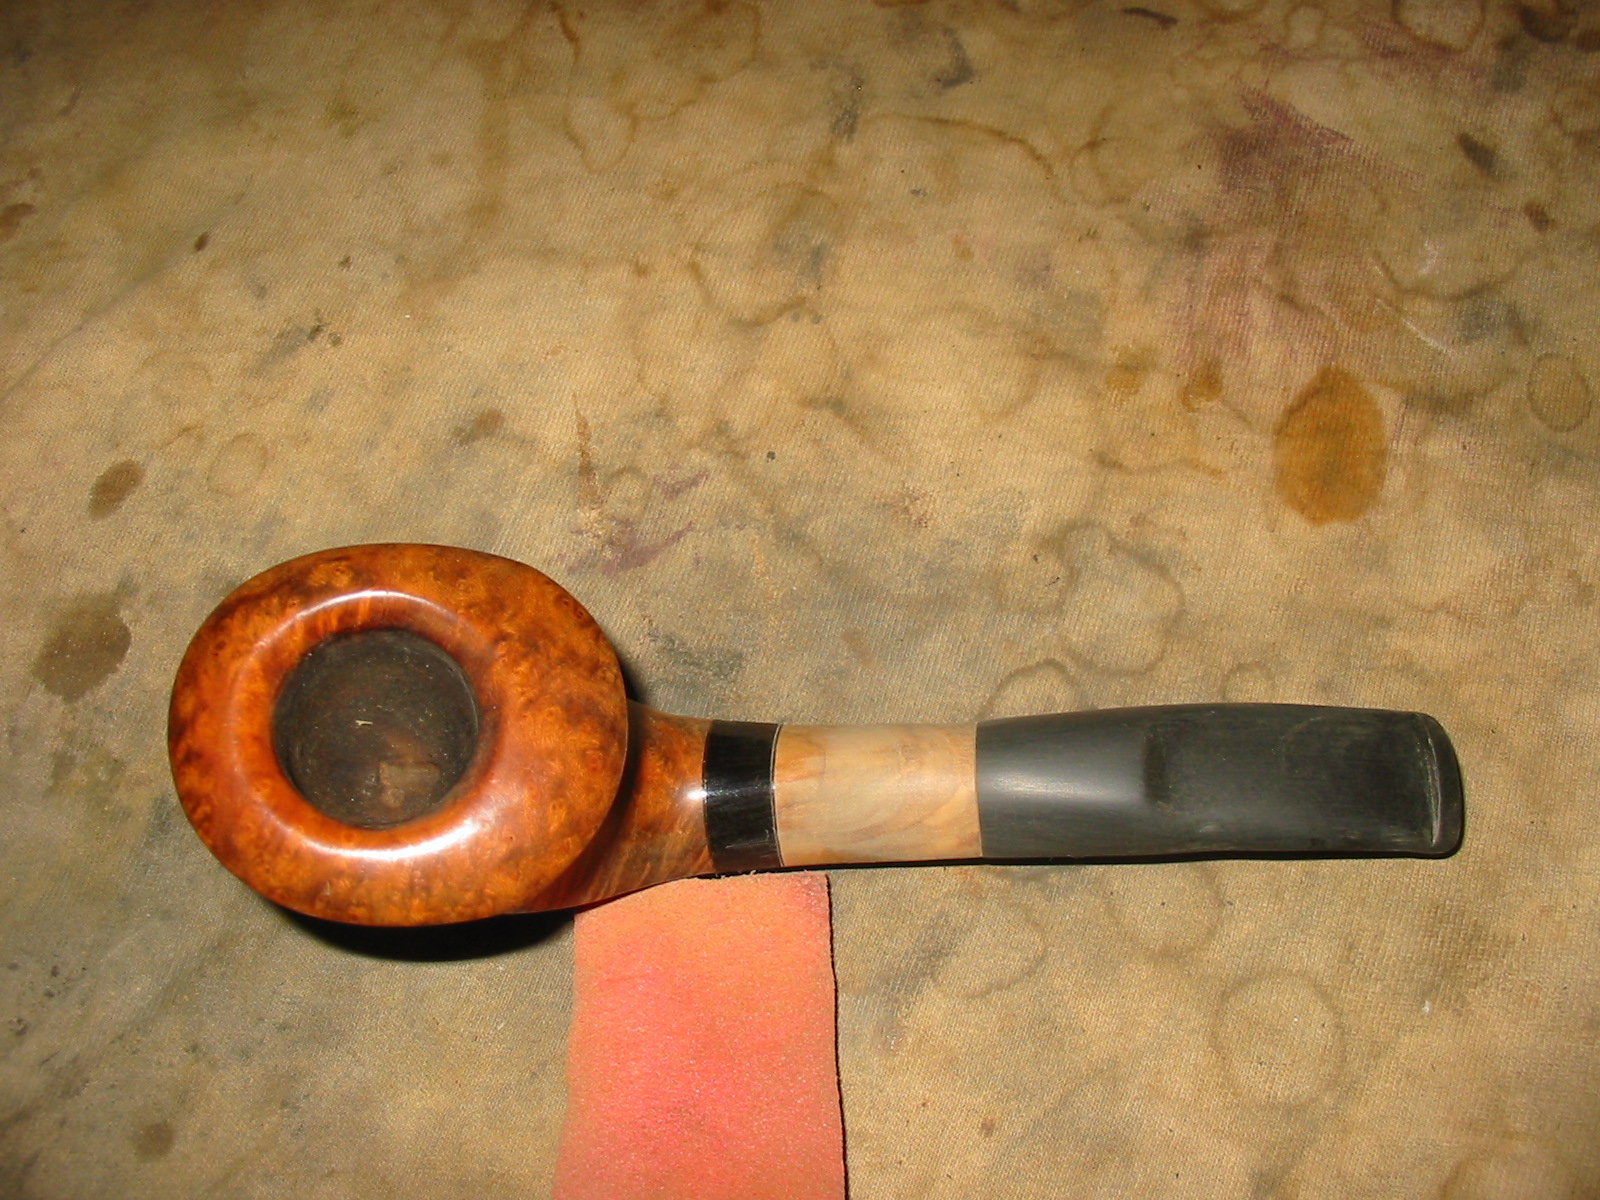
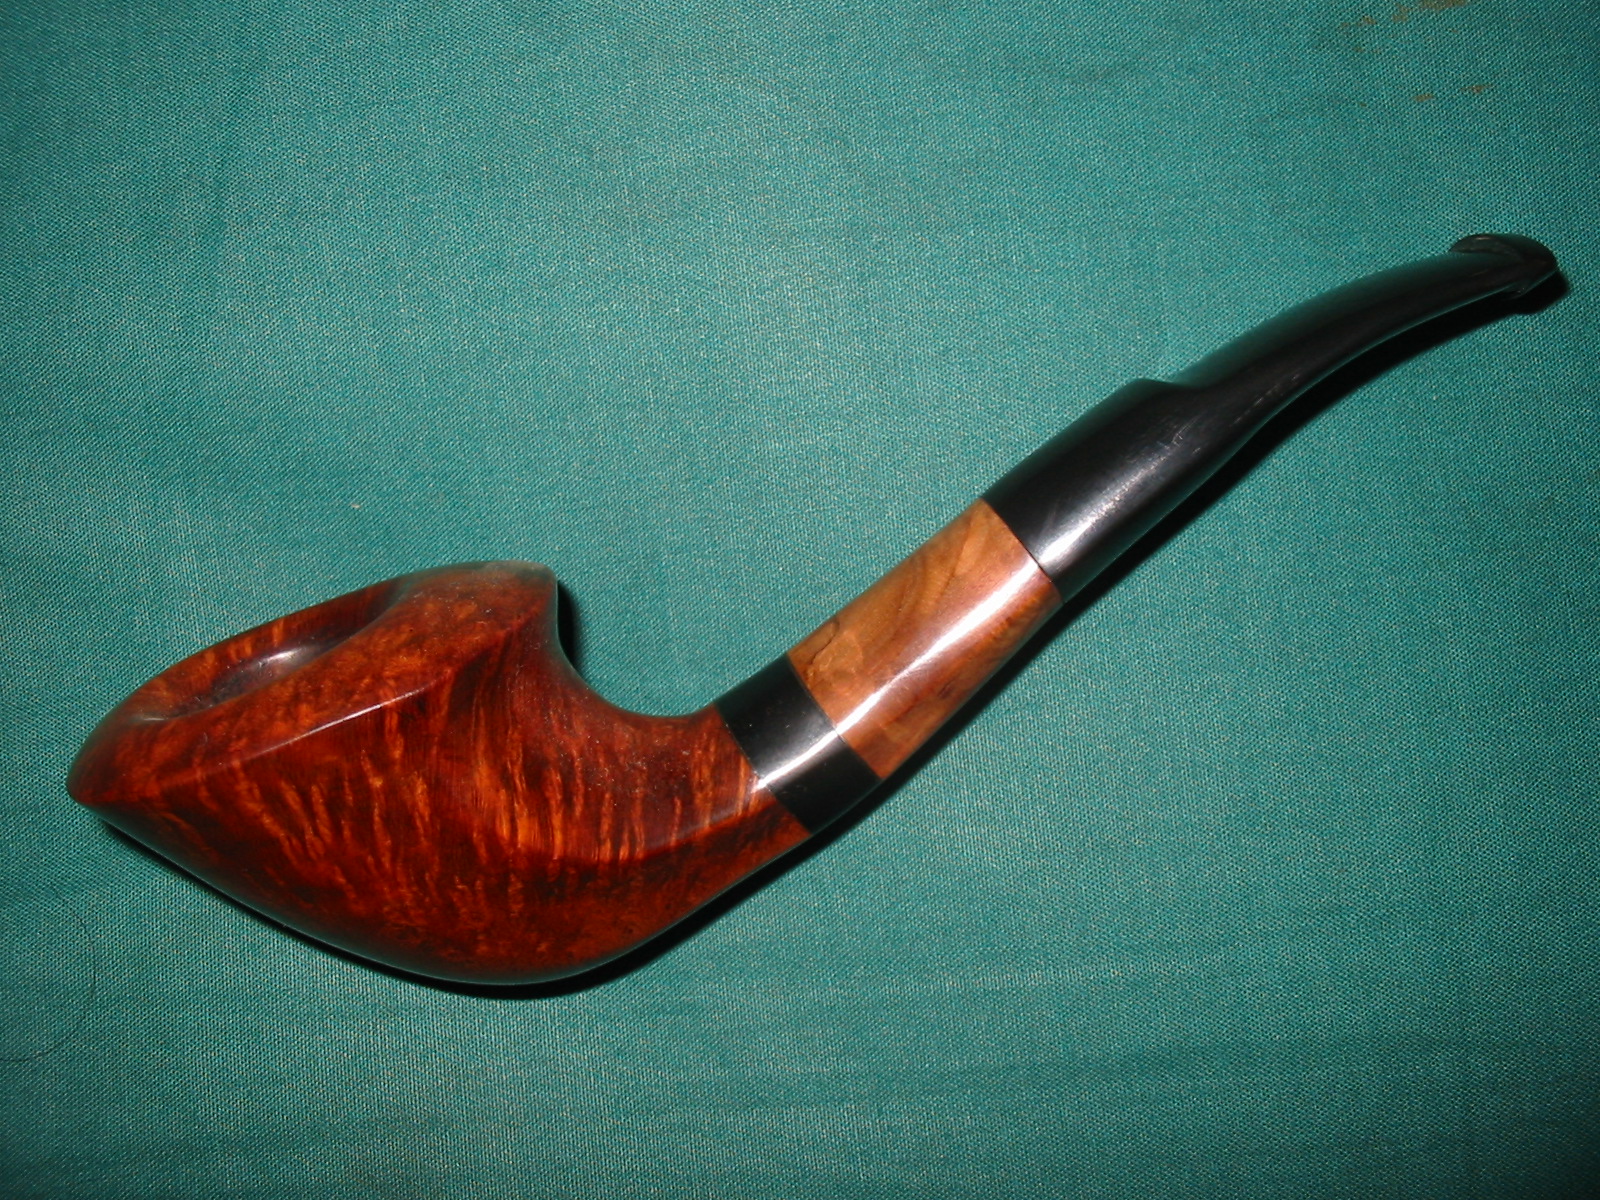
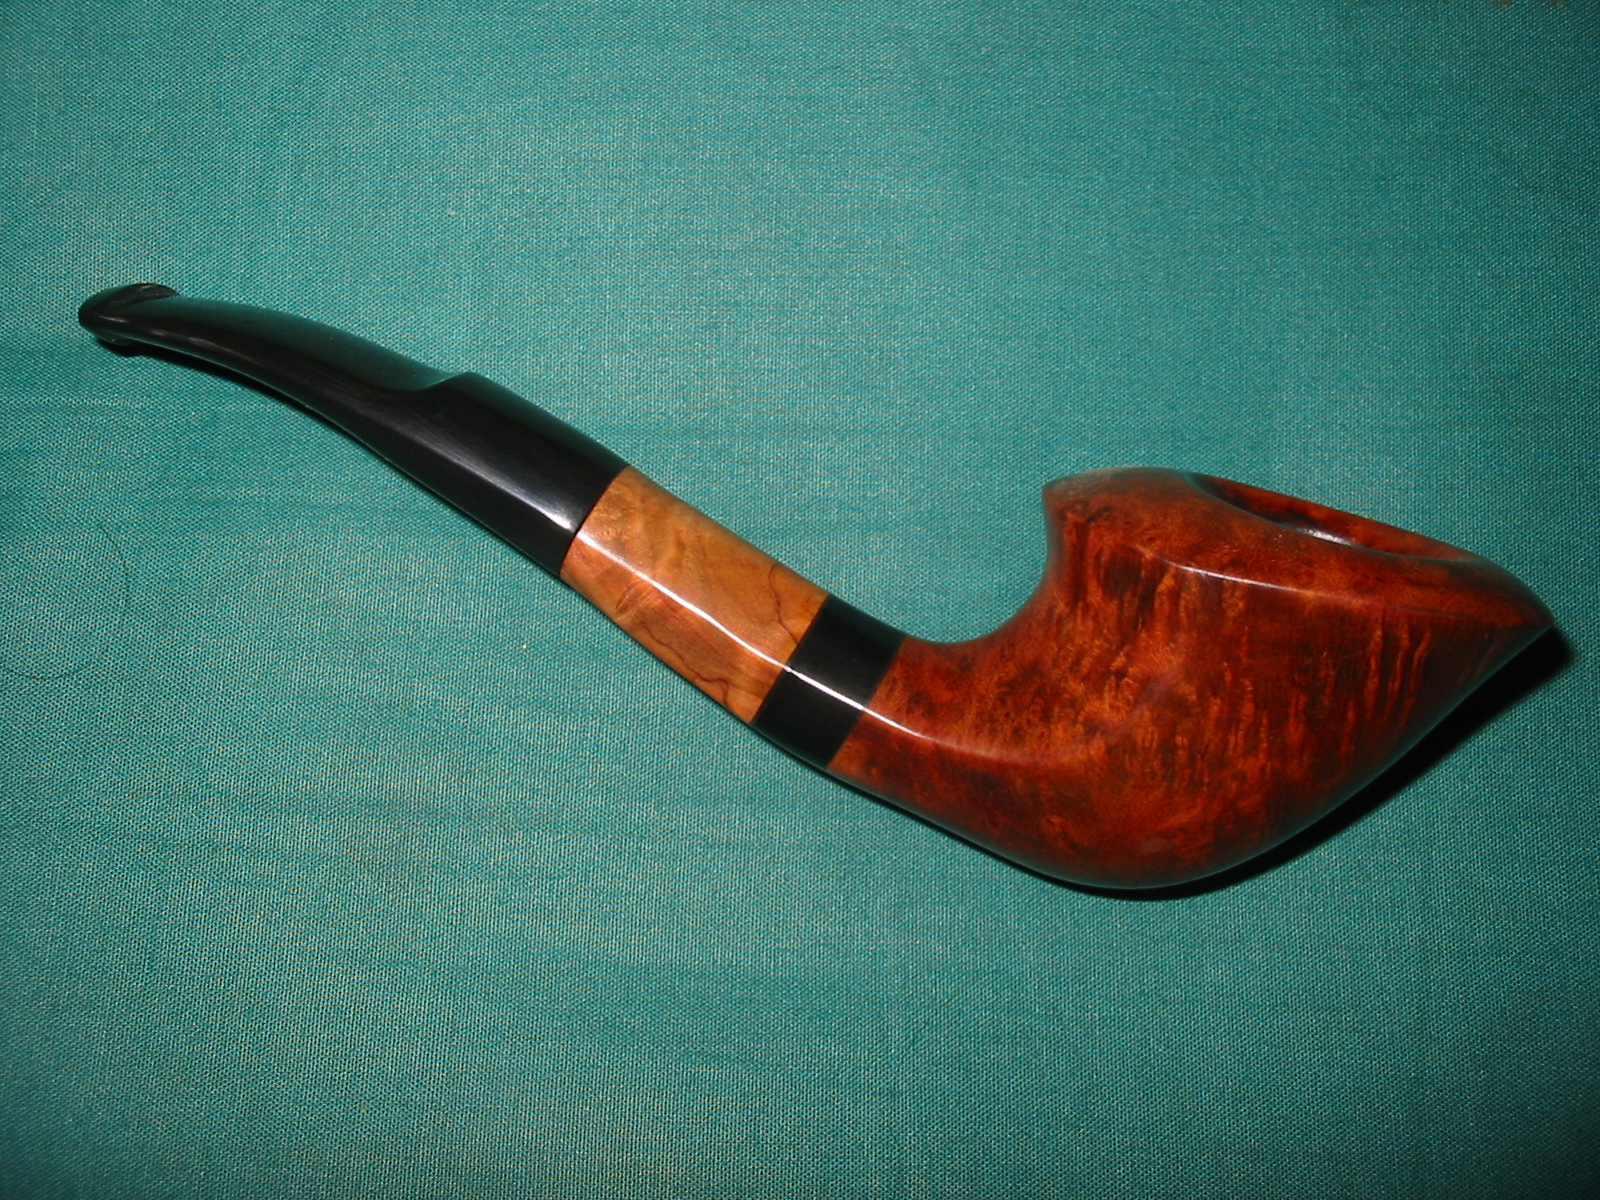
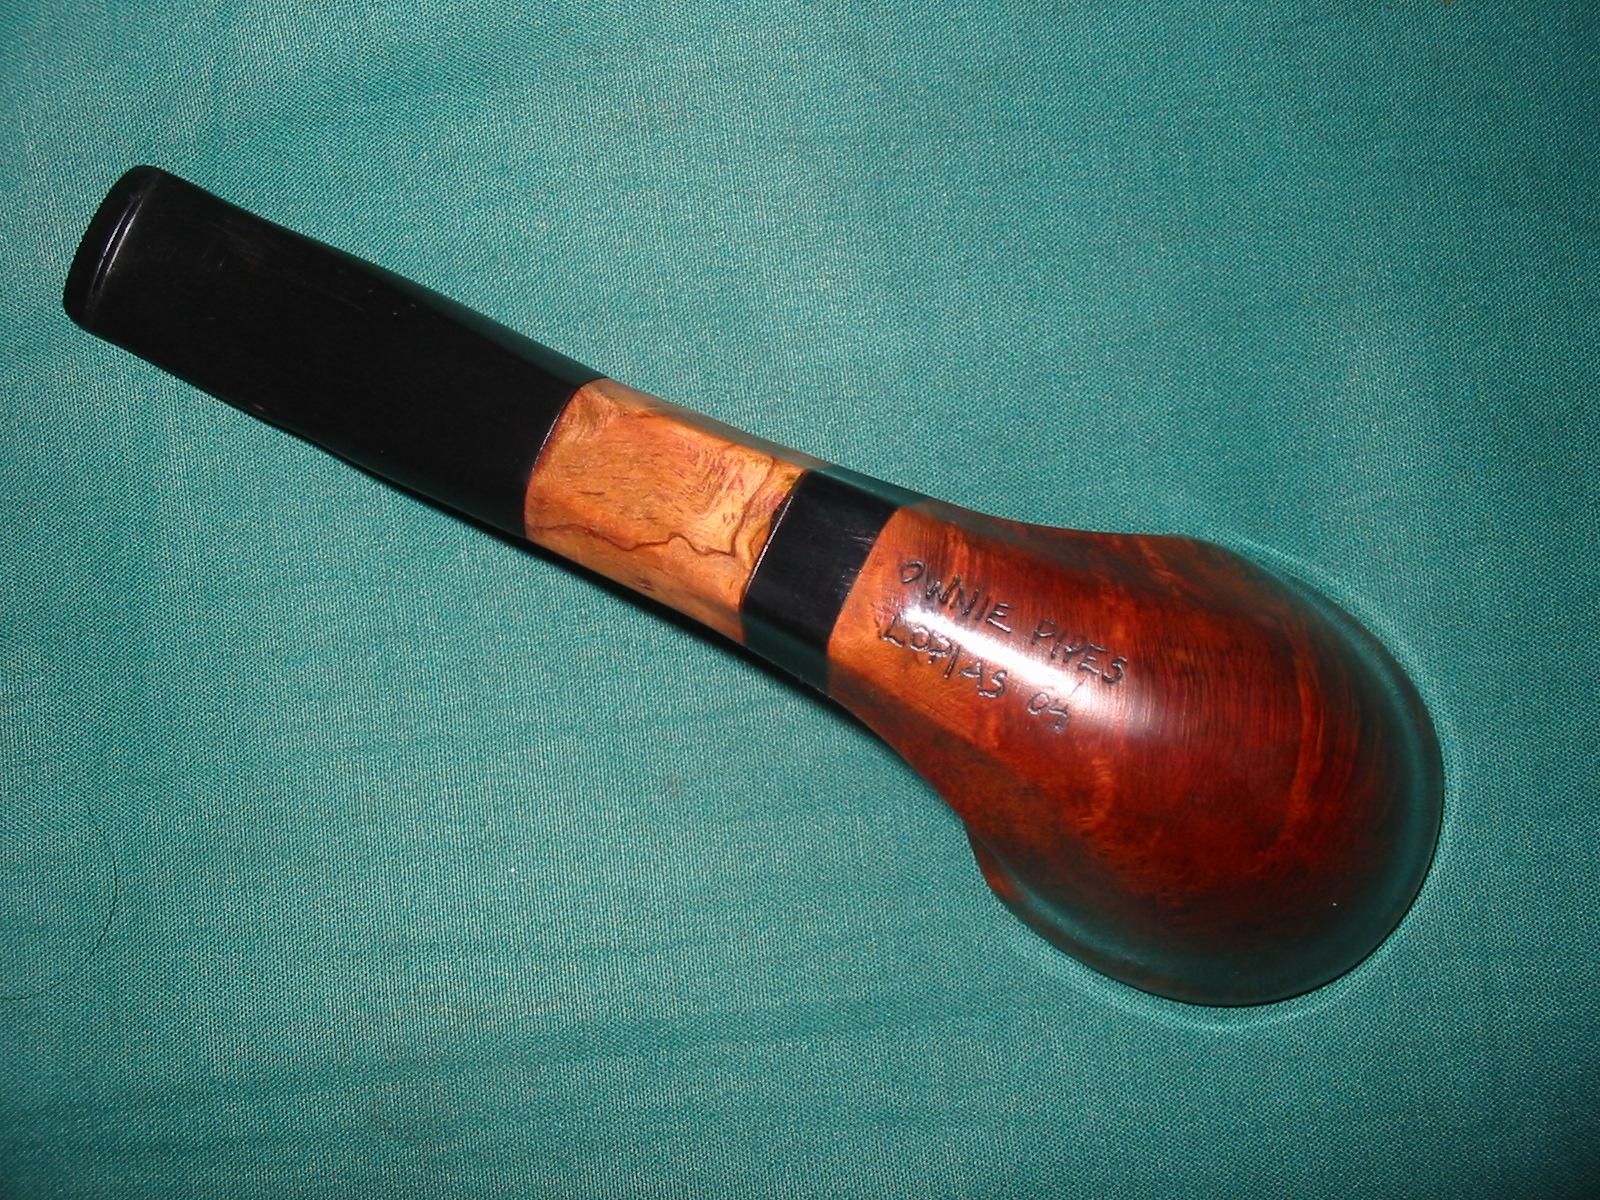
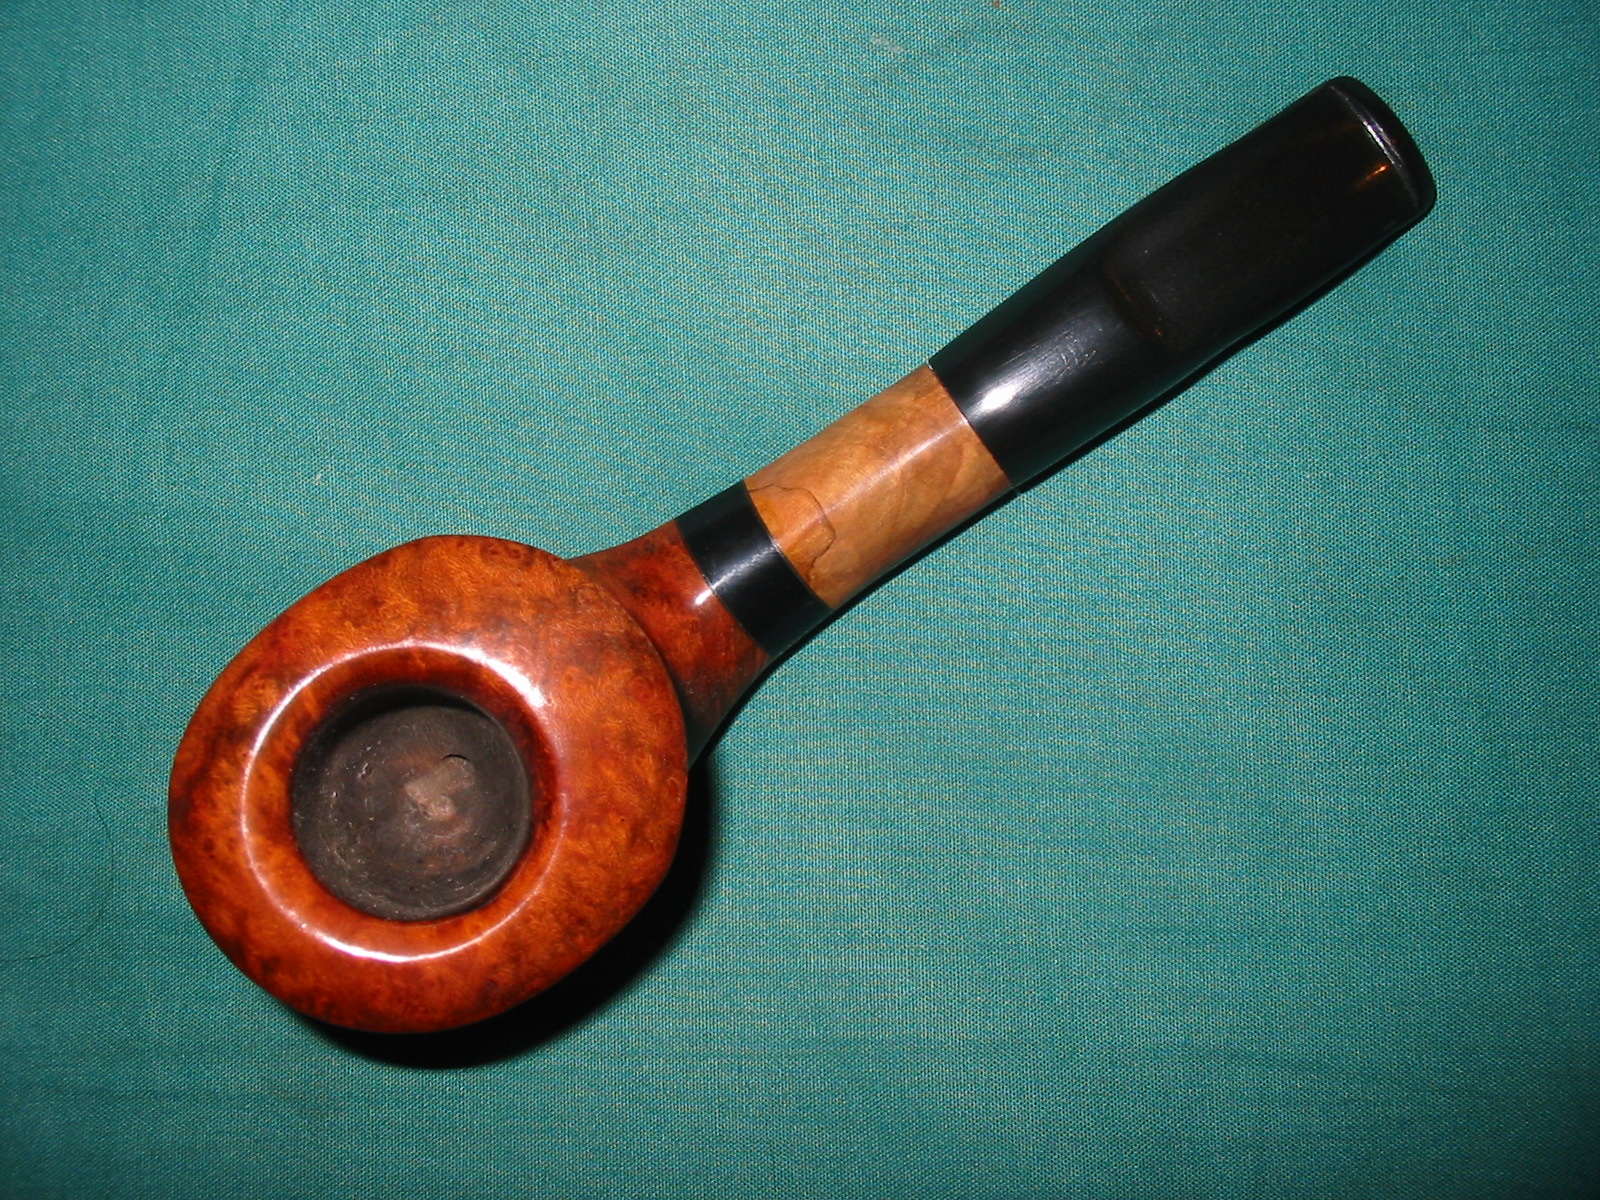
The first series of four photos are of the pipe Stephen named the Alopias (named after a Thresher Shark). This is what it looked like when I took it from the cupboard to work on it.

IMG_0933

IMG_0934

IMG_0935

IMG_0936

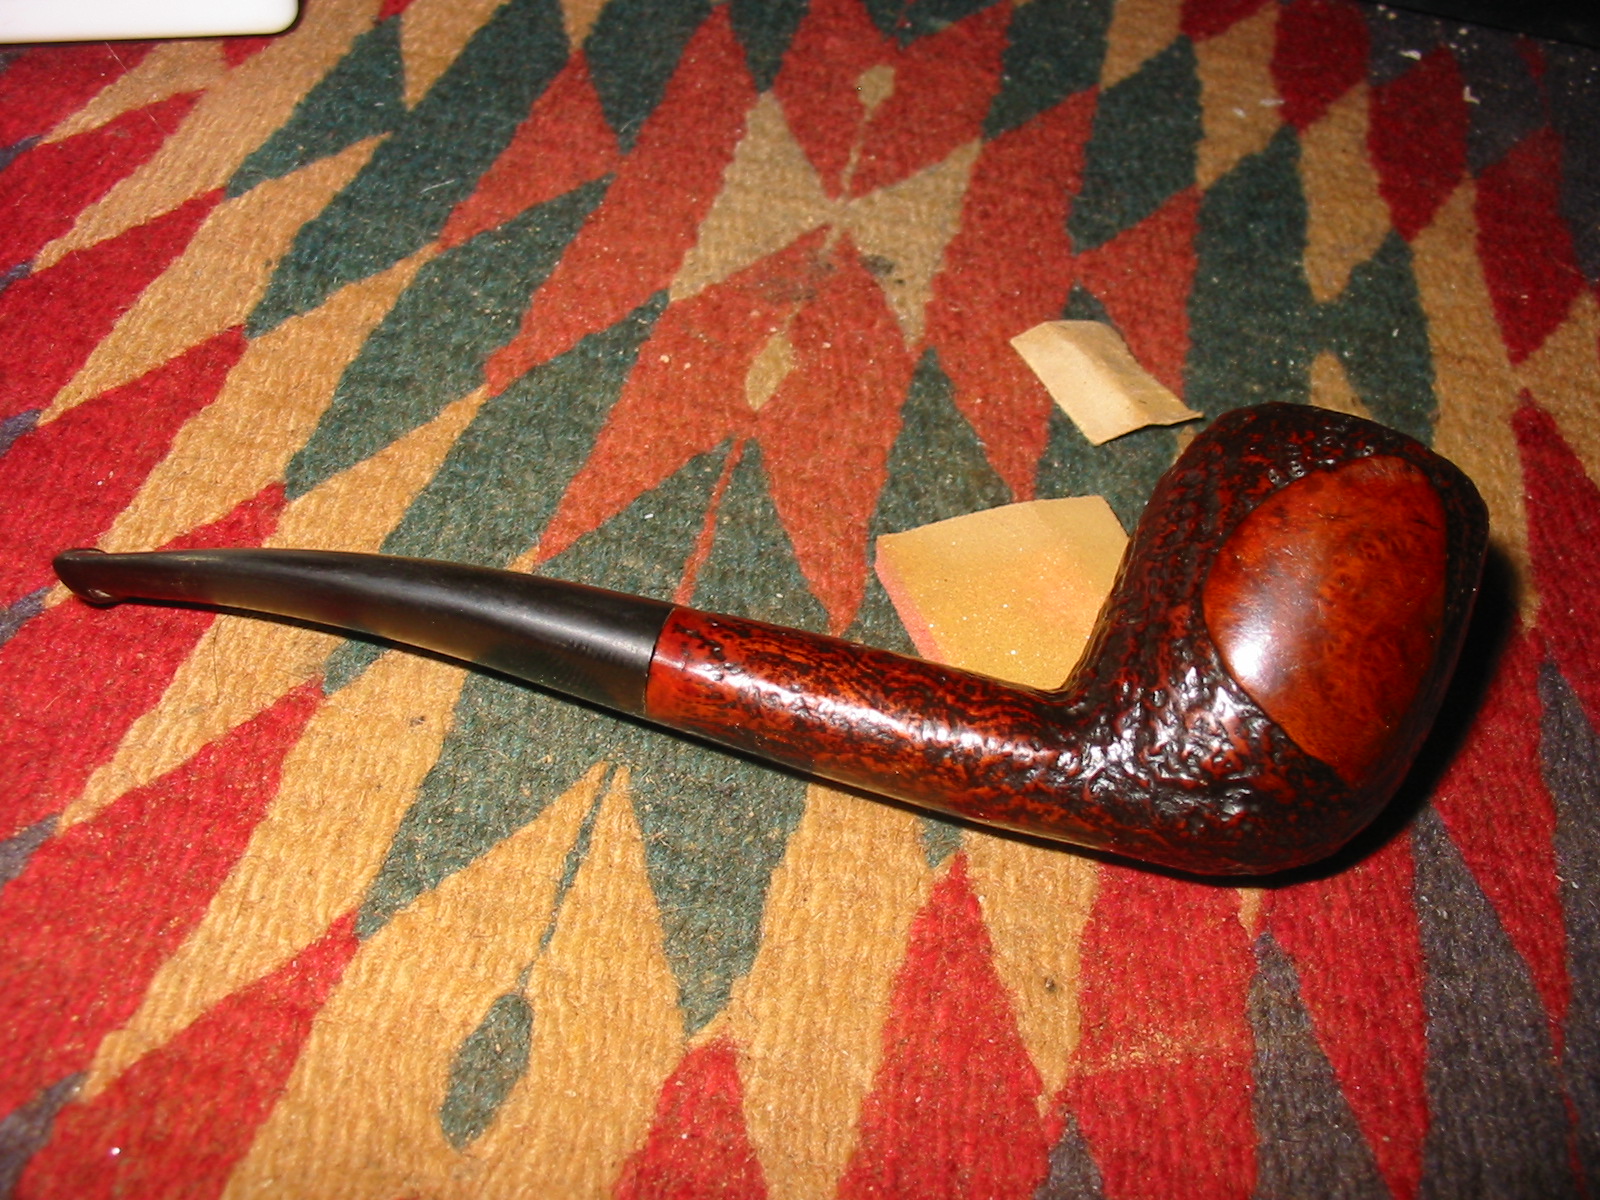
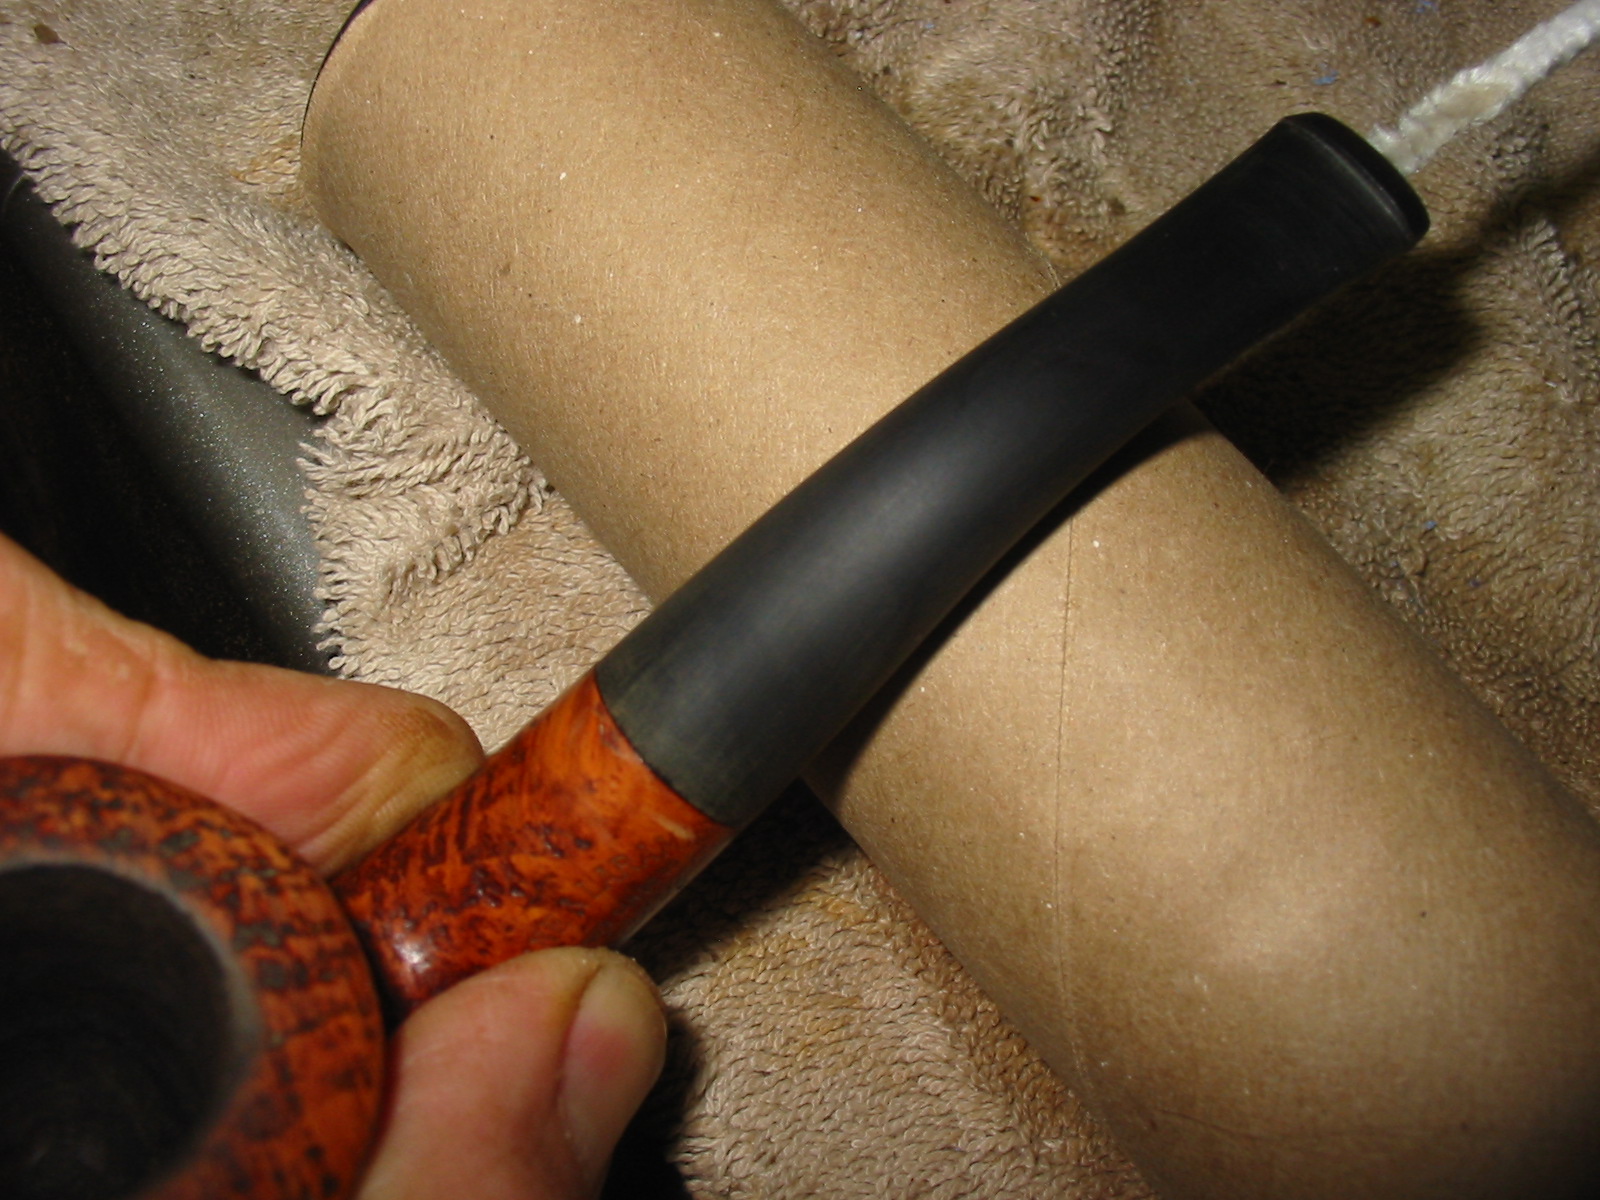
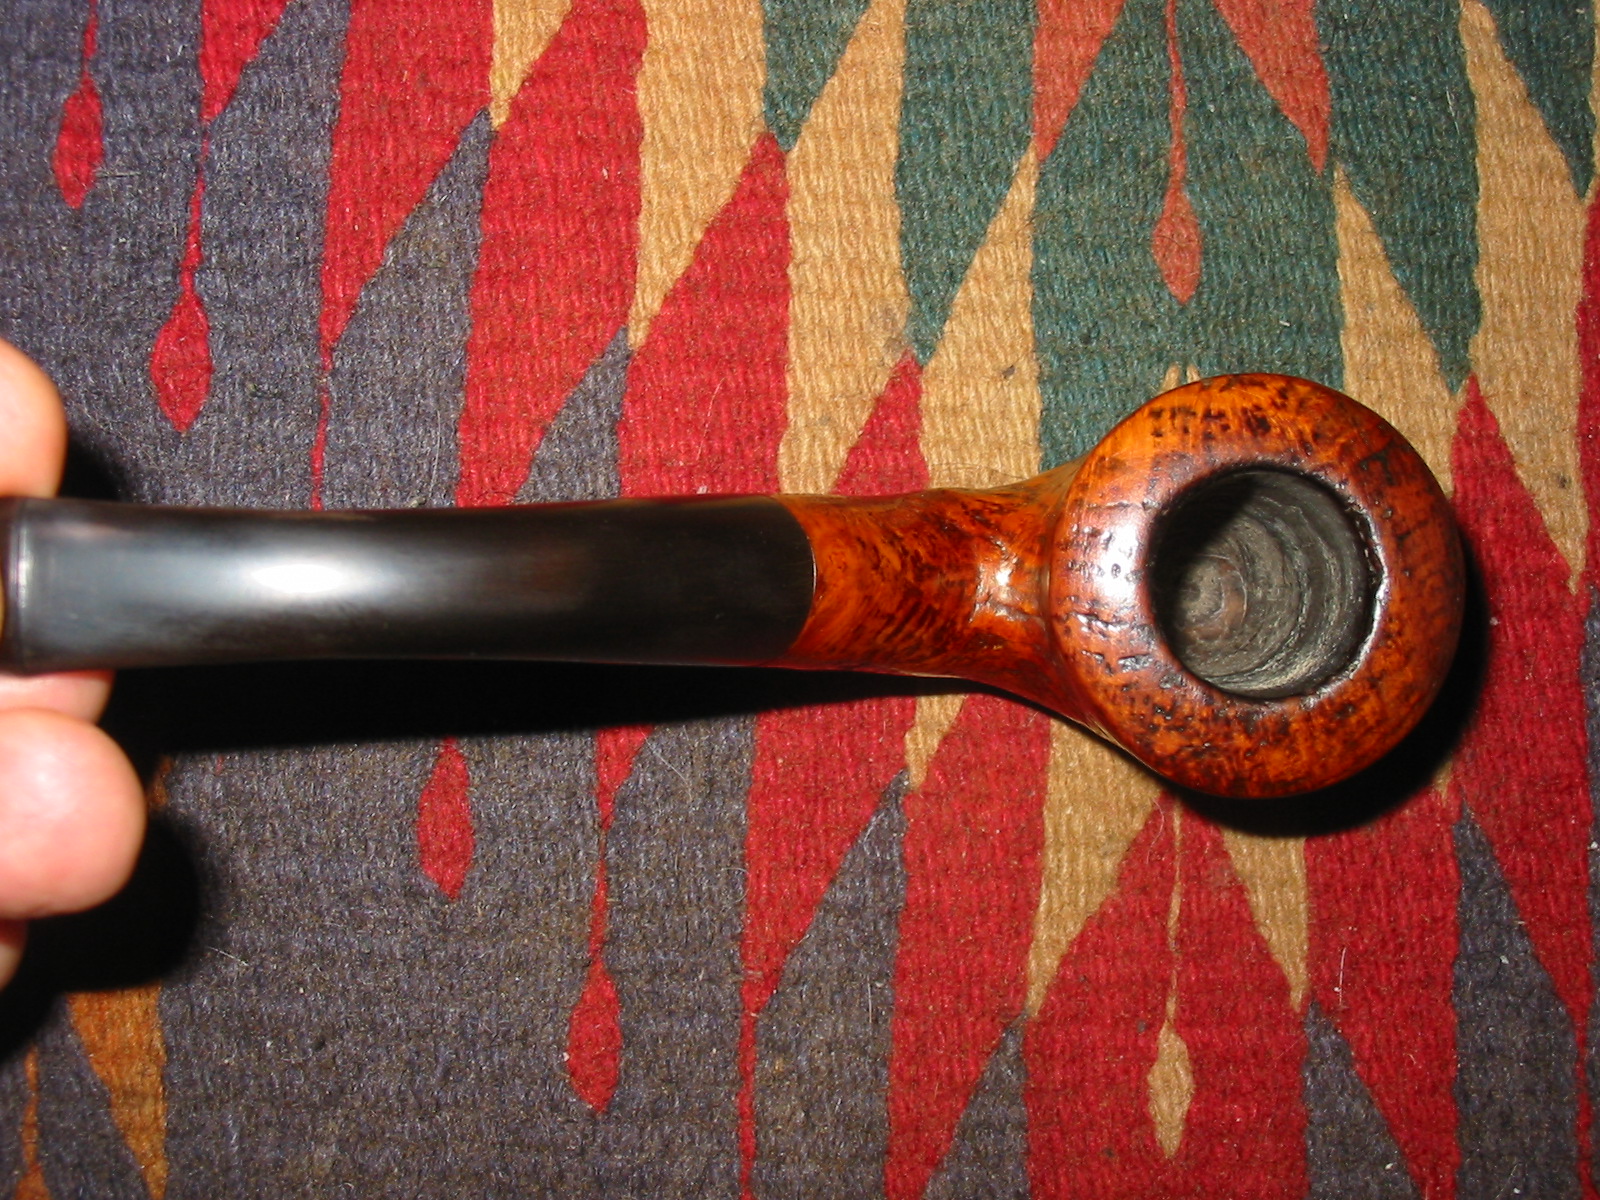
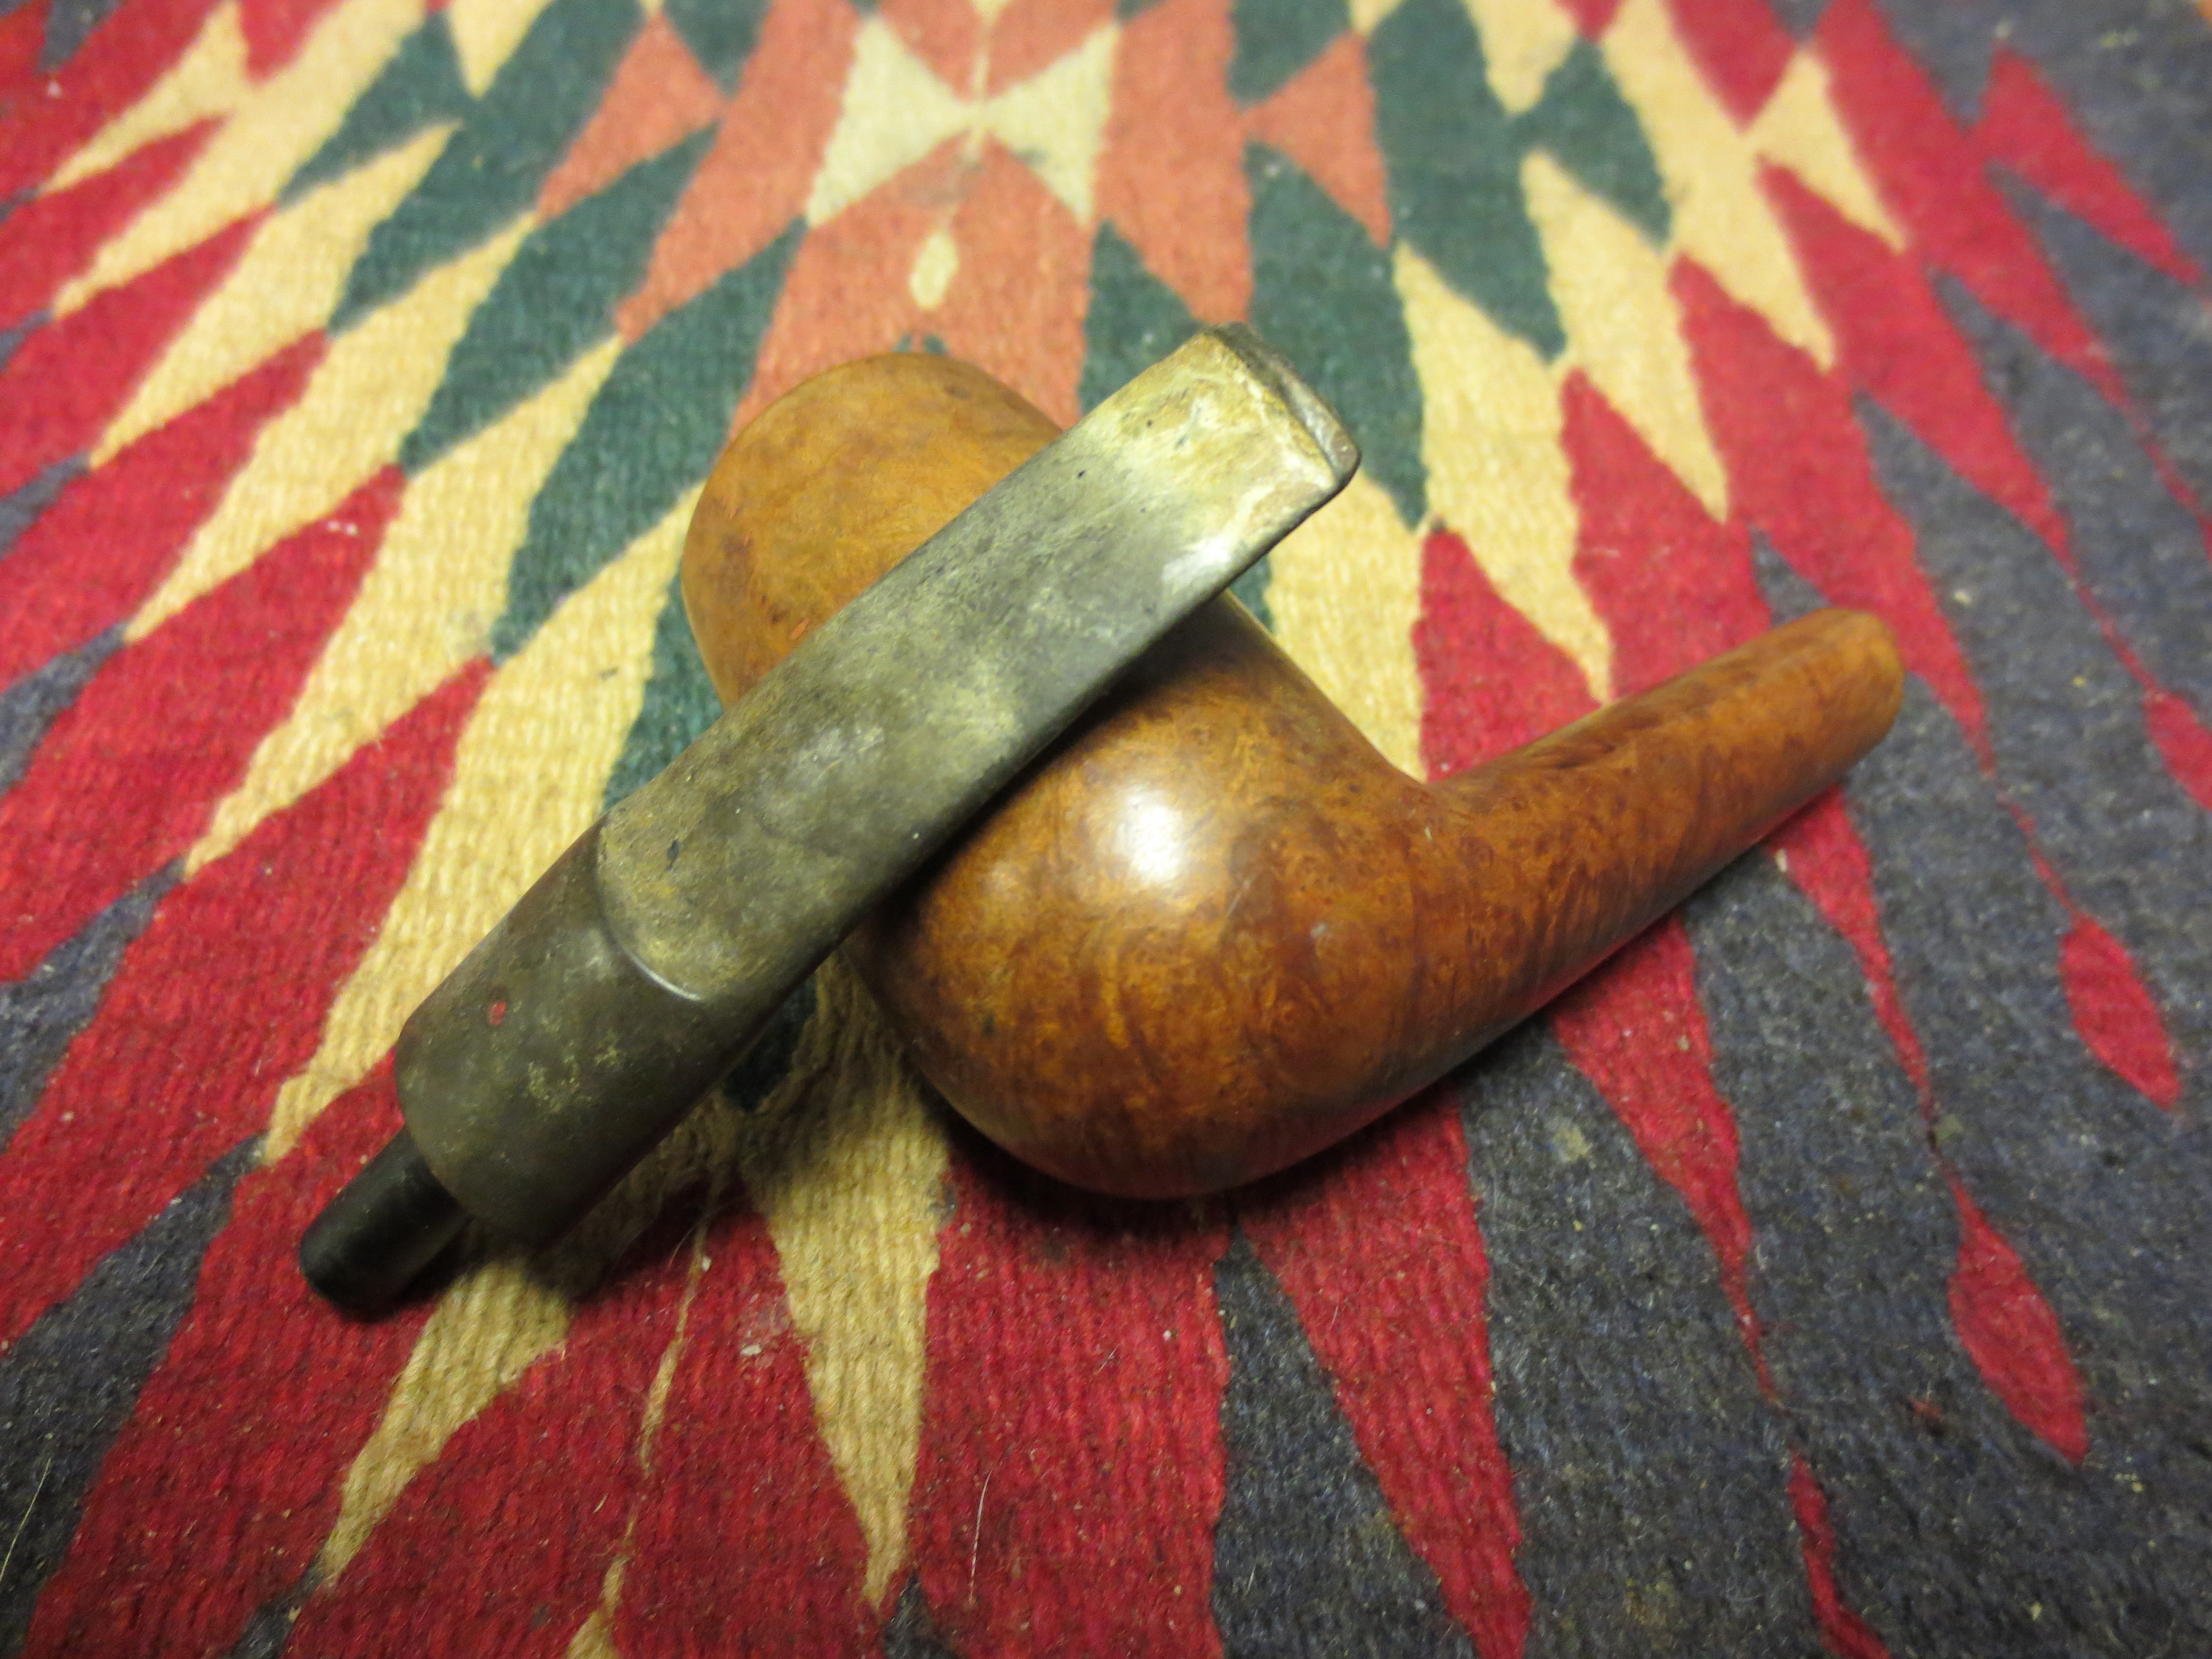
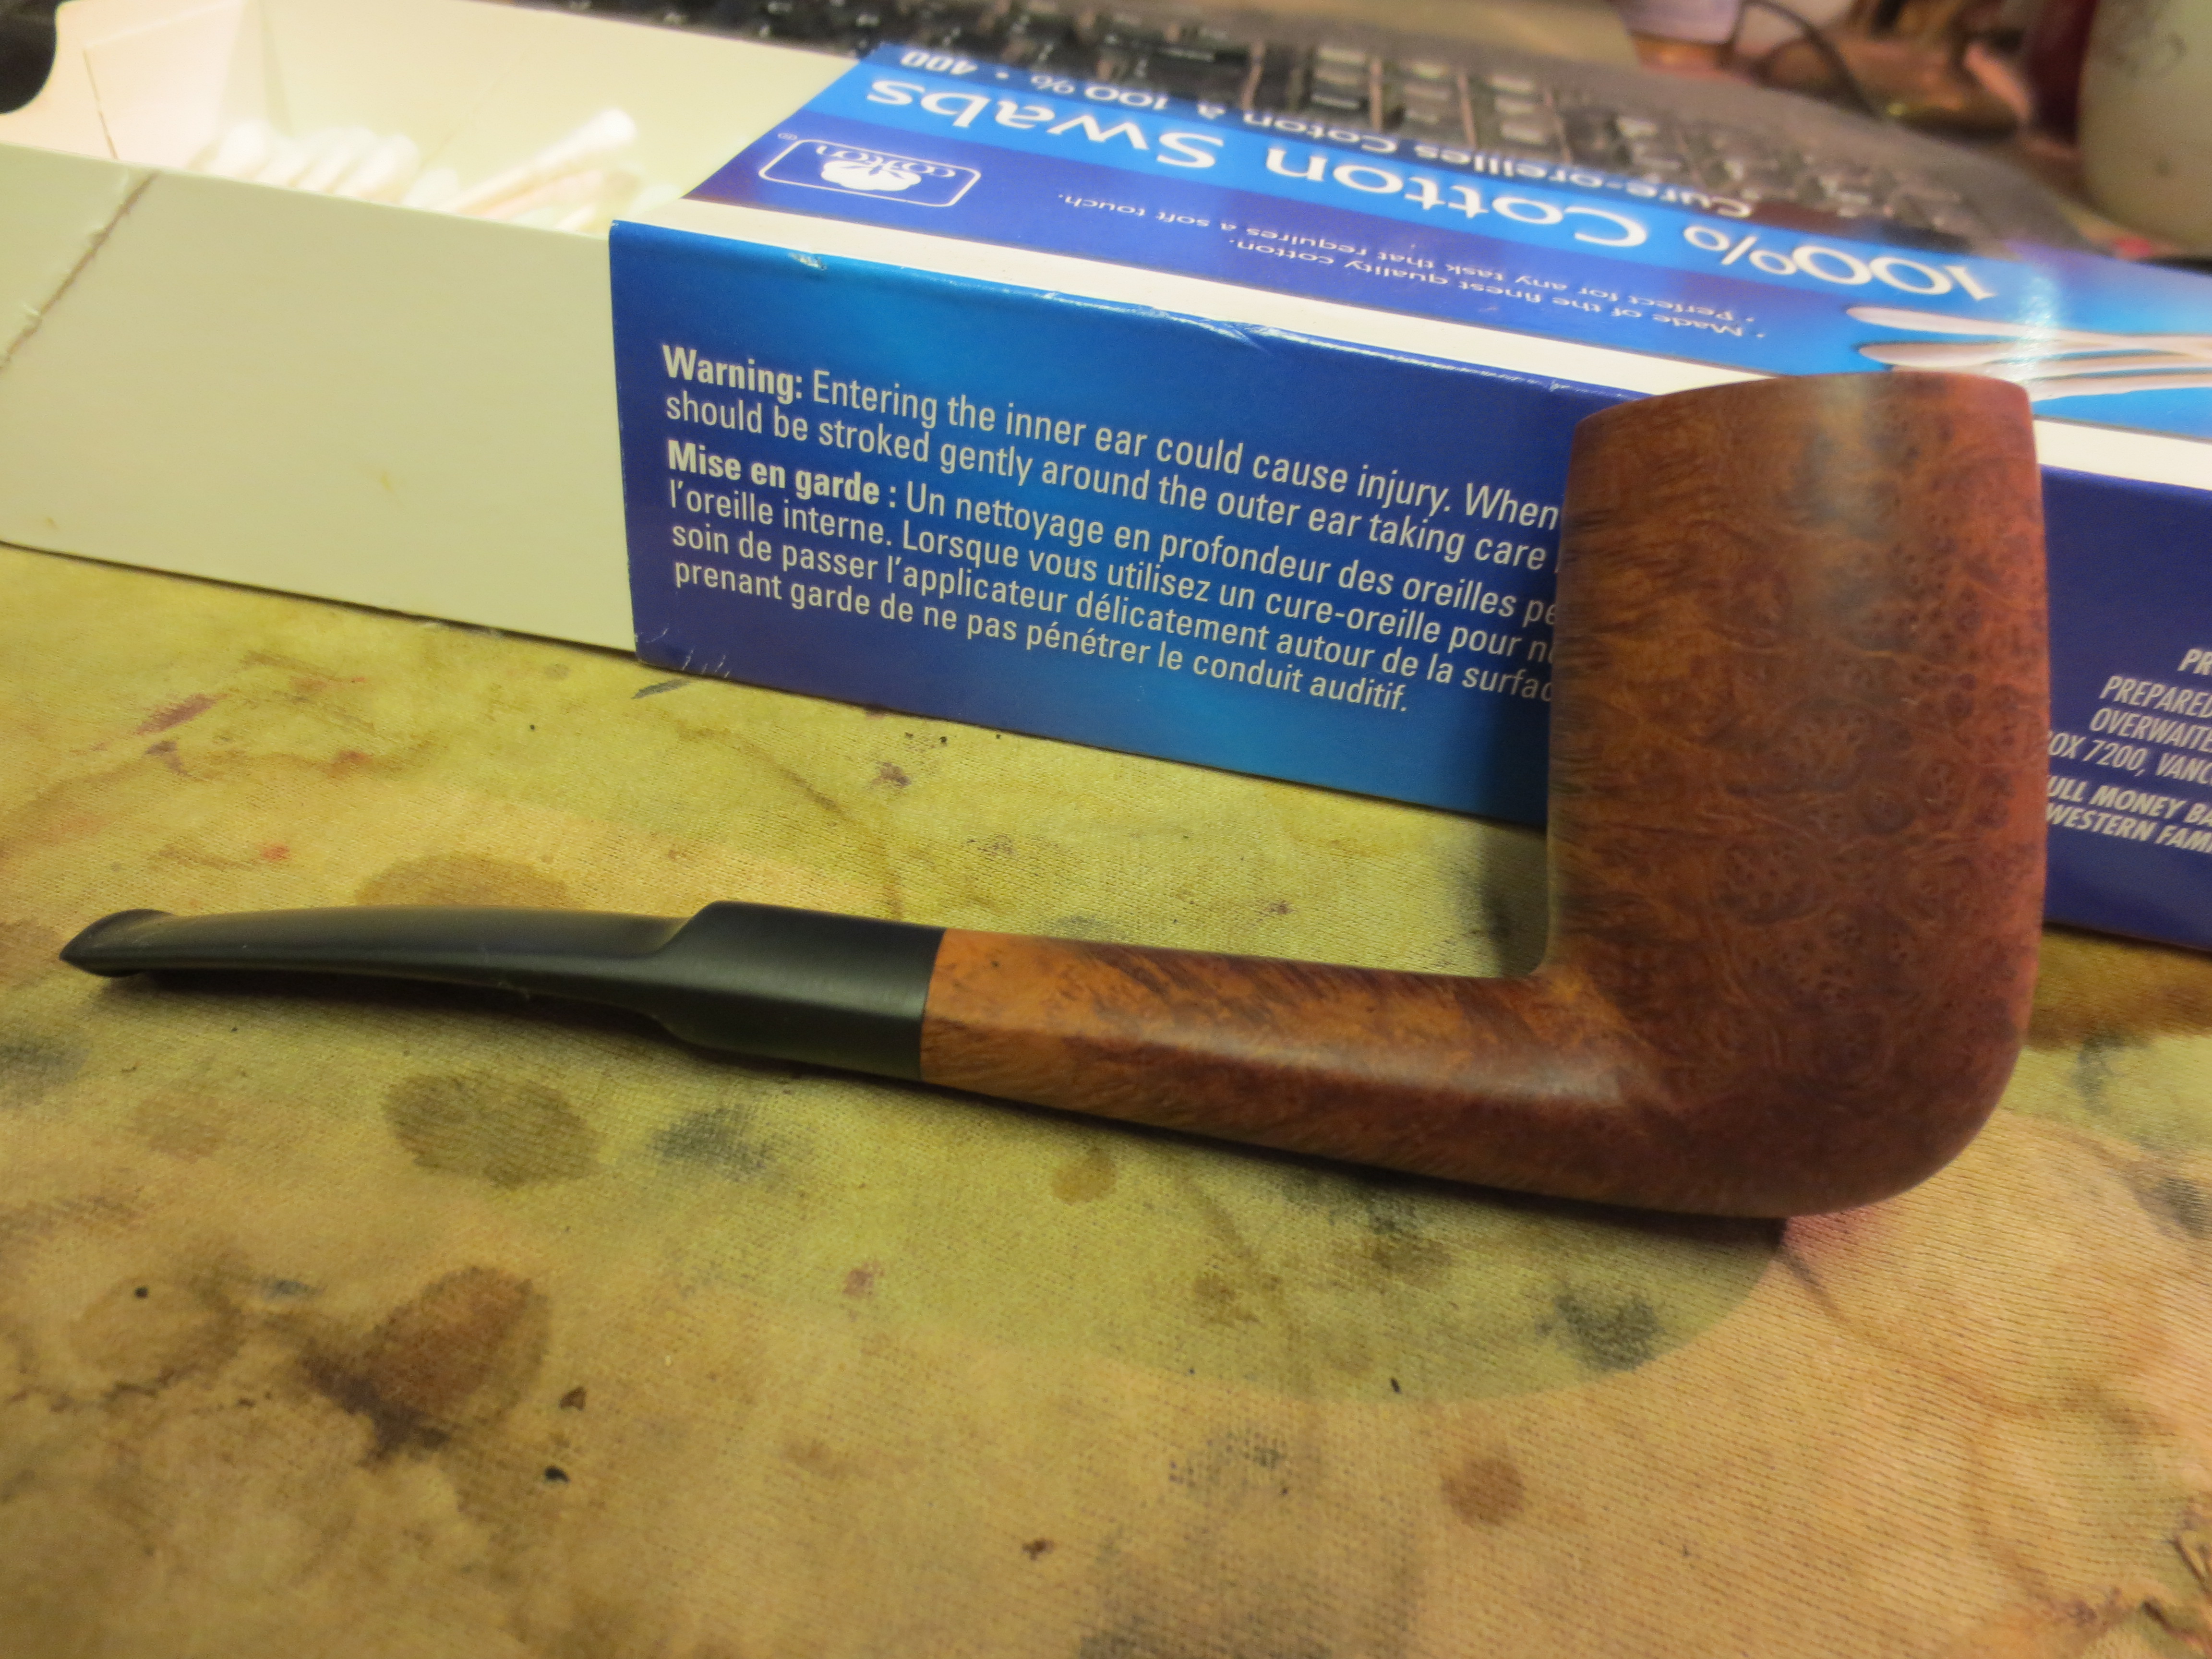
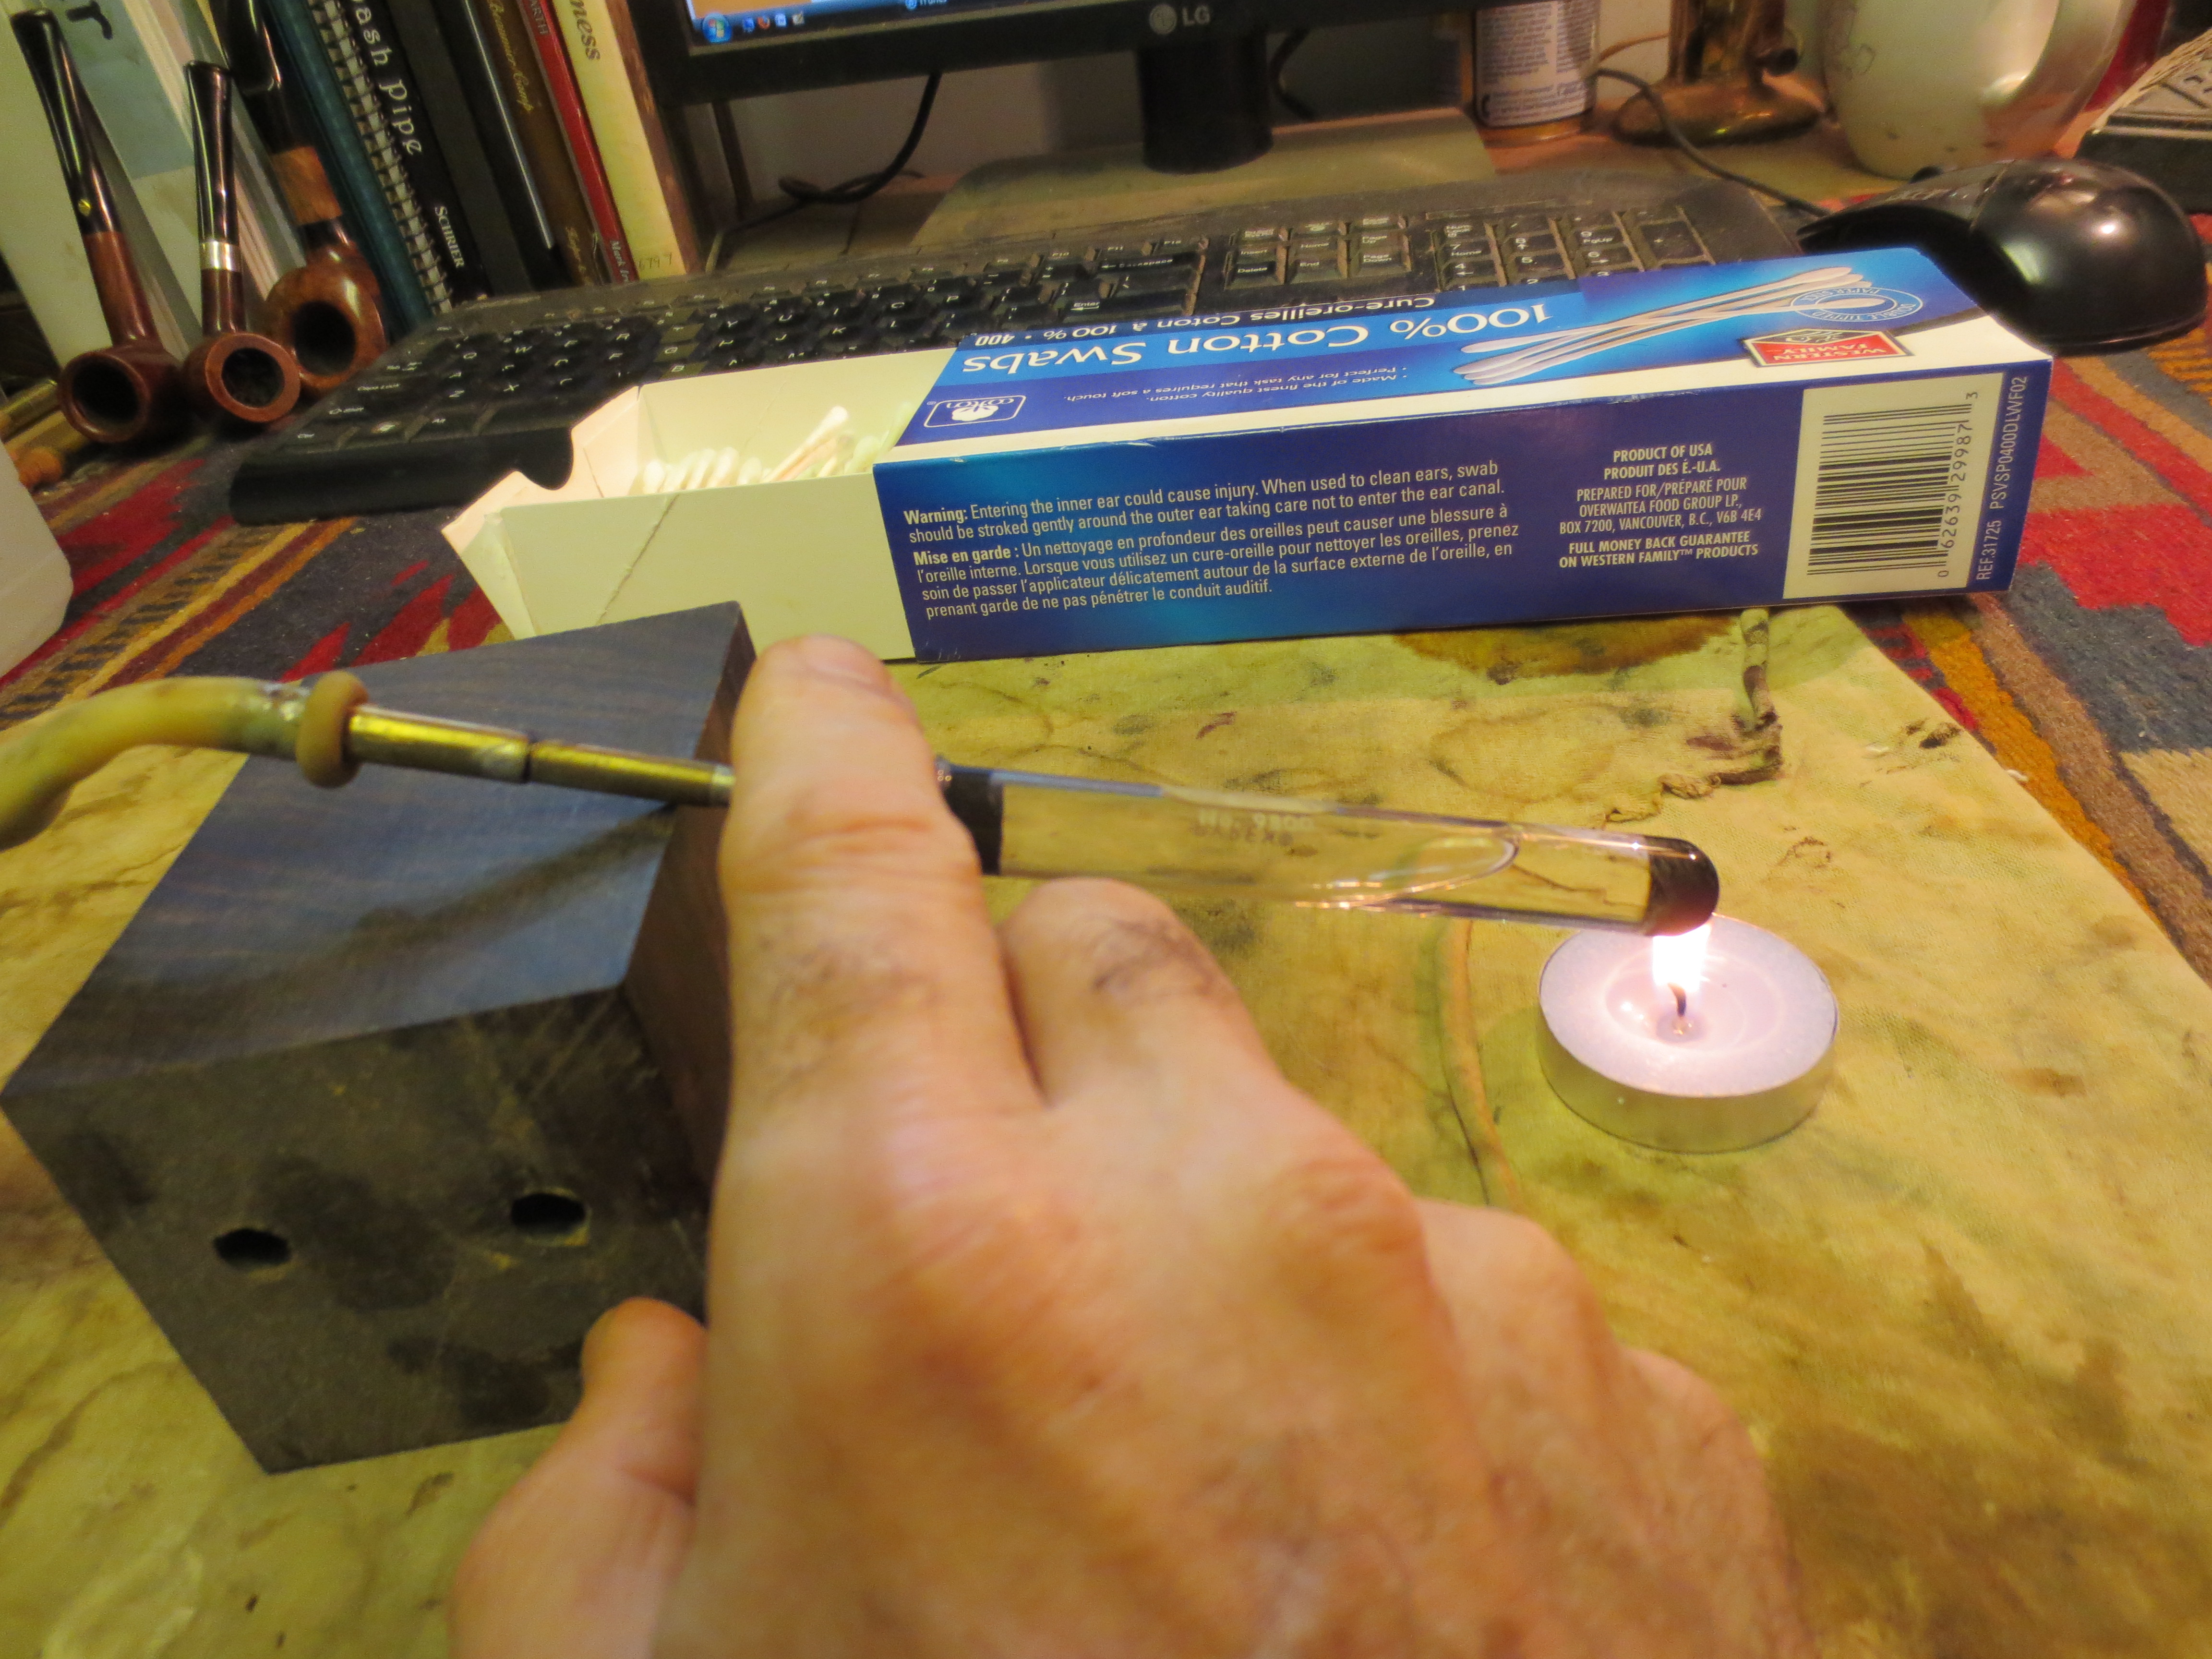
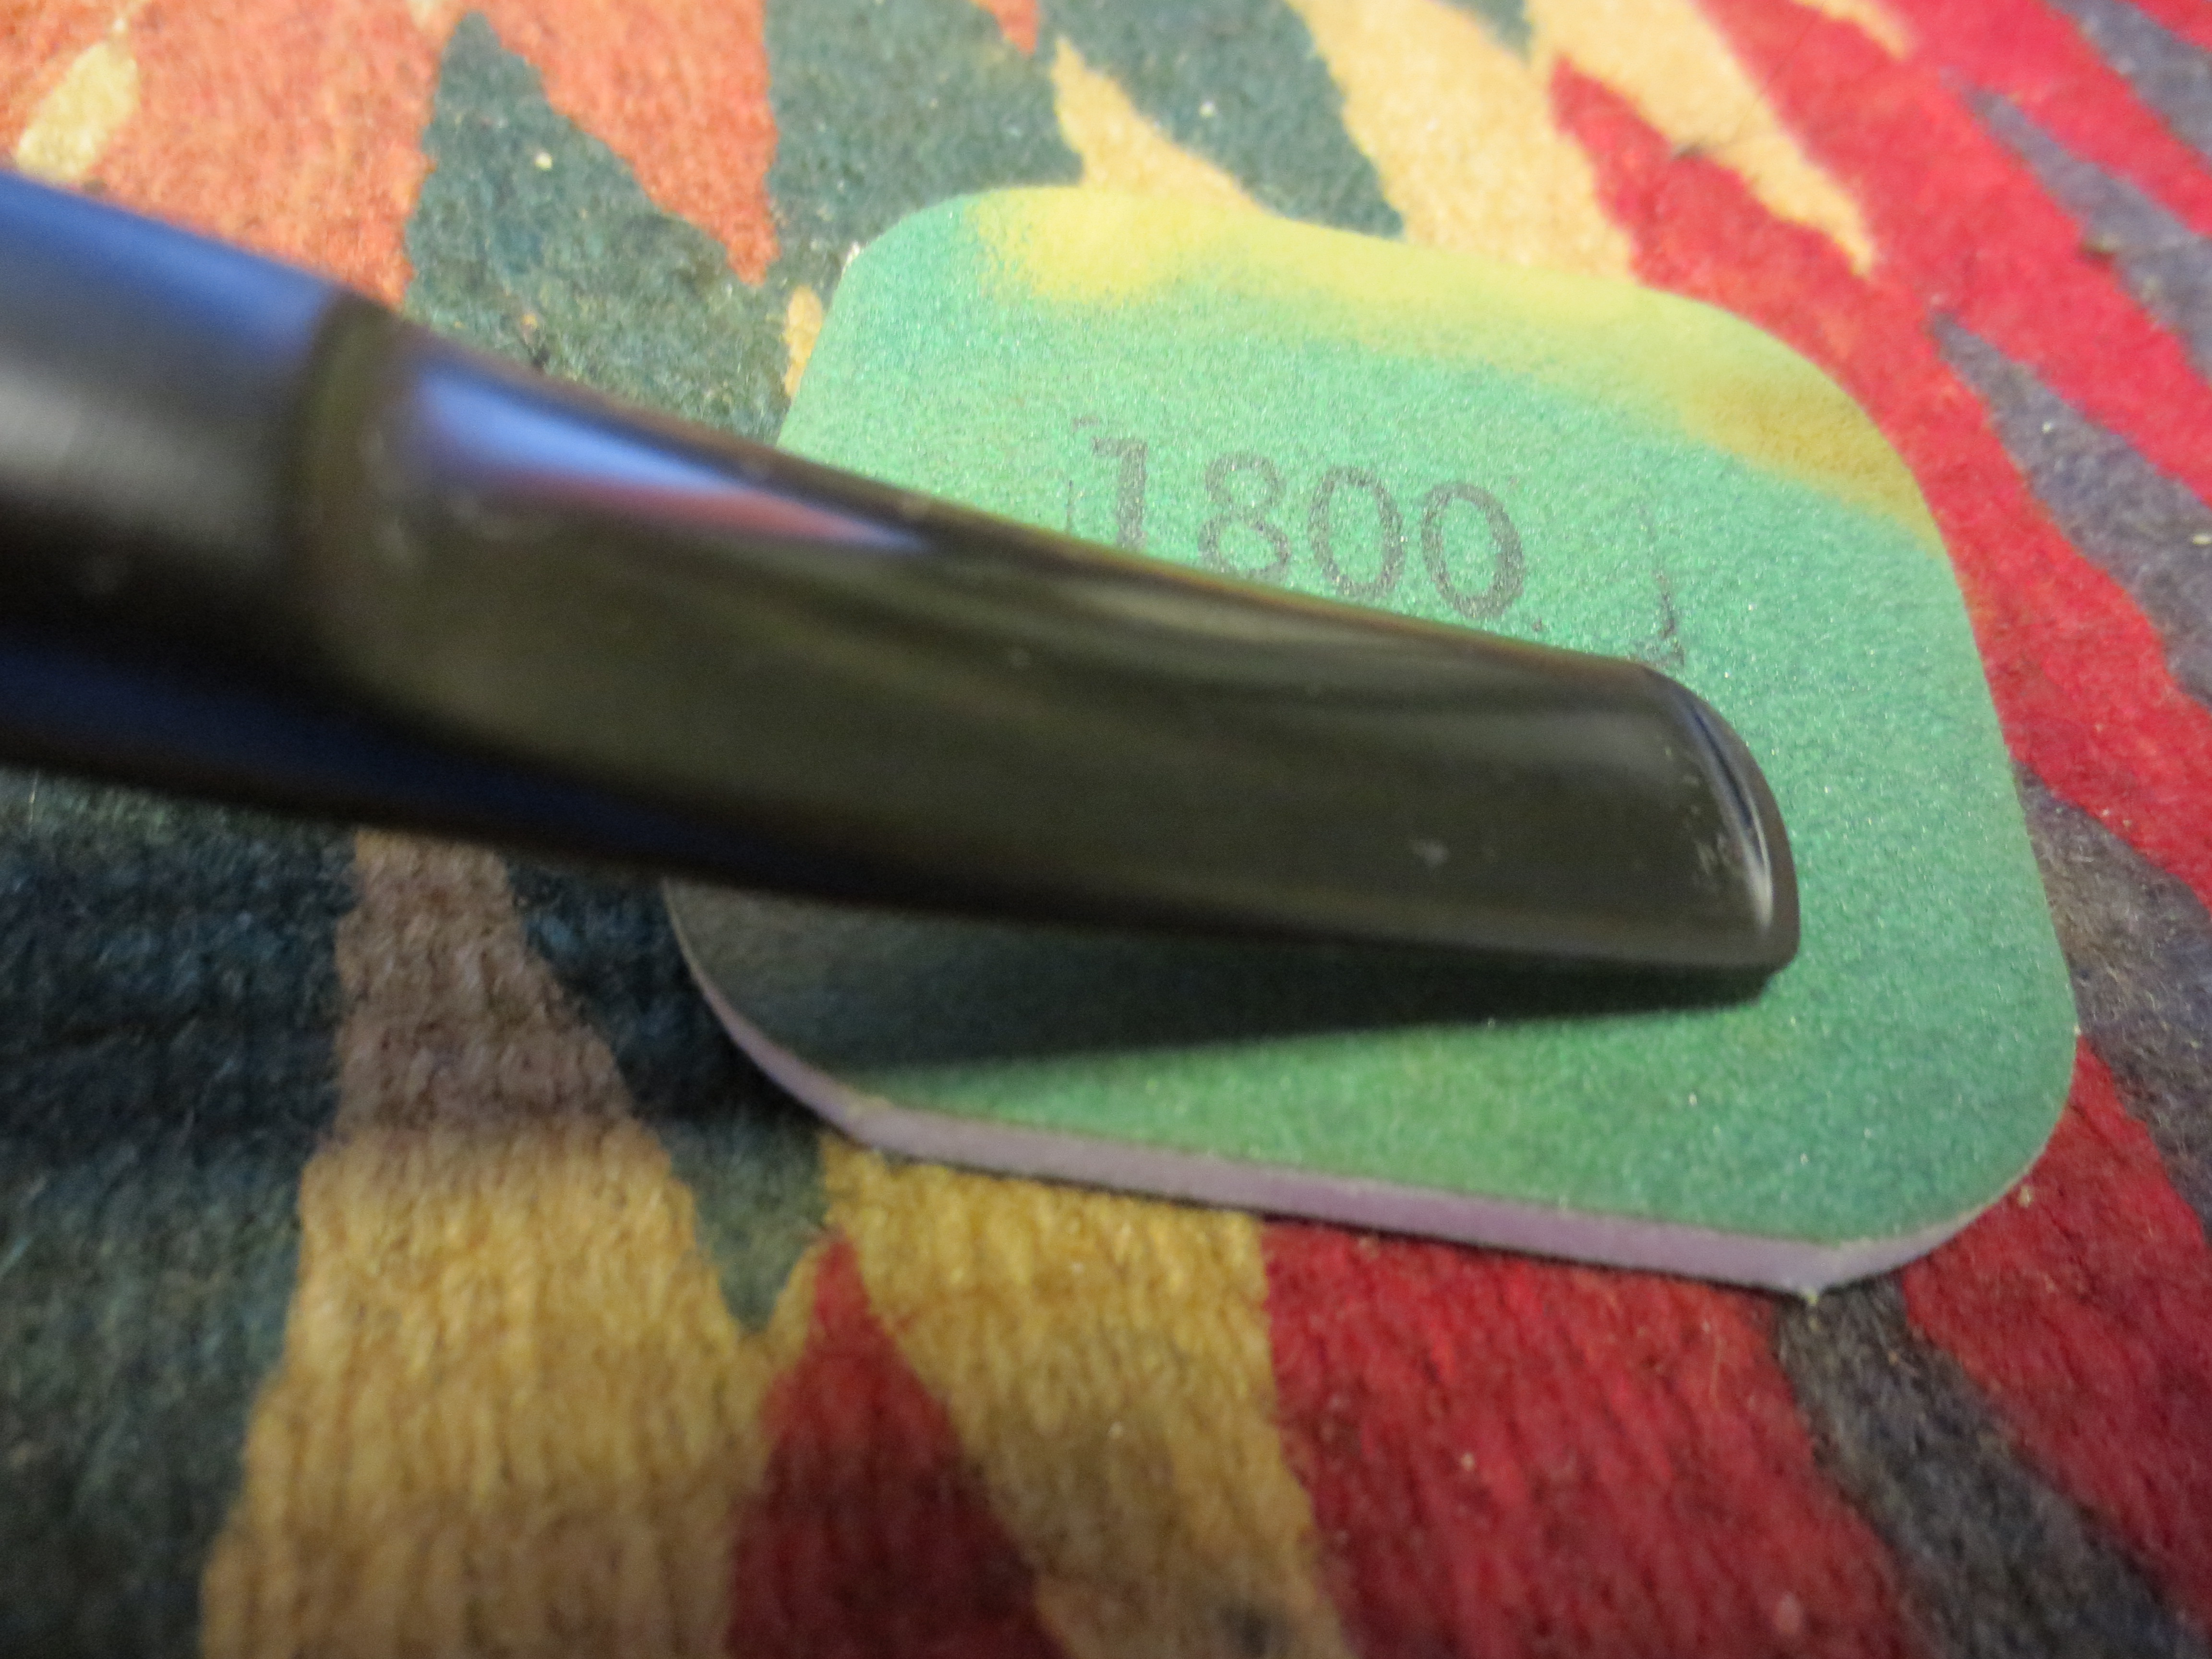
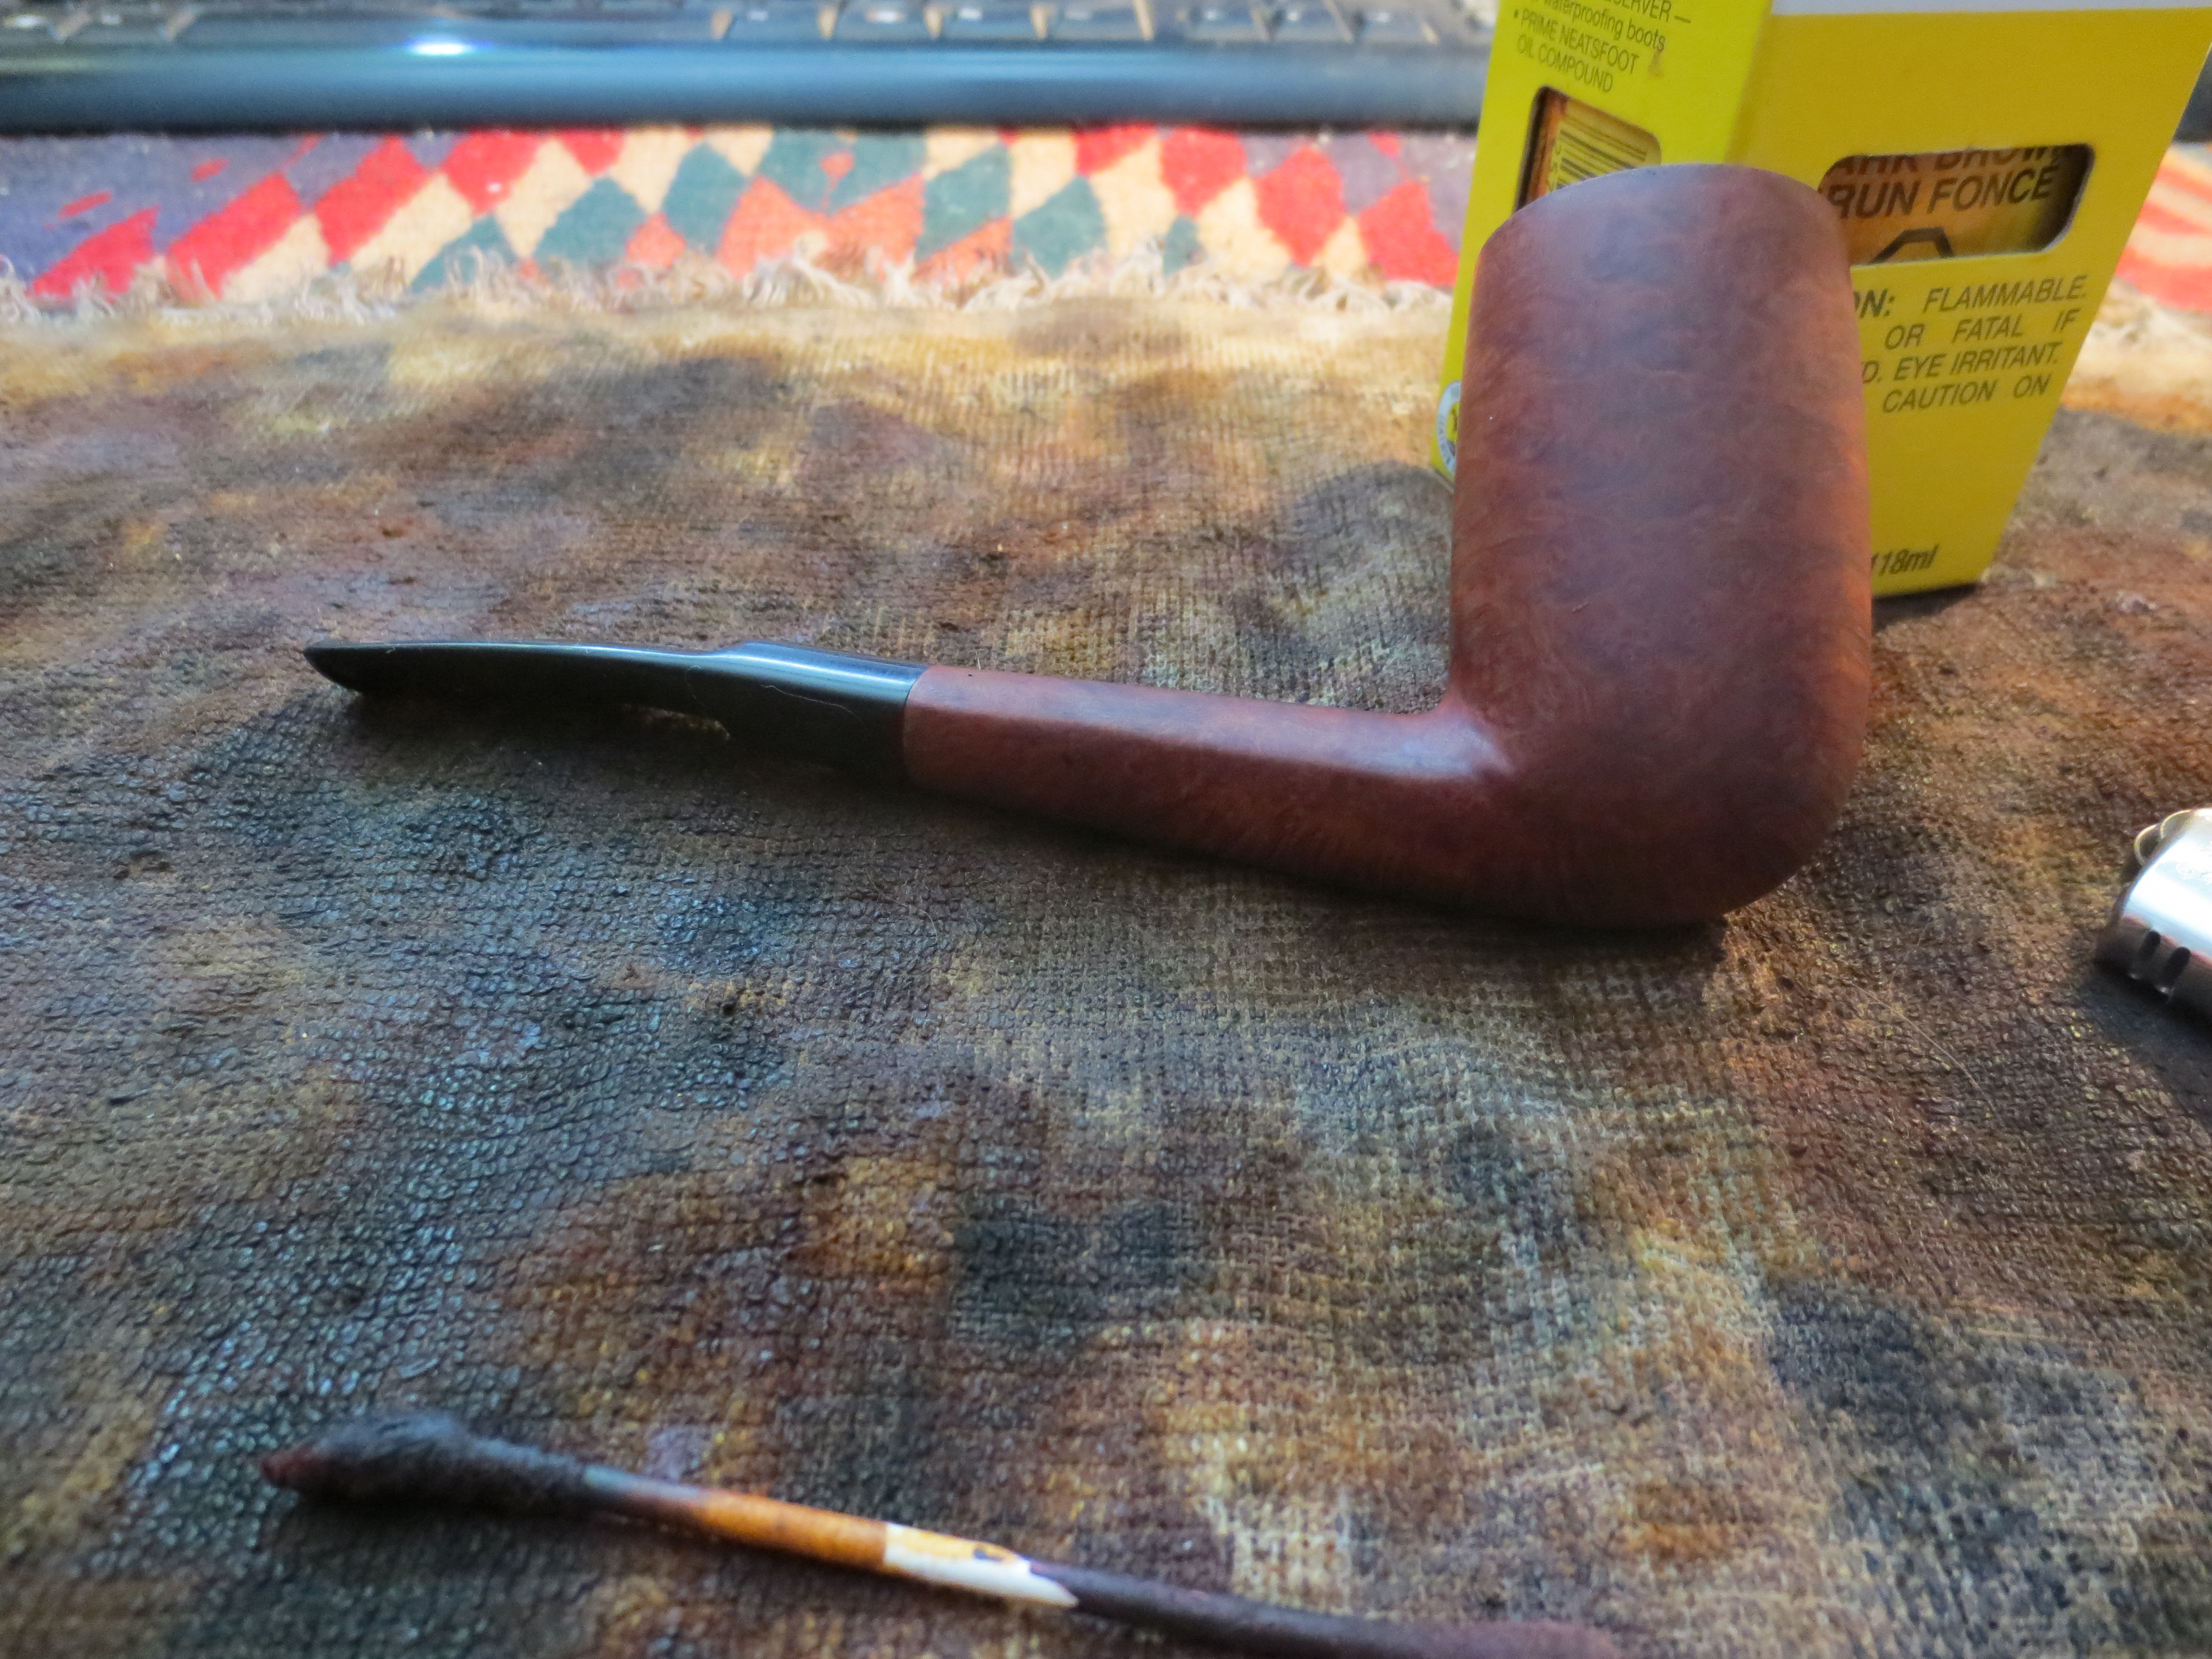
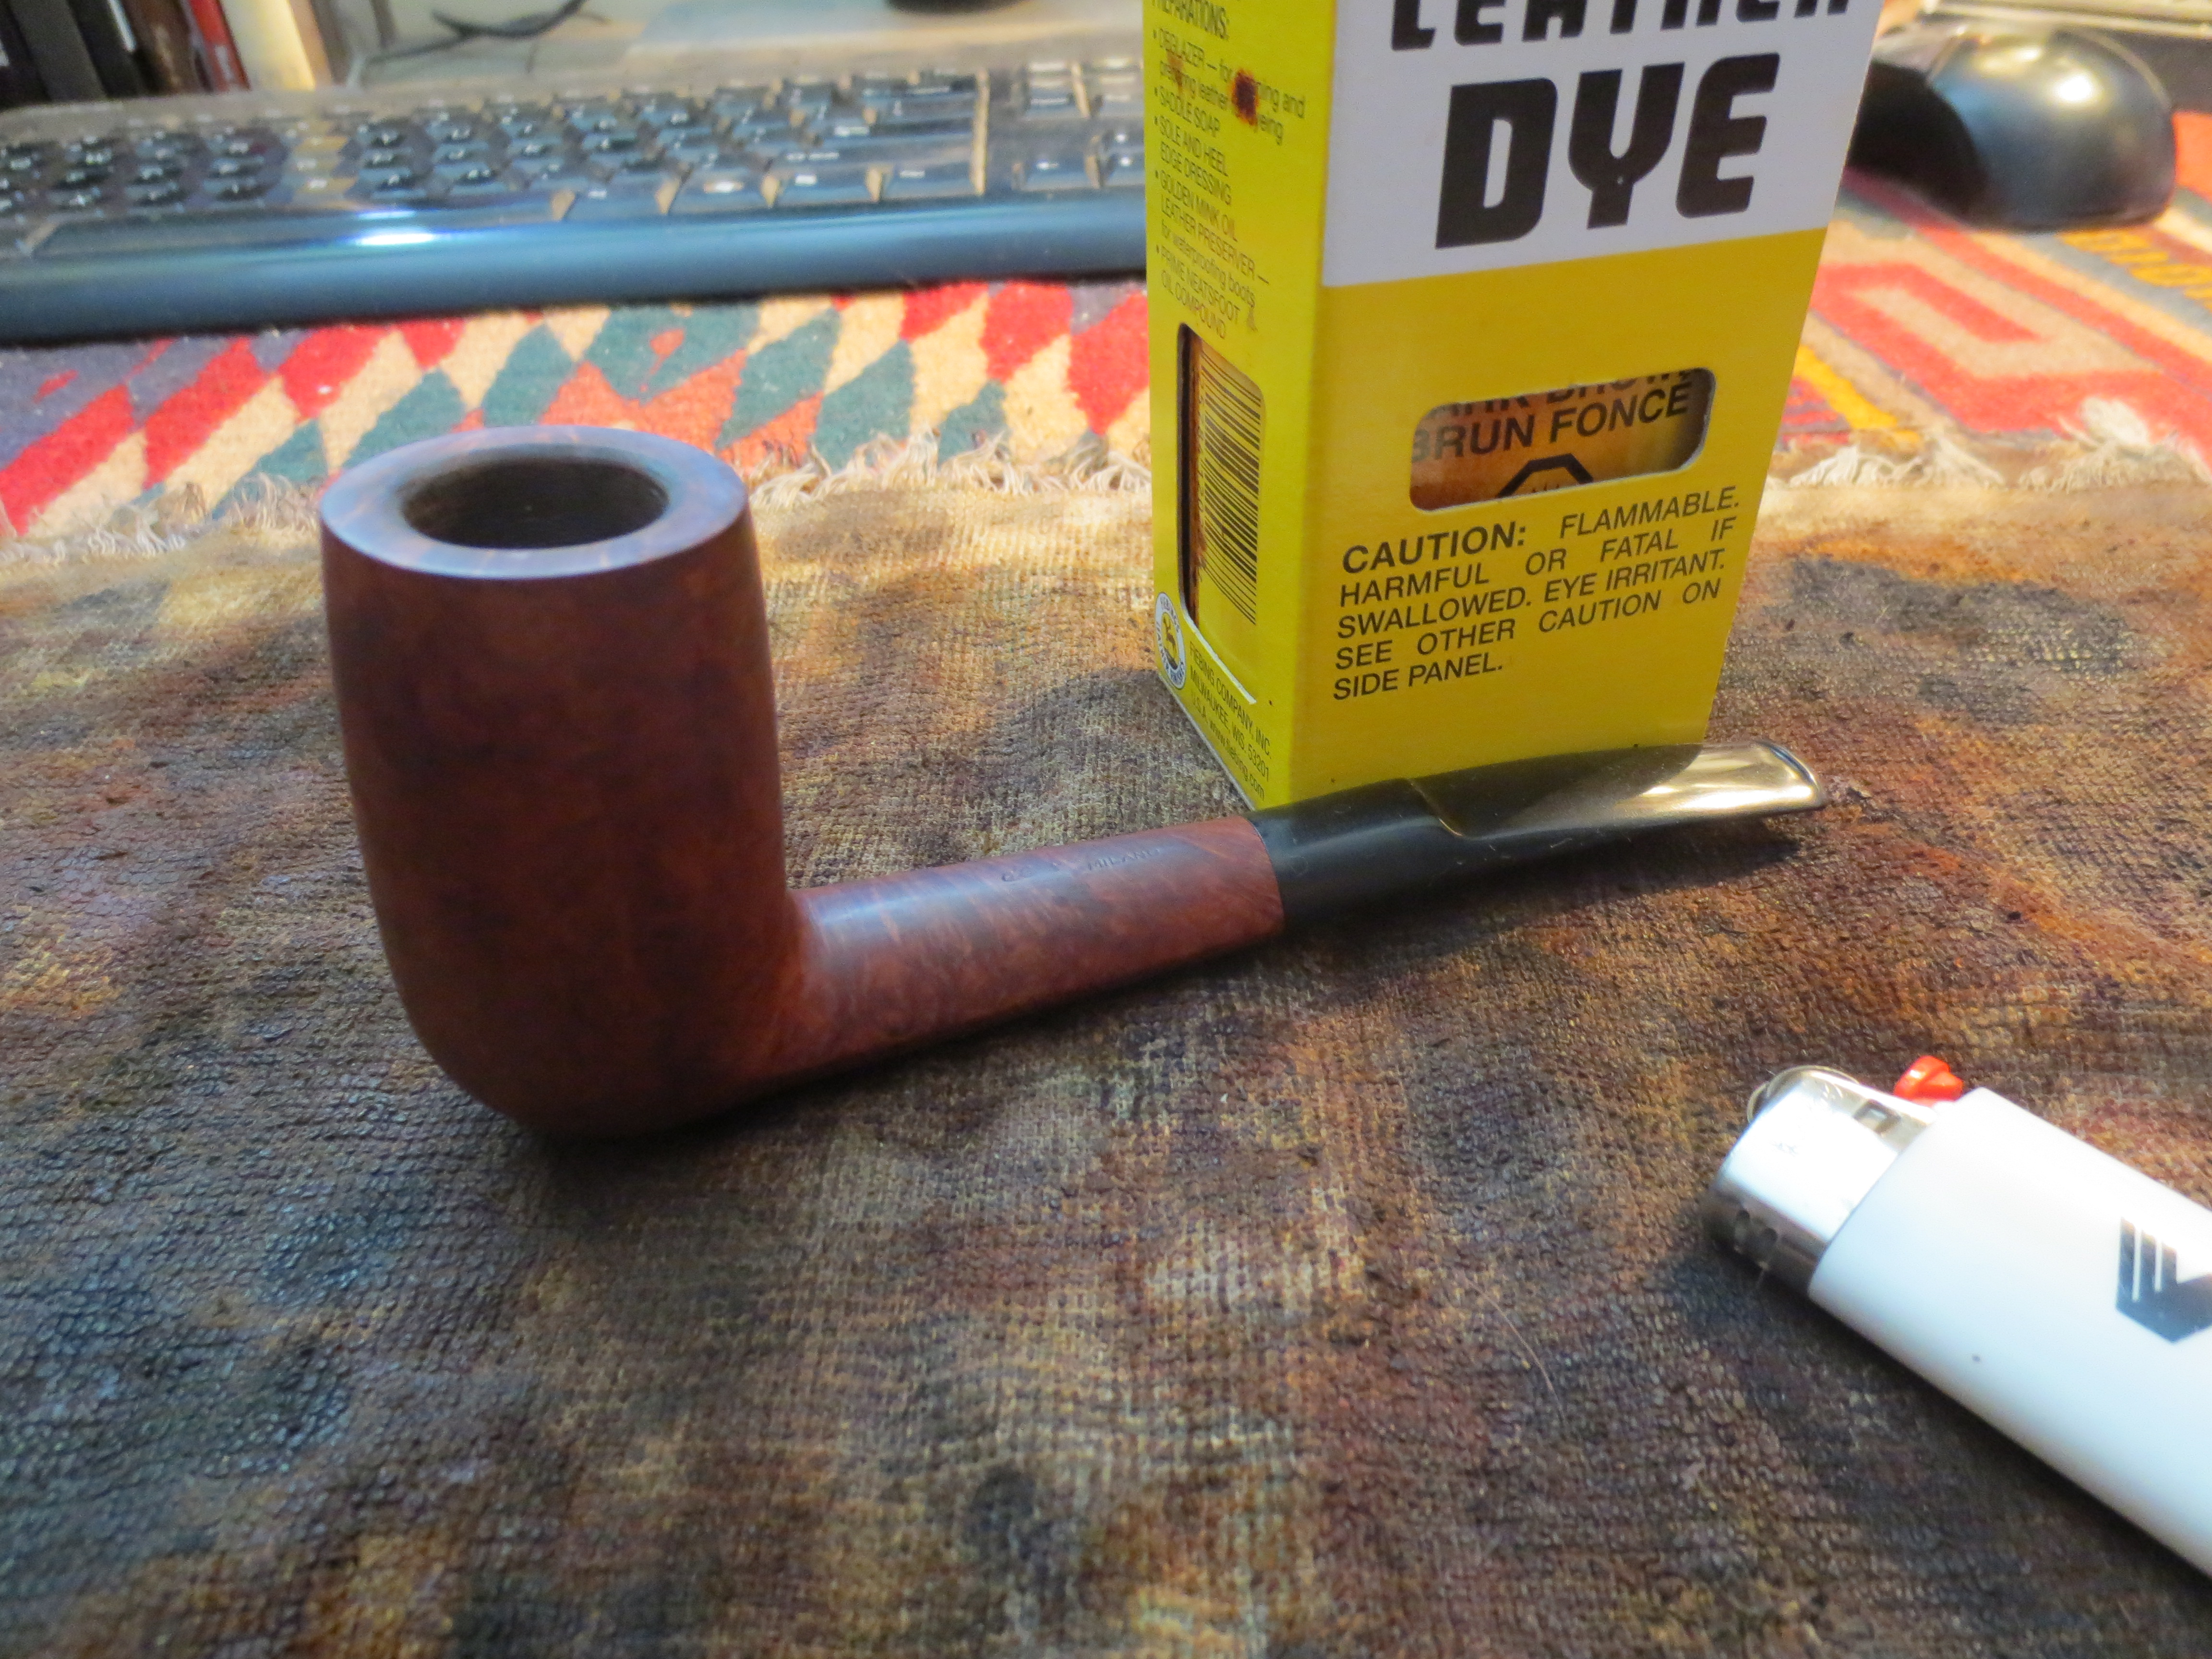
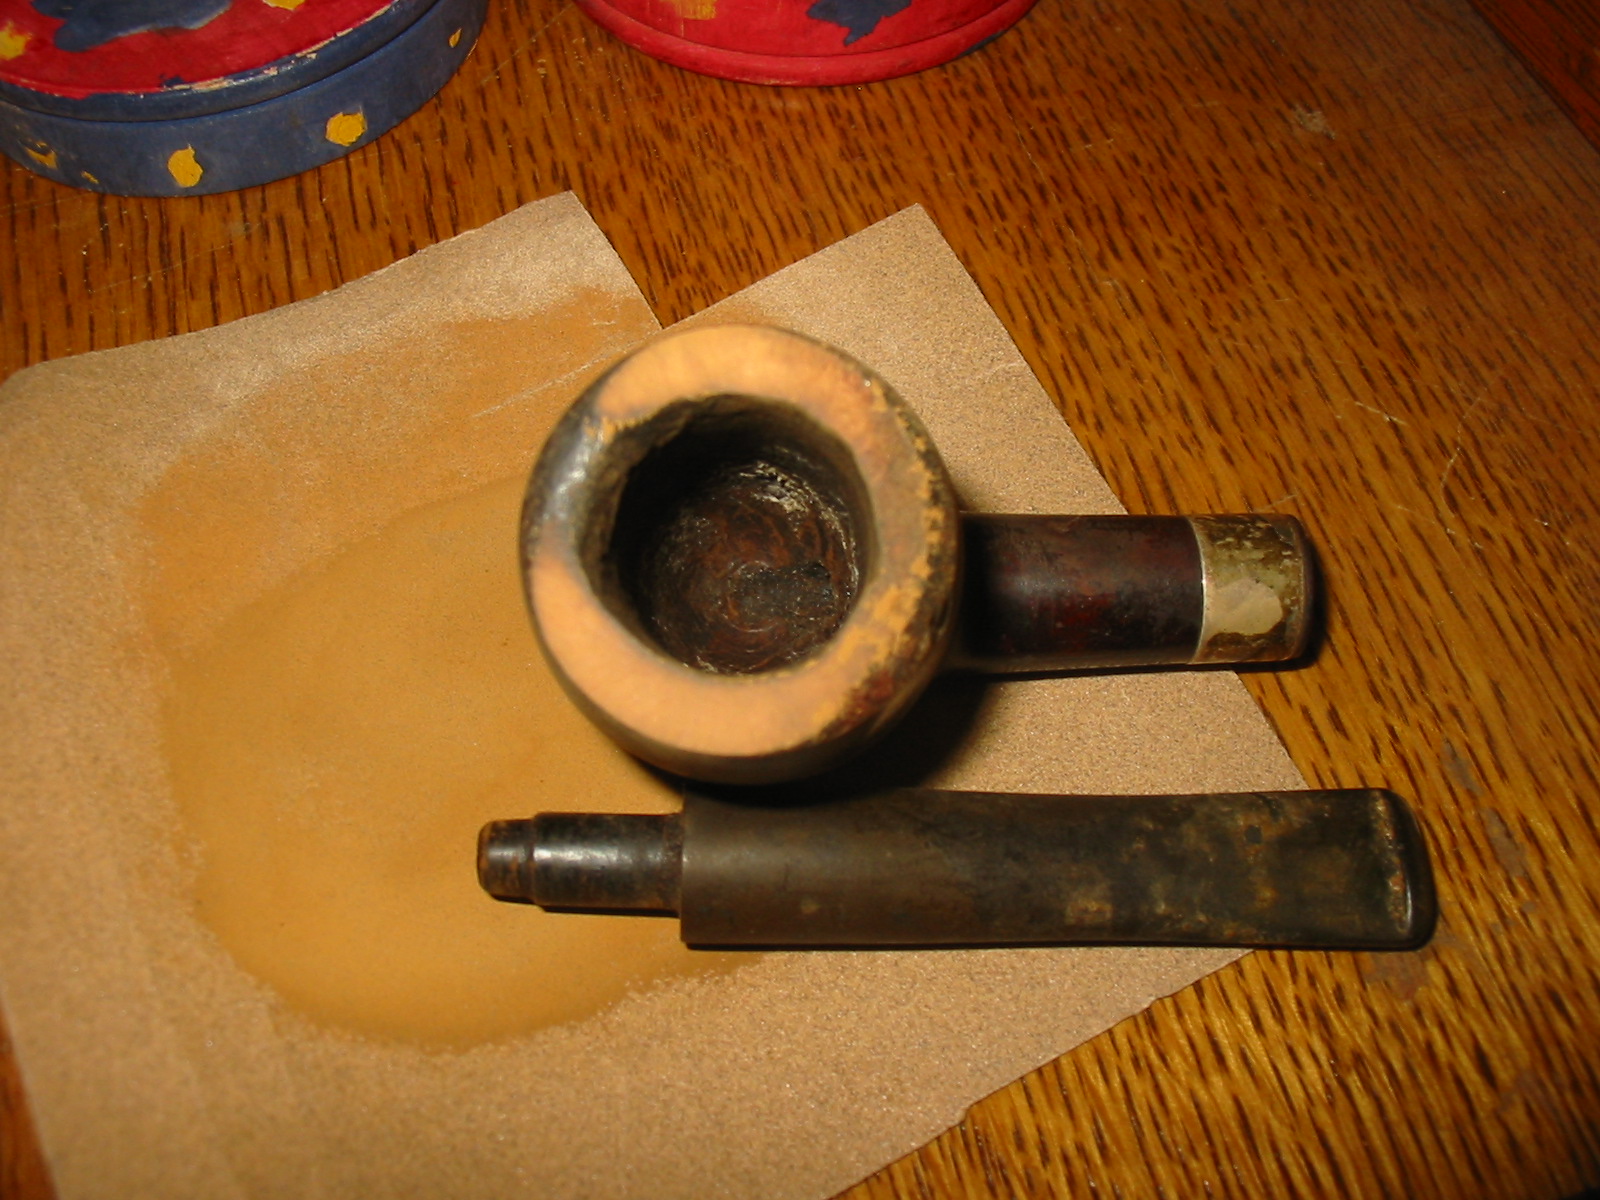
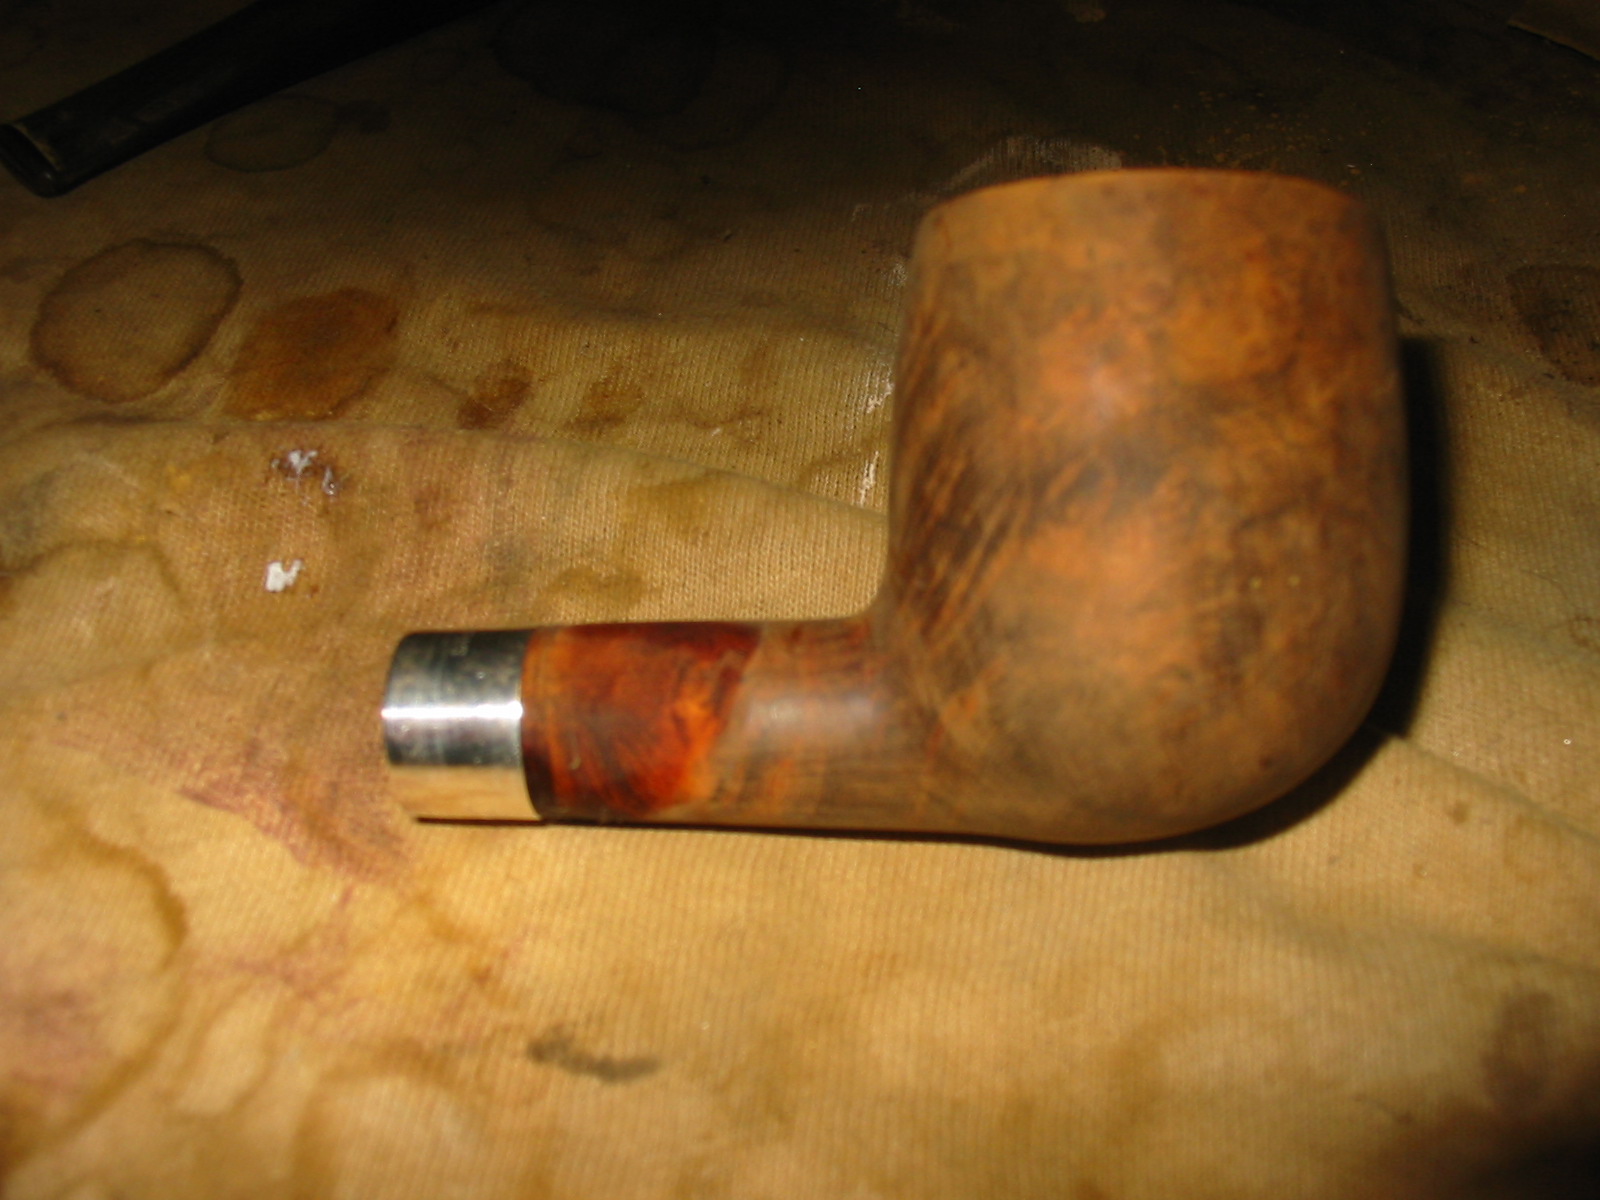
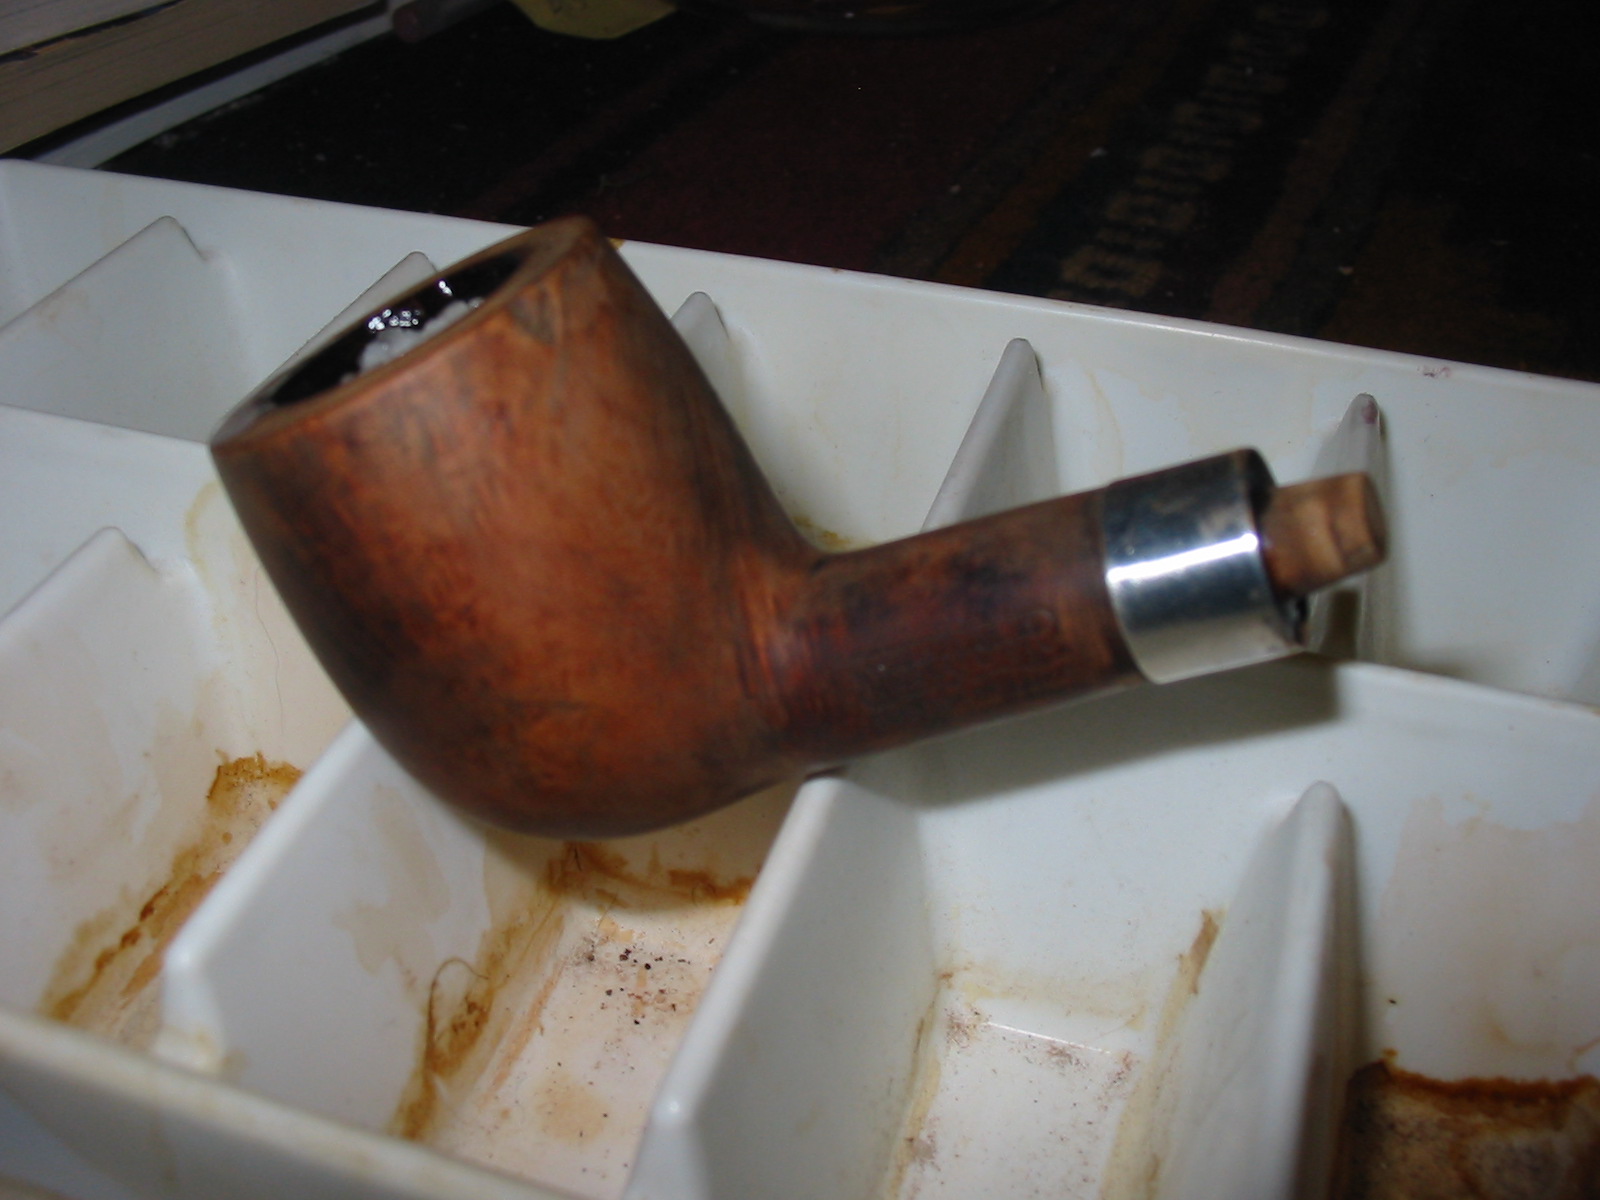
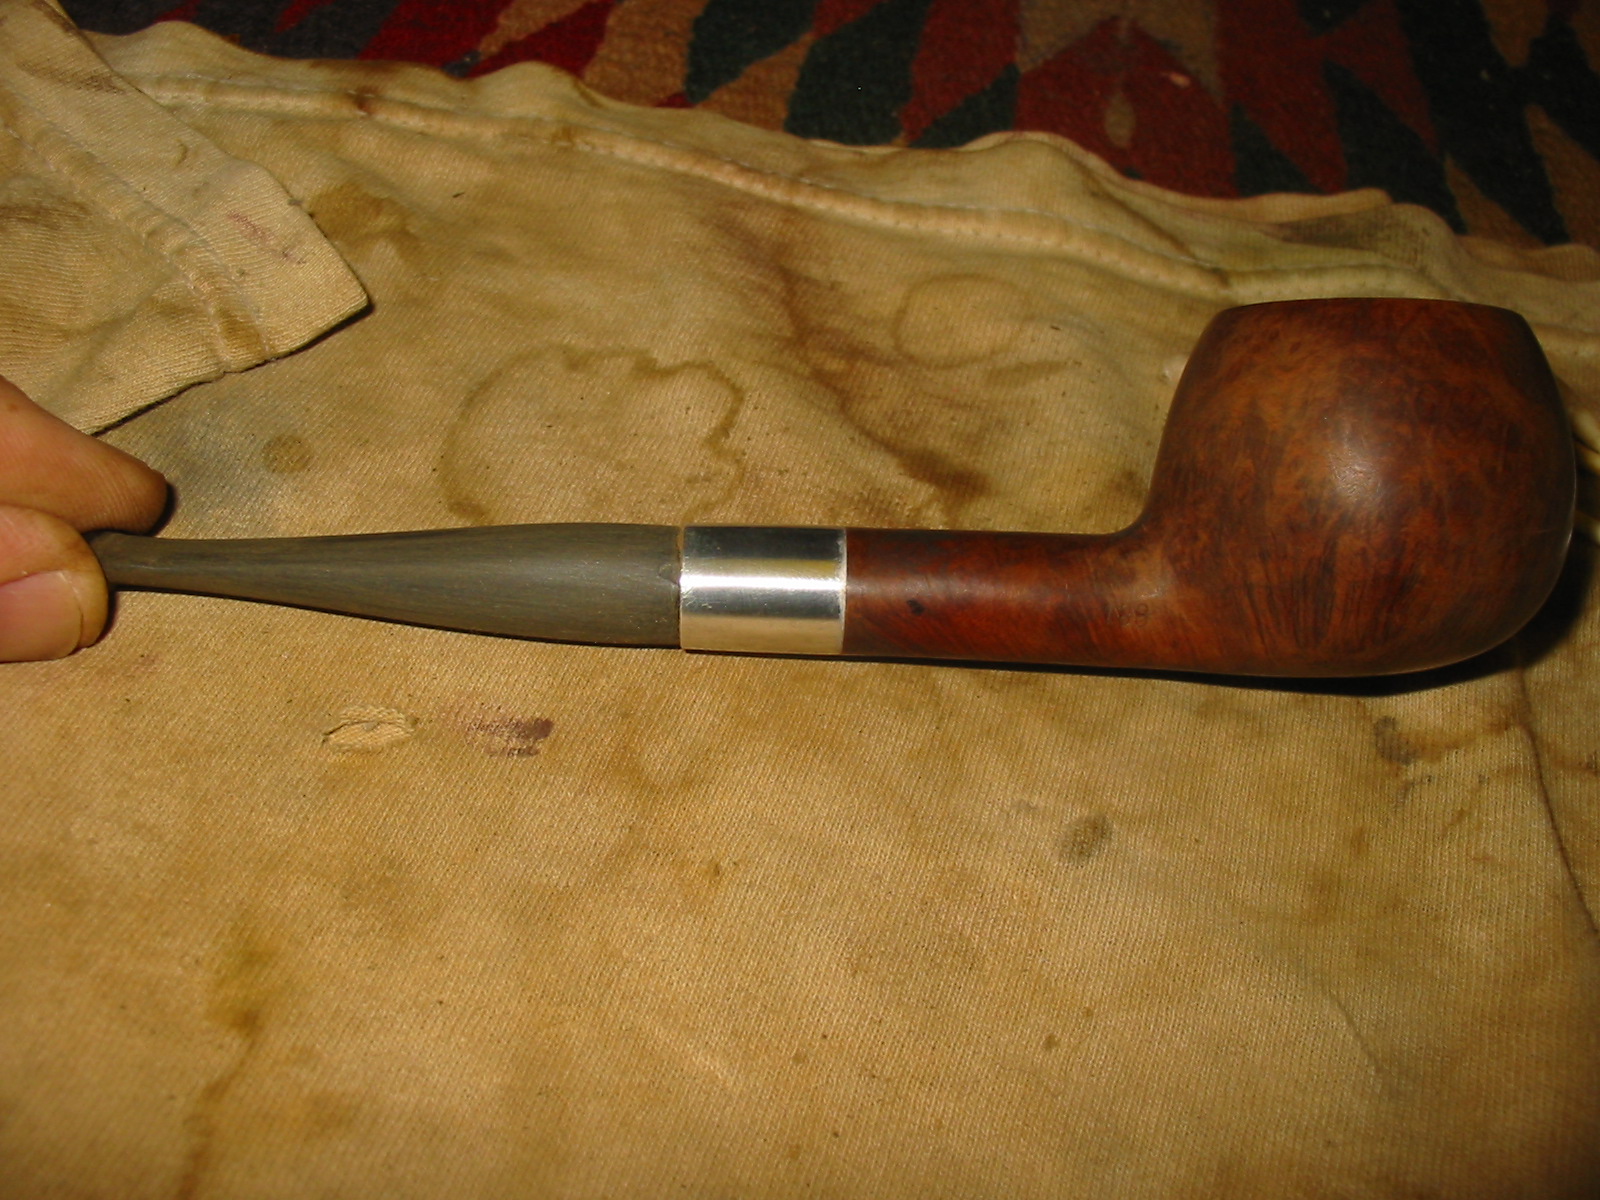
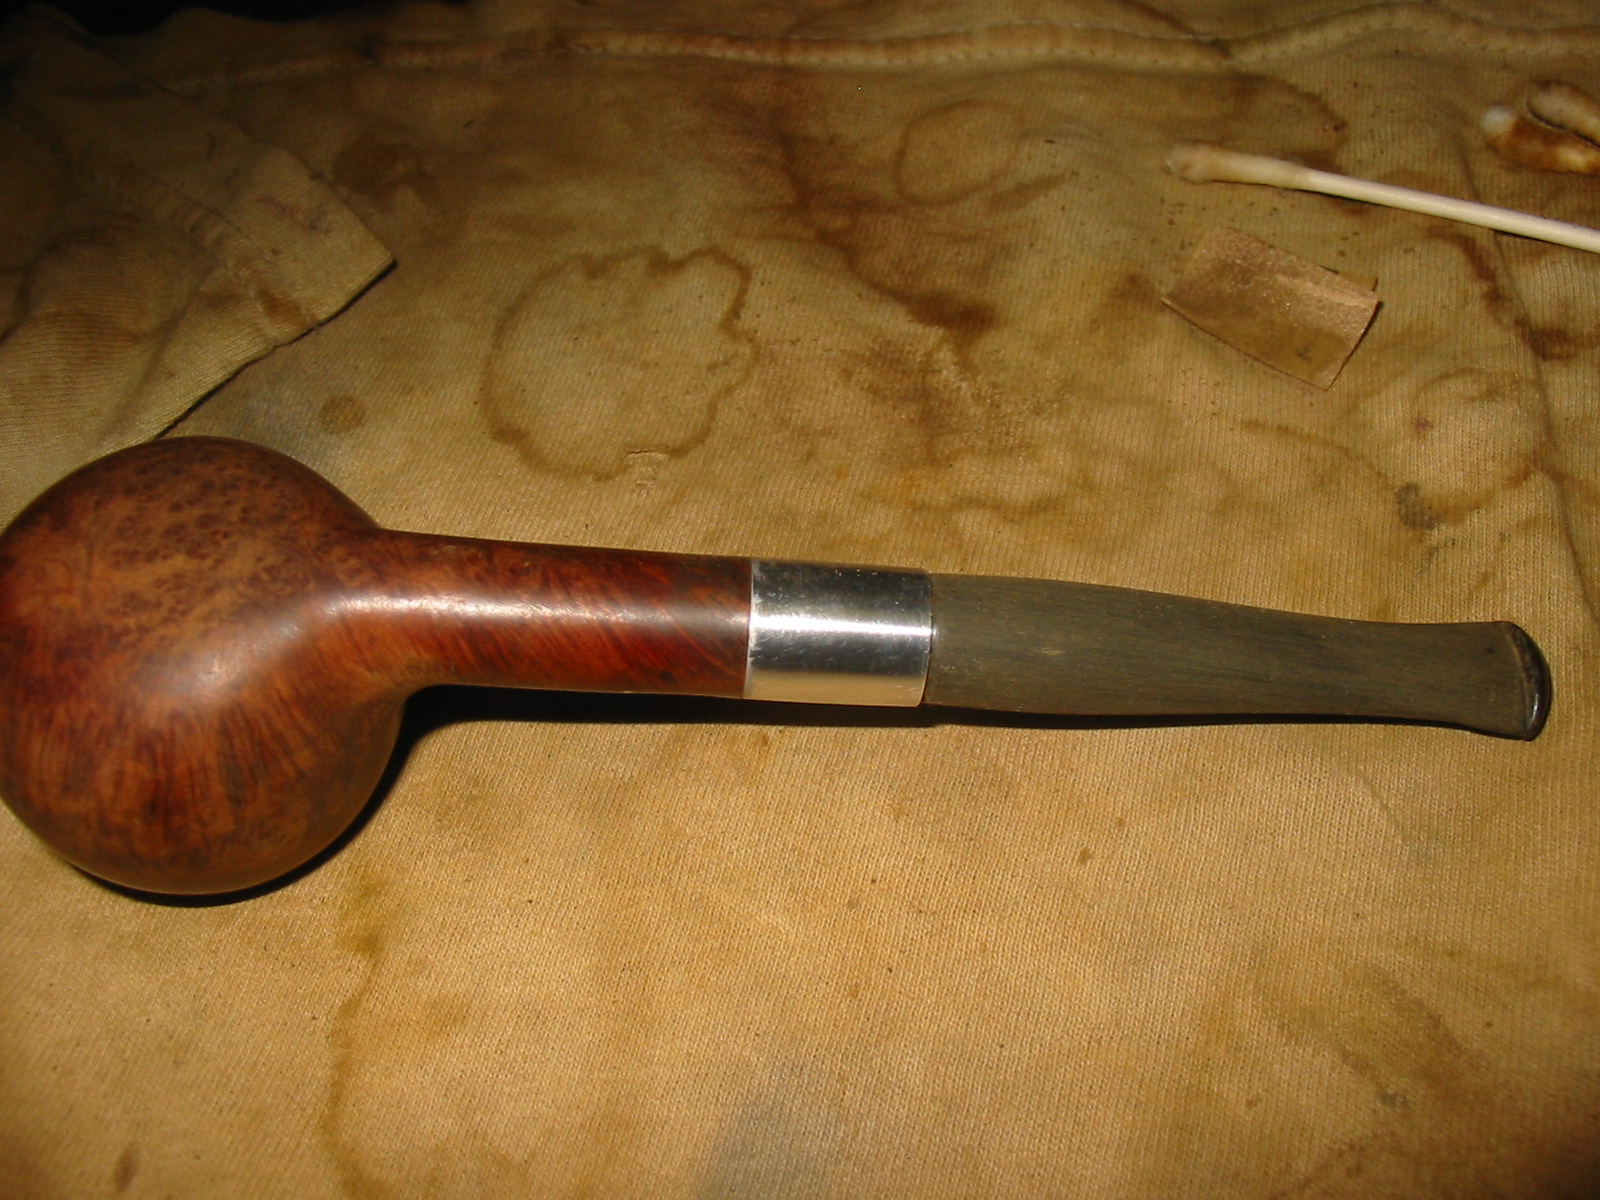
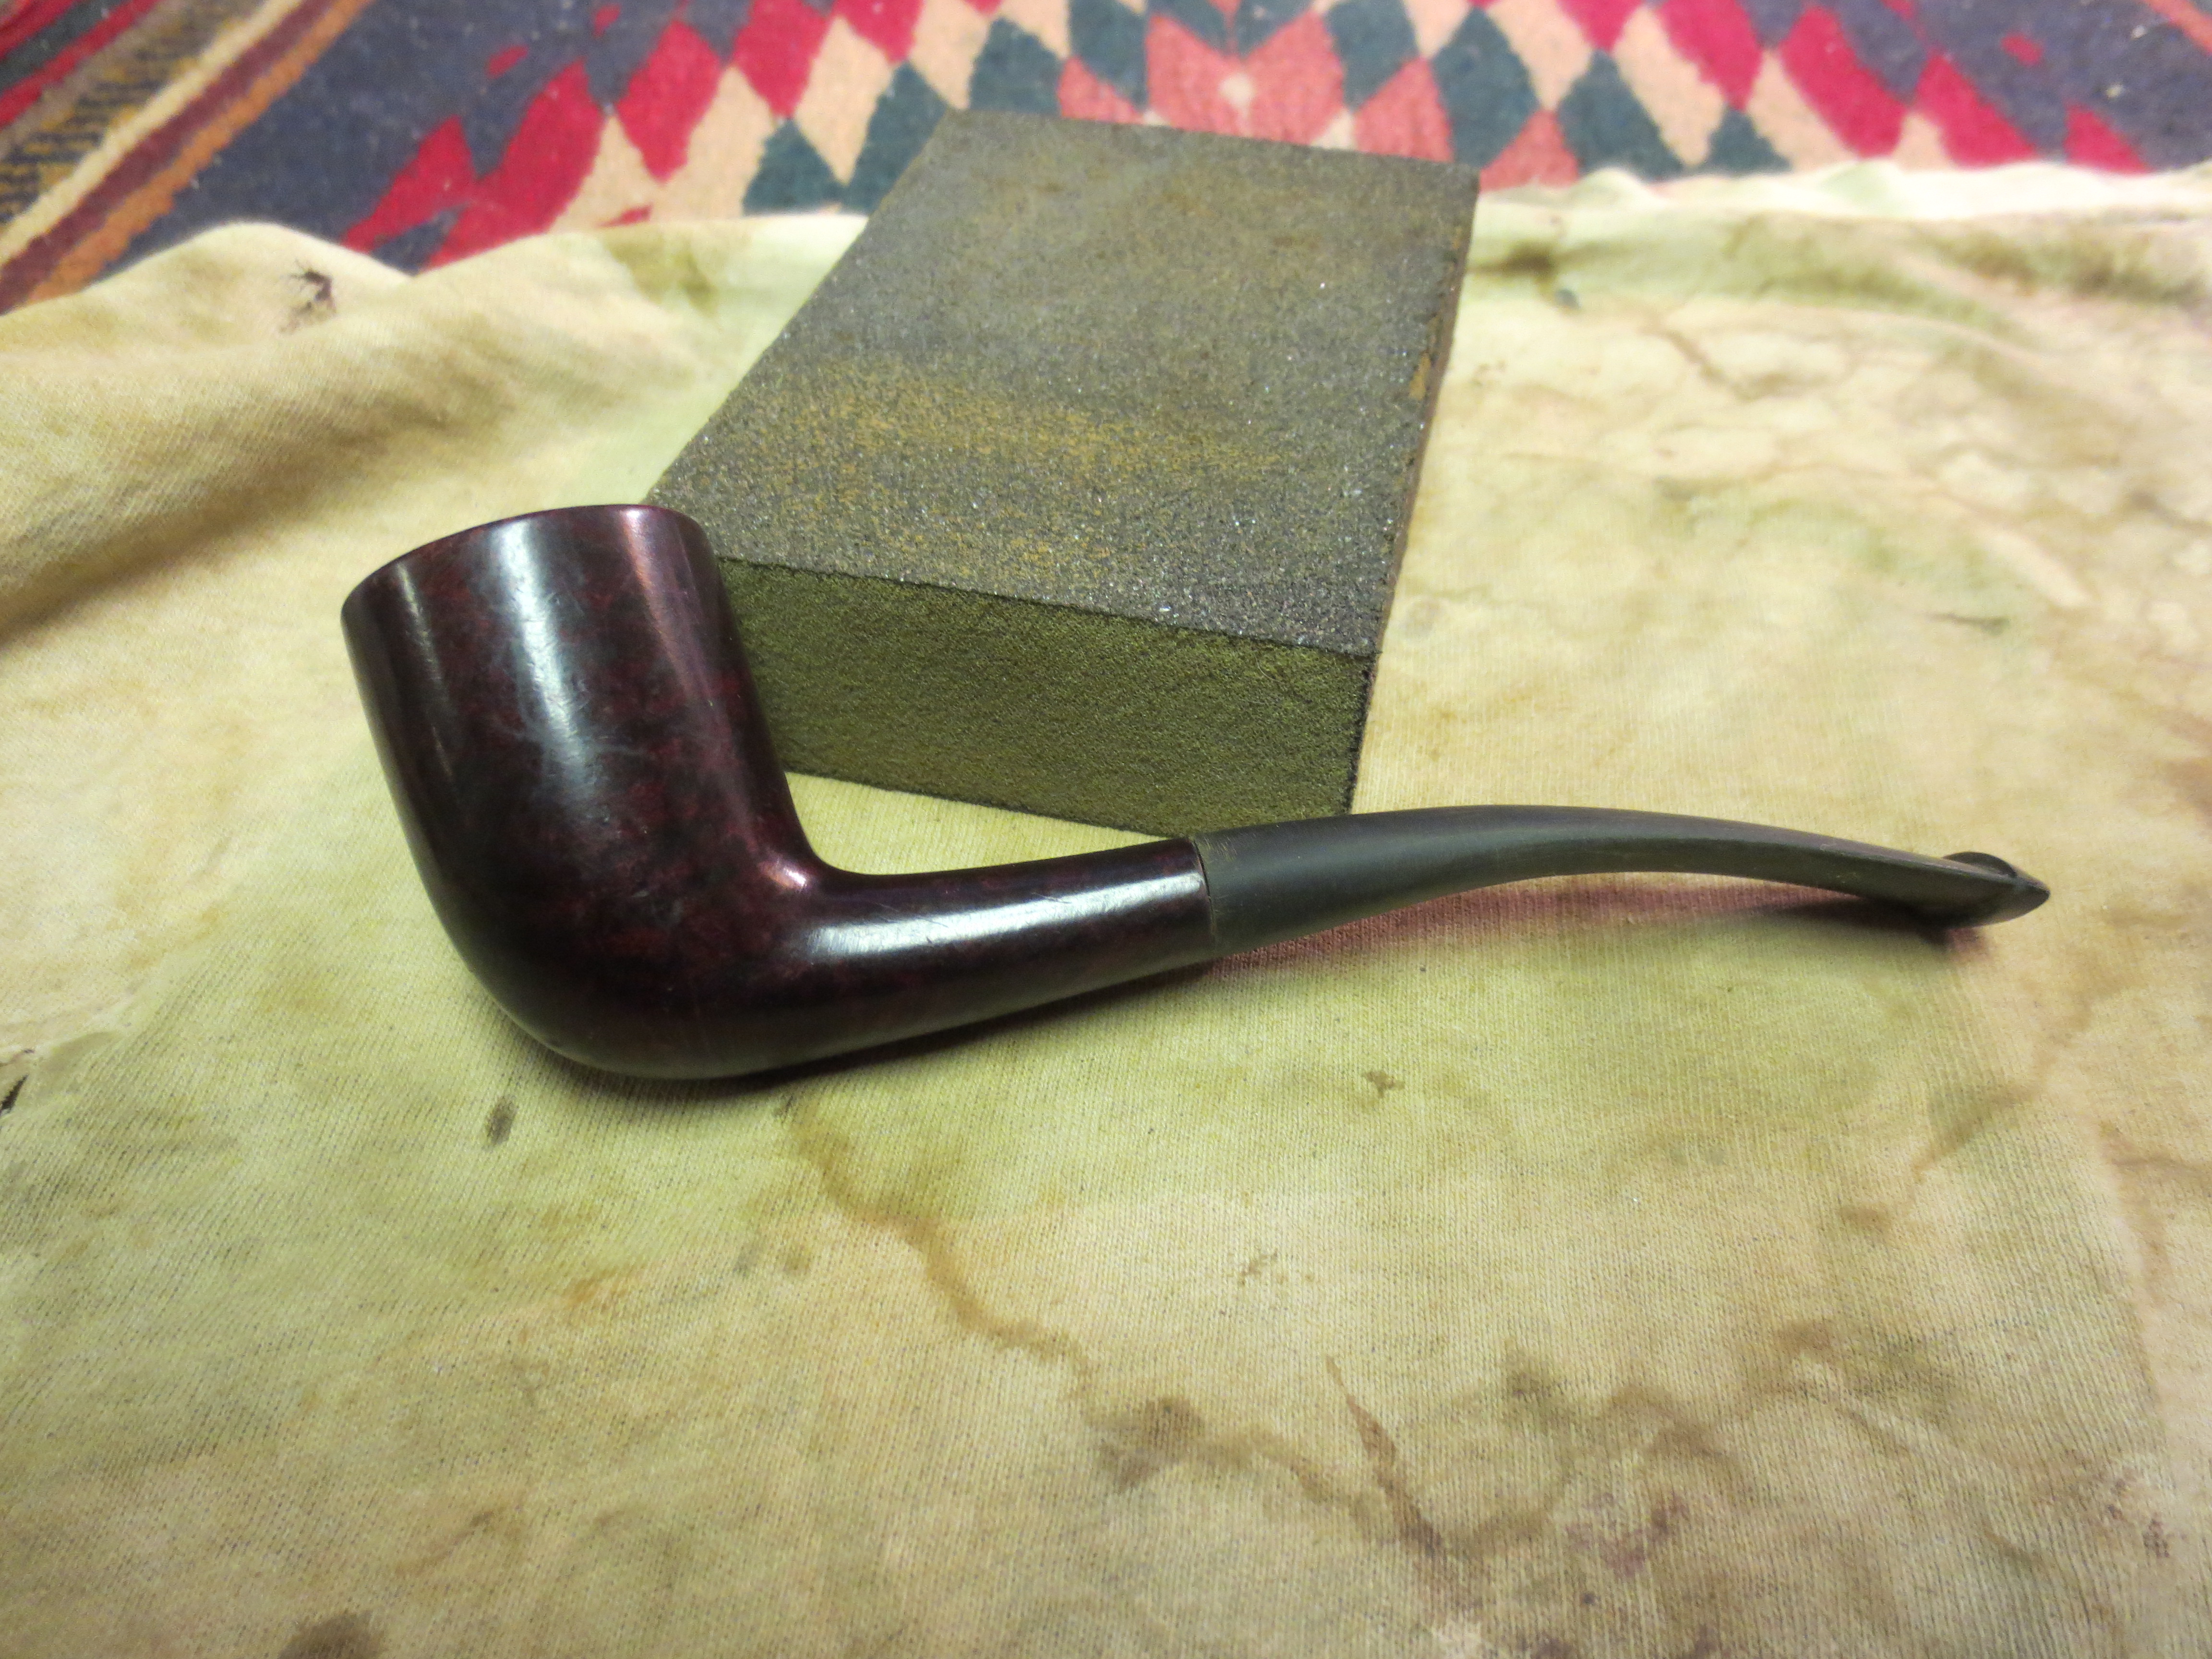
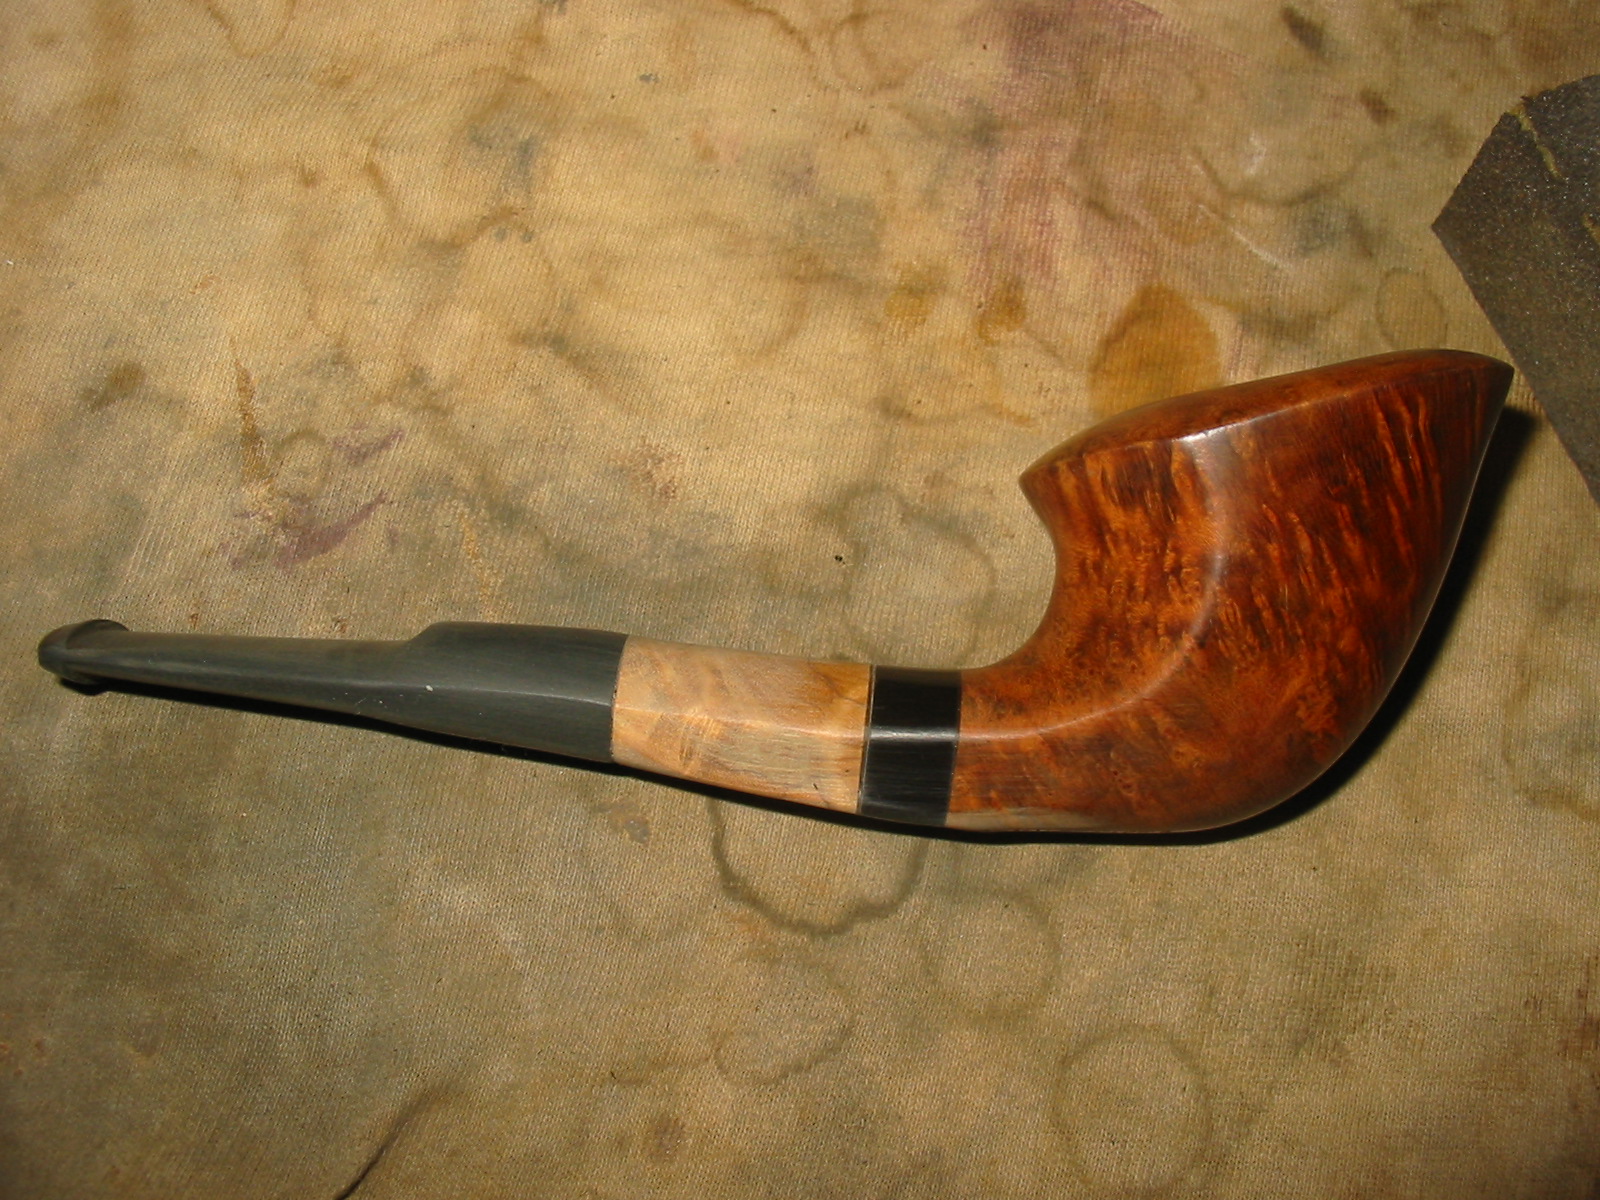
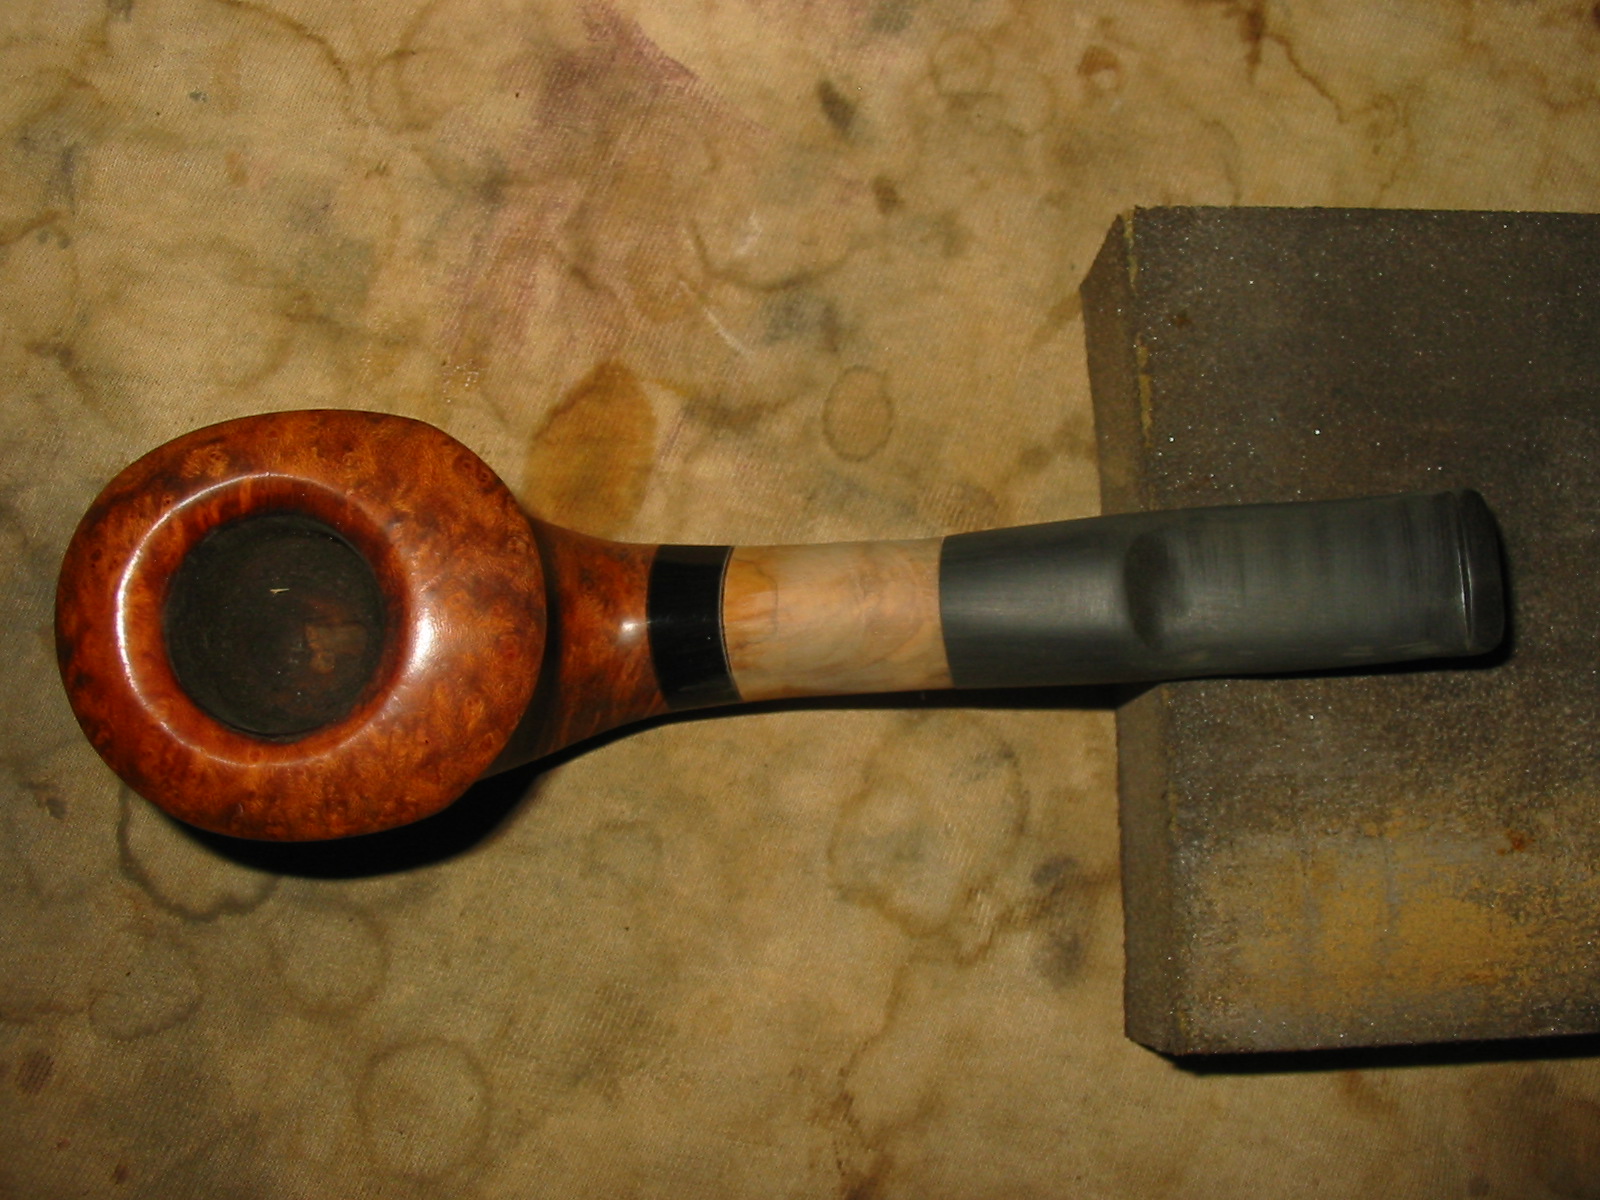
I used a Dremel with a sanding drum to take down the fin on the shank and the nob on the Cumberland stem. I figured that would be fairly straight forward work – not a big deal to do with the Dremel. And it certainly worked easily enough. Removing the two parts of the pipe was pretty quick work. I finished with the sanding drum and left a little extra on the shank and stem that I would sand away by hand. I wanted to make sure that I could match the flow and shape of the shank and stem. The next three photos show what the pipe looked like after I had removed the fin and nob. It certainly changed the appearance and the hand feel of the pipe. I began to think that my reimagining was going to work out well.

IMG_0937

IMG_0938

IMG_0939

I took the pipe to my work table and sanded the stem and shank with medium grit emery paper and also with 220 grit sandpaper to further shape the flow of the shank and stem. I wanted to sand a gentle taper from the shank into the stem. I worked at the slope to get it the way I saw it in my head. Once I had that done I sanded it with a medium grit sanding sponge to smooth out the scratches and marks in the briar and the Cumberland. I really like the way the pipe was beginning to look. As I looked at the pipe I thought that a little more sanding of the slope would really make the pipe look proper.

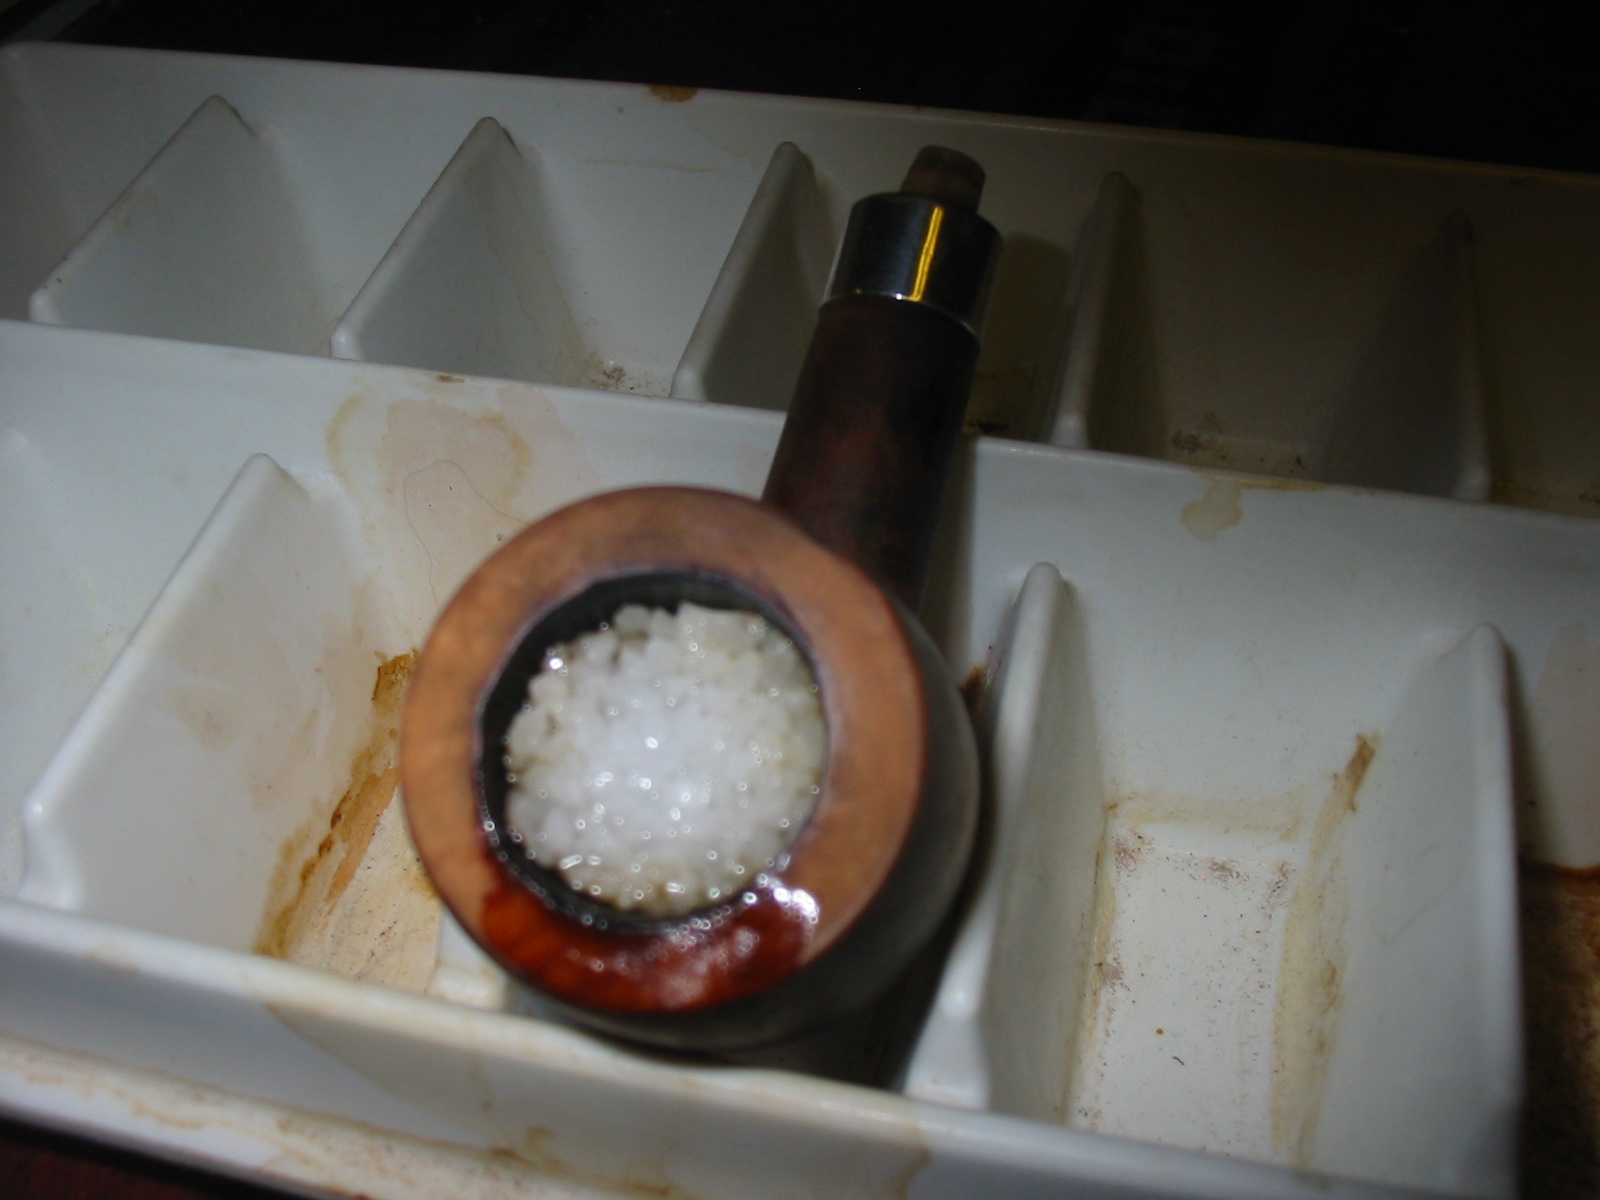
But that is when the job became more than I had bargained for. In order to accomplish what I had in mind I would have to sand down the shank a bit more. To match the stem and shank flow it would need to have some more of the shank extension sanded away. That is when it hit! MAJOR PROBLEM! When I took the stem off the shank to check things before sanding I saw that there was not enough olive wood on the extension between the Delrin insert and the outside of the shank to take any more material off the shank. If I continued to sand it as I had been doing would expose the Delrin and ruin the shank. Even the amount of sanding and sloping that I had done had made the wood very thin on the underside of the shank. I could not do any more sanding on it without ruining it. So that is where this Phoenix took a turn and a new solution had to be worked out.

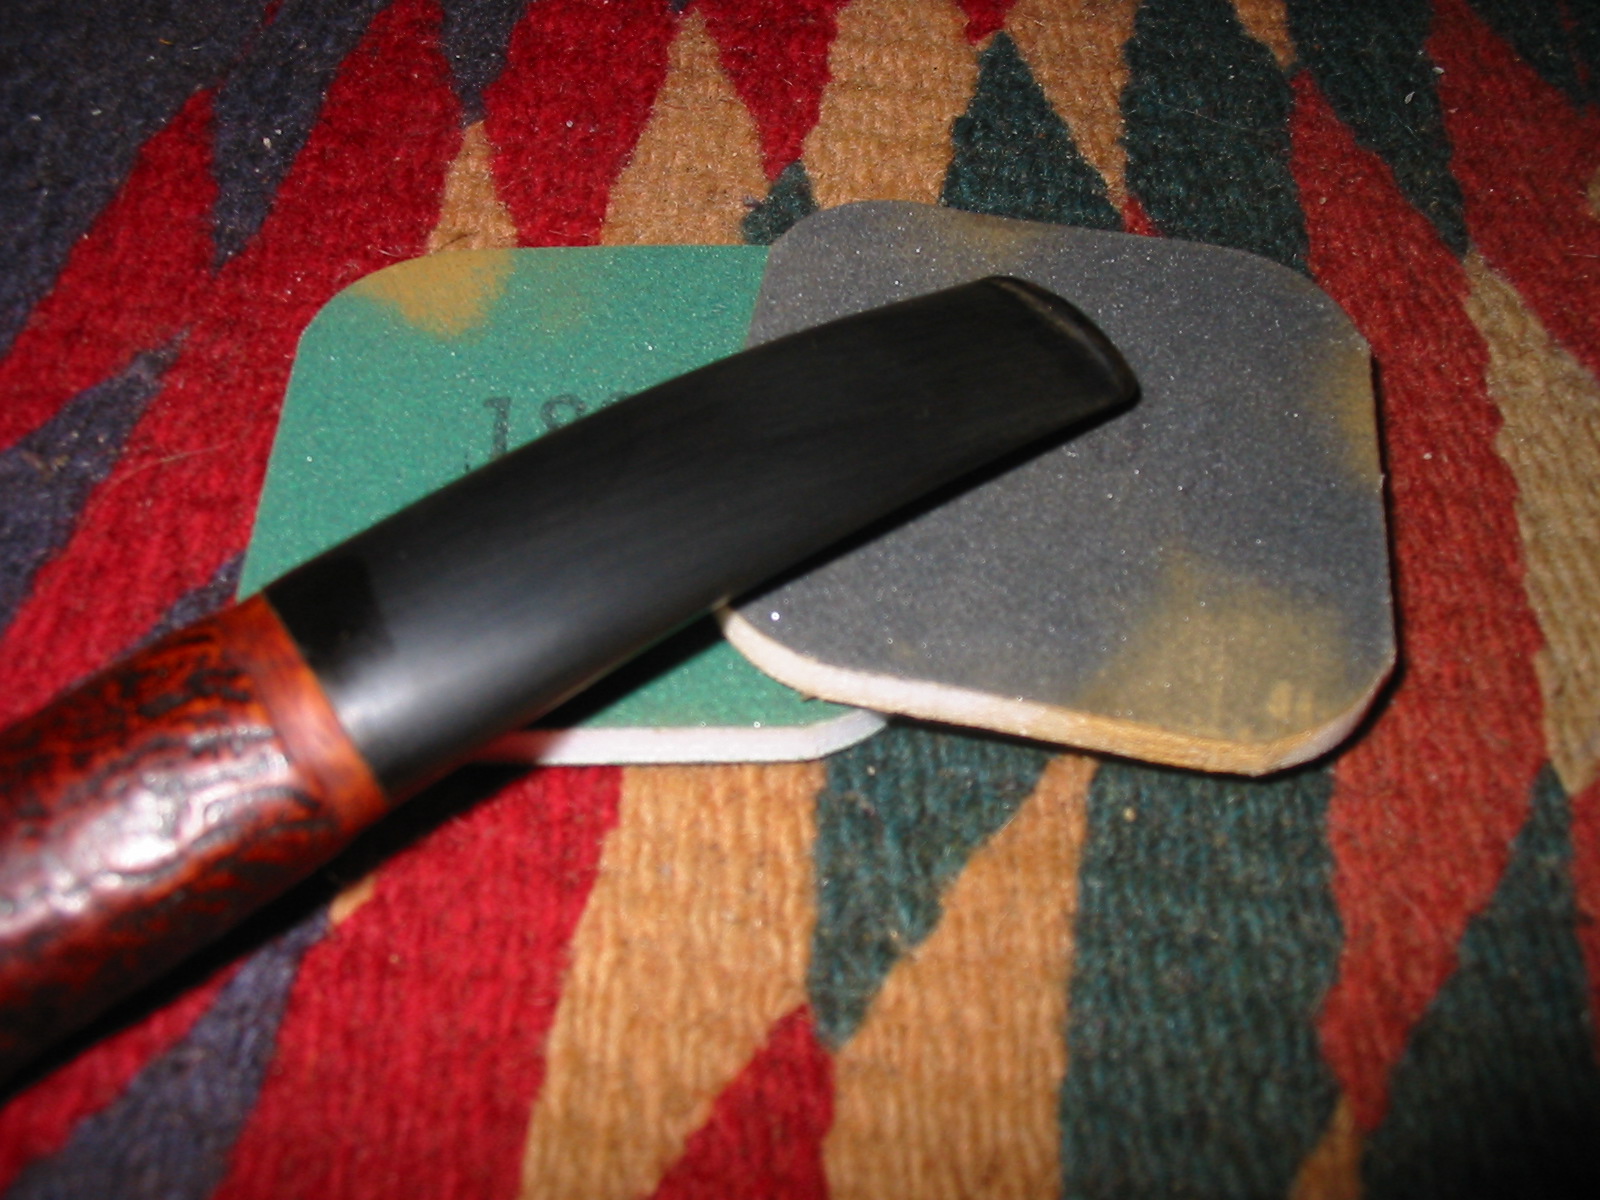
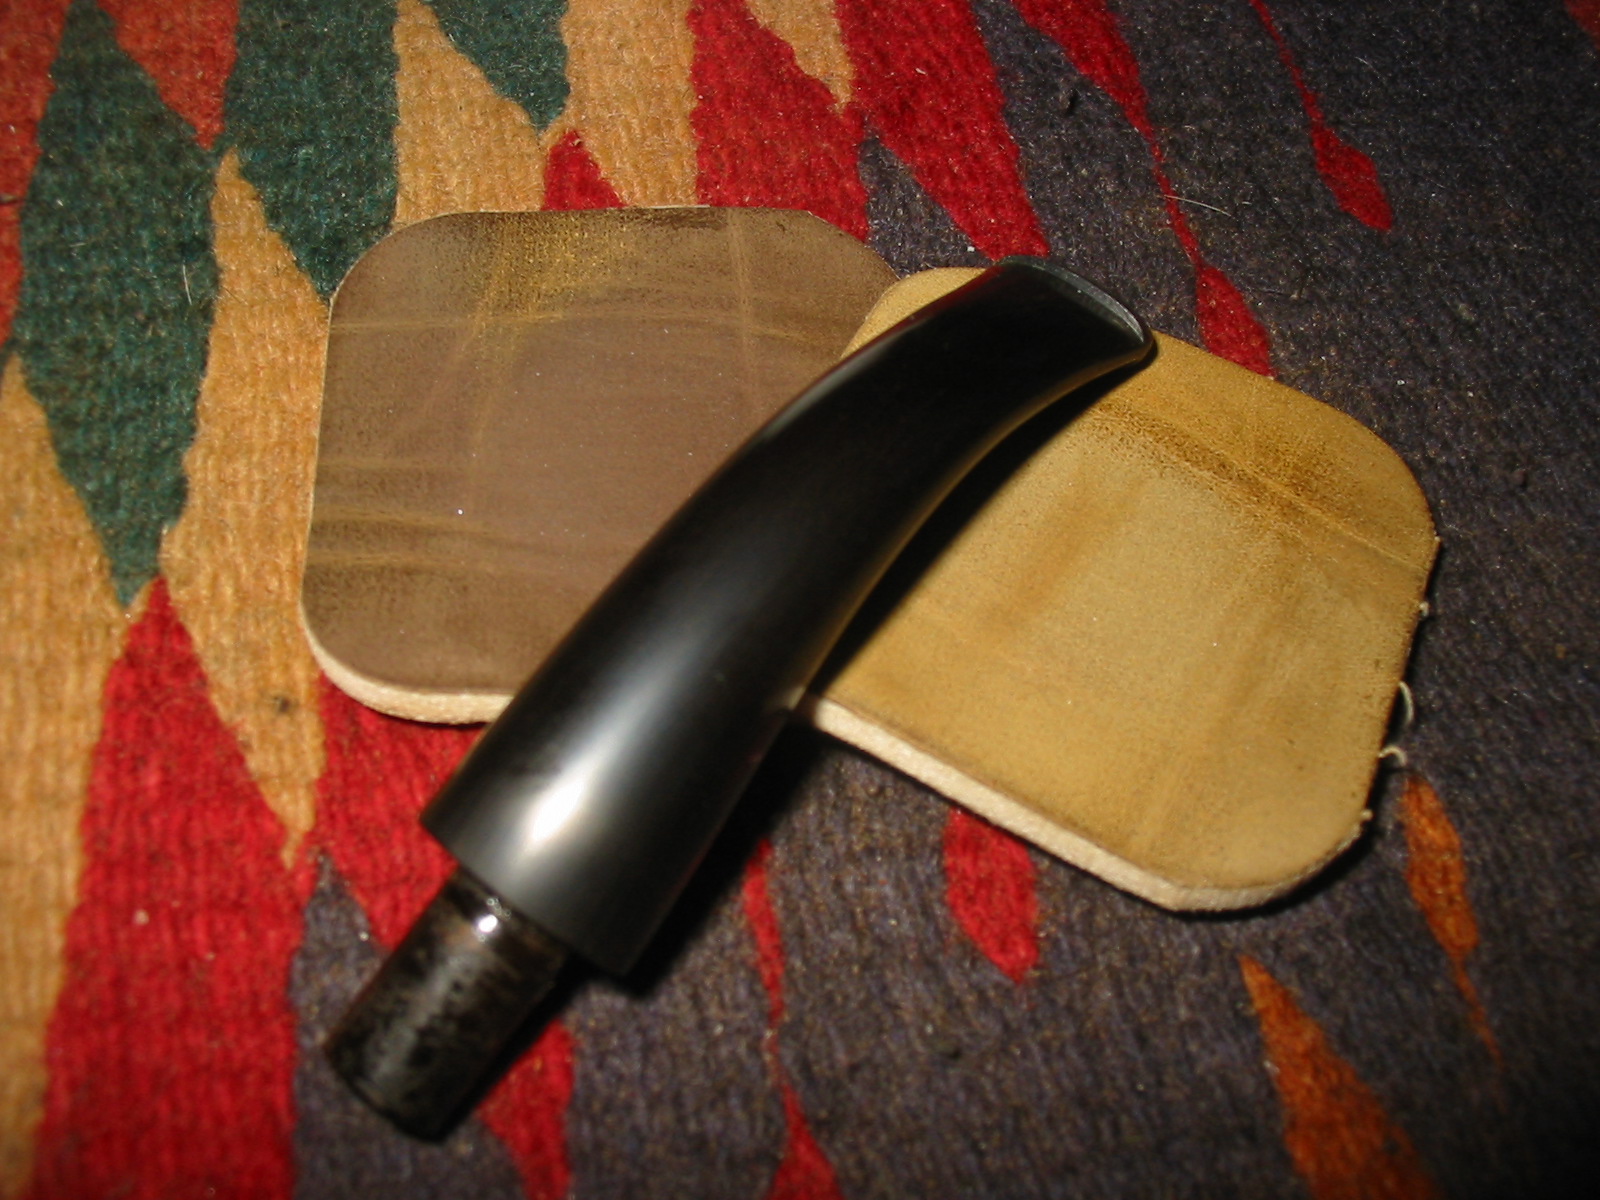
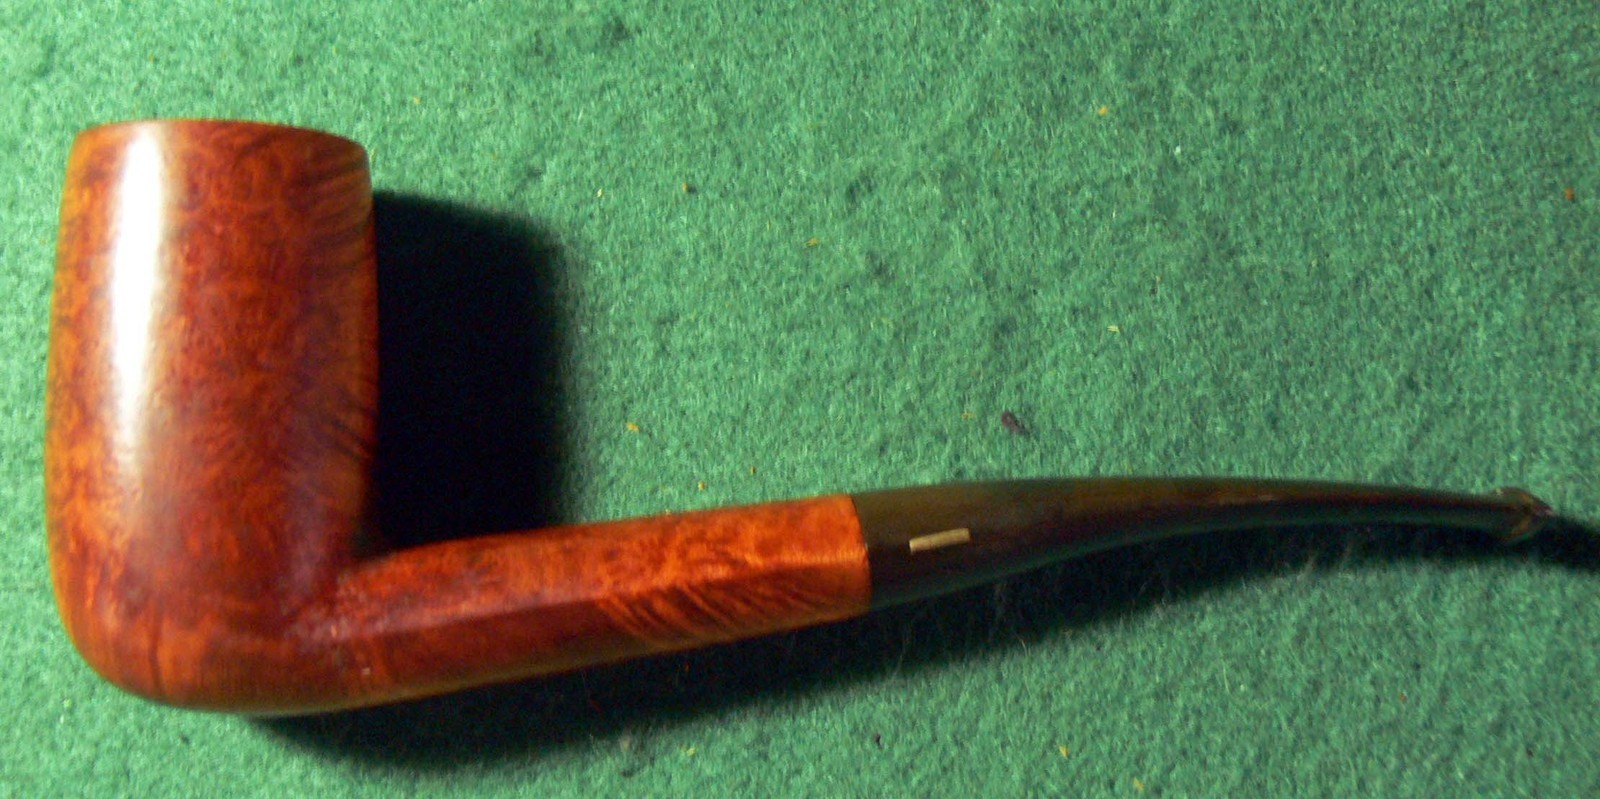
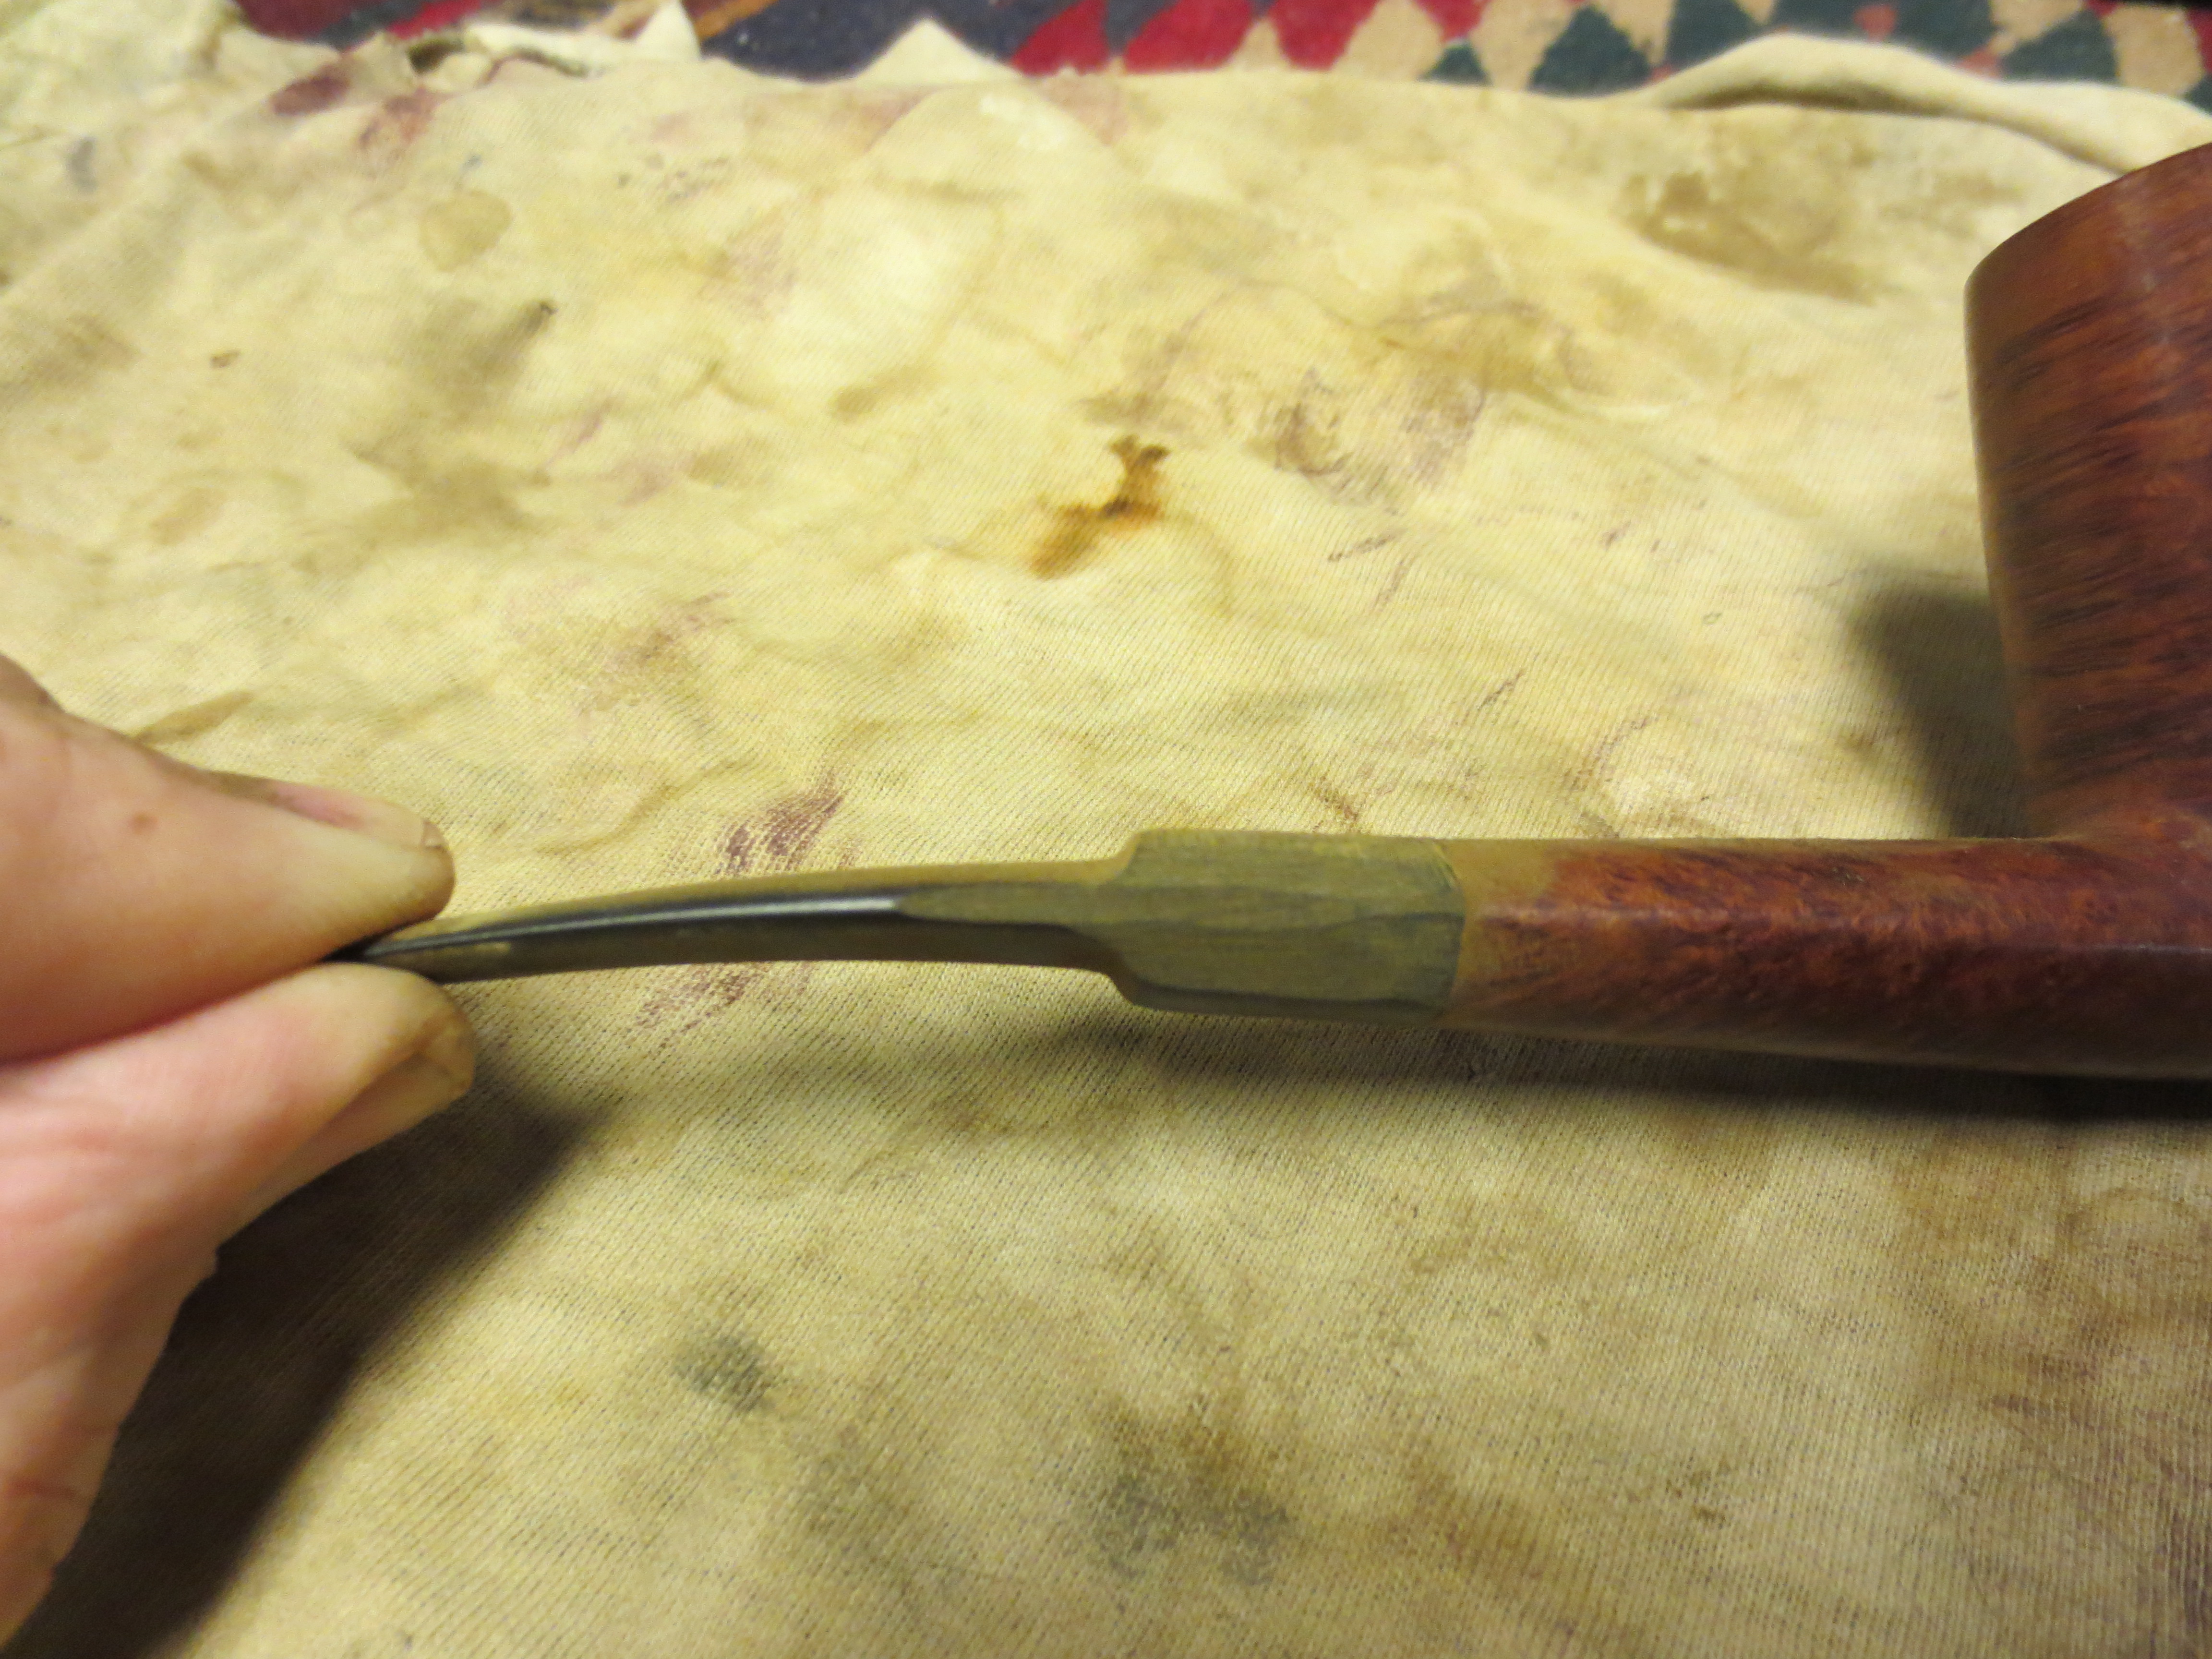
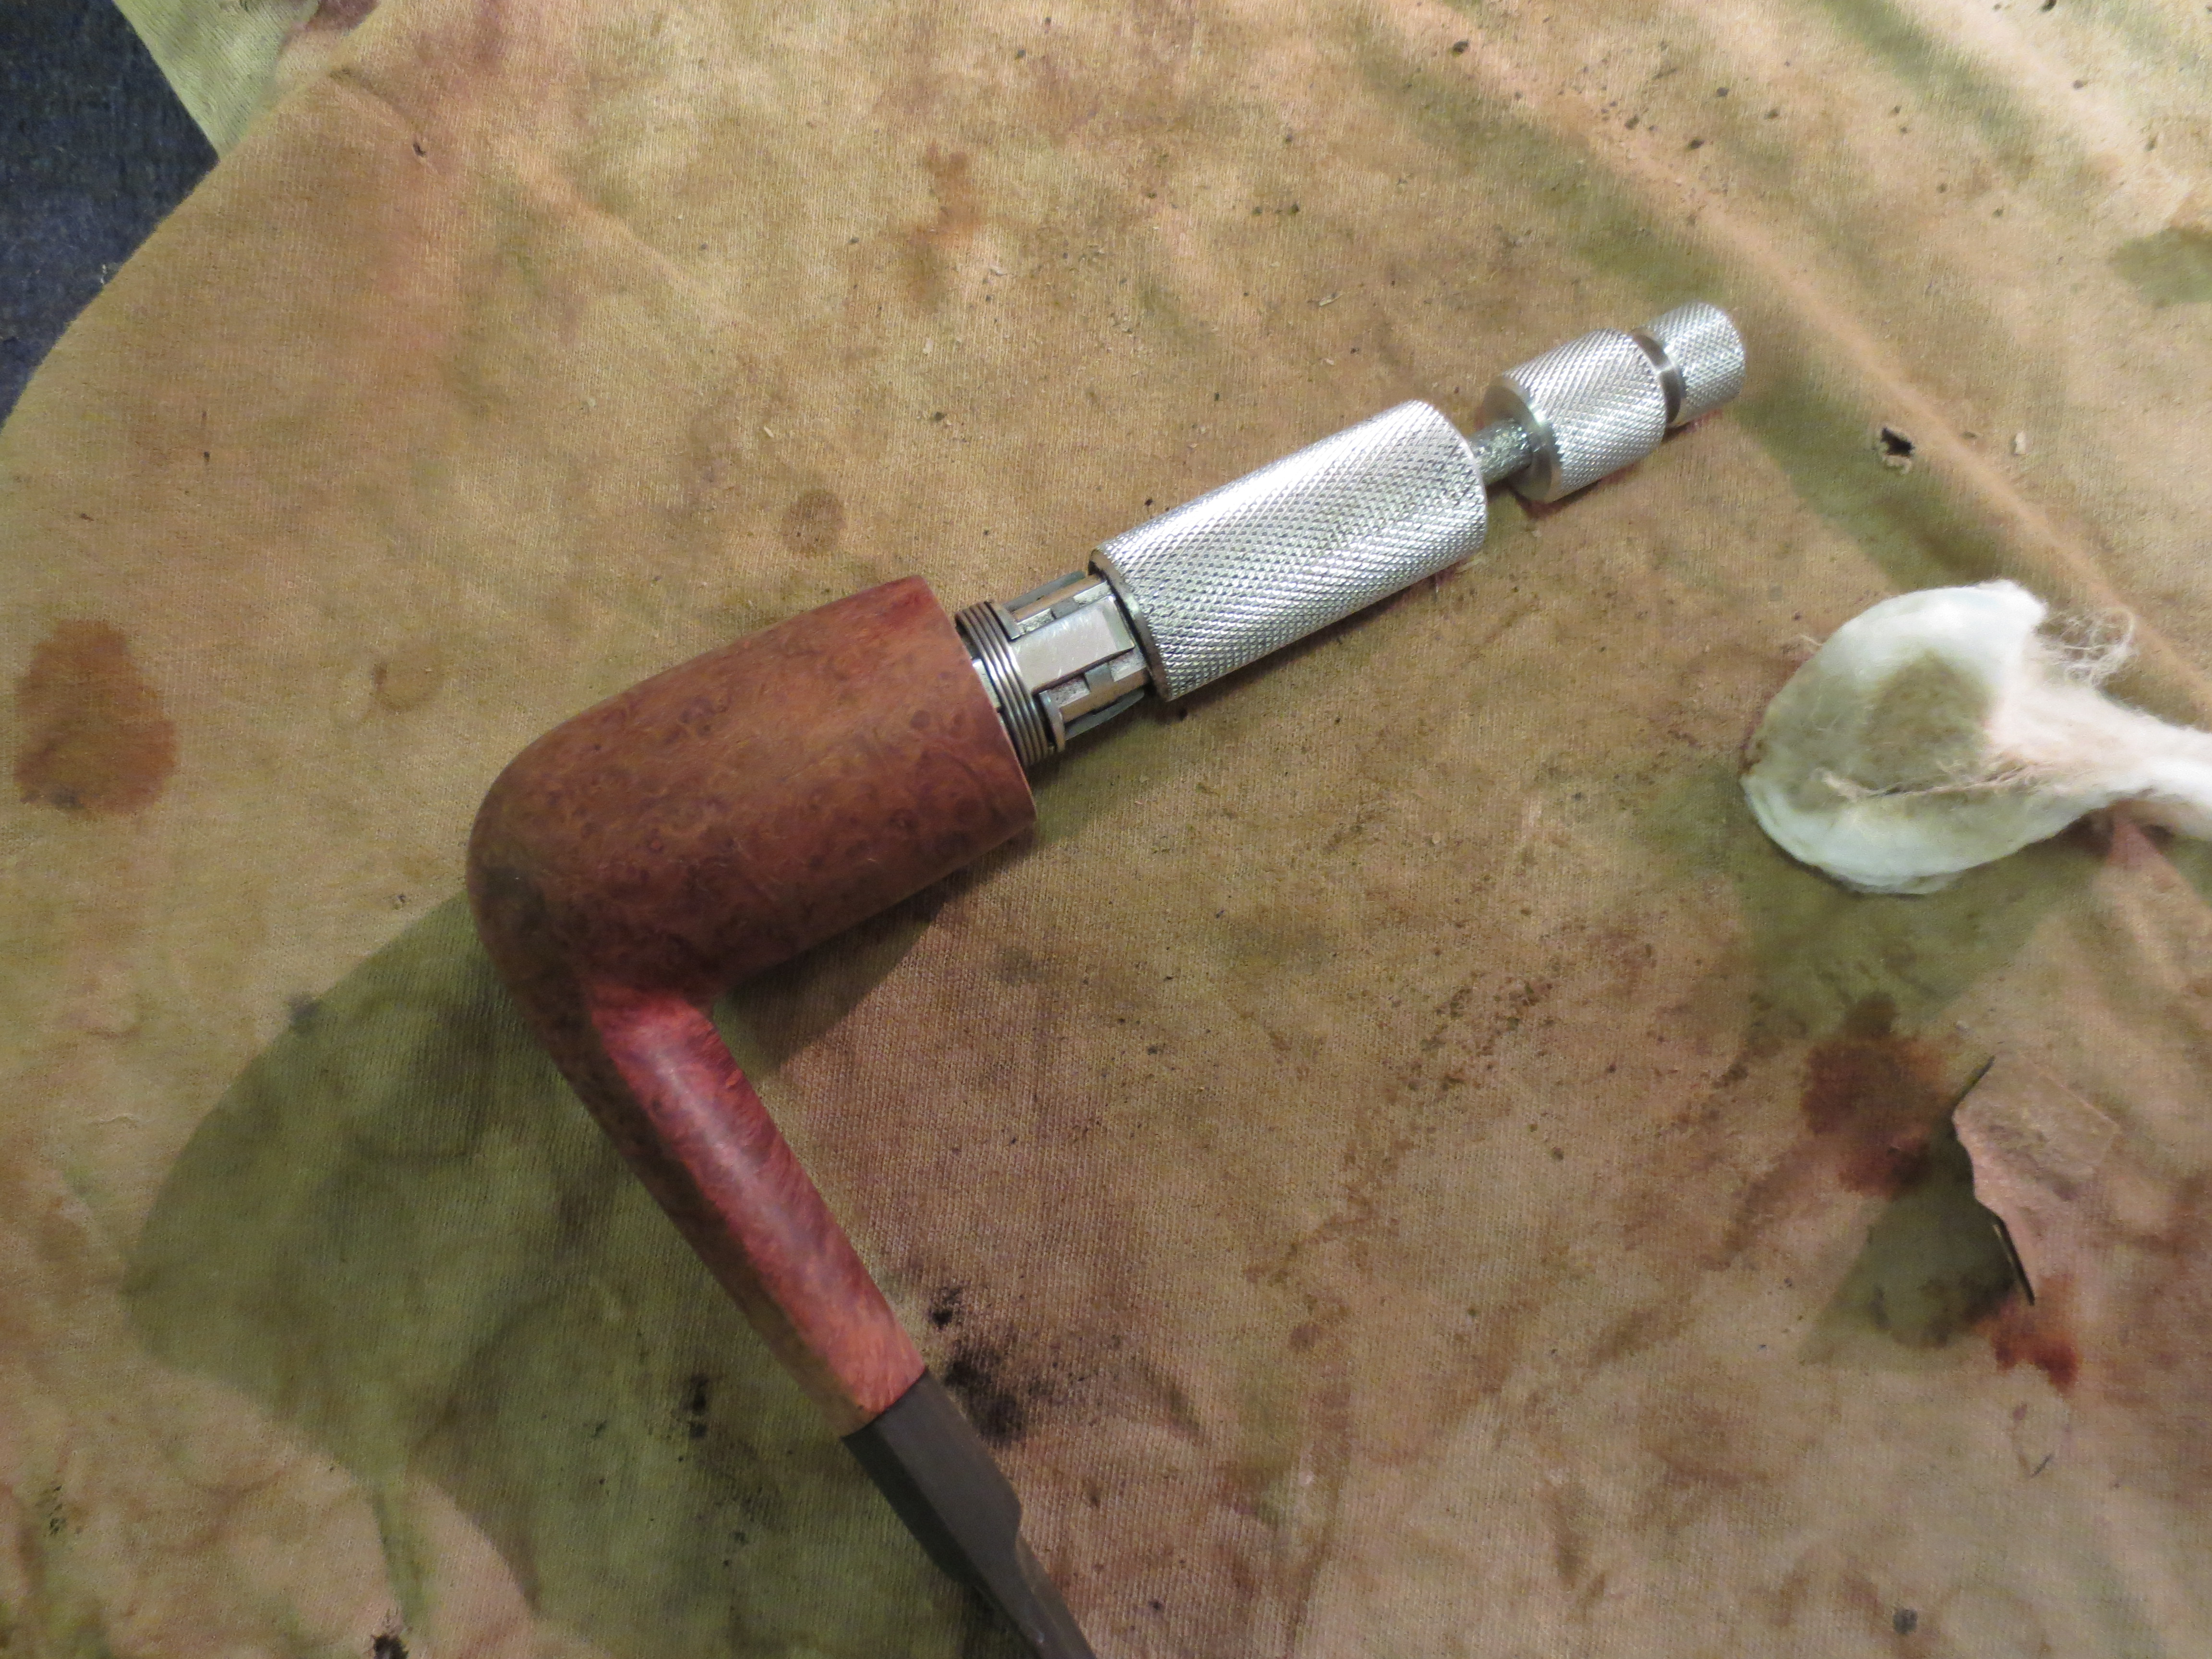
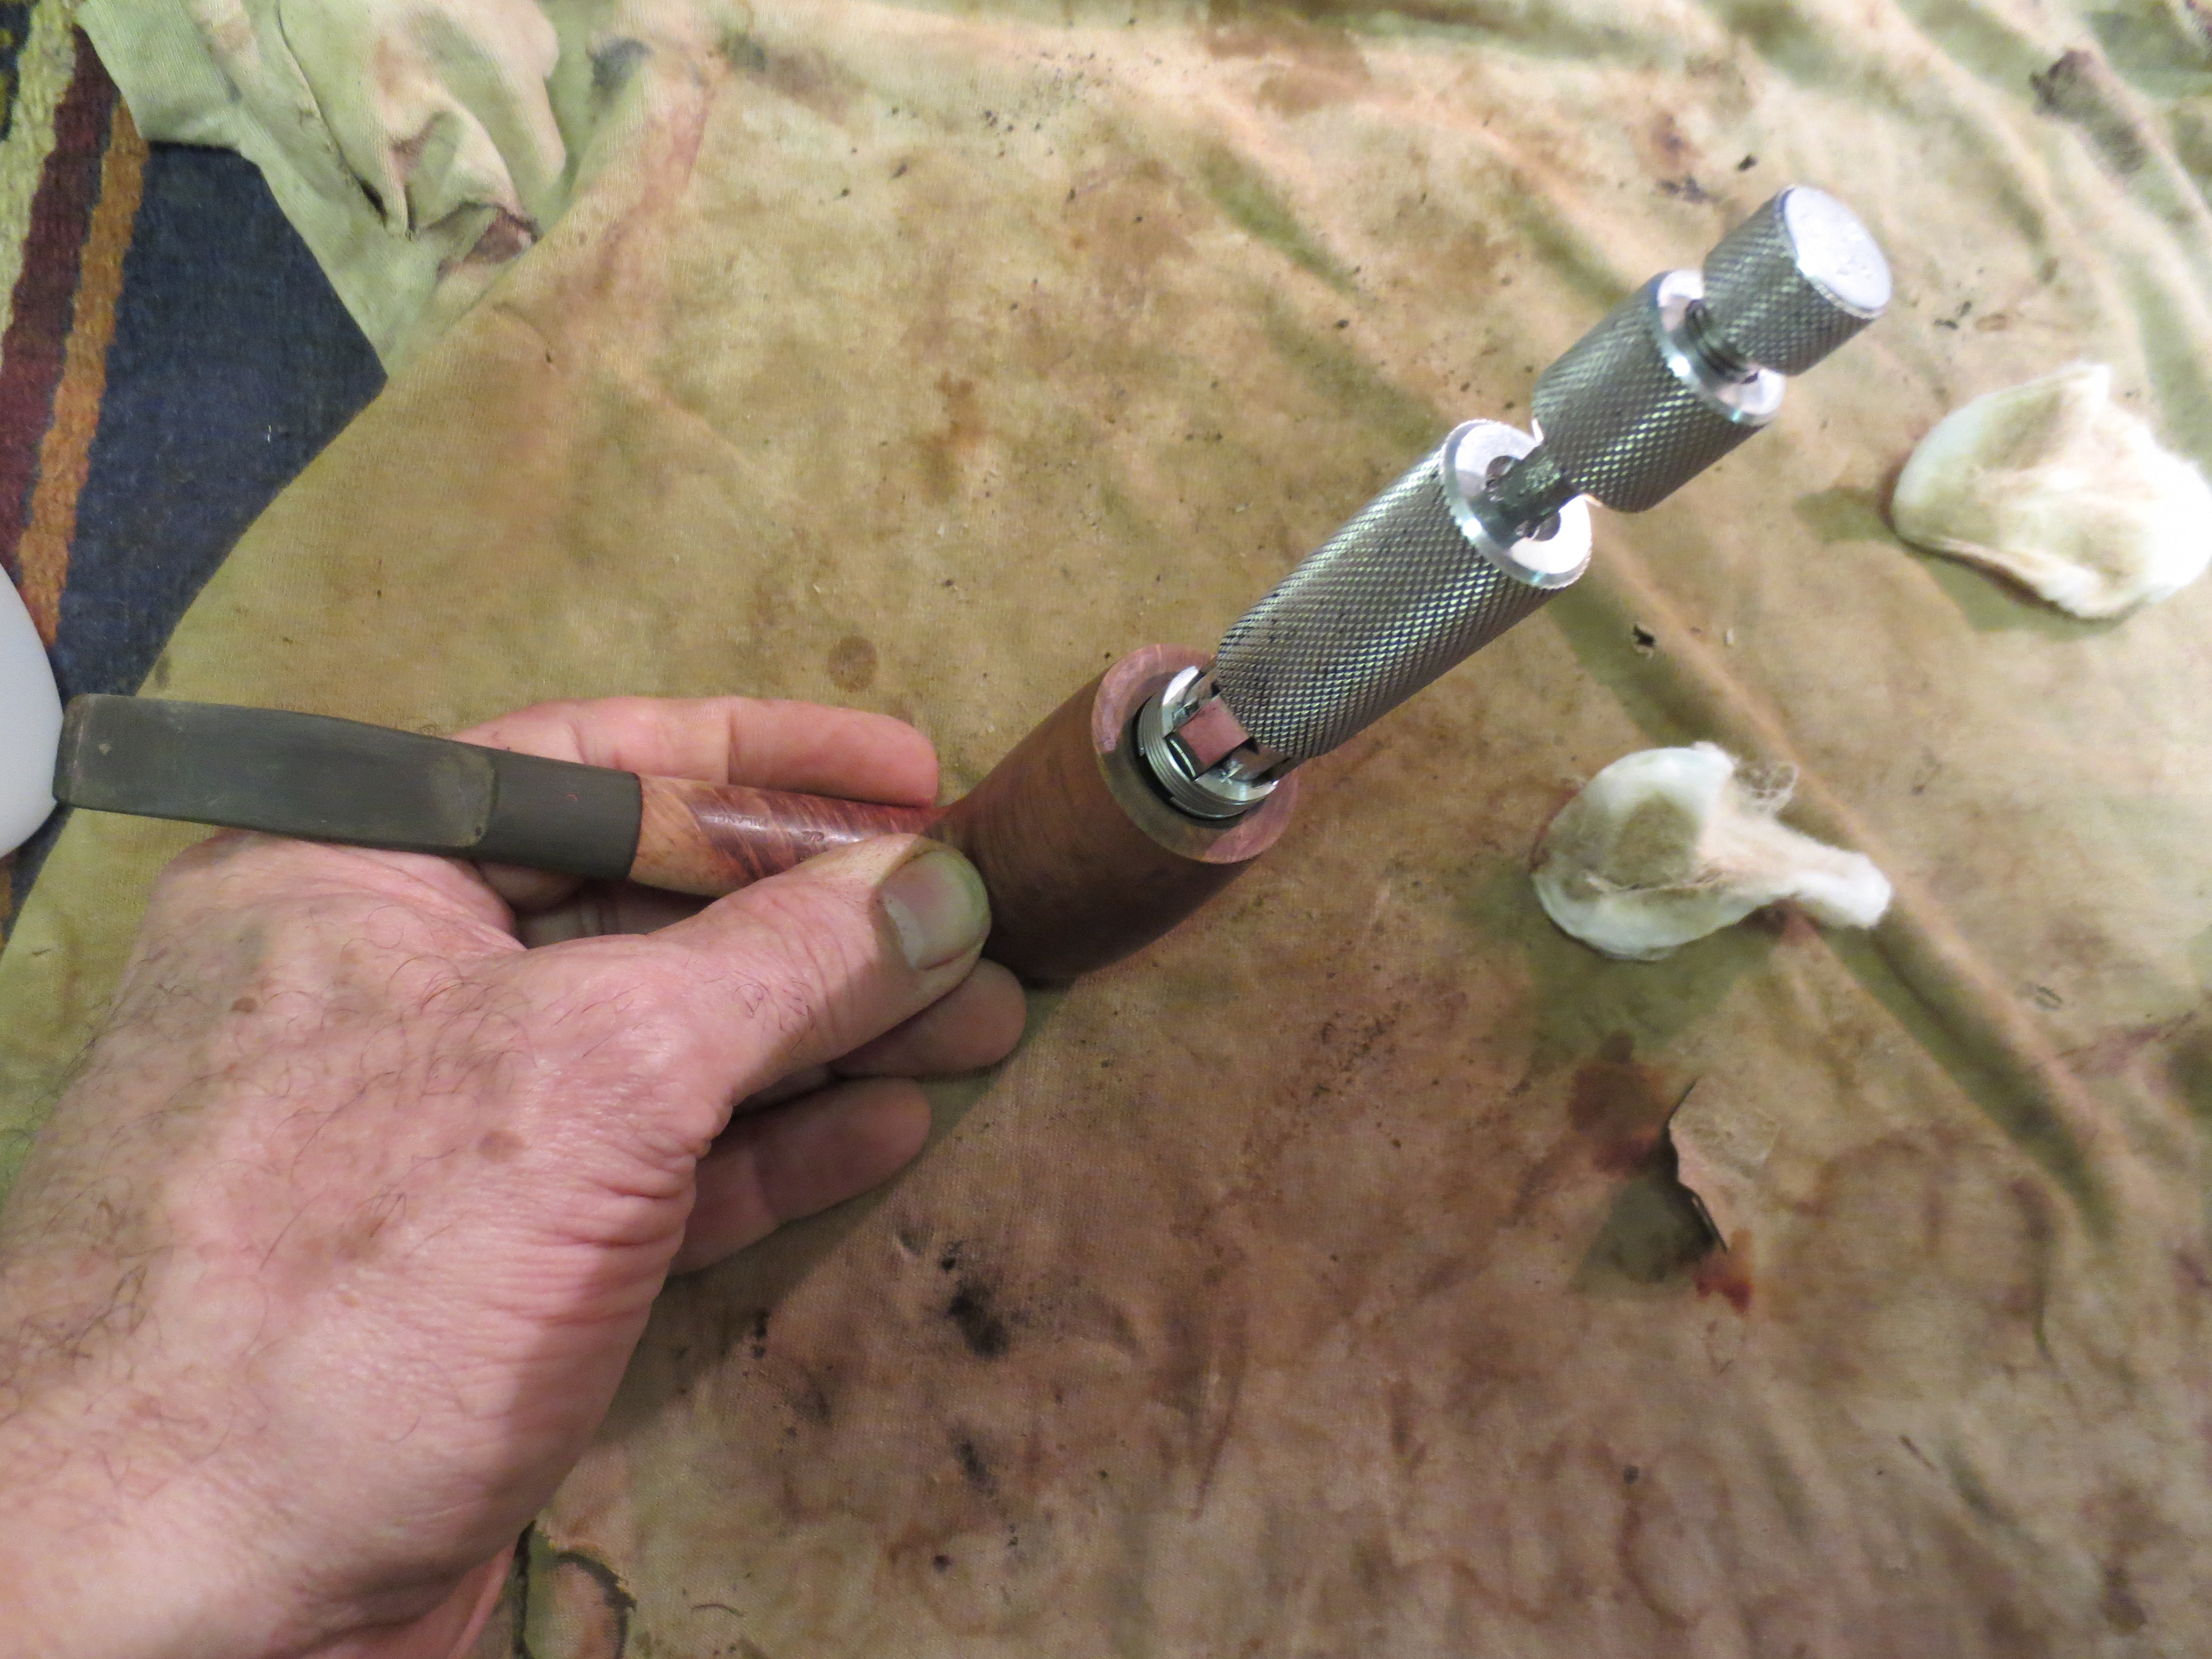
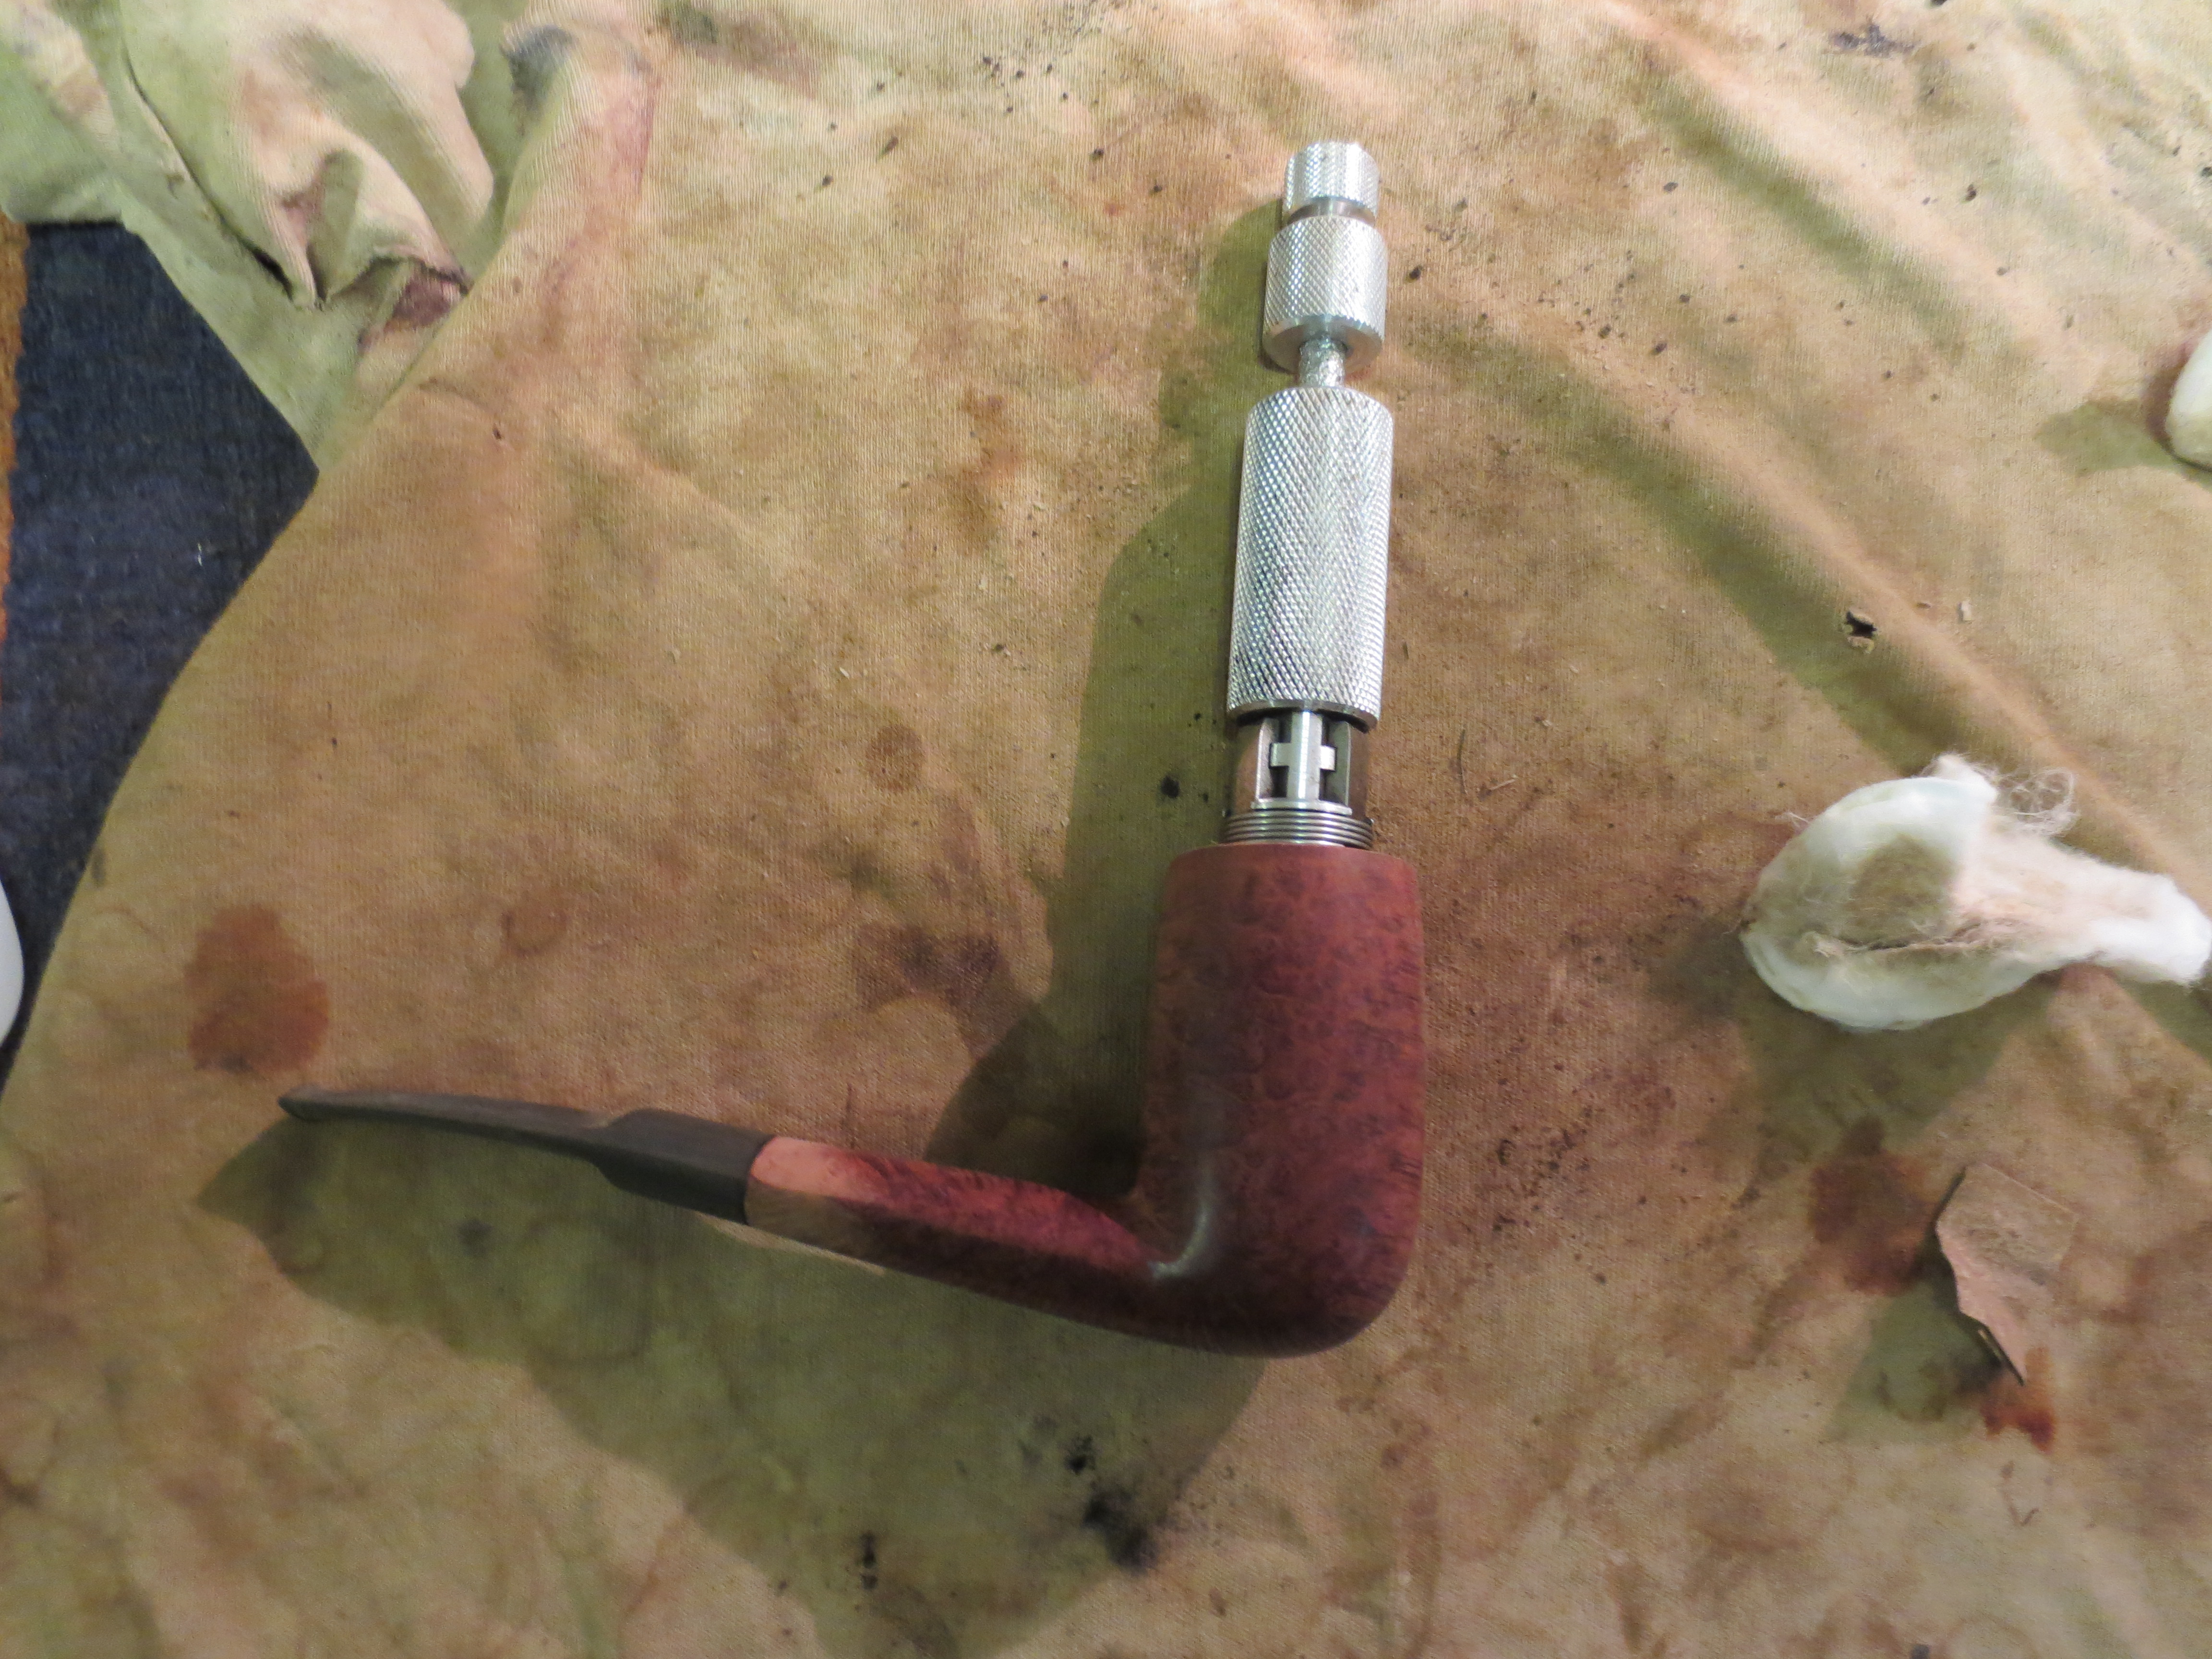
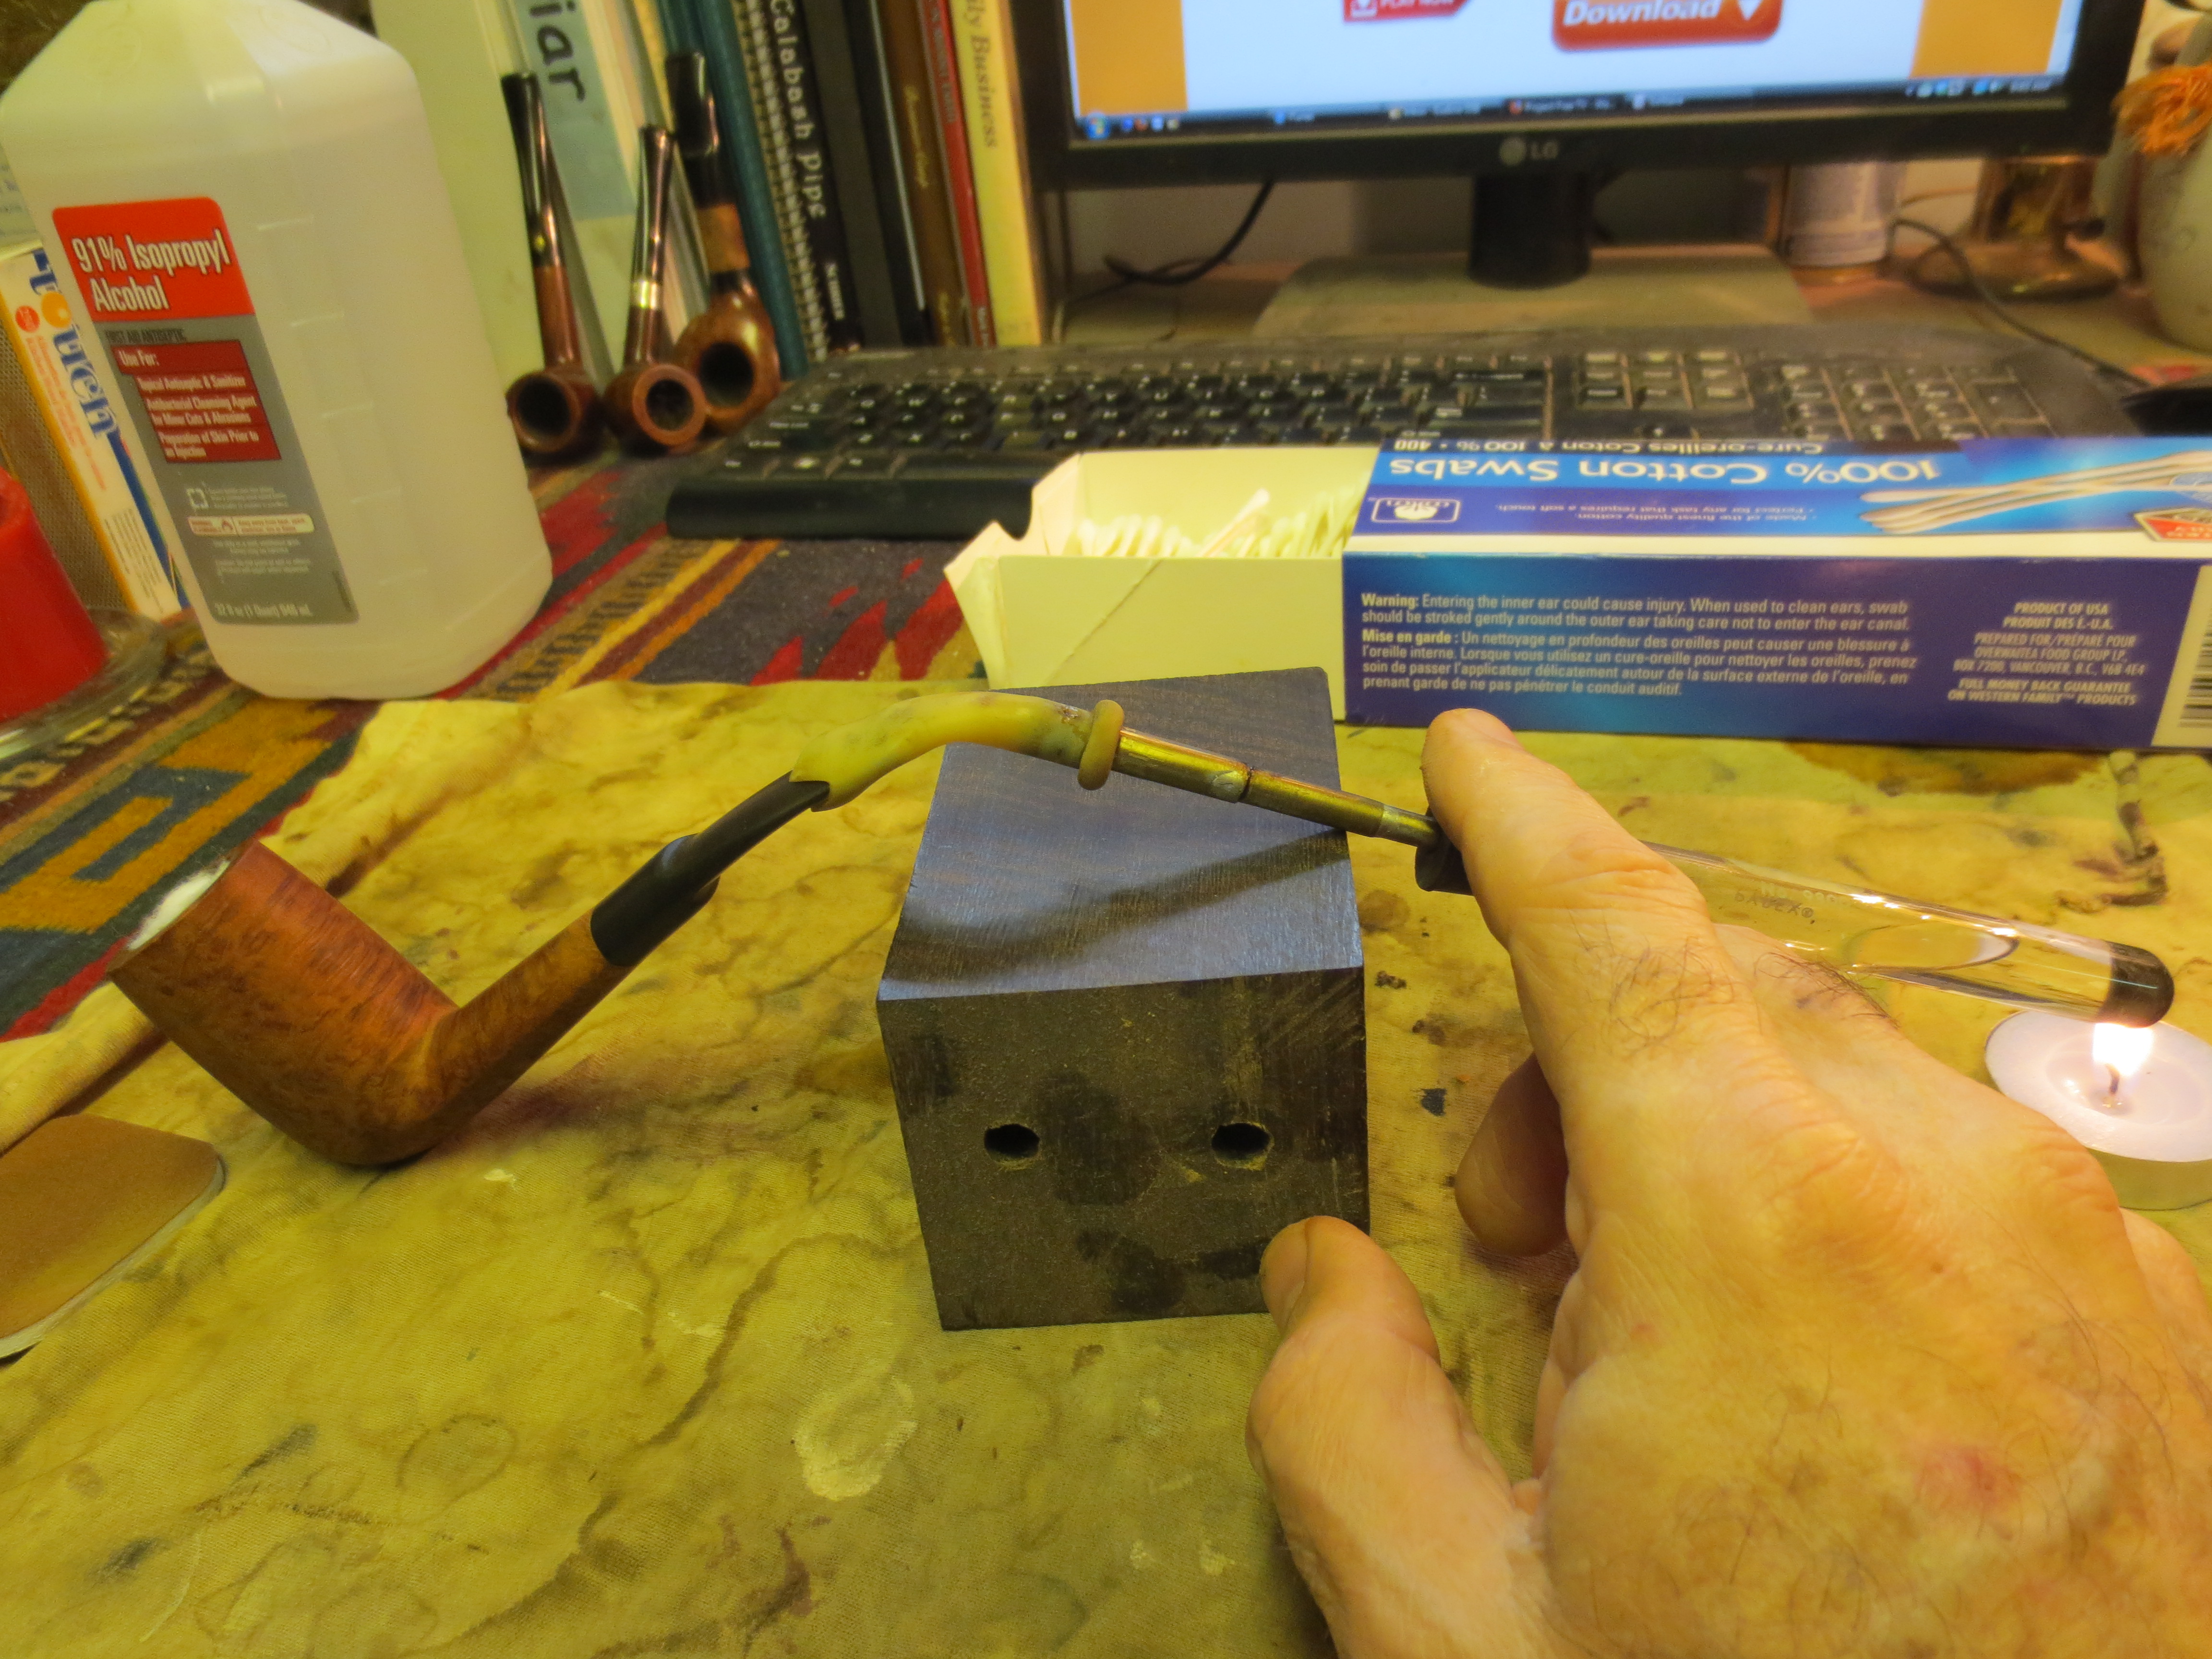
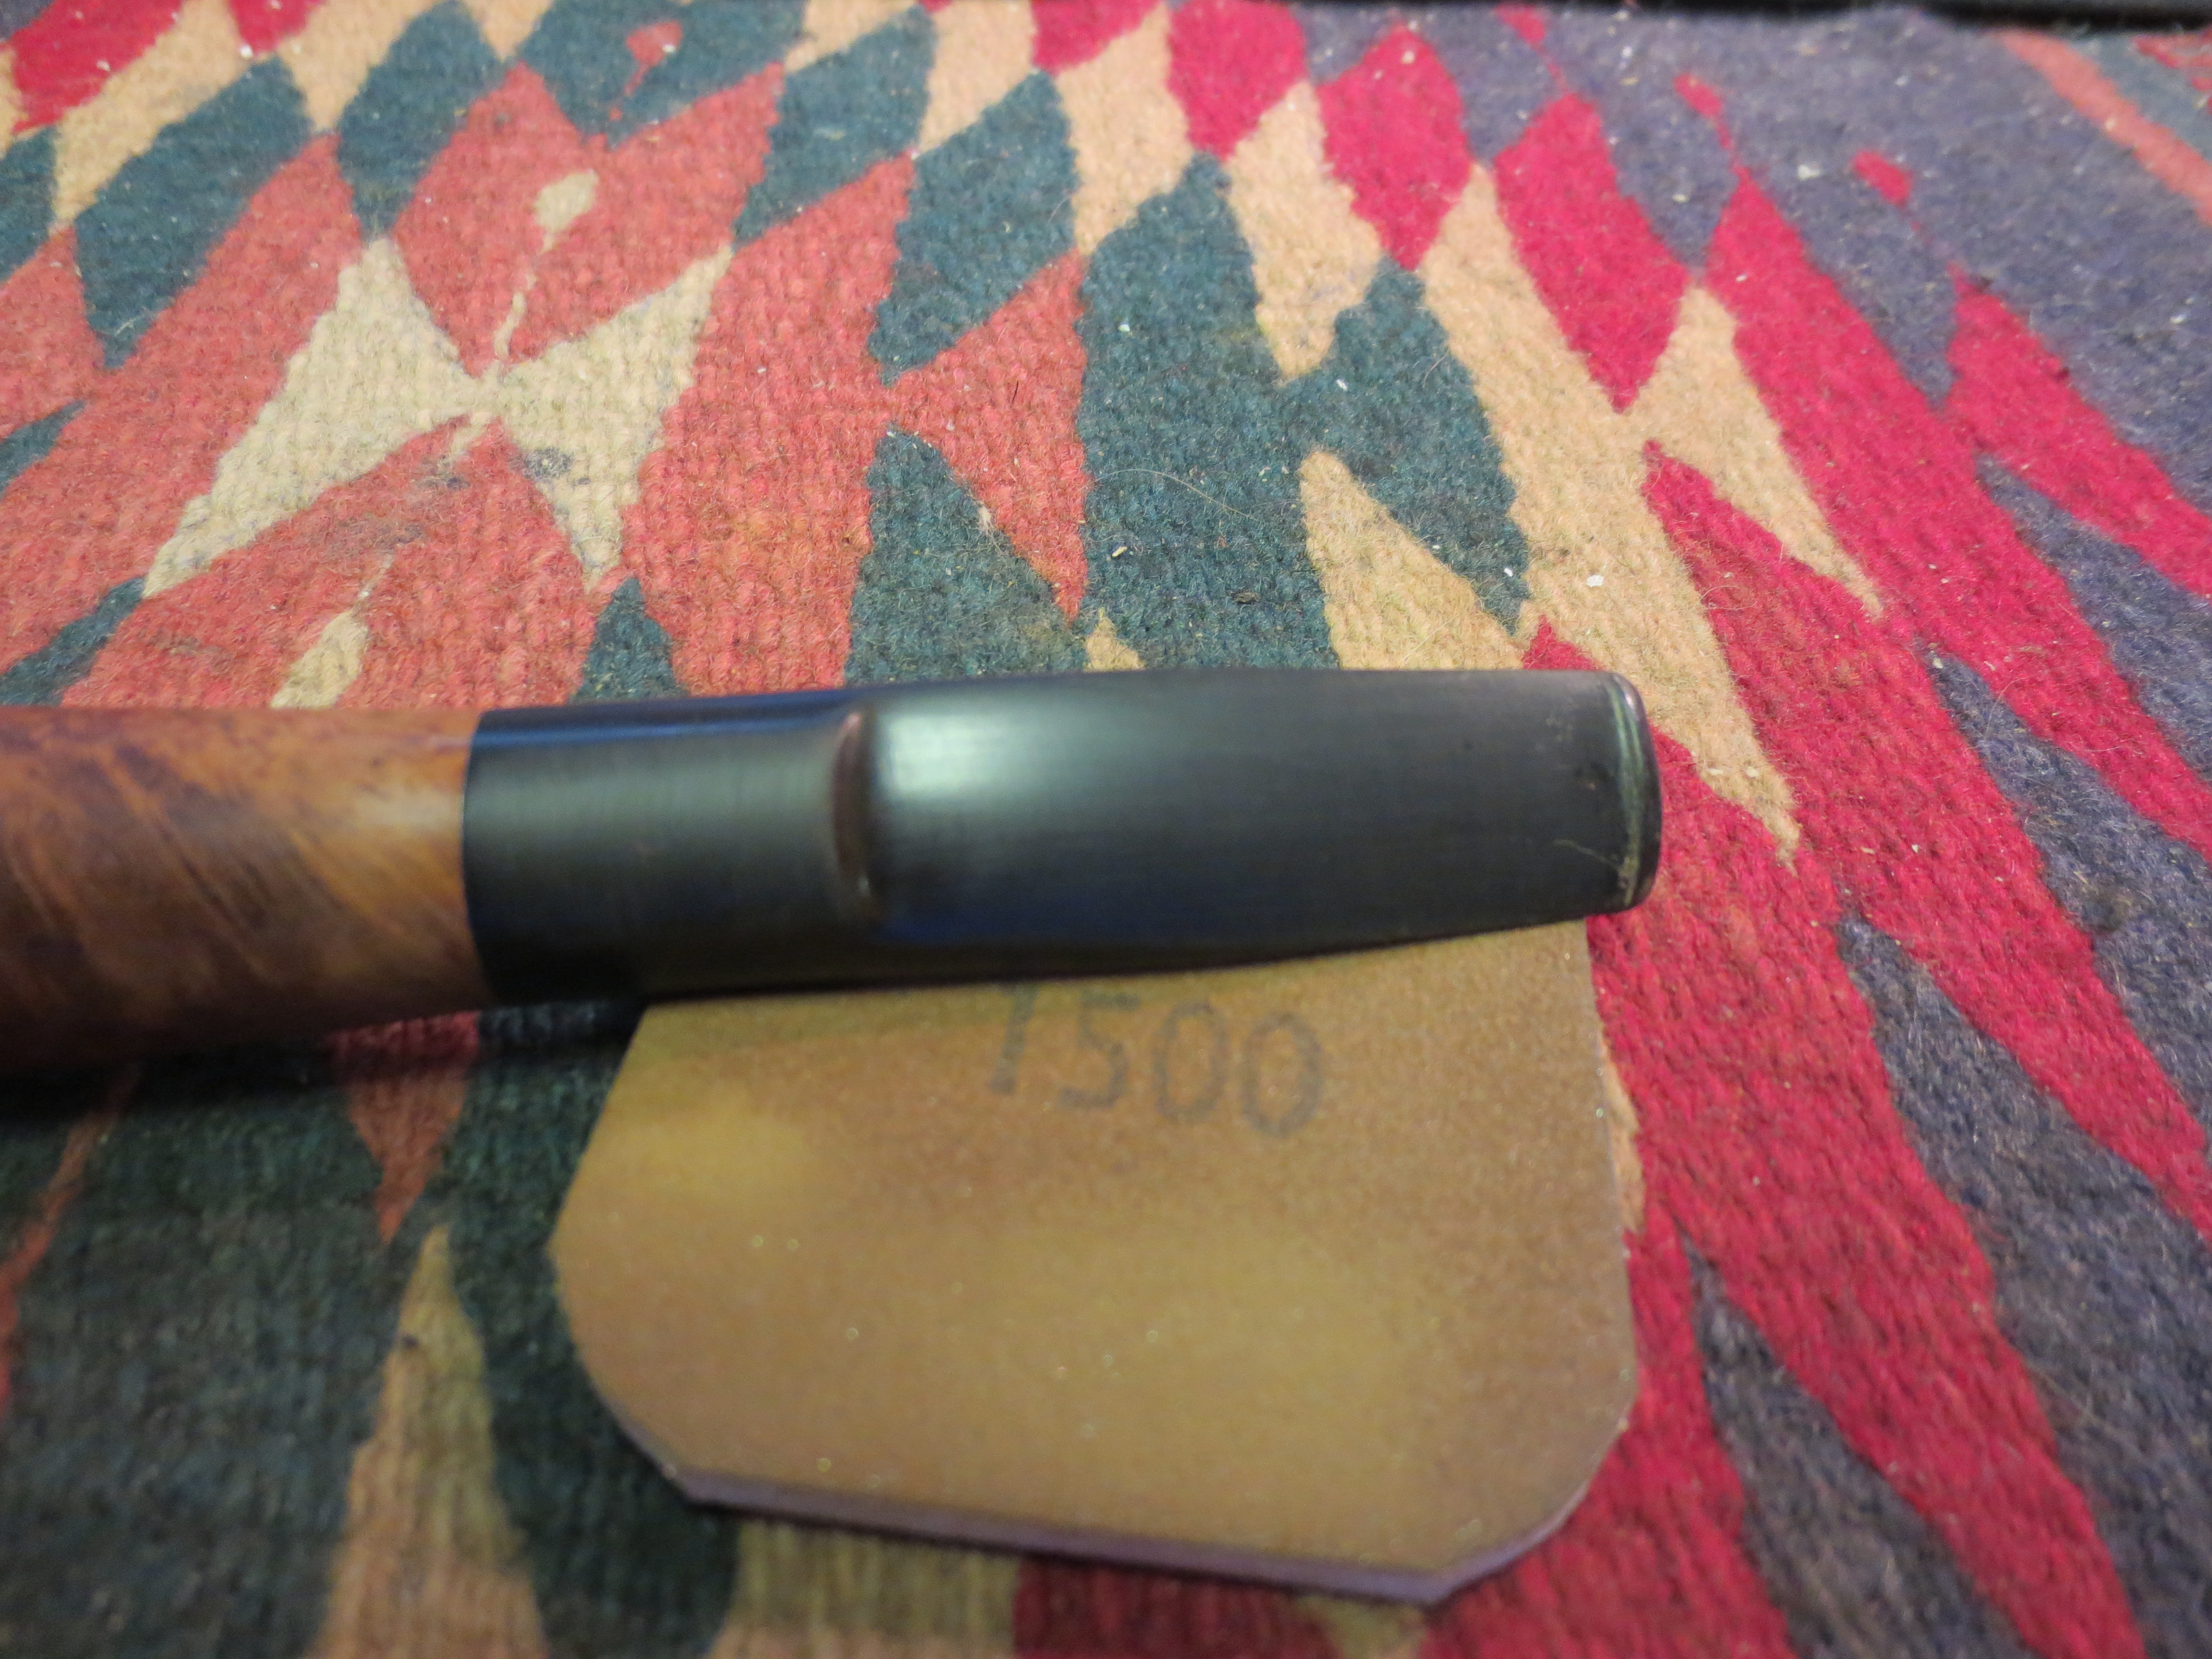
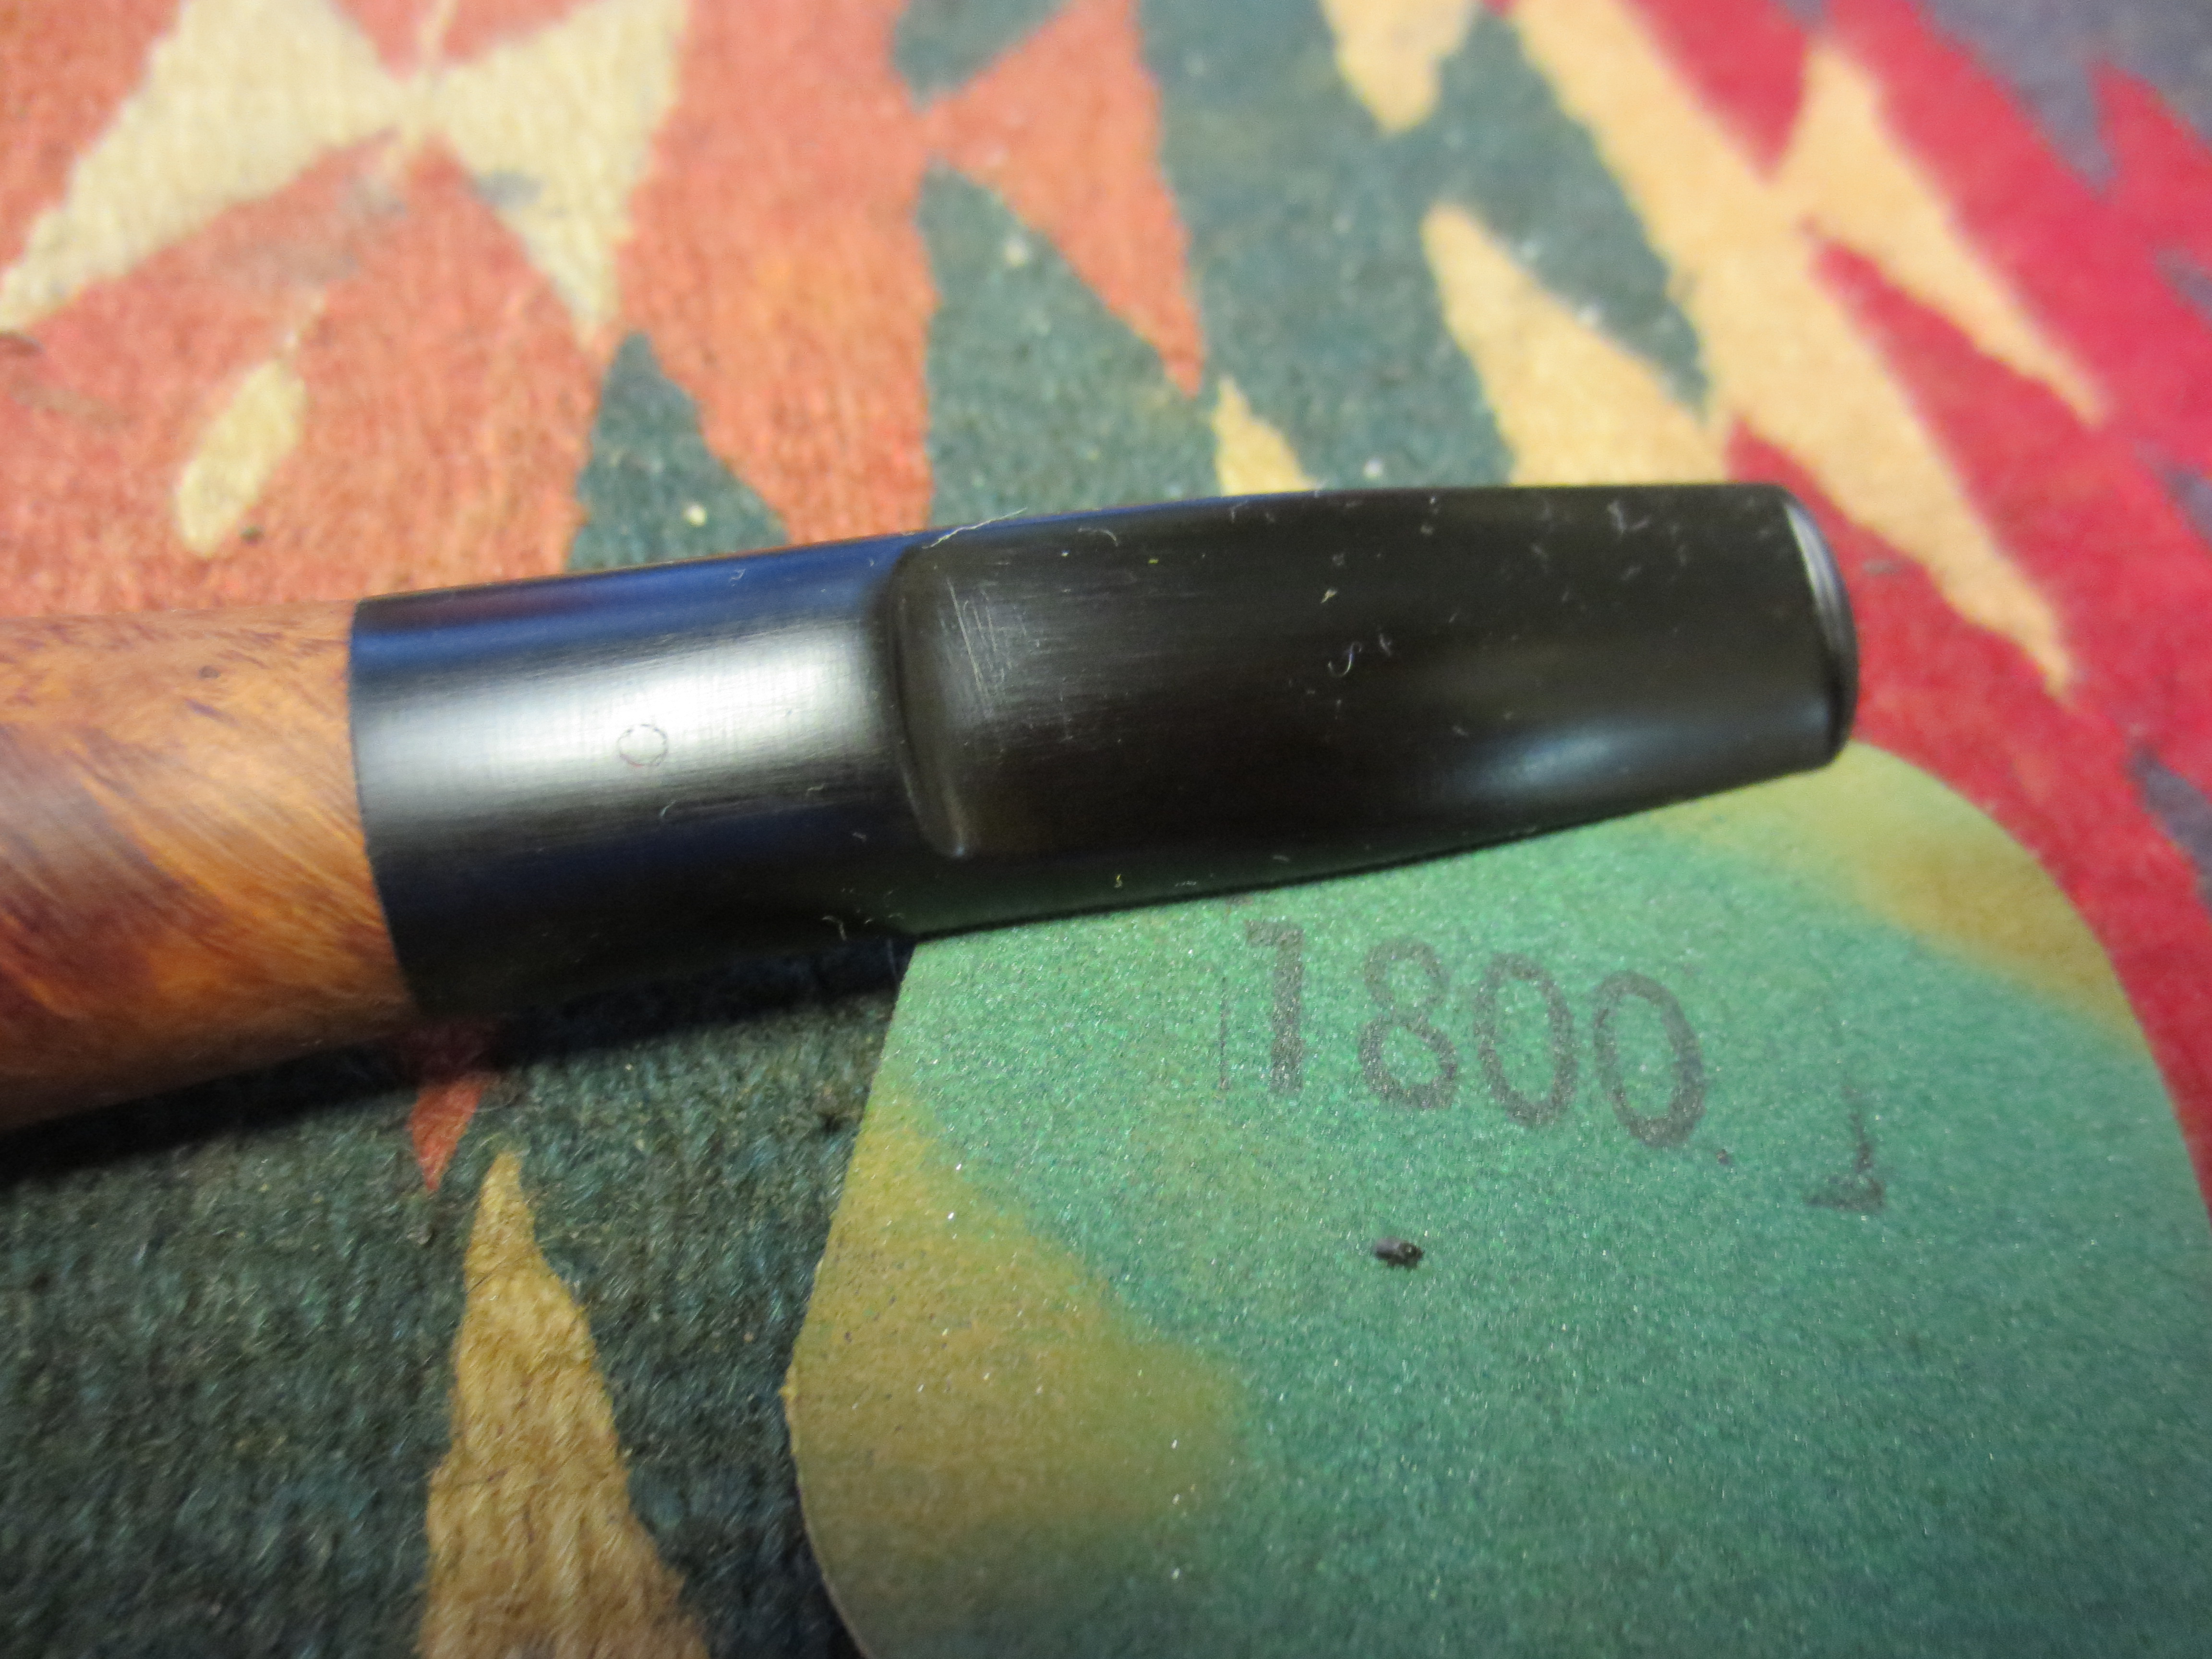
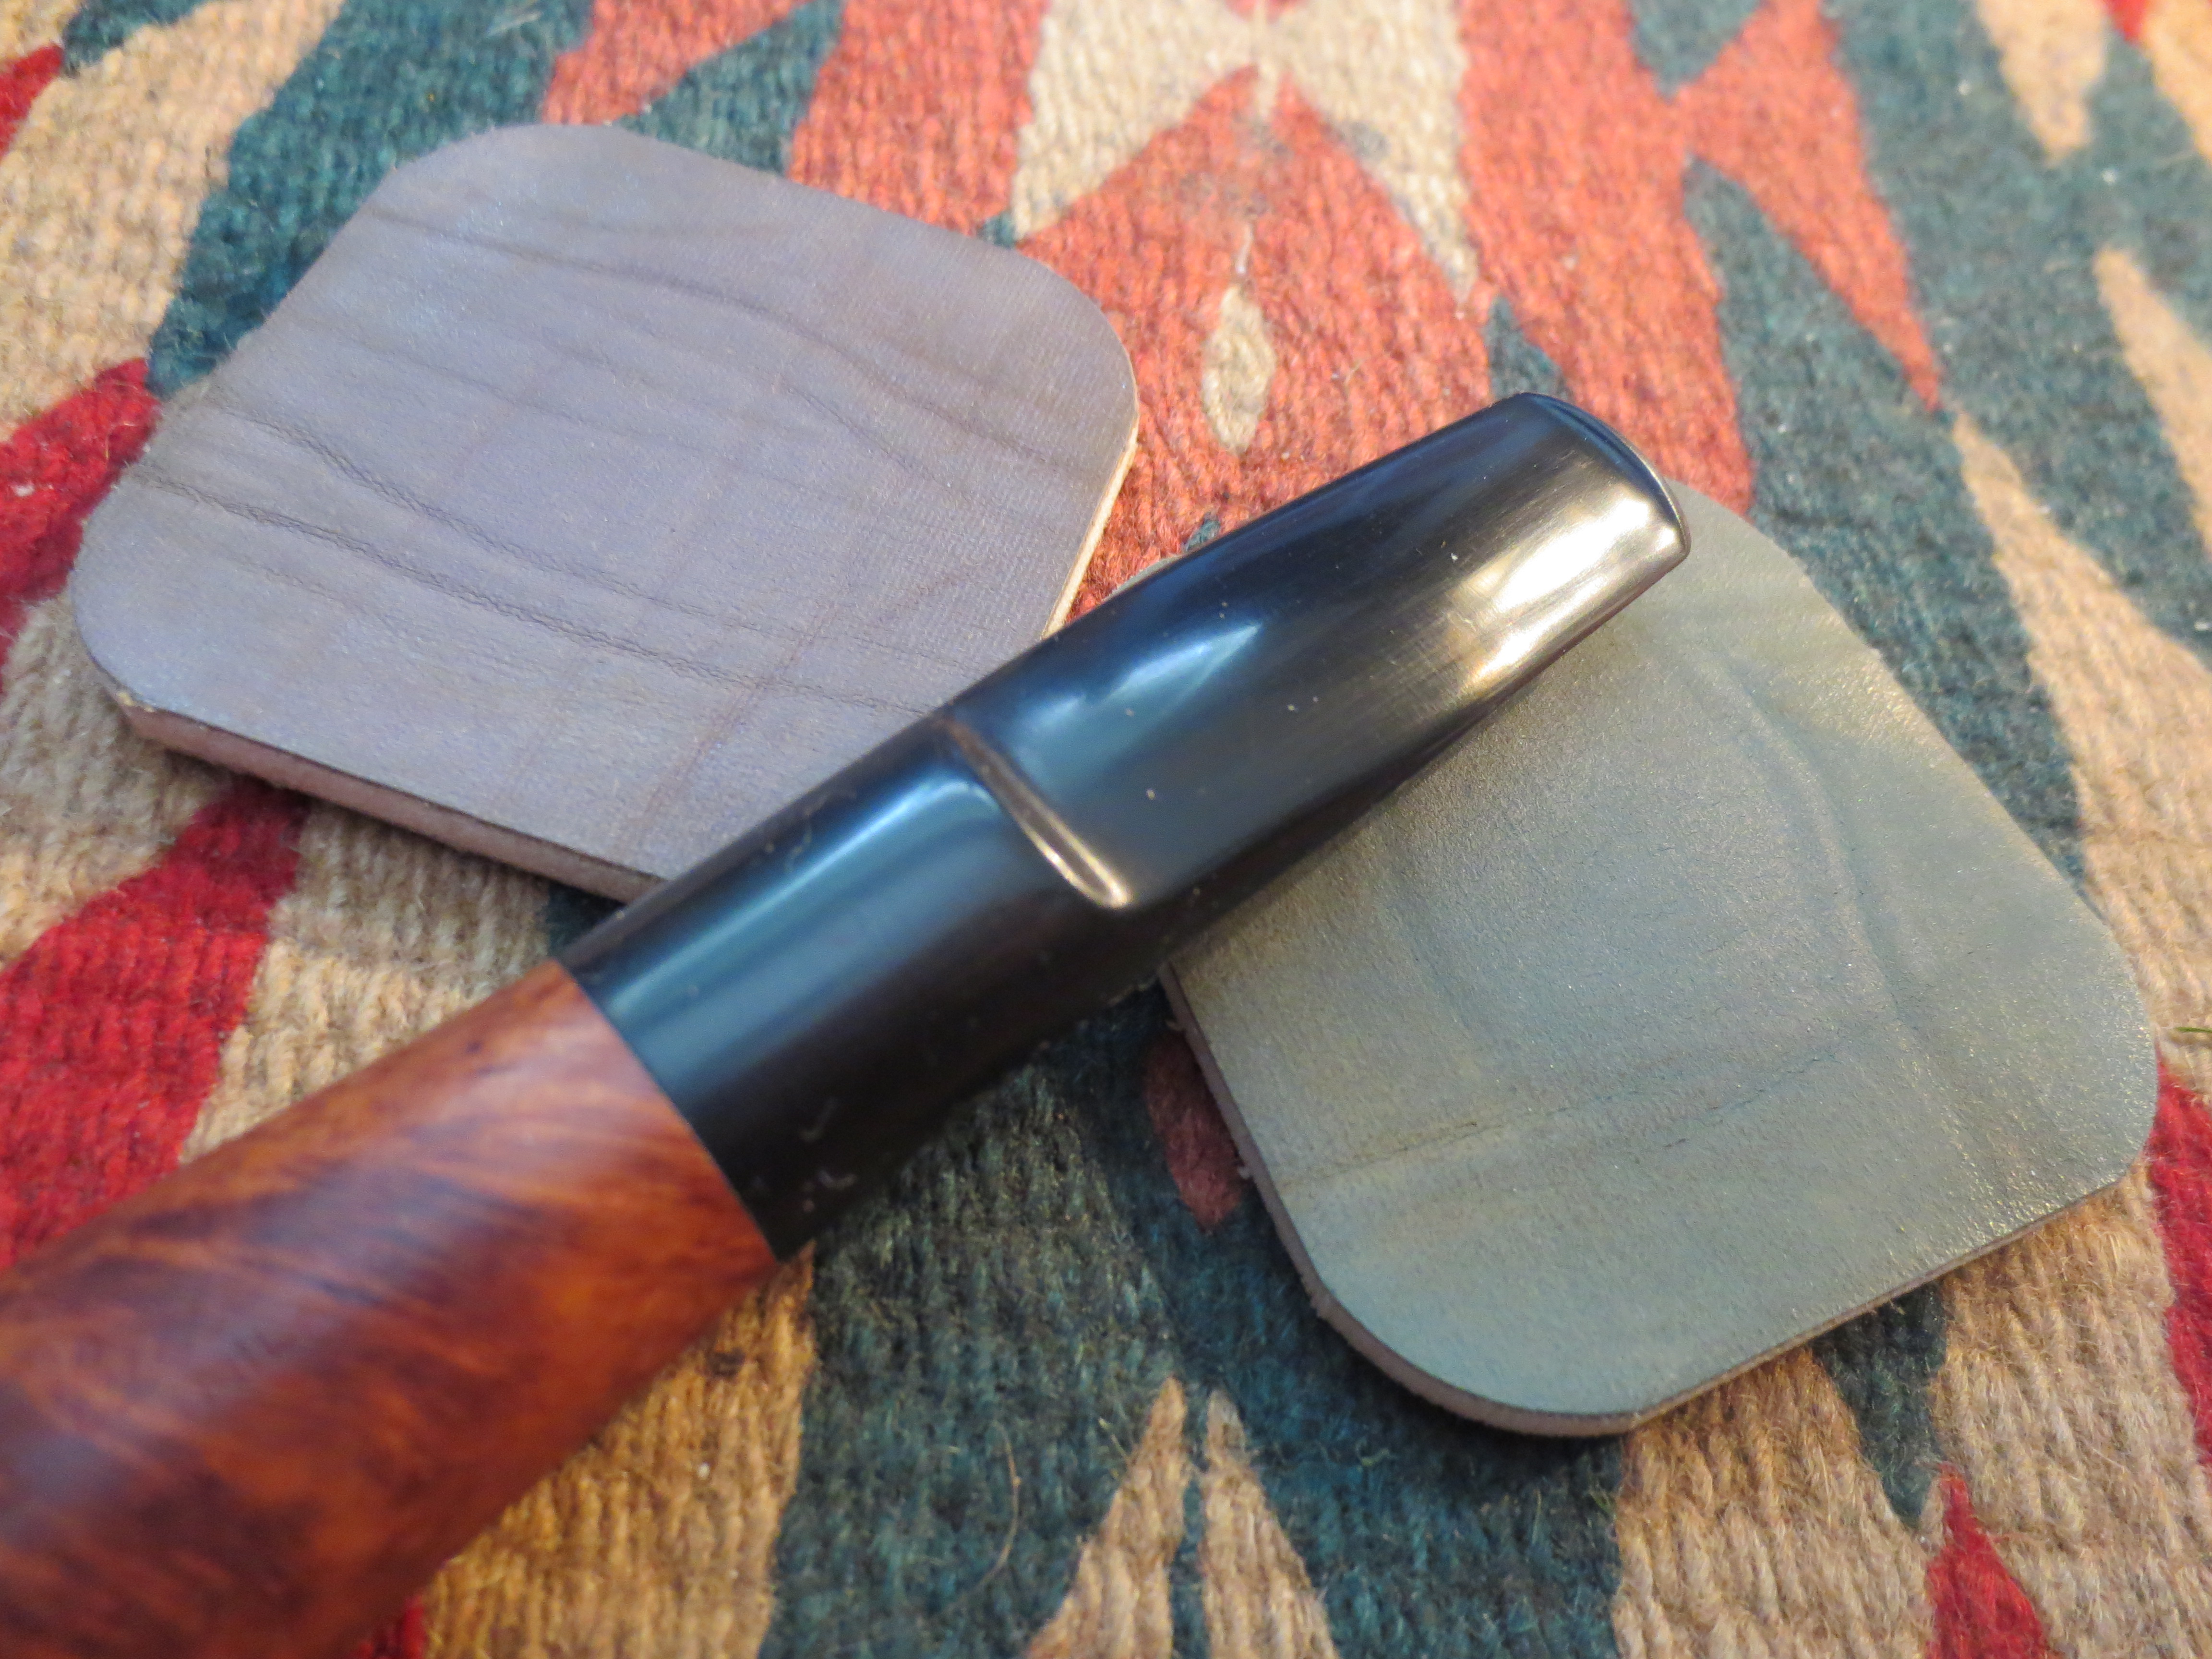
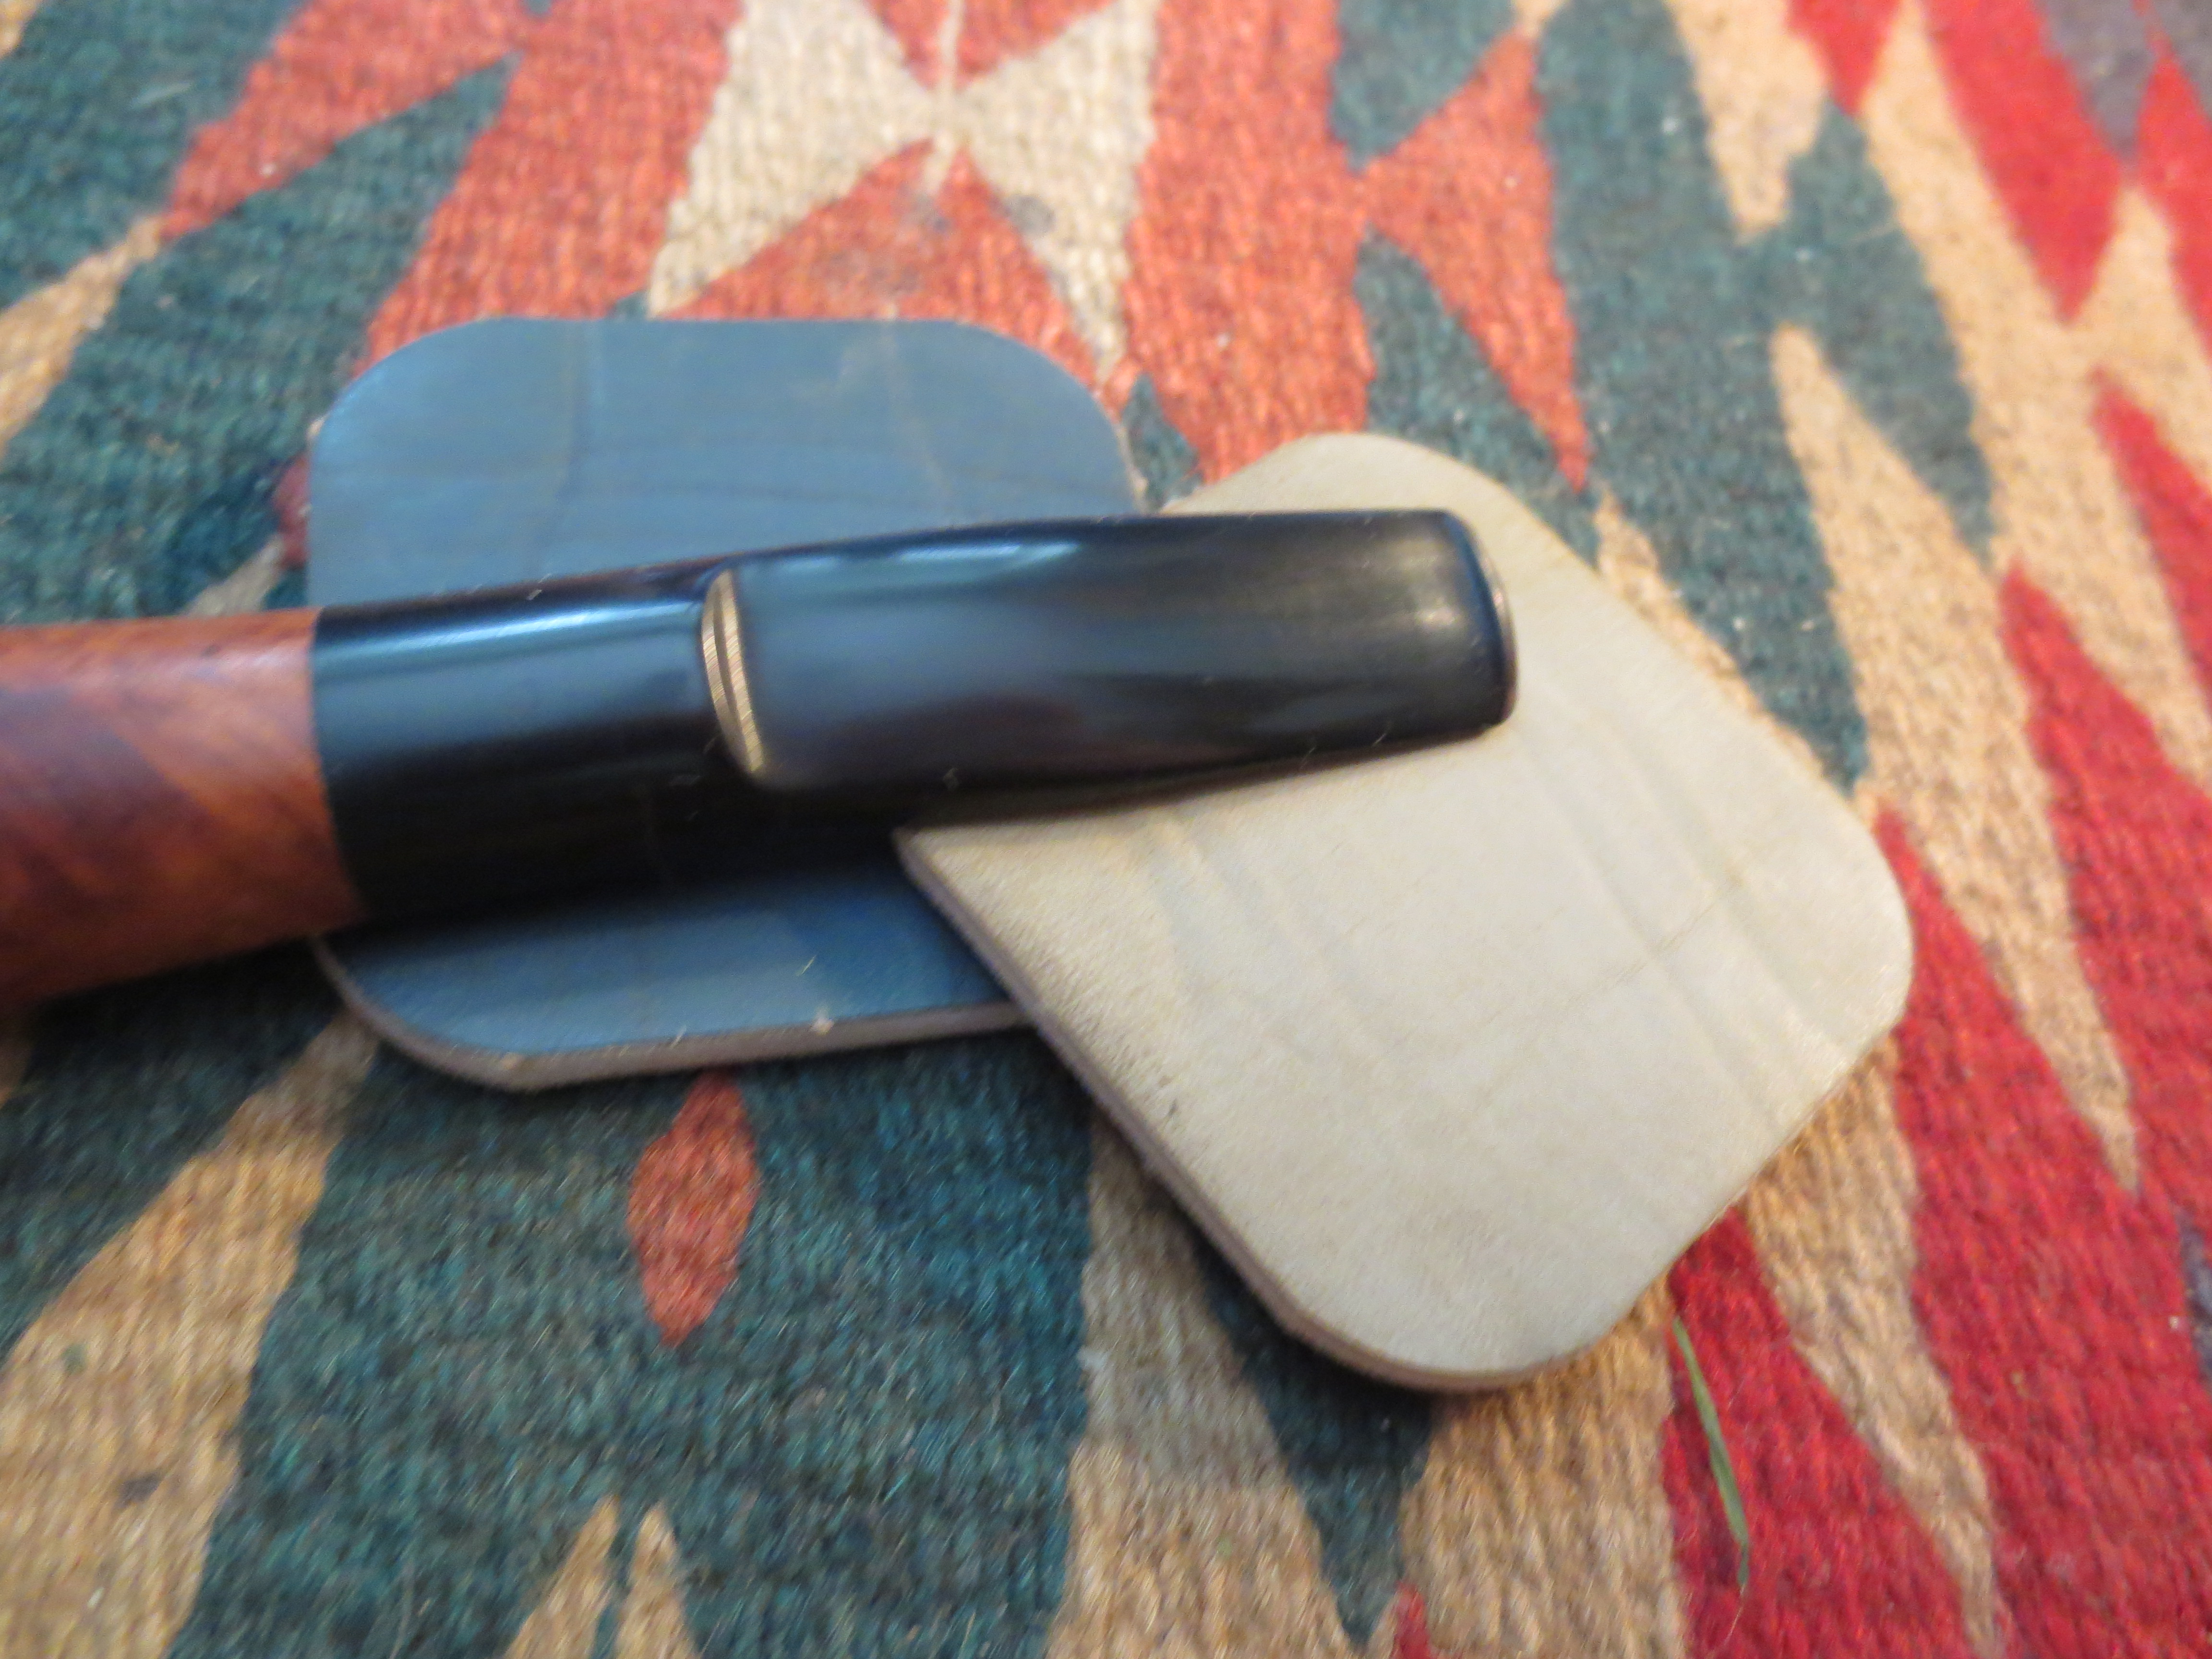
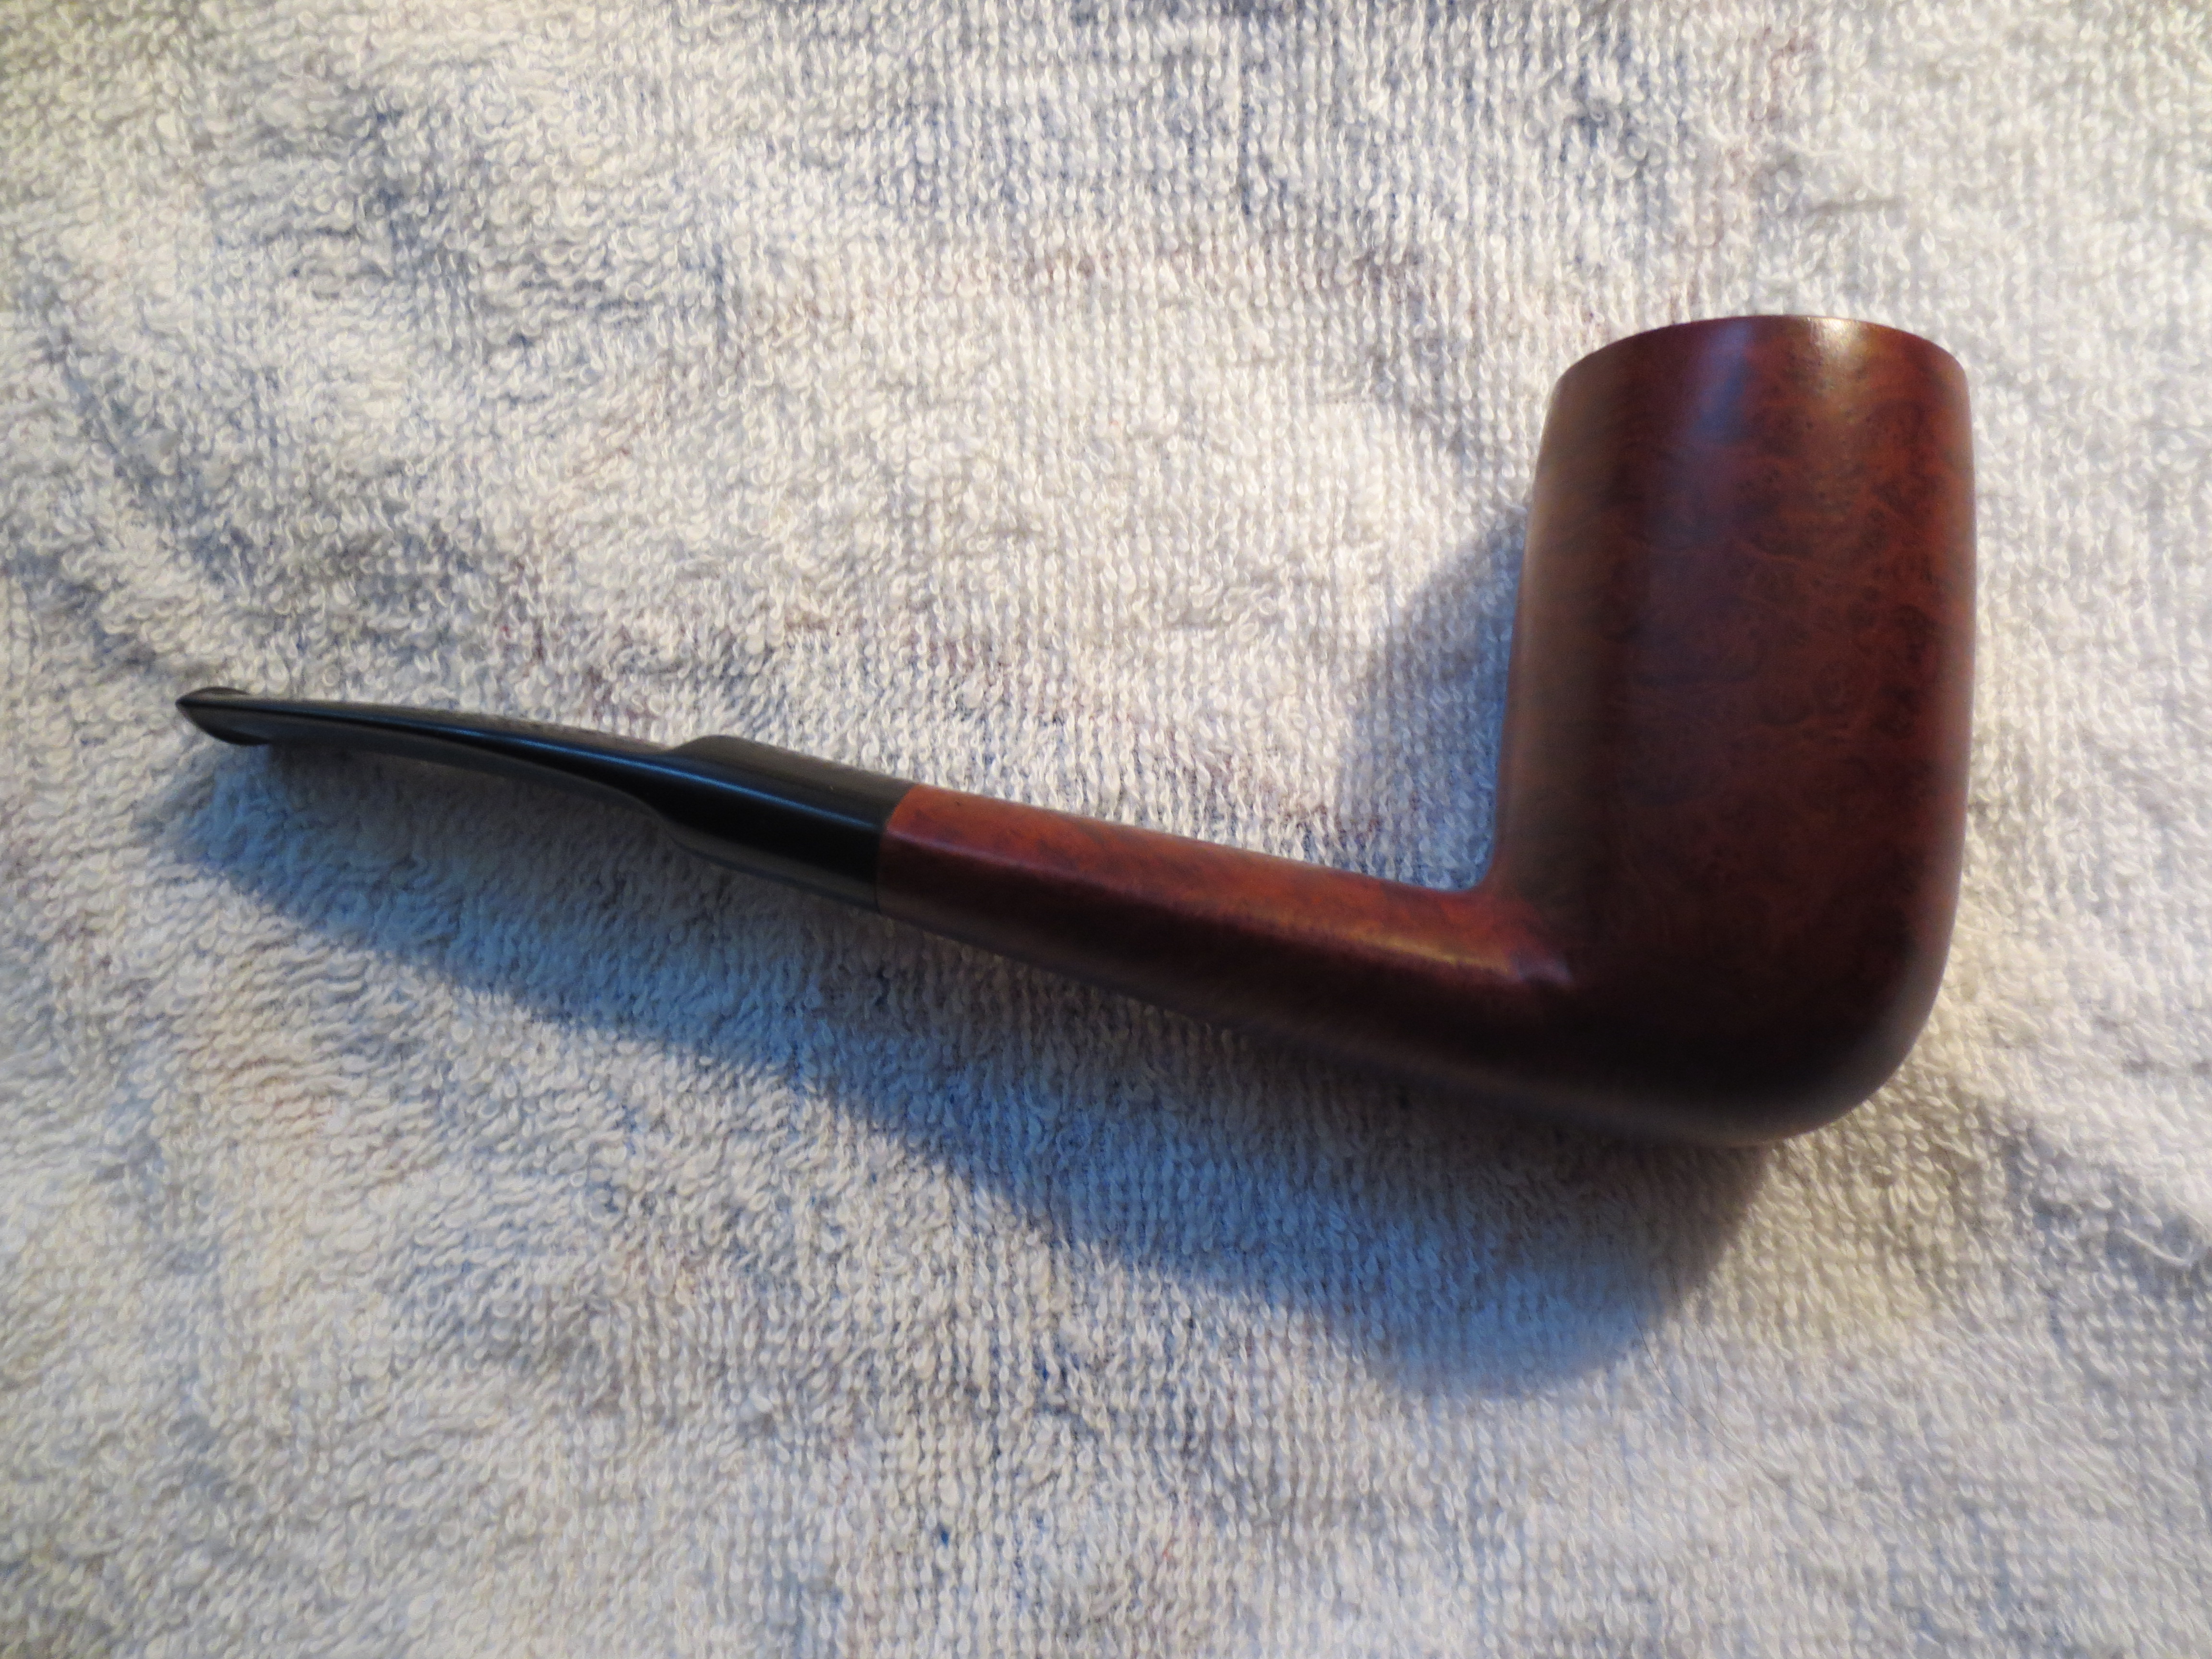
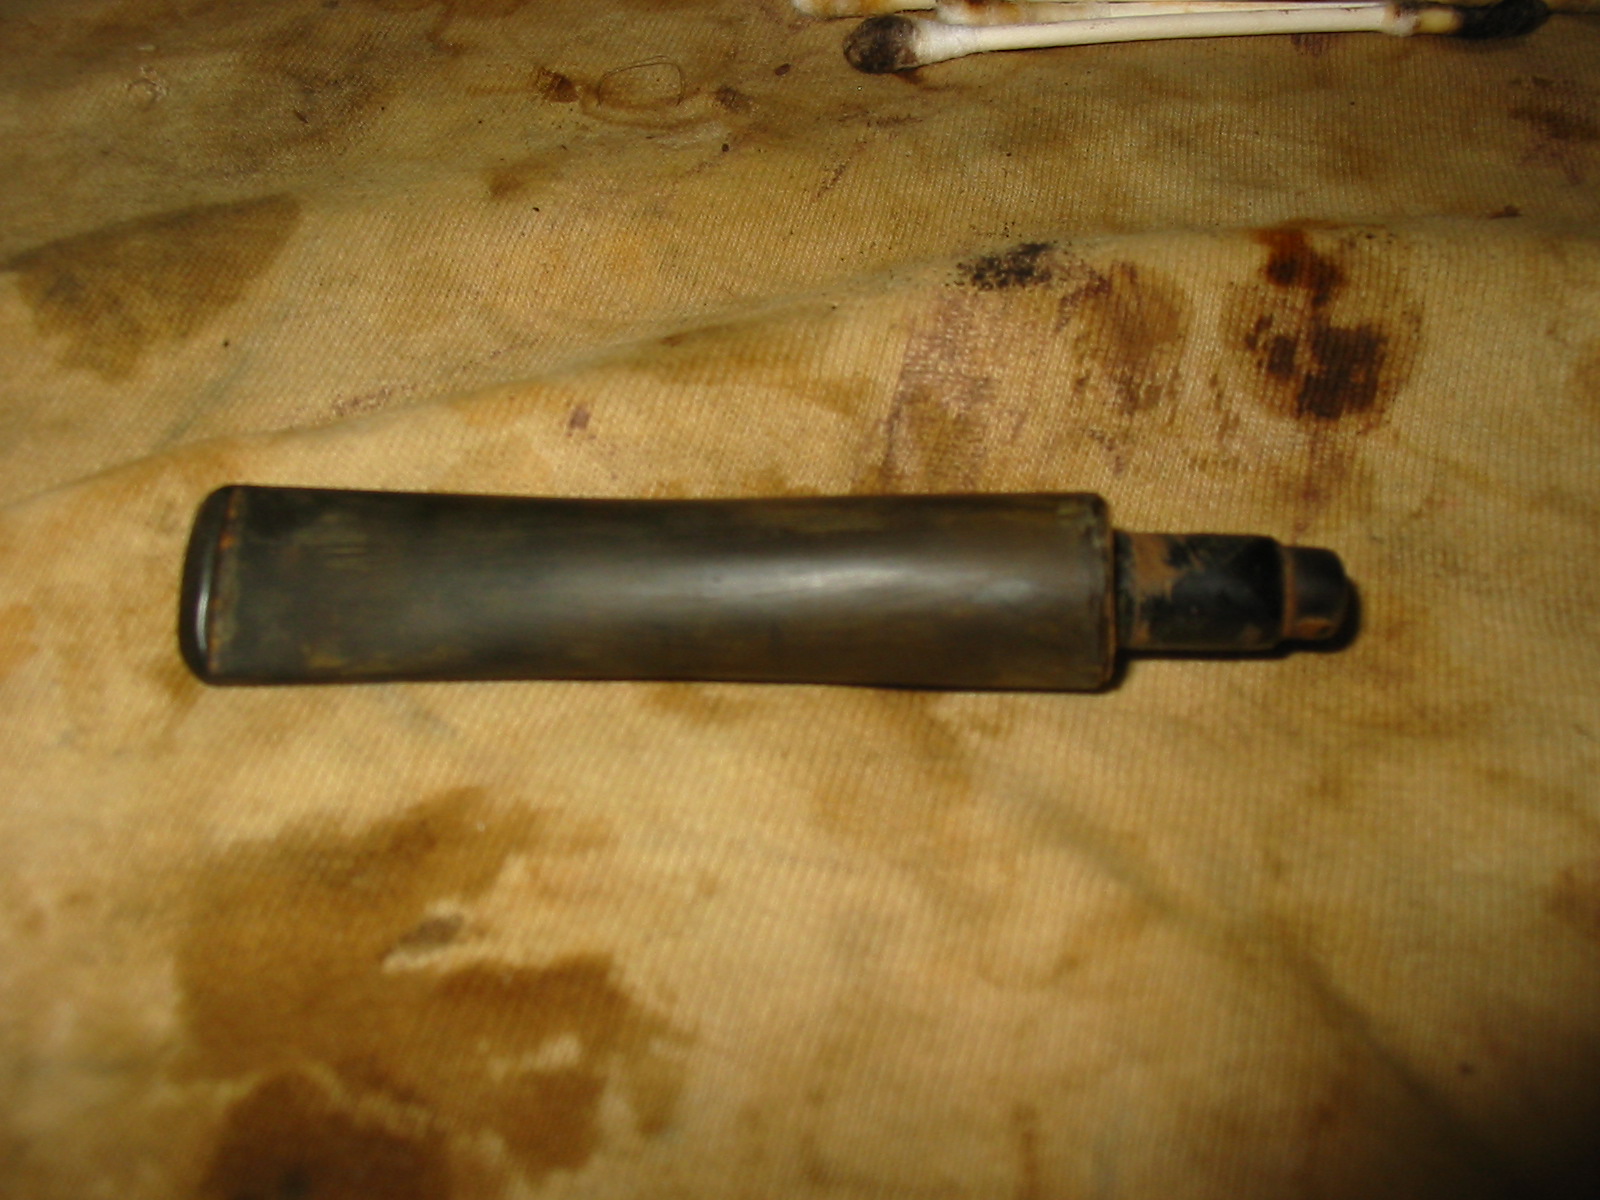
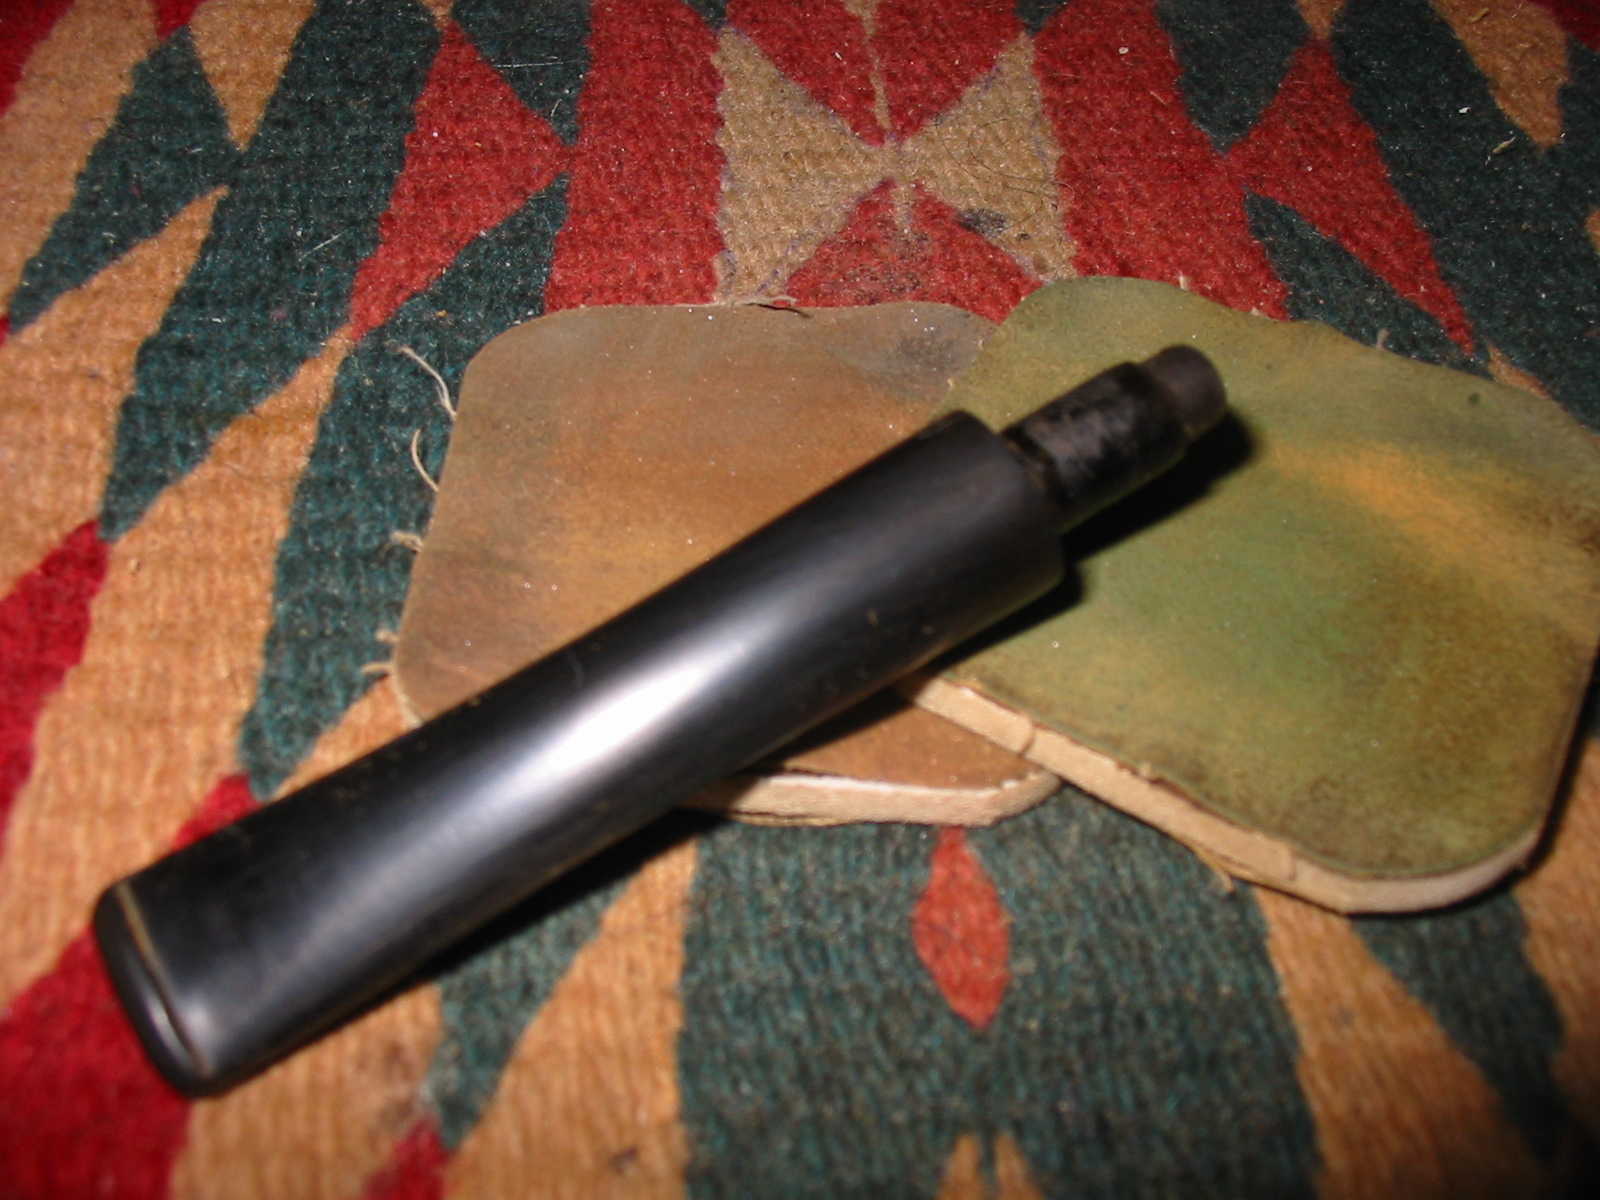
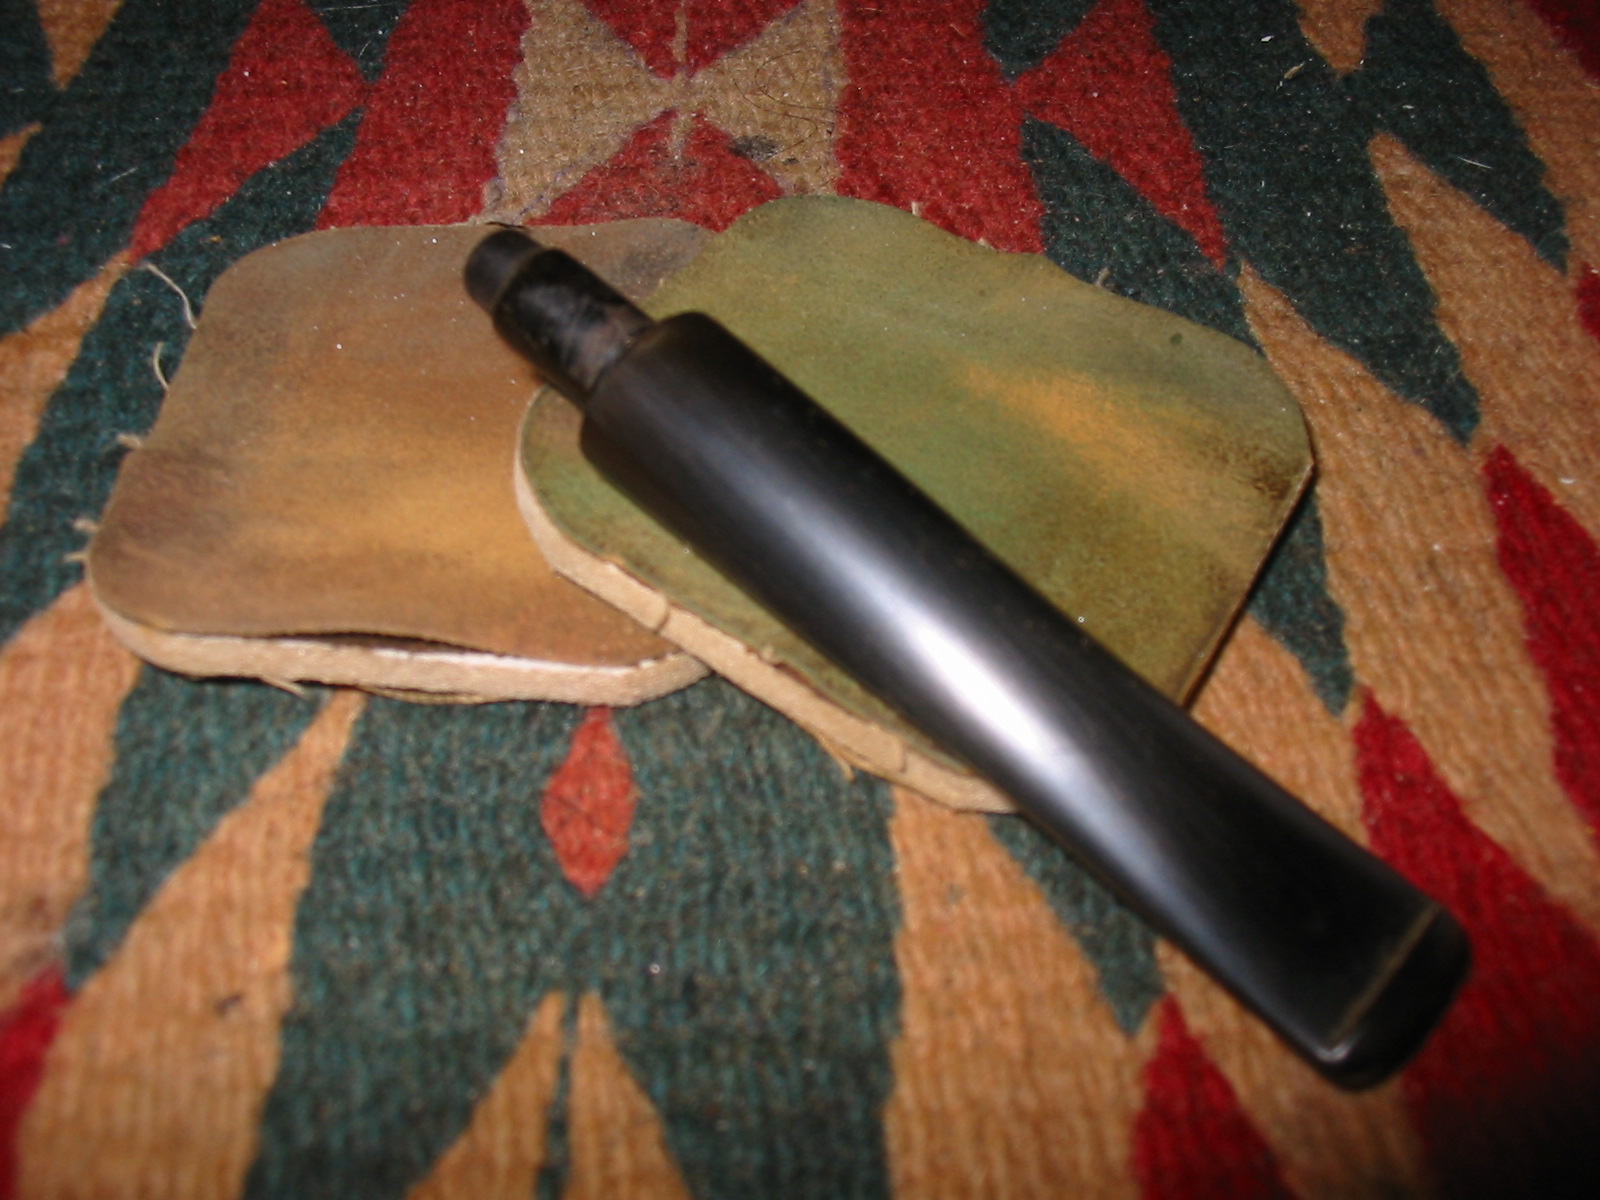
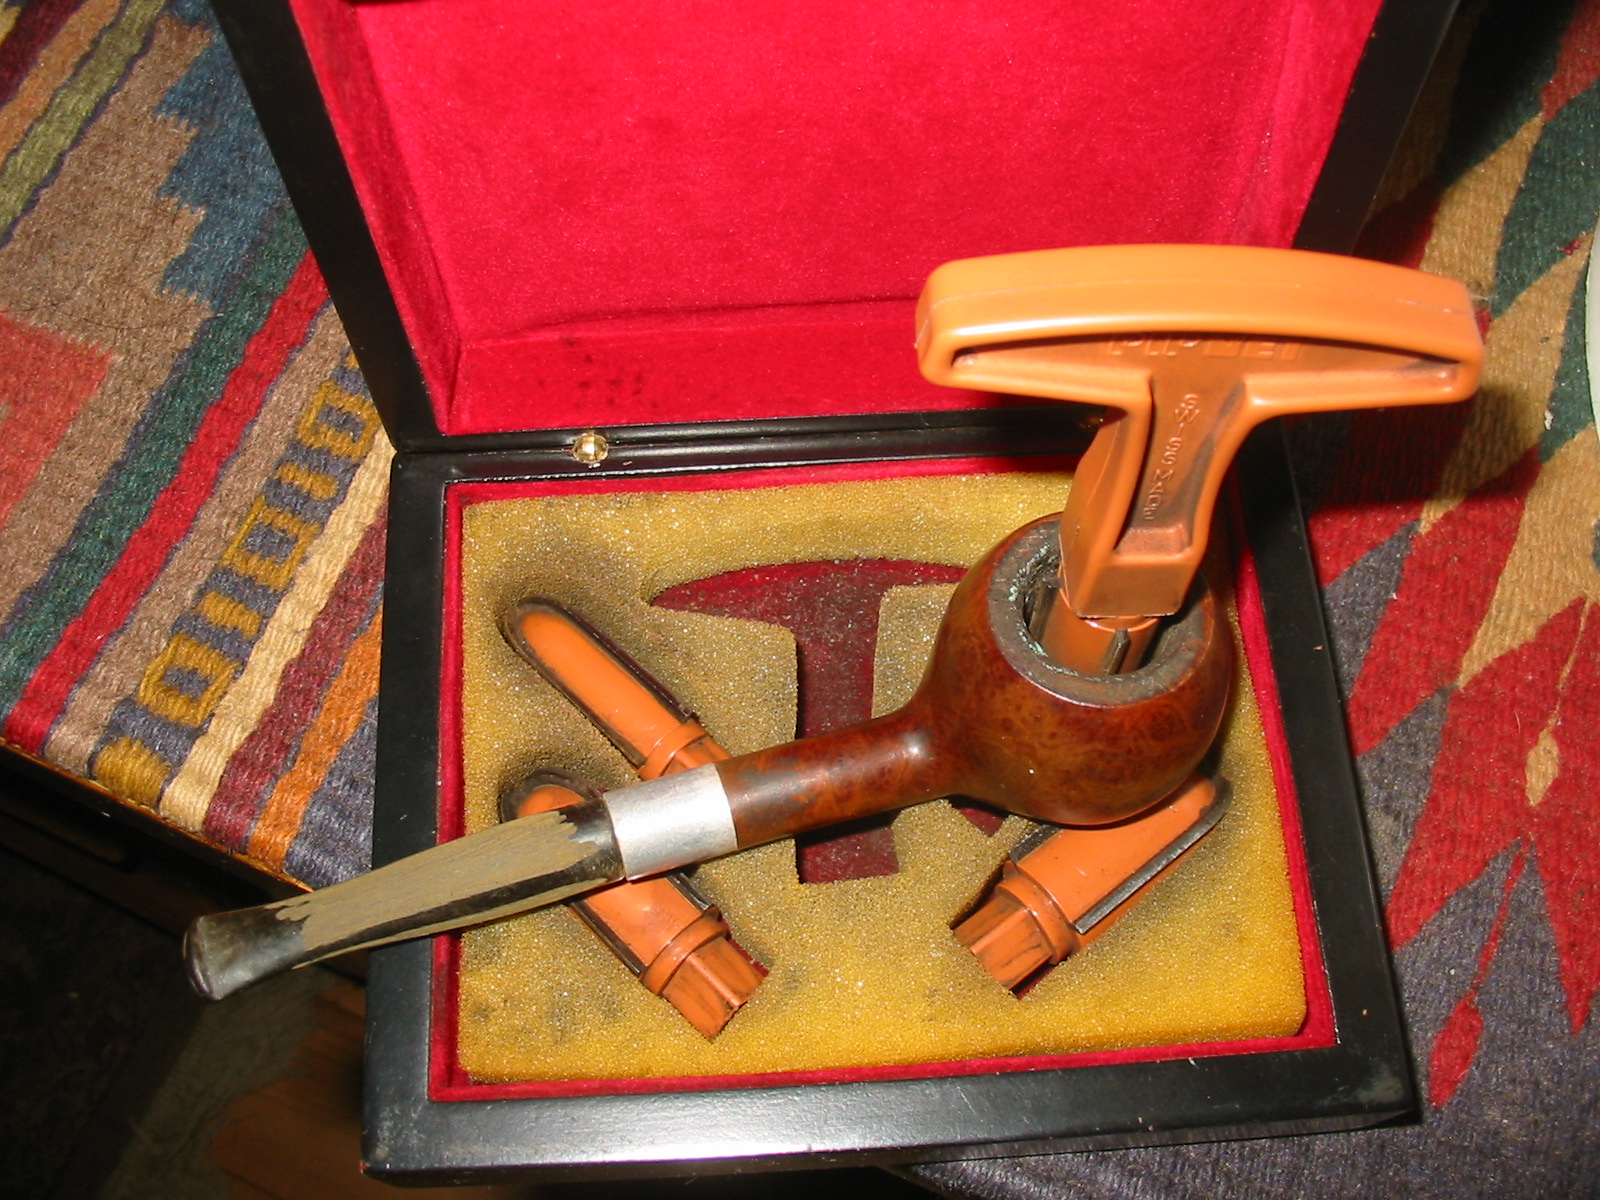
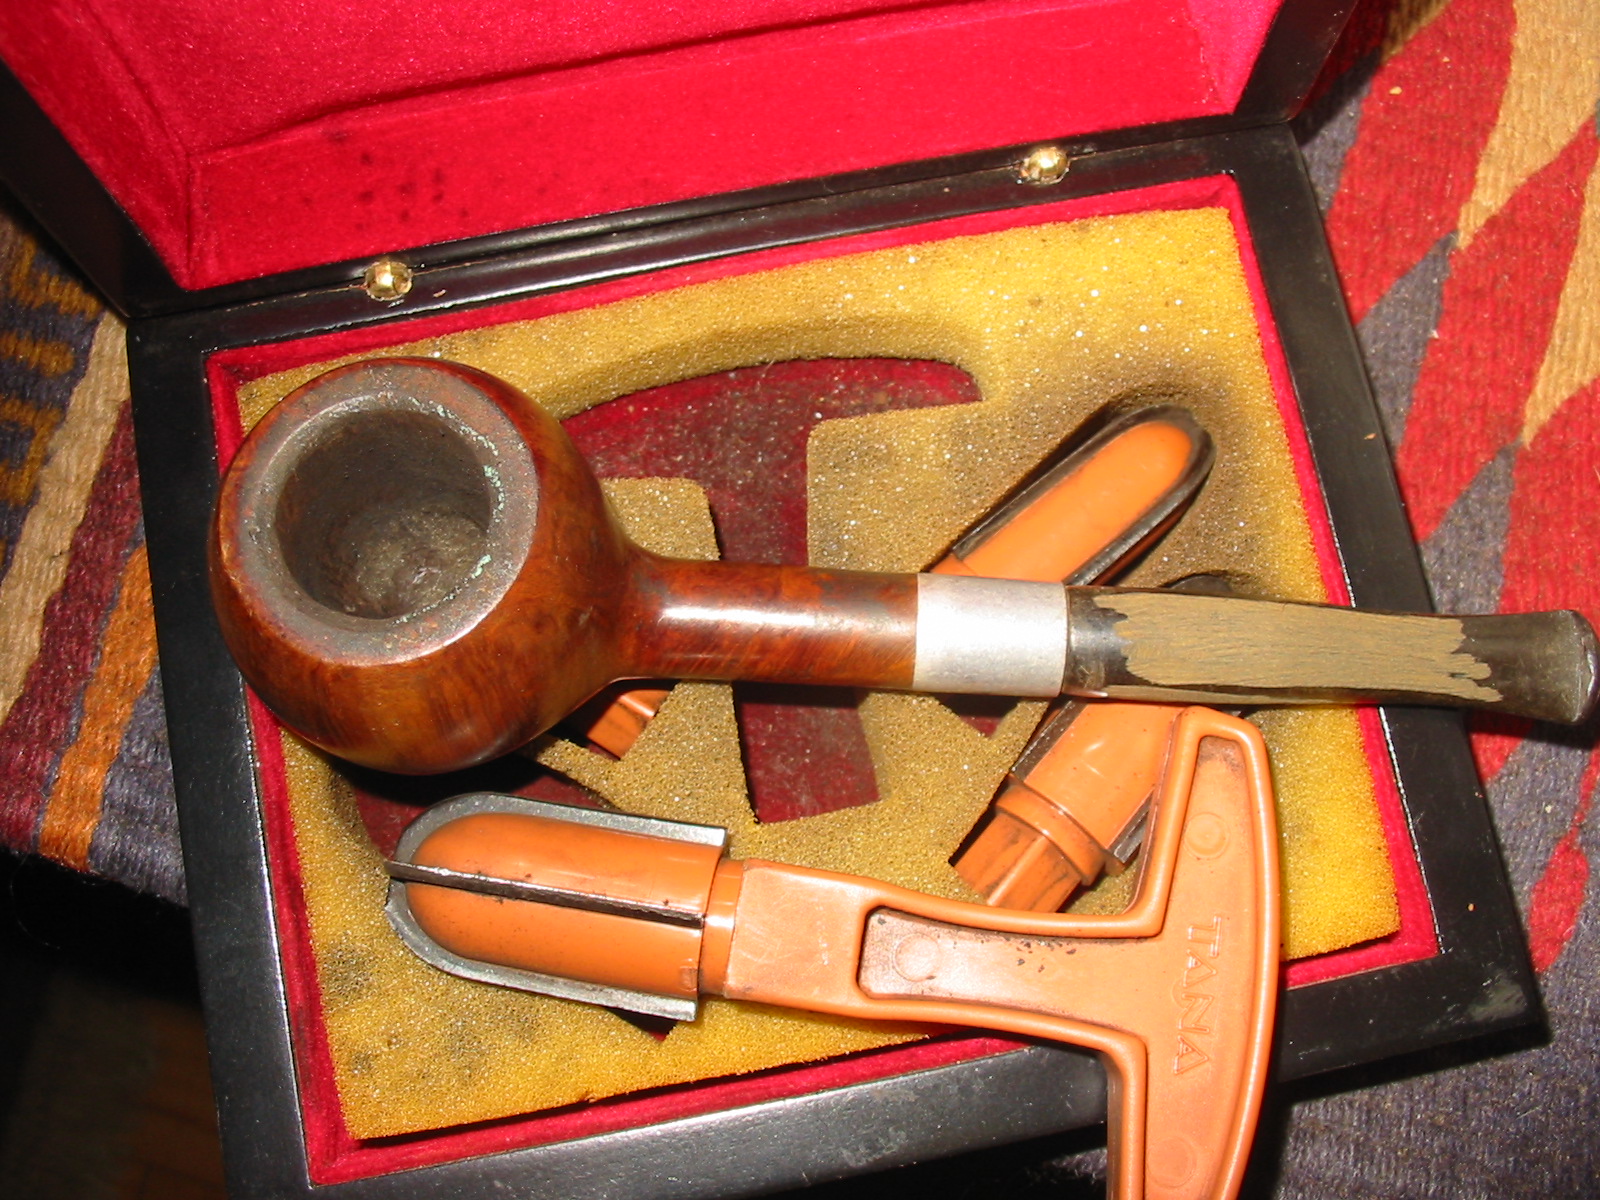
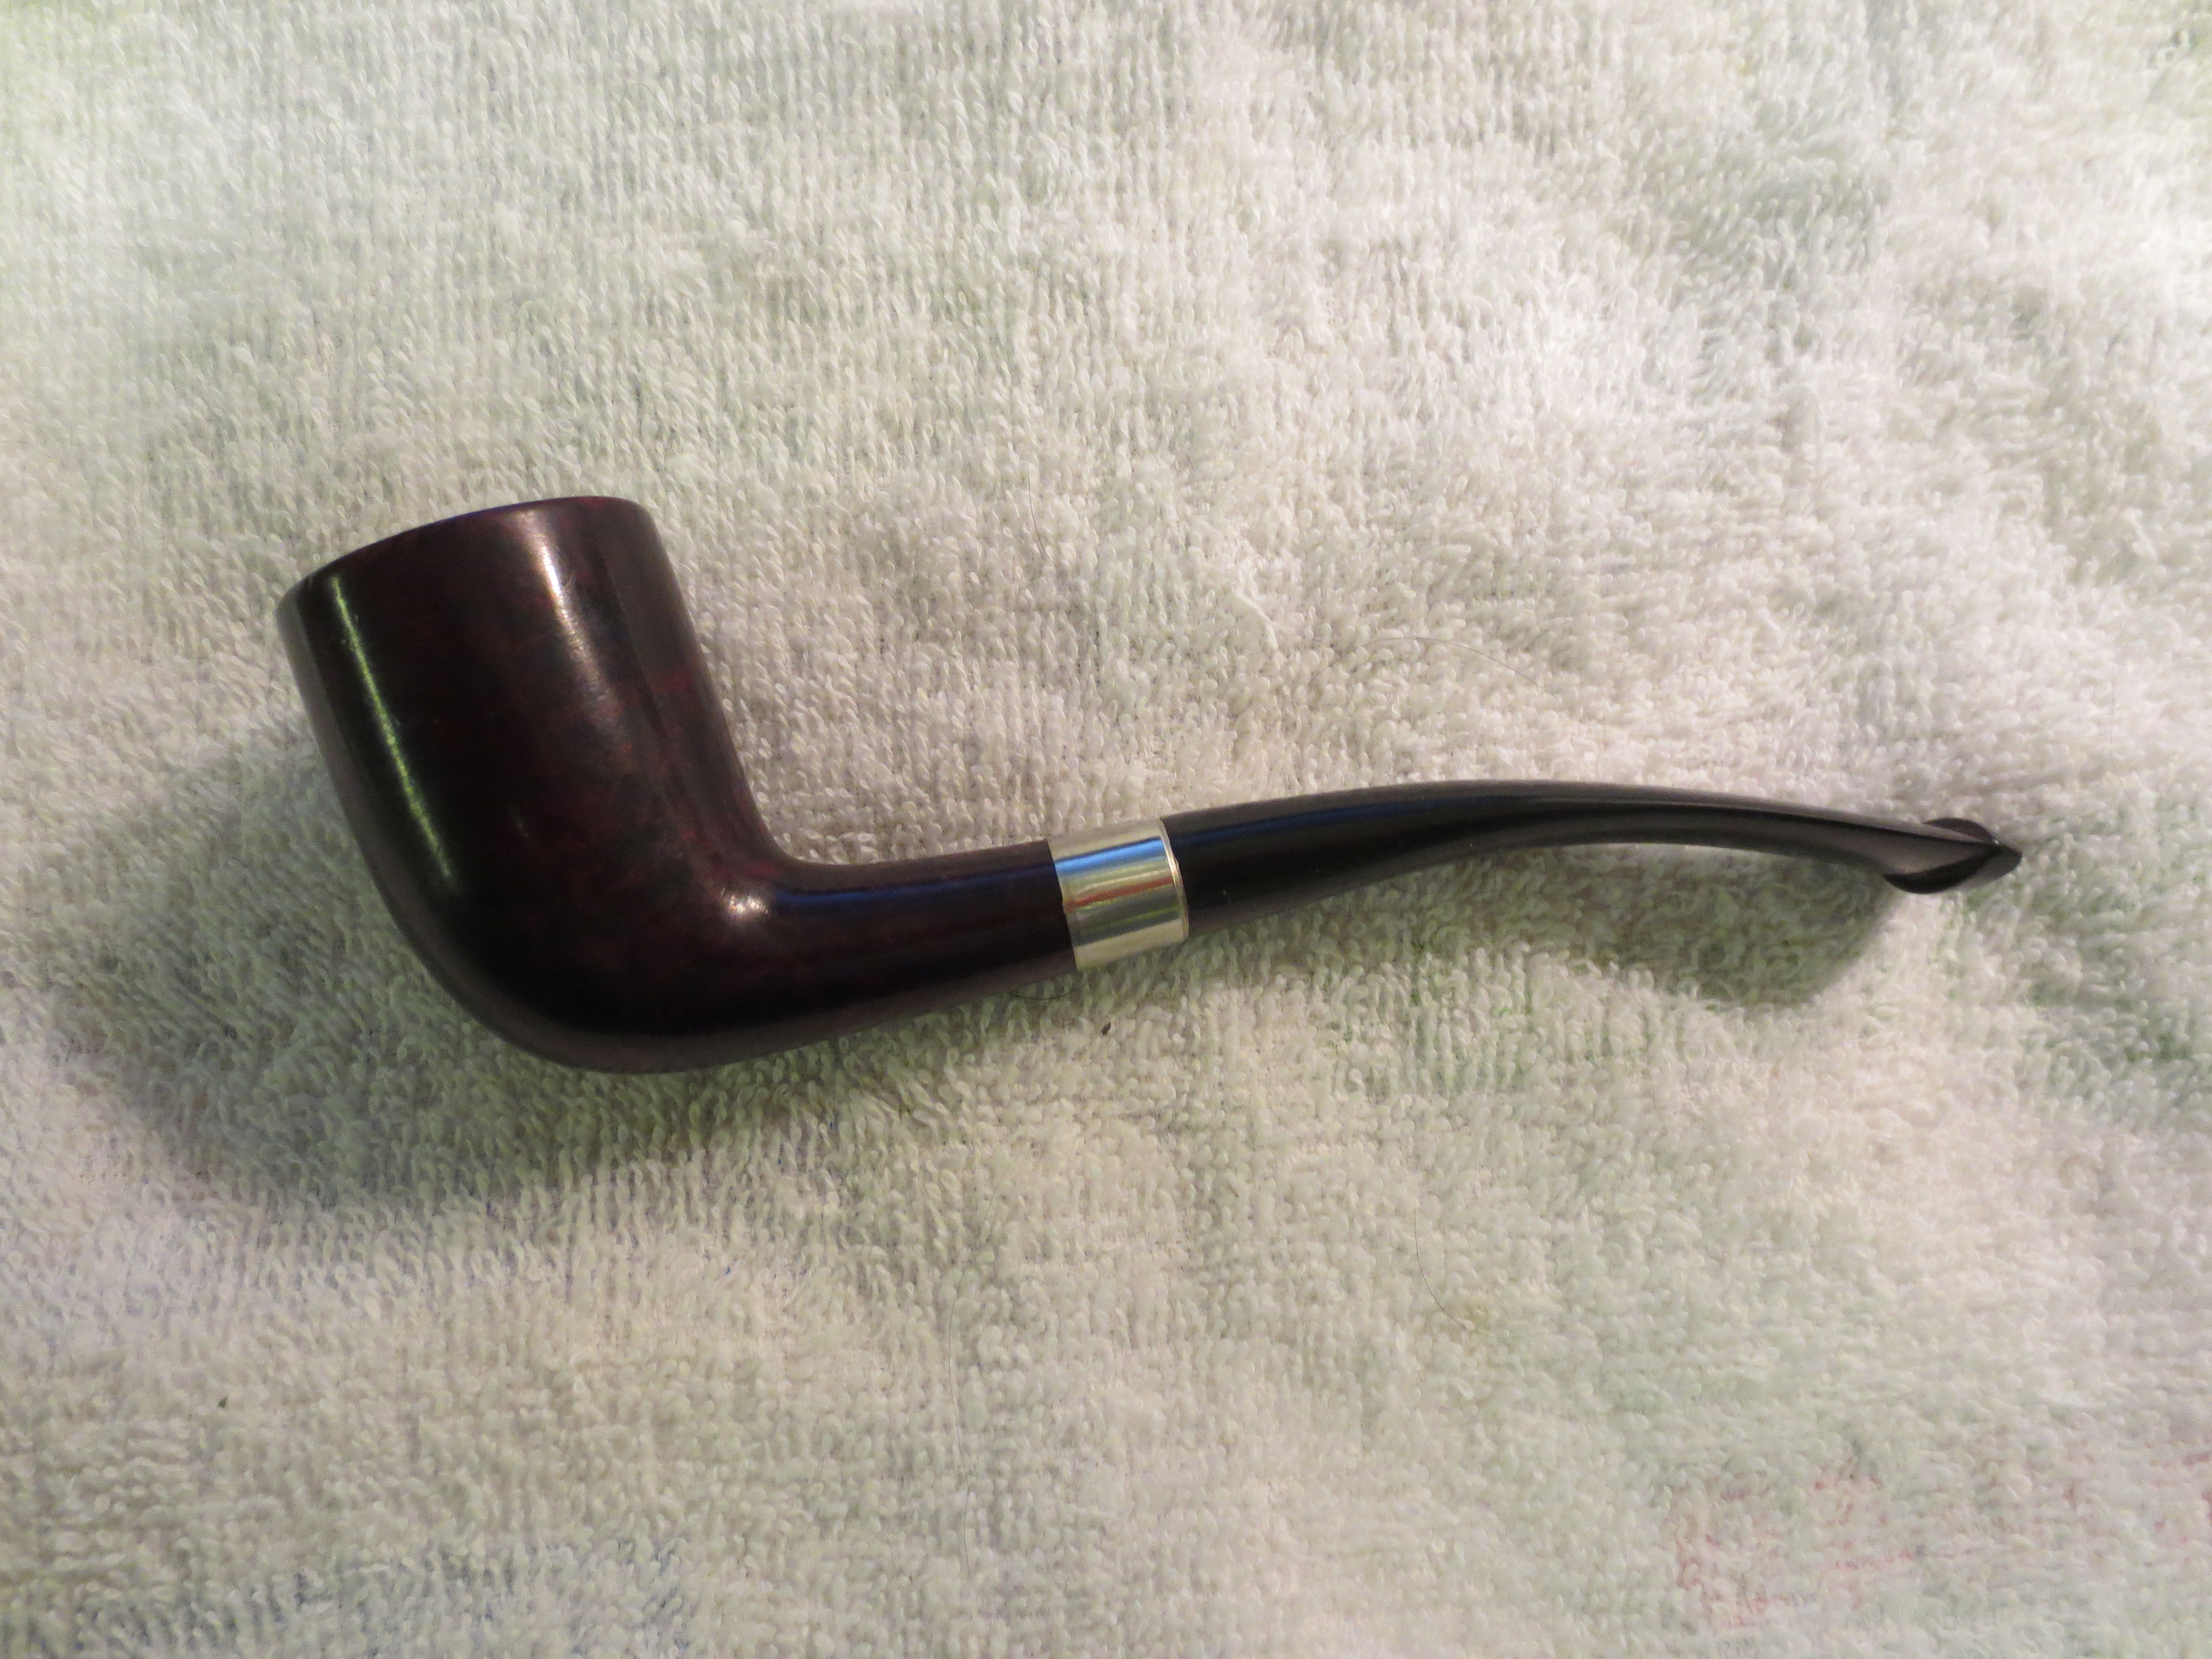
I looked at it and scribbled out some sketches of how to rework things. I thought about shortening the shank but really did not want to do that. So in the end I decided to remove the old stem altogether and shape a vulcanite stem for the pipe. The polished black of the vulcanite would match the band of black on the shank. It would also bookend the olive wood shank extension. So I found an oval saddle stem in my box of stems and turned the tenon with the PIMO tenon tool. Once I had a good fit on the tenon, I used the Dremel with the sanding drum to shape the stem to the shank. I decided to make the stem a half saddle by removing the saddle portion on the underside of the stem. This was tedious and slow work as I did not have any margin for damage on the shank itself. Once I had sanded the stem to a close fit with the Dremel I did the rest of the work by hand with files and sandpaper. The next four photos show the new vulcanite stem after all the fitting and shaping work had beencompleted. I still needed to polish and bend the stem to make the angle similar to the original.

IMG_0940

IMG_0941

IMG_0942

IMG_0943

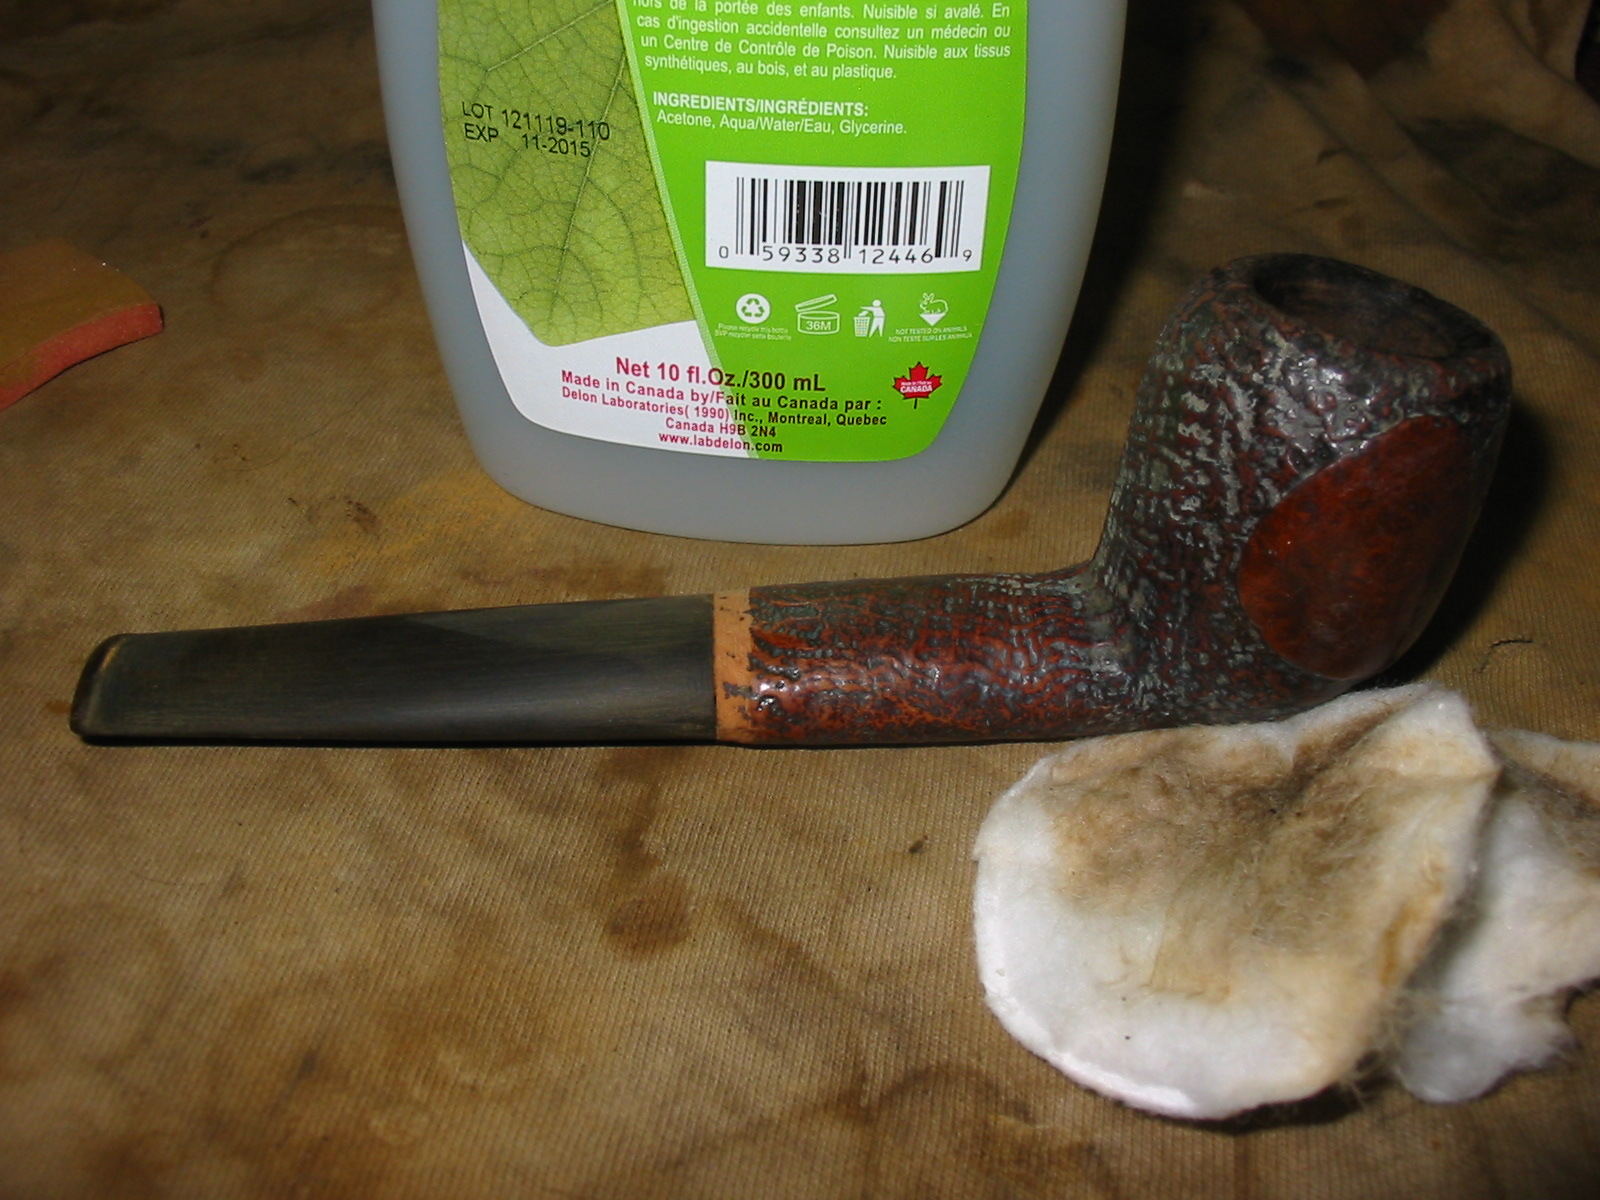
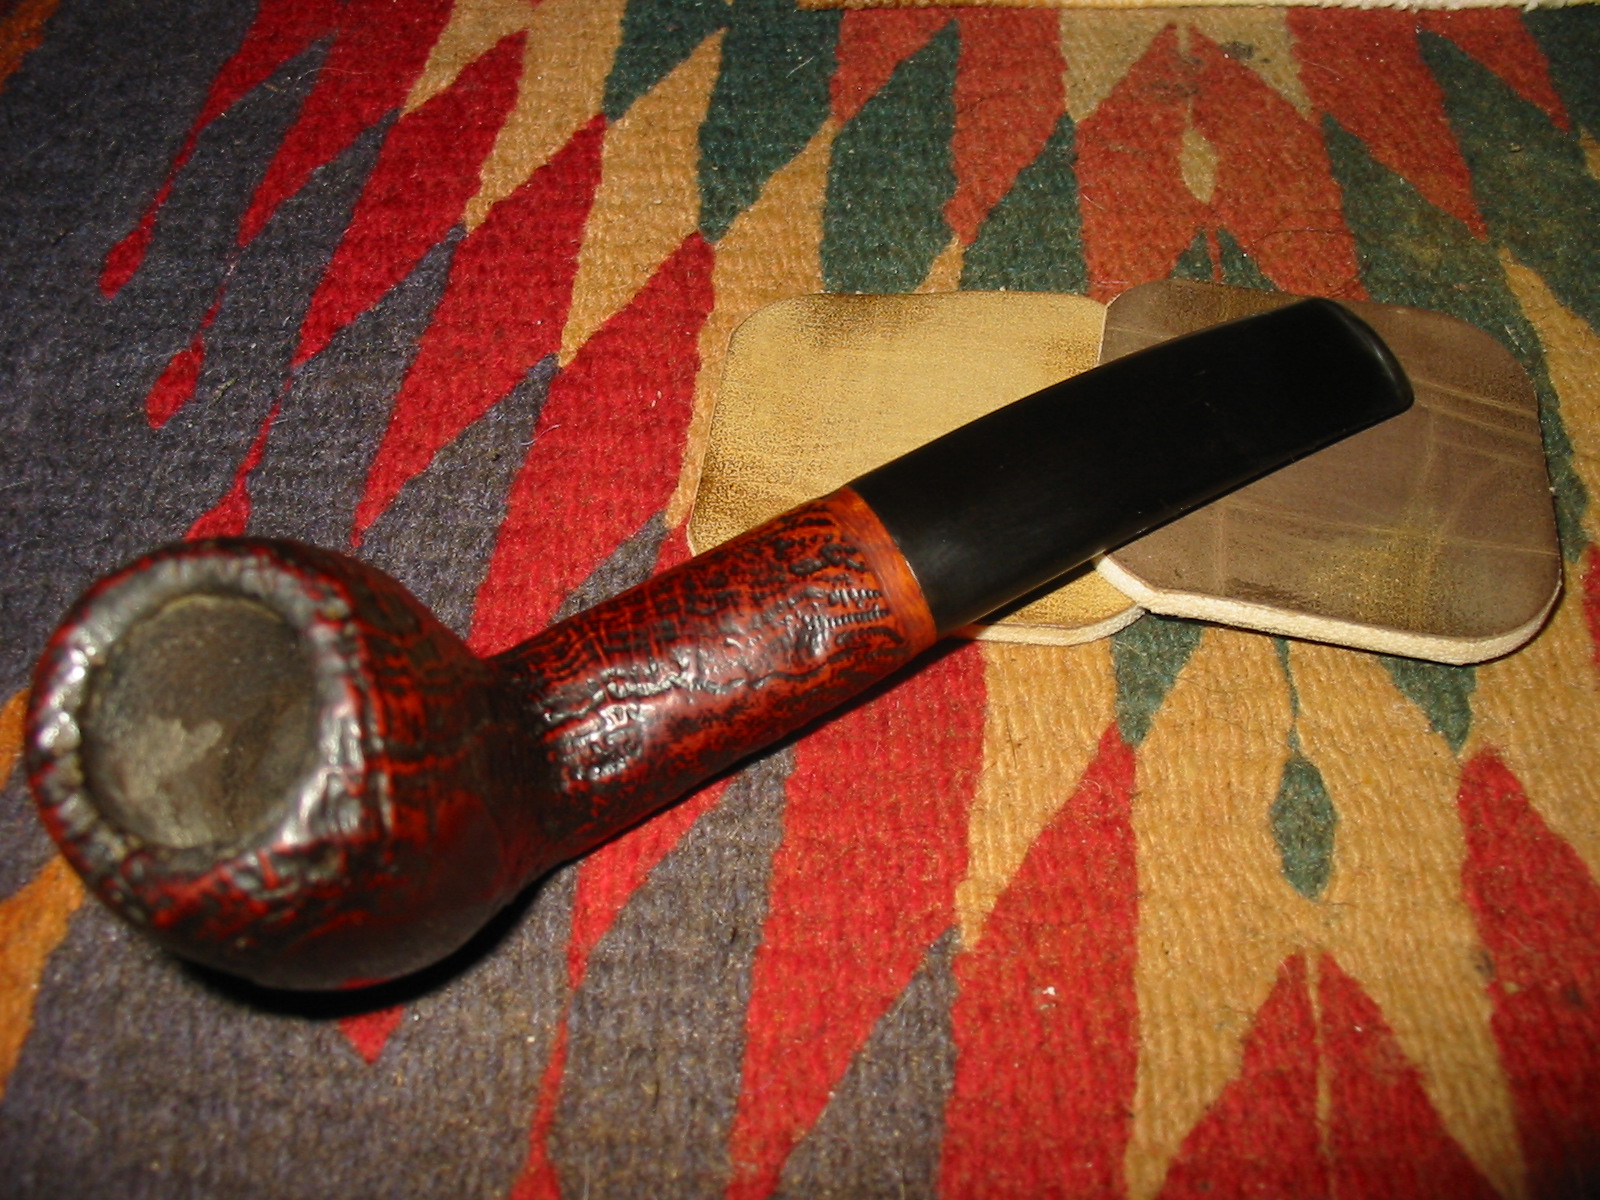
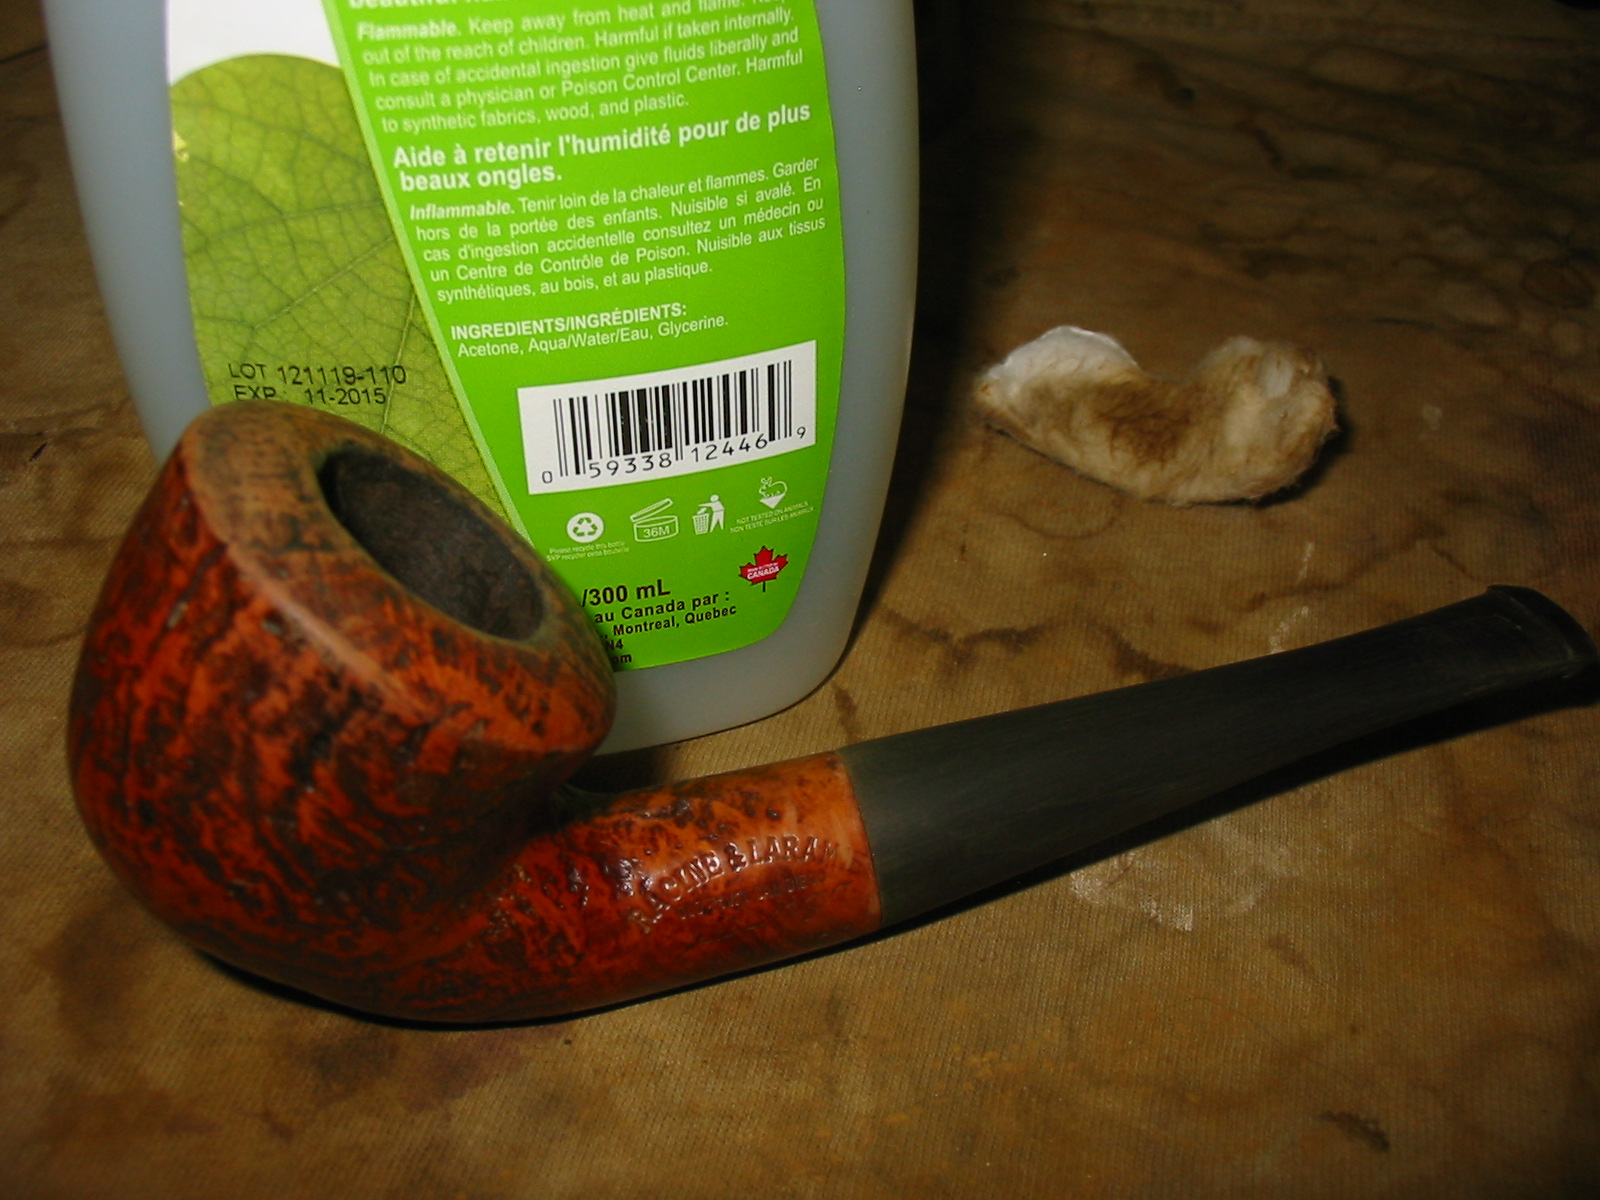
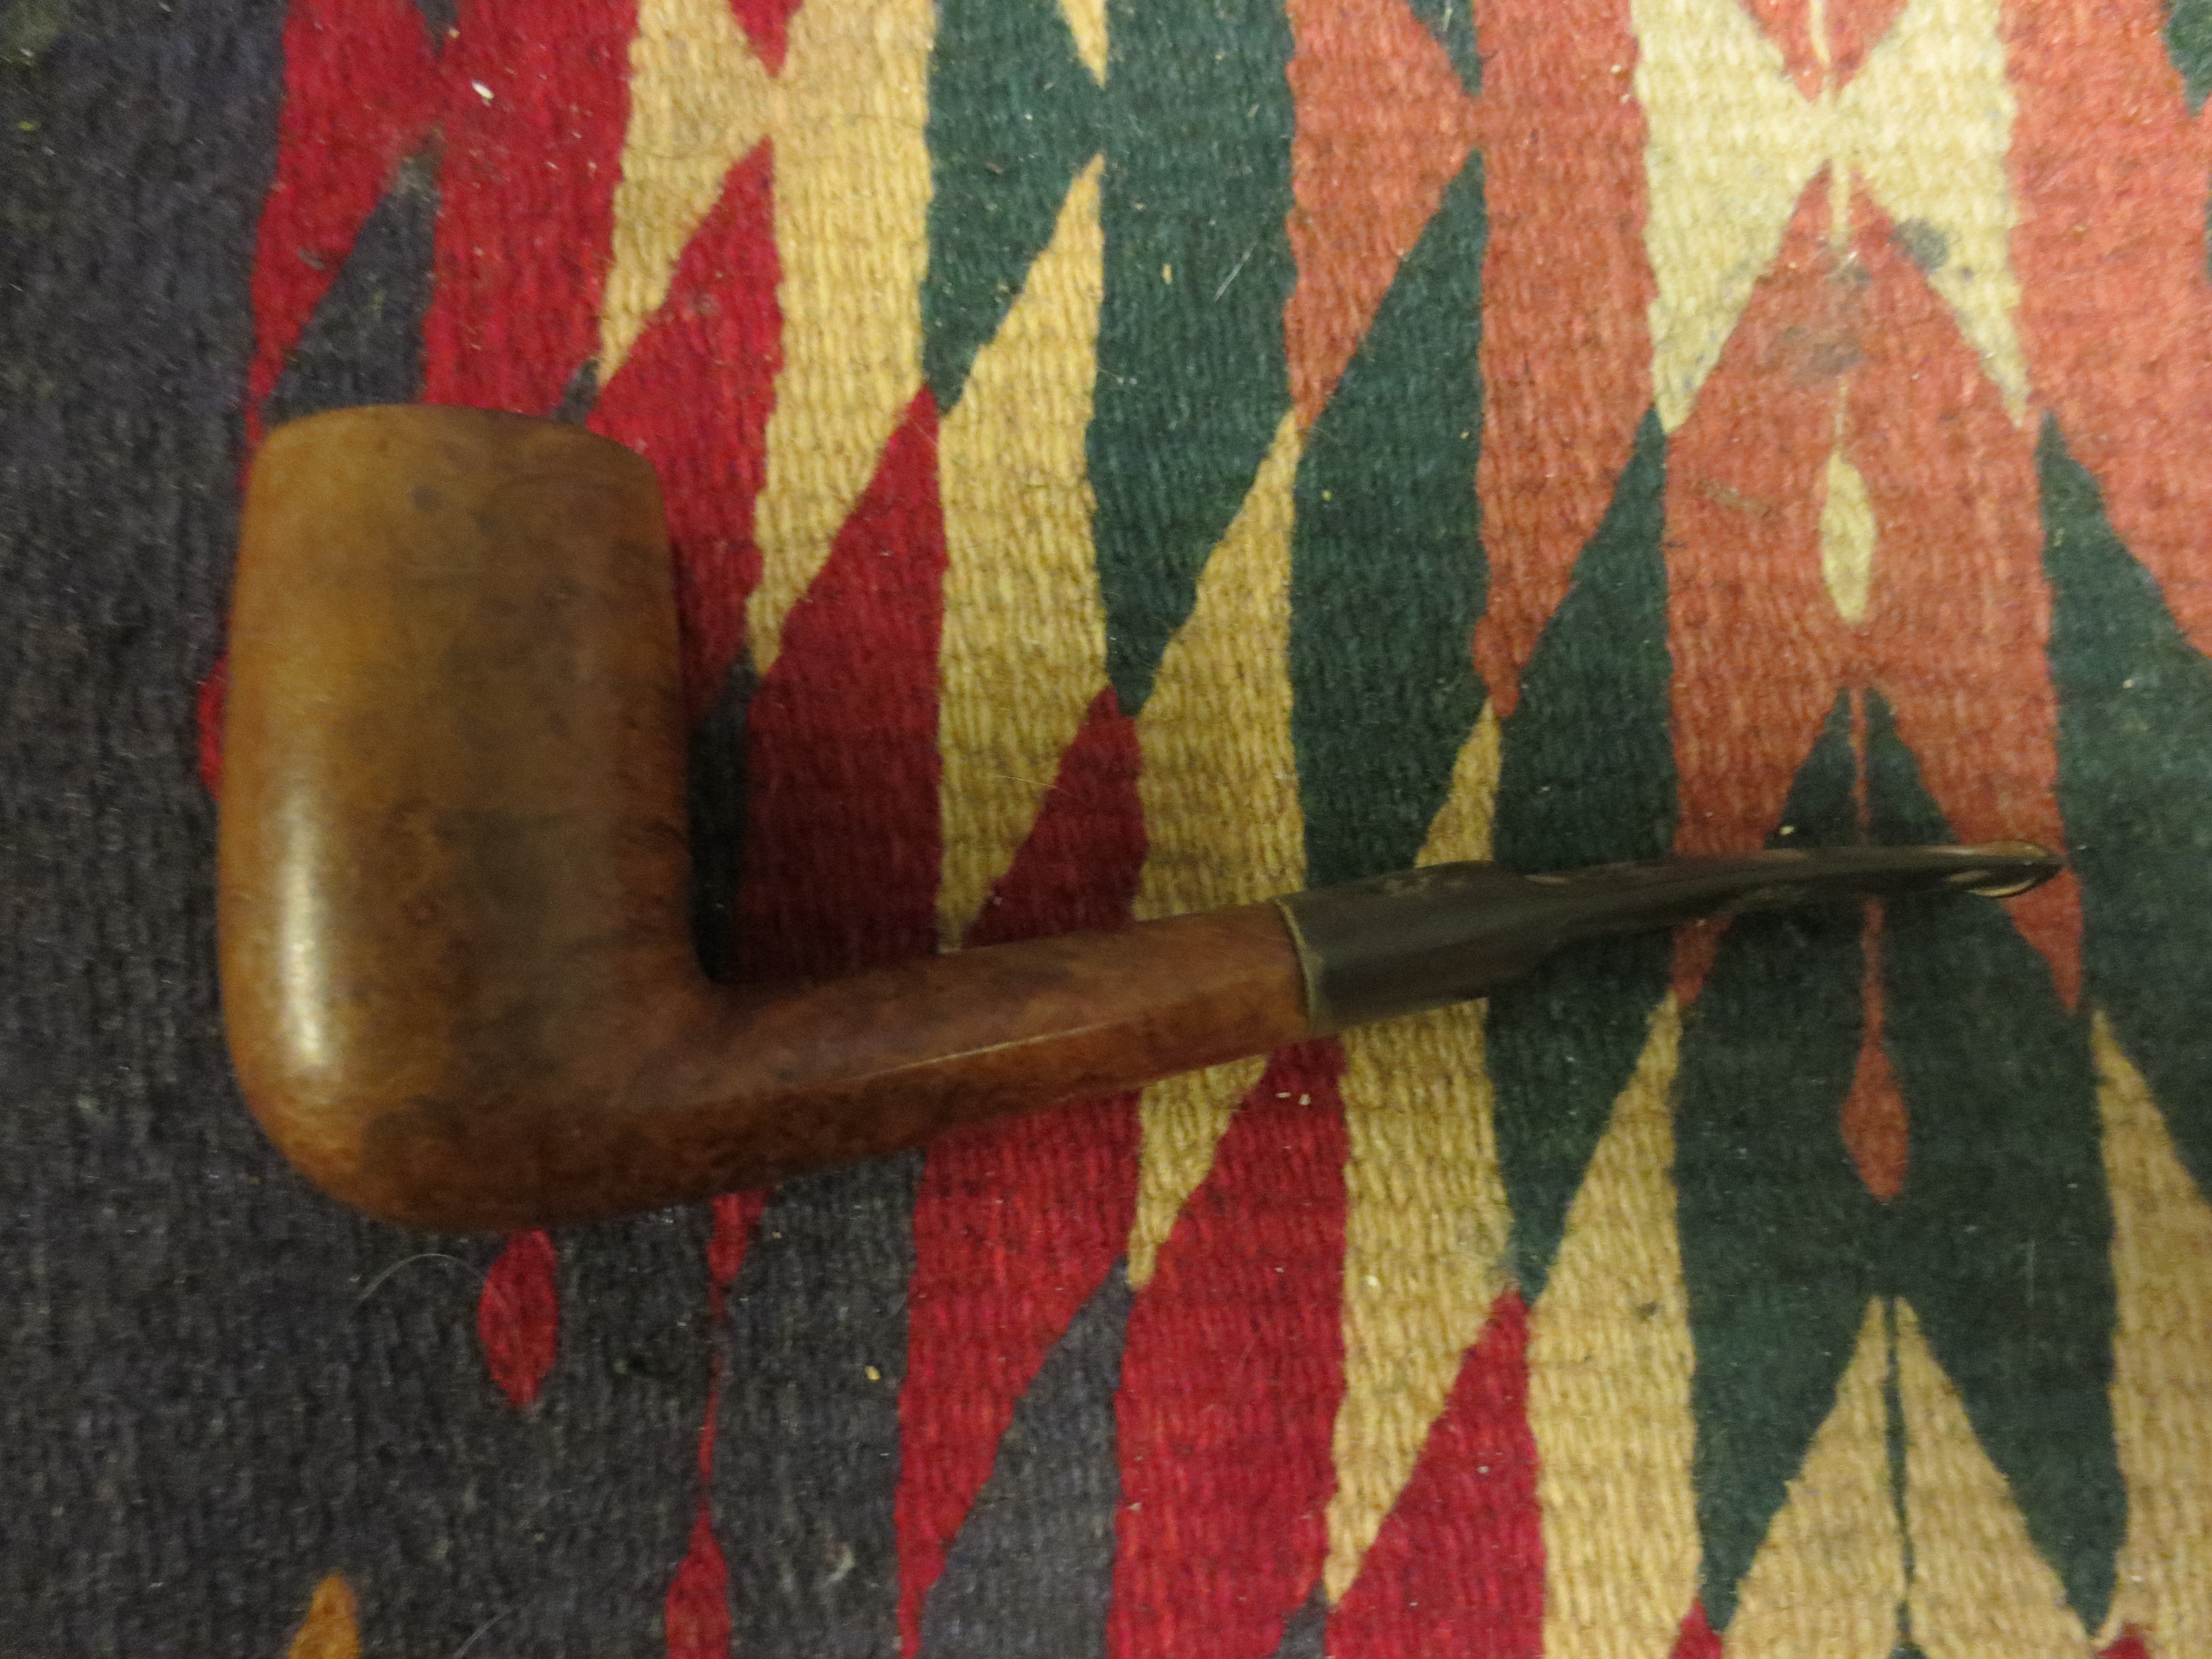
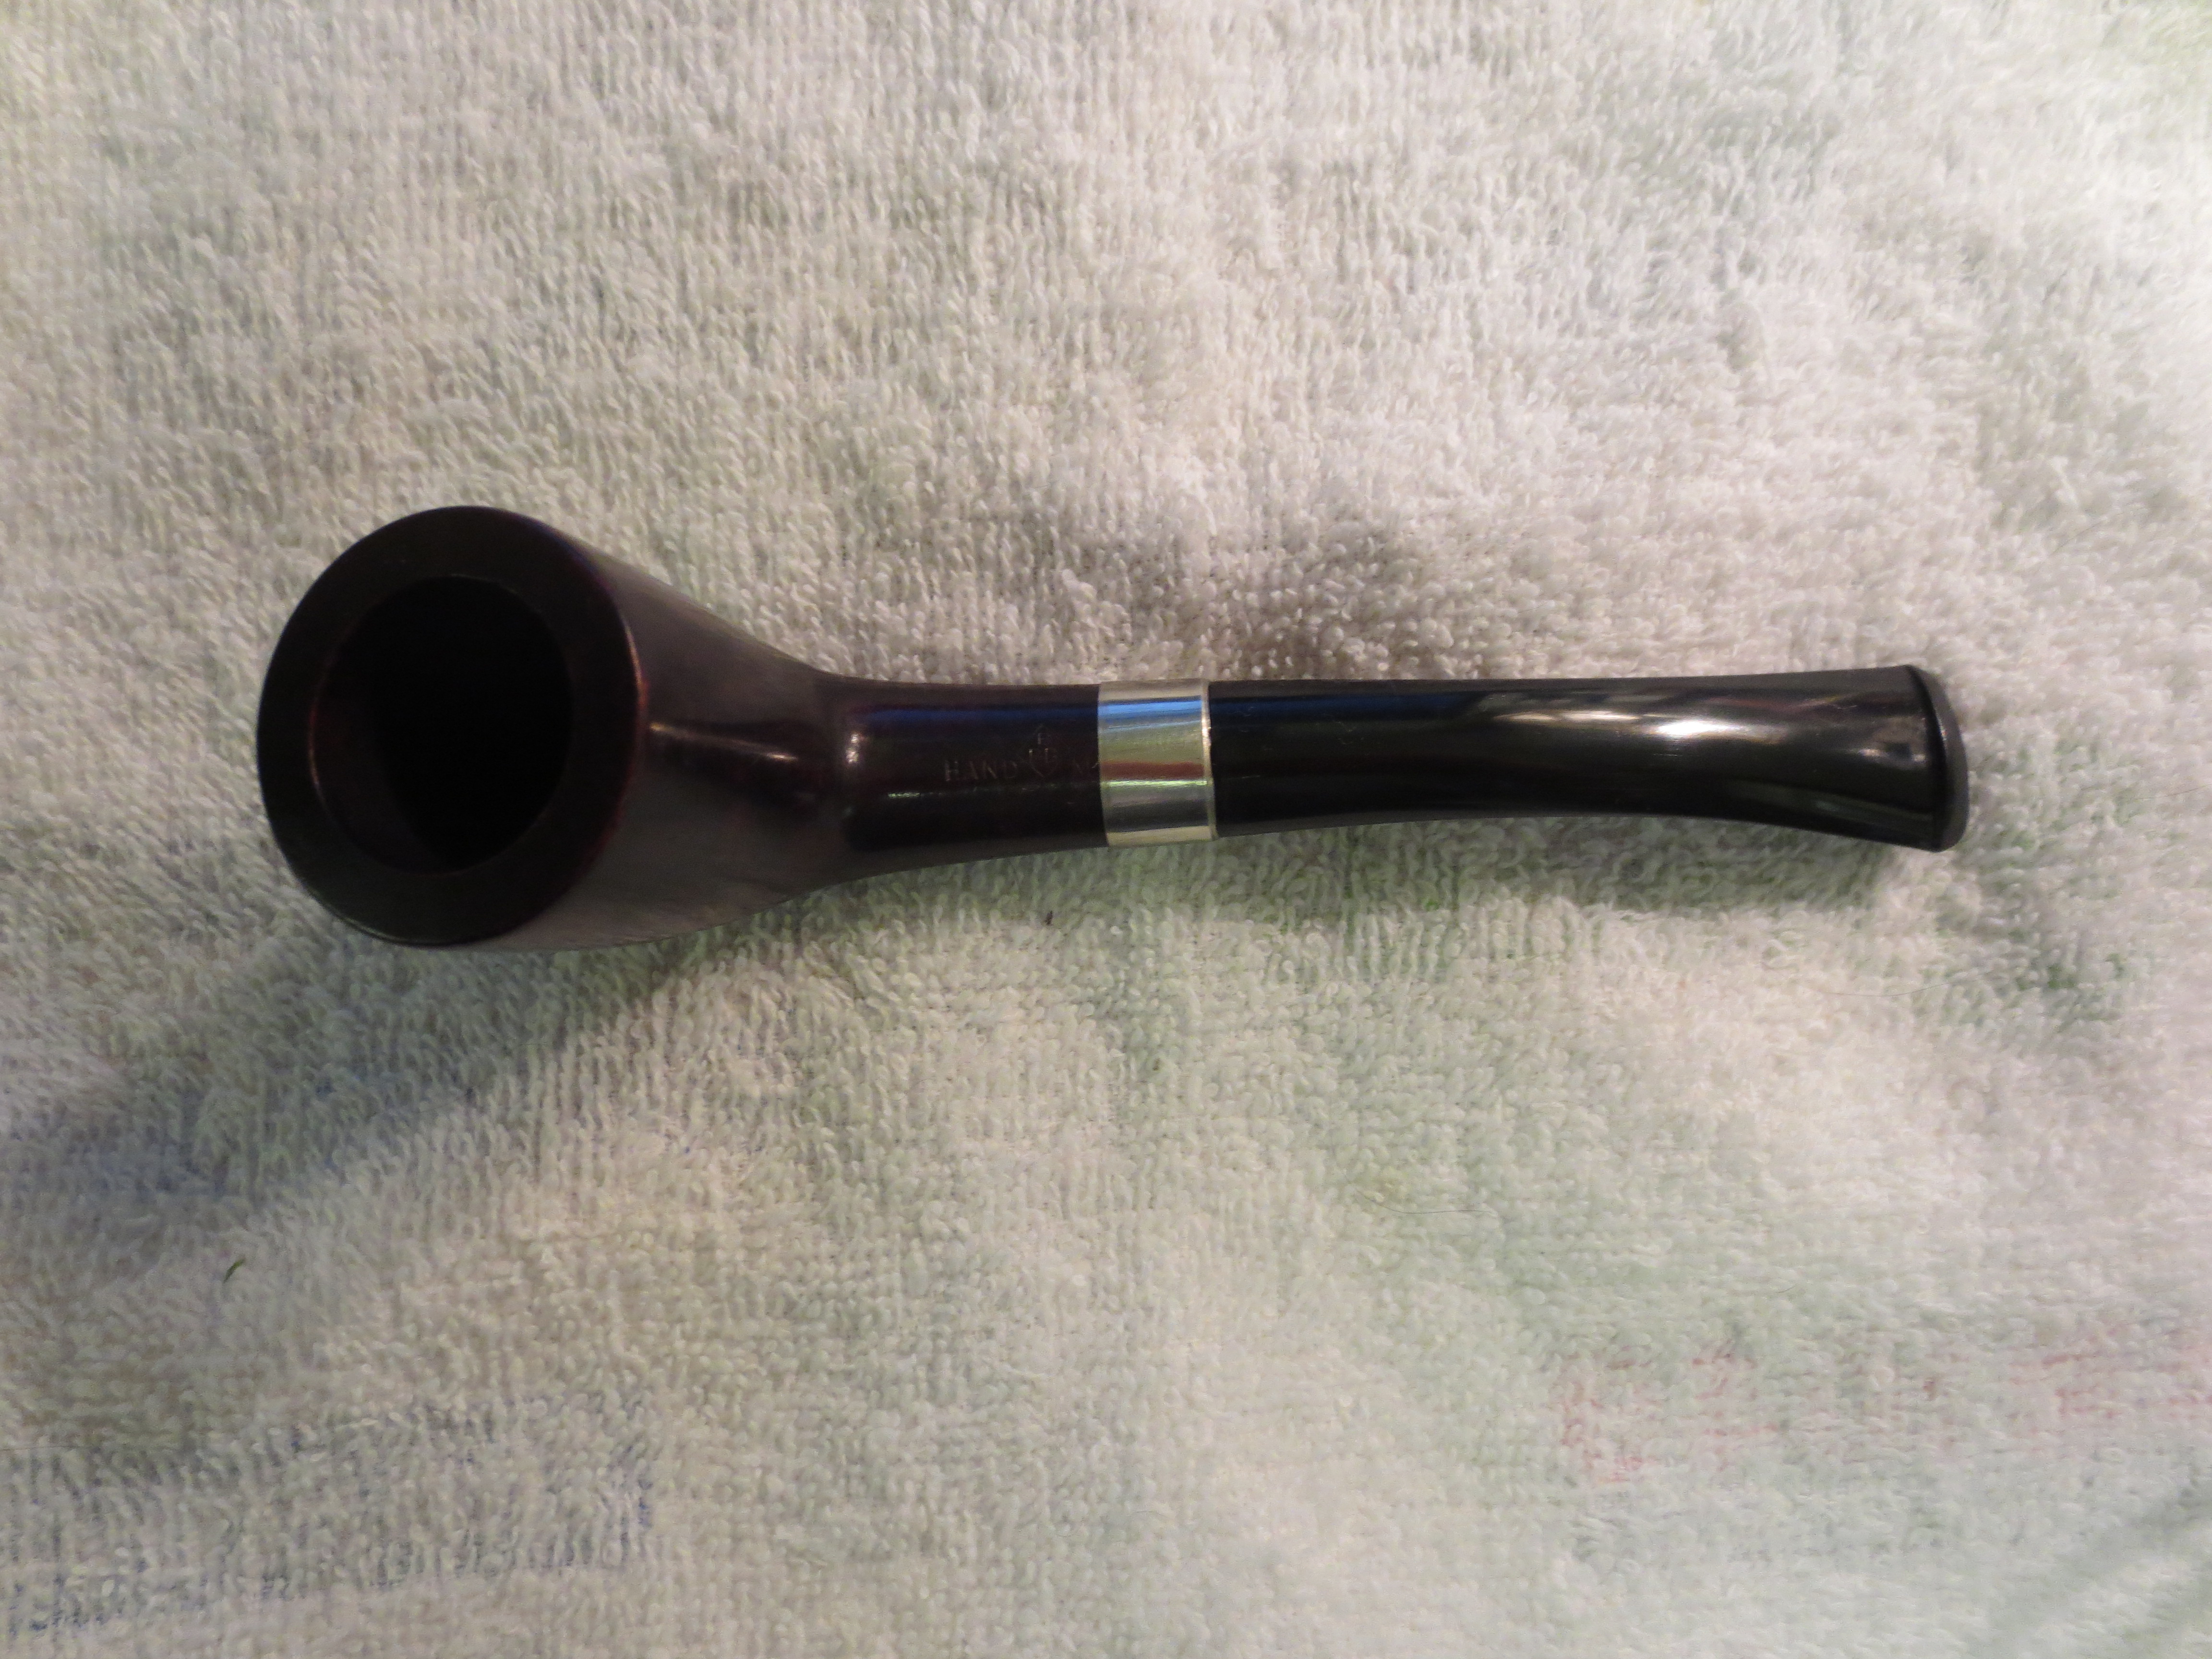
At this point in the process I wiped down the bowl with an acetone soaked cotton pad to remove the wax and finish from the pipe so that I could restain and blend the sanded portion of the shank on the bottom with the stain on the bowl. I also chose to stain the olive wood with the same stain to add a patina like quality to the look. The next three photos show the pipe after it has been wiped down and is ready to be stained.

IMG_0946

IMG_0944

IMG_0945

I did some more sanding on the shank and stem using a fine grit sanding sponge to smooth out any of the remaining surface scratches.I followed up by sanding the shank and the stem with micromesh sanding padsand then wiped it down a final time to remove the sanding dust and other debris before staining.The photo below shows the bowl and shank ready for staining.

IMG_0947

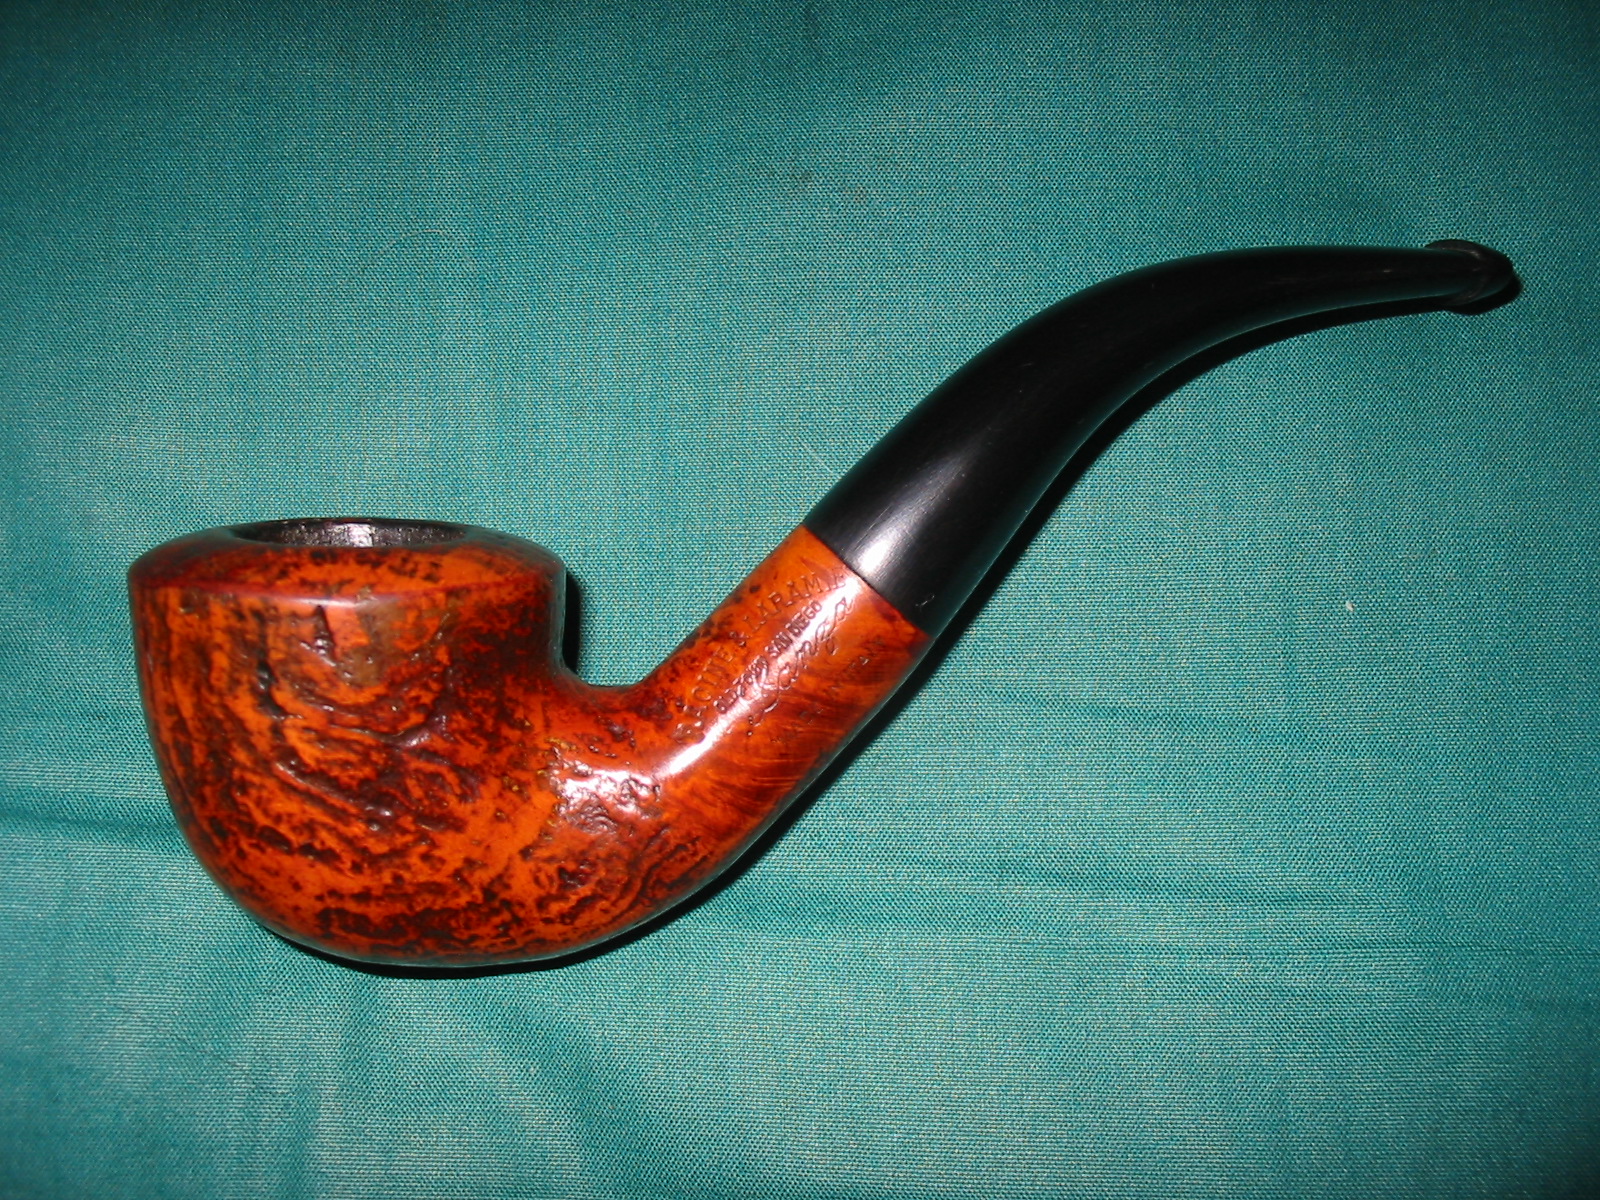
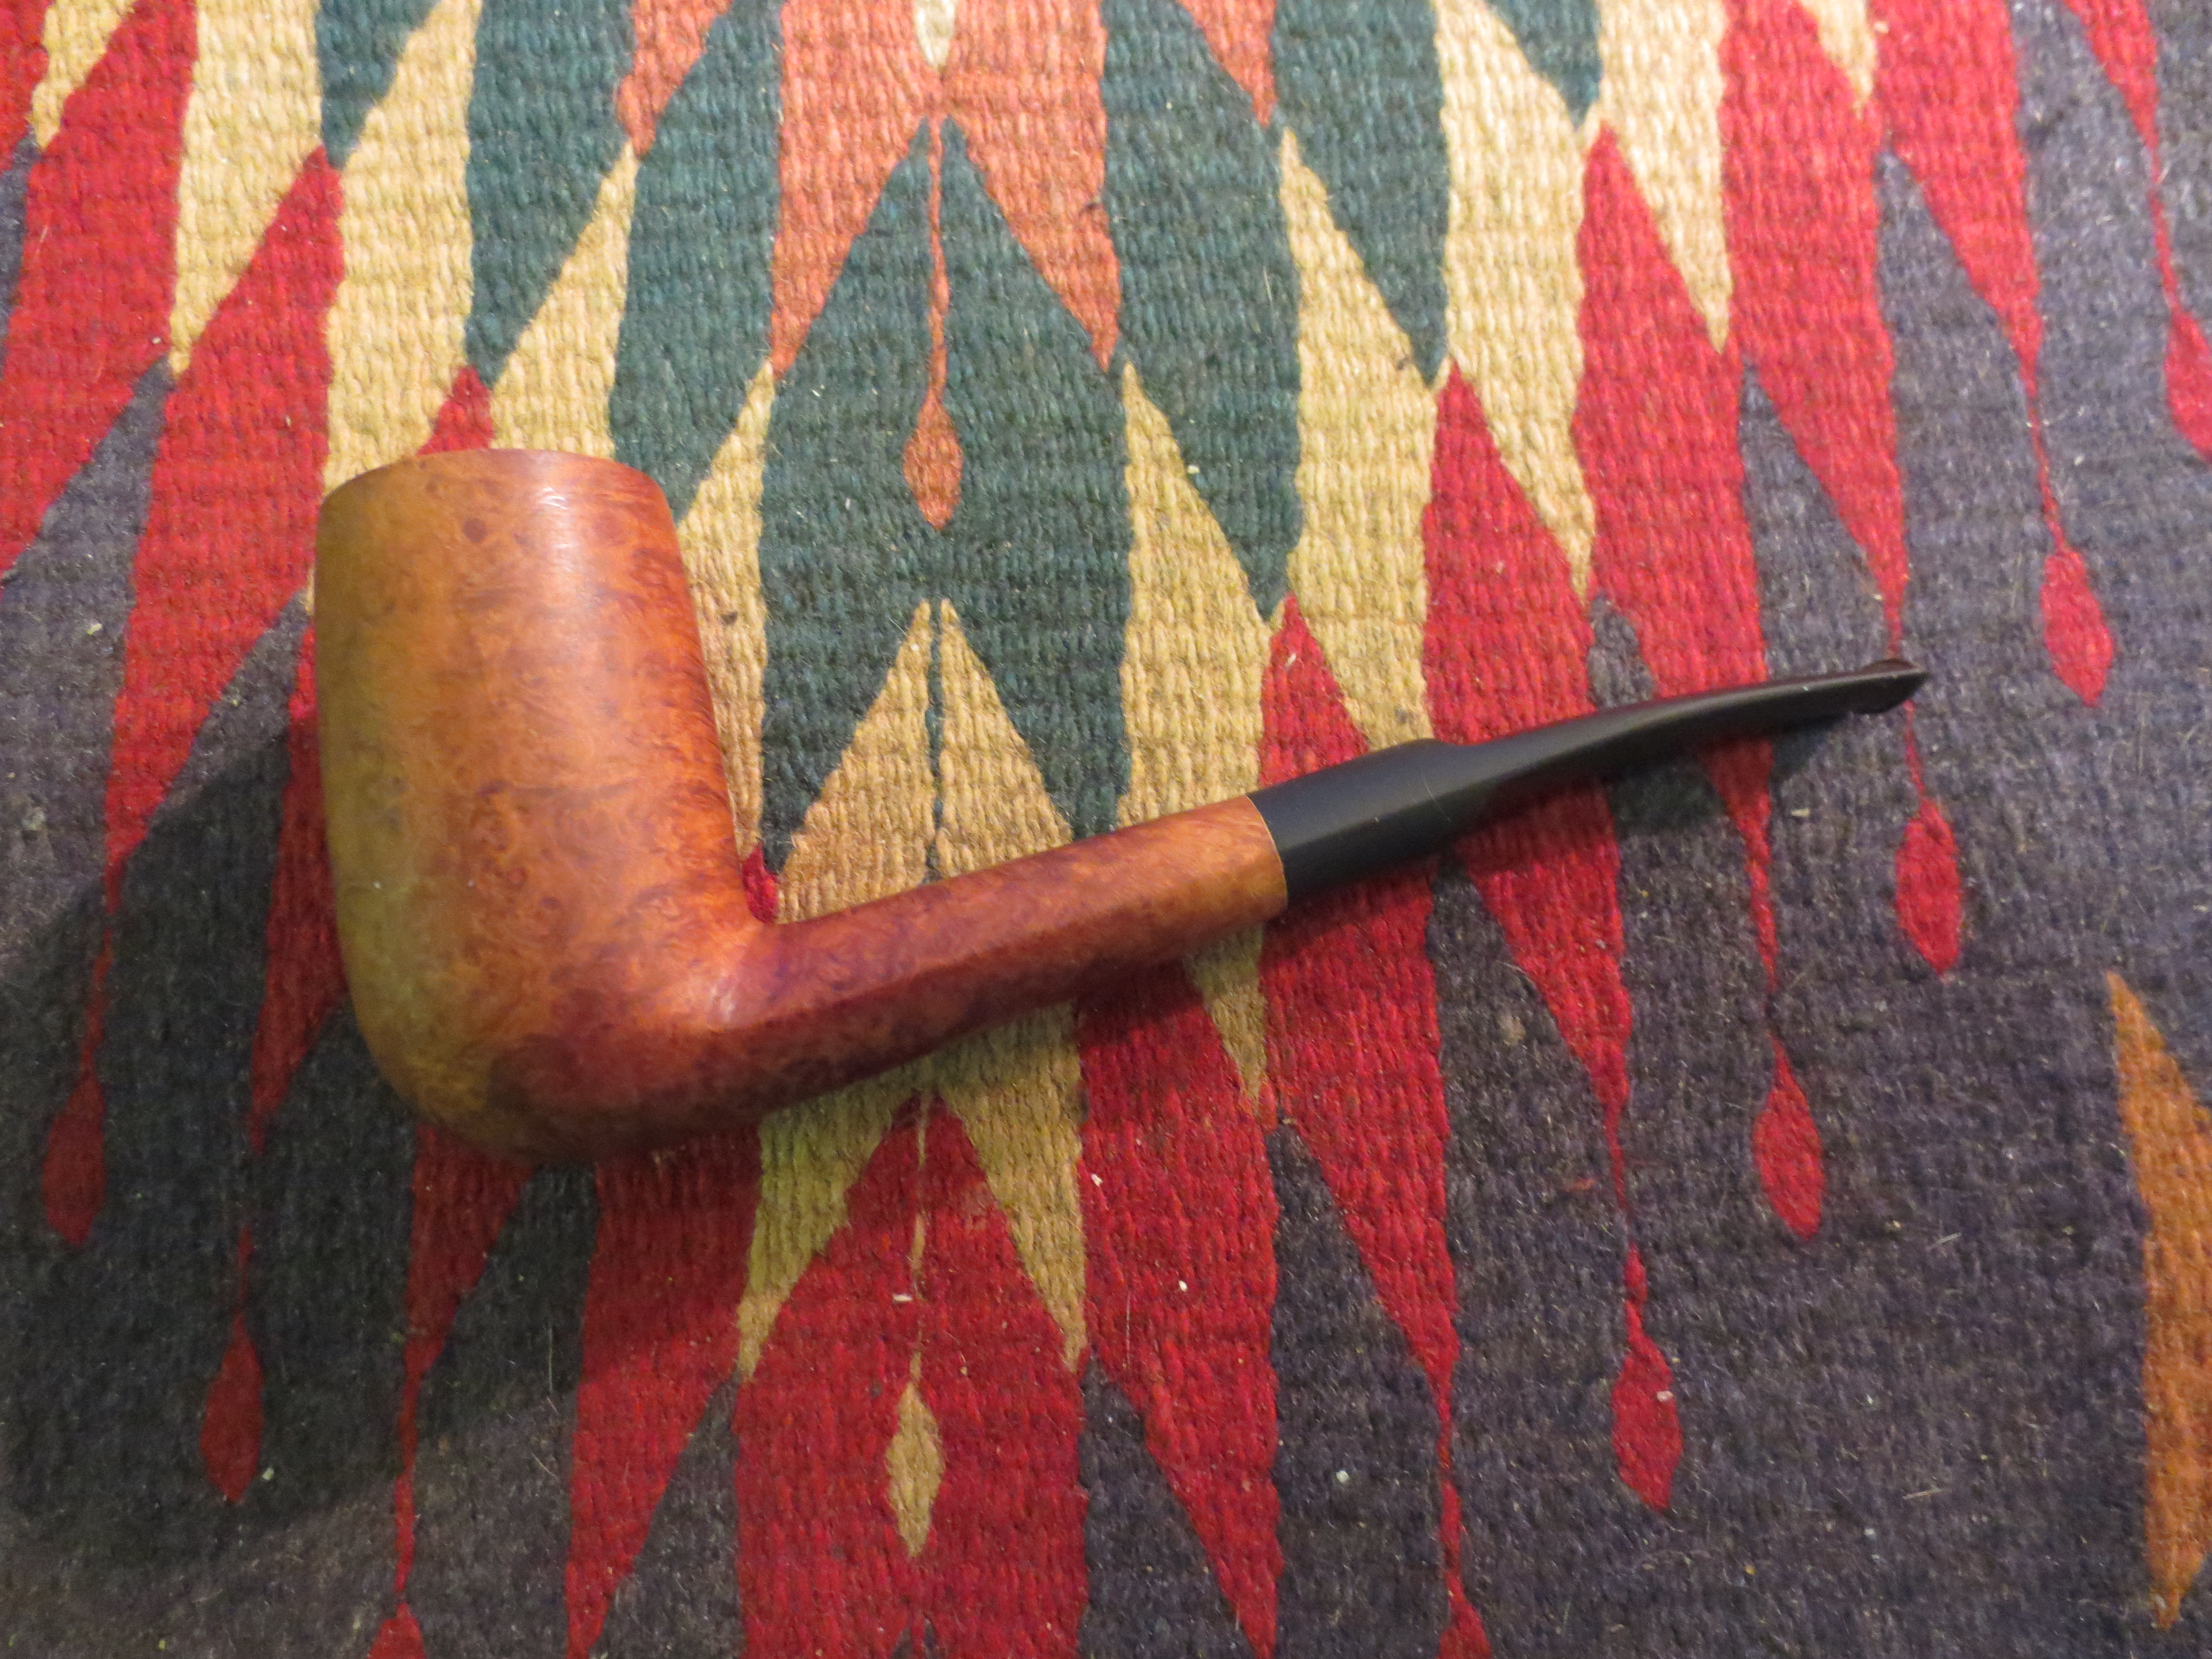
I stained the bowl and shank with an oxblood stain to give a reddish over stain to the brown undercoat. I wiped it on, flamed it, wiped it on again, and flamed it again. The red overcoat gave a depth to the colour on the bowl that had not been present before. It also gave a patina to the olivewood that really highlighted the grain in the wood. After the stain had dried I took the pipe to the buffer and buffed the bowl and stem with Tripoli and with White Diamond. The next series of four photos show pipe after I had buffed it. The new look seemed to work with the pipe. From the photos I could see that I also needed to make some adjustments to the underside of the shank to give it a better flow.

IMG_1223

IMG_1224

IMG_1225

IMG_1226

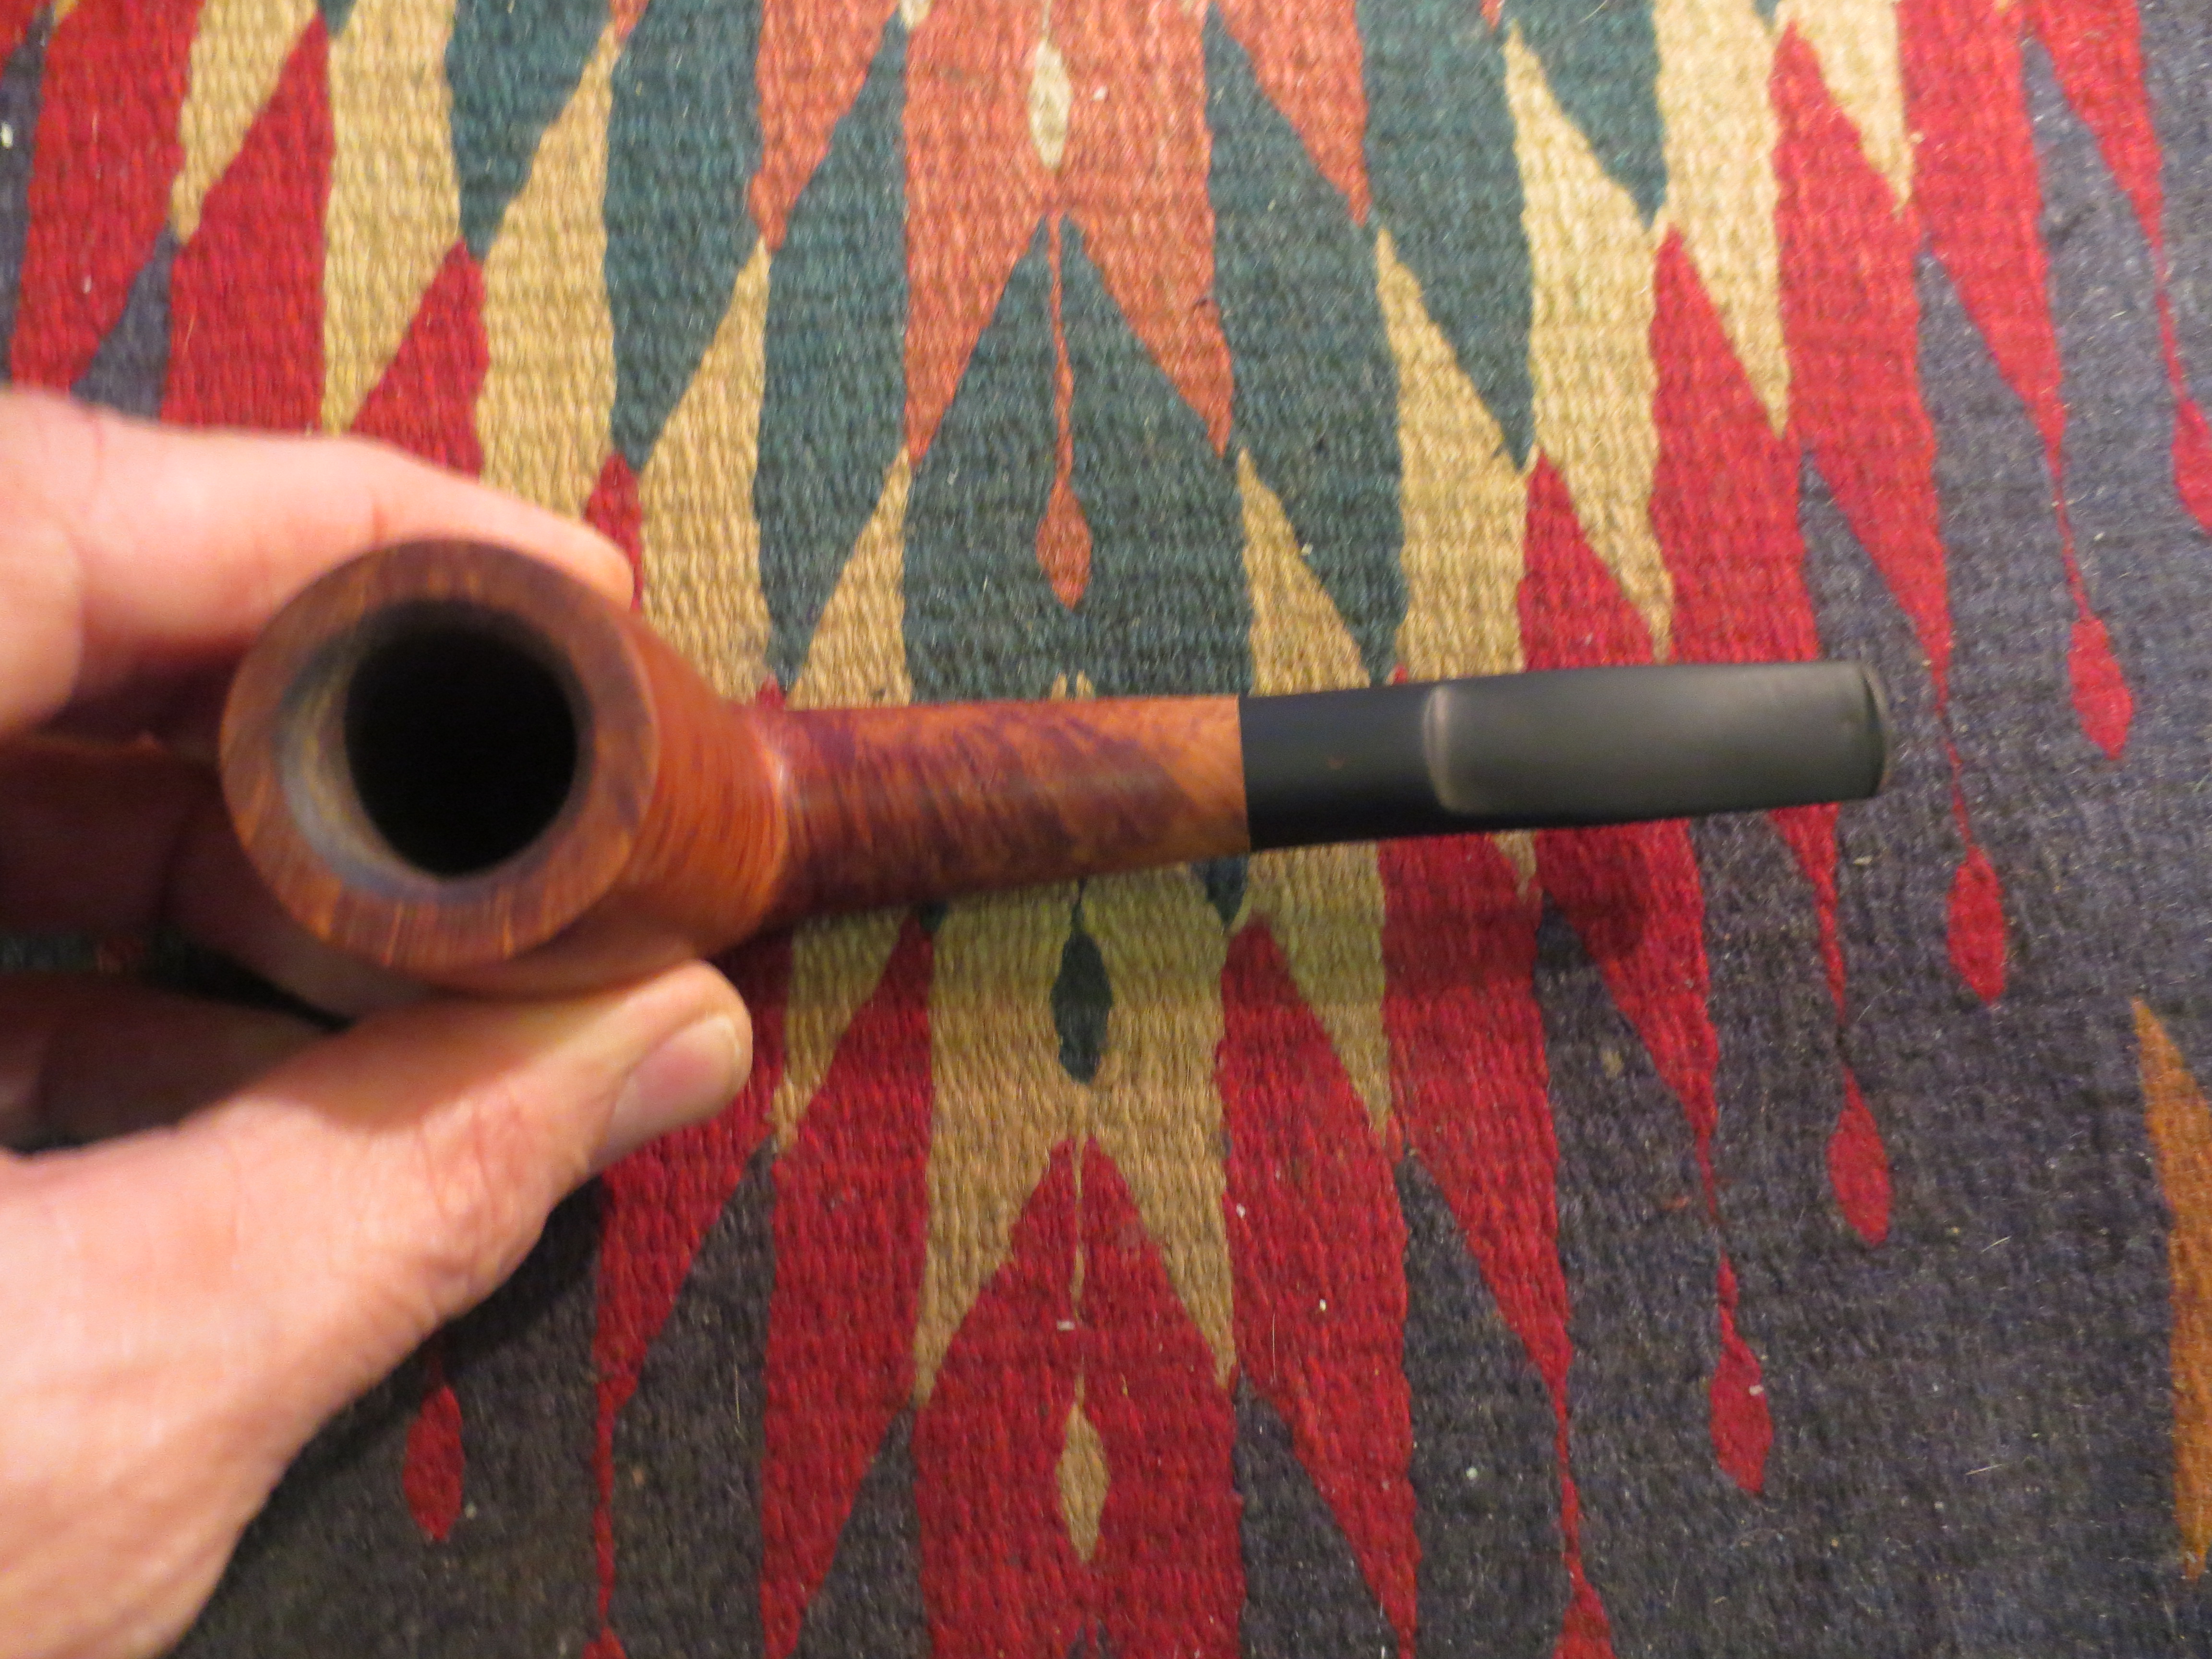
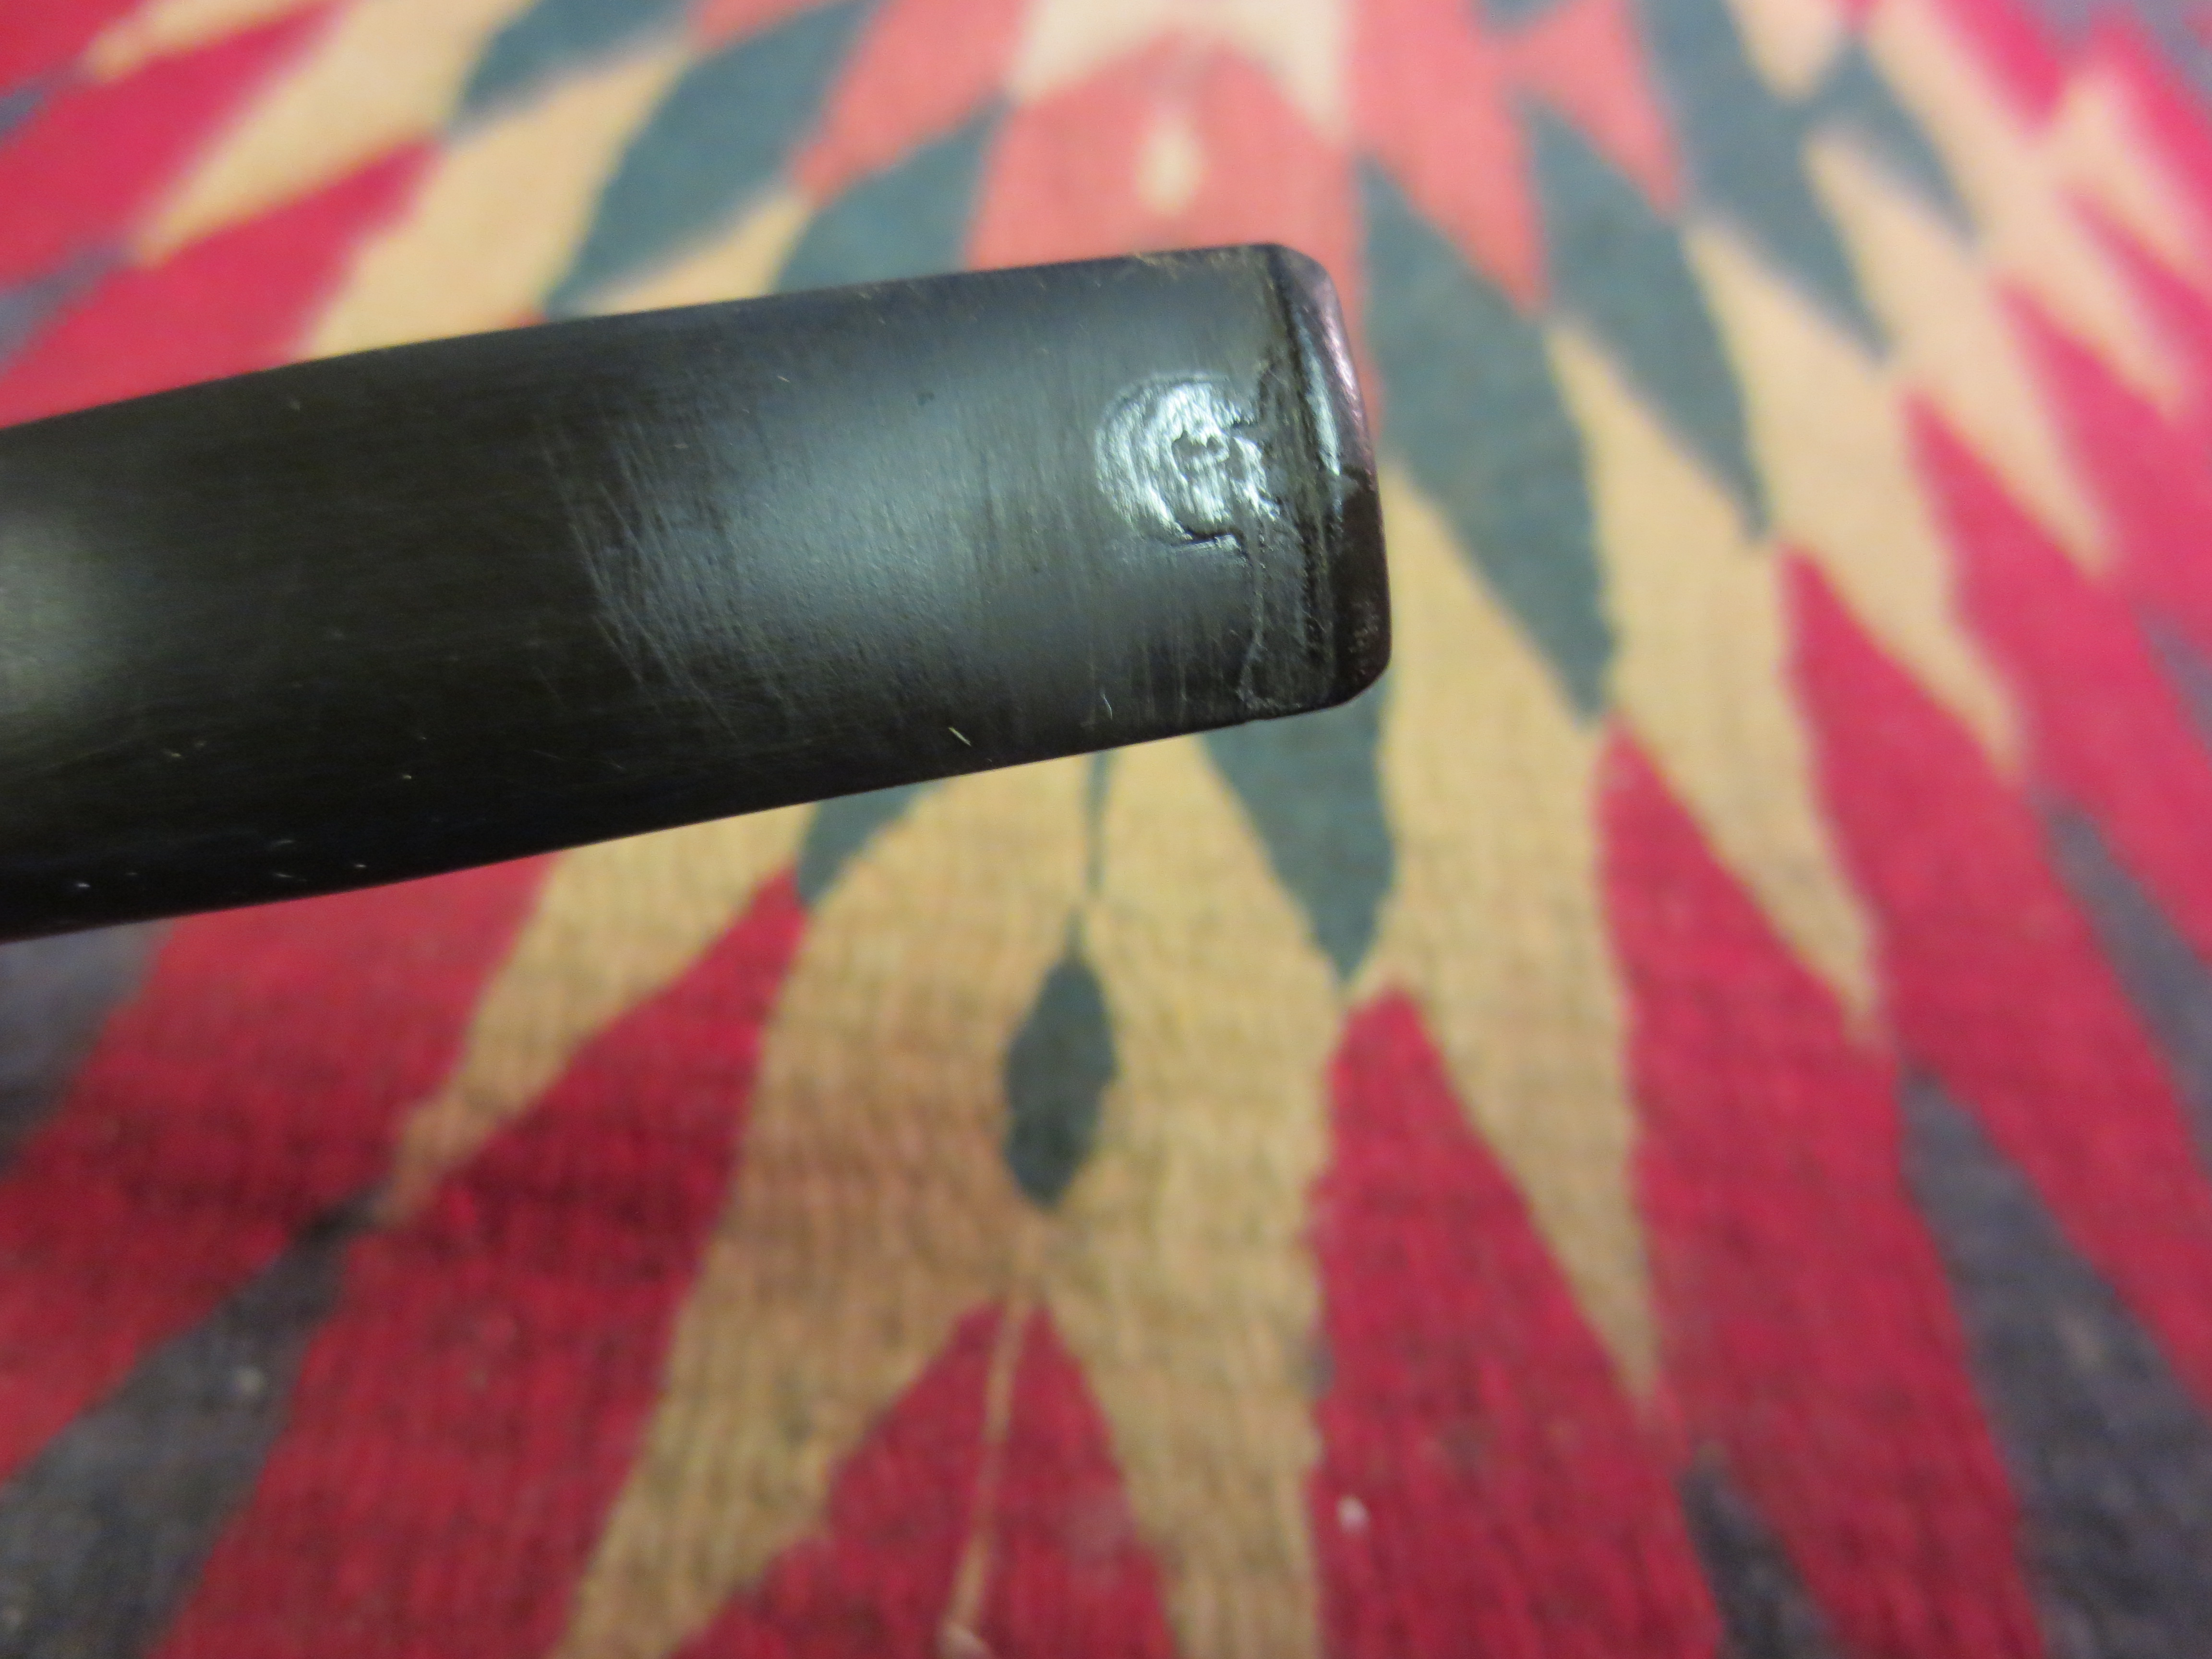
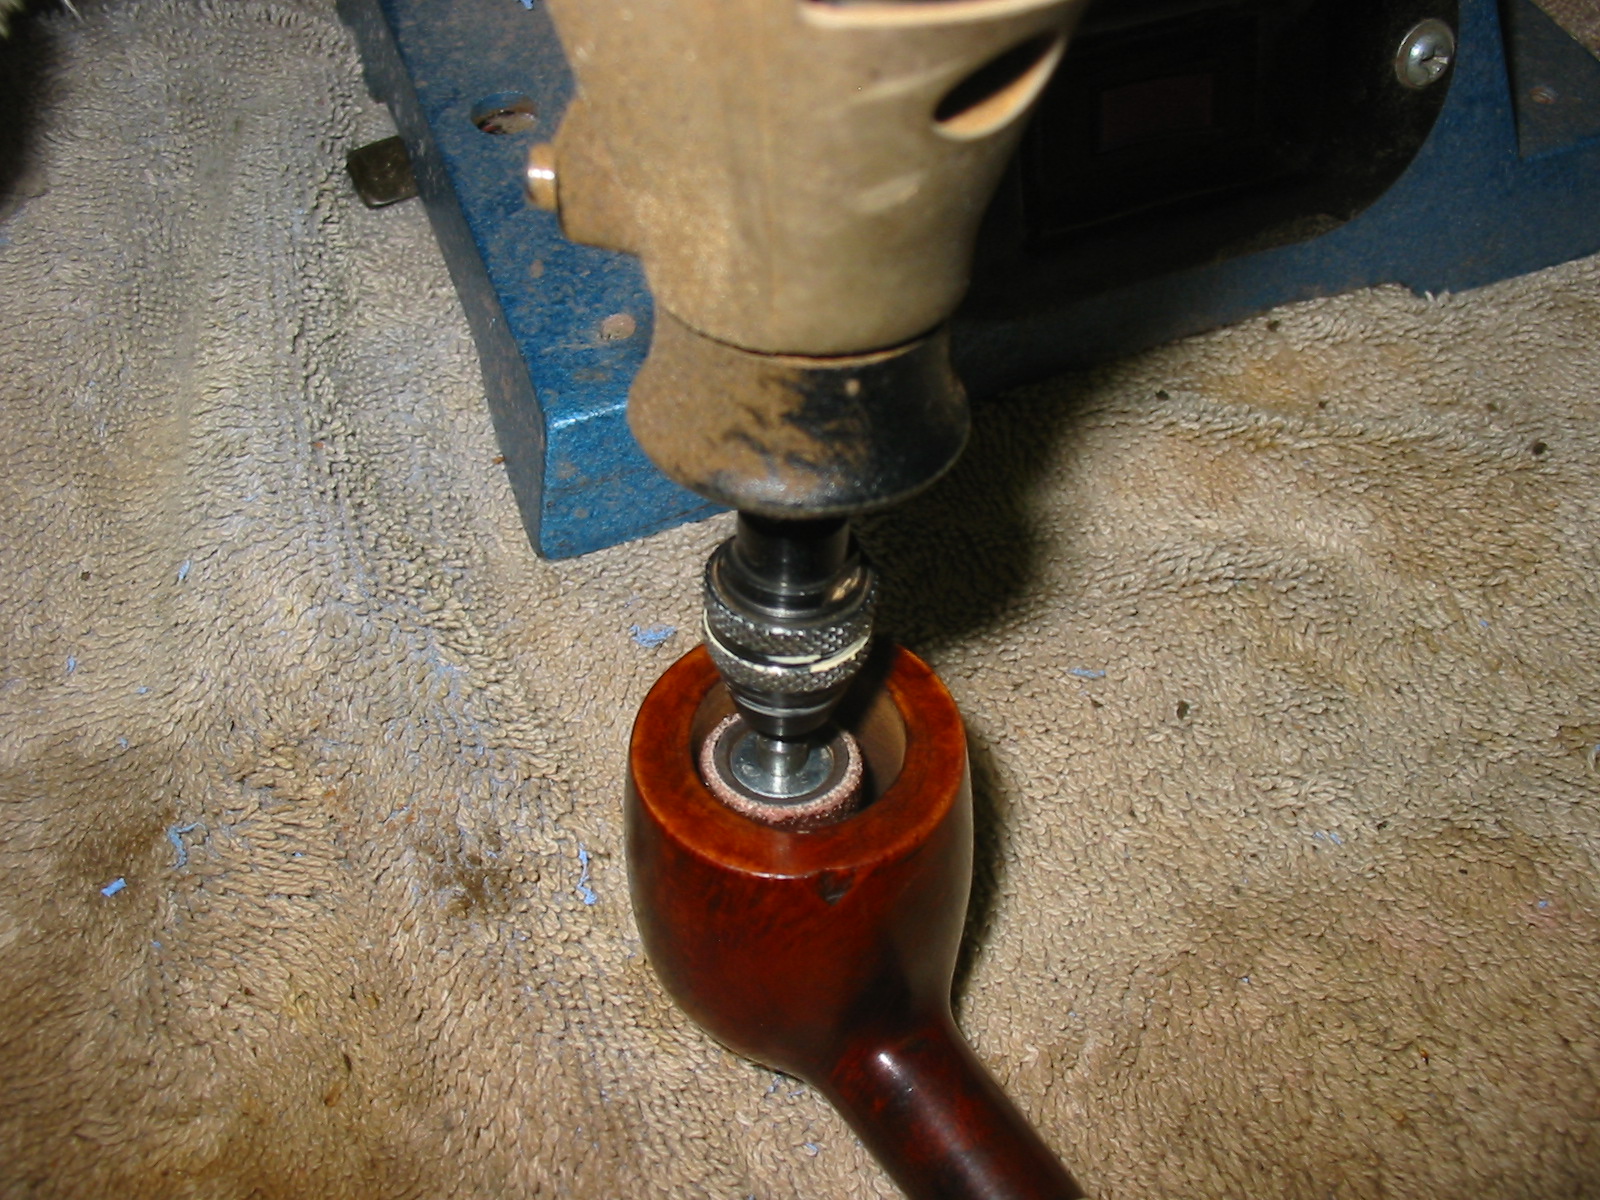
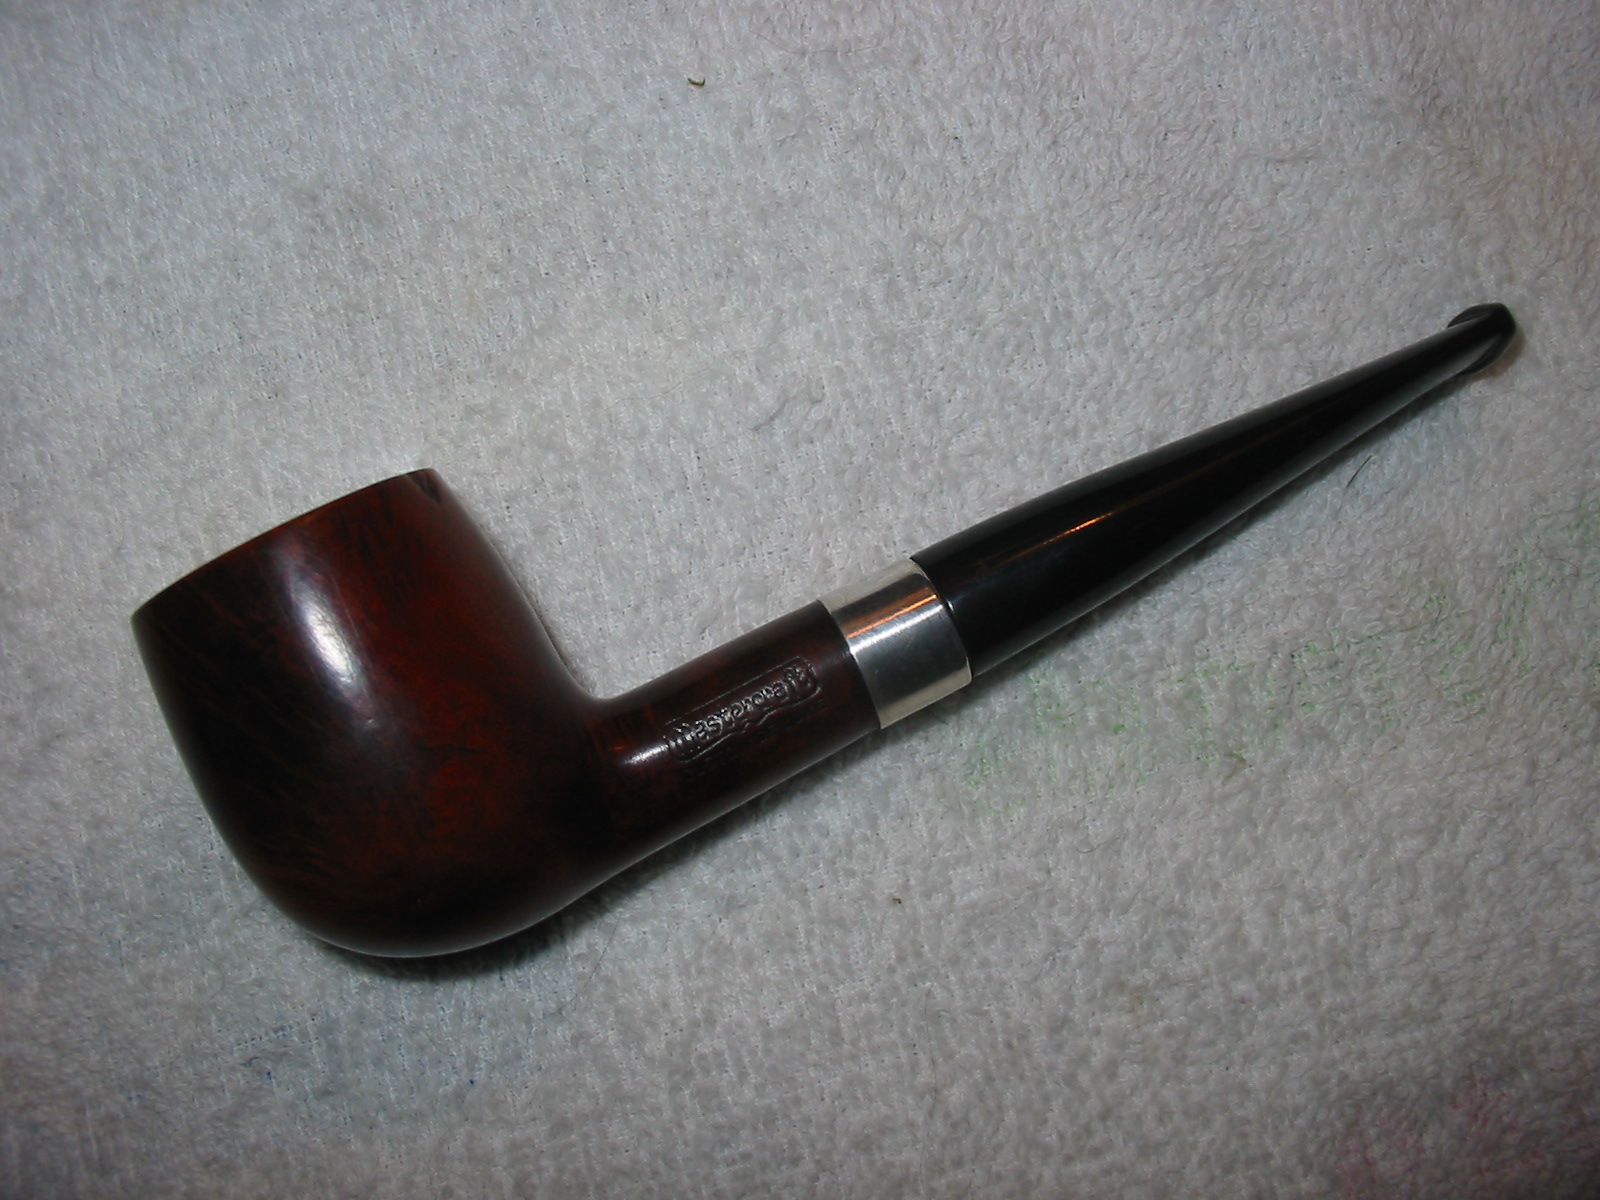
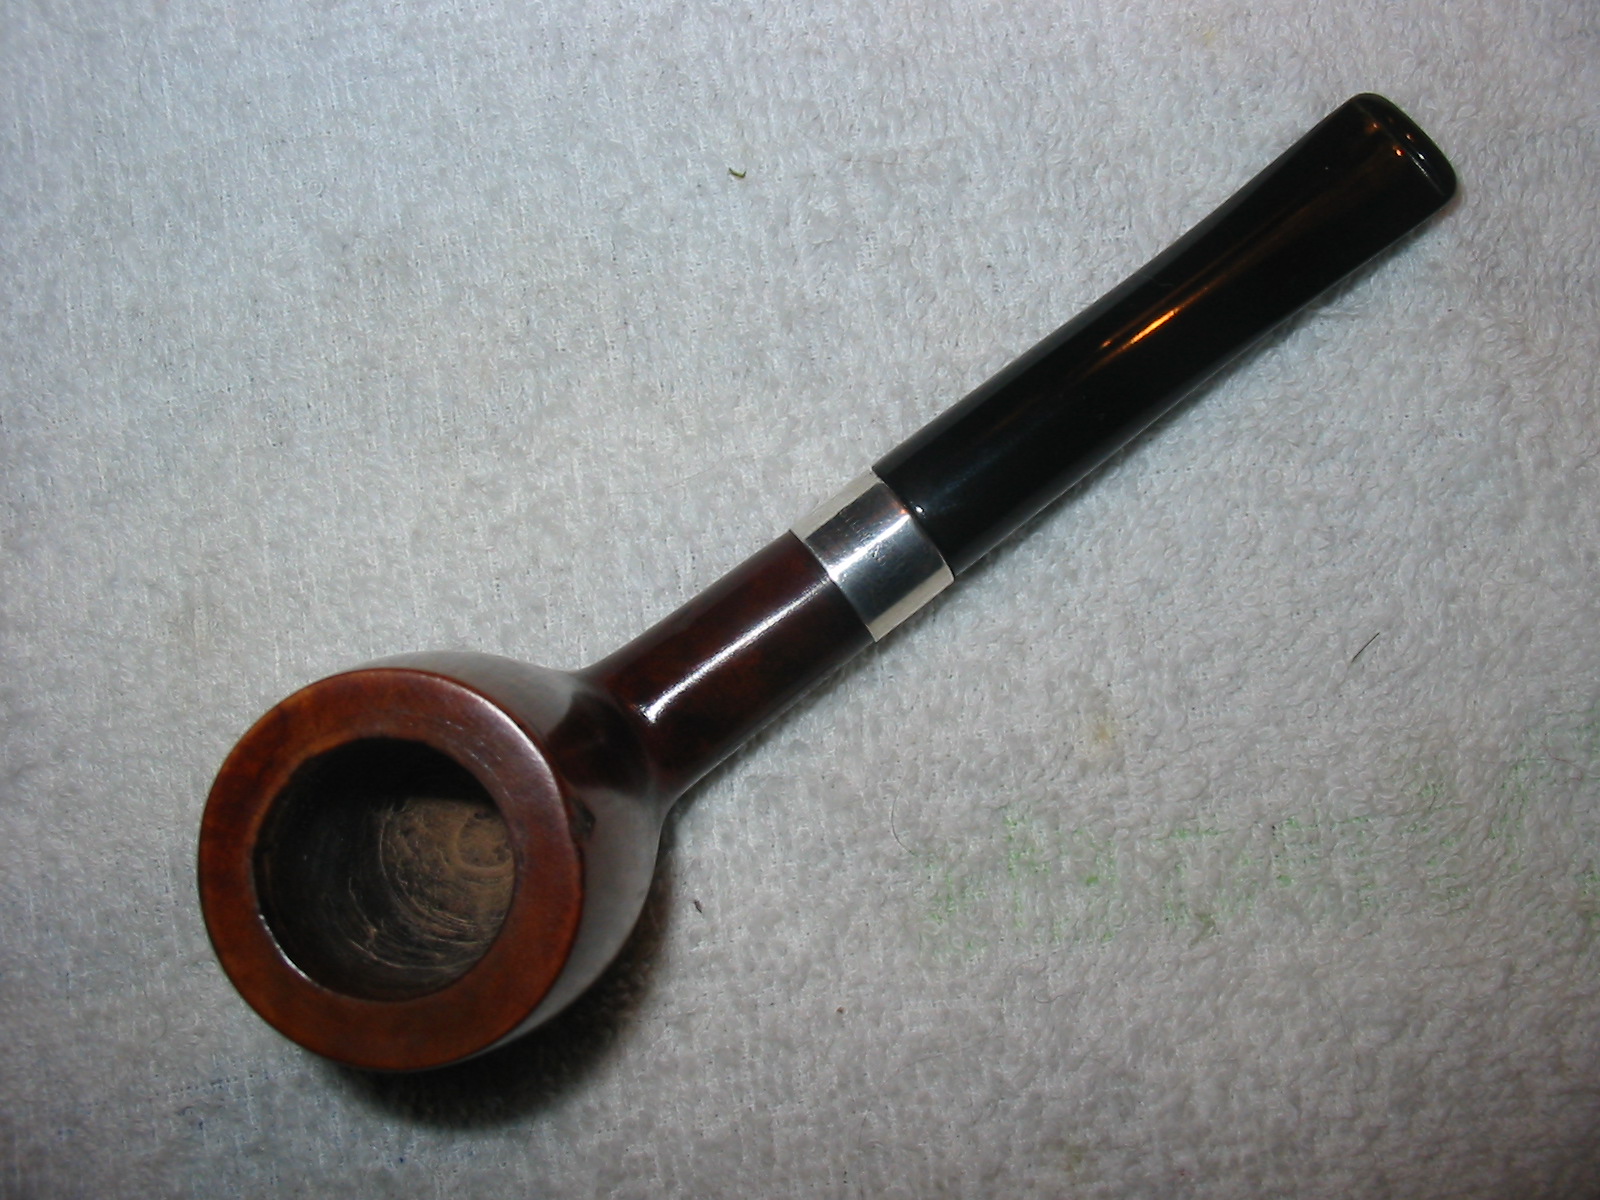
In the above photos it is evident that there was still a slight hump on the bottom of the shank on both sides of the acrylic band. That hump bothered me so I took it back to the Dremel and sanding drum and removed some more of the material on the shank around the acrylic band. I wanted to smooth out the flow of the bottom of the shank from the tip of the stem to the bottom of the bowl. One of the issues that I had to think through in doing this was that some of the original Downie stamp would lost. I would not remove all of the stamping but some of the letters on the stem side of the shank would be lost. I decided that I had made enough changes to the pipe that to not finish would leave the job half done. Sanding it down definitely improved the way it looked. After I finished sanding with the DremelI sanded the entire underside of the shank with 220 grit sandpaper, a medium and fine grit sanding sponge and then micromesh sanding pads 1500-3200 grit. I stained the portion I had sanded with the oxblood stain to match the rest of the pipe and then buffed it with White Diamond. I gave the entirety several coats of carnauba wax and then buffed with a soft flannel buff to polish it. The final series of four photos show the finished pipe.

IMG_1326

IMG_1327

IMG_1328

IMG_1329

Finding a Hidden Gem Underneath all the Grit and Grime


I went to work on the third pipe down in the far right column. It was one that I almost bypassed because of the shape it was in, but decided to take a chance and see what was underneath all of the mess. The stamping was long ago worn away by buffing. It had originally had a ferrule on the shank and that was missing. The bowl was badly caked and it was out of round from overzealous reaming. The finish was shot with thick black grime impregnated into the bowl finish all the way around. Underneath there appeared to be some nice grain. The missing ferrule left behind remnants of the glue that had held it in place. In the shank where the ferrule was missing were several fills – the only ones in the pipe. The size of the pipe is about a group 2 – kind of the classic size of an older billiard. The stem was missing so it would need to have one made to fit.

bowls1

Noname

The next series of photos shows the build up on the outside of the bowl. Not only was it badly caked it also was covered with a grey/black grime that would be challenging.

IMG_1258

IMG_1259

IMG_1255

IMG_1256

IMG_1257

I used acetone and cotton pads to remove the external grime on the bowl (Photos 1 – 2 below). There was actually some nice grain underneath all the grime. I reamed the bowl with a PipNet reamer starting with the smallest cutting head and working my way up to the largest that would fit the bowl. I wanted to ream it back to bare wood so that I could work on the damaged inner rim (Photo 3 below). I topped the bowl to remove the damage to the top of the rim and clean up the outer edges of the rim. I used my normal method of a piece of sandpaper on a flat surface and pushing the bowl into the sandpaper and rotating it to remove the damaged briar (Photo 4 – 5). I also push a nickel band onto the shank part way. I would later need to heat it to get a pressure fit deep on the shank. This band would both strengthen the thin walls of the mortise at the end and also cover the only fills present on the pipe.

IMG_1260

IMG_1261

IMG_1262

IMG_1263

IMG_1264

I used a Dremel with a sanding drum to work on the roundness of the bowl. I worked to even out the distance between the inner edge of the rim and the outer edge. Once this was completed I used sandpaper to smooth out the edge and give it a slight bevel (Photo 1). I wiped down the bowl and rim with acetone on a cotton pad to clean off the last of the dust and grime from the reaming and sanding (Photos 2 – 3).

IMG_1265

IMG_1266

IMG_1267

I set up the heat gun and turned it to the high setting. I held the band over the heat and rotated it to evenly heat the entire band (Photo 1). Once it was heated (just a few minutes) I then took it to the work table and pressed the band in place on a metal plate I use for setting the bands. Sometimes this takes several trips between the heat and the plate but this time one trip was all it took and the band was set (Photos 2 – 3).

IMG_1268

IMG_1269

IMG_1270

I used a PIMO tenon turning tool to turn the tenon to fit the mortise. I generally turn it until it is close and then finish the fit by hand with sandpaper (Photo 1). After sanding the stem fit quite well in terms of the tenon. It was snug and flush against the shank – no light showing through (Photos 2 -3). I used the Dremel with a sanding drum to remove the excess vulcanite on the stem and to shape it to match the diameter of the shank. I sand carefully with the sanding drum to bring it as close as possible to the size I want. You have to be careful and steady so that you do not nick the shank or the band while doing this. The finishing fit is done by hand with files and sandpaper (Photos 4 – 5).

IMG_1275

IMG_1276

IMG_1277

IMG_1278

IMG_1279

The next series of seven photos show the shaping process. I begin with a medium grit emery paper and sand out the scratches left behind by the Dremel. I shape the stem with this paper to the point where the flow and fit of the stem is what I am looking for (Photos 1 – 2). I then move on to 220 grit sandpaper and continue to remove the scratches and shape the stem (Photos 3 – 4). It then finish this shaping with a fine grit sanding sponge and polish out more of the scratches. Each grit of paper brings the stem closer to the finished shape (Photos 5 – 7).

IMG_1280

IMG_1281

IMG_1289

IMG_1290

IMG_1293

IMG_1294

IMG_1295

I apologize for the graininess of the next two photos but they show the bowl after I had stained it. I used a dark brown aniline stain thinned with one part alcohol. I wanted a rich reddish brown colour on this old timer so I thinned the stain to match the colour I wanted. I applied it to the bowl and rim, flamed it, reapplied it and flamed it again.

IMG_1299

IMG_1300

IMG_1301

I worked on the stem with micromesh sanding pads. I also sanded the nickel band to bring out a polish to it as well. The next series of seven photos shows the progressive shine that comes to the stem with each successive grit of micromesh from 1500-12,000 grit. I wet sanded with the 1500-2400 grit and then dry sanded with the remaining grits.

IMG_1313

IMG_1314

IMG_1315

IMG_1316

IMG_1317

IMG_1318

IMG_1319

I sanded the bowl with the higher grits of micromesh and then buffed the pipe with White Diamond to give the entirety a rich shine. I applied several coats of carnauba wax and buffed it with a soft flannel buff. The stain really highlights some of the beautiful grain on this pipe. I am glad I took the risk to bring this one back to life.

IMG_1321

IMG_1322

IMG_1323

IMG_1324

Royal Danish Acorn Shape 971 Reborn


Blog by Steve Laug

This is another pipe from the lot I picked up on Ebay not long ago. The lot is pictured in the photo below and this one is the third pipe down on the first column, left side. It is stamped Royal Danish in script over MADE IN DENMARK on the underside of the shank. It is also stamped 971. To me the shape is an oval shanked acorn. It has a sandblast finish with a smooth area on each side of the bowl and on the area that bears the stamping on the shank. The bowl was heavily caked as can be seen in the second photo. The finish was not in bad shape just dirty and the smooth areas had small scratches on the surface. The rim was caked with spill over from the bowl and would need to be scrubbed to remove the build up and make the sand blasted rim visible again. The bowl came without a stem.

bowls1

Danish

I sorted through my box of stems to see if I had one that was suitable for this pipe and found an estate stem that would work with a little cleanup. It was heavily oxidized and had some tooth chatter on the surface of the stem that became very visible as I cleaned it. The stem was clogged with tar and oils and I would have to unclog it to make it work. I used a paper clip that I straightened out to clean out the build up in the stem then sanded the tenon until the stem fit the pipe. I lined it up with the curves on the shank. Because of the sandblast on the shank the stem would not line up perfectly so I decided to sand a smooth band around the shank for the stem to line up with. I used a Dremel with a sanding drum to smooth out the edge of the shank. The next four photos show the finished band around the shank. Once it was stained I thought it would be a good contrast with the stem and the finish of the sandblast.

IMG_1282

IMG_1283

IMG_1284

IMG_1285

I reamed the bowl with a PipNet reamer. I began with the smallest cutting head and worked my way up to the second cutting head (first photo below). Once I had the bowl cleaned out I worked on the stem to clean up the oxidation and work on the tooth marks. I sanded it with 220 grit sandpaper and then with a fine grit sanding sponge (photos 2 and 3 below). I also sanded the banded area that I cut with the sanding drum.

IMG_1286

IMG_1287

IMG_1288

I wiped the bowl and shank down with acetone and a cotton pad. I wanted to remove the grime in the crevices of the blast on the shank and bowl. I used a soft bristle tooth brush and acetone to clean up the rim of the pipe. I scrubbed it until the finish was clean. Photos 1 and 2 below show the finish after the cleaning. The grey is the finish after it broke down with the acetone. I continued to scrub it until the finish was clean.

IMG_1291

IMG_1292

I set up the heat gun and heated the stem and bent it over the rolling pin that I use to get a good straight bend in the stem. I also buffed the stem and bowl with White Diamond. I used a light touch on the stem as I intended to keep sanding it with the micromesh sanding pads. I took it back to the work table and restained it with a dark brown aniline stain thinned with isopropyl alcohol. The mix was my attempt to match it to the original stain. I wanted the dark stain in the grooves of the blast to stand out against the brown over stain. The next three photos show the bend in the stem and the restained bowl. The band that I sanded in the shank is a nice contrast to the sandblast and the black of the vulcanite stem.

IMG_1296

IMG_1297

IMG_1298

I sanded the stem with micromesh sanding pads from 1500-12,000 grit. I wet sanded with the 1500-2400 grit pads and then dry sanded with the 3200-12,000 grit pads. The next series of four photos show how each progressive grit of sanding pads bring a deeper shine to the stem.

IMG_1304

IMG_1305

IMG_1306

IMG_1307

I wiped the stem down with Obsidian Oil to protect the new shine against oxidation and then once it was dry took it to the buffer and buffed the stem with White Diamond. I finished by buffing the bowl and stem lightly with White Diamond a second time. It took the pipe back to my work table and gave it several coats of Halcyon II Wax. I have found that it does a great job on sandblast and rusticated finishes. When it was dry I hand buffed it with a shoe brush until it had a rich shine. The next series of photos show the finished pipe. I like the new look to the shank and bowl and the new stem looks like it came with the pipe!

IMG_1309

IMG_1310

IMG_1311

IMG_1312

A Restemming Job with Memories of the Past


The third pipe I worked on in the lot below is the second one down in the third column. It is a Dublin like shape but probably properly is a freehand. It has a shallow sandblast finish with a two-tone stain. The undercoat is black and the top coat is brown. It is stamped on the left side of the shank Racine & Laramie in an arch over OLD TOWN SAN DIEGO over Banza in a script and then a line stamped Made in Italy. The look and feel of it says to me it is made by Lorenzo but I am not sure. When I read the stamping is when the memory came back. I have been in the Racine & Laramie tobacco shop in Old Town San Diego, California. It is a museum like tobacco shop that has a wide range of tobaccos and pipes in an old California mission style village setting. You can almost imagine cowboys riding up and tying up their horse to go in and get a pouch of fixin’s. The picture below is what I remember of the shop. It is from the website http://www.racineandlaramie.com/

Racine & Laramie

The following excerpt on the history of the shop comes from the website as well. I find it incredibly interesting reading.

History of Racine & Laramie
In 1868 Racine & Laramie became San Diego’s first Cigar Store. Having come from eastern Canada in the prosperity following the War Between the States, Messrs. Racine and Laramée sold cigars, tobacco, stationery, pipes, cutlery and gentlemen’s furnishings. The adobe they rented had been built in the 1820’s as the retirement home for leather-jacket soldier, Juan Rodriguez of the Royal Presidio. It was one of the first six buildings in the small pueblo, 500 registered voters, thousands of Kumeyaay. The Rodriguez family held ownership through periods of depression and Gold Rush boom, and their son, Ramon, was on the City Council. The widow Rodriguez had the building remodeled in 1867 and rented to Racine & Laramie and the Bank Exchange saloon. All was lost in the fire of 1872.

Using archeology, historic research and photographs this building has been reconstructed with the interior furnished and stocked as it may have been in that remote, frontier Pacific port. This picture gives a panoramic view of the interior of the shop looking at the cigar humidor.

Humidore

It was this shop that I visited many times over the years. It is like stepping back in time to enter the old town and then to walk into the shop itself. I think the last time I was there was about six years ago now. I took the train from the downtown harbor area to the old town site. I walked through the reconstructed village. I must have spent 3 or 4 hours wandering around the site and ending up in the old tobacco shop. I looked at pipes and tobaccos before settling on a couple of tins. I think I picked up some Dunhill EMP and maybe a tin of McClelland Dark Star before catching the train back into town.

Needless to say when I found this pipe bowl among the lot pictured below I restemmed it and while working on it relived my visits to the pipe shop in Old Town San Diego.

bowls1

The finish on the pipe was in pretty good shape – slight wear on the shank area and on the rim left the stain spotty in those areas. The bowl was caked – but differently than most of the pipes I work on. Its cake was primarily in the bottom half of the bowl. The bottom half was thickly caked while the top was not as bad. The photo below shows the bowl as it was when I took it to the work table. The sandblast is either worn from use or it is a lightly blasted finish. The shank was in very good shape and there were no cracks of damage to the inside. The drilling is a bit funny on this as well. It is drilled with a relatively deep mortise and the airway is drilled at the top of the arc of the mortise. It then drops at a sharp angle into the bowl coming out just left of centre in the bottom of the bowl. Because of the high drilling the mortise acts as a sump similar to the Peterson sump in the shank of the system pipes. It was dirty but not with any aromatic residue. Rather the pipe smelled of Virginias and would take little to clean it up.

new1

This pipe that took me several tries to get a stem that would work. This was not due to the look or feel of the stem but due to unforeseen troubles. The first was a nice saddle stem. I turned the tenon and had a great fit on it. I heated it with my heat gun and tried to bend it over my rolling pin to aid in getting the right angles on it. The heat made it very flexible and as I bent it to the correct angle it just snapped in two parts. Those things happen and in this case it was a frustration to be sure – so back to the drawing board. This time I chose a tapered stem. I turned the tenon and fit it to the mortise. I then used the Dremel with the sanding drum to remove the excess material and fit it to the diameter of the shank. I then sanded it with 220 grit sandpaper to finish the fit of the stem. The next three photos show the newly fit stem.

IMG_1227

IMG_1228

IMG_1229

I reamed the pipe with the PipNet reamer and cleaned out cake from the bottom of the bowl. I had to use two different cutting heads on the reamer to get it to remove the cake. The smallest head fit into the bottom half of the bowl and I was able to cut it back until the third head fit and removed cake from the top half and the remaining cake on the bottom half.

IMG_1230

I wiped down the bowl and shank with acetone on a cotton pad to remove some of the top coat of stain and even out the lighter areas and the darker areas where the stain was still present. My goal was not to remove all of the stain present but merely even out the top coat so that I could more easily blend in the new stain coat.

IMG_1231

Then with a bit of fear and trepidation, after breaking the first stem, I took the stem to the heat gun and heated it so that I could bend it into shape. I inserted a pipe cleaner in the airway as the bend would be quite significant and I did not want to risk having the airway collapse or kink. I heated it a high heat setting until the stem was flexible. I want the bend to be quite high up the stem toward the shank and not just on the thin portion of the stem so it took some time over the heat to make the stem bendable. I kept the stem moving over the heat as I did not want to burn the vulcanite. Once it was pliable I bend it over an old rolling pin that I have absconded with for that purpose. I have a heavy cardboard tube over the pin so that the surface is very smooth for the bend. Any cracks or rough spots on the rolling pin translate into wrinkles in the hot vulcanite.

IMG_1232

IMG_1233

IMG_1234

In the first photo below the bend in the stem can be seen after the first heating. I took it back to my worktable and took the photo below so that I could have a clear look at the bend in comparison with the curves in the bowl. It was not bent enough so I took it back to the heat gun, reheated it and bent it further. The second and third photos below show the final bend that I was aiming for. The bend in the stem reflects the curve of the bottom of the bowl and gives the pipe a pleasant flow. It is also bent perfectly for the pipe to sit well in the mouth.

IMG_1235

IMG_1236

IMG_1237

With the stem bent to the proper angle I worked on its finish with the micromesh sanding pads. I wet sanded the stem with 1500 grit until the major surface flaws were no longer present. The scratches left behind by the sandpaper were gone when I had finished wet sanding it.

IMG_1239

IMG_1240

IMG_1241

IMG_1242

I restained the bowl with a dark brown aniline stain thinned to 2 parts stain to 1 part isopropyl alcohol to match the existing stain on the bowl. I applied the stain with a cotton swab, flamed it with a lighter, reapplied more stain and then flamed it again to get the match correct. When finished I took the pipe to the buffer and buffed the pipe and the stem with White Diamond. The next three photos below show the pipe as it stood at this point in the process. The finished shape is very clear in these photos.

IMG_1243

IMG_1244

IMG_1245

I brought it back to the worktable and continued sanding with the micromesh sanding pads. I wet sanded the stem with 1800 and 2400 grit sanding pads. I wiped the stem down between sanding to see how it was progressing. Then I dry sanded with 3200-12,000 grit sanding pads to finish polishing the stem. The next series of four photos show the progressive shine on the stem.

IMG_1246

IMG_1247

IMG_1248

IMG_1249

Once the stem was polished I buffed it a second time with White Diamond and then coated the stem with a rub down of Obsidian Oil and let that soak in. After it was dry I rubbed down the stem with a clean cotton rag to bring out the shine even more.

IMG_1250

The final four photos show the finished pipe with its new stem. The old Racine & Laramie pipe was back in action and ready to smoke. The back story to this one is as interesting as the old pipe. I wonder the path it took from San Diego to Chicago area and then up to Vancouver, British Columbia. I wonder where it lost its stem along the path it travelled. I only wish it could tell the stories of its travels and the pipemen who smoked it along that journey. I will probably never know the story but at least my imagination can create a suitable tale for the pipe before I too send it on its way, for I am sure it will outlive me as it passes into the hands of future pipemen who come after me.

IMG_1251

IMG_1252

IMG_1253

IMG_1254

Savinelli deluxe Milano Stack Restemmed & Renewed


Blog by Steve Laug

The second pipe in the lot pictured below that I chose to work on was the one on the top of the right column. It is stamped on top of the shank Savinelli de luxe Milano and on the underside the Savinelli shield and next to that is it stamped 130KS Italy. The finish was dull and mostly gone. The rim was not charred at all but had a heavy build up of tars. The bowl was caked – interestingly for a pipe this deep it was caked all the way to the bottom of the bowl. The dimensions of this bowl are: height 2 1/4 inches, outer diameter of the bowl 1 ½ inches, diameter of the chamber ¾ inches. It smelled of sweet aromatics so it would need to be reamed and cleaned well. There was no stem with it but there was a broken tenon stuck in the shank. I would have to pull the tenon and fit a new stem on the bowl. It was made of a good piece of briar – no fills or sand pits. The grain is cross grain on the front and back of the bowl and the top and the bottom of the shank. It had some very nice birdseye grain on each side of the bowl and the shank. The shape of the shank was a modified oval shape.

bowls1

Savinelli top

Before I cleaned the bowl and shank I removed the broken tenon that was stuck in the mortise. I have a screw that works perfectly for this process. I turn it into the tenon by hand or a screw driver and then work it out by hand or with a pair of pliers. If the tenon is stuck and will not move I put it in the freezer for 30 minutes or more and generally it will pop out quite easily. In this case it came out quite simply and I was able to move on in the process of cleaning.

IMG_1323

IMG_1324

I sorted through my collection of old stems to find an oval one that I could modify to fit the style of the shank. I had looked on line and found that this particular model of Savinelli had a taper stem (see the first photo below). I did not have any oval tapered stems that would fit, nor did I have large enough round stems that could be modified. I chose an older oval saddle stem that I believed would look good. I think that originally it was on a Dr. Plumb pipe but the logo was worn off and my modifications would remove the red dot on the stem (second photo below).

$T2eC16JHJHUFFfhDpWd3BR)N9Jwnpw~~60_57

IMG_1325

I sanded the tenon with 220 grit sandpaper until I had a good snug fit on the shank. The next four photos show the stem before I began to shape it to fit. The fit against the shank was good and tight. The look of the pipe and stem worked for me so I was good to go.

IMG_1326

IMG_1327

IMG_1328

IMG_1329

I do the initial shaping of a stem with a Dremel and sanding drum. I set the speed about mid mark on the speed control of the Dremel and slowly work at the surface of the stem. I do this initial shaping with the stem on the shank. I want to shape it as closely as possible to the shank shape before doing the finish shaping by hand. The next three photos show the stem after this initial shaping. There was still much work to do in bring the stem and shank to a proper fit and the width of the stem to a match with the taper of the shank. This work had to be done by hand using sandpaper and files.

IMG_1330

IMG_1331

IMG_1332

The depth of the bowl on this stack made it impossible for me to get to the bottom of the bowl with my reamers. The PipNet reamer went about 2/3 of the way down the bowl and the KleenReem or Senior reamer did the same. I have used a plumbing tool that is used to clean up pipe after cutting it to ream deep bowl. It is a ¾ inch cone shaped wire brush with a handle that I can turn into the bowl and go to the bottom to remove the cake evenly. It works exceptionally well for this purpose.

IMG_1337

IMG_1338

IMG_1339

IMG_1333

I cleaned up the rim of the pipe with 220 grit sandpaper and also worked on the shank stem fit with the same sandpaper. As I was planning to refinish the pipe bowl and shank I did not care if I removed a bit of the finish while sanding the stem and shank. The next three photos show the stem/shank fit after I had sanded it with the sandpaper. I really liked the look of the pipe at this point and only needed to do the stem polishing and the finish sanding and cleaning of the bowl.

IMG_1334

IMG_1335

IMG_1336

I used acetone on cotton pads to remove the finish on the pipe. I wiped it down until it was the same colour as the sanded portion of the shank. This would make blending the stain much easier to do. The first two photos below show the bowl after the initial wipe down with acetone. Photos 3-5 show the pipe after the finish has been removed from the pipe and it is ready to be stained.

IMG_1340

IMG_1341

IMG_1342

IMG_1343

IMG_1344

When I sanded the stem I found that there was one small tooth mark on the top of the stem near the button that no amount of heat would lift up. I sanded the spot with the 220 grit sandpaper until it was clean and then buffed it with Tripoli until it was very clear the breadth of the spot. I filled the indentation with clear super glue and sanded it once it was dry. The two photos below show the stem repair after the initial sanding and then after it was ready to be polished. Once the polishing was done the repair would be virtually invisible.

IMG_1345

IMG_1346

I cleaned the internals of the stem and the shank with pipe cleaners, cotton swabs and Everclear until the shank and the internals of the stem were clean. I used a dental pick to clean out the areas inside the button and the flare of the airway in the button.

IMG_1347

IMG_1349

Once the insides were clean I wiped the bowl down with Everclear and removed any possible grime that I added to the surface in the cleaning process. The next three photos show the pipe after all of the cleaning. It is beginning to look like the stem and pipe were made together.

IMG_1350

IMG_1351

IMG_1352

Because of the amount of grime that I cleaned out of the shank and the stem I decided to use a retort on it to give it a more thorough cleaning. The next series of three photos show the set up of the retort system. I use isopropyl alcohol in the test tube and heat the tube with a small tea light candle. I use a block of ebony that I have here to support the pipe and retort during the process. The alcohol is boiled through the pipe until it comes out clean. Generally this takes 2-3 fresh test tubes of alcohol.

IMG_1353

IMG_1354

IMG_1355

After removing the retort I cleaned out the bowl, shank and stem with pipe cleaners and cotton swabs a final time to remove any of the alcohol and oils that remained. I then sanded the stem with 1500 and 1800 grit micromesh sanding pads to begin polishing the surface and to remove any of the debris left from the surgical tubing on the stem.I continued to sand the stem with the micromesh sanding pads from 2400-12,000 grit in preparation for staining.

IMG_1356

IMG_1357

IMG_1358

IMG_1359

IMG_1360

IMG_1361

IMG_1362

I stained the pipe bowl and shank with dark brown aniline stain mixed 2 parts stain to one part alcohol to get the brown colour that was previously on the pipe. I wanted it thin enough that the grain would really stand out and give the pipe a uniform look after the sanding. The pipe has some beautiful cross grain on the front and back of the bowl and the top and bottom of the shank with birdseye grain on the sides. I wanted the stain to highlight that. I stained the pipe, flamed it and restained and reflamed it to set the stain in the grain.

IMG_1363

IMG_1364

IMG_1365

Once the stain was dry I took the pipe to the buffer and buffed the bowl and the stem with White Diamond to polish the stem and the stained bowl. Afterwards I gave it multiple coats of carnauba wax and buffed it with a clean flannel buff. For a final touch I hand buffed it with one last coat of wax and shoe shine brush. The final photos below show the finished pipe. It is cleaned, renewed and ready to go out to a good friend who loves this shape!

IMG_1368

IMG_1369

IMG_1370

IMG_1371

A Surprise in this Lot of Pipe Bowls – a BBB Virgin Own Make Billiard


Blog by Steve Laug

This package of pipe bowls to restem arrived this week. There were several surprises in the lot but one that the seller had listed as London Made turned out to be a BBB Virgin Own Make. The stamping had been buffed and was fairly faint but it indeed read BBB under the loupe. The left side of the shank is stamped London Made and the shape number 638. In the photo below it is in the center column the third pipe in the column. It came with a heavy cake and tar buildup on the rim. The bowl had been reamed in the past with a knife but was still fairly round. The chamfer/bevel on the inner rim is what had suffered the damage. The finish was dirty but would clean up fairly easily. Under the grime it appeared to be a beautiful cross grain – birdseye on the front and back of the bowl, on the top and bottom of the shank and cross grain on the sides of the bowl and the shank. It was going to be a beauty once it was cleaned up. The edges on the shank end were clean and undamaged and there were no cracks in the shank. The inside of the shank was also very tarry and caked.

Figure 1 Assorted pipe bowls for restemming

Figure 1 Assorted pipe bowls for restemming

I used a PipNet reamer to ream the bowl and remove the heavy cake build up. I reamed it with a smaller cutting head first and then used the correct size to finish. I wanted to ream it back to bare briar so I patiently worked with the cutting heads until the bowl was clean. The next series of three photos show the reamer in place and the result of the reaming. Look closely at the top of the bowl in the third photo and you will see the damage to the chamfer/bevel on the inner edge of the rim. Also in the photos is the stem I picked out of my can of stems for this pipe. The great thing is that I had a BBB stem in the can that fit well with minimal work on the tenon.

BBB Virgin bowl

IMG_1188

IMG_1189

IMG_1190

The next photo shows a side view of the pipe. I took this photo because of the great cross grain that is visible on the bowl.

IMG_1191

I sanded the tenon with 220 grit sandpaper to remove a thin layer of the vulcanite and make a good fit on the stem. The next two photos show the fit of the stem. I was unable to push it into the shank due to the tar buildup in the shank. Once I cleaned out the shank I would be able to tell if I needed to do a bit more sanding on the tenon.

IMG_1192

IMG_1193

I cleaned out the shank with cotton swabs and Everclear. While I worked on that I also swabbed out the inside of the bowl and the rim with Everclear as well. It took many cotton swabs and pipe cleaners to get the shank clean and ready for the new stem.

IMG_1194

IMG_1195

When the shank was clean I tried to fit the stem again. It was still a little tight so I set it aside to work on when it was thoroughly dry. I have learned that if I fit it when the shank is wet the fit will be too loose once it dries out. The photo below shows how the stem fit after the cleaning of the shank.

IMG_1196

When I returned from work the stem fit perfectly. I did not need to do any more sanding on the tenon. I wiped down the exterior of the bowl and shank with acetone on cotton pads to remove the finish and grime from the top of the bowl. I also did some minor adjustments to the shank/stem union as the shank was slightly out of round and needed to have briar removed on the top and left edges to smooth out the union. I used 220 grit sandpaper and a medium grit sanding sponge to even out the fit of the stem. The next three photos show the fit of the stem and shank after the work.

IMG_1197

IMG_1198

IMG_1199

I sanded the chamfer/bevel on the inner rim of the bowl with a folded piece of 220 grit sandpaper. I wanted to repair and minimize the damage to the rim from the reaming that had been done with a knife. I have found that I can set the folded sandpaper at a set angle and work my way around the inner rim of the bowl repairing the bevel. It takes careful work to get the angles to even out and give a finished look to the repair. The photo below shows the finished chamfer/bevel.

IMG_1200

Once the bevel was completed and the shank/stem fit fine-tuned I needed to remove the rest of the finish from the pipe so that I could easily restain it and have a good match on the sanded areas. I sanded the rim and the shank with a fine grit sanding sponge and also with 1500-2400 micromesh. I then wiped the bowl down with acetone wetted cotton pads to remove the finish. The next three photos show the pipe after the wash with acetone. The finish stained acetone cotton pads are in the background.

IMG_1201

IMG_1202

IMG_1203

I sanded the stem and the bowl with a fine grit sanding sponge after the wash to even out the look of the finish and to prepare it for staining. The next three photos show how the sanded portions now blend in with the finish of the bowl and shank. The scratches have been removed and the bowl and shank are ready to be stained.

IMG_1204

IMG_1205

IMG_1206

I decided to begin working on the stem before I stained the bowl. I wet sanded the stem with micromesh sanding pads from 1500-1800 grit. Once I had it started as pictured in the first photo below I changed my mind about sanding the stem further at this point. I restained the bowl with a dark brown aniline stain thinned 2:1 with isopropyl alcohol. I applied the stain with a cotton swab and then flamed it with my lighter, reapplied the stain and reflamed it until I had the colour and coverage I wanted. Photos 2-4 below show the pipe after staining. I am happy with the blend of the stain on the rim and the sanded area of the shank. The coverage is heavy enough to give a good colour and yet it is not too heavy so that the grain really shines through. I had not buffed the pipe at this point merely stained it and let it sit while I went back to working on the stem.

IMG_1207

IMG_1208

IMG_1209

IMG_1210

I went back to sanding the stem with the micromesh sanding pads. I worked through the remaining grits of pad from 2400-12,000. Each successive grit of pad deepened the shine on the stem and progressed to a deep black look. I also sanded the bowl with the micromesh pads. The hardest area to remove the oxidation was around the brass BBB diamond insert. To clean that up I used a Bic lighter and passed the flame over the stem surface quickly and the oxidation burned. I also wet sanded the area with the edge of the sanding pads. To finish that area I also used the Scratch X2.0 plastic polish and then rubbed the stem down with Obsidian Oil and let it dry. The next three photos show the stem after sanding with the pads.

IMG_1212

IMG_1213

IMG_1214

The final four photos show the finished pipe. There are some dents remaining in the side of the bowl that I steamed to lift but they still show. I tend to leave these on older pipes as signs of their age and character. I love the way the grain stands out on this pipe. The sides show the cross grain. I did not take photos of the ends of the bowl to show the birdseye grain that is situated on them but you can imagine the look from the straight lines of the cross grain. The rim and sanded areas on the shank look well blended in and the bowl smells fresh and ready to use. I am well pleased with how this old beauty turned out and know that it is ready for a life of service.

IMG_1219

IMG_1220

IMG_1221

IMG_1222

Reworking a Mastercraft Custom Deluxe Billiard and Removing Mold


Blog by Steve Laug

This old Mastercraft billiard is the second pipe of the threesome that was sent to me last week as a gift. In his email asking if I wanted them he said they were either going to the rubbish bin or to me so I was not surprised when I opened the box and unpacked them. It had some nice looking grain underneath all of the grime and peeling varnish. But this one was in very rough shape. The stem was chewed in half so there was not enough to save. The inner tube apparatus inserted into the stem looked like it had been destroyed and then somebody bent it close to shape and cut a X cut in the end of the tenon so that it would fit into the stem. The shank was grimy and dark with a white mold residing inside both the bowl and the shank. The pipe reeked of mold. The bowl itself had a heavy but broken cake underneath the mold. It had a coat of varnish that was spotty and peeling where it was worn off the briar. In those worn spots the briar was almost black. The rim was also in very bad shape. The front was burned down from repeatedly lighting the pipe in the same spot with a torch. The back side of the rim looked like it had been scraped on concrete or hammered out on concrete because it was worn and broken down. The three photos below (I apologize for the poor quality – still getting used to this new camera!) show the state of the bowl and stem.

IMG_1009

IMG_1010

IMG_1011

I sorted through my stems and found two options that I thought might work on the pipe. The first one was an acrylic saddle stem that I thought might look good with the bowl (pictured in the first photo below). I turned the tenon and fit it to the pipe but did not like the proportion of the stem and shank length. I then took the second stem – a shorter, straight tapered stem and fit it to the pipe (pictured in the second – fourth photo below). It looked like it belonged on the pipe so my choice was made. It was an old previously used vulcanite stem from my collection of old pre-used stems that I collect. This one would take some work as it was oxidized and had a calcified buildup around the button area. It was also clogged and the slot was plugged to a small pin hole. But it had the right look so it would be worth cleaning up.

IMG_1020

IMG_1049

IMG_1050

IMG_1051

I set the stem aside and worked on the bowl. I reamed the pipe with a PipNet reamer to get rid of the cake and the mold. I cleaned the reamer with alcohol before putting it away. I cleaned the bowl and the shank with cotton swabs, pipe cleaners and Everclear to remove as much of the tars and oils and moldy smell as possible.

IMG_1021

IMG_1022

IMG_1023

When I finished it still smelled moldy, but I had several plans in mind for addressing that. But first I topped the bowl with my usual flat board and 220 grit sandpaper. I place the bowl rim down flat against the sandpaper and work in it a circle to remove the damage on the rim. This one took quite a bit of work to even out the top and get rid of the damage from the burn on the front side of the rim and the roughened back edge done by beating the pipe against concrete. I sanded it, repeatedly checking to see if I was removing enough of the damage to get a sharp edge on the bowl. On the outer rim next to the shank there was a chunk of briar missing that I would try to minimize after topping the bowl. I was able to remove all of the damage of the burned area and most of the damage of the battering the old pipe had taken. The rim looked good. I used a folded piece of sand paper to work on the inside edge of the rim and clean up the damage that was done there and keep the bowl in round.

IMG_1053

IMG_1054

IMG_1055

IMG_1056

IMG_1057

IMG_1058

I wiped the exterior of the bowl down with acetone on a cotton pad to remove the grime and the finish that remained. I repeated this until I could not remove any more finish or grime. The next two photos show the wipe downed bowl.

IMG_1059

IMG_1060

I placed the bowl in an alcohol bath for several hours while I worked on the stem and worked on several other old pipes that I have on the go. When I took it out of the bath, I dried it off with a cotton cloth and scrubbed it with a tooth-brush dipped in alcohol from the bath. I dried it again to check on the finish. There were still several spots where the varnish remained – the shank and the bottom of the bowl. One benefit of the bath was that the glue softened on the over pressed band and I was able to remove it from the shank. I sanded and scrubbed the old glue off the shank and sanded the bowl with a fine grit sanding sponge. I wiped it down with another acetone cotton pad. It still needed to soak a bit longer to finish breaking down the varnish that remained. While it soaked I cleaned up the silver band with silver polish and the jeweler’s polishing cloth. Under all the tarnish I found that the band was stamped Sterling.
I removed the bowl from the alcohol soak and dried it off. I used a lighter to burn off the alcohol from inside the bowl and the shank. I then recleaned the inside of the bowl and the shank with Everclear and many more pipe cleaners and cotton swabs. The amount of tars and sticky oils and grit that came out of the shank was incredible. It was no wonder that the pipe still reeked like mold. The next series of three photos show the pipe after soaking and sanding.

IMG_1061

IMG_1062

IMG_1063

I scoured the shank until it was fairly clean and then set up a retort to do a more thorough clean. The retort sends vaporized alcohol into the bowl and shank and in essence boils out the grime with hot alcohol. As the alcohol cools it returns to the tube and with it the grime and oils from the pipe. I repeated the retort three times on the pipe until the alcohol came out clean. I then took apart the pipe and cleaned out the shank with pipe cleaners and cotton swabs a third time. There was even more oil and grime that came out of the shank. I cleaned off the surface with an acetone wipe and then reset the silver band with Weldbond glue. I turned it so that the Sterling stamp was on the top of the shank and pressed it on to the shank until it was even with the edge of the shank. Weldbond dries fairly quickly to touch so that the band would not be loosened when I went on to the next step in my cleaning process.

IMG_1064

IMG_1065

IMG_1071

After removing the retort I cleaned the bowl and shank. Yet even more grime came out. I put the stem back on and took the four photos below to show the state of the pipe at this point. I did this more for an encouragement to me as this one was proving a difficult rework. The photos gave me a picture of what I was aiming for in cleaning this one up. If I lose sight of that it will end up in the bin as rubbish.

IMG_1066

IMG_1067

IMG_1068

IMG_1069

When the alcohol dried in the bowl and the visual showed a clean bowl and shank I took a sniff of the bowl. After all of this work the moldy smell still was present in the bowl and shank. This called for more drastic measures. I used the Dremel with a sanding drum on it and sanded the inside of the bowl until the briar was bare and clean. Then I filled the bowl with salt and alcohol to leach out the oil from the inside of the bowl and shank. My hope was that in doing this I would also kill the stench. I plugged the shank with a cork, filled the bowl with kosher rock salt (I was out of my normal cotton bolls) and set it up on an old ice-cube tray. I used an ear syringe to fill the bowl with 99% isopropyl alcohol. I set it aside and went to bed to let the treatment do its work while I was sleeping. The two photos below show the bowl after filling with alcohol.

IMG_1072

IMG_1073

In the morning the salt was a dark brown as pictured below. I emptied the now darkened salt and dried out the inside of the bowl by flaming the alcohol with my lighter. It still smelled like mold though the smell was definitely losing strength.

IMG_1070

I cleaned out the button area of the stem with the dental pick and then ran several bristle pipe cleaners through it and then followed up with regular pipe cleaners. I soak both in Everclear to clean out the stem. I then sanded the stem with 220 grit sandpaper to remove the calcification that was all over the stem. I also gave the stem a quick sand all over with the 220 grit to remove the top oxidation. I ran the flame from the Bic lighter over the surface to burn off the oxidation. It did a great job of removing what I had loosened with the sandpaper. I continued sanding it with a fine grit sanding sponge to remove the remaining oxidation. I rubbed down with Obsidian Oil and set it aside with the bowl while I went off to work. The Obsidian Oil sat on the stem and soaked in for the 9 hours I was at work.

IMG_1074

IMG_1075

IMG_1076

IMG_1077

I refilled the bowl with salt and put a cork in the shank. I again used the ear syringe to fill the bowl with alcohol and set it aside to work on the stem. It too sat for the nine hours I was at work.

IMG_1072

When I got home from work the stem looked quite good. It was significantly more black and the oxidation was gone except around the stem shank union. More work to do there. The salt was a dark brown, but slightly lighter than the first treatment. I dumped out the salt and cleaned out the bowl and shank with cotton swabs again. When I finished the smell was better but present nonetheless. I cleaned out the bowl with alcohol and cotton swabs again.

IMG_1078

I needed another bit of encouragement at this point so I decided to stain the pipe with a dark brown aniline stain cut 2:1 with isopropyl alcohol. I applied the stain, flamed it and then buffed it on with Tripoli and White Diamond (photos 1-4 below). The brown did a fair job of coverage but I would need to give it a second coat of stain using a oxblood colour to do some blending with the dark areas on the bowl.

IMG_1083

IMG_1084

IMG_1085

IMG_1086

I worked on the stem with fine grit sanding sponges and 1500-2400 grit micromesh sanding pads. There were some minor tooth dents that still showed up so I passed over them with a Bic lighter and was able to raise them. More sanding was needed and I repeated the sanding described above.

IMG_1079

IMG_1080

IMG_1081

IMG_1082

Once the bowl dried out it still smelled so I decided to repeat the salt and alcohol treatment a third time. I filled the bowl with salt and isopropyl and set it aside over night (photo 1 below). In the morning the salt was little lighter brown this time (photos 2-3 below). I dumped the salt out and cleaned the bowl and shank again. This time the cotton swabs came out fairly clean. I flamed the inside of the bowl. Once the bowl dried out it still smelled so I decided to repeat the salt and alcohol treatment again. I filled the bowl with salt and isopropyl and set it aside over night. In the morning the salt was once again a dark brown. I dumped the salt out and cleaned the bowl and shank again. This time the cotton swabs came out fairly clean. I flamed the inside of the bowl. Though the inside of the bowl and the shank was very clean the musty smell still remained, though less prevalent. This was one stubborn pipe bowl to clean.

IMG_1087

IMG_1088

IMG_1089

While the inside of the bowl dried out I decided to restain the bowl. For the second/top coat I used a oxblood stain. I applied it and wiped it off (first photo below). The coverage this time was much better. The dark reddish stain blended well and covered the dark areas of the bowl. The finished colour is a nice older deep reddish brown look (second-fourth photos below).

IMG_1090

IMG_1091

IMG_1092

IMG_1093

I decided to sand back the inside of the bowl yet again. I used the Dremel with the sanding drum a second time. When I was finished the inside of the bowl was very clean and fresh looking. The smell was still there. I stuffed the bowl with cotton bolls and then used an ear syringe to fill it with white vinegar and set it in the ice-cube tray to let it work. I have used that in the past to remove stubborn ghosts so I thought I would give it a try on this one.

IMG_1094

While the bowl soaked I worked on the stem with the remaining grits of micromesh sanding pads – 3200-12,000 to bring back the deep shine on the stem. Sanding them with the higher grits of micromesh really gives a deep shine to the stem. It is amazing to see the difference between each of the successive grits of micromesh. I did not take photos of the steps as almost all of my refurbishing posts have shown the polishing process with the micromesh. The next two photos show the finished stem. Once the bowl is finished I will buff the bowl and stem with White Diamond and then give the whole a buff with multiple coats of carnauba wax to polish.

IMG_1141

IMG_1142

Once the vinegar had soaked in the bowl for several hours I removed the cotton boll and dried out the bowl. I then used a Dremel with a sanding drum to sand back the sides of the bowl yet again. This time I extended the diameter of the bowl to get rid of the surface area of the bowl interior. Once I was finished with the Dremel I hand sanded the bowl with 220 grit sandpaper to smooth out the small ridges left behind by the drum sanding. The last two photos in this sequence show the newly sanded bowl.

IMG_1126

IMG_1127

IMG_1119

IMG_1120

I took the bowl outside and put it in the bright sun on my patio. I wanted to let the heat and the UV rays from the sun do more work on the potential mold in the bowl. The evening is cooling down and the sun is no longer as warm. I brought in the bowl and wiped down the inside of the bowl and shank with an alcohol based anti bacterial wipe. I took it to the buffer and gave the whole pipe a buff with White Diamond. I then gave it several coats of carnauba wax and buffed it with a clean flannel buff. The pipe is like new and it SMELLS GREAT. I finally beat the moldy smell. The final four photos show the finished pipe.

IMG_1143

IMG_1144

IMG_1145

IMG_1146

Restoring and Reclaiming a Byford Prince


I was gifted three old pipes by a friend on Smokers Forums. The first that caught my attention was an older Byford Prince. It was pretty worn but the wood was in good shape under the wear and tear. The stem was shot. It had a split along the stop side and was missing a few pieces. When I removed it I found that it was quite brittle. Once I took the stem off I found the most interesting system inside. The shank had an aluminum attachment which held two metal tubes inside of it. On the inside of the broken stem was a third metal tube. These formed three concentric, nested circles which wicked out the moisture of the smoke while not hampering the flow of air in the pipe from bowl to button. The photo below shows magnified picture of the interior of the stem and shank.

Byford Pipes

The stem was so broken and damaged that I was not sure how the flow of the angles on the taper was supposed to look. I did not know what the button and the stem were supposed to be like. I did a search on the internet and found this photo of a Byford stem that showed the proper angles on the stem. I used the stem in the photo as a template for my replacement stem. I made one modification which I will speak about in the explanation of the restemming below.

Byford stem

The next photo shows the interior of the stem and shank – the system part of the pipe. The tube in the stem sits between the other two tubes in the shank creating three rings on the inside of the shank and stem. It looked like this stem apparatus would be a bear to clean up. I would have to used cotton swabs, folded pipe cleaners and whatever I could to get in between the layers.

Byford2

The bowl was badly caked with a broken cake. It was soft rather than hard. There was also a buildup of some blue substance on the bowl. I am not sure what it was but it smelled suspiciously like a mold. The stem as you can see in the poor quality pictures below was damaged beyond repair. The aluminum band or shank end was oxidized and rough. Underneath all of the grime it was a beautiful piece of briar. The shape is a well executed prince. The old stem seemed a bit long to my liking so the new one would be slightly shorter and accommodate the lines of the one in the photo.

IMG_1012

IMG_1013

IMG_1014

I removed the old stem and went through my box of stem and found what I was looking for. The drilling on this had to be very wide to accommodate the apparatus on the system of the Byford pictured above. This older style stem had exactly the right fit. It slipped into place and looked good. It was a bit flared on each side and on the top and bottom so that would need to be sanded back to a flush angle. In the photo below you can see the fit of the new stem before I did any shaping on it. You can also see the blue/green substance on the bowl.

IMG_1019

I used a Dremel with a sanding drum to remove the excess vulcanite and shape the stem to the proper angles. I reamed the bowl with a PipNet reamer starting with the smallest head and working up to the third head which took the cake back to bare wood. I wanted to remove the cake and whatever the buildup on the bowl and rim that was there.

IMG_1024

IMG_1025

IMG_1026

After reaming the bowl back I sanded the rim and inner edge with a fine grit sanding sponge to remove the remaining blue/green substance. I also sanded the inside of the bowl smooth to remove any thing that was buildup on the inside edges. I sanded the stem with 220 grit sandpaper to remove the scratches caused by the Dremel and sanding drum. I sanded the exterior of the bowl and the oxidized aluminum on the shank end with the fine grit sanding sponge as well. The next three photos below show the state of the bowl and stem at this point in the process.

IMG_1031

IMG_1032

IMG_1033

I wiped the bowl down with an acetone wetted cotton pad to remove the grime and the old finish. The next two photos show the bowl at this point. The cotton pad is below the bowl to show the amount of finish and grime that came off. I find that the acetone will even out the finish and clean up any remaining grime.

IMG_1034

IMG_1035

I continued to sand the stem with 220 grit sandpaper and also cleaned out the shank apparatus with Everclear and cotton swabs. That was a challenge! The grime that built up in the concentric tubes took some bends and twists of cotton swabs and pipe cleaners to remove from the shank. I also scrubbed down the interior of the bowl with Everclear on the cotton swabs and then scoured it out with 0000 steel wool. I did not want any remnants of the blue/green stuff. While the bowl was wet with the alcohol I also flamed the inside with a lighter. The alcohol burns quickly and should destroy whatever remnants of the sludge that may have been resident in the briar. I sanded the aluminum with 1500 grit micromesh sanding pads to remove the oxidation and crust that had built up at the junction of the aluminum and the briar.

IMG_1036

IMG_1037

The next two photos show the stem after the pipe and stem have been cleaned and after I had finished shaping the stem with the 220 grit and 340 grit sandpaper. The angles matched the photo above that I was trying to duplicate.

IMG_1038

IMG_1039

At this point it was time to sand with the micromesh sanding pads. The next series of five photos show the progressive shine that comes through the micromesh. I wet sanded with 1500 and 1800 grit micromesh to remove the scratches and begin to give the stem a polish. I also sanded the bowl with these two grits as well. I followed up by dry sanding with the remaining grits of micromesh from 2400-12,000. I sanded the bowl, the aluminum shank end and the stem.

IMG_1040

IMG_1041

IMG_1042

IMG_1043

IMG_1044

Upon completing the sanding and polishing with the micromesh pads I took the pipe to the buffer and buffed the stem and bowl with White Diamond on the wheel. It brought out the shine and help highlight the grain. I wiped down the stem with Obsidian Oil to protect it and then gave the entire pipe several coats of carnauba wax and buffed it to a shine. The last series of four photos show the finished pipe.

IMG_1045

IMG_1046

IMG_1047

IMG_1048

ADDENDUM 03/07/15
Just recently I discovered this interesting piece on the Byford pipes. They were originally made by Orlik. Here is a page from their catalogue.
445px-Orlik_70S07

Restemming and Reclaiming a BBB Hand Made Unsmoked Bowl


Blog by Steve Laug

This is the third unsmoked New Old Stock pipe bowl I picked up on EBay. It is stamped BBB in a diamond with Hand Made split by the Diamond on the top of the shank. The finish was very good and the bowl absolutely clean. Again it had no stem. I talked with a friend on the forums and he is sending some stems that may work. But, I decided to give it a go with fitting a stem blank while I was waiting. Sometimes the old impatience can be productive! The first series of four photos are from the EBay seller and show the condition of the bowl.

BBB1

BBB4

BBB3

BBB2

I sorted through my box of stems and chose an oval stem that looked to be the right length and close to the diameter that I needed. I used the PIMO tenon turning tool on my cordless drill to cut the tenon close to the diameter I was looking for. One issue with the turning tool is the inability to get accurate cuts so over time I have learned to take it very close and then finish the fit by hand. The first photo below shows the stem on the turning tool. Prior to putting it on the turner I had to drill out the airway to the same size as the stabilizing pin on the tool.

IMG_0958

The next photo shows the tenon after turning it on the tool. I needed to sand it by hand to get a proper fit in the mortise. I use medium grit emery paper to sand the tenon down and then 220 grit sandpaper to smooth it out.

IMG_0959

After sanding the tenon the fit is perfect. The next two photos show the stem in place. There are still casting marks on the sides of the stem and the diameter of the stem needs to be trimmed to match the diameter of the shank. I use a Dremel with a sanding drum to bring the stem diameter down close to the shank size. I am careful to not trim to close to the shank as I do not want to inadvertently scratch the shank and cause more work. I also run the Dremel the length of the stem to take down the casting marks and excess vulcanite. I use it the same way on the end of the button to remove excess and also clean up the marks from the cast.

IMG_0960

IMG_0961

After removing the excess material from the stem as close as I can to the shank using the Dremel the rest is handwork. I begin with medium grit emery paper to quickly remove more material. This is by far the most labour intensive part of the work. There is no way to rush it as it just takes patience to keep sanding until the fit is correct. I work it on the shank and off the shank. Photos one and two below show the results after the stem has been sanded with the emery paper. The diameter is getting close. Photos three, four and five below show the next progress of the shaping. For that I used 220 grit sandpaper. I cut it into squares and fold it so that I can get in close to the button and also close to the shank without scratching the shank. I also used a heat gun to bend the stem. This was done in several installments before I actually got it the way I wanted. The bend in the early photos below is a bit abrupt and too close to the button. I reheated and rebent the stem over a wooden rolling pin that I appropriated for this purpose.

IMG_1301

IMG_1302

IMG_1303

IMG_1304

IMG_1305

I continued sanding the stem to get the fit right with 340 grit sandpaper and then a fine grit sanding sponge. You can see from the photos that the shank stem junction is well fitted. There is no gap at the joint. The next two photos show the progress of the shaping after I used the sanding sponge. They also show the stem after it was rebent to the angle I wanted for this pipe.

IMG_1306

IMG_1307

Though the fit was good and the pipe looked and the stem was getting smoother, it just seemed bland to me. There was something missing to the look that would dress up this pipe and take it beyond just a well fit stem and a darkly stained bowl. I decided to shape and press on a nickel band to dress up the shank. The band was not necessary as the shank and stem union was perfect and the shank was uncracked. It was solely done for decorative purposes – to add a bit of bling to the shank of the pipe and dress it up (in my opinion!). The next three photos show the newly banded shank and the fit and look of the stem in place. The delicate bend of the stem, the flow of the bowl and the band all work together to give this pipe a touch of elegance.

IMG_1308

IMG_1309

IMG_1310

The next series of six photos show the progressive polishing of the new stem with micromesh sanding pads from 1500-12,000 grit. Each successive grit of micromesh sanding pad gives a deeper and more polished shine to the stem. It always amazes me to see the difference between the stem before the last three grits of micromesh (6000, 8000, 12000) and the previous grits.

IMG_1311

IMG_1312

IMG_1313

IMG_1314

IMG_1315

IMG_1316

Once I finished with the micromesh pads I took it to the buffer and buffed the bowl and stem with White Diamond polish on the wheel. The next two photos show the pipe after the buff. The shine is almost glass like by this point in the process. All that remains is to buff on several coats of carnauba wax and polish the metal band with metal polish.

IMG_1317

IMG_1318

The next four photos show the finished pipe. To me it has a gentle elegance to the shape and the bend. The slender stem and the bend make the pipe sit well in the mouth. The light weight makes this a likely clencher. The deep shine in the bowl and stem give it the look of a new pipe – which for all intents and purposes it is. This Hand Made BBB has come back to life to fulfill the purposes for which it was originally made.

IMG_1319

IMG_1320

IMG_1321

IMG_1322

Restemming and Reclaiming an Old, Unsmoked Rex Bulldog


This is the second of the old unsmoked pipe bowls I picked up on EBay. It is one that I can find absolutely no information on anywhere. Some have thought it was a Barclay Rex but I can find nothing that would link it to that shop in NYC. It is stamped Rex in cursive script on the right side of the shank and also stamped Rex over Sterling on the band. It has the look and feel of an older English-made pipe. But I am not sure. The seller said it was from the late 1800’s but all attempts to contact them on the source of that information have remained unanswered. So it remains a bit of a mystery to me. It is one though that I will continue to hunt down until I can come up with something. This shape is what is called in some of the older catalogues a Bulldog. I personally am not sure what to call it. It has the shape of a bulldog on the bowl and the double ring separating the bottom of the bowl from the cap. The shank however, is oval. It has a factory installed band on it that is also stamped Rex. The script on the shank is in gold leaf. The bowl is very clean. There was a small crack in the shank on the shank at about one o’clock looking toward the bowl. This may have been the reason for the band or the band may have been decorative. There was no stem with this pipe so I was not sure of the length of the stem to make for it. The drilling is very interesting. It is drilled like some of the calabash bowls or bowls that were screwed onto Bakelite shank and bases in the late 1800s. It is directly in the bottom of the bowl and seems to have a small hollow chamber under the hole. The airway meets it directly underneath. I have not seen this drilling on briar pipes of newer eras. The bowl is smooth inside and almost polished. The briar is quite nice and sports mixed grains from cross grain to birdseye to flame around the bowl. The double cut rings are clean and are not clogged with wax or dirt. There appears to be a thin coat of shellac on the outside of the bowl to give it a shine as it shines with or without the application of wax. The silver band is interestingly shaped as well. It is somewhat conical – wider toward the bowl side and narrower on the stem side. There is also a stepped down lip on both sides of the band. Where it is on the bowl is stepped down to a small ring around the shank. On the stem side it is also stepped down. This would make fitting a stem to the shank a challenge. It was not too badly oxidized so it would clean up very easily. The first series of five photos are those taken by the Ebay seller and give a good idea of the look and condition of the pipe. The one thing not clear to me was the size of the pipe. I took a chance on it as the apparent age and the assumed age stated by the seller made the likelihood of it being smaller was very high. When it arrived it was indeed quite small. The bowl and shank are roughly 3 inches long without the stem. The height of the bowl is 1 5/8 inches. The inside diameter of the bowl is ¾ inches and the outside diameter is 1 ¼ inches.

Rex1

Rex2

Rex3

Rex4

Rex5

Once I started working on it the first decision that needed to be made was on the type and length of the stem to be used. I fitted several oval stems to the bowl – a standard length billiard type stem, a thicker and a thinner oval Canadian stem and a Lovat style saddle stem. The longer stem did not work well with the longer shank on the pipe. The thicker Canadian stem also made the stem look quite chunky and large as did the saddle stem of the Lovat. The stem I settled on was the thinner Canadian oval. Even this one would require considerable thinning to make for a proper fit against the bevel of the band. The first photo below shows the two Canadian taper style oval stems. I chose the bottom stem in the photo.

IMG_0968

I used the PIMO tenon turning tool to turn the tenon so that it would fit in the shank. The next three photos show the initial fit of the stem. You will note in the photos the gap where the bevel of the band lies. I had to make a decision to either leave the gap or work on the stem size so that it fit against the bevel and thus was slightly thinner than the shank prior to the band.

IMG_0969

IMG_0970

IMG_0971

I decided to thin the stem to fit against the bevel. I used the Dremel with a sanding drum to bring it close to the finished size. I then sanded it with medium grit emery paper to smooth out the scratches and grooves from the Dremel. Once I had most of the scratches removed I sanded it with a medium grit sanding sponge to further shape the stem and remove excess material. The next series of three photos show the fit of the stem after it was sanded with the sanding sponge (pink square in the photos).

IMG_0997

IMG_0998

IMG_0999

At this point in the process I had to take it back and sand off some more material with 340 grit sandpaper. It still was too thick to fit well. I also had to finesse the fit against the band with needle files as in some places it was not quite straight. When I had it fitting well I moved on to sanding with a 1500 grit micromesh sanding pad (the next two photos). I also did a small repair on the crack in the top of the shank. I pried it open slightly and dripped some clear super glue into the crack. It did not go all the way through into the shank which was interesting. It seemed to be a surface crack. The repair worked well. I polished that portion of the shank with the 1500 grit micromesh sanding pad as well to remove the slight excess of glue left behind (third photo below).

IMG_1000

IMG_1001

IMG_1002

After the repair I continued sanding and polishing the stem with 1800-12,000 grit micromesh sanding pads. The next four photos highlight the sanding/polishing process. Notice the slight hip on the stem at the band edge. In the photos this appears to be more drastic than it is in actual life. The fit is more of a pinched look.

IMG_1003

IMG_1004

IMG_1005

IMG_1006

The final series of four photos show the finished pipe. I buffed it with White Diamond and then gave it multiple coats of carnauba wax. I really like the stem and fit against this long shanked “Bulldog” bowl. The pipe glows with an age and patina that calls out to be smoked. This is yet another who will soon fulfill the purpose for which it was made.

IMG_1297

IMG_1298

IMG_1299

IMG_1300