
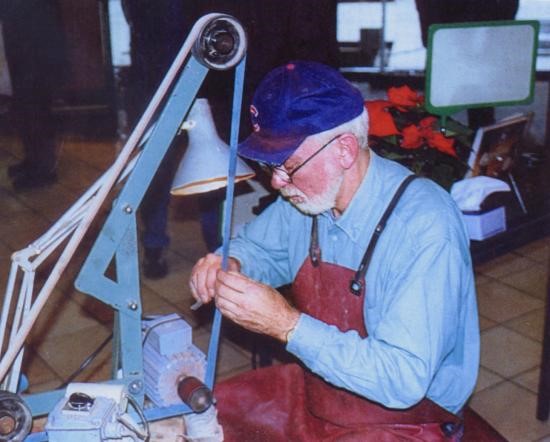
Blog by Steve Laug
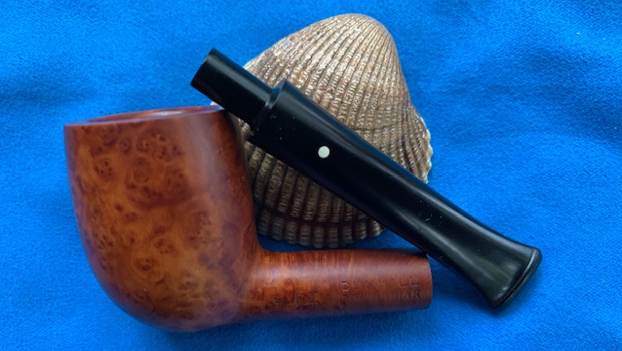
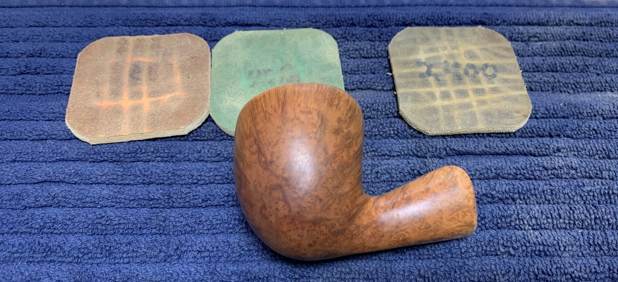
 The next pipe on the table is a Dunhill Group 4 Bruyere Lovat that is proportionally well done. It has a two digit the shape number that I will define below. Jeff and I purchased a group of pipes on 04/26/2022 from a woman who contacted us from Cleveland, Ohio, USA. They had belonged to her husband’s father. We spent time chatting with her and arrived at a price and she sent the pipes to Jeff. It included 28+ pipes including this one.
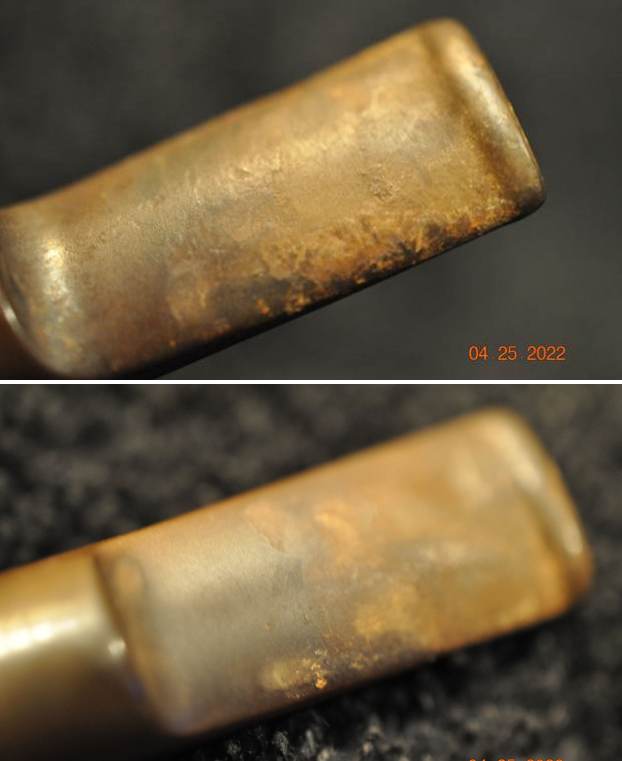
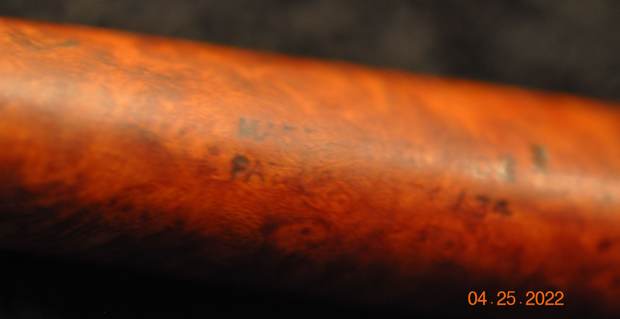
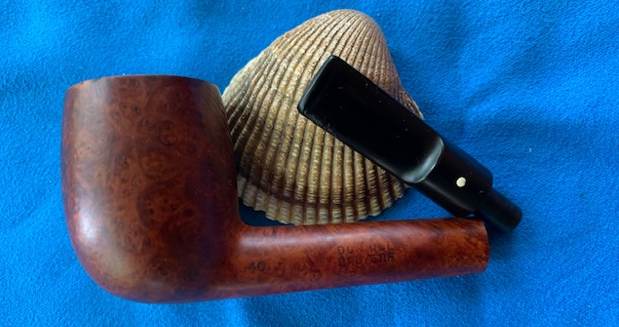
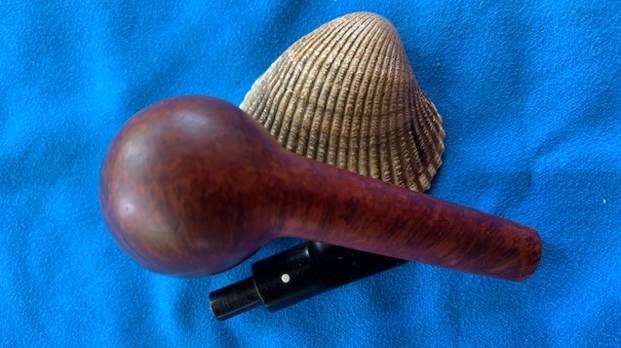
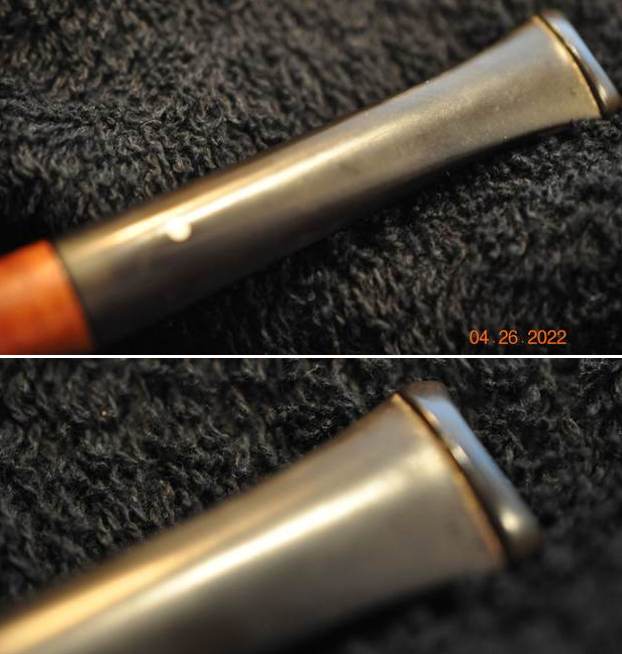
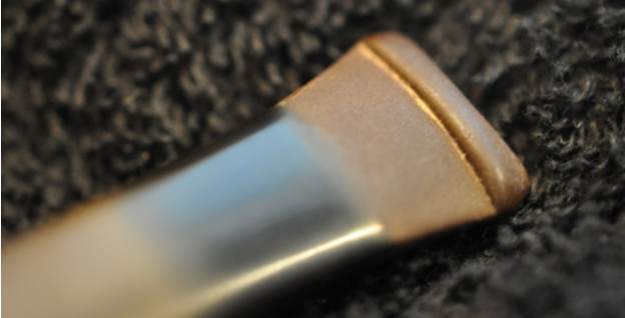
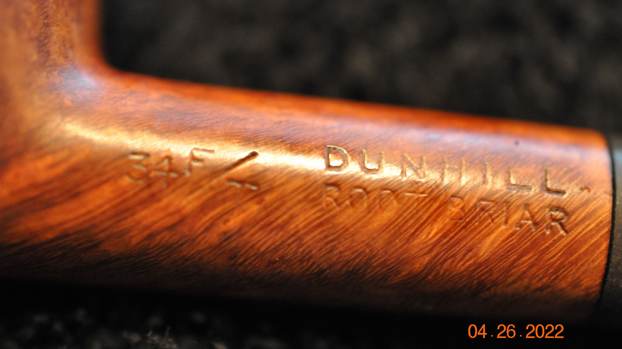
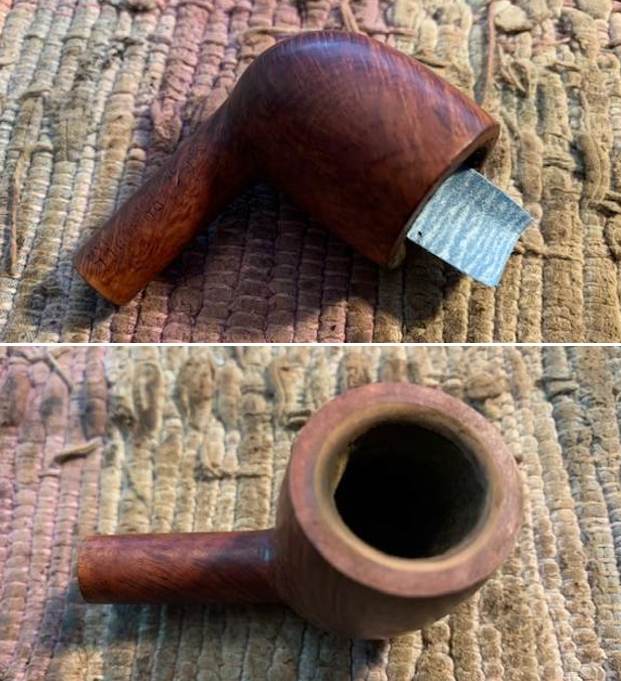
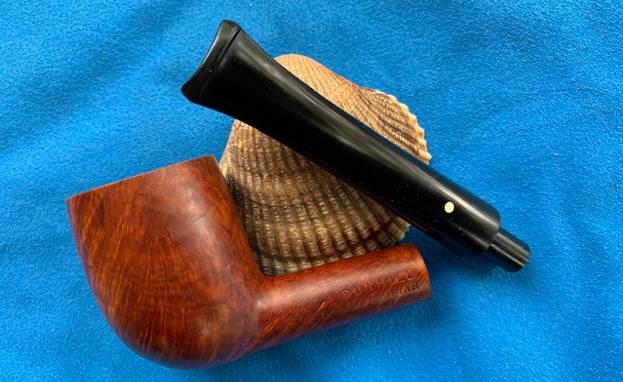
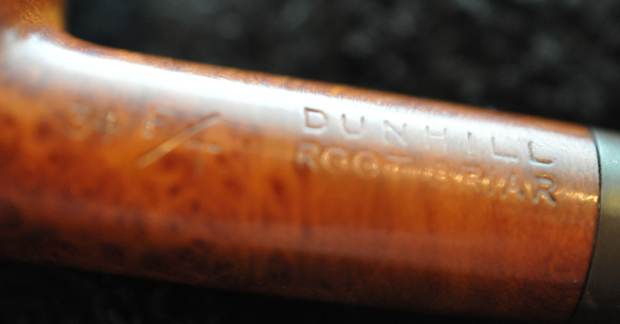
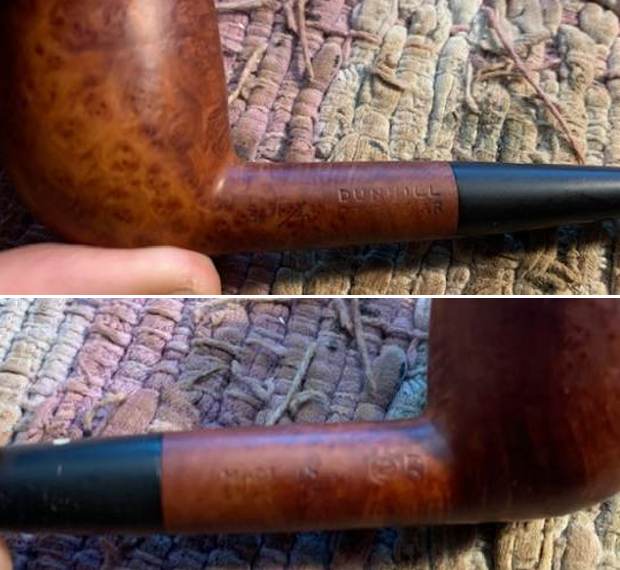
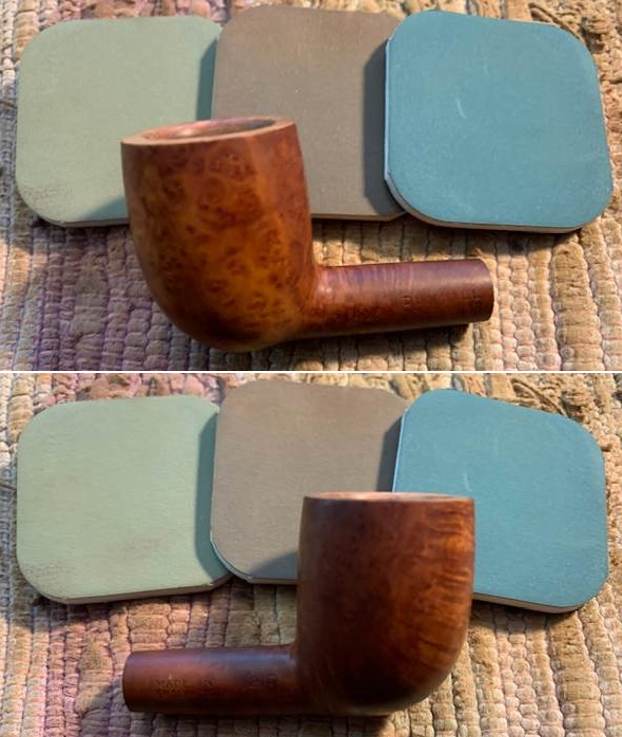
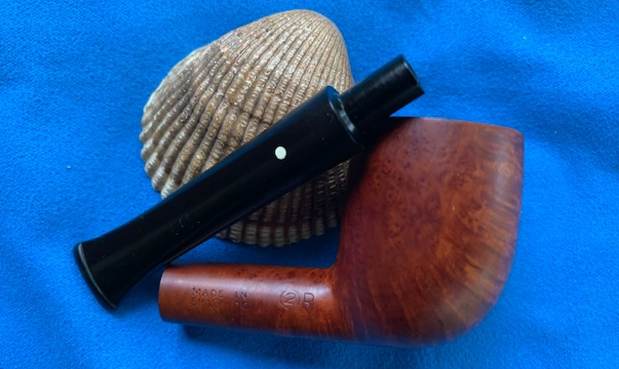
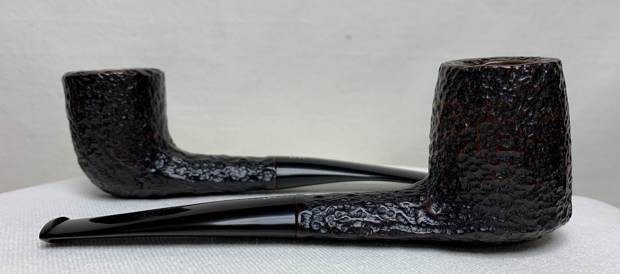
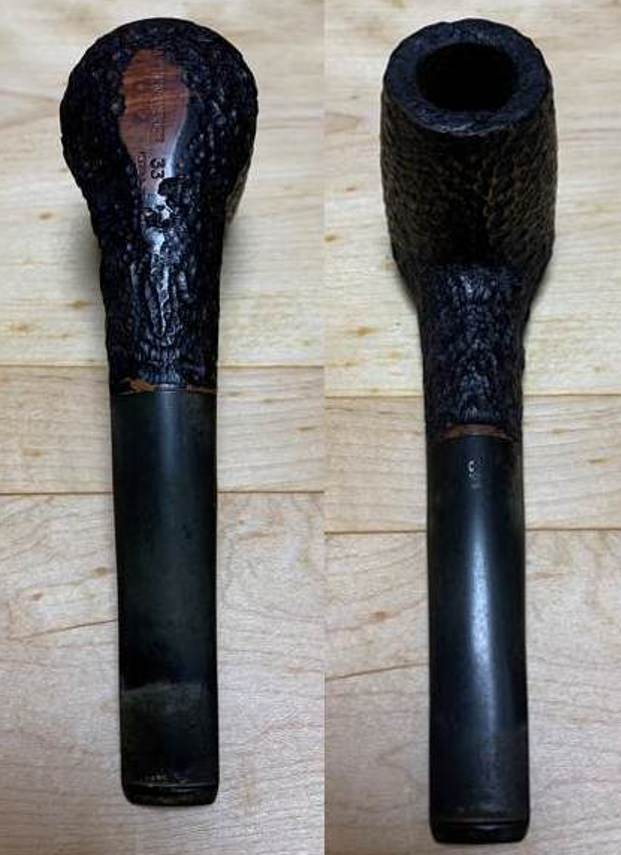
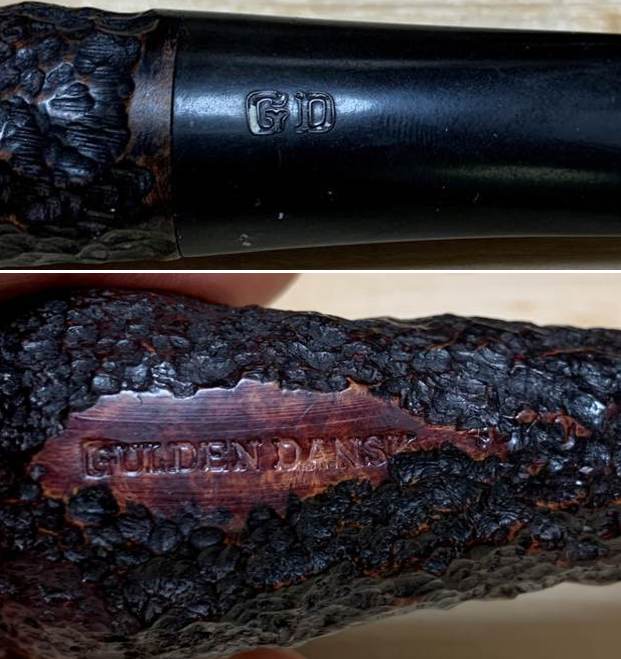
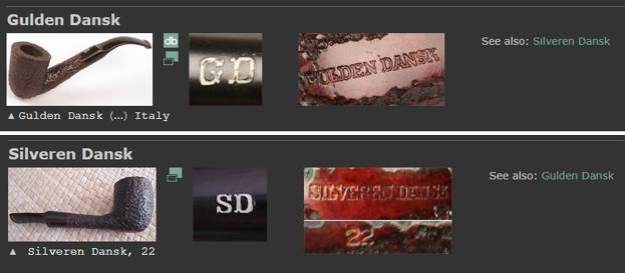
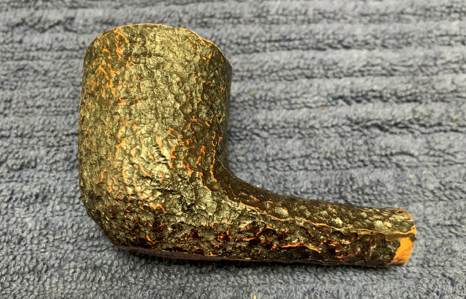
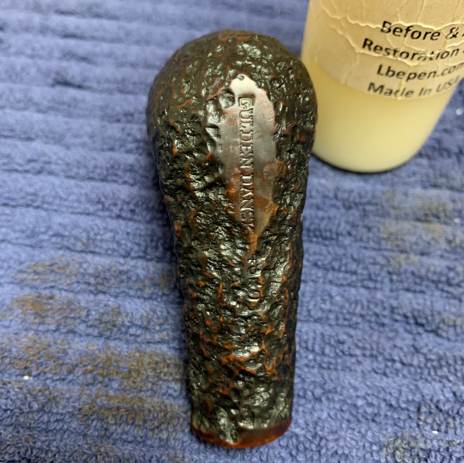
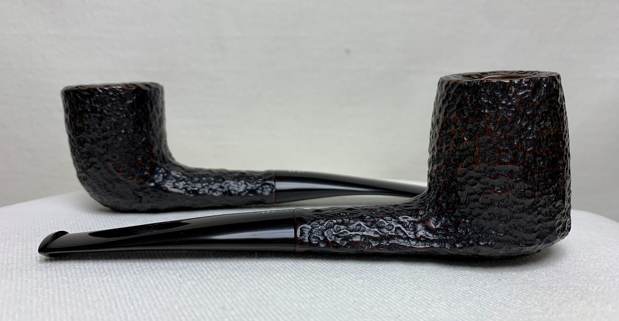
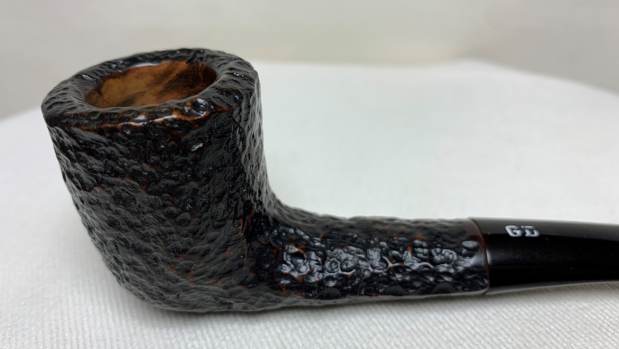
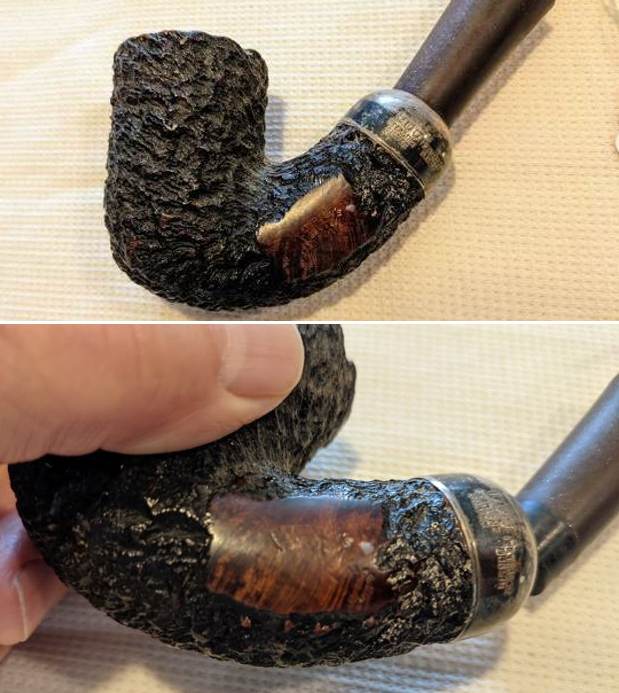
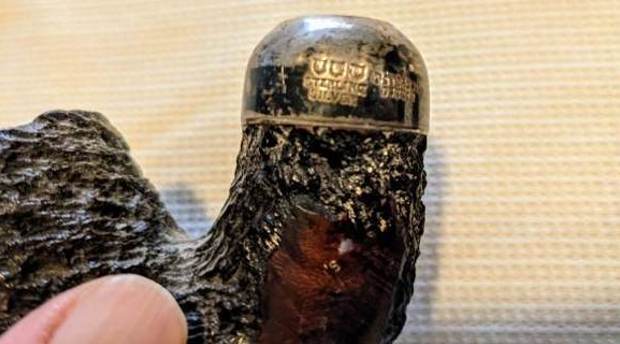
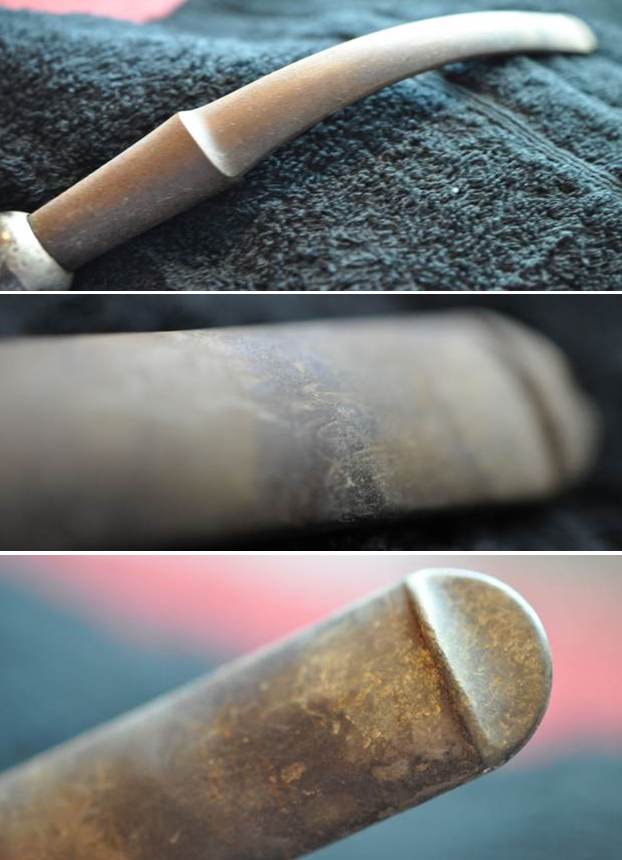
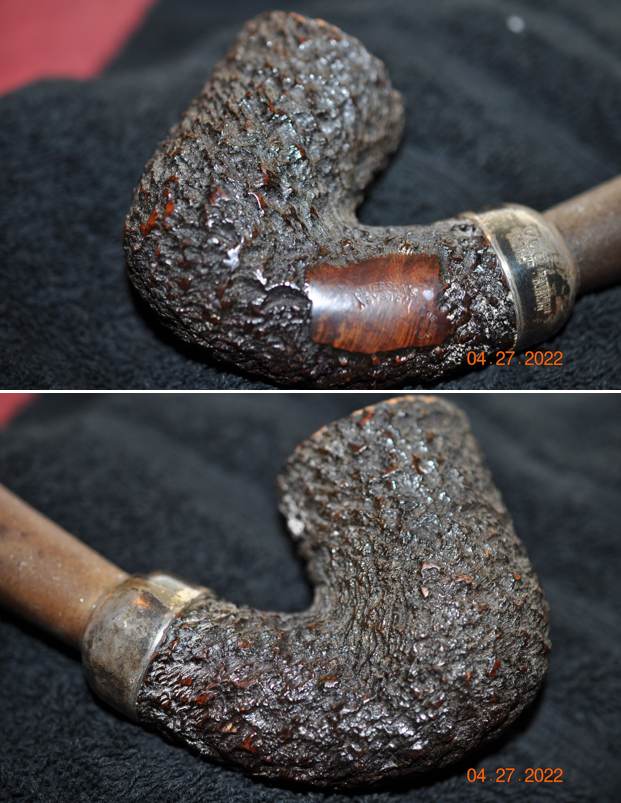
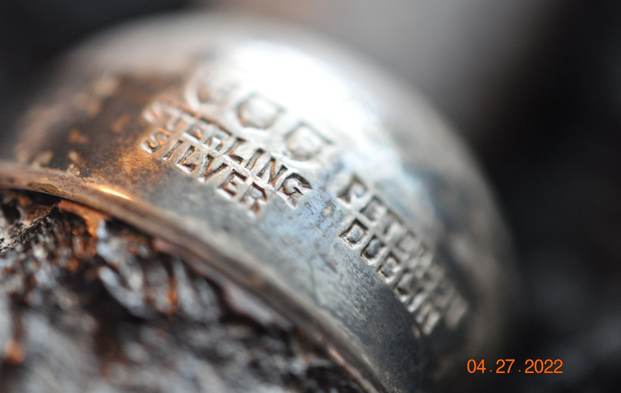
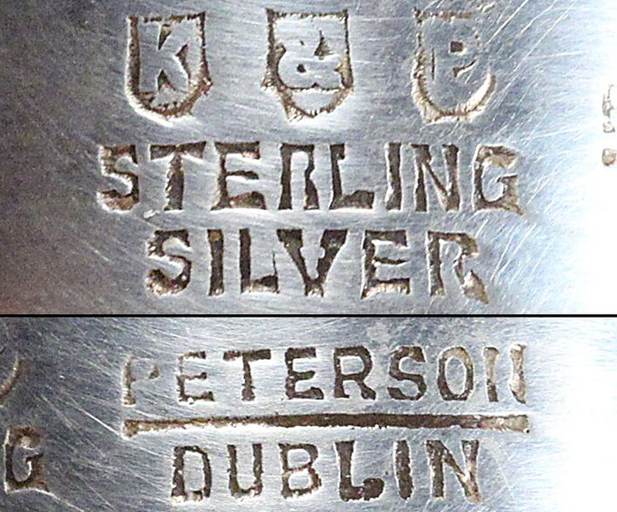
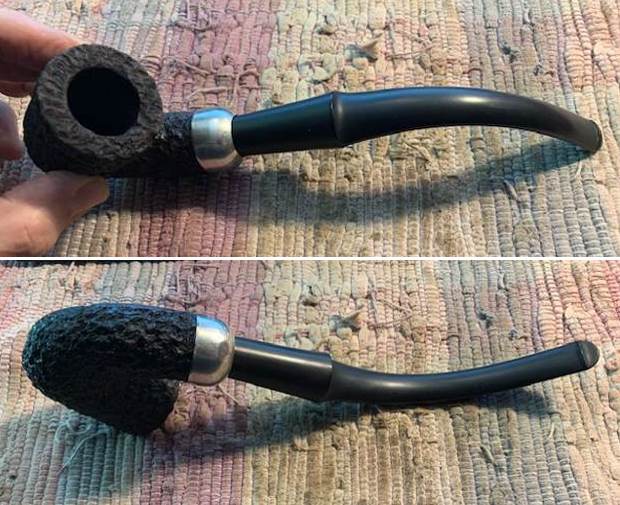
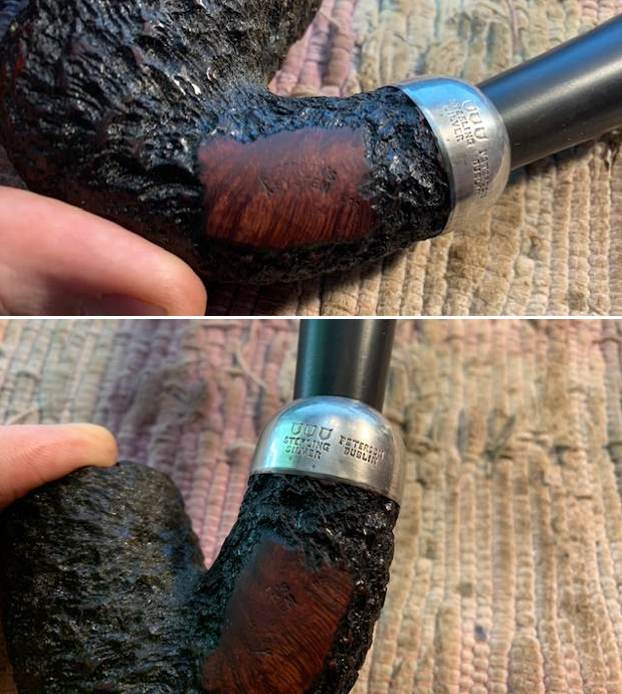
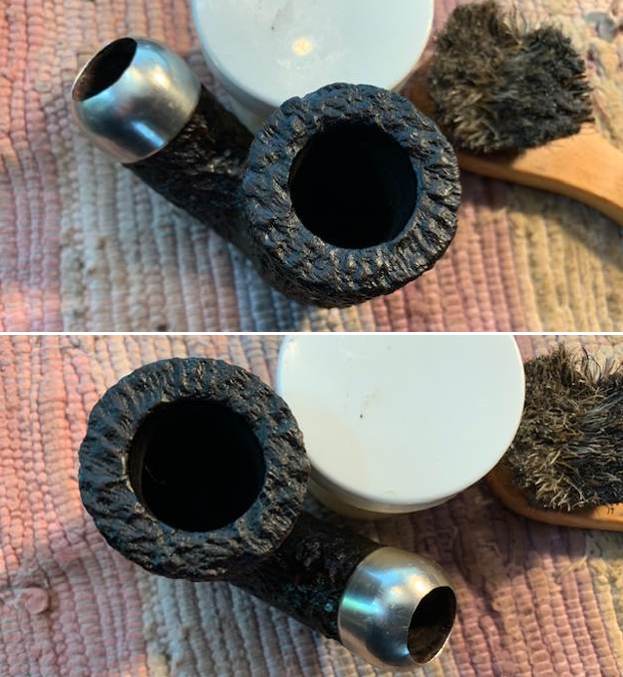
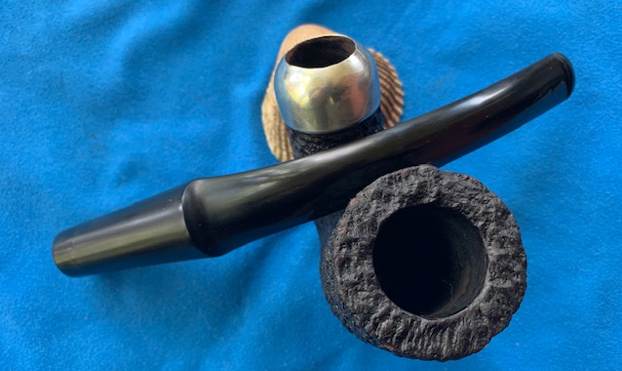
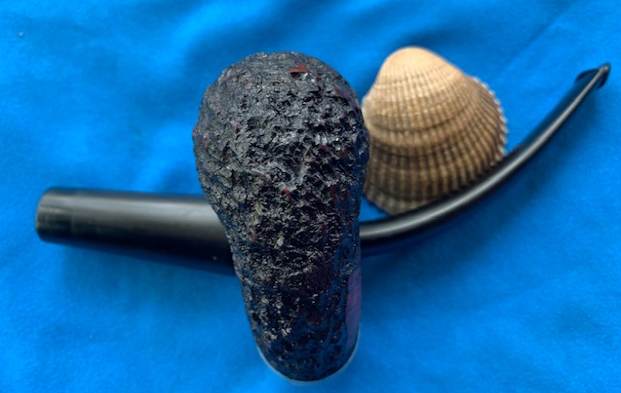
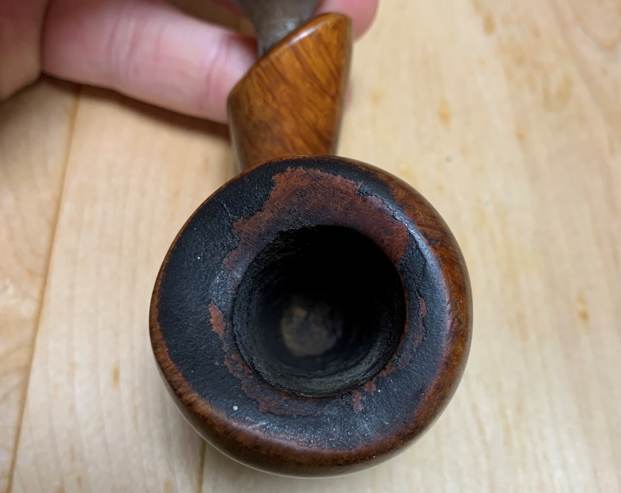
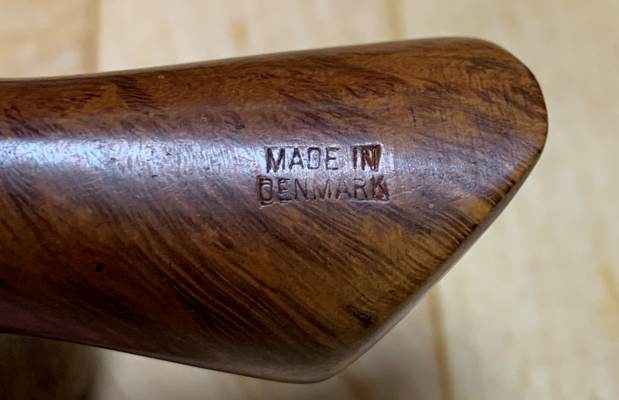
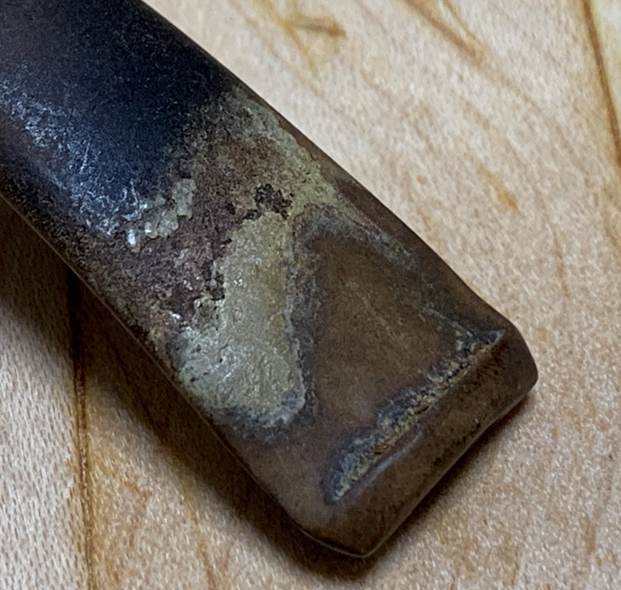
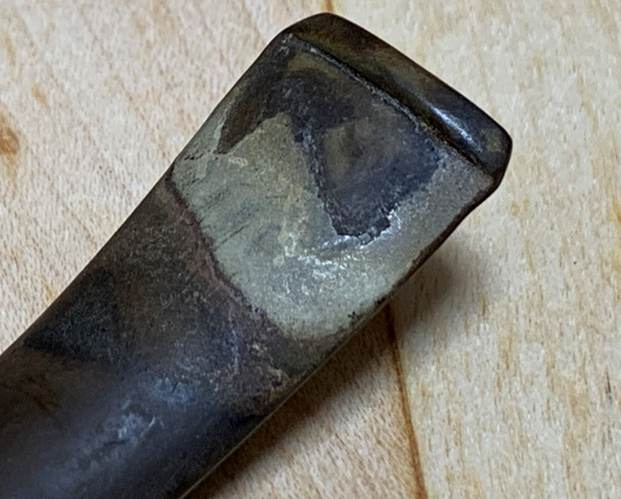
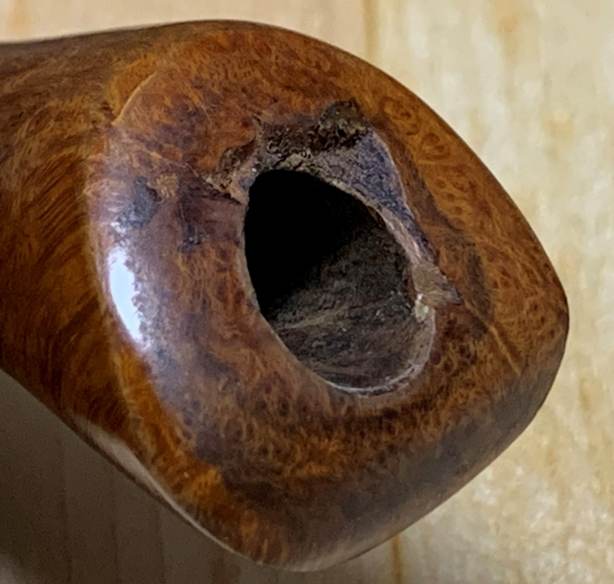
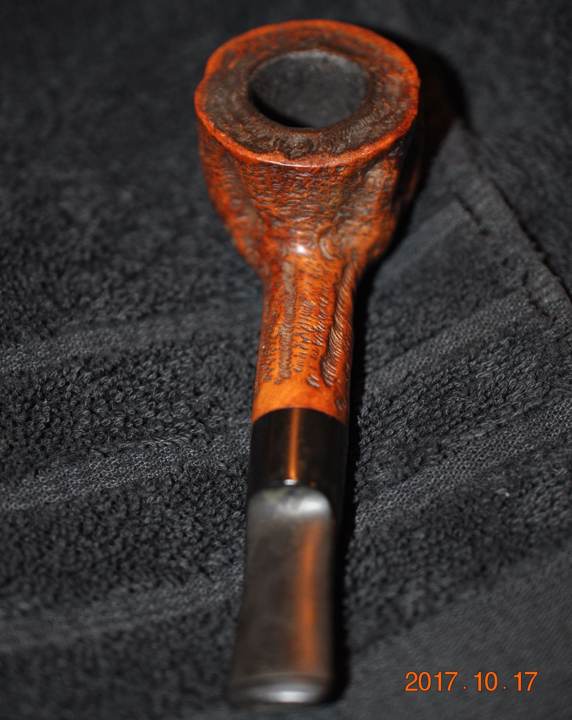
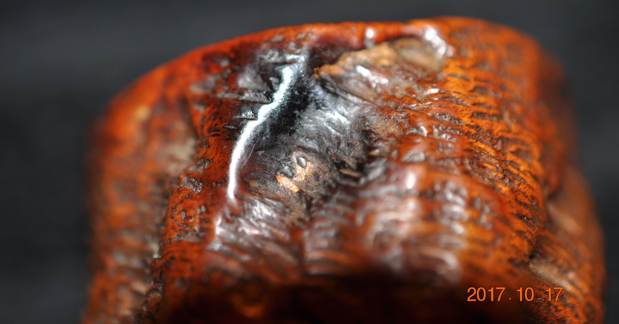
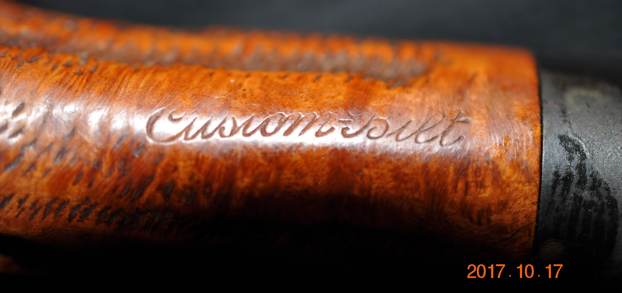
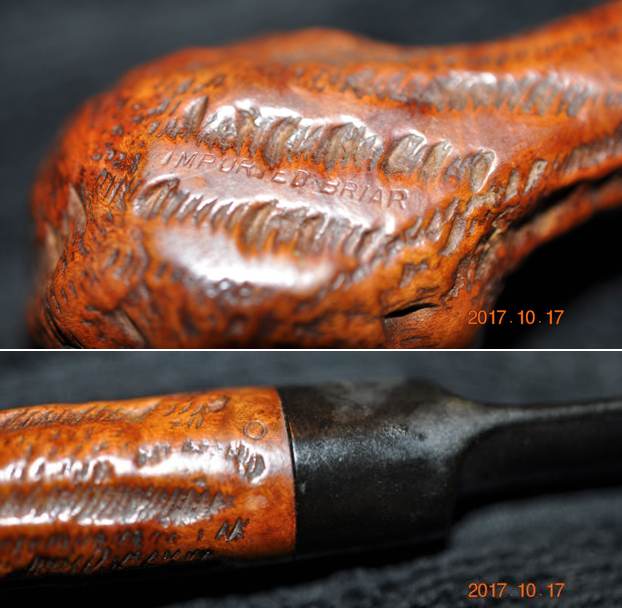
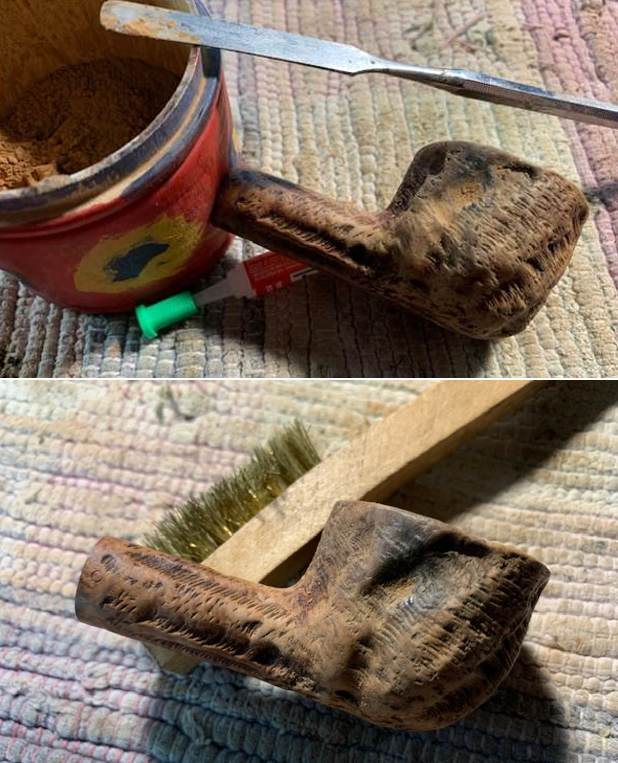
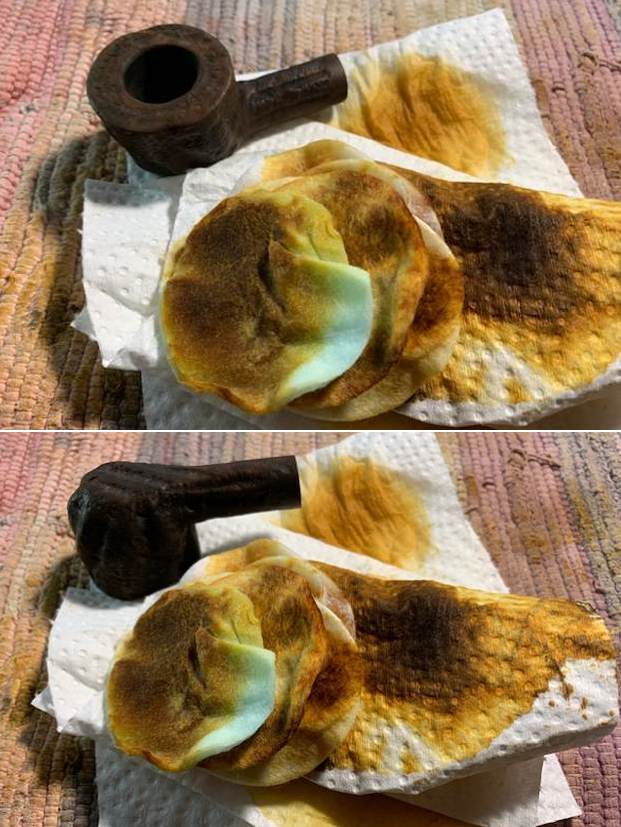
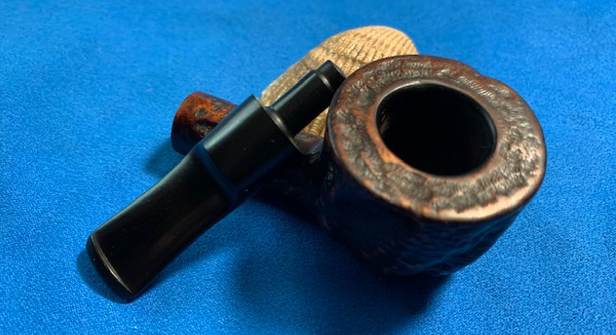
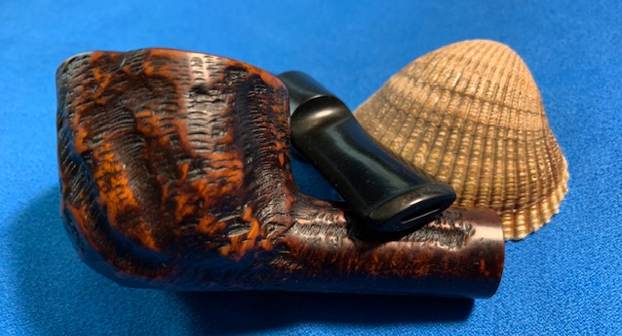
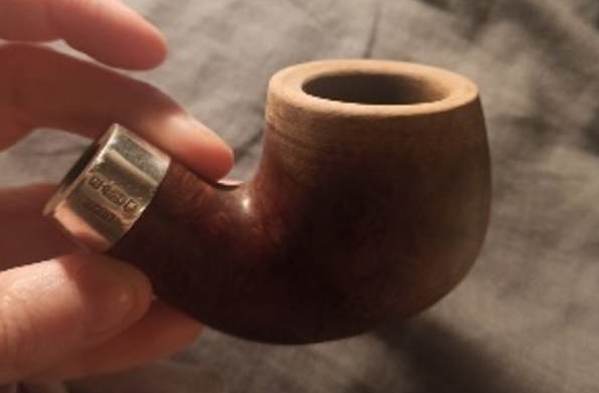
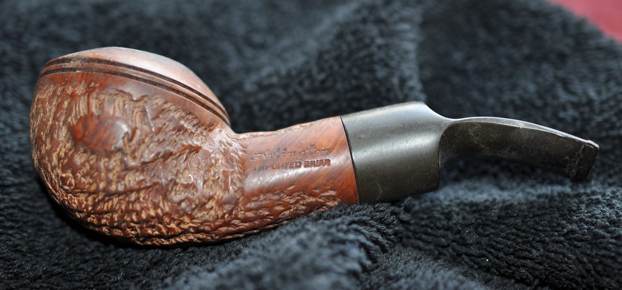
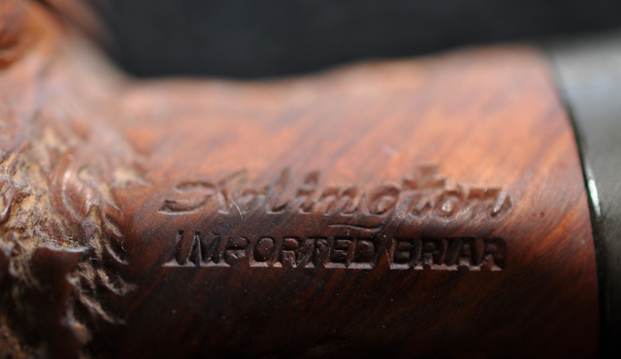
This Dunhill Lovat is stamped on the left side and reads 40 followed by Dunhill over Bruyere. On the right side it is stamped Made in England2 3 (double date stamp) [over] Pat. No. 417574/34. A circle 4 followed by A is stamped on the right side next to the bowl/shank junction. The numbers and stamping tell me that the pipe is a Bruyere and the size is a Group 4. The 2 digit shape number makes it an older pipe as does the Patent No. stamp under Made in England. The double date stamp says the pipe was made one year and sold the next. The finish was very dirty with spots of grime and debris stuck on it. The bowl had a thick cake in the bowl and heavy lava overflowing onto the rim top. The rim top had burned area on the left front top and inner and outer edges. There was darkening and burn damage on the inner edge all the way around. There were burn marks toward the back of the rim top. The stem had calcification, oxidation and tooth marks and chatter on both sides ahead of the button. The button itself appeared to be in good condition. Jeff took photos of the pipe before he started his clean up work on it. 
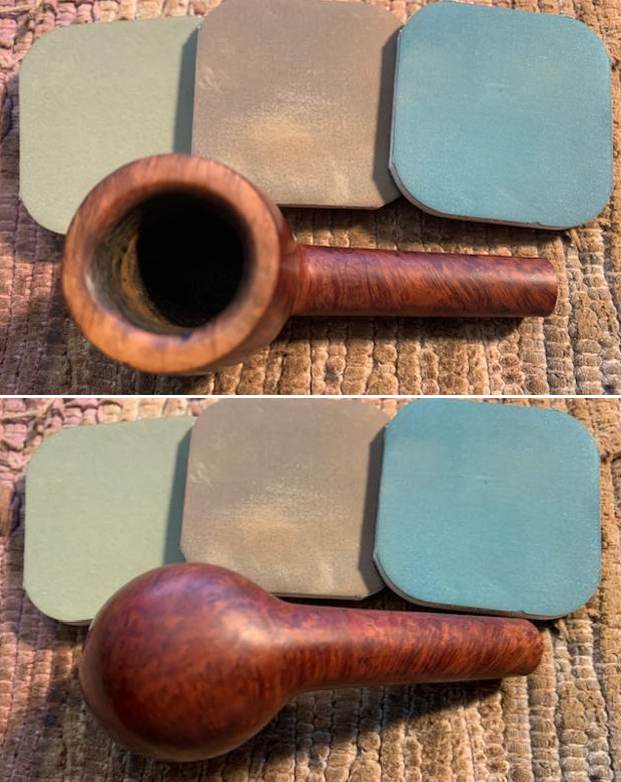
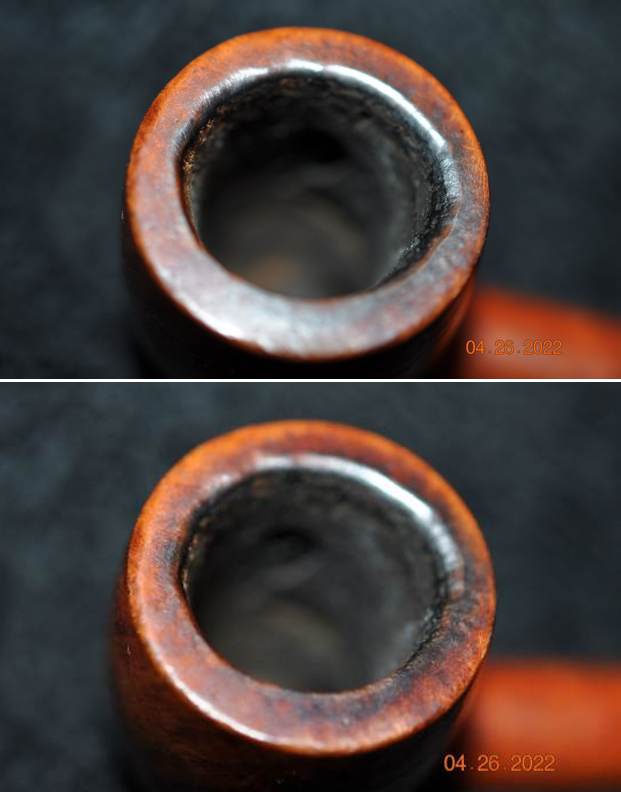
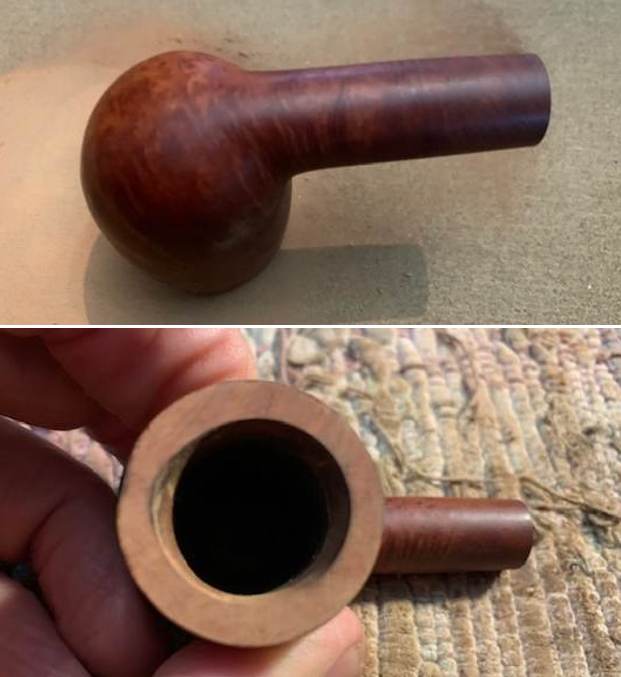
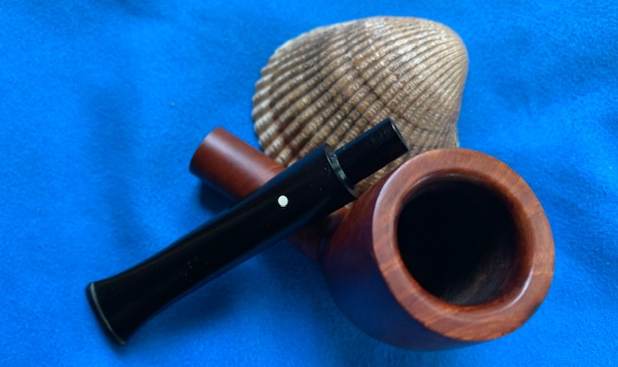
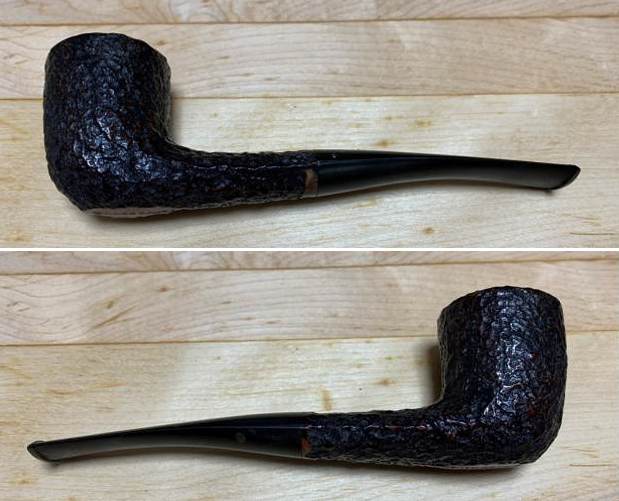
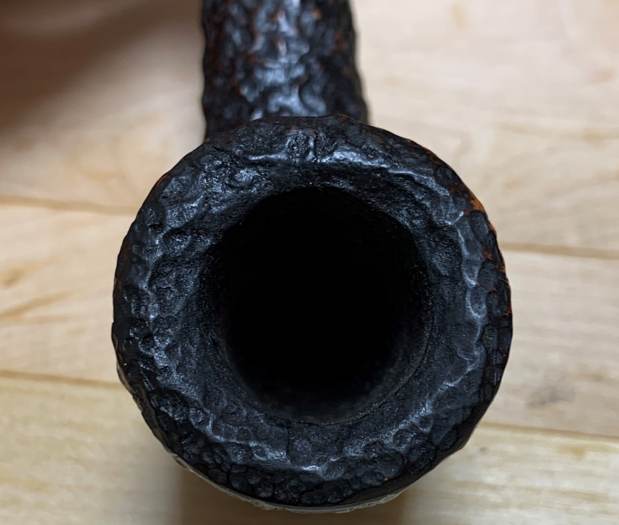
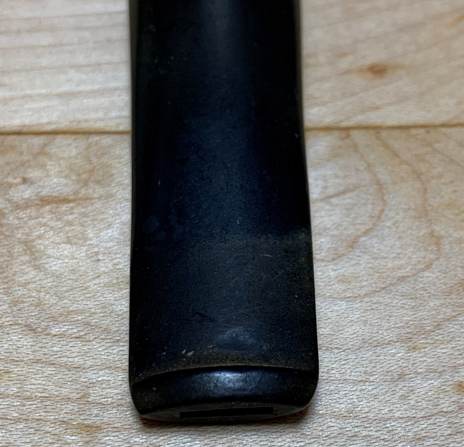
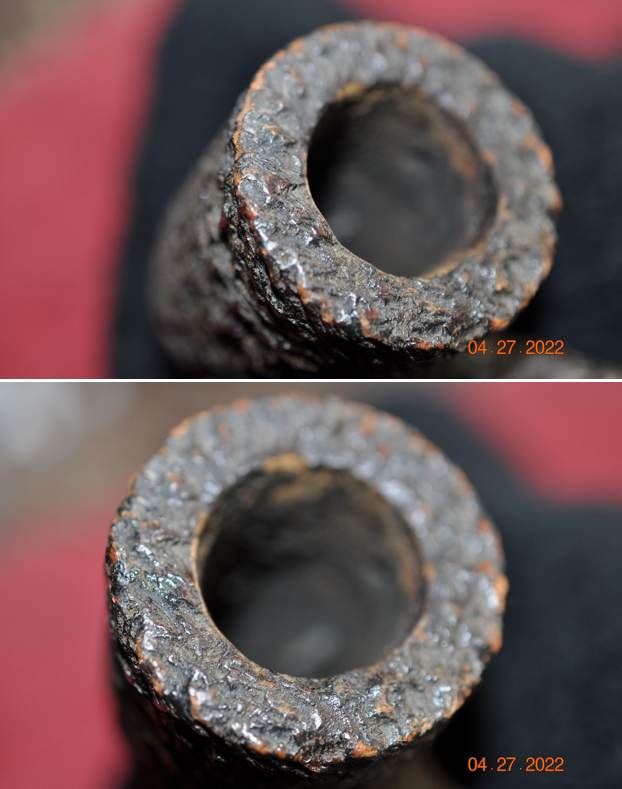
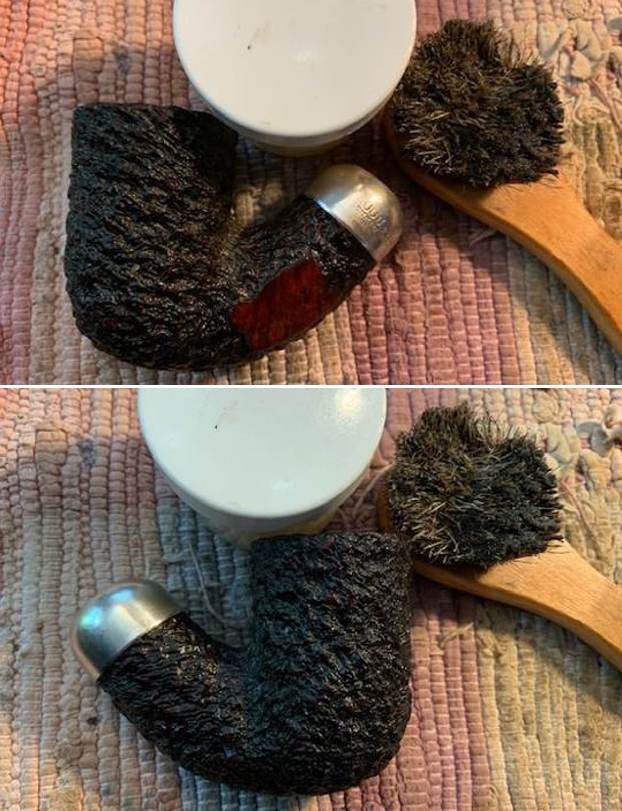
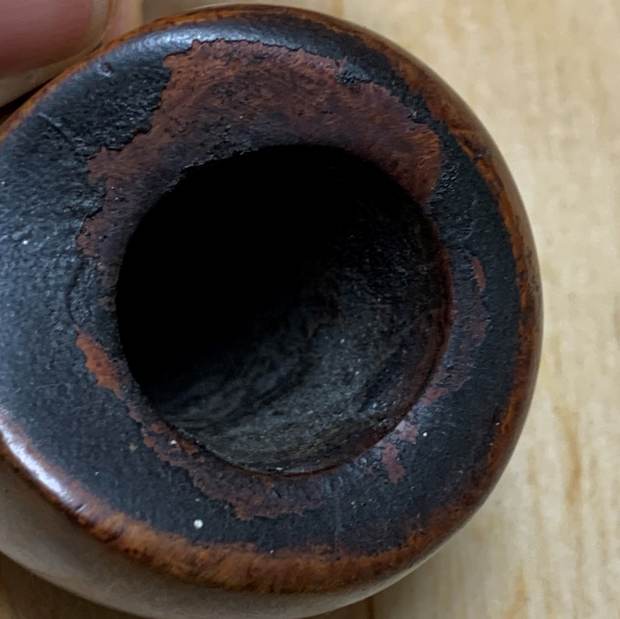
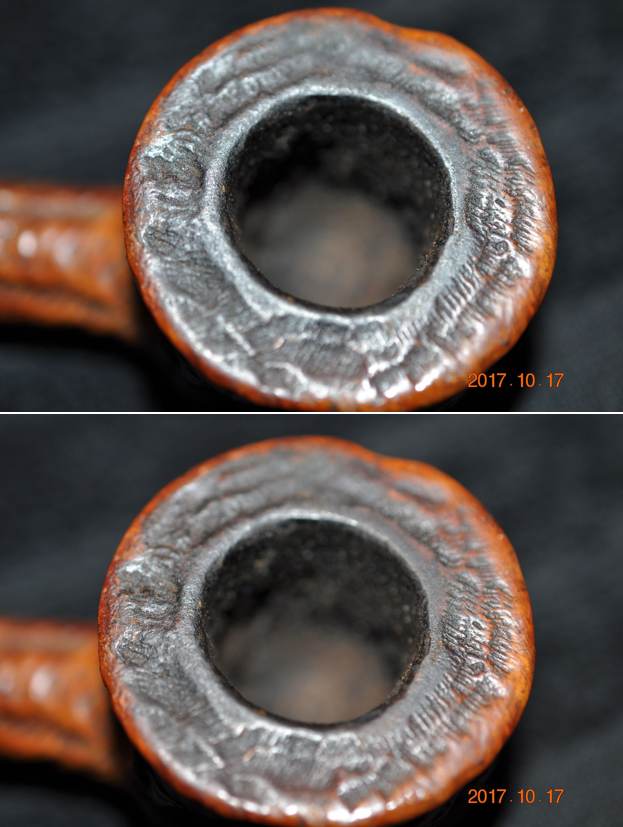
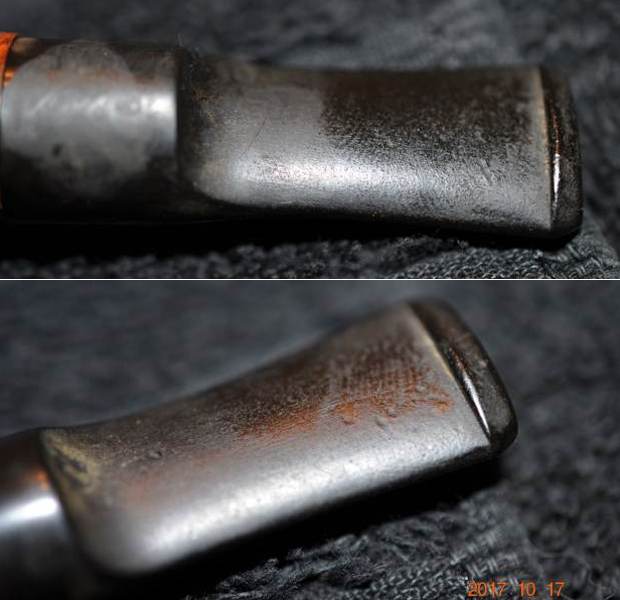
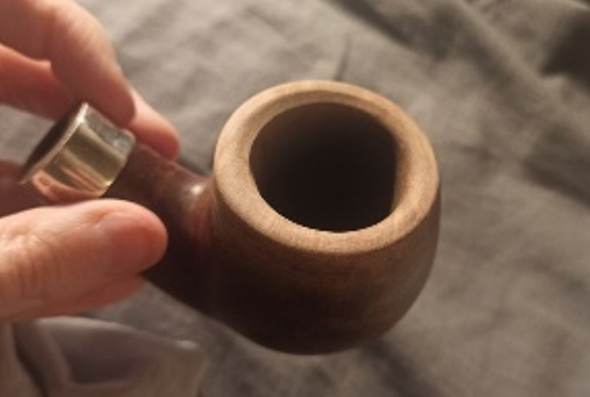
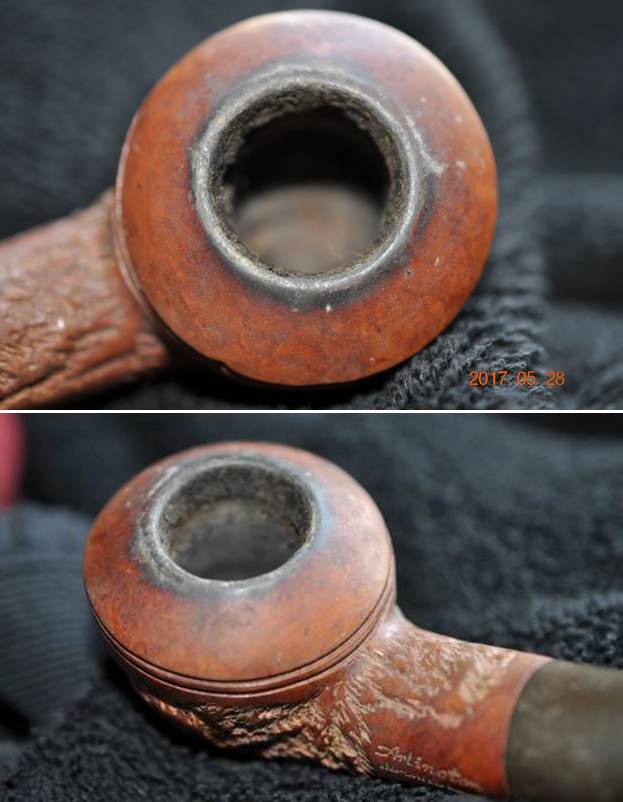
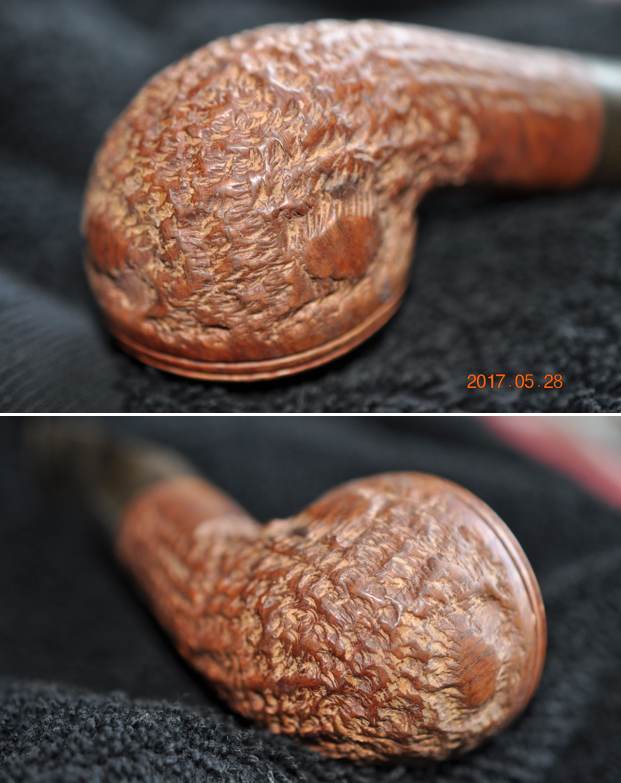
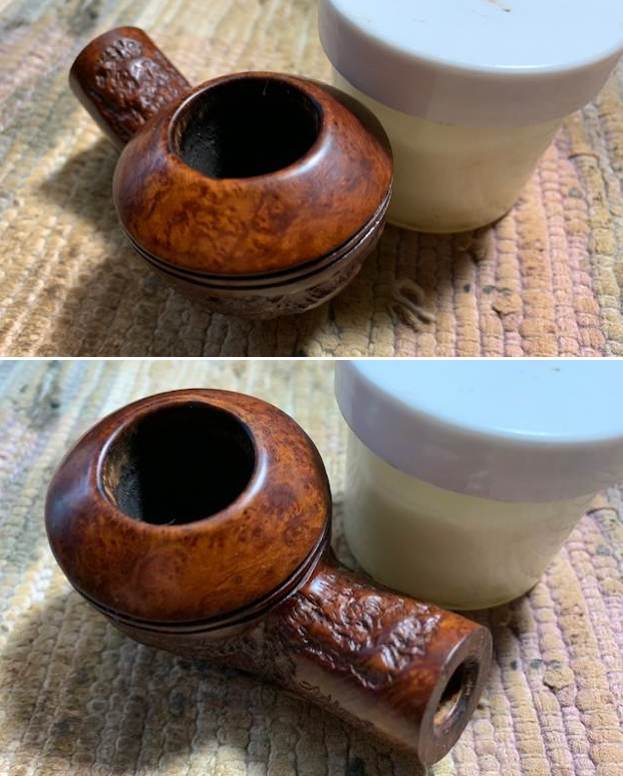
 He took photos of the bowl and rim top to show the condition. You can see the thick cake in the bowl and rim top and edges. The lava is so thick that is hard to know what the edges and top look like underneath. The stem was heavily oxidized, calcified and has tooth marks and chatter on both sides ahead of the button. Overall the pipe is a real mess.
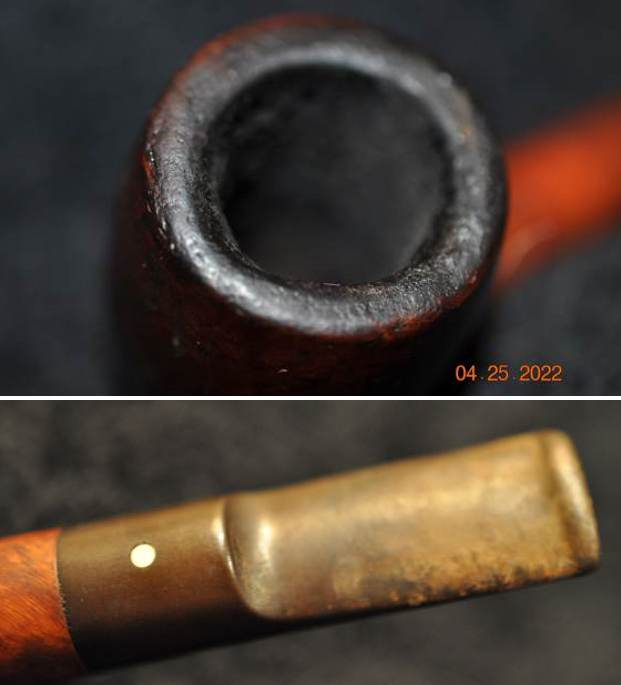
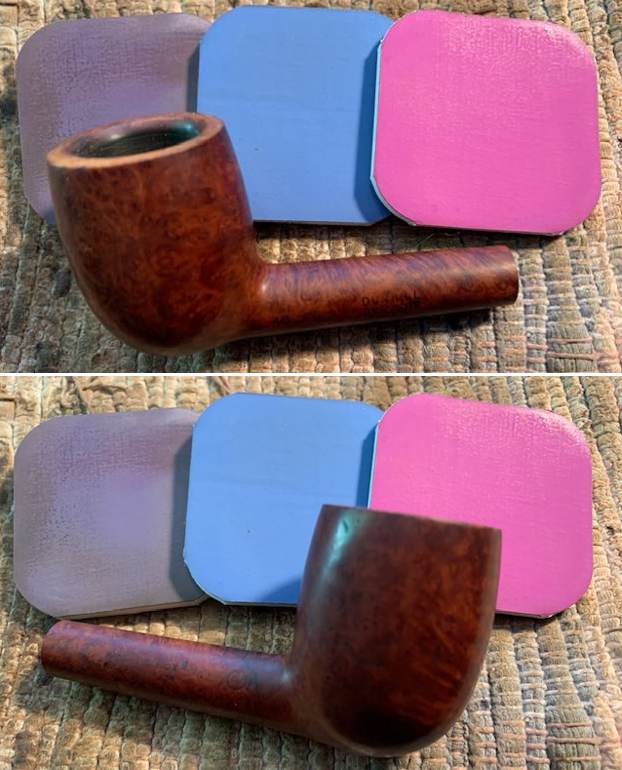
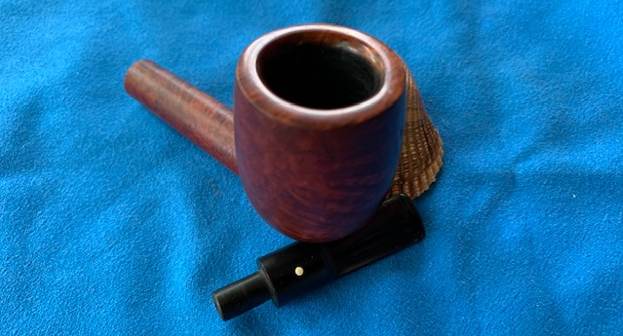
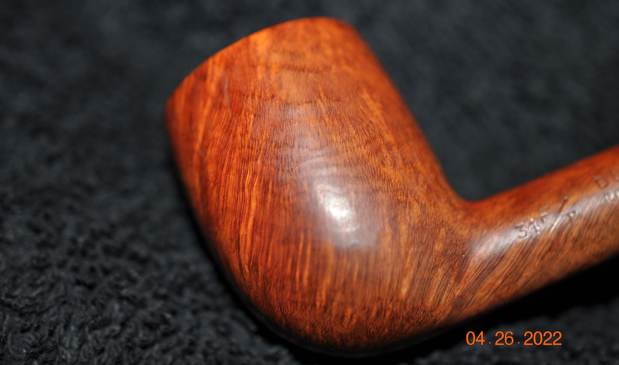
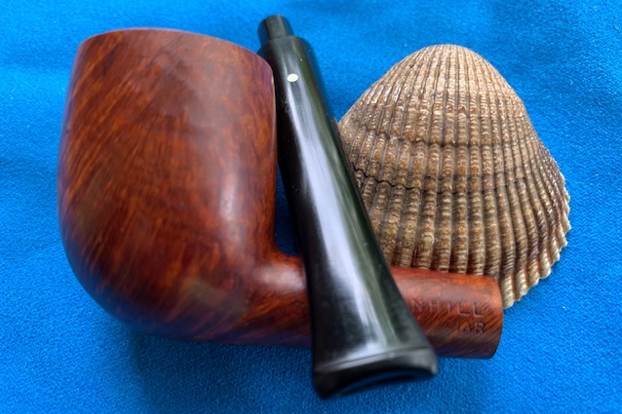
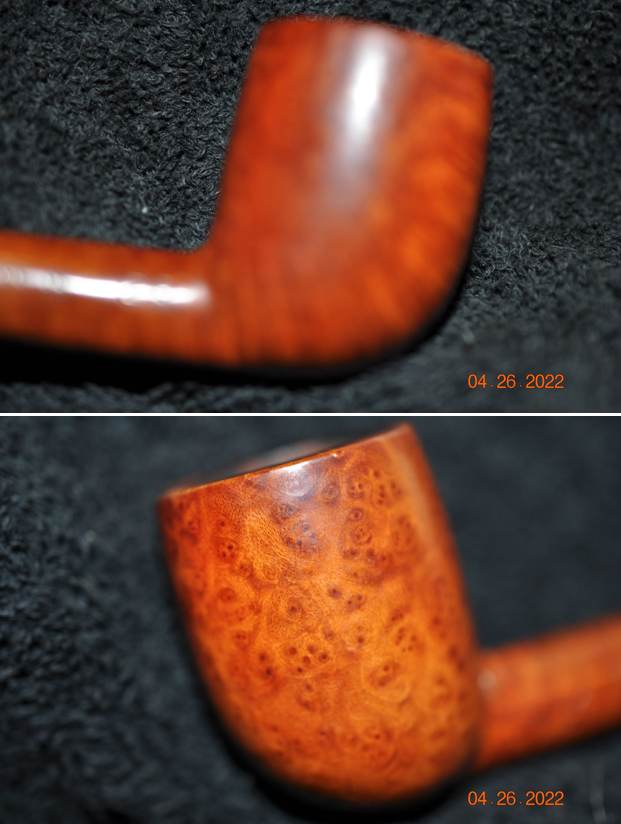
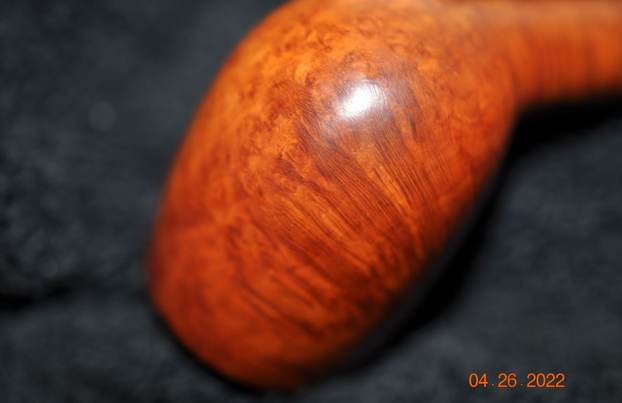
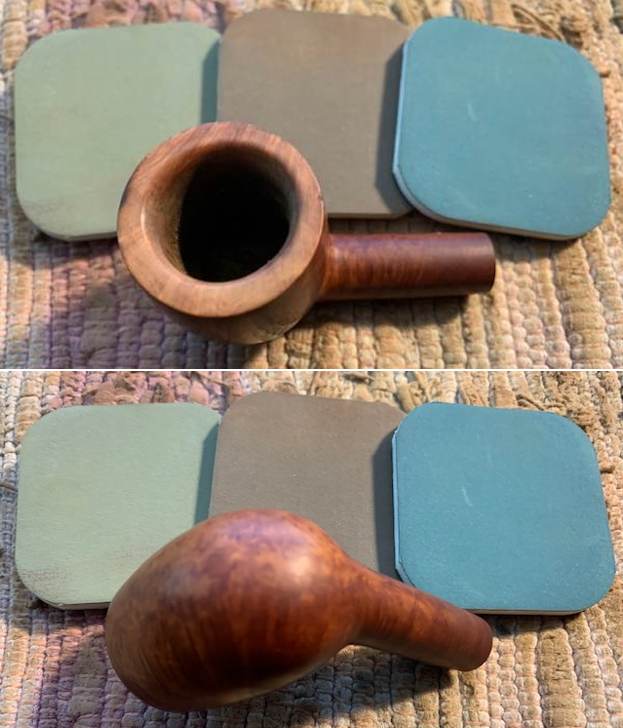
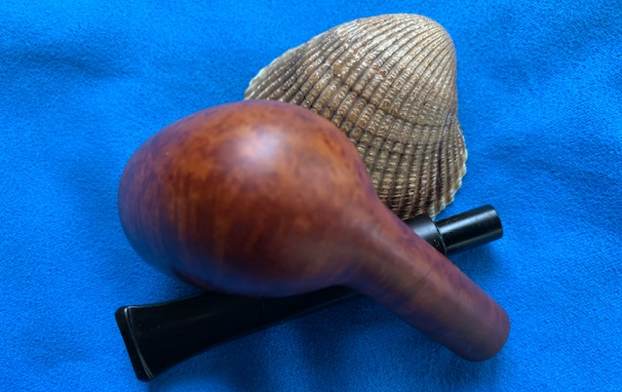
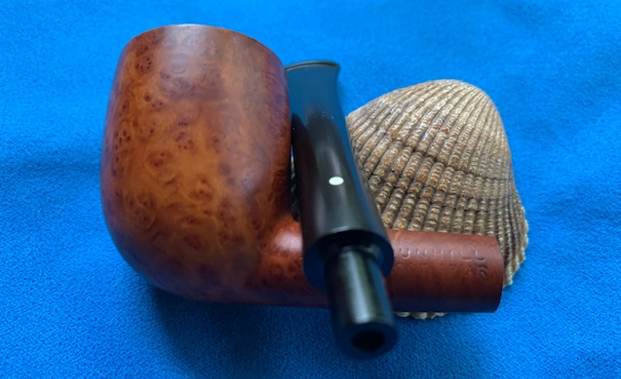
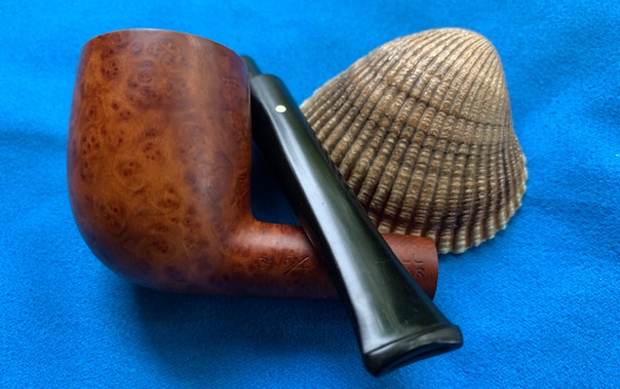
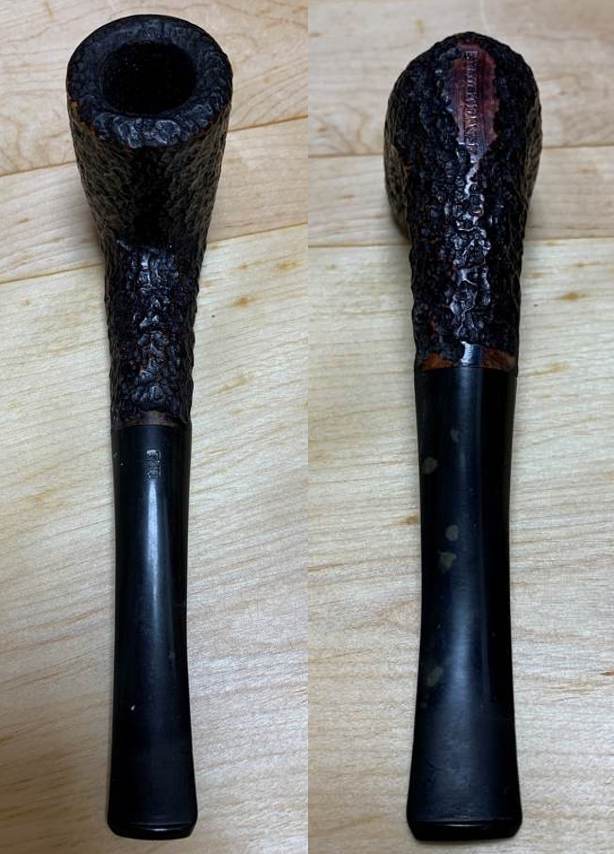
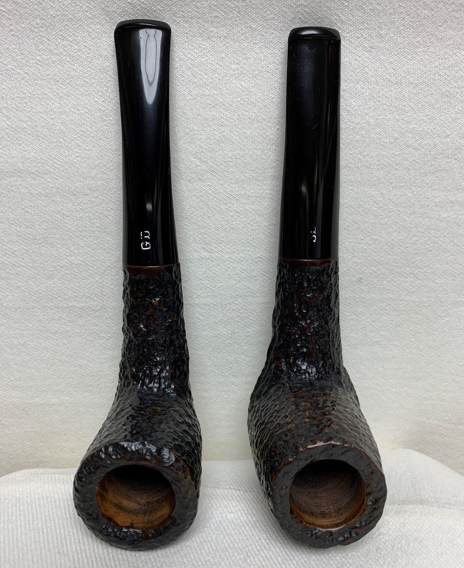
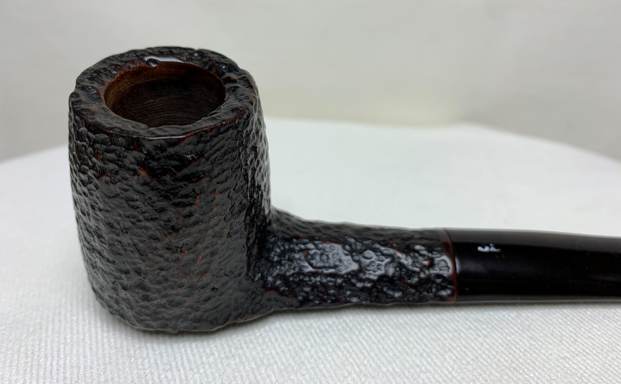
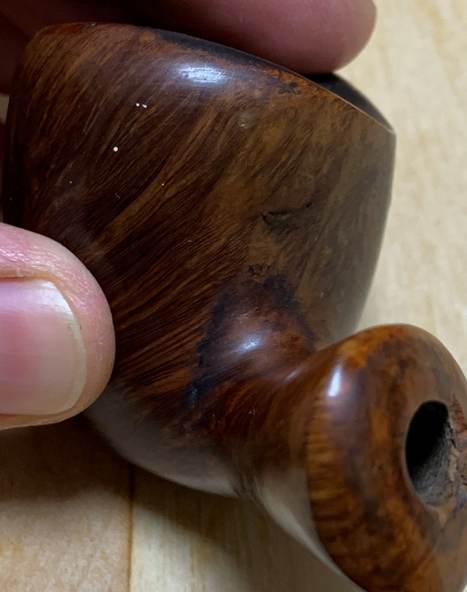
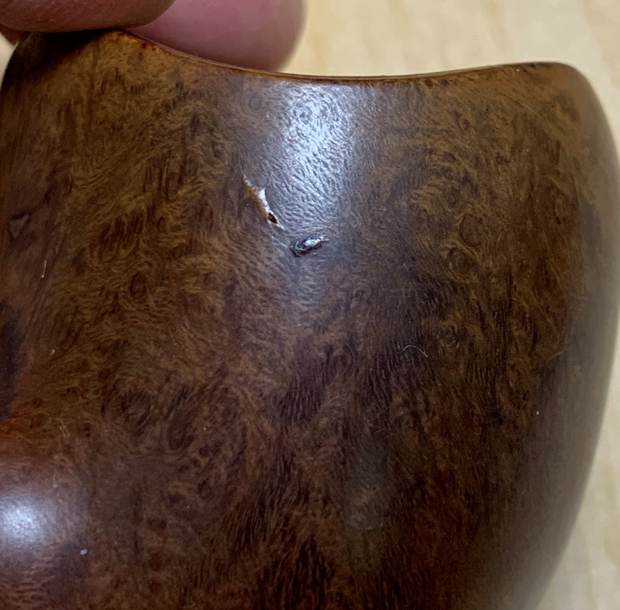
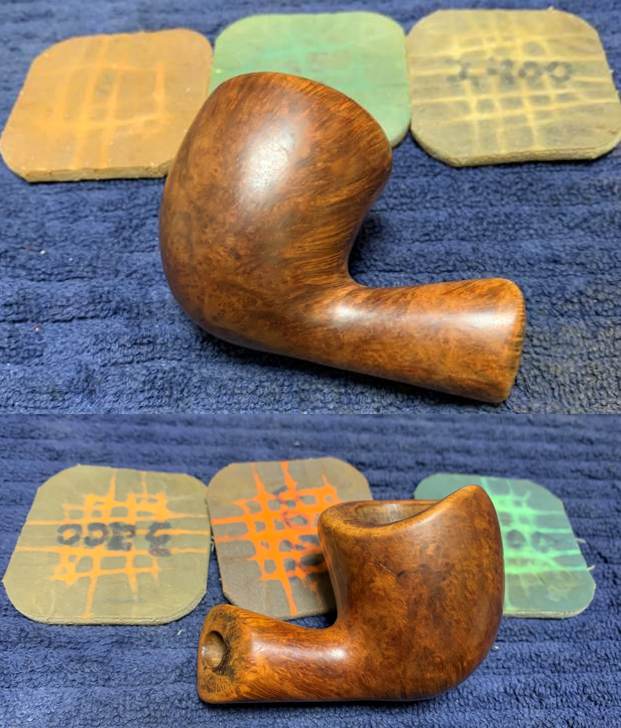
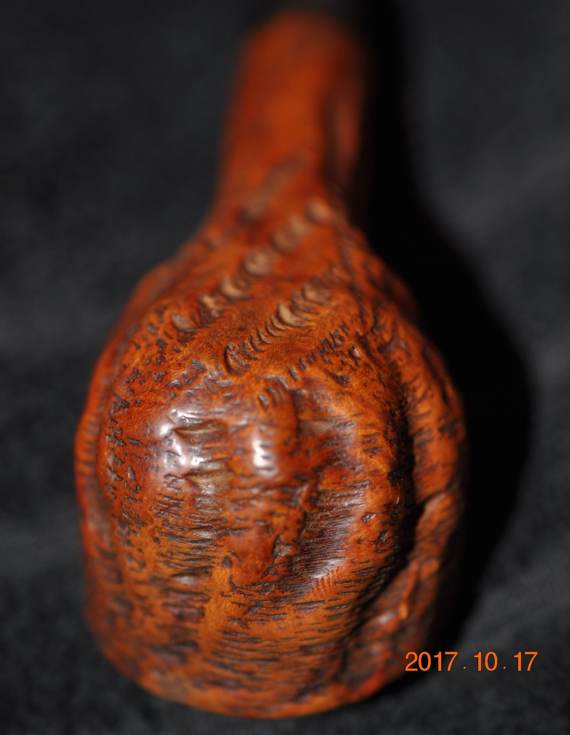
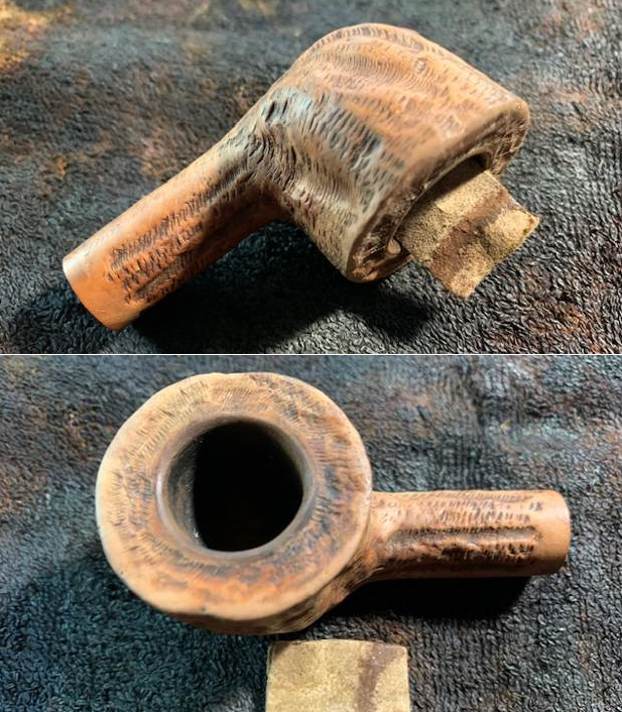
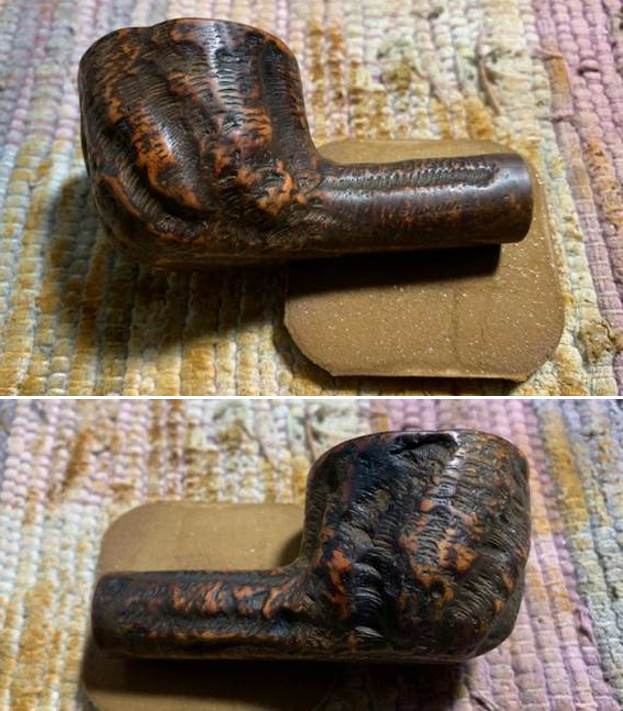
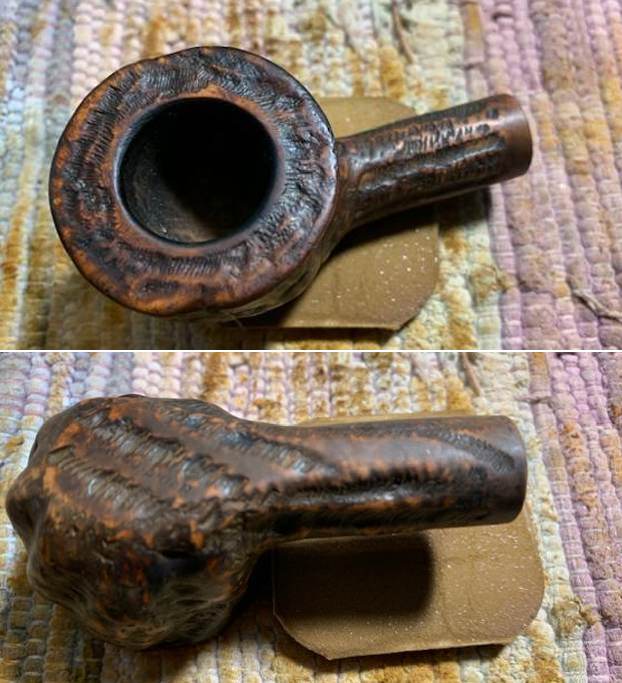
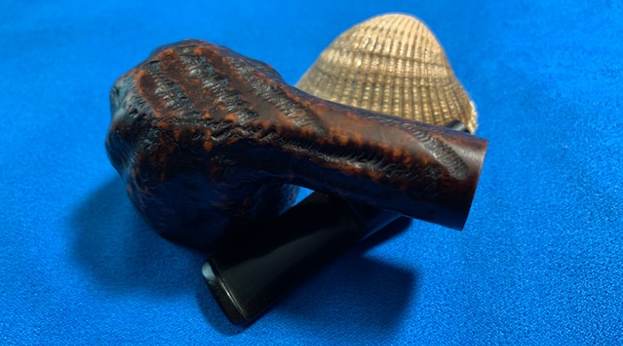
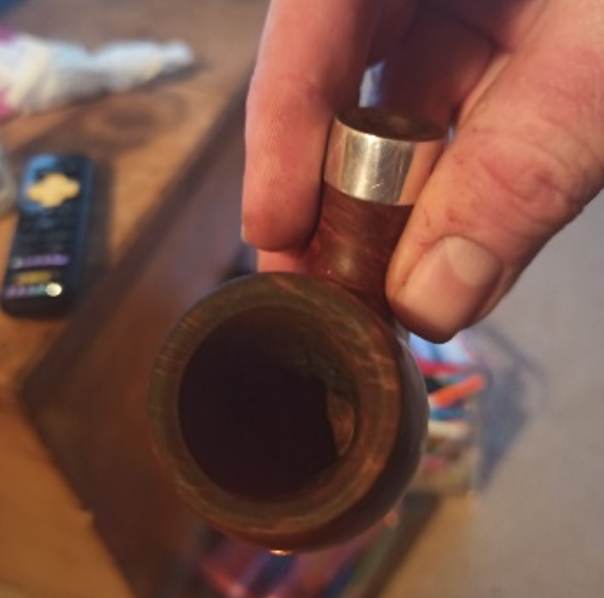
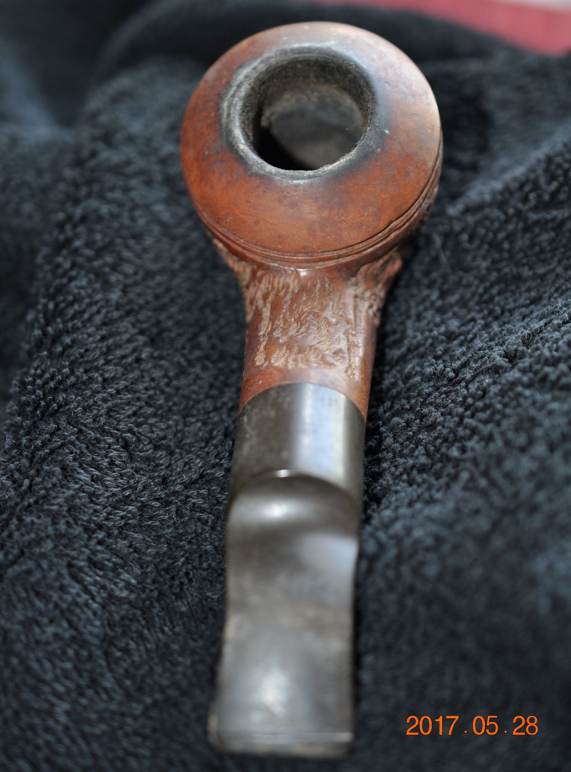
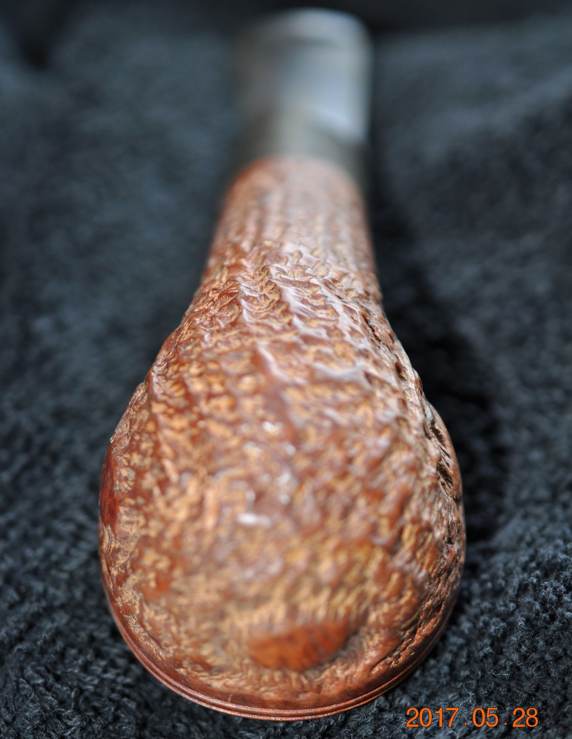
 Jeff took photos of the grain and the finish around the bowl sides and heel. It was nice looking if you can see through the grime ground into the surface.
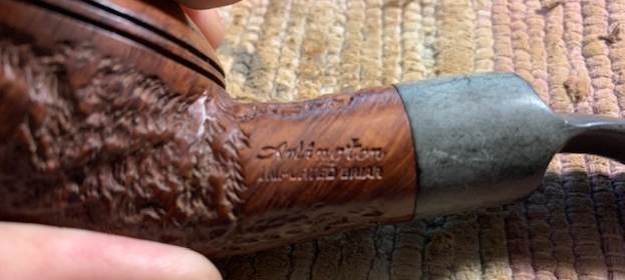
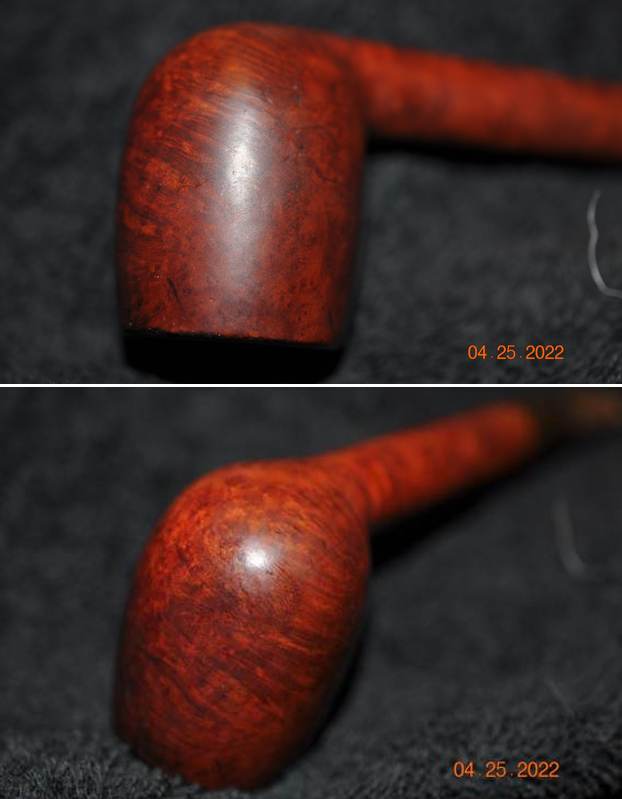 He took photos of the stamping on the sides of the shank. The stamping is faint but readable. It reads as noted above.
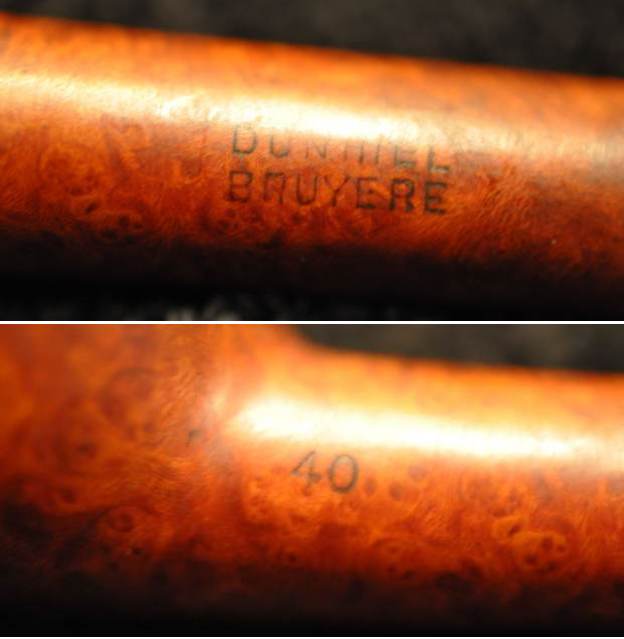
 Now it was time to begin to work on the stamping on the pipe. I turned first to Pipedia as I remembered they had some great information on the Bruyere finish and dates and how the finish was made (https://pipedia.org/wiki/Dunhill#Bruyere). The first quote below give the short version of the finish. The second link goes into more detail. I quote from both below.
Bruyere – The original finish produced (usually made using Calabrian briar), and a big part of developing and marketing the brand. It was the only finish from 1910 until 1917. A dark reddish-brown stain. Before the 1950s, there were three possible finishes for Dunhill pipes. The Bruyere was a smooth finish with a deep red stain, obtained through two coats, a brown understain followed by a deep red.
https://pipedia.org/wiki/Dunhill_Bruyere
Initially, made from over century-old briar burls, classified by a “B” (denoted highest quality pipe); “DR” (denoted straight-grained) and an “A” (denoted first quality), until early 1915. After that, they became a high-end subset to the Dunhill ‘Bruyere’. The DR and B pipes, a limited production, they should be distinguished as hand-cut in London from burls as opposed to the Bruyere line which was generally finished from French turned bowls until 1917, when the Calabrian briar started to be used, but not completely. Only in 1920 Dunhill took the final step in its pipe making operation and began sourcing and cutting all of its own bowls, proudly announcing thereafter that “no French briar was employed”.
Bruyere pipes were usually made using Calabrian briar, a very dense and hardy briar that has a modest grain but does very well with the deep red stain.
“Before the 1950s, there were three possible finishes for Dunhill pipes. The Bruyere was a smooth finish with a deep red stain, obtained through two coats, a brown understain followed by a deep red. The Shell finish was the original sandblast with a near-black stain (though the degree to which it is truly black has varied over the years). Lastly, the Root finish was smooth also but with a light brown finish. Early Dunhill used different briars with different stains, resulting in more distinct and identifiable creations… Over the years, to these traditional styles were added four new finishes: Cumberland, Dress, Chestnut and Amber Root, plus some now-defunct finishes, such as County, Russet and Red Bark.”
With that information clear for me I wanted to identify the shape number and try to pin that down (https://pipedia.org/wiki/Dunhill_Shape_Chart). I turned to the section on the older 3 digit Shape Numbers and read it. I quote it below.
Early Days – 2 digits/letters – The original skus/model numbers from the 1920’s until the early 1970’s stood for very specific shapes and bowls. For example, the codes 31, 34, 59, 111, 113, 117, 196, LB, LBS… were all different types of Billiard shaped pipes and there were about 50(!), such codes for the Billiard shape alone. On top of those are a large variety of other shapes.
I knew that the pipe shape number locked in a time period between 1920-1970 – a large time span that I needed to narrow down more clearly. I turned to another link on Pipedia (https://pipedia.org/wiki/Dunhill_Shapes_List) to a shape list that Eric Boehm put together for Dunhills. I copied the four 2 digit numbers on Lovats from the list. The shape 40 was in the list.
Lovats:
37 Lovat, short, thick, saddle 1928 11
38 Lovat, long shank, saddle bit 3 4¾” 1928, 50, 60, 69 11
40 Lovat, long shank, saddle bit 4 5″ 1928, 1950, 1969 11
481 Lovat, long shank, saddle bit 1 5″ 1950, 1969 11
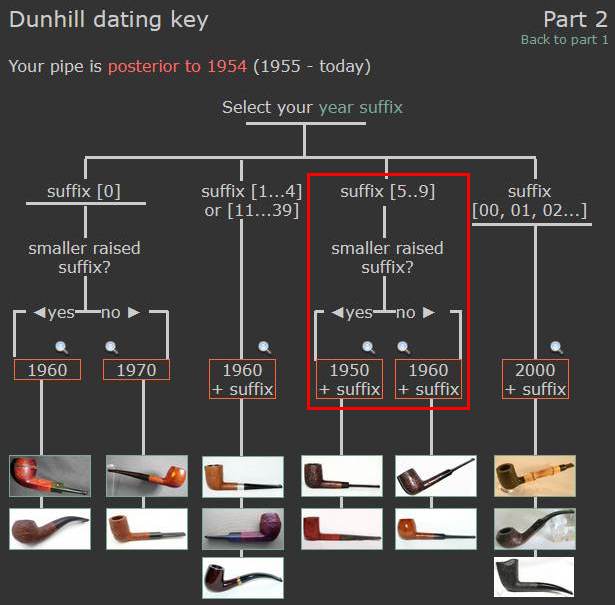
I turned next to dating the pipe. There is a superscript underlined 2 followed by superscript underlined 3 a little higher and to the right of the first superscript. The numbers follow the D in ENGLAND on the right side of the shank. I turned to the dating chart on Pipephil to pin down the date on this twin (http://pipephil.eu/logos/en/dunhill/cledat-en1a.html). I did a screen capture of Part 1 of the Dunhill Dating Key and included it below. I drew a red box around the section dating this pipe. It is clear that the pipe was made prior to 1954 as it includes a Patent Number. I drew a red box around the pertinent section that narrows the date down to between 1921 and 1954. It also had a link to further narrow down the dating.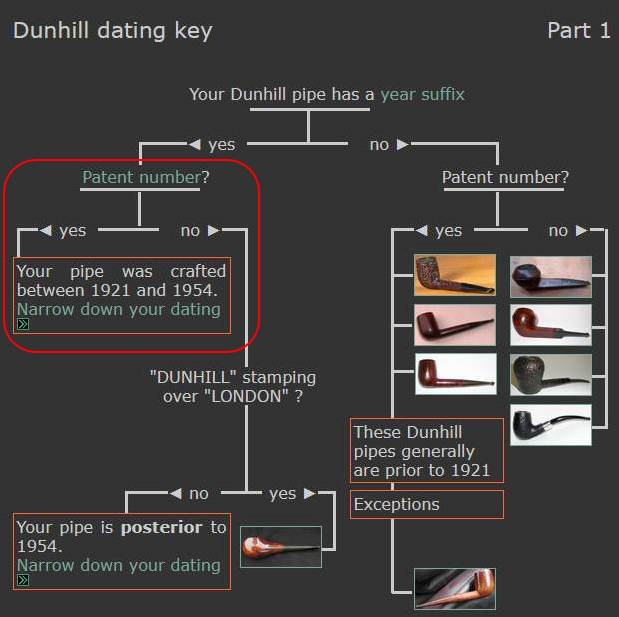 I followed the link to narrow it down and it took me to Page 2. The pipe has the patent number listed at the top of the chart – 417574/34. I followed the tree down the yes path to the part where it reads DUNHILL stamping aligned with SHELL. My pipe has BRUYERE aligned with DUNHILL. Again I followed the yes path to two options 1950 or 1940 + suffix (2-9). Since the pipe has a superscript 2 followed by a slightly higher superscript 3 told me that the pipe was made in 1942 and later sold in 1943. It was an old timer.
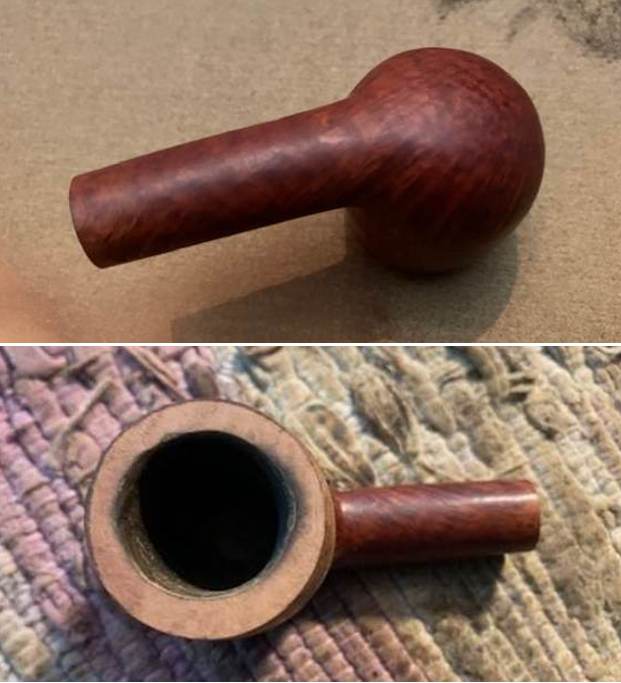
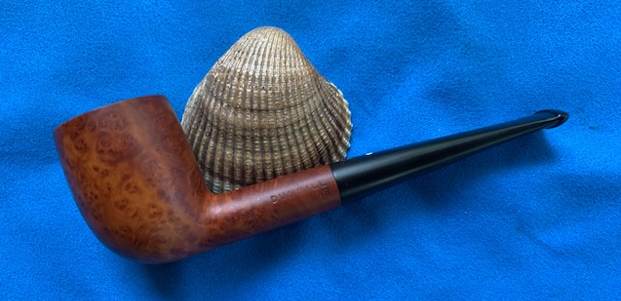
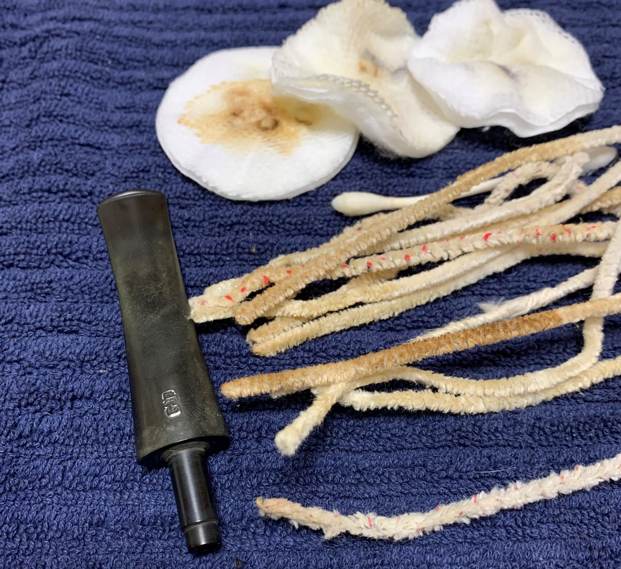
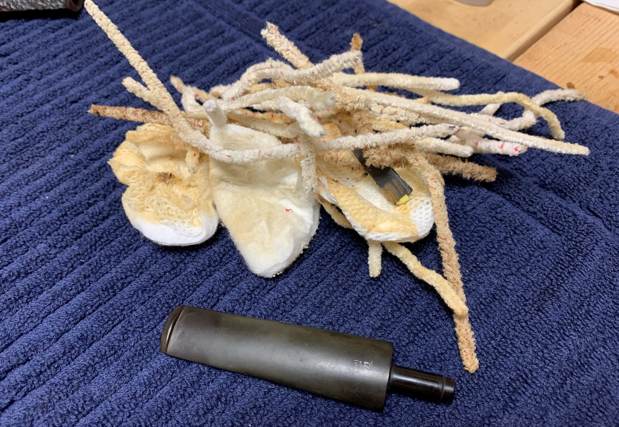
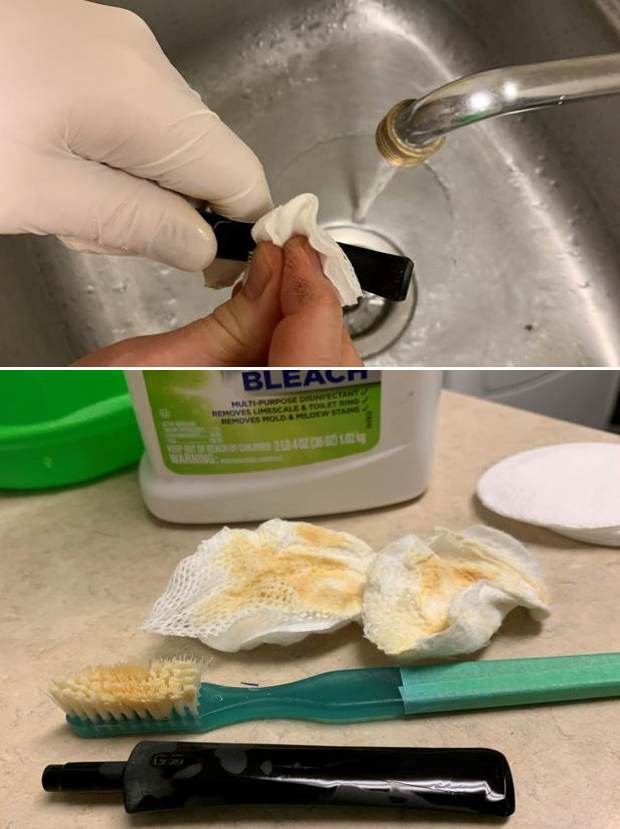
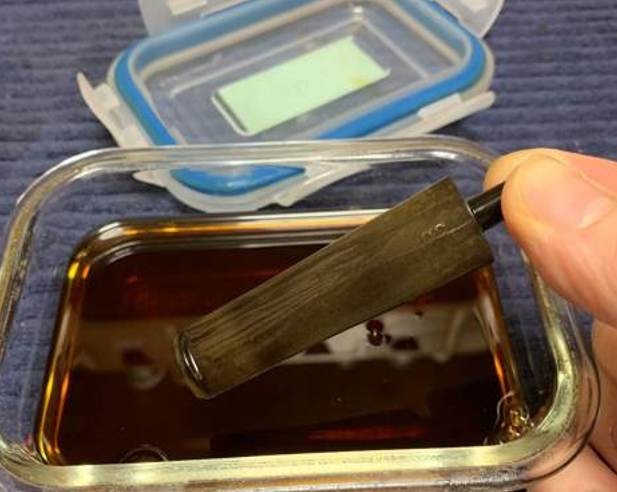
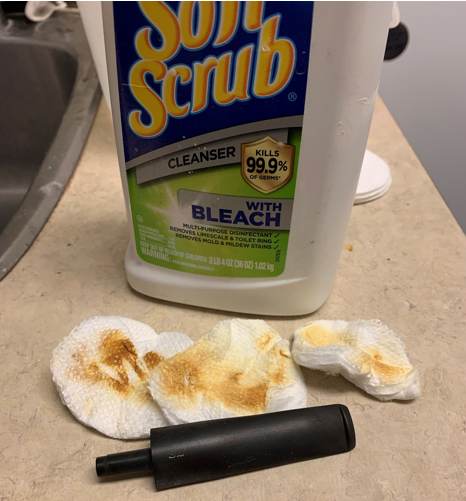
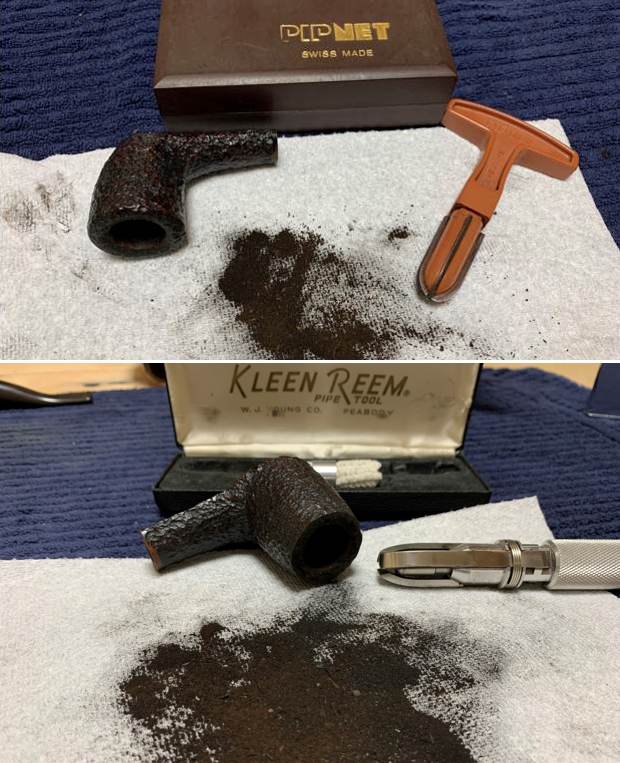
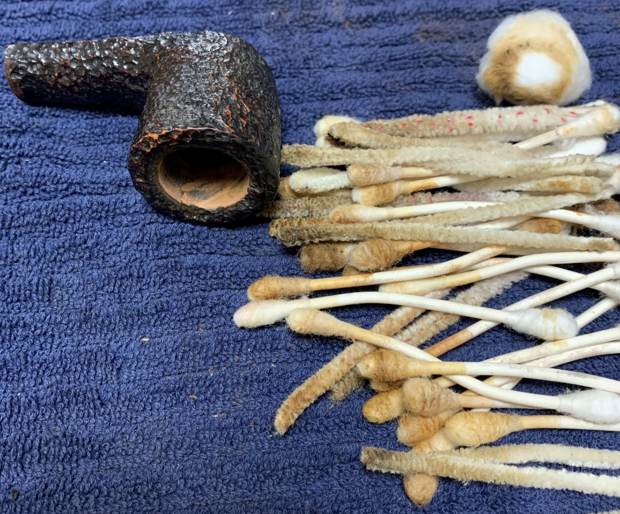
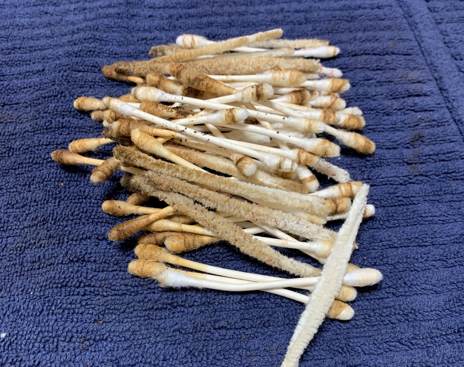
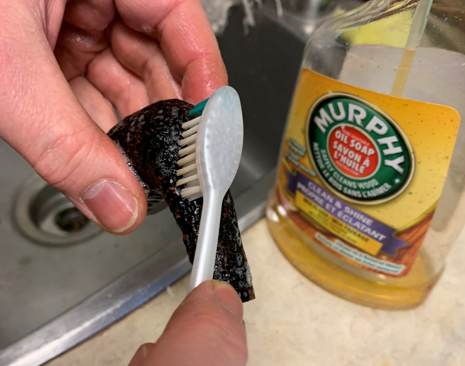
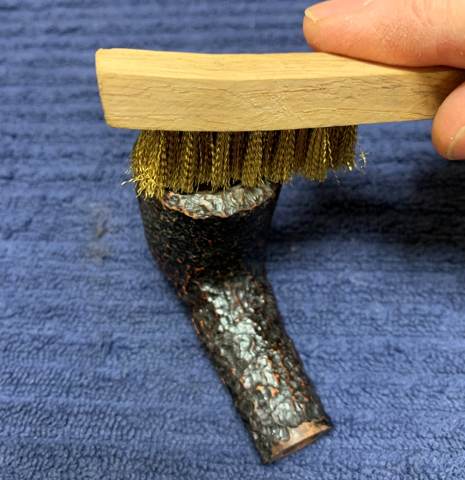
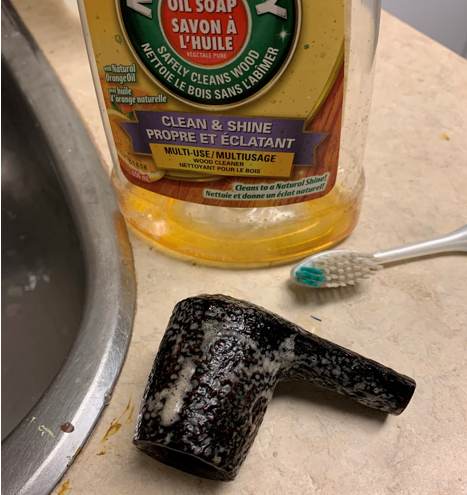
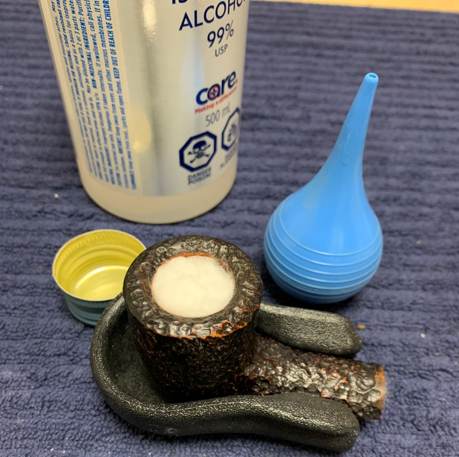
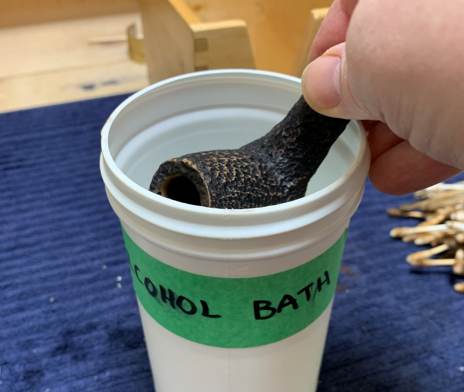
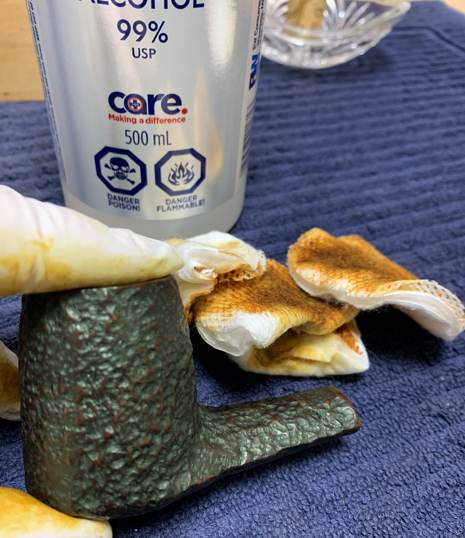
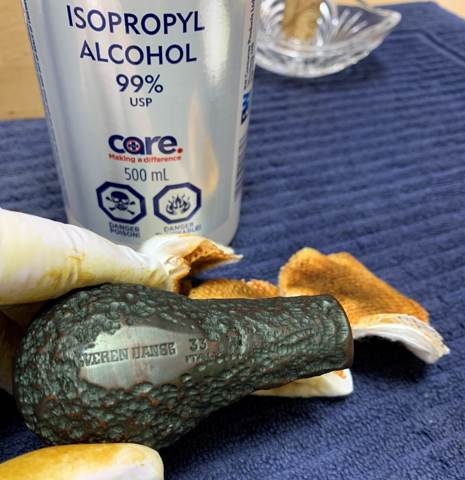
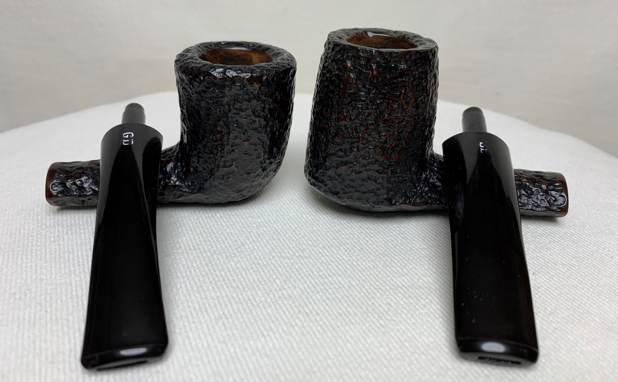
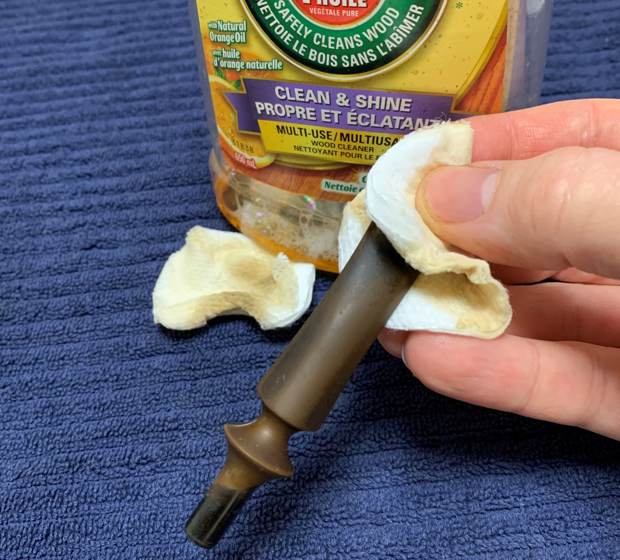
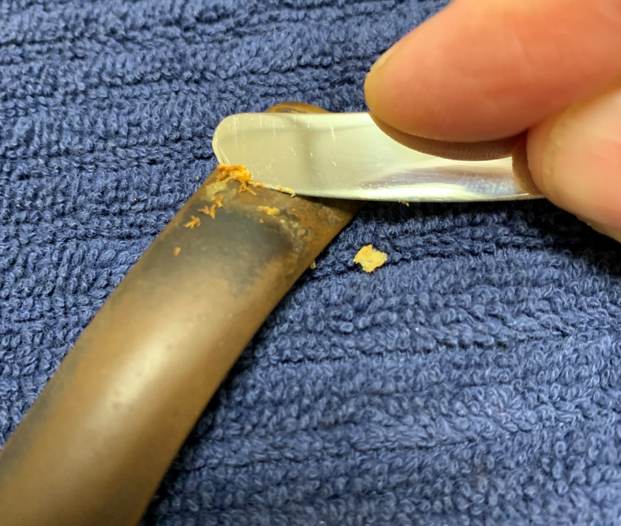
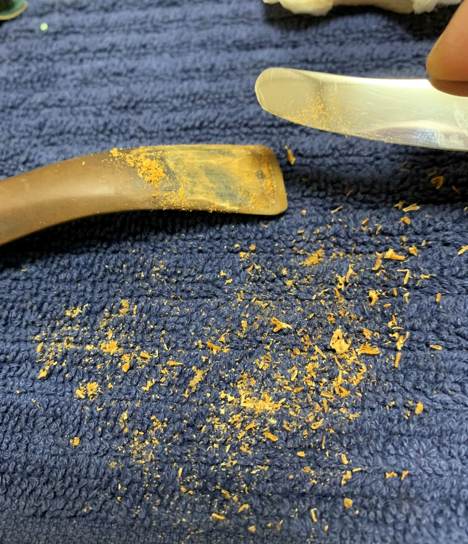
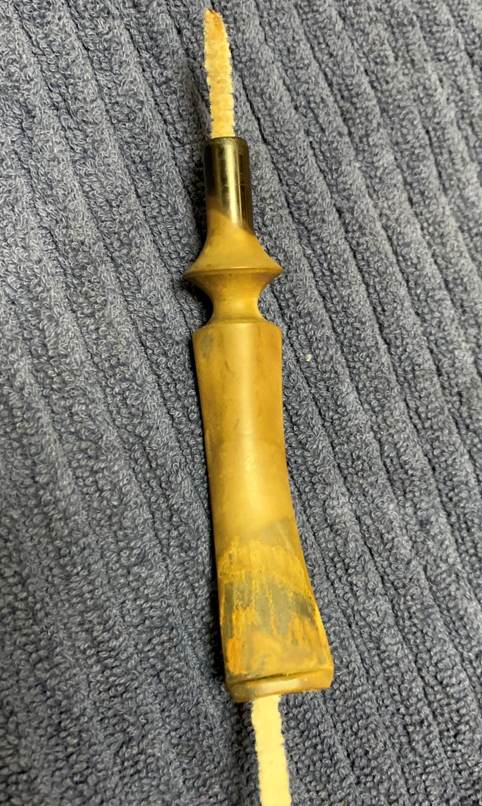
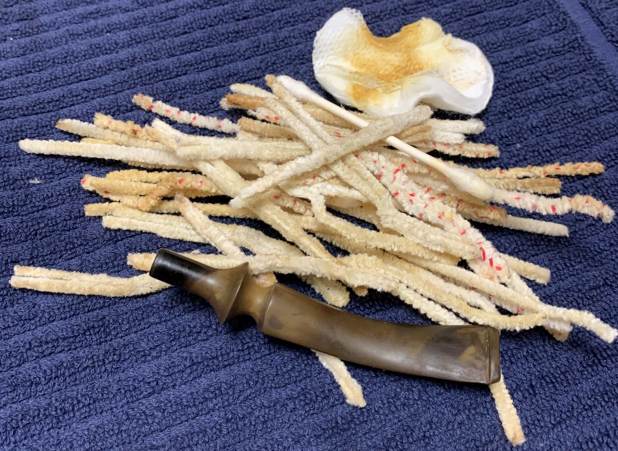
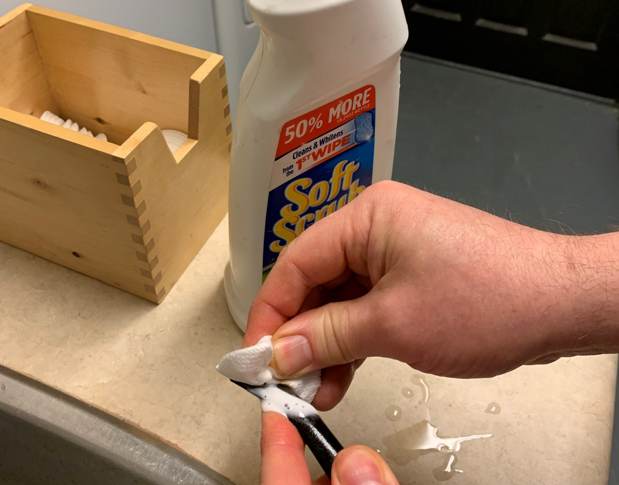
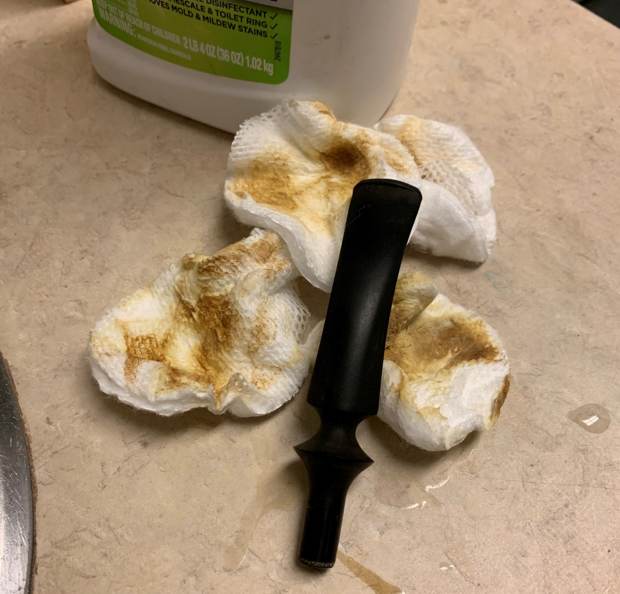
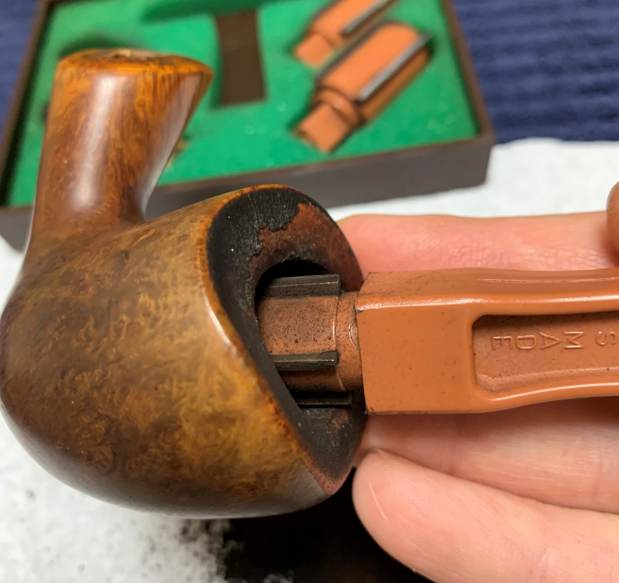
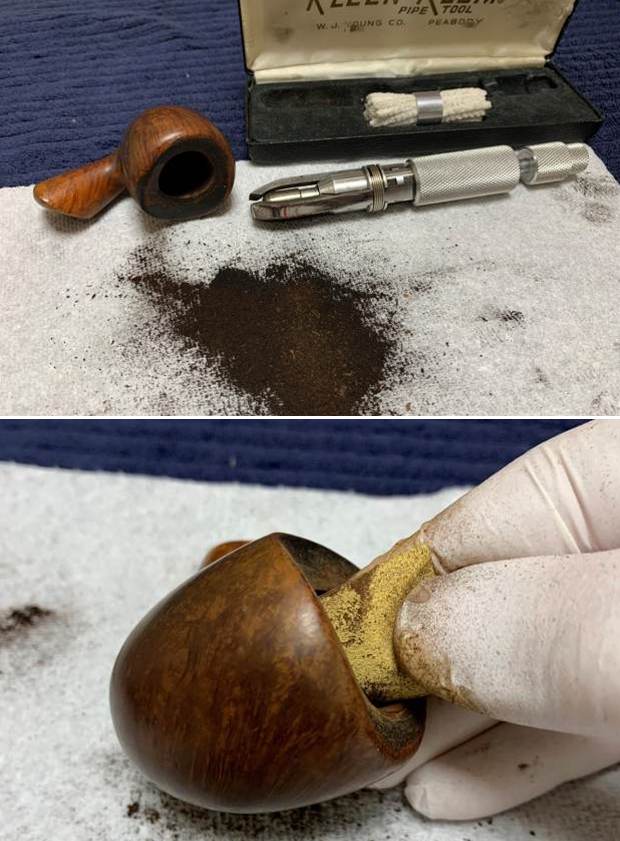
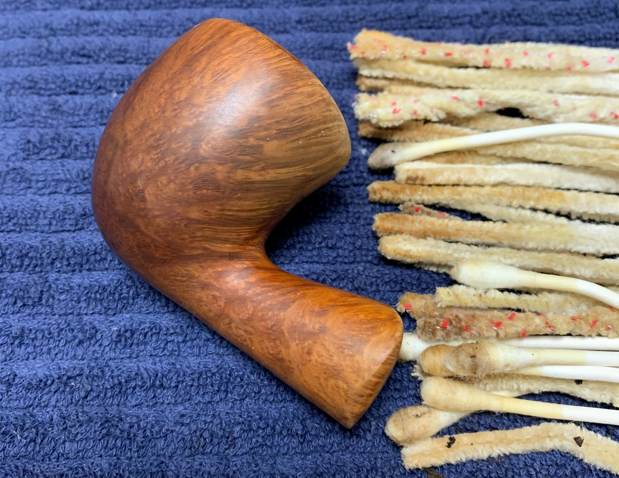
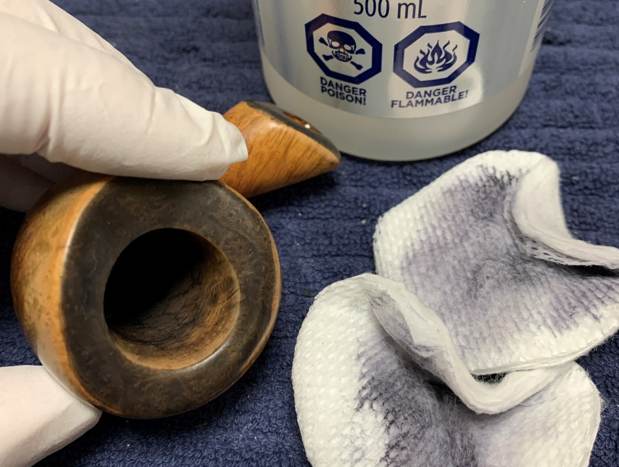
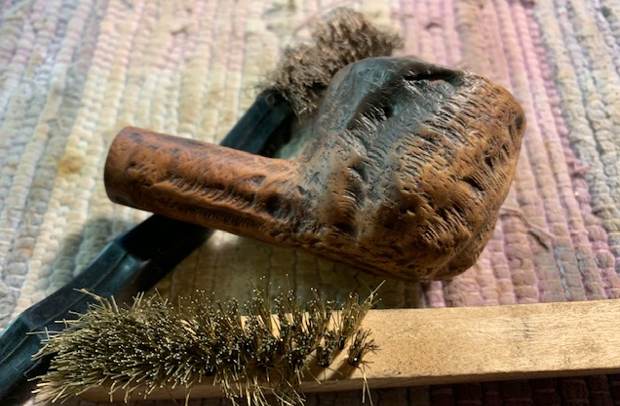
 Armed with that information I turned to work on the pipe itself. Before he sent it to me, Jeff had done an amazing job cleaning the pipe. It almost looked like a different pipe after his work. He reamed the pipe with a PipNet pipe reamer and removed the rest of it with a Savinelli Fitsall Pipe Knife. He scrubbed the bowl with undiluted Murphy’s Oil Soap with a tooth brush. He rinsed it under running warm water to remove the soap and grime. He cleaned out the inside of the shank and the airway in the stem with isopropyl alcohol, cotton swabs and pipe cleaners. He soaked the stem in Briarville’s Pipe Stem Deoxidizer and then rinsed it off with warm water. He scrubbed the stem with Soft Scrub and a tooth brush and rinsed it off with warm water. It looked amazing when I took it out of the package of pipes he shipped me. I took photos of the pipe before I started my part of the restoration work.
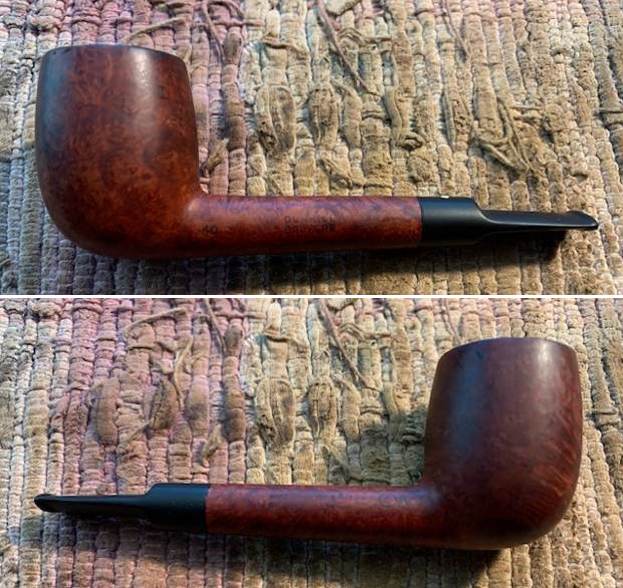
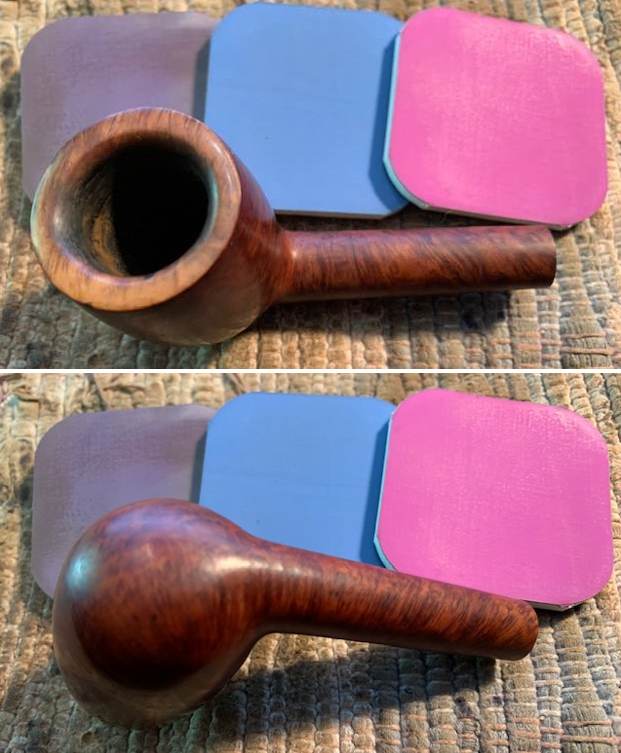
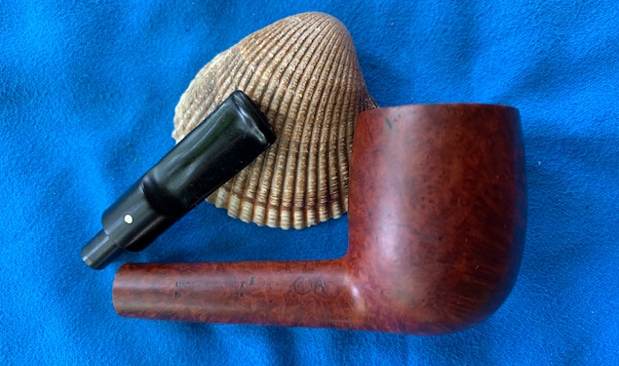
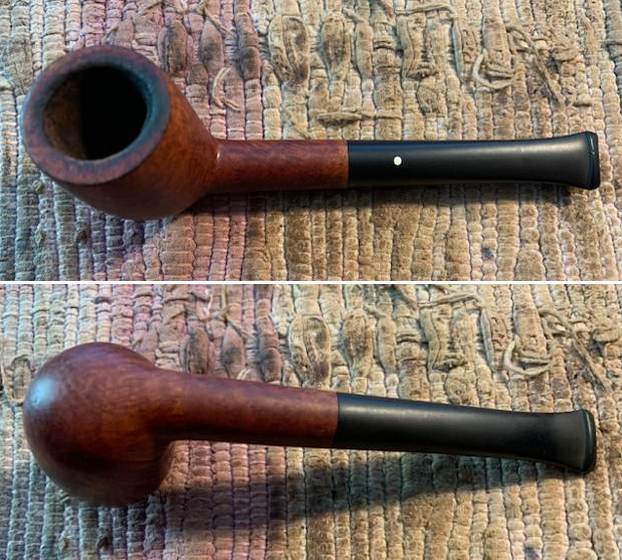
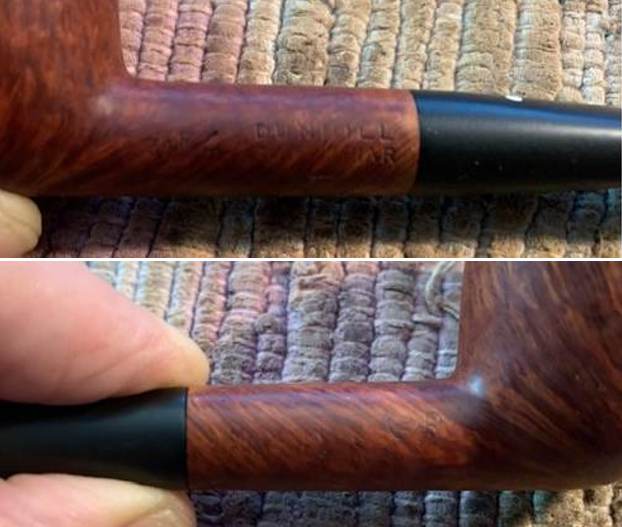
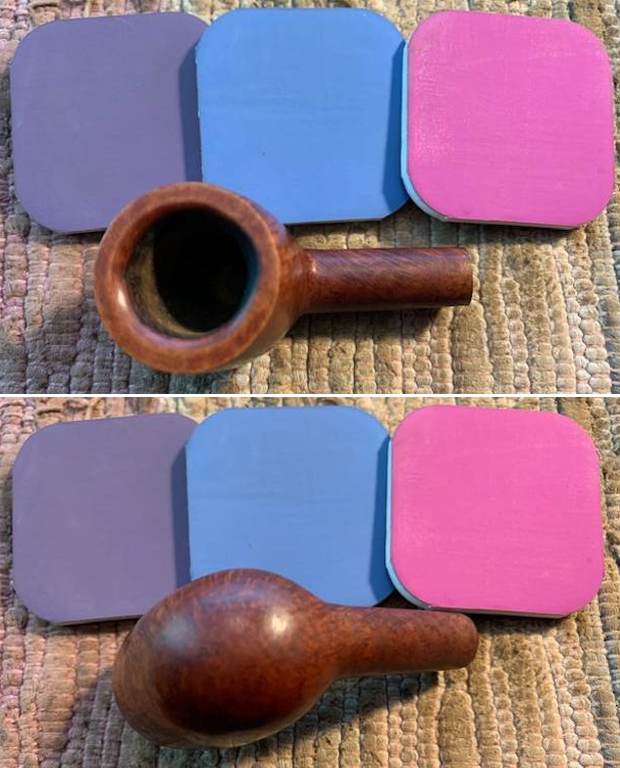
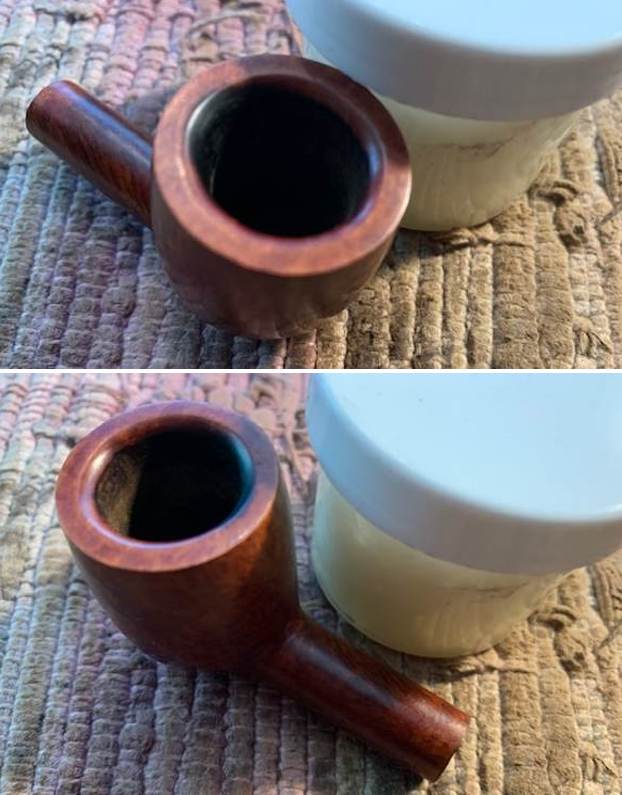
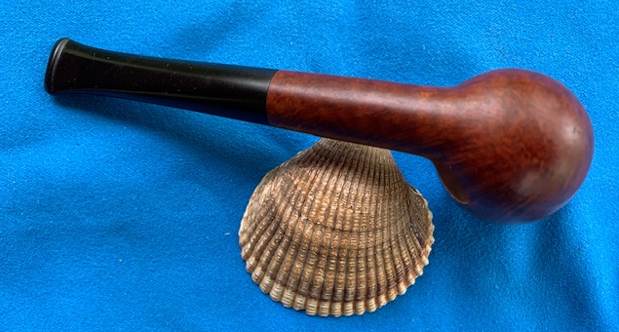
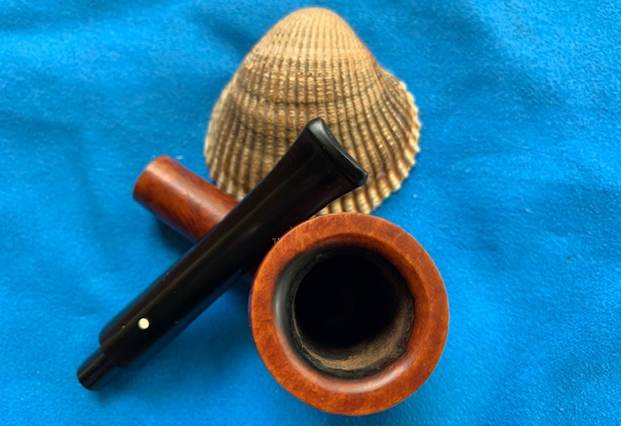
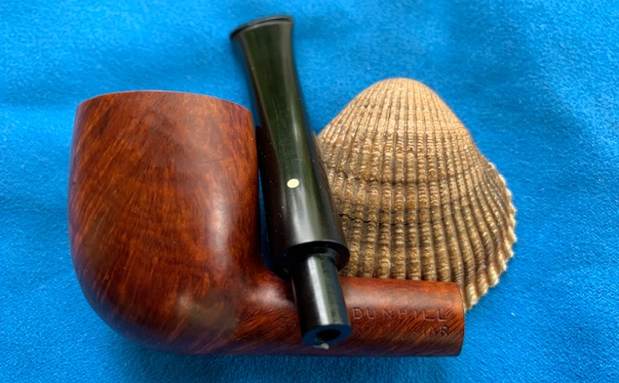
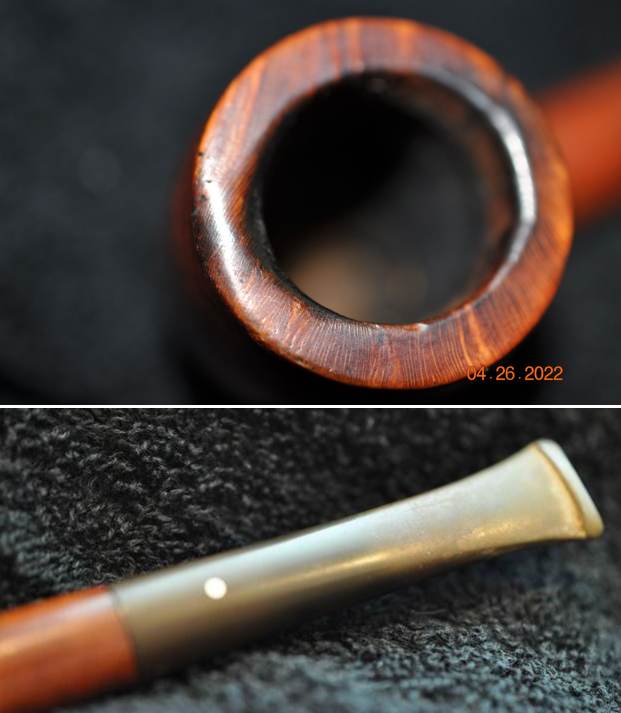
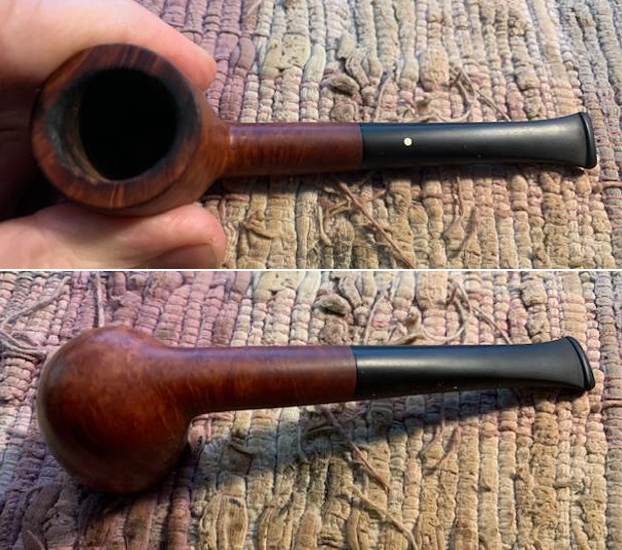
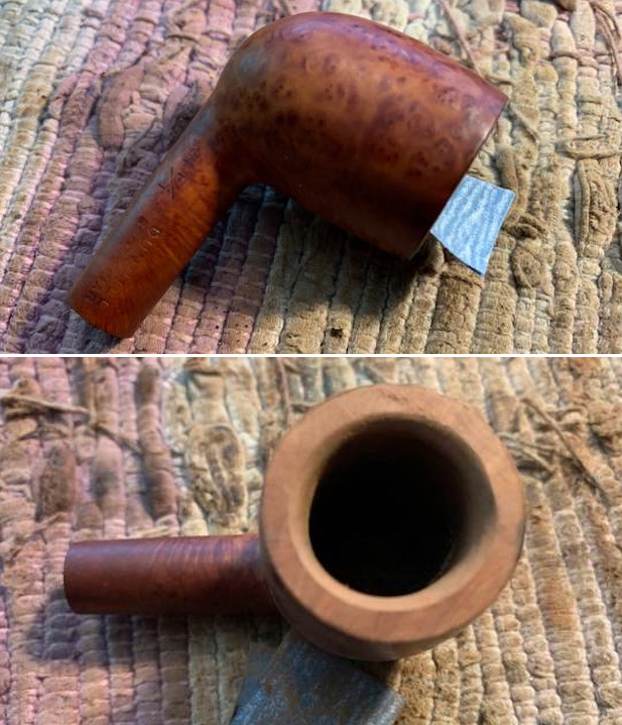
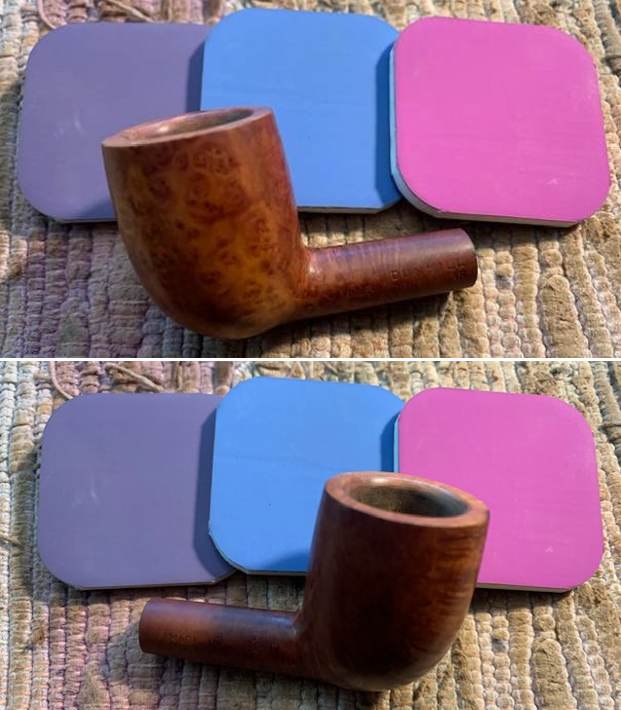
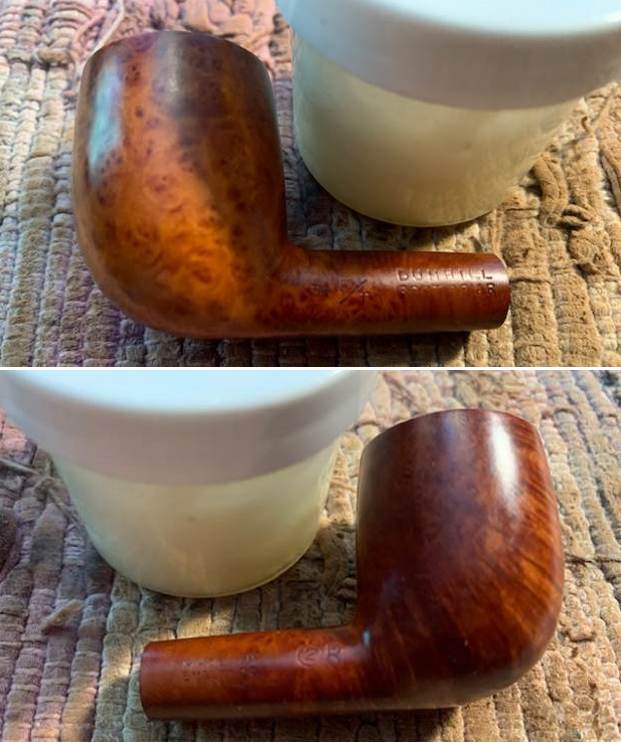
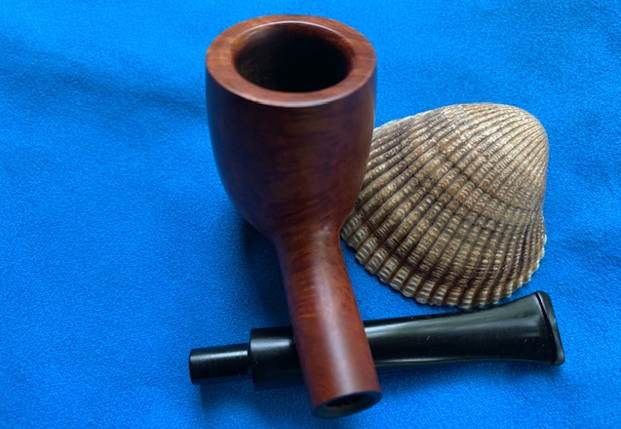
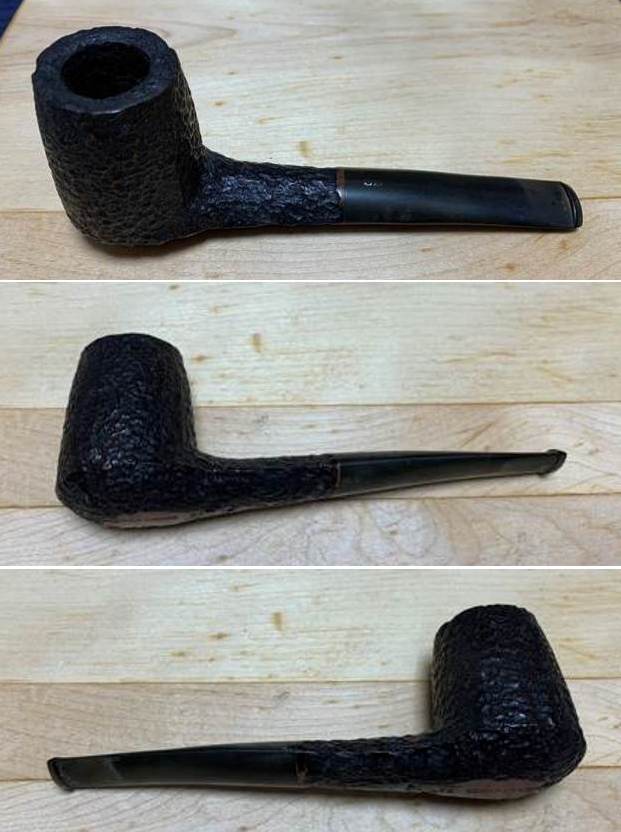
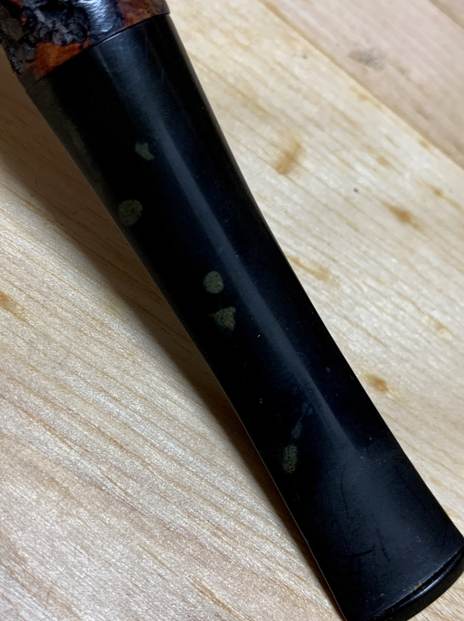
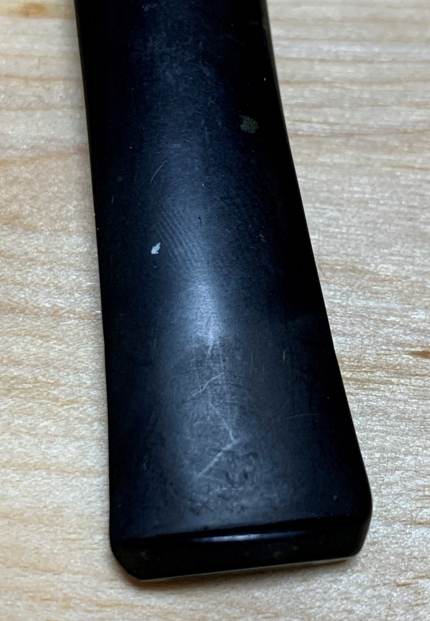
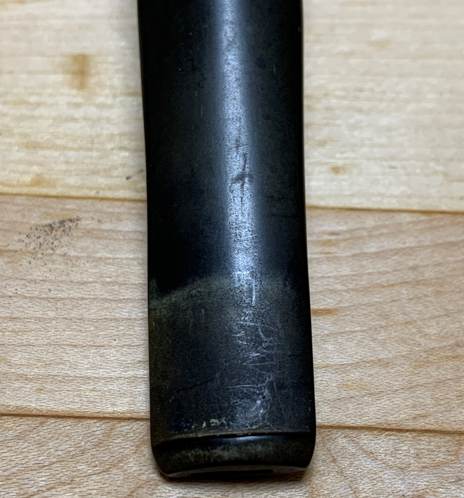
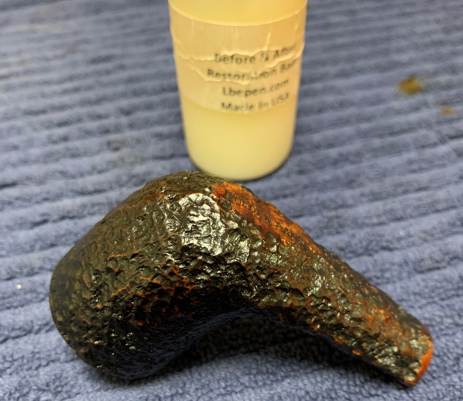
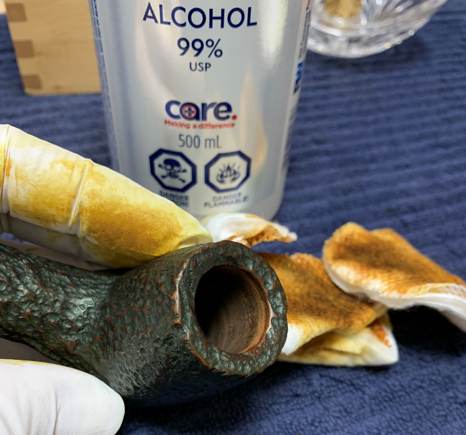
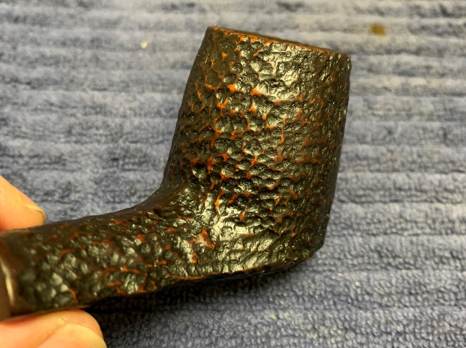
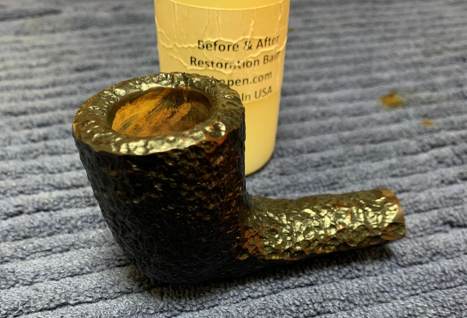
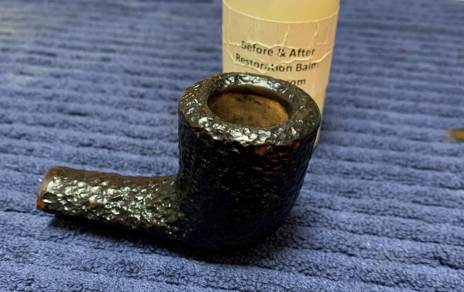
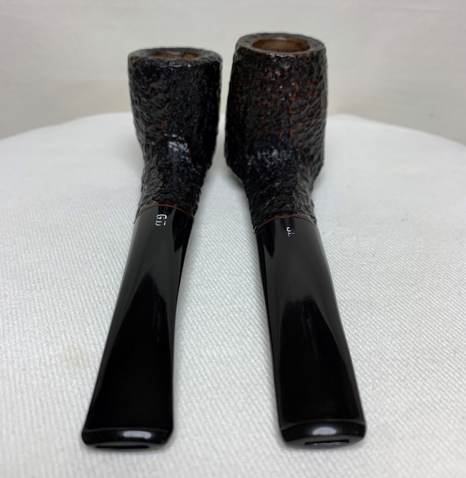
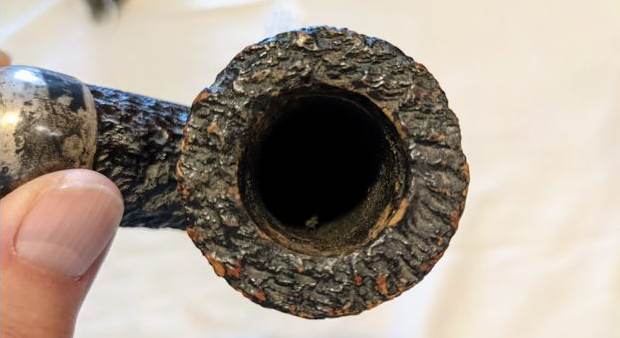
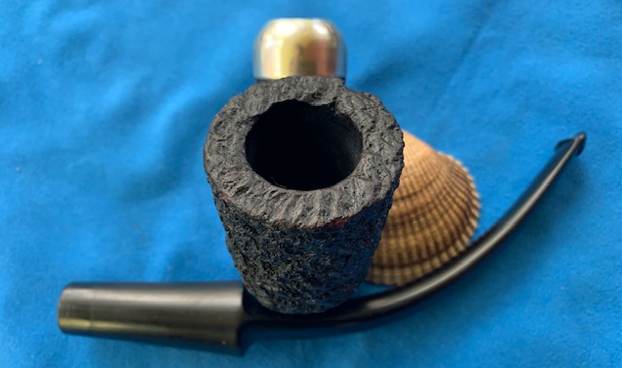
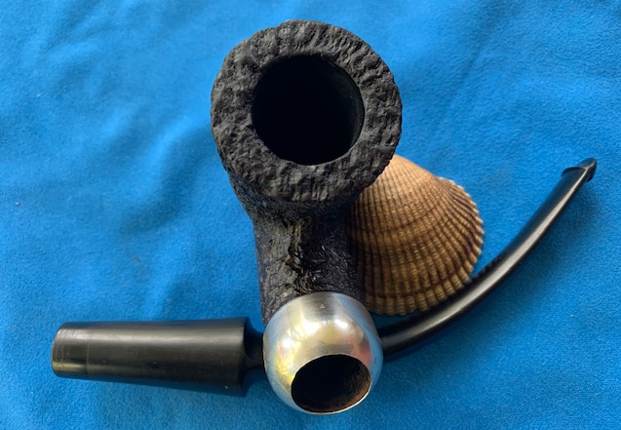
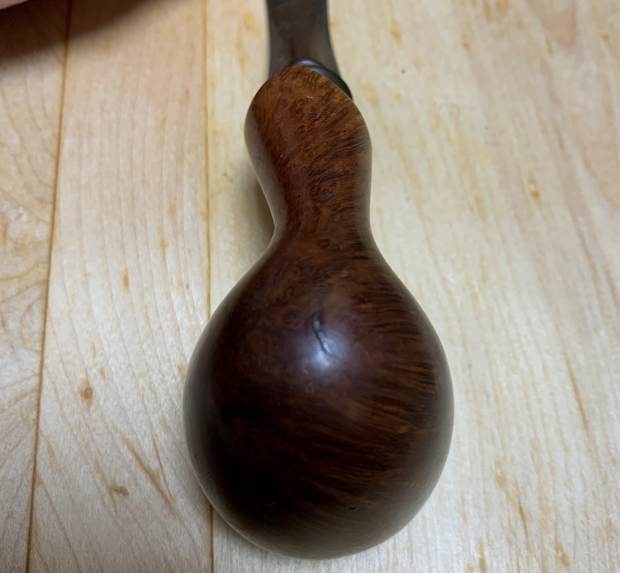
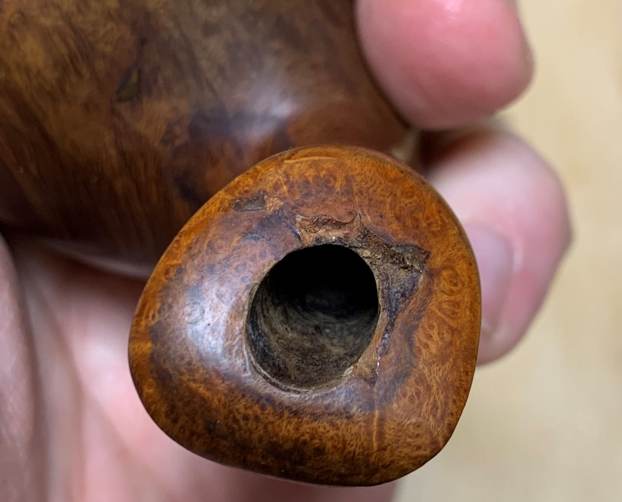
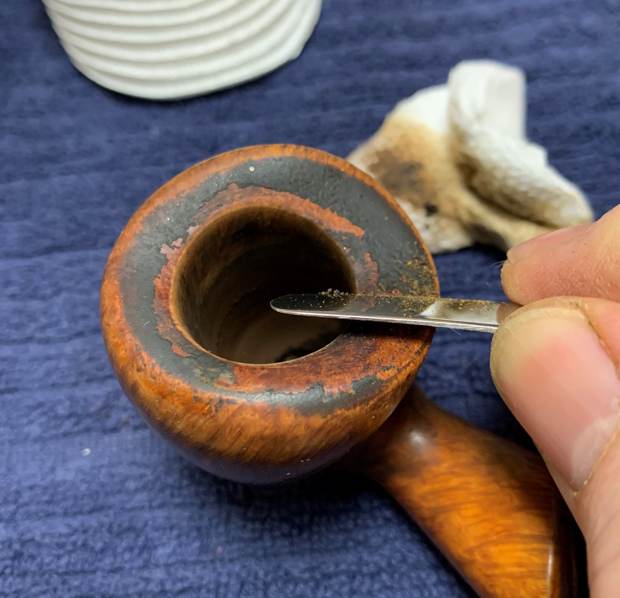
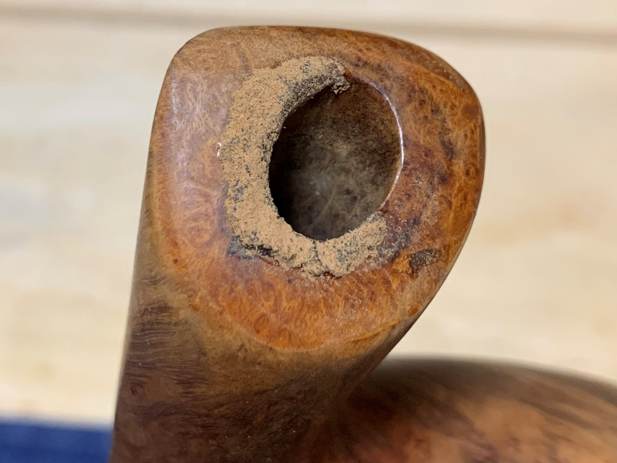
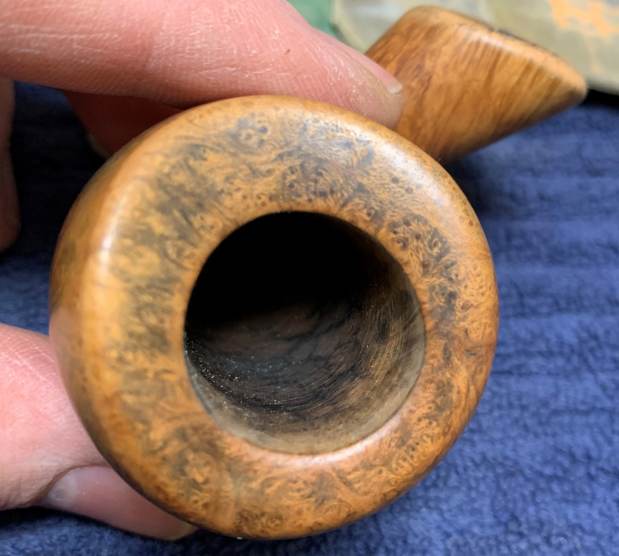
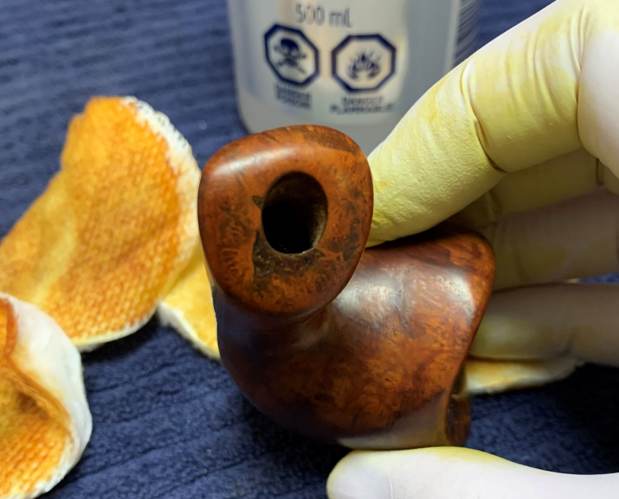
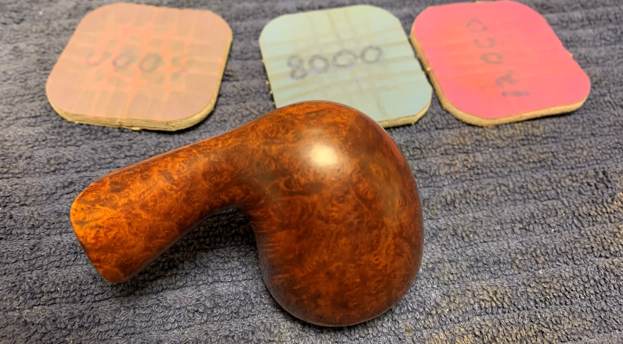
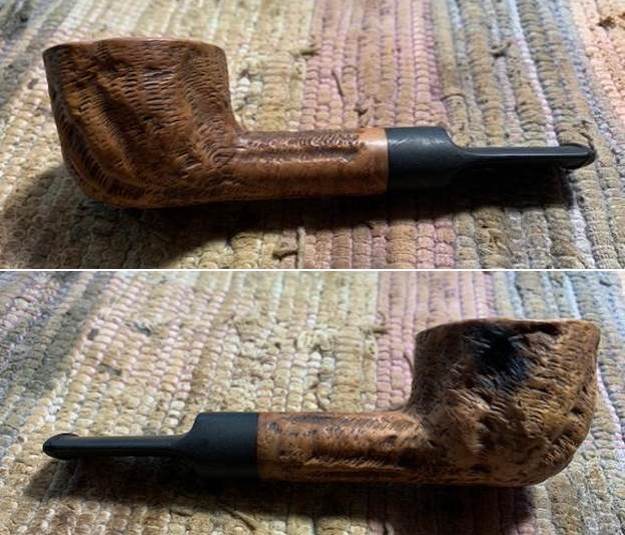
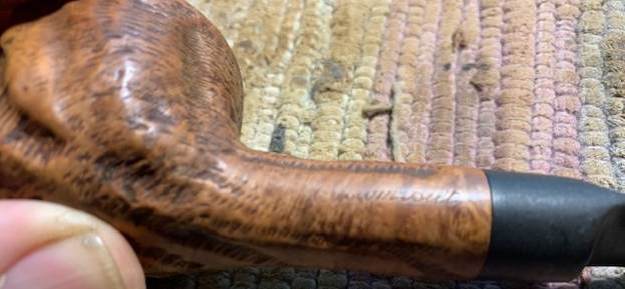
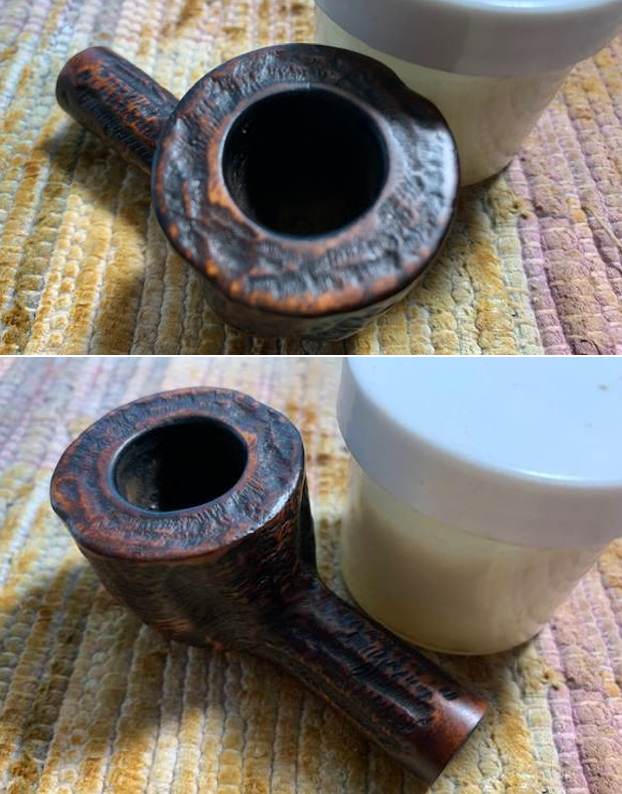
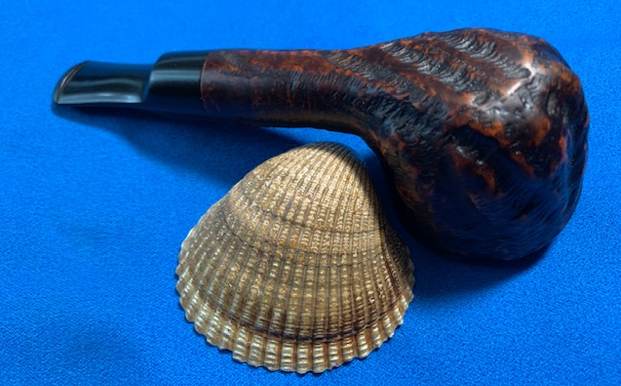
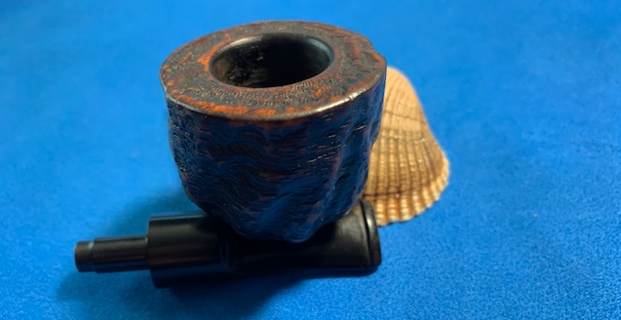
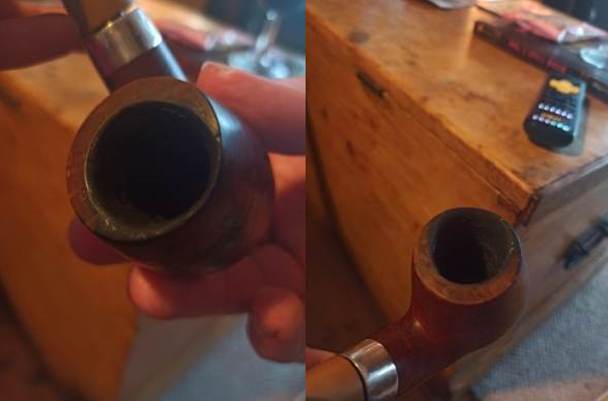
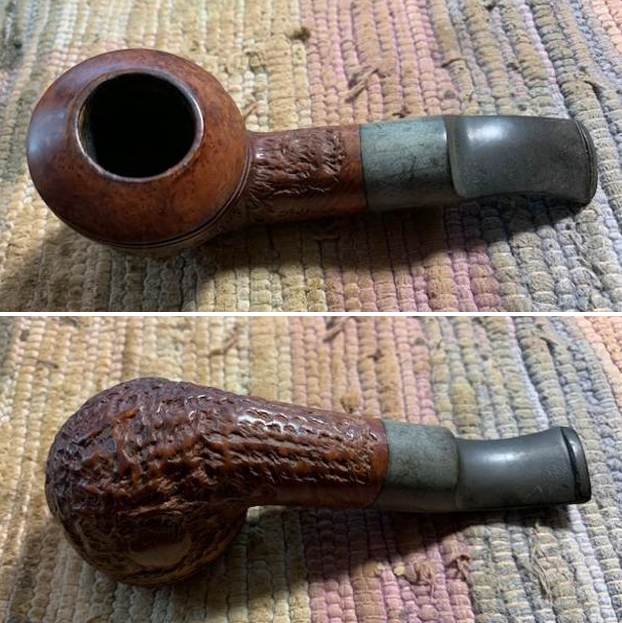
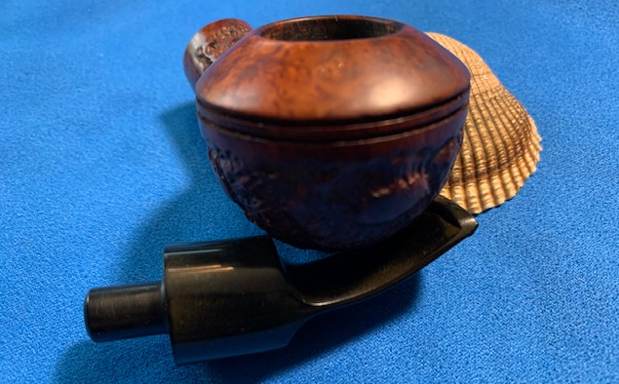
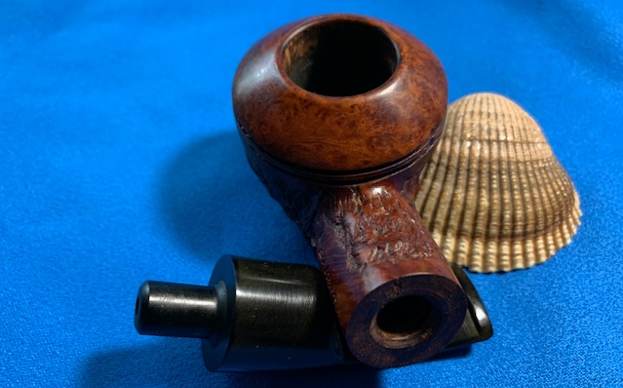
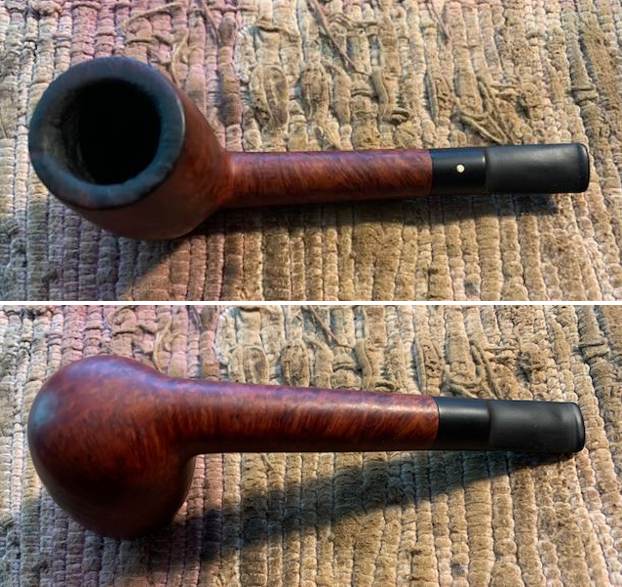 The rim top was cleaner and the inner edge of the bowl looked rough. The rim top was chipped and damaged with the edges carved. There was burn damage all the way around but heavier on the front and the back of the bowl on the top and inner edge. The bowl was slightly out of round. The stem surface looked good with the oxidation gone and light but visible tooth chatter on either side of the stem.
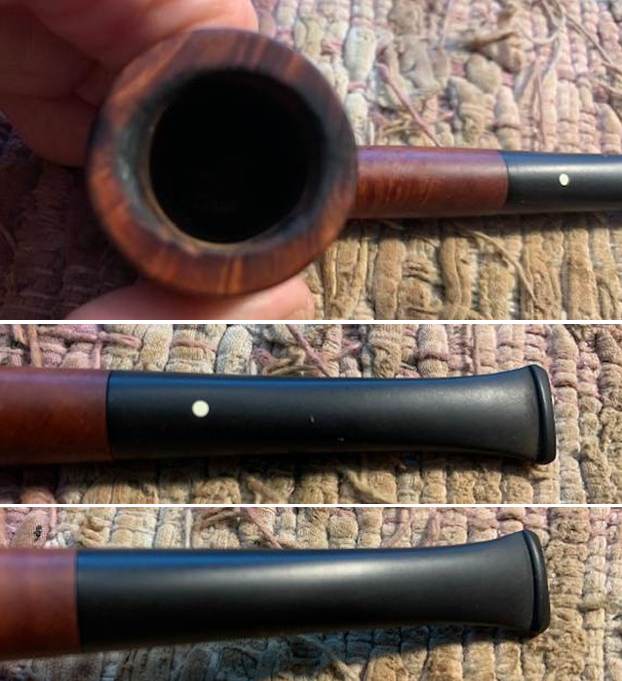
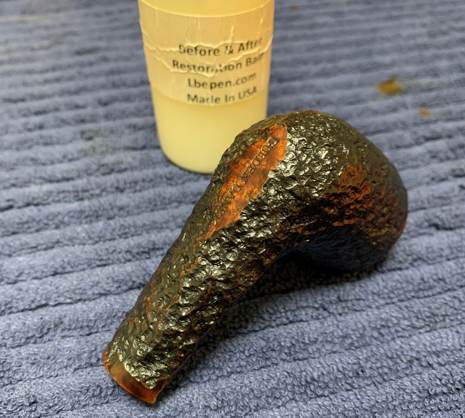
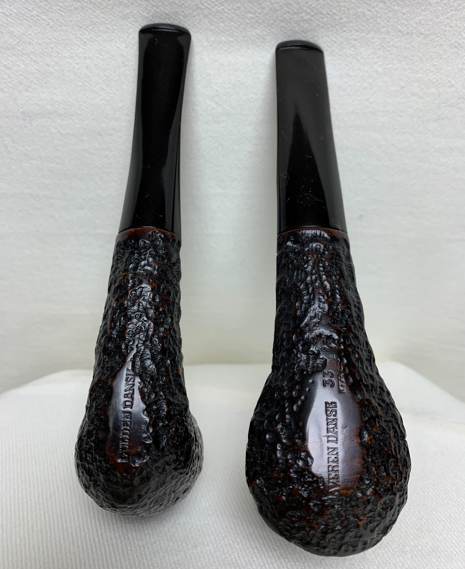
 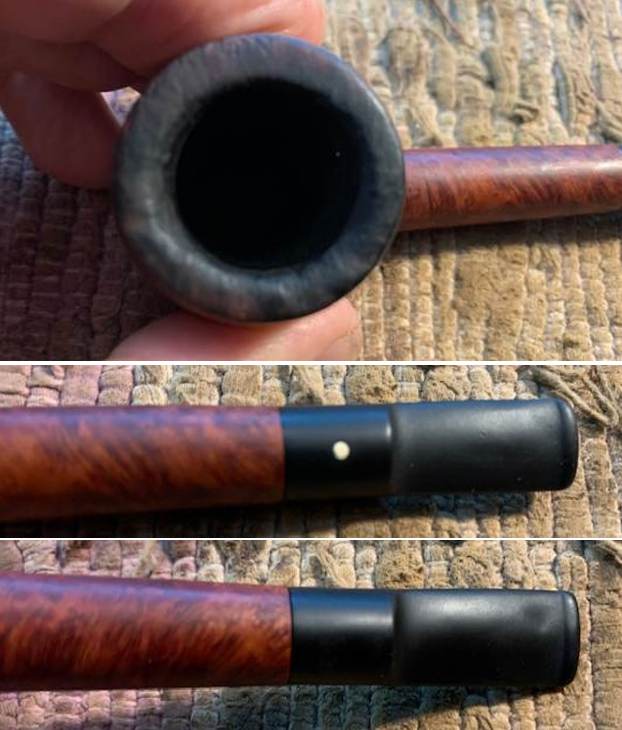 I took a photo of the stamping on the sides of the shank. It is faint but is still readable as noted above.
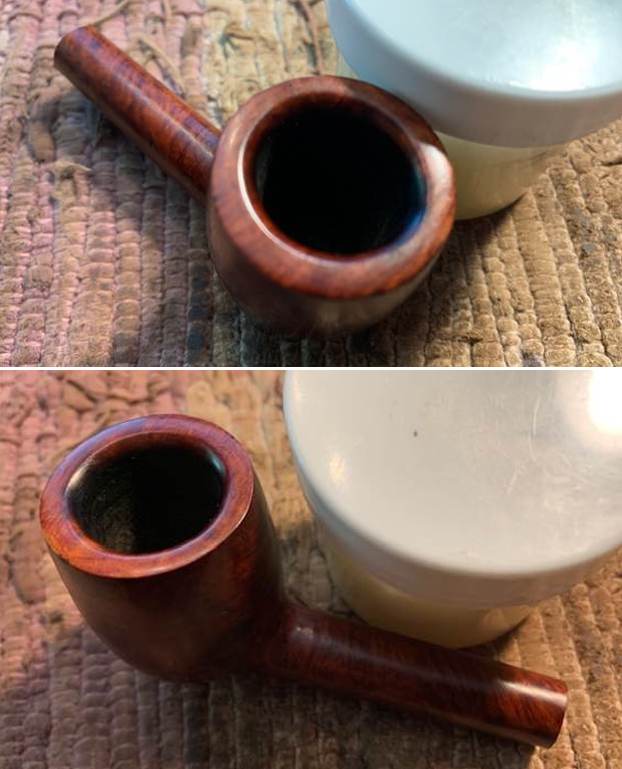
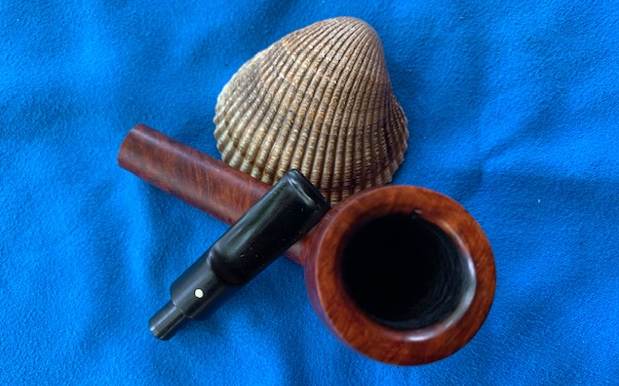
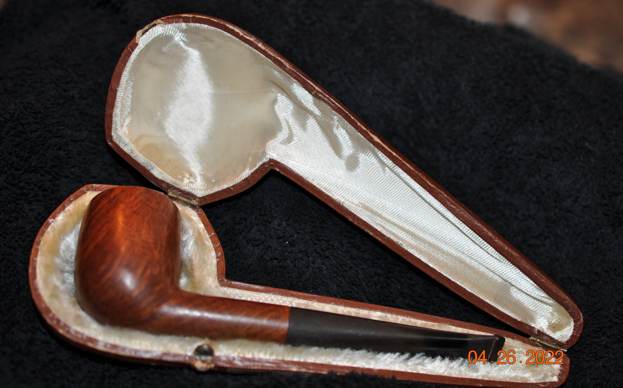
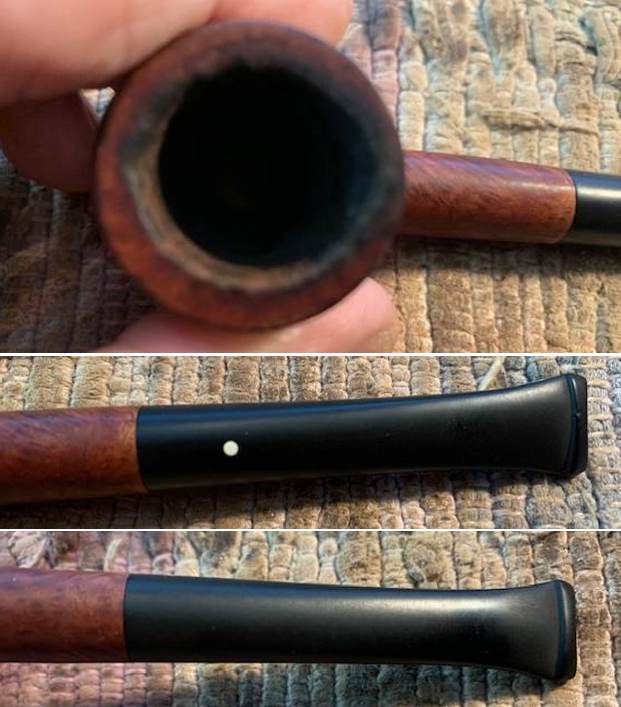
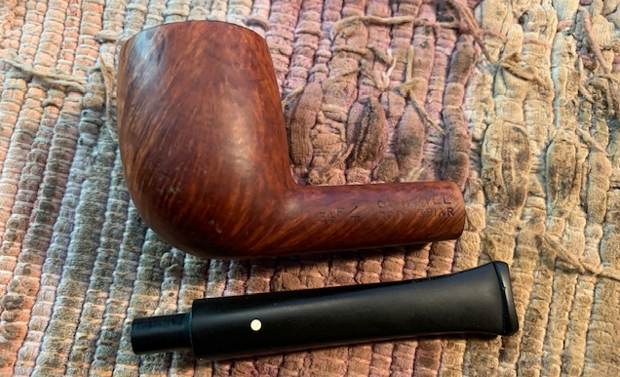
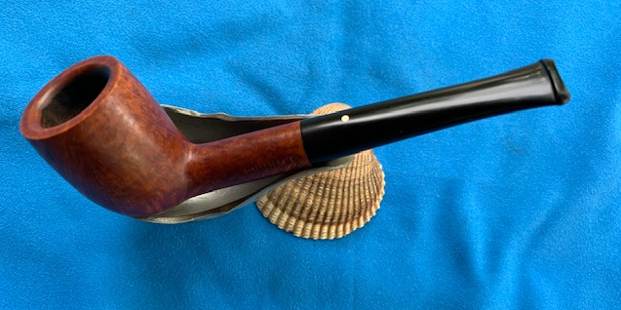
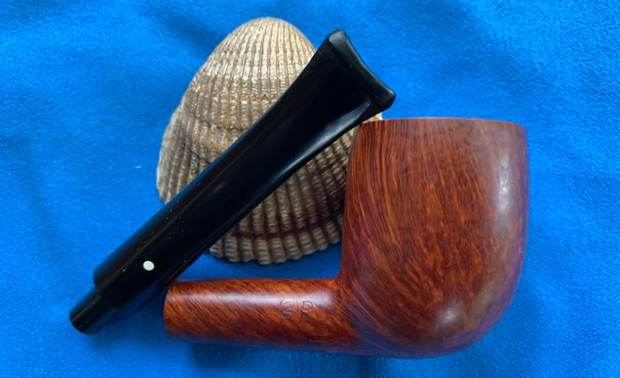
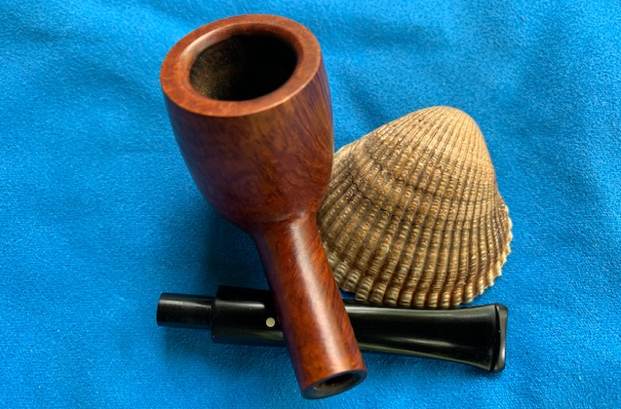
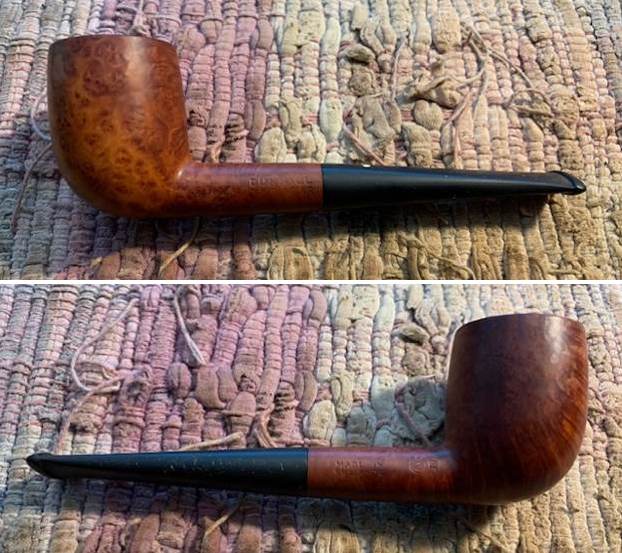
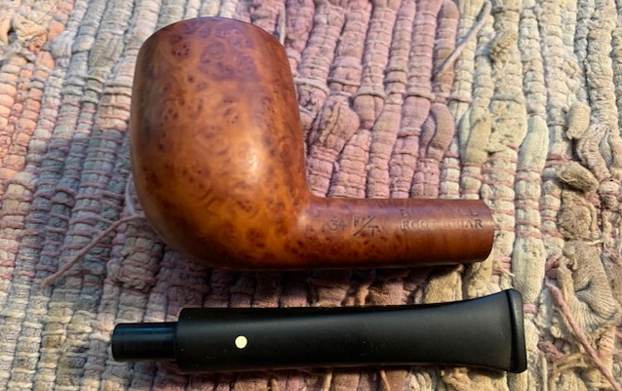
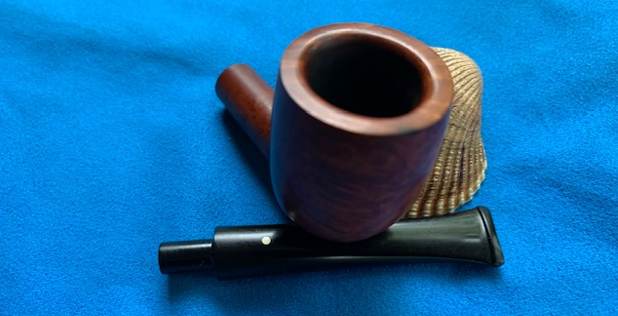
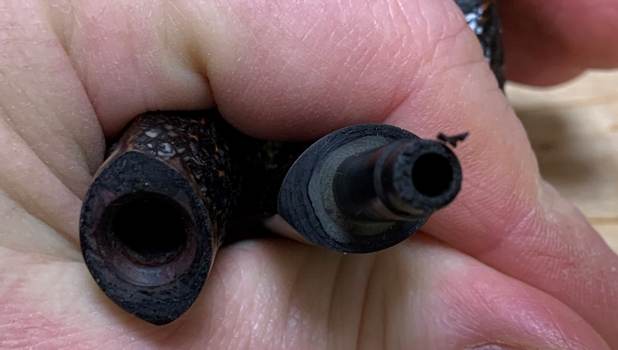
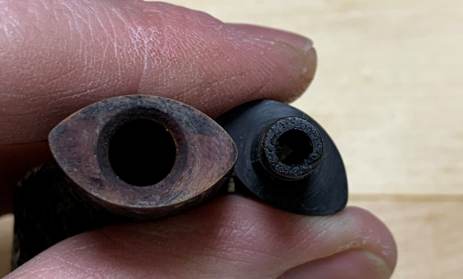
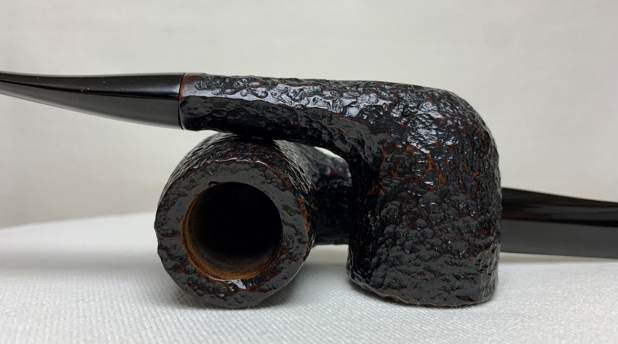
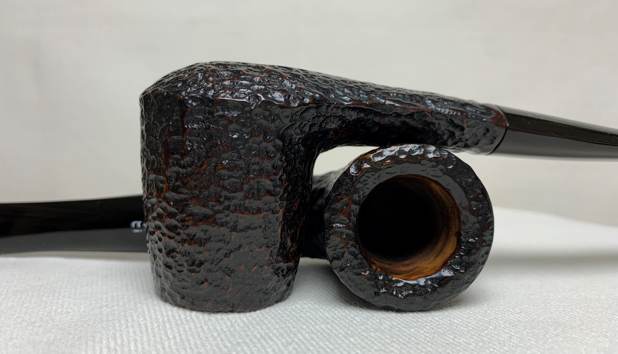
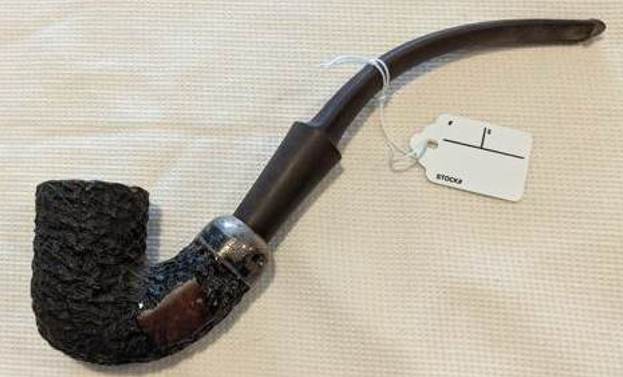
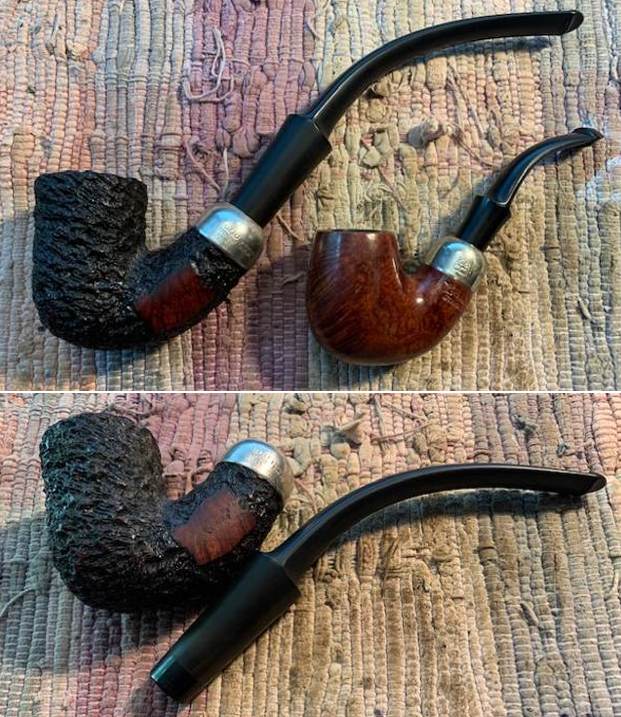
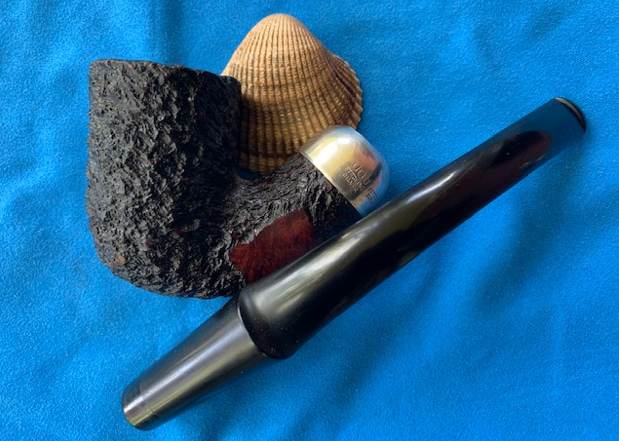
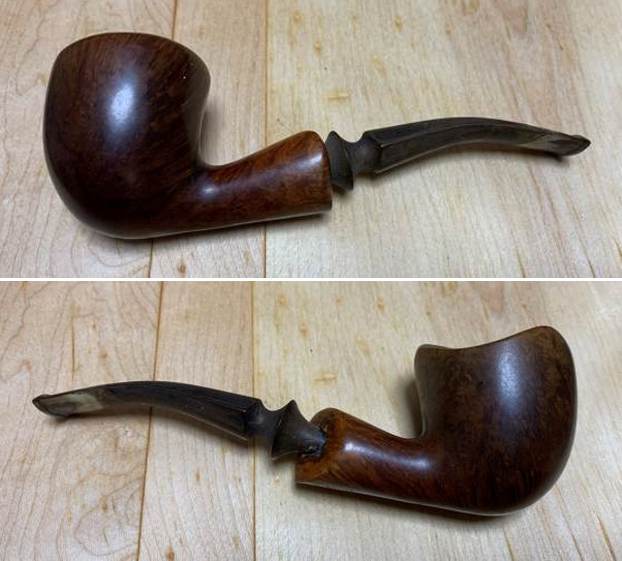
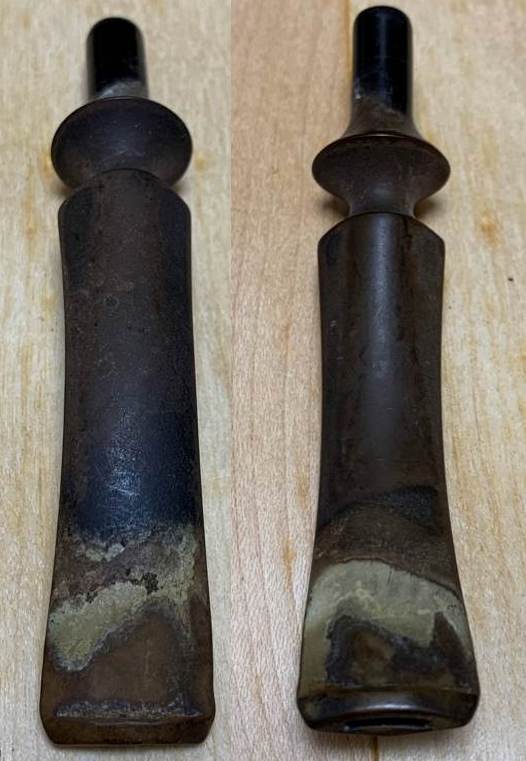
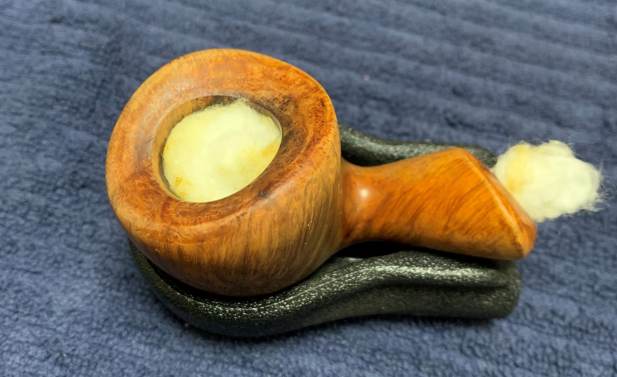
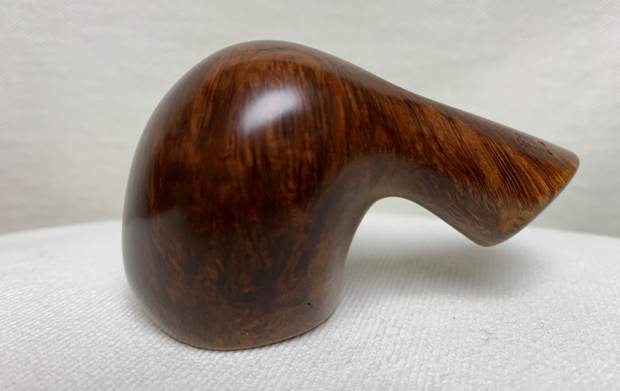
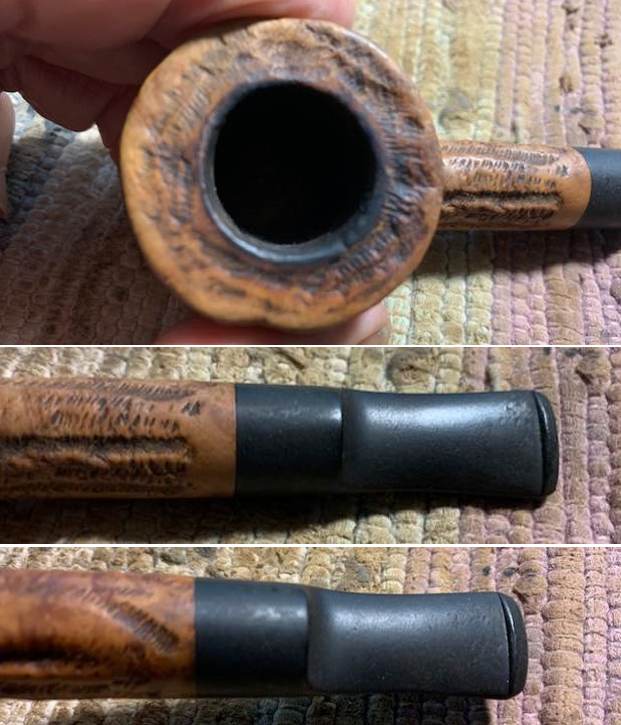
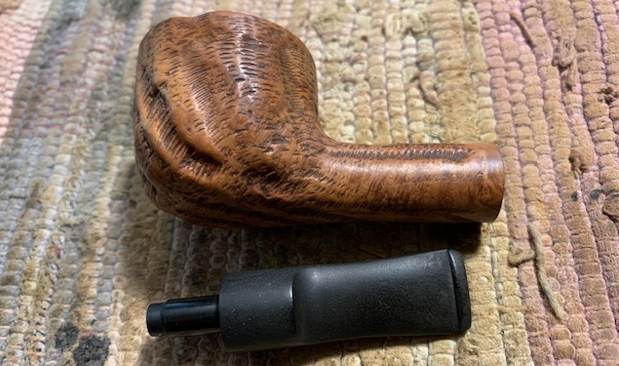
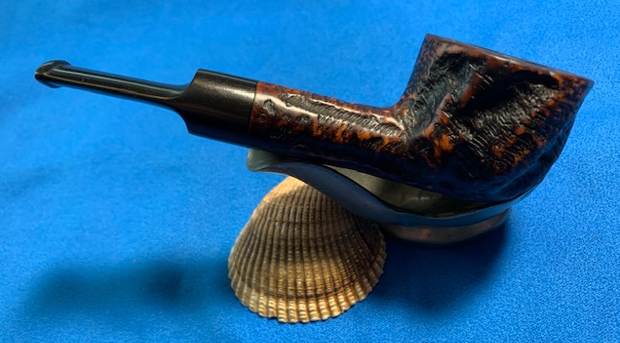
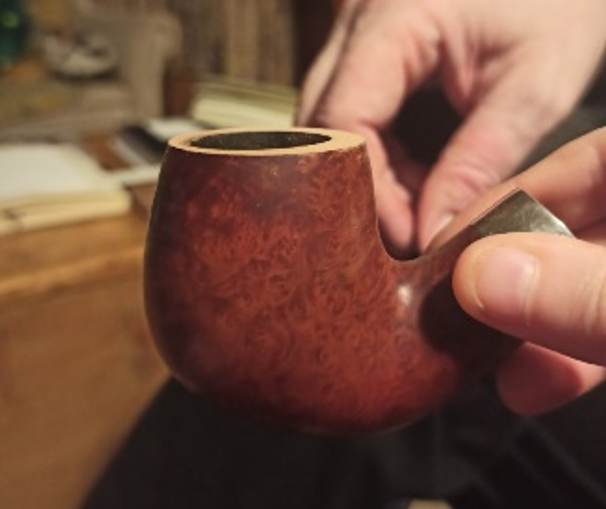
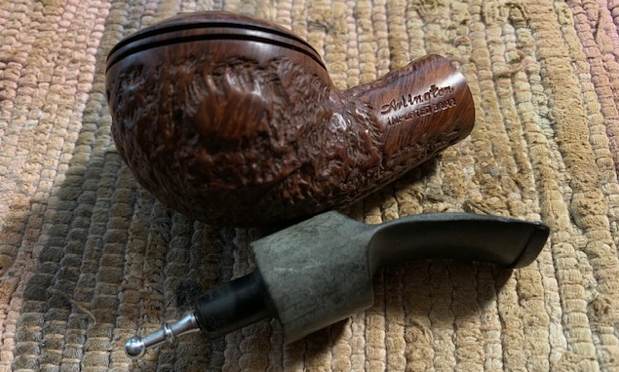
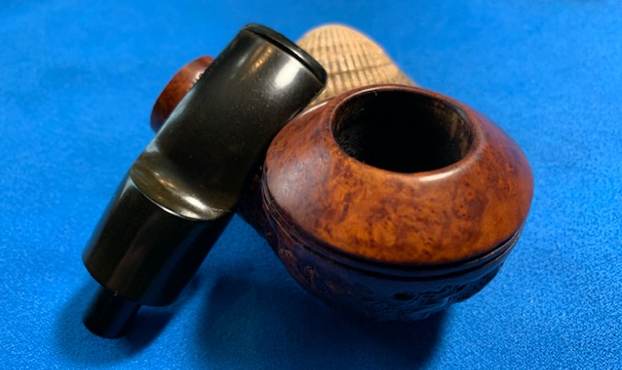
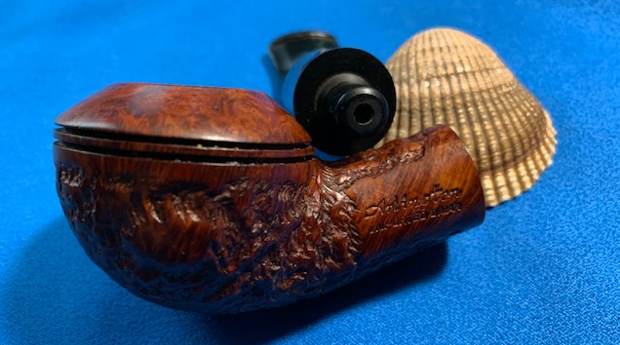
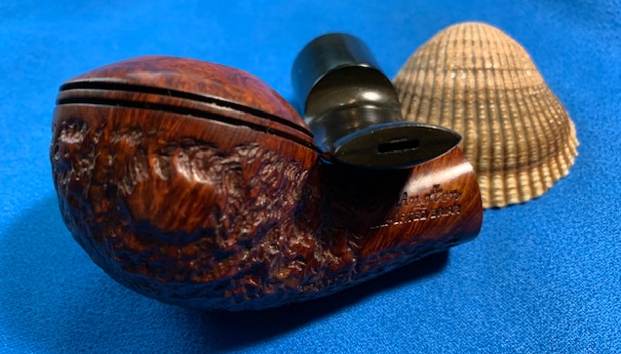
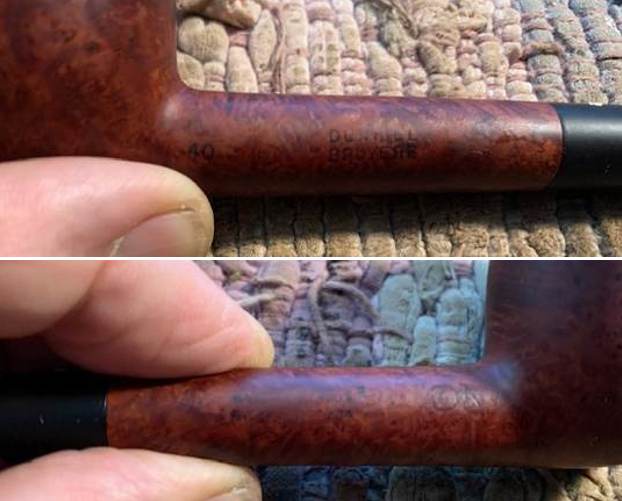 I took the stem off the shank and took a photo of the parts of the pipe. The overall look of the pipe is quite nice.
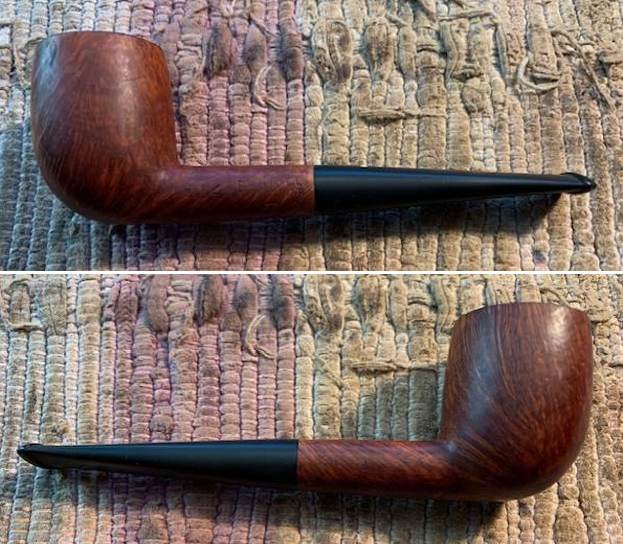
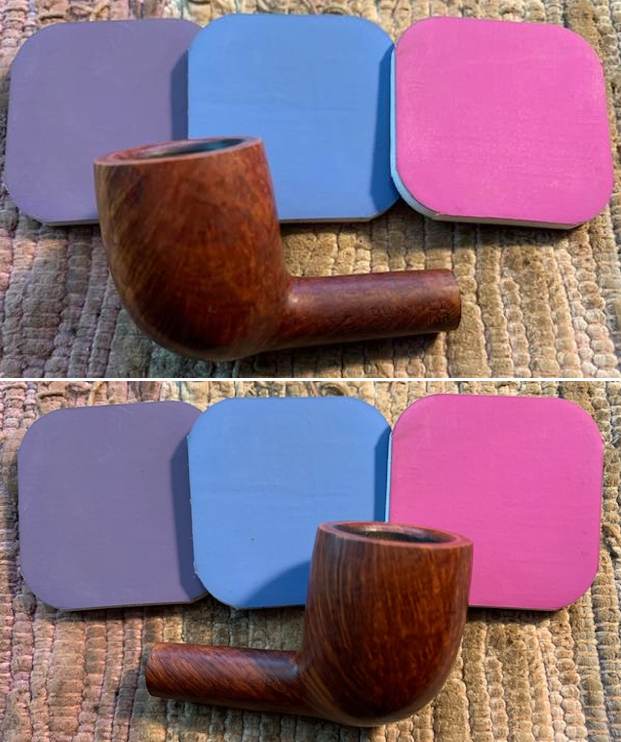
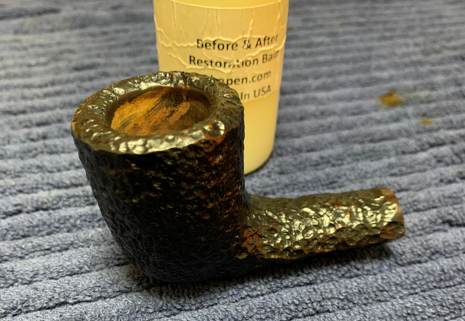
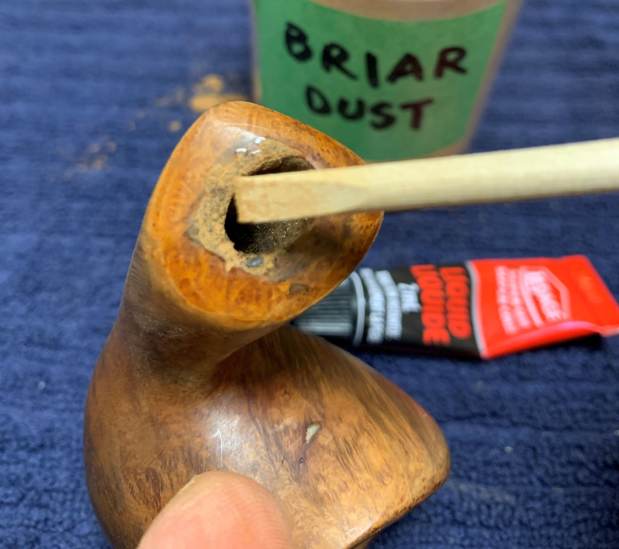
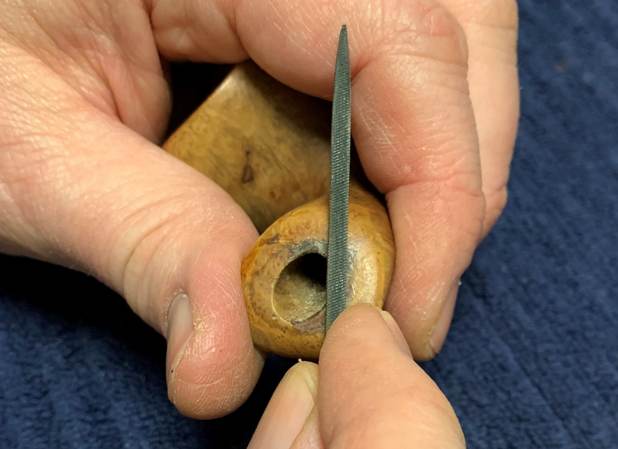
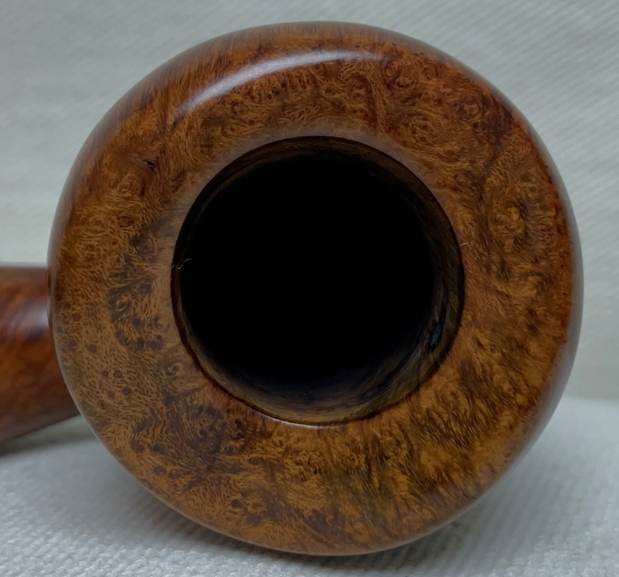
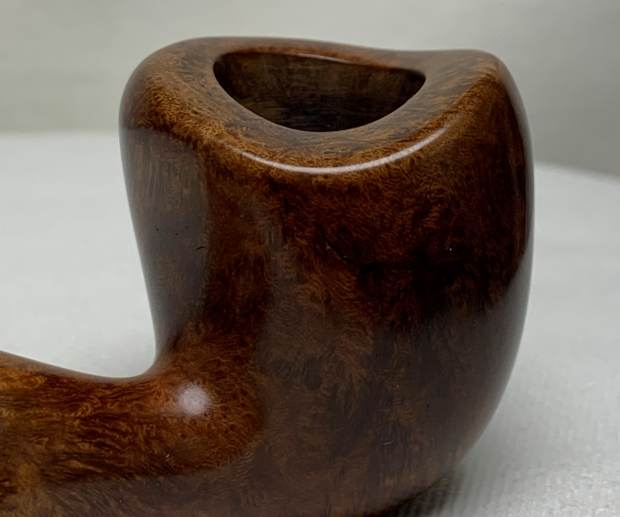
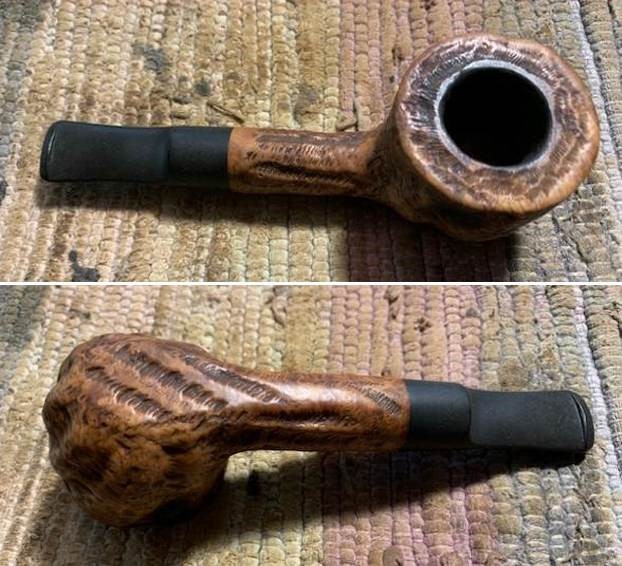
 I started my portion of the work on this pipe by addressing the damage to the rim top and the inner edge of the bowl. I topped the bowl on a topping board with 220 grit sandpaper to remove the damage to the rim top and minimize it on the edges. I used a folded piece of 220 grit sandpaper to smooth out the edge and give it a slight bevel to deal with the chipping and cutting on the inner edge. It cleaned up remarkably well. With polishing and buffing it would look even better.
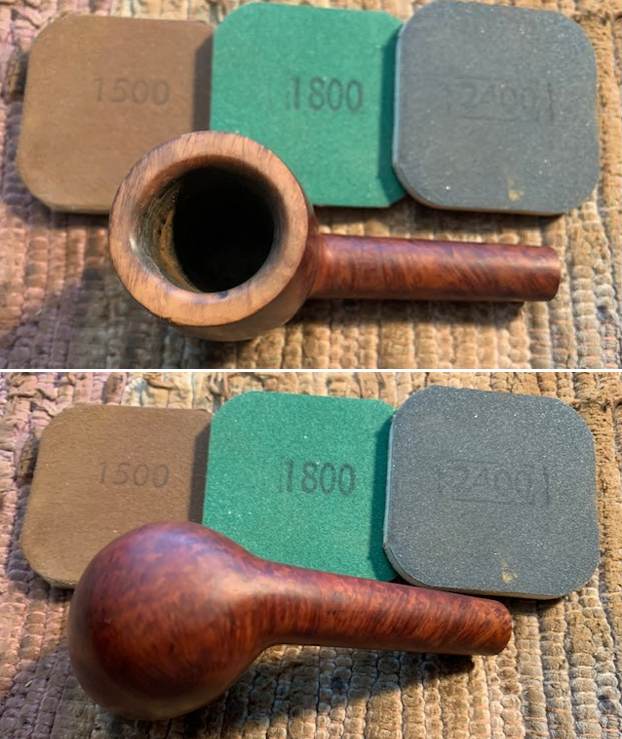
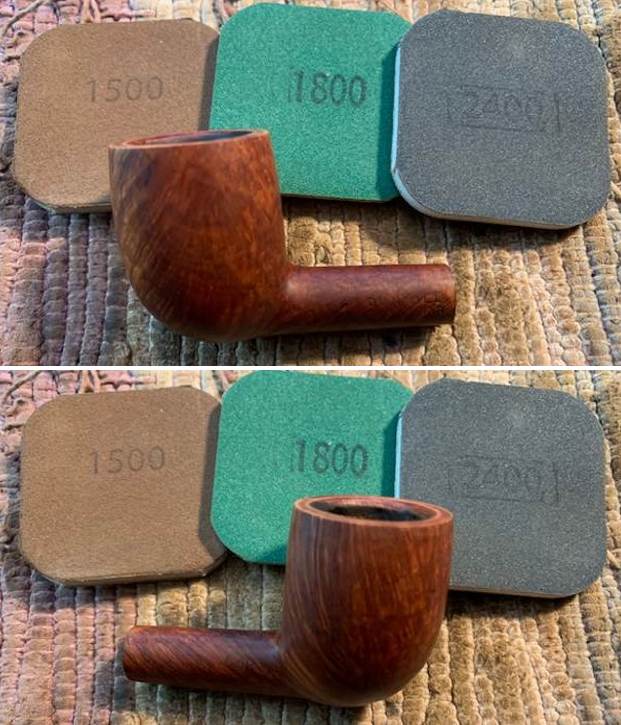
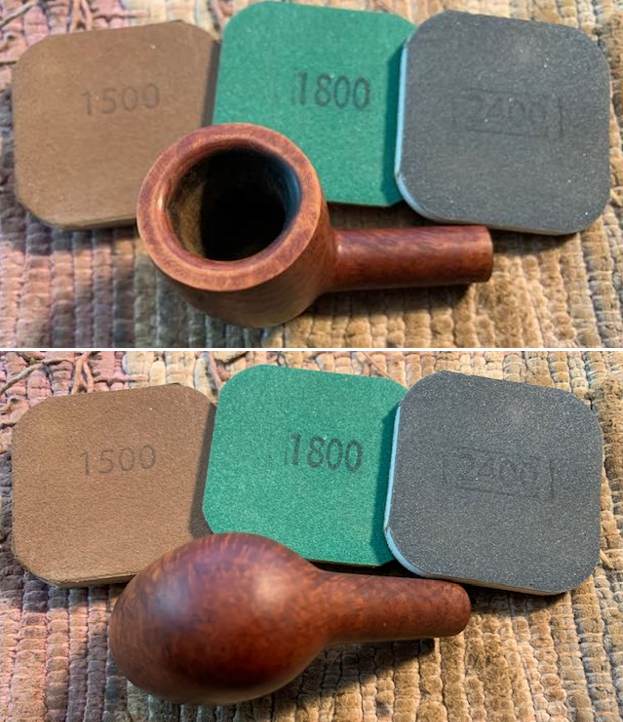
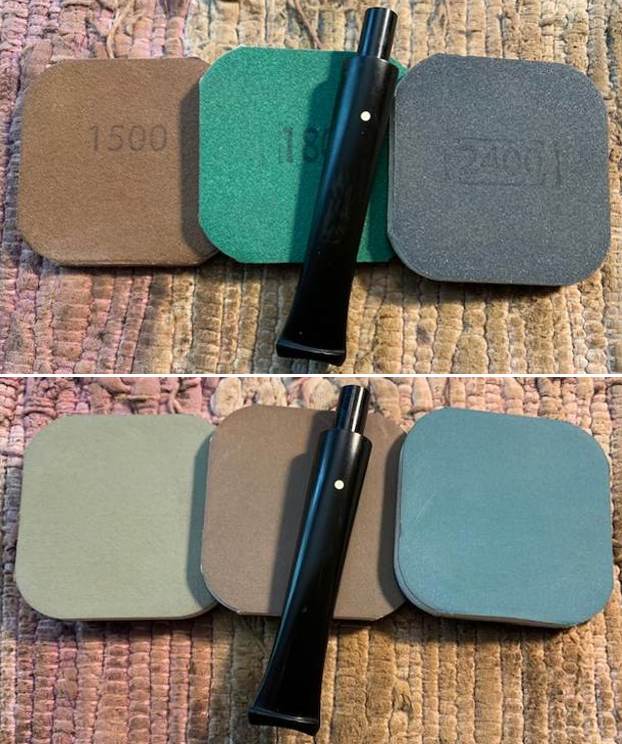
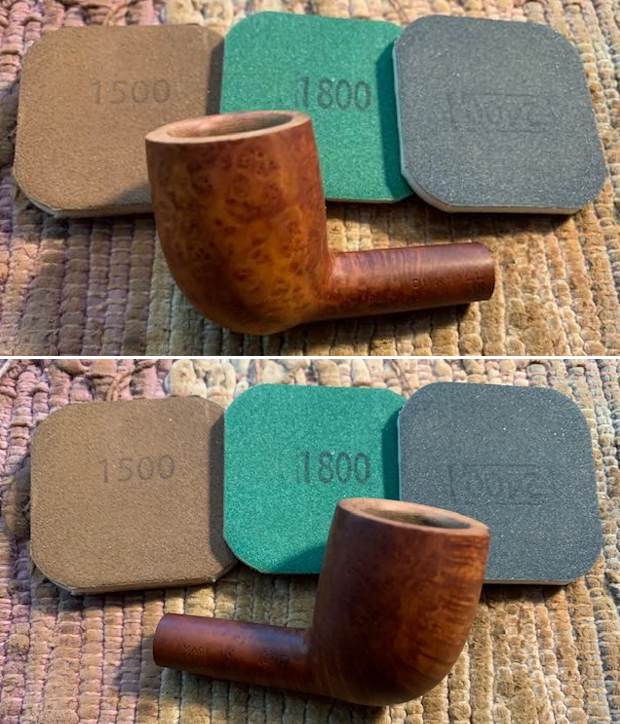
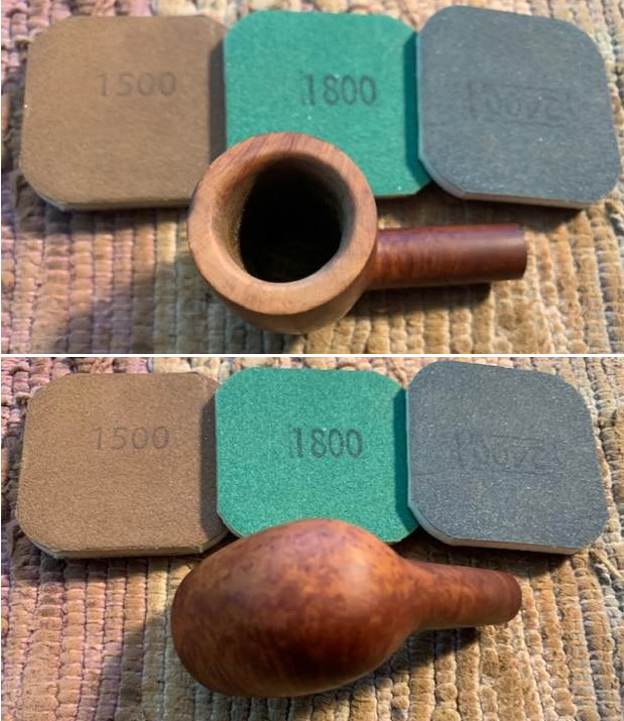
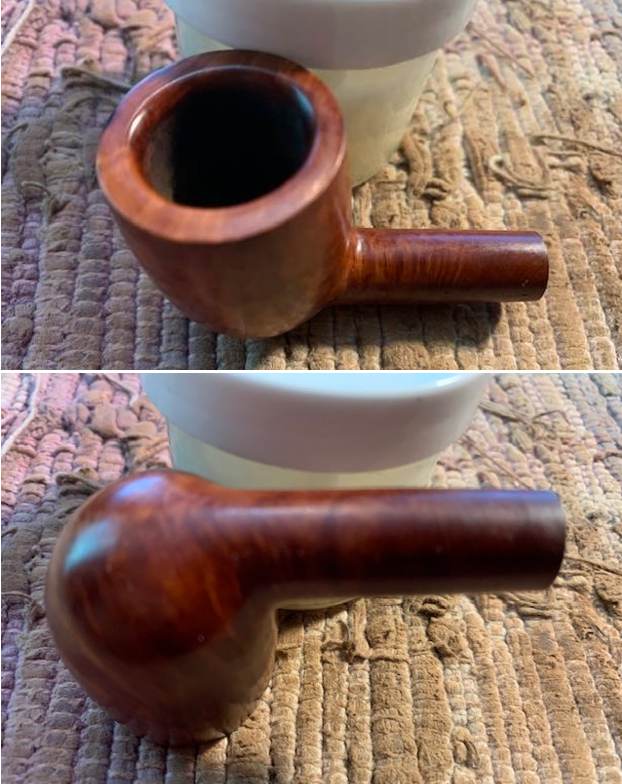
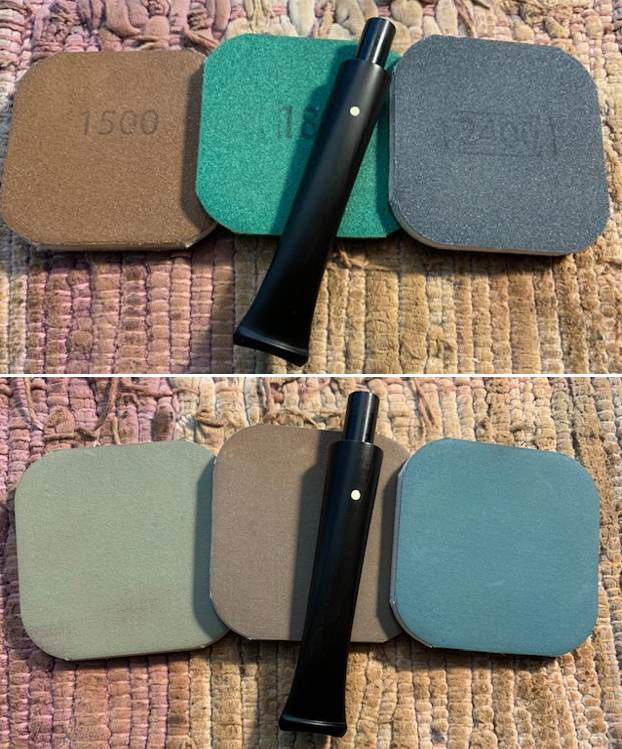
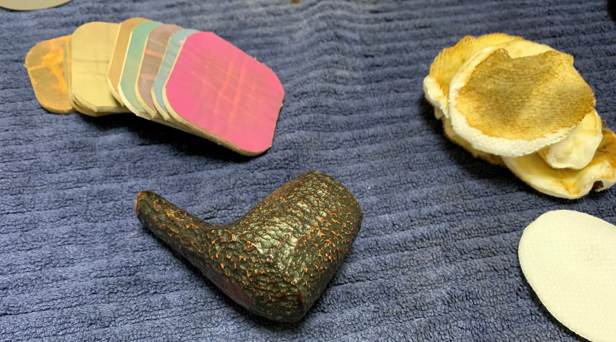
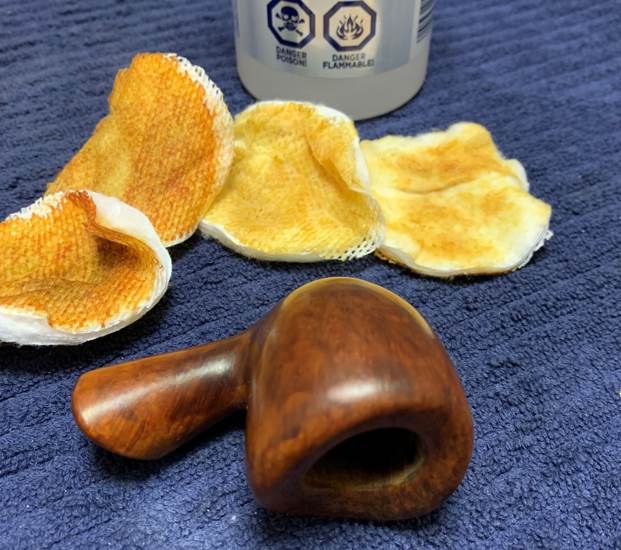
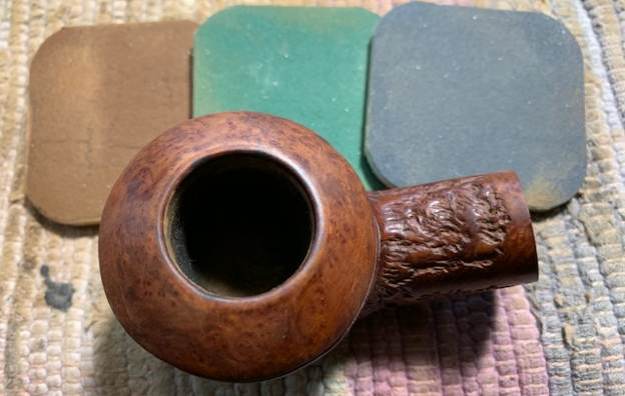
 I polished the bowl and rim top with micromesh sanding pads – dry sanding with 1500-12000 grit sanding pads. I wiped the briar down with a damp cloth after each pad to remove the debris and sanding dust.
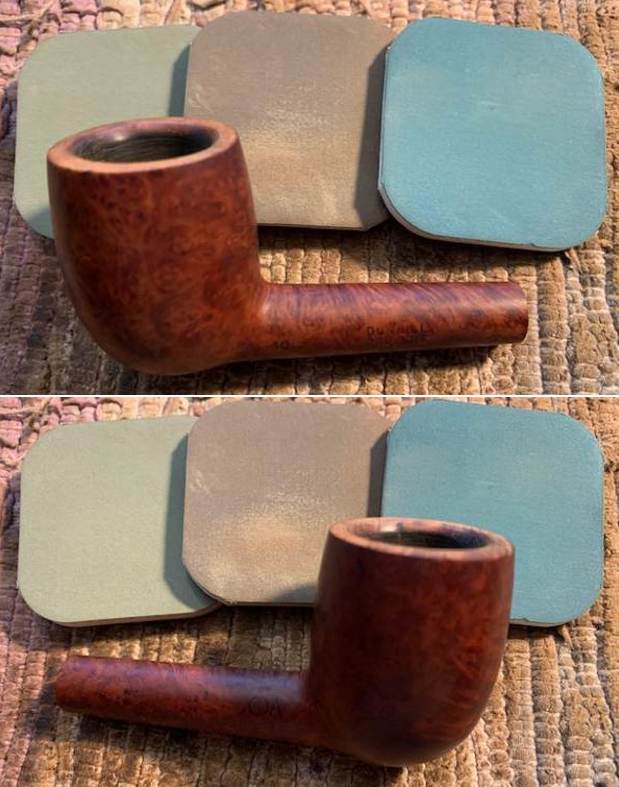
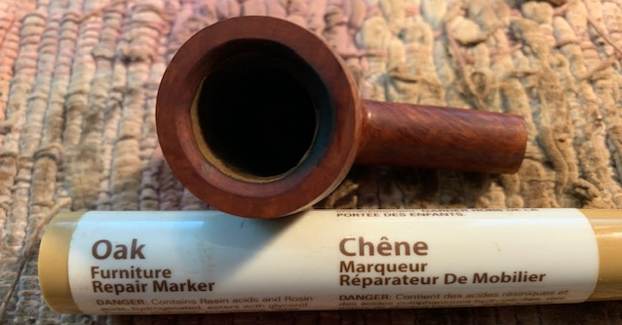
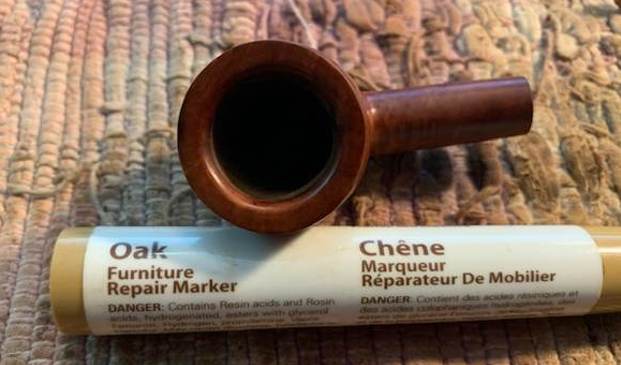
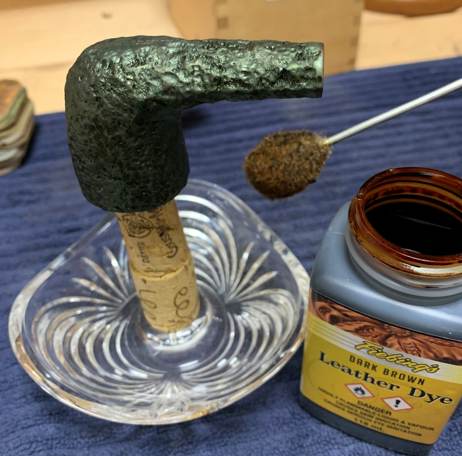
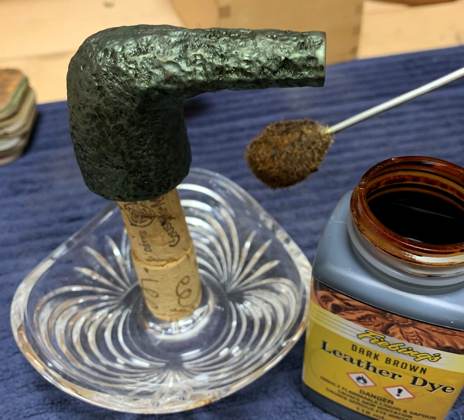
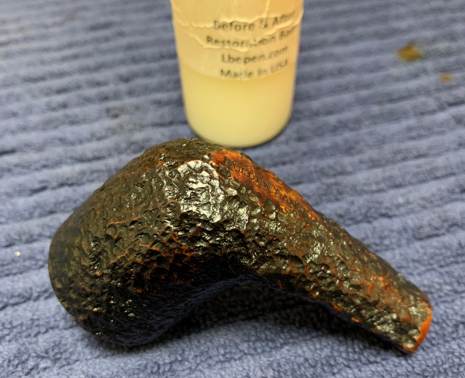
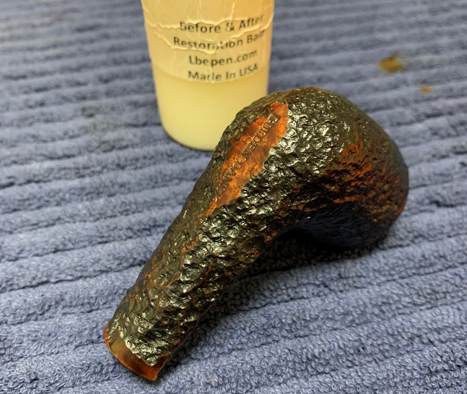
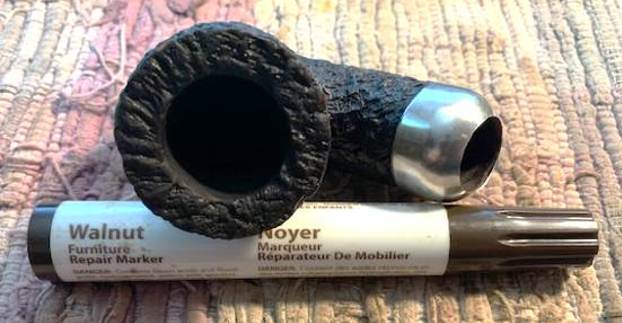
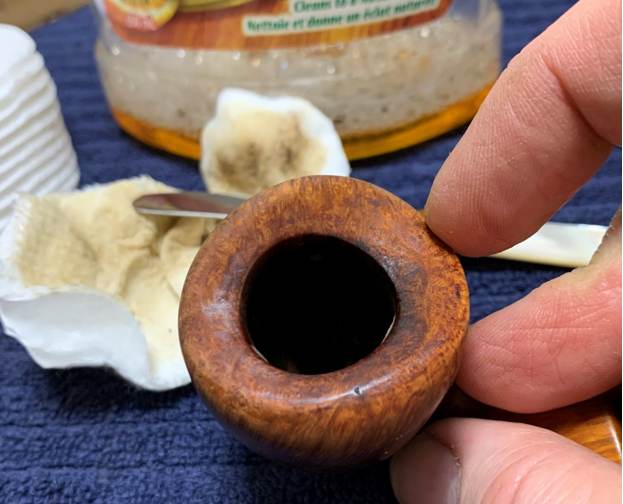
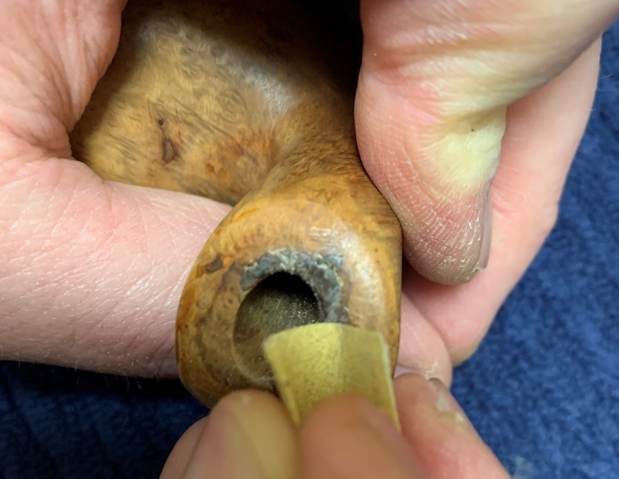
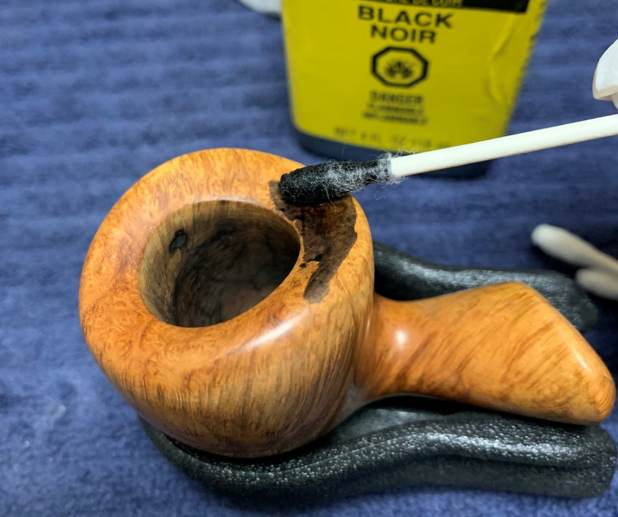
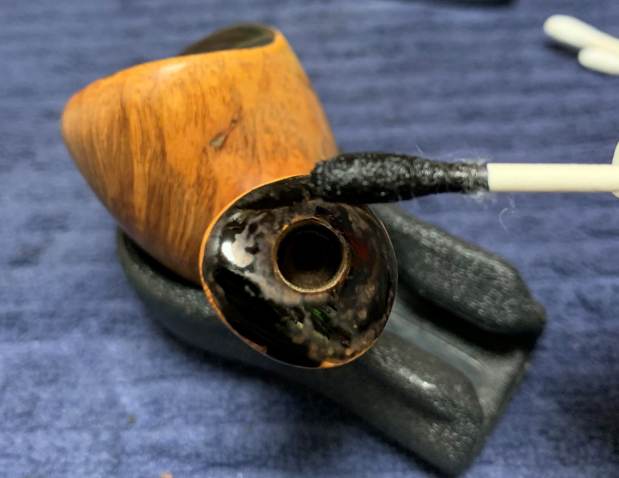
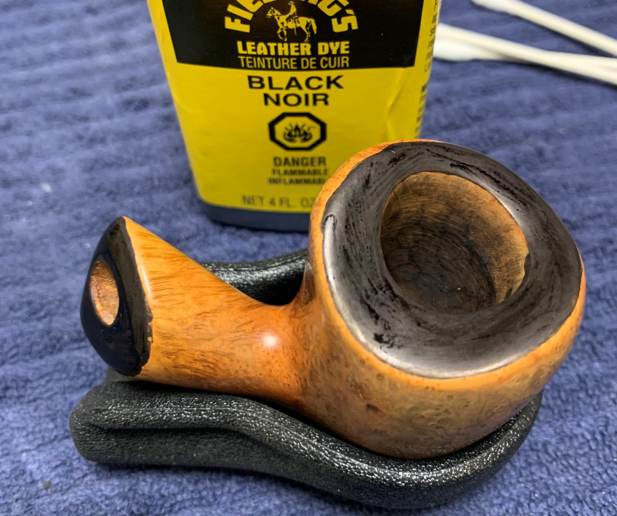
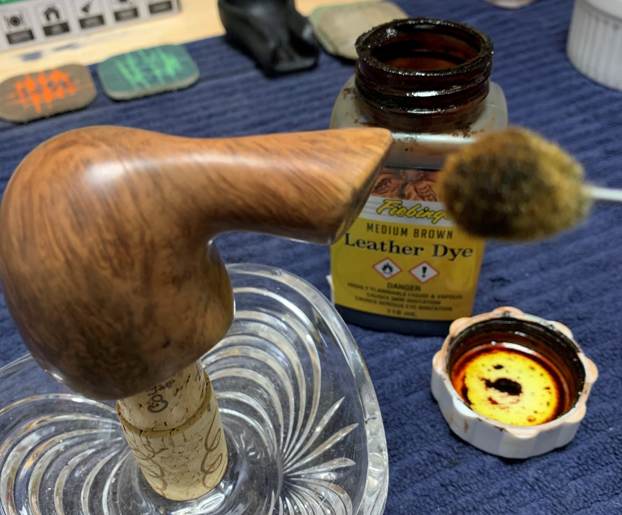
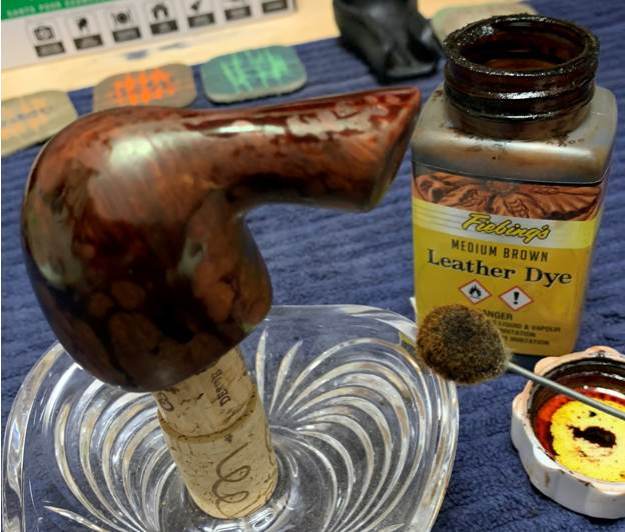
 I used an Maple Stain Pen to restain the rim top and the inner bevel of the rim edge. With the darkening on the edges and the top still present the Maple stain worked well to mimic the stain on the rest of the bowl and shank. Once it dried I buffed it with a cotton cloth and the match was very good. It looked much better with the work on the rim edge.
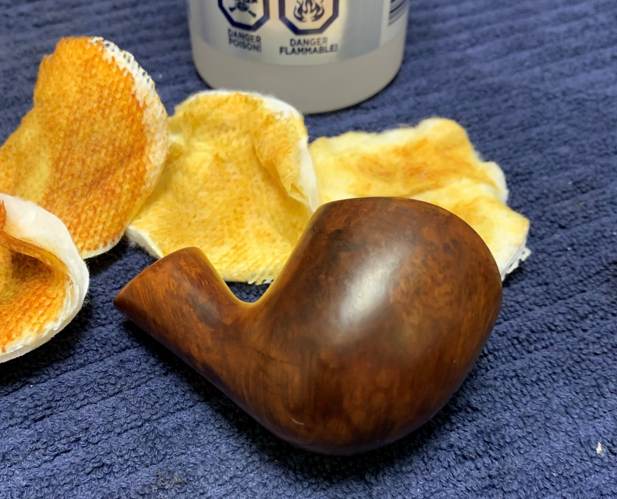
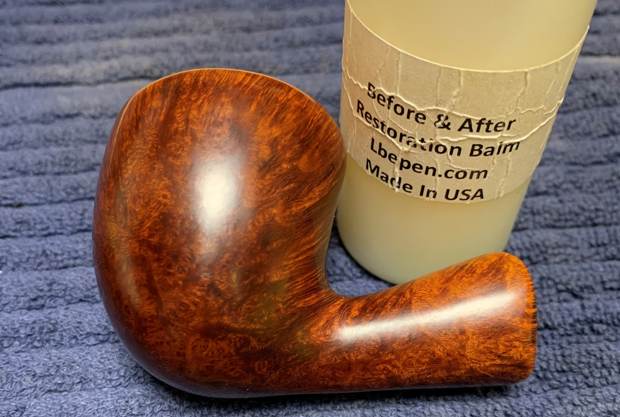
  The bowl looked very good at this point so I rubbed it down with Before & After Restoration Balm. I worked it into the surface of the bowl and shank with my fingertips and a horse hair shoe brush to clean, enliven and protect the briar. I let the balm sit for about 10-15 minutes and buffed with a cotton cloth to raise the shine.
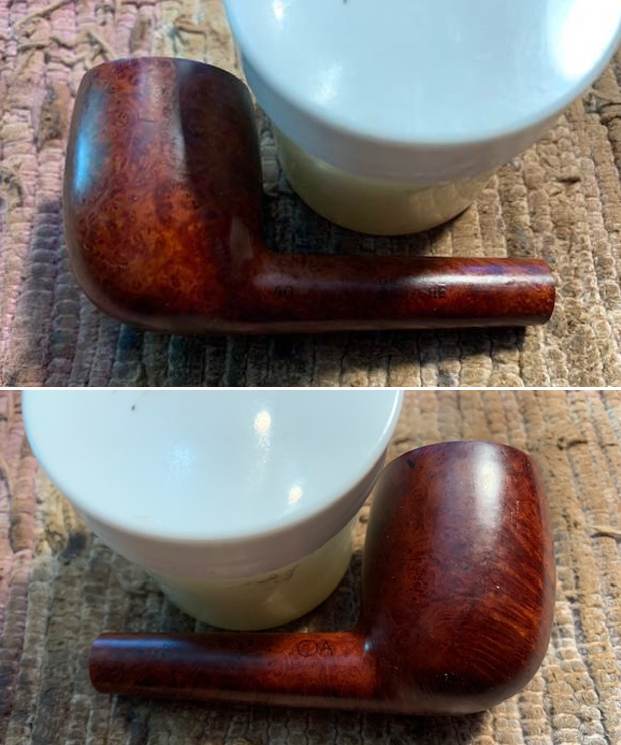
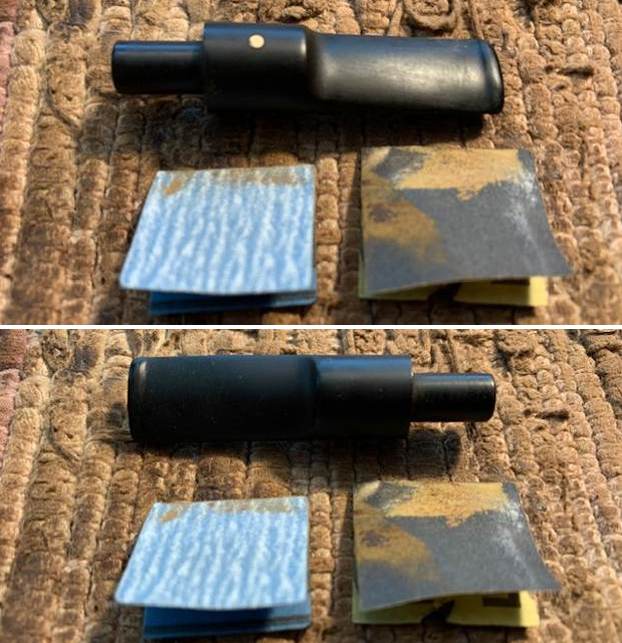
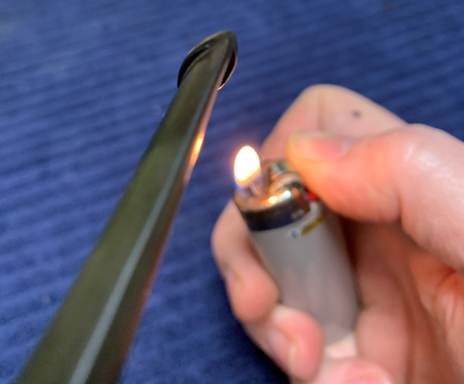
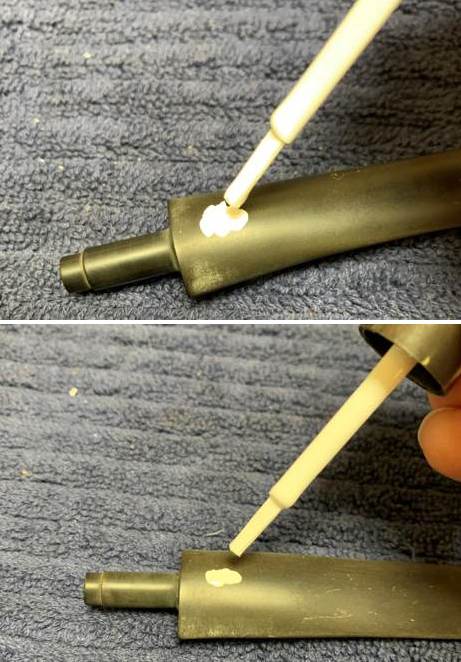
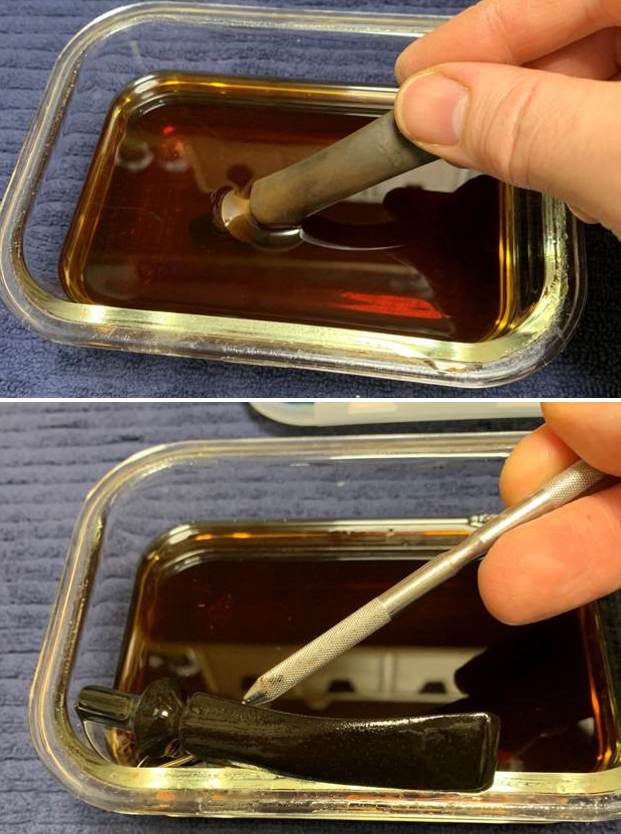
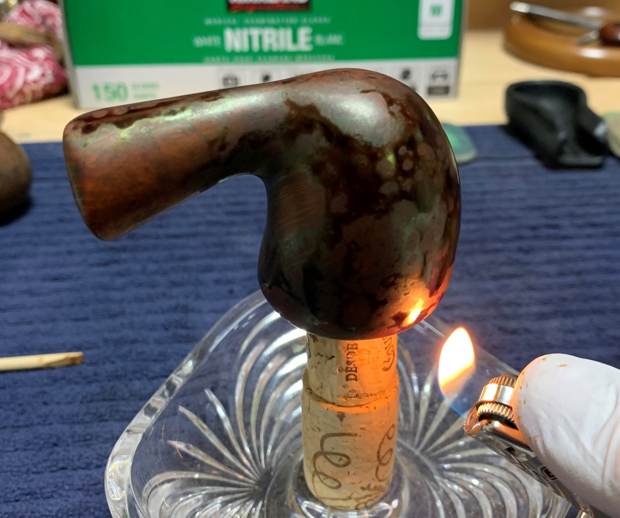
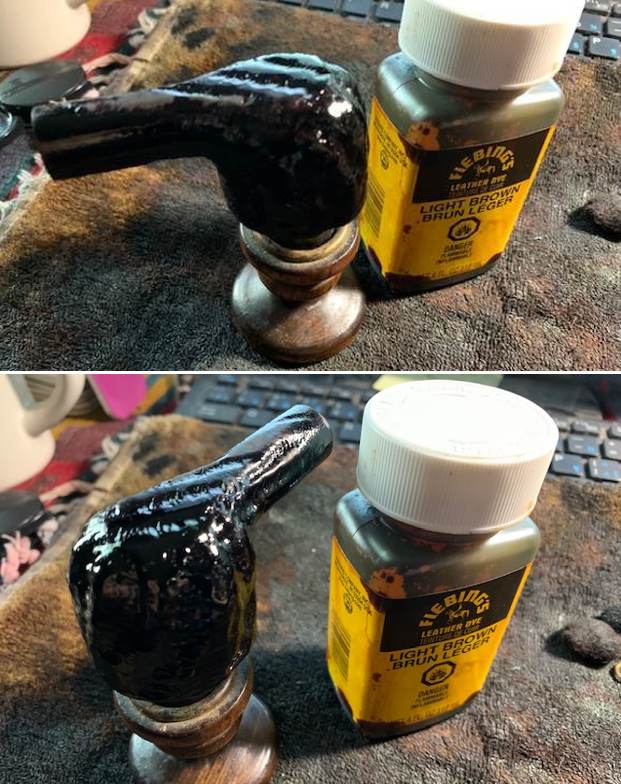
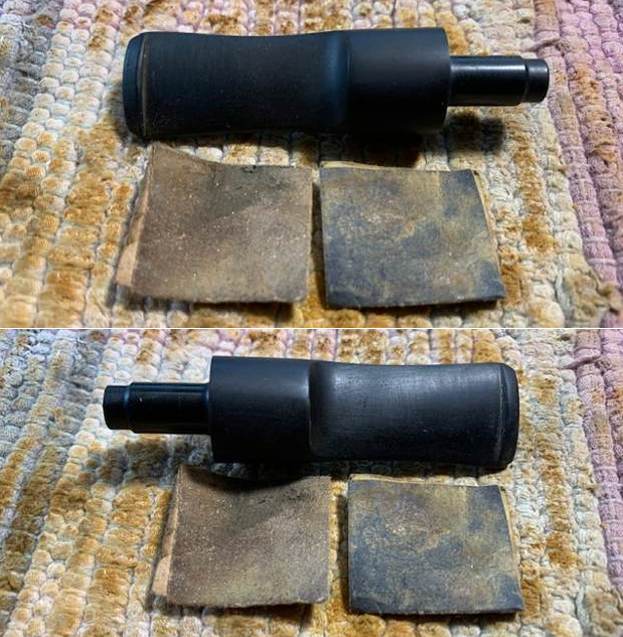
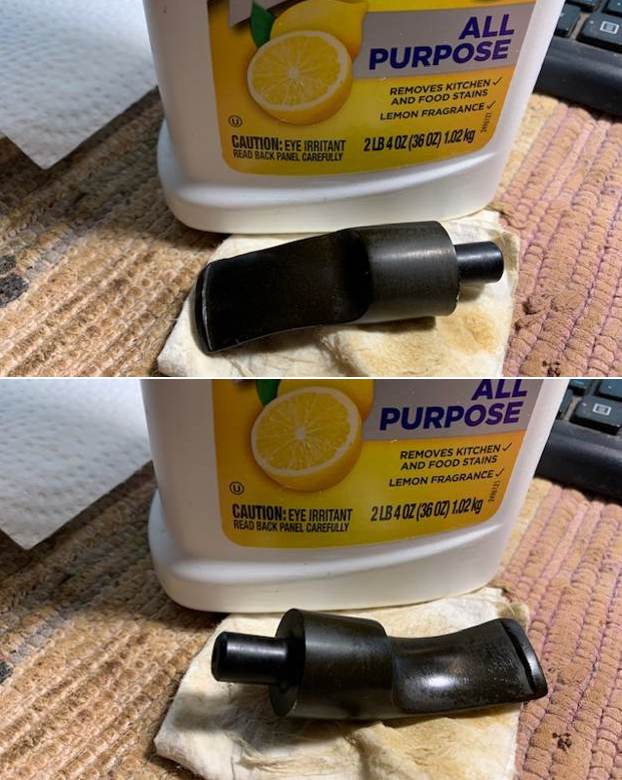
 I set the bowl aside and turned my attention to the stem. I “painted” the surface of the vulcanite stem with the flame of the lighter. I was able to lift almost all of the tooth marks and chatter except one on the top side that I needed to fill in with drop of black CA glue. I sanded the repair and the remaining tooth chatter with 220 grit sandpaper. I started polishing the stem with 400 grit wet dry sandpaper to start the polishing.
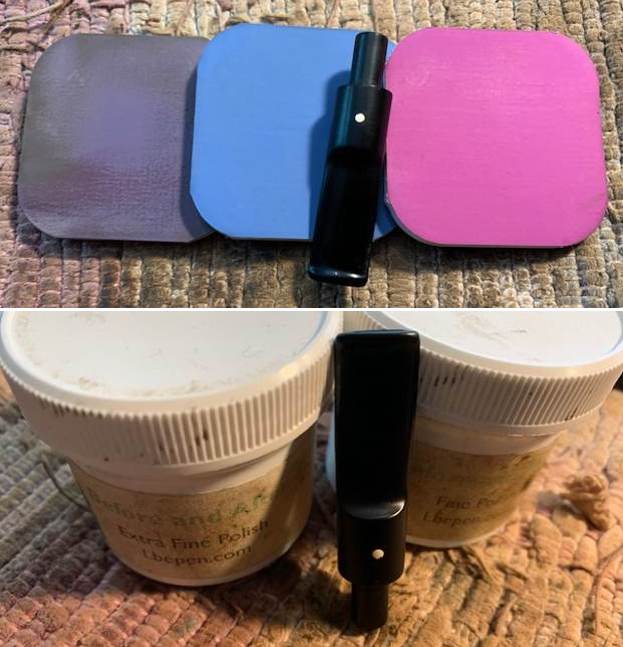
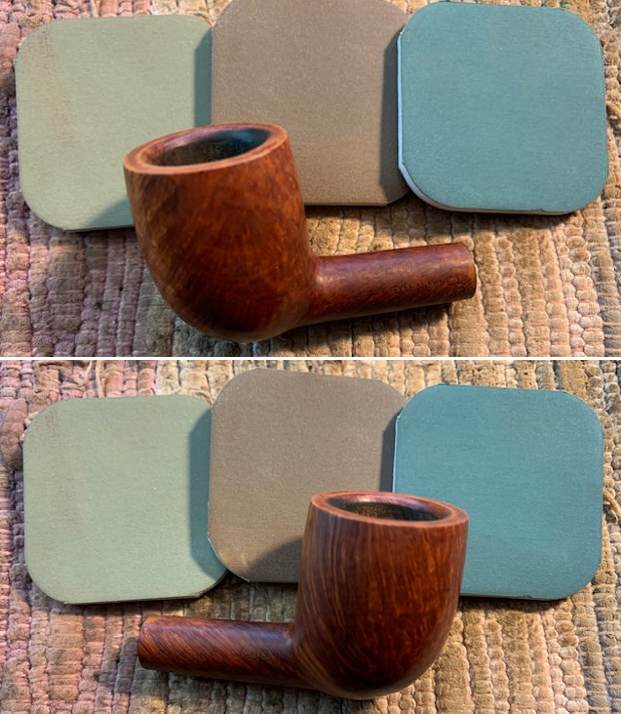
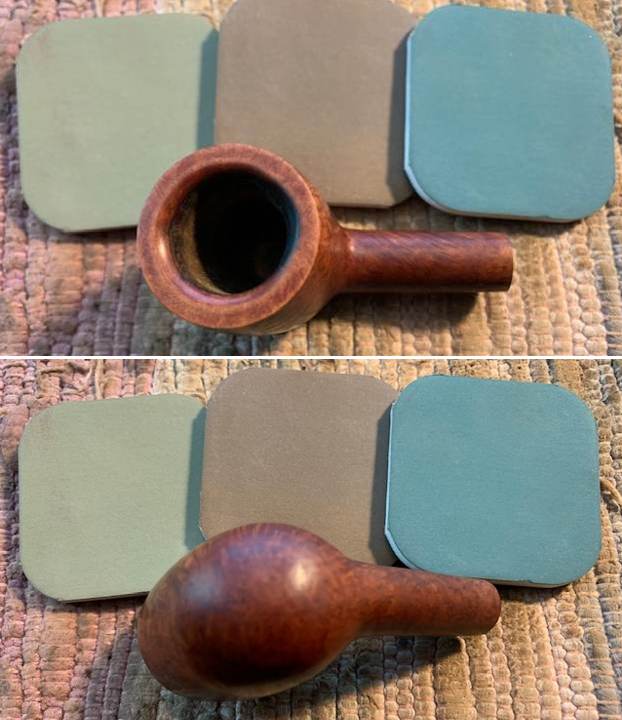
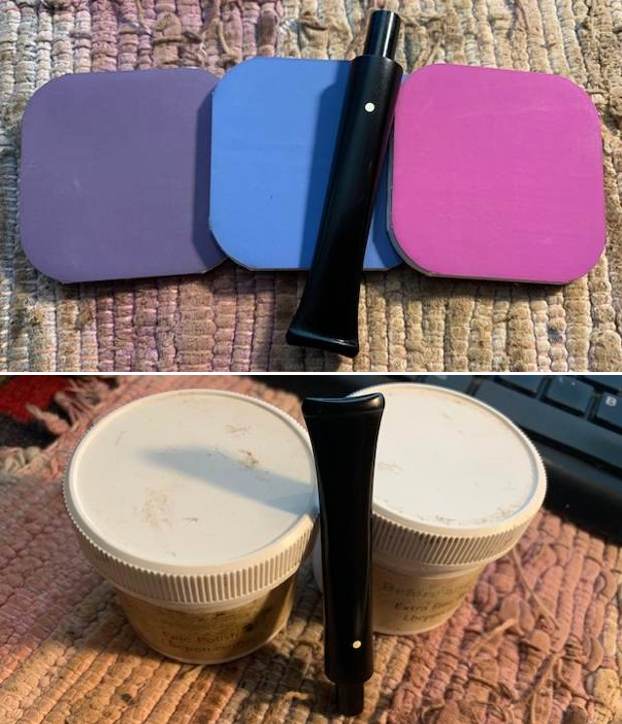
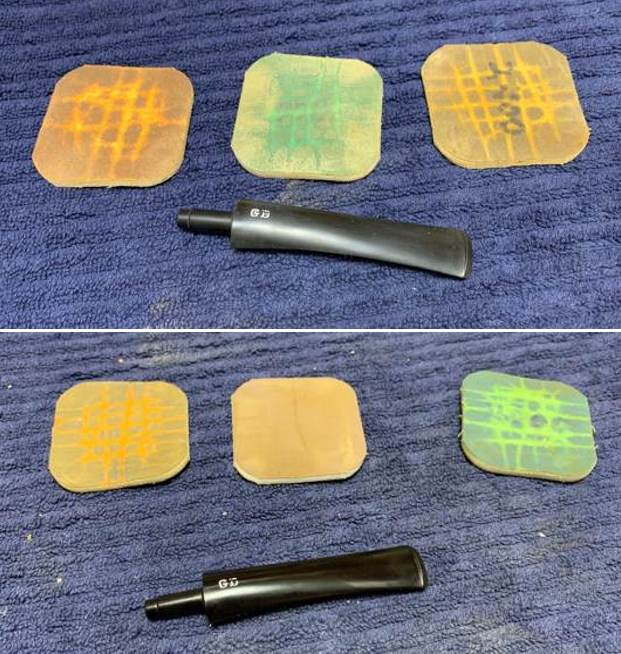
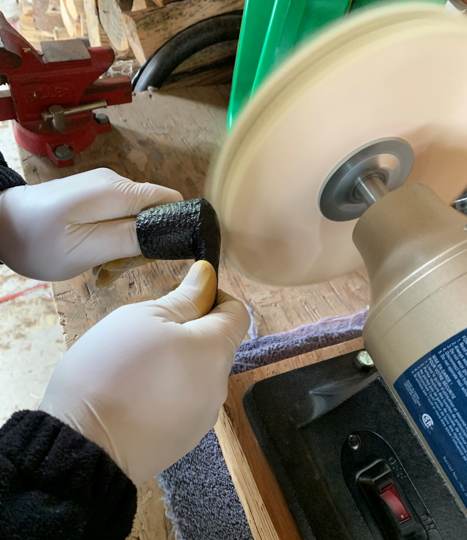
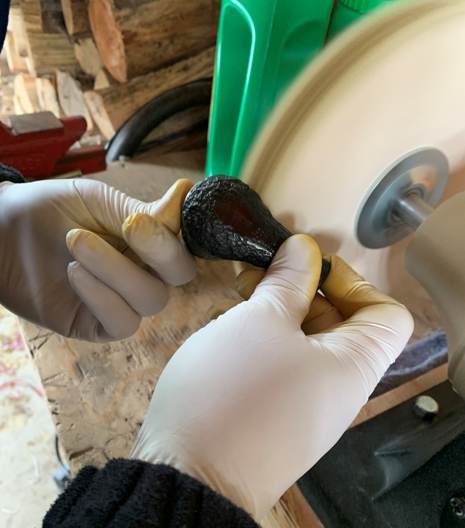
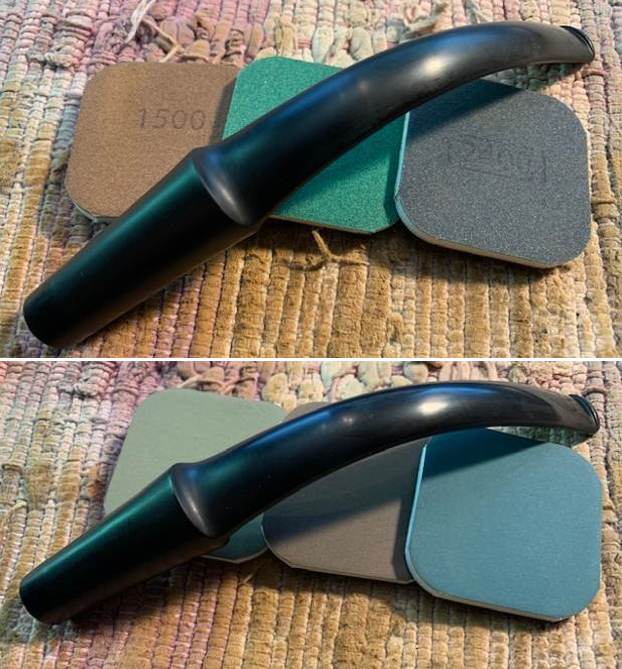
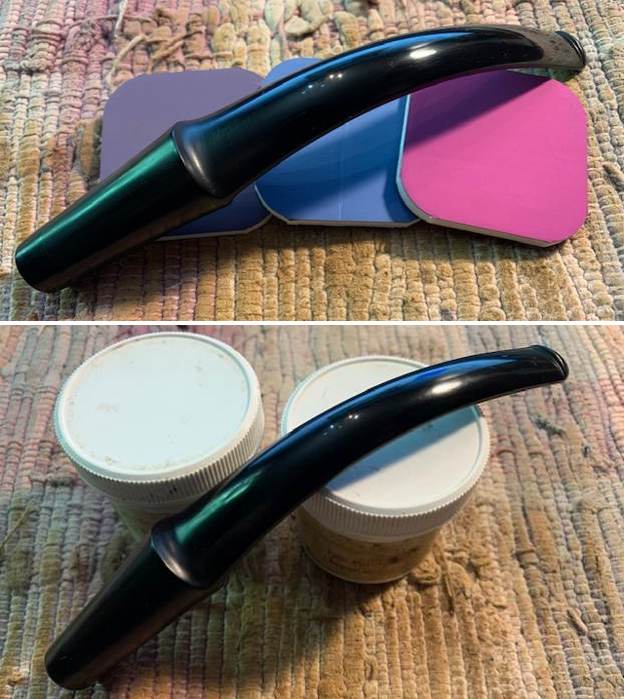
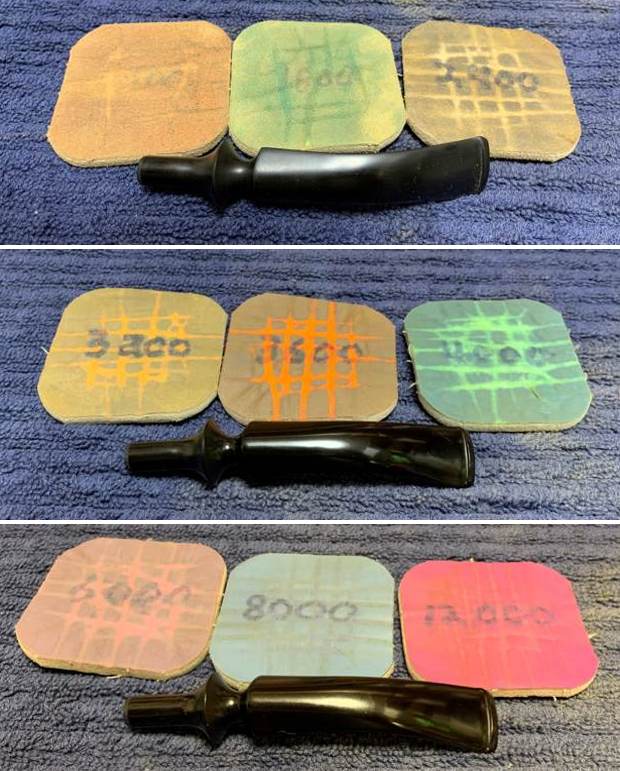
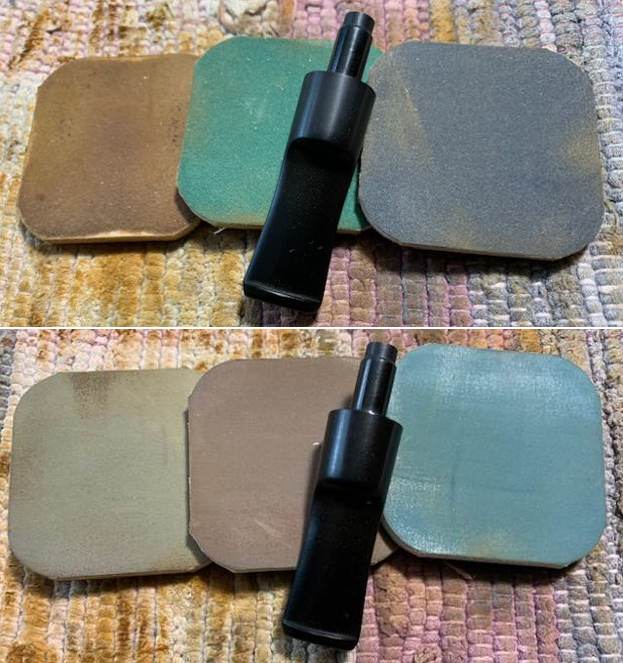
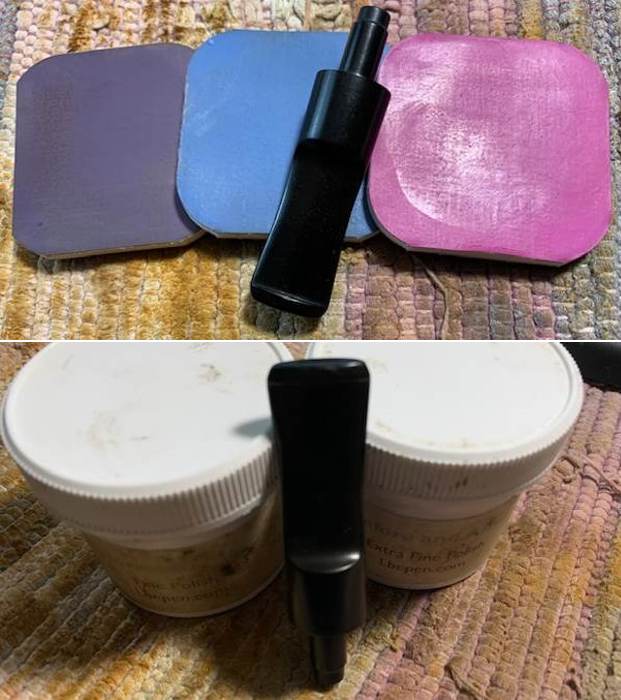
 I polished the vulcanite stem with micromesh sanding pads – dry sanding with 1500-12000 grit pads. I wiped it down with Obsidian Oil after each sanding pad. I used Before & After Pipe Polish – both Fine and Extra Fine to further polish the stem and gave it a final coat of Obsidian Oil to finish it.
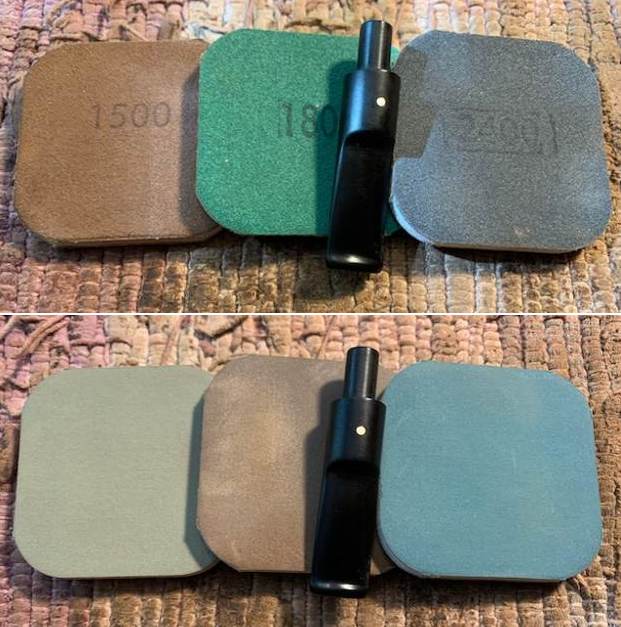
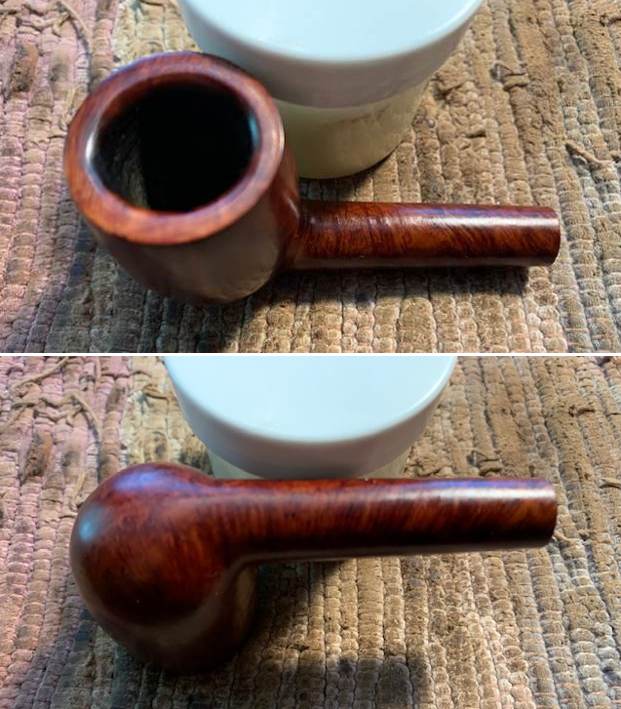
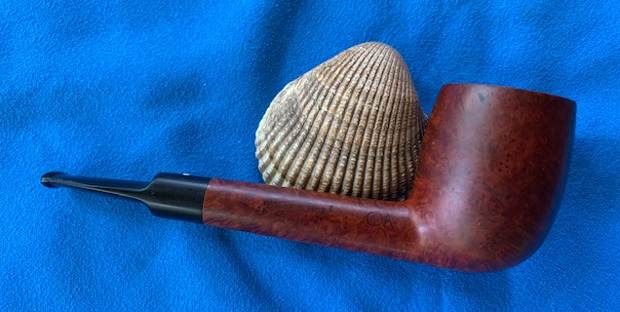
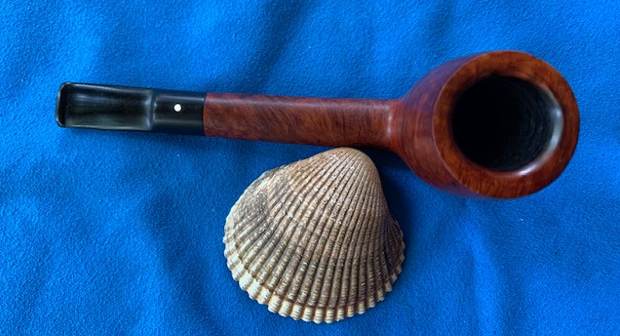
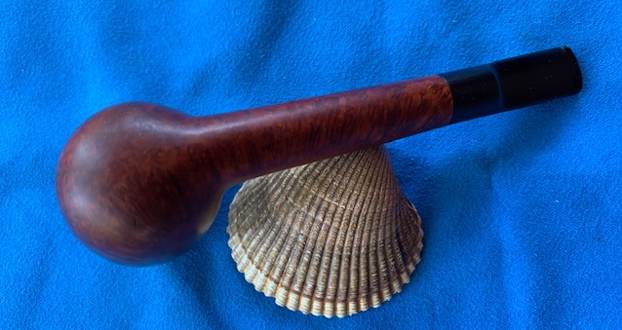
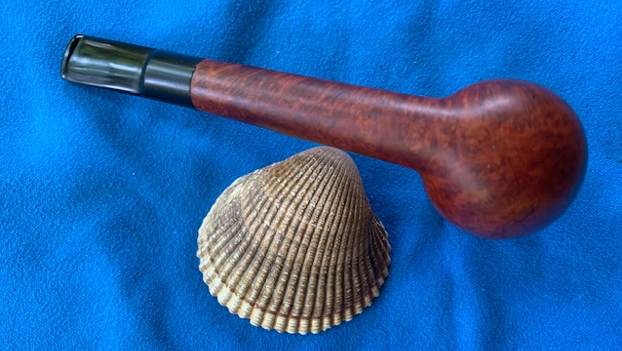
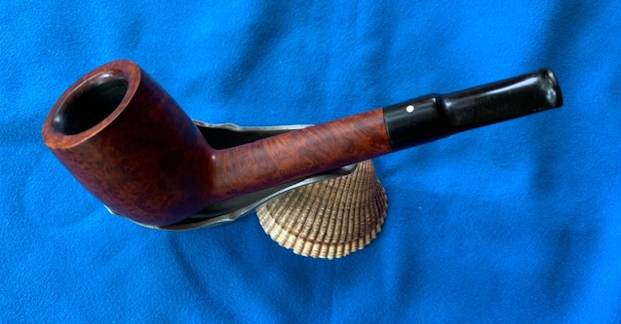
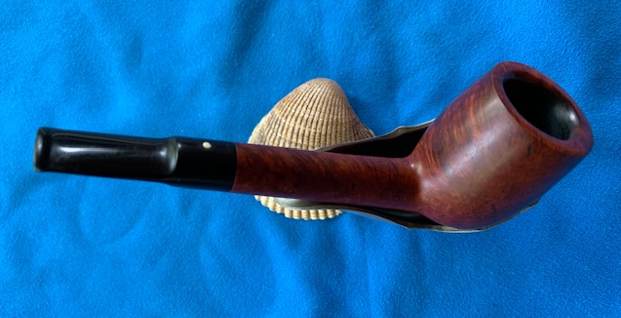
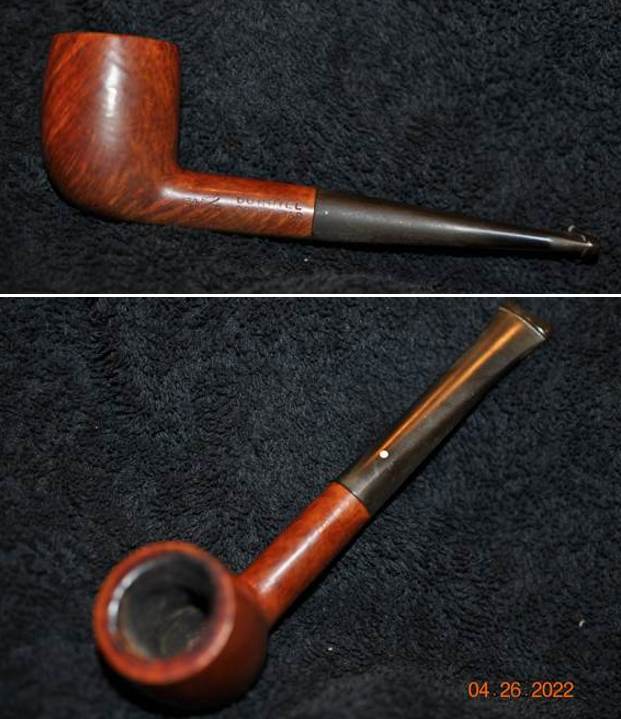
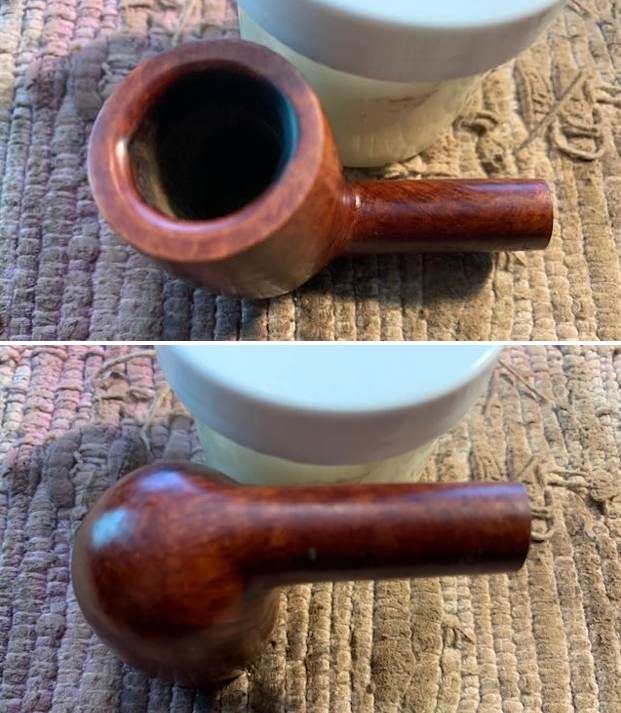
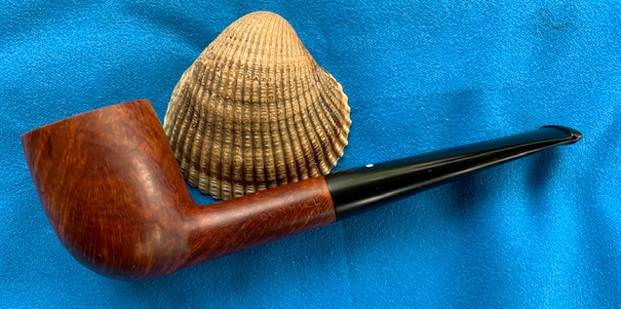
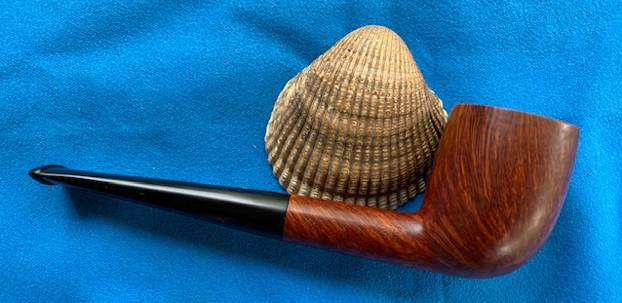
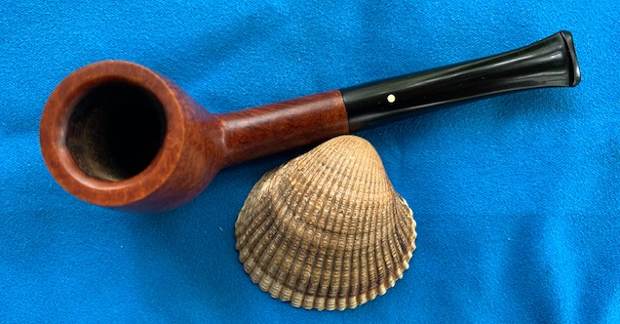
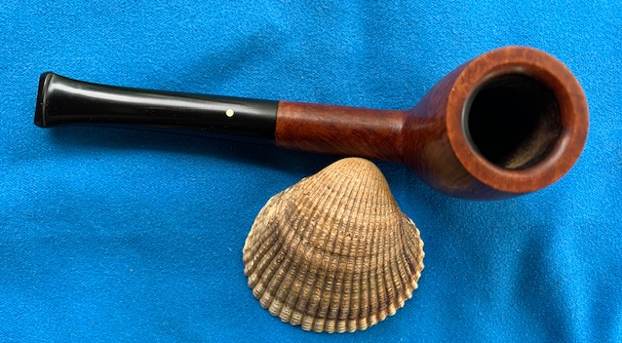
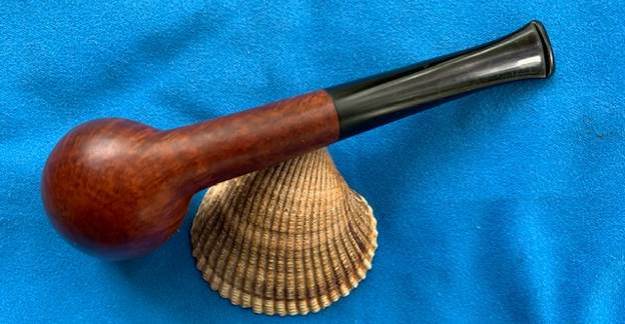
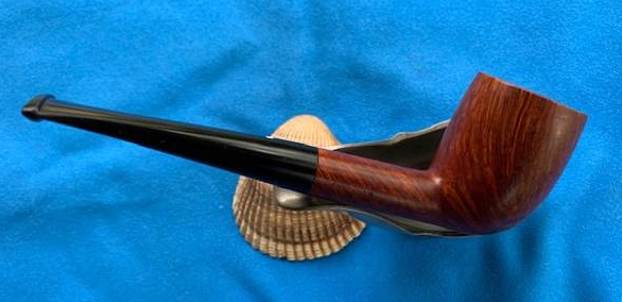
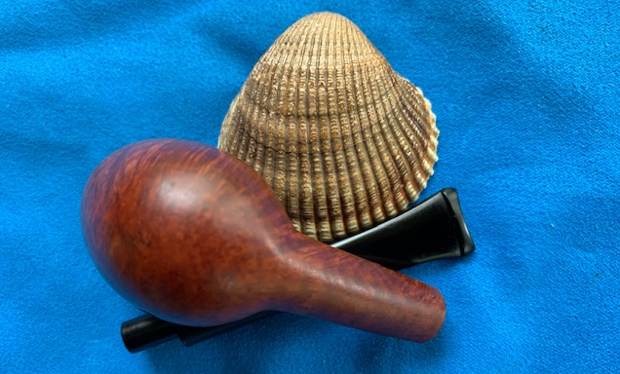
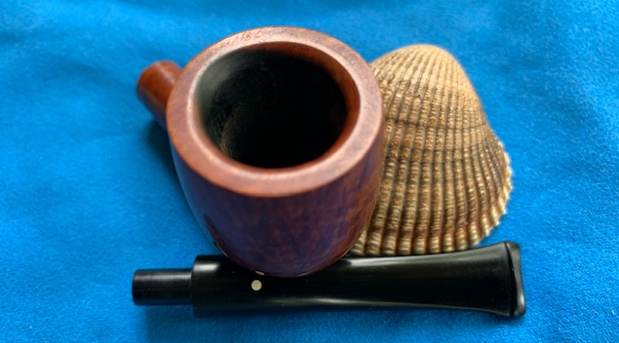
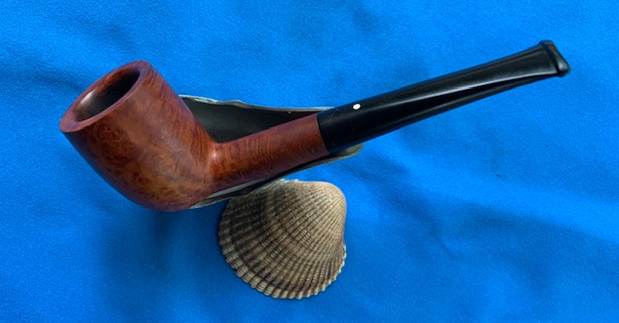
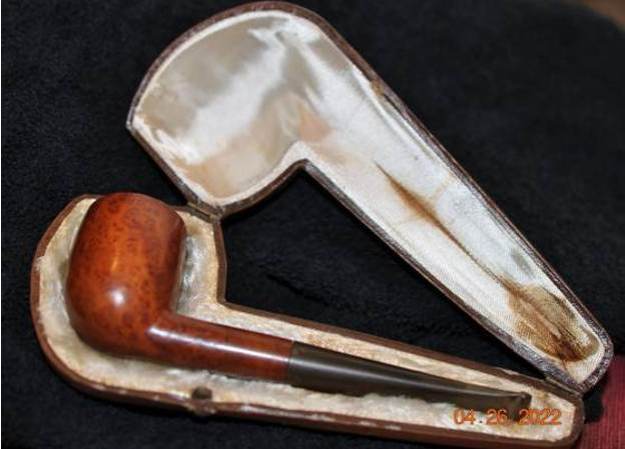
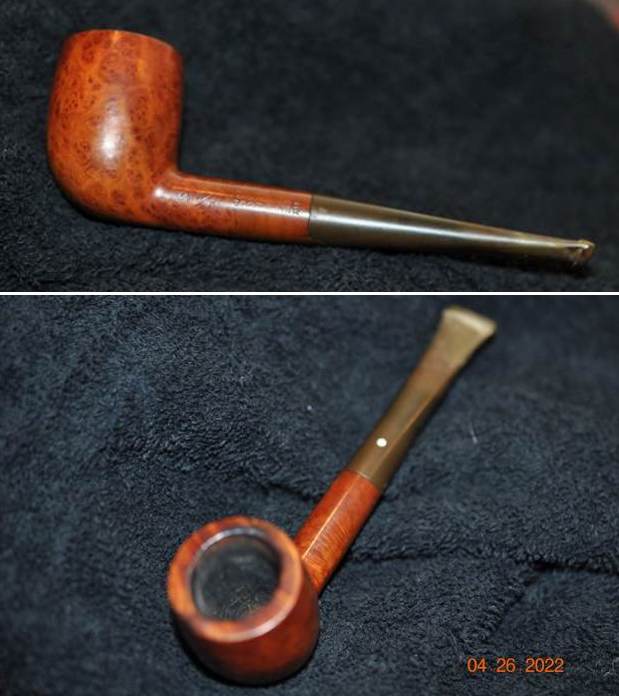
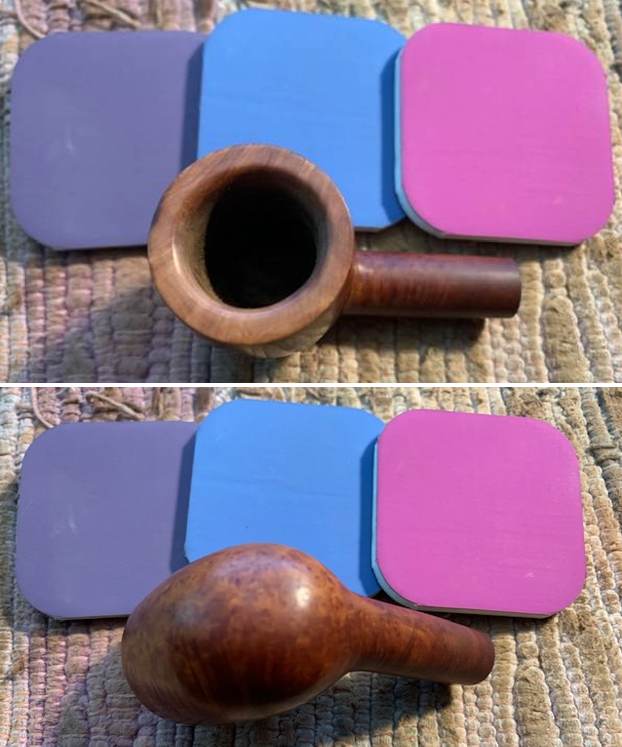
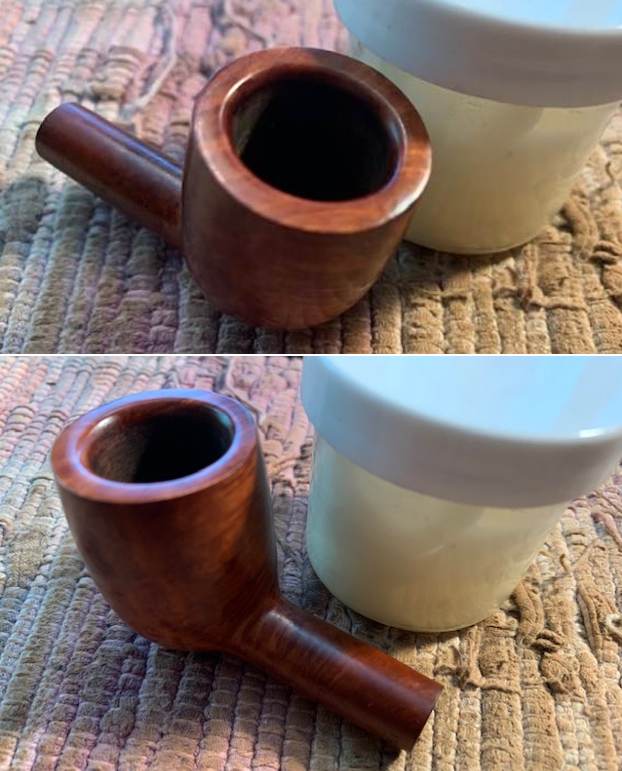
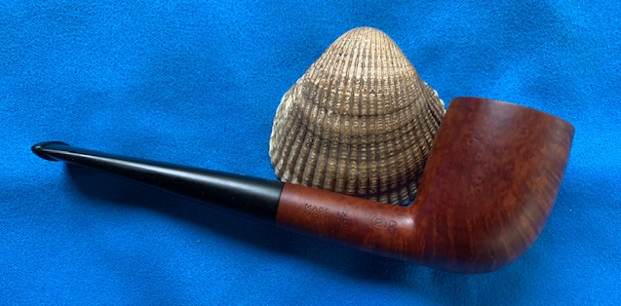
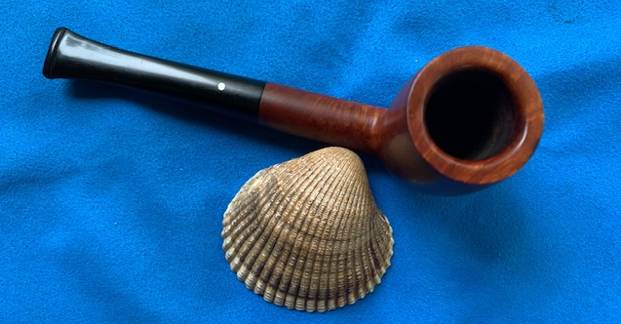
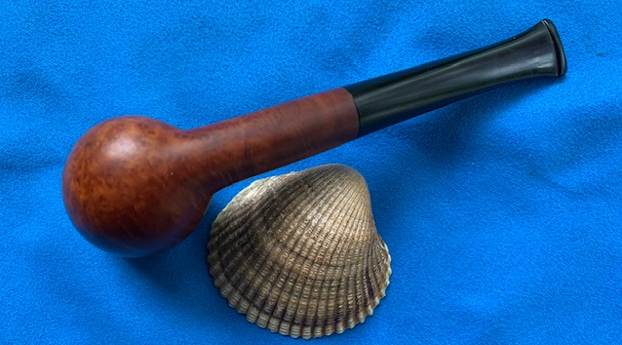
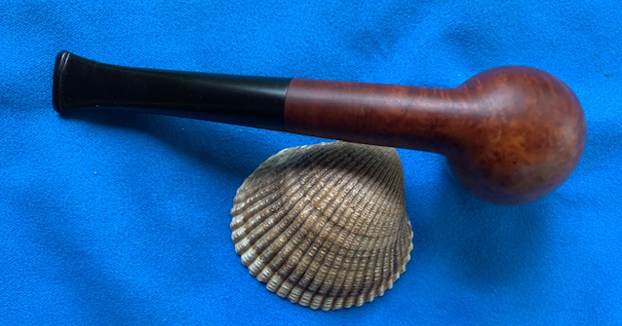
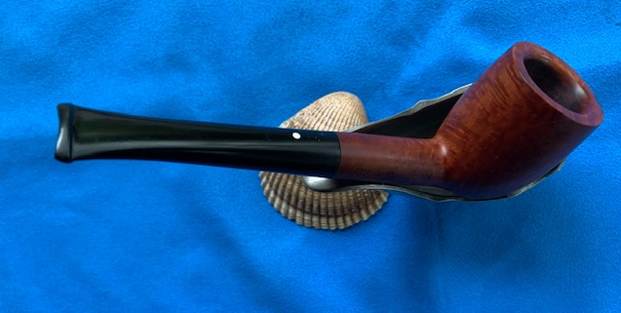
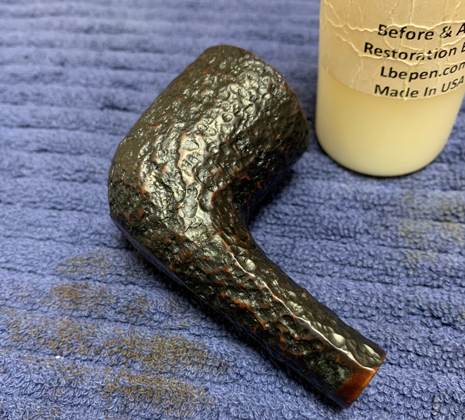
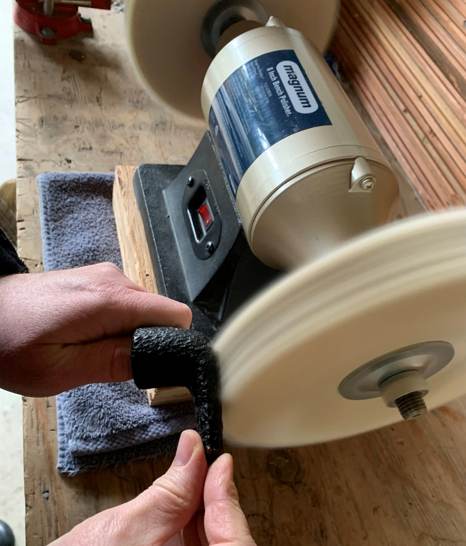
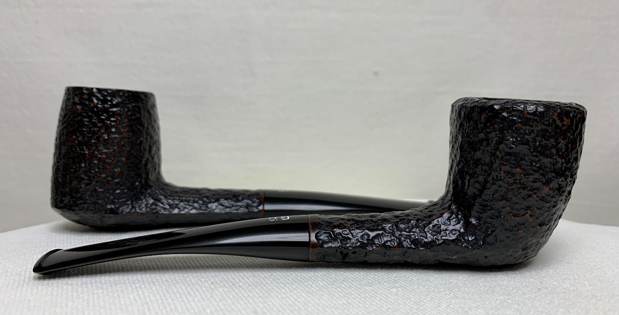
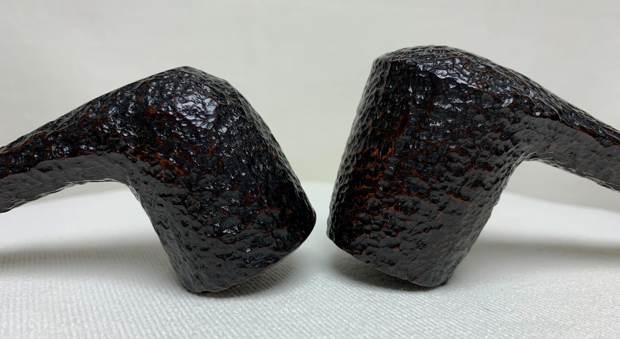
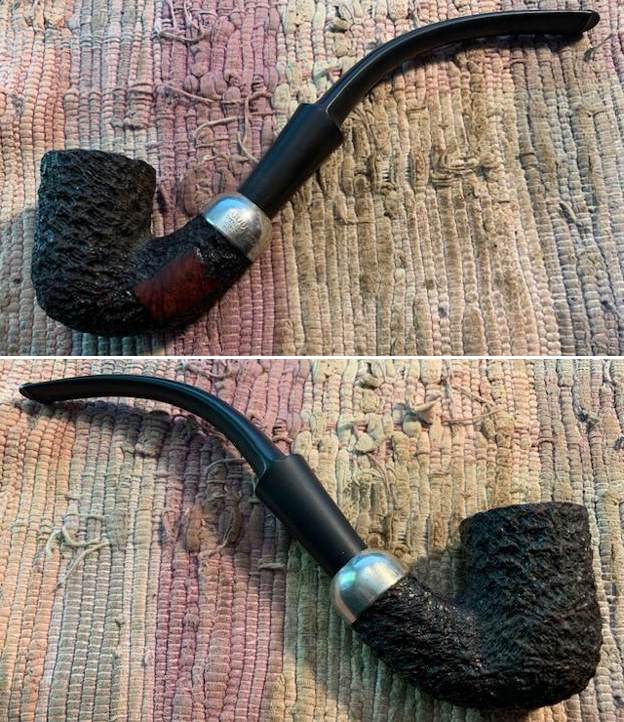
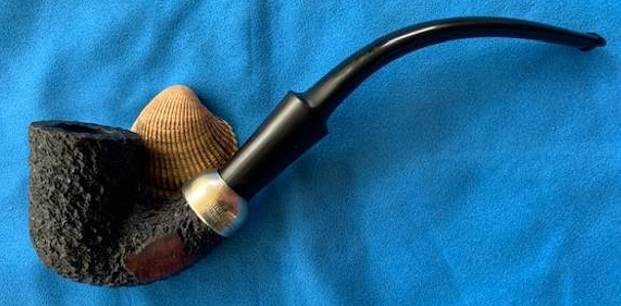
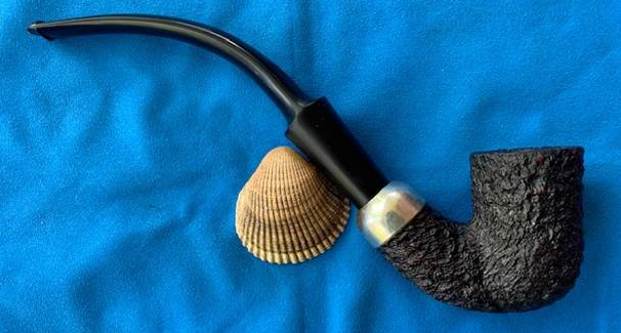
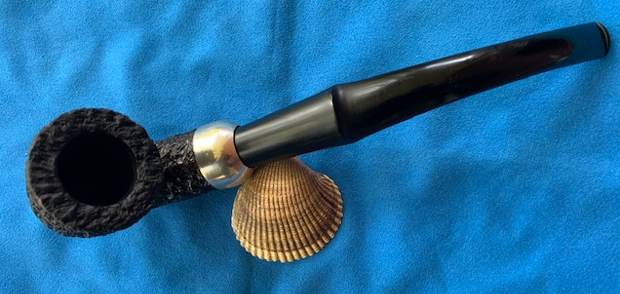
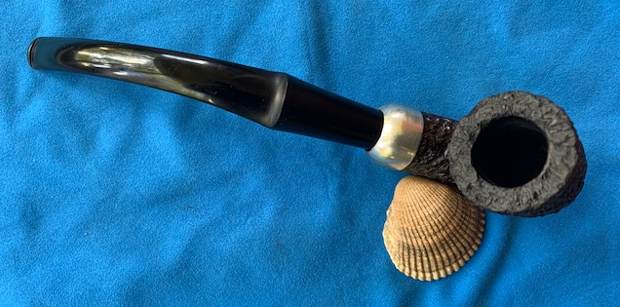
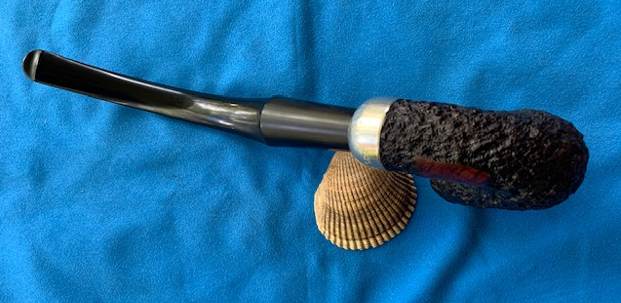
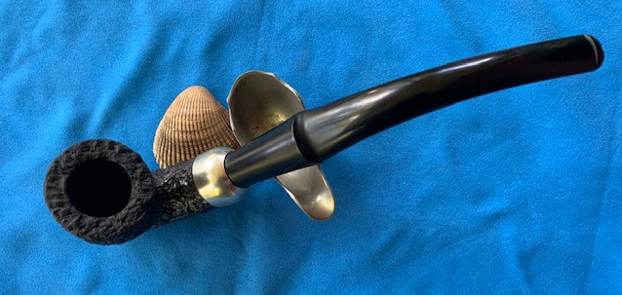
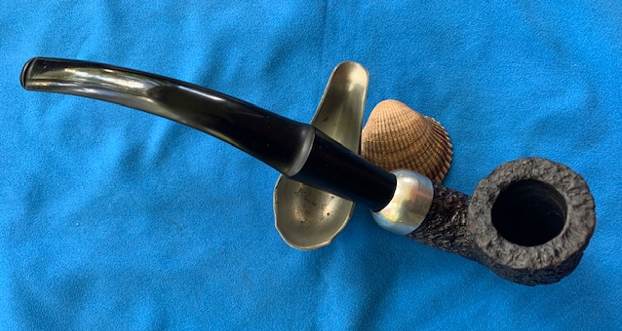
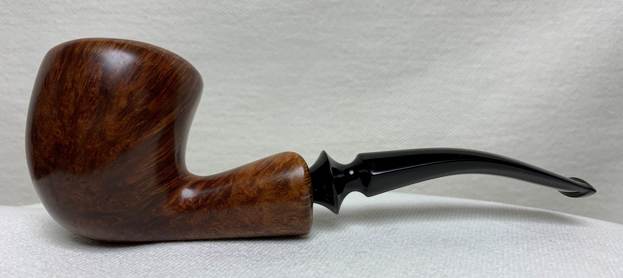
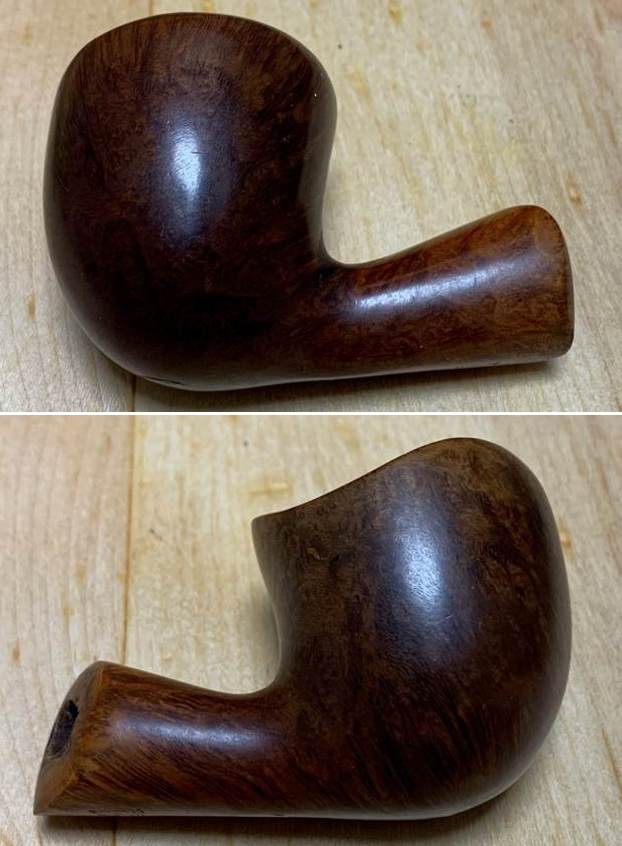
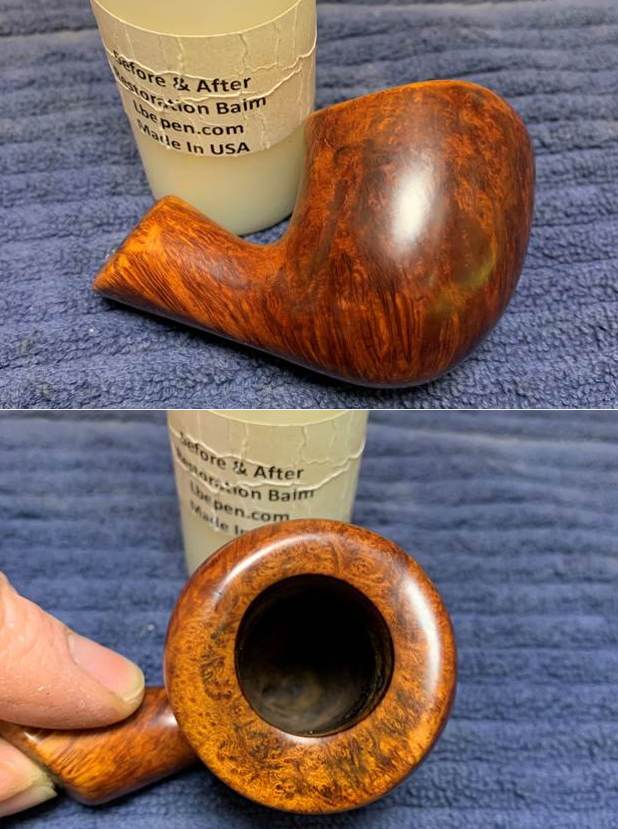
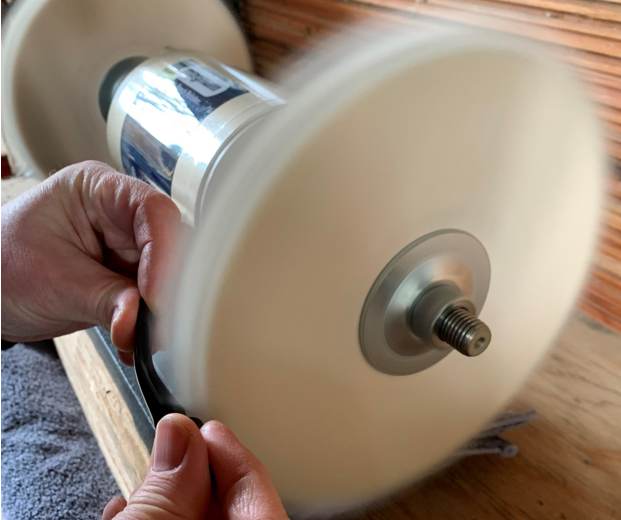
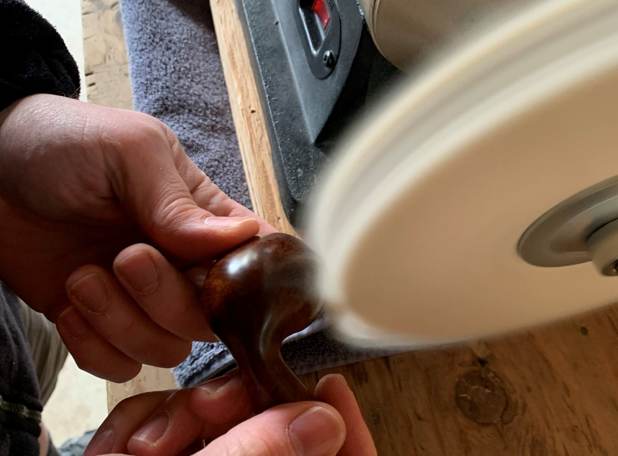
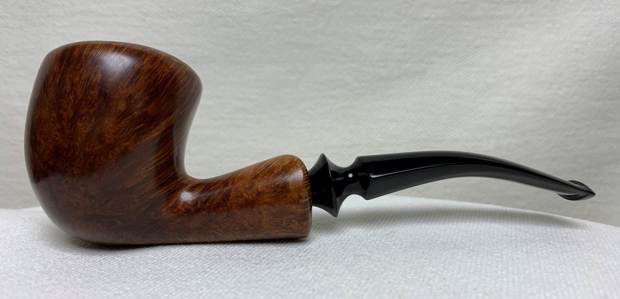
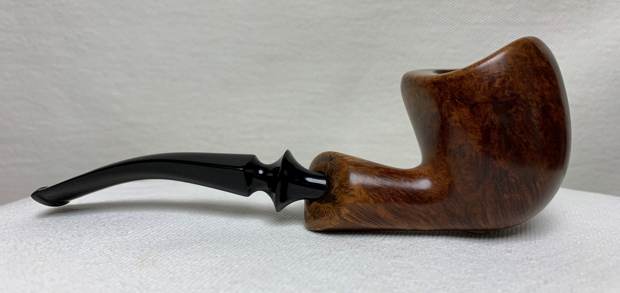
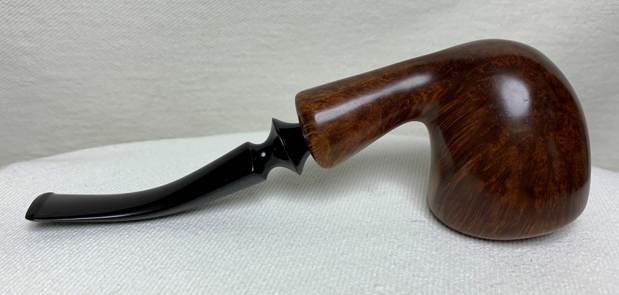
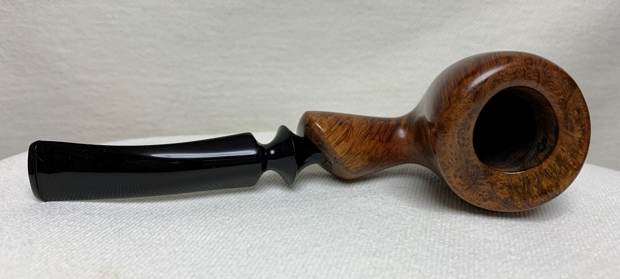
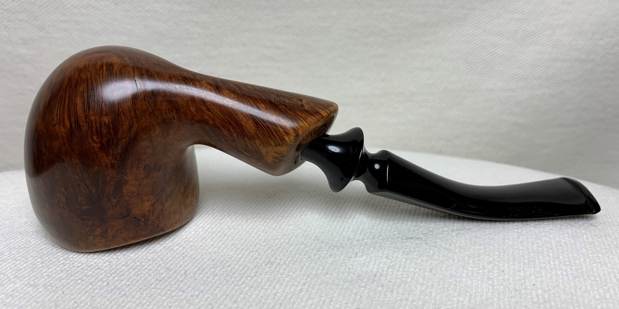
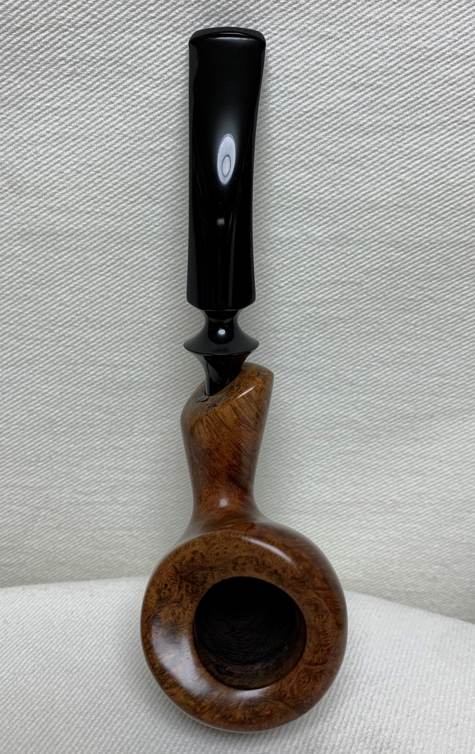
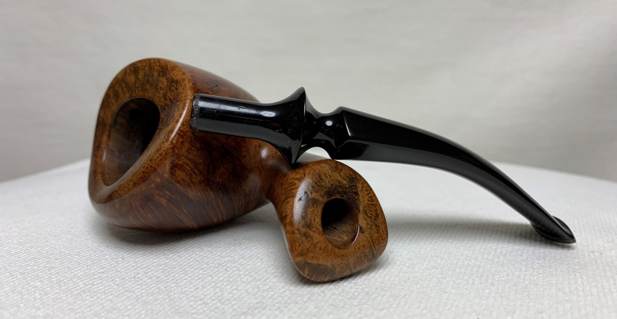
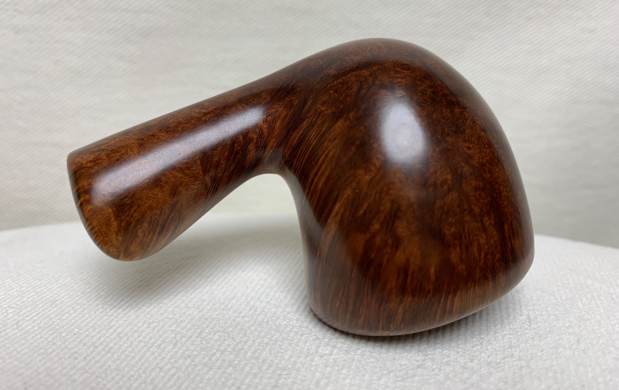
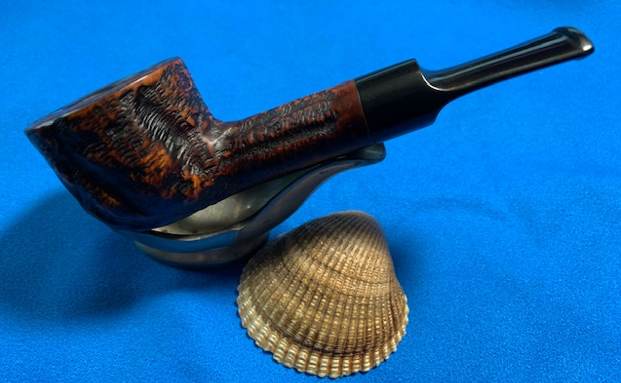
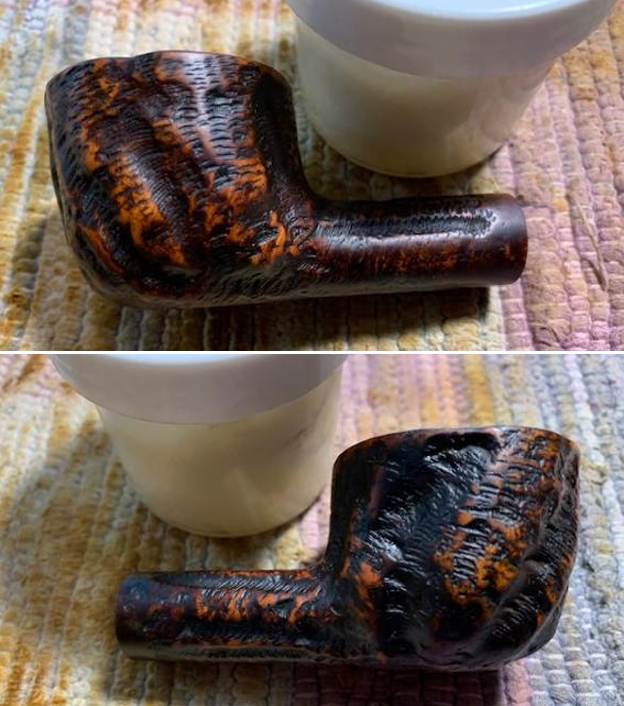
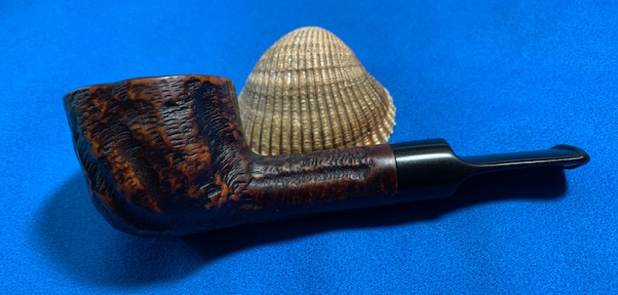
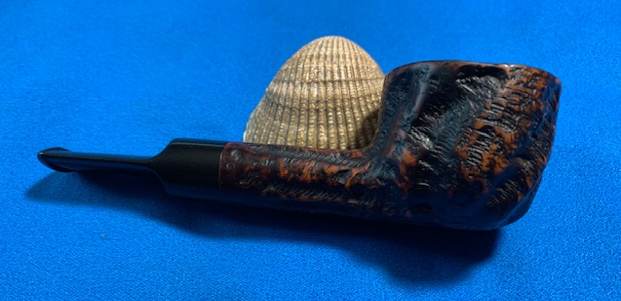
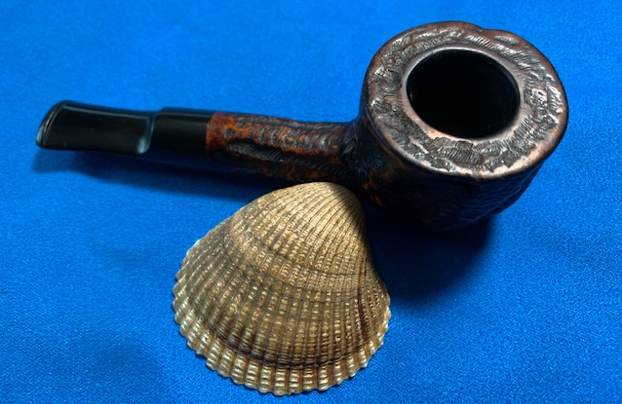
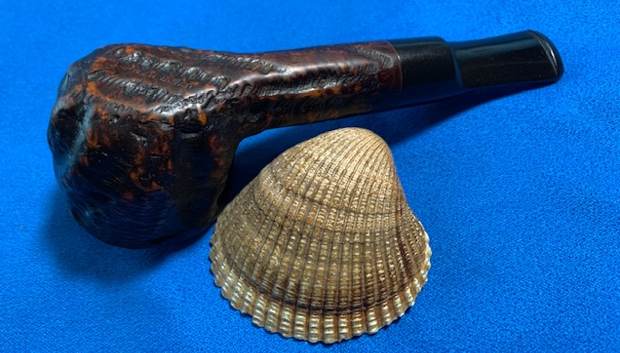
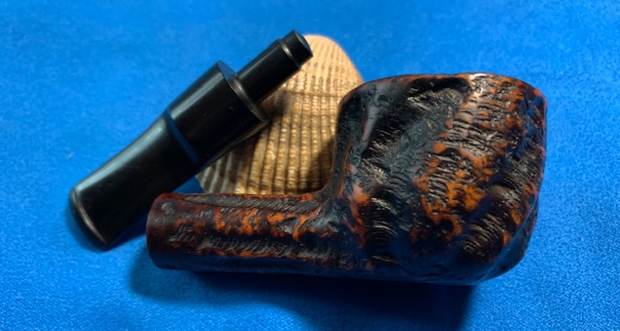
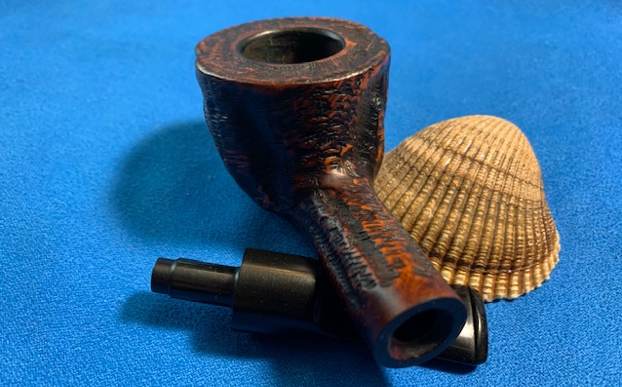
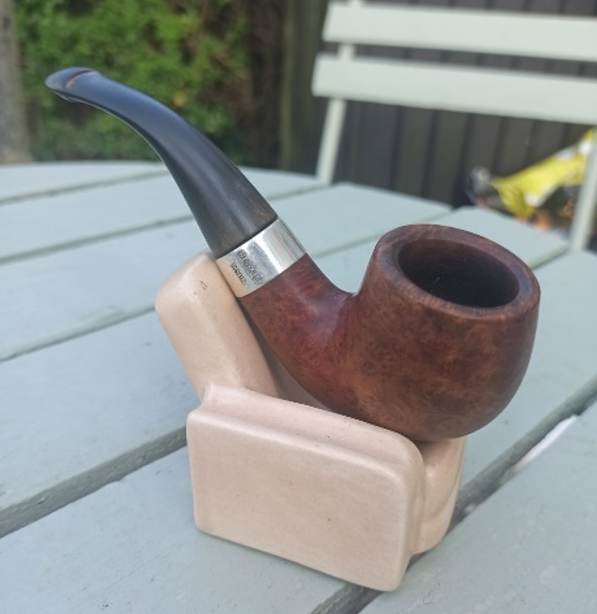
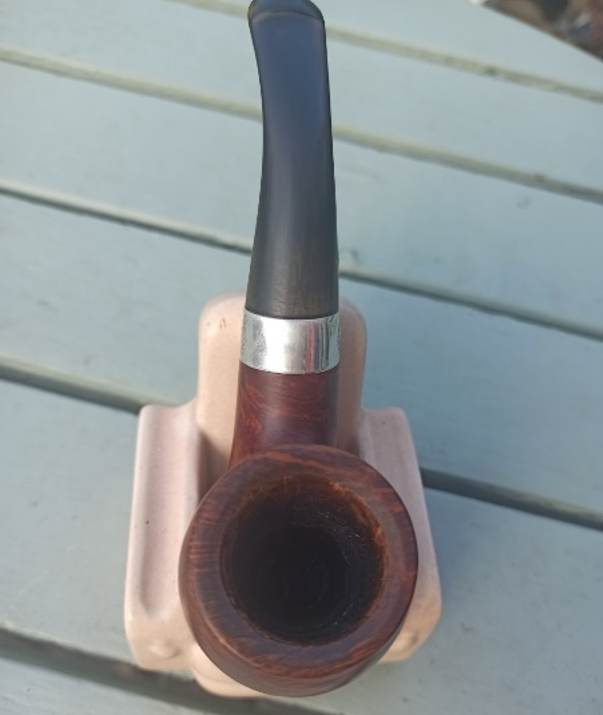
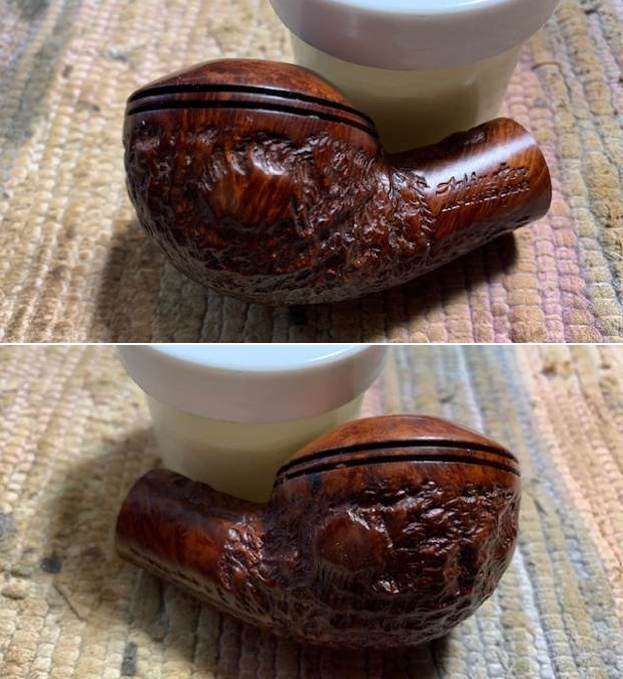
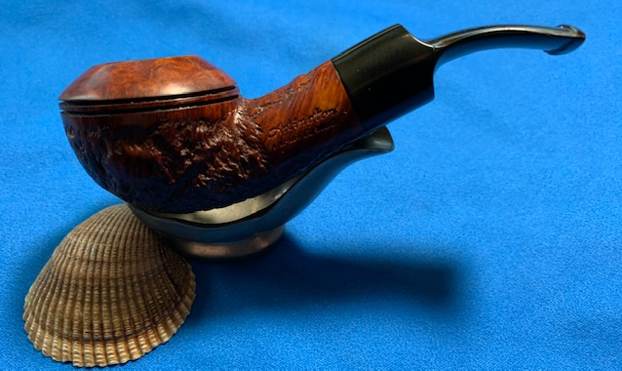
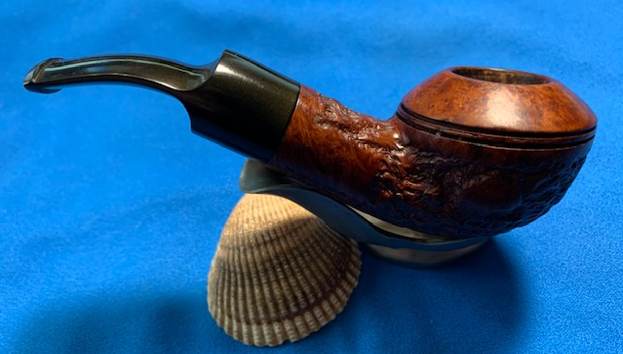
 This Beautiful Patented 1942/43 Dunhill Bruyere 40 Lovat is a great looking pipe now that it has been restored. The rich Bruyere finish that highlights the grain and works well with the polished vulcanite stem. I put the stem back on the bowl and carefully buffed the pipe with Blue Diamond on the buffing wheel using a light touch on the briar. I gave the bowl and the stem multiple coats of carnauba wax on the buffing wheel and followed that by buffing the entire pipe with a clean buffing pad. I hand buffed the pipe with a microfiber cloth to deepen the shine. The finished Dunhill Bruyere 40 Lovat is a Group 4 size pipe that will be a great smoker. Give the finished pipe a look in the photos below. The dimensions of the pipe are Length: 5 inches, Height: 1 ¾ inches, Outside diameter of the bowl: 1 ¼ inches, Chamber diameter: ¾ of an inch. The weight of the pipe is 35 grams/1.23 ounces. I will be adding the pipe to the British Pipemakers Section of the rebornpipes store shortly. If you are interested in adding it to your collection be sure to let me know. I take a moment to remind myself and each of us that we are trustees of pipes that will outlive us and the lives of many other pipe men and women who carry on the trust of their care and use. Thanks for reading this blog and my reflections on the pipe while I worked on it.
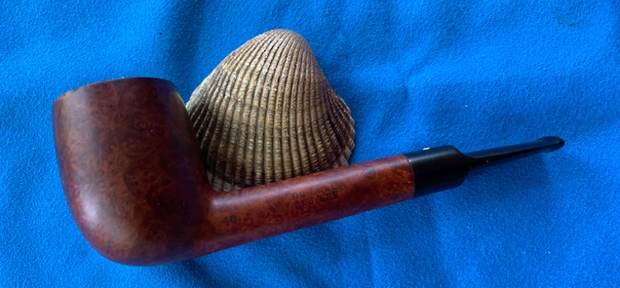


