Blog by Dal Stanton
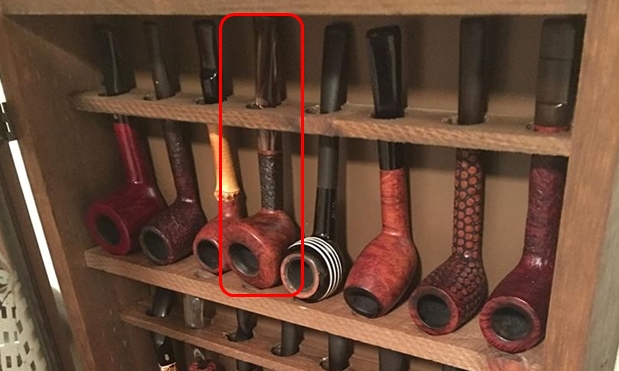
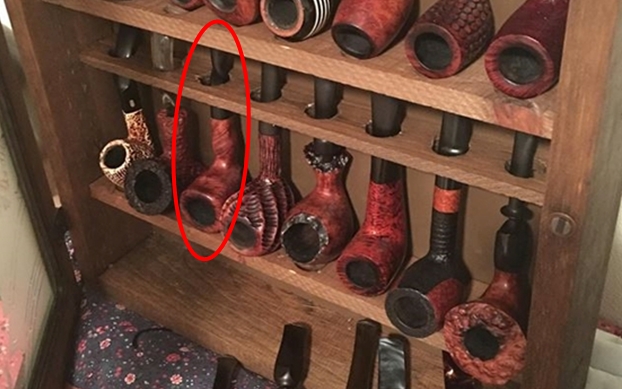
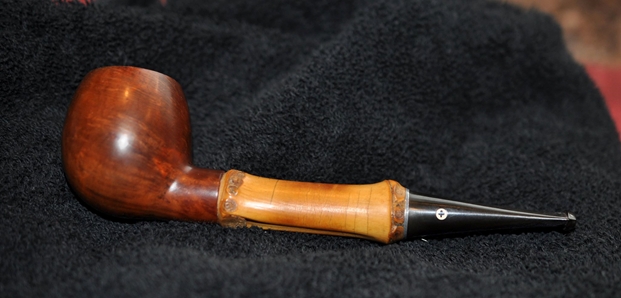
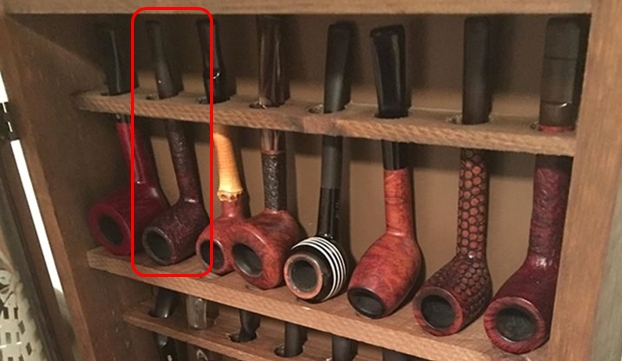
 This is an amazing petite now on my worktable. I think it qualifies as a ‘pocket pipe’ because it has obviously been used and loved. I acquired it last year from the French eBay auction block in a Lot of 50 that included some prized pipes which have already passed through my work table and are now serving new stewards. I cannot find the EPC Majestic in this picture of the French Lot of 50, but what has been characteristic of this Lot is that there are several named pipes that I’ve never heard of before. My assumption has been that many of these are French made since the Lot came from France. Many of these pipes also sport very nice horn stems. This is true also of the EPC Majestic.
Stephen saw the EPC Majestic in the For “Pipe Dreamers” Only! collection on The Pipe Steward website. I love it when I get return pipe men looking again! Stephen has already brought home an L. J. Peretti Bent Billiard (LINK) and now he’s commissioned the EPC Majestic as well as a newer acquisition from an antique store in St. Louis, a really nice Aldo Valeni Trio Blasted Billiard – next on my worktable. I appreciate Stephen, even though he happens to be a cousin on my wife’s side of the family! He’s a retired Coast Guard man and has grown in his love for and appreciation of pipes.
When he asked about the EPC Majestic, I made sure he understood that he was inquiring about a pipe with diminutive dimensions. He assured me that this was exactly what he was looking for and I placed him in the queue.
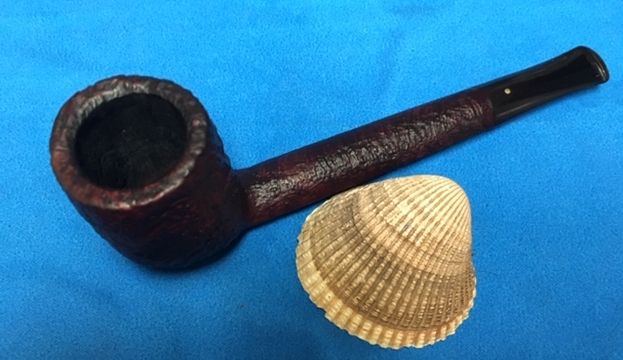
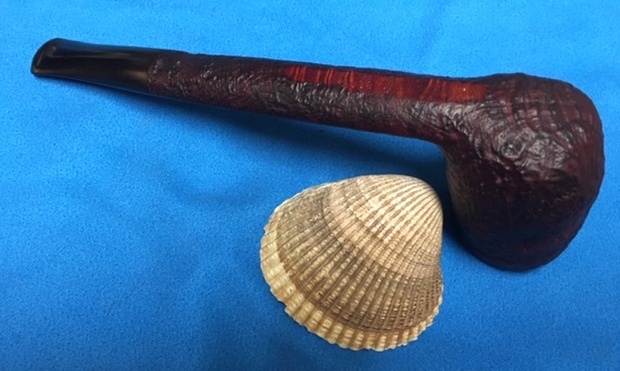
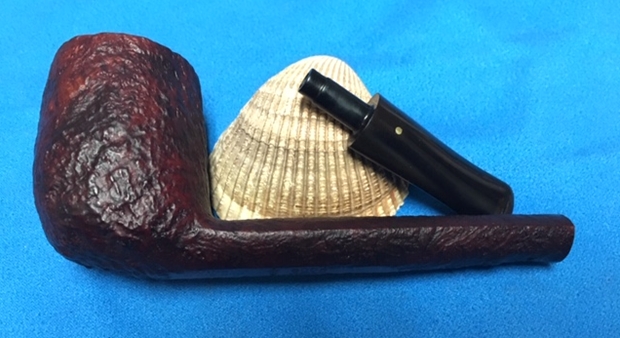
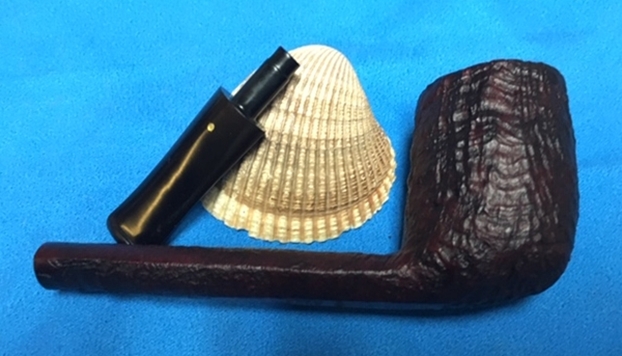
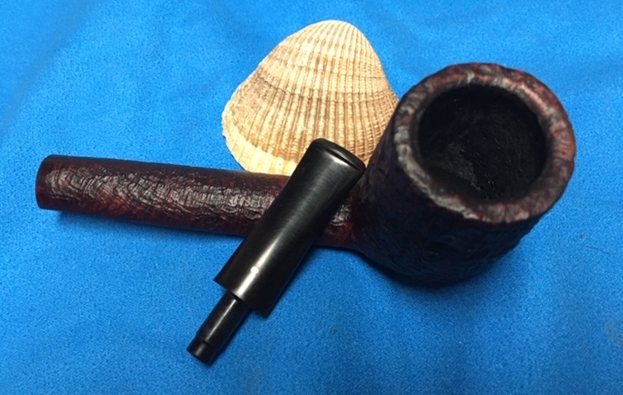
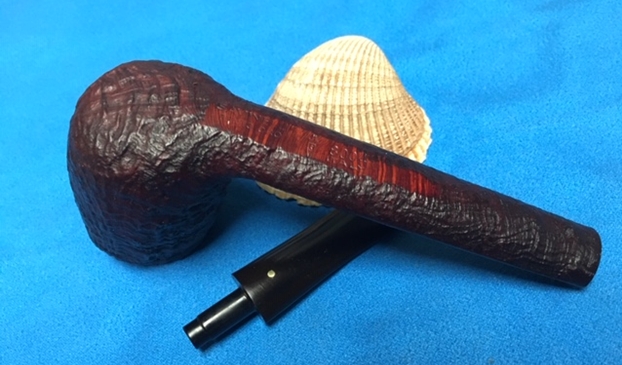
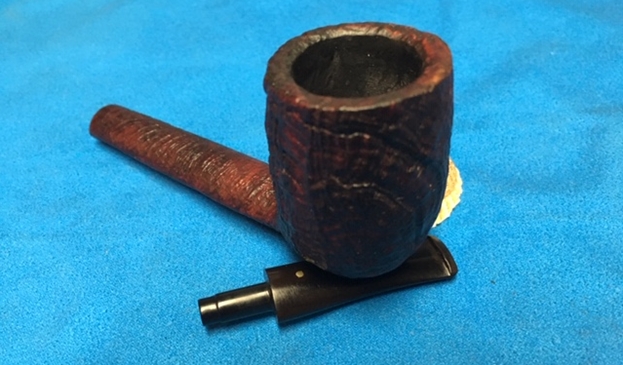
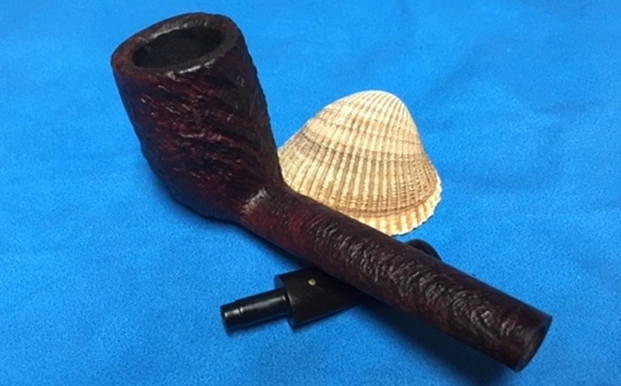
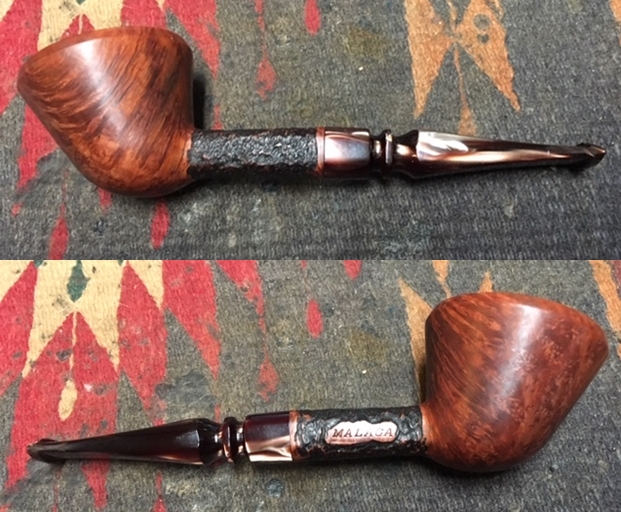
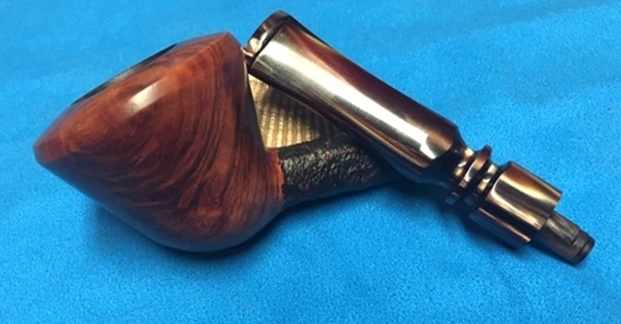
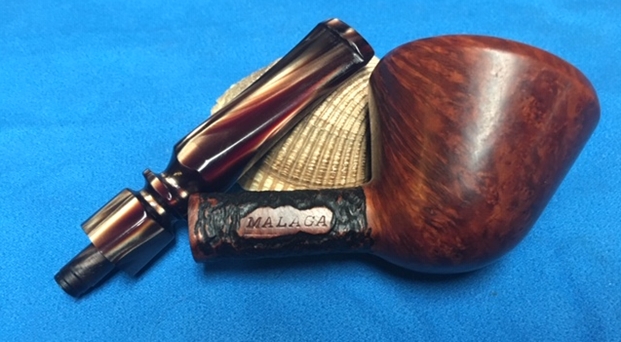
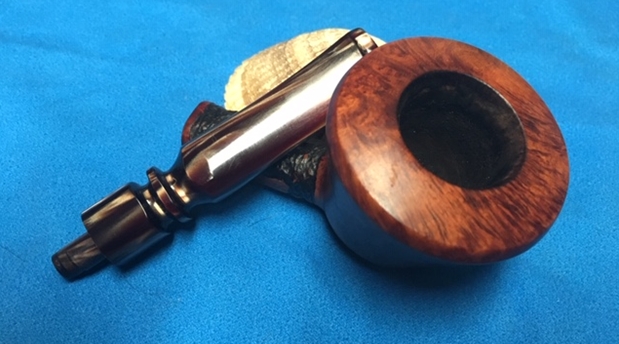
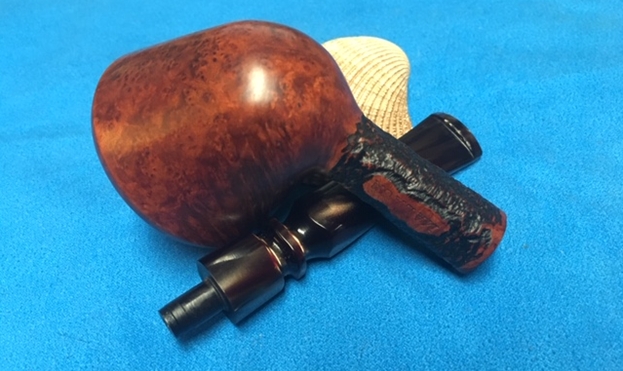
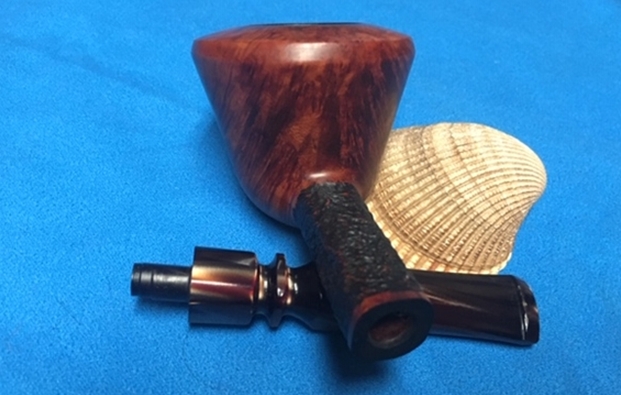
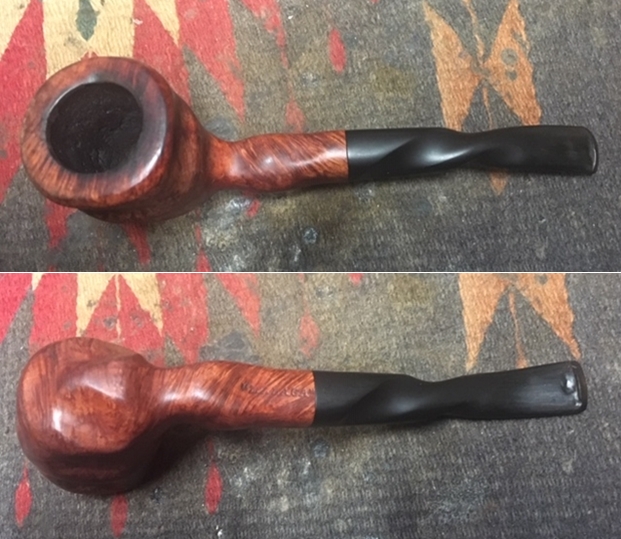
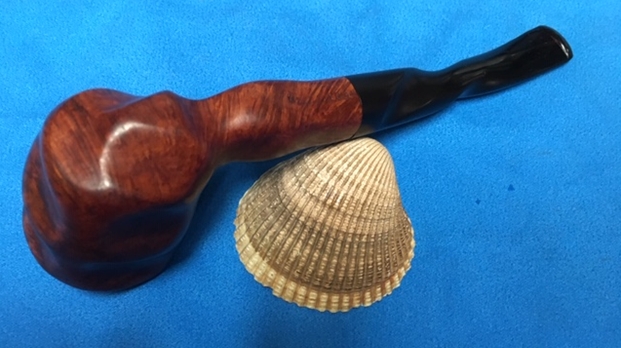
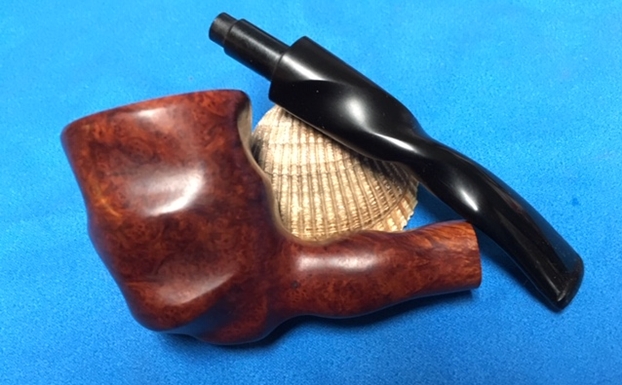
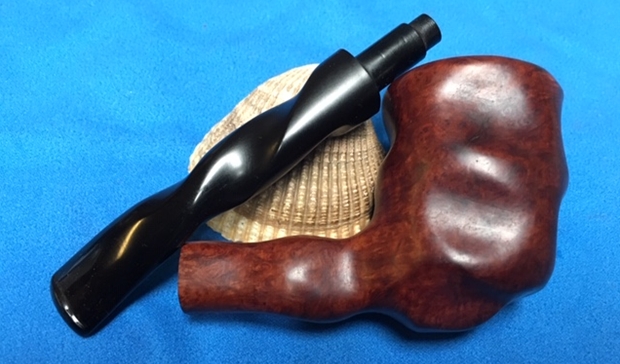
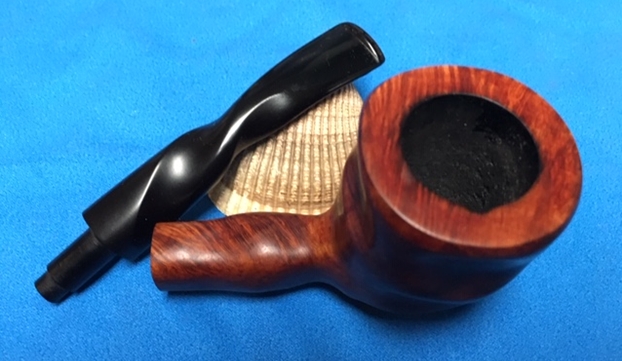
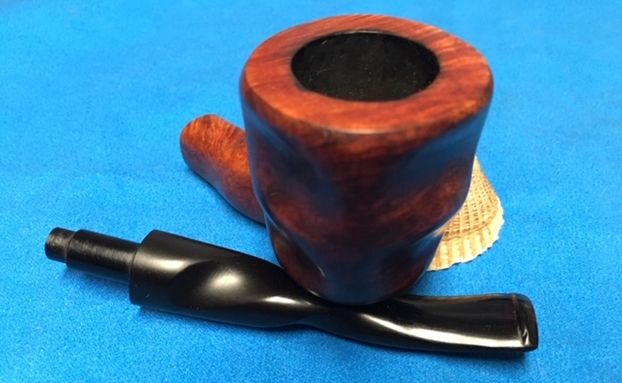
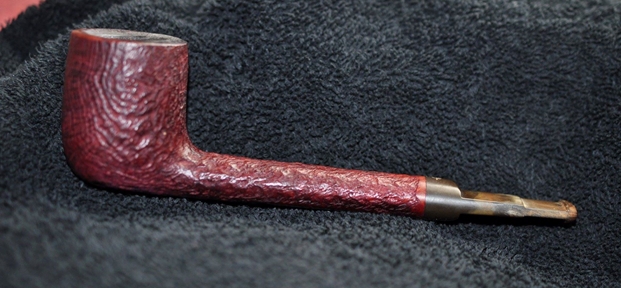
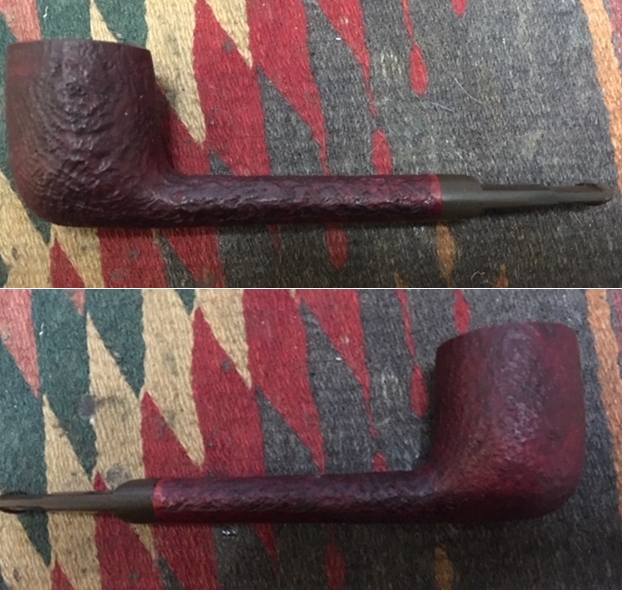
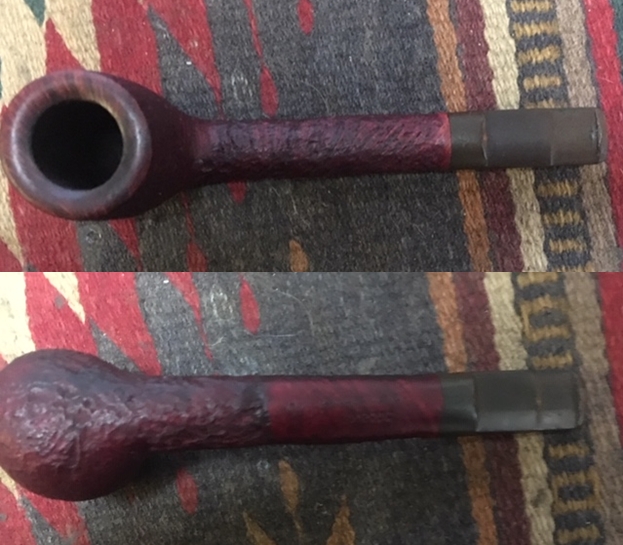
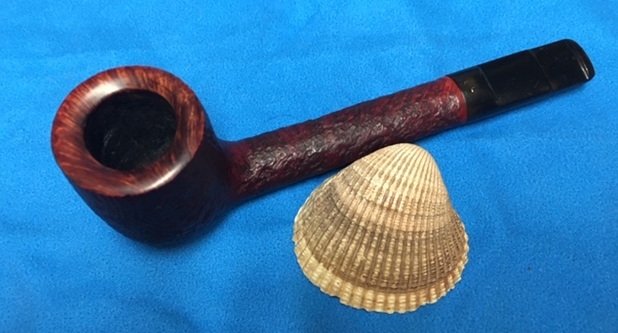
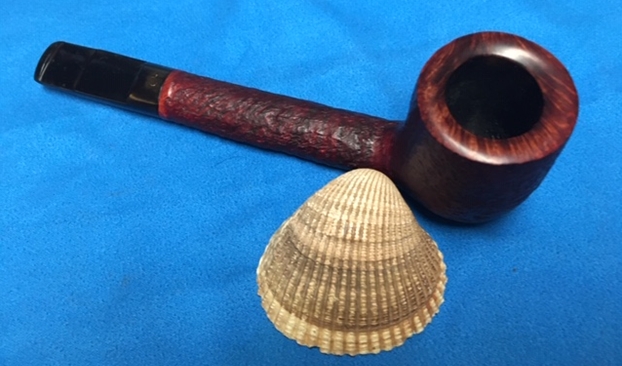
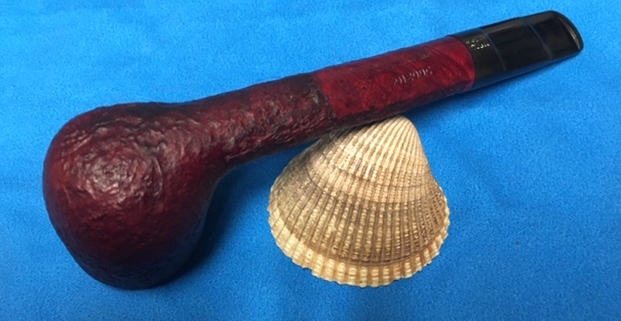
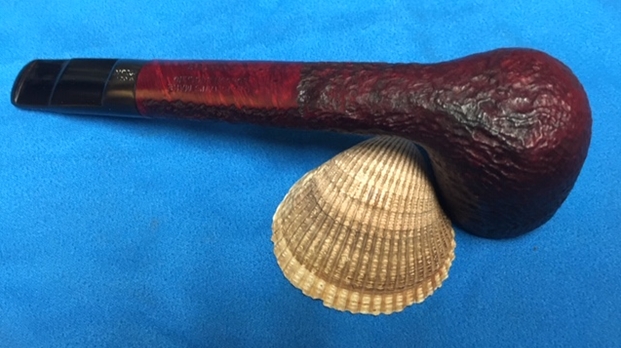
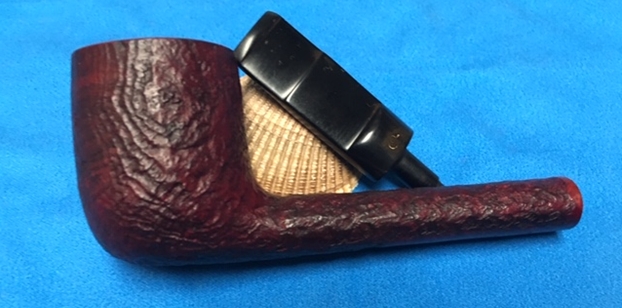
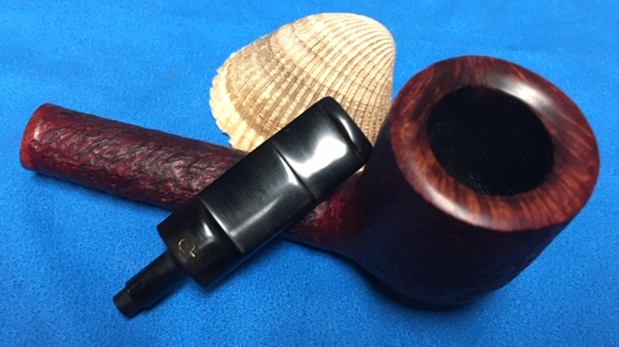
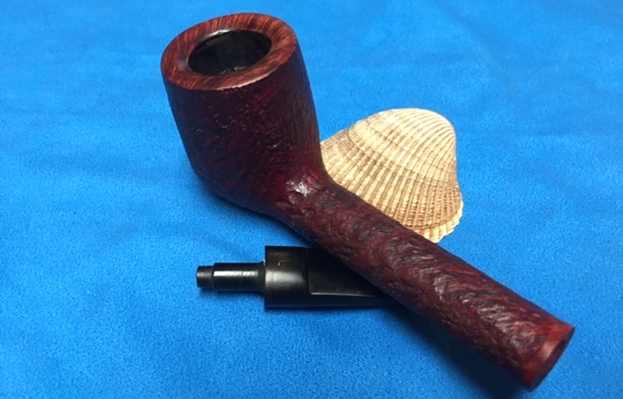
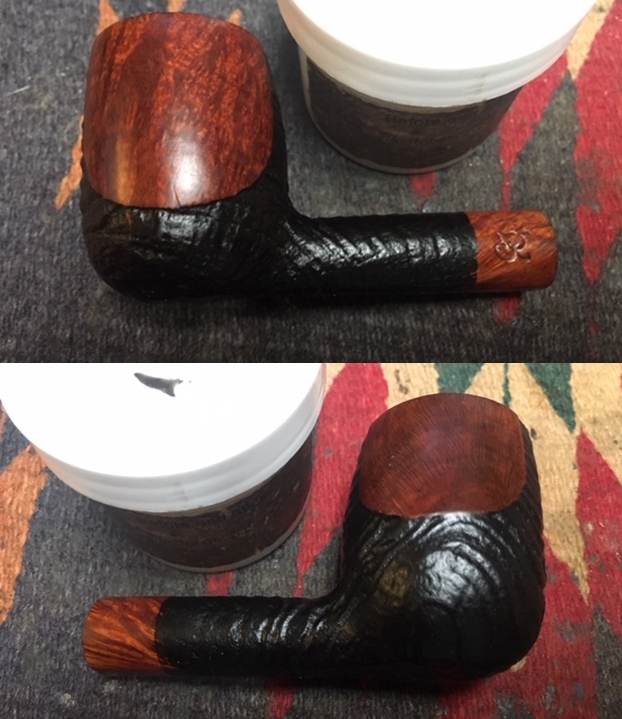
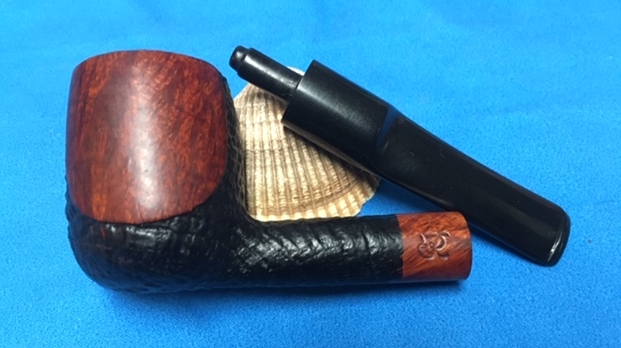
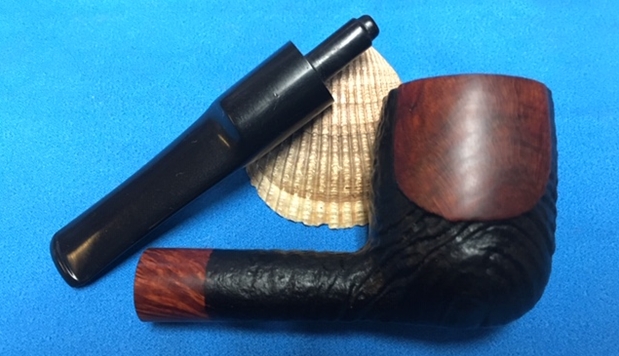
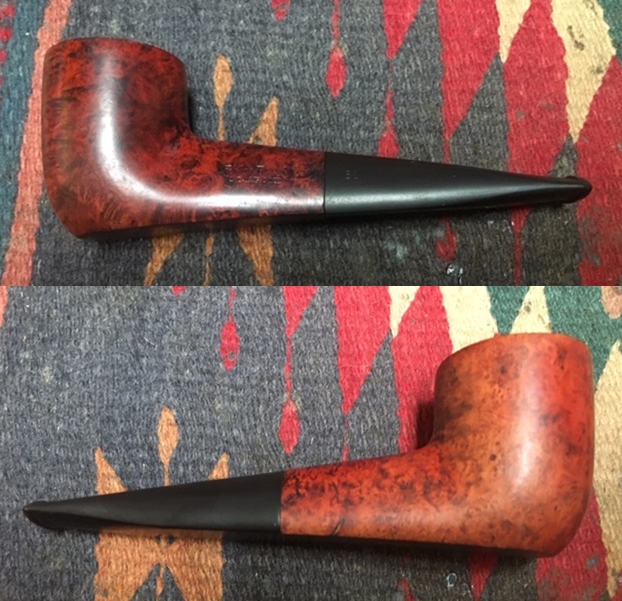
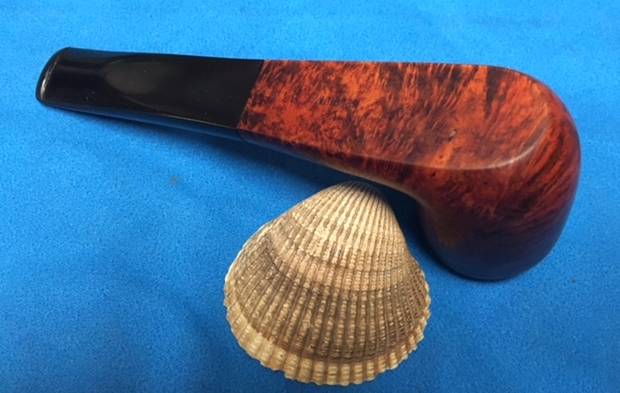
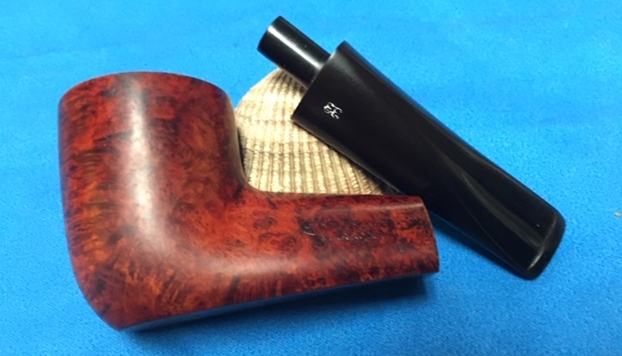
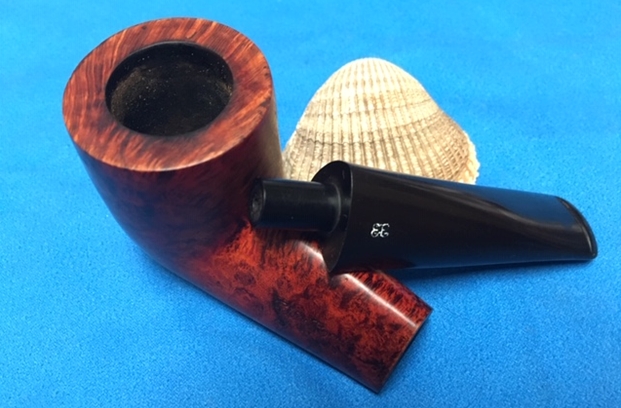
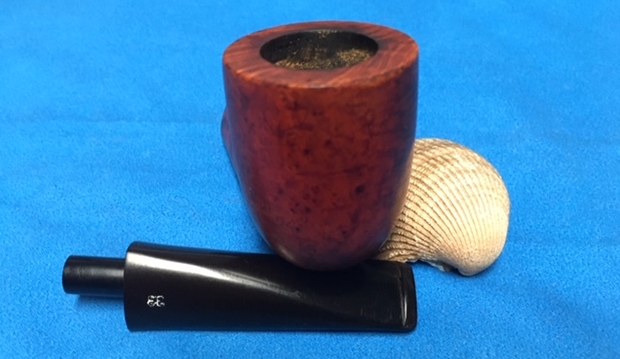
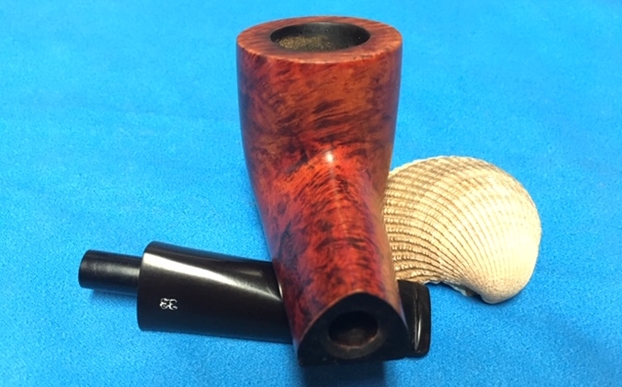
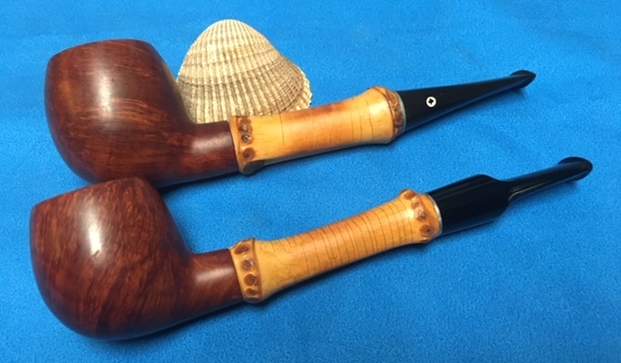
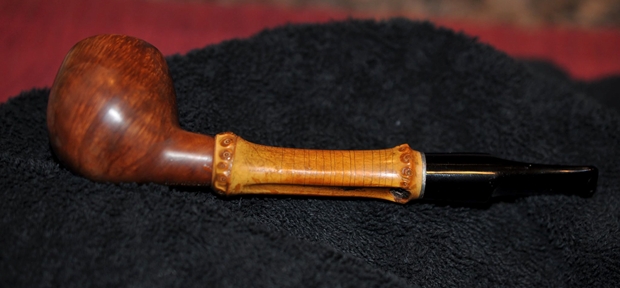
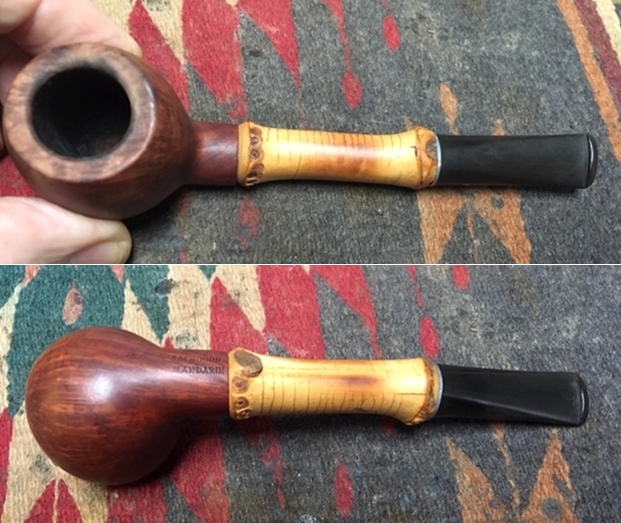
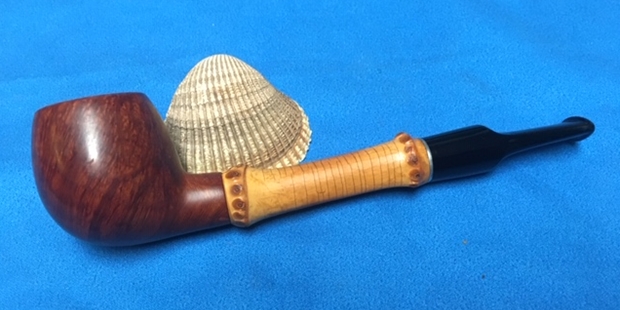
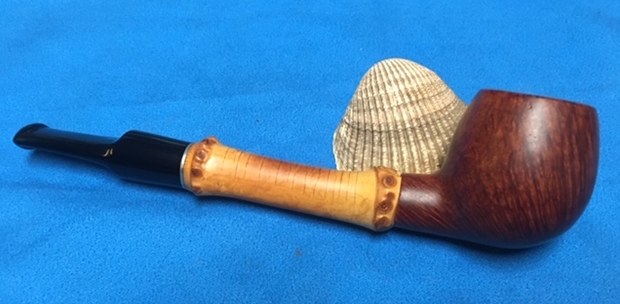
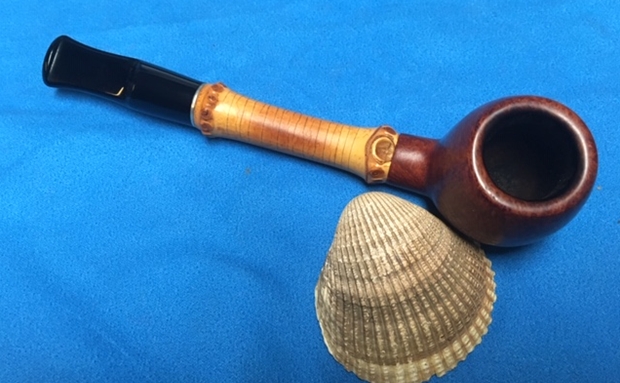
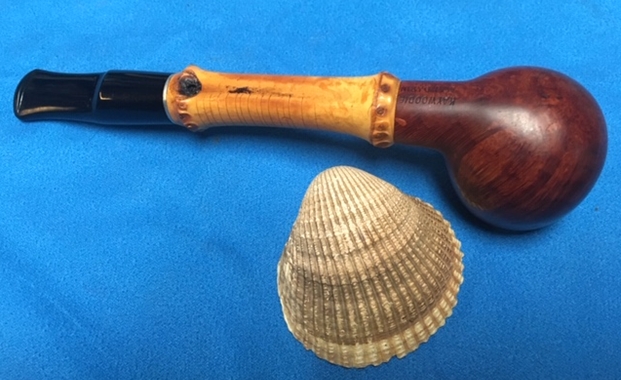
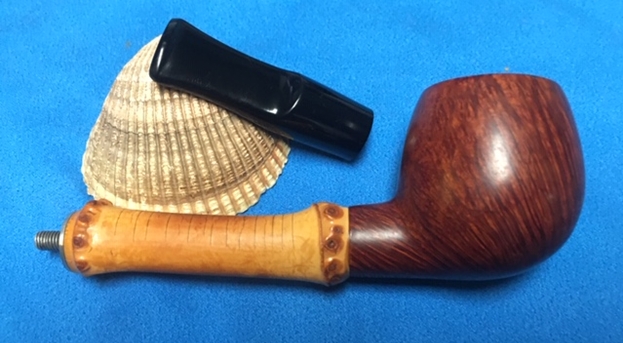
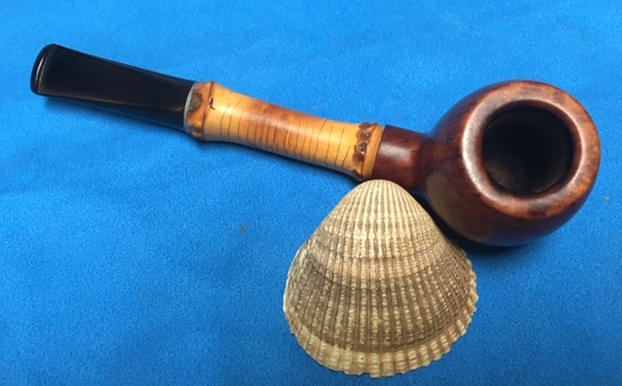
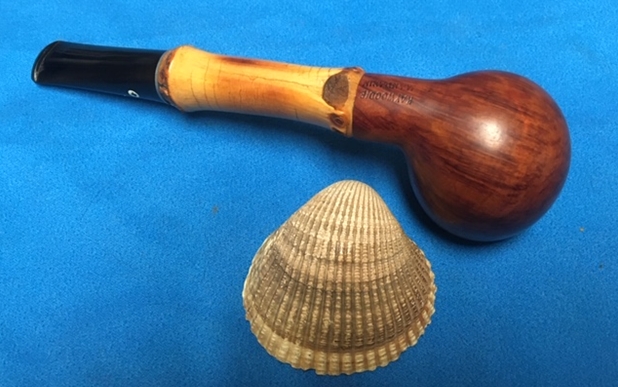
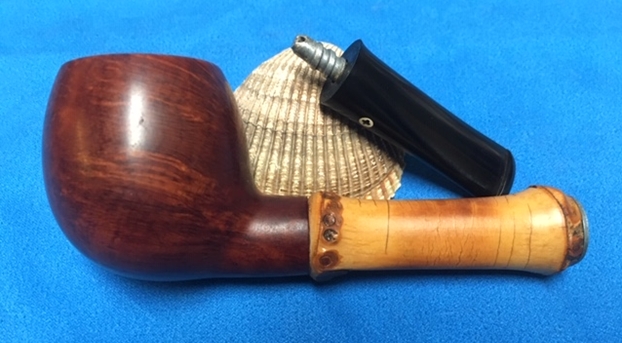
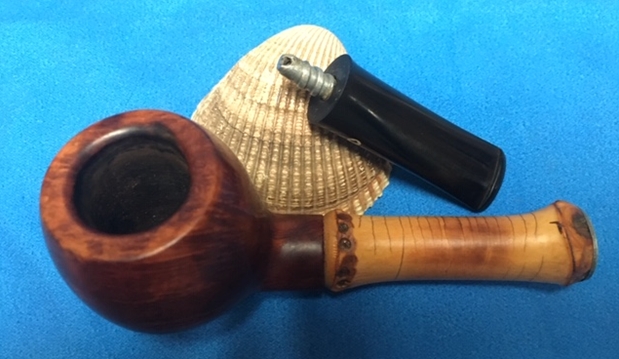
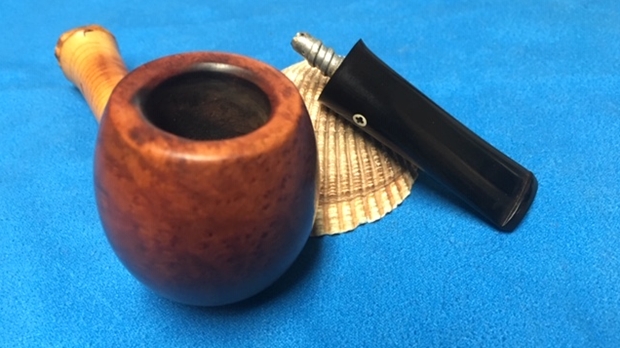
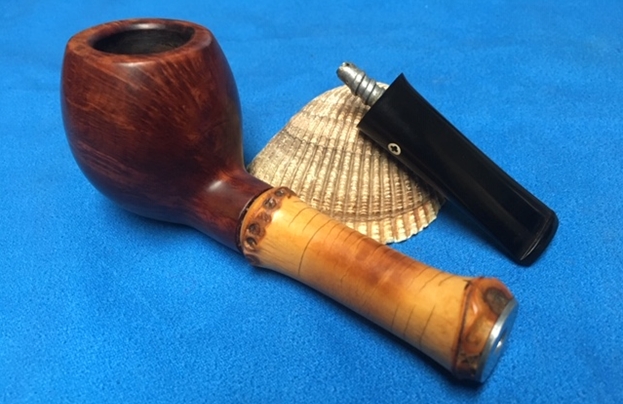
Here are pictures that got Stephen’s attention:

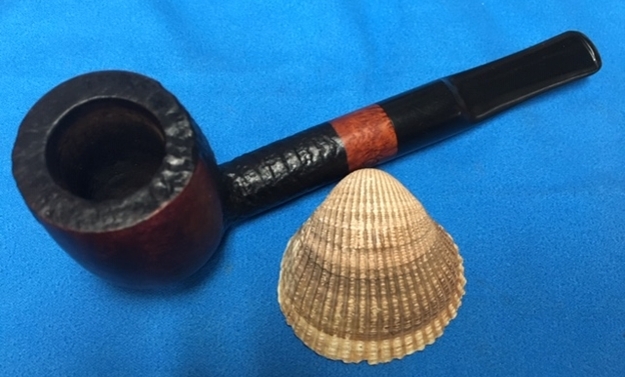
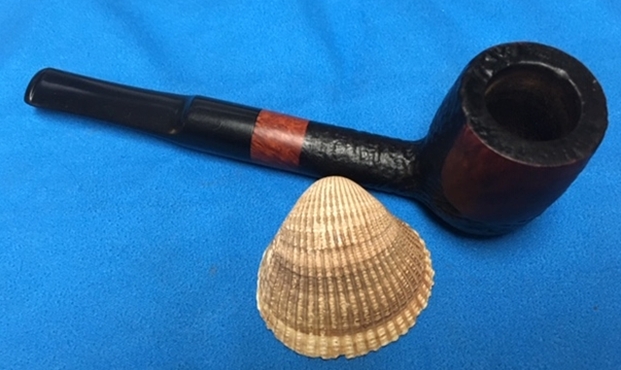
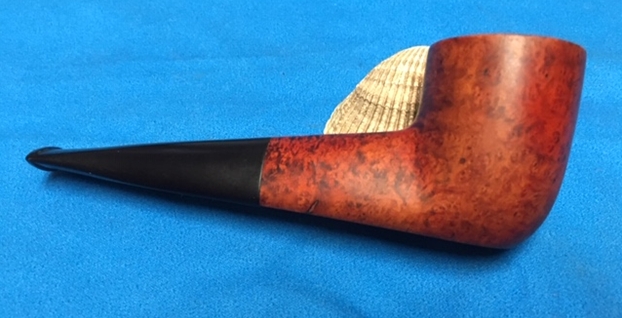
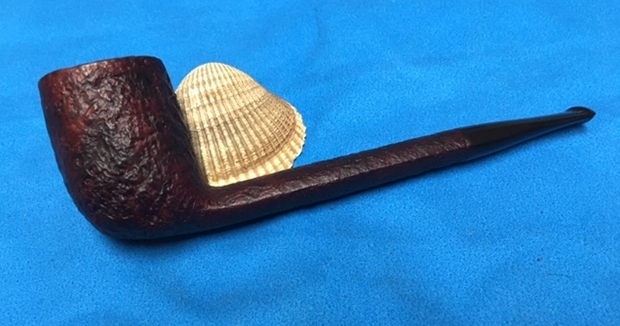
 The dimensions of the EPC Majestic are: Length: 4 1/8 inches, Height: 1 1/2 inches, Rim width: 1 inch, Chamber width: 5/8 inches, and Chamber depth: 1 3/8 inches. Sometimes measurements don’t translate as well to people and therefore I questioned Stephen. For demonstrable purposes to show this very nice looking ‘Pocket Pipe’ in the natural habitat, I take a palm picture – I’m not a big man and this pipe fits fully in my palm! My wife’s description was, ‘How cute!’
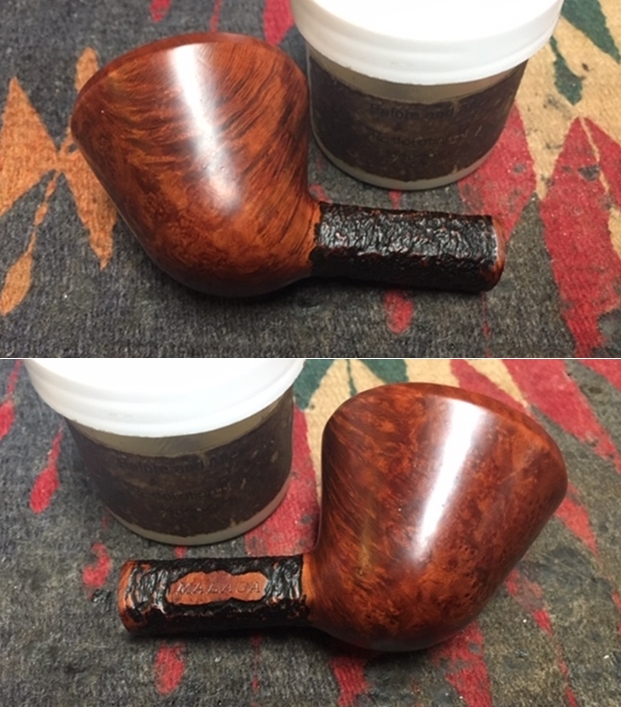
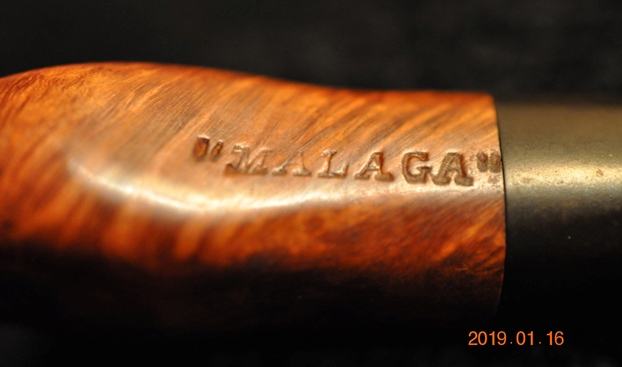
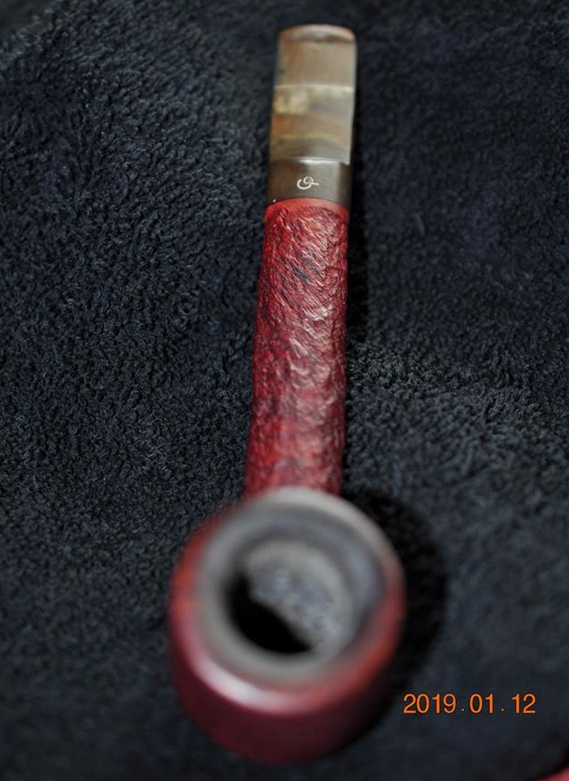
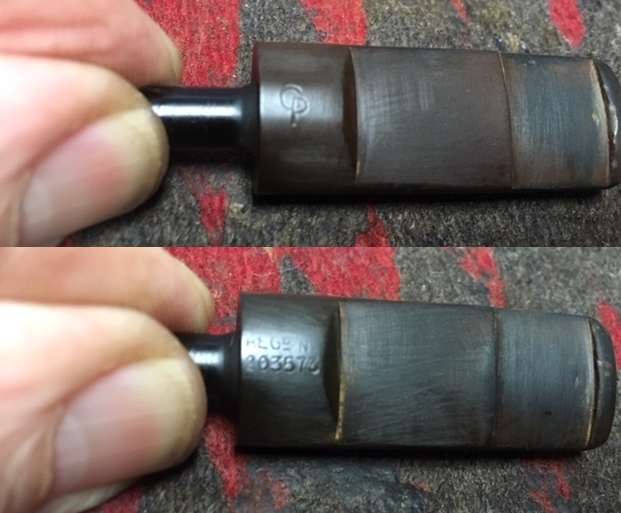
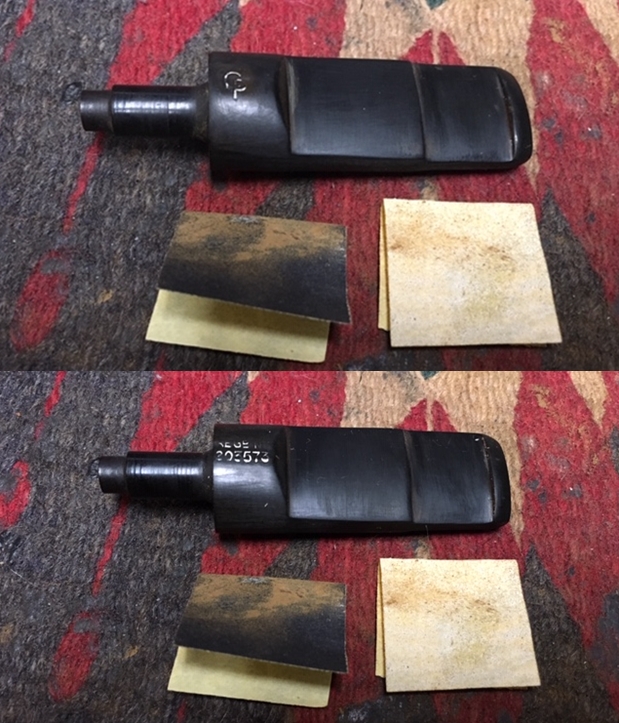
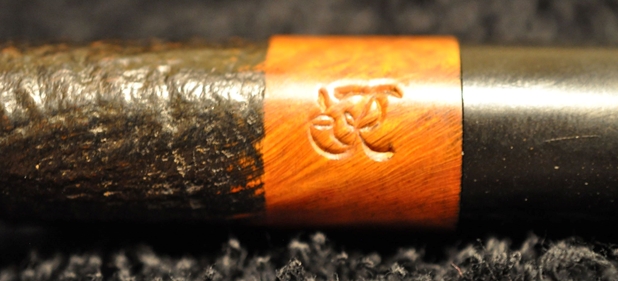
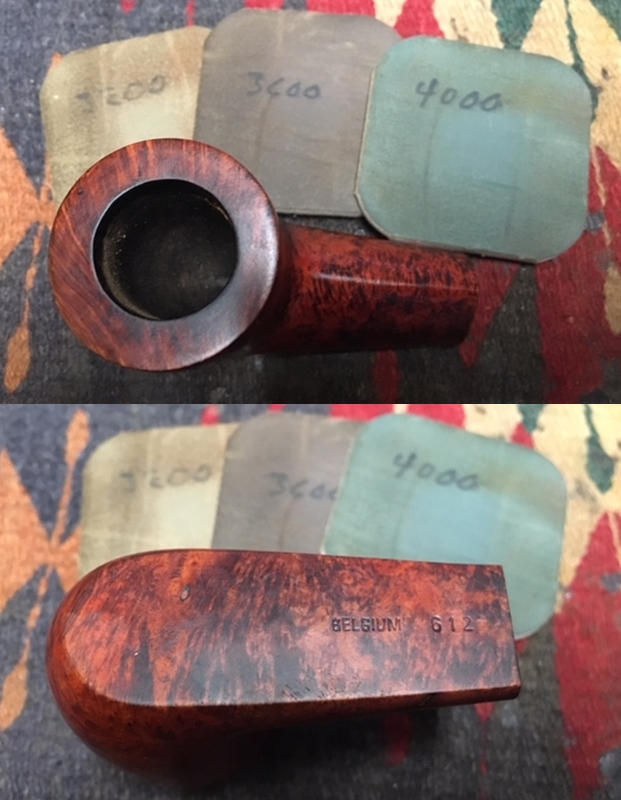
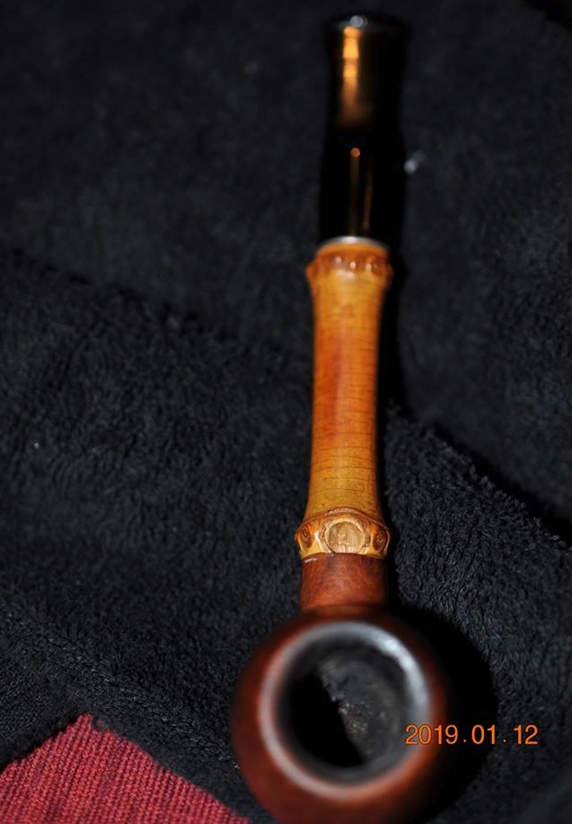
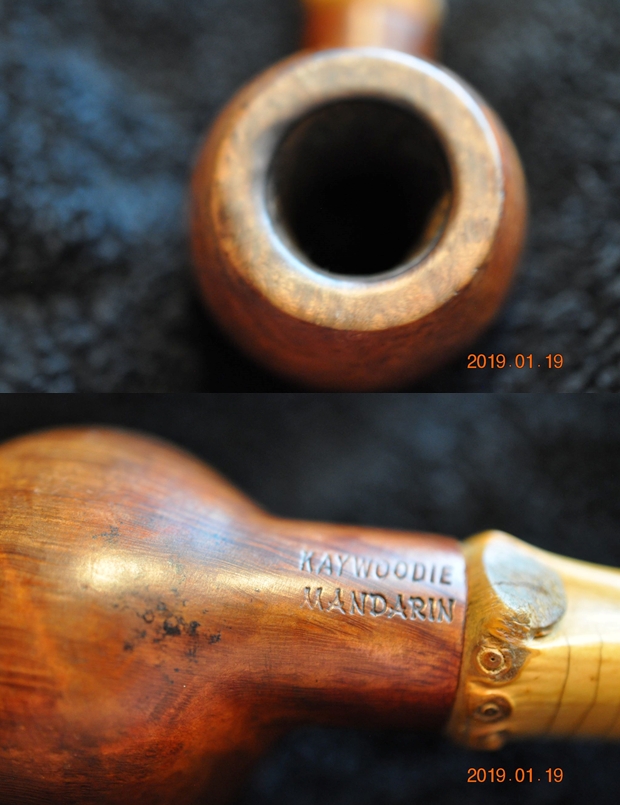
 The nomenclature is interesting. On the left shank flank is stamped 3 hearts and in each heart is stamped the letters, E – P – C. The hearted letters are over ‘MAJESTIC’. There are no other identifying marks that I can find on the pipe. My assumption at this point, as I mentioned above, is that this is a French made pipe, but this is only a guess at this point.
As I’ve experienced with other pipes from this Lot, EPC shows up nowhere that I see in my usual first places: Pipedia or Pipephil.eu. I also look in other groups and threads and I can find  nothing. Expanding the search, I put in ‘EPC Majestic’ in Google and came up with an interesting vein of information – a cigar company. E.P. Carrillo to be exact based in Miami, Florida. I read with interest the story of Ernesto Perez-Carrillo who was a well-known cigar manufacturer in Cuba and during the Fidel Castro era was forced to leave Cuba and settle in Miami with his family. After much struggle, was able to restart a cigar company which is very well-known today among cigar aficionados. Interestingly, the brand that won the 2018 Cigar of the Year Award rated the #1 cigar of 2018 by Cigar Aficionado was named, ‘Majestic’. Yet, what does this have to do with a nomenclature on the side of a pipe’s shank?
My mind started coming up with questions – Did this the E.P. Carrillo cigar company put its name on a pipe? Was the diminutive size of this pipe indicator of a promotional pipe of some sort? Would a pipe be used to promote cigars? The questions came even though they made absolutely no sense! Every pipe man and cigar man would answer, absolutely, not! My heart agrees 100% but my mind’s questions were not satisfied. So, as I’ve done many times before with surprising success, I went to the contact tab of the E.P. Carrillo website and sent an email to the info@epcarrillo.com address given. I have very little expectation that I will receive a response, especially with an email essentially asking if they ever used pipes to promote their cigars…. We’ll see!
Well, during the restoration, I received a very nice note back from Lissette Perez-Carrillo, the daughter of founder, Ernesto (pictured above with father), stating: Hi that’s very nice but we aren’t in the pipe business. Thanks for sharing. No one is surprised by her response!
I have one more lead that came after I posted  pictures in different Pipe smokers Face Book groups and Eduardo responded from Pipe Smokers of America suggesting that the EPC may be related to the Edinburgh Pipe Club. Feeling like I’m grasping at straws, I find the EPC web site (LINK) and it’s nicely done. I also find an information email and send off another inquiry. Does Scotland have a stake in the EPC Majestic?
Then, the breakthrough came. I had completed the restoration and was doing the  final edit of the write-up, when I remembered the link that Eduardo had posted in the FB group, Pipe Smokers of America. It was a link that I had seen before in my first look in Pipedia, but I missed an important clue. The link was a simple search result of ‘Majestic’ in Pipedia. Twenty pictures come up on the page, most of the pictures have pipes with a ‘Majestic’ nomenclature that belonged to other companies that didn’t help me. But I missed the clue in the very first picture of a very old company symbol. The 3 hearts with EPC.
The picture gave me the company, but at first glance, the company name given, ‘A. Pandevant & Roy’ offered no correlation to EPC. Pipedia nor Pipephil.eu had any references for a direct search of Pandevant & Roy. When I broadened the search on the internet, I hit pay dirt. The search took me to a Dutch site called, ‘PKN Society for Research of Historical Tobacco Pipes’ (link) which contained many old catalogues dating back to the 1800s when ‘Clay’ was king in the pipe world. Of special interest to me were two catalogues of the ‘A. Pandevant & Roy’ company. The catalogues were in French, so it took some time to work through the text – Google Translate was employed!
The catalogues were in PDF format and the pages turned easily to scan the product lines of pipes and other paraphernalia for sale. I first looked through the first catalogue dated 1922 to 1923. I perused the pages and still was not able to put together the nomenclature – EPC, though I was seeing EPC in several places. I went back to the front cover of the catalogue and looked again to see if I could piece together EPC. I think the cover is interesting and has a classic feel, so I included it below. As I study the cover again, I noticed that there were actually two Pandevants represented – the more prominent was “A.”, but just above “A.”, the less prominent, “E. Pandevant” was present. I’m theorizing that “A.” is still living and currently (1920s) is running the company with “Roy”. However, the founder of the company was the father, “E.”, probably now deceased. The theory sounds good, but not only good, but plausible!
This gives me a credible EP, but what about ‘C’? Then I see it – ‘Charenton’ near Paris. I did a quick search of the French district of Charenton and discovered that there are many places in France bearing this name and the ‘Pres Paris’ – near Paris, would be a marker regarding which Charenton was the former base of operations for the A. Pandevant & Roy Co. The cover also says that “E.P.C.”, “La Savoyarde”, “MAJESTIC”, “La Parisienne” and “E.P.” were registered trademarks of the company. At the top of the cover, it states that this ‘House was founded in 1884’ – when clay pipes were the predominant medium of pipe smoking. Curious to see, I used Google Maps to search the address, 29, Avenue du Marché, Charenton (Seine), Paris, and discover that the street and address have passed into history.  The pages in the catalogue were interesting to peruse. I discover that horn is a predominant stem material displayed in the catalogue, though there are vulcanite varieties, there are just not as many. Of course, I look for the petite EPC Majestic and I do find pipes very close to the Petite. Notice on the page included below – the stems are all depicted as horn. Depicted also is the brass shank cap receiving each of the horn stems. It would seem the pipe on my table belongs to this era of production of the A Pandevant & Roy Co.
  I did find these this example below of a petite – the nomenclature isn’t exactly the same with the three hearts, but I wanted to include this just in case the petite on my table has one of these names, ‘My Little Jeannette’ or ‘My Little Mariette’! I love it.
 The later catalogue dated 1937-39, gives some additional information. The first thing I see is that the address has changed – the same street number, 29, but the street was changed to, 29, Avenue Anatole-France Charenton Seine. This time Google Maps found the address – it is now an apartment complex on a residential street. With this later catalogue, pipes took more of a backseat to the other paraphernalia – not starting until page 24! The assortment was less than the former catalogue and few pipes that could possibly resemble the EPC Majestic in my possession. 1939, the date of this catalogue, is the last entry I could find anywhere for the A. Pandevant & Roy Co. What was happening in 1939 could be a clue to understanding the fate of the A. Pandevant & Roy Co. From ‘The People in History’:
1939 Germany and the Soviet Union attacked Poland and Britain, France, India, Australia and new Zealand declared war on Germany on September 3rd , the United States decided to remain neutral but did begin rearming for war , which helped end the great depression. The United States also hosted the Worlds Fair in New York early in the year. Also, after speaking to the physicist Albert Einstein president Roosevelt initiated the Americas A-Bomb programme.
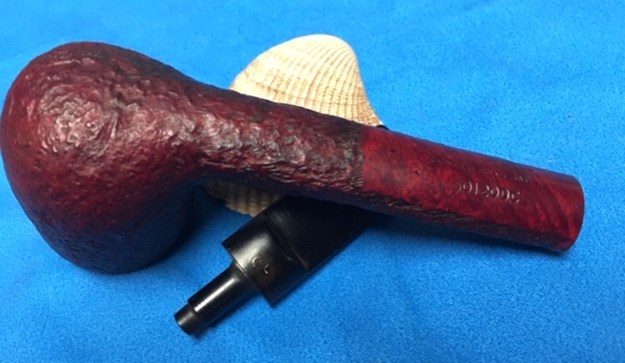
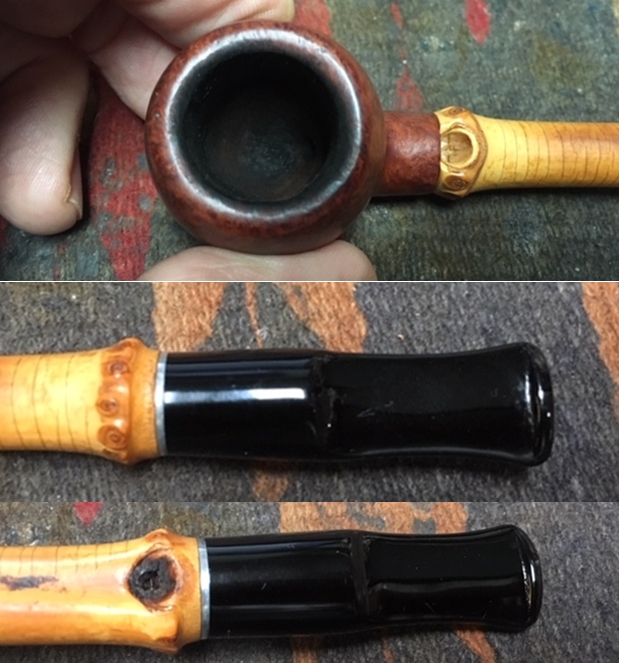
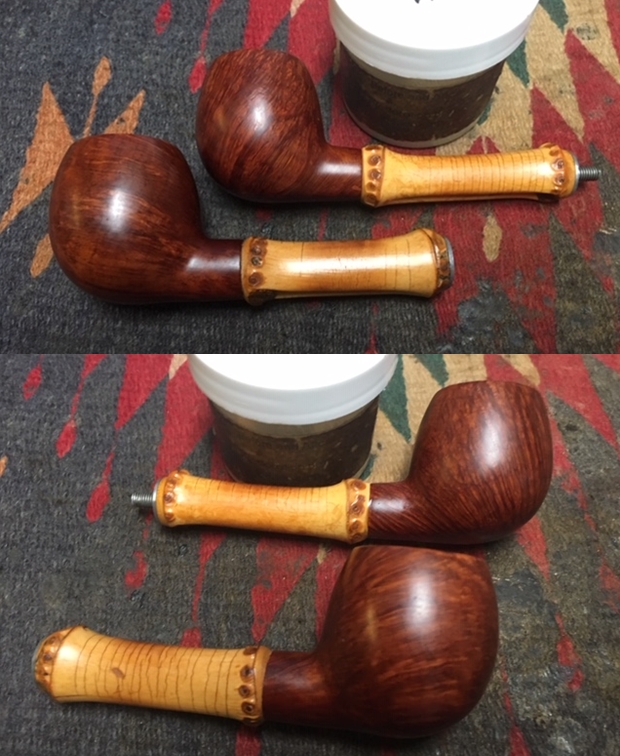
Perhaps, one of the tolls of World War II was also the French company in Paris that produced the EPC Majestic now on my table. My research will stop here and with a greater sense of the history and heritage of this EPC Majestic Petite Horn Stem Billiard before me, I look more closely at the pipe itself, I discover something very interesting that I haven’t seen before and is reminiscent of a Gourd Calabash. I’m looking more closely at the horn stem and that it was fashioned with what appears to be a horn tenon as well. I don’t know if its threaded or glued in place, but it is solid, and I’m not interested in forcing the tenon to discover if it will be moved!  I then look at the shank and wonder if the brass band/shank cap will come off. I give a little twist of pressure and it comes off easily. What I see next surprises me. I see the briar shank ringing something else inserted into to the mortise. A lining of some sort. I discover then that it appears to be cork. Cork seats the horn tenon in the mortise much like cork seats the Meerschaum bowl on a Gourd Calabash. I have never seen this before, but it seems to work quite well. I will condition the cork with a little petroleum jelly later. The challenge becomes protecting the cork while I’m cleaning the rest of the stummel internals. I’m not sure that I want the cork saturated with alcohol – I’m not sure that will be the best thing.
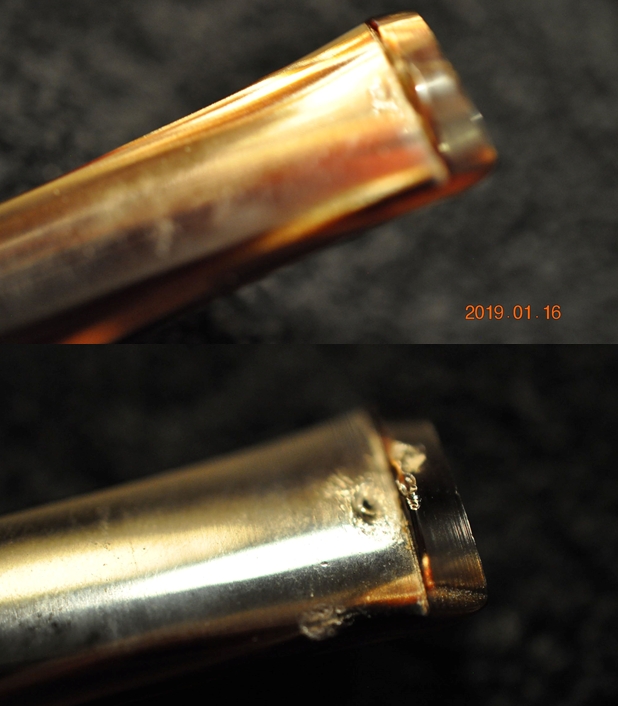
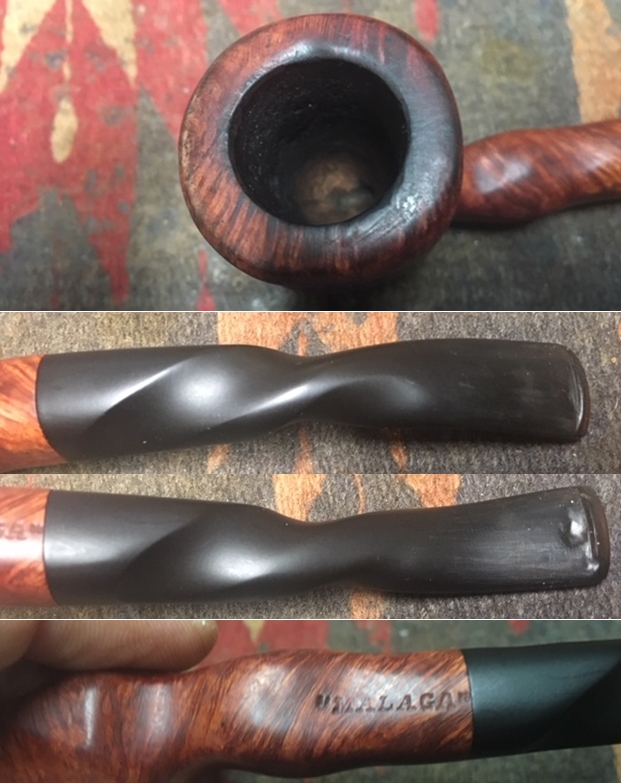
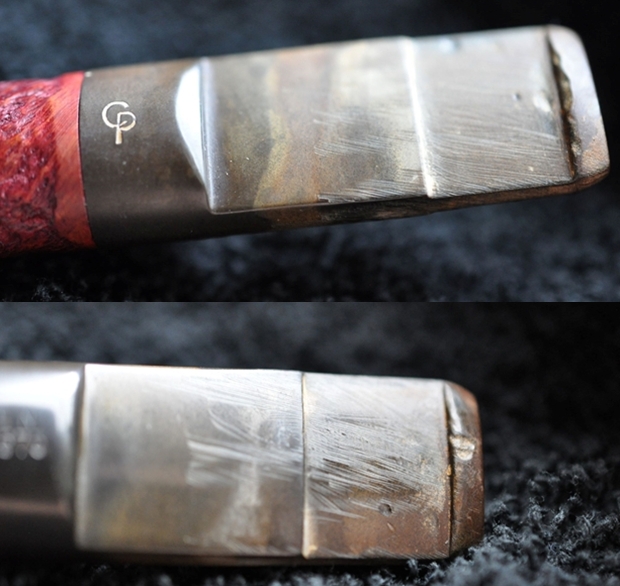
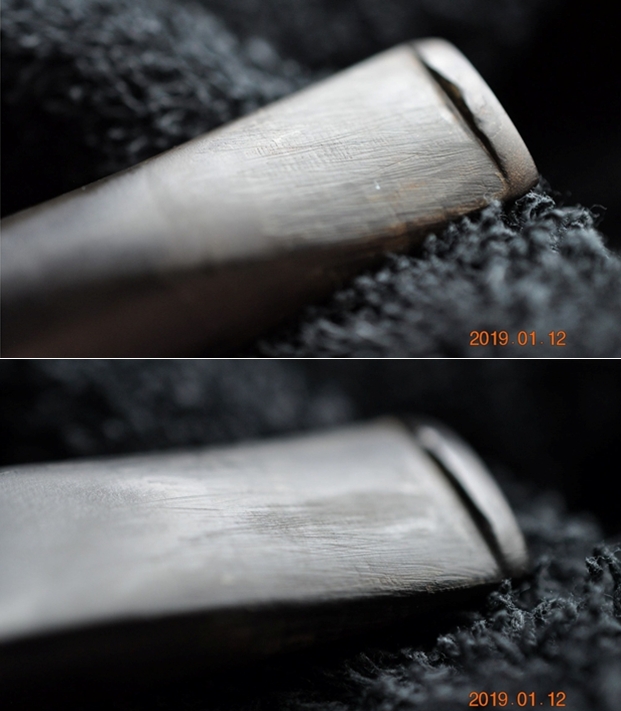
 The bit of the horn stem appears to be chewed some. On both the upper and lower bit there are bite compressions and chatter.
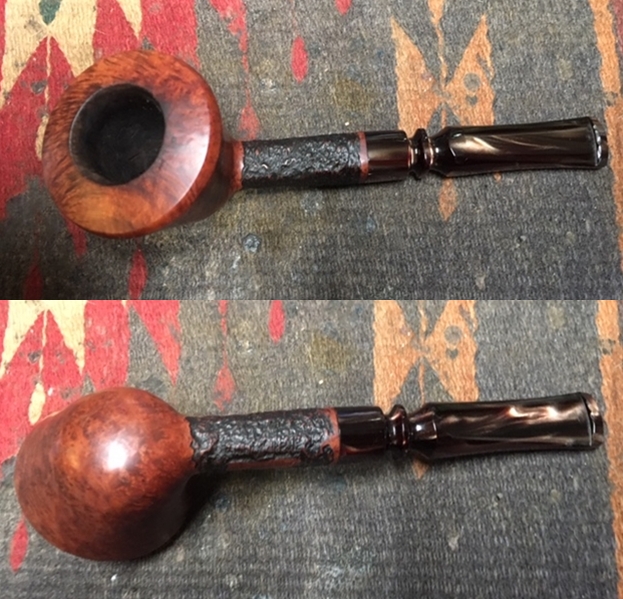
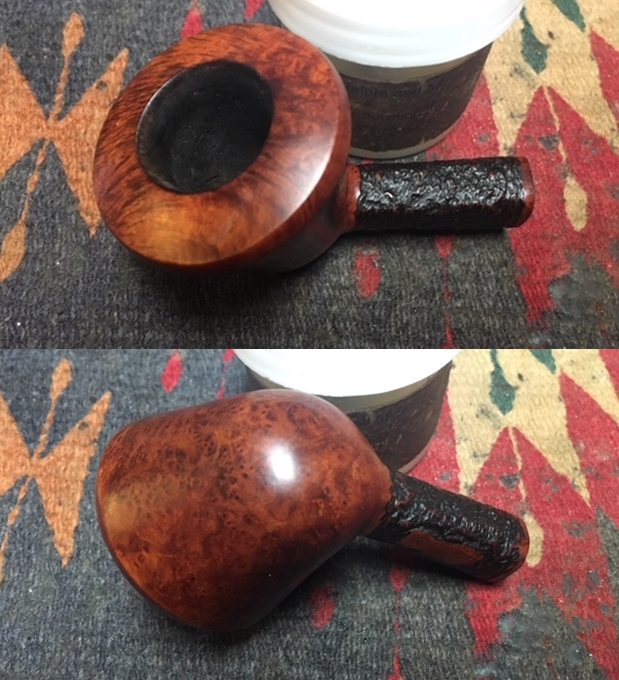
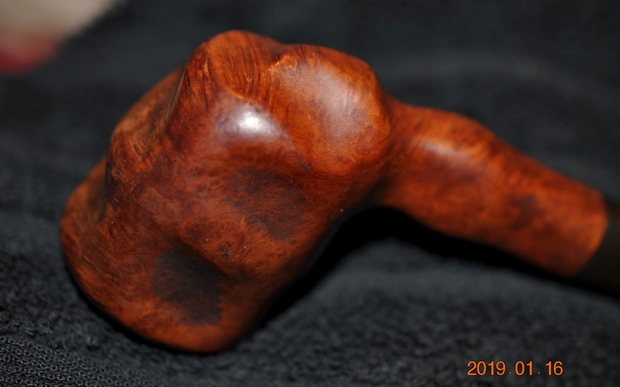
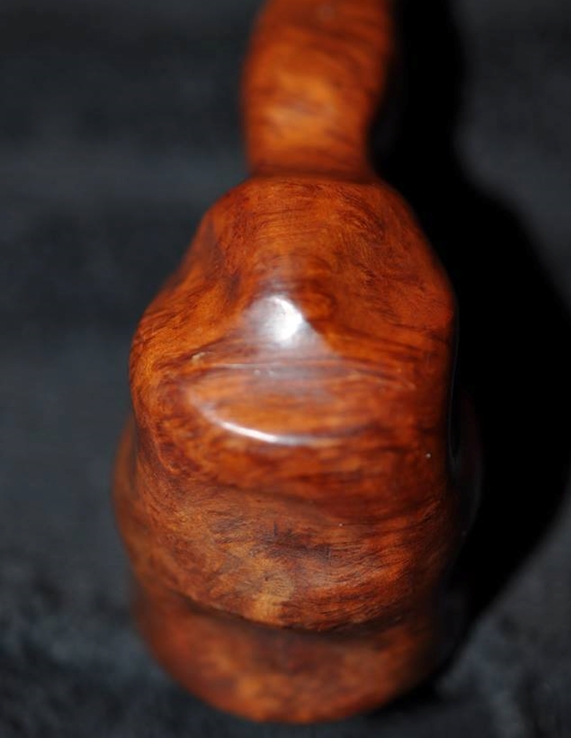
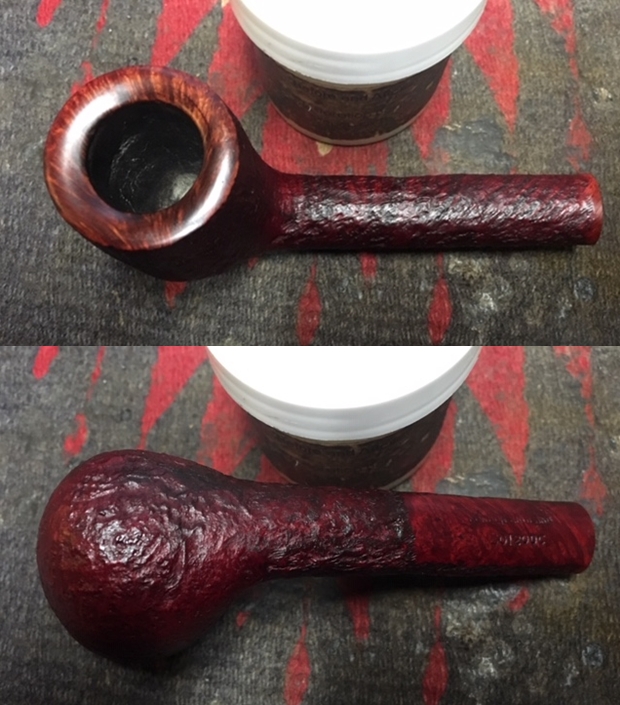
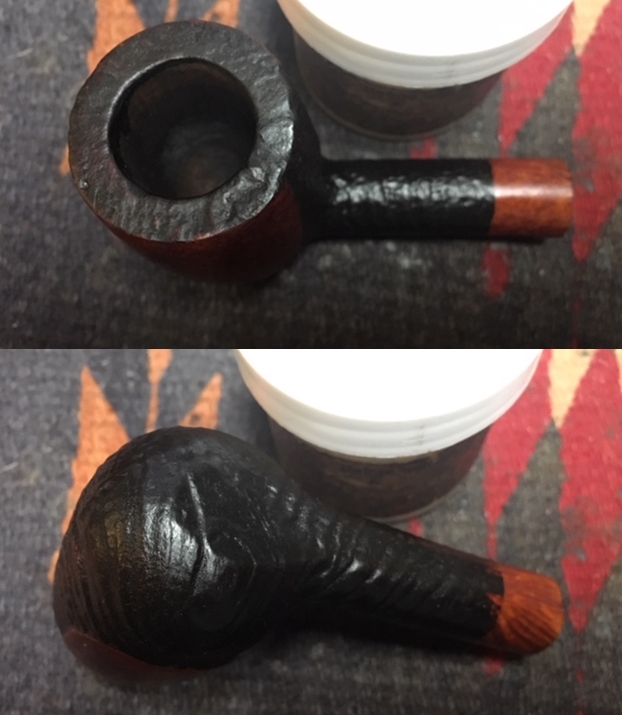
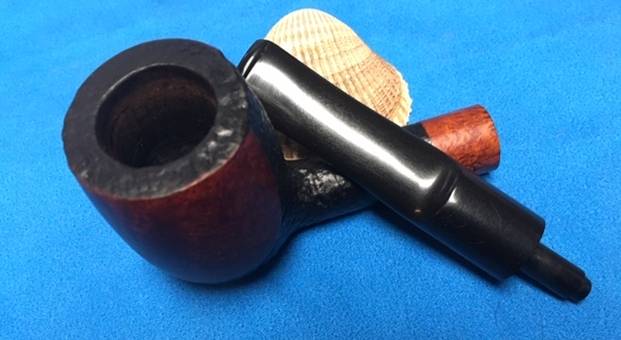
 The EPC Majestic bowl has seen better days. There are four large fills on the heel of the stummel that will need addressing. The finish on the bowl has seen better days. There is a ‘water mark’ line running perfectly straight, bisecting the stummel. It appears that the stummel was half submerged in some liquid for a time – enough time to discolor the stummel.

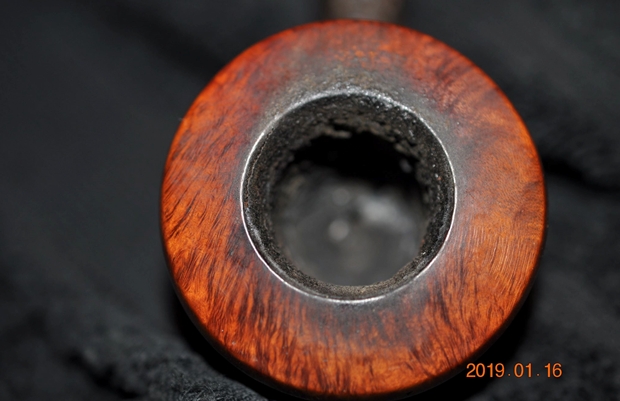
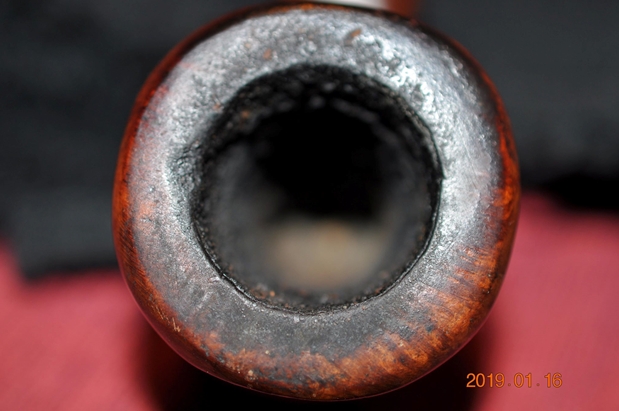
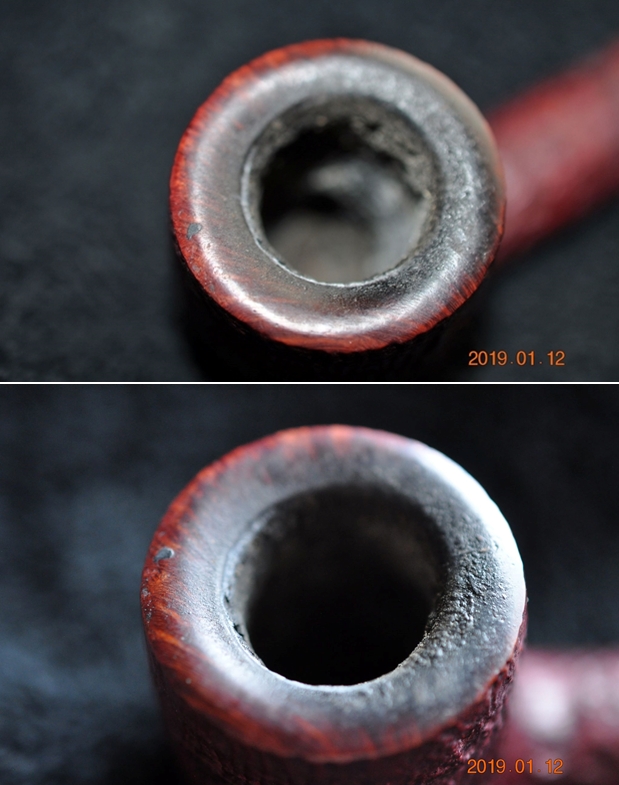
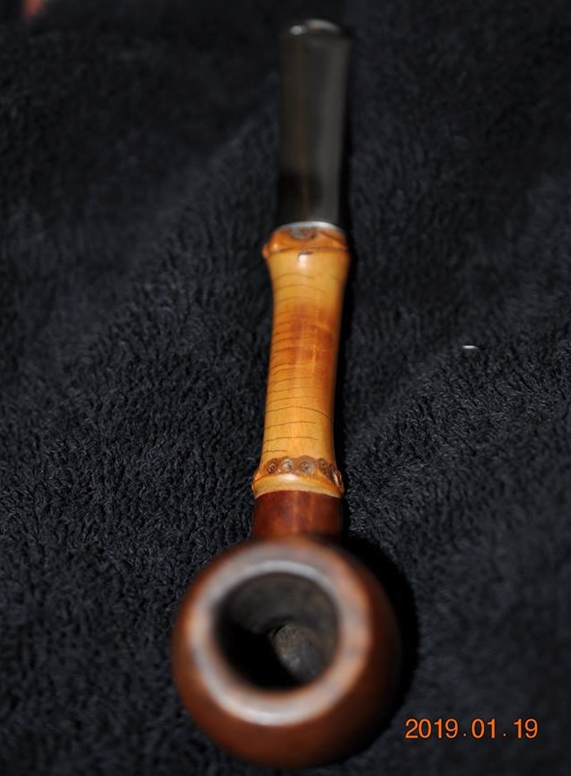
 The rim is nicked and has some lava flow needing to be cleaned. The chamber has light cake but needs freshening. The general condition of the pipe is banged up and dirty.
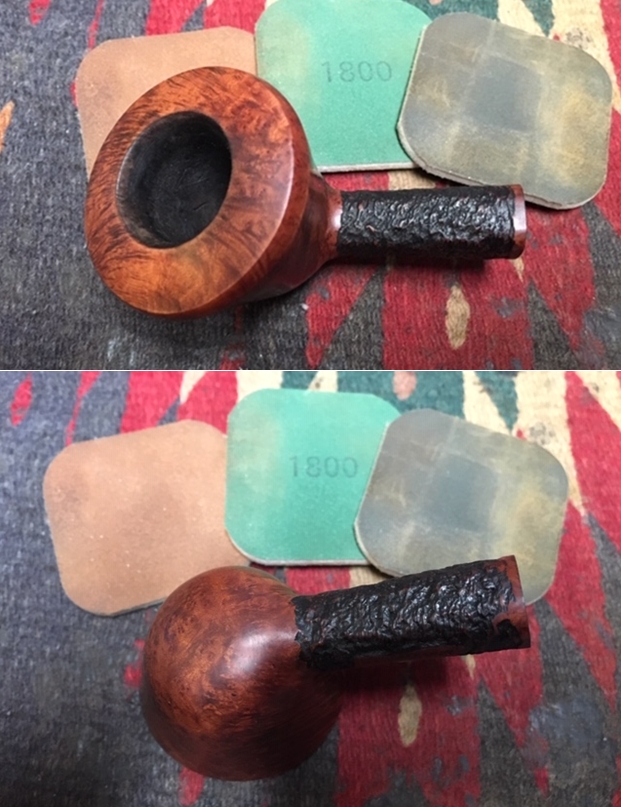
 I begin the clean up of the stummel by reaming the chamber using the Pipnet Reaming kit. I use only the smallest blade head and it is too large to reach to the chamber floor. I switch to using the Savinelli Fitsall tool to continue the job and it does well scraping and cleaning the chamber walls down to the floor. I then sand the chamber using 240 grade paper wrapped around a Sharpie Pen to give leverage. This cleans the chamber further of carbon and then I wipe the chamber with a cotton pad wetted with isopropyl 95% to remove the carbon dust. After looking at the cleaned chamber, I detect no problems with heating – fissures, etc. Moving on!
 To clean the external briar surface, I use undiluted Murphy’s Oil soap and a cotton pad. I’m anxious to see how or if the stummel cleans up! It does clean up, but the finish is very thin. The rim cleans up nicely with the help of a brass wire brush except for one area on the right-hand side from lighting the tobacco. After scrubbing the stummel, I rinse it with cool tap water careful to keep water out of the internals. With the stummel wet, I use a sharp dental probe to test the large fills on the heel of the stummel. As I suspected, they are soft, and I remove them with the probe and clean the holes to make sure all the old fill was gone. The pictures show the progress.

 Next, I work on cleaning the internals of the stummel. Using cotton buds and pipe cleaners dipped in isopropyl 95% I go to work. With the cork lining in the mortise, I reach beyond it as much as possible to clean. The drilling of the small stummel has the primary larger mortise drilling first, then a more angled airway drilling from the mortise to the draft hole. A trap of sorts is created and the end of the mortise because of the drilling. It cleans up well. With the cork lining I will not be utilizing a kosher salt and alcohol soak, so I press through cleaning with buds and pipe cleaners. I also use a dental spatula to scrape in the mortise, but things are clean. Well, I finish the cleaning and toss the evidence before taking a picture! Oh well, moving on!
Next, I look more closely at the stummel. I refill the holes now using a briar dust and CA glue putty mixture. I first wipe the stummel with alcohol to clean the area. I then put a small amount of briar dust on an index card and mix CA glue with it gradually until it thickens to a molasses-like thickness. Then I use a tooth pick to trowel the putty to the holes and fill them. After tamping the patches, I set the stummel aside for a time to allow the briar dust putty to cure.
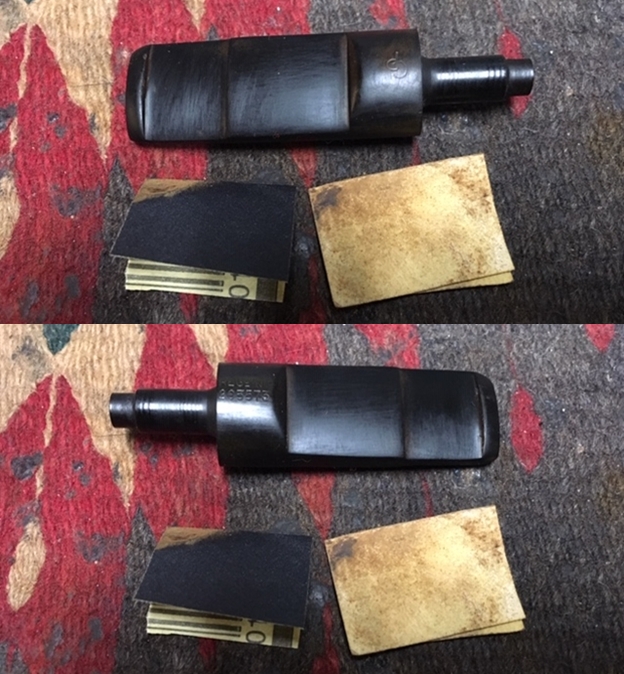
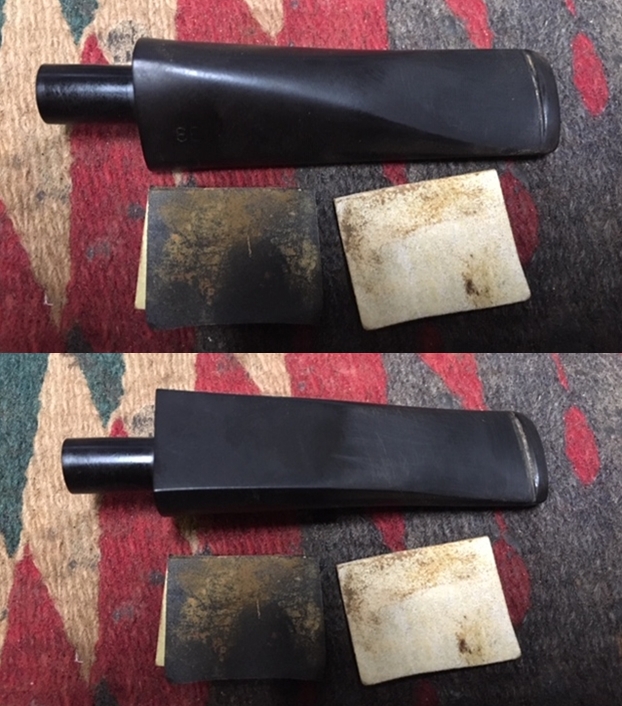
 With the stummel on the sidelines, I start work on the bent horn stem. I first clean it with Murphy’s Oil soap and a bristled tooth brush to rid the porous horn surface of grime. After I scrub it well, I rinse it off with water to rinse the soap. It looks much better.

 Then I clean the internal airway with a few pipe cleaners wetted with isopropyl 95%. It didn’t take too much effort.
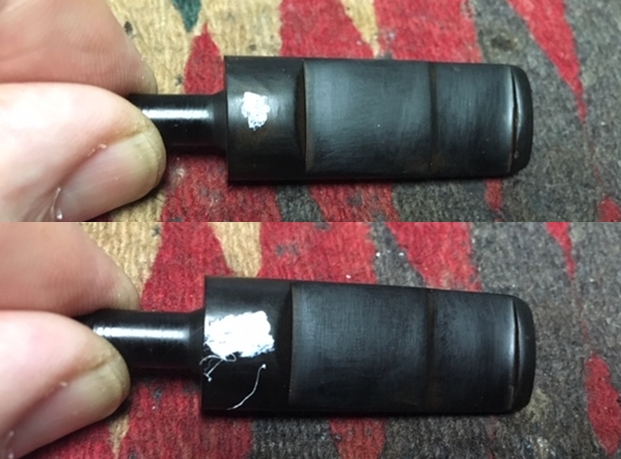
 There is tooth chatter on the upper and lower bit. I also see some bite compressions on the lower. I sand the area with 240 grit paper.
 After sanding the upper and lower bit with 240 grit paper, there remains 2 small compressions on the bit and one on the button lip. The lower has major bites that need filling.
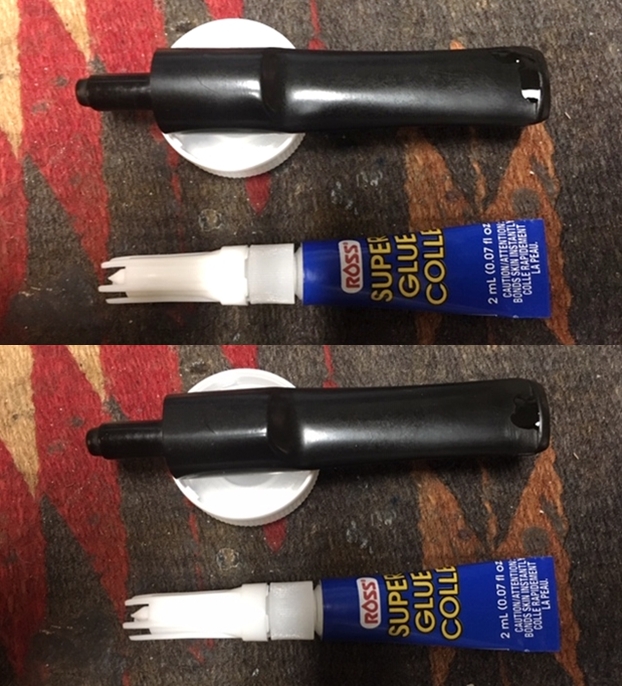
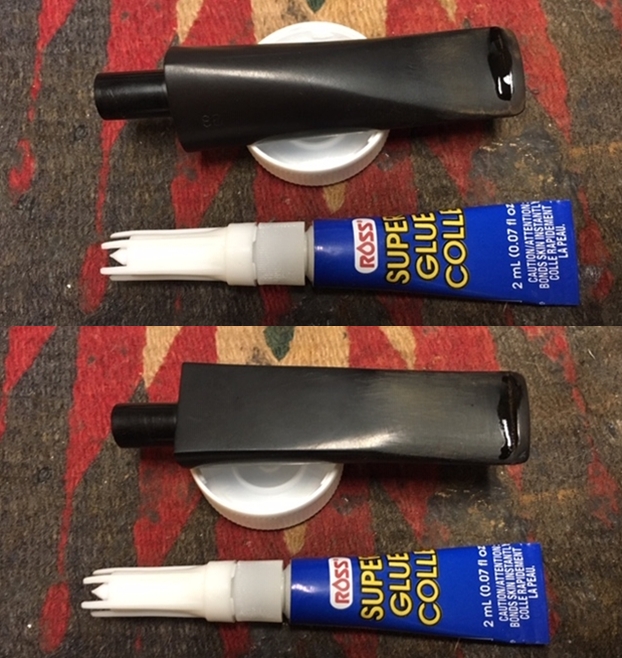
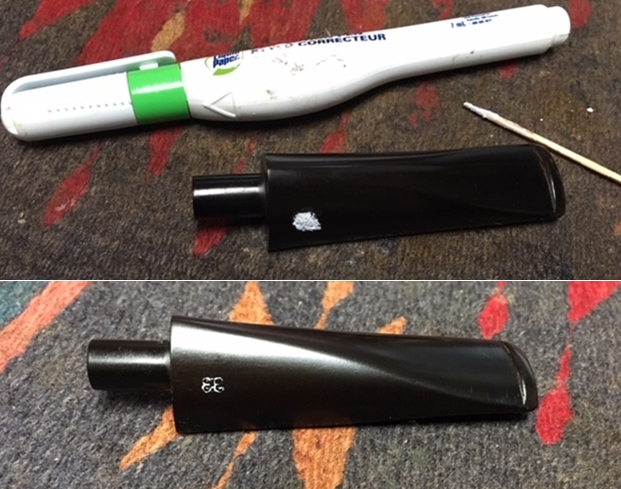
  I purchased an amber CA glue last time I was in the US and this is the first opportunity to use it. I apply drops to the upper bit in the 3 places and on the lower. I’m hopeful that the amber CA glue will result in a blended patch.
 With the stem patches curing, I turn back to the stummel and the briar putty fills have cured. I file the patches down with a flat needle file close to the briar surface. I’m careful to stay over the patch as I file to avoid scratching the adjoining briar.
 Then, switching to 240 grade paper, I sand the patches down to the briar surface.
 I condition the cork lining in the mortise and to do this, I swab some petroleum jelly over it using a cotton bud. This will moisten the cork keeping it from drying out.
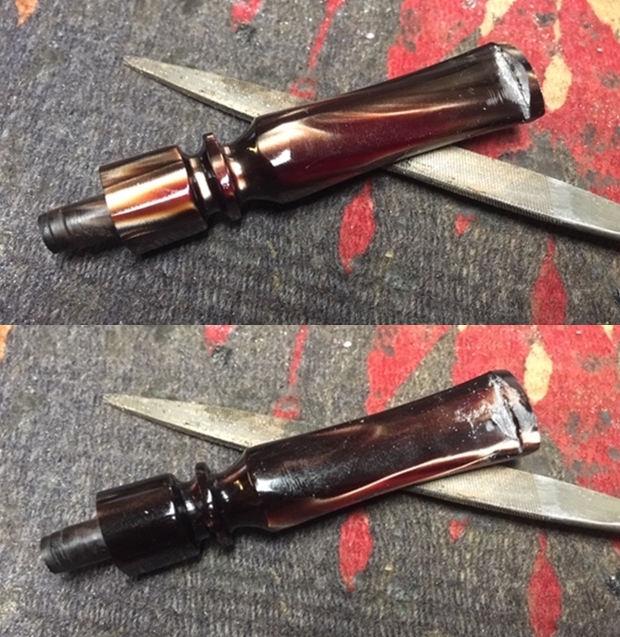
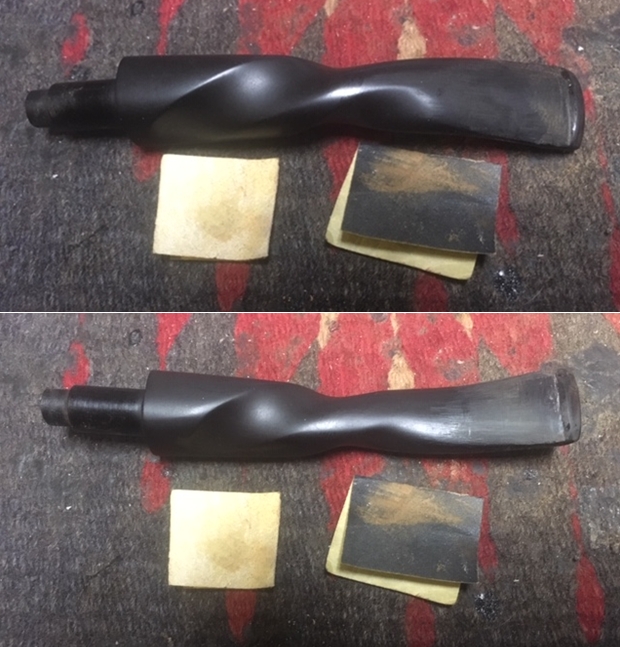
 The Amber CA glue used to patch the horn stem has cured and I use a flat needle file and 240 grit sanding paper to work on the patches. The smaller patches on the upper bit are dispatched easily with 240 grade paper. On the lower repair, I first use the flat needle file to shape the button and reduce the patch. I then finish it with 240 grit paper.

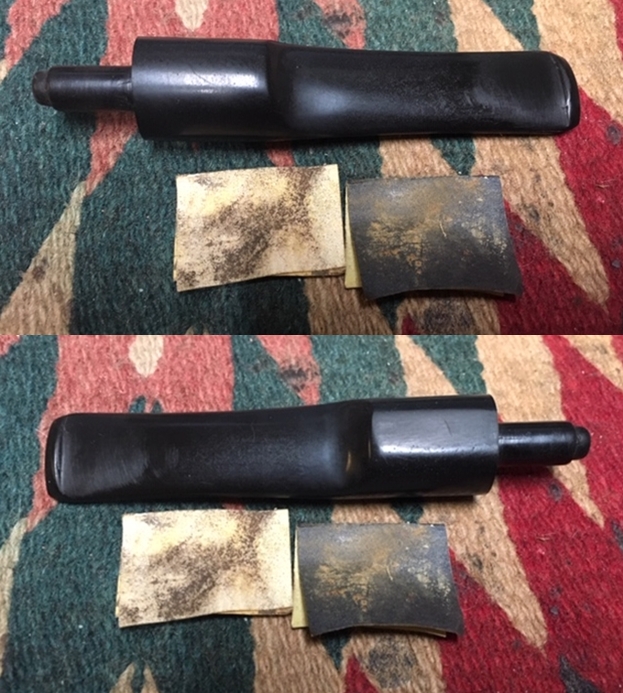
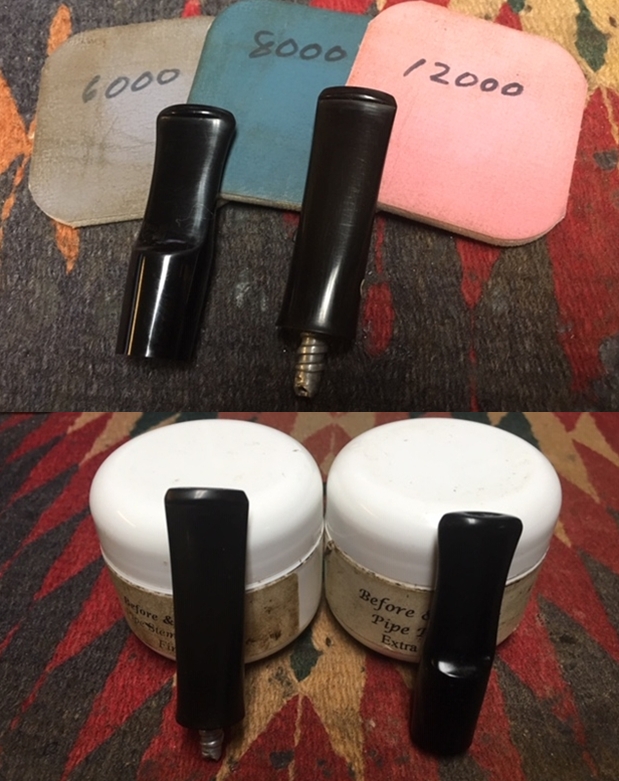
 Next, I wet sand the horn stem using 600 grade paper.
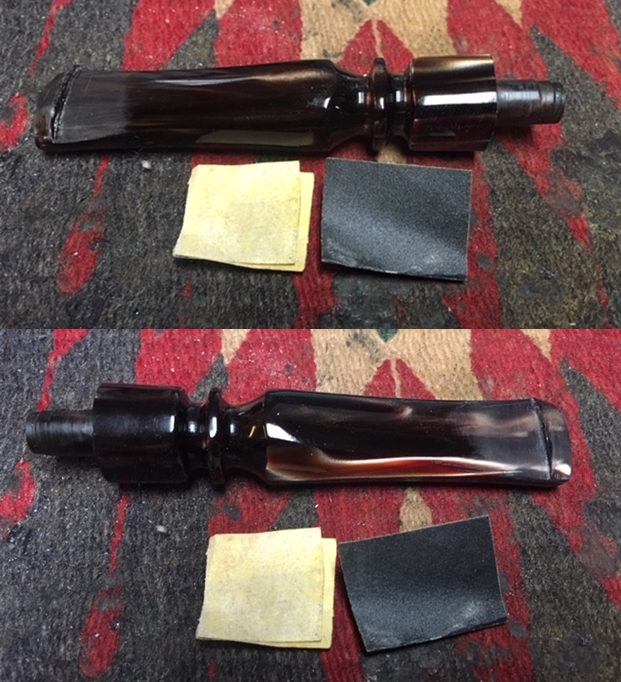
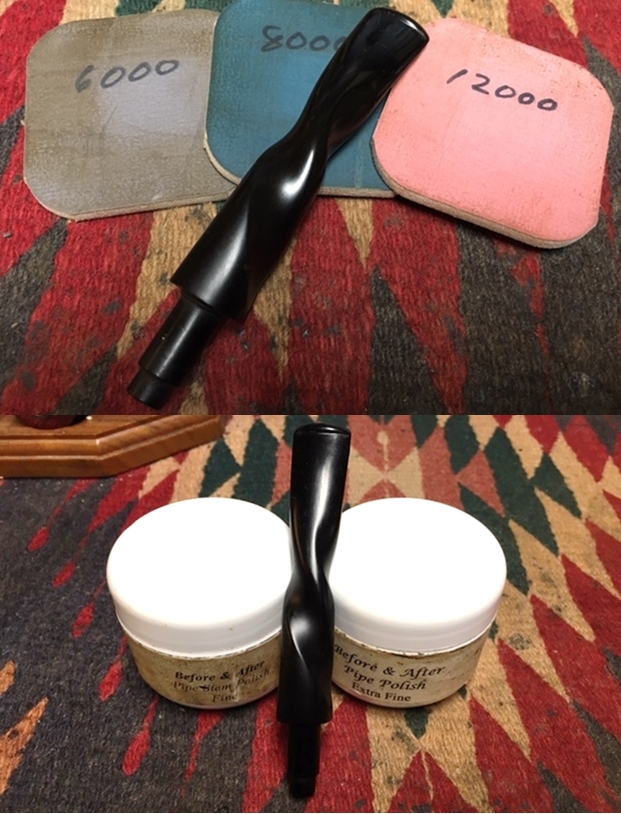
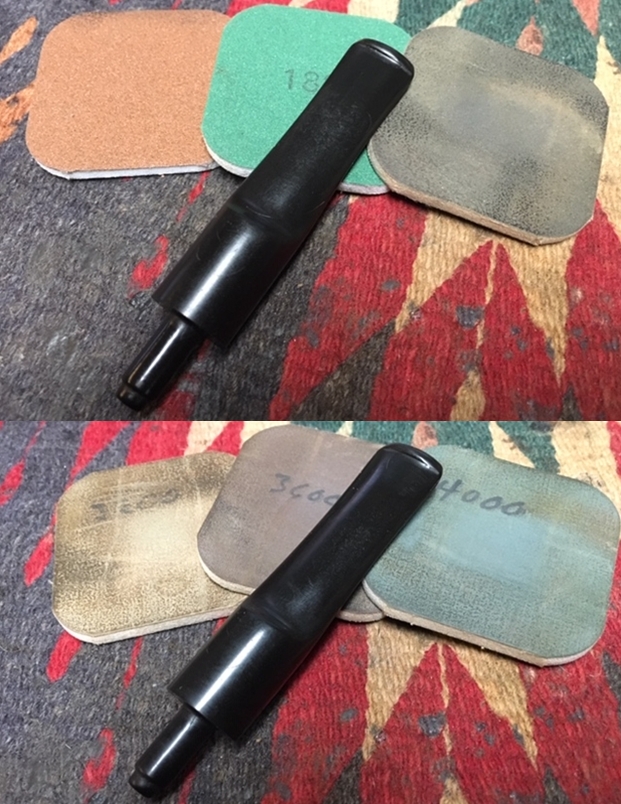
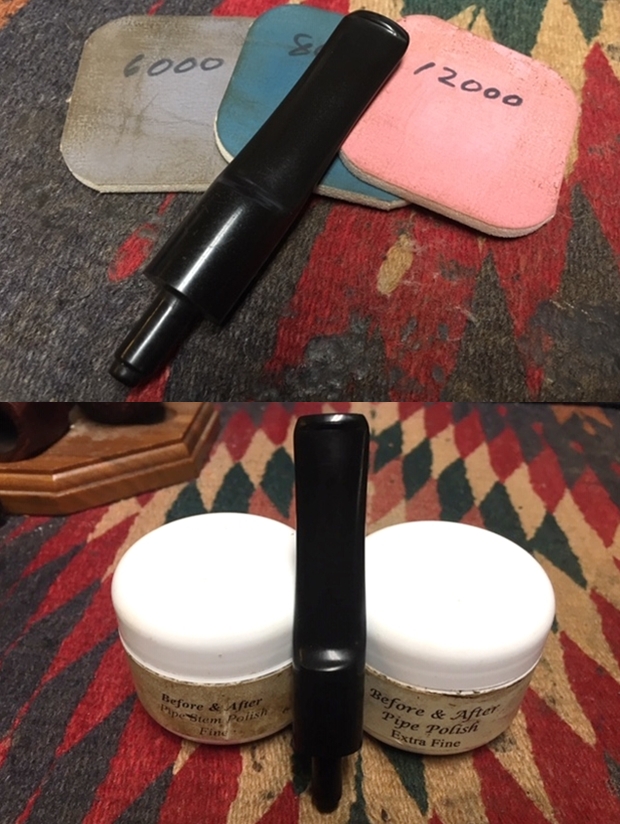
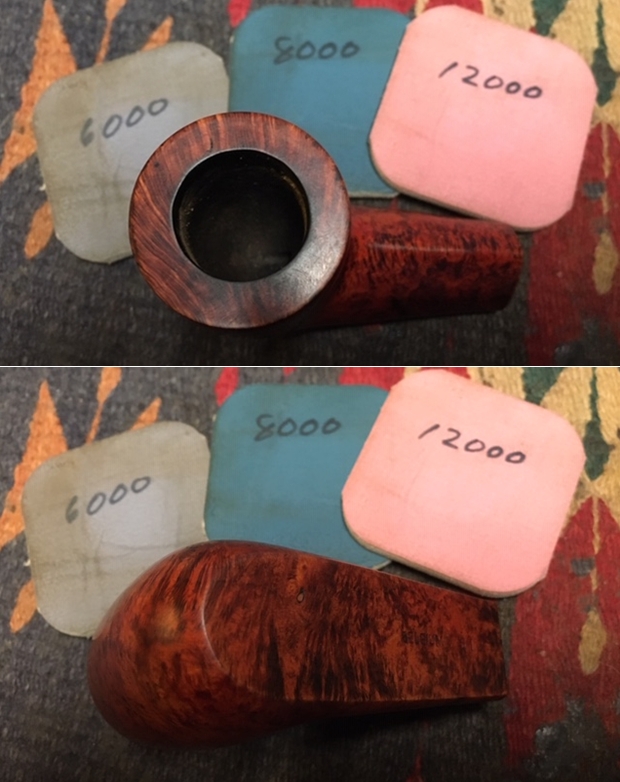
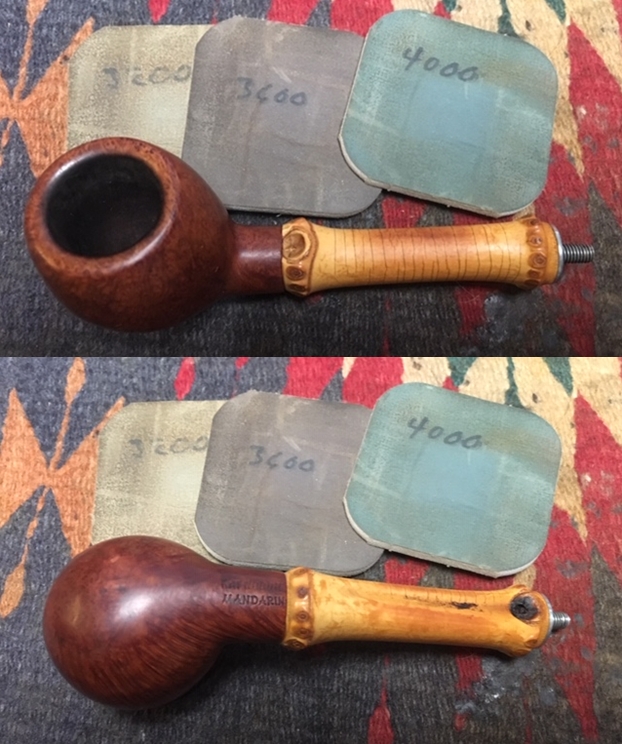
 Straight away, I then apply micromesh from 1500 to 12000. I first wet sand using pads 1500 to 2400 and then dry sand with pads 3200 to 4000 and 6000 to 12000. I apply a coat of Obsidian Oil after each set of three pads – the horn drinks up the oil and it looks great. I put the stem aside to absorb the oil and dry.
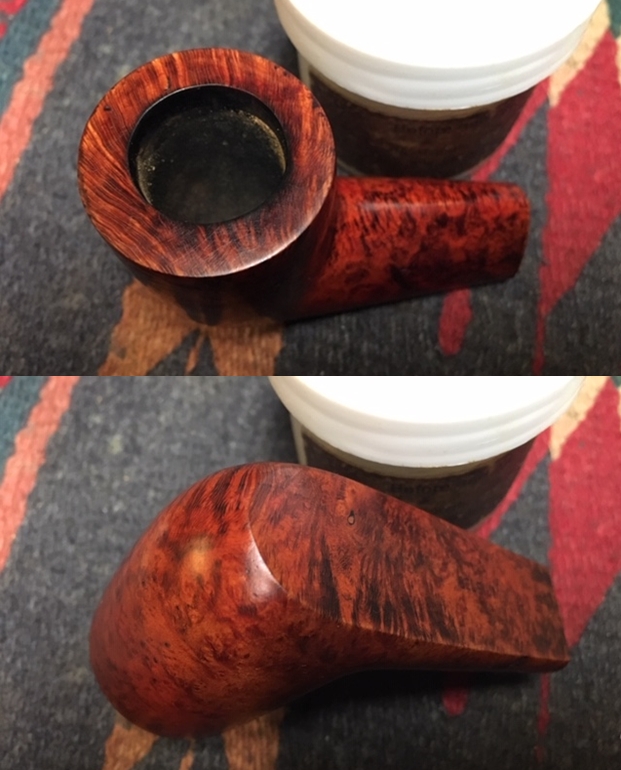
 Turning again to the stummel, I first use sanding sponges from coarse to light weight to address the scratches and nicks in the stummel surface. I also sponge sand the rim and it looks good except for a small area of residual scorching on the inner rim lip.
 To clean the inner rim of the scorching I introduce a light bevel using 240 grit paper rolled tightly. I pinch the roll between my thumb and the inner lip of the rim and rotate around the rim. I then do the same with 600 grade paper. I’m satisfied with the progress.
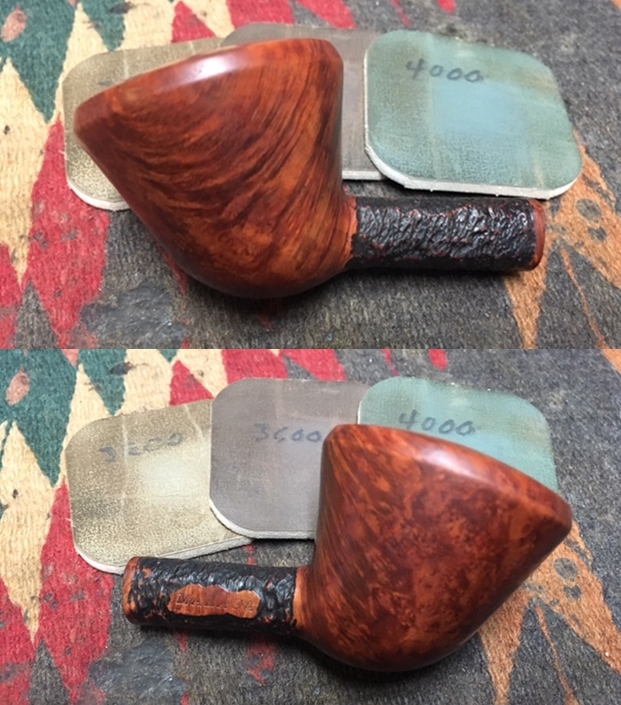
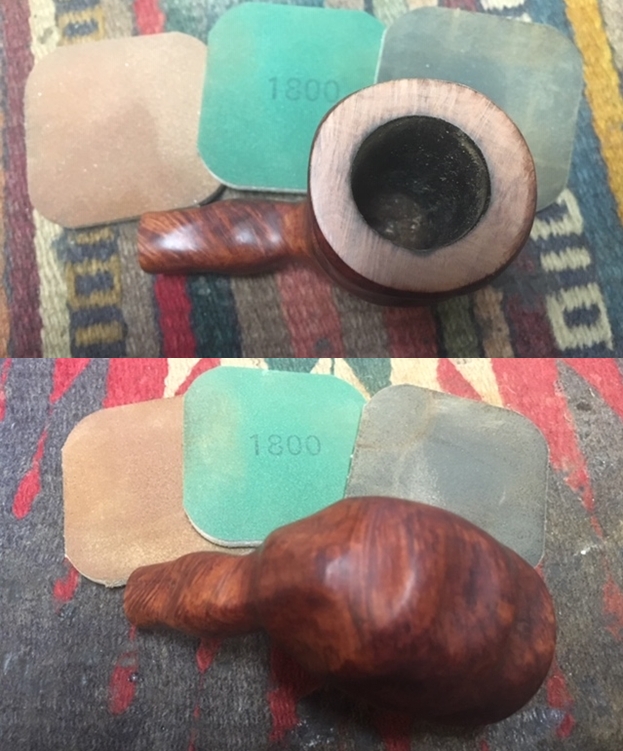
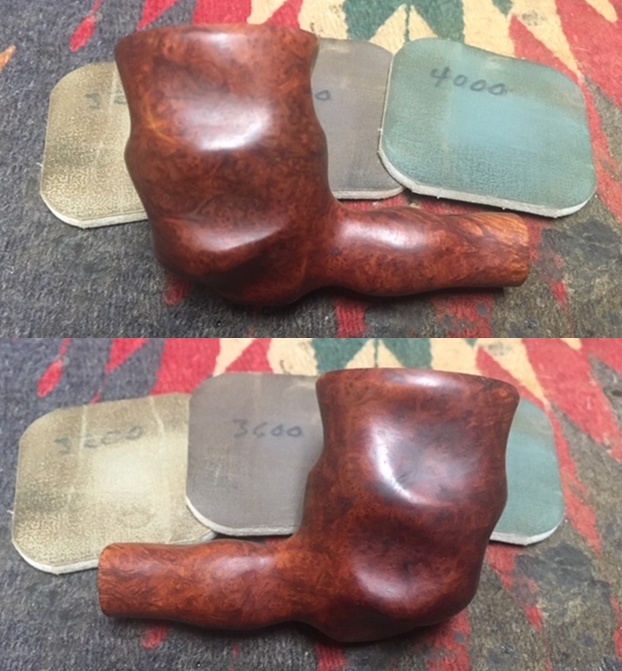
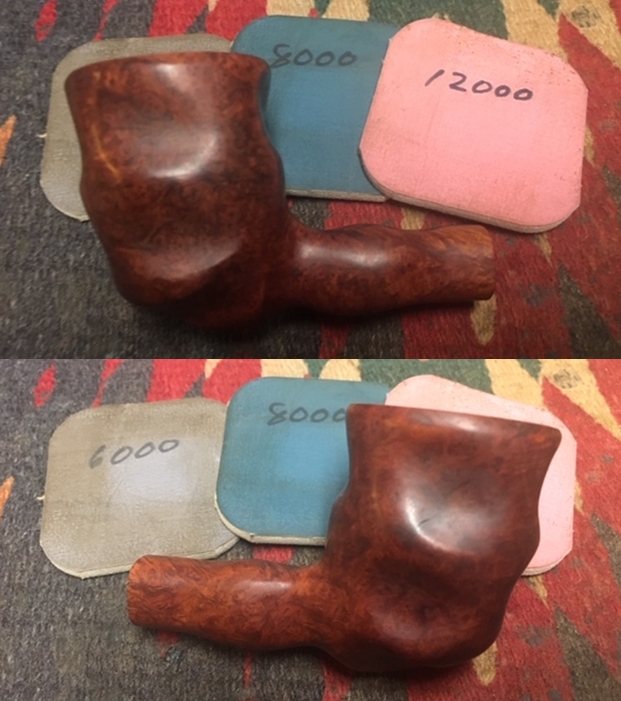
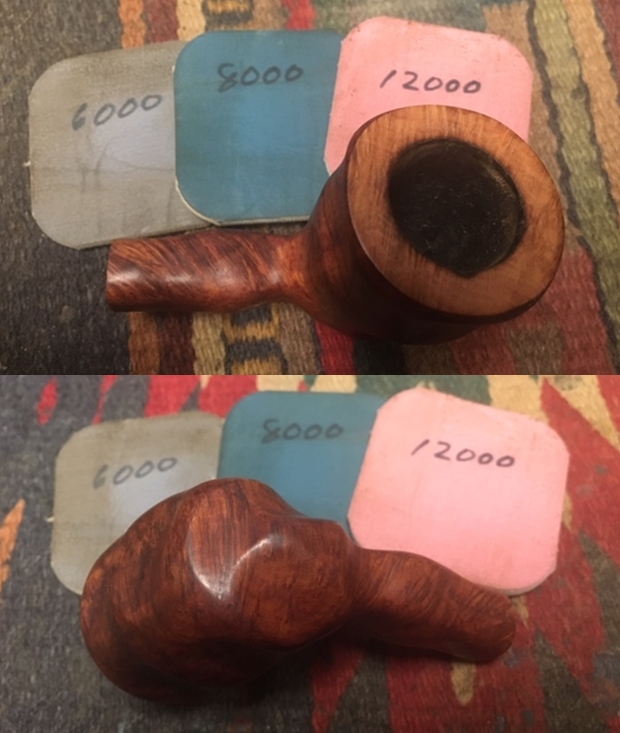
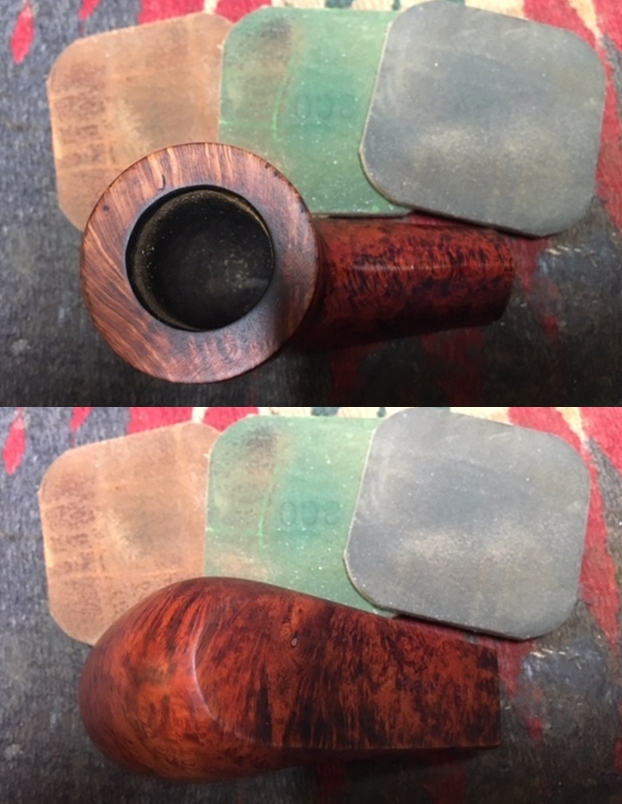
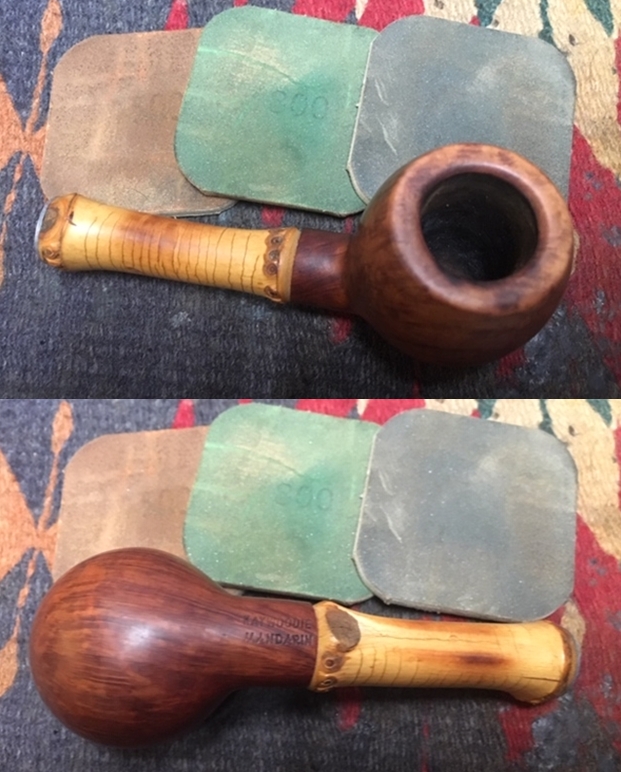
 Next, I sand the stummel with the full regimen of micromesh pads, 1500 to 12000. First, I wet sand with pads 1500 to 2400, then dry sand with pads 3200 to 4000 and 6000 to 12000. The grain really emerges during this sanding phase.
 I believe the original hue on this EPC Majestic stummel was a darker brown. I say this because the color of the stummel underneath the brass shank plate/band was darker – it was protected. A darker hue suits better too, to help blend the briar dust patches on the heal of the stummel. I elect to go with a Fiebing’s Dark Brown Leather Dye to darken the stummel. I assemble all the desk top components of my staining process. I first wipe the bowl down with a cotton pad wetted with alcohol to clean it. I then fit the shank with a cork to serve as a handle. I warm the stummel with the hot air gun to expand the briar to help it be more receptive to the dye. Then, I amply apply the Dark Brown aniline dye using a folded over pipe cleaner. As I paint a portion of the stummel with the dye I ‘fire’ it, by igniting the dye with a lit candle and it combust the alcohol in the dye and sets the dye pigment. When the surface is covered, I set the stummel aside to rest through the night.
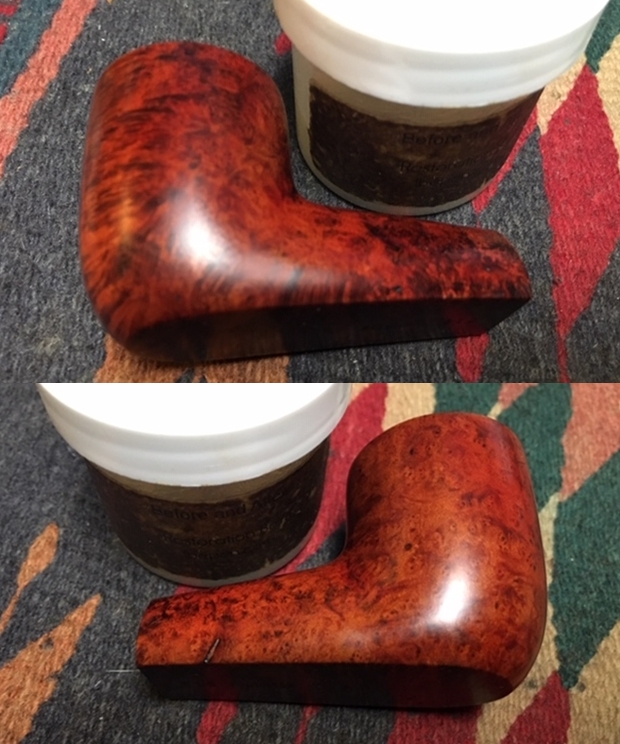
 The next morning, I mount a felt buffing wheel to the Dremel, lower the speed to the slowest possible, and ‘unwrap’ the ‘fired’ crust with Tripoli compound. The grain contrast that begins to bleed out is striking. After applying the Tripoli compound to the stummel, I mount a cotton cloth buffing wheel and go over the stummel again with Tripoli after increasing the speed of the Dremel to about 40% full power. This helps sharpen the grain, removing blotches of dye and reaching into the crook of the shank bend that was difficult to reach with the felt wheel. After completing the Tripoli compound application, I wipe the stummel with a cotton pad wetted with alcohol to lighten the finish a bit and to blend the newly dyed surface. I then mount another cotton cloth buffing wheel to the Dremel, maintain the same speed and apply Blue Diamond compound to the horn stem and stummel.
 The brass shank cap/band is next on my sites. I wash it with warm tap water and soap and rinse it well and dry it. Then I apply a little of the TarnX liquid to a cotton pad and wipe it on the brass shank cap to clean it. Afterwards I rinse the shank cap and what a difference!

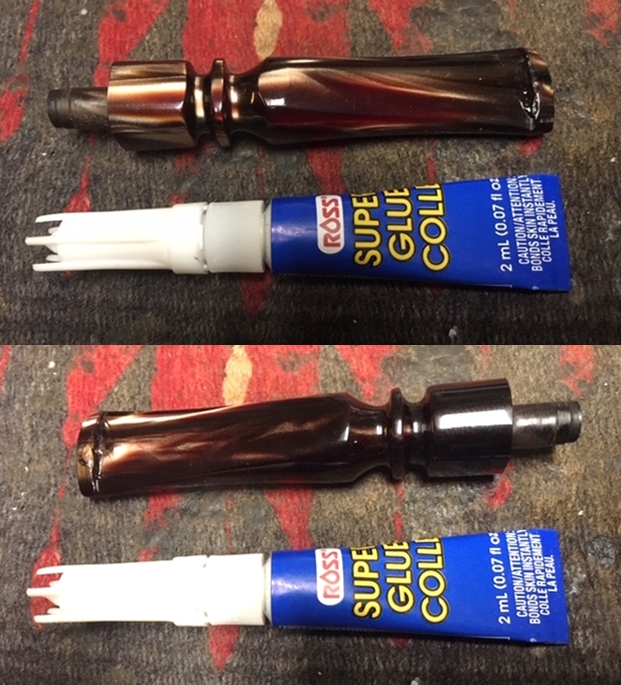
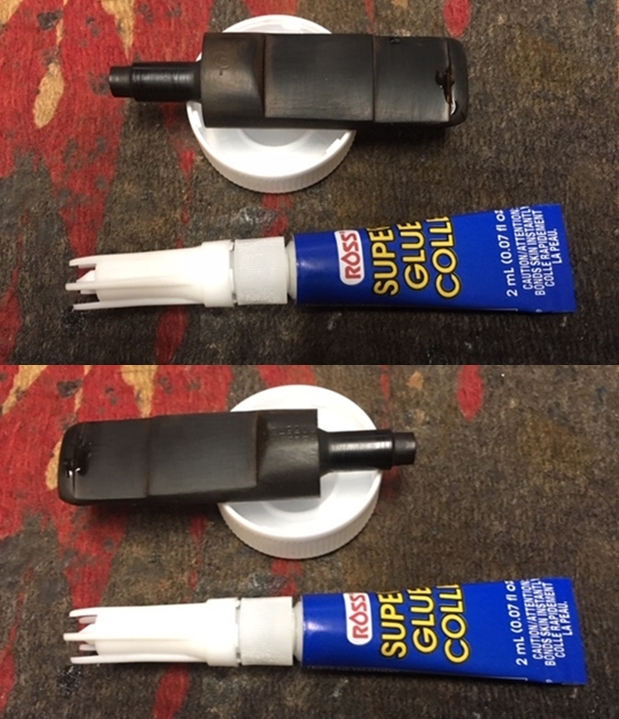
 I replace the cap on the shank with a small drop of thick CA glue to hold it solidly in place. It looks great.
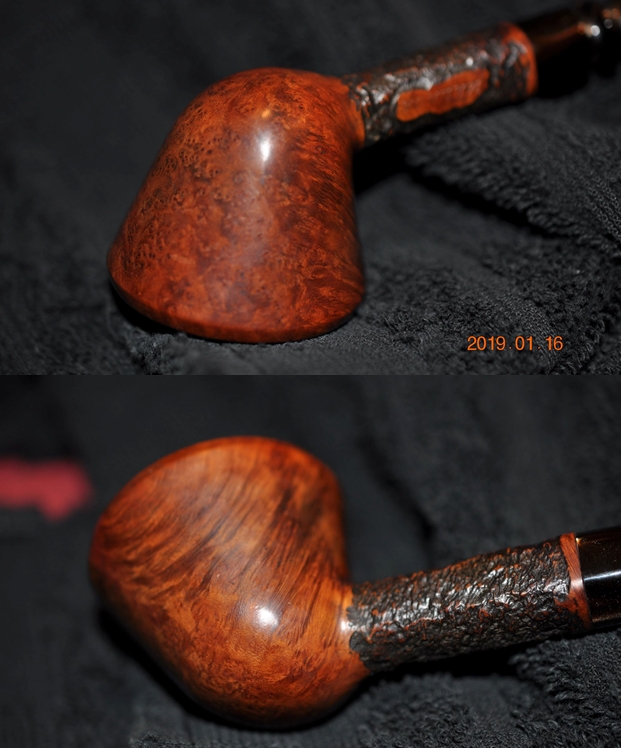
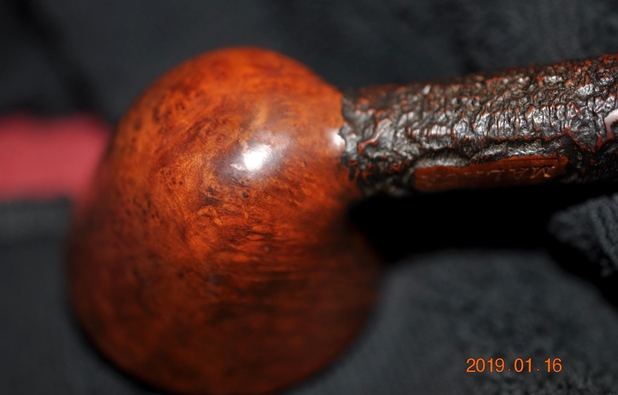
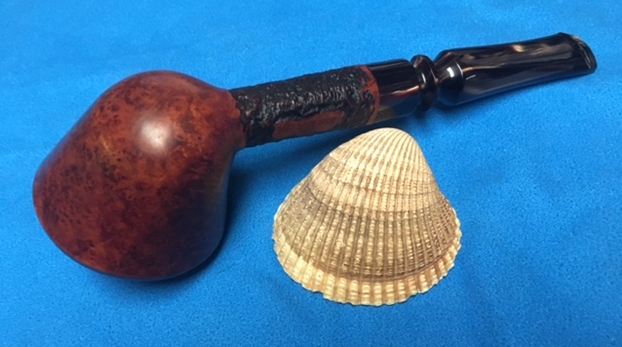
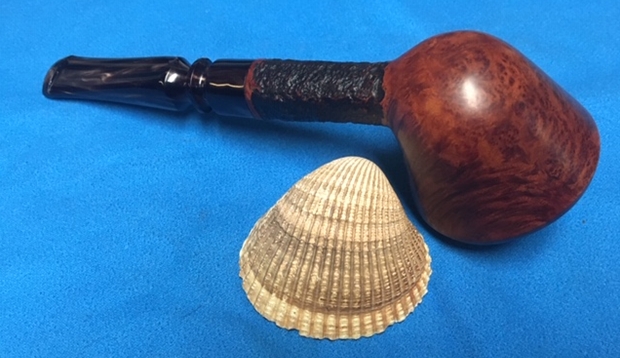
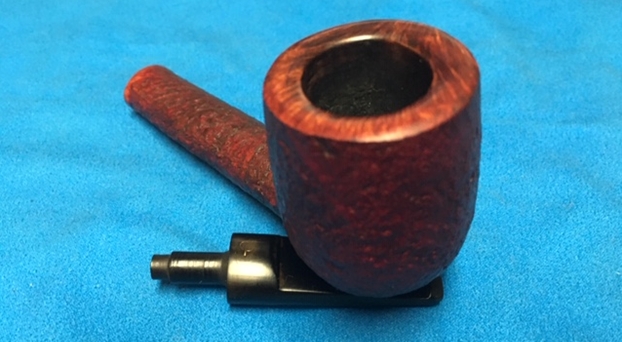
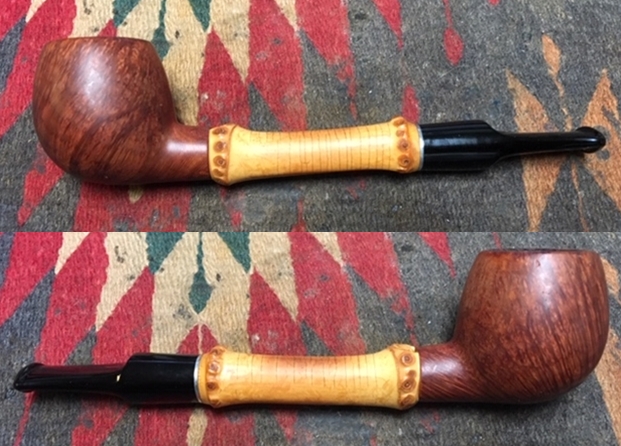
 Now the home stretch. With the shank cap cleaned, polished and replaced, I rejoin the horn stem with the petite Bent Billiard stummel and wipe the pipe with a felt cloth to make sure the compound dust is removed before applying wax. I then mount another cotton cloth wheel and apply some coats of carnauba wax to the entire pipe. I finish by giving the pipe a rigorous rubbing with a microfiber cloth to raise the shine.
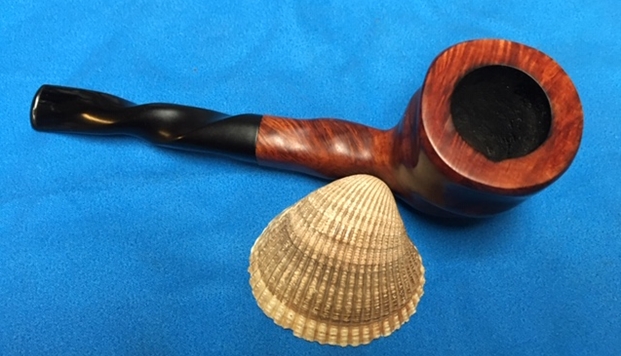
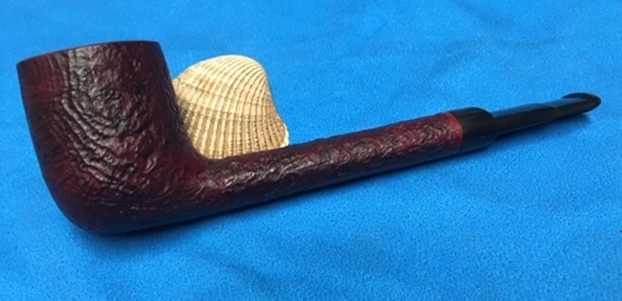
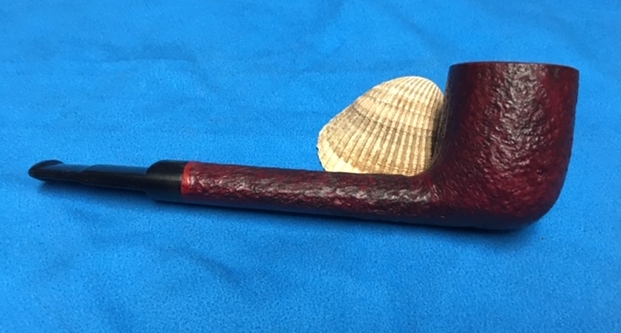
Well, this petite EPC Majestic Bent Horn Stem Billiard had a mysterious origin that is now much clearer. I have not heard from the Edinburgh Pipe Club regarding my inquiry – I hope they don’t think me a loon! The Miami-based Cigar company, E.P. Carrillo does not own this pipe. It was manufactured by the A. Pandevant & Roy Co., at 29, Avenue du Marché, Charenton (Seine), Paris. My guess is that this pipe is dated in the 1920s because of the preponderance of similarities to the pipes in the 1922-23 catalogue. I believe the latest dating, if my theory holds, would be with the commencement with World War II and the eventual Nazi occupation of Paris and France.
Yet, all told, this small pocket pipe is a superbly fashioned pipe. It’s so small one might think it is toy-like. It IS small, but it’s the real deal – a seriously fashioned pipe. The grain color with the dark brown dye is beautiful – the heel patches are forgotten in the dark grain swirls. The blend of the briar, brass band and horn stem are a striking ensemble that I believe my cousin Steve will be pleased to bring home to Alabama. He commissioned the pipe from the For “Pipe Dreamers” Only! collection and this pipe truly fits into the dreamer category. Not only is it a beautiful pipe but the research reveals that it is a collectible as well. Since Stephen commissioned it, he will have the first opportunity to acquire it from The Pipe Steward Store. This pipe benefits our work here in Bulgaria working with the Daughters of Bulgaria – women and girls who have been trafficked and sexually exploited. Thanks for joining me! First, before and after palm shots!


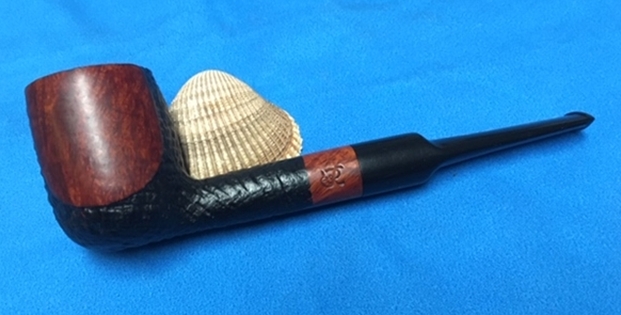
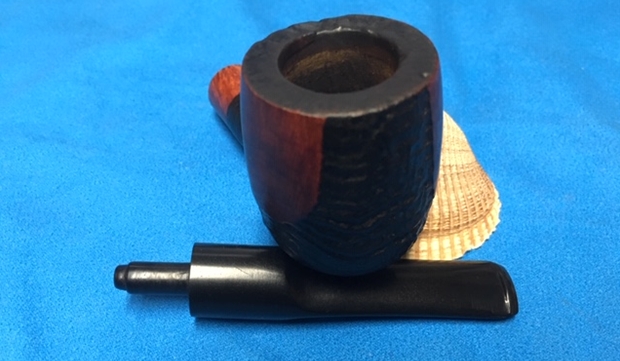
 Jeff took some photos of the pipe when he received them to show the general condition of the pipe before he started his cleanup work. Like the rest of the pipes from the Michigan collection this pipe was dirty and well used. There was a thick cake in the bowl and lava overflowing onto the rim top. It was hard to know if the edges of the bowl were damaged or not because of the cake and lava. The deep sandblast on the bowl, shank make the pipe very interesting. The vulcanite stem is lightly oxidized and has some calcification at the button. There are deep tooth marks on both sides of the stem at the button edge and some wear on the button edge itself. There are also scratches in the vulcanite where it looks like someone scraped off some of the calcification. The photos below tell the story and give a glimpse of the beautiful Canadian.
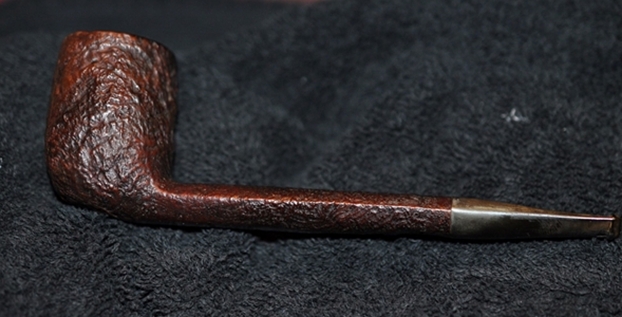
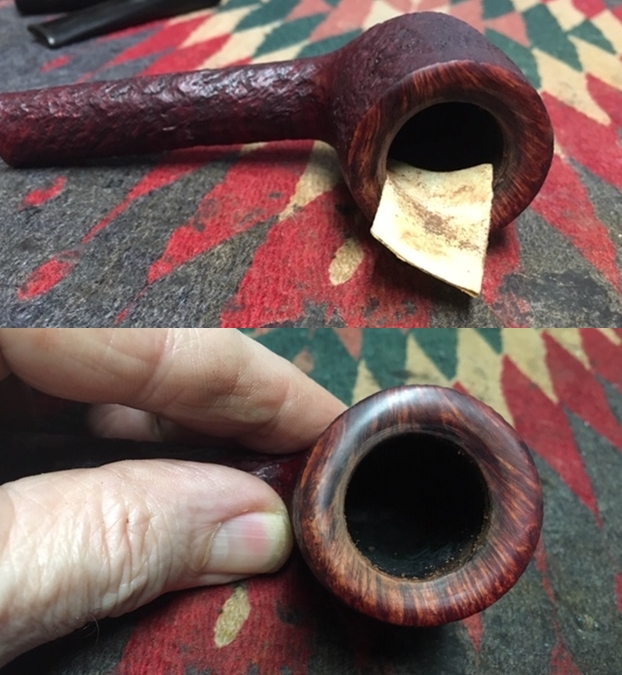
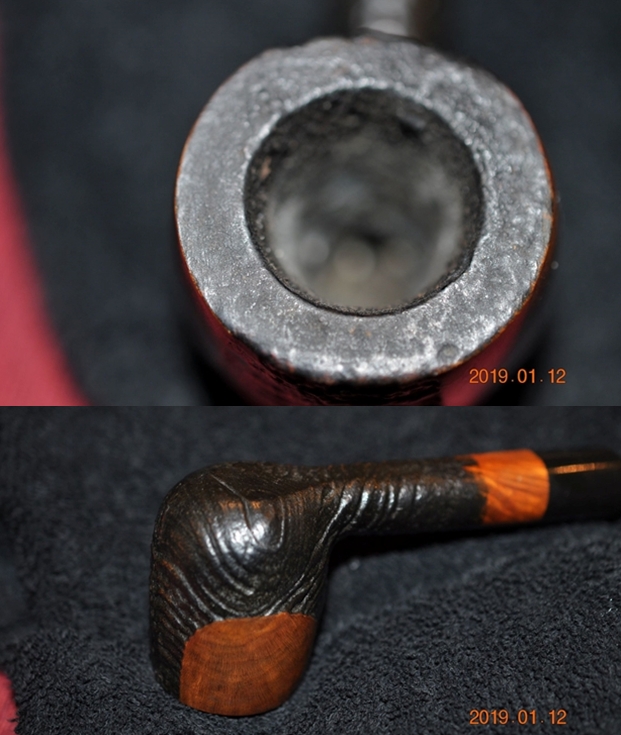
 Jeff took a close up photo of the bowl and rim to capture the condition of the pipe before he started his cleanup work. The rim top had some thick lava overflow and some darkening. The thick lava on the rim top made it hard to know what the inner and outer edges of the bowl looked like. There is also a general accumulation of dust in the finish on the rest of the bowl and shank.
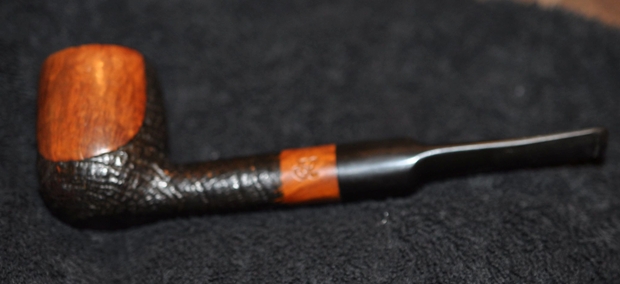
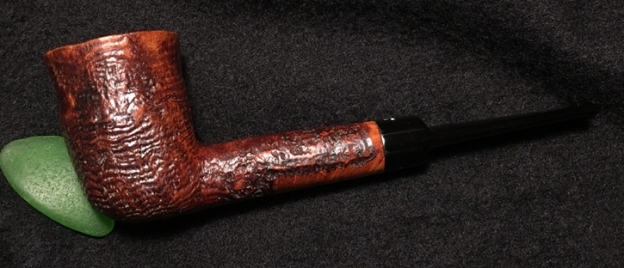
 He also took photo of the right and underside of the bowl and shank to show the interesting sandblast finish. The finish is very dirty but this is another beautiful pipe.
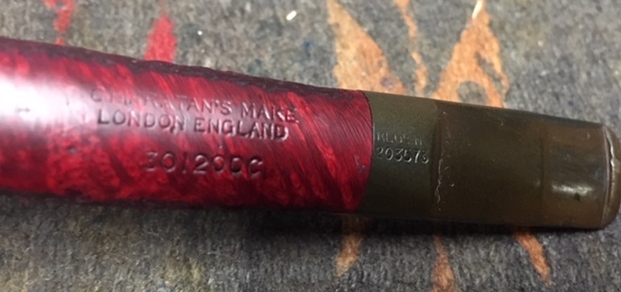
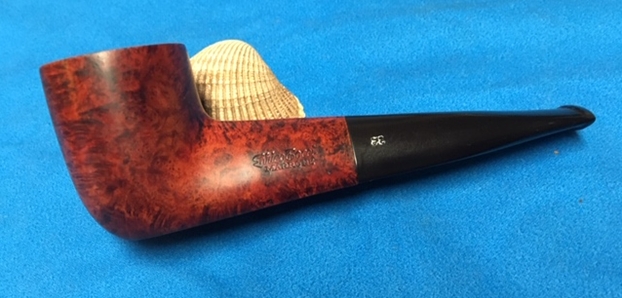
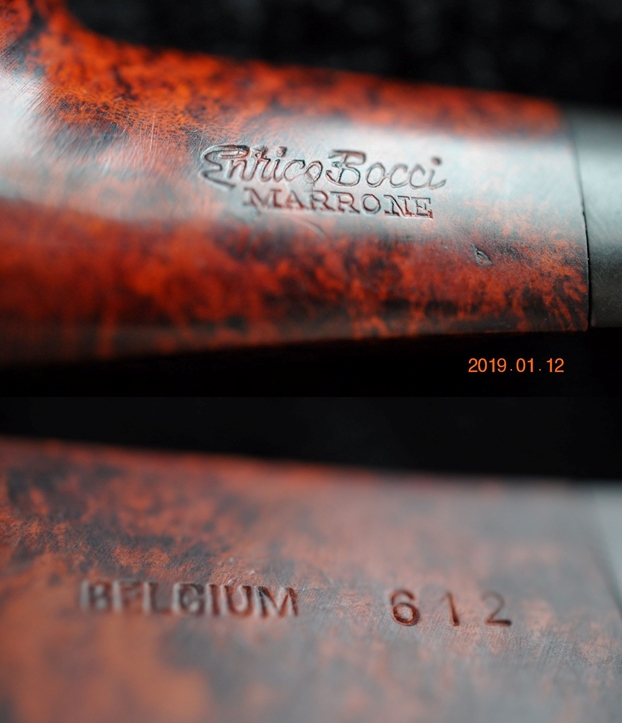
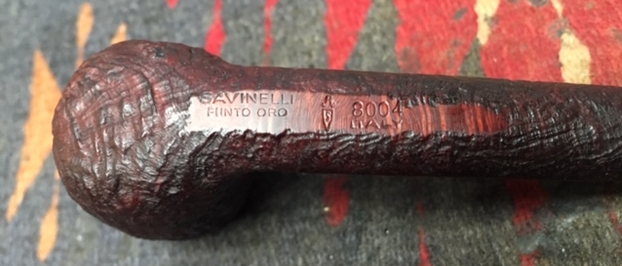
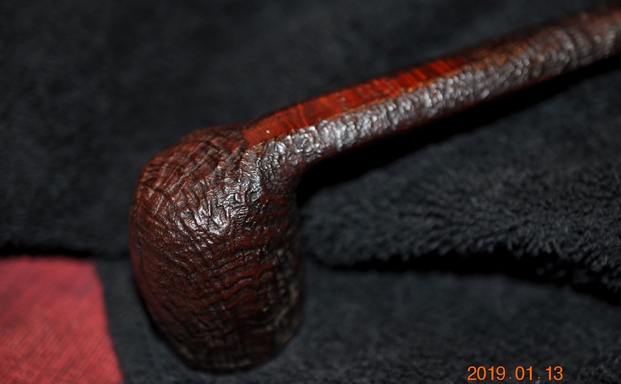 Jeff took a photo to capture the stamping on the underside of the shank. The photo shows stamping as noted above. The stamping on this pipe is clear and readable.
 The next two photos show the stem surface. They show the tooth marks and chatter on both sides near the button. There are also some marks on the sharp edge of the button. The stem is dirty, oxidized and has a yellow cast to it. The single brass Punto dot on the top of the stem is almost invisible.
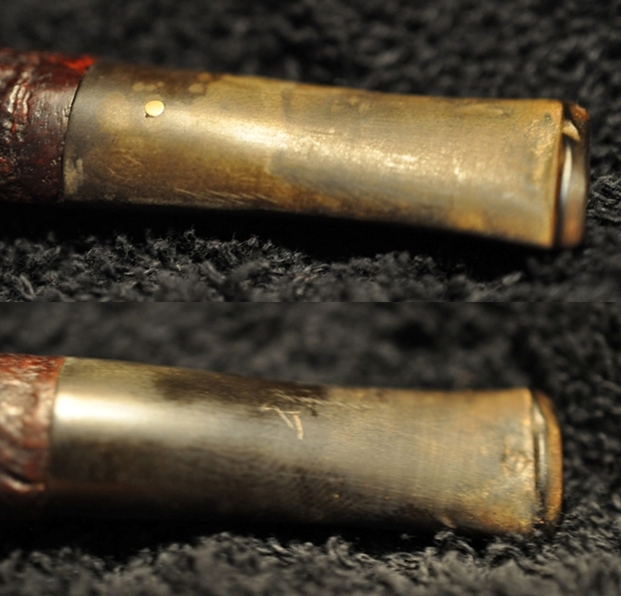 Jeff reamed the bowl with a PipNet pipe reamer and followed up with a Savinelli Fitsall pipe knife to remove the cake. He scrubbed out the mortise and the airway in the shank and the stem with alcohol, cotton swabs and pipe cleaners. He scrubbed the exterior of the bowl, rim, shank and stem with a tooth brush and Murphy’s Oil Soap to remove the oils and tars on the rim and the grime on the finish of the bowl. He rinsed it under running water. He dried it off with a soft cloth. He was able to remove the lava build up on the rim top and you could see the great condition of the bowl top and edges of the rim. He soaked the stem in Before & After Deoxidizer to remove the oxidation. I took photos of the pipe to show its condition before I started my work on it.
 I took a close up photo of the rim top to show the darkening on the surface of the rim toward the back of the bowl that was normal with use. The front part of the rim top looked a little lighter in colour but the sandblast on the entire rim made the rim top repairs minimal. The inner edge and the outer edge of the rim look really good. The stem photos show the tooth marks and the wear on the button surface on both sides. The final close up photos shows the Savinelli stamping on the underside of the shank.
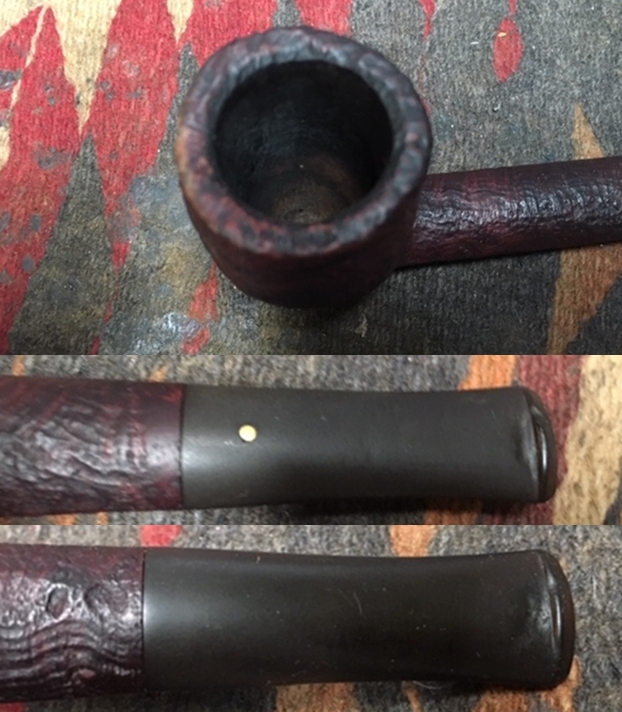
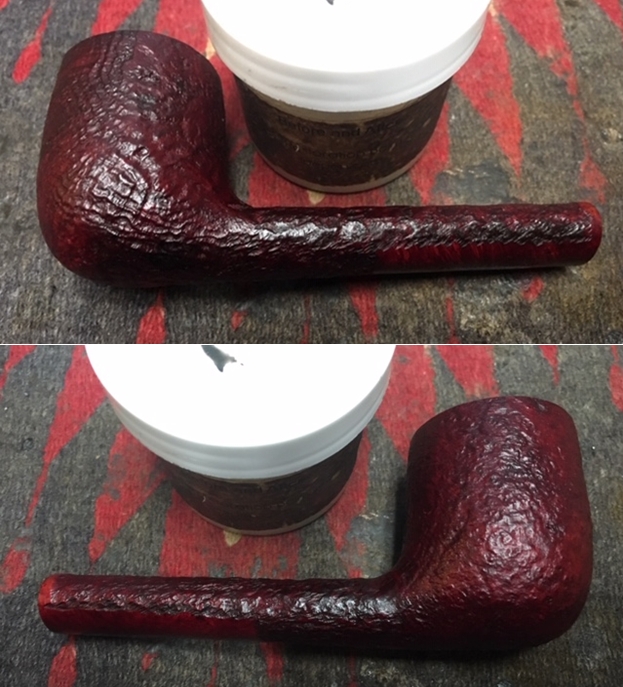
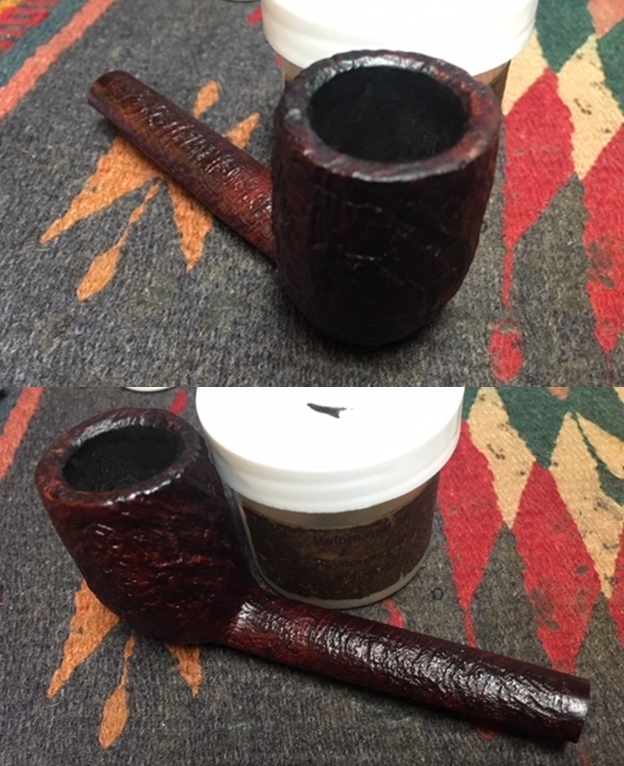
 Jeff had done such a great job cleaning the surface of the pipe that there was nothing I needed to do move forward. I started by working some Before & After Restoration Balm into the sand blast finish of the briar with my fingertips to clean, enliven and protect it. I let the balm sit for a little while and then buffed with a cotton cloth to raise the shine. The following photos show the bowl at this point in the restoration process. The bowl and the rim top look really good and the darkening and lava are gone. The finish looks very good and I am very happy with the results.
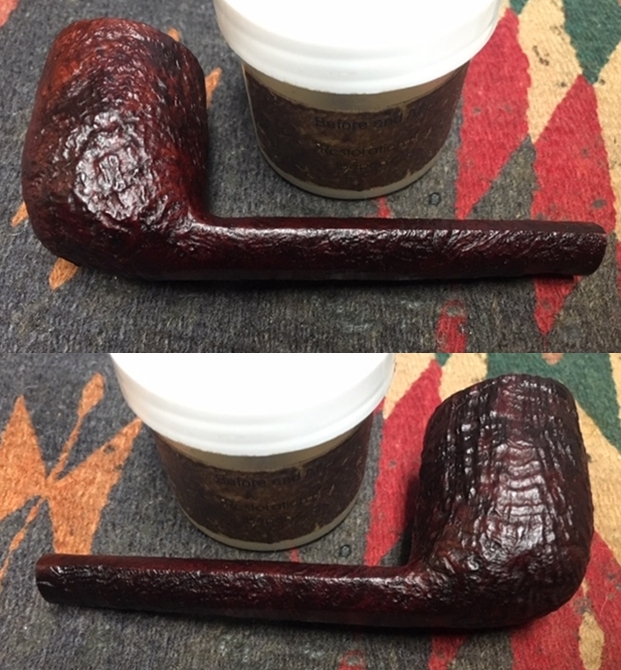

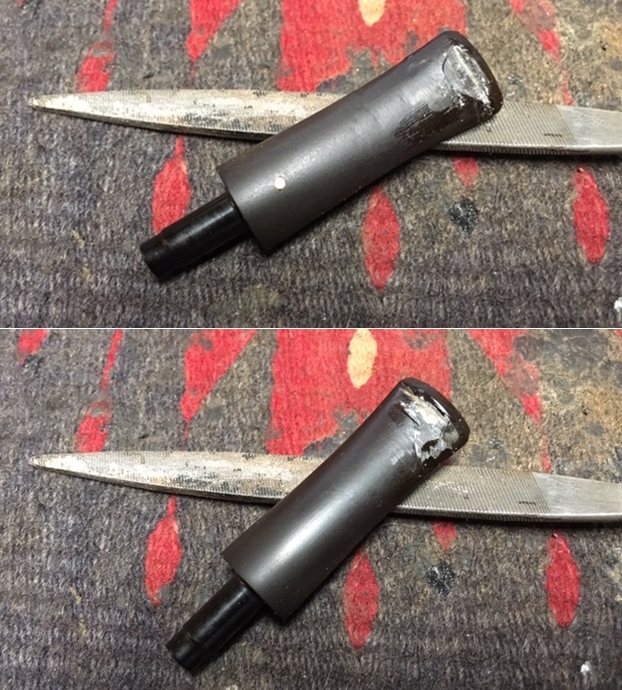
 With the bowl finished I set it aside and turned my attention to the stem. I cleaned out the tooth marks on both sides of the stem with a cotton swab and alcohol. I filled in the tooth marks with clear super glue. Once the repairs had cured I used a needle file to flatten out the repaired areas. I filed it until the patches were smooth with the surface of the stem.
 I used a folded piece of 240 grit sandpaper to blend the repairs into the surface of the stem. Once the surface was smooth I sanded out the scratch marks and started the polishing of the stem with a folded piece of 400 grit sandpaper. I wiped the stem down with a damp cloth and took the following photos.
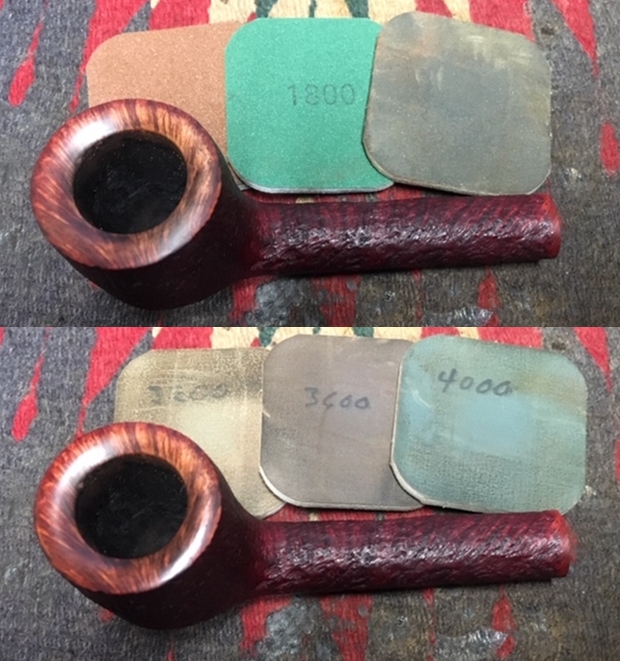
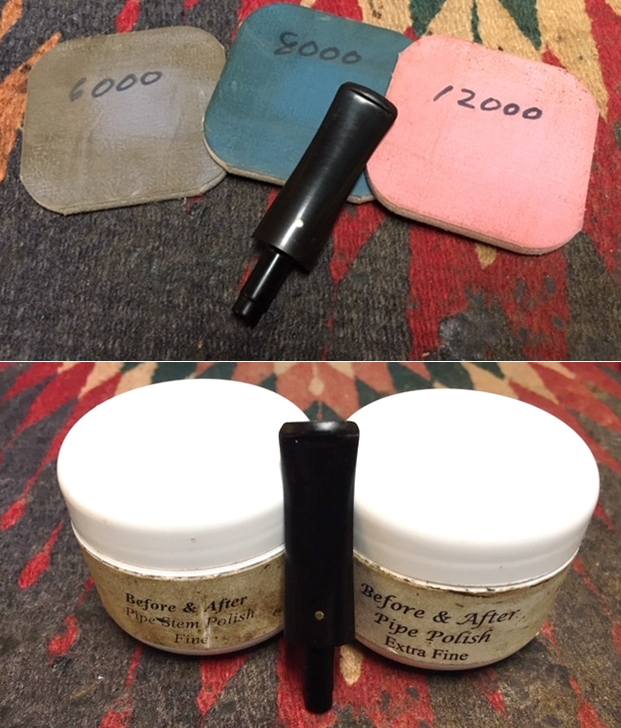
 I polished the stem with micromesh sanding pads – wetsanding it with 1500-2400 grit pads and dry sanding it with 3200-12000 grit pads. I wiped the stem down with a damp cloth after each pad. I further polished it with Before & After Pipe Polish – both Fine and Extra Fine. I wiped it down with a coat of Obsidian Oil and set it aside to dry.
 I put the stem back on the bowl so I could polish it without rounding the edges as the shank union. I polished stem with Blue Diamond polish on the buffing wheel. I gave the bowl multiple coats of Conservator’s Wax and the stem multiple coats of carnauba wax. I buffed the pipe with a clean buffing pad to raise the shine. I hand buffed it with a microfiber cloth to deepen the shine. The pipe polished up pretty nicely. The contrasting deep sandblast showed the contrasts between the valleys and the high spots. It truly came alive with the buffing. The rich browns and oxblood stains worked very well with the polished black vulcanite stem. The finished pipe is a beauty and feels great in the hand. Have a look at it with the photos below. The dimensions are Length: 6 inches, Height: 2 inches, Outside diameter of the bowl: 1 1/4 inches, Chamber diameter: 3/4 of an inch. This beauty will be on the rebornpipes store sometime in the days ahead. It may well be the kind of sandblasted Canadian you have been looking for. Let me know if you are interested. Thanks for walking through the restoration of this beautiful Canadian with me it was a pleasure to work on.