Tag Archives: removing tooth marks

The Resurrection of an old KBB Yello-Bole Premier Panel


Blog by Steve Laug

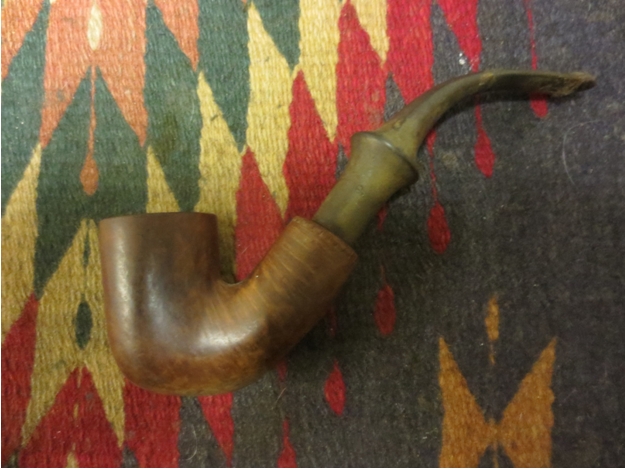
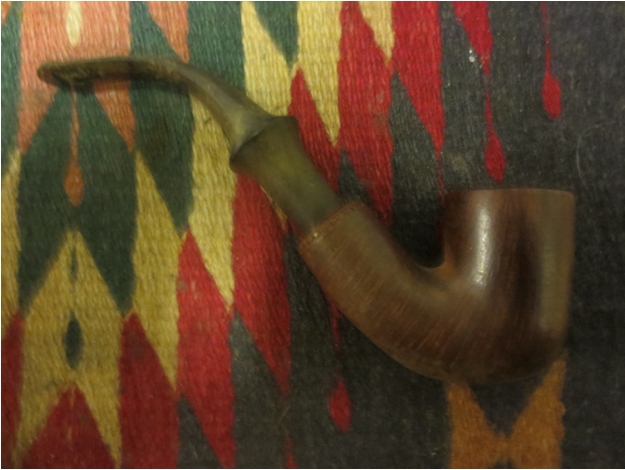
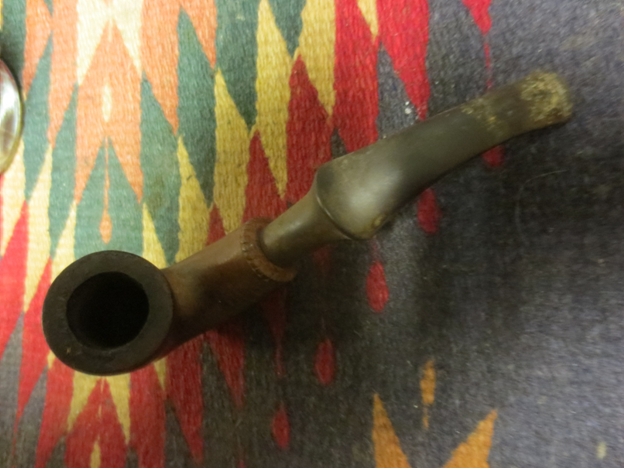
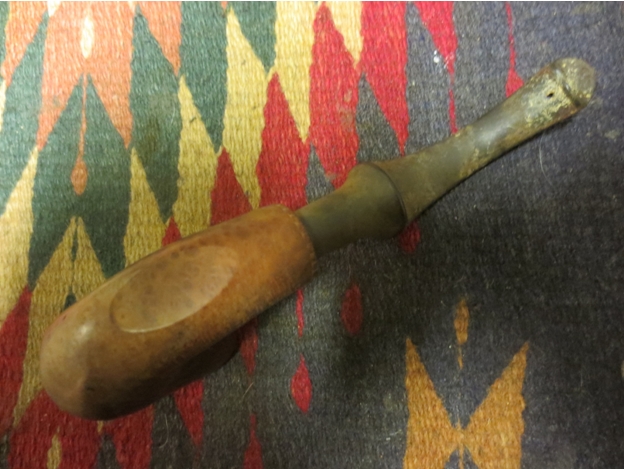
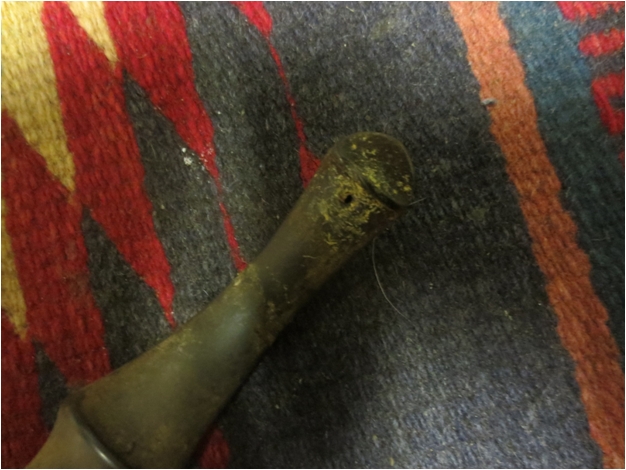
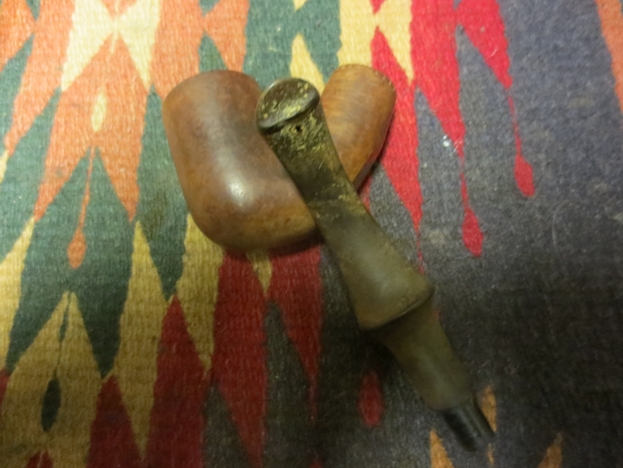
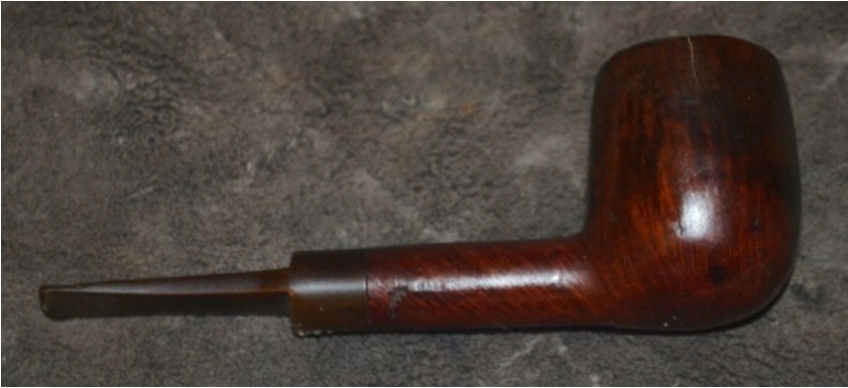
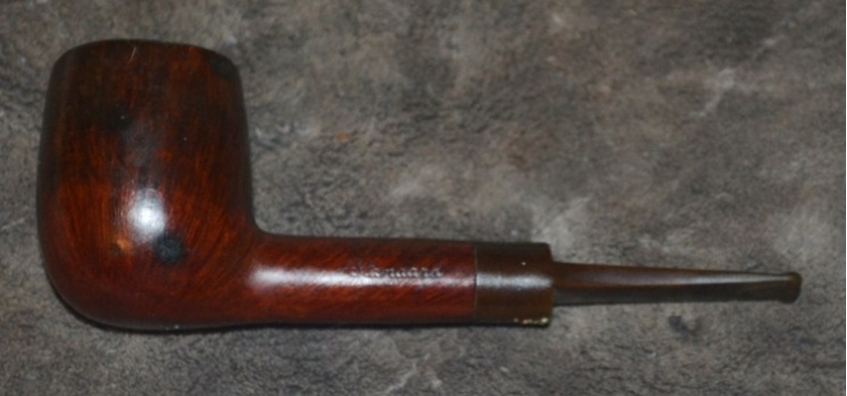
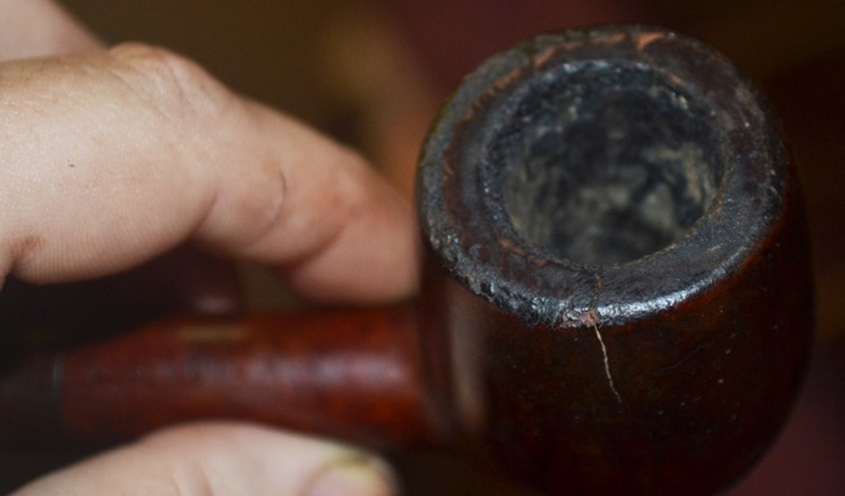
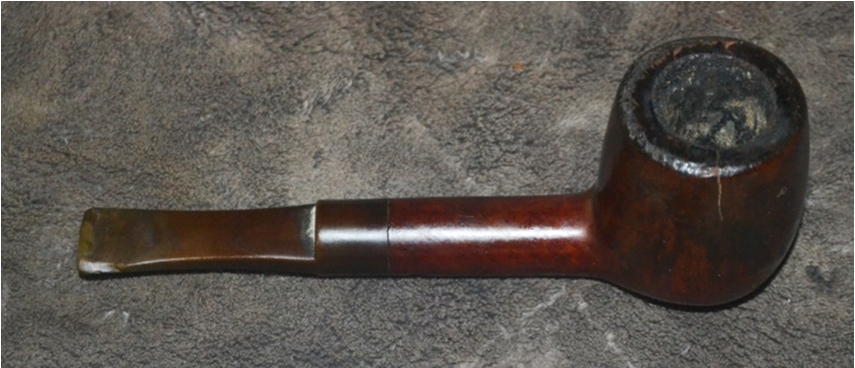
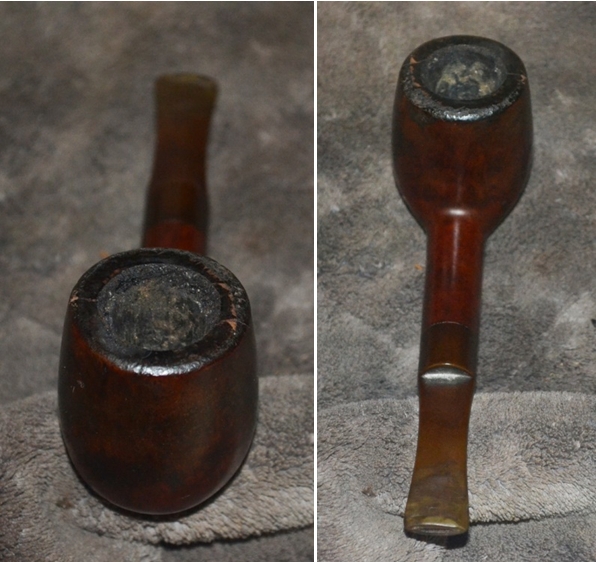
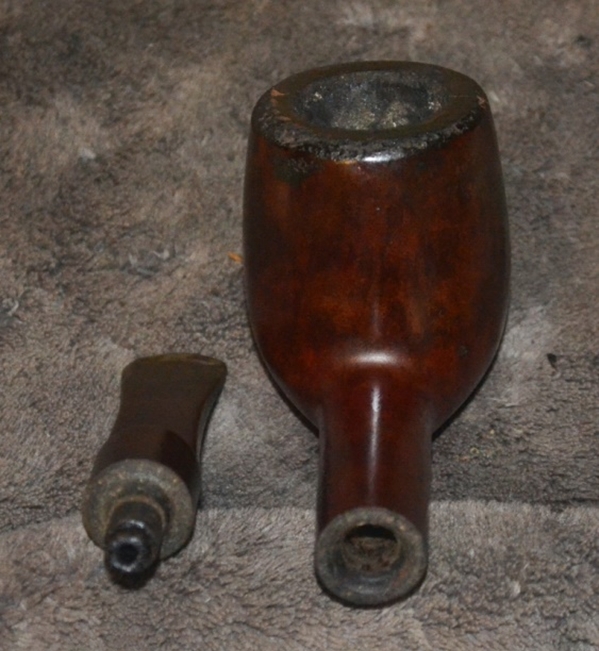
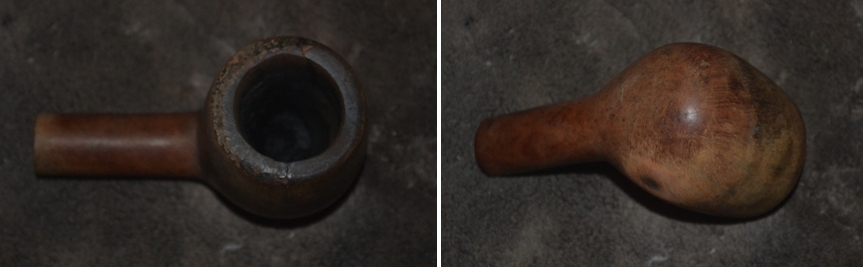
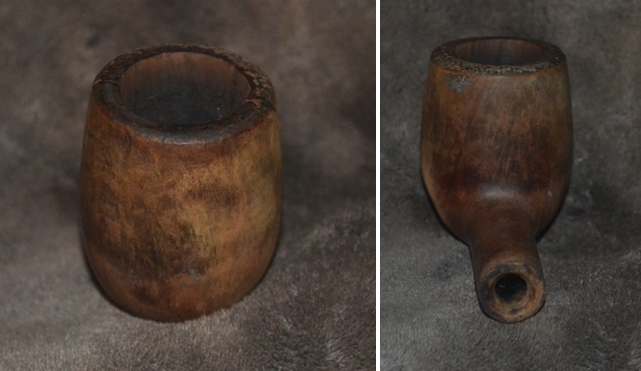
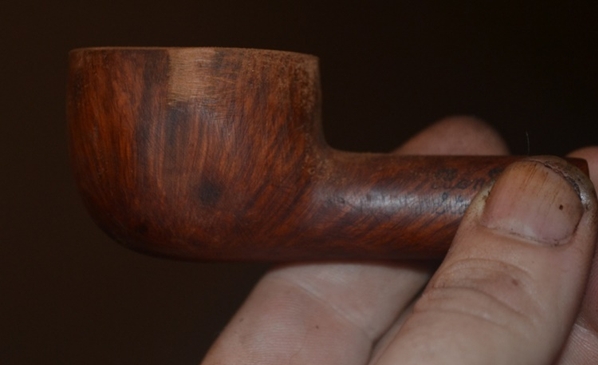
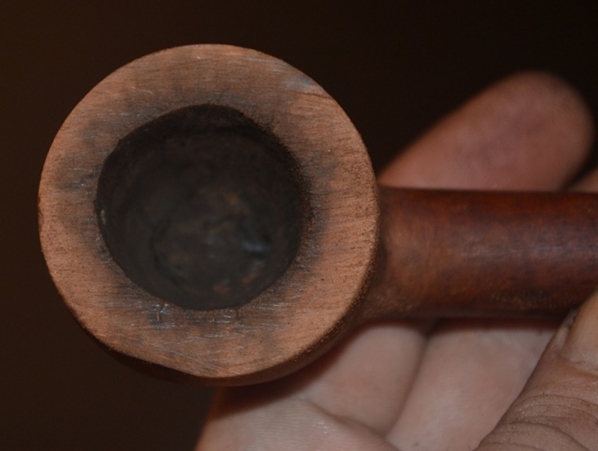
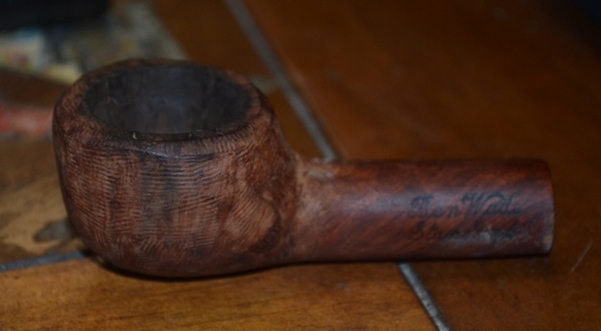
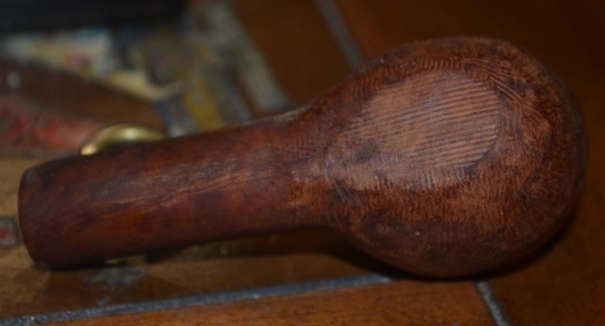
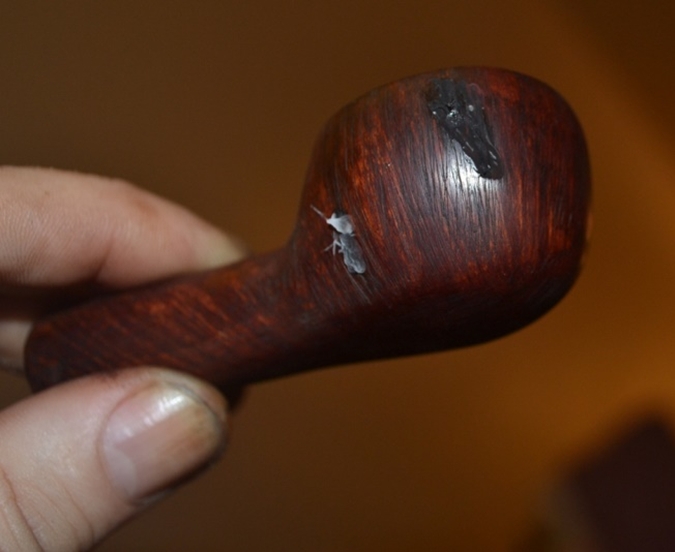
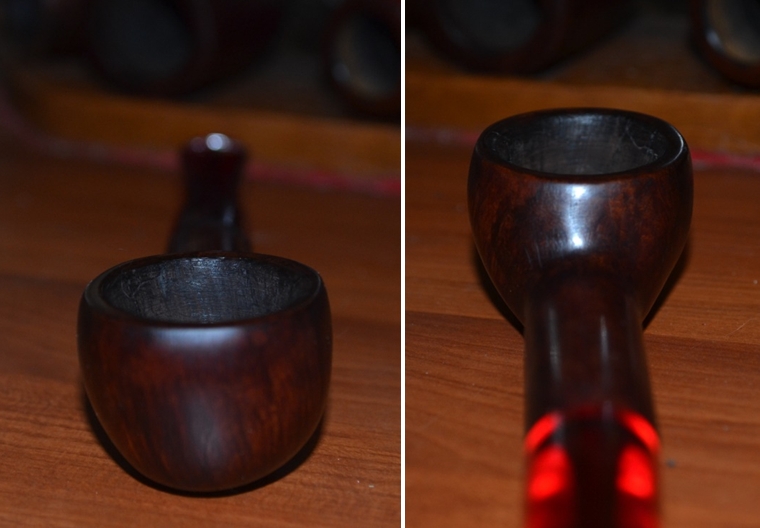
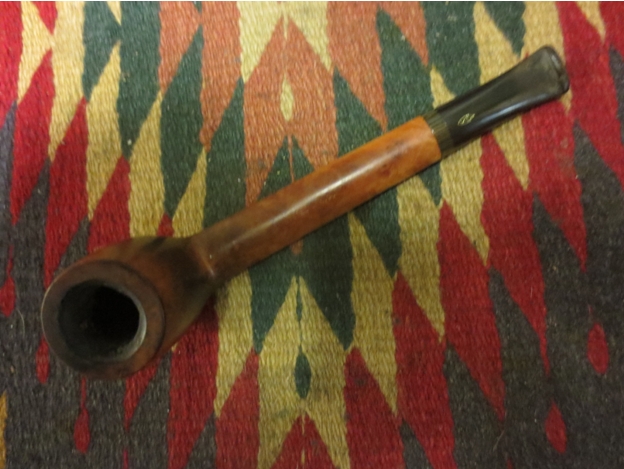
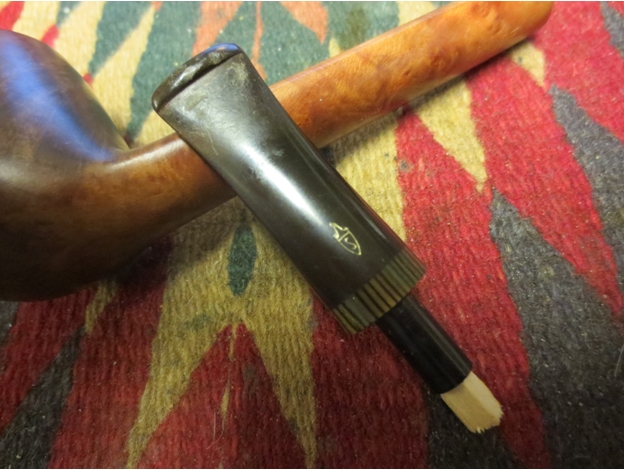
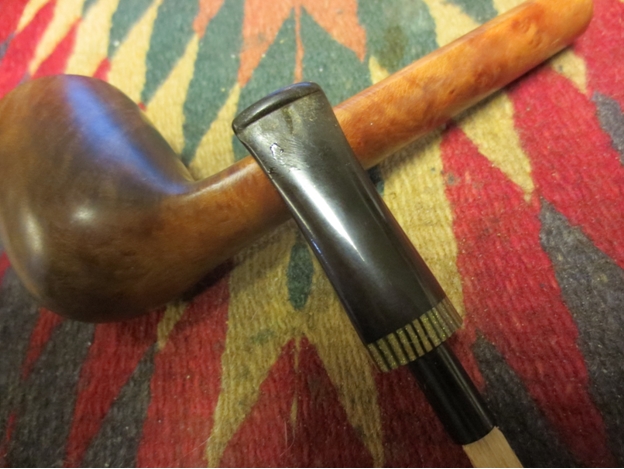
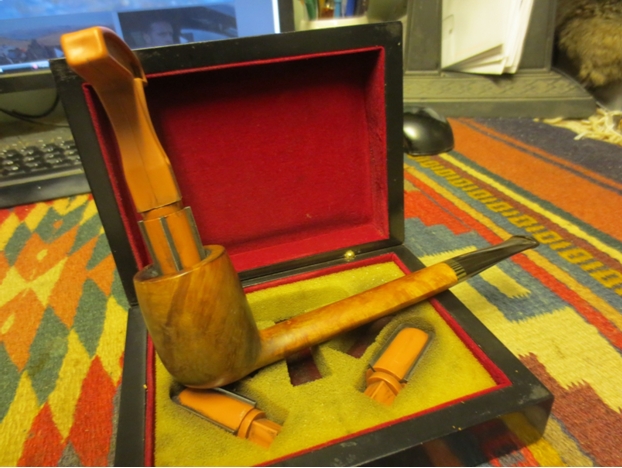
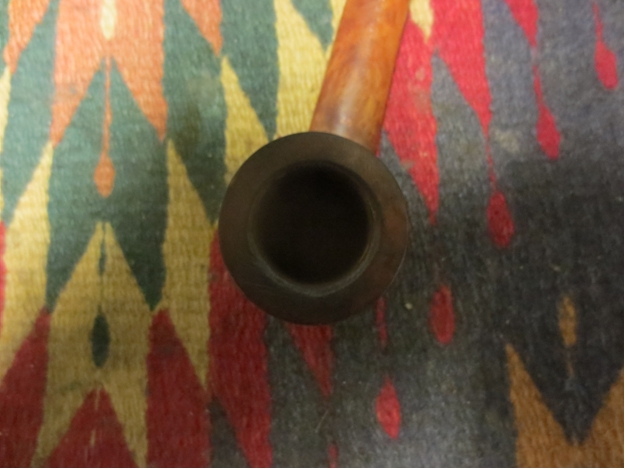
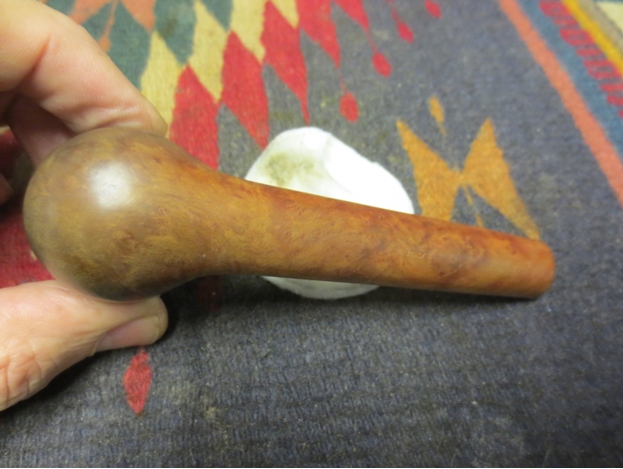
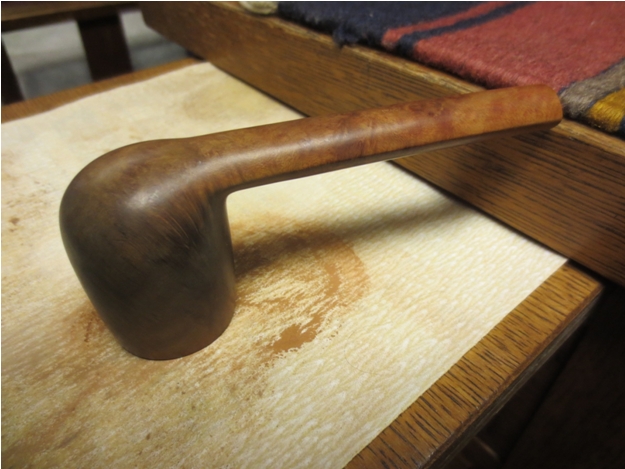
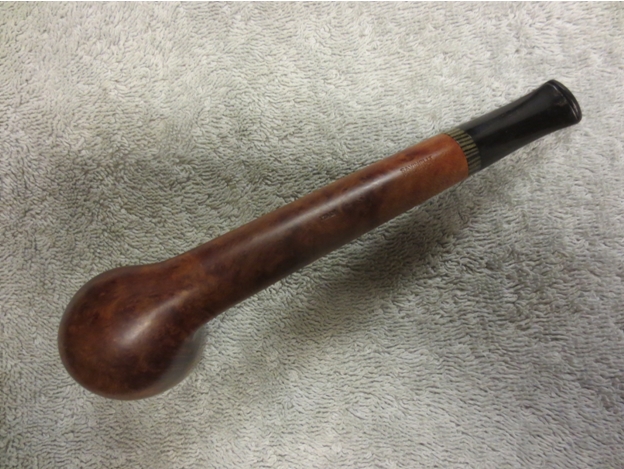
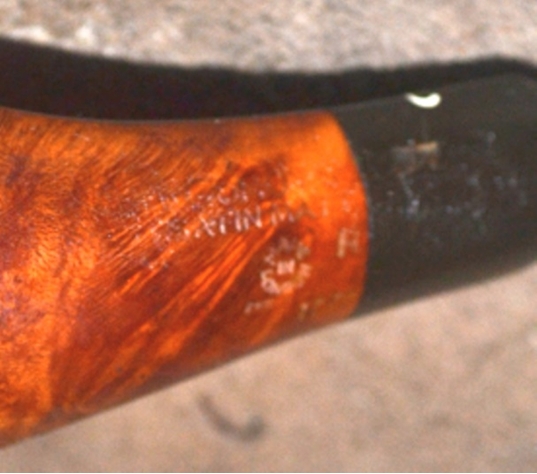
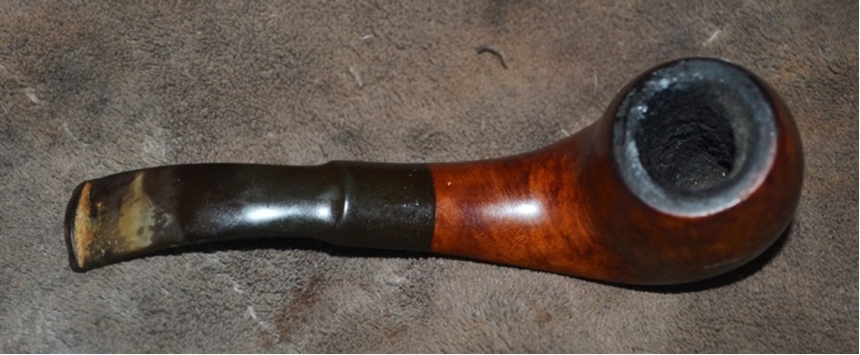
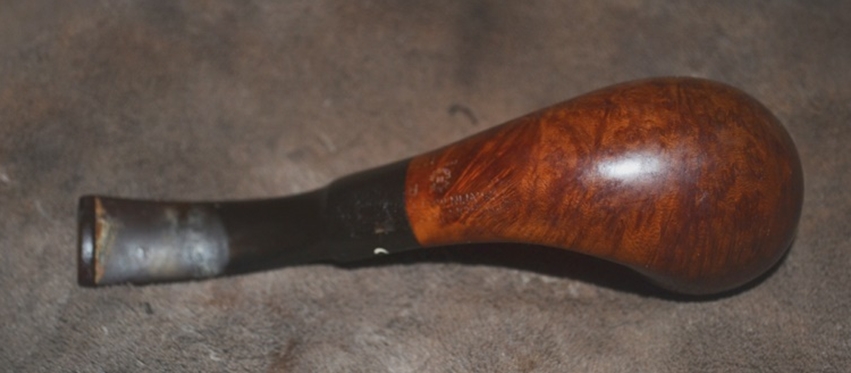
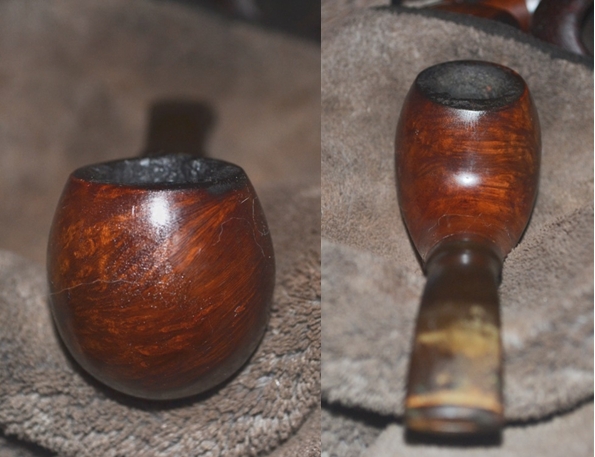
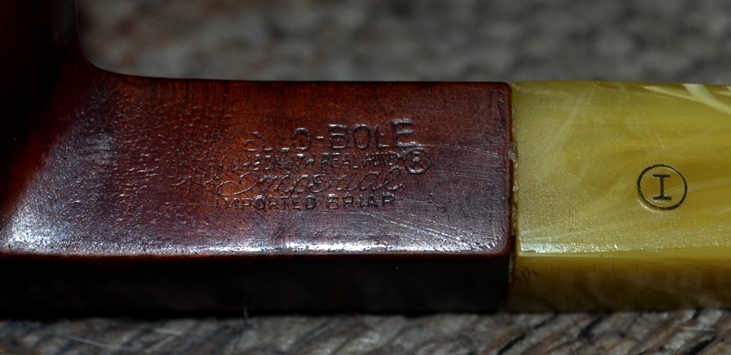
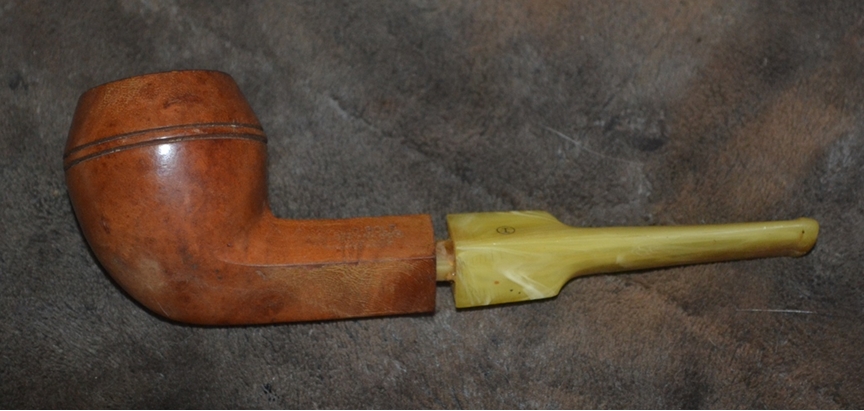
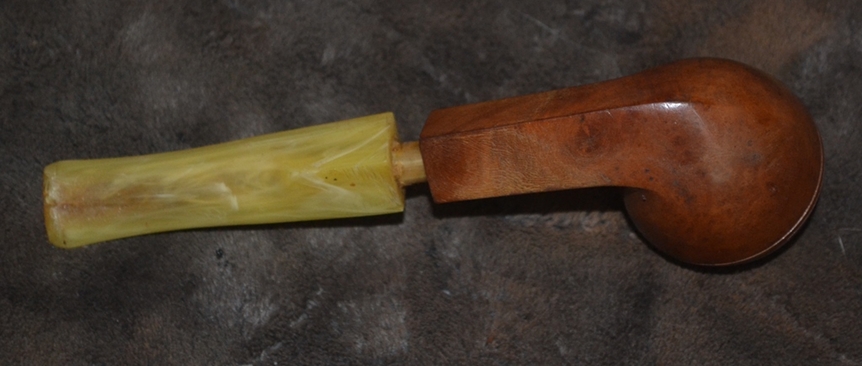
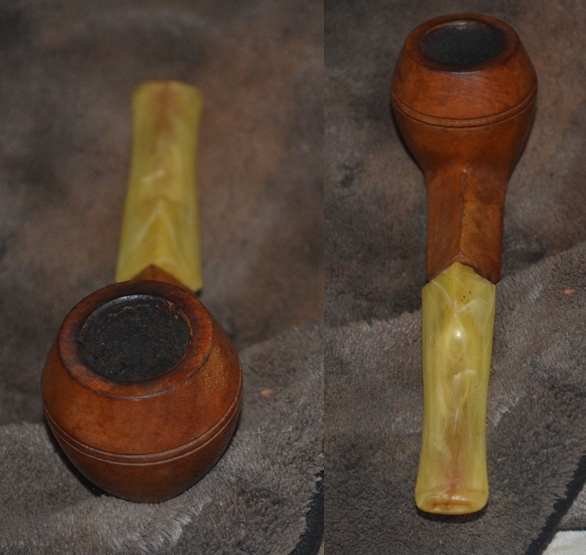
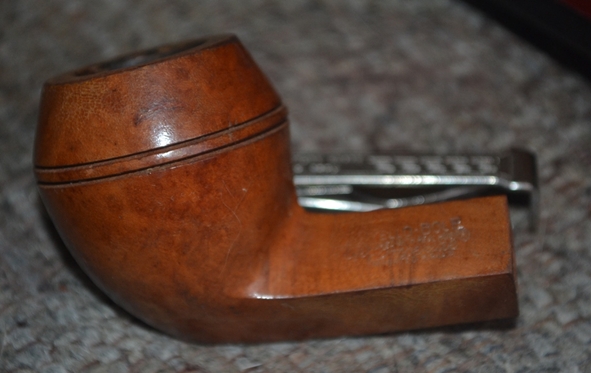
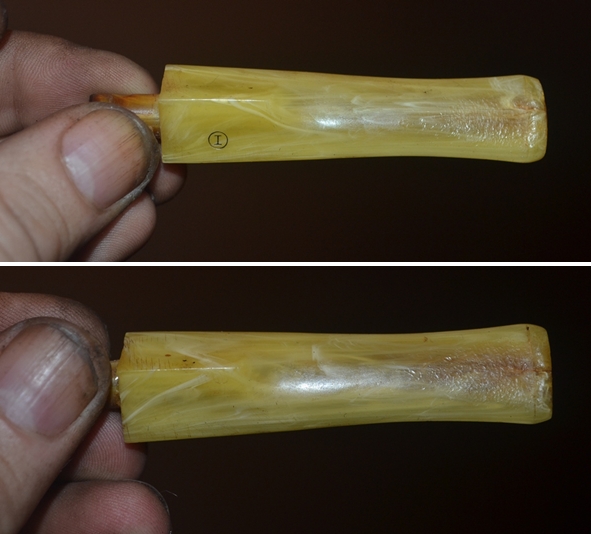
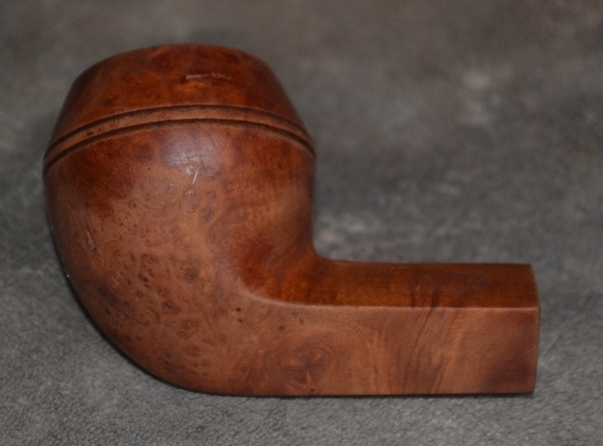
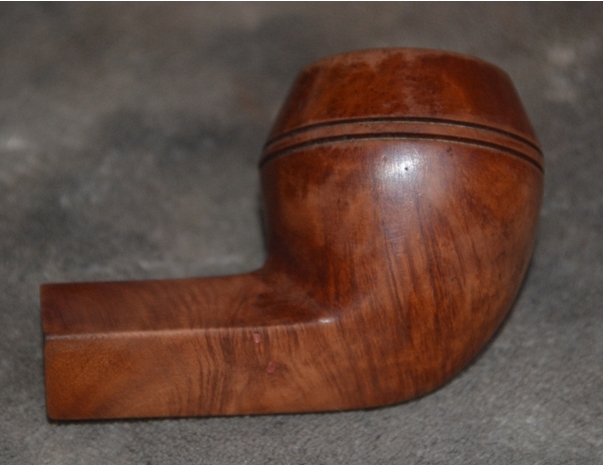
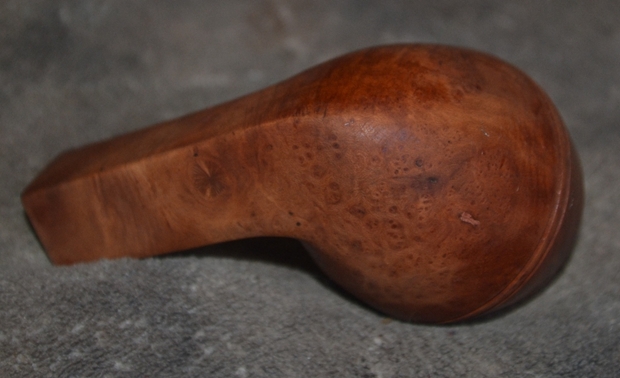
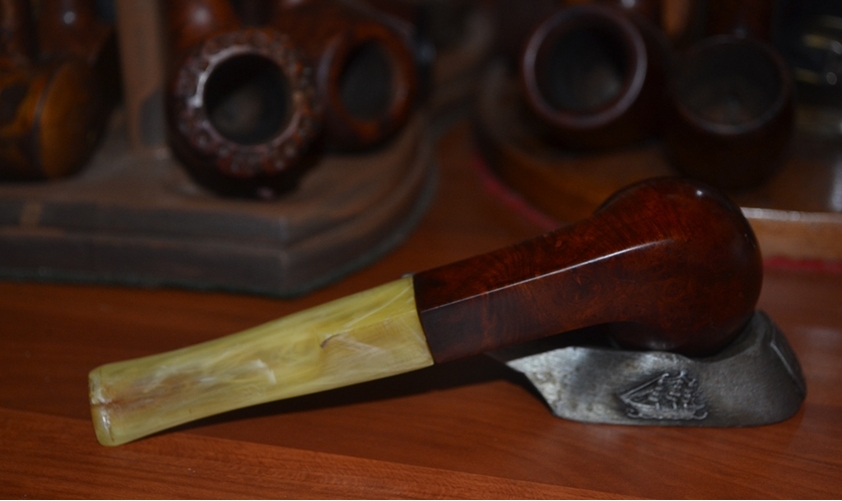
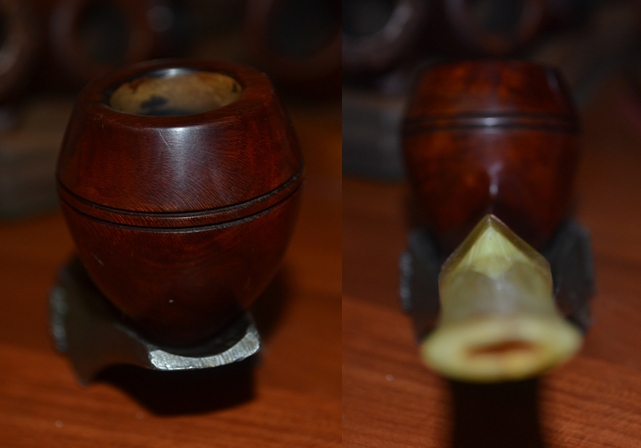
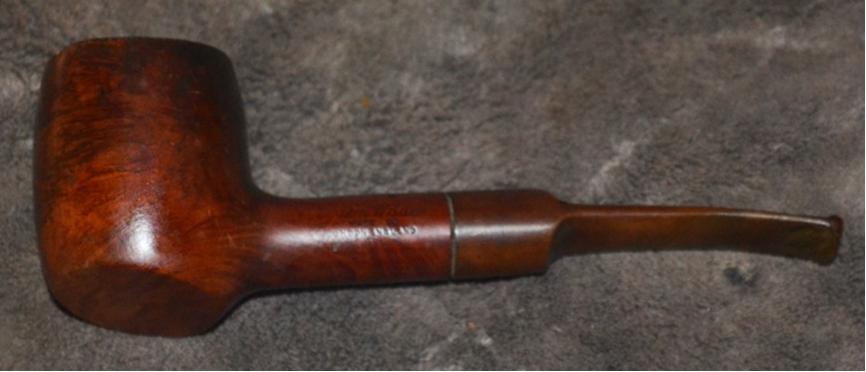
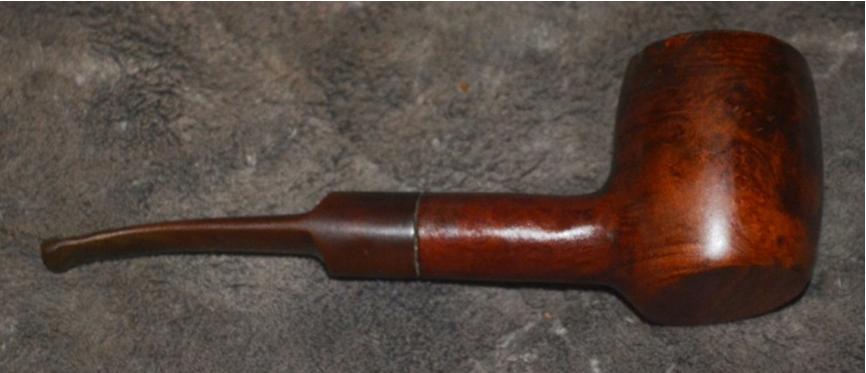
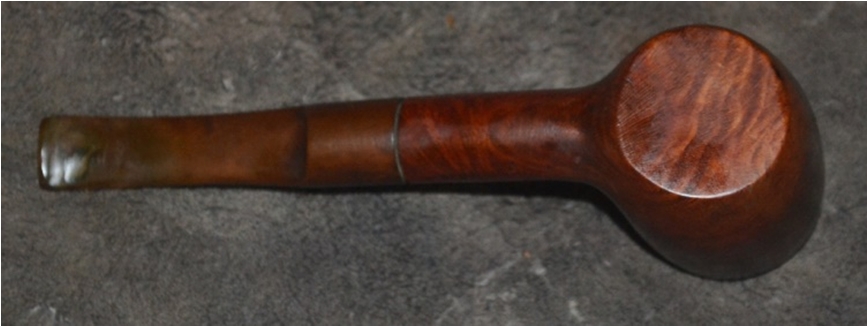
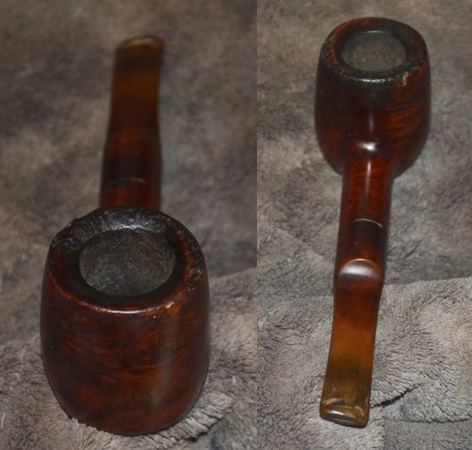
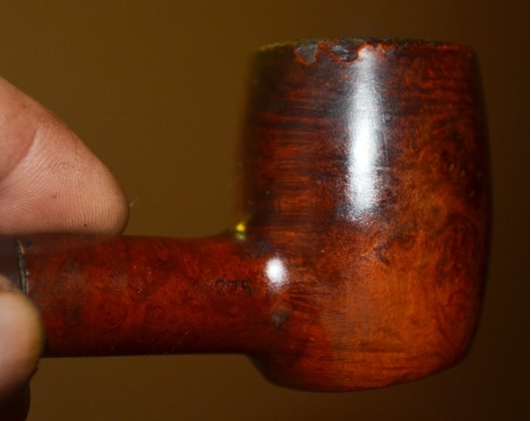
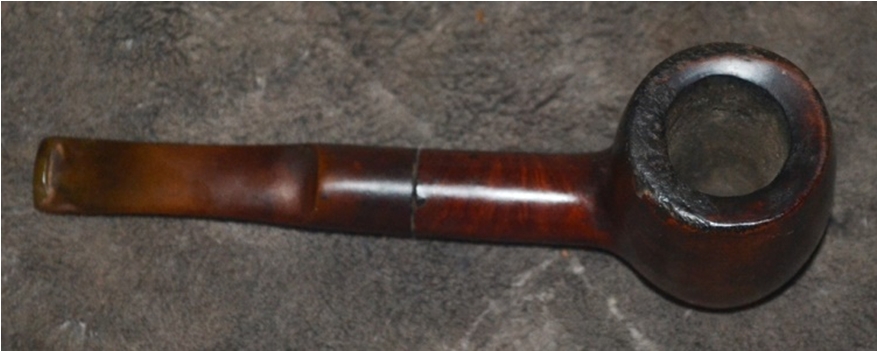
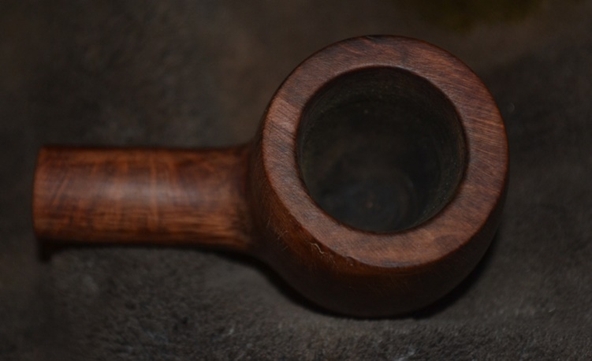
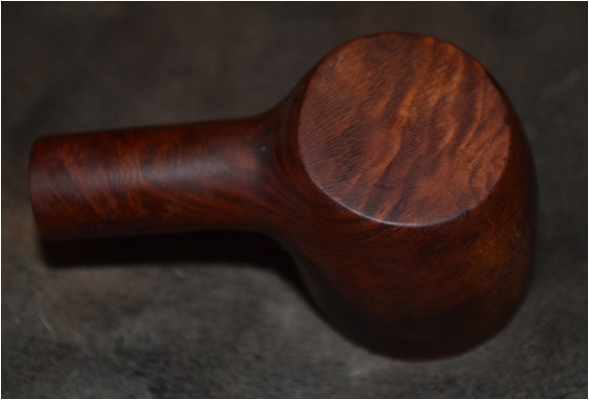
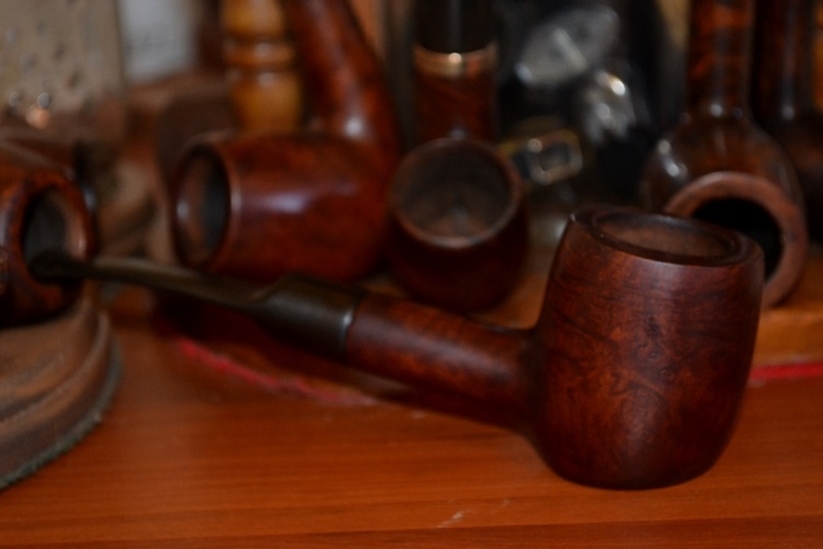
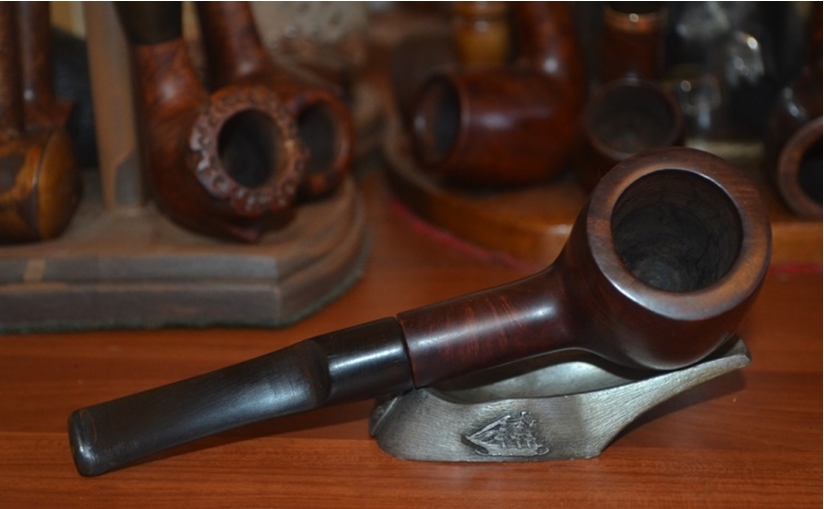
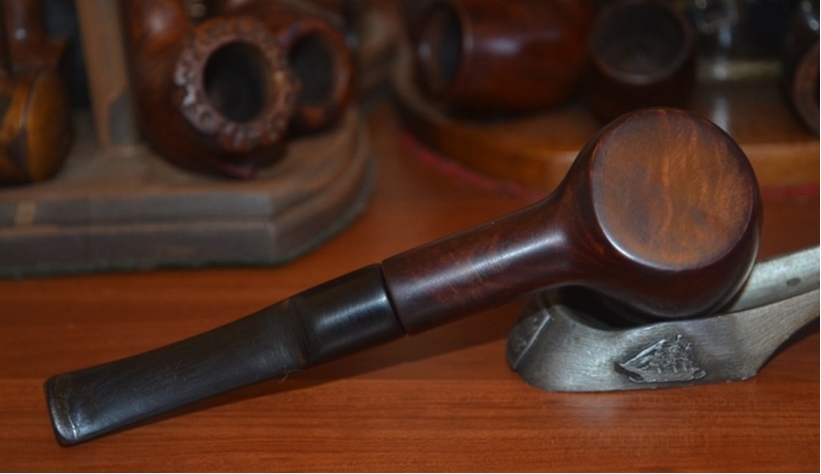
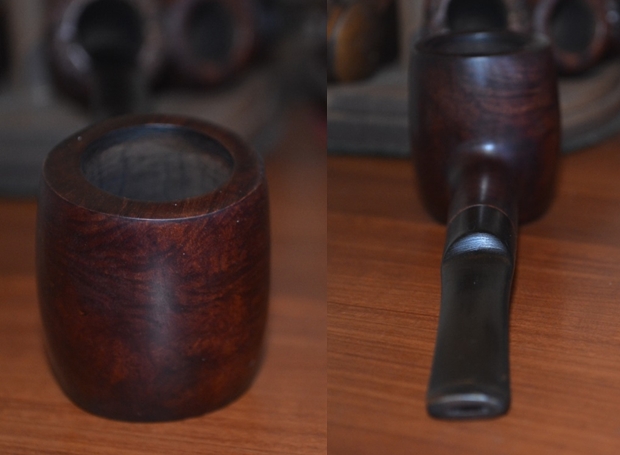
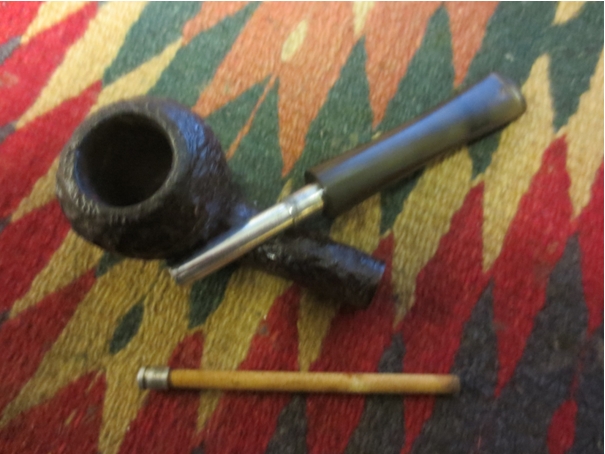
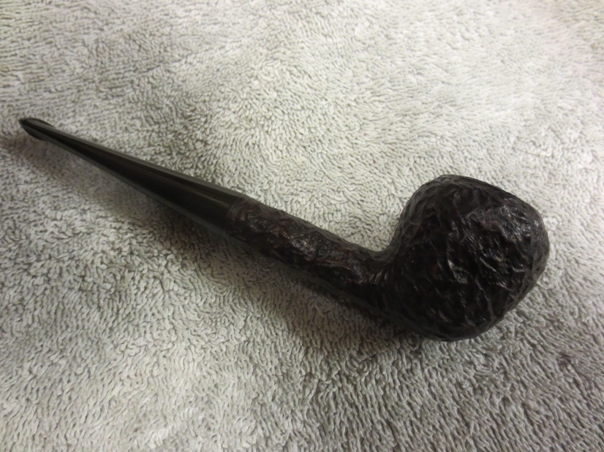
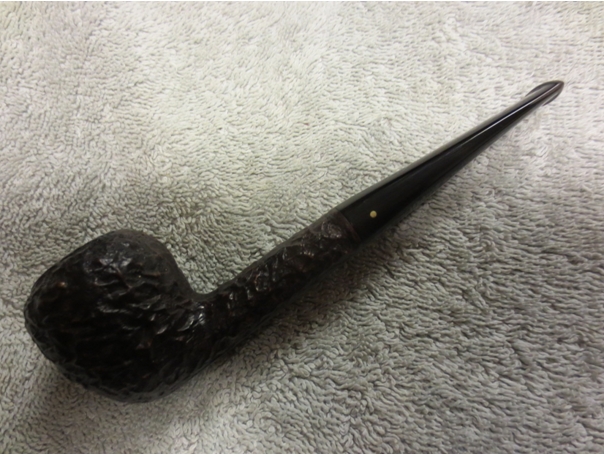
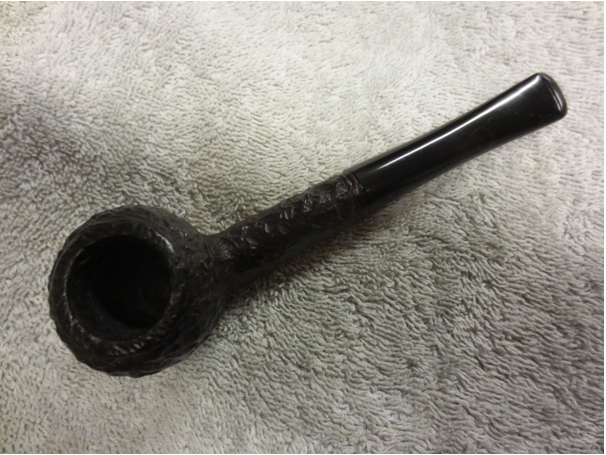
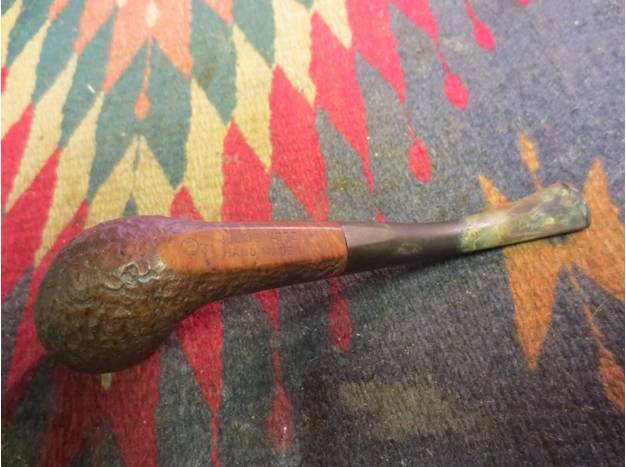
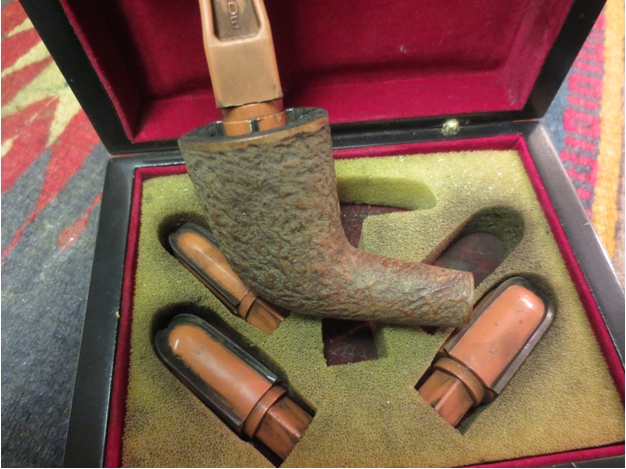
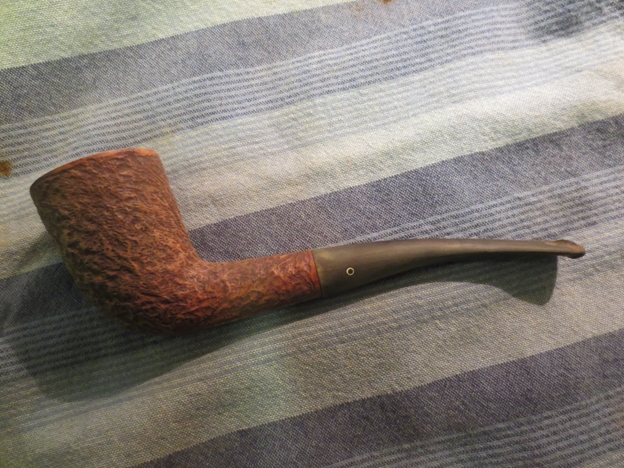
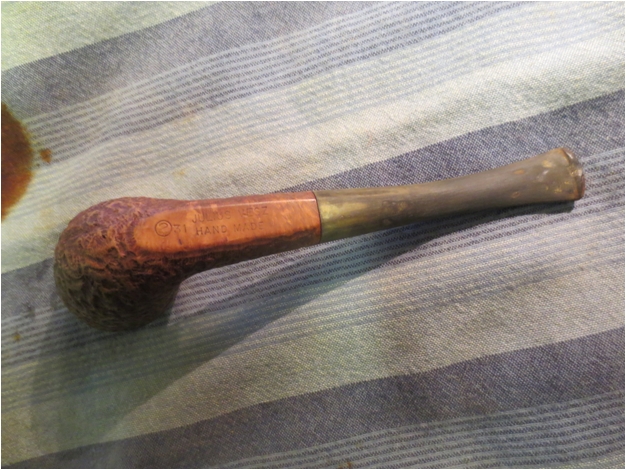
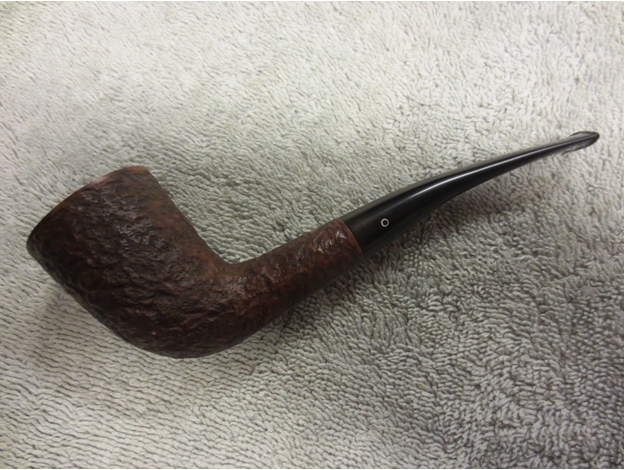
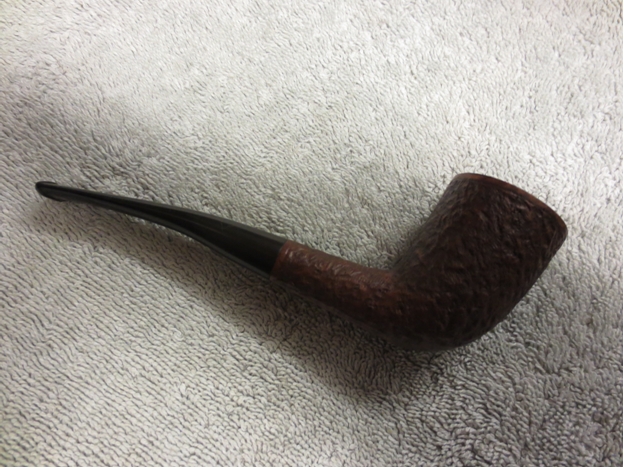
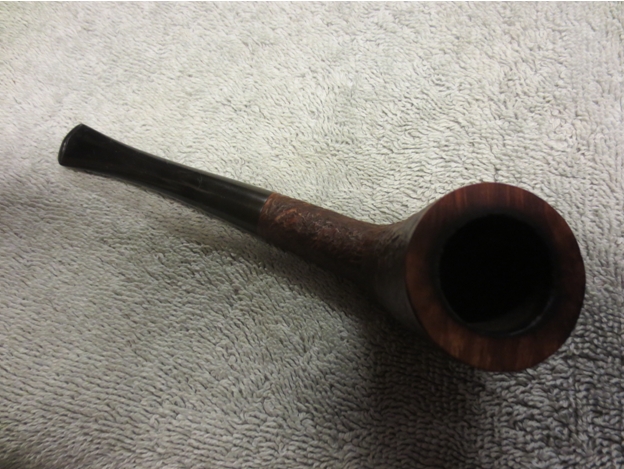
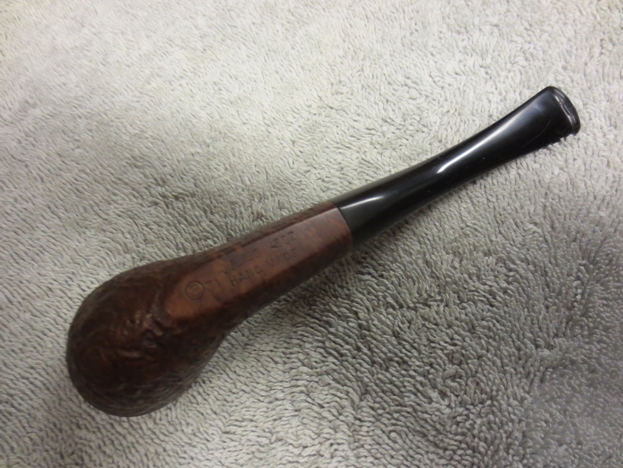
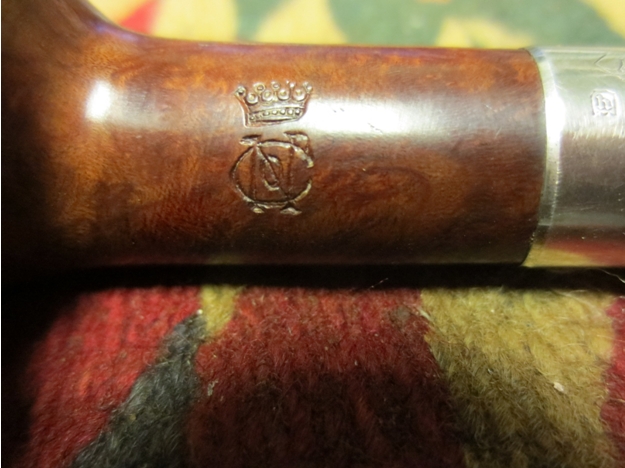
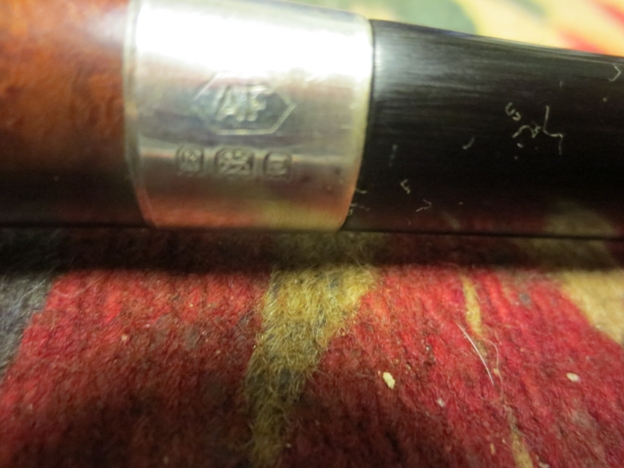
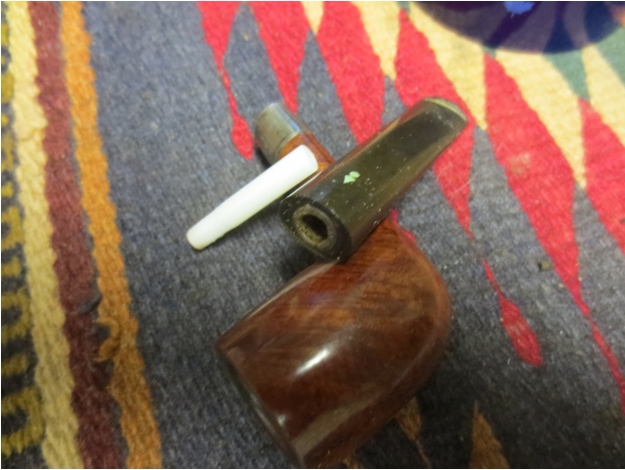
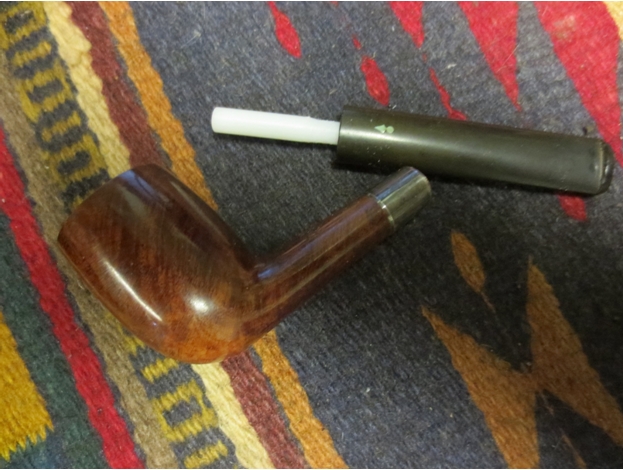
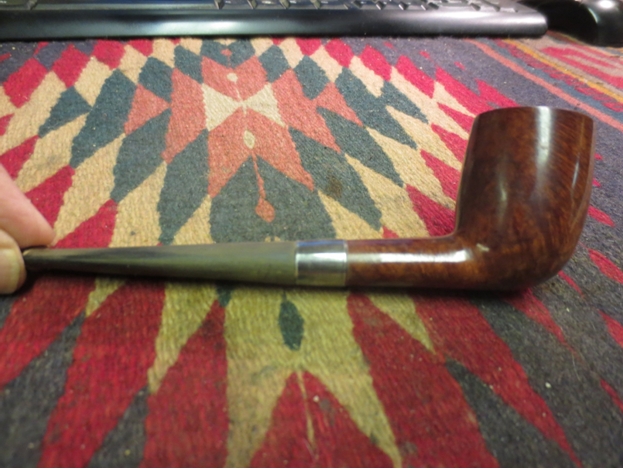
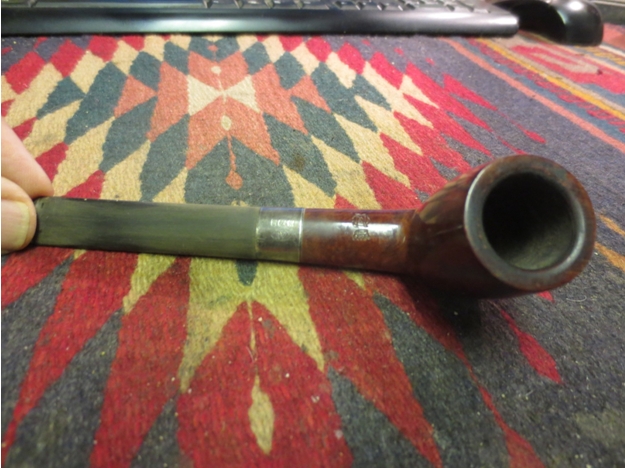
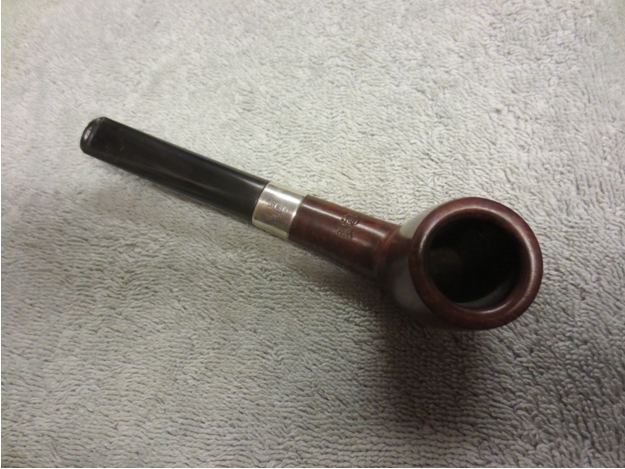
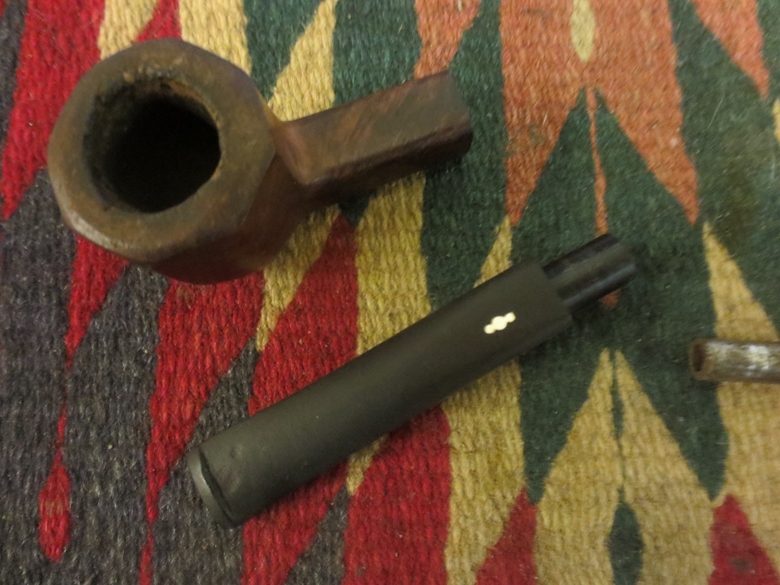
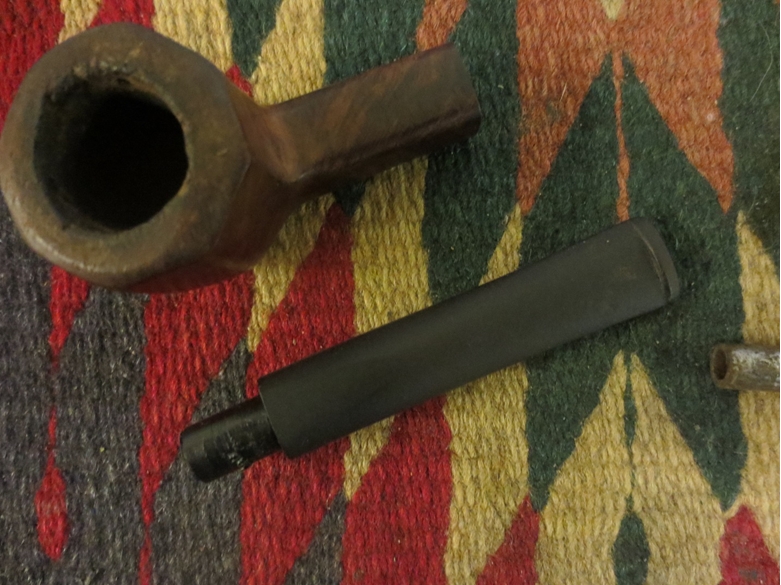
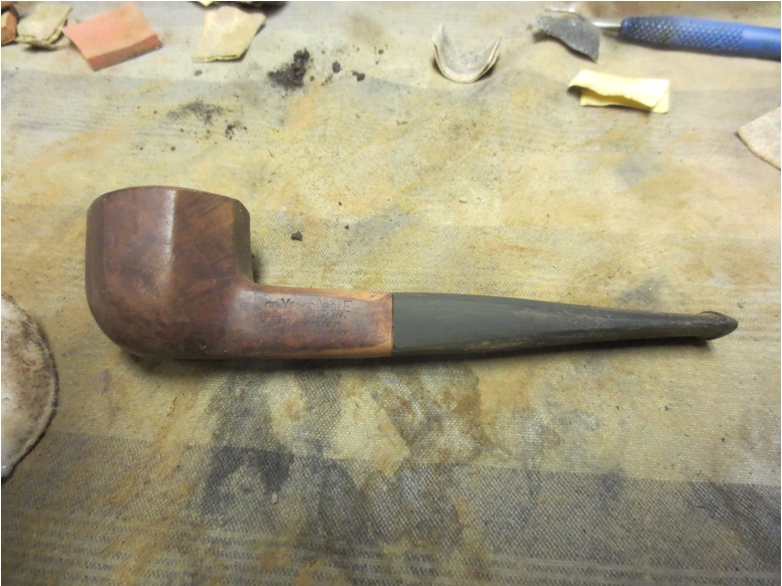
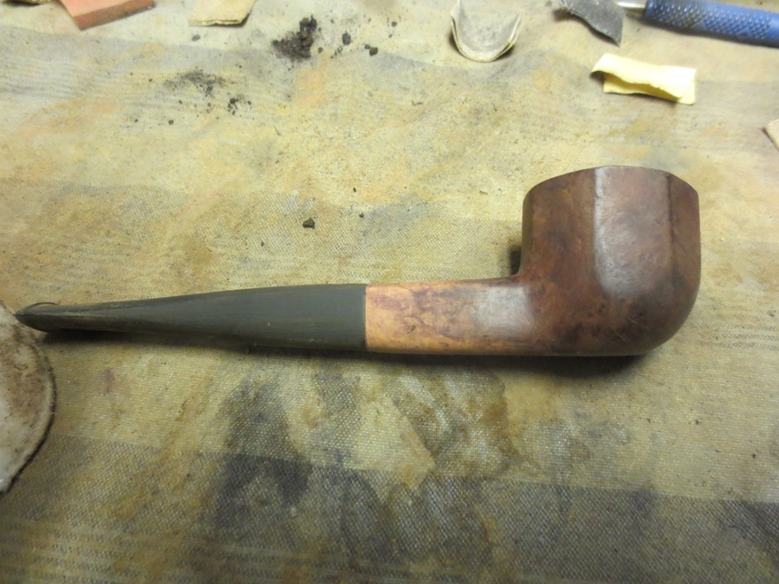
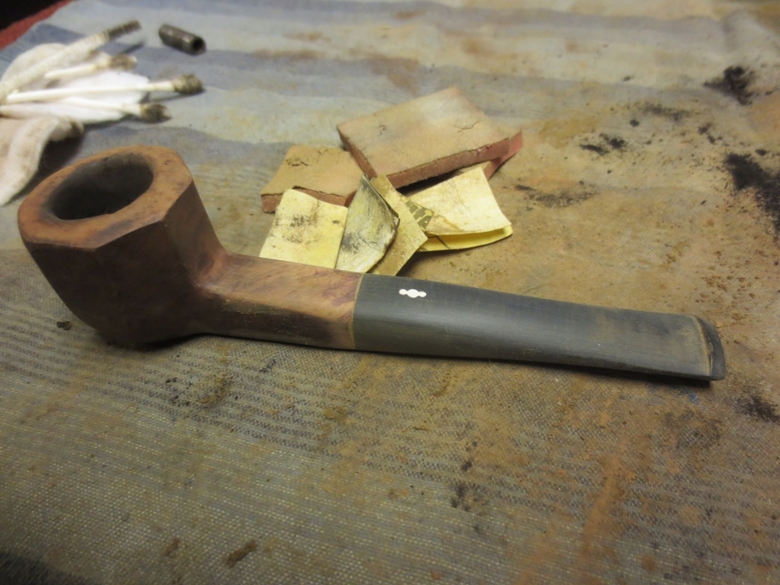
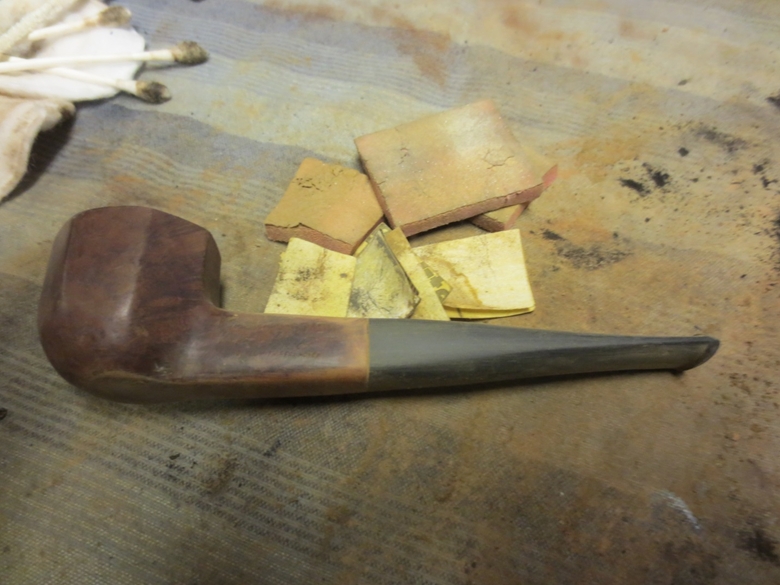
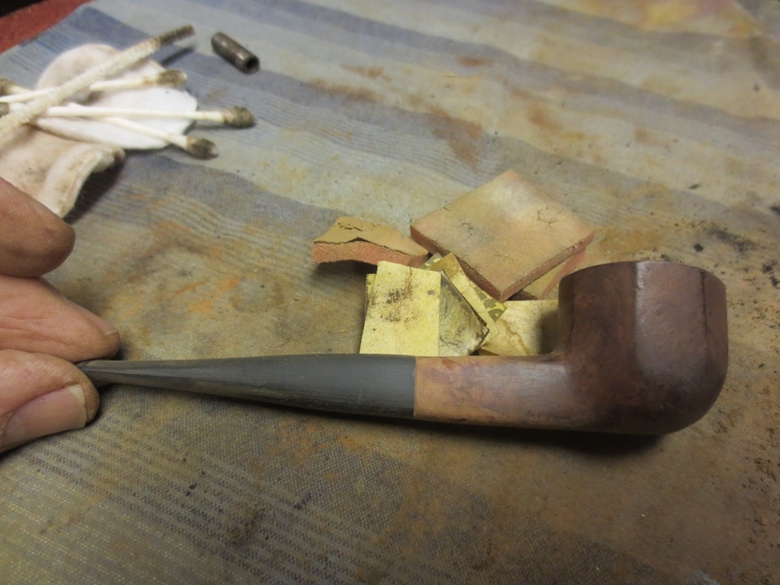
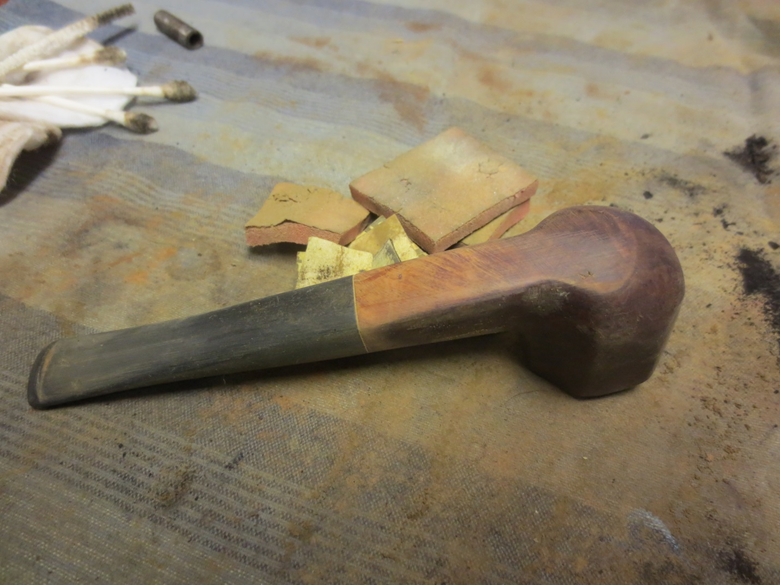
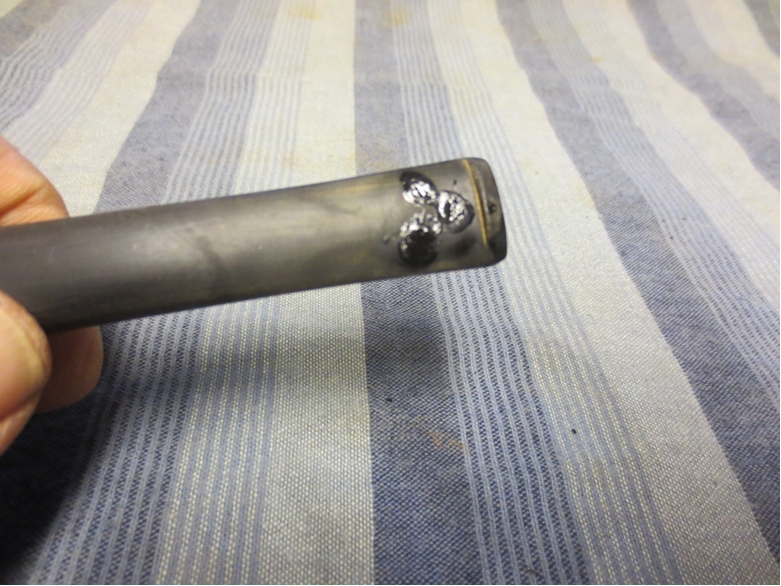
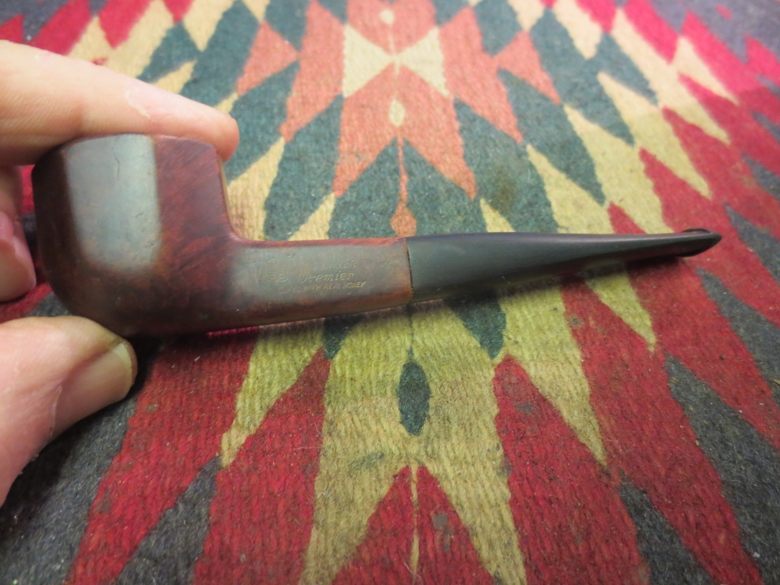
In a recent trade with Andrew Selking I received an older KBB Yello Bole Paneled billiard. When I removed it from the box there was something about the older KBB Panel that grabbed my attention. It was stamped on the left side of the shank with the familiar KBB logo and the Yello-Bole next to it. Underneath that it bore the stamp Reg. US Pat. Off. Directly below that was stamped Premier over Cured with Real Honey. The pipe had been repaired at some time in its ragged existence with what appeared to be a homemade repair job. The tenon had broken somewhere along the line and a previous owner had drilled out the stem and used a piece of stainless steel tubing to make a new tenon. The metal tenon was stuck in the shank of the pipe and the stem just sat loosely on it. The fit of the stem to the shank was off with the stem sitting high and to the right. The previous owner had tried to compensate for the off centered stem by sanding flat spots on the stem sides and bottom that broke the smooth lines of the square shank and stem. There were two small hairline cracks on the shank – top right and bottom left that would need to be repaired once the tenon was removed. The bowl was out of round with damage to the inner edge of the rim and a tarry build-up on the surface. The outer edge rim crown of the bowl was also compromised and would need some work. The stem was not too badly oxidized but it had tooth marks on the top and bottom near the button.YB1

YB2

YB3 
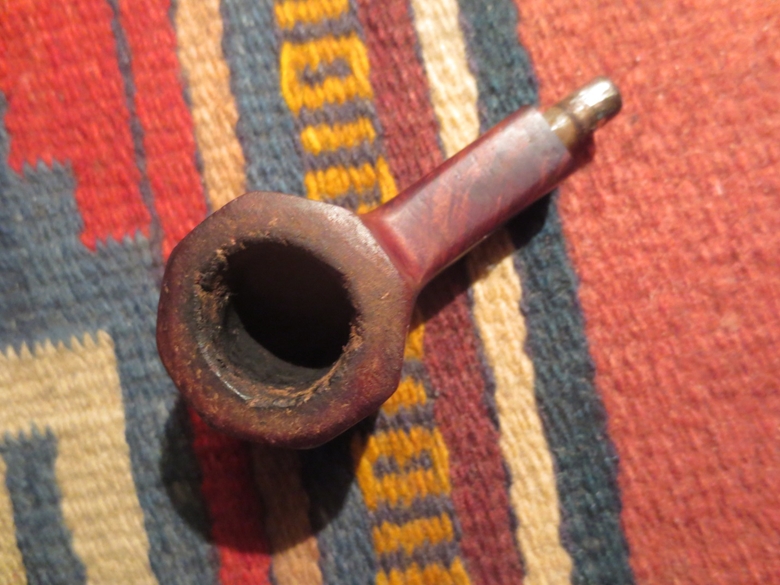
Background Information
I wrote about the history of the KBB stamped Yello-Bole Pipes. The following link will give you the details: https://rebornpipes.com/2014/07/21/renewing-an-old-kbb-yello-bole-honey-cured-briar-billiard/
Yello-Bole pipes are one of my favorite older US brands doing the research would be enjoyable. As with other early brands made in the states I have found that older is better. A KBB in a cloverleaf stamp will date them back to the ’30’s. I have found through my reading that the 4 digit shape numbers are older than 2 digit ones. The pipes with the logo on top of the stem are older than ones that have them on the side. That is just some of the information that I found with a cursory read through the forums and a variety of websites.

The SM Frank website http://www.smfrankcoinc.com/home/?page_id=2 gives a wealth of historical information on Kaywoodies, Yello-Boles and the merger between KBB and SM Frank and later Demuth. It was a great read and I would encourage others to give the website a read. I also wanted to find some help in dating my old Yello-Bole Pipes and I came across this link to the Kaywoodie Forum: http://kaywoodie.myfreeforum.org/archive/dating-yello-bole-pipes__o_t__t_86.html . I am including some of the information I found there as it gives the only information that I found in my hunt to this point.
“…there isn’t a lot of dating information for Yello-Bole pipes but here is what I have learned so far.

– If it has the KBB stamped in the clover leaf it was made 1955 or earlier as they stopped the stamping after being acquired by S.M. Frank.
– From 1933-1936 they were stamped Honey Cured Briar.
– Pipes stems stamped with the propeller logo they were made in the 30s or 40s no propellers were used after the 40s.
– Yello-Bole also used a 4 digit code stamped on the pipe in the 30s.
– If the pipe had the Yello-Bole circle stamped on the shank it was made in the 30s this stopped after 1939.
– If the pipe was stamped BRUYERE rather than briar it was made in the 30s.”
Given the above information I discovered that the pipe I was working on was made sometime between 1930 and 1940. Thus it was an early Yello-Bole from the 1930s or 40s.

Restoration Process

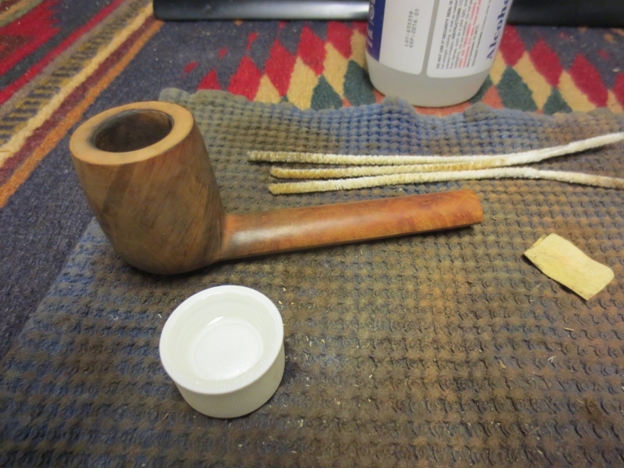
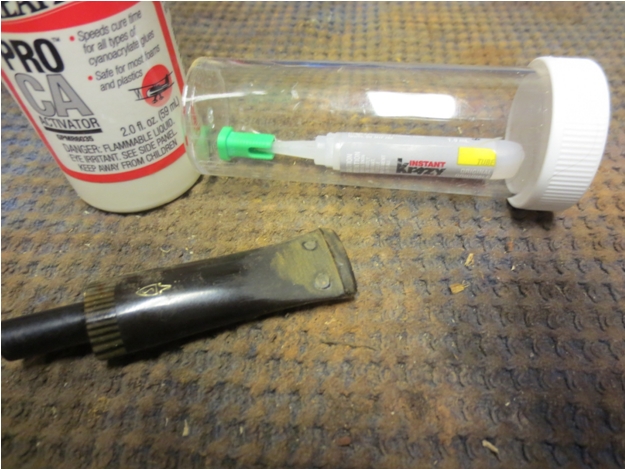
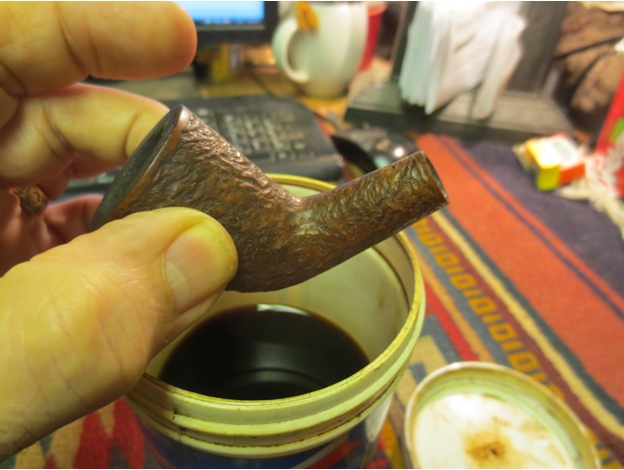
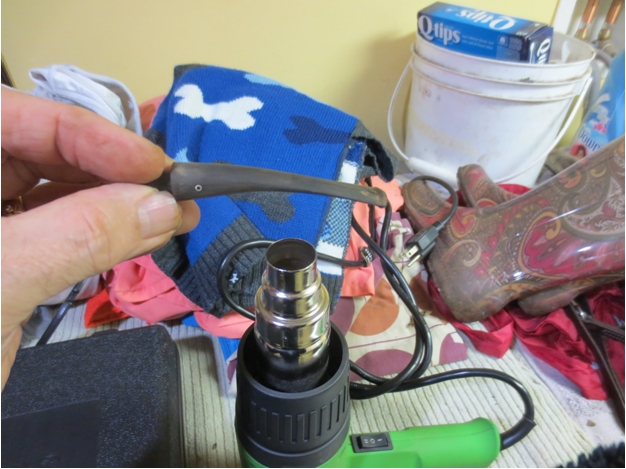
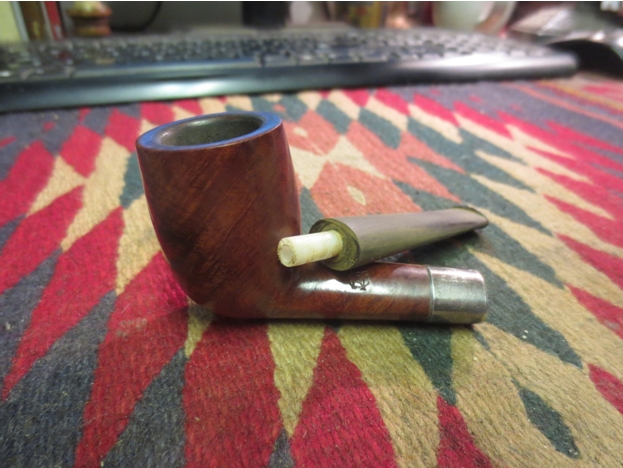
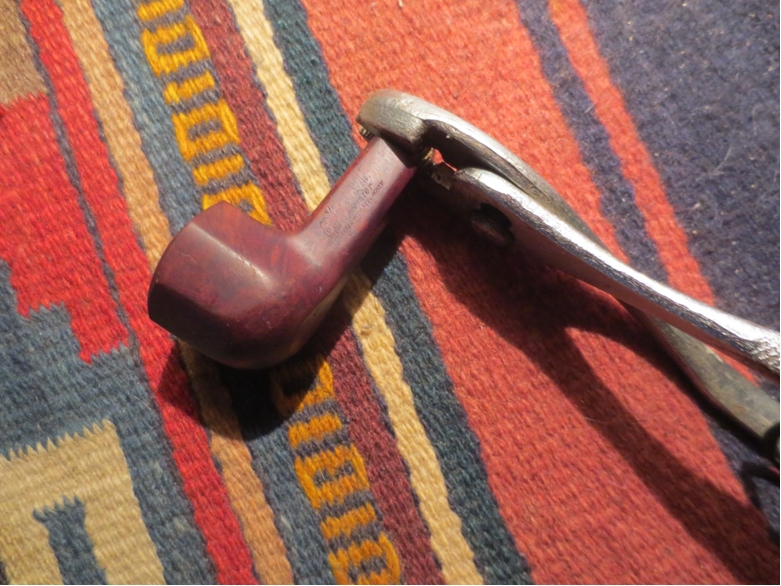
I took the stem off the bowl and tried to remove the inserted metal tenon. It was firmly stuck in place and I could not move it even with pliers. I put the bowl in the freezer overnight hoping that the cold would contract the metal and briar differently (as is the case with the varied material and density). In the morning I took it out of the freezer and was able to turn the tenon out of the shank with pliers. Once it was removed it was clear to see that it had not been glued in the shank but merely stuck with the tars and oils of the tobacco in the shank.YB4 
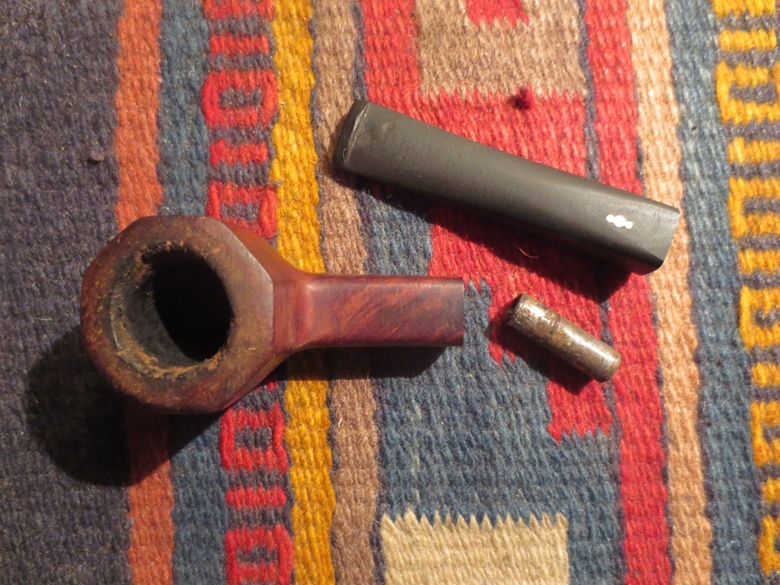
I found a threaded Delrin tenon in my box of tenon parts and it was a workable replacement for the metal tenon. I tapped the drilled out hole in the stem and screwed the threaded tenon into the hole. It was a perfect fit. I removed it once again and put some glue on the threads and screwed it into place and let the glue set. The diameter of the tenon would need to be adjusted as it was too big for the mortise. This was actually ideal in that I would be able to adjust the fit against the shank on the sides and the top. The bottom of the shank would take work to make a smooth transition.YB5

YB6

YB7

YB8

YB9

YB10 
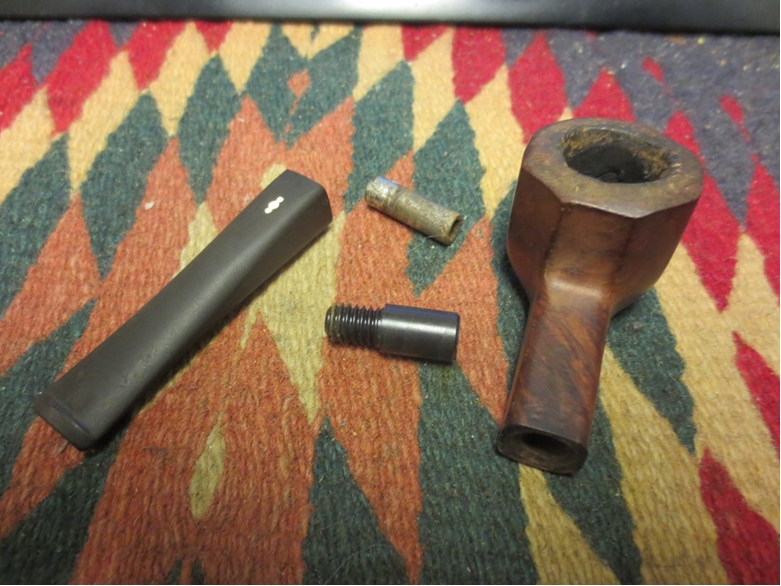
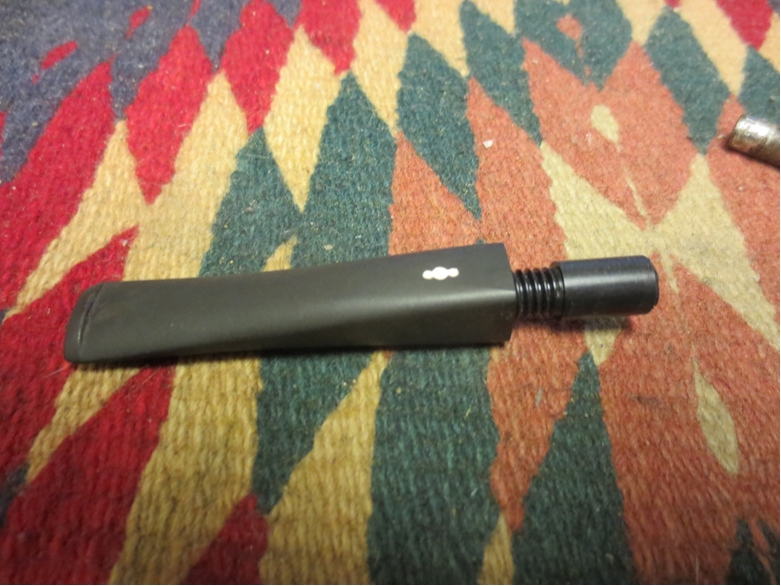
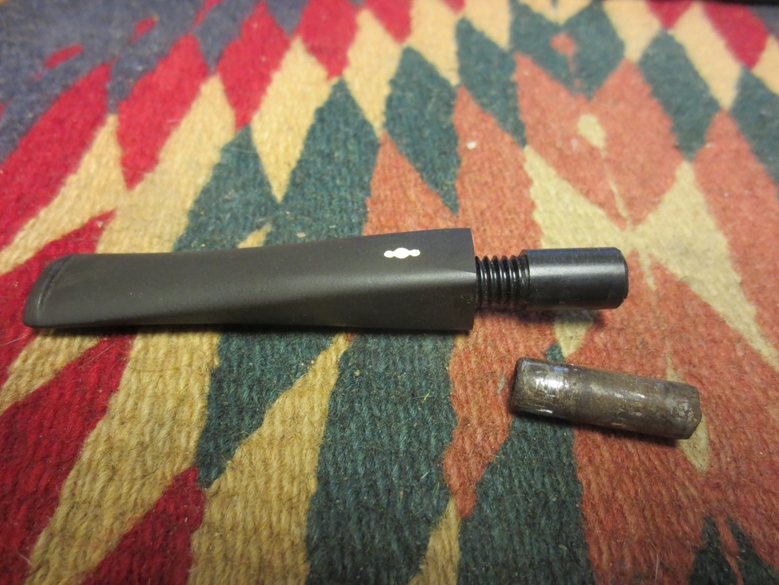
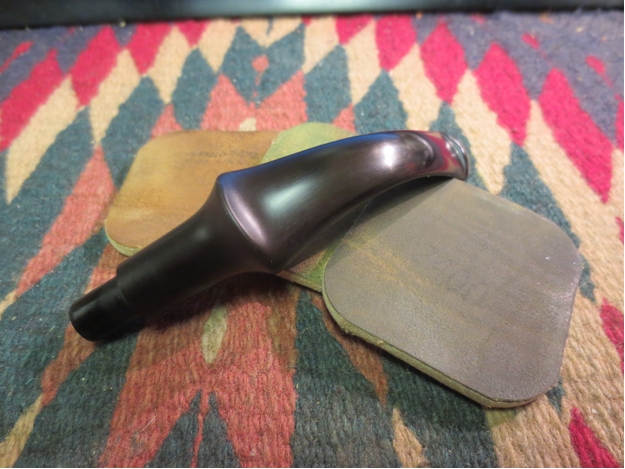
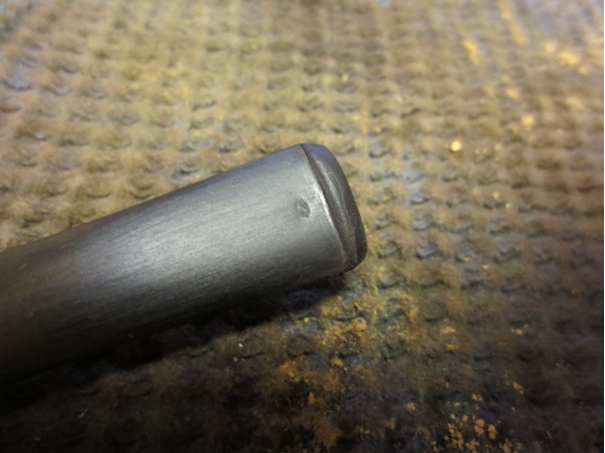
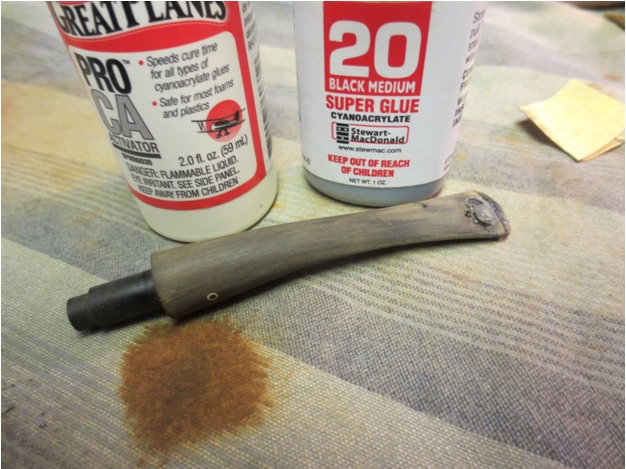
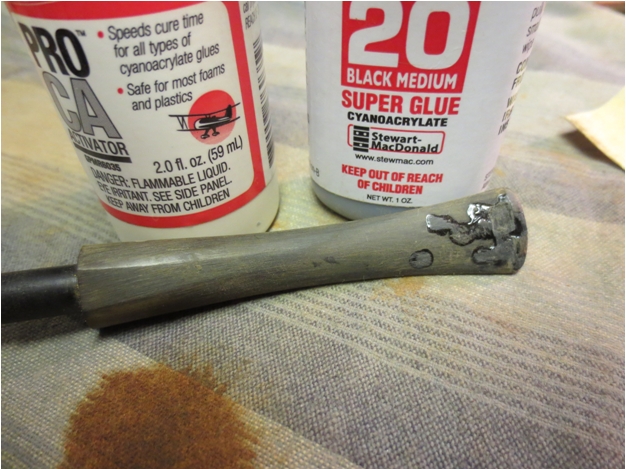
I sanded the tenon with a Dremel and sanding drum to remove the excess Delrin. I hand sanded it with 180 grit and 220 grit sandpaper to smooth out and fine tune the fit. I spread the hairline cracks with a dental pick and dripped superglue along the cracks and pressed them together until the glue set.YB11 
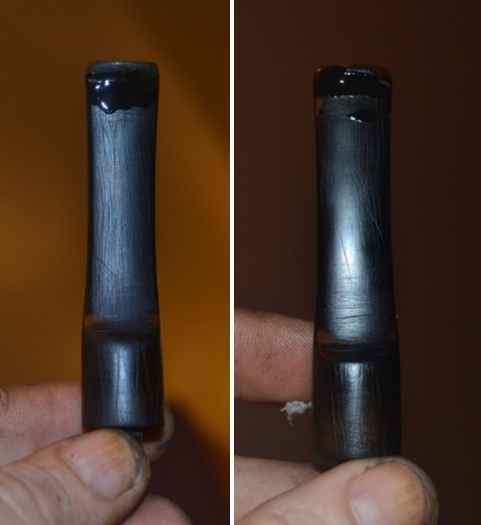
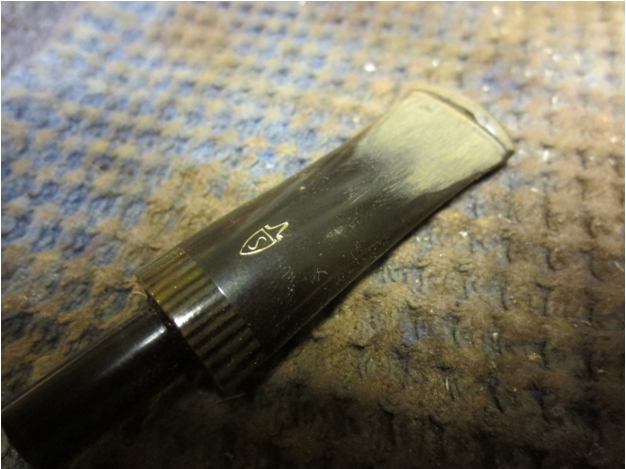
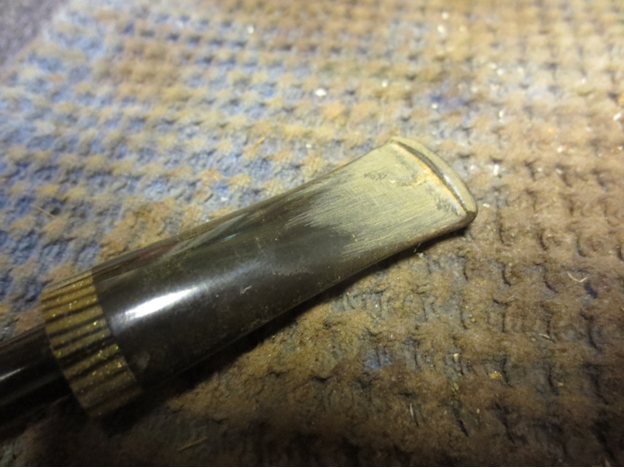
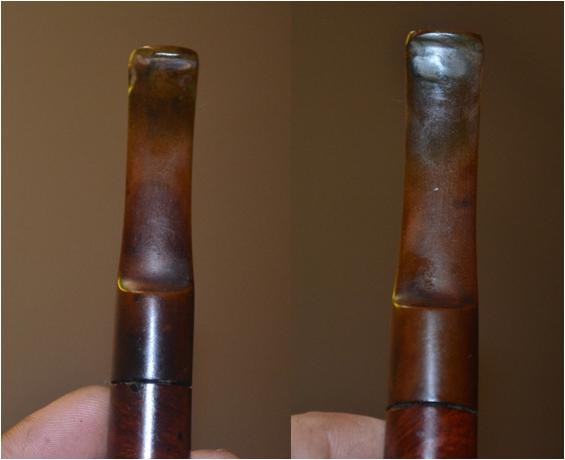
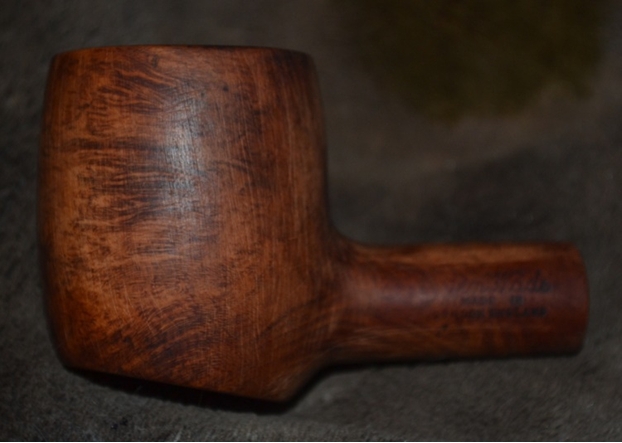
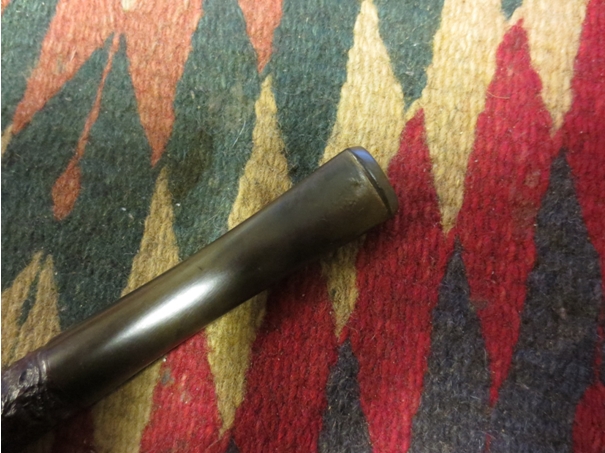
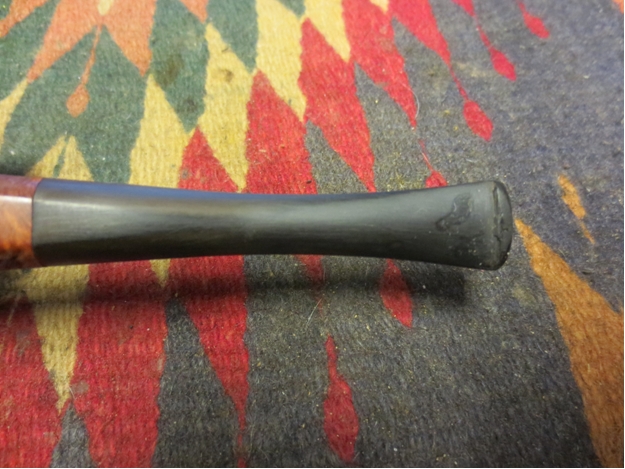
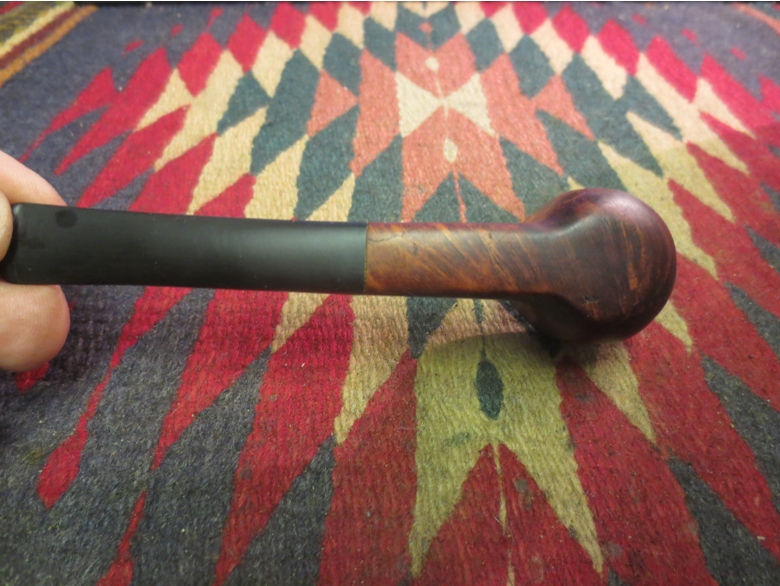
The stem fit in the shank nicely. The photos below show the damage that had been done to the stem in the previous repair. It is especially visible in the photos of the pipe from the side and the bottom. The stem had been modified to the misfit of the previous tenon so work would need to be done to realign the fit against the end of the shank.YB12

YB13

YB14

YB15

YB16

YB17 
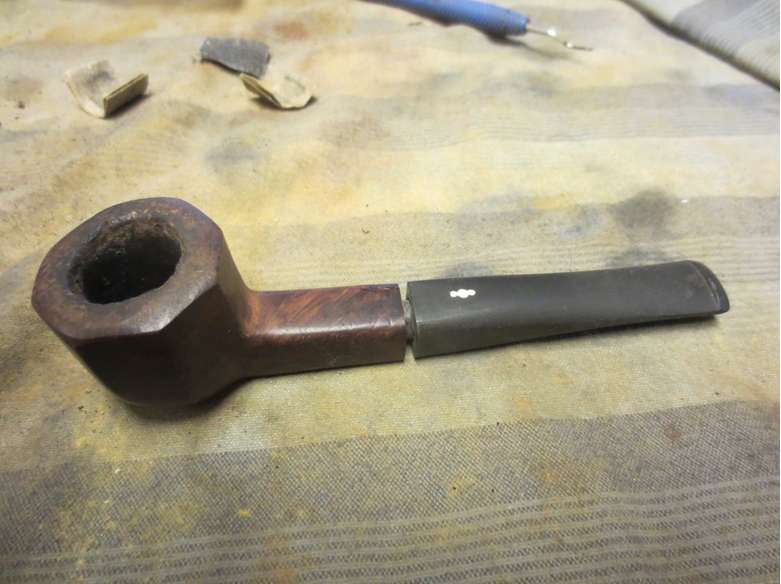
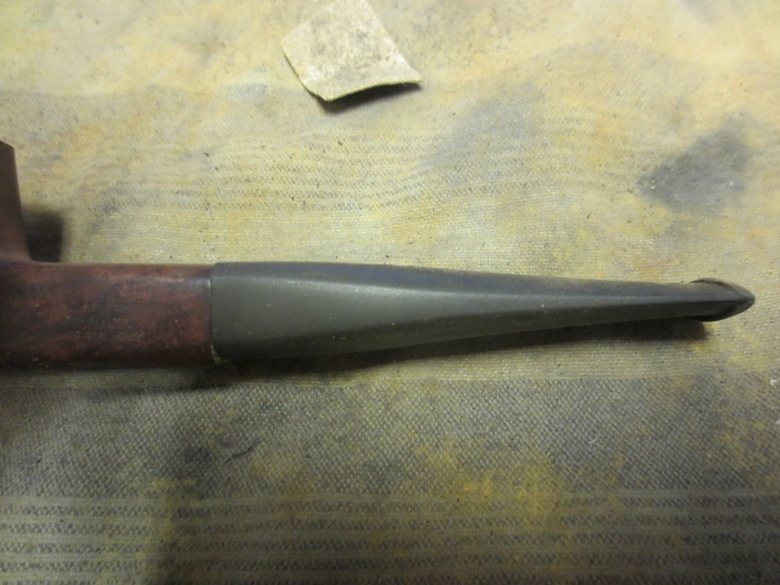
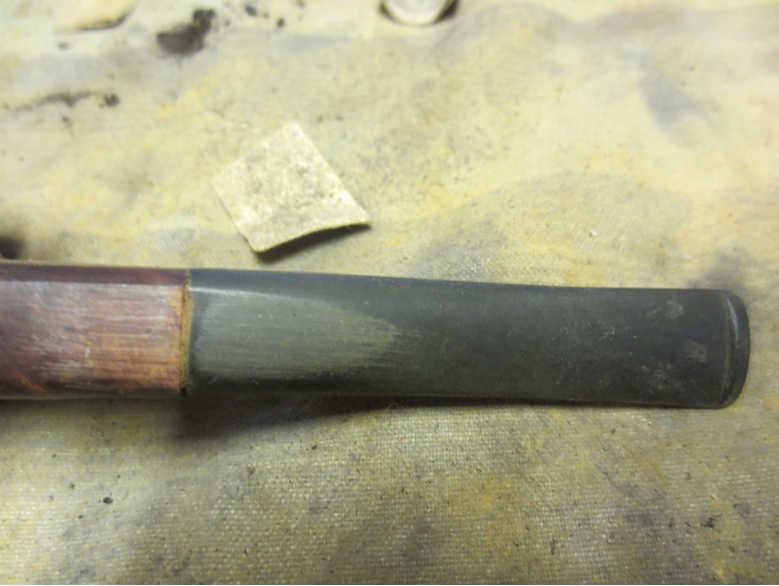
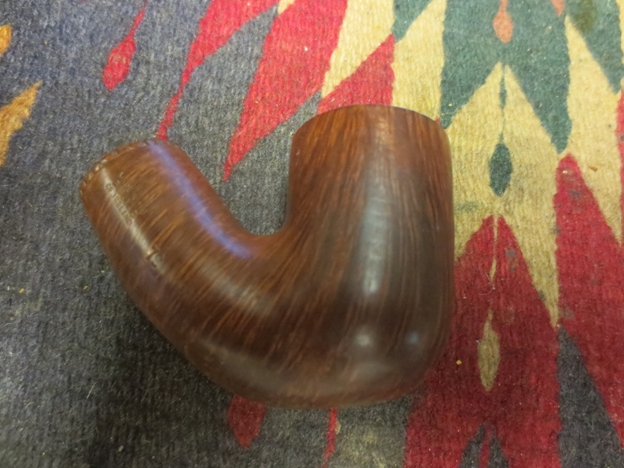
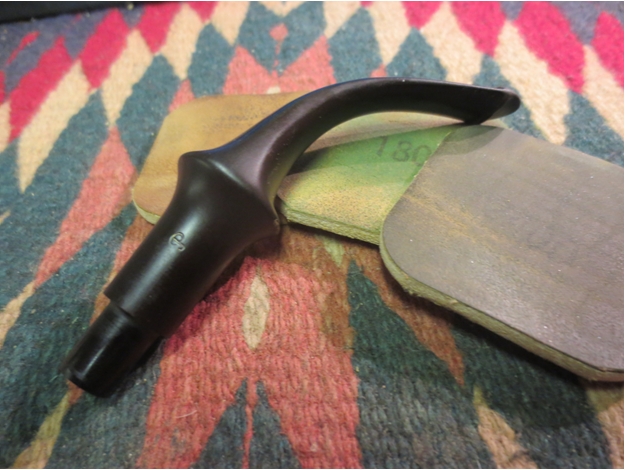
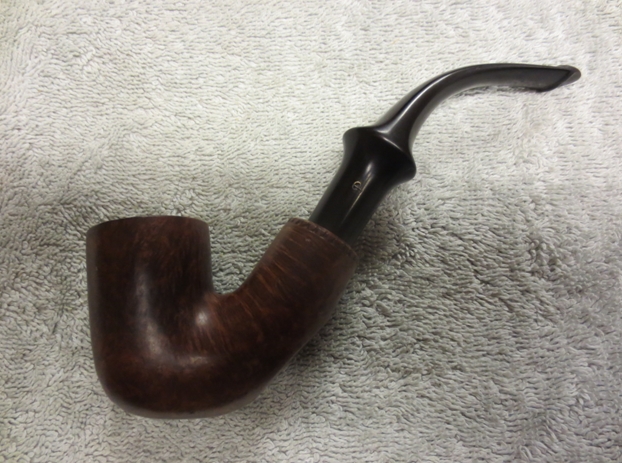
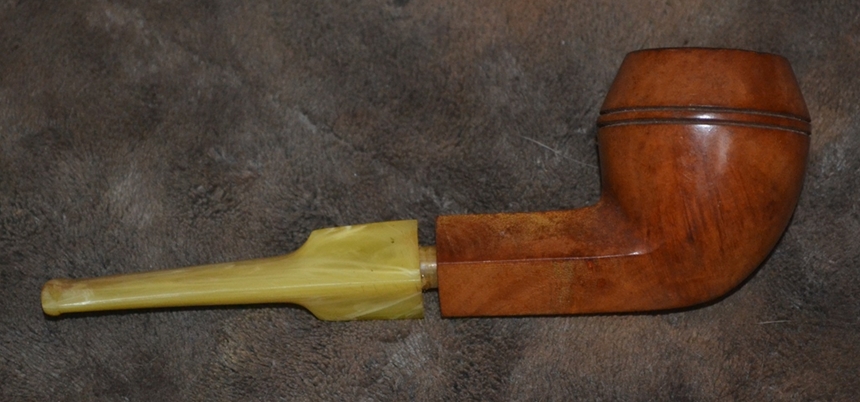
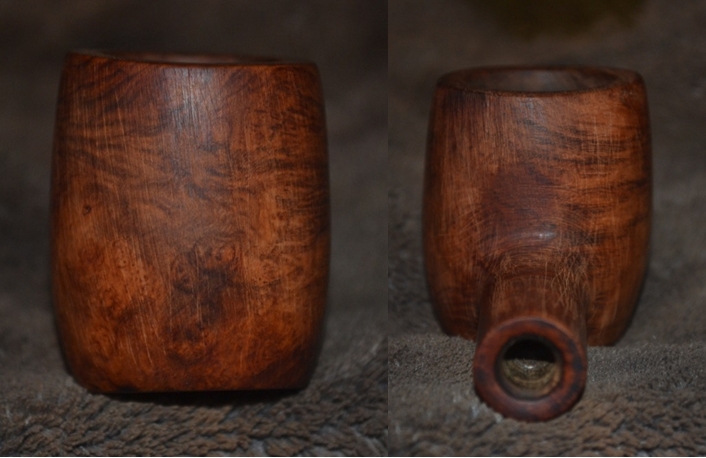
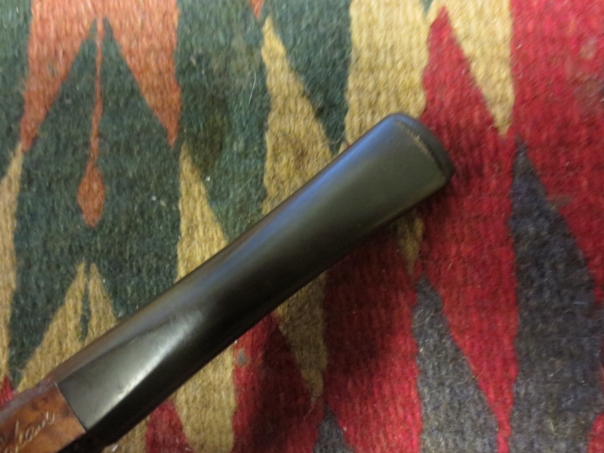
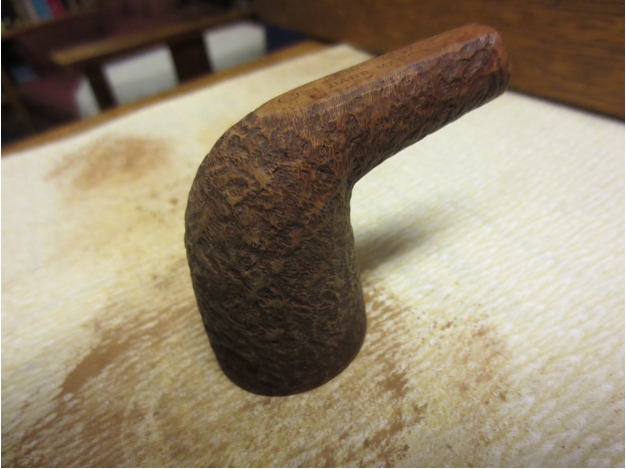
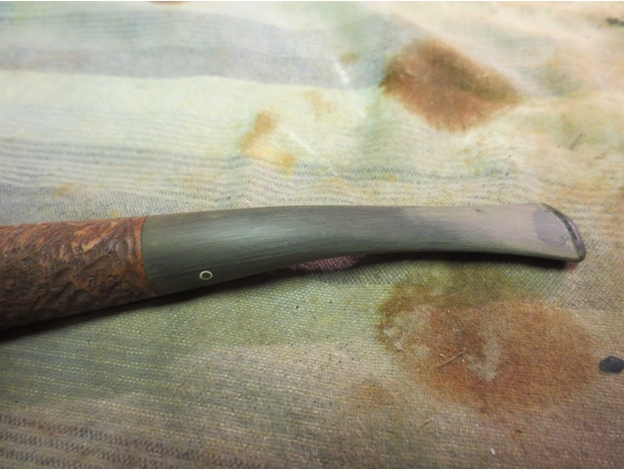
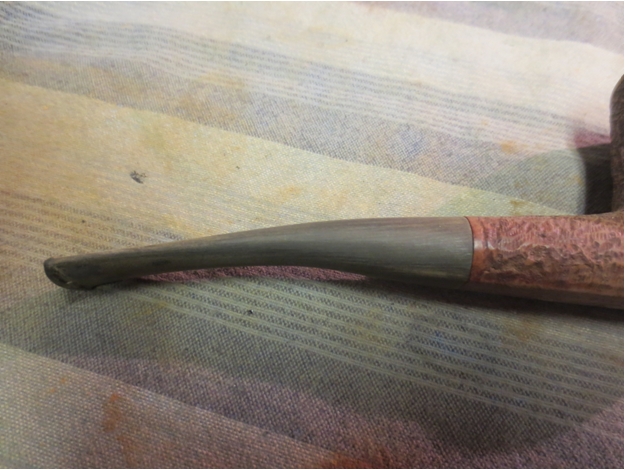
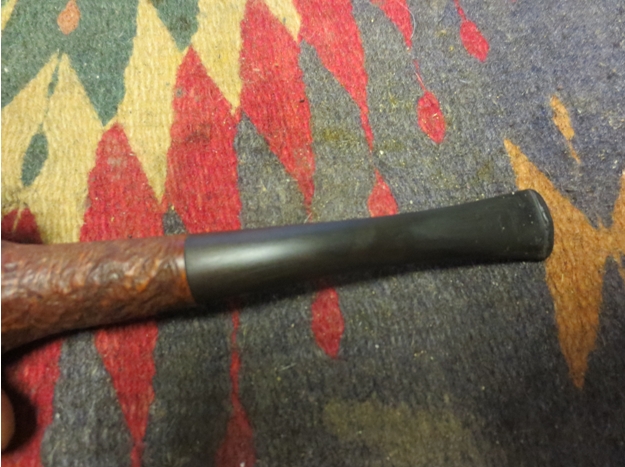
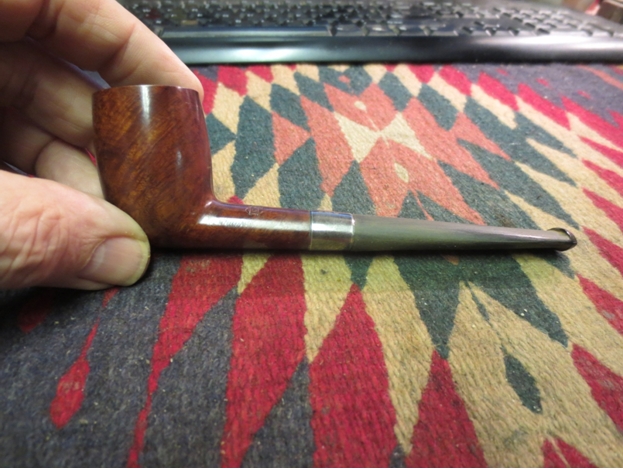
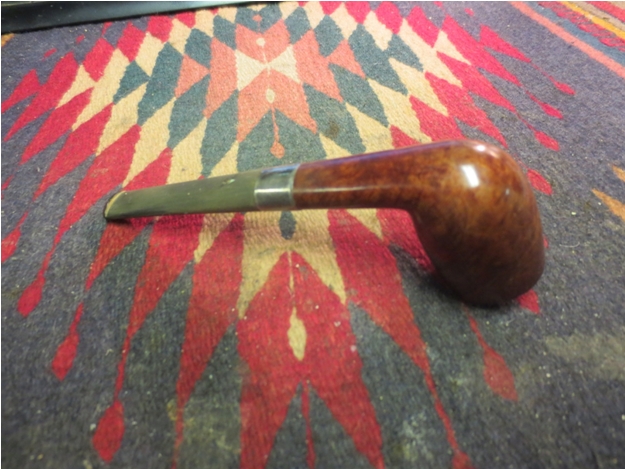
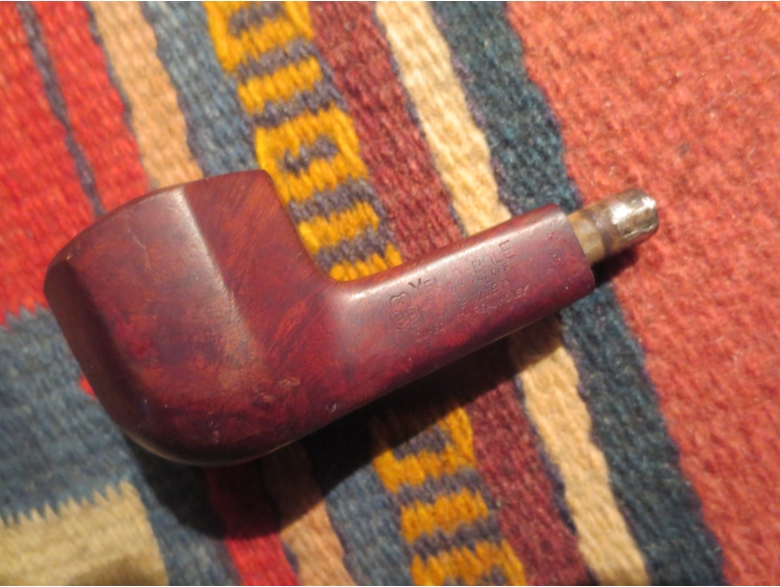
I sanded the bottom, top and right side of the shank until the transition between the briar and the vulcanite was smooth. The left side was touchier in that I did not want to damage the stamping. I sanded this area while covering the stamping. The trick was to smooth out the transition without making a drastic dip in the briar – it just needed to be re-tapered until it flowed naturally into the stem. Sanding the top of the stem also took care as it had the insert of the white propeller. Too much sanding on the top would damage and compromise the insert. The photos below show the newly sanded and tapered shank/stem. I sanded with 220 grit sandpaper, medium and fine grit sanding sponges and a fine grit sanding block. I sanded the rim and curves of the rim with the same sandpapers. I folded a piece of 220 grit sandpaper and worked on the out of round bowl to clean it up as much as possible.YB18

YB19

YB20

YB21 
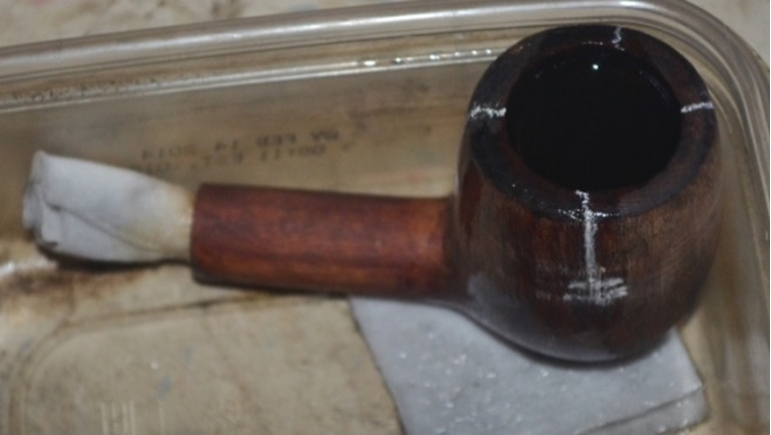
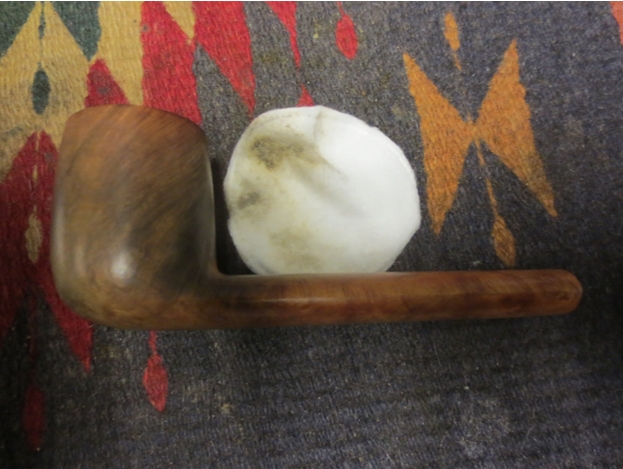
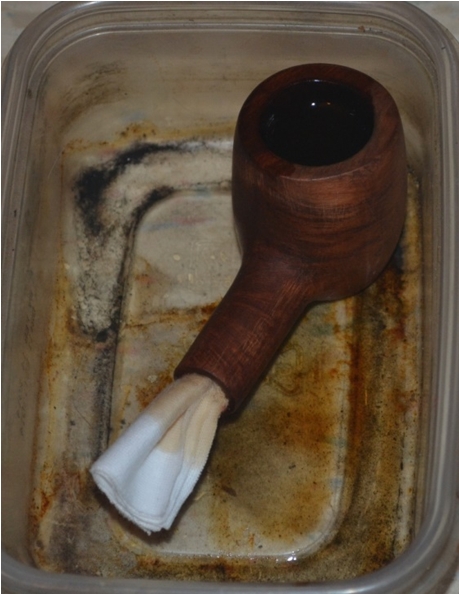
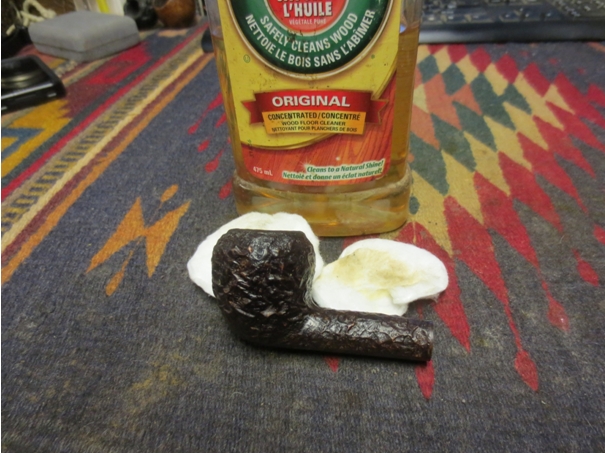
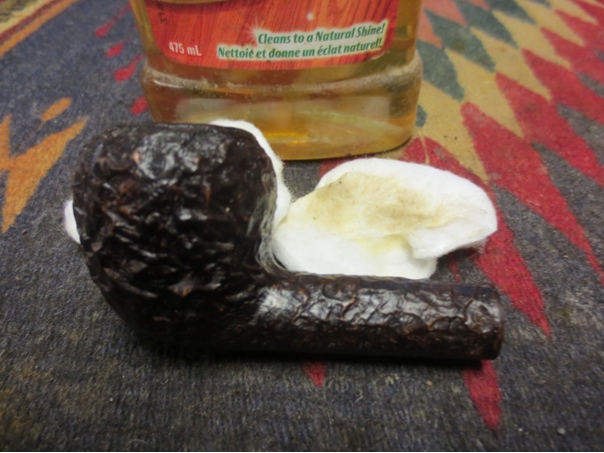
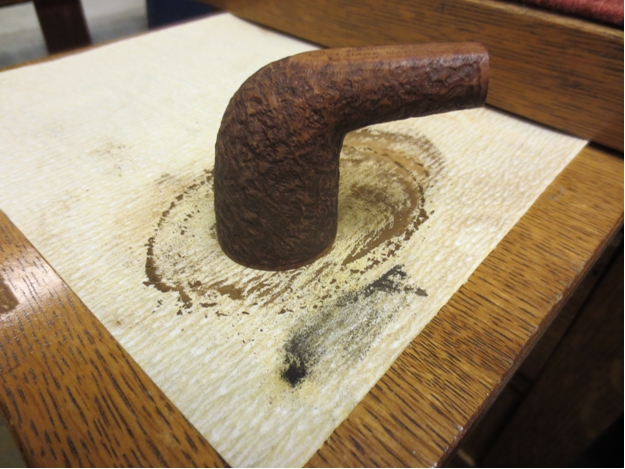
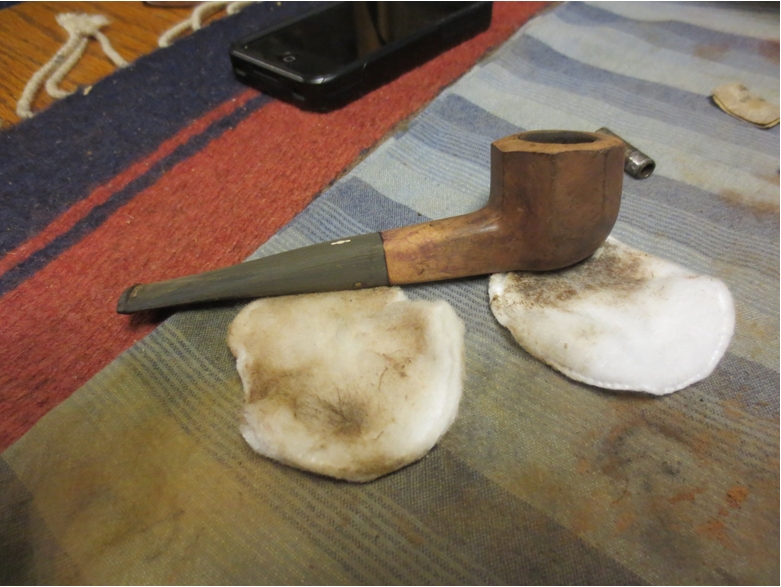
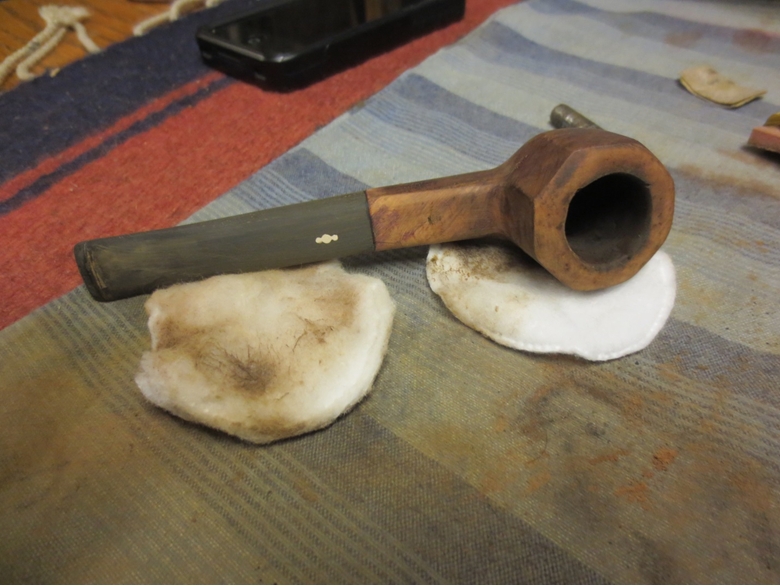
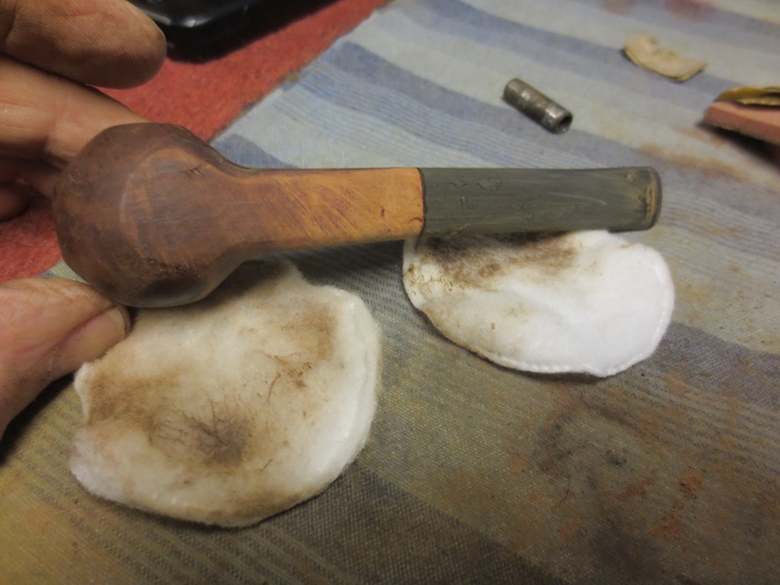
I wiped the bowl and shank down with acetone on a cotton pad to remove the finish from the bowl.YB22

YB23

YB24

YB25 
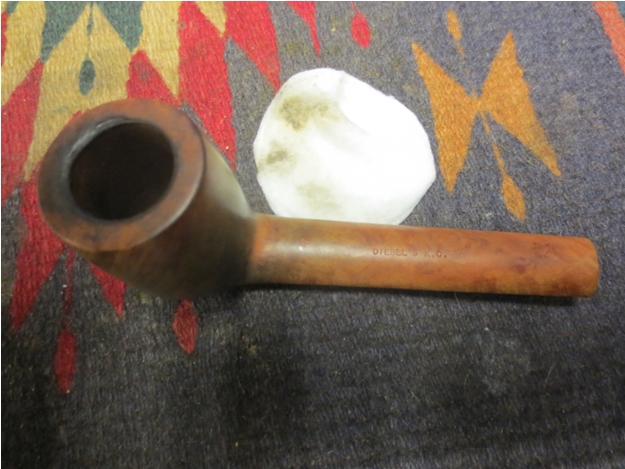
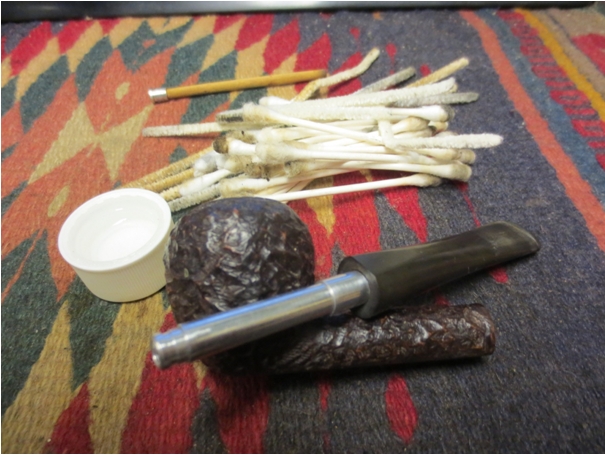
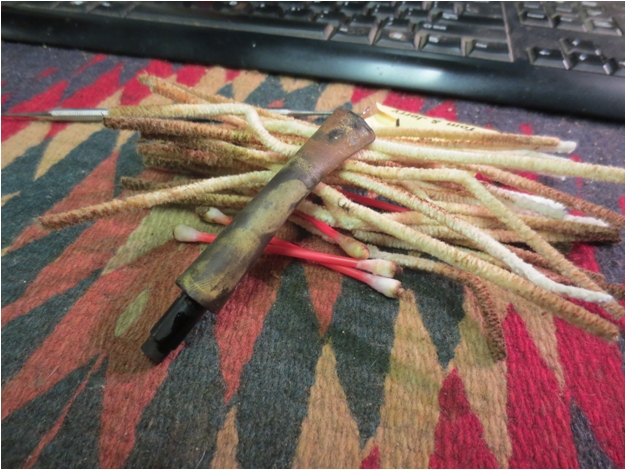
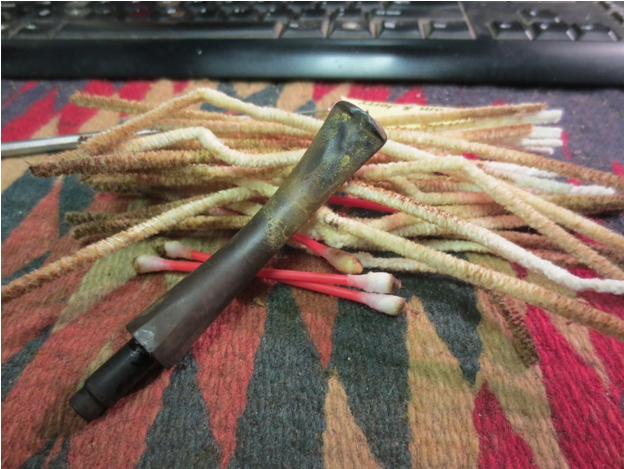
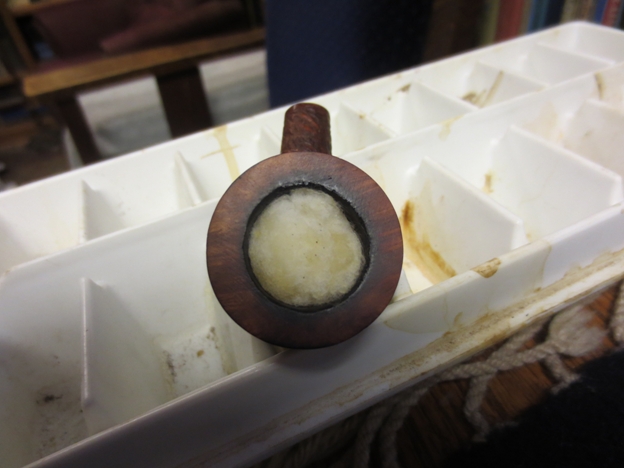
I cleaned out the bowl and shank with isopropyl alcohol, cotton swabs and pipe cleaners. I cleaned out the stem as well at the same time. I sanded the bite marks on the top and bottom of the stem with 220 grit sandpaper to minimize the damage and remove the tooth chatter. There were still some tooth marks that needed to be repaired.YB26

YB27

YB28

YB29

YB30 
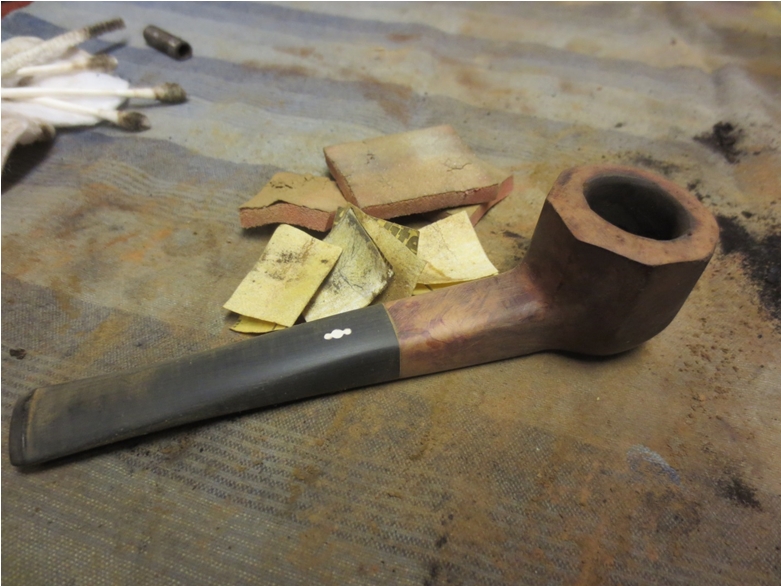
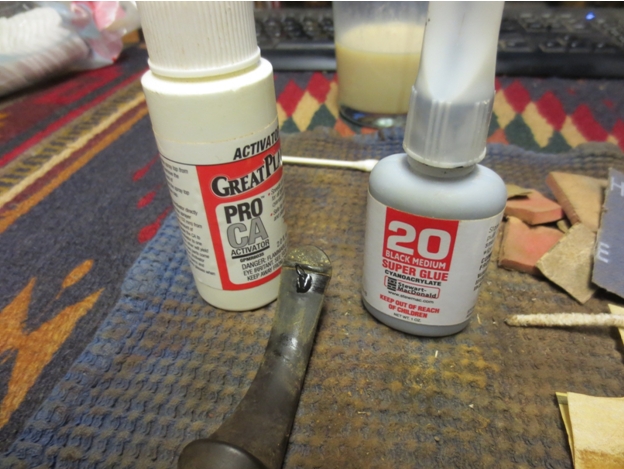
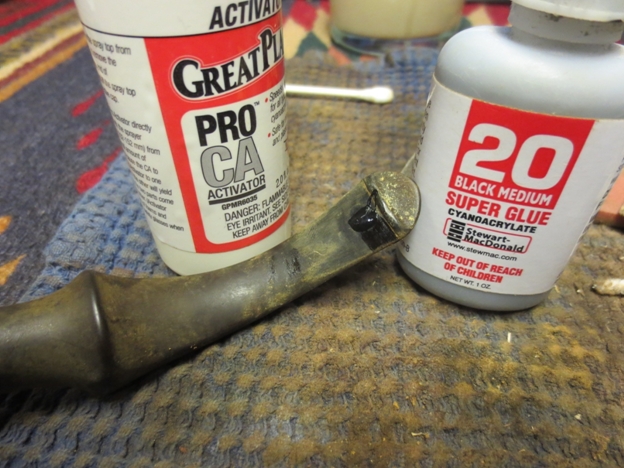
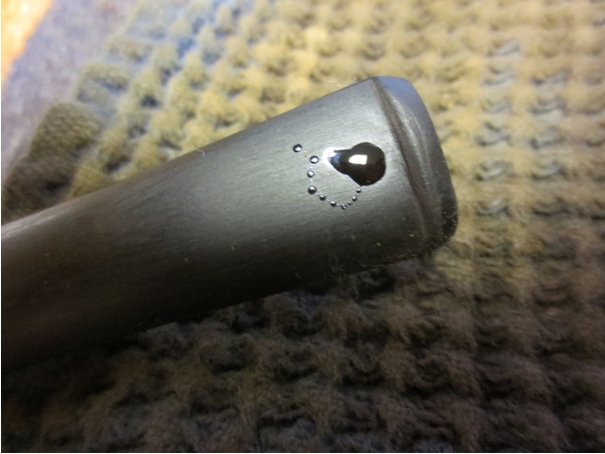
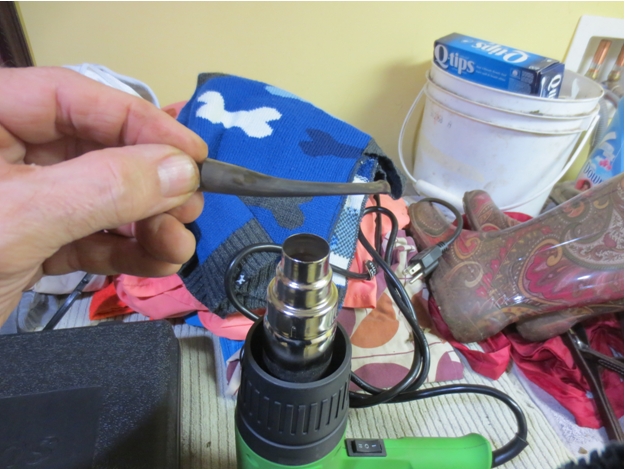
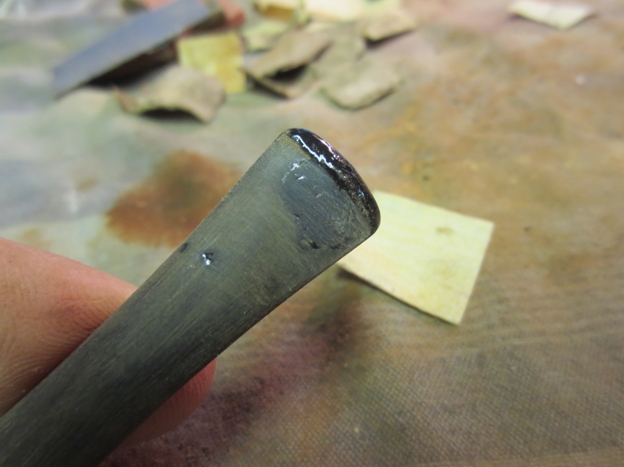
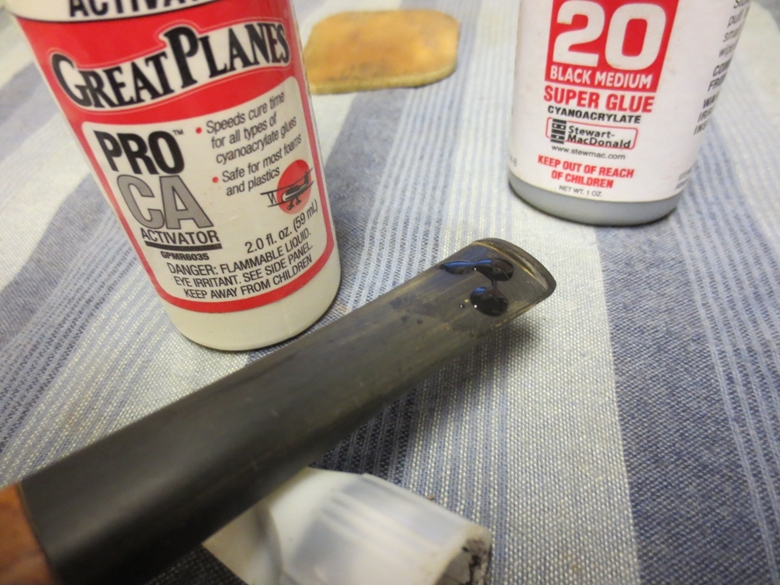
I scrubbed the areas around the bite marks with alcohol to clean the sanding dust and grit from around them. I then used black superglue to fill the bite marks and sprayed it with and activator/accelerator to harden it.YB31

YB32

YB33

YB34 
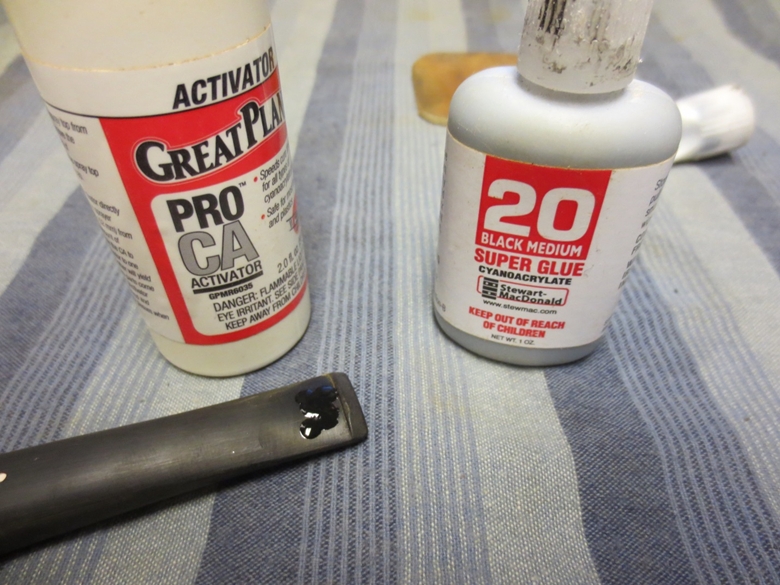
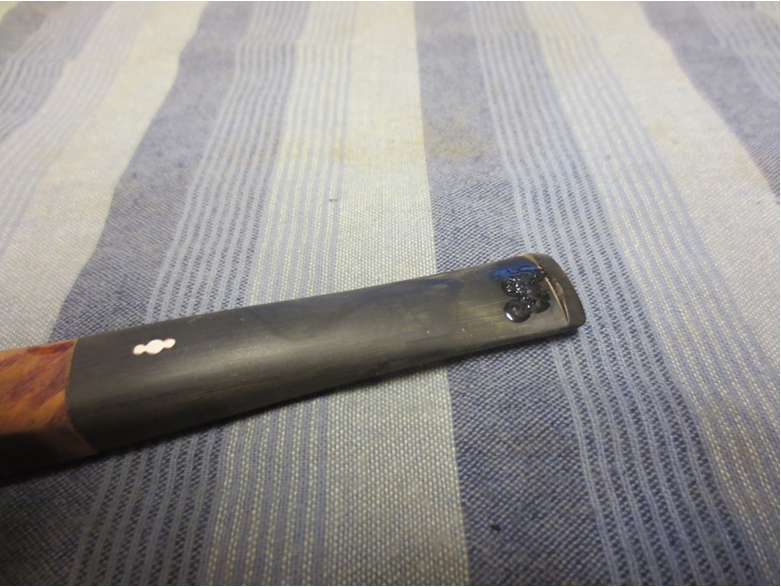
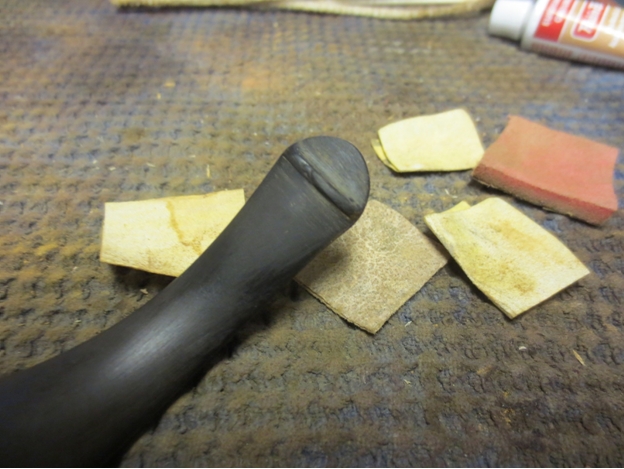
When it dried I sanded the filled areas with 220 grit sandpaper to level them out with the surface of the stem. I sanded the stem with a medium and fine grit sanding sponge and a fine grit sanding block to further blend the patches into the stem surface. In the next two photos the patches are blended into the stem but the blackness of the super glue and the blackness of the unpolished stem do not match so they show up as spots on the stem.YB35

YB36 
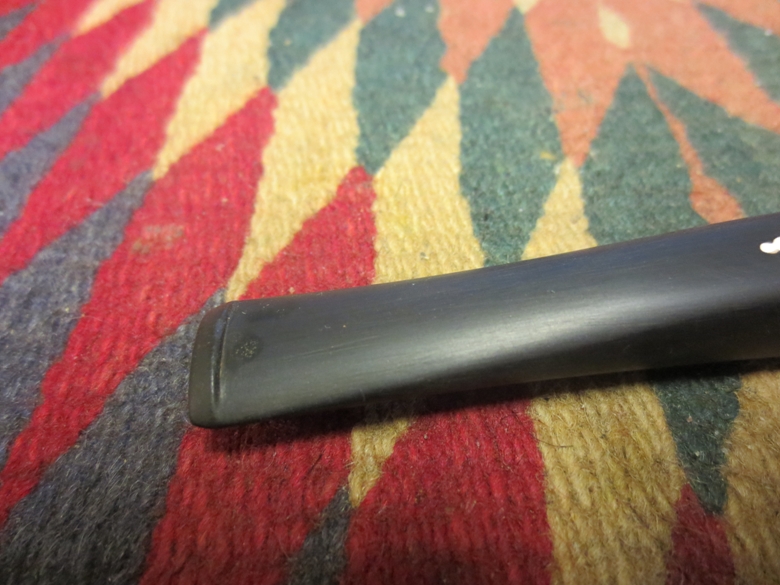
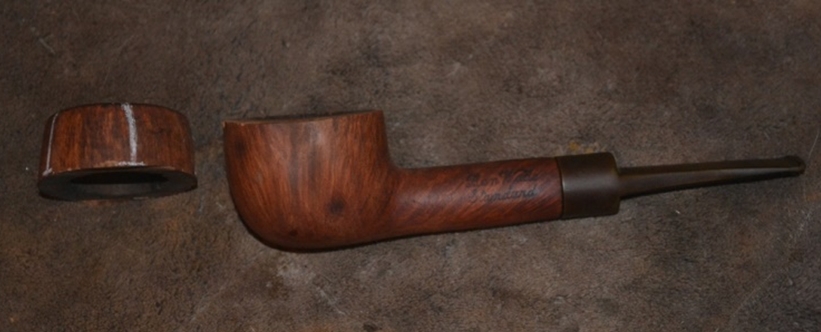
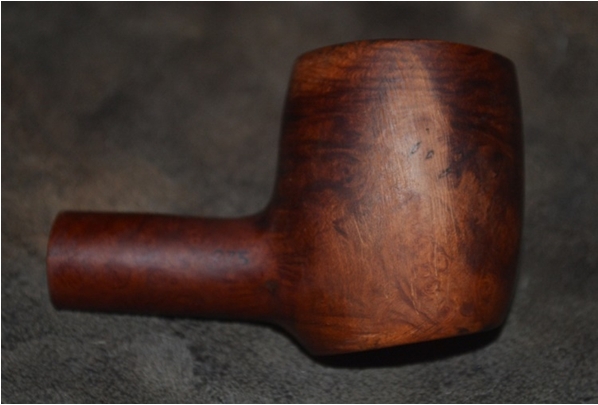
I stained the bowl and shank with a medium brown aniline stain thinned 50/50 with isopropyl alcohol. I wanted a medium brown wash to highlight the grain and show contrast in the finish. The wash provided just what I was looking for.YB37

YB38

YB39

YB40

YB41 
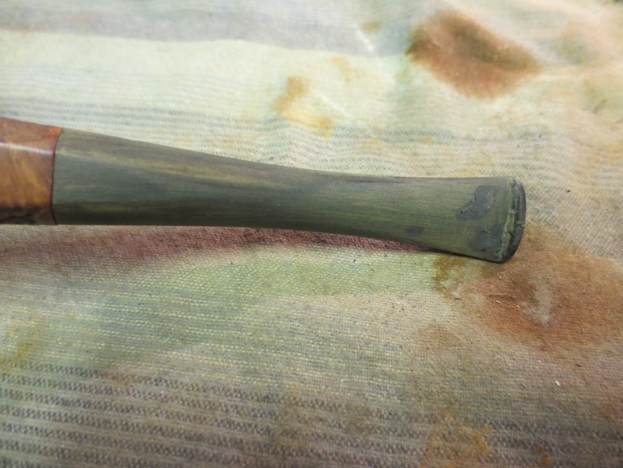
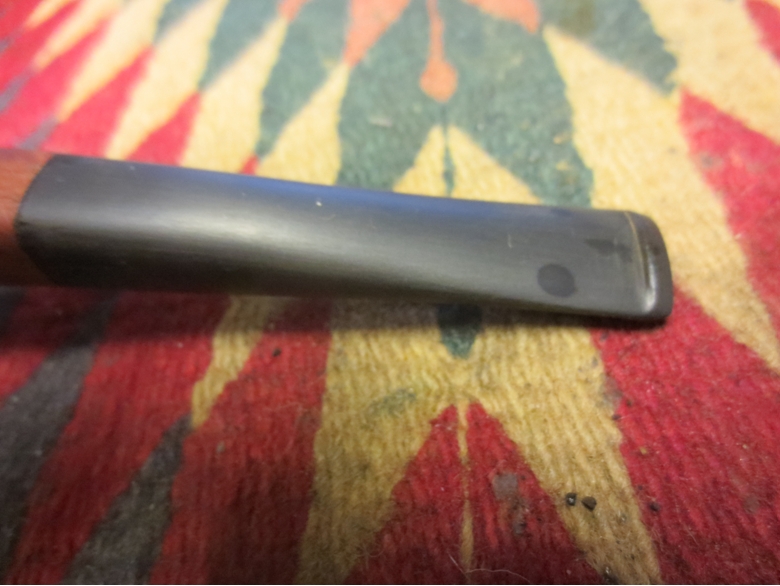
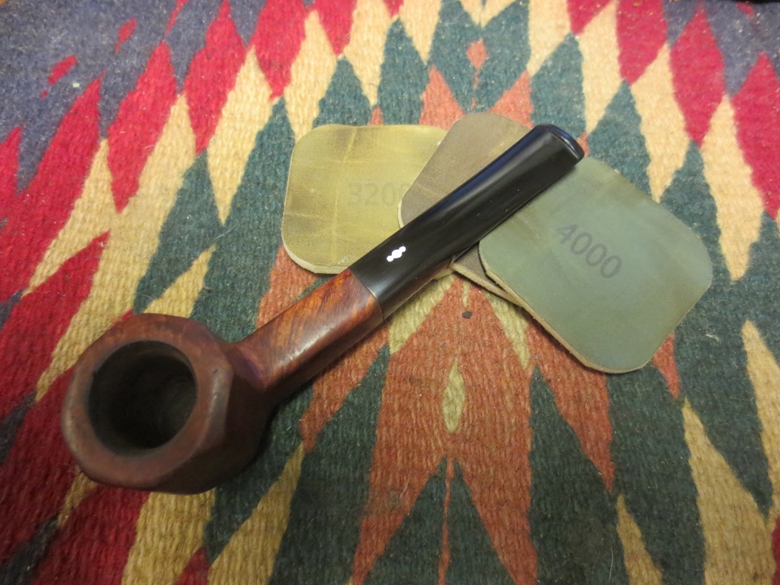
I sanded the stem further with fine grit sanding blocks and also sanded the flat areas on the transition between the shank and stem to work towards a more seamless look. The next photos show the smooth transition and the smooth stem. The patches are fading more into the vulcanite of the stem as well at this point in the process.YB42

YB43 
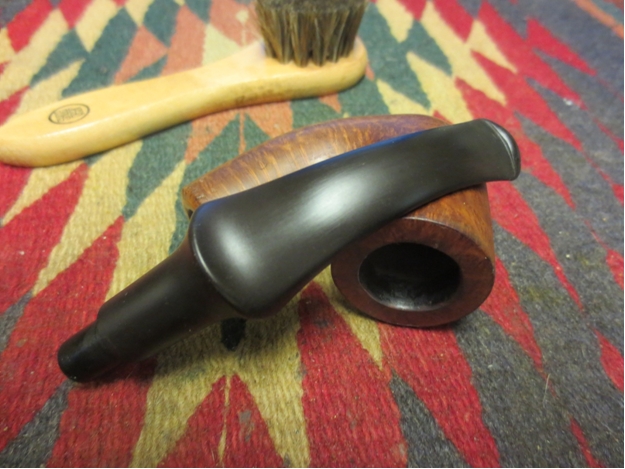
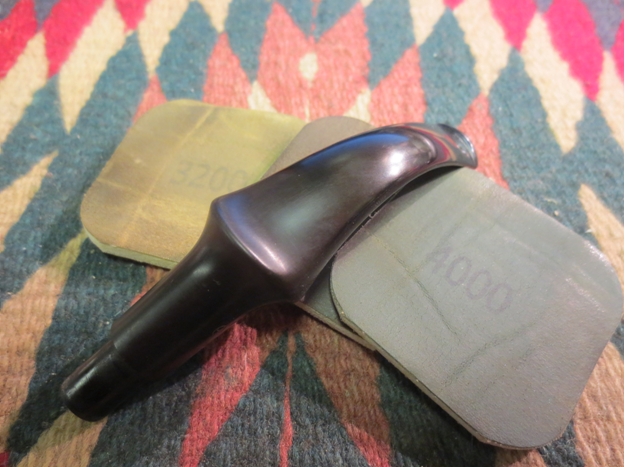
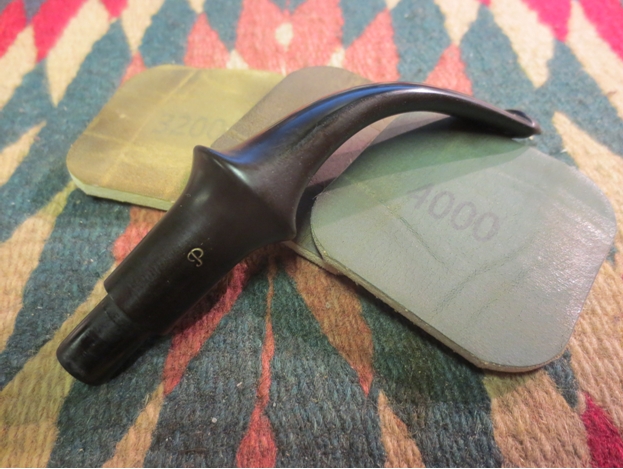
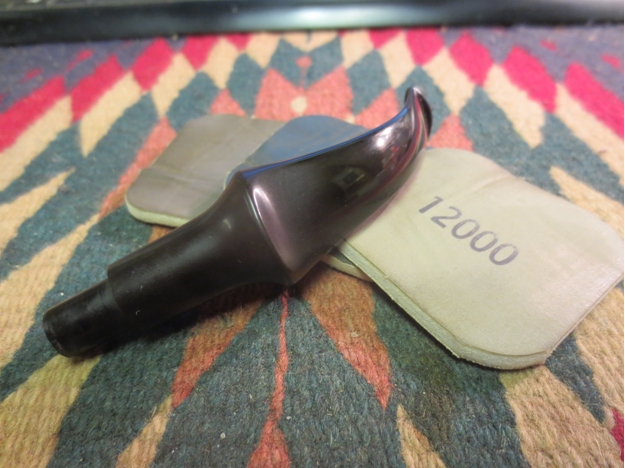
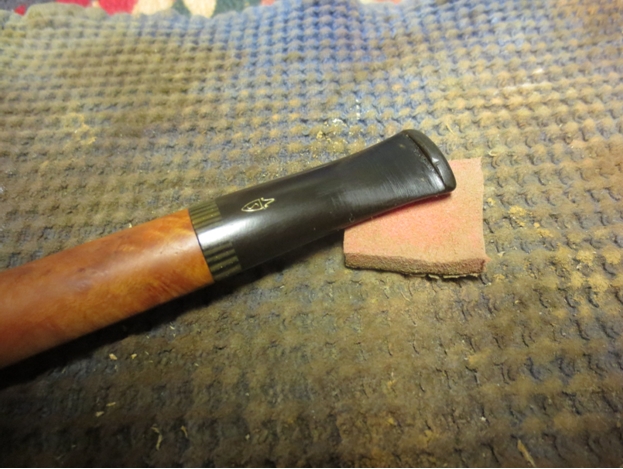
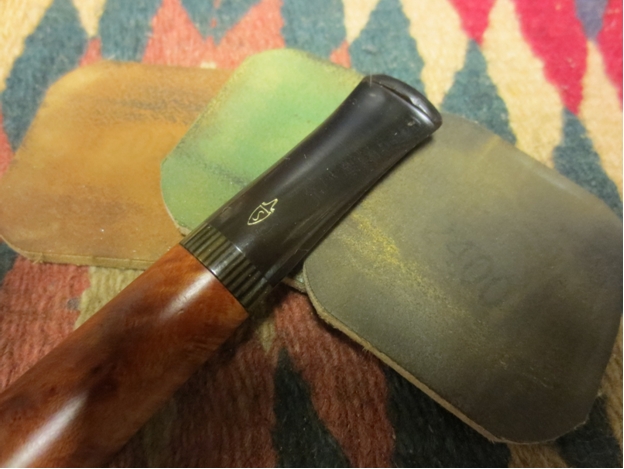
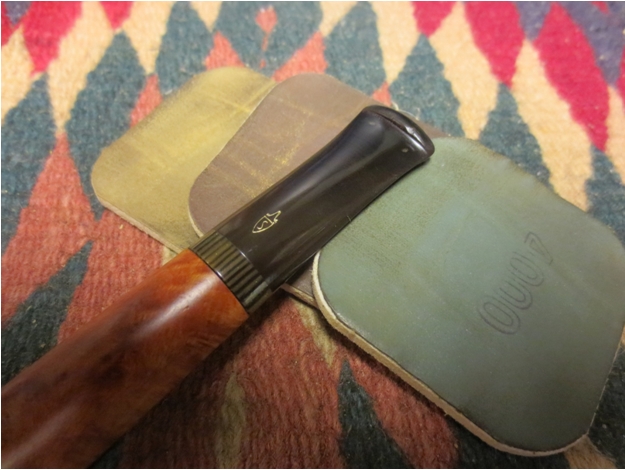
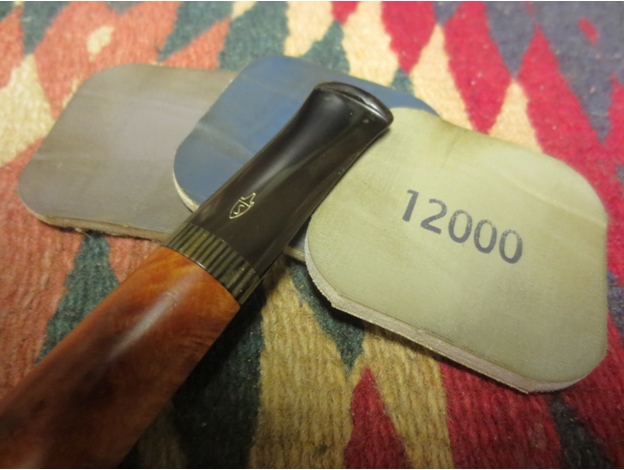
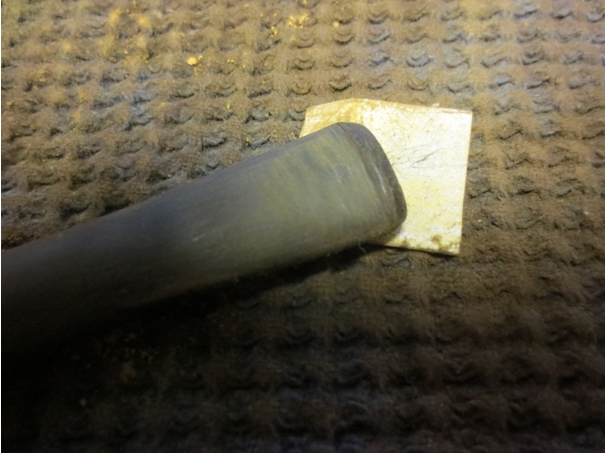
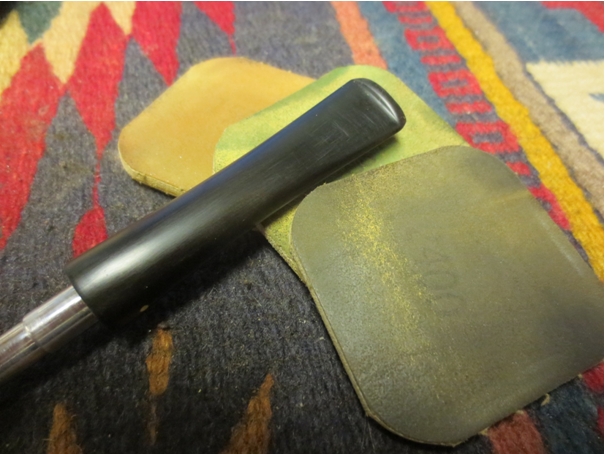
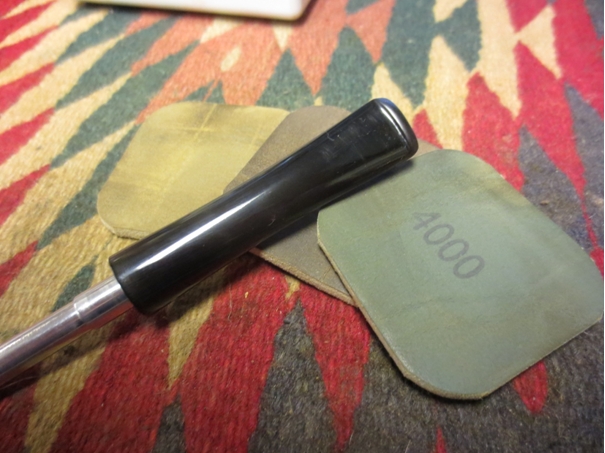
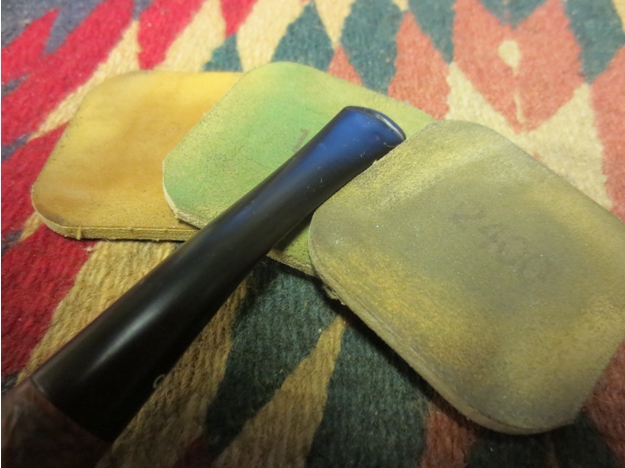
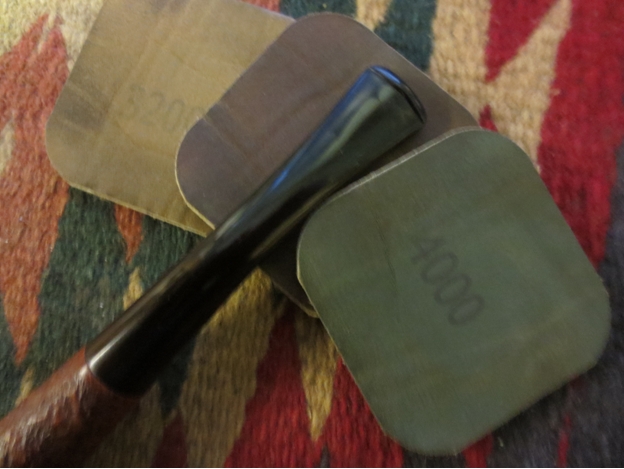
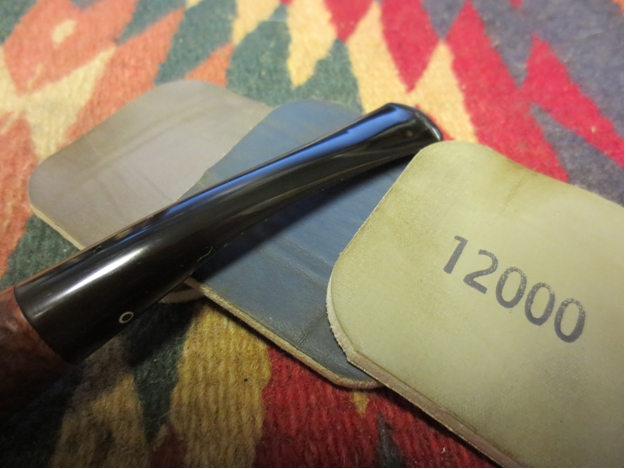
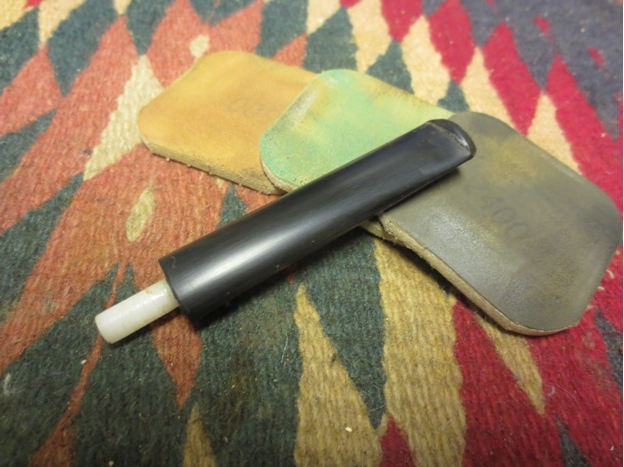
I moved on to sand the stem with micromesh sanding pads – wet sanding with 1500-2400 grit pads and dry sanding with 3200-12,000 grit pads. I rubbed down the stem between each set of three pads with Obsidian Oil and then continued sanding. I have found that sanding the stem while the oil is freshly applied allows the grit on the pads to cut into the finish and raise a shine.YB44

YB45

YB46
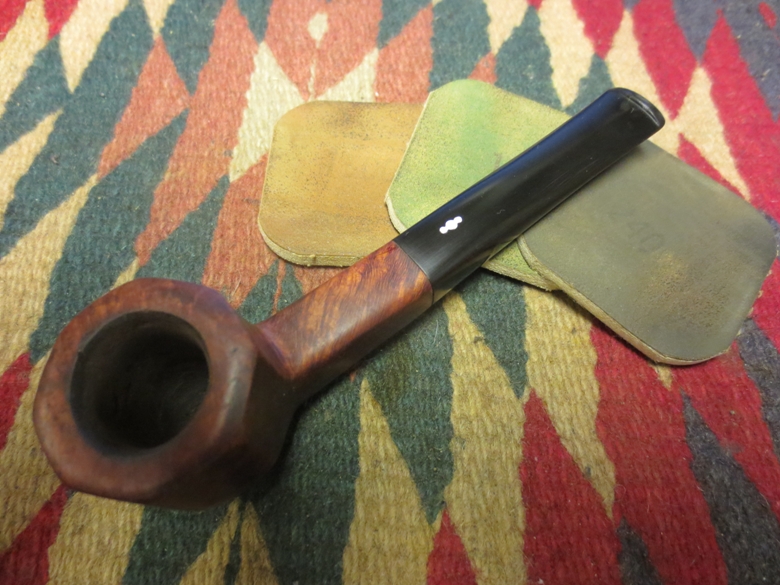
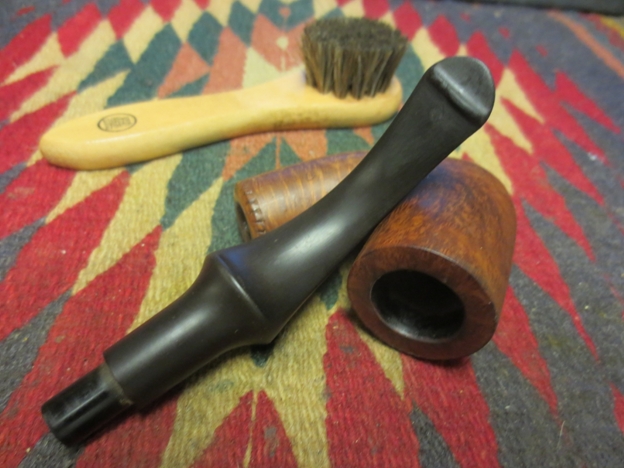
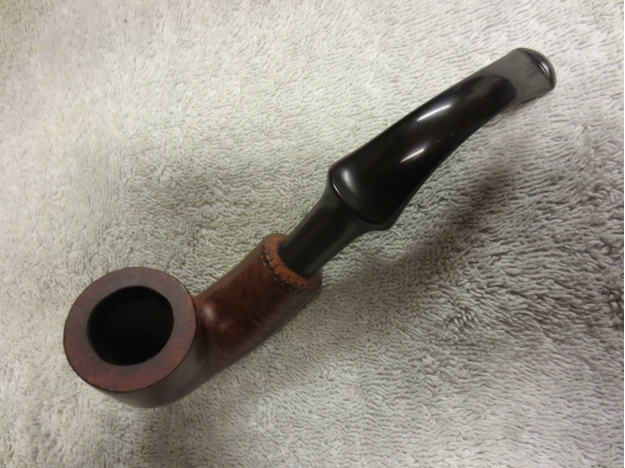
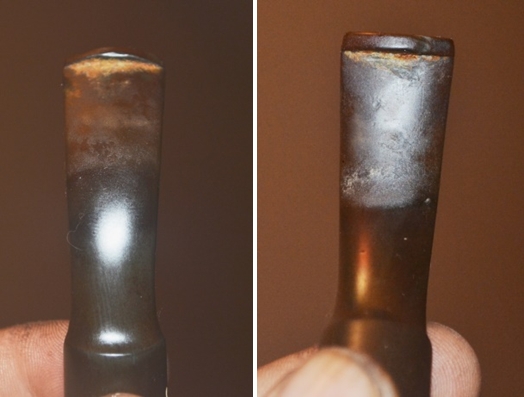
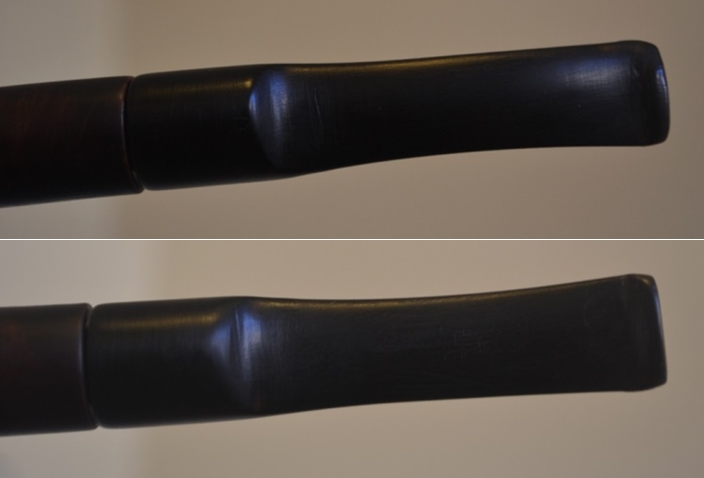
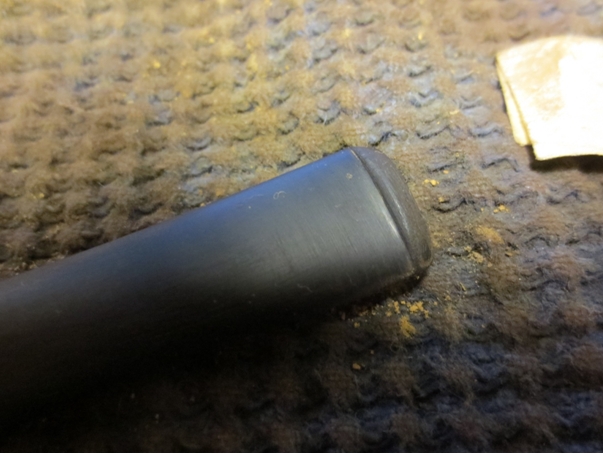
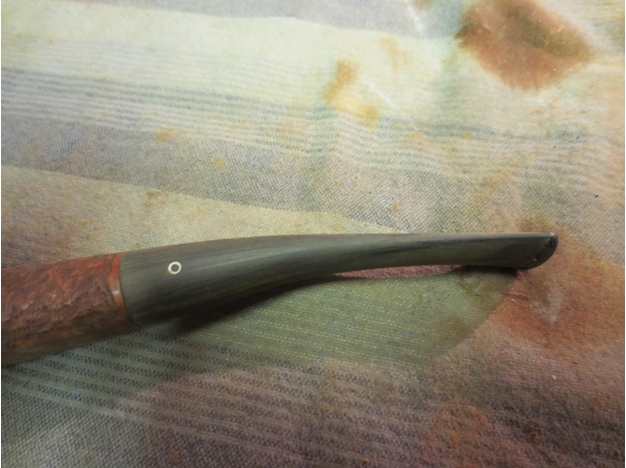
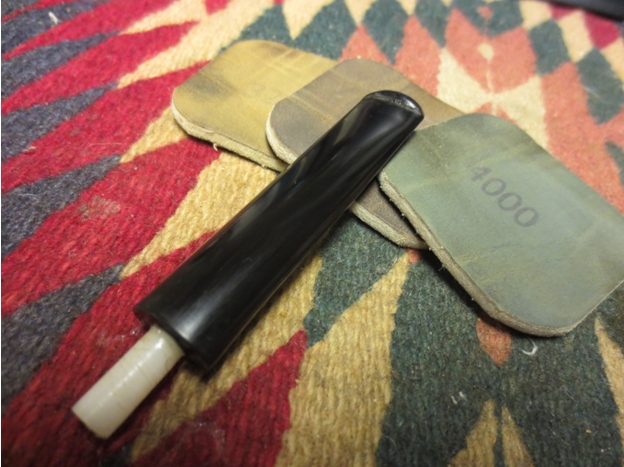
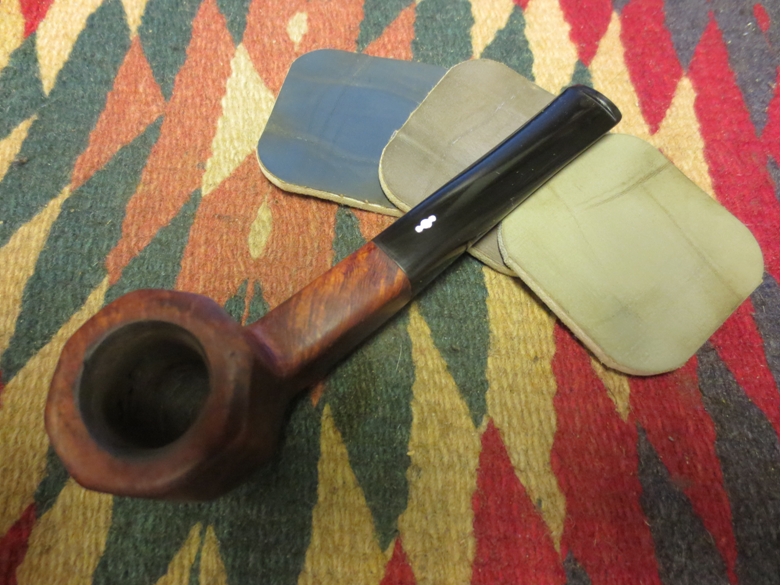
The next two photos show the finished stem. After the final sanding I rubbed it down with Obsidian Oil and let it soak in before polishing it with the buffer. I gave it several coats of carnauba wax. The patches on the stem by this point are fully blended into the vulcanite and cannot be identified.YB47

YB48 
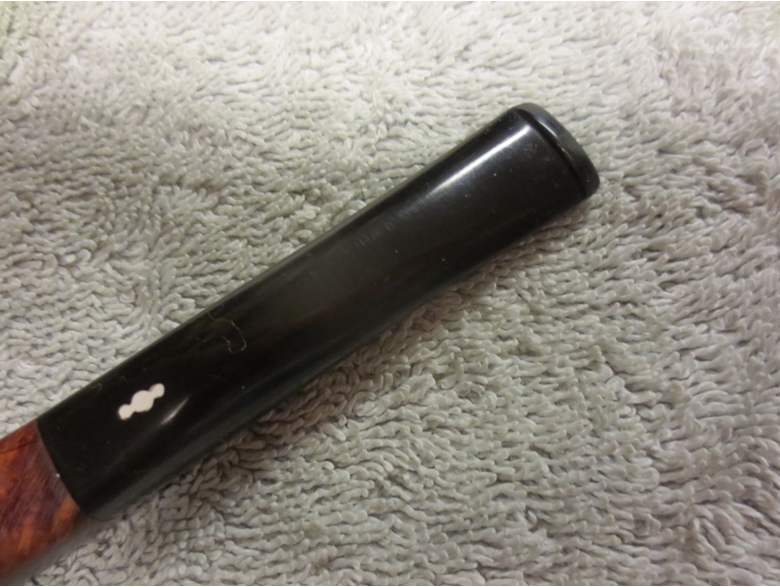
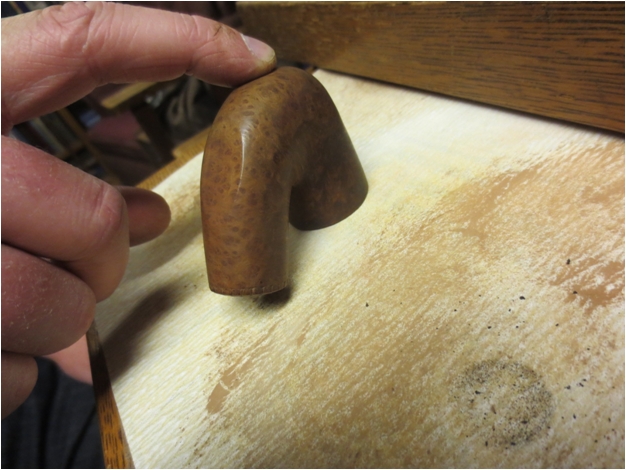
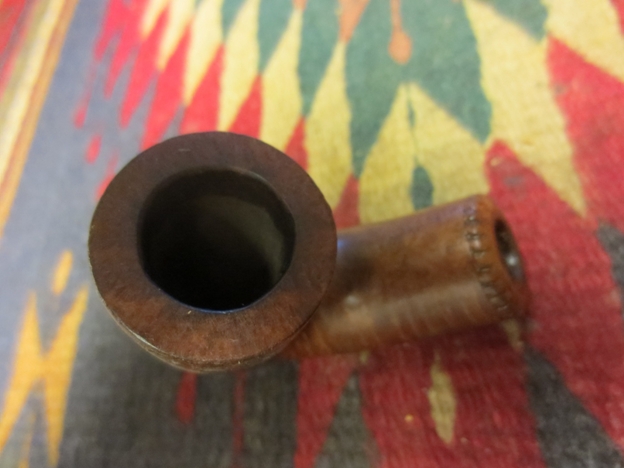
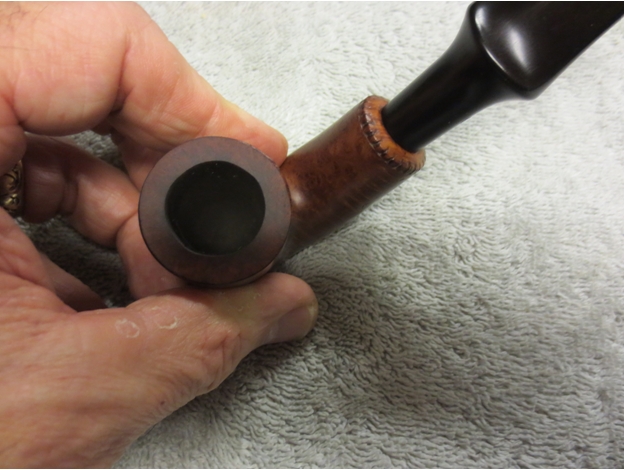
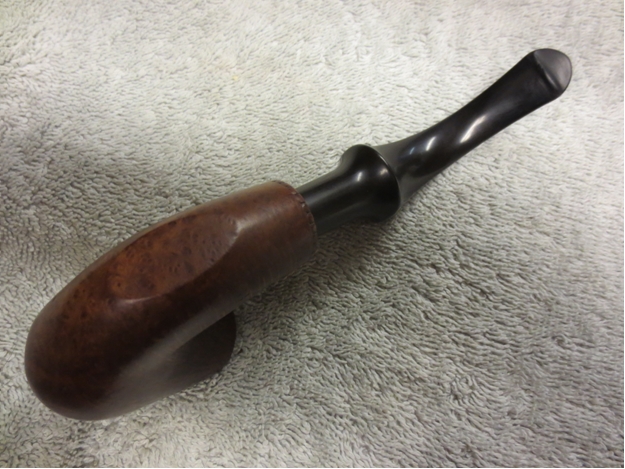
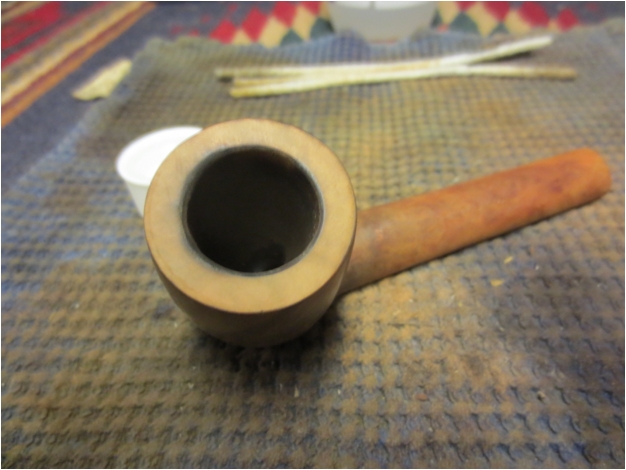
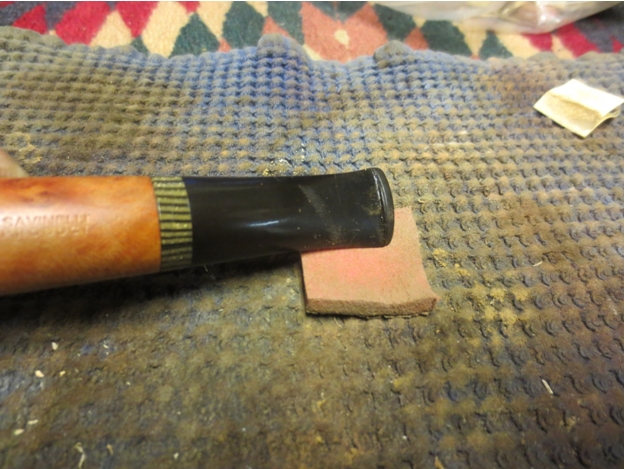
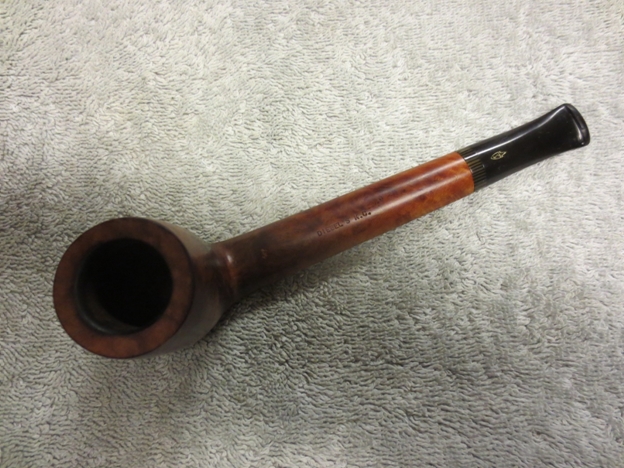
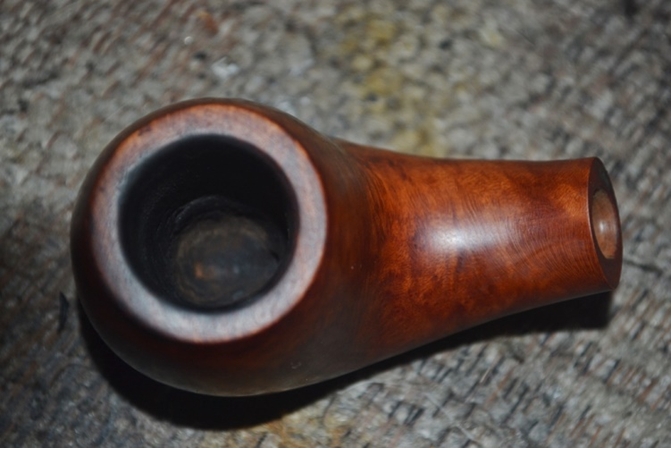
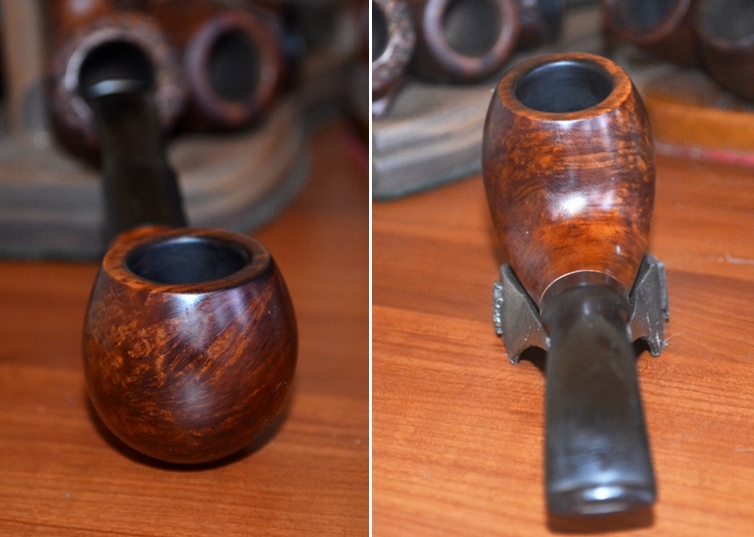
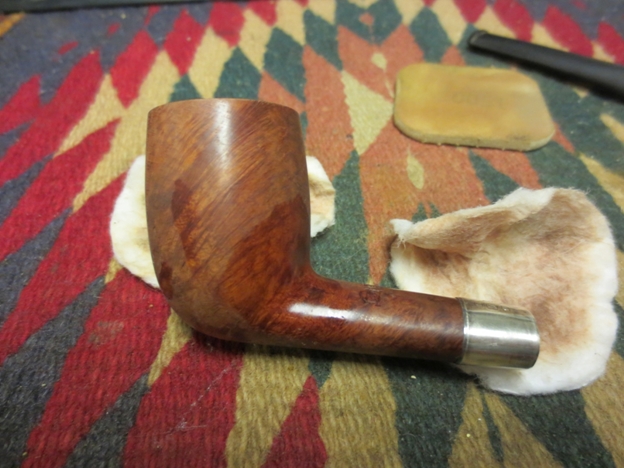
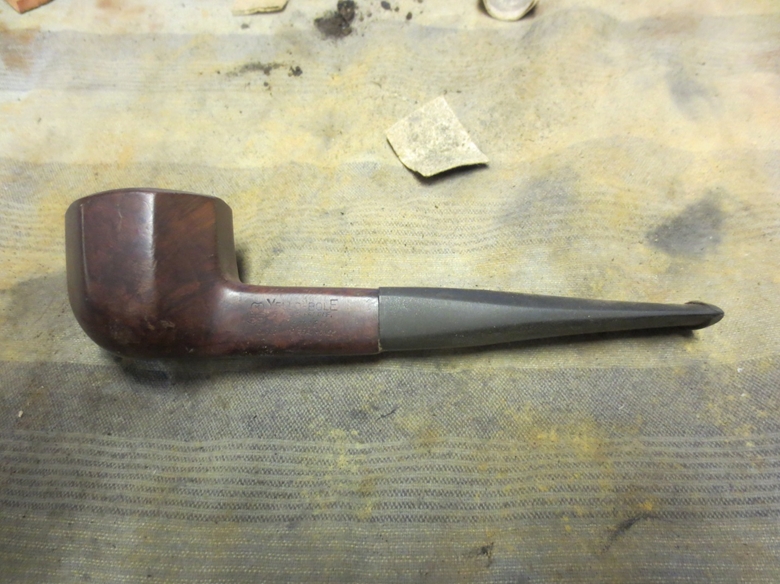
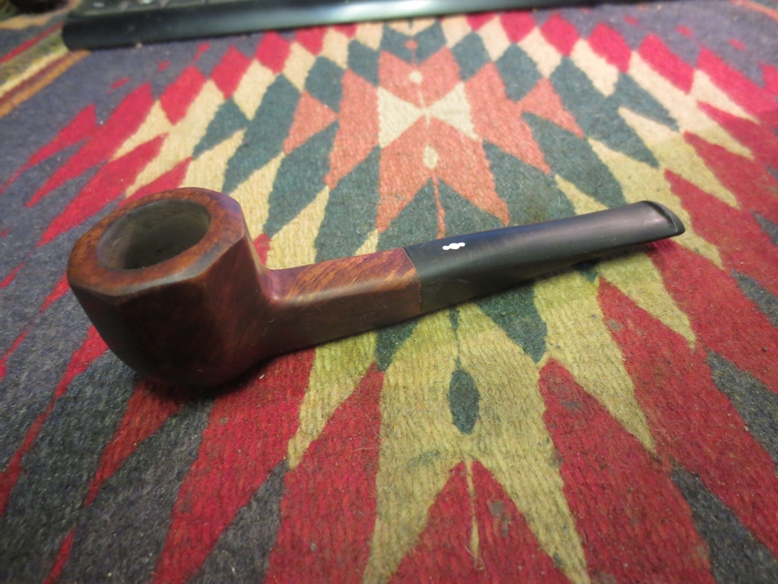
The next photo shows the reworked inner edge of the rim to show my repairs on the out of round bowl. I sanded until it was as close to round as I could get it by hand. I bevelled the inner edge of the bowl with the sandpaper to make the transition smooth.YB49 
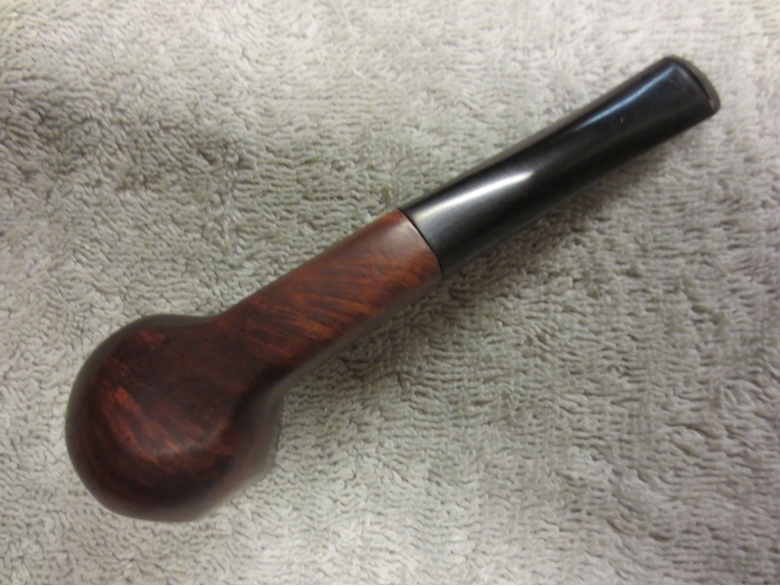
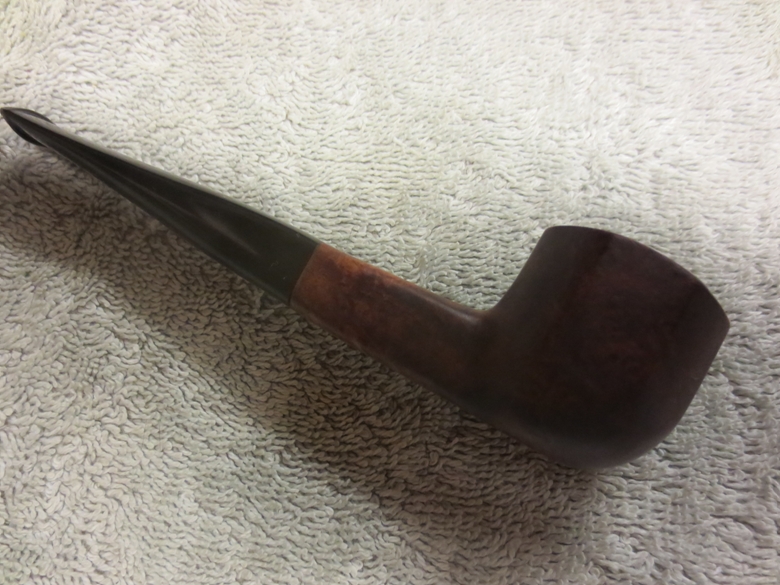
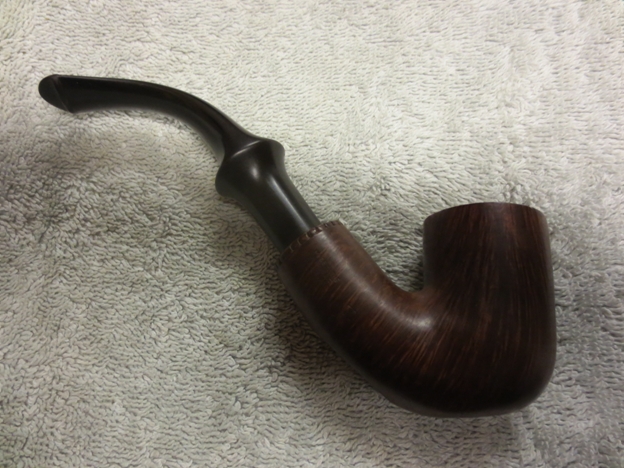
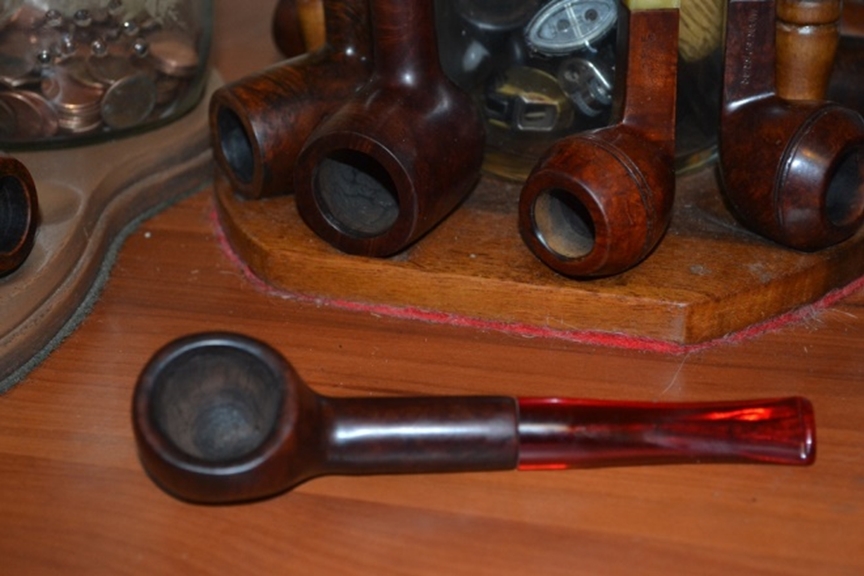
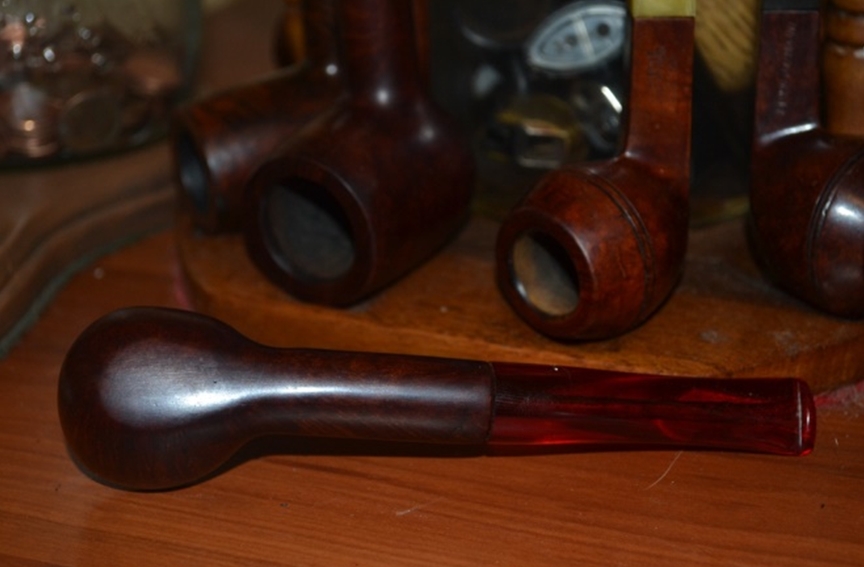
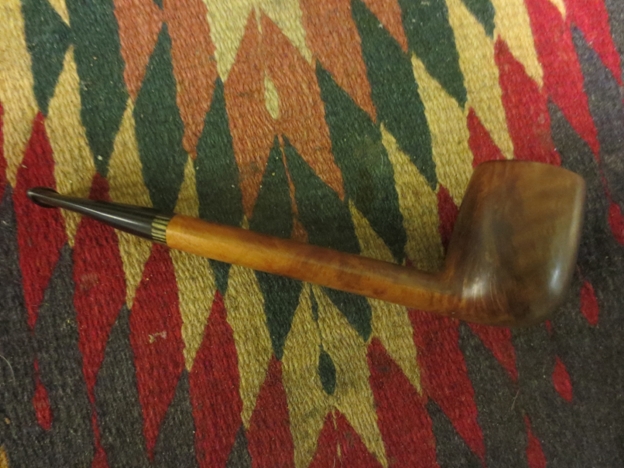
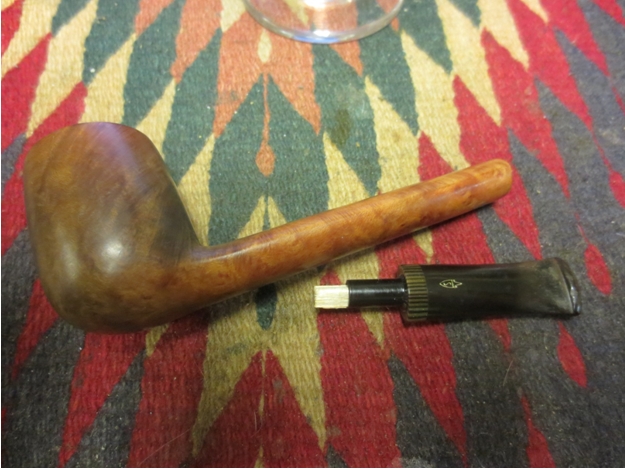
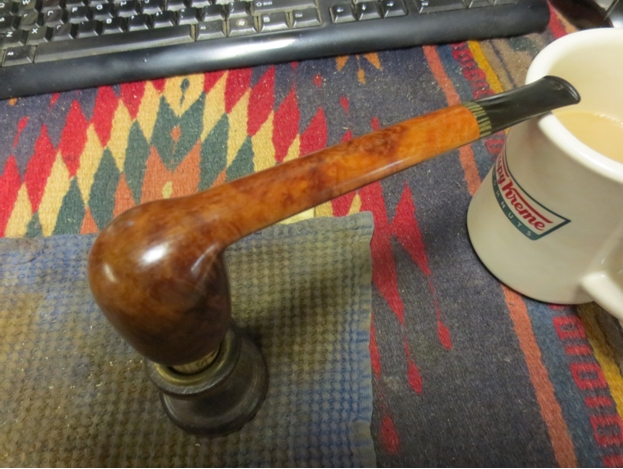
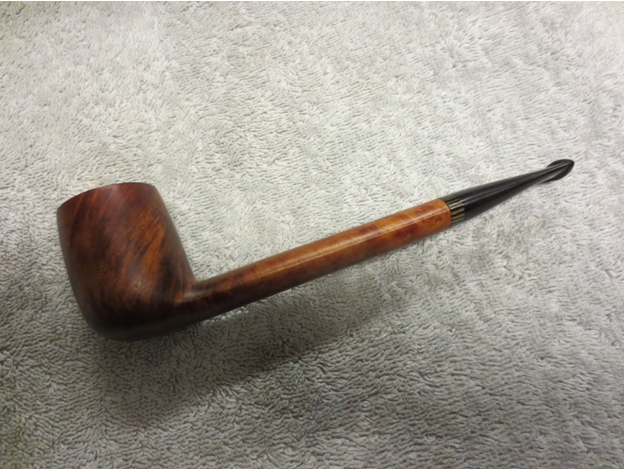
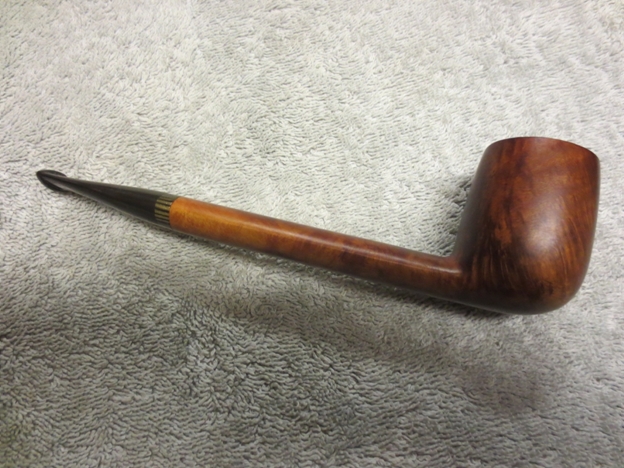
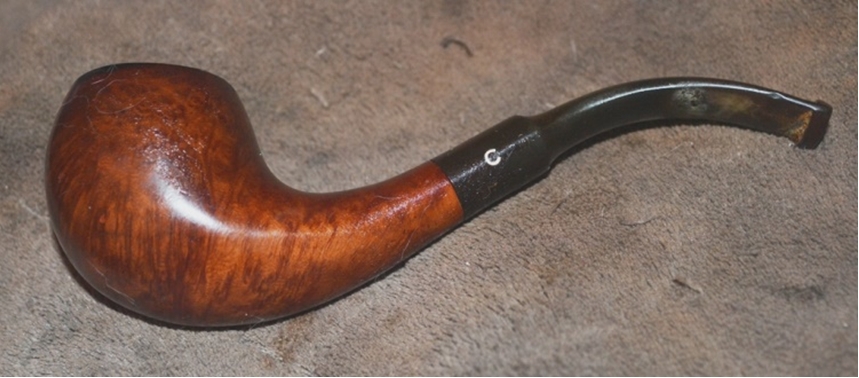
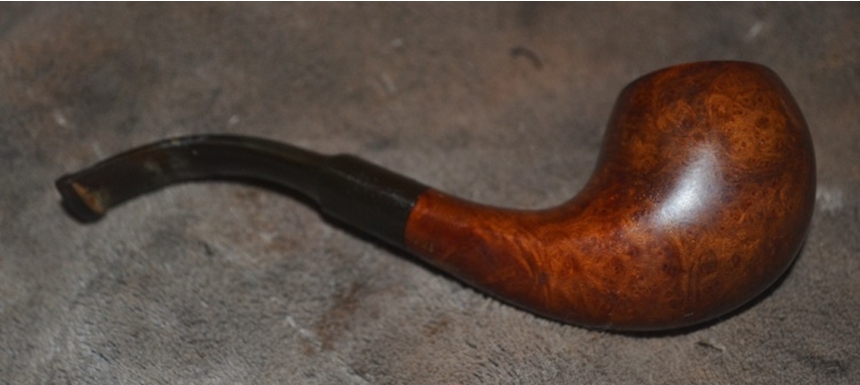
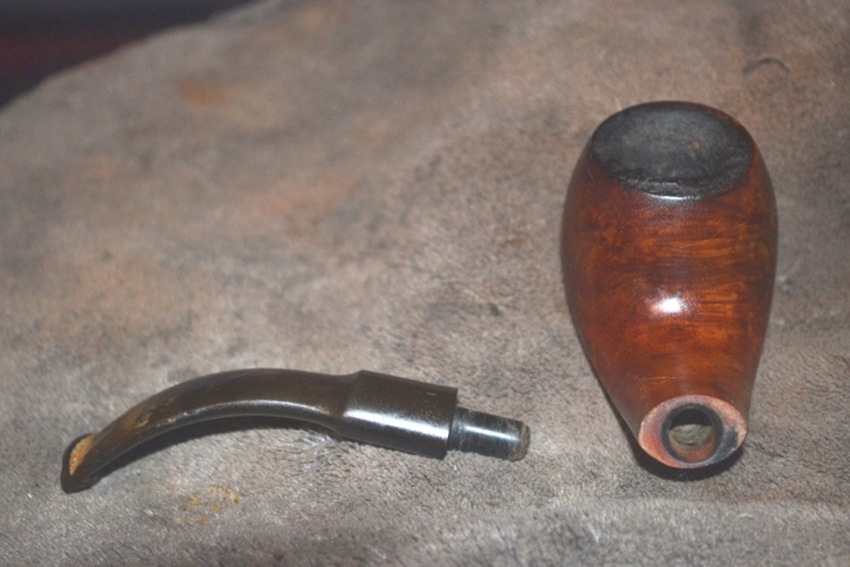
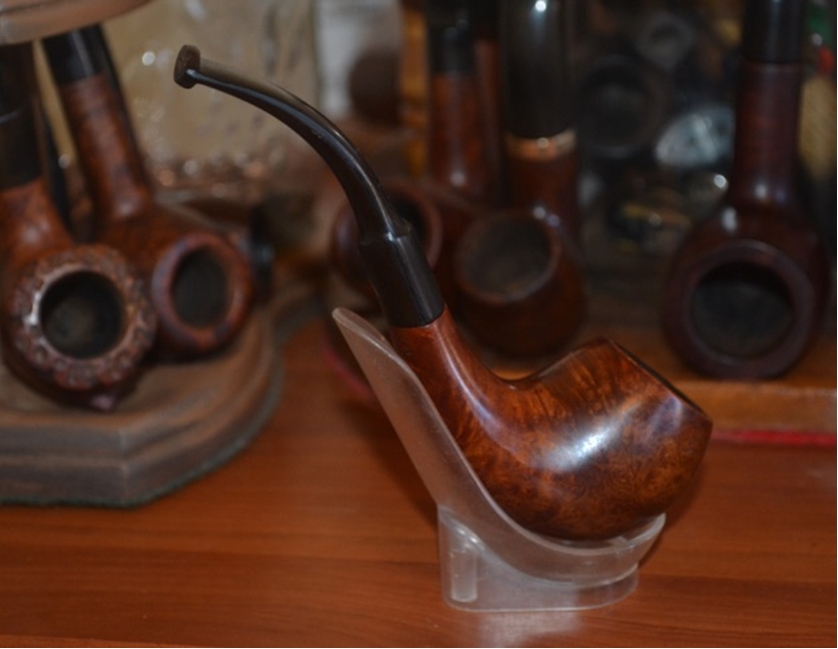
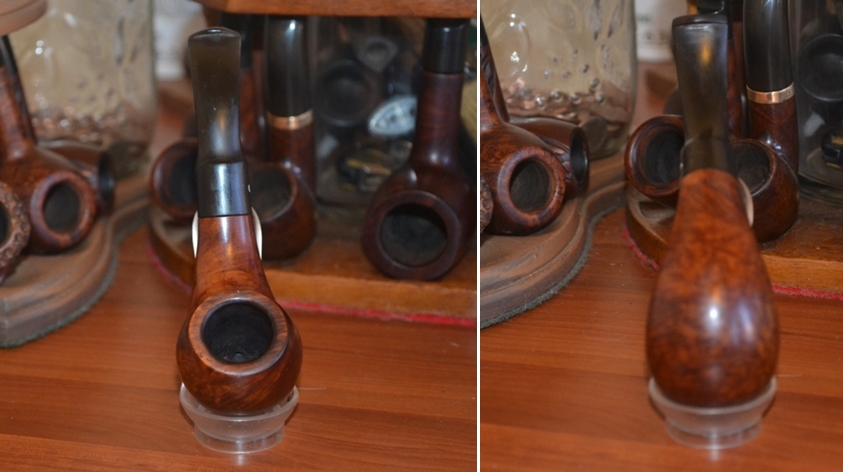
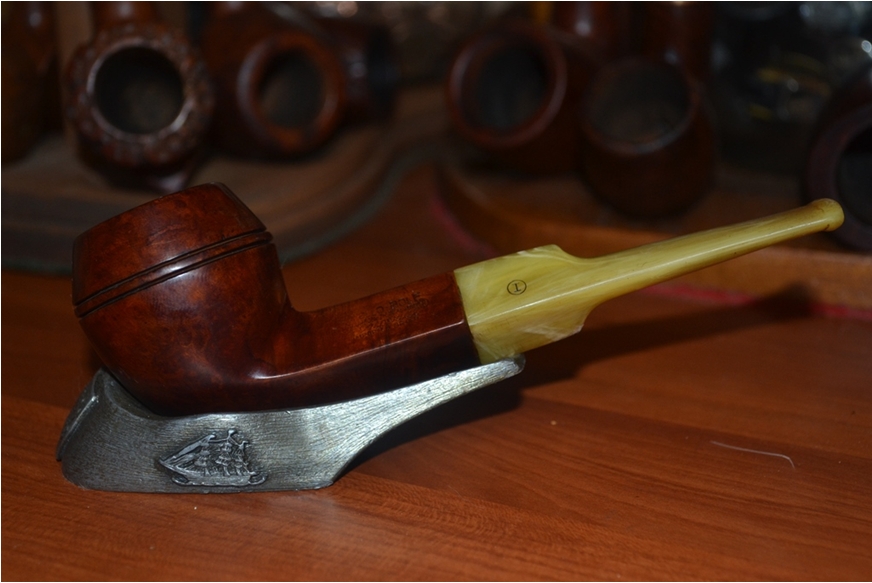
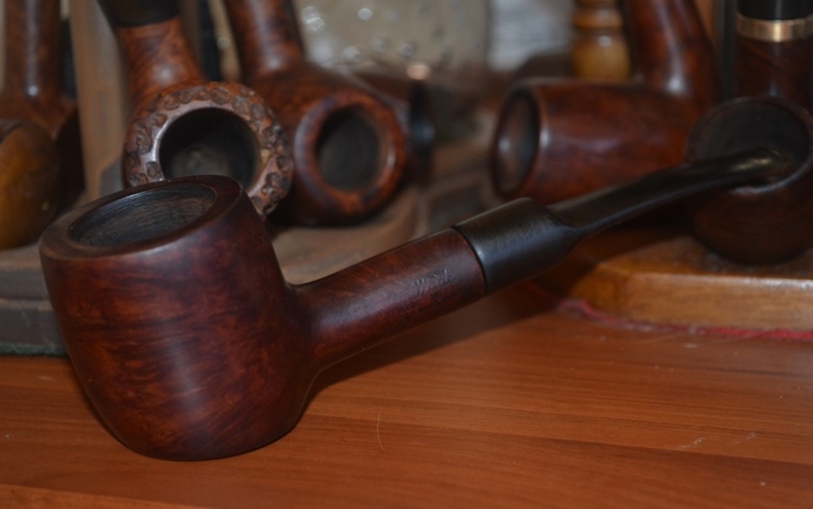
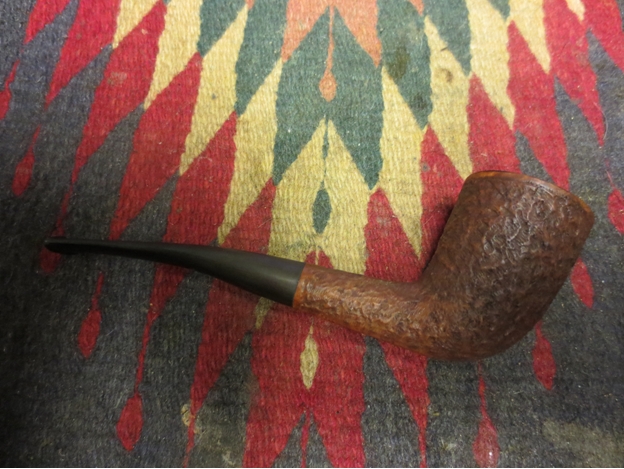
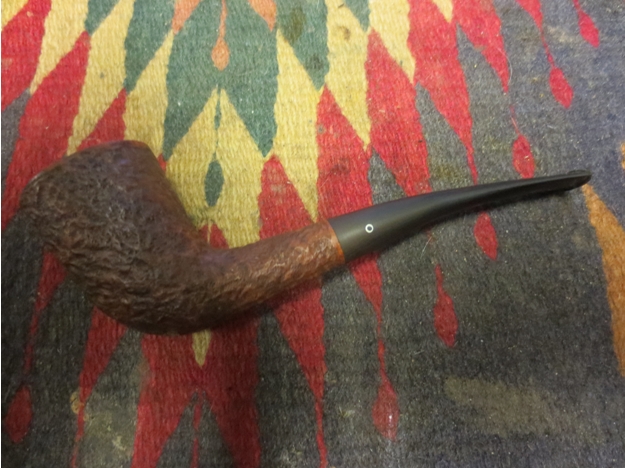
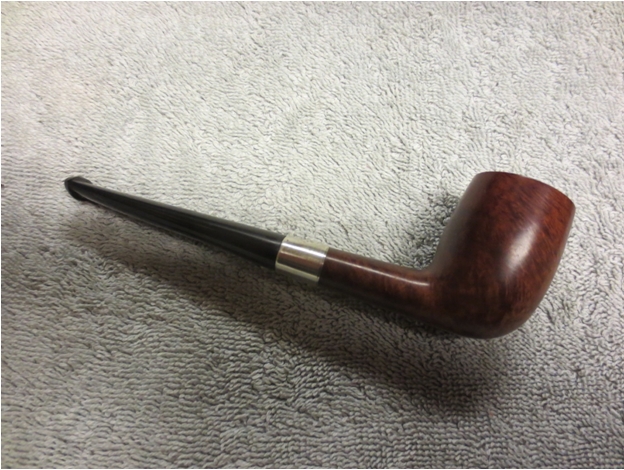
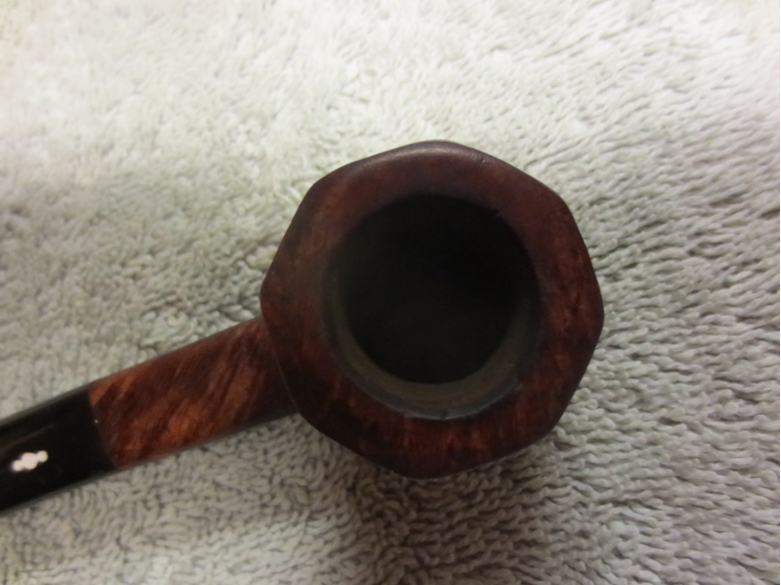
The finished pipe is shown below. Thanks to Andrew for sending me this challenge. I really enjoyed bringing this old timer back to life. It will occupy a special spot in my older American pipe maker collection and join my other KBB Yello-Boles as favourites that I enjoy smoking. I buffed it with White Diamond and gave it multiple coats of carnauba wax and finished by buffing it with a soft flannel buffing pad to raise the shine. All that remains is to sit back and enjoy a bowl of an aged Virginia tobacco and read a good story!YB50

YB51

YB52

YB53

Reviving a Peterson Dunmore 79 with my Son in Law


Blog by Steve Laug

This past weekend my son in law came over with the Peterson Dunmore pipe that he had purchased on a recent pipe hunt in the US. He picked it up for $15USD so it was a good purchase. We finally got around to working on it. In a previous post on the Dunmore line I had found that the line from Peterson really is a stripped down pipe. The one that we worked on this weekend was in essence a system pipe. The lack of a ferrule is made up for by a stylized carving around the shank end. The stem sits snugly against the end of the shank but is not flush with the diameter of the shank. The saddle on the stem has a slightly different flair than a regular Peterson pipe. It had a Plip stem. It bore the stamping Peterson’s over “Dunmore” on the left side of the shank and Made in the Republic of Ireland and the number 79 on the right side of the shank.Dun1

Dun2

Dun3

Dun4 The pipe was in pretty decent shape under the grime and tars on the bowl and rim. It had some beautiful birdseye grain under the grime that would really stand out with a bit of work. The rim was damaged along the back outer edge with small nicks. The build up on the rim was hard and uneven. The bowl itself was out of round and would need to be adjusted. The stem was oxidized but under the oxidation on the saddle it bore the stylized P stamp. The top of the stem near the button had a few small bite marks and some tooth chatter. The underside of the stem near the button had a pin hole in it that would need to be patched.Dun5

Dun6 While my son in law, Lance worked on the bowl scrubbing and cleaning it I worked on the stem. I sanded it with 220 grit sandpaper to clean up the tooth marks. I wiped it down with alcohol to clean the areas around the hole. I daubed Vaseline on a pipe cleaner and inserted it from the tenon end of the stem and then used black superglue to repair the hole. I gave it several coats of glue to build up the repair, sprayed it with accelerator and let it dry between applications. Once I had the patch solidly in place I set it aside and let it cure. After curing for about 30 minutes I sanded the patch with 220 grit sandpaper to blend it into the surface of the stem. I sanded it with a medium and a fine grit sanding sponge to remove the scratches and further blend it. Dun7

Dun8

Dun9 Lance worked on the bowl while this was going on. He washed down the bowl with acetone on cotton pads to remove the grime and the remaining finish on the pipe. He softened the buildup on the rim surface and then lightly topped the bowl to remove the damage and the buildup. Once it was smooth, he sanded it with a fine grit sanding sponge and then wiped the bowl down with another wash of acetone.Dun10 We gave the bowl a coat of medium walnut stain mixed with Danish Oil and rubbed it onto the bowl and off again with a soft cotton pad. The bowl looked good when I had finished wiping it down and buffing it with a shoe brush. The grain is quite stunning.Dun11

Dun12

Dun13 I buffed the stem with red Tripoli and White Diamond to remove more of the oxidation. I rubbed it down with some Obsidian Oil and set it aside for the pictures below. At this point in the refurbishing the stem is looking quite good. I still need to sand with micromesh pads and then reapply the gold in the P stamp on the left side of the stem.Dun14

Dun15 I wet sanded the stem with 1500-2400 grit micromesh pads and then dry sanded with 3200-12,000 grit pads. In between each set of three pads I wiped the stem down with Obsidian Oil. I finished by buffing the stem with White Diamond and then gave it multiple coats of carnauba wax and buffed it with a soft flannel buffing pad.Dun16

Dun17

Dun18 After sanding it with 3200-4000 grit pads I used a gold paint and applied it to the P logo on the stem and then sanded it again with the same three grits of pad.Dun19

Dun20 I put the stem back in the shank and buffed the entire pipe with carnauba wax and with a soft flannel buffing pad. The finished pipe is shown below. The first four photos give a close up look at the bowl so that you can appreciate the beautiful grain on the pipe. The last four photos show the pipe in its entirety. It is truly a stunning piece of briar with no fills or pits. It is ready for its inaugural smoke by my son in law. It looks as good as new and the stunning birdseye grain gives the pipe a rich look. I look forward to hearing what he thinks of his restored pipe and even more what he thinks once he has smoked it.Dun21

Dun22

Dun23

Dun24

Dun25

Dun26

Dun27

Dun28

Radical Surgery, Amputation Extend Ben Wade’s Life


Patient in Operating Room for 14 Days
by ROBERT M. BOUGHTON
RP Blogger

(Albuquerque, NM, USA) Two weeks after entering a restorer’s shop for a routine checkup, a tall billiard was released following emergency surgery to amputate more than half of its upper bowl and perform cosmetic adjustments, the restorer announced Wednesday.

Claiming the likely sole previous owner of the victim, a Ben Wade Standard, was suspected of chronic abuse of the English-born pipe for an unspecified number of years, the restorer, who wished to remain anonymous, said the identity of the perpetrator remained unknown.

“This is the worst, most depraved example of tobacco pipe abuse I have ever encountered,” the restorer said. “The briar pipe presented with first-degree burns on the rim and a chamber stuffed with carbon cake as well as acute scratches, pits, gouges and grime covering the outside of its body, and other mayhem of the stem.”

New Mexico law defines mayhem as the “malicious intent to maim or disfigure” any part of a body by means including cutting, mutilating or otherwise disabling.

Further examination revealed an almost fatal crack through the chamber to the outside of the bowl extending almost an inch downward from the right side of the rim, the restorer said, and added that was the wound requiring amputation of about half of the victim’s main body.

“Never before have I seen such a horrific case of compound commutated fracture,” the restorer said, showing photographs taken at the time of the initial examination.Rob1

Rob2

Rob3

Rob4

Rob5

Rob6

Rob7 “After the first look, the prognosis for this unfortunate former billiard was terminal,” the restorer said.“However, upon consulting some of my colleagues, we agreed that a combination of amputation, which was unavoidable if the pipe’s vital functions were to continue at all, and radical reconstructive surgery was the only viable course of action.”

Calling the complex work involved “a Hail Mary toss,” the restorer described the plan to remove half of the bowl and reshape the stump into a “squat pot.” Preliminary measures to determine the pipe’s structural ability to survive this highly invasive operation – including a thorough cleansing, soaking the chamber and shank with 190-proof alcohol and the beginning of a rigorous course of sanding the outside and the “mangled guts” – began immediately.Rob8

Rob9

Rob10 According to the restorer, the possibility that the pipe would reject the amputation and reconstruction was serious.

“Imagine if one day you awoke to find your head flattened to less than half its original size, but the rest of your body proportional to the way you had been,” the restorer said.“The shock of it could be devastating, dare I say catastrophic, not to mention the way you would stand out in public and the resulting open pointing, name-calling and general ridicule.”

The restorer said the ultimate decision to proceed with the surgery was his alone and based on a desire to save the pipe’s life if possible.

“Before I soaked the chamber and shank with alcohol, I drew incision lines downward at intervals around the rim, to the highest point of the bowl possible and yet still clear of the long scar of the crack, to guide me,” the restorer said.Rob11 Choosing a hacksaw for the amputation phase, the restorer said no anæsthesia was used as the pipe was unconscious.Rob12

Rob13

Rob14 “Lopping off the dome of that tall, proud billiard was the most extreme measure I hope I ever have to take in the name of restoration,” the restorer said. “But the removal was clean, and the deed done, it was easy to see the problems I still faced to reshape the resulting bowl, from something that could not even be called a short billiard, into at least a passable pot.”

The restorer added that sanding down the shank until it was proportionate to the bowl was possible only by erasing Ben Wade’s identity, and therefore was never seriously considered.

“No, our friend Ben Wade will just have to learn to adjust to his new body,” the restorer, who was drenched in sweat and appeared haggard, said. “I have done everything possible, although there were complications.”

Using an electric Dremel for the first time, with a smooth sander bit and set at the lowest speed, the restorer began the process of increasing the curve of the bowl. He said he applied the least pressure possible to the wood but still noticed the tendency of the tool to remove uneven layers of briar.

When the restorer had made his first full circle of the bowl and observed the jagged beginning of the reshaping into what would become a very short pot due to the amount of wood on which he could work, he said he switched to a rasp for a fast initial leveling of the bowl’s underside to make it a “sitter.” Rob15

Rob16

Rob17

Rob18 To finish the basic reshaping, the restorer said, he returned to the Dremel for a “touch-up of the rougher spots” before taking the rasp and using it with smooth, upward strokes from the bottom of the bowl to the top to make the shape still more curved.

“At the end of this phase, I was left with a very rough surface that I knew could be smoothed with sandpaper and micromesh pads,” the restorer said. “But the rim was uneven and required careful leveling. The hardest aspect of this part of the cosmetic work was moving the rasp in the correct direction to make the thickness of the rim uniform all around.”

The chamber was still coated with what the restorer called “never-ending cake.” He said he took a chance with the Dremel again and used it to loosen some of the carbon buildup.

“This was successful, but also revealed the beginning of another crack that in time was certain to work its way all the way through the bowl,” the restorer said and sighed. “This was when I knew the best I could do was to extend the life of the once whole and healthy pipe. Only God can say how long that life will be.” Rob19 The restorer then sanded the remaining scratches from the bowl and made the chamber as smooth and free of the old cake as he could before starting what he thought would be the finishing touches: buffing the outer pipe with several grades of micromesh, re-staining the wood a dark red color and polishing the pipe with four kinds of wax.

“It’s funny how sometimes going all the way through the regular steps of restoration will reveal new problems,” the restorer said. “In this case, two blemishes in the forms of gashes showed up.”

The restorer explained how he used a black marker over the damaged areas to simulate the grain color and then applied small amounts of Super Glue, which he let dry.Rob20 Once the glue dried and hardened, the restorer added, he rubbed it away with three grades of micromesh. The tenon of the replacement stem that was on the pipe when it arrived, despite the restorer’s attempts to fix it with Black Super Glue, no longer fit the shank.

“It was way too small, and I hated the idea of using beeswax to force it to fit,” the restorer said. “It is my belief that the previous owner, instead of cleaning the pipe regularly if ever, let the crud in the shank accrete until the stem became stuck and then sanded down the tenon to fit the goop. I guess it takes all kinds.” Rob21 Finding a good Lucite replacement stem that fit the shank as if it were made for it, the restorer said he only needed to remove some minor scratches with high-grade micromesh and buff it with some waxes before re-finishing the bowl and shank. Rob22

Rob23

Rob24

Rob25 “I decided to adopt the Ben Wade and care for it however long it has to live,” the restorer said with a hopeful smile. “But of course I wouldn’t dream of having its name legally changed to mine.”

http://www.naspc.org
http://www.roadrunnerpipes.com
http://about.me/boughtonrobert
Photos © the Author

A New Pipe for me – a Diebel’s K.C. Canadian


Blog by Steve Laug

NonameThere is a bit of a back story to this pipe. For as long as I can remember (you have to remember that may not be that long when you reach a certain age. Memory plays tricks on you) I have had two copies of Carl Ehwa Jr.’s The Book of Pipes and Tobaccos. One I am saving is pristine and one that graces my shelf. The other is for lending out and referring to when I am looking for information. It is a book I have read and reread and never tire of in the process. In a recent thread on Smoker’s Forums Ken posted to a thread on a review of the book some interesting information tying the book to a Diebel pipe that he had in his possession. He posted the pipe and then the information that Carl Ehwa Jr. was formerly a Master Blender at Diebels Tobacco and founder of McClelland Tobacco. He received several responses – one from Chris noting that the book’s dedication reads, “For my grandfather, Dr. W. C. McClelland…” I remember meeting Mary McNeil and sharing a limo back to the airport after the Chicago Show. In our conversation I found out that she was married to Ehwa when they started McClellands. He passed away and she married Mike McNeil who has always been a part of things there I believe.

Thanks to Ken I was given the impetus to try to find a Diebel’s pipe. I searched on Ebay and found one – a Diebel’s Canadian – to add to the collection. It should arrive very soon and when it does I will load a bowl of Christmas Cheer and read Ehwa’s book yet again. Adding a pipe to the read will be just one more dimension to the experience.Diebel Canadian

Diebel canadian2

Diebel Canadian3 I was excited to receive the Diebel pipe in the mail so when it arrived I opened the box expecting to see the pipe above. I expected it to be a normal length Canadian with simply the Diebel stamping. When I unwrapped it I found a Diebel pipe but a different one than the one I had purchased. It was stamped DIEBEL’S K.C. on the top of the shank and had a Savinelli shield on the stem. It had a band of gold as part of the stem. On the underside of the shank it is stamped Italy and Savinelli Product. There were no shape numbers on the pipe but it was the long shank Canadian that is common with Savinelli. It measures 7 inches long. The briar was dirty and stained on the sides and the back of the bowl with oils. It was quite dark. It appeared to have a matte finish. The rim was darkened with tars and some scratches on the top front of the rim. The inner edge was darkened and had some burning.Diebel1

Diebel2

Diebel3

Diebel4The bowl had a thick cake that was rock hard. It significantly reduced the diameter of the bowl. The stem had two tooth marks on the top near the button and on the underside was a deep bite mark. I removed the stem and inside it had been drilled to receive the Savinelli balsa filter. There was a new filter in the tenon.Diebel5

Diebel6

Diebel7

Diebel8 Examining the old Diebel’s stamped Savinelli left me with questions that needed answering. I wanted to know more about the Diebel’s pipe shop. I wanted to know if Savinelli made all of their pipes or if some were actually carved in the shop itself. I wanted to know if the other pipe, the one I had actually ordered was made by Savinelli as well or if it may possibly have had a different manufacturer. You can see that the pipe left me with many questions that would require some research to find answers.

I did some digging and found the Diebels web site. On the site was a section on company history. The link follows: http://diebelsg.com/stores/company-history/

In reading through that section on the history of the company I learned that Fred Diebel learned pipe making from a local pipemaker, Fred Metz. He carved in house pipe made the way he had learned to make them from Fred. He also imported Savinelli and English made pipes. I am including a short section from that portion of the company history.

“When Fred Diebel returned from his World War II duty as a U.S. Navy pilot of lighter than air craft (blimps), he knew he wanted to own his own business. Diebel, who earned a degree in mathematics from Kansas City University (now UMKC), saved for his life’s ambition while working successively for two venerable retailers in Kansas City: Rothschild’s and Montgomery Ward.”

“In 1950, Diebel capitalized on his first entrepreneurial opportunity, buying into Afflick & Co., a tobacco shop located at 11th and Walnut in downtown Kansas City. The company was re-named Afflick & Diebel. There, Diebel became an avid pipe smoker and developed an interest in the arcane craft of pipemaking. He sought a noted local pipemaker, Fred Metz, to teach him the craft. Initially, the elderly German native refused. But eventually, Diebel’s persistence paid off and Mr. Metz consented, saying, “Young man, I will teach you to make pipes on these conditions. You buy the proper equipment and you promise to do it my way, the right way.””

“In 1954, Diebel determined it was time to strike out on his own. He saw the Country Club Plaza as a shopping and business district on the rise. So with a bankroll of $1,000, he purchased two display cases for $100 each, tools, tobacco product, and signed a lease. Fred Diebel, Pipemaker, Tobacconist was born at 4625 Wornall, across from Putchs’s Cafeteria (now Houston’s) and next to Renner’s Shoe Repair. The enterprise was successful from the beginning, though not in the way Diebel expected. He underestimated the strong demand for pipe repair and found little time for the pipe making work necessary to supply his retail pipe business. In order to manage the growth demand for new pipes, he began importing pipes from England.”

“For more than a decade, Diebel specialized exclusively in pipes, pipe repair, and pipe tobacco. Customers requesting cigars or cigarettes were politely but firmly referred elsewhere. Mr. Diebel’s philosophy may have been guided more by personal disdain for any smoking related product that did not involve a pipe than by visionary marketing theory. Nonetheless, he became one of the early niche retailing pioneers…”

“…The company also began manufacturing pipe tobacco. Conditioning, cutting, casing, blending, pressing and packing operations occurred in a warehouse located in the caves at Bannister and Holmes. Manufacturing continued through the early 1980’s. The business continued to grow as a family business, with Diebel’s wife plus his two sons and daughter working in the shops and manufacturing facilities during their teen and young adult years.”

I love learning the history of a brand. Further reading on other sites led me to the information that Savinelli made Diebel’s pipes. With that information I went on to clean up the pipe. I reamed it with a PipNet reamer, starting with the smallest cutting head and working up to the second head. I reamed the cake back to bare wood. The cake and bowl smelled of a heavily cased aromatic. The inside of the shank and stem was black with tars.Diebel9

Diebel10 I wiped the bowl down with acetone on cotton pads to remove the grime and the finish. The black grime came off easily with repeated scrubbing.Diebel11

Diebel12 Once I had cleaned the grime and tars off the rim I could see the darkened damaged area of the top of the rim and the inner edge of the bowl. Though it is hard to see there were some deep scratches on the top of the rim on the right front side. They were quite deep gouges. The bowl would need to be topped to remove the damage and minimize the burn marks.Diebel13

Diebel14 I set up a topping board with 220 grit sandpaper on top of it. I turned the top of the bowl into the sandpaper in a circular motion, clockwise until the damaged area of the gouges and burned area was gone. I sanded the rim with a medium and a fine grit sanding sponge to remove the scratches left behind by the sandpaper. I used a folded piece of sandpaper to remove the burn damage on the inner edge of the rim. I sanded the bowl with the medium and fine grit sanding sponges to clean up the remaining dark areas. I wiped it down a final time with acetone on cotton pads.Diebel15

Diebel16

Diebel17 With the bowl cleaned and ready to finish I set it aside and worked on the stem. I sanded the tooth marks with 220 grit sandpaper to smooth out the damage of the tooth marks.Diebel18

Diebel19 The tooth marks on the top of the stem cleaned up nicely, leaving behind two small divots that I needed to repair with super glue. The damage on the underside was much worse – the dent was deep and needed a large fill. The first photo below shows the repaired underside tooth mark. The second photo shows the repairs of the marks on the topside. I used clear super glue and an accelerator to harden it. Some might ask why I used clear super glue instead of black super glue and to be honest I am not sure why, I picked up the tube of clear glue and used it as it was closest to pipe at hand. Both work equally well for me.Diebel20

Diebel21 I sanded the glue patches with 220 grit sandpaper and then with medium and fine grit sanding sponges. I sanded until the surface of the patch was blended in with the surface of the stem. You can see from the photos that the clear glue worked well.Diebel22

Diebel23 At this point in the process I gave the pipe a coat of medium walnut Danish Oil stain. I set the pipe on a cork to dry while I went to work for the day.Diebel24 When I came home I buffed the bowl and shank with White Diamond and then worked on the stem with micromesh sanding pads. I wet sanded the stem with 1500-2400 grit micromesh pads and then dry sanded with 3200-12,000 grit pads. I buffed the stem with White Diamond and then rubbed it down with Obsidian Oil. Once it was dry I gave the bowl and stem several coats of carnauba wax and buffed it with a soft flannel buffing pad to raise a shine.Diebel25

Diebel26

Diebel27 The finished pipe is shown below. It is cleaned and ready to smoke. The overall look of the pipe is clearly a Savinelli to me. It is distinctively Italian. The taper of the stem, the sharper edges on the sides of the shank and the bowl shape all say Italian. The band on the stem is various sizes of gold stripes that encircle the stem at the shank union. The walnut stain gives the pipe a contrast look and makes the grain stand out. The finish is warm an earthy in tone and the smooth feel in the hand is comfortable. I am looking forward to loading up a bowl and enjoying an inaugural smoke.Diebel28

Diebel29

Diebel30

Diebel31 Now I am waiting for the arrival of the original pipe I purchased from the seller in Eastern Canada. I look forward to seeing if it is one of Fred Diebel’s own hand-made pipes. The look in the first trio of photos above is certainly different from the look of the Savinelli. When it arrives I will clean it up and do a write up on it and a comparison with the Sav.

Comoy’s Satin Matte Bent Christmas Pipe, In Four-Part Harmony – Robert M. Boughton


Guest Blog by Robert M. Boughton
Member, North American Society of Pipe Collectors
http://www.naspc.org
http://www.roadrunnerpipes.com
http://about.me/boughtonrobert
Photos © the Author

This blog is dedicated to my older uncle, Frank Lee Grannis (1945-2014), who was maybe Arlo Guthrie’s biggest fan. Frank once snapped a black and white photo of a teenaged Arlo, at an outdoor music festival somewhere in the countryside, smiling and signing an autograph for another fan who was about Arlo’s age. I lost the photo in my younger, wilder days, or I would include it here, but the image will always be in my memory.

Let’s get Santa Clause ’cause:
Santa Clause has a red suit
He’s a communist
And a beard, and long hair
Must be a pacifist
What’s in the pipe that he’s smoking?
—Arlo Guthrie, U.S. singer-songwriter-musician, in “The Pause of Mr. Claus” (1968)

INTRODUCTION
Now friends, tonight we’re gonna sing you a song, a Christmas carol in four-part harmony. The song…the Christmas carol is part of an album called “Arlo.” That’s my name. Some of you right about now might be thinking, thinking in your private thoughts there in your heads, well, this Arlo fella must have a pretty big ego. I mean, to go and name an album after himself, he must have let all that fame and fortune go to his head. I don’t know about the fame and fortune part, because all that doesn’t last long, but my head, my head is really sort of small. We’ve never actually met. All of you out there and me, that is.But that’s not what I came to talk about. Came to talk about a pipe. Remember the pipe? This is a story about a pipe.And I’ll get to it. In time, and four-part harmony.

So there I was, sitting on a bench, looking for a song to start with. I didn’t find it. I’m not proud…or tired.Out of all the songs I wrote, there I was, on the bench trying to pull just one verse from my head, but nothing would come.I knew right then and there I had to get ahold of Steve Laug, he’s a good friend of mine. We’ve never actually met. But we write emails back and forth to each other all the time. Now friends, if you ask me, that’s one hell of a way for folks to talk. Sort of like writing a story, in four-part harmony.

And then it hits me that it would be a friendly gesture to sing a Christmas carol about the guy who started it all. A guy in a red coat who has a beard, and all he does is give presents…for free…to all the rest of us. Must be something deranged about a guy like that.Living in Canada…living at the North Pole, it’ll do that to a guy.

Now, Steve and me, we never exactly said anything about any quote. All we talked about was the pipe. Remember the pipe? Anyway, I sent him a picture with the email, an eight-by-ten color glossy with all the details written down, and I said I thought it was what’s called a brandy shape, and Steve, he says it’s like a BBB he has that’s the same shape, only it’s a Christmas pipe. Well, I never heard of any Christmas pipe shape, but Steve knows more than I do. And later on he wrote back and sent a picture of his BBB, an eight-by-ten color glossy with all the details. And the two eight-by-ten color glossies with all the details were almost the same.

And the good news is, that’s when I remembered this Christmas carol I wrote, in four-part harmony, because it was about Santa Claus, even though it’s spelled with an “e” in the song. Don’t ask me why, you can figure it out. Now, everyone knows old Santa is all about Christmas. So that’s about how that story goes.

Now I’ll get on with the other story, about the pipe. Remember the pipe?

I got mixed up online with some poor fella who was selling seven pipes all together and didn’t have a clue what all was in there. ’Cause my eye went straight to one with a white C on the stem and even I knew what that meant. The listing, in micro-mini small print at the bottom of the page, that you’re not supposed to read, called it a “Como’s Bent Billiard,” but I took a closer look and made out the blurry Y after Como. So there I was, still sitting on the bench and having a good old time knowing how nobody else knew the Como pipe was in there with all the others, and that’s why the price was so low with time running out.Rob2 I’d like to dedicate this Christmas carol to all the pipe-abusing S.O.B.s out there who have been bad little boys and girls and ought to keep that in mind this coming Christmas. It’s called “The Pause of Mr. Como.” Now here’s how the song goes.

RESTORATION
Meanwhile, back to myself again after a brief diversion, I will describe the pipe as I received it. Although there were bad cake buildup in the chamber, rim burning, ubiquitous scratches on all sides of the bowl and a stem in dire need of work and polishing, the allure of this excellent Comoy’s example was almost intoxicating, and I haven’t tasted alcohol in 26 years – not that you could tell after reading my Introduction.Rob3

Rob4

Rob5

Rob6

Rob7

Rob8

Rob9 I like to start on a rim with super fine steel wool, as I did with this pipe. In general, this approach takes off most or all of the char and leaves the wood beneath without a single new scratch and often even shiny. This time I got nowhere with the regular method, and so I switched to 400-grit paper, which removed the char as well as dings and scratches I uncovered. Of course, the sandpaper also took off the old stain.

With the rim clean and smooth, showing the fine grain, I found my old Senior Reamer in its box and took on the chamber.This time, the reamer worked as it should. Almost all of the buildup was reduced to dust. A little quick sanding with 120-grit paper was needed before smoothing with 400.Rob10 Now, as I described earlier, the outer wood was scratched almost everywhere. I very much wanted to avoid ruining the good, light stain of the original. Having learned that micromesh can go a long way, from advice of my mentor, Chuck Richards, as well as our host and several previous readers, I put the theory to a tougher test than I had before.

And you know what? I think they’re on to something! Starting with 800-grade, I was able to eliminate all but the most insignificant scratches. I then worked my way up from 1000 to 1500 to 2400 and ending with 3200, leaving the briar– well, leaving the briar as smooth as it must have been the day it left the Comoy’s shop.

Taking on the stem only required heavy sanding and buffing with 1500, 2400 and 3200 micromesh.

Cleaning the pipe turned out to be the hardest part. I just kept dipping the bristly cleaners in Everclear one half at a time and scrubbing away until they came out of the shank and stem clear.Rob11

Rob12

Rob13

Rob14 CONCLUSION
If I had kept this fine example of Comoy’s craftsmanship, I would prize it as the best as compared to the two I own. However, as fate would have it, the pipe sold almost as soon as I posted it on my restored pipes Website. My only consolation is that I have reason to believe it is in adoring hands.

A Sweet KBB Yello-Bole Honey Cured Bulldog – Robert M. Boughton


Guest Blog by Robert M. Boughton
Member, North American Society of Pipe Collectors
http://www.naspc.org
http://www.roadrunnerpipes.com
http://about.me/boughtonrobert
Photos © the Author

You can’t stop us on the road to freedom
You can’t stop us ’cause our eyes can see
Men with insight, men in granite
Knights in armor intent on chivalry
She’s as sweet as Tupelo honey
She’s an angel of the first degree
She’s as sweet as Tupelo honey

Just like honey, baby, from the bee — Van Morrison, Northern Irish singer-songwriter-musician, “Tupelo Honey” (1971)

INTRODUCTION
As my good friend and mentor, Chuck Richards, commented at a recent gathering of local enjoyers of the fair tobacco pipe in general, Kaufman Brothers & Bondy created the Yello-Bole line in 1932 as a less expensive alternative to its regular stable of Kaywoodie, Reiss-Premier and of course KB&B pipes.

Now the name Yello-Bole is synonymous with the terms second-rate and, worse still, just cheap, as though the measure of a good smoke were ever determined by its price. [See, for example, Peterson’s late great and noble attempt in years gone by to make pipes affordable to the Everyman.]

But its older products, such as the KBB Yello-Bole Imperial Bulldog of this discourse, “Cured with Real Honey” and with the KBB in a clover, as well as a tell-tale encircled “I” on the stem (might it be ambera?) – although crafted with briar deemed unsuitable for the older brothers of the family – nevertheless was still made from higher quality pieces of that fine wood than is, in general if ever, available today.

Also, the KBB Yello-Bole Imperial Bulldog is a definite vintage specimen (another present day determinant of value), based on the four key signs contained on the pipe, which date it to anywhere from the 1930s to the 1950s.Rob1

Rob2

Rob3

Rob4

Rob5

Rob6

Rob7

Rob8

Rob9 Beginning with the rim, I removed most of the blackening with a quick rub of purified water, and the rest except for one small, pernicious burn with a light touch of super fine steel wool that left no new scratches but also made clear the blemishes that were already present. Rob10 I sanded the rim with 400-grit paper and micro-meshed with 1500, 2400 and 3600 grades. I later succeeded in removing the one remaining burn mark shown below.Rob11 Moving on to the chamber, I was startled when most of the cake crumbled from the walls with a couple of turns of the reamer. Still more shocking was the sudden appearance of a thin coat of the original yellow product of honey curing. I knew I had a rare find and wondered at the short-term but intense enjoyment of the pipe that could have led to more than average cake but left the prominent yellowing intact. The rest of the cake came clean with gentle 400-grit sanding.

Staying with the 400-grit paper to remove scratches and dings on the beautiful briar, I lightened the color still more and found a few fills and other grain flaws that accounted for why this finely shaped bulldog didn’t end up with, say, a Kaywoodie stamp.Rob12

Rob13

Rob14

Rob15 Using micromesh at an escalation from 1500 to 2400 and 3600 grades eliminated the remaining scratches.

The cleaning of this pipe was achieved with refreshing ease and the expenditure of few bristly cleaners soaked in Everclear.

In a difficult choice, I decided to re-stain the briar with a medium as opposed to the original light brown color. I applied Lincoln boot stain and flamed the alcohol out before removing the char with 2400 micromesh and smoothing it out using 3600.

To polish the prepped pipe, I used red and white Tripoli, White Diamond and carnauba, and after rubbing the wood with a cotton rag saw it needed another round on all of the buffers except the red Tripoli.

I finished the stem with red and white Tripoli before White Diamond.Rob16

Rob17

Rob18

Rob19

Rob20 CONCLUSION
This was a very pleasant and relaxing restoration, in particular following my Ben Wade and the Chamber of Horrors brush with terror.

Tonight and tomorrow (Wednesday and Thursday), before the monthly official meeting of my pipe club at the local Moose Lodge, I will attempt to power through as many of the easier prospects as possible from my recent online purchase spree. The highlights include what I believe is a Comoy’s Smooth Bent Satin Matt Short Brandy #1770 (Made in London in a circle); a Kaywoodie Silhouette Bent Rusticated Squat Apple; a Kaywoodie Smooth Bent Signet Billiard; an Ehrlich Rusticated Straight Billiard; a LHS Park Lane Smooth Straight Poker; a Reinhard’s Smooth Straight Billiard; an Amadeus Greek Bent Billiard; a Parker Tall Tan Straight Poker; a unique small Town and Country Round-Bottom Straight Squat Rhodesian; a no-name Gourd Calabash Meerschaum Lined; a trio of old Missouri Meerschaum corncobs…and another KBB Yello-Bole, this one a Straight Four-Panel, also with the KBB in a clover but a yellow circle on the stem.

The first person to post a response challenging my ability to pull off the restorations/refurbishes of the above pipes before tomorrow night, and willing to bet a free pipe from the loser to the winner, is on for the bet. I will post before and after shots in a blog on my business Website, noted at the top of this submission, by 9:00 p.m. MDT (U.S.) tomorrow.

Our host, I trust, will vouch for my honesty in this type of wager.

Ben Wade and the Chamber of Horrors – Robert M. Boughton


Guest Blog by Robert M. Boughton
Member, North American Society of Pipe Collectors
http://www.naspc.org
http://www.roadrunnerpipes.com
http://about.me/boughtonrobert
Photos © the Author

“It is our choices, Harry, that show what we truly are, far more than our abilities.” —J.K. Rowling, “Harry Potter and the Chamber of Secrets” (1998 U.K.)

INTRODUCTION
Never has one of the quotes with which I like to begin my blogs spoken with more directness to the heart of the matter at hand than the words of J.K. Rowling above. At the risk of kicking a dead horse, I must point out how the choices of the prior owner of the Ben Wade Tall Poker (Made in London England) effected this description of its harrowing restoration. I am sure the individual lacked not in ability, only decision-making. But where do I begin? Ah, the stem pops into mind.Rob1 Just try to take in the scope of the mauling the perp inflicted on the bit and downward, from these photos alone: the complete gnashing away of the bottom lip and the gash in the upper side as shown on the left, and the chips in the top of the bit and great flat plain below it on the right. The only true cure for this degree of chewing, like a single piranha in frenzy that has been chased away by a bigger fish with no interest in pipes, is total replacement.

I believe someone even re-stemmed this pipe at some point during the old owner’s possession of it, as the bottom of the bowl is flat with ample room to stabilize it in a canted position yet the stem’s weight topples it. But that probability only serves to compound the undeserving person’s culpability. After all, imagine the debasement the original stem must have suffered. However, with another replacement in mind for the future, for now I took the mayhem as a challenge for some serious Black Super Glue practice.

Then there was the liberal, to use a kind adjective, distribution of deep pits and scratches covering the bowl and shank.Rob2

Rob3

Rob4

Rob5

Rob6

Rob7 And at last, I come to the reason for the name of this blog: the chamber and rim.Rob8 When I first saw this angle on the site where I ordered a three-pipe lot of Ben Wades (one of which, when it arrived, was a tall billiard with a huge crack extending down the side of the bowl that required amputation and is therefore now undergoing the trauma of drastic re-shaping, and the other a small apple, which I restored with success and already blogged), I thought the rim would be the biggest challenge of the project.

Although the rim did indeed present considerable obstacles to overcome, the greatest battle proved to be with the chamber of horrors itself, from which I emerged, torn and bleeding, but victorious – if there can be any genuine victory in war.

REFURBISH
Following my initial structural inspection with a couple of bristly cleaners soaked in Everclear 190-proof that I ran through the stem and shank, I concluded the pipe somehow was intact but filthy almost to the point of total clogging with black resinous goop. In fact, when I looked at the shank opening as shown in the second to last photo above and then tried to blow through it only to meet extreme resistance, I got my first clue that many sturdy cleaners would make the ultimate sacrifice before this BW was fit to enjoy.

I proceeded with the part of the restoration that has always been my first step: reaming the chamber. But this time, after about an hour of sweaty, hand- and arm-weakening cranking, I only prevailed, with repeated efforts applying the reamer at different levels and angles of attack, in dislodging multiple layers of cake that slowly made a pile of fine carbon amounting to more than half a dozen bowls. Even sanding with 80-grit paper only added another few bowls of carbon to the growing heap. It’s too bad all the pipe cake out there waiting to be converted to powder by folks of my persuasion isn’t recyclable as tobacco, but then again, there seem to be plenty of another kind of folk who enjoy the taste of massive congestion from carbon and other nasty accretions.

Deciding, based on the horrible pocks and craters remaining in the chamber, that the hallowed space would take work throughout the restoration process, I launched a concerted offensive on the rim, at first believing with reason based on experience that I would be able to salvage the nice inward curve of the briar there. However, after another considerable chunk of time flew away with each level of char I banished, all that I had done was reveal wounds so deep and close-spaced along the inside curve of the rim and several bad wounds at the top of the bowl that I knew I would have to level the rim.
Drastic situations call for equal measures, and so, not having a power sander, I chose the best weapon I possessed, said tool being a metal rasp. Thus began another arduous labor removing the once elegant curve of the rim, with heavy mental protest. I was filled with sadness as I applied the rough edge of the rasp with slow care to the rim and watched the slope disappear more and more over time.

That stage finished and the rim flat, I sanded the well-grained wood with 220-grit paper followed by 400 and then micro-meshed using 600, then 800, 1000, 1500, 2400 and ending with 3600.Rob9 Even this view does not reveal the insidious nature of the cake buildup inside the chamber from hell. The ongoing task of removing all of the cake, every time I thought I achieved smoothness all around, only uncovered still more hidden holes, similar to microcosmic pits and craters on the moon, only black.

I decided the time had come to remove all of the dings and other rough spots in the bowl and shank and used 220 paper again for the worst areas, then 2400 micromesh followed by 3600.Rob10

Rob11

Rob12

Rob13 Seeing the nice, lighter wood that lay beneath, but suspecting the dark stain was used for a reason (e.g., hiding fills), I nevertheless embarked on a removal of the original stain by hand using 400-grit paper.Rob14

Rob15

Rob16

Rob17 I know, I know! I see here and noted at the time the scratches left by my removal method, but careful, even sanding and then buffing with several levels of micromesh took them off quite well. Two important goals were accomplished by this roughness. One, I satisfied my curiosity about the potential for fills. Yes, as you can see, they are present, but nowhere near to the extent that I anticipated. Two, I removed the dings, divots, dents and most of the other defects. Of course, some might reverse the order of significance of these resolved issues.

At this juncture, I became resolved to eradicate the stubborn, troublesome cake no matter what it might take. The determination was born not only of my own obdurate nature that exceeds that of any piece of wood, but from the fact that the Ben Wade Chamber of Horrors had managed to destroy my Senior Reamer – no joke. Not wanting to discard the fallen reamer, which had been so faithful to me until it met The Chamber That Must Not Be Named, by such callous means as tossing it in the garbage, I chose rather to retire it to a place of honor on my bench. But now I had to avenge my defeated brother in restoration, not to mention buy a replacement. I already ordered a new-in-box Castleford Five-Piece Multi-Fit Reamer Kit and a full set of micromesh pads (no more paper for me) online for just more than $30, postage included.

With no small sense of retribution fuelling me, I girded myself with an entire large sheet of the coarsest sandpaper I had and cut off a few small strips before bending one into the right shape to begin the ugly but necessary task with a vengeance. Unbelievable amounts of carbon spilling from the demon chamber every time I emptied it, and my fingers blackened with soot, I kept at it with gusto, thinking I must have made progress. My left index finger was developing scrapes and calluses.

Still, the evil chamber walls in spots felt like the bowels of a volcano. In desperation, I turned to a Dremel I borrowed for the amputated Ben Wade Billiard’s re-shaping. I changed the Dremel bit to a small, fine rounded piece of sandpaper and, at the slowest speed, began making circular turns around the chamber walls.

As some of you with more experience might imagine, this approach almost led to disaster, but instead turned the tables in my favor. Granted, the Dremel (not I) left several new chinked spots where none existed before. But these occurring after the power tool caught a scent of the pure briar, the cake crisis was solved with a bit more rapid sanding that also repaired the new nicks.

With the chamber vanquished of the dreadful cake as well as it ever would be, and the hollow area covered in blackness, and the shank still needing to be purged of its mess, I plugged the shank opening with several small squares of cotton and flooded the chamber with Everclear. I set the big chunk of briar aside for about 20 minutes.Rob18 In the meantime, I felt a keen sting in my right index finger and noticed that under the True Coat of soot there appeared to be some blood and loose skin. I thought it wise to scrub my hands forthwith, with soap and water as hot as I could stand, and this ordeal ended up lasting about 15 minutes. When I was done, I realized I had no hydrogen peroxide to sterilize the cut caused by so much sanding of the wicked chamber.

But I did have Everclear, the pouring of which onto my already burning sore did not excite me. Better safe than sorry, I just got it over with.

Oh, my gosh, did it burn!Rob19 I pulled the cotton plug from the shank and let the remaining coal-black liquid ooze from it like a suppurating wound, and began the still serious business of running both ends of so many bristly cleaners dipped in alcohol through the shank that I lost count. While the darker part of my brain, made meaner by the frequent sting of more Everclear running onto my exposed wound, whispered that the little hole would never come clean, the rational side assured me that before I knew it the job would be done.

But it wasn’t happening fast enough, and so I resorted to digging through my growing and a bit disordered supplies for the wire bristle brush I knew was there. At last I found it buried in the bottom of a drawer and at once started the repetitious but effective process of wetting it with alcohol, scrubbing the inner shank, rinsing it in a shallow bowl of alcohol that grew fouler each time, squeezing the bristles clean and dry, and repeating all of these steps over and over. Of course, my reward did come when I switched back to a normal cleaner soaked in alcohol and it came out clean.

Somewhere along the line, I finished the stem work by sanding down the excess Black Super Glue and smoothing the Vulcanite with vigorous rubbings of three grades of micromesh.

After inspecting the briar for any missed flaws I could fix and finding none, I gave the bowl and shank a final purified water bath, which proved to be necessary from all of the black powder that had transferred from my formerly dirty fingers.

Ready for the final countdown, I opened a brand-new bottle of burgundy-colored Lincoln boot stain and coated the entire outer area of wood using the small, damp applicator. As fast as I could manage, I flamed it all over with my Bic, reveling in the great poofs of blue flame that rose and dissipated as the alcohol in the stain burned off.

I rubbed off the char with a piece of 2400 micromesh until I could see the good grain through the fresh, dark red stain and then put on my magnifier glasses to do the finish work with 3600. It looked good to me, so I put it aside with the stem on a thick cotton cloth for about a half-hour.

That was all I could stand before taking the pieces to my bedroom/office/shop and focusing on the two buffing wheels I use to bring out the ever-anticipated shine. Taking a deep breath to steady myself for the always risky business of touching anything fragile to the high speed wheels, I turned them both on.

Starting with the stem, I turned it with all due respect and care first on the red Tripoli wheel and looked it over as I rubbed it with the cotton cloth, then the white Tripoli wheel on the other machine, and back to the first for the final coat of White Diamond. Much better, I thought and set it aside.Rob20 To the wood I applied quick, thorough coats of white Tripoli, White Diamond and carnauba.I looked it over, noticed a spot that was duller than the rest and repeated the process there.Rob21

Rob22

Rob23

Rob24

Rob25 CONCLUSION
Fixing this pipe took me the greater part of a week, by far the longest I have spent on a project since my first real restoration two years ago. That is the reason why the concept of being finished with the Ben Wade Tall Poker is still taking time to sink in. After all the time I have spent with the BW – before the project began to make a plan of action I ended up throwing out the window, during the circuitous restoration itself and now afterward, writing about the experience – I have grown attached to the curious example of pipe craft. I would like to keep it to myself, to add it to my growing collection of Ben Wades. I have no doubt it will smoke at least as well as the others.

But I have decided to let someone else discover the accuracy of that prediction.

Cleaning Up a Brigham One Dot Acorn 778


Blog by Steve Laug

One of the last pipes I picked up on my recent Alberta trip and the last pipe in my current pile of pipes to refurbish is a little Brigham Canada Acorn or Strawberry shaped rusticated pipe. The shape of the pipe is what caught my attention. And when I had it in hand the size was also a relevant feature. It is a very light weight pipe (don’t have a scale) and it is diminutive in size. The dimensions are: length – 5.5 inches, height – 1.5 inches, bore – .75 inches. The bowl is conical in shape ending well below the entry of the airway into the back wall. Overall the pipe was in decent shape and would be fairly easy to clean up. The finish was dirty and the bowl had a thin cake in it. The stem was oxidized and the inside of the shank was dirty. The stem was oxidized and had one tooth mark on the top surface near the button. On the underside of the stem near the button was a lot of tooth chatter. The stamping on the underside of the shank in a smooth area reads 778 which is the shape and that is followed by Made in Canada and then Brigham in script.Brig1

Brig2

Brig3

Brig4 The next two photos show the tooth marks and tooth chatter on the stem. The tooth dent on the top of the stem near the button was quite deep and would need to be raised with heat and then probably repaired with superglue.Brig5

Brig6The aluminum Brigham tenon system was in great shape and showed no wear or tear on it. In the past I have taken apart these older Brigham pipes with the aluminum tenon and found it pitted and sometimes even eaten away. The filter surprised me in that when I pulled it out it was actually quite clean. The bowl was very clean and the rim was also clean.Brig7 I cleaned out the aluminum tenon and the mortise area with isopropyl alcohol (99%) and cotton swabs and pipe cleaners. I ran them through the shank and stem until they came out clean.Brig8I sanded the stem with 220 grit sandpaper, medium and fine grit sanding sponges and then cleaned the surface with alcohol on a cotton pad. I scratched out the surface with a dental pick to remove any loose vulcanite or grit on the surface. I put several drops of clear superglue in the tooth dent and let it dry until it was hard.Brig9

Brig10Once it hardened and cured for about an hour I sanded it with 220 grit sandpaper to blend it into the surface of the stem. I wanted the surface to be smooth and the super glue bump to be smoothed into the surface. I also sanded it with a medium and fine grit sanding sponge to remove the scratches in the surface.Brig11

Brig12 I sanded the stem with micromesh sanding pads – wet sanding with 1500-2400 grit pads and dry sanding with 3200-12,000 grit pads. In between each set of three pads I rubbed the stem down with Obsidian Oil and let it soak into the vulcanite. I had to repeat the process several times to remove the oxidation near the shank. I buffed it with White Diamond and then gave it a coat of carnauba wax.Brig13

Brig14

Brig15 I set the stem aside and scrubbed the bowl with Murphy’s Oil Soap. I used a soft bristle tooth brush to scrub it and then rinsed it off with running water. I kept a thumb in the bowl to keep the water from getting into the inside of the pipe. I dried it off with a cotton towel.Brig16

Brig17 I rubbed down the bowl with Halcyon II wax and buffed it with a shoe brush to raise the shine and even out the wax. I put the maple filter back in the tenon and then put the stem on the bowl. I buffed the bowl lightly with carnauba wax and then with a soft flannel buff. The finished pipe is shown in the photos below. It is cleaned and ready to smoke. I love the older Brigham pipes like this one and find that they smoke very well. They deliver a cool dry smoke and the Brigham filter system works well to cool the smoke and not hamper the draw or the flavour. Sometime later this week I will load a bowl of Virginia and enjoy the first smoke in this old timer.Brig18

Brig19

Brig20

Brig21

Rode Hard Put Away Wet – A Tired Julius Vesz shape 31 Zulu/Canted Dublin


Blog by Steve Laug

When I walked by the display case in the antique mall and saw the classic Vesz finish and the O logo on the stem I knew I was looking at one of Julius’ pipes. It was in very rough shape. The stem was covered on the topside and underside from the button forward for about an inch with a lot of dents and bite marks. On the topside there was a bite through – not large, more of a pinhole sized hole. There was also a lot of calcified buildup on the stem. The stem was over bent and the flat bottom of the bowl and shank did not rest on the desk top when laid down. The stem arch kept it from happening. The button and crease had were also worn. The rest of the stem was oxidized. The bowl finish was dirty and worn with white paint spots on the bowl. The stem was very tight and hard to remove but when I did remove it the tars on the end of the tenon were thick. The inside of the stem was so filled that the airway was virtually clogged. The slot on the end of the stem was plugged but for a hole the size of a pencil lead.Vesz1 Vesz2 The rim was damaged and worn from tapping it out on hard surfaces. There were large dents and worn areas. The inner edge was blackened and on first glance looked to have burned damage. It was hard to tell for sure but it also looked to be slightly out of round due to the damage to the inside edge. The bowl was heavily caked with a concrete like carbon build up. I tried to ream it and found it too hard to cut as it stood. The inside of the shank had heavy carbon and tar buildup.Vesz3 The pipe is stamped on the flattened bottom of the shank. Toward the front of the bowl it is stamped Circle 3 which denotes the price point of the pipes. Julius stamped them 1-6 to denote the price. That is followed by the shape number – in this case 31. The final stamping is Julius Vesz over Hand Made.Vesz4 To soften the concrete like cake so that I could ream it more easily without damaging the briar I put the bowl into an alcohol bath to soak for a while. I also wanted to remove the grime from the rustication on the bowl and the soak would facilitate that.Vesz5 While the bowl soaked I worked on the stem. I cleaned the inside of the stem with cotton swabs, pipe cleaners and isopropyl alcohol. I also sanded the calcification with 180 grit sandpaper and 220 grit sandpaper to remove the build up from the surface of the stem. The tooth marks are very evident in the photos below.Vesz6 Vesz7 I took the bowl out of the alcohol bath to ream it and found that indeed the alcohol had softened the cake enough to make reaming a very easy task. I reamed it with a PipNet reamer starting with the smallest cutting head and working up to the size of the diameter of the bowl.Vesz8 I topped the bowl and removed the damaged surface of the rim. I set up a topping board and used 220 grit sandpaper to gently and carefully remove the damage. I sanded the bowl in a circular pattern on the board as I find that doing so does not leave as deep scratches in the finish. Once I had removed the damage I could see the state of the inner edge of the rim. It had some darkening but it was still solid. There were no deep burned areas that needed to be removed.Vesz9 Vesz10 Vesz11 I set up a heat gun and heated the bent stem to reduce the bend to a point where the pipe would sit up right on the flat bottom of the shank and bowl. I also heated the tooth dents to raise them as much as possible before I sanded them.Vesz12 Vesz13 Once the stem was heated and flexible I inserted it in the shank and pressed down on the bend to adjust the bend to allow the bowl to sit without falling over. The tooth marks did lift quite a bit and are visible in the last two photos of the foursome below.Vesz14 Vesz15 Vesz16 I sanded the stem with 220 grit sandpaper and then with medium and fine grit sanding sponges to clean up the dents as much as possible. The surface needed to be cleaned and prepped for the work of filling the dents with black super glue. I washed down the dents with alcohol to remove the sanding dust. I filled the holes and built up the dents in the button lip with black super glue until they were overfilled, then sprayed them with the accelerator to harden the glue. I sanded the fills with 180 grit sandpaper and then with 220 grit sandpaper to begin the process of smoothing them and blending them into the surface of the vulcanite.Vesz17 Vesz18 I continued to sand with the 220 grit sandpaper to shape the crease and the button as well as the surface of the patches until they were at the same level as the surface of the stem.Vesz19 Vesz20 I sanded the stem after that with a medium and a fine grit sanding sponge to further blend it into the stem surface. It took a lot of sanding to blend it into the surrounding vulcanite.Vesz21 Vesz22Vesz23 Vesz24 I rubbed down the stem with Obsidian Oil to make the scratches and trouble areas very visible. I also rubbed down the bowl with olive oil and wiped it off and set it aside overnight to let the oil be absorbed into the wood. In the morning I took the following set of two photos to show the state of the pipe when I began to do the finishing work on it. Vesz25 Vesz26 I sanded the stem with fine grit sanding sponges to clean it up further and remove the deeper scratches. I then sanded it with micromesh sanding pads – wet sanding with 1500-2400 grit pads and dry sanding with 3200-12,000 grit pads. I rubbed it down with Obsidian Oil between each set of three pads. I finished the stem work by buffing the stem with White Diamond on the wheel to finish the polish. I gave it several coats of carnauba wax and buffed it with a soft flannel buff to raise the shine.Vesz27 Vesz28 Vesz29 Vesz30 Vesz31 The bowl had a heavy ghosting of aromatics – it was overwhelming and no matter how many times I cleaned it the smell remained. I filled the bowl with cotton balls, pressed them down and then filled the bowl with isopropyl alcohol with an ear syringe until the cotton was soaked. I set the pipe bowl in an old ice-cube tray that holds it upright and let the alcohol and cotton do their work to pull out the oils from the briar and sweeten it. I have moved more and more toward using cotton instead of coarse salt. It seems to work just as well and is less of a mess in the clean up stage.Vesz32 I let the pipe sit with the alcohol and cotton balls for about three hours. The photo below shows the oils that were drawn out of the bowl. The cotton turned a yellow-brown and was almost dry.Vesz33 I took the cotton balls out of the bowl and cleaned the shank and bowl with pipe cleaners. I put the stem back in place on the pipe and gave the pipe a hand polish with some Halcyon II Wax. I hand buffed it with a shoe brush to raise the shine. The finished pipe is shown below. The look and feel of the pipe is far better than when I started. The repairs to the stem and button worked well and blended in nicely to the stem. The topping of the bowl removed the damaged portion and the blackening of the inner edge of the rim is merely a character trait. This is one that will stay in my collection. It smells sweet and is ready to smoke.Vesz34 Vesz35 Vesz36 Vesz37

An Old 1923 Adolph Frankau Billiard Restemmed and Restored


Blog by Steve Laug

On a recent road trip to Alberta I drove over 3300 kilometres and stopped along the way at antique shops and antique malls to look for old pipes to add to my refurbishing box. I am always on the lookout for old pipes that show promise or will make good additions to my own collection. In one of the shops in Nanton, Alberta I found an old billiard and a Savinelli Made Canadian pipe bowl. Both bowls were missing their stems. The billiard bowl was stamped with a stacked lower case o and an N with C over the top of it. Above the stamped letters was a crown. There was no other stamping on the briar. I have looked around the web for this stamping and have not been able to find out who made the pipe from the stamping and the logo on the shank. The photo below gives a clear picture of the stamping on the top of the oval shank. If it looks familiar to any of you reading this article please post the information in the replies at the bottom of the page.A1 There was also a band on the shank that was factory installed. It was not a repair band or one that was added at a later date. The sterling silver band also bore stamping. On the top of the shank band there was an AF in a hexagon stamped in the silver. That AF stamping seems to point to the pipe being made by Adoph Frankau and Company as far as I can ascertain. Stamped underneath the AF there were three hallmarks in the silver. These hallmarks included the following – each of them was in a cartouche. The first was a letter h, the second was a lion, and the third was a lion’s head. The stamping and the order in which they were stamped identifies the silver band on the pipe in the following order – the h is the year 1923, the lion is the stamp for sterling silver and the third stamp, the lion’s head is the stamp for the city of London. The close up photo below shows the stamping on the silver band.A2The finish on the bowl was worn and spotty but otherwise was in good shape. The rim was slightly darkened but did not have any tarry build up. The bowl interior was clean and appeared to either have been reamed or lightly smoked. The shank had a threaded mortise and would have taken a threaded tenon. I went through my can of stems and found a stem that was oval and of a similar diameter as the shank. It had a broken off tenon that needed to be sanded smooth to flatten it against the face of the stem. With some sanding and cleaning up it would fit the shank well. Once I had faced the stem I drilled the remainder of the old broken tenon out of the stem and fit a piece of Delrin tenon into the hole. The piece of Delrin was too long and I cut it off with a hacksaw. The tenon was not threaded to fit in the threaded mortise however the diameter would make a snug fitting push tenon. The diameter of the stem was slightly larger than the shank and band so it would need to be sanded to remove the excess material.A3 A4 I cut of the tenon piece and then glued it into the drilled out stem with superglue. I sanded the stem to adjust the diameter of the oval to make the fit more precise.A5 When the stem was in place the fit was better with the logo side of the stem facing down. I decided to sand that side to fit it against the shank. The inlaid logo was not set too deeply into the vulcanite and with sanding it would be easy to remove. Once I had sanded it with 220 grit sandpaper to remove the excess vulcanite I fit it in the shank to get an overall look at the pipe with stem. More sanding would be necessary to get the fit perfect against the band and shank.A6 a7 a8 A9 To further shape the stem I removed it from the shank and sanded it some more with 220 grit sandpaper and then with a medium and a fine grit sanding sponge. I sanded the stem until the diameter matched that of the shank. I sanded the tooth marks next to the button on the top and bottom of the stem. The photo below shows the shaped and sanded stem. All tooth marks and damage to the stem was removed in the sanding and the stem was ready to polish.A10 I wiped down the bowl with acetone on a cotton pad to remove the spotty finish on the bowl. It took some scrubbing to remove the varnish coat on the pipe. I scrubbed the silver band with silver polish and wiped it down with a silver polishing cloth.A11 A12 A13 I sanded the stem with micromesh sanding pads – wet sanding with 1500-2400 grit pads and dry sanding with 3200-12,000 grit pads. I sanded the tenon smooth as well. I rubbed the stem down with Obsidian Oil after each set of three sanding pads. I buffed the stem with White Diamond to further polish it and then gave it several coats of carnauba wax and buffed it with a soft flannel buffing pad to raise the shine. A14 A15 A16 I buffed bowl with White Diamond on the buffer and then gave it multiple coats of carnauba wax to protect and polish it. I then buffed it with a soft flannel buff to give it a shine. I put the stem back in place on the shank and the buffed the pipe a final time. The finished pipe is shown in the next set of four photos below. It is ready to smoke with its inaugural bowl. It will be a treat to fire up this lightly smoked pipe from 1923.A17 A18 A19 A20