Tag Archives: removing tooth marks

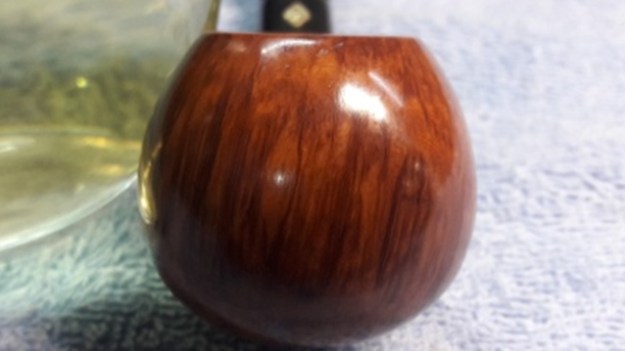
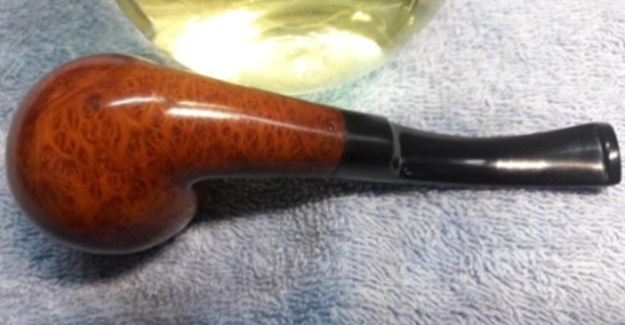
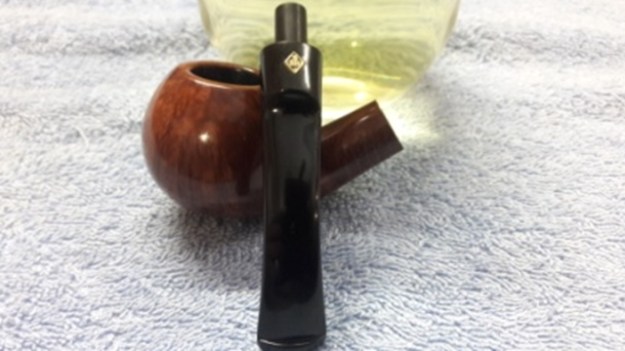
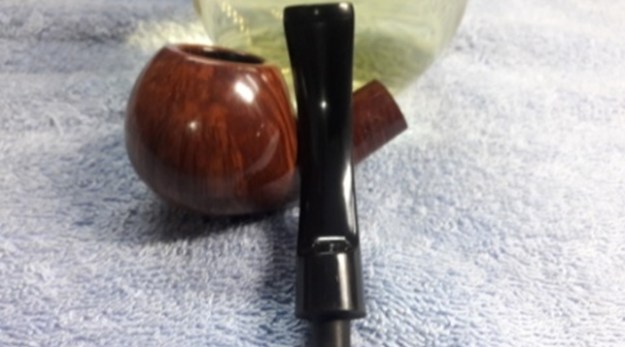
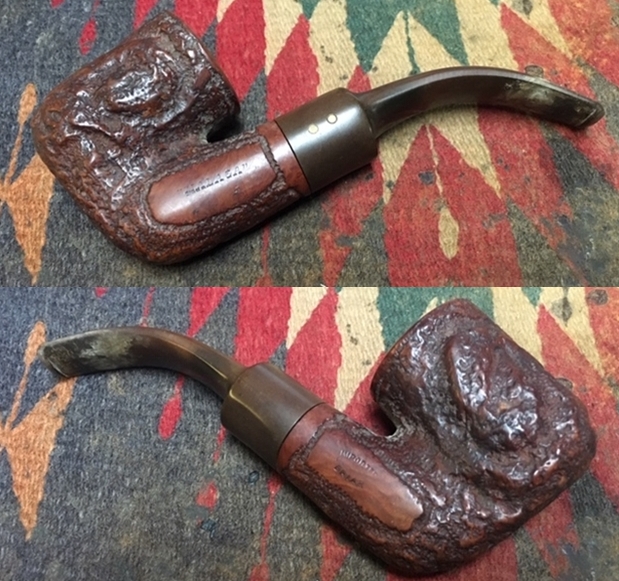
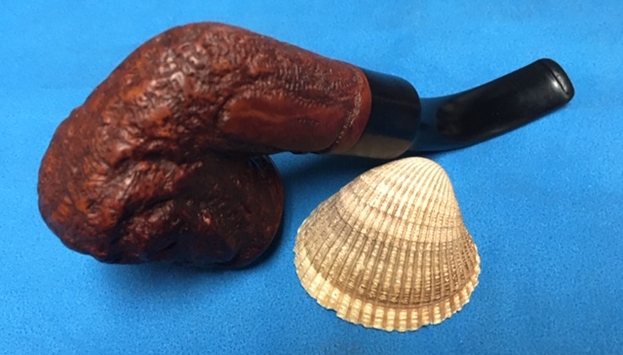
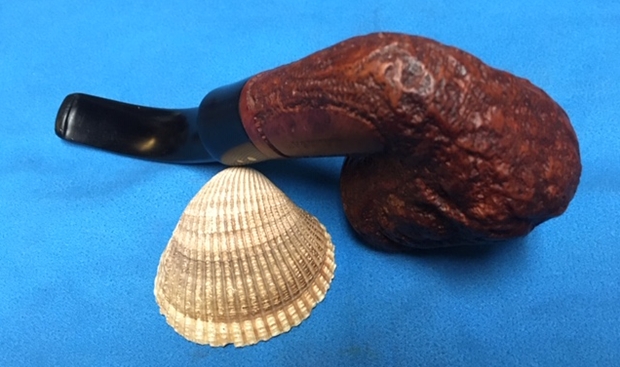
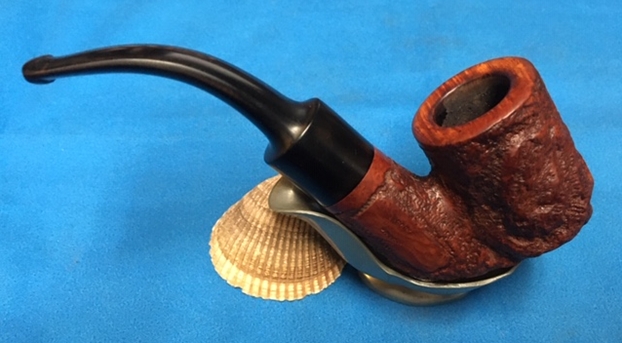
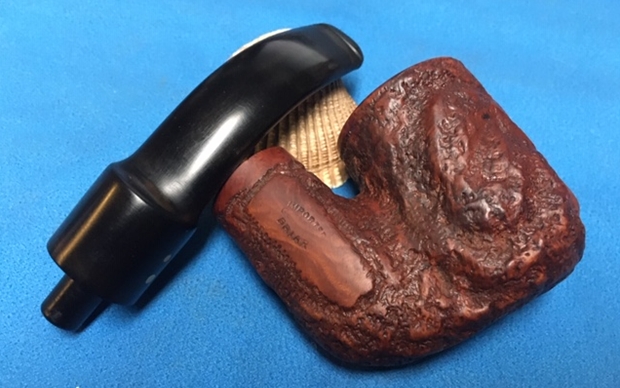
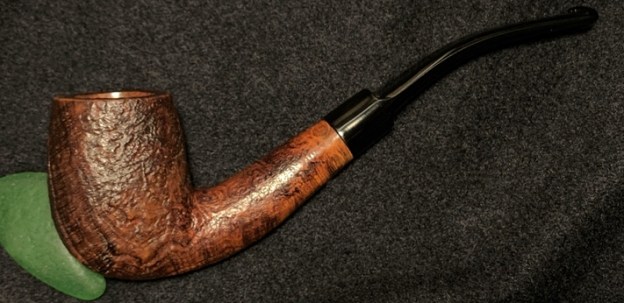
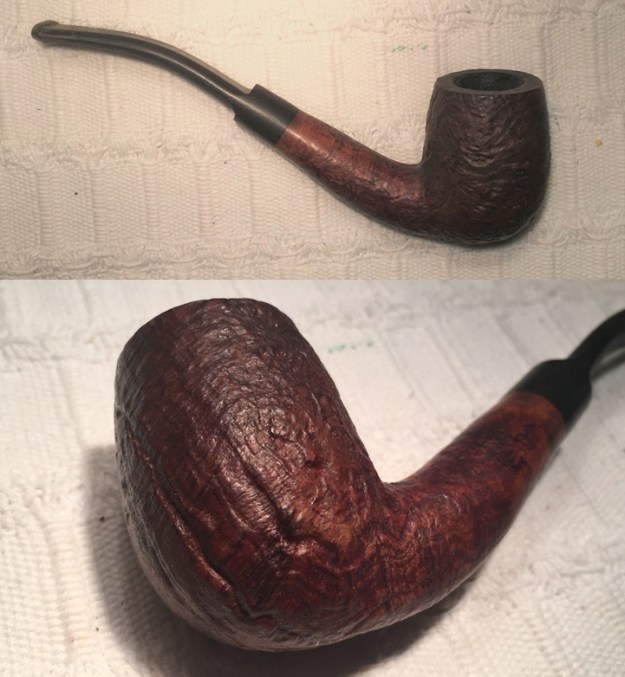
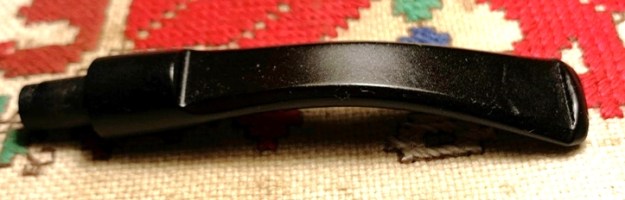
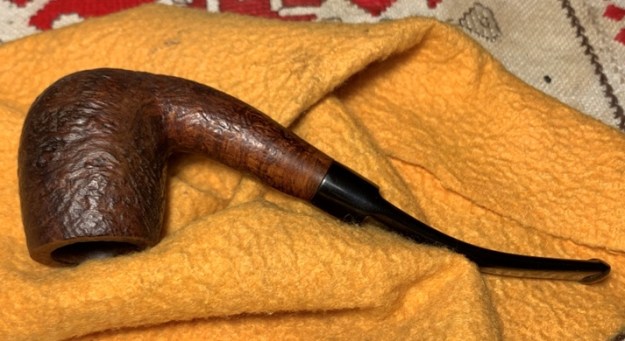
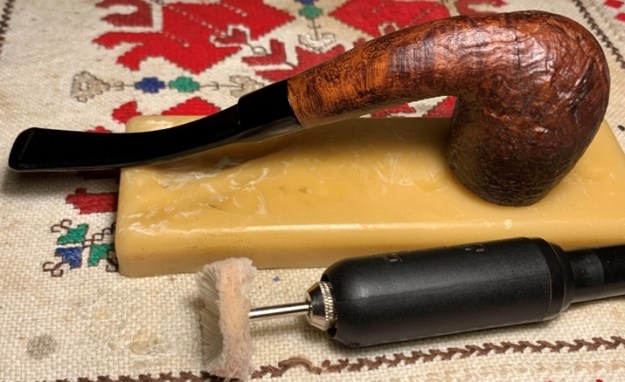
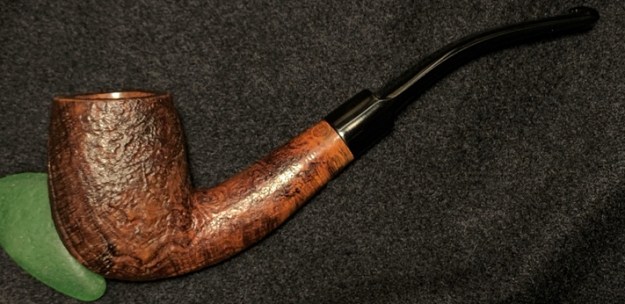
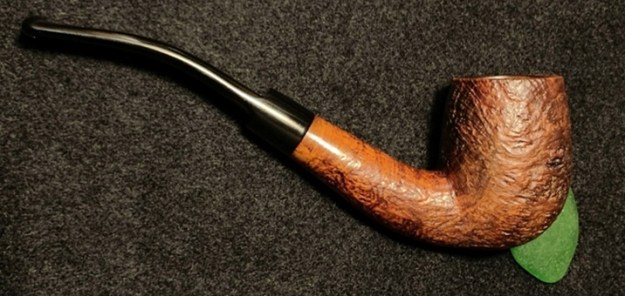
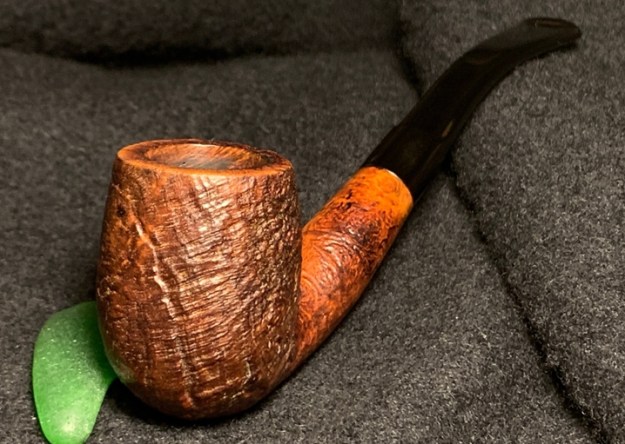
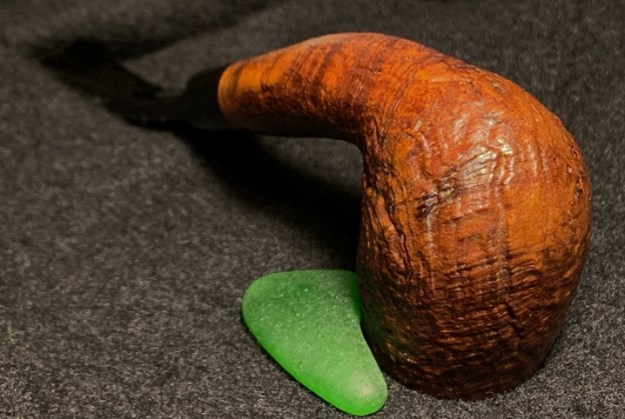
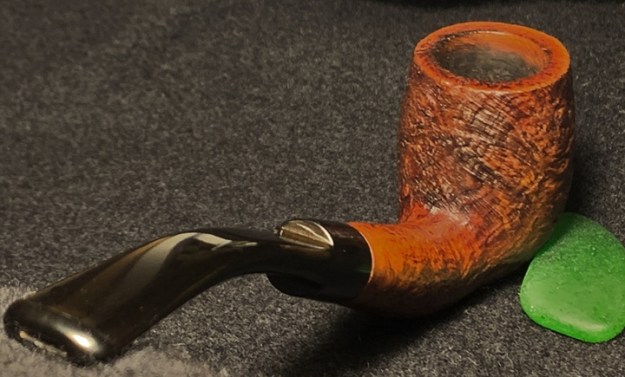
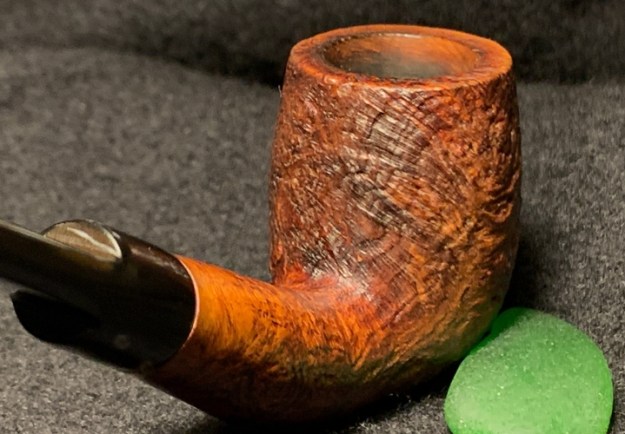
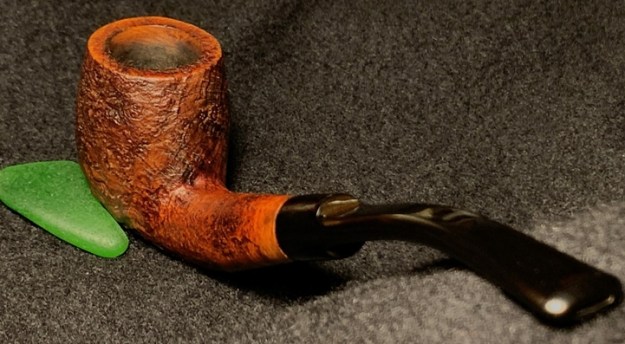
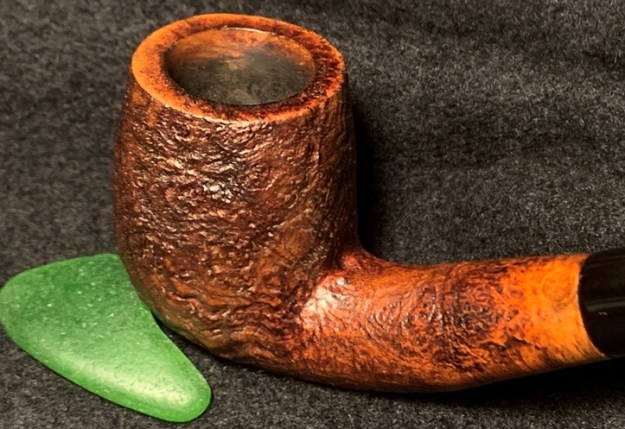
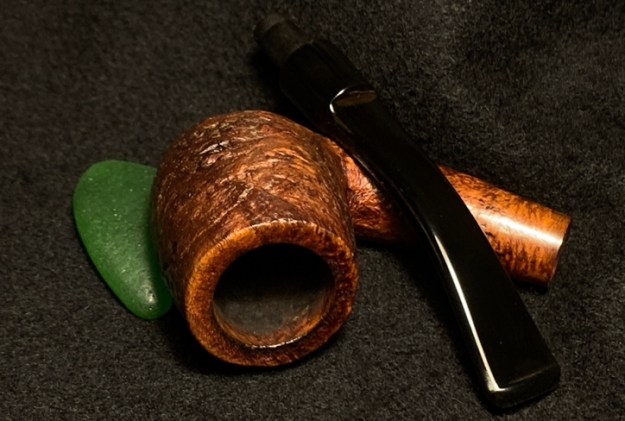
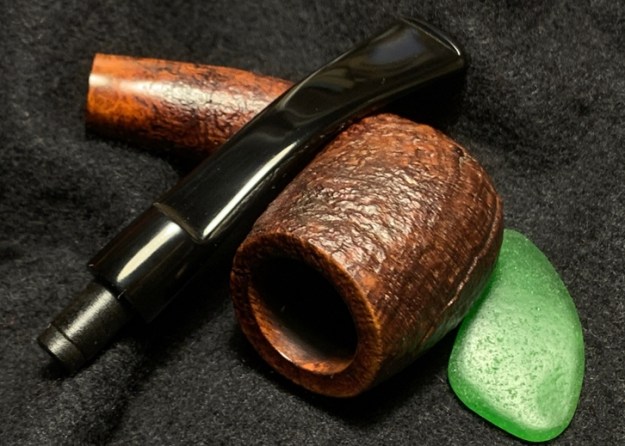
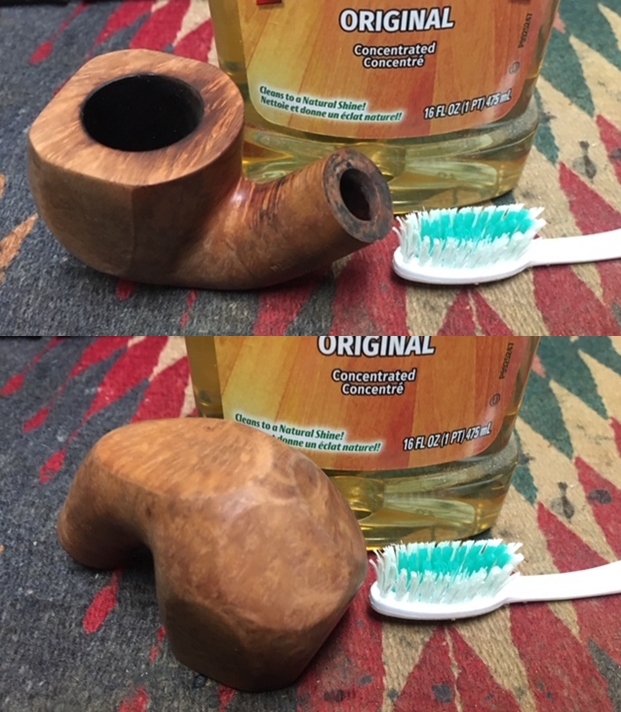
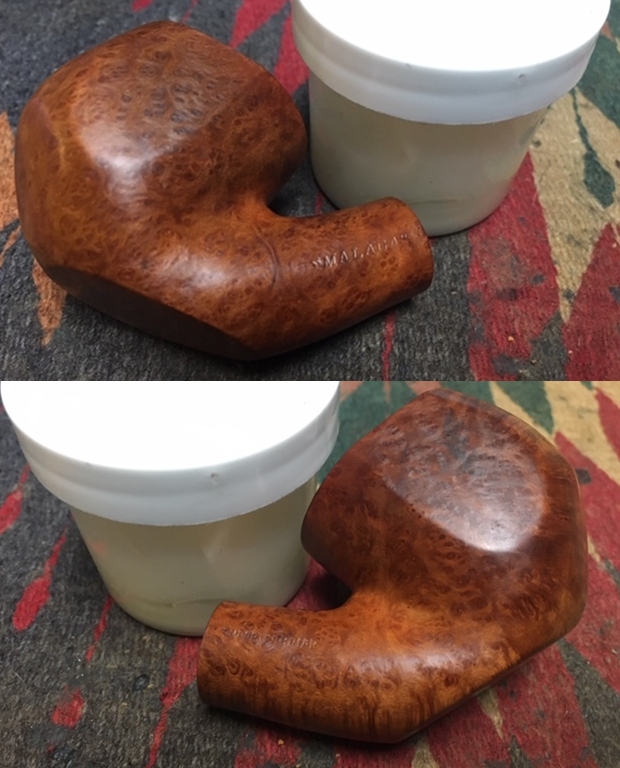
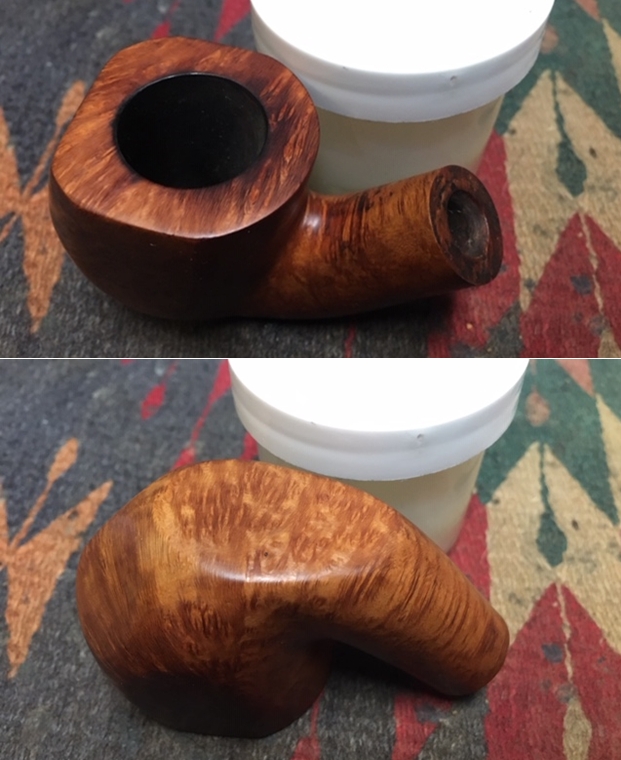
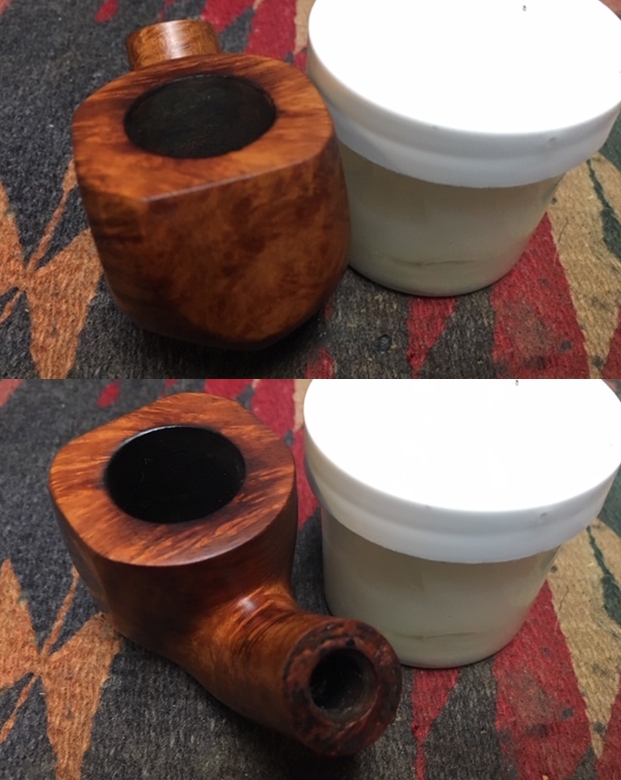
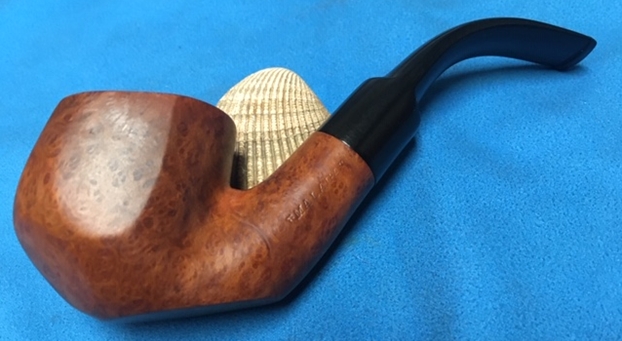
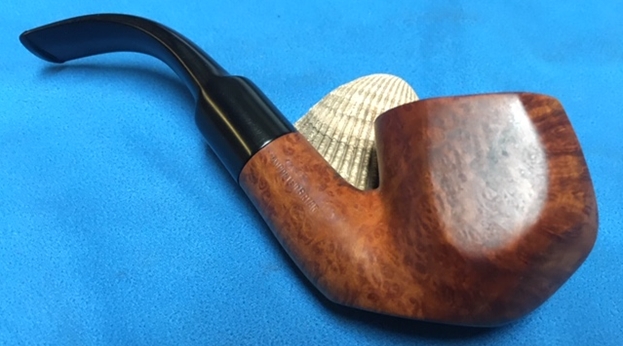
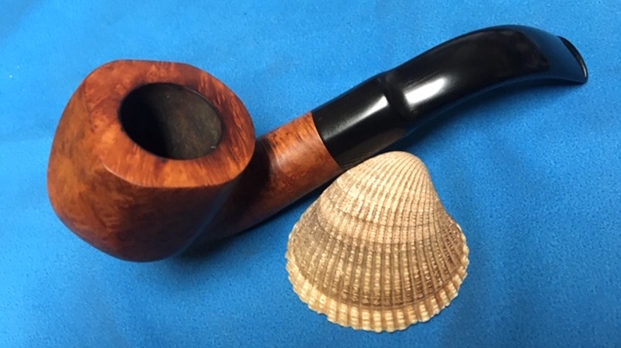
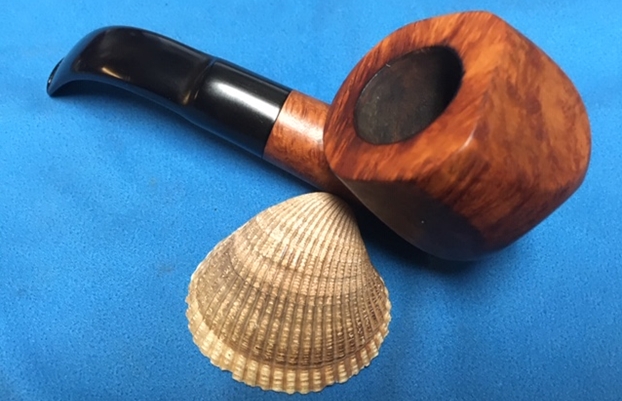
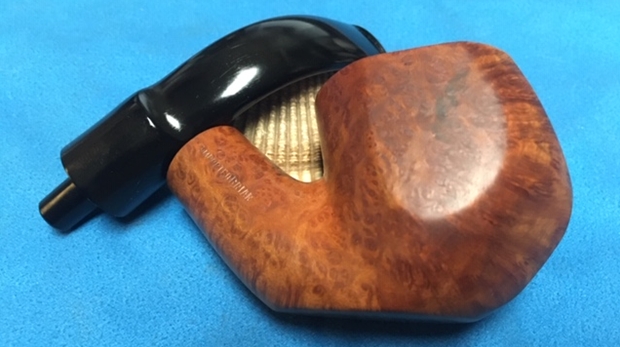
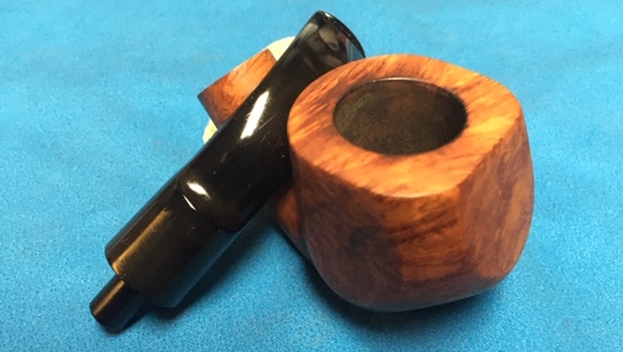
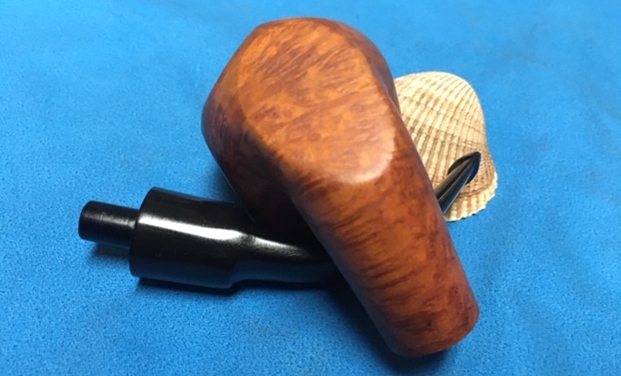
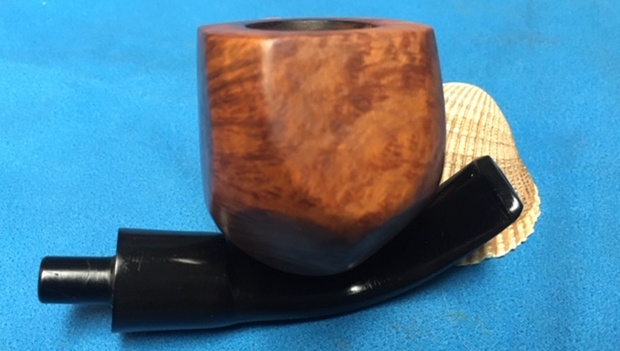
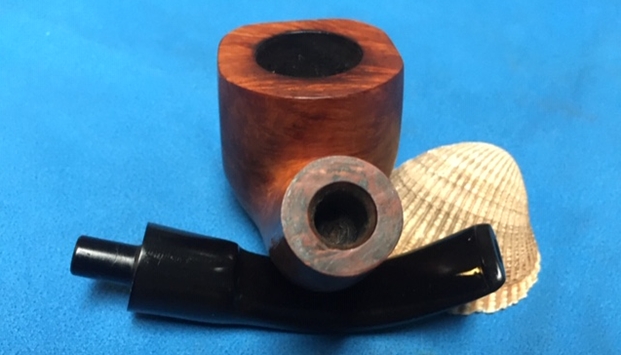
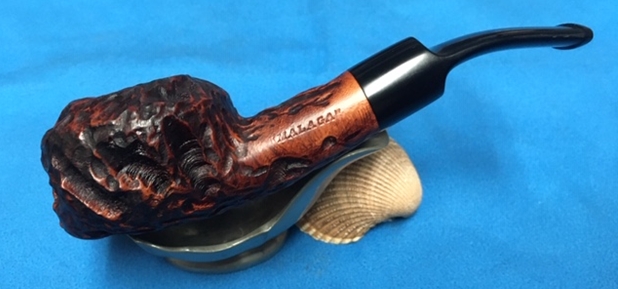
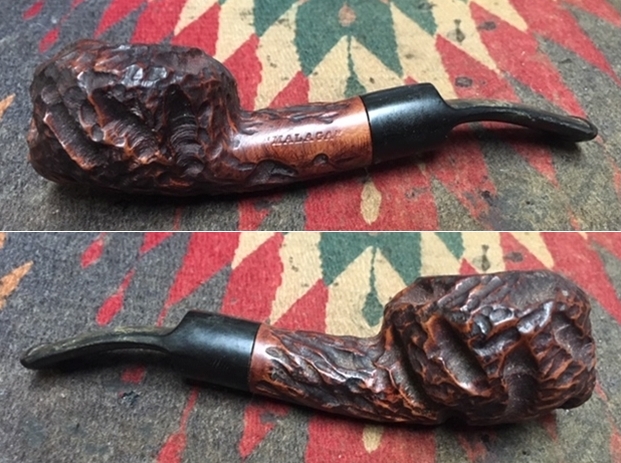
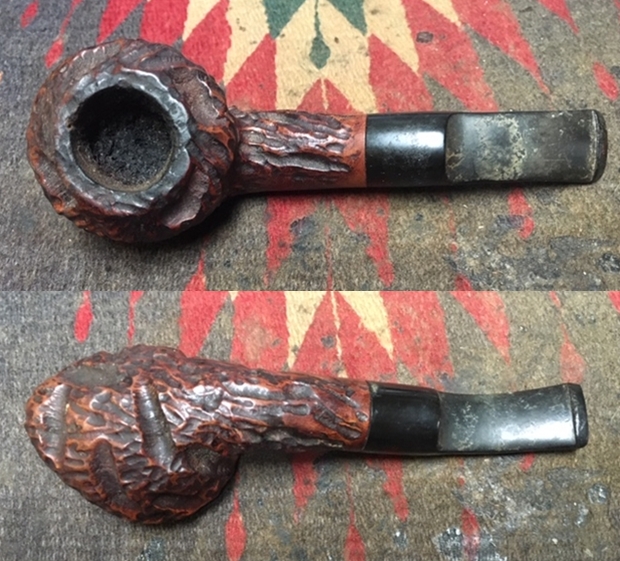
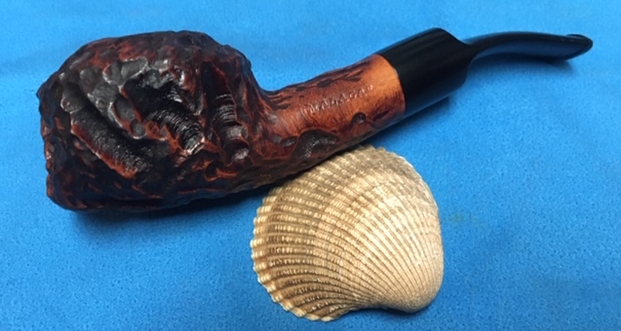
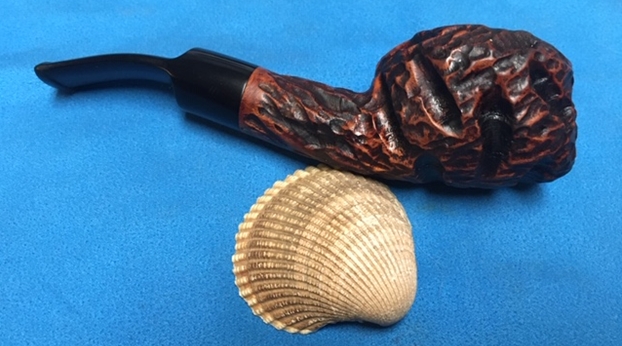
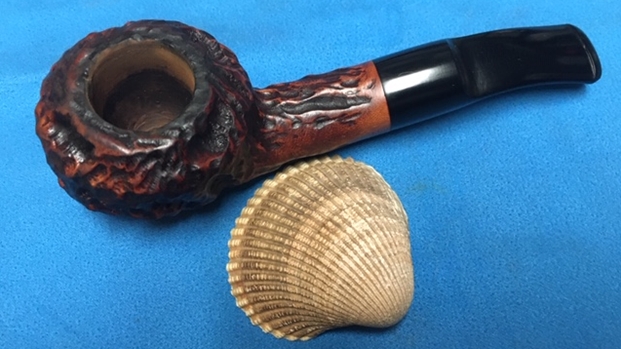
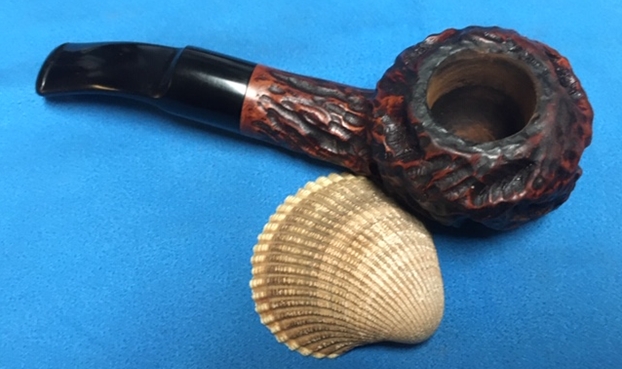
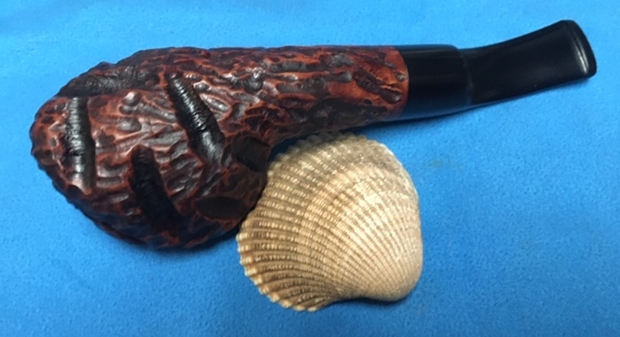
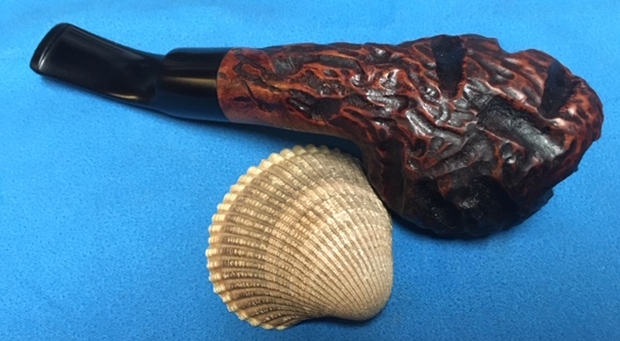
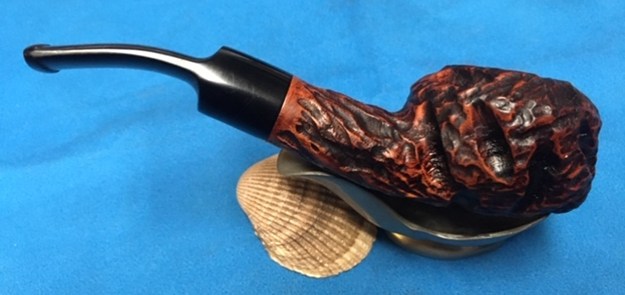
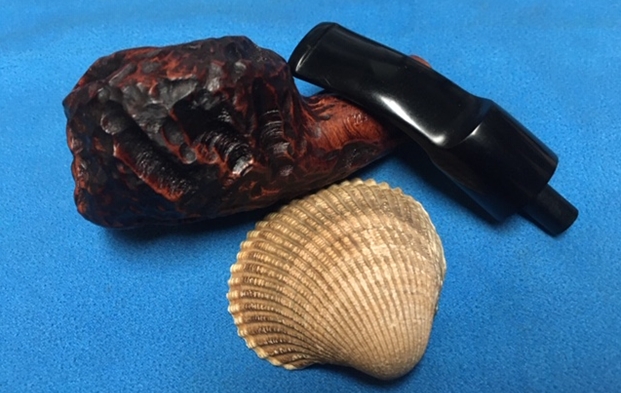
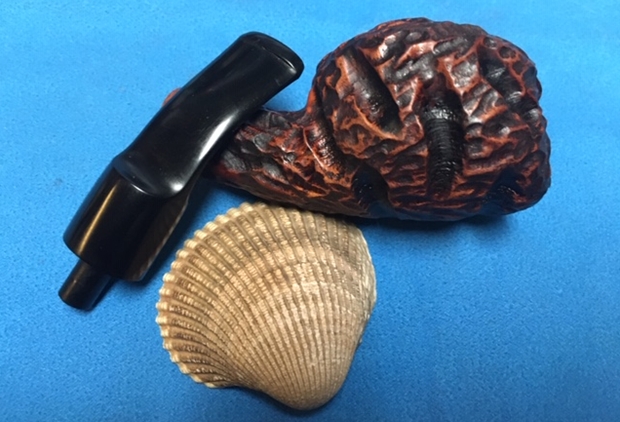
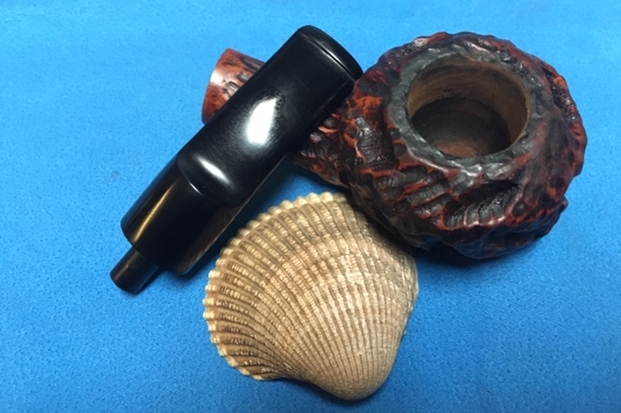
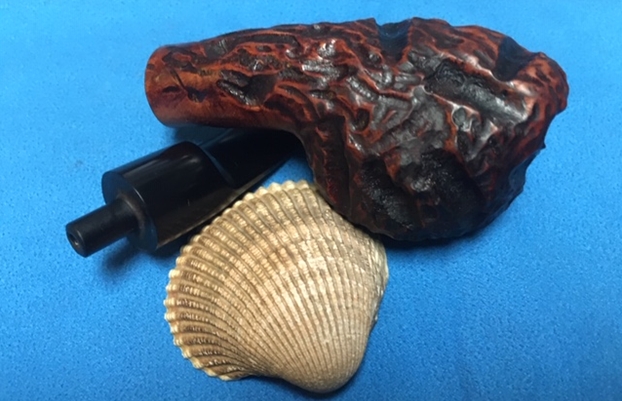
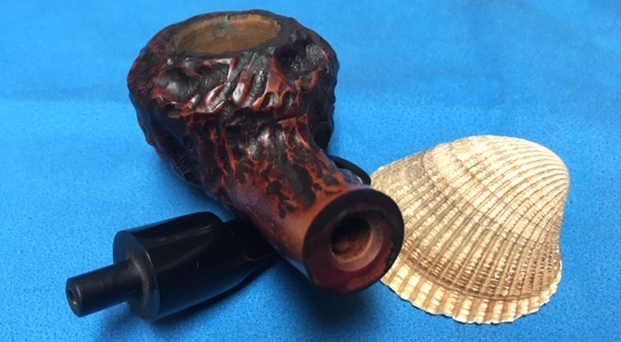
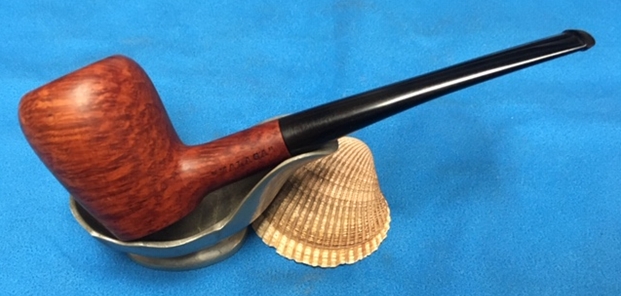
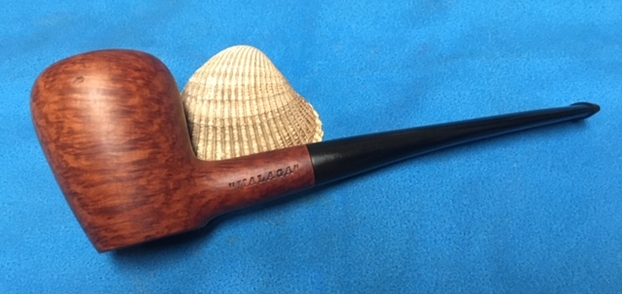
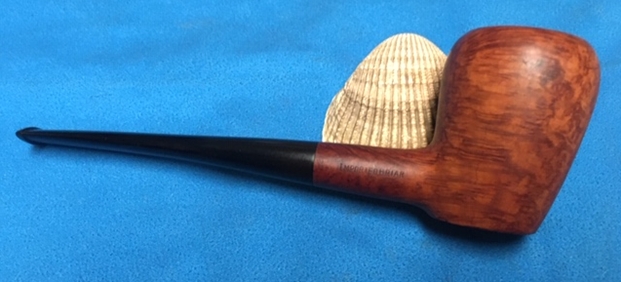
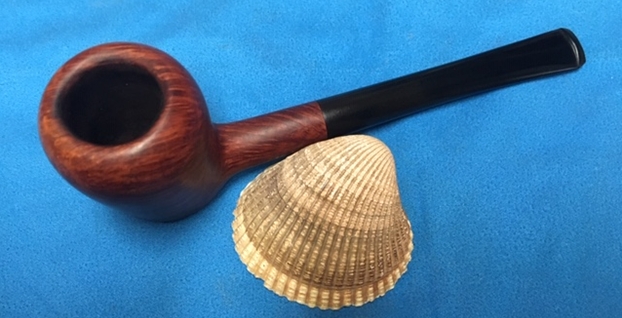
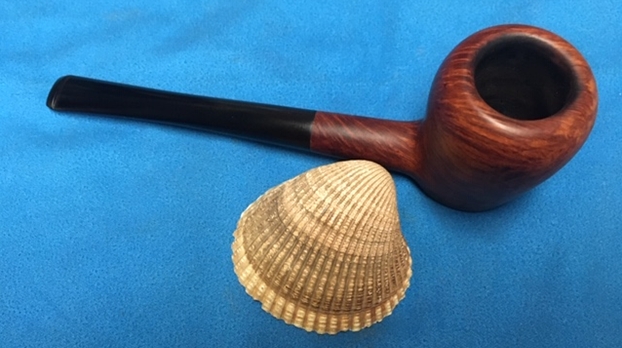
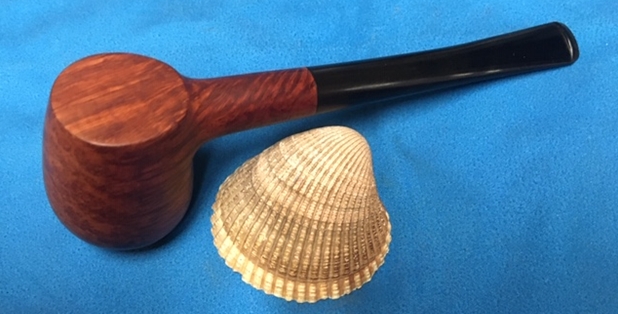
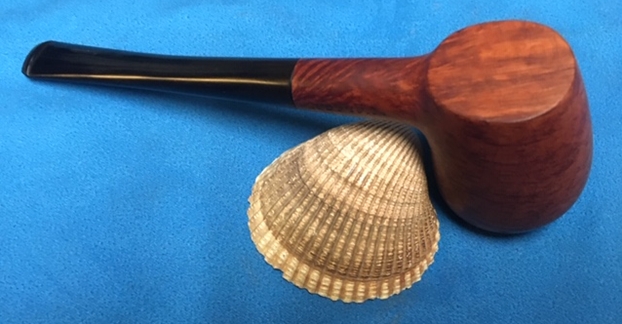
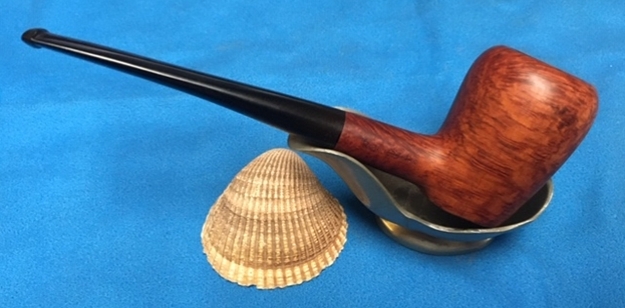
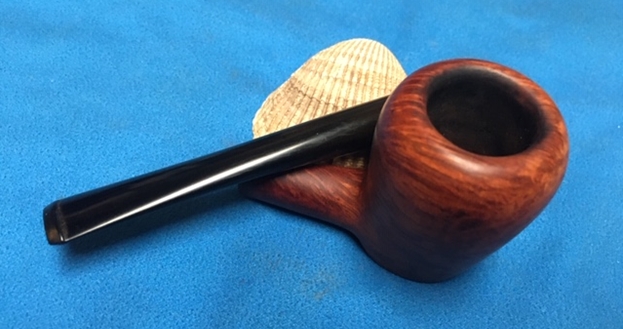
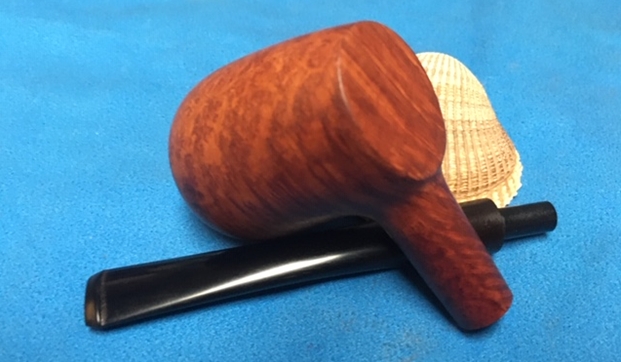
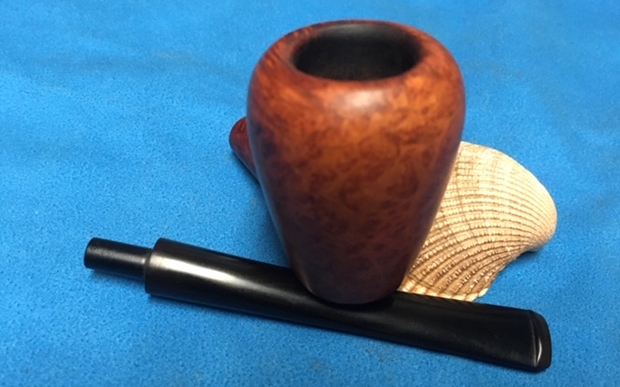
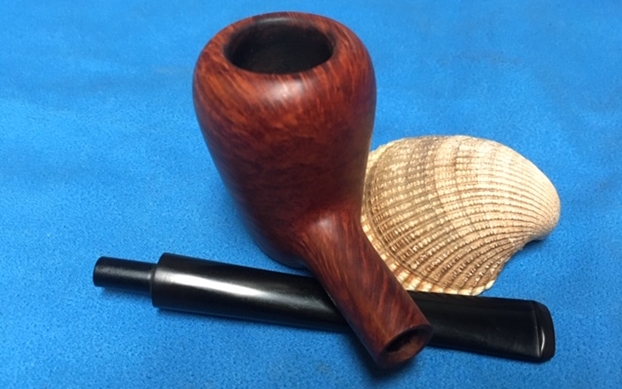
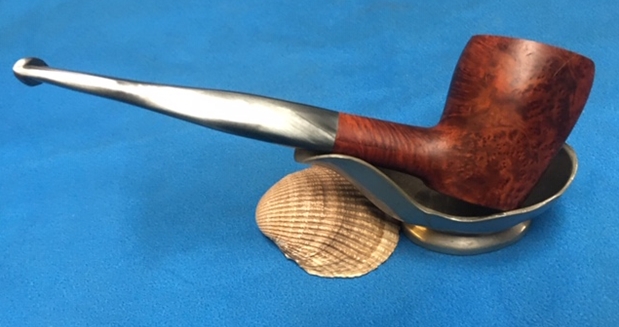
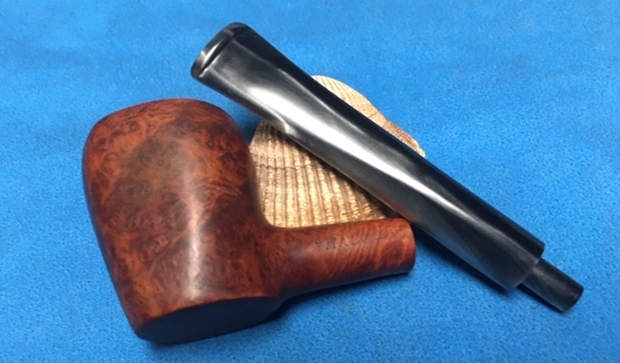
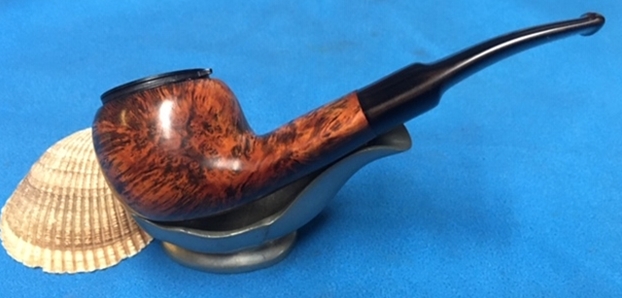
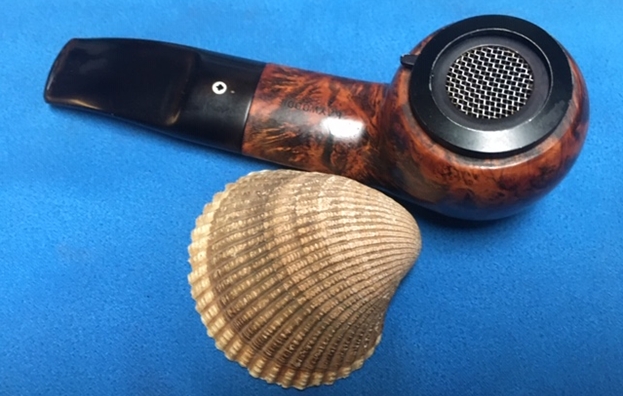
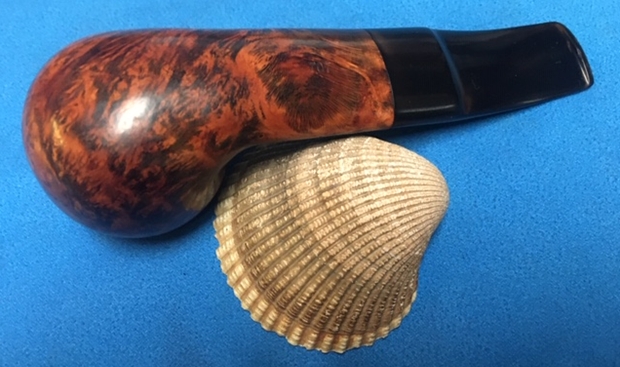
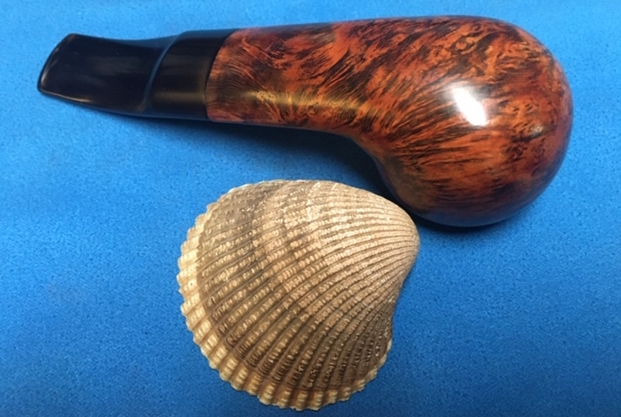
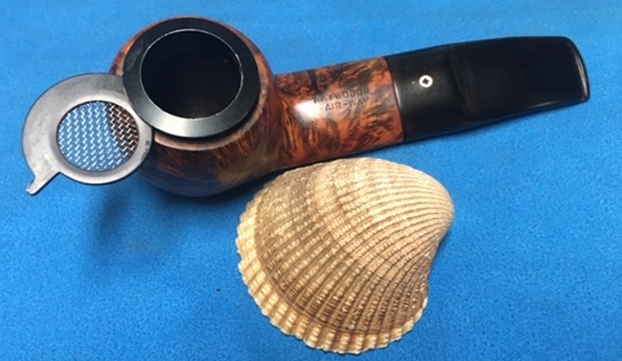
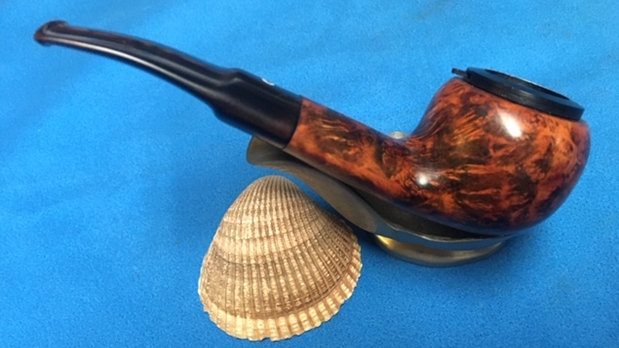
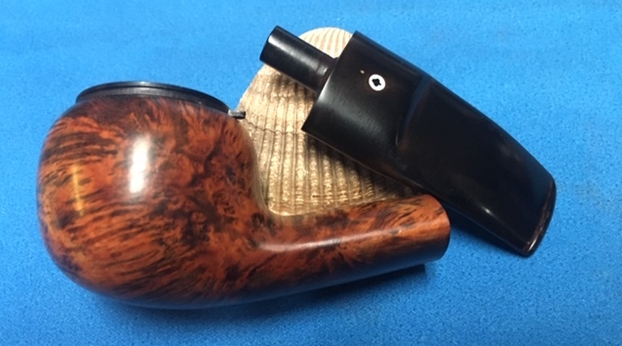
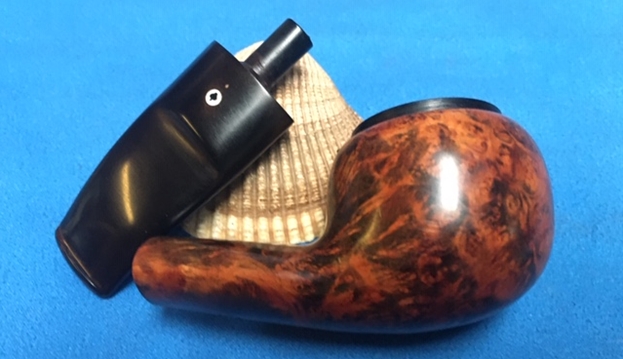
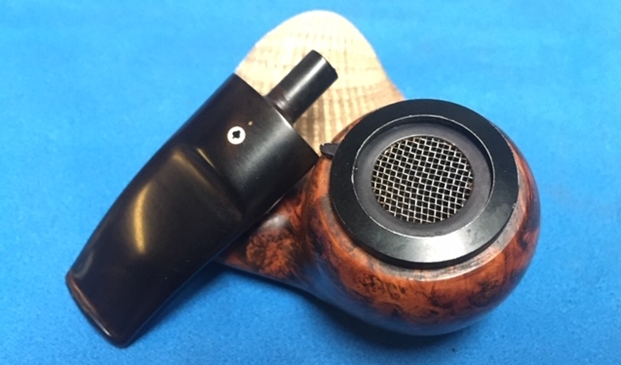
New Life for Alex’s Rusticated “Malaga” Oom Paul


Blog by Steve Laug

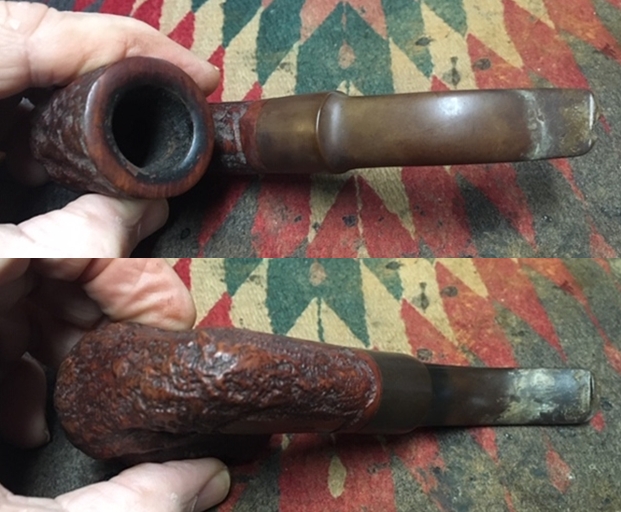
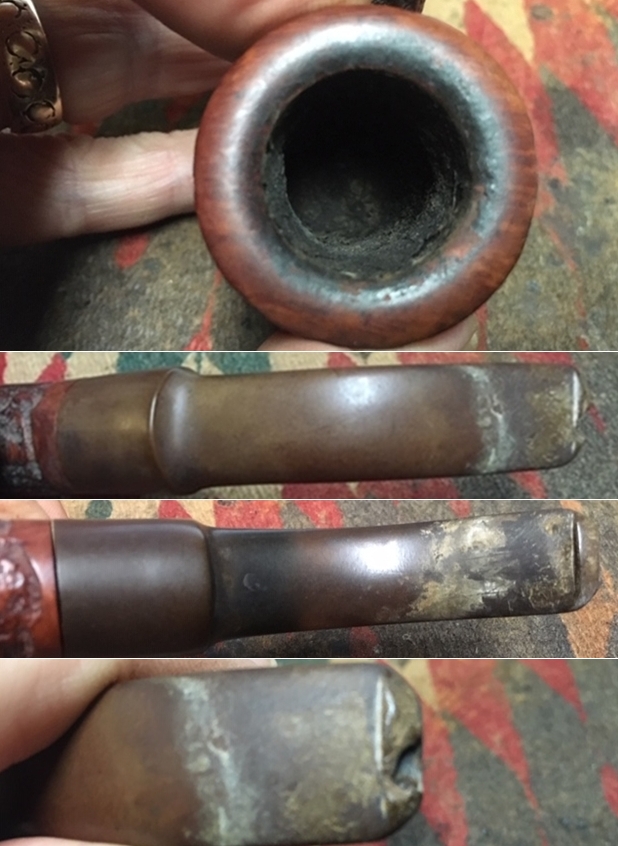
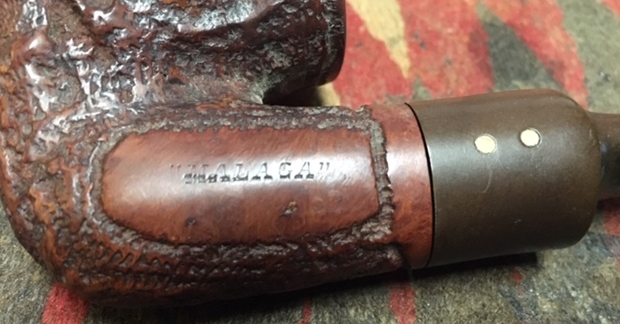
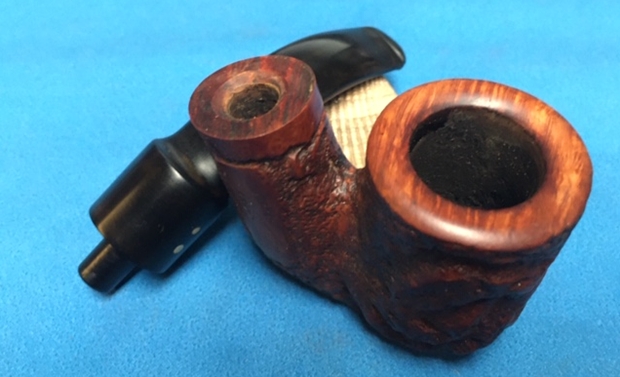
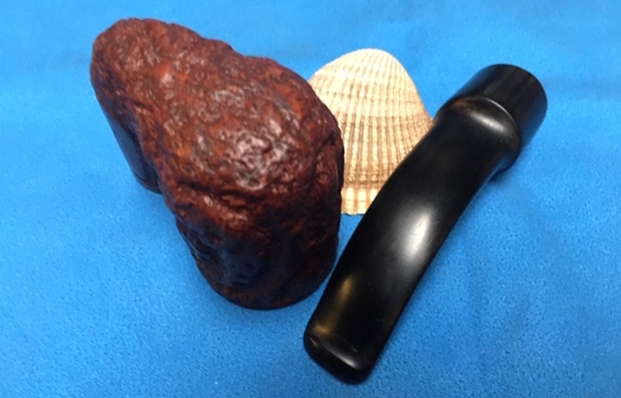
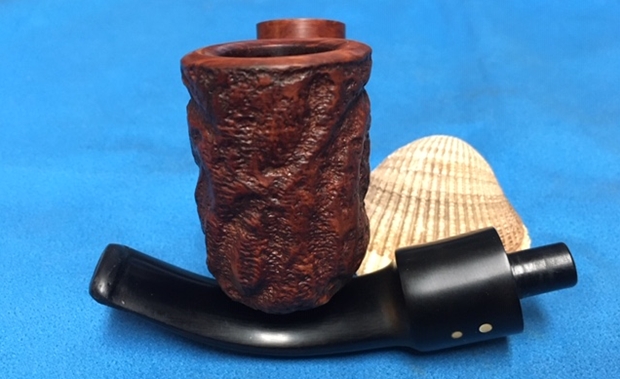
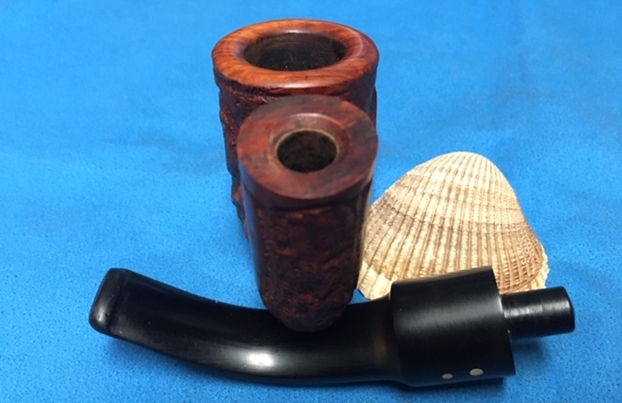
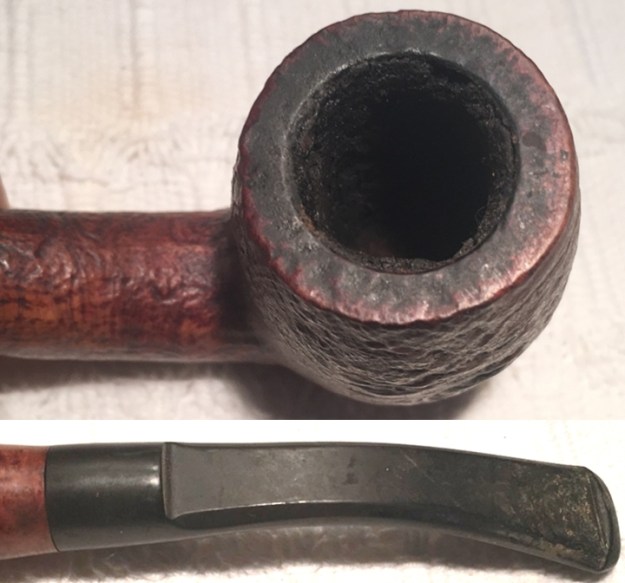
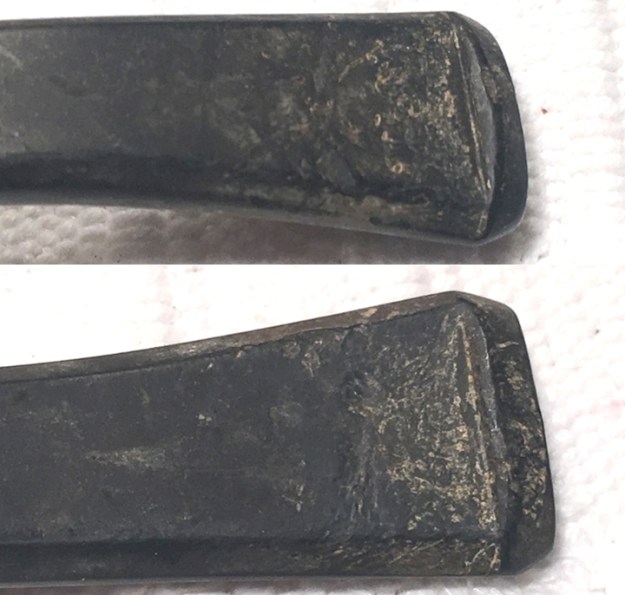
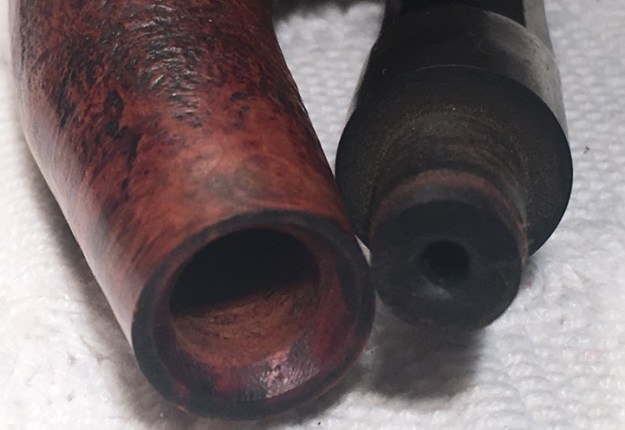
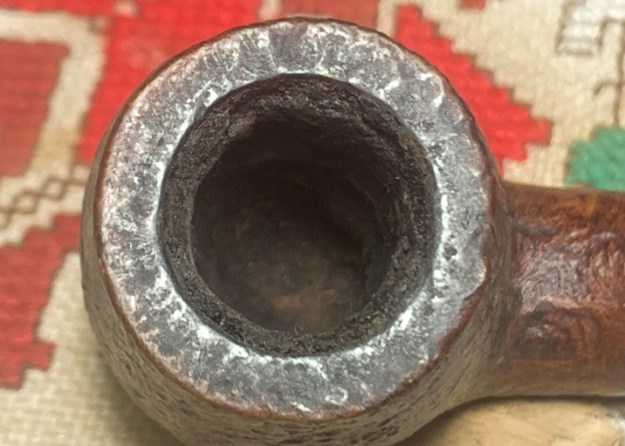
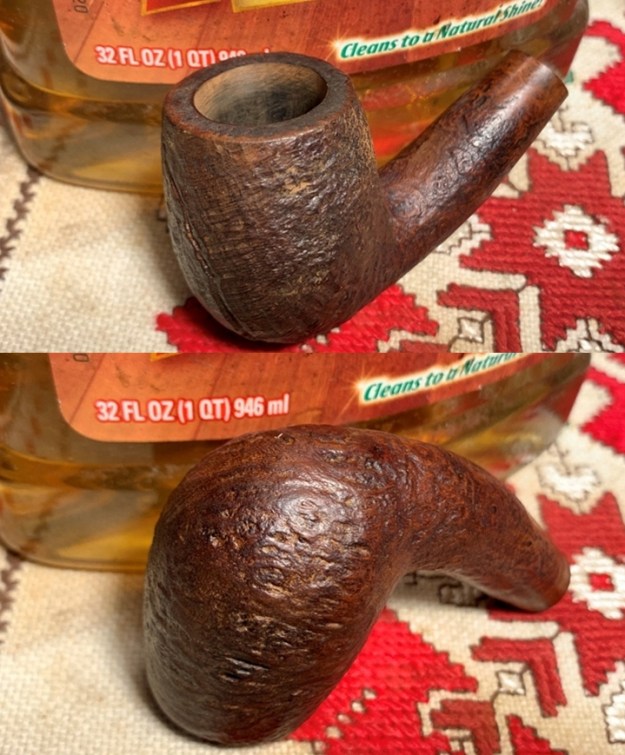
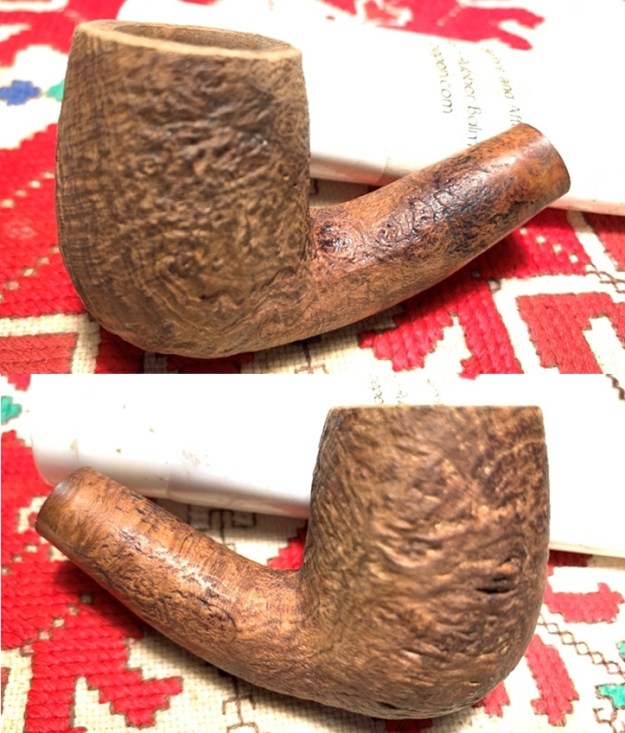
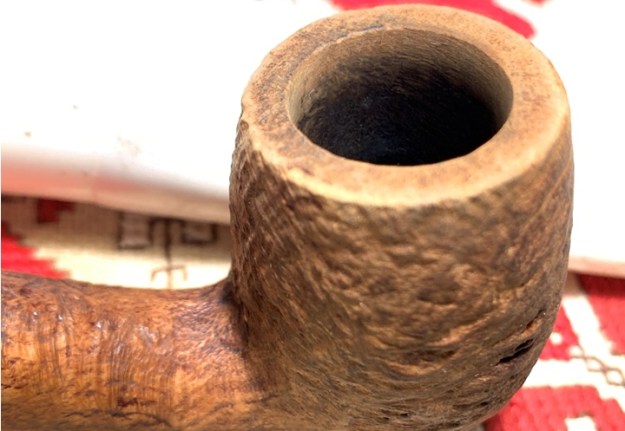
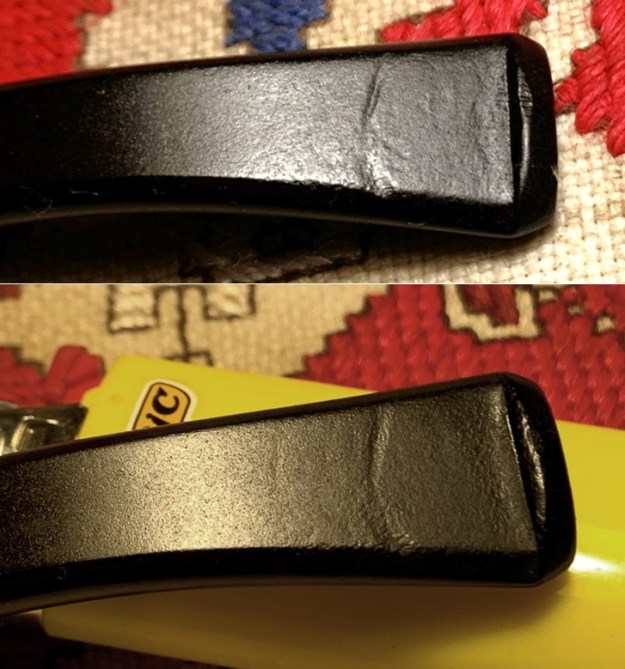
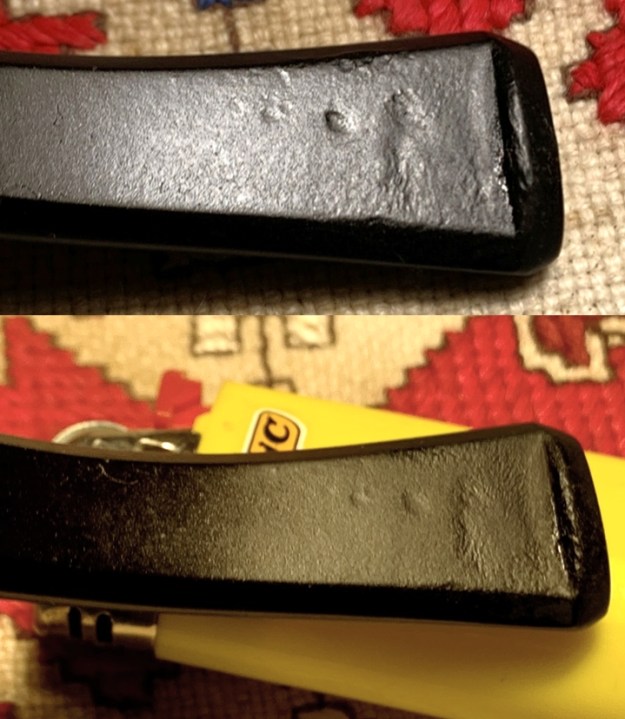
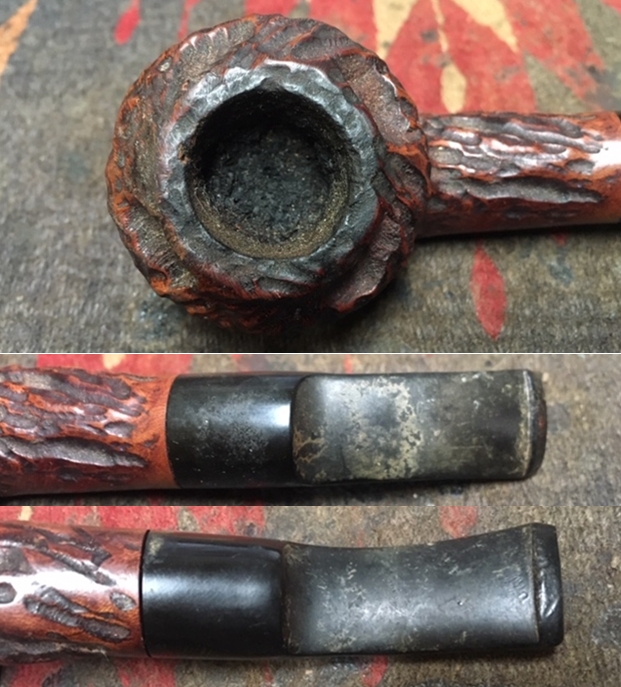
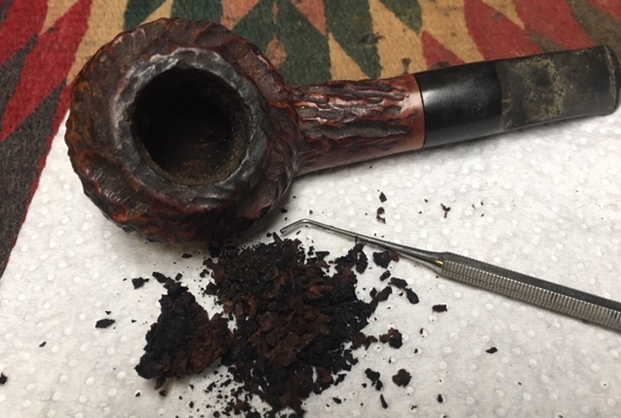
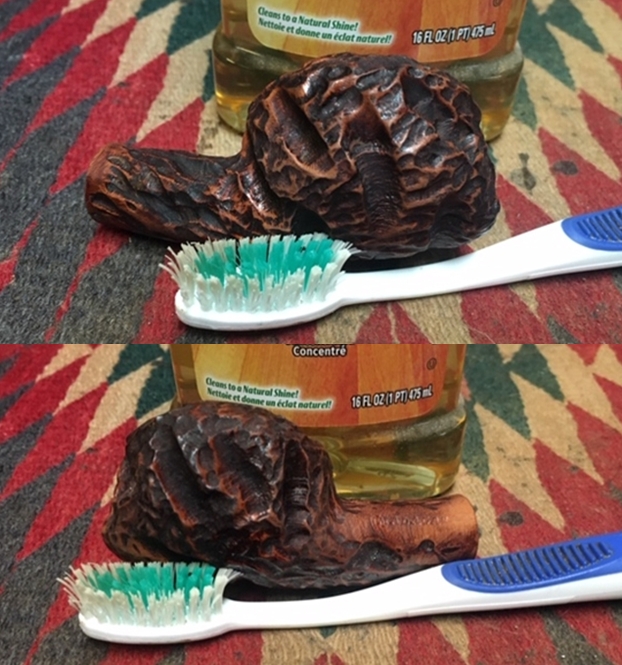
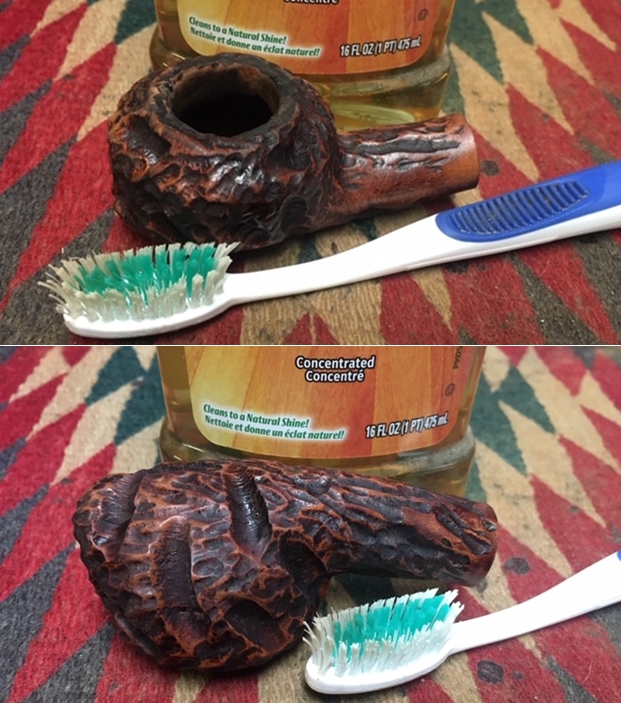
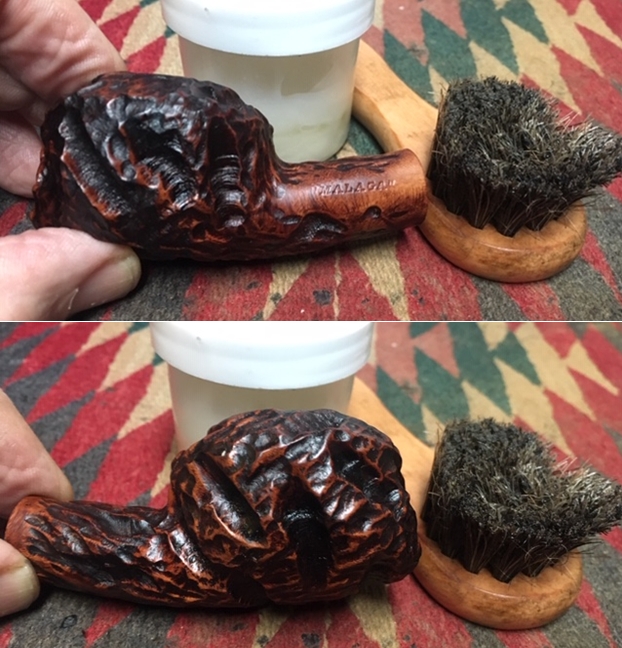
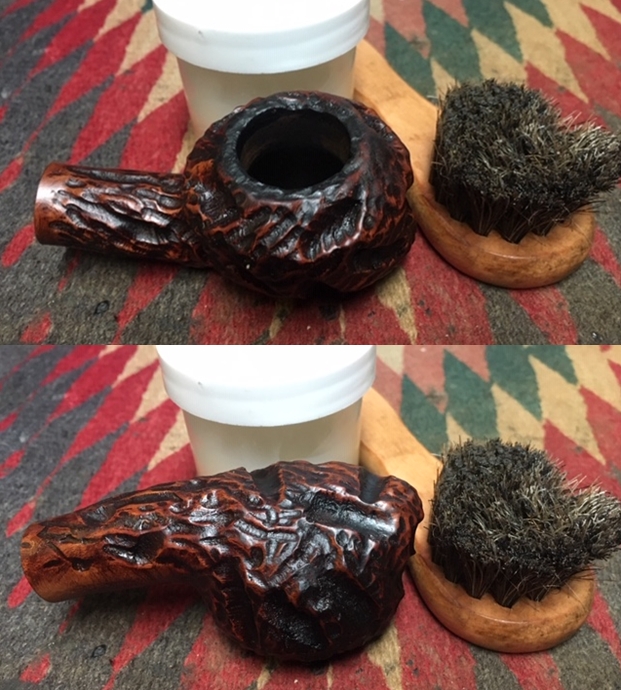
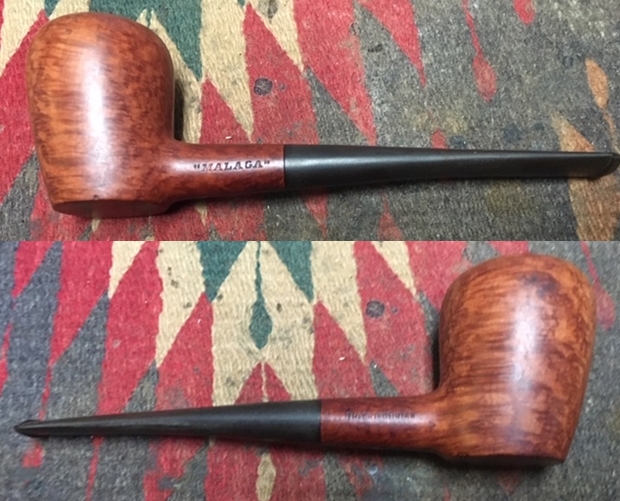
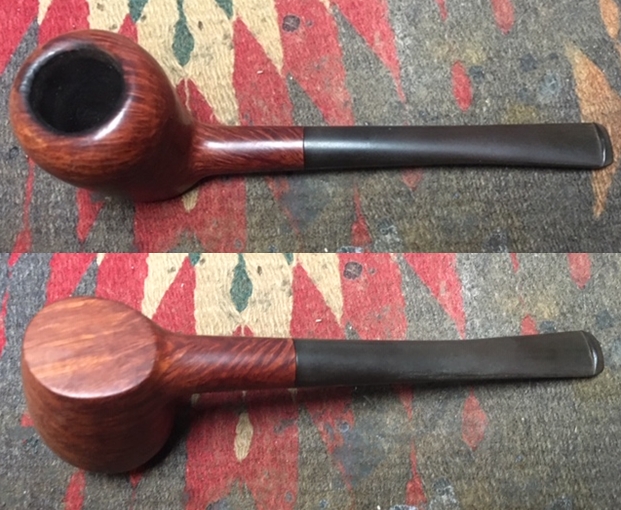
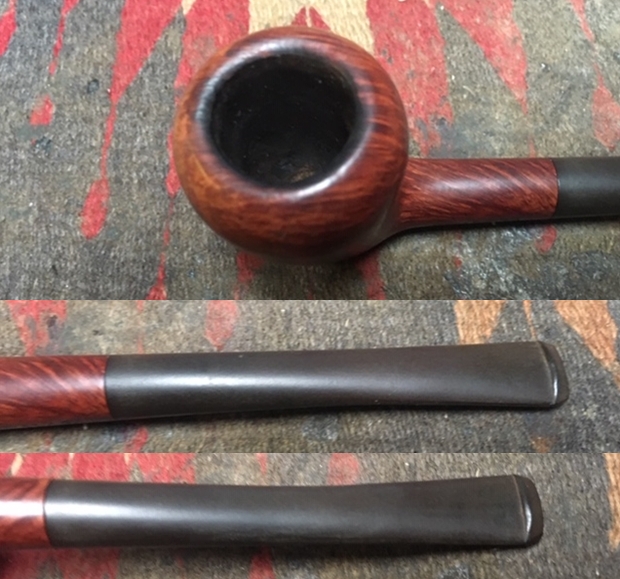
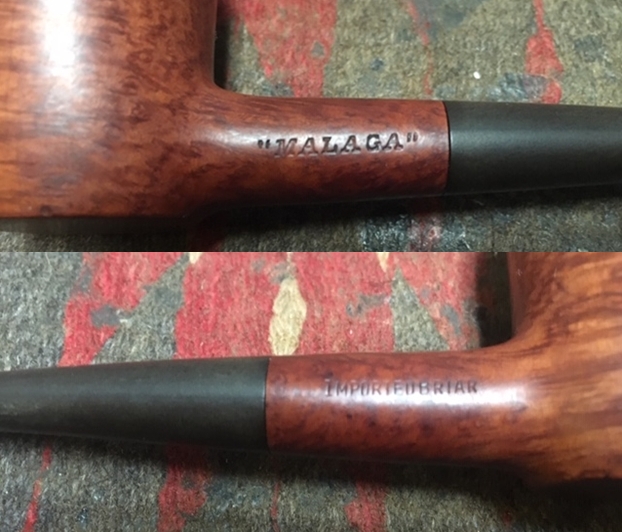
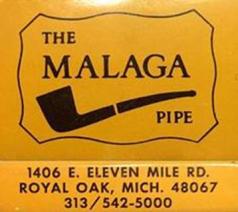
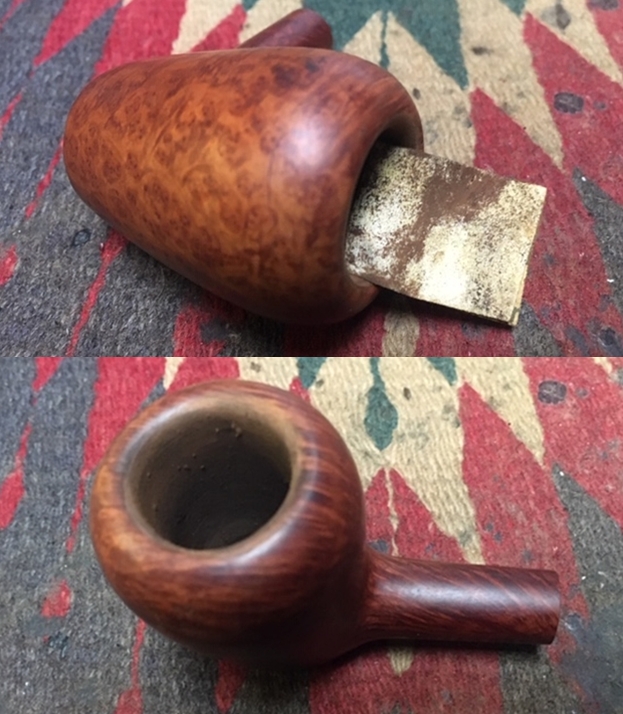
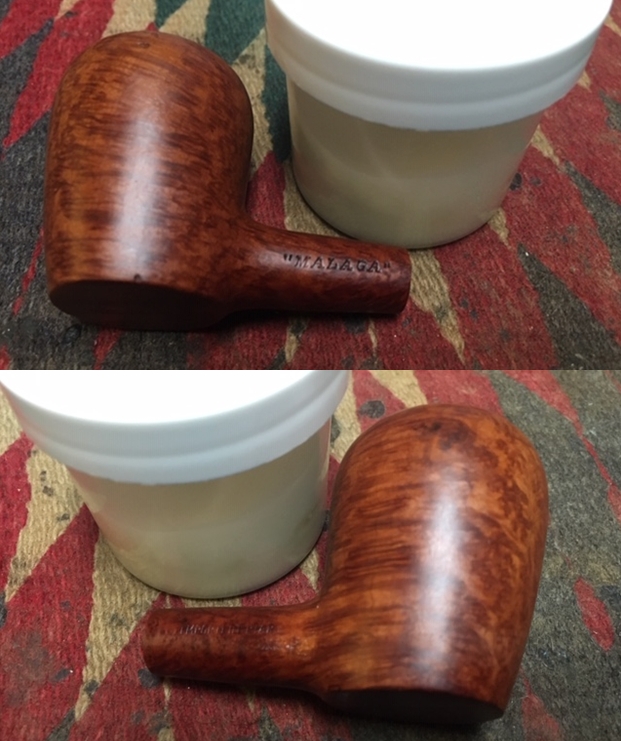
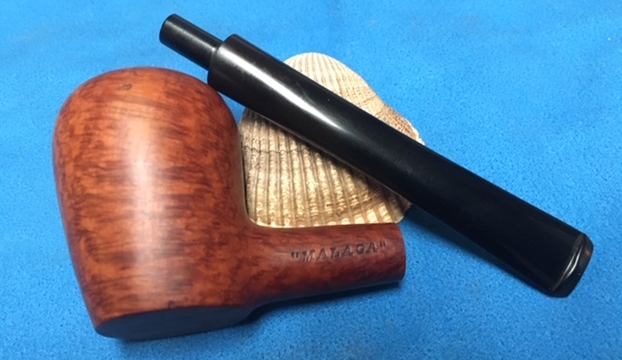
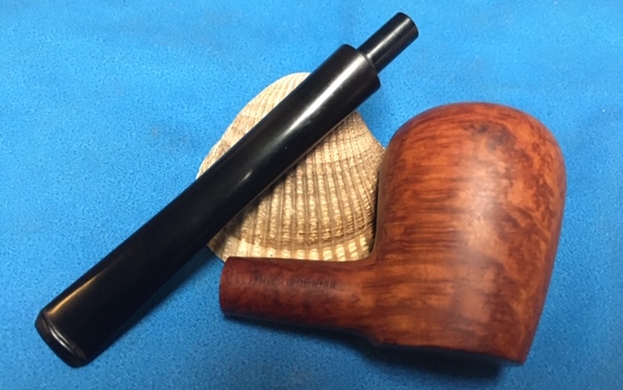
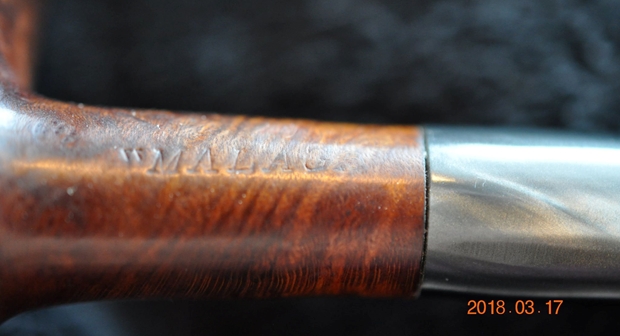
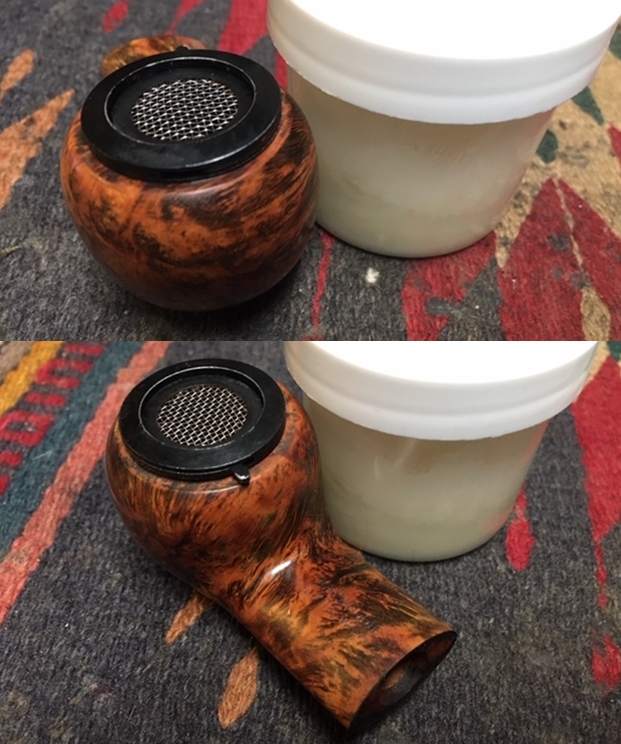
I have another of Alex’s purchases on the table this morning. It is an Oom Paul pipe with a rusticated finish. It is another very unique Malaga that has the same kind of rustication as a lot of the Custom-Bilt pipes had as well. The rim top, the ring around the shank end and a panel on each side of the shank are smooth. The pipe was dirty and caked with few spots of lava and some darkening on the inner edge of the bowl. The bowl had a thick rough surfaced cake. The exterior was dirty with grime and oils in the crevices of the finish. The stamping on the left side of the shank read “MALAGA” and the right side the stamping was in an oval and read Imported Briar. There appears to be something else in the oval but it is worn. The first two letters could be CA the rest are worn away. The vulcanite saddle stem had two dots on the left side of the stem. It was oxidized and had tooth marks and chatter on both sides. There was a chip out of the top edge of the button. I took photos of the pipe before I started the cleanup work. I took close up photos of the bowl and rim to capture the condition of the pipe before I started my cleanup work. The rim top had some lava and it was thick enough that I could not see if there was any darkening or damage on the crowned rim top and the inner edge. There was a thick cake in the bowl. Other than being very dirty the pipe was in great condition. The stem was dirty and oxidized. It was covered with a thick scum on the surfaces. There was tooth chatter on the top and underside near the button and some tooth marks on the button surface itself. There was a large chunk out of the top of the button on the stem. I have included a close up photo of the chipped stem surface below.I took a photo to capture the stamping on the shank. The stamping on the left side of the shank read “MALAGA”. I forgot to take a photo of the stamping on the right side the stamping but it was in an oval and read Imported Briar. There appears to be something in the center of the oval but it is worn. The first two letters could be CA the rest is worn away. It would make sense that this was one of the pipes from the “MALAGA” CARVED line so the rest of the letters may well be RVED. There were also two white dots on the left side of the saddle stem.If this is the first of the Malaga restorations that you have read about then you should know the backstory of the brand. I am including the link to a blog that I wrote that gives some of the history of the Malaga brand and the Malaga Pipe Shop in Royal Oak, Michigan in the USA. I have written an earlier blog to give a little history of the Malaga Brand and the pipemaker, George Khoubesser. Here is the link – https://rebornpipes.com/tag/malaga-pipes/.That blog also includes links to a catalogue and the history of the pipemaker George Khoubesser. Follow the link to get a feel for the brand and the pipemaker.

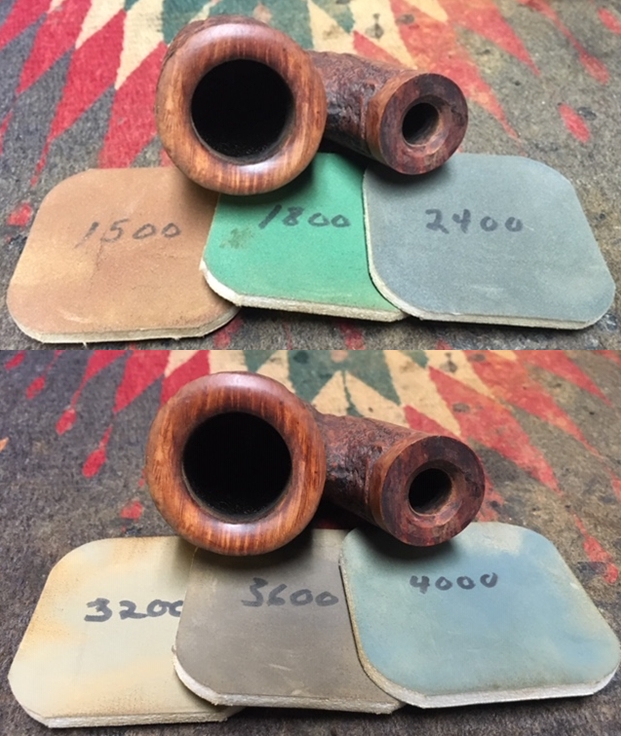
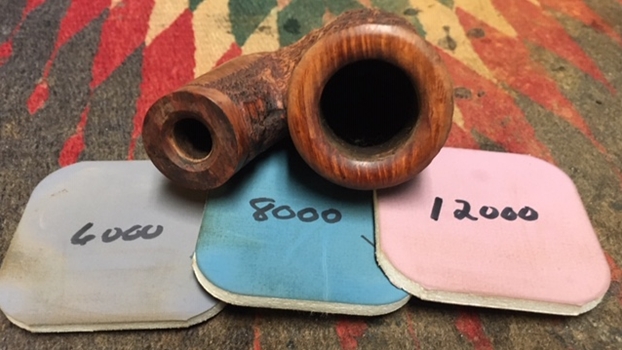
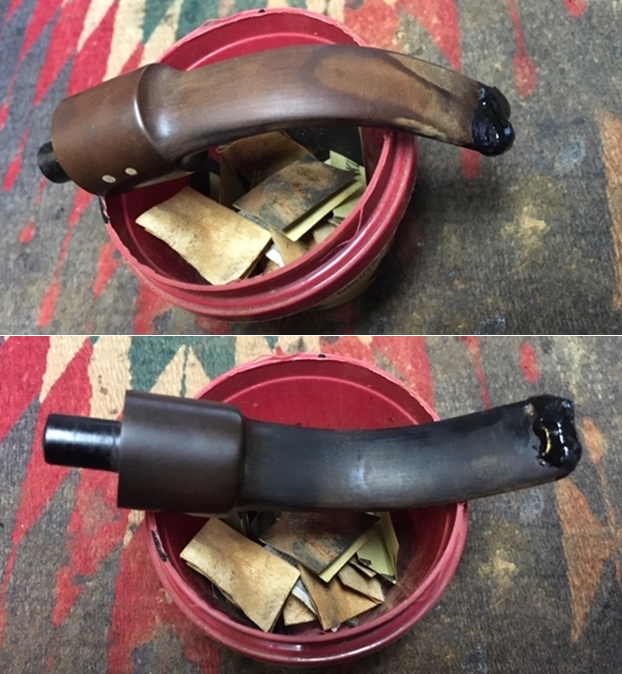
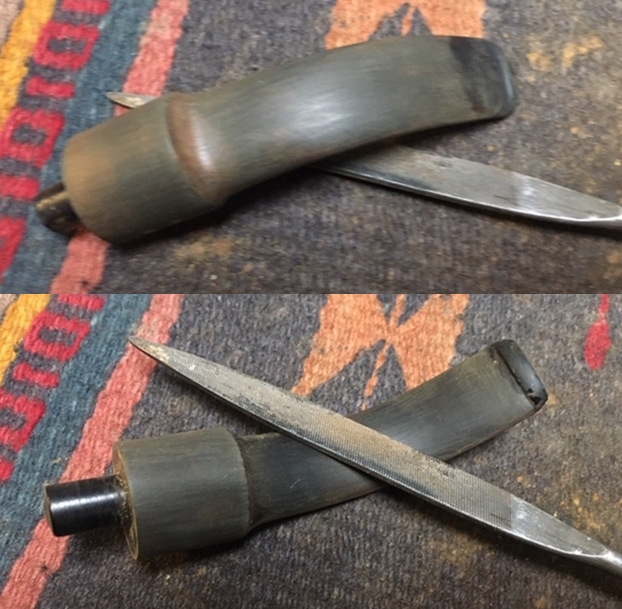
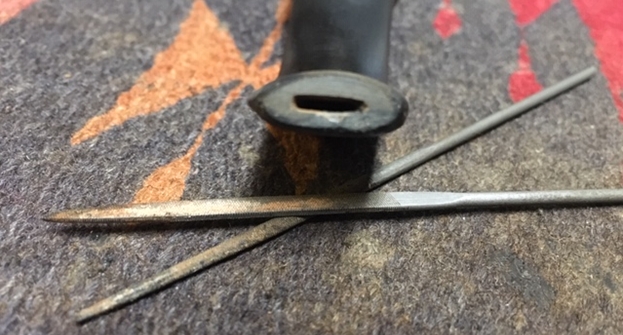
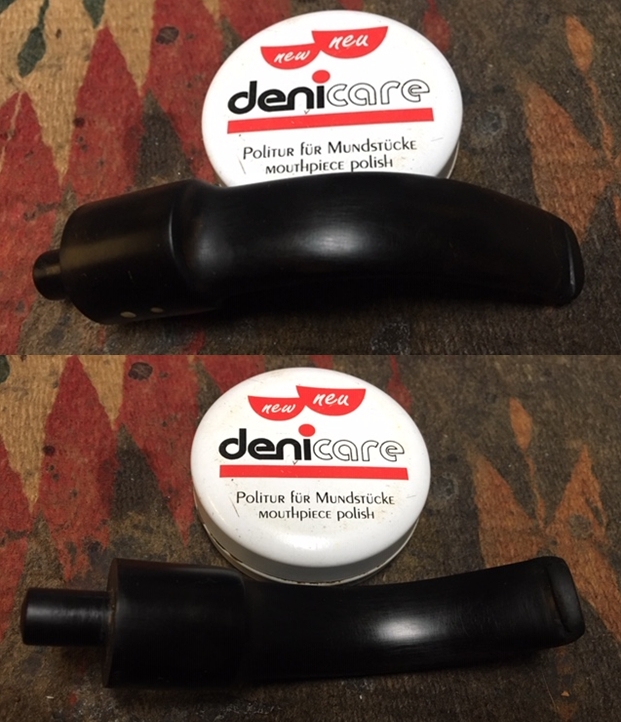
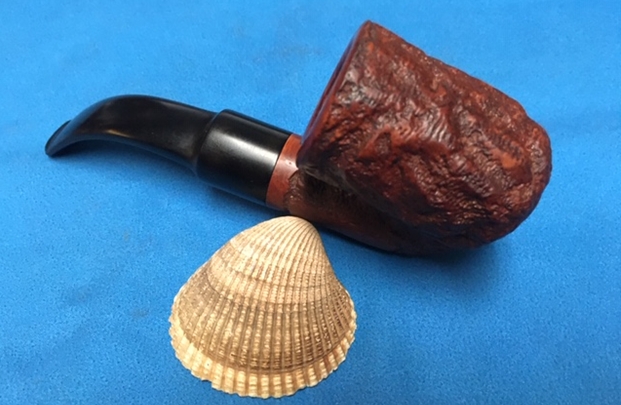
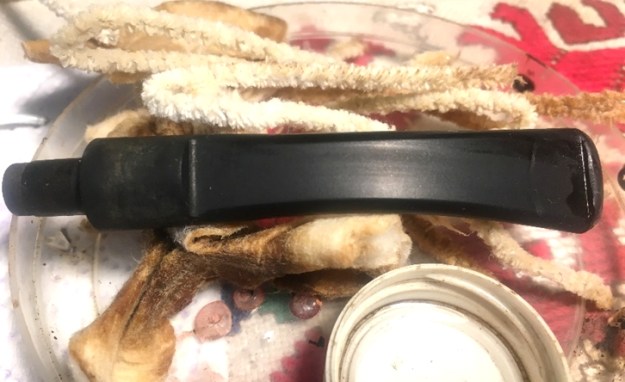
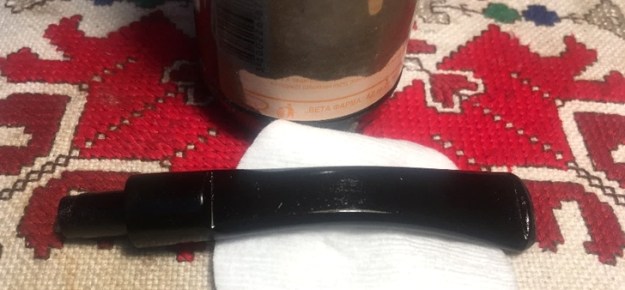
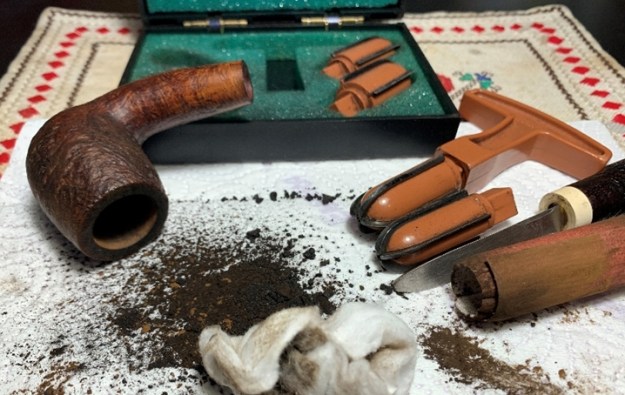
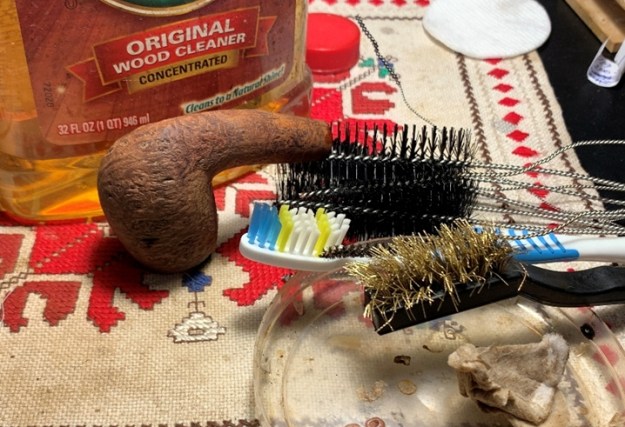
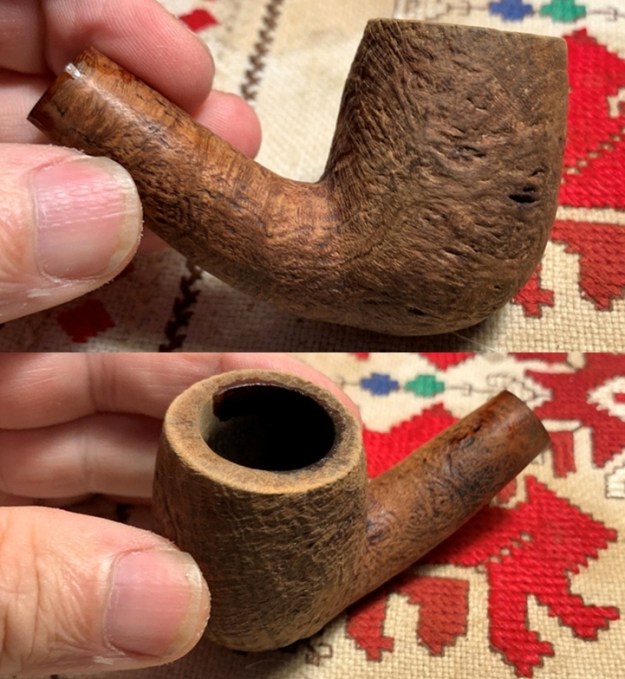
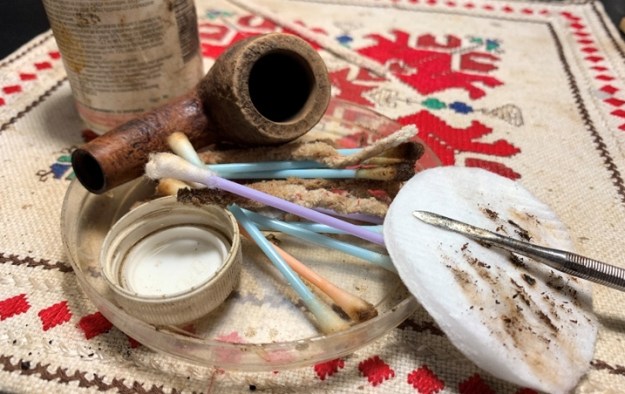
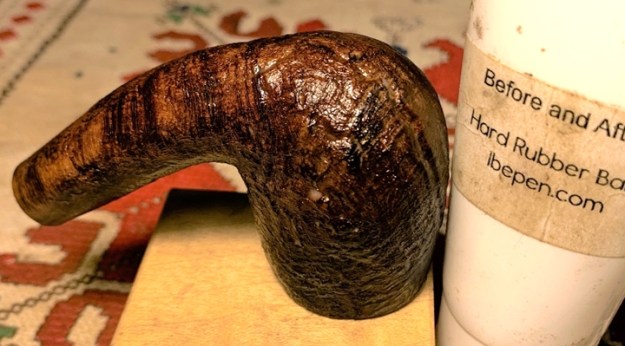
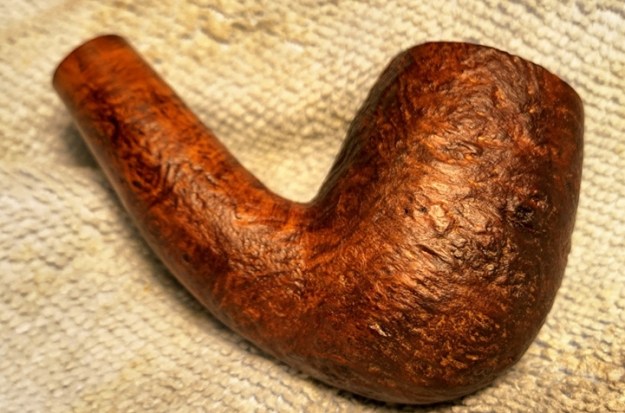
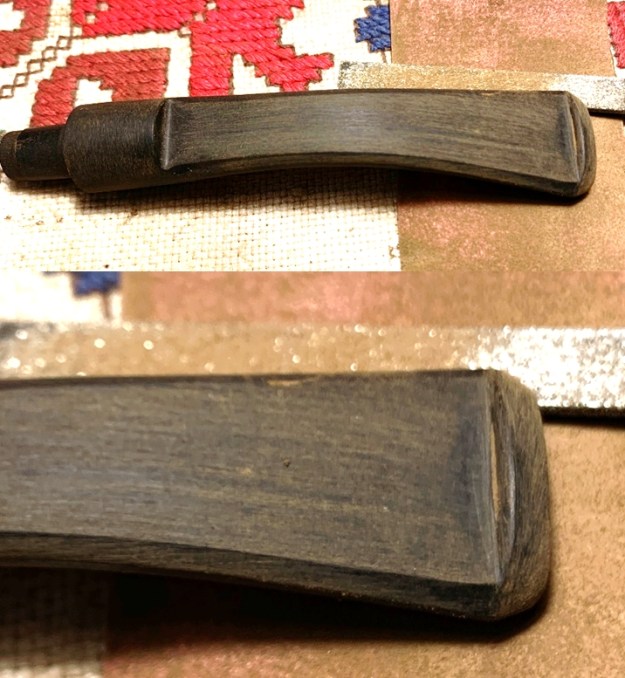
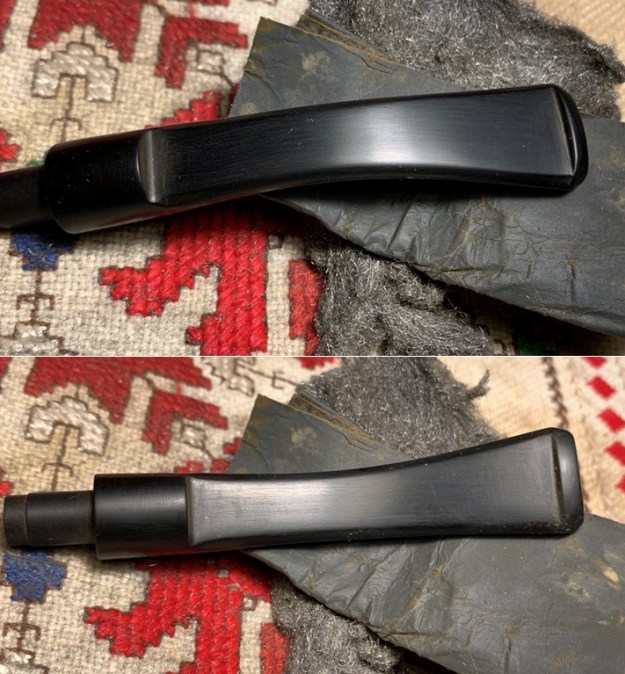
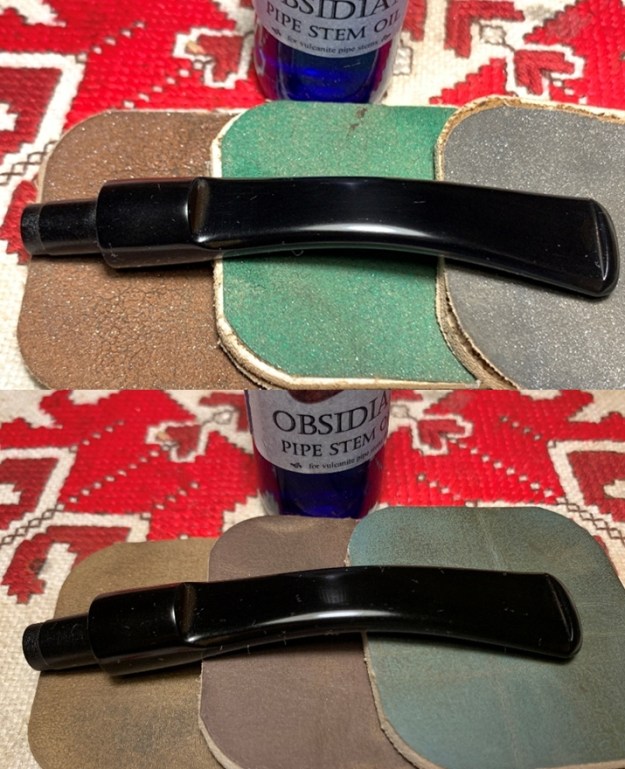
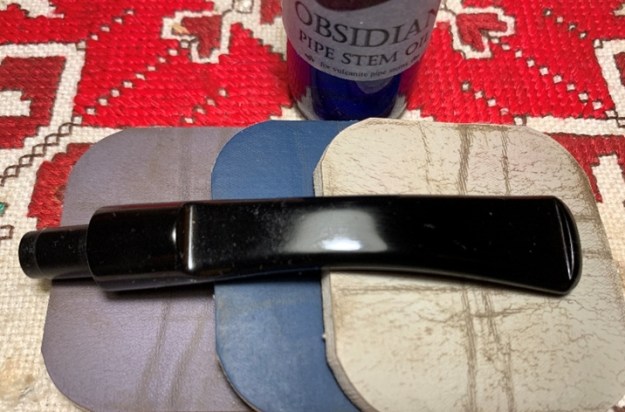
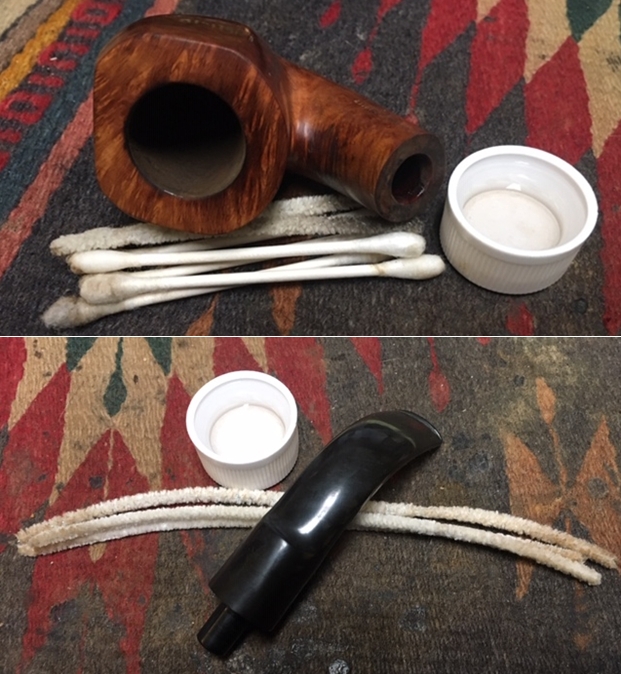
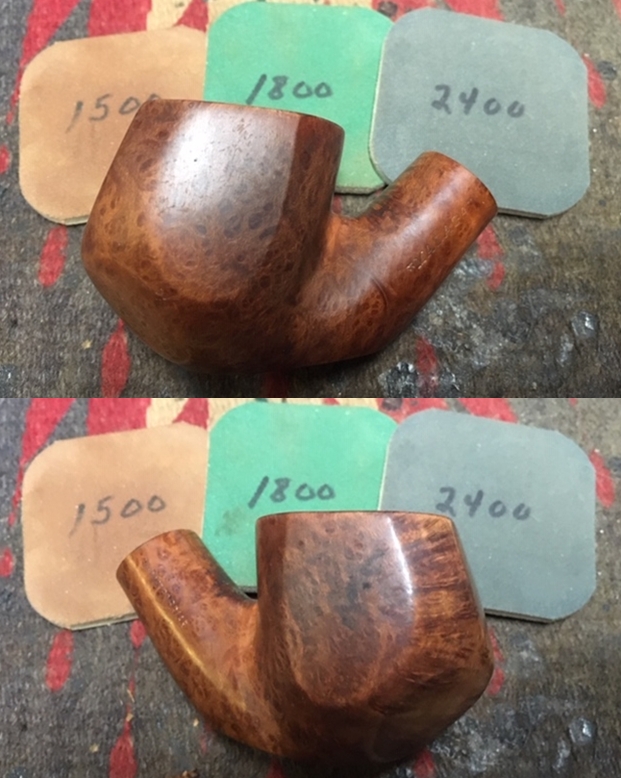
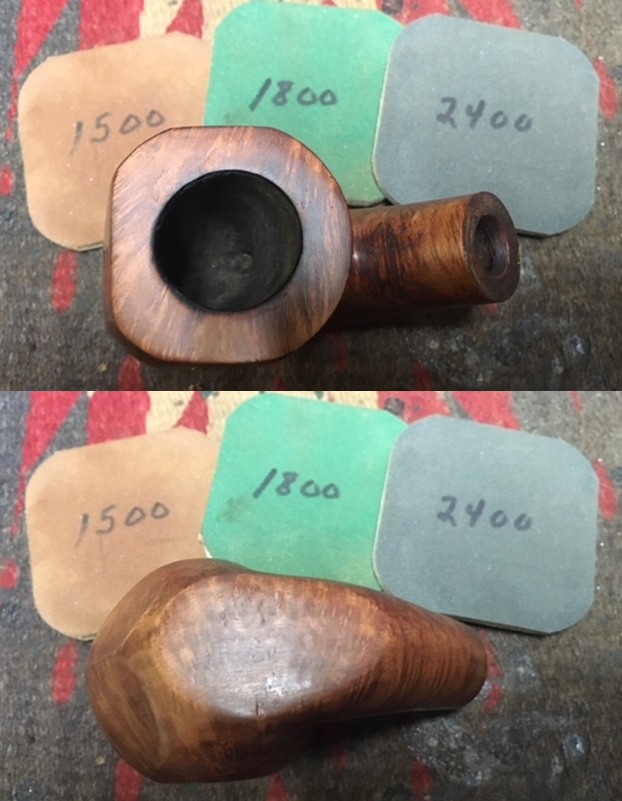
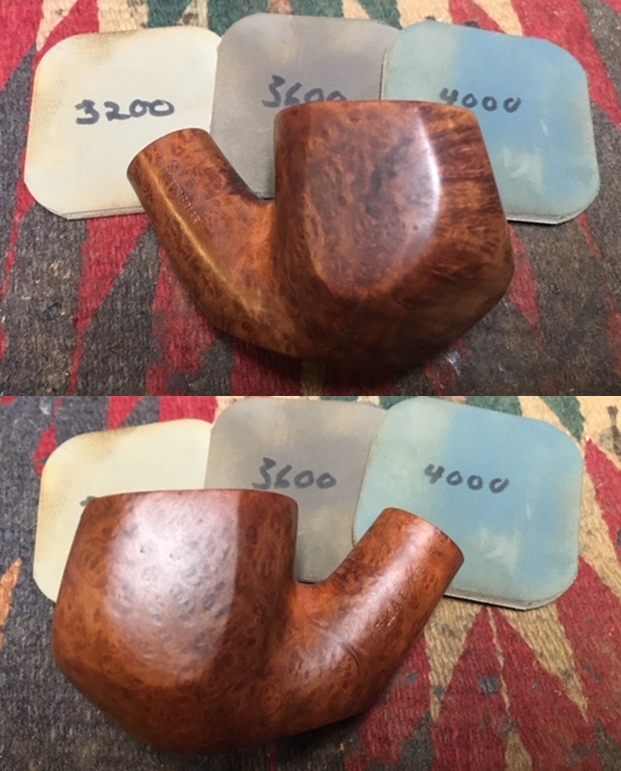
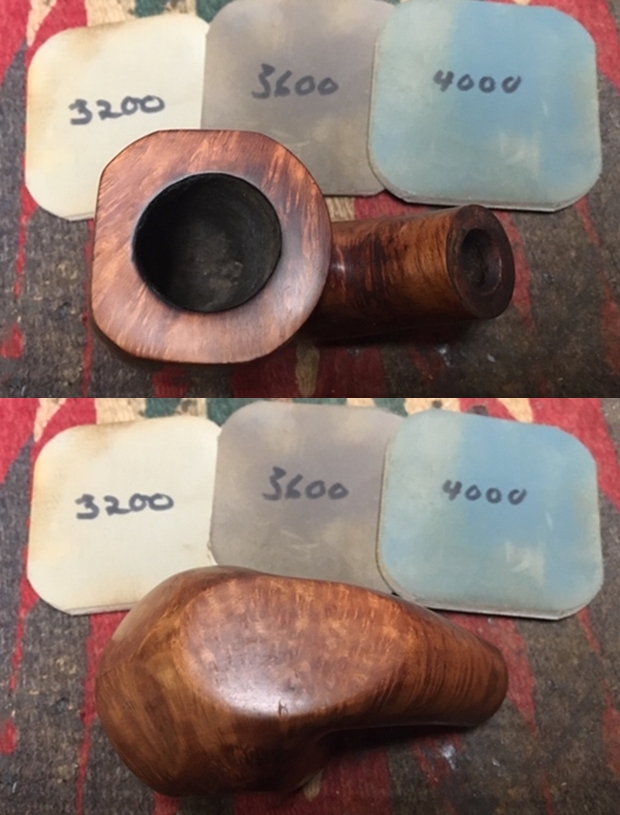
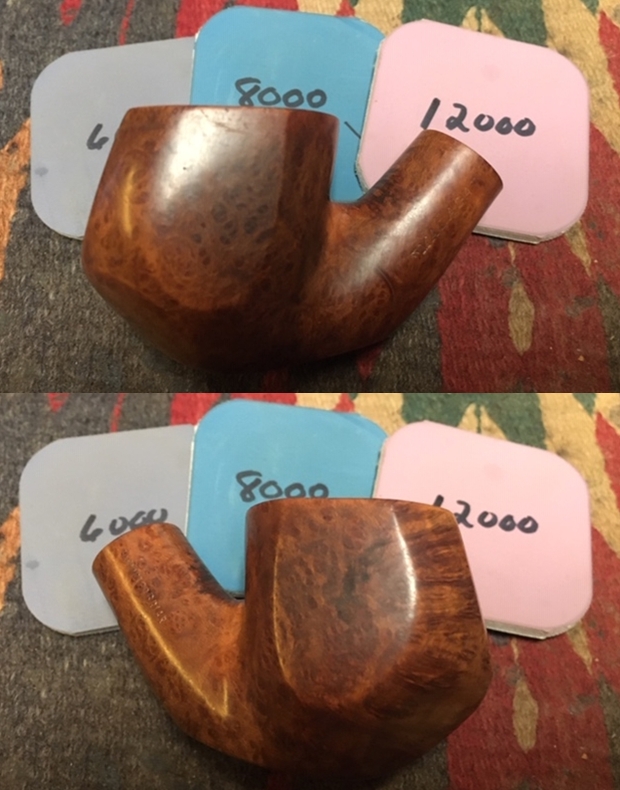
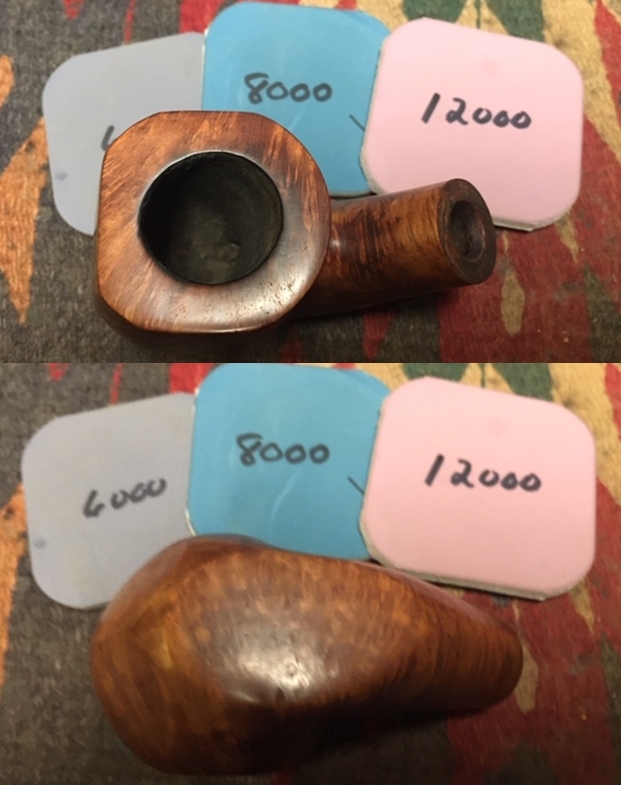
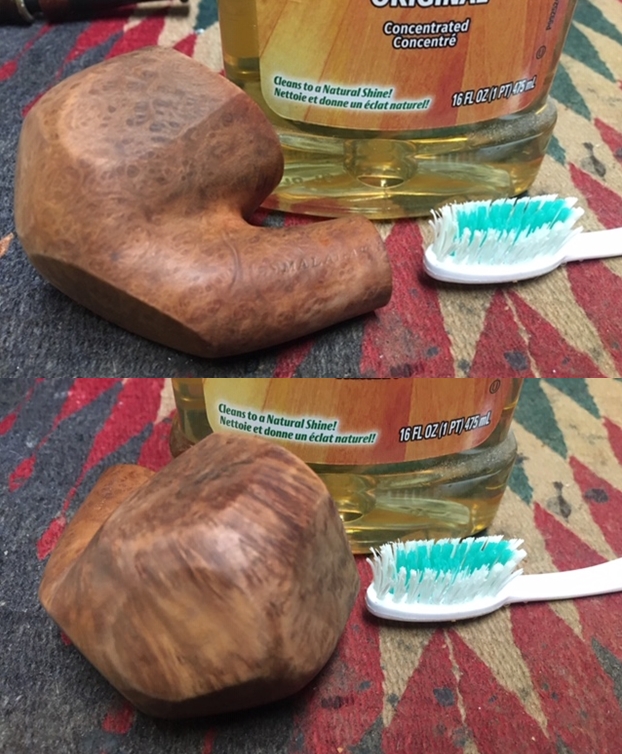
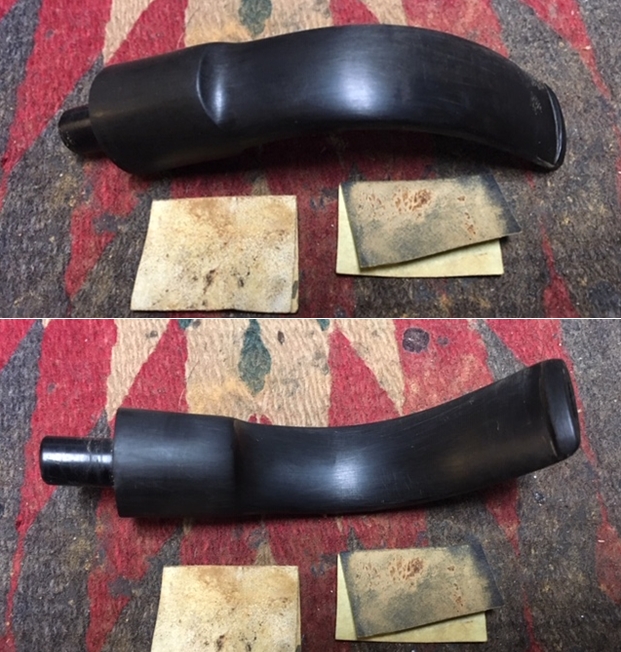
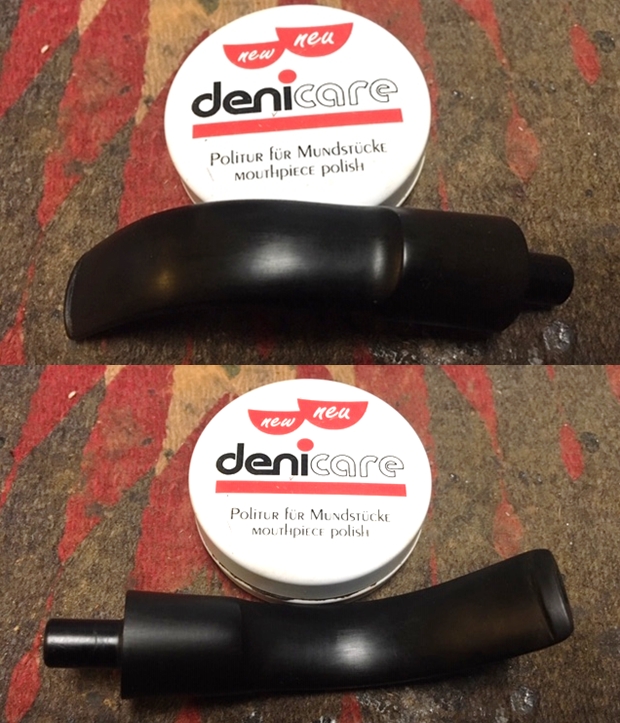
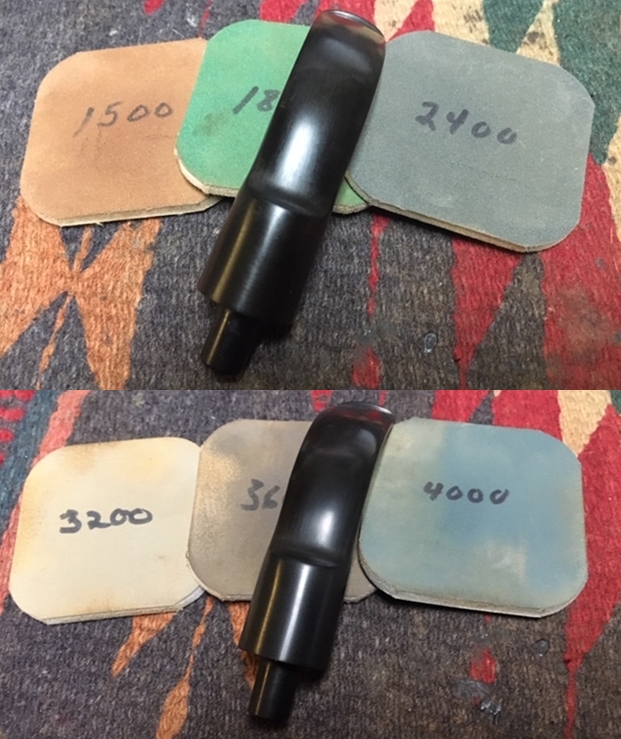
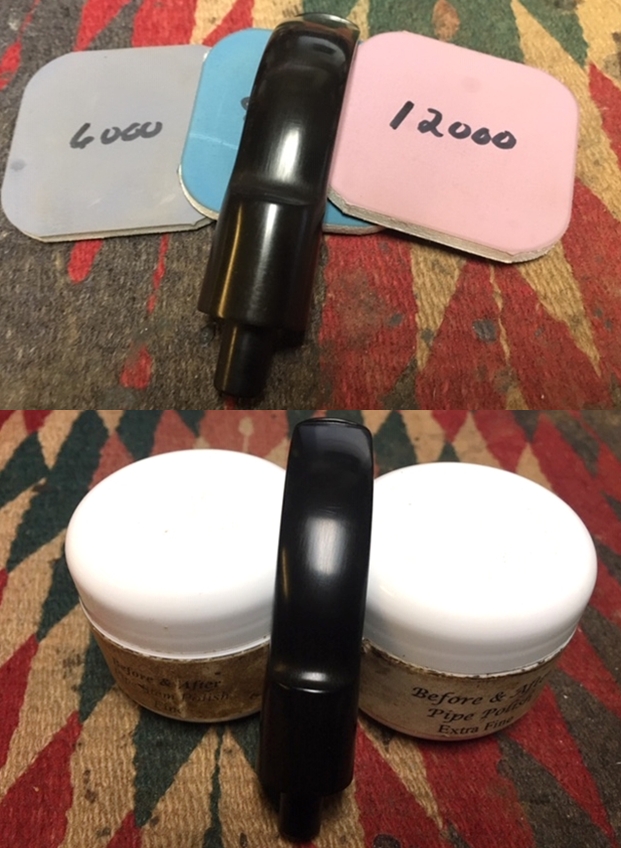
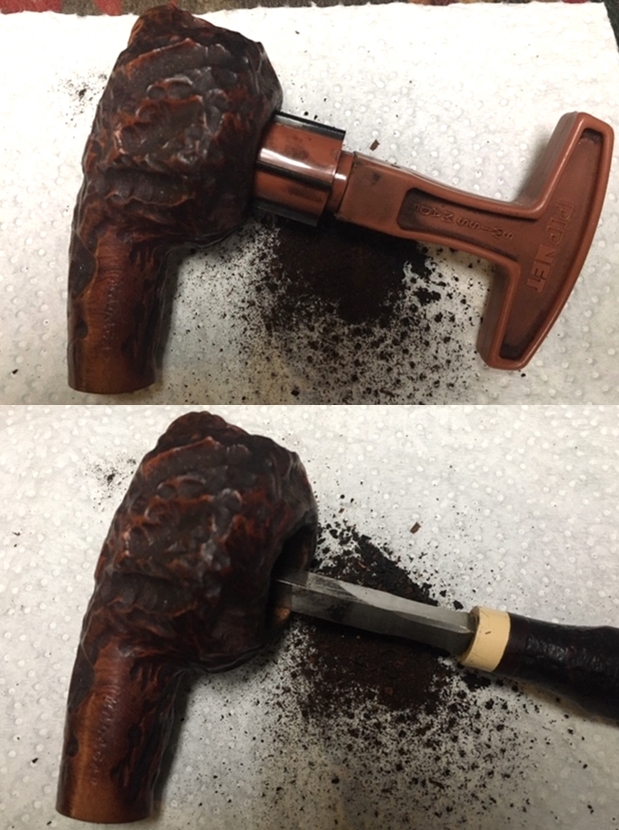
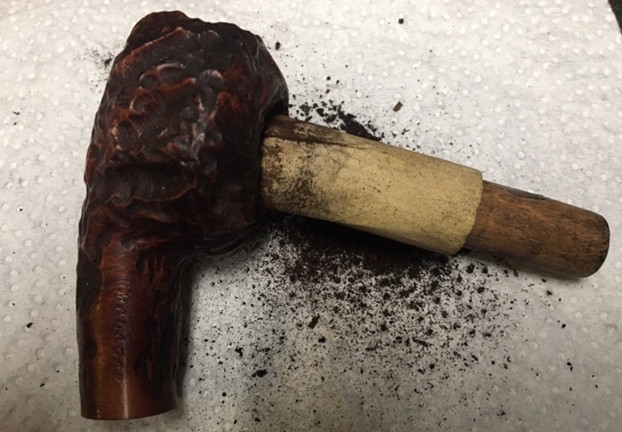
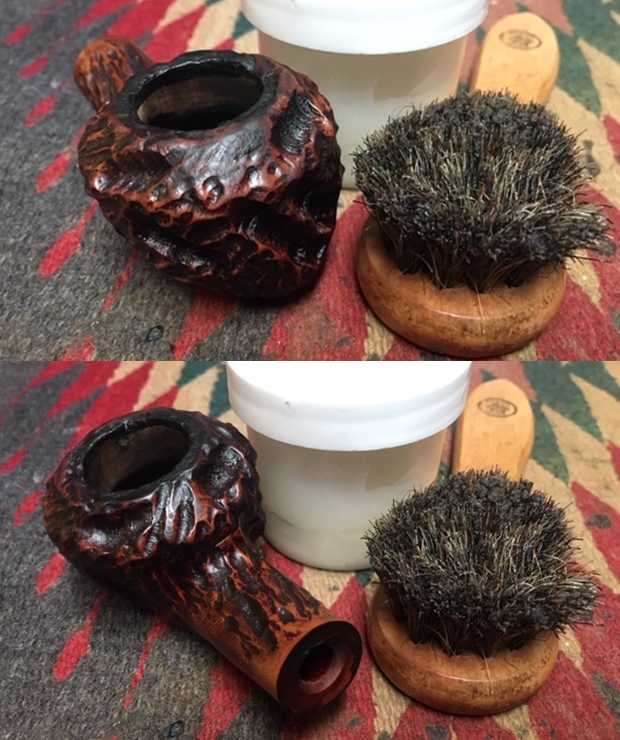
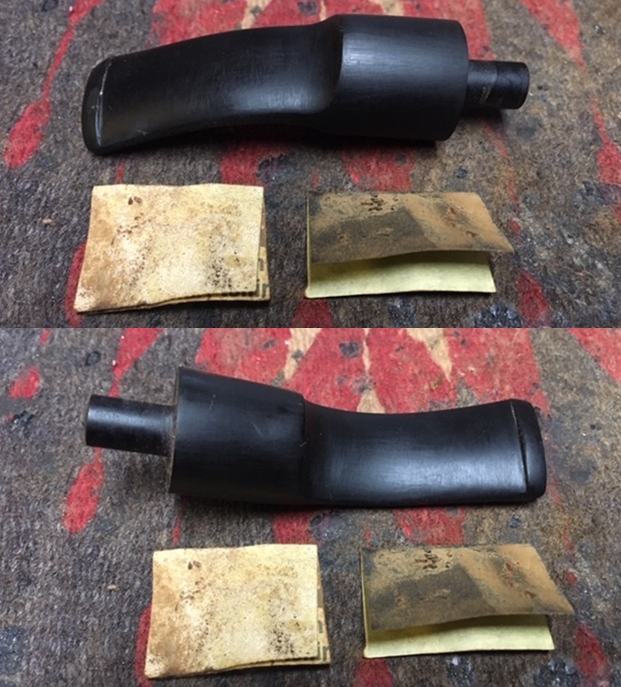
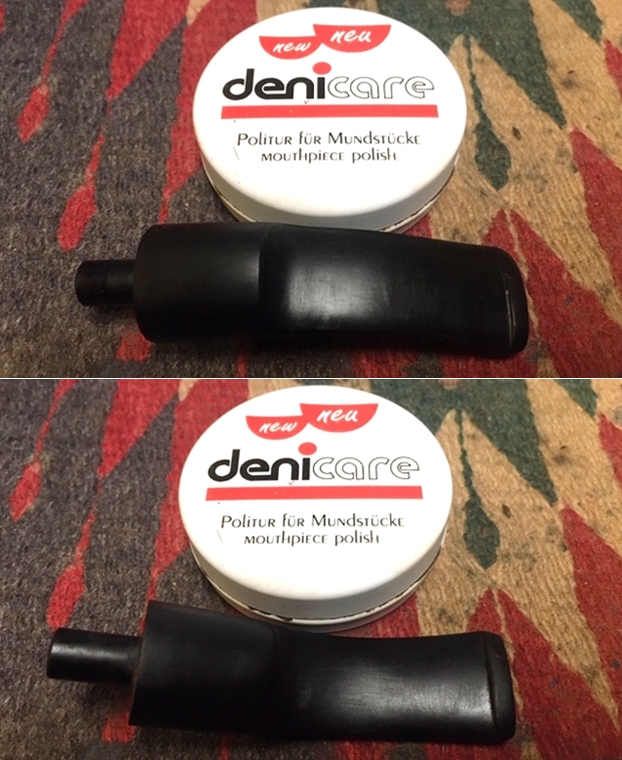
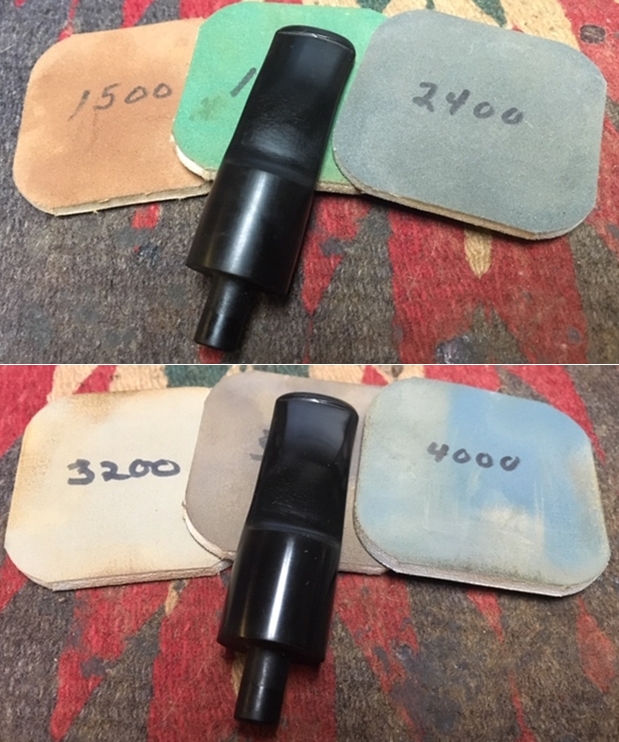
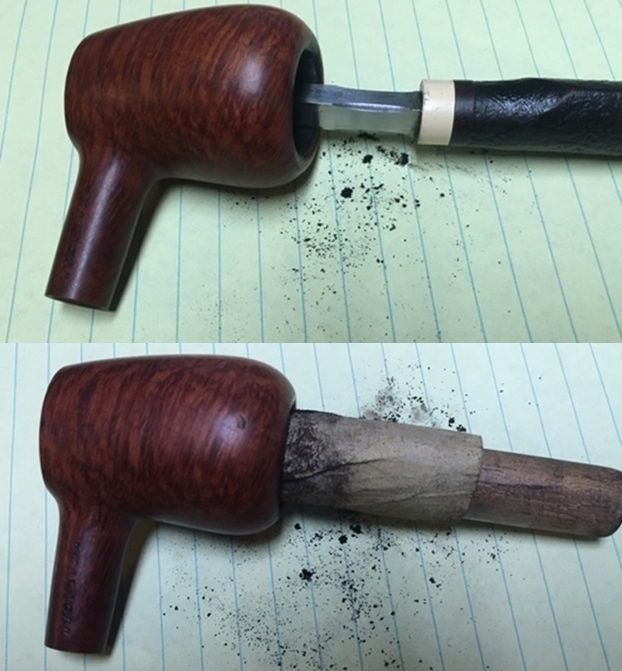
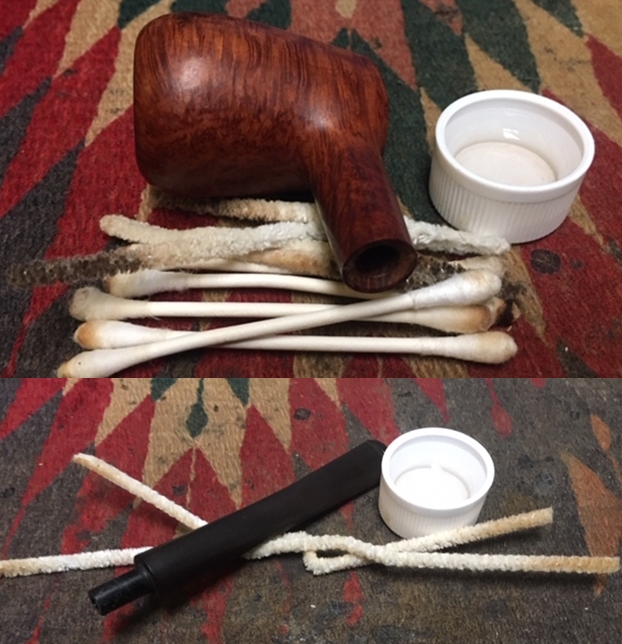
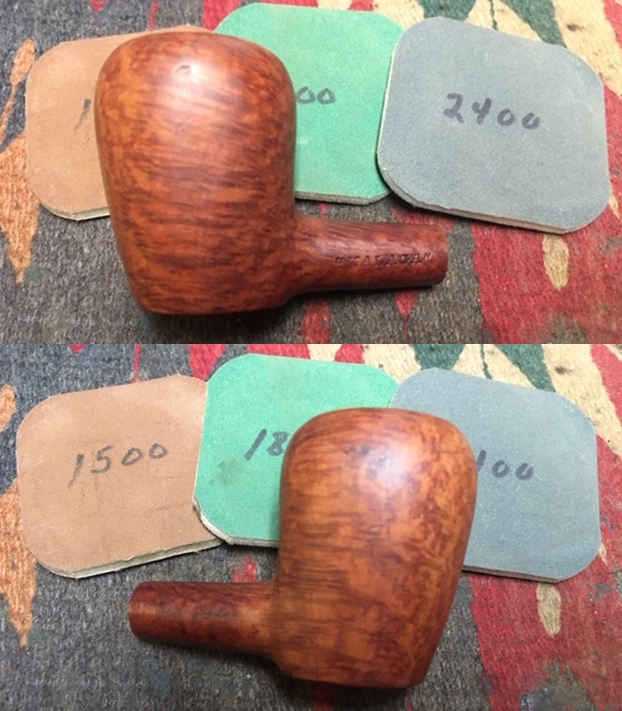
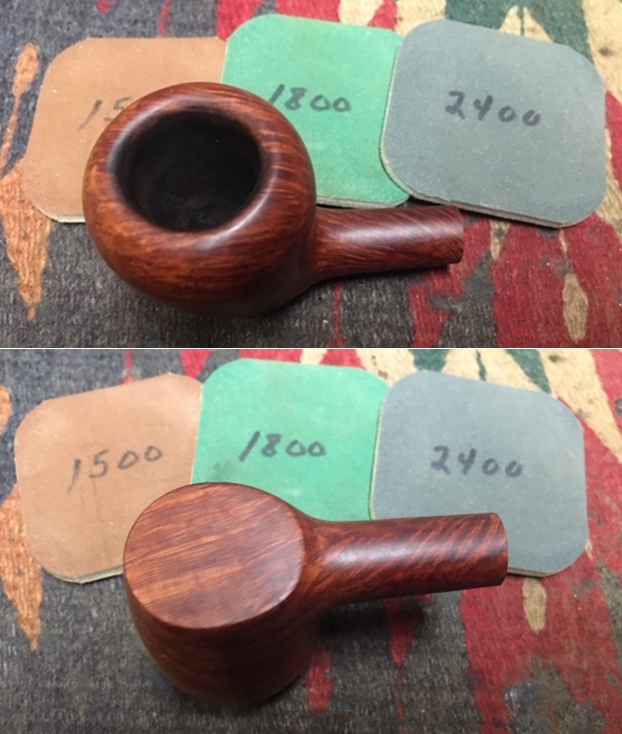
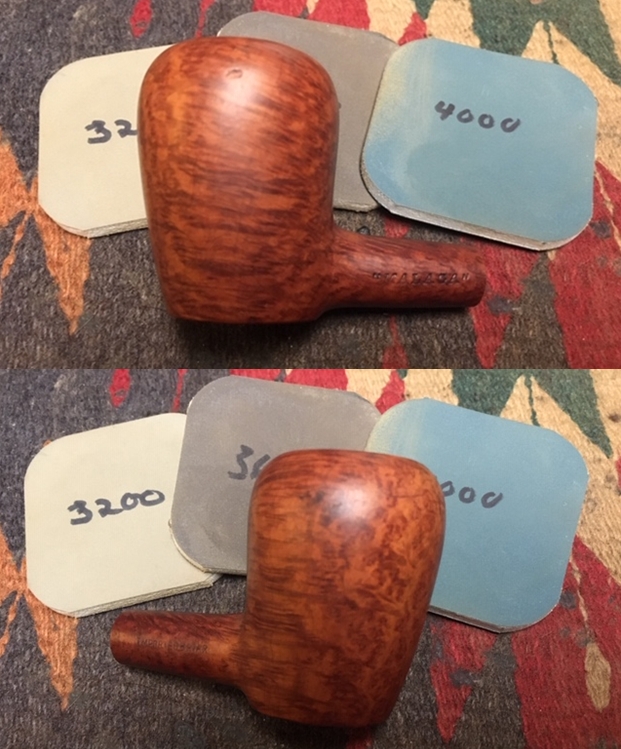
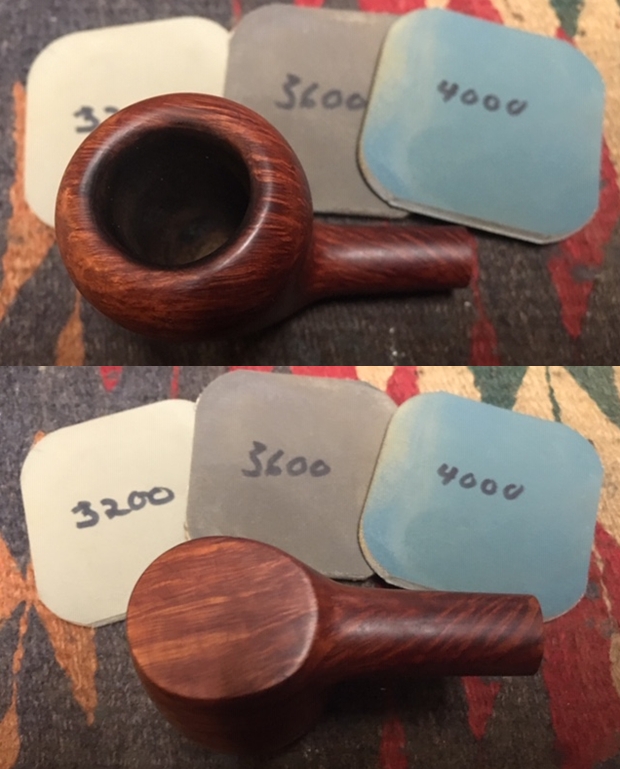
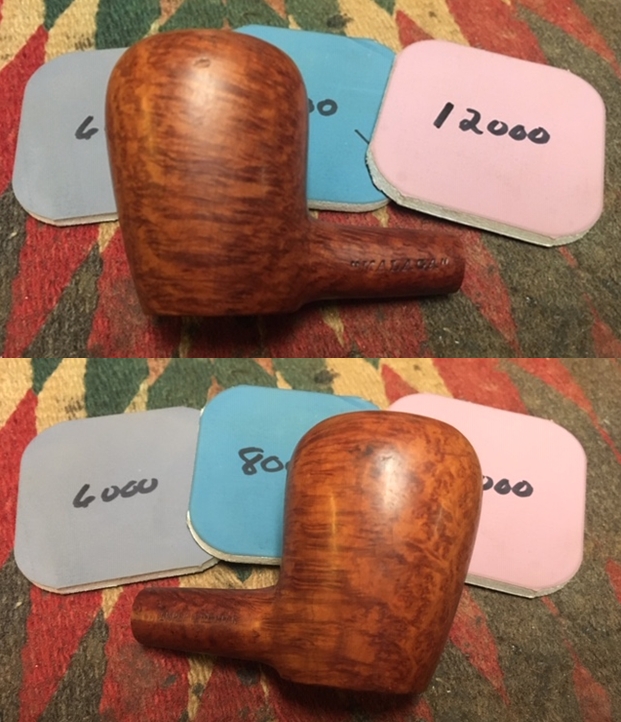
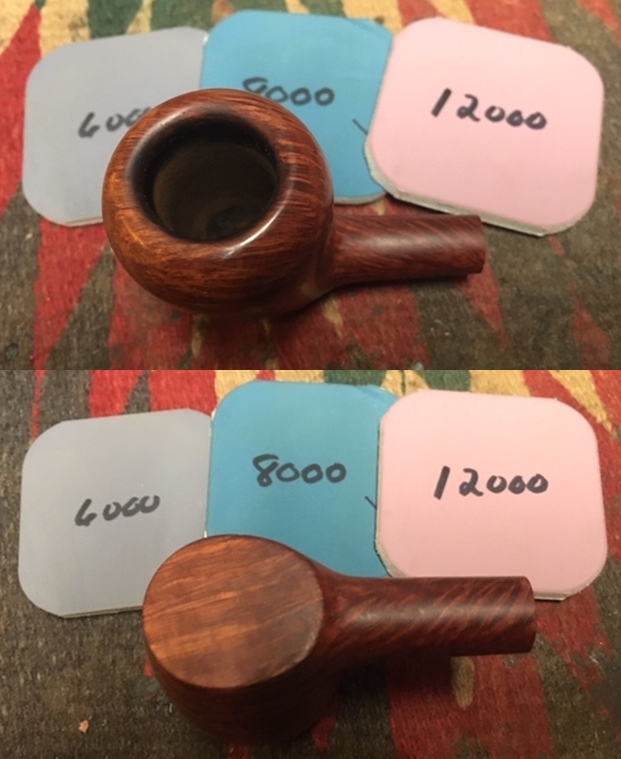
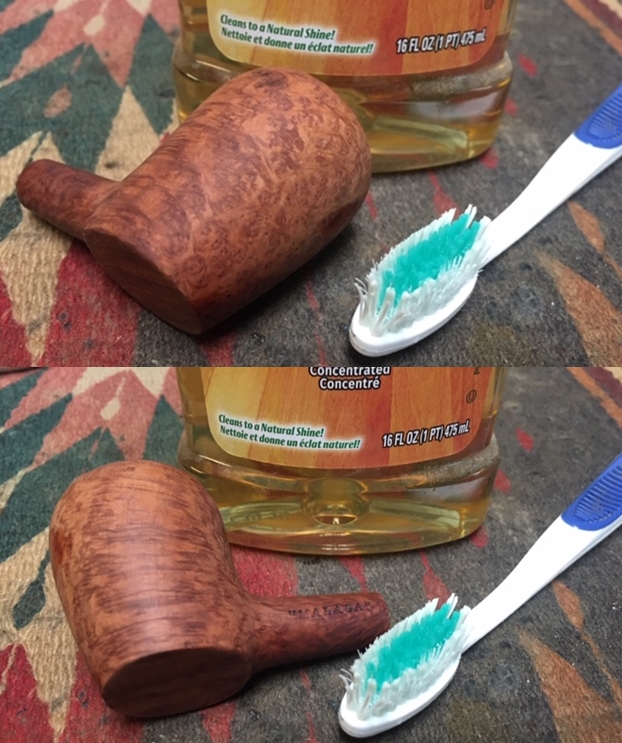
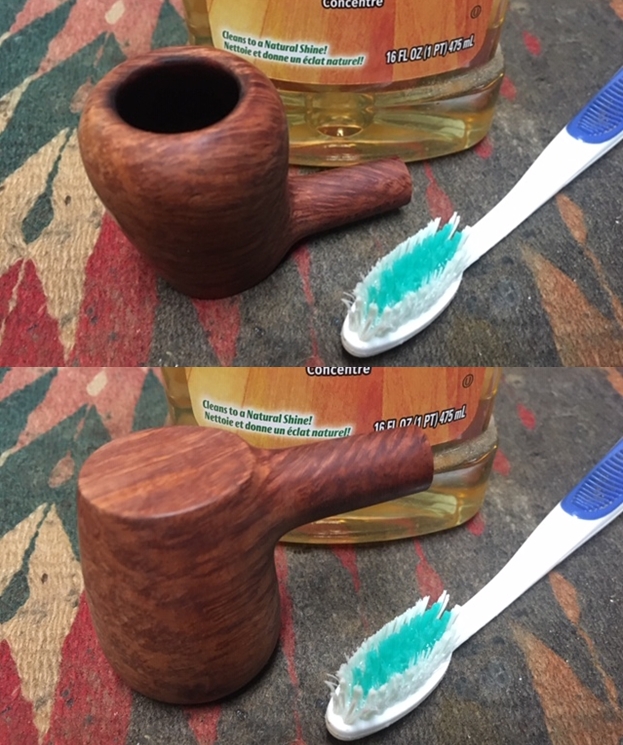
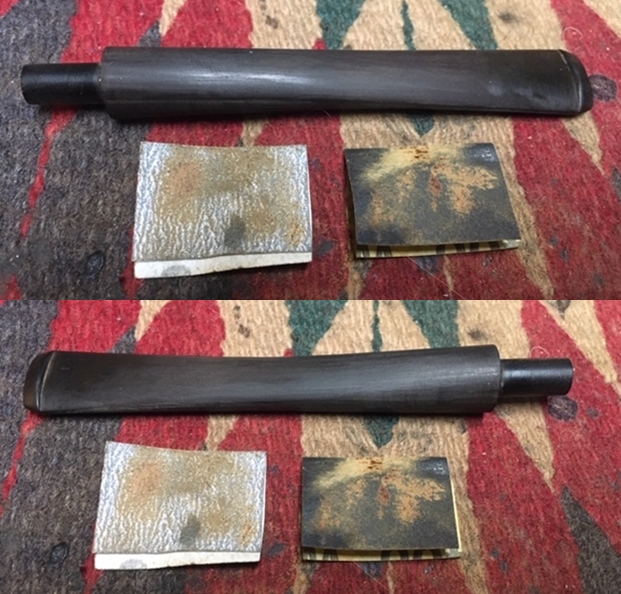
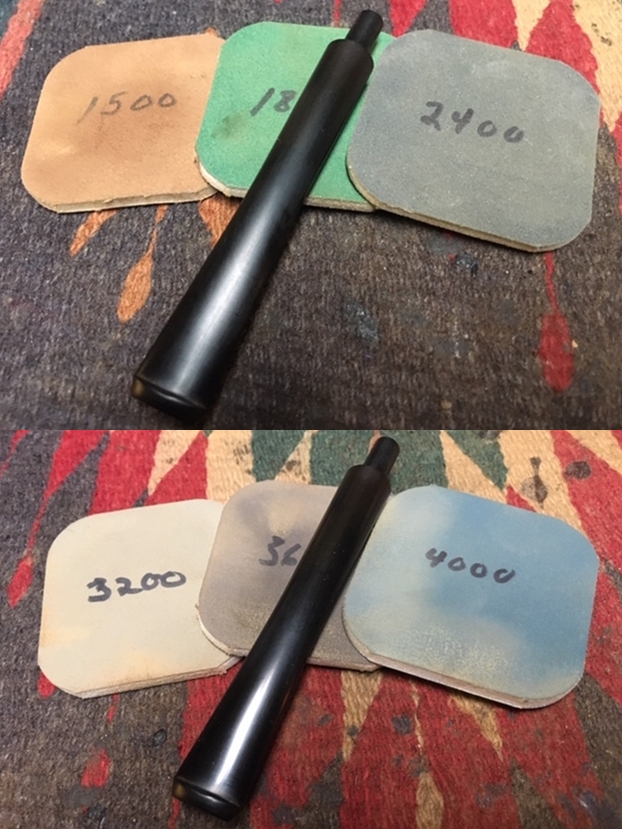
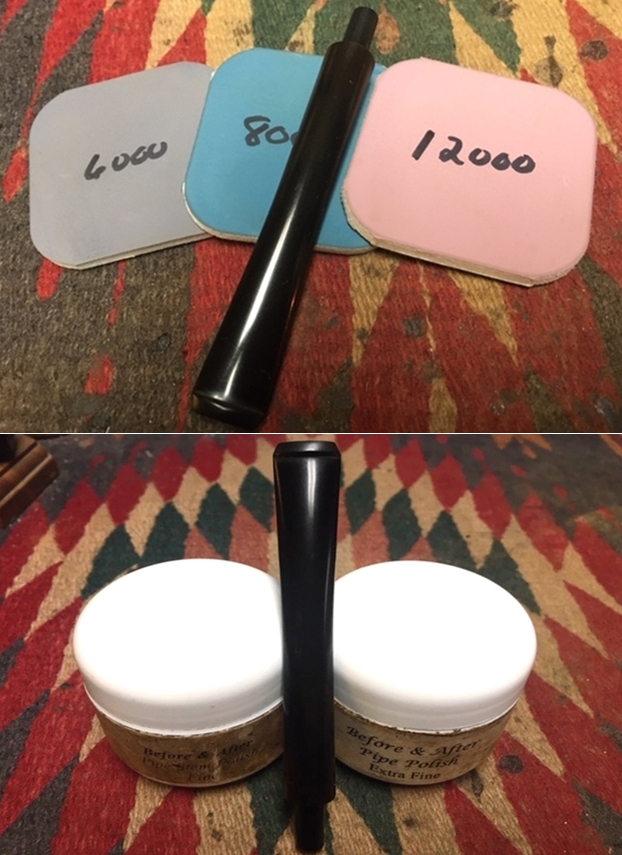
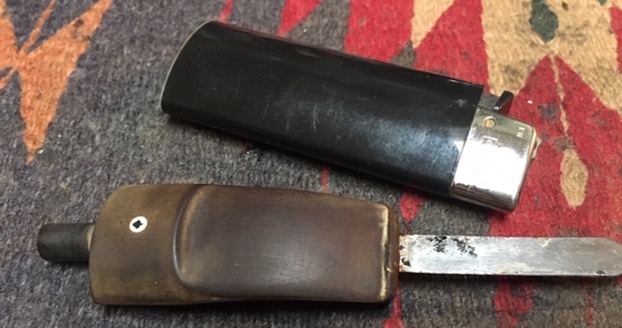
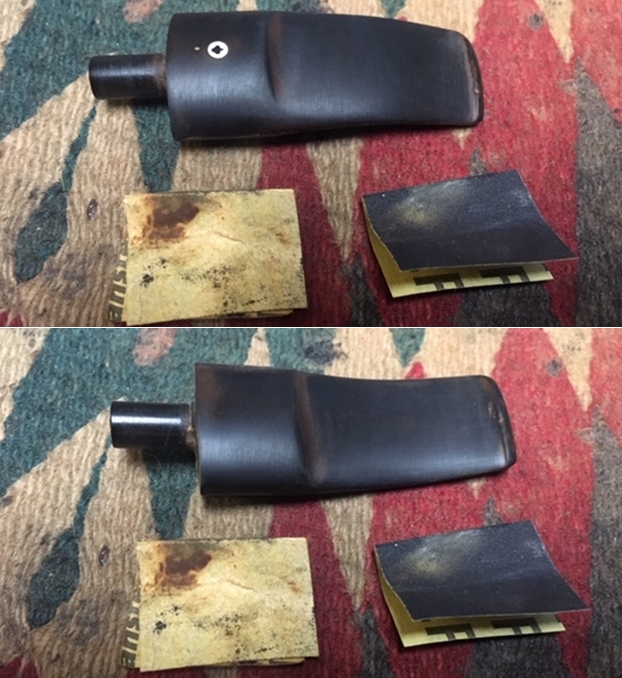
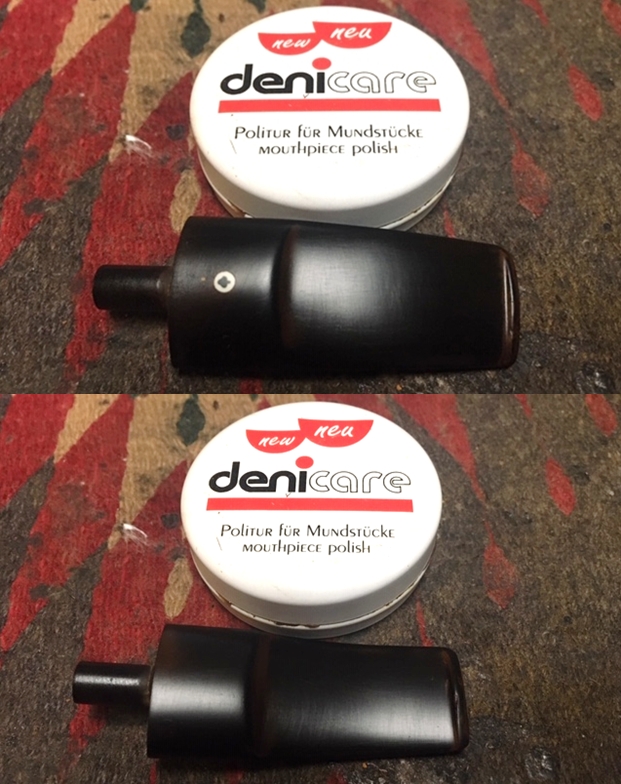
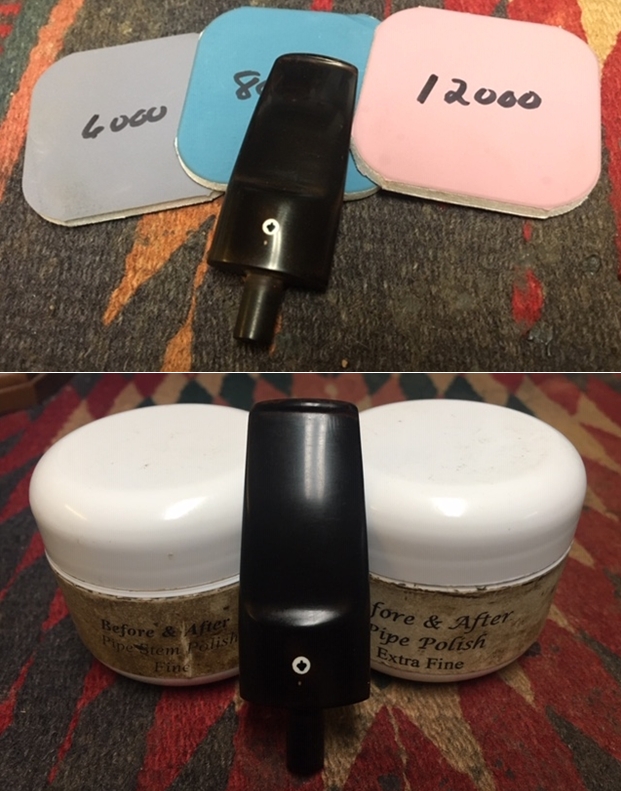
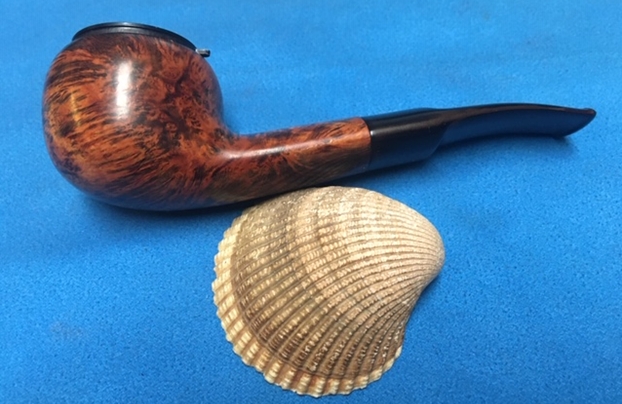
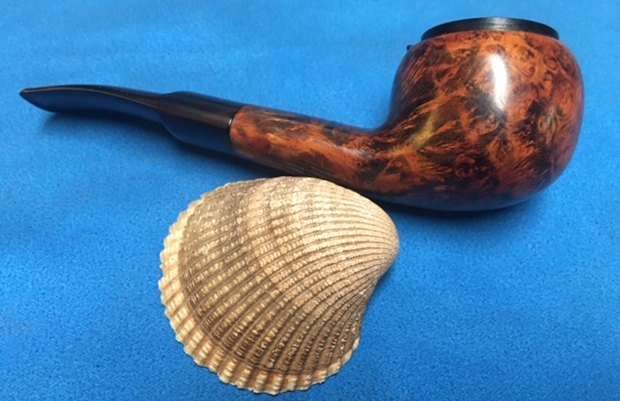
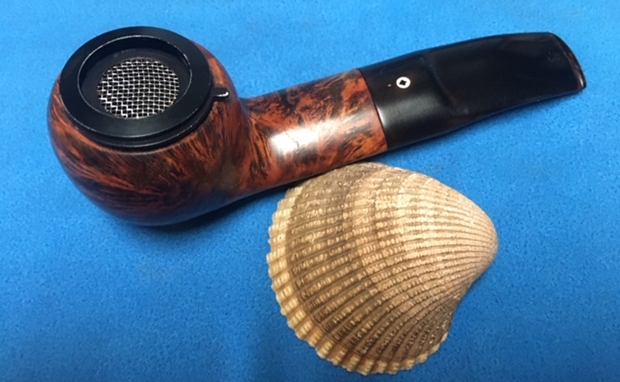
I decided to start with the bowl first. I followed Jeff and my regular regimen for cleaning estates. I reamed the thick cake in the bowl with a PipNet Pipe Reamer using the third size of cutting heads to take the cake back to bare briar. I followed up with a Savinelli Fitsall pipe knife to remove the slight remnants of cake toward the bottom of the bowl. I sanded the bowl with 220 grit sandpaper wrapped around a piece of dowel to smooth out the inside walls of the bowl.The mortise was surprisingly clean but there were some tars and oils on the walls. I scrubbed the mortise and the airway in the shank and the stem with alcohol, cotton swabs and pipe cleaners.I polished the smooth rim top and the ring around the end of the shank with micromesh sanding pads – wet sanding with 1500-12000 grit sanding pads. I wiped down the bowl after each sanding pad with a damp cloth. The polishing took the remainder of the bit of lava that had remained after the cleanup. I scrubbed the briar with Murphy’s Oil Soap with a tooth brush. I scrubbed it off under running water to remove the soap and the grime on the bowl. I dried it off with a soft cloth. I worked some Before & After Restoration Balm into the surface of the briar with my fingertips and a horsehair shoe brush to clean, enliven and protect it. I let the balm sit for a little while and then buffed with a cotton cloth to raise the shine. The photos show the bowl at this point in the restoration process. I set the bowl aside and turned my attention to the stem. I took a photo of the stem before I started my work on it. I cleaned it with alcohol and sanded off the calcification and oxidation on the surface. Once it was cleaned I mixed up a batch of activated charcoal powder and black super glue. I greased a pipe cleaner with Vaseline and inserted it in the button. I used a dental spatula to fill in the missing chunk of vulcanite. Once it had hardened a bit I removed the pipe cleaner and set it aside to cure.I set it on a container to let the repair cure. Once it hardened I would need to reshape the button and the slot on the stem. I had also filled in the damage to the underside of the button. The reshaping would bring it back to the original shape.I shaped the button edges and surface with a needle file to remove the excess material on the repair. I still need to do some more sanding but the stem is shaping up to be quite nice. I still need to remove the oxidation on the surface but it is getting there.I sanded out the tooth chatter with 220 grit sand paper and started to polish it with a folded piece of 400 wet dry sandpaper. Once it was finished it the tooth chatter and oxidation was gone and it began to shine.I reshaped the slot in the button end with needle files to clean up the shape.I polished the stem with Denicare Mouthpiece Polish from a tin of it I have in the drawer here. It is a gritty red paste that I rub on with my finger tips and work into the surface of the stem and button and buff off with a cotton pad. It gives me a bit of a head start on the polishing work plus I have a tin to use up!I polished the stem with micromesh sanding pads – wet sanding with 1500-12000 grit sanding pads. I wiped it down after each sanding pad with Obsidian Oil. I polished it with Before & After Pipe Stem Polish – both Fine and Extra Fine and buffed it off with a final coat of Obsidian Oil. This is another interestingly shaped rusticated pipe in what I would call an Oom Paul shape. It has a black vulcanite saddle stem with two brass dots. The smooth rim top and shank end band look really good against the rustication. Everything about this one says that it was part of the “Malaga” Carved line of pipes. It has a great look and feel. The shape is very tactile and fits well in the hand. I polished stem and the bowl with Blue Diamond polish on the buffing wheel. I gave the bowl multiple coats of Conservator’s Wax and the stem multiple coats of carnauba wax. I buffed the pipe with a clean buffing pad to raise the shine. I hand buffed it with a microfiber cloth to deepen the shine. The pipe polished up pretty nicely. The rich oil cured briar took on life with the buffing. The rich brown colour of the briar works well with the polished vulcanite stem. The finished pipe has a rich look that is quite catching. Have a look at it with the photos below. The shape, finish and flow of the pipe and stem are very well done. The dimensions are Length: 6 inches, Height: 2 inches, Outside diameter of the bowl: 1 ½ inches, Chamber diameter: ¾ of an inch. I will be adding the pipe to the finished Malaga pipes that I have set aside for Alex. This will be a great addition to his collection of Malaga pipes. Thanks for walking through the restoration with me as I worked over another Malaga.

A Long-time Friend Commissions a Blasted French GBD Sablée Standard Bent Billiard


Blog by Dal Stanton

I’ve known Steve for 40 or so years – I’m not counting!  In our earlier years we shared the same pursuit of going to seminary in Jackson, Mississippi, where we shared many things in common.  We studied dusty but fascinating theological books, wrote papers for hopeful professors, studied Greek and Hebrew and we would do the occasional obligatory trips to fish for bass and hunt ducks when they were in season.  We were both relatively new in the business of being husbands and against all odds, we also became fathers during this time of stretching our minds and hearts to be better men before our God and to do what we could to make a difference in this world.  After seminary, Steve and his family and I and my family followed different paths yet, over the years we’ve been able to cross those paths here and there and generally stay in touch – at least every few decades or so.  Steve is a wood worker going way back – the serious kind that gets paid for it.  When he came across my avocation of restoring pipes by seeing my posts on Facebook, he reached out to me a few years back and kept threatening to commission a pipe or two.  Steve isn’t a big pipe smoker, but his last email to me to confirm the two pipes he commissioned, wrote these words his pipe collection:

“I bought a very cheap one in a kit and these will probably be all the ones I get. But knowing that it came from the work of your hands will be special to me and help out the ministry to boot.”

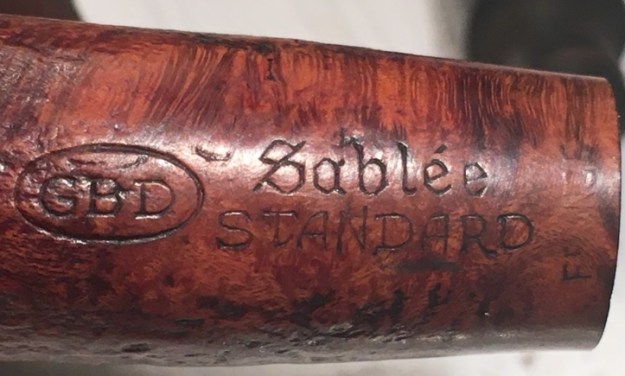
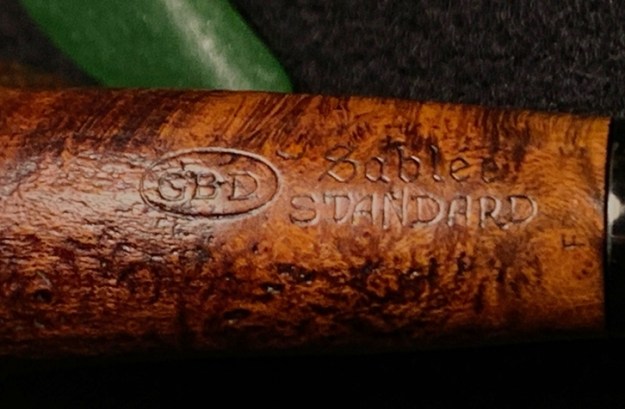
Friendship is a valuable thing, and I appreciate Steve’s desire to help the Daughters of Bulgaria – women and girls who have been trafficked and sexually exploited.  Steve commissioned a very nicely grained, honest to goodness American made iconic pipe, a Carey Magic Inch Straight Apple.  He also commissioned a continental pipe – a beautifully blasted GBD Sablée Standard long shank Bent Billiard.  Here are Steve’s commissioned pipes pictured when I first acquired them:The Carey Magic Inch came to me from another good friend, Dave Shane. I worked with Dave when he was a younger man in Ukraine, a pipe man and restorer himself (see: https://www.thepipery.com).  When I was in the US a few years ago I visited Dave and he gifted me a box of pipes that he hoped would benefit the Daughters of Bulgaria.  The Carey Magic Inch was in this offering.  The first pipe on my worktable is the GBD Sablée Standard which I acquired in what I have affectionately called, the Lot of 66, which I acquired on the eBay auction block a few years back.  This Lot of 66 has yielded many very nice collectable pipes and I’m honestly surprised that this Blasted GBD has remained this long waiting for someone to come along – a very nice pipe for Steve’s small, select collection. Here are more original pictures of the GBD: The nomenclature is found on the lower shank panel with a ‘GBD’ ensconced in the oval.  To the right is ‘Sablée’ [over] STANDARD.  To the right of this is the COM, ‘FRANCE’ perpendicular to the rest of the nomenclature.  The fancy lettering of ‘Sablée’ is classy.  I did a quick search of the French, ‘Sablée’ using Google Translate and discovered the meaning to be, “sandblasted” – a very nice blasted finish to be sure.I like Jerry Hannah’s VERY ‘Brief History of GBD’ from Pipedia: GBD Model Information:

The company was founded in Paris France in the 19th century by Ganeval, Boundier and Donninger who were no longer associated with the company by the turn of the century. By the time they left the GBD name was well established and thus retained. In 1903 an additional factory was built in England and ran by Oppenheimer. The Paris factory moved to Saint-Claude in 1952. Since 1981 the majority of GBD pipes come from the English factory. At about that same time GBD merged with Comoys, since then all production for both GBD and Comoy comes from a single factory. ( I wasn’t kidding when I said it was brief! )

Pipedia’s main article on GBD is extensive in detailing the history and all the corporate iterations of English/French interests going back to the 1800s.

The opportunities that I’ve had to restore GBD pipes, has led me to reach out to the resident expert on GBDs, rebornpipes contributor, Al Jones.  Al has always been very helpful with questions about GBD pipes and some questions emerged as I look at the FRANCE COM of this ‘Sablée’ Standard.  The standard practice in dating GBD pipes is based upon the brass rondel.  Generally, GBDs with brass rondels come from the pre-Cadogan era – that is, when GBD, owned by the Oppenheimer conglomerate, merged with Cadogan, maker of Comoy’s.  This happened in 1980/81.  This gives a dating parameter for GBD made pipes.  With this guideline, then the Sablée STANDARD on my worktable would be dated after 1981.  It’s possible that it’s listed in some GBD catalogue which would give the specific period the line came into production.  The question floating through my mind now has to do with the French origin of this GBD.  There’s much information about the English side of the Channel regarding GBD production, but I could find almost nothing about the French side. Do the openings and closings of French factories referred to above, have any bearing on the dating of this French GBD? Is the absence of the GBD rondel have the same force of marking the date of a French made GBD?  These essentially were the questions I shot off to Al with some pictures of the pipe and nomenclature.

Dal:
I’m not clear on if the pipe has the rondel or not?
You are right, there is almost nothing written about GBD’s made in France.
If it has the rondel, I’d say you can assume it was a pre-Cadogan pipe.
I don’t know what happened to French made COM’s after the merger (perhaps there weren’t any).
So, unfortunately, you can’t be any more definitive.
I don’t think they posted French made GBD’s in the older catalogs, at least not that I’m aware.
Al

After responding to Al’s question about the presence of the rondel in the negative, his last response was definitive:

Yep, another GBD story lost to time, that adds to the charm!
Al

With the mystery of the provenance of this French GBD solidly established with Al’s help, I take a closer look at the pipe’s generally good condition. The medium cake buildup in the chamber needs to be removed to give the underlying briar a fresh start and to check for heating damage.  The rim has normal darkening along with a very nice blasted stummel surface that appears in need only of cleaning of normal grime buildup.  The shank appears to be longer than a normal half bent Billiard and gives more of a sweeping presentation transitioning to the saddle stem – which has some oxidation and tooth chatter damage on the upper and lower bit.  What stands out to me about the stem is its sharp, distinct cut shaping.  The edges are not rounded but have distinctive edge transitions – nice.

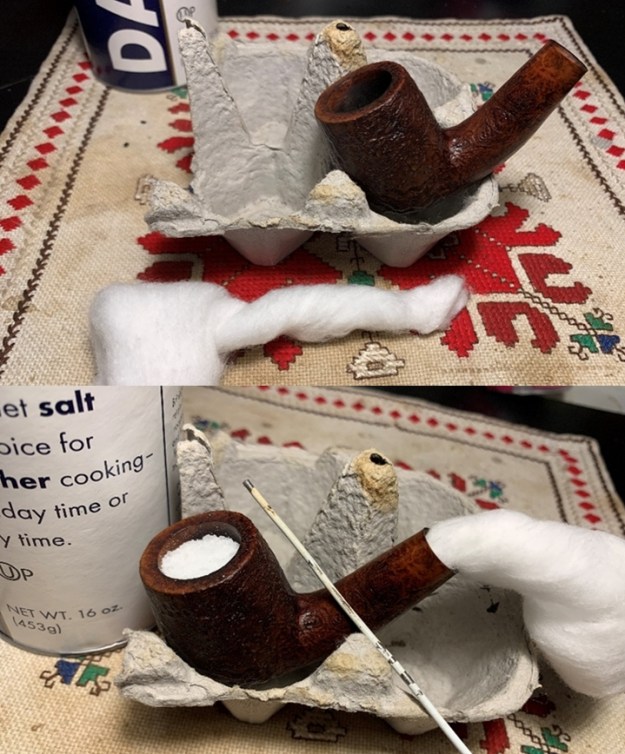
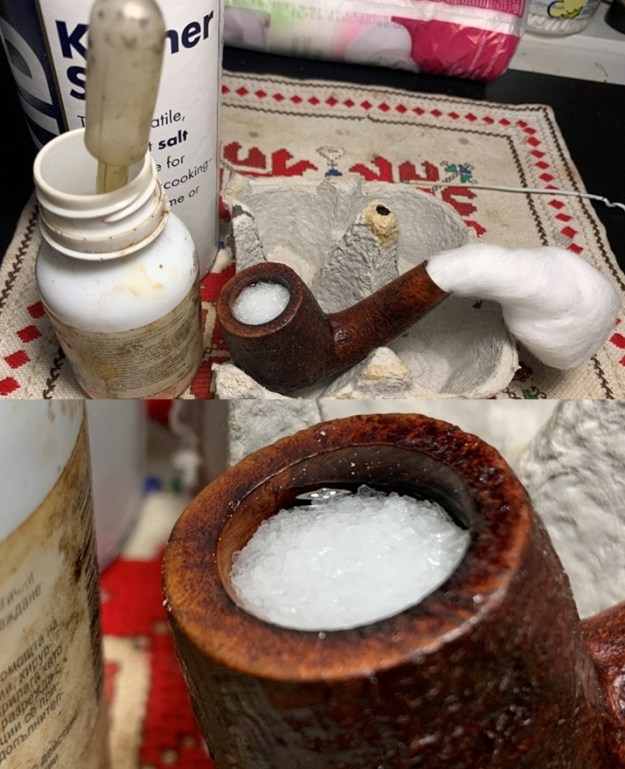
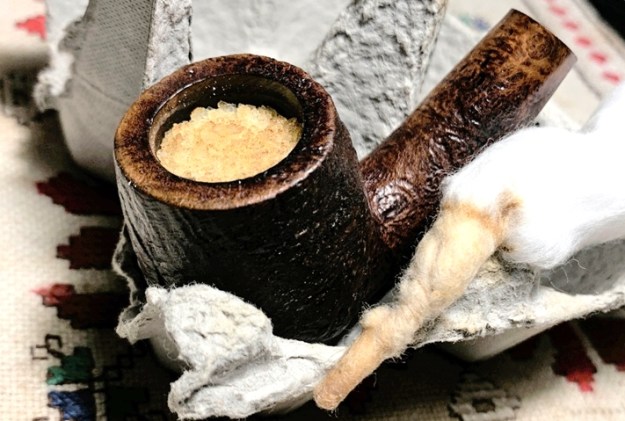
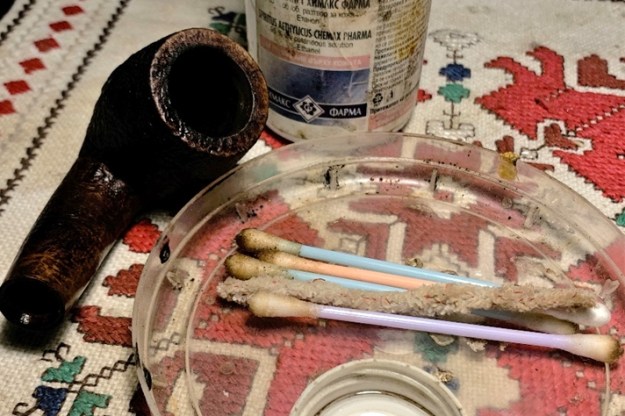
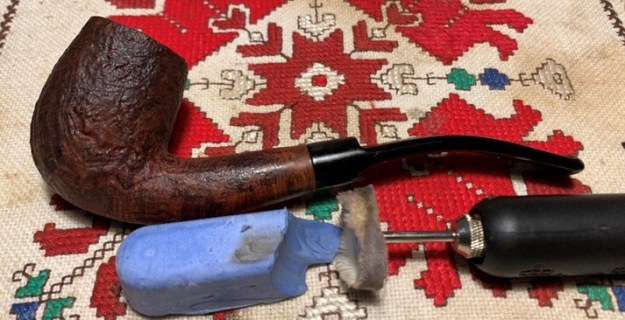
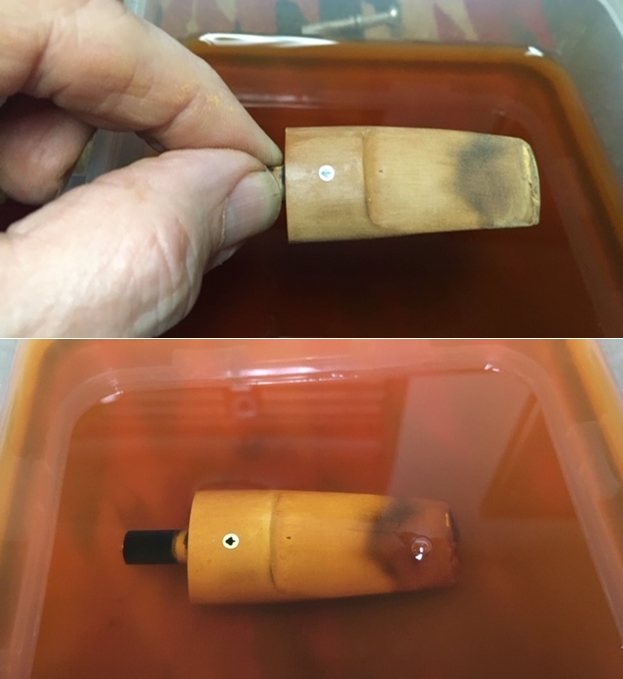
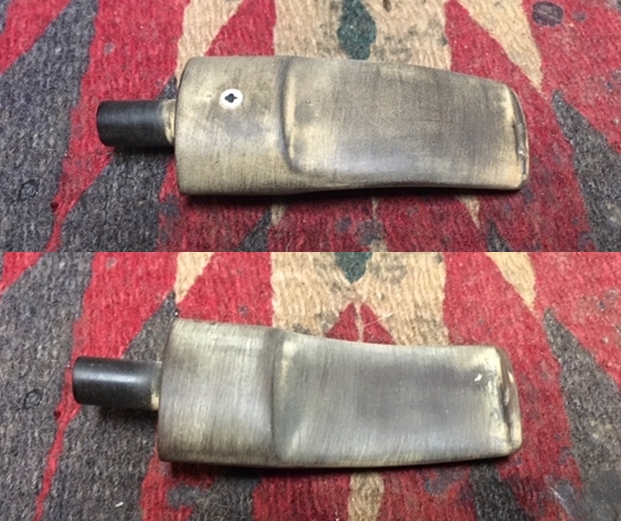
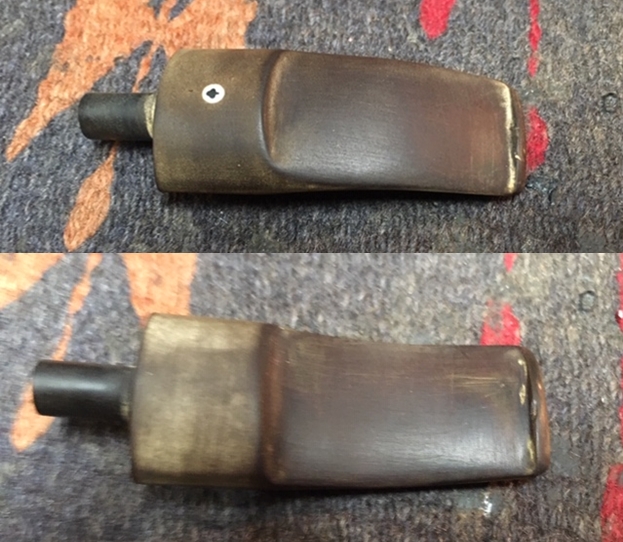
I start the restoration by adding the French GBD’s stem to the queue along with other pipes to soak in Before & After Deoxidizer.  First, using pipe cleaners and bristled shank brushes dipped in isopropyl 95%, the stem’s airway is cleaned.Following this, the stem is placed in the B&A Deoxidizer for several hours.After soaking in the Deoxidizer, I fish out the stem allowing it to drain the fluid back into the vat and run another pipe cleaner wetted with isopropyl 95% through the airway to clean it of Deoxidizer.  I then wipe off the raised oxidation with cotton pads wetted with isopropyl 95%.  The Deoxidizer seems to have done a good job.To help in revitalizing the vulcanite rubber, paraffin oil is applied with a cotton pad and worked into the surface.  I set the stem aside to absorb the oil.Turning to the stummel, I take closer look at the condition of the chamber.  I take a close-up of the cake buildup to mark the start.  After putting paper towel down to minimize on the cleanup, I use the Pipnet Reaming Kit to begin cleaning the chamber. I use two smaller of the 4 blade heads available in the Kit.  The cake is soft and is removed very easily.  I follow reaming by fine tuning using the Savinelli Fitsall Tool which does a great job of scraping the walls removing additional carbon cake as well as reaching down to the floor of the chamber and addressing the hard to get to angles and curves.  I finish by sanding the chamber using 240 grade paper wrapped around a Sharpie Pen and then wiping out the residual carbon dust with a cotton pad wetted with alcohol. I forgot to take a picture of the cleaned chamber inspection which looks good.  No heating damages. Moving from the chamber clean up, after taking a few pictures to mark the start, I focus on the external briar using undiluted Murphy’s Oil Soap and a cotton pad to scrub the sandblasted finish.  I also employ a brass wire brush to address the residue on the rim.  A brass brush does not harm the briar as it works. From the worktable I take the GBD stummel to the sink to continue the cleaning by using warm water with anti-oil dish soap and using bristled shank brushes, I scrub the internals of the pipe in the mortise and airway.  I also use the brass wire brush to do some additional scrubbing on the rim.  Finally, after rinsing the stummel thoroughly, I return to the worktable focusing on the internal cleaning using pipe cleaners and cotton buds wetted with isopropyl 95%. The internals are surprisingly clean, but still in need of cleaning.  I also use the small dental spoon to remove some tars and oils that have collected at the ridges created by the mortise drilling.  Without great effort, cotton buds are emerging lighter, and I call it done for now.  Later, I’ll give the stummel a kosher salt and alcohol soak to continue the internal cleaning process.Looking at the stummel and the condition of the blasted surface, the cleaning, as expected lightened the surface.  The briar seemed to call out to me for an application of Before and After Restoration Balm to hydrate and condition the dry stummel. I happily comply!  After applying some of Mark Hoover’s Before & After Restoration Balm (www.iberen.com) to my fingers, I work the balm into the blasted briar surface – thoroughly working it into the rough surface and rim.  I take a picture of the stummel after application, set to the side for 20 minutes or so.After about 20 minutes, using a cloth, I wipe the excess Balm off and then using a microfiber cloth, continue wiping and buffing up the briar surface.  Wow!  I’m loving the results and the hues of this blasted surface.  I take another picture after buffing.  This is a bowl that doesn’t need a lot of help 😊.Turning now to the stem, I observe again the stem’s unique shape.  The stem is not rounded but with flat surfaces on the upper and lower sides.  The edges of the stem connect the flat surfaces with a half diamond right angle.  Very smart – I like it.There is bite and chatter damage on the upper and lower bit. To address this, I first use the heating method to expand the compressions.  Using a Bic lighter, I paint the bit area heating the vulcanite and the physics of expansion take over.  After applying the heat, the indentations are still visible but have lessened so that sanding dispatches the problems easily.  First the before and after of the upper bit followed by the lower bit. I still can detect deep oxidation in the stem.  Therefore, I sand the entire stem with 240 grade paper to address this. Also employing a flat needle file, I file the button to freshen it as well as sand the bit to erase the bite and tooth chatter damage. Following the filing and 240 sanding, using 600 grade sanding paper I wet sand the entire stem followed by applying 000 grade steel wool.  The stem is looking good.Next, I go straight away to applying the full regimen of micromesh pads.  Starting with pads 1500 to 2400, I wet sand.  Following this, I dry sand using pads 3200 to 4000 and 6000 to 12000.  To continue revitalization of the vulcanite, I apply a coat of Obsidian Oil after each set of the micromesh pads. Next, I continue the internal cleaning of the stummel by giving it a soak using kosher salt and alcohol.  I first stretch and twist a cotton ball to act as a ‘wick’ which serves to draw the oils and tars from the internal chamber.  I use a stiff wire to guide the wick down the mortise and airway. After filling the bowl with kosher salt which doesn’t leave an aftertaste as iodized salt does, I settle the stummel in an egg carton for stability. I then fill the bowl with isopropyl 95% with a large eye dropper until it surfaces over the salt.  After a few minutes the alcohol absorbs into the pipe and I top the alcohol off again and set the stummel aside to soak.After several hours, the salt and wick have soiled from absorbing the tars and oils.  I remove the expended salt into the waste basket, wipe the chamber with paper towel and blow through the mortise to dislodge any residual salt crystals.I follow the soak by employing a few more pipe cleaners and cotton buds assuring that all is clean.  I move on!With a freshened bowl for a new steward, and after reuniting the stem and stummel, I mount a cotton cloth buffing wheel to the Dremel, and after setting the speed at about 40% full power, I give a light application of Blue Diamond compound over the blasted surface of the stummel.  I’m light on applying compound so that it will not cake up in the rougher sandblasted surface.  I apply compound normally over the stem.To clean the pipe of compound dust in preparation for the application of wax, a felt cloth is used to wipe down the pipe.After mounting another cotton cloth buffing wheel onto the Dremel, increasing the speed to about 60% full power, I apply carnauba wax to both stem and stummel.  I increase the speed of the Dremel in order to create more friction heat to aid the wax in liquifying as it works into the blasted briar surface.  I decrease the speed of the Dremel to my normal 40% as I apply wax to the stem.  After applying a few coats of wax and working it in well so that there is no caking, using a micromesh cloth, I give the pipe a rigorous hand buffing to disperse excess wax and to raise the shine.Undoubtedly, there’s some mystery surrounding the provenance of this GBD Sablée Standard.  The French origins of this GBD leave us with questions of its dating – pre- or post- 1981, the merger which marks the eras of the GBD name.  Even though this will be lost to us in history, at least for now, there is no disputing the exquisite quality of this pipe’s sandblasted briar surface.  It is a classic Bent Billiard workhorse with an elongated stem that adds to the sweep of this pipe.  The flat, cut stem design also adds to the uniqueness.  Steve, my long-time friend, commissioned this GBD Sablée Standard and will have the first opportunity to acquire it from ThePipeSteward Store.  This pipe benefits the Daughters of Bulgaria – women and girls who have been trafficked and sexually exploited.  Thanks for joining me!

New Life for a Stunning Malaga Bent Billiard from Kathy’s Dad’s Pipes


Blog by Steve Laug

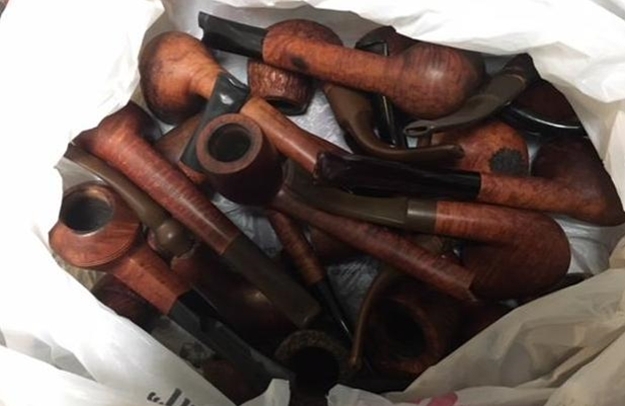
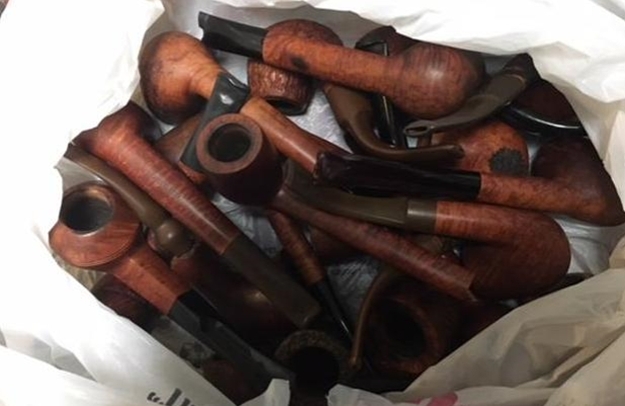
This is another of the Malaga pipes from George Koch’s estate that Alex added to the box of pipes I had set aside for him. There are quite a few of them to work on so I go back to them quite regularly to work on one of them. The next Malaga is a shape I would define as a bent billiard. It has some great cross and birdseye grain and a tapered vulcanite stem. The grain around the bowl and shank combined with the stem make it a stunning pipe. It is one of the many Malaga pipes that came to my brother and me in several shipments of pipes from George’s daughter Kathy. When Jeff got each box the pipes were well wrapped and packed. Jeff unwrapped them and took the following photo to give an idea of the volume of the pipes that we purchased. This Malaga came in mixed in a box of pipes much like the one below.In each of the previous blogs that I have written on the restoration of George’s pipes I have told his story. If you have followed the restorations you will have read the information and the background piece that Kathy did on her father. Here is a link to one of the previous blogs on his Malaga pipes where I included her tribute in full (https://rebornpipes.com/2019/01/26/back-to-kathys-dads-pipes-restoring-a-%c2%bc-bent-malaga-author/). You can also read the bio on her Dad, George Koch. It is an interesting read and one that shows just how far our pipe collecting passion can go when we find a brand of pipes that we enjoy. I am going to only include the portion on the Malagas at this point. If you wish to read the rest follow the link above.

Kathy writes…We lived in Livonia, and that’s where his love for Malaga pipes began. After a few years he returned to Allis Chalmers and we moved back to Springfield. I remember that when we went back to Michigan to visit friends, Dad had to go to the Malaga store and acquire a few new pipes. Many a year I wrote to Malaga and they picked out a pipe for me to purchase that I could give Dad for a Christmas or birthday present. He was always pleased. His favorites were the straight stemmed medium sized bowl pipes, but he liked them all. 

He had some other pipes, but the Malagas were his favorites. I remember him smoking them sitting in his easy chair after work, with feet up on the ledge by the fire burning in the fireplace.  Growing up it was my job to clean them and he liked the inner bowl and stem coated with Watkins vanilla, leaving a little of that liquid in the bowl to soak in when I put them back on the rack…I’m very happy they are being restored by you and your brother and hope they find homes who enjoy them as much as Dad did. Thank-you for your care and interest. — Kathy, the oldest daughter

The next “Malaga” Bent Billiard on the table is another classic bent shape. The carver did a great job of shaping the pipe to follow the grain on the briar. The bowl, round shank and bent tapered vulcanite stem look very good. The bowl had a thick cake that overflowed with lava onto the rim and there was significant burn damage on the top front inner of the bowl. The sides of the bowl and shank are very dirty with grime and oils from prolonged use. The stamping on the left side of the shank read “MALAGA” and on the right side it read Imported Briar. The vulcanite stem had tooth dents and chatter on the top and the underside of the stem. The button was worn almost smooth Jeff took these photos before he started the cleanup work on the pipe. Jeff took a close up photo of the bowl and rim to capture the condition of the pipe before he started his cleanup work. The rim top had some lava overflow and darkening on the back of the bowl and some serious burn damage to the inner edge on the bowl front. The burn marks appeared to be quite deep on the inner edge on the right front side of the grimy pipe.He also took photos of the sides and bottom of the bowl and shank to show the beautiful grain around the bowl. The photos show the general condition of the bowl and wear on the finish. It is very dirty but this is another beautiful pipe.Jeff took a photo to capture the stamping on the shank. The photos show the stamping “MALAGA” on the left side of the shank and Imported Briar on the right side. The stamping is very readable.The next photos show the stem surface. There is oxidation and calcification on the stem. There are tooth marks and chatter on both sides near the button and wear on the button surface and edges. The button surfaces and edges are worn and almost smooth.I am also including the link to a blog that I wrote that gives some of the history of the Malaga brand and the Malaga Pipe Shop in Royal Oak, Michigan in the USA. I have written an earlier blog to give a little history of the Malaga Brand and the pipemaker, George Khoubesser. Here is the link – https://rebornpipes.com/tag/malaga-pipes/.That blog also includes links to a catalogue and the history of the pipemaker George Khoubesser. Follow the link to get a feel for the brand and the pipemaker.

Jeff reamed the bowl with a PipNet pipe reamer and followed up with a Savinelli Fitsall pipe knife to remove the cake. He scrubbed out the mortise and the airway in the shank and the stem with alcohol, cotton swabs and pipe cleaners. He scrubbed the exterior of the bowl, rim, shank and stem with a tooth brush and Murphy’s Oil Soap to remove the oils and tars on the rim and the grime on the finish of the bowl. He rinsed it under running water. He dried it off with a soft cloth. He was able to remove the lava build up on the rim top and the flat surface of the rim looked very good. The inner edge of the rim has some serious burn damage on the front right side. The outer edge looked very good. He soaked the stem in Before & After Deoxidizer and rinsed it with hot water. I took photos of the pipe to show its condition before I started my work on it. I took close up photos of the bowl and rim top as well as the stem. You can see the condition of the rim top and bowl in the first photo. Jeff was able to remove all of the tar and oils but you can now see the damage on the inside rim edge. The edge is out of round. There is a burn mark that extends across the front and the back edge of the rim top at that point. The vulcanite stem had tooth chatter on both sides near and on the button surface there was also a large deep bite mark on the underside of the stem.I took a photo of the stamping on the shank to show how good the condition is. It shows the “MALAGA” stamp on the left side and Imported Briar on the right side. The stamping is very legible.I decided to address the rim top first. I topped the bowl on a topping board with 220 grit sandpaper. I wanted to remove the damage on the top front edge and remove the darkening all the way around the inner edge of the bowl. I took a close up photo the rim top before I started to give a clear picture of the condition of the pipe. I used a folded piece of 220 grit sandpaper to clean up the damage on the right rear inner edge of the bowl. I gave the inner edge a slight bevel to repair the damage. I polished the edge with 400 grit wet dry sandpaper. The rim top and edges really looked better.I polished the rim top and the briar with micromesh sanding pads. I wet sanded the bowl with 1500-12000 grit sanding pads. I wiped the bowl down after each pad with a damp cloth to remove the sanding dust. I restained the rim top and edges with an Oak Stain Pen. I was able to blend it into the rest of the bowl. I scrubbed the briar with Murphy’s Oil Soap and a tooth brush. I rubbed it into the surface of the briar with my finger tips and let it sit for a few minutes then scrubbed it off with a tooth brush and running water. I dried it off with a soft cloth. I worked some Before & After Restoration Balm into the surface of the briar with my fingertips to clean, enliven and protect it. I let the balm sit for a little while and then buffed with a cotton cloth to raise the shine. The following photos show the bowl at this point in the restoration process. I am very happy with the results. I turned to the stem to address the issues on the surface of both sides at the button. I used a needle file to recut the edges of the button. They had been chewed to the point of no edge remaining so I used the file to cut it and sharpen the edges. I smoothed out the top and bottom surfaces of the button on both sides.Once I had the button edge reshaped I decided to address the tooth marks and dents in the button and just ahead of the button. I “painted” the surface of the stem with the flame of a lighter to lift the tooth chatter and marks. The light marks on the top side disappeared quickly and the larger indentation on the underside lifted until the remaining small marks could be dealt with by sanding the stem.I sanded both sides smooth with 220 grit sandpaper to remove the deep oxidation on the surfaces. I finished this initial polishing with 400 grit sandpaper to smooth out the scratches in the stem surface. As I sanded and reshaped the button and stem surface the stem began to look very good. I polished the stem with Denicare Mouthpiece Polish from a tin of it I have in the drawer here. It is a gritty red paste that I rub on with my finger tips and work into the surface of the stem and button and buff off with a cotton pad. It gives me a bit of a head start on the polishing work plus I have a tin to use up!I polished the stem with micromesh sanding pads – wet sanding with 1500-12000 grit sanding pads. I wiped it down after each sanding pad Obsidian Oil. I finished by polishing it with Before & After Pipe Stem Polish both fine and extra Fine and then wiped it down with a final coat of Obsidian Oil. This is another, slightly larger Malaga Bent Billiard with a vulcanite tapered stem. It has a great grain around the bowl and the carver really maximized that with the shape of the pipe. Everything about the pipe – the shape of the bowl, the beveled rim top and the cut of the briar work well to highlight the grain around the bowl sides. I polished stem and the bowl with Blue Diamond polish on the buffing wheel and the grain just popped and came alive. I gave the bowl and the stem multiple coats of carnauba wax. I buffed the pipe with a clean buffing pad to raise the shine. I hand buffed it with a microfiber cloth to deepen the shine. The pipe polished up pretty nicely. The grain took on life with the buffing. The rich oil cured colour works well with the polished vulcanite stem. The finished pipe has a rich look that is quite catching. Have a look at it with the photos below. The shape, finish and flow of the pipe and stem are very well done. The dimensions are Length: 6 inches, Height: 2 inches, Outside diameter of the bowl: 1 ¼ inches, Chamber diameter: ¾ of an inch. I will be adding the pipe to the finished Malaga pipes that I have set aside for Alex. I am glad that he is carrying on the trust for George Koch. Thanks for walking through the restoration with me as I worked over another one of Kathy’s Dad’s Pipes.

Restoring a Stunning Malaga Bent Billiard from Kathy’s Dad’s Pipes


Blog by Steve Laug

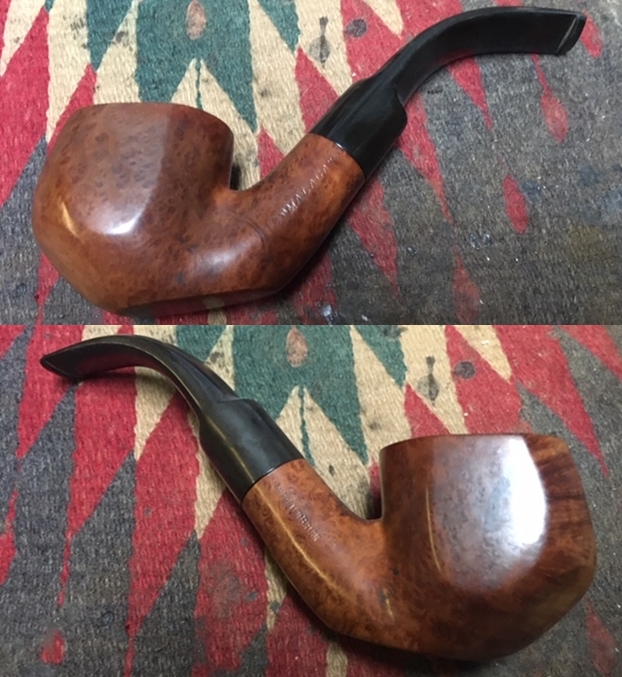
Not long ago Alex came by and went through the Malaga pipes from George Koch’s estate. Alex added the newly chosen pipes to the box of pipes I set aside for him. There are quite a few of them to work on so I decided to go back to work on one of them. The next Malaga is a shape I would define as a bent billiard. It has some great cross and birdseye grain and a saddle vulcanite stem. The grain around the bowl and shank combined with the stem make it a stunning pipe. It is one of the many Malaga pipes that came to my brother and me in several shipments of pipes from George’s daughter Kathy. When Jeff got each box the pipes were well wrapped and packed. Jeff unwrapped them and took the following photo to give an idea of the volume of the pipes that we purchased. This Malaga came in mixed in a box of pipes much like the one below.In each of the previous blogs that I have written on the restoration of George’s pipes I have told his story. If you have followed the restorations you will have read the information and the background piece that Kathy did on her father. Here is a link to one of the previous blogs on his Malaga pipes where I included her tribute in full (https://rebornpipes.com/2019/01/26/back-to-kathys-dads-pipes-restoring-a-%c2%bc-bent-malaga-author/). You can also read the bio on her Dad, George Koch. It is an interesting read and one that shows just how far our pipe collecting passion can go when we find a brand of pipes that we enjoy. I am going to only include the portion on the Malagas at this point. If you wish to read the rest follow the link above.

Kathy writes…We lived in Livonia, and that’s where his love for Malaga pipes began. After a few years he returned to Allis Chalmers and we moved back to Springfield. I remember that when we went back to Michigan to visit friends, Dad had to go to the Malaga store and acquire a few new pipes. Many a year I wrote to Malaga and they picked out a pipe for me to purchase that I could give Dad for a Christmas or birthday present. He was always pleased. His favorites were the straight stemmed medium sized bowl pipes, but he liked them all. 

He had some other pipes, but the Malagas were his favorites. I remember him smoking them sitting in his easy chair after work, with feet up on the ledge by the fire burning in the fireplace.  Growing up it was my job to clean them and he liked the inner bowl and stem coated with Watkins vanilla, leaving a little of that liquid in the bowl to soak in when I put them back on the rack…I’m very happy they are being restored by you and your brother and hope they find homes who enjoy them as much as Dad did. Thank-you for your care and interest. — Kathy, the oldest daughter

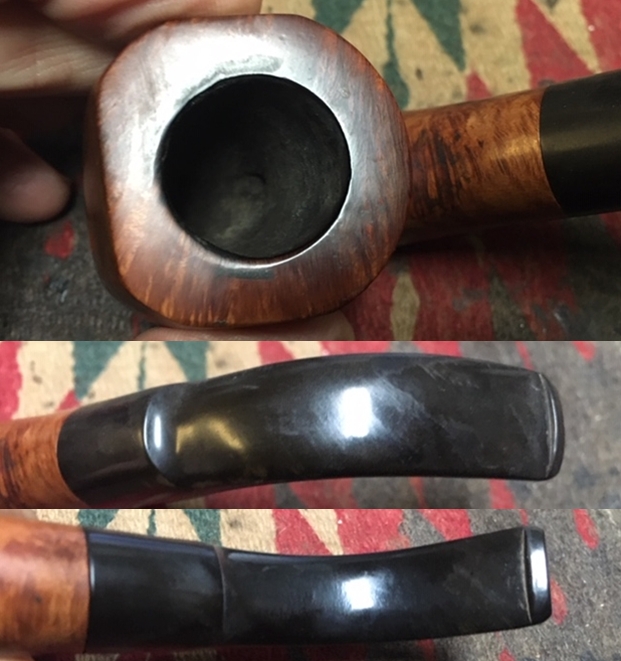
The “Malaga” Bent Billiard with the classic bent shape is the next on the table. The carver did a great job of shaping the pipe to follow the grain on the briar. The bowl, round shank and bent tapered vulcanite stem look very good. The bowl had a thick cake that overflowed with lava onto the rim so that it was impossible to see if there was damage on the inner edges. The sides of the bowl and shank are very dirty with grime and oils from prolonged use. The stamping on the left side of the shank read “MALAGA” and on the right side it read Imported Briar. The vulcanite stem had tooth dents and chatter on the top and the underside of the stem. Jeff took these photos before he started the cleanup work on the pipe.Jeff took a close up photo of the bowl and rim to capture the condition of the pipe before he started his cleanup work. The rim top had some lava overflow and darkening on the back of the bowl and some damage to the inner edge of the bowl front. There appeared to be deep burn marks on the inner edge on the right front side of the grimy pipe.He also took photos of the sides and bottom of the bowl and shank to show the beautiful grain around the bowl. The photos show the general condition of the bowl and wear on the finish. It is very dirty but this is another beautiful pipe.Jeff took a photo to capture the stamping on the shank. The photos show the stamping “MALAGA” on the left side of the shank and Imported Briar on the right side. The stamping is very readable.The next photos show the stem surface. There are tooth marks and chatter on both sides near the button and wear on the button surface and edges.I am also including the link to a blog that I wrote that gives some of the history of the Malaga brand and the Malaga Pipe Shop in Royal Oak, Michigan in the USA. I have written an earlier blog to give a little history of the Malaga Brand and the pipemaker, George Khoubesser. Here is the link – https://rebornpipes.com/tag/malaga-pipes/.That blog also includes links to a catalogue and the history of the pipemaker George Khoubesser. Follow the link to get a feel for the brand and the pipemaker.

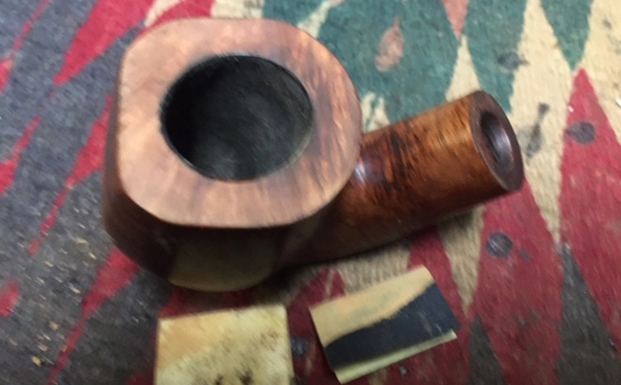
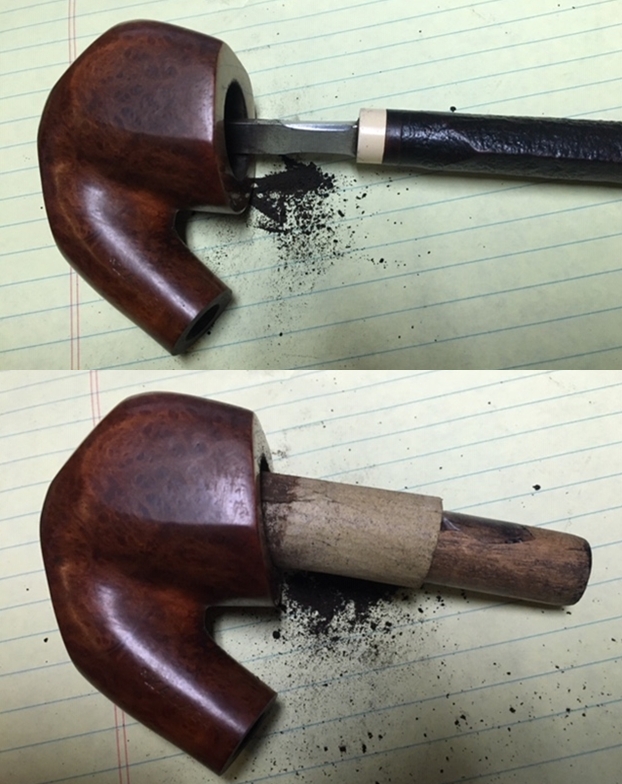
Jeff reamed the bowl with a PipNet pipe reamer and followed up with a Savinelli Fitsall pipe knife to remove the cake. He scrubbed out the mortise and the airway in the shank and the stem with alcohol, cotton swabs and pipe cleaners. He scrubbed the exterior of the bowl, rim, shank and stem with a tooth brush and Murphy’s Oil Soap to remove the oils and tars on the rim and the grime on the finish of the bowl. He rinsed it under running water. He dried it off with a soft cloth. He was able to remove the lava build up on the rim top and the flat surface of the rim looked very good. The inner edge of the rim has some serious burn damage on the front right side. The outer edge looked very good. I took photos of the pipe to show its condition before I started my work on it. I took close up photos of the bowl and rim top as well as the stem. You can see the condition of the rim top and bowl in the first photo. Jeff was able to remove all of the tar and oils but you can now see the damage on the inside rim edge. The edge is out of round. There is a burn mark that extends across the front and the back edge of the rim top at that point. The vulcanite stem had tooth chatter on both sides near and on the button surface there was also a large deep bite mark on the underside of the stem.I took a photo of the stamping on the shank to show how good the condition is. It shows the “MALAGA” stamp on the left side and Imported Briar on the right side. The stamping is very legible.I decided to address the rim top first. I lightly topped the bowl on a topping board with 220 grit sandpaper. I wanted to minimize the damage on the top, remove the darkening and clean up the damage on the front and rear inner edge of the bowl.I used a folded piece of 220 grit sandpaper to clean up the damage on the right rear inner edge of the bowl. I gave the inner edge a slight bevel to repair the damage. I polished the edge with 400 grit wet dry sandpaper. The rim top and edges really looked better.I polished the rim top and the briar with micromesh sanding pads. I wet sanded the bowl with 1500-12000 grit sanding pads. I wiped the bowl down after each pad with a damp cloth to remove the sanding dust. I scrubbed the briar with Murphy’s Oil Soap and a tooth brush. I rubbed it into the surface of the briar with my finger tips and let it sit for about 10 minutes then rinsed it off with running water. I dried it off with a soft cloth. I restained the rim top and edges with an Oak Stain Pen. I was able to blend it into the rest of the bowl.I worked some Before & After Restoration Balm into the surface of the briar with my fingertips to clean, enliven and protect it. I let the balm sit for a little while and then buffed with a cotton cloth to raise the shine. The following photos show the bowl at this point in the restoration process. I am very happy with the results. I turned to the stem to address the issues on the surface of both sides at the button. I started by “painting” the surface of the stem with the flame of a lighter to lift the tooth chatter and marks. The light marks on the top side disappeared quickly and the larger indentation on the underside lifted until the remaining small marks could be dealt with by sanding the stem.I sanded both sides smooth with 220 grit sandpaper to remove the deep oxidation on the surfaces. I finished this initial polishing with 400 grit sandpaper to smooth out the scratches in the stem surface. As I sanded and reshaped the button and stem surface the stem began to look very good.I polished the stem with Denicare Mouthpiece Polish from a tin of it I have in the drawer here. It is a gritty red paste that I rub on with my finger tips and work into the surface of the stem and button and buff off with a cotton pad. It gives me a bit of a head start on the polishing work plus I have a tin to use up!I polished the stem with micromesh sanding pads – wet sanding with 1500-12000 grit sanding pads. I wiped it down after each sanding pad Obsidian Oil. I finished by polishing it with Before & After Pipe Stem Polish both fine and extra Fine and then wiped it down with a final coat of Obsidian Oil. This is a Malaga Bent Billiard with a vulcanite saddle stem. It has a great grain around the bowl and the carver really maximized that with the shape of the pipe. Everything about the pipe – the shape of the bowl, the beveled rim top and the cut of the briar work well to highlight the grain around the bowl sides. I polished stem and the bowl with Blue Diamond polish on the buffing wheel and the grain just popped and came alive. I gave the bowl and the stem multiple coats of carnauba wax. I buffed the pipe with a clean buffing pad to raise the shine. I hand buffed it with a microfiber cloth to deepen the shine. The pipe polished up pretty nicely. The grain took on life with the buffing. The rich oil cured colour works well with the polished vulcanite stem. The finished pipe has a rich look that is quite catching. Have a look at it with the photos below. The shape, finish and flow of the pipe and stem are very well done. The dimensions are Length: 5 ¾ inches, Height: 1 7/8 inches, Outside diameter of the bowl: 1 ¼ inches, Chamber diameter: ¾ of an inch. I will be adding the pipe to the finished Malaga pipes that I have set aside for Alex. I am glad that he is carrying on the trust for George Koch. Thanks for walking through the restoration with me as I worked over another one of Kathy’s Dad’s Pipes.


Restoring a 2 Star BBB “Special” # 395


Blog by Paresh Deshpande

A few weeks ago, Steve had worked on a BBB Own Make 693 Canadian with some really gorgeous grains to boast about. As I was reading the blog, I remembered the BBBs that Abha had cleaned and sent across for further restoration along with 40 other pipes. However, since I was working on a Thorburn Clark pipe from my inheritance, I had postponed work on this BBB. With the Thorburn Clark completed, I rummaged through the pile and separated all the BBBs that she had sent. This is the one that caught my attention. The note in the package, along with the issues observed by Abha while cleaning the pipe, said that it was from my grandfather’s collection!! I had to work on this BBB.

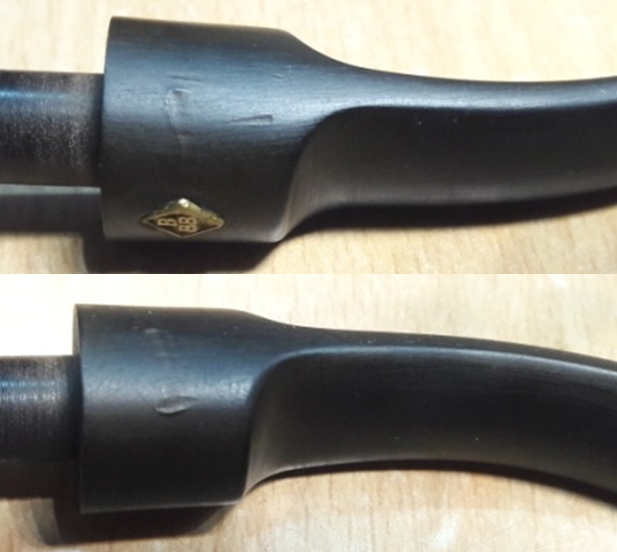
This BBB in bent Apple shape with a saddle stem has stunning grains and it appears that the grain on the block of briar dictated the shape to the carver. The stummel boasts of beautiful tightly packed straight grains to the front, sides, back and along the sides of the shank. The foot of the stummel, bottom and top of the shank has the most beautiful and distinct bird’s eye that you would ever see. The transition from bird’s eye at the foot of the stummel to the straight grain all around is very well defined and seamless. The stummel is stamped on the left shank surface, close to the shank end, in trademark rhombus as “BBB” over two Stars (**) on either side of the lower part of the rhombus over “SPECIAL”. On the left shank surface, it is stamped as “LONDON ENGLAND” over the shape code “395”. The bottom of the shank bears the numeral “0” very close to the shank end. Inlaid BBB brass diamond logo on the saddle adorns the vulcanite stem. If you are interested to know anything about BBB pipes, look no further than rebornpipes.com!! This is Steve’s favorite brand and he has been researching and collecting BBB pipes for decades. I visited rebornpipes and sure enough there was a write up on “History of BBB Pipes”! Here is the link to the blog: https://rebornpipes.com/2012/08/05/history-of-bbb-pipes/
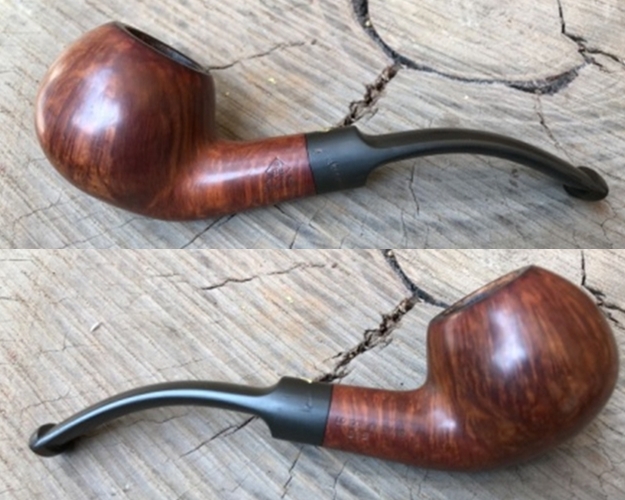
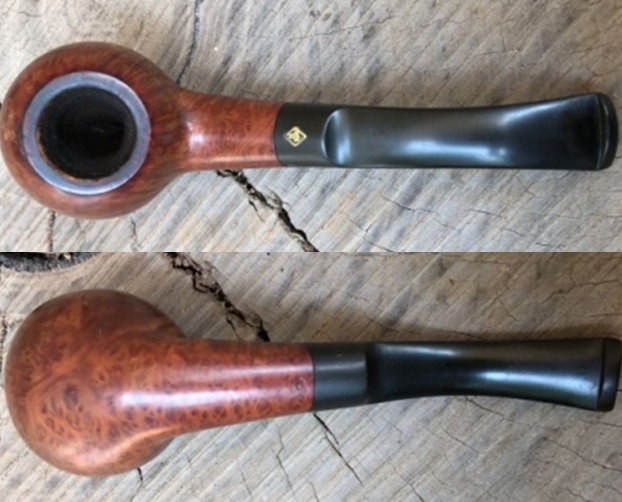
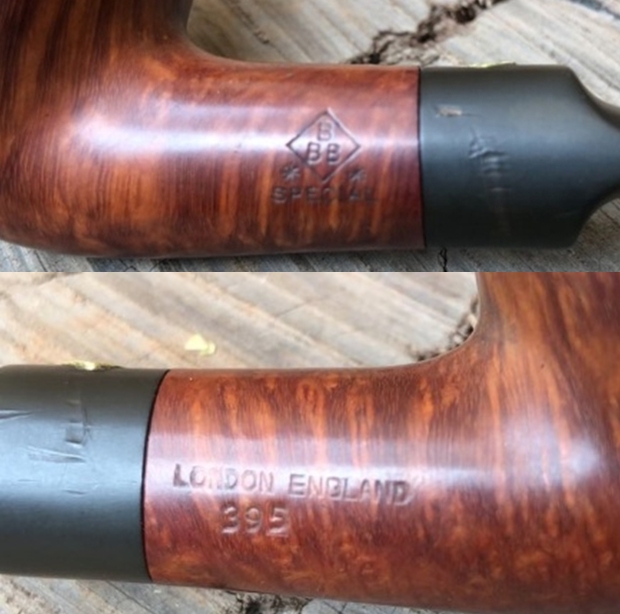
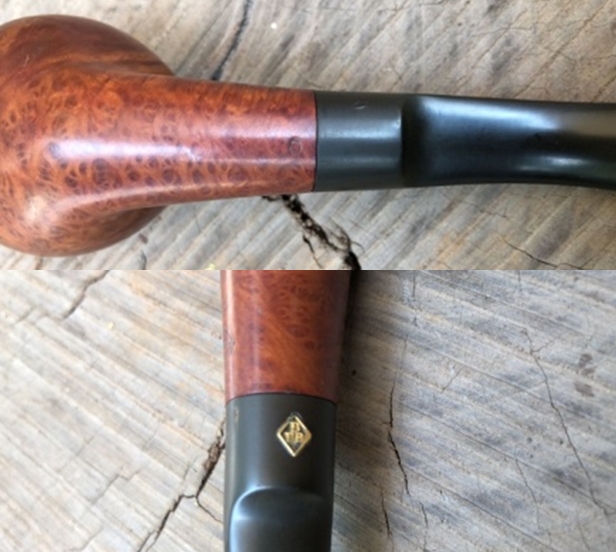
I was more interested in background information of the brand and later in the dating of this pipe. Here is what I found interesting;

Adolph Frankau arrived in London in 1847 and quickly grasped the opportunities which the enlarging tobacco market introduced. He started “Adolph Frankau and Co.” and began importing meerschaum pipes and tobacco supplies. The Company took a young 14 year-old boy, Louis Blumfeld under its wing. The Company quickly thrived and did so until the untimely death of Adolph Frankau in 1856. His widow decided to sell the company.

Thomas Carlyle (1795-1881), author of “Hero and worship of the heroes” came on the scene at this point. He recommended that the widow Frankau not sell, but rather that she should entrust the future of the company into the hands of young Louis Blumfeld, then 18 years old. Carlyle had to have had a very high opinion of the young Louis to make this recommendation, and his trust proved to be justified as Blumfield took care of the company with enthusiasm and bottomless energy. Louis quickly realized, as others had before him, the potential of the newly acknowledged pipes made of briar.

Louis Blumfeld developed important international trade relations from the beginning, and had particular success in Canada, Australia, New Zealand, India, Europe, as well as Switzerland and Denmark. The USA had never been an extraordinary market for the company, but nonetheless a subsidiary was opened in New York. His commercial strategy focused on the countries of British Empire.        

In the 1930s, the top pipe of the line was “BBB Best Make” with variants such as “Great Dam” and “Ultonia Thule”. The BBB Carlton, sold retail in 1938, was endowed with a complicated stinger system; the same system was also used on the BBB London Dry. The Blue Peter was not stamped BBB but BBB Ultonia, and BBB Two Star (**) was the stamping on lesser quality pipes.

Shapes of BBB pipe were typical of other companies pipes made in this era: half were billiards, some princes and bullcaps, bulldogs and some bents. It is also in this period that the inlaid metal BBB was put on more upscale pipes, while series of lesser quality had only the stamped BBB on the stem.

During the middle of 1950s and 1960s, BBB lines were comparatively stable. The top pipes of the line were stamped Own Make “Rare Grain”, followed by Own Make “Virgin”, Own Make “Walnut” and finally Own Make “Thorneycroft”.

From the above, it is evident that the BBB on my work table is from the period 1930 to 1950.

INITIAL VISUAL INSPECTION
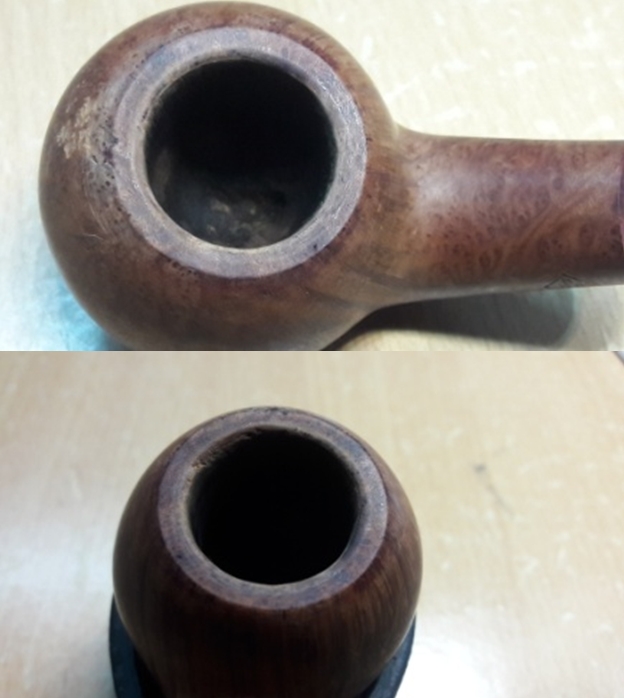
The chamber had a thick layer of cake, but not as thick as seen in some of his pipes. As expected, the rim top surface is covered with overflow of lava. The beveled inner edge of the rim in 11 ‘O’ clock direction is badly damaged which could probably be caused as a result of hitting against a hard surface to remove the dottle. The outer rim edge too has dents and dings around. The condition of the walls can be commented upon only once the cake has been taken down to the bare briar. This chamber has some pretty strong ghost smells.   The stummel surface is pebbled with numerous dents, dings and scratches. However, there is not a single fill in the stummel surface!! Significant damage was seen to the front of the stummel and around the rim. This damage, in all probability, has been caused due to uncared for storage and it having rubbed against some hard object. The briar had taken on a nice aged patina and I shall try to preserve it. However, the kind of damage to the stummel would necessitate a few invasive methods to address these issues which are detrimental to preservation of aged patina. Let’s see how the restoration pans out!! The mortise showed dried accumulated gunk with a blocked draught hole. Air flow was very laborious to say the least.The stem is heavily oxidized with a deep gouge on either side of the saddle of the stem. This and other stummel damage could have been due to uncared for storage for the last 40 odd years. There is no significant damage to the button or in the bite zone, save for a few very minor tooth marks to button edges and tooth chatter in the bite zone. This was surprising as I have observed that the stem was the most damaged part in most of my inherited collection. Maybe my grandfather did not like the smoking character of this pipe or the shape or the hand feel or the clench or could be that he did not like the size of this pipe (most probable cause since he preferred large sized ones!!) The tenon is covered in dried gunk. INITIAL CLEANING BY ABHA…
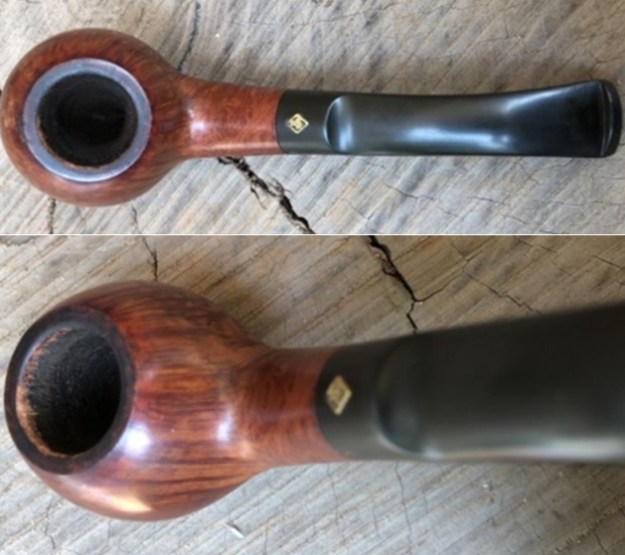
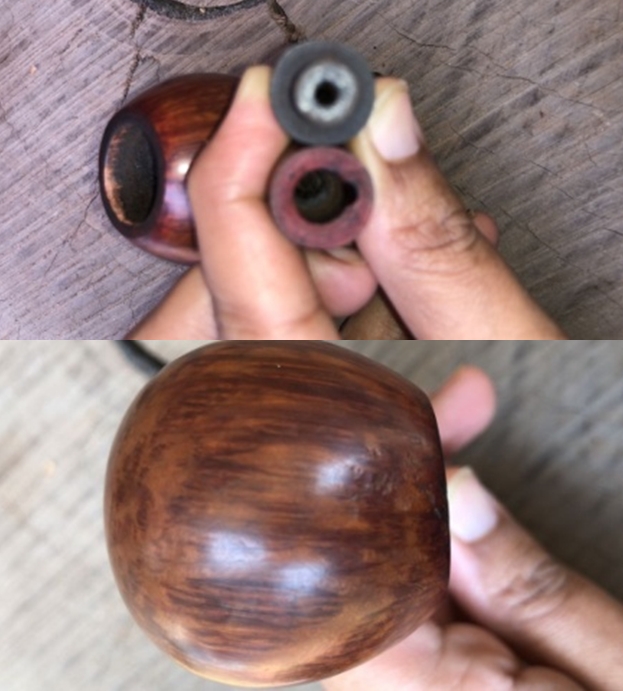
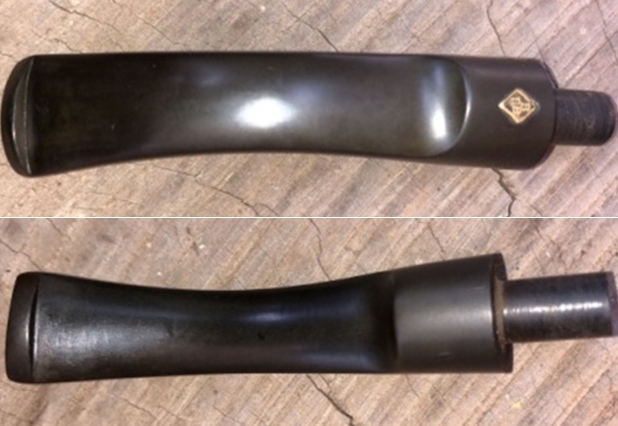
The initial cleaning on this pipe was done by Abha, my wife (she has cleaned up around 40-50 pipes and these have now reached me for further restoration). She reamed out the complete cake and further smoothed out the chamber walls with a folded piece of 220 grit sand paper. She further cleaned out the internals of the shank with pipe cleaners and alcohol and cotton buds. In the note that she had packed with pipe, she mentioned that getting a pipe cleaner out through the draught hole was not easy. She followed the internal cleaning of the shank with external cleaning of the stummel using Murphy’s Oil soap and hard bristled tooth brush and dried it with paper napkins and cotton cloth.

Next she cleaned out the internals of the stem air way. She covered the inlaid brass stem logo with petroleum jelly (helps protect the metal from corrosion due the solution) and immersed it in “Before and After Deoxidizer” solution along with the stem of other pipes in line for restoration. Once the stem had soaked overnight, she cleaned the stem under running warm water and scrubbed the raised oxidation from the stem surface using Scotch Brite pad. She further removed the oxidation by scrubbing the stem with 0000 grade steel wool and applied a little olive oil to rehydrate the stem.

ONCE THE PIPE IS ON MY WORK TABLE…
The initial cleaning by Abha, my wife, is thorough and while saving me time, it also provides a clear picture of all the issues that needs to be addressed during the restoration process. She also makes a note of all the issues that she observed during initial cleaning for me to address and includes this note with each pipe that she packs. It’s a big saving on the time factor and I am really thankful to her for indulging me.

This is how the pipe came to me after Abha had worked her magic. This is definitely a beautiful pipe and would be a challenge for me to do justice and bring the beauty of this pipe to the fore!!
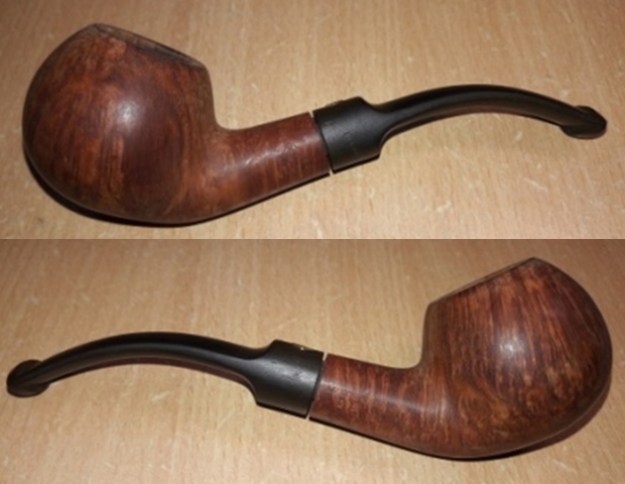
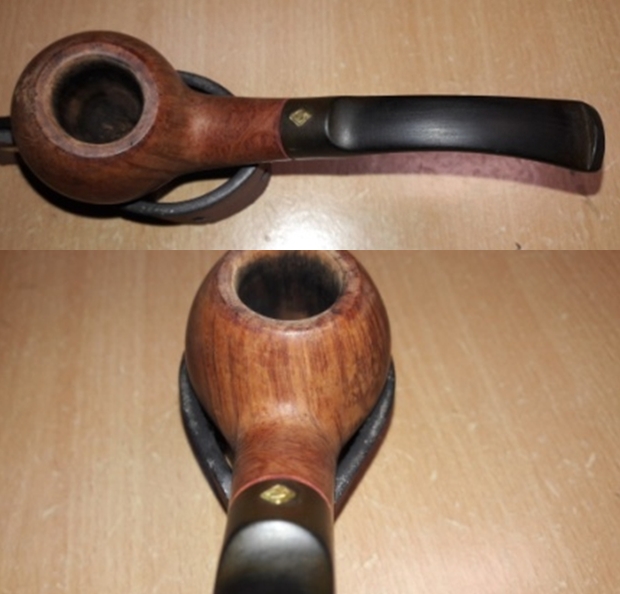
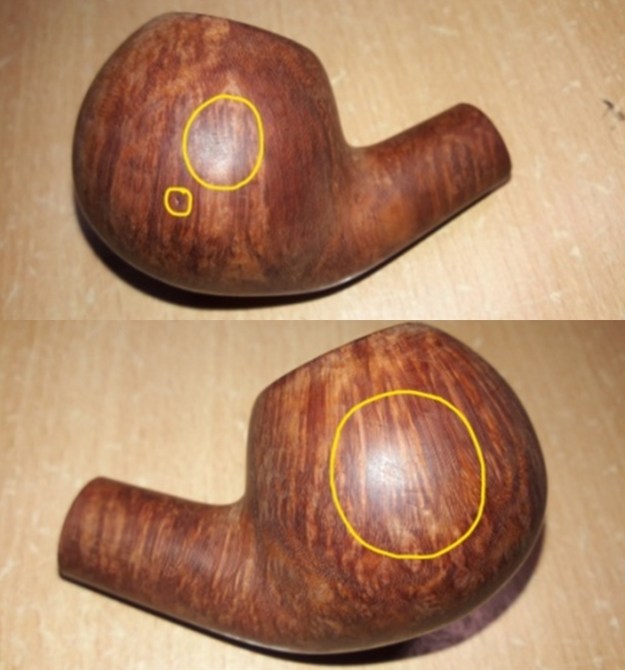
The chamber walls are solid without any signs of damage. The smooth and thin rim top surface is where all the action is on this pipe with an added bonus of an equally damaged beveled inner rim edge. At this point, the damage to the outer rim edge does not appear to be a major issue and should be easy to address. The ghost smells are greatly reduced, but still offending to the olfactory nerves. One major cause of concern is in the heel of the stummel. There is a dip at the bottom that forms a channel from the draught hole to the heel with raised shoulders along the sides (marked in yellow arrows). If this issue is not addressed now, prolonged further use may subsequently lead to a burnout at the foot of the stummel. However, as things stand now, the external surface at the foot appears solid. As observed earlier, there is not a single fill in the entire stummel. The reasoning for giving it a 2 Star, denoting lesser grade, fails me completely!! Abha had nicely cleaned the stummel surface. The surface is solid to the touch but has a number of dents and dings over the stummel, notably to the front, sides and a couple at the foot of the stummel (marked in yellow circles and arrows). Is it a figment of my imagination or a reality, I am not sure, but I think I saw a very slightly darkened spot at the bottom of the foot (circled in green), which was strongly refuted by anyone and everyone I happened to show it to. Just to be sure, I gently tapped it with the back of a screw driver for a shallow sound, but nothing!! I checked the entire stummel for sound and it all sounded the same. The stummel is solid throughout. In the note that Abha had enclosed in the packet containing this pipe, she had mentioned that she could not get a pipe cleaner through the mortise and the draught hole and as such she had left it alone. I would need to check it and further clean the mortise. The stem is free of any major tooth indentations/ bite marks. Minor light tooth chatter, however, is seen on both the stem surfaces in the bite zone. The lip edges needs to be sharpened and evened out. The stem still has signs of deep oxidation. The otherwise good condition of the stem is marred by deep gouges on either sides of the saddle of the stem. THE PROCESS
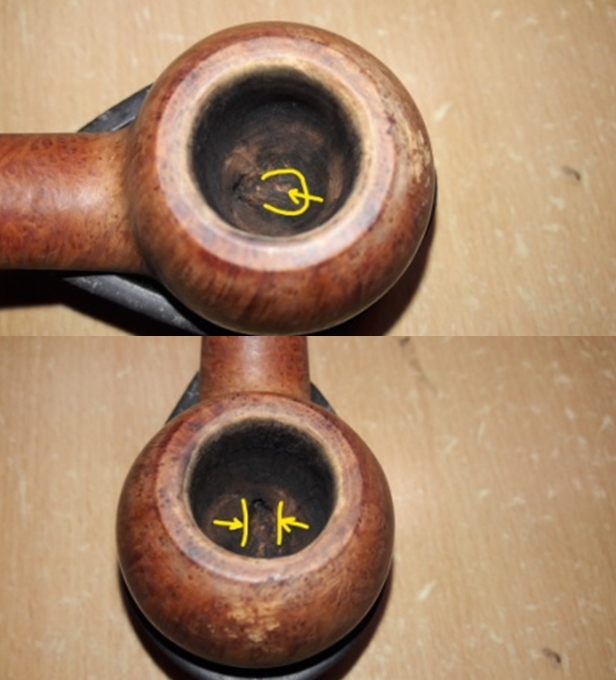
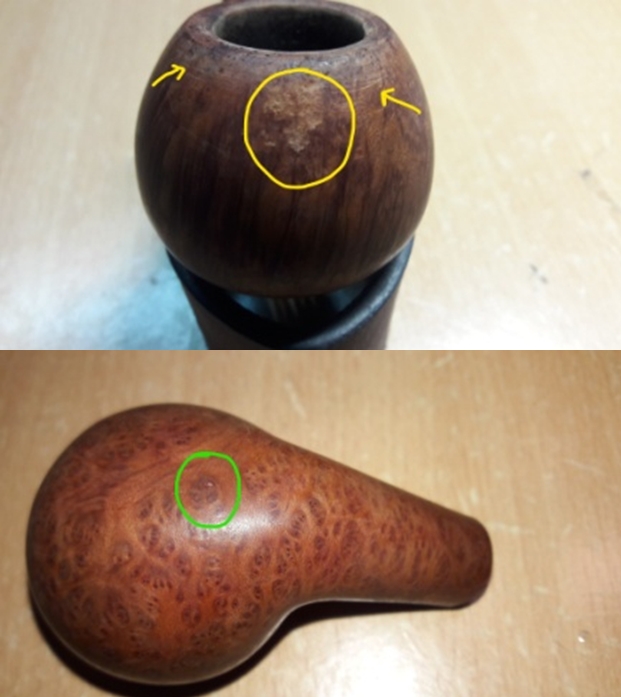
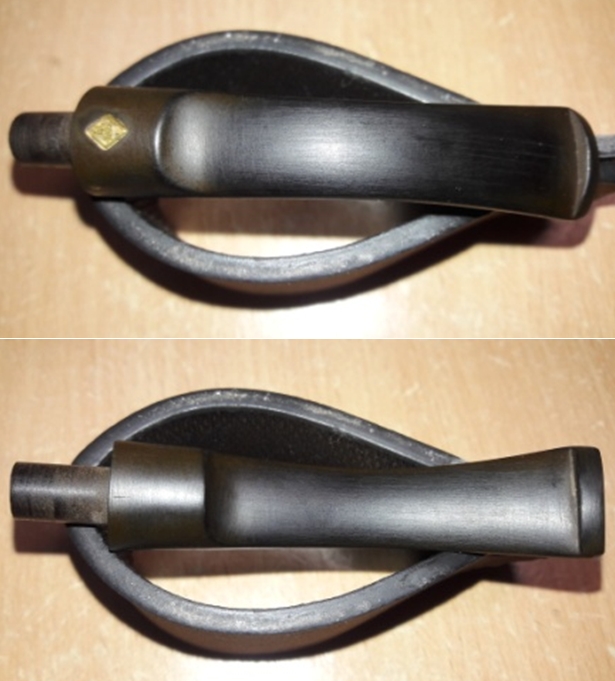
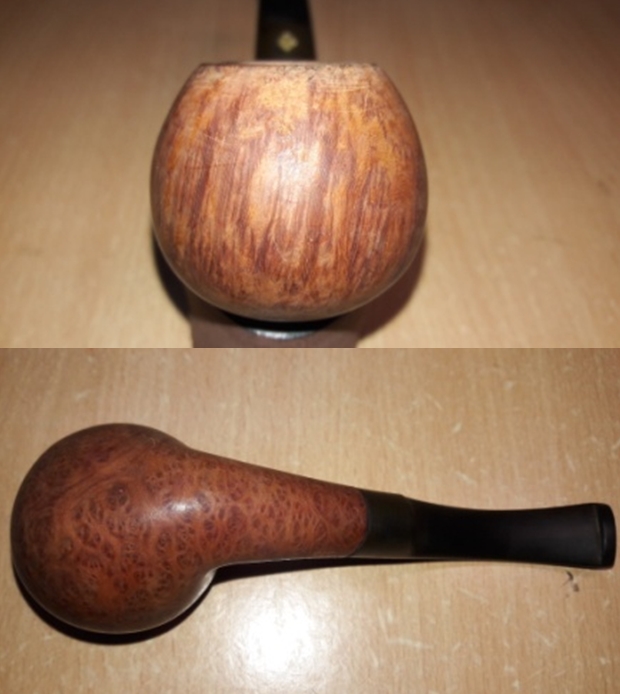
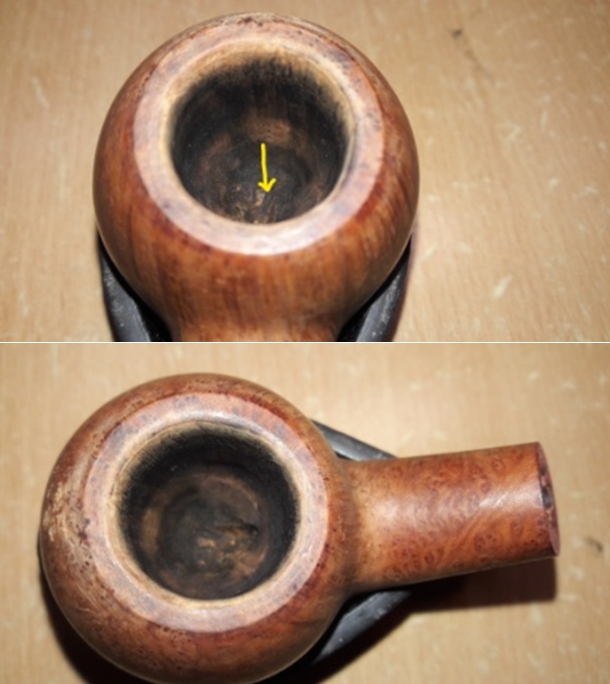
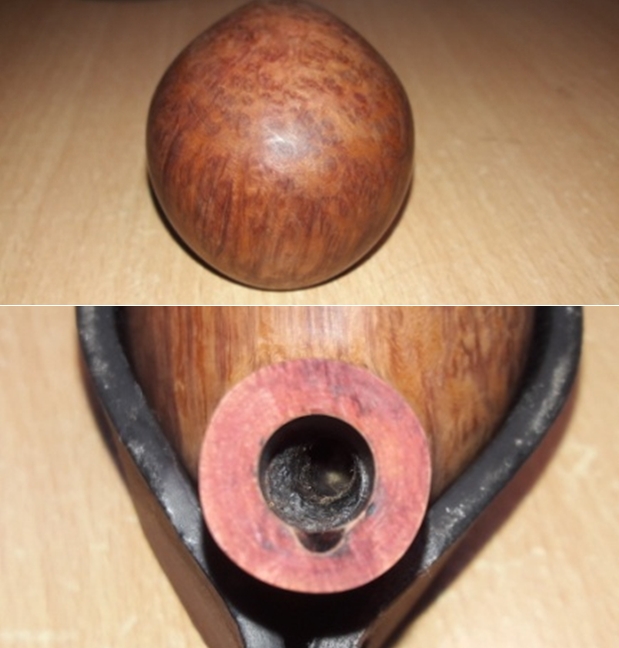
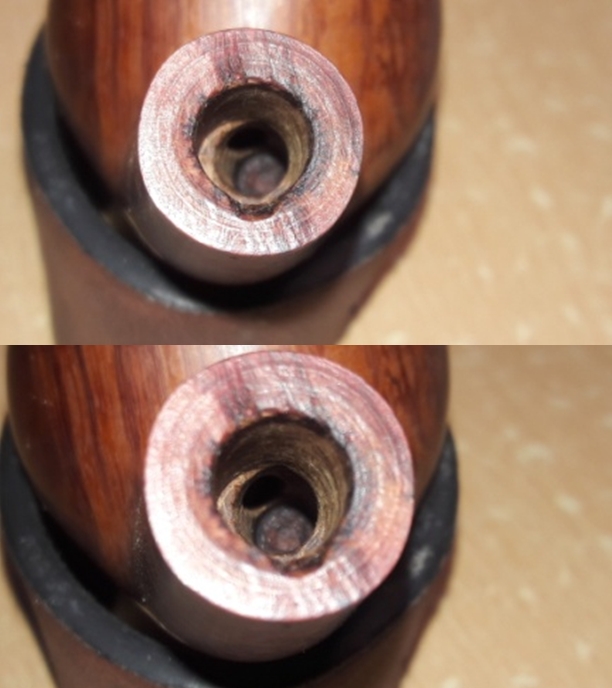
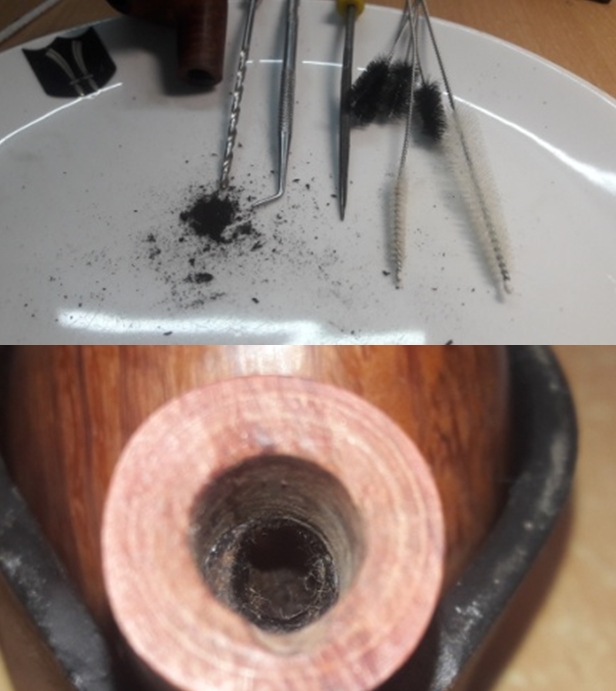
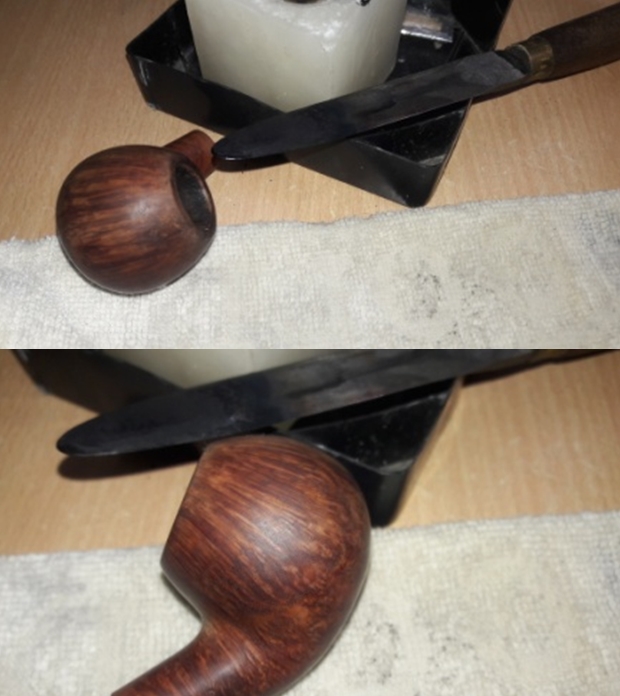
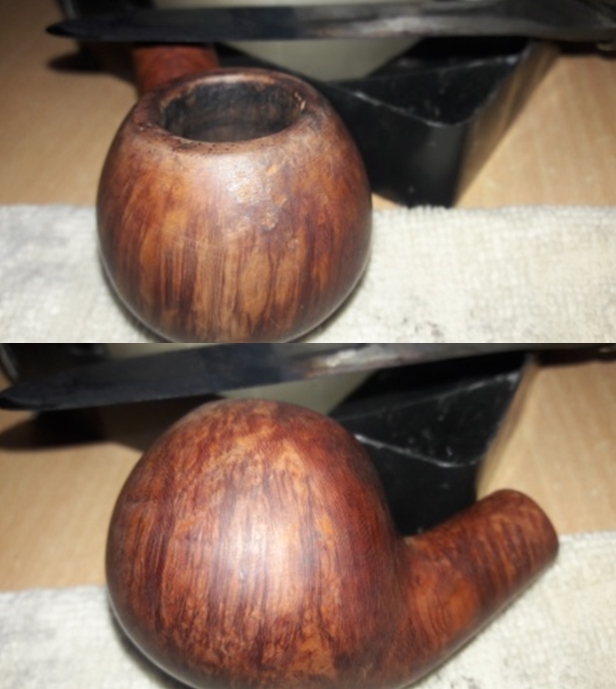
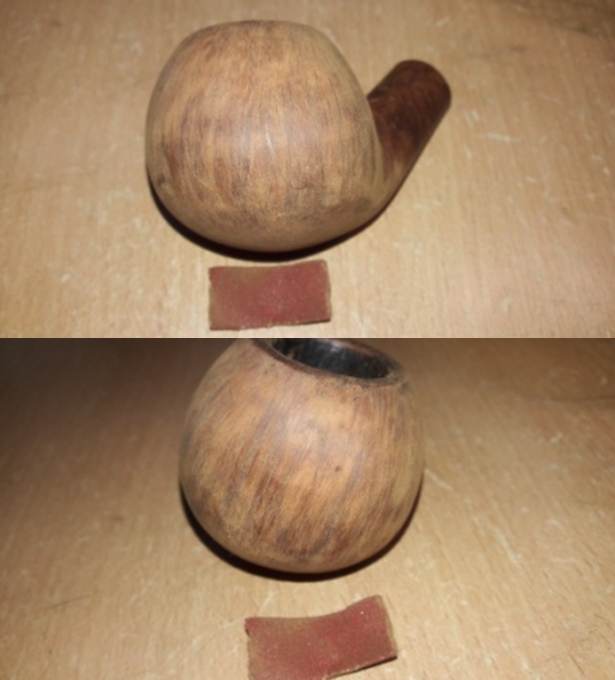
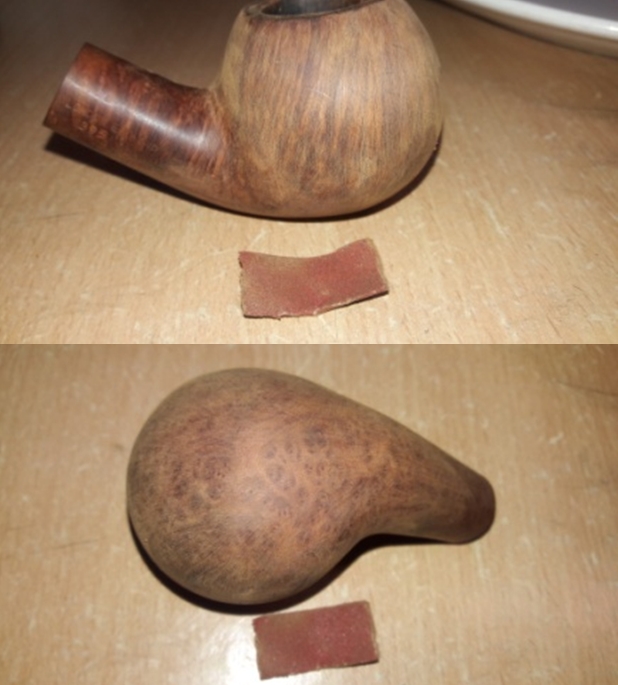
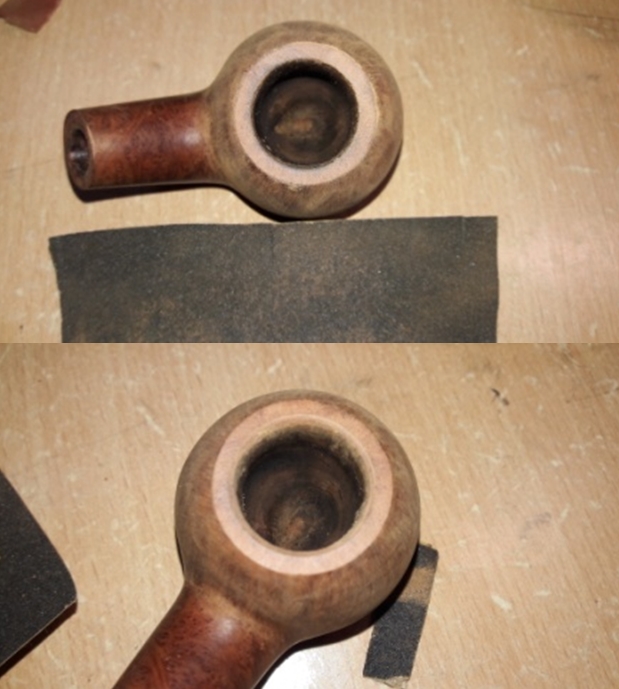
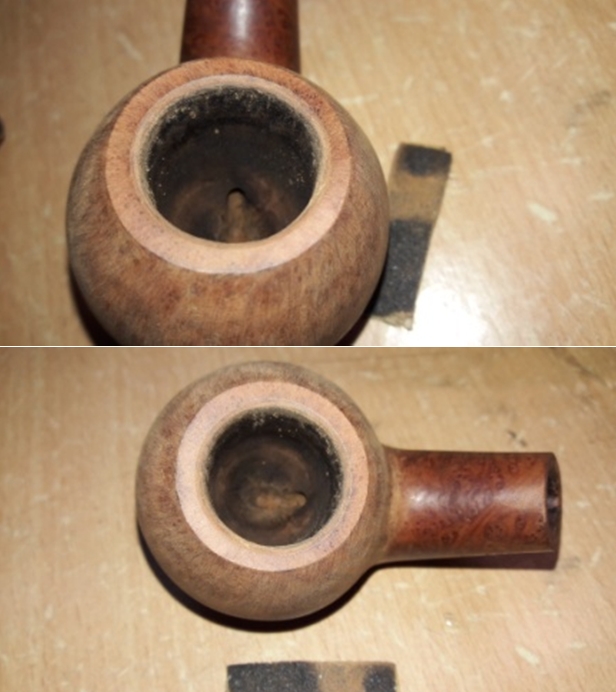
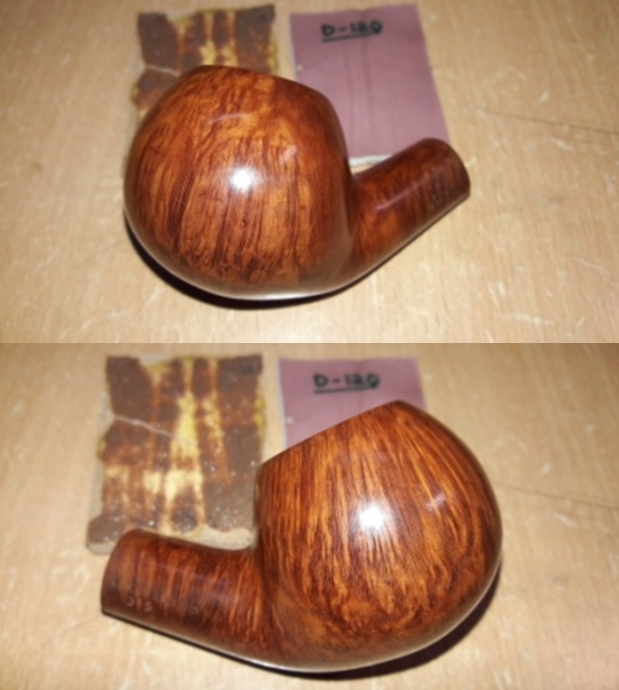
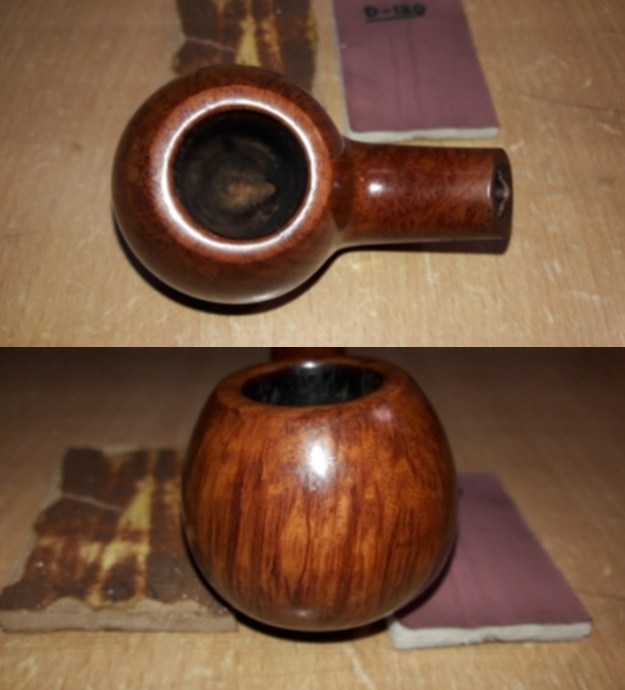
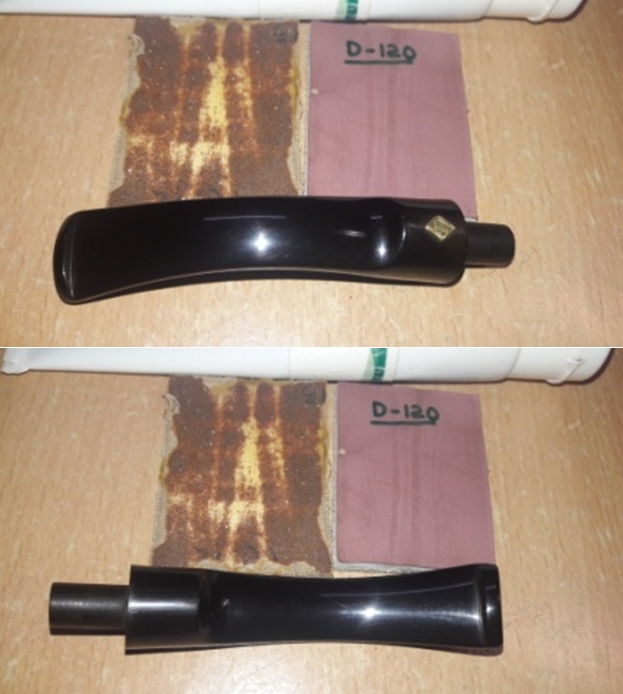
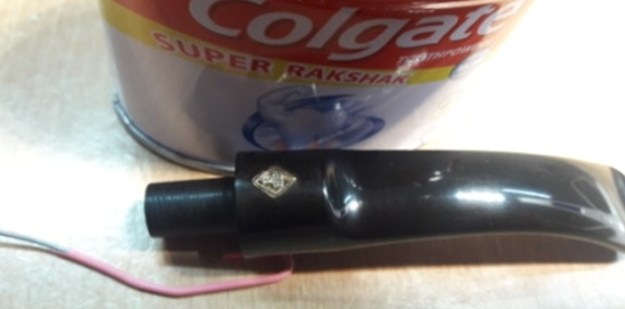
The first issue that I decided to address was that of the blocked air way in the mortise. With the bent flat dental tool, I scraped the walls of the mortise and removed as much of the dried gunk as I could. Using a round needle file, I tried to pry at the blockage, but to no avail. What I found unusual was that an upward movement of the needle file had a little give, however, when I tried to push it in straight, I hit a hard and solid block. Using shank brush and dish washing soap, I scrubbed the shank internals clean. This helped in getting a better idea of what lurked within the mortise that was preventing the pipe cleaner from coming out of the draught hole.I checked the mortise internals under a torch light and what I saw surprised me no end!! Straight away, I could not see the draught hole straight ahead and all that I saw was a reservoir like the one seen on a Pete System pipe. Closer observation around the mortise revealed the opening for the draught hole that was aligned towards the top side and that too was at a weird angle to the rest of the mortise. Here is how the internal of the mortise looked and will present a clearer picture of what I have been trying to explain.Well, this could very well be a flaw in the drilling of the mortise or could be a design element for a better smoke (HIGHLY IMPROBABLE!!), I really cannot tell. Continuing with the internal cleaning of the bowl, I subject the chamber to salt and alcohol treatment to get rid of the strong ghost smells. I insert a folded pipe cleaner through the mortise and out of the draught hole in to the chamber. Thereafter, I tightly pack cotton balls in the mortise, pushing it deep with a dental tool. Next I tightly pack cotton balls in to the chamber, slightly below the rim edge. Once this set up is ready, I pour 99.9% pure isopropyl alcohol in to the chamber and mortise, using a syringe. I let the alcohol settle down and top it again after about an hour. I set the stummel aside for the night to let the alcohol loosen up the grime, draw out all the entrenched oils and be trapped in the cotton. By next afternoon, the cotton and alcohol had drawn out the old oils and tars from the chamber and mortise. I removed the cotton from the chamber and the mortise. I scraped out the loosened crud from the mortise with my dental tools and further cleaned the mortise using hard bristled and regular pipe cleaners. However, on close scrutiny of the mortise under a torch light, I realized that the mortise was still not clean. While removing the loosened cake from the chamber, I gently scraped the shoulders that had formed at the heel near the draught hole. Lucky me, the shoulder that was formed was nothing but hardened cake and was easily removed due to the softening during the salt and alcohol bath. Using my dental tools, I scraped out all the crud that I could and followed it up with a cleaning using q-tips and alcohol. Though the mortise cleaned up pretty nicely, the smells were still strong. I decided to subject the chamber and the mortise to a second salt and alcohol bath. I followed the procedure for the bath explained above and set the stummel aside for the bath to work its magic. The next day, all the remaining oils and tars were drawn out and trapped in the pipe cleaner and cotton. I cleaned the mortise again using pipe cleaners and dental tools. I am happy with the way the mortise cleaned up this time. The pipe smells clean and fresh. Next, I decided to address the dents and dings on the stummel surface and on the rim outer edge. Using a whitener pen, I marked all the major areas with dents and dings and decided to leave the minor ones as they were. I heated my fabricated knife over the flame of a candle, placed a wet Turkish hand towel over the marked areas and steamed out the dents by placing the heated knife over the towel. Though some dents were still observed, these were greatly reduced when compared to before the steaming. Steaming out the dents and dings from the stummel surface had necessitated that the surface of the stummel be evened out by sanding. Using a folded piece of 220 grit sand paper, I sand the entire stummel surface taking care to preserve the stampings on this pipe. To address the damaged inner beveled edge of the rim as well as the dents and dings and darkening of the thin rim top surface, I topped the rim top on 180 grit sand paper. I took a piece of used and worn 180 grit sand paper, folded it and pinching it between my thumb and forefinger, freshened the inner bevel on the inner edge of the rim. Both the rim top and inner edge look much better than before. Staying with the stummel restoration, I polished the stummel with micromesh pads, dry sanding with 1500 to 12000 pads. I polished the freshly topped rim surface and the newly created inner rim bevel. I wiped the surface with a soft cloth at the end of the micromesh cycle. The stummel looks amazing with a deep shine and beautiful grains popping over the stummel surface. I am surprised that the rim top surface has the same deep brown coloration as the rest of the stummel surface and use of stain pen was not required. Also the supposed dark spot at the foot of the stummel was indeed a figment of my imagination and was nothing but the eye in the bird’s eye grain, whew!! The next step is the application of the “Before and After Restoration Balm”, developed by Mark Hoover and a must have for restorations. This product not only protects and enlivens the briar but also highlights the grains on the surface. I rubbed a small quantity of the balm into the briar surface with my fingers and set it aside for about 20 minutes. The transformation is almost immediate and I polished the surface with a microfiber cloth to bring out a deep shine on the stummel. The bird’s eye and straight grains look awesome. The following pictures speak for themselves. Now with the stummel refurbished, I turned my attention to the stem. I start with addressing the issue of deep gouges to the either sides of the saddle by heating the damaged surface with the flame of a lighter. The heat from the flame expands the vulcanite and raises it to the surface. The results are pretty satisfactory.Next I sand the entire stem surface with a folded piece of worn out 180 grit sand paper followed by a 220 grit sand paper. This addresses two issues; firstly the minor tooth chatter in the bite zone and the raised gouges are evened out and secondly, the residual oxidation is sanded out. I follow it up with sharpening of the lip edges with a flat head needle file. To finish the stem repairs, I wiped out the raised oxidation and dust from the surface with Murphy’s Oil soap and cotton swab.To bring a deep shine to the vulcanite stem, I went through the complete set of micromesh pads, wet sanding with 1500 to 12000 grit pads. I wiped the stem with a moist cloth after each pad. Another Mark Hoover product which I had recently ordered is the “Before and After Extra Fine” stem polish. I applied a small quantity of this polish and rubbed it deep in to the vulcanite stem. This polish, purportedly, is supposed to remove the finer sanding marks left behind by the abrasive grit papers. The pictures of the process and final results are shown below.Only the brass BBB stem logo remains to be polished. Abha, my wife, had suggested that I should try using Colgate toothpowder to bring back the shine on the metal logo. She had tried this on her jewelry with amazing results. I rubbed the brass logo with Colgate toothpowder and the results are truly amazing.To apply the finishing touches, I mount a cotton cloth buffing wheel on to my hand held rotary tool and apply a coat of Blue Diamond to the stummel and the stem to polish out the minor scratches. With a cotton buffing wheel that I use for carnauba wax, I apply a coat of carnauba wax and continue to work on it till the complete coat of wax had been polished out. I mount a clean cotton cloth buffing wheel and give the entire pipe a once over buff. I finished the restoration by giving the entire pipe a rigorous hand buffing using a microfiber cloth to raise the shine further. This is a truly beautiful pipe with a classic bent Apple shape boasting of stunning straight grains all round the stummel and shank and bird’s eye grains at the bottom of the entire stummel. Just to be on the safe side, I decided to protect the chamber walls and the heel of the stummel by giving it a bowl coating of activated charcoal and yogurt. This not only protects the walls from direct contact with the burning tobacco but also helps in speeding up the formation of cake. Now the pipe is completed aesthetically as well as functionally.P.S. The only aspect that was bothering me with this pipe is the alignment of the opening of the draught hole in to the mortise. I shared my concerns and pictures of the skewed alignment with my Guru and mentor, Steve. He suggested that this issue, to be addressed, may necessitate funneling the tenon end. He also suggested that I should first smoke this pipe and if the draw is smooth, even and full, funneling the tenon may not be necessary.
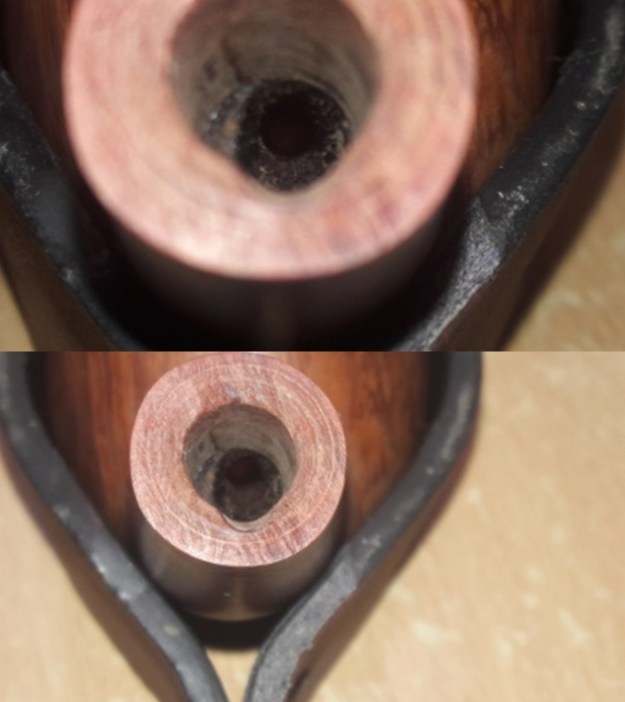
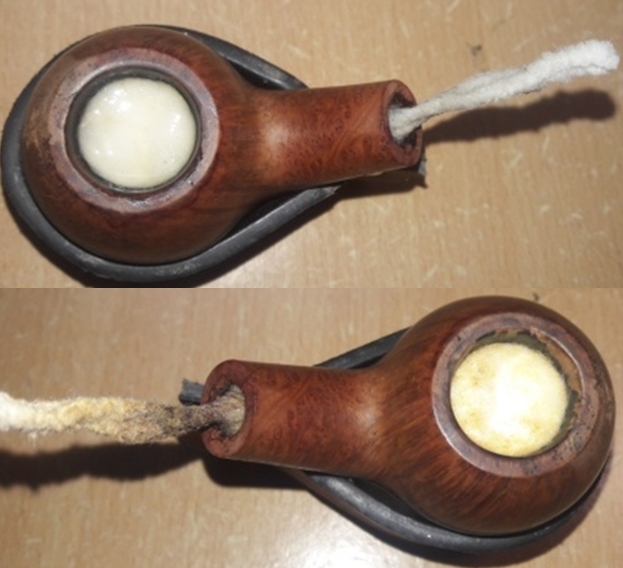
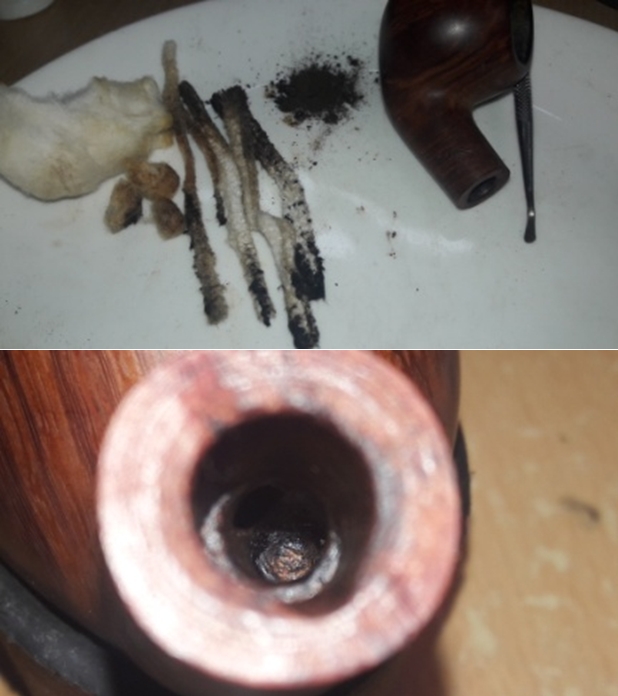
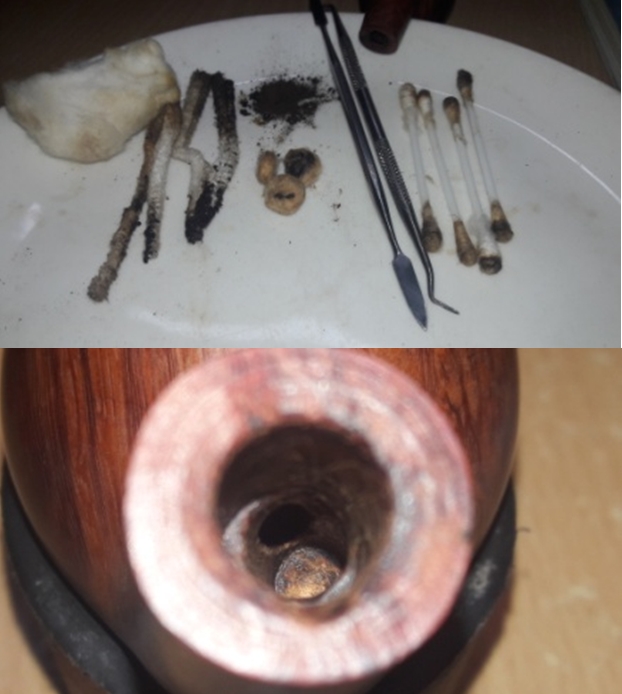
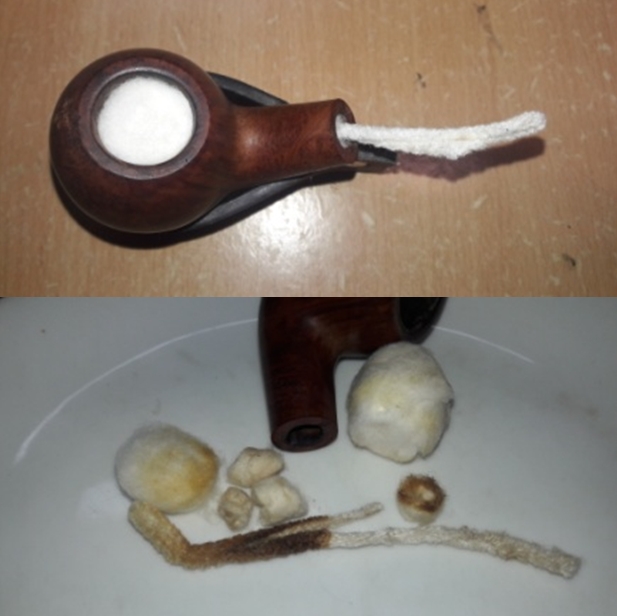
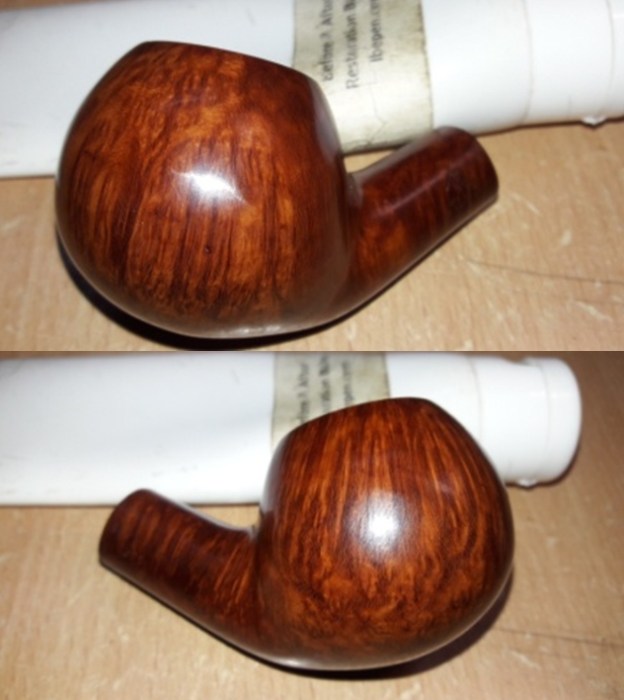
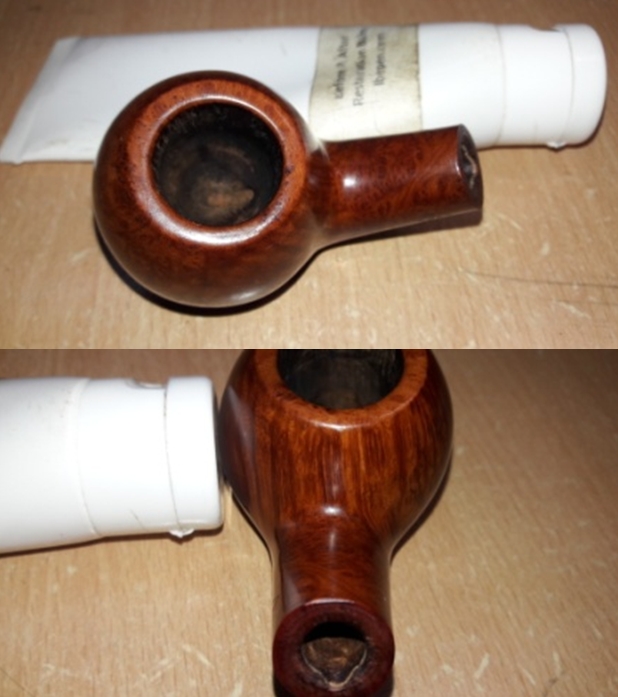
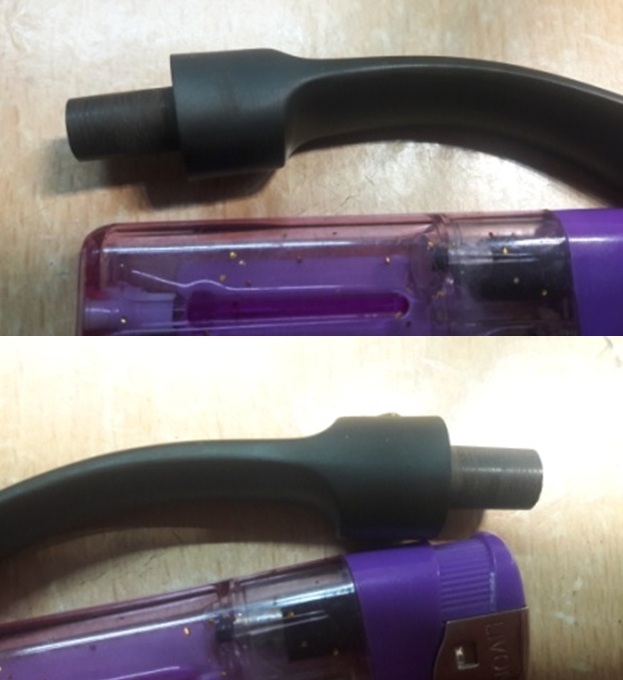
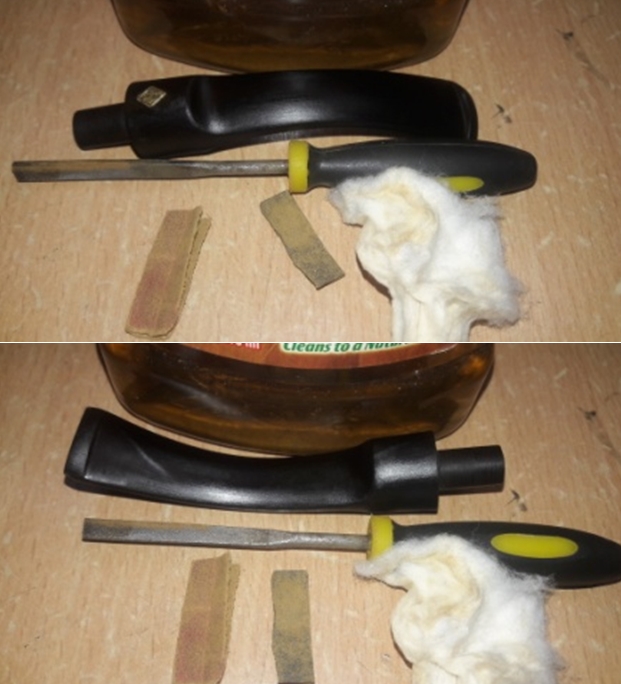
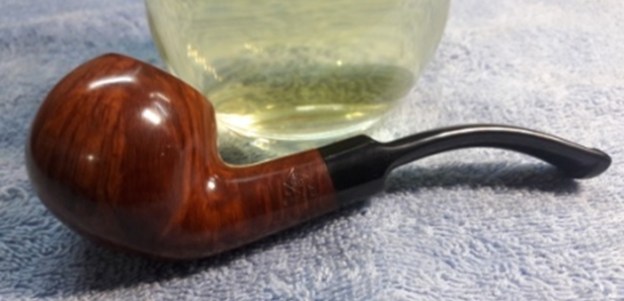
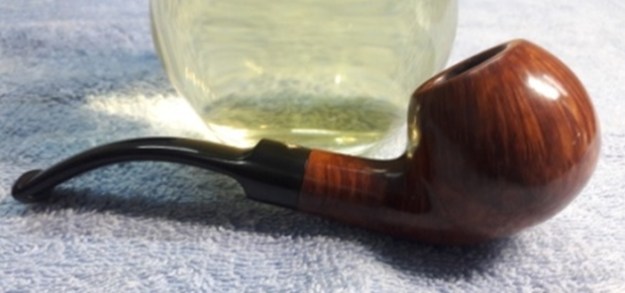
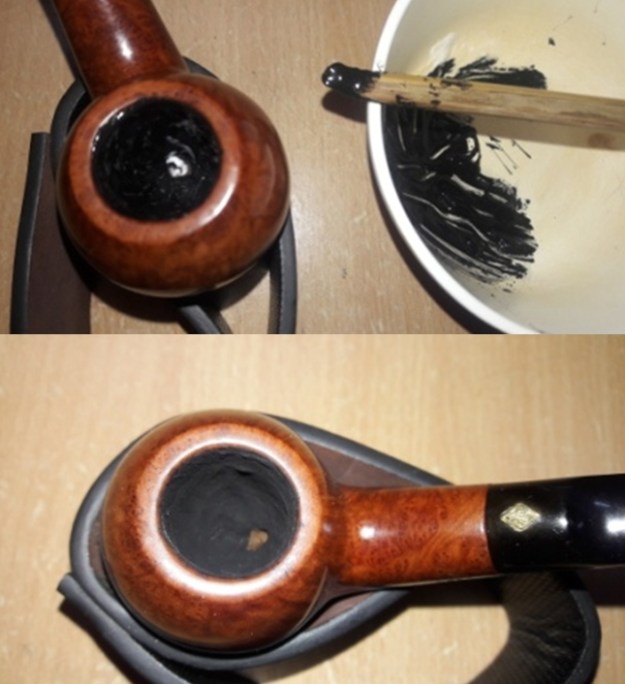
I dry tested the draw and found it to be smooth even and full without any whistling sounds. Thus, I can safely expect that the pipe should be a good smoker. I shall eventually get around to enjoying my first smoke in this beauty, but for now, the confidence that this one will be good smoke has me satisfied.

Truth be told, this project was completed by 16 October 2019, however, thereafter I proceeded on leave for my home and got around to complete the write up only after rejoining from leave.

I earnestly thank all the readers for sparing their valuable time in following this write up and hope to learn from your comments on this post.

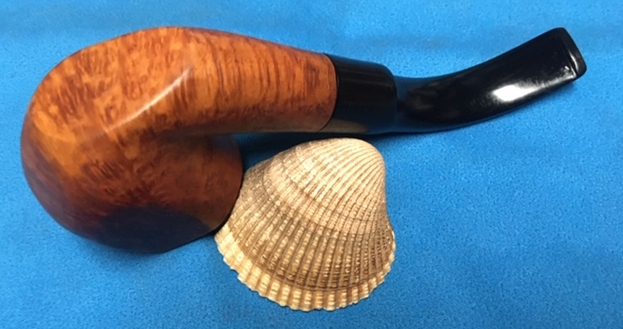
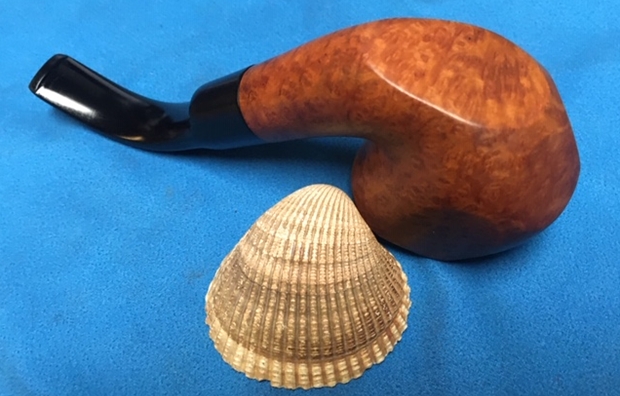
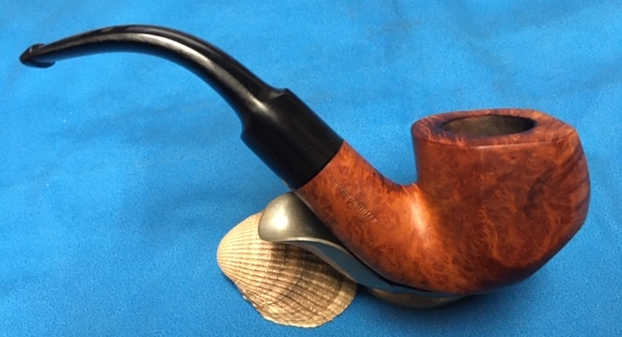
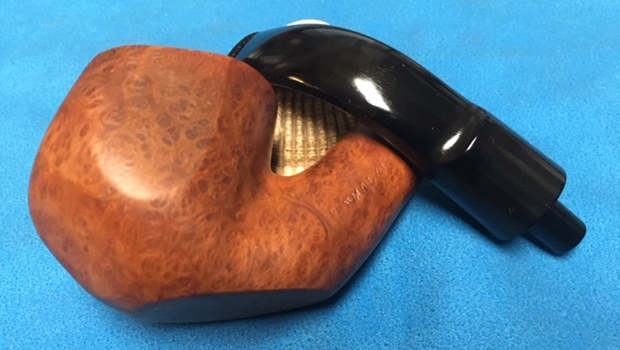
Restoring a Pipe for Alex with a shape I don’t know how to identify


Blog by Steve Laug

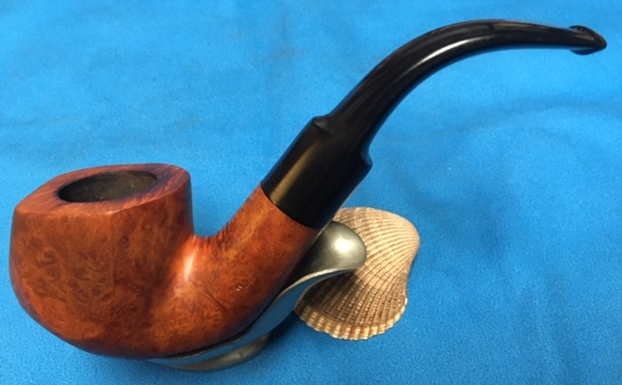
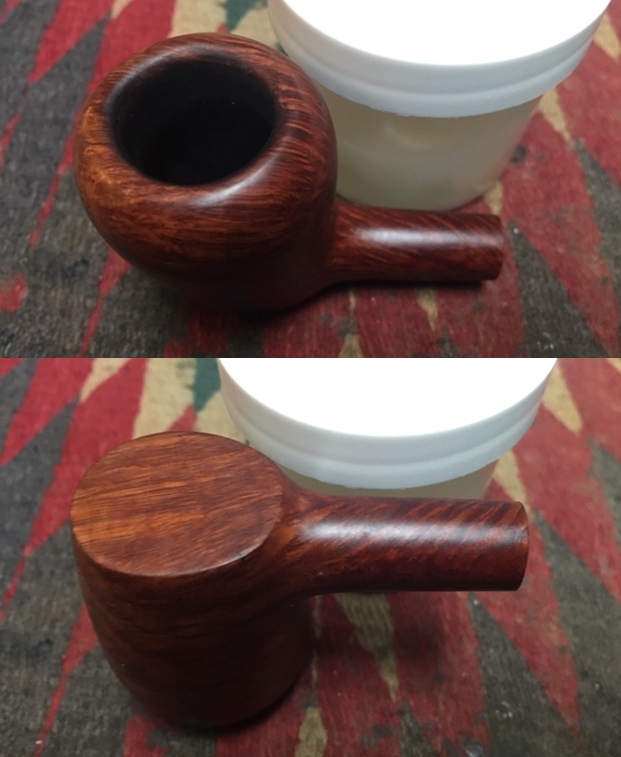
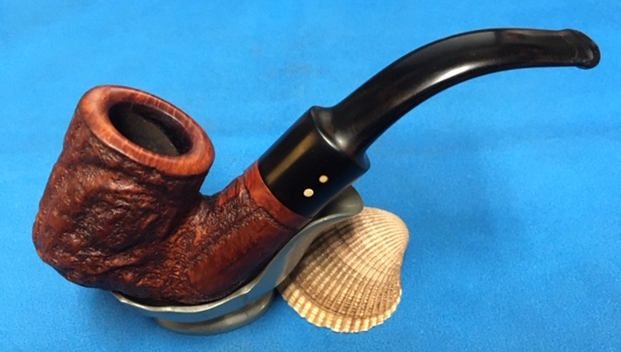
I have another of Alex’s purchases on the table this morning. It is a smooth finished pipe in a shape that really covers a gamut of shapes – a bent pot, paneled pot, sitter, canted pot sitter. It is a very unique Malaga that I am not sure what to call. When it is set as a sitter the rim top is straight with the stem. The pipe was dirty and caked with few spots of lava and some darkening on the inner edge of the bowl. The bowl had a rough surfaced cake. The exterior was dirty with grime and oils. The stamping on the left side of the shank read “MALAGA” and the right side read Imported Briar. The vulcanite saddle stem had tooth marks and chatter on both sides. I took photos of the pipe before I started the cleanup work. I took close up photos of the bowl and rim to capture the condition of the pipe before I started my cleanup work. The rim top had some lava and darkening on the top and the inner edge. There was a thin uneven cake in the bowl. Other than being very dirty the pipe was in great condition. The stem was dirty and covered with a thick scum on the surfaces. There was tooth chatter on the top and underside near the button and some tooth marks on the button surface itself.I took a photo to capture the stamping on both sides of the shank. The first photo shows the stamping “MALAGA” on the left side of the shank. The second photo shows the stamping on the right side of the shank. It reads Imported Briar. The stamping on both sides is clear and readable.If this is the first of the Malaga restorations that you have read about then you should know the backstory of the brand. I am including the link to a blog that I wrote that gives some of the history of the Malaga brand and the Malaga Pipe Shop in Royal Oak, Michigan in the USA. I have written an earlier blog to give a little history of the Malaga Brand and the pipemaker, George Khoubesser. Here is the link – https://rebornpipes.com/tag/malaga-pipes/.That blog also includes links to a catalogue and the history of the pipemaker George Khoubesser. Follow the link to get a feel for the brand and the pipemaker.
I decided to start with the bowl first. I cleaned up the rim top with a folded piece of 220 and 400 grit sandpaper to remove the lava and the damage. I followed Jeff and my regular regimen for cleaning estates. I reamed the light cake in the bowl with a Savinelli Fitsall pipe knife to remove the cake. I sanded the bowl with 220 grit sandpaper wrapped around a piece of dowel to smooth out the inside walls of the bowl. The mortise was surprisingly clean but there were some tars and oils on the walls. I scrubbed the mortise and the airway in the shank and the stem with alcohol, cotton swabs and pipe cleaners.I polished the exterior of the bowl and the rim with micromesh sanding pads – wet sanding with 1500-12000 grit sanding pads. I wiped down the bowl after each sanding pad with a damp cloth. I scrubbed the briar with Murphy’s Oil Soap with a tooth brush. I scrubbed it off with running water to remove the soap and the grime on the bowl. I dried it off with a soft cloth. I worked some Before & After Restoration Balm into the surface of the briar with my fingertips to clean, enliven and protect it. I let the balm sit for a little while and then buffed with a cotton cloth to raise the shine. The photos show the bowl at this point in the restoration process. I set the bowl aside and turned my attention to the stem. I sanded out the tooth chatter with 220 grit sand paper and started to polish it with a folded piece of 400 wet dry sandpaper. Once it was finished it the tooth chatter and oxidation was gone and it began to shine.I polished the stem with Denicare Mouthpiece Polish from a tin of it I have in the drawer here. It is a gritty red paste that I rub on with my finger tips and work into the surface of the stem and button and buff off with a cotton pad. It gives me a bit of a head start on the polishing work plus I have a tin to use up!I polished the stem with micromesh sanding pads – wet sanding with 1500-12000 grit sanding pads. I wiped it down after each sanding pad with Obsidian Oil. I polished it with Before & After Pipe Stem Polish – both Fine and Extra Fine and buffed it off with a final coat of Obsidian Oil. This is interestingly shaped smooth, bent sitter in what I would call a Bent, Paneled Pot Sitter with a black vulcanite saddle stem. It has a great look and feel. The shape is very tactile and fits well in the hand. The shape makes it a unique looking pipe. I polished stem and the bowl with Blue Diamond polish on the buffing wheel. I gave the bowl and the stem multiple coats of carnauba wax. I buffed the pipe with a clean buffing pad to raise the shine. I hand buffed it with a microfiber cloth to deepen the shine. The pipe polished up pretty nicely. The rich oil cured briar took on life with the buffing. The rich brown colour of the briar work well with the polished vulcanite stem. The finished pipe has a rich look that is quite catching. Have a look at it with the photos below. The shape, finish and flow of the pipe and stem are very well done. The dimensions are Length: 6 inches, Height: 1 ¾ inches, Outside diameter of the bowl: 1 ½ inches, Chamber diameter: 7/8 of an inch. I will be adding the pipe to the finished Malaga pipes that I have set aside for Alex. This will be a great addition to his collection of Malaga pipes. Thanks for walking through the restoration with me as I worked over another Malaga.
New Life for a Rusticated Malaga Bullmoose for Alex


Blog by Steve Laug

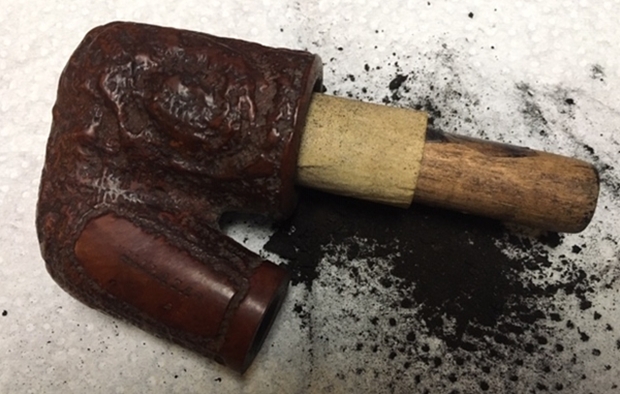
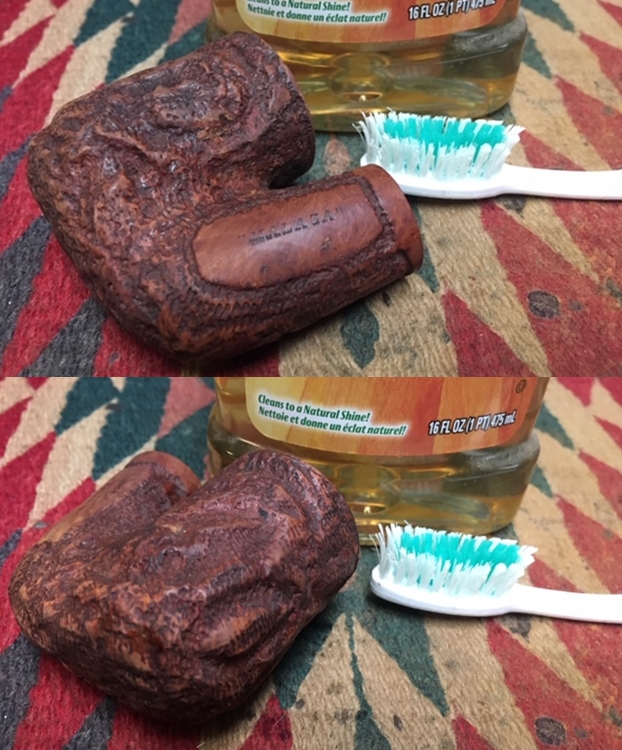
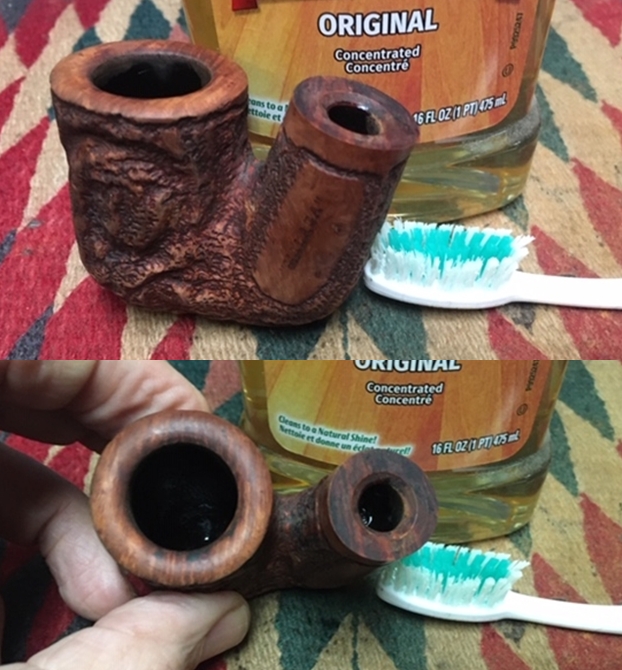
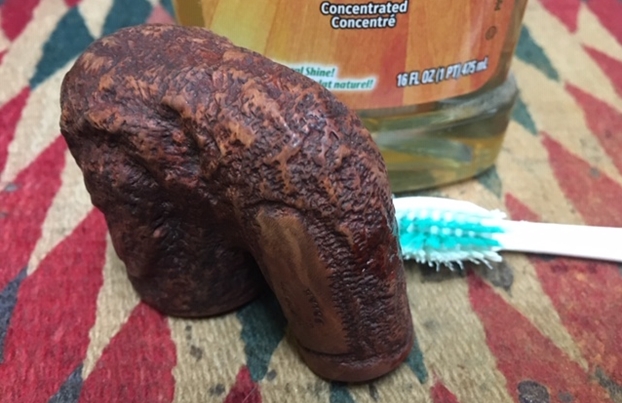
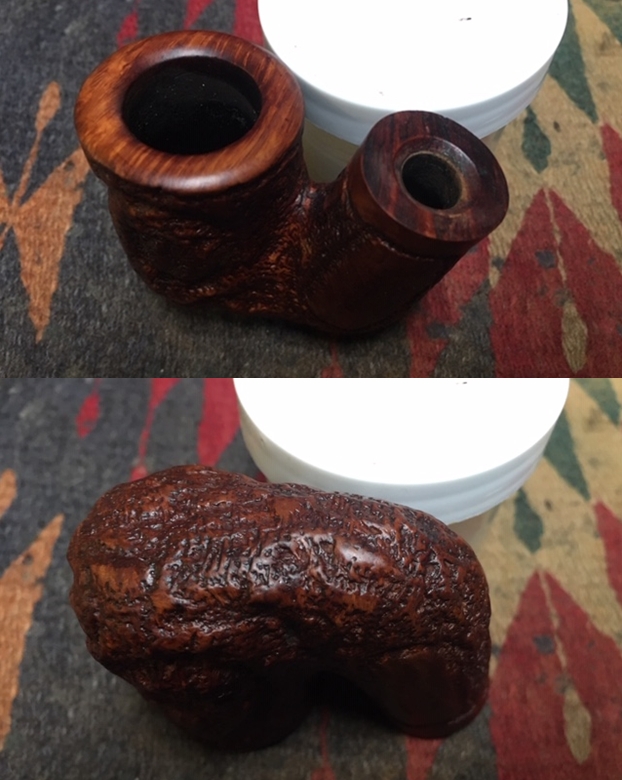
I have been working on a lot of different estate pipes and selling them for different families. I am continuing to work on the Malaga pipes that Alex put aside for restoration. He also brought other pipes to add to his box. I have a box of pipes from Alex that I am always working away at. He periodically drops more Malaga pipes into his box. There are quite a few of them to work on so I decided work on a few of them. The next one of these was another Malaga pipe. It is a rusticated Bullmoose with deeply carved grooves and rustications almost like bark on the bowl and shank of the pipe that really grabbed my attention. It has a vulcanite saddle stem. The pipe was dirty and caked when arrived. The rim top has lava and some darkening on the top edge of the bowl. The bowl had not only a thick cake in the bowl but had the remnants of the previous pipeman’s last smoke inside. The exterior of the bowl and shank are dirty with grime and oils from prolonged use. The stamping on the left side of the shank read “MALAGA” The vulcanite saddle stem was in great condition and had tooth marks and chatter on the top and the underside of the stem. I took photos of the pipe before I started the cleanup work. I took close up photos of the bowl and rim to capture the condition of the pipe before I started my cleanup work. The rim top had some lava and darkening smooth top and a slight nick on the front inner edge. The bowl was half filled with tobacco that had been sitting for a very long time in the bowl. It had hardened. Above the tobacco there was a thick cake in the bowl. Other than being very dirty the pipe was in great condition. The stem was dirty and covered with a thick scum on the surfaces. There was tooth chatter on the top and underside near the button and some tooth marks on the button surface itself.I took a photo to capture the stamping on the shank. The photo shows the stamping “MALAGA” on a smooth panel on the left side of the shank. It is clear and very readable.If this is the first of the Malaga restorations that you have read about then you should know the backstory of the brand. I am including the link to a blog that I wrote that gives some of the history of the Malaga brand and the Malaga Pipe Shop in Royal Oak, Michigan in the USA. I have written an earlier blog to give a little history of the Malaga Brand and the pipemaker, George Khoubesser. Here is the link – https://rebornpipes.com/tag/malaga-pipes/.That blog also includes links to a catalogue and the history of the pipemaker George Khoubesser. Follow the link to get a feel for the brand and the pipemaker.

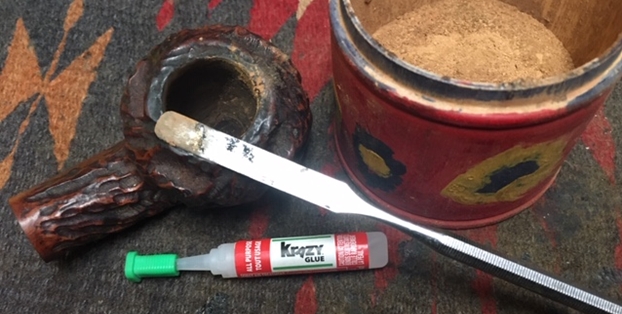
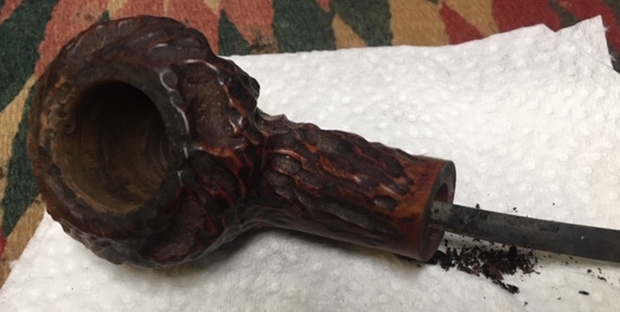
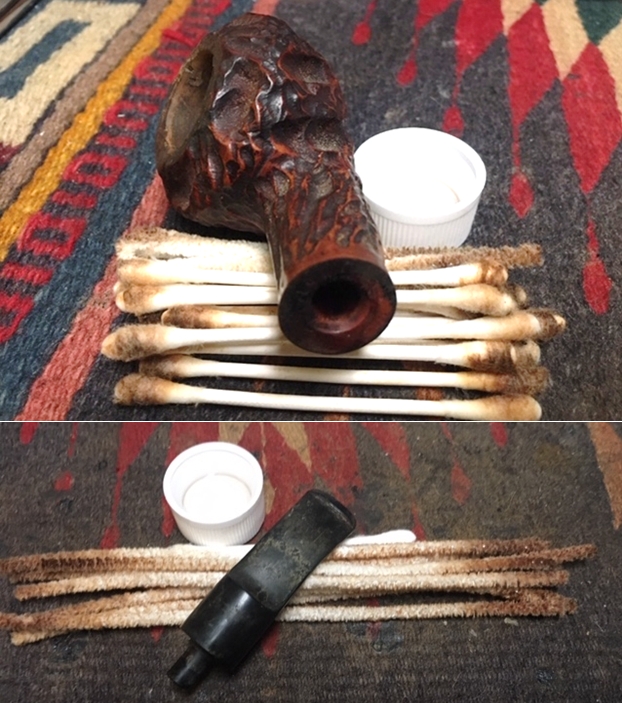
I decided to start with the bowl first. I used a dental pick to remove the remnants of the previous pipeman’s tobacco. The dottle was very hard and dry. It was almost welded to the wall of the bowl and pressed into the hardened cake. I followed Jeff and my regular regimen for cleaning estates. I reamed the light cake in the bowl with a PipNet pipe reaming set to remove the hard cake on the walls. I cleaned it up with a Savinelli Fitsall pipe knife to remove the remnants of the cake. I sanded the bowl with 220 grit sandpaper wrapped around a piece of dowel to smooth out the inside walls of the bowl. I wiped the bowl interior down with a paper towel to remove the debris. I repaired the nick on rim top at the front of the bowl. I filled it in with a drop of clear Krazy Glue and pressed some briar dust into the surface of the glue.I scraped out the mortise and the shank with a pen knife to remove the thick build of tobacco lacquer on the walls. The walls were covered with debris that was thick and hard. I scrubbed the mortise and the airway in the shank and the stem with alcohol, cotton swabs and pipe cleaners. I scrubbed the briar with Murphy’s Oil Soap with a tooth brush. I scrubbed it off with running water to remove the soap and the grime on the bowl. I dried it off with a soft cloth. I worked some Before & After Restoration Balm into the rusticated surface of the briar with my fingertips and a horsehair shoe brush to clean, enliven and protect it. I let the balm sit for a little while and then buffed with a cotton cloth to raise the shine. The photos show the bowl at this point in the restoration process. I set the bowl aside and turned my attention to the stem. I sanded out the tooth chatter with 220 grit sand paper and started to polish it with a folded piece of 400 wet dry sandpaper. Once it was finished it the tooth chatter and oxidation was gone and it began to shine.I polished the stem with Denicare Mouthpiece Polish from a tin of it I have in the drawer here. It is a gritty red paste that I rub on with my finger tips and work into the surface of the stem and button and buff off with a cotton pad. It gives me a bit of a head start on the polishing work plus I have a tin to use up!I polished the stem with micromesh sanding pads – wet sanding with 1500-12000 grit sanding pads. I wiped it down after each sanding pad with Obsidian Oil. I polished it with Before & After Pipe Stem Polish – both Fine and Extra Fine and buffed it off with a final coat of Obsidian Oil. This is an interesting Rusticated “Malaga” Bullmoose with a black vulcanite saddle stem. It has a great look and feel. The shape is very tactile and fits well in the hand. The rustication and grooves make it a unique looking pipe. I polished stem and the bowl with Blue Diamond polish on the buffing wheel. I gave the bowl multiple coats of Conservator’s Wax and the stem multiple coats of carnauba wax. I buffed the pipe with a clean buffing pad to raise the shine. I hand buffed it with a microfiber cloth to deepen the shine. The pipe polished up pretty nicely. The rich oil cured briar took on life with the buffing. The rich brown and black colours of the briar work well with the polished vulcanite stem. The finished pipe has a rich look that is quite catching. Have a look at it with the photos below. The shape, finish and flow of the pipe and stem are very well done. The dimensions are Length: 5 ¾ inches, Height: 1 ½ inches, Outside diameter of the bowl: 2 inches, Chamber diameter: ¾ of an inch. I will be adding the pipe to the finished Malaga pipes that I have set aside for Alex. This will be a great addition to his collection of Malaga pipes. Thanks for walking through the restoration with me as I worked over another Malaga.
New Life for a Malaga Poker/Sitter for Alex


Blog by Steve Laug

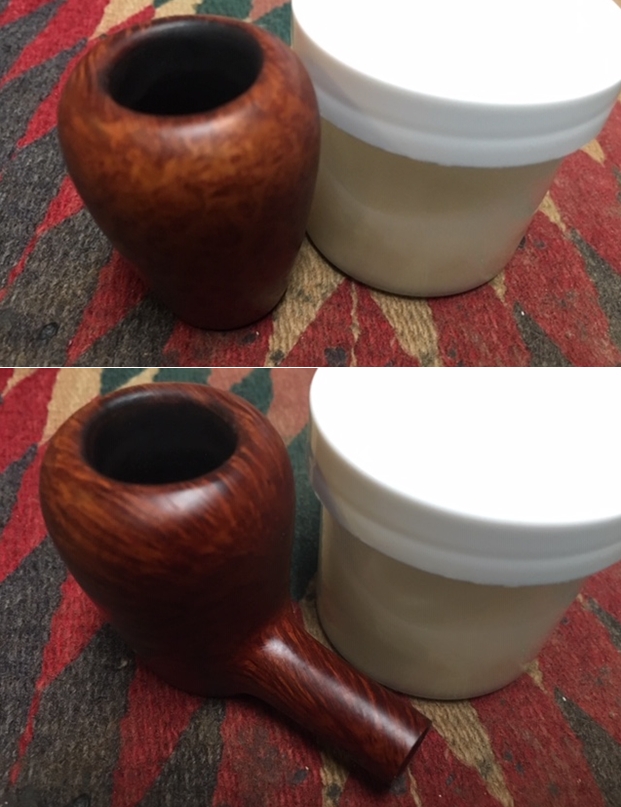
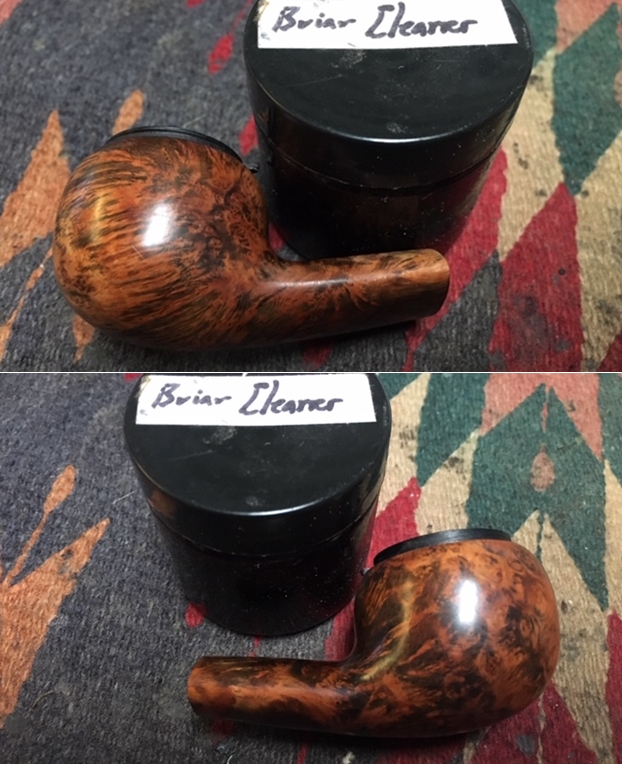
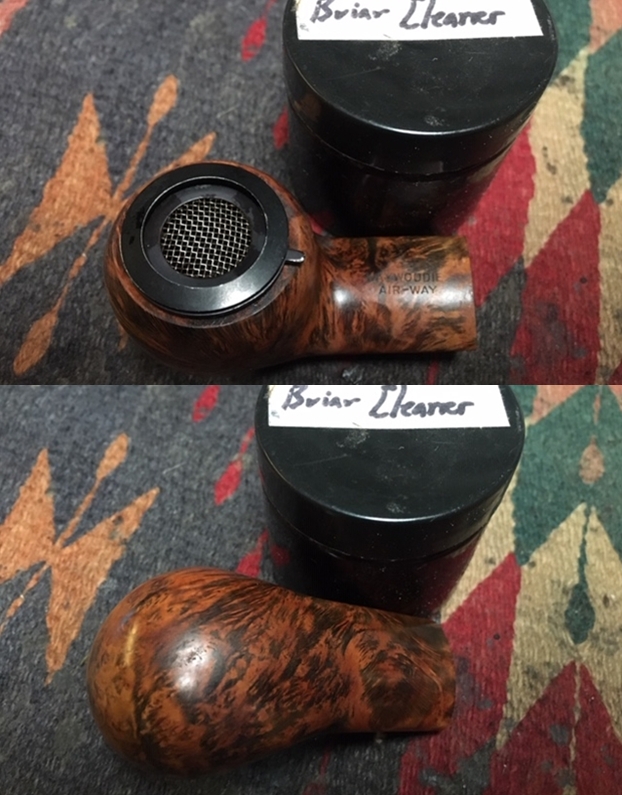
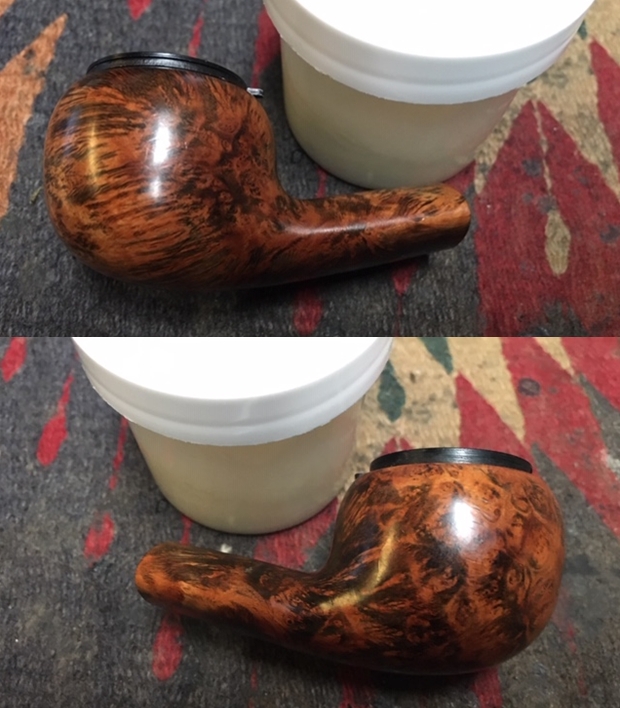
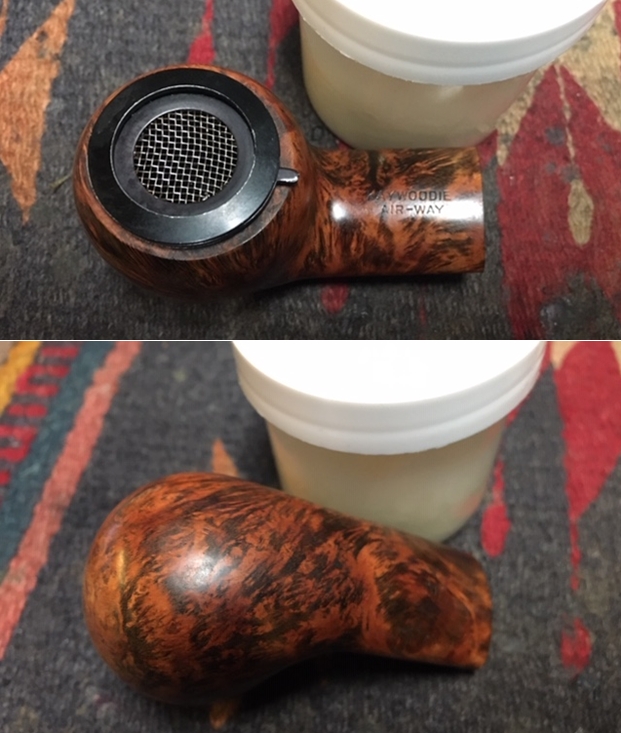
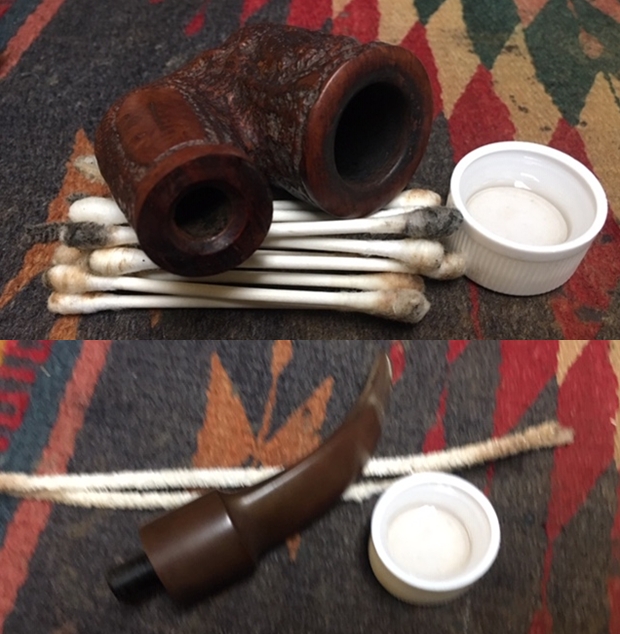
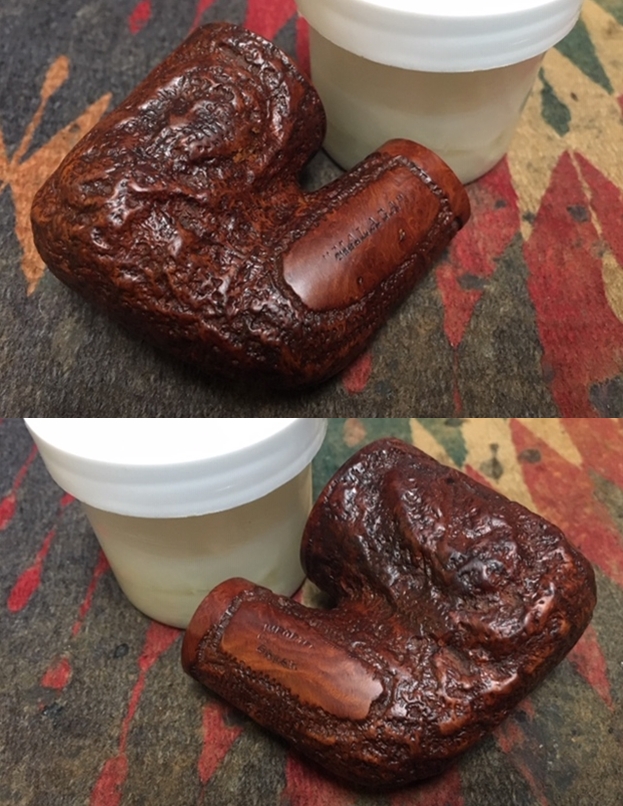
I have been working on a lot of different estate pipes and selling them for different families. I am continuing to work on the Malaga pipes that Alex put aside for restoration. He also brought other pipes to add to his box. I have a box of pipes from Alex that I am always working away at. He periodically drops more Malaga pipes into his box. There are quite a few of them to work on so I decided work on a few of them. The next one of these was another Malaga pipe. It is a beautiful Poker Sitter that is almost pear shaped. It has a very tight grain pattern around the bowl – cross grain on the sides and birdseye on the front and back of the bowl. It also has a tapered vulcanite stem. The pipe was dirty and caked when arrived. The rim top has a little lava and some darkening on the top rear edge of the bowl. The bowl had a thin cake in it that was hard and dense. The exterior of the bowl and shank are dirty with grime and oils from prolonged use. The stamping on the left side of the shank read “MALAGA” and on the right side it read Imported Briar. The vulcanite stem was in great condition and had tooth chatter on the top and the underside of the stem. I took photos of the pipe before I started the cleanup work. I took close up photos of the bowl and rim to capture the condition of the pipe before I started my cleanup work. The rim top had some light lava and darkening on the front and back edge. The inner edge was slightly bevel and was darkened. Other than being so dirty it was in great condition. There was a light hard cake in the bowl interior. The stem was dirty and there was tooth chatter on the top and underside near the button. The stem was also lightly oxidized.I took a photo to capture the stamping on the shank. The first photo shows the stamping “MALAGA” on the left side of the shank is very readable. The second photo shows the stamping Imported Briar on the right side.If this is the first of the Malaga restorations that you have read about then you should know the backstory of the brand. I am including the link to a blog that I wrote that gives some of the history of the Malaga brand and the Malaga Pipe Shop in Royal Oak, Michigan in the USA. I have written an earlier blog to give a little history of the Malaga Brand and the pipemaker, George Khoubesser. Here is the link – https://rebornpipes.com/tag/malaga-pipes/.That blog also includes links to a catalogue and the history of the pipemaker George Khoubesser. Follow the link to get a feel for the brand and the pipemaker.

I decided to start with the issues with the rim top first. I wiped down the rim top of the bowl with a damp cotton pad to remove the tars and lava. I used a folded piece of 220 grit sandpaper to smooth out the burn damage and the darkening on the bevel.I followed Jeff and my regular regimen for cleaning estates. I reamed the light cake in the bowl with a Savinelli Fitsall pipe knife to remove the cake. I sanded the bowl with 220 grit sandpaper wrapped around a piece of dowel to smooth out the inside walls of the bowl.I scrubbed out the mortise and the airway in the shank and the stem with alcohol, cotton swabs and pipe cleaners.I polished the briar with micromesh sanding pads – 1500-12000 grit pads. I wiped the bowl down after each sanding pad with a damp cloth to wipe of the dust. I scrubbed the briar with Murphy’s Oil Soap with a tooth brush. I scrubbed it off with running water to remove the soap and the grime on the bowl. I dried it off with a soft cloth. I worked some Before & After Restoration Balm into the surface of the briar with my fingertips and a horsehair shoe brush to clean, enliven and protect it. I let the balm sit for a little while and then buffed with a cotton cloth to raise the shine. The photos show the bowl at this point in the restoration process. I set the bowl aside and turned my attention to the stem. I sanded out the tooth chatter with 220 grit sand paper and started to polish it with a folded piece of 400 wet dry sandpaper. Once it was finished it the tooth chatter and oxidation was gone and it began to shine.I polished the stem with micromesh sanding pads – wet sanding with 1500-12000 grit sanding pads. I wiped it down after each sanding pad with Obsidian Oil. I polished it with Before & After Pipe Stem Polish – both Fine and Extra Fine and buffed it off with a final coat of Obsidian Oil. This is a beautiful “Malaga” Imported Briar Poker Sitter with a tapered black vulcanite stem. It has a great look and feel. The shape fits well in the hand and sits on the desk when you are resting. The grain makes it a real beauty. I polished stem and the bowl with Blue Diamond polish on the buffing wheel. I gave the bowl and the stem multiple coats of carnauba wax. I buffed the pipe with a clean buffing pad to raise the shine. I hand buffed it with a microfiber cloth to deepen the shine. The pipe polished up pretty nicely. The rich oil cured briar took on life with the buffing. The rich brown colour of the briar works well with the polished vulcanite stem. The finished pipe has a rich look that is quite catching. Have a look at it with the photos below. The shape, finish and flow of the pipe and stem are very well done. The dimensions are Length: 6 inches, Height: 2 inches, Outside diameter of the bowl: 1 ½ inches, Chamber diameter:  ¾ of an inch. I will be adding the pipe to the finished Malaga pipes that I have set aside for Alex. This will be a great addition to his collection of Malaga pipes. Thanks for walking through the restoration with me as I worked over another Malaga.
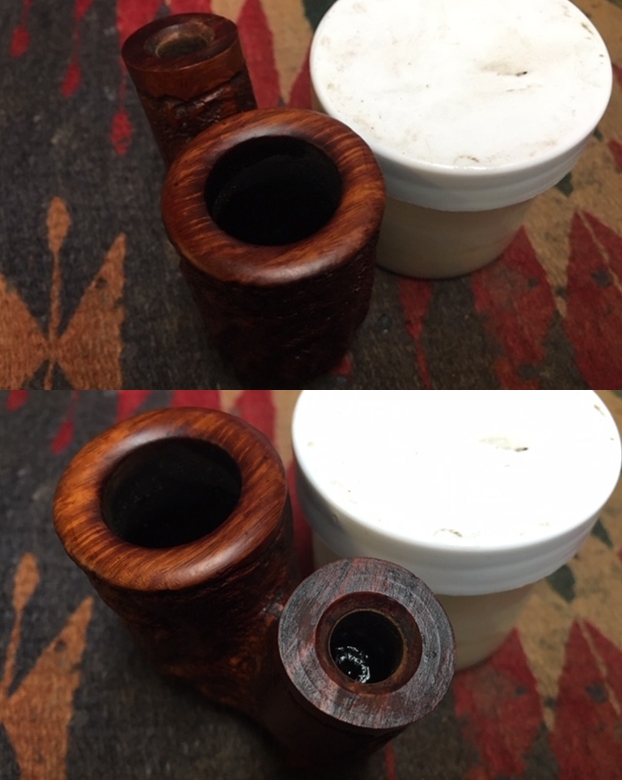
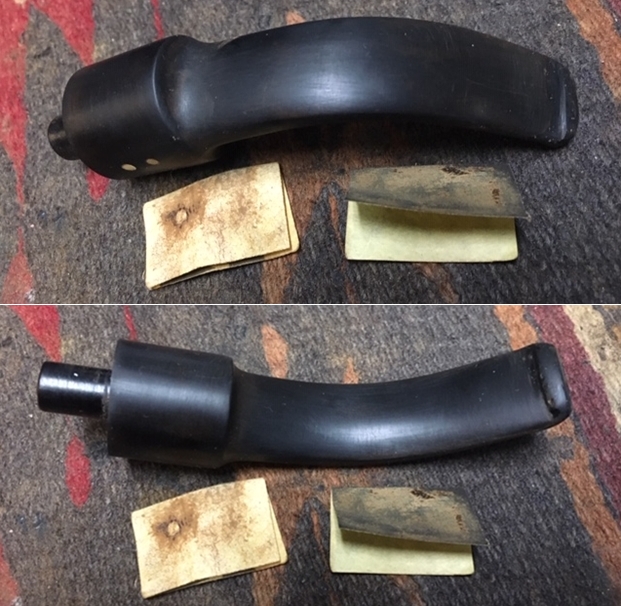
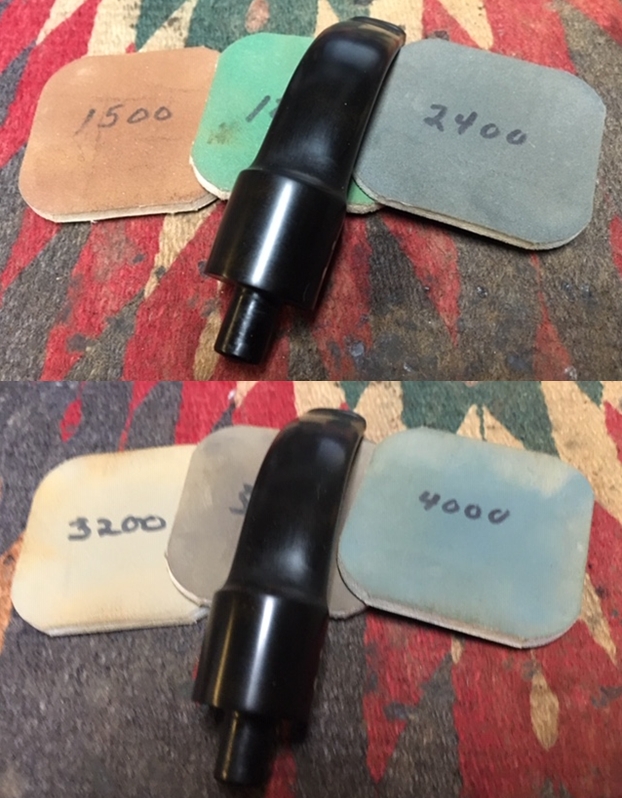
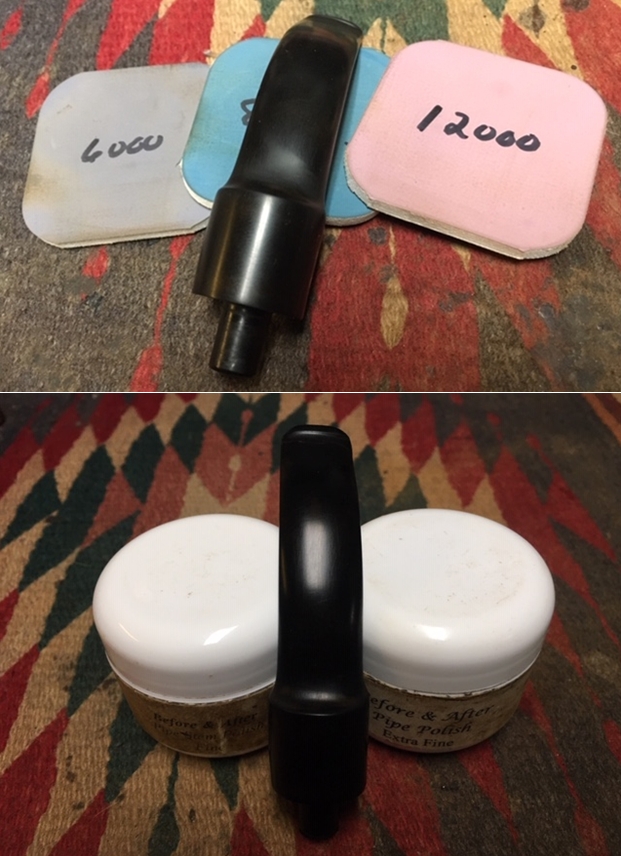
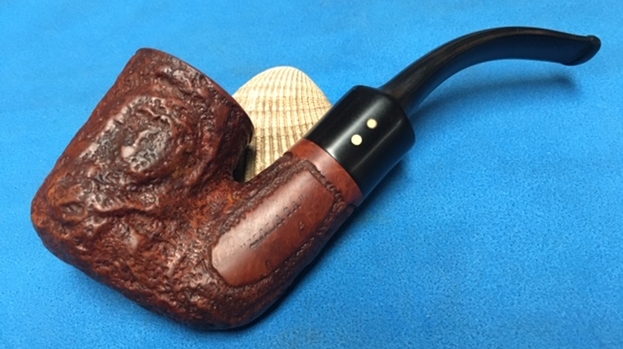
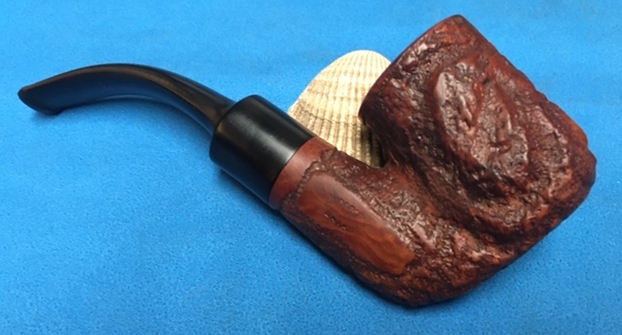
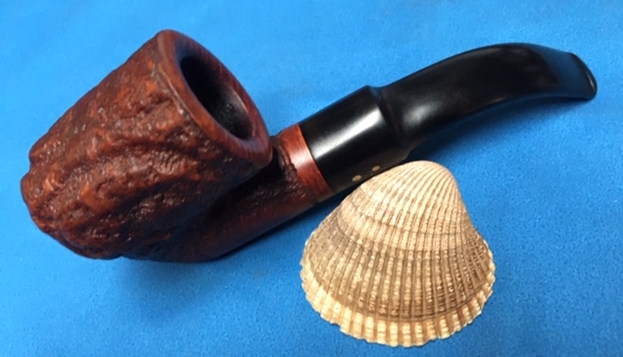
Restoring a Faceted “Malaga” Poker from Kathy’s Dad’s Pipes


Blog by Steve Laug

This morning I was looking through the bag of pipes that Alex chose from George Koch’s estate. This one is the first of two interestingly shaped Poker Sitters. The rim was well knocked about and the acrylic stem had some tooth dents and deep gouges in the surface of the variegated silver. The inner and outer edges of the rim top were damaged from knocking the pipe out against a hard surface. The carver had done a great job matching the mixed grain to the flow of the shape of the bowl and shank. Remember that all of these Malaga pipes came to my brother and me in several shipments of pipes from George’s daughter Kathy. Jeff unwrapped the pipes when they came to him and took the following photo to give an idea of the volume of the pipes that we purchased. The carver did a great job of shaping the pipe to follow the grain on the briar. The large bowl, round shank and tapered variegated silver acrylic stem look very good. The bowl had a thick cake that overflowed with lava onto the rim. The inner and outer edges of the rim were in rough shape as was the rim top. The sides of the bowl and shank are very dirty with grime and oils from prolonged use. The stamping on the left side of the shank read “MALAGA”. The right side read Imported Briar. The acrylic stem had tooth dents and chatter on the top and the underside. Jeff took these photos before he started the cleanup work on the pipe. Jeff took close up photos of the bowl and rim to capture the condition of the pipe before he started his cleanup work. The rim top had some lava overflow and darkening and wear under the lava on the rim at the back of the bowl. There appeared to be deep nicks in the outer edge at the front of the grimy pipe. He also took photos of the sides and bottom of the bowl and shank to show the beautiful grain and unique carvings around the bowl. The photos show the general condition of the bowl and wear on the finish. It is very dirty but this is another beautiful pipe. Jeff took a photo to capture the stamping on the top side of the shank. The photos show the stamping “MALAGA” on the left side of the shank. The stamping is very readable. The next photos show the stem surface. There are tooth marks and chatter on both sides near the button and wear on the button surface and edges.In each of the previous blogs that I have written on the restoration of George’s pipes I have told his story. If you have followed the restorations you will have read the information and the background piece that Kathy did on her father. Here is a link to one of the previous blogs on his Malaga pipes where I included her tribute in full (https://rebornpipes.com/2019/01/26/back-to-kathys-dads-pipes-restoring-a-%c2%bc-bent-malaga-author/). You can also read the bio on her Dad, George Koch. It is an interesting read and one that shows just how far our pipe collecting passion can go when we find a brand of pipes that we enjoy. I am going to only include the portion on the Malagas at this point. If you wish to read the rest follow the link above.
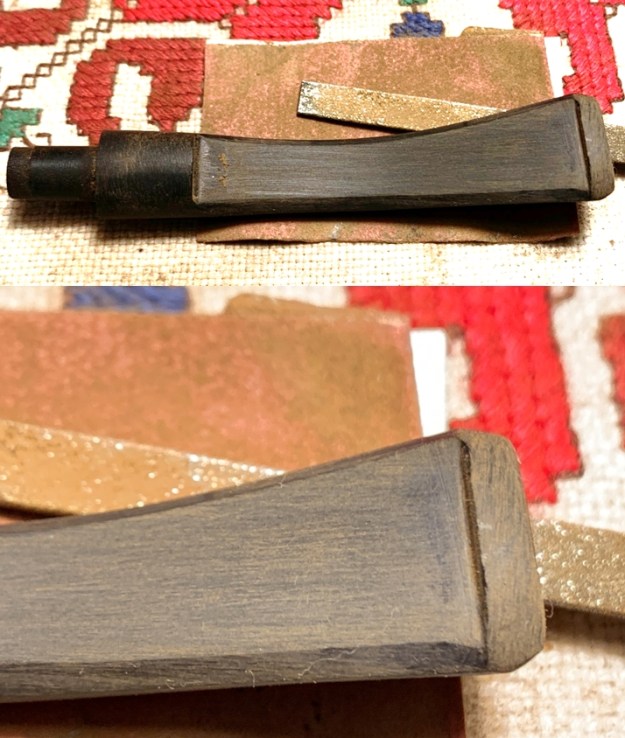
Kathy writes…We lived in Livonia, and that’s where his love for Malaga pipes began. After a few years he returned to Allis Chalmers and we moved back to Springfield. I remember that when we went back to Michigan to visit friends, Dad had to go to the Malaga store and acquire a few new pipes. Many a year I wrote to Malaga and they picked out a pipe for me to purchase that I could give Dad for a Christmas or birthday present. He was always pleased. His favorites were the straight stemmed medium sized bowl pipes, but he liked them all. 

He had some other pipes, but the Malagas were his favorites. I remember him smoking them sitting in his easy chair after work, with feet up on the ledge by the fire burning in the fireplace.  Growing up it was my job to clean them and he liked the inner bowl and stem coated with Watkins vanilla, leaving a little of that liquid in the bowl to soak in when I put them back on the rack…I’m very happy they are being restored by you and your brother and hope they find homes who enjoy them as much as Dad did. Thank-you for your care and interest. — Kathy, the oldest daughter

Jeff reamed the bowl with a PipNet pipe reamer and followed up with a Savinelli Fitsall pipe knife to remove the cake. He scrubbed out the mortise and the airway in the shank and the stem with alcohol, cotton swabs and pipe cleaners. He scrubbed the exterior of the bowl, rim, shank and stem with a tooth brush and Murphy’s Oil Soap to remove the oils and tars on the rim and the grime on the finish of the bowl. He rinsed it under running water. He dried it off with a soft cloth. Even after the cleanup it is another on that is in rough condition. But even in its damaged condition you can see the great grain on the bowl. The photos show the damaged rim top. The interesting shape, round shank and chewed acrylic stem give a clear picture of what the pipe must have looked like when George bought it at the shop. The rim top had been knocked hard against rough surfaces to knock out the dottle and left damage. The stamping on the left side of the shank read “MALAGA” and on the right side it read Imported Briar. The acrylic stem had been chewed but could be easily repaired. I took photos of the pipe before I started my work. I took a photo of the  rim top and bowl to show the condition of the pipe. You can see why I said it was used as a hammer. The surface of the rim is very rough and you can see the damage on both the inner and outer edge of the rim. There is some darkening on the back edge and surface of the rim top. I took photos of the stem to show the chewed condition it was in. Remember this is hard acrylic so it took some real gnawing to do this to it!I took photos of the shank to capture the stamping on both sides. The first photo shows the stamping “MALAGA” on the left and the second shows Imported Briar on the right. Both are clear and readable.I am also including the link to a blog that I wrote that gives some of the history of the Malaga brand and the Malaga Pipe Shop in Royal Oak, Michigan in the USA. I have written an earlier blog to give a little history of the Malaga Brand and the pipemaker, George Khoubesser. Here is the link – https://rebornpipes.com/tag/malaga-pipes/.That blog also includes links to a catalogue and the history of the pipemaker George Khoubesser. Follow the link to get a feel for the brand and the pipemaker.

I decided to start the restoration of the pipe by dealing with the rim top. I topped it on a topping board with 220 grit sandpaper and cleaned up the inner edge with a piece of folded 220 grit sandpaper. I used some clear Krazy Glue to fill in the rim damage on the front edge. It was nicked and worn so I filled it in to smooth it out. I sanded the repair after the glue cured. I smoothed out surface of the front edge and rim top until it blended into the surface. I polished the bowl and rim top with micromesh sanding pads to smooth out the rim edge repairs and top. I wet sanded with 1500-12000 grit pads and wiped the bowl down with a damp cloth after each pad. The photos show the progress. I scrubbed the briar with Murphy’s Oil Soap and a tooth brush. I rubbed it into the surface of the briar with my finger tips and let it sit for about 10 minutes then rinsed it off with running water. I dried it off with a soft cloth. I used an Oak Stain Pen to stain the rim top to blend topping and darkening into the bowl colour. I buffed it with a clean buffing pad. You can see from the photo below it blends well.I worked some Before & After Restoration Balm into the surface of the briar with my fingertips to clean, enliven and protect it. I let the balm sit for a little while and then buffed with a cotton cloth to raise the shine. The following photos show the bowl at this point in the restoration process. I am very happy with the results. I turned to the stem and filled in the deep tooth marks on both sides of the stem with clear Krazy Glue. I set it aside to let the repairs cure.I used a needle file to reshape the button edge on both sides. I sanded the surface of the stem with 220 grit sandpaper and 400 grit sandpaper to clean up the stem.I polished the stem with micromesh sanding pads – wet sanding with 1500-12000 grit sanding pads. I wiped it down after each sanding pad with a damp cloth. I finished by polishing it with Before & After Pipe Stem Polish both Fine and Extra Fine and then wiped it down a final time with a damp cloth. This restored “Malaga” Poker with a taper acrylic stem is a beauty. The unique shape of the bowl, the reshaped and repaired rim top and the cut of the briar work well to highlight the grain around the bowl sides. I polished acrylic silver variegated stem and the bowl with Blue Diamond polish on the buffing wheel. I gave the bowl and the stem multiple coats of carnauba wax. I buffed the pipe with a clean buffing pad to raise the shine. I hand buffed it with a microfiber cloth to deepen the shine. The pipe polished up pretty nicely. The grain took on life with the buffing. The rich oil cured colour works well with the polished acrylic stem. The finished pipe has a rich look that is quite catching. Have a look at it with the photos below. The shape, finish and flow of the pipe and stem are very well done. The dimensions are Length: 6 inches, Height: 1 ¾ inches, Outside diameter of the bowl: 1 ¼ inches, Chamber diameter: ¾ of an inch. I will be adding the pipe to the box of finished Malaga pipes that I have completed for Alex. I am looking forward to hearing what he thinks of this beauty and once he fires it up and carries on the trust for George Koch. Thanks for walking through the restoration with me as I worked over another one of Kathy’s Dad’s Pipes.

Cleaning up an English Made Kaywoodie Air-way 707 Diplomat


Blog by Steve Laug

On our recent trip to Alberta we picked up quite a few pipes that were really nice. Some of them were brands we were familiar with and some were pipes that were unknown and unidentifiable. But if you are a pipe hunter you know the feeling when you are holding a particular pipe, no matter what the brand and it just speaks to you. That is what happened with this next pipe. It was in a display case at an antique mall in Edmonton. The shape of the pipe, the wind cap that was an integral part of the rim top and the interesting staining that highlighted some unique grain called my name. The stamping on the top of the shank read Kaywoodie over Air-way and on the underside it was stamped London, England and the shape number 707. It was a shape I had not seen before and the wind cap mechanism was a new one for me as well. The fact that it was an English made Kaywoodie also insure that it was going home with me. I have drawn a red box around the pipe at the top of the column on the right.The grain under the dirty finish was unique and the finish was interesting. The diplomat shape is one that I enjoy smoking and it has a good feel in the hand. The rim top was truly unique. The wind cap was fascinated on the rim top and the screen can be swiveled to the left to open the bowl. The bowl itself had a think cake in the bowl and the inside of the bowl and rim edges looked very good. The finish was dirty but still in good condition under the grime. The vulcanite stem was so heavily oxidized that it was butterscotch colour. It had some tooth marks and chatter on both sides near the button. There were some small cracks and the slot was slightly collapsed on the left side. The Kaywoodie club logo on the top of the saddle stem was a white circle with a black club inside. I took close up photos of the wind screen mechanism on the rim top with it open and closed to show how it worked. You can see the condition of the bowl in the second photo below.I took photos of the stem showing the deep oxidation and tooth chatter on both sides near the button. You can also see the small cracks on the top side of the button. It is thin so it easily was chipped and cracked when clenched.I took some photos of the stamping on the shank. The first photo shows the Kaywoodie Air-Way stamp and the white circle/black club insert on the stem top. The second photo shows the London, England and shape number 707 on the underside of the shank.I took a closer look at the inside of the bowl and took a photo. It was dirty but very lightly caked.I took a photo of the pipe with the push stem removed from the shank. The stinger was different from the usual Kaywoodie stinger. It had a ball on the end of the stinger but no holes in it. There was a ring around the stinger just above the tenon insert and a slotted hole. Before doing cleanup work on the pipe I decided to do some research on the pipe. I looked first on the Pipephil website and found some information on the white circle/black club stamp on the top of the stem. I did a screen capture of the pertinent information on the logo itself (http://www.pipephil.eu/logos/en/logo-kaywoodie.html). From there I learned that the logo was used first in 1937 and up until the late 1940s for the higher grade pipes. Also until the late 40s early 50s the logo was on top of the stem.

There was no other information on the Air-way line on the site and nothing under the section on the London/British made Kaywoodie pipes. That meant I would need to turn elsewhere to find that information. This would be an interesting hunt and restoration.

I turned to Pipedia (https://pipedia.org/wiki/Kaywoodie) and read the section on the rough outline on the history of the brand that links the brand with the English section of the company. I quote:

Again, demand for KBB pipes and especially Kaywoodie prompted another move for both the manufacturing facilities and the corporate offices. In 1930 the corporate office moved into the Empire State Building on Fifth Avenue in New York. By 1935, the manufacturing operations moved from Union City to 6400 Broadway in West New York, New Jersey which, at the time, was touted as the largest pipe making facility in the world. At the height of production, there were 500 employees producing up to 10,000 pipes per day.

The corporate offices were relocated in 1936 to the International Building, Rockefeller Center, 630 Fifth Avenue, New York. The invitation to visit the new office reads, “Kaywoodie is now on display at the world’s most famous address – Rockefeller Center. Here Kaywoodie takes its place among the leaders of industry and commerce.” The move to Rockefeller Center coincided with The Kaywoodie Company’s emergence as a subsidiary of KBB. All of the pipes manufactured by KBB including the Yello-Bole line were also on display here. By 1938 Kaywoodie had opened an office in London to meet worldwide demand. Kaywoodie of London was jointly owned with another famous pipemaker, Comoy’s of London.

I am also including a screen capture of a picture of a pipe that is the same shape as the one that I am working on. Thanks to Doug Valitchka for the photo.From there I turned to a link on the article to a section called Guide to Kaywoodie Pipes (https://pipedia.org/wiki/Collector%27s_Guide_to_Kaywoodie_Pipes#NOTES_ON_.22OTHER.E2.80.9D_KAYWOODIE_PIPES).  It gave some pertinent information on the Air-way line. I quote two sections from that article below. I have highlighted the Air-way brand name in the second paragraph.

English Kaywoodies. All of the catalogs reviewed in this research contained the following copyright notification: Printed in U.S.A., Kaufmann Bros. and Bondy, Inc., New York and London. Kaywoodie Pipe cases and smoker’s accessories were also marked with “New York and London”. The catalogs, however, do not present any information concerning Kaywoodie’s London operations, or how the English Kaywoodies might have differed from those manufactured and marketed in the U.S. Lowndes notes that he has several English Kaywoodies acquired in

Vaduz and Zurich. English Kaywoodies are now made by Oppenheimer pipes. Lowndes notes that English Kaywoodies with the “screw-in bit” come in Ruby Grain, Custom Grain, Standard, and Relief Grain grades. The traditional push-bit models come in Continental Plain and Relief, London Made, Minaret, Air-way Polished No. 707, and Lightweight grades. Prices in 1985 ranged from 9.50 (pounds) to 26.00 (pounds). Lowndes notes that the Super Star was a special edition English Kaywoodie made of finest briar with a handmade silver band. Lowndes has two: one from Zurich with a large white-outlined logo, and beautifully cased; and one in walnut finish with the black-­in-white logo. A recent catalog shows the Super Star without a band and the ordinary small white logo. A 1985 letter from Oppenheimer states that the black-in-white logo has been discontinued and only the regular white logo is now used.

From that information I now knew that the pipe in hand was made prior to 1985 in London by Oppenheimer. It had a traditional push-bit rather than the threaded screw in bit. After 1985 Oppenheimer discontinued the black in white logo. It was time to work on the pipe now. I scraped the shank with a pen knife to remove the tarry buildup that did not allow the stem to seat properly. I cleaned out the mortise and the airway in the shank and the stem with alcohol, cotton swabs and pipe cleaners. I took some close up photos of the cleaned button and slot to show how it had a crack and had been collapsed slightly on the left side of the top.I scrubbed the exterior of the bowl with Before & After Briar Cleaner. I worked it into the surface of the briar with my finger tips and let it sit for a short time to absorb the grime. I rinsed it down under warm water to remove the grime debris that was collected in the cleaner. At the same time I used a tooth brush to scrub out the inside of the bowl and rinsed it. I dried the bowl off with a soft cotton cloth and lightly polished it. I worked some Before and After Restoration Balm into the surface of the briar. I rubbed it into the briar to restore, preserve and polish the briar. I let it sit on the bowl for about 10 minutes and buffed it off with cotton cloth. It was getting late so I set the polished bowl aside for the night and put the stem into a bath of Before & After Pipe Stem Deoxidizer to soak overnight. In the morning I would take it out and start working on the stem.I took it out of the bath in the morning and wiped it down with a microfiber cloth. Much of the oxidation on the surface came off. I used a Scotch Brite pad to scrub off the oxidation. You can see from the photos that some still remained.I put it back in the bath overnight again to see what would happen. When I took it out it looked better but there was still a lot of work to do with it.I decided to address the damaged button on the top edge. The top edge of the button had collapsed partially into the slot. There were small cracks on the surface. I have used clear super glue in the past to address this but I had an idea for an experiment. I heated the blade of a dental spatula and inserted it into the slot. I repeated the process several times until I had the slot opened and lined up. I touched the heated blade to the cracks on the top of the button and stem and to the tooth mark on the underside. The tooth marks disappeared and the cracks were sealed with the heat welding the pieces together. Whereas before the repair I could not insert a pipe cleaner, I now could slide it in and out with ease.I sanded the stem surface with 220 grit sandpaper to remove the oxidation and tooth chatter. I started polishing it with 400 grit sandpaper to remove the scratches.I polished the stem surface with Denicare Mouthpiece Polish to polish out the scratches left behind by the sandpaper. It also works well to remove stubborn oxidation in the saddle and along the edge of the button. It worked really well to remove the oxidation and leave the stem looking far better.I polished out the remaining scratches in the stem material with micromesh sanding pads. I wet sanded with 1500-12000 grit sanding pads. I wiped down the stem after each pad with some Obsidian Oil. Once I used the last pad – 12000 grit – I polished the stem with Before & After Pipe Stem Polish, both Fine and Extra Fine. I used a new product I am trying for Briarville called No Oxy Oil to give the stem a final wipe down and polish. I put the stem back on the pipe and polished both pipe and stem with Blue Diamond on the buffing wheel. I avoided the wind screen with the buffing wheel. I gave the pipe several coats of Carnauba Wax and buffed it with a clean buffing pad to raise a shine. I hand buffed it with a soft cotton cloth to deepen the shine. The finished pipe is shown in the photos below. The original stain looks really good and the polishing brought the grain back to life. The contrasting rich brown finish highlight the grain and contrasts well with the black vulcanite stem. The Air-way Diplomat is a beautiful pipe that really has the look of an English made pipe. The tie to Oppenheimer is clear in looking at the shape of the pipe and the finish. The black metal wind screen with the flip screen cover is unique and seems very functional. The dimensions of the pipe are – Length: 4 ¾ inches, Height: 1 ½ inches, Outside diameter of the bowl: 1 ½ inches, Chamber diameter: ¾ of an inch. I left the stinger out of the shank because I plan keeping this unique English made Kaywoodie for my own collection. It tics all the boxes for me – shape, finish, grain, etc.  I am looking forward to loading a bowl in it and enjoying a great smoke. I will carry on the legacy! Thanks for reading the blog.