Blog by Steve Laug
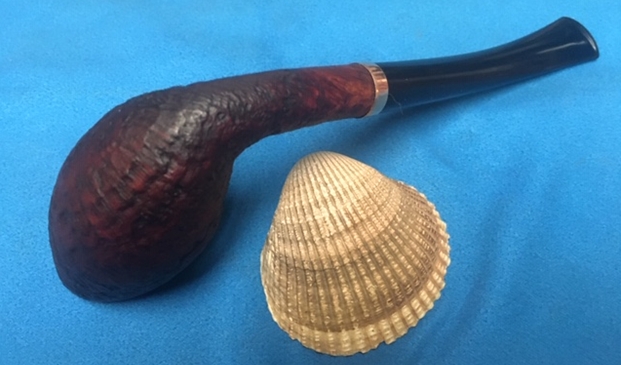
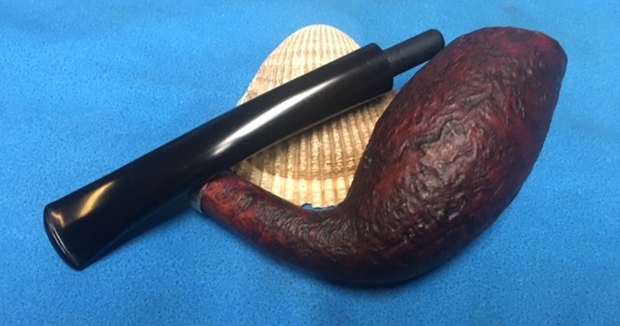
Jeff picked up this interesting Larsen Hand Made from an auction in Columbus, Michigan in March, 2019. The shape and design of this pipe caught his eye and mine. It has a great shape and sandblast finish. The shape is what I would call a tulip and has a forward tipping bowl and a gently curved shank from the bowl through the curve of the stem. The finish is very dirty with dust and grime filling in the grooves of the blast. The bowl has a thick cake that overflows onto the rim top. The rim top has some darkening and perhaps some damage around the thin edge. The shank has about a ½ inch crack on the left side that has spread slightly due to the thick tar and oil in the shank. The stem is oxidized and has tooth chatter and tooth marks on both sides near the button and also damage to the button edge on both sides. Jeff took photos of the pipe before he started his cleanup work. The conditions noted above are evident in the photos.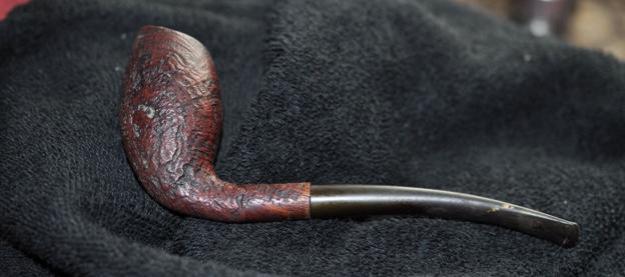
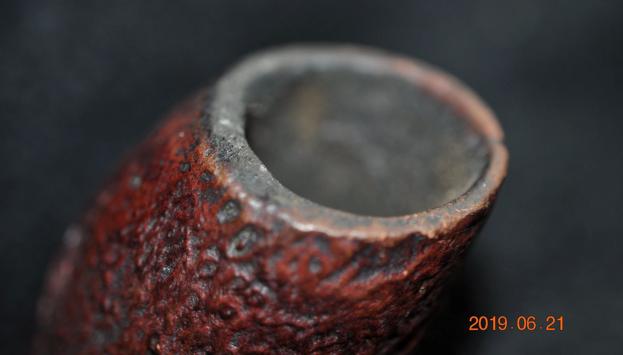
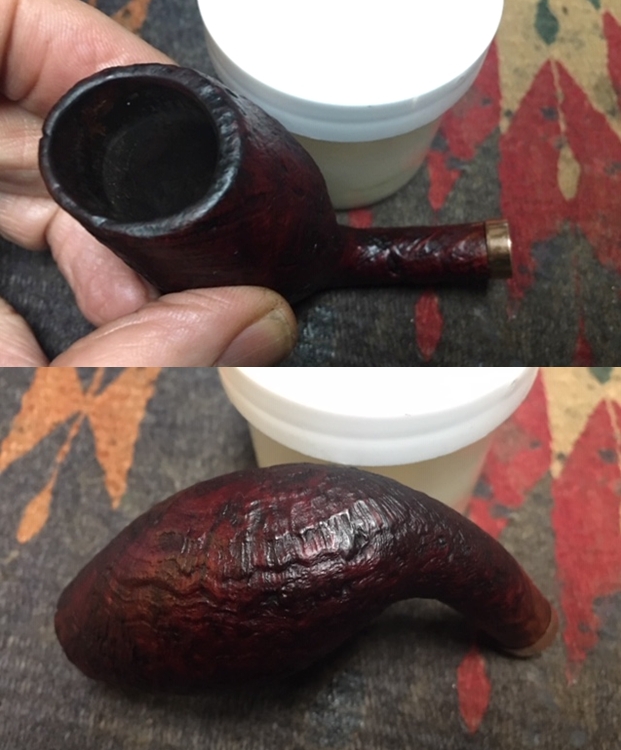
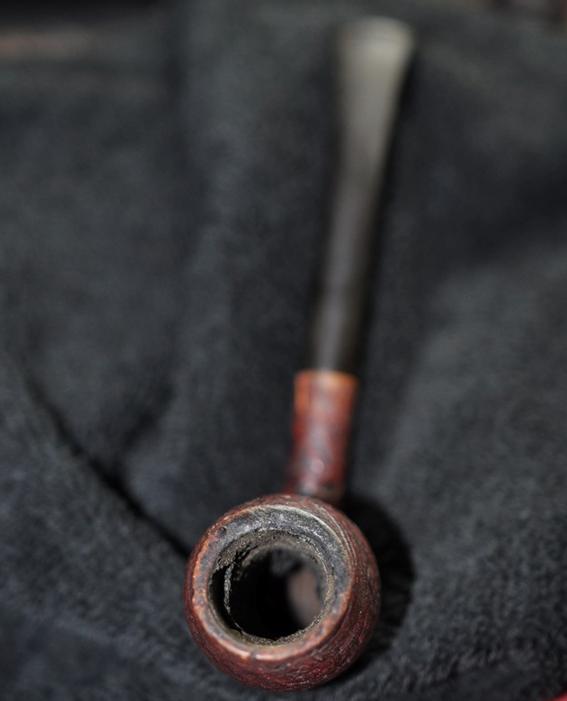 Jeff took close up photos of the rim top from various angles to show the general condition of the bowl and rim. The first photo shows the thickness of the cake in the bowl and the lava build up on the back edge. The edges look like they have been protected by the thick cake so they will probably be fine once the bowl is reamed. The second and third photos give a clear picture of the bowl sides and rim edges.
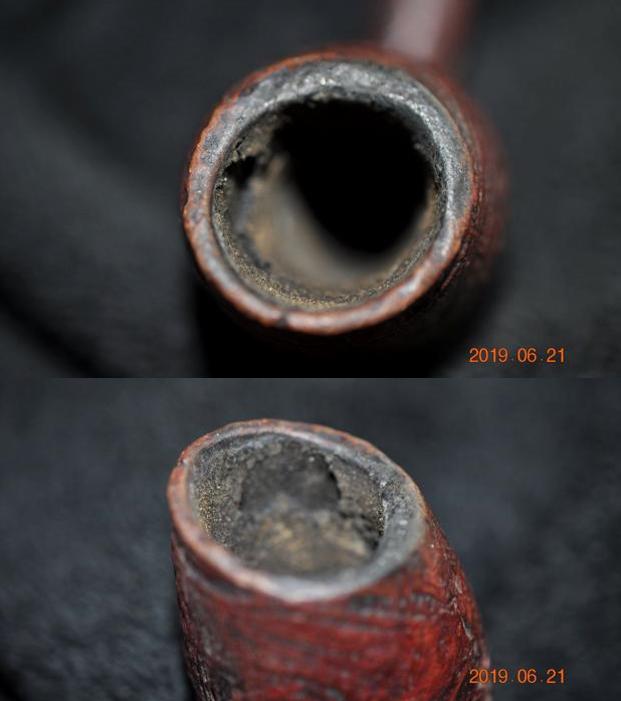
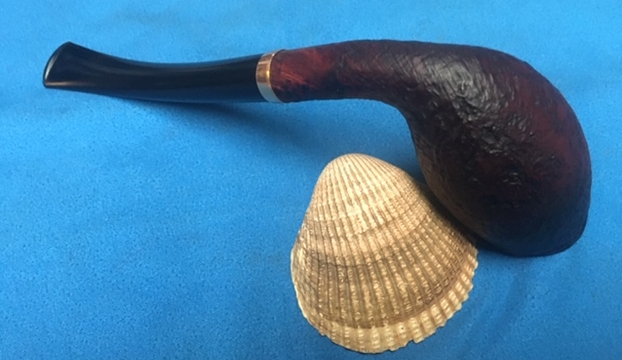
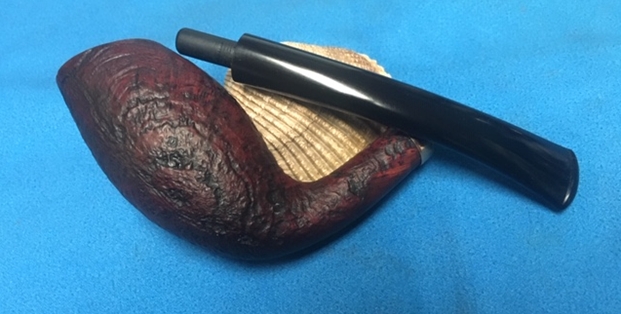
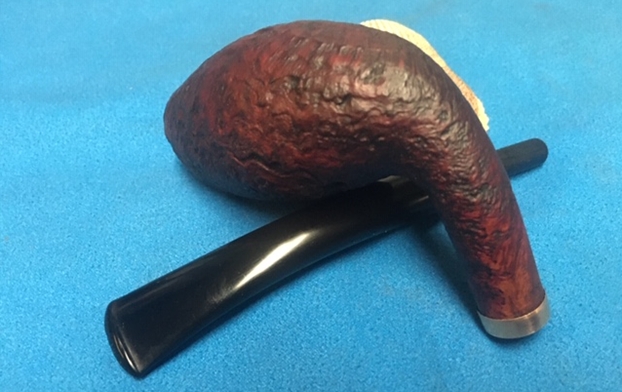
 Jeff took photos of the sides and heel of the bowl to give an idea of the beauty of the sandblast and the condition of the bowl.
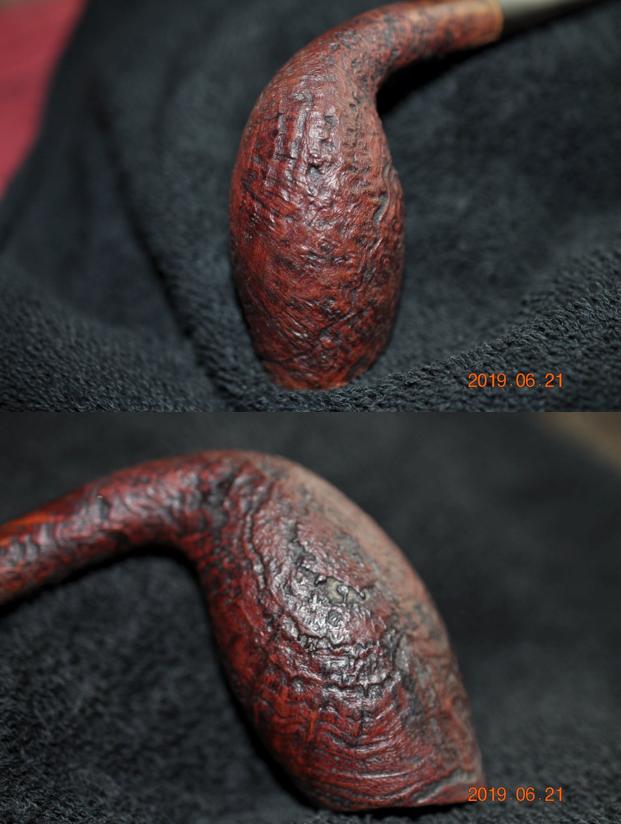 The underside of the shank is stamped Super over Larsen over Handmade over Made in Denmark. The stamping is faint toward the edge of the shank/stem junction. Between the Larsen and Handmade there appears to be something stamped but it is unclear.
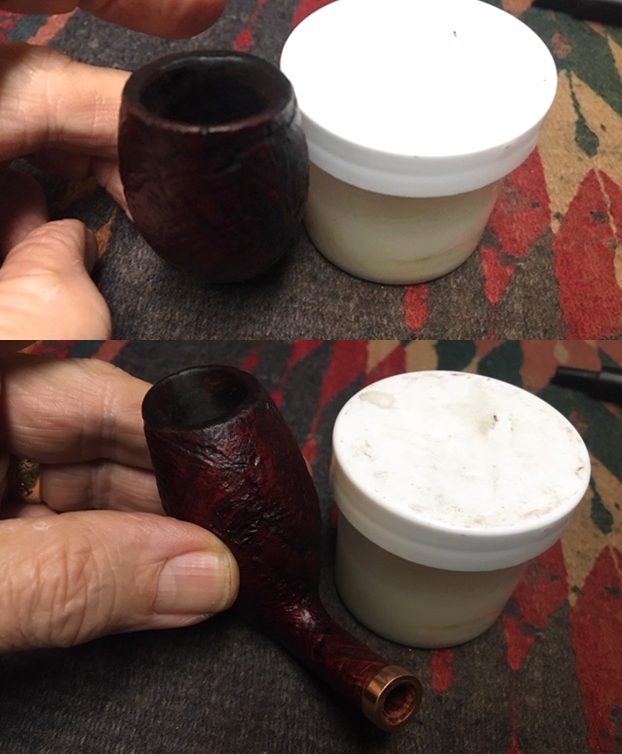
 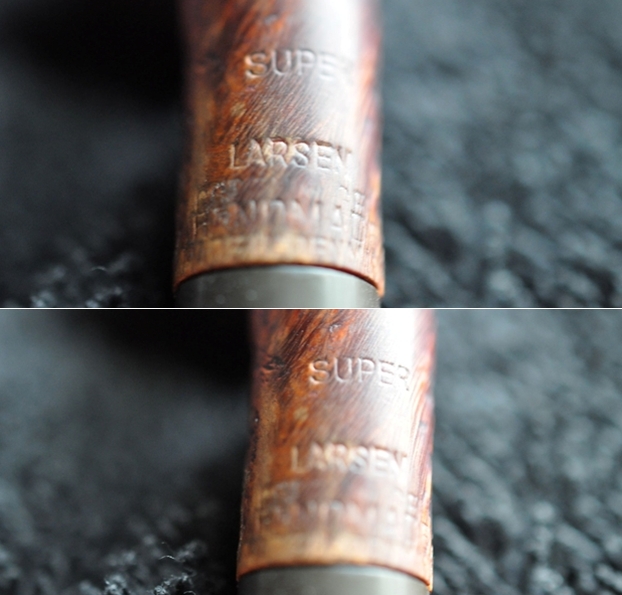 There is a crack in the shank that is evident in the third photo and it almost looks like there was a thin band on the shank at some point before it came to me. You can see a light strip at the shank end in the photos above and the one below.
 The photos of the stem show the condition of the stem on both sides. The first one shows the tooth marks and chatter on the top of the stem and on the button.
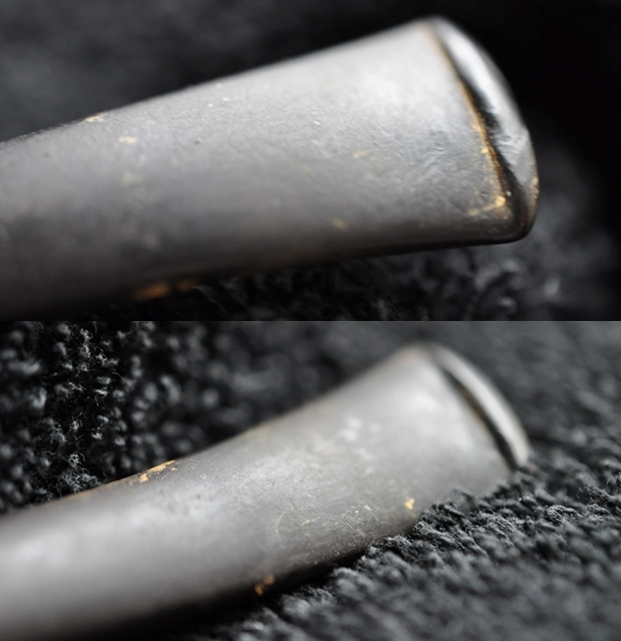 I turned to Pipephil’s site to get a quick review of the brand (http://pipephil.eu/logos/en/logo-l2.html). There was a sidebar on the site that gave the following information:
In the 1960s Ole Larsen, owner of the Copenhagen tobacco store, retails pipes carved by Sixten Ivarsson, Poul Rasmussen, Sven Knudsen or Peter Brakner. Faced with the success and urged by Sven Bang (store manager), Sven Knudsen and Former (Hans Nielsen) are successively hired to carve pipes in the basement of the shop at the beginning and in the old Larsen cigar factory afterwards. Carver like Teddy Knudsen, Tonni Nielsen, Jess Chonowitch, Peter Hedegaard work a while in this context.
When Nils, son of Ole Larsen, succeeds his father he acquires the Georg Jensen pipe factory to focus on less expensive pipes. This turns out to be an error ending with the sale of W.O. Larsen trademark to Stanwell.
The famous tobacco shop at Strøget, Amagertorv 9 closed down for good on Dec 31, 2004.
I turned to Pipedia and read the history of the brand. It is a short article and a very good read. It seems that W.O. Larsen was a famous pipe retailer in Denmark who employed many of the famous pipemakers such as S. Bang, Former, Teddy Knudsen, Tonni Nielsen, Jess Chonowitsch, Peter Hedegaard and others. Give the article a read as it is very interesting. The link follows below: (https://pipedia.org/wiki/W.%C3%98._Larsen).
There were several links to Larsen catalogues at the end of the article. The screen captures below give some pipes that look very similar to the one I am working on . It is like the Larsen Handmade No.71 in the first photo below and like the Larsen Handmade No. 75 in the second photo below. (https://pipedia.org/images/5/5c/Wo1.pdf) (http://www.danishpipemakers.com/pdf/wo1.pdf)
 Jeff cleaned the pipe with his usual penchant for thoroughness that I really appreciate. This one was a real mess and I did not know what to expect when I unwrapped it from his box. He reamed it with a PipNet pipe reamer and cleaned up the reaming with a Savinelli Fitsall Pipe Knife. He scrubbed out the internals with alcohol, pipe cleaners and cotton swabs until the pipe was clean. He scrubbed the exterior of the bowl with Murphy’s Oil Soap and a tooth brush to remove the grime and grit on the briar and the lava on the rim top. The finish looks very good with good looking grain around the bowl and shank. Jeff soaked the stem in Before & After Deoxidizer to remove the oxidation on the rubber. When the pipe arrived here in Vancouver for the second stop of its restoration tour it looked very good. I took photos before I started my part of the work.
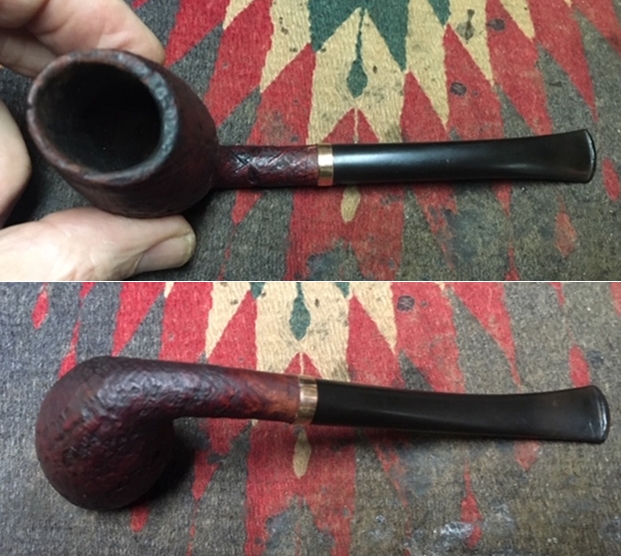
 I took some close up photos of the rim top and also of the stem surface. I wanted to show what an amazing job Jeff did in the cleanup of the rim top. The bowl and the rim top look very good. There was some darkening on the back top of the rim and some wear in the finish on the front of the rim top. I also took close up photos of the stem to show the tooth marks and chatter on both sides at the button.
  As I examined the crack I the shank under a lens I could see that it actually was two cracks running parallel and then connected at the top. I carefully remove the chip of briar from the shank and took the following photo. I have some older thin bands that looked like rose gold and were the right size to achieve the repair without covering the majority of the stamping on the underside of the shank. I glued the chip back in place on the shank with clear super glue. Once it hardened I coated the outside of the shank (the width of the band) with an all purpose white glue and pressed the band onto the shank to hold the piece in place and stabilize the repair.
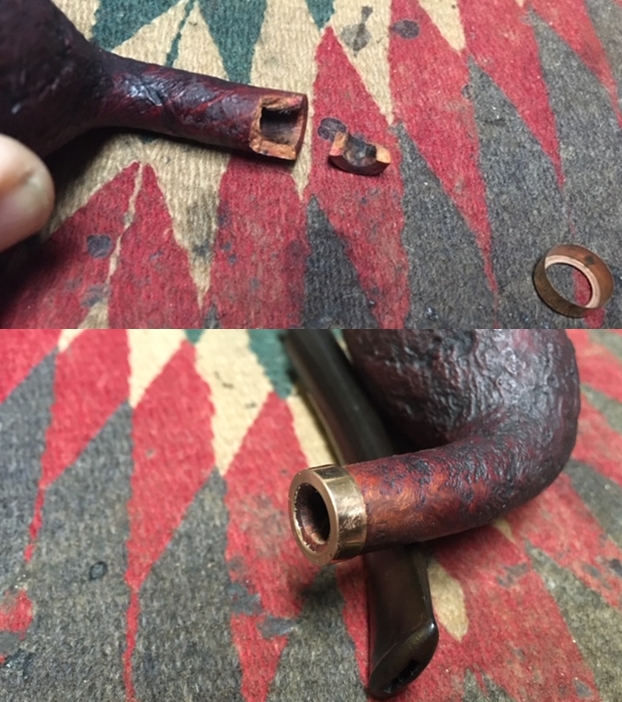
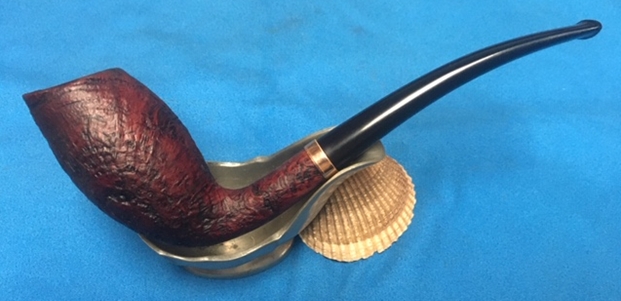
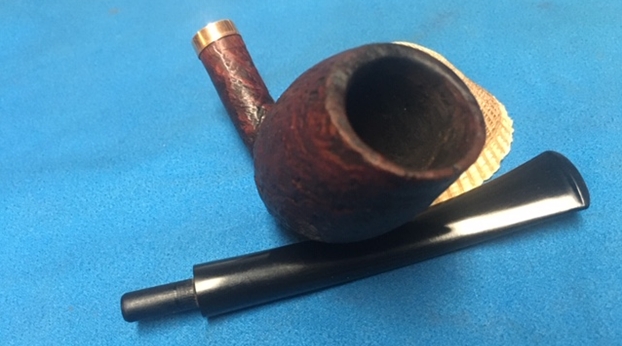
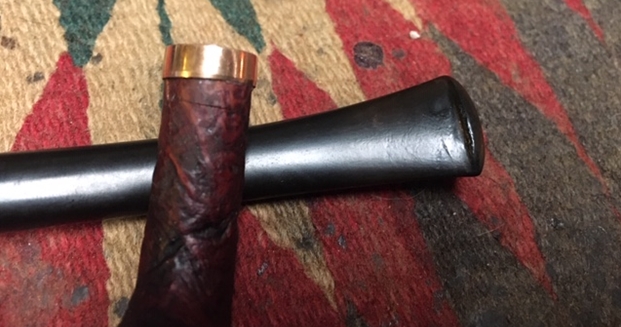 I put the stem on the shank and took photos of the pipe to get an idea of what it looked like with the delicate rose gold band on the shank end. I like the way it looked. It achieved the repair but did not sacrifice the dignity of the pipe.
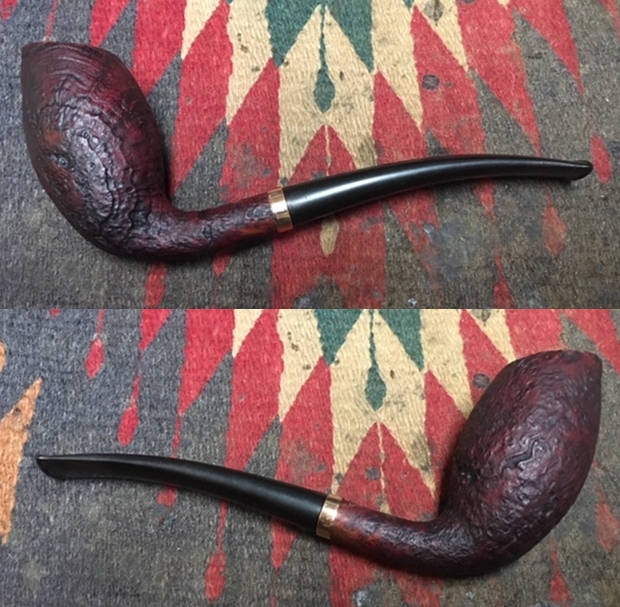
 I restained the rim top to blend the lighter front with the darkening on the rear portion using a Mahogany stain pen. It blended the colours well matching the rest of the bowl.
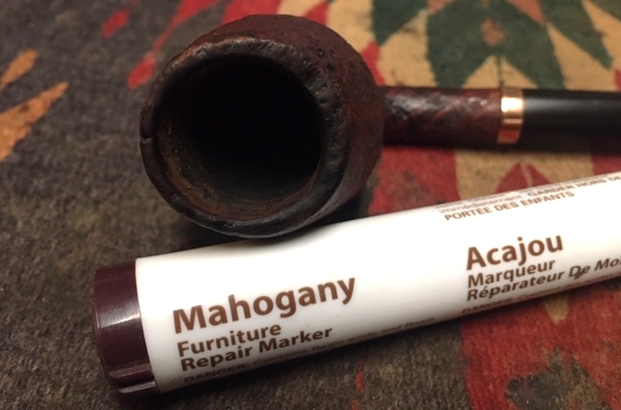 I rubbed the bowl down with Before & After Restoration Balm. I worked it into the surface of the briar with my fingertips to clean, enliven and protect it. I let the balm sit for a little while and then buffed with a cotton cloth to raise the shine. Mark Hoover’s Balm is a product that I have come to appreciate and one I use on every pipe I have been working on.
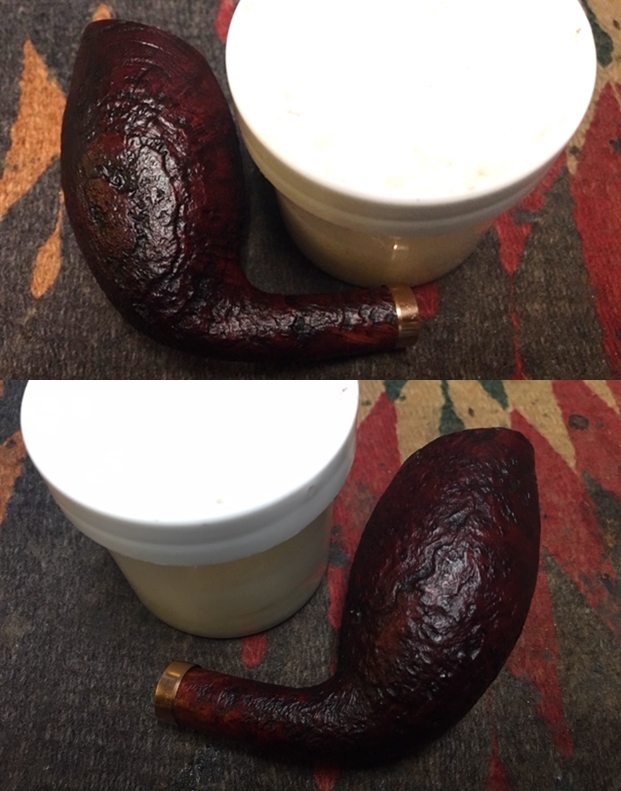
 I set the bowl aside and turned my attention to the stem. I “painted” the stem surface ahead of the button and on the button surface on both sides of the stem with the flame of a Bic lighter. The heat lifts the tooth marks on the surface and because of the “Memory” of vulcanite I was able to make them almost invisible with the heat. All I would need to do to finish the repairs was to sand the stem surface and polish it.
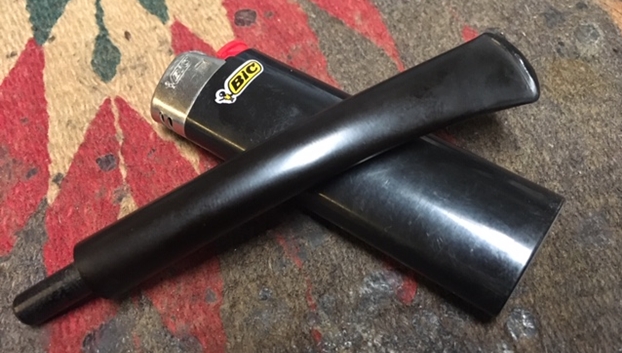 I sanded the stem with 220 grit sandpaper to break up the oxidation. I started the polishing with 400 grit wet dry sandpaper to remove the scratching. It is starting to look good. The tenon was very tight in the shank. I believe that it was the cause of the cracks in the shank. So, to deal with the issue I reduced the diameter of the tenon with the sandpaper at the same time I sanded the stem surface.
 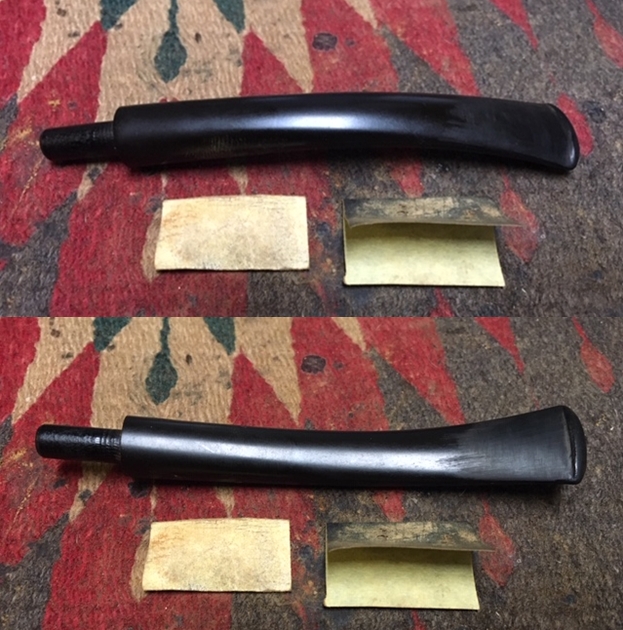 I began the polishing work on the stem by rubbing it down with Denicare Mouthpiece Polish. It is a gritty red paste that I work into the surface of the vulcanite and then buff off with a cotton pad. It does a great job minimizing the scratching on the surface. I have a few tins of this laying around so I am trying to use them up.
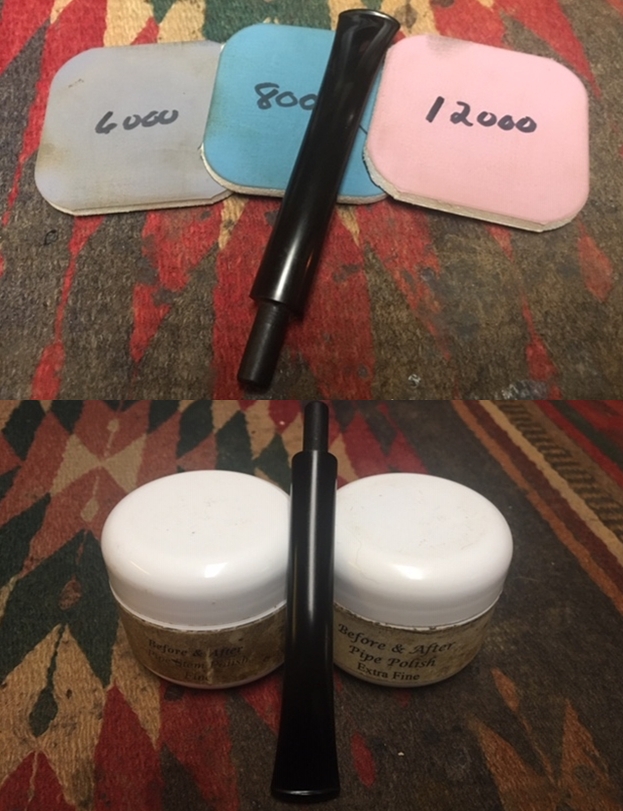
 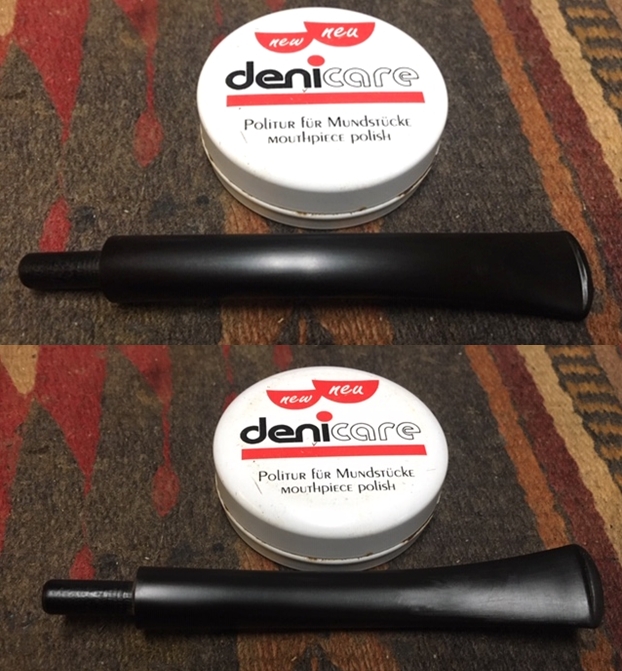 I polished the stem with micromesh sanding pads – wet sanding with 1500-12000 grit pads. I wiped the stem down after each sanding pad with Obsidian Oil. I polished it with Before & After Pipe Stem Polish – both Fine and Extra Fine. Once I had finished the polishing I gave it final coat of oil and set it aside to dry.
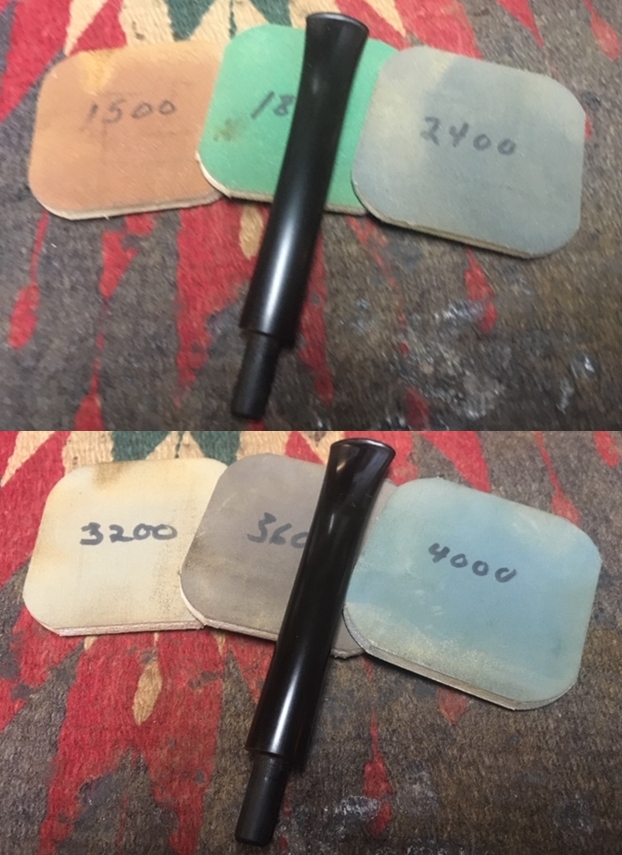
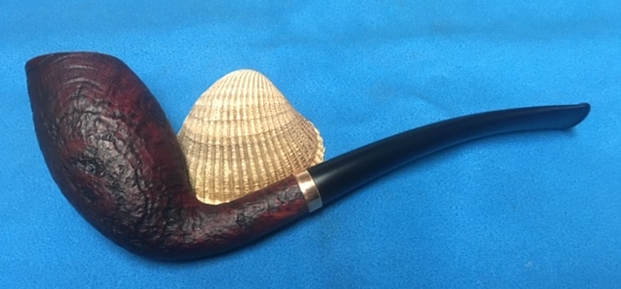
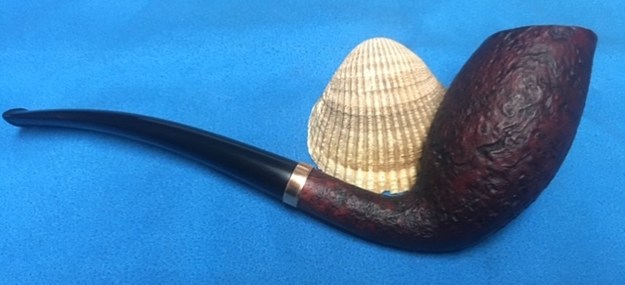
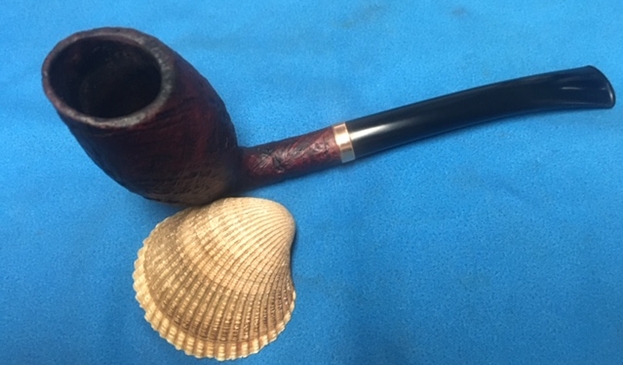
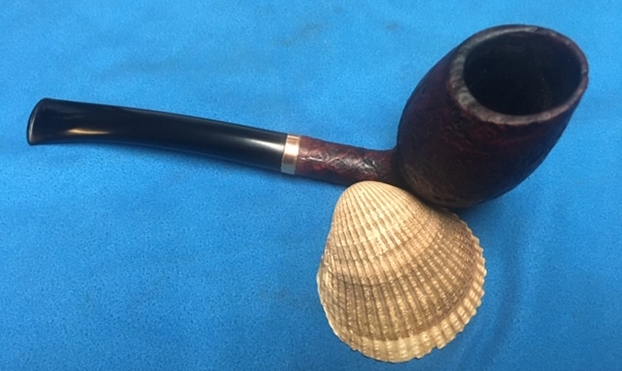
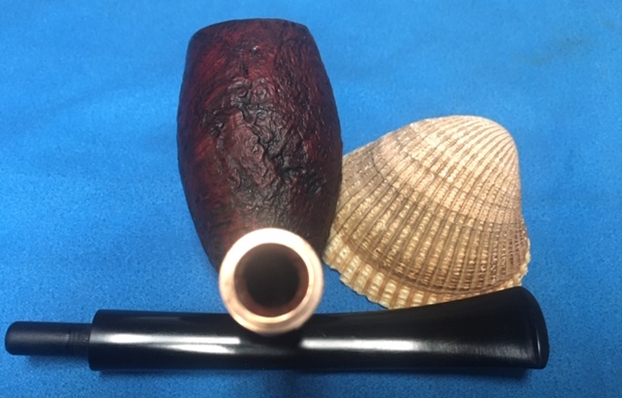
 I am excited to be on the homestretch with beautiful Larsen pipe. This is the part I look forward to when it all comes back together, polished and waxed. I put the bowl and stem back together. I polished the bowl and stem with Blue Diamond to polish out the scratches in the briar and the vulcanite. I gave the bowl multiple coats of Conservator’s Wax and the stem multiple coats of carnauba wax. I buffed the pipe with a clean buffing pad to raise the shine. I hand buffed it with a microfiber cloth to deepen the shine. The pipe polished up pretty nicely. The new band on the repaired shank adds a nice touch to the look of the pipe. The sandblast finish looks really good interesting grain patterns popping through the blast. The band, the blast and the polished black vulcanite went really well together. This Larsen Super freehand shape Tulip was another fun pipe to work on thanks to Jeff’s cleanup work. It really has that classic Danish look that catches the eye. The combination of various brown stains undulating in the nooks and crannies of the blast really makes the pipe look attractive. It is another comfortable pipe to hold in the hand. The finished pipe is shown in the photos below. The dimensions of the pipe are Length: 6 ½ inches, Height: 2 ½ inches, Outside diameter of the bowl: 1 1/8 inches, Chamber diameter: ¾ of an inch. I like the looks of the repaired shank and the flow of the gold band on the shank. It sets off the brown of the briar and the black of the vulcanite. Thanks for reading this blog and my reflections on the pipe while I worked on it. This is an interesting estate to bring back to life.