Tag Archives: removing oxidation

A Surprising Collaboration between Sasieni and Tinderbox – an Ivory London Made by Sasieni 107 Freehand


n SanBlog by Steve Laug

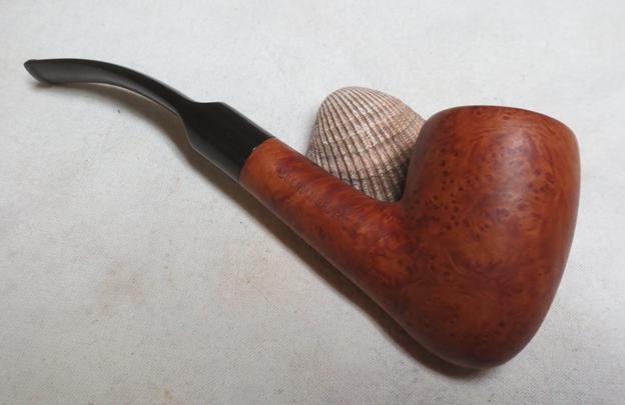
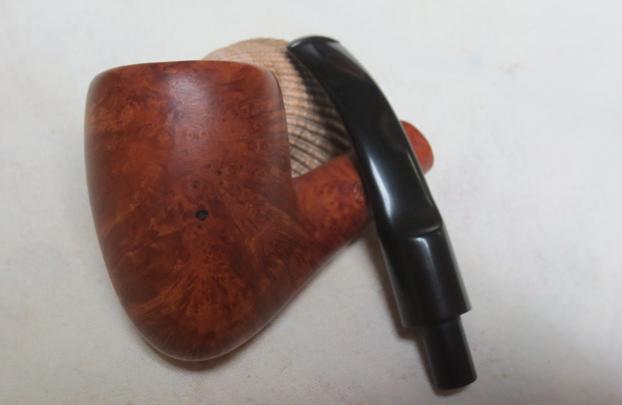
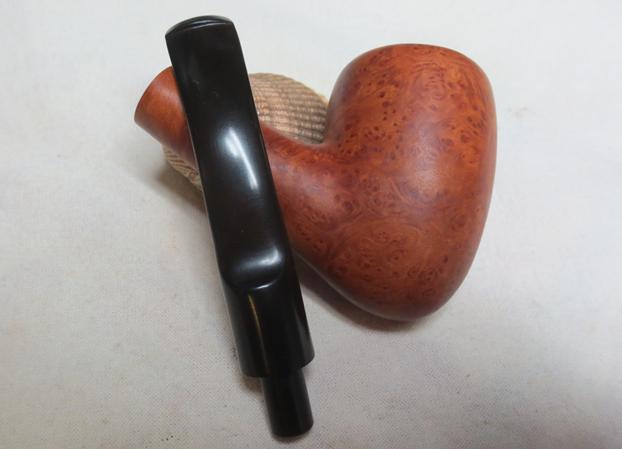
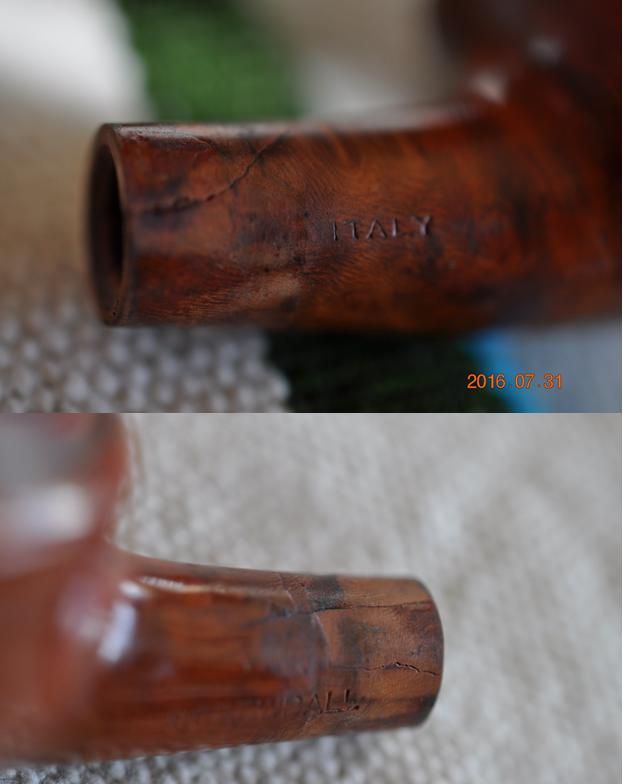
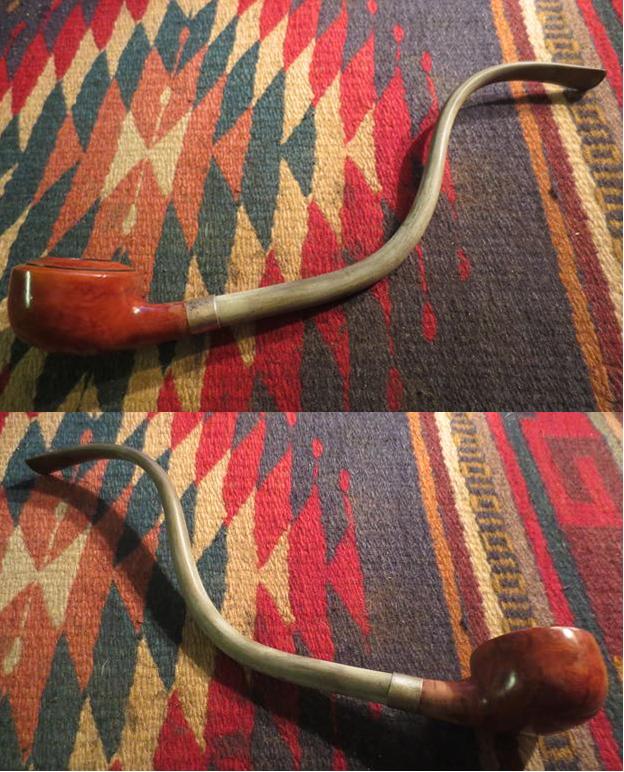
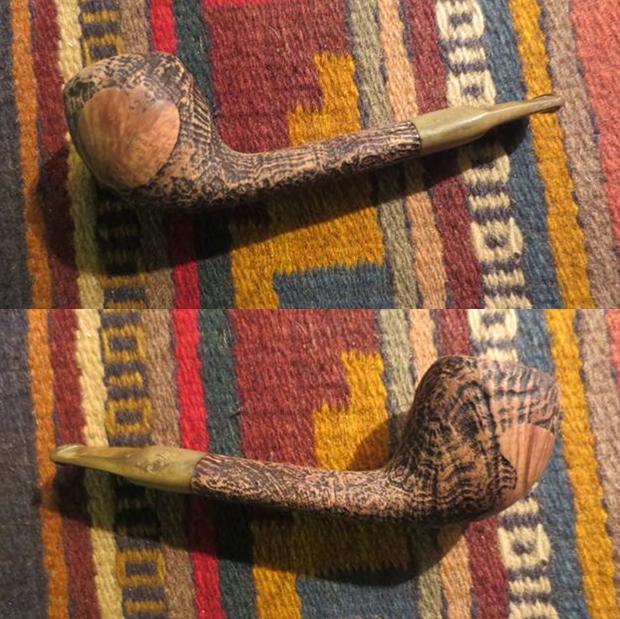
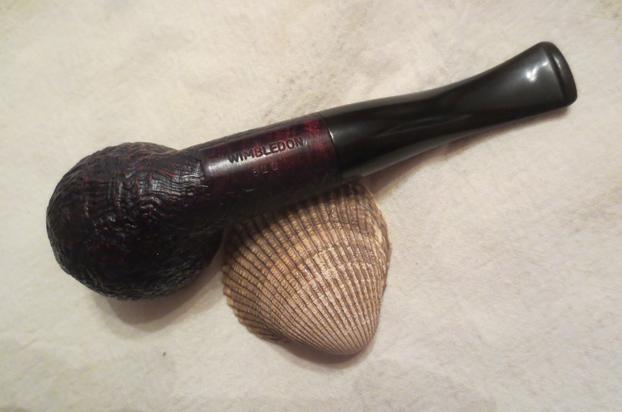
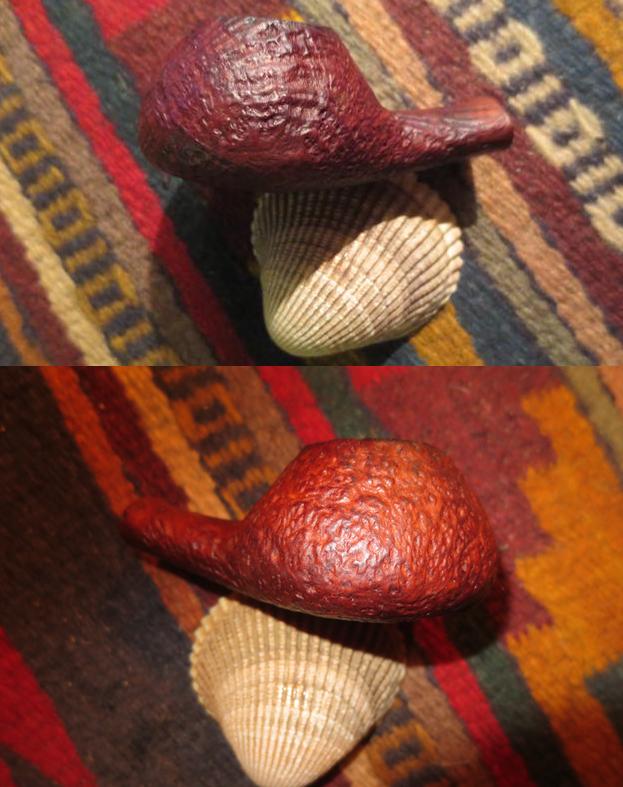
My brother sent me this pipe that was stamped on the left side of the shank Ivory over London Made over by Sasieni and on the right side of the shank was the rugby ball shaped stamping Made In England and the shape number 107. When I saw the photos that my brother sent I have to admit, I thought it was an ugly, strangely shaped deformed pipe. I was not sure what to make of it but I ‘knew’ I did not like it. I thought. The shape did not do anything for me and the blandness of the grain that I saw in the left side photo did not help. Too me there was not much redeeming about the look of the pipe. (The next photos are the ones my brother sent me.)ivory1
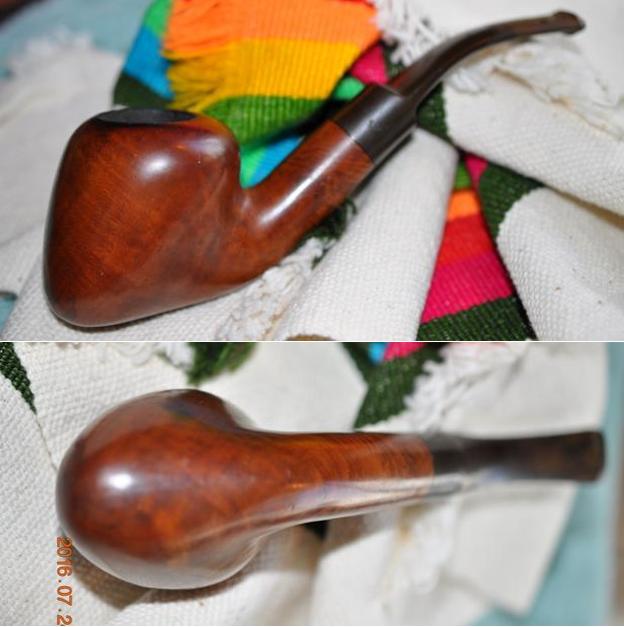
I had not heard of the Ivory made by Sasieni pipe stamping before. It was a new one to me. So I did a little searching. On one of the online forums I found a clue that the Ivory was mentioned in the 1979 Tinderbox catalogue at pipepages. I went to pipepages and found the link to the catalogue: http://pipepages.com/tinderbox.htm. There was a 1979 Tinderbox Catalogue there that had the following quotation regarding the Ivory. “Made to our specifications by Albert Sasieni of London. The Sasieni Ivory is a Tinder Box exclusive.” The mention of the name Albert Sasieni I believe is an error as the company was run by Alfred Sasieni.

I knew from the link that the pipe was made for Tinderbox in 1979, the end of the family era. The collaboration between Tinderbox and Sasieni was established in that catalogue. In a way the Ivory made by Sasienin was like the Unique made by Charatan’s. Both were special orders by Tinderbox from those pipe companies. I have included a copy of the page in the 1979 catalogue from the pipepages site.ivory2
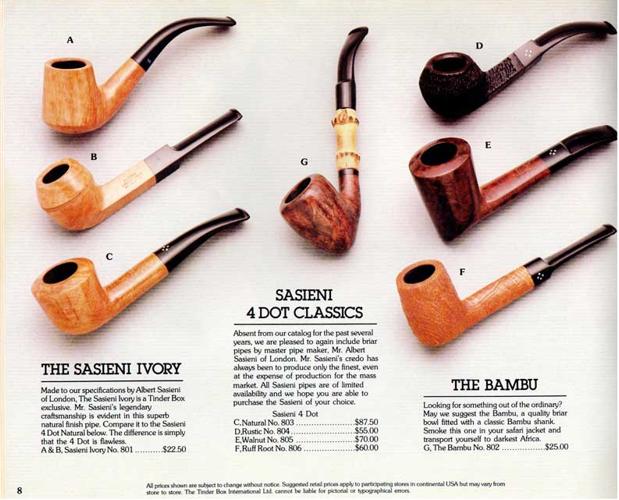
I also found a Sasieni Shape Chart online and copied the page that had the 107 shape listed. It is circled in red in the photo below. The 107 is called a Waterloo and has a xs* notation in the catalogue. The note on the top of the page says that the xs* means that the pipe is a premium priced pipe in the 4 dot grades only.ivory3
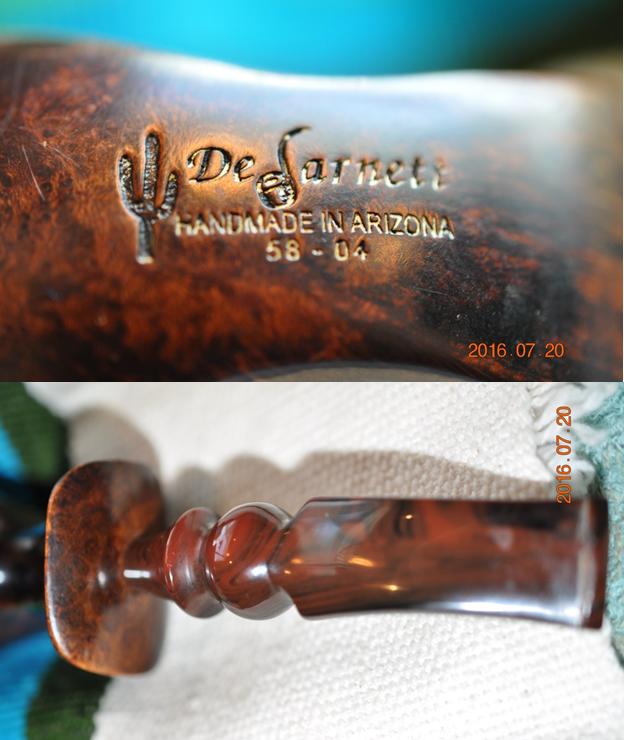
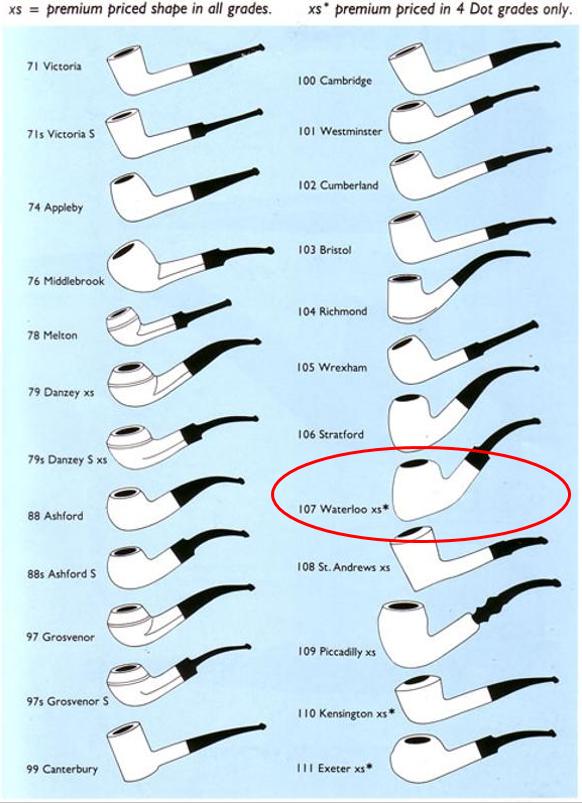
I also looked on pipephil’s logos and stampings site and found the Sasieni Ivory there as well. There was a ivory3a
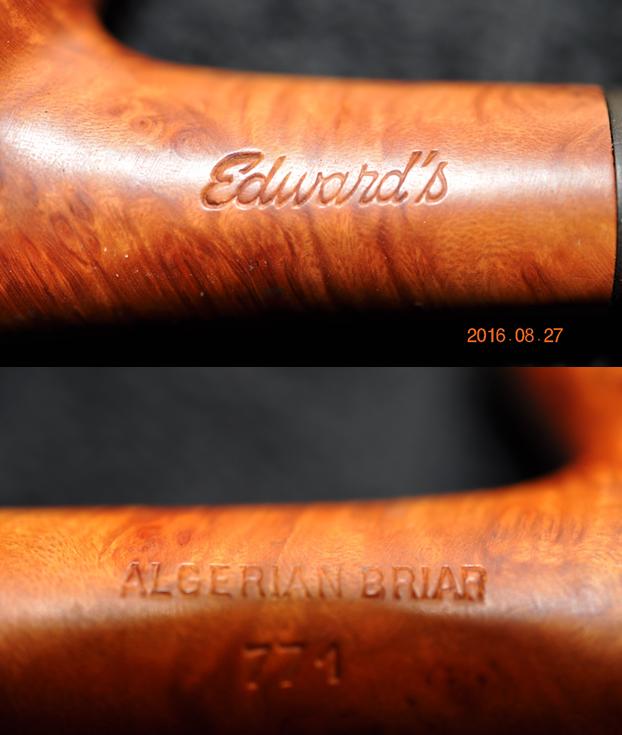
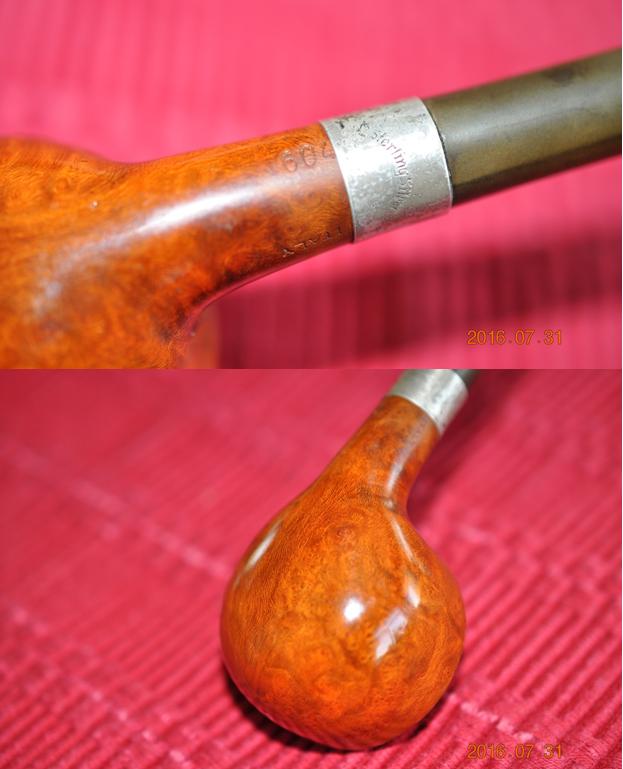
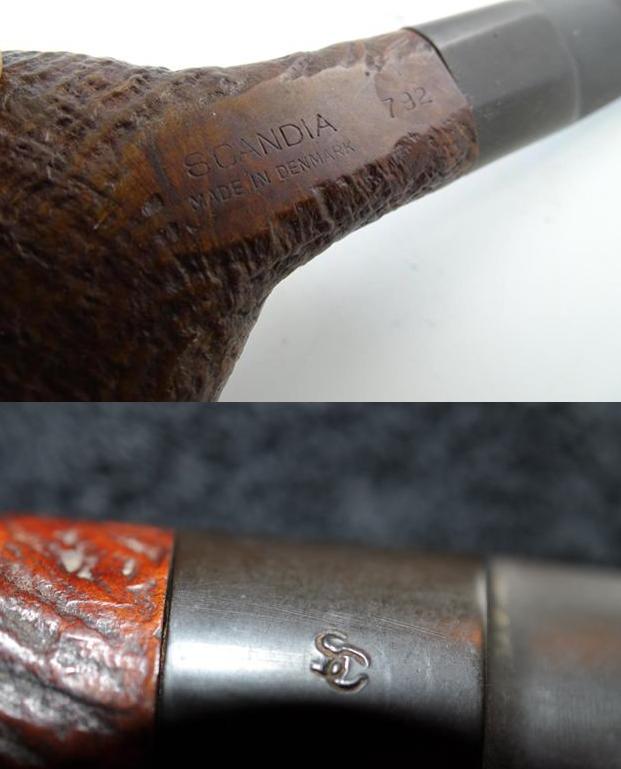
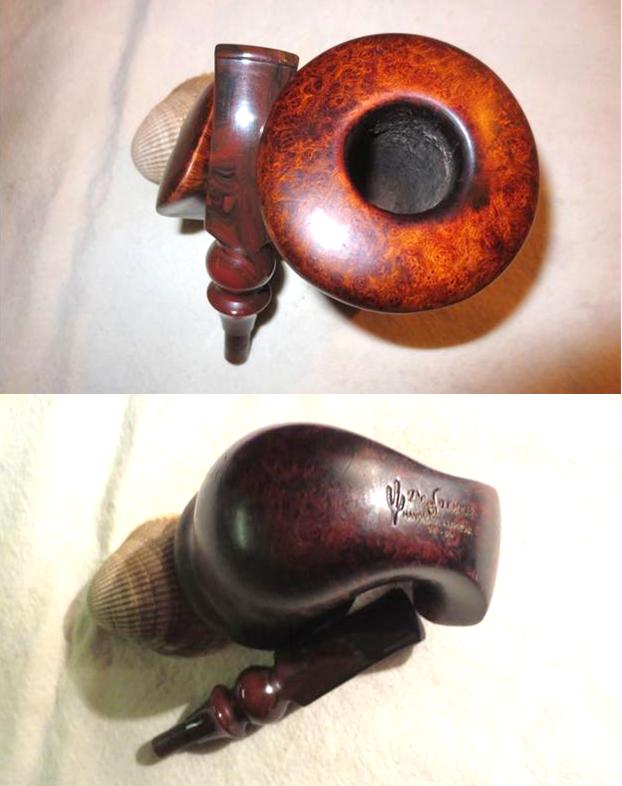
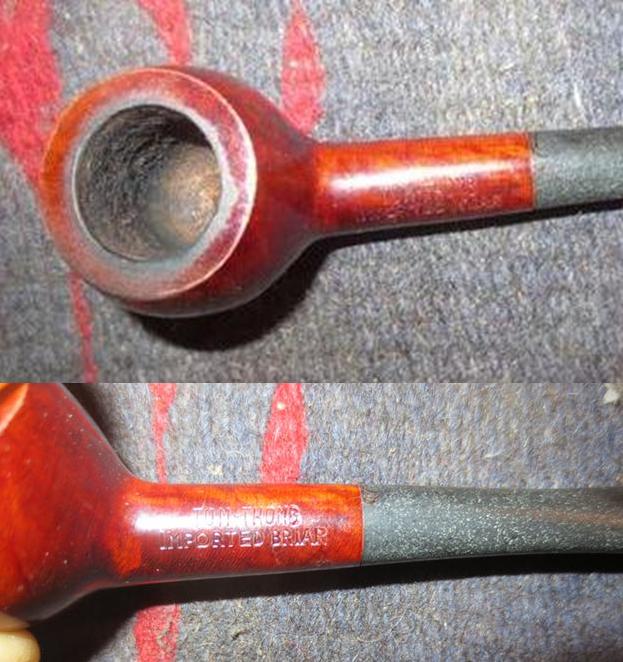
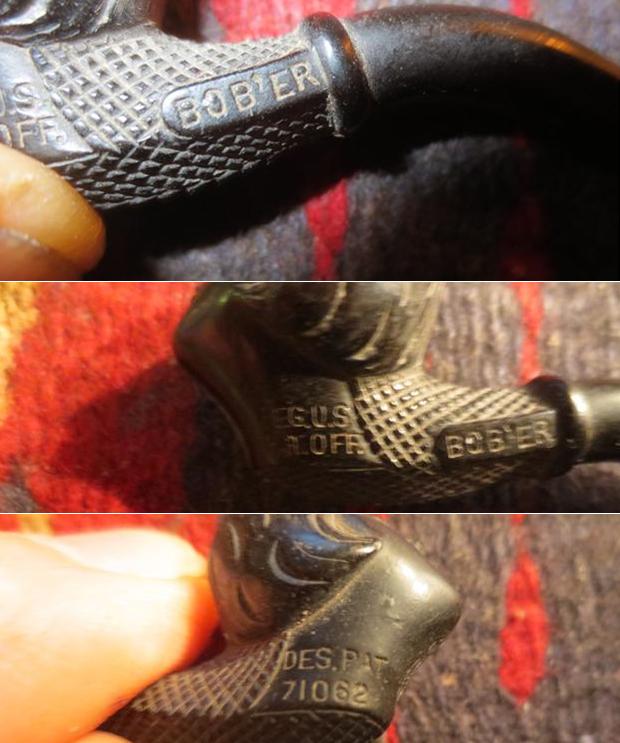
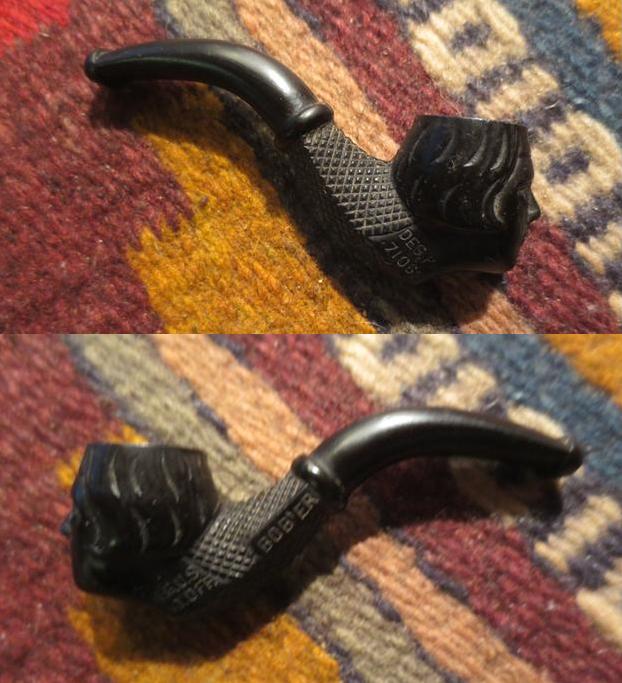
great photo of the stamping on the shank and the stem. The stamping on the one I have is identical in all but the shape number. Mine is a 107 shape. The S on the stem is also exactly the same and in the same position on the saddle.

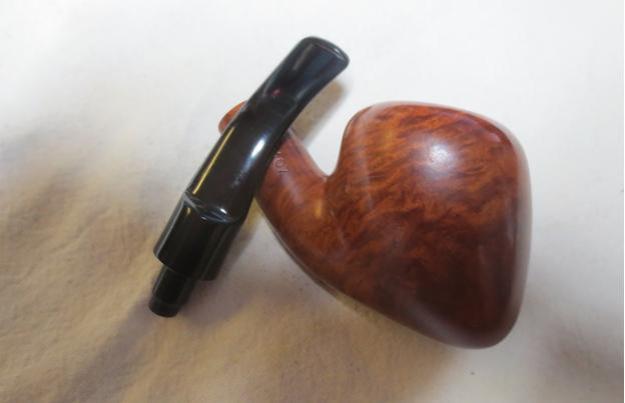
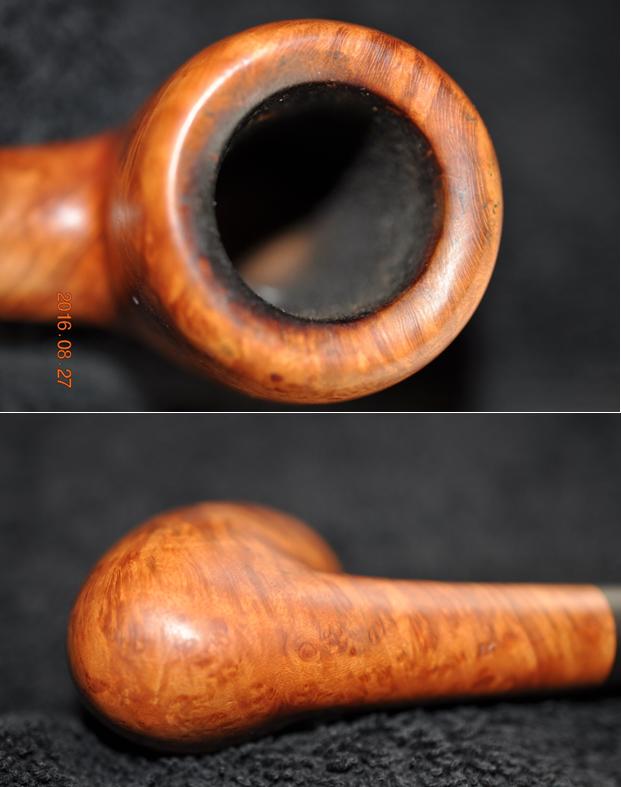
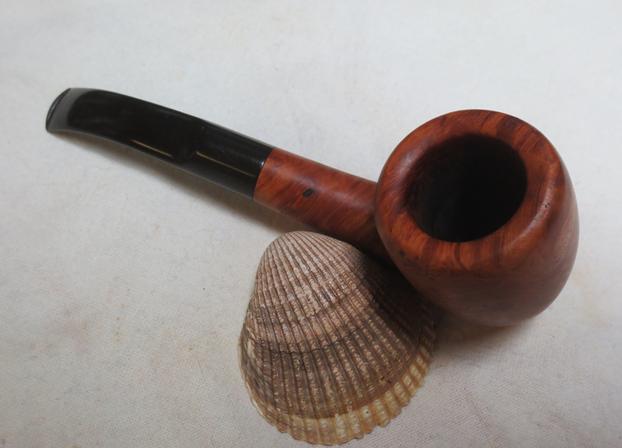
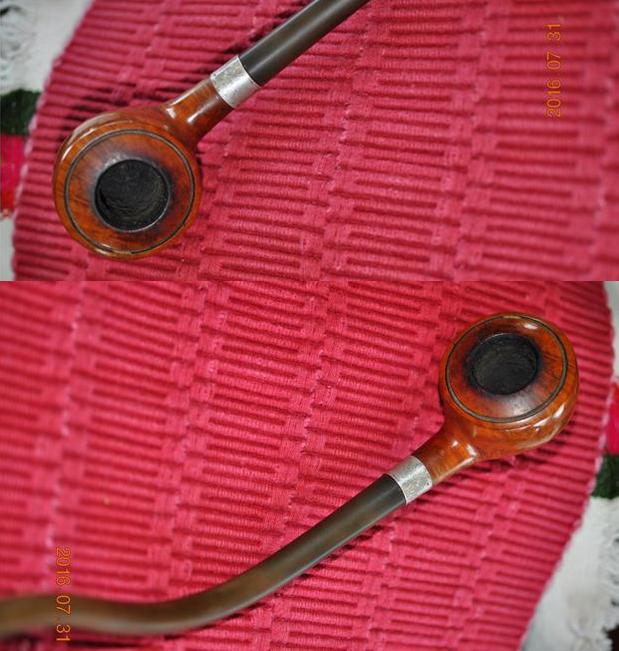
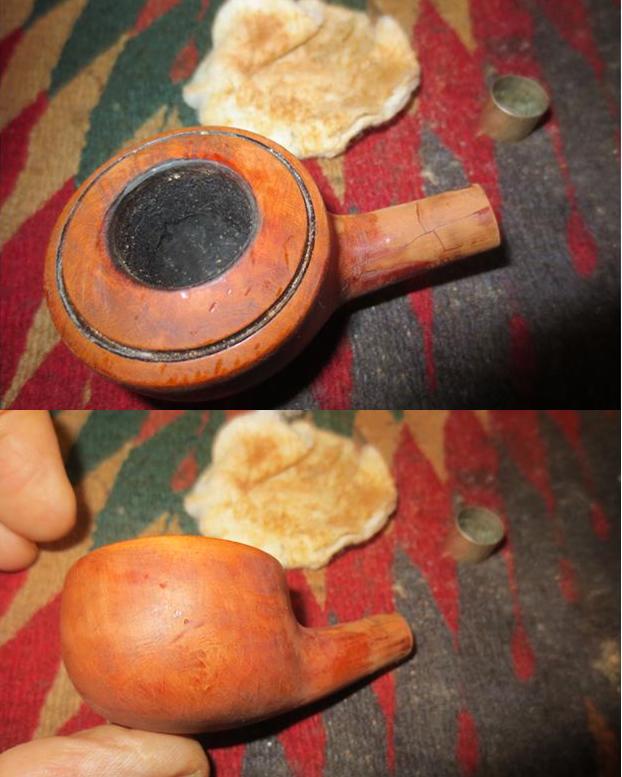
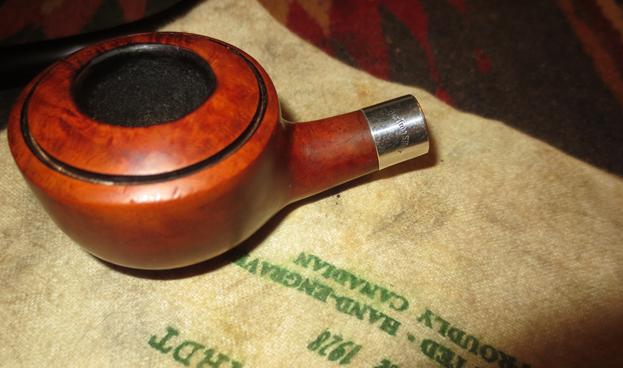
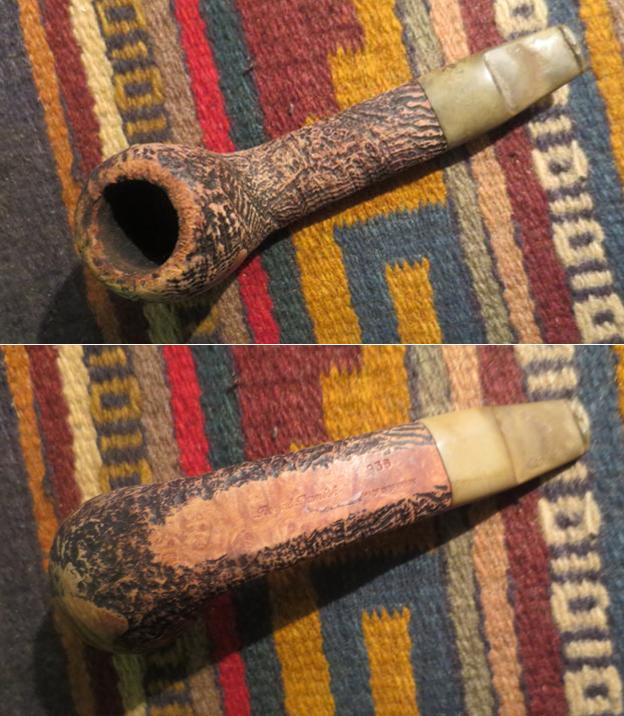
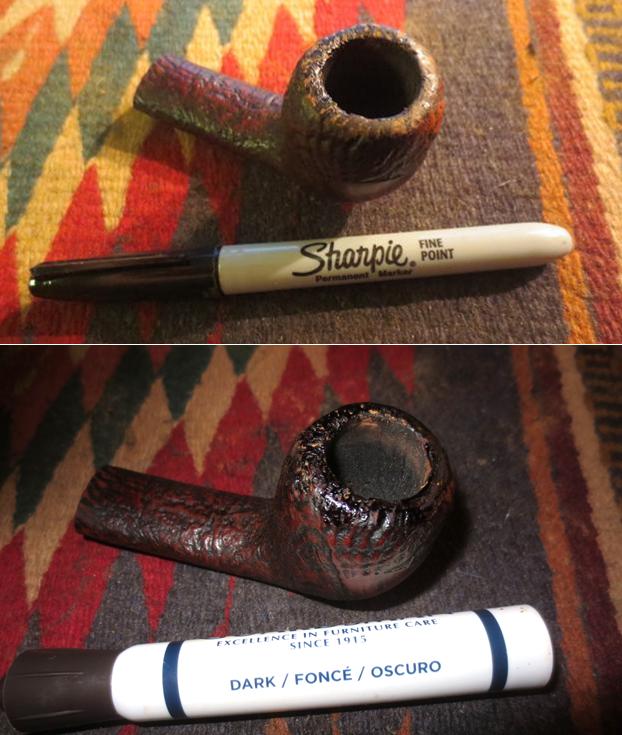
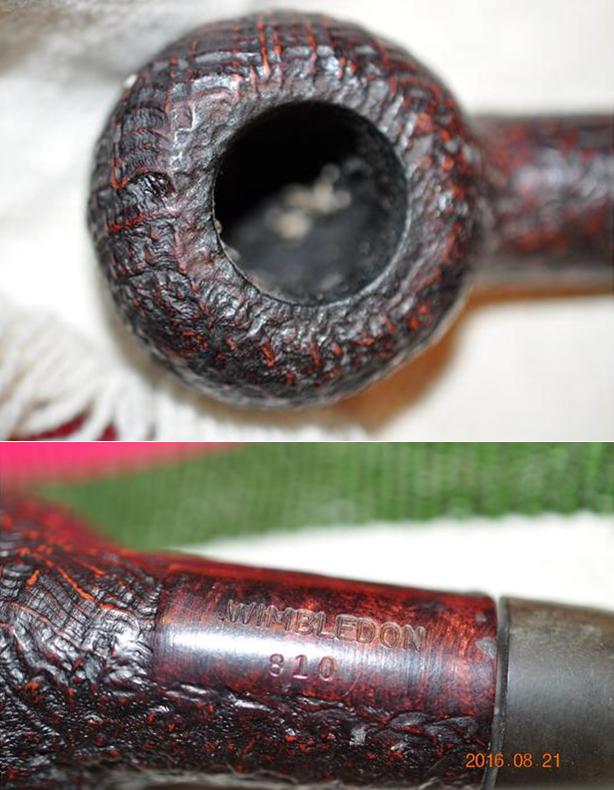
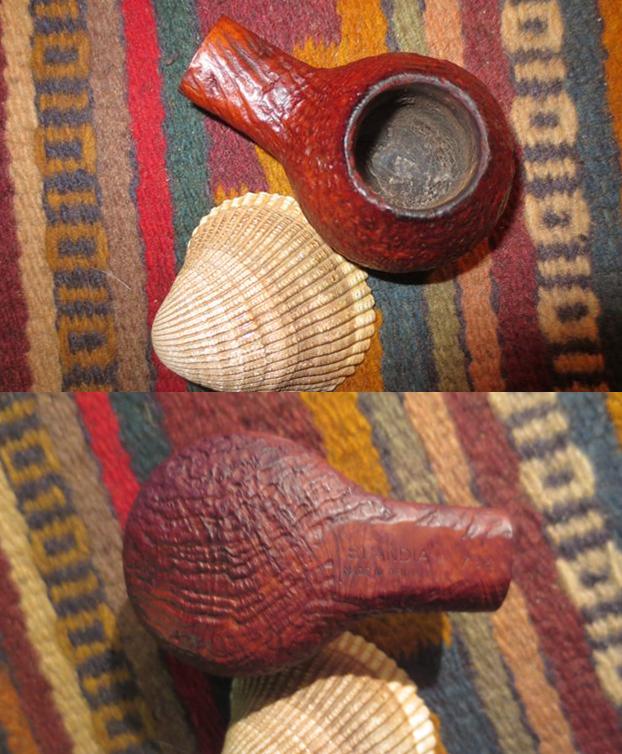
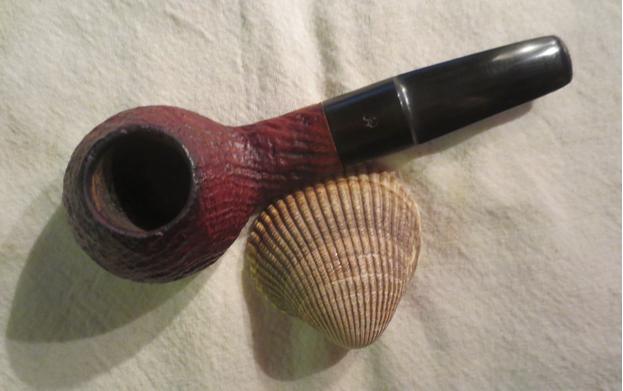
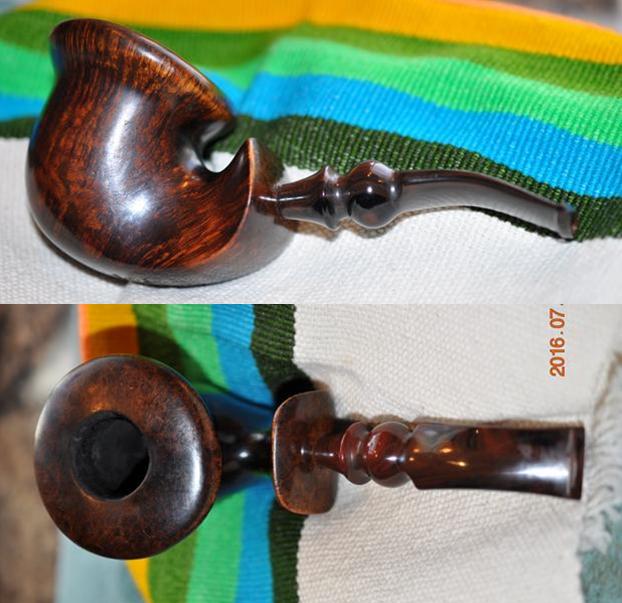
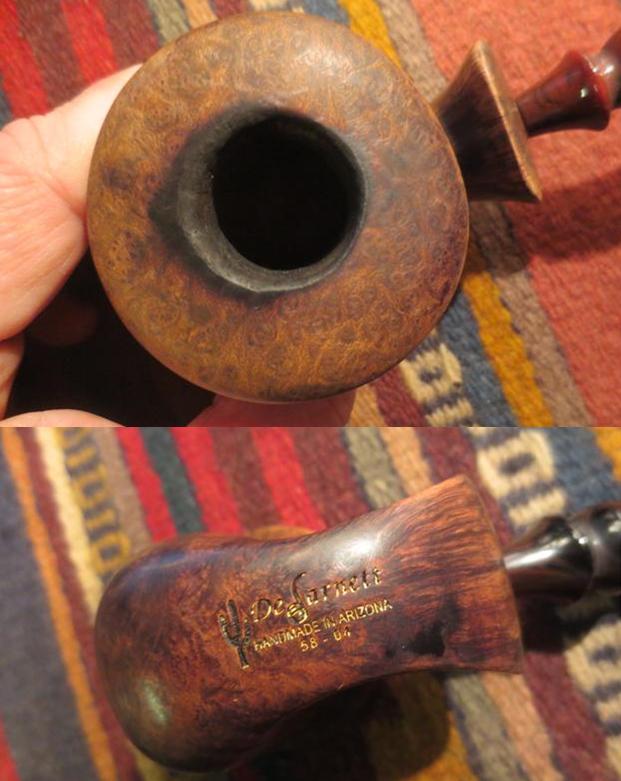
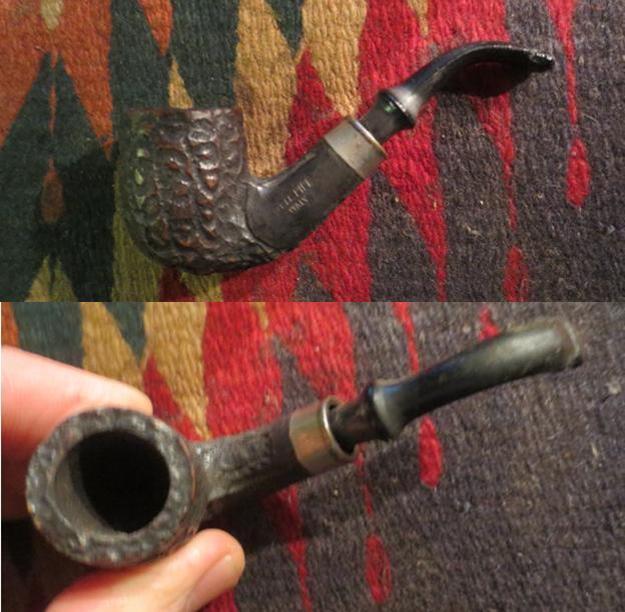
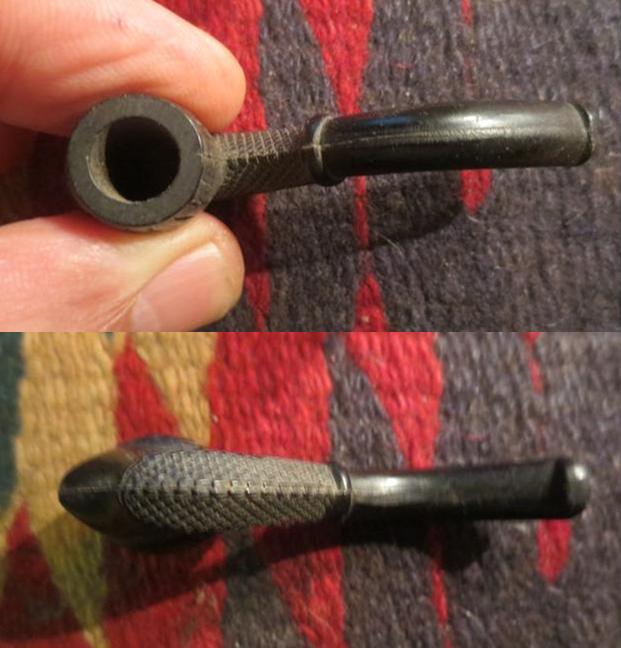
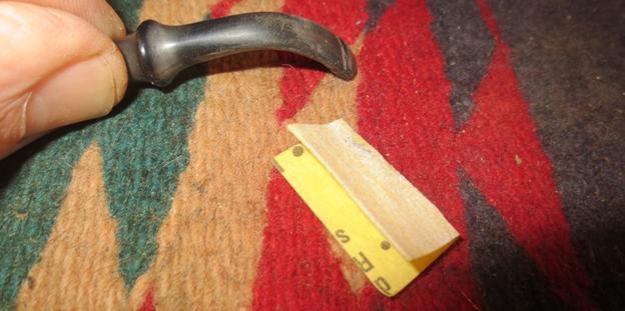
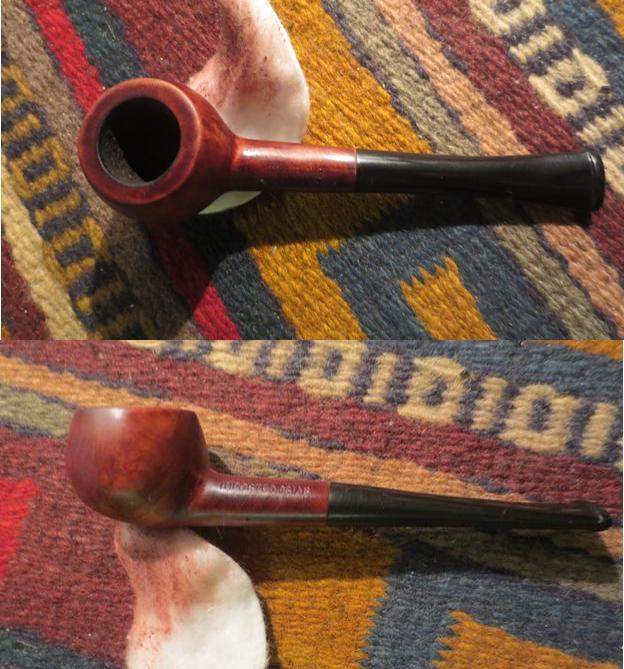
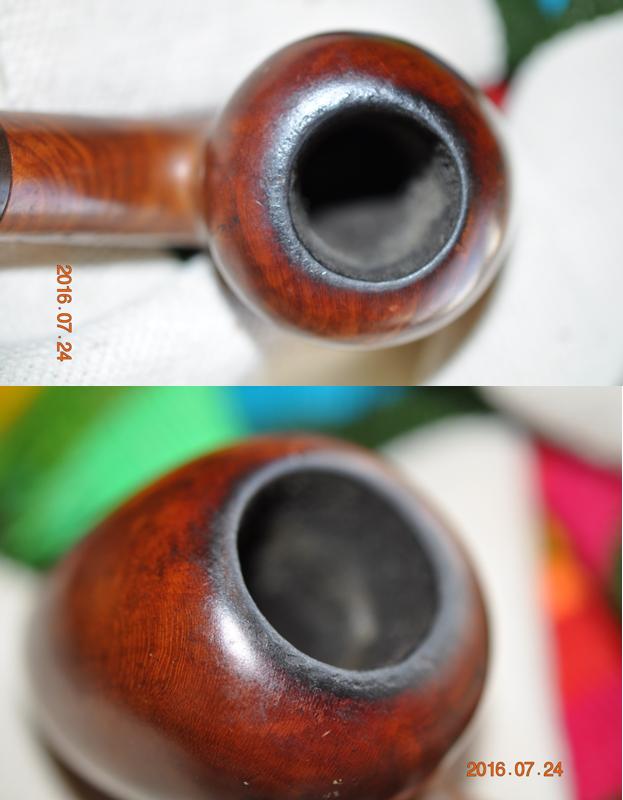
My brother also took some close up photos of the stamping on the sides of the shank and the rim to show me the damage to the rim top and the cake in the bowl.ivory4 ivory5
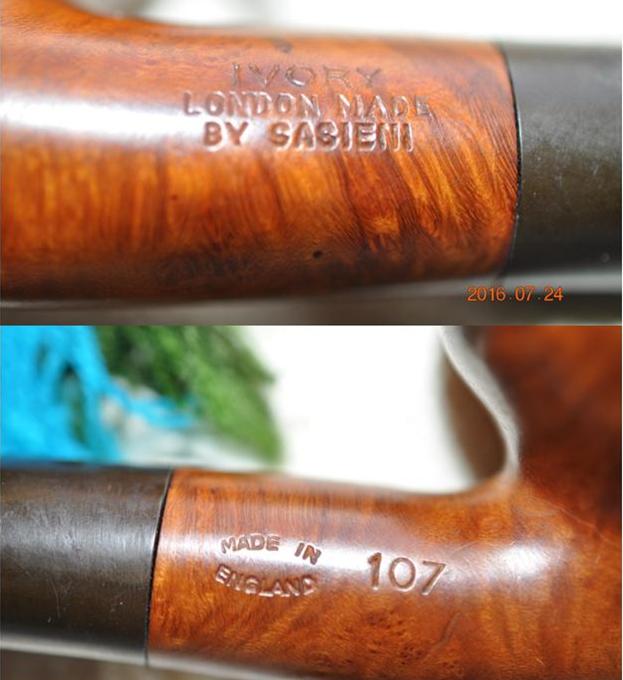
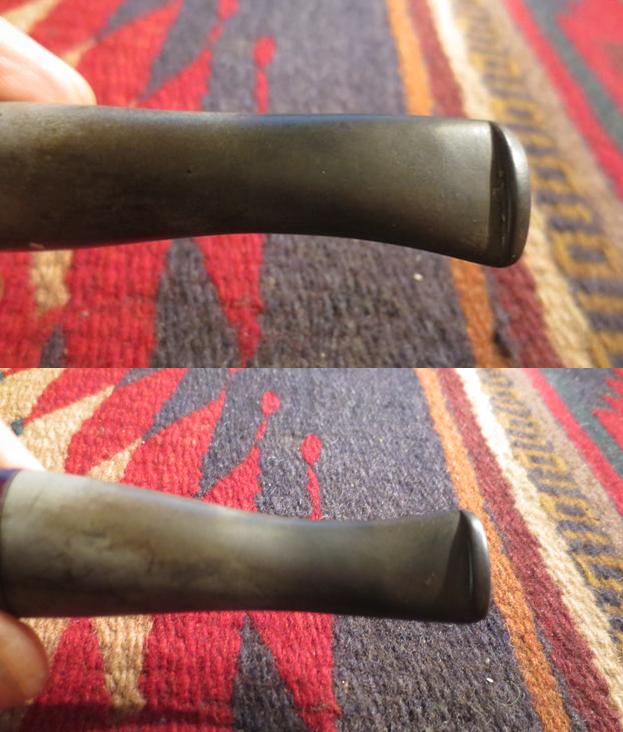
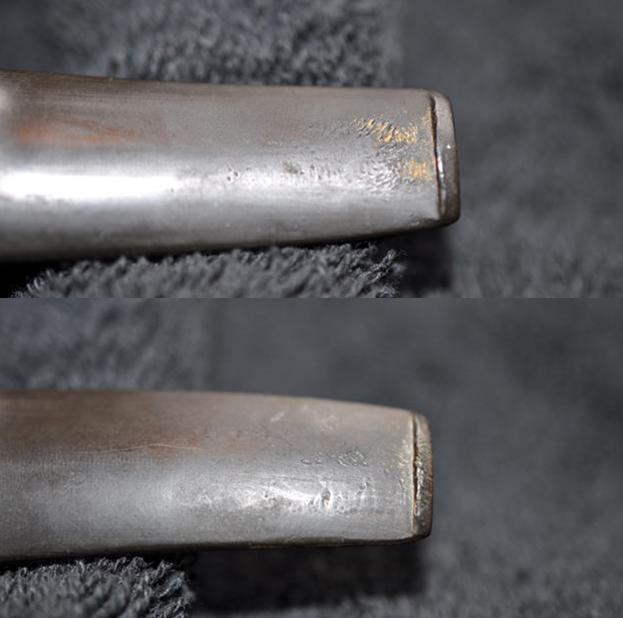
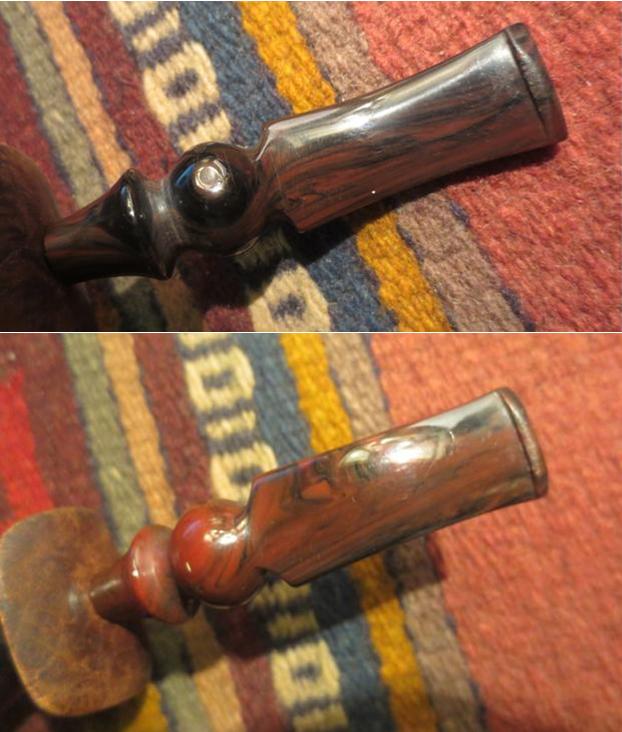
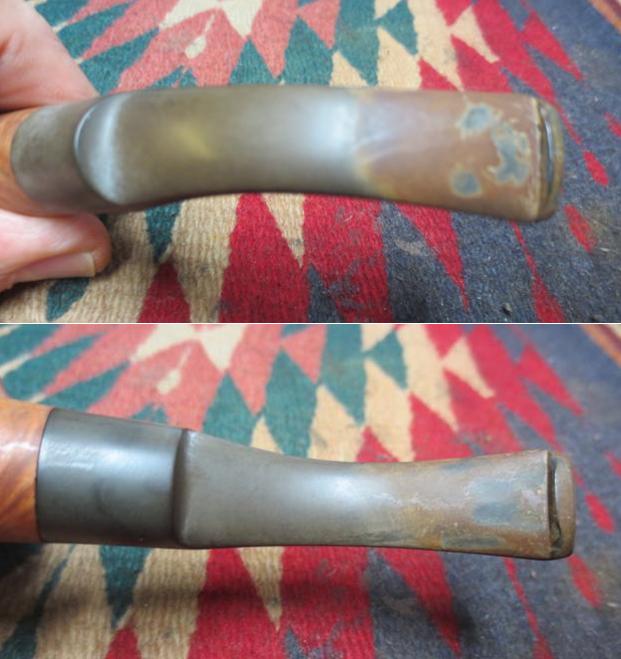
He also took a photo of the top side of the stem to show the tooth marks on that surface. There was a matched set on the underside of the stem. Combined with the surrounding tooth chatter the stem was a bit of a mess.ivory6
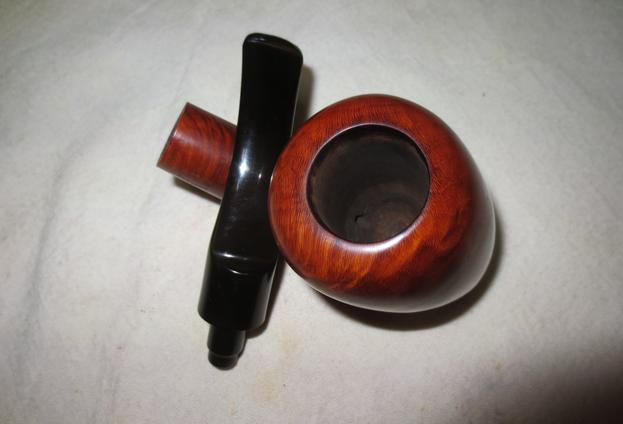
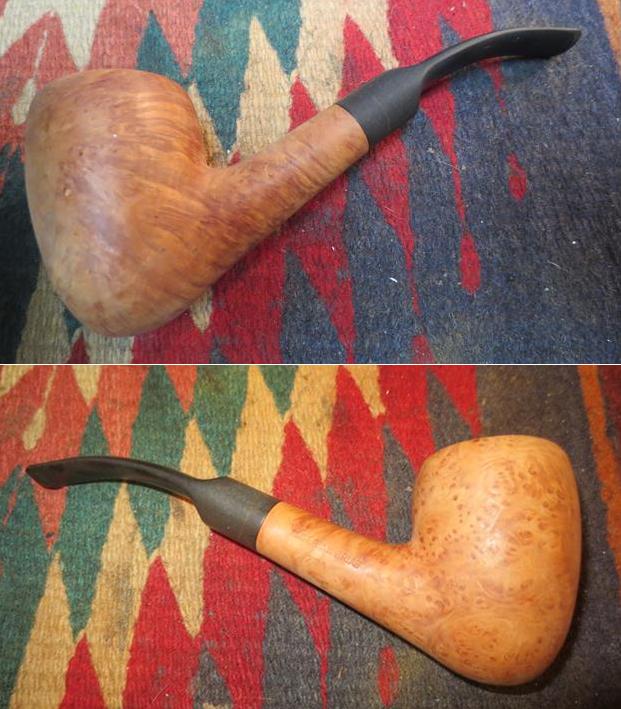
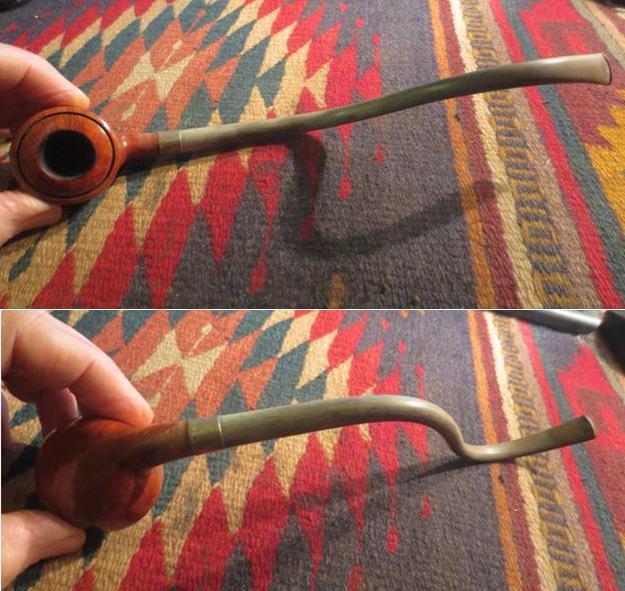
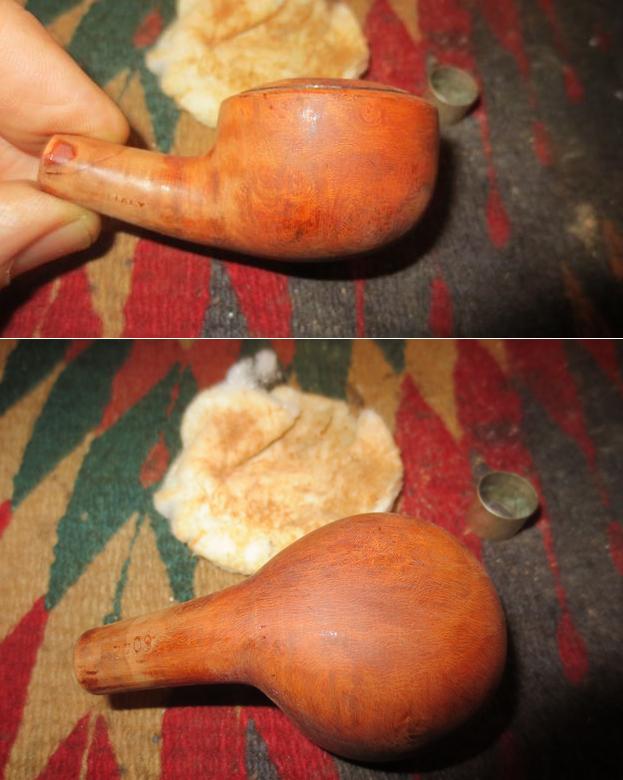
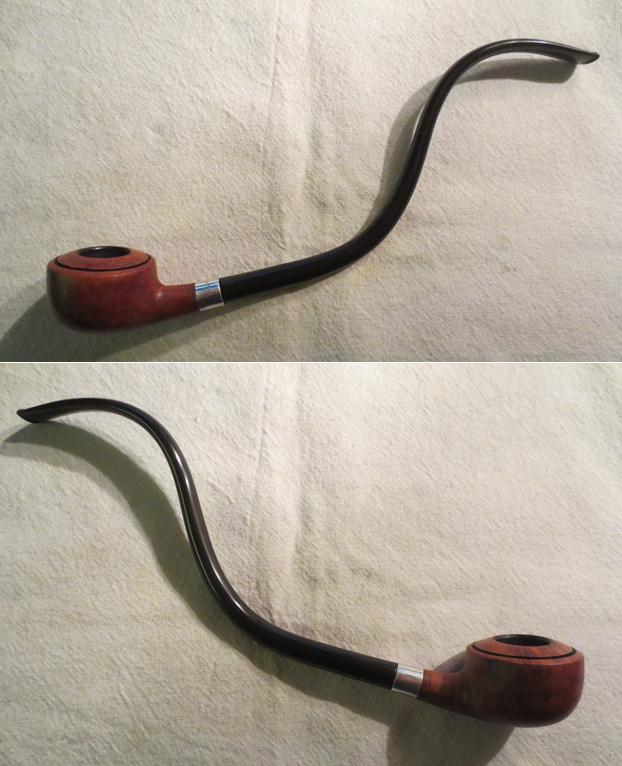
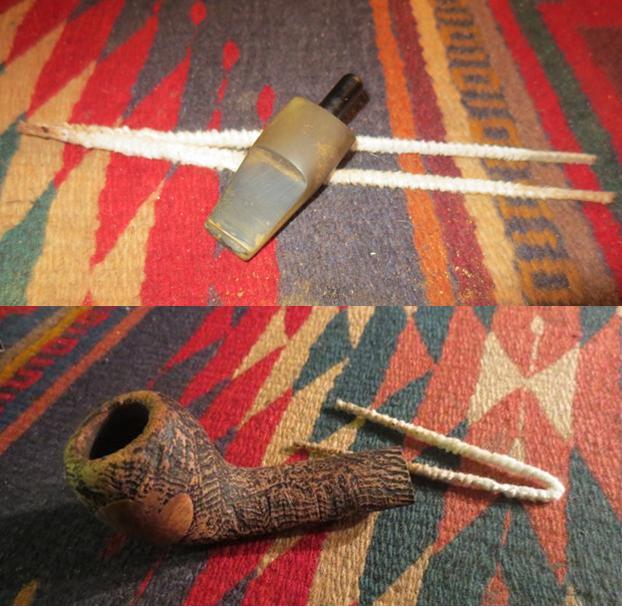
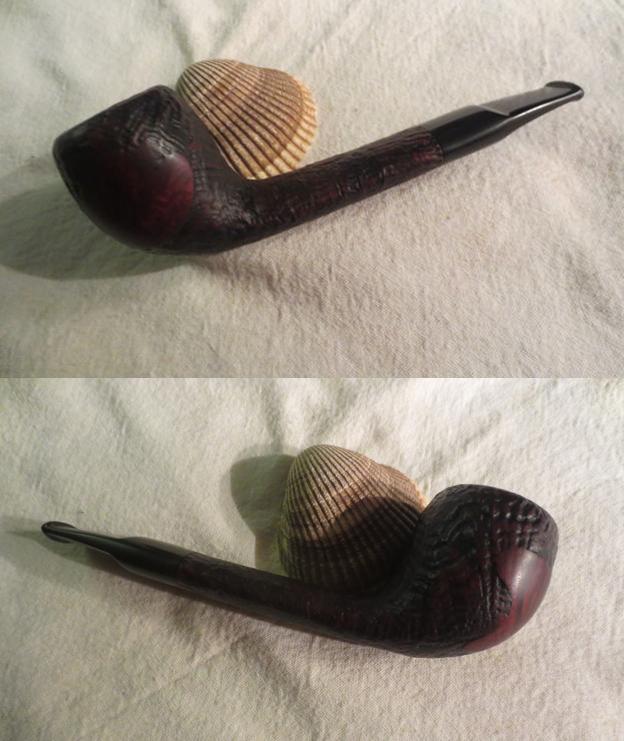
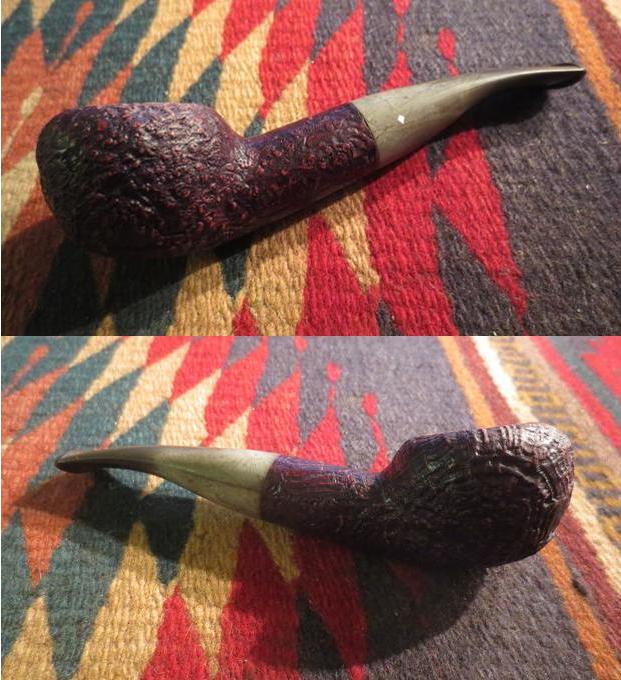
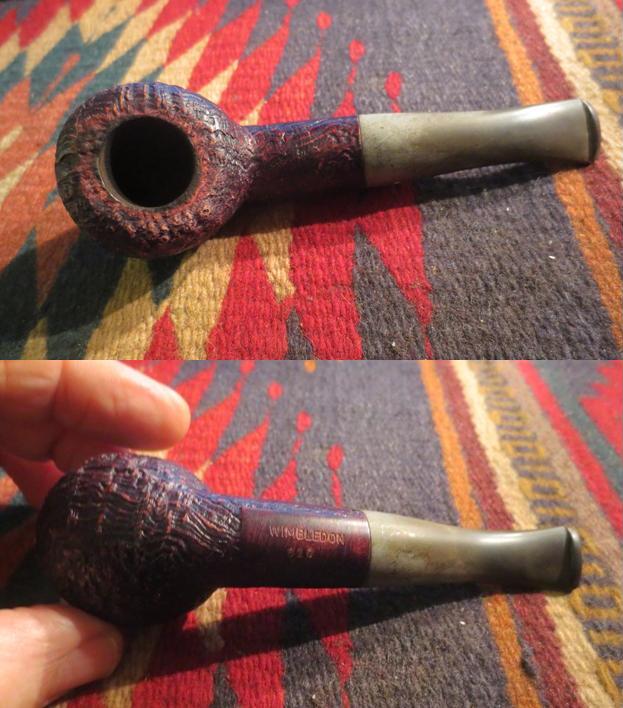
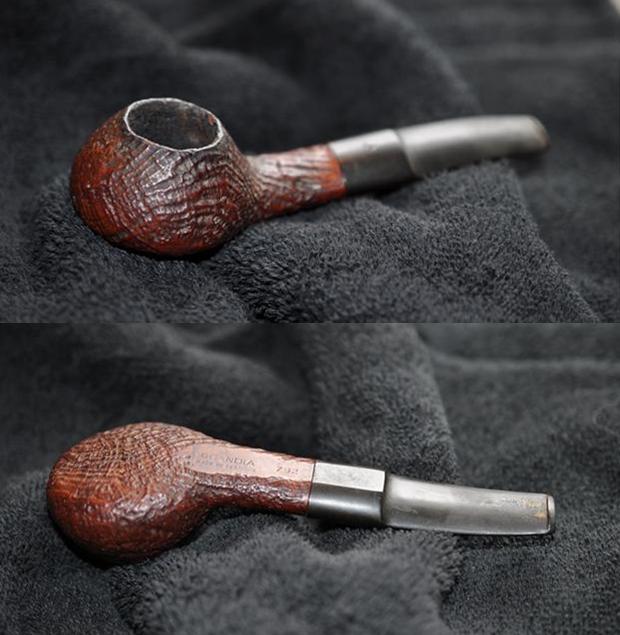
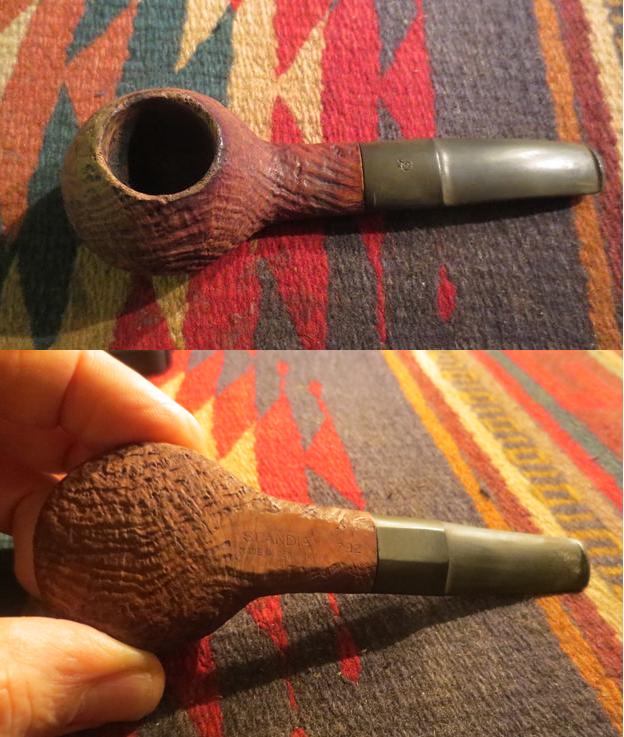
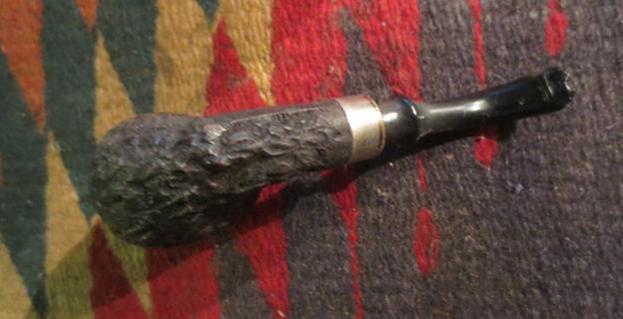
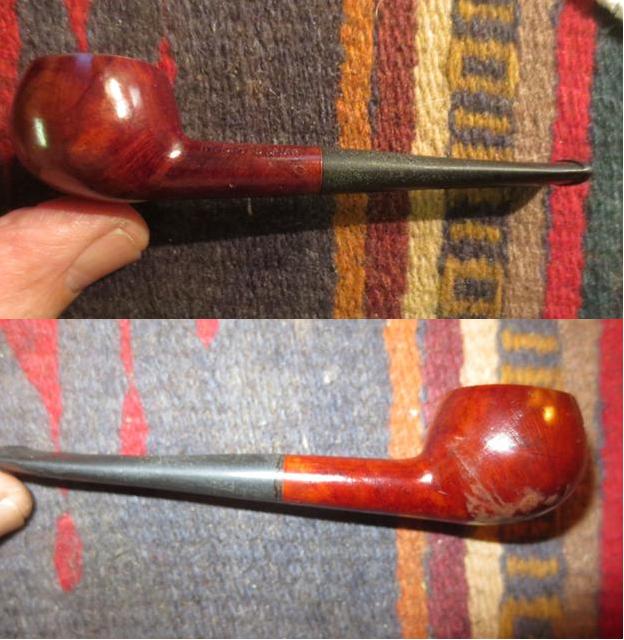
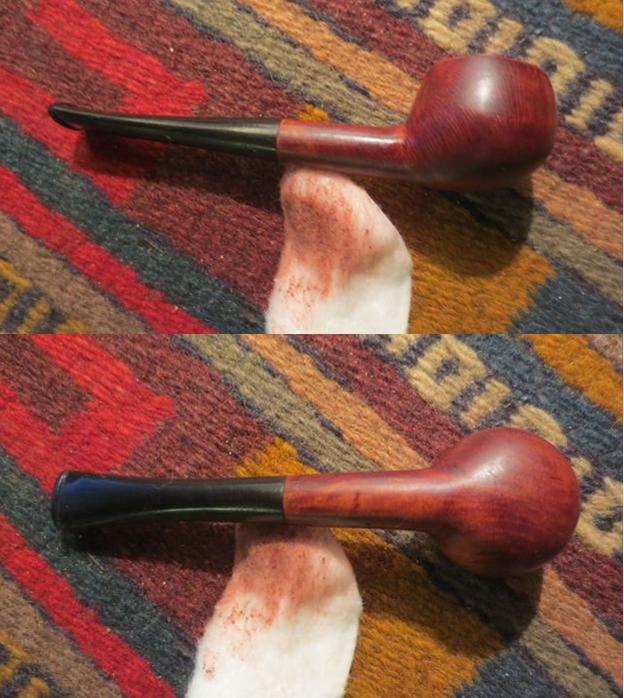
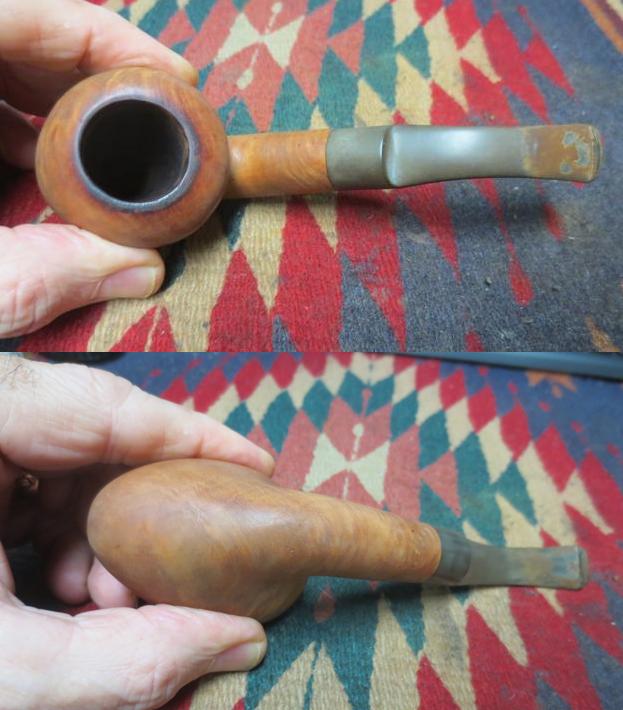
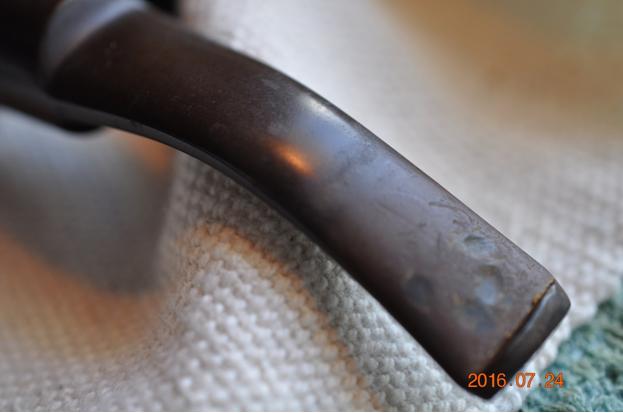
My brother did his usual stellar job of cleaning up the pipe. He scrubbed the exterior of the bowl with a tooth brush and Murphy’s Oil Soap and rinsed it under running water. He was able to remove the wax and oils on the surface of the bowl and leave the briar pretty bare. The rim was better but the burn marks would need more work. He cleaned out the mortise and airway in the shank and stem with pipe cleaners, cotton swabs and alcohol. I took the next photos of the pipe before I started working on it.ivory7 ivory8
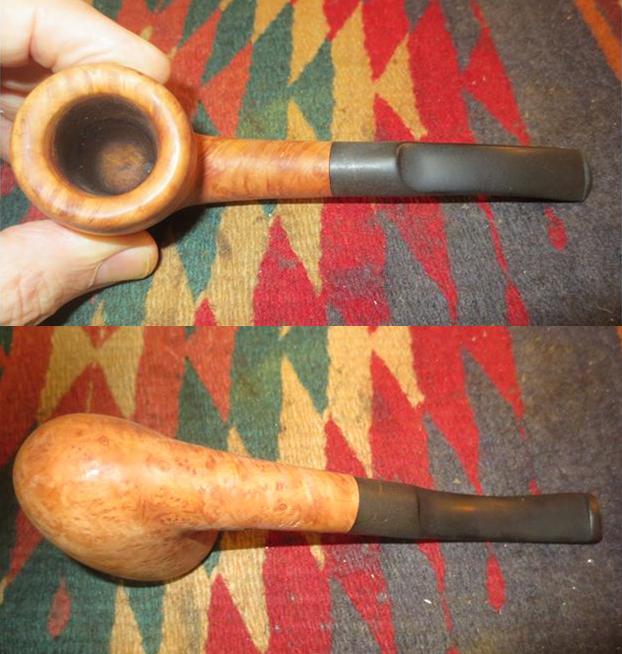
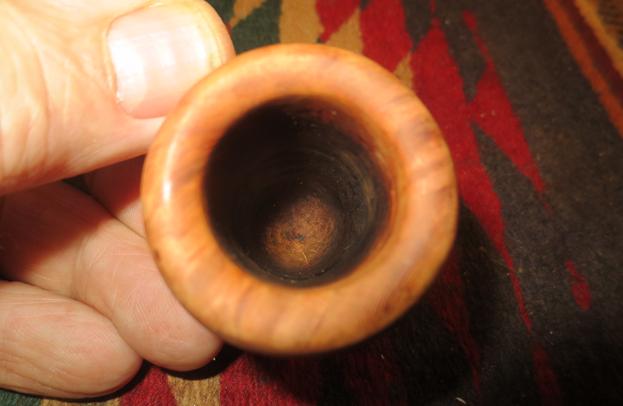
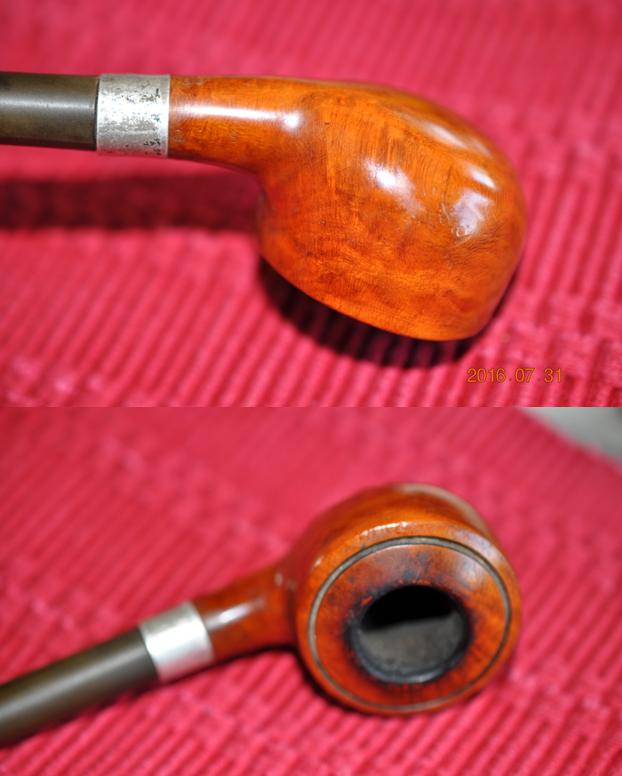
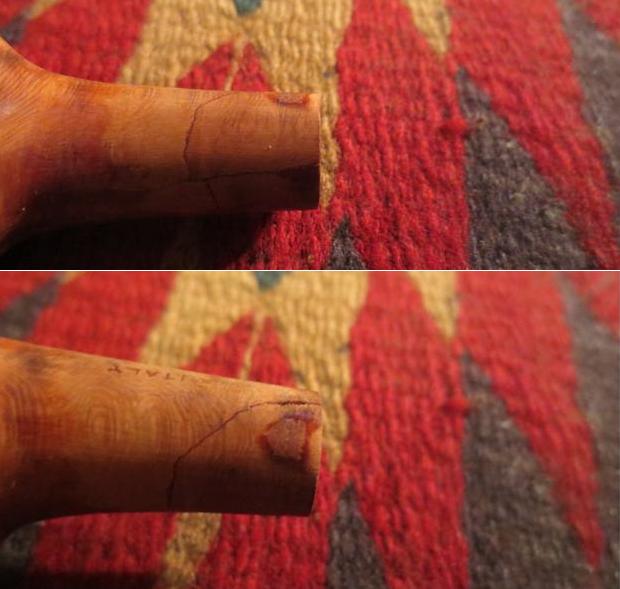
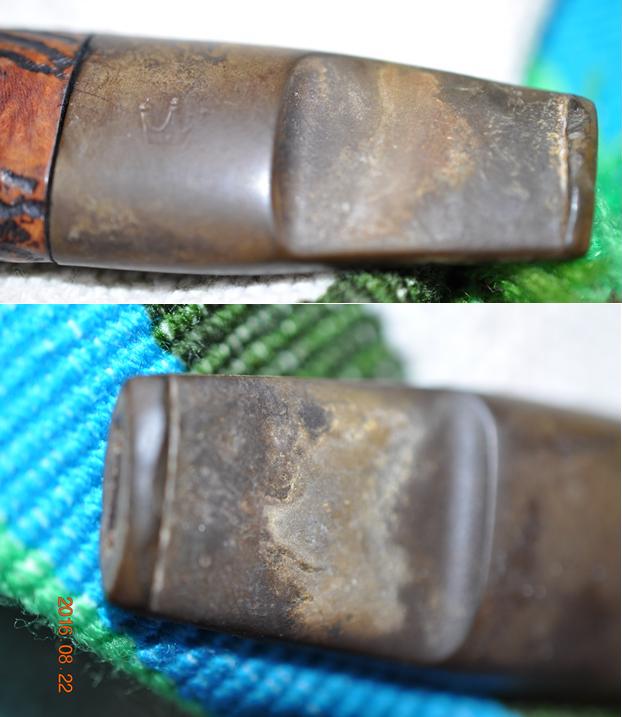
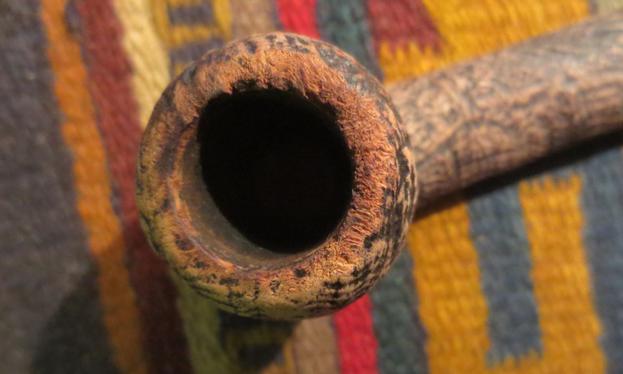
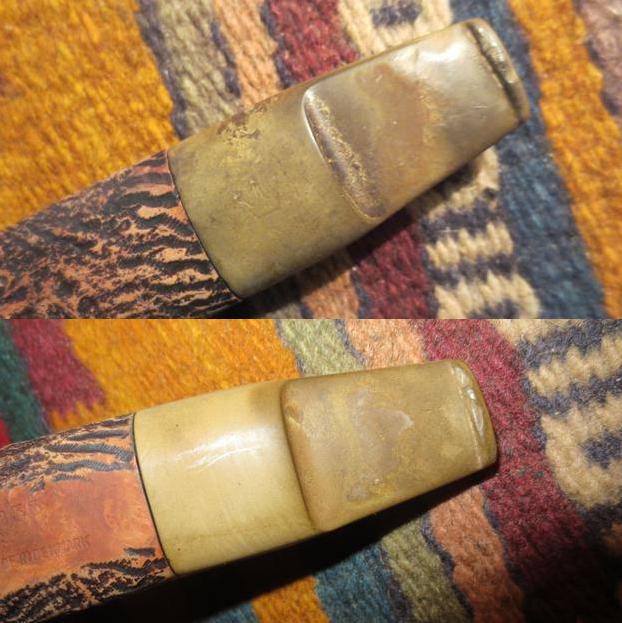
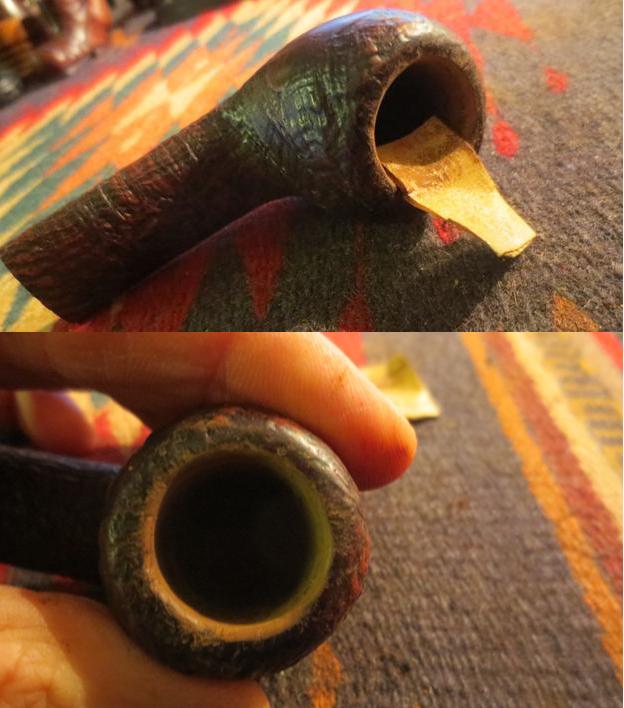
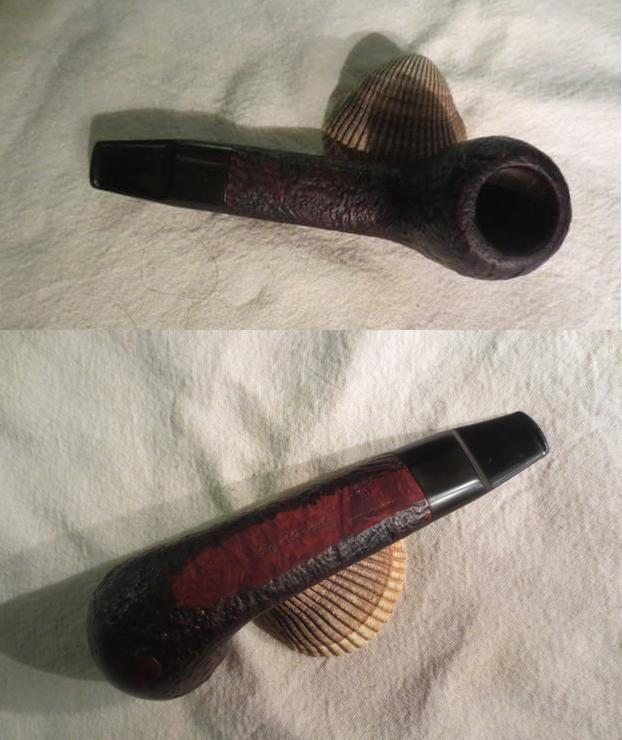
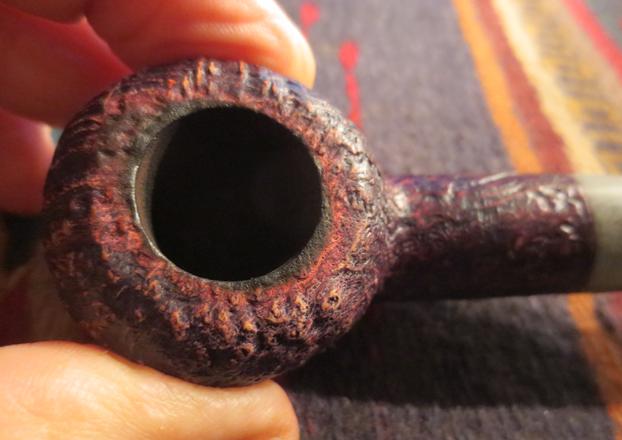
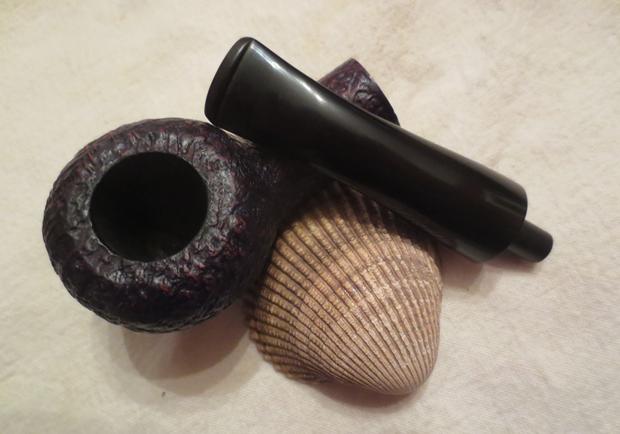
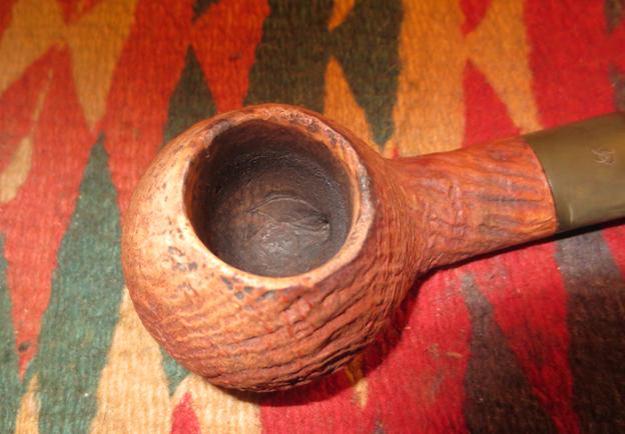
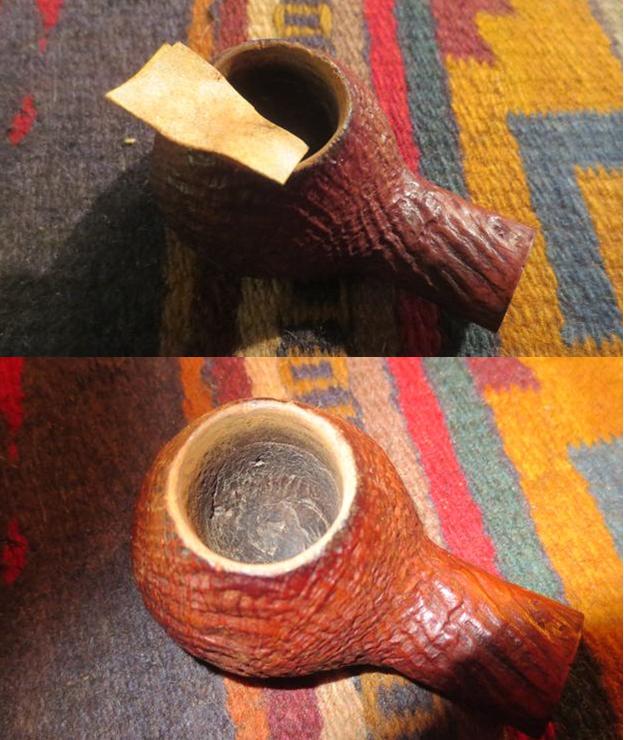
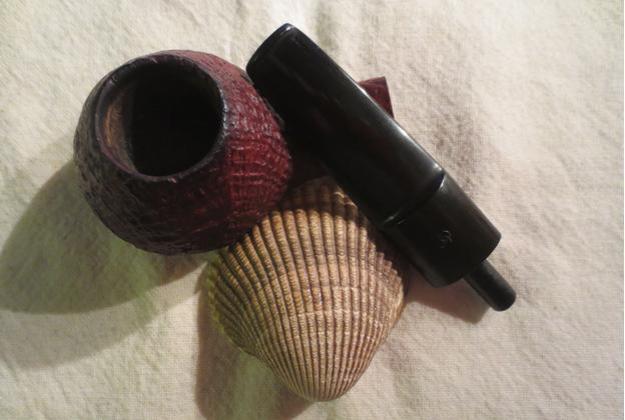
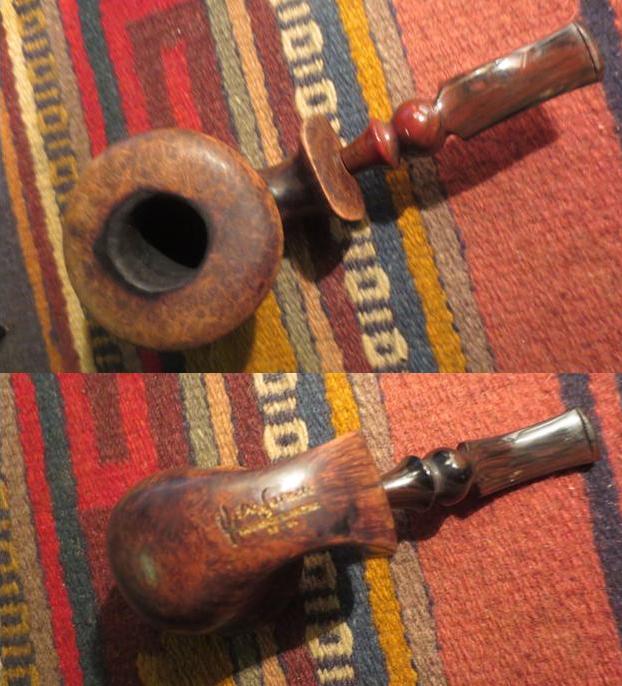
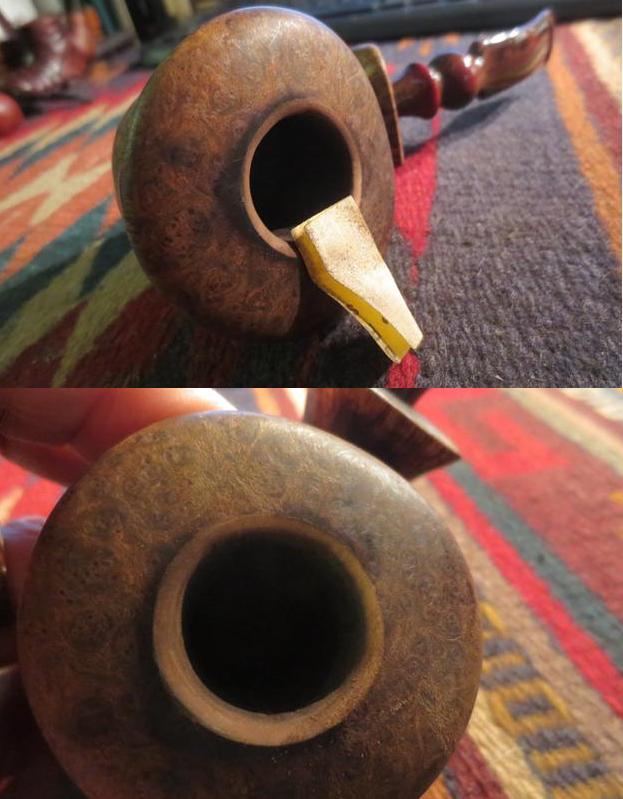
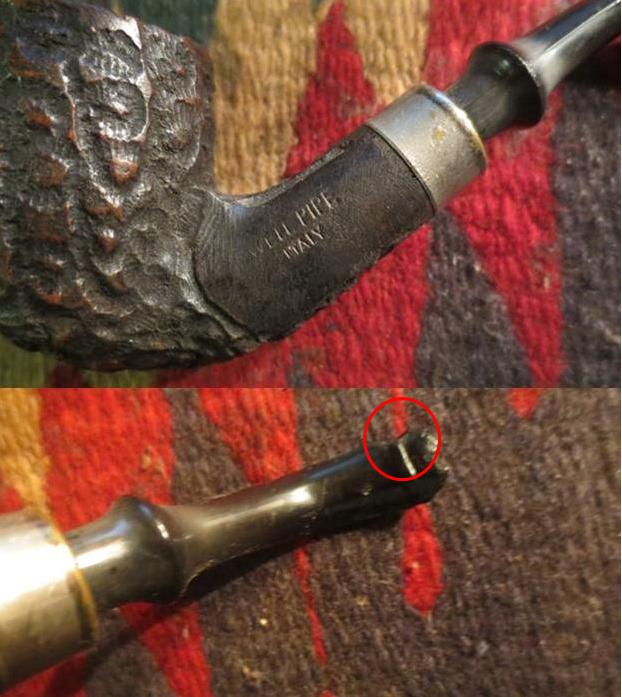
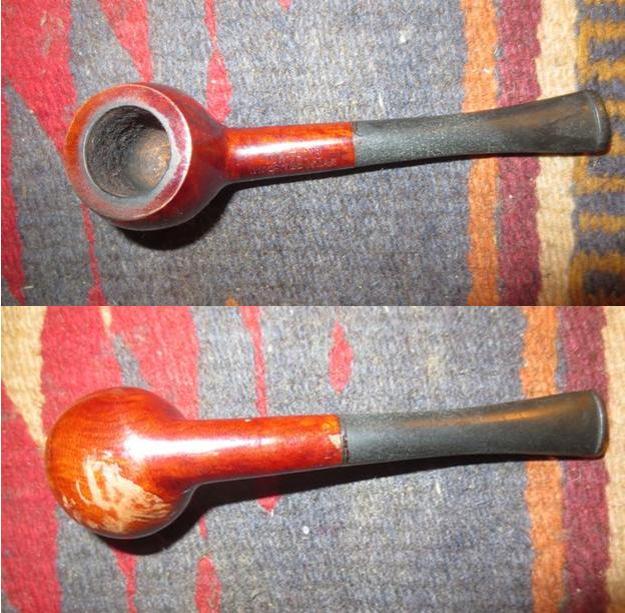
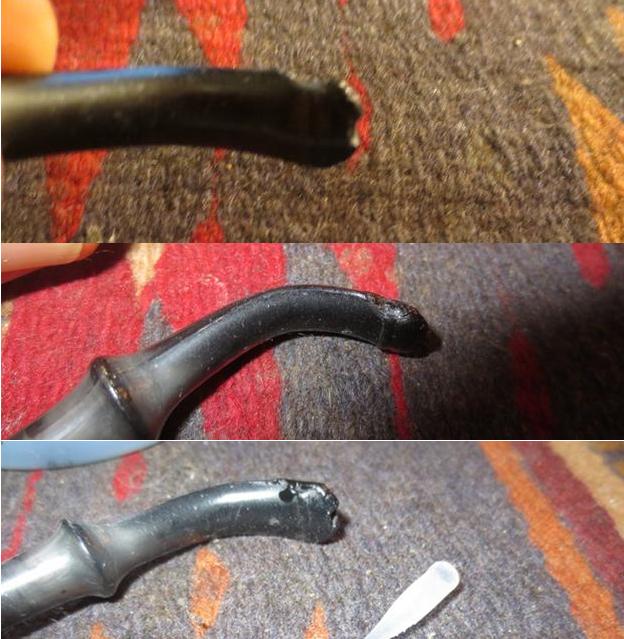
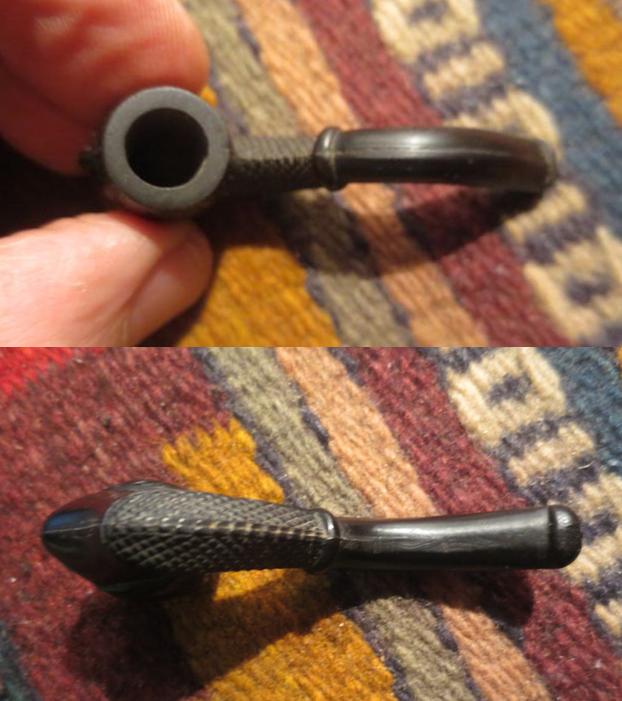
I took close up photos of the rim and the stem to show what I had to work with on this pipe. My brother was able to get the majority of the stuff off the rim. There was still some remaining buildup and tars on the rim. There were also some burn marks on the rim. The stem closeup photos reveal the dents and tooth marks on both sides of the stem and the damage to the edge of the button.ivory9 ivory10
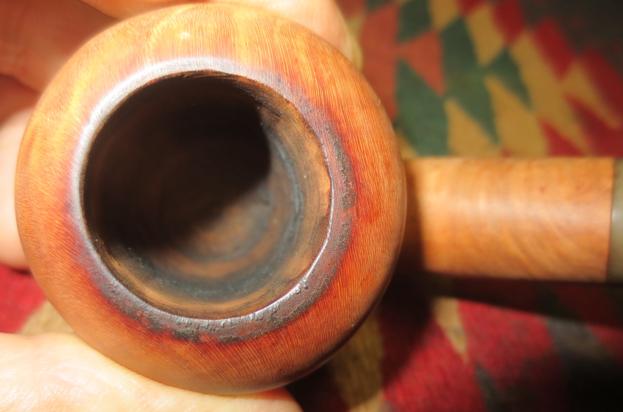
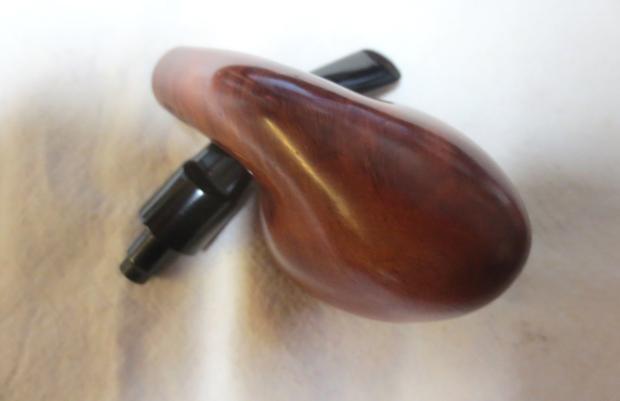
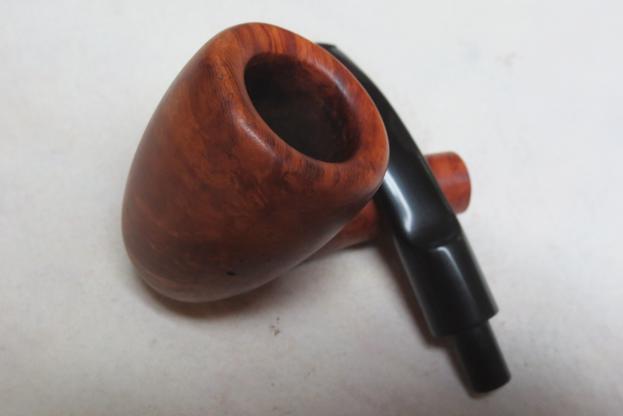
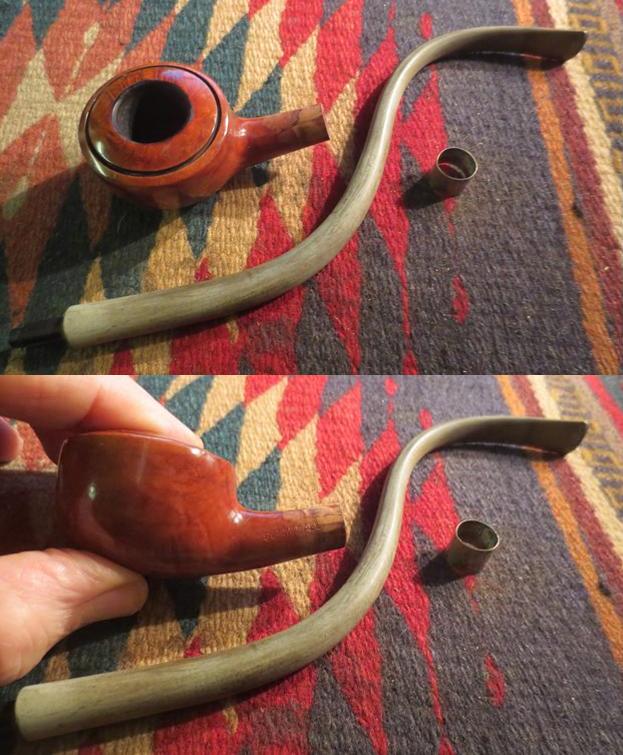
I sanded the rim with 220 grit sandpaper to remove the rim damage. I also sanded the inside edge of rim. I was able to remove the damage to the rim and edge. It is a nice looking piece of briar from the top down.ivory11
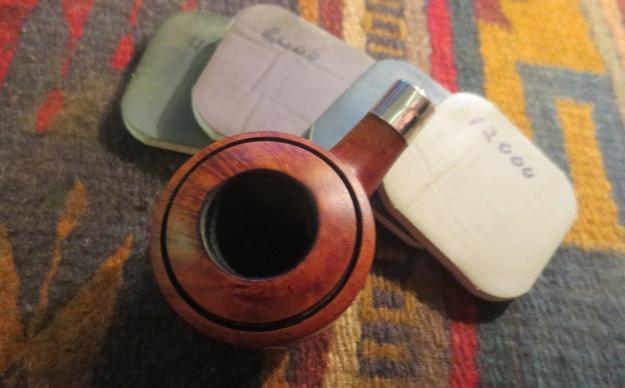
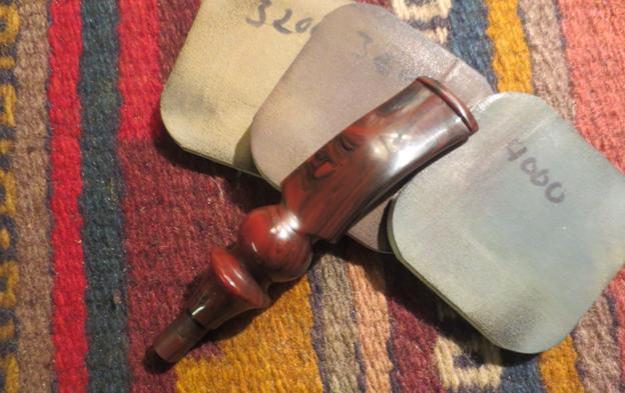
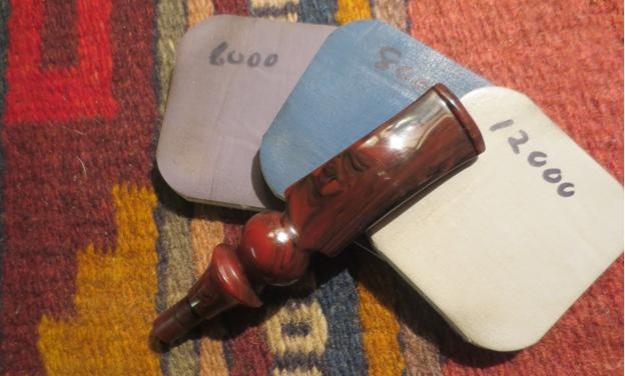
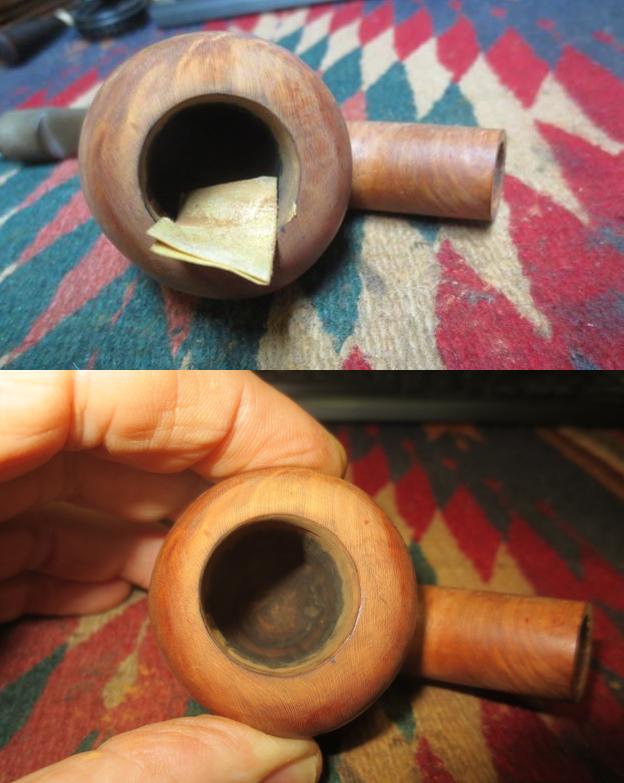
I sanded the bowl with microfibre sanding pads to polish the briar.  I sanded with 1500-12000 grit sanding pads.ivory12 ivory13 ivory14
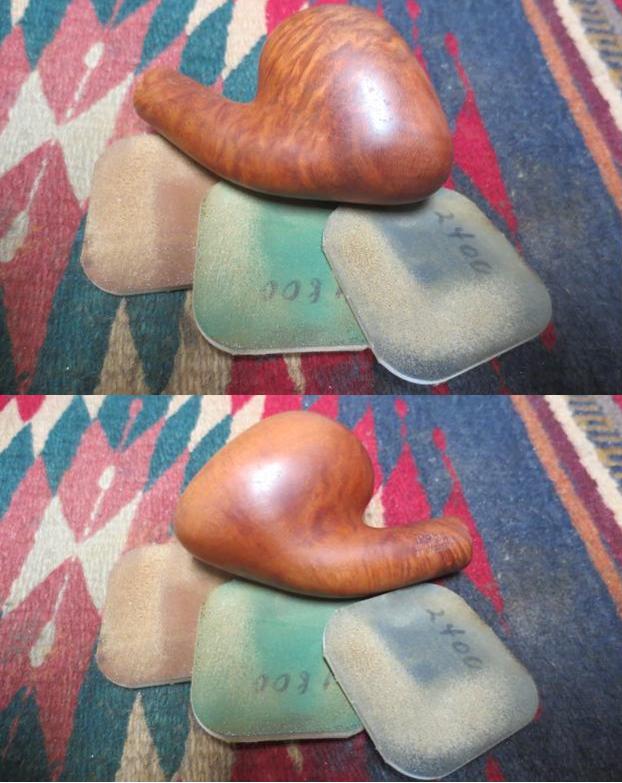
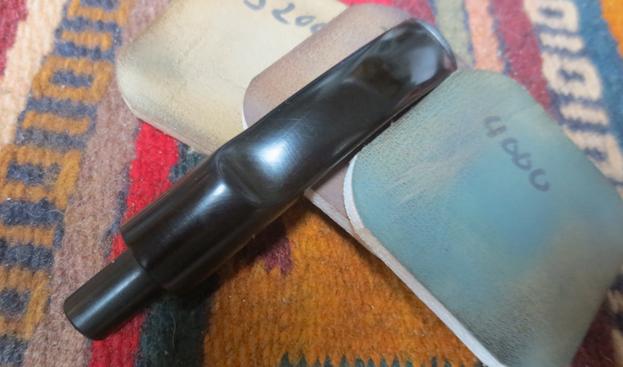
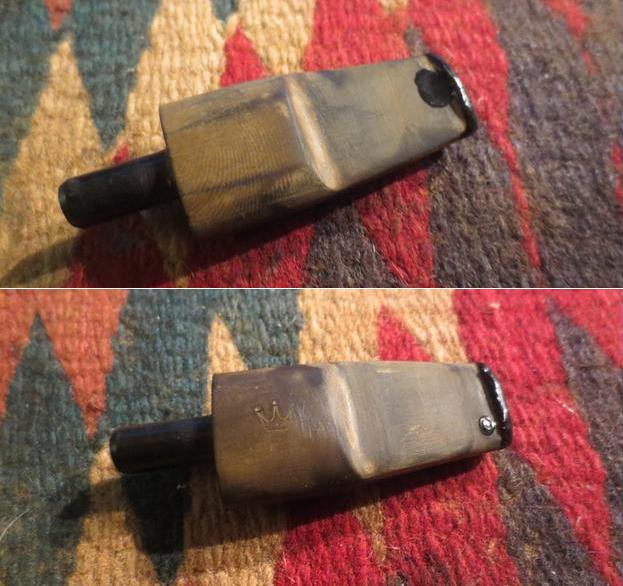
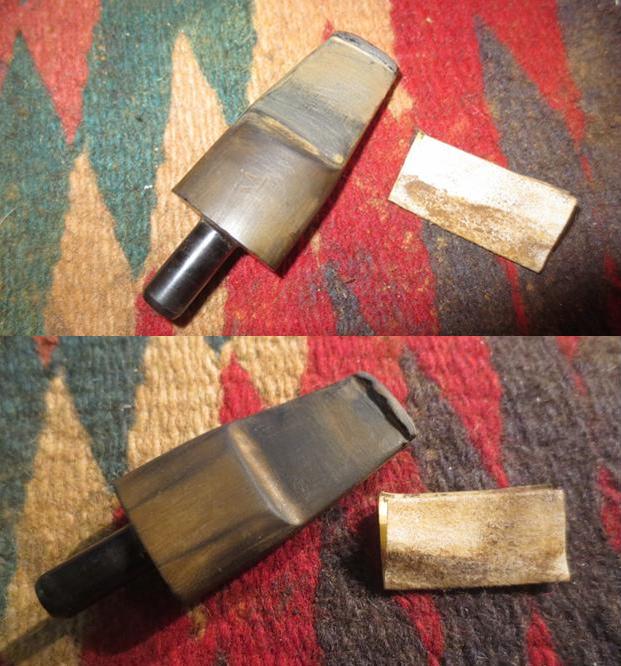
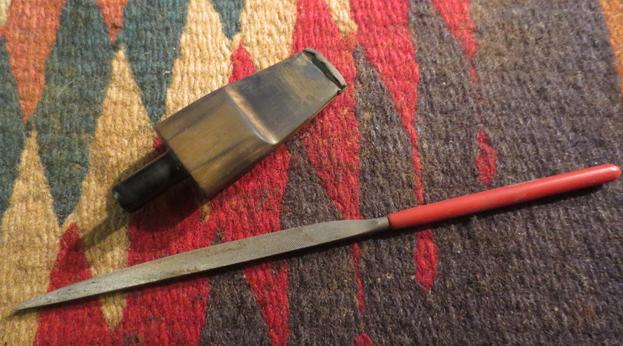
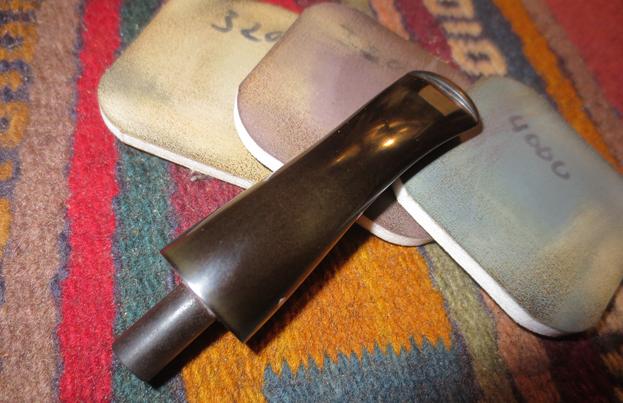
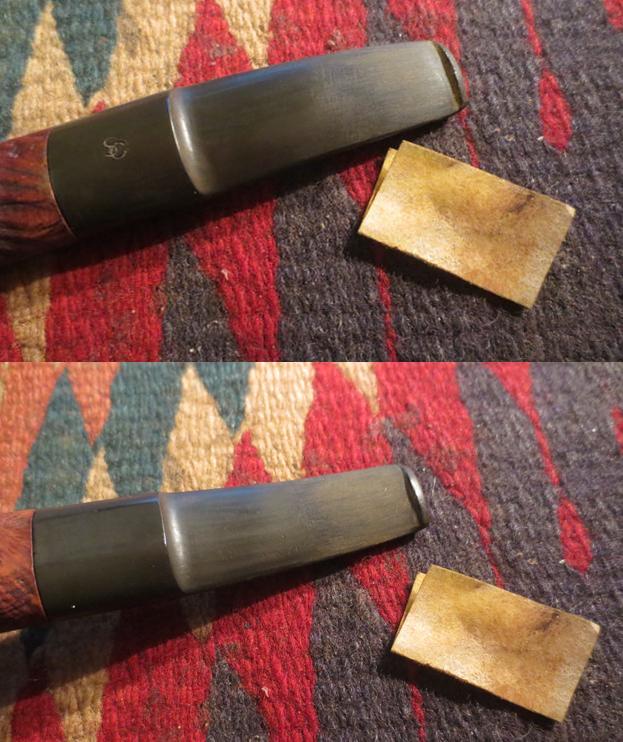
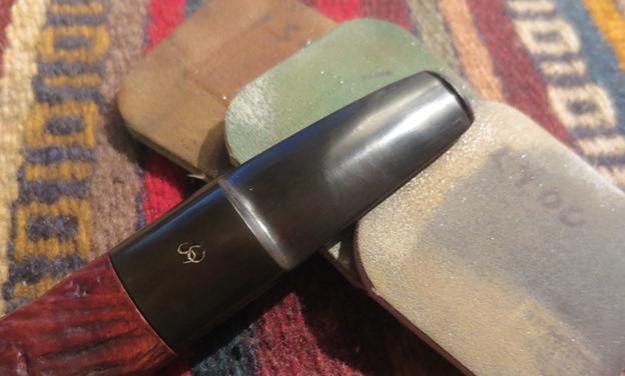
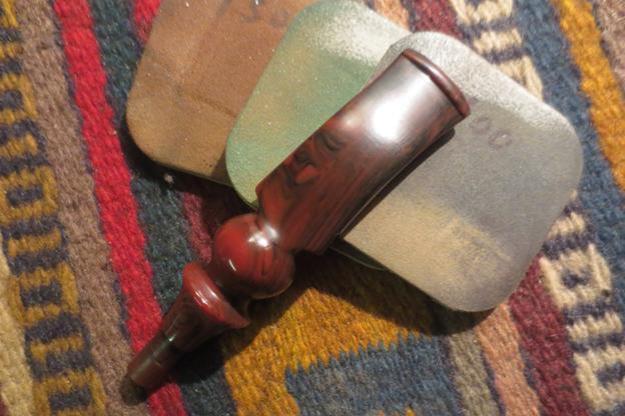
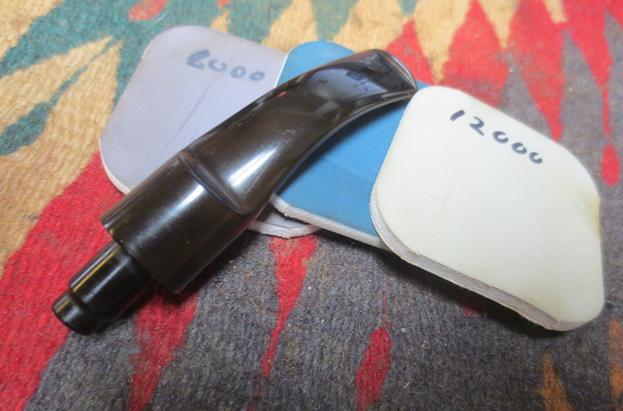
With the bowl finished I turned my attention to the stem. I heated the dents in the stem to raise them. I was able to raise them a bit and then sanded the stem with 220 grit sandpaper to smooth them out. I wet sanded the stem with 1500-2400 grit micromesh sanding pads. I was able to remove much of the oxidation. I left the area around the S stamp on the left side of the saddle. The stem looks far better at this point in the process than when I started.ivory16
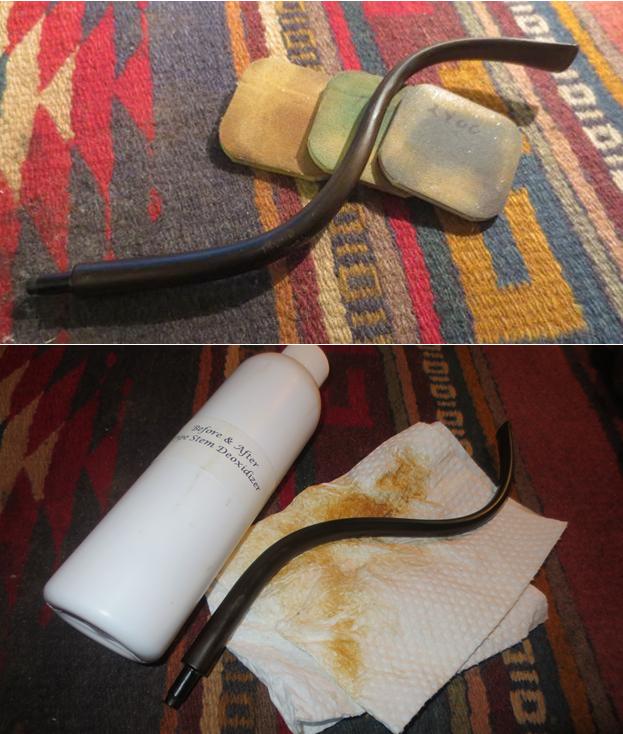
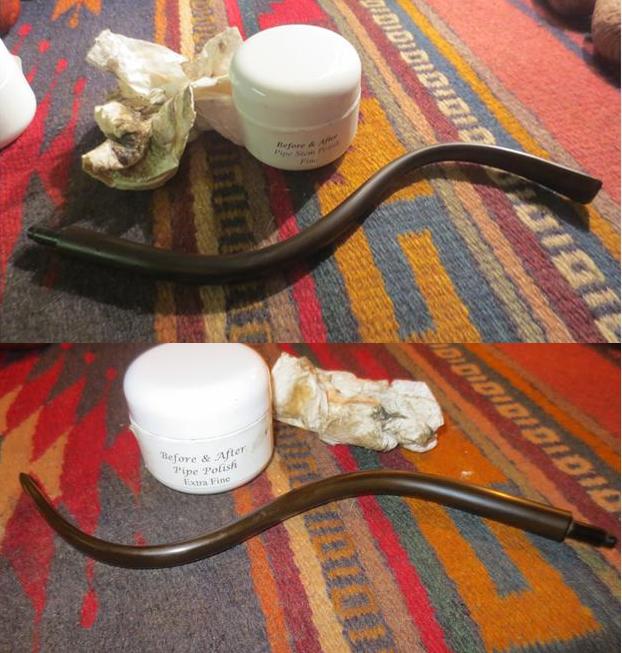
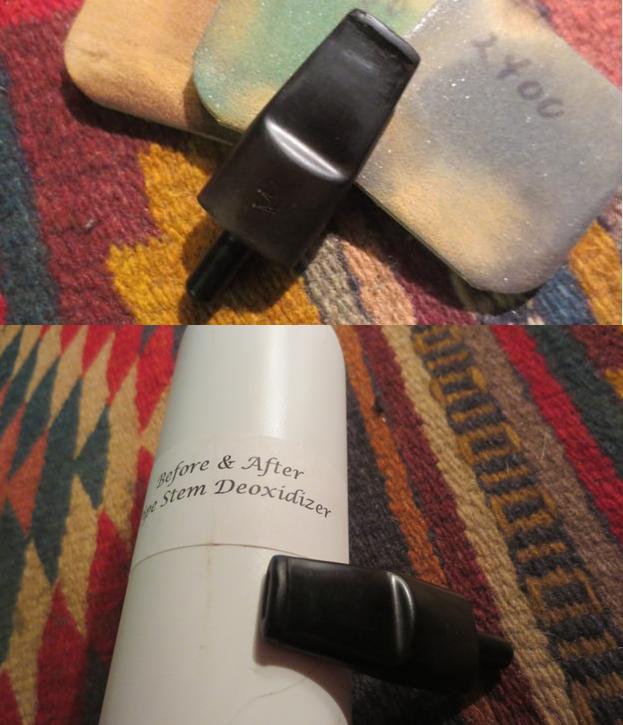
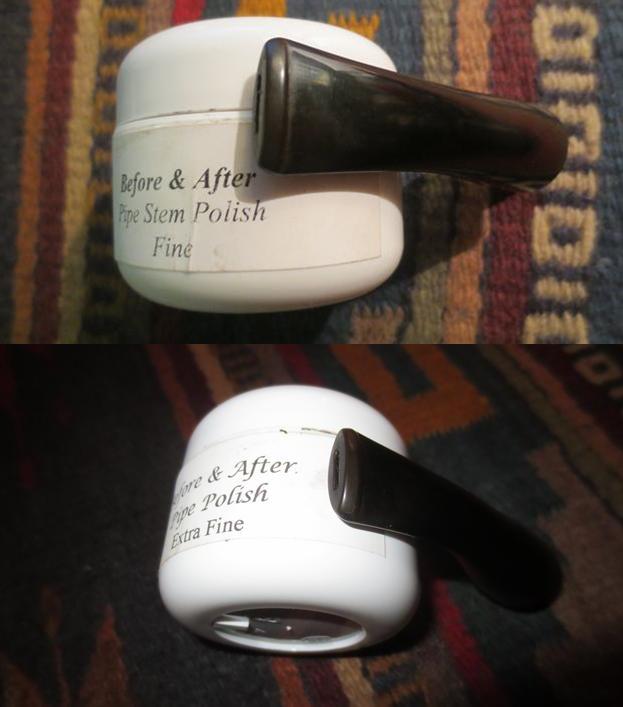
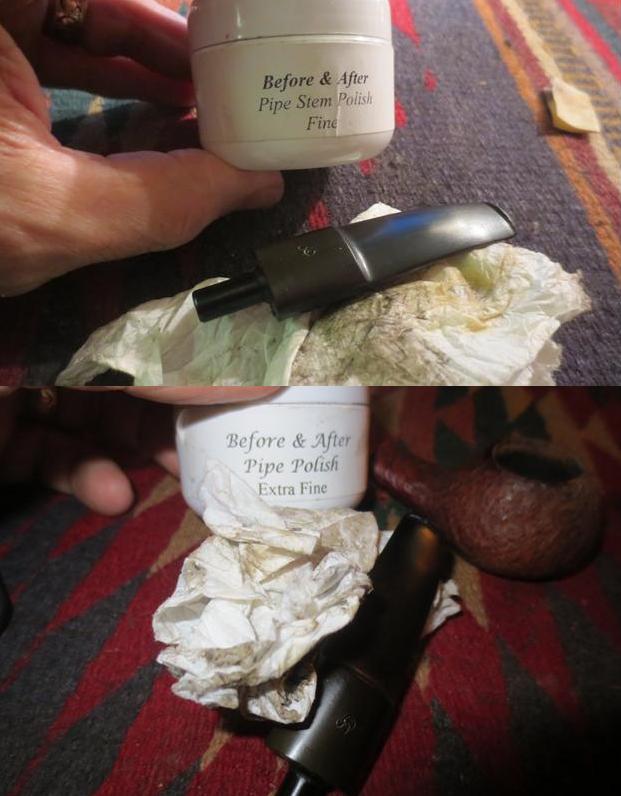
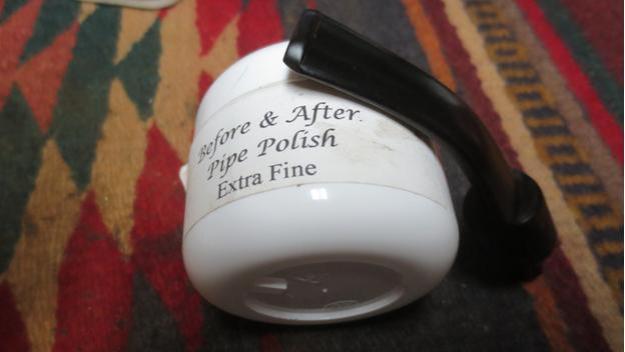
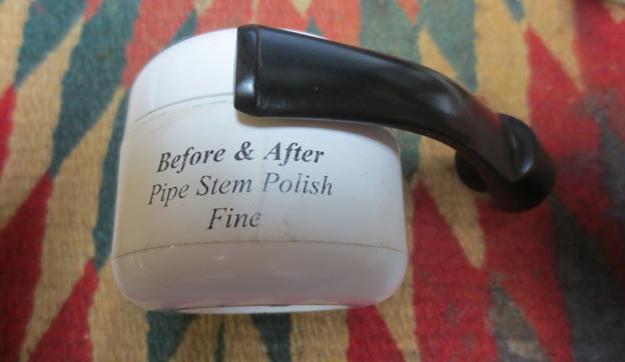
I scrubbed the stem with the Before & After Pipe Stem Deoxidizer to work on the oxidation around the S stamp. I was able to remove the majority of the oxidation without damaging the stamping. I scrubbed it with multiple applications of the deoxidizer until the oxidation was gone. I polished it with the Before & After Pipe Stem Polish Fine and Extra Fine.ivory17 ivory18 ivory19
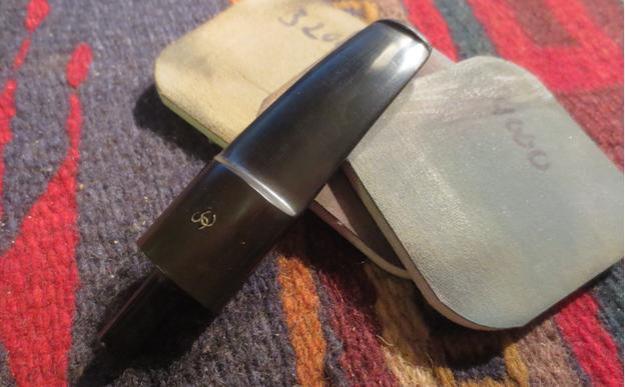
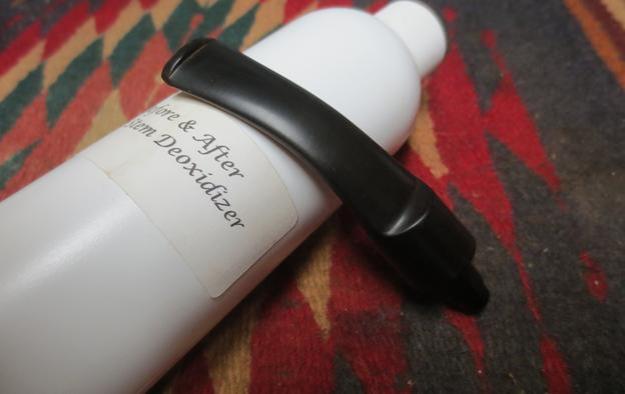
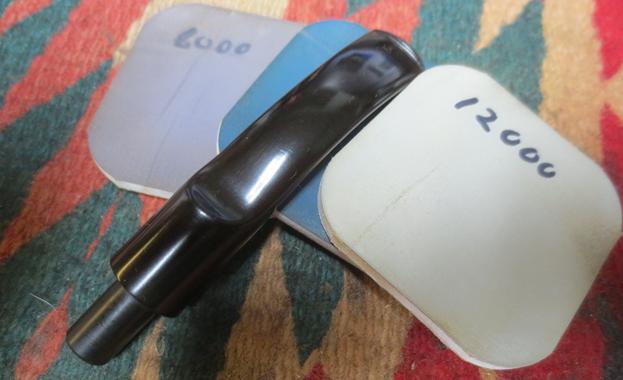
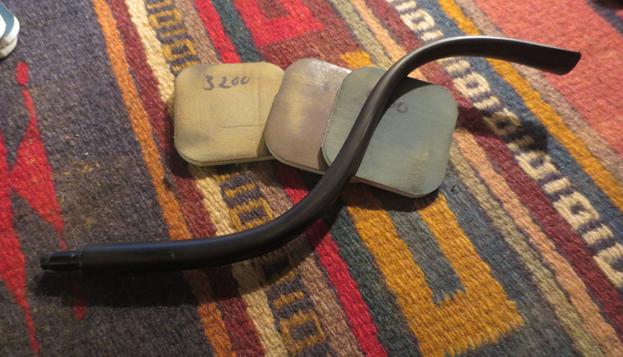
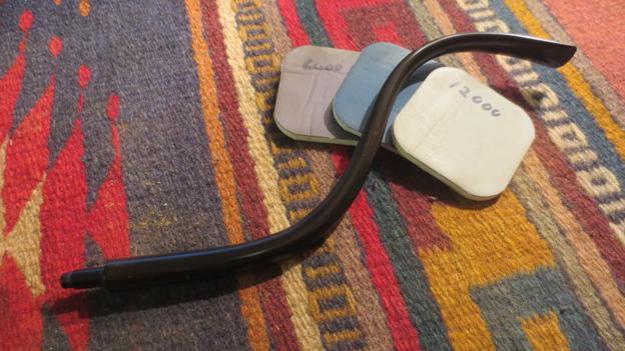
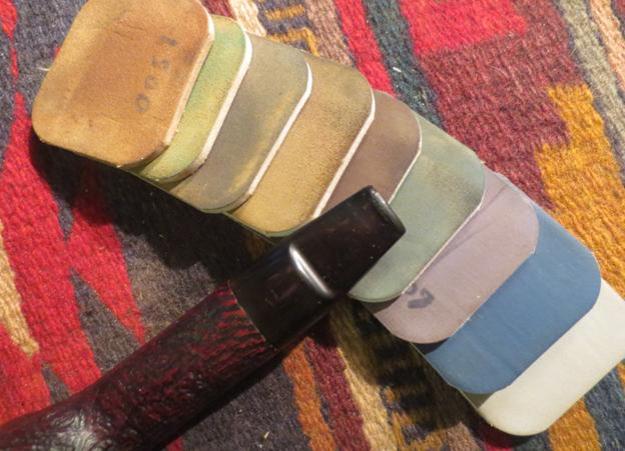
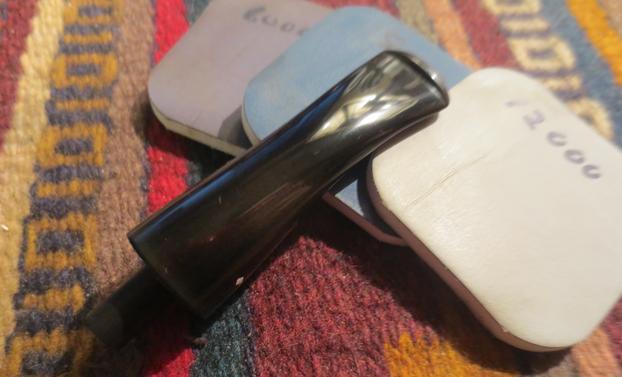
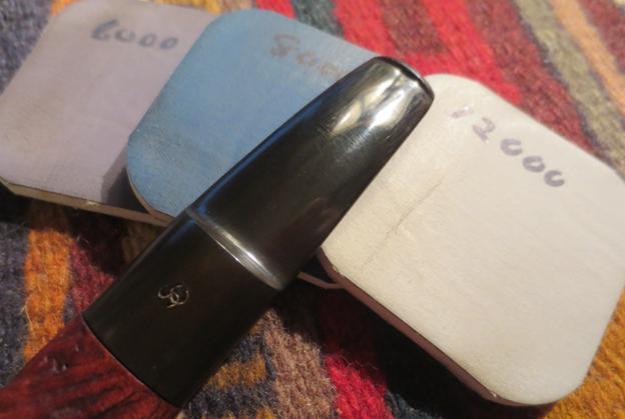
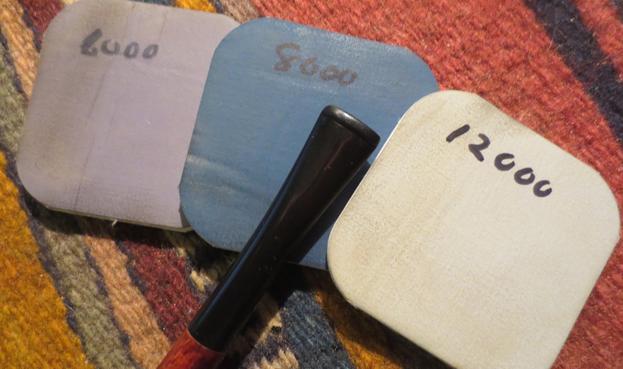
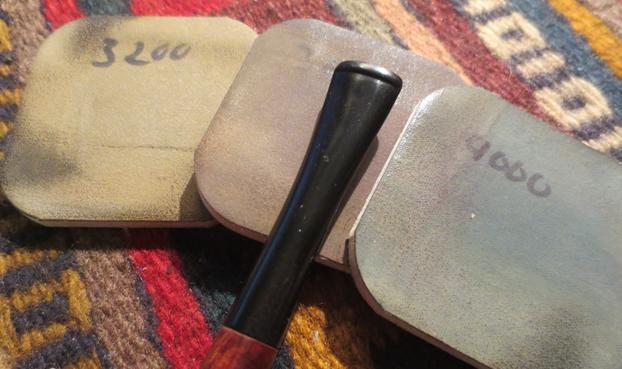
I sanded the stem with 3200-4000 grit micromesh sanding pads to further polish it. I rubbed it down with Obsidian Oil. I sanded it with 6000-12000 grit pads and gave it another coat of Obsidian Oil. I set it aside to dry.ivory20 ivory21
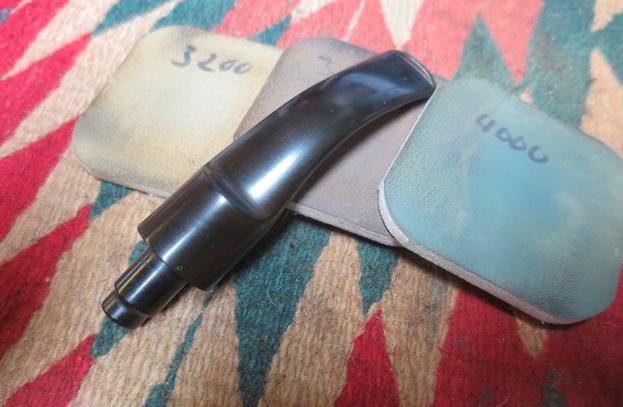
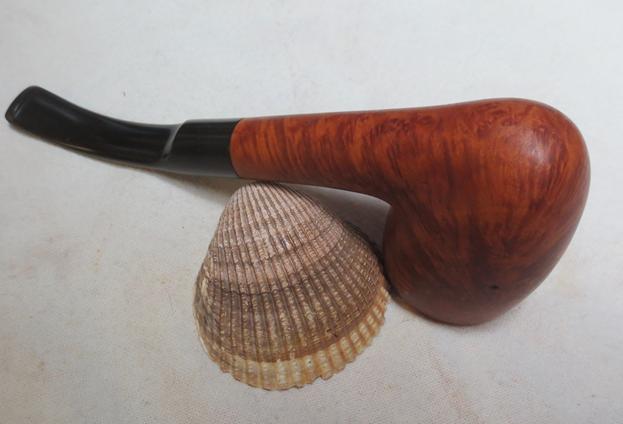
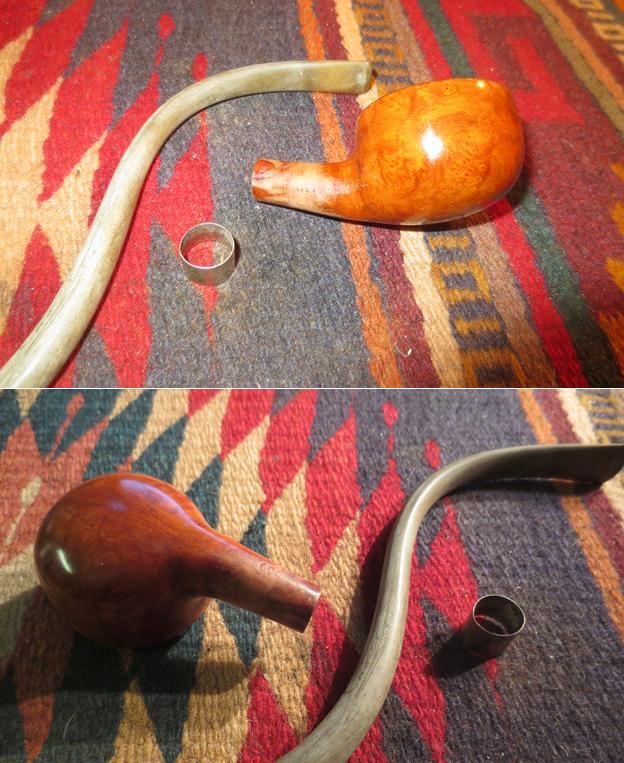
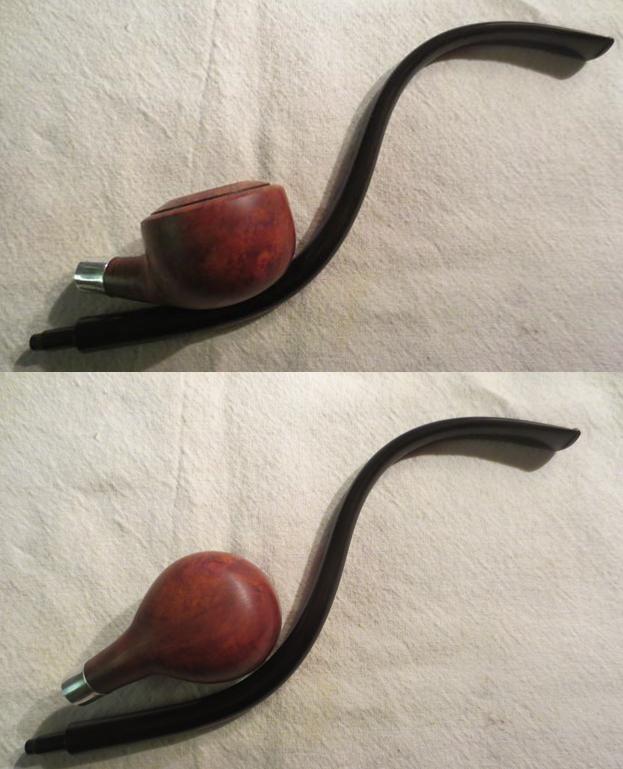
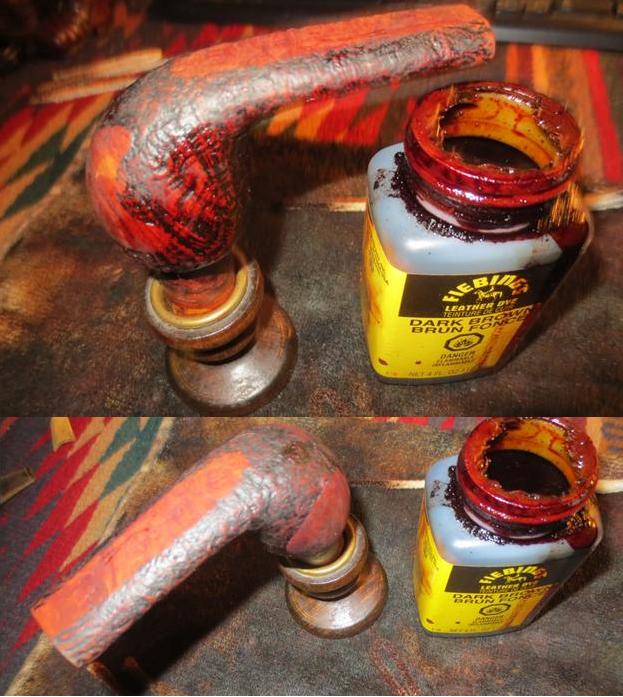
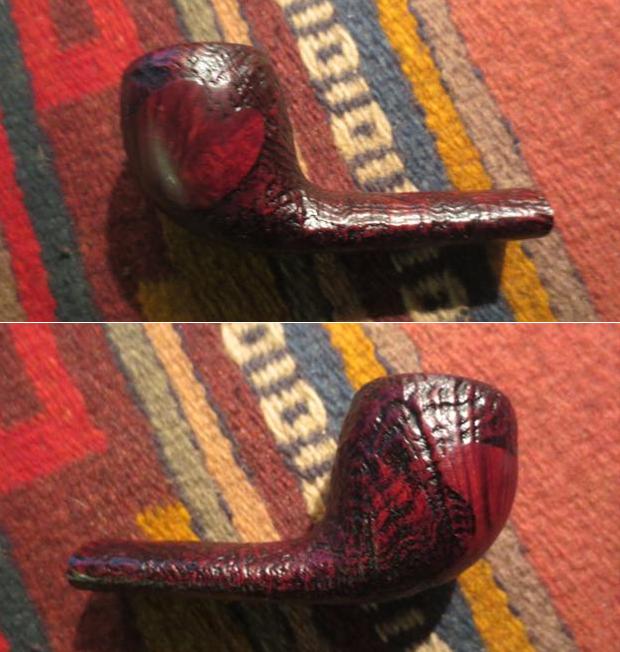
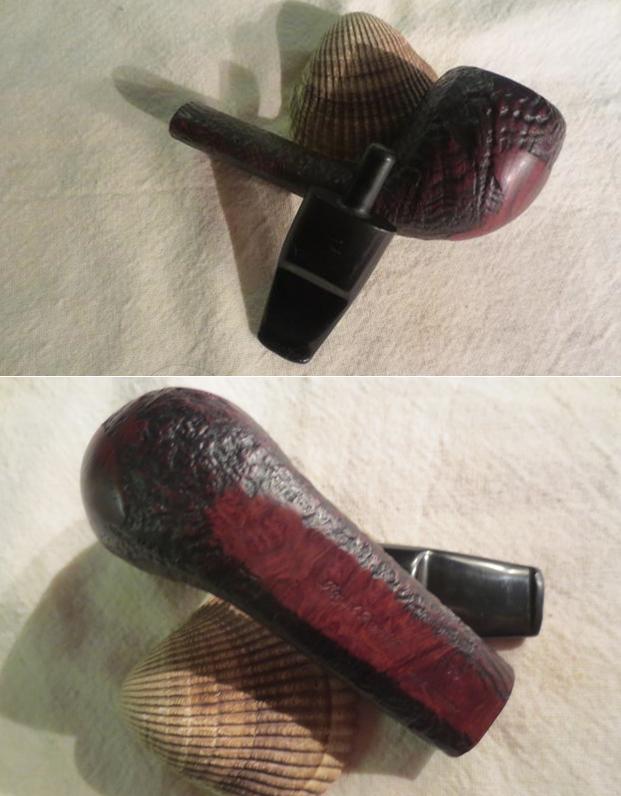
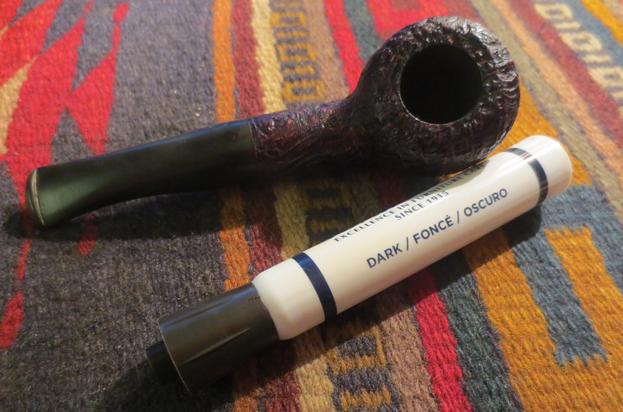
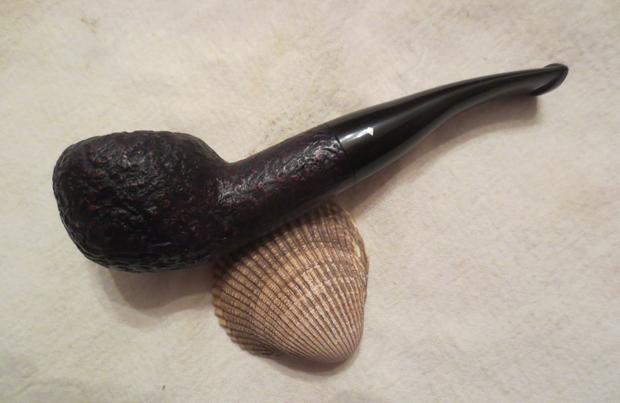
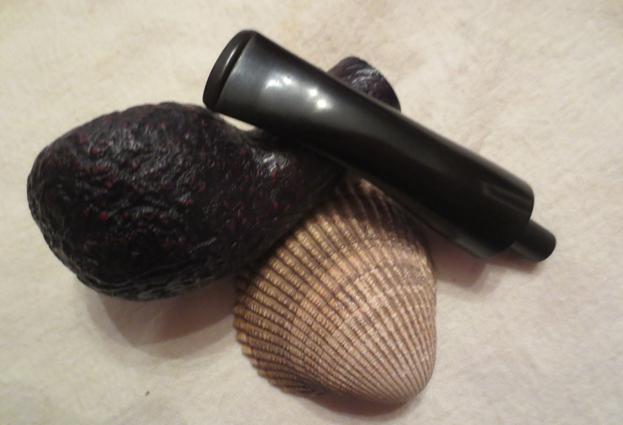
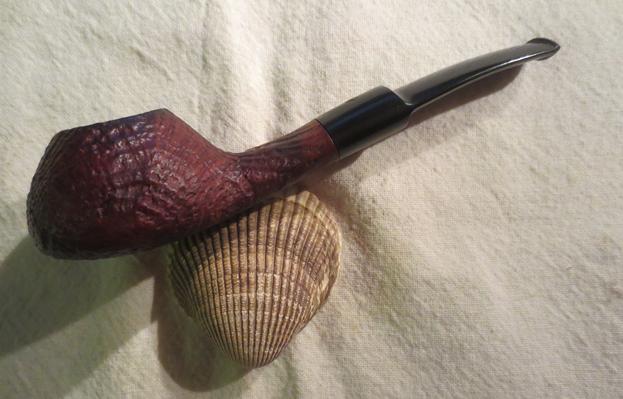
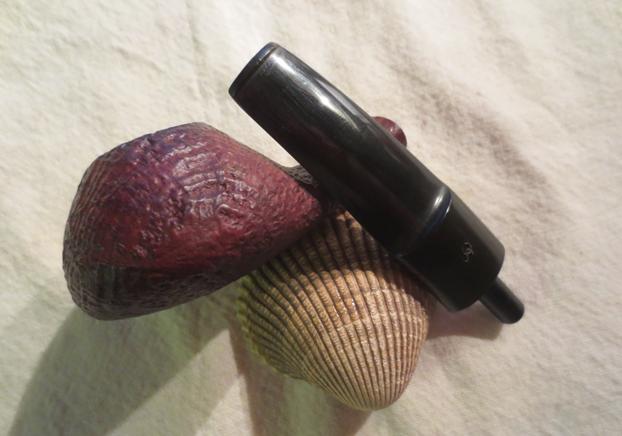
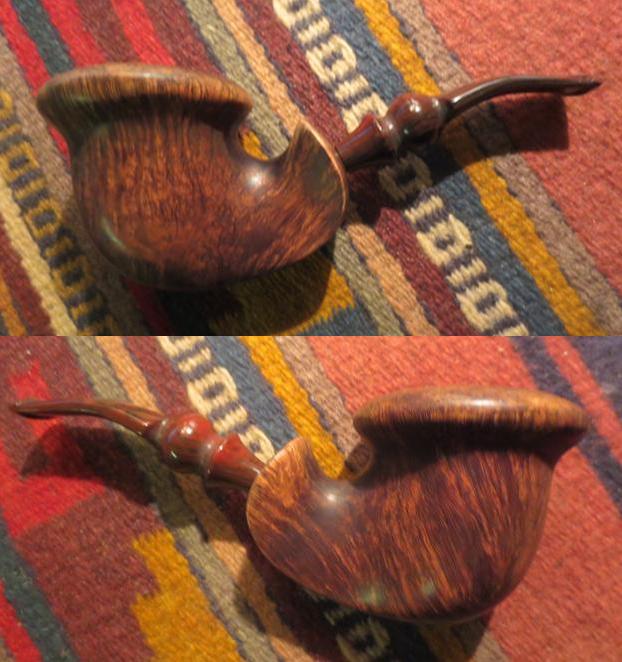
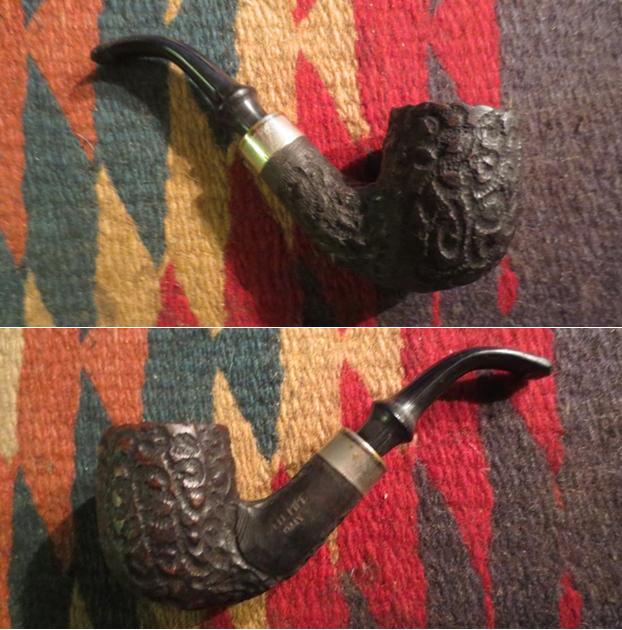
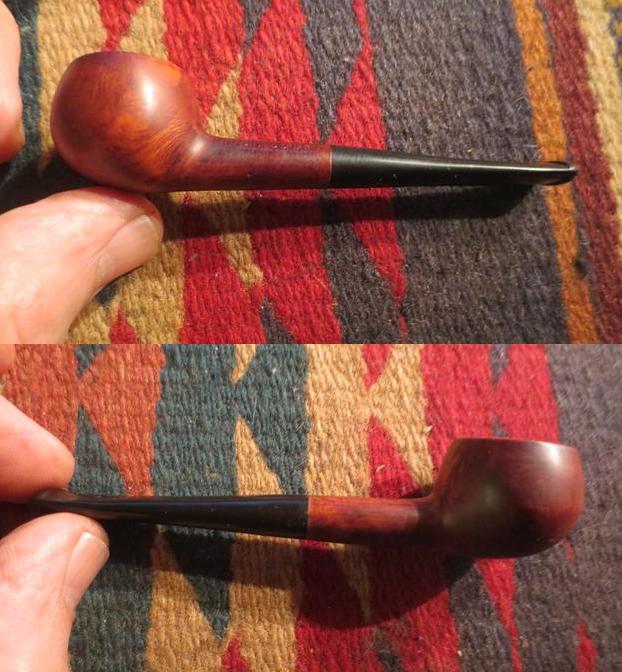
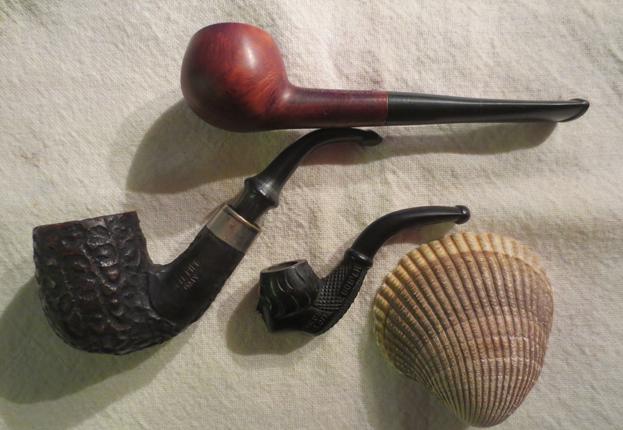
I decided not to stain the pipe but leave it with a natural finish. I buffed the pipe and stem with Blue Diamond and gave it several coats of Carnauba wax. I buffed it with a clean buffing pad to raise the shine. I received an email from Wikus, a reader in the South Africa asking if I could show some photos of the pipe after the final machine buff and before the hand buffing to show the difference in results of the two techniques. The photos below show the pipe at this point in the process.ivory22 ivory23
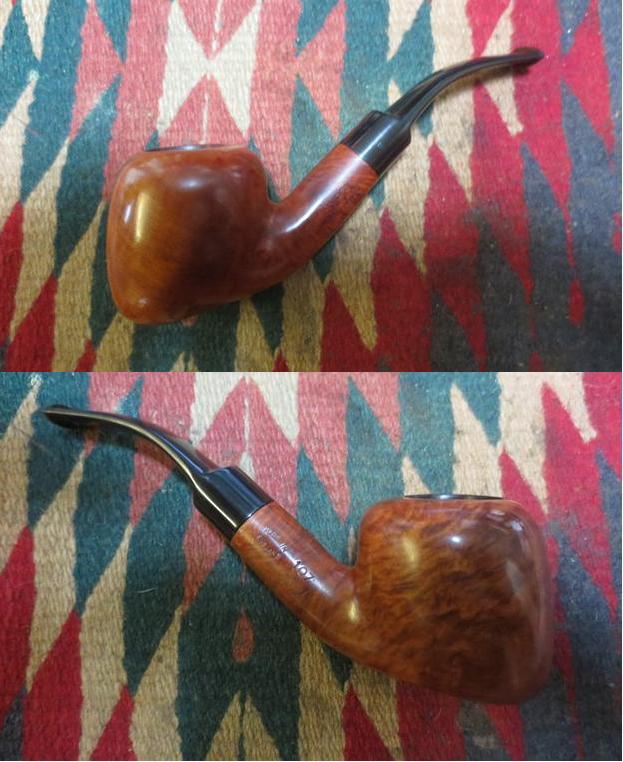
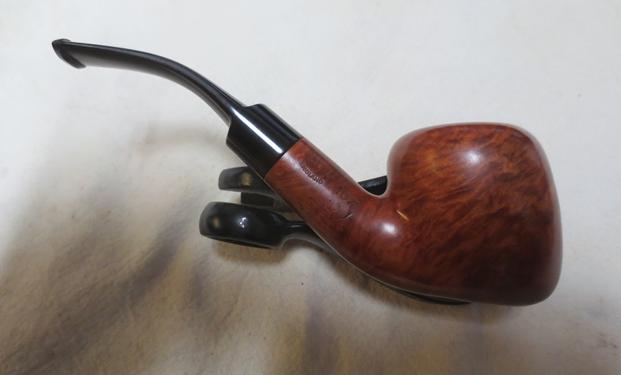
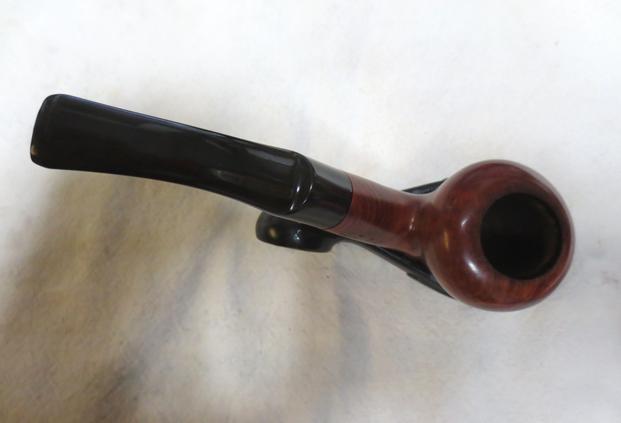
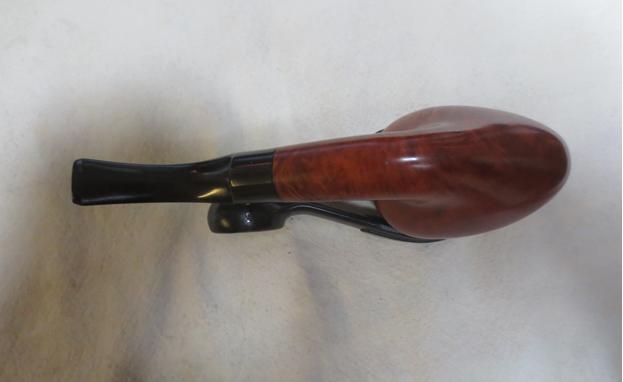
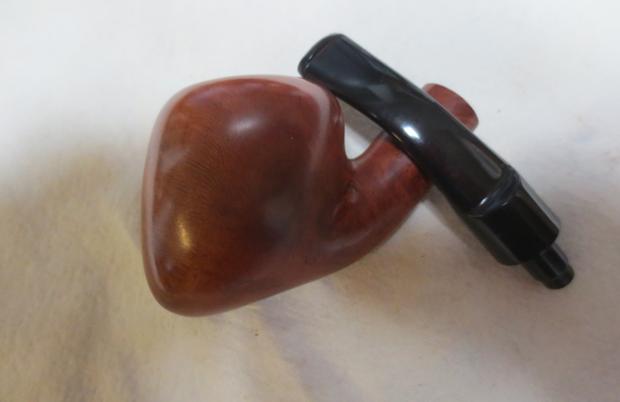
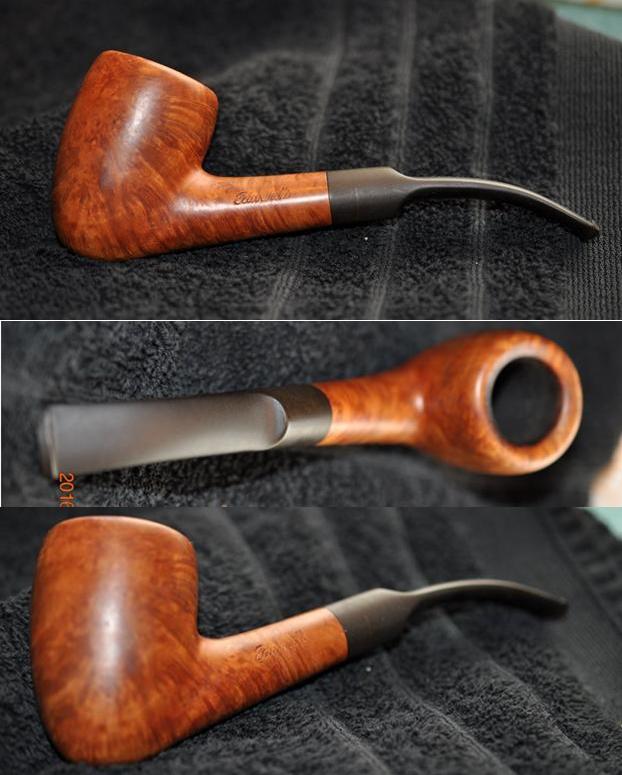
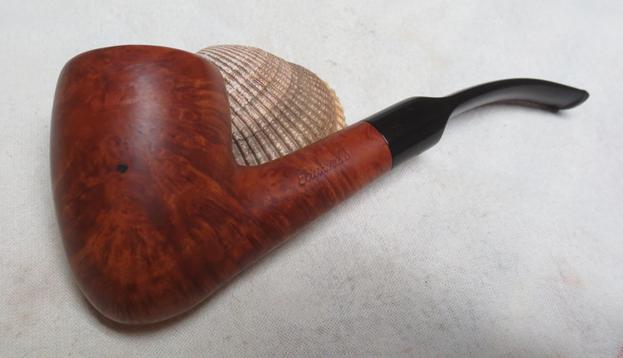
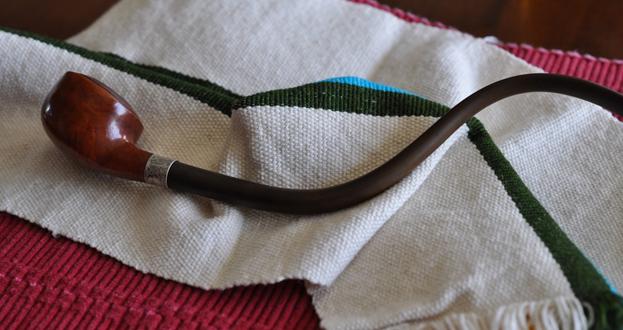
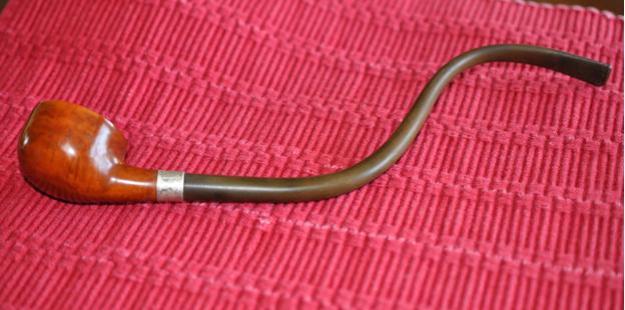
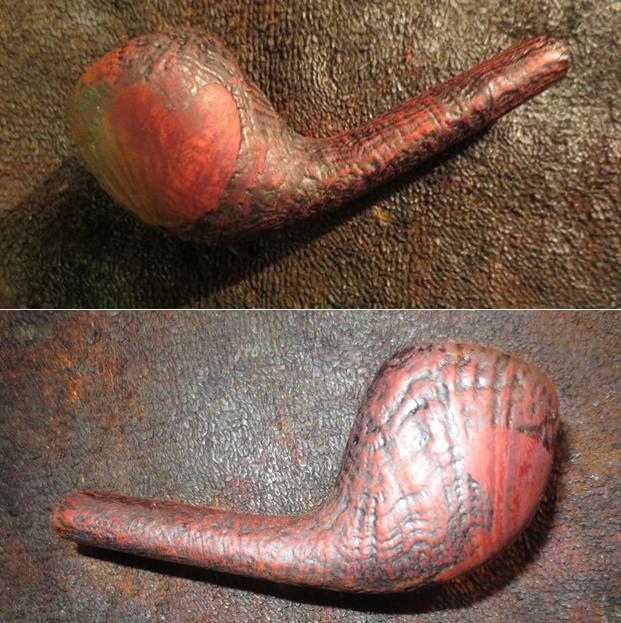
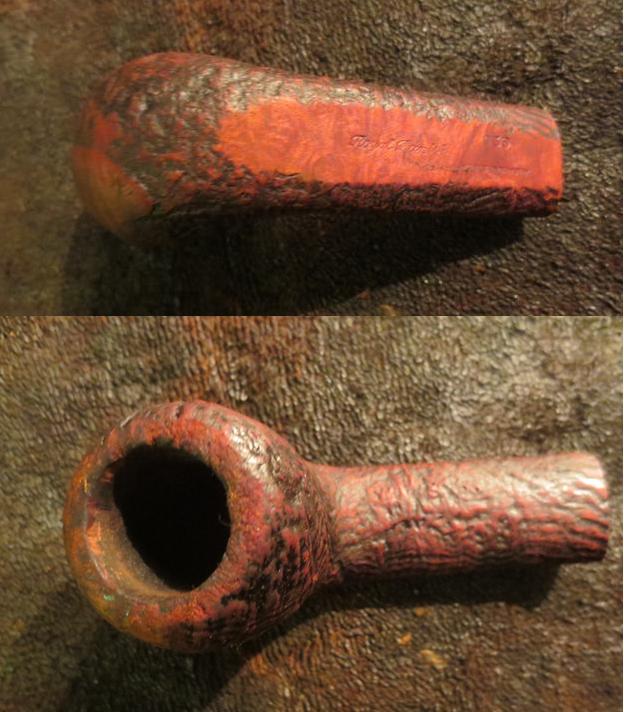
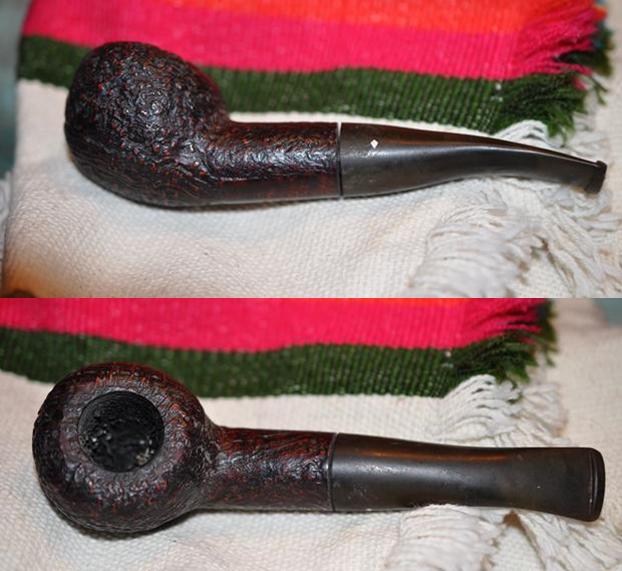
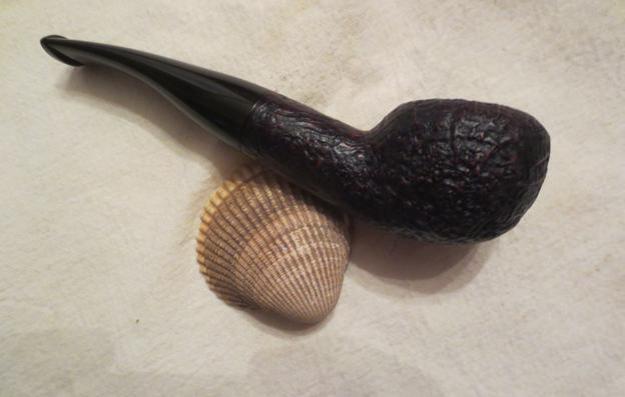
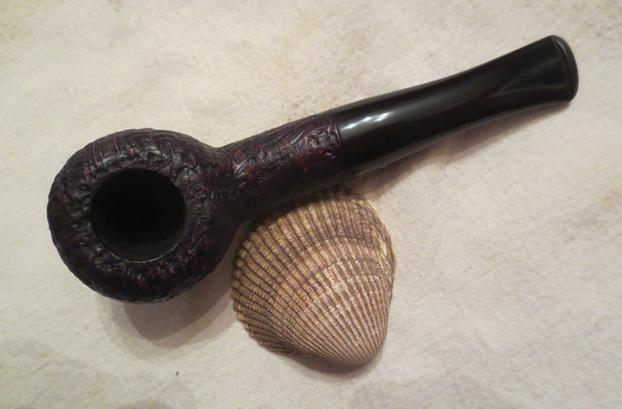
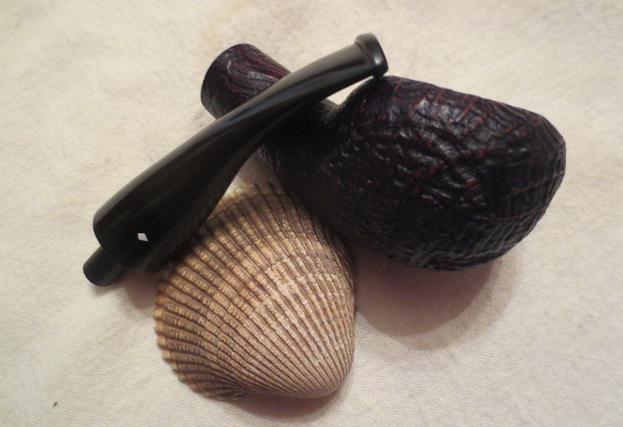
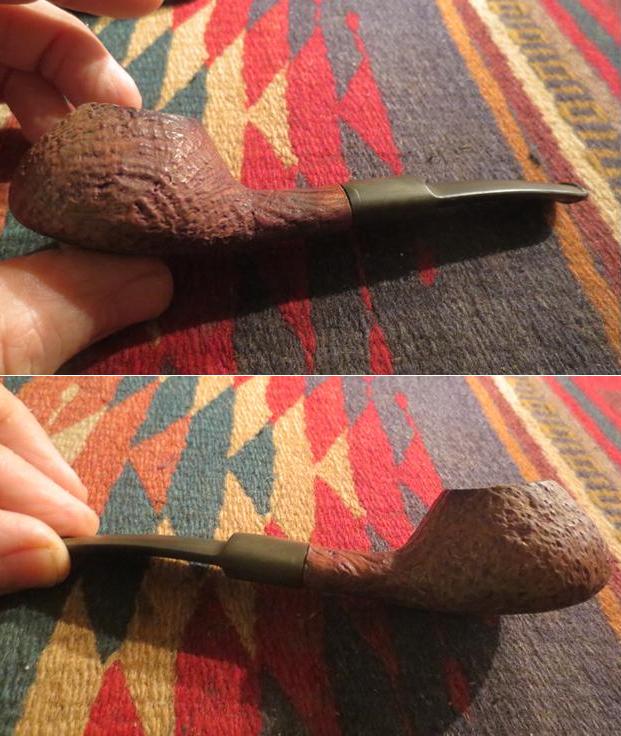
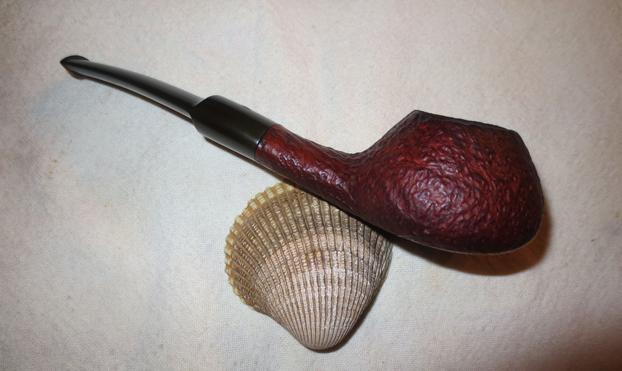
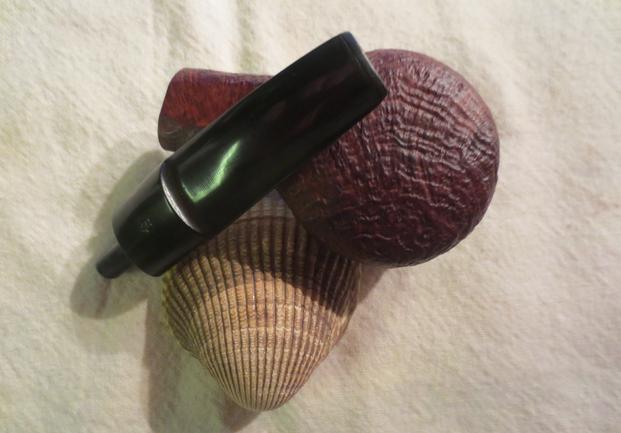
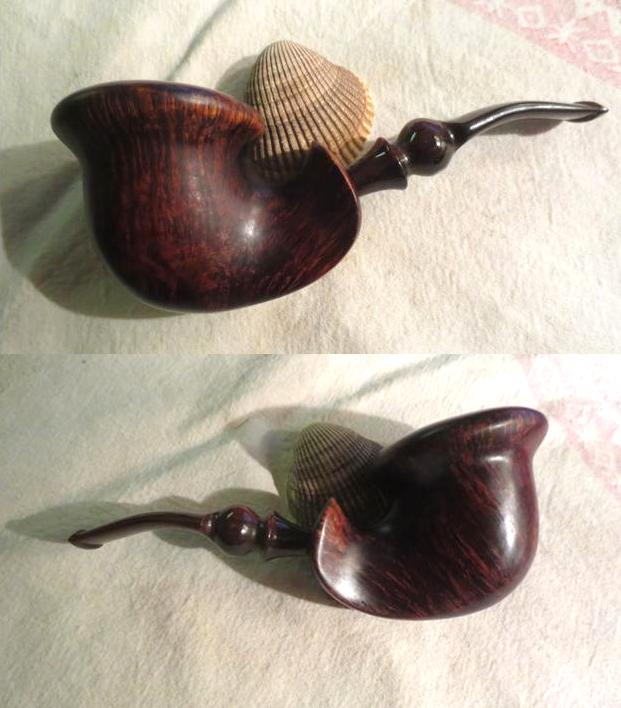
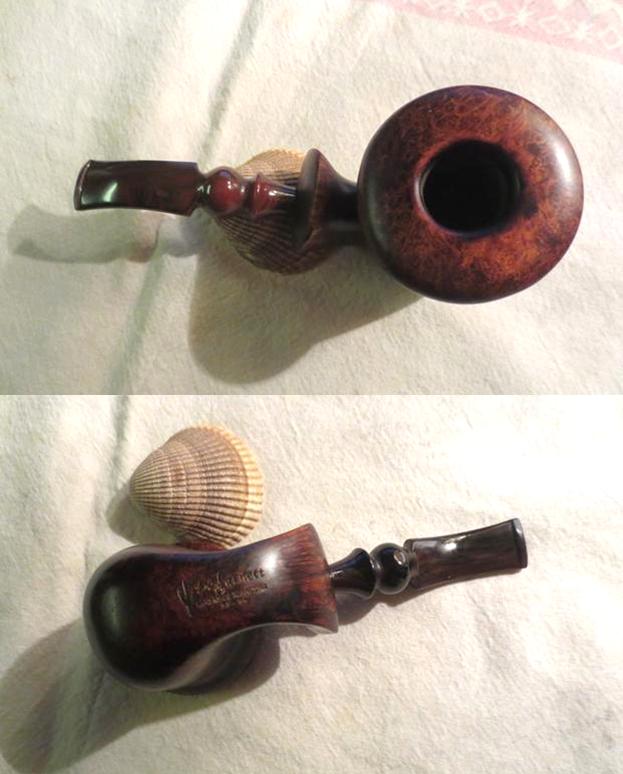
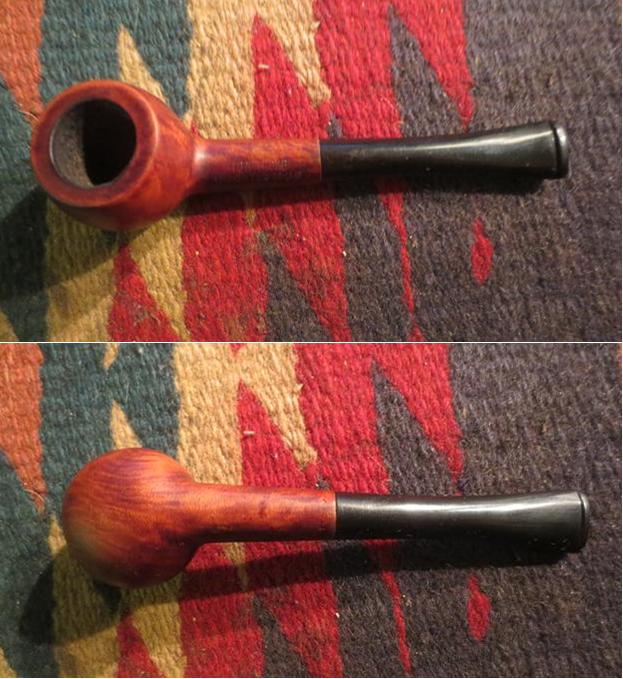
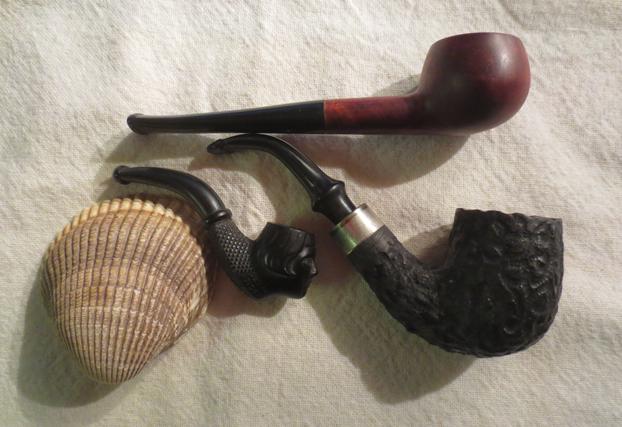
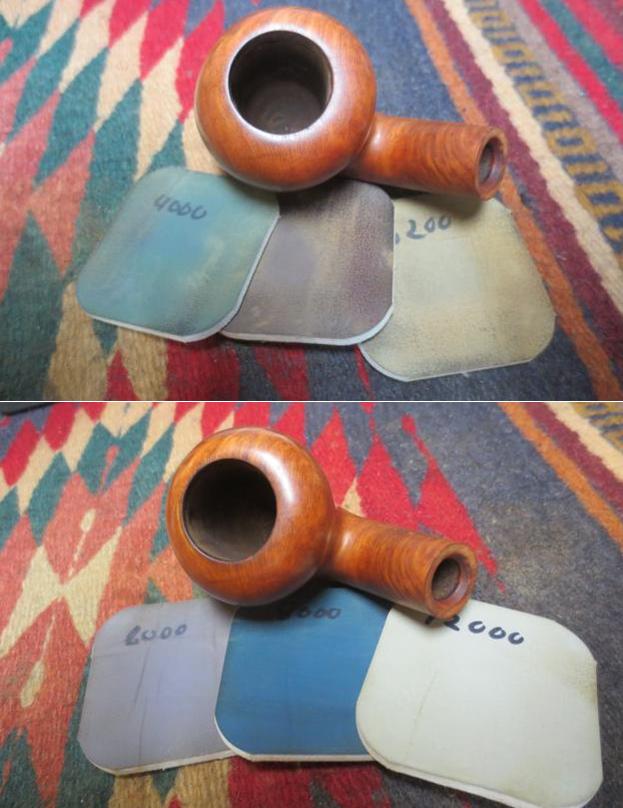
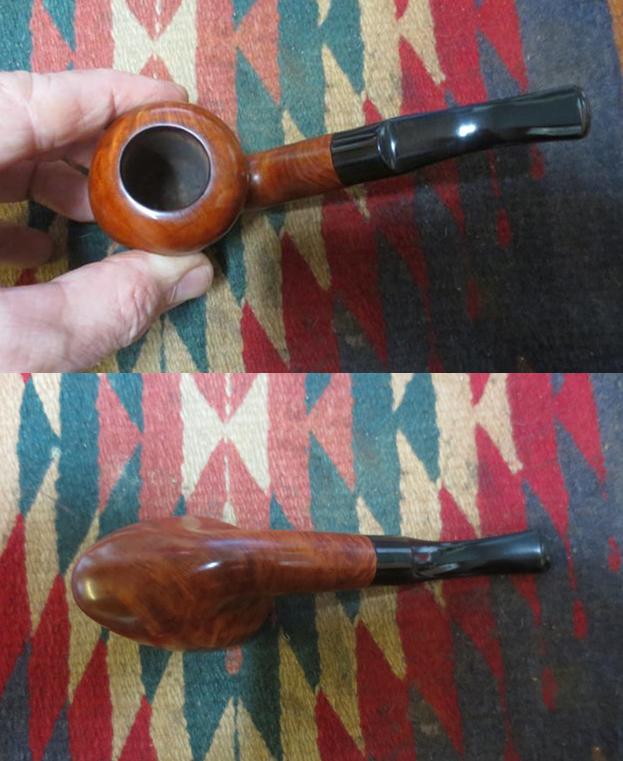
I took it back to the worktable and hand buffed with a microfibre cloth. The remaining photos were taken after the hand buffing. It removed some of the surface shine on the bowl and added more depth. To me the hand buffing has always improved the quality of the shine and adds another dimension. Overall the restoration on this pipe moved it from a thing of ugliness in my eyes to one that actually had beauty and felt good in the hand. Even the rather bald grain on the left side of the pipe shined up well and reflects the briar nicely. The finished pipe is shown in the photos below. Thanks for looking.ivory24 ivory25 ivory26 ivory27 ivory28 ivory29 ivory30 ivory31


My Latest Refurb, an Edwards Algerian Briar 771 is not a shape I’ve seen before


Blog by Steve Laug.

Over the years I have had many Edwards pipes cross my work table. I have kept a few and sold many. I have also repaired many of them. The available shapes that the pipes came out it spoke of a very fluid design philosophy. Pipedia says that “Edward’s Design Philosophy is hard to pin down, think of their style as the “American Charatan” with unique & clever twists all their own.” Across the board they were all Algerian Briar and all were unstained waxed or oiled briar. I remember reading that actually oil curing was a feature of their pipes. I did a quick look on Pipedia  https://pipedia.org/wiki/Edward’s and found that I was correct. I quote: “All of Edward’s pipes are Algerian Briar – a fact very few pipe companies can claim, and all are oil-cured utilizing natural finishes – no strange concoctions are used to interfere in your tastebud’s dance with the briar. Algerian, Calabrian, Sardinian, Corsican – take your pick, but Algerian Briar is generally considered the finest smoking briar ever used. When combined with oil-curing, Algerian takes on a magical quality that even Alfred Dunhill recognized as far back as 1918 as the choice for both his Bruyere and Shell.”

The pipe is stamped Edwards on the left side of the shank and Algerian Briar over shape number 771 on the right side of the shank. The pipe is a large group 5 sized bowl. The stem was lightly oxidized but does not have any tooth or chatter marks. Push in tenon fits tight. The dimensions are: length 6 inches, height 2 1/4 inches, chamber width 13/16, chamber depth 2 inches. The following photos were taken by my brother before he cleaned the pipe. It is obvious it is in pretty decent shape. The rim has a little tar and darkening on the rounded back edge but the rest is pretty clean. The finish is quite nice and has some rubbed in grime that will come off with scrubbing. The photos tell the story on this pipe.ed1My brother took some close up photos of the rim, the bottom of the bowl and the stampng on the sides of the shank. You can see from the photos that the pipe is in great shape except for the slight buildup on the back edge of the rim. There is a light cake in the bowl and the bottom third of the bowl appears to be raw briar that has not been darkened by smoking. I would call the pipe lightly smoked.ed2 ed3My brother scrubbed the pipe with his usual mix of a tooth brush and Murphy’s Oil Soap. He rinsed it with water. The scrubbing removed all of the grime and oils on the bowl and removed the build up on the rim as well. The stem was lightly oxidized and there were some scratches around the circumference of the saddle portion of the stem. My brother also cleaned the interior of the airways in the stem and shank and the mortise area. I took some photos of the pipe when it arrived here. ed4 ed5I took a close up photo of the rim to show how well it cleaned up after Jeff had scrubbed it. There is a shine to the rim that is unblemished by scratches or dents. I also took some photos of the stem to show the light oxidation and the absence of tooth marks or chatter. The stem is stamped on the underside horizontally across the saddle with the word France.ed6 ed7I worked over the stem with micromesh sanding pads – wet sanding it with 1500-2400 grit pads and dry sanding with 3200-12000 grit pads. I rubbed the stem down with Obsidian Oil between each set of three pads. After the final micromesh pad I gave it a last coat of Obsidian Oil and set it aside to dry.ed8 ed9 ed10I rubbed the bowl down with a light coat of olive oil to bring the grain to the surface. It also brought life to the briar. I buffed the pipe with Blue Diamond on the wheel and then gave it several coats of carnauba wax. I buffed it with a clean buffing pad. The finished pipe is shown in the photos below. It is a beautiful piece of briar, lightweight and well grained.ed11 ed12 ed13 ed14 ed15 ed16 ed17

“Chinrester” Pipe stamped Screwball would be an interesting restoration project


Blog by Steve Laug

Over the years I have seen photos of the strangely shaped pipes with the long almost tortuously bent stems but I had never seen one close up. Then my brother sent me photos of one that he had picked up for me to restore. It was stamped Screwball on the left side of the shank and 6044 over Italy on the right side. It had a tarnished silver coloured band on the shank that covered what appeared to be a cracked shank. The finish had been sanded free of the area that was banded but the rest of the bowl was still covered with a shiny plastic coat finish that seemed impermeable. The stem was intact which was interesting as many of the ones I have seen were either twisted or bent or broken. The bowl was a unique shape as well. At a side glance it was a combination of a prince and pot but there was a ring around the top of the rim that divided the rim into two enclosed circles. It is a large pipe – 11 inches long, 1 ¼ tall, 1 ¾ inches diameter and a ¾ inch chamber diameter.chin1The stem was oxidized and slightly brown. The silver band was tarnished but the pipe still had a glossy shine in the photos he sent me.chin2The rim showed darkening and some lava over flow on the top of the bowl. There was a light cake in the bowl. The ring around the top was filled with grit and grime. chin3My brother took some close up photos of the pipe. The first of these shows the rim top and the cake and overflow on the rim. The second shows the stamping. The name of the pipe as it appears in the photo is SCREW. Underneath the band is the second half of the name BALL.chin4The next two photos show the stamping on the shank and the imprint of Sterling Silver on the band. They also show the grain peeking out of the shiny topcoat on the underside of the bowl.chin5Here are a couple more shots of the bowl – you can see that the shiny coat has some scrapes in the surface and the almost painted on look that makes me wonder if it is not a later coat of varathane.chin6When my brother received the pipe the band was loose so he slid it off the shank and revealed not only the complete stamping on the pipe but a large cracked area that had been repaired. The cracked area looks like a large chunk of briar had broken free. It had been glued in place and then a band slid over the repair. The glue had dried and long since let the band fall loose.chin7 chin8My brother did the clean up and took off the rim burn on the top and scrubbed the exterior with Murphy’s Oil Soap and the interior with pipe cleaners, cotton swabs and alcohol. When I received the oxidation on the stem was on the surface and the pipe was ready to restore. I have to be honest with you all it was not a restoration that I was looking forward to. The long and curved stem just spelled trouble to me. Trying to run pipe cleaners through it and also polishing and cleaning the oxidation seemed a daunting task. But finally I brought it to the table. Here are some photos of the pipe before I started.chin10 chin11I took the pipe apart and took photos of the parts. With the band removed you can see where the repair person had sanded the shank and done the crack repair before banding the shank.chin12 chin13Trying to scrub off the shiny topcoat with acetone was next to useless. The only place it came off was in the area that had already been sanded. I lightly sanded the bowl with 220 grit sandpaper to break up the surface of the shiny coat. Once that was done I was able to scrub it off with acetone quite easily. In the next photos you can see the repaired crack. It was quite large.chin14 chin15I took photos of the repaired crack to show the extent of it. The band fortunately covered the entire cracked area so it provided stability to the glued crack. Unfortunately it also covered up half of the stamping on the left side of the shank.chin16I used some Weldbond white all-purpose glue to glue the band in place on the shank. I applied it with the tip of the bottle and spread it around with my finger tip to get good coverage. I pressed the band in place on the shank.chin17While the band repair was drying I worked on the stem. I broke up the oxidation on the surface by wet sanding with 1500-2400 grit micromesh sanding pads. I wiped the stem down with a damp cloth. I scrubbed the stem with Before & After Pipe Stem Deoxidizer and was able to remove more of the oxidation. This was a labour intensive effort and took a lot of scrubbing with the solution and paper towels. When there was no more brown coming off the stem I scrubbed it with Before & After Pipe Polish – both Fine and Extra Fine to further address the oxidation.chin18 chin19You can see from the above photos that much of the oxidation had been removed but under a bright light such as the camera flash the oxidation still showed. At this point I had a decision to make – either scrub the stem with more of the deoxidizer or use my tried and true method of micromesh sanding pads. I chose to use the pads. I wet sanded it again with 1500-2400 grit pads and rubbed it down with Obsidian Oil. I dry sanded it with 3200-12000 grit pads and gave it a coat of Obsidian Oil after each set of three pads. After the final set and another coat of oil I set the stem aside to dry.chin20 chin21 chin22While the stem dried I sanded the bowl with the micromesh sanding pads to polish the briar. I had decided not to stain the bowl but leave it natural with a light oil finish and a good buffing. I cleaned off the tarnish on the band with a jeweler’s cloth and polished it to a shine.chin23 chin24With the bowl and stem both hand polished I took the pipe to the buffer and buffed it with Blue Diamond on the wheel. I was able to raise more of a shine with the buffing on both the bowl and stem. Buffing the stem was a real interesting challenge – lots of twisting and turning to get the entire stem buffed. At one point I removed it from the bowl to make it easier to maneuver on the wheel. I gave the bowl and stem several coats of carnauba wax to protect it and buffed it with a clean buffing pad. I finished by hand buffing it with a microfibre cloth. It turned out pretty decent considering where it started. I don’t know if I would call it a chinrester or a shoulder rester as it is a big pipe. I do know that the original design to make it easier on the teeth of the pipeman may not apply here. In the original design the stem rested against the chin of the smoker. In this design unless the smoker has a jutting jaw there is no way that it can rest against the chin. Anyway, the finished pipe is shown in the photos below. Thanks for looking.chin25 chin26 chin27 chin28

A Worn Royal Danish 936 Wide Oval Shank Pipe given new life


Blog by Steve Laug

When I saw the pictures of the way this pipe looked – at least the first picture I thought it was in pretty decent shape. The finish was a little worn; particularly some of the high spots on the sand blast had worn off. The smooth patches were also worn and lifeless. The back edge of the rim looked really rough – as if the pipe had been knocked about on concrete or another hard surface to remove the dottle from the bowl. It was ragged. The inner edge of the rim also looked worn and the cake in the bowl was a bit odd looking – as if it was partially removed. It seemed heavier on one side than the other. The stem looked okay in the first picture but the second hinted that all was not well with it either.danish1The close up photos reveal the issues that I hinted at above. The first shows the strangely caked bowl – heavily built up toward the left side and rear of the bowl as well as the rough back rim top and edge of the bowl. The inner edge of the rim also looks like it has taken some damage. The second photo shows the slight cap at the stem junction that to my mind spoke of a tarry and caked mortise that kept the stem from seating properly. The finish also shows some wear in the photos. The pipe is stamped Royal Danish and Made in Denmark. The shape number is 936 which is a Stanwell shape.danish2The next two photos show the issues with the stem. There were tooth marks on the top and underside of the stem that went from quite deep to very shallow. The button top and bottom were worn down and had deep tooth marks. There was also a heavy build up of oxidation on the stem. The stem logo on the top is very faint. It made me wonder if I would be able to feel it with my finger once it arrived in Canada.danish3I am so glad my brother does the heavy work on cleaning out these pipes. I have reamed and cleaned out the shanks of a lot of pipes and I can’t say that I miss it. I still get to do my share of cleanups on pipes that I find but these that he sends me come ready for the restoration process. He scrubbed the exterior of the bowl with Murphy’s Oil Soap and was able to remove the wax and tars on bowl and rim. He reamed the bowl back to bare briar and scrubbed out the mortise and the airway in the shank and stem. When it arrived the stain was quite washed out and the stem was really oxidized. The damaged rim top was very visible and it was in rough shape.danish4 danish5I took some close up photos of the rim and the stem when it arrived here. The roughness of the rim top and inner edge are seen in the first photo. The tooth marks and wear on the stem top and underside in the second and third photos. My brother had cleaned out the mortise so the stem fit tightly against the shank so my guess mentioned above about a dirty mortise appears to have been correct. The crown logo on the top of the stem could hardly be felt by touch.danish6 danish7I started sanding the stem then decided to run a few pipe cleaners and alcohol through the airway in the stem and shank as well as in the mortise. They were quite clean and did not take too much work to remove the little bit of debris that was still left.danish8I sanded the rim lightly to take away the roughness but still leave the finish looking like the sand blasted portion of the rim that had not been damaged. I stained the bowl with a dark brown stain mixed 50/50 with isopropyl alcohol. I applied the stain and flamed it and repeated the process until the coverage was what I was looking for. I wanted the dark stain in the deep grain of blast to show through the brown top stain.danish9I hand buffed the bowl with a microfibre cloth to raise a shine and to give an even look to the finish. The photos below show the pipe at this point in the process.danish10In the second photo below the rim surface is visible. There will need to be some contrast applied to the finish to make it blend in and not look merely “less damaged”.danish11To address the contrast issue on the rim mentioned above I used a black Sharpie Pen to provide some darkening in the crevices of the pitted surface. I used a dark brown stain pen to give the top coat over the black stain.danish12I sanded the inner edge of the rim with a folded piece of 220 grit sandpaper to smooth out the roughened inner edge. In retrospect I probably should have done this before staining the bowl but I did not so I put it in the order I did the work. In the second photo below you can see how the contrast stain worked on the rim top.danish13When I finished sanding I stained the inner edge of the rim with the dark brown stain pen and added some streaks of black Sharpie pen to give it some contrast. I buffed the rim lightly Blue Diamond on the buffing wheel and with a microfibre cloth. The photos below show the pipe bowl after buffing. Notice the change to the rim after the sanding, staining and buffing.danish14 danish15I set the bowl aside and worked on the issues with the stem. I sanded the area around the button on both sides of the stem with 220 grit sandpaper and scrubbed the deeper tooth marks with cotton swabs and alcohol. Once they were clean I filled the deeper marks and built up the button surface with black super glue.danish16I sanded the repairs once they had cured with 220 grit sandpaper to smooth them into the surface of the stem. I reshaped the top of the button on both sides of the stem with the sandpaper.danish17The edge of the button on the underside of the stem was still rough so I used a needle file to shape and sharpen the straight edge.danish18I wet sanded the stem with 1500-2400 micromesh sanding pads. I rubbed the stem down with Before & After Pipe Stem Deoxidizer and a paper towel to further remove the oxidation on the stem. I polished the stem with Before & After Pipe Polish both Fine and Extra Fine with paper towels. The stem was beginning to shine.danish19 danish20I sanded the stem once again with the micromesh sanding pads using 1500-12000 grit pads. Each successive grit of sanding pad added more shine and depth to the shine. The more I polished the stem the more the crown logo disappeared.danish21I buffed the pipe with Blue Diamond on the buffing wheel and then gave the stem multiple coats of carnauba wax. I rubbed the bowl down with Conservator’s Wax by hand. I buffed the pipe with a clean buffing pad to raise the shine. I hand buffed the pipe with a microfibre cloth to deepen the shine. The finished pipe is shown in the photos below. The pipe is clean and looks new. The restoration brought it back to life. Thanks for looking.danish22 danish23 danish24 danish25

A Great Looking Wimbledon 810 Author showing promise


Blog by Steve Laug

The pipe pictured below is a Wimbledon Author. It is stamped on the underside of the shank on a smooth patch, WIMBLEDON over the shape number 810. The sandblast finish is craggy and the contrast of dark brown and reddish-brown give it even more depth. My brother took the following photos when he received it from the EBay seller. The finish looked to be in excellent shape. There were no worn spots on the bowl. The rim had some tars in the grooves but it was quite clean. The bowl had a thin cake but nothing too thick. The stem did not seat in the mortise properly and there was a gap between the end of the shank and the stem. The stem was oxidized though it had no tooth marks or chatter.briar1I had seen the brand before but could not remember what I had read about it. I turned to pipephil’s site and found a picture of the same pipe – the same finish, the same stem logo and the same stamping on the underside. The site said that the pipe was crafted by Briarcraft as established by the stem logo. I have included a photo of the listing on the pipephil site.wim1That led me to look on pipedia.org to do some digging on Briarcraft pipes. Here is the link: https://pipedia.org/wiki/Briarcraft. There I found the following information. I have included the part of it here that includes a reference to the Wimbledon line.

Briarcraft Pipe Company was very prosperous between 1920 and 1940 and their pipes usually feature a diamond shield logo. They also produced a line of seconds under the following names: Airo, Arcadian, Briarmeer, Smokemaster, Cavalcade, Hallmark, Sterling Hall, and Wimbledon (emphasis mine). They closed their doors in 1950. Briarcraft was started by Richard Kliethermes Sr. and located on Pipetown Hill Rd, Spring Valley, NY. It received its power from a dam on Hyenga Lake, later it moved to 66 Central Ave., Spring Valley, NY. At first it was housed in a 2 story frame building and later a 2 story stone building was added. Upon the death of RK Sr., business was run by Richard Jr, between 1920 and 1940 it was second in size to Frank Medico pipes. All the briar root was imported from Africa, with the start of WWII, imports stopped and a briar like root was imported from S. Carolina. Richard Kliethermes Jr. was the inventor of a pipe known as Smokemaster, which used a doubled up pipe cleaner in the bit to absorb tobacco juice. With the decline in business during WWII and the following 5 years it closed its doors 1950.

Jeff took the following close up photos to show the bowl and rim condition and the stamping on the underside of the shank. The third photo below shows the oxidation on the otherwise clean stem.briar2 briar3Jeff did his usual great clean up on the mortise and airways in the shank and stem. He reamed the bowl back to briar and scrubbed the externals with a tooth brush and Murphy’s Oil Soap. He rinsed it under running water. When the pipe arrived in Vancouver in the last box I received it looked like the photos below.briar4 briar5There was some rim darkening around the inner edge of the bowl but the briar was solid with no crumbling or burning. The finish had lightened with the scrubbing but would be easy to bring back to the original colour.briar6The oxidation on the button end of the stem was pretty light but on the tenon end was quite heavy. For some reason it rose to the surface and was almost white in colour.briar7I wiped down the rim with some alcohol on a cotton pad to clean it up and prepare it for restaining to match the bowl. I stained it with a dark brown stain pen.The colour of the stain pen was a perfect match to the bowl.briar8I wetsanded the stem with 1500-2400 grit micromesh sanding pads to cut through the surface oxidation. I dry sanded with 3200-12000 grit pads to further polish it. I rubbed it down with Obsidian Oil after each set of three pads and with the final pad set the stem aside to dry. I took the following photos of the stem and in them you can still see the residual oxidation under the flash of the camera.briar9 briar10 briar11I decided to use some more of the Before & After Pipe Stem Deoxidizer and Fine and Extra Fine Pipe Polish and see if I could draw out further oxidation. I am still experimenting with the product to check out its effectiveness so this seemed like another good test. I rubbed it down with the deoxidizer and a paper towel and was able to remove even more oxidation from the stem. I was impressed by what it brought out of the vulcanite.briar12I rubbed the stem down with the Fine and Extra Fine Pipe Polish and saw the shine on the stem increase and the oxidation disappear. So far so good.briar13I buffed the stem with Blue Diamond on the buffing wheel to futher polish it. The oxidation was gone. I gave the bowl several coats of Conservator’s Wax and the stem several coats of carnauba on the buffing wheel. I buffed the pipe with a clean buffing pad to raise the shine. I hand buffed the pipe with a microfibre cloth to deepen the shine on the pipe. The finished pipe is shown in the photos below. It is a great looking pipe and one that has great feel in the hand. This one will also make its way to the rebornpipes store soon. If you are interested let me know – send me an email at slaug@uniserve.com or a message on Facebook. Thanks for looking.briar14 briar15 briar16 briar17 briar18 briar19 briar20 briar21

Sometimes you get lucky and it’s an easy cleanup – a Royal Danish 930 Acorn


Blog by Steve Laug

It seems that over the years I have picked up a lot of hard case pipes – pipes that need lots of TLC to even make them usable once again. Somehow, lately my brother has been picking up some pretty sweet pipes that don’t take a lot of work and if you saw my refurbishing bin you would understand why that really makes me thankful. The current pipe I am working on is one those easy ones. He did the lions share of cleaning work on it. He reamed the bowl and scrubbed the internals – the mortise and airways in the shank and stem. He scrubbed the exterior of the pipe so that added to the ease of the cleanup. The pipe is a Stanwell second or sub line. It is stamped on the underside of the shank in a smooth patch Royal Danish over Made in Denmark. To the left of that stamping is the shape number 930 which to my mind is the classic Danish acorn shape. The pipe has a shallow sandblast finish with two smooth patches on the sides of the bowl. The graceful stem gives it a classic look. There is some light oxidation on the stem and some light cake in the bowl and lava on top of the bowl. My brother took the next photos to show the overall look of the pipe.danish1 danish2He also took some close up photos of the rim, the stamping and the stem logo. The first photo below shows the light cake and lava on the rim. It should clean up nicely. The second and third photos show the stamping on the shank and the stem. The crown logo on the stem is faded and worn but still quite legible.danish3 danish4When I brought it to the work table I took the following four photos to show the state of the pipe before I cleaned or polished it. You can see from the photos that the finish was in good shape. The stem was oxidized but otherwise clean with no tooth marks or chatter.danish5 danish6I took some close up photos of the rim and bowl. The rim is in good shape. My brother cleaned off the rim with a tooth brush and Murphy’s Oil Soap to remove the grime and tars. He reamed the bowl and cleaned it. There was some lightening of the stain on the rim.danish7The stem was in great shape other than the oxidation. There were no tooth marks or chatter on the top or the underside of the stem.danish8I wet sanded the stem with 1500-2400 micromesh sanding pads to loosen the oxidation. I scrubbed the stem with the Before & After Pipe Stem Deoxidizer and paper towels. I scrubbed it with Before & After Pipe Polish Fine and Extra Fine. I rubbed the stem down with Obsidian Oil to protect and give life to the stem. I buffed it with carnauba wax and hand buffed it with a microfibre cloth.danish9 danish10I buffed the bowl lightly with Blue Diamond and the stem with a bit more pressure. I was careful around the stamping on the stem and shank. I gave the stme mulitple coats of carnauba wax and buffed it with a clean buffing pad. I waxed the bowl with Conservator’s Wax and buffed it with a clean buffing pad. I hand polished the stem with a microfibre cloth to deepen the shine. The finished pipe is shown in the photos below. The pipe will also one day be listed on the store. It is for sale now if anyone is interested. It would make a great addition to your collection.danish12 danish13 danish14 danish15 danish16 danish17 danish18 danish19

Good “bones” make for a beautiful restored pipe – Scandia 792 Squashed Tomato


Blog by Steve Laug

The next pipe I took out of the latest box was a Scandia 792 – a shape I call a squashed tomato. It may be a Danish author shape. It was in decent shape – the stem was lightly oxidized and there were tooth marks and chatter on the top and bottom sides of the stem near the button. The finish was worn but functional, there was a lot of dust and grime in the grooves of the sandblast. The rim had some small chips out of the inner edge. There was also darkening on the top of the bowl. The next photos show the pipe when my brother received it.scan1The next two close up photos show the close up photos of the rim. The chips on the top of the rim and on the inner edge are visible. There was also some tarry buildup on the inner edge and on the top. scan4The next two photos show the stamping on the smooth portion on the bottom of the shank. It is stamped SCANDIA over Made in Denmark and the shape number 792. The second photo shows the SC logo on the shank. Scandia is a Stanwell second line.scan2The next two photos show the tooth chatter and tooth marks on the top and underside of the stem. There was also some slight oxidation. scan3My brother scrubbed the exterior of the pipe with Murphy’s Oil Soap and rinsed it with running water. He reamed the bowl and cleaned out the mortise and airway in the shank with cotton swabs, pipe cleaners and alcohol. When I received it the pipe was in very clean shape. The next pictures show what the pipe looked like when I brought it to the work table.scan6 scan7I took some close up photos of the rim to show the darkening and the wear on the inner and outer edge. There are some chips. I took close up photos of the stem to show the condition and oxidation on the stem.scan8 scan9I sanded it with 220 grit sandpaper to remove all of the tooth chatter and tooth marks. I also sanded it to remove the oxidation.scan10I used the Before & After pipe stem cleaning kit to work on the stem. I scrubbed the stem with the Pipe Stem Deoxidizer and a paper towel until I had removed the surface oxidation. I continued to scrub it until some of the deeper oxidation came out. I polished it the Pipe Stem Fine and Extra Fine polish to further remove the oxidation.scan11 scan12I used a folded piece of 220 grit sandpaper to sand the rim edges and the top. I was able to remove the chips and divots from the inner edge. The second photo shows the rim after sanding.scan13I used Rub ‘n Buff European Gold to highlight the stamping on stem to bring life back into the logo.scan14I wet sanded the stem with 1500-2400 grit micromesh sanding pads and wiped it down with Obsidian Oil. I dry sanded it with 3200-12000 grit pads and rubbed down Obsidian Oil after each set of three pads. After the final rub down of Obsidian Oil I set the stem aside to dry.scan15 scan16 scan17I waxed the bowl with Conservator’s Wax and buffed the pipe with a clean buffing pad. The next four photos show the polished bowl.scan18 scan19I sanded out the bowl with 220 grit sandpaper on around my finger to clean up the scratches and nicks in the bowl interior. I buffed the bowl with a clean buffing pad and gave the stem several coats carnauba. I buffed the stem with a clean buffing pad and then once again with microfibre cloth to raise and deepen the shine. The finished pipe is shown in the photos below. It will one day be on the rebornpipes store, if you would like to add it to your rack email me at slaug@uniserve.com or send me a message on Facebook or a comment on the blog. Thanks for looking.scan20 scan21 scan22 scan23 scan24 scan25 scan26 scan27


An Italian Thompson Briar Cherry Wood


Blog by Robert M. Boughton

Member, International Society of Codgers
Member, North American Society of Pipe Collectors
Member, Facebook Gentlemen’s Pipe Smoking Society
https://www.facebook.com/roadrunnerpipes/ Now Open!
https://roadrunnerpipes.wordpress.com/
http://about.me/boughtonrobert

Photos © the Author except as noted

Sittin’ in the mornin’ sun
I’ll be sittin’ when the evenin’ comes
Watchin’ the ships roll in
Then I watch ’em roll away again, yeah
I’m sittin’ on the dock of the bay
Watchin’ the tide roll away, ooo
I’m just sittin’ on the dock of the bay
Wastin’ time.

— Otis Redding (1941-1967), U.S. singer, songwriter, arranger, record producer, talent scout, in “Dock of the Bay.” 1968

In the late great soul singer’s relaxed, heartfelt poetry, I have ventured upon a quintessential pipe quote.  To me the words evoke certain clear and happy memories of my childhood and the highest objective of all pipe enthusiasts: to sit in peaceful, easy contemplation of life and enjoy its passage with thoughts that may or may not be as eloquent as those of the lyric and stylistic artist, but nevertheless belong to us.  Only fitting, therefore, is the fact that this refurbish concerns a lovely sitter, made of briar but fashioned in the cherry wood shape.

Having the Dutch pipe maker E. Gubbels B.V. of the Netherlands on the brain in recent days, I thought I had an unusual shape of one of its brands, another Thompson.  My first clue that this might be incorrect came upon my initial inspection of the fine specimen, whereupon I discovered a made in Italy stamp under the brand.  Turning to Pipephil, I noted the slight but nevertheless clear difference in the cursive style of the name.  Unless anyone comes up with a better answer, I conclude this beautiful briar pipe with almost seamless birds-eye grain was made for the Thompson Cigar Co., established in 1915, of Tampa, Florida.

I have owned several cherry wood style pipes, and only one that I recall was, to me at least, a dud.  That’s why I let it go to a collector of the brand, which shall remain unnamed despite the fine reputation it enjoys for good reason.  The gentleman snagged the little beauty, with its excellent dark red and orange vertical grain, from my first online business site the day after I blogged and posted it, and wrote to let me know how happy he was in every respect with his purchase.  This anecdote illustrates how the pleasures derived from these diminutive wonders for partaking of the sundry blends of tobaccos are of an intense and personal nature, and every functional pipe is destined, in a way, for a loving keeper.

Here are three of the many examples I have owned and come to know on an intimate basis.  The first and last are briars.thompson1thompson2And here is the Thompson I have had the pleasure of cleaning up and savoring on a frequent basis ever since.thompson3thompson4thompson5thompson6The sitter had few signs of wear and tear other than chatter and general abrasions on the bit, and so I commenced the refurbish there with an OxiClean bath.  I followed that step by sanding with 320-grit paper and wet micro meshing from 1500-12000.

thompson7thompson8thompson9The superfluous system tenon, which was of a variety so popular back in the day when every pipe maker and his brother was in the mad competitive habit of patenting such idiotic devices, was stuck so tight inside the push section that I had to heat and remove it first.  Then I reamed the chamber and sanded it smooth with 150-, 220- and 320-grit paper before running some preliminary Everclear-soaked cleaners through the shank.  As I was keeping the pipe for my own use, I tucked away the unnecessary system nuisance.

thompson10thompson11The full micro mesh treatment of the stummel was enough to clear away the insignificant blemishes on the wood.  Still, more light work was needed on the rim with 320-grit paper, then another round of micro mesh on that narrow area.thompson12thompson13thompson14Retorting the pipe necessitated several more cleaners through the shank.thompson15This is where a phenomenon I never before saw occurred.  Thinking the stummel ready for waxing, I couldn’t help noticing the inexplicable appearance of a dark red patch that appeared to be an old stain, seeming to have no logical origin, on the top front of the bowl, under the rim.  Blast me for not snapping a shot of the spooky manifestation before I corrected it with spot sanding, again using 320 paper!  I had already applied Halcyon II to the surface and had to spot wax the narrow spot again.thompson16thompson17Following the 15-minute soak-in stage and vigorous buffing with a soft thick cotton cloth, all that was left was a quick spin on the clean electric buffer wheel.thompson18thompson19thompson20 SOURCES
https://www.thompsoncigar.com/section/PIPES/8394.uts
https://wordpress.com/post/roadrunnerpipes.wordpress.com/219

The Rim on this De Jarnett Handmade Needed Attention


Blog by Steve Laug

My brother sent me photos of this interestingly shaped De Jarnett pipe and wondered about it. I agreed there was something about it that grabbed me too. The grain on the darkly stained bowl, the Cumberland style Lucite stem, the curves of the pipe following the grain, the mushroom cap on the top of the bowl all were a part of the mystique of the pipe. He bid on it and the pipe was his. I received it in the mail in the last box of pipes he sent me. Last night I took it out to have a closer look at the pipe. I always have my brother take photos of the pipe before he does any work on it so he sent the following photos along with the pipe.de1It looks really nice but I had no idea how large the pipe was until I had it in hand. It is 6 ½ inches long, 2 ¾ inches tall, 2 ¼ inches in diameter with a chamber size of 7/8 inch. It is a handful. The stamping on the underside of the shank has a cactus which was Horace’s logo and the name De Jarnett with the J stylized into a pipe. Underneath it says Handmade in Arizona over 58-04. My guess is that the number stamping tells me that the pipe is the 58th pipe he made in 2004.de2The photo he sent me of the rim shows the cake in the bowl and the damage to the inner edge of the rim. It looks like it is burned but once I see it and examine it I will know how bad the burn mark is. There is also a sizable dent on the bowl top and some overall darkening of the rim cap.de3I had heard of De Jarnett pipes in the past and talked to others about them. I have also done repairs on one of them in the past but I had never taken the time to read about the maker. I assumed he was still living which turns out to be false. I turned to my two go to sites Pipephil and Pipedia for information and found little other than the dates of the maker which showed he had died and the location of the shop which is on the pipe anyway. However, Pipedia was more fruitful. Here is the link: https://pipedia.org/wiki/DeJarnett_Pipes

When I read the write up on Pipedia I found that Horace DeJarnett had died on July 24, 2013. He had been battling with terminal cancer, but his wife reported that he ultimately died of a stroke. Since I had also suffered a stroke this gave me a sense of connection with the carver. I only wish that I had been able to have a chat with him before he died. I find that those conversations I have had with pipe makers have been highlights of my pipe collecting and repair/restoration hobby.

Pipedia also included a photo of Horace that was taken by Pipes& Tobacco Magazine and used by courtesy. I have included much of the Pipedia article here for ease of reference. For the details and the remainder of the article use the link above.

Horace wrote of his pipes: “All of my pipes are carved from the finest quality Algerian briar I can find. I coat each bowl with a special pre-carb treatment which speeds up the break-in process. After the third bowl, it will smoke as if it had been in your collection for years. I get a lot of positive feed-back on this feature.

Standard draft holes are 5/32″. I think that’s too small and many pipe smokers agree with me. So I drill mine to 3/16″ for a better draw. You won’t have to send my pipes out to a pipe repairman to have them opened up, as many do.

For over 40 years I worked in the grocery industry. In 1984 I founded my own food brokerage business. It prospered and grew into a multi-state corporation. In 1999 I sold my portion of the business and retired.

Due to health concerns and public scrutiny, I quit smoking cigarettes in 1993 and took up the pipe.

(I believed then – and still do – that health risks are greatly reduced by not inhaling and just puffing.) Serious pipe-smoking is conducive to day-dreaming, and thus the idea of making my own pipes became a quest.

I was fortunate to study under Andrew Kovacs, a well-known carver in Northern Arizona (trade name “Jandrew”) for about a year, off and on. I learned a lot of the basics from Andy, but some of my best counsel came via long telephone conversations with Mark Tinsky.

Over the years I have made and sold approximately 1,000 pipes, most of them here in the United States, but I do have customers in Indonesia, Germany, Japan, England, Israel, Canada, and Thailand.

What began as a hobby has become my passion. I lost my leg in 2001 due to a blood clot, so fortunately for me, I have an occupation that is “handicap friendly”.

That glimpse of Horace from his own words gives a clear picture of what he brought to the making of each pipe that he sent out. I have no idea where the pipe that arrived in Vancouver has been before coming here nor do I know where it will go afterward. But I know that it will certainly outlive me. The quality of briar and craftsmanship give it a great chance at longevity.

My brother Jeff did his normal thorough cleanup of the exterior and the interior of the pipe. When it arrived it had been reamed, cleaned and sent to me for the final touches. It is really nice to have him doing the grunt work on these pipes. This was no exception. I took a few photos of the cleaned up pipe when I brought it to my work table. de4The next photo shows the darkening and burn mark on the rim. A close up of that area is shown in the photos that follow.de5The burn mark and darkening at the front of the bowl was more extensive than I had originally guessed from the photos sent. The front inner edge is burned and beveled inward with the darkening extending quite a way into the rim top. The back edge also shows some burning that will need to be address. The second photo gives another view of the stamping.de6The stem had some tooth chatter on the top and the underside and the edge of the button was worn and flattened. de7To remove the burn damage on the inner edge of the rim I used a folded piece of 220 grit sandpaper to bevel the rim edge inward to accommodate the damage on the bowl front. I carried that bevel around the entire rim edge to clean up the damage at the rear as well. The next two photos show the newly beveled rim. The angle on the second photo makes the bevel appear to be thicker at the front of the bowl than the back. However, in hand the bevel is the same size around the bowl.de8I wet sanded the rim with 1500-2400 grit micromesh sanding pads and dry sanded it with 3200-12000 grit pads to polish the scratches and the new bevel. I used a dark brown stain pen to touch up the inner edge of the rim to match the colour of the bowl. All that remains of the burn mark is a small dark spot on the front top of the bowl and some darkening in the inner edge. It is far better than when I began. de9I sanded out the tooth chatter and reshaped the button with 220 grit sandpaper. I wet sanded the stem with 1500-2400 grit micromesh sanding pads, wiped it down with a damp cloth and dry sanded it with 3200-12000 grit pads. I wiped it down with a damp cloth a final time. de10 de11 de12I buffed the pipe and stem with Blue Diamond on the buffing wheel. I gave the bowl and stem multiple coats of carnauba wax. I buffed the pipe with a clean buffing pad to raise and shine and hand buffed it with a microfibre cloth. The finished pipe is shown in the photos below. It is a big pipe so it will eventually be listed on the store for sale. If you are interested in it before that time just send me an email at slaug@uniserve.com or send me a message or a comment here or on Facebook. Thanks for looking.de13 de14 de15 de16


An odd assortment of tiny Salesmen’s Pipes


Blog by Steve Laug

Over the past six months or so I have been taking the tiny pipes that my brother has sent and stack them to the side of the desk in a “maybe someday” pile. That is a pile that I might work on some day – you know what I mean kind of a cast of pipe pile. Finally last evening I was looking at them again. It may have been triggered by the refurbish I just did on the little KBB Yello-Bole bent billiard that refurbished recently (https://rebornpipes.com/2016/10/08/a-living-tiny-kbb-yello-bole-salesmans-pipe/). I am not sure but whatever it was I picked up the three pipes that were in the pile. The first was a rusticated bent billiard that looks like an old WDC System pipe. It is stamped Well Pipe over Italy on a smooth portion of the left side of the shank. The second one was a straight prince shaped pipe that was stamped Tom Thomb over Imported Briar on the left side and top of the shank. The third was a very unique pipe made of Bakelite I believe. It is a tiny carved figural head of a man who looks like a page. It is stamped Bob’er on the left side of the shank. On the neck and chin of the figural it was stamped on the left side Reg.US.Pat.Off and on the right side neck and chin Des.Pat. 71062. I took two photos of the group of three pipes as they were when I started.tiny1The first pipe, the Well Pipe was a fascinating little fellow. It is 3 ½ inches long, 1 ½ inches tall and the diameter is 1 inch. The chamber diameter is ½ inch. Proportionally, the pipe is very nicely done. The metal rim is oxidized. The bowl had a light cake that my brother had taken out. The stem was cast rubber with a typical P-lip type stem though the airway is directly in the end. The stem was chewed and there was a chunk out of the side of the stem below the button on the left side.tiny2tiny2aI took some close up photos of the stamping on the side of the shank and the condition of the stem. The bowl and stamping were in great shape. The nickel band was dirty and oxidized. The stem has a chunk missing out of the end of the stem. I have circled it in in red.tiny4The second pipe, the Tom Thomb prince was in decent shape. The bowl had a light cake that my brother reamed before sending it to me. The finish was peeling off the bowl on the right side and the bottom of the bowl. The rim had a tar buildup and some cake over flow. It is 4 inches long, 1 inch tall and the diameter is 1 inch. The chamber diameter is ½ inch. Proportionally, the pipe is very nicely done. The vulcanite stem was oxidized and there were two blisters on the top and bottom left side ahead of the button.tiny5 tiny6I took a close up photo of the rim to show the condition and the stamping to show its location on the shank. You can also see the oxidation in the vulcanite stem.tiny7The third pipe was the unique pipe Bakelite figural head of a man. The carved face is quite well done. It is a cast as the pipe has a seam on the top of the stem across the bowl and down the front and underside of the bowl and shank. It is 2 1/2 inches long, 3/4 inch tall and the diameter is 1/2 inch. The chamber diameter is 1/4 inch. The stem and bowl are pristine. The bowl is unsmoked. There is a cross hatched pattern on the shank. The casting is quite well done.tiny8 tiny9I took some close up photos of the stamping on the pipe. The first photo shows the left side shank stamp shows up clearly as Bob’er. The second photo shows the stamping on the left side of the neck and chin of the figural. The Reg.US.Pat.Off. stamping is very clear. The final photo shows the stamping on the right side neck and chin. Again the Des.Pat. 71062. is very clear.tiny10I wiped down the bowls with alcohol on cotton pads. I scrubbed the prince with acetone on a cotton pad. I was able to remove the grime and build up on the Well and the Bob’er. The acetone barely dented the surface of the peeling finish on the Tom Thomb.tiny11I started working on the stem of the Well pipe. I took a photo of the missing chunk. I cleaned the area with alcohol and then filled it in with black super glue using a tooth pick to place it in the divot.tiny12Once the repair had cured I sanded it with 229 grit sandpaper and shaped it with a needle file. I wanted it to match the right side of the stem and look like it had originally. I also shaped the P-lip on the top and bottom sides.tiny13I wet sanded the stem with 1500-2400 grit micromesh sanding pads and dry sanded it with 3200-12000 grit pads. After each set of three pads I rubbed the stem down with Obsidian Oil. After the final sanding of the 12000 grit pad I gave it a final coat of oil and set it aside to dry.tiny20 tiny21 tiny22I buffed the stem and the bowl with Blue Diamond and gave them multiple coats of carnauba wax. I buffed it with a clean buffing pad and then by hand with a microfibre cloth. The finished Well pipe is shown in the photos below.tiny17 tiny18With the Well Pipe finished I focused on the Tom Thomb prince. I started by sanding out the blisters on the stem. On both the top and the bottom there were blisters on the left side near the button. I forgot to take a photo of the bubbles but after I had started sanding it with 220 grit sandpaper I took the next photo. I sanded out the bubbles and then wet sanded the stem with 1500-2400 grit micromesh sanding pads. I dry sanded it with 3200-12000 grit sanding pads. I rubbed it down with Obsidian Oil after each set of three pads and let it dry after the last pad.tiny19 tiny20 tiny21 tiny22I sanded off the finish on the bowl and shank avoiding the stamping. I wiped it down with acetone on cotton pads to remove the remaining finish. I stained the pipe with Danish Oil and Cherry stain.tiny23 tiny24I buffed the pipe and stem with Blue Diamond on the wheel and gave it multiple coats of carnauba wax. I buffed it with a clean buffing pad and then by hand with a microfibre cloth. The finished Tom Thomb pipe is shown in the photos below.tiny25 tiny26The last pipe, the Bakelite pipe did not take a lot of work. I gave it a coat or Conservator’s Wax and hand buffed it with a shoe brush and a microfibre cloth. The finished pipe is shown in the photos below.tiny27 tiny28I thought I would take some photos of the finished lot. The tiny pipes shine with a new sparkle. As I look at them I wonder if this is what they looked like when the salesmen carried to the pipe shops to sell orders for year’s pipes. Thanks for looking.tiny29 tiny30 tiny31 tiny32