Blog by Dal Stanton
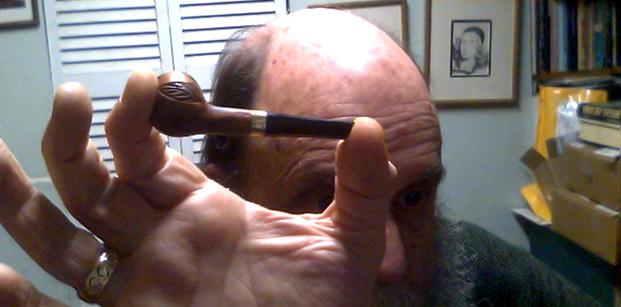
After a wonderful time in the US, sharing Christmas and New Year with our family, and catching up on ‘grandpa time’ with our two grandsons, my wife and I returned to Sofia, Bulgaria, to find as much snow as we left in Denver! Two memorable ‘piping events’ transpired while in Denver. First, the inaugural smoke of the restored 1907 McLardy Gourd Calabash (See: Link) which was filled with a tasty bowl of Dark Star recommended by Steve for the special occasion. It was a wonderful, cool smoke. The McLardy did admirably.  The second ‘piping event’ was a pipe-picking expedition several of my family members (guess who this trip was for?) did to Denver’s huge Brass Armadillo Antique Mall! We had a great time in search but unfortunately, I found no treasures to bring home. Yet secretly, my youngest son stowed away his Christmas gift for me which I discovered under the tree a few days later! He got a great deal and I can see why! He knew I would have fun trying to breathe new life into the L J Peretti now before me on my work table in Sofia. I am anxious to get back to work on a pipe and this Peretti is a great starting block for 2017!


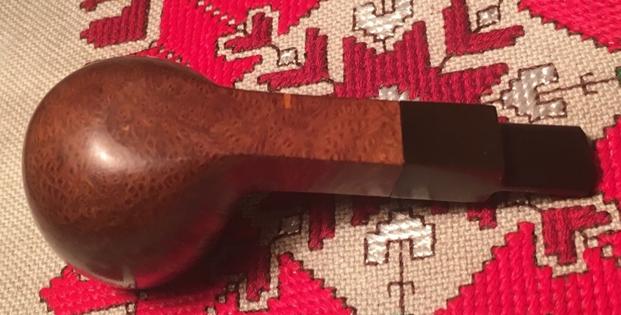
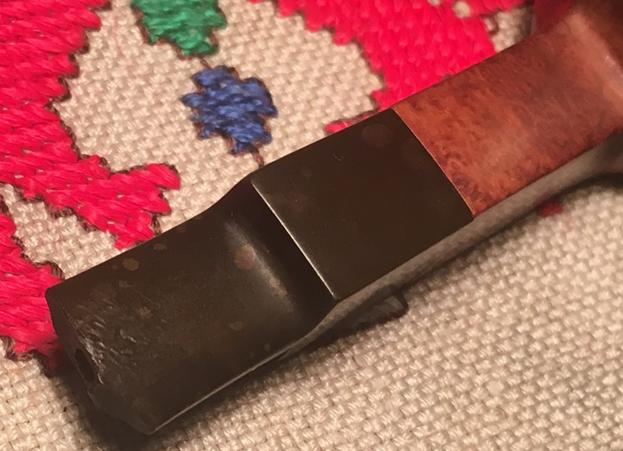
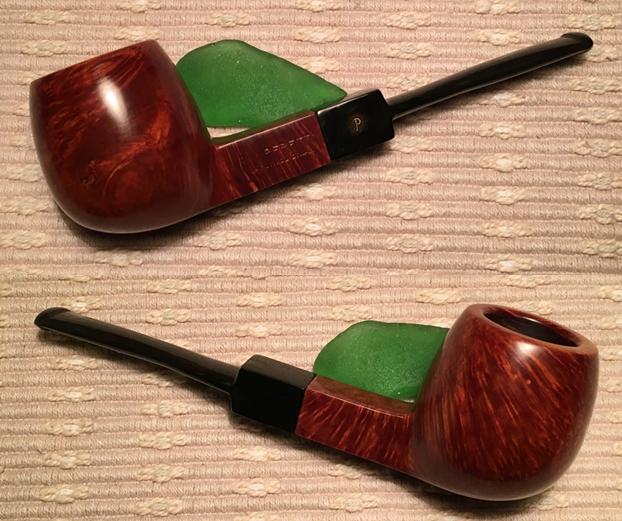
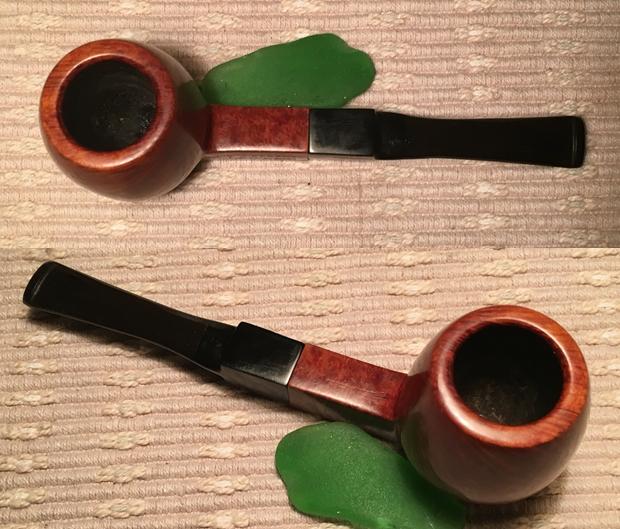
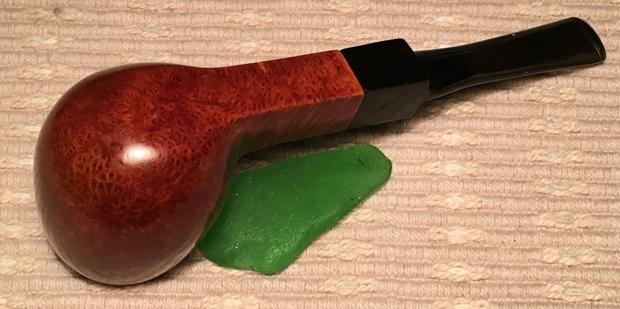
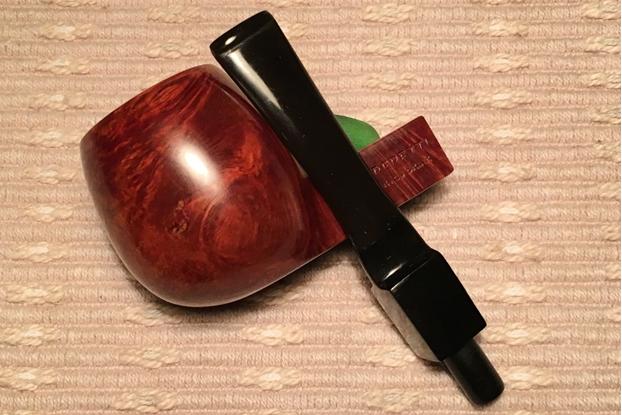
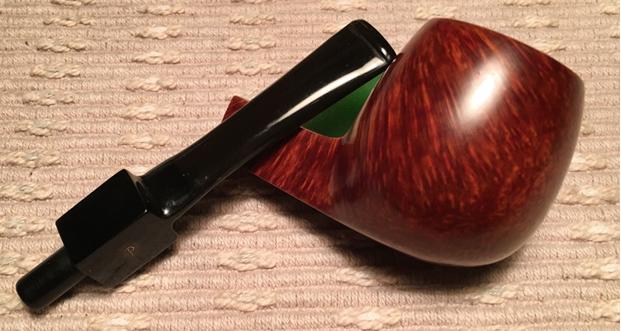
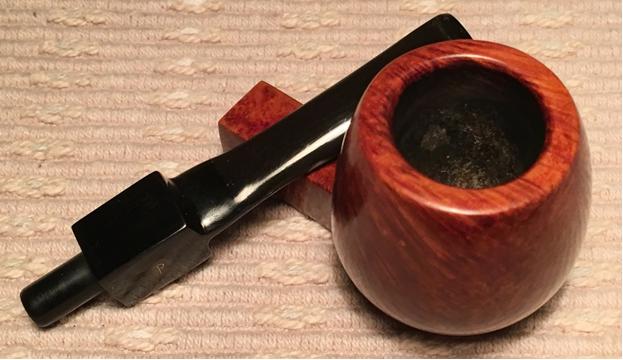
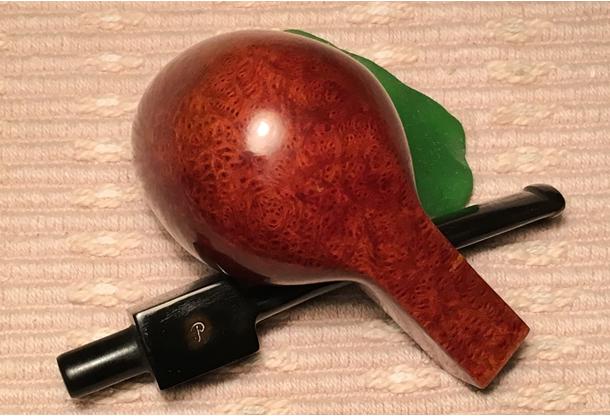
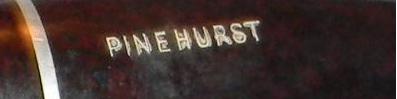
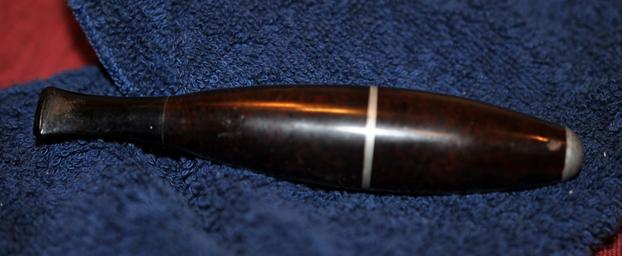
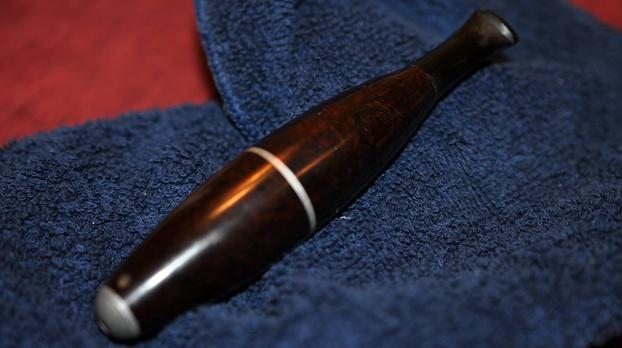
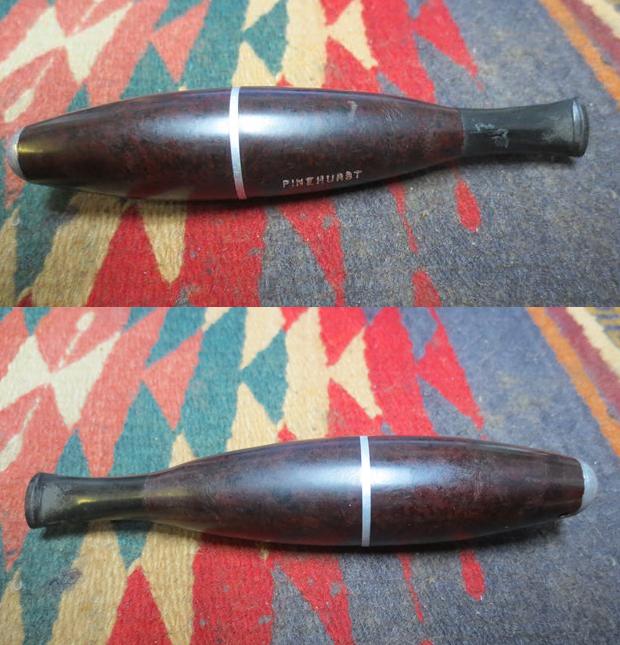
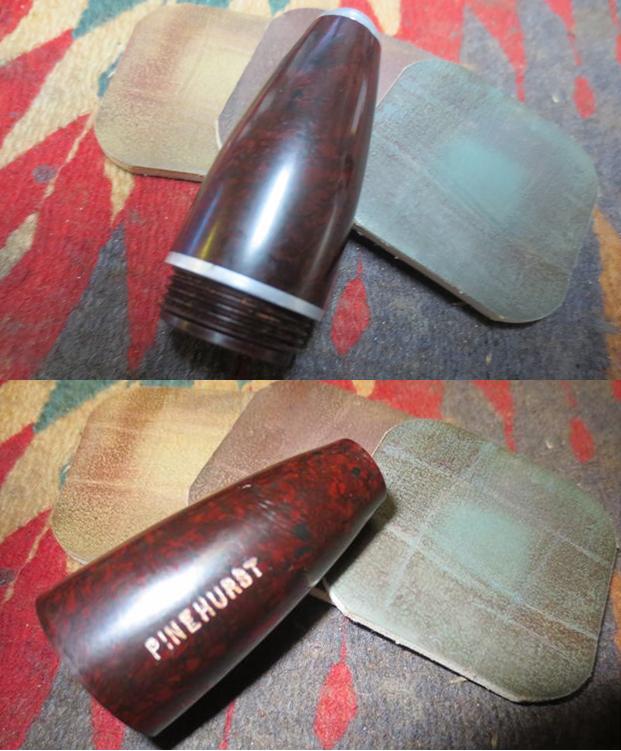
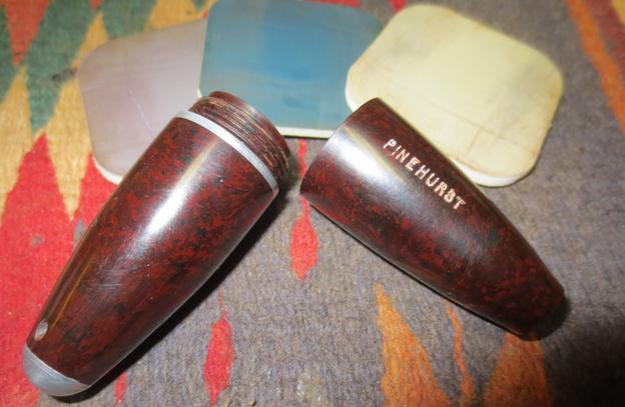
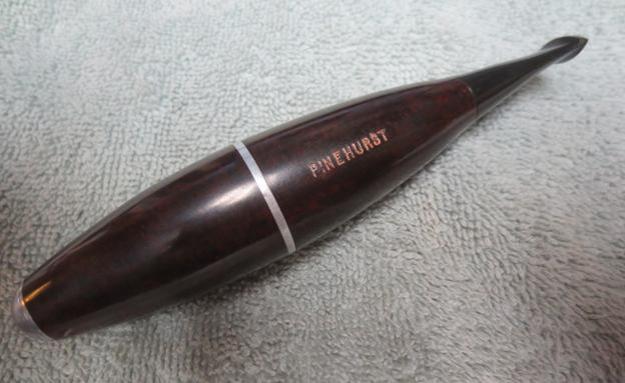
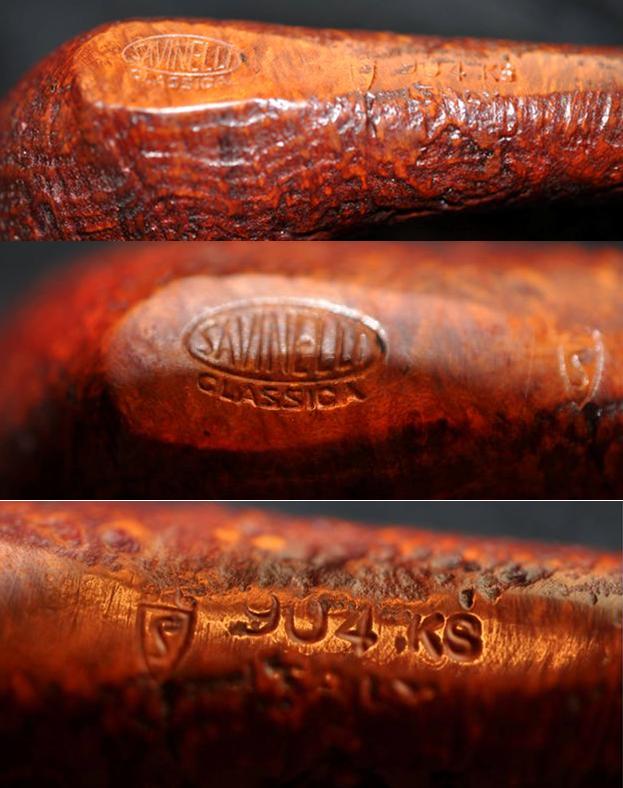
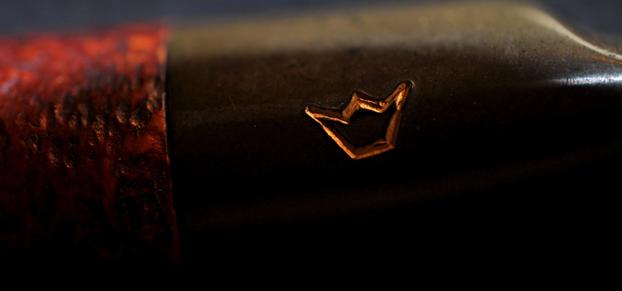
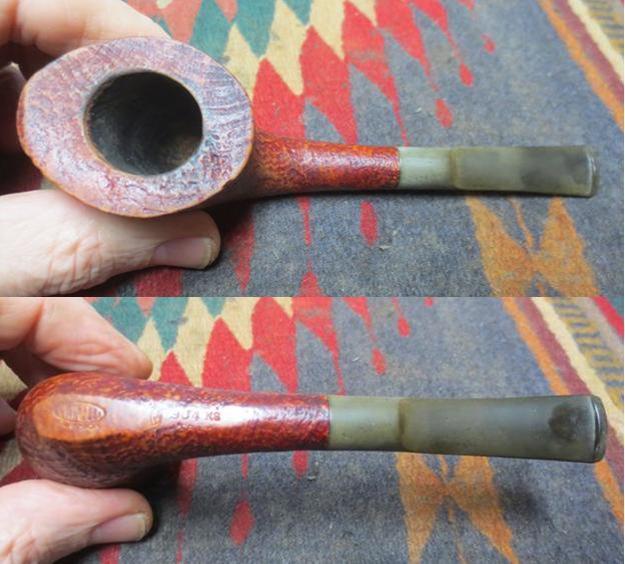
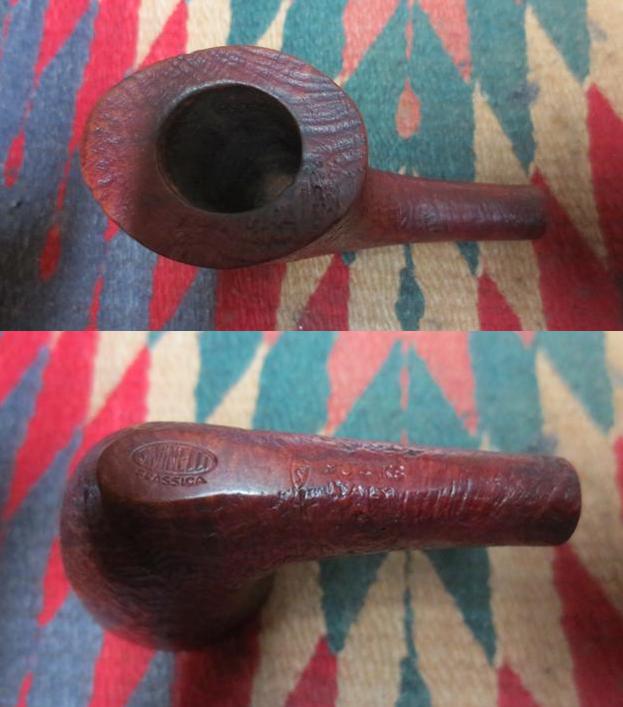
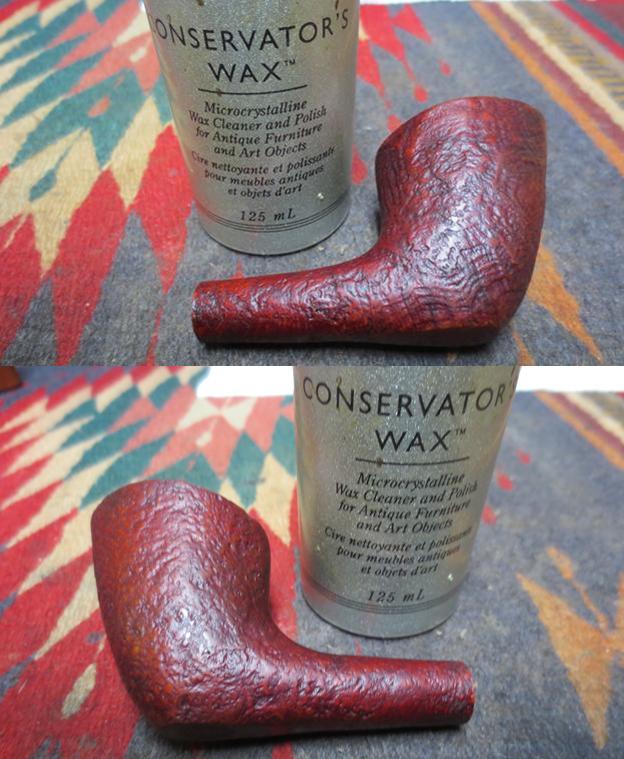
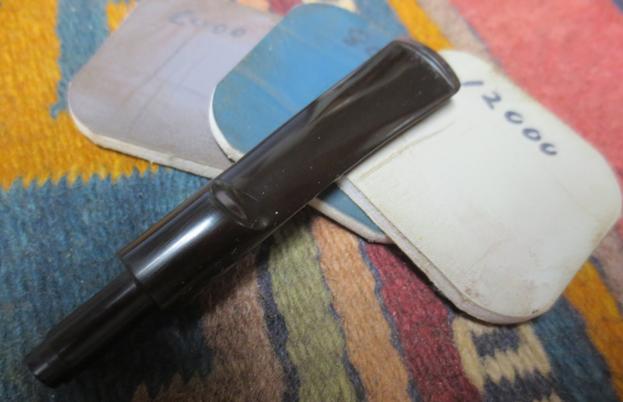
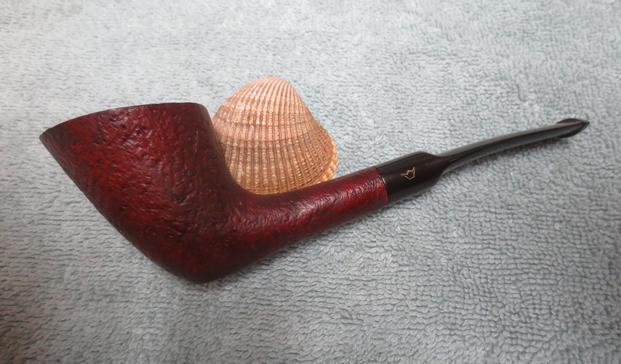
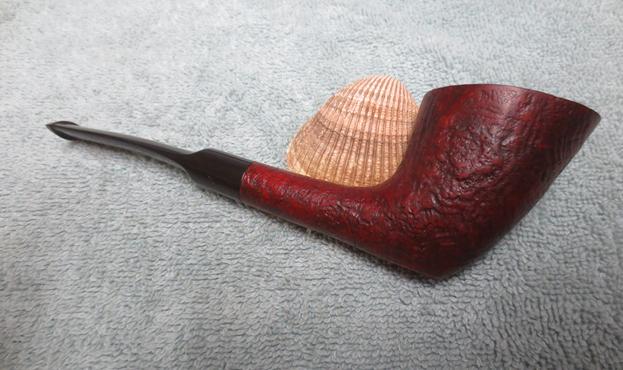
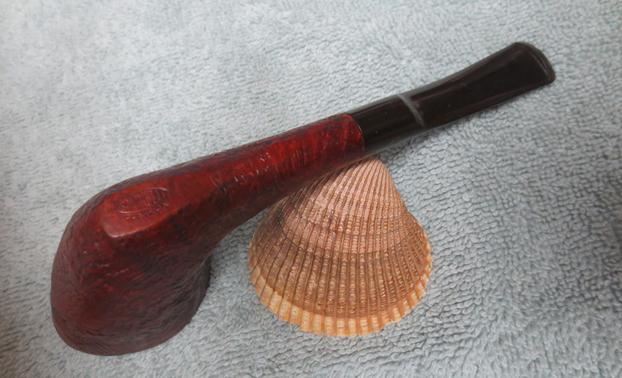
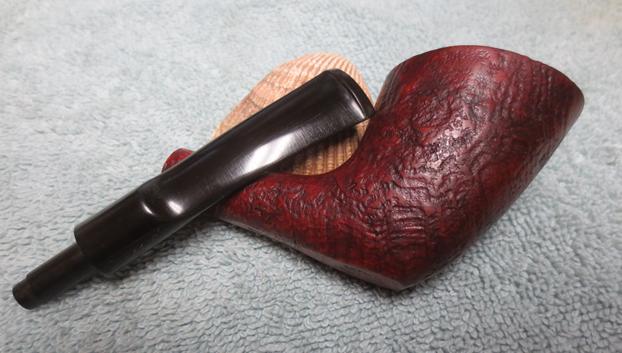
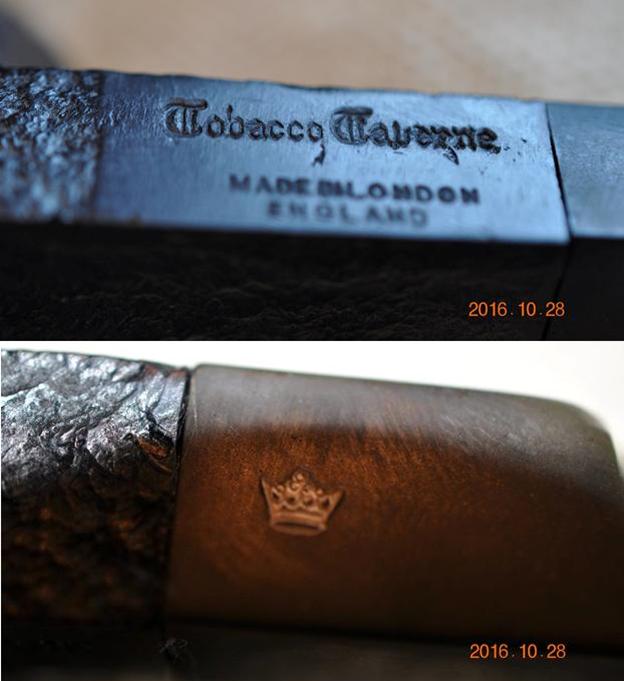
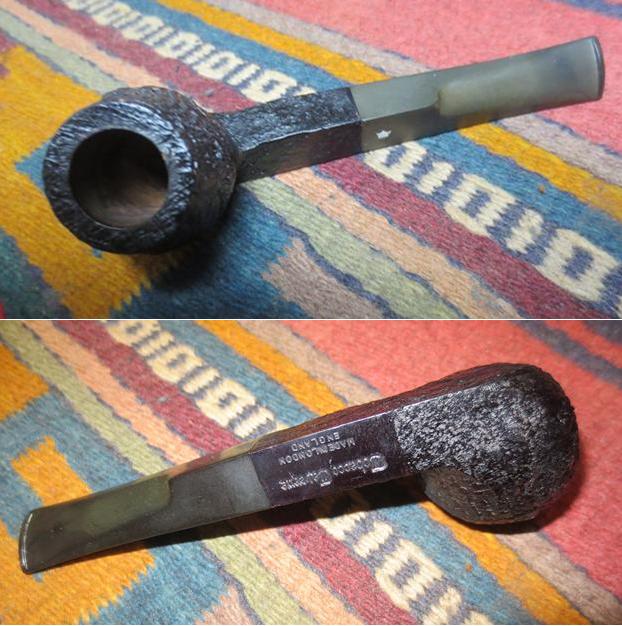
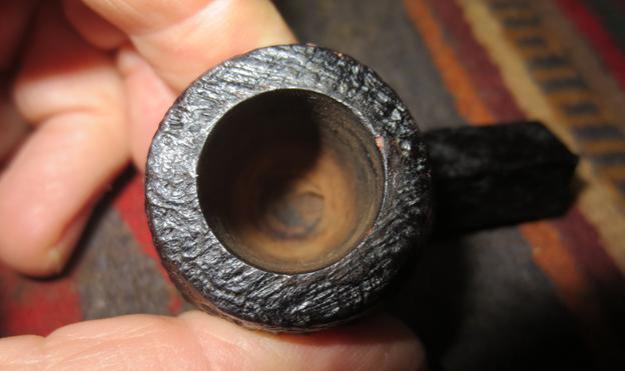
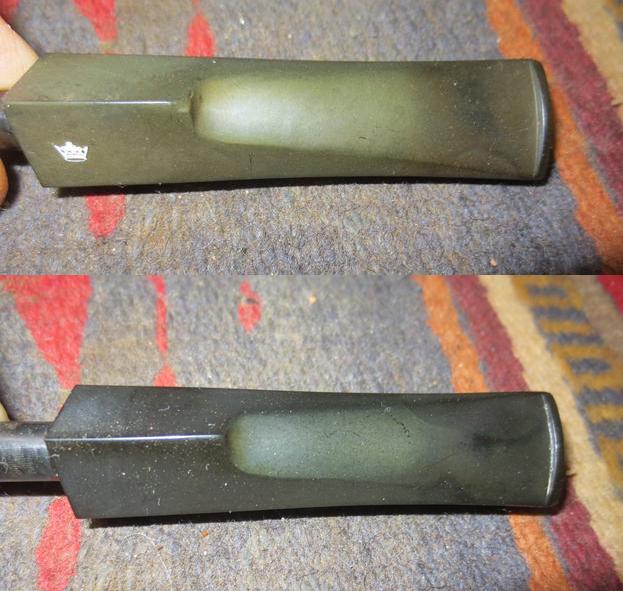
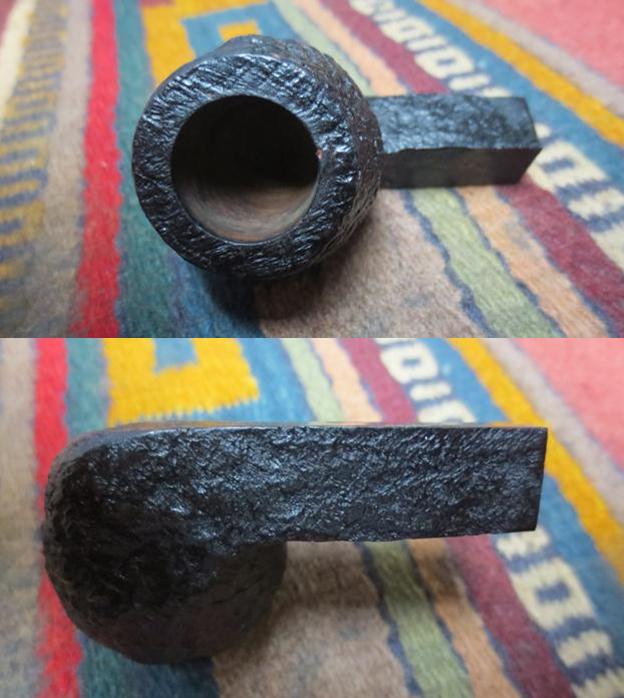
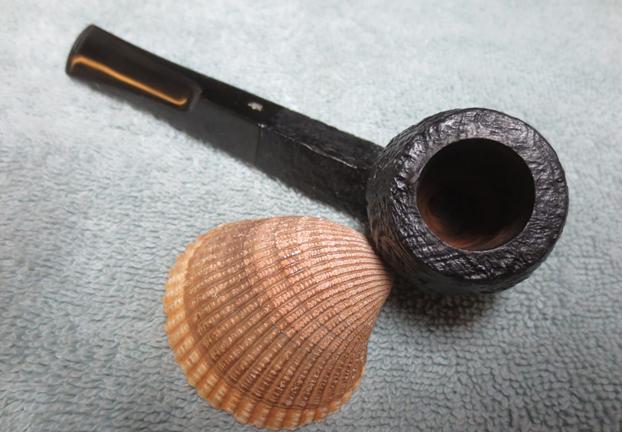
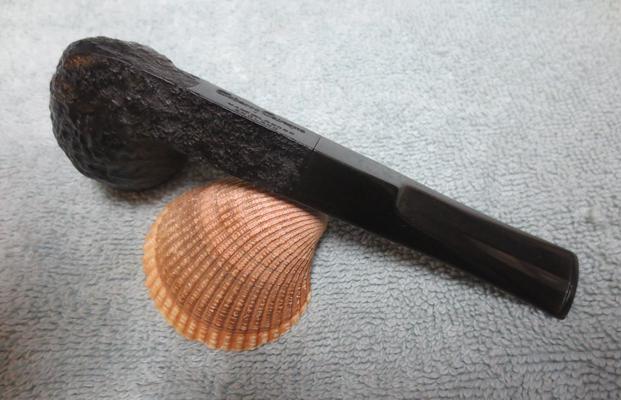
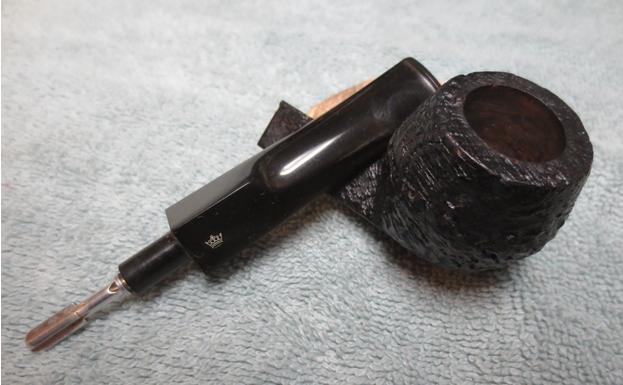
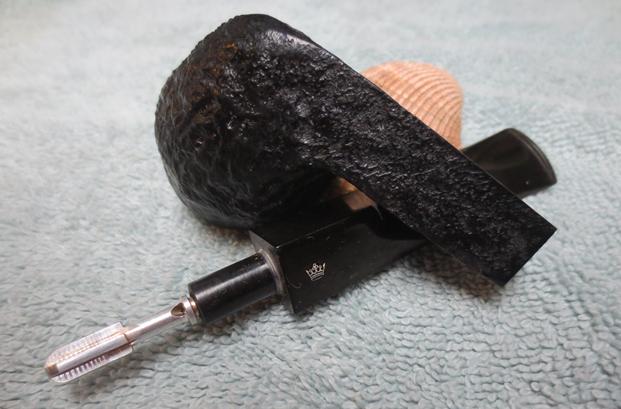
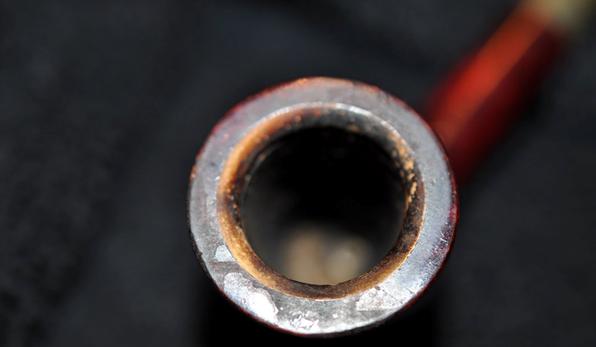
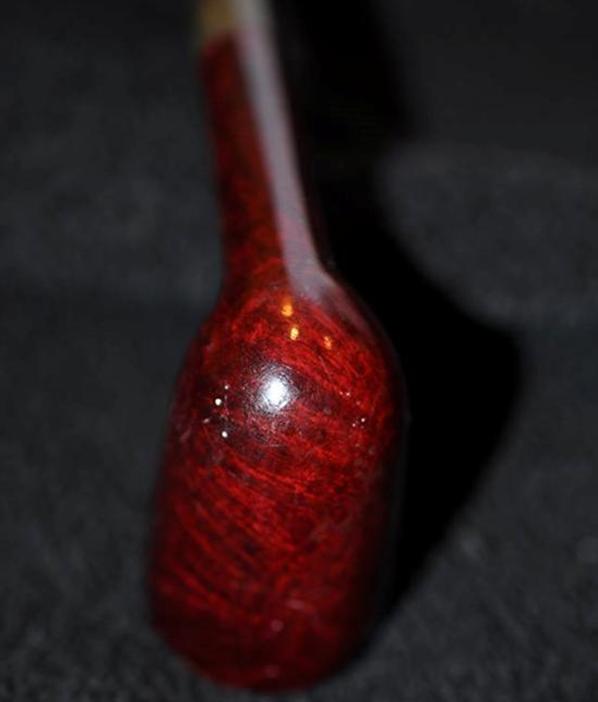
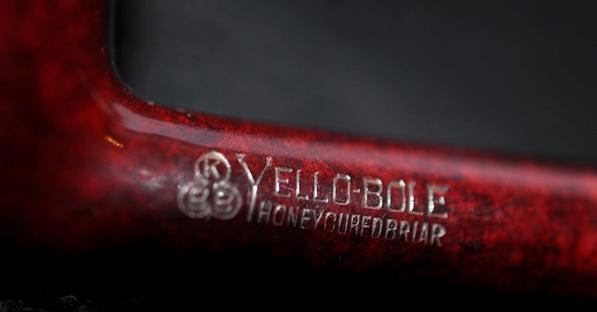
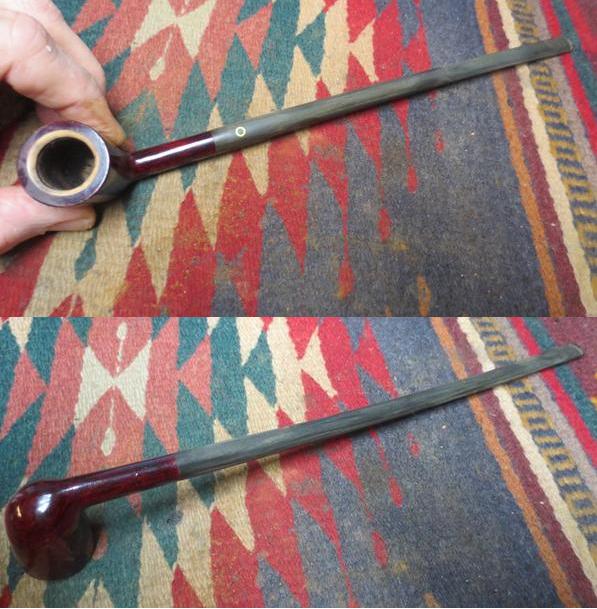
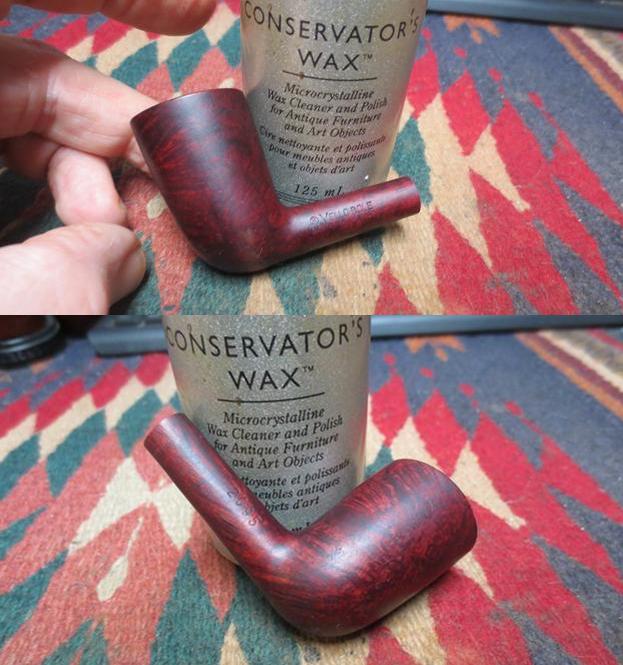
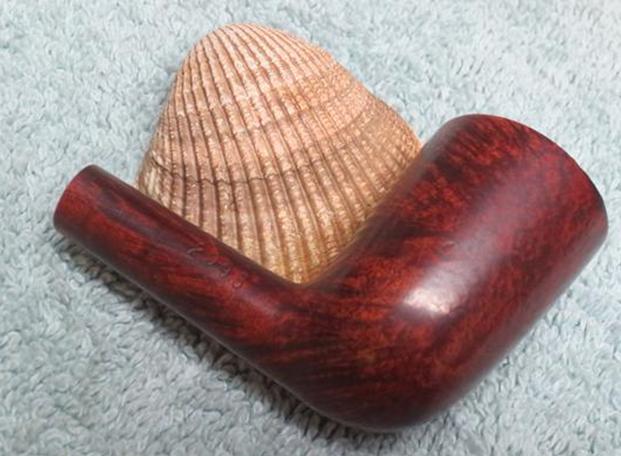
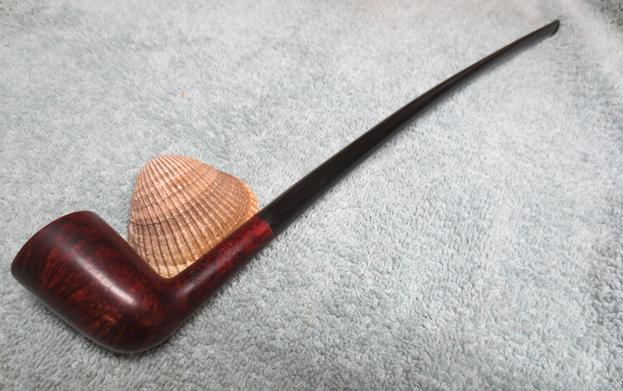
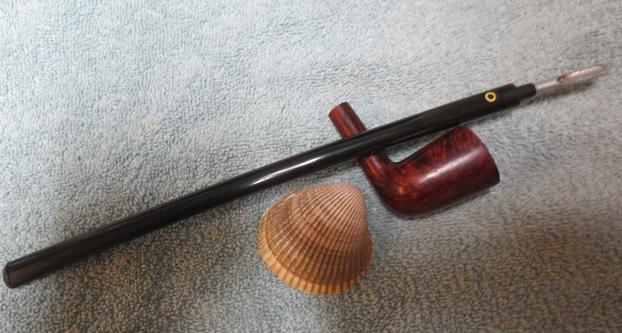
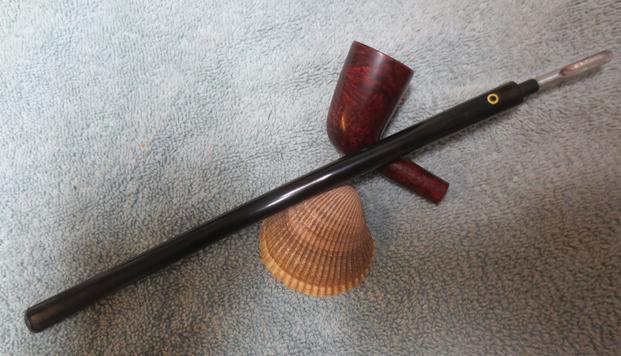
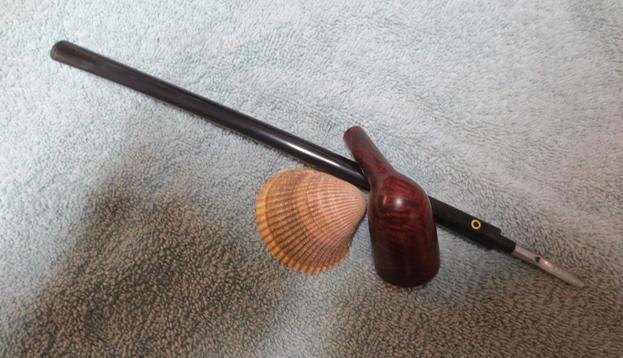
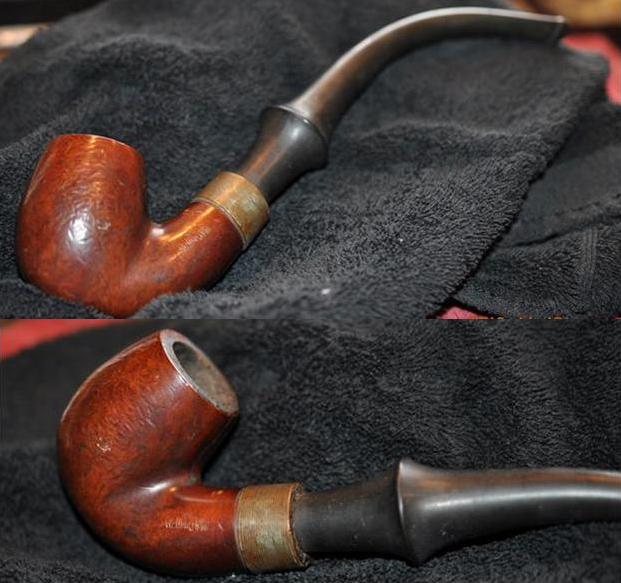
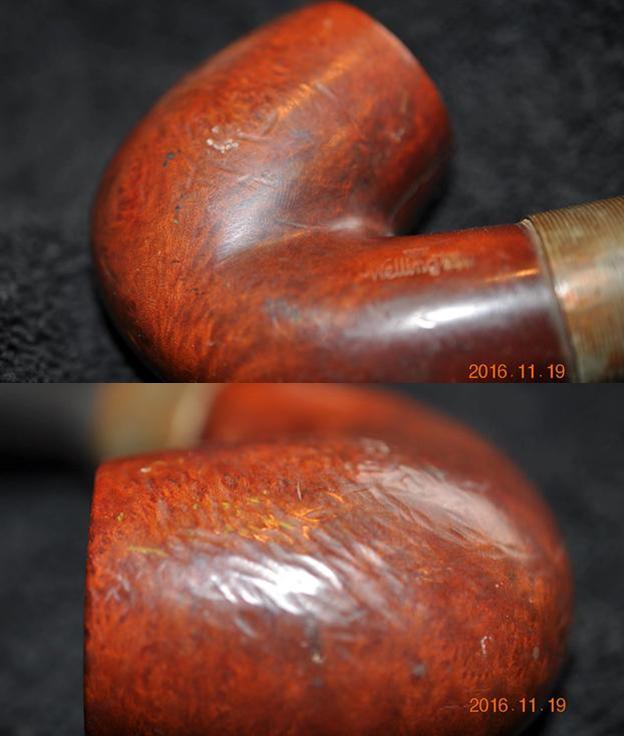
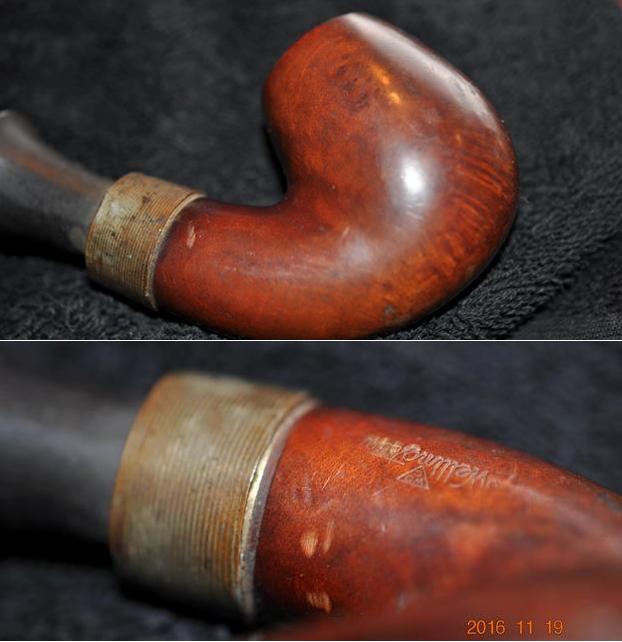
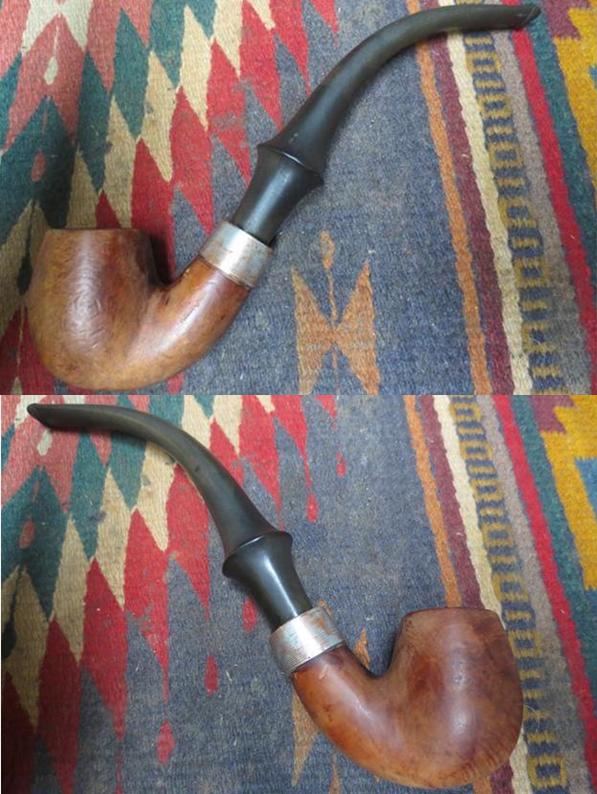
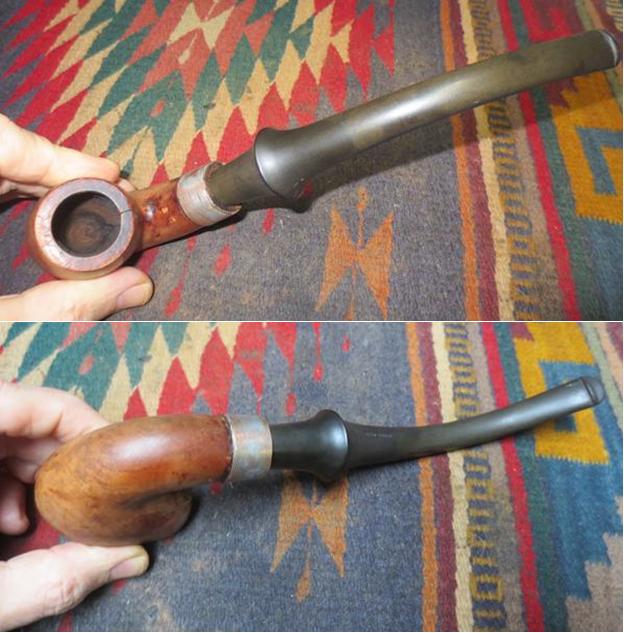
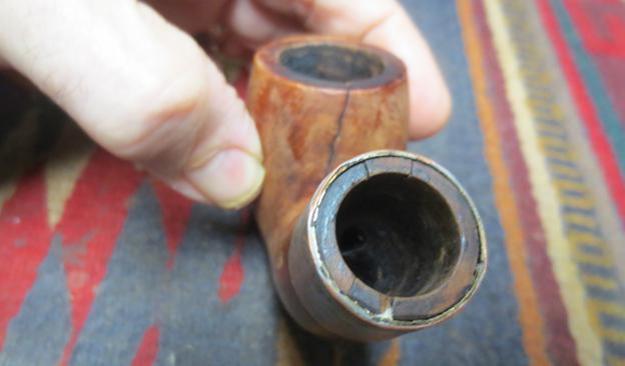
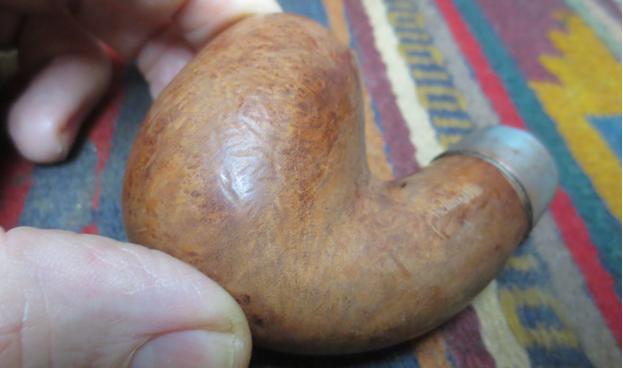
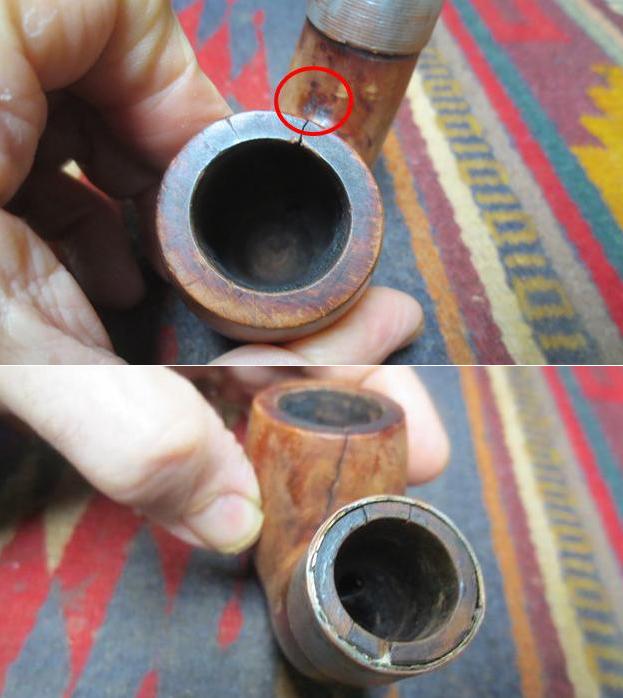
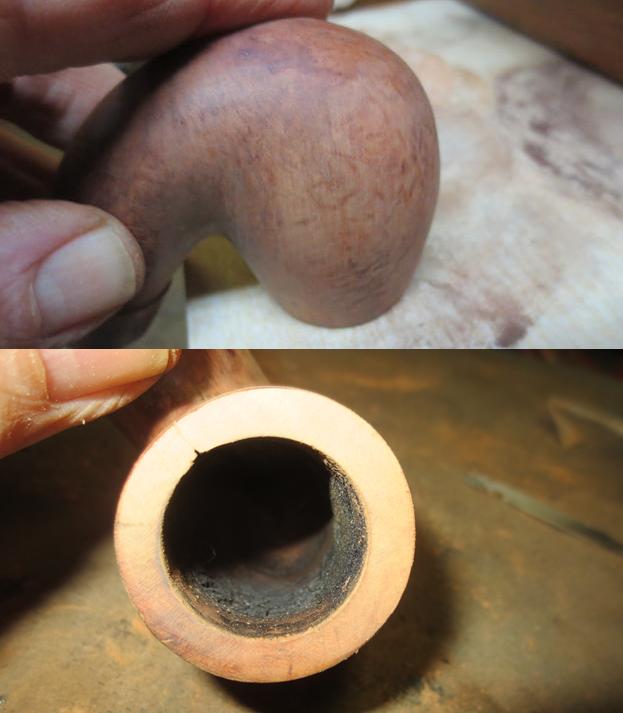
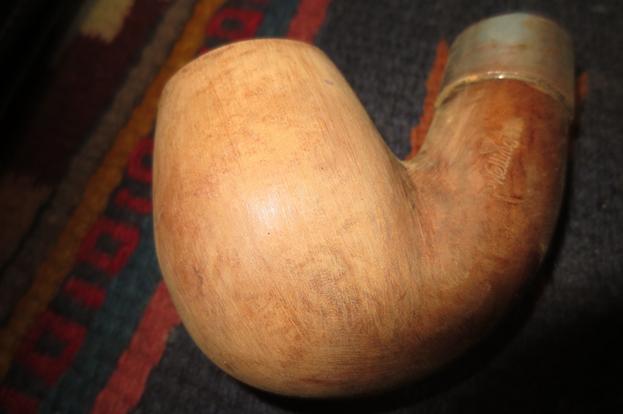
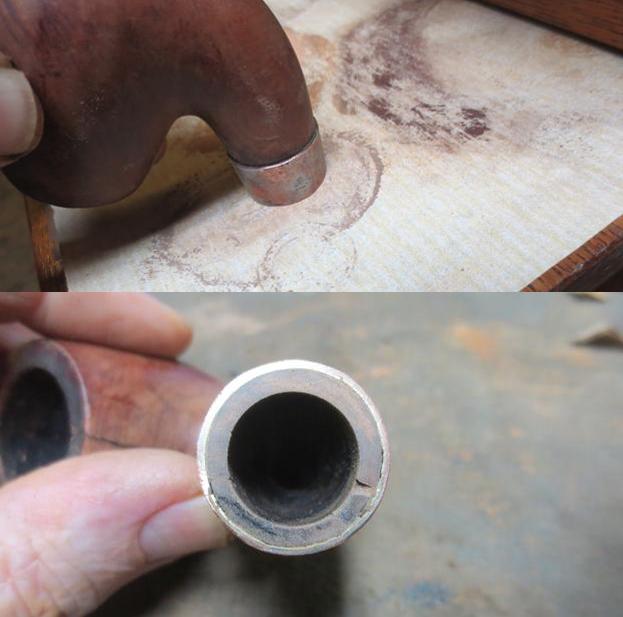
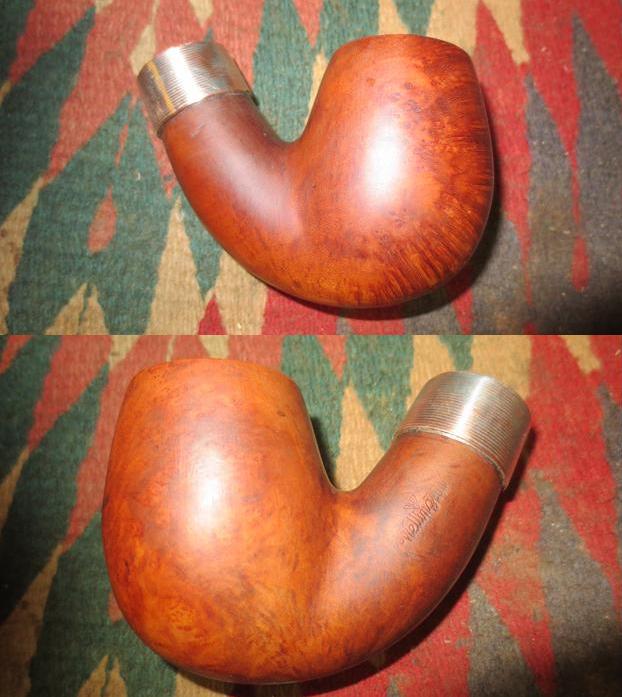
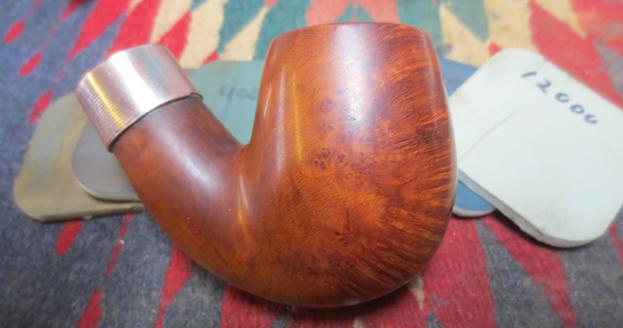
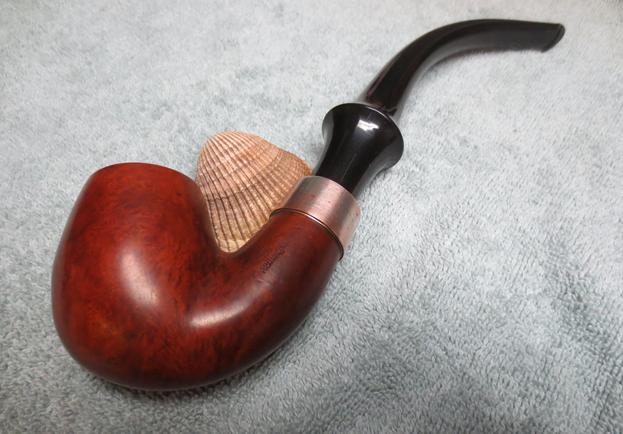
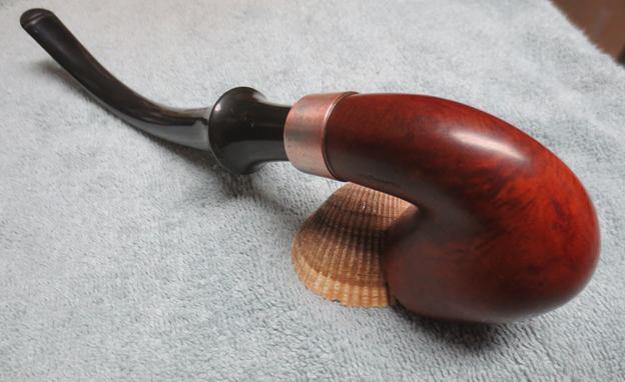
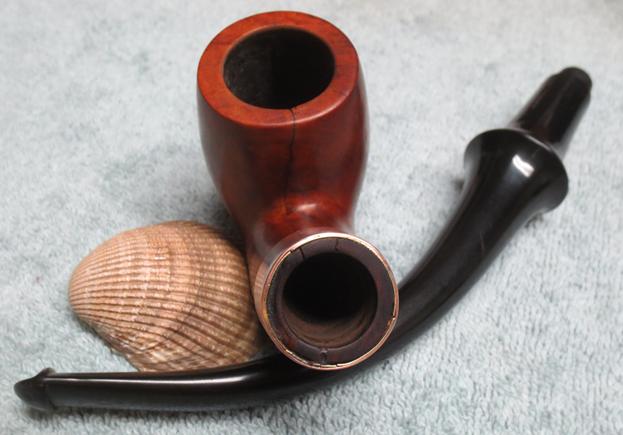
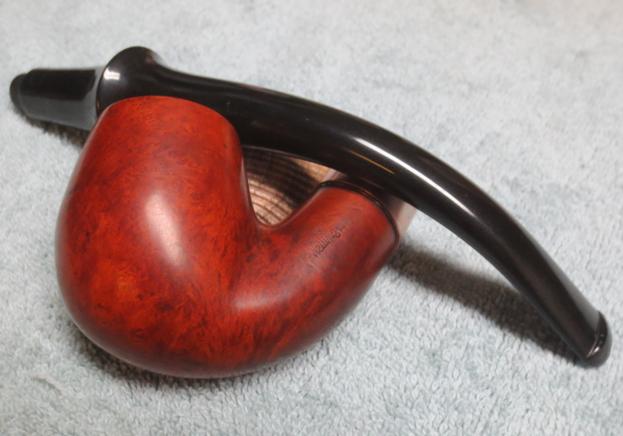
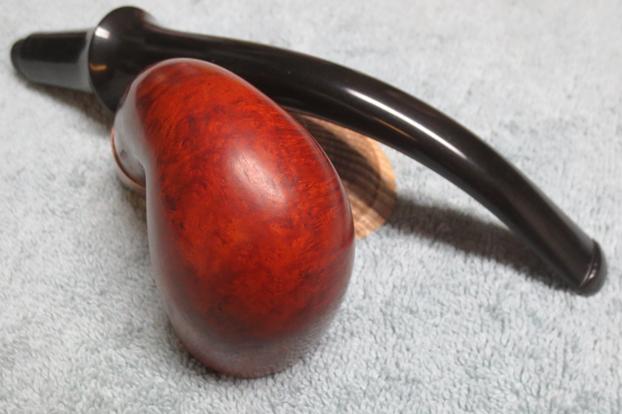
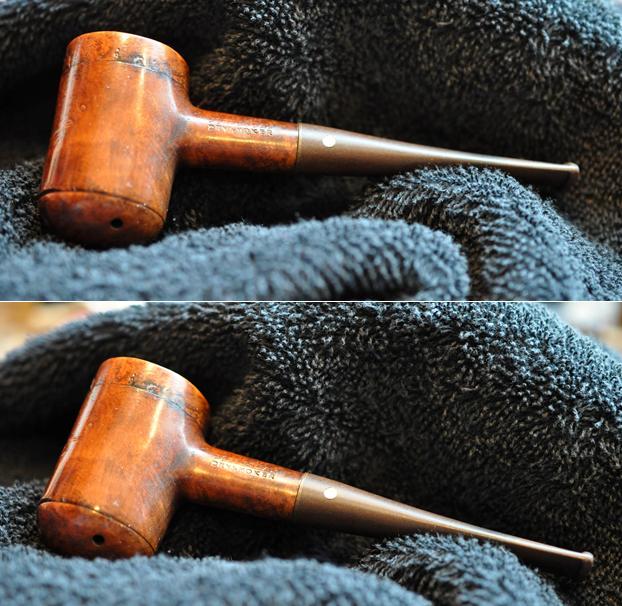
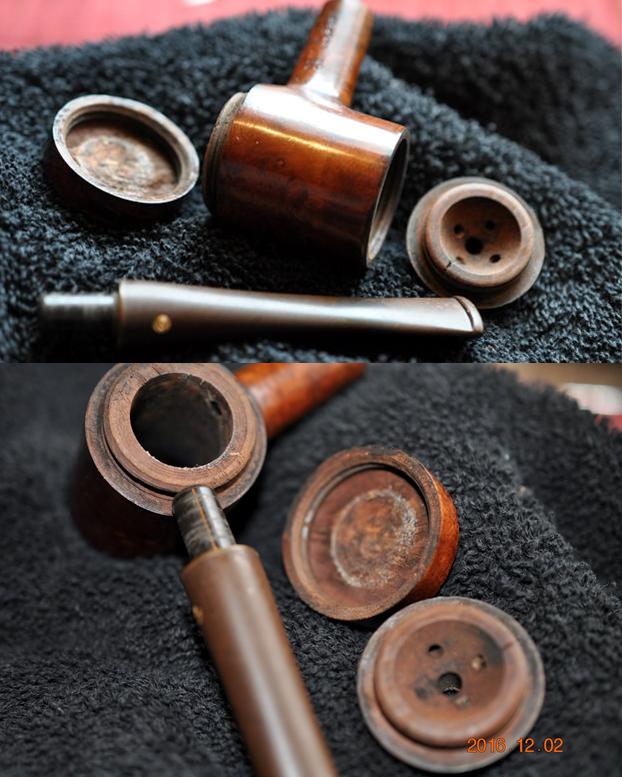
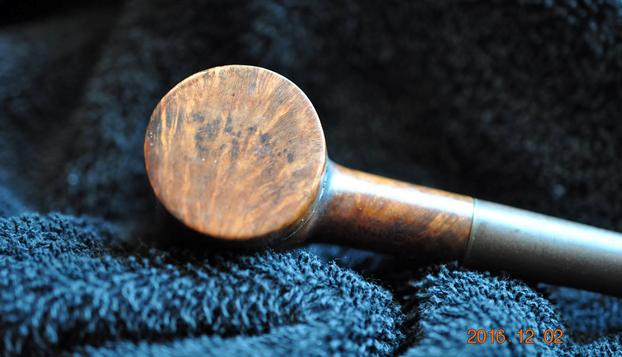
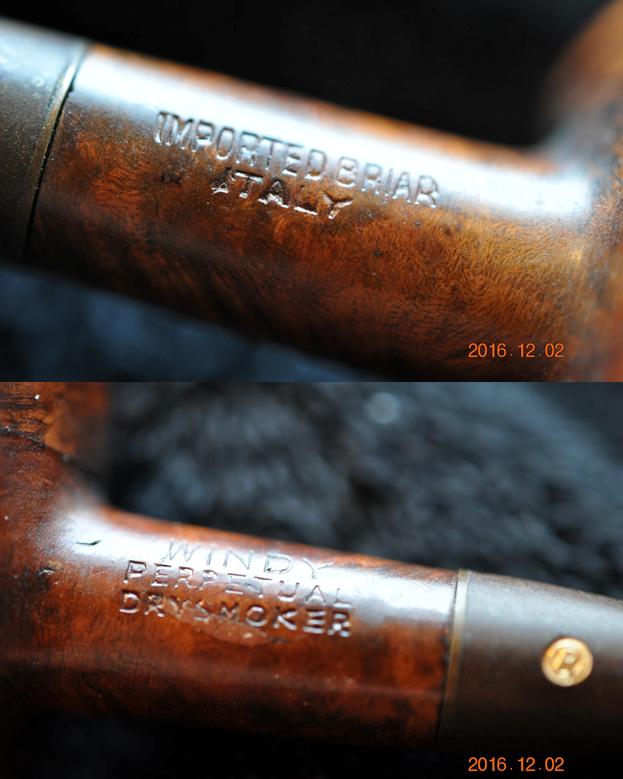
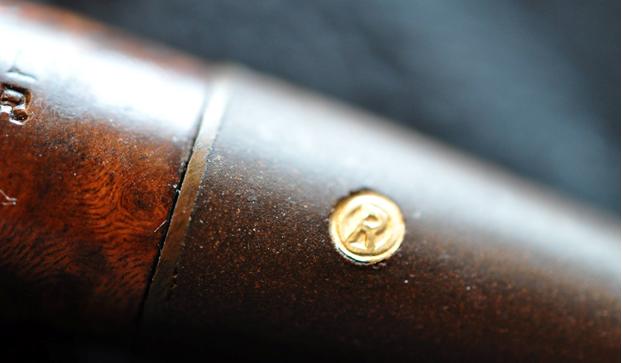
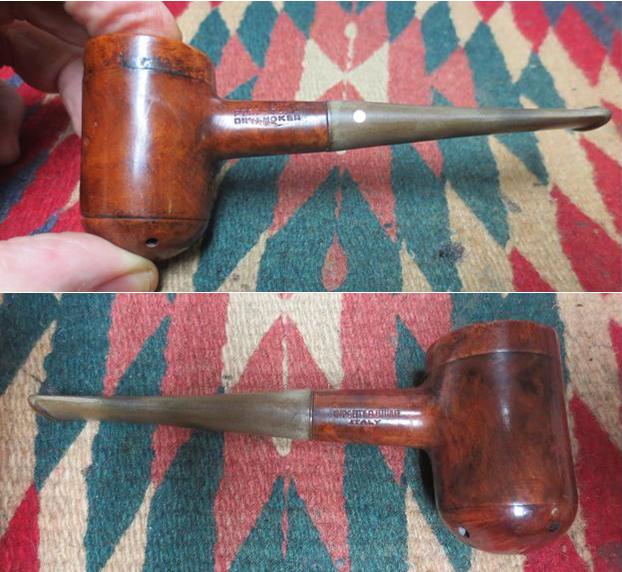
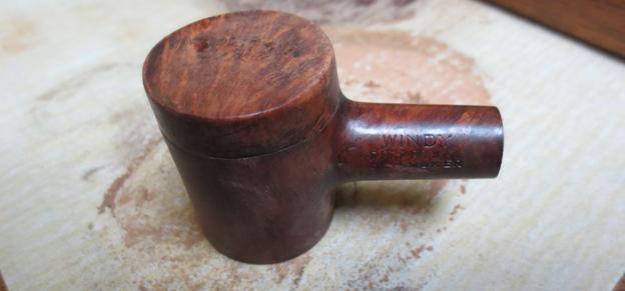
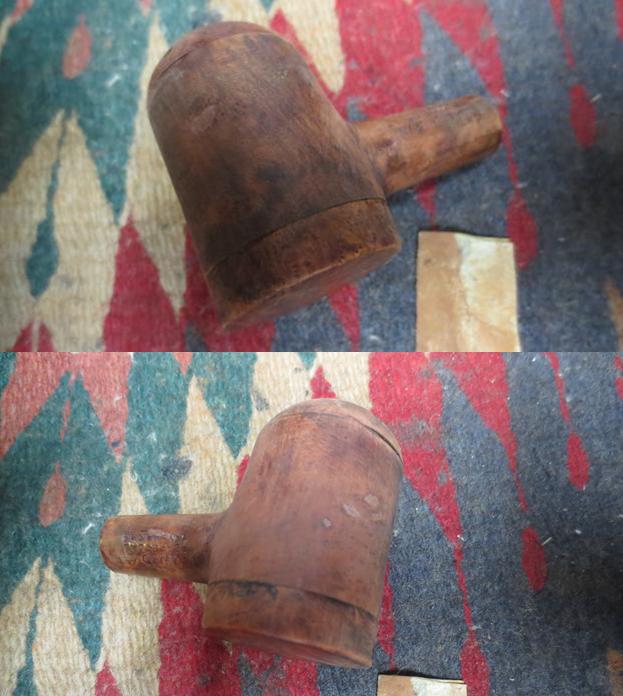
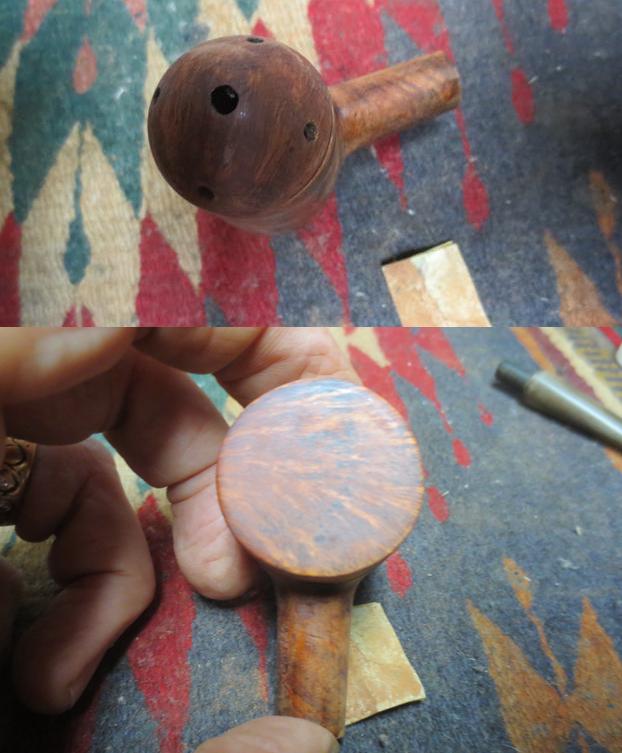
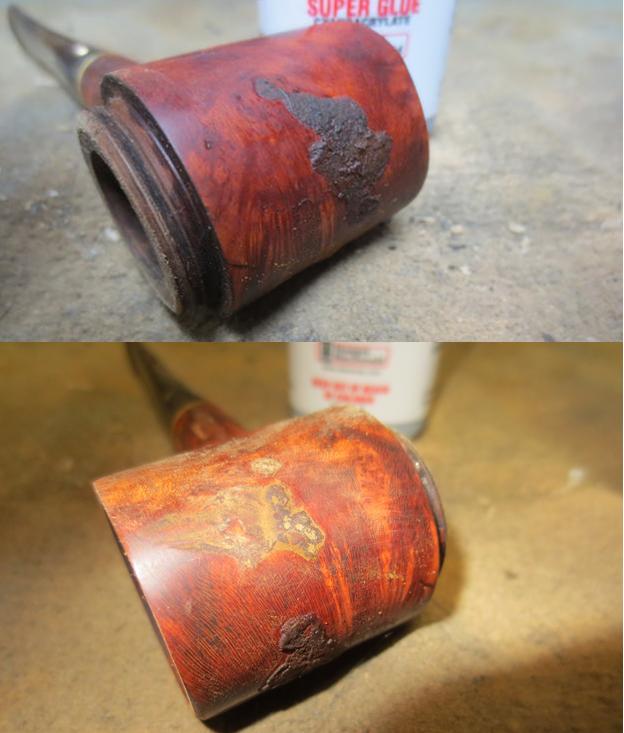
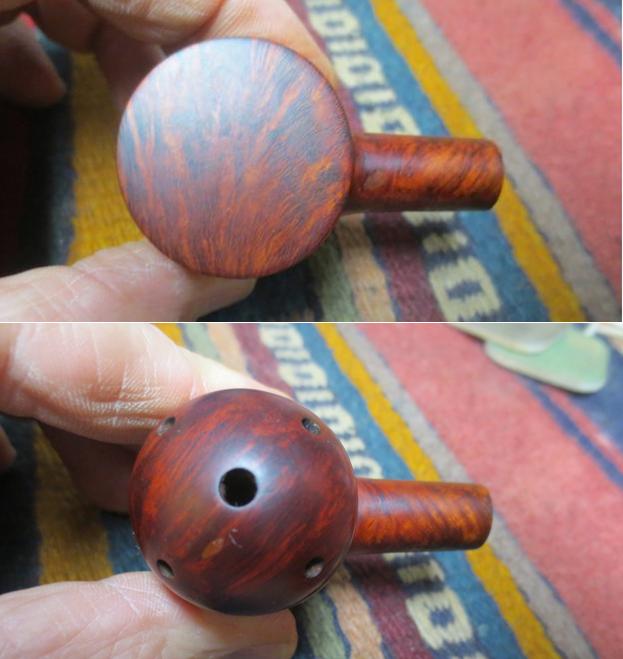
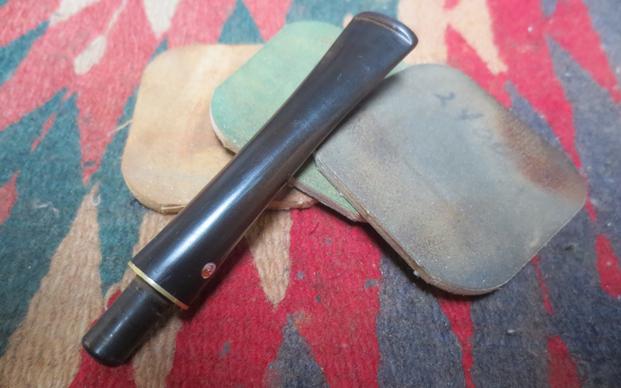
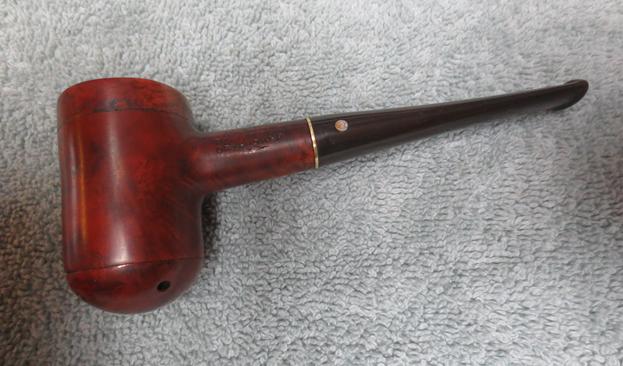
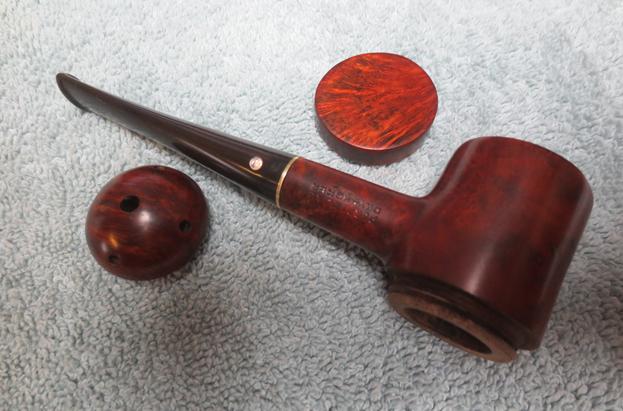
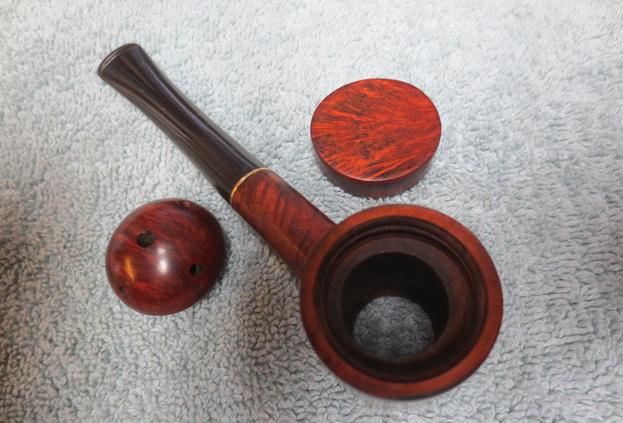
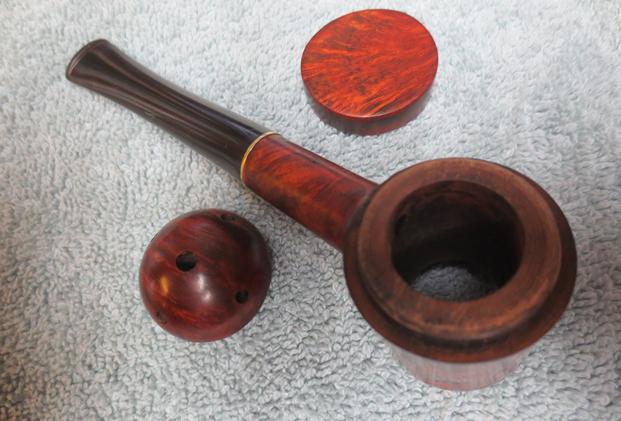
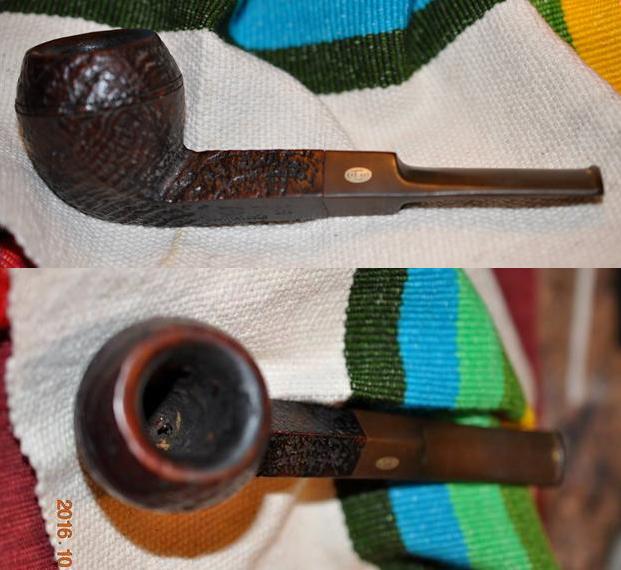
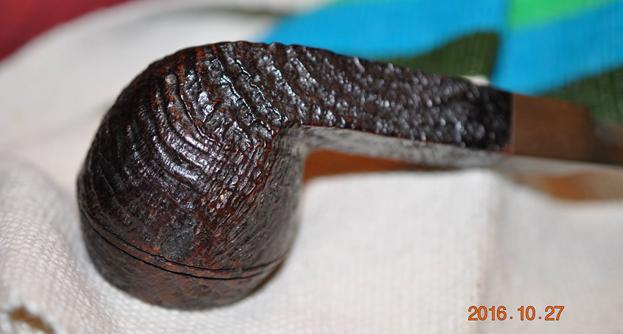
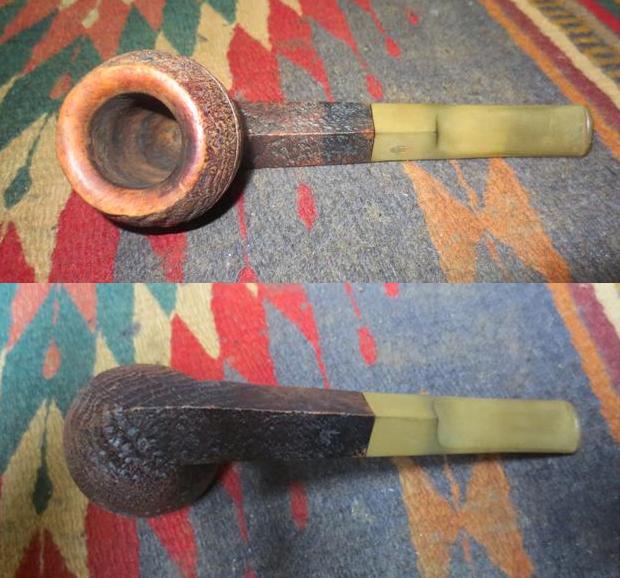
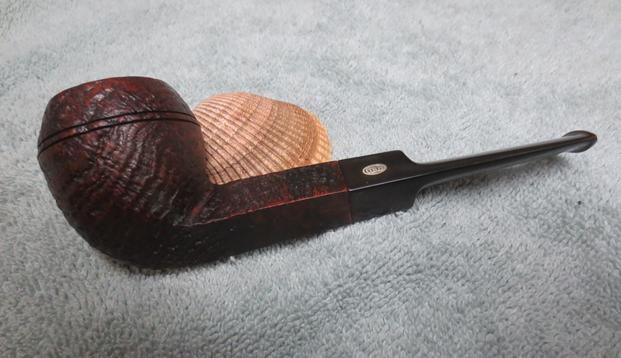
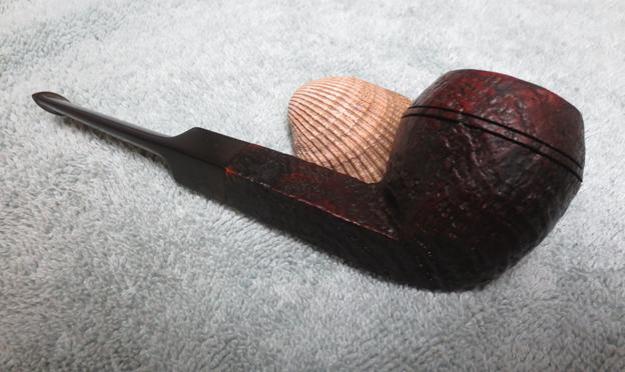
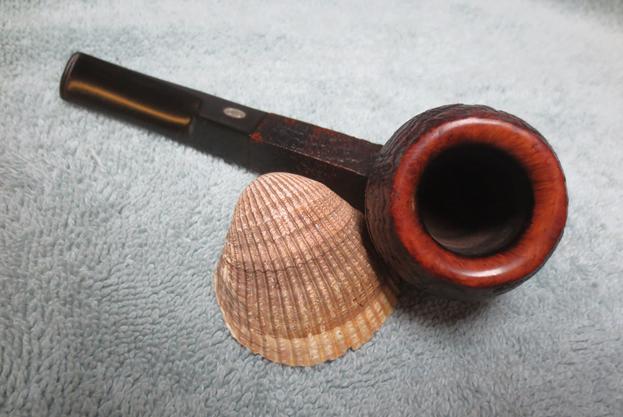
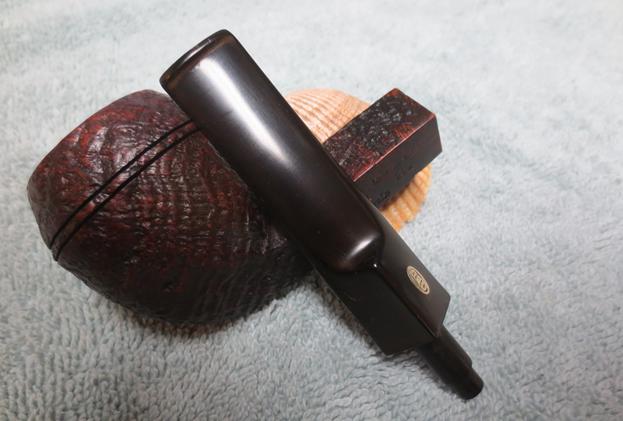
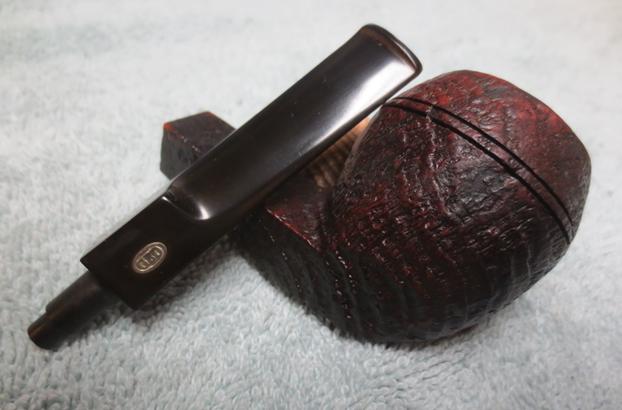
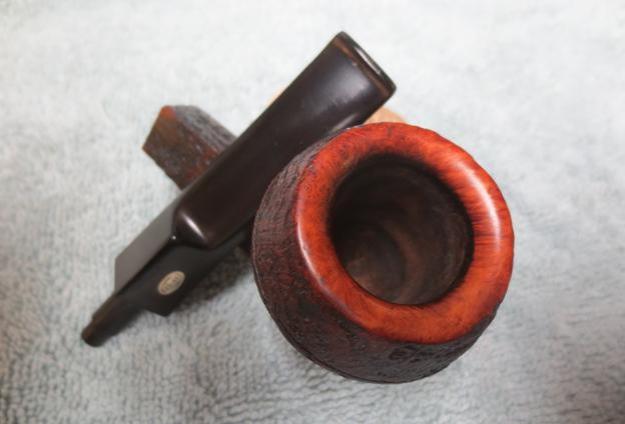
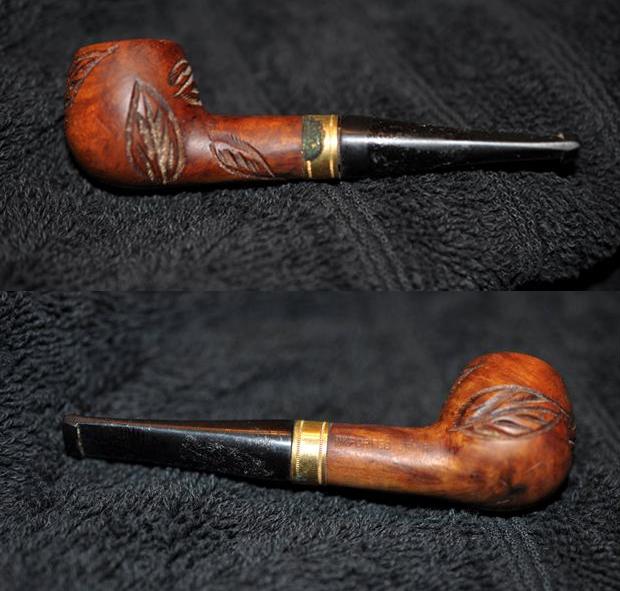
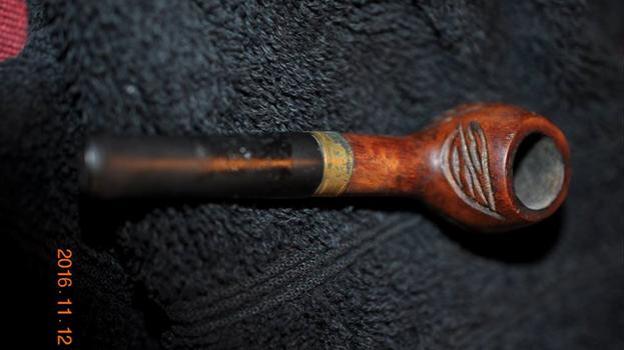
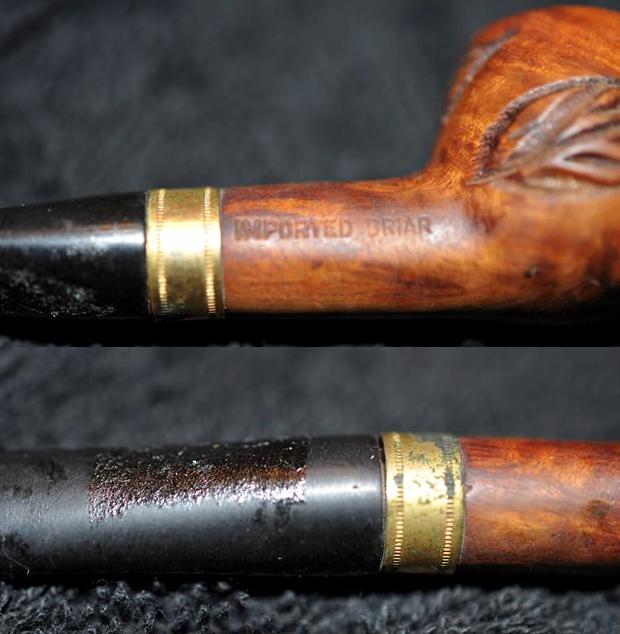
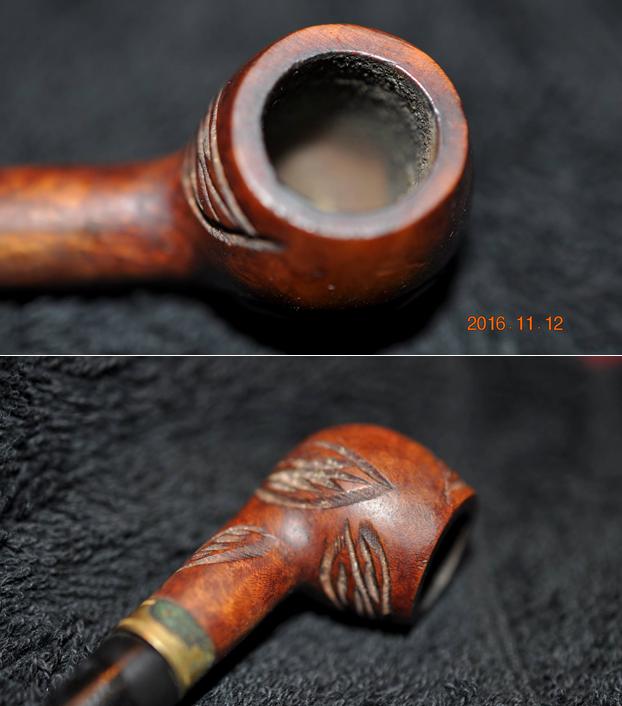
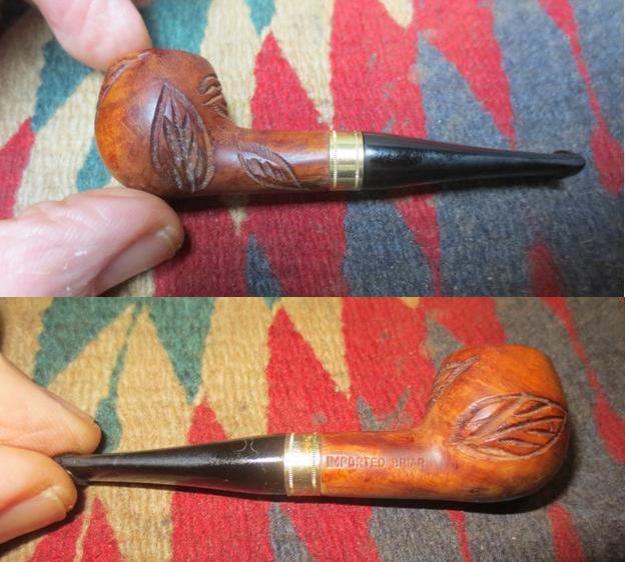
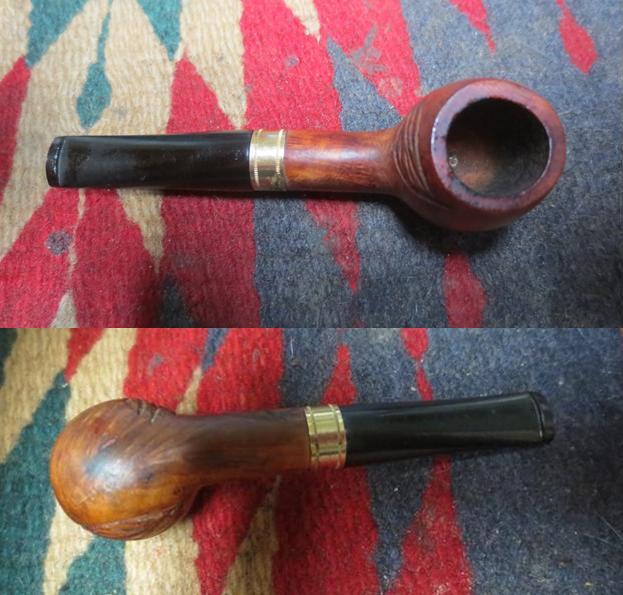
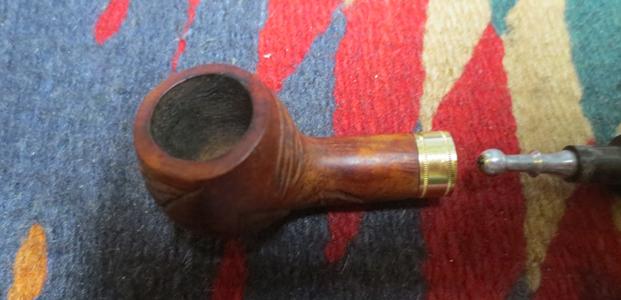
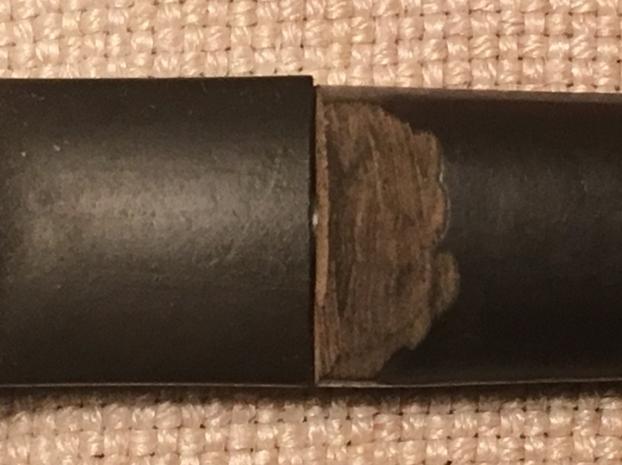
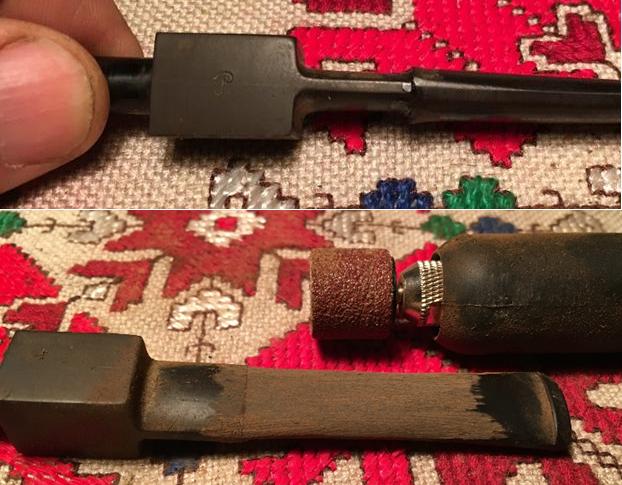
 With the obvious need to solve the issue of the broken and missing stem piece, I can easily see what attracted my son to this stummel. The briar swirls stunningly into fire grain and very distinct and tight bird’s eye knots. There are a few lightened fills that will need attention and the bowl has significant cake and will need to be reamed down to the fresh briar. The rim shows some thick lava flow and has minor dents. Unfortunately, the center swatch of the L J Peretti – Imported Briar marking on the squared shank is worn off – over achieving buffing or wear? The Peretti ‘P’ is visible on the surviving legacy of the original saddle stem. I’ve grown to appreciate the enduring marks of a pipe’s provenance and for this reason, this surviving piece of this pipes history needs to be protected and restored! I’ve been thinking for some days – actually, starting with the opened gift (!) about how to splice a new piece of stem to the survivor? I haven’t done this particular maneuver before, but I’m sure it can be done!
When I began my research on L J Peretti, I was surprised to discover that it is not an Italian pipe as one might expect with such a name! In fact, I discovered the genesis of a significant story of Americana pipe history with the establishment of the L. J. Peretti Company of Boston in 1870 (Pipedia citing: Pipes, Artisans and Trademarks, by José Manuel Lopes), the second oldest tobacco shop in the US, second only to Iwan Ries & Co. of Chicago established in 1857 (See: Link).  Going directly to L J Peretti’s website, now president, Stephen L. Willett provides this historical summary of this Boston icon (Link: http://www.ljperetti.com):
In 1870, Libero Joseph Peretti arrived in Boston from Lugano, Switzerland. Filled with an entrepreneurial spirit and a love for fine tobacco, L.J. established the “Peretti Cuban Cigar Co.” in Boston’s historic North End. In the first two decades of business, the company provided a number of contributions to the tobacco industry and began to blend “house cigars”.
1892 marks the establishment of the Peretti Cigar Factory in Park Square, Boston. For over forty years, the company employed fifty rollers who produced some of the finest cigars in New England. Not only did Peretti’s manufacture blended cigars, but they also created Clear Havana Vitolas such as the legendary La Mirendella.
L.J.’s son, Joseph, aka “The Major”, followed his father into the family business. His primary love was pipes and pipe tobacco. Among his notable accomplishments was the creation of the first “English” blend, called British, in the United States; as well as securing the exclusive import rights to Peterson pipes and Sullivan & Powell tobaccos.
After World War II the third generation Peretti’s, Robert, entered the firm. The original store had moved from the North End to the centre of Boston on Massachusetts Avenue and there were additional stores throughout the financial district of Boston. Robert became a tobacco legend in United States and throughout the world. Most of the more than eighty house blends of pipe tobacco were created by Robert Peretti. His reputation as a blender led politicians, actors, celebrities and gentlemen of all callings to seek his tobacco advice.
I enjoyed reading several comments after the interview of Stephen Willett on The Pipes Magazine Radio Show (See: Pipes Magazine Radio Interview) extolling the fact that tobaccos are mixed in house and one could take his pipe to their shop on 2 1/2 Park Square today, and be guided by experienced tobacconists and test several selections before making a decision to purchase. My son and daughter-in-law, formerly of Boston, also had the opportunity to explore this historic tobacco shop!
I was still curious about the name, “Peretti”, and its Swiss (not Italian) origins with the patriarch Libero Joseph Peretti’s arrival in the US in 1870 from Lugano, Switzerland. It did not take long to figure it out when looking at the location of Lugano on a map of Europe thanks to Google Maps. The Italian influence would be inescapable as Lugano is situated in a slender finger of Swiss land on the southern edge of the Alps with greater topographical access to the Italian planes falling away to its south than to Switzerland proper to the north – through the Alps. Curiosity satisfied. One other question hounds me – the question for each pipe: Where was this particular L J Peretti pipe made? In Boston? Per L J Peretti’s website, today pipes with the Peretti stamping are made exclusively by Briar Works in Nashville, TN. This Peretti, however, predates this association. Briar Works began operations in 2012. One possible clue came at the close of Stephen Willett’s interview on the Pipes Magazine Radio Show in April of 2016 referenced above. Willet was asked about relating a ‘favorite pipe story’. Willett commented on being in London smoking pipes with a John Redman, who used to make pipes for L. J. Perretti Co. So, a possible source. The John Redman Ltd. and British Empire Pipe Co. is cited in Pipephil.eu listing the names produced (Aristocrat, Buckingham, Buckingham Palace, Canberra, Captain Fortune, Dr John, Golden Square, Redonian, Richmond, Smokewell, Twin Bore) but no reference to a L. J. Peretti association. I sent an email to the L. J. Peretti Tobacconists shop in Boston regarding the provenance of this particular Peretti names-sake before me. We’ll see if we can learn more.
I was gratified when an email arrived from the L. J. Perretti Co. Tobacconists shop in Boston a few days later. Here is what I found:
Hello Dal,
We have been sourcing our proprietary pipes from a number of different manufacturers. That said, it is most likely that Arlington Briars made the pipe you have in your possession. Photos would help us identify the pipe further. I will have to look through some of our old content and see what I can find. Hope this helps,
Tom
LJP
Thankful to Tom for his response, I sent on photos. Per Pipedia,
Arlington Briar Pipes Corporation was founded in 1919 in Brooklyn, New York, and produced the Arlington, Briarlee, Firethorn, Krona and Olde London brands among dozens of others, primarily acting as a subcontractor making pipes to be sold under other brand names. Among others, in the 1950’s, Arlington turned pipes for the famed Wilke Pipe Shop in New York City. The corporation was dissolved by the State of New York as inactive on December 6, 1978.
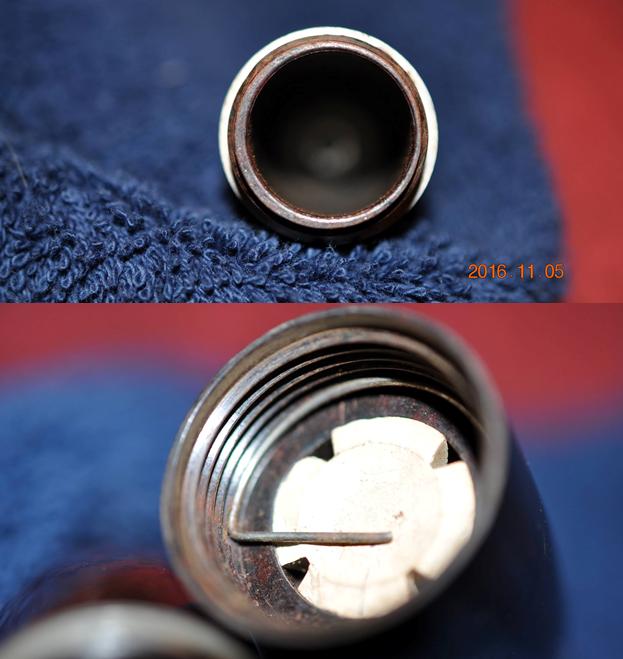
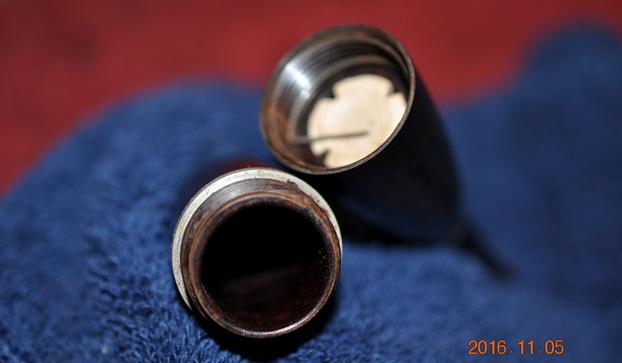
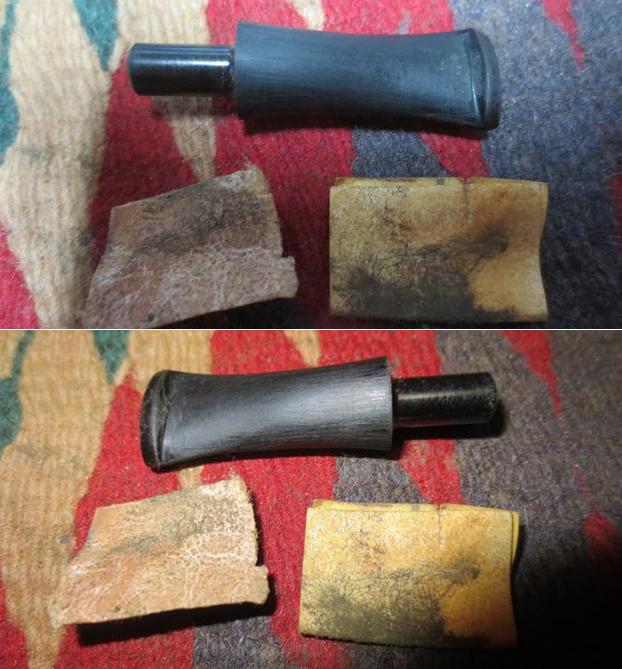
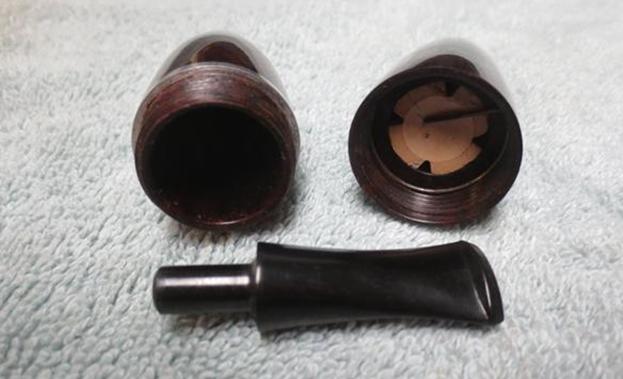
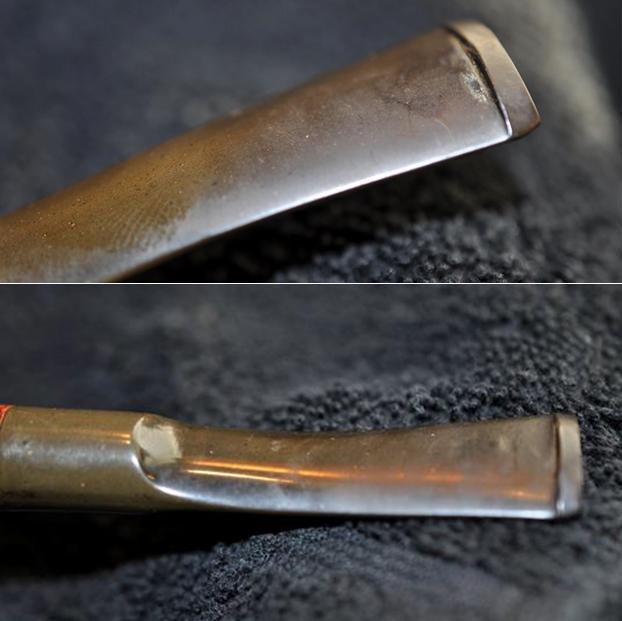
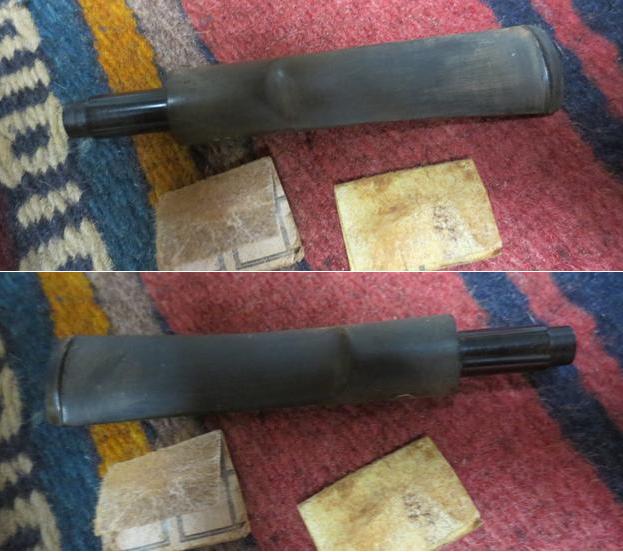
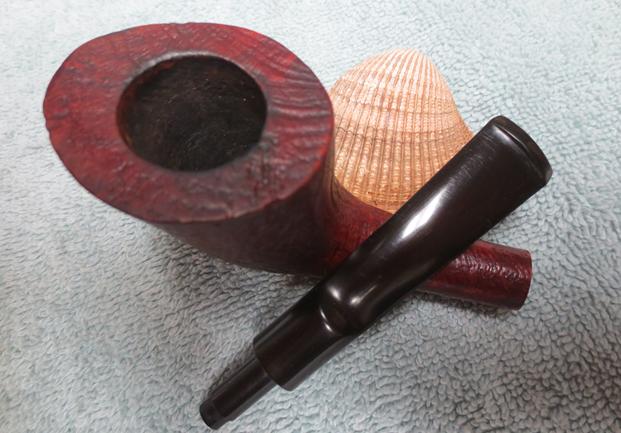
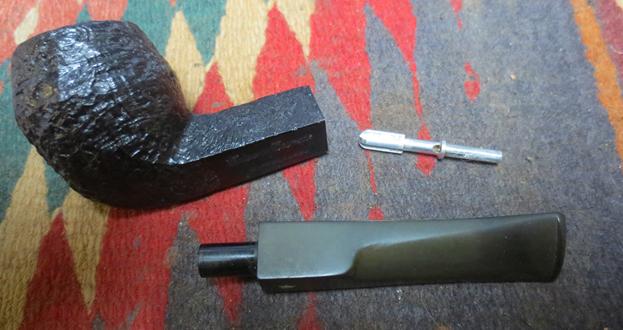
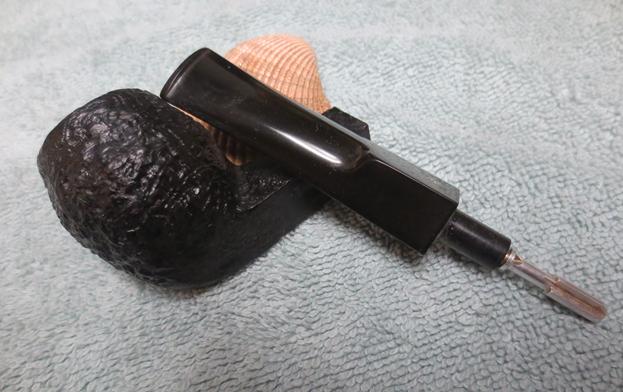
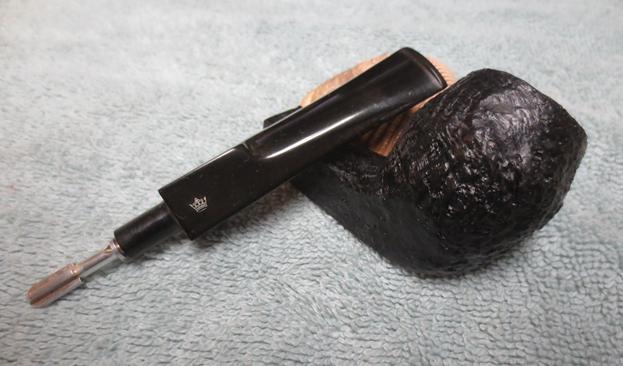
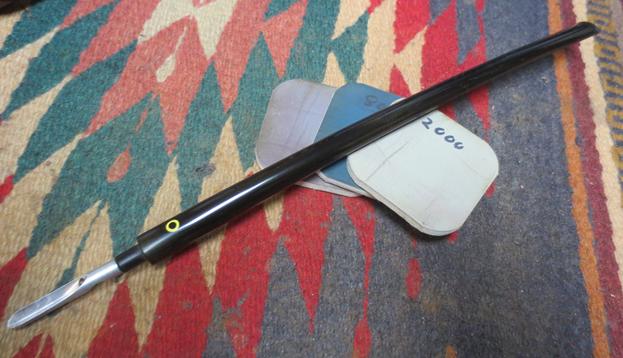
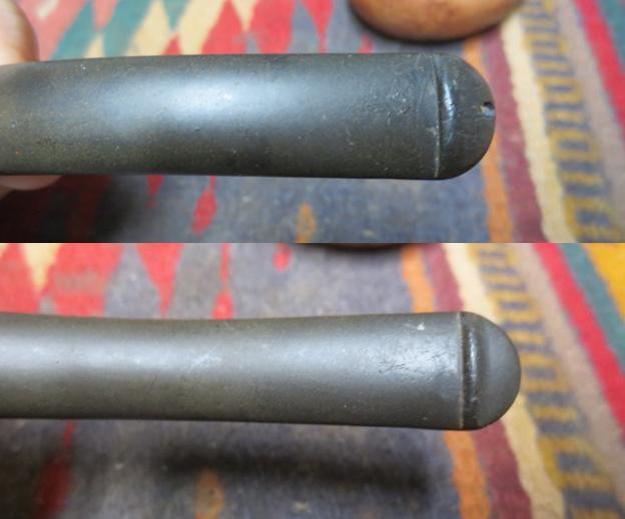
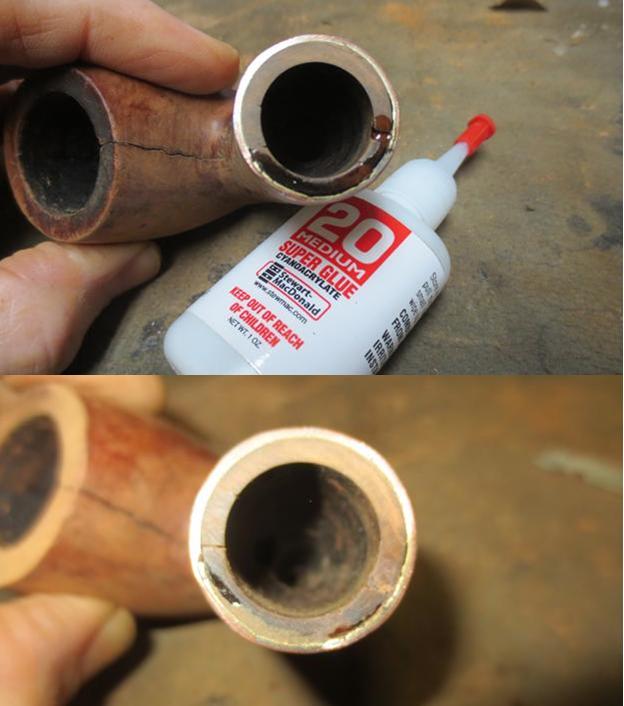
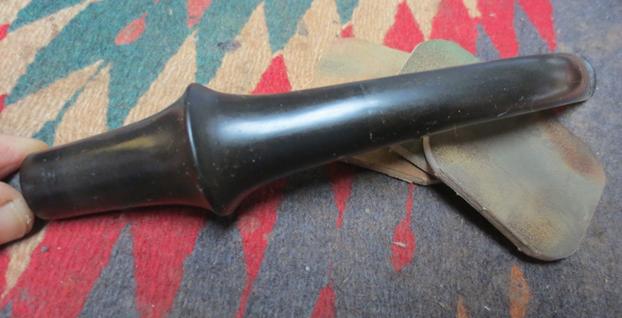
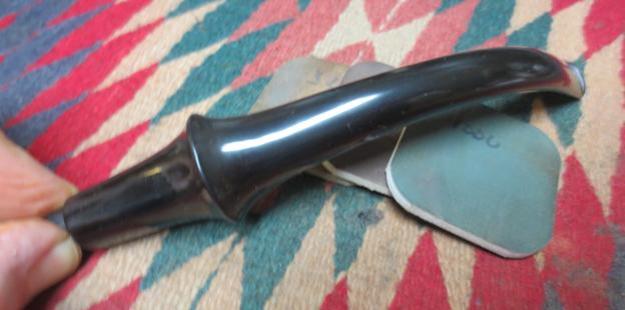
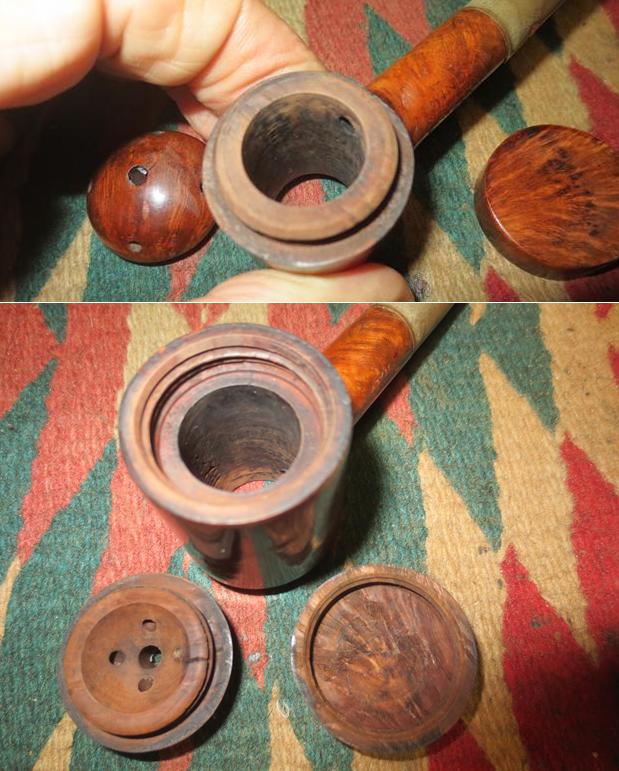
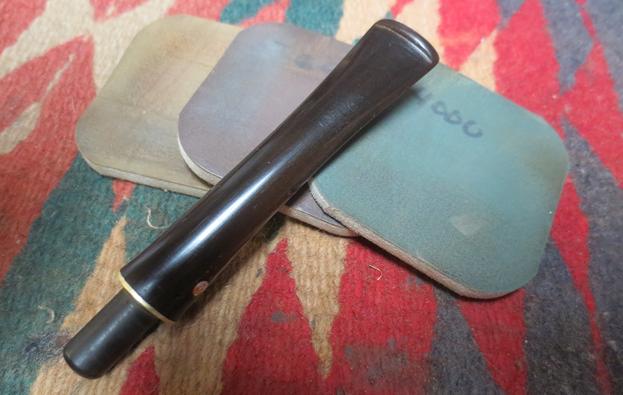
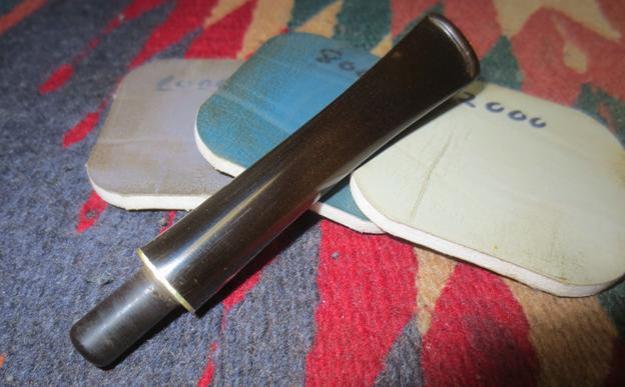
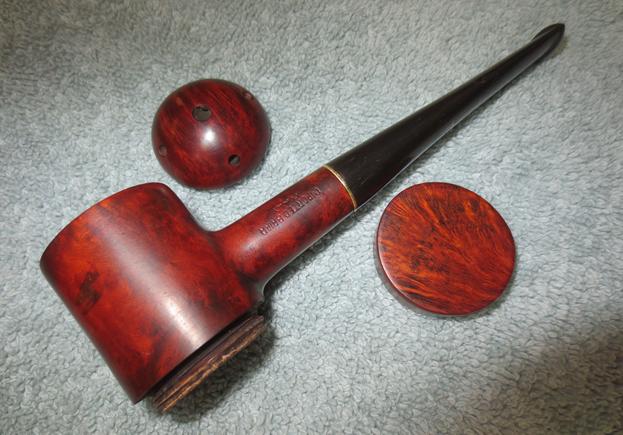
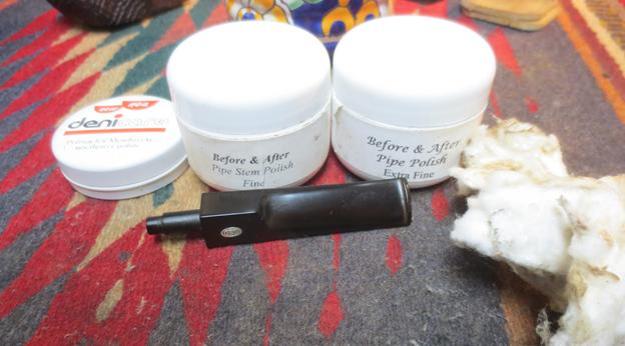
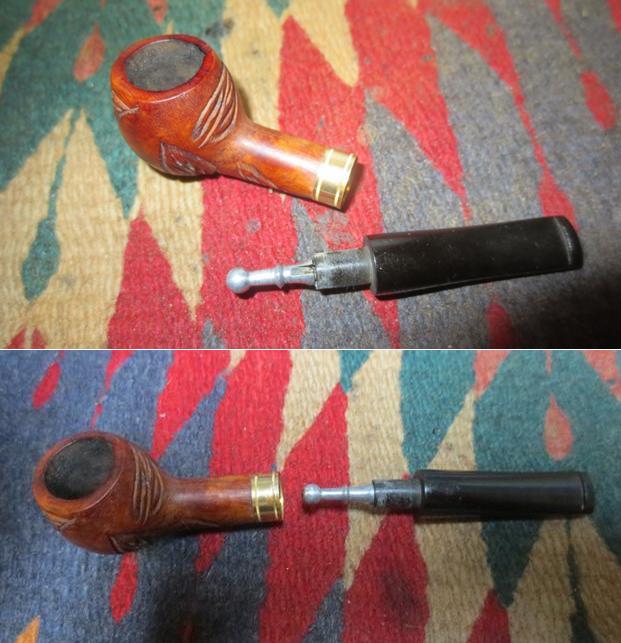
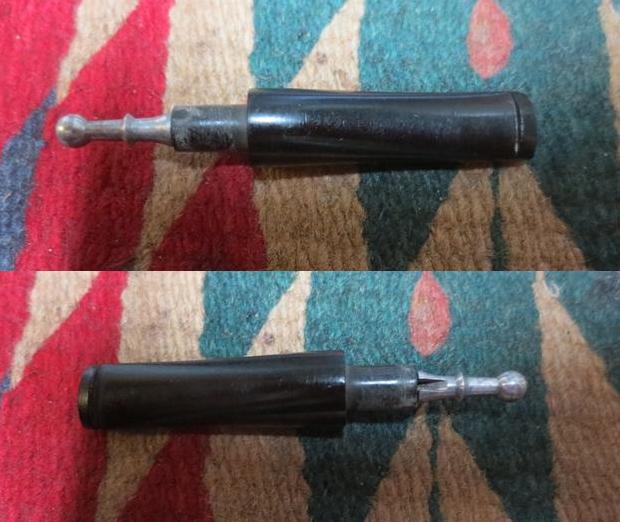
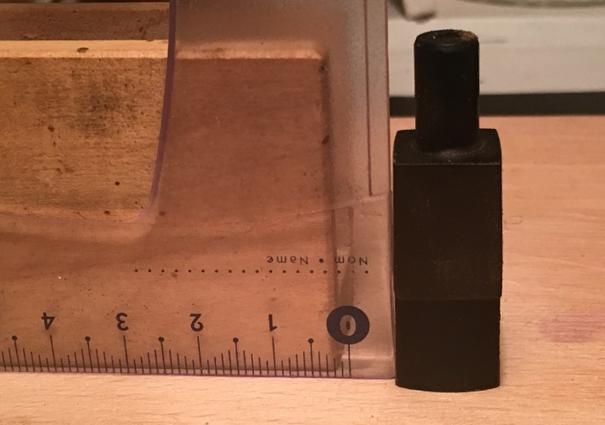
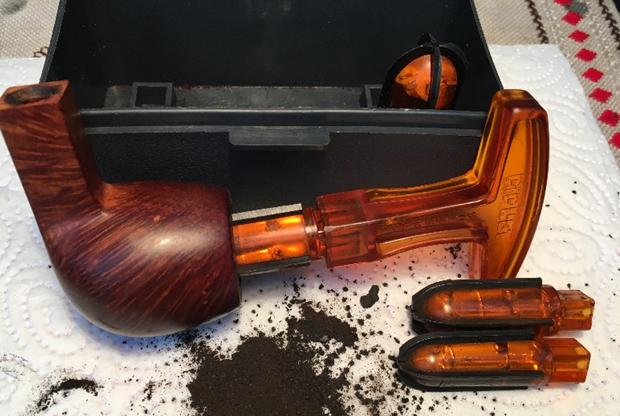
With a greater appreciation for the pipe before me and the rich heritage of the L. J. Peretti name and company, I take another long, hard look at the surviving stem piece. My goal is to splice the stem by cannibalizing another saddle stem. My original idea was to see if I could find a piece of stainless steel tubing small enough to insert into the airways of both the survivor stem piece and the new cannibalized piece and connect them – providing a firm connection point and reinforcement for the splice. Before returning to Bulgaria, I went to a specialized store in Denver with hope of finding such a tube. They were not able to help me and indicated that I could probably find tubing like I wanted in a medical equipment context…. So, with this idea put aside, my goal is a clean bond using only superglue. I take another picture of the surviving stem piece and the stem candidate. I want to remove the stinger and after it refuses to budge I heat it with a lighter loosening the vulcanite grip. It joins the other retired stingers in the bottle. Using a straight edge, block and sharpie pen, I draw a line across the original stem. It will act as a guide as I cut the vulcanite using the Dremel with a cutting blade. Well, after starting with a cutting blade, I discovered that it was difficult to maintain control over the blade movement. I switched to the sanding drum and that worked much better. I’ll fine tune the cut after cutting the second stem. The pictures show the progress.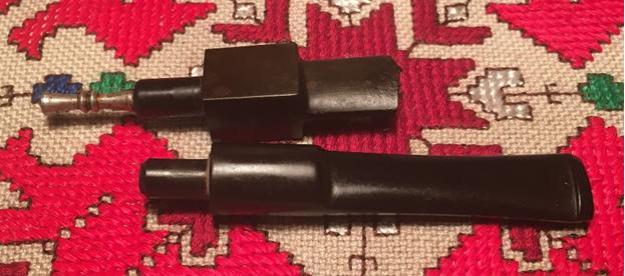
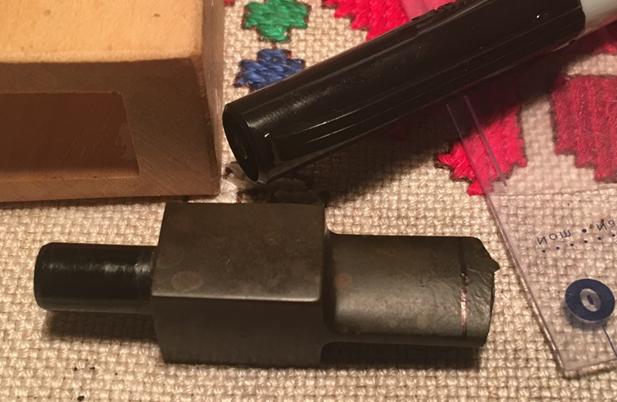


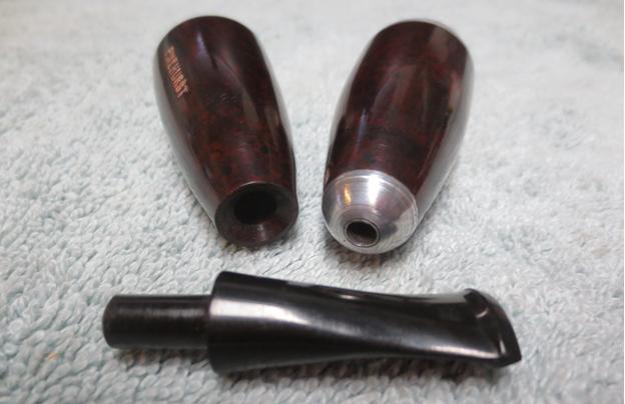
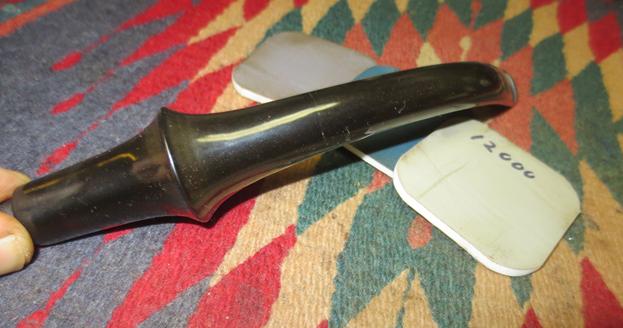
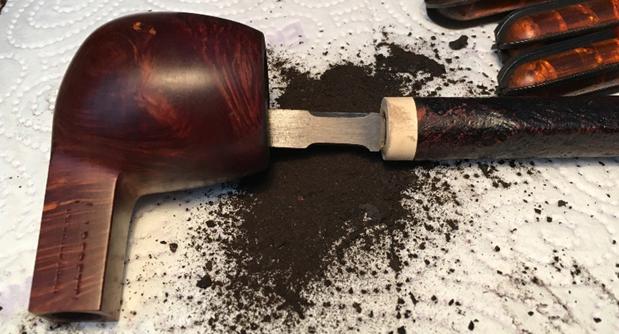
 I want to cut the donor stem very close to the saddle expansion where the stem is thickest. This hopefully will give me more wiggle room as I fashion the two stems together. I use the Dremel blade to do a rough cut to remove the shank side of the stem. I’ll save this piece to fabricate a breather insert later – waste not want not! Key to this stem splice working is a proper aligning of the airways while working on shaping the external stem appearance. Hopefully to accomplish this, to keep the airway stationary, I form a temporary insert stabilizer by cutting off the ends of a Q-tip and wrap the center plastic Q-tip tubing with scotch tape. I do this to enlarge the circumference of the left-over Q-tip to form a tight fit as each end is inserted into the airways of the adjacent stem pieces. It took me a few test Q-tips to get the size right. Now I can gradually shape the external stem and keep things lined up. In the final picture of the set below, you can see the aligning tube. The pictures show my plan materializing. I have hope that it will work!


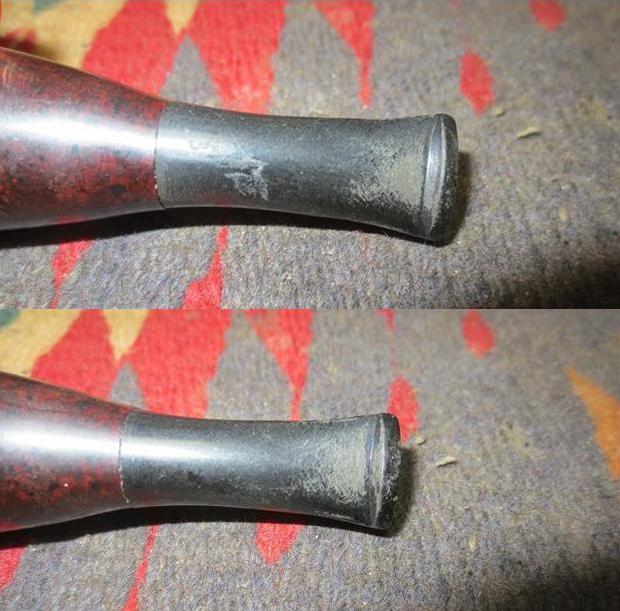
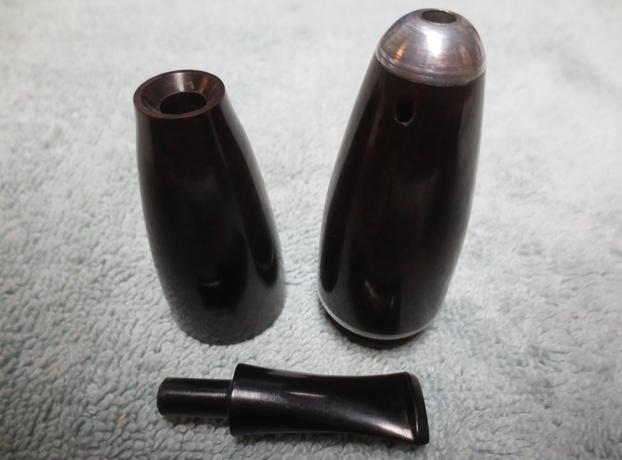
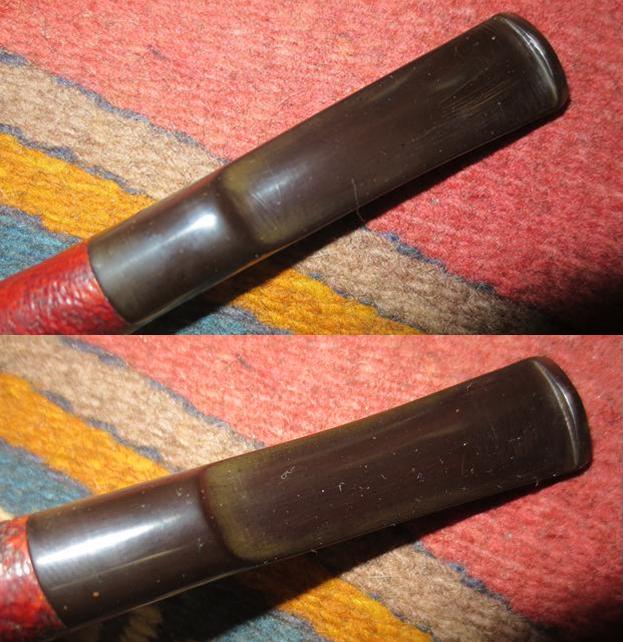
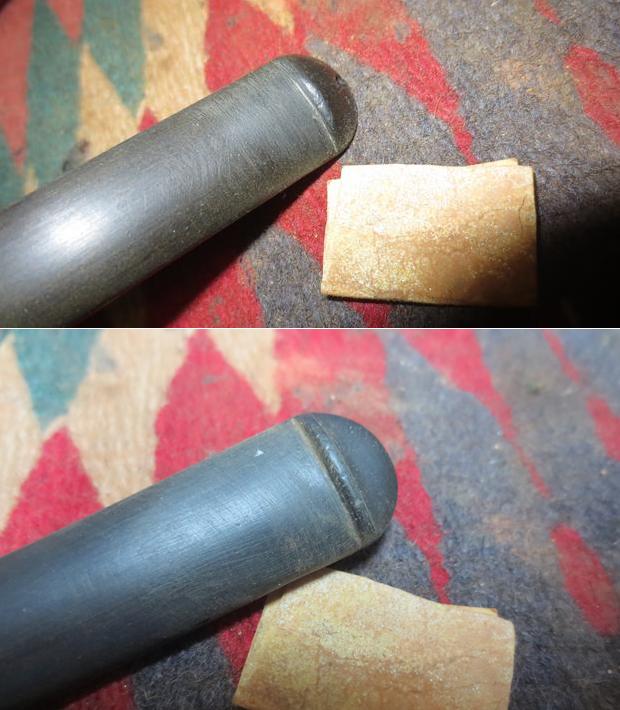
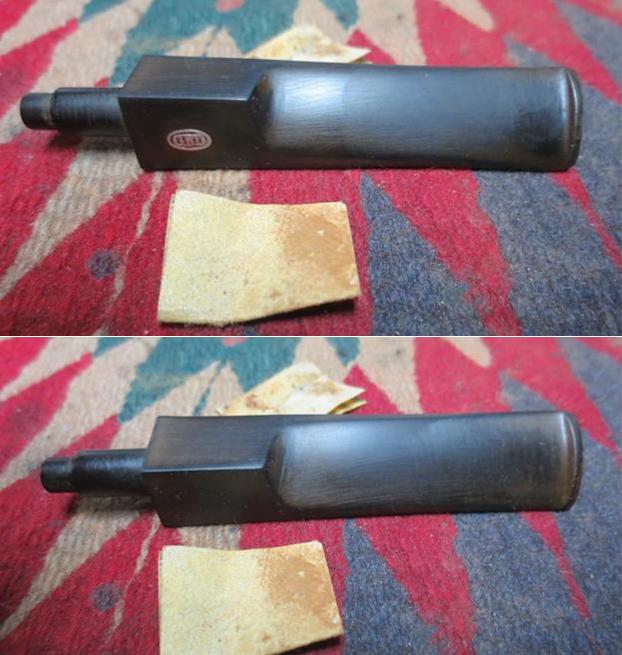
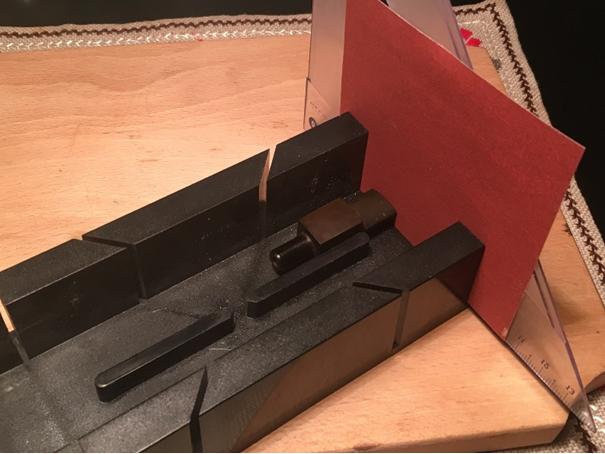
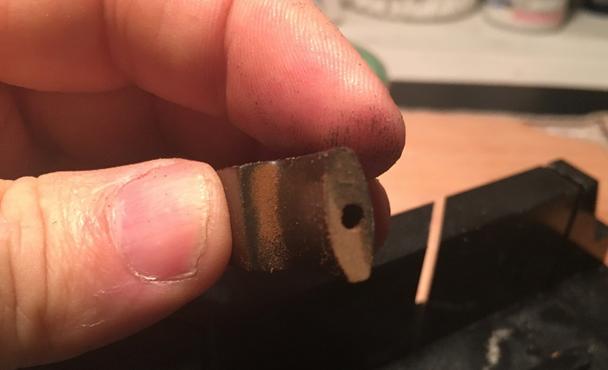
 Now to fine-tune the trueness of the cut stem ends. I start with the survivor by standing it and eye-balling it next to a straight edge – not perfect! The first picture shows the leaning tower of Pisa! Working out of our 10th floor flat, I don’t have all the tools available to me to automate procedures so I must improvise. I have a miter box that might do the trick. I take a strip of 240 grit sanding paper and use the miter’s perpendicular position to create a sanding mechanism that should produce a flat, true end. Moving the sanding paper back and forth while I manually pinch it against the triangle seems to do the job. After patient, easy back-and-forth motion, the end of the survivor stem piece looks good! A comparison shot to the leaning Tower of Pisa shot shows the progress.
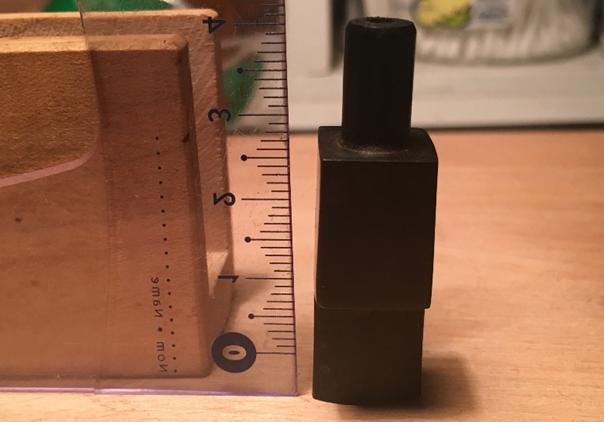
 The new extension also needed some fine-tuning. Since there is a taper in the stem and therefore it’s uneven, I cannot use the miter box like before. I use the topping board with 240 grit paper to bring the angle into proper alignment – I discover that it is not an easy slam dunk to get things right. It takes several spins on the board following each spin by refitting the extension with the original stem and looking for the gaps between the two pieces. I need the junction to be as true, tight, and flat as possible for a good bond and a straight stem. After several cycles, I have it about as good as its going to get. The pictures show the process.


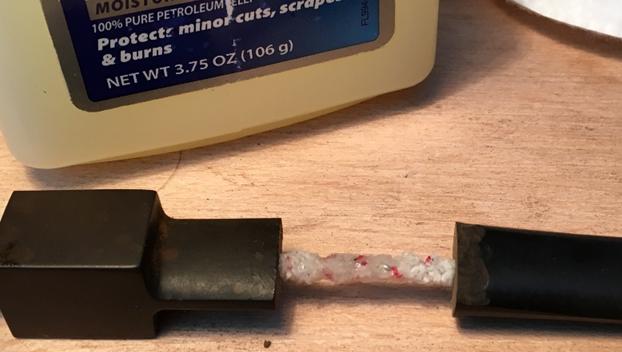
 I replace the temporary Q-tip stabilizing insert with a pipe cleaner inserted through both pieces and linking them up. The pipe cleaner will serve to keep the airway lined up during gluing as well as guard against glue possibly clogging the airway. I use a narrower, less fuzzy bristled pipe cleaner. After testing I found that a non-bristled pipe cleaner had too much fuzz and inhibited a tight junction between the pieces. I apply a little petroleum jelly to the section of the pipe cleaner that may meet the superglue. This will (hopefully!) keep the pipe cleaner from sticking to the glue. I wipe off excess jelly because I don’t want it interfering with the glue bonding. I then apply Starbond Black Medium KE-150 glue to the original stem piece, not too thick and spread it over the junction surface with a toothpick. My main concern is to allow the bond to settle ‘naturally’ around the airway alignment and have the stem straight. If gaps appear I can add additional glue later as a fill. Pulling the pipe cleaner from the shank side I draw the pieces together, align and compress for a few minutes. I set the spliced stem aside allowing the KE-150 glue to cure. The pictures show the progress.
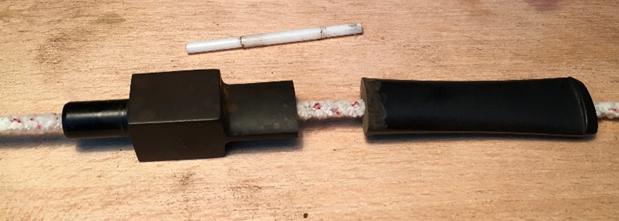
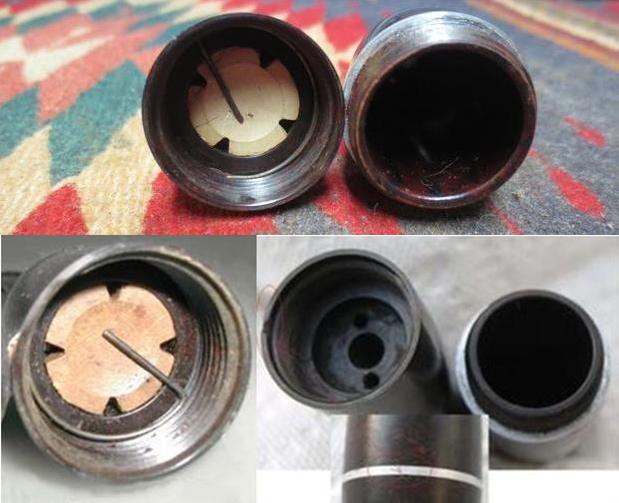
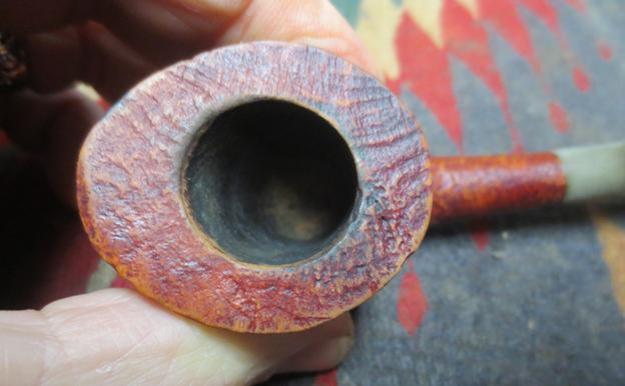
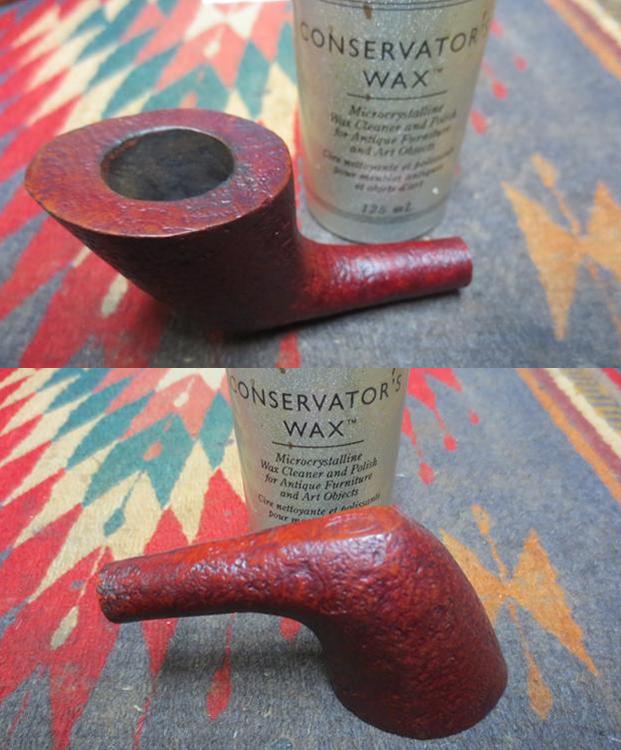
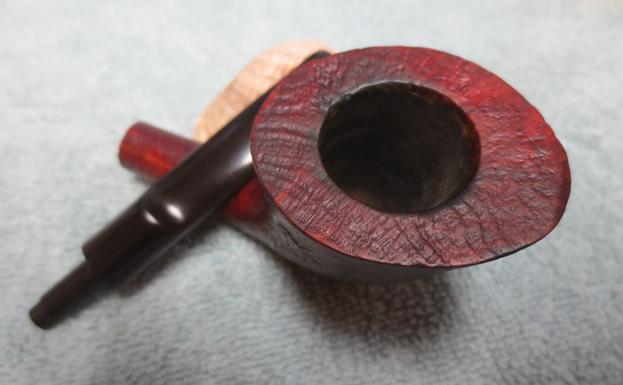
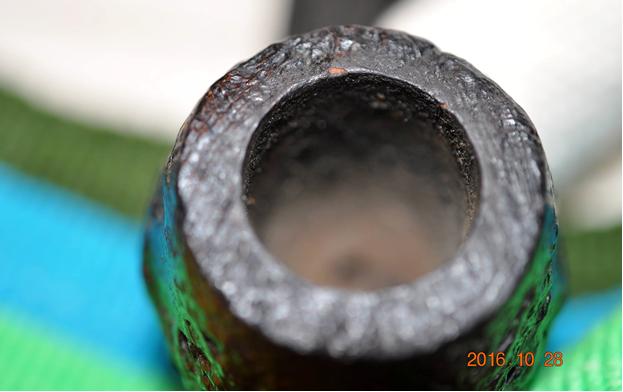
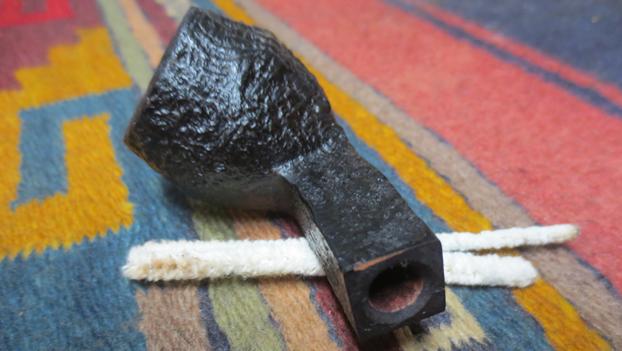
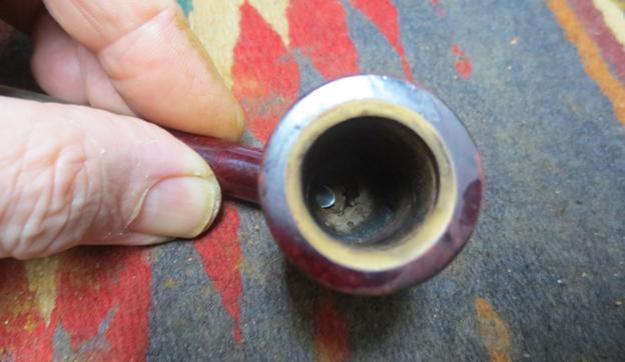
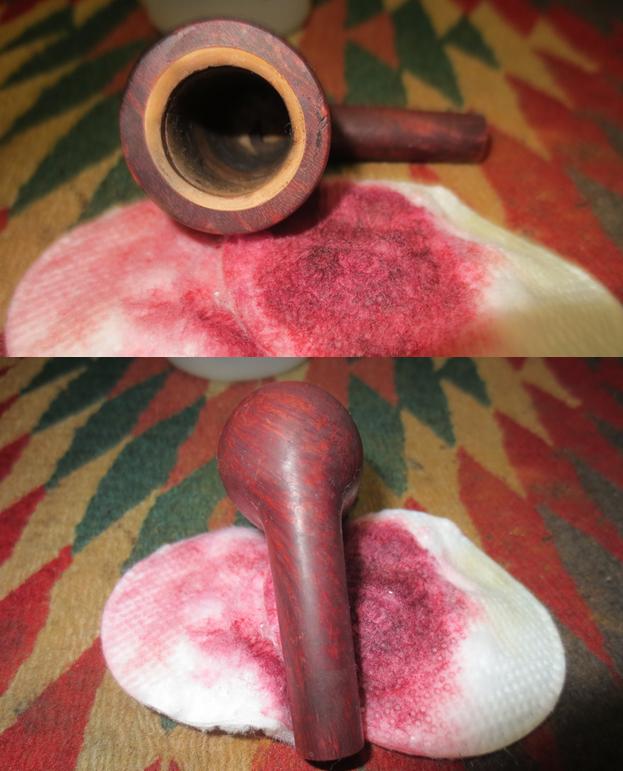
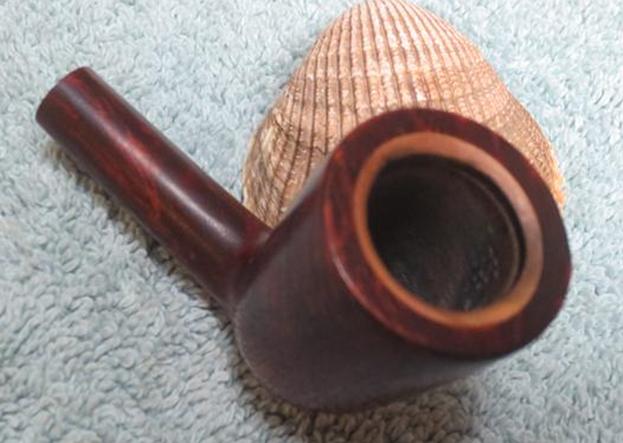
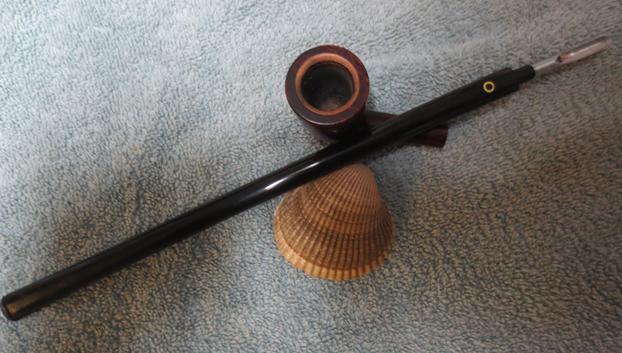
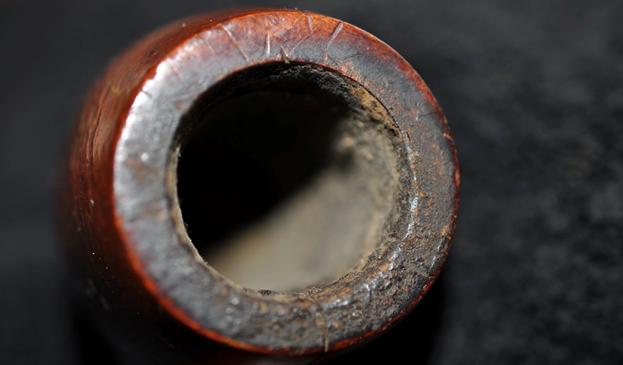
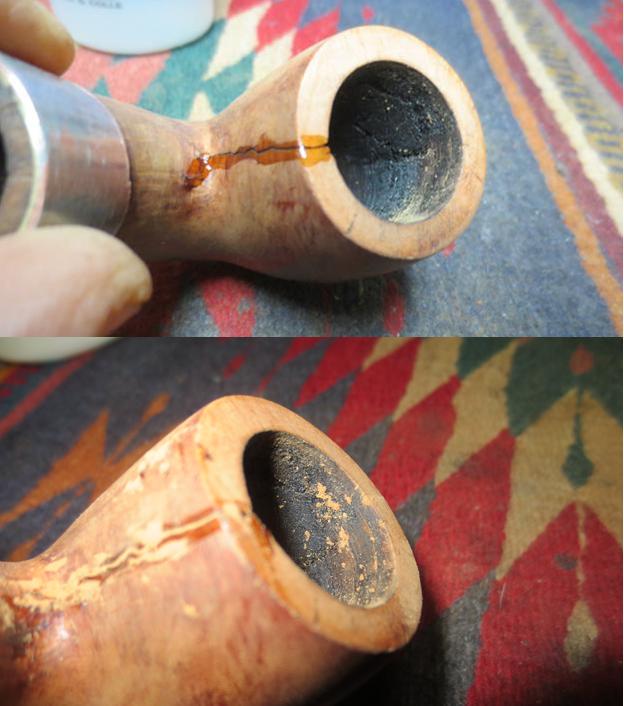
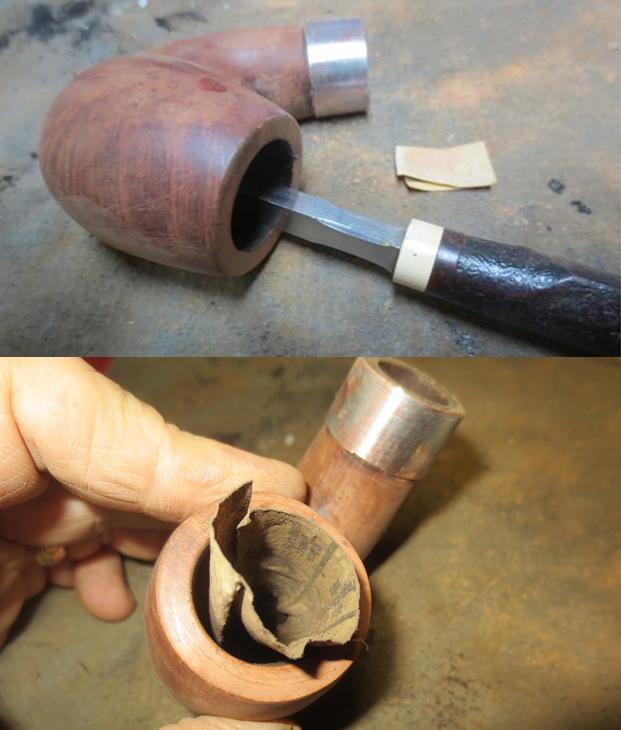
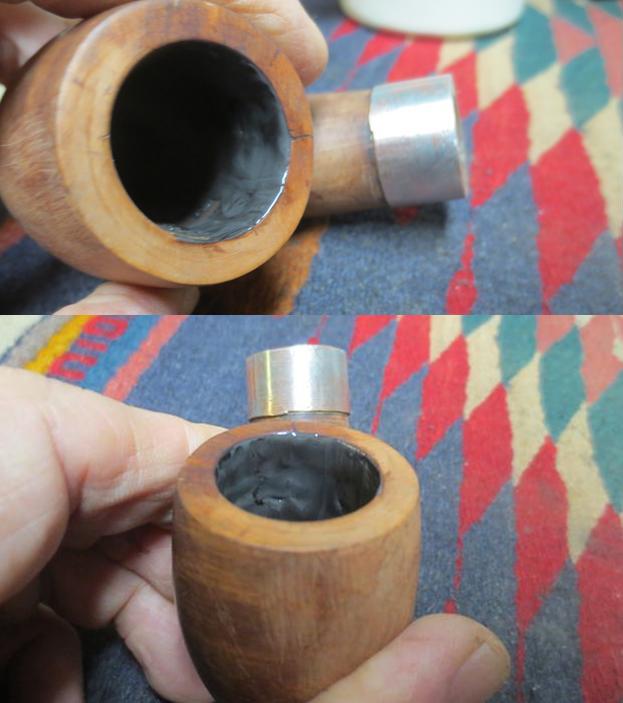
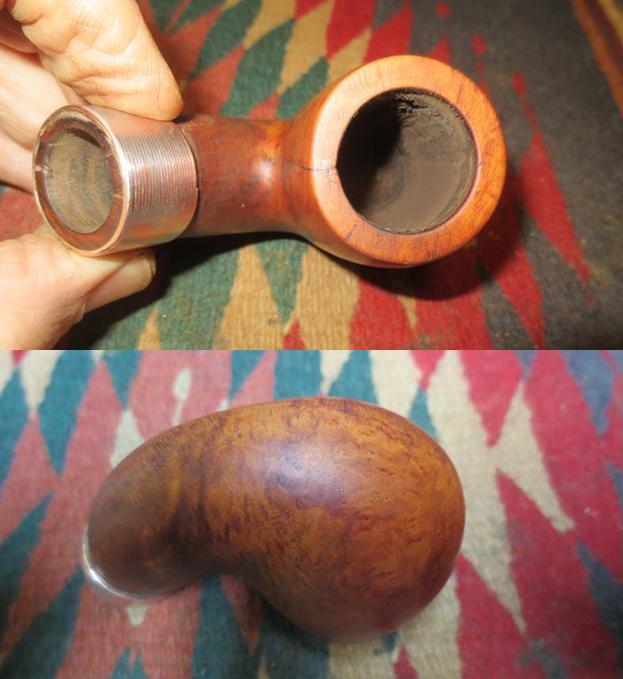
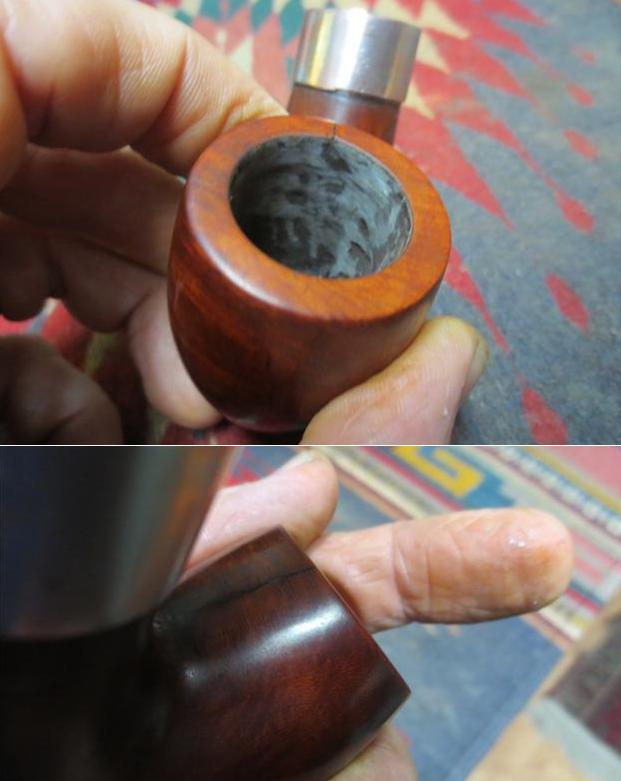
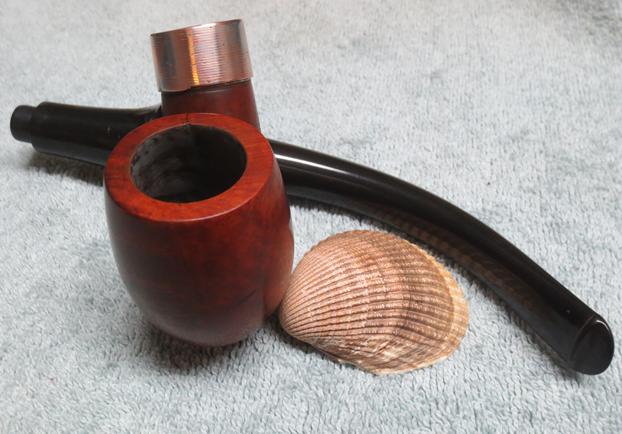
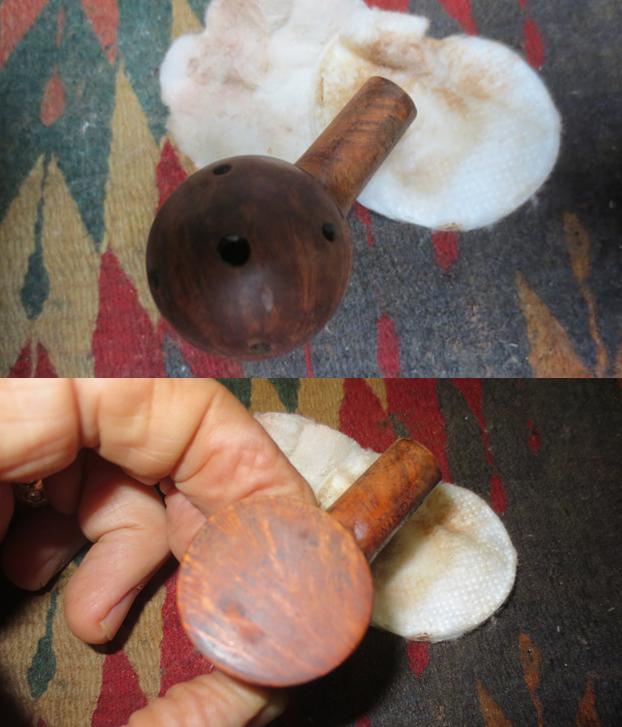
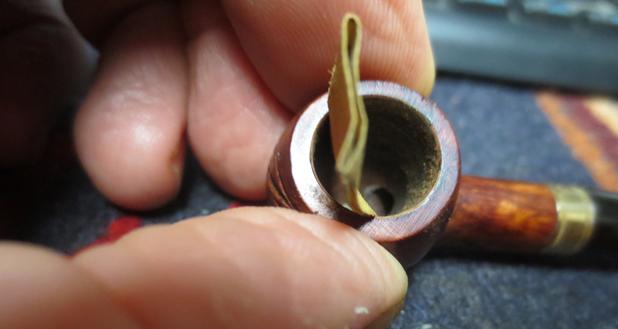
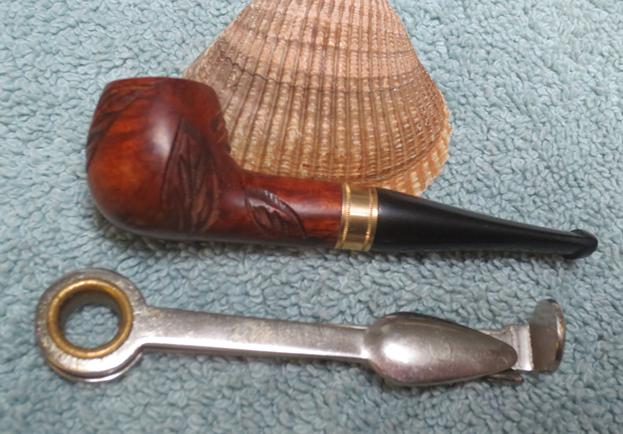
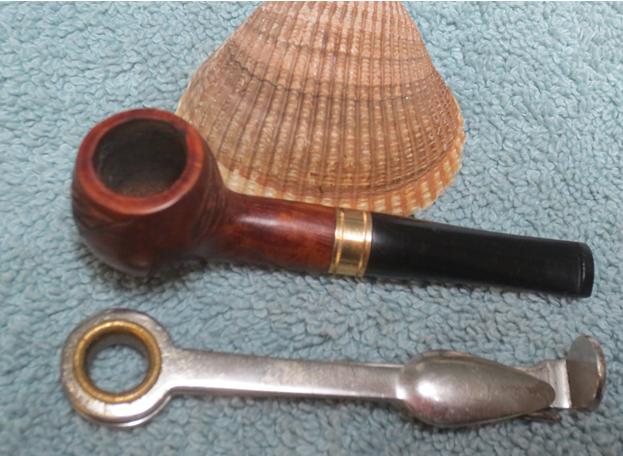
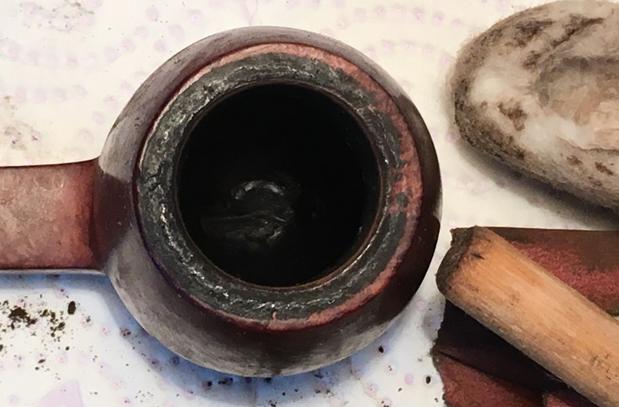
 Turning now to the stummel, I take another close-up of the rim and chamber before starting. I use the Pipnet reaming kit and clean out the moderately thick carbon cake formed in the chamber. I use 3 of the 4 blades available to me to remove the harder than usual cake. After the Pipnet blades, I fine tune the chamber surface with the Savinelli pipe knife and then, using my finger and a dowel rod, I sand the internal chamber wall with 240 grit paper. Finally, I wipe the bowl out with a cotton pad dampened with isopropyl 95%. The chamber wall looks good – no problems there.
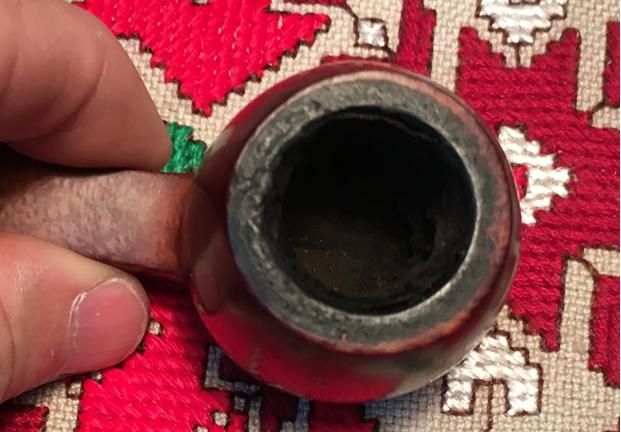
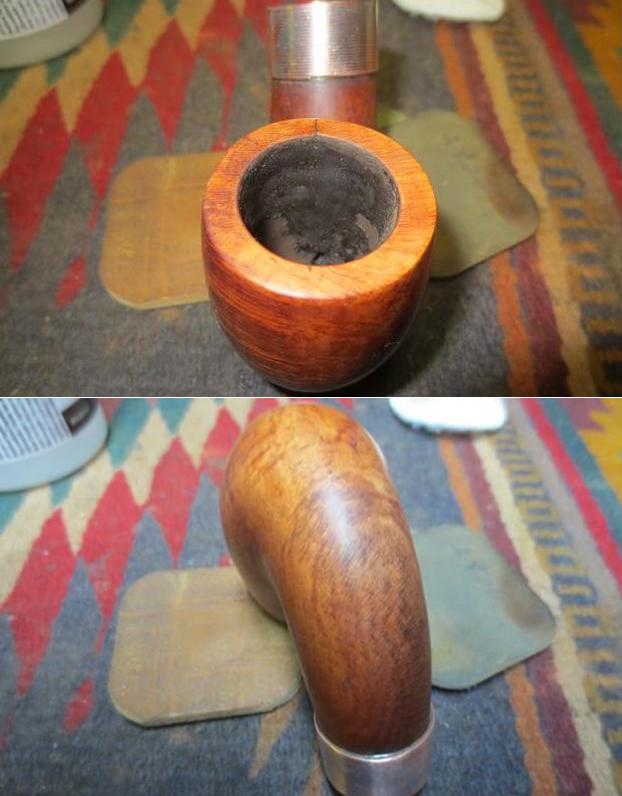
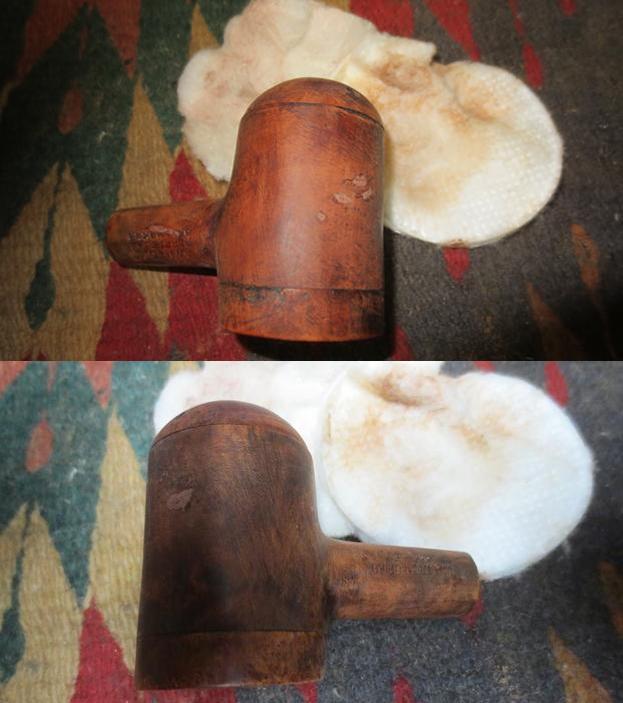
 Before cleaning the rim and stummel externals, I take Q-tips and pipe cleaners with isopropyl 95% to clean the internals of the stummel. Following this, I use Murphy’s Oil Soap undiluted with cotton pads and scrub the rim and surface. The lava build up on the rim proved to be resistant so I added use of the brass brush to the cleaning job. The inner rim appears to have burn marks on the front and back of the bowl. I’ll remove this damage by cutting an inner rim bevel later. The pictures show the cleaning progress.
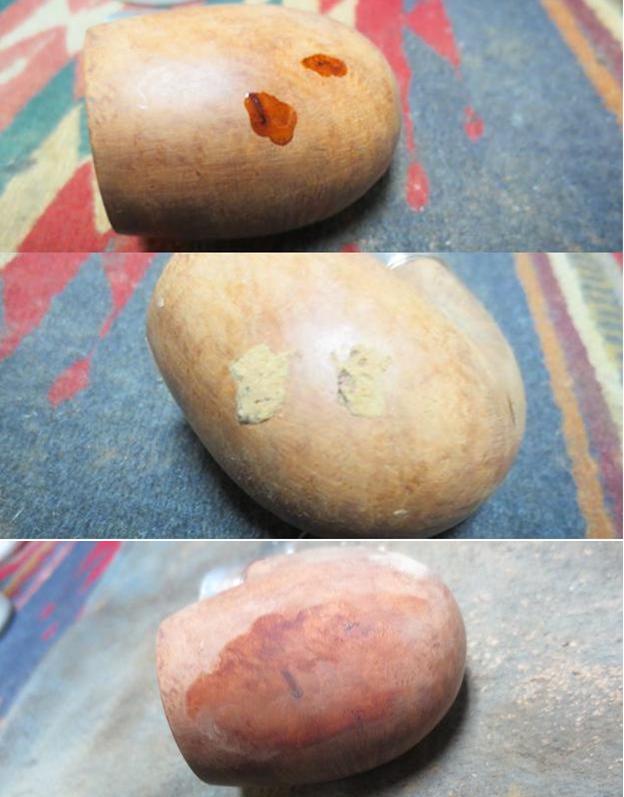
 After rejoining the curing spliced stem to the stummel to avoid creating shank shoulders, I take a medium grade sanding sponge and sand the entire stummel surface and rim, avoiding the shank panel containing the L J Peretti stamping. I follow this with the same regimen using a light grade sanding sponge. With the sanding sponges, I’m removing small pitting and imperfections from the briar surface. To clean up the rim further, I cut an initial bevel on the inner rim first using a tightly rolled piece of 120 grade paper. I follow this using 240 grit then 600. I closely examine the surface and the sponge sanding did the job so that I did not need to use any super glue for fills. I did use the stain marker and darken fills that had lightened. The pictures show the initial stummel prep.


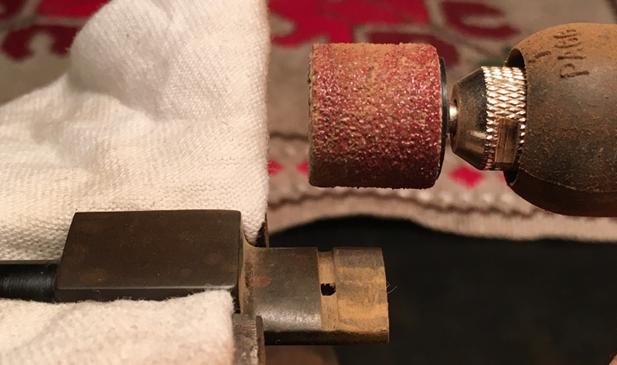
 I’m anxious to return to the stem repair to begin the ‘sculpting’ process. I’m sure that the donor stem that I’m using isn’t the best candidate for a match, but it is the only other saddle stem I have that isn’t already claimed by a stummel here in Bulgaria. Oh my – it reminds me that I just saw lots of 100 stems being auctioned on eBay! If only…. I take a few pictures of the spliced stem before I begin. To do the sculpting I use my Dremel high-speed rotary tool and mount the drum sanding tool. With the Dremel speed set on 2 of 5 (1 being the slowest RPMs) I gently and patiently begin removing vulcanite and shape the stem to give it a uniform look. The pictures show the progress until…
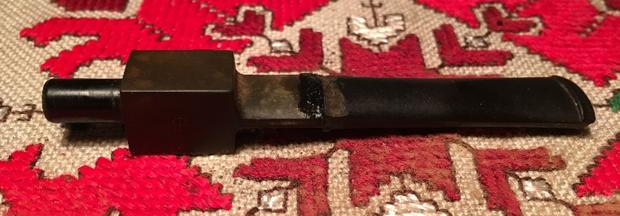
 …You’ve heard me say before, “As they say, it was going so well until it wasn’t.” The new superglue bond between the two stem parts simply gave way. I sat back in my chair looking at the divide and contemplated a visit to my favorite adult beverage. Before starting this project, I researched through the blogs looking for different approaches and techniques to this specific genre of stem repair – splicing. Steve has a very helpful Reborn essay, What are the options for repairing a damaged stem? I could not find anything with the specifics I was facing. Now with the two pieces before me, I decide to shoot an ‘SOS’ to Steve, even though I know he’s somewhere in the world traveling with his work. I press the send button, turn off the light, and head to bed!
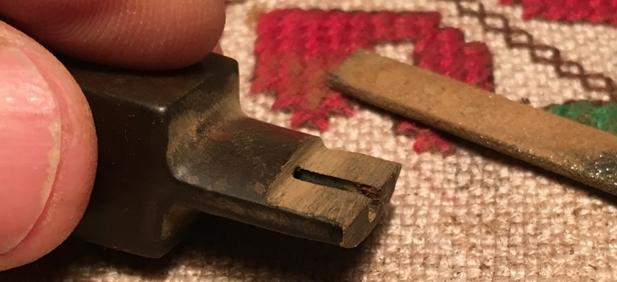
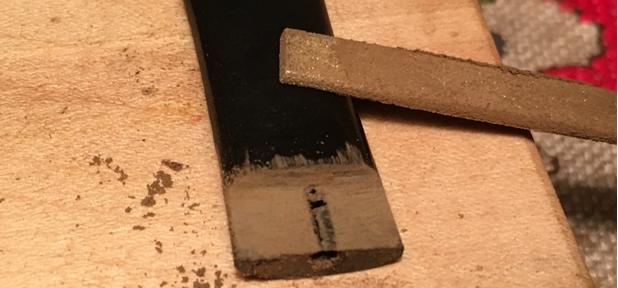
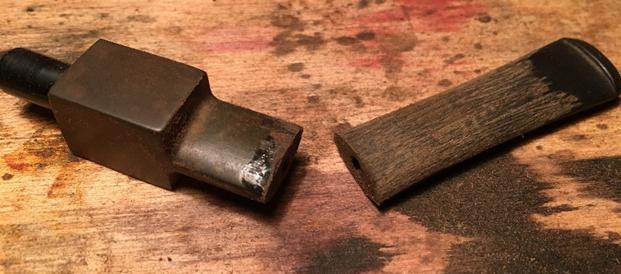 Gratefully, Steve’s reply arrived the next morning referencing another Reborn Pipes contributor, Jacek A. Rochacki, from Poland. Steve’s email described Jacek’s technique of creating a simple interlocking step between the two stem pieces by filing 90 degree angles out of the upper half of one piece and a corresponding 90 degree angle out of the lower half of the other piece. Essentially creating a juxtaposed and flipped ‘L’ on each stem piece. The step will provide more area for the glue to bond as well as distribute the stummel’s weight across the stem rather than at one tension point. The science behind the technique sounds good, now I need to bring the theory into physical reality! I decide to use the width of a flat needle file to determine the steps’ widths. Starting with surviving stem, I score a line to provide a guide for the edge of the step (first picture). After this, I wedge the stem piece in the miter box and invert the flat needle file and use it as a saw to cut a straight vertical incision half-way into the stem. Pictures 2 and 3 show this in progress. I use the Dremel to gradually remove the vulcanite and finish the fine-tuning with the needle file. The pictures show the progress.
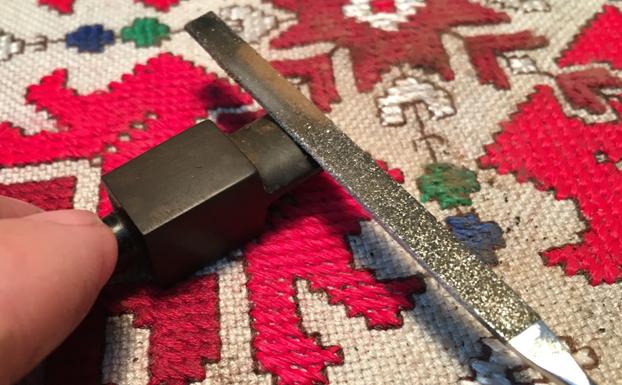

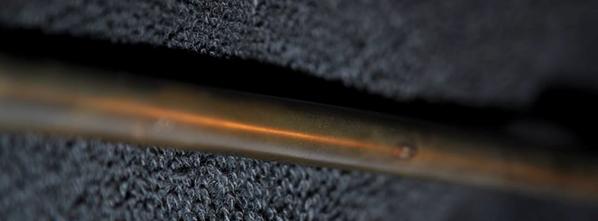
 The other stem piece follows the same protocol. The whole process took quite a bit of time filing, eye-balling, test fitting and filing again. The junction I have is not a perfect fit. Dealing with the odd matching stem pieces presents its own challenges. The key as before, is to align the airway holes to have as much as possible a seamless airflow. The final picture in the set below shows the pipe cleaner inserted through the pieces and mimics the natural alignment before bonding with superglue. In this position, to test the freedom of the pipe cleaner to move, I compressed the pieces at the ‘step junction’ and then pulled the pipe cleaner back and forth to assure as much as possible a good alignment. The pictures tell the story.
 As before, I use a bristled pipe cleaner with less fuzz, apply petroleum jelly to the pipe cleaner to avoid sticking to the glue, and apply Black KE-150 Glue to the step surfaces. I pull the pipe cleaner from the shank-side to draw the stem pieces together to allow a natural placement favoring a clear airway. Once the steps fully engage, I compress the steps together to form the bond. While I apply this pressure, I also give a little pull on the pipe cleaner to assure that it is still moving freely and not crimped at the splice junction. After curing for 24 hours, I inspect the junction lines and apply additional KE-150 glue where needed to seal the joint.
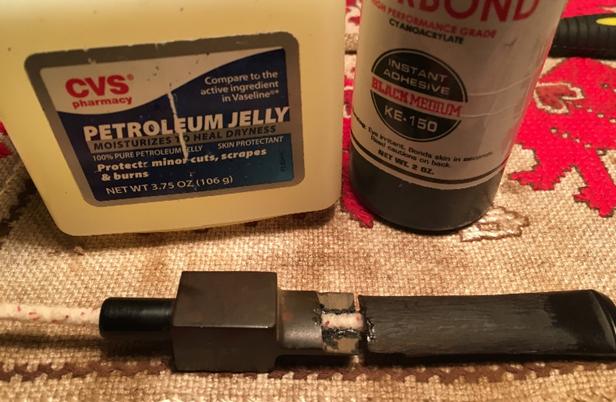
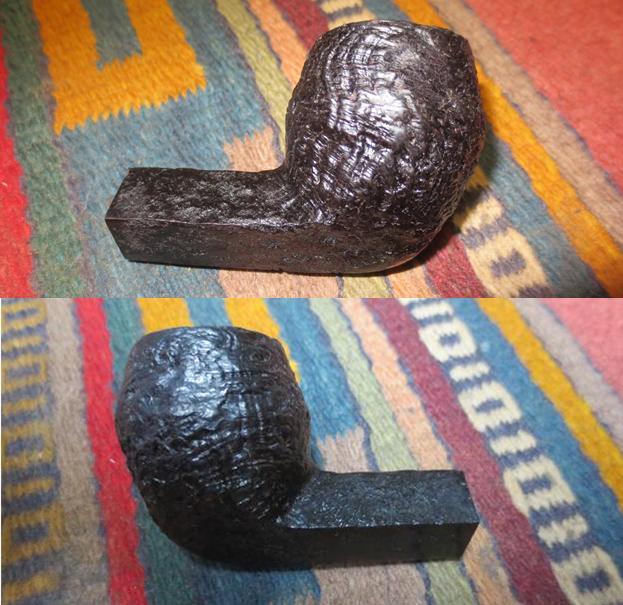
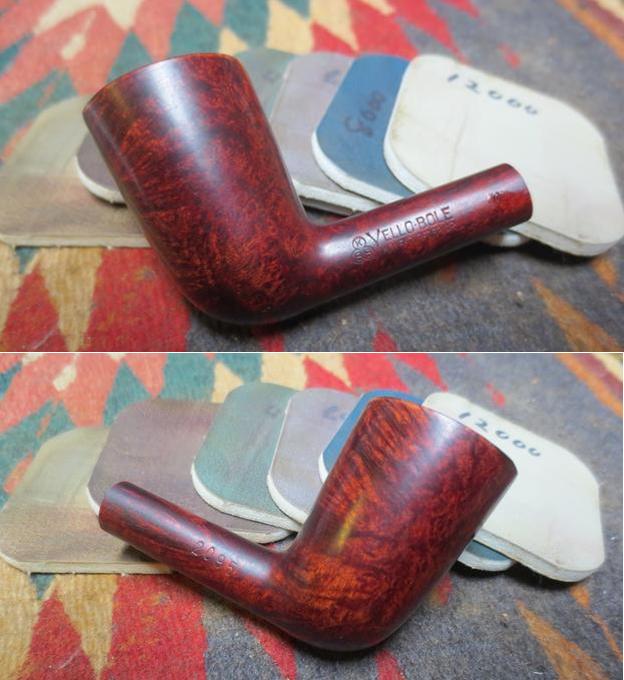
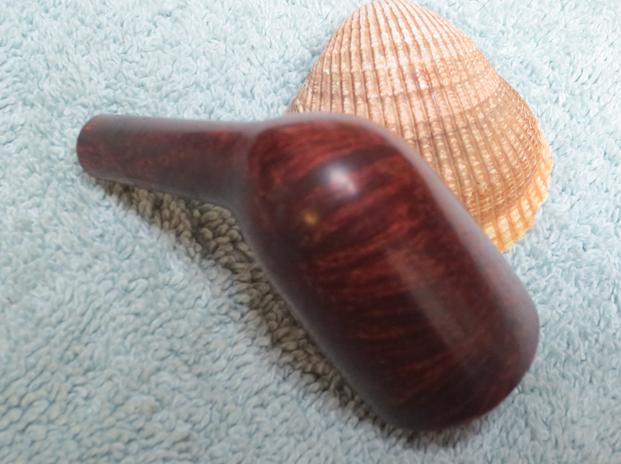
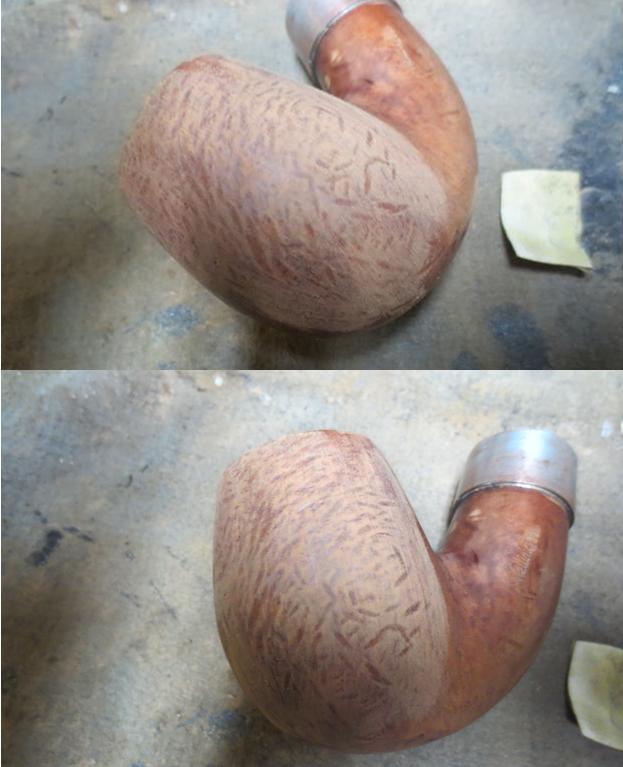
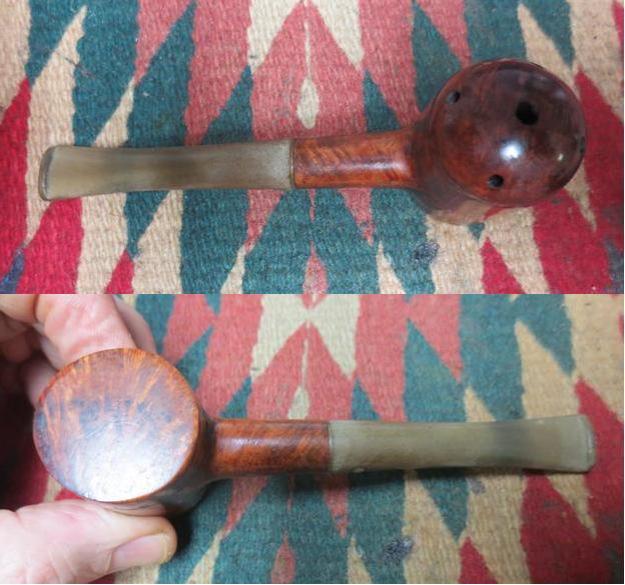
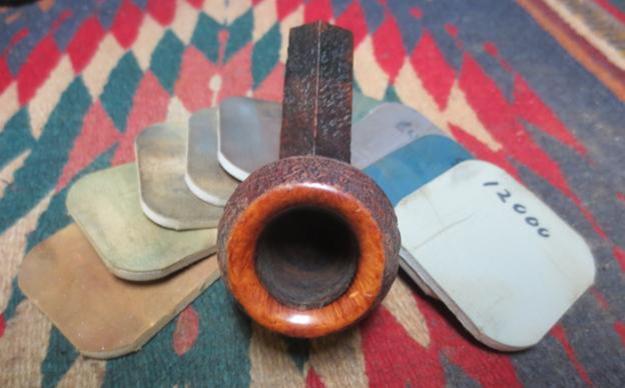
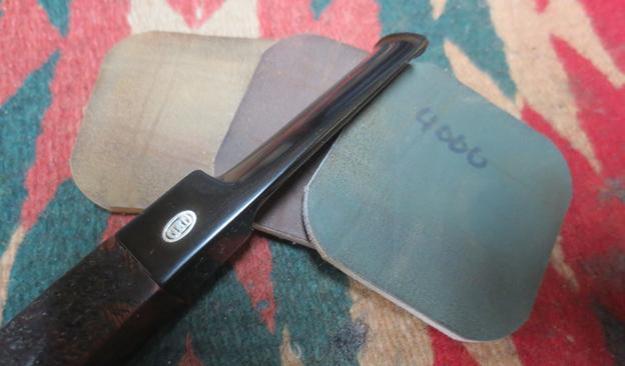
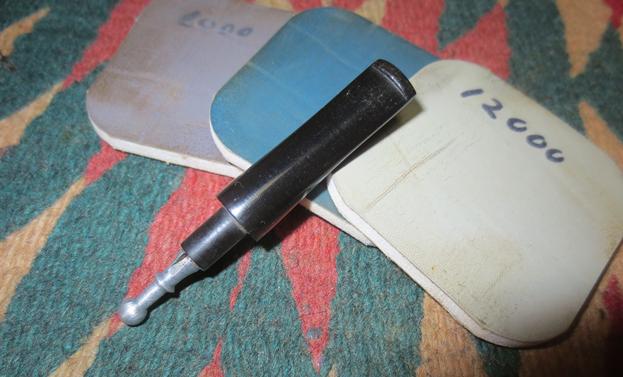
 With the stem splice curing, I turn my attention to the stummel. Staying clear of the L J Peretti nomenclature on the left shank panel, using micromesh pads 1500 to 2400 I wet sand the stummel. Following this, I dry sand the stummel using micromesh pads 3200 to 4000 then again with pads 6000 to 12000. The depth of the briar grain looks good. The pictures show the progress.
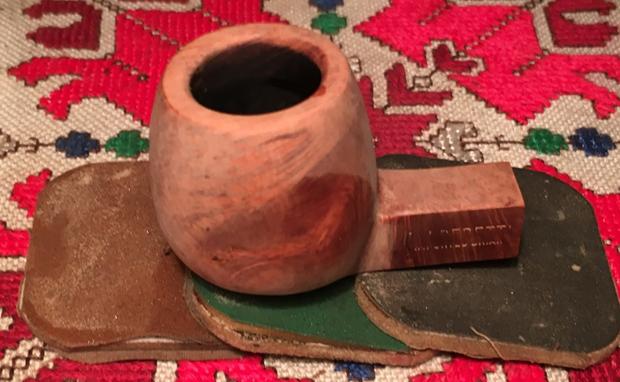
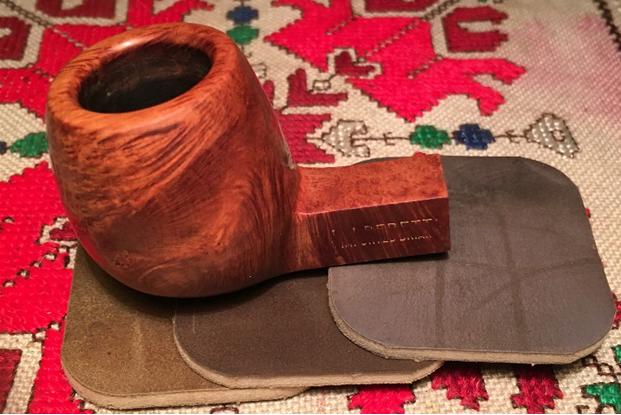
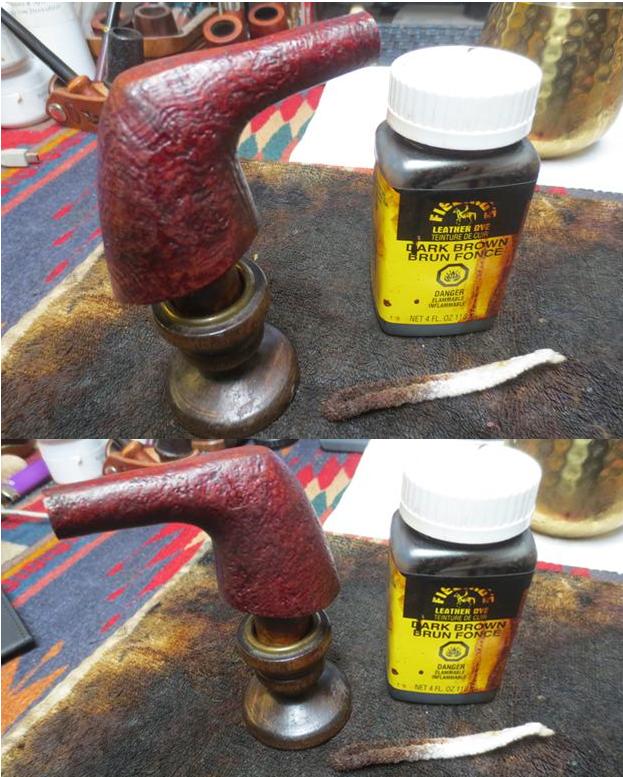
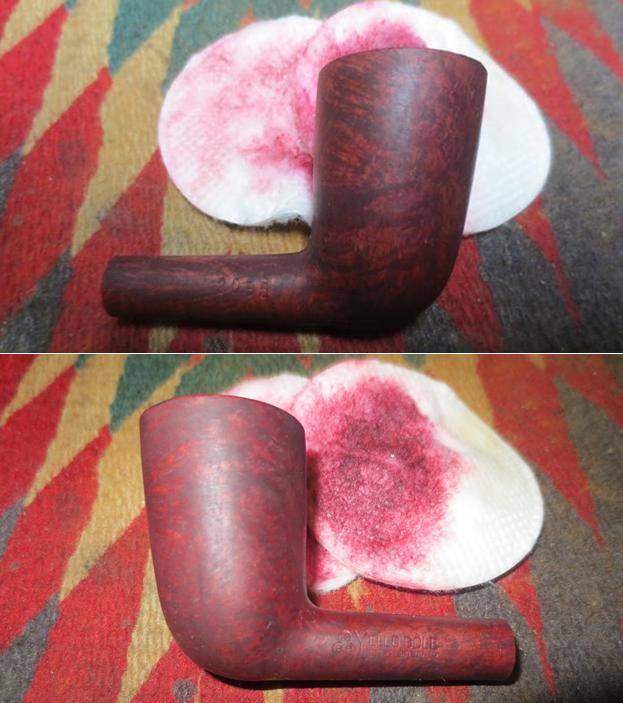
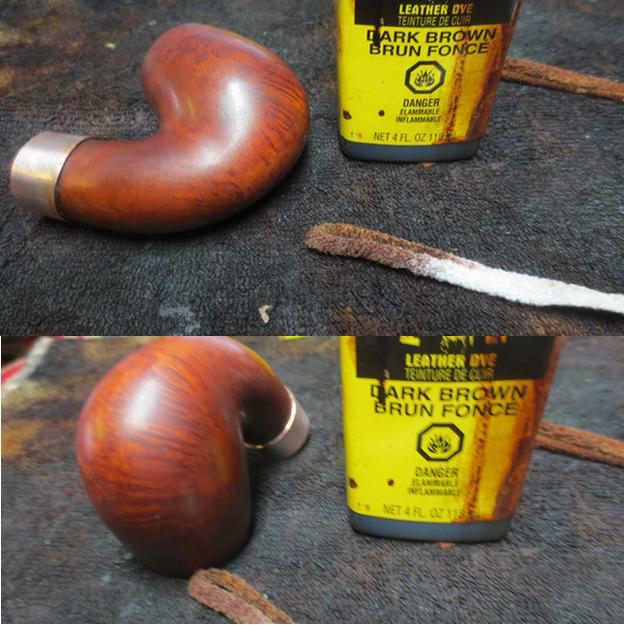
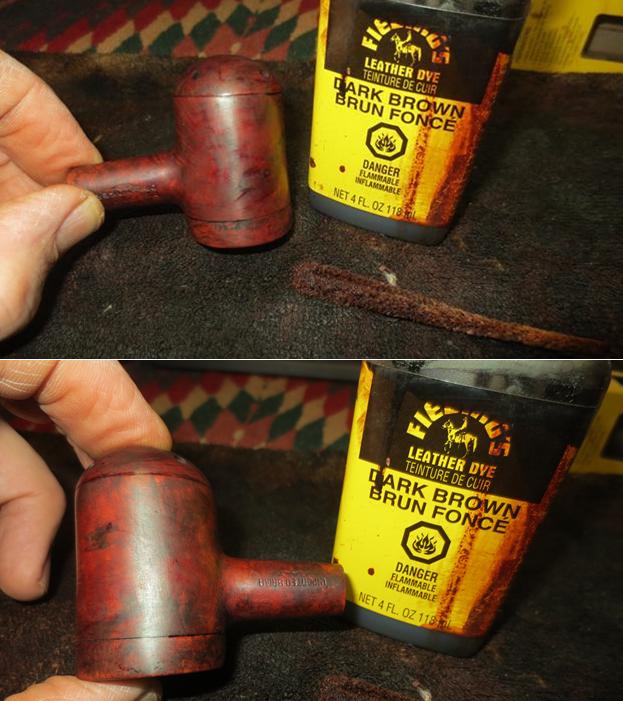
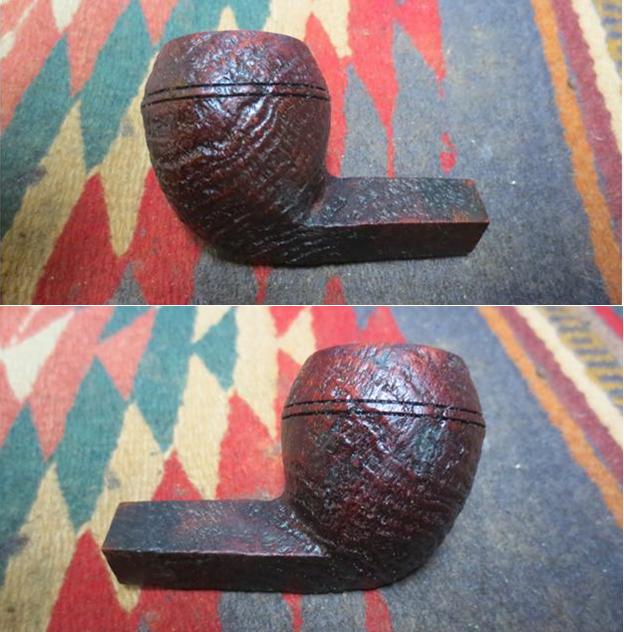
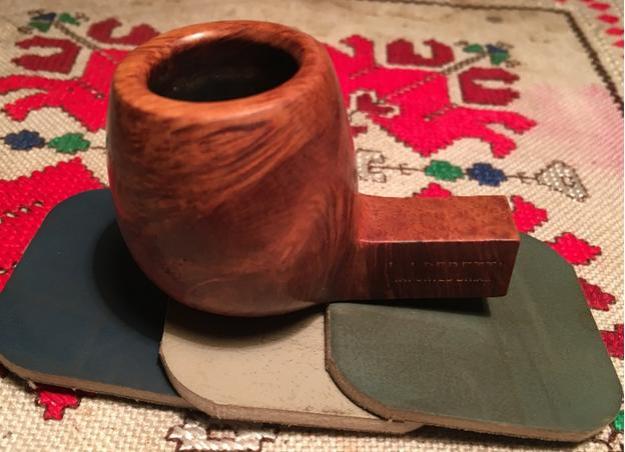 I like very much the lighter brown, butterscotch tones of the briar. I decide to apply a very light stain made up of one part Fiebing’s Light Brown Leather Dye to 4 parts isopropyl 95%. My desire is to blend the fills on the bowl even though I had already applied stain sticks to these areas. Using a pipe cleaner folded I apply a generous coat of the dye mixture, making sure to cover the entire stummel. After applying the dye, while still wet I fire the dye with a lit candle. This sets the hue of the dye well in the grain. After a few minutes, I repeat the process concluding with firing the wet dye. The alcohol in the dye burns off quickly and normally this does not burn the wood. I did scorch the wood of the rim of a restoration not long ago. I concluded that the problem was the cork that I had inserted in the bowl to manipulate the stummel while staining – the cork itself was saturated with the alcohol and kept ‘firing’ and scorched the thin wood of the rim…. Ever learning! Now, I hold the stummel by inserting a couple twisted pipe cleaners in the shank acting as a handle. The picture shows the final state after the second application of stain.
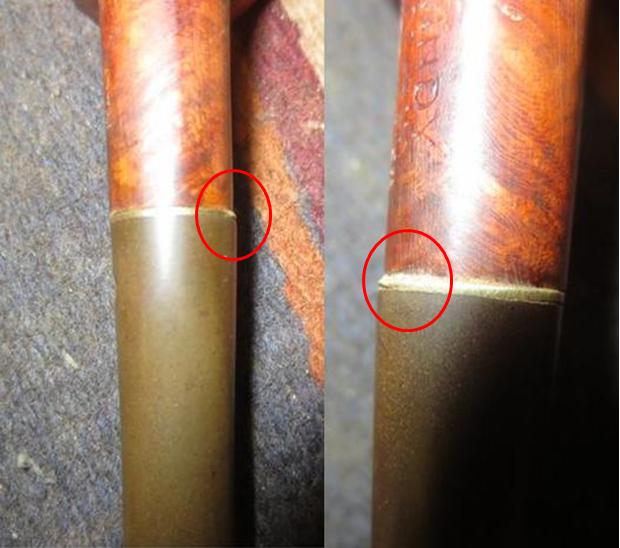
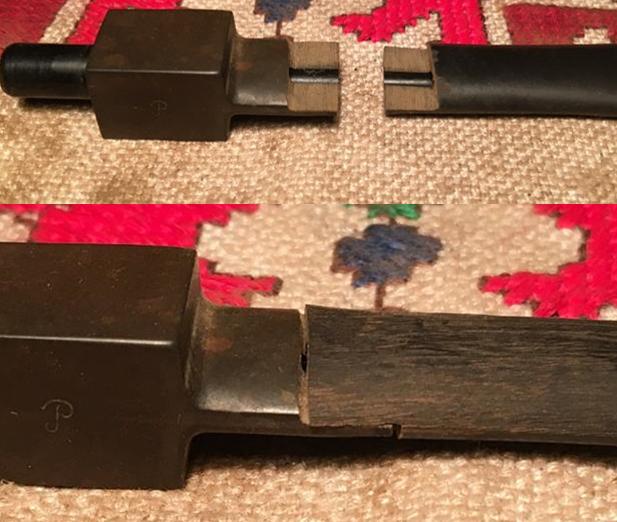
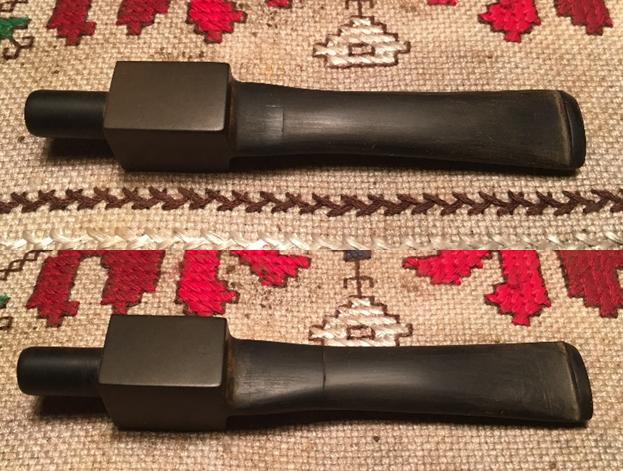
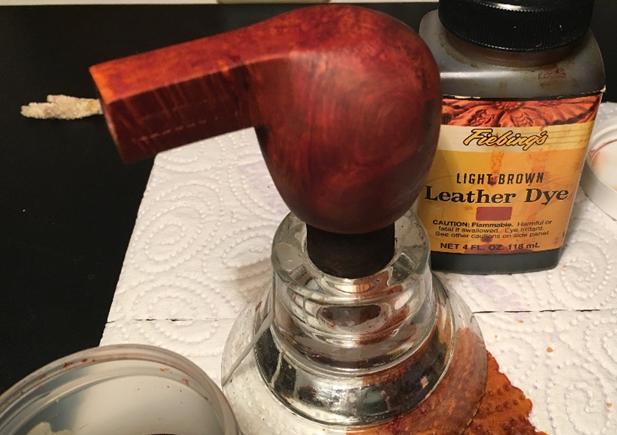 I set the stummel aside to allow it to ‘rest’ through the night. The next day, I’m looking at the stummel and the spliced stem. I decide to jump into the stem work. Honestly, as I look at the stem, the word that comes to mind is ‘Frankenstem’. The stem that I cannibalized was not the best match to begin with. Changing the positioning of the stem pieces to give the ‘step splice technique’ a chance of working, left a spliced stem with a definite limp. Yet, I’m not finished and I’ve discovered along the way, there is a lot of forgiveness and flexibility in working with vulcanite. As the old Timex commercial assured, “Takes a lick’n and keeps on tick’n!” That will be my mindset as I approach the Frankenstem! I take some pictures to show the challenges. The first picture, perspective from the top looking down, shows the greatest challenges. The stem addition is offset revealing the original stem’s protrusion underneath. There is also more taper in the stem addition than in the original stem. My approach as I look at the stem will be to try to create a higher (toward the shank) taper on the original stem (on the lower side in the picture). This hopefully will blend the mismatch.
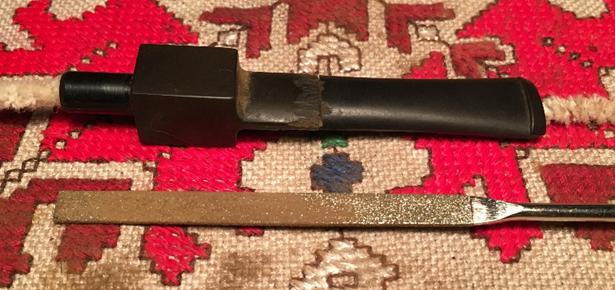
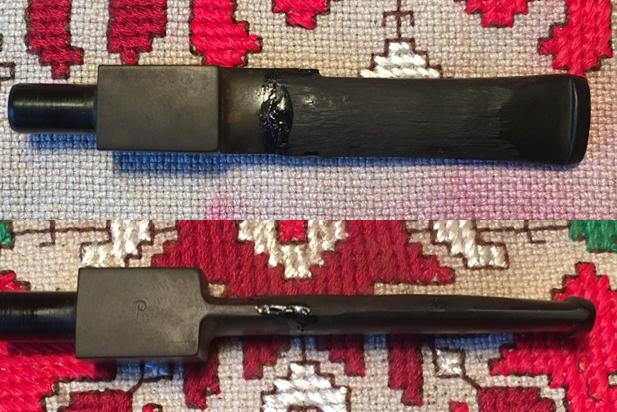 I decide to chronicle the approach I take. I first work on the ‘straight’ side of the stem (lower) by using a rounded needle file to create a ‘dimple’ that would represent the deepest part of the tapered curve. It was adjacent to the protrusion on the right side (above in the picture below). After creating the dimple, I then gradually fan out the dimple with 240 grit sanding paper until I achieve a smooth taper joining the saddle with the button. I’m pleased with the results of phase 1.
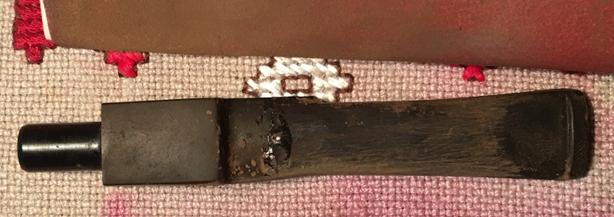 Phase 2 is creating another dimple on the other side – right at the point of the protrusion sticking out from underneath from the original stem step (pictured better above). Again, after the dimple is formed with the rounded needle file I use 240 grit sanding paper to fan the taper evenly throughout the stem. While the stem still is off center a bit, the tapering gives the allusion of a straighter stem. It seems to me the stem is resembling a fishtail style reminiscent of Stanwell pipes.
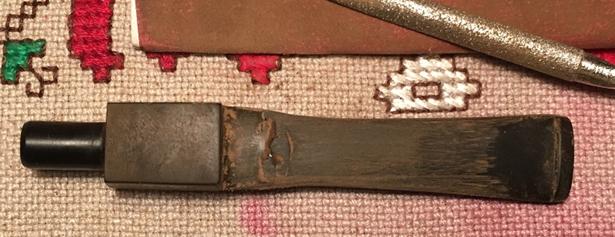 Next, I sanded the upper and lower stem with 240 grit paper to smooth and blend the splice repair. This is helpful because it enables me to see that there are gaps in the seams of the patch. In the pictures below you can see the vulcanite dust from sanding lodged in the gaps. I decide to apply a bit of the Black Medium KE-150 glue to fill the gaps. Before I do, I wash the stem with water and a bit of dish soap. I apply the KE-150 then spray the joint with an accelerator that I just brought back to Bulgaria from my time in the US for Christmas.
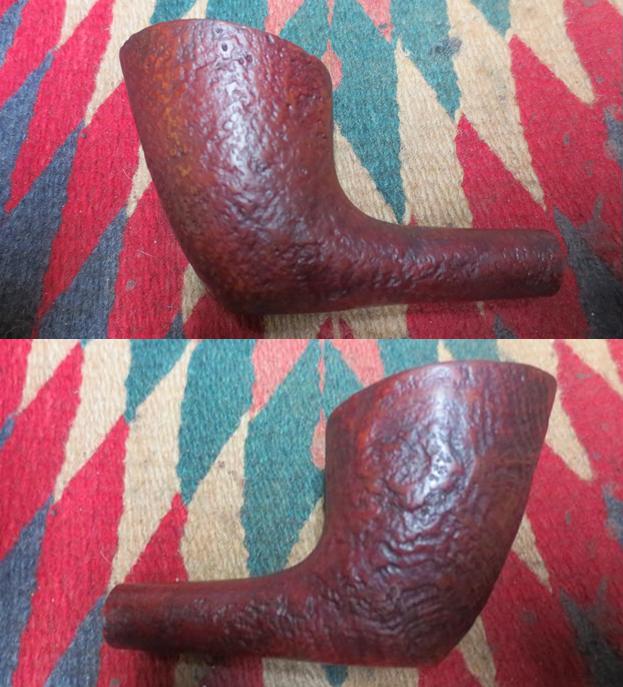
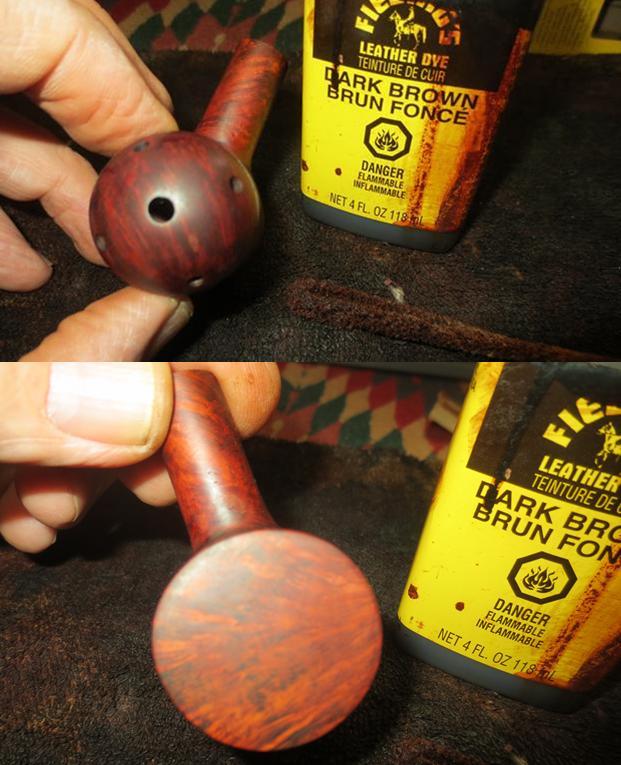
 Putting the stem on the sidelines to cure a bit, I’m anxious to ‘unwrap’ the stummel and look at the briar underneath the fired dye crust. I take the Dremel and mount a felt wheel and using Tripoli compound, I apply the compound using the slowest speed available on the Dremel. For detailed ‘how tos’ in using a Dremel for this process, see my essay on Dremel Polishing Technique. After I finish the cycle with the Tripoli compound, I wipe the bowl lightly with a cotton pad and isopropyl 95% to blend the stain. After the Tripoli, I change to the Blue Diamond compound felt wheel at the same RPMs and apply Blue Diamond. Then I take a clean cotton cloth and give the stummel a rubdown removing the excess compound residues which is like powder. The stummel is looking great even before the carnauba wax application, but I decide to delay the wax application and again turn back to the stem.
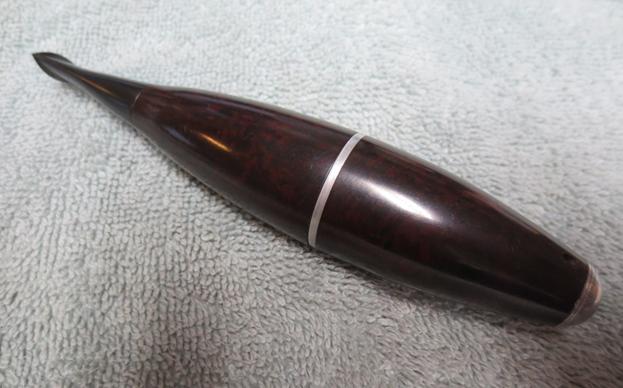
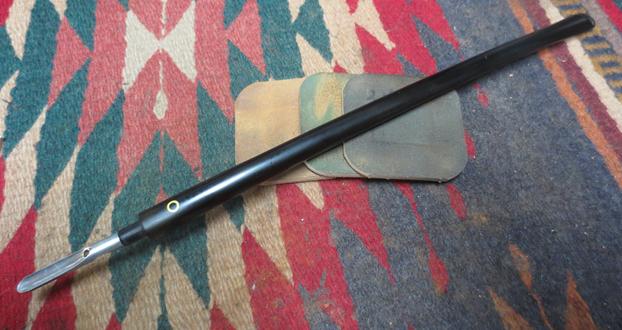
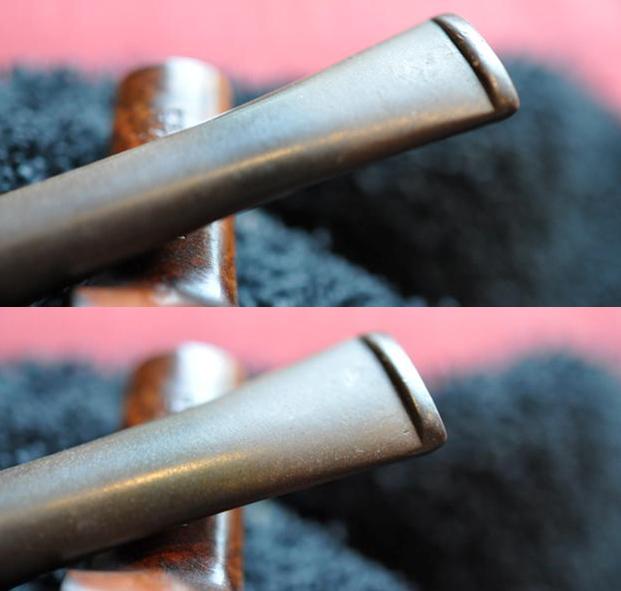
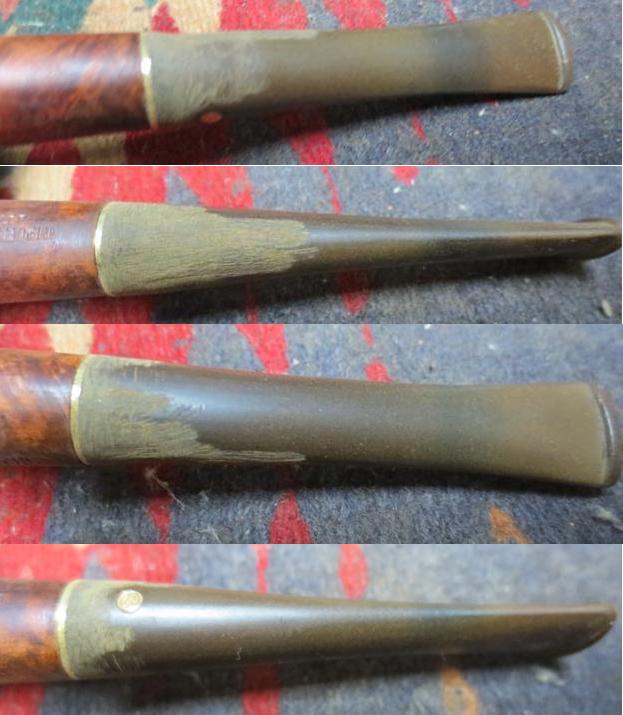
To see the big picture, I unite the spliced stem with the stummel. I like the proportions. I was concerned that the stem might end up being too short and the L J Perretti becoming a nose warmer. This is not the case as the picture shows!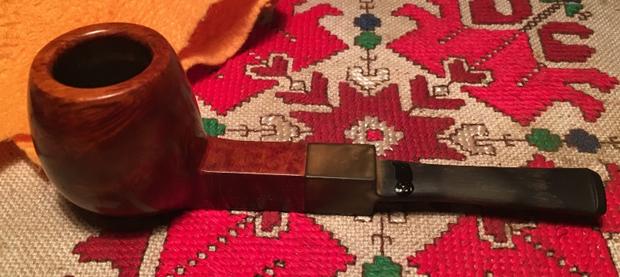 Accelerator is God’s gift to the impatient! My first time to use it and it is nice – though I understand the downside of using an accelerator is the potential of a weaker bond, at least as I have read. The Black K-150 glue looks good. I return to sanding the stem to blend the patch and finish the shaping. With 240 grit paper, I smooth out the superglue fill and even though I can still see the lines, the touch test is the goal. I can feel no ridge at the junction seams. Success! With all this rigorous sanding, the verdict is in – the step splice technique is holding! I continue sanding moving down the stem removing the sand marks left by the Dremel drum sanding wheel. I finally arrive at the button and to lower lip is out of line. I straighten this with a flat needle file and I freshen the button lines while I’m at it. I use 240 grit paper again to remove the effects of the needle file use in the button area. Finished with the 240 grit paper, I use 600 grit paper to smooth the stem more and to reveal nicks or gouges that may have been missed. The last two pictures below show the finished shaping project. I’m very pleased with the results – the splice is holding well and the newly shaped stem is passable. Even though the splice seams are visible, they are smooth to the touch and I’m hopeful that as the stem polishing and waxing is completed, the seams will blend more. I think Frankenstem has been transformed well. Before bringing out the micromesh pads on the stem, I drop the newly spliced stem into the Oxi-Clean bath to raise the heavy oxidation left in the original stem piece. Another day is finished.

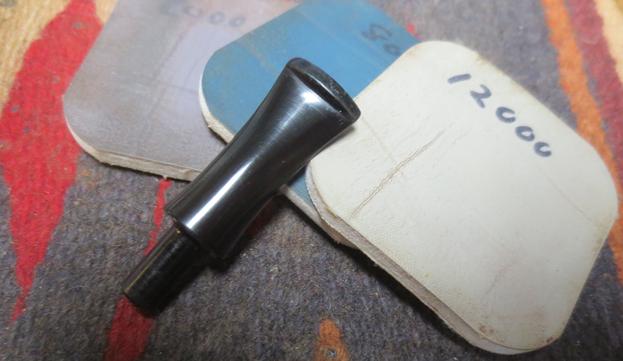
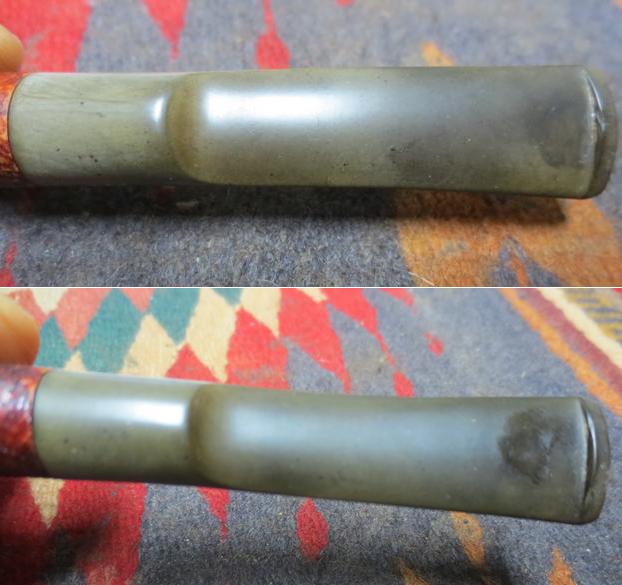
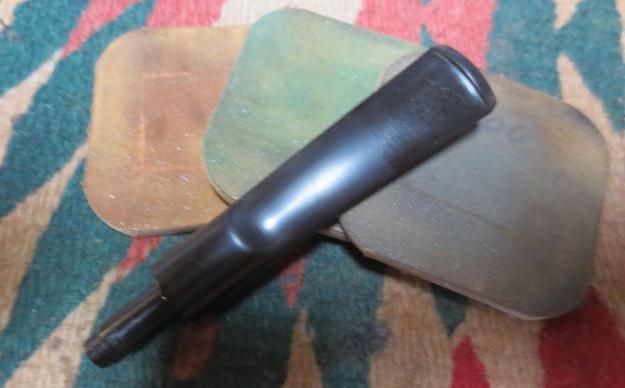
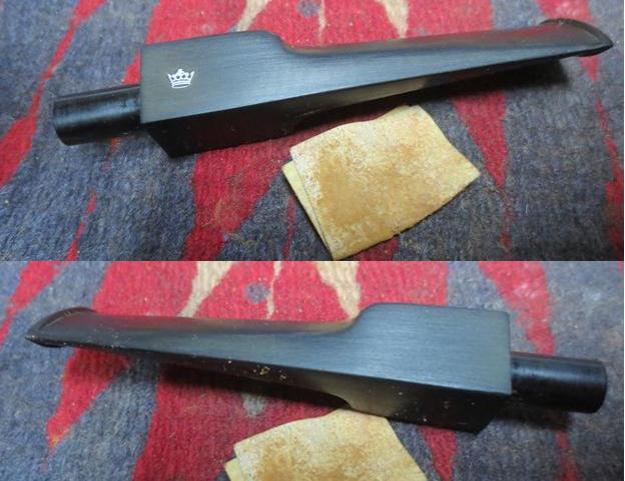
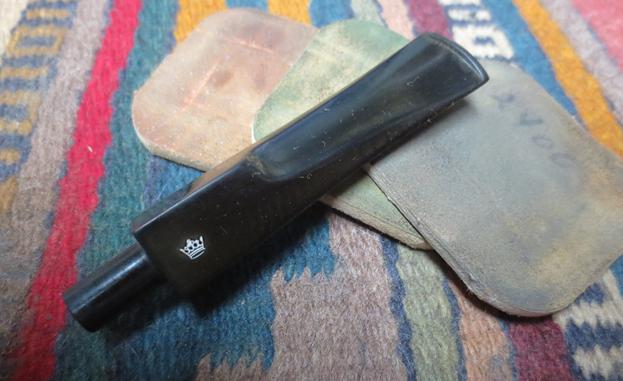
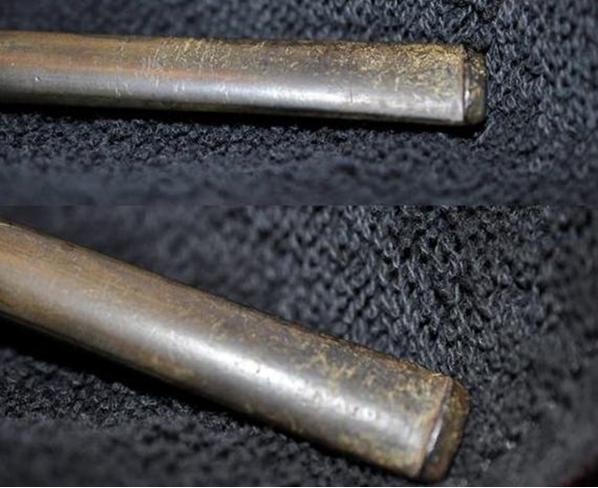
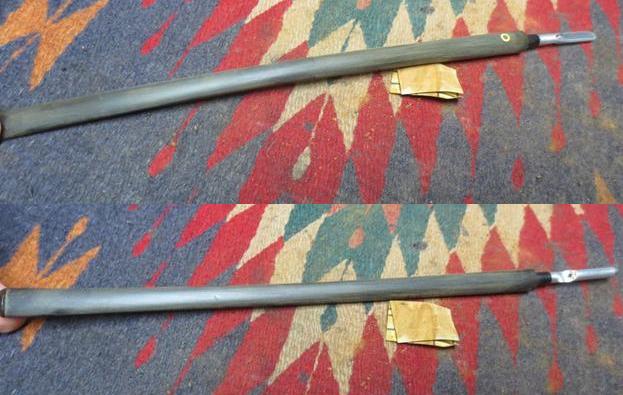
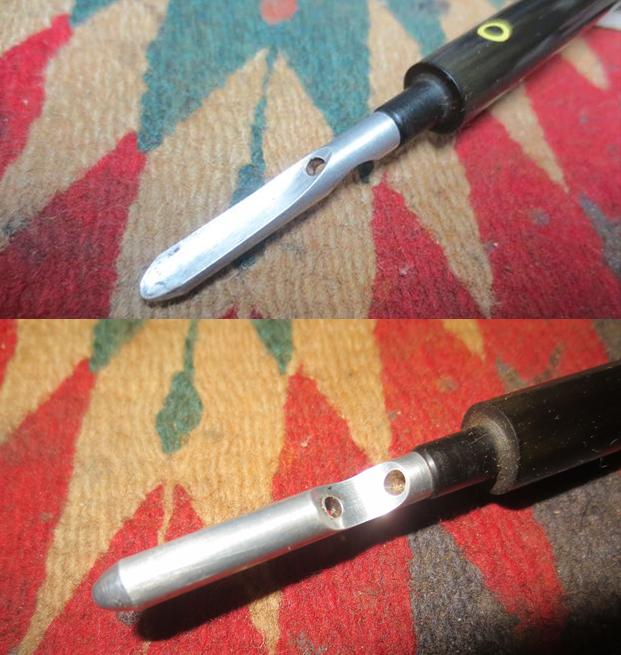
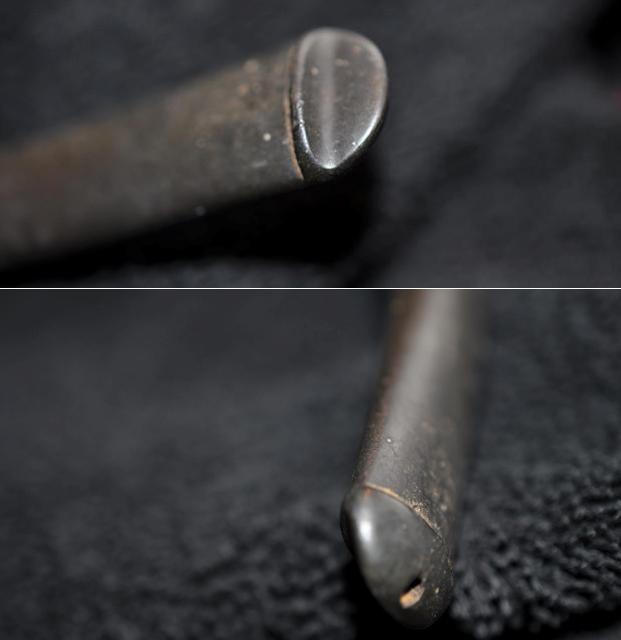
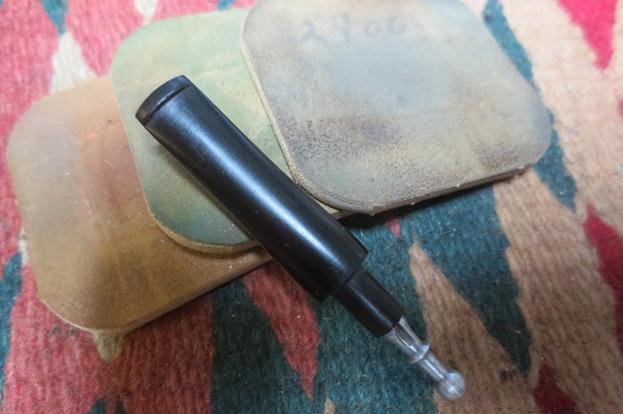
 The next morning I fish the soaking stem out of the Oxi-Clean bath. The oxidation has surfaced, and as expected, especially on the original stem piece. Initially I use 600 grit paper and wet sand the stem removing the top layer of oxidation. I use a topping board with 600 grit paper to make quick work of 3 of the 4 panels of the saddle stem block (not sure if there is a special name for this part of the stem). I am careful to protect the Perretti ‘P’ on the other panel by putting my thumb over it as I sanded around it. I repeated the process using 0000 steel wool. As always, the most difficult part to rid of oxidation were the vertical ‘rise panels’ above and below the stem. I’m satisfied with the progress the pictures show.


 With the new day, I’m in the home-stretch! With so much focus on the stem repair, I only now recall that I have not cleaned the internals of the now spliced stem. Using pipe cleaners dipped in isopropyl 95% I work on cleaning the internals. After running 2 pipe cleaners through the airway, for a nice change, I discover that all is clean!
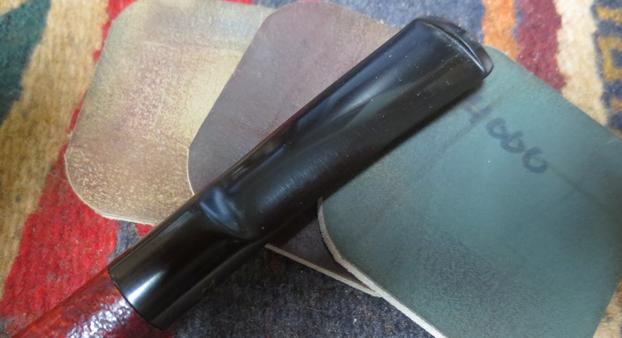
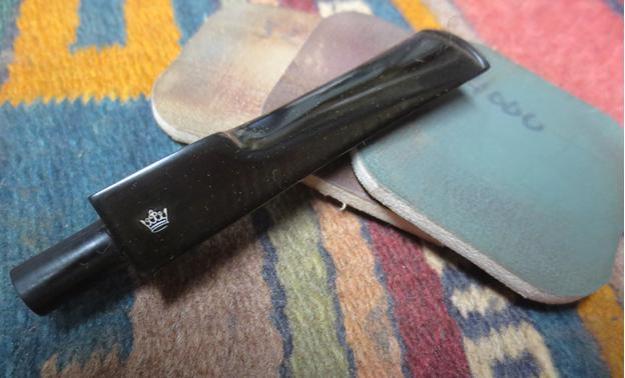
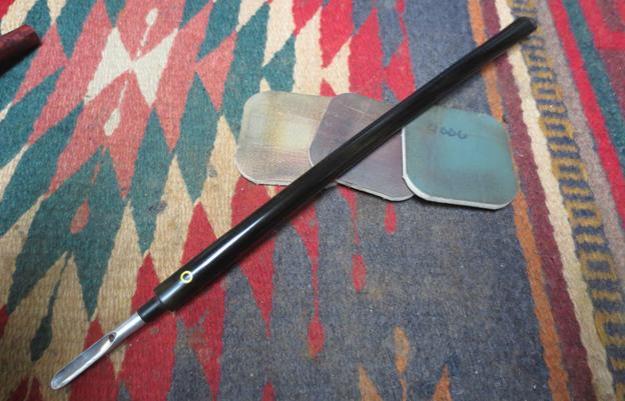
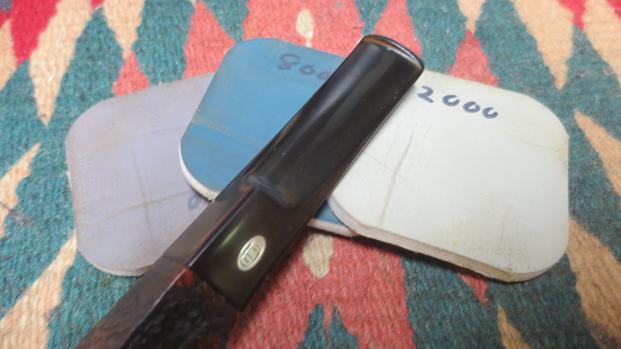
 I turn now to the micromesh cycles with the stem. Beginning with pads 1500 to 2400 I wet sand the stem and follow the set with an application of Obsidian Oil over the stem. Next, I dry sand using pads 3200 to 4000 followed by 6000 to 12000, following each set with a fresh application of Obsidian Oil. I’m generally pleased with the technique of this splice, but the fine polishing of the two pieces of vulcanite have revealed that not all vulcanite is the same. I assume the original survivor piece was of better quality than the donor piece. The polishing reveals that the original is a darker hue of black and it wasn’t evident only until now. So, we do the best we can with what we have! The pictures reveal this with a close look. The stem still looks good and what I’ve been through with it make it even look better! The pictures show the progress.

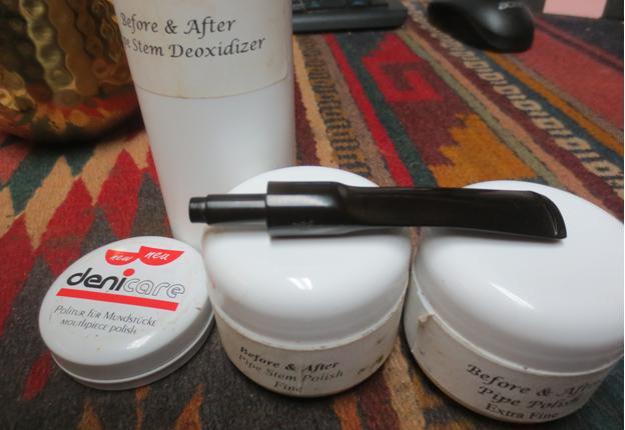
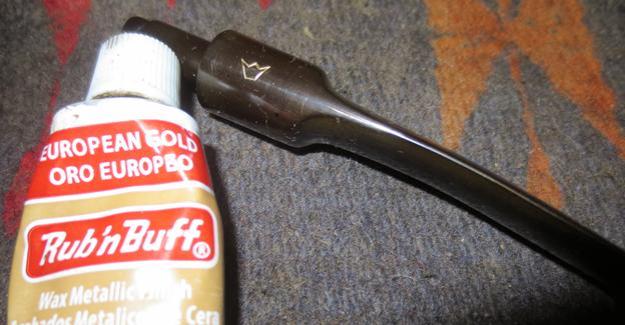
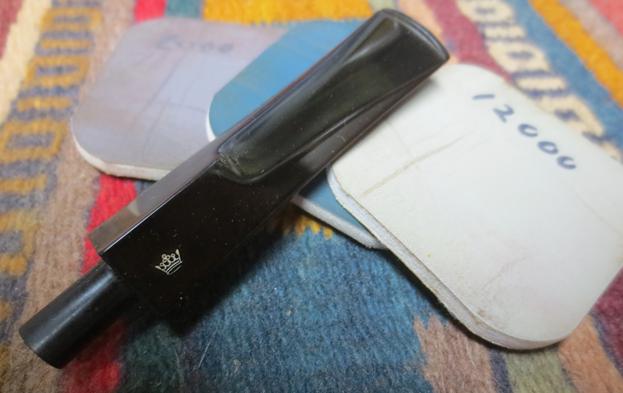
 Before rejoining stummel and stem to apply carnauba wax, I want to re-establish the Perretti ‘P’ stamping on the stem. Checking with the L. J. Perretti Co. stampings on Pipephil.eu, most stem marks are set with white lettering. I want to do the same to emulate how this Perretti most likely was commissioned. Taking white acrylic paint, I dab a bit over the ‘P’ on the stem. After an hour or so, after dried, I gently scrape the top layer of paint off with a pointed Q-tip which I picked up in the US at Hobby Lobby. Pictures show the result.

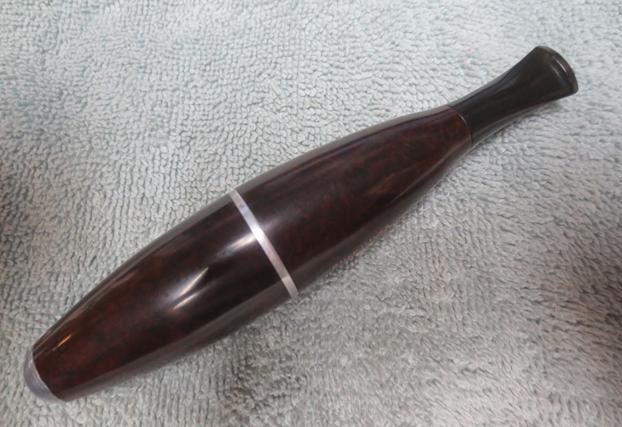
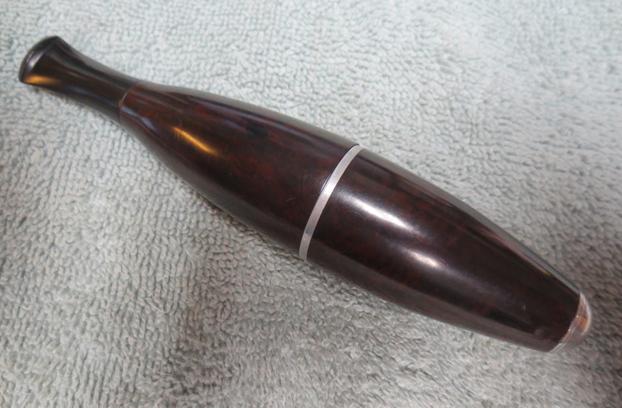
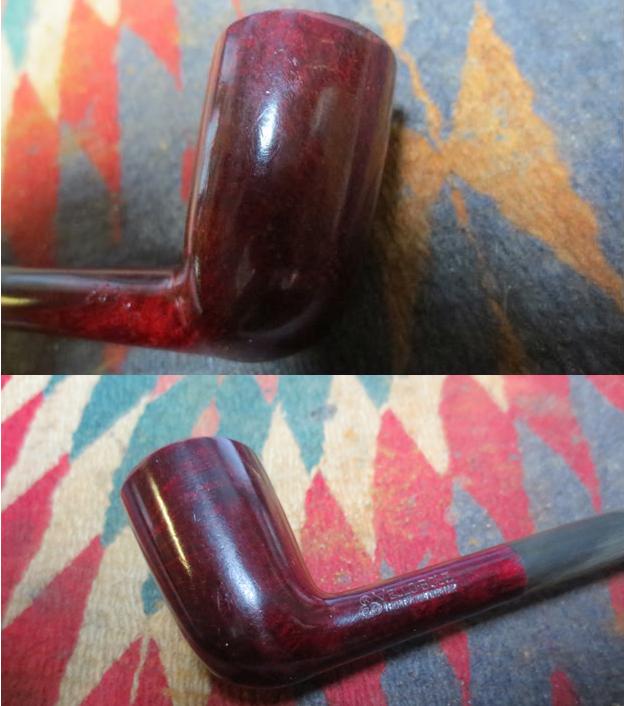
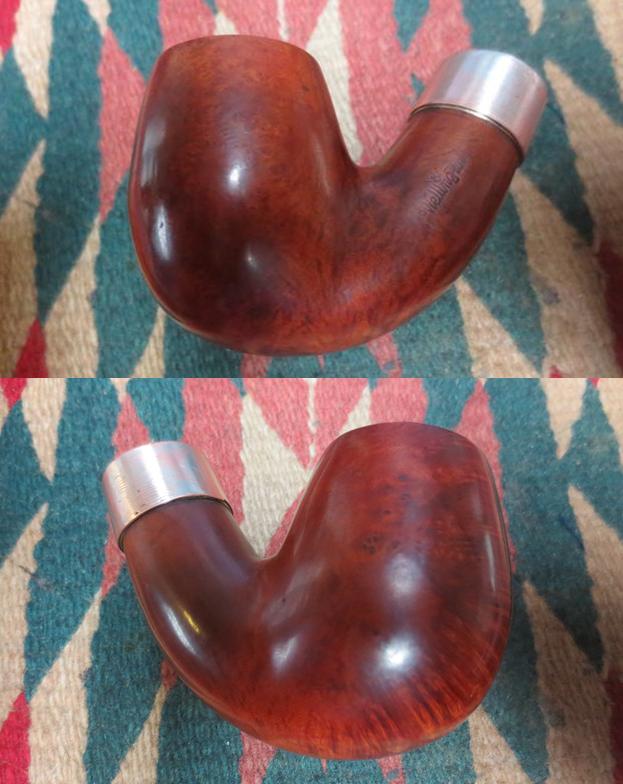
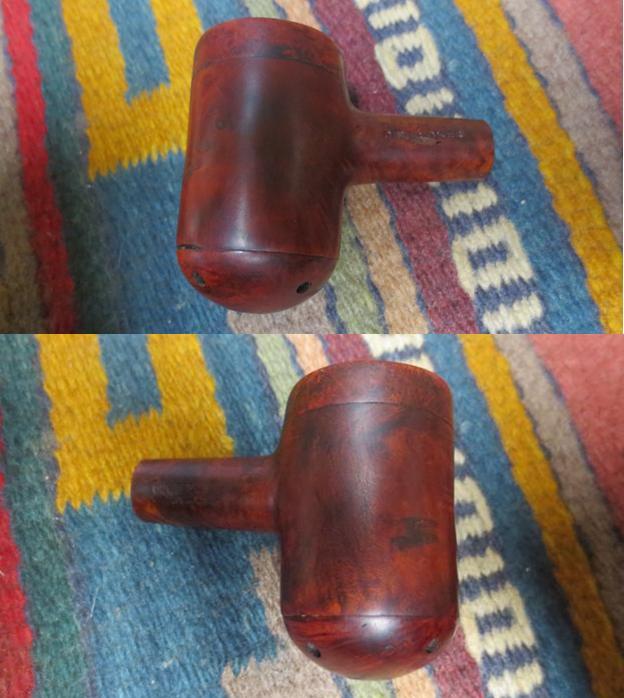
 Rejoining stem and stummel, I apply several coats of carnauba wax to both. I use a cotton cloth wheel mounted on the Dremel, increase the speed to a setting of 2 and apply the wax moving the wheel in a circular motion over the surface. After completing the carnauba wax application, I mount a clean cotton cloth wheel on the Dremel and clean buff the stummel and stem. Following this, I give the entire pipe a hand buffing with microfiber cloth to bring out the luster and depth of the grain even more.
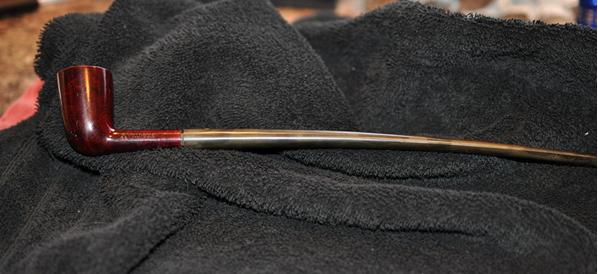
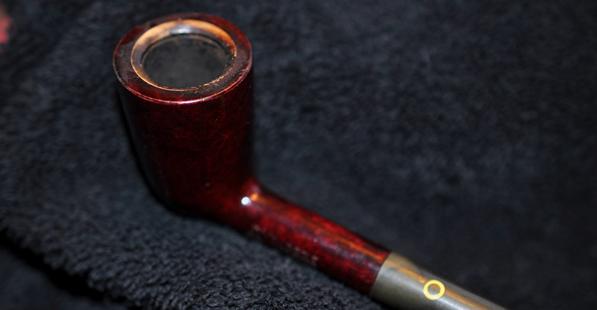
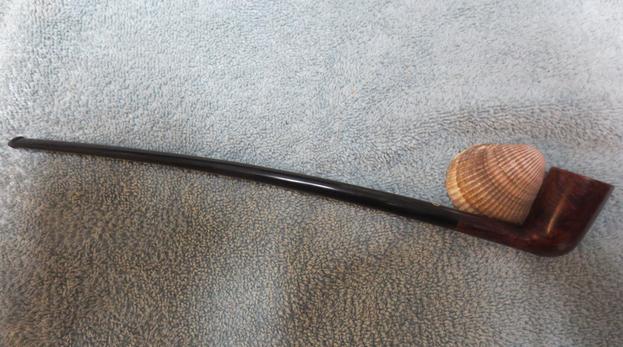
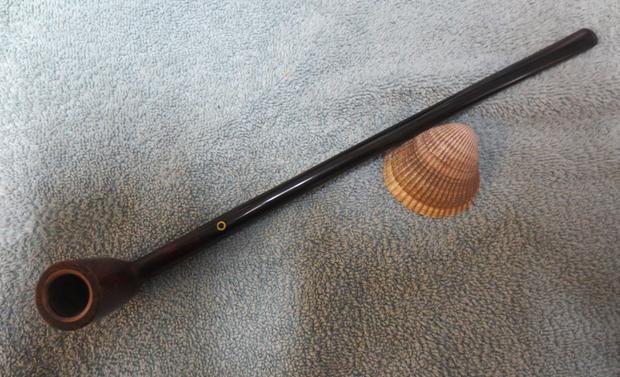
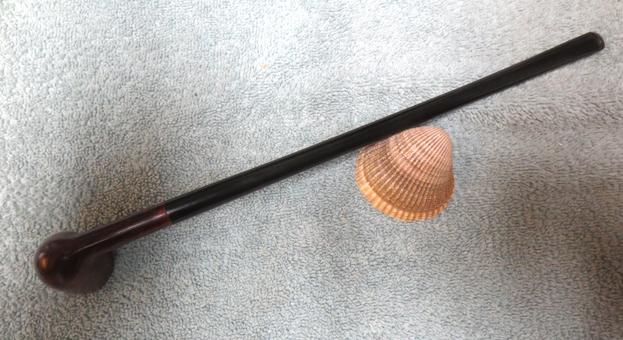
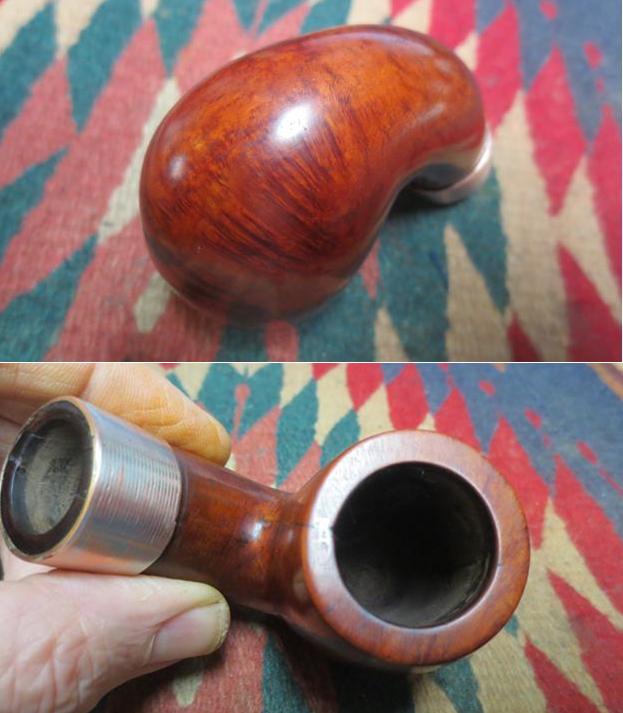
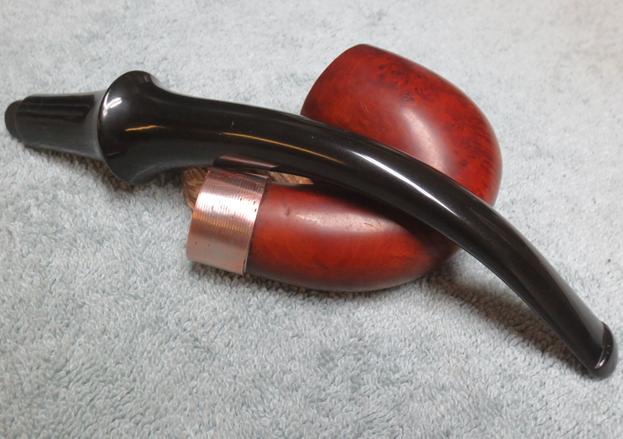
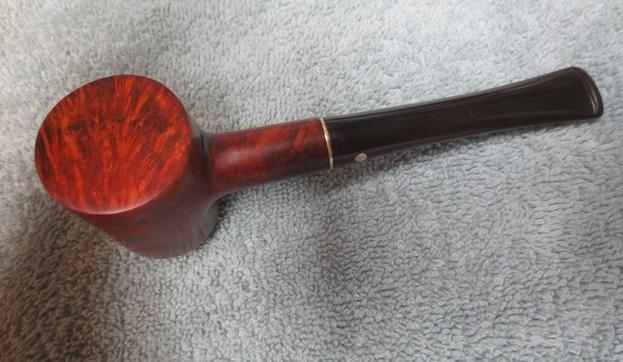
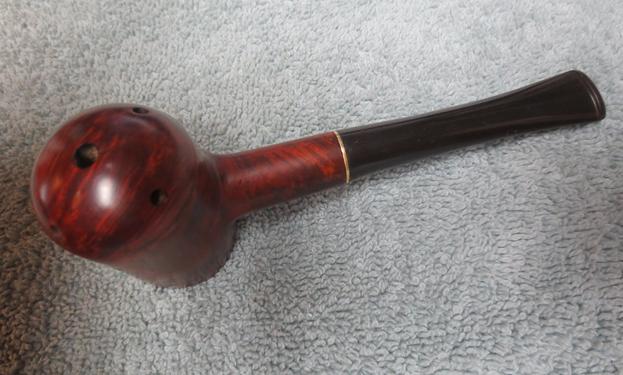
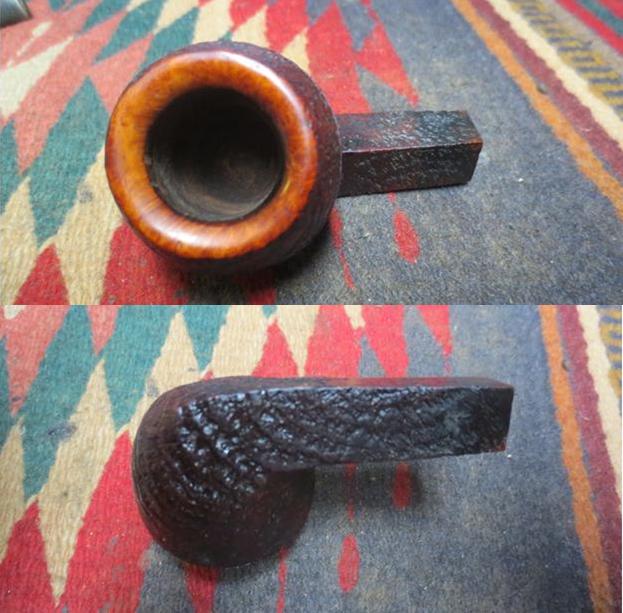
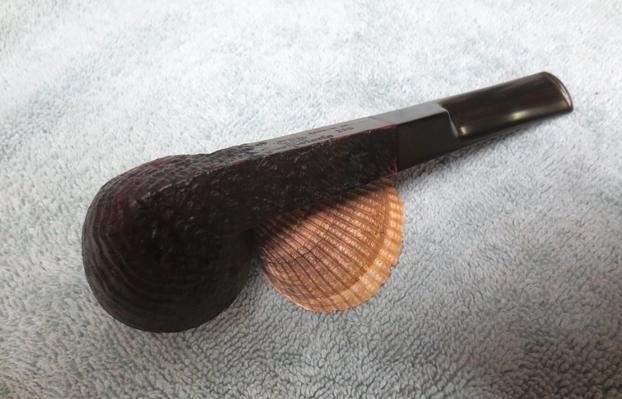
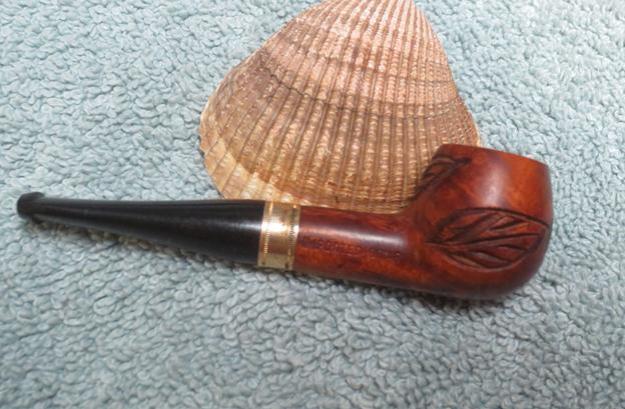
The briar of this L J Perretti is unbelievable – a beautiful display of fire grain and very clear and distinct bird’s eye. The stem isn’t a perfect rendition mainly because of the unmatched vulcanite creating the splice. Yet, the ‘step’ technique Jacek provided (via Steve!) is working very well. The squared shank transitioning into the tapered fishtail-like stem I think is very nice. It works. I’m thankful to my son for gifting me with this L J Perretti! I would have enjoyed my inaugural smoke to have been a bowl of a special hand blended mixture from the L. J. Perretti Co. Tobacconists in Boston! Yet, after taking the presentation pictures following, I settled for a bowl of my favorite Cavendish blend – Lane BCA. Report? The L J Perretti smoked very well, indeed. Thanks for joining me!