Tag Archives: Oxidation

Churchill’s Bent Pot


Blog by Steve Laug

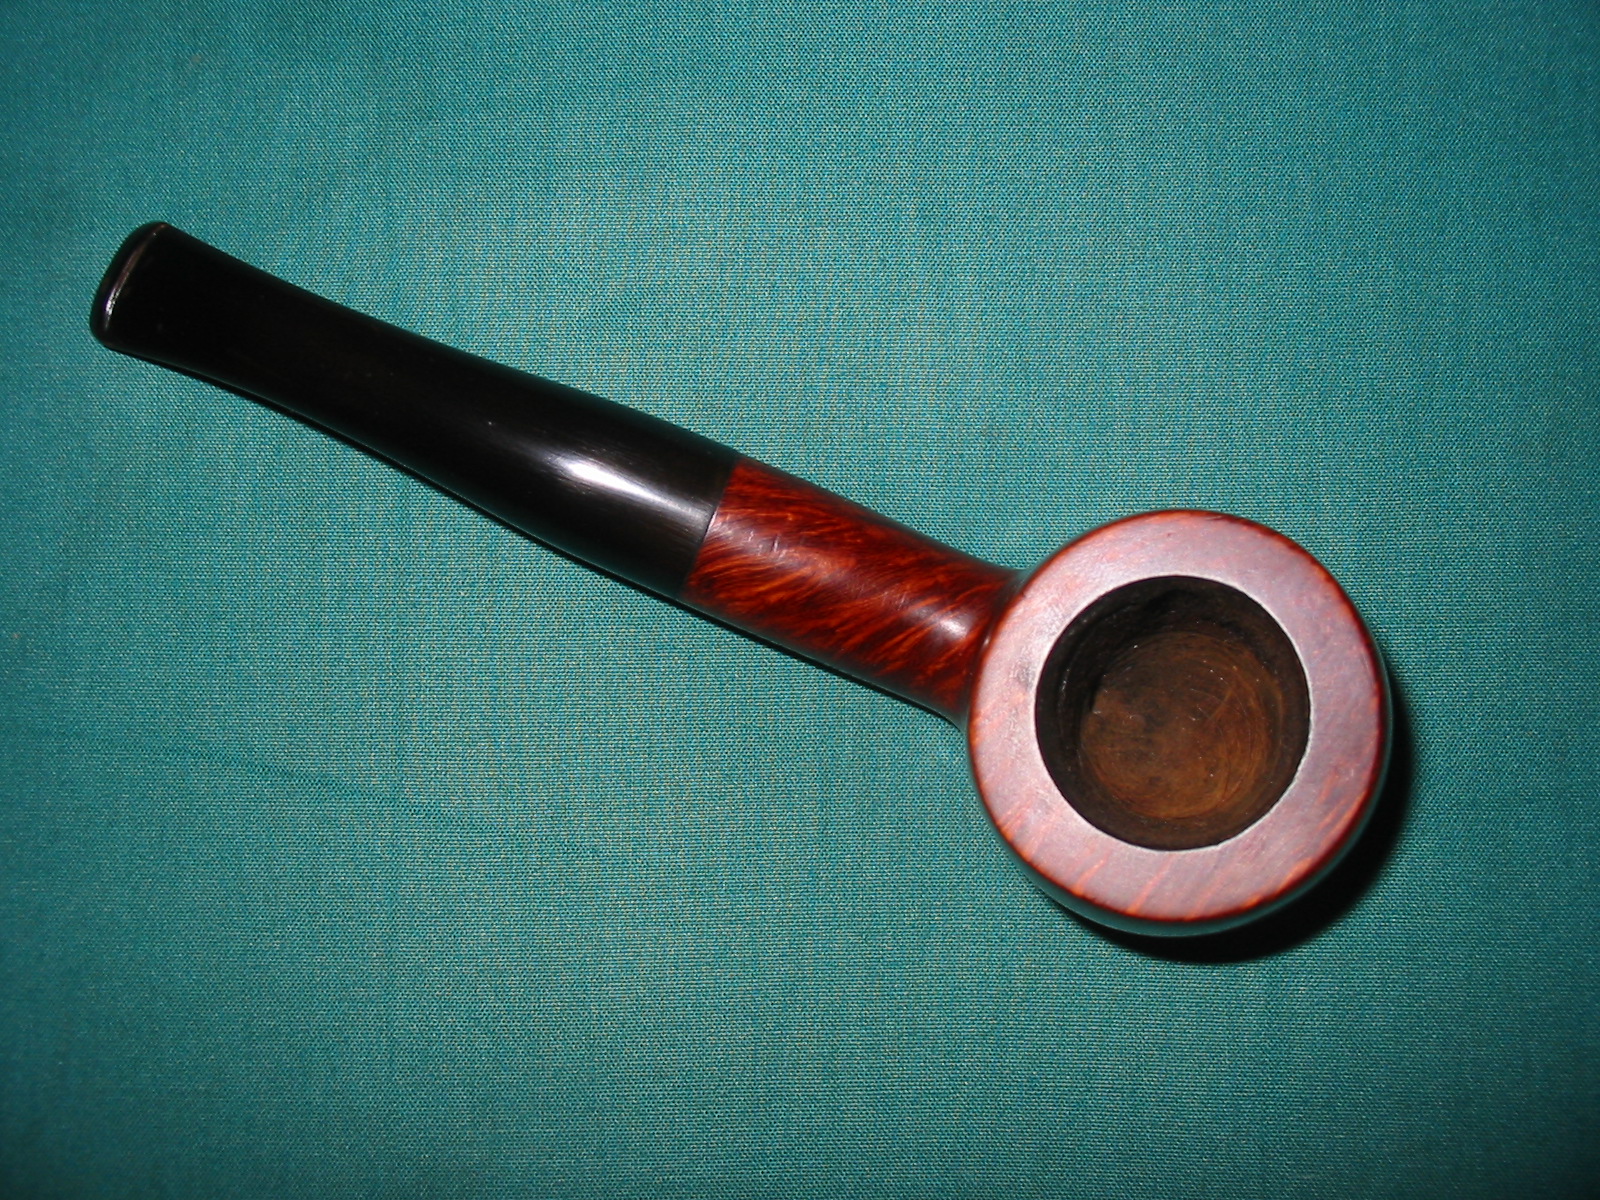
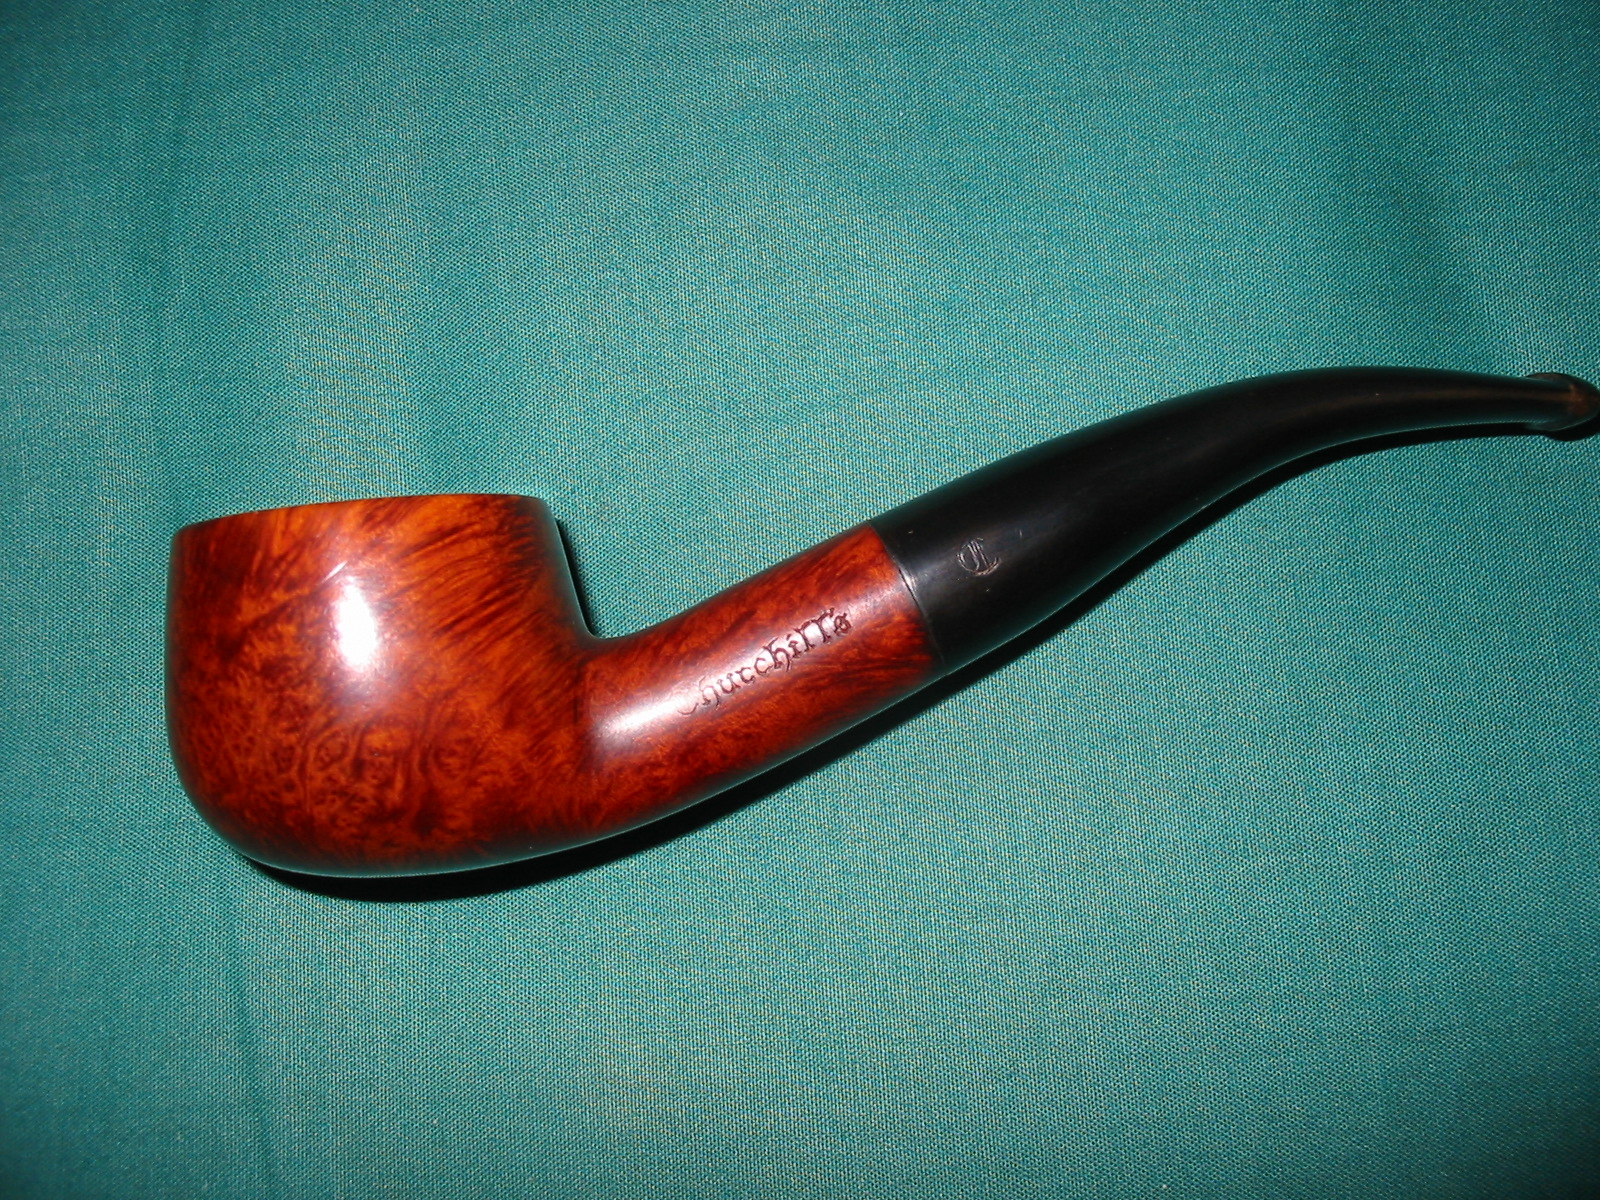
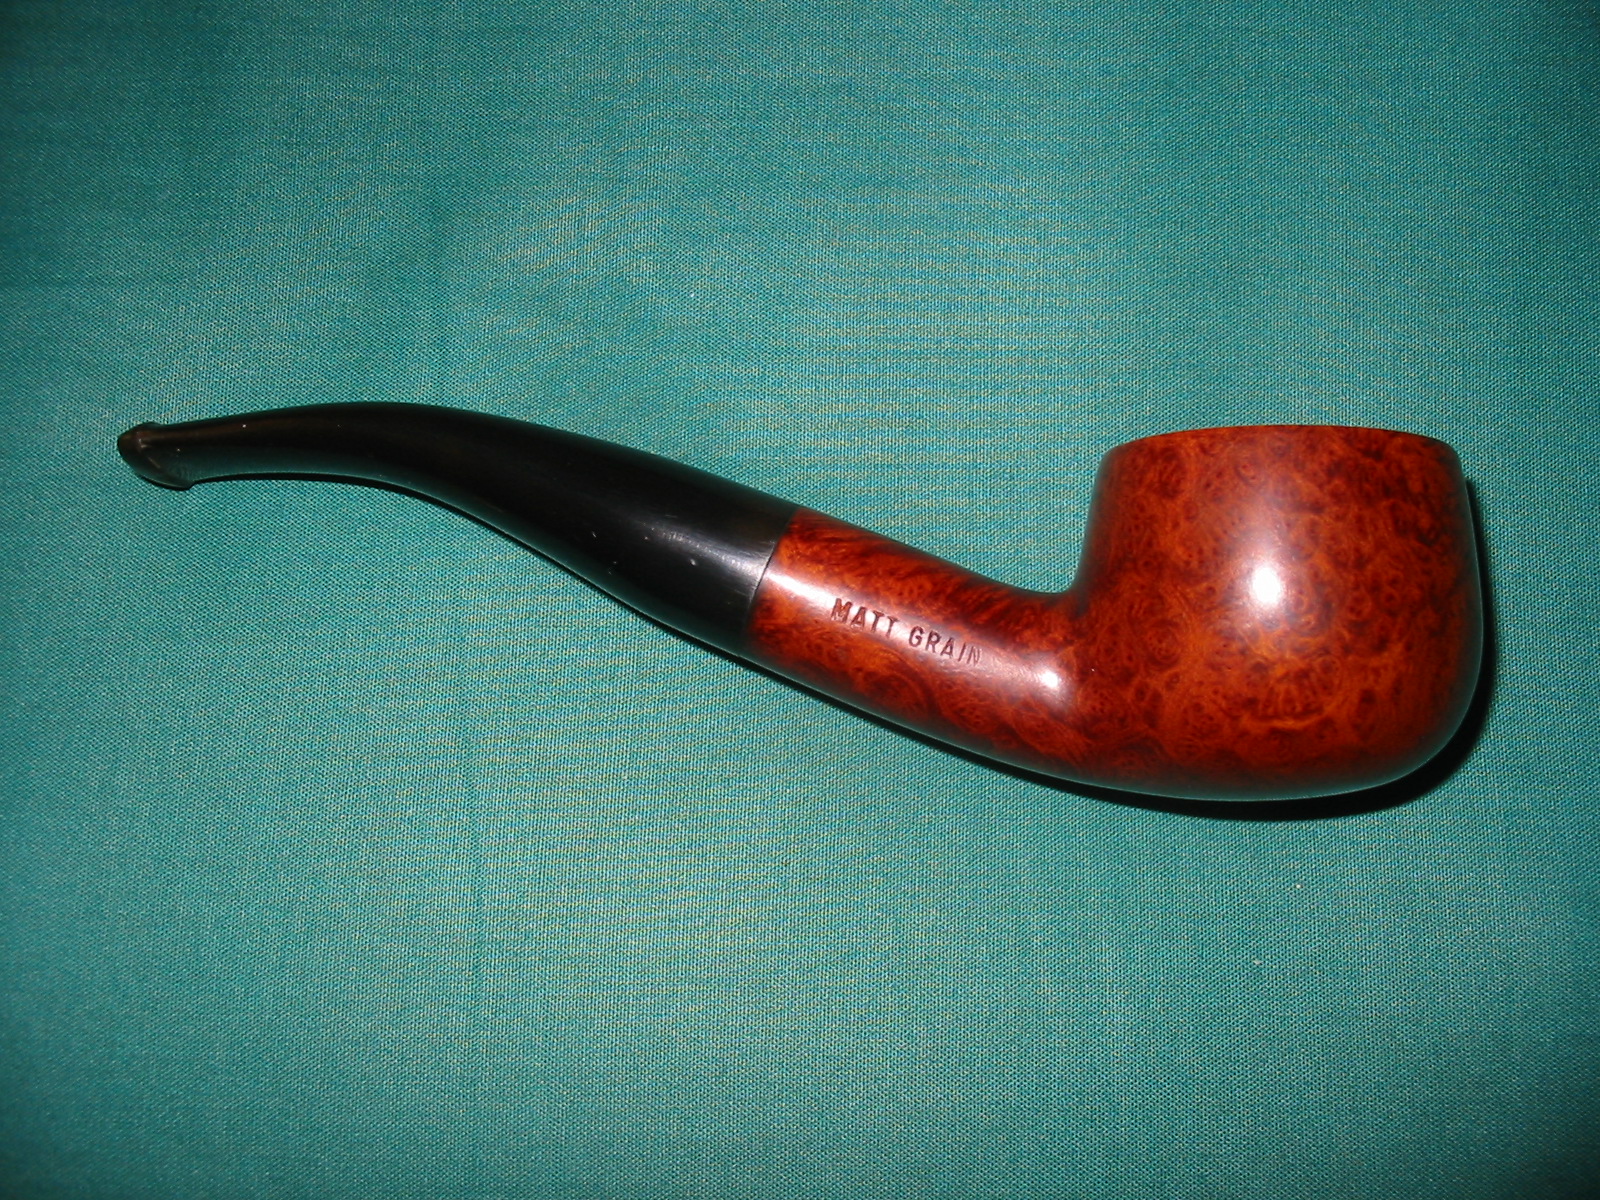
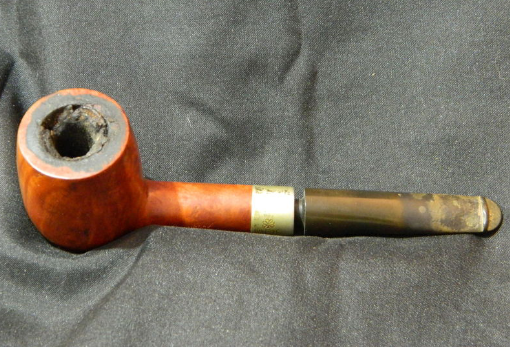
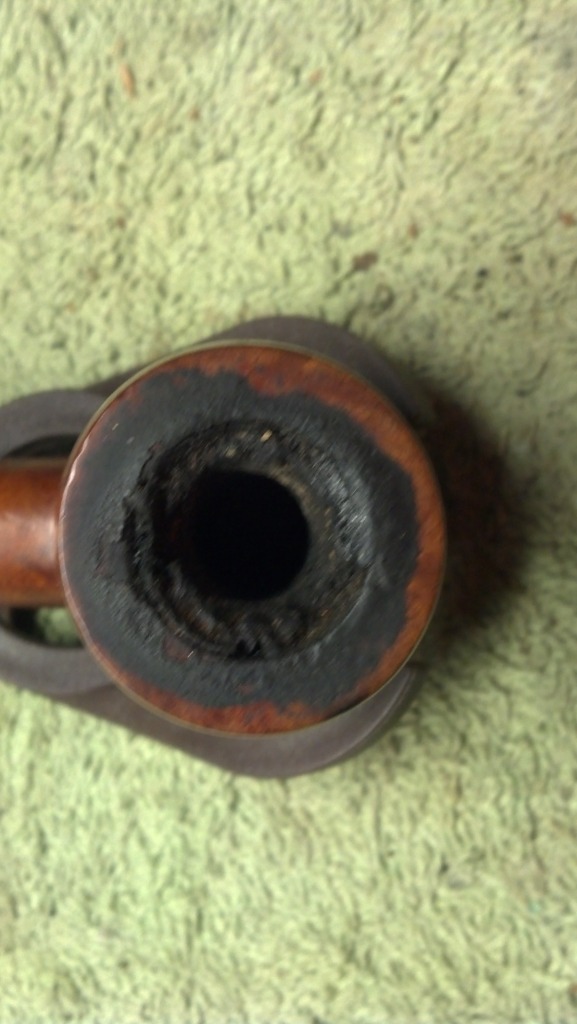
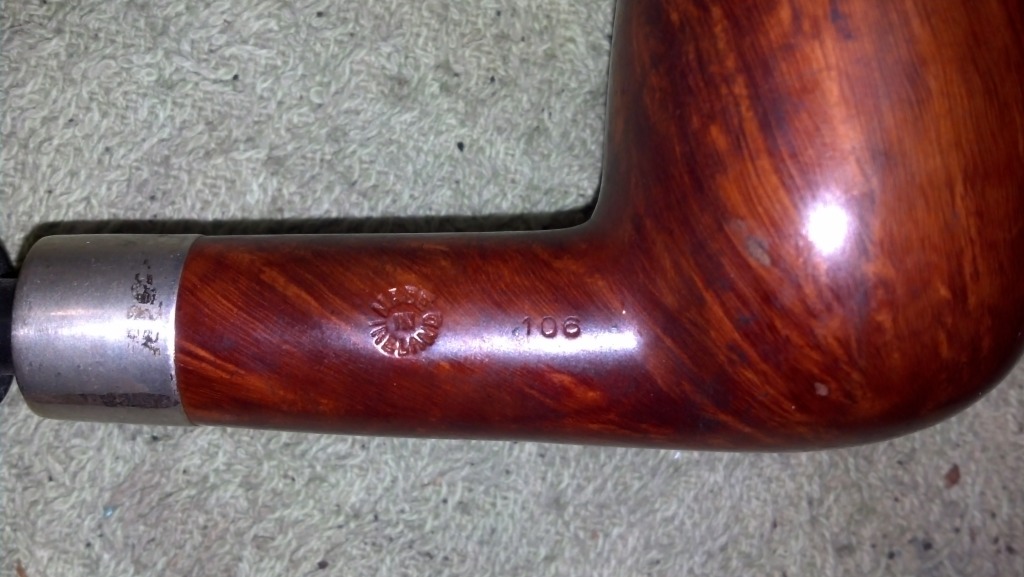
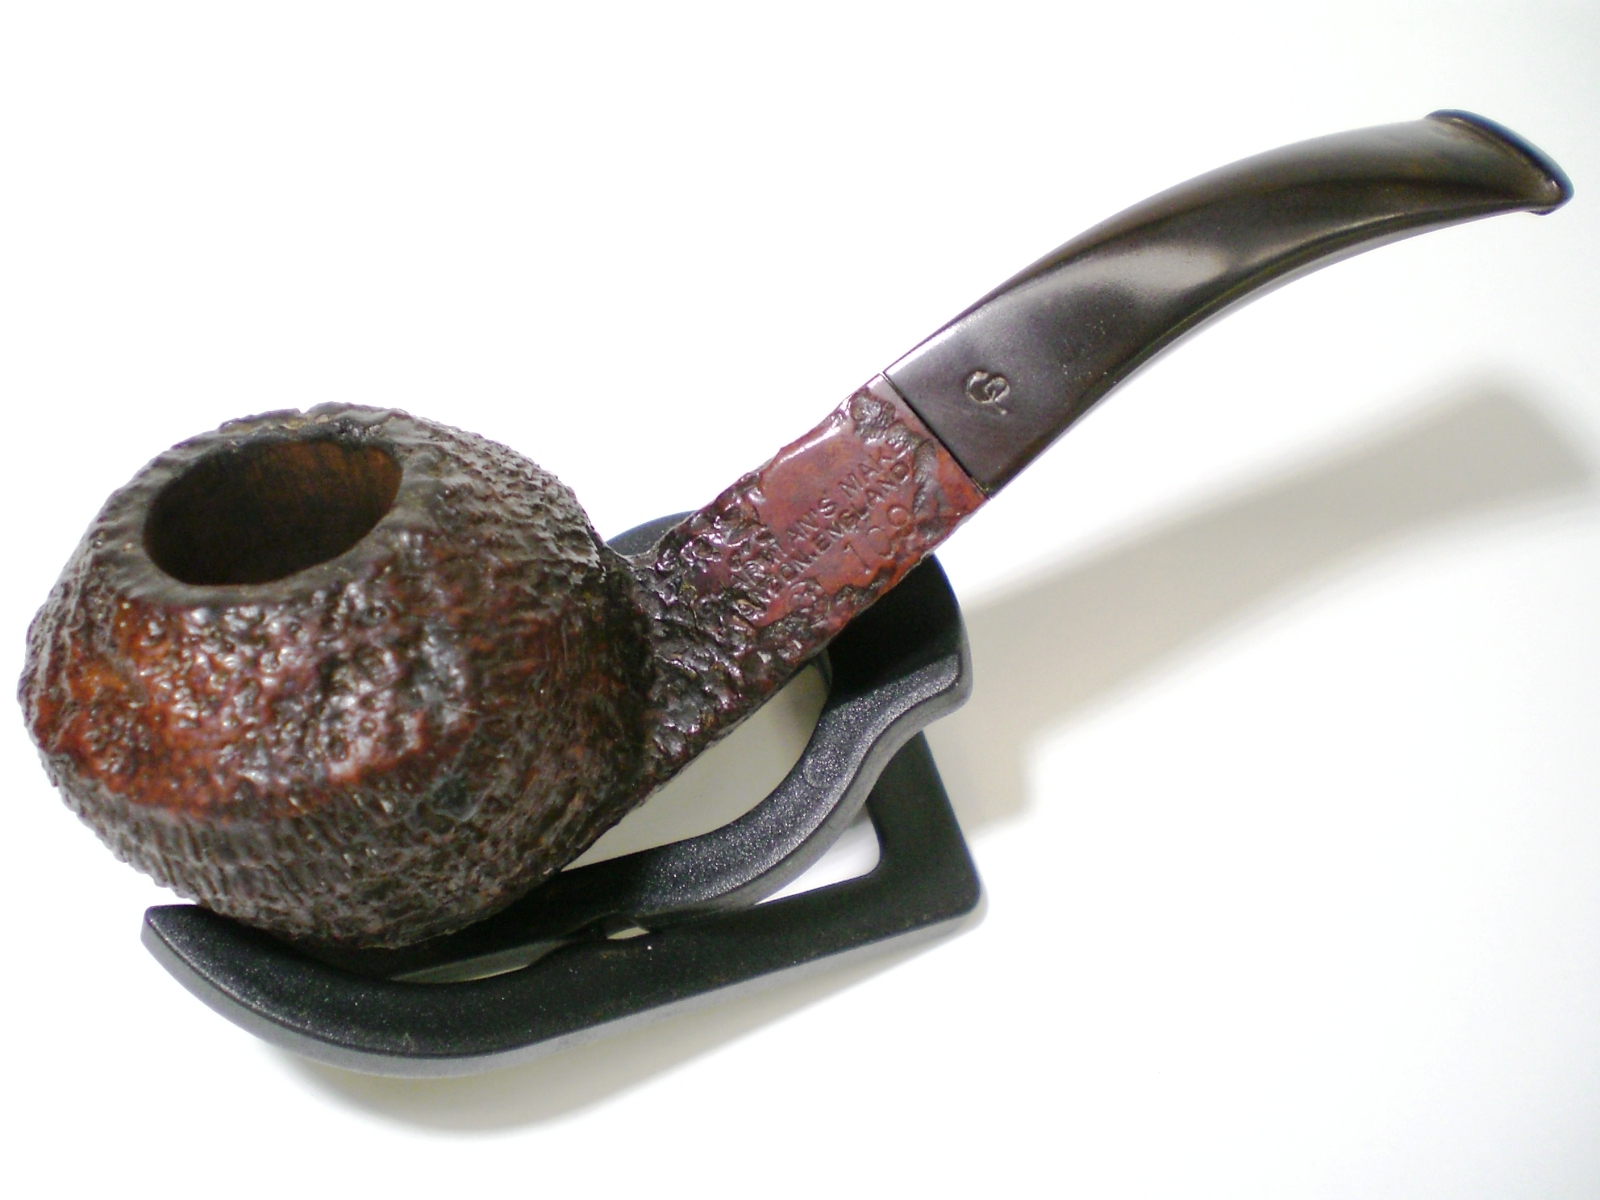
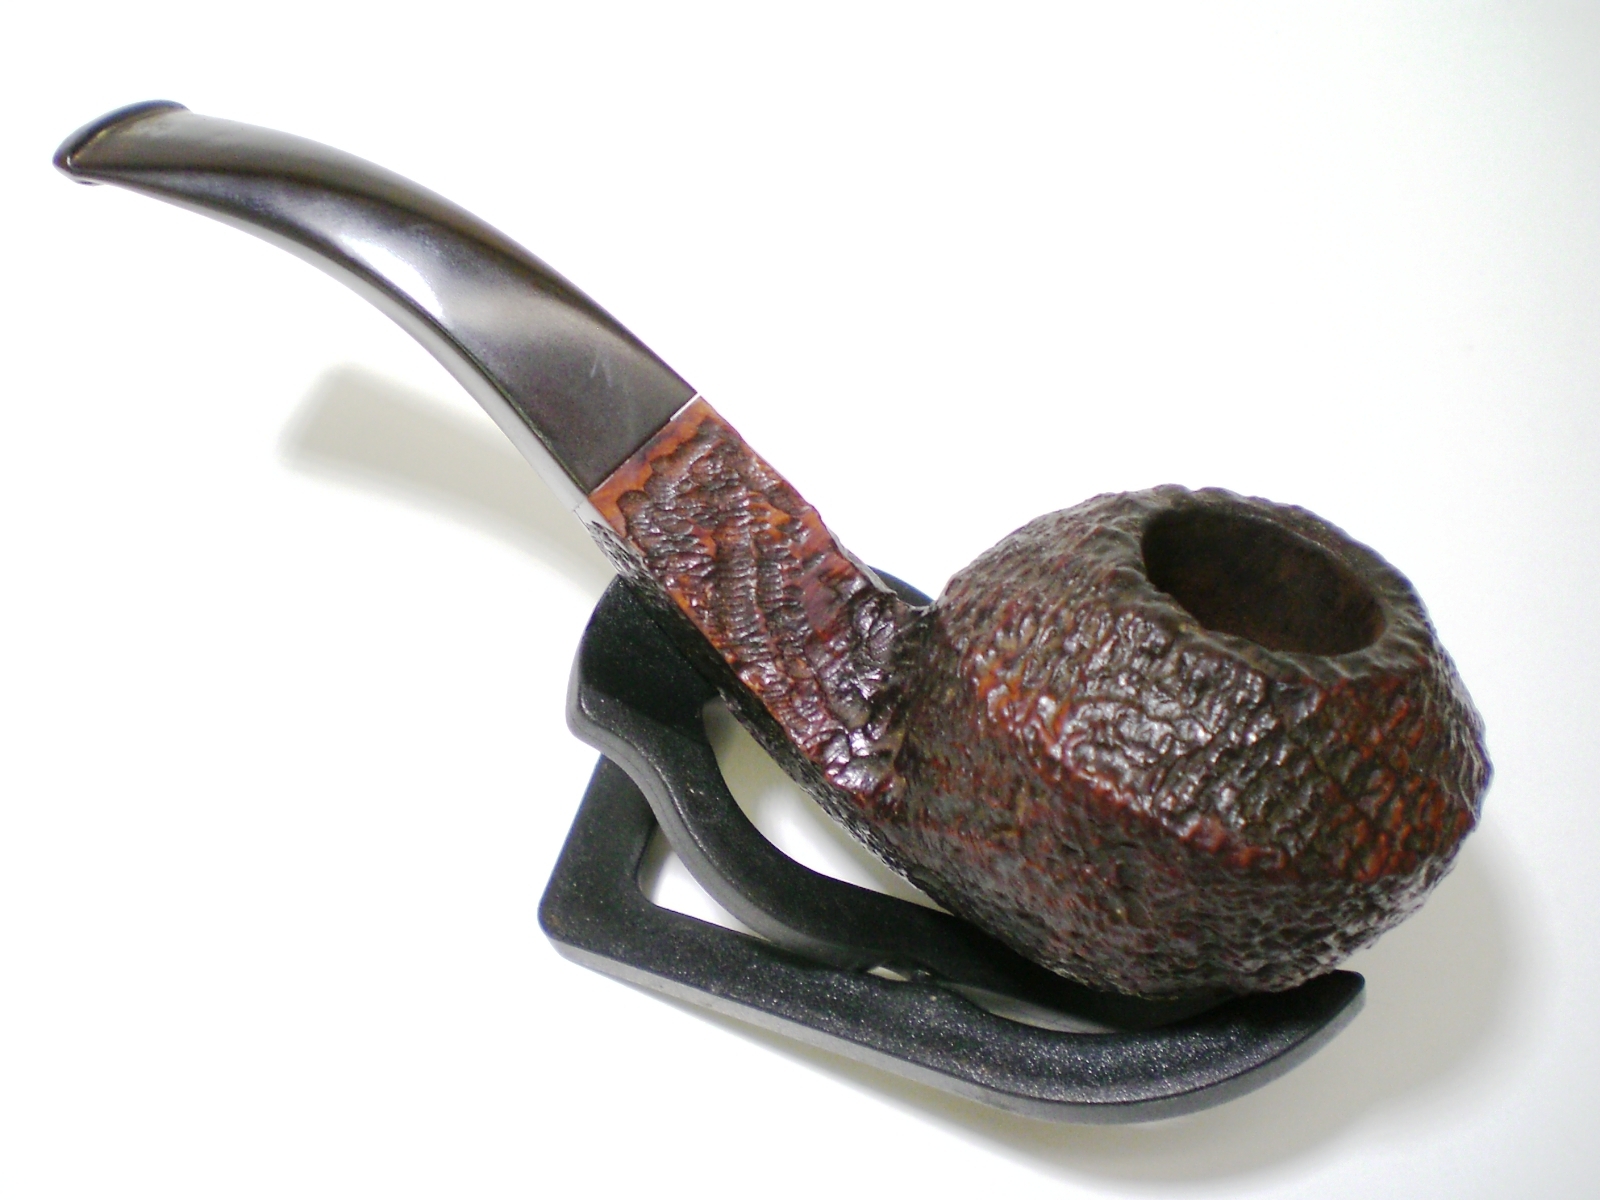
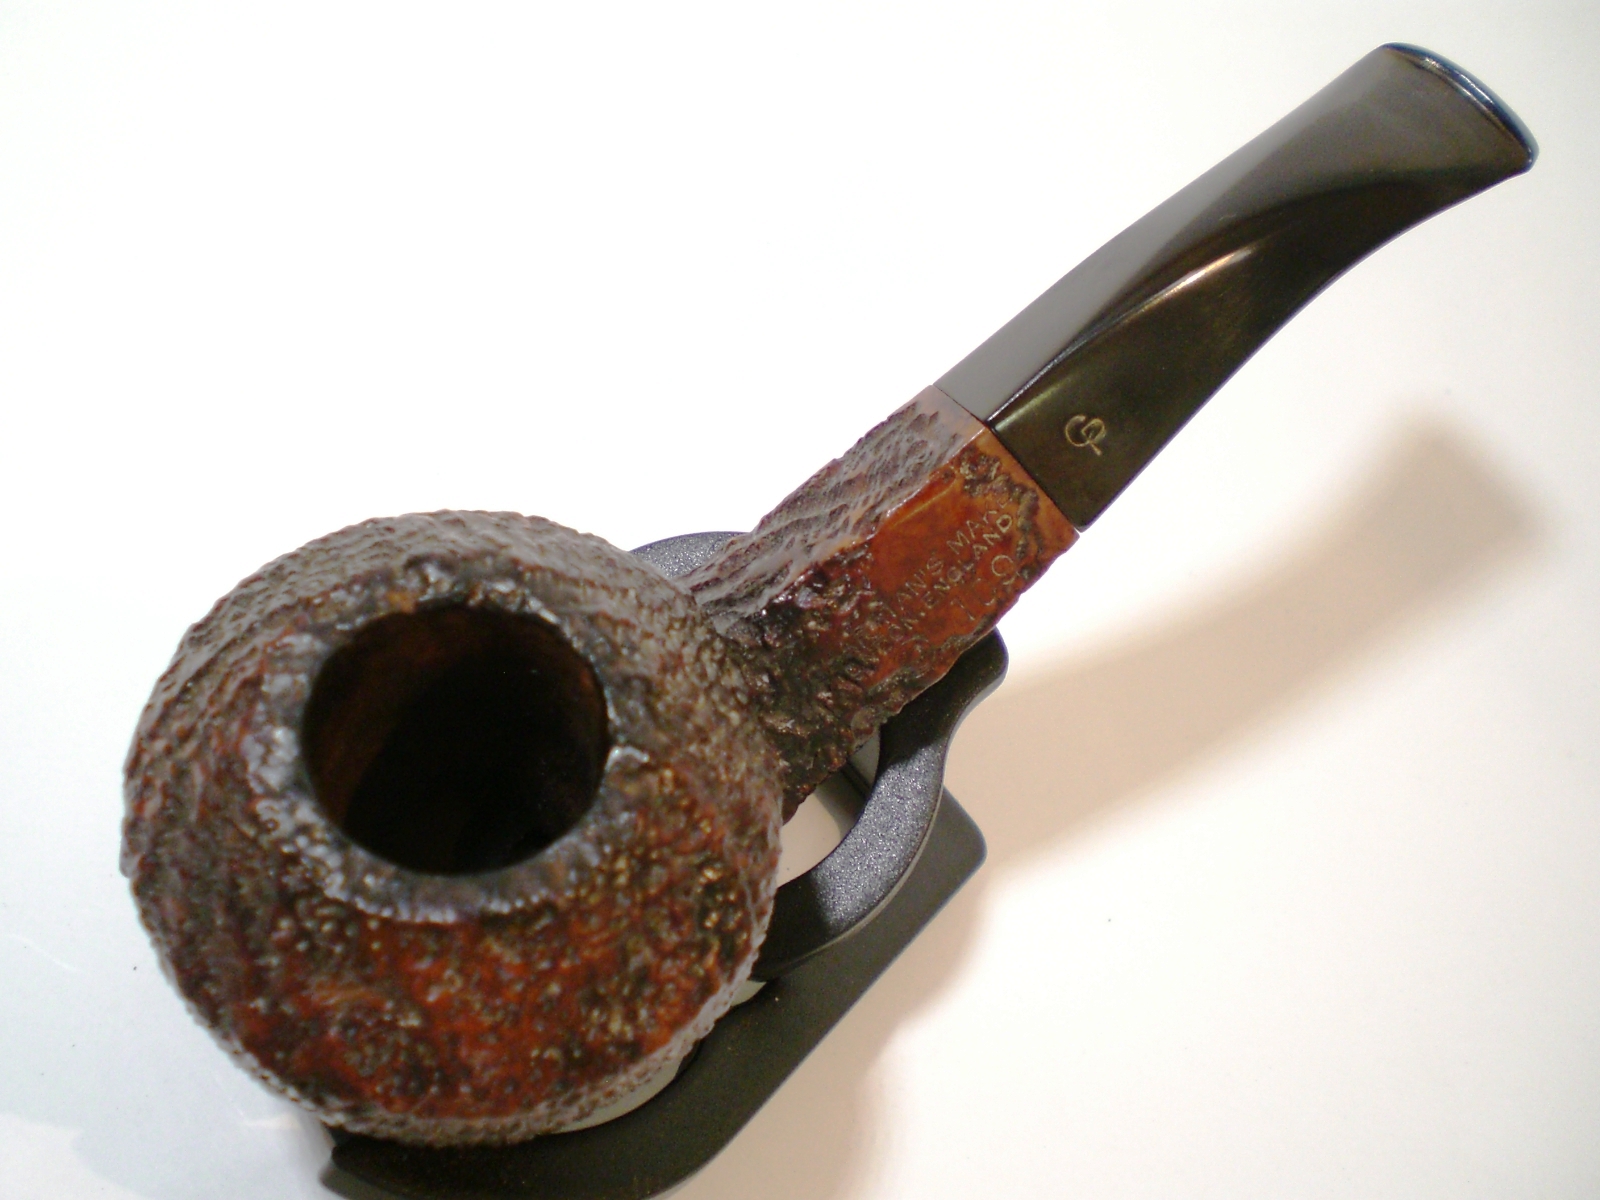
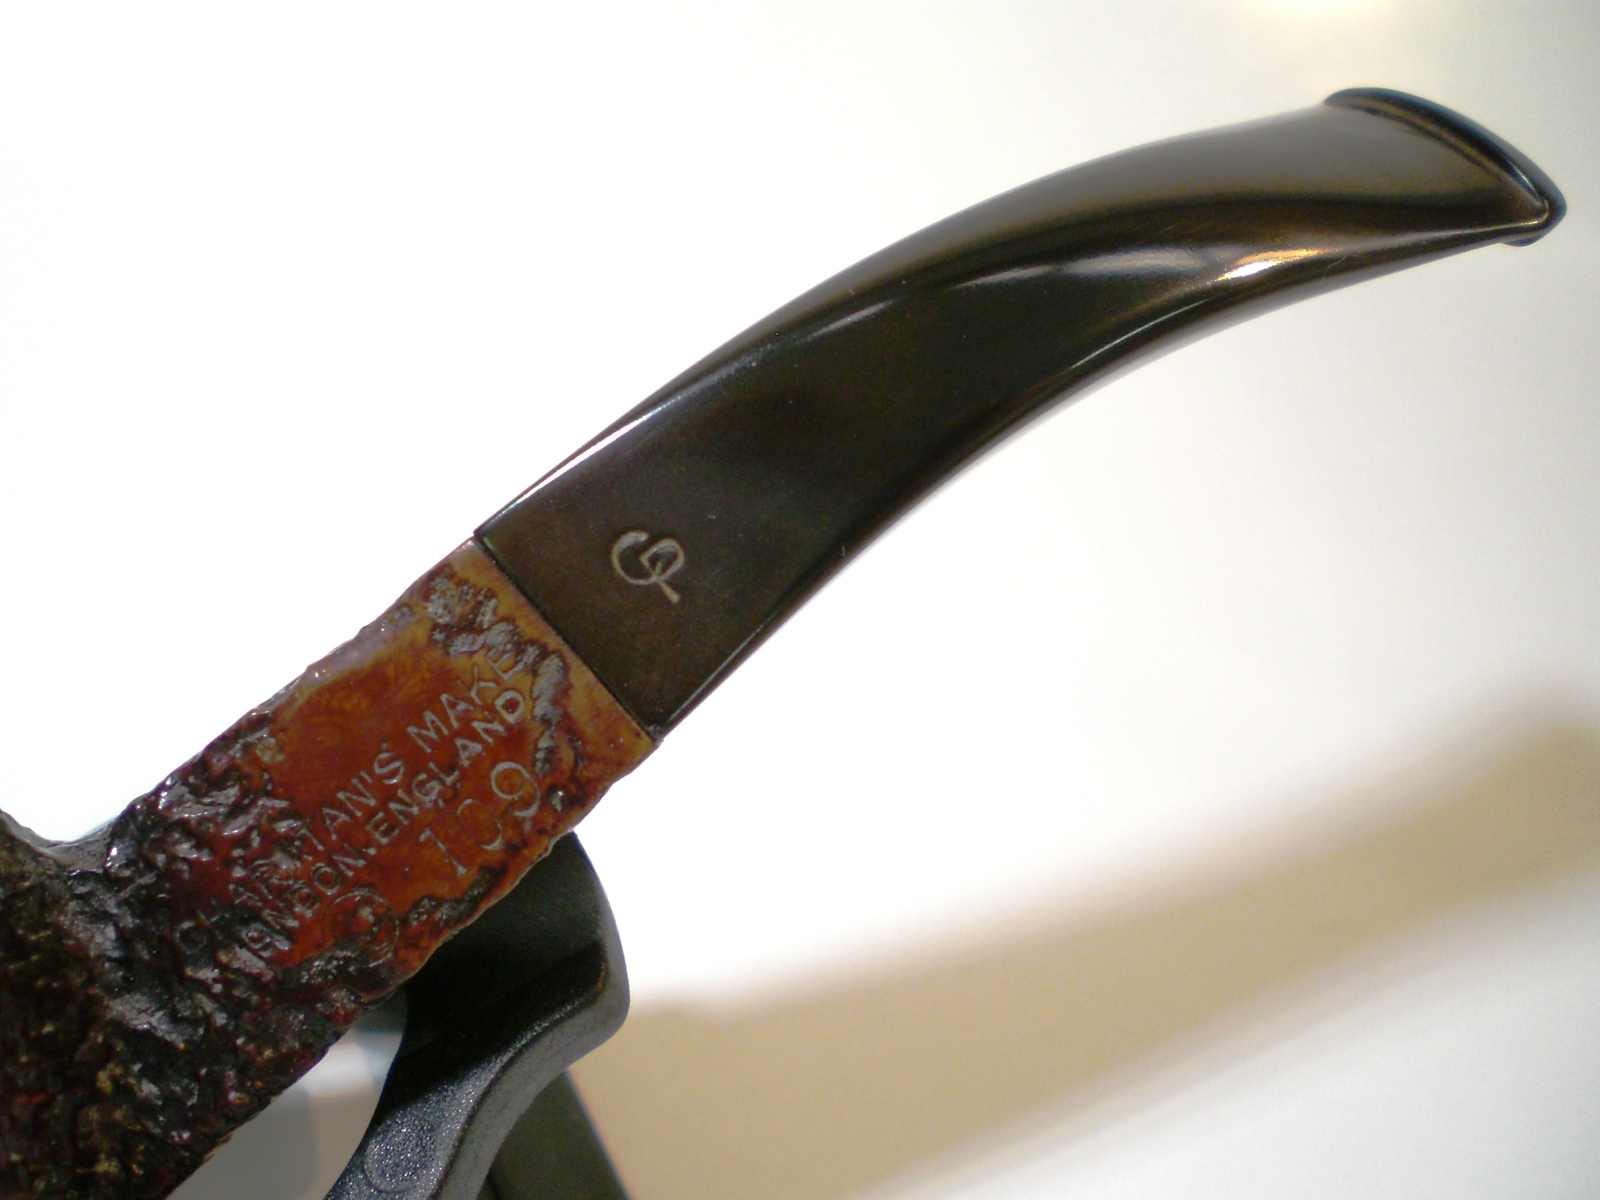
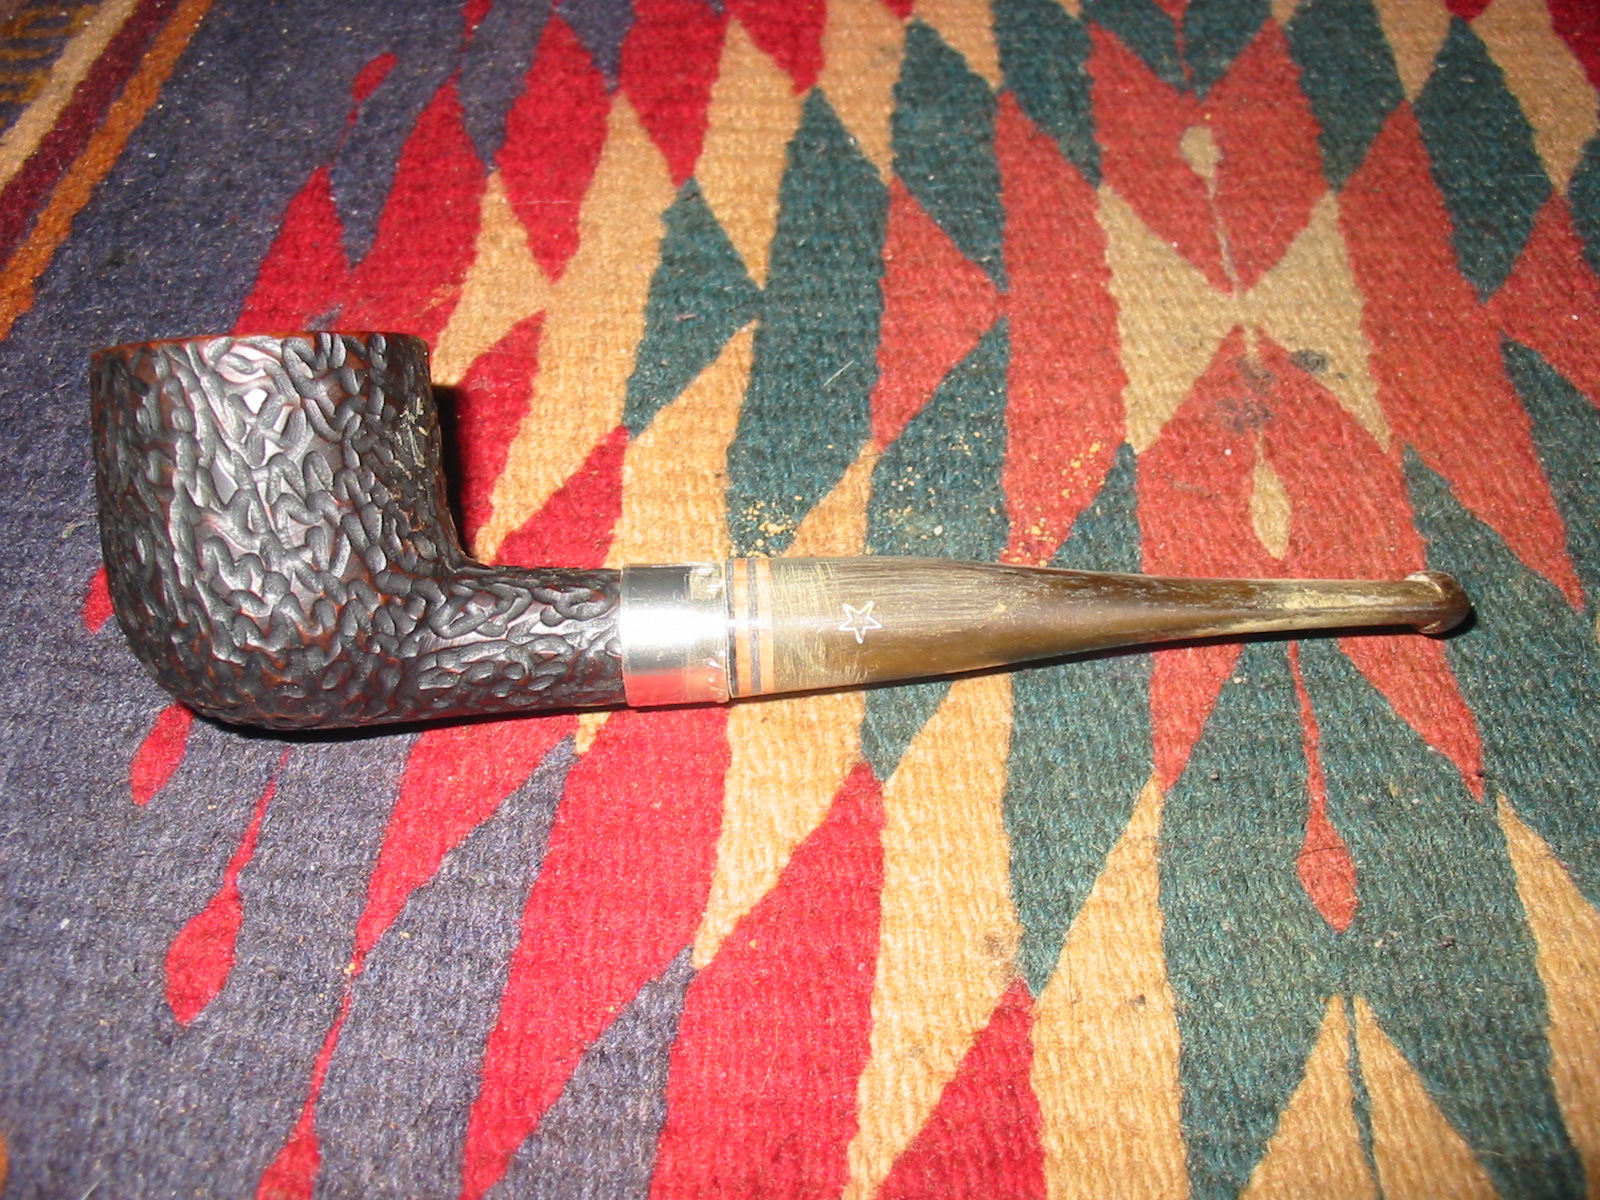
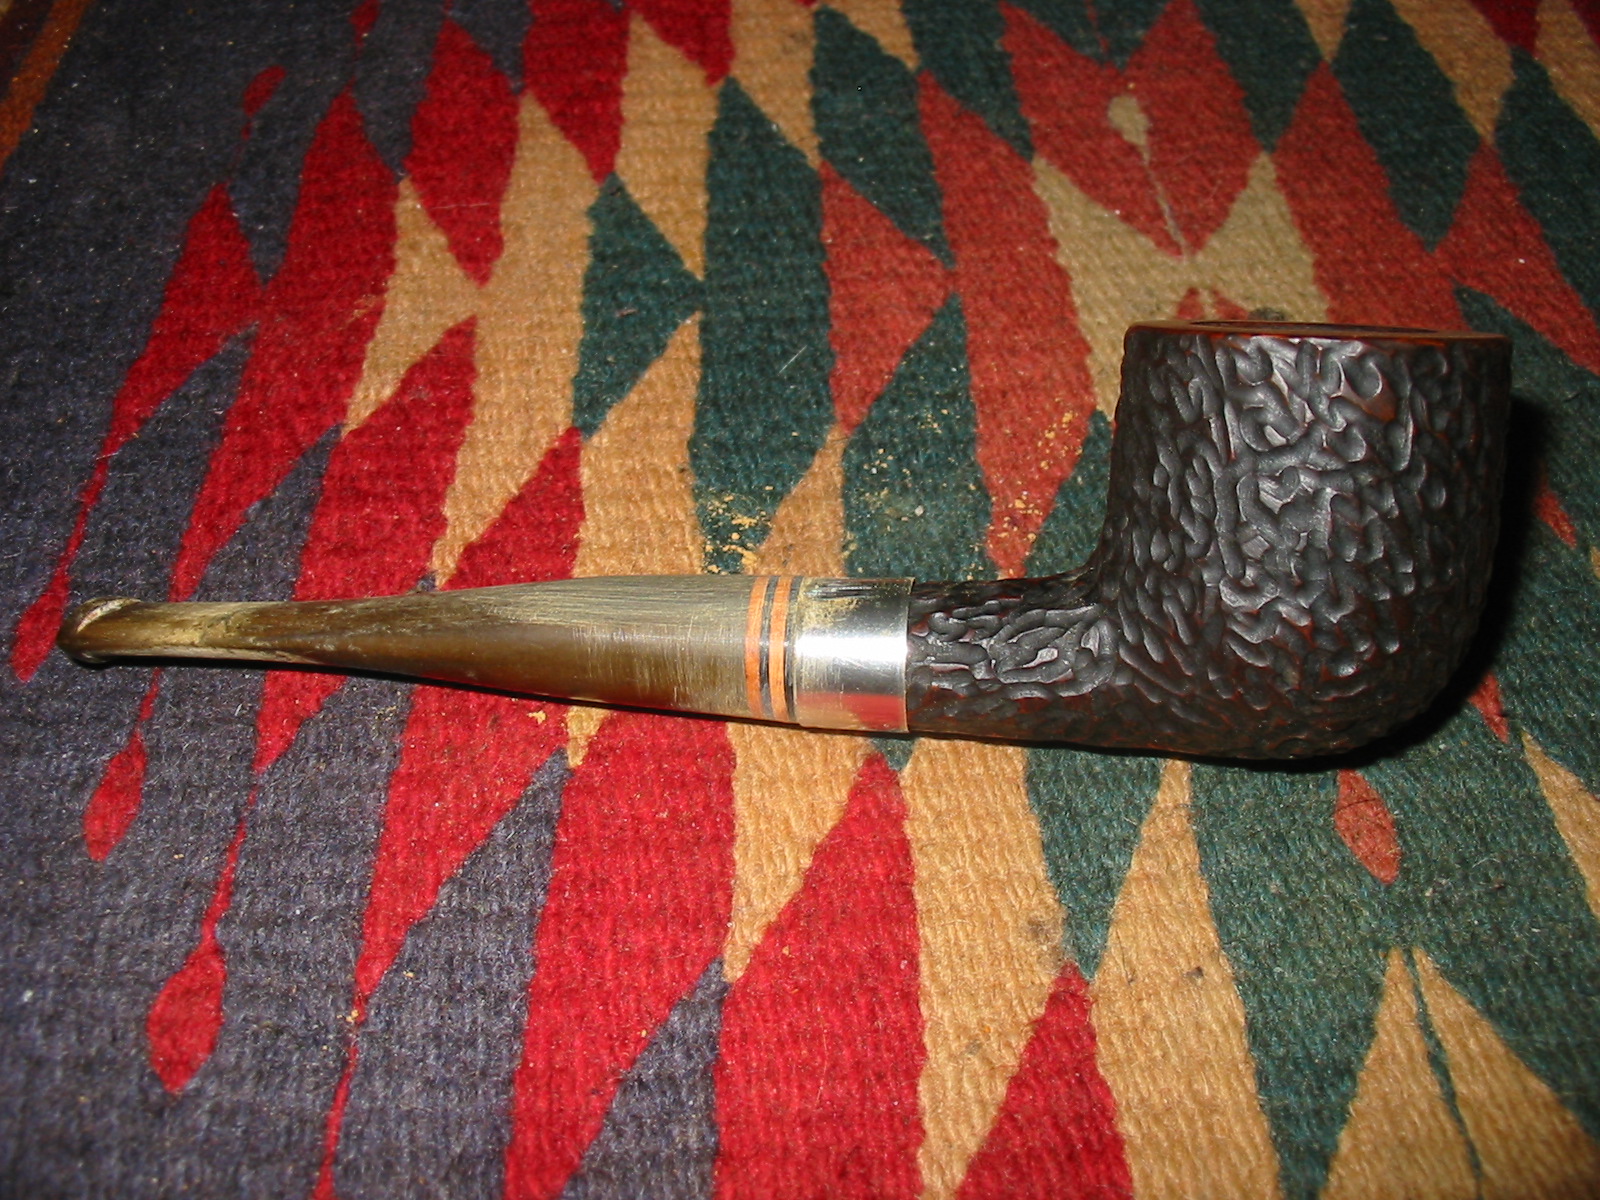
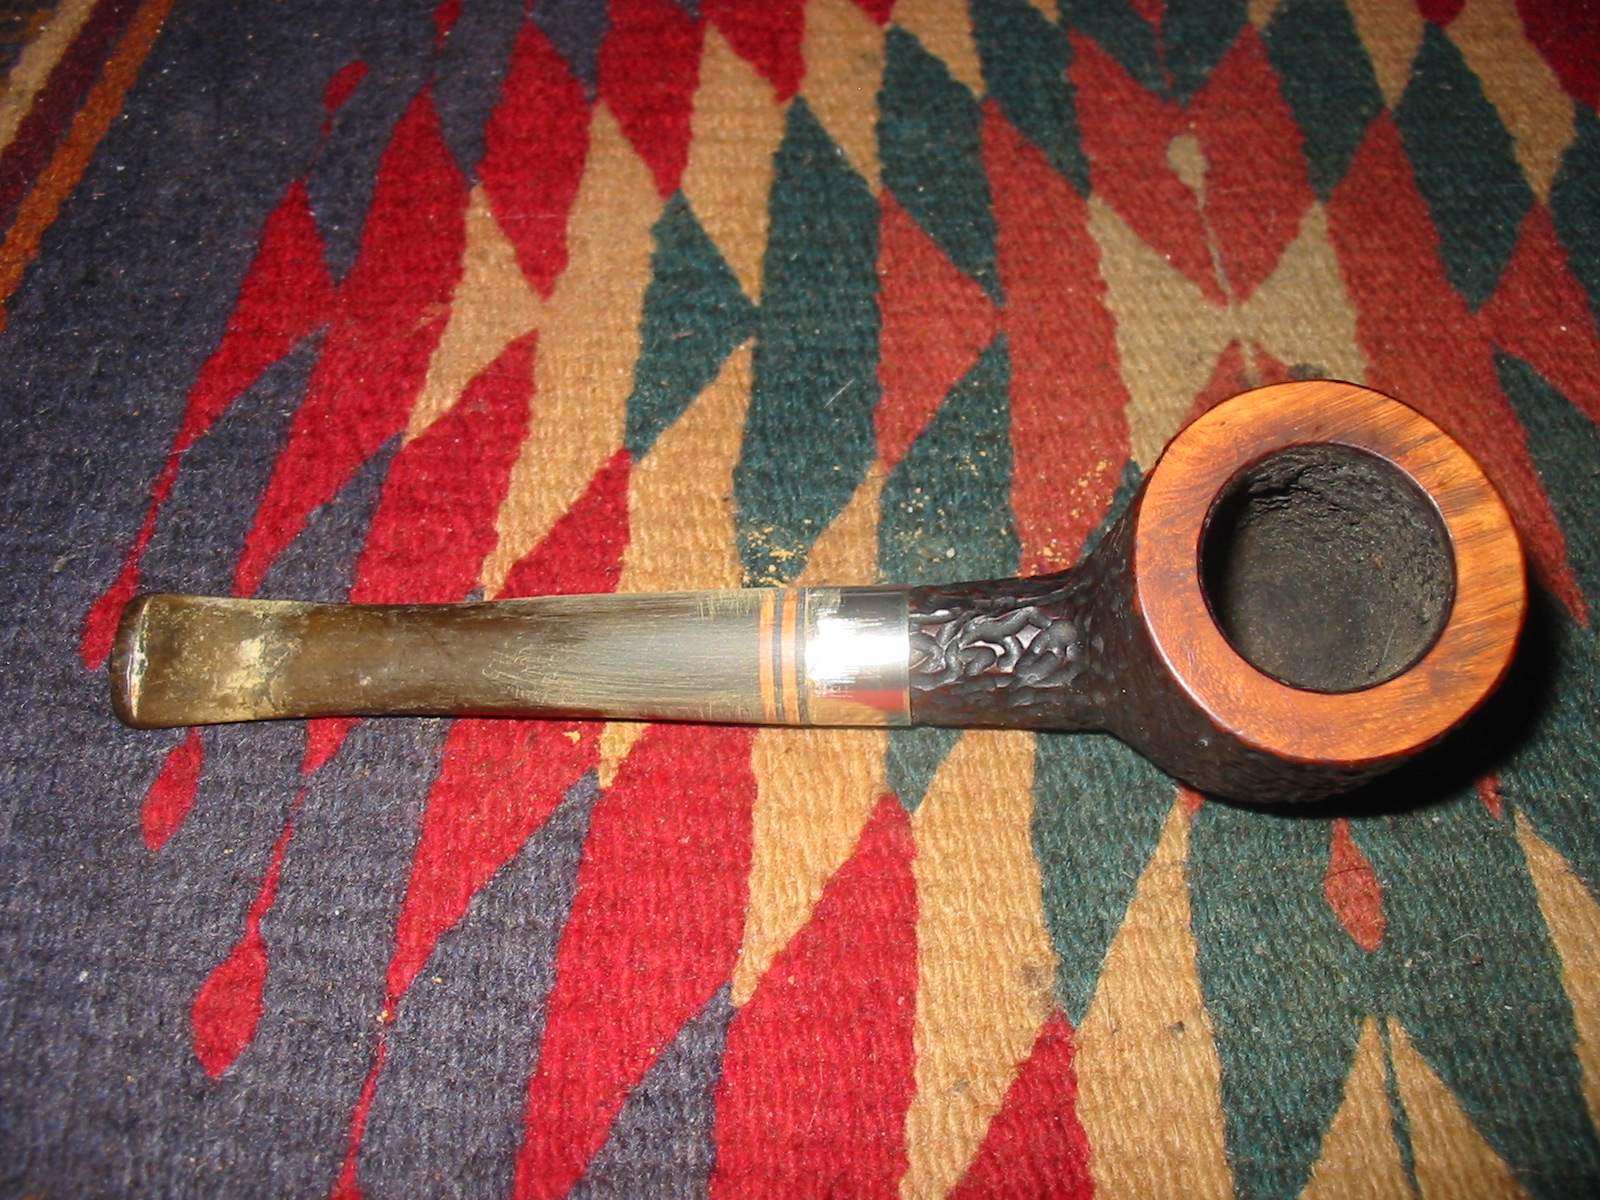
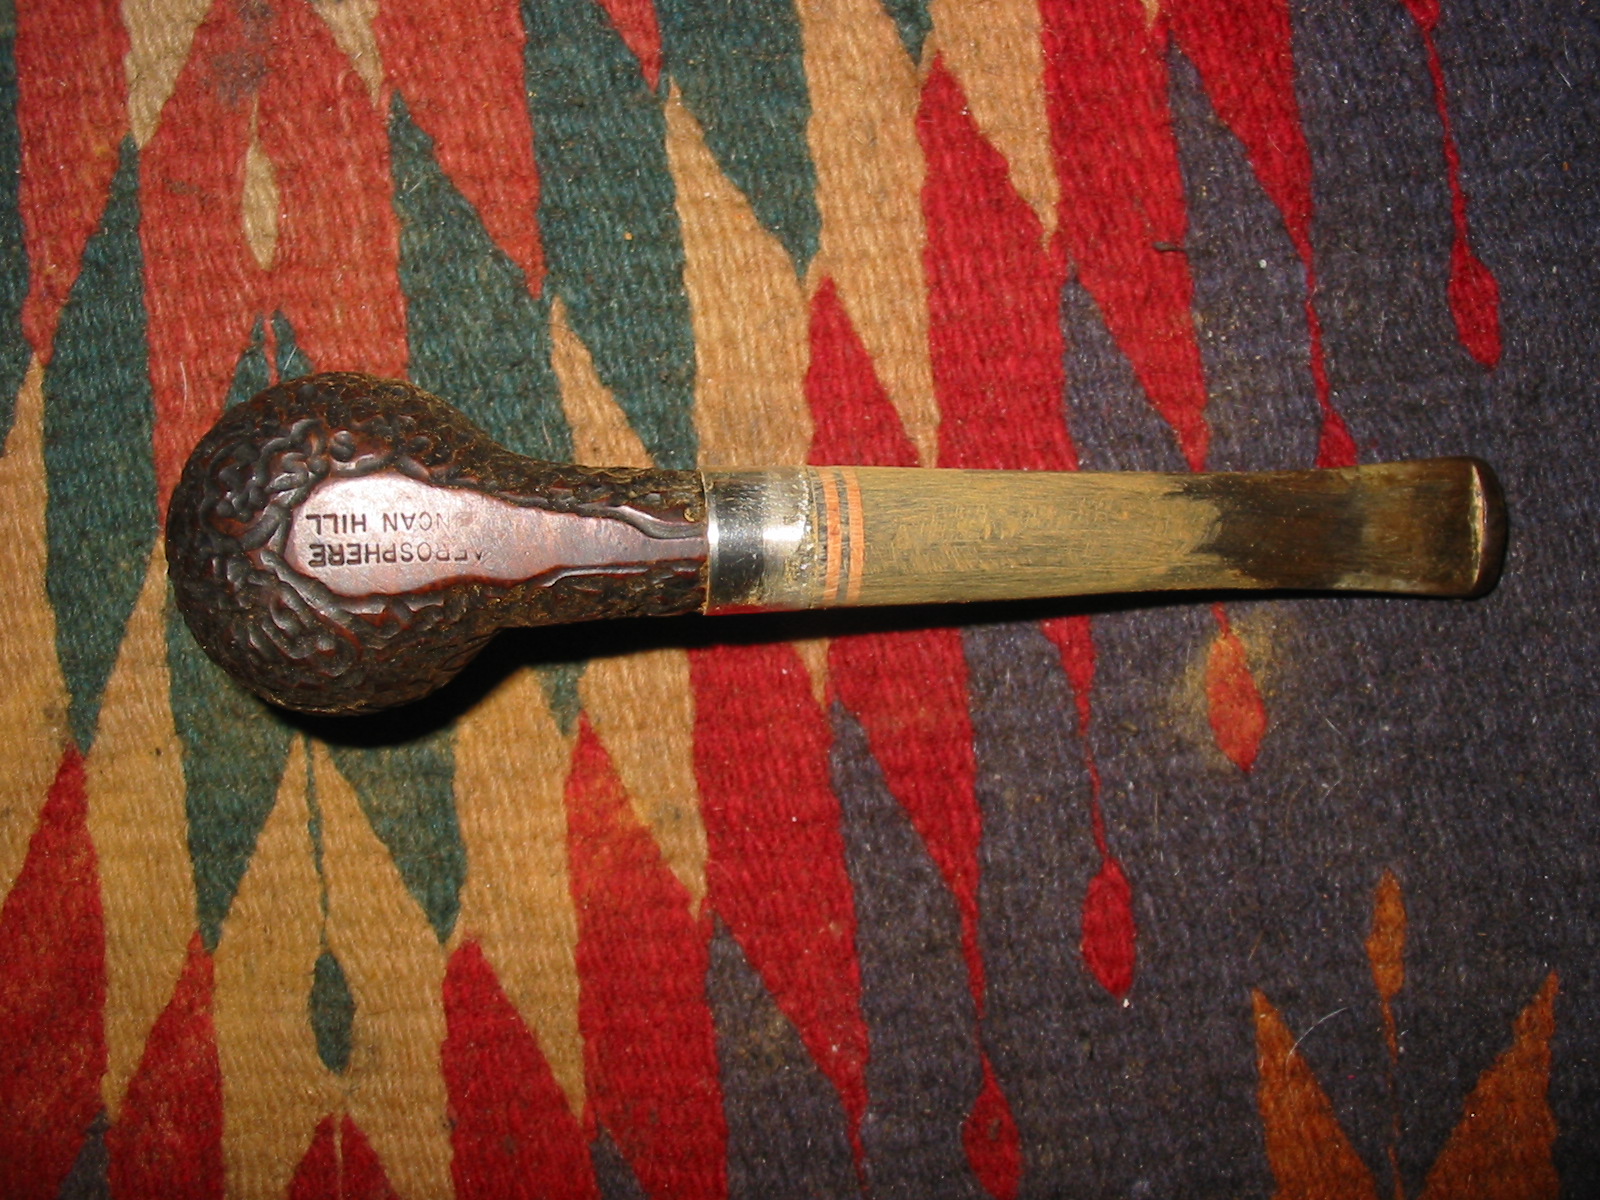
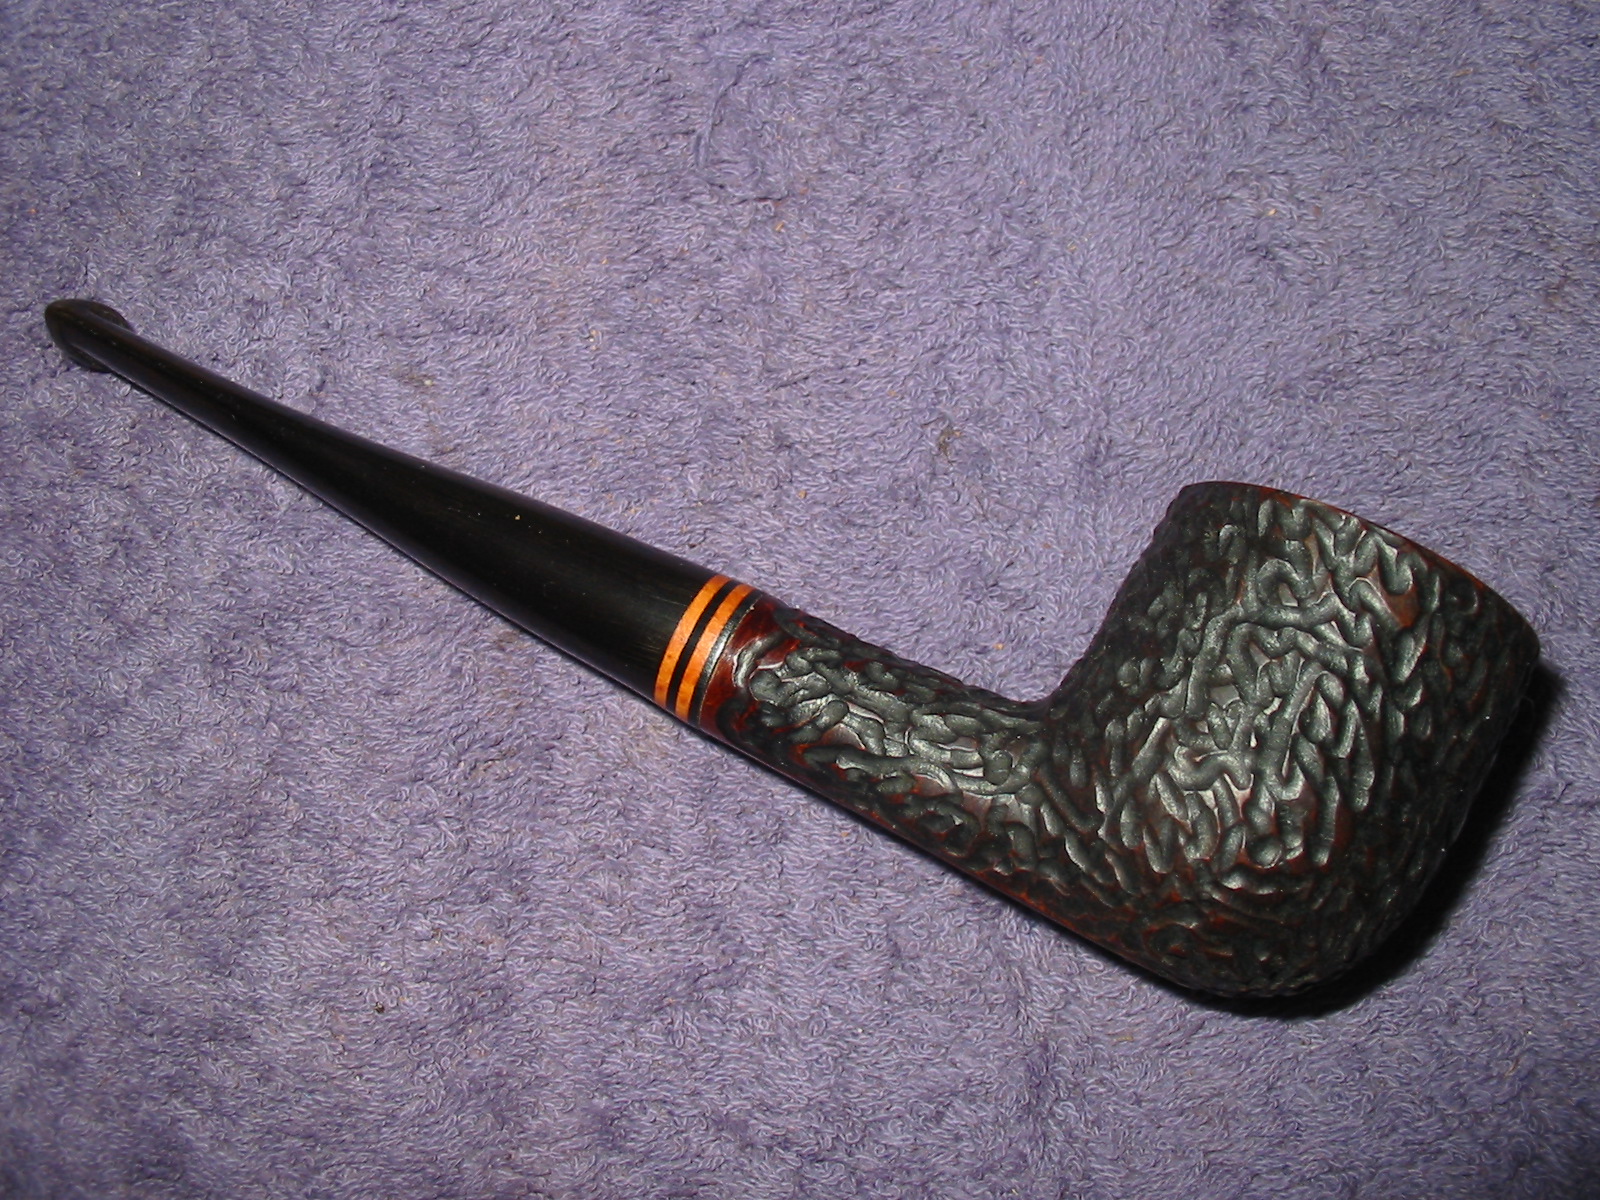
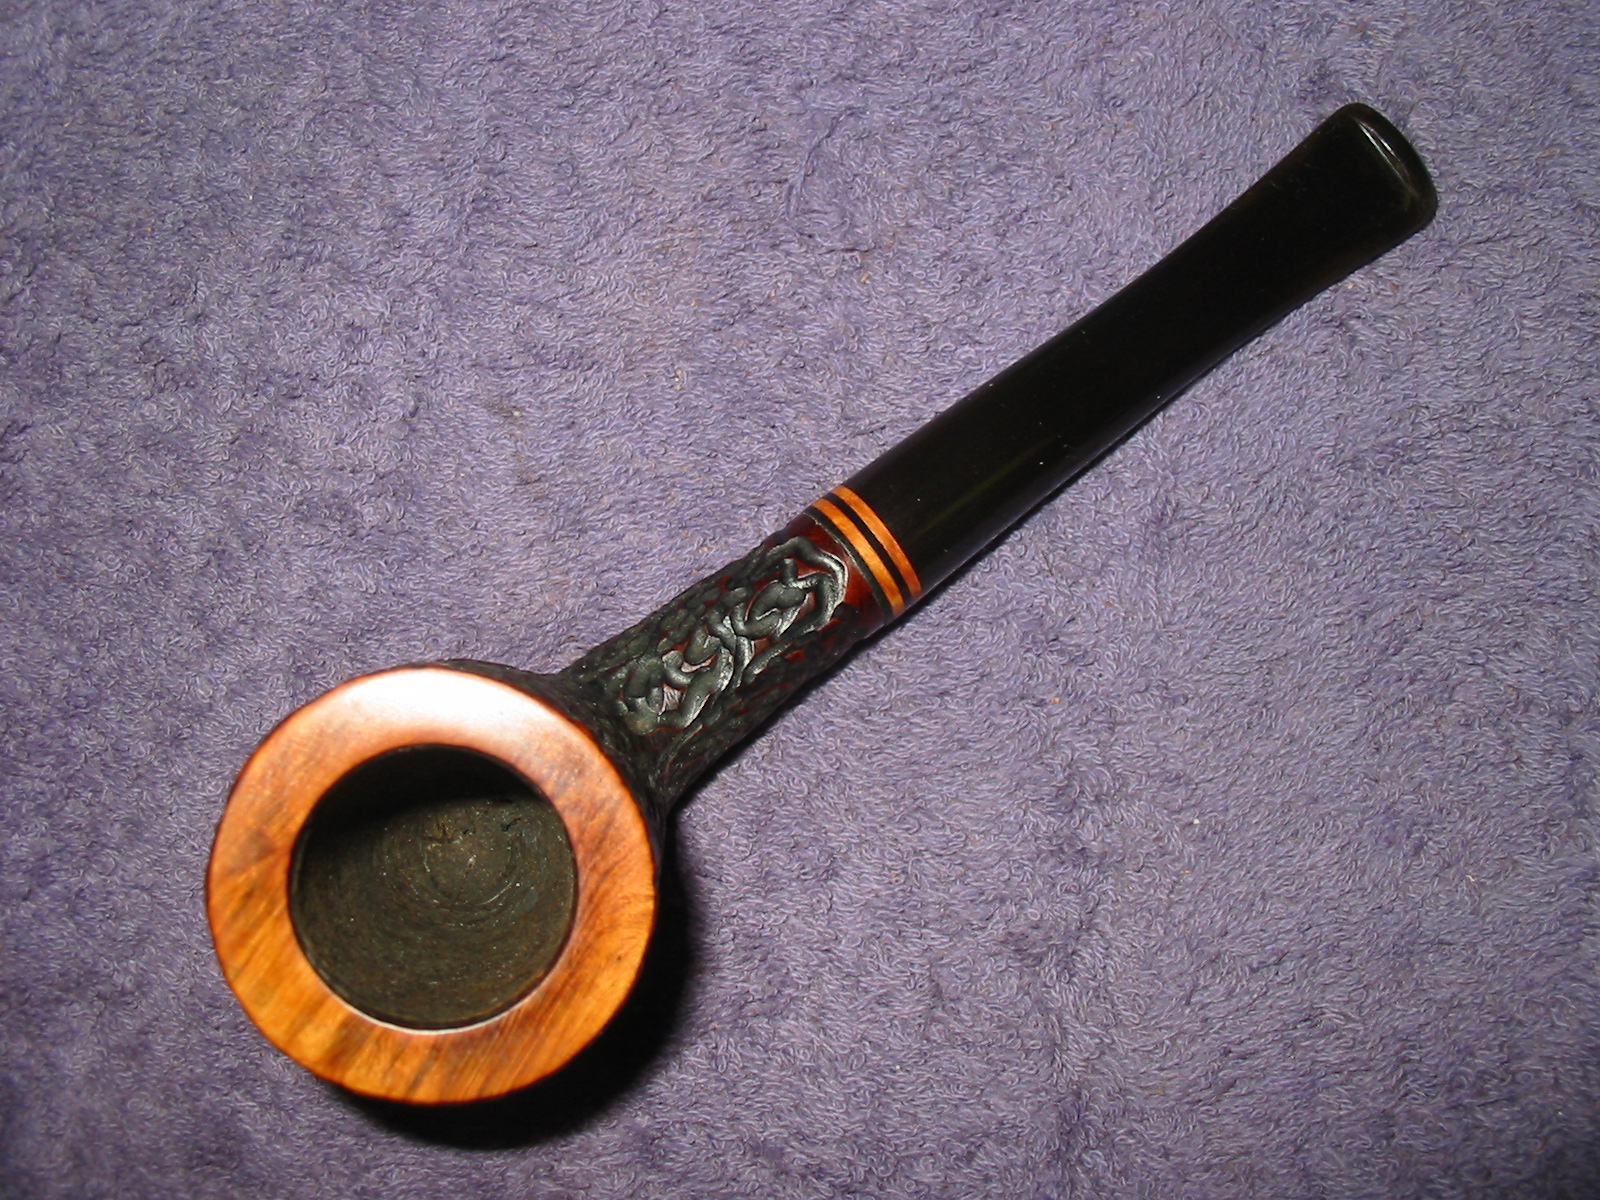
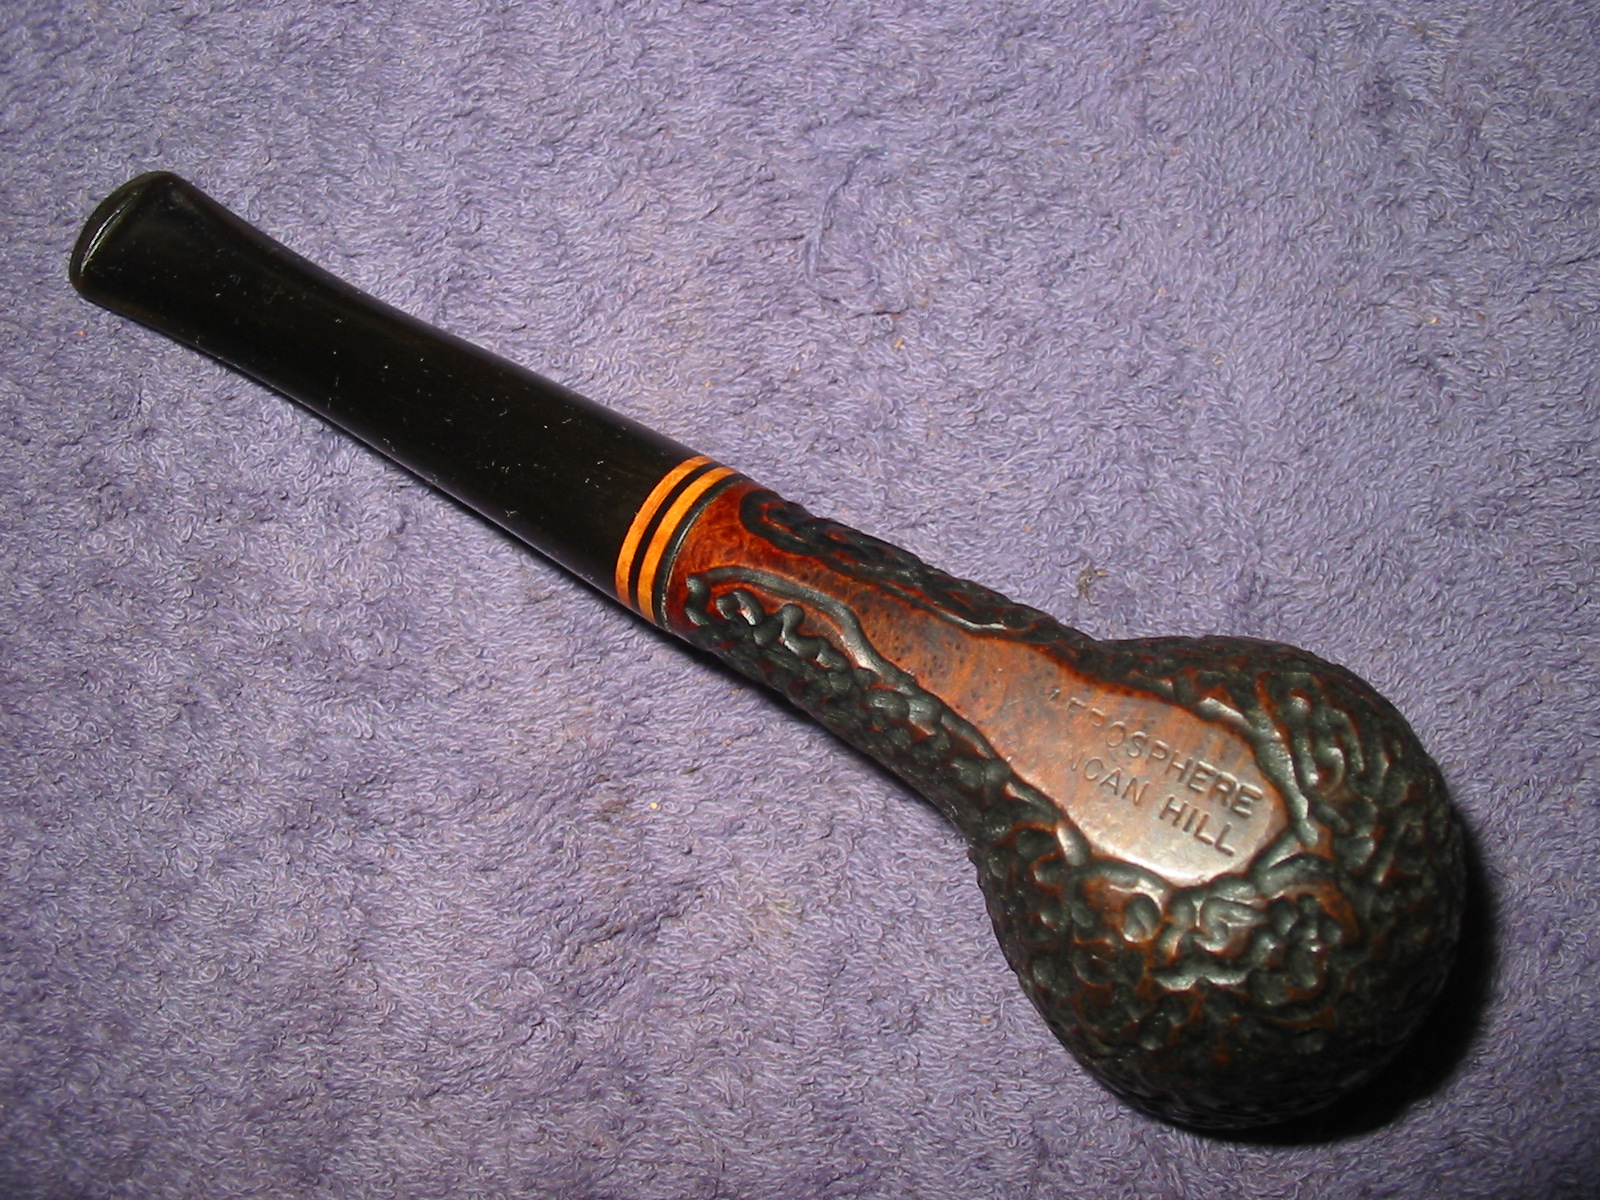
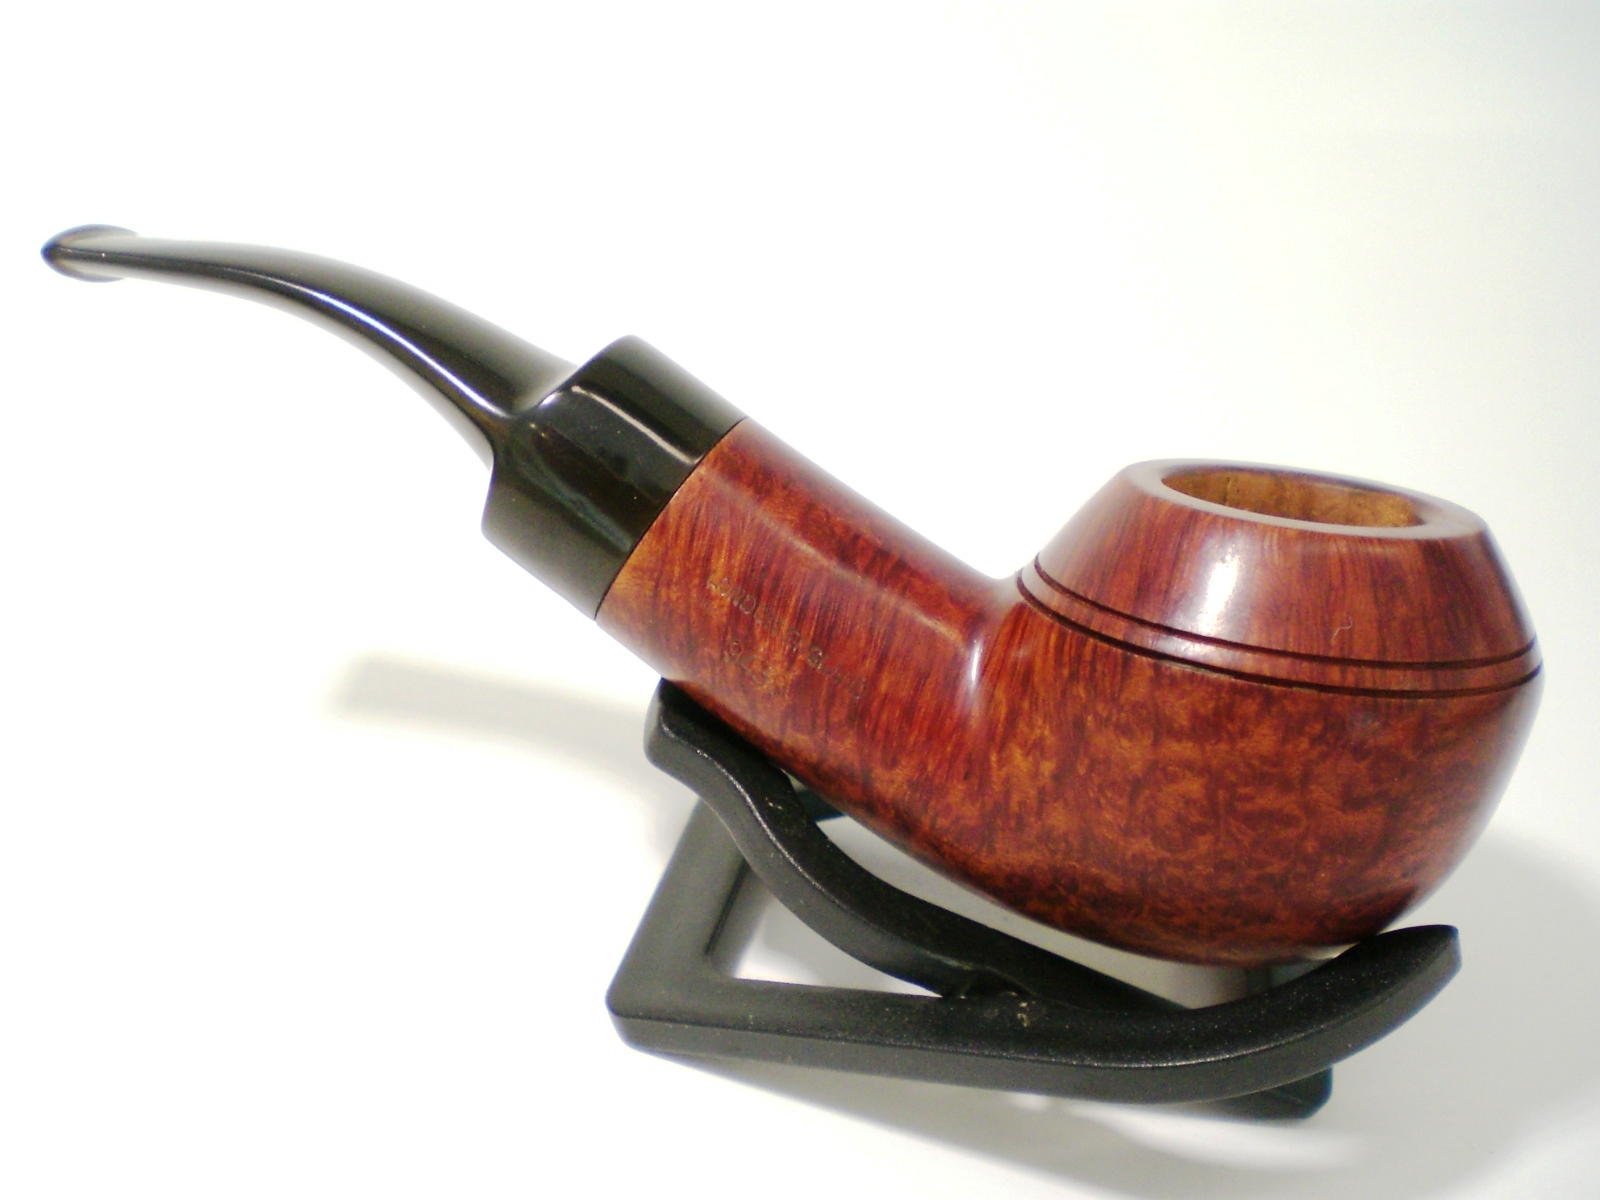
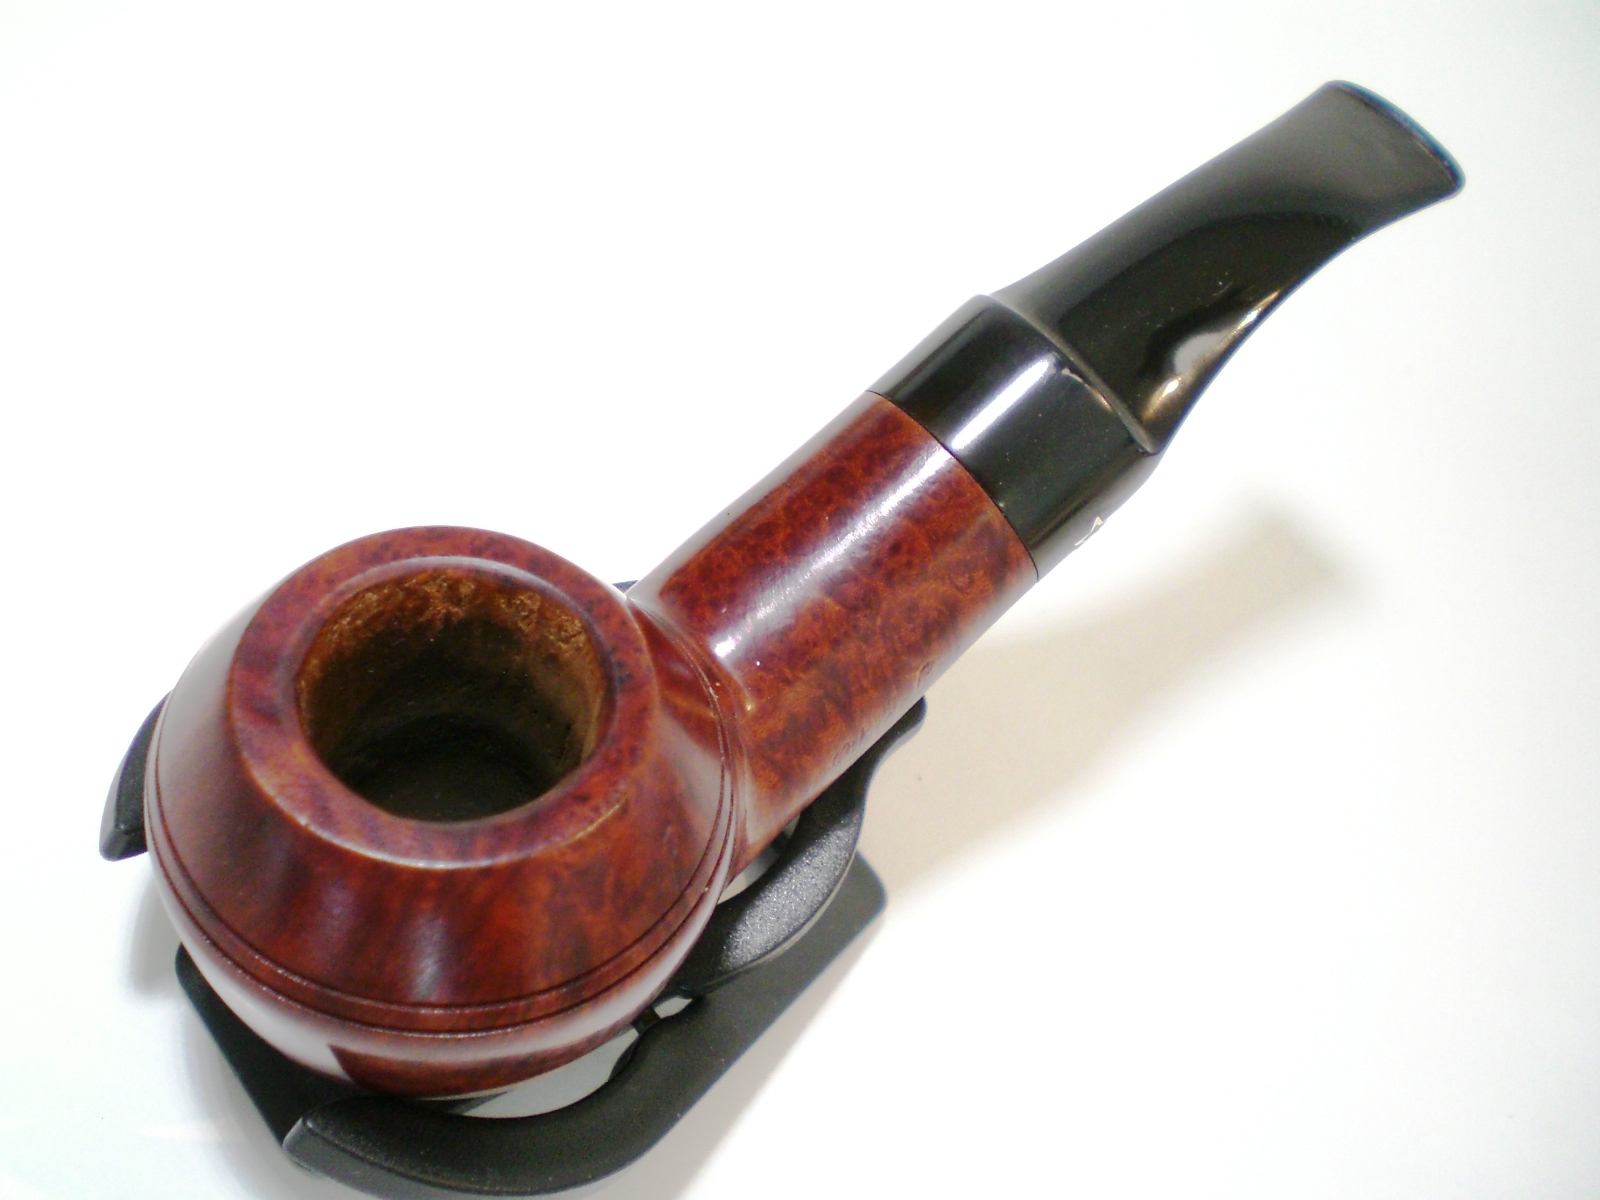
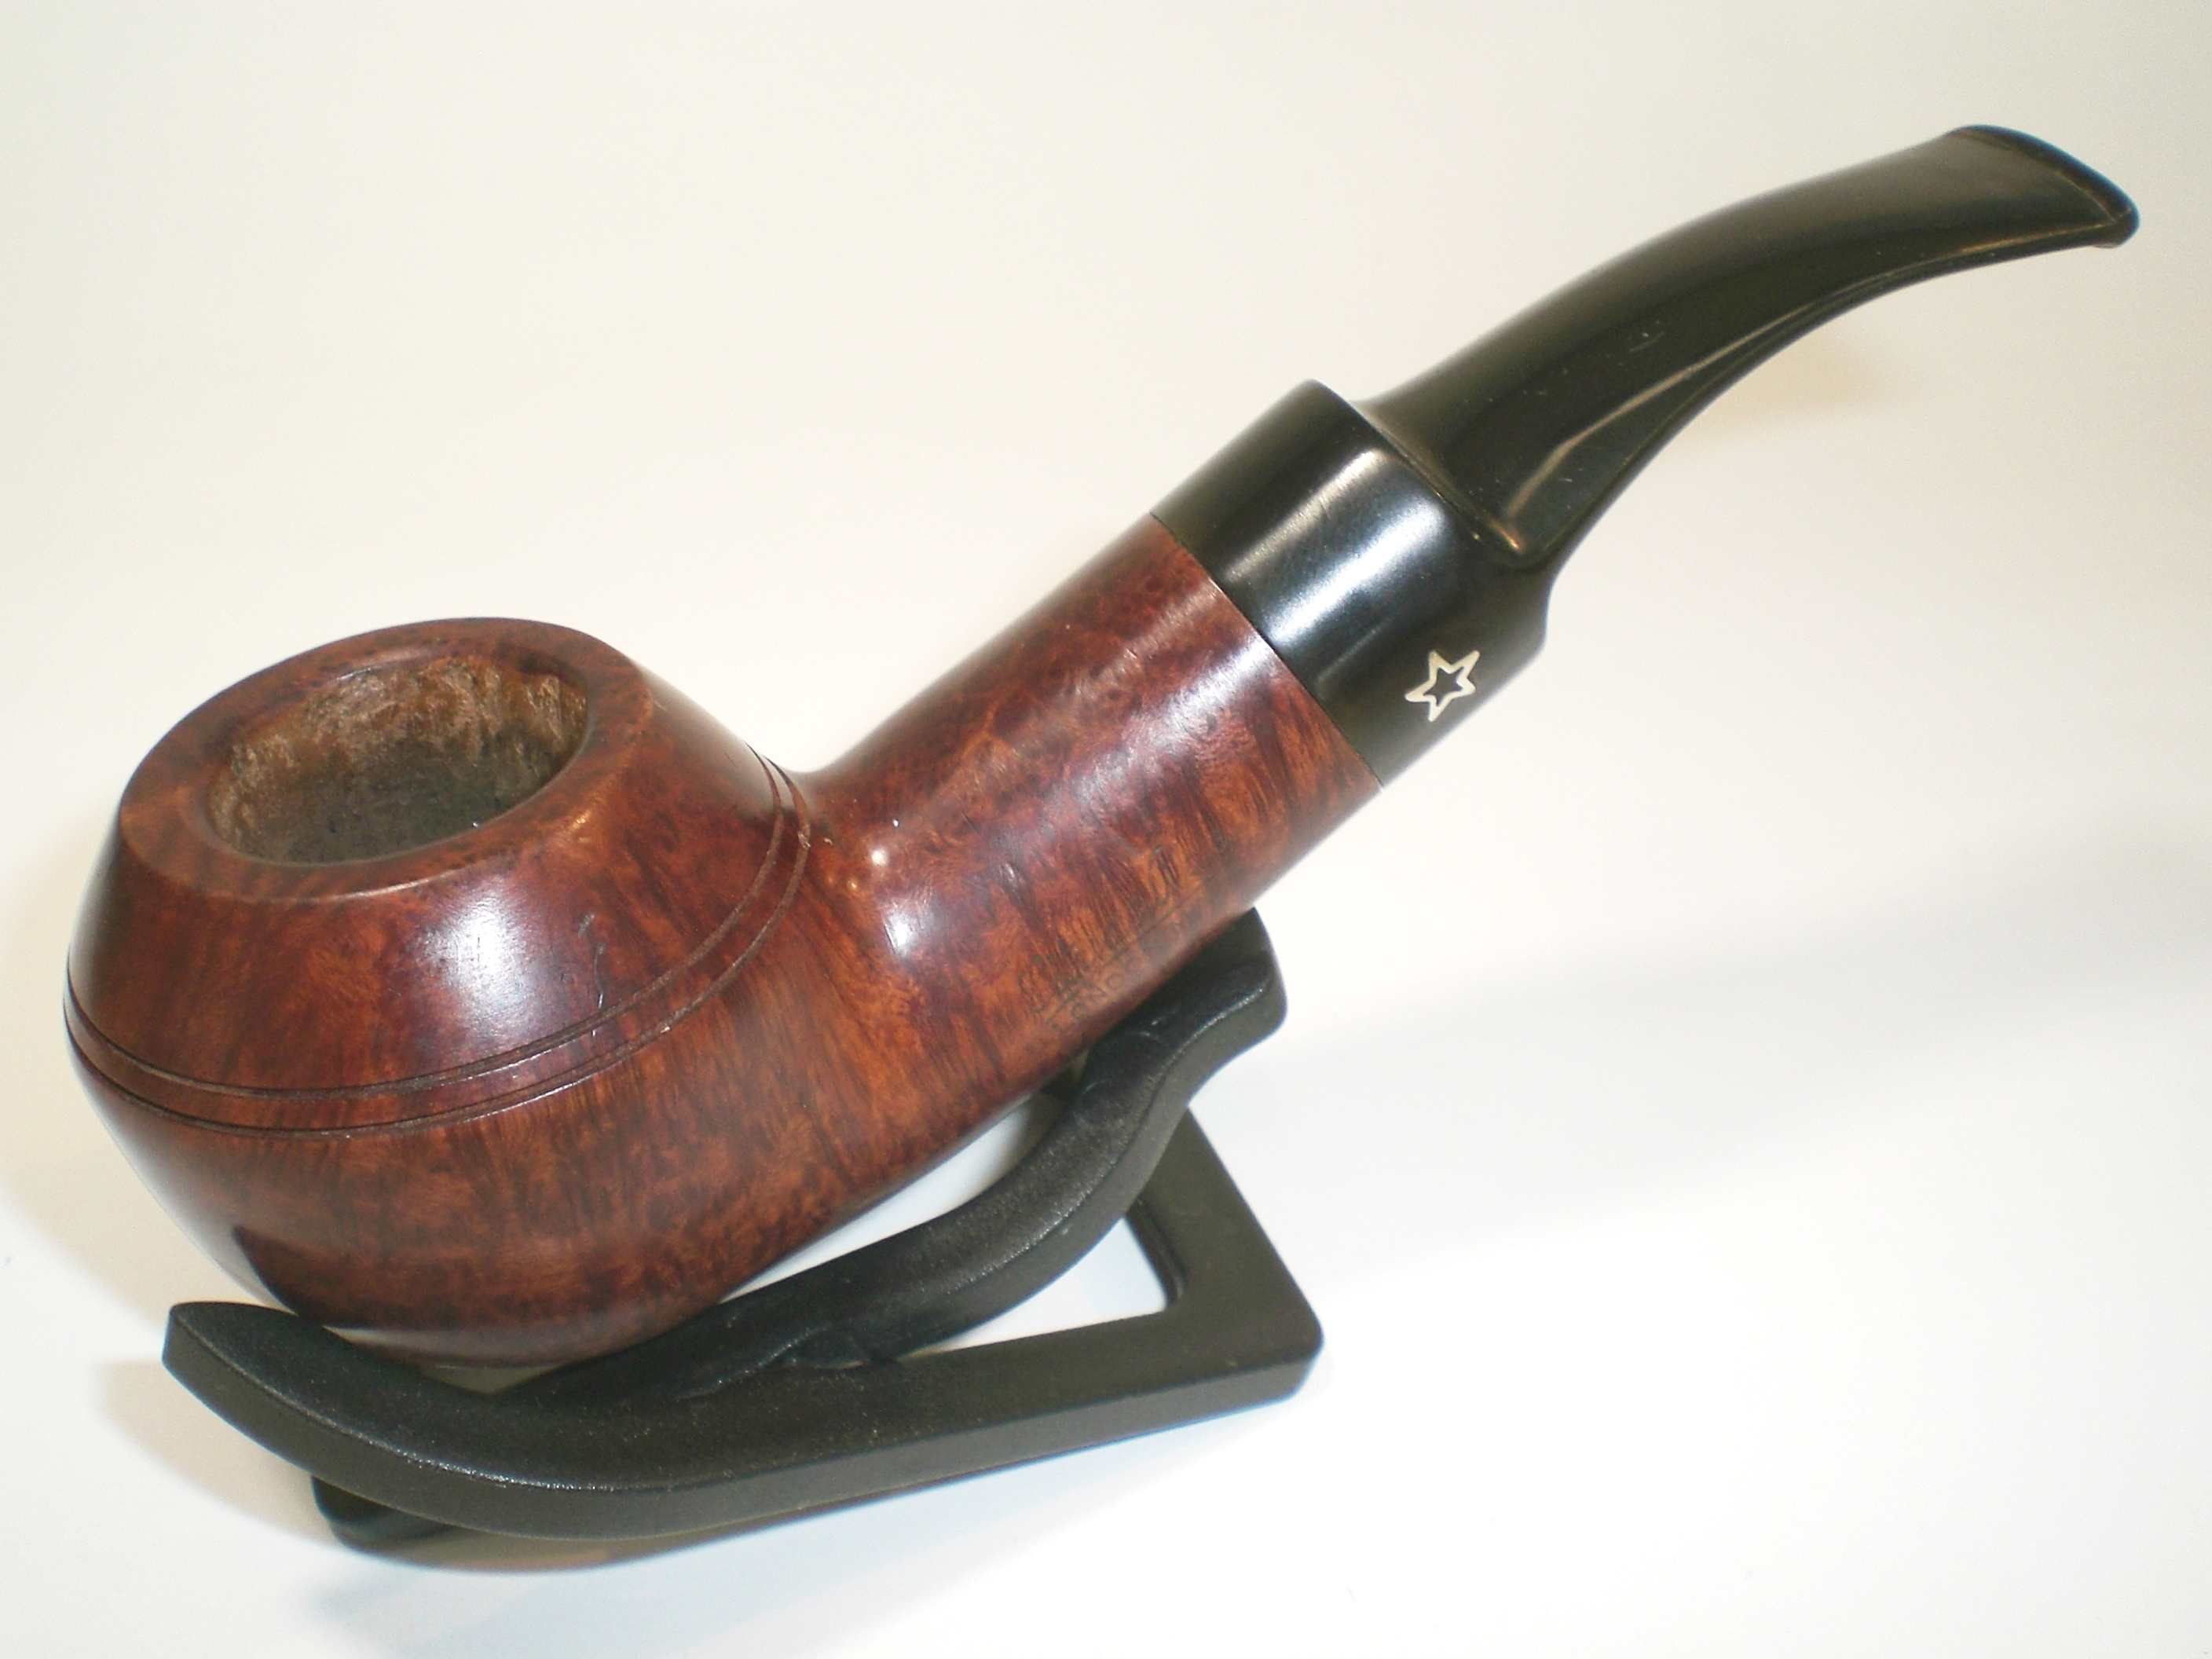
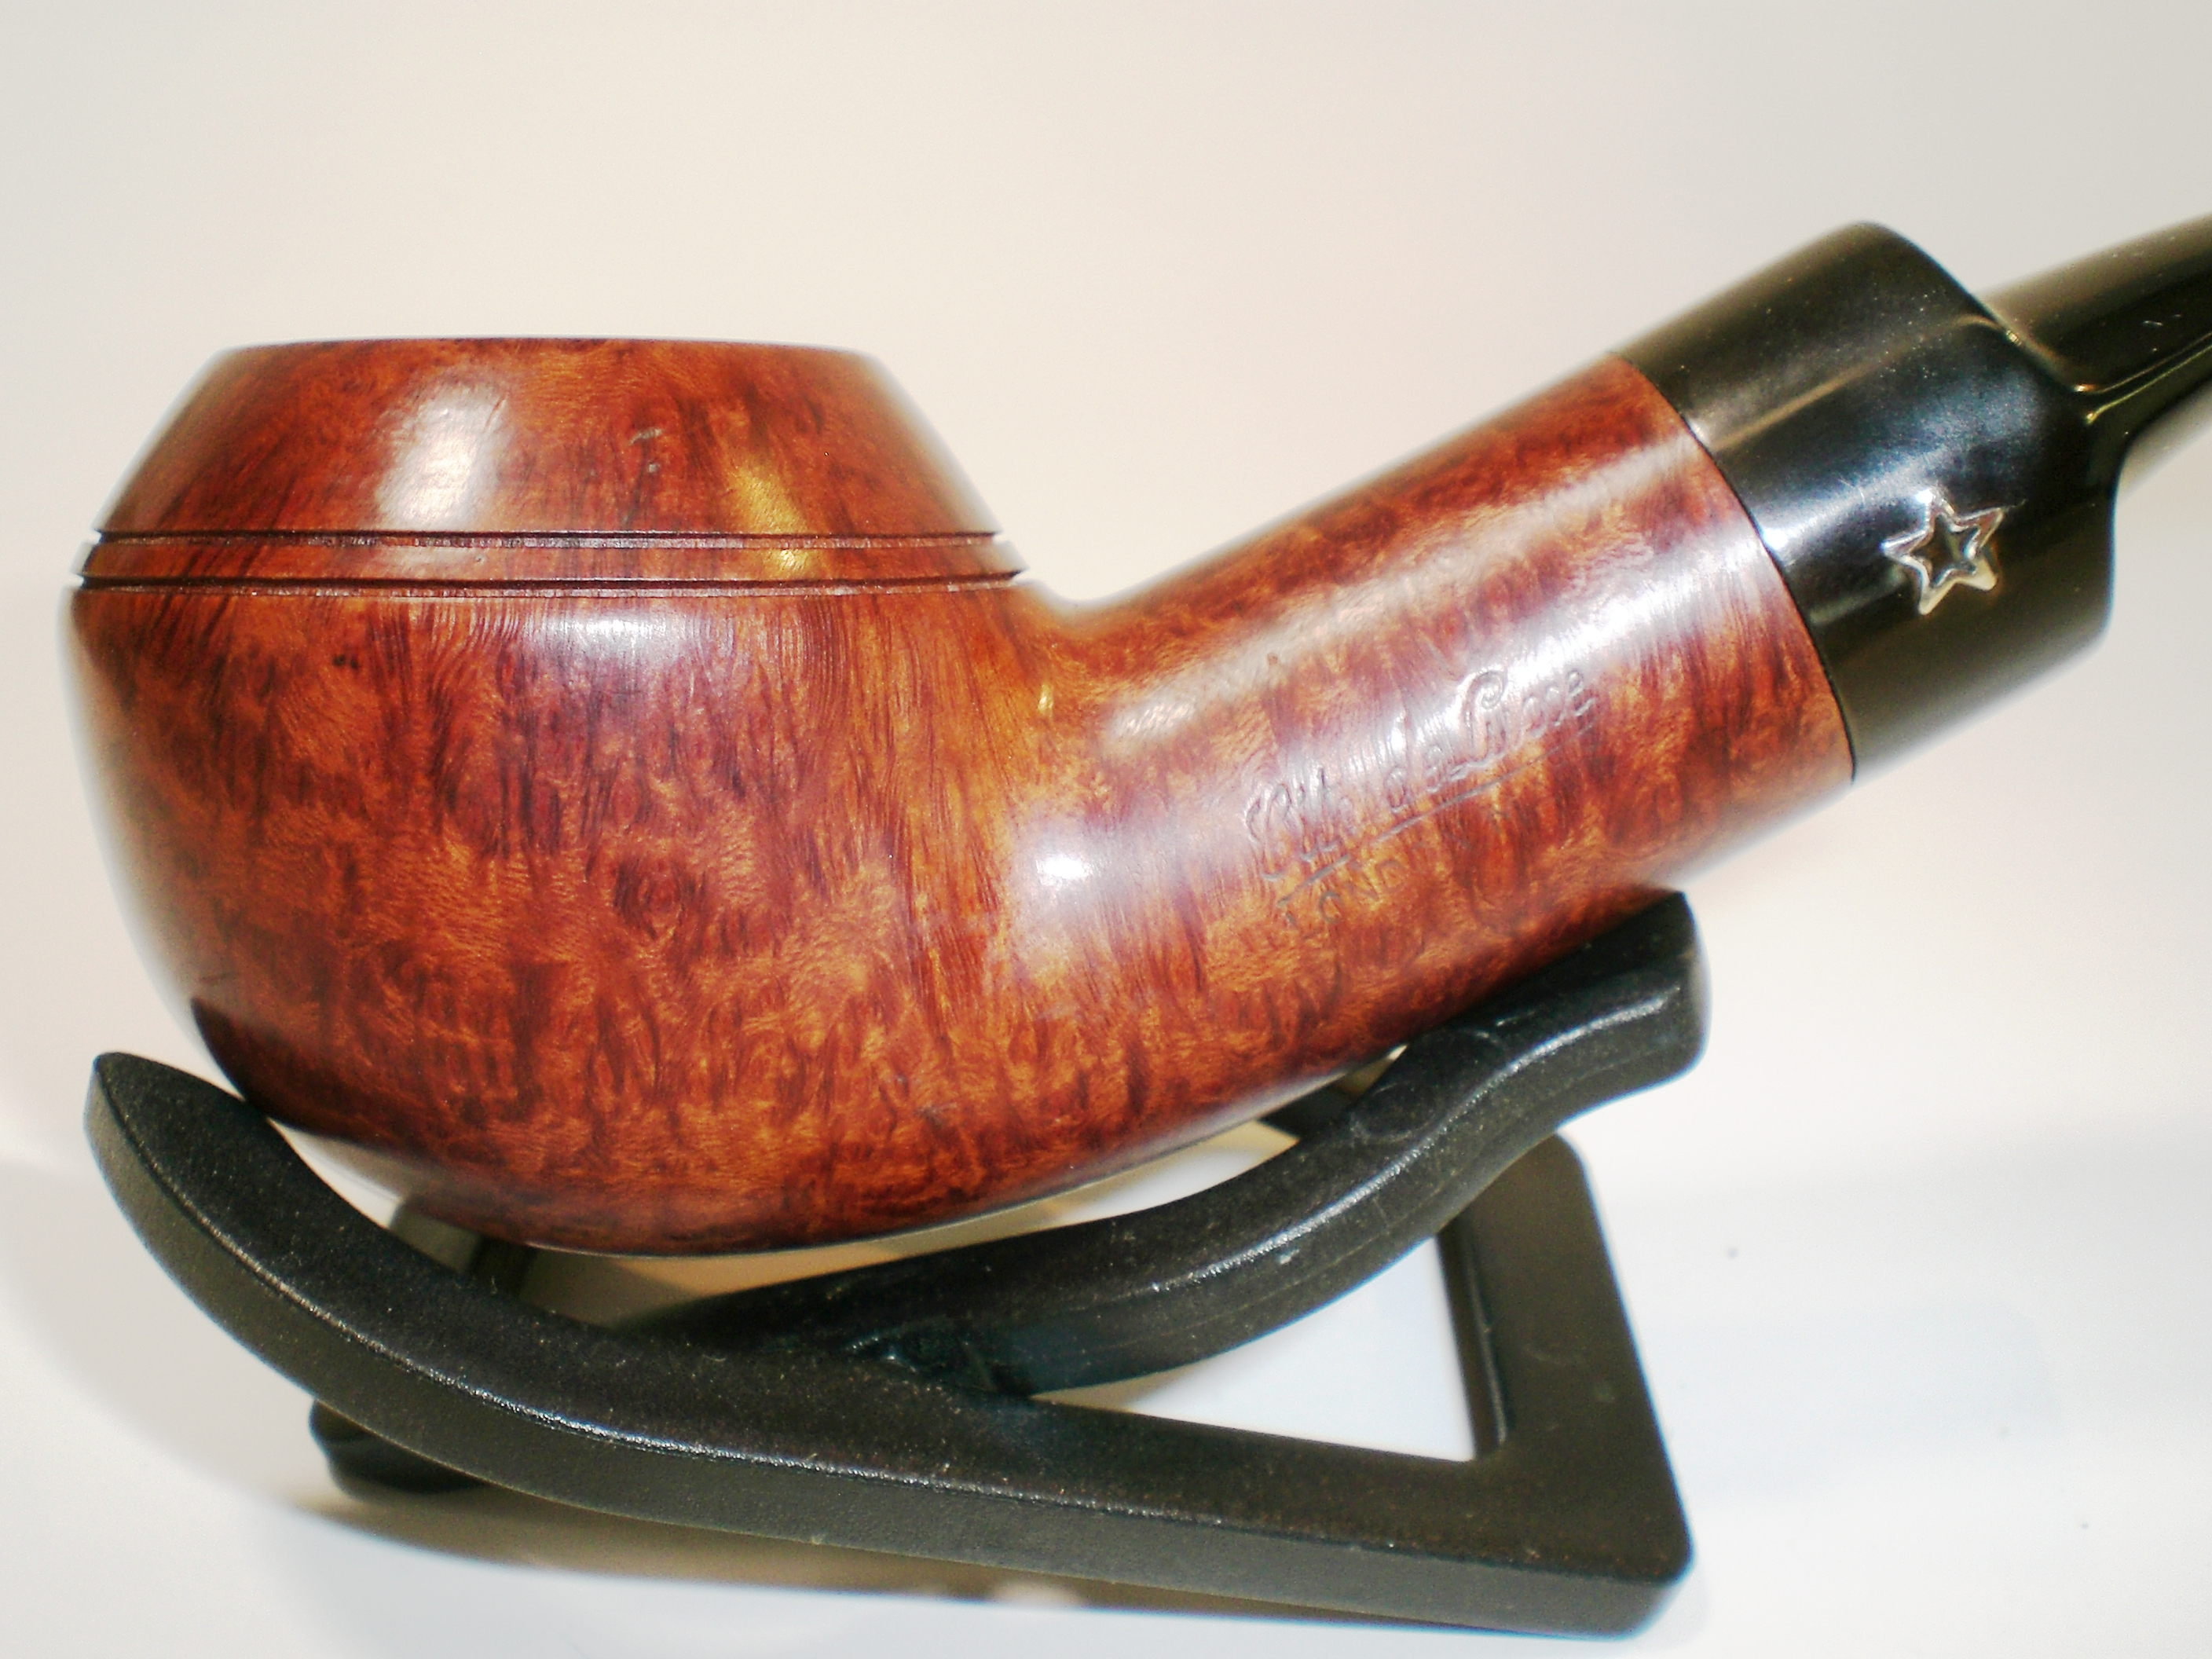
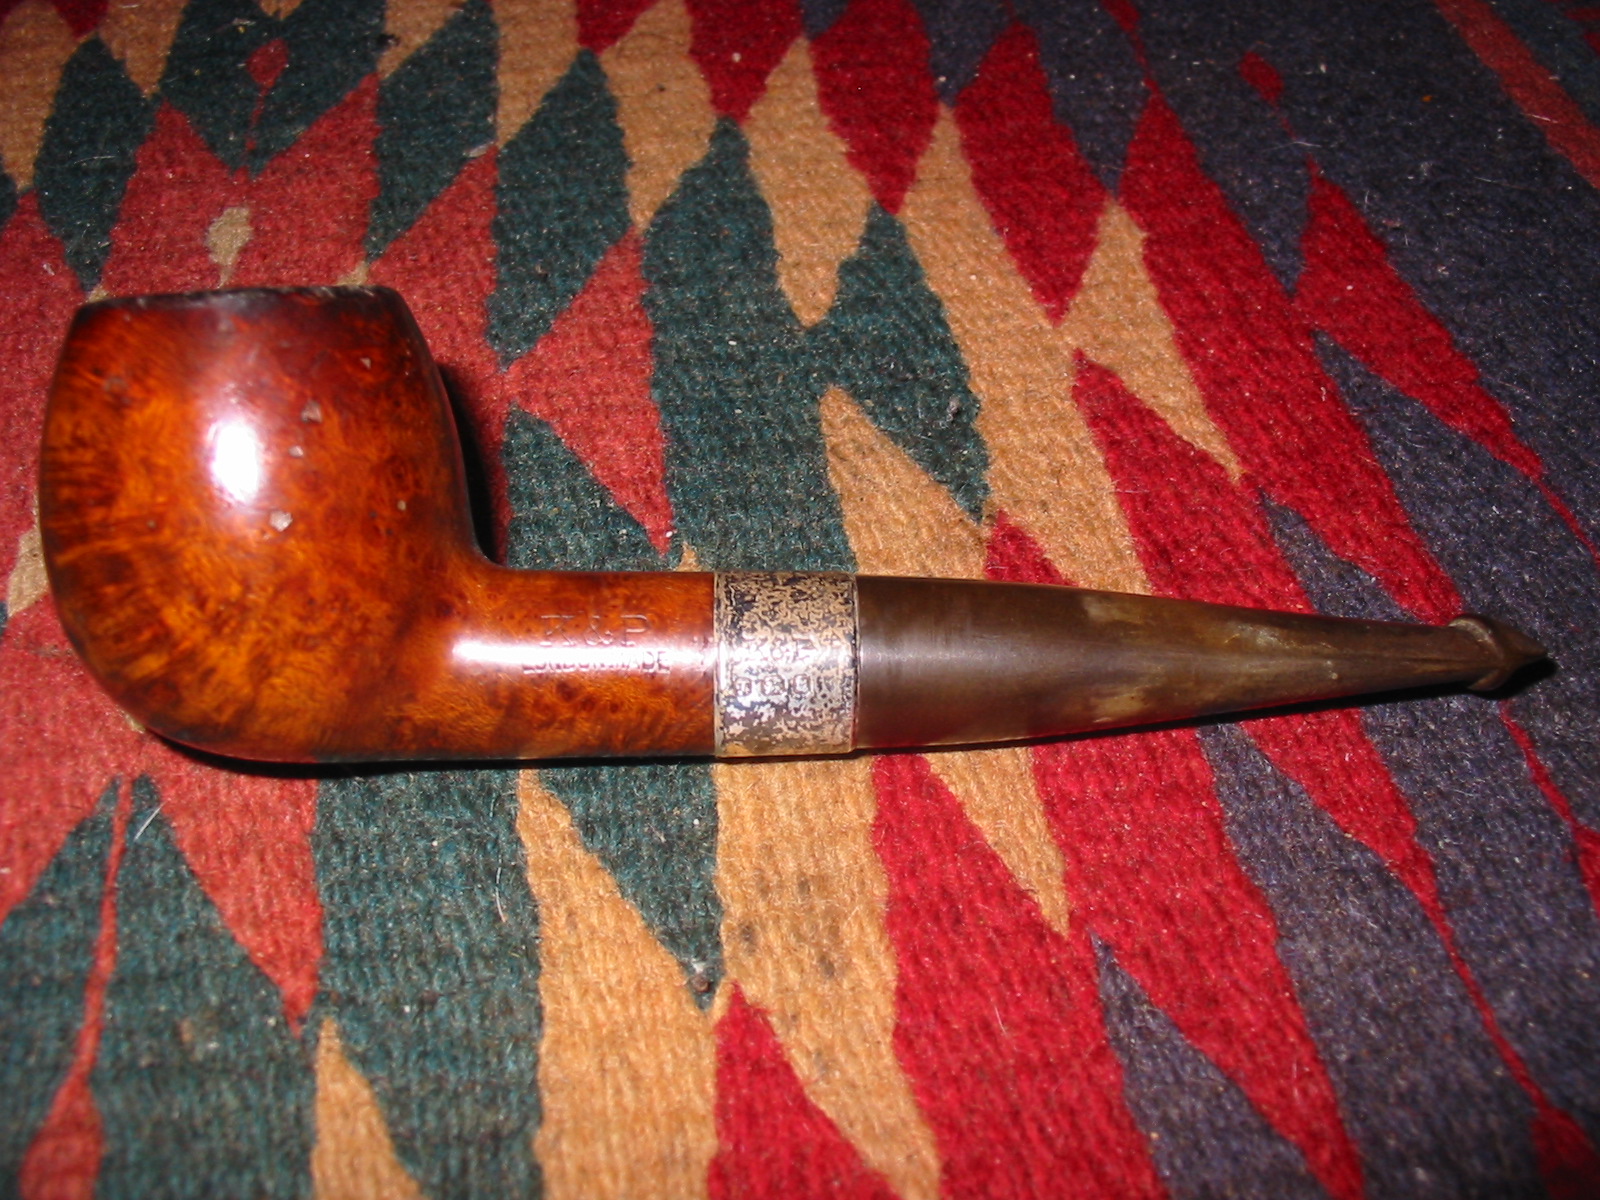
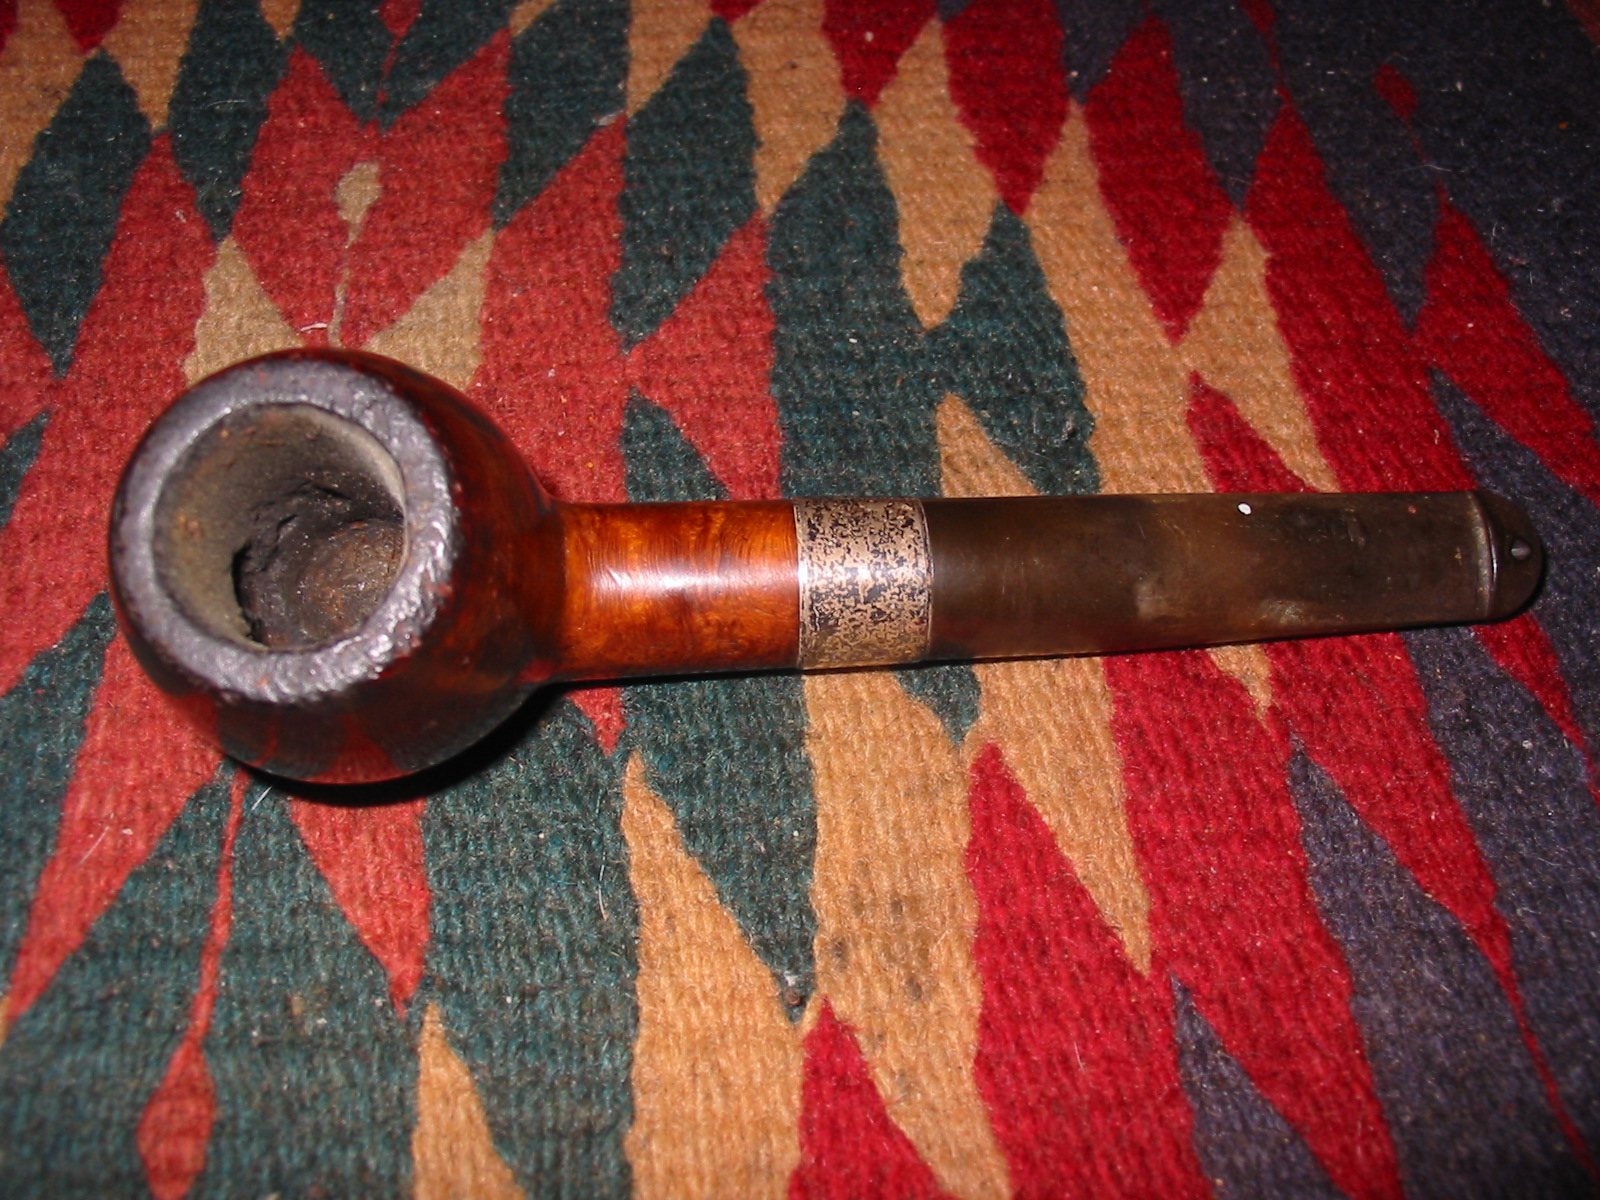
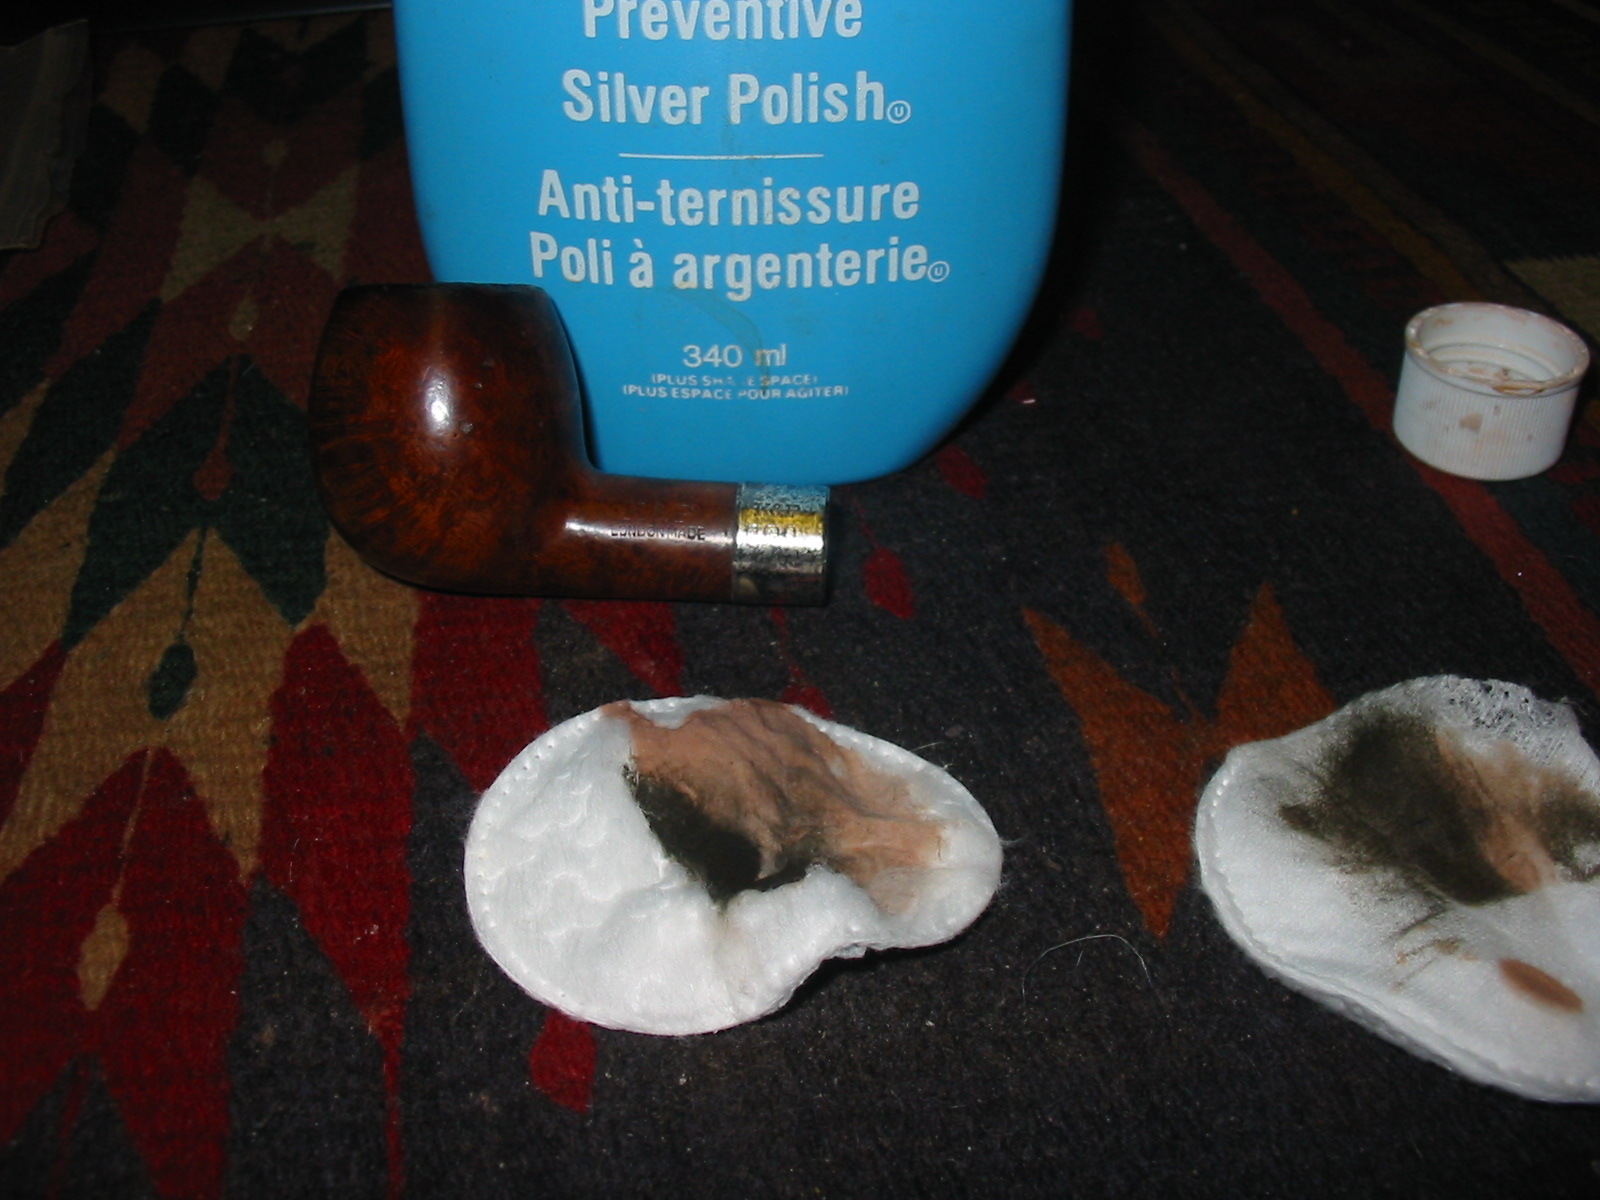
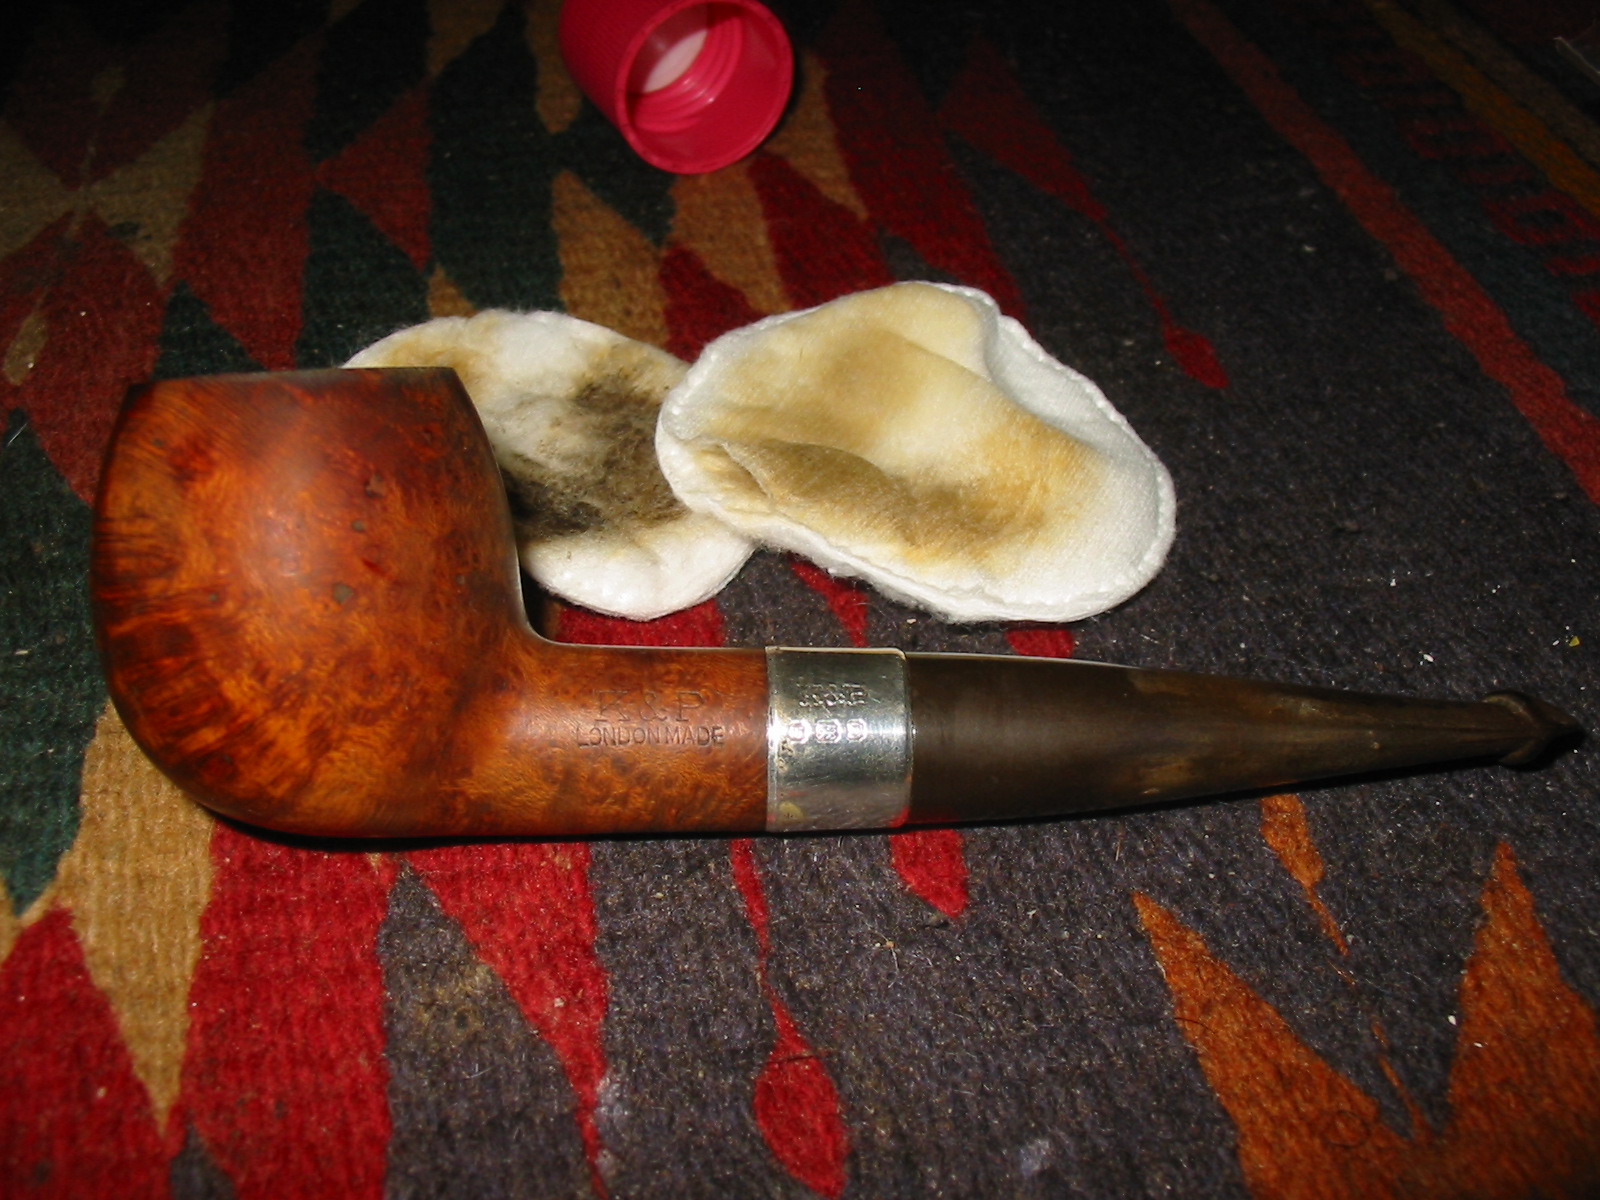
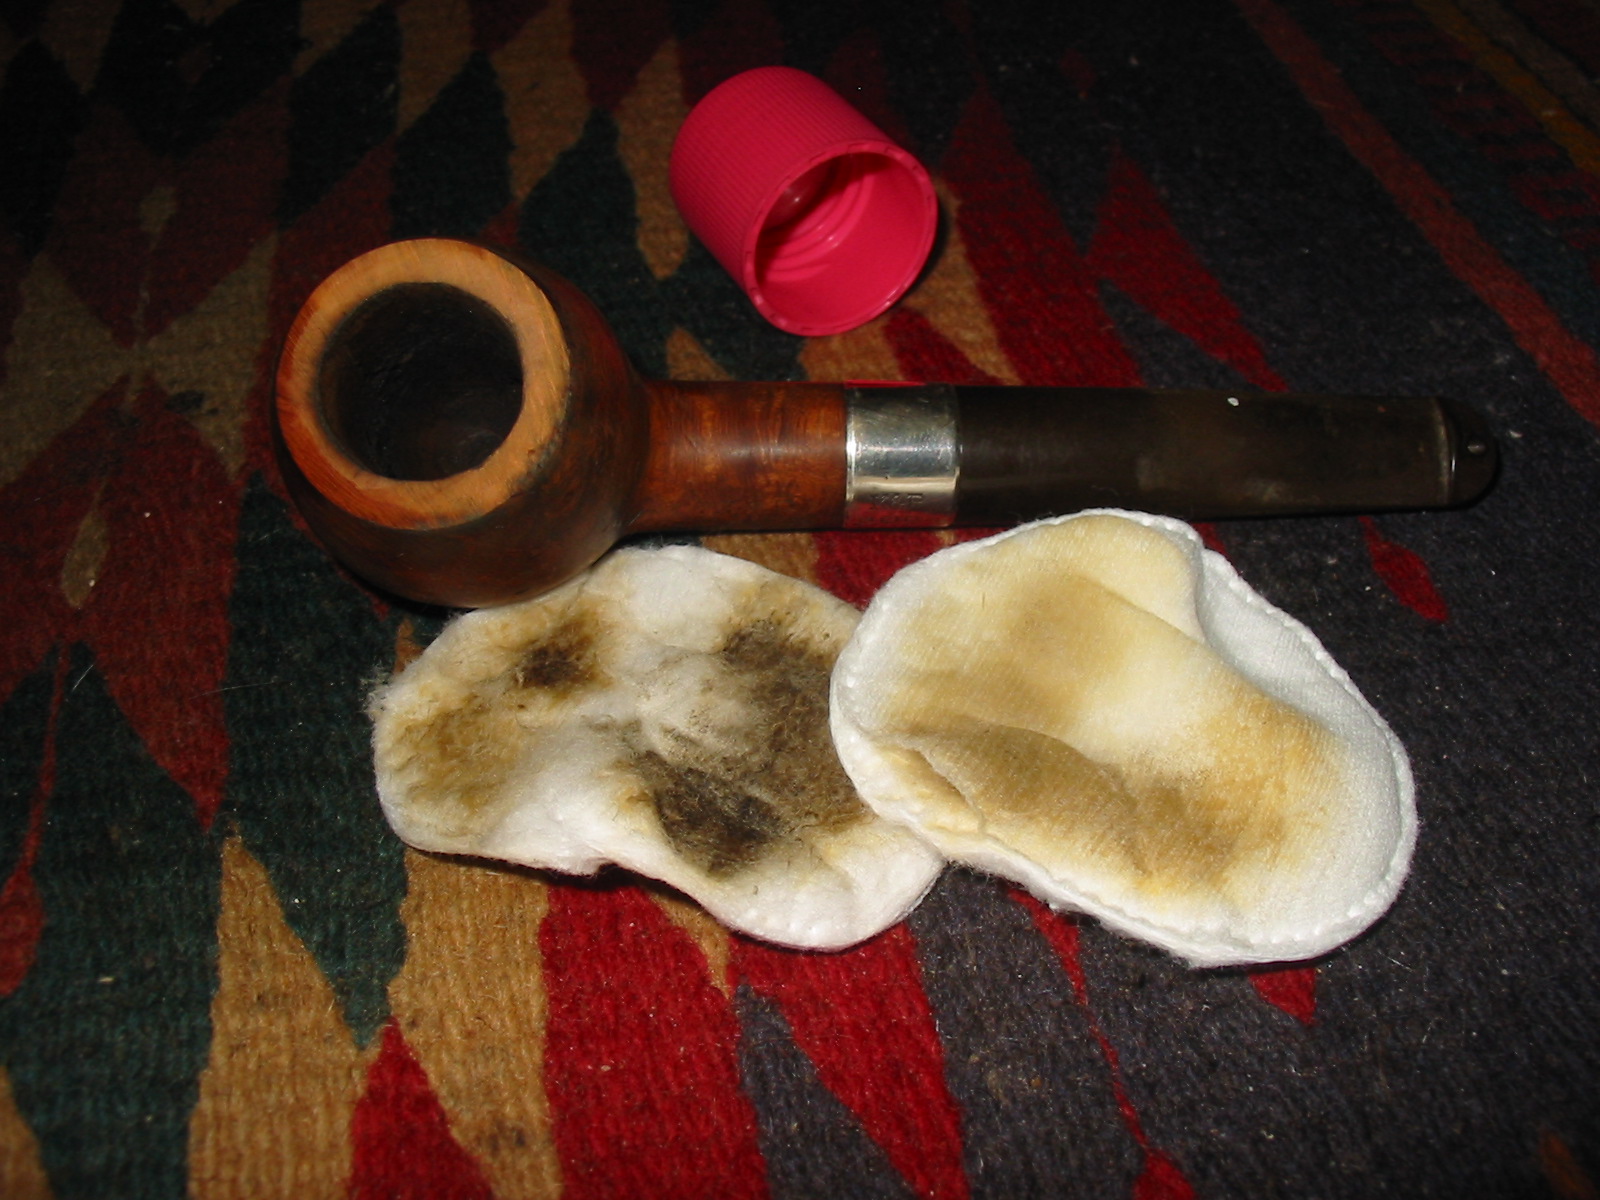
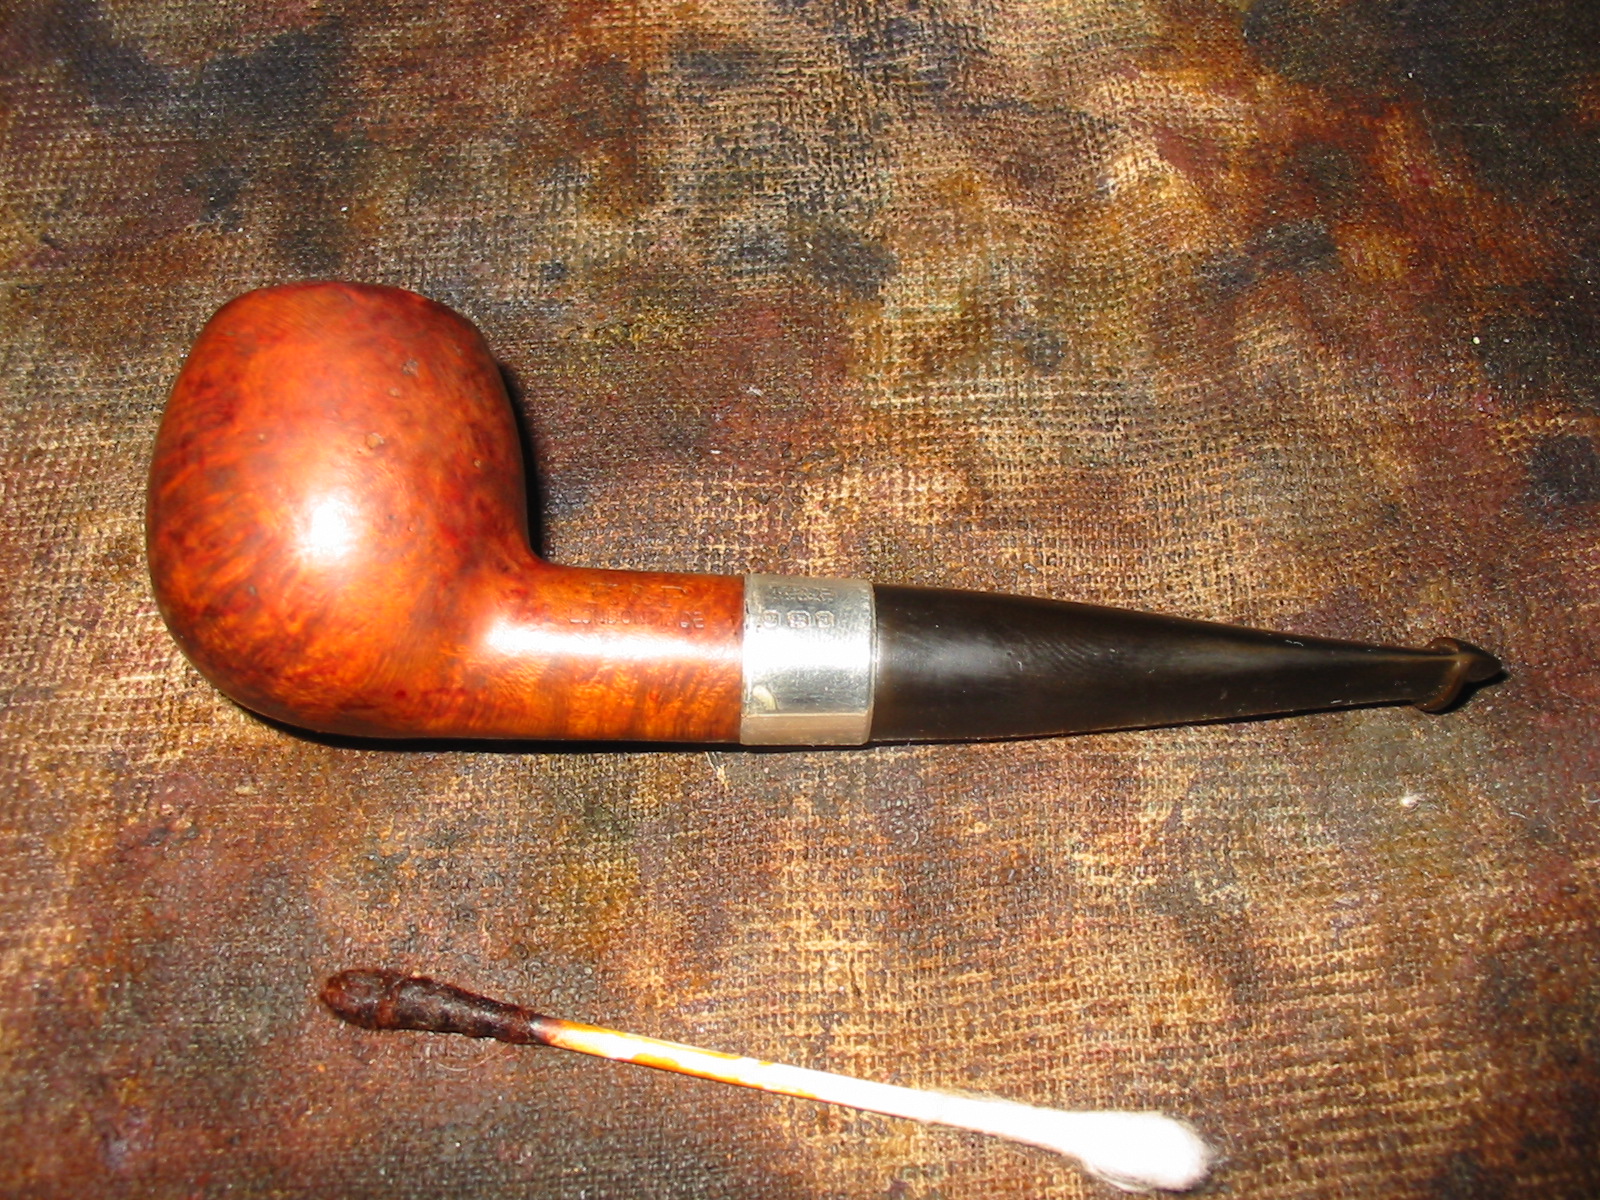
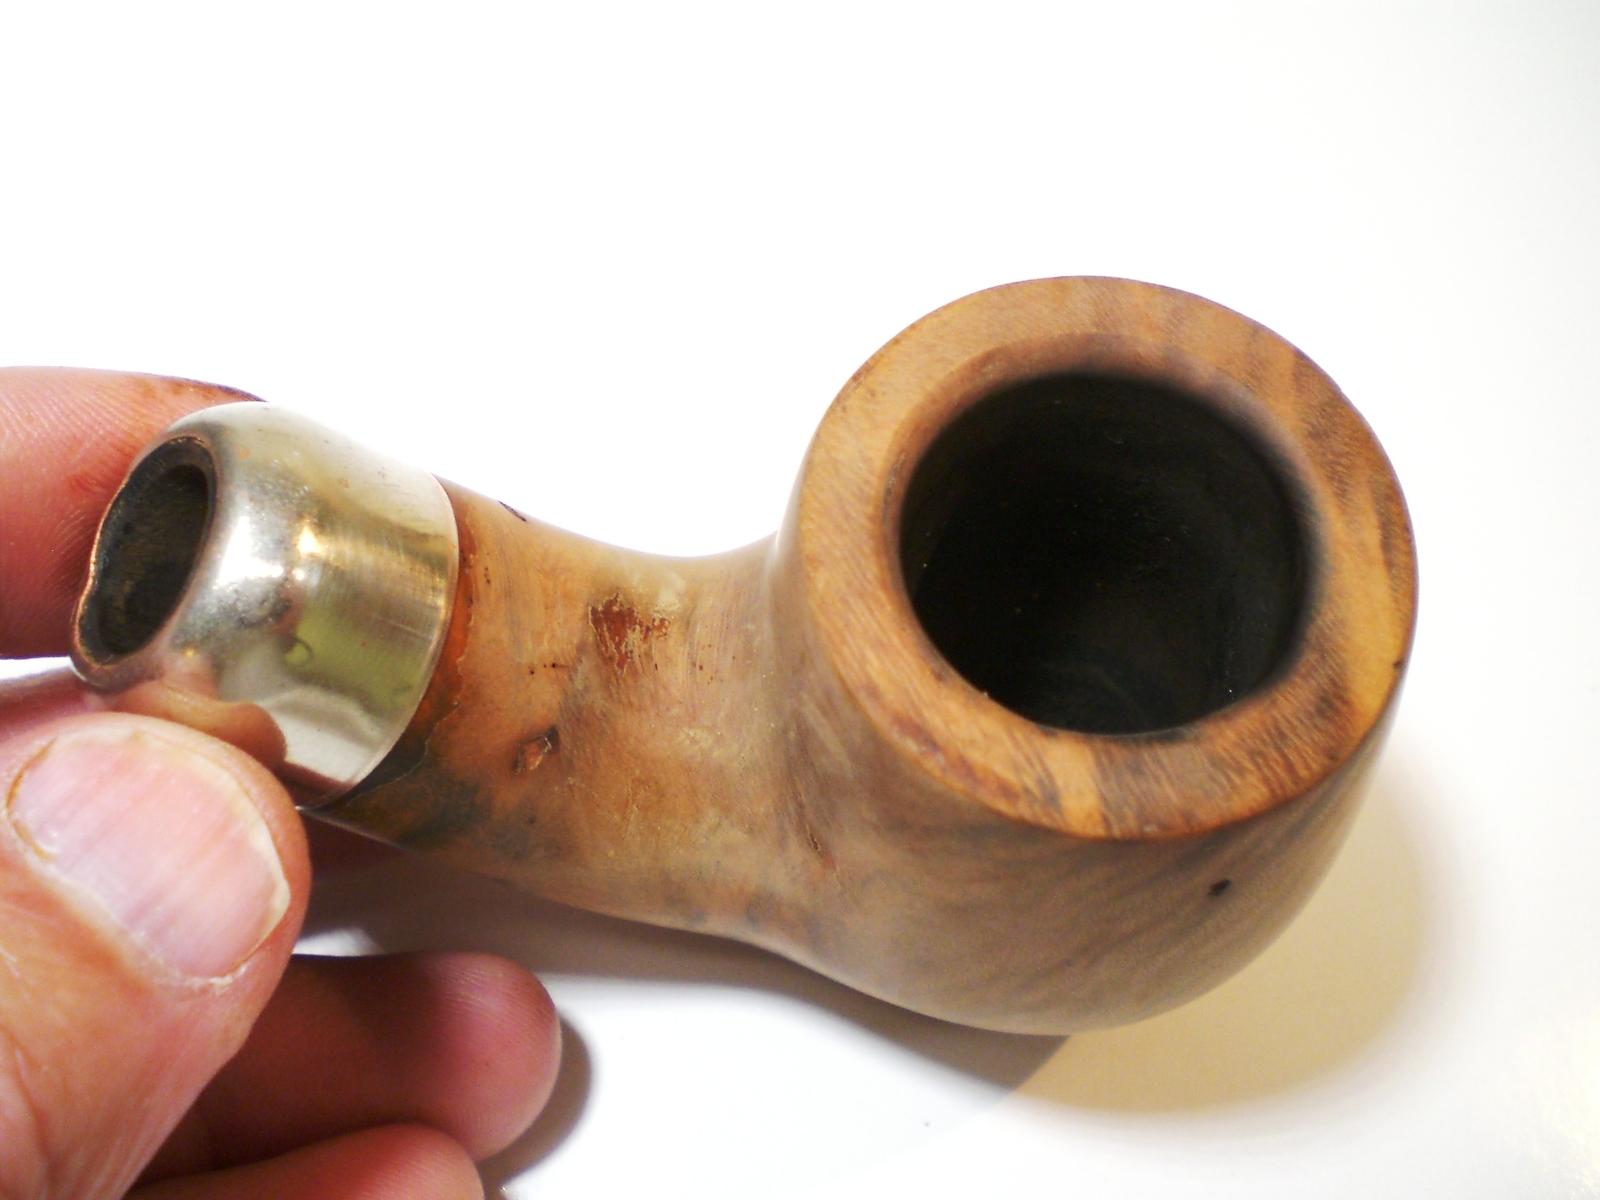
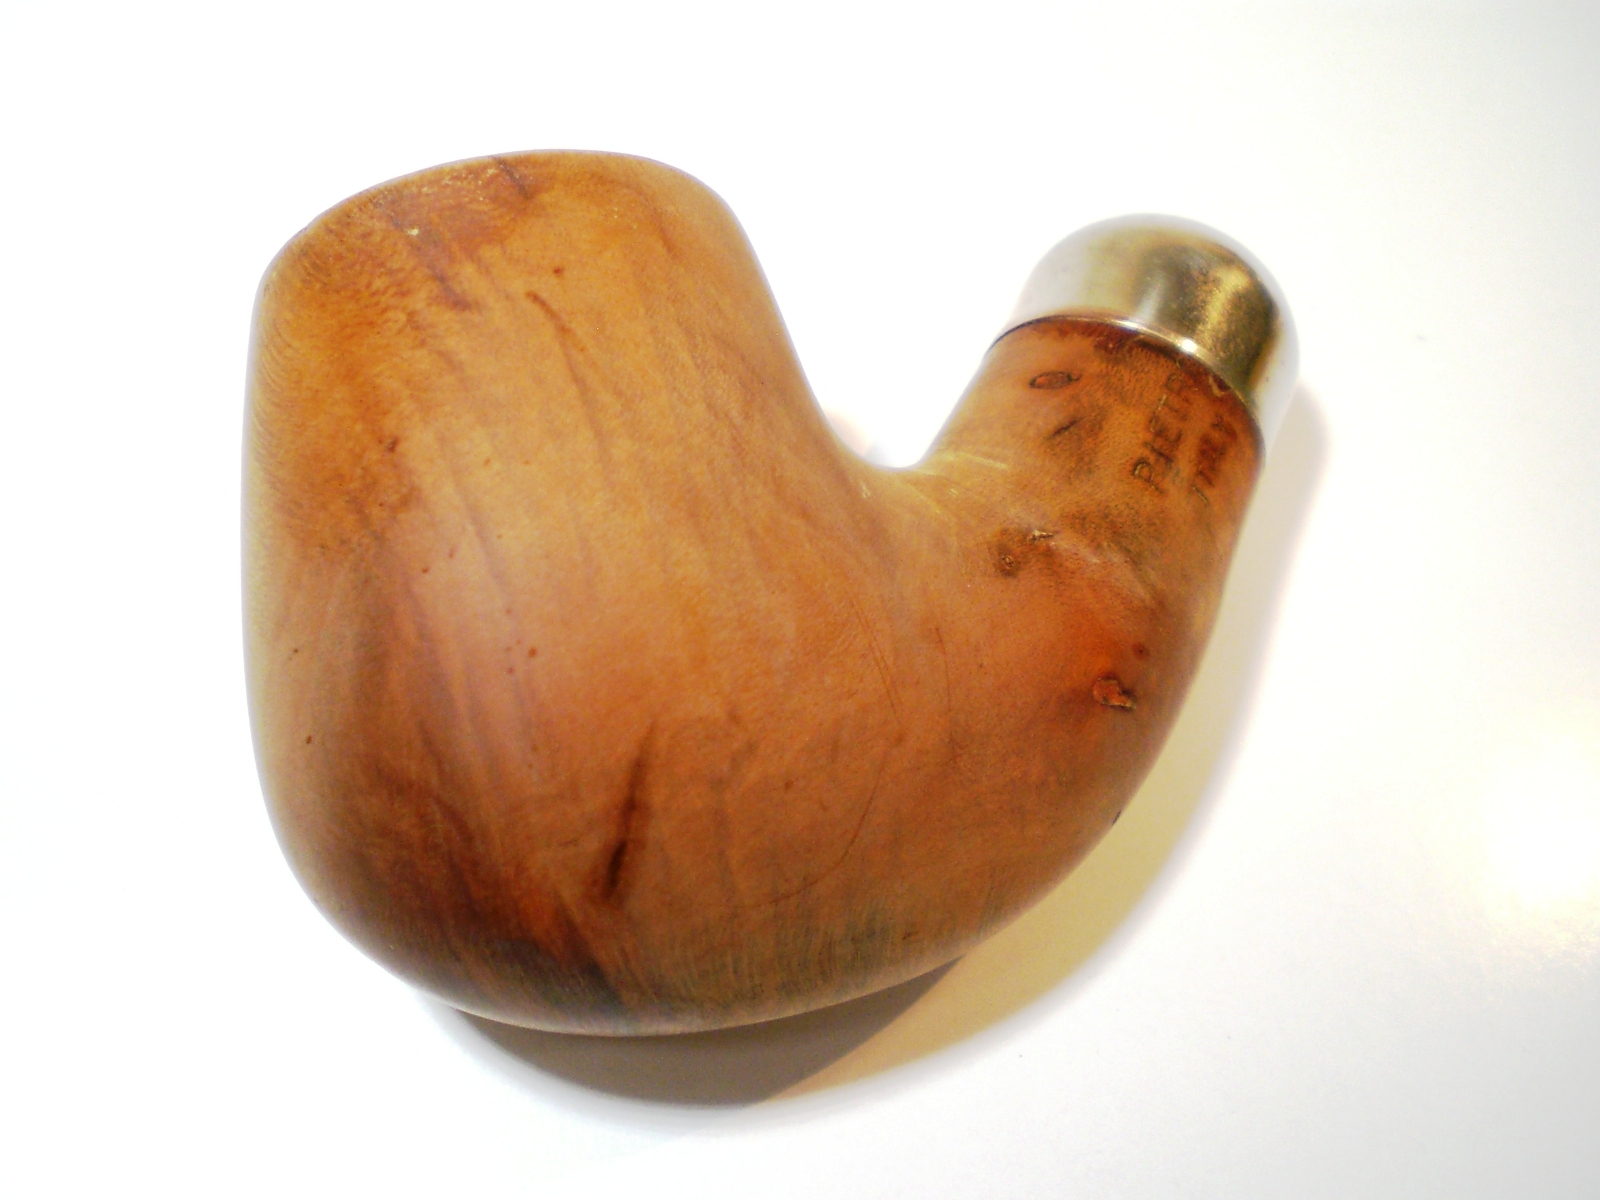
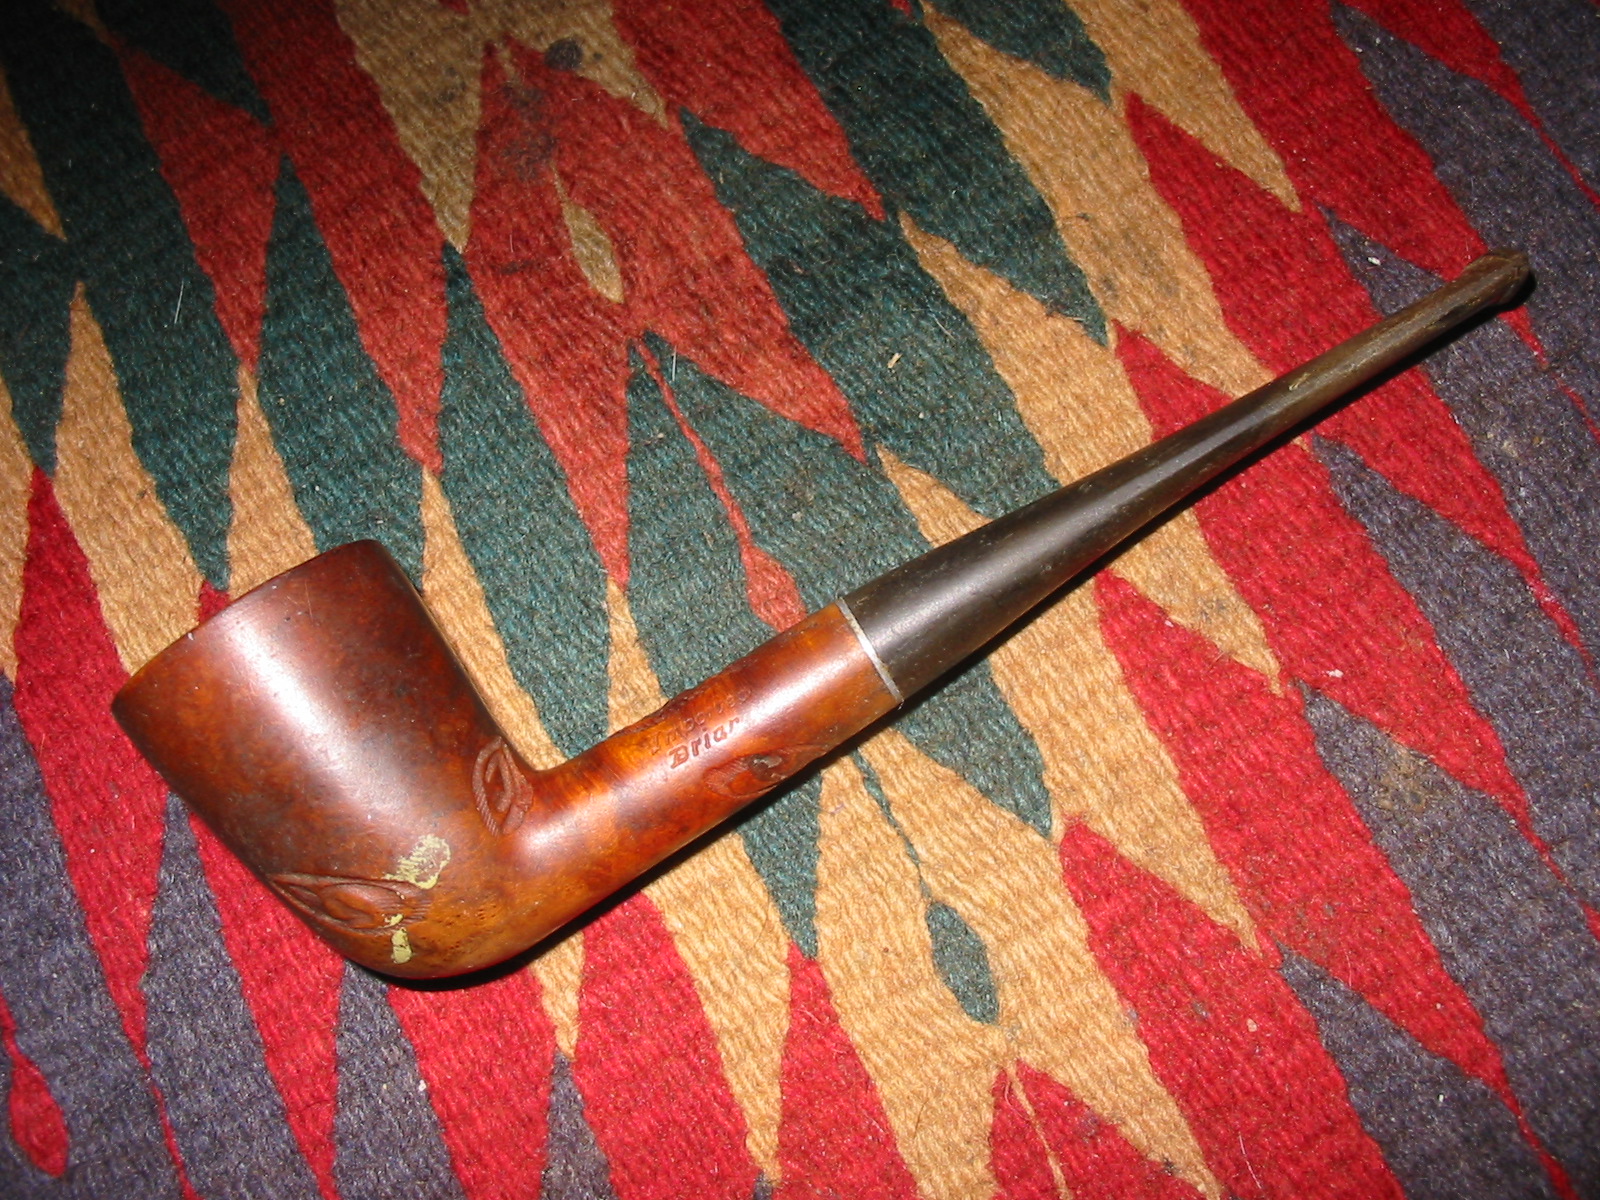
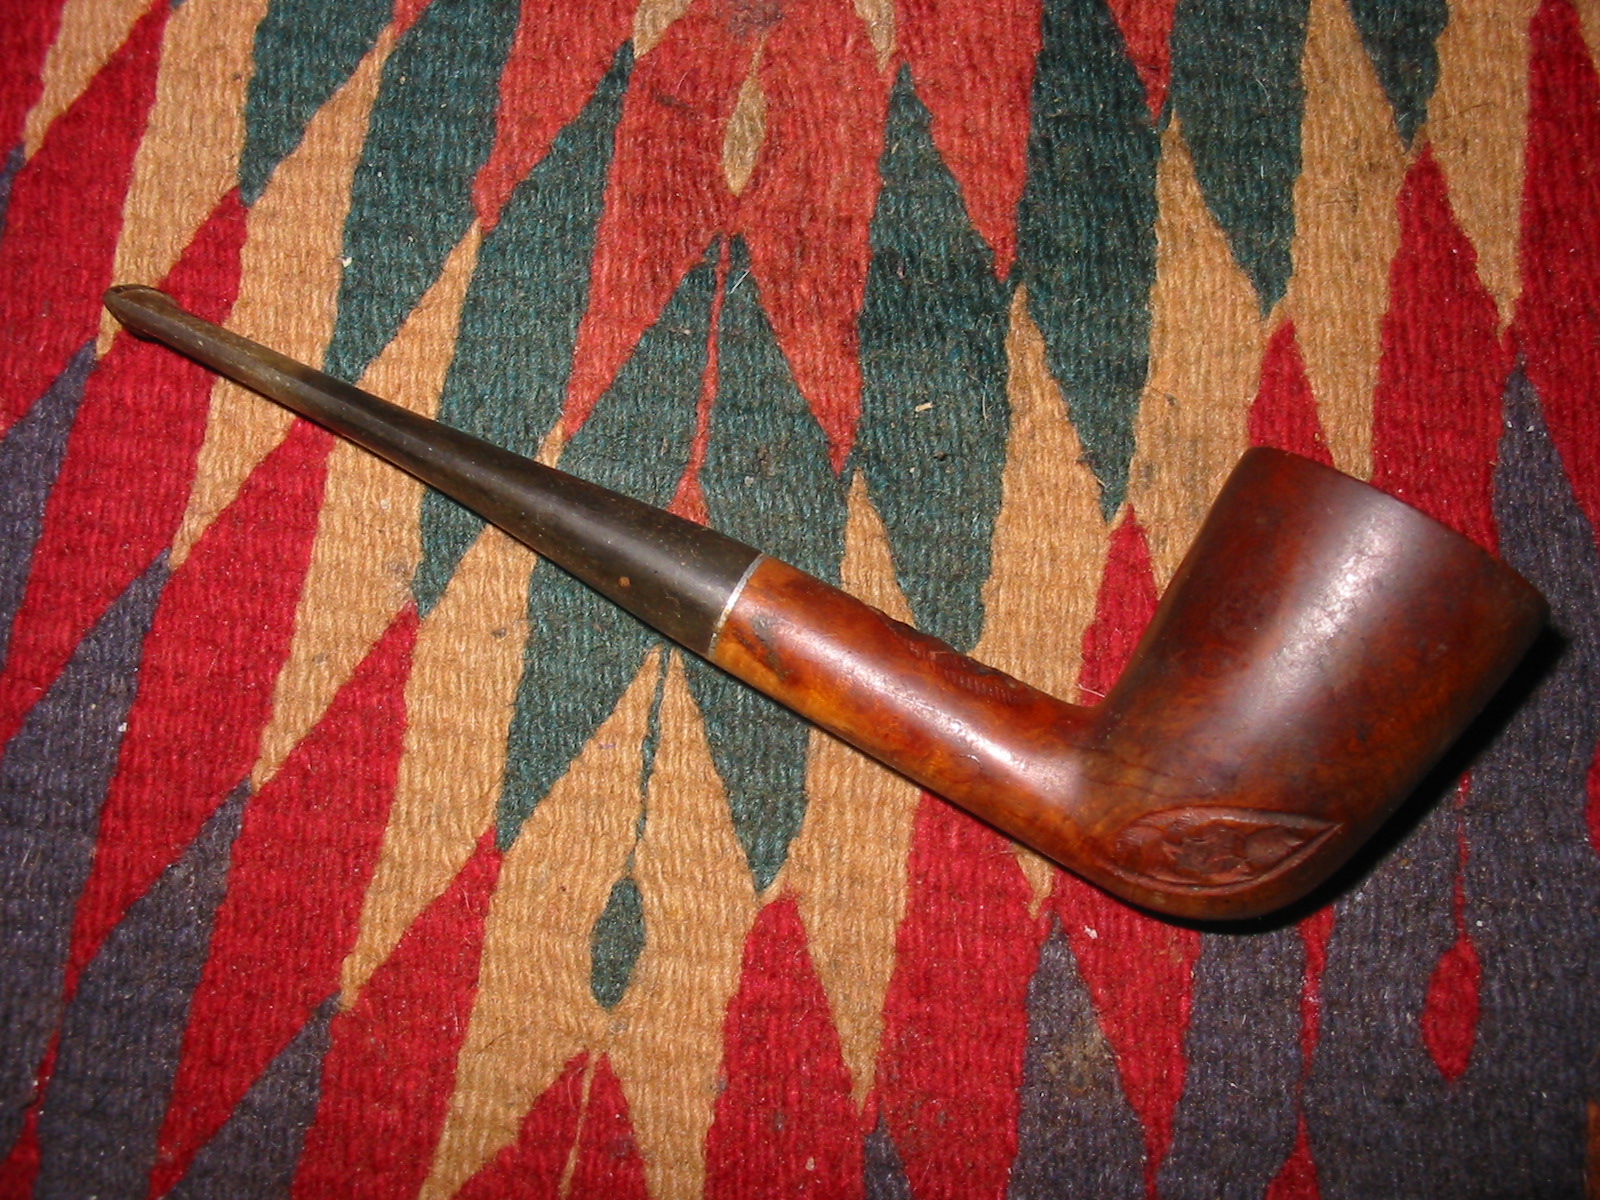
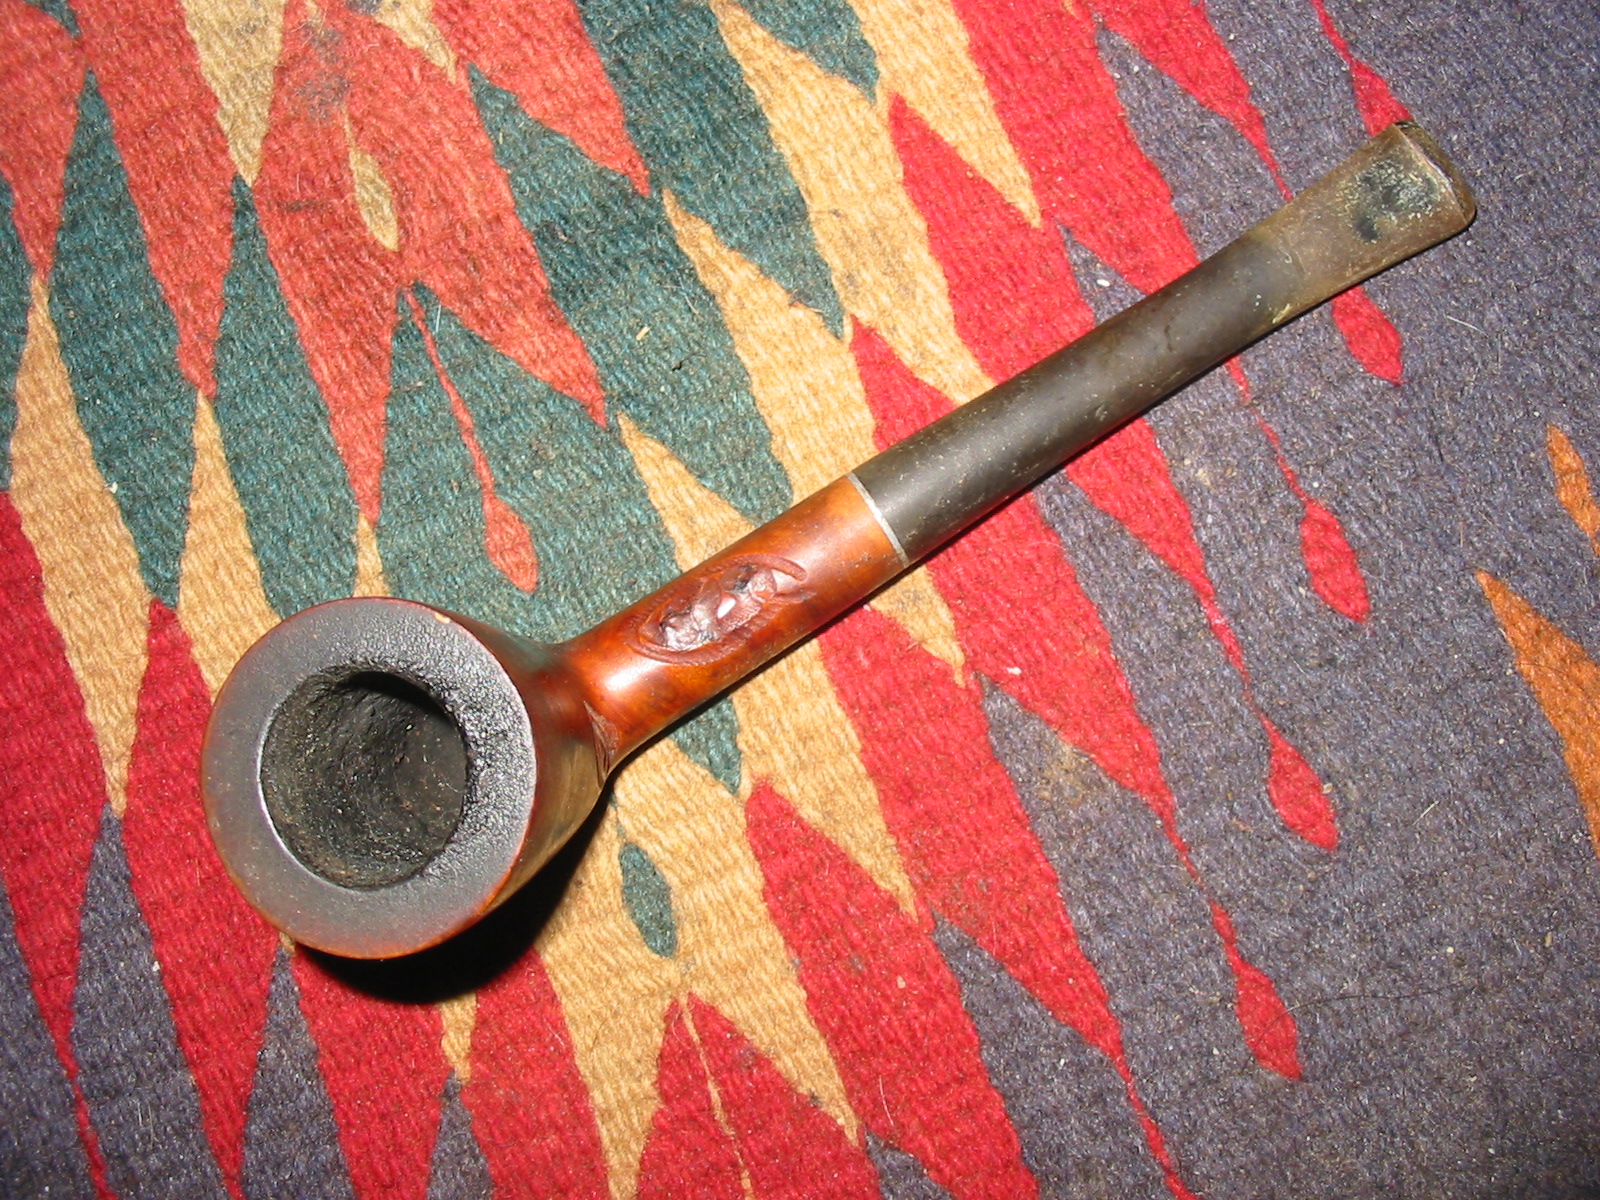
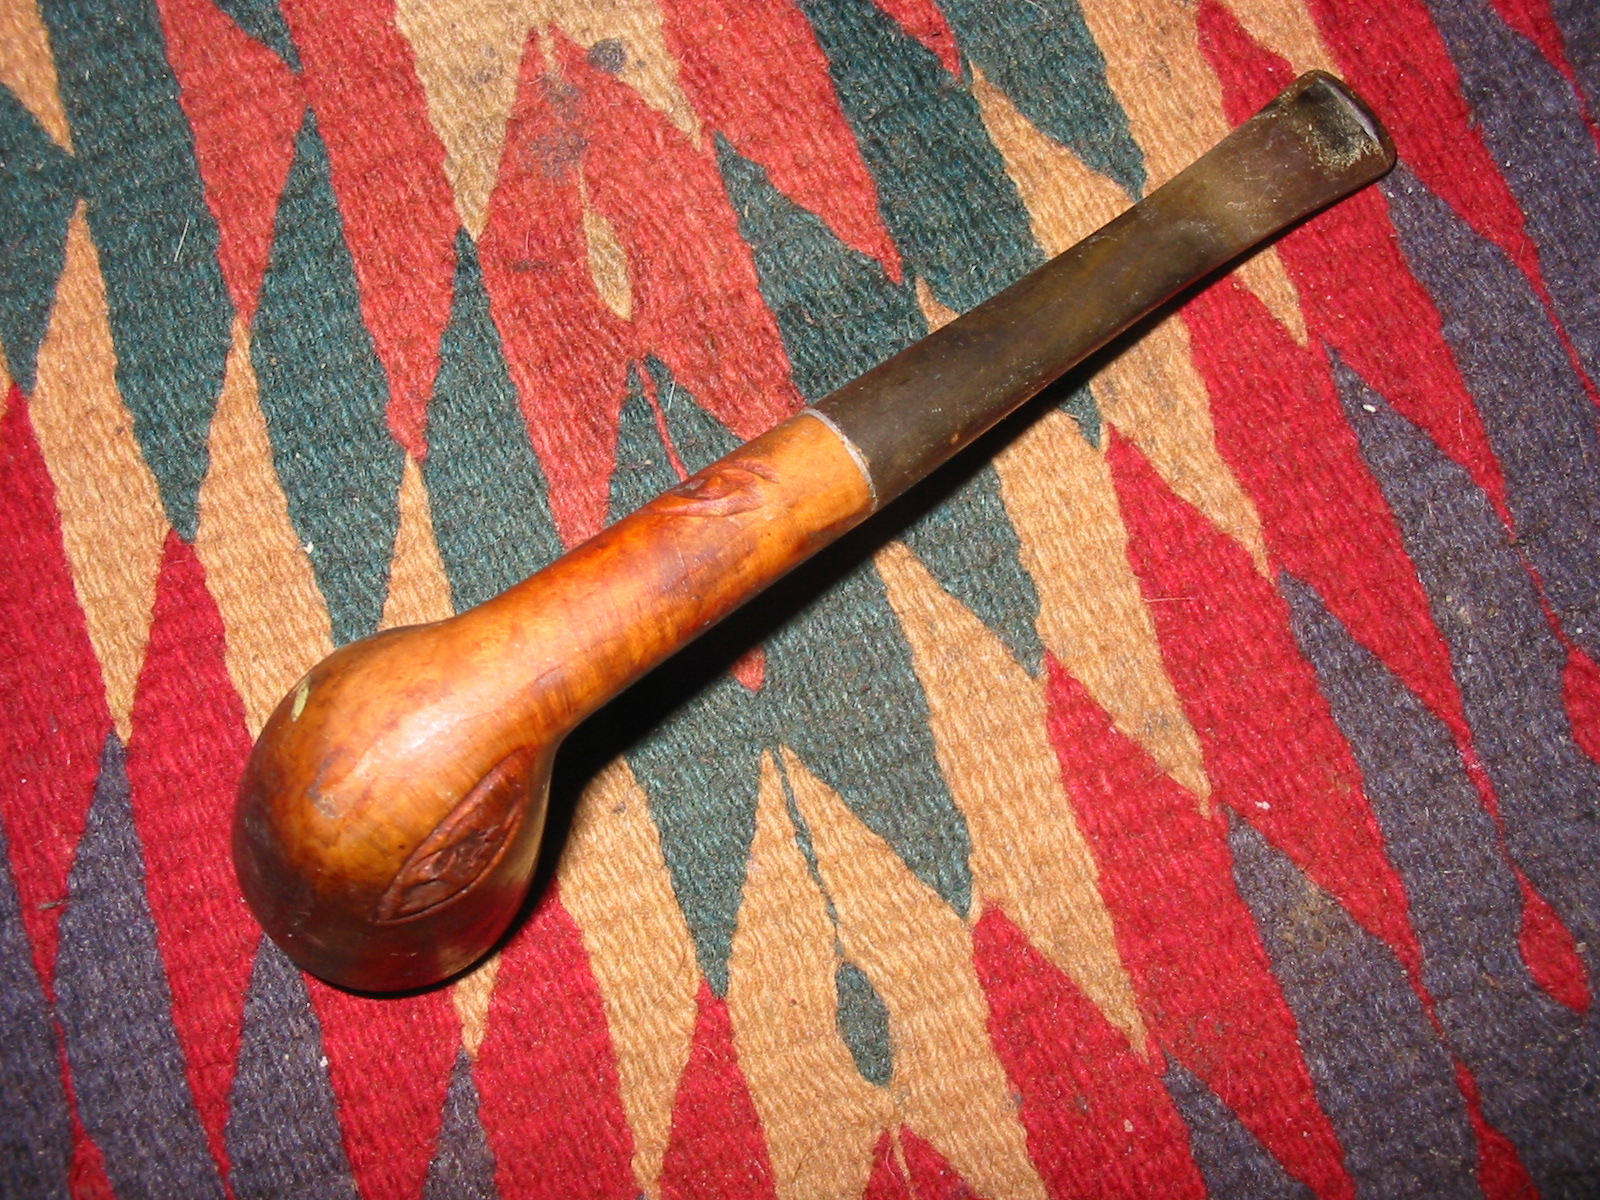
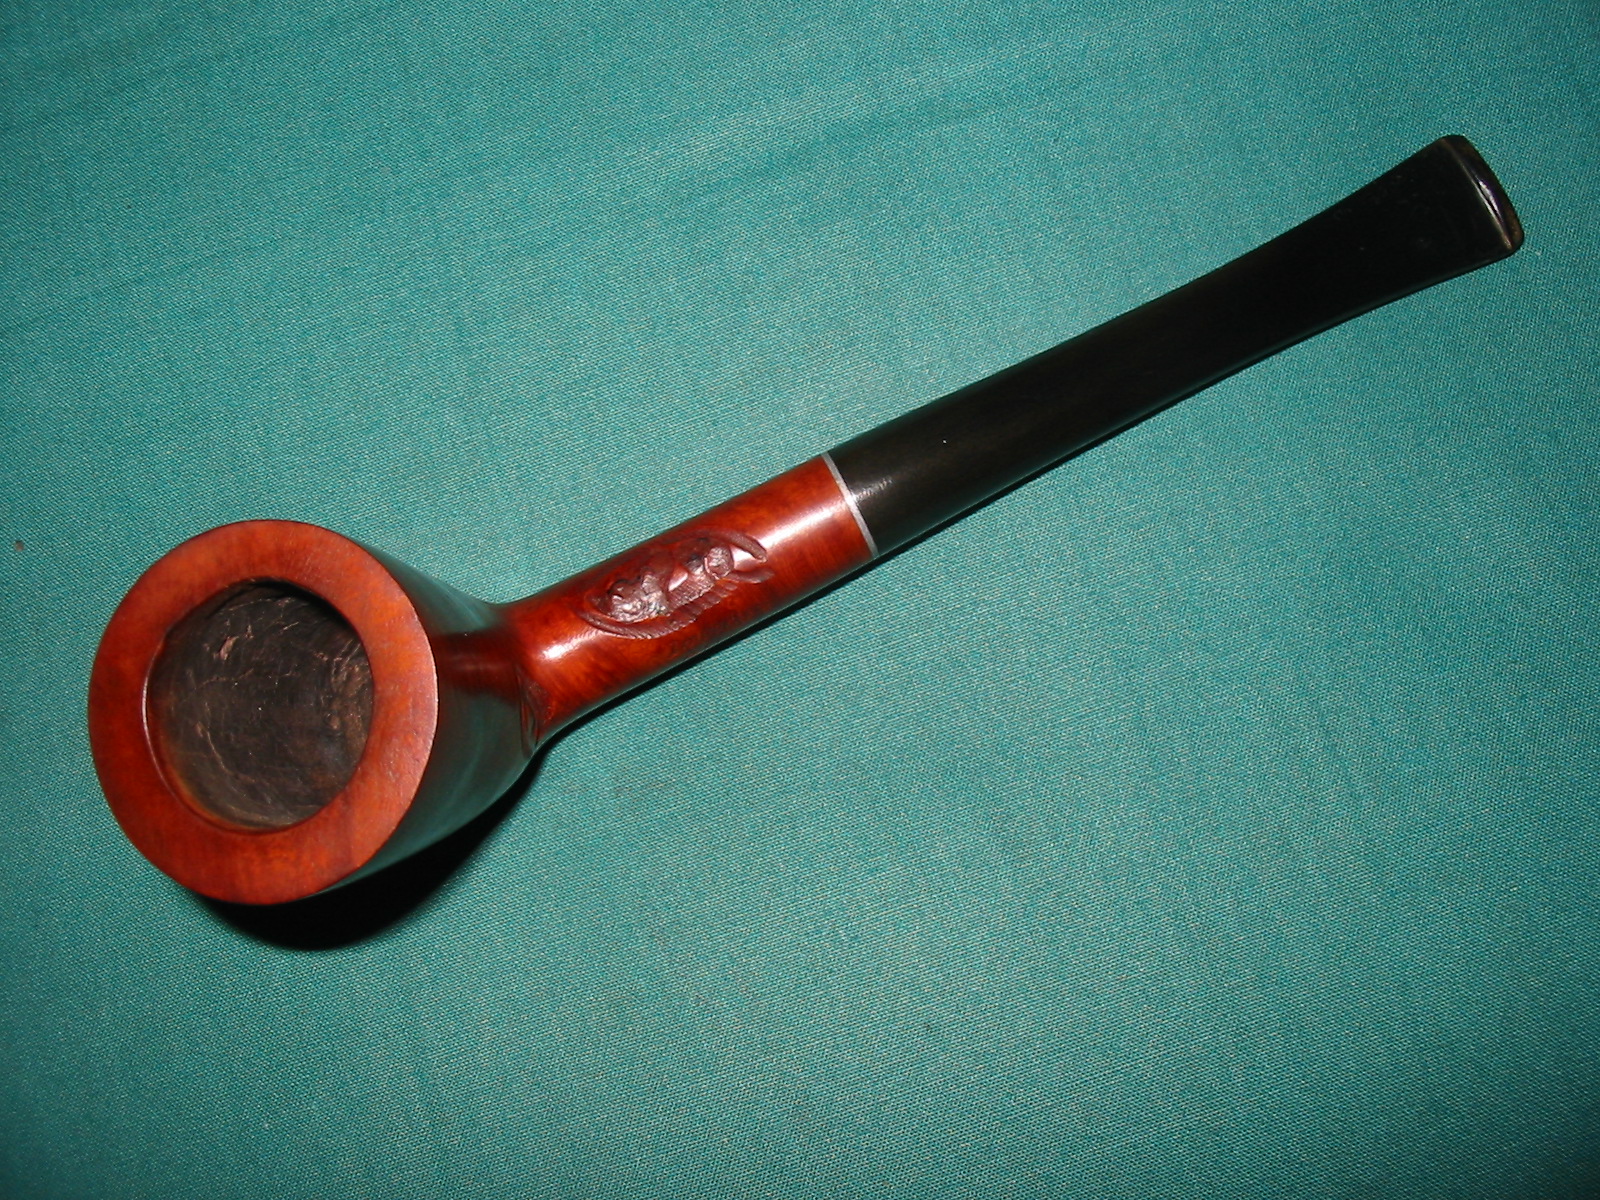
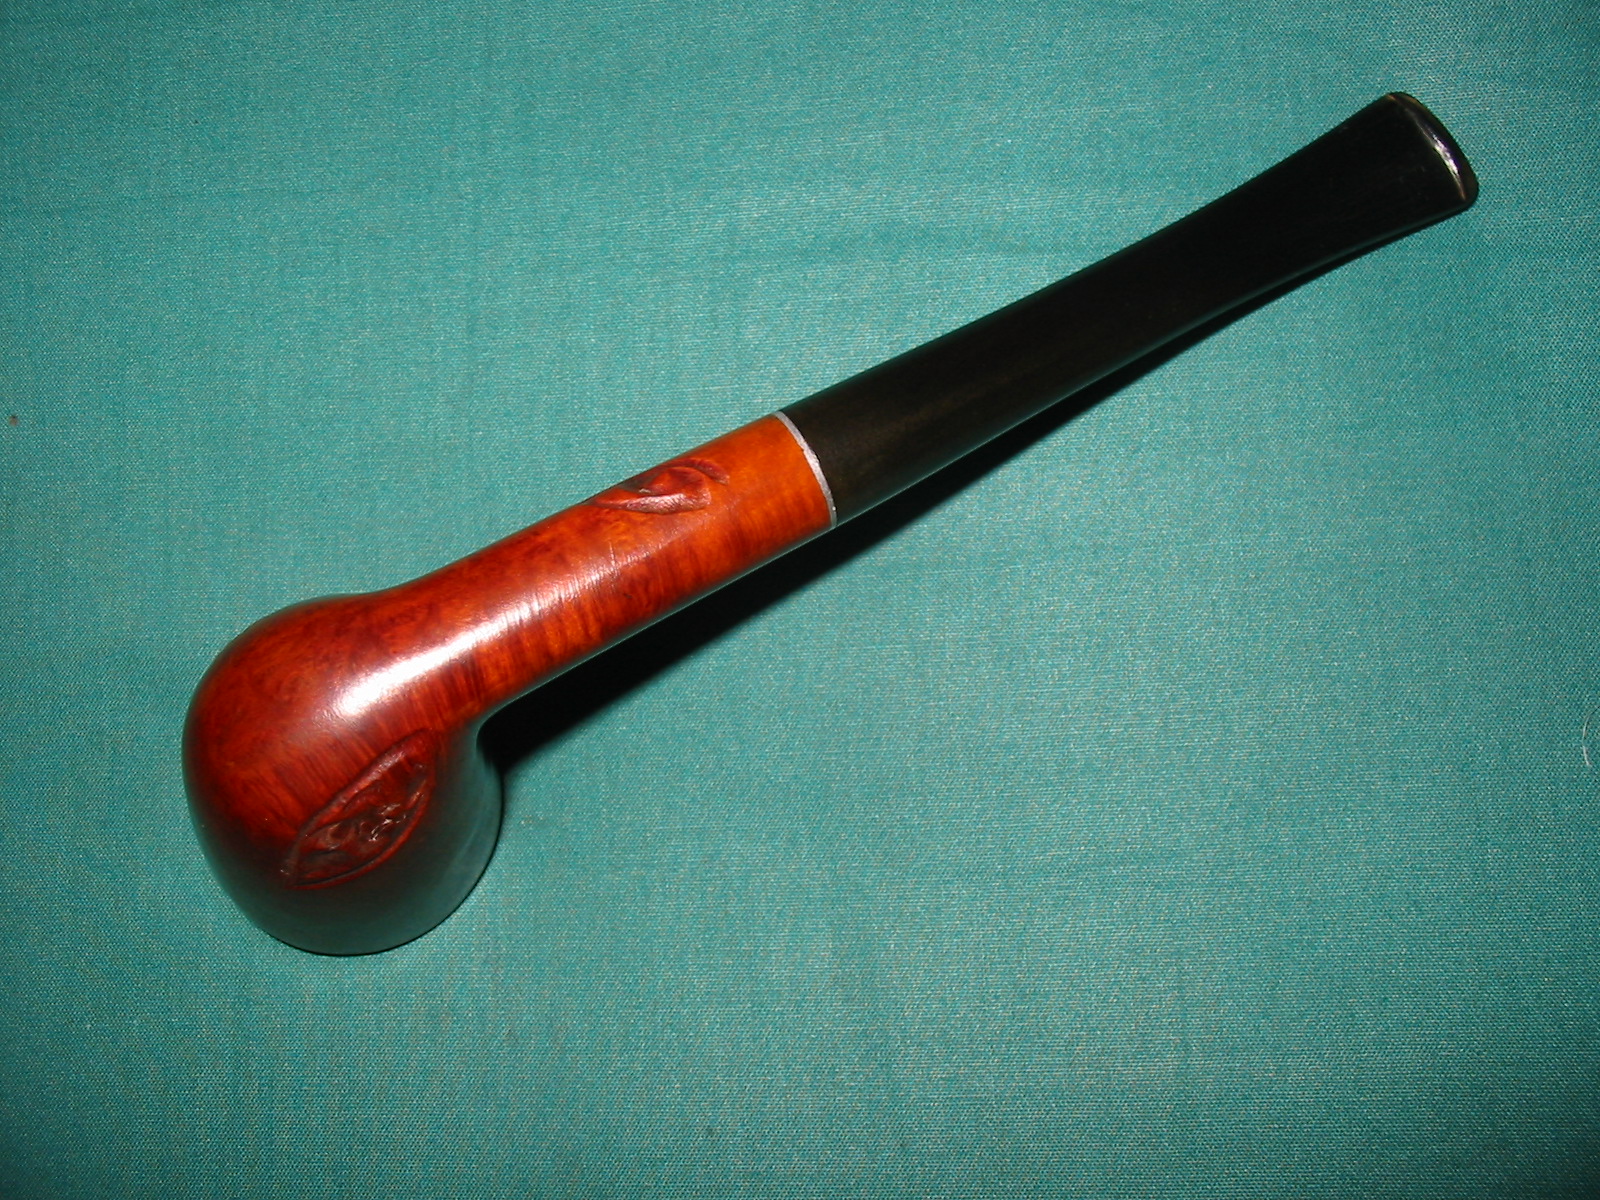
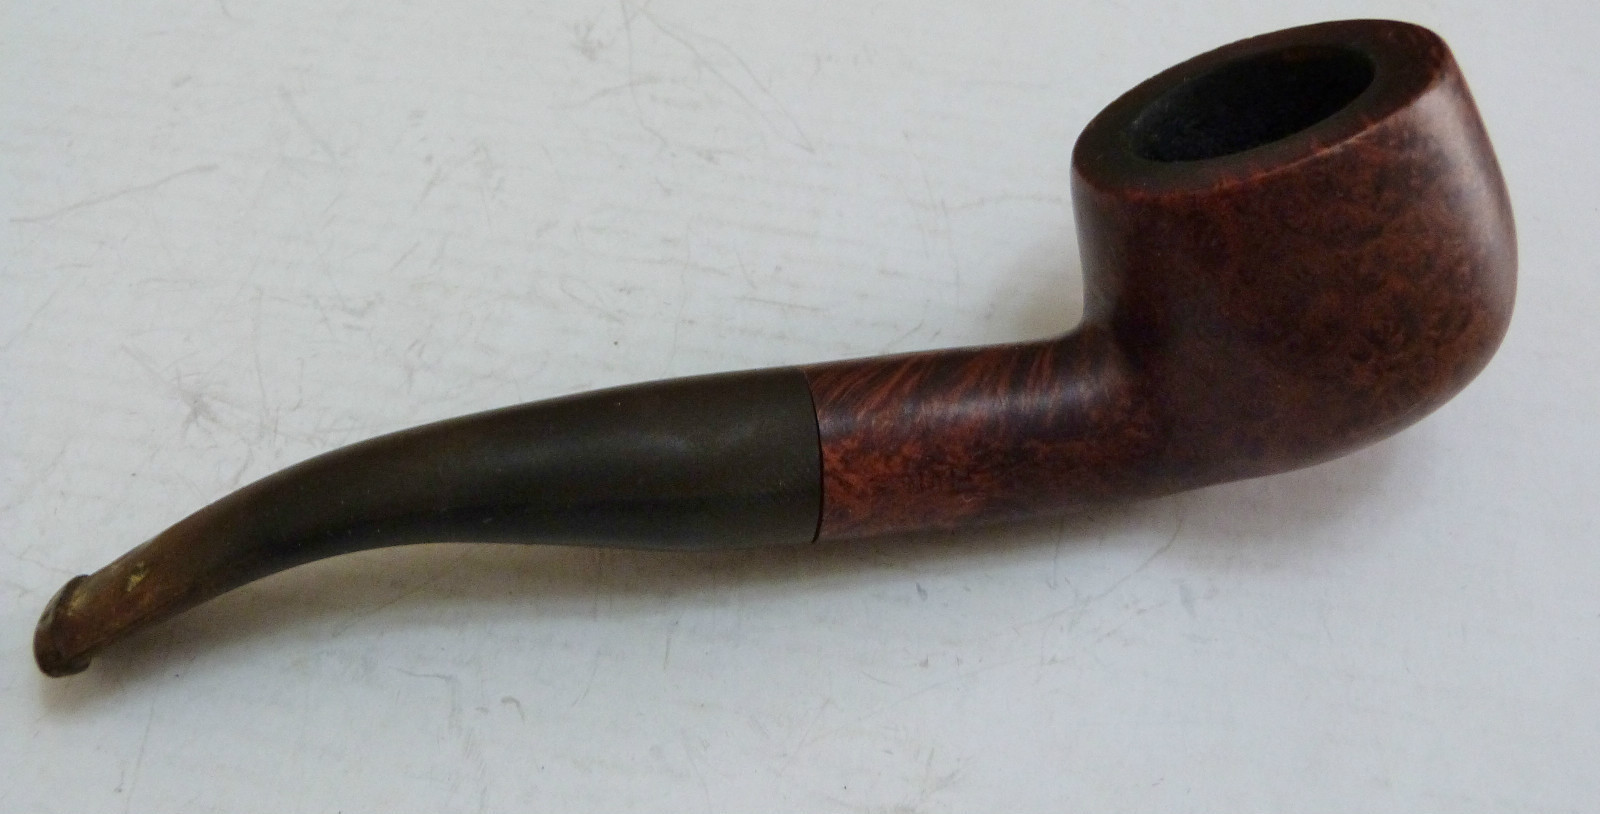
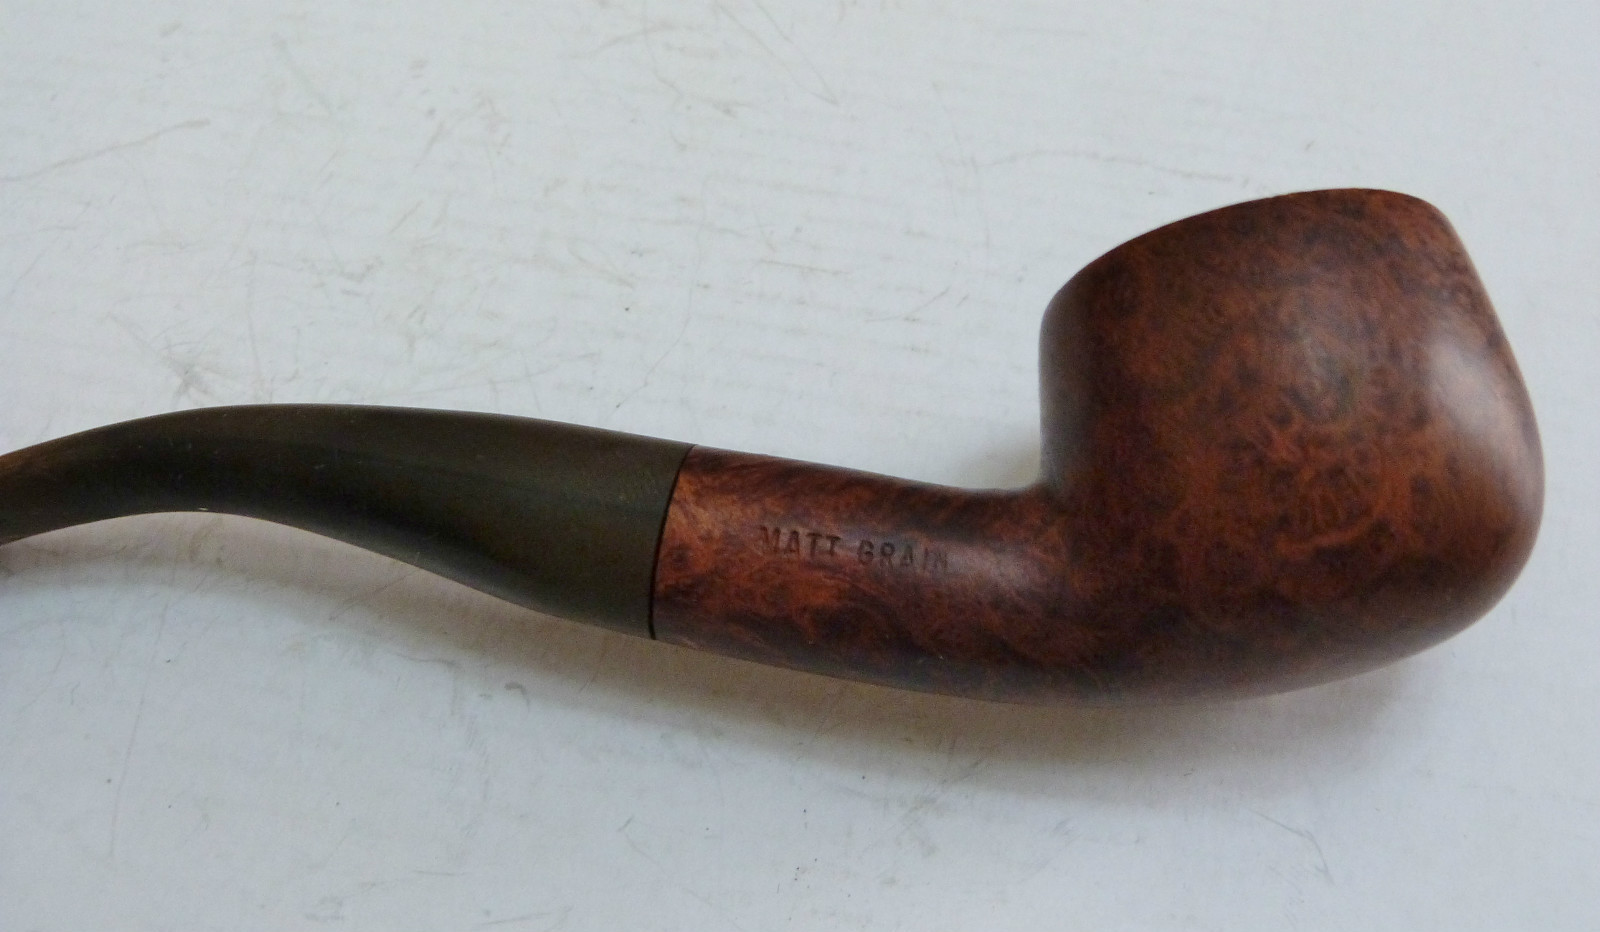
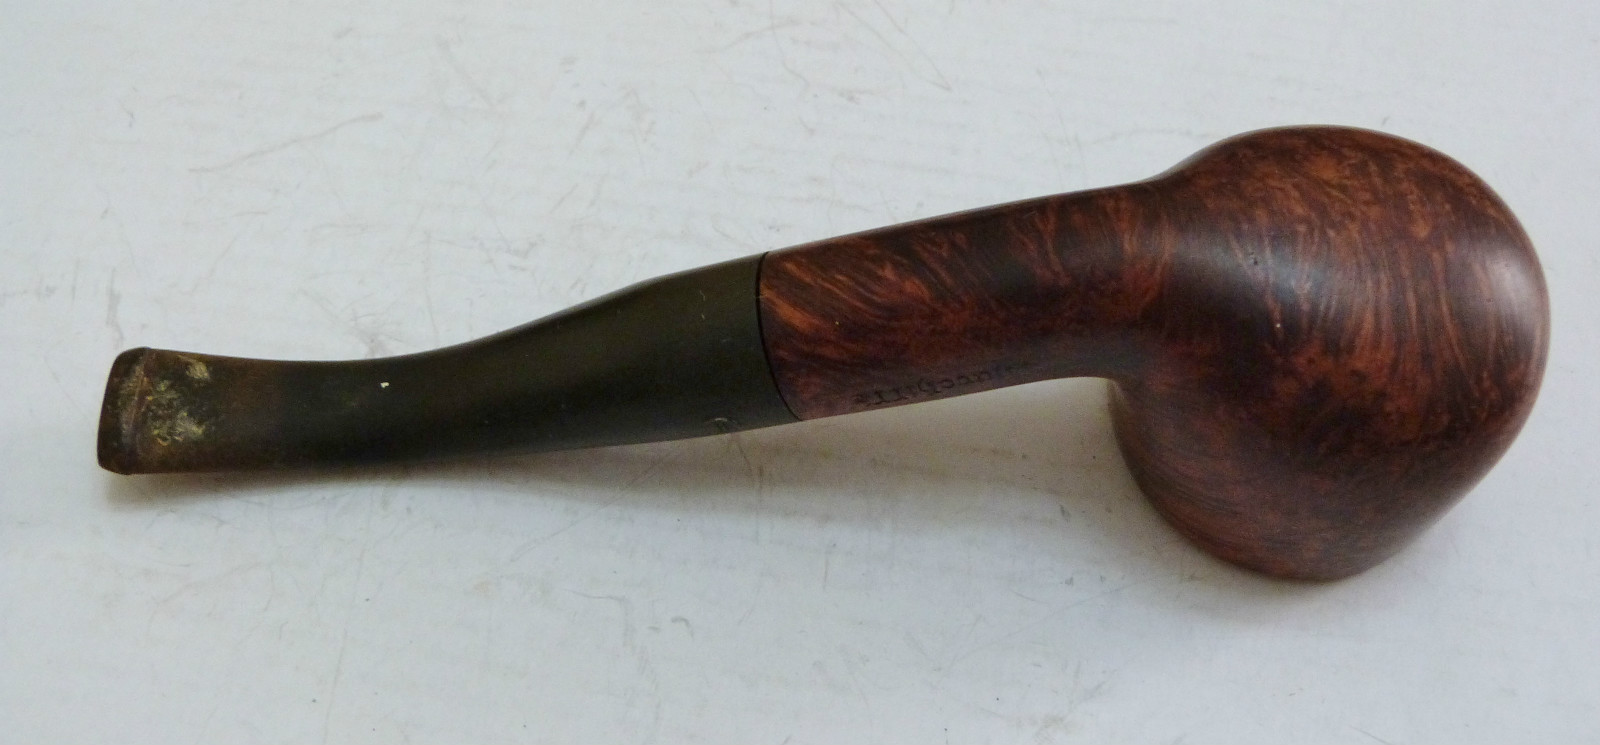
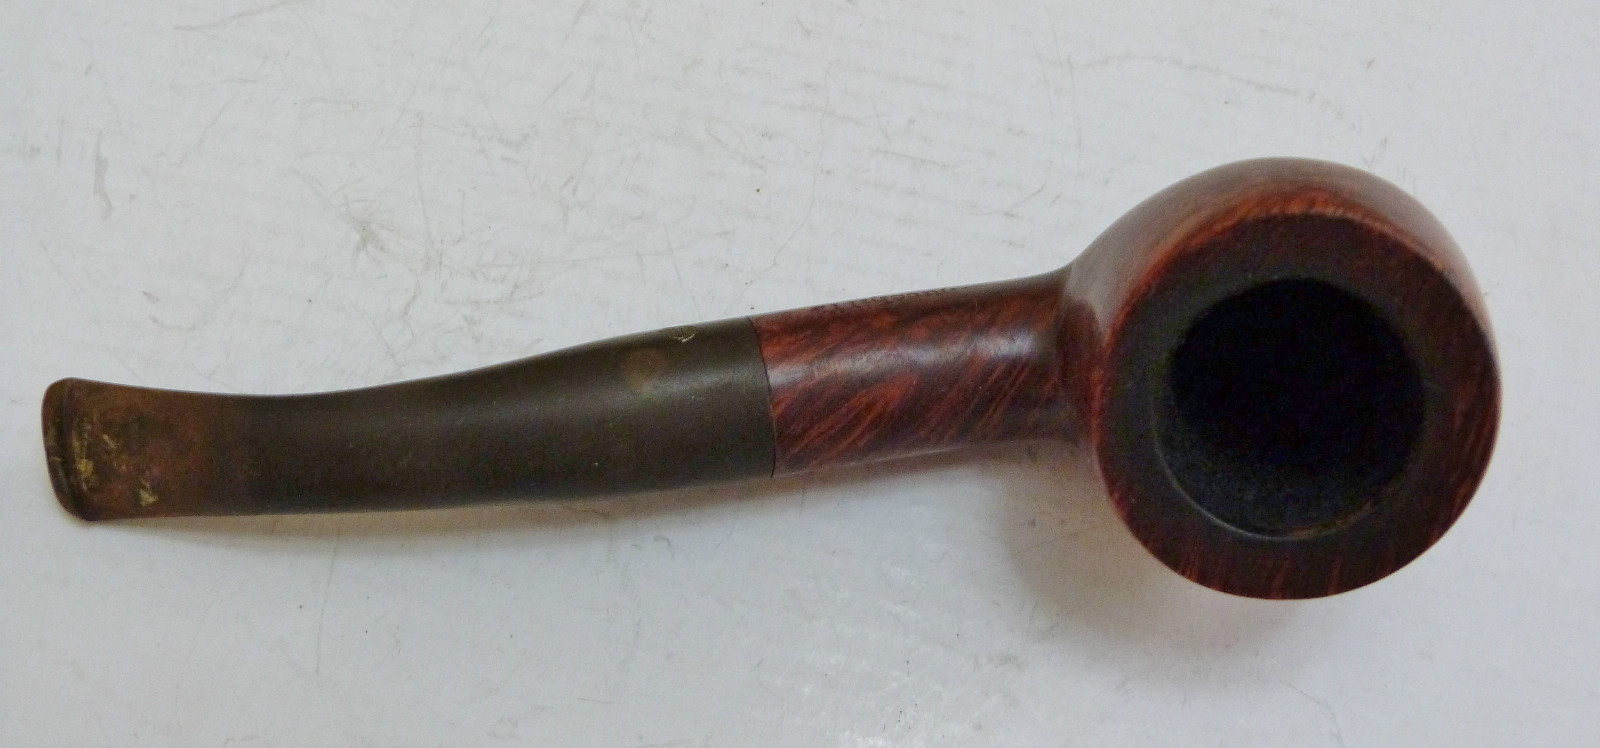
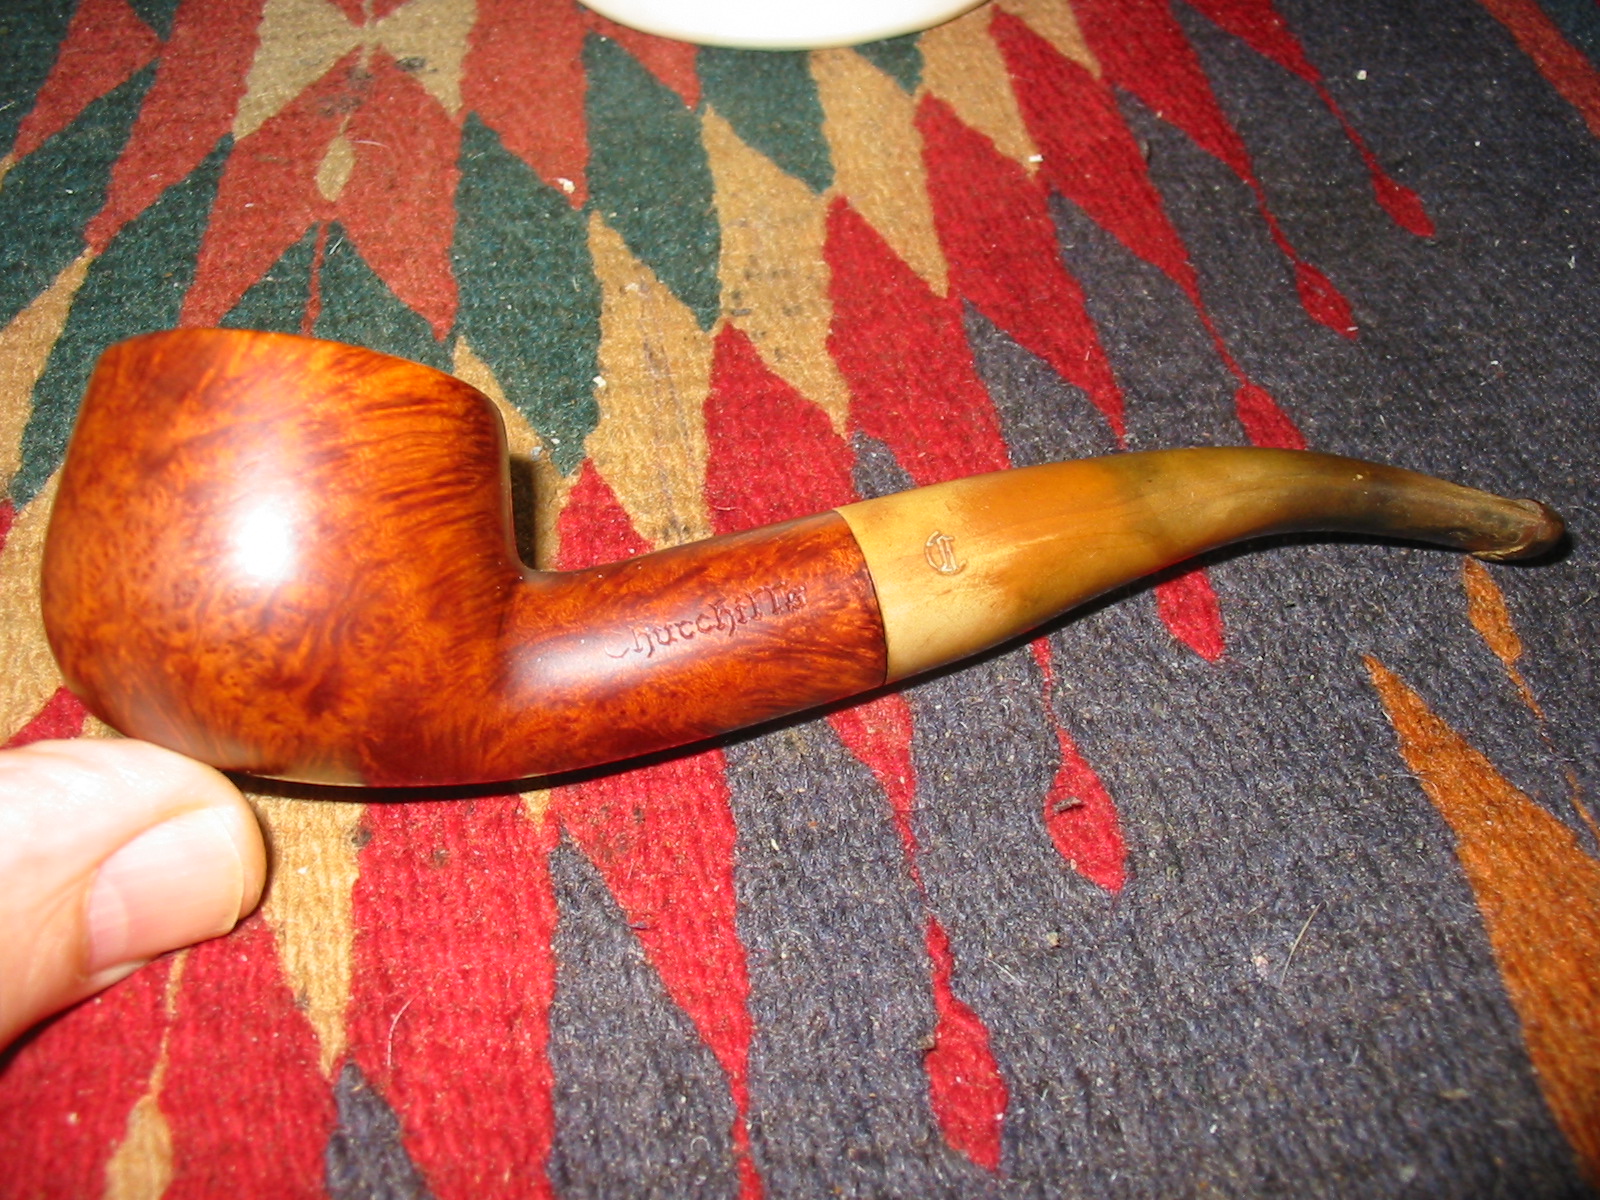
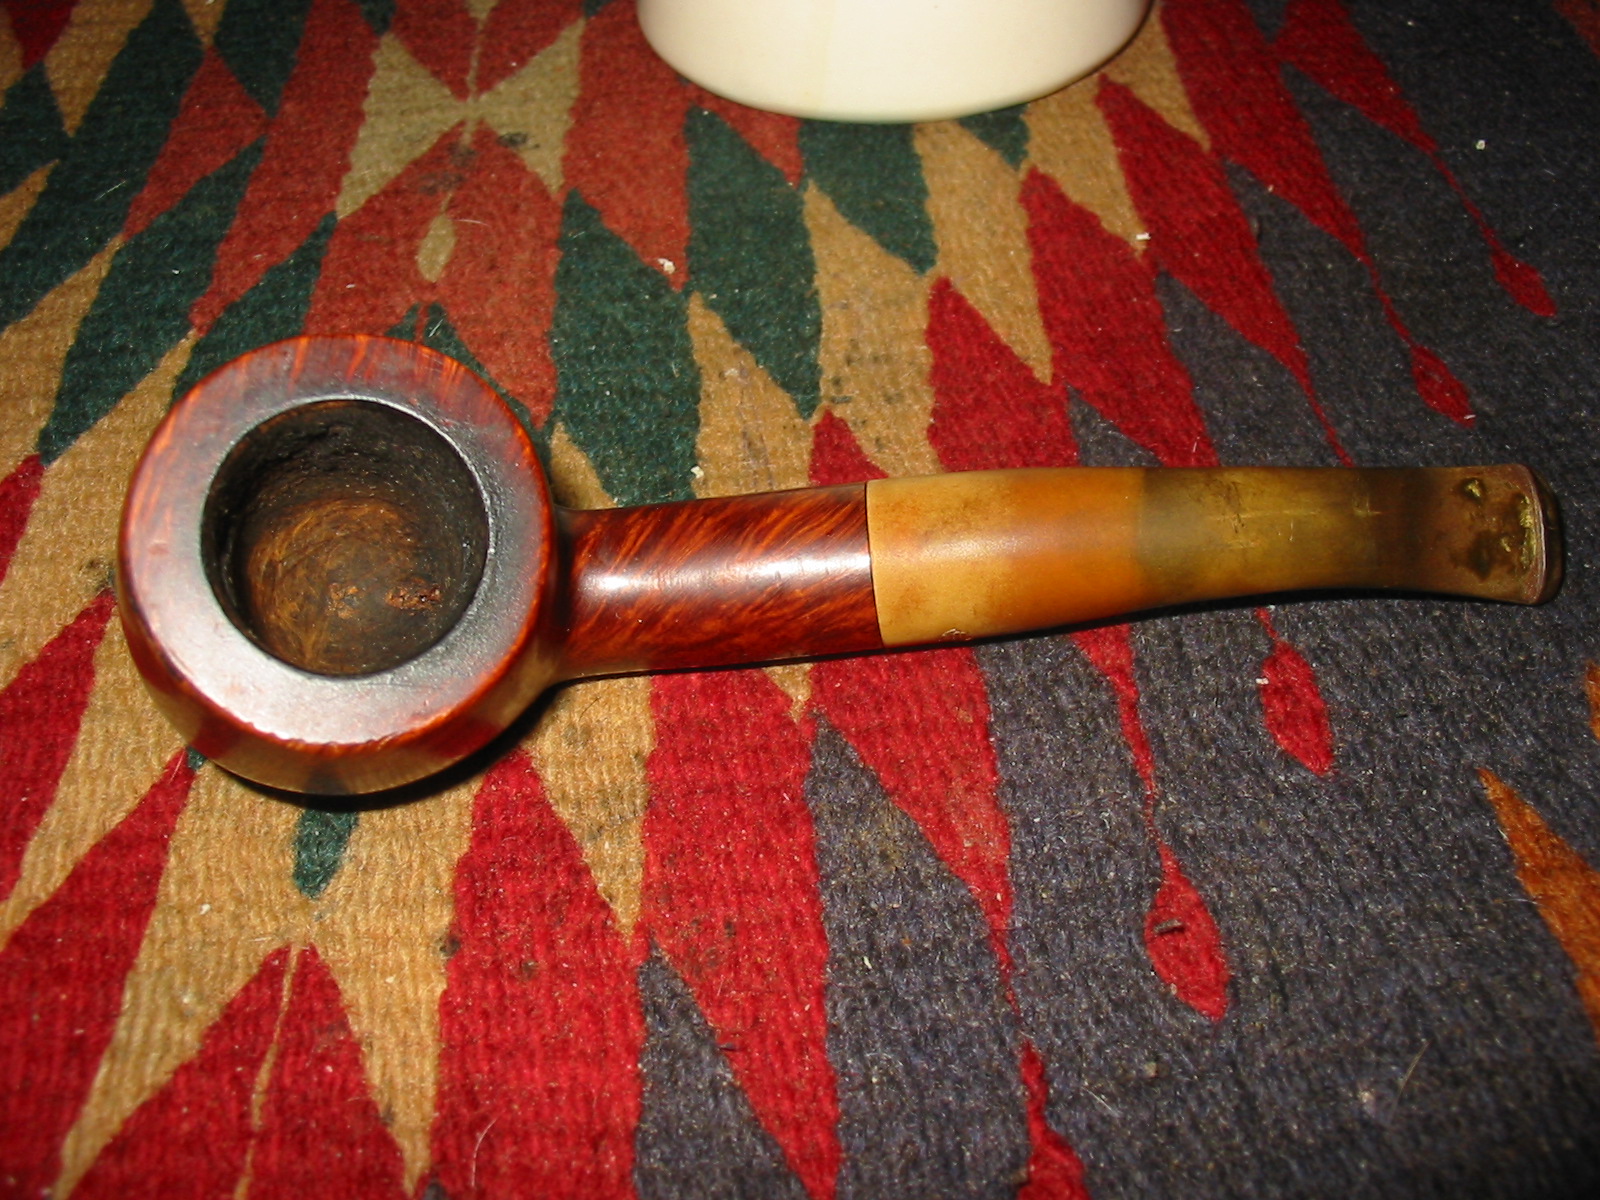
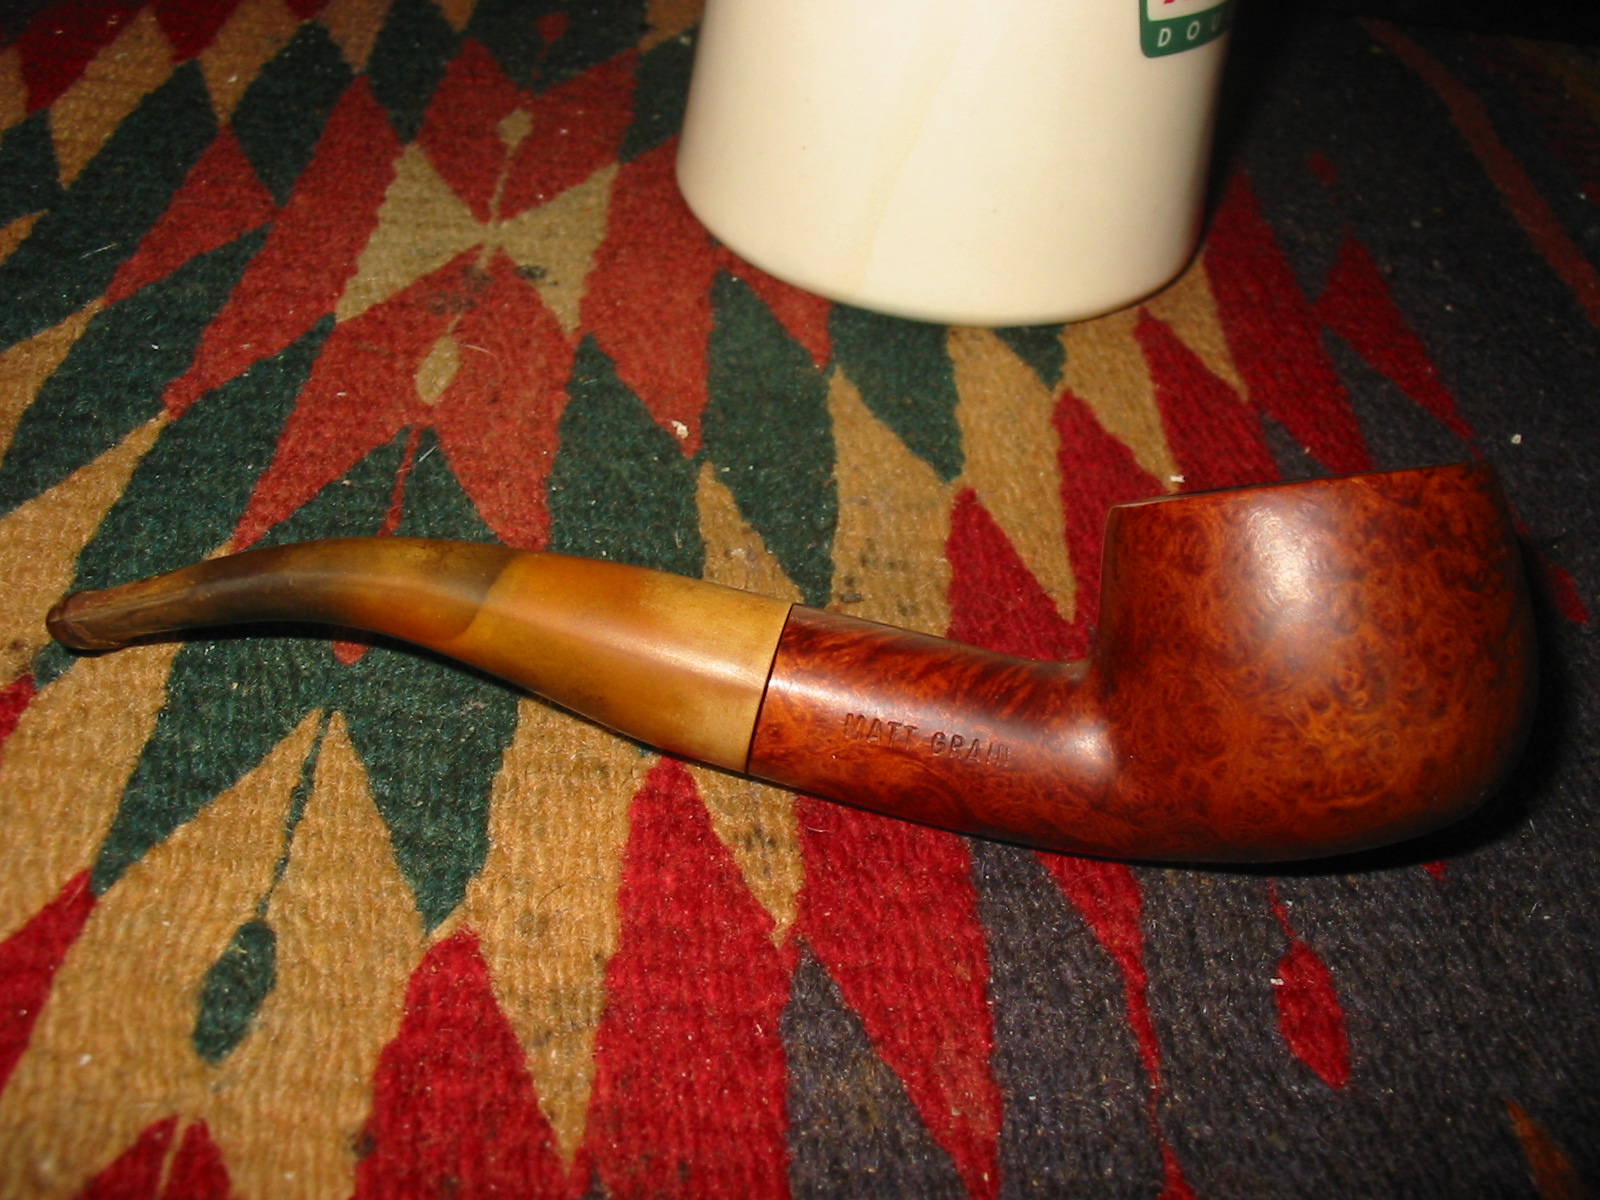
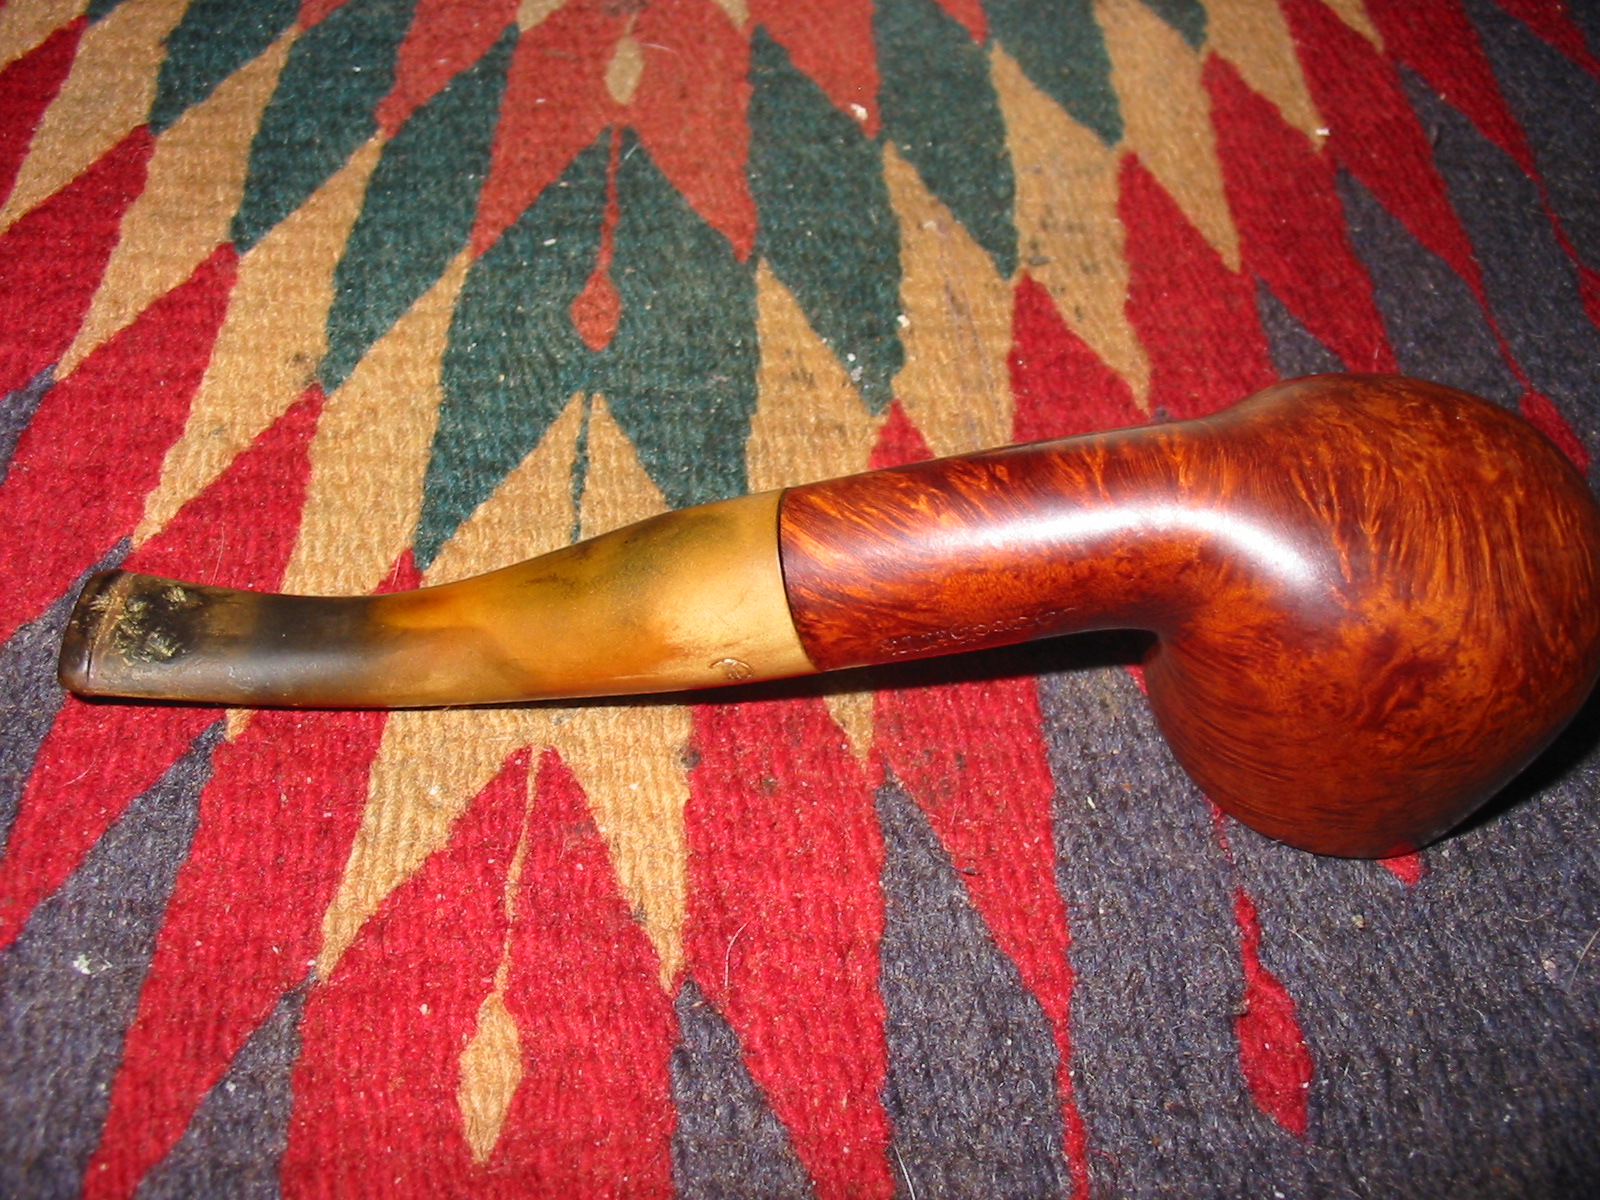
I saw this pipe come up on Ebay and love the shape. Some have called it a bent pot but I am not sure that the name captures the shape but I will call it that nonetheless. Churchill’s was not a brand I was familiar with but it looked very good. The stamping on the pipe is very simple on the left side of the shank it is stamped Churchill’s and on the right side it is stamped Matt Grain. The bowl had been reamed back by the seller before shipping and was well done. No damage to the roundness of the bowl. The inside of the shank was filled with chips of carbon from the reaming and they were stuck in the tar in the shank. The buildup was enough that the stem did not seat in the mortise and there was a gap in the fit of the stem and shank. The rim had some tarry buildup. The stem sat at an angle to the shank as if the tenon was bent slightly. There were three deep tooth marks on the top and the bottom of the stem near the button. The oxidation was present but not heavy at this point. The stem was also plugged with tars and the airflow was very constricted. There was an old English style C stamped on the stem. The first nine photos below were provided by the Ebay seller.
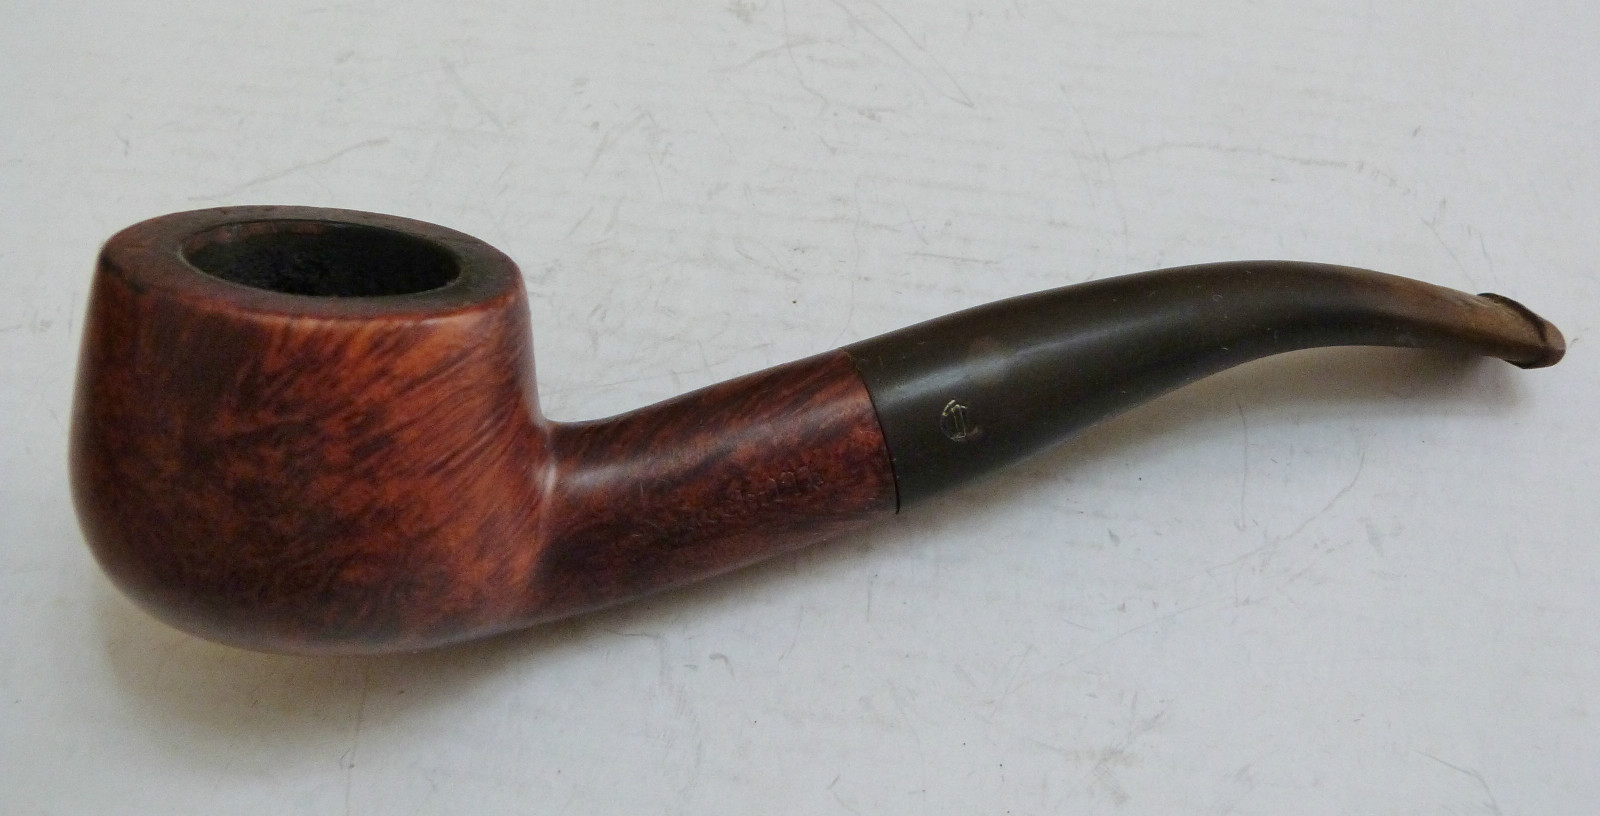
Churchill 1

Churchill 2

Churchill 3

Churchill 4

Churchill 5

Churchill 6

Churchill 7

Churchill 8

Churchill 10

Logo NEW Logo 2012 Small

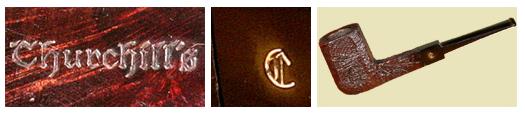
I am fairly certain that the pipe came from Churchill’s Tobacco Shop in Norwich, England. I found the following information on the Pipes and Logos website http://pipephil.eu/logos/en/logo-c4.html On the site there is a small paragraph which I have copied as follows: “Churchill’s Tobacco shop is situated in St Andrew’s Street at the corner of Bridewell Alley in Norwich, England. The shop was next to a church and at the bottom of two hills, and that’s how it became “Churchill’s”. Former manager: John Elvin (retired on May, 31 2008). Current owner (2008): Keith Garrard.” I have included these pictures from that website as they show the stamping on both the shank and stem that is identical to the pipe that I have just refurbished.

Church

According to the Churchill’s website it is the last remaining specialist tobacconist in Norwich, originally standing at 32 St Andrews Street for over 23 years. http://www.churchillsofnorwich.com/index.php?_a=viewDoc&docId=1 The site also notifies the shop’s clients that Keith Garrard, who had a wealth of knowledge and was an avid pipe and cigar smoker himself, passed away on 23rd March 2012. His wife Coral continues to maintain the business in his honor.

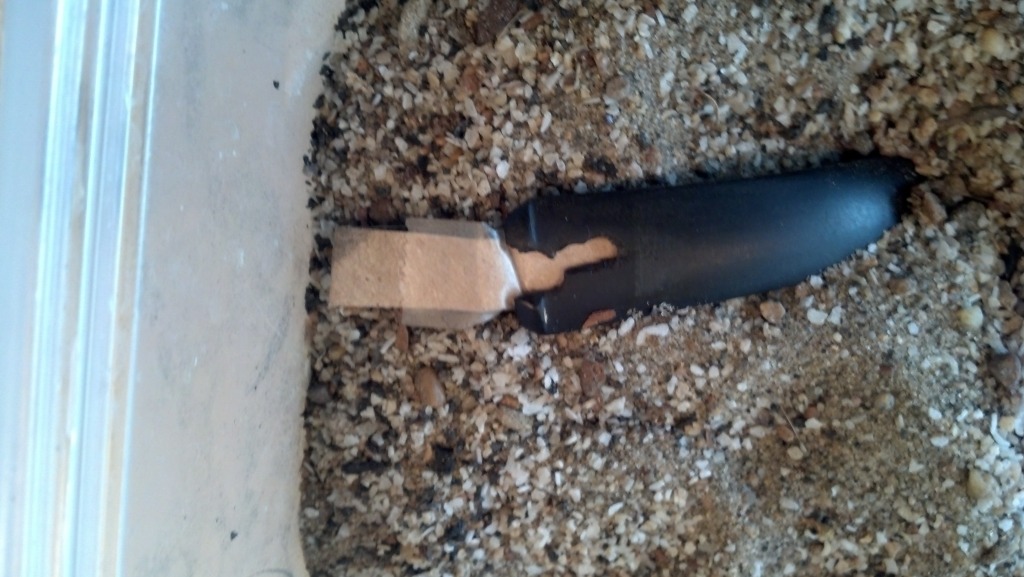
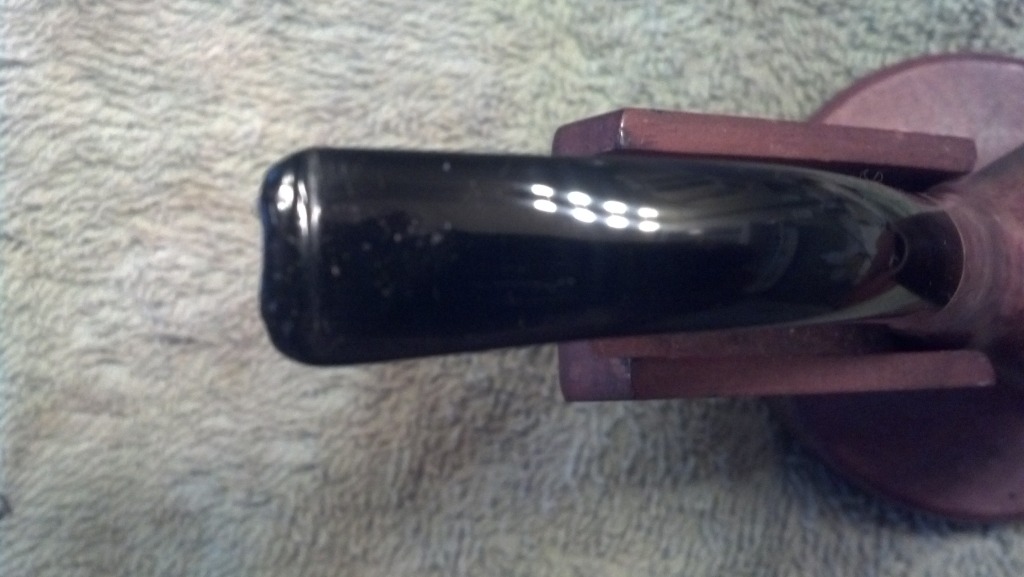
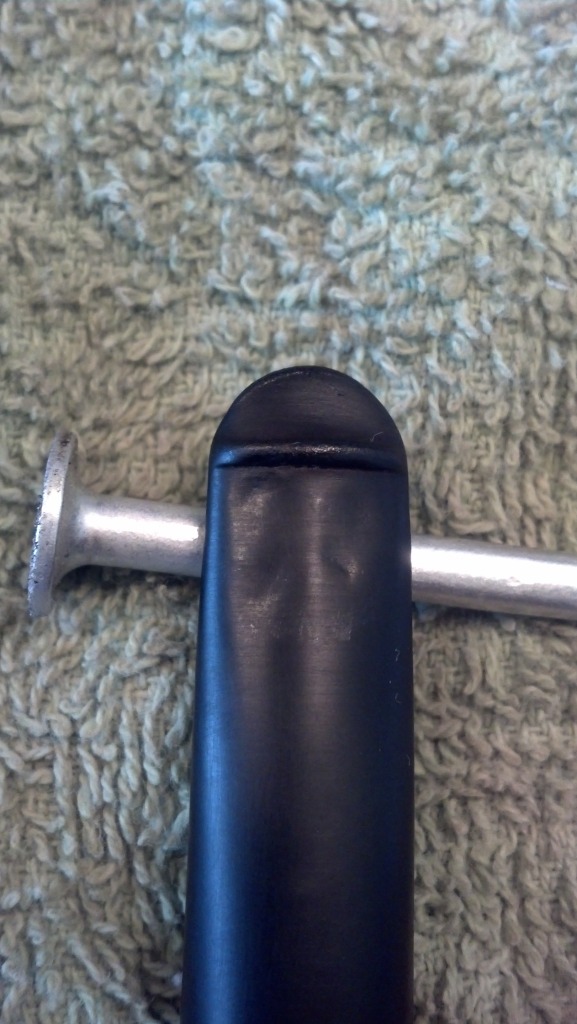
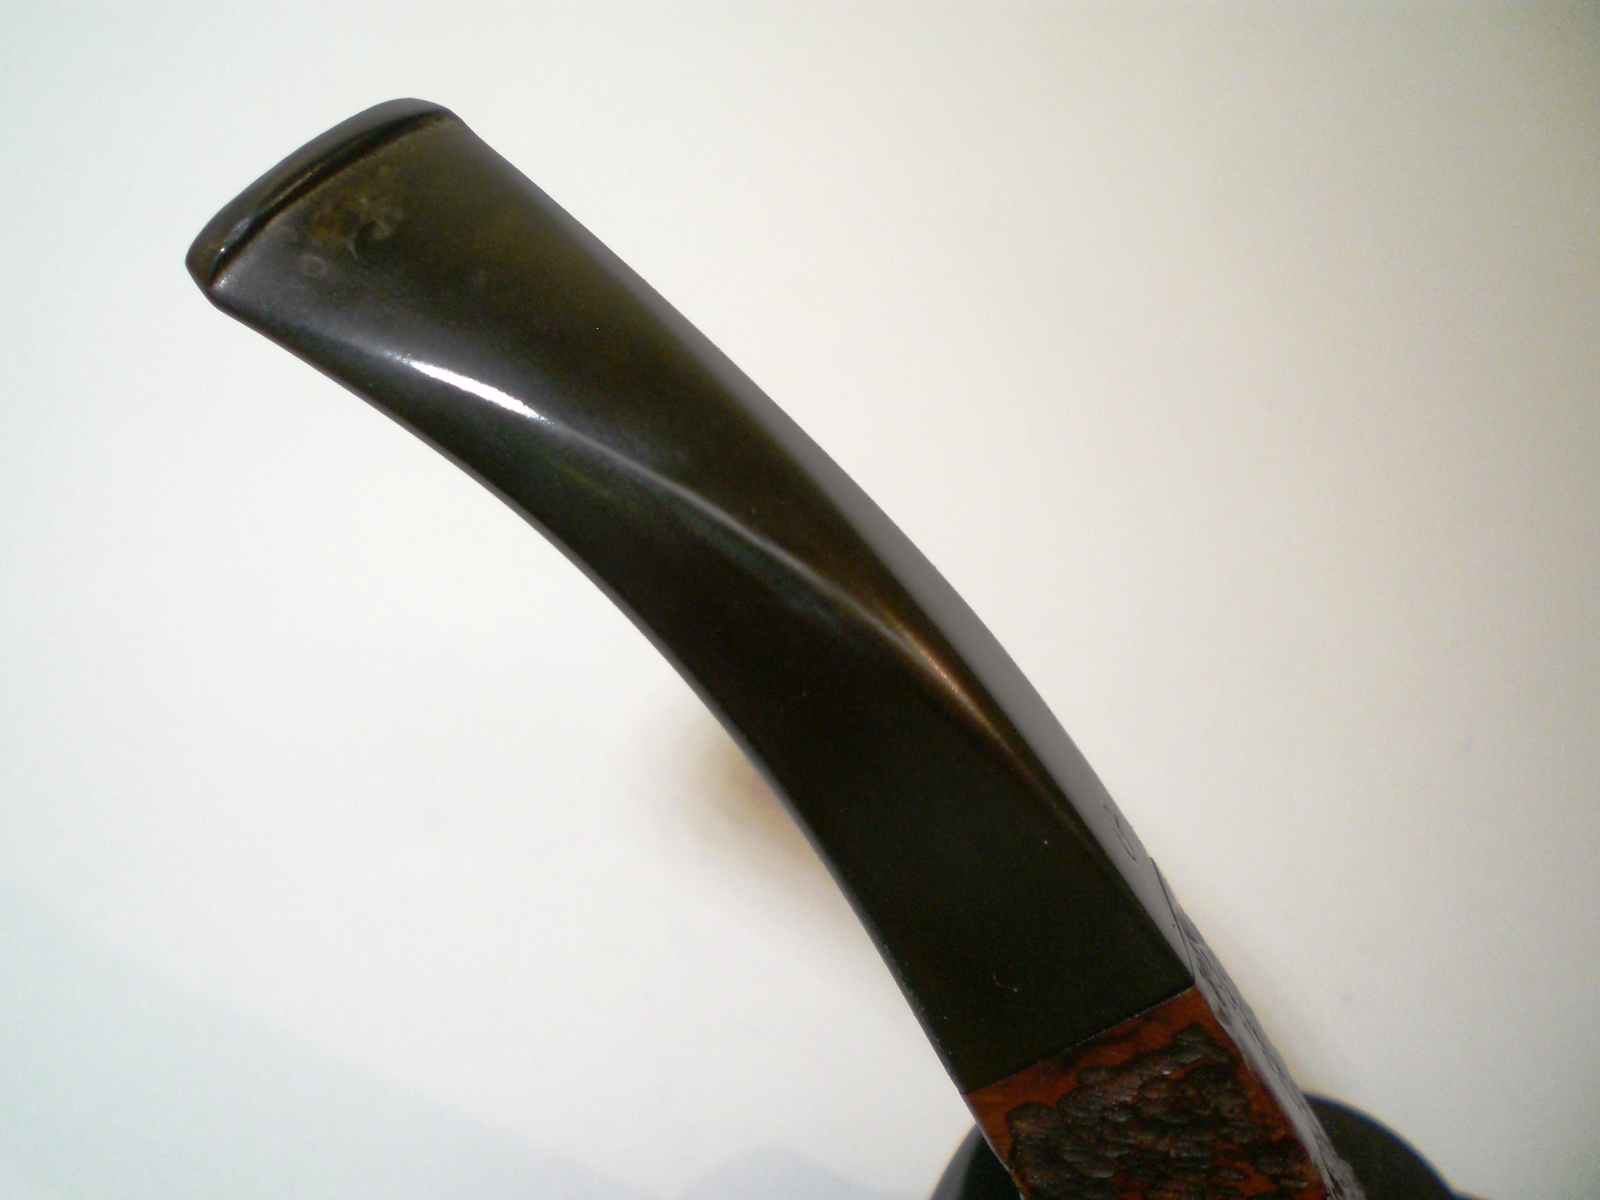
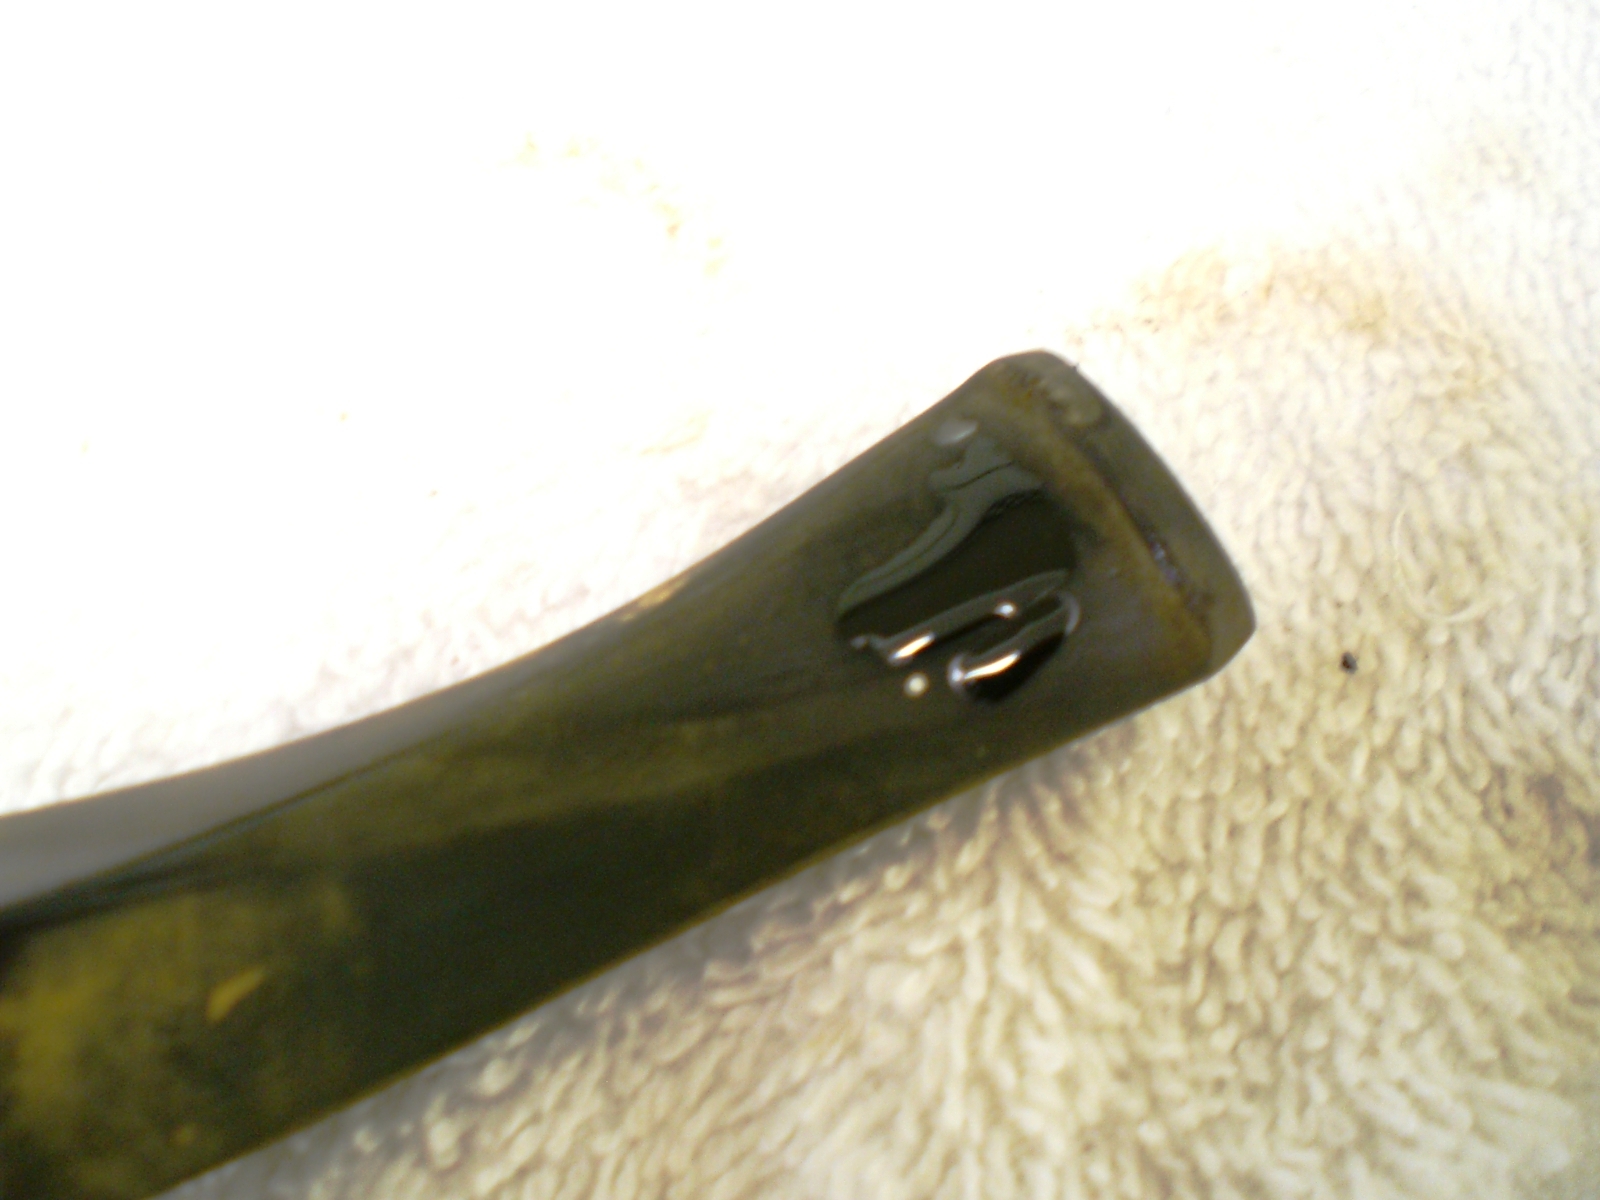
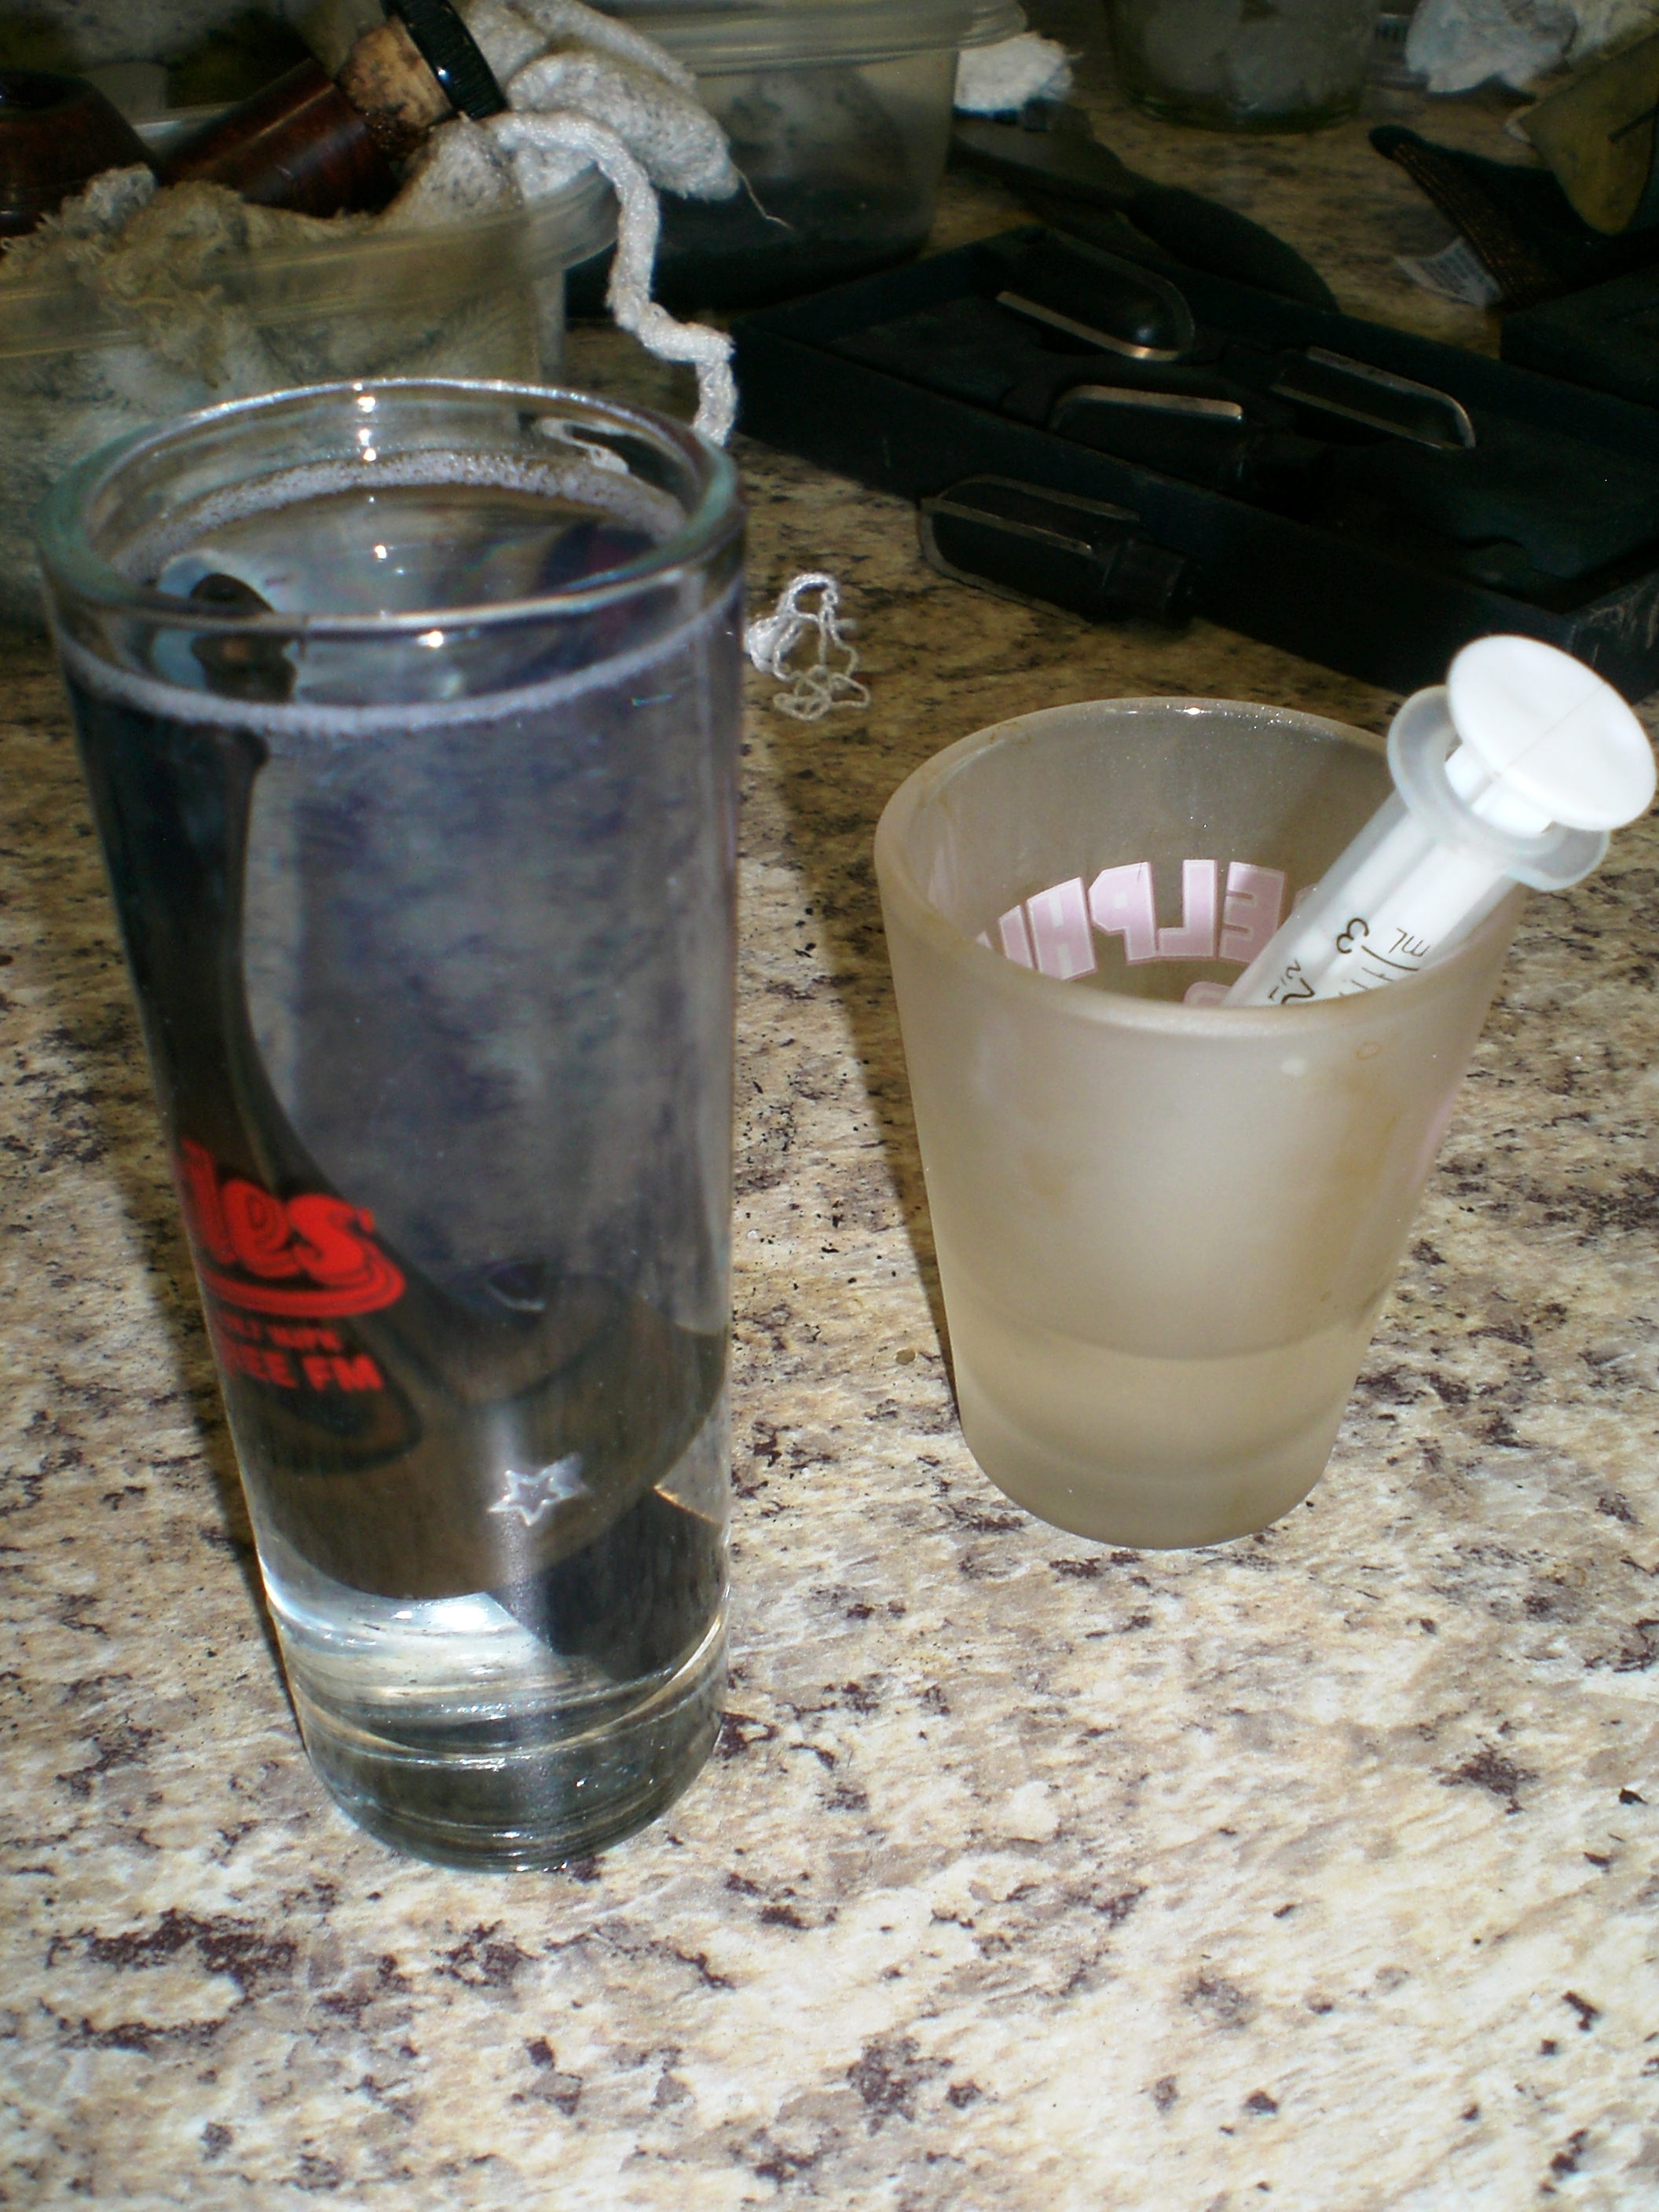
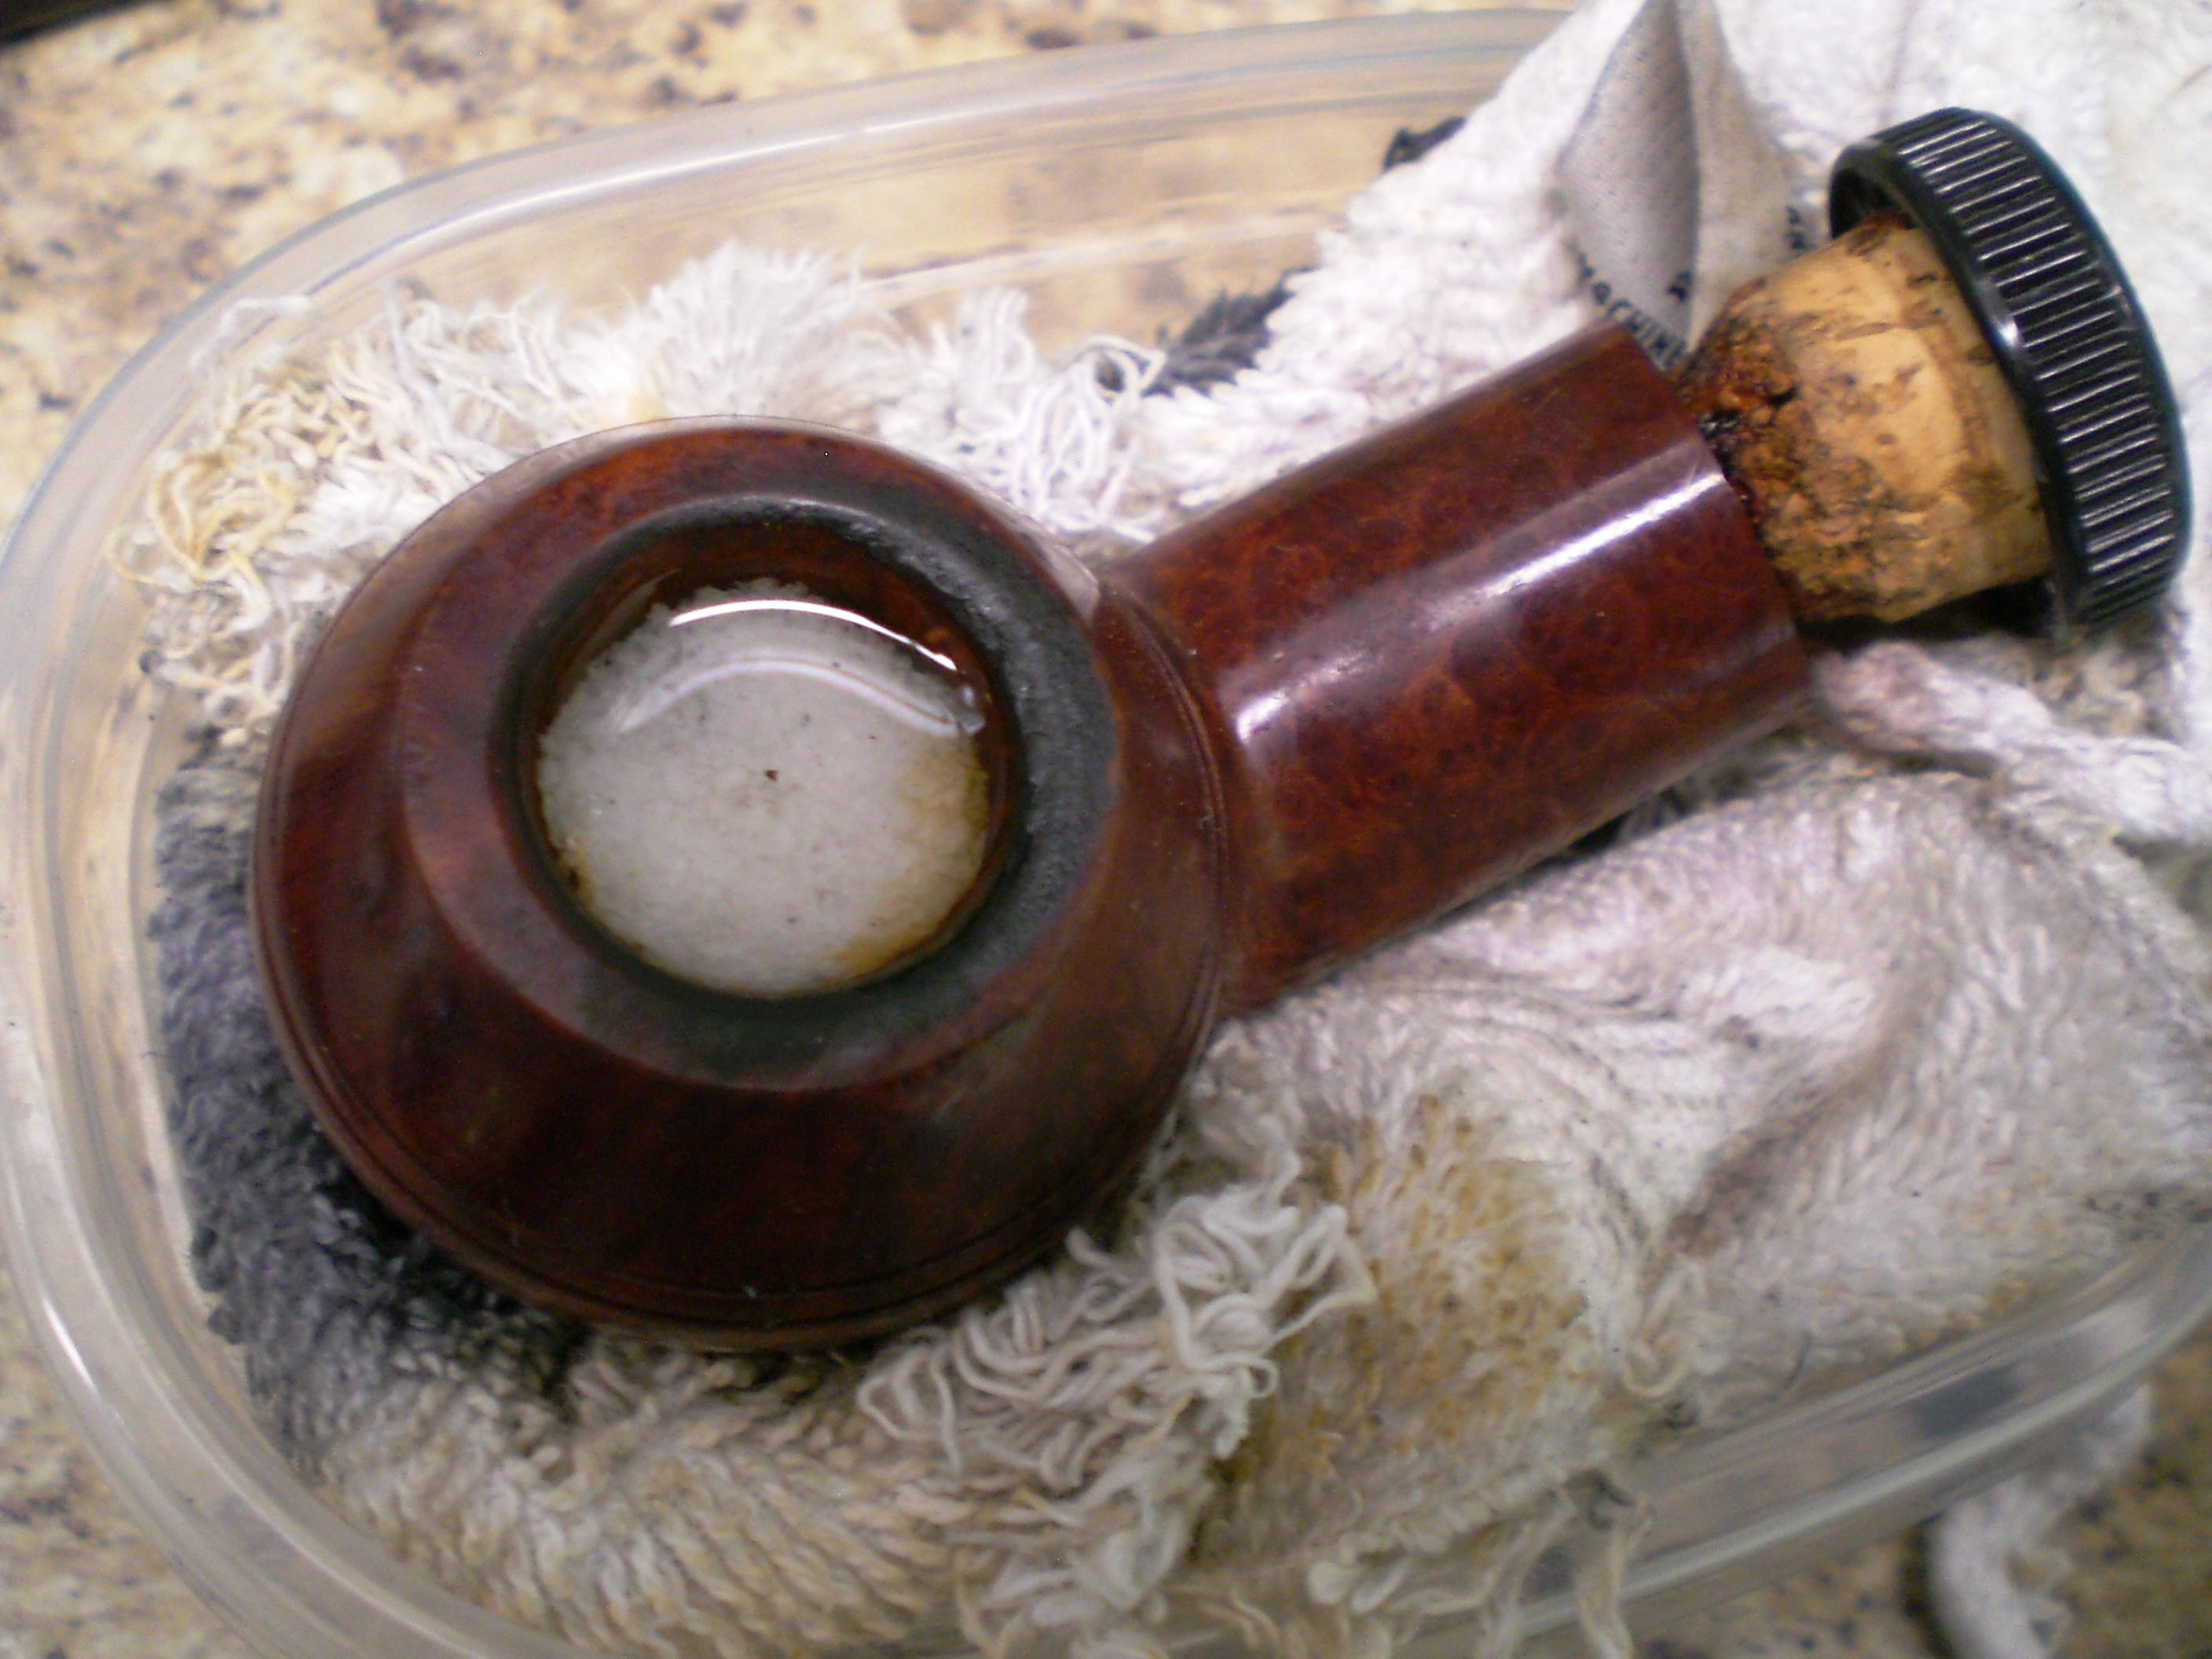
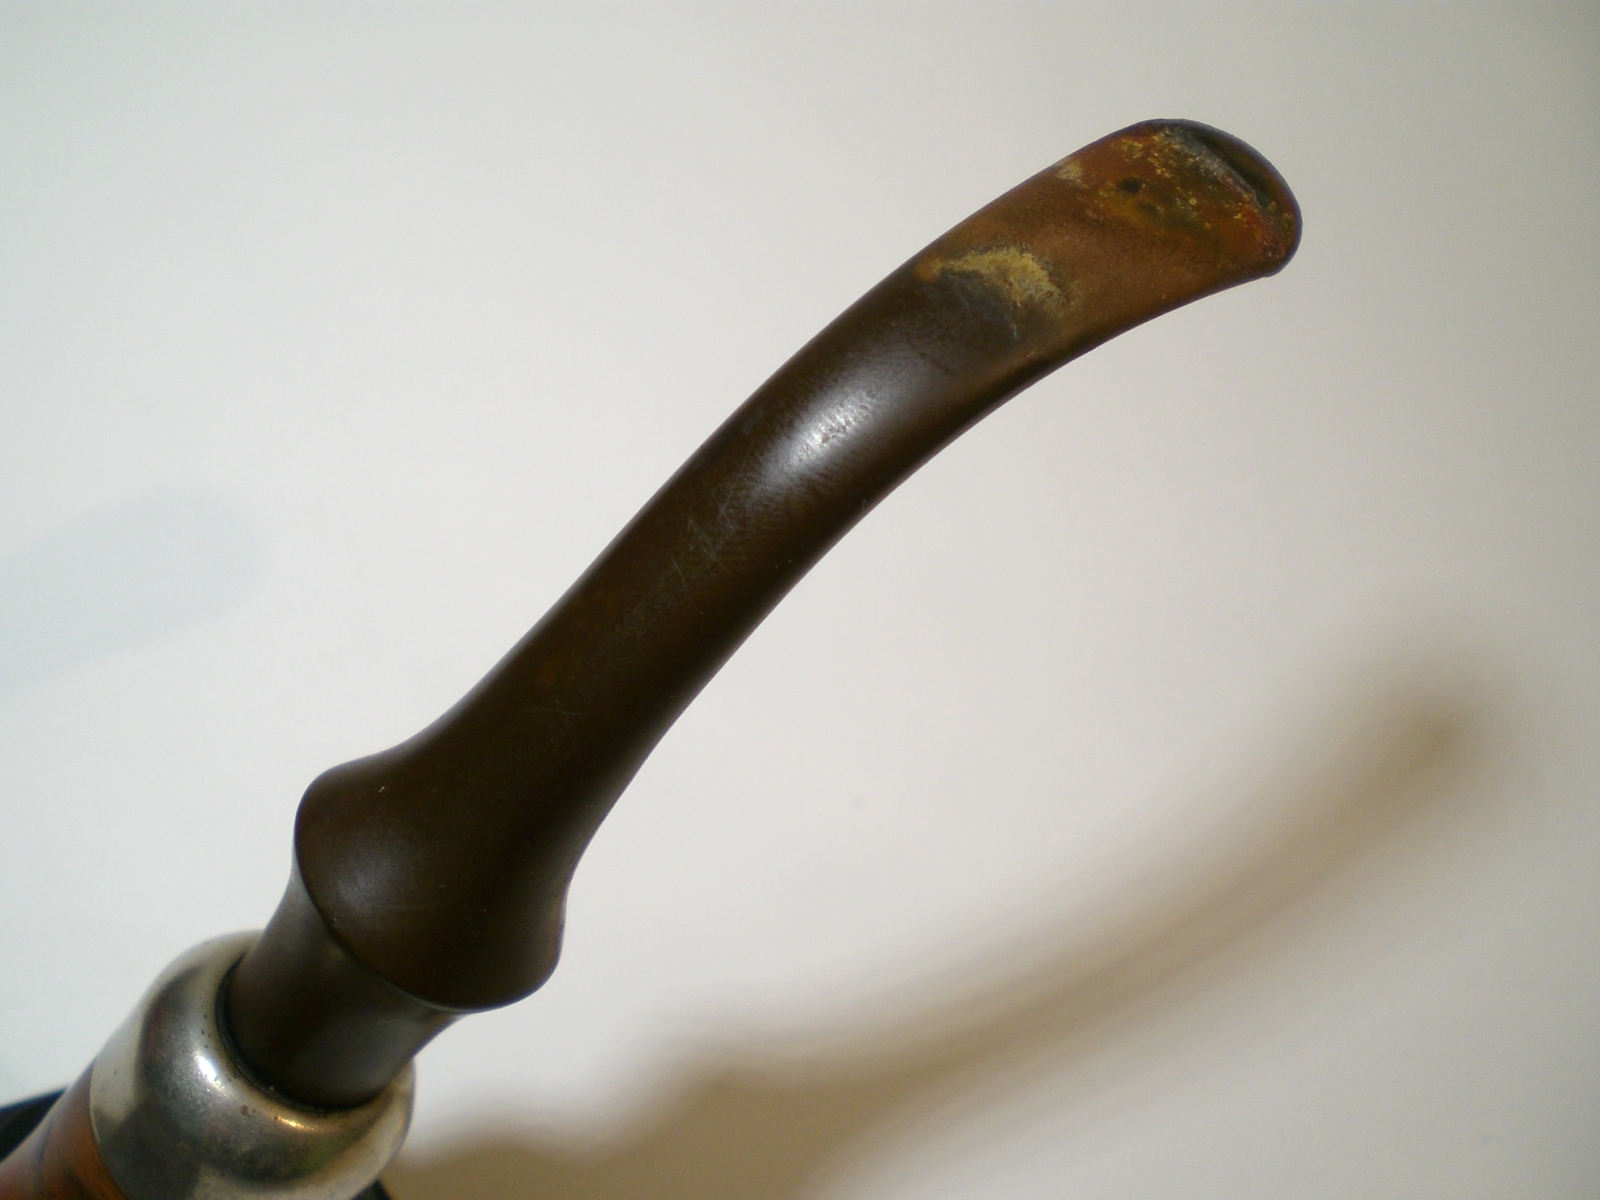
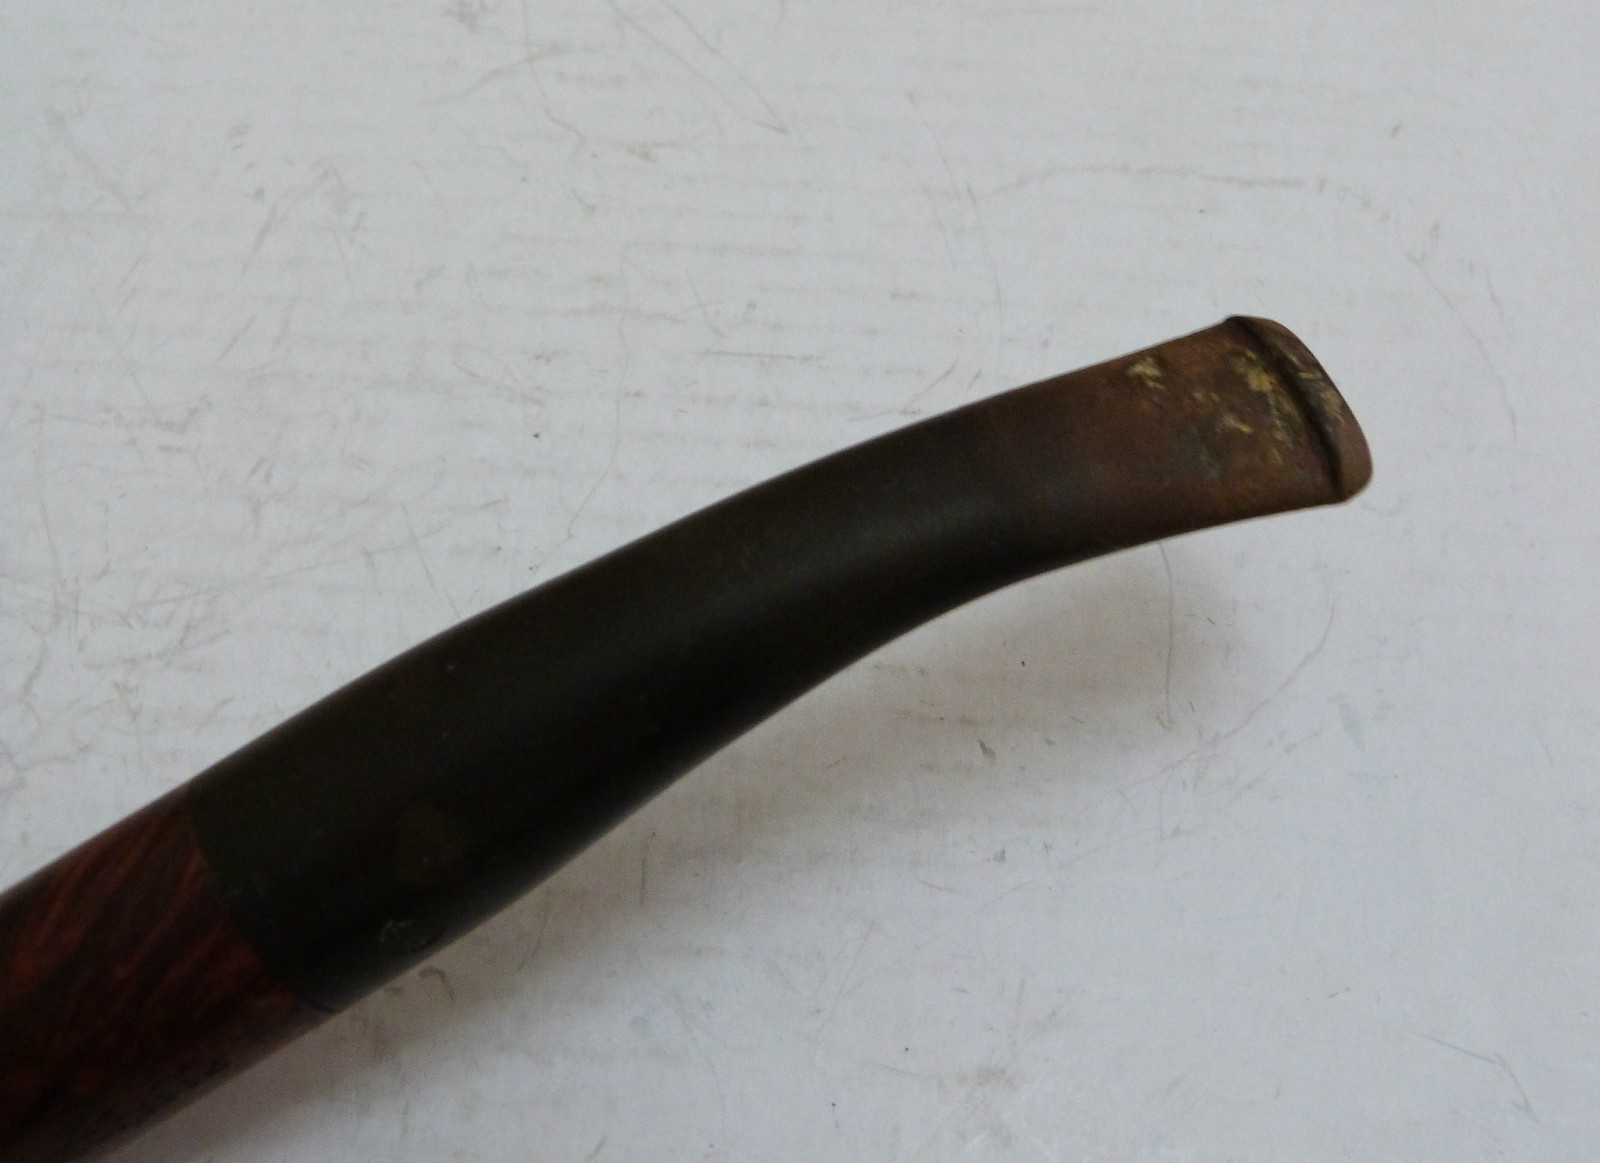
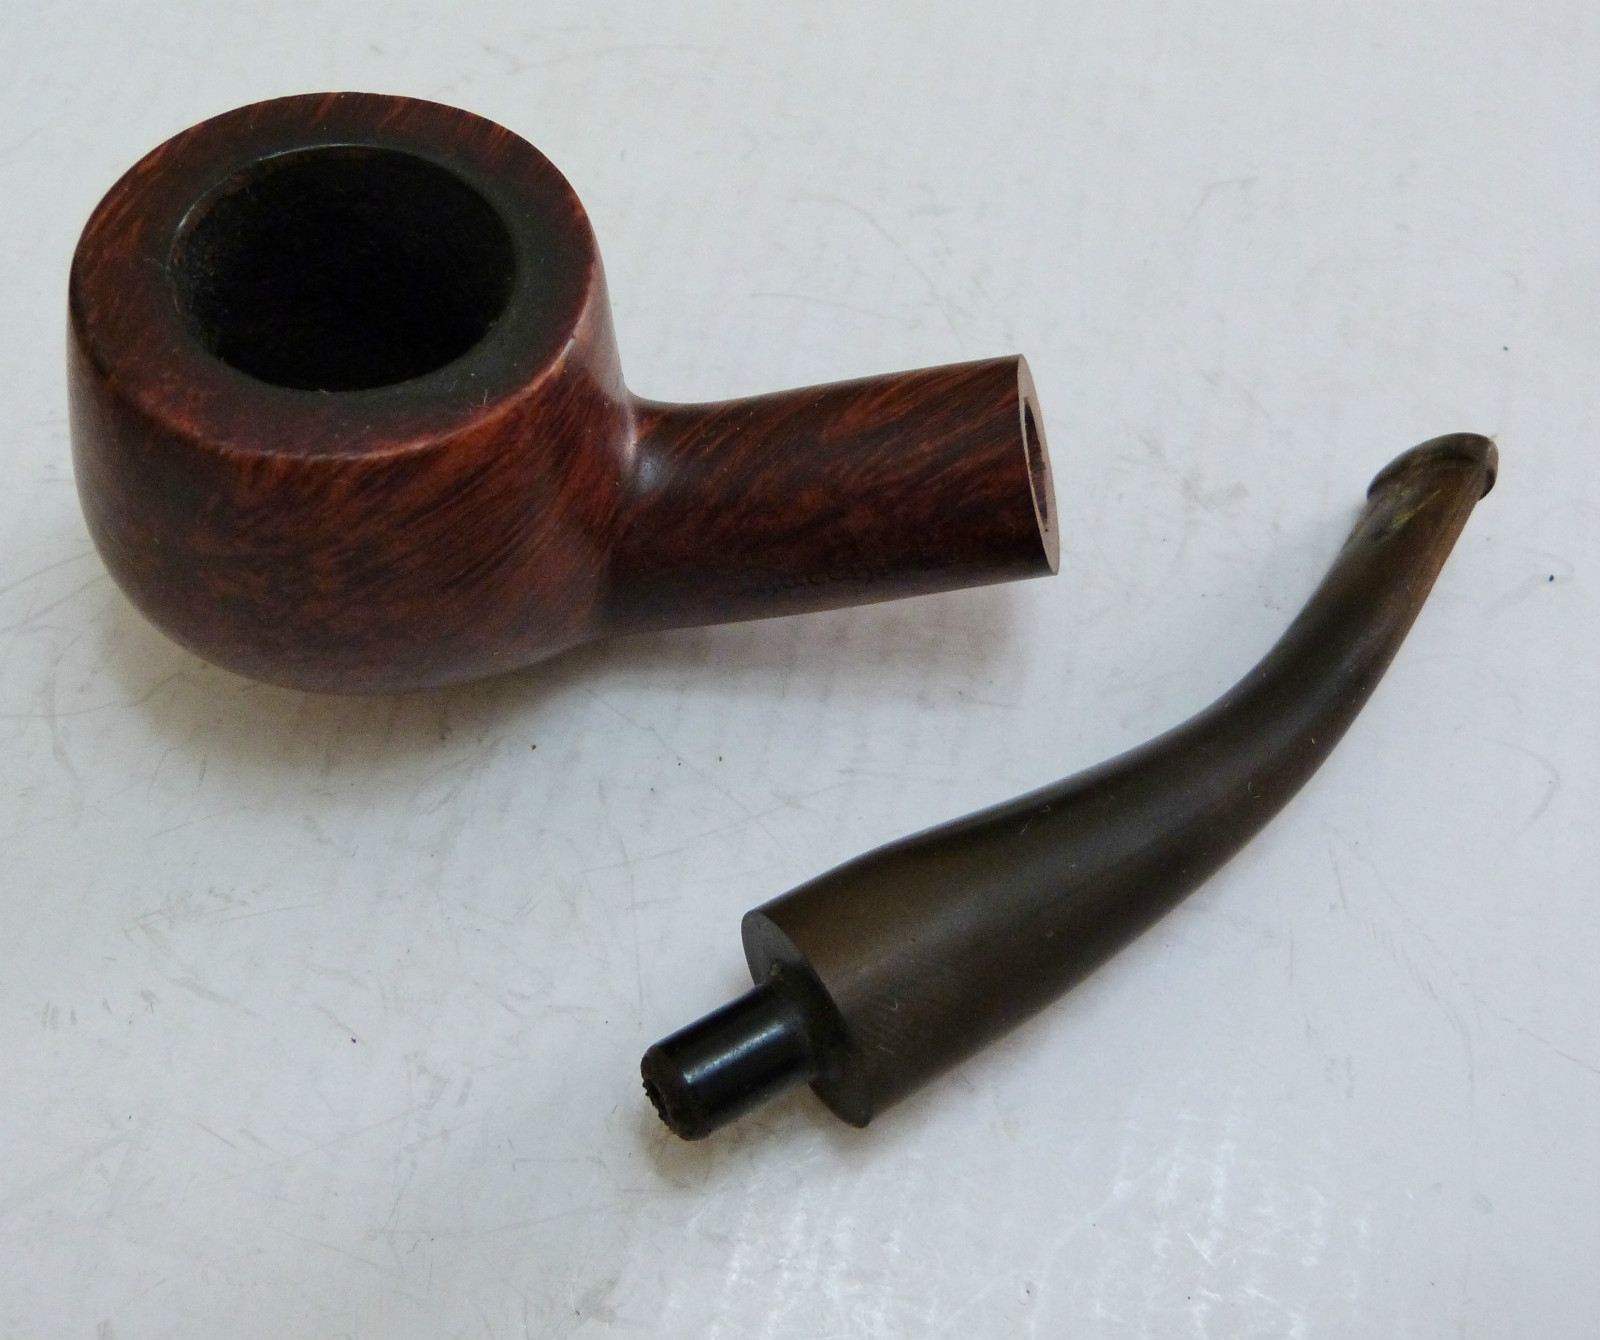
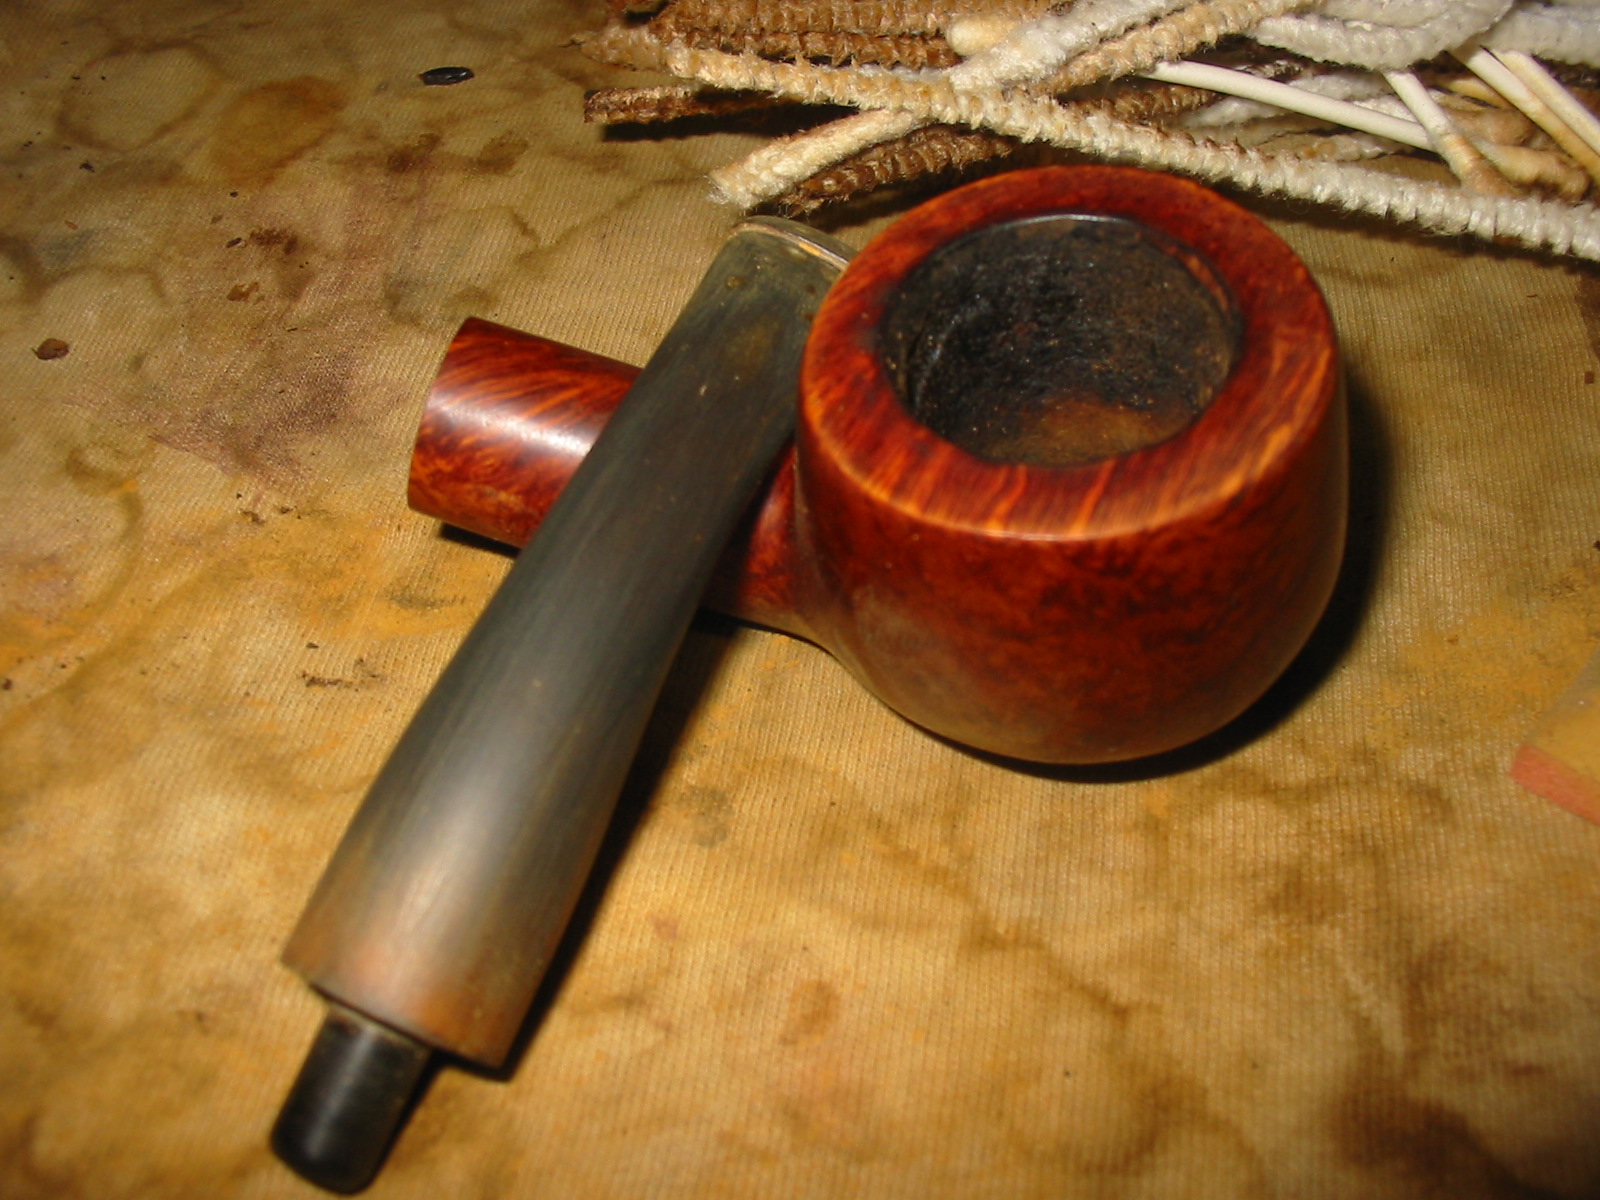
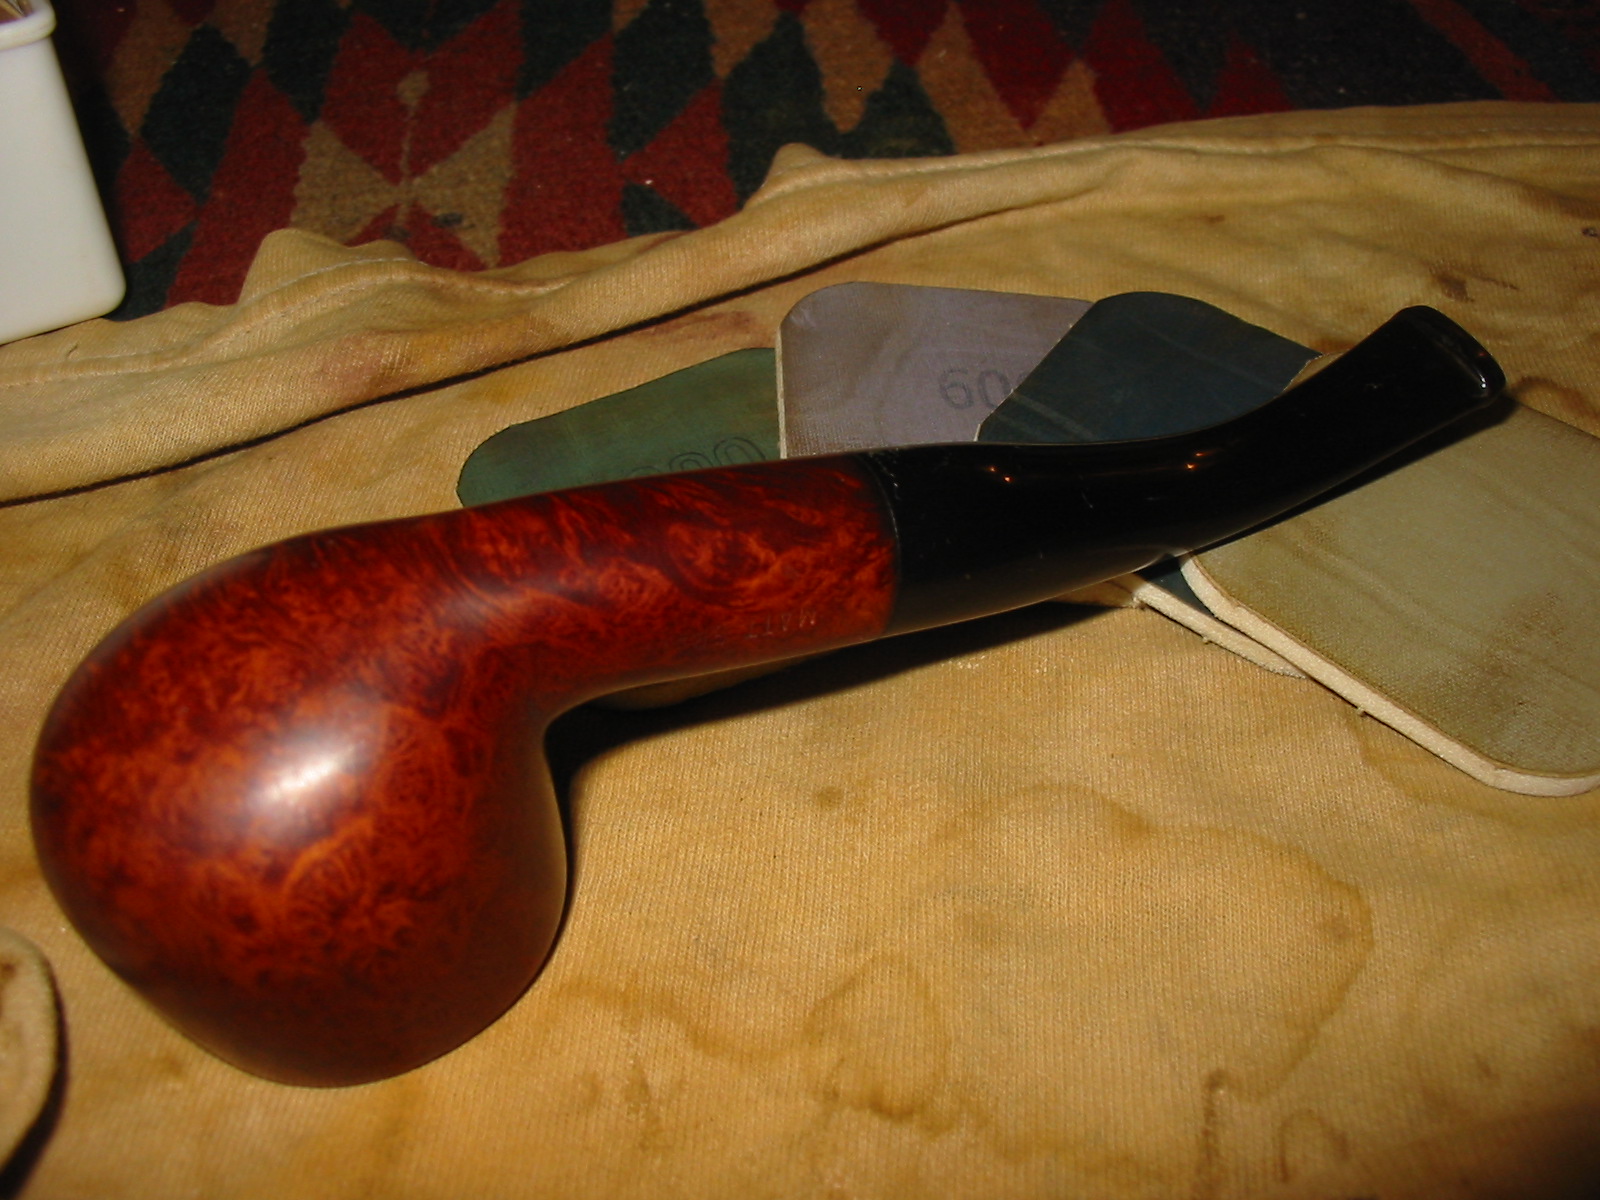
I decided to try to remedy the bent tenon on the pipe to begin with. I heated it in a cup of boiling water to try to adjust it and tighten the fit in the mortise. I was able to adjust the fit and get a good tight seat with no gap between the shank and the stem. However, in the process the water oxidized the stem badly. The four photos below show the adjusted fit of the stem and also clearly show the bite marks on the stem – top and bottom near the button.

IMG_1738

IMG_1739

IMG_1740

IMG_1741

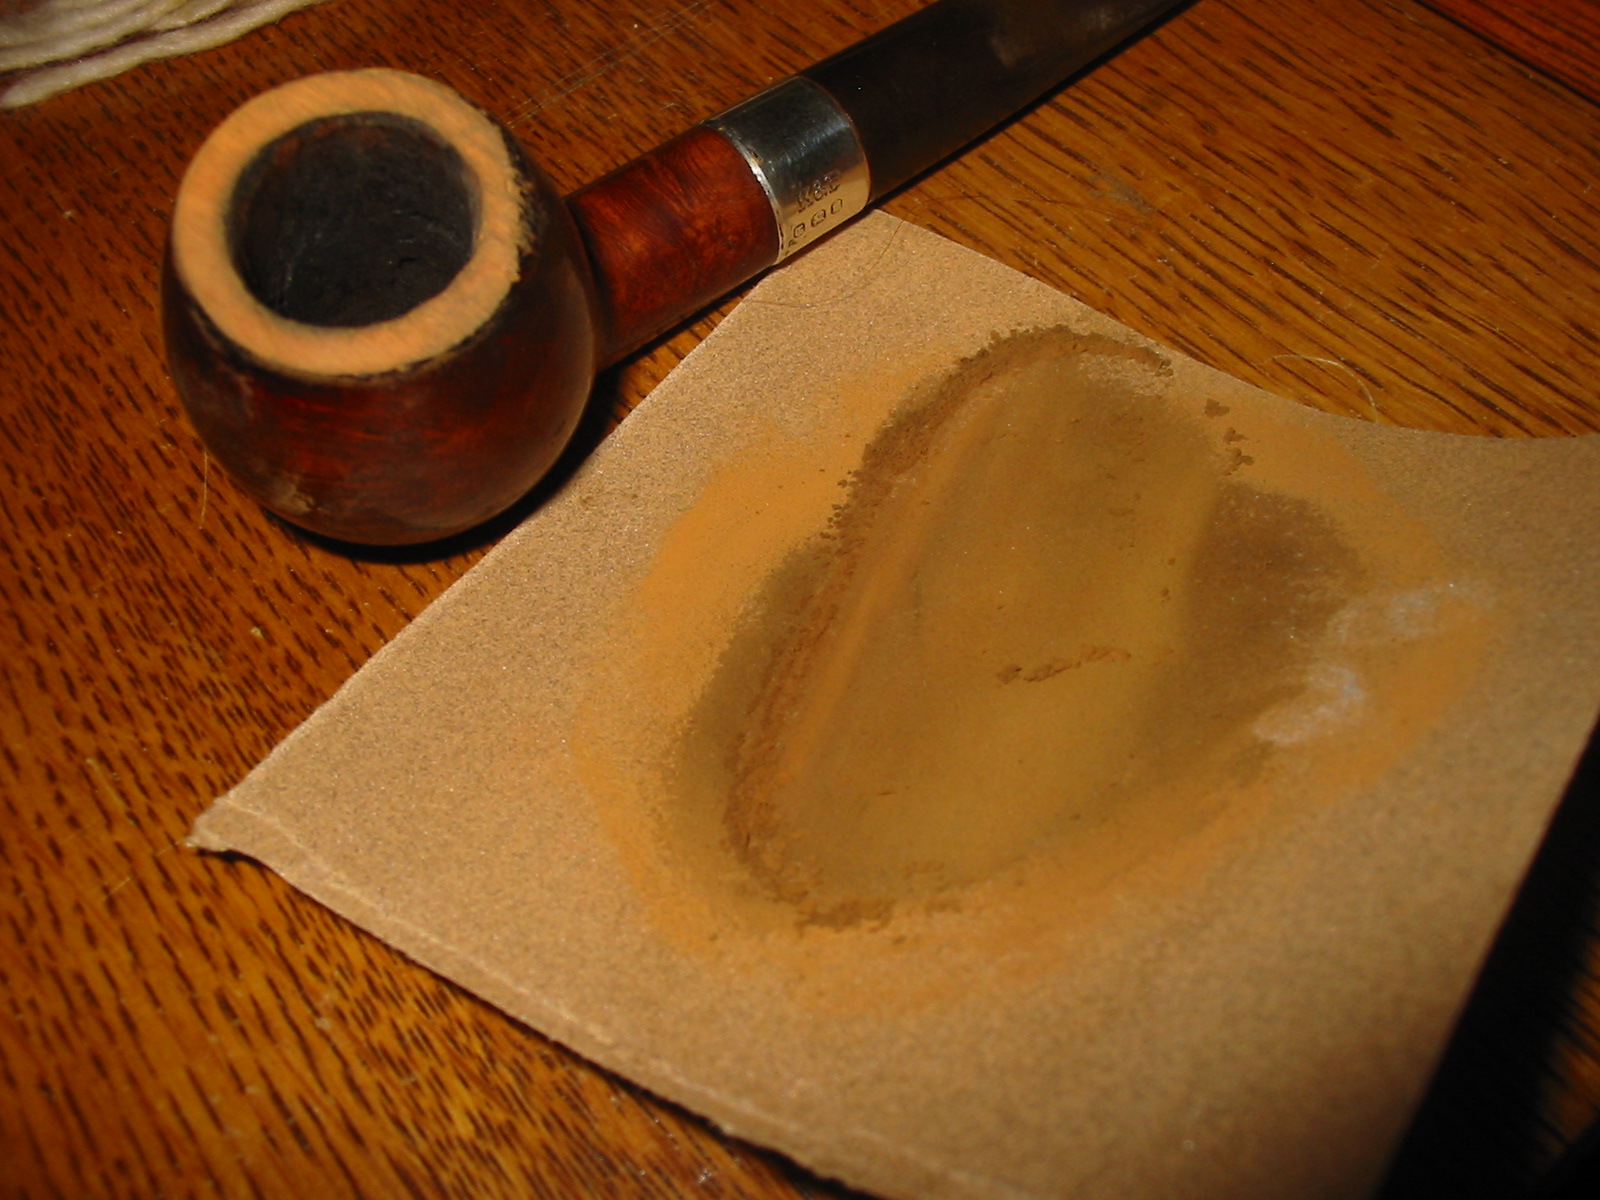
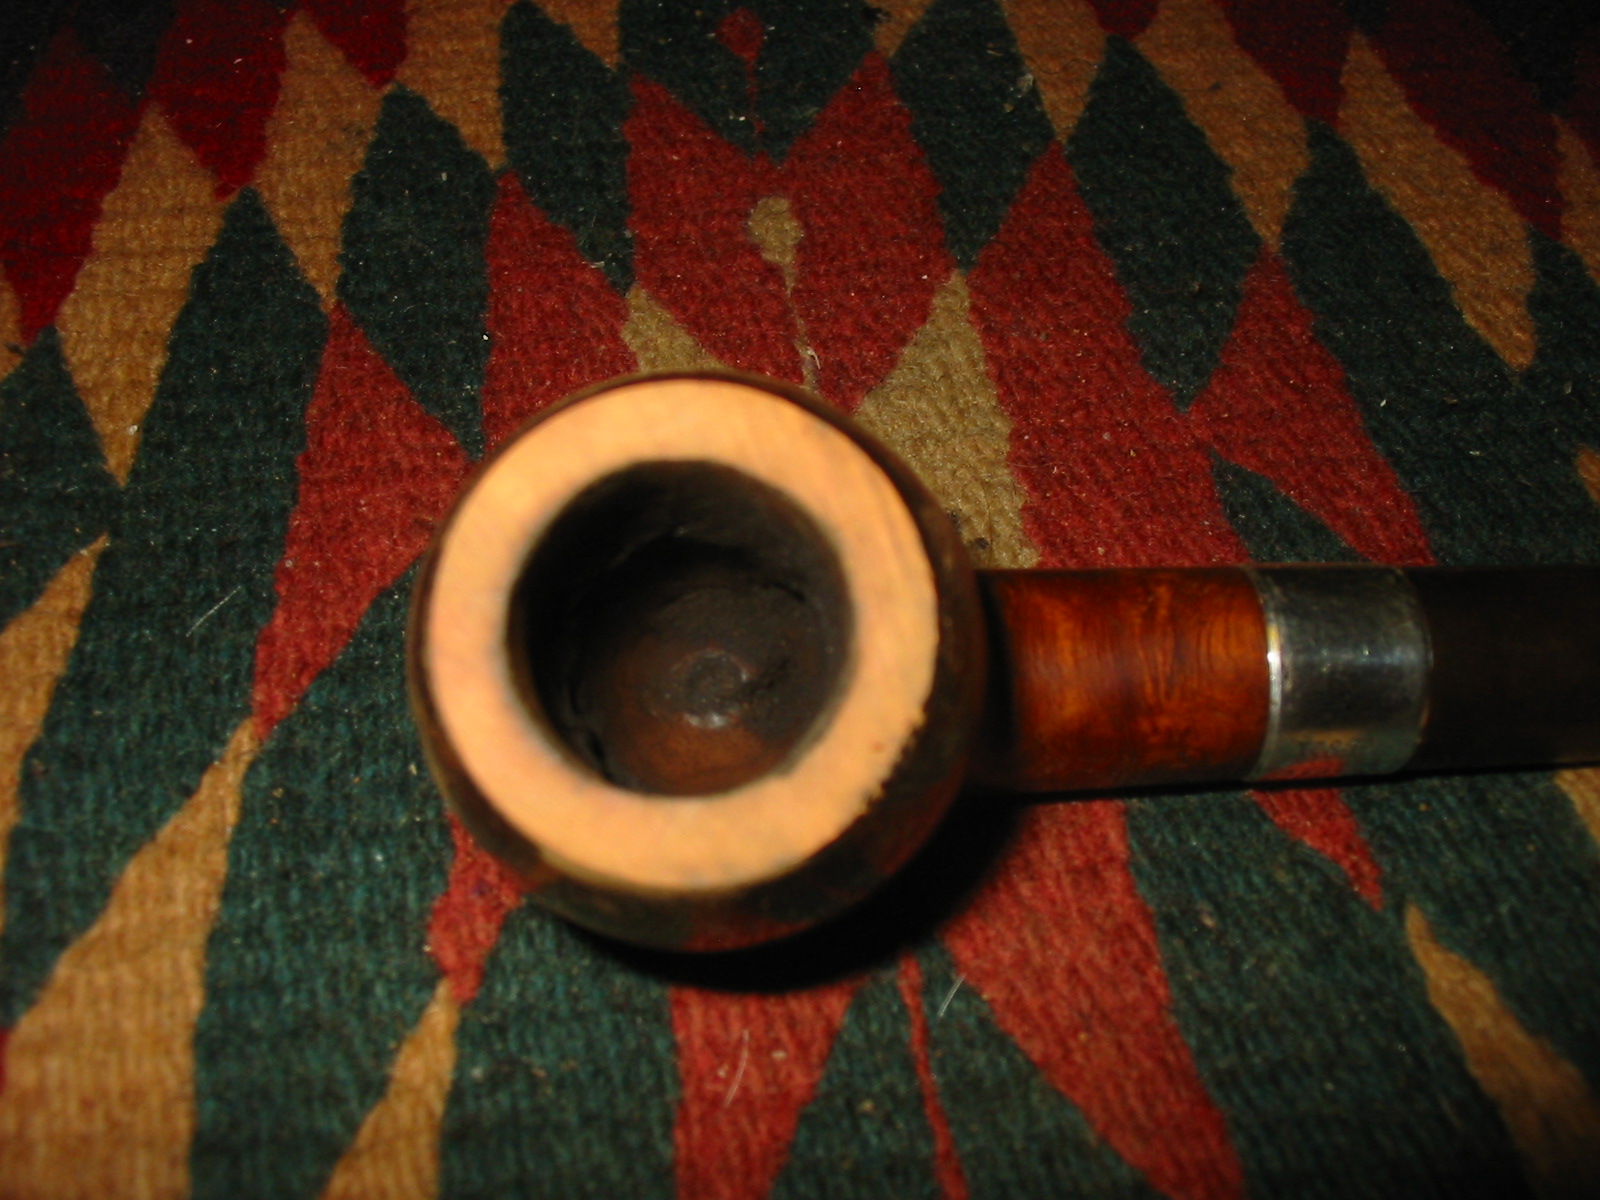
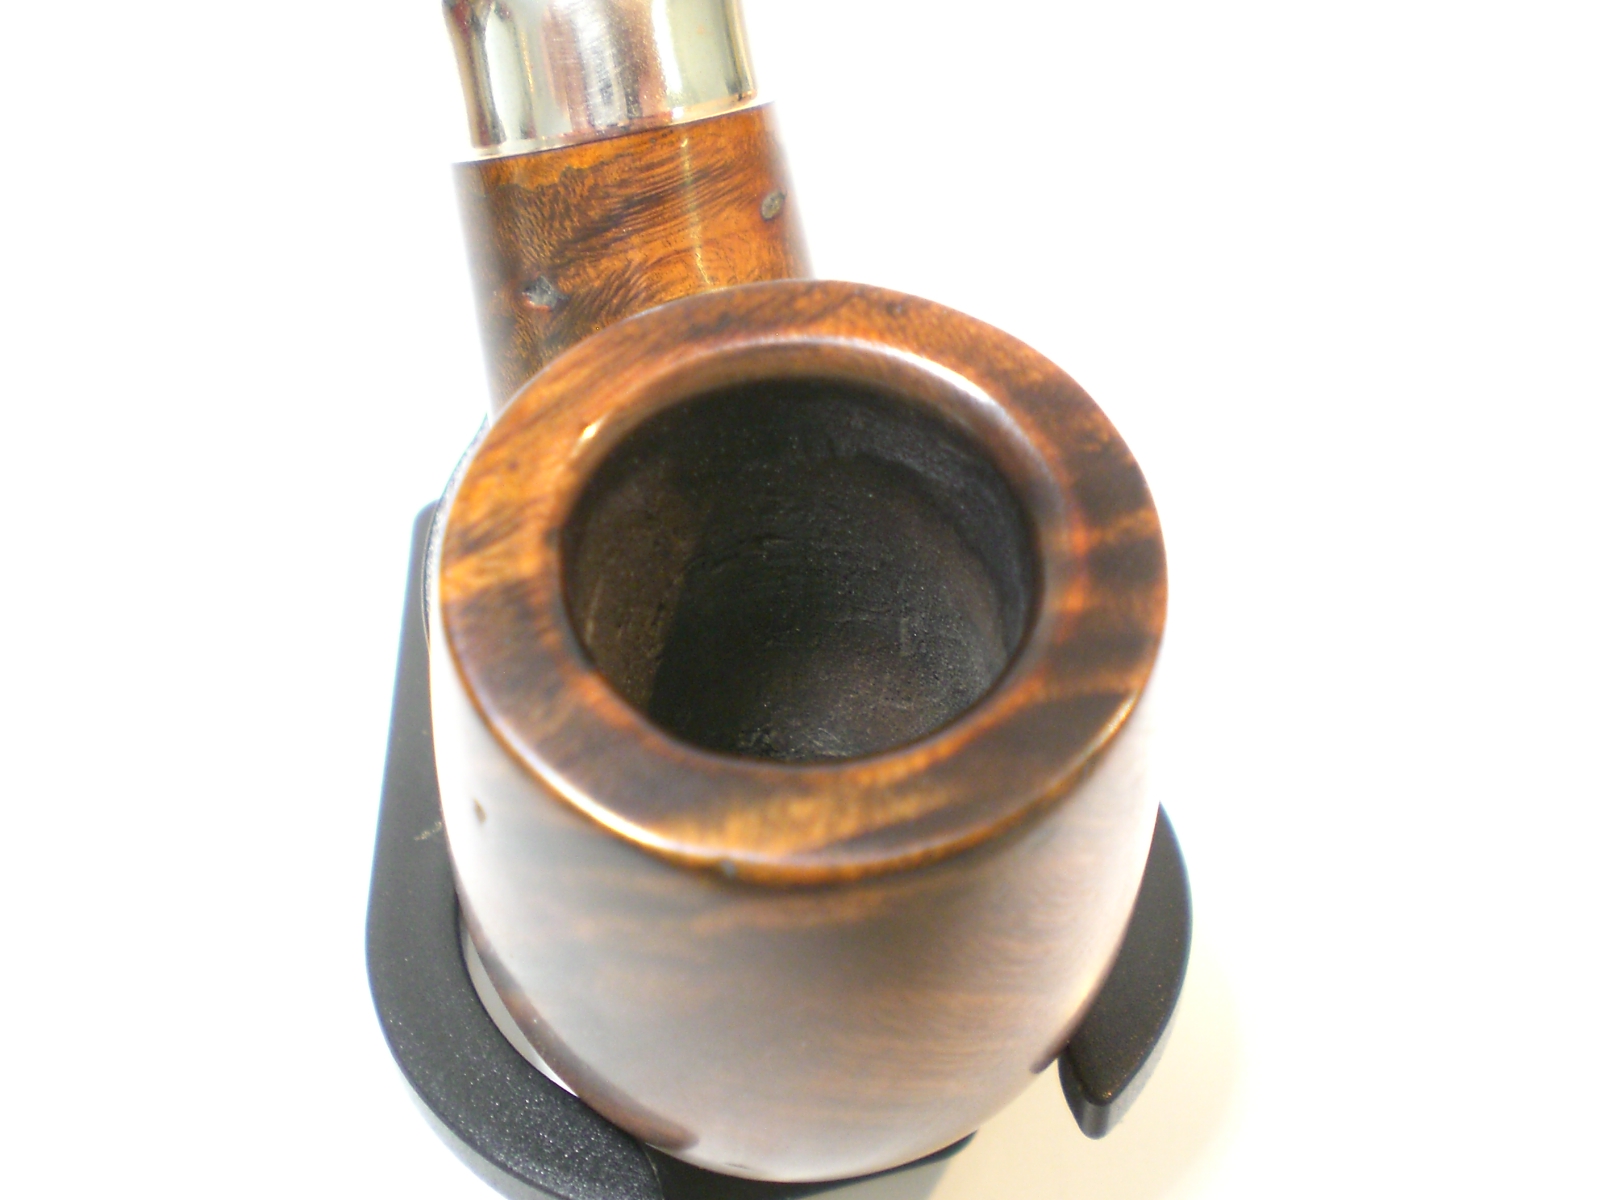
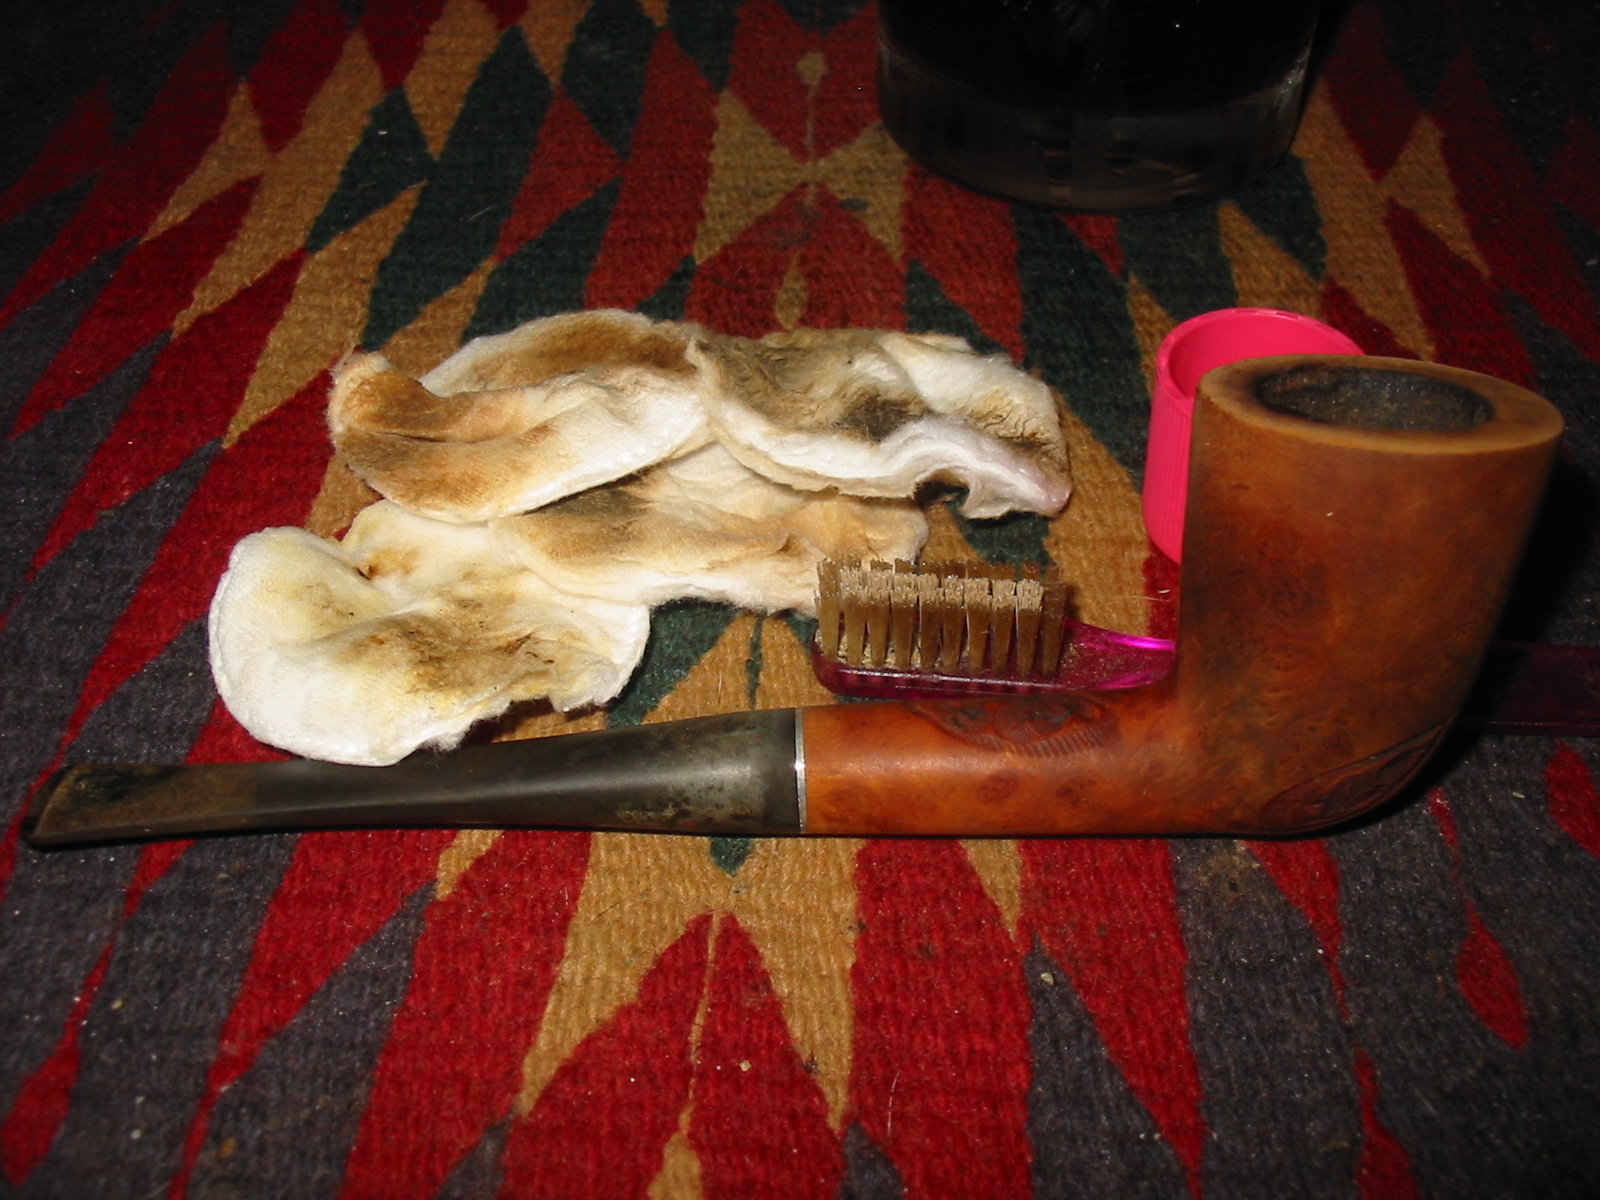
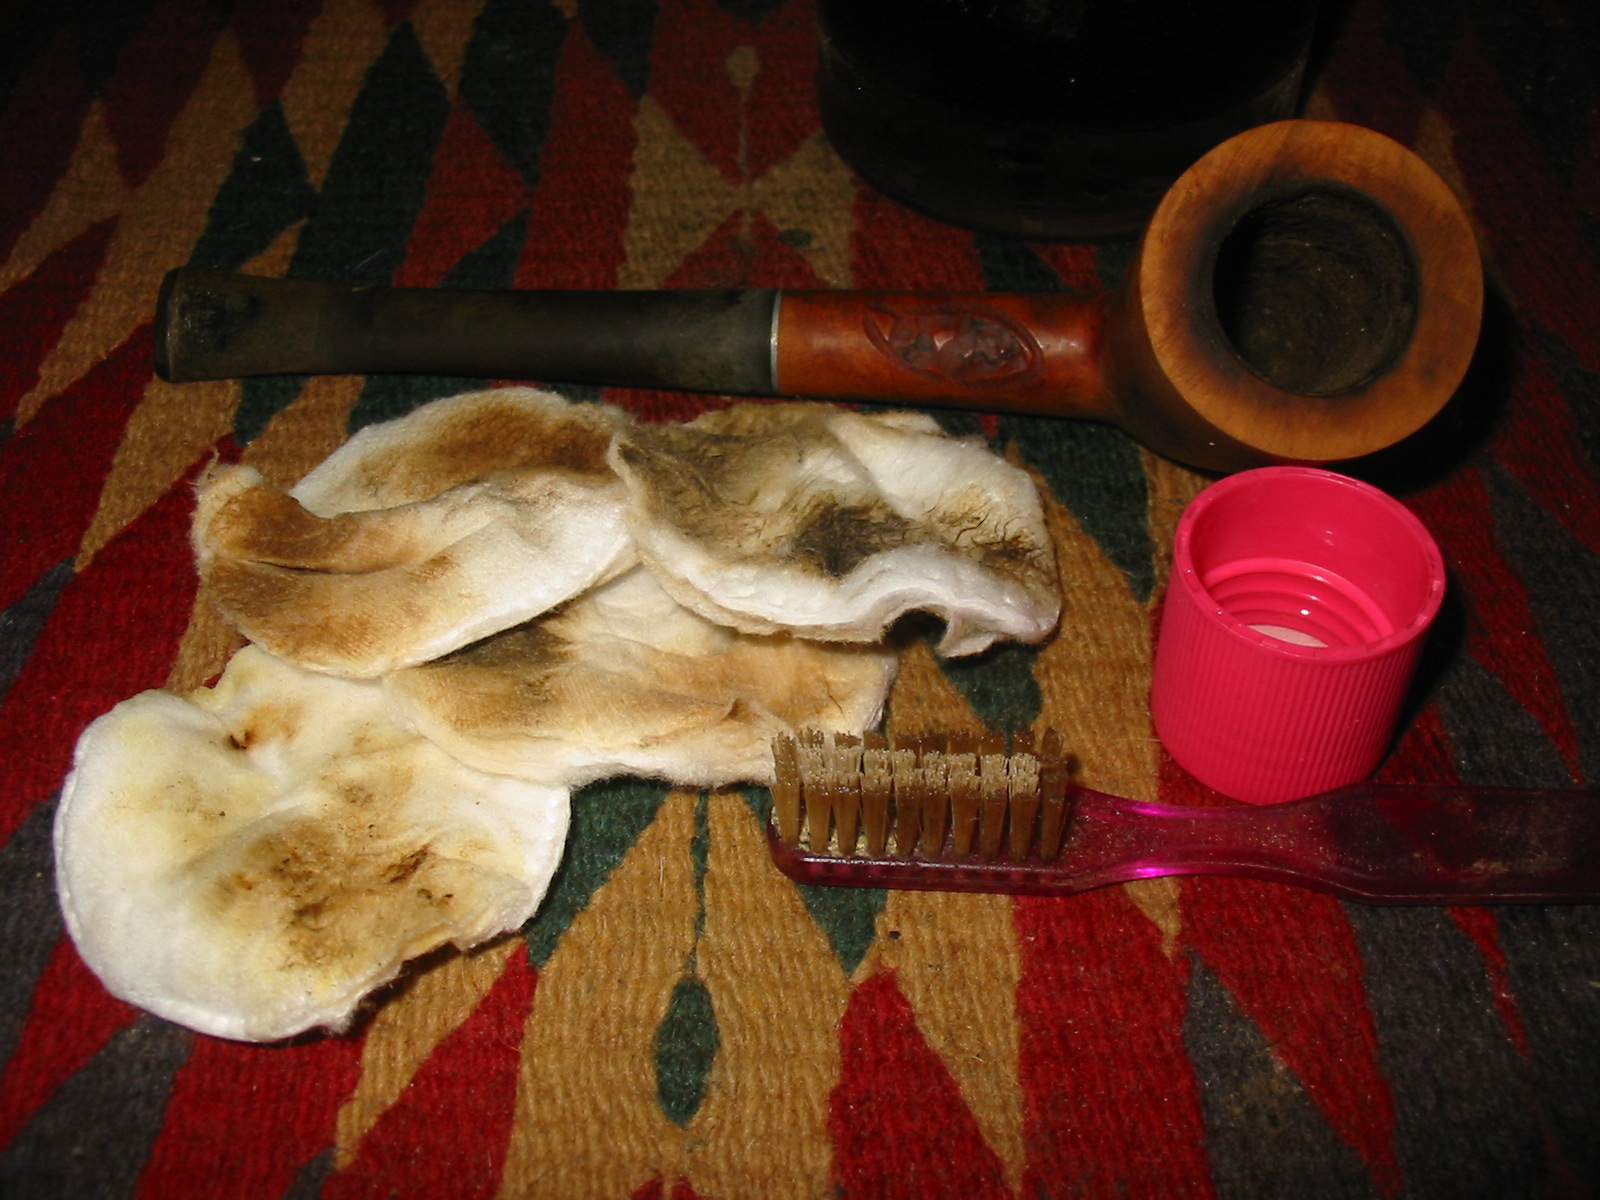
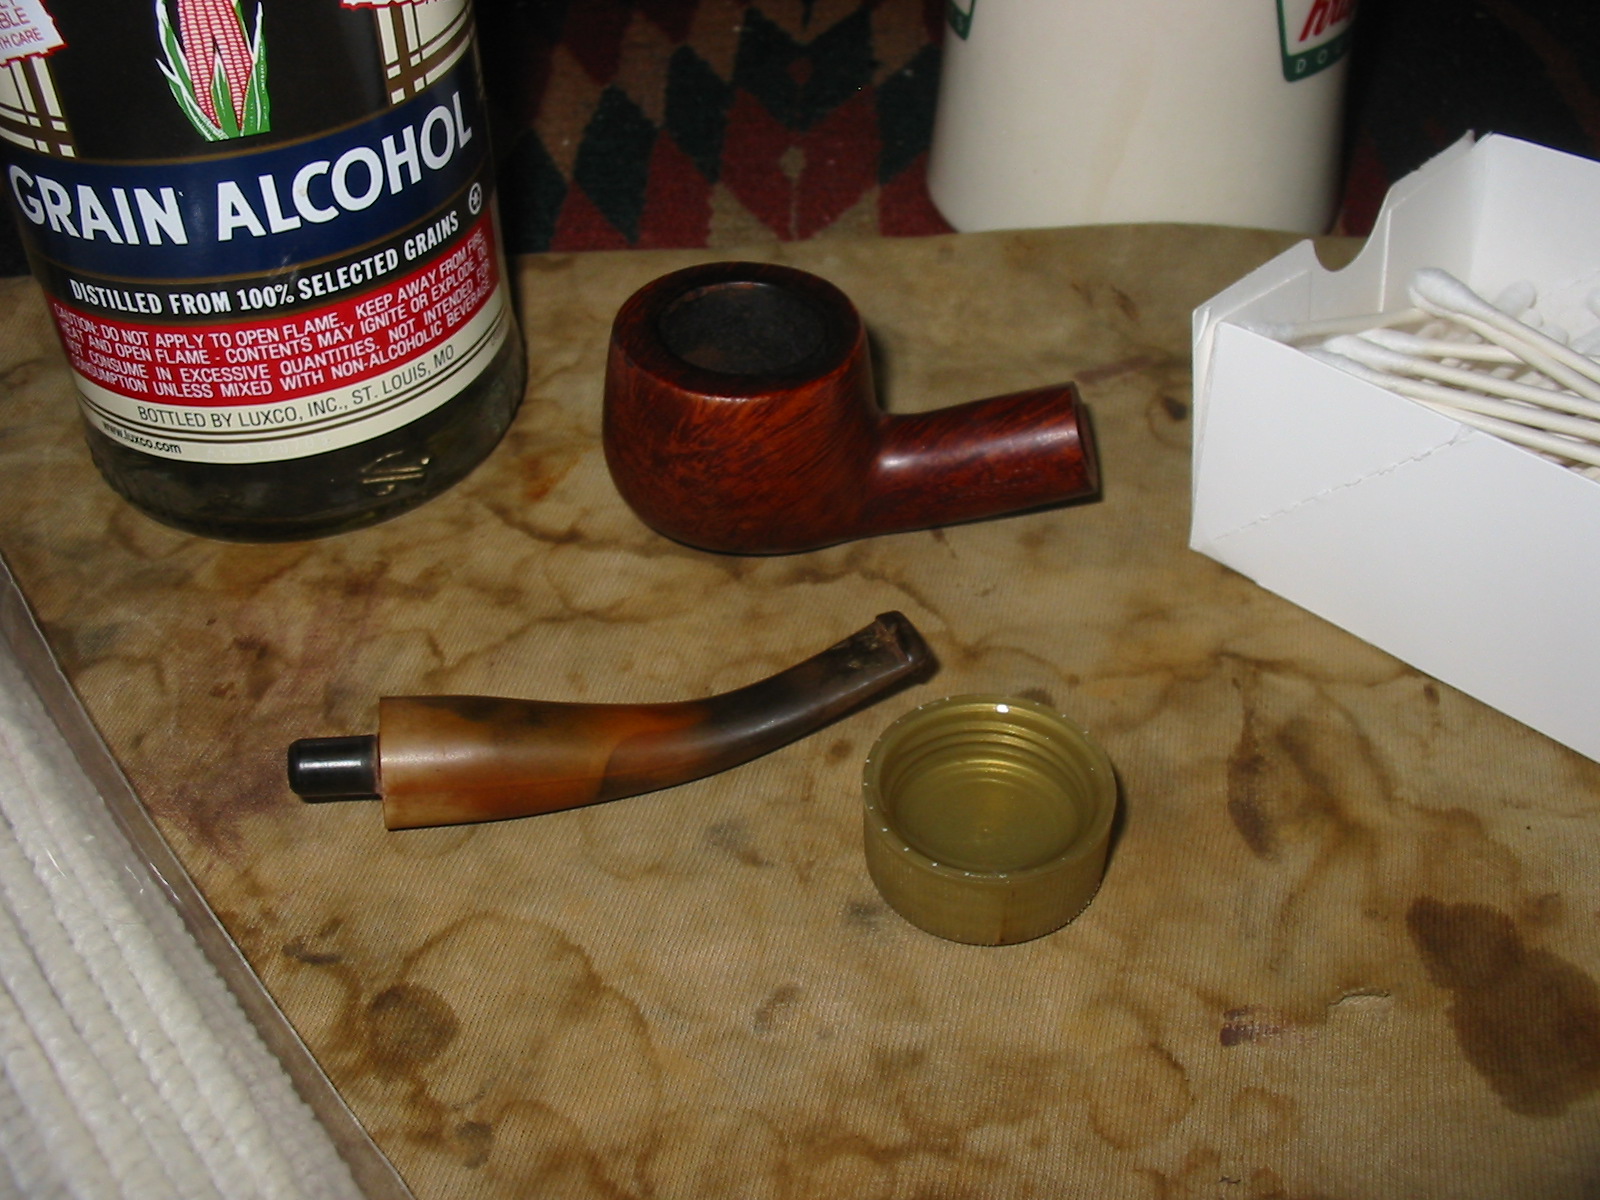
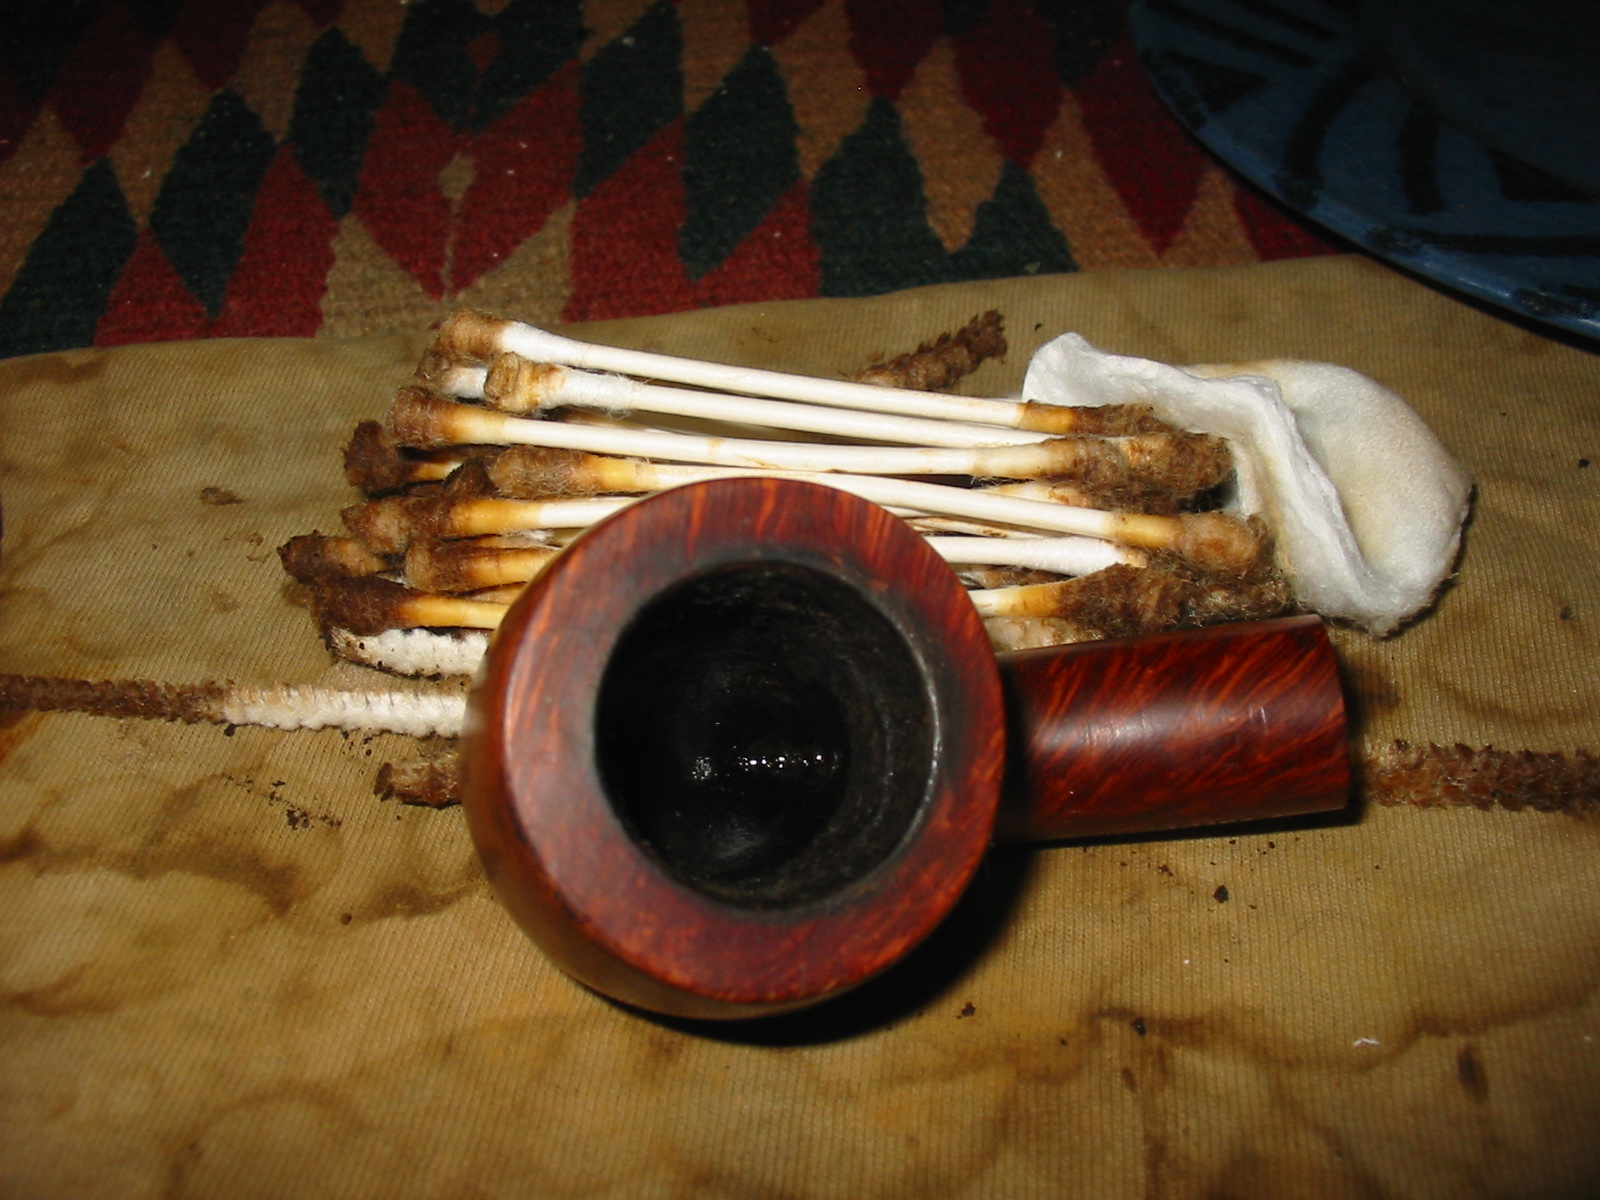
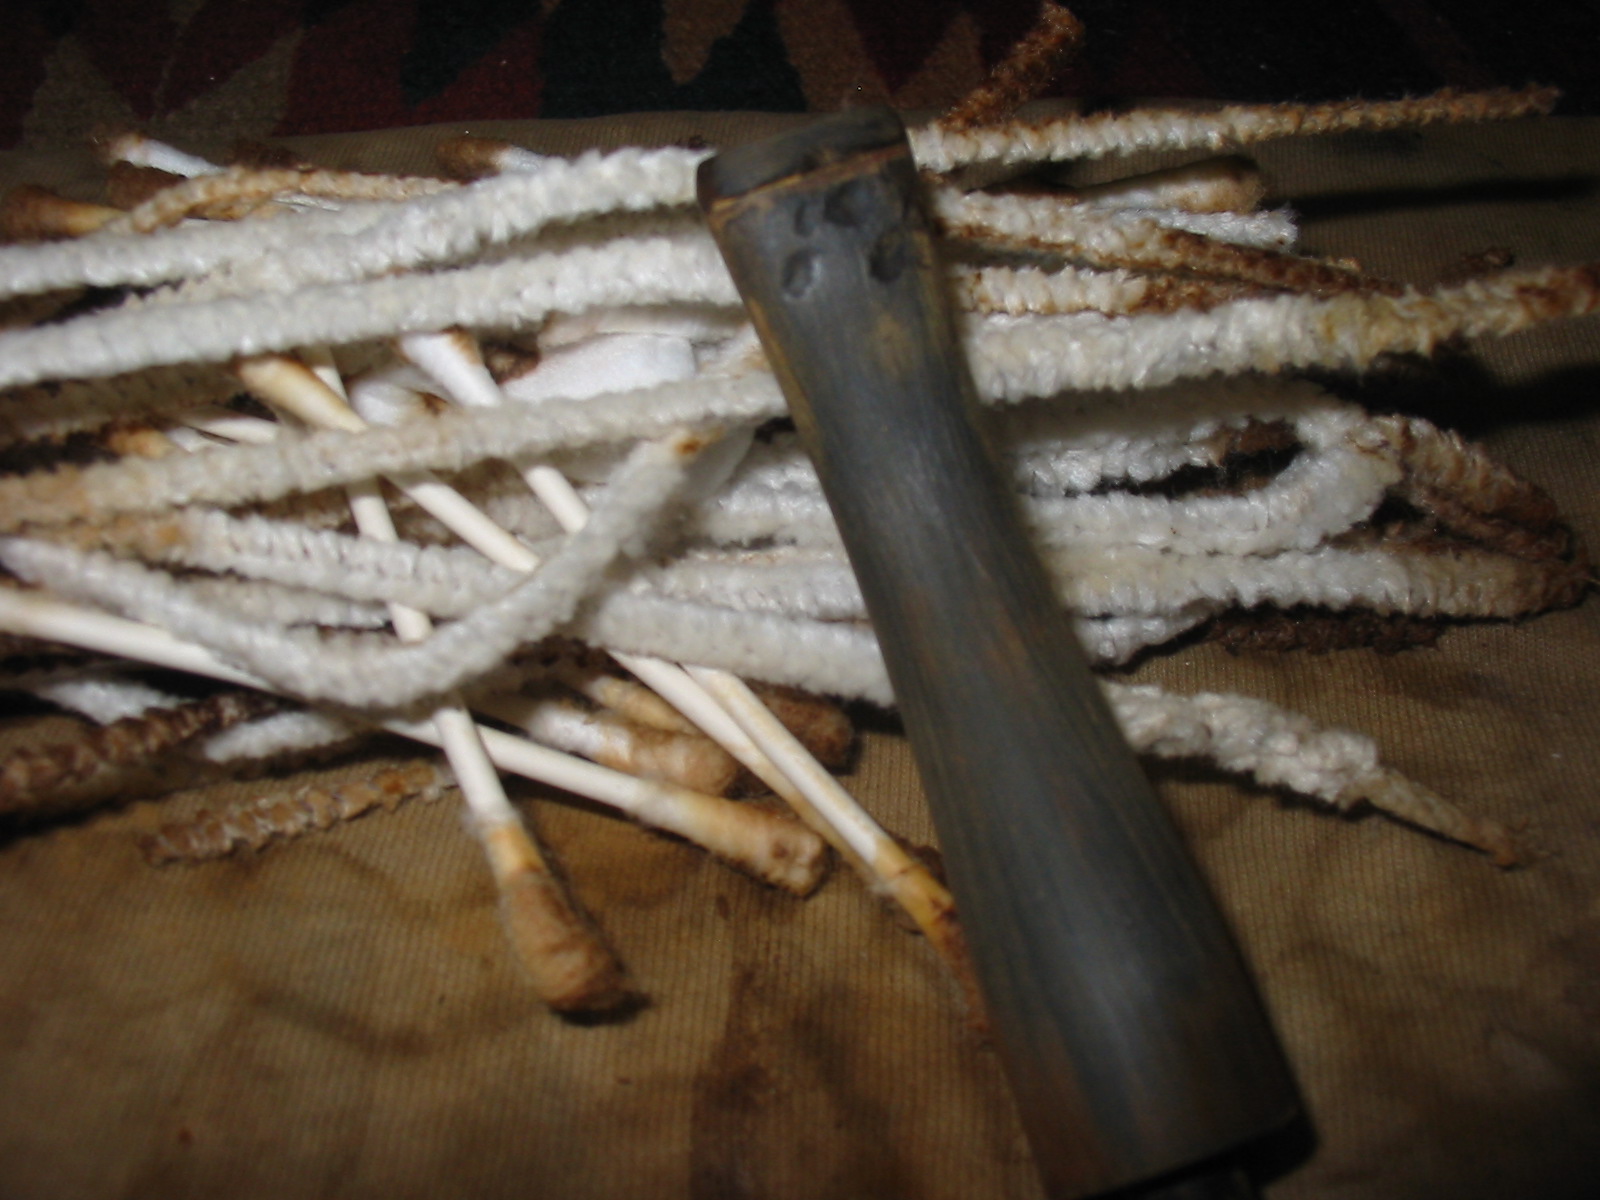
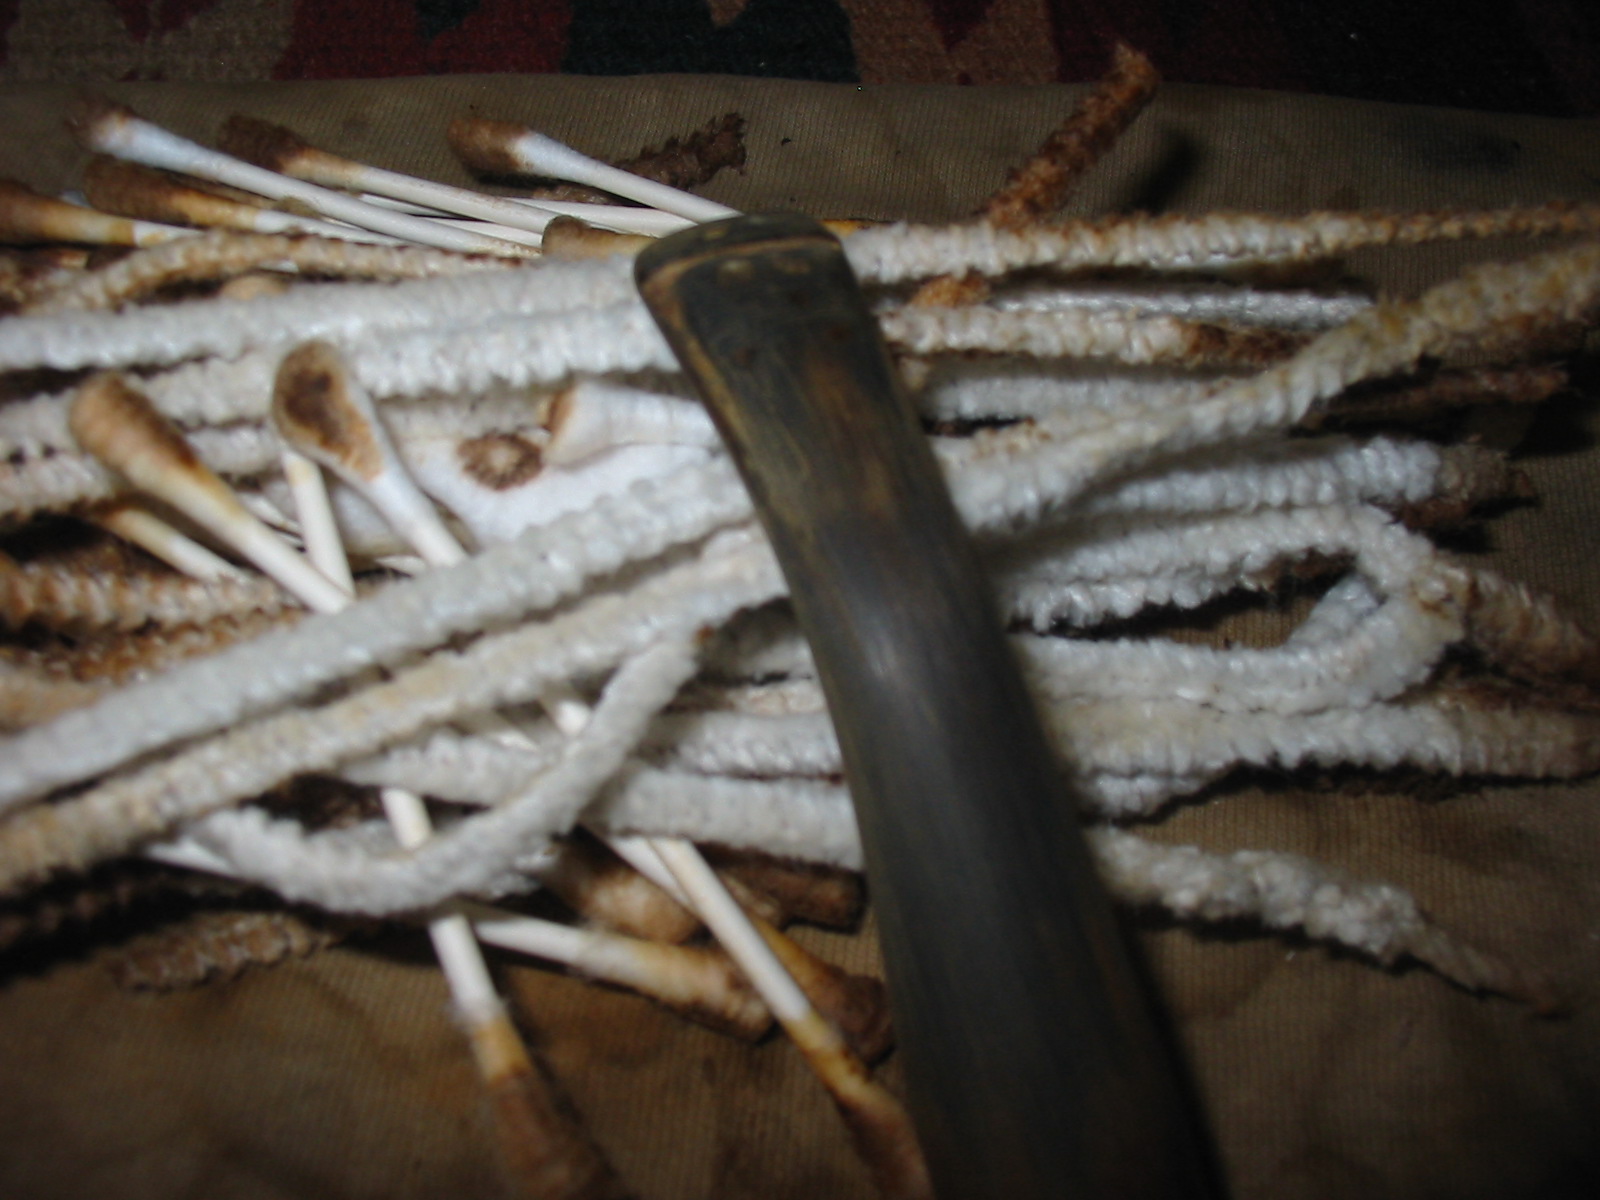
I scrubbed the inside of the shank with Everclear and cotton swabs. I cleaned the airway with bristle pipe cleaners and then fluffy pipe cleaners. I continued to scrub it until the pipe cleaners and cotton swabs came out clean. I cleaned the rim of the bowl with saliva and a cotton pad until the grime was gone. It took a bit more than a cotton pad and saliva so I also used a very fine grit sanding block to knock off the remaining tar, being careful to not break the finish.IMG_1743

IMG_1744

IMG_1745

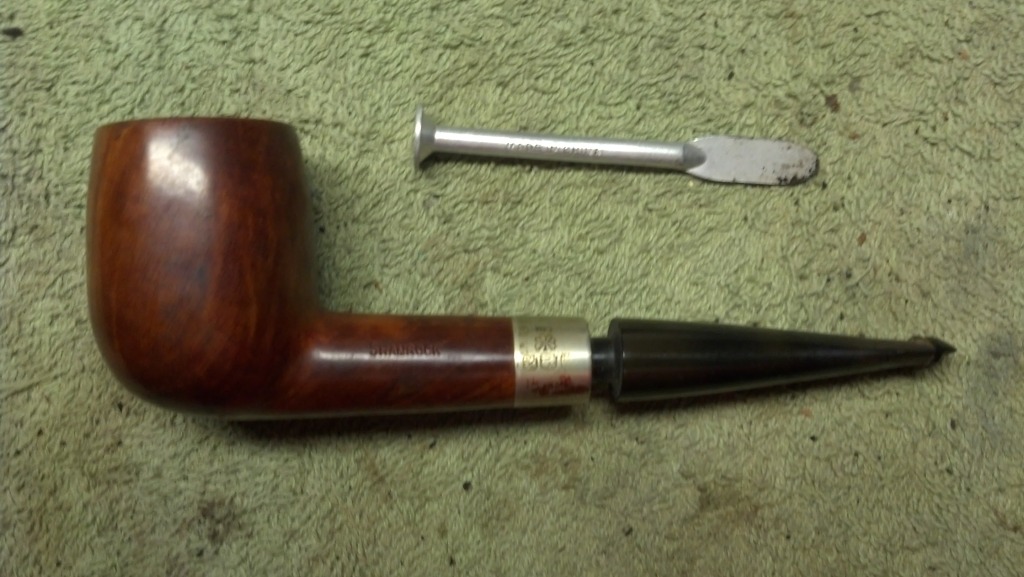
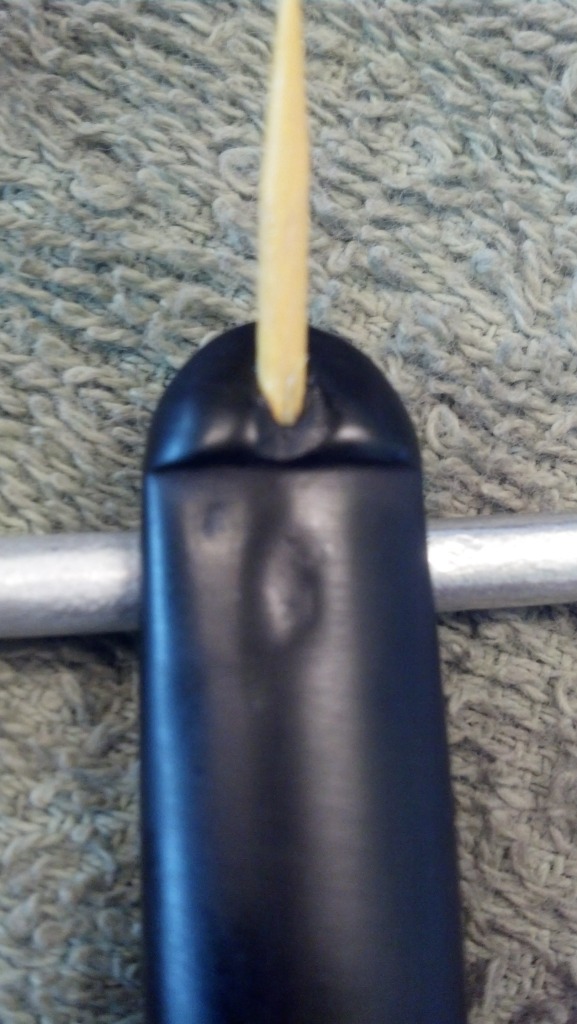
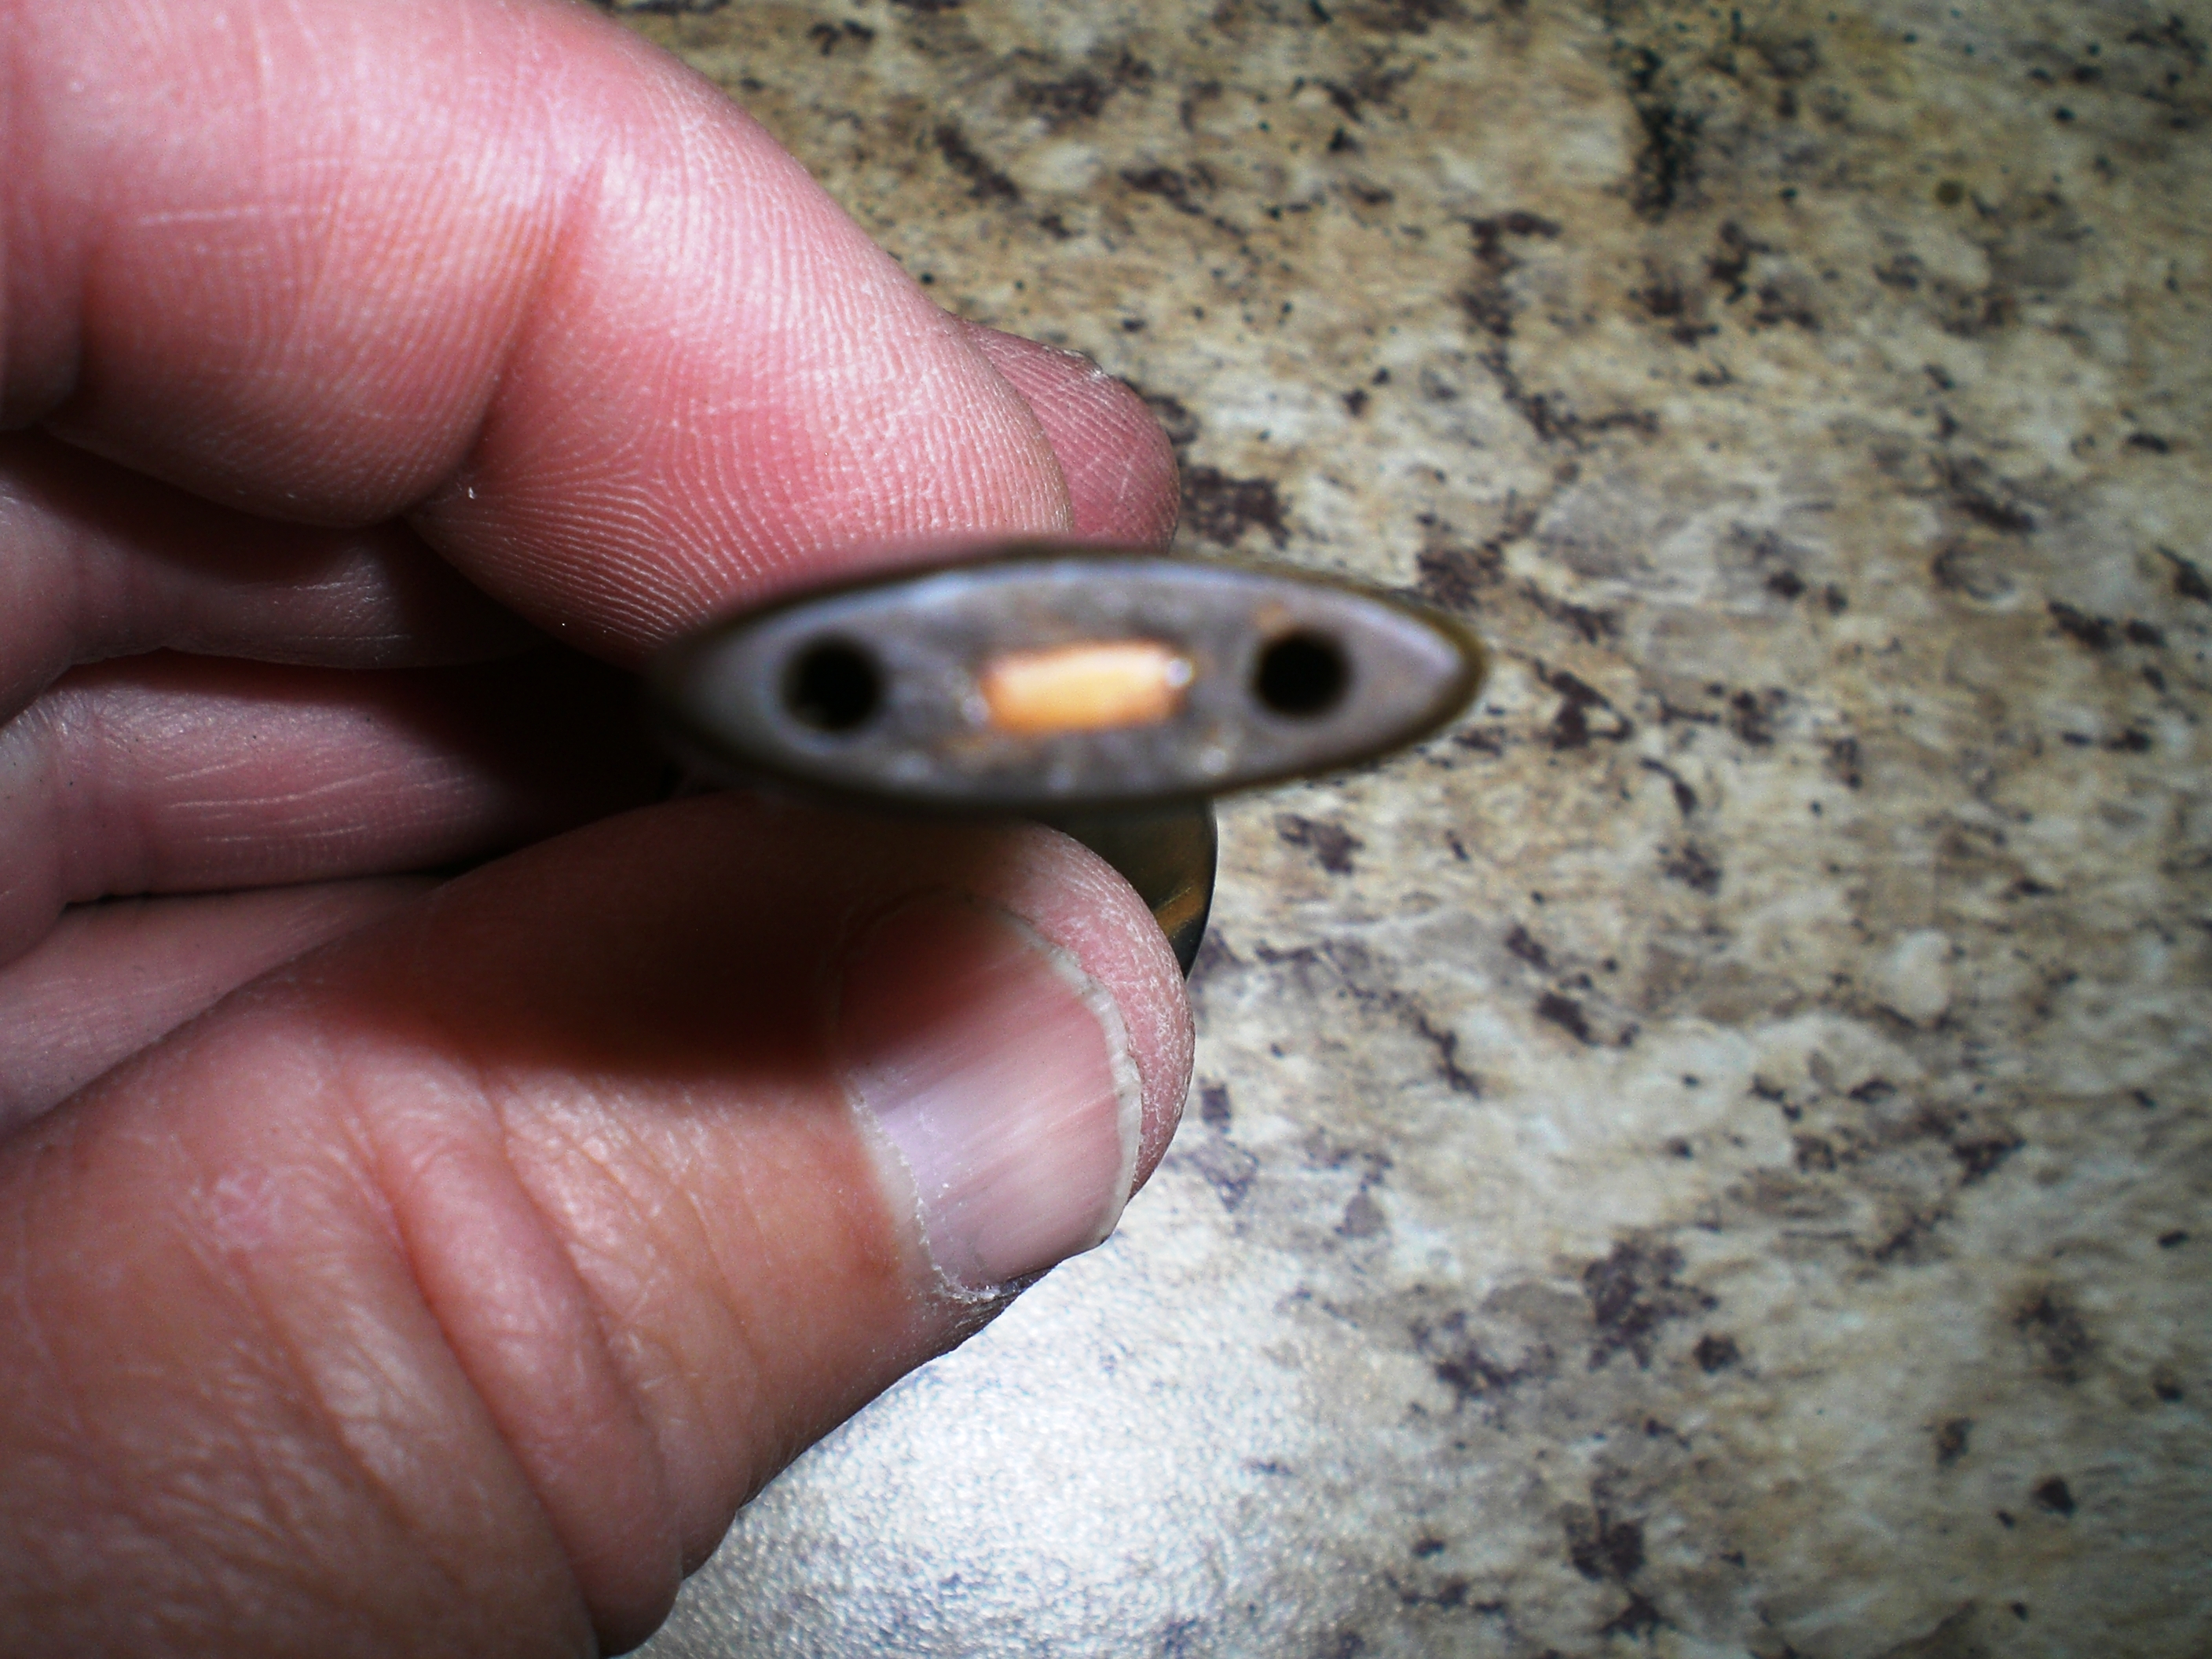
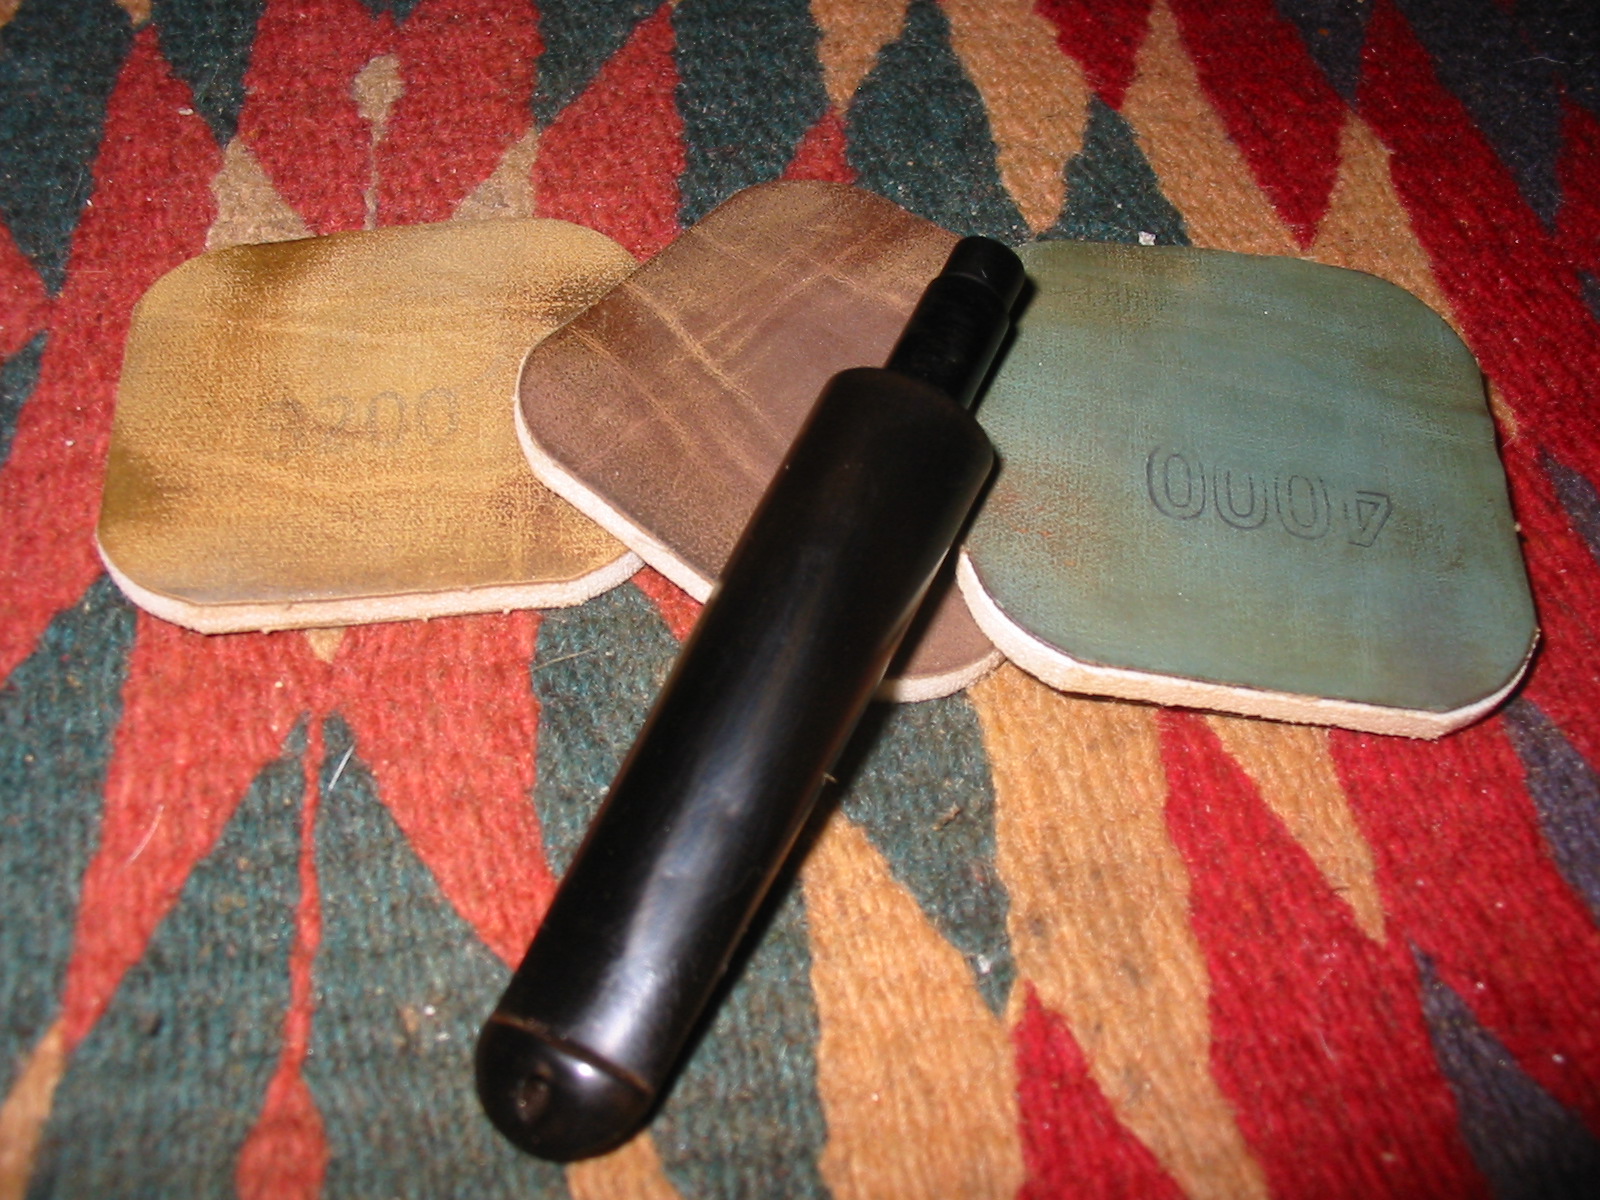
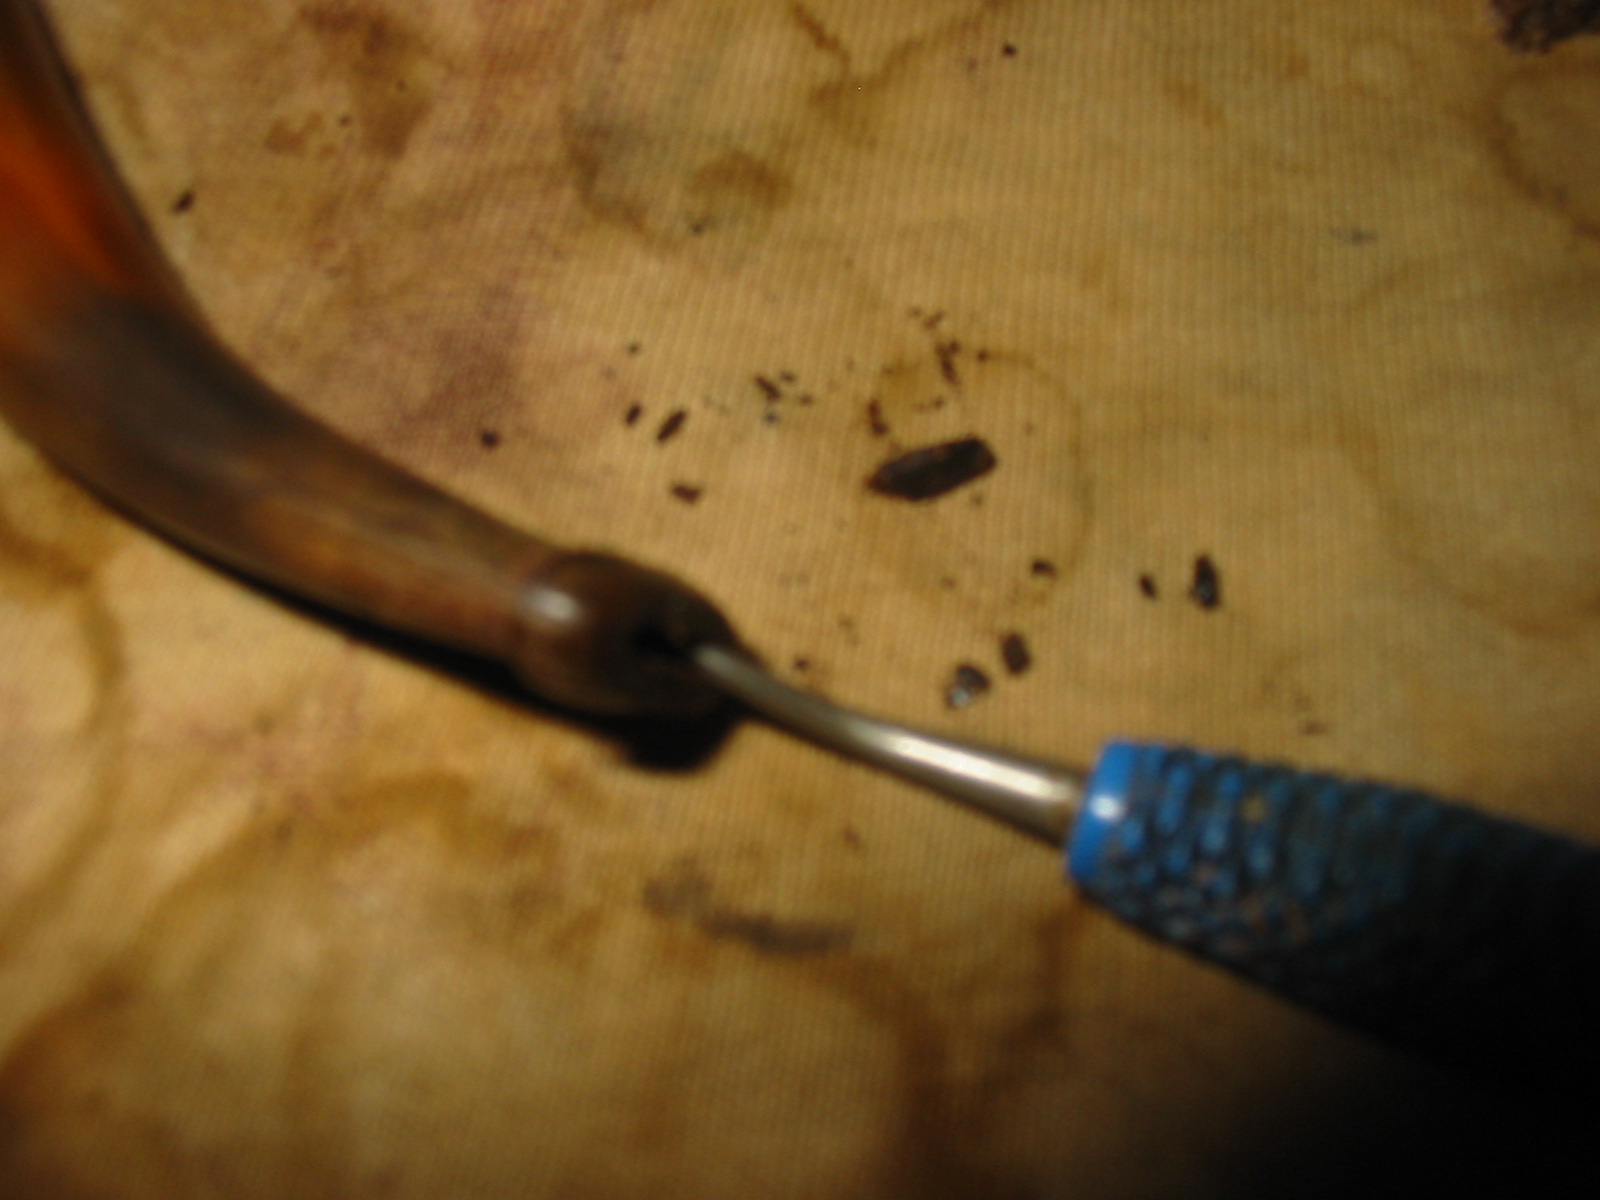
The stem took a bit of work as it was plugged with grit and tar. I used a dental pick to clean out the slot. To the right of the stem in the photo is some of tar and grit I picked out of the slot. I used a straightened end of the pick to clean deeply in the slot. I then used pipe cleaners soaked in Everclear and pushed them through the blockage. I also opened the slot with needle files to facilitate easy access with pipe cleaners. The slot was very narrow which also made the blockage hard to get at.

IMG_1746

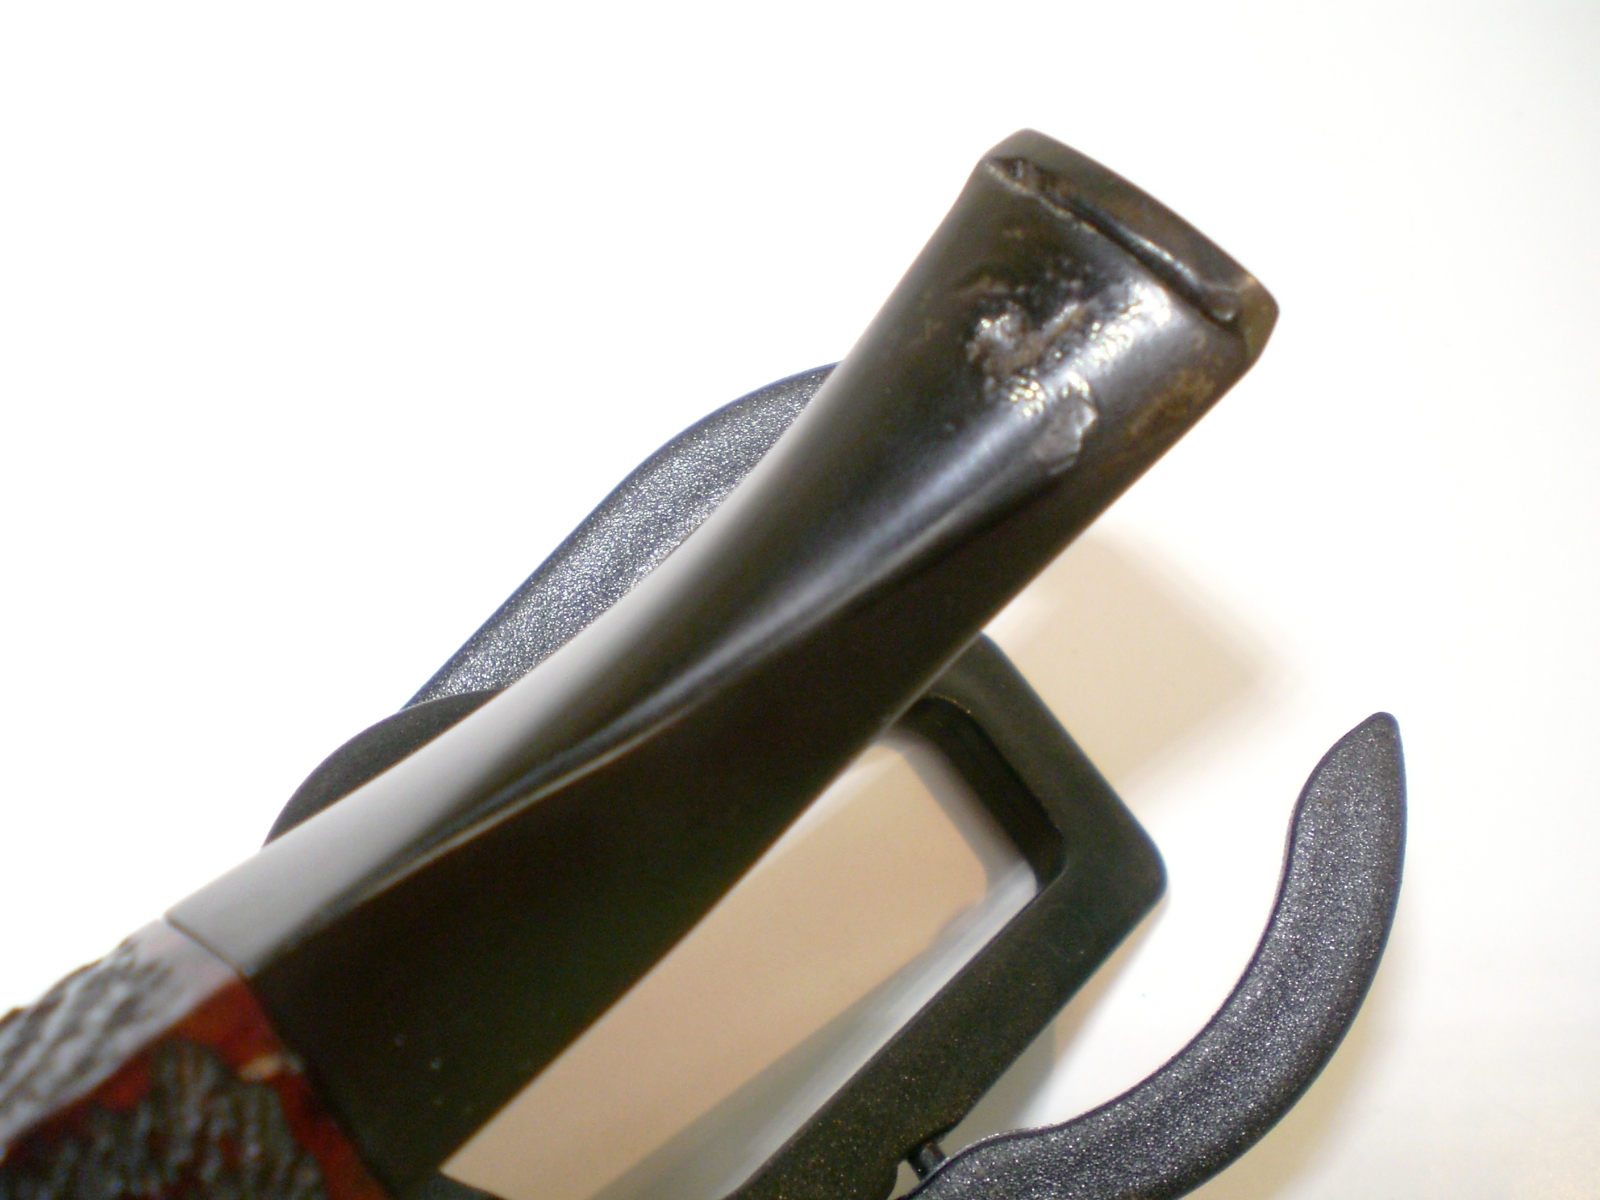
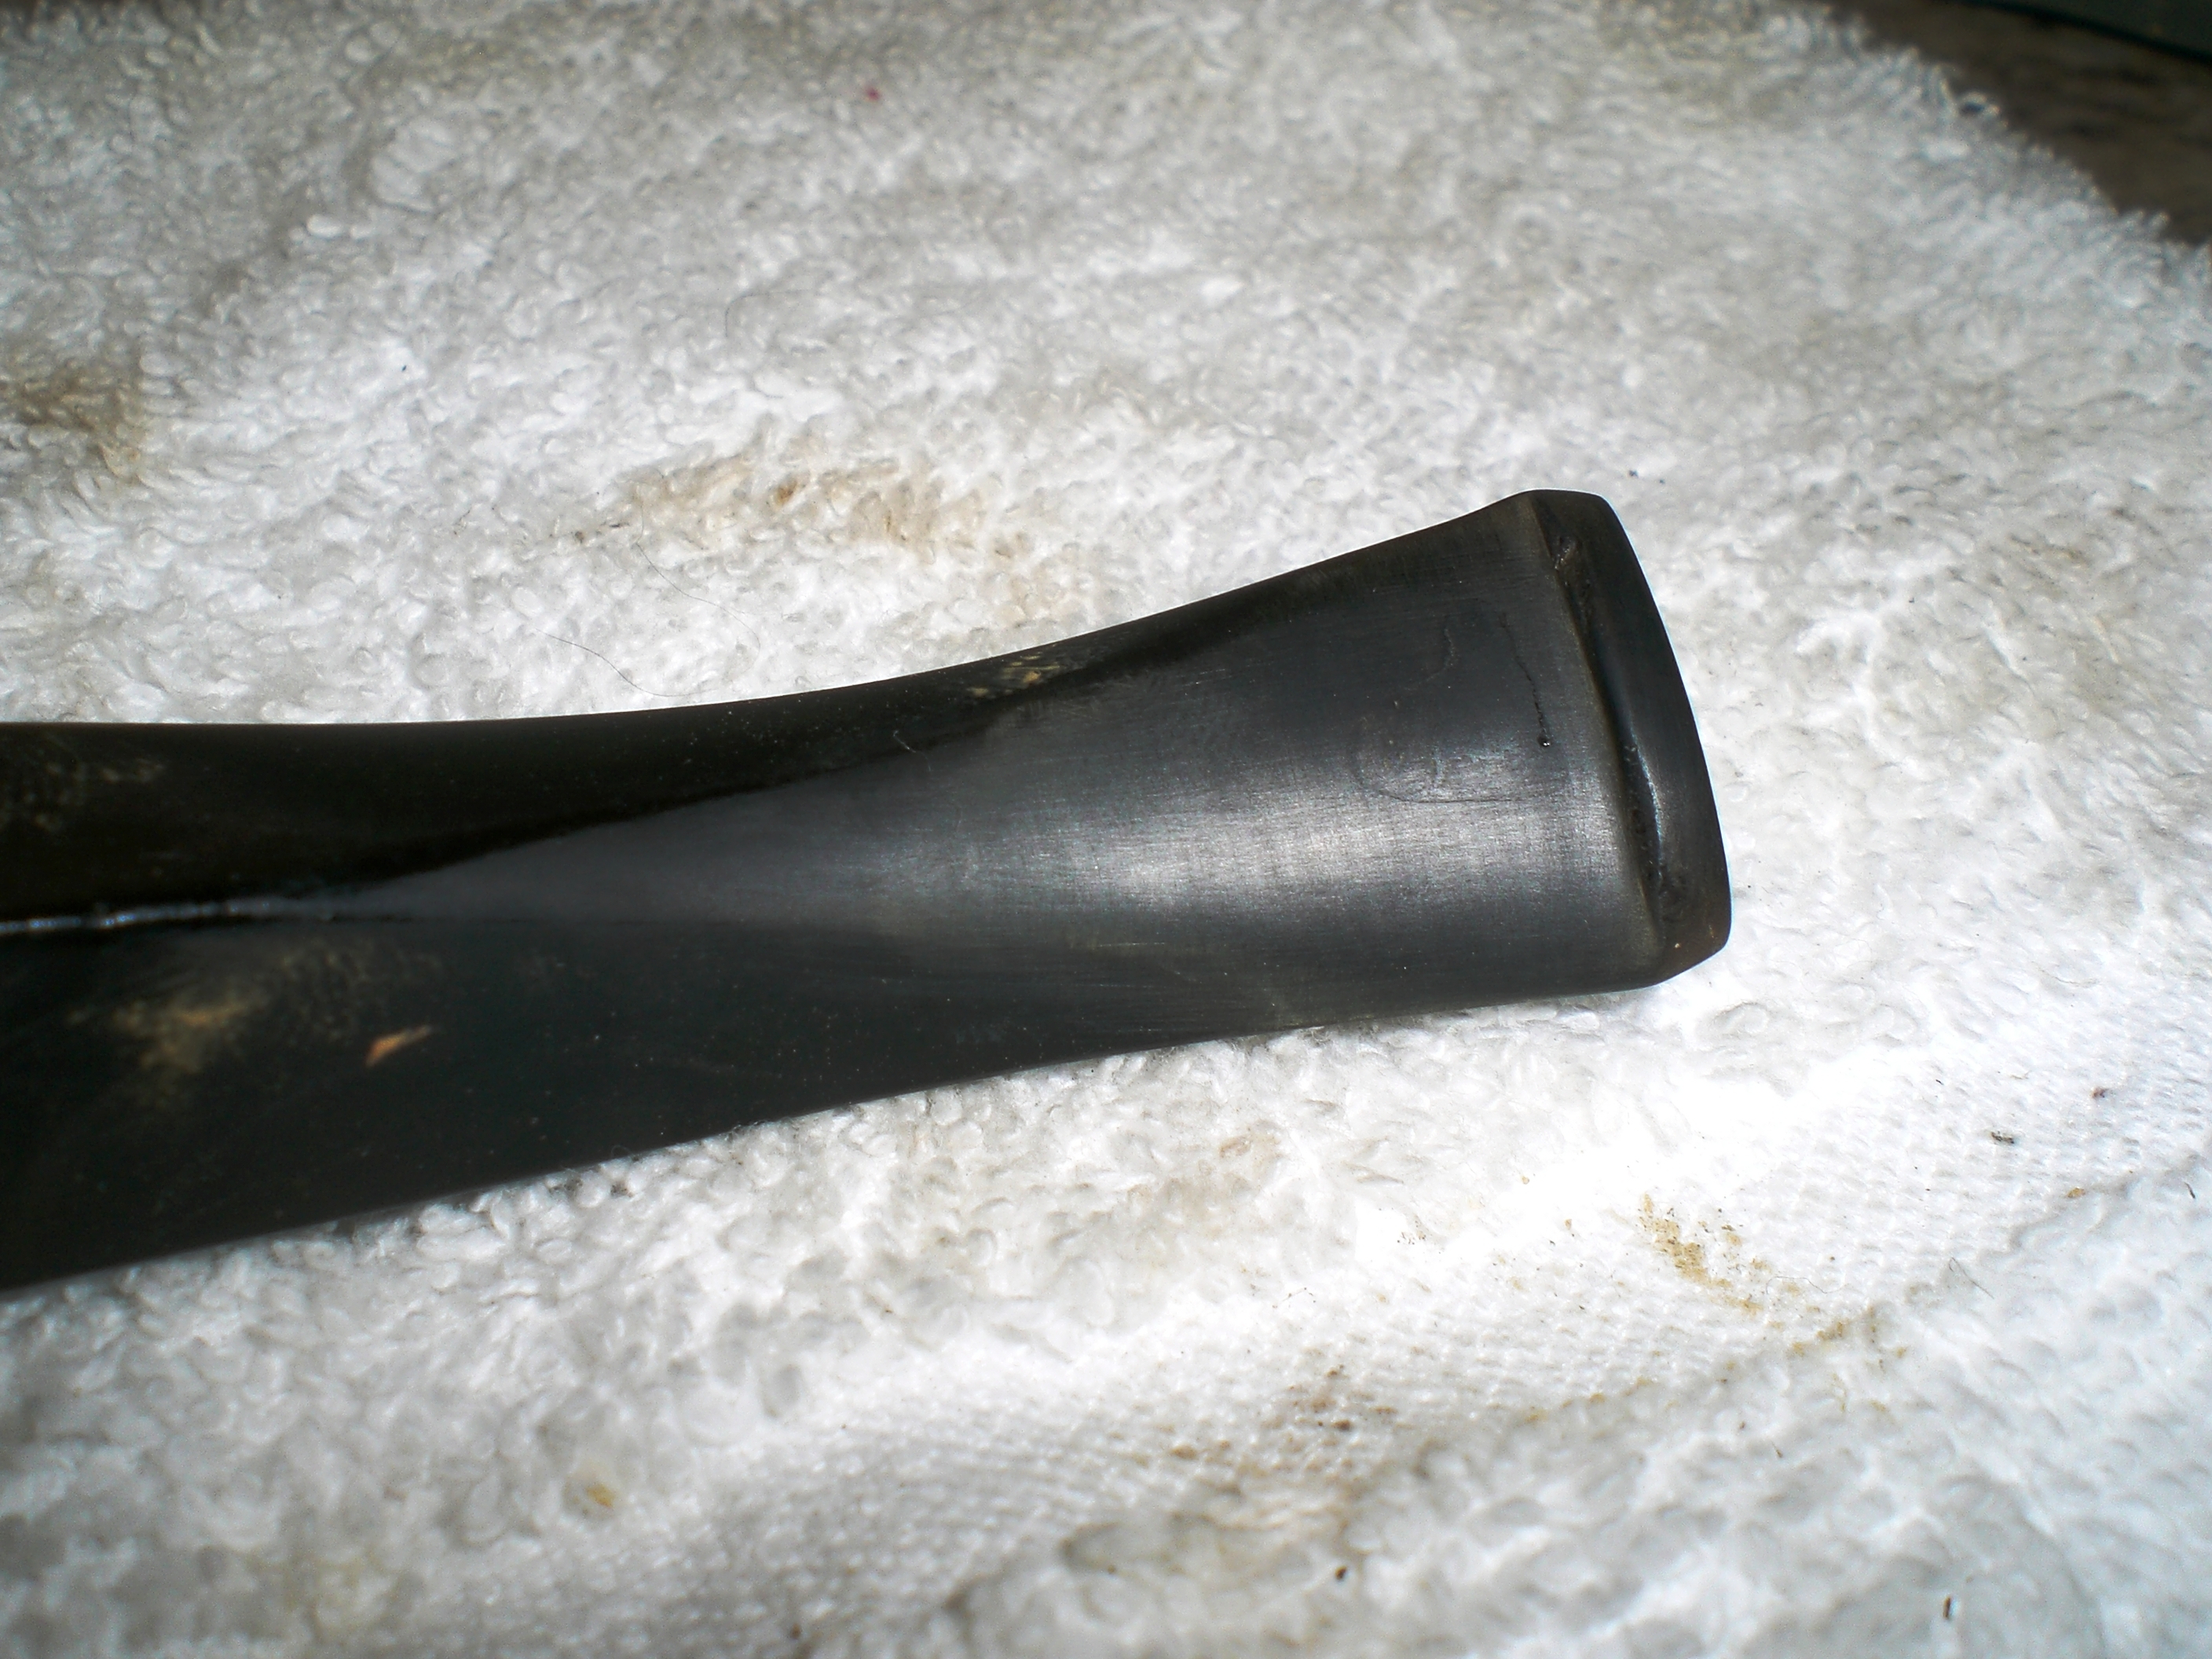
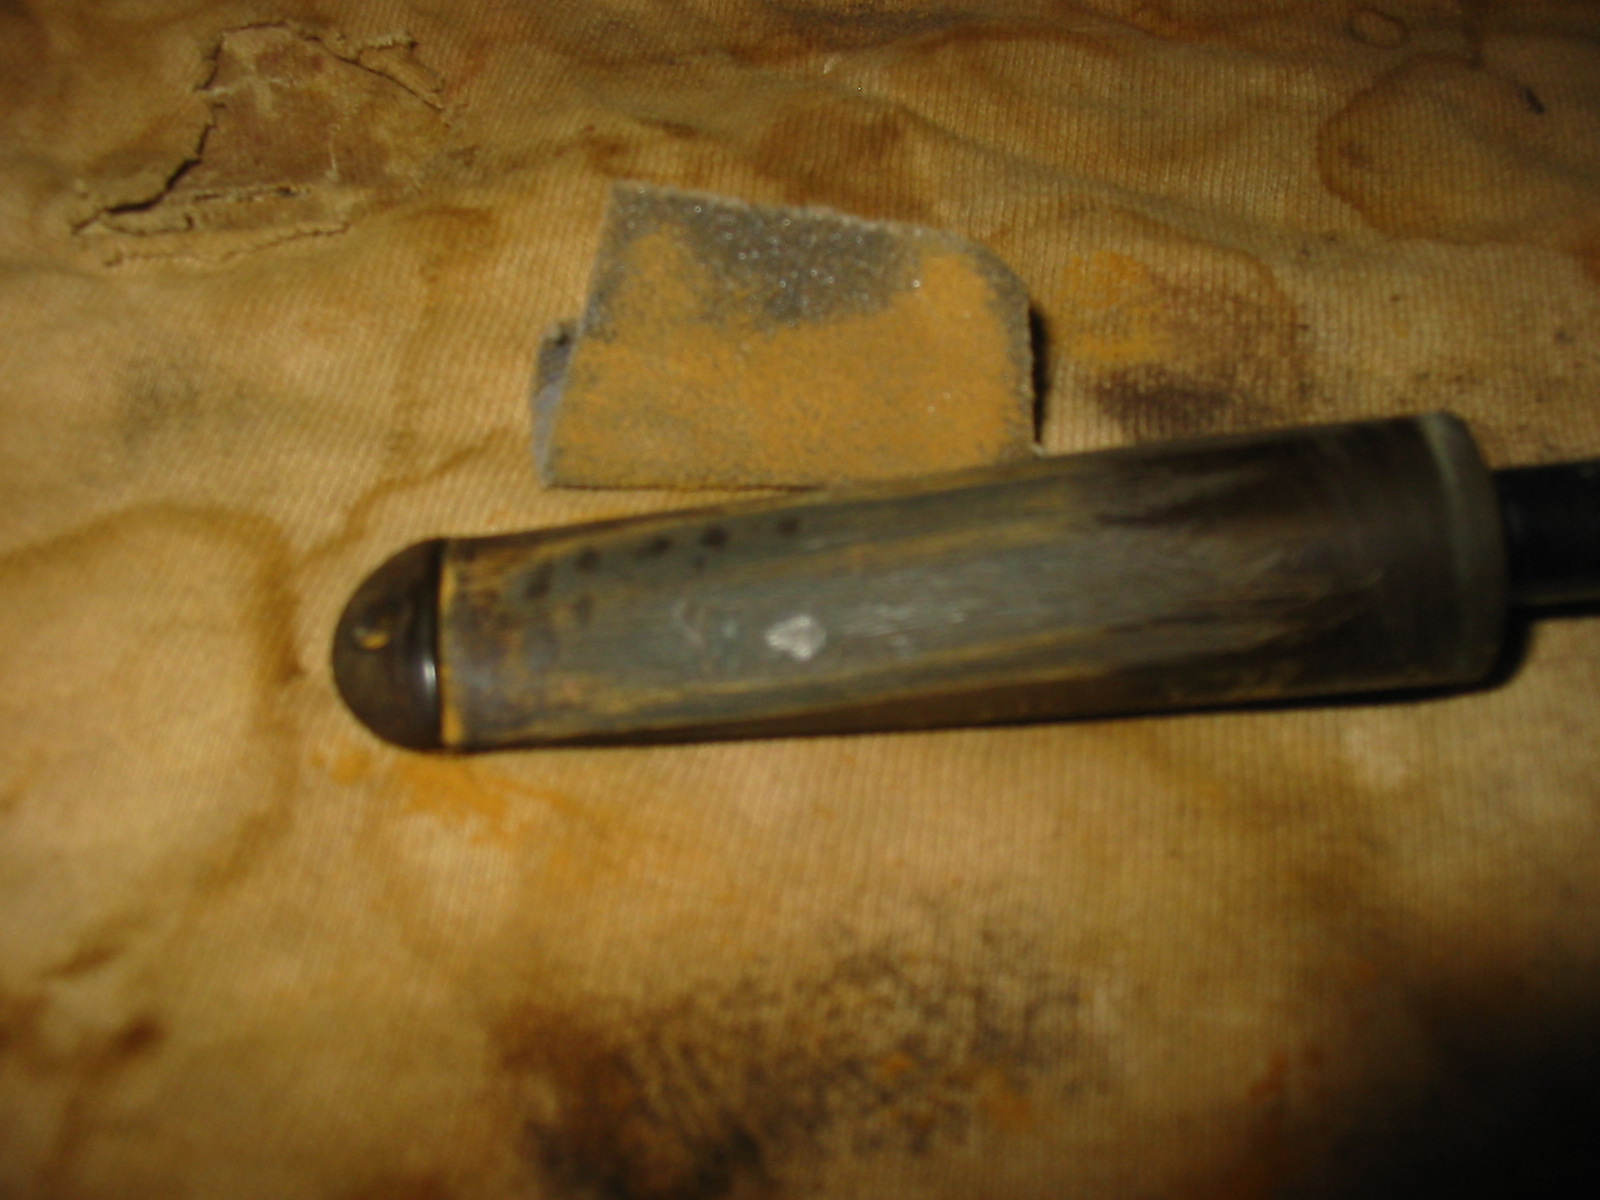
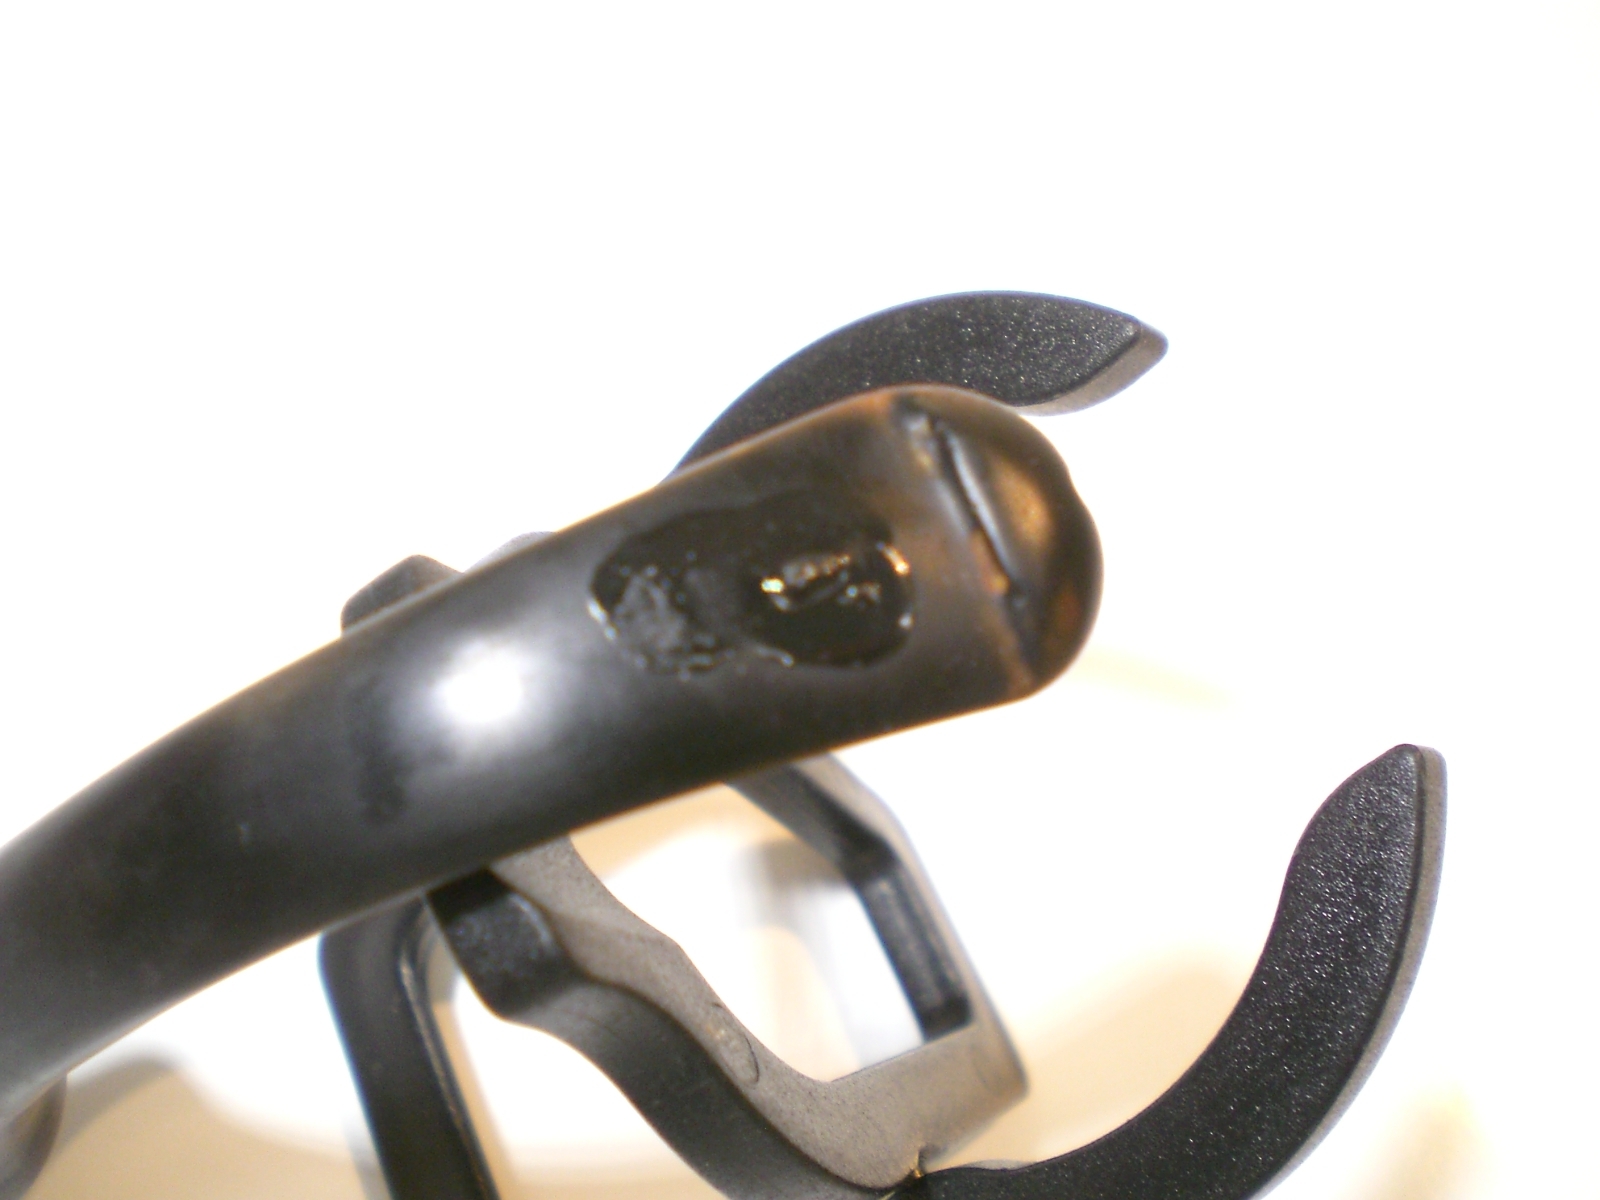
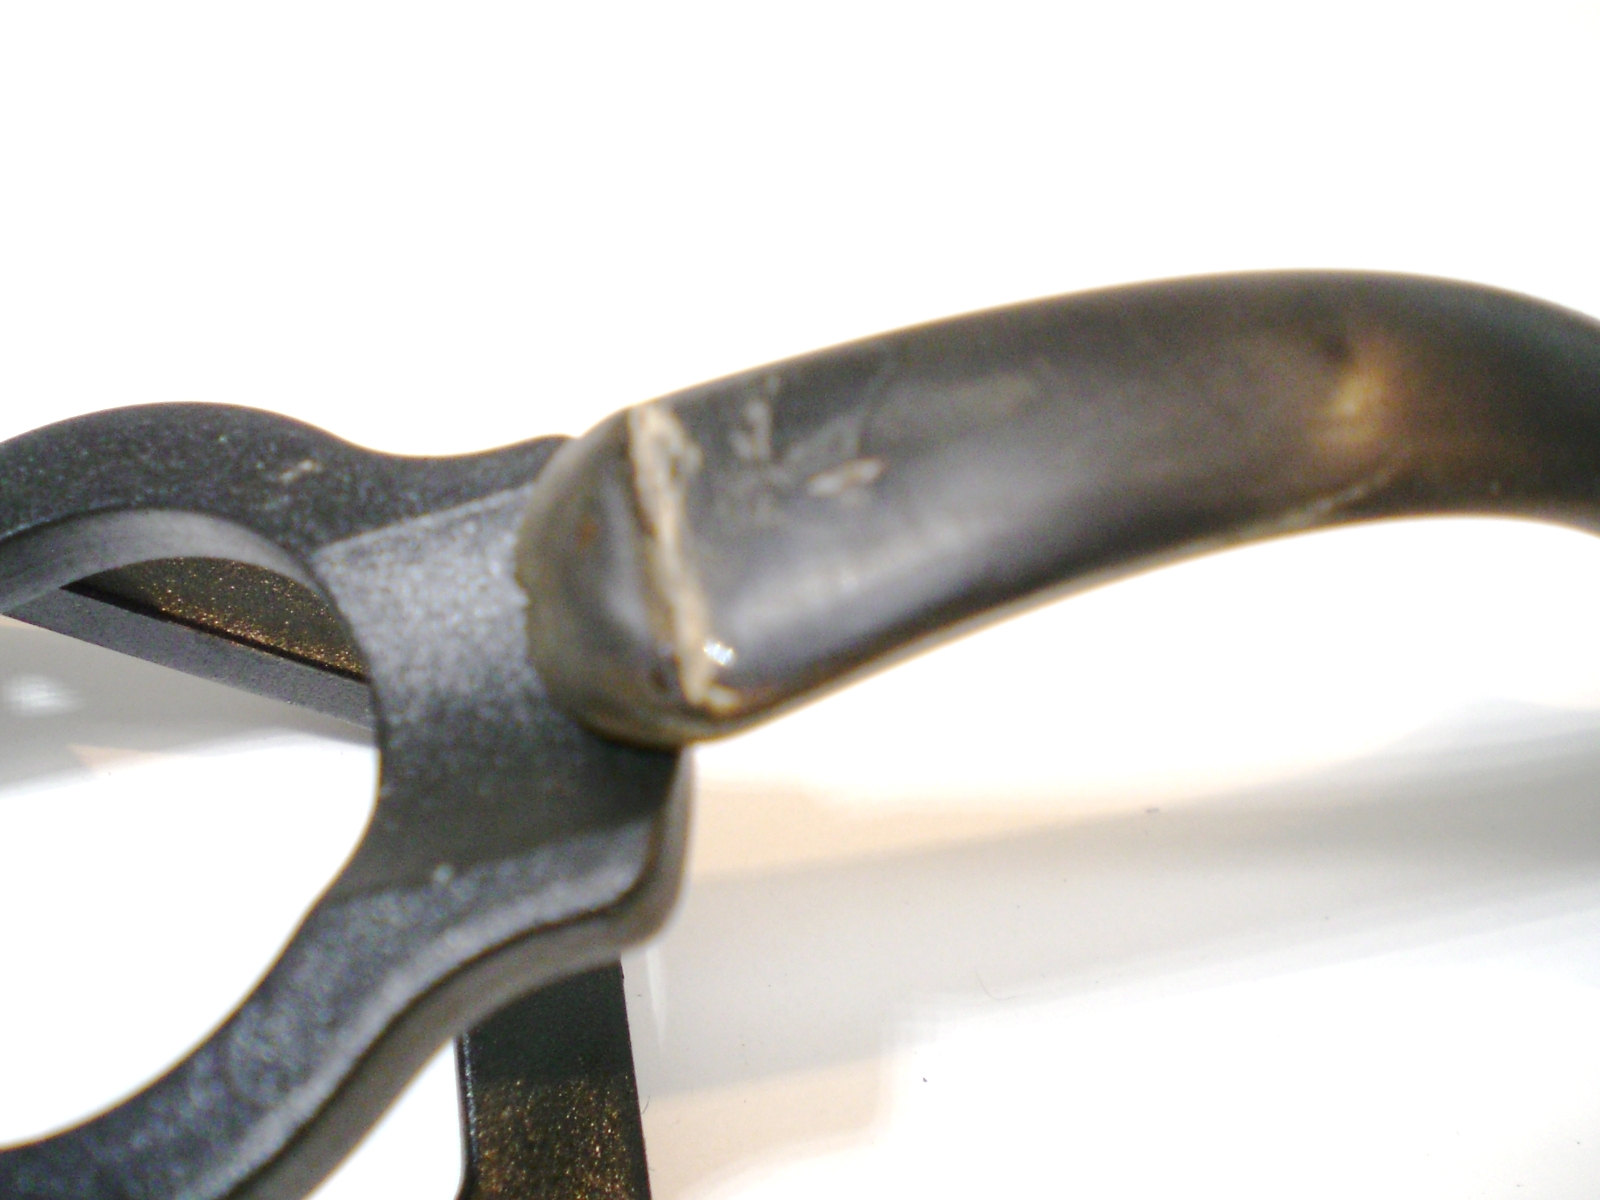
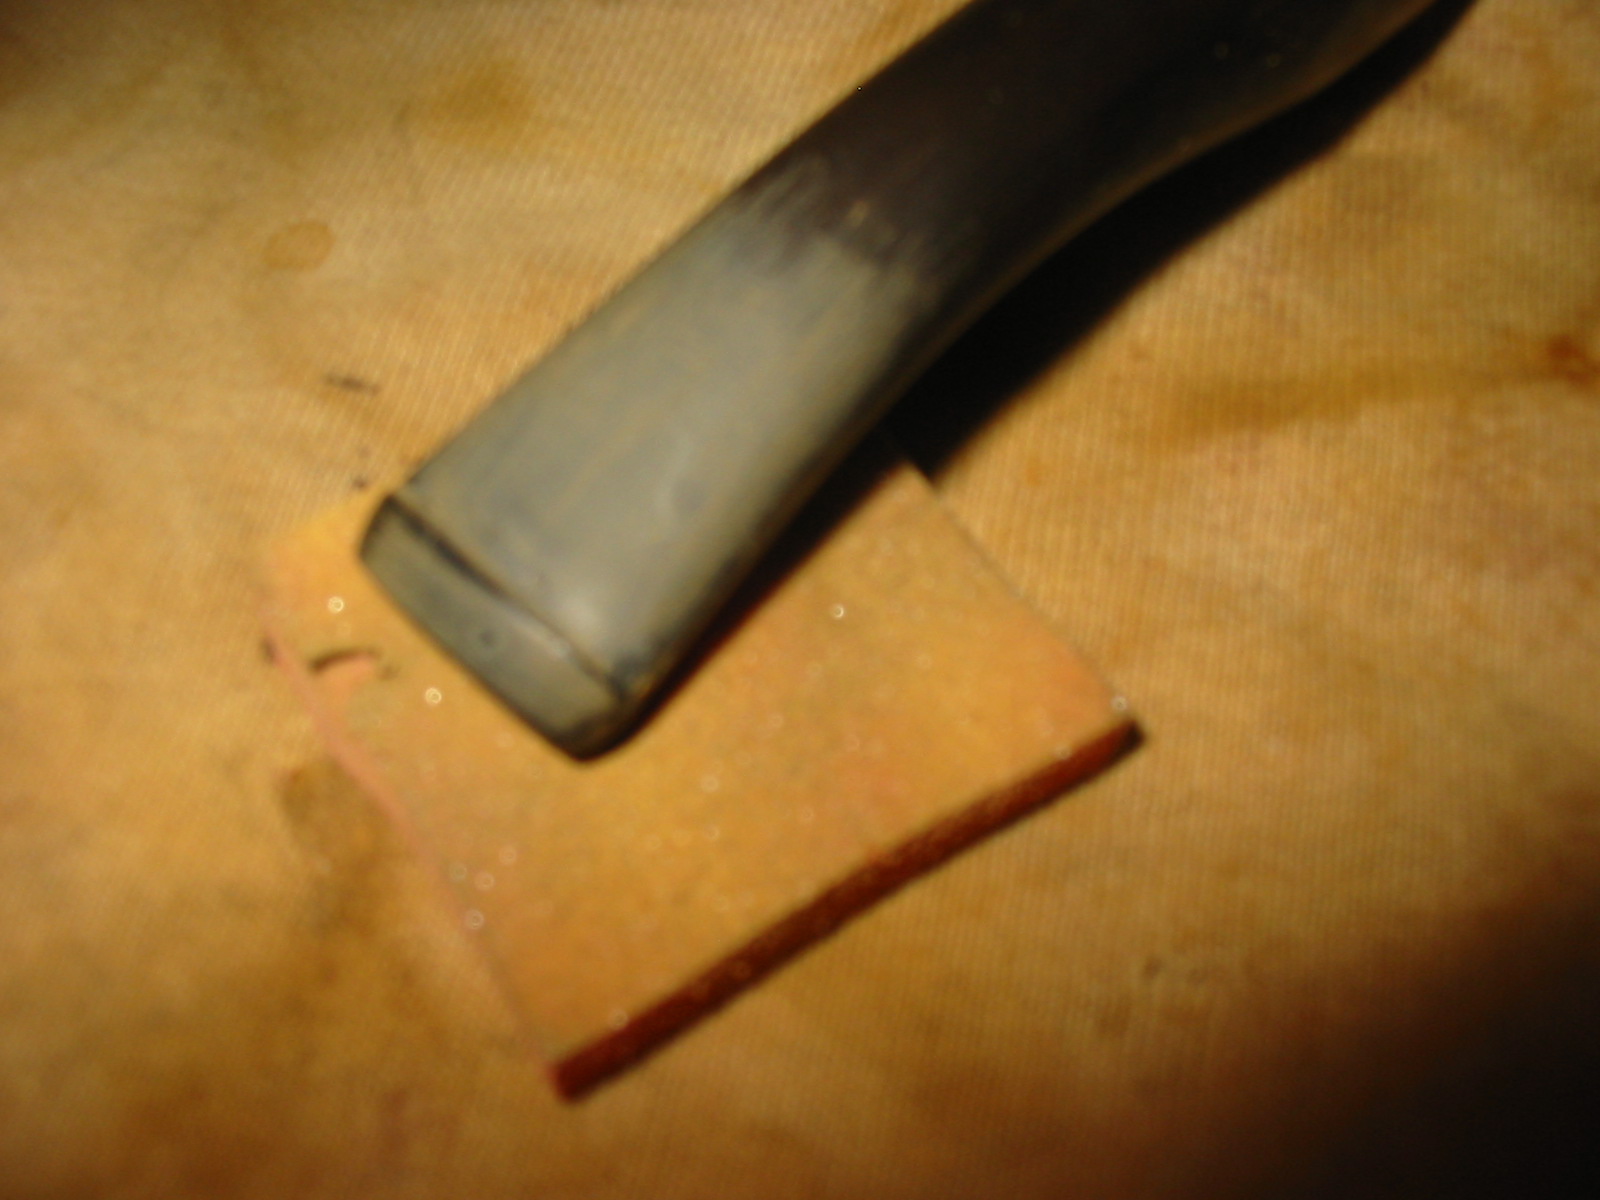
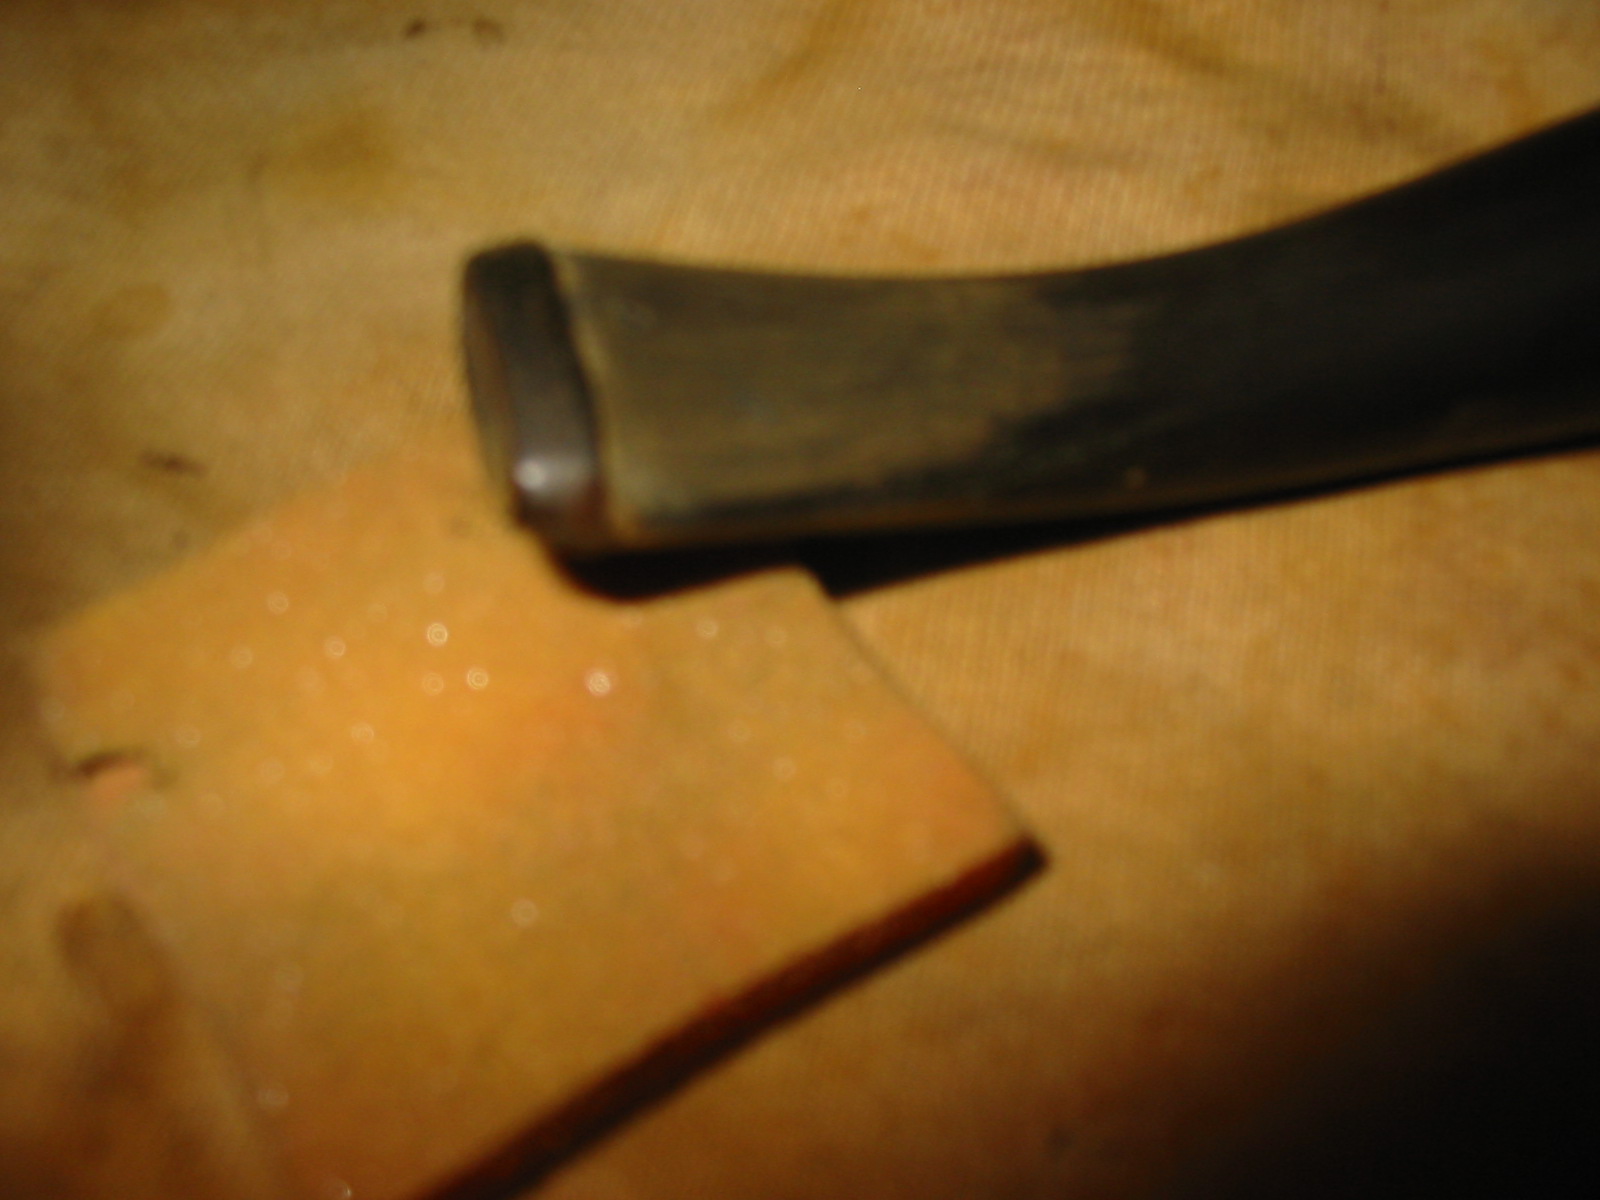
I sanded the stem with 220 grit sandpaper to clean up the surface around the bite marks. In the next three photos the bite marks are visible. I heated them to lift them as much as possible. The bite marks on the top were less troublesome than the ones on the underside. Fortunately the stem was quite thick so that the tooth marks did not go all the way through the vulcanite.

IMG_1747

IMG_1748

IMG_1749

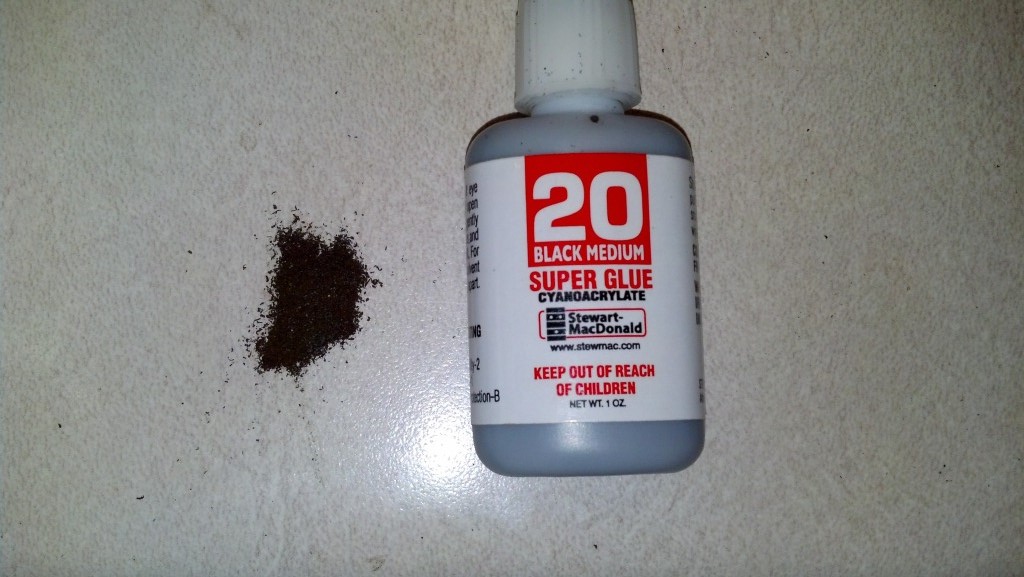
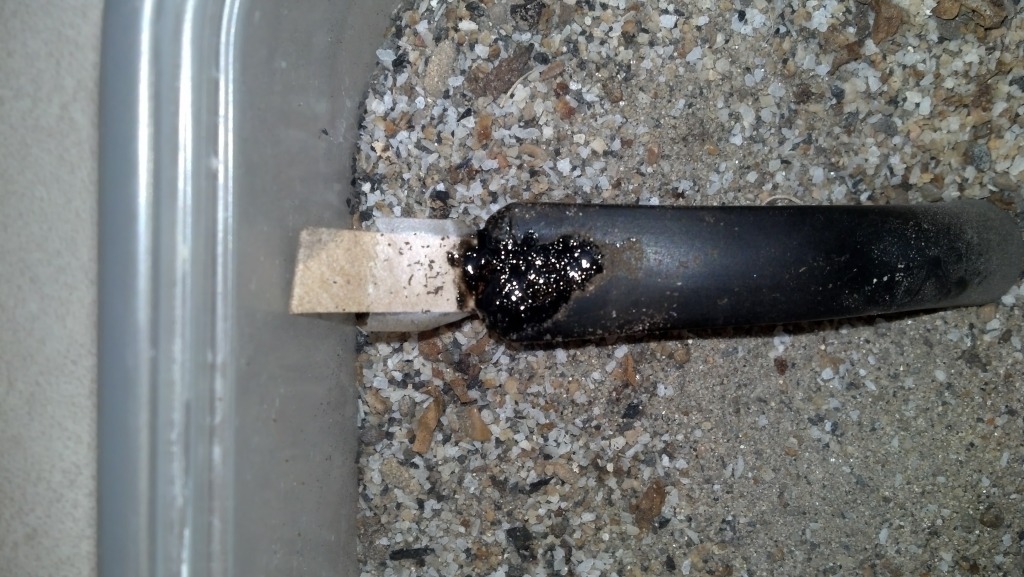
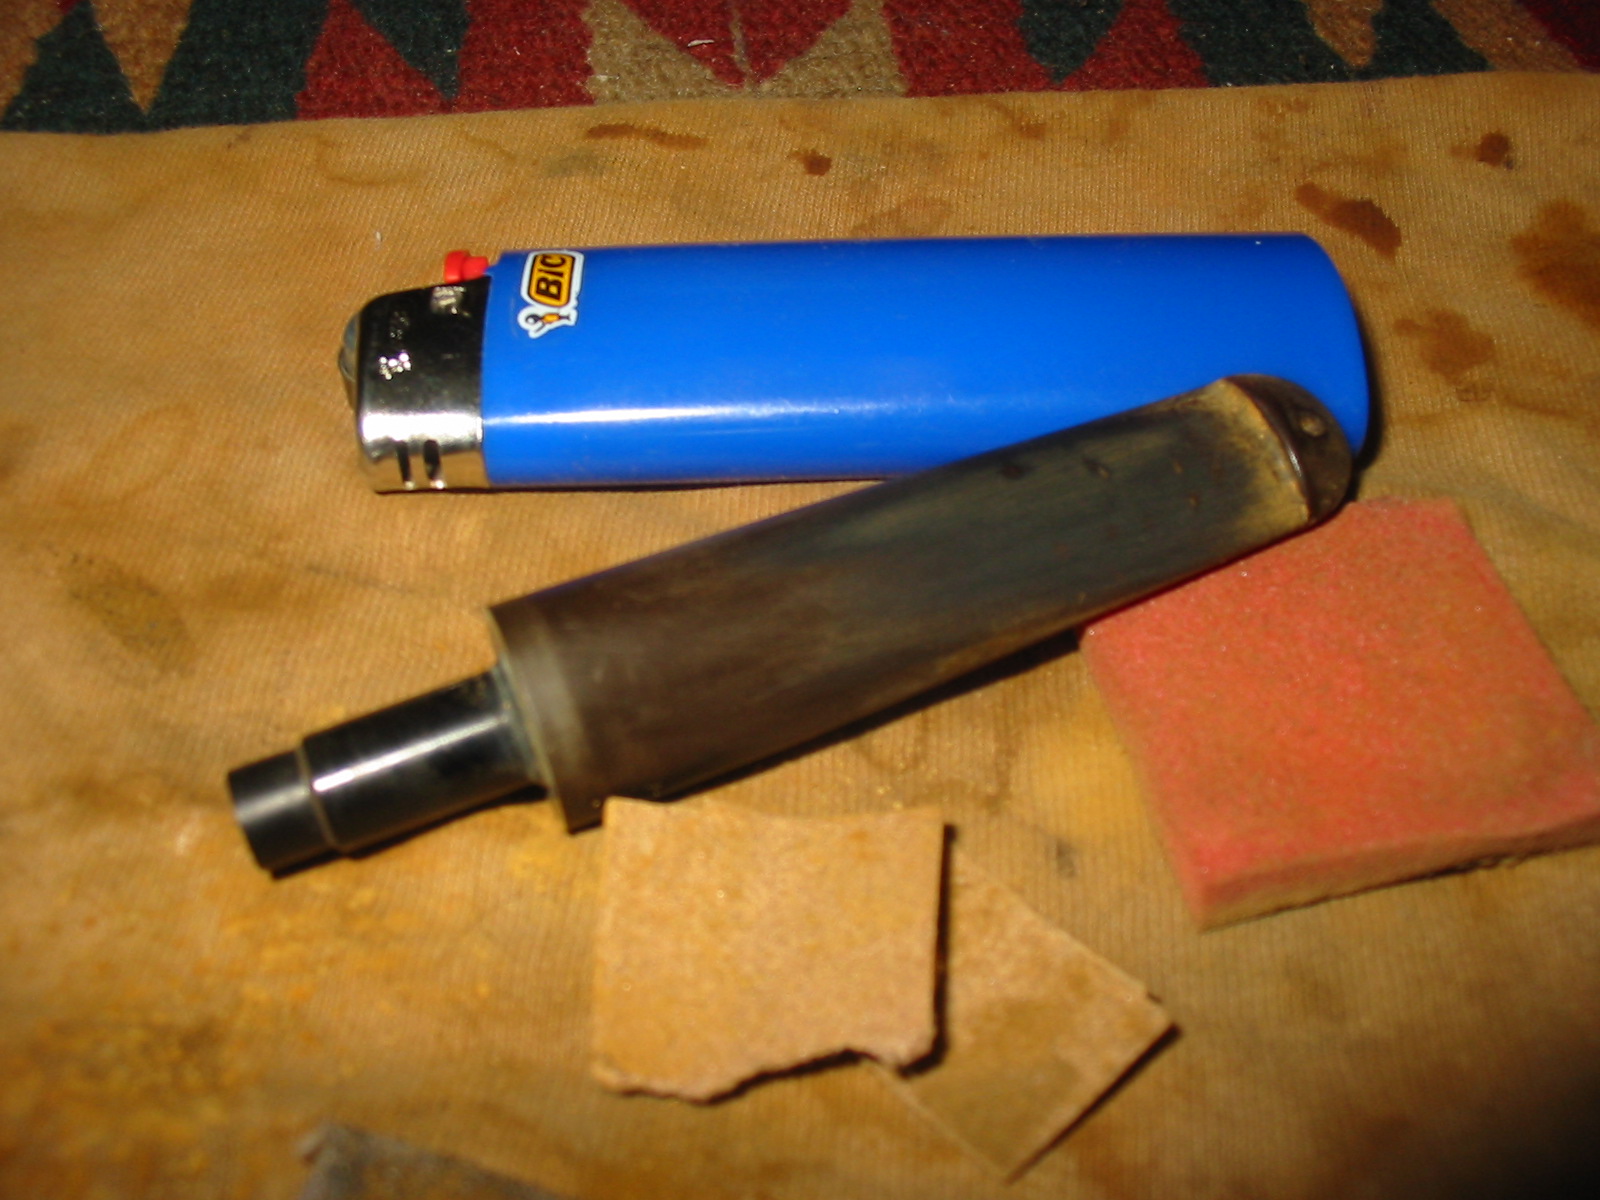
I picked the tooth marks clean with a dental pick and then used black super glue to patch the deep marks that remained. Once the glue had cured and was hard I sanded the patches with 220 grit sandpaper and then a medium grit sanding sponge to smooth out the surface and blend in the patch. The next three photos show the patch after it had been applied and after sanding.

IMG_1750

IMG_1752

IMG_1753

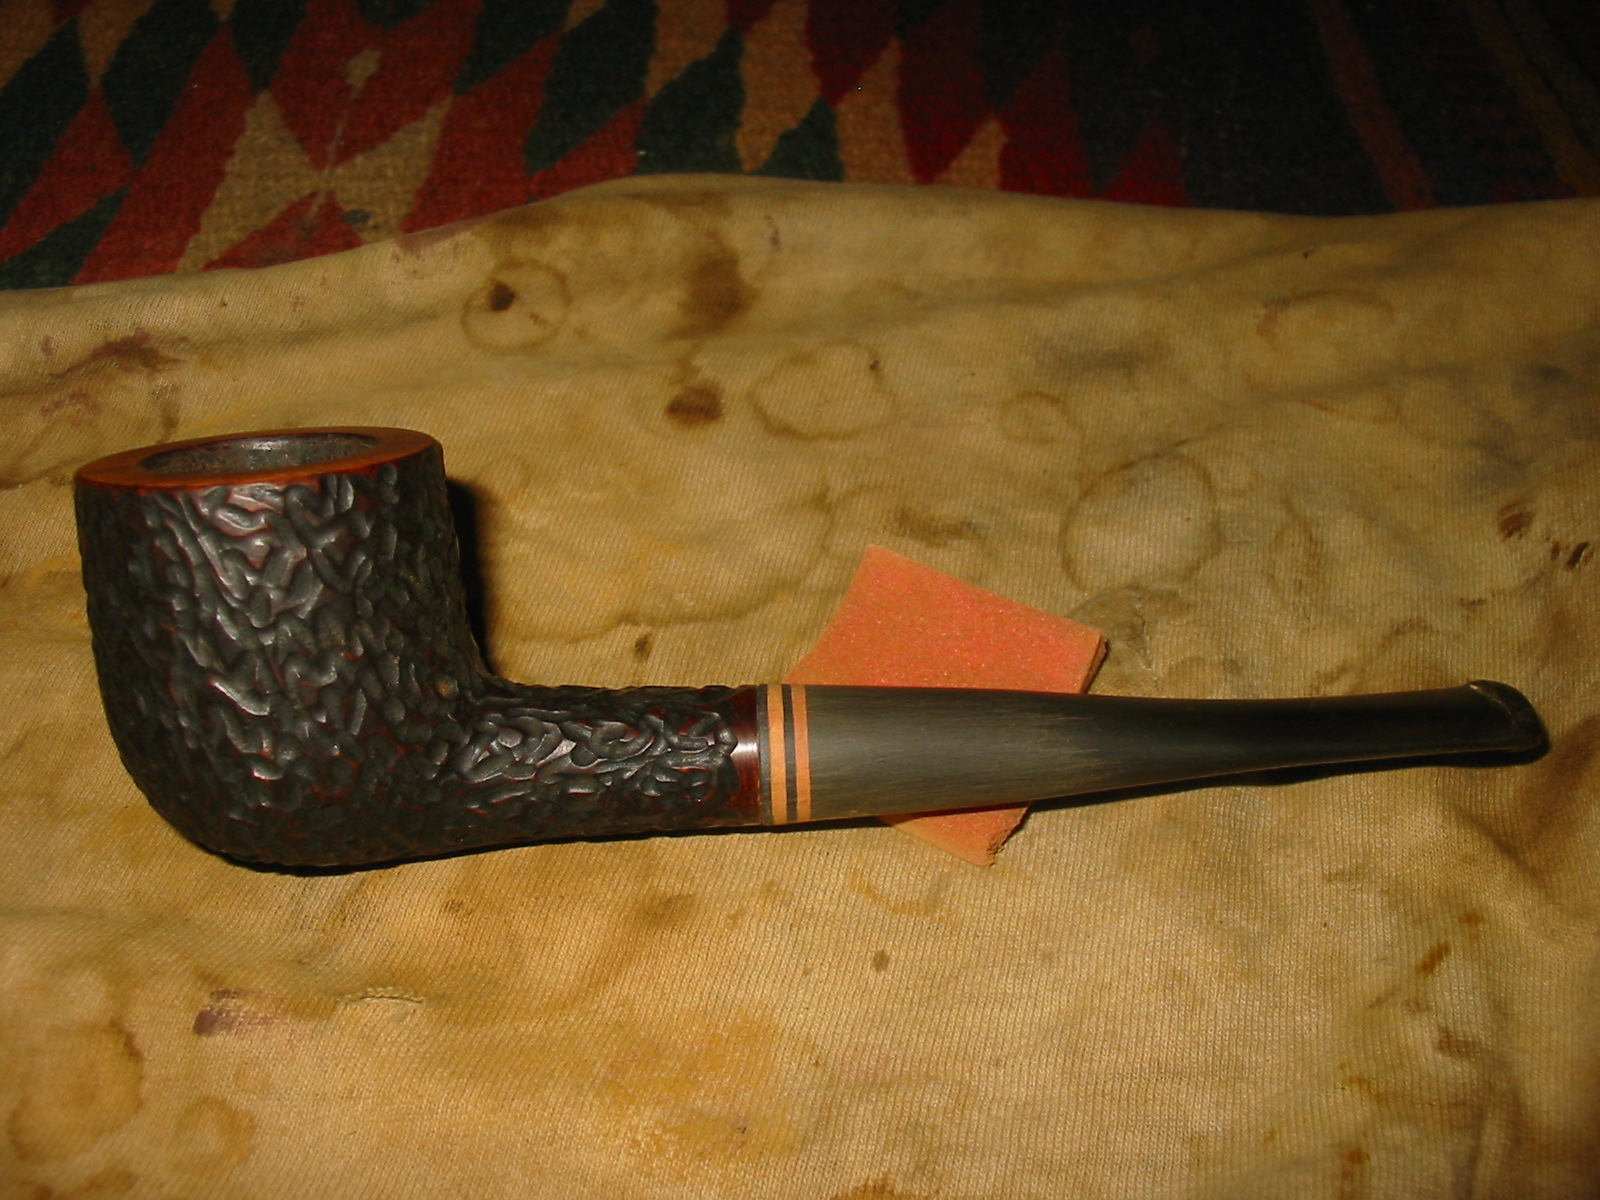
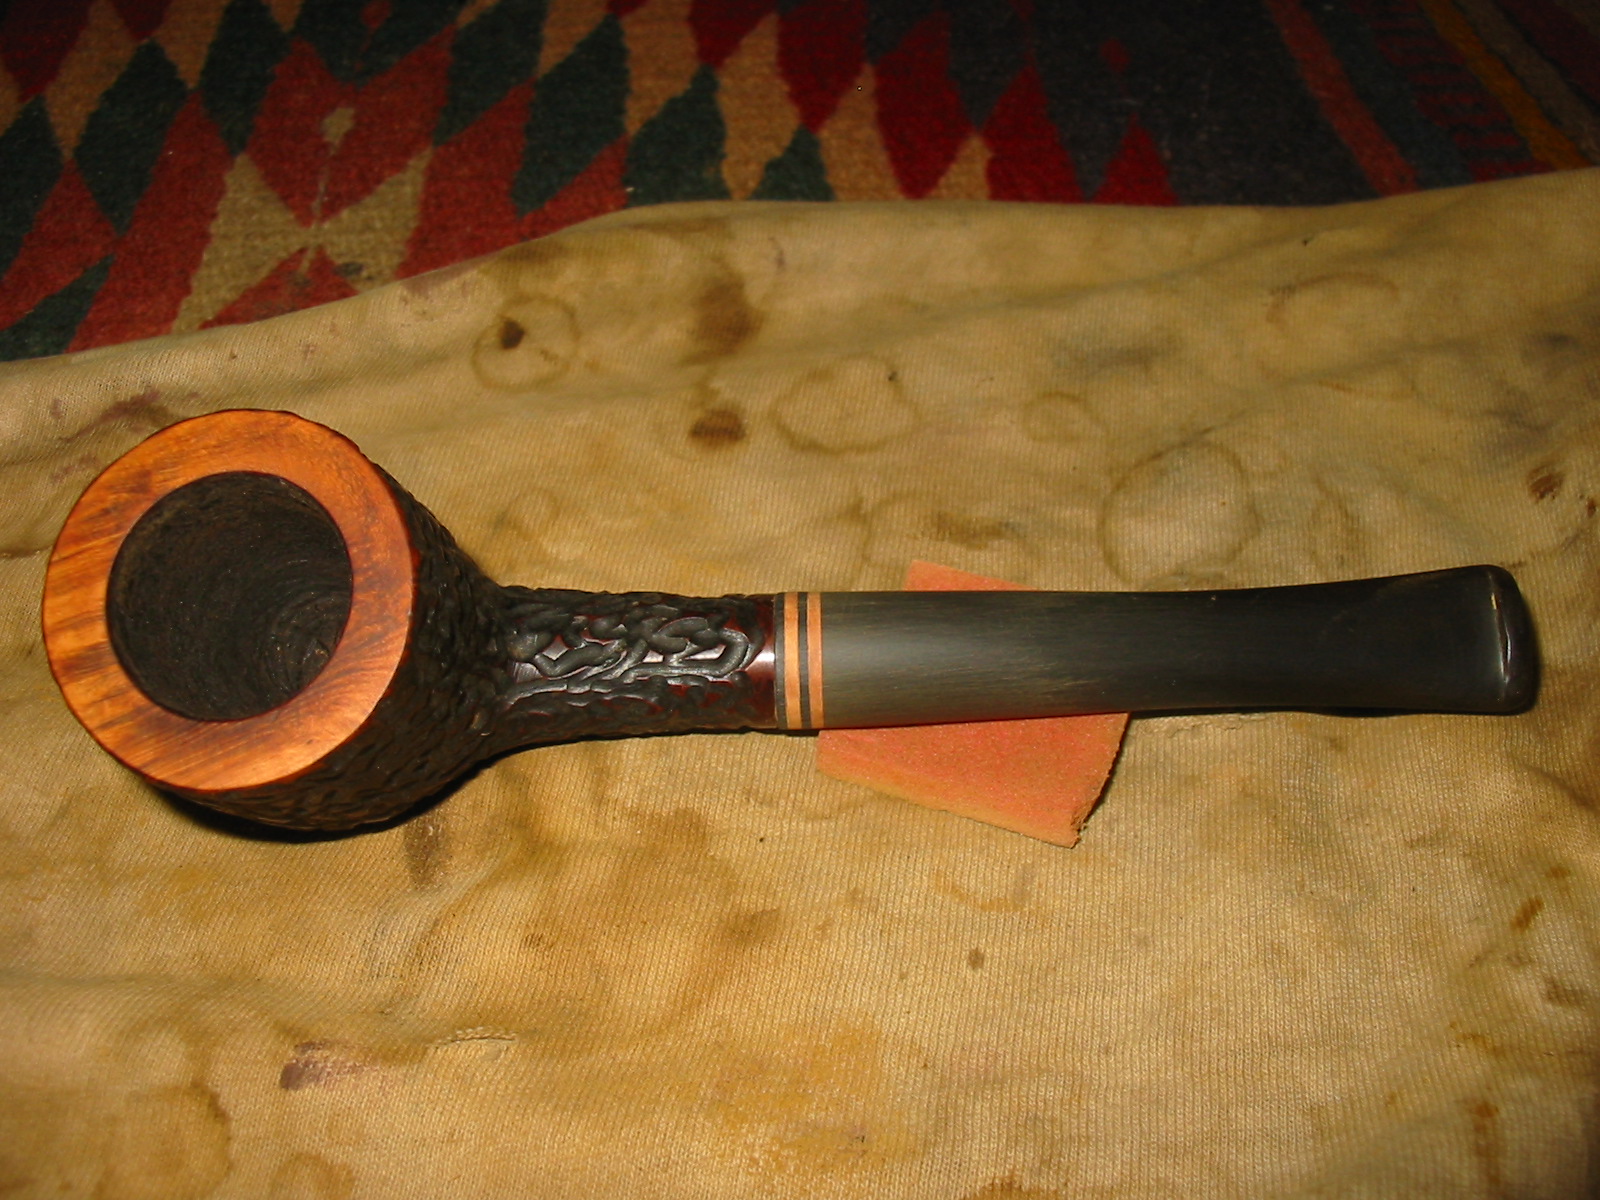
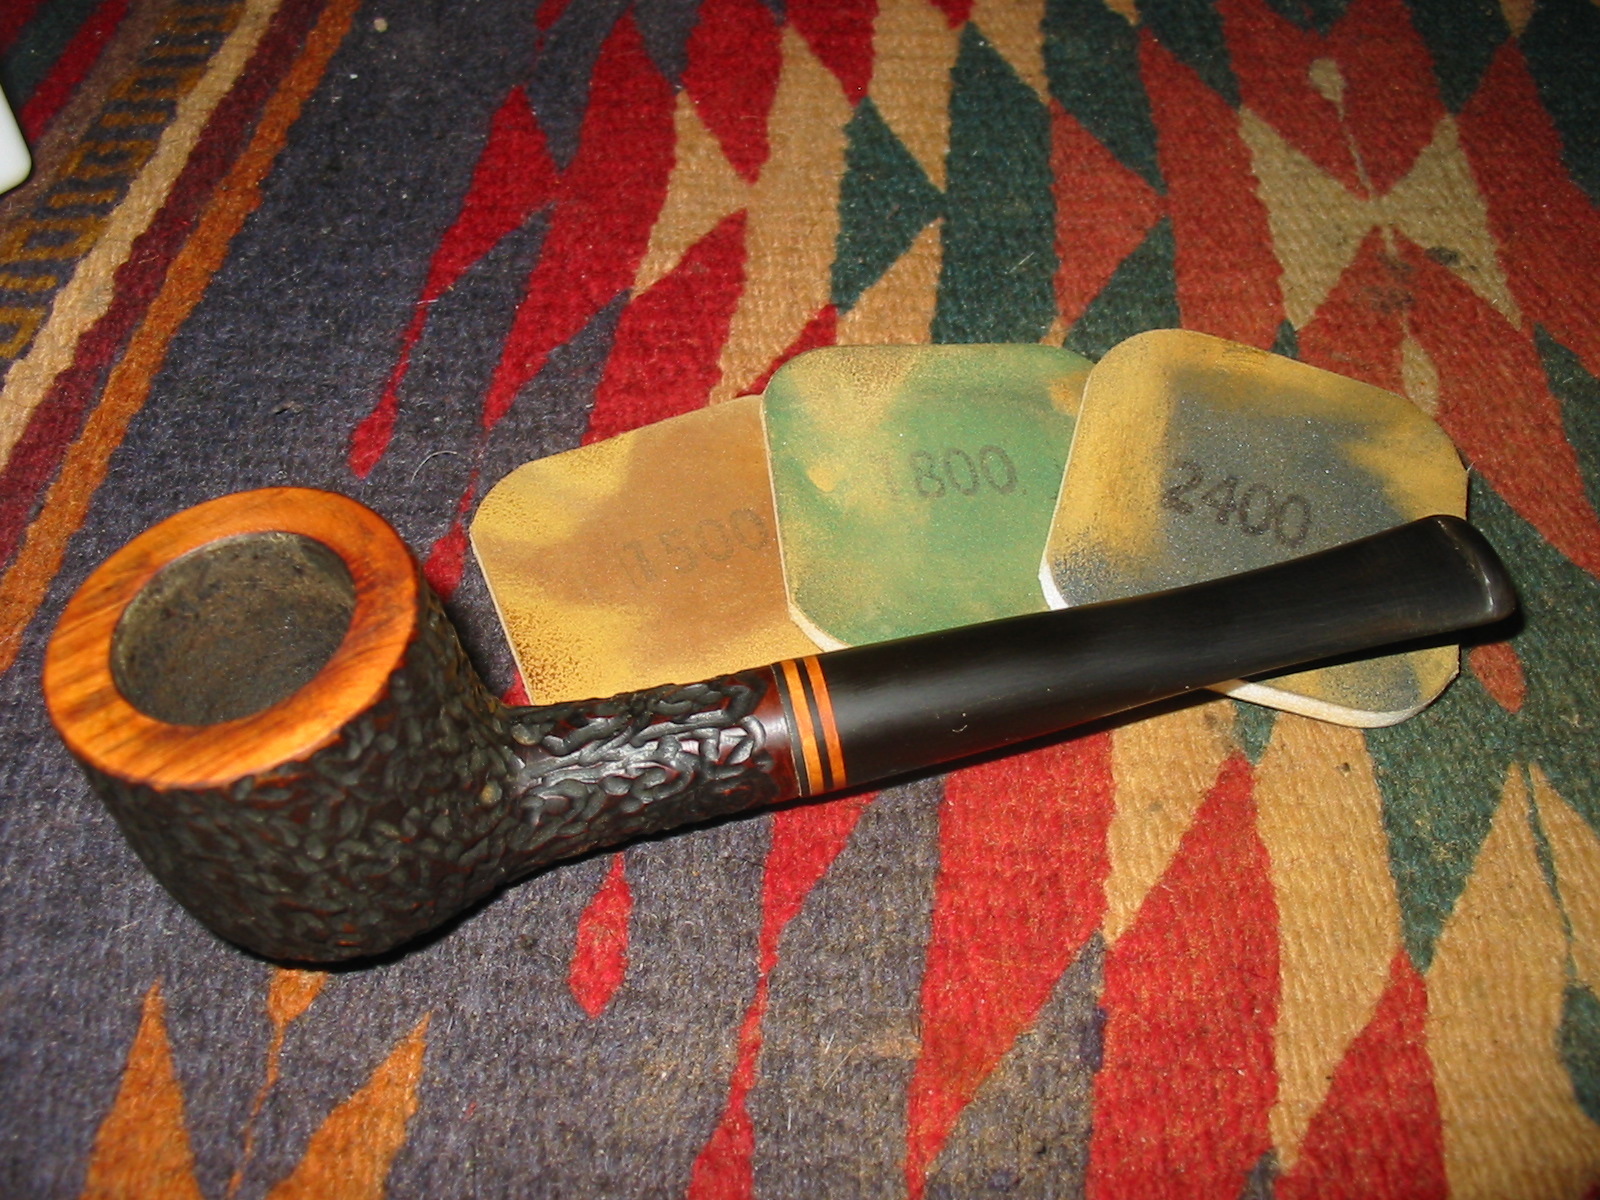
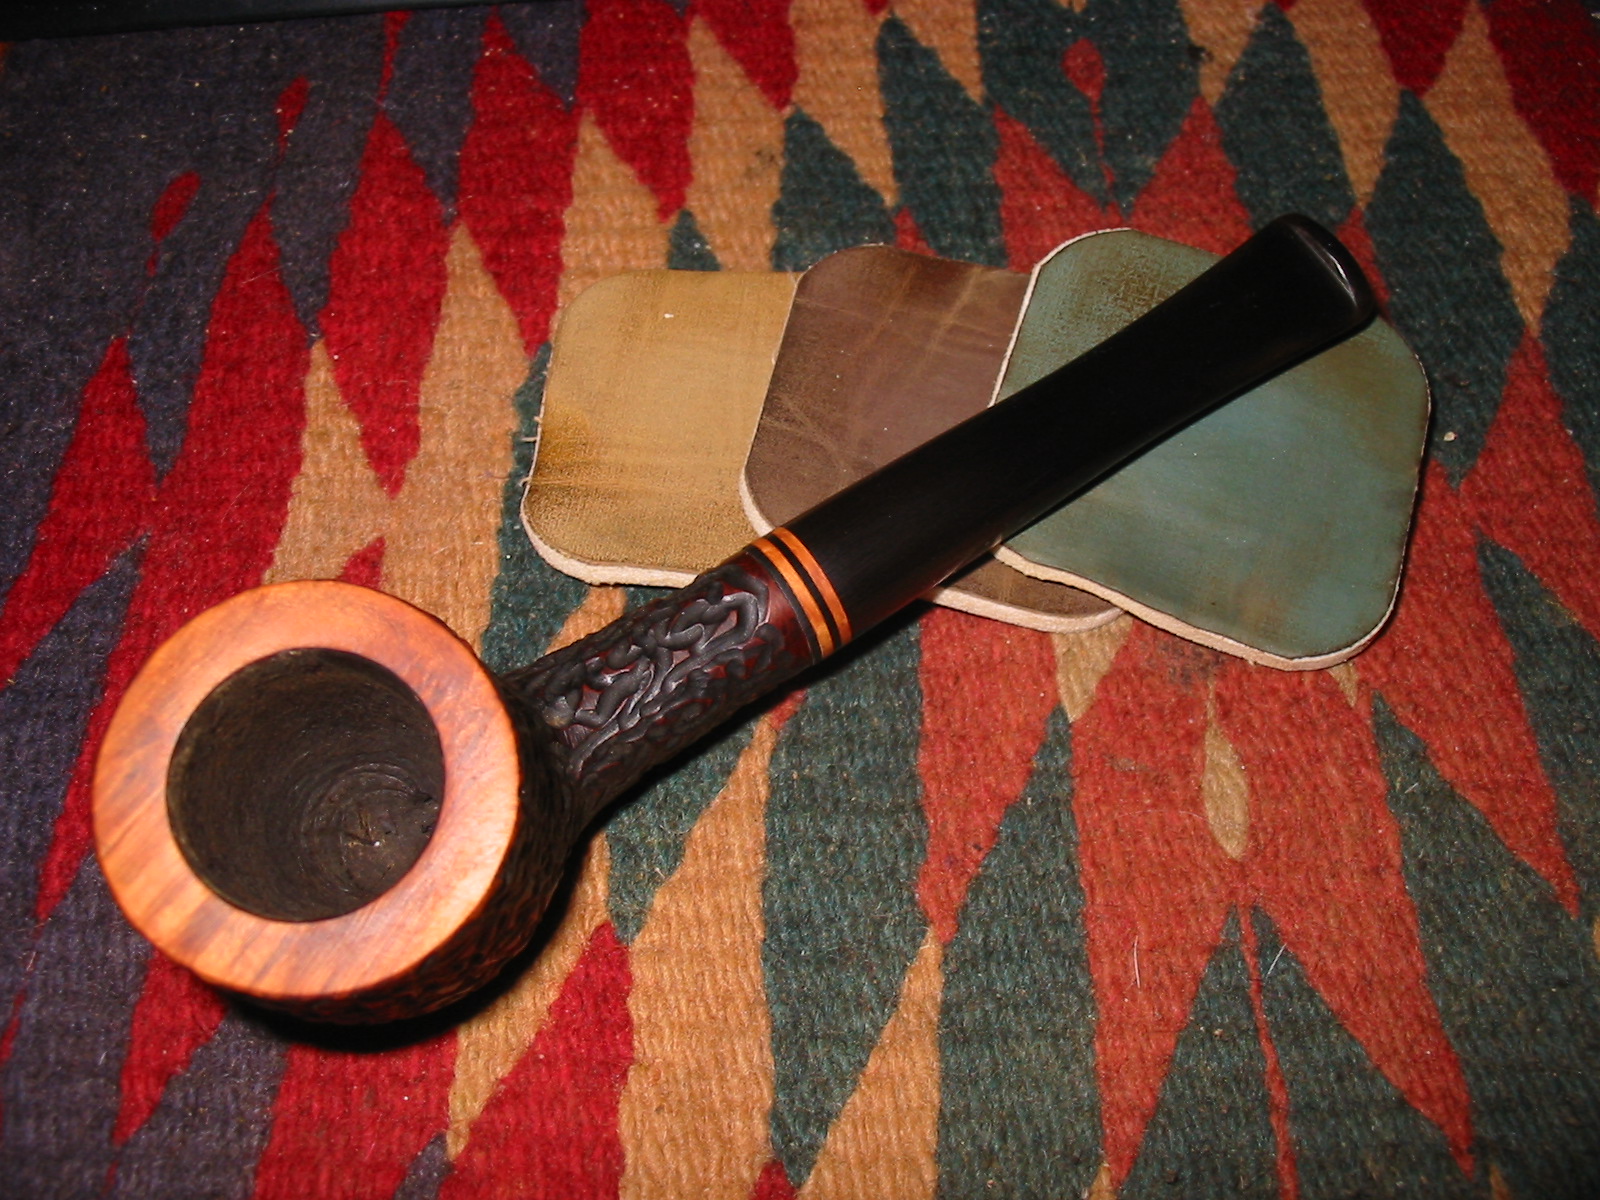
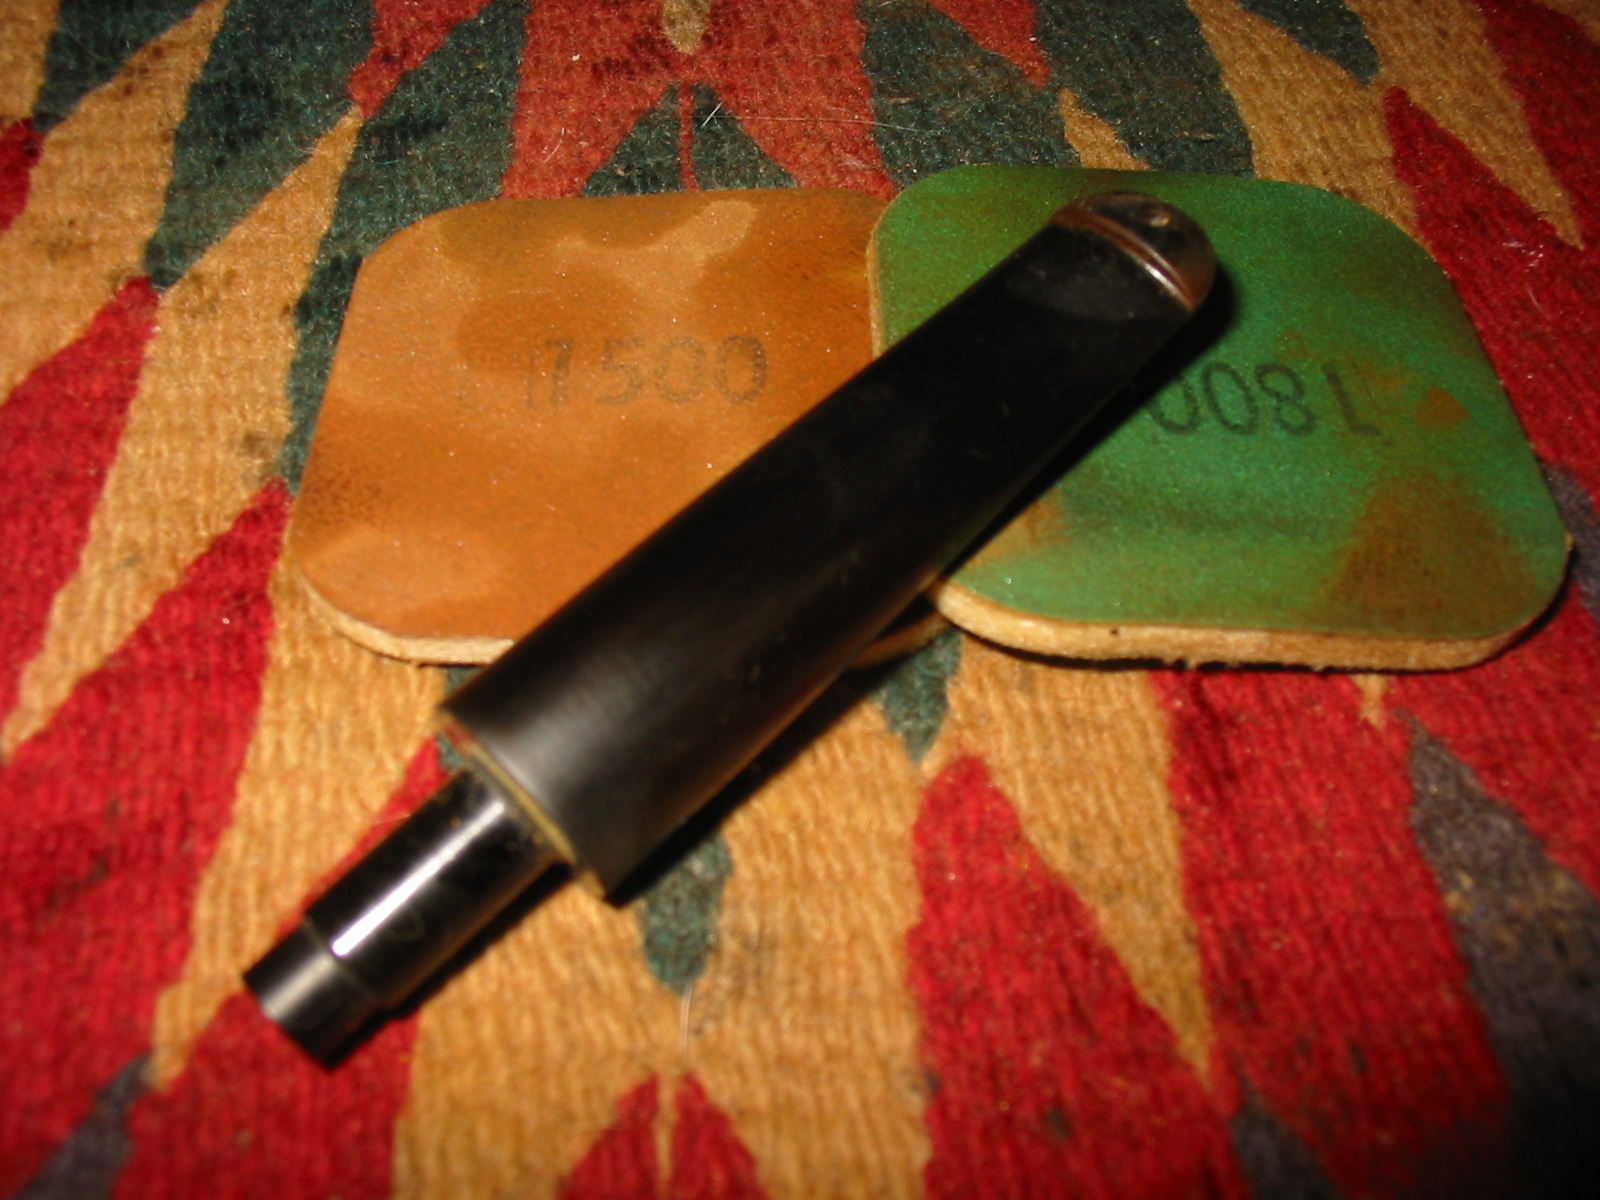
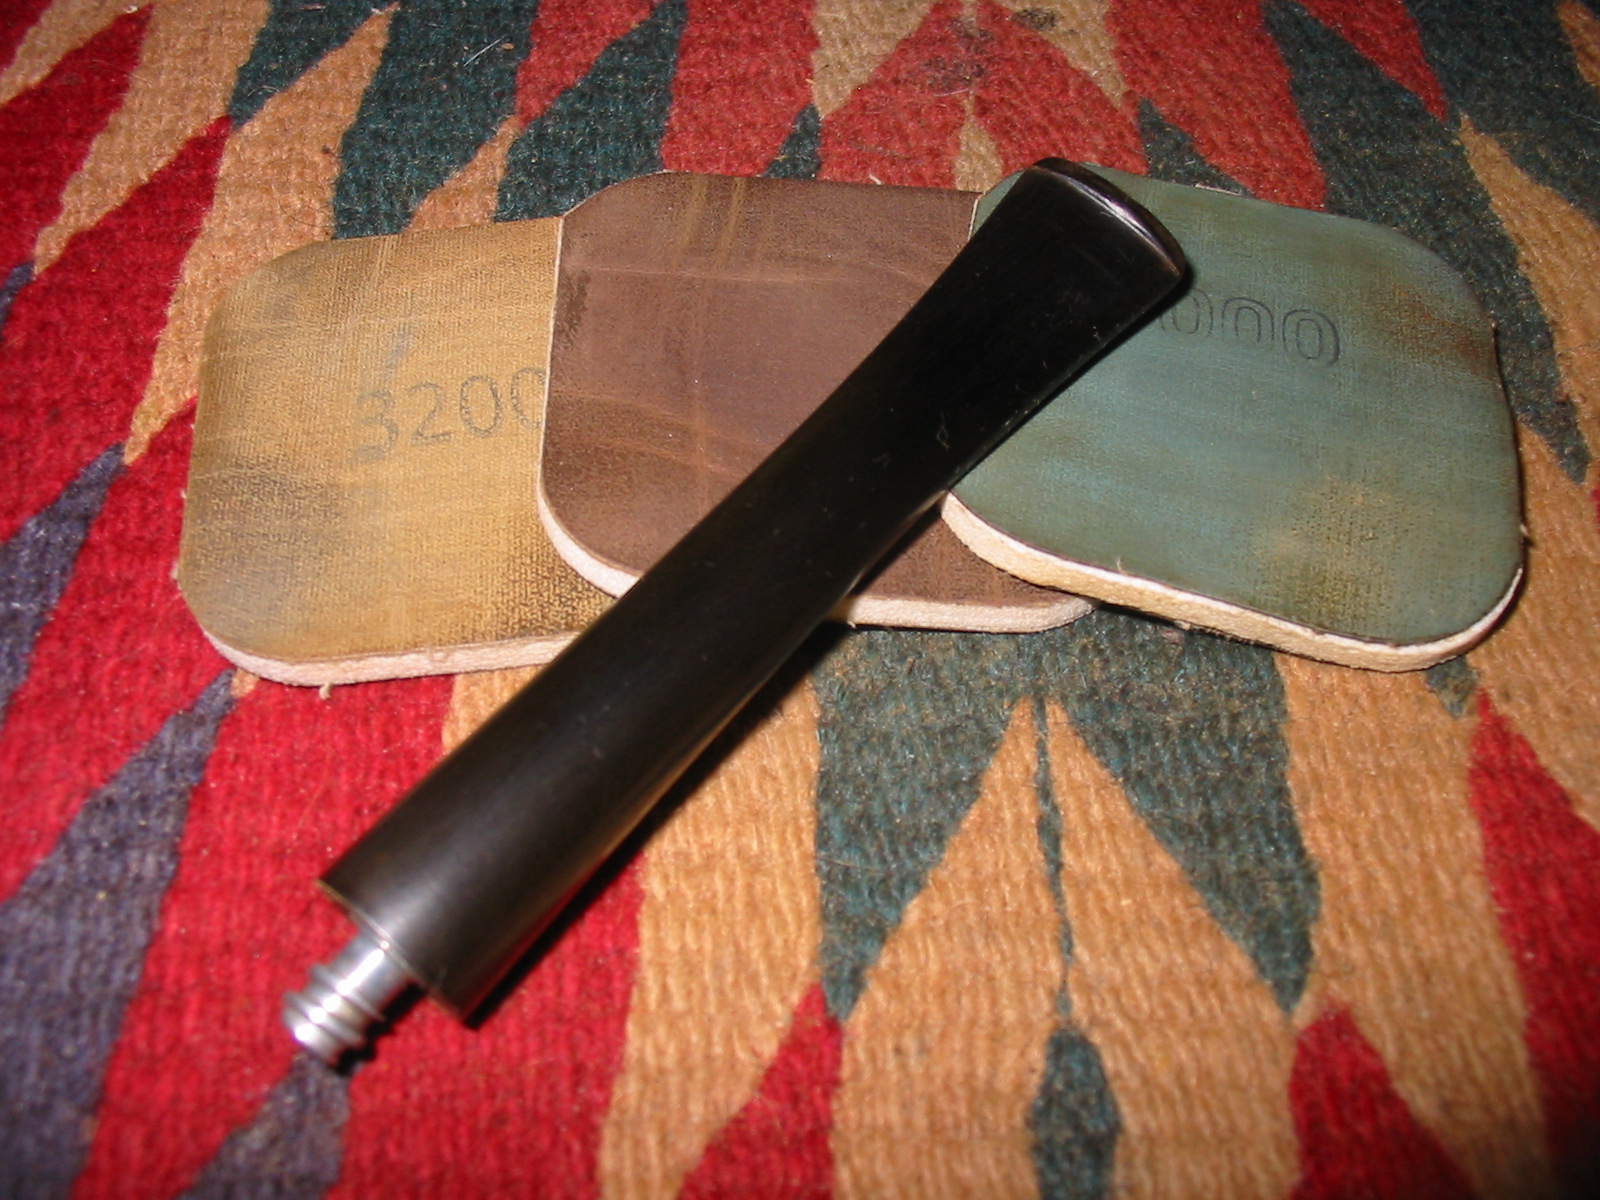
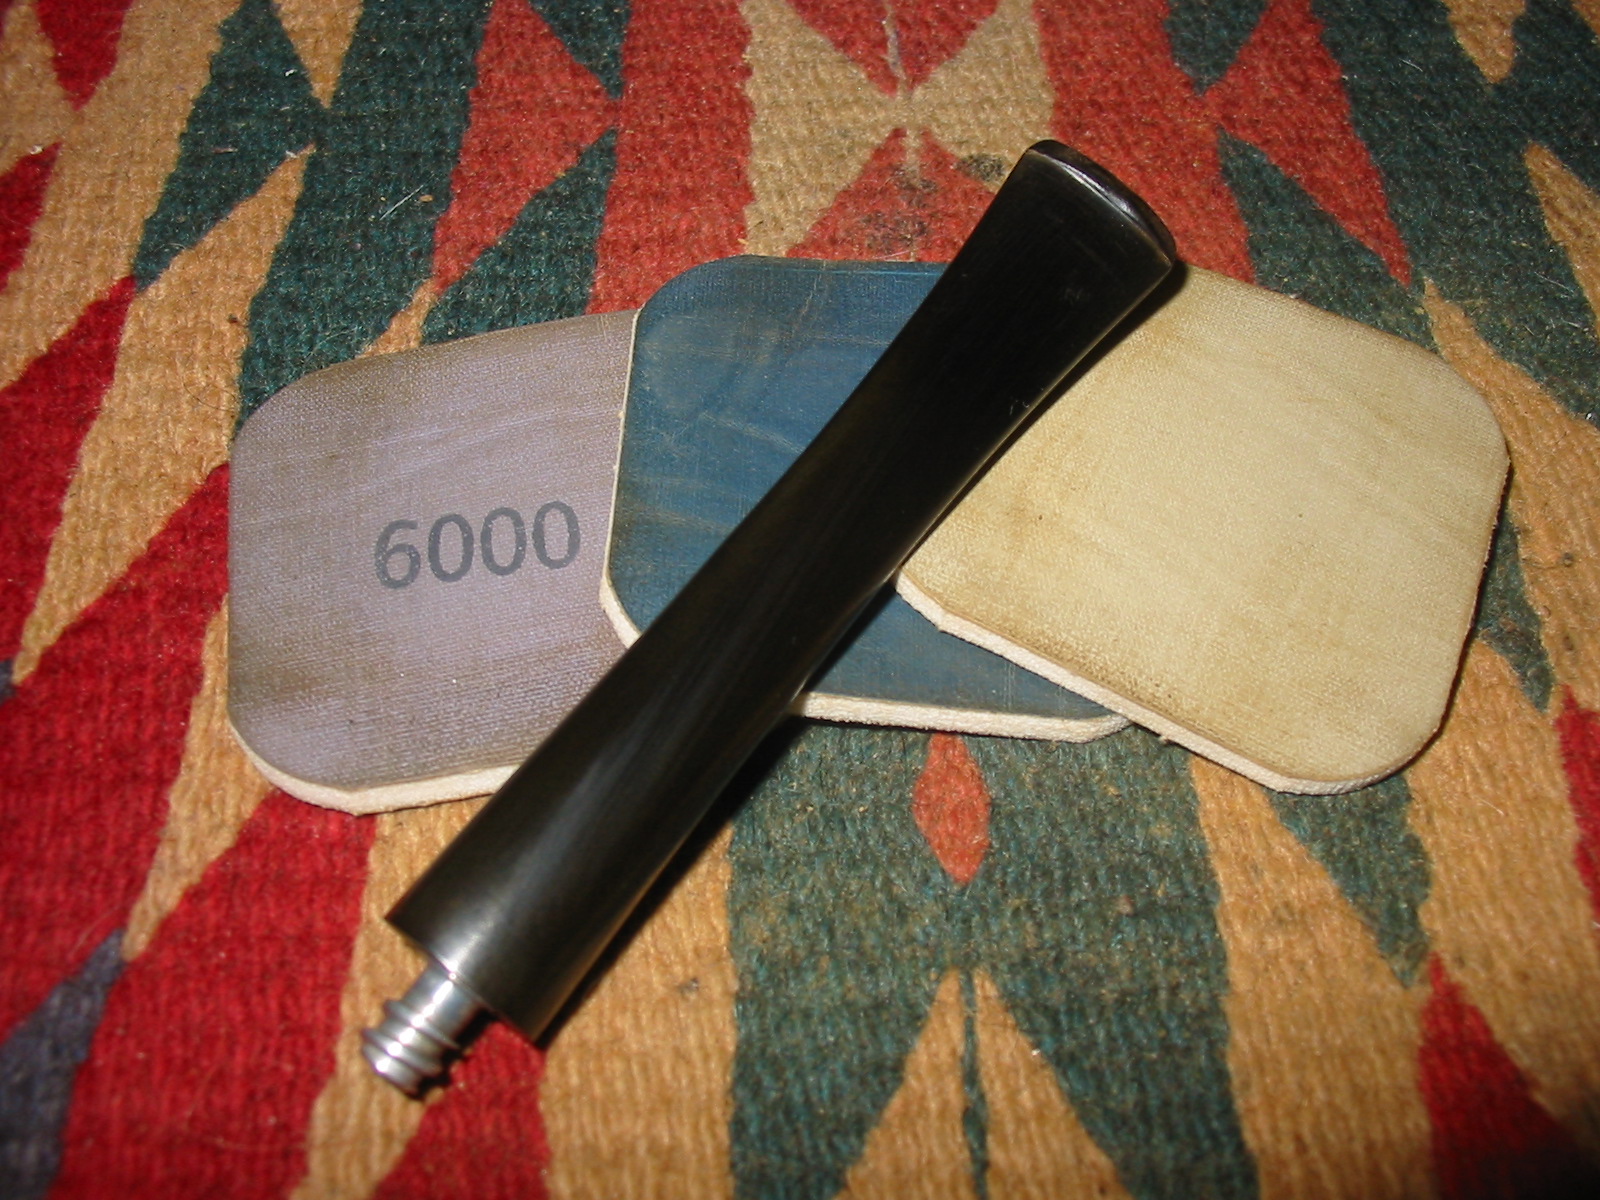
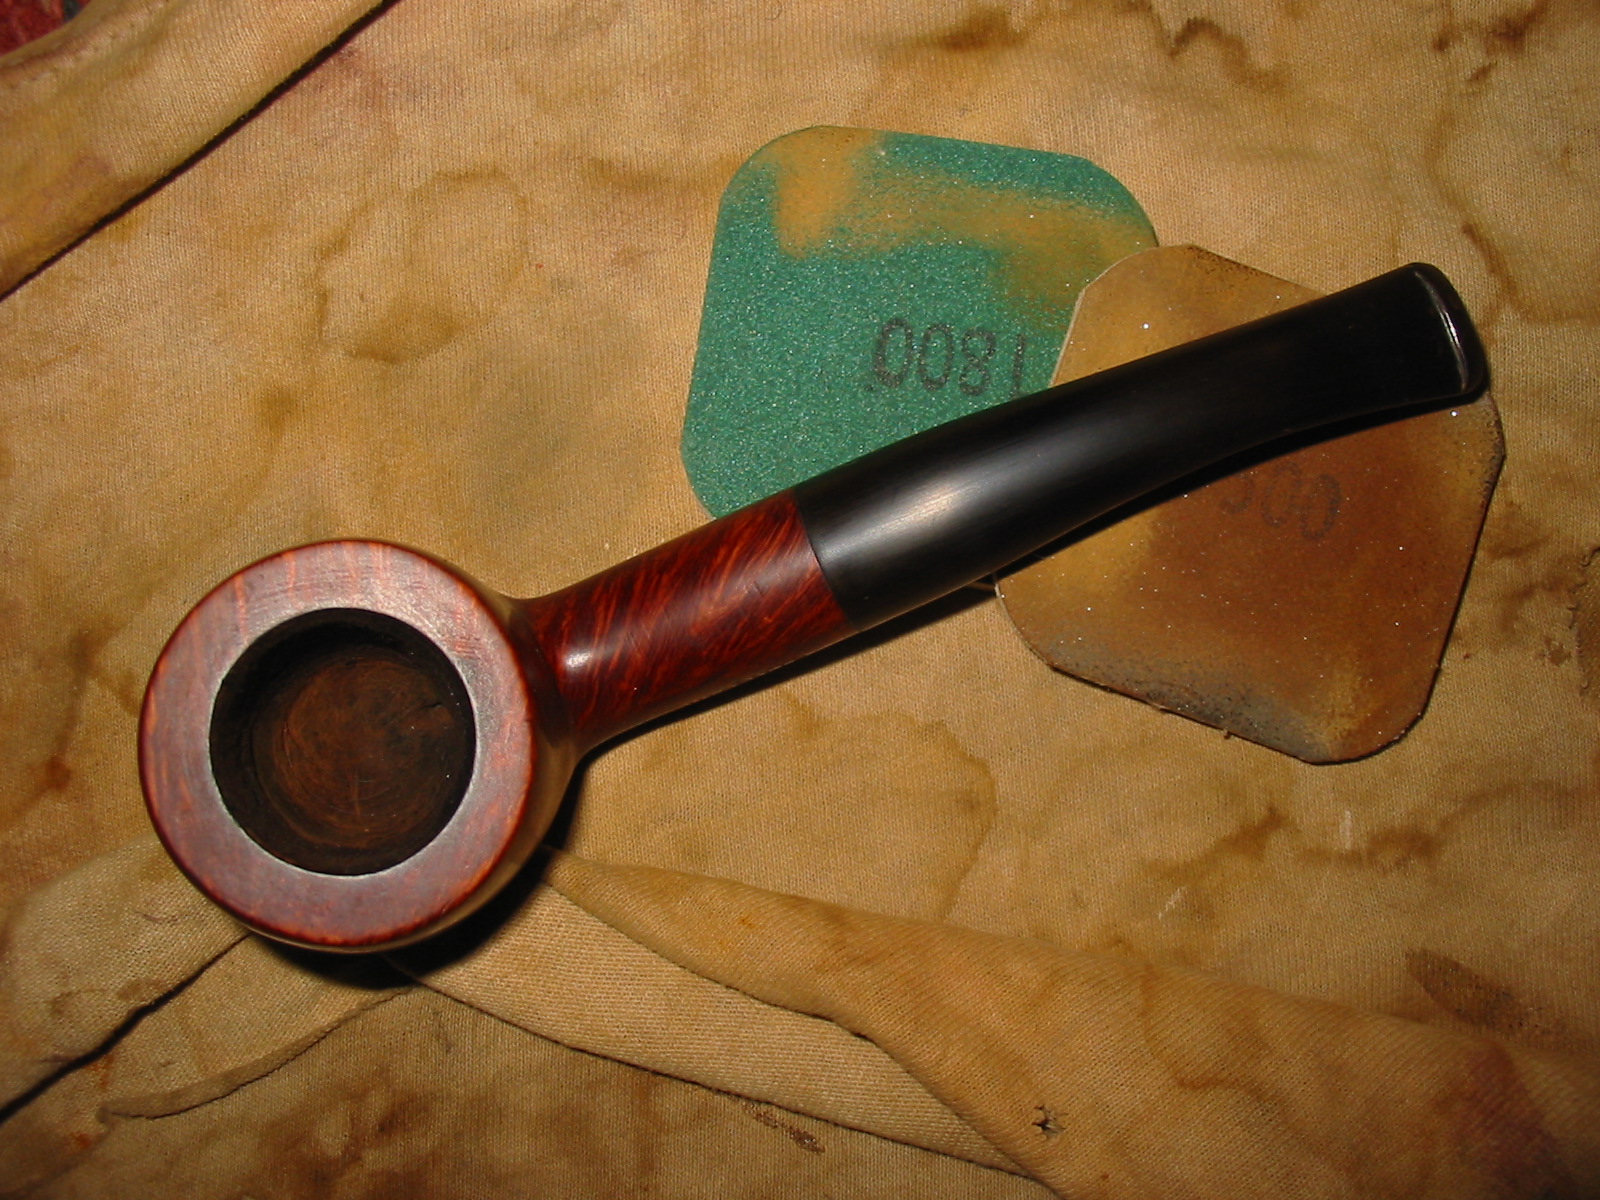
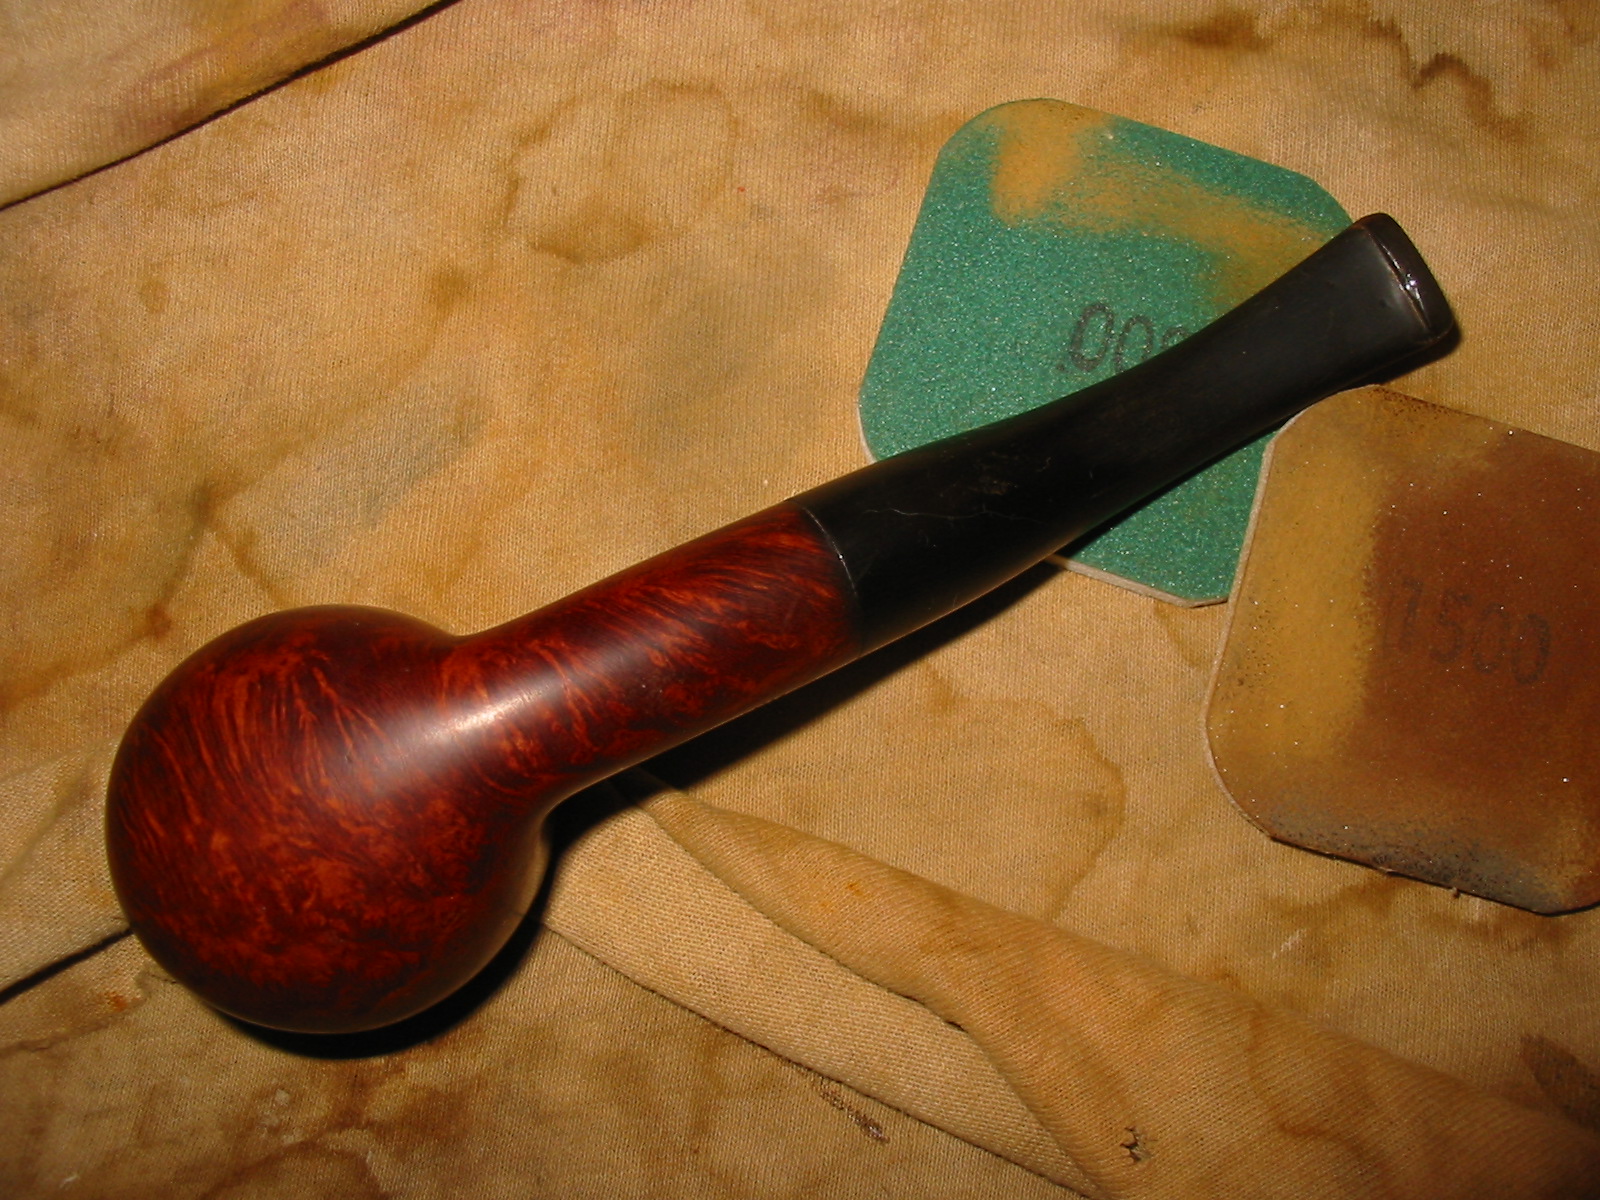
I sanded the stem with micromesh sanding pads from 1500-12,000 grit to finish removing the oxidation and the scratches left behind by the various sandpapers I used. The next series of photos show the progress of the shine after each group of sanding pads.

IMG_1755

IMG_1756

IMG_1757

IMG_1758

IMG_1761

IMG_1762

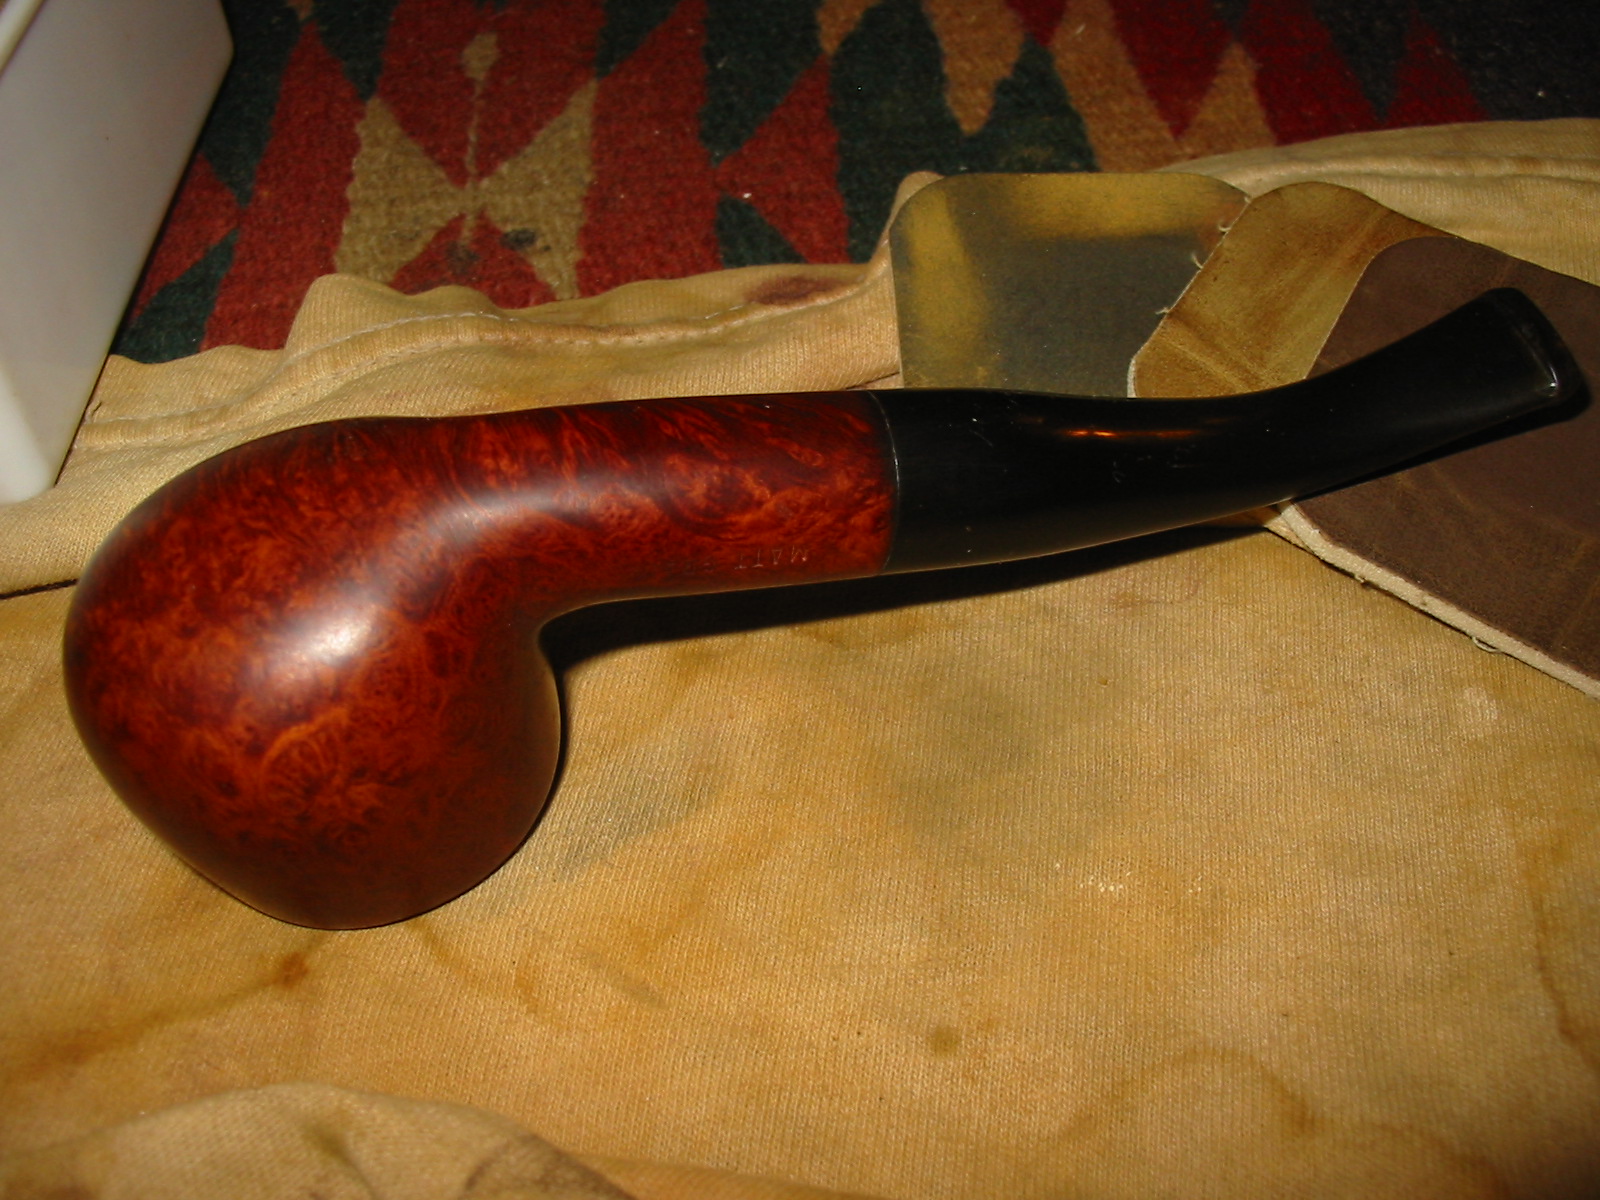
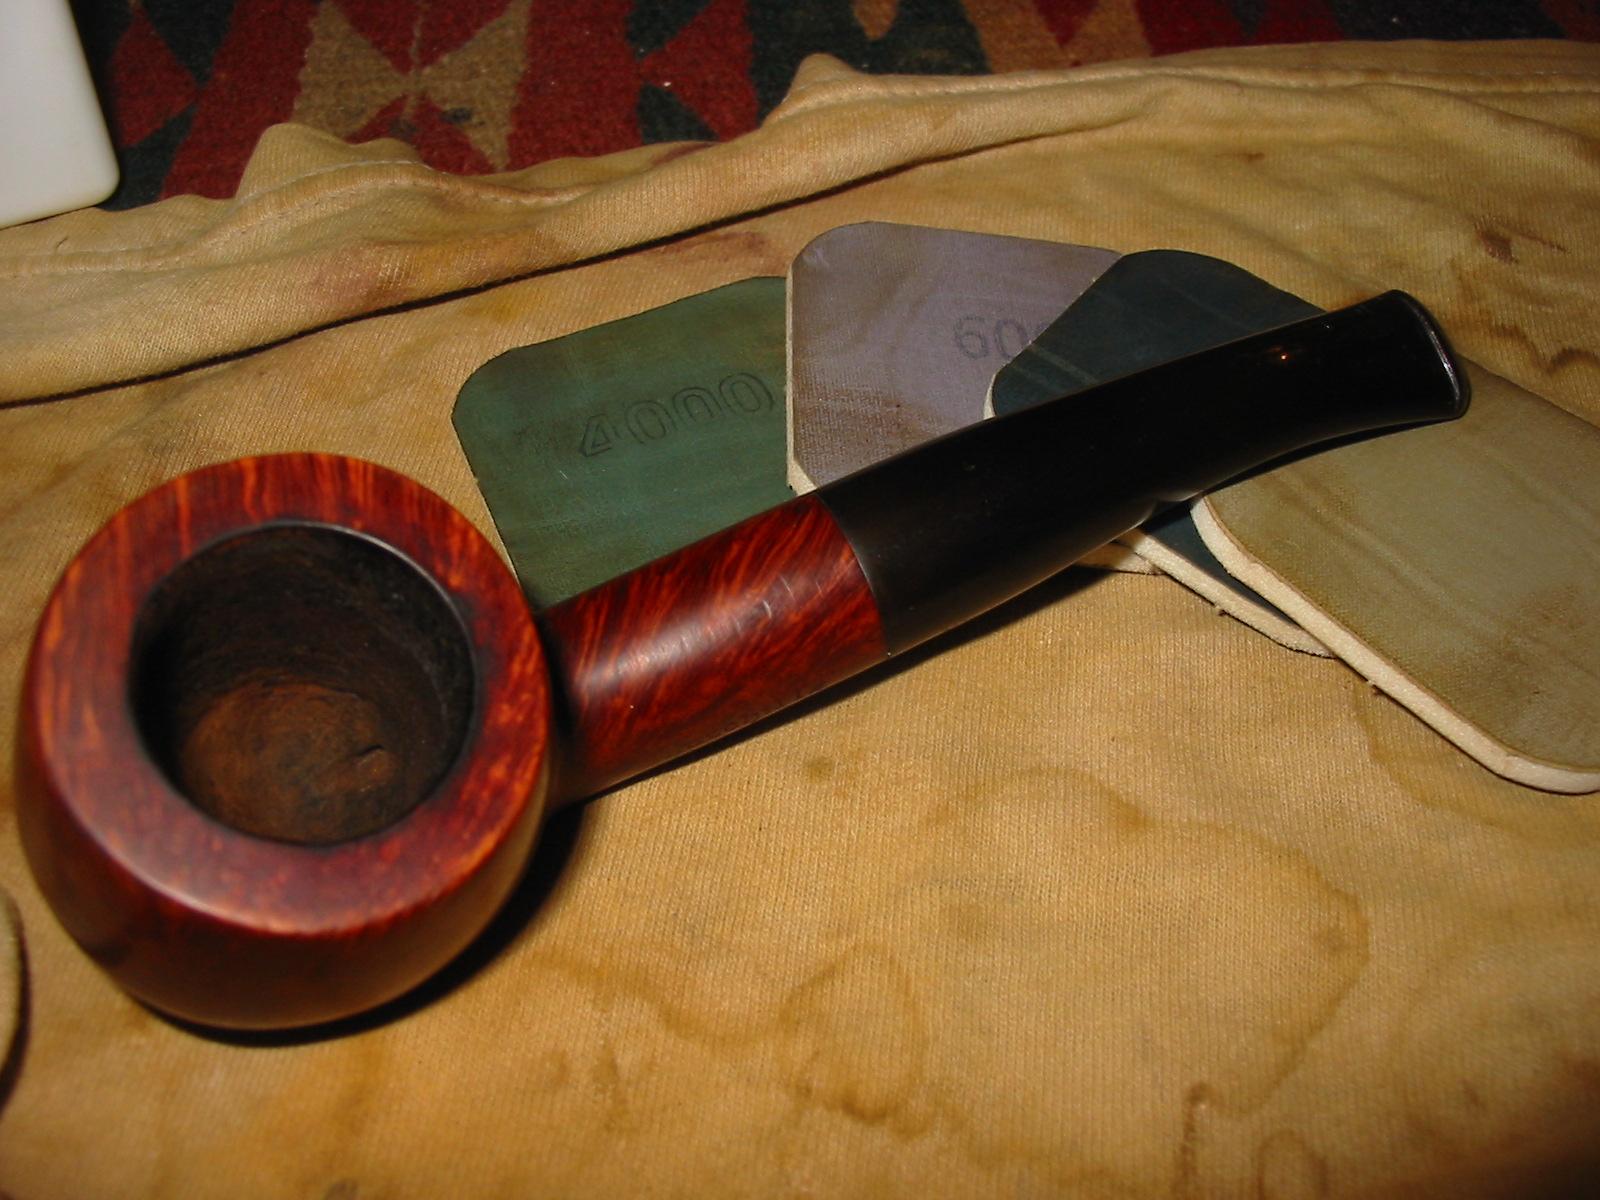
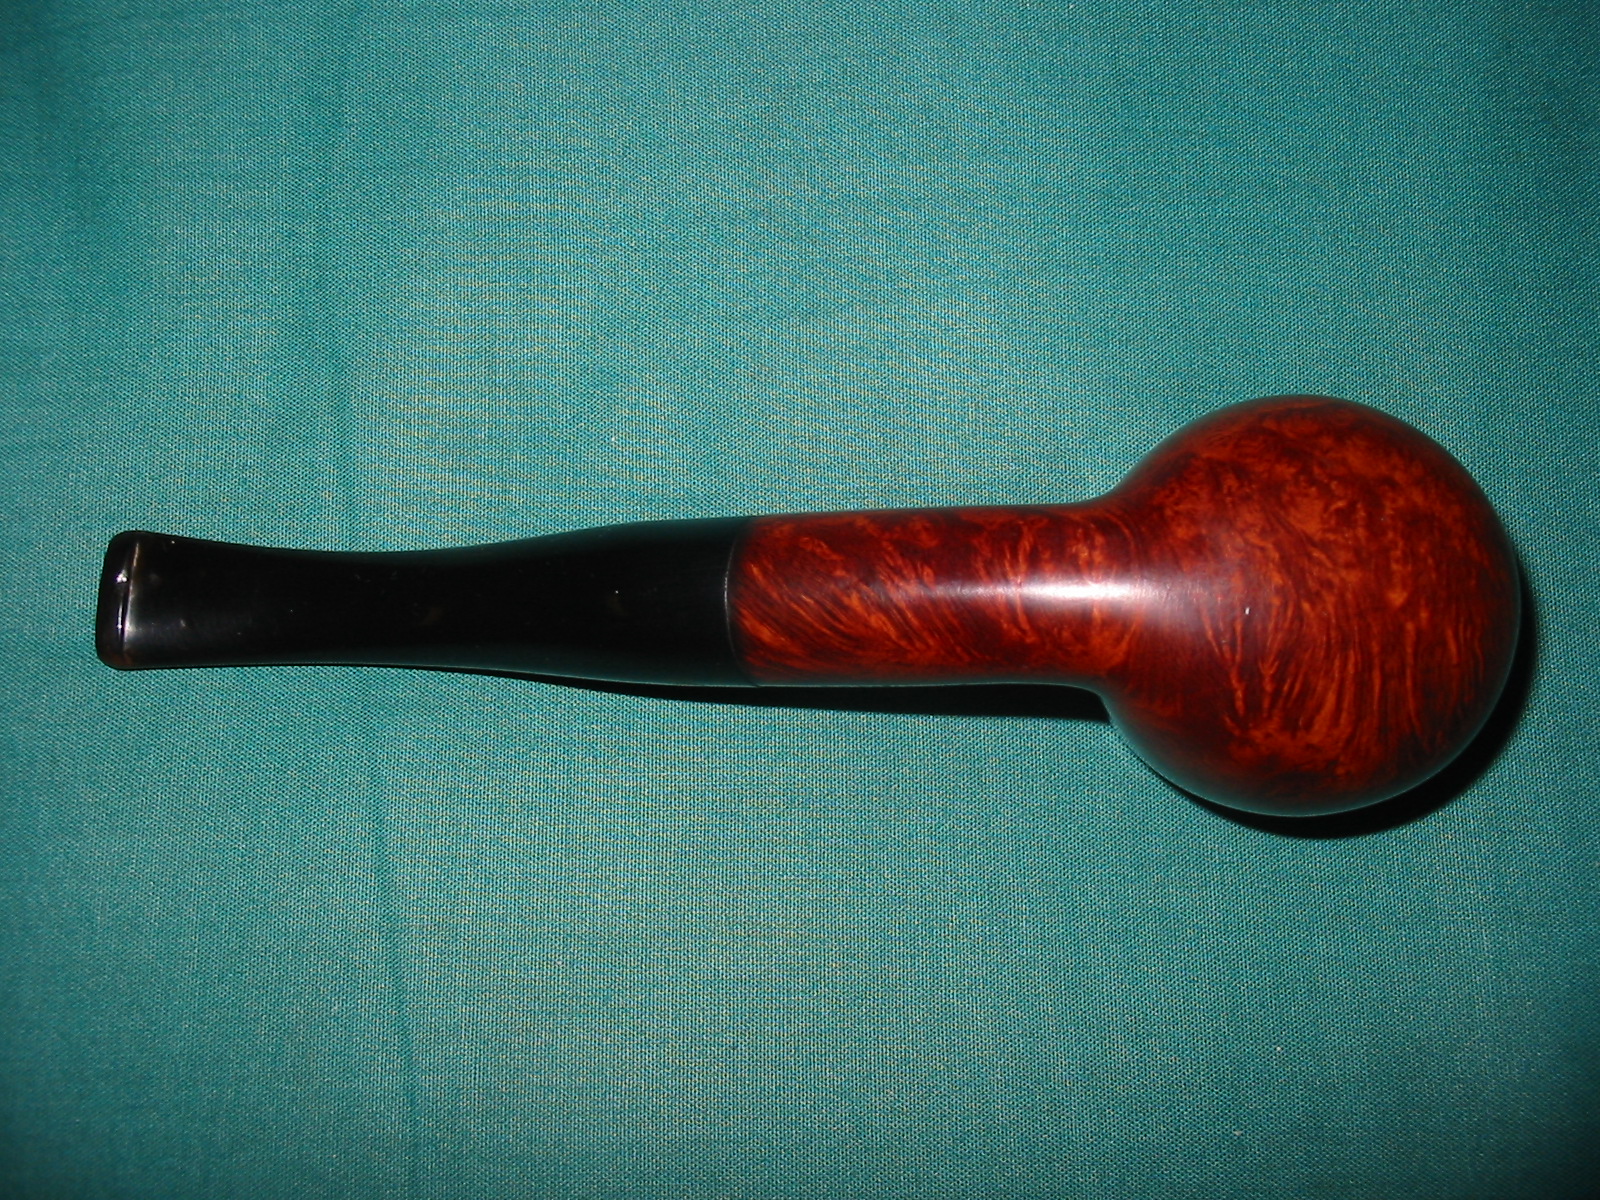
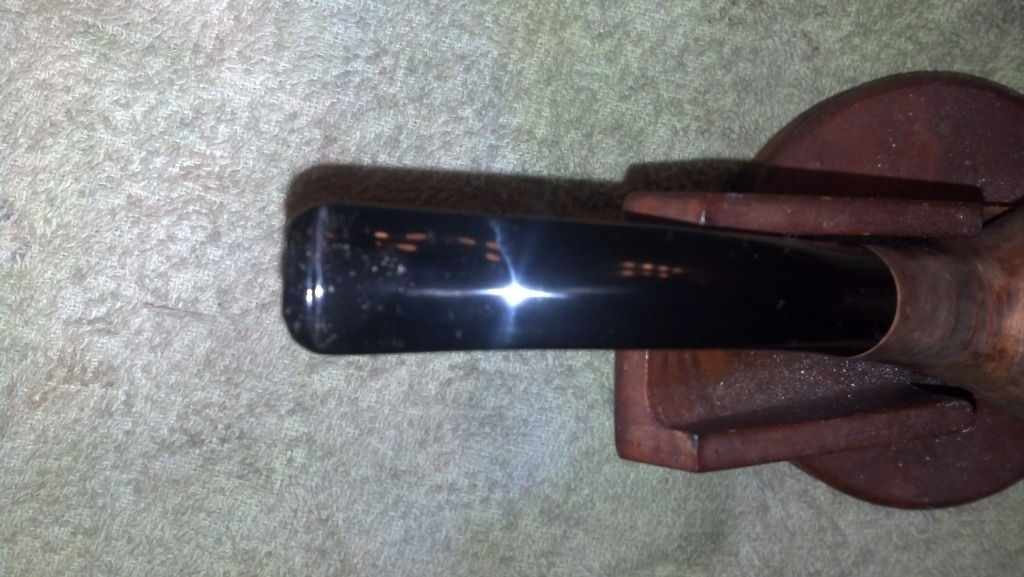
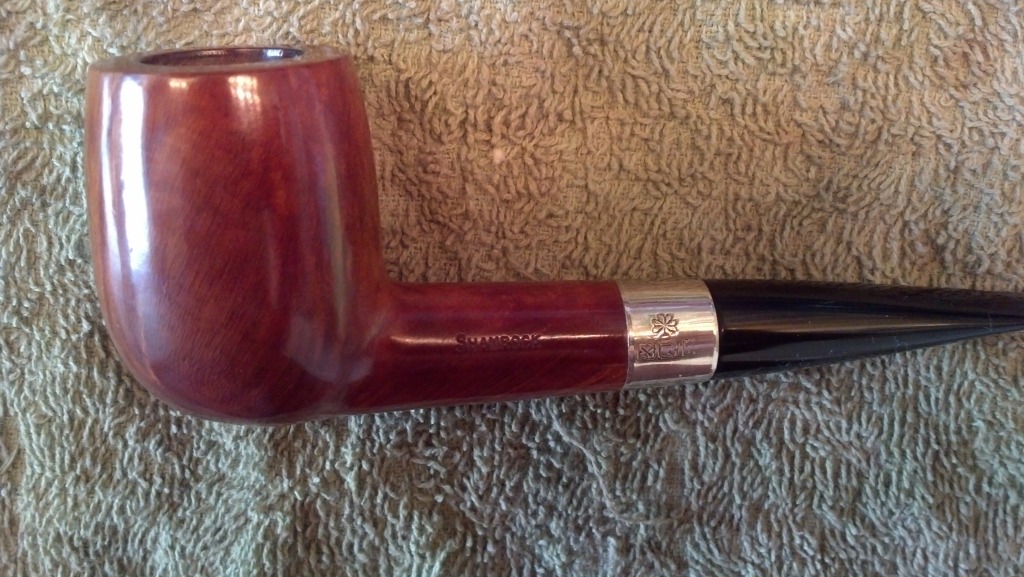
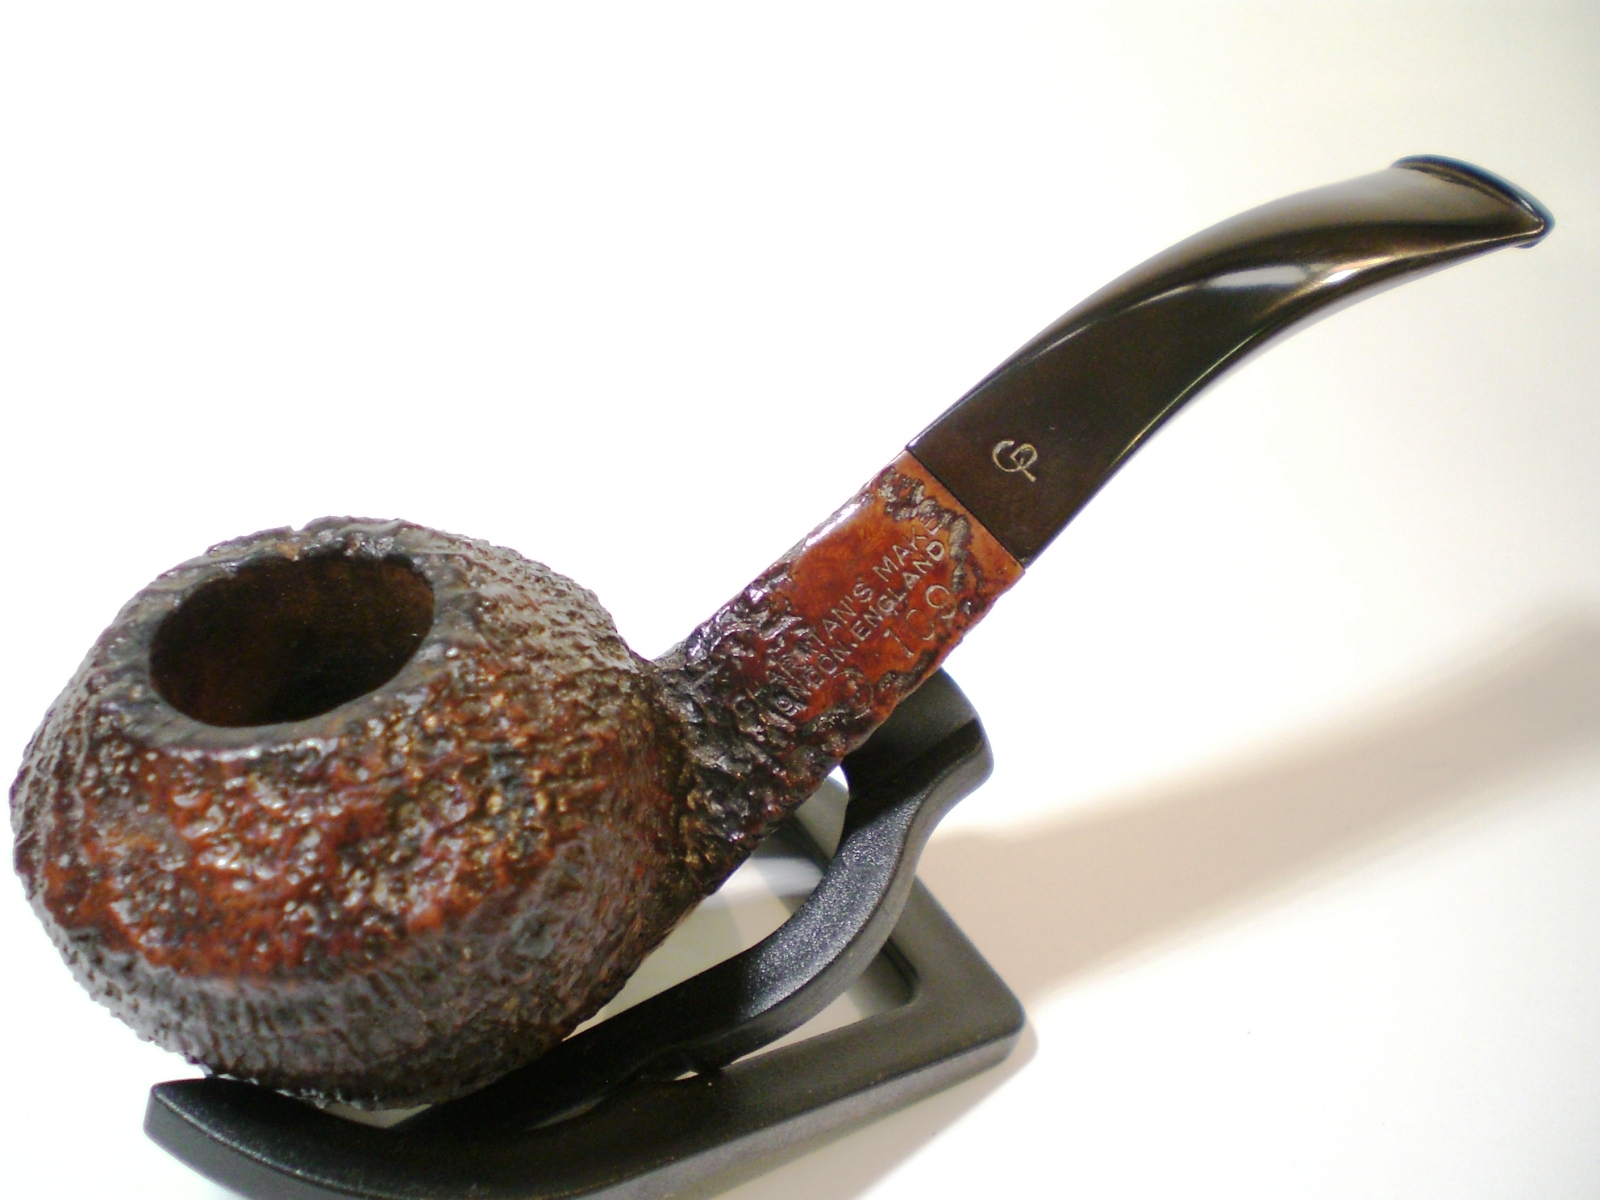
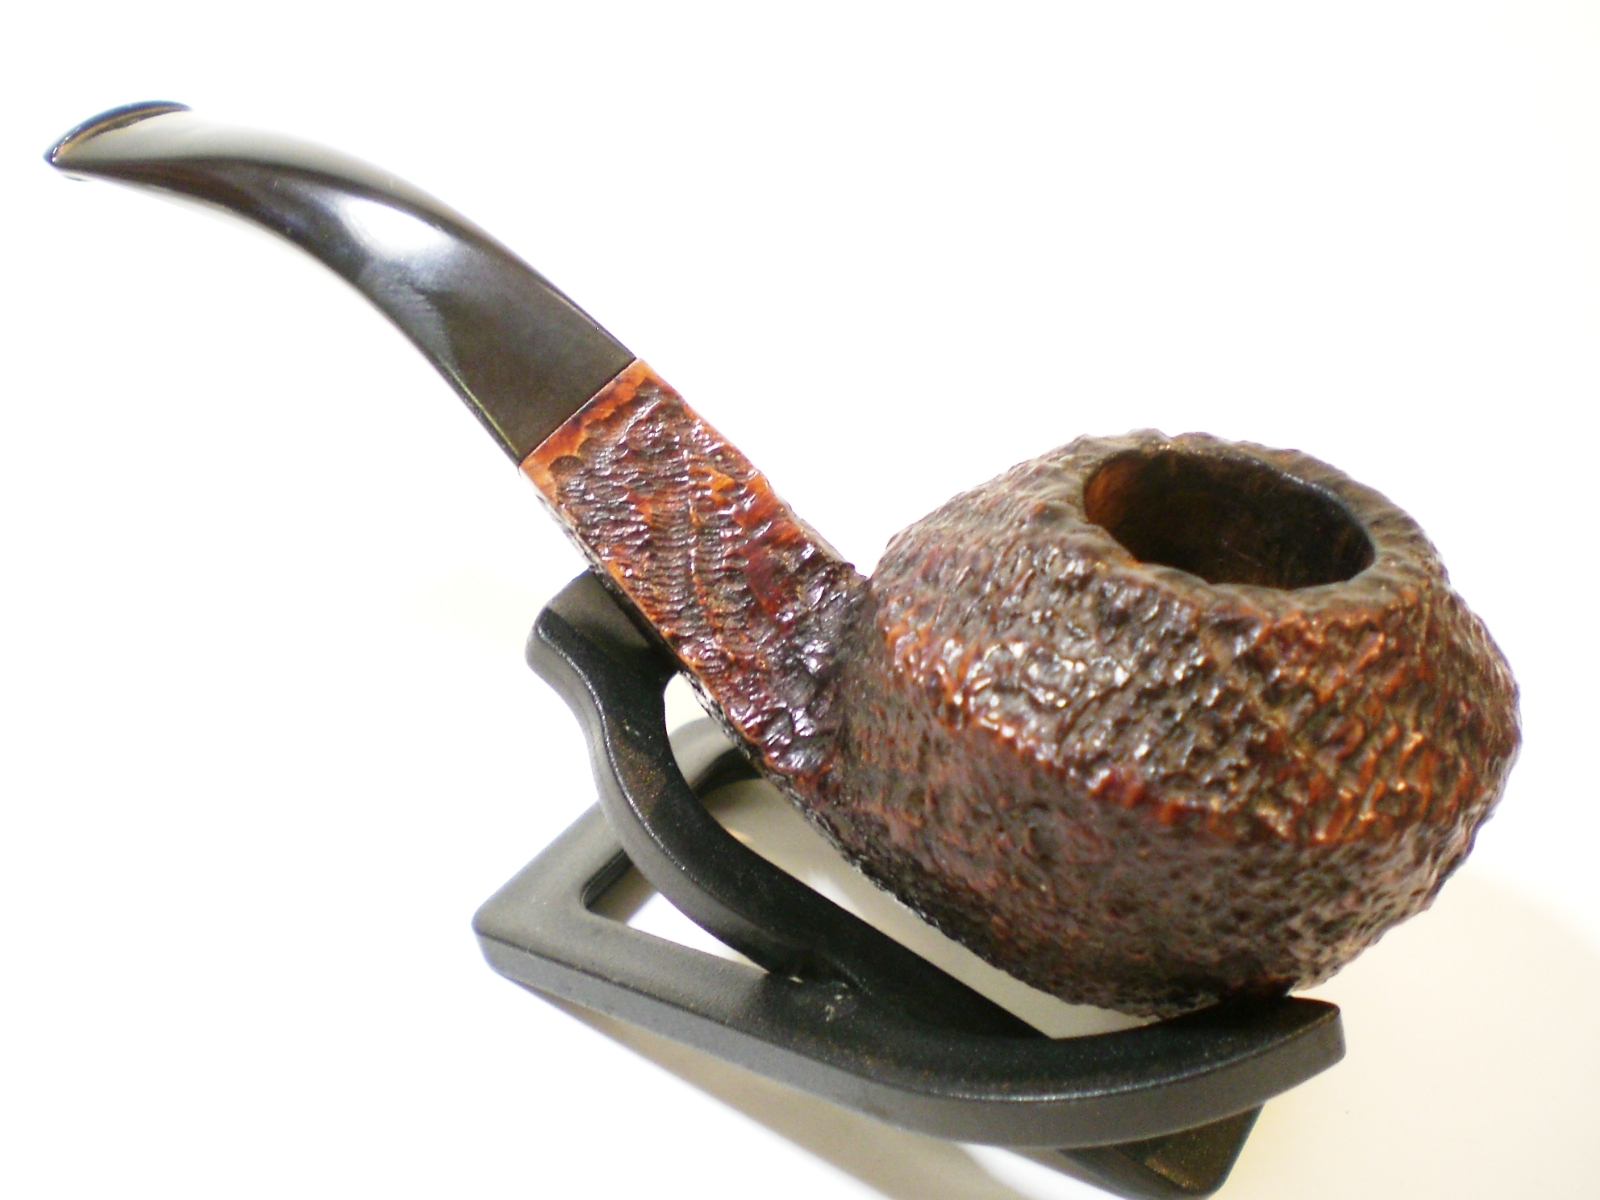
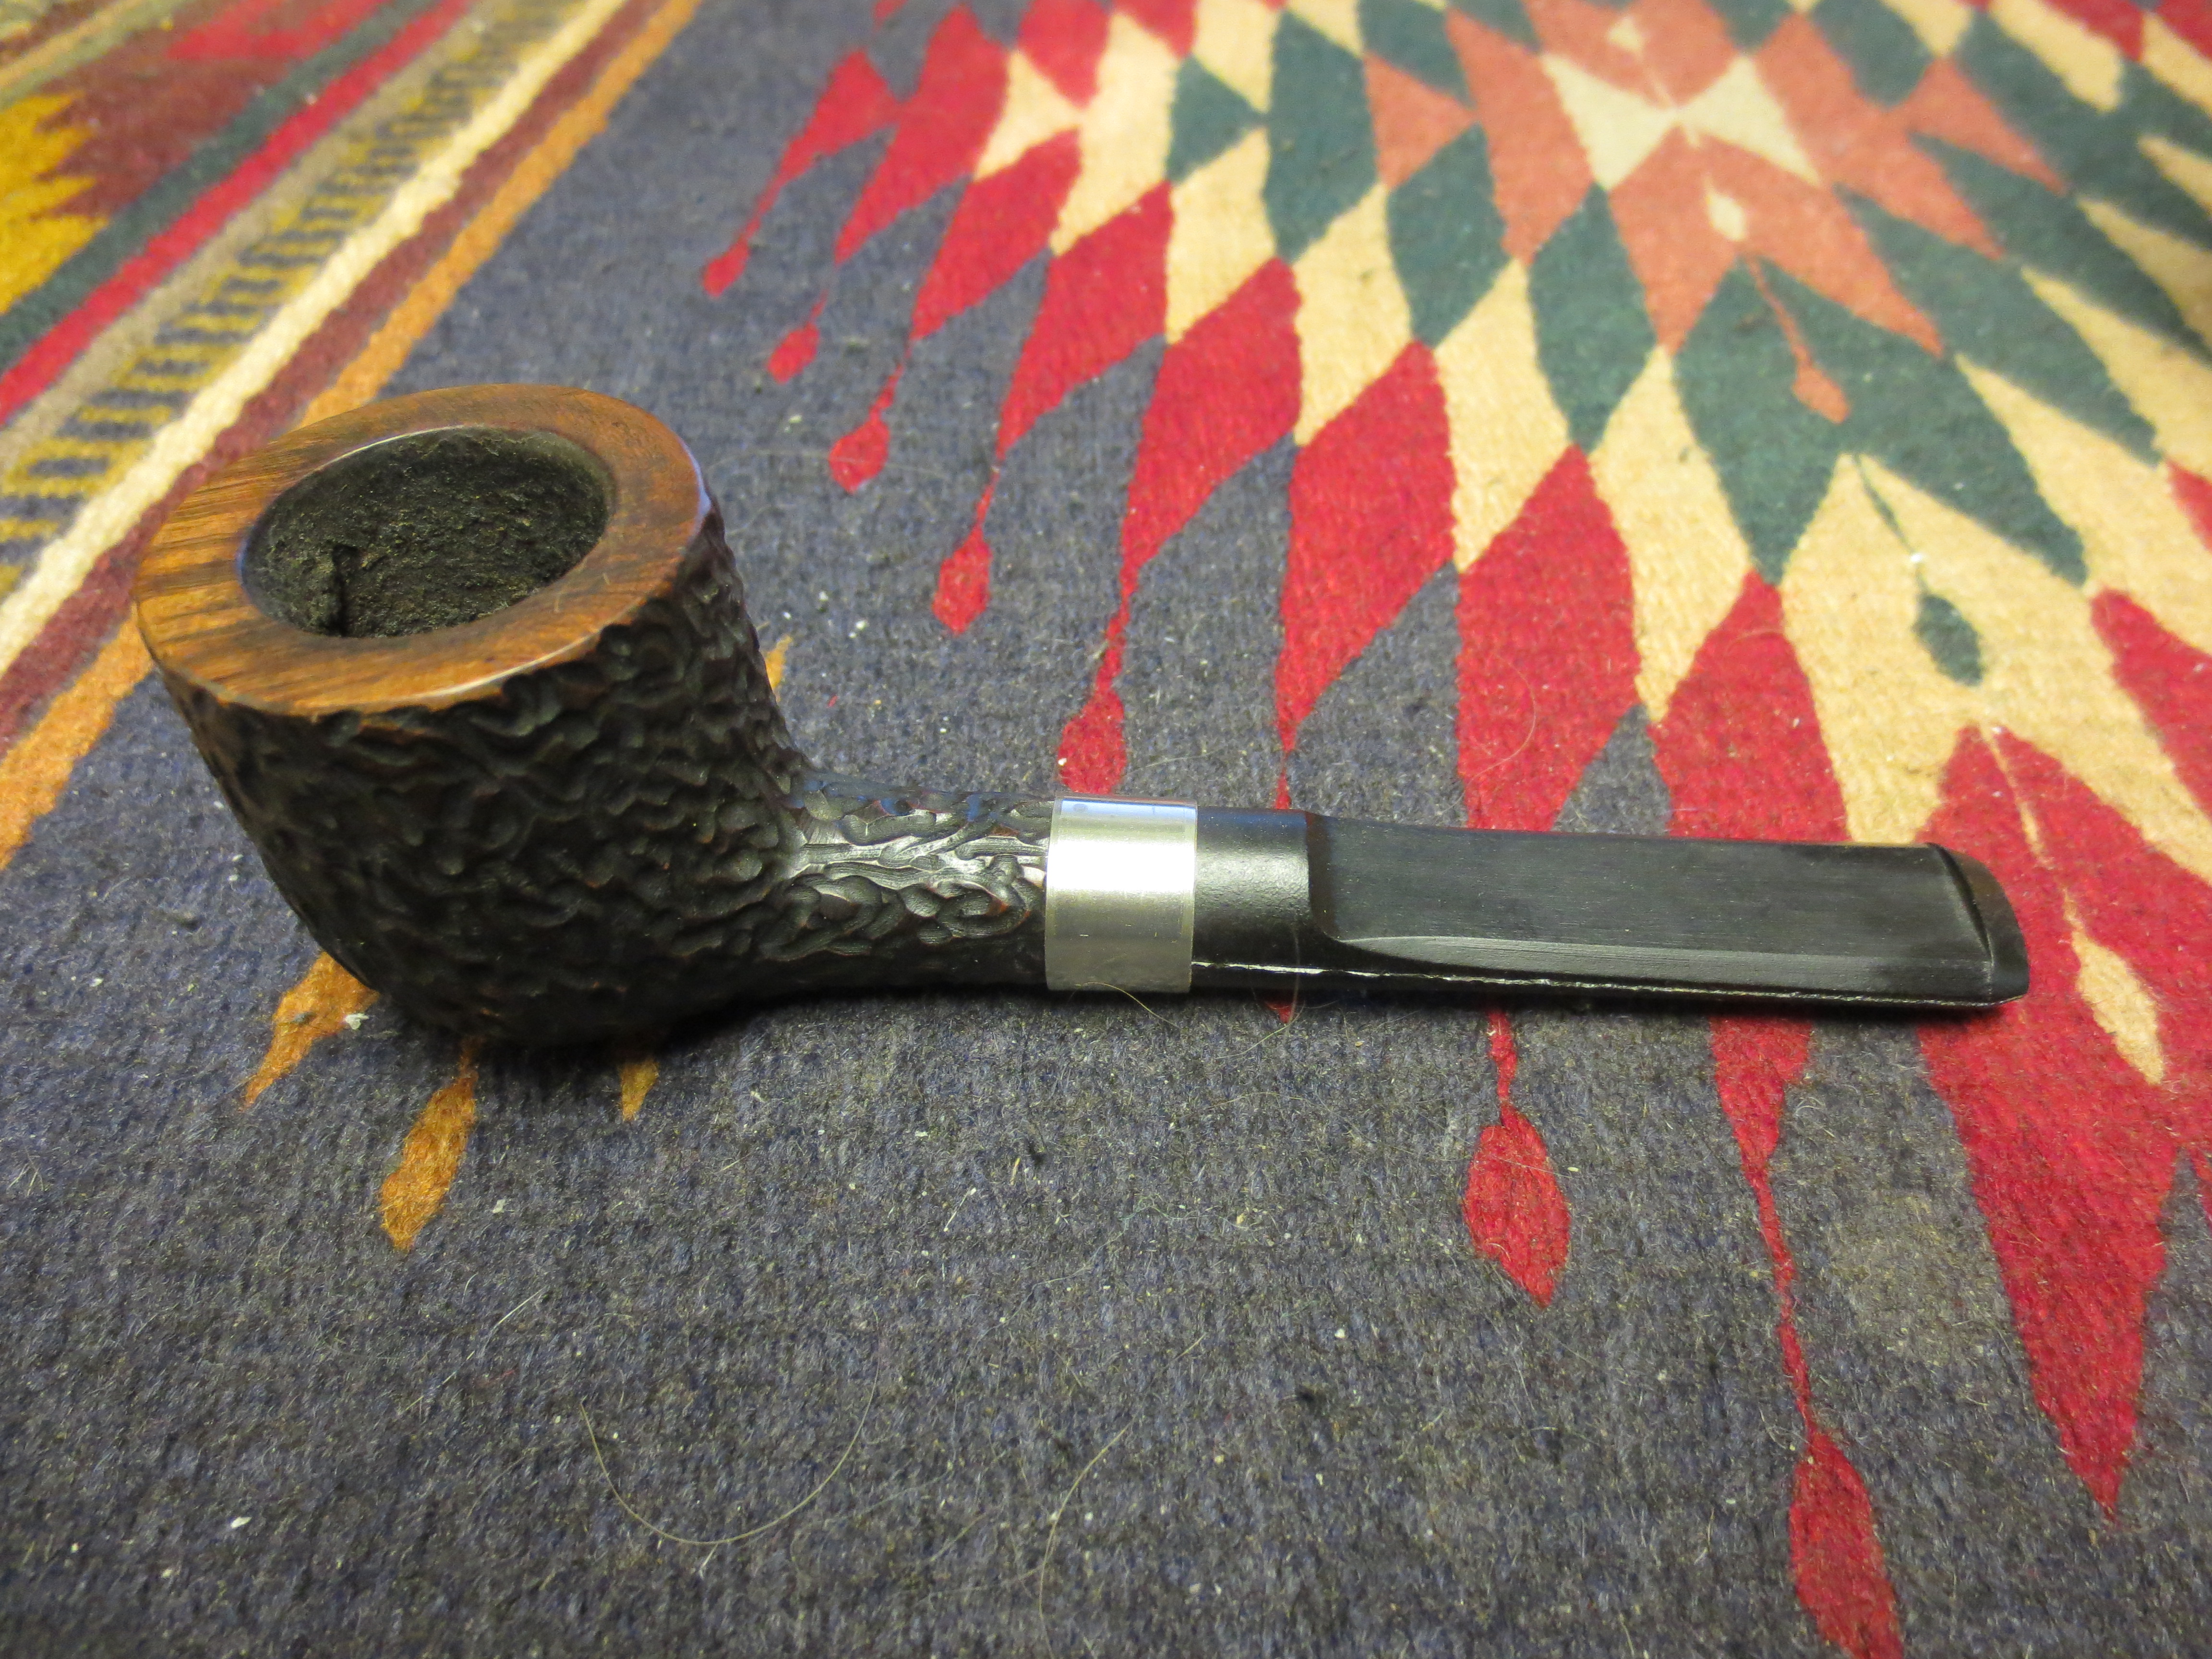
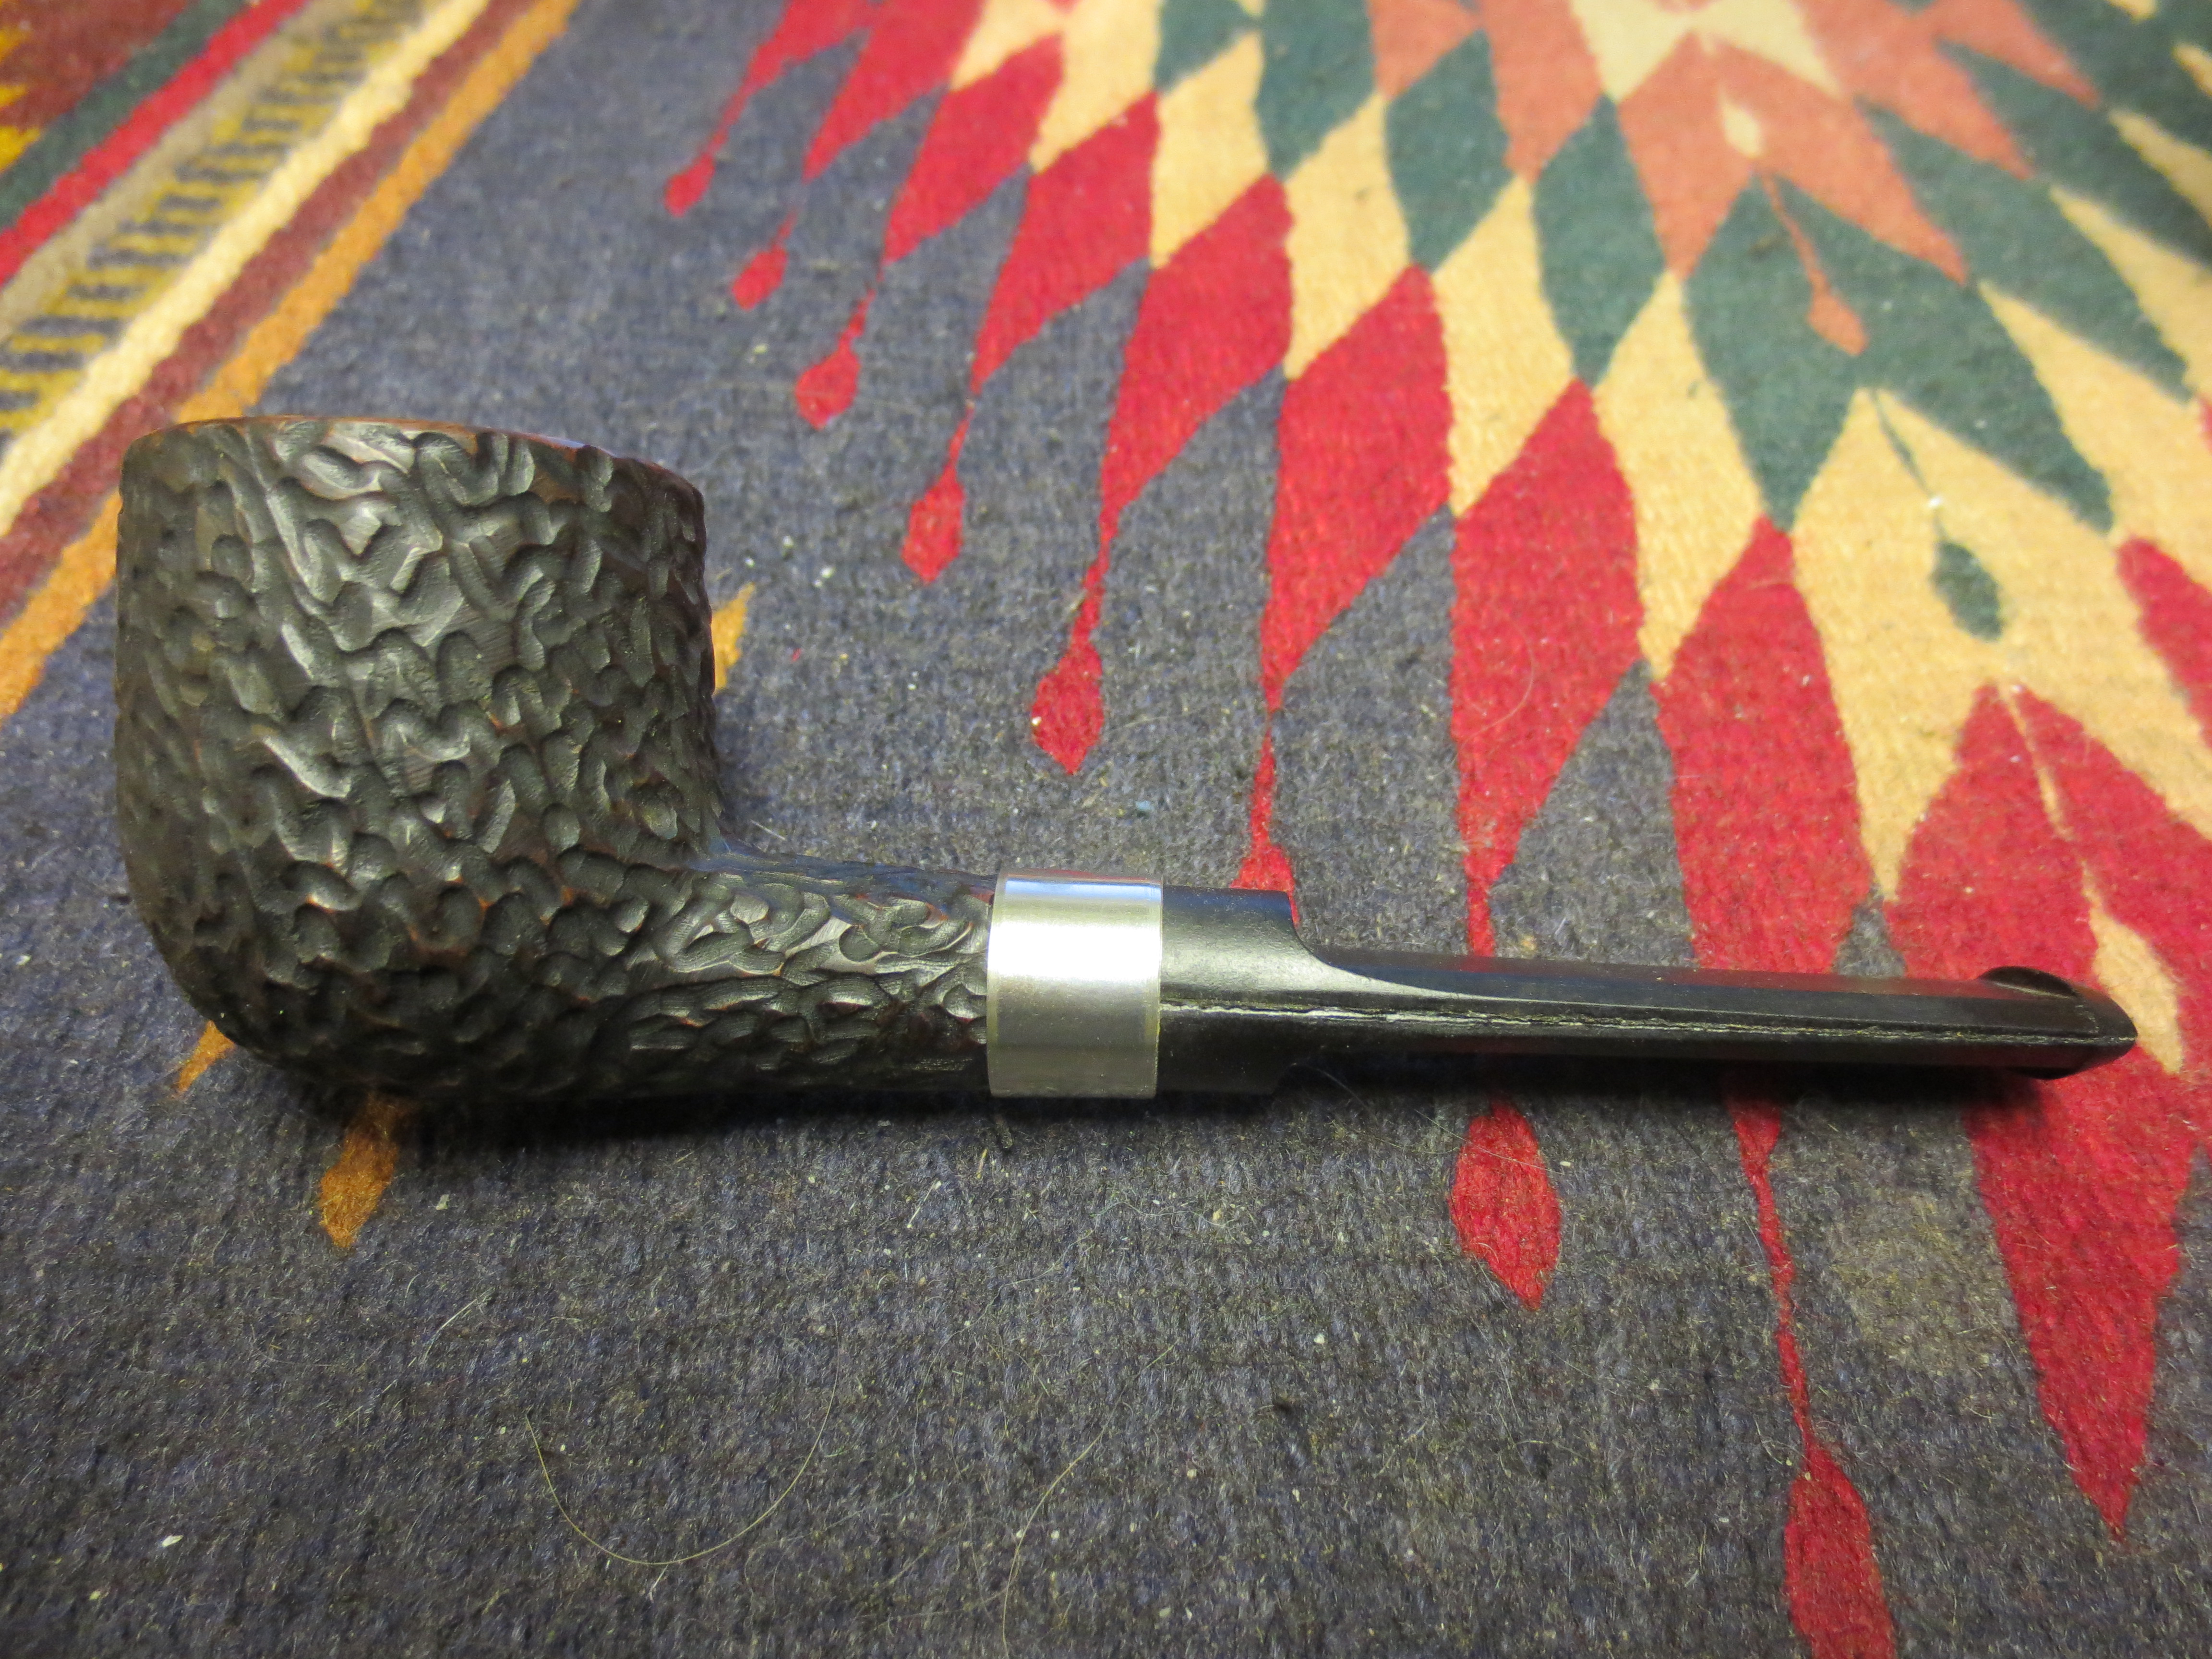
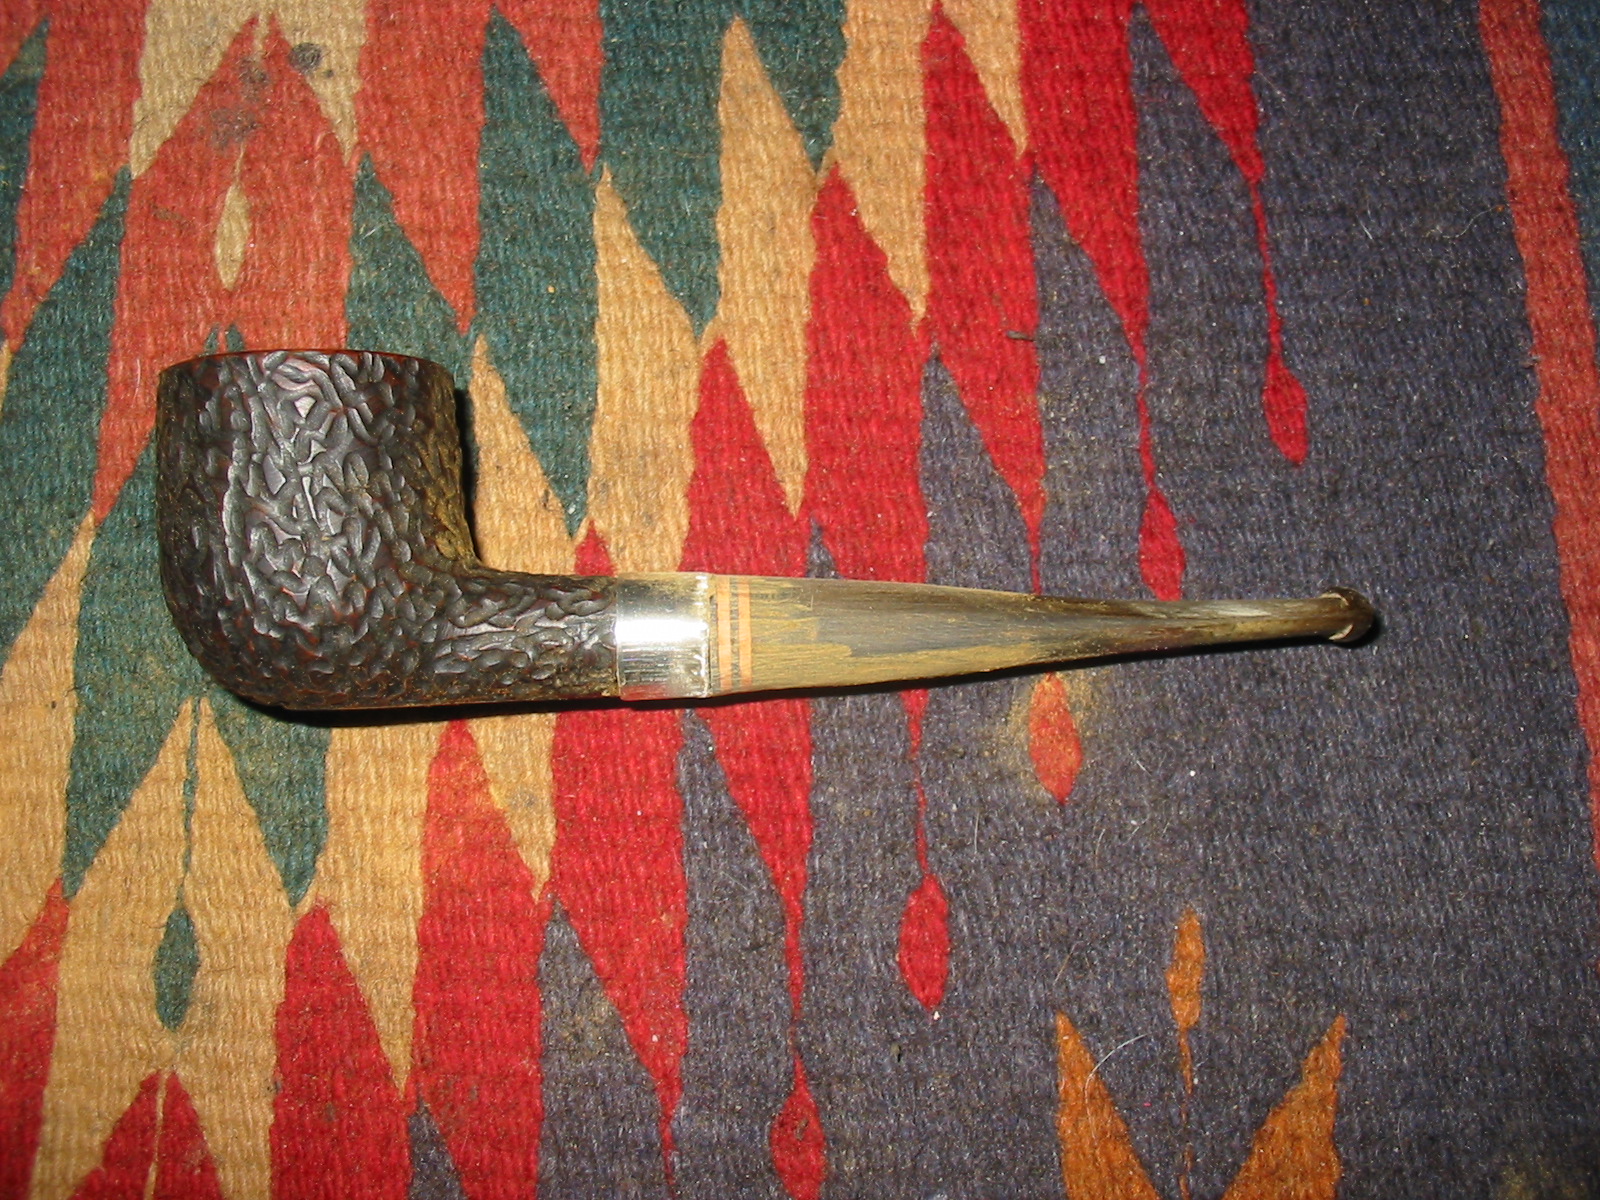
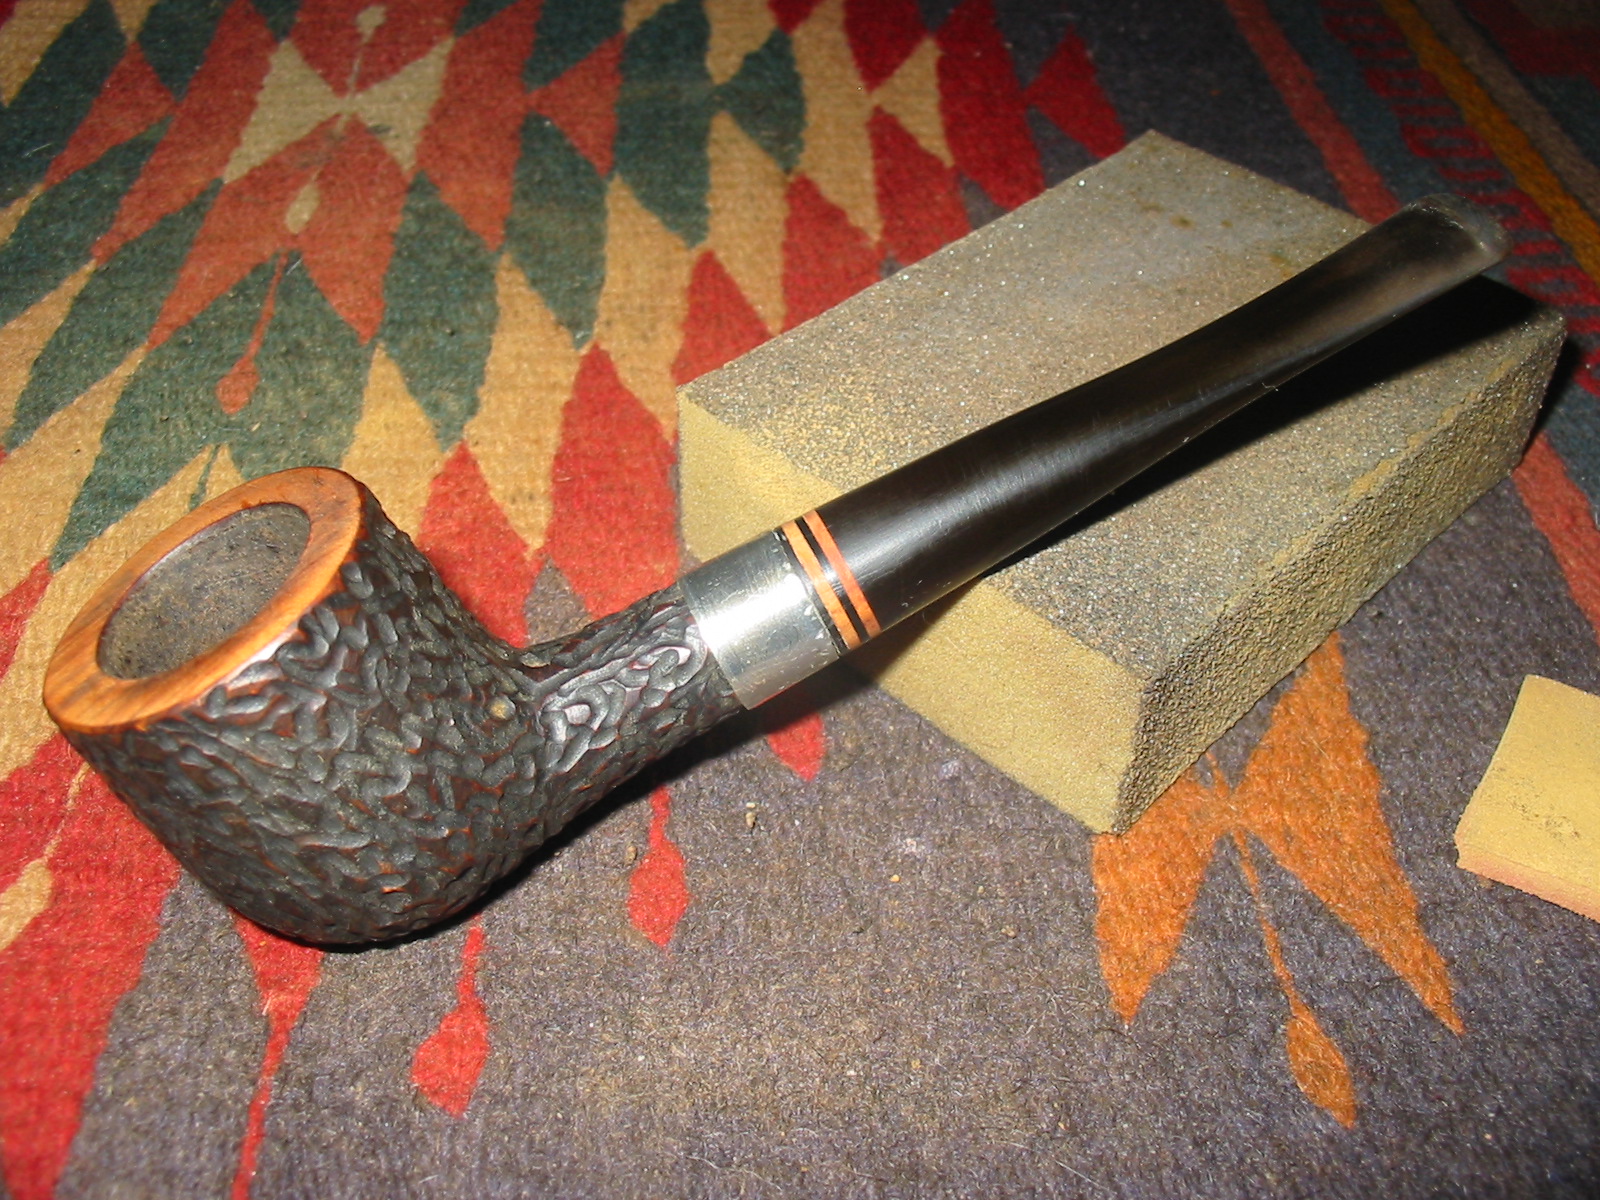
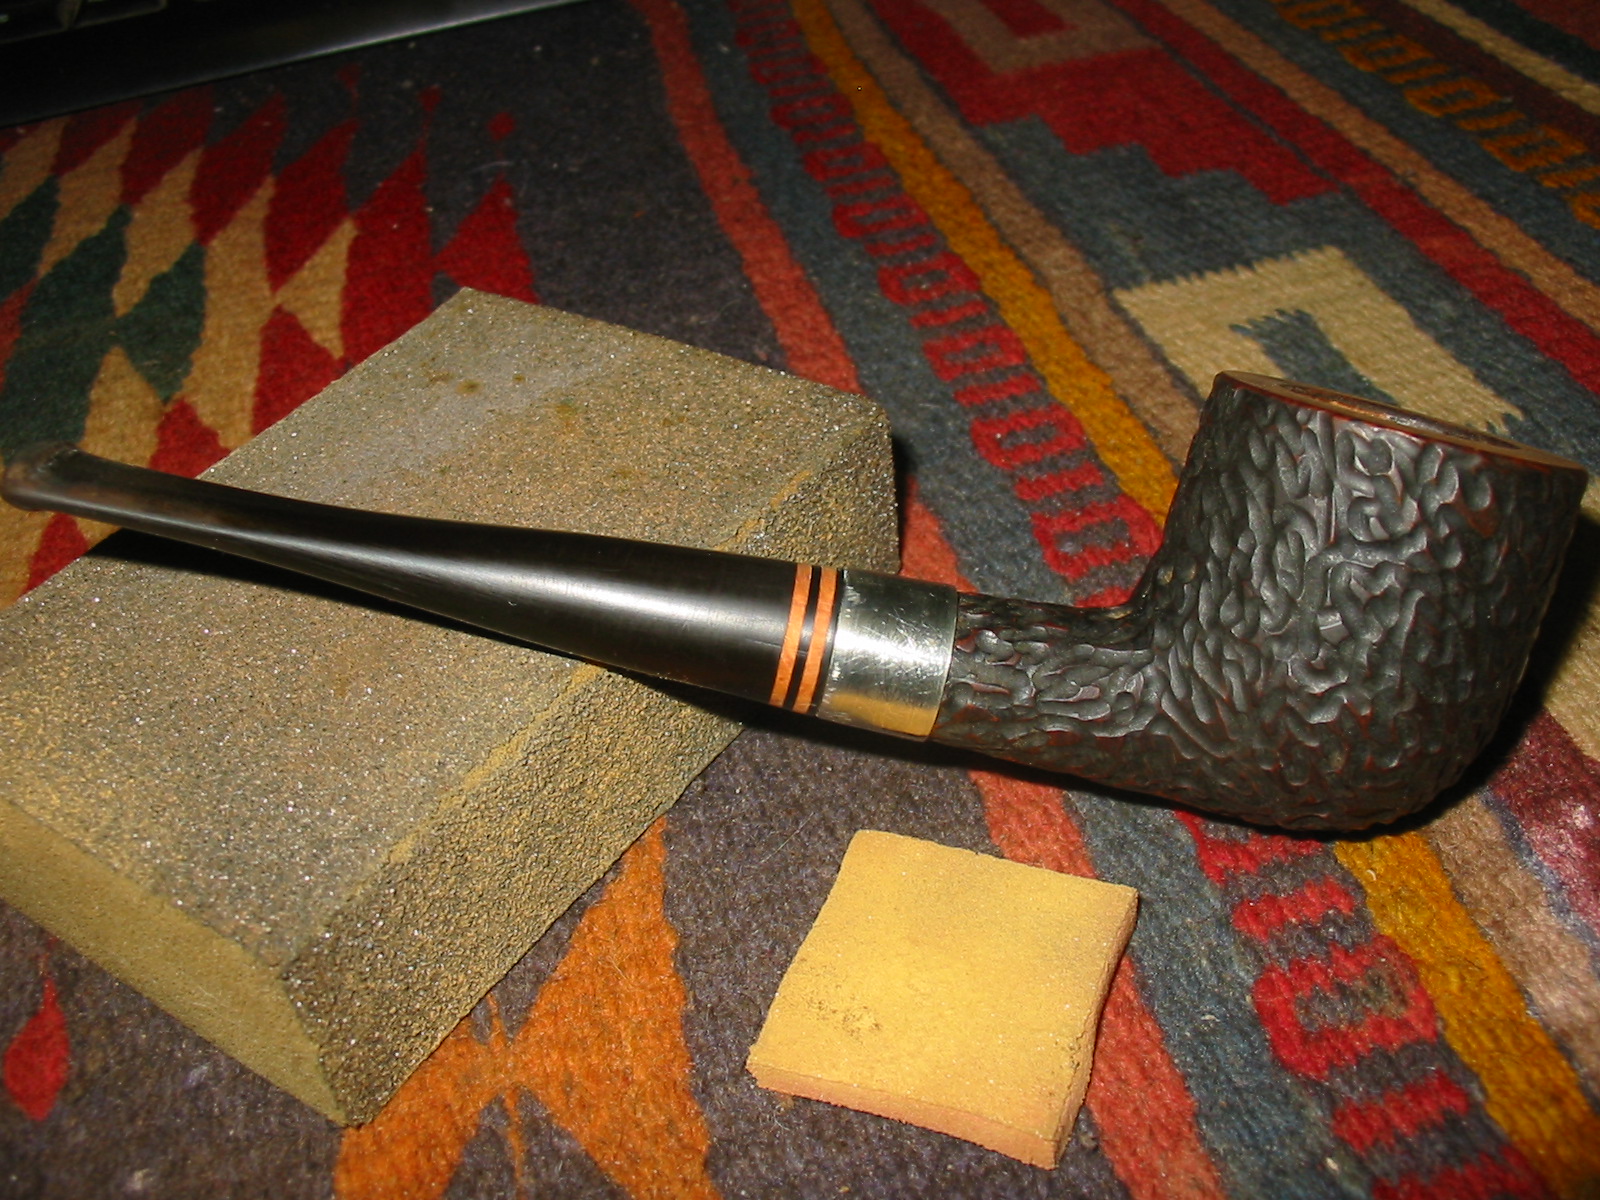
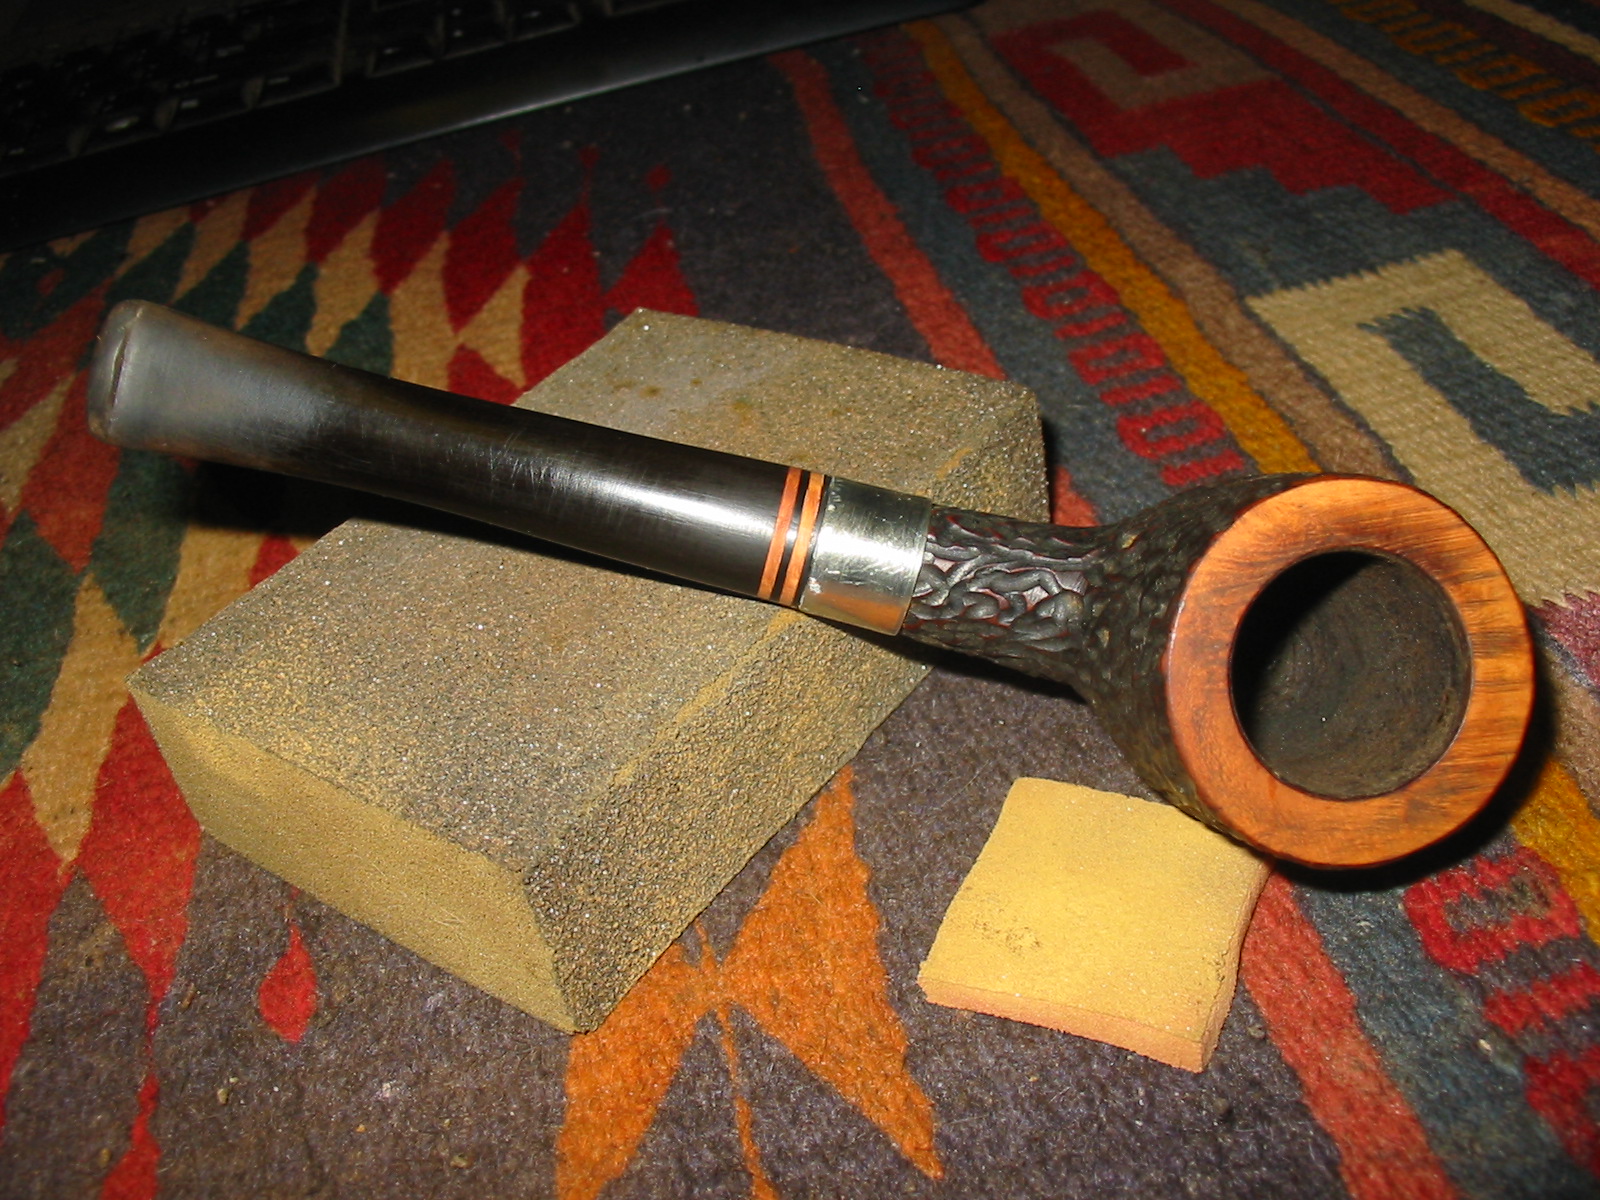
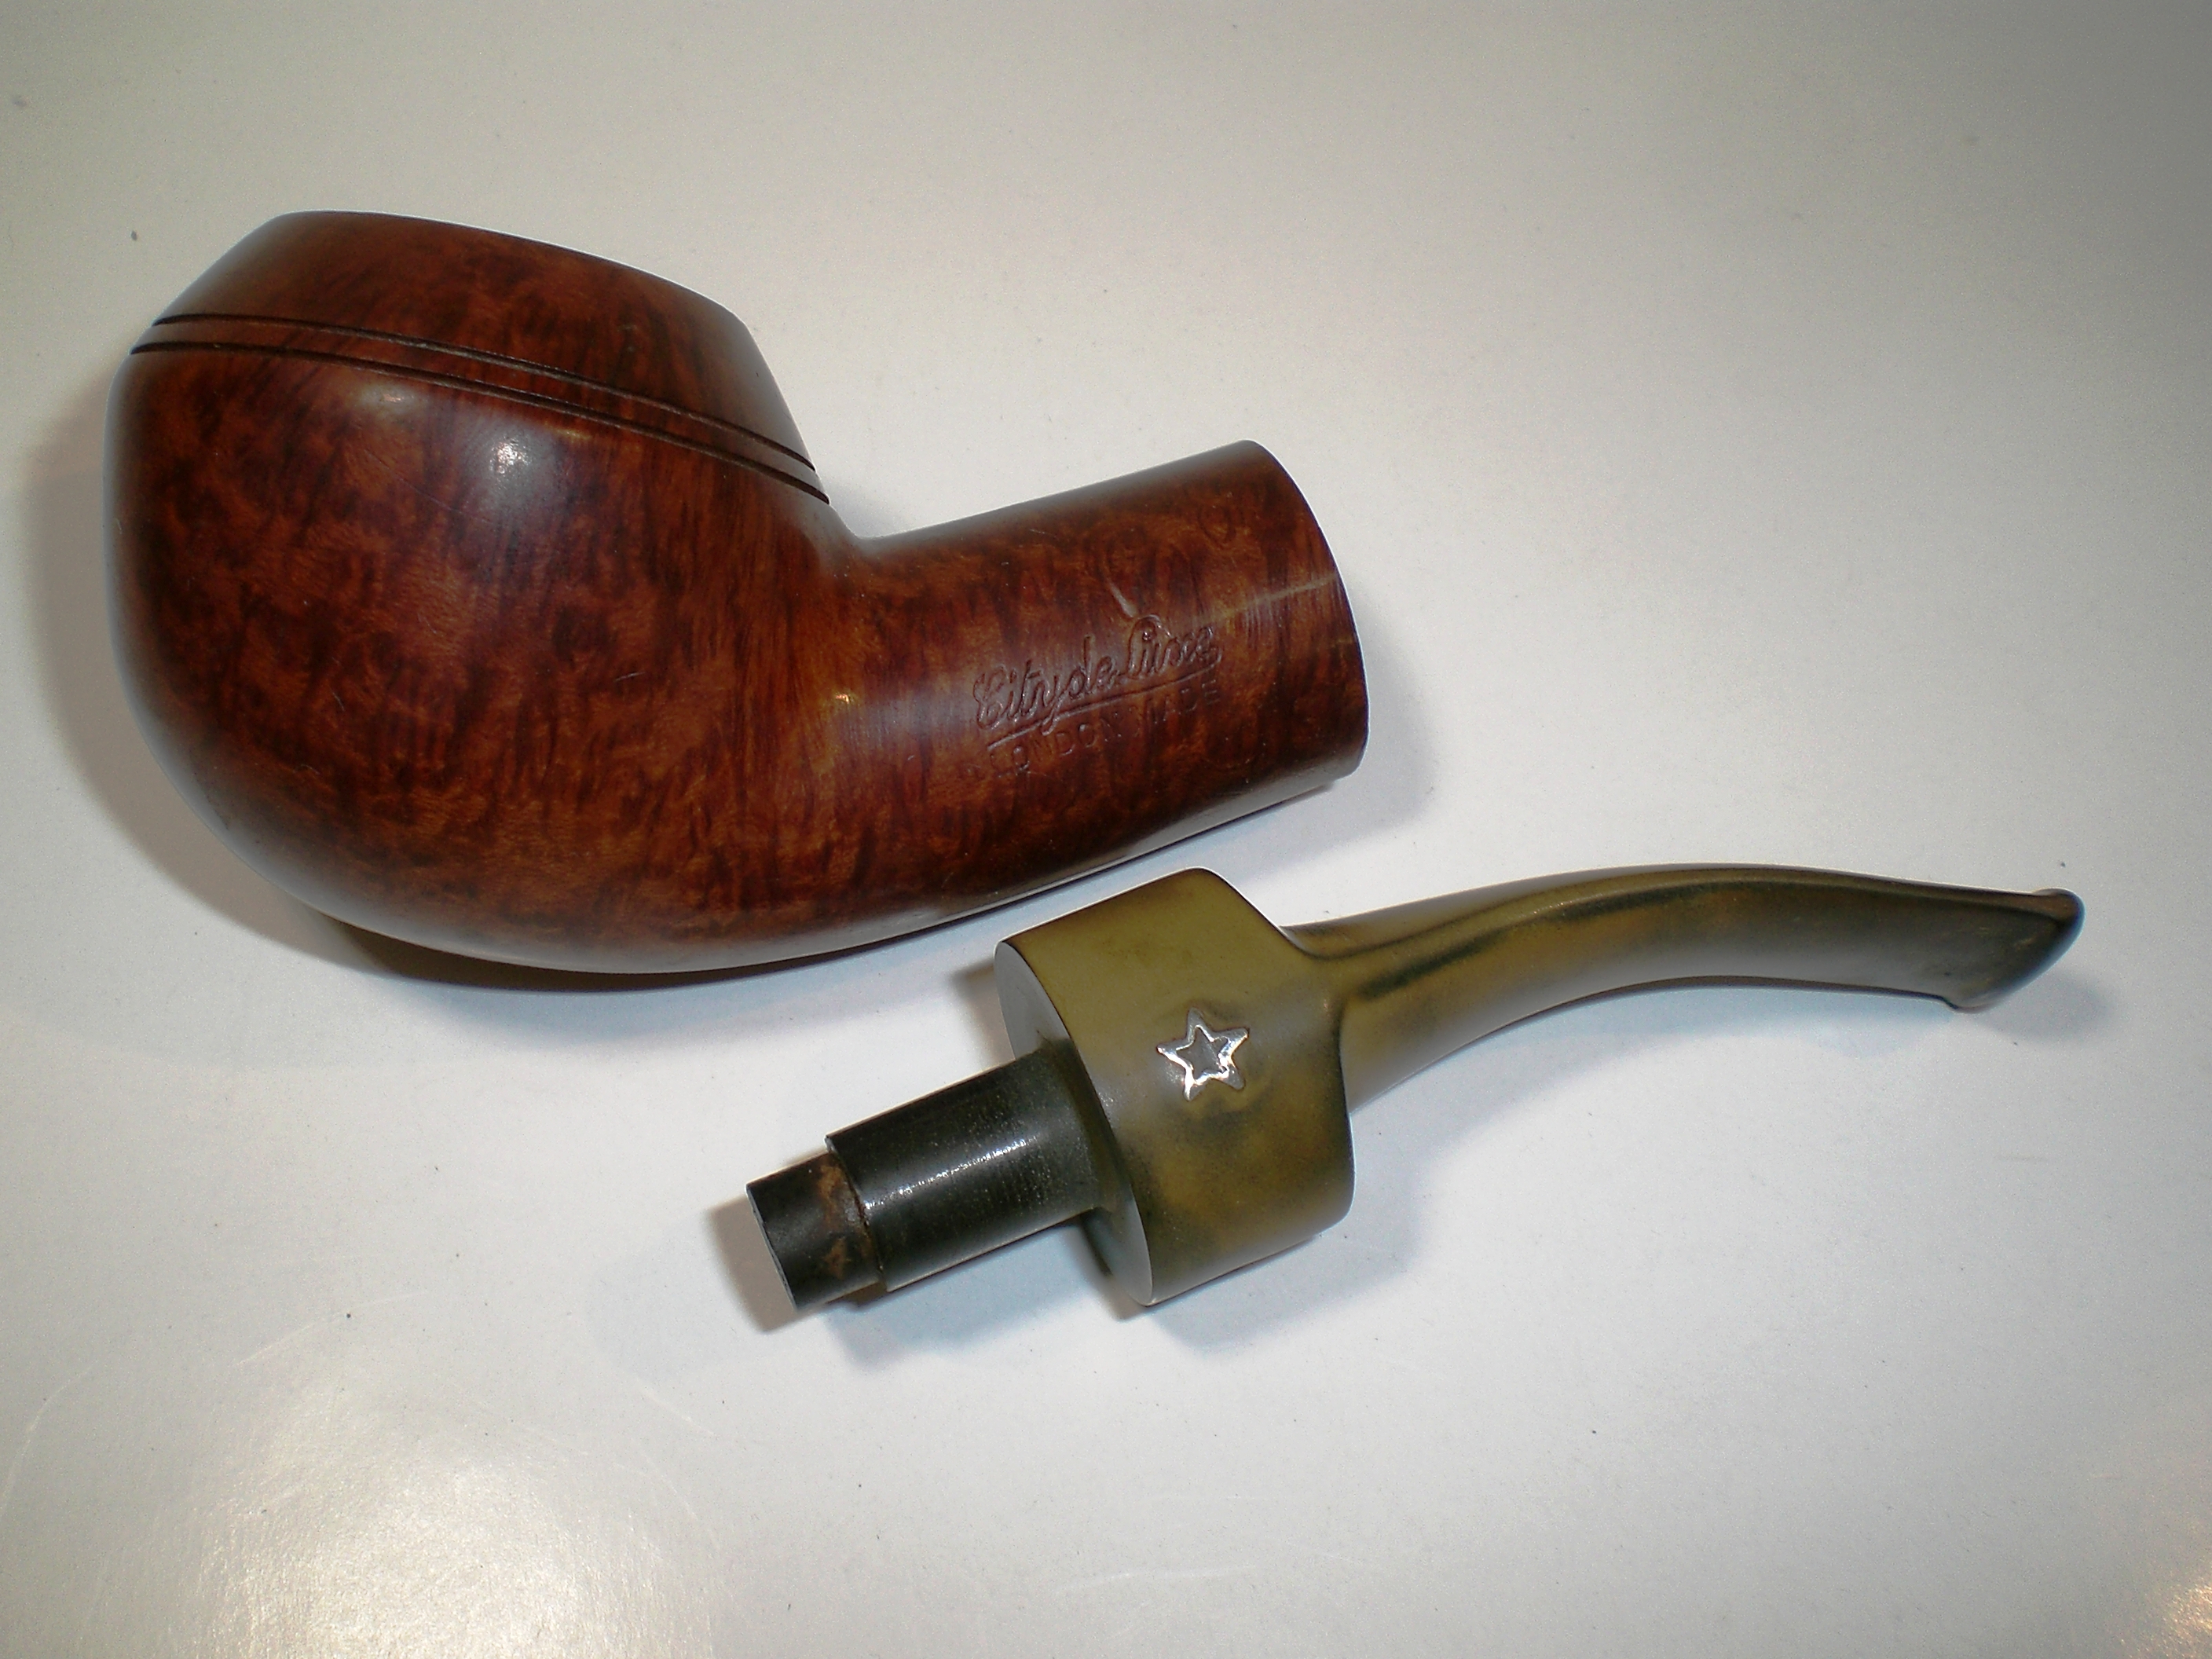
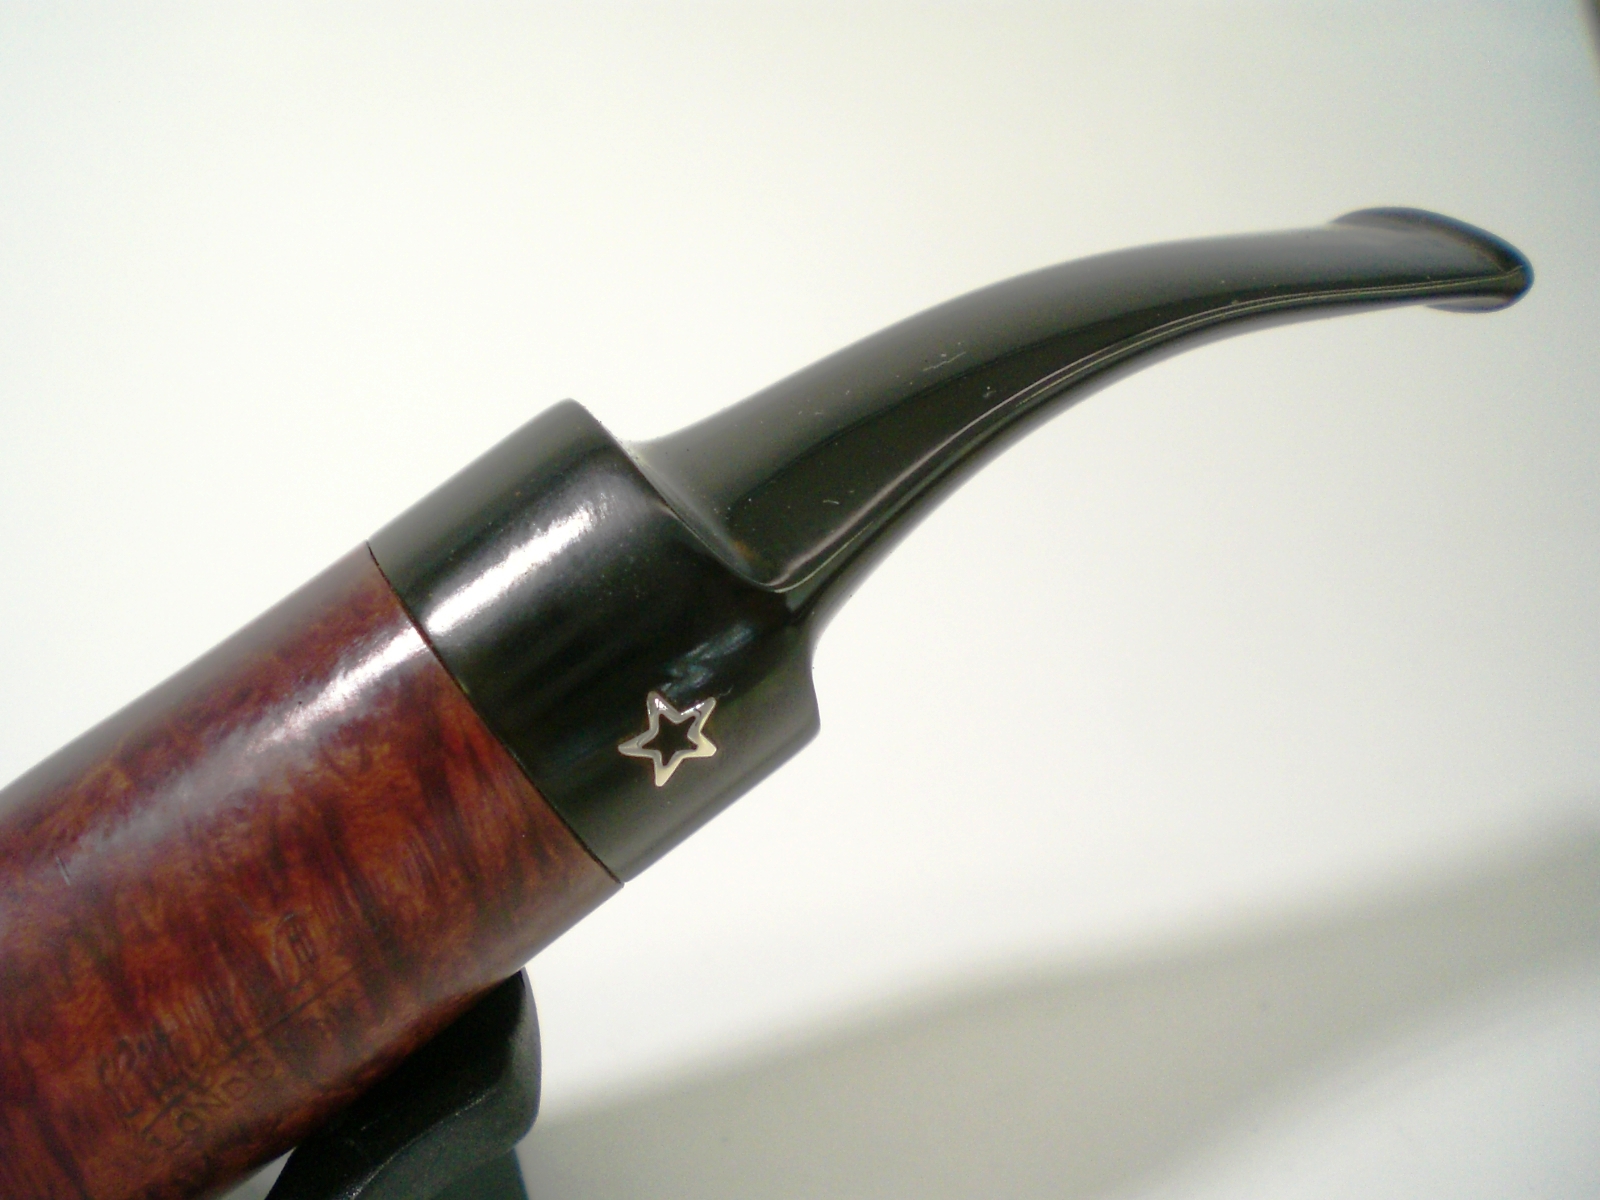
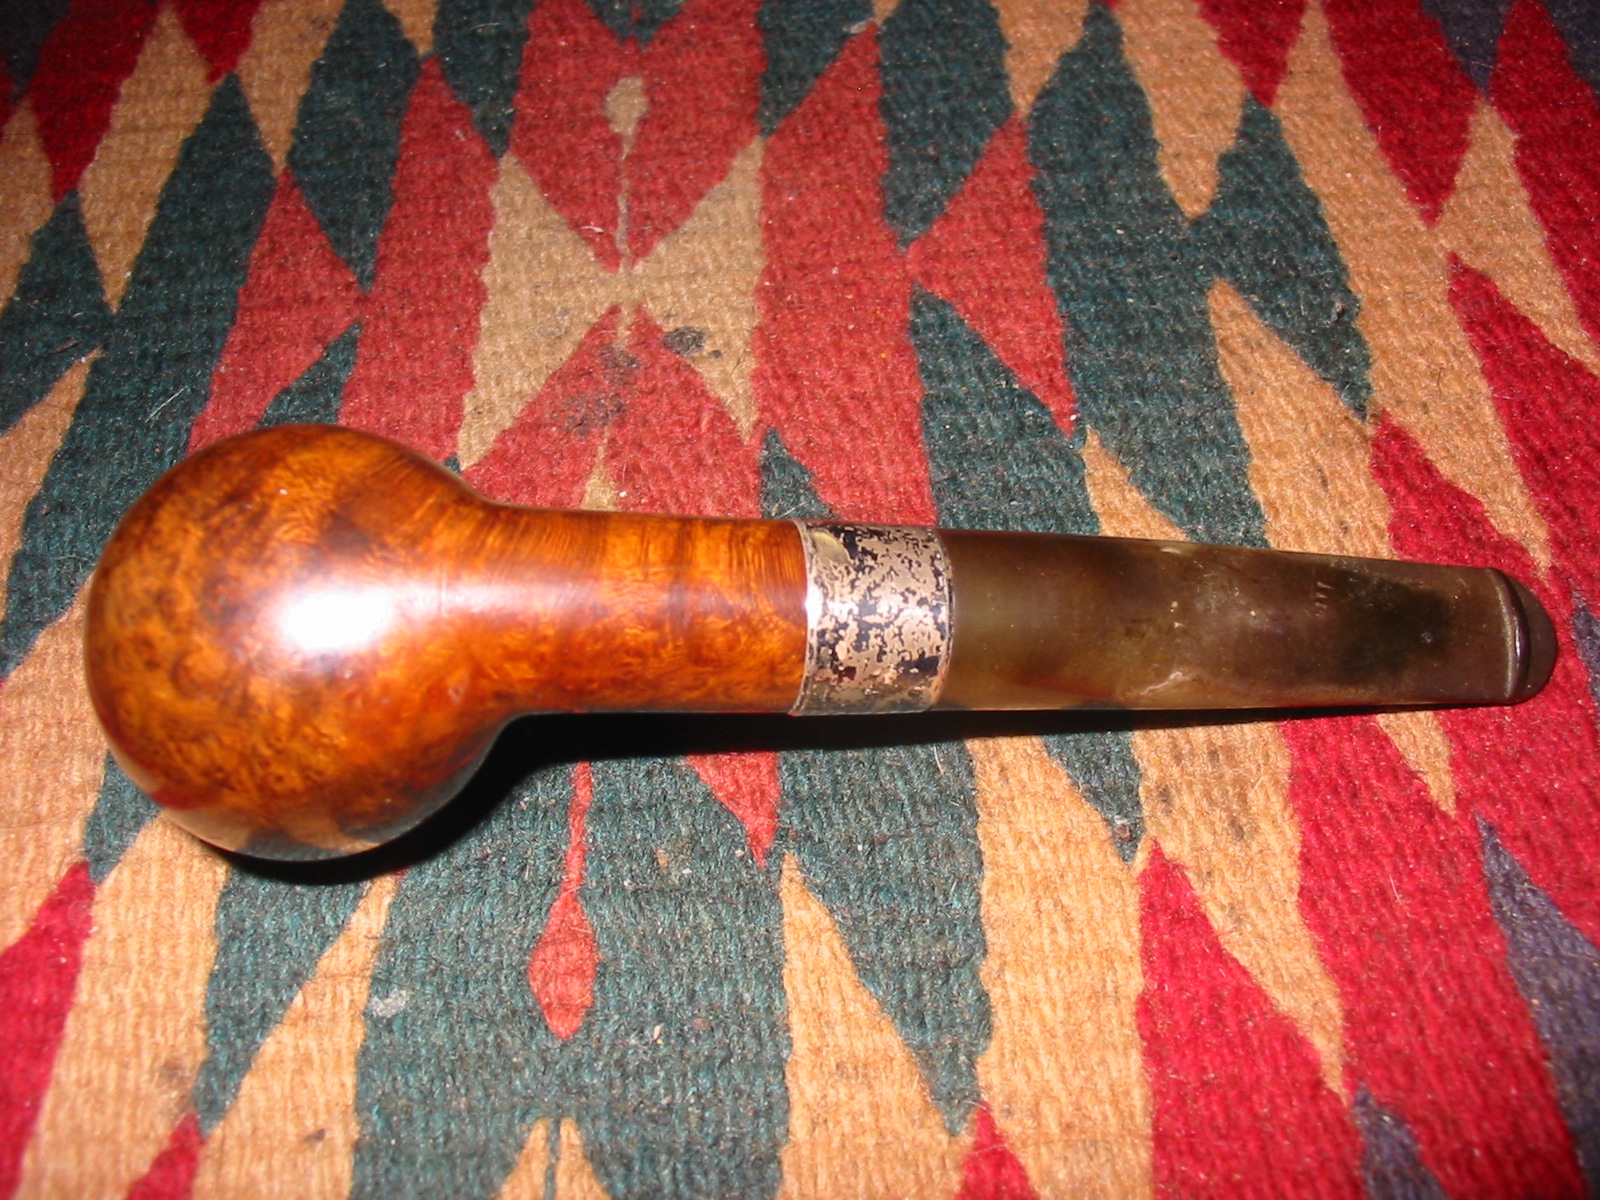
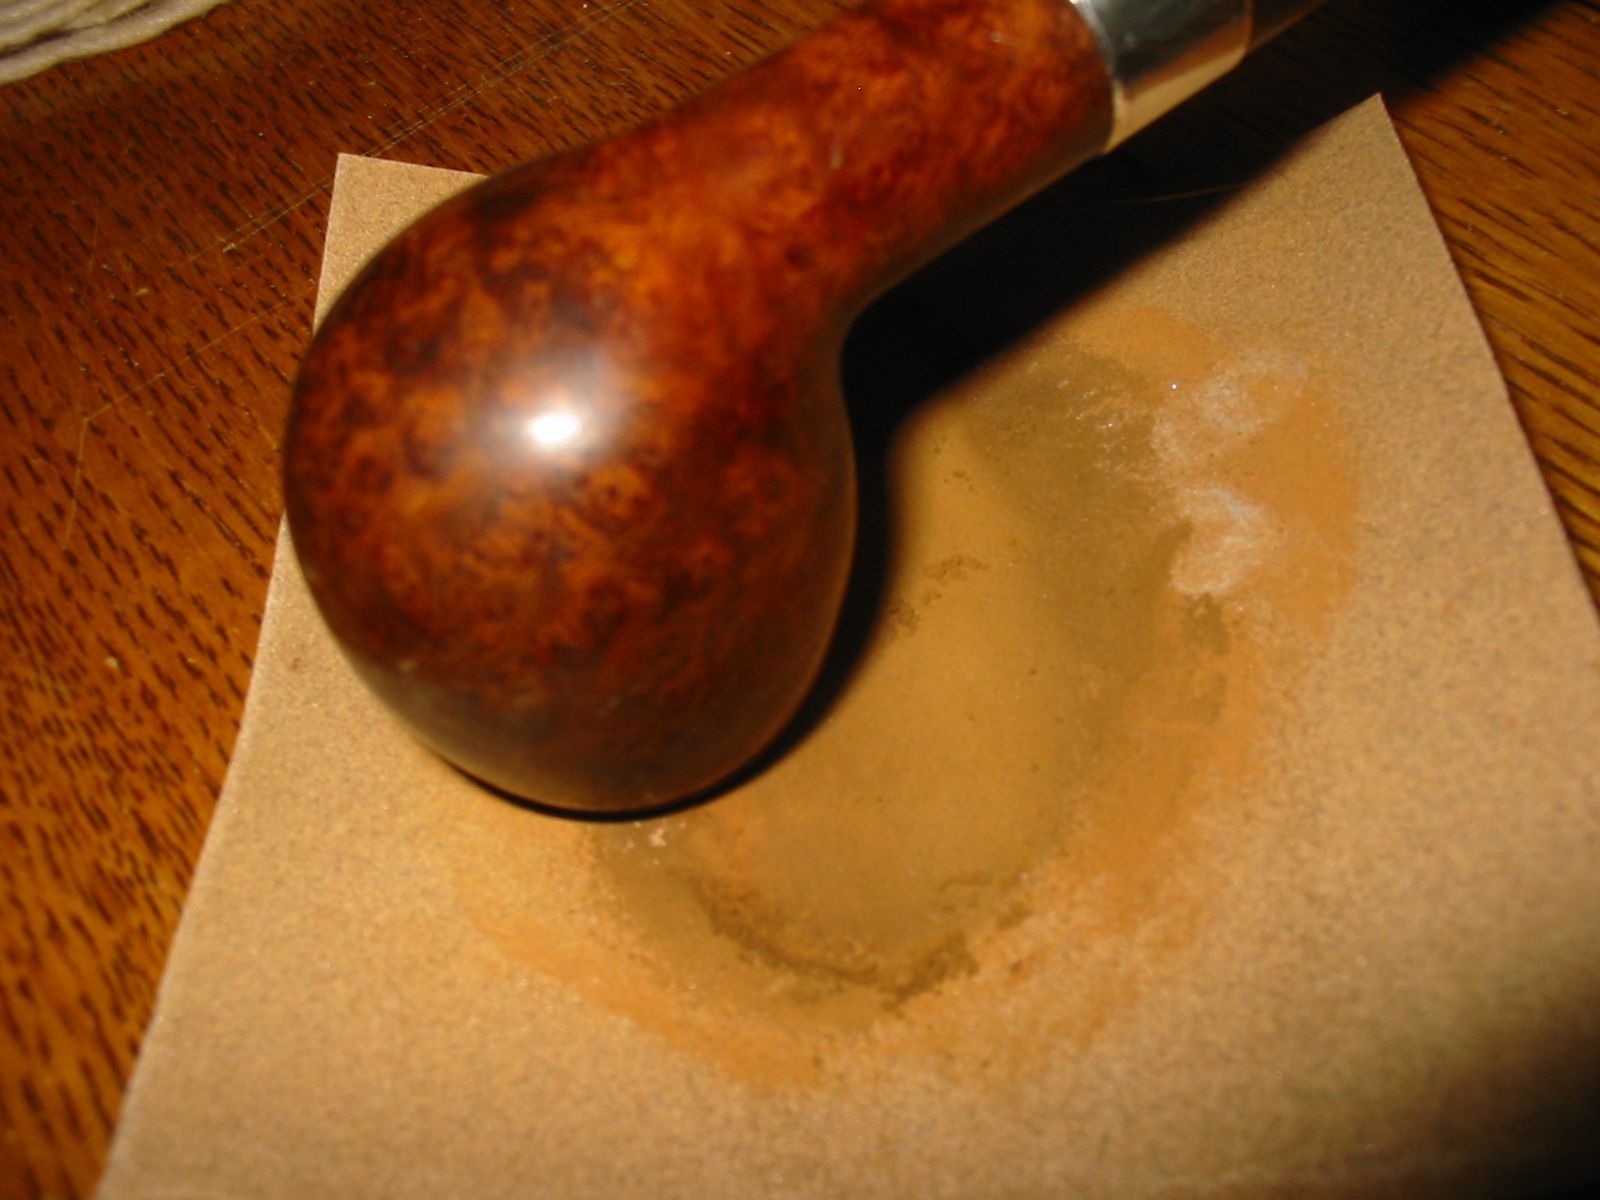
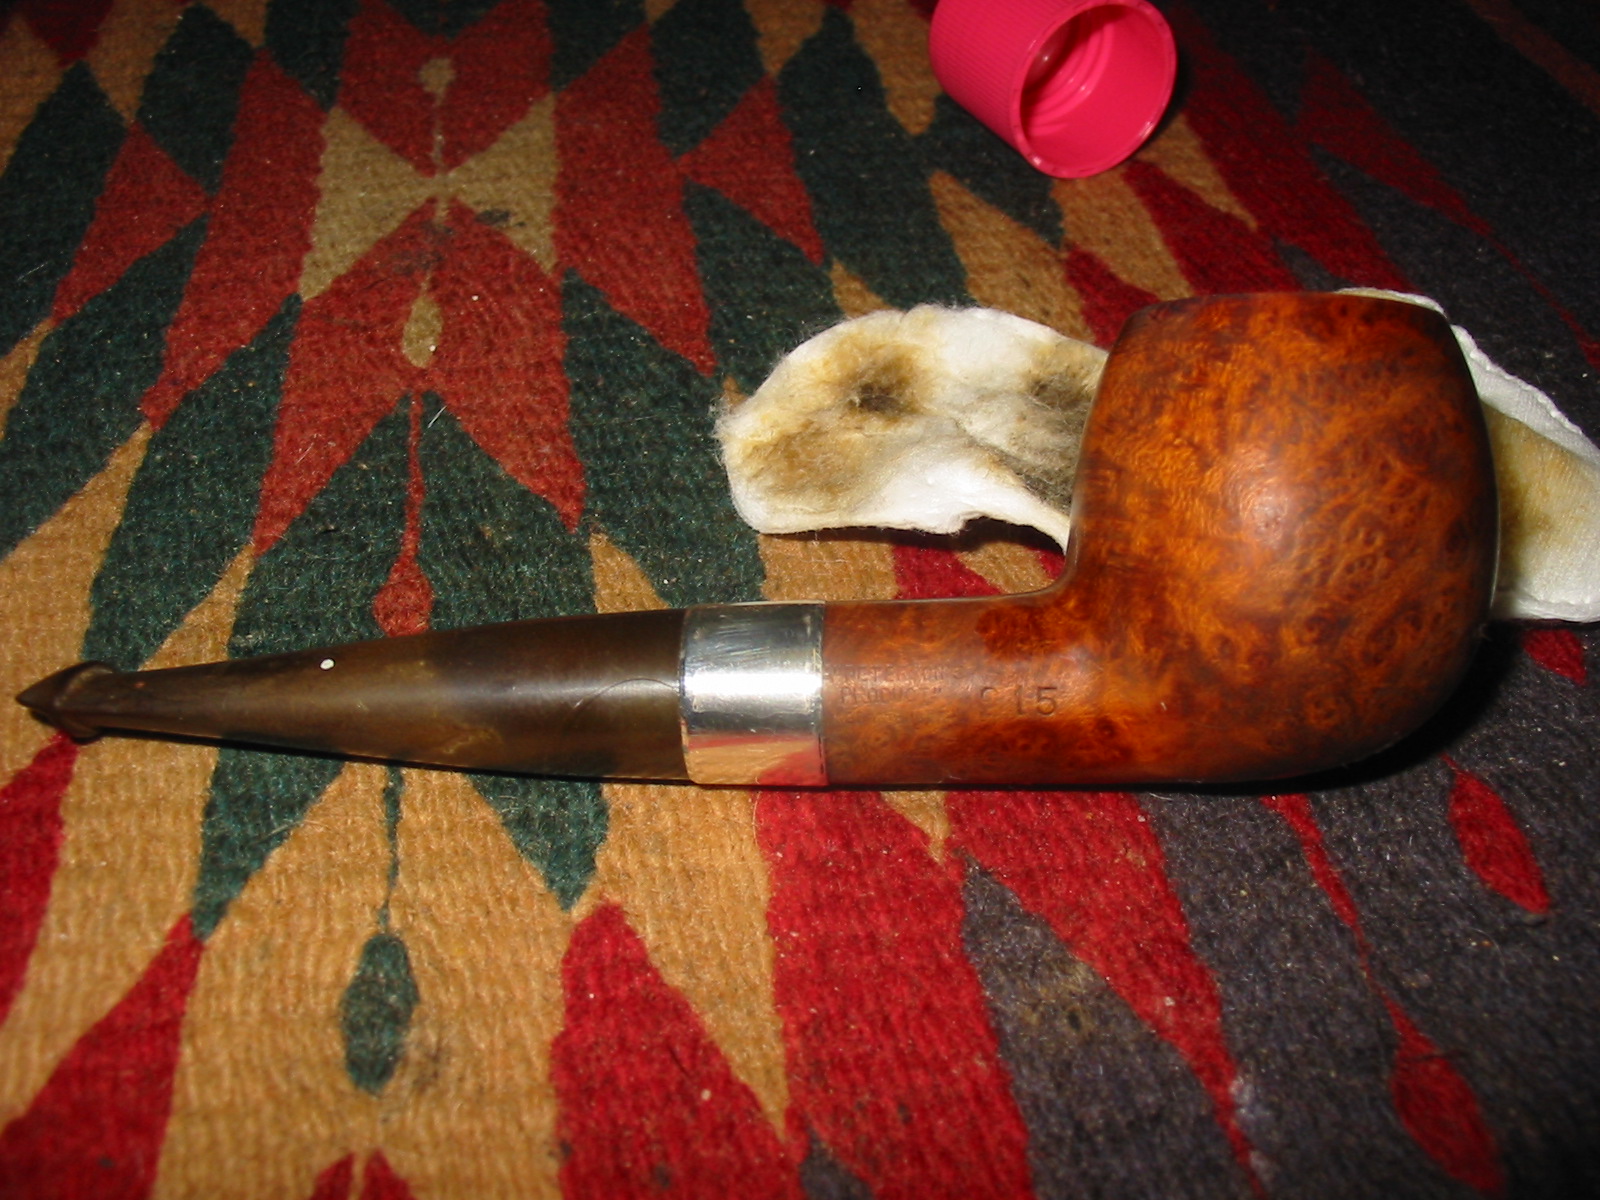
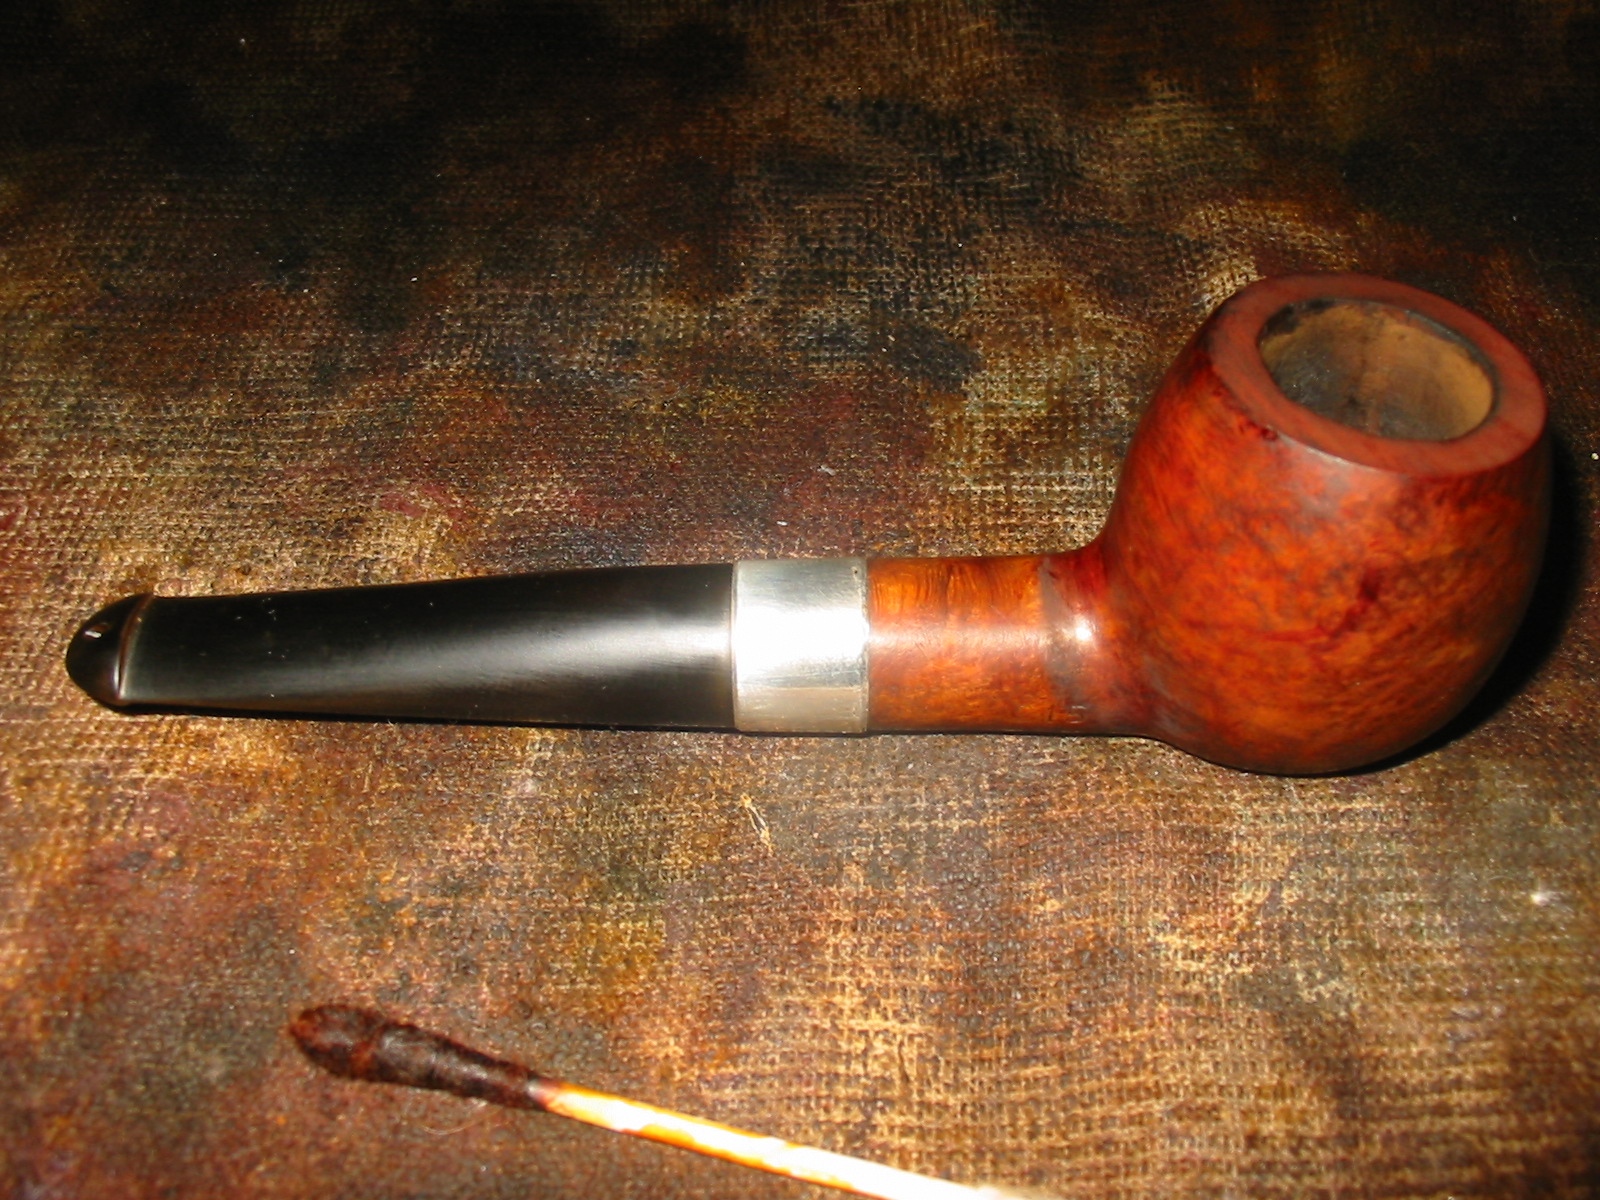
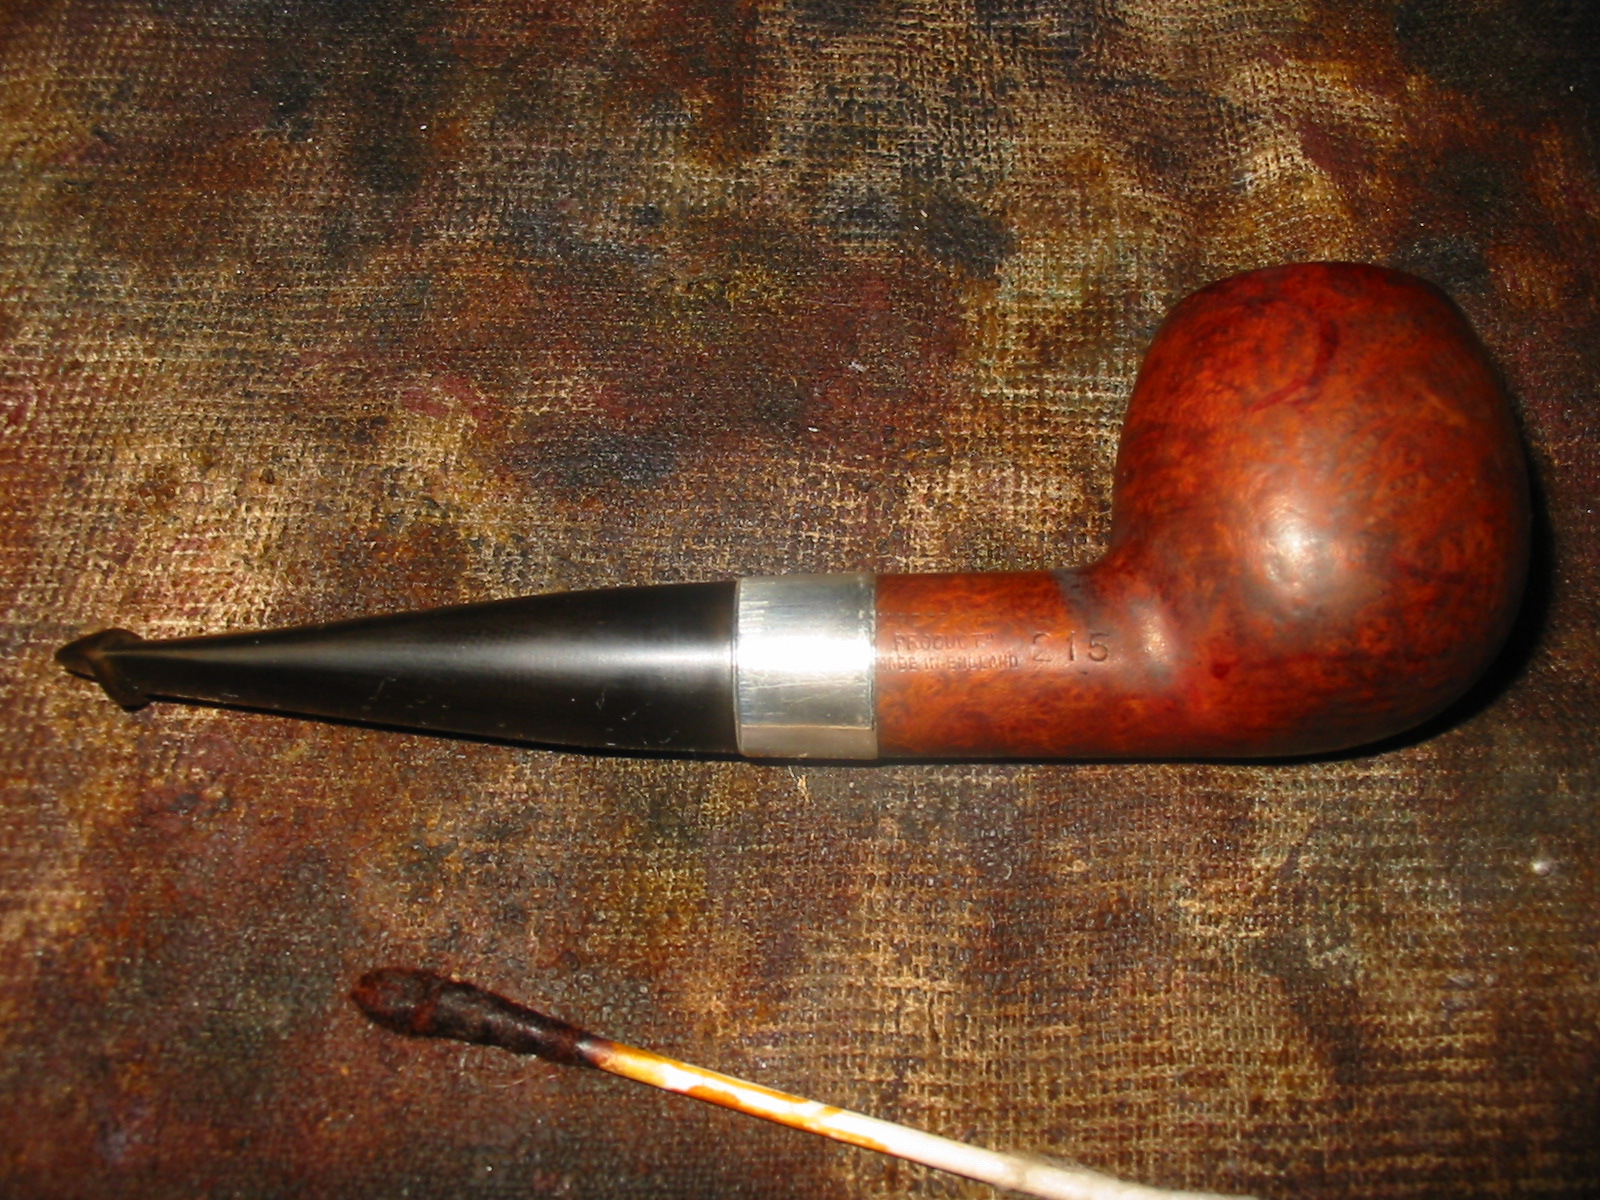
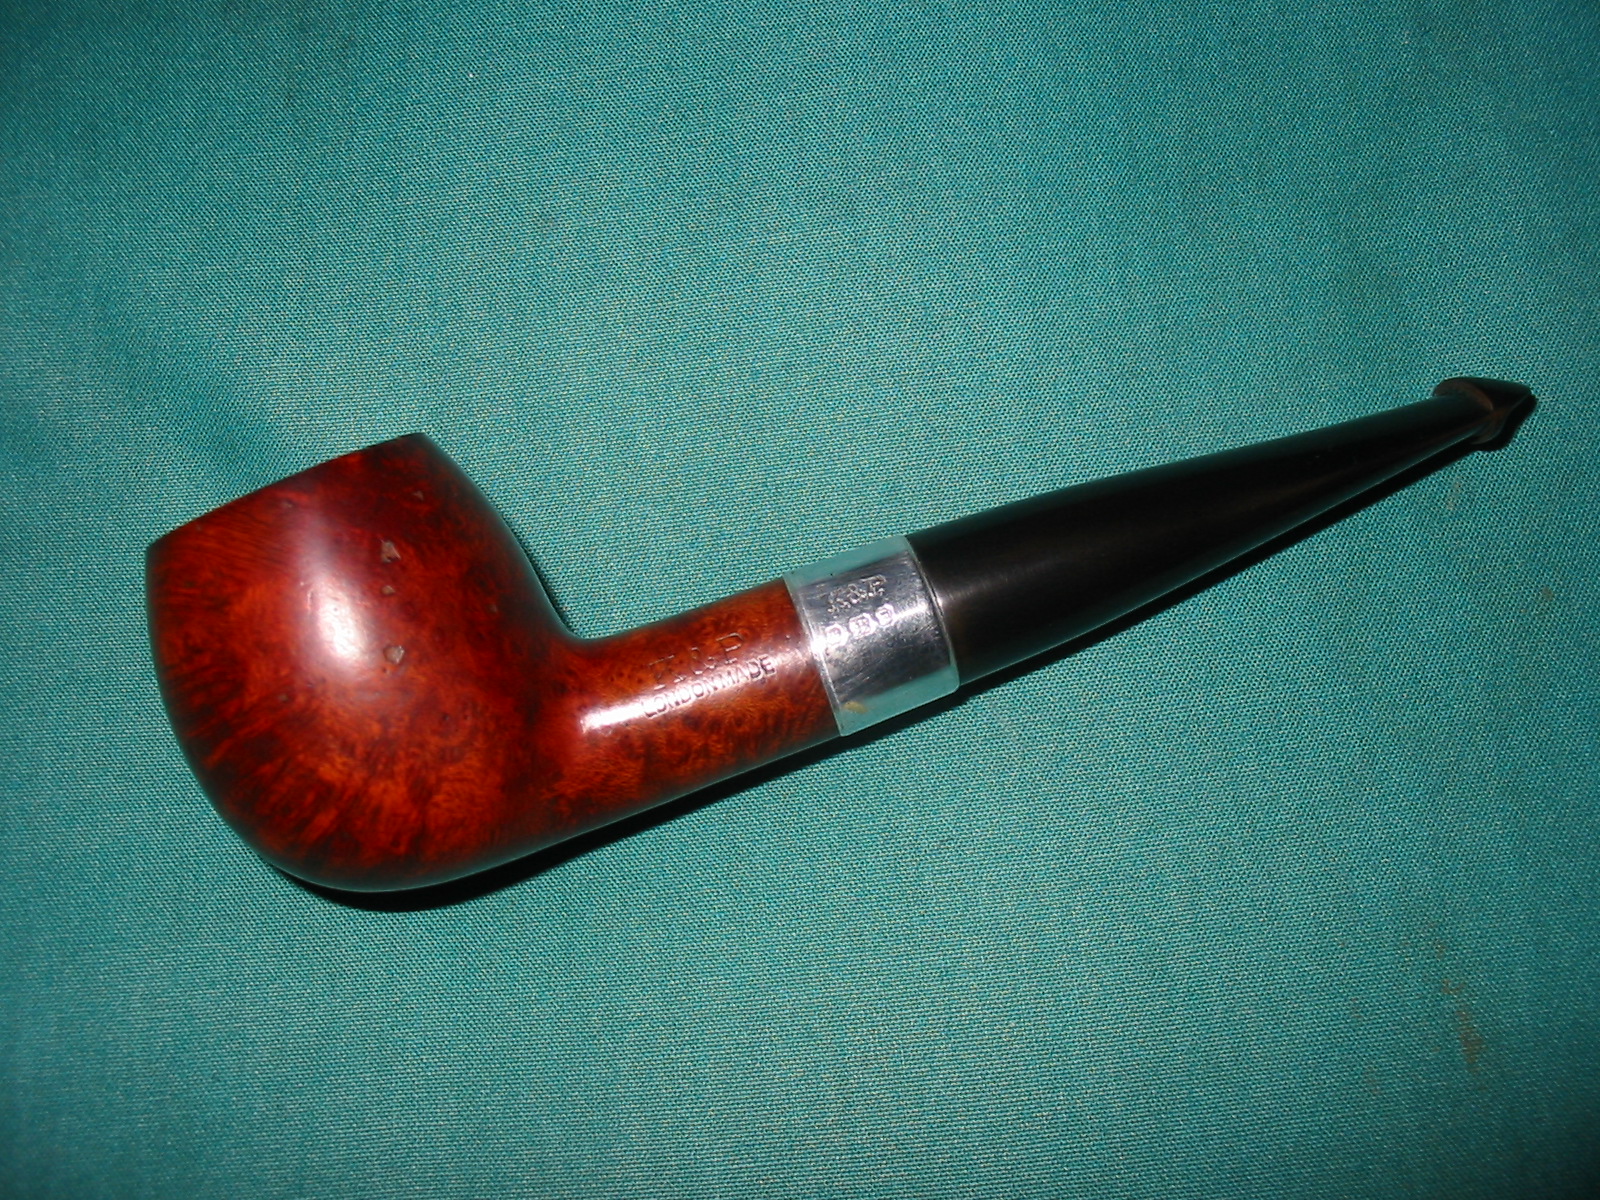
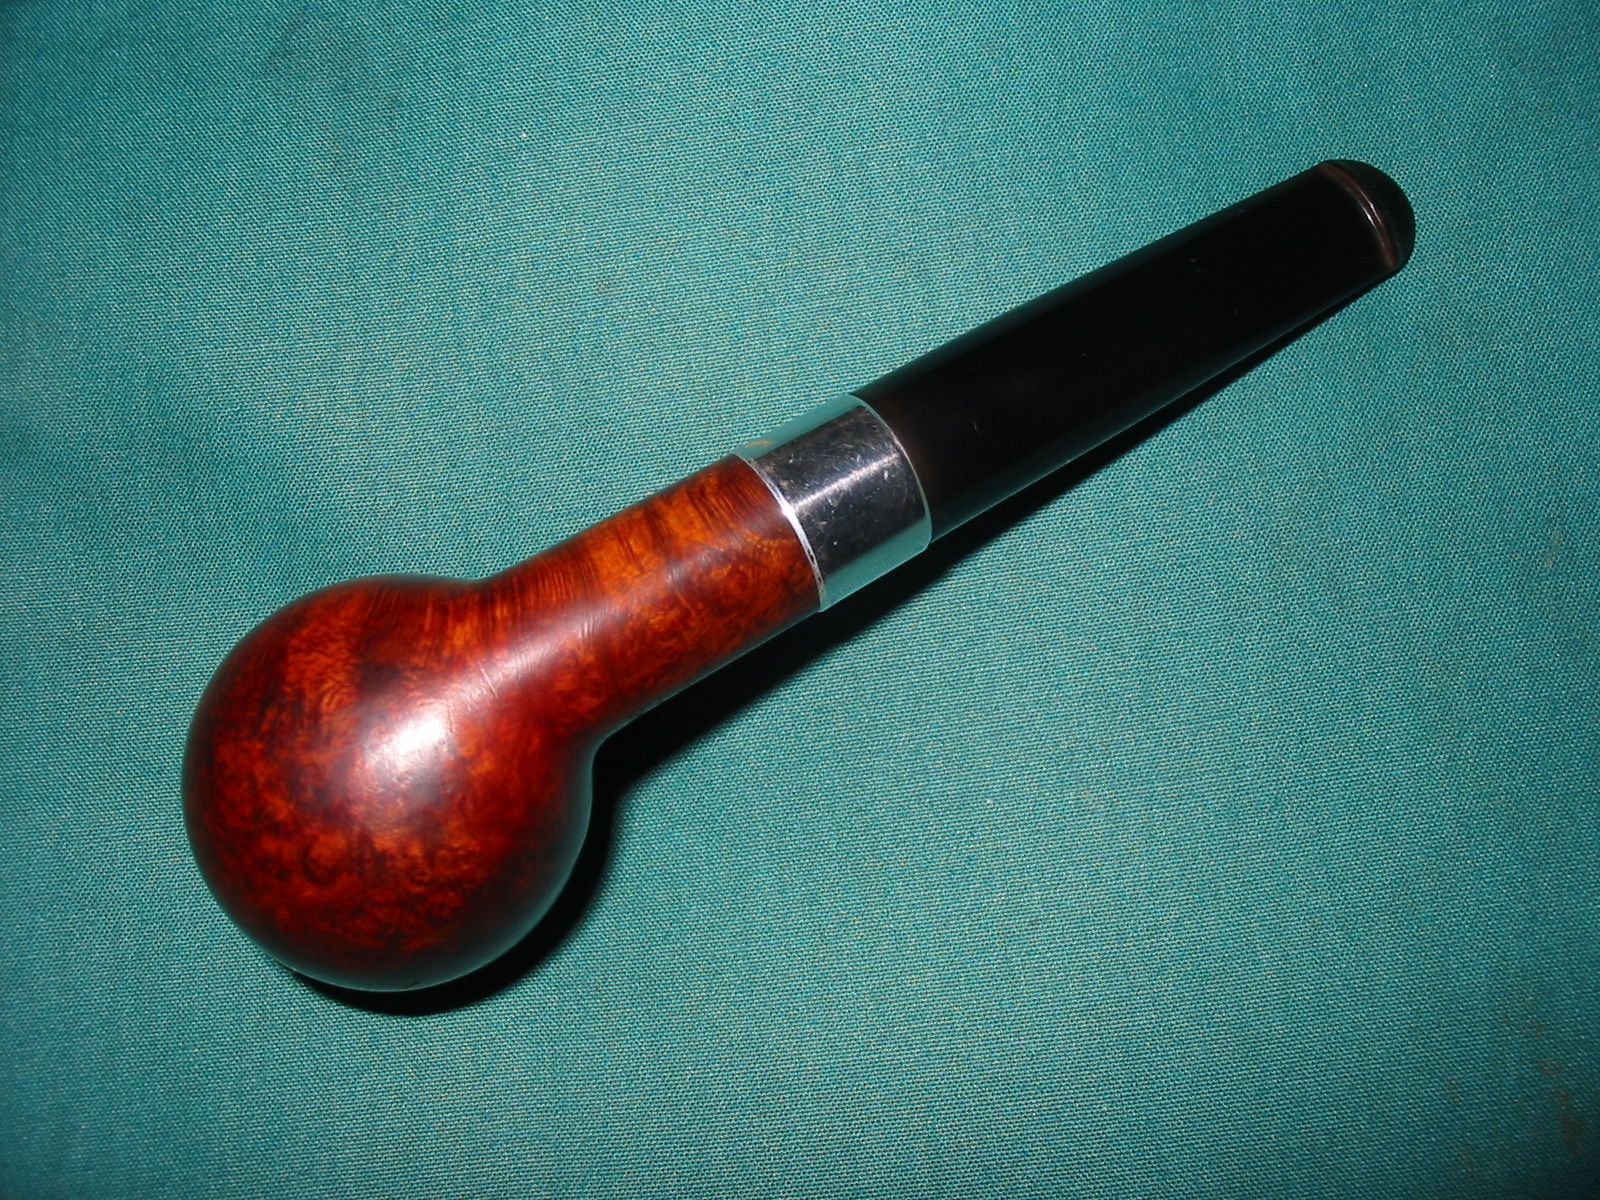
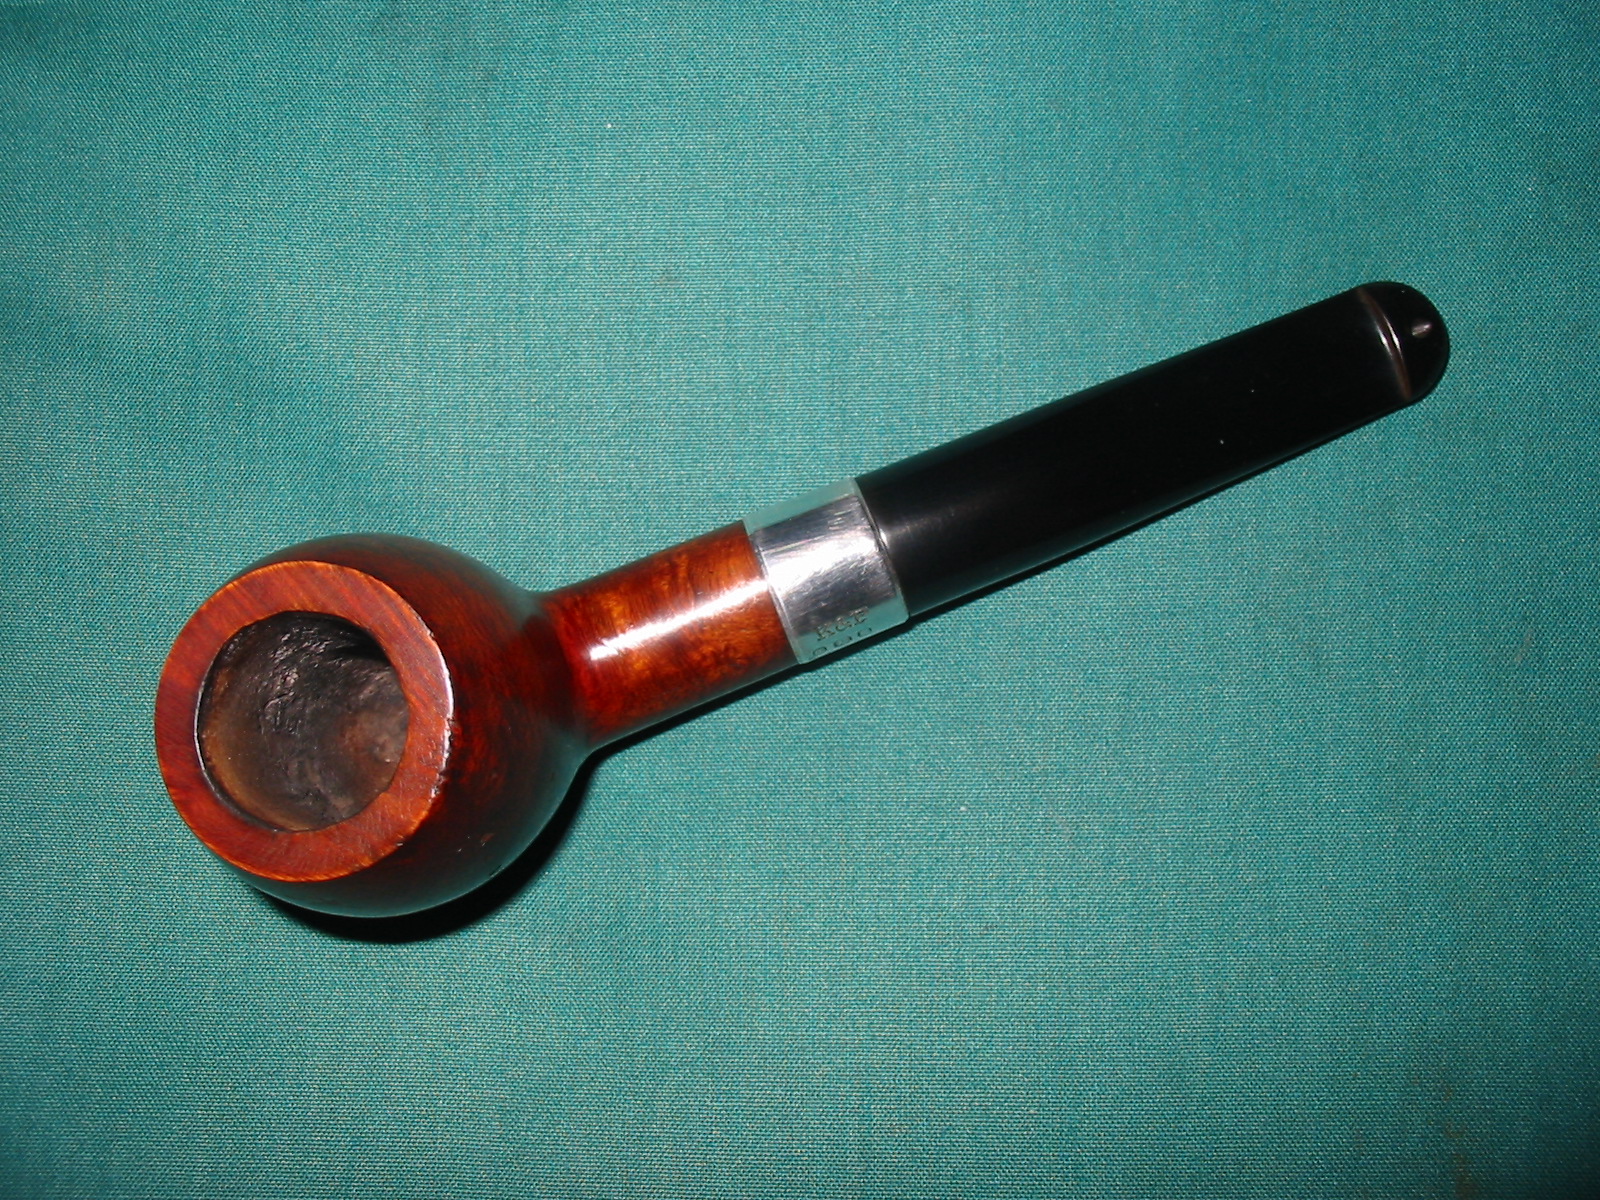
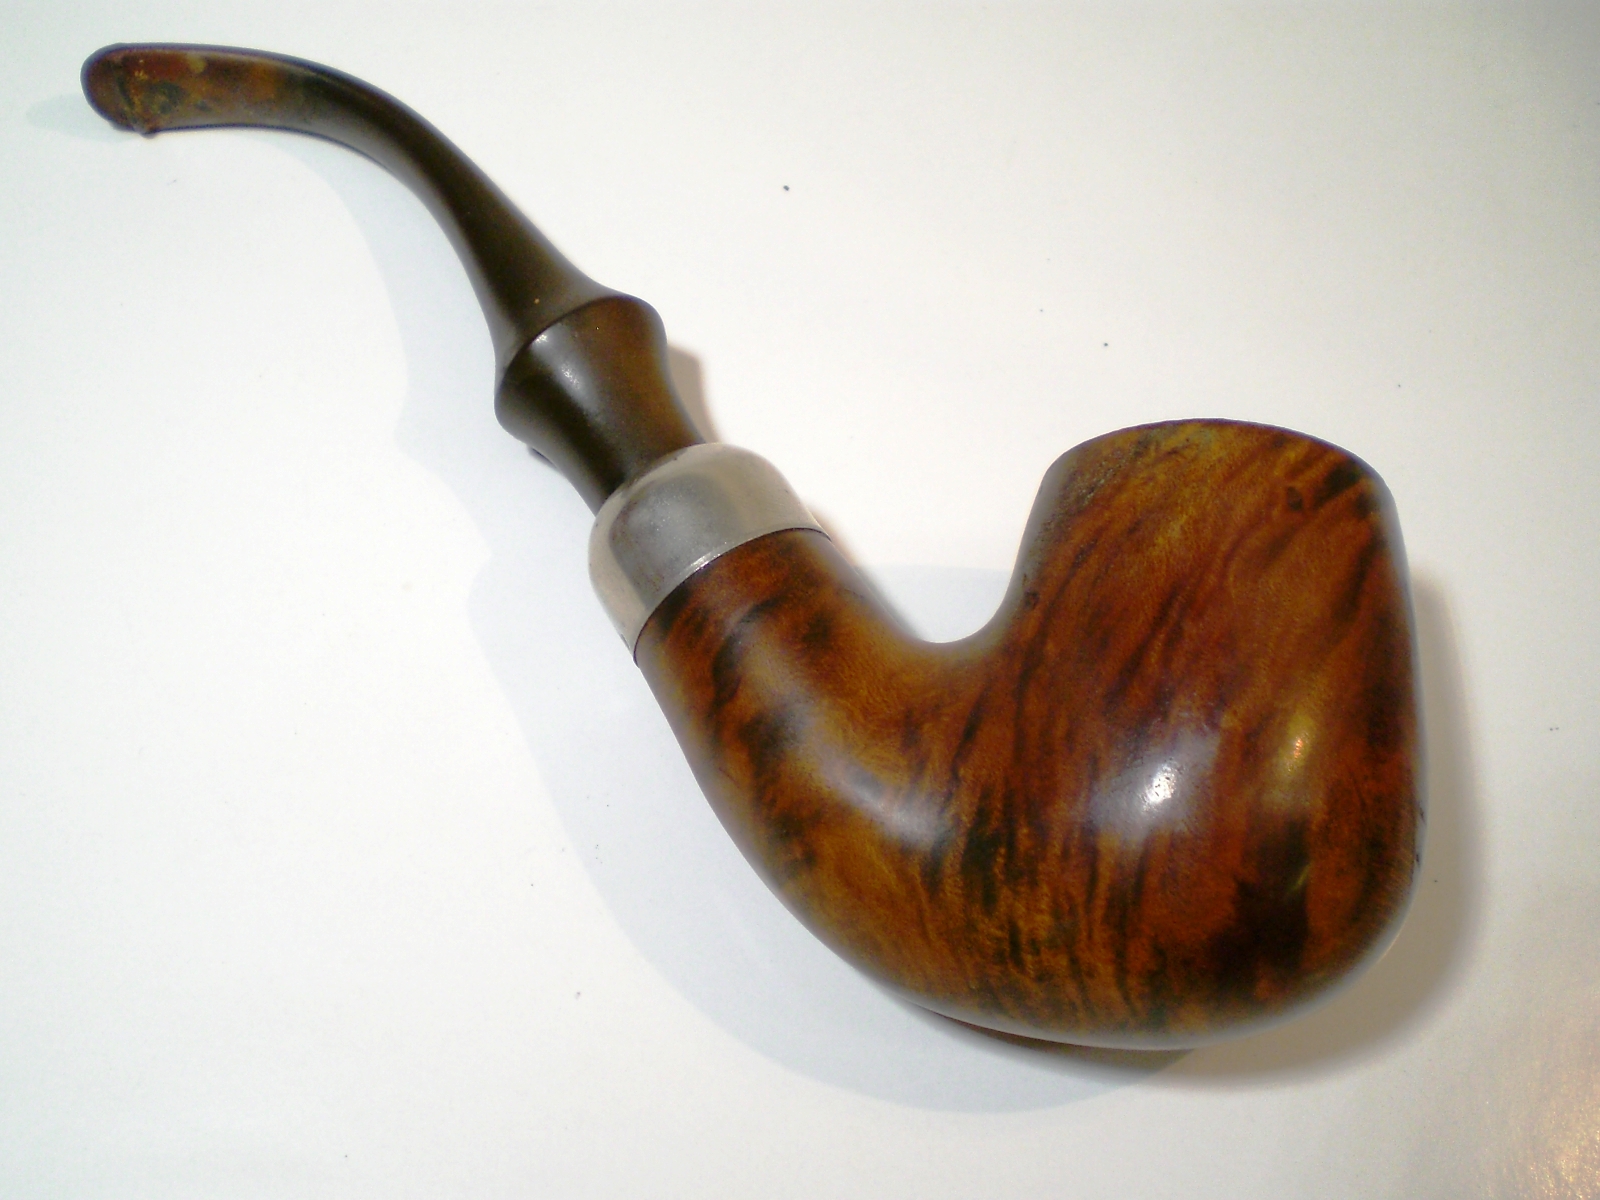
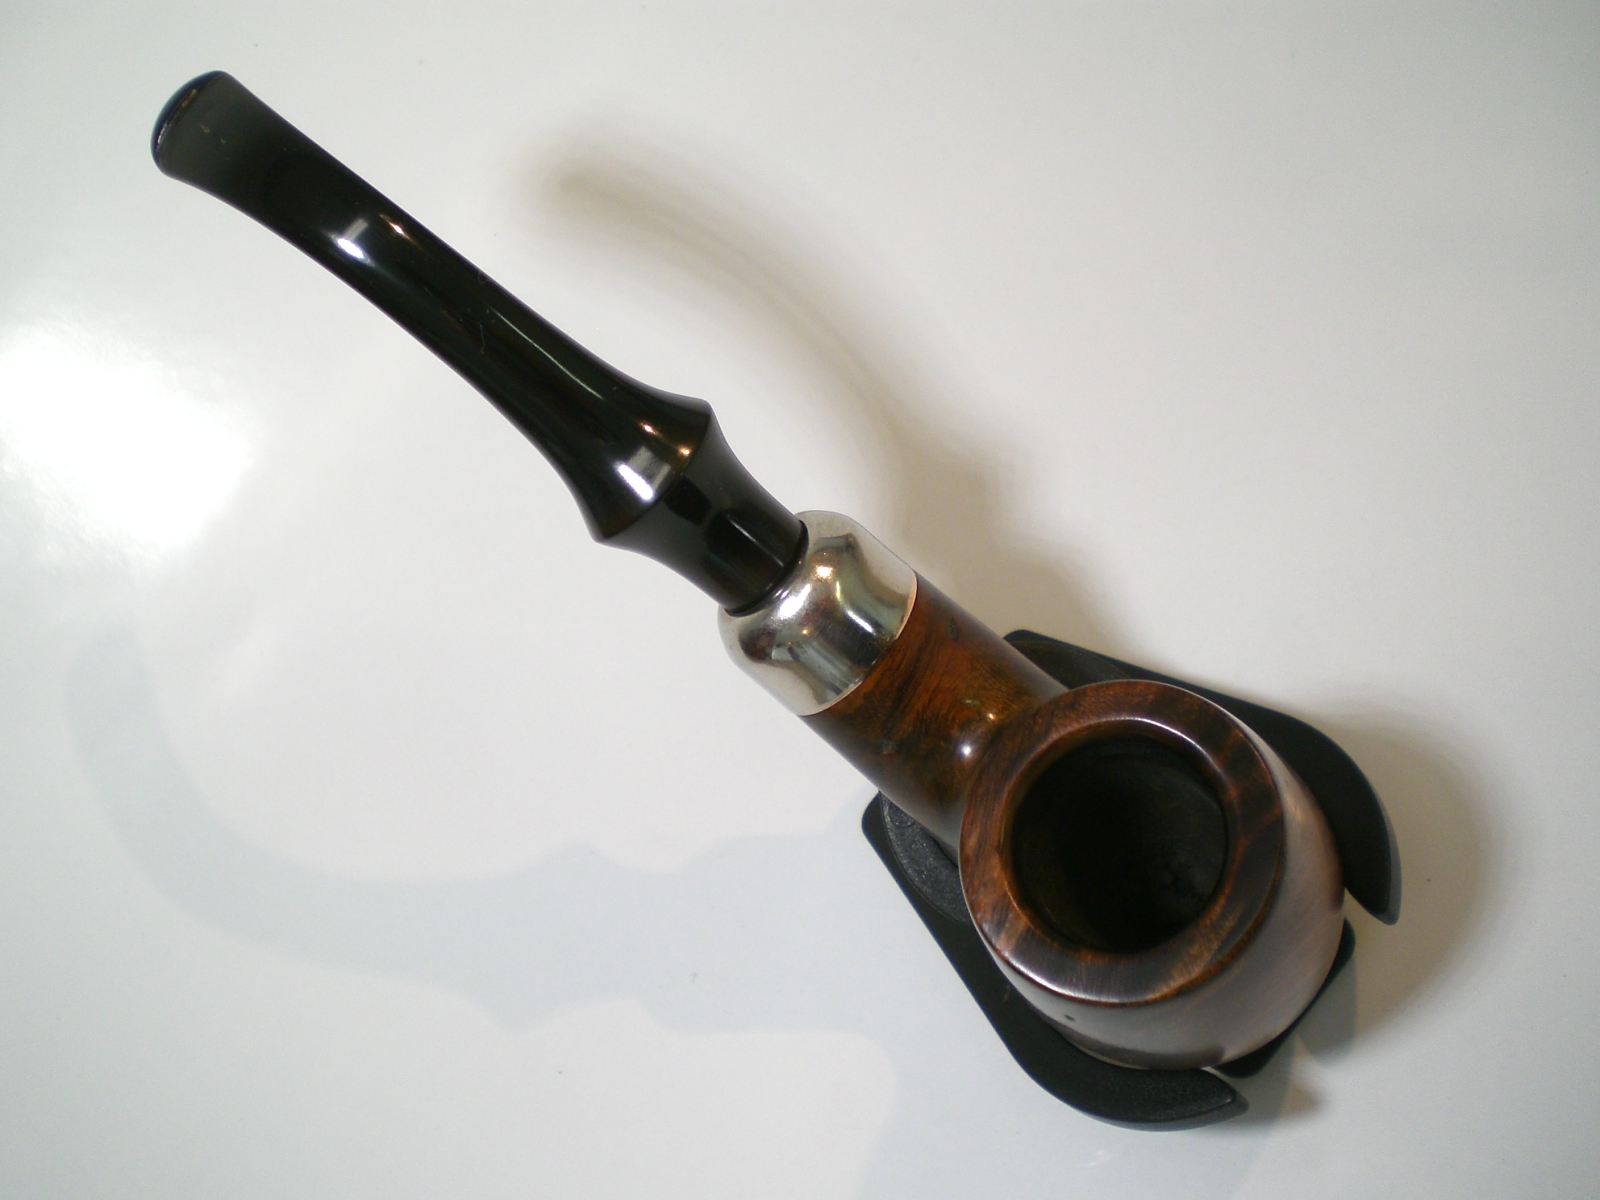
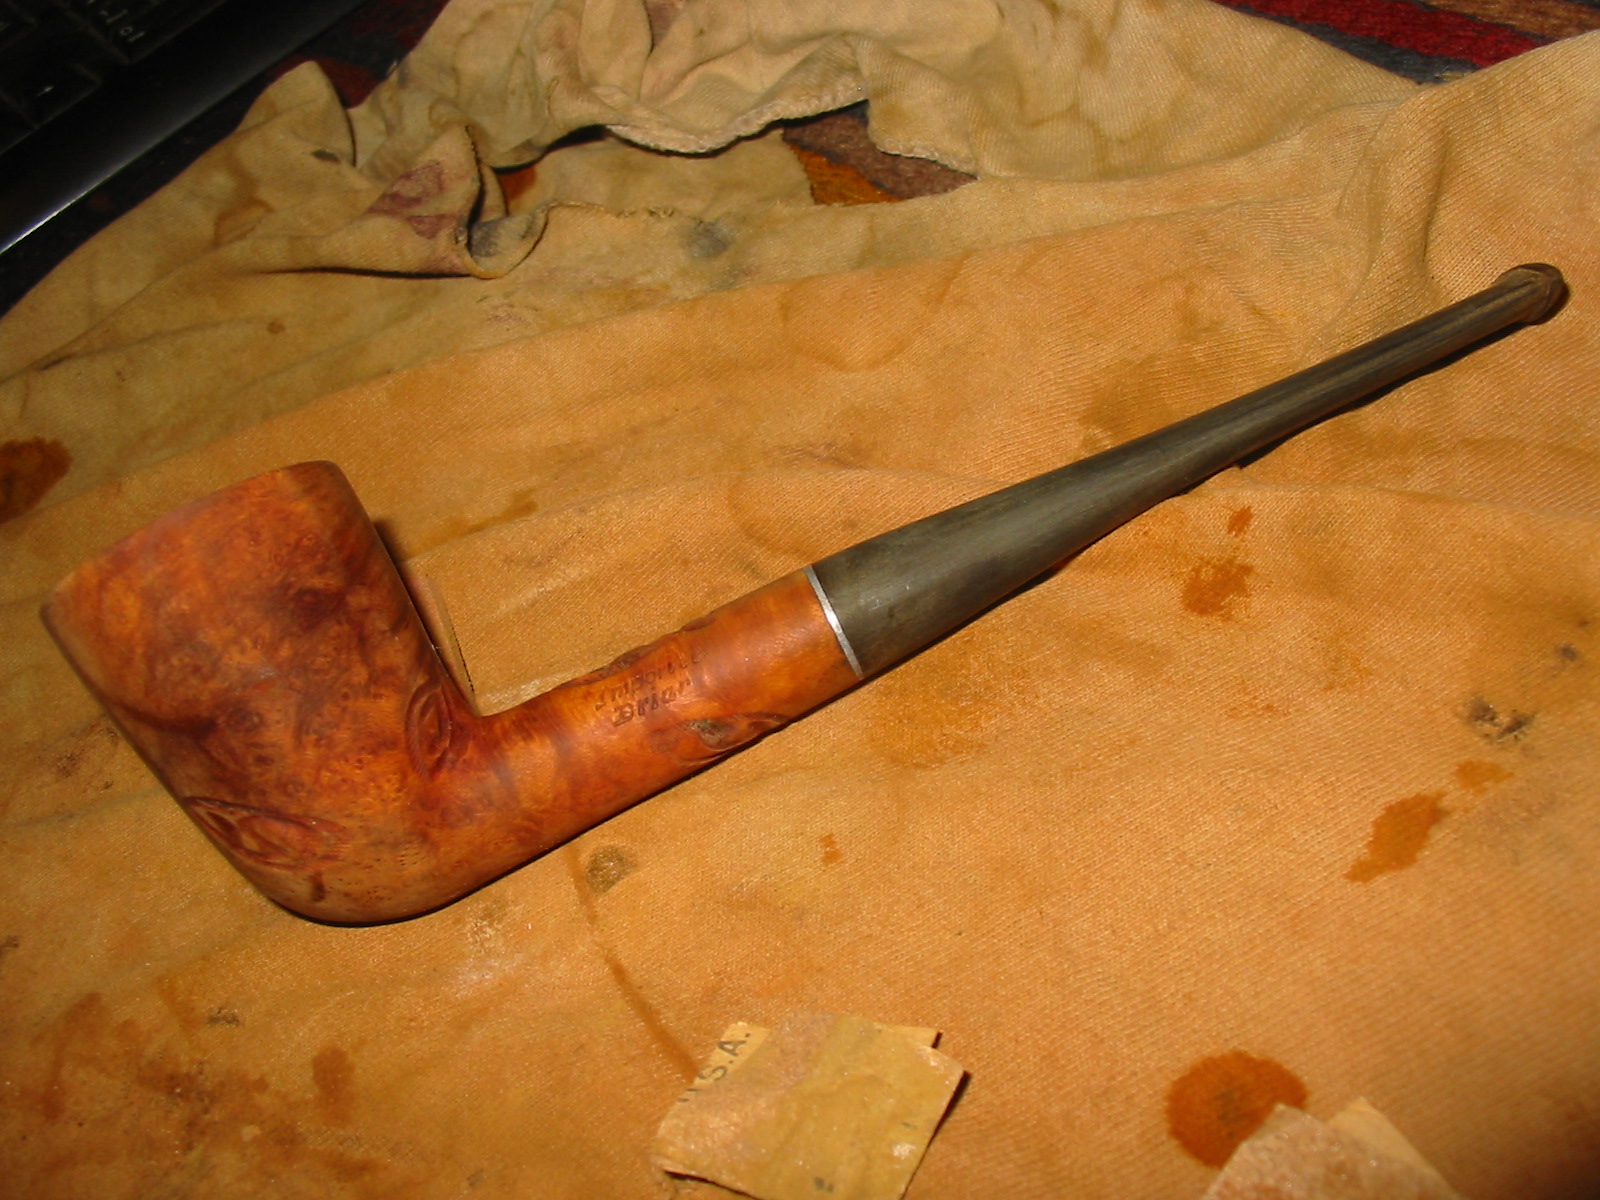
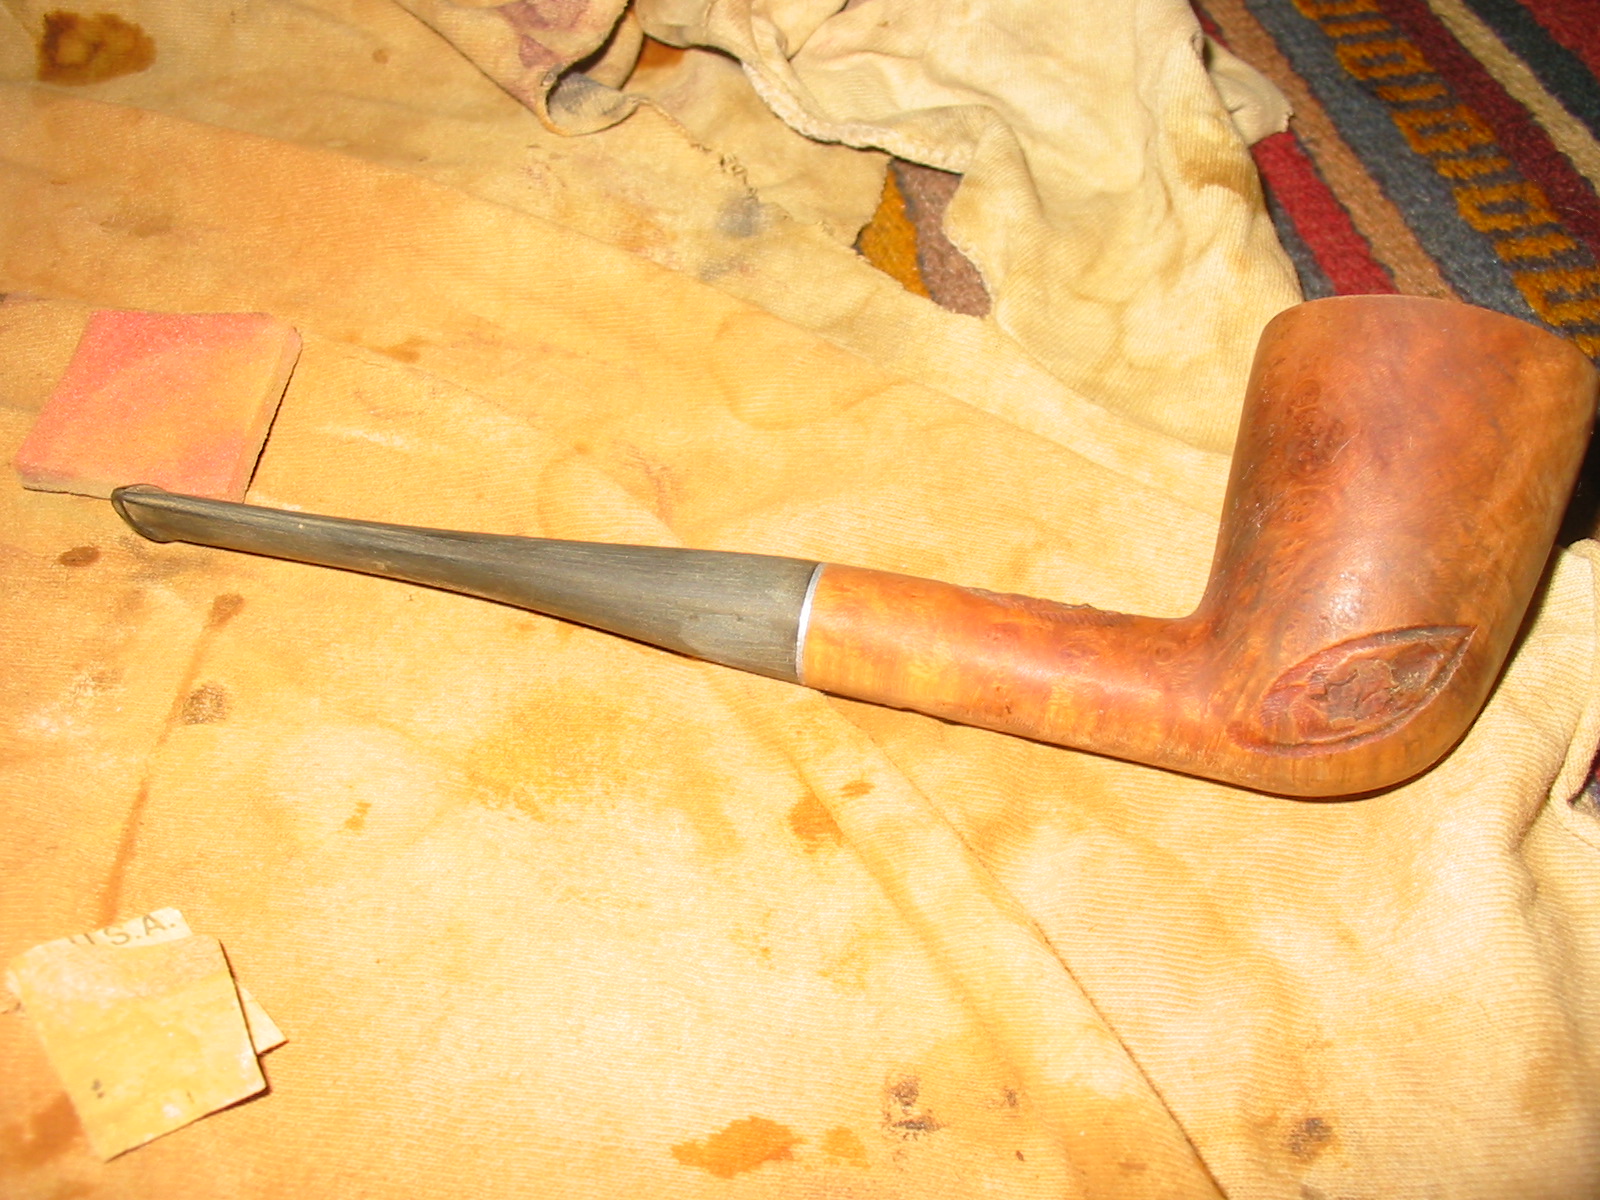
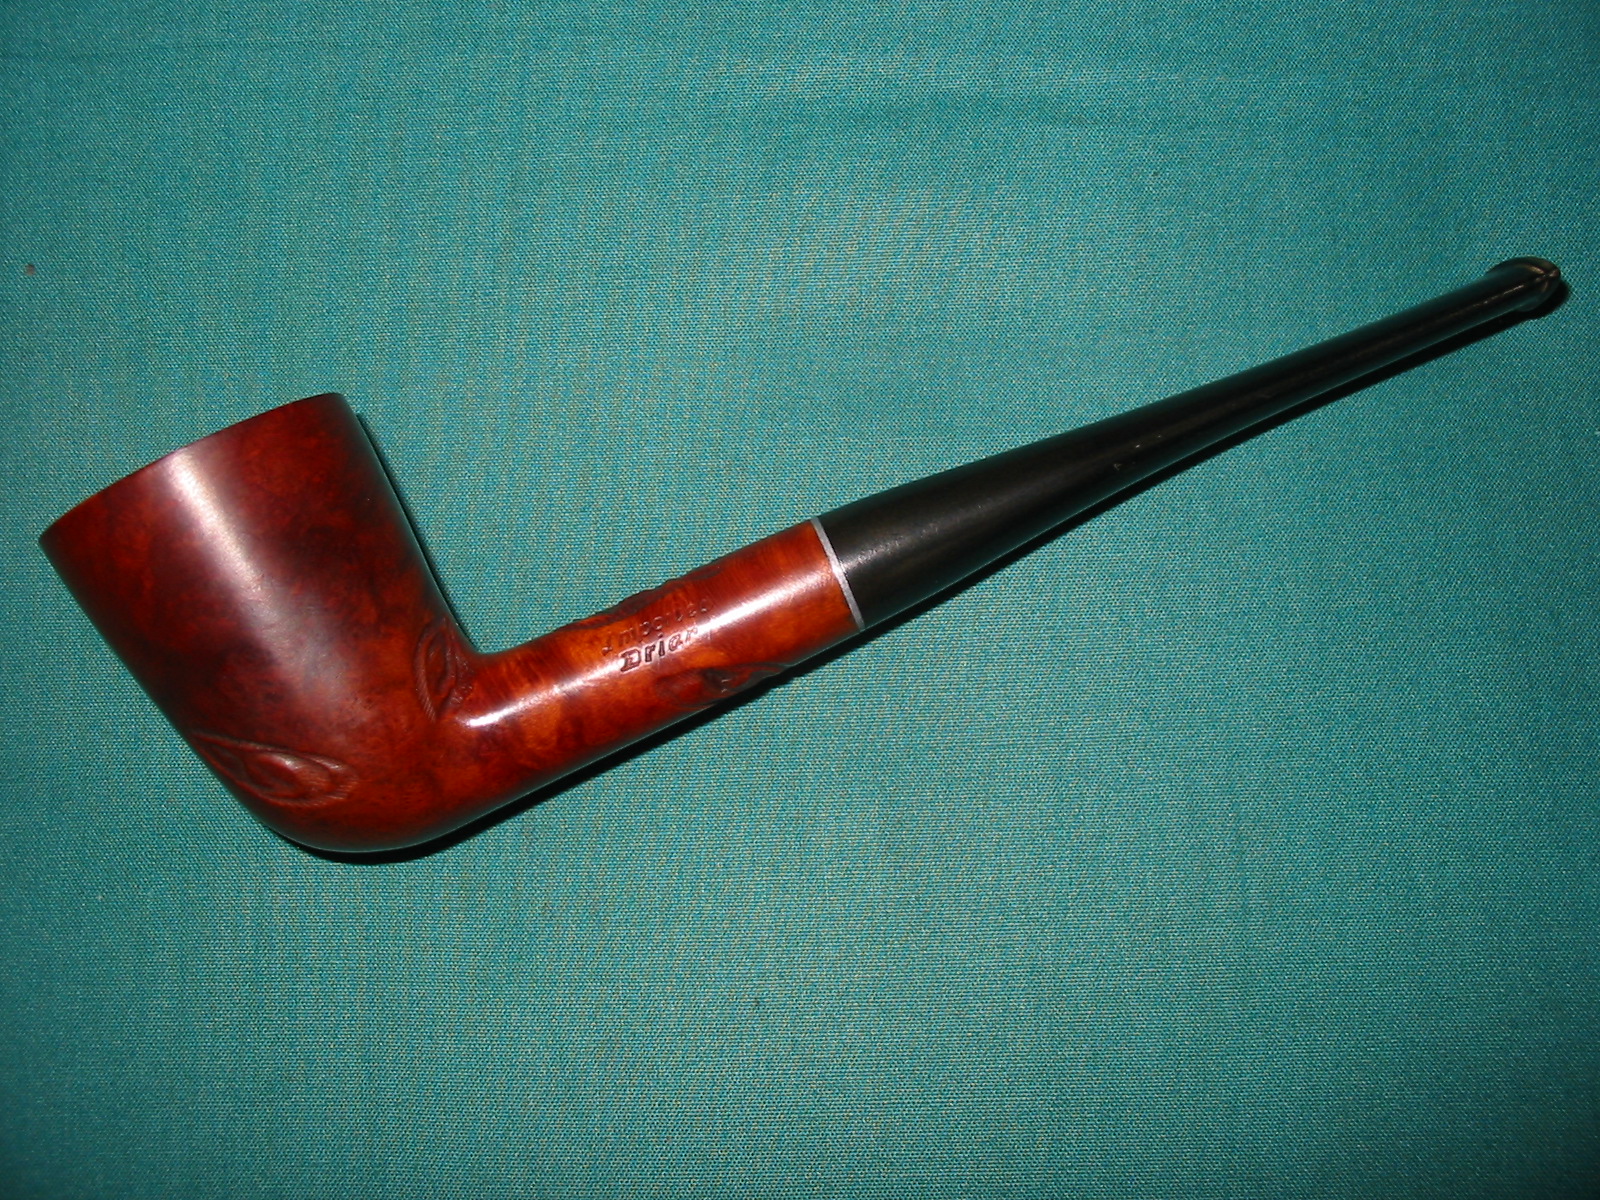
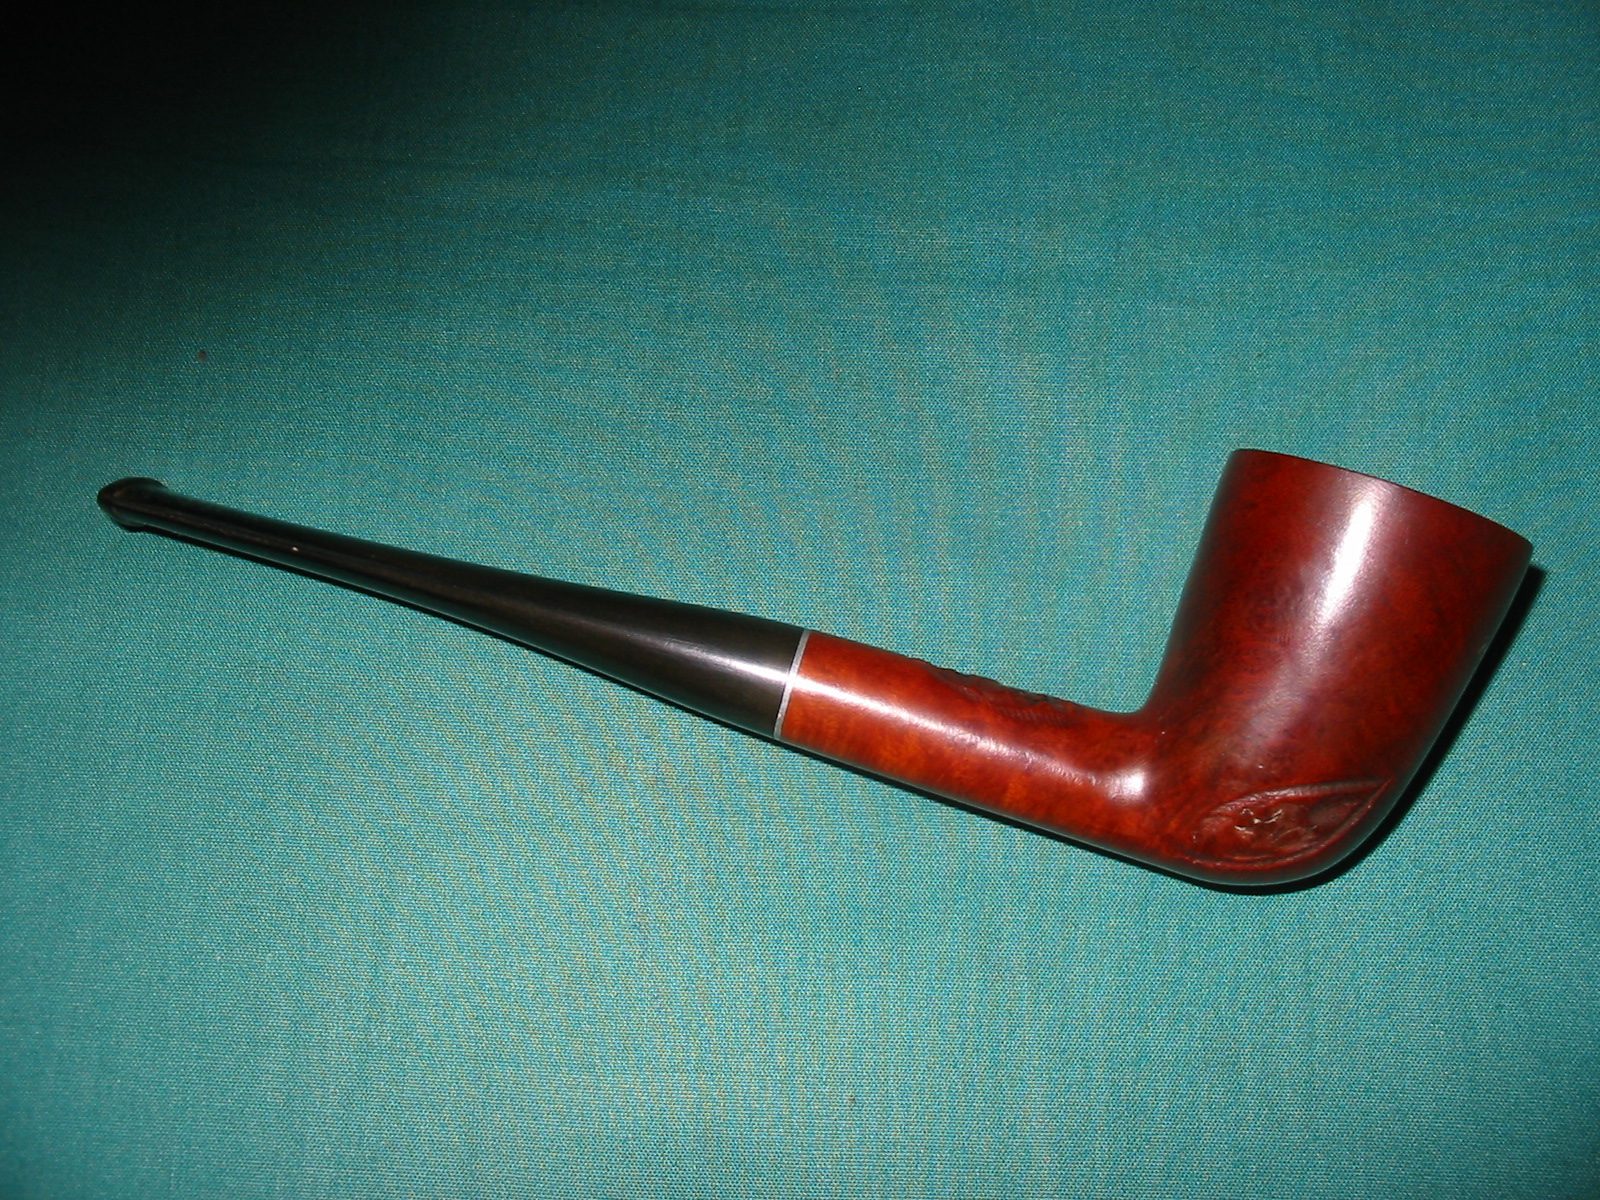
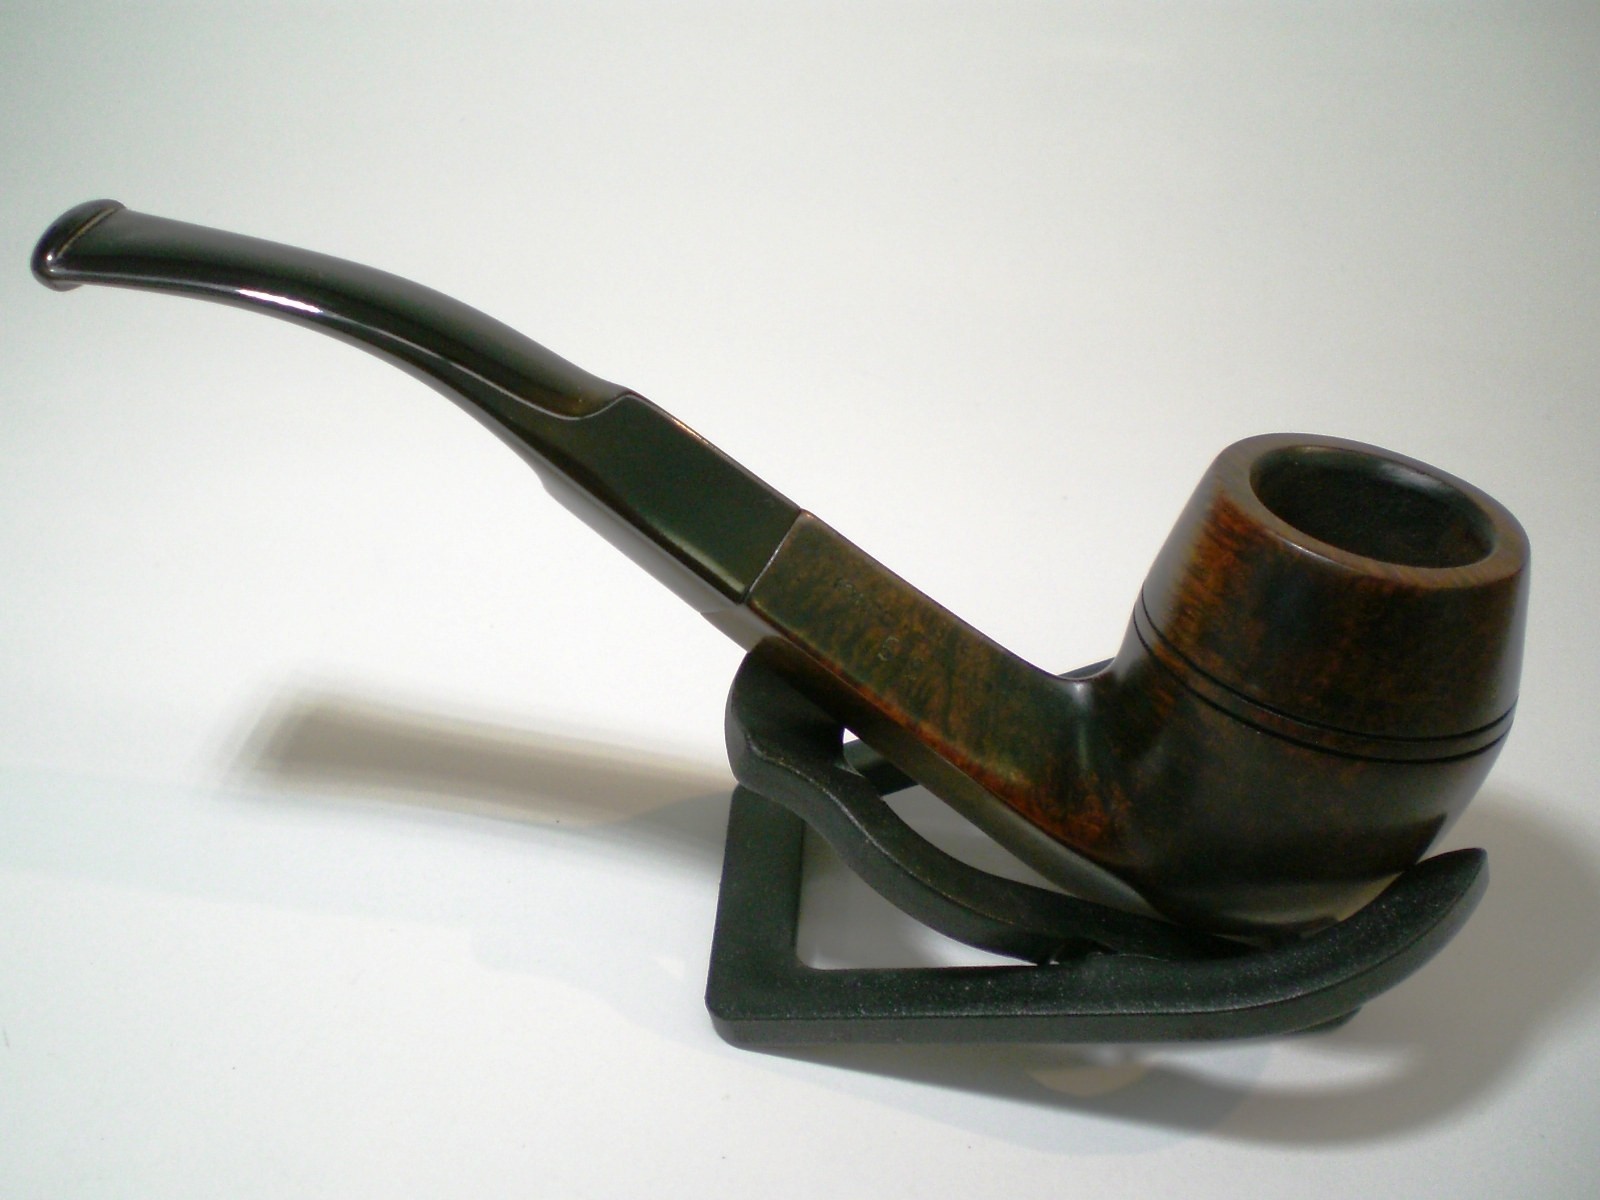
I wiped the stem down with Obsidian Oil and rubbed it into the surface of the stem. Once it had dried I rubbed it and polished it with a shoe brush before taking the pipe to the buffer. I buffed it with White Diamond and then carnauba wax. I gave it a polish with a clean flannel buffing wheel. The next four photos show the finished pipe. I really like the way the matte finish came alive. The grain really pops. This was an easy refurbish as the finish was in very good shape under the top layer of grime.

IMG_1770

IMG_1771

IMG_1772

IMG_1773

Stem Repair Failure – by Mark Domingues


This is an interesting piece that Mark wrote on a stem repair that not even I would have undertaken. To me this stem was a goner. The hole and missing vulcanite would make a patch virtually impossible in my opinion. But my hat’s off to Mark for giving it a go. He writes up the repair and the failure of the repair in a clear and concise way. Thanks Mark for blazing the trail on this and letting know about one that did not work.

I got a Peterson Shamrock off Ebay with a chunk missing from the stem near the bit. I figured I would try to shape a repair using black super glue and vulcanite dust from an old stem. Instead of using the Oxyclean soak, I “painted” the stem with a bic lighter to remove the oxidation. I put a piece of cardboard wrapped with scotch tape and smeared with Vaseline in the bit end. Then put some glue on the cardboard, sprinkled dust and dripped more glue to make a patch. Since it was a curved stem, I placed it in my bowl of sand I use to do the alcohol and cotton ball treatment. I used to do the alcohol/salt but this is far easier and has the same effectiveness IMHO.

stem1

stem2

stem3

stem4

After drying, I used files and wet/dry paper moving from 320 up to 2000 to get the stem shaped. I used a needle file to reshape the bit, and then took it to my buffer wheels to really shine it. I think it came out great. The camera has some white spots that aren’t on the stem. It looks like a new stem!

stem5

stem6

Well, the repair LOOKED beautiful but didn’t hold!! Running a pipe cleaner through it a week later, it cracked and just crumbled away back to the original picture. I’m wondering about the ratio of glue to vulcanite dust, or like someone said on a pipe forum, the 2 different materials will not hold due to expansion and contraction when heated. Maybe I will try again with more glue, less dust.

Peterson Pre-Republic Shamrock – by Mark Domingues


Mark has been following the blog for awhile now and posting his work on Pipe Smokers Unleashed pipe forum. I have been reading about his work for awhile now and invited him to write about his refurbs for the blog. I am hoping this is the first of many posts that he will do for us on his restorations.

This is my first full writeup on a pipe. I got this Pre-Republic Shamrock shape 106 billiard on eBay. It has the circle COM dating it between 1947-49. The pics from eBay were enough to scare away the casual smoker. The bowl was heavily caked and had severe lava flow on the rim. The calcified stem didn’t fit all the way into the shank, in fact it was stuck. But the nomenclature was crisp and when I saw the “Made in Ireland” circle format, I knew I had to have it!

Pete1

When I got the pipe in, it was just as shown. The cake was so thick I couldn’t get my pinkie into the bowl very far. The stem had a tooth mark divot on the p-lip opening and was frozen into the shank upside down.

Pete2

Pete3

Pete4

First thing I did was use a cotton pad to wipe the outside of the bowl to get rid of 65+ years of grime. The bowl stain was still in excellent condition. Put the pipe in the freezer for 30 minutes then was able to free the stem. I soaked the bowl with the alcohol/cotton ball routine overnight. The next day I reamed the bowl, worked an alcohol soaked shank brush into the shank until the buildup was gone. When dry, the stem fit perfectly!
Here is the stem after “painting” it with a bic lighter to remove oxidation and raise up tooth depressions. Note the large divot in the airhole.

Pete5

Pete6

I put a Vaseline coated toothpick in the opening and used the StewMac black superglue to close up the opening to a more normal size, filling in the divot over several days.

Pete7

Using 320 grit wet/dry sandpaper on up to 1200 grit, I reshaped the stem where the glue was built up. Then moving to the Beall 3 wheel buffing system I hit the pipe with Tripoli, white diamond and carnauba wax. Each wheel is dedicated to each compound and is attached to a ½ hp motor on an old barstool in my garage (mancave). I put an old quilt under the buffer because occasionally the pipe or stem I am working on will jump out and hit the concrete. This gives it a soft cushion should it happen. Here is the finished pipe, one of my new favorites!

Pete8

Pete9

Charatan’s Make 109 Rhodesian Restoration


Blog by Al Jones

I have been a fan of the Charatan Shape 109, but rarely see them become available. This one was recently posted on Ebay. It is a Lane era pipe, with the L stamp, but it has a tapered stem versus the more common Double Comfort. I think the Double Comfort stem on Chartan Bulldog or Rhodesian stems look a little ungainly, so this one was very appealing. The pipes small size was a definite appeal. It is similar to a Group 4 Dunhill or XX Ashton. The pipe weighs approximately 45 grams, which is my right in my sweet spot.

The Ebay pictures for the pipe weren’t very detailed and there were some pretty deep teeth marks on the bottom of the stem. The pips is stamped:
Charatan’s Make
London England
109 and the L stamp

I’ve learned that Charatan pipes stamped in this manner were known as having the “Rough” grade. From a somewhat controversial web article by Ivy Ryan, I’ve learned that:
“Sandblasted pipes stamped Charatan’s Make over London England and a number are one version of the famous “Rough” grade. These were apprentice pipes that didn’t come out well
enough to be graded but were still eminently smokable. To save the wood and give the
less-well-off a quality smoke, Charatan would first hand rusticate the pipe gently, then sandblast
it. (Due to Dunhill’s patent, they couldn’t simply blast the pipe, and the rustication made for a very
different blast.)”

The “L” in circle stamp denotes a pipe imported into USA by Lane Ltd between 1955 and 1988. If anyone has information to narrow down that range, please chime in.

Here is the pipe as it was delivered. The nomenclature on the stem was in decent shape but it had some heavy tooth waves on top and heavy indention’s underneath.

Charatan_109_Before

Charatan_109_Before (1)

Charatan_109_Before (2)

Charatan_109_Before (3)

Once again, I employed the Stew-Mac black superglue to repair the teeth marks on the bottom of stem. The first photo shows the application of the superglue and the second shows it sanded smooth with 800 grit sandpaper.

Charatan_109_Stem

Charatan_109_Stem (1)

I reamed the bowl and soaked it with alcohol and sea salt. There was some tar build up on the bowl top, but that was removed with a very mild oxy-clean solution and a cloth.

I removed the oxidation on the stem with 800 grit wet sandpaper, then progressed thru the 1500 and 2000 grade paper. Most of the waves came off the top of the stem and the marks underneath blended in nicely with the superglue. The button was in good shape. I stayed away from the CP stem logo. The stem was then buffed lightly with white diamond rouge.

I finished the bowl with some Halycon wax, worked into the bowl with an old toothbrush polished by hand

Here is the finished pipe.

Charatan_109_Gallery
Charatan_109_Finished (5)
Charatan_109_Finished (8)
Charatan_109_Finished (3)

Charatan_109_Finished (1)

A New Look for a Duncan Hill Aerosphere


Blog by Steve Laug

Over the years I have owned and sold several Duncan Hill Aerosphere pipes. The system on the pipes and the thinness of the bit always made the airway too tight for me and the draught sluggish at best. I have repaired several of them over the years as well and never found one that really worked well for me. Then in one of the lots I picked up on Ebay that needed new stems there was a Duncan Hill Aerosphere bowl without a stem. It had a wide open airway and was in decent shape. The bowl had a light cake and the rim was tarred but not damage. The bowl was still round and obviously the pipe had not been smoked very much. I figured it was an opportunity to restem it with a standard stem and see what I could get from it.

I tried two different stems on the pipe. The first was a flat blade saddle stem blank. I turned the tenon with a PIMO tenon turning tool and fit it to the pipe. I decided to put a nickel band on the shank for cosmetic purposes as I thought it would look good with the saddle stem. There were two problems with this fitting. The rustication pattern on the Duncan Hill made a smooth fit of the band virtually impossible and the gap around the shank did not work for me. The second issue was that the stem itself was just a few millimeters’ smaller in diameter than the shank. It was not noticeable except with the band it was accentuated. I removed the band and tried the stem without the band and it did not work well. I abandoned that option and went back to my can of stems to see what else I could find that might work in terms of both diameter and length.

IMG_0730

IMG_0731

IMG_0732

For the second stem I found an older “pre-used” stem that worked in terms of length and diameter. I cleaned up the tenon and shortened it slightly and the fit was quite good. I left the band in place and tried to rusticate the band to match the bowl rustication. I heated it and used a scribing tool to carve it up to get the bowl finish look. I stopped that rustication process and worked on the stem fit. For some reason the stem taper on top and bottom did not match. With the fitting on the Duncan Hill bowl the angles at the top did not match the bottom. Reversing the stem made the stem fit even worse. The diameter needed slight adjustments to repair the taper and fit it well against the band.

IMG_1690

IMG_1691

IMG_1692

I used a Dremel to take off material on the stem to adjust the taper to match on both the top and the bottom. I also used the Dremel to clean up the fit at the shank/band. I tried to mark the band with the Dremel in the process as well. I used a scribing tip and still did not get much more of finish than I had with the hand scribing tip. I did not like the look so I took the stem back to the worktable and sanded it to remove the scratches left behind by the sanding drum.

IMG_1693

IMG_1694

IMG_1695

I sanded the stem with 220 grit sandpaper, a medium grit sanding sponge and a fine grit sanding block to clean up the fit and also remove the scratches. The more I looked at it the less I liked the band. The area around the stem shank union looked terrible and the scribing merely looked like scratches. It was awful looking. I decided at this point to remove the band from the shank. I heated the band and slipped it off the shank. I cleaned up the light marks left by the band on the shank with micromesh sanding pads.

IMG_1696

IMG_1697

IMG_1698

With the band off the pipe the tenon was too long for the stem to seat properly. This was not visible to me with the band in place. It felt tight but without the band there was a gap at the junction. I measured the tenon and found that I needed to remove some of the length on the tenon and also needed to countersink the mortise slightly. The countersink on the mortise is a slight bevel inward. I used a knife to bevel the inner edge of the mortise. Once the mortise was prepared and the tenon shortened to measure the stem fit tightly against the shank. I used 220 grit sandpaper and a medium grit sanding sponge to remove a little more of the diameter of the stem to clean up the junction. The two bands on the stem appear to be briar but are actually Cumberland/brindle inserts. I sanded the top of the bowl/rim and the colour matched the twin bands on the stem.

IMG_1699

IMG_1700

I sanded the stem with micromesh sanding pads from 1500-12,000 grit to remove the scratches on the vulcanite and polish the stem. I wet sanded with 1500-2400 grit micromesh pads and dry sanded with the remaining grits. Between 3600 and 4000 grit pads I polished the stem with Maguiars Scratch X2.0. It polished the stem considerably. I then finished sanding with the micromesh pads. While I sanded the stem with the micromesh I also sanded the rim to polish it. With each successive change of grit the rim and the twin bands on the stem began to truly match. The combination looked like it was factory designed to be a combination. I wiped the stem down with Obsidian Oil and set it aside for the evening. In the morning I rubbed the stem down and then waxed it with carnauba.

IMG_1701

IMG_1702

IMG_1703

I gave the bowl a several coats of Halcyon II wax and buffed it with a shoe brush to raise the shine. I buffed the stem with carnauba several time to raise the shine as well. I then buffed the pipe with a soft flannel buffing pad. The finished pipe is pictured below. The look of the Duncan Hill with the banded stem that matches the rim is a great combination. The improved draught of the pipe is exactly what I was aiming for. The Duncan Hill Aerosphere pipe re-enters life with a new level of service to the pipeman who ends up with it in their collection.

IMG_1708

IMG_1709

IMG_1710

IMG_1711

City de Luxe 9438


Blog by Al Jones

I have a number of GBD 9438’s on my rack and it is a favorite shape. I’ve always admired the City de Luxe stem logo but didn’t yet own that brand, a GBD second line. I didnt’ find much about the City de Luxe line, other than it appears to have existed since 1921. I couldn’t resist this 9438 shape I found on Ebay. Below is a copy of an old Oppenheimer ad I found on the web.

City_de_Luxe_Ad_Oppenheimer

This one has a “twin bore” stem. I’ve never owned a twin-bore pipe and always considered it to be somewhat of a gimmick. I’ll have to see how it smokes to reserve judgement.

This is the pipe as it was delivered. The briar was in good shape with only a dulled finish and some tar build up on the rim. The stem was oxidized but also in very good shape.

City_DeLuxe_9438_Ebay

City_DeLuxe_9438_Ebay2

City_DeLuxe_9438_Ebay5

I reamed the bowl and soaked in with some alcohol and sea salt. While the bowl was soaking, I also soaked the stem in a mild solution of Oxy-Clean. I put a dab of grease on the Star stem logo. I use shot glasses to hold my alcohol and add it to the bowl/salt with a dog medicine syringe. Another shot glass makes a good container for soaking the stem.

City_DeLuxe_Process (7)

City_DeLuxe_Process (1)

I easily removed the bowl top tars with a wet cloth and elbow grease. The bowl was then buffed with Tripoli, White Diamond and then several coats of Carnauba wax.

The next step was to clean the stem. One of the twin-bore draft holes was plugged with tobacco build-up, but a cleaner and alcohol freed the blockage. Curiously, there is a white plastic plug at the button. I was hoping perhaps it led to a traditional draft hole, but is only about 1/4″ deep. I’m not sure why that was drilled or inserted. I suspect the City de Luxe stems are premade. Even cleared, the draw was somewhat tight. I opened up the tenon end with several drill bits and I hope that makes the smoking draw easier.

City_DeLuxe_Process (6)

The Oxy-clean soak loosened the oxidation, so I started with 800 grit wet sandpaper. I like to use the highest grade paper possible to start as I want to remove as little stem material as possible. I progressed to 1000, 1500 and 2000 grades wet paper than moved to the 8000 and 12000 grades of micromesh. The stem was then buffed with white diamond rouge and a final buff the Blue Magic auto plastic polish. Below is a shot of the stem after the 800 grade paper and the polished bowl.

City_DeLuxe_Stem_Soak

Below are pictures of the completed restoration a relatively easy task.

City_DeLuxe_9438_Finished (1)

City_DeLuxe_9438_Finished (2)

City_DeLuxe_9438_Finished (3)

City_DeLuxe_9438_Finished (5)

City_DeLuxe_9438_Finished (7)

K&P London Made Found in a Bargain Shop


Blog by Steve Laug

Yesterday afternoon I went with my eldest daughter to Walmart here in Vancouver. Across the street is a bargain shop that sells lot of movie set items and other things that are collectible and antique. I have found quite a few good pipes there over the years. I went to the shop while she was in Walmart and looked over the lot they had this time. There were quite a few pipes in the case and most of them while interesting just did not capture my attention. Then I moved a few of them out of the way and underneath was this little P-lip apple. I could tell it was a Pete and an older one because of the thick shank and stem. I held it up to the light and my guess was confirmed. It was a Peterson. It was marked $28 and I offered $25 for it. They accepted the offer and I paid the bill and put the pipe in my pocket. I picked up my daughter and headed home to check it out.

I wiped off the shank with a cotton pad dampened with saliva and found that it was stamped K&P LONDONMADE on the right side of the shank. On the left side it was stamped 215 and A “PETERSON’S PRODUCT” Made In London. So I had found an English made Peterson’s shape 215 pipe. The band was silver and was badly tarnished but I could see from the hallmarks that it was also stamped with English hallmarks. The first was an anchor which told me that the band was made in Birmingham. The second was a reclining lion which is the stamping for Sterling silver. The third mark was hard to see with the grime and tarnish but looked like an animal face in the cartouche. Closer examination would have to wait until I had cleaned up the tarnish.

The pipe was in fair shape. The bowl had nicks in the sides in several places as well as a very rough rim. It looked as if it had been hammered about and was damaged. It would require topping to remedy that problem. The bowl had been reamed and was slightly out of round and then smoked again for some time – long enough to build up an uneven cake with most of the cake at the top of the bowl and the bottom of the bowl was bare wood. The silver band was loose and had turned about a quarter turn clockwise. The stem was very tight in the shank – which thankfully had kept the band in place on the pipe. The stem had many bite marks and tooth dents up the shaft from the button for about an inch. It looked as if the individual who had smoked it held it far back in his teeth. Both the underside and topside of the stem were damaged with tooth marks and a series of grooves from a tool. The button itself and the ledge on the underside were in very good shape. The round opening in the button was elongated from years of pipe cleaners.

I was able to carefully remove the stem and the inside of the shank was darkened with tars but not terribly dirty. The end of the tenon is stepped down and the fit in the shank was very snug. After cleaning the stem would fit well. There was no stamping on the oxidized stem and appeared to be no remnant of stamping. The oxidation on the stem was heavy at the shank stem union and also around the button on the top and bottom.

IMG_1664

IMG_1665

IMG_1666

IMG_1667

I wrote about the stamping to Mark Irwin who is my Peterson’s go to contact for information on Peterson pipes. He is a wealth of information that I have been unable to find in other places. He was on the road but sent me the following information. “…The “Peterson Product” indicates the pipe is a lower line. They began using this stamp in the 1930 catalog for their “K” pipes, but if it was this, you should’ve seen a “K” on it. There were several “200” series shapes, but the “215” is not in a catalog I have here. The London factory was much smaller than the Dublin, but I’ll have to ask Gary about the hallmarks, as I’m unfamiliar with the Brit system. Best my guess tonight is that the pipe dates anywhere from 1920-1940. I have photos of a thick-shanked and thick-stemmed straight apple hallmarked Dublin 1920–I can send you a .gif when I get home if this sounds like the pipe. If so, the shape itself goes back to at least that year.”

That was helpful information on the dating of the pipe. I sent Mark the photos last evening and then this morning received this reply concerning the pipe. “… Gorgeous! Yup, it’s the same shape as the photo I have, which means the shape itself goes back to at least 1920.” In the mean time I had cleaned up the band with silver polish and scrubbed it with a soft cotton pad. I reset it with white glue on the shank and examined the hallmarks under a bright light with a jewelers loop. It became clear that the last of the hallmarks was not an animal but rather a letter in the cartouche. It was well worn but from the outlines on the mark it appeared to be the letter “T” which dates the pipe to 1943.

IMG_1669

I reamed the bowl with a PipNet reamer using the smallest cutting head and the next size as well. I removed the cake back to the wood to even out the broken cake. I cleaned out the shank with cotton swabs to remove all the tars and oils in the shank. Once I had cleaned out the shank I also cleaned the stem with pipe cleaners. I used Everclear with cotton swabs on both. When it was finished I put the stem back in the shank and the fit was snug.

IMG_1670

I topped the bowl with my usual method – 220 grit sandpaper on a flat board and turned the bowl clockwise as I pressed the rim into the sandpaper. I sanded the top until the damaged portion of the rim was removed. One side benefit of the process was that it also removed some of the damaged inner rim as well bringing the bowl back into round.

IMG_1671

IMG_1672

IMG_1673

To prepare the bowl for restaining I wiped it down with acetone on a cotton pad. I wanted to remove as much of the finish as possible so that I could more easily blend the new stain on the rim with the stain on the bowl. I have found that if I thin down the original stain on the bowl I can generally make a good match with the rim when I stain the entire pipe. The rim always takes several more coats of stain than the bowl but the match comes out very well. I wanted to end up with a stain colour that matched the original stain colour as much as possible. Between each coat of stain I flamed the stain to set it in the grain of the briar. The stain I used was an aniline stain in a dark brown that I thinned 2:1 with isopropyl alcohol. Once it was dry I hand buffed it with a shoe brush to blend the colours of the stain and give me a clear look at the stain to make sure it was evenly applied.

IMG_1674

IMG_1675

IMG_1676

IMG_1680

IMG_1681

IMG_1682

I set the bowl aside and worked on the stem. I sanded the stem with medium grit emery paper to remove the oxidation and also clean up the vulcanite around the tooth dents. Once clean, I heated the dents by passing the flame of a lighter across the tooth marks. The heat of the flame lifts the dents to the surface. The key is to keep the flame moving quickly and not allow it to sit in one place too long or the stem will burn. The first photo below shows the tooth marks on the top side of the stem. There were matching tooth marks on the underside. The second photo shows the stem after the heating with the flame. I sanded the stem with 220 grit sandpaper and also a fine grit sanding sponge to remove the scratches and remnants of the dents. I filled the two remaining dents with super glue, sanded the glue down to match the surface of the stem and then finished the sanding with micromesh sanding pads from 1500-12,000 grit (Photos 3 – 5).

IMG_1677

IMG_1678

IMG_1679

IMG_1683

IMG_1684

Once the stem was sanded with the 12,000 grit micromesh pad I wiped it down with Obsidian Oil and when dry rubbed it into the stem. I gave the stem several coats of wax and returned it to the bowl. I polished the silver band a final time and also waxed that. I buffed the pipe lightly with White Diamond and gave it multiple coats of carnauba wax and buffed it with a clean flannel buffing pad. The finished pipe is pictured below. It has some beautiful grain on it. There are also some flaws in the briar that I chose to leave as I find they add character to the pipe.

IMG_1685

IMG_1686

IMG_1688

IMG_1689

Father Tom’s Briar – Reborn – by Al Jones


Blog by Al Jones

Followers of this blog are no doubt very familiar with Steve Laug’s wonderful “Father Tom” short stories. For those not familiar with Father Tom, he is fictional well seasoned, pipe smoking minister.

On the “Brothers of Briar” pipe forum and we are fortunate to have a real life “Father Tom” as a member. Father Tom is an Episcopal priest in Northern Indiana. He taught for 32 years before leaving the classroom for full-time parish work. He has been a pipe smoker since college, and most of his college pipes are still in the rotation. The pipe is one he bought in the late 70’s in South Carolina. Tom posted a picture of this pipe earlier this summer on the forum and wondered if the finish could be restored. Tom had recently returned from a church assignment to the Honduras. The pipe was very much well-loved and the varnished finish was worn off in the handling areas. The stem was also heavily oxidized. Tom reported that it smoked Granger quite well. Here is the pipe as it was delivered.

Fr_Tom_Before (3)

Fr_Tom_Before

Fr_Tom_Before (1)

Fr_Tom_Before (2)

Steve sent me some information on a Wellington brand pipe and this one appears to be a reproduction of that and the Peterson system pipe, including a p-lip military stem. The pipe is stamped “Pietro”. Steve told me that these stems had a reputation of being drilled close to the edge of the stem near the bend. As such, over time, the use of a pipe cleaner wears the stem material thin. Sure enough, after I started to remove the oxidation, there was a small hole and crack on the top of the stem bend. I wasn’t sure the stem could be saved but I thought that perhaps several layers of black superglue blended in would rebuild that area. In total, I applied four light coats of the superglue, raising the surface about 1 mm and covering the hold. The crack still shows thru the material but I think it should hold up to some use. But, I advised Father Tom to be careful clenching that one. At some point a new stem will have to be made for the pipe.

This shows the repair in progress with the black superglue (purchased from Stewart-Mac, a guitar repair supply house).

Fr_Tom_Process_Stem2

Fr_Tom_Stem3

Fr_Tom_Stem4

I finished the stem by removing the heavy oxidation first with 600 grit wet sandpaper, than moving to the 800, 1000, 1500 and 2000 grades. I used 8000 and 12000 grades of micromesh to complete that step. Than, with the stem mounted in the briar, it was buffed with white diamond rouge, than a automotive plastic polish.

I then moved my attention to the briar. I first soaked the briar in an alcohol bath in an attempt to soften the varnished finish. That had some effect, but it was necessary to sand most of the shiny varnish off by hand. I used 600 grit paper and progress up to 1500 grade wet paper. There was one large gash on the bottom of the bowl and one large fill spot, where the putty had fallen out. Not surprisingly, there were other fills on the briar under that finish. I was able to lift out the dent using a heated kitchen knife and steam. I repaired the fill hold with some of the black superglue. Sometimes I think covering the fills looks worse than leaving them and I thought the others lent some character to the pipe that Tom had given the briar (they might have also been handling dings, etc.)

Fr_Tom_Process4

Fr_Tom_Process1

Fr_Tom_Process2

Fr_Tom_Process3

I used a two step process to apply the stain to the briar. First I warmed the bowl with a hair dryer and then brushed on a coat of black stain. I lit the stain with flame to set it into the grain. The black stain was then sanded off with a series of sandpaper, starting again at 800 grit. I then applied a very light, almost neutral brown stain over the black. The bowl was then buffed with white diamond rouge and several coats of carnuba wax. While hand buffing the carnuba wax, I almost had a tragic accident with the pipe – it slipped out of my hands and bounced off my concrete workshop floor. I was horrified but was somewhat relieved to see no visible damage. It was only in the final hand polishing did I notice that the fall had put a dent in the metal cap. Steve shared with me a technique to heat the cap (once removed) and use a wooden dowel shaped into the half-circle to work out dents. Unfortunately, even using heat, I was unable to remove the cap. After discussion with the gracious Father Tom, it was decided to leave well enough alone. I will be picking up a padded piece of carpet to place in front of my work bench.

Below is the finished pipe. My grandfather was also a minister, but didn’t smoke a pipe. I would often watch him in his study poring over notes for his next sermon or wrestling with the day-to-day issues that a pastor faces. While working thru this restoration, I could picture Father Tom thoughtfully puffing on pipe as he completed his pastoral duties. I imagine it has been with him thru many weighty challenges faced by a modern minister. I hope this reborn pipe will be with him for many more years and help work thru the challenges of that endeavor.

Fr_Tom_Finished (9)

Fr_Tom_Finished

Fr_Tom_Finished (1)

Fr_Tom_Finished (2)

Fr_Tom_Finished (4)

Fr_Tom_Finished (5)

Fr_Tom_Finished (6)

Fr_Tom_Finished (7)

Fr_Tom_Finished (8)

Refurbed No name Dublin


I am once again down to the remnants of the box of pipes to refurbished. This one is a no name Dublin with a large bowl and a long stem. The only stamping on the pipe is the words Imported over Briar on the left side of the shank. It is a screw mount metal tenon but the condenser attachment is missing. The stem was oxidized and had tooth dents on the top and bottom near the button. The inside of the stem was sticky black tar and smelled of sweet aromatics with goopy topping. The bowl was caked but not too badly so. There were flakes of tobacco stuck to the walls of the bowl. There was some darkening to the briar on the outside that made me wonder what I would find underneath the uneven cake. The exterior of the bowl was very dirty. There was a lot of oil ground into the finish on the smooth parts of the bowl and the carved feathers/leaves had dirt built up in the grooves. There was also a large drop of green paint on the lower left side of the bowl. The rim was caked and dirty and was slightly out of round.

IMG_1640

IMG_1641

IMG_1642

IMG_1643

I reamed the uneven cake from the bowl with the PipNet reamer set. Underneath the surface of the cake there were some fissures in the surface of thin cake I left on the wood of the inside of the bowl. The pipe may be a candidate for quick bowl coating or pipe mud to protect it from any damage or burn out. I scrubbed the exterior of the bowl with acetone wetted cotton pads. It took many pads before I was down to the clean surface of the briar. I topped the bowl with a medium grit sanding block to remove the buildup on the surface. I followed up on this with a fine grit sanding block to remove the scratches and then with a fine grit sanding sponge. I used a tooth brush and acetone to clean out the grooves of the carvings.

IMG_1644

IMG_1645

I sanded the entire bowl and shank with a fine grit sanding sponge to remove the remaining finish. I also sanded the stem with 220 grit sandpaper and then followed up with the same sanding sponge. I heated the bite marks with a Bic lighter to lift them and then sanded the surface smooth with 220 grit sandpaper. I sanded that area of the stem with fine grit sandpaper and a sanding sponge. Once the bowl was sanded and ready to be stained I wiped it down a final time with an acetone wetted cotton pad to remove the sanding dust from the grooves and carvings.

IMG_1646

IMG_1647

IMG_1648

I sanded the stem with micromesh sanding pads from 1500-12,000 grit to bring back the shine. I rubbed down the stem with Obsidian Oil and buffed it with White Diamond. I coated the stem with carnauba wax and hand polished it with a shoe brush.

IMG_1649

IMG_1650

IMG_1651

I stained the bowl with a dark brown aniline stain that I mixed with isopropyl alcohol in a 2:1 ratio to get it to be the colour I wanted for this pipe. I applied the stain with a cotton swab and flamed it to set it in the grain. I repeated the staining until the colour was on target and even around the bowl. Each time I flamed it to set it in the briar. Once it was dry I buffed the pipe and stem on the buffer with White Diamond and then gave it repeated coats of carnauba wax and buffed in between with a soft flannel buffing pad. The finished pipe is pictured below.

IMG_1652

IMG_1653

IMG_1654

IMG_1655

An Engagement Pipe (GBD 548 Seventy-Six)


My family had a pretty big life event here last week. My daughter came home from New Orleans for a week of vacation, with the boyfriend of two years in tow again. He had called us a few weeks prior to ask permission to marry her, the first of our daughters to get engaged. This young man is quite a gentleman, as you might have guessed (who knew guys still ask for permission?). He and I share a number of interests, including pipes. I enjoyed my week with him and we were able to spend some time in the shop where I shared with him some estate pipe restoration techniques. He left here with a few briars that he cleaned. I miss him and her already.

As they were getting ready to depart, I found this GBD Seventy-Six, shape 548, on Ebay. I later learned it was sold by our own Bob Landry. The pipe had some issues and I was a bit skeptical that a good outcome could result. I’m a fan of the Seventy-Six line and I liked the tall bulldog shape. The bowl top had some chips on it but the tall bowl looked like there was plenty of briar there to top it just a bit. The stem was in great shape, just oxidized and I rationalized that if it didn’t work out, at least I had a brass rondell for the parts box. The big concern was the two burn marks on the briar (photographed and described well by Bob). I knew it would require a restain. Here is the pipe as it was received.

GBD_584_76-Before

GBD_584_76-Before (1)

GBD_584_76-Before (2)

GBD_584_76-Before (3)

GBD_584_76-Before (4)

I reamed the bowl and found it to be in great shape. I used a sheet of 800 grit paper on my flat work bench to top the bowl and work past the damaged area. That fix came out great and the tall bowl definitely lent itself to that repair. Next up, I soaked the bowl in alcohol to remove the stain. This really exposed the burned areas. I tried to sand past them, but that was not possible and I was afraid of putting a flat spot on the bowl, particularly on that right side. This work exposed some other nicks on the bottom of the bowl. I was able to buff/sand out most of those.

GBD_548_76_Work (4)

GBD_548_76_Work (3)

GBD_548_76_Work

GBD_548_76_Work (2)

The GBD Seventy-Six line used a two stain process that I really like, much like Comoys used. I stained the bowl black but must have put it on too heavy, as I had a hard time getting the black off. The plan was to sand off the black, leaving it to highlight the grain and then apply a very light brown stain. I mulled over just leaving it black, but that didn’t set well with me either. I was a bit frustrated at this point and almost bagged the whole project and save the stem for a future project. I left it on the bench for the better part of a week, working on other projects. I decided to soak off the black stain and left it in an alcohol bath for several days. That finally did the trick and afterwards, I sanded the briar smooth with some 2000 grit paper and then 8000 grit micromesh.

GBD_548_76_Work (5)

GBD_548_76_Work (6)

GBD_548_76_Work (9)

GBD_548_76_Work (8)

GBD_548_76_Work (7)

I then applied a very light brown stain using Feiblings Medium Brown heavily diluted with alcohol (20:1 ratio or so?) The combination of the black and brown stain finally hid the burn marks rather well and I was pleased with the outcome. The bowl was then polished with White Diamond and then several coats of carnuba wax was applied.

With the bowl completed, I turned my attention to the stem, which didn’t require nearly as much work. Using a piece of plastic, cut into a round shape I inserted it as a shield between the stem and the briar for the sanding work. I sanded the stem with 800, 1500 and 2000 grit paper, all wet. I then moved to 8000 and 12000 grit micromesh sheets. The stem was then buffed with White Diamond and an automotive plastic polish.

This shows the plastic shield.

GBD_584_76_Work (10)

As I was finishing the pipe and thinking about my daughters marriage, it struck me that there were some similarities in this pipe project and a successful marriage. Like a marriage, at times things don’t always go the way you anticipated and being patient with your spouse or a project always pays off. I sent the pipe off to my future son-in-law with a note welcoming him to our family. I hoped when smoking the pipe, he would remember the week he spent here and his proposal to my daughter.

GBD_584_76-Finished (4)

GBD_584_76-Finished (3)

GBD_584_76-Finished (2)

GBD_584_76-Finished (1)

GBD_584_76-Finished