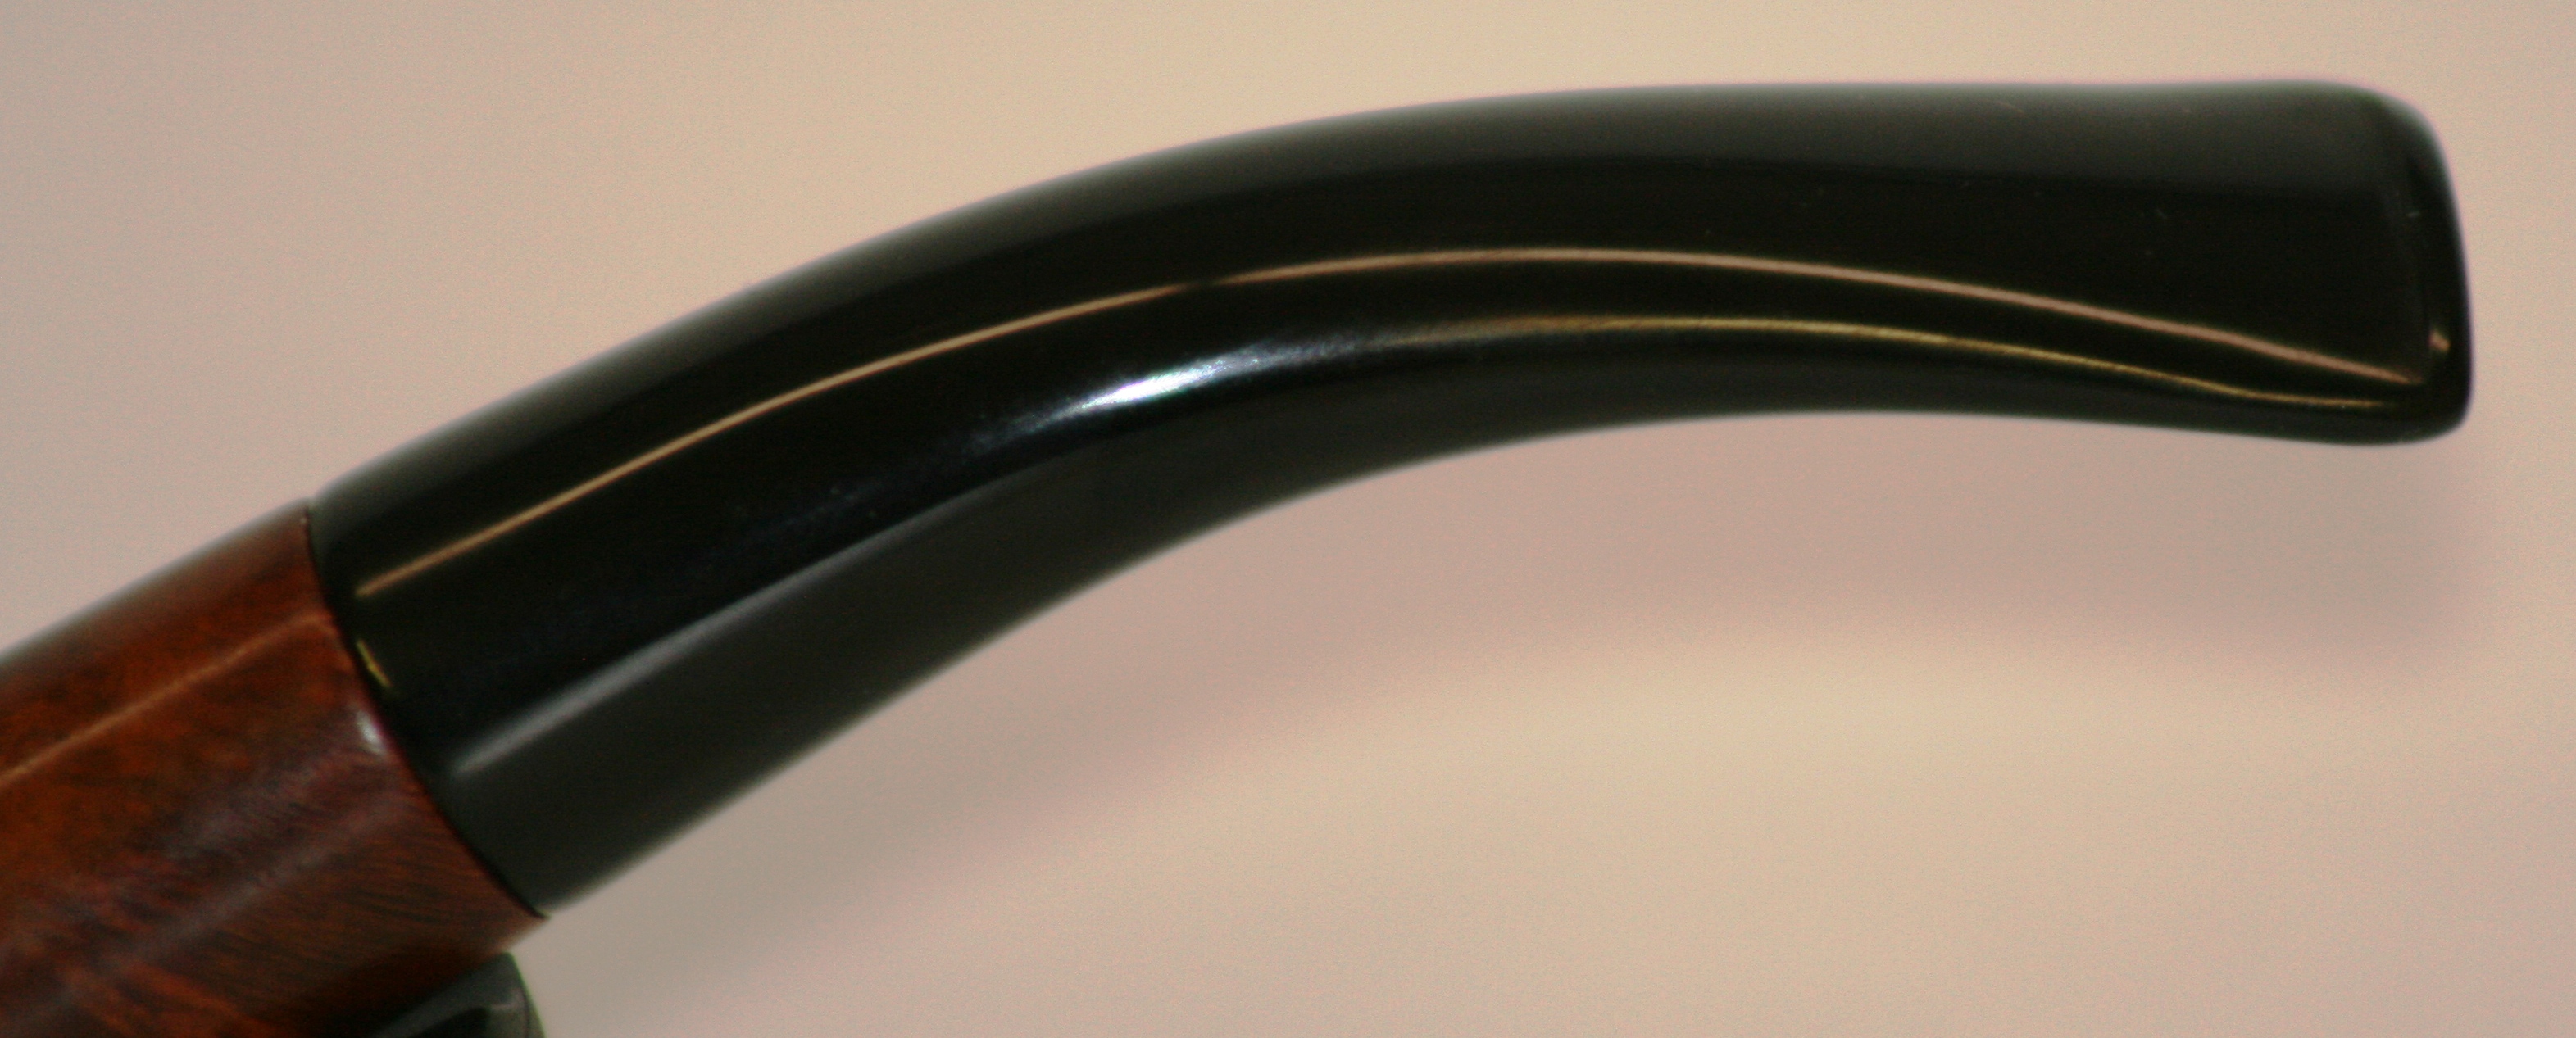
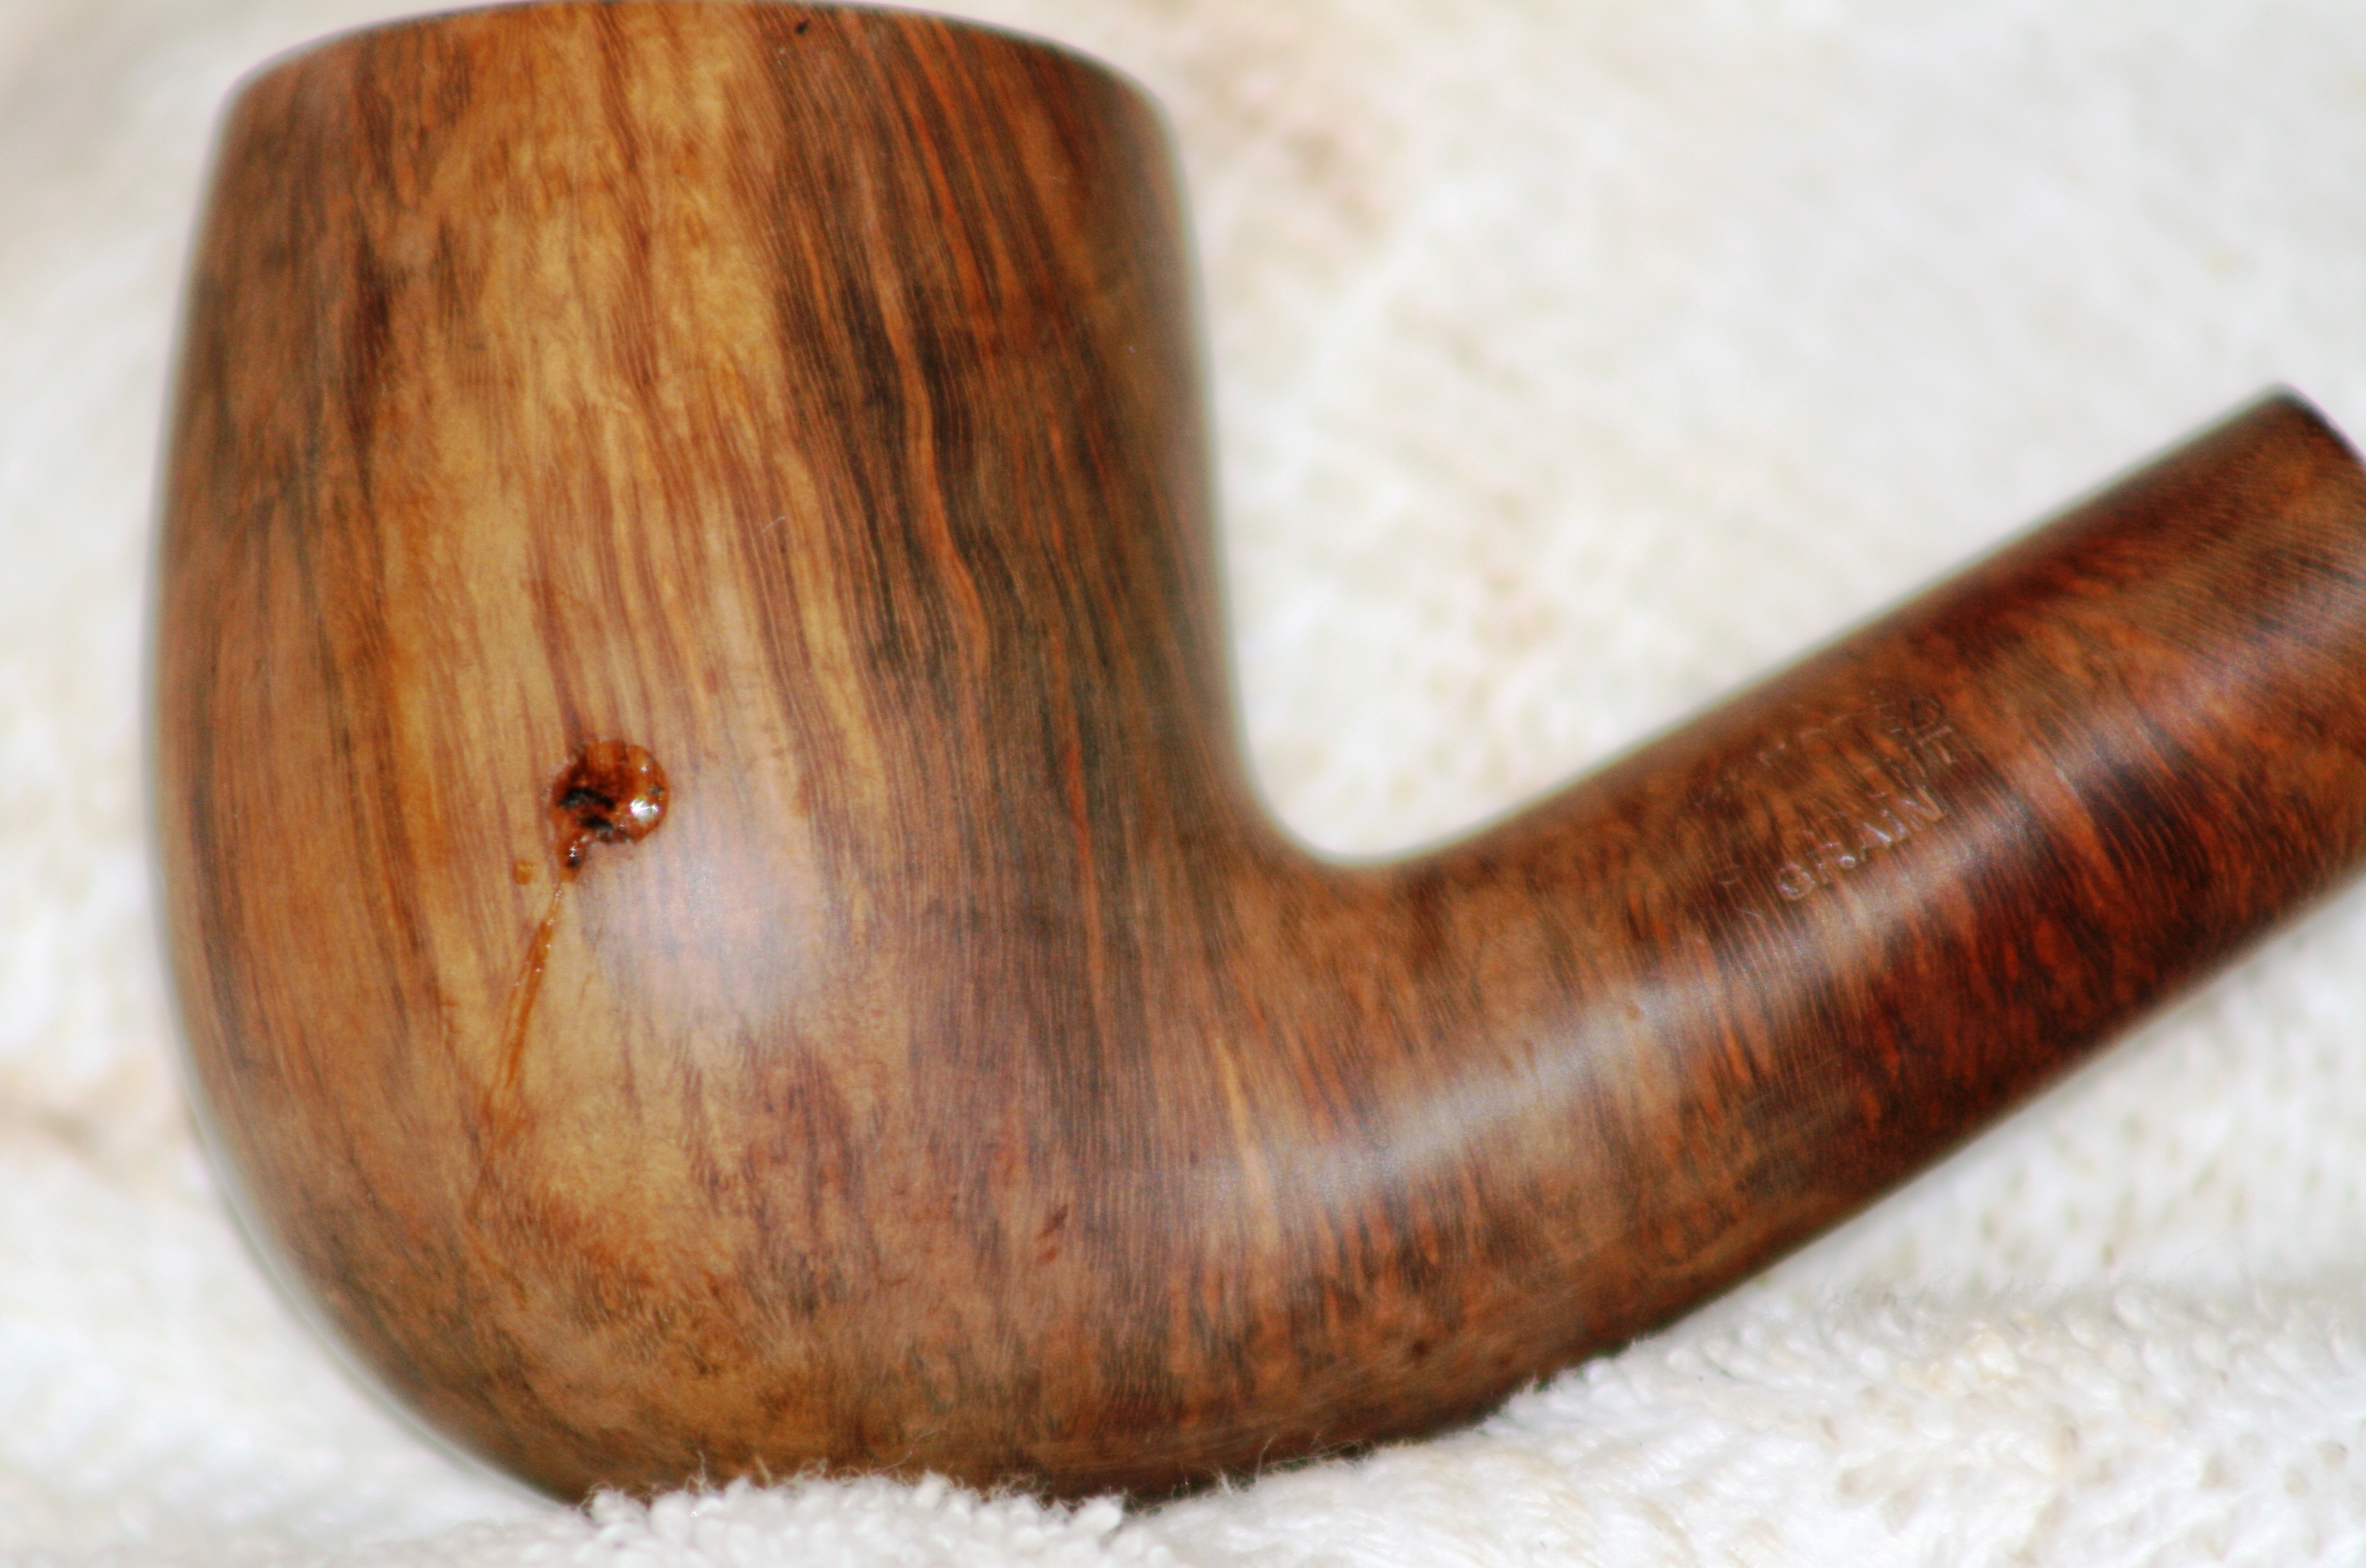
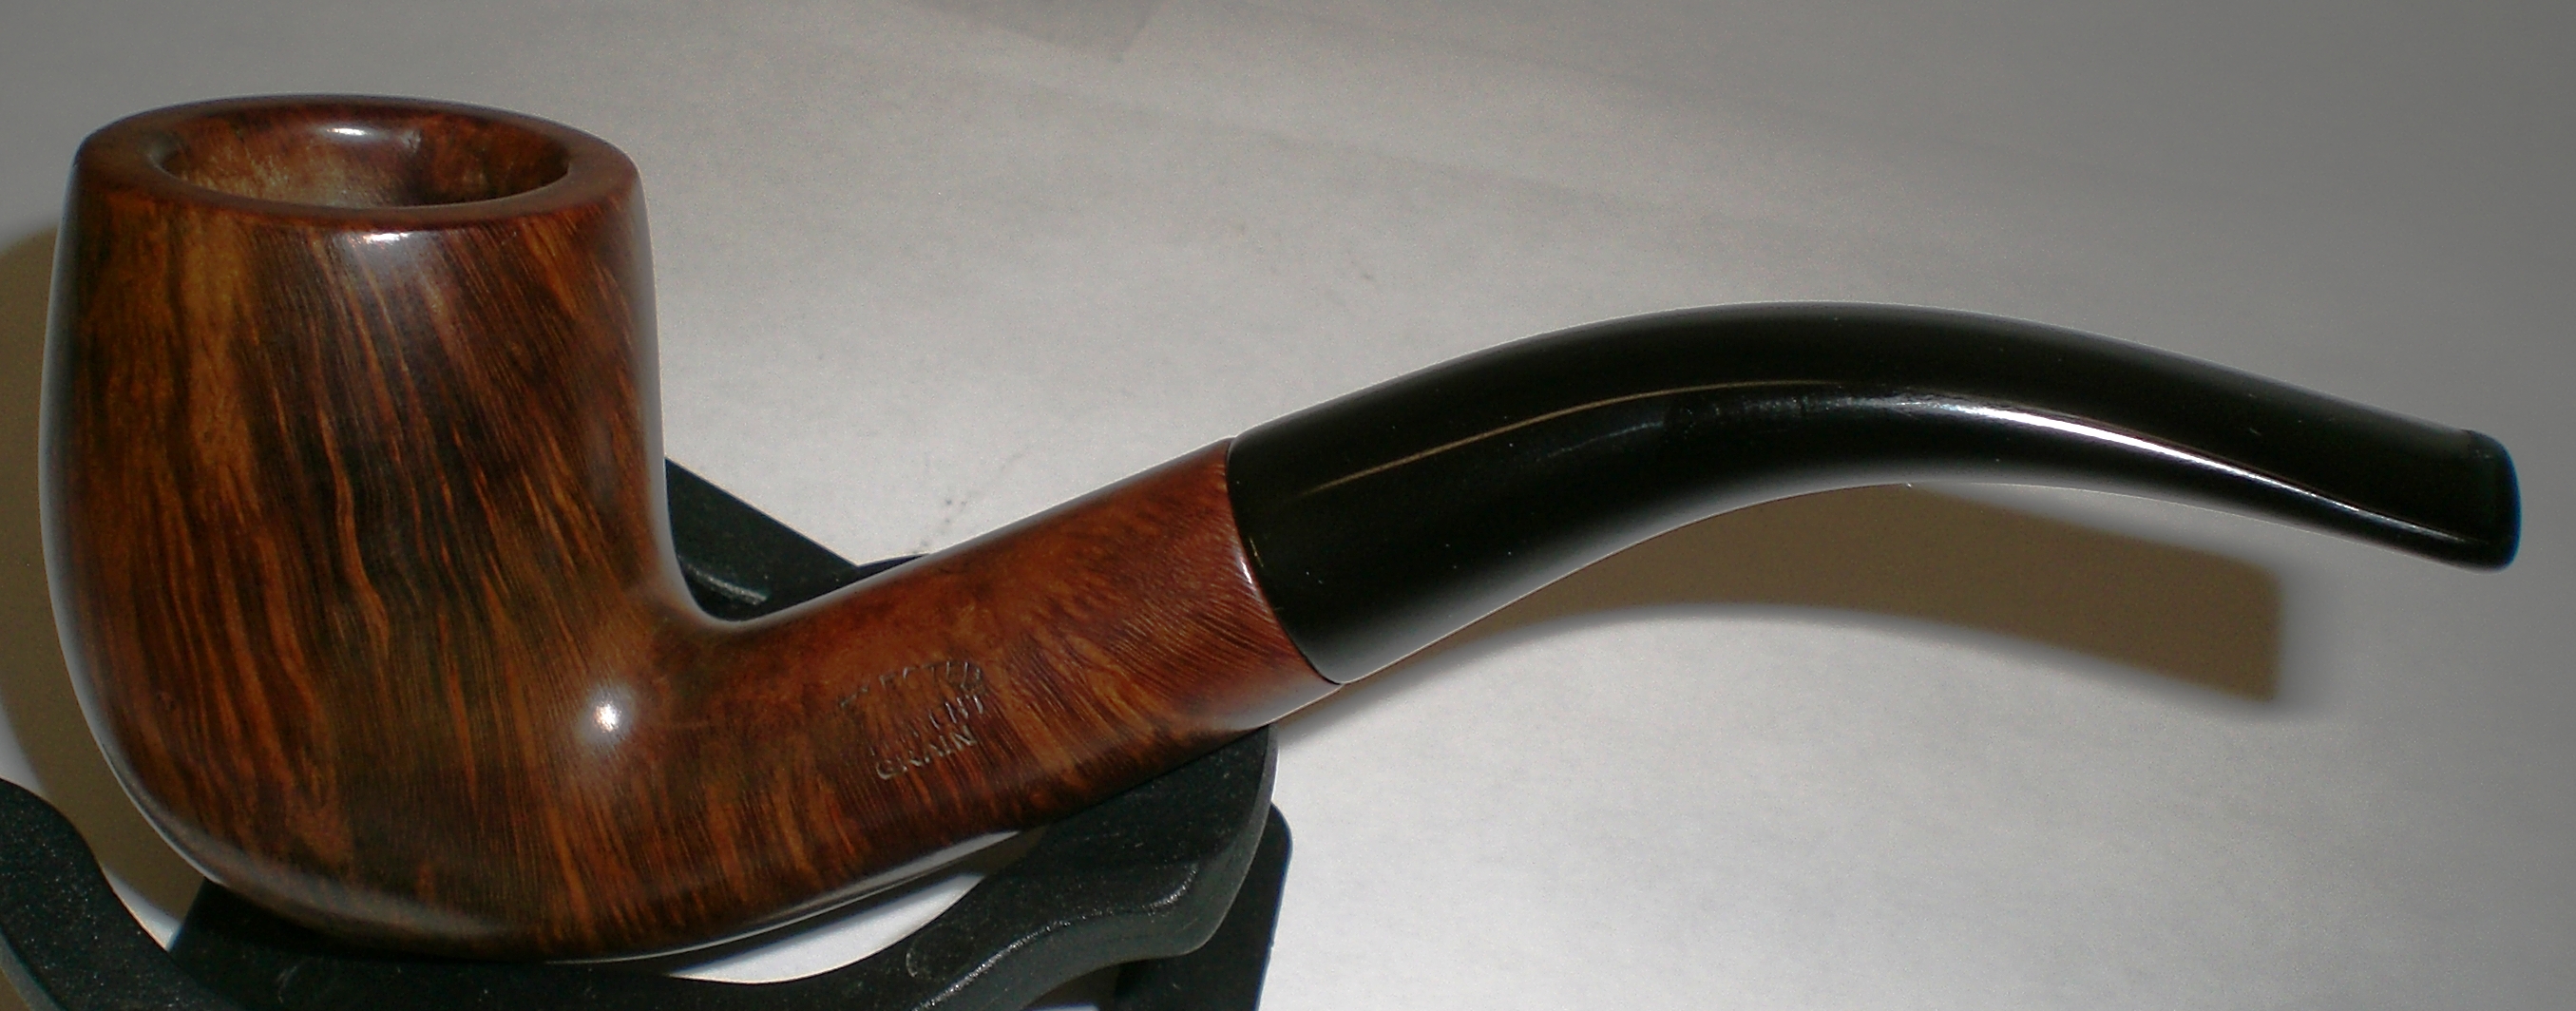
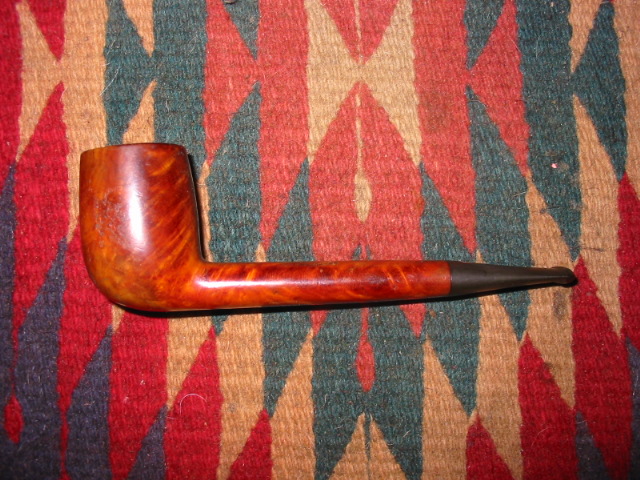
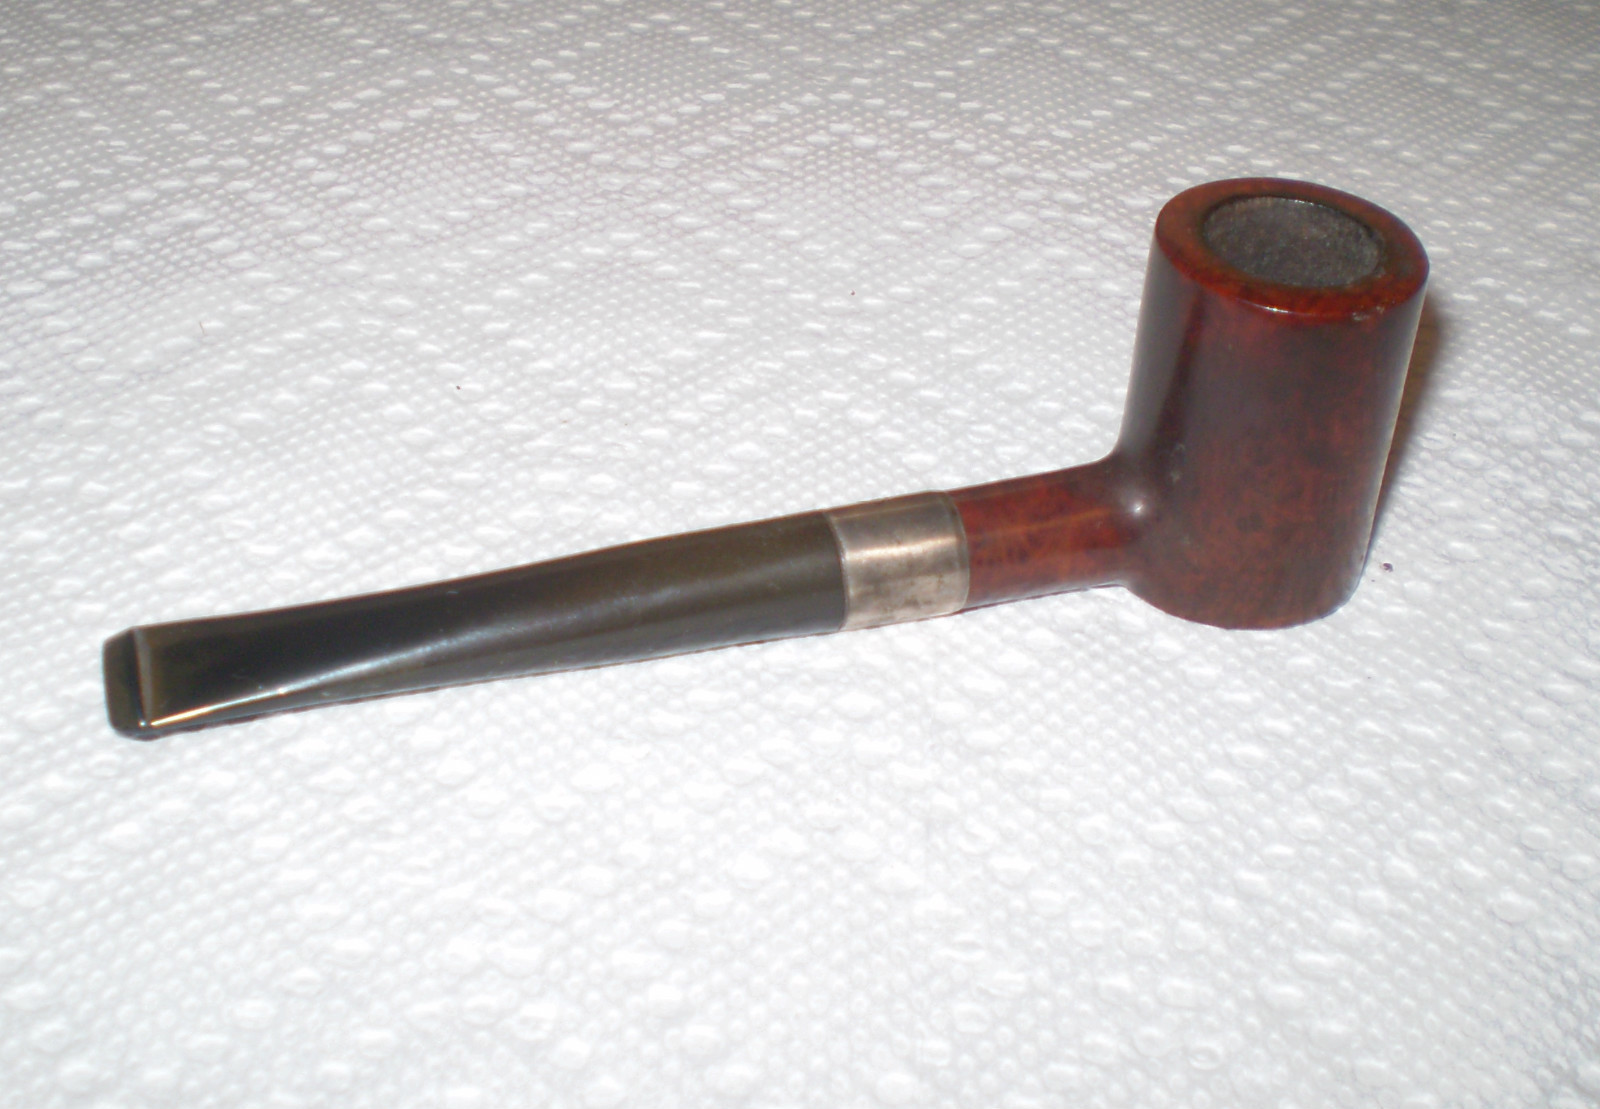
Tag Archives: buffing

Black Super Glue Repair to a Damaged Stem


Blog by Steve Laug

Using the stem on the little Barling I repaired earlier as an example I thought I would post the process of repairing bite marks with Black Super Glue. The glue is available online at a variety of sources, though I purchased mine from http://www.stewmac.com/shop/Glues,_adhesives.html a company that is a supplier for stringed instrument repairmen. They offer super glue in several colours and viscosities. I order the black super glue from them that comes with whip tip nozzles as I find that it is easy to control the size of the drops used. I also have used the clear super glue and it works very well in several other applications including repairing and replacing fills on older pipes. They also carry a wide variety of micromesh sanding pads and papers. It is a great resource for hard to find items (at least in Canada) that I use regularly in my repairs.

I always seek to repair a stem in the least intrusive manner possible. In the case of the stem below I heated the tooth dents to try and lift them as much as possible before any other method was used. This can be done carefully with a heat gun – I stand the gun on its stand, turn it on its lowest setting and move the damaged part of the stem in the heat about 4-6 inches above the tip of the gun. If it gets too close the vulcanite is damaged through burning. The other method that I have used avoids this problem – it involves putting a cup of water in a microwave and boiling it. Once it is hot place the stem button end down in the boiling water and leave it. Repeat as often as necessary or until there is no more lift on the dents of marks in the stem. Note if the dents have sharp edges, or are cuts, the heat will not lift the dents at all. It also will not work on holes or bite throughs on the stem.

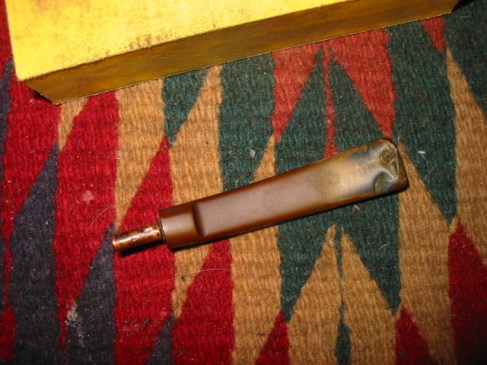
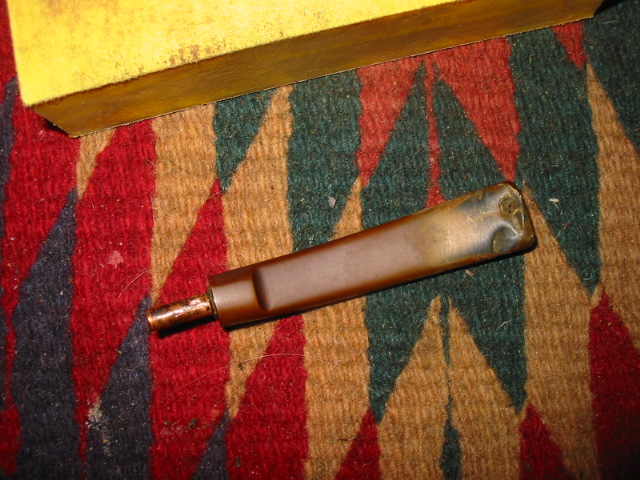
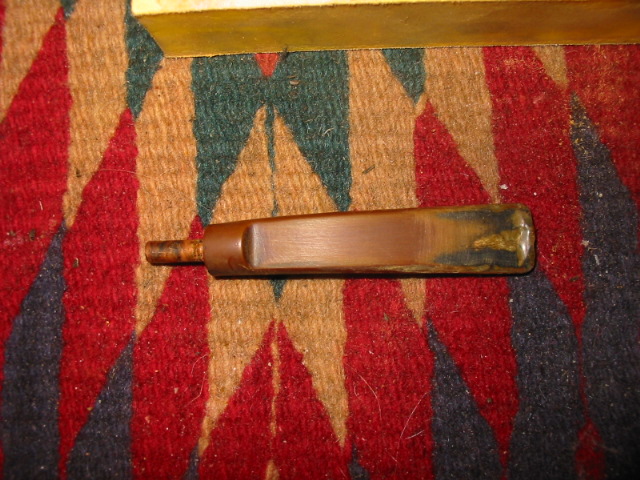
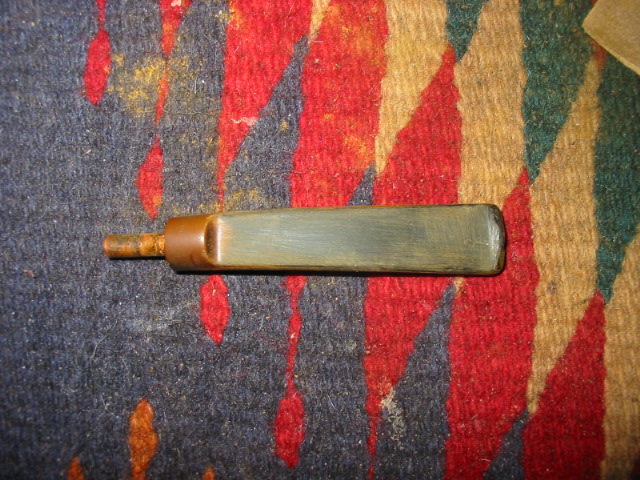
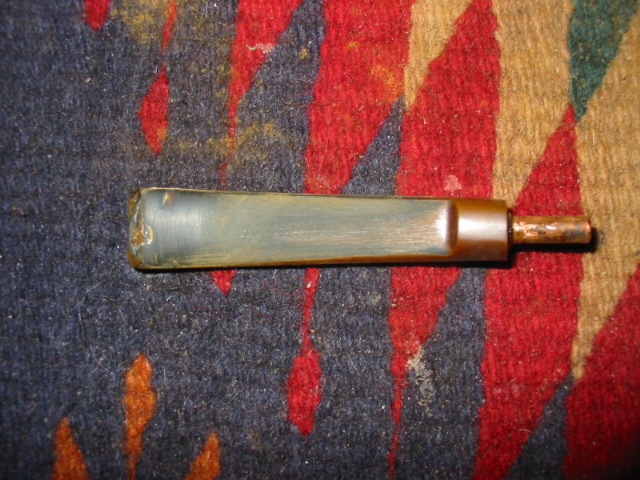
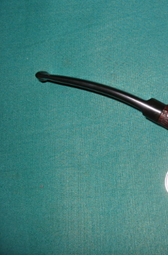
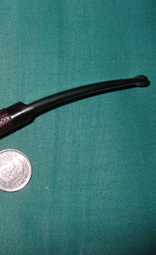
In Photos 1 and 2 the stem is pictured as I received it on the pipe. The first photo shows the top of the stem and shows the damage to the button and the surface – mostly dents. The second photo shows the underside of the stem. It was significantly worse that the top. The dents were very deep and the button was virtually destroyed. At this point it is probably pertinent to ask whether the stem should have been replaced or not. Several things went against doing that in my opinion. The first was that this is an original Transition Era Barling stem. It is hard to find replacements that have the slab look and slight taper on the saddle that are hallmarks of the Barling stem. The second was that the tenon on this one is very tiny. I did not have a tool that allowed me to turn that small of a tenon. Thus I decided to give it a repair. Then of course, if you have followed this blog for long you will understand, there was the challenge. Could I possible restore the stem to at least a semblance of its original “glory” and functionality?  
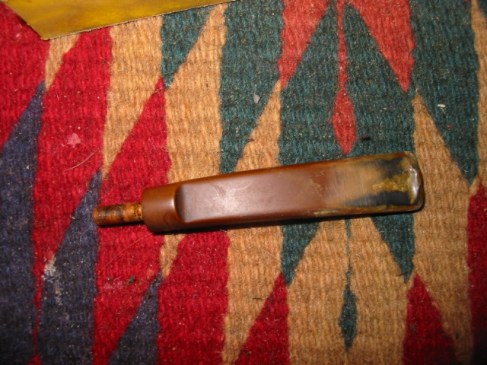
ImageImage

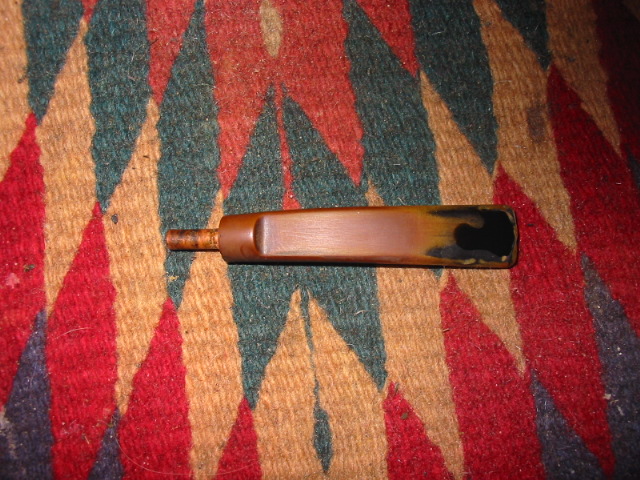
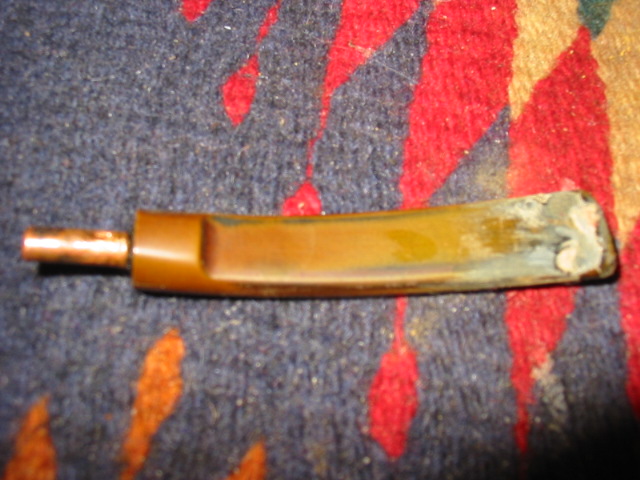
So with the decision made I turned to work on this stem. I used my heat gun to lift the marks as much as I could on the top and the bottom of the stem. The two pictures below show the effect of the heat on the stems. The first photo shows the top of the stem – the heat actually lifted those bit marks quite a bit. It took out the rounded edges of the dents. What is left was actually sharp edges or cuts from the teeth on the button and on the surface. You will also notice that some of the oxidation burned off in the process. I also sanded the surface with 240 grit sand paper to better see what I was dealing with on this stem. The second photo shows the underside of the stem – the heat lifted the dents significantly but not totally. The sharp edges on the dents still remain, as does the destroyed button and the hole is very visible. I repeated the heating process several times (to be honest I lost count) until there was no more visible improvement in the dents. It was time to prepare for the patching process.
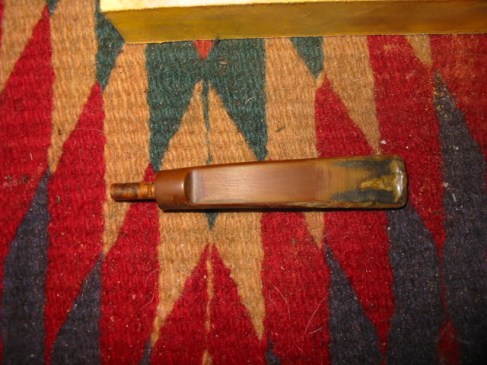
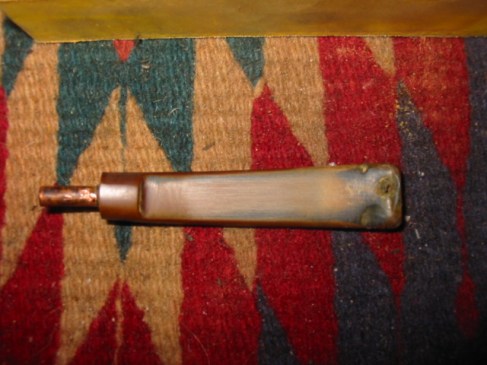
ImageImage

Before I use super glue to patch a hole or fill dents in the stem I prepare the surface to be clean and debris free in order to get a good bond on the glue. I sand the surface with 240 grit to remove the oxidation as much as possible. I want the area under the patch to be black so that the glue matches. Oxidation on the edges of the patch makes that match impossible. Once I have the surface sanded I buff it with Tripoli to take a bit of the roughness out. I don’t want a glossy finish as a little roughness gives surface for the glue to bite into. But I do want it clean. I wash the stem with isopropyl alcohol to remove any debris that still remains, including any of the Tripoli. I use a dental pick to make sure that the edges of the hole are not cracked or broken. Doing this often opens the hole a bit larger but it also removes chips or cracking that will not provide a good base for the patch. I finish the cleanup with yet another wash with alcohol and a cotton swab. The surface should have solid edges to bind to and no extraneous sanding dust or debris that will be in the way of the patch.

On this stem the easiest part to patch was the top of the stem so I started with that part. I used the whip nozzle on the super glue and dripped it on the stem. I smoothed the drop out with the end of the whip. I want the dent and cut to be totally filled so I moved the glue back and forth until it was all covered and then set it aside to dry with the end of the stem propped up to keep the patch level. The first picture below shows the patch after the glue had dried. It formed a solid patch on the stem. I always layer the patch doing multiple layers until I have built up the hole and dent. In this case I also used the glue to build up the button. While the picture does not show it clearly, the glue is actually level with the top of the button and small spots of glue are moved into the dent marks in the button surface itself. In the second photo the stem shows the patch after sanding with 240 grit sandpaper. The object was to get a smooth surface on the stem. The dent marks in front of the button are gone. The brown spot on the stem is some oxidation that has not been sanded out yet. The button is also repaired and you can see a bit of the bulk that is now there. The button will need to be shaped and recut with needle files once the underside of the stem is also patched.
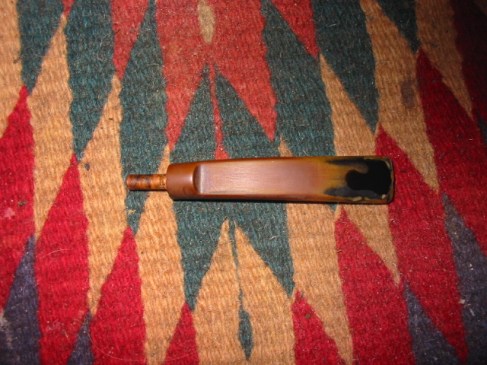
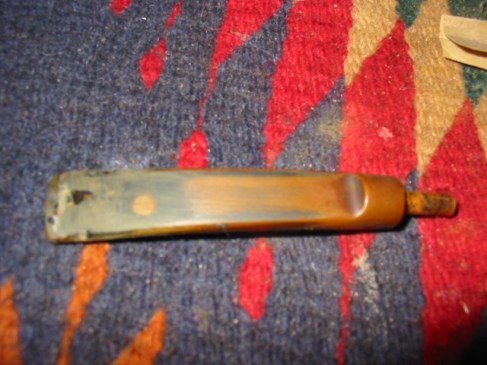
ImageImage

Once I had the top surface of the stem to the point it is pictured above I turned the stem over to work on the underside. This part of the stem was really the challenge on this one. It had deep tooth cuts and a bite through that needed to be repaired. The first step for me was to repair the bite through. I fold a pipe cleaned to fit the flared slot on the button. I greased it with olive oil and inserted it in the slot. I wanted it to be smooth and not pucker through the bite hole, so I tucked it down with my dental pick. Once it was set I put in the first drops of black super glue. Remember at this point I am not work on the surface detail of the holes only the bite through. Once it was patched I went on to fill the other deep dents and marks on the surface and build up the button. I set aside the stem on a level surface and raise the tenon end to keep the bubble of glue level so it would dry.

Once the glue dried I removed the pipe cleaner from the slot. This is always the moment of truth for me – did I grease it well enough that the pipe cleaner did not permanently bond to the slot. In this case it worked perfectly and it came out easily! Whew! Once it was removed I filled the rest of the dent marks with the super glue and also built up the non-existent button. I forgot to take pictures of that step. So the verbal description and the picture of the topside fill will have to suffice. I set the stem aside again and leveled the glue so that it would dry and not run up the stem. Super glue dries very hard and is a lot of work to sand off the surface. Once it was dry I sanded the surface with 240 grit sandpaper once again to level out the surface. The picture below shows the stem at that stage in the process. The fills appear to be white but that is the sanding dust on the surface. You can clearly see the three large patches on the underside of the stem in this picture as well as the rebuilt portion of the button. Again I over filled the patch to the level of the top of the button to provide a solid new surface for me to work with when I recut the button with the needle files.
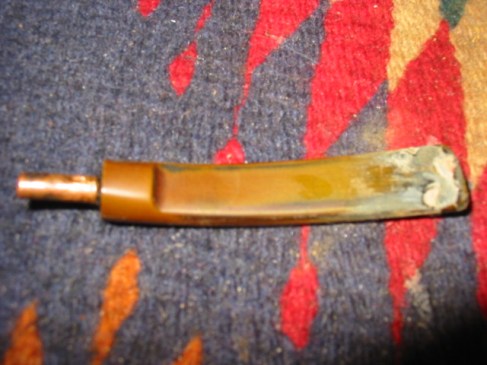
Image

The next two photos show the result of the sanding process with the 240 grit sandpaper on the top and the bottom of the stem. I wanted to make sure that the patches blended into the surface of the stem. You will note that in the first photo of the top of the stem, that the patch is virtually invisible. Though it is not very clear, I had also recut the button with the needle files to give it a good sharp edge against the surface of the stem. I use wedge shaped file and a rectangular file to cut that edge cleanly and the result is a button that looks original. In the second photo you can clearly see that the patches are fairly well hidden. The one against the button and the large one at the top of the photo were the deepest ones. After this sanding and recleaning the surface I refilled those two spots, let them dry and sanded them again. Once that was completed the underside of the stem looked exactly like the topside of the stem at this point.
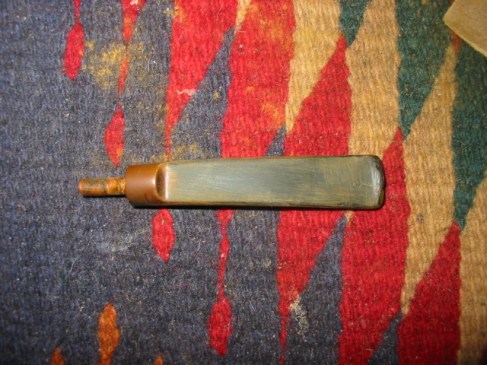
ImageImage

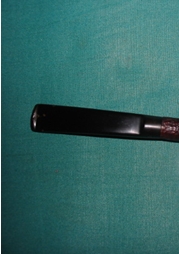
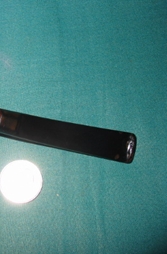
I failed to take pictures of recutting the button on the underside of the stem but you can see the new button in the pictures below. I cut and shaped it with the same needle files that I used on the top of the stem. I like the clean angles of a new button so I was aiming for that with just a little wear or rounding to match the age of the pipe. I finished the sanding and polishing of the stem using 400 and 600 grit wet dry sandpaper and then used the normal list of micromesh sanding pads from 1500-6000 grit. I keep a bowl of water close by to dip both the paper and the pads in as I sand as I find it more effective in removing the scratches and remaining oxidation. Once the stem was finished I put it on the pipe bowl and gave it a buff with Tripoli and White Diamond to get a good sheen to the surface. I never buff a stem apart from a pipe as I do not want to damage the stem shank junction by rounding the clean edge of the stem. The top two photos below show the top and bottom of the stem respectively. You can see the repair is complete and the button is very clean and present. The second two photos below show the stem from the right and left profile so you can see the flow of the stem surface – uninterrupted from either side with the tooth dents as before and also the profile of the button. It is distinctive and present. The stem was finished with several coats of Obsidian Oil and then carnauba wax to protect the surface.

ImageImage

ImageImage

Refinished Rims and Touch-Ups


Blog by Alan Chestnutt

Alan, aka Castana on SF, posted this recently and I found it extremely helpful so I asked and received his permission to post it here as well. I am ordering some of these as I speak. Nicely done Alan. I look forward to gving them a try. They are available on Ebay and also on Amazon.

When restoring pipes, I nearly always like to refinish the rim. I think a nice clean sharp rim always sets a pipe off. As well as this it is just as easy to sand and refinish a rim as to try to remove tar and staining to the old rim. One of the problems though in refinishing a rim is trying to match the stain to the rest of the bowl. I always shied away from getting leather dyes, simply because you would need to be artist to be able to correctly mix all the differing shades.

I always remember my grandfather staining shoes and the smell of the dye always lingered in my brain. In more recent times that memory was triggered when smelling a sharpie marker, so my thoughts were that it must contain a similar alcohol based dye. I used a sharpie a few years ago to restain a black sandblast bowl and it worked a treat. “If only they were available in shades of brown” I thought to myself.

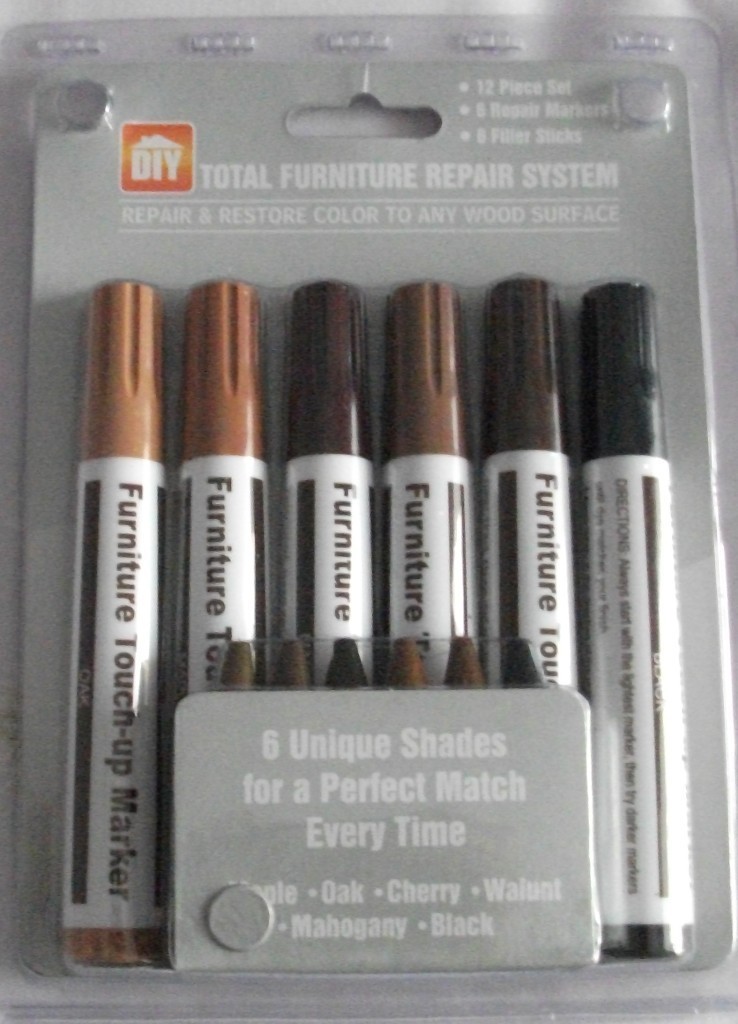
So while walking through a local discount store a few months ago, I spied furniture repair markers. Exactly what I had been thinking of.

Image

They come in 5 shades of brown plus black and cost £2 (about 3 bucks). I couldn’t wait to get home and try them. They are a chisel shape marker and apply a translucent stain exactly like an alcohol dye. Perfect! With the variety of shades a match can be made 99% of the time by application of a couple of coats or moving to the next darker shade. Simply cover the rim by wiping the marker over it and a few seconds later remove the excess with a soft cloth.

Image

A refinished Tilshead rim.

They are excellent for touch ups on other areas of the pipe and I often use them to just refinish the whole pipe to brighten up the grain. Needless to say I acquired a few more packs, but I have refinished literally hundreds of pipes and I am still on my first pack. Simple to use, no mess, a variety of shades and cheap. I class them as my best purchase ever for restoring pipes, so keep your eyes open for them. Available on eBay too, but at a premium.

Alan

Refurb LHS SEC system pipe – strange one


Blog by Steve Laug

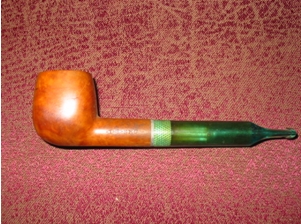
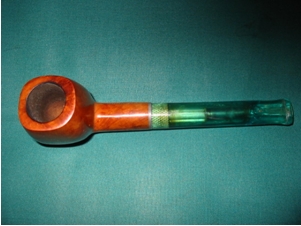
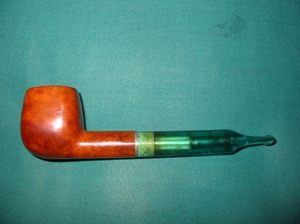
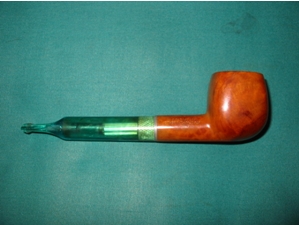
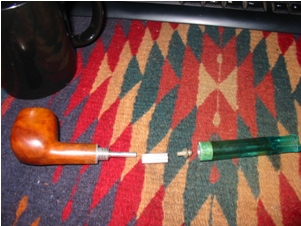
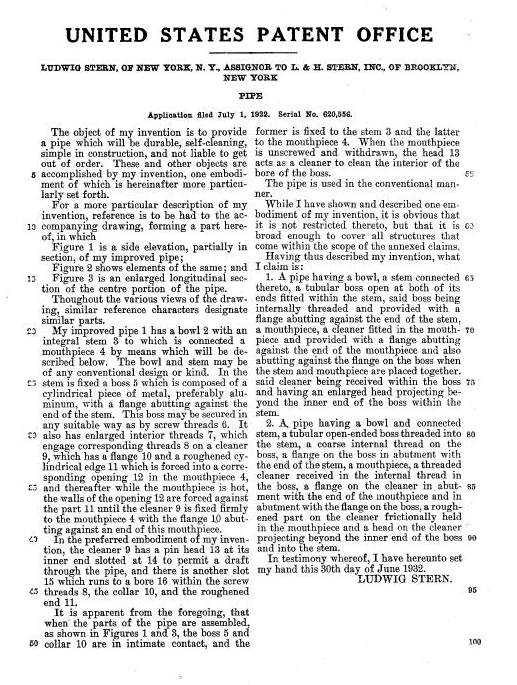
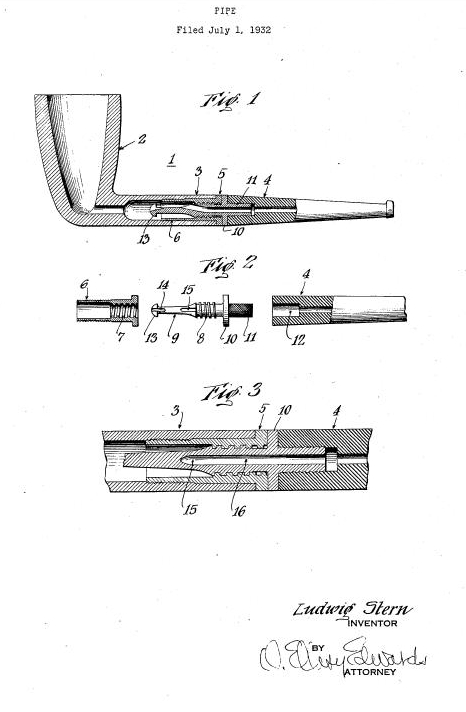
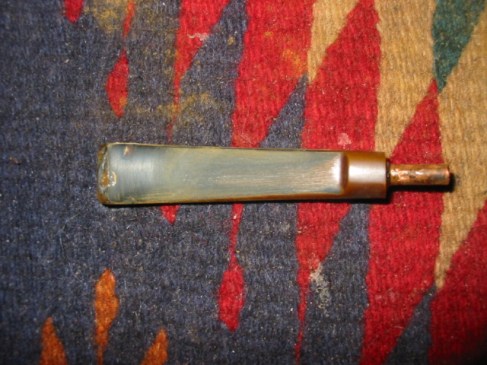
In my ongoing quest to collect pipes that are unique and give a picture of the history of interesting inventions and modifications to the simple smoking pipe I wanted to post this refurb that I finished. It is a LH Stern (LHS) SEC pipe. It is a system pipe as can be seen from the blown out pictures and the diagrams from the patent office. It is an interesting piece of history. The apparatus inside is quite elaborate. The stem is green perspex that serves as a collection chamber for sediments before the smoke goes to your mouth. I cleaned and reamed the bowl and polished it with carnauba wax. The stem had some tooth marks and cuts. I lifted the majority of them with my heat gun and finished by sanding them  and buffing them smooth.
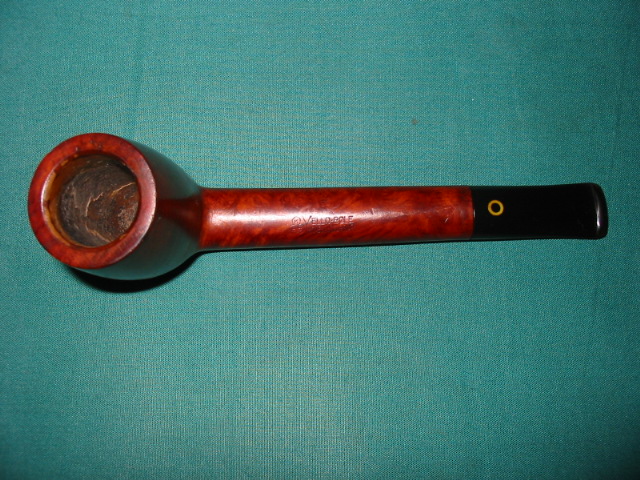
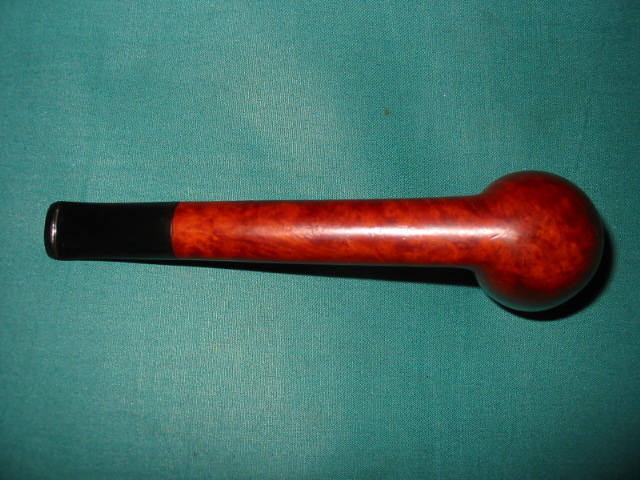
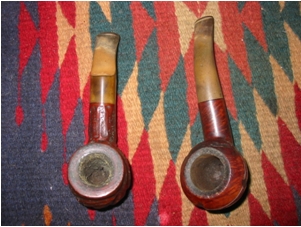
Here are pictures of the pipe when it arrived:

ImageImage

Here are pictures of the pipe after I cleaned it and polished it:

ImageImageImage

Here is the pipe taken apart – it has an amazing assortment of parts. I have also included a copy of the patent information for those interested in the background of this pipe.

ImageImageImage

The 1912 BBB Poker


Blog by Steve Laug

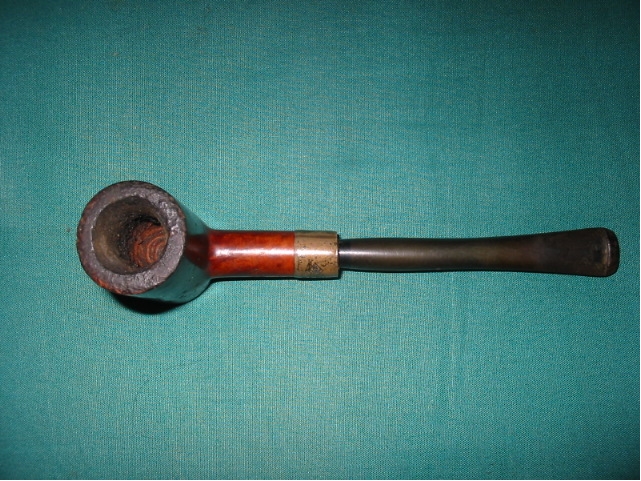
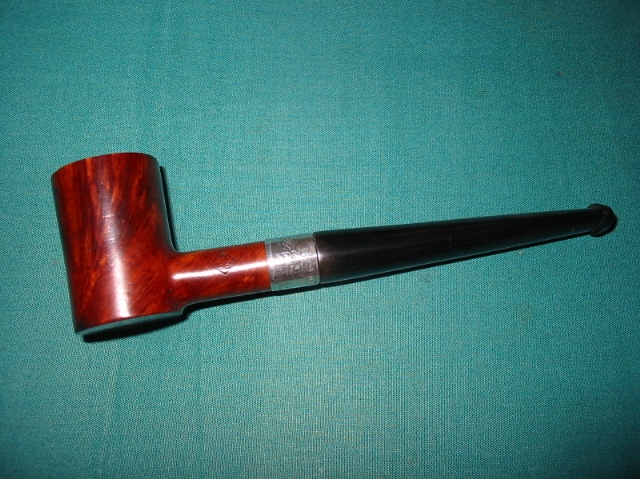
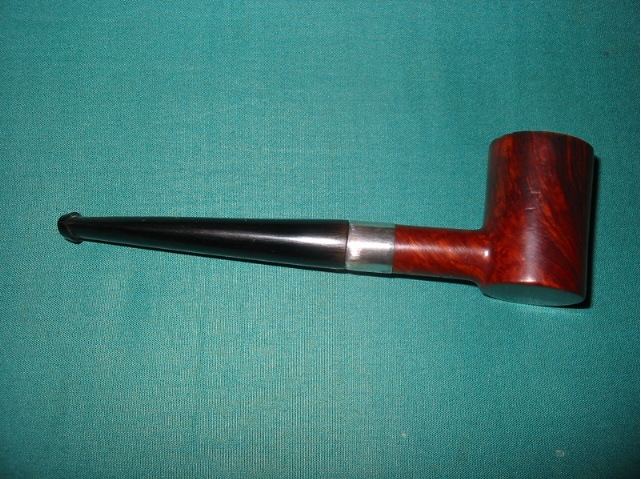
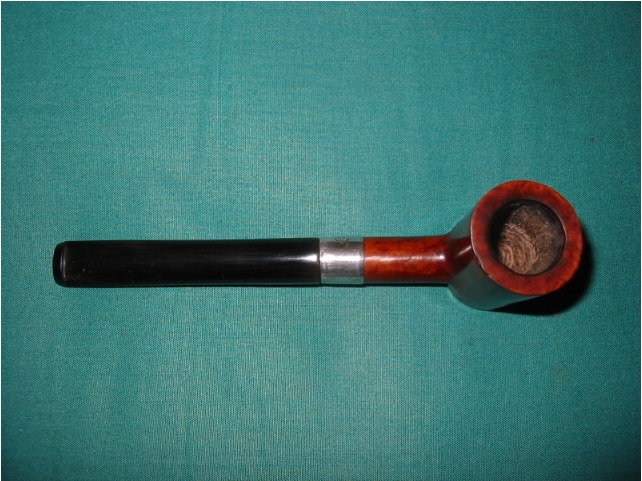
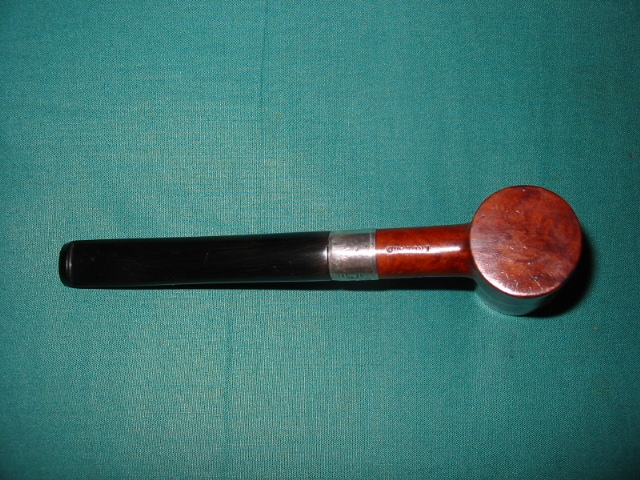
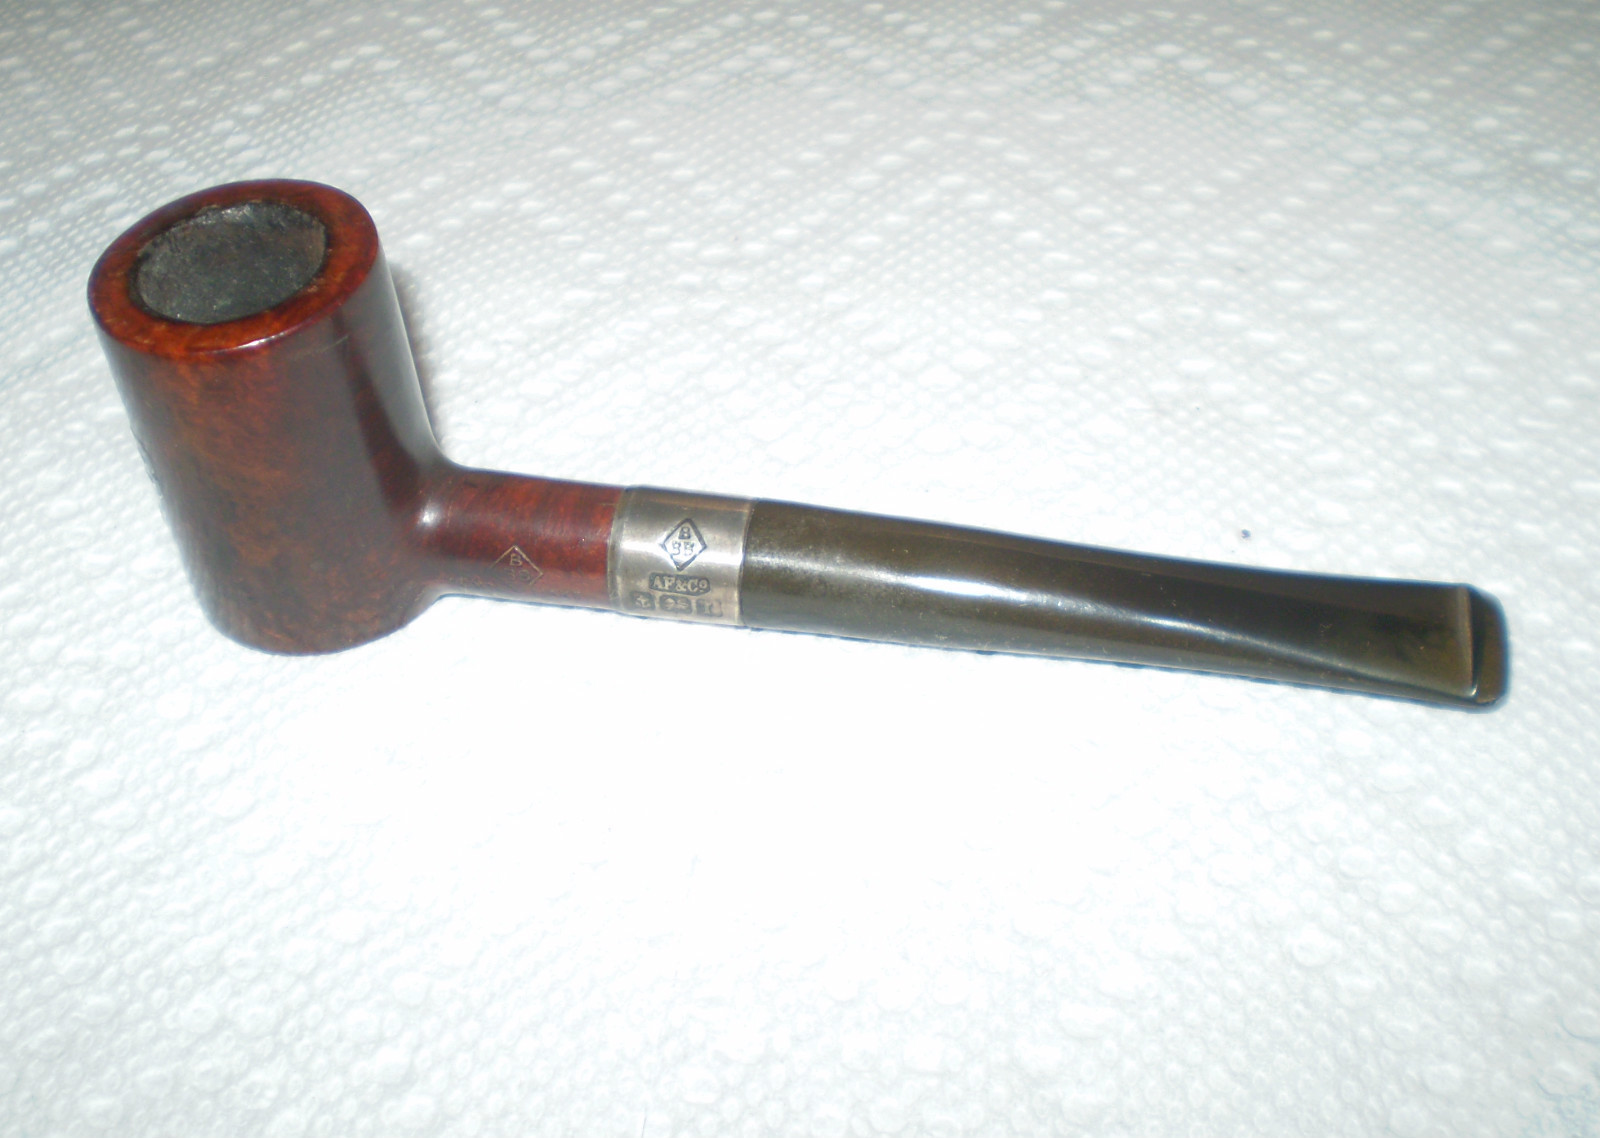
I picked up this old 1912 BBB Poker on EBay not long ago. It is stamped BBB in a diamond on the shank and on the underside England. The silver is hallmarked Birmingham 1912. It is a smaller group 1 or 2 sized pipe. In the pictures the military stick bit looked like it belonged. It looked like it was shipped that way from the factory. The grime on the silver and on the shank as well as the oxidation on the stem made it appear to be that style of pipe. When it arrived with the other 5 pipes that I bought with it I examined it a bit more closely. In the picture below you can see the roughness of the stem. It is definitely poorly cut. The closer I looked the more I realized that it was a poor replication of an older stem. A BBB pipe of this age came with a different style of military stem and it had an orifice button rather than a slot like this one. The stick bit was not original as it was a slotted bit and was not finished smoothly. There were lots of file marks on both sides of the stem. When I removed the stem I was even more certain that it was a poor copy. The one thing I was still thinking was that it was definitely spigot or military bit pipe.

ImageImage

Then I began to work on the shank and the band. Someone had darkened the end of the shank to make it look almost black like the tarnished silver band. Once I cleaned the silver and cleaned the shank I could see that it was not a silver end cap at all but a very typical BBB silver band. In the picture below you can clearly see the end of the shank showing as it sits inside the silver band. I used a 1500 micromesh pad to clean off the end of the shank and return it to wood. When I re-stained the pipe I would also re-stain the shank end to match. It was clear that I would need to do a bit of research on what kind of stem was originally on this poker style pipe if I was to restore it to its original glory.

Image

I have a copy of the BBB Catalogue reprint from Gary Shrier so I got it out and went to work researching the look of the missing original stem. It became clear rather quickly that the pipe shape I had originally came with a taper stem with an orific button. In the catalogue is the exact shape in the exact size. I could not believe it. I laid the bowl on the page and then traced out the shape and size of the stem. A part of my hobby refurbishing is collecting old stems. I buy them wherever and whenever I find them and stockpile them in an old coffee can in my office. I went and got the can and emptied it on my desk to sort through what I had. I have yet to organize them by size so it is a matter of dumping the can out and digging through them. Well, I found one in my can of stems that had the right orifice button and the correct taper so I turned the tenon and fit the stem to the pipe. I used my Dremel to remove excess diameter from the stem so that it was the same diameter as the shank and band.

I also had to clean up the bowl of the pipe as the top was pretty beat up and the inside rim had been chipped and cut as if it had been carelessly reamed with a knife. I steamed the dents from the rim and carefully did a minor topping on the bowl to bring the top back to smooth and the inner and outer rim to smooth. I also chamfered or beveled the inner rim to bring it back into round. There were also dents on both sides of the bowl so I steamed those out as well. I use a wet cloth and a hot butter knife (heated over a flame) to raise the dents. I finished the work on the pipe by re-staining the top to match the bowl then buffed it and gave it a final polishing with White Diamond and then several coats of carnauba wax.

Here are pictures of the finished pipe. Other than being in colour it is a perfect match to the one in the catalogue.

ImageImageImageImage

Edit – 24 Feb. 2013 – I just came across an old BBB poker on eBay that is similar to the one above. I did some research on the stem on the one above and restemmed it. The one in the eBay photos is a newer version of the same pipe number. I have attached two photos below for sake of comparison.

BBB Poker BBB Poker 2

GBD 9438 Tapestry Refurb


Blog by Al Jones

I am truly honored that forum owner, Steve, asked me to write a guest article on his wonderful blog. Just a little over one year ago, I made the transition from occasional cigar smoker to an avid pipe smoker/collector. Pretty early on, I discovered that access to better quality pipes could be had through the estate market. It was also about that time I found the SmokersForums.uk forum and quickly made that venue my go-to spot for pipe information. While reading the “Restoration & Maintenance” section, it became apparent to me that even finer estates could be found if I was willing to put in a little elbow-grease and restore them. If one reads the “Stickies” in that section, pipe restoration techniques can be quickly learned thru contributions from professionals and amateurs. I was fascinated and dove in.

My tools evolved from simple sandpaper and some buffing wheels mounted in a hand drill to a bench mounted buffer, micromesh sanding papers, reamers, needle files etc. Making some of the tools to save a few bucks was all part of the fun and learning process. I favor Vulcanite stems, so occasional maintenance will be a part of my pipe smoking experience.

Due to my Welsh heritage, I’m a big fan of anything British, primarily cars and motorcycles. So, it seemed natural to be attracted to the classic shapes produced by the British masters. I’m a fan of GBD brand pipes and those estates can be readily found at reasonable prices thru Ebay, etc. The 9438 Author shape is a particular favorite and I have several models of that shape. The pipe I chose to document in this article is in Tapestry finish. I was intrigued by the turned stem and after a little research, I found it was a “chair-leg” stem used on certain Tapestry models. My joy in finding this pipe quickly evaporated when I opened the box and saw the level of oxidation on the many curves and crevices. I tend to purchase estates with saddle stems, but this one ramped the difficulty notch up significantly. Indeed this stem proved to be the most difficult I’ve encountered.

Some “before” shots of the pipe:

Typically, it takes me about an hour or so to restore a stem. This one took nearly twice that long. Fortunately, the previous owner had left no teeth indention issues to resolve. I soaked the stem in a mild Oxyclean solution as the first step. In badly oxidized stems, I think this step pays off in removing oxidation from the inside of the stem as well. Next up, I used some 1500 and than 2000 grit wet paper until the brown was removed. Getting oxidation from the chairleg creases was frustrating and finger aching. I almost gave up at one point, but sitting the project down for a few hours strengthened my resolve. I’m always eager to smoke an estate I’ve cleaned up, so there is always that pot at the end of the rainbow. I found wrapping the sandpaper around a thin kitchen knife allowed me to get the oxidation from those thin crevices. Next up, was a polish with each of the final four grades of “micromesh” (4000, 6000, 8000 and 12000). Micromesh comes in pads and sheets. I found the larger, 6” x 2” sheets last longer and are easier to fold into creases, etc. Following the micromesh, the stem had a deep, black shine that I enjoy on my mostly Vulcanite stems.

The next step was to buff the stem lightly with some White diamond and then “Blue Magic Plastic Polish”, each product getting it’s own cloth wheel. The Blue Magic product is made for the automotive industry and available at most autoparts stores (Megiuars also makes a similar product). Some folks are adverse to putting an automotive product on their stems, but so far, I’ve found no adverse tastes, etc. I do think the product helps “seal” the Vulcanite as oxidation seems to either not occur or very slowly. James Upshall pipes are noted for their fast oxidation, but so far my restorations using this product has kept my collection shiny. I also gave the pipe a light coat of “Obsidian Stem Oil”.

The bowl wasn’t in bad shape, but had the usual tobacco/tar buildup on the bowl top. I used my Castleford reamer set to remove the thin cake than soaked the bowl with Sea Salt and Everclear for a few hours. This was done while I was working on the stem. Following the soak, the draft hole was thoroughly cleaned with a series of bristle pipe cleaners soaked in Everclear. I’ve had success eliminating ghosts by cleaning this area of the pipe until the cleaners come out nearly white. I gave the bowl a light buff on the wheel with some white diamond, then Carnuba wax. A hand polish with Paragon wax completed the briar clean up. The wood on the bowl top was a little lighter in color, but I knew smoking it would even out and darken that area. (plus I was not looking forward to prepping and staining the mixed “Tapestry” finish..)

The completed pipe:

It may be a combination of the pipe shape and the effort required to refurbish it, but this particular pipe has become a favorite. I swore that I’d never purchase another chairleg stemmed pipe, but won an Ebay auction last night for another GBD Tapestry pipe with a chairleg stem……

Smoke safe!
Al Jones

Refurbed Social by Comoy’s


This afternoon late the postie delivered the Social pipe made by Comoy’s that I picked up off Ebay a few weeks ago. I took it apart and went to work. The bowl was pretty caked and broken up inside… cake falling off the walls. The The top was tarred. I reamed and cleaned it. Interestingly this is an old timer. It has the old orific button as I show in one of the before shots of the stem. It has some kind of reservoir between then end of the stepped tenon and the the airway into the bowl. It is below the airway and the tenon is drilled with the airway high to match up.

I put the bowl in an alcohol bath and cleaned it up. The mess came off really well. I then sanded the bowl with 600, 1800, 2400 and 4000 grit and then restained it with a medium brown stain. The Stem was soaking in Oxyclean and when I removed it I cleaned the grime off of it. It was a bit oxidized so that came off no problem. I then buffed the entirety with white diamond and then Carnuba. Here are the before shots:

ImageImageImageImage

You will note there are some pretty deep dents in the side of the bowl. These came out a bit but they remain as character marks. There were some on the underside of the shank as well. They too remain.

After refurbishing:

ImageImageImageImage

Reworked Old Apple


Blog by Steve Laug

I had this old apple with very faint stamping that looked like it could have been stamped Edwards but not clear. I decided yesterday to rework it. The old stem had a split in the button and was shot. I decided to fit a new stem for it. I reamed and cleaned the bowl and fit the stem. While I worked on the stem I dropped the bowl in my alcohol bath for an hour. Once it was done I sanded the bowl and cleaned it some more. There were a couple of spots on it where small fills had fallen out so put some briar dust in them and then a spot of super glue. Once dry I sanded them smooth so that the stain would take around and in them. I put the stem on and stained the bowl with an oxblood stain as I figured that would match what was originally on the pipe. Once it was all polished it reminded me of an old timer that I had seen and been hunting for – a straight shanked BBB apple. Well that got me thinking and I dug through my box of bands and sure enough I had an old BBB silver band hallmarked 1909 that fit perfectly. The stem and pipe look older so the band added some more age to it. I really like the final look of this one.

Before pictures:
ImageImage

And the finished pipe:
ImageImageImageImage