Tag Archives: bowl topping

A Unique Vertical Oval Shank Meerschaum Reborn


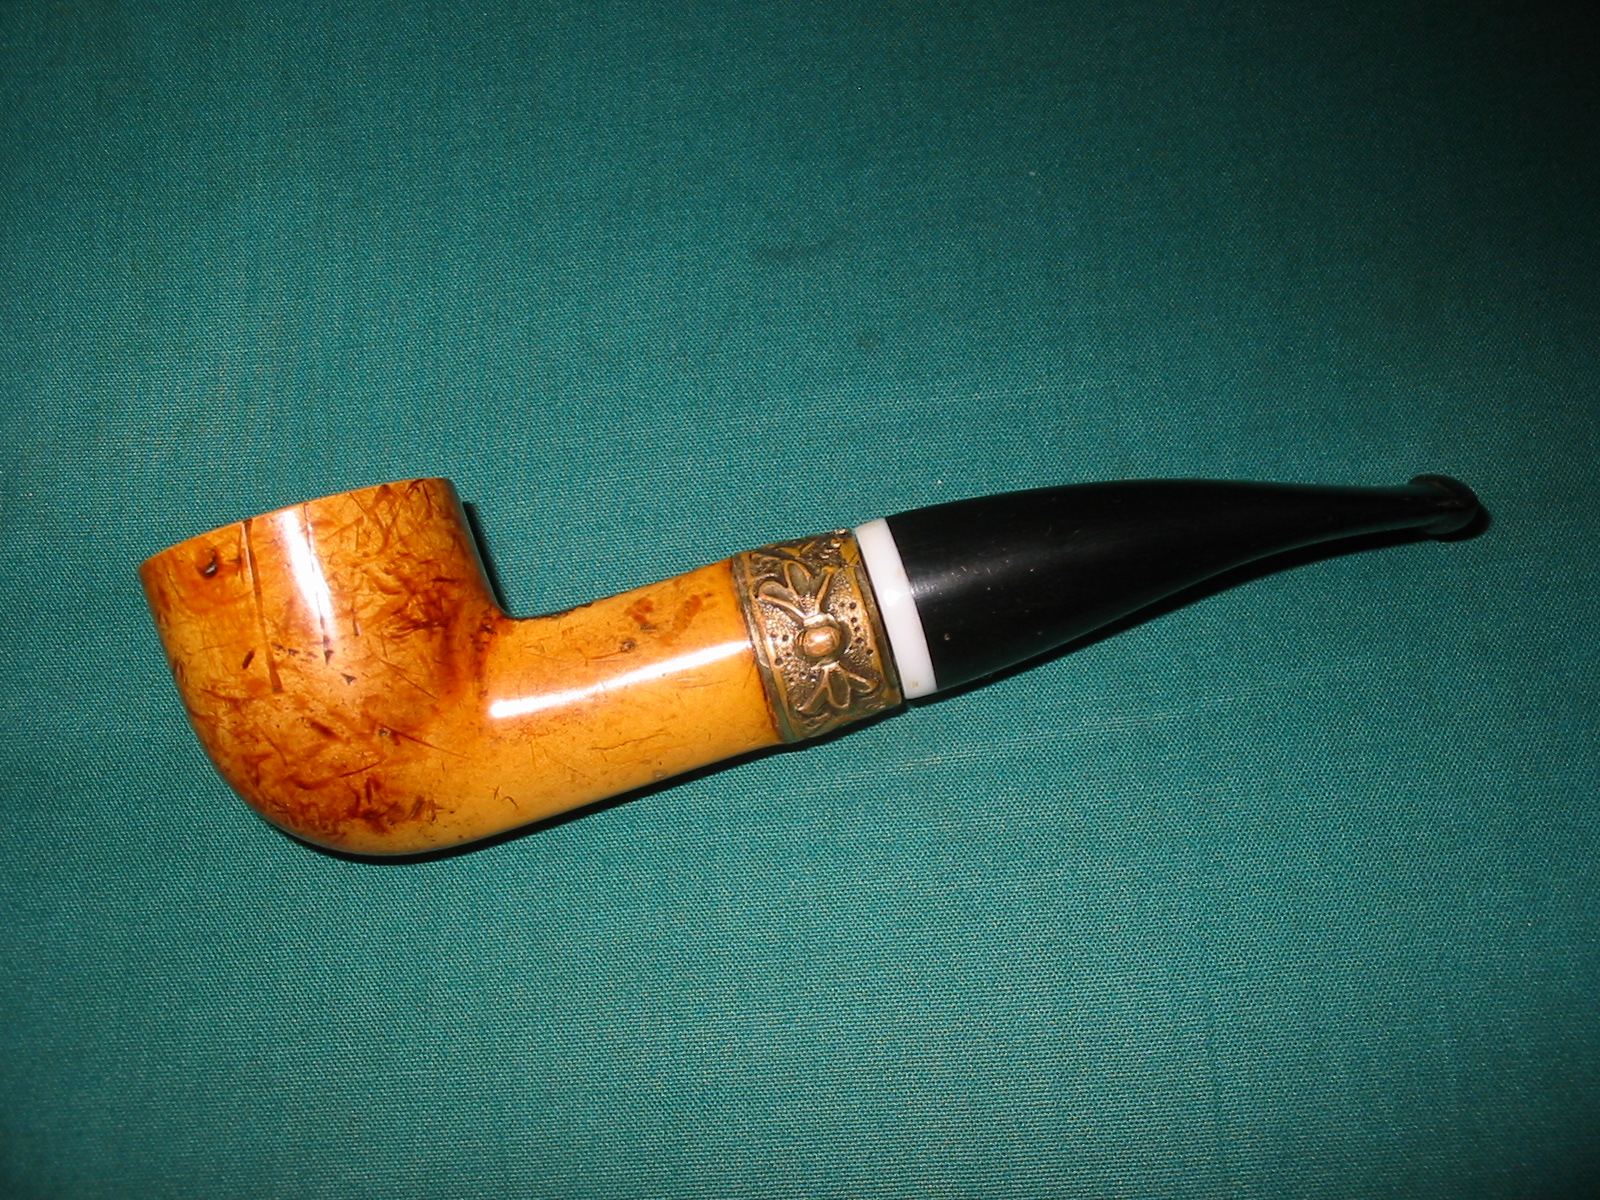
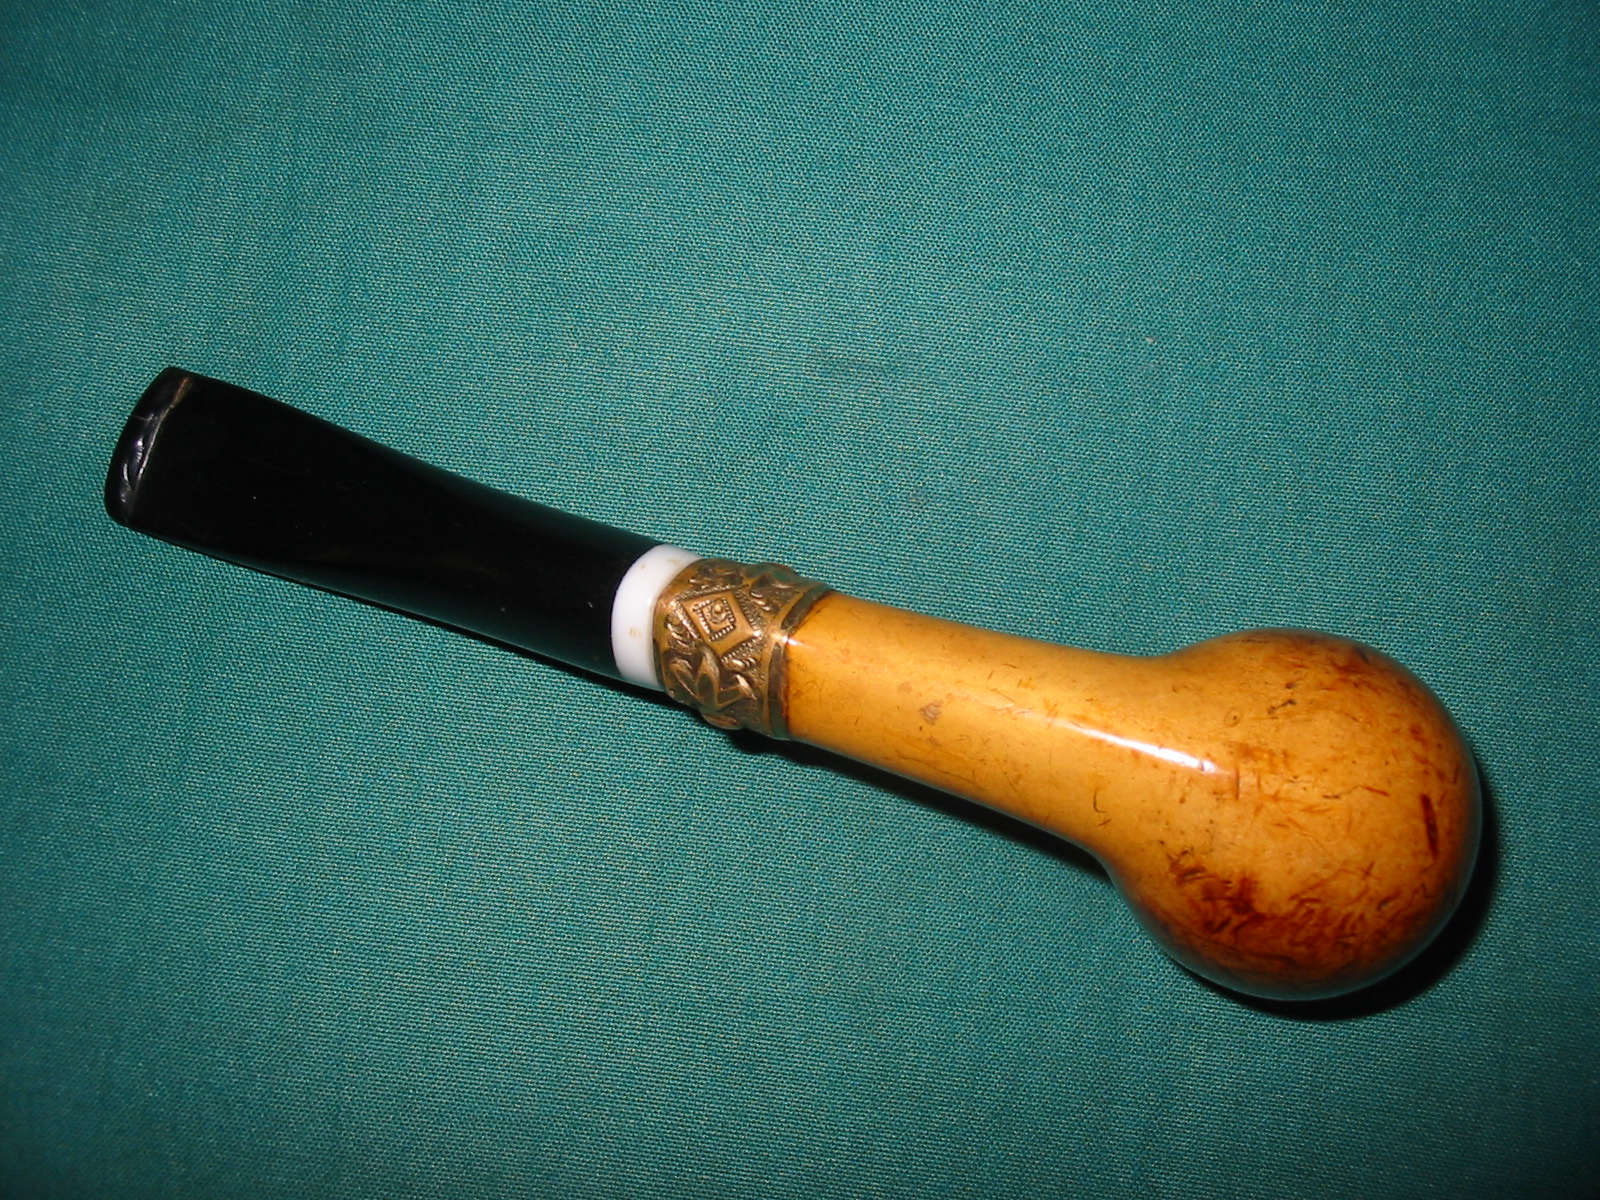
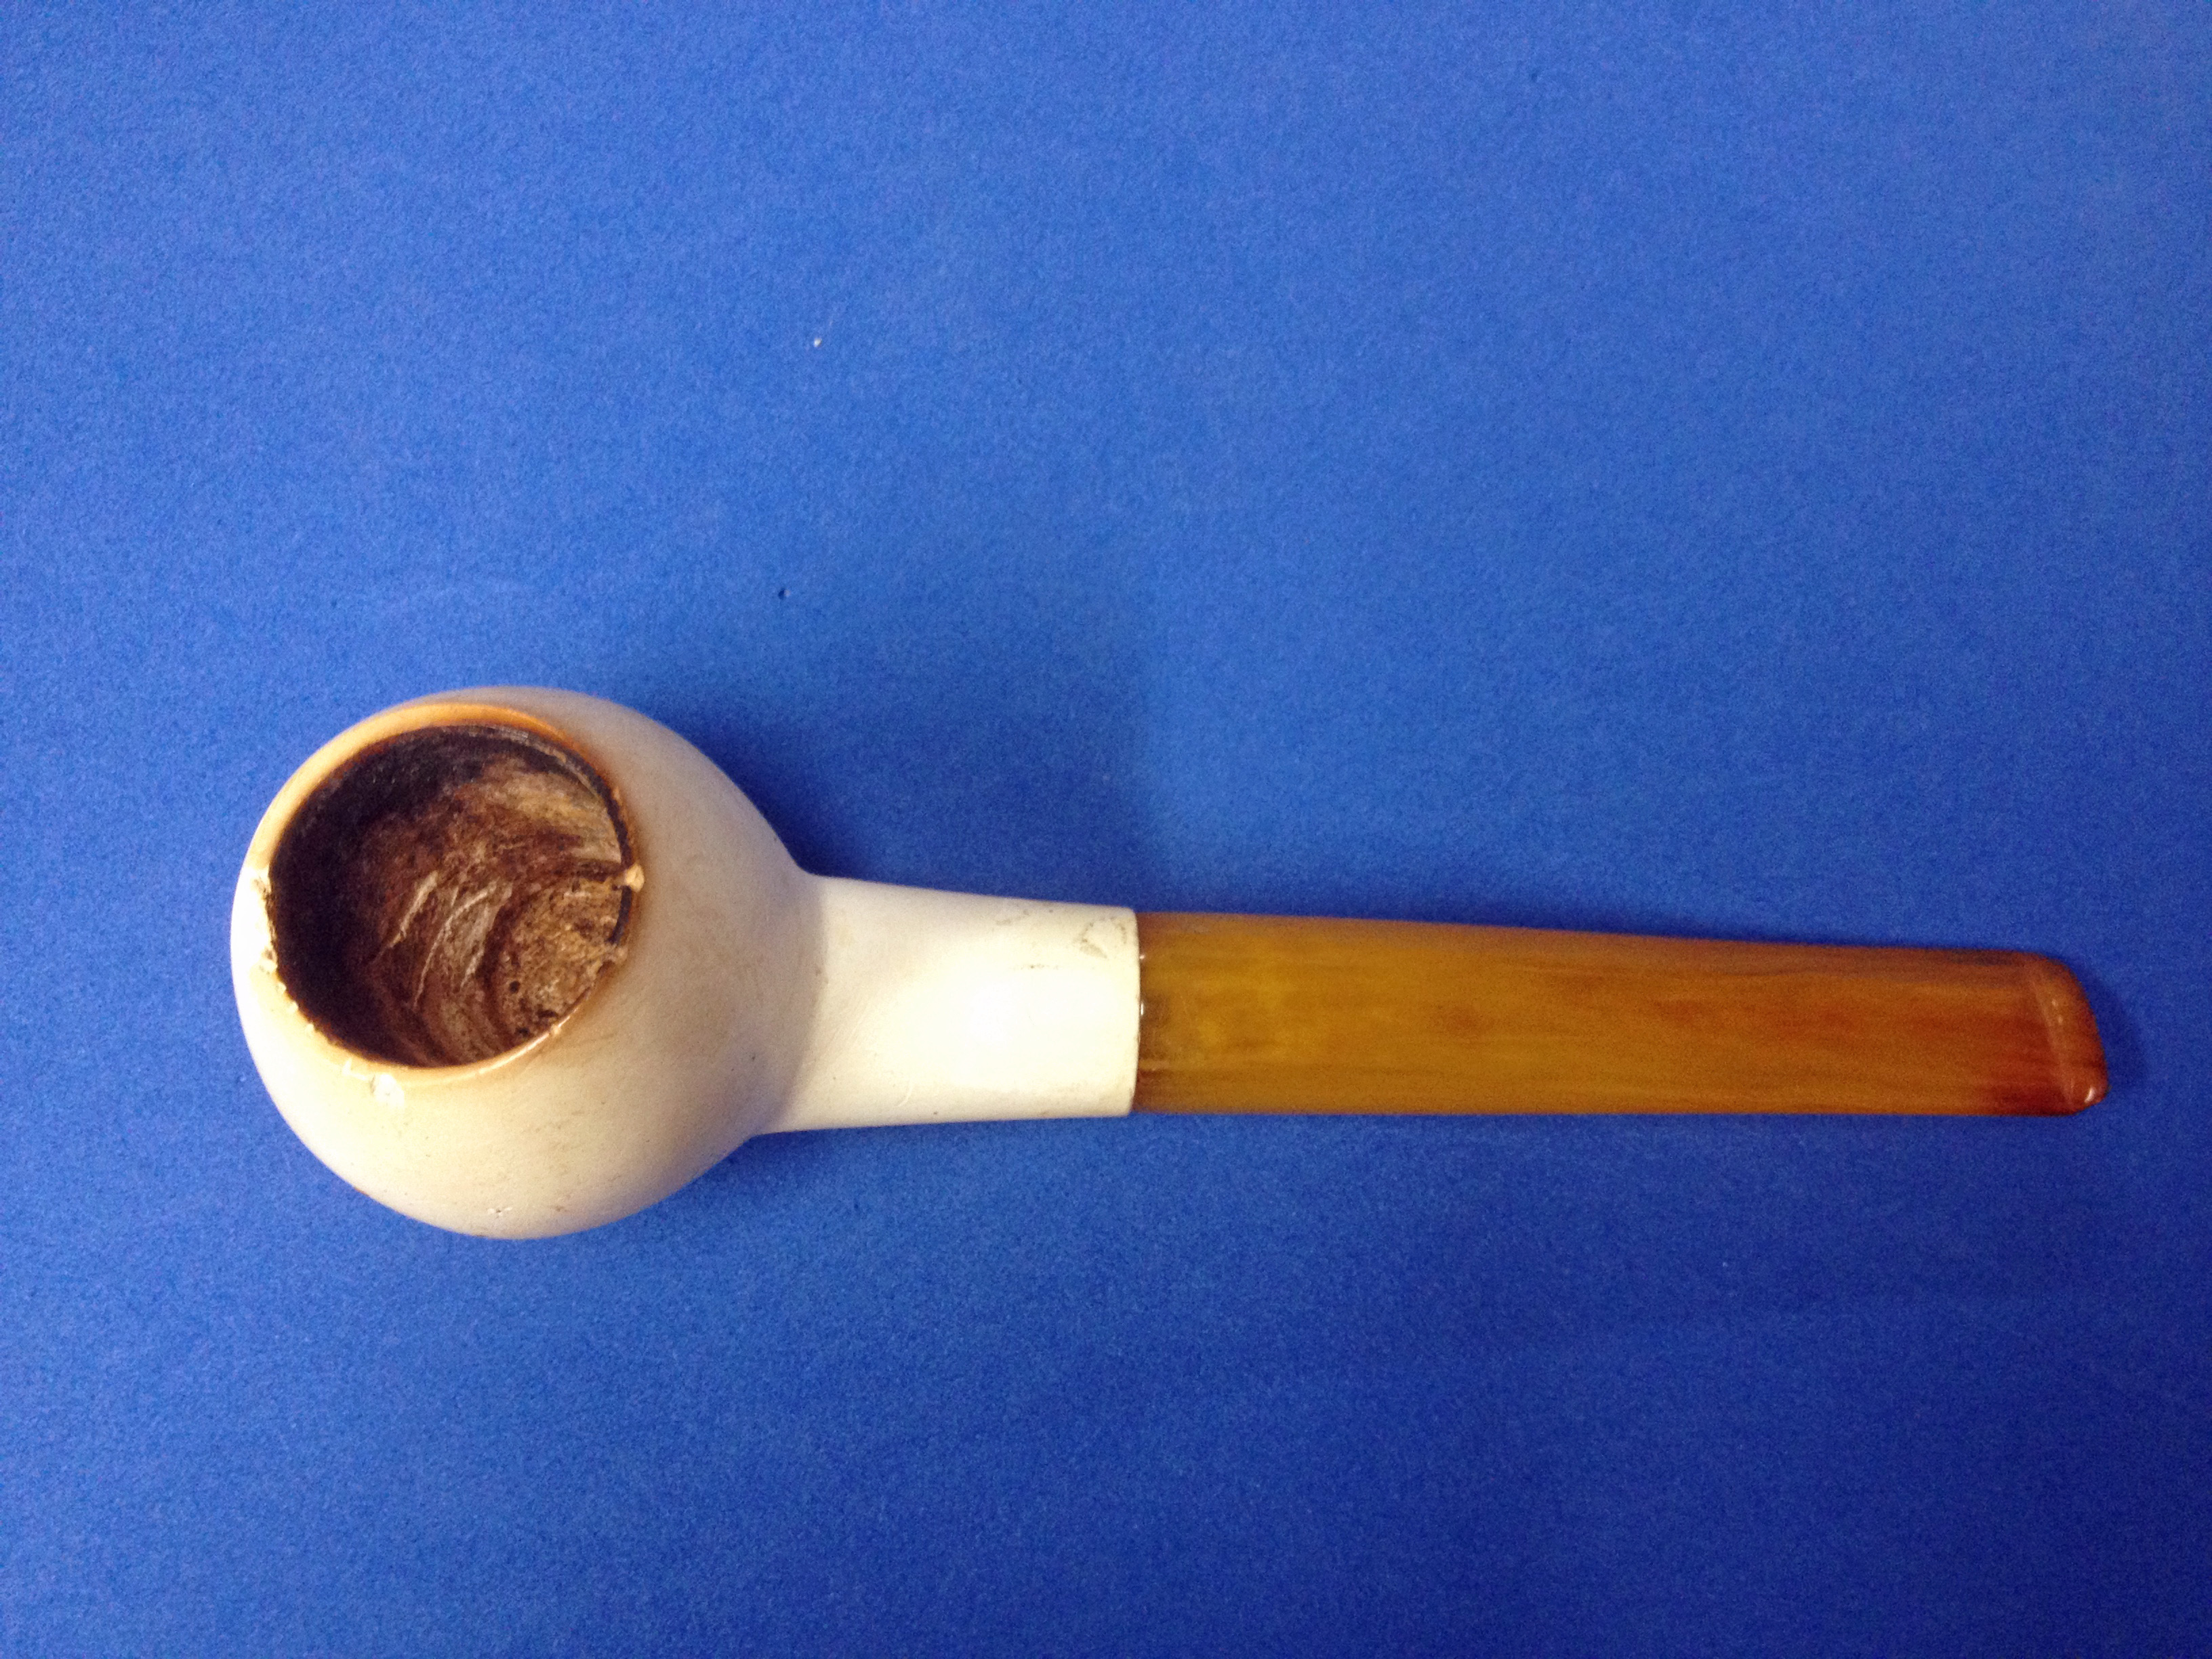
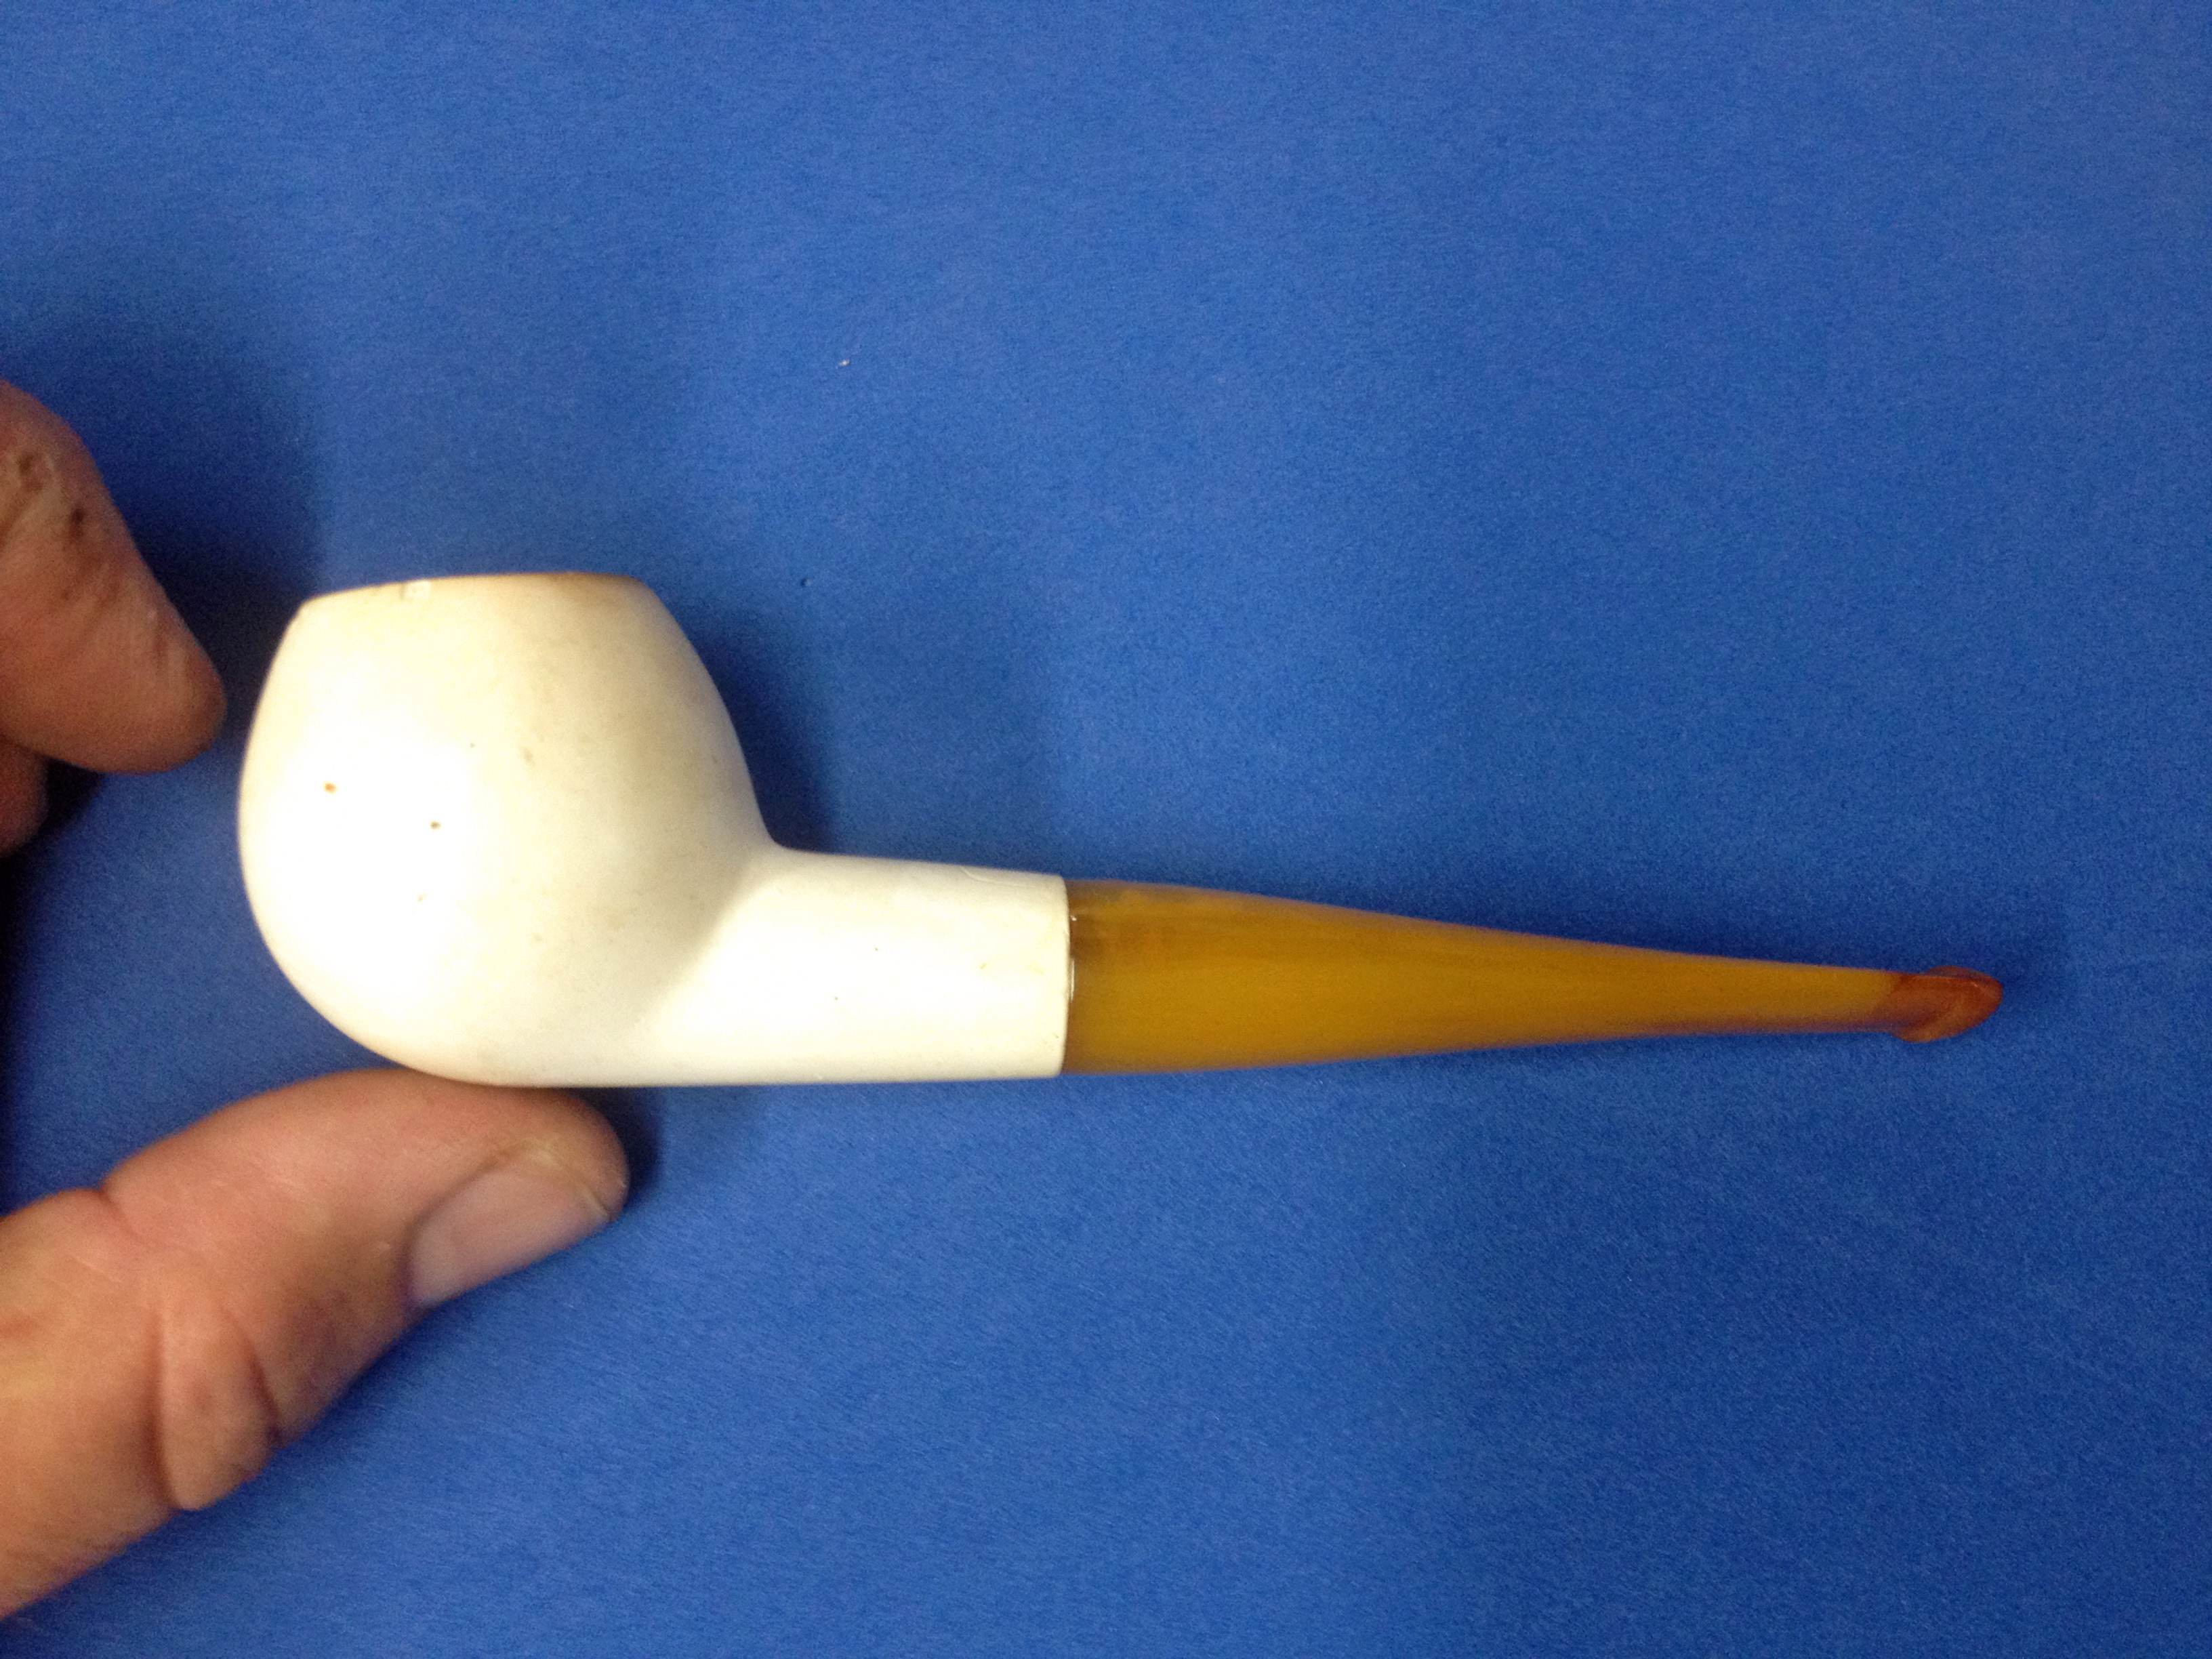
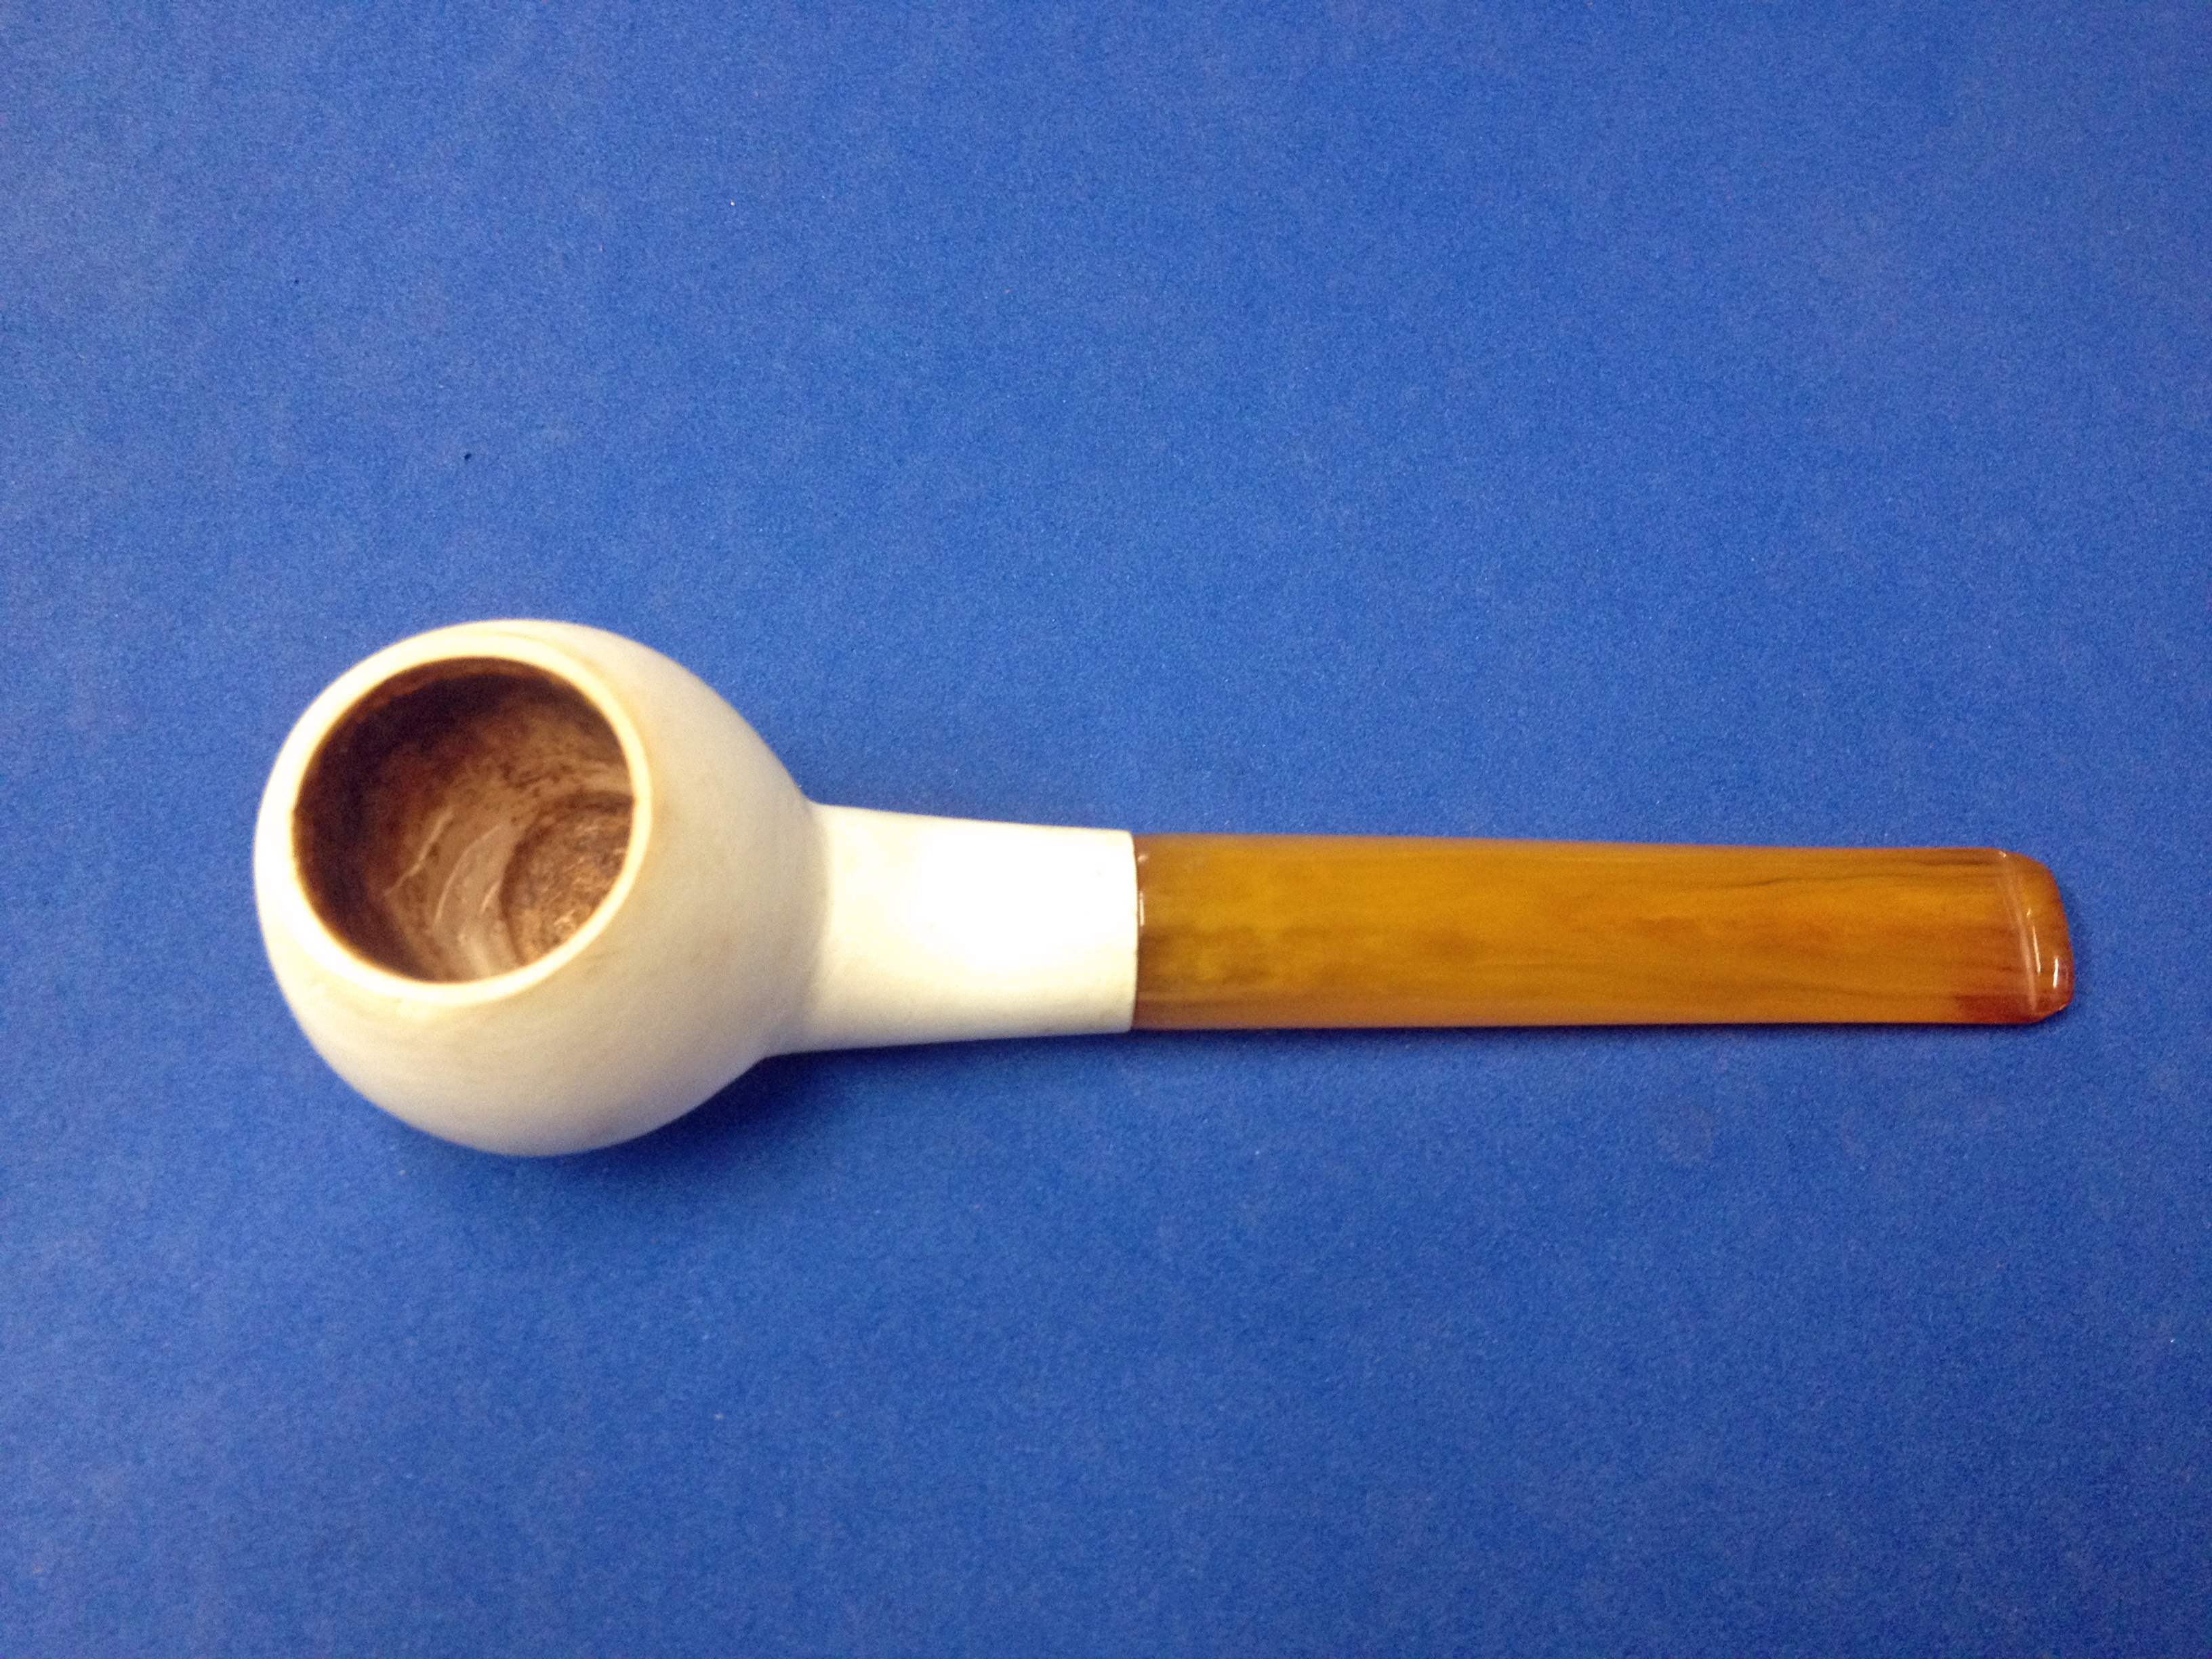
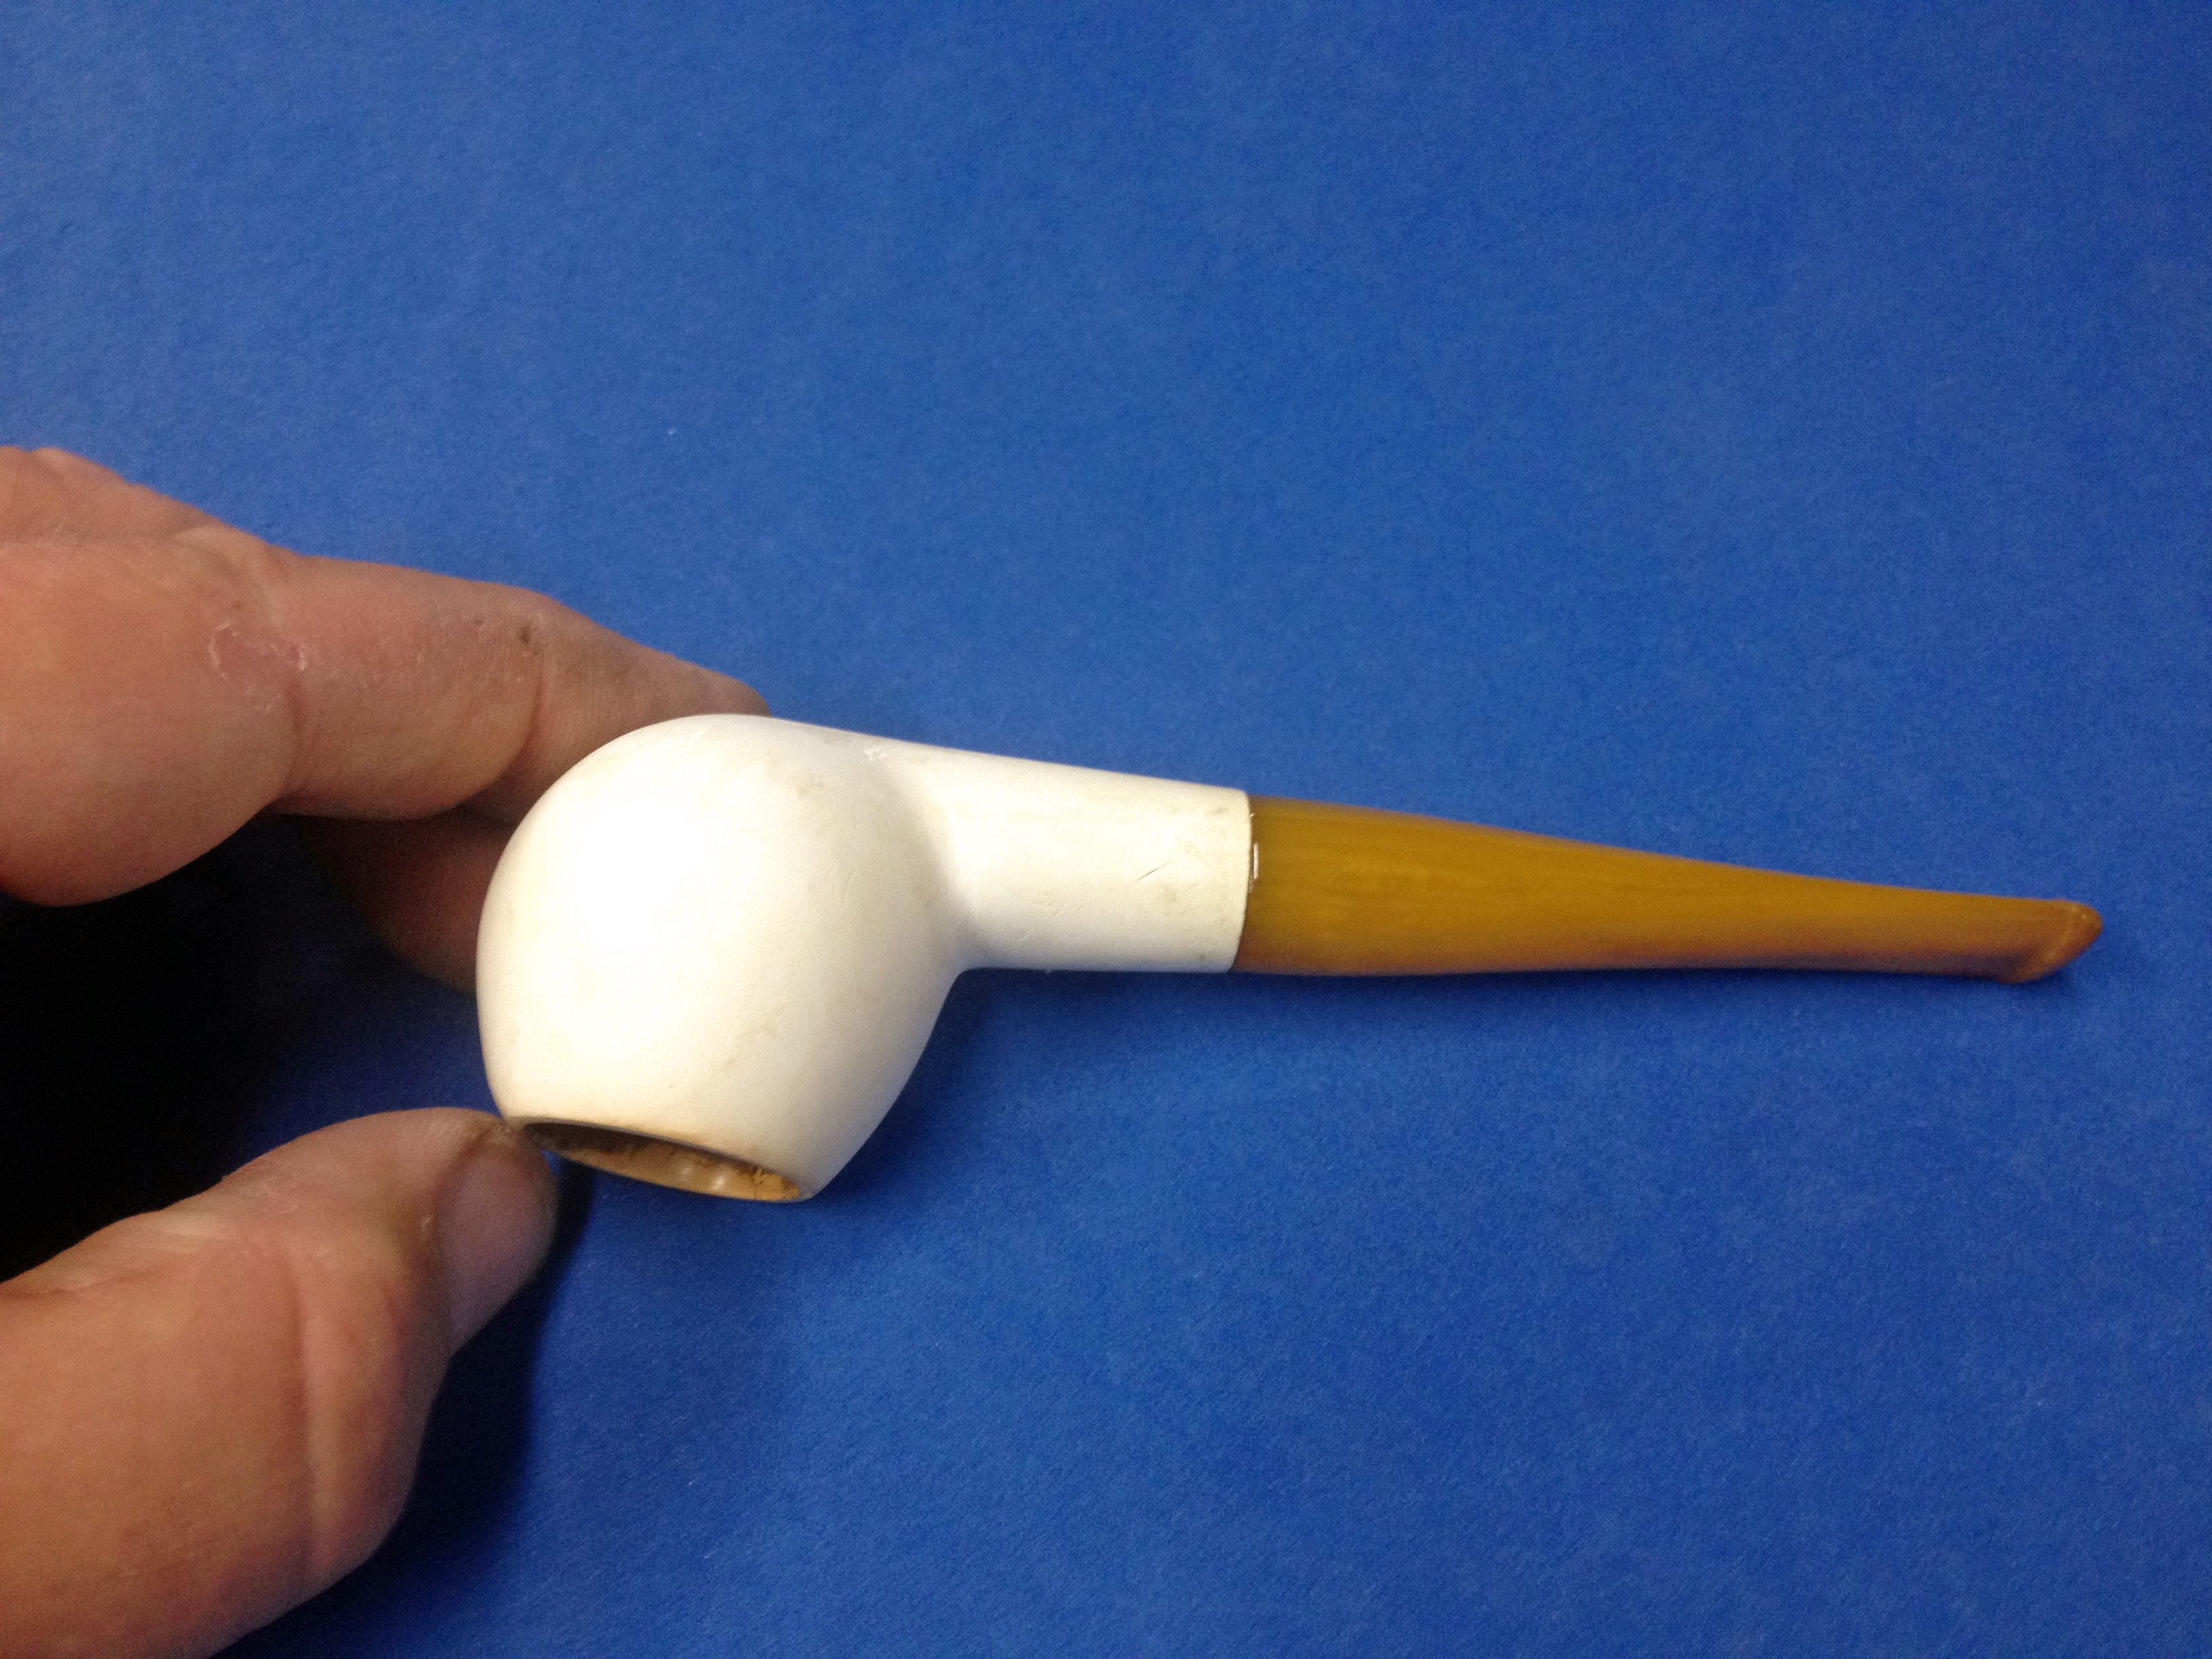
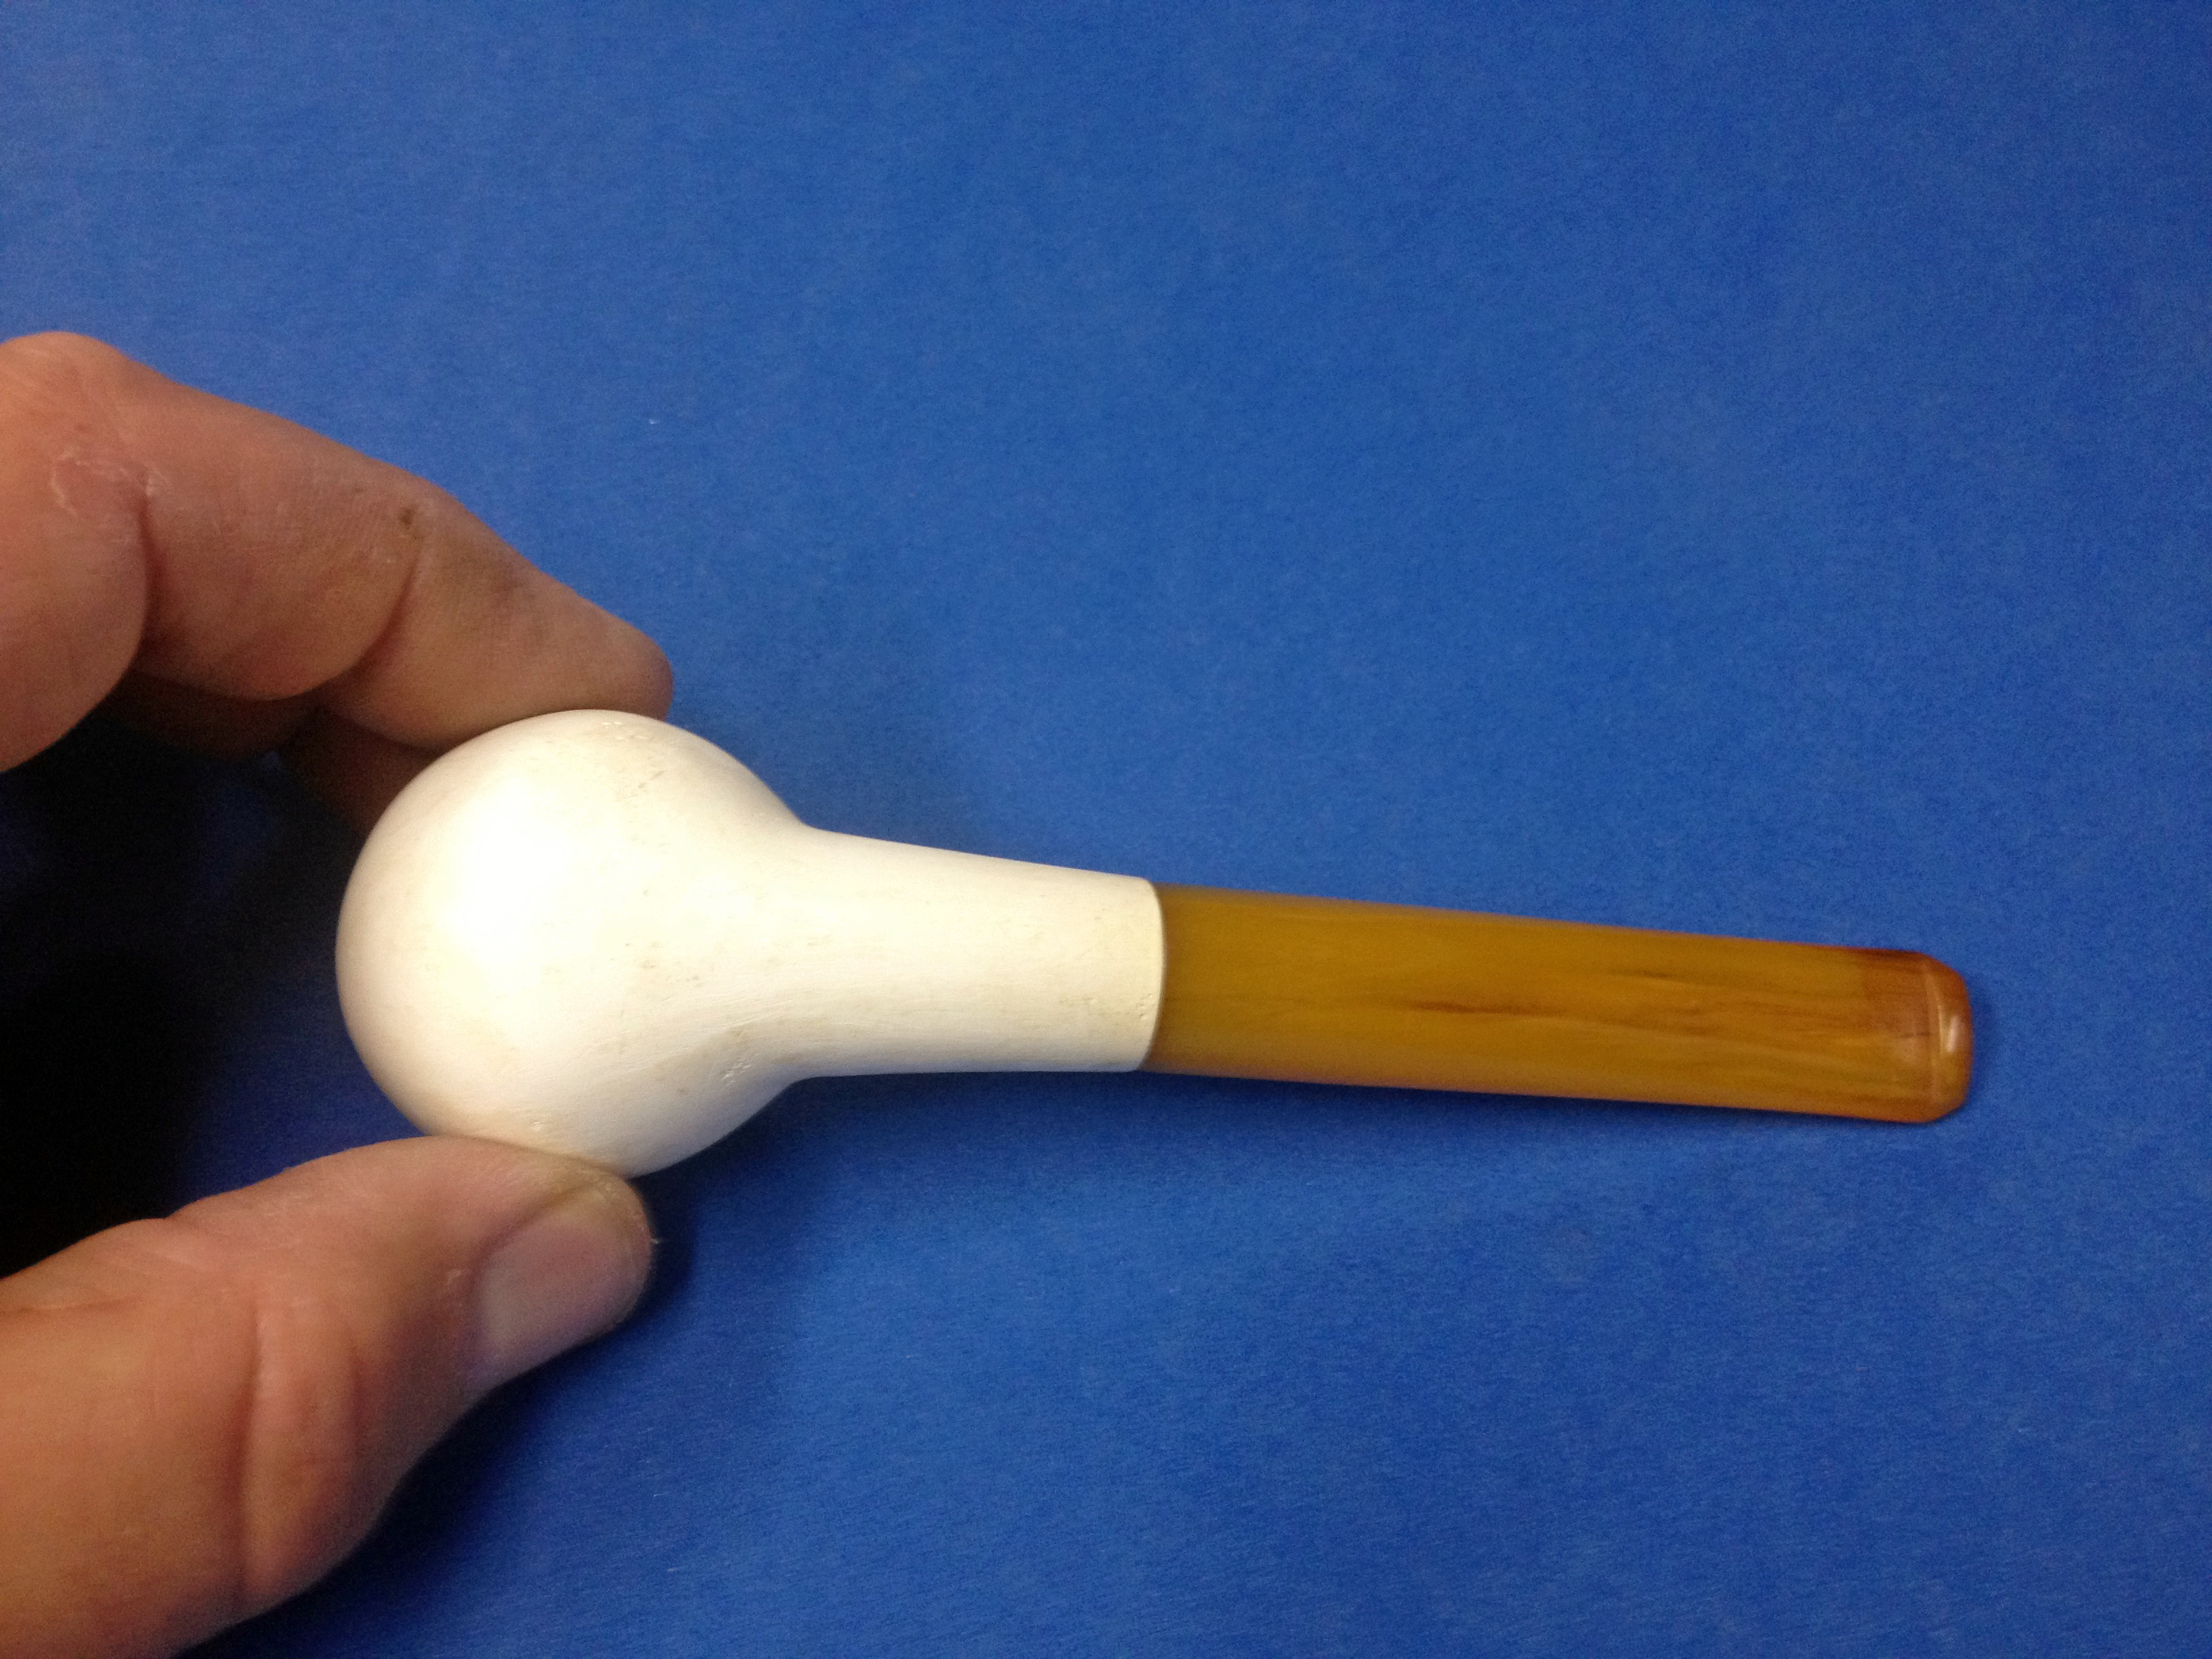
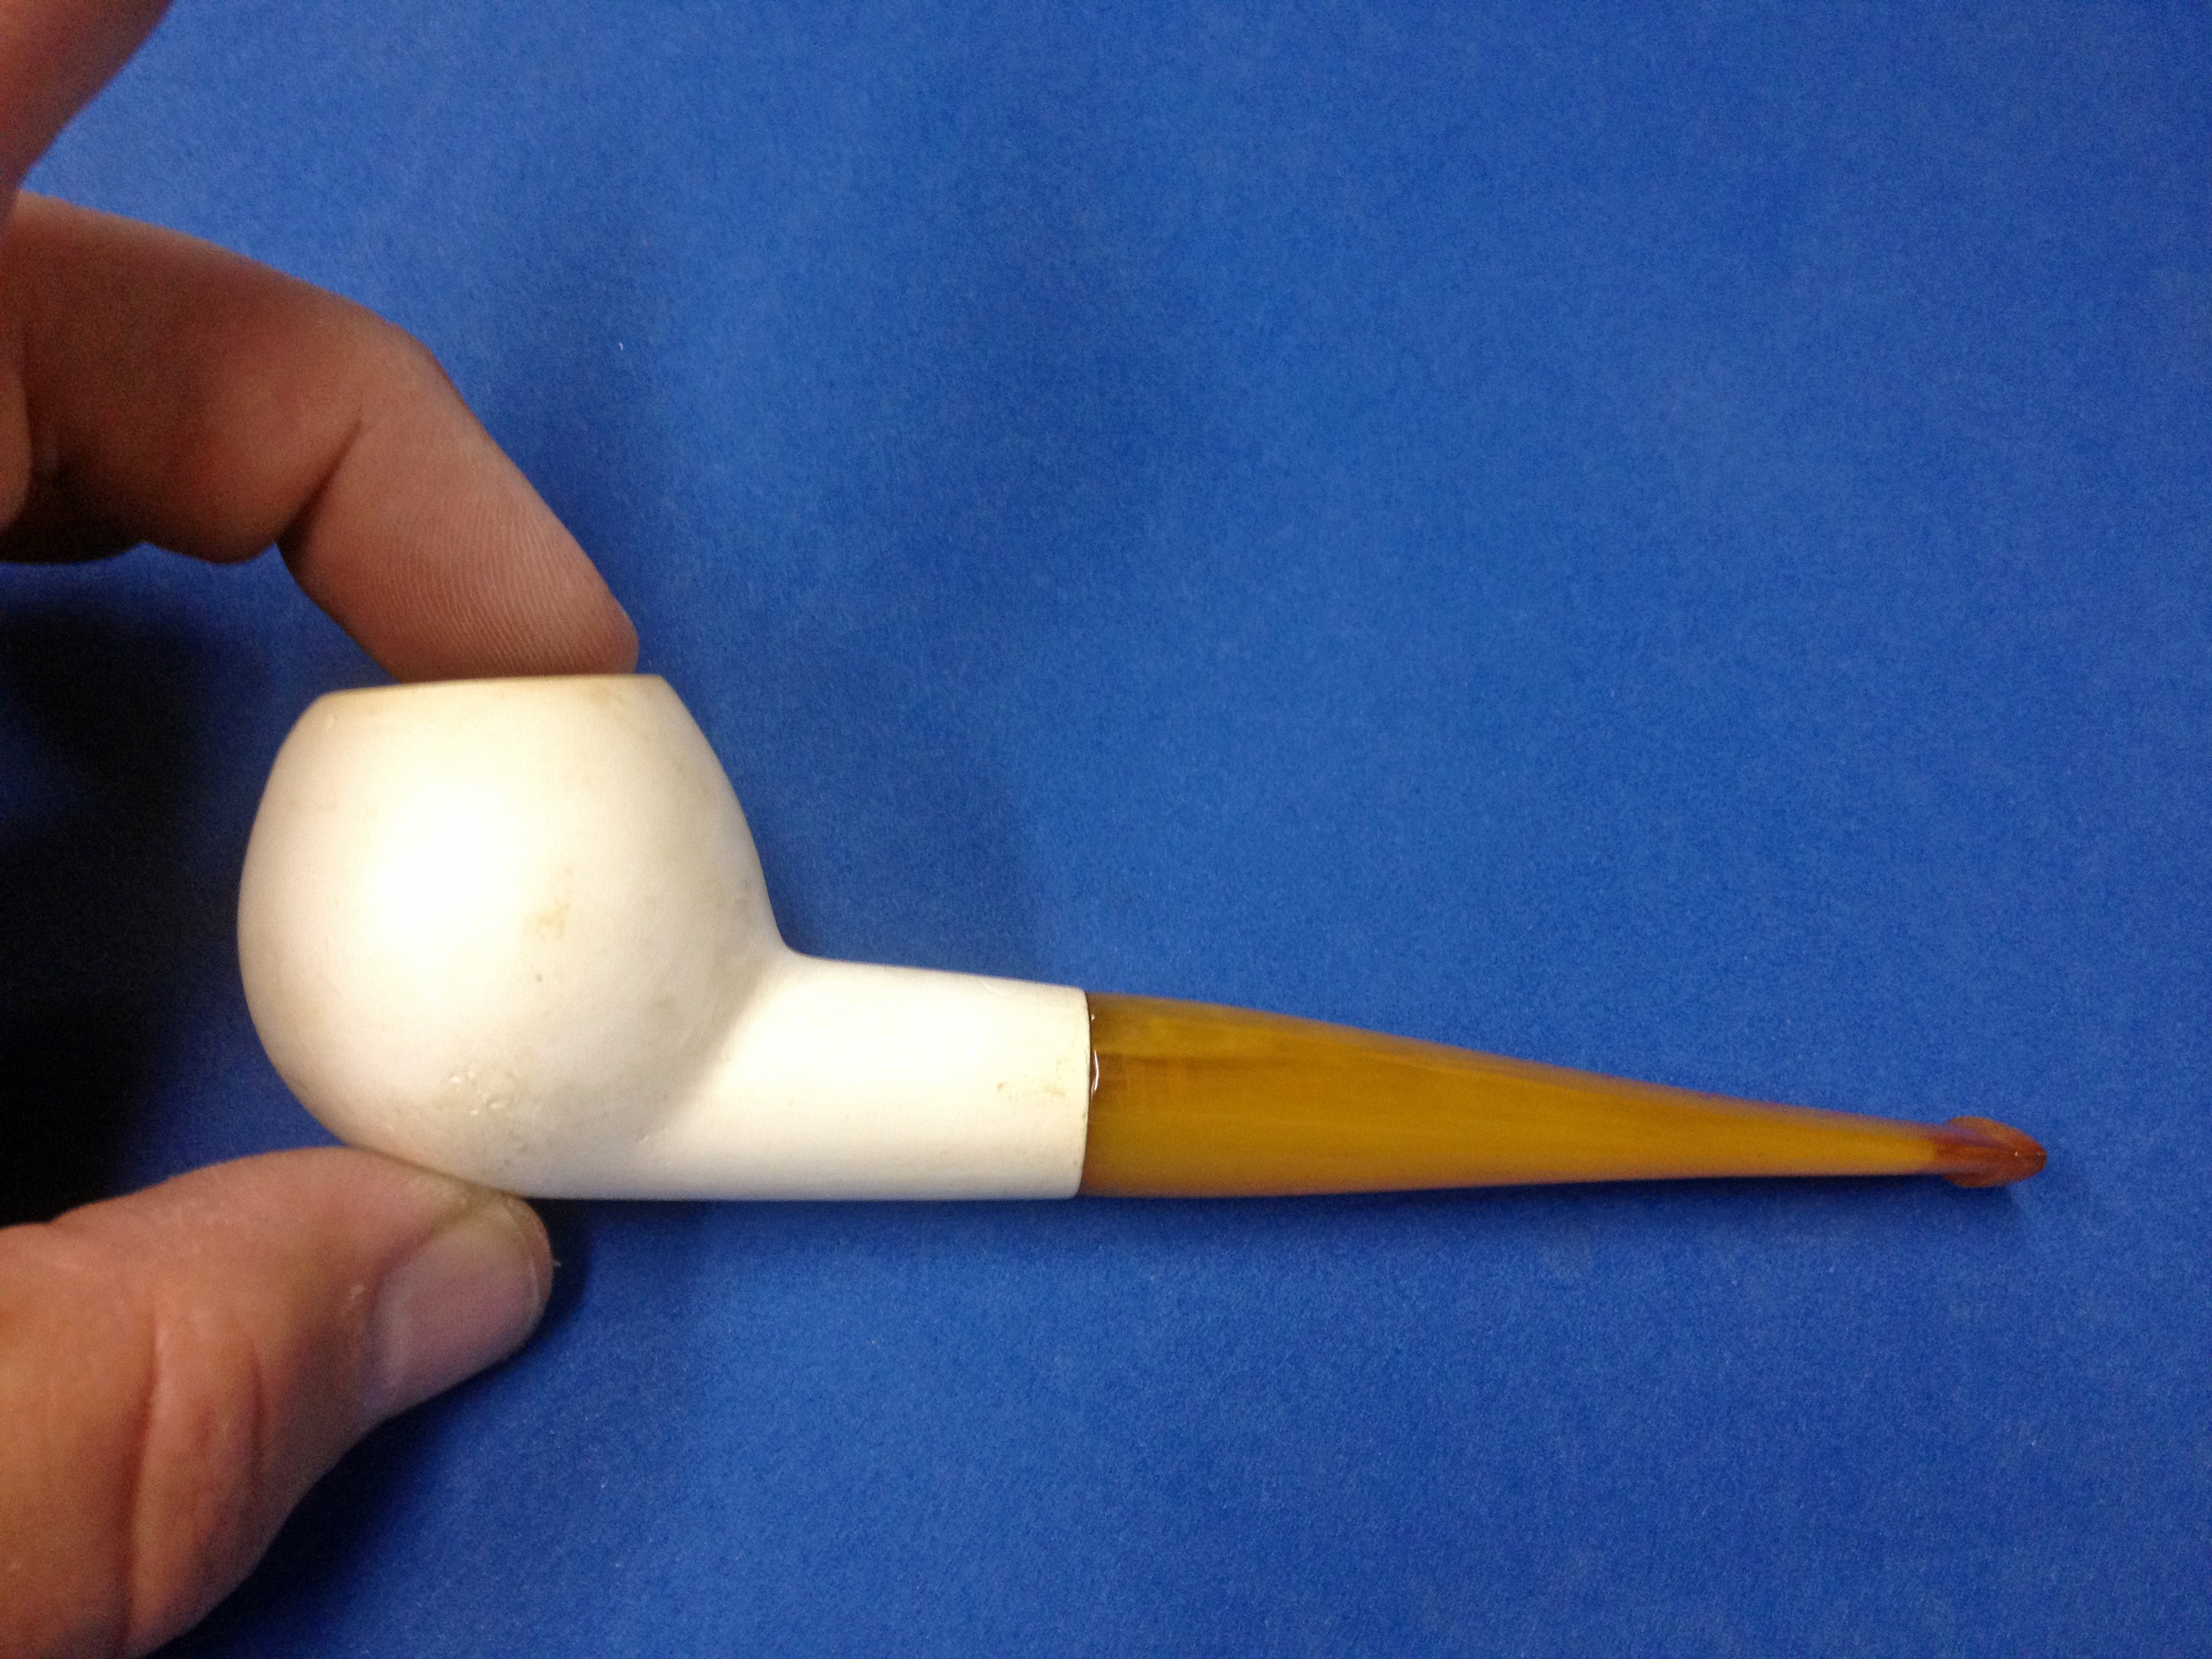
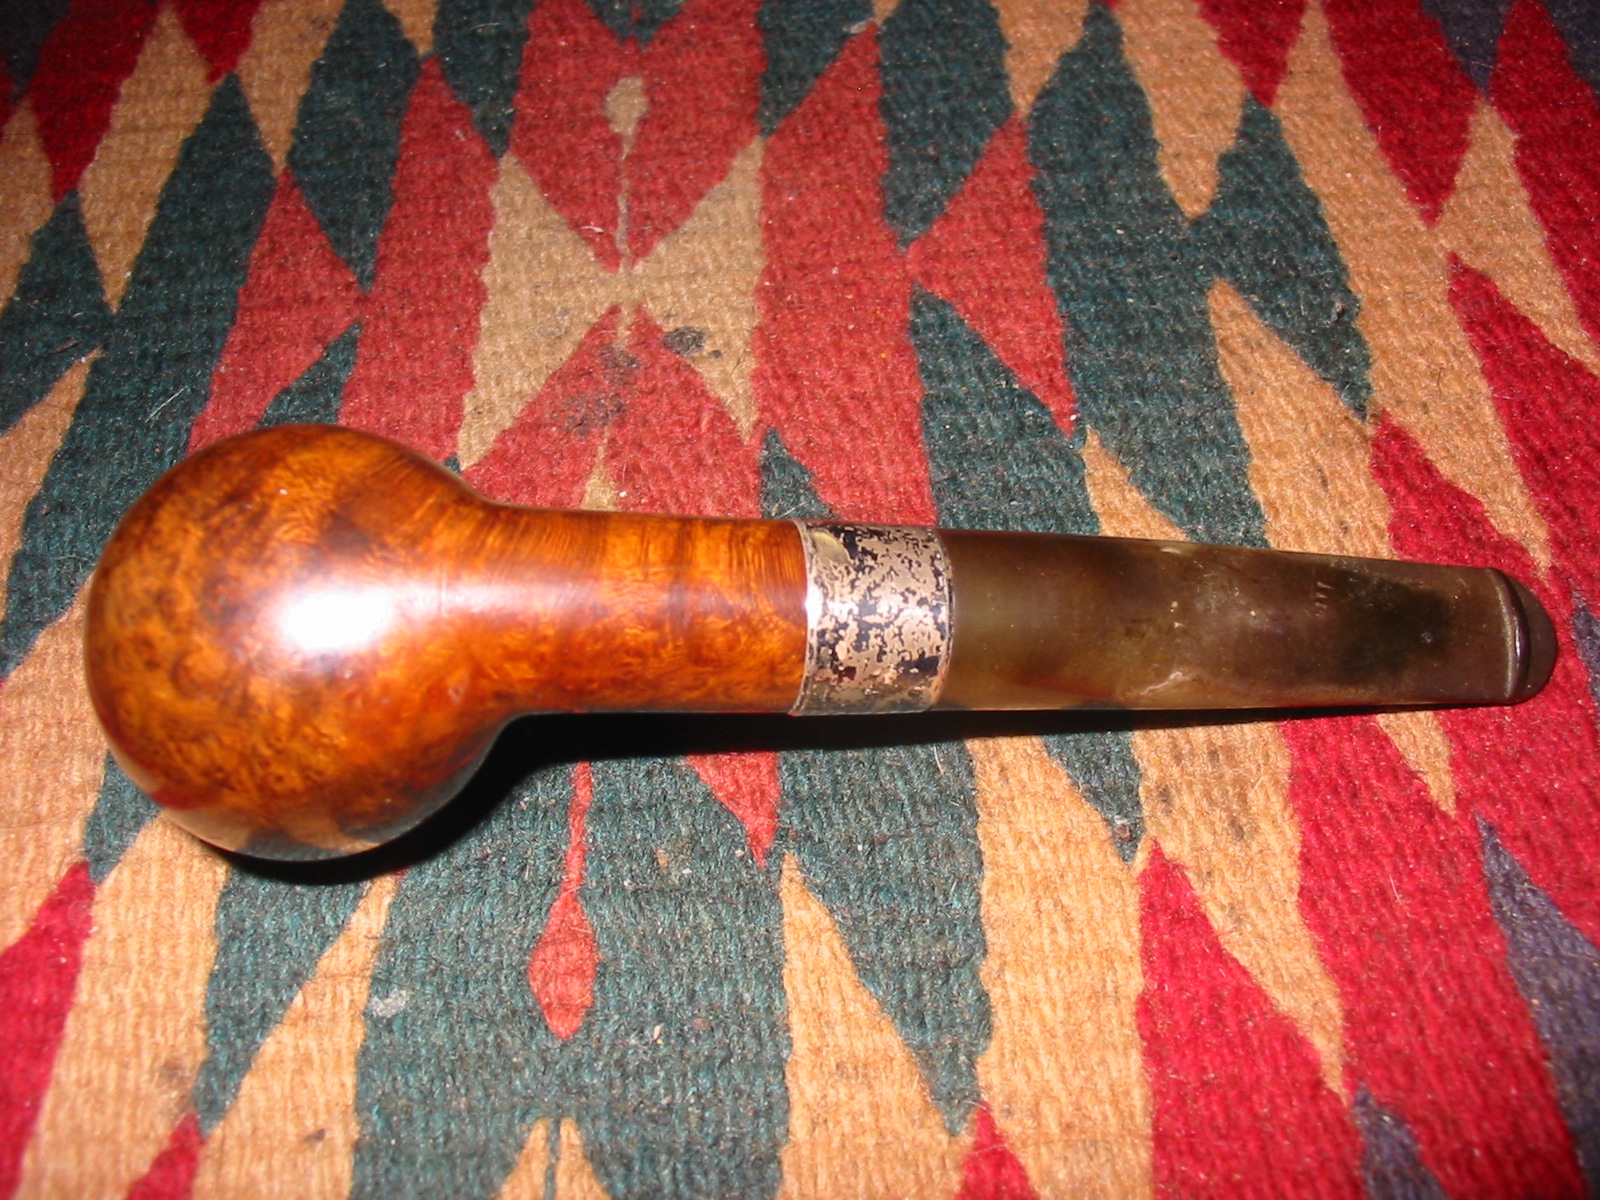
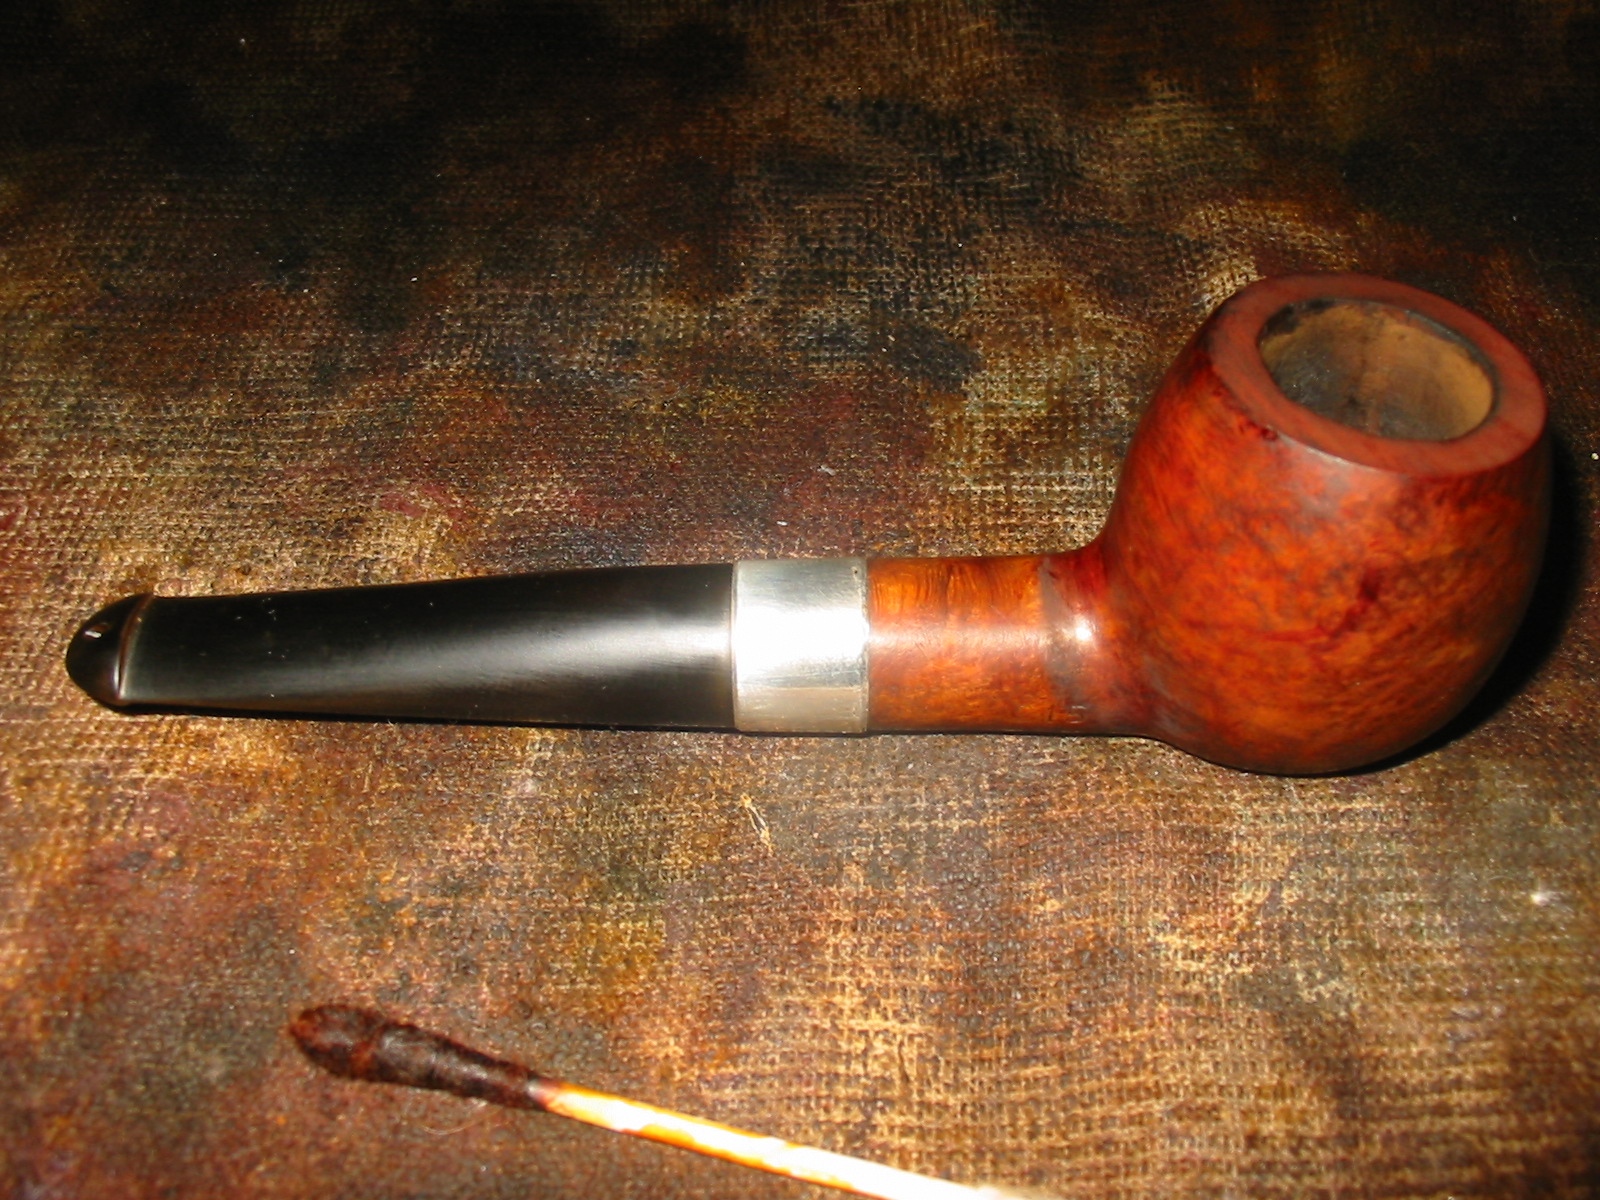
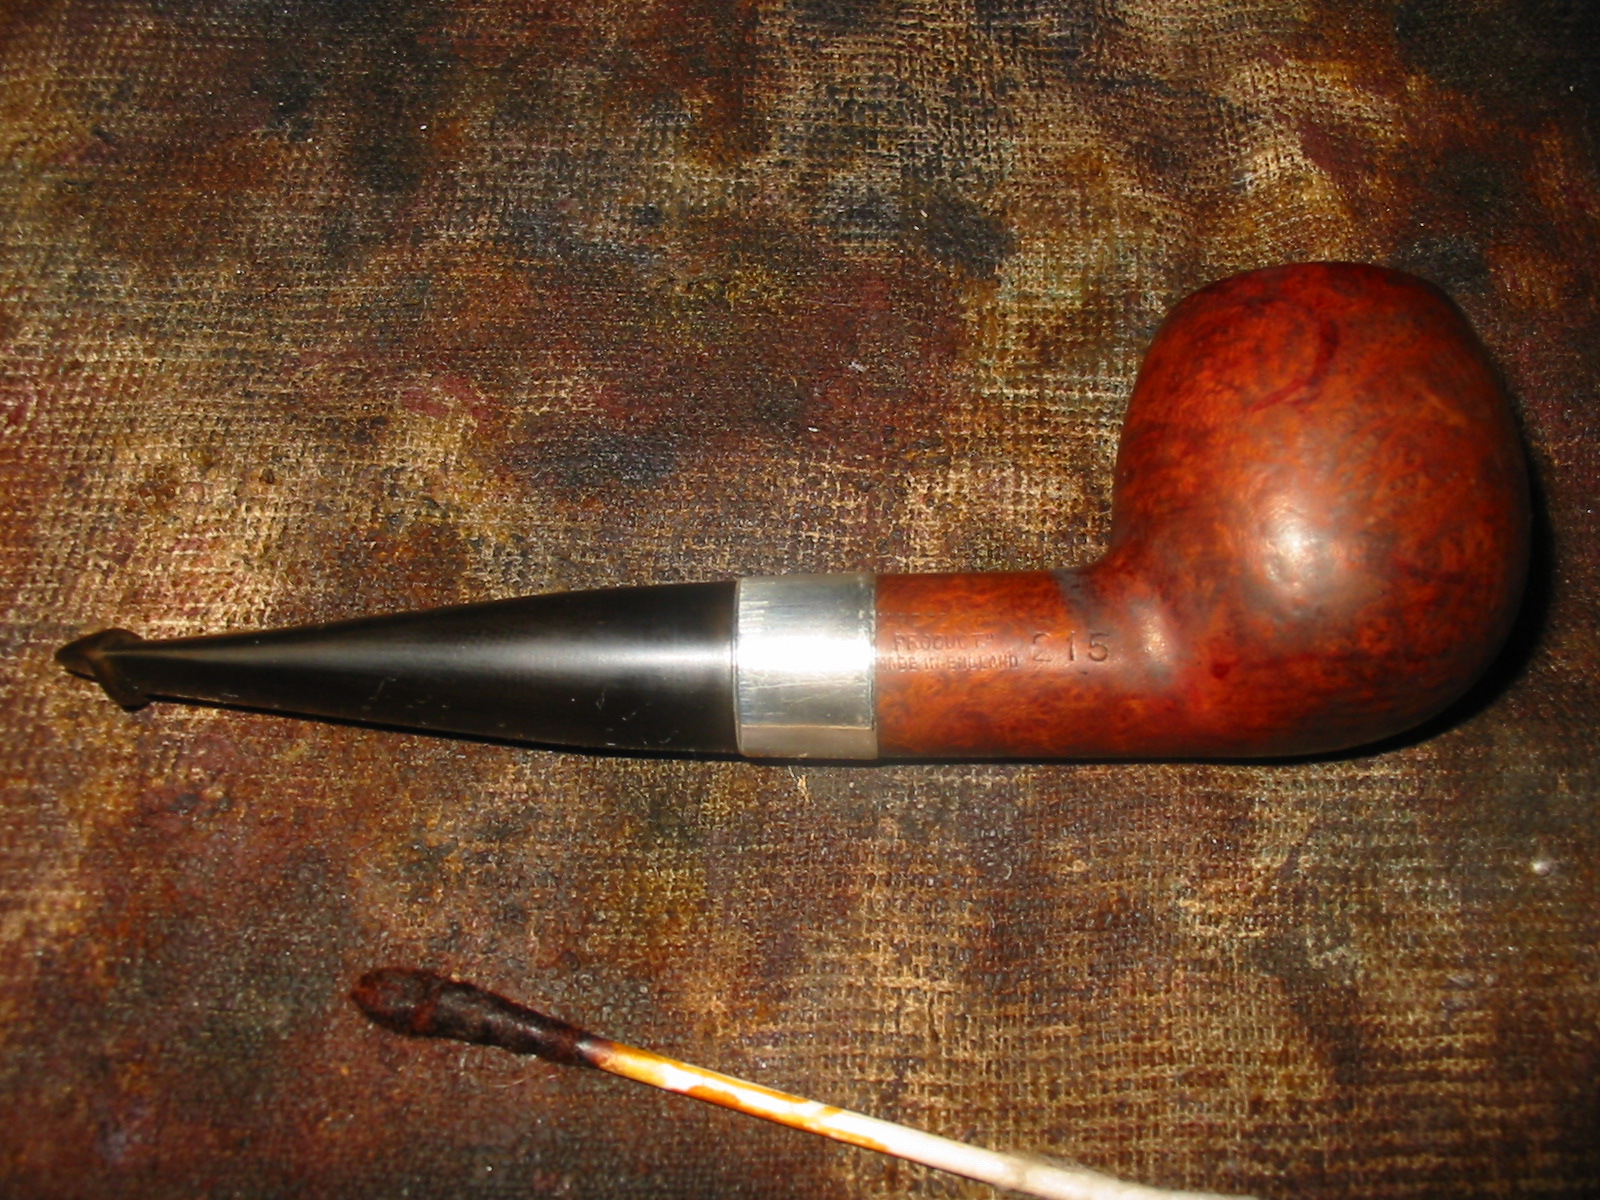
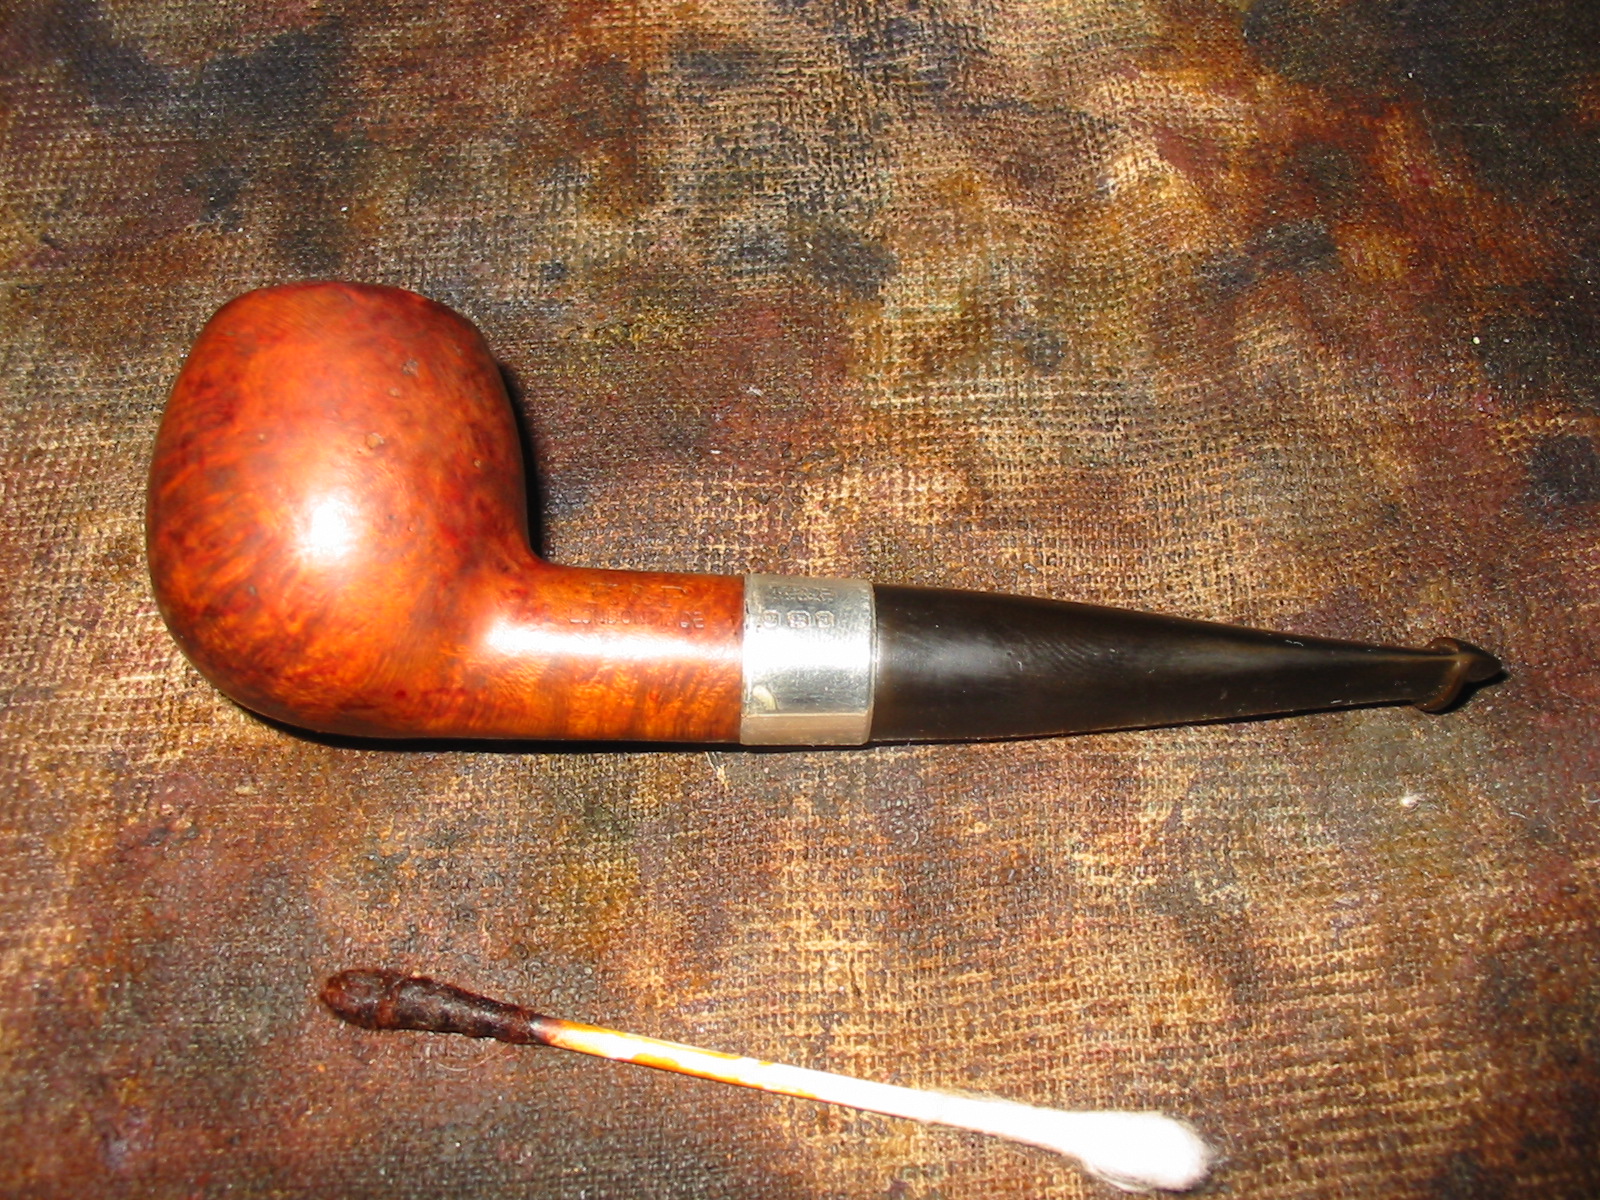
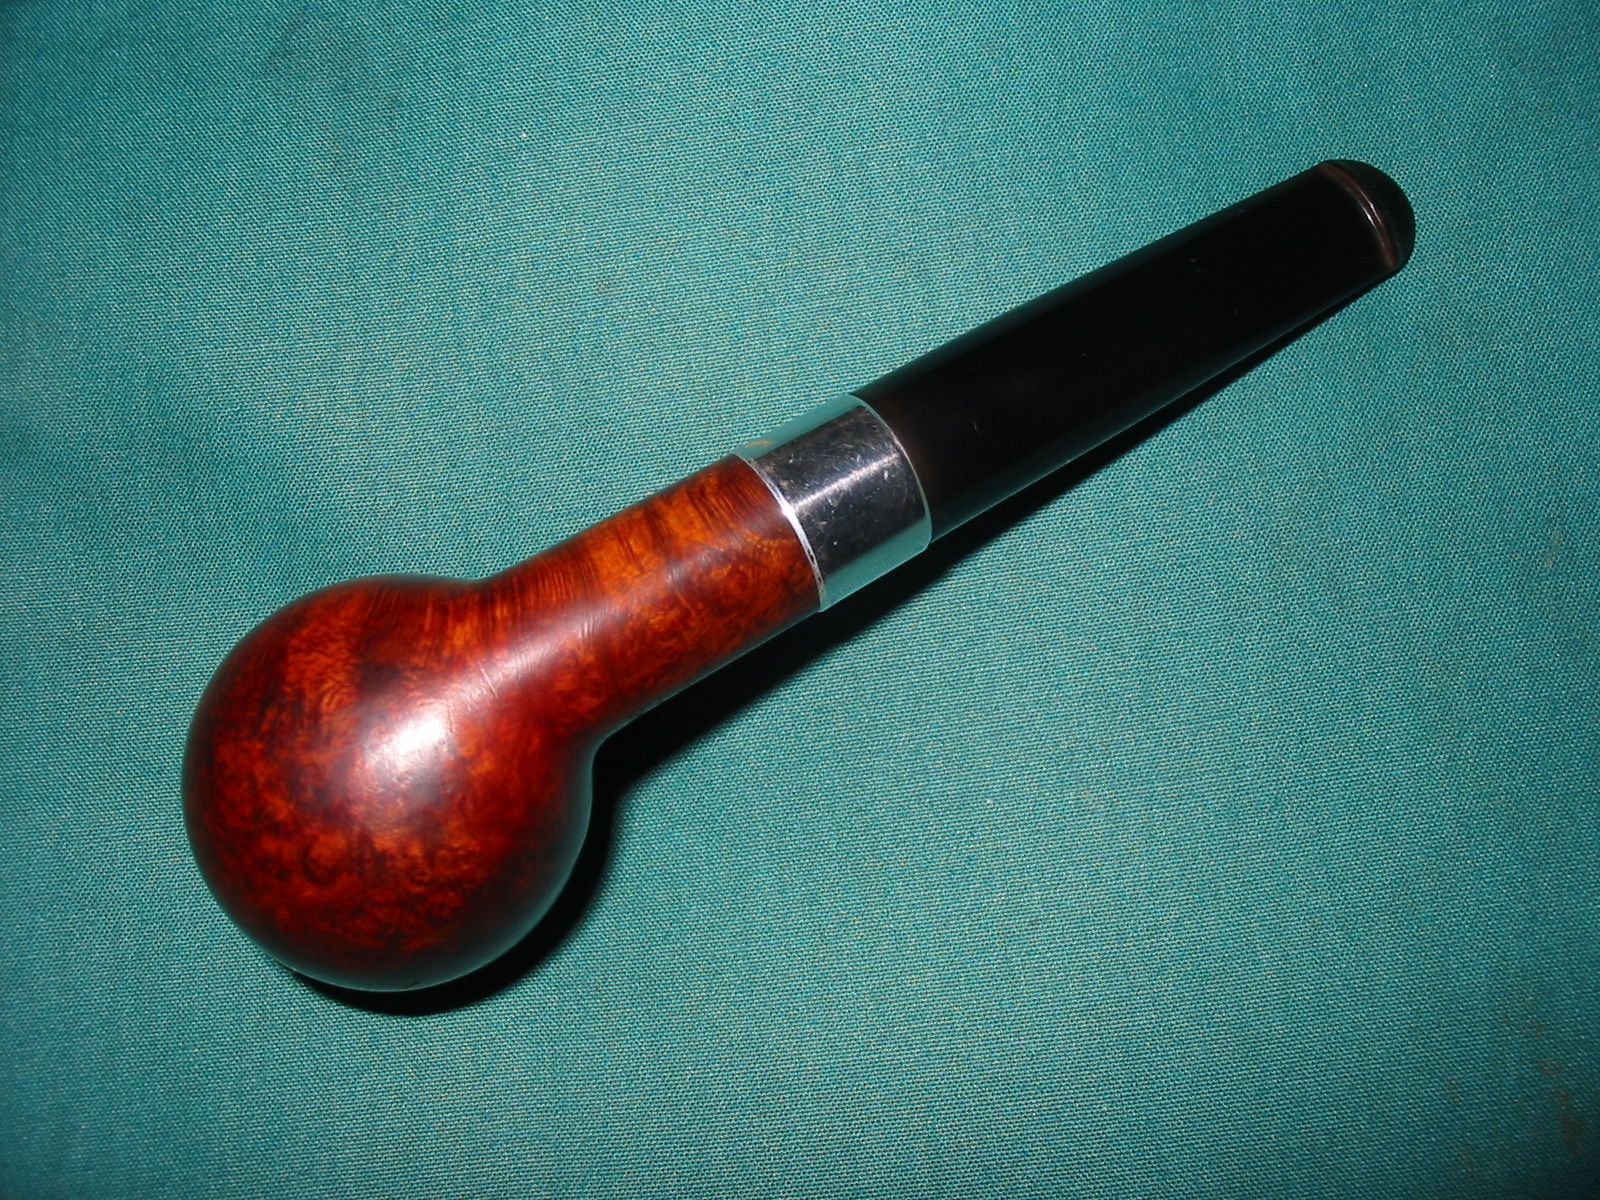
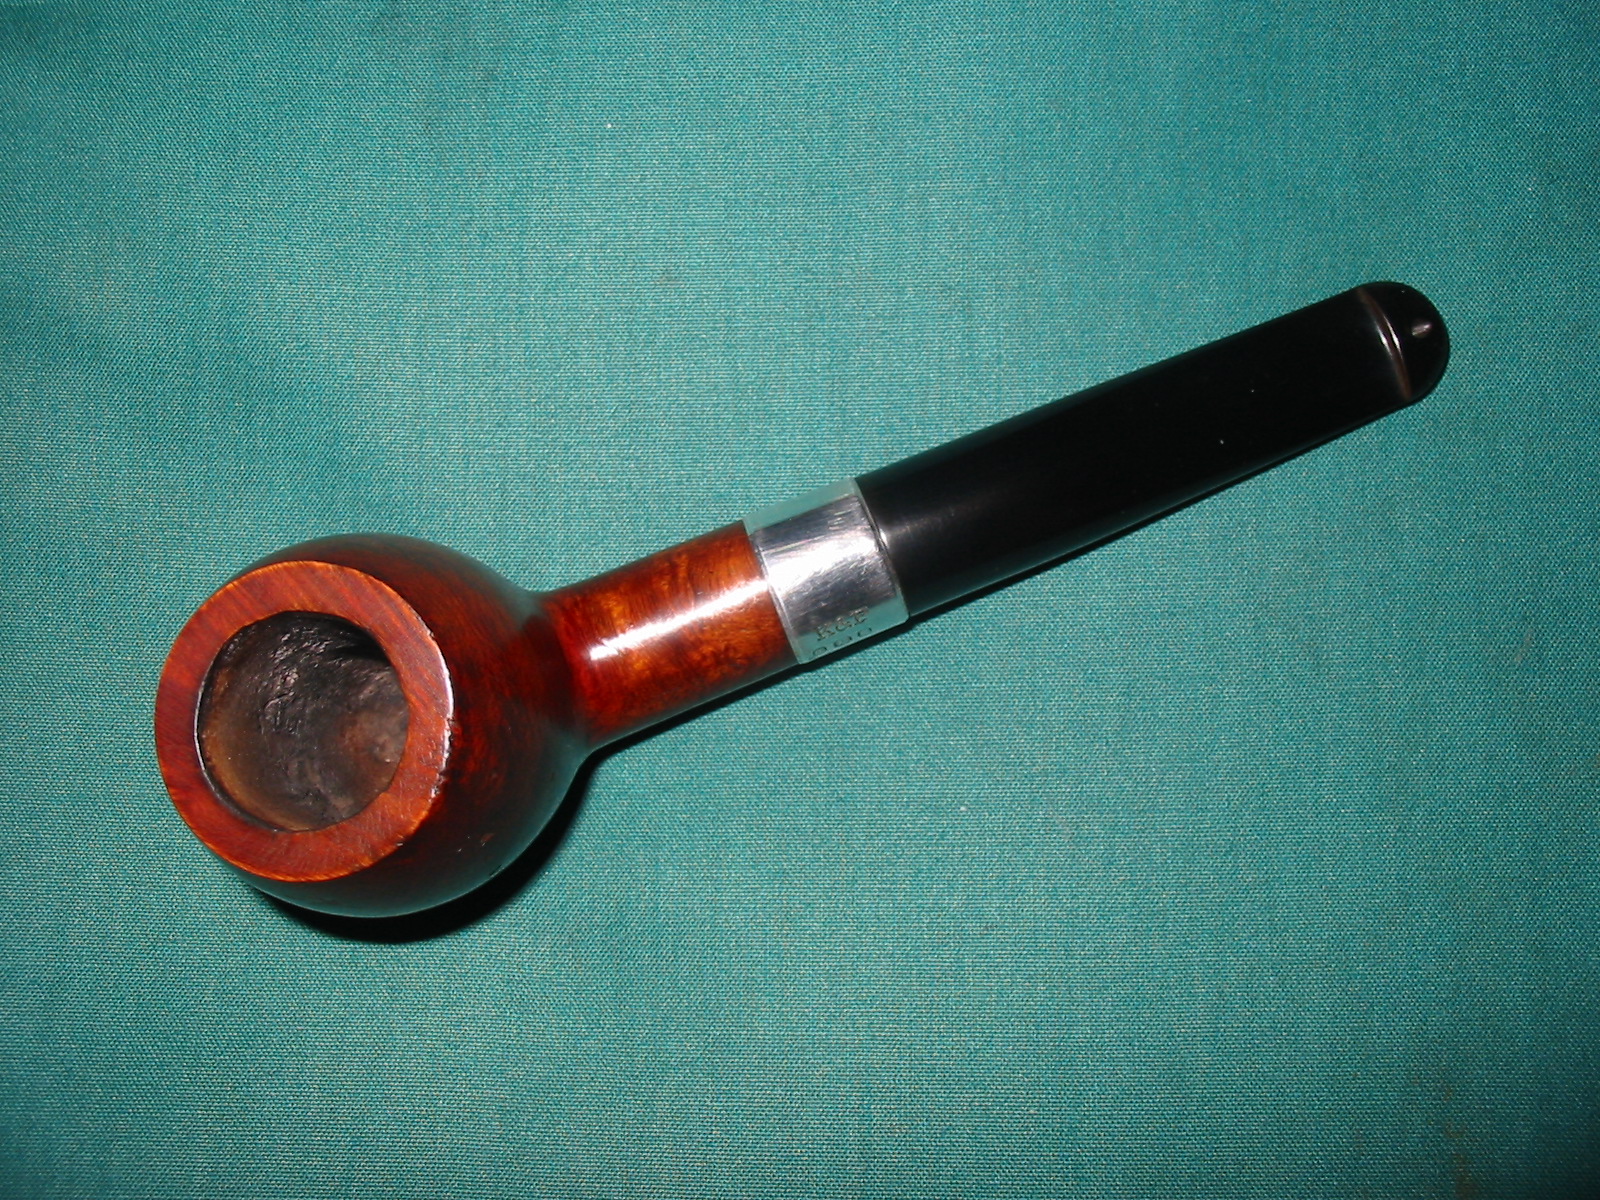
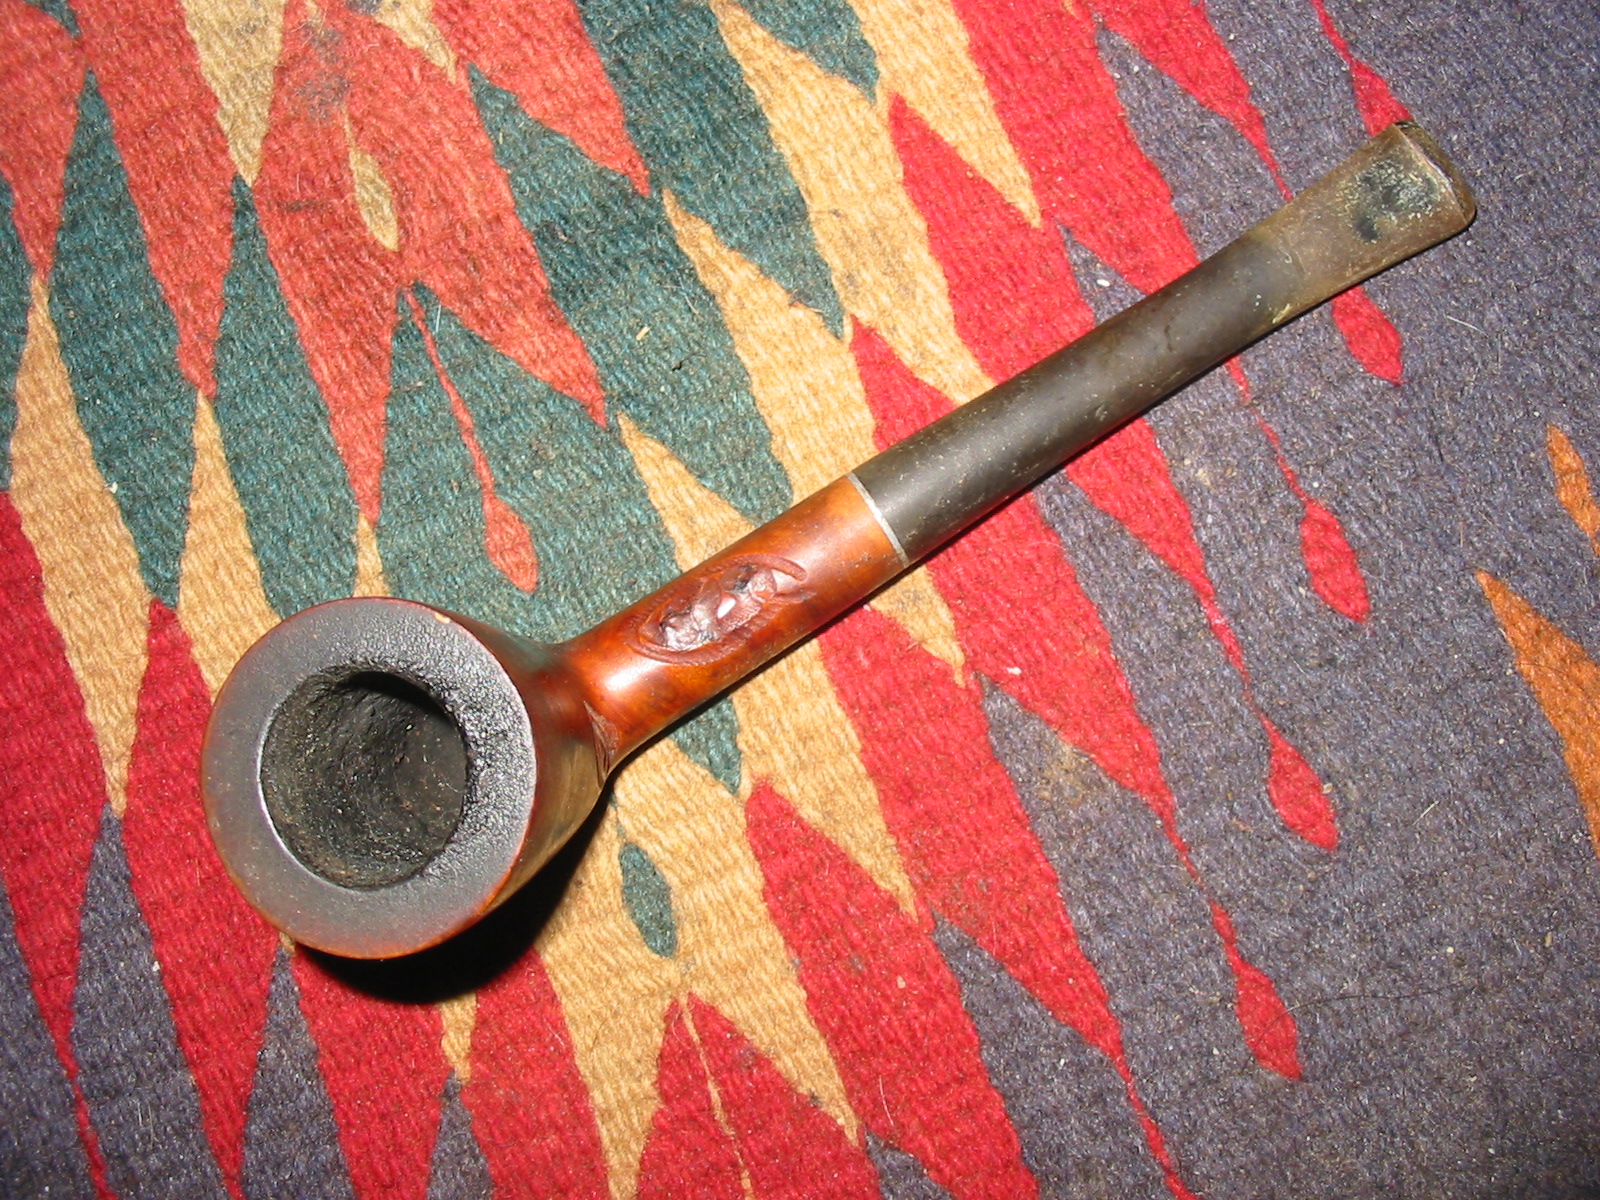
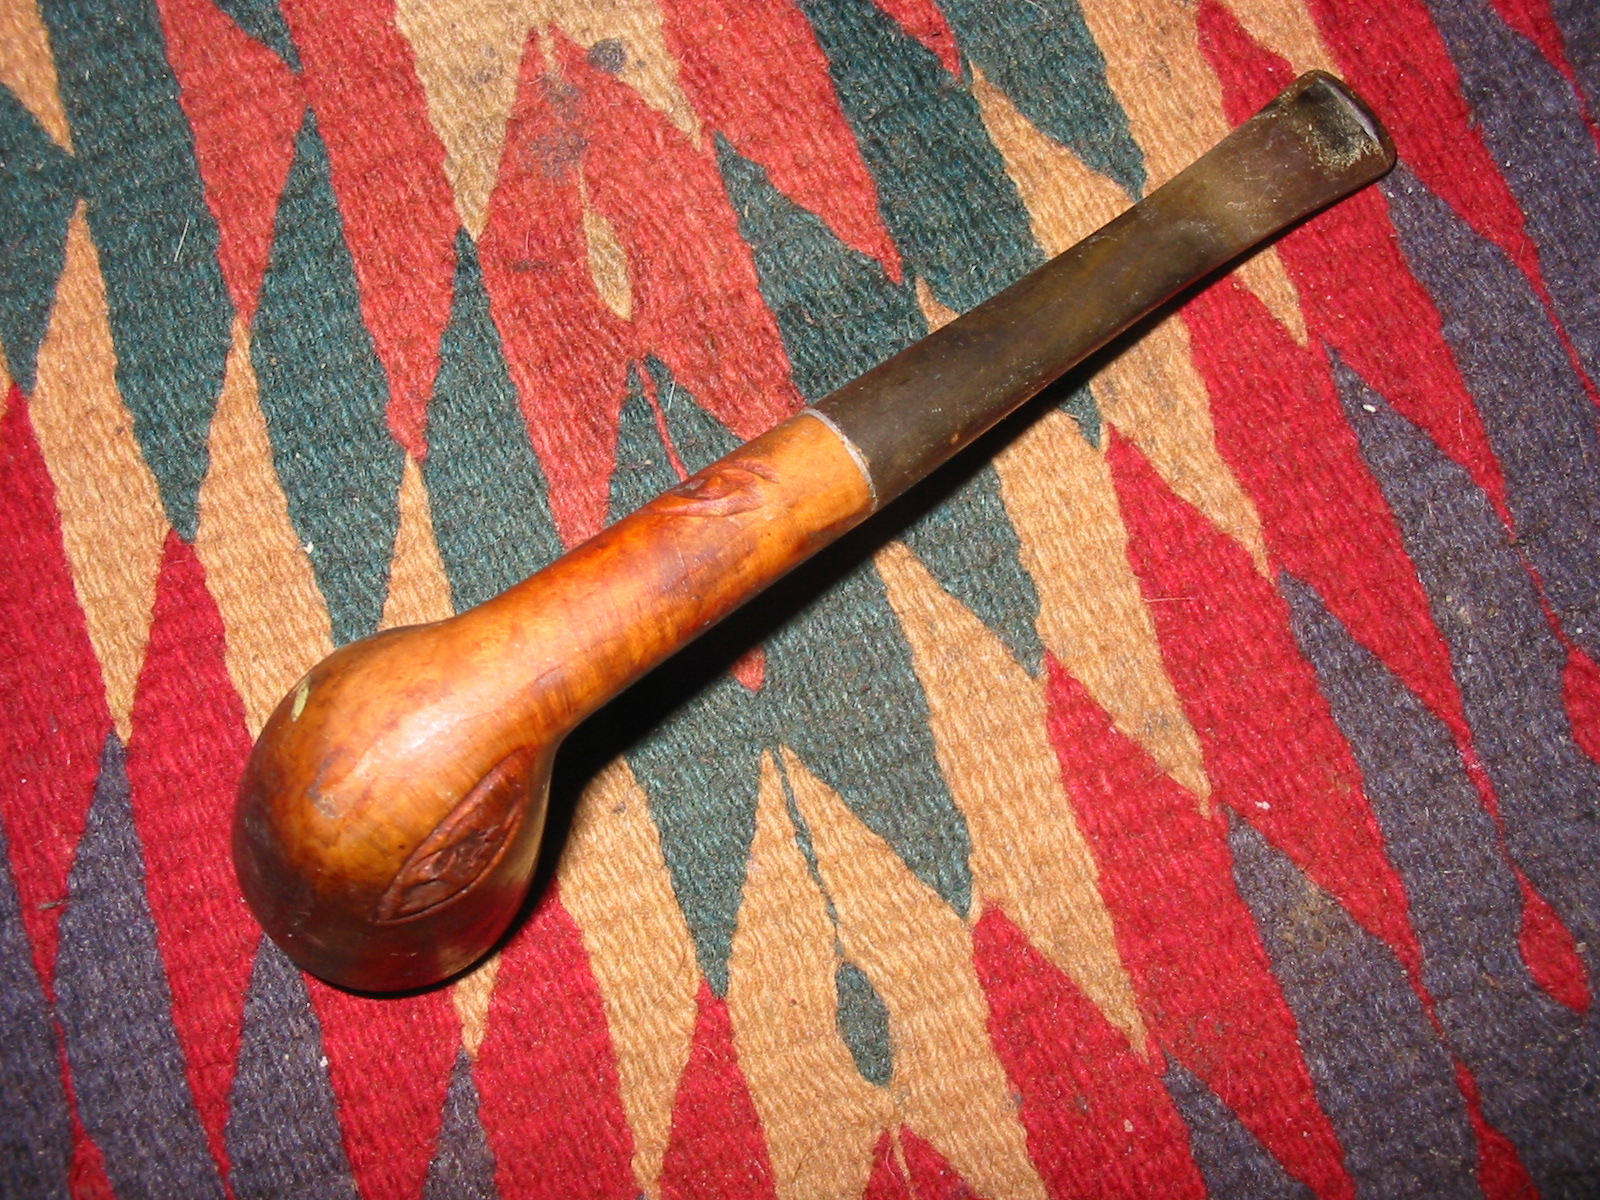
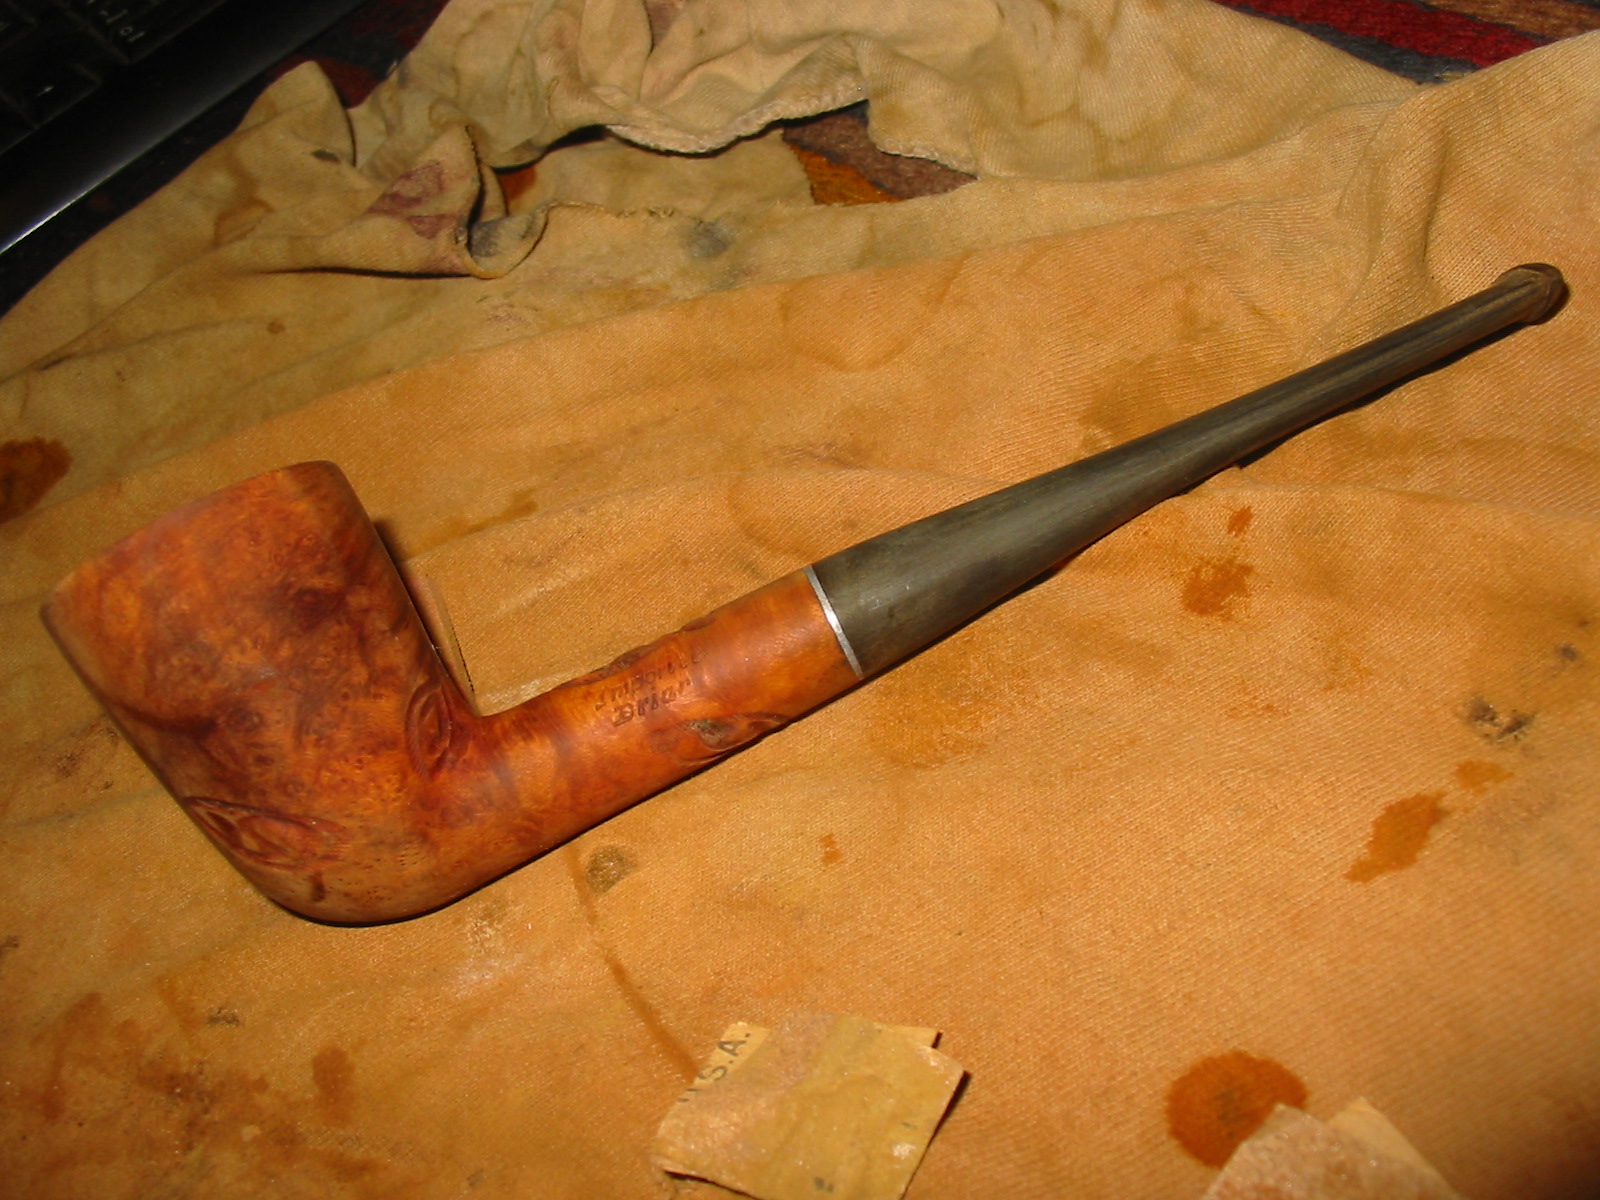
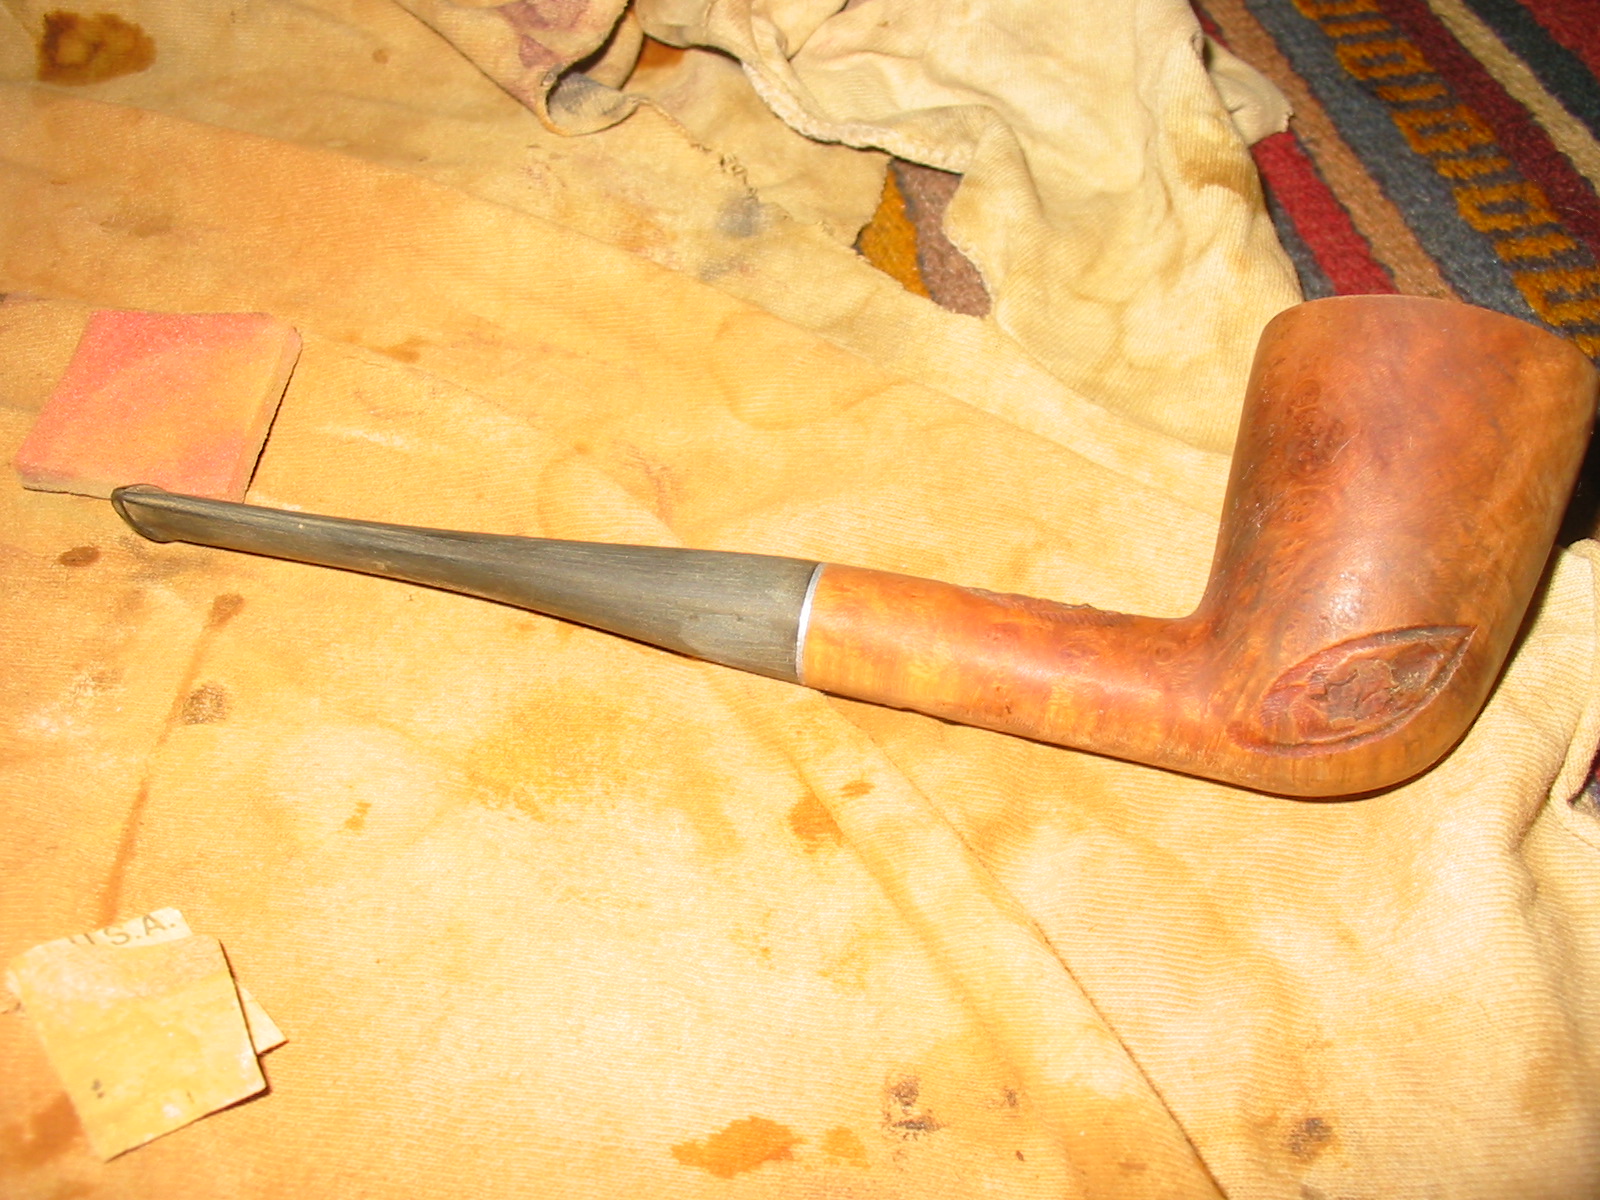
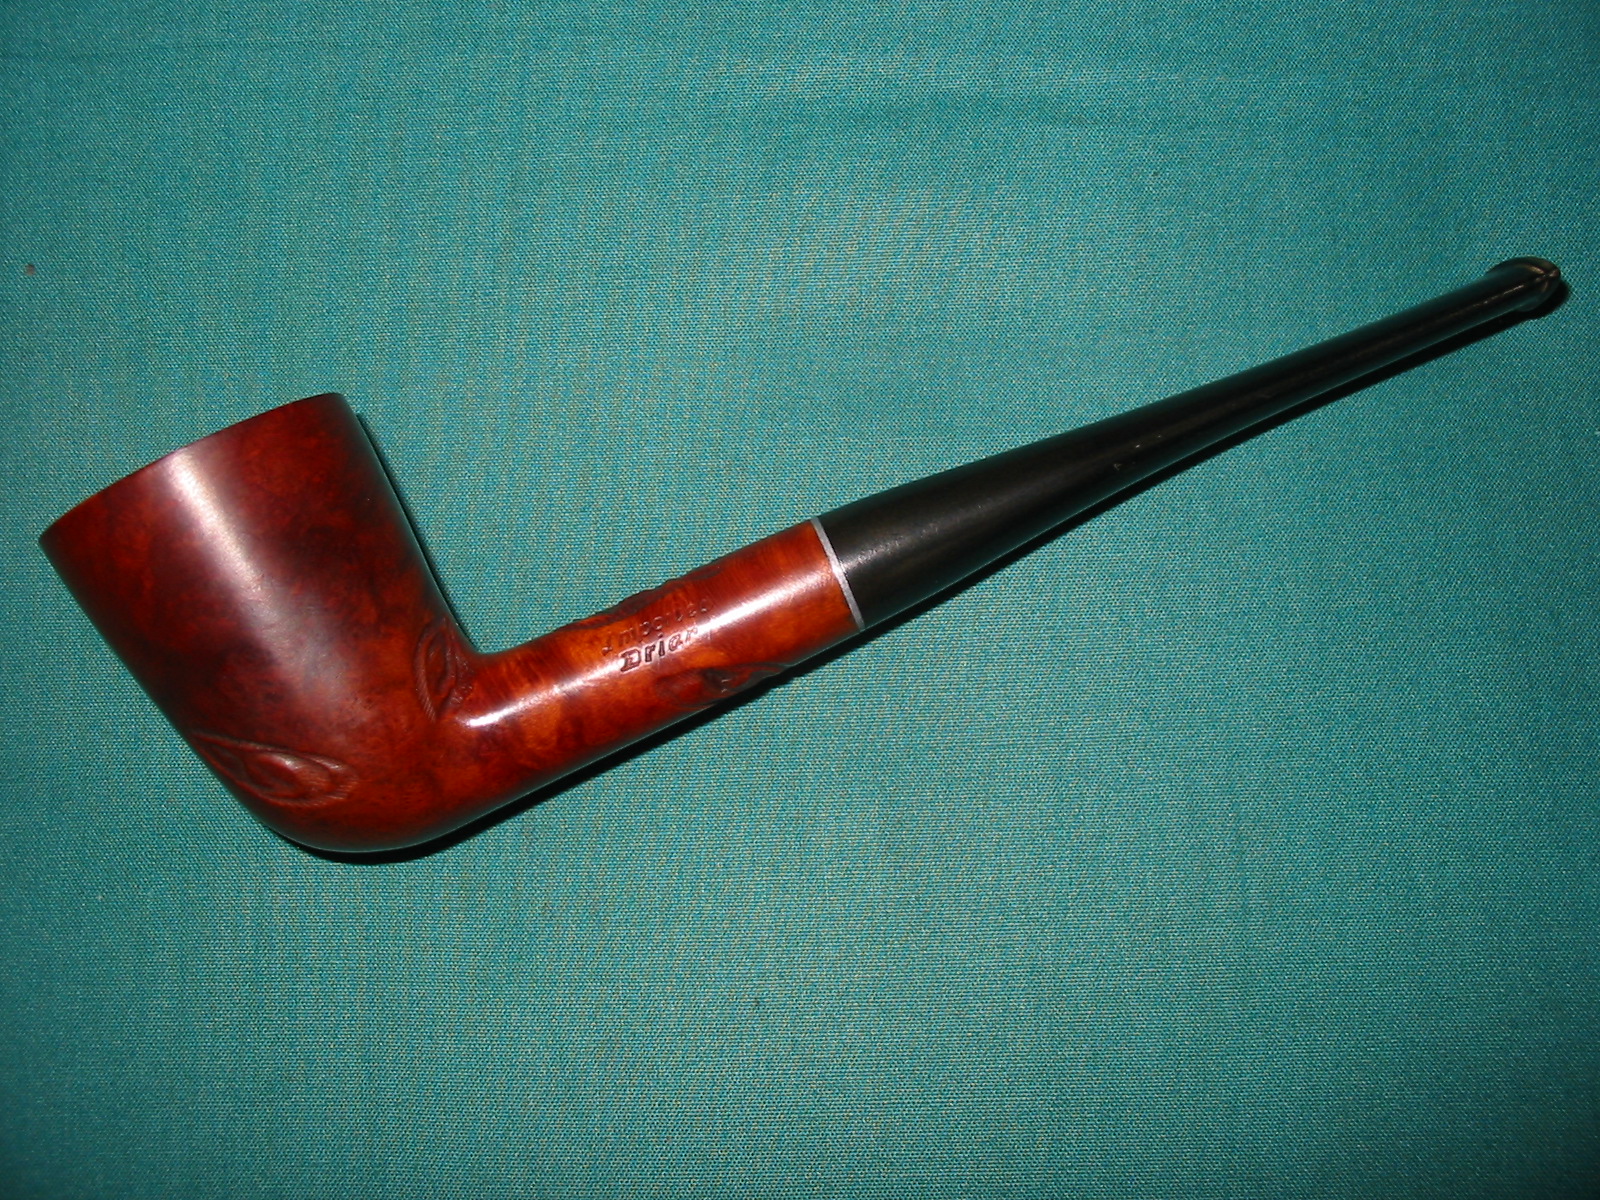
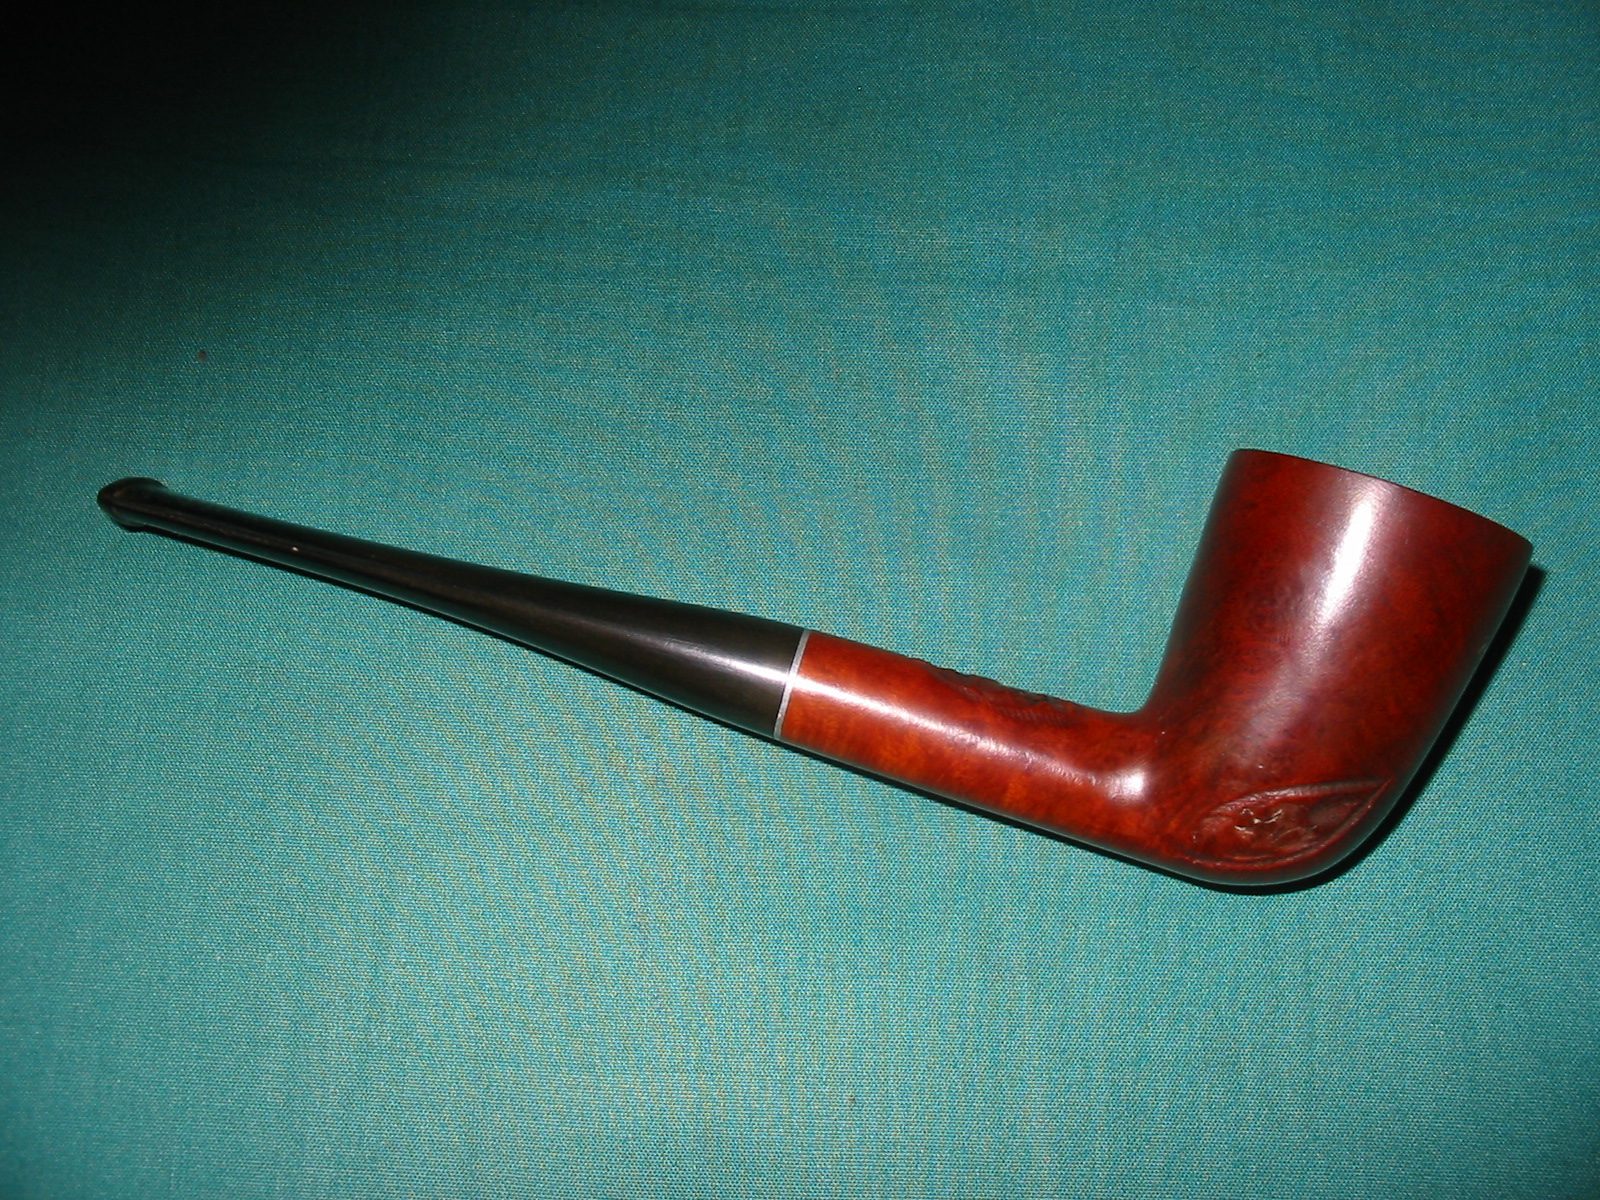
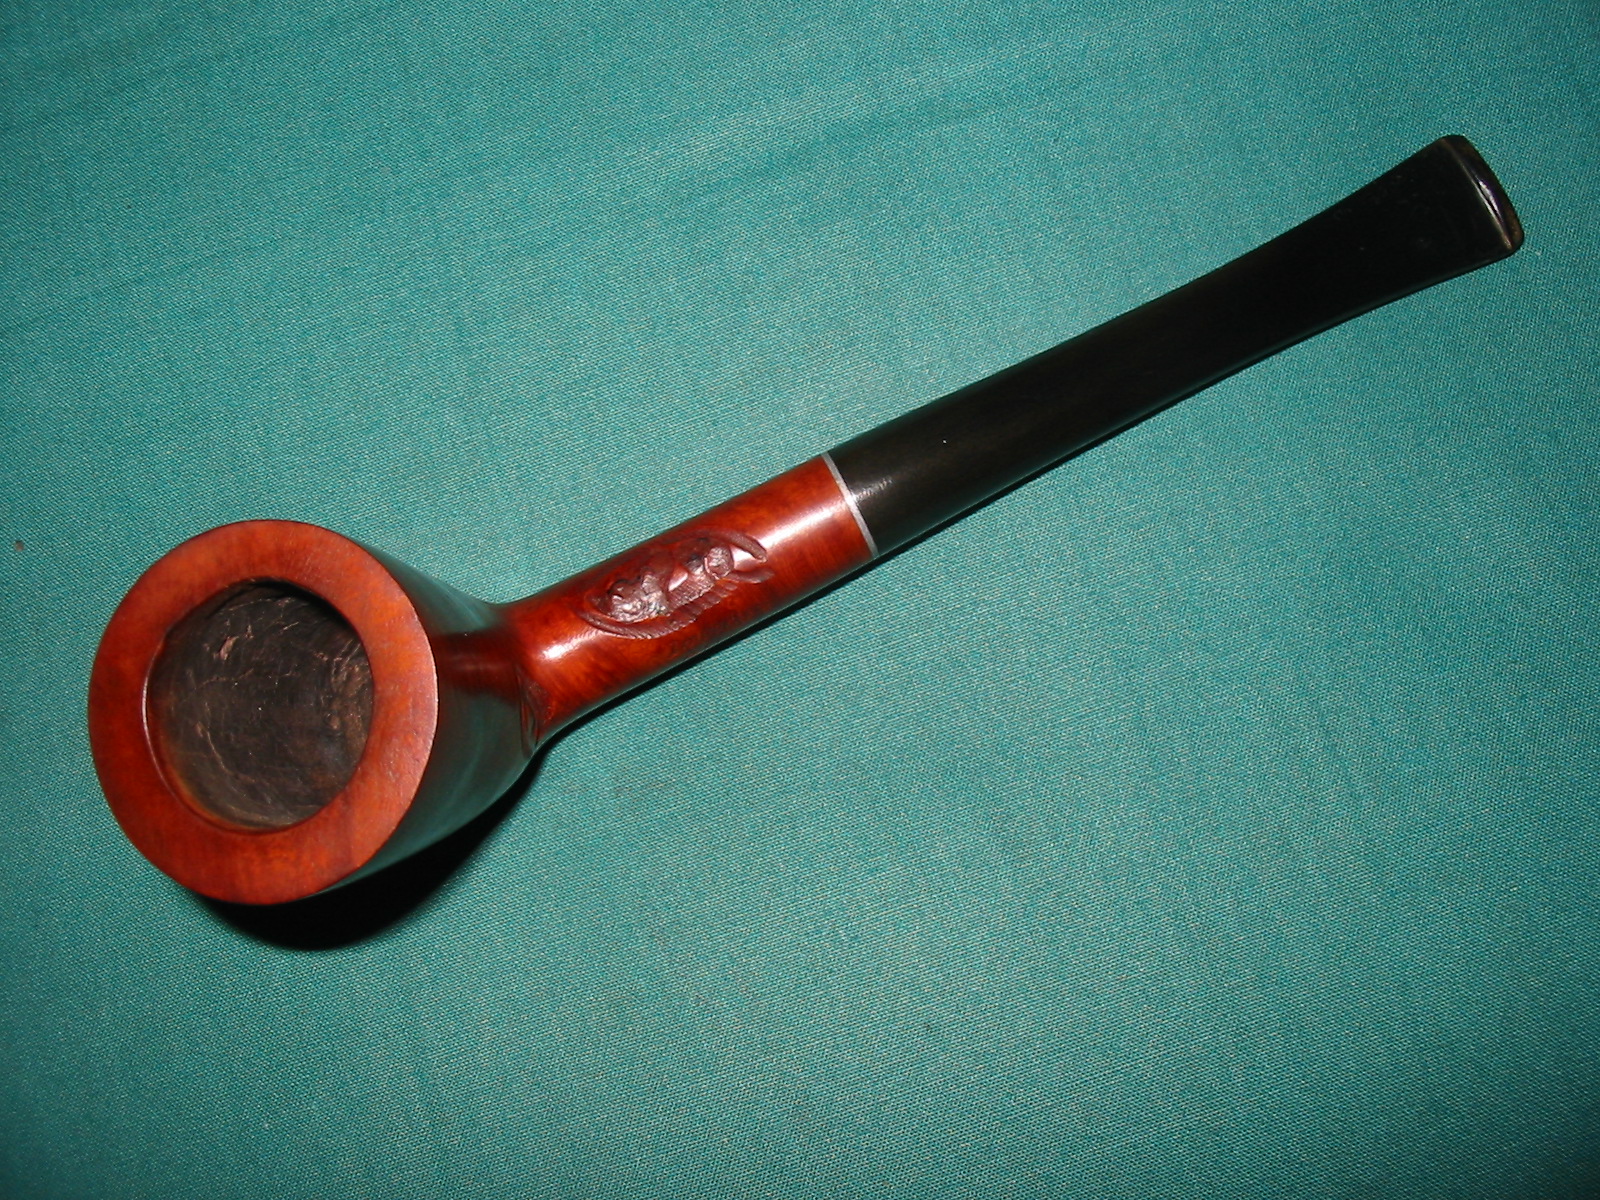
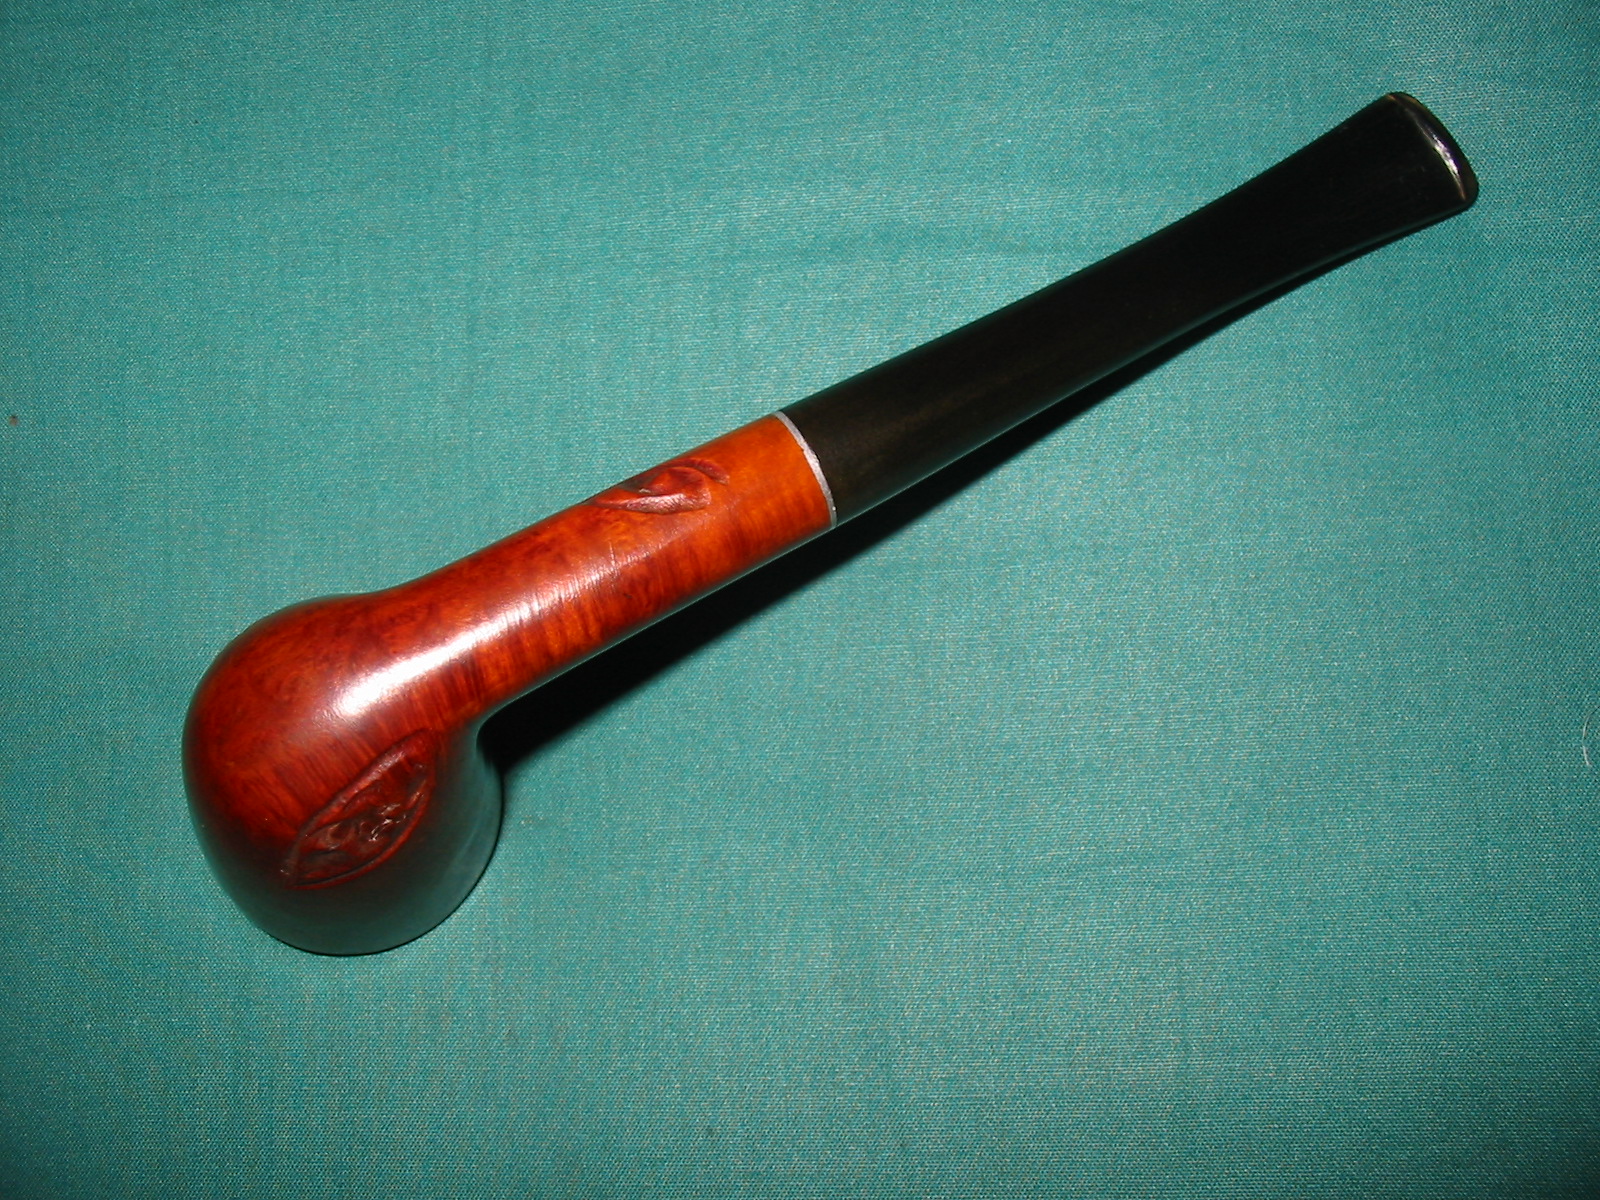
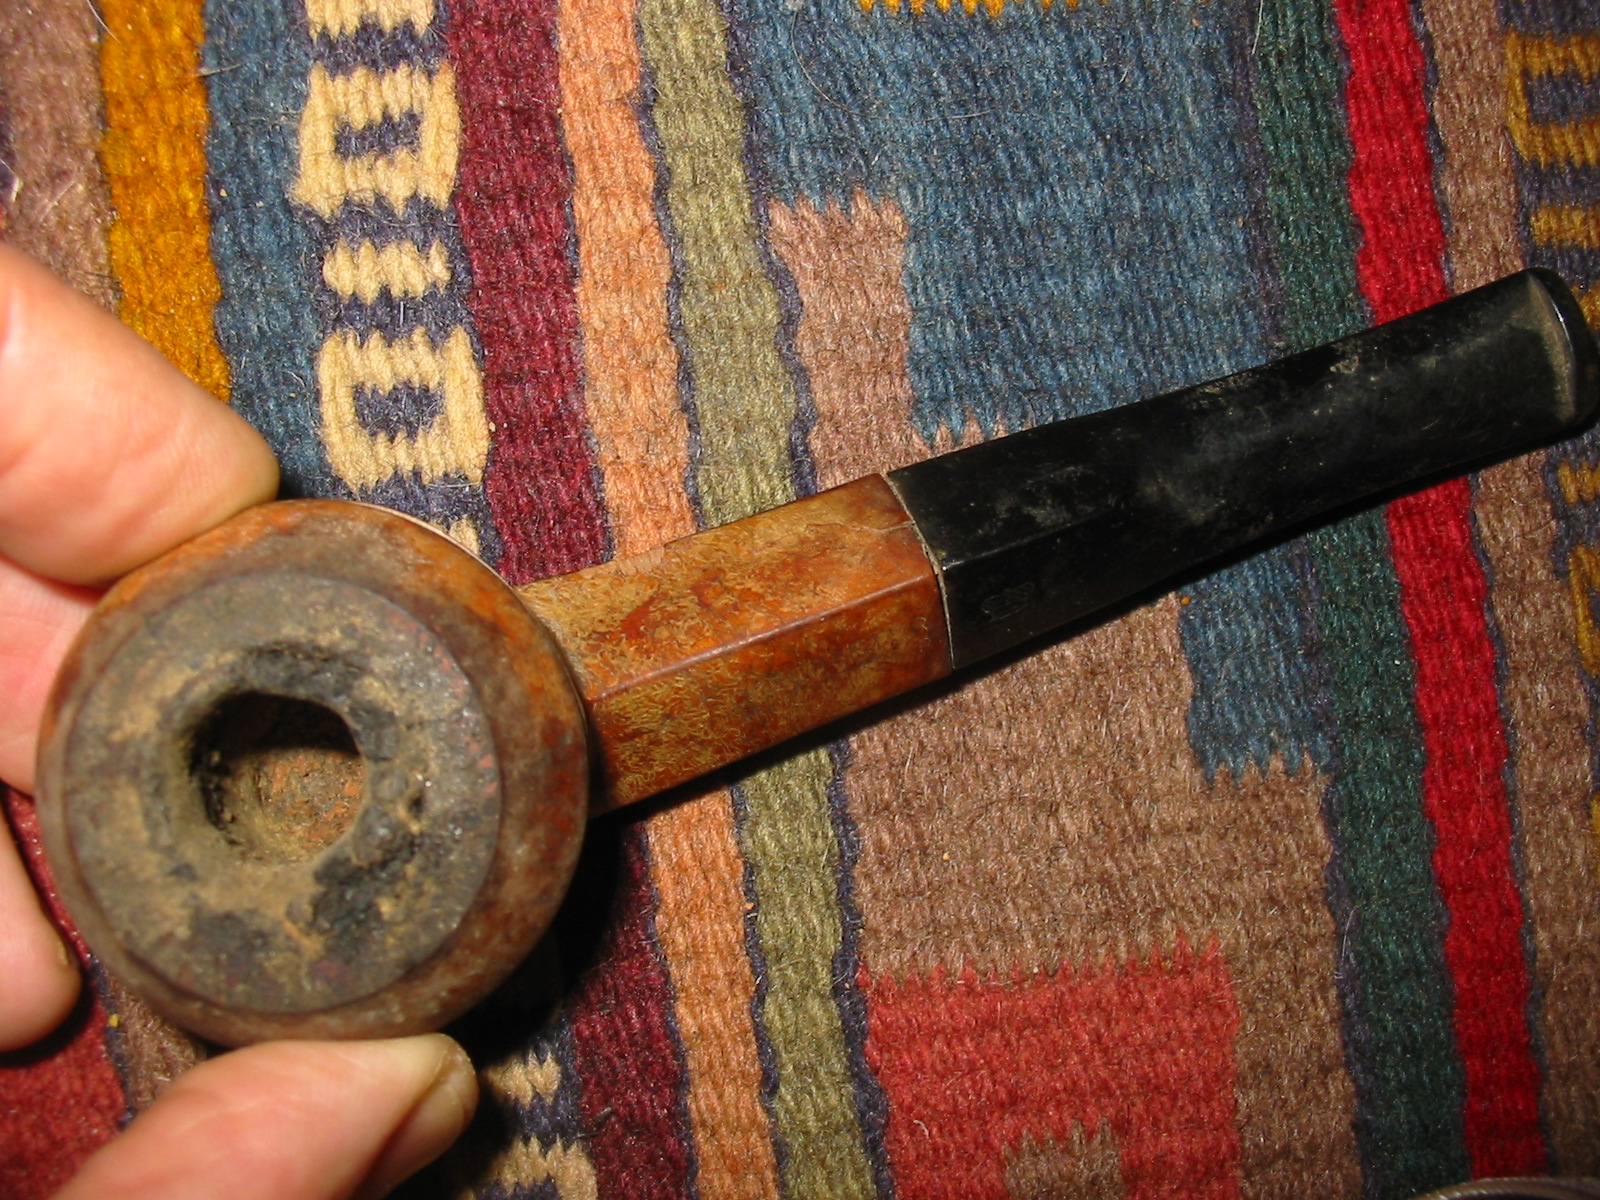
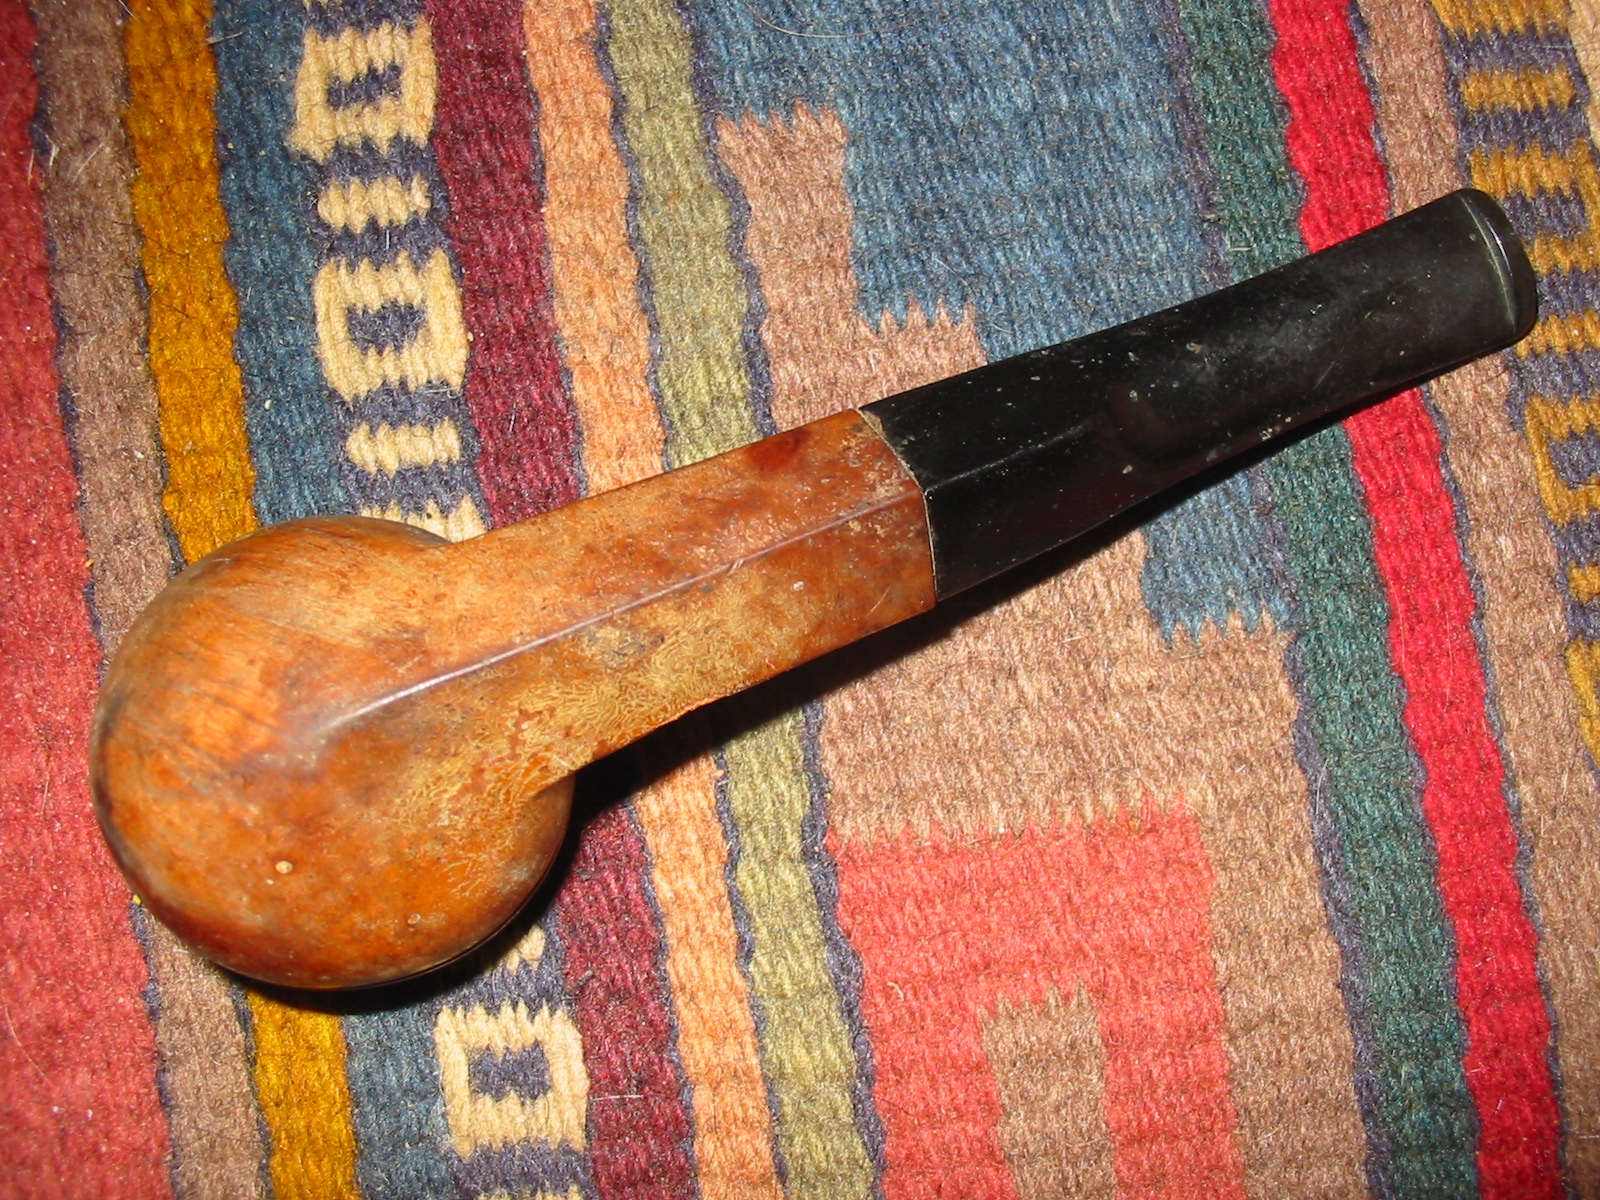
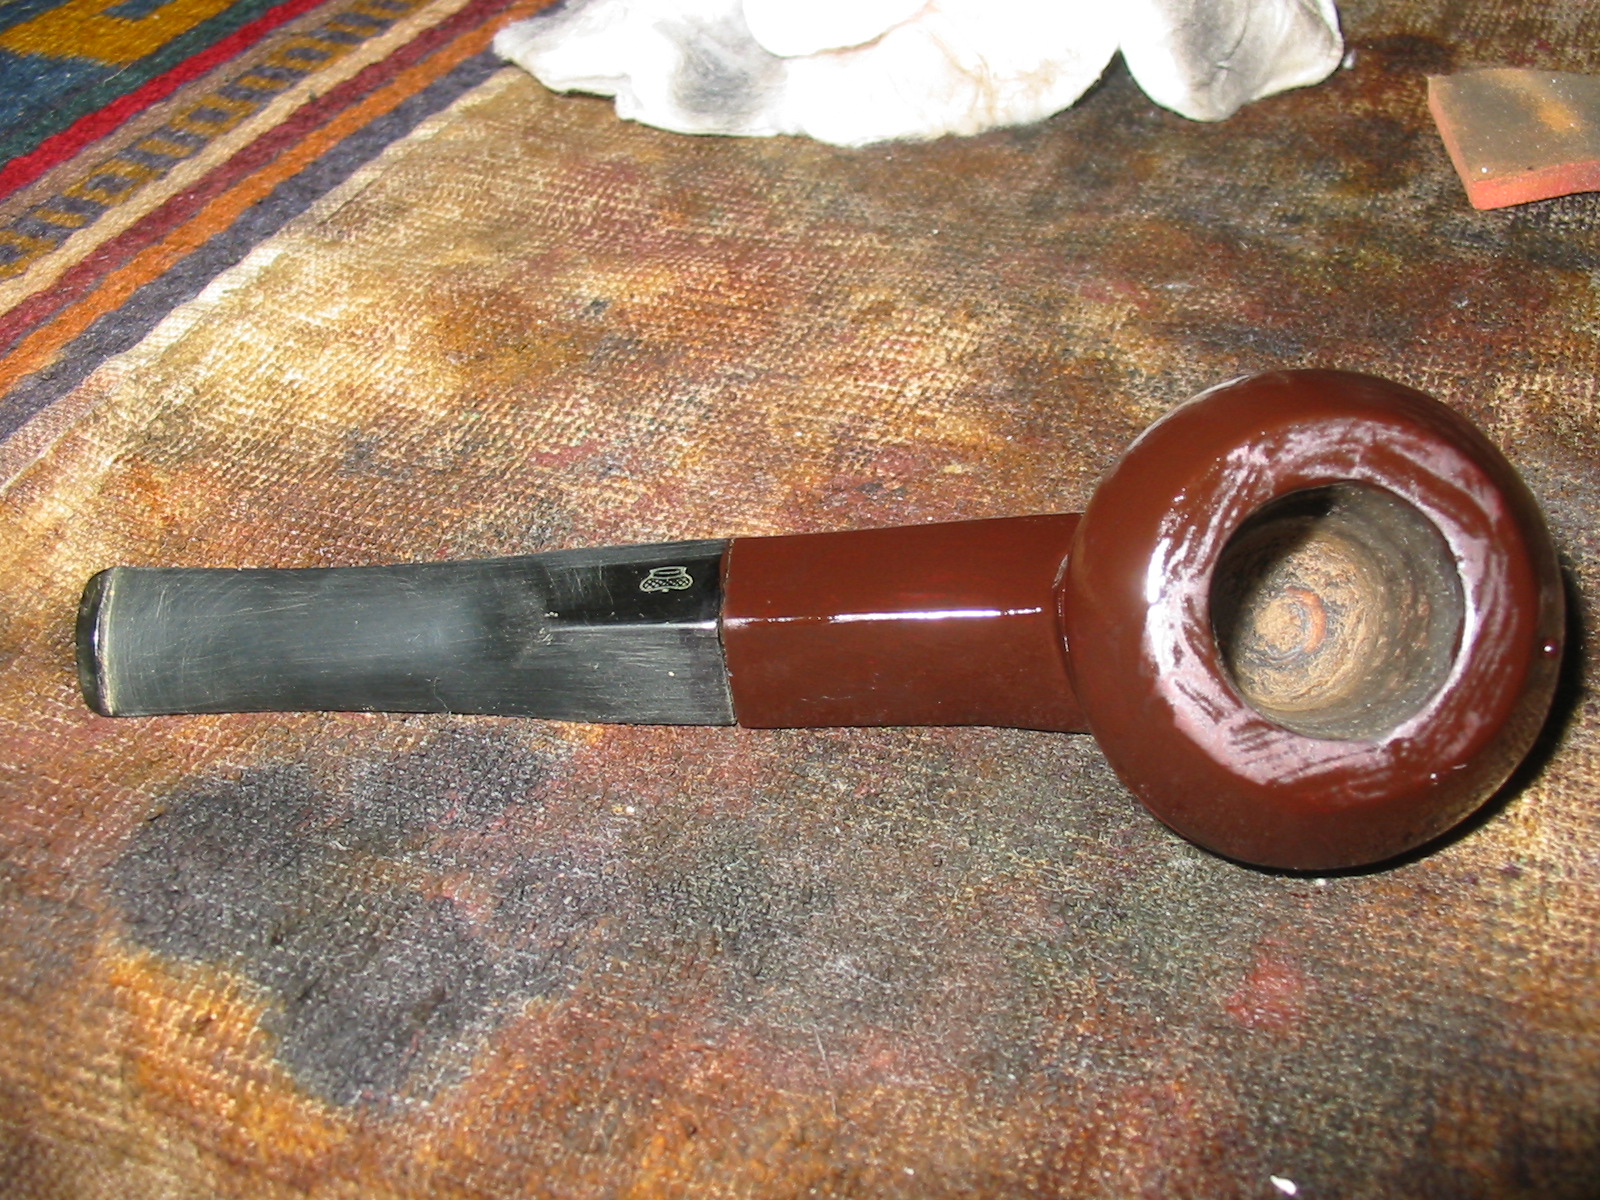
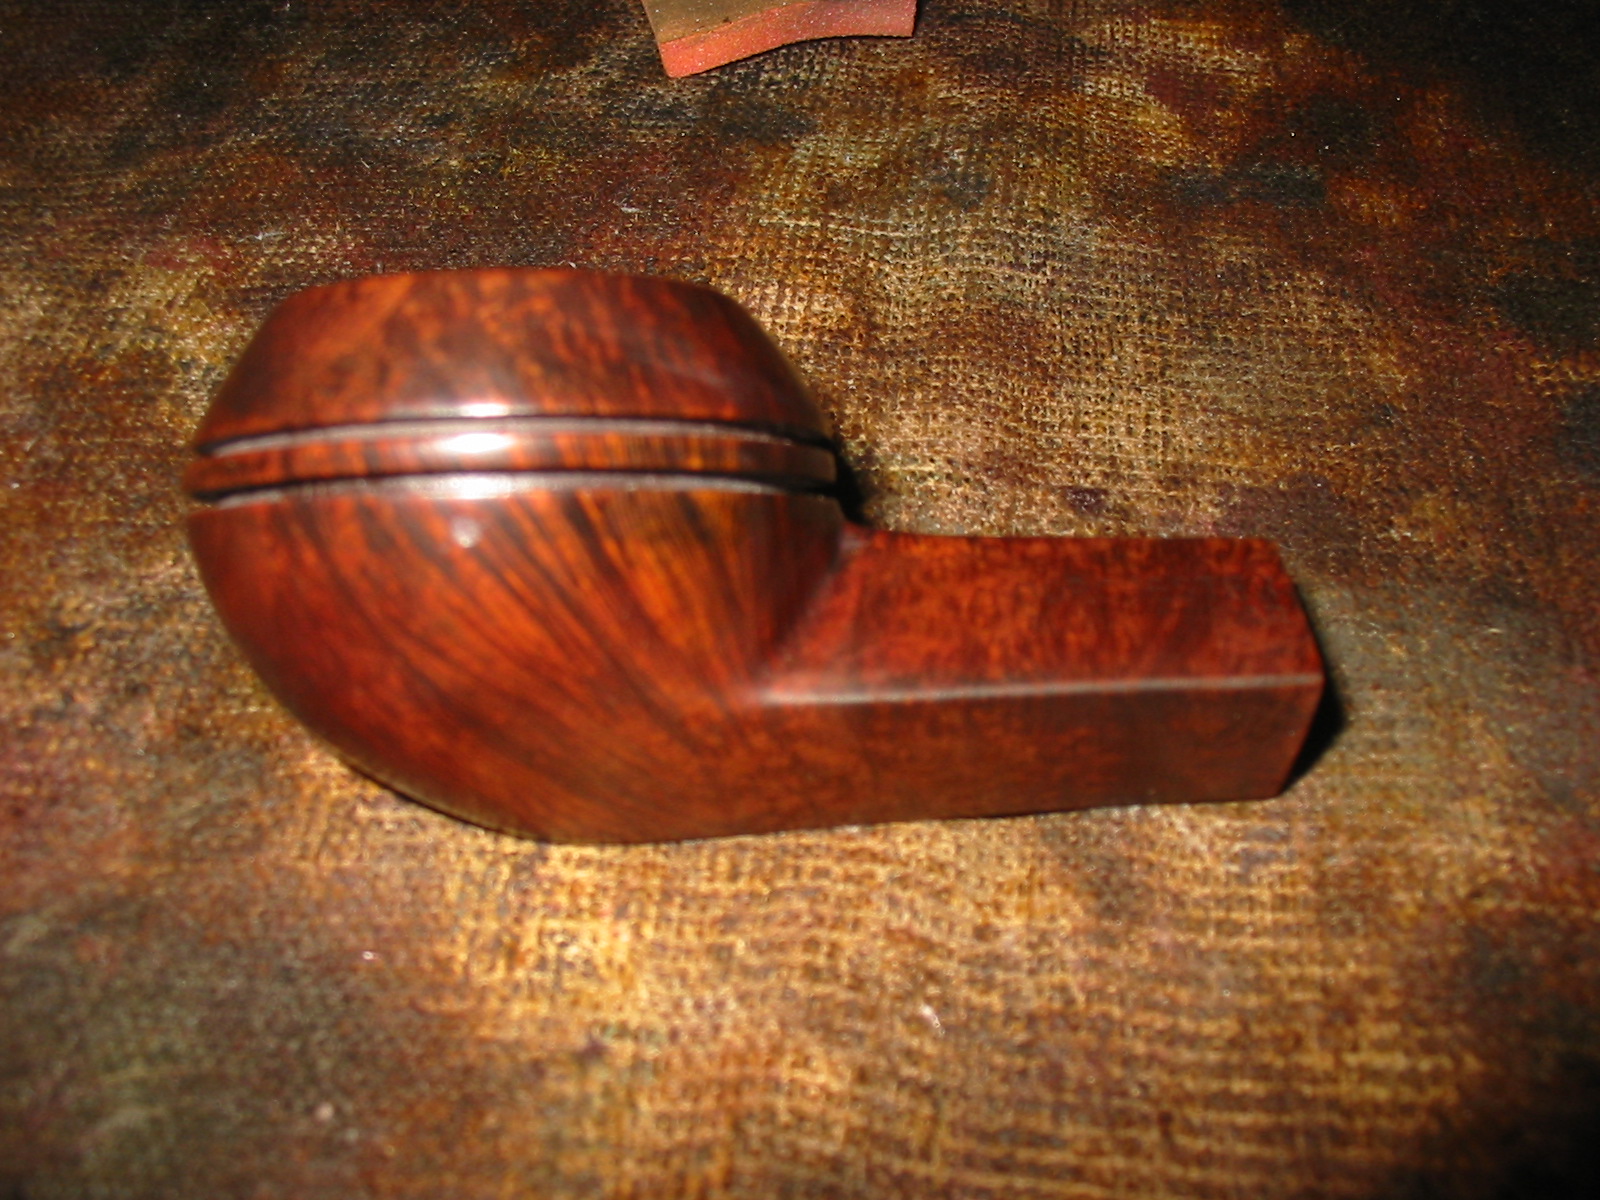
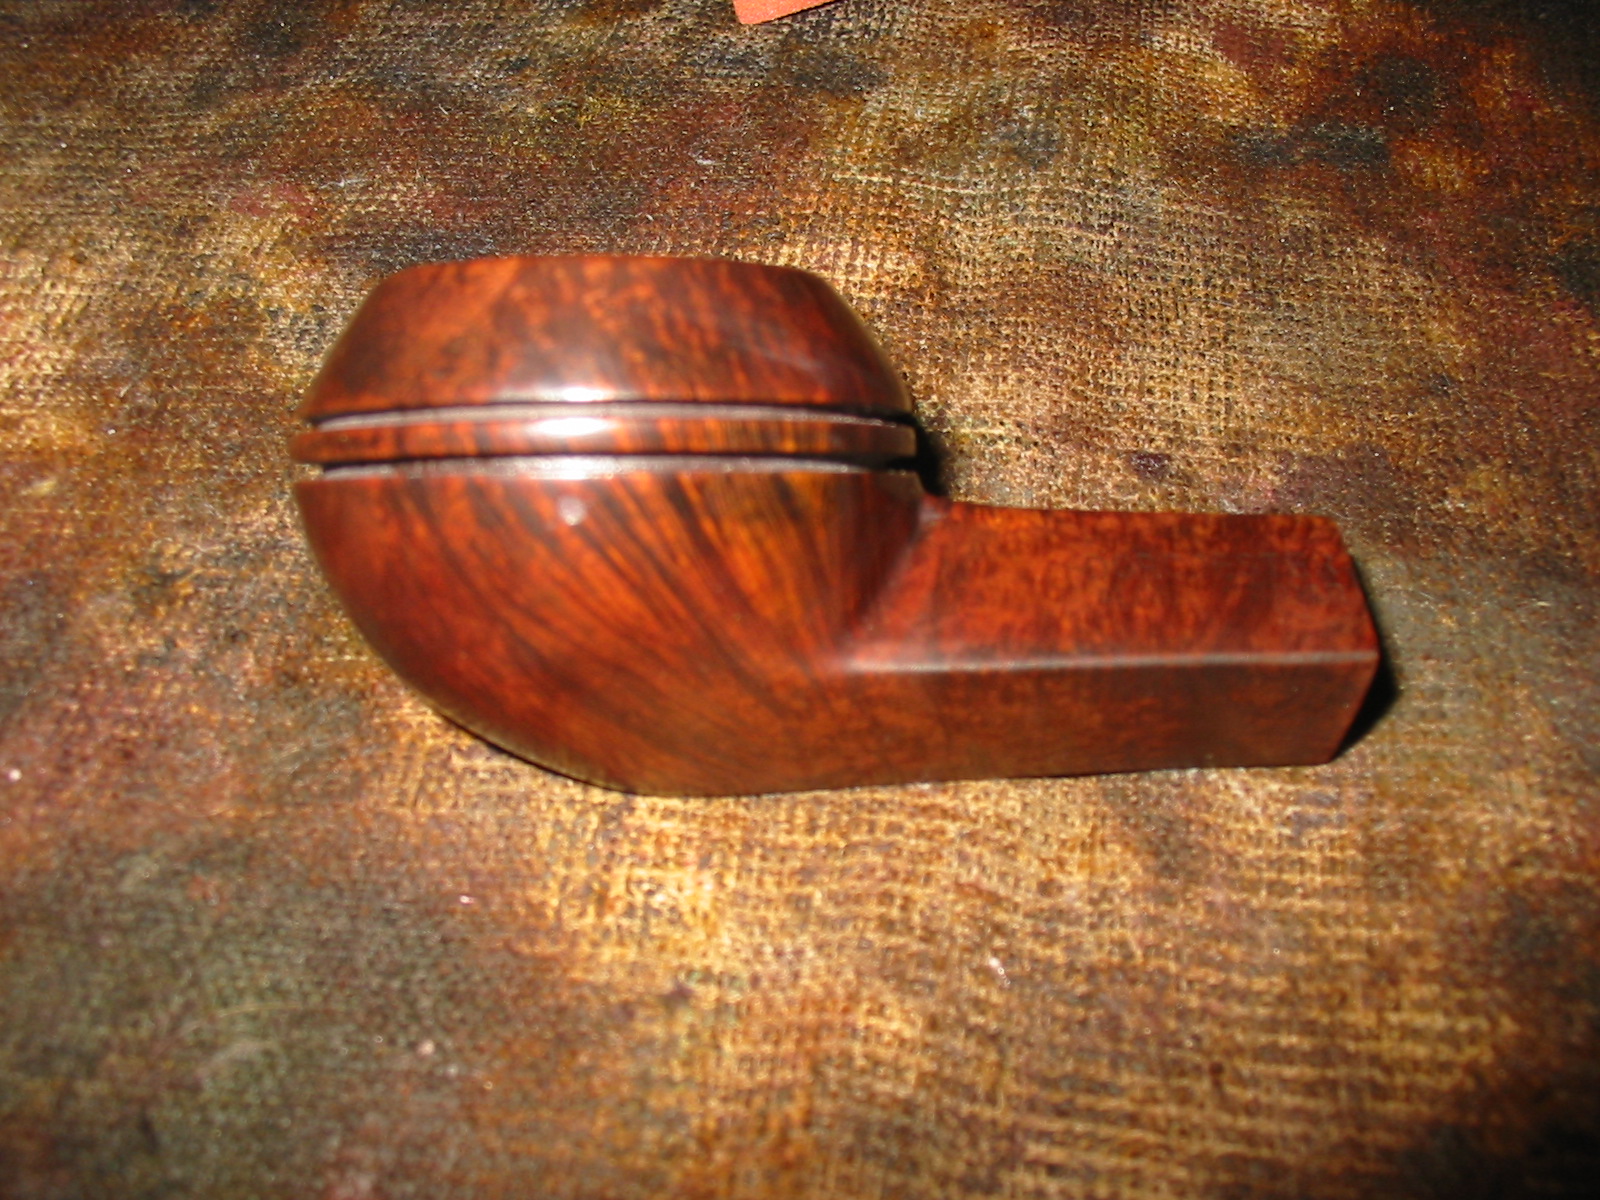
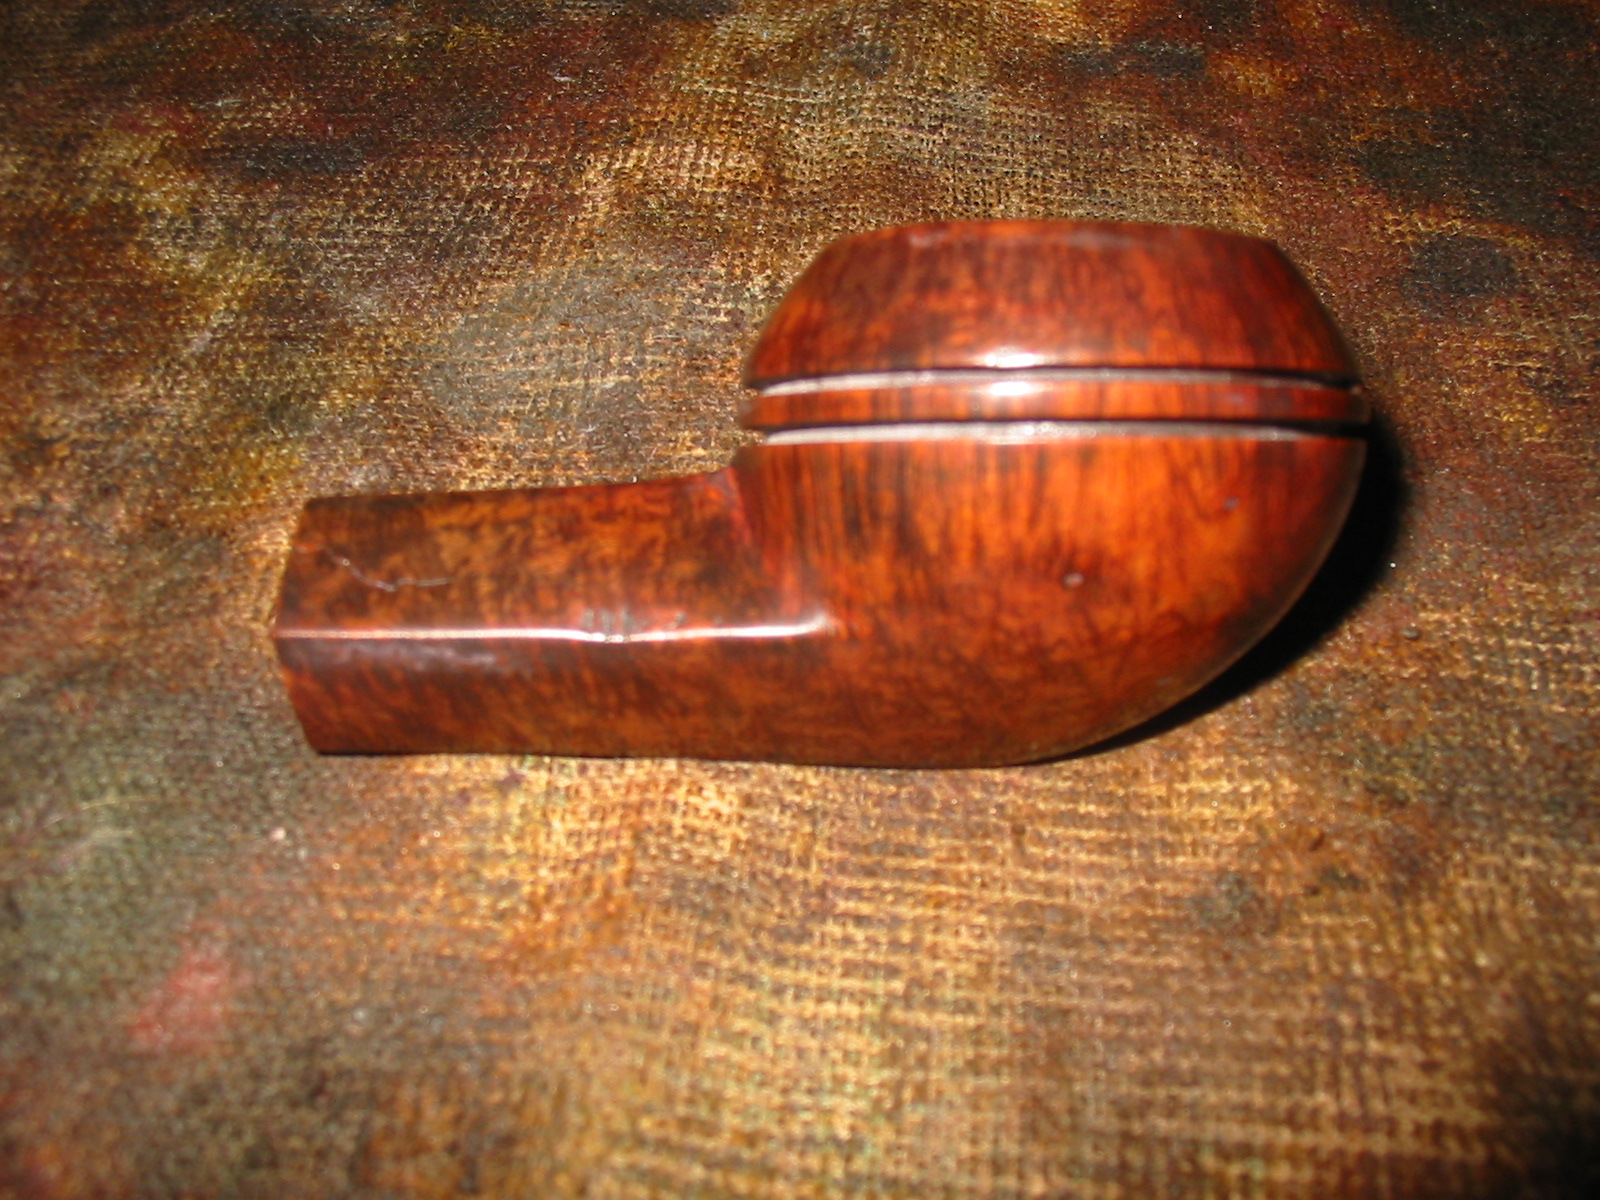
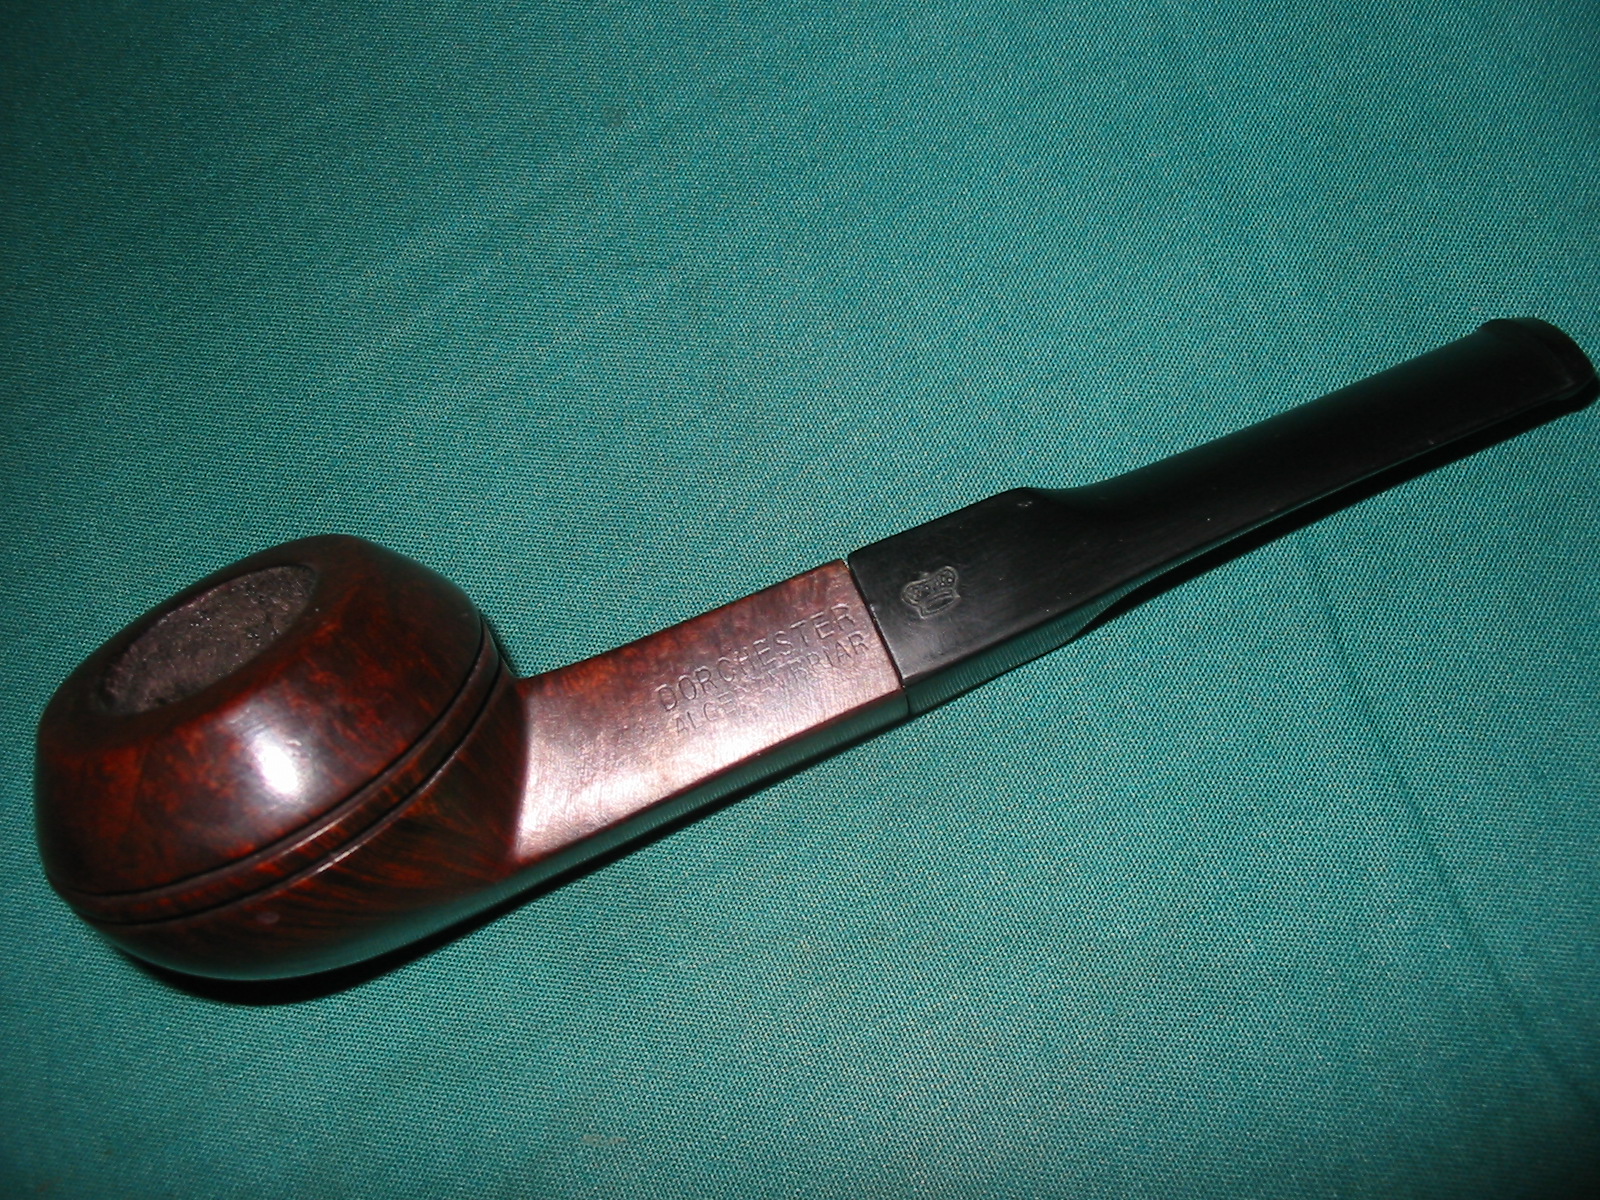
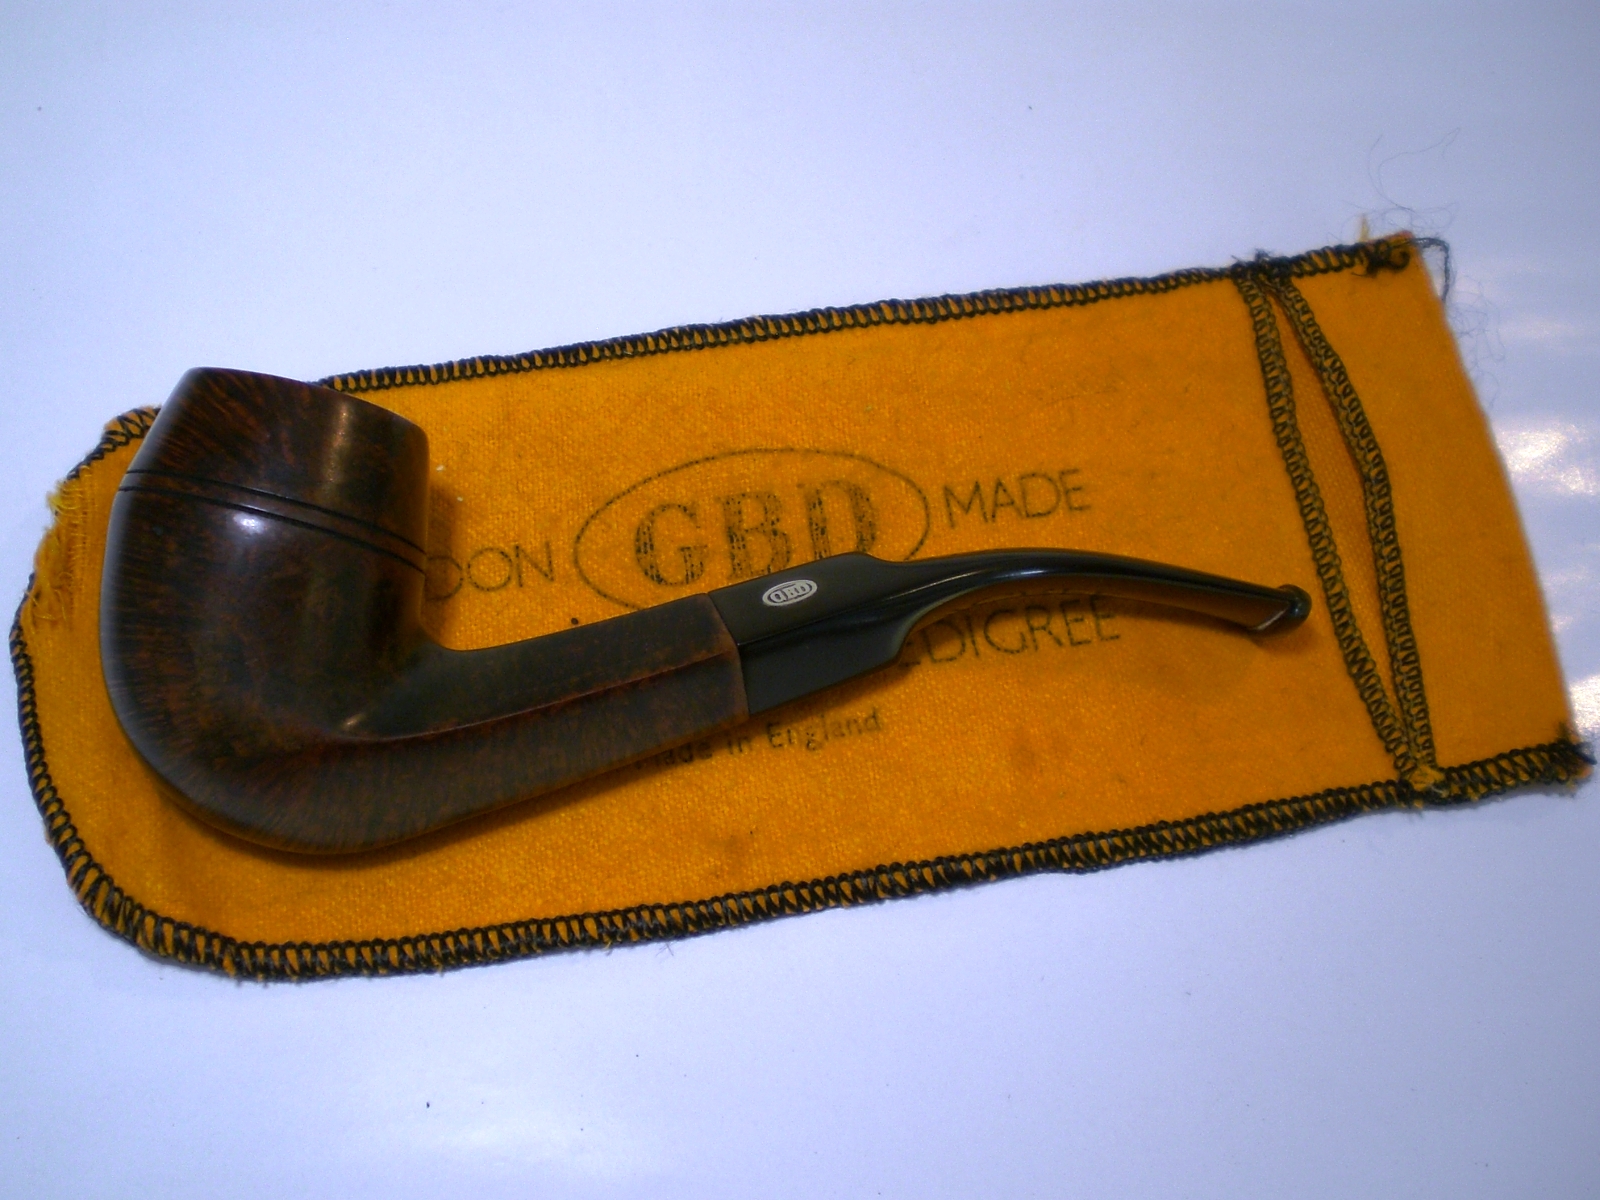
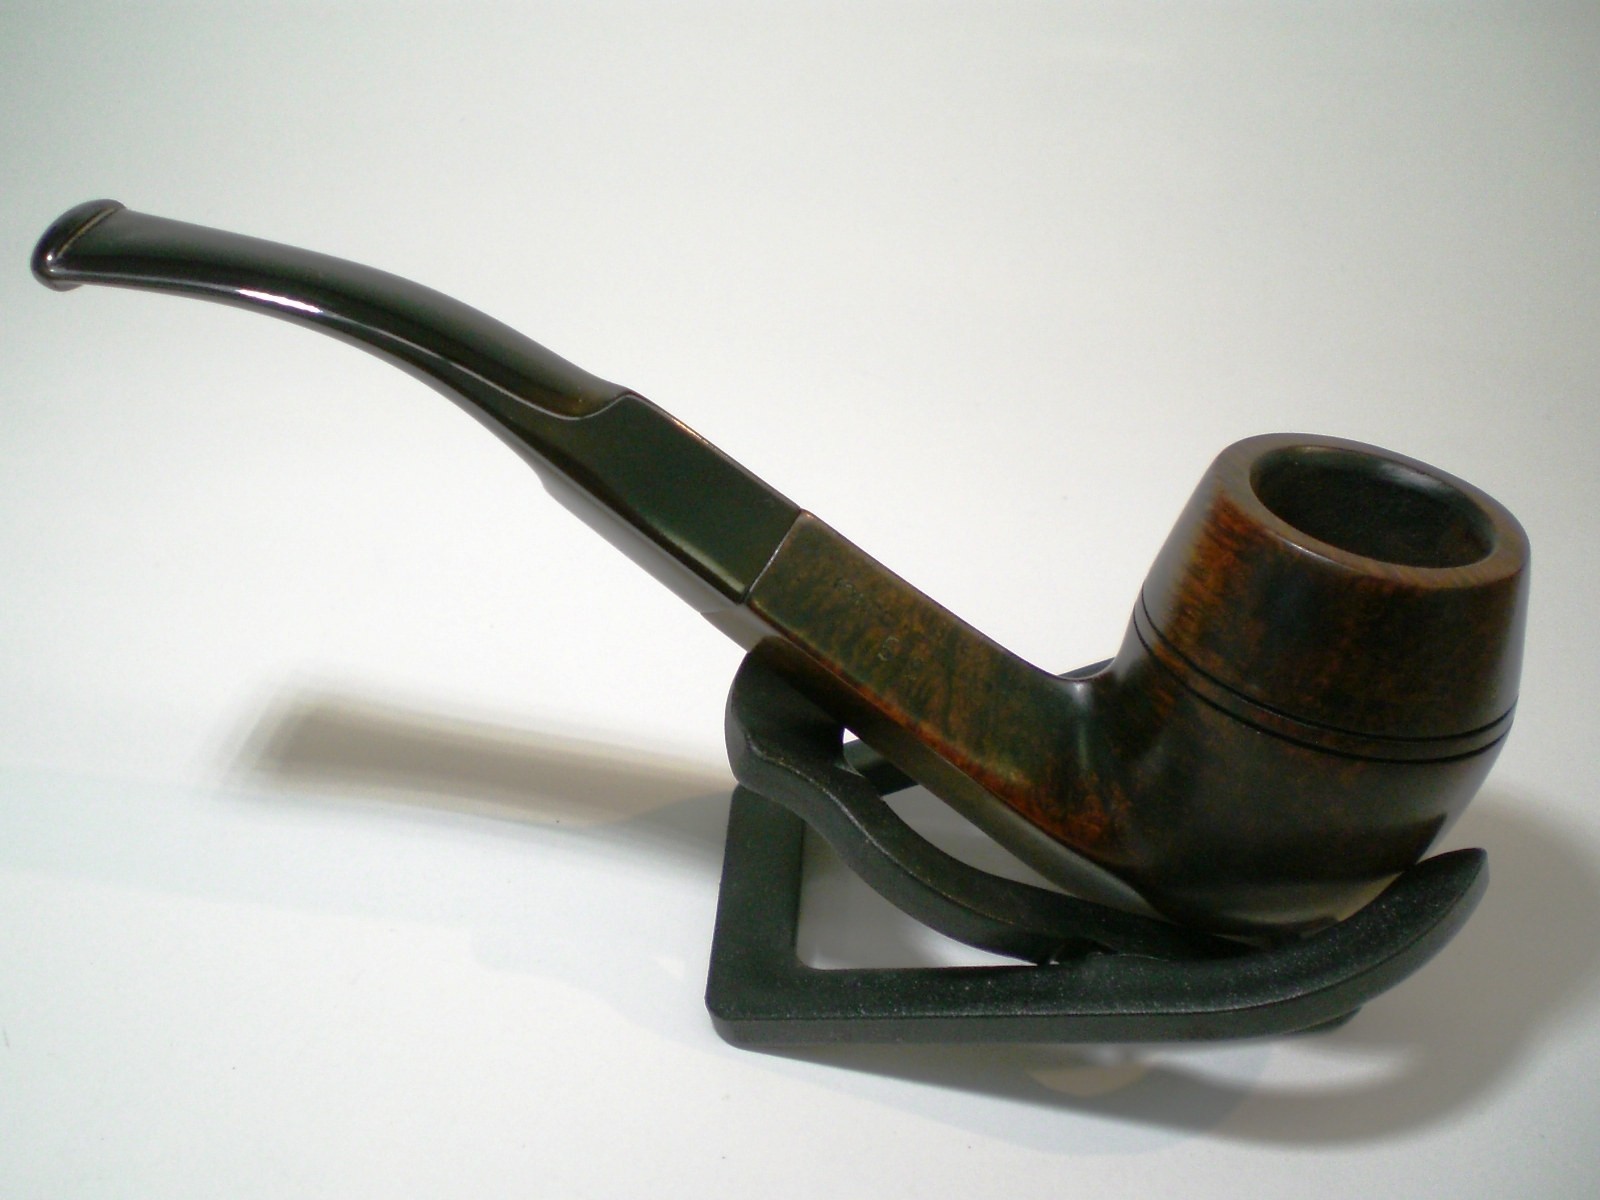
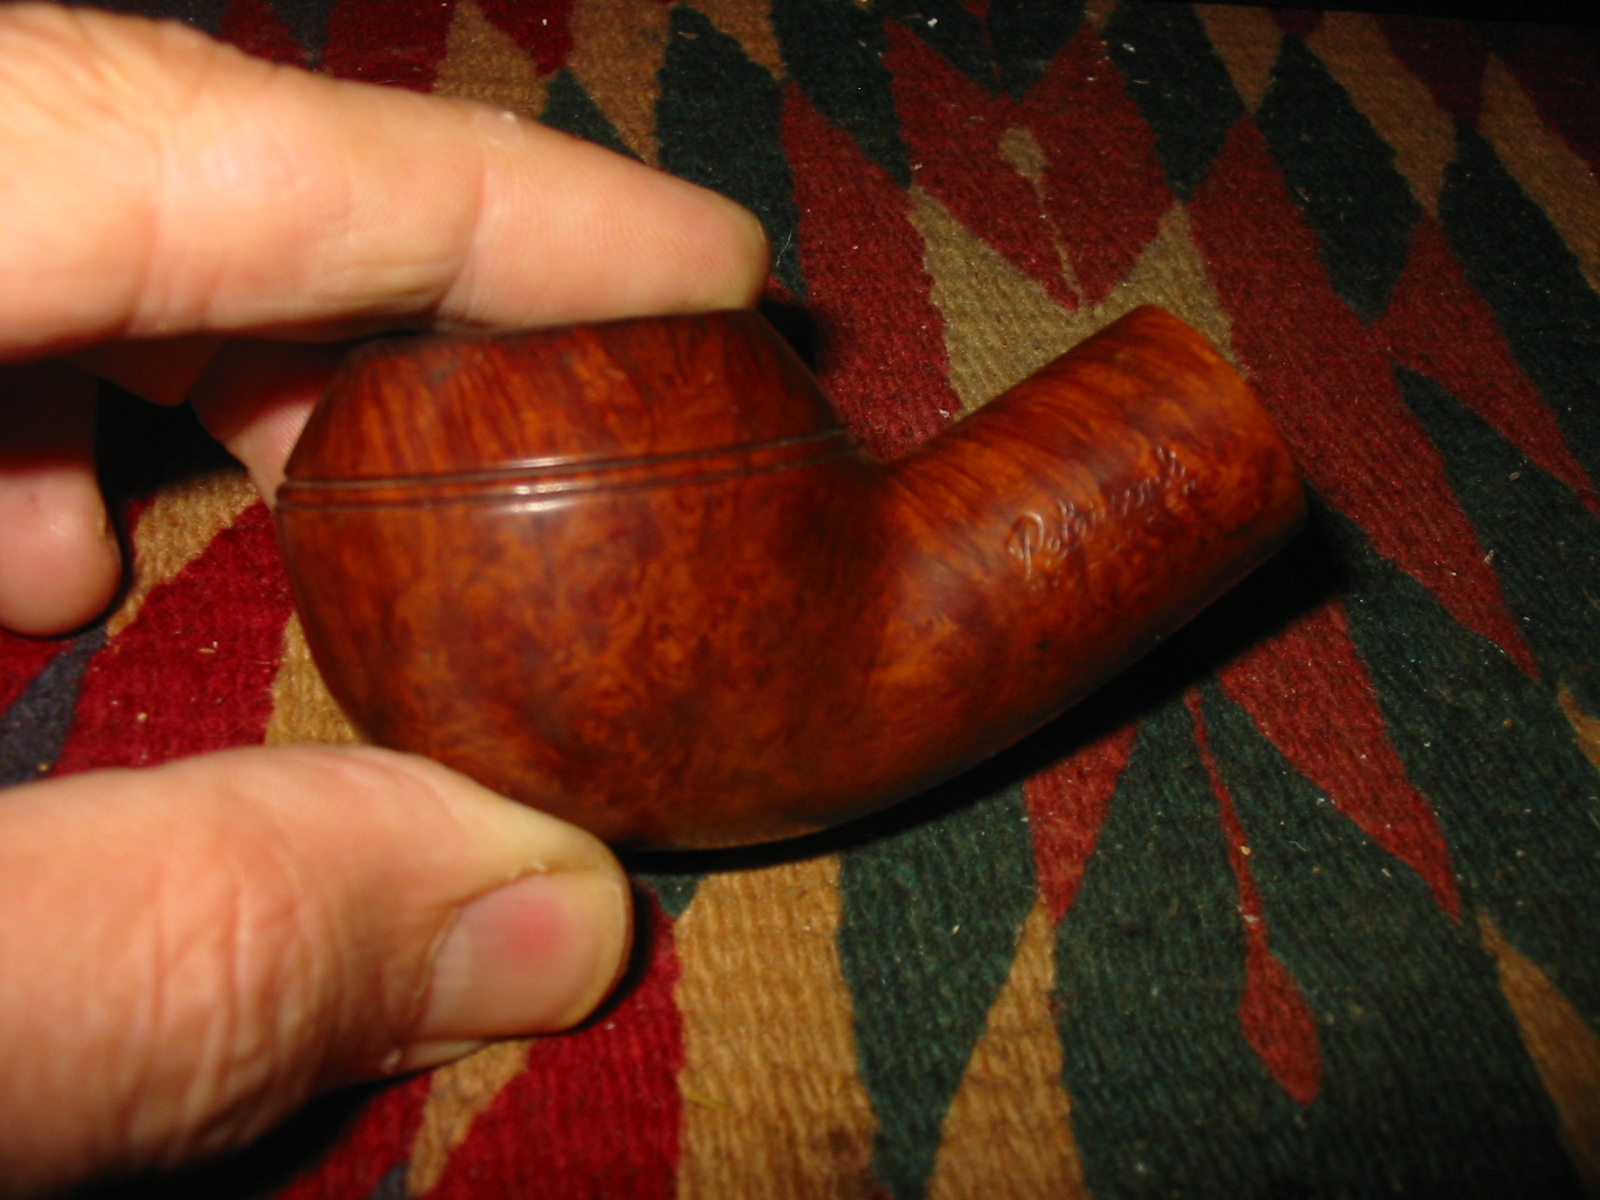
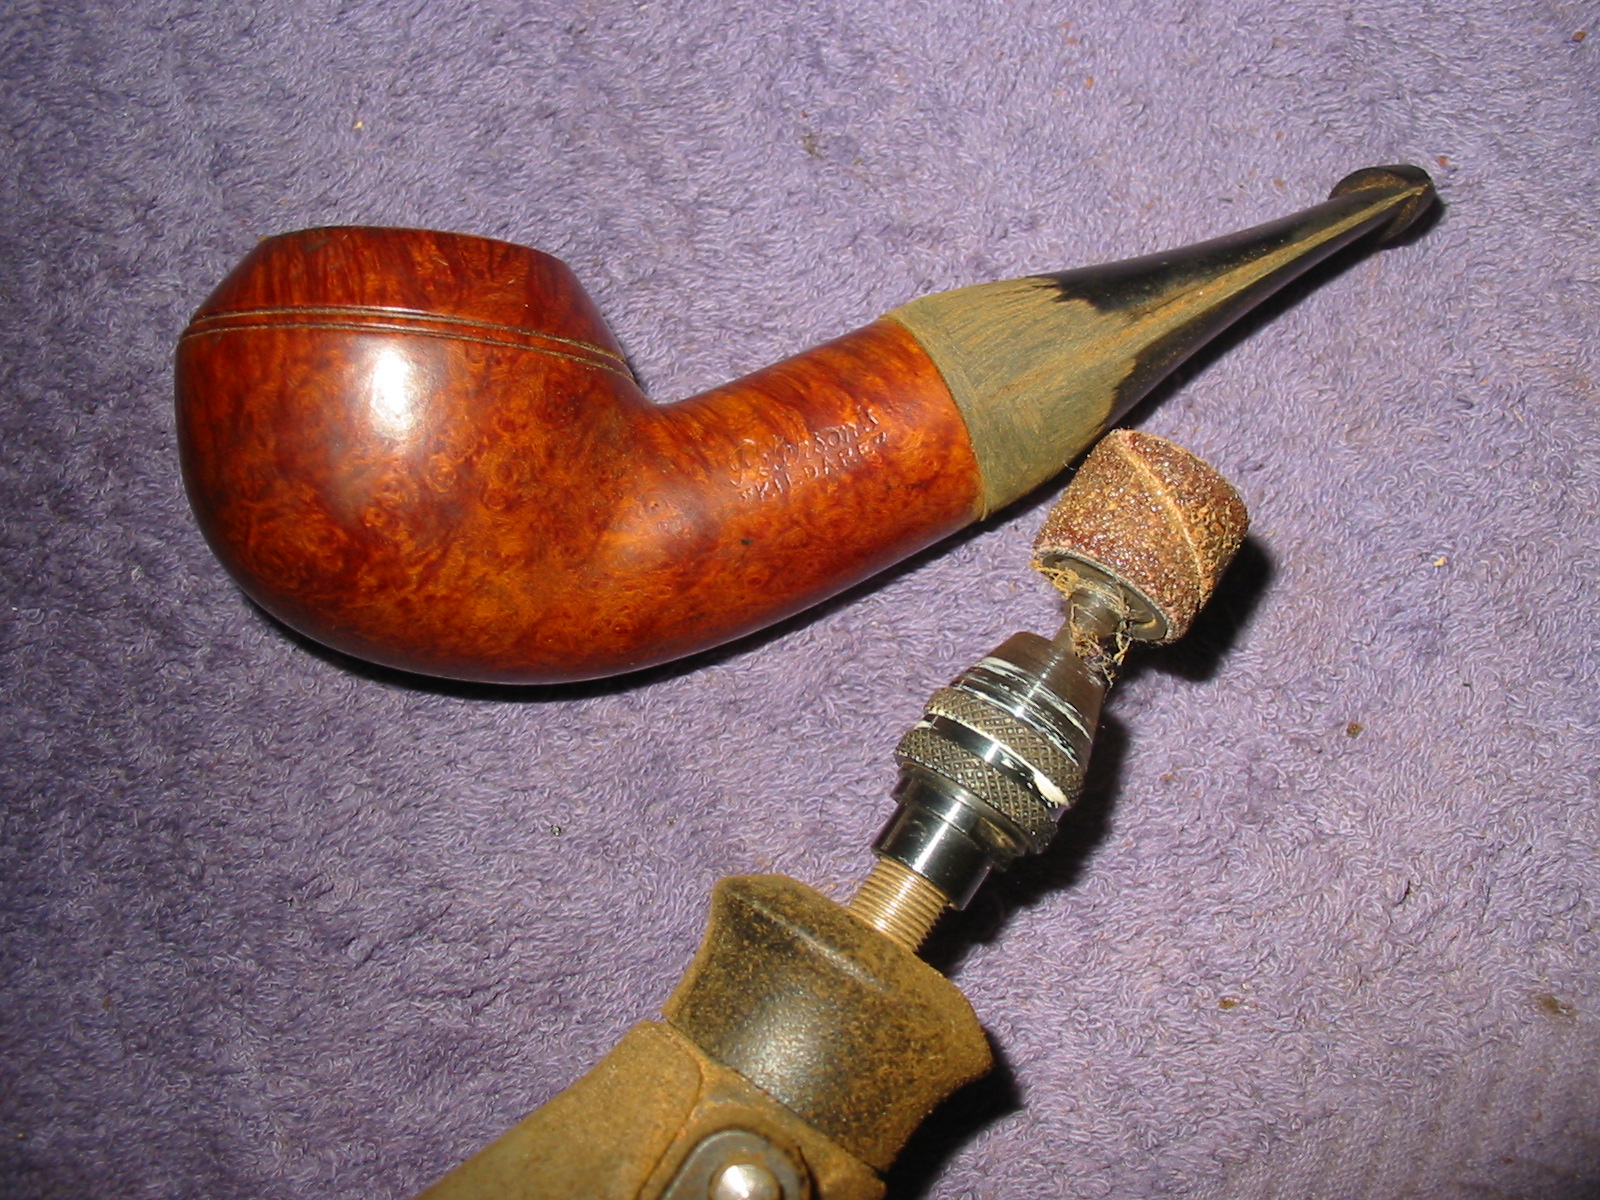
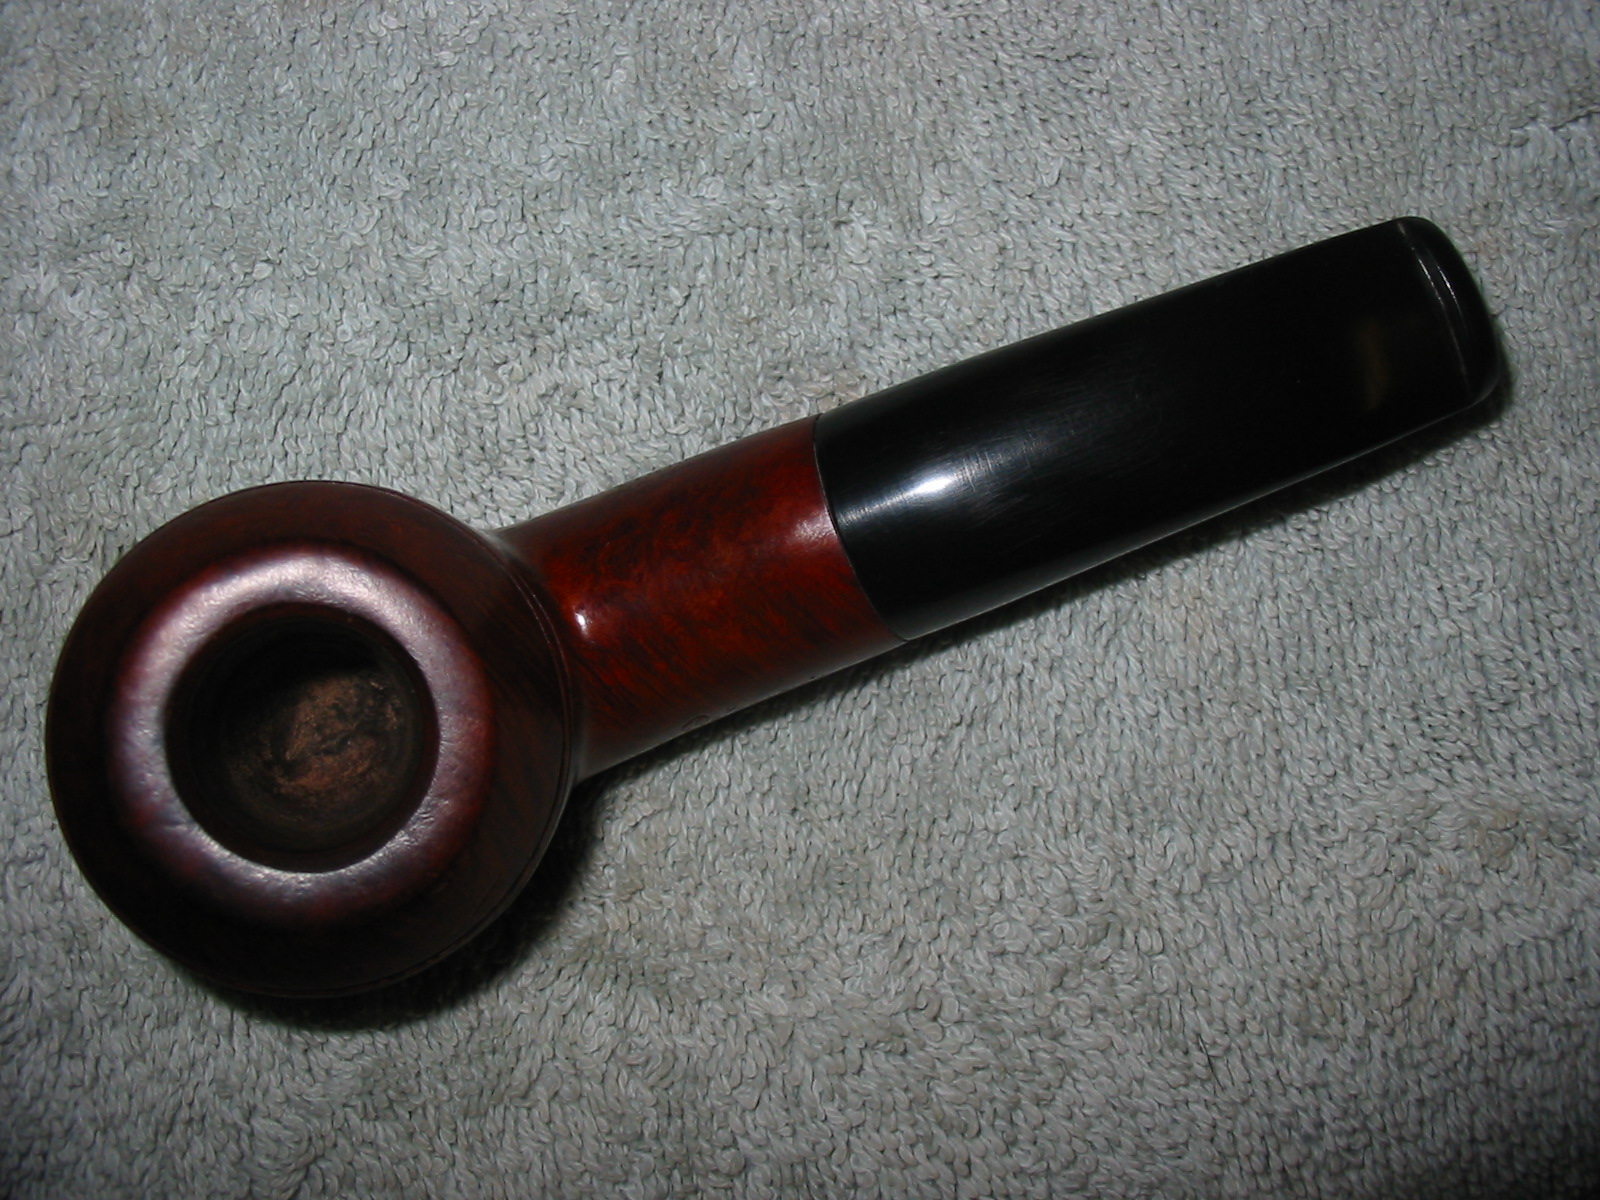
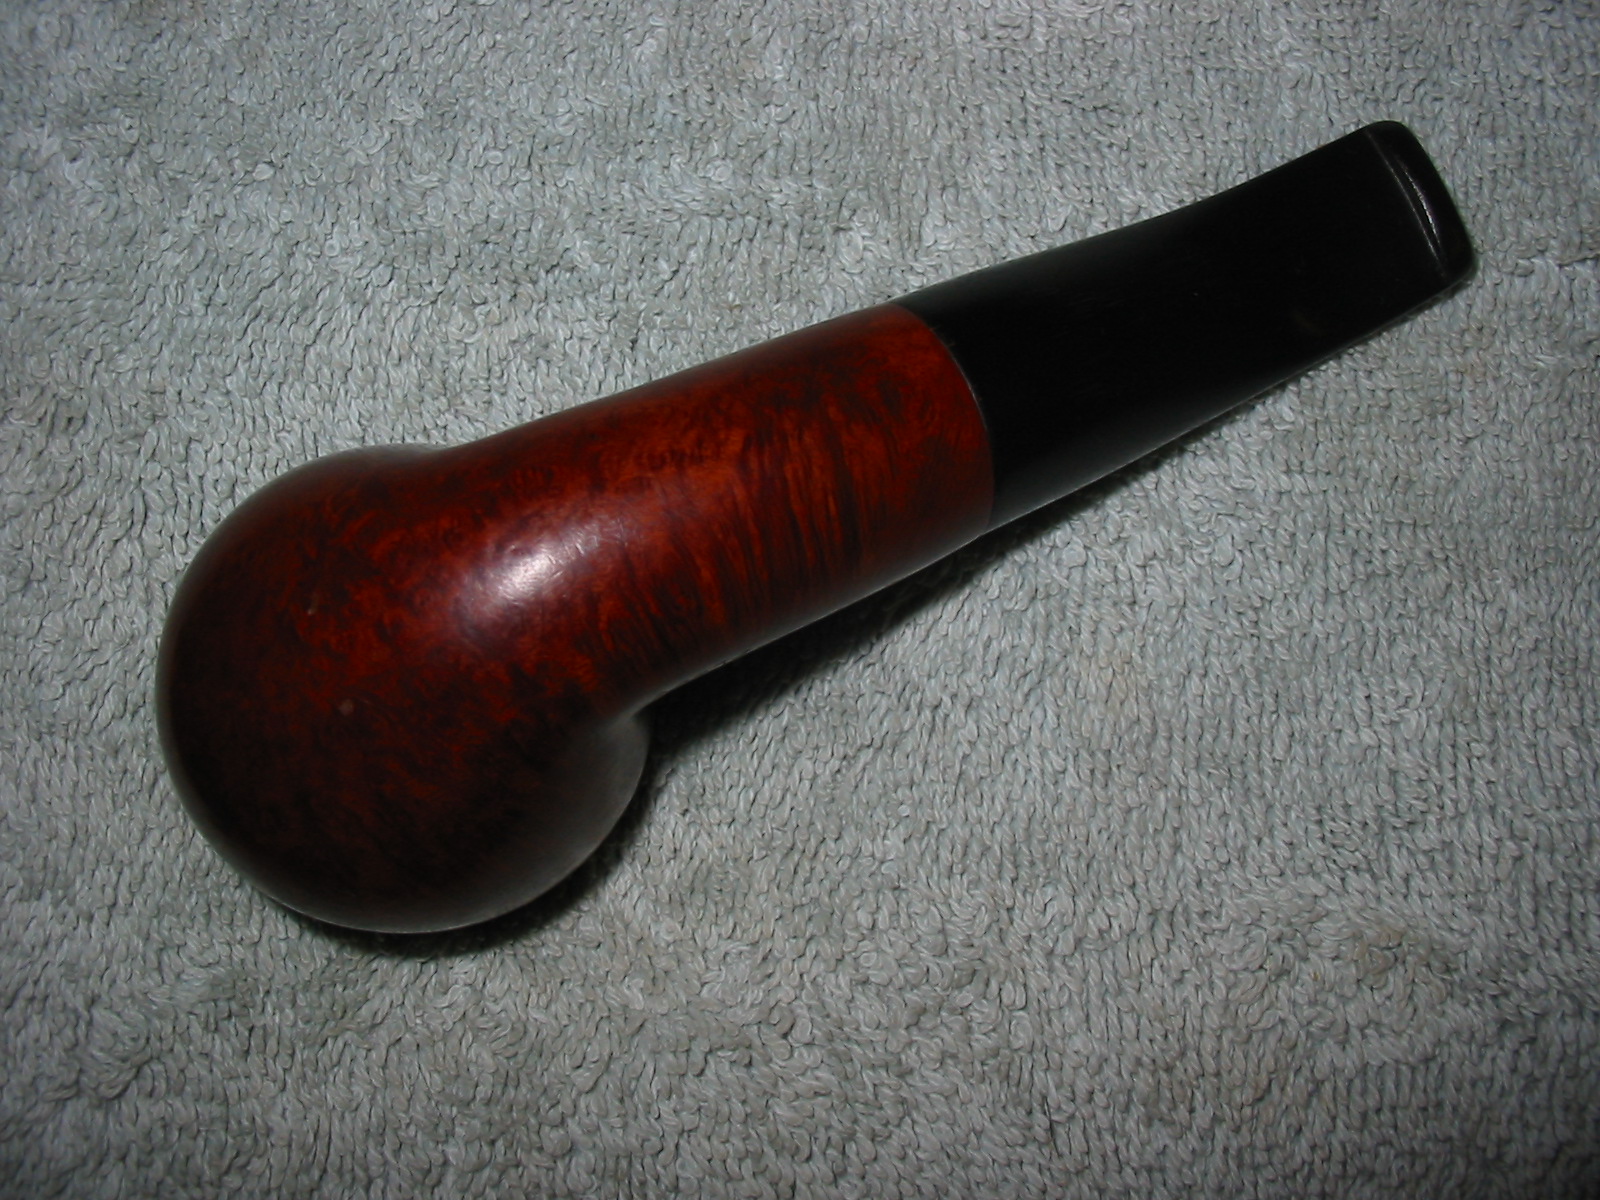
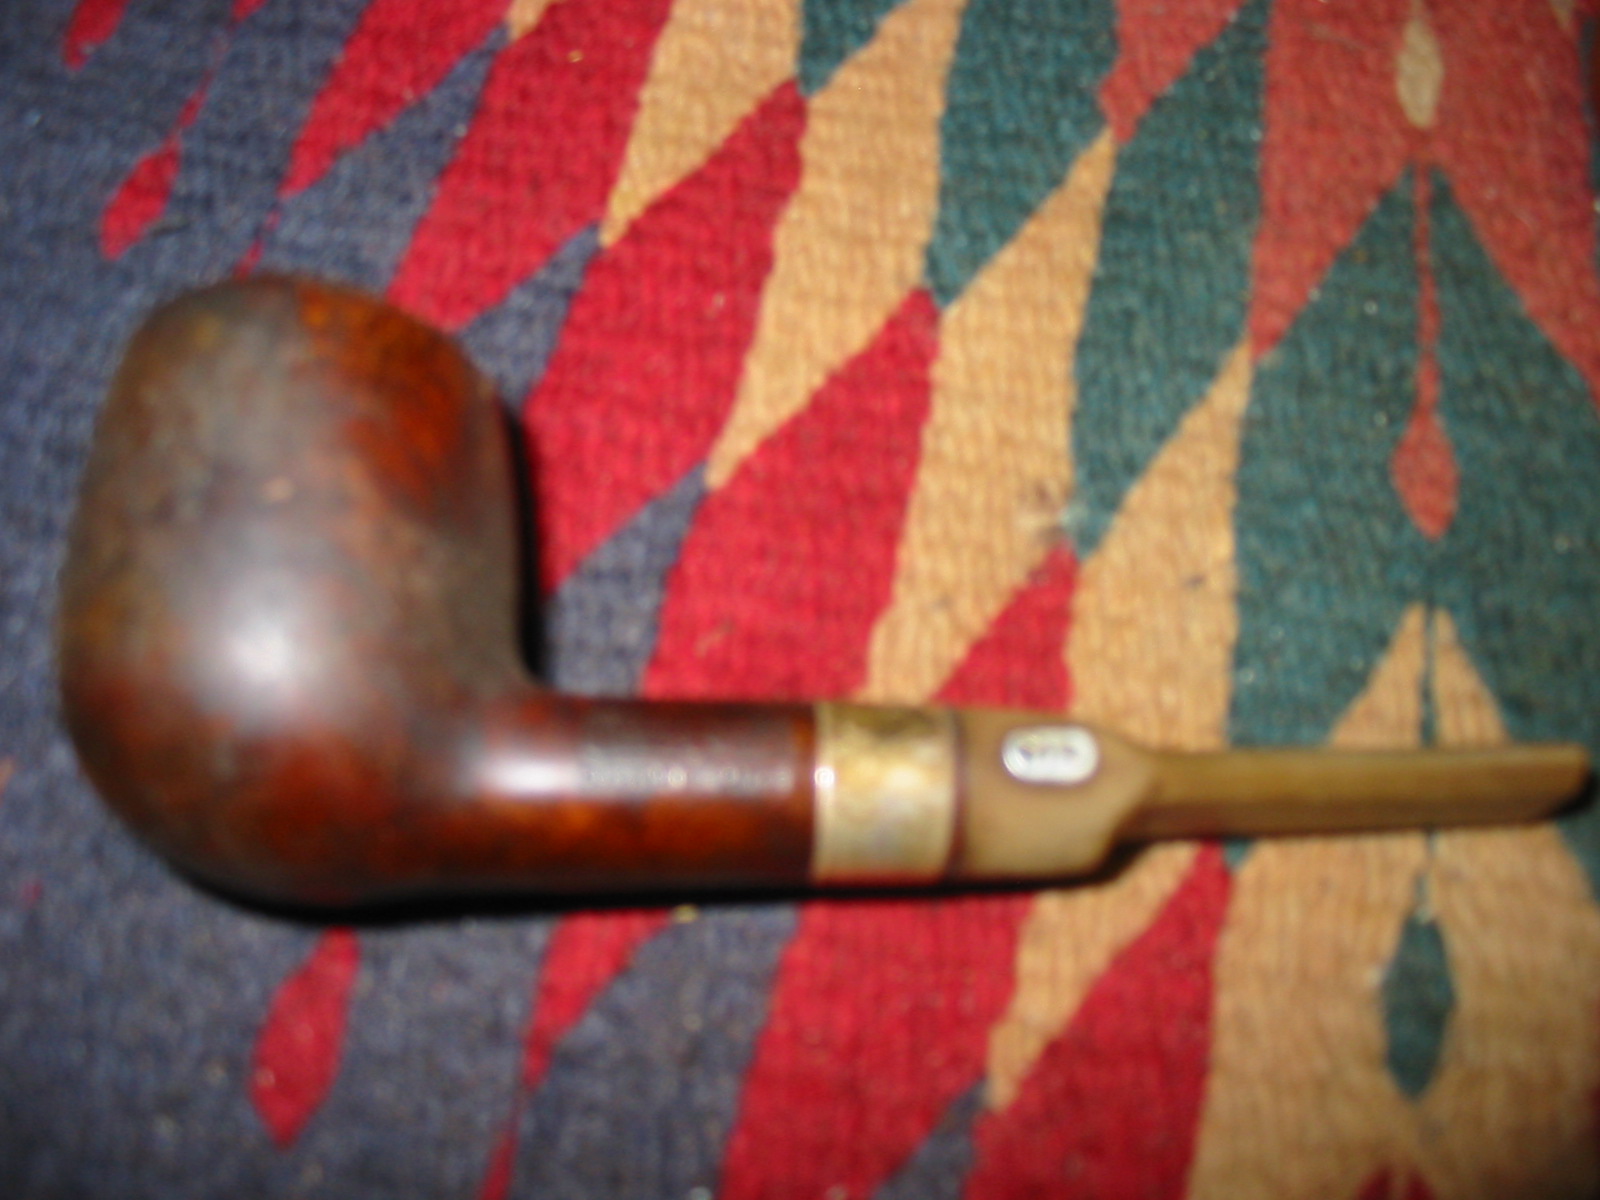
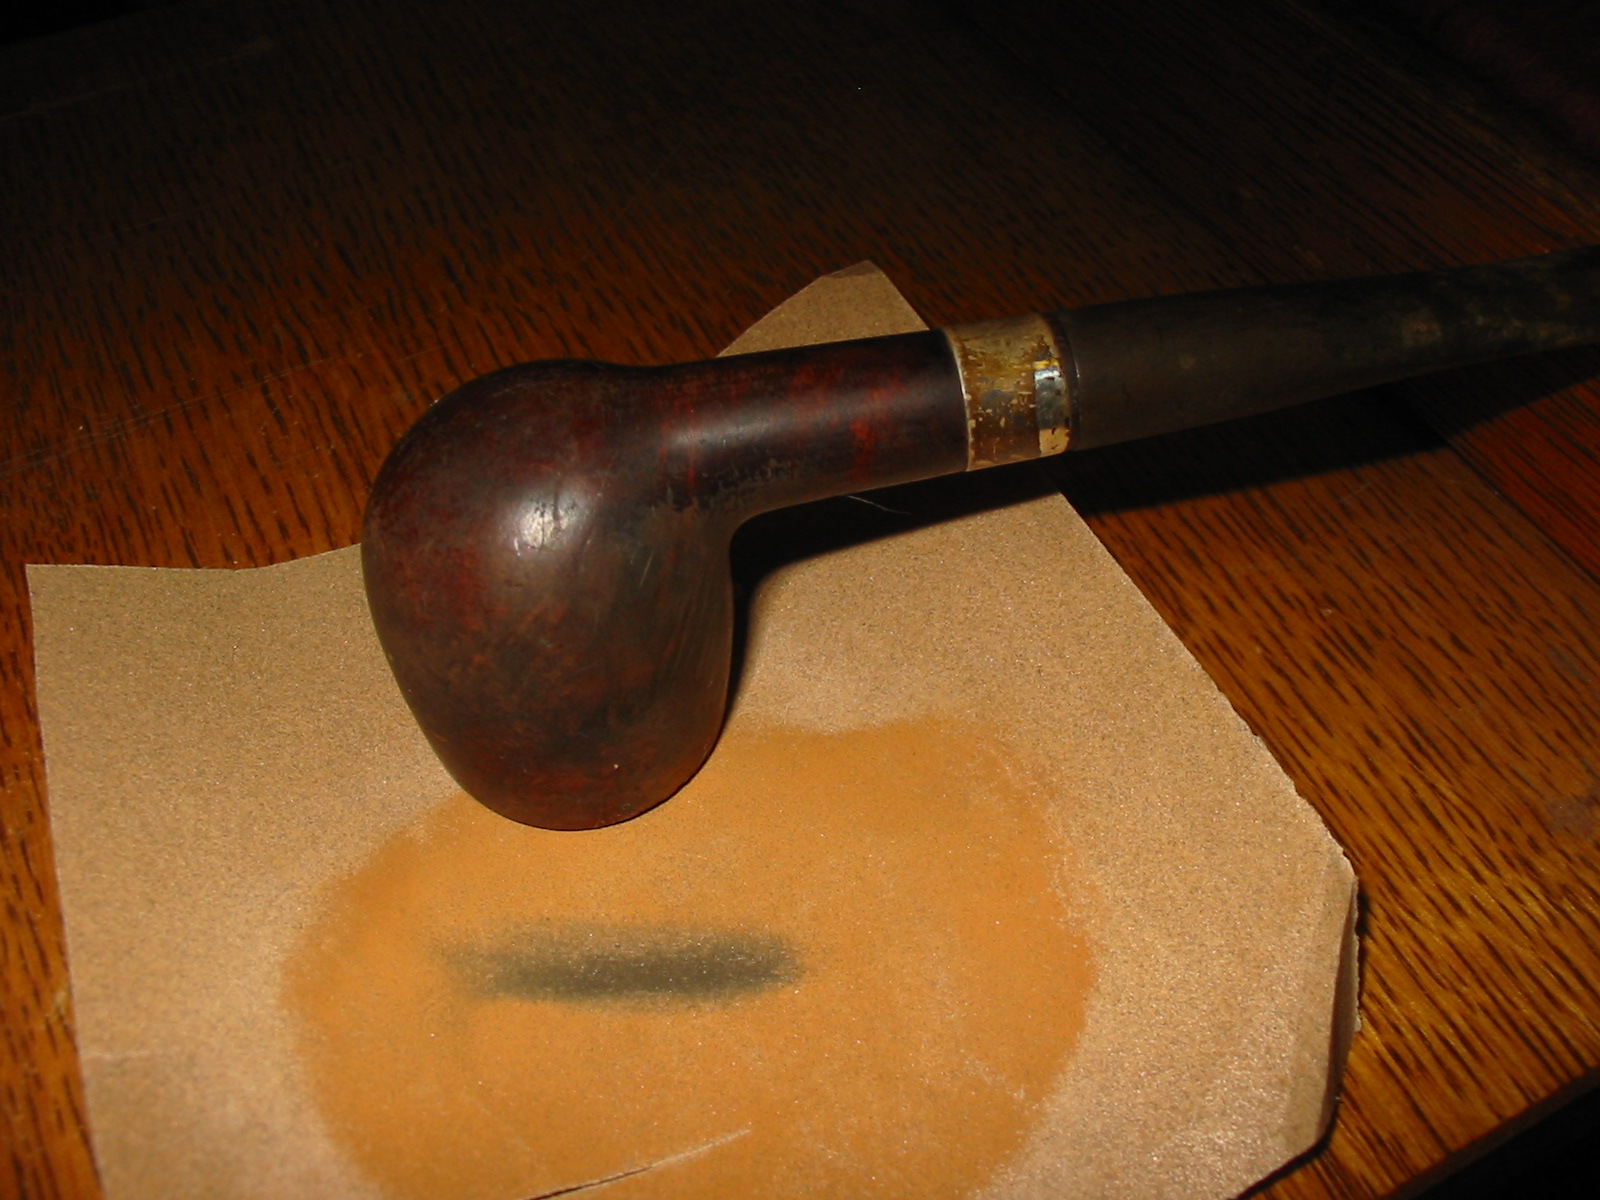
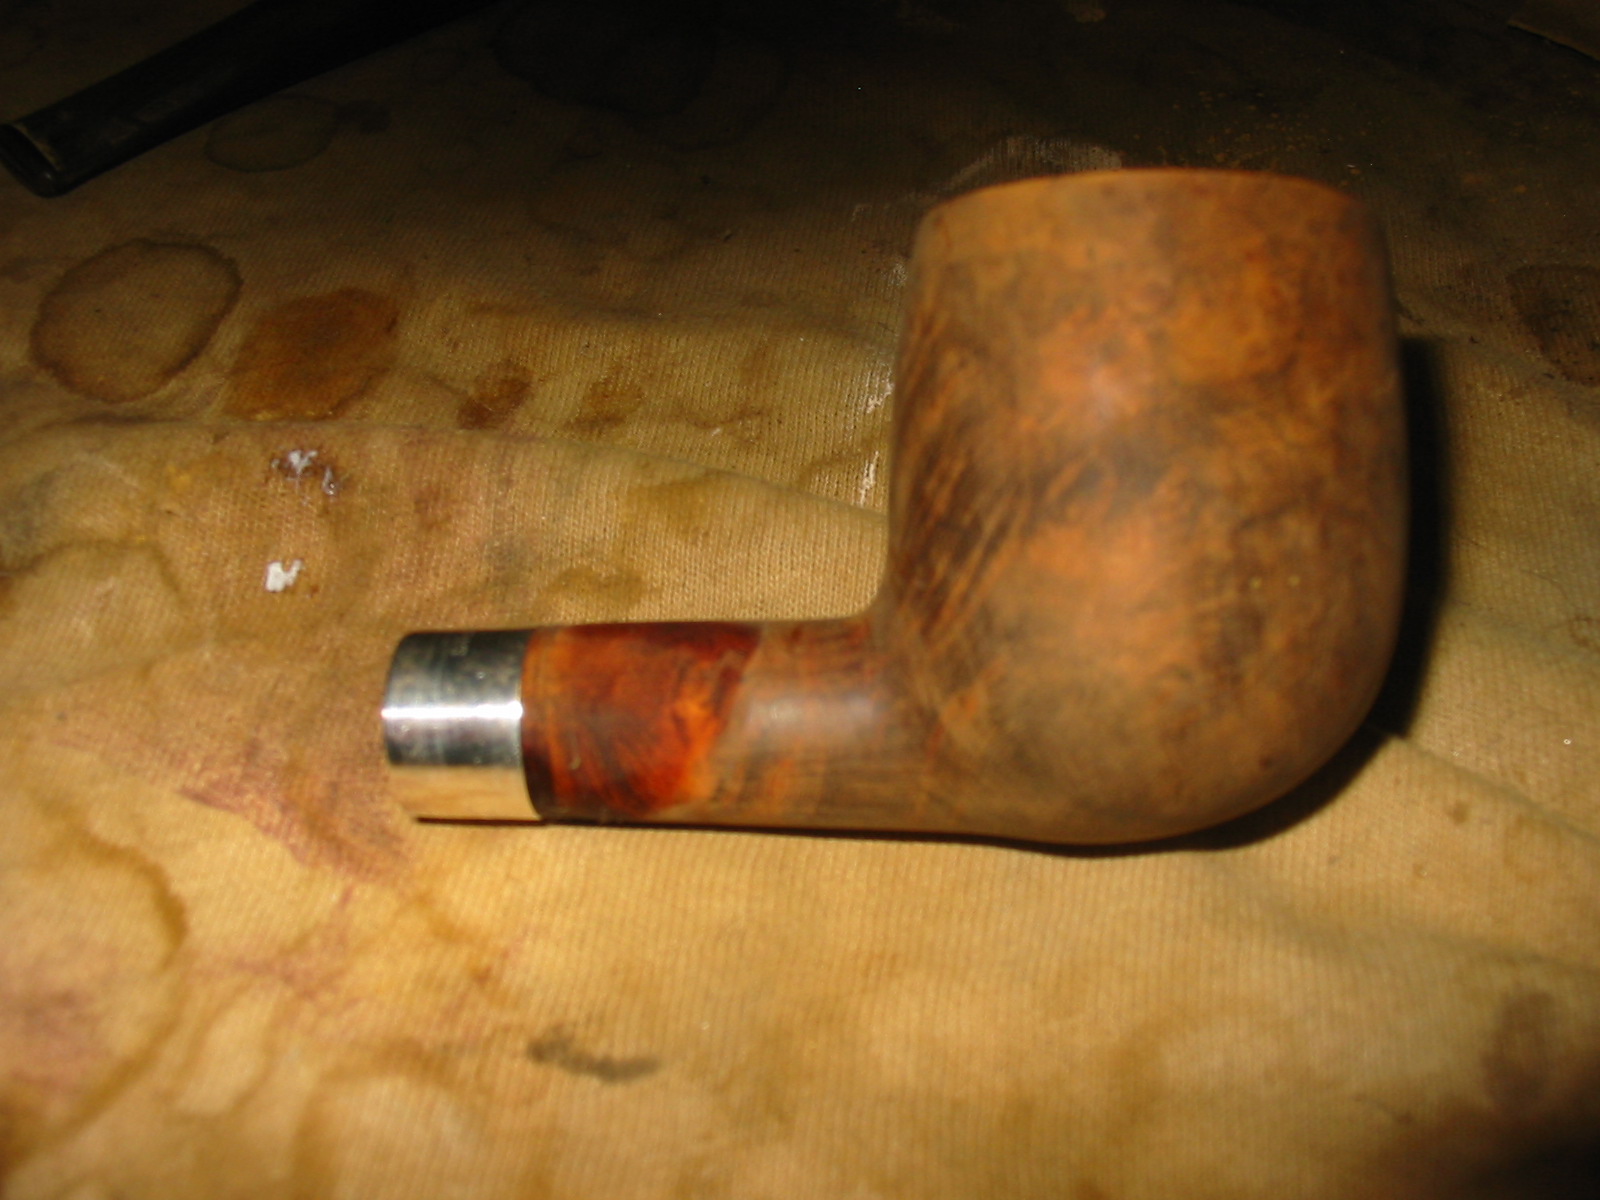
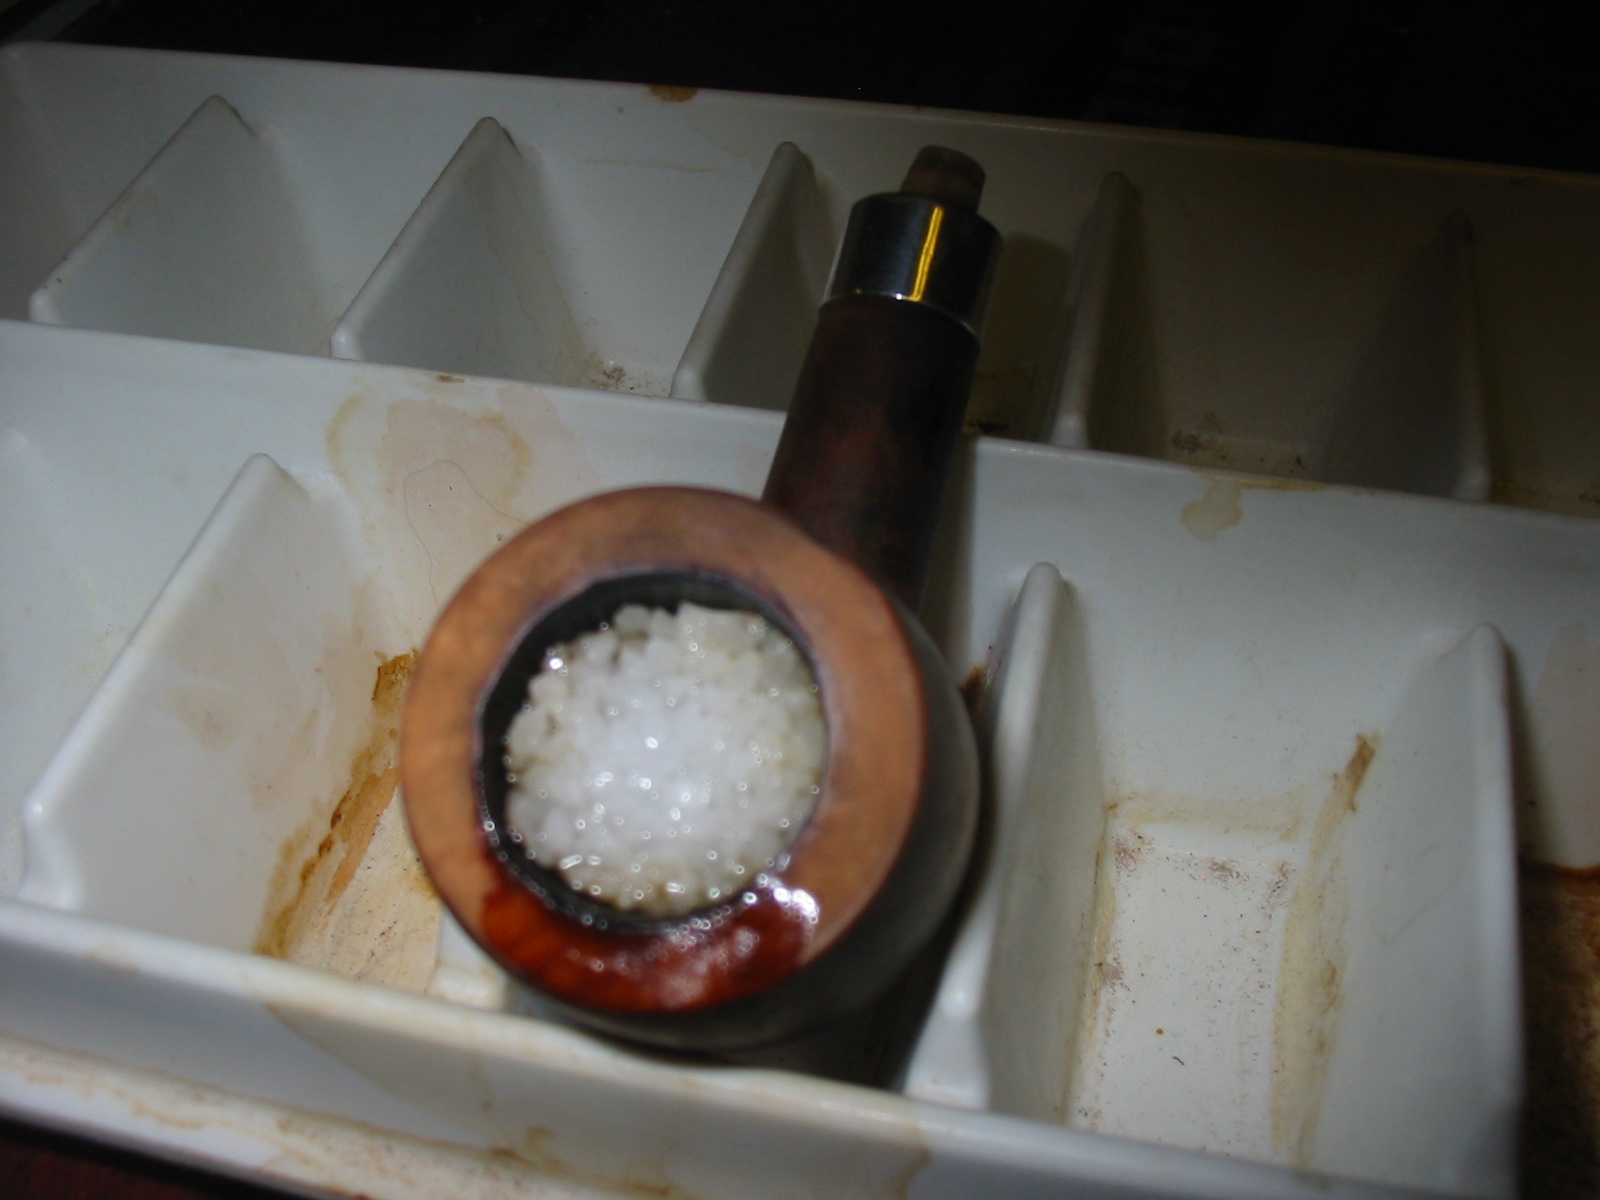
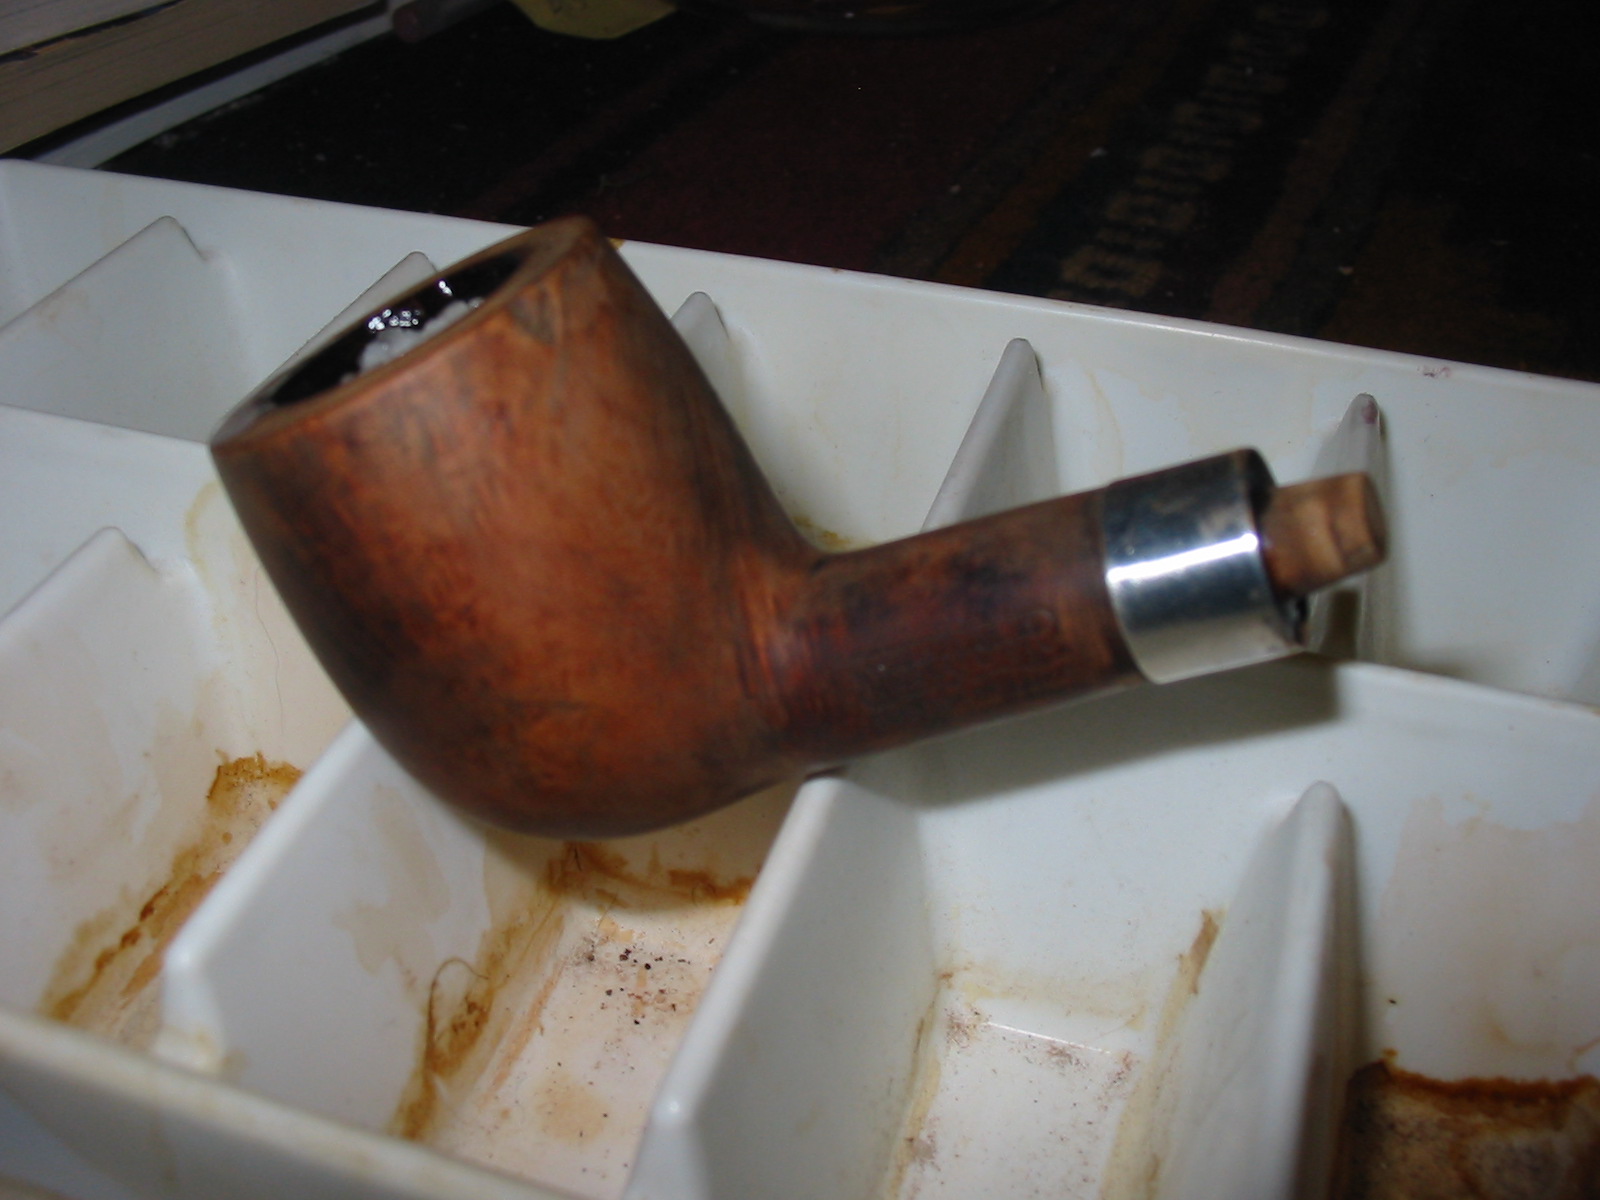
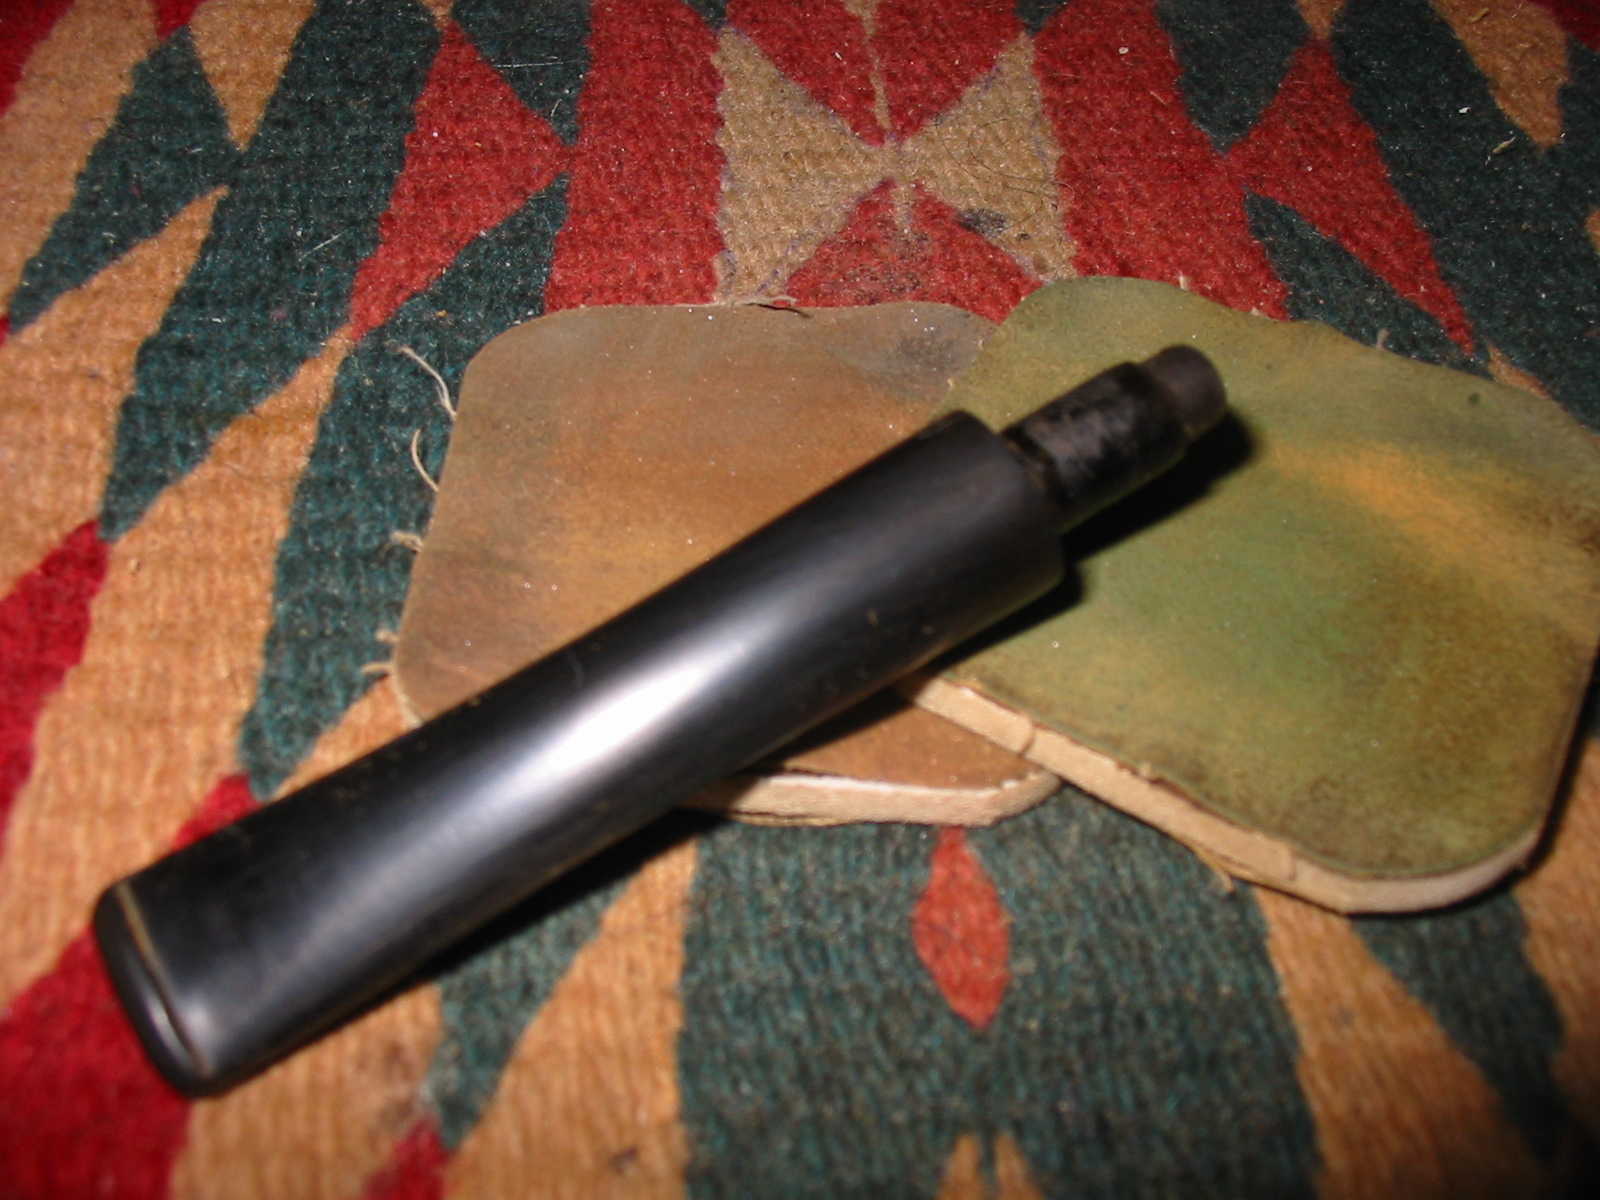
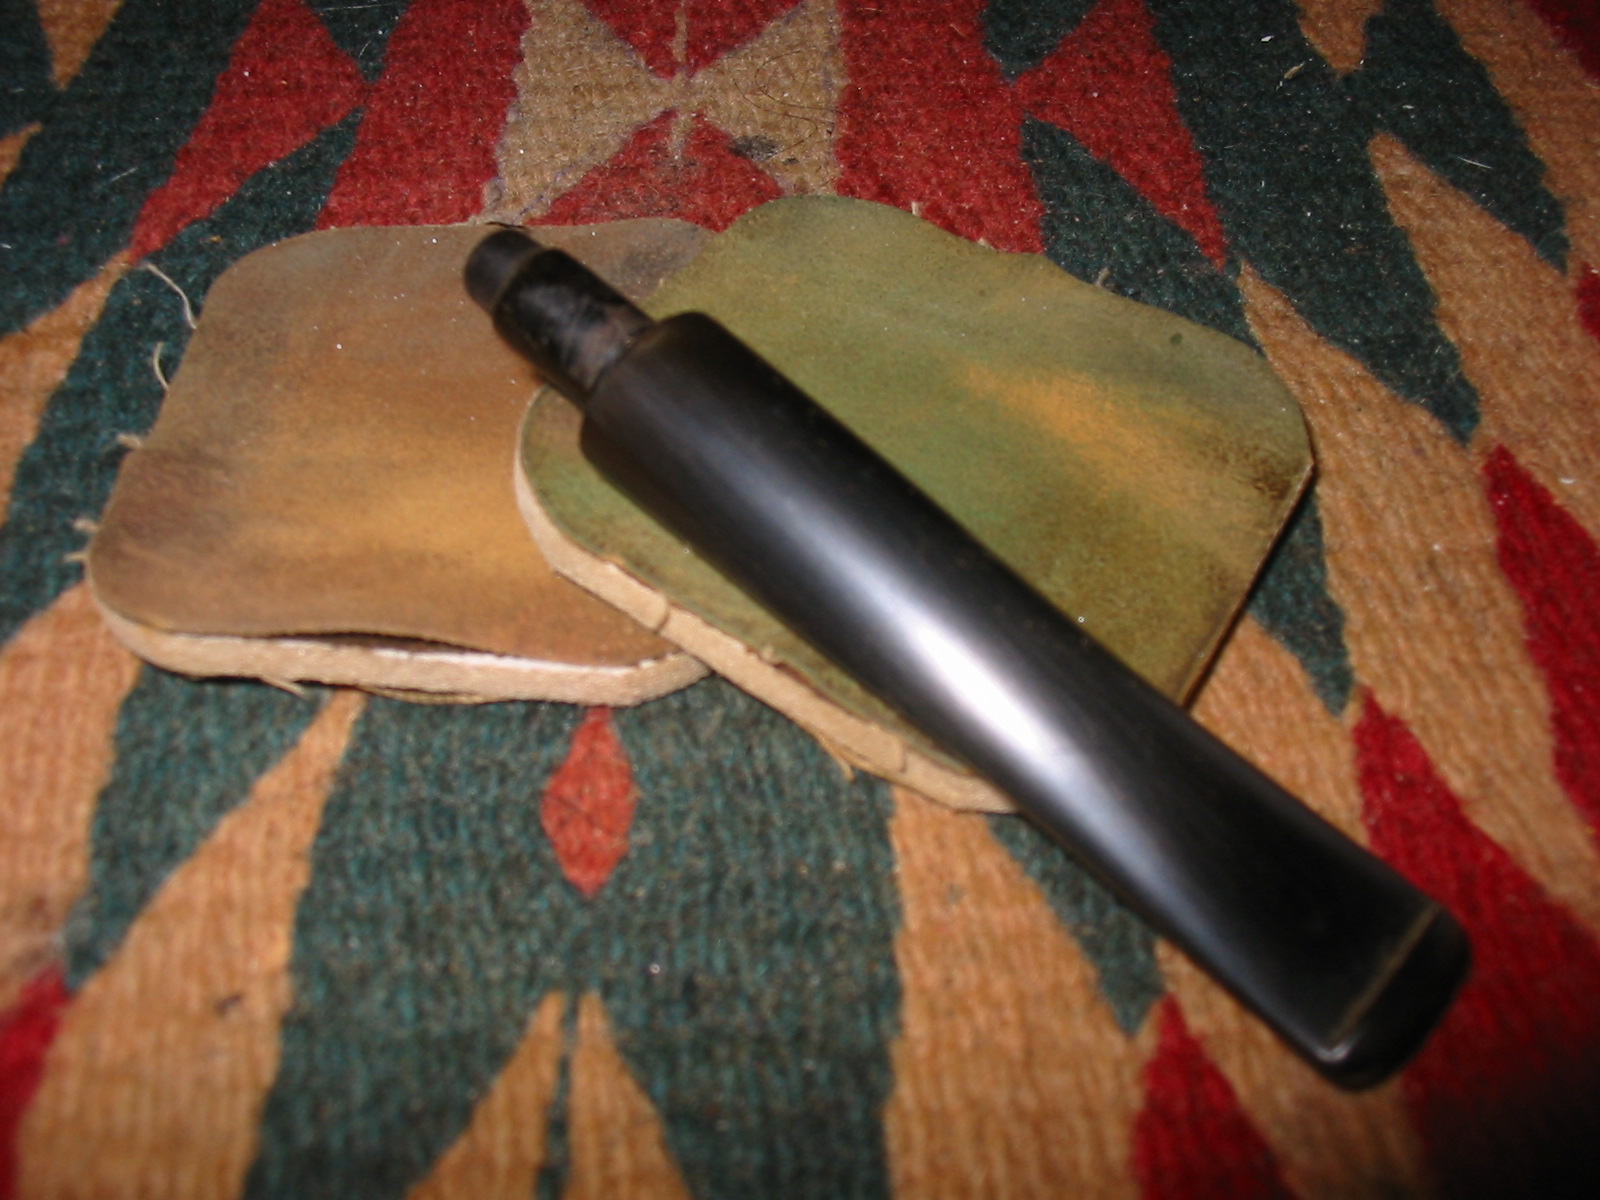
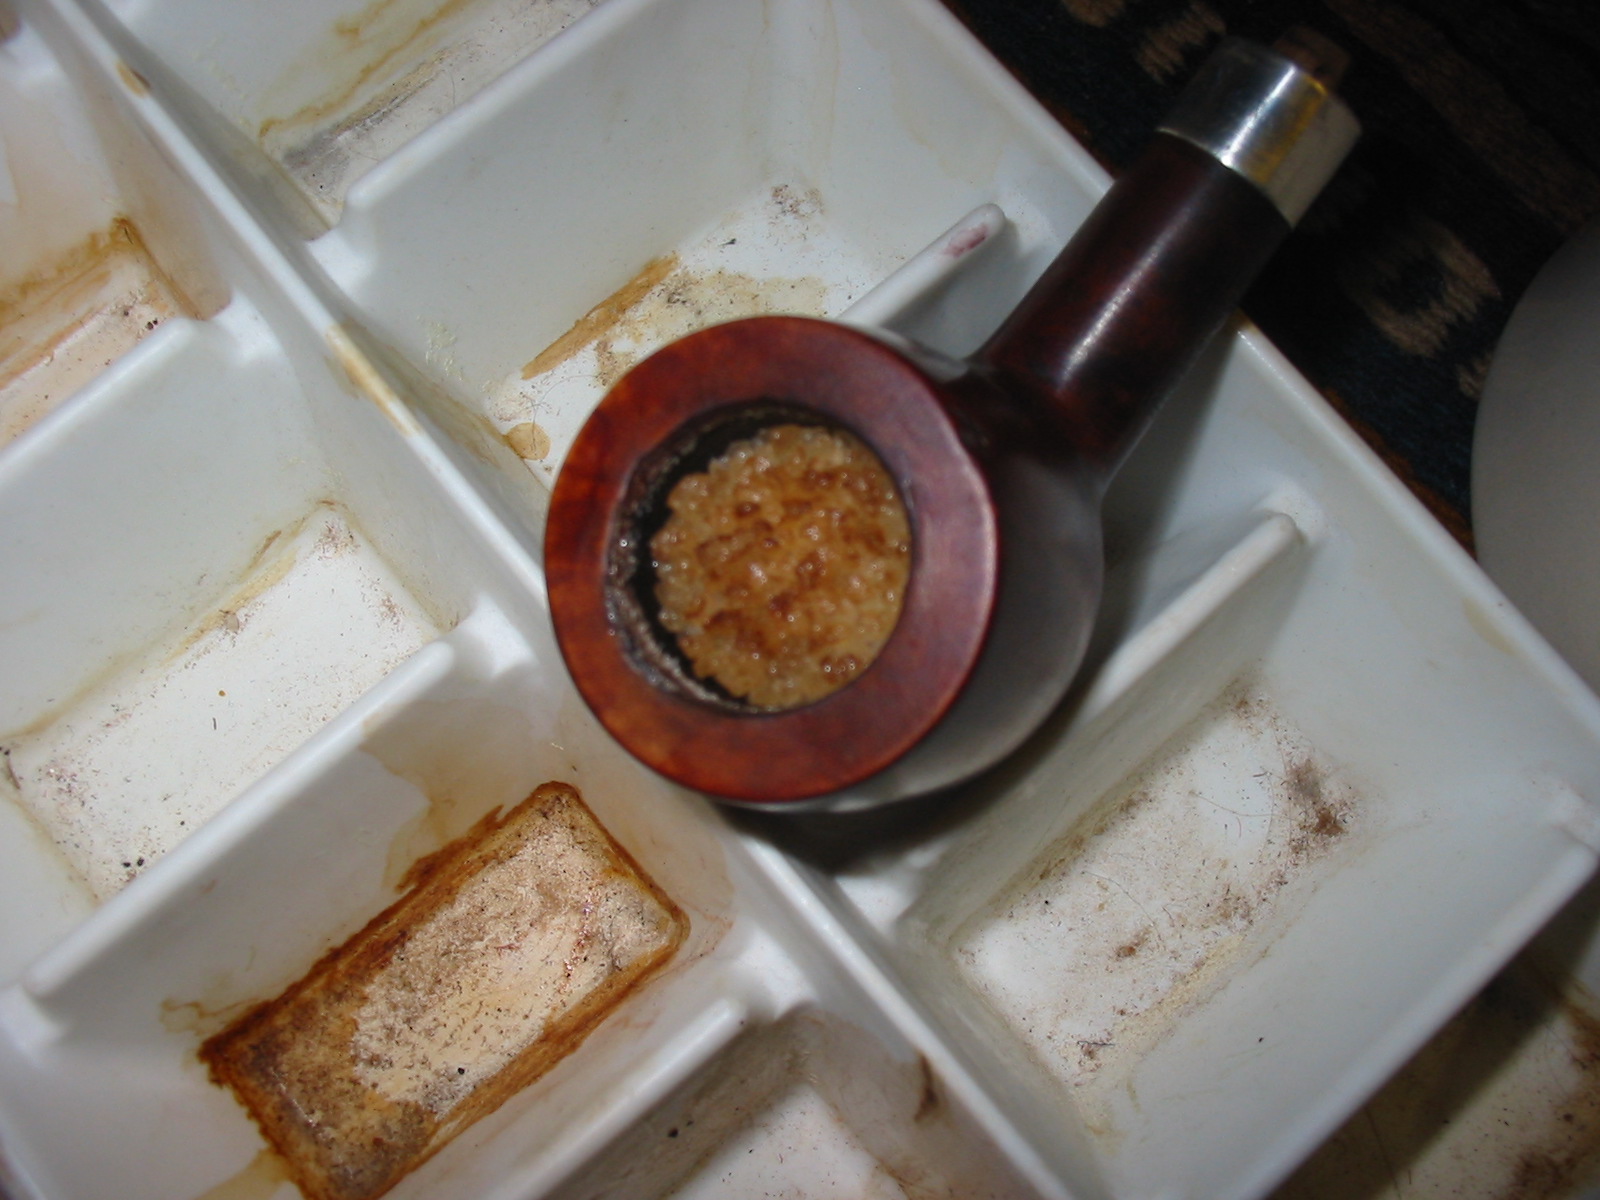
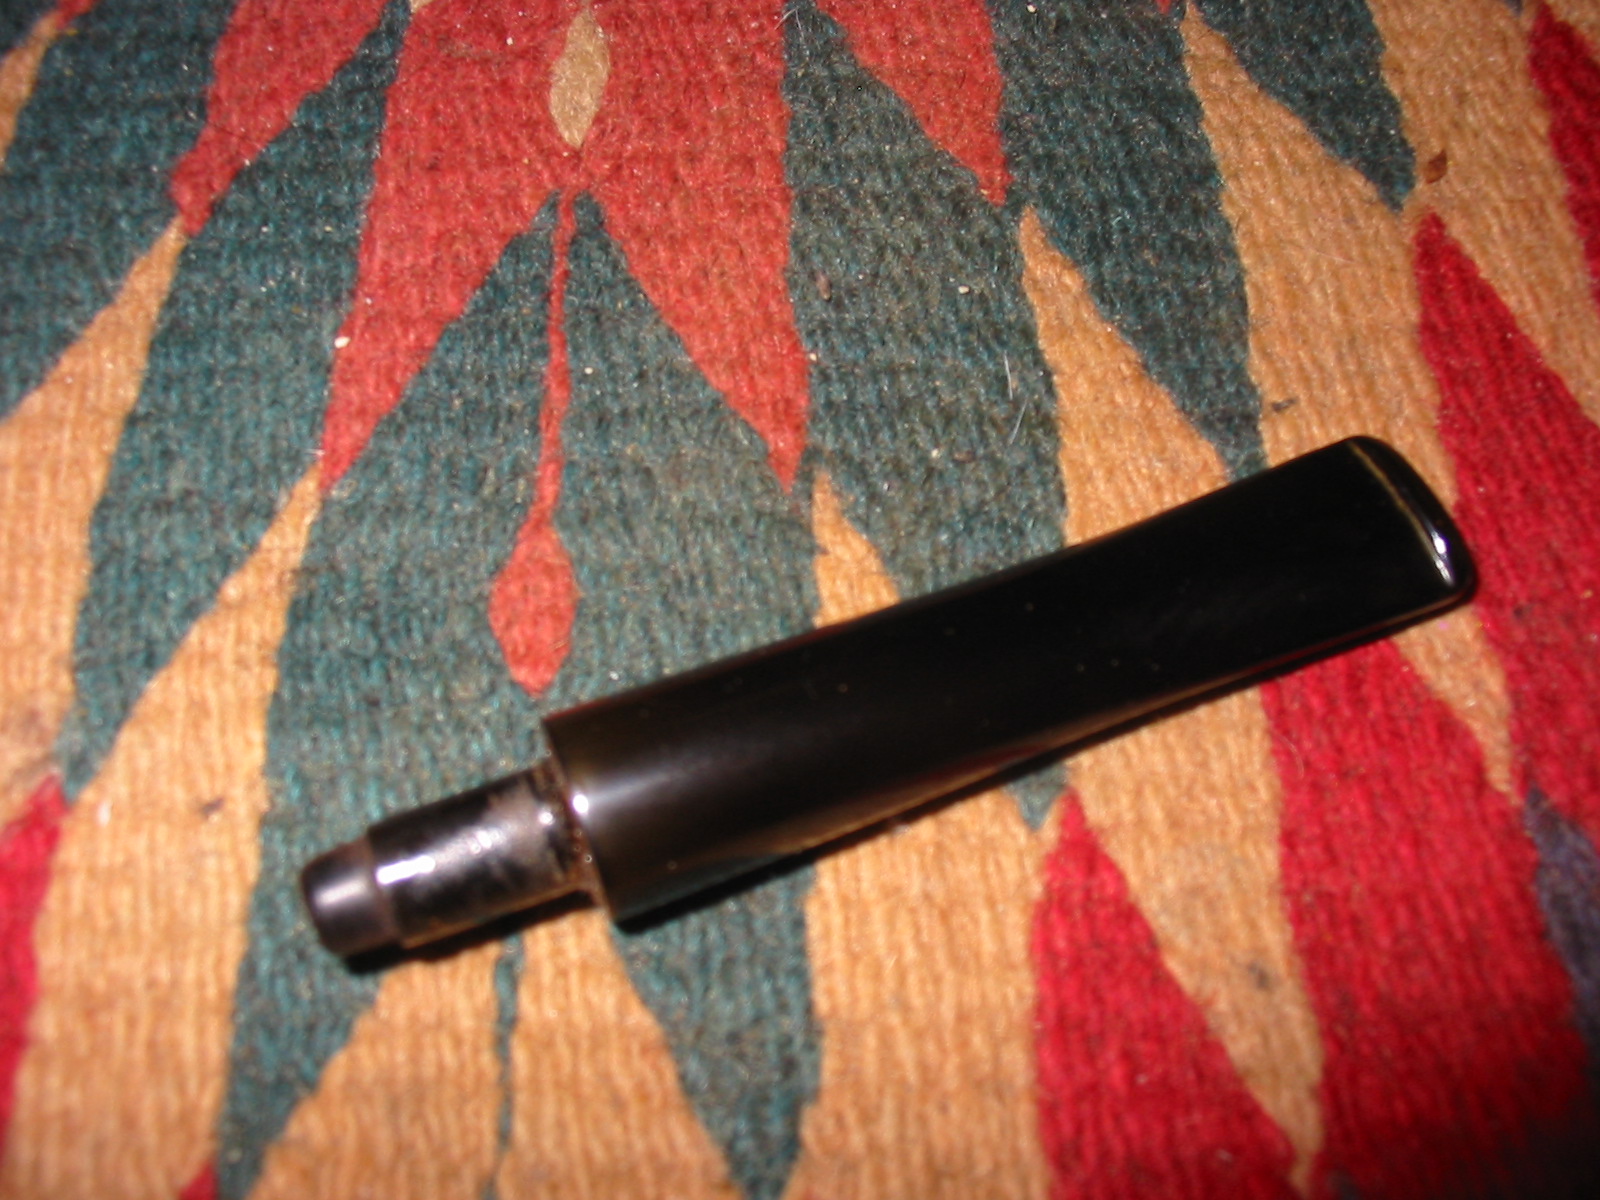
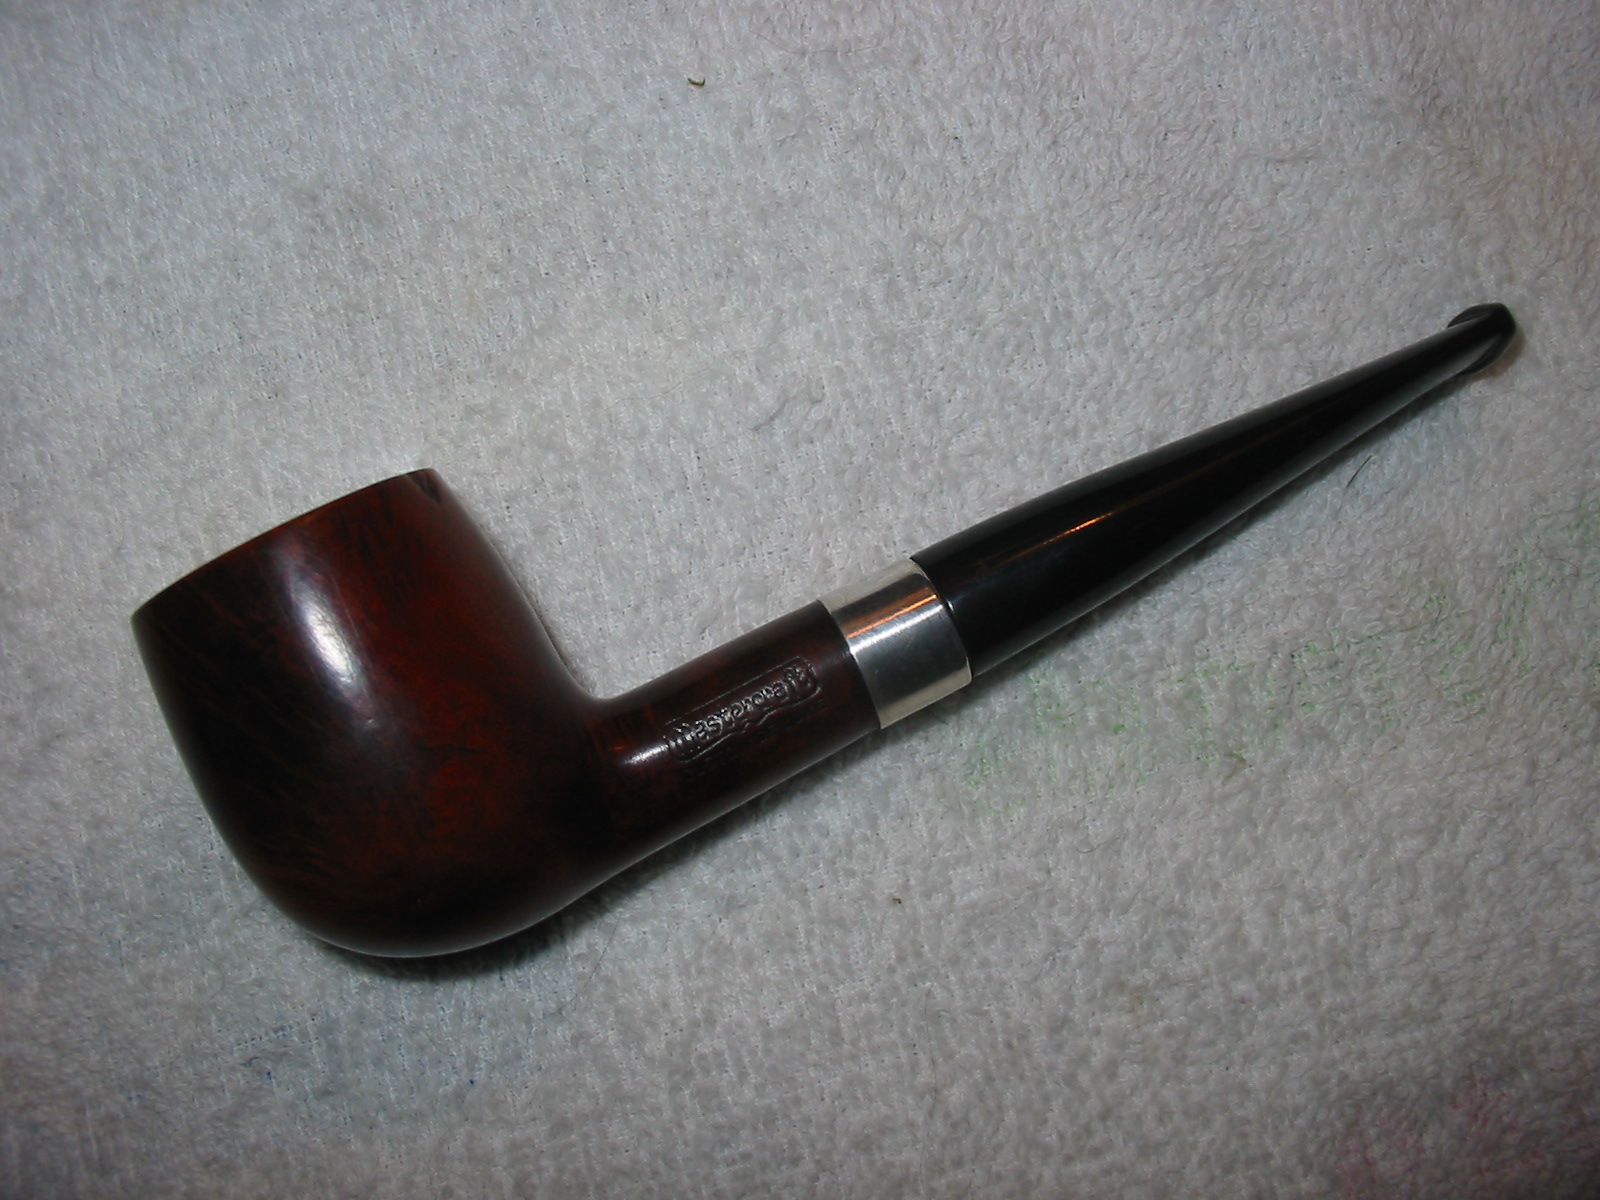
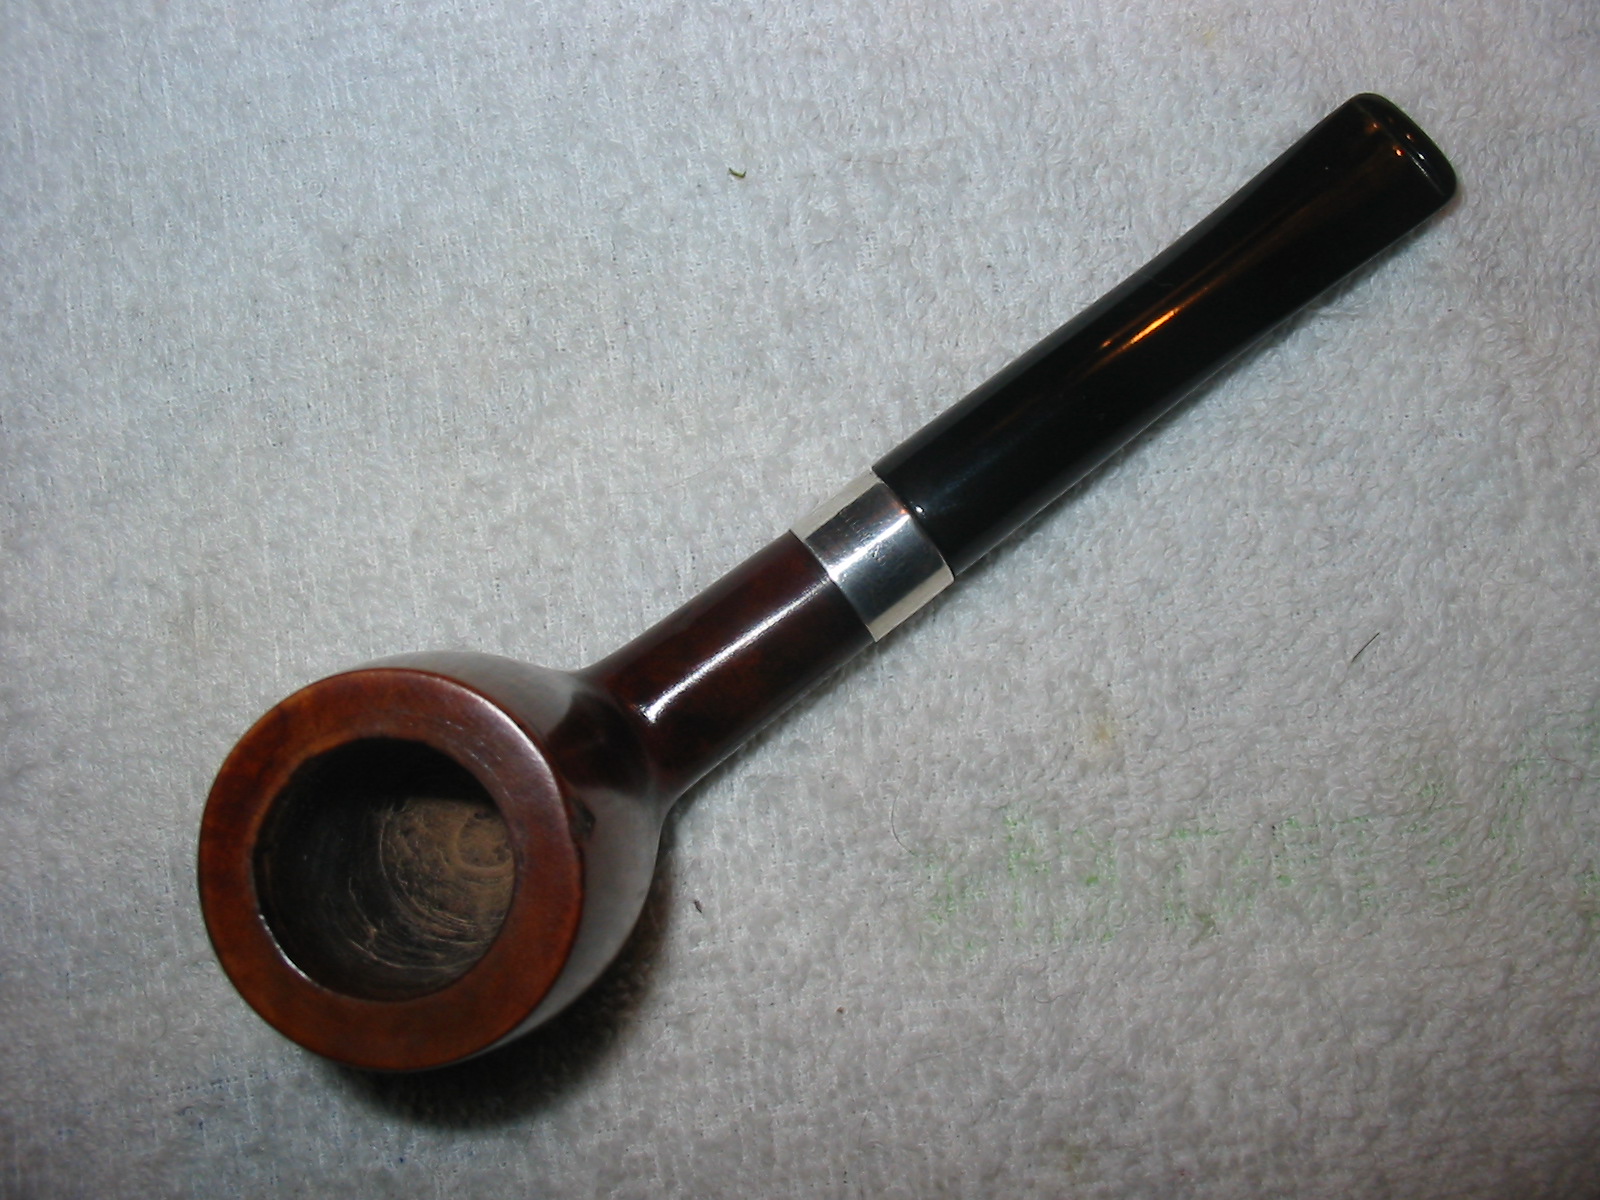
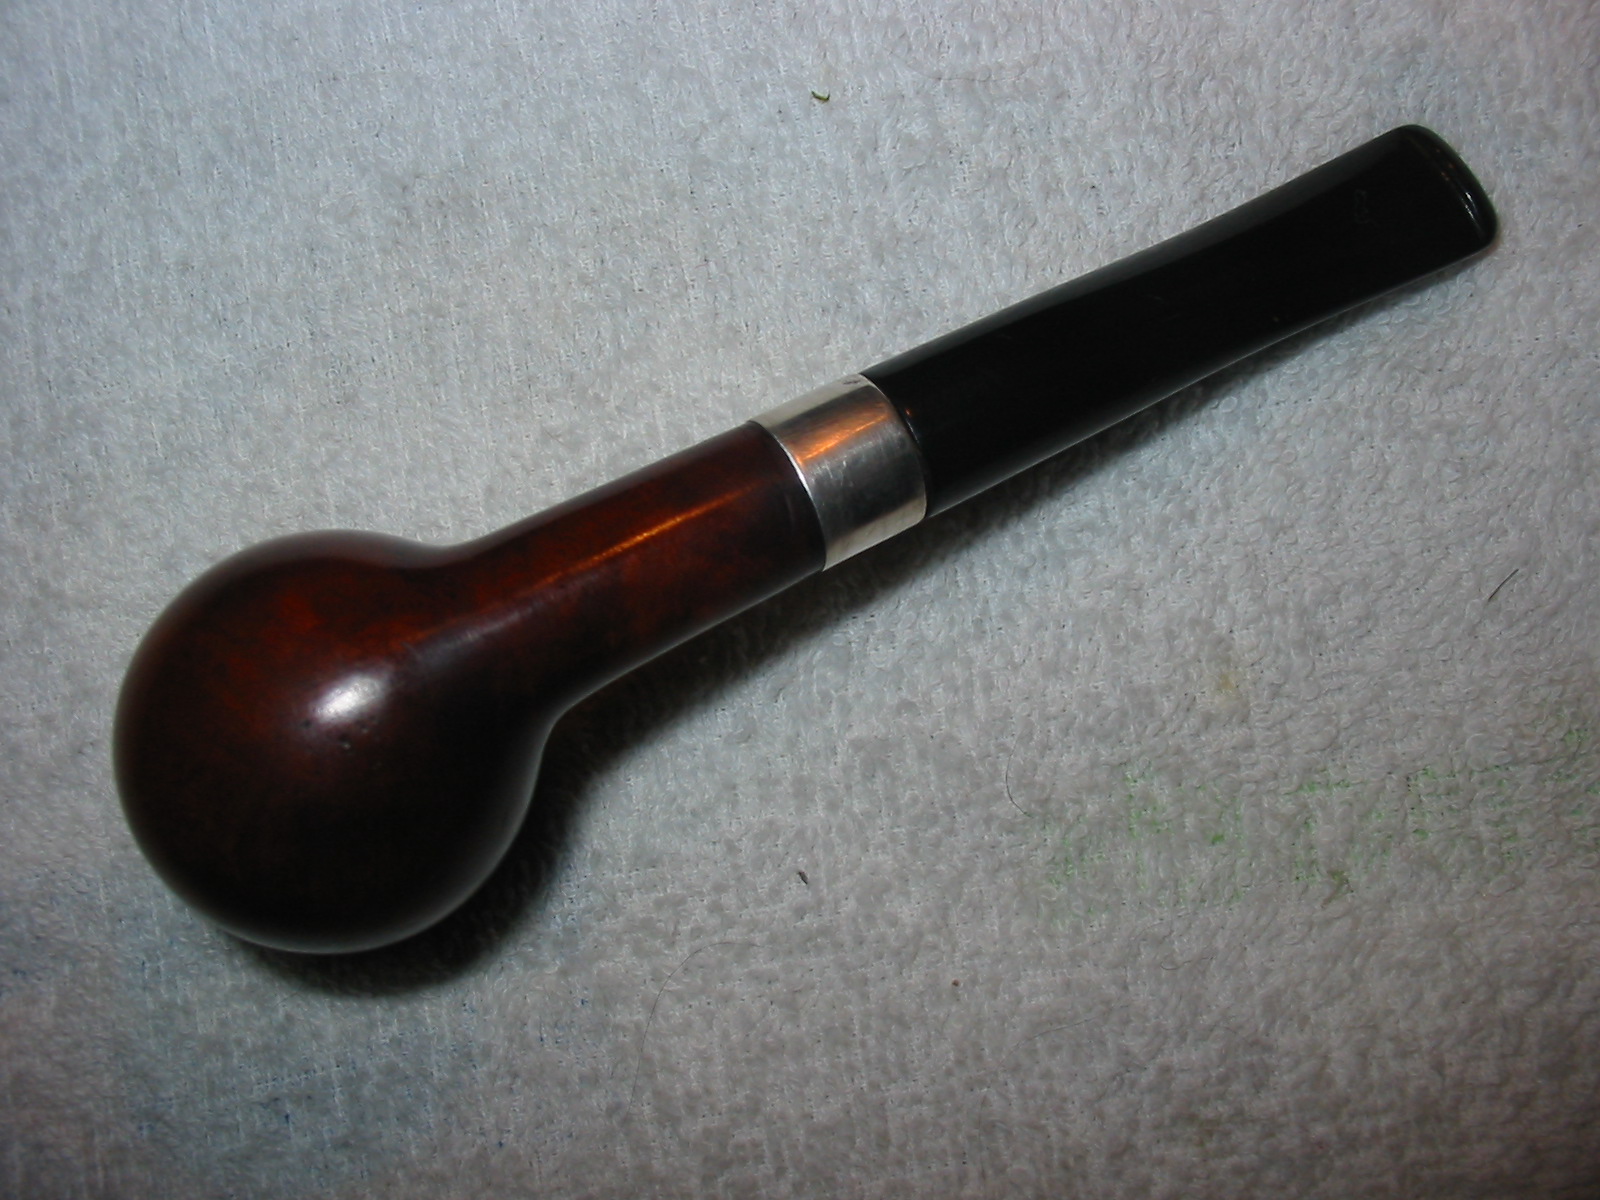
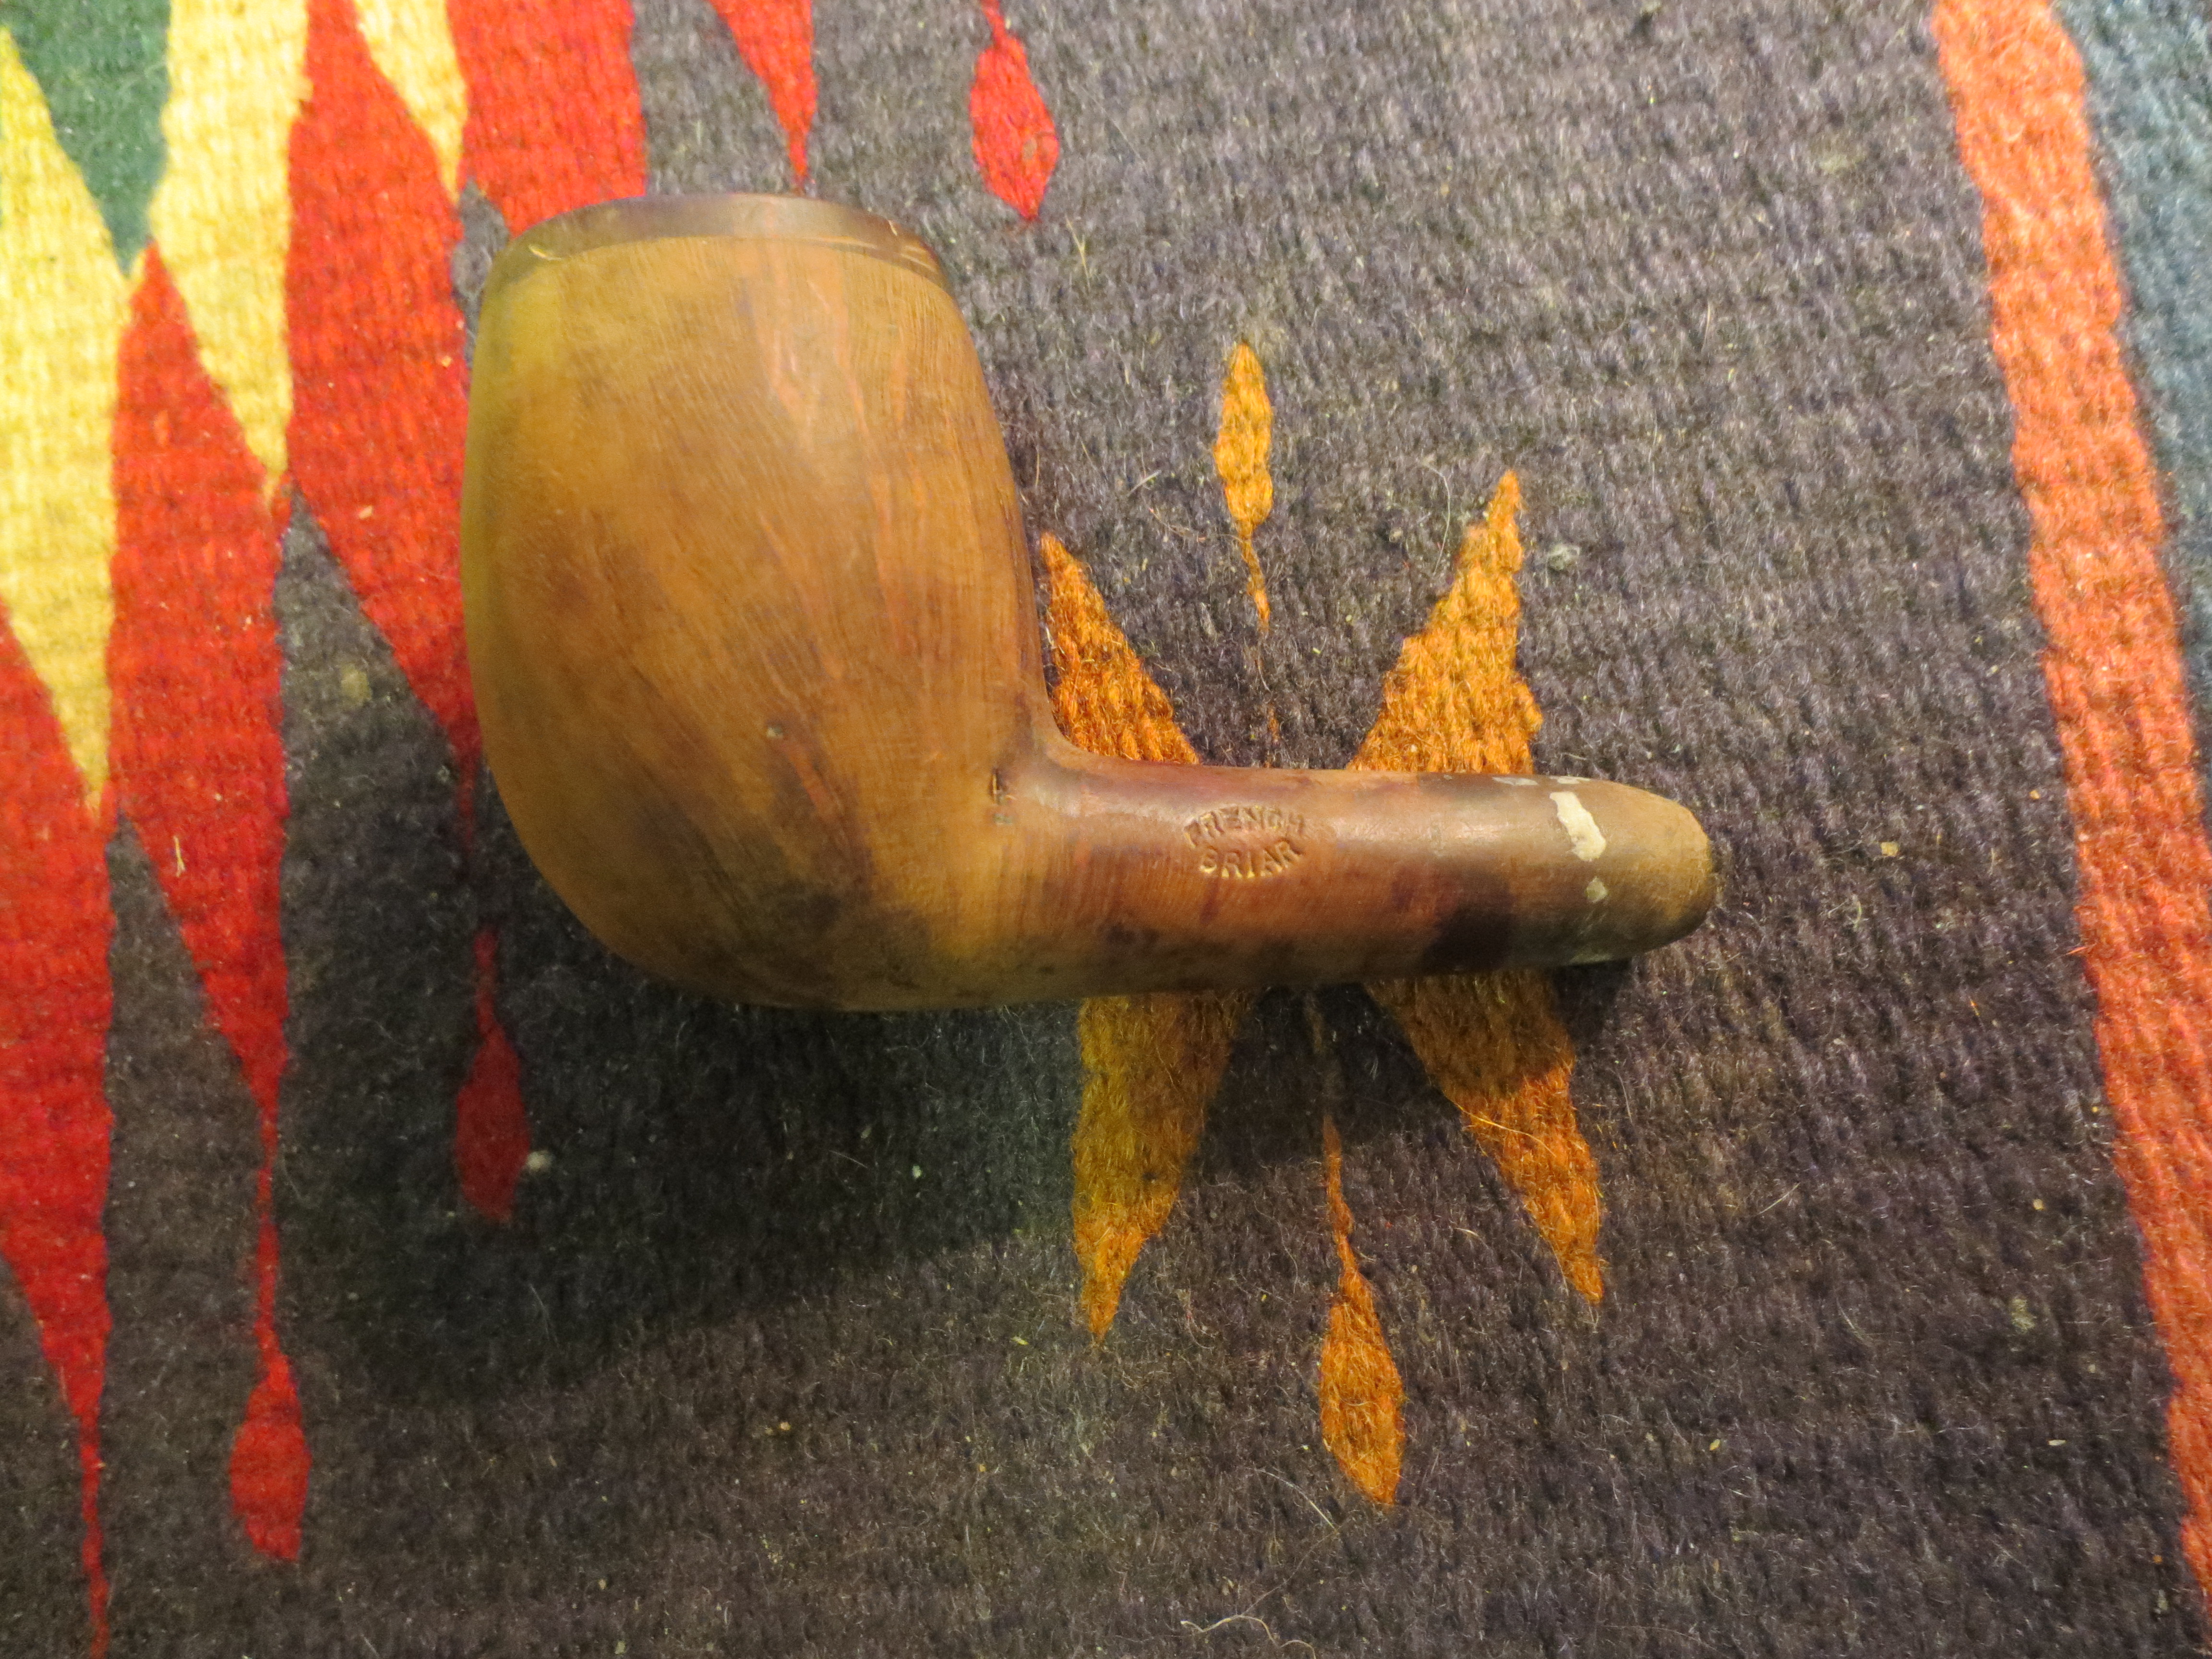
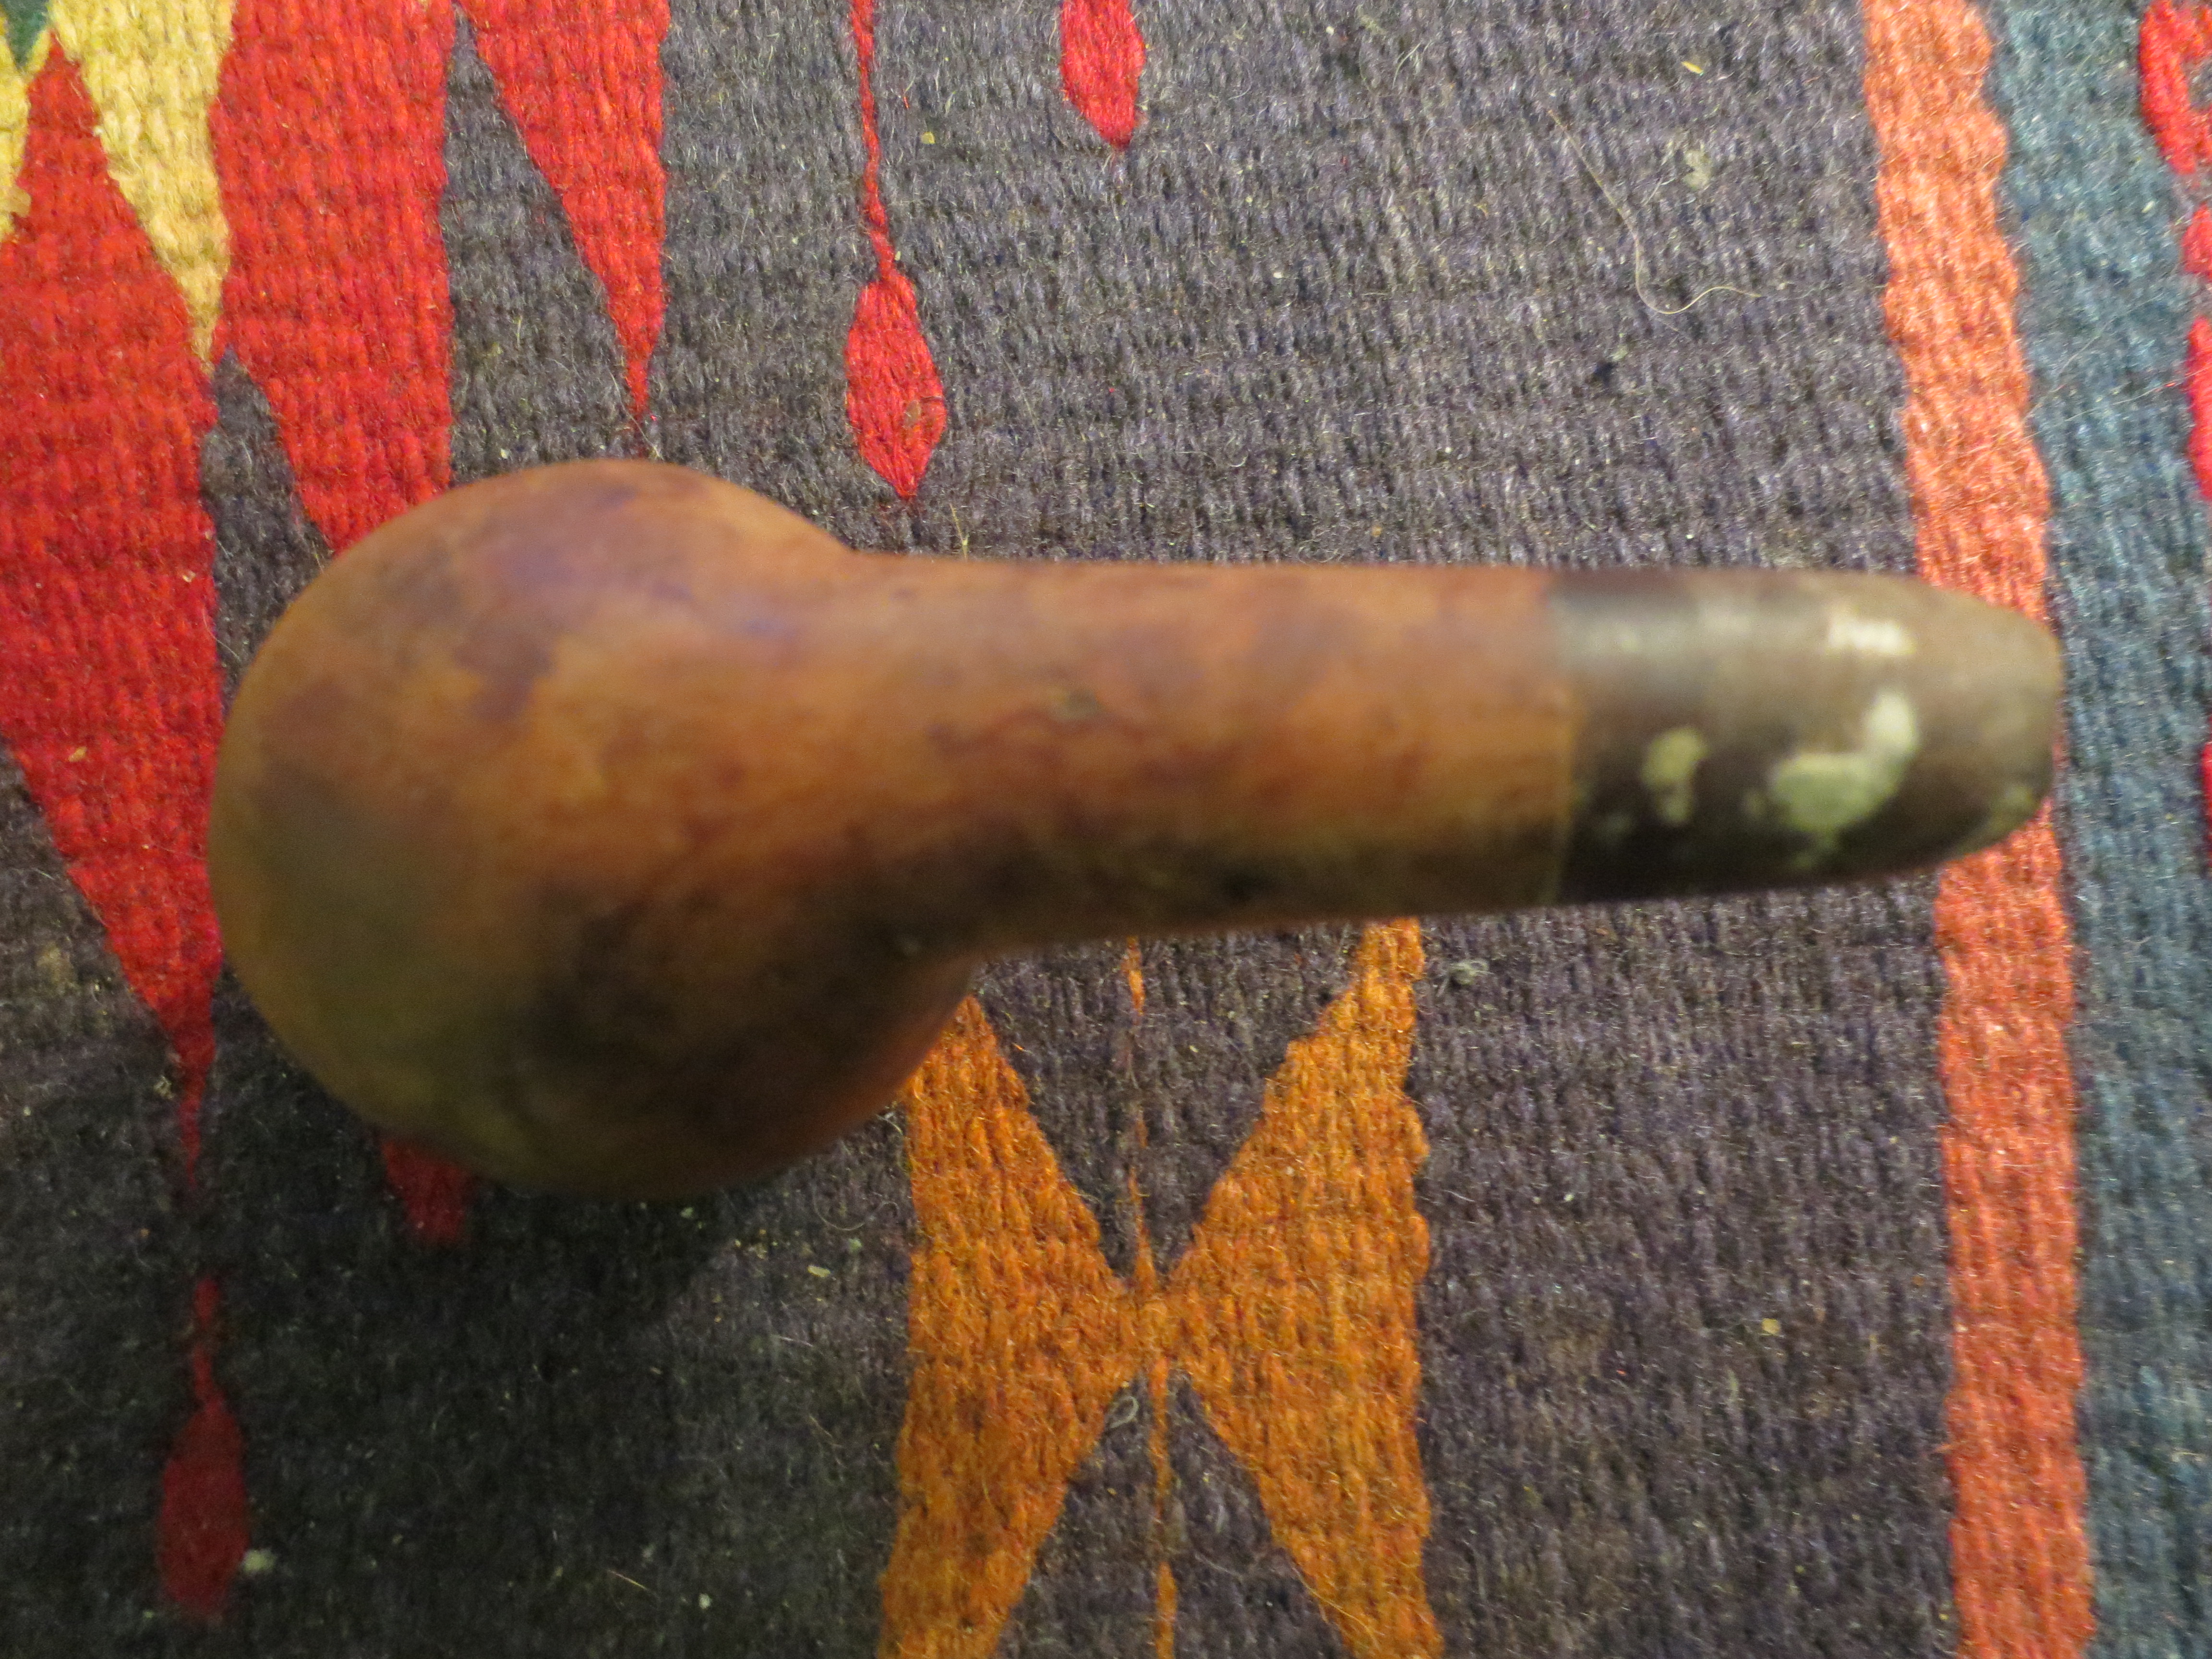
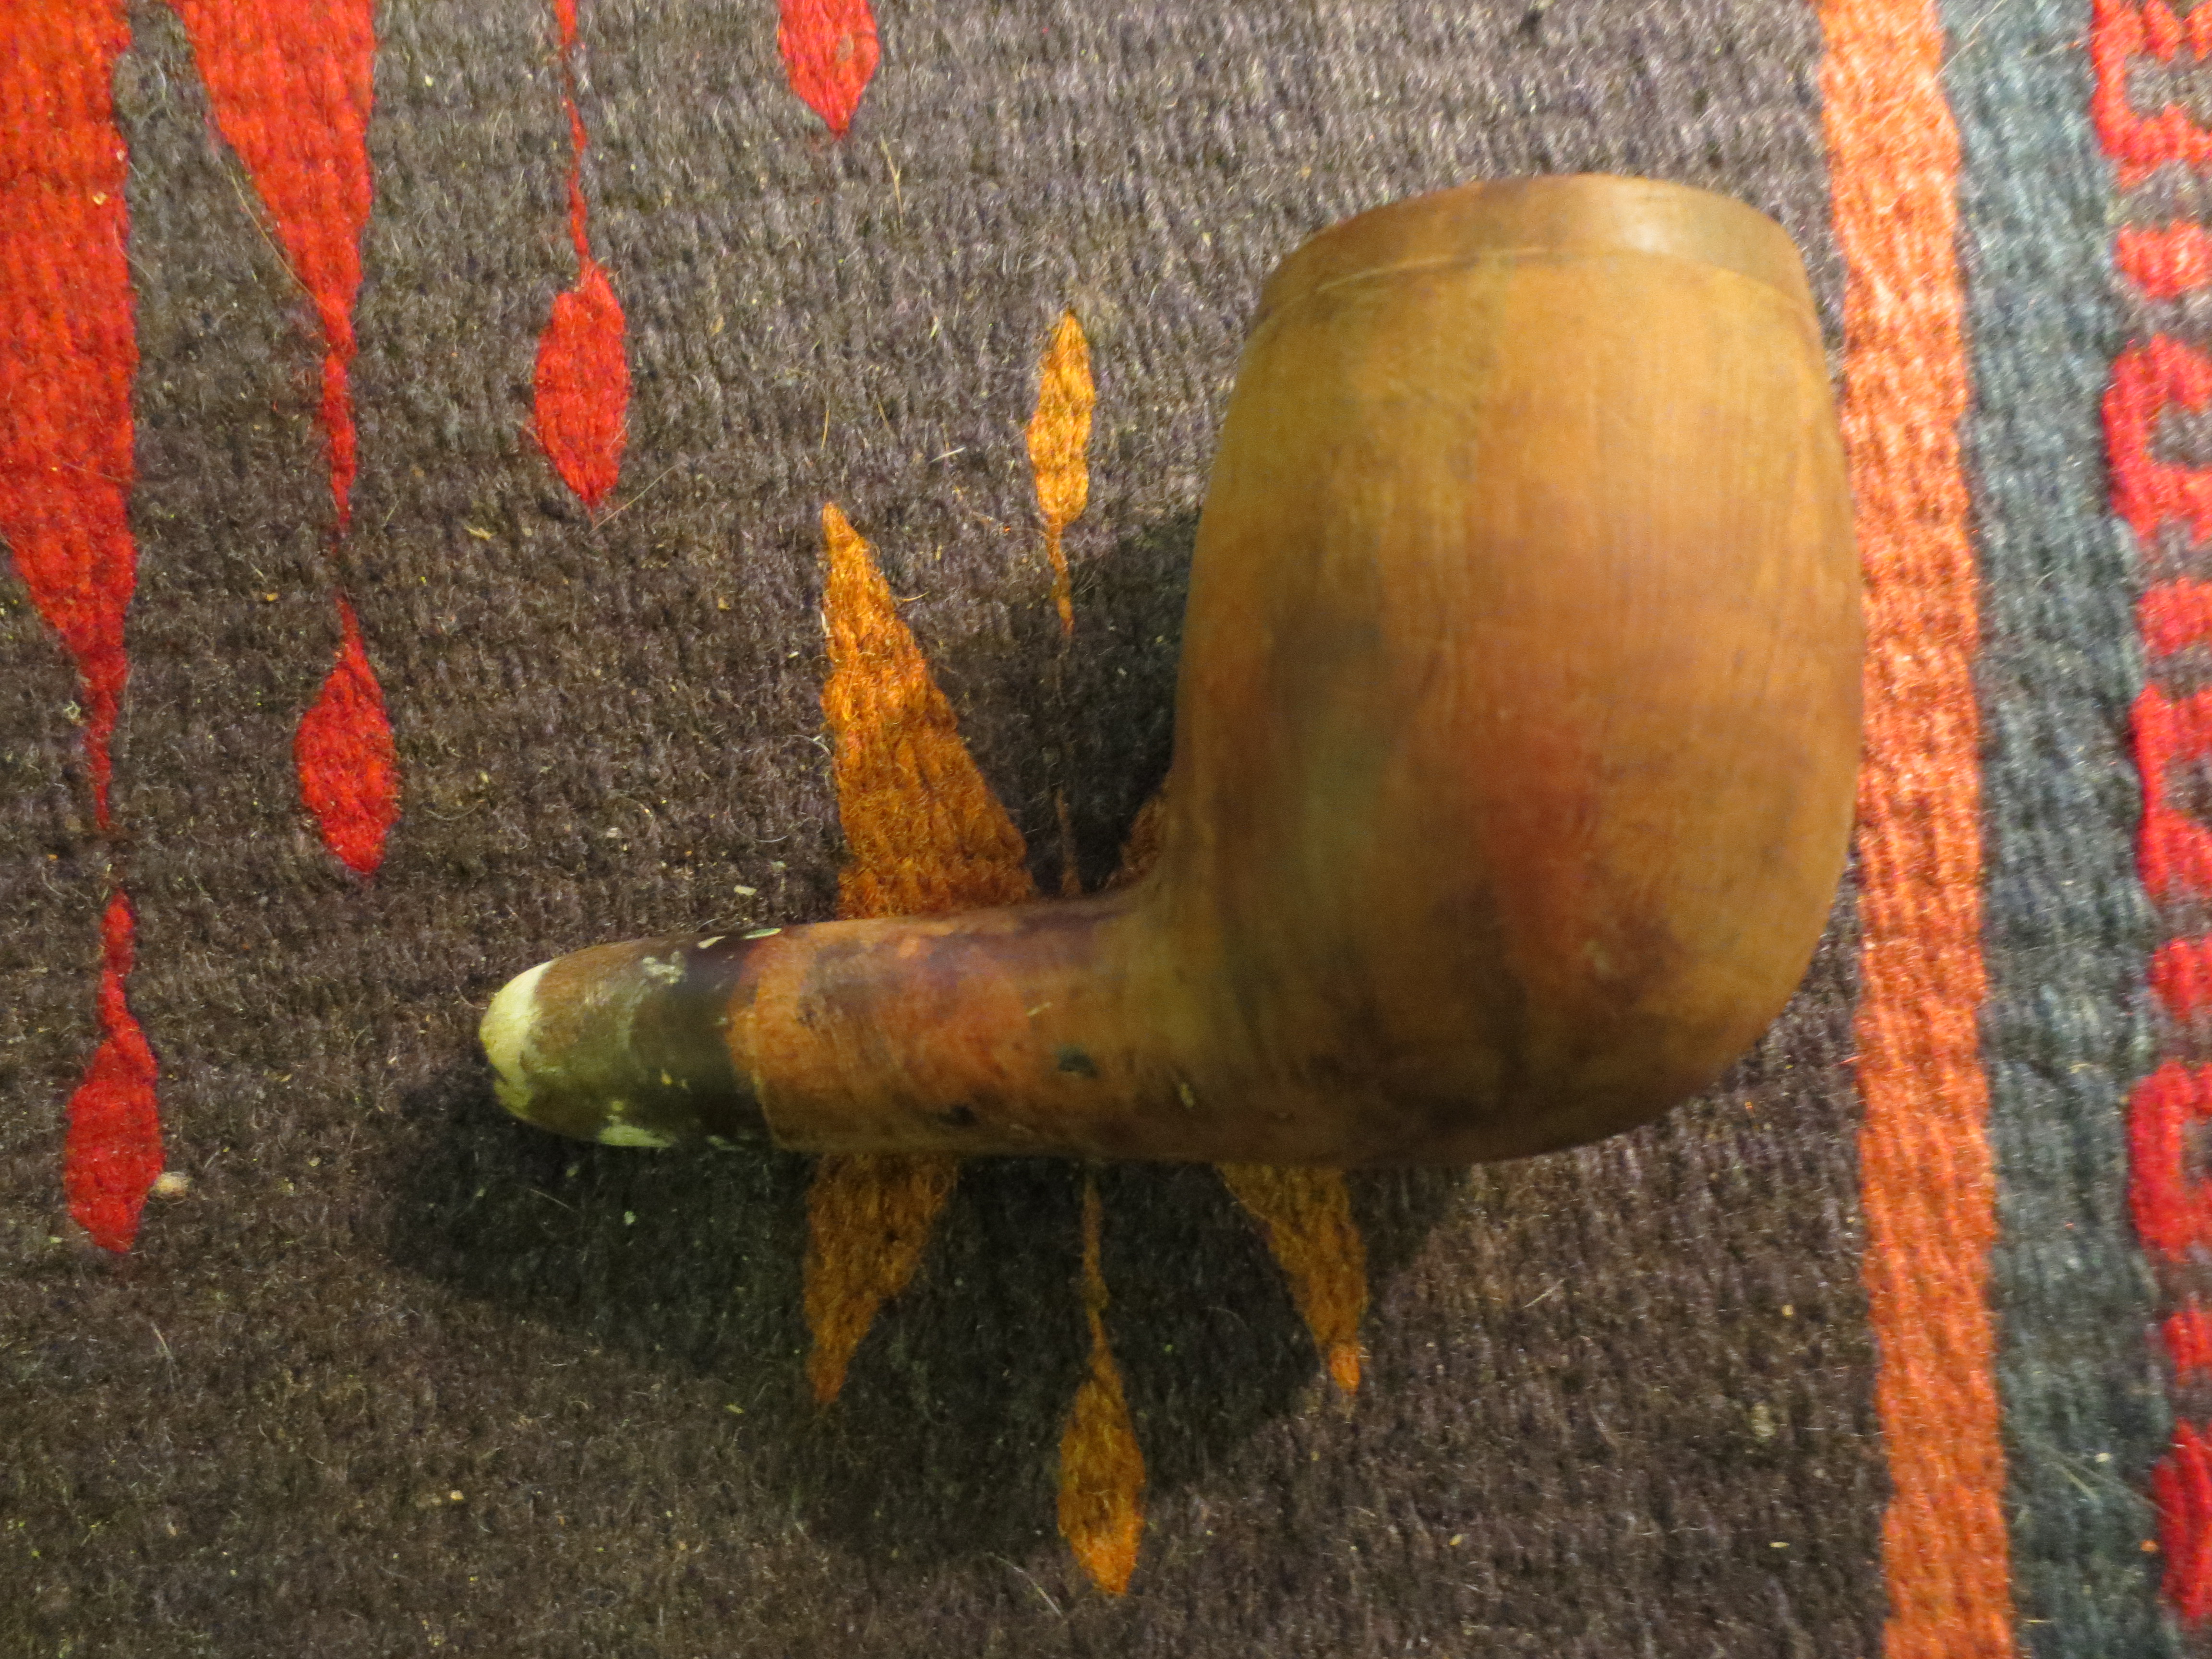
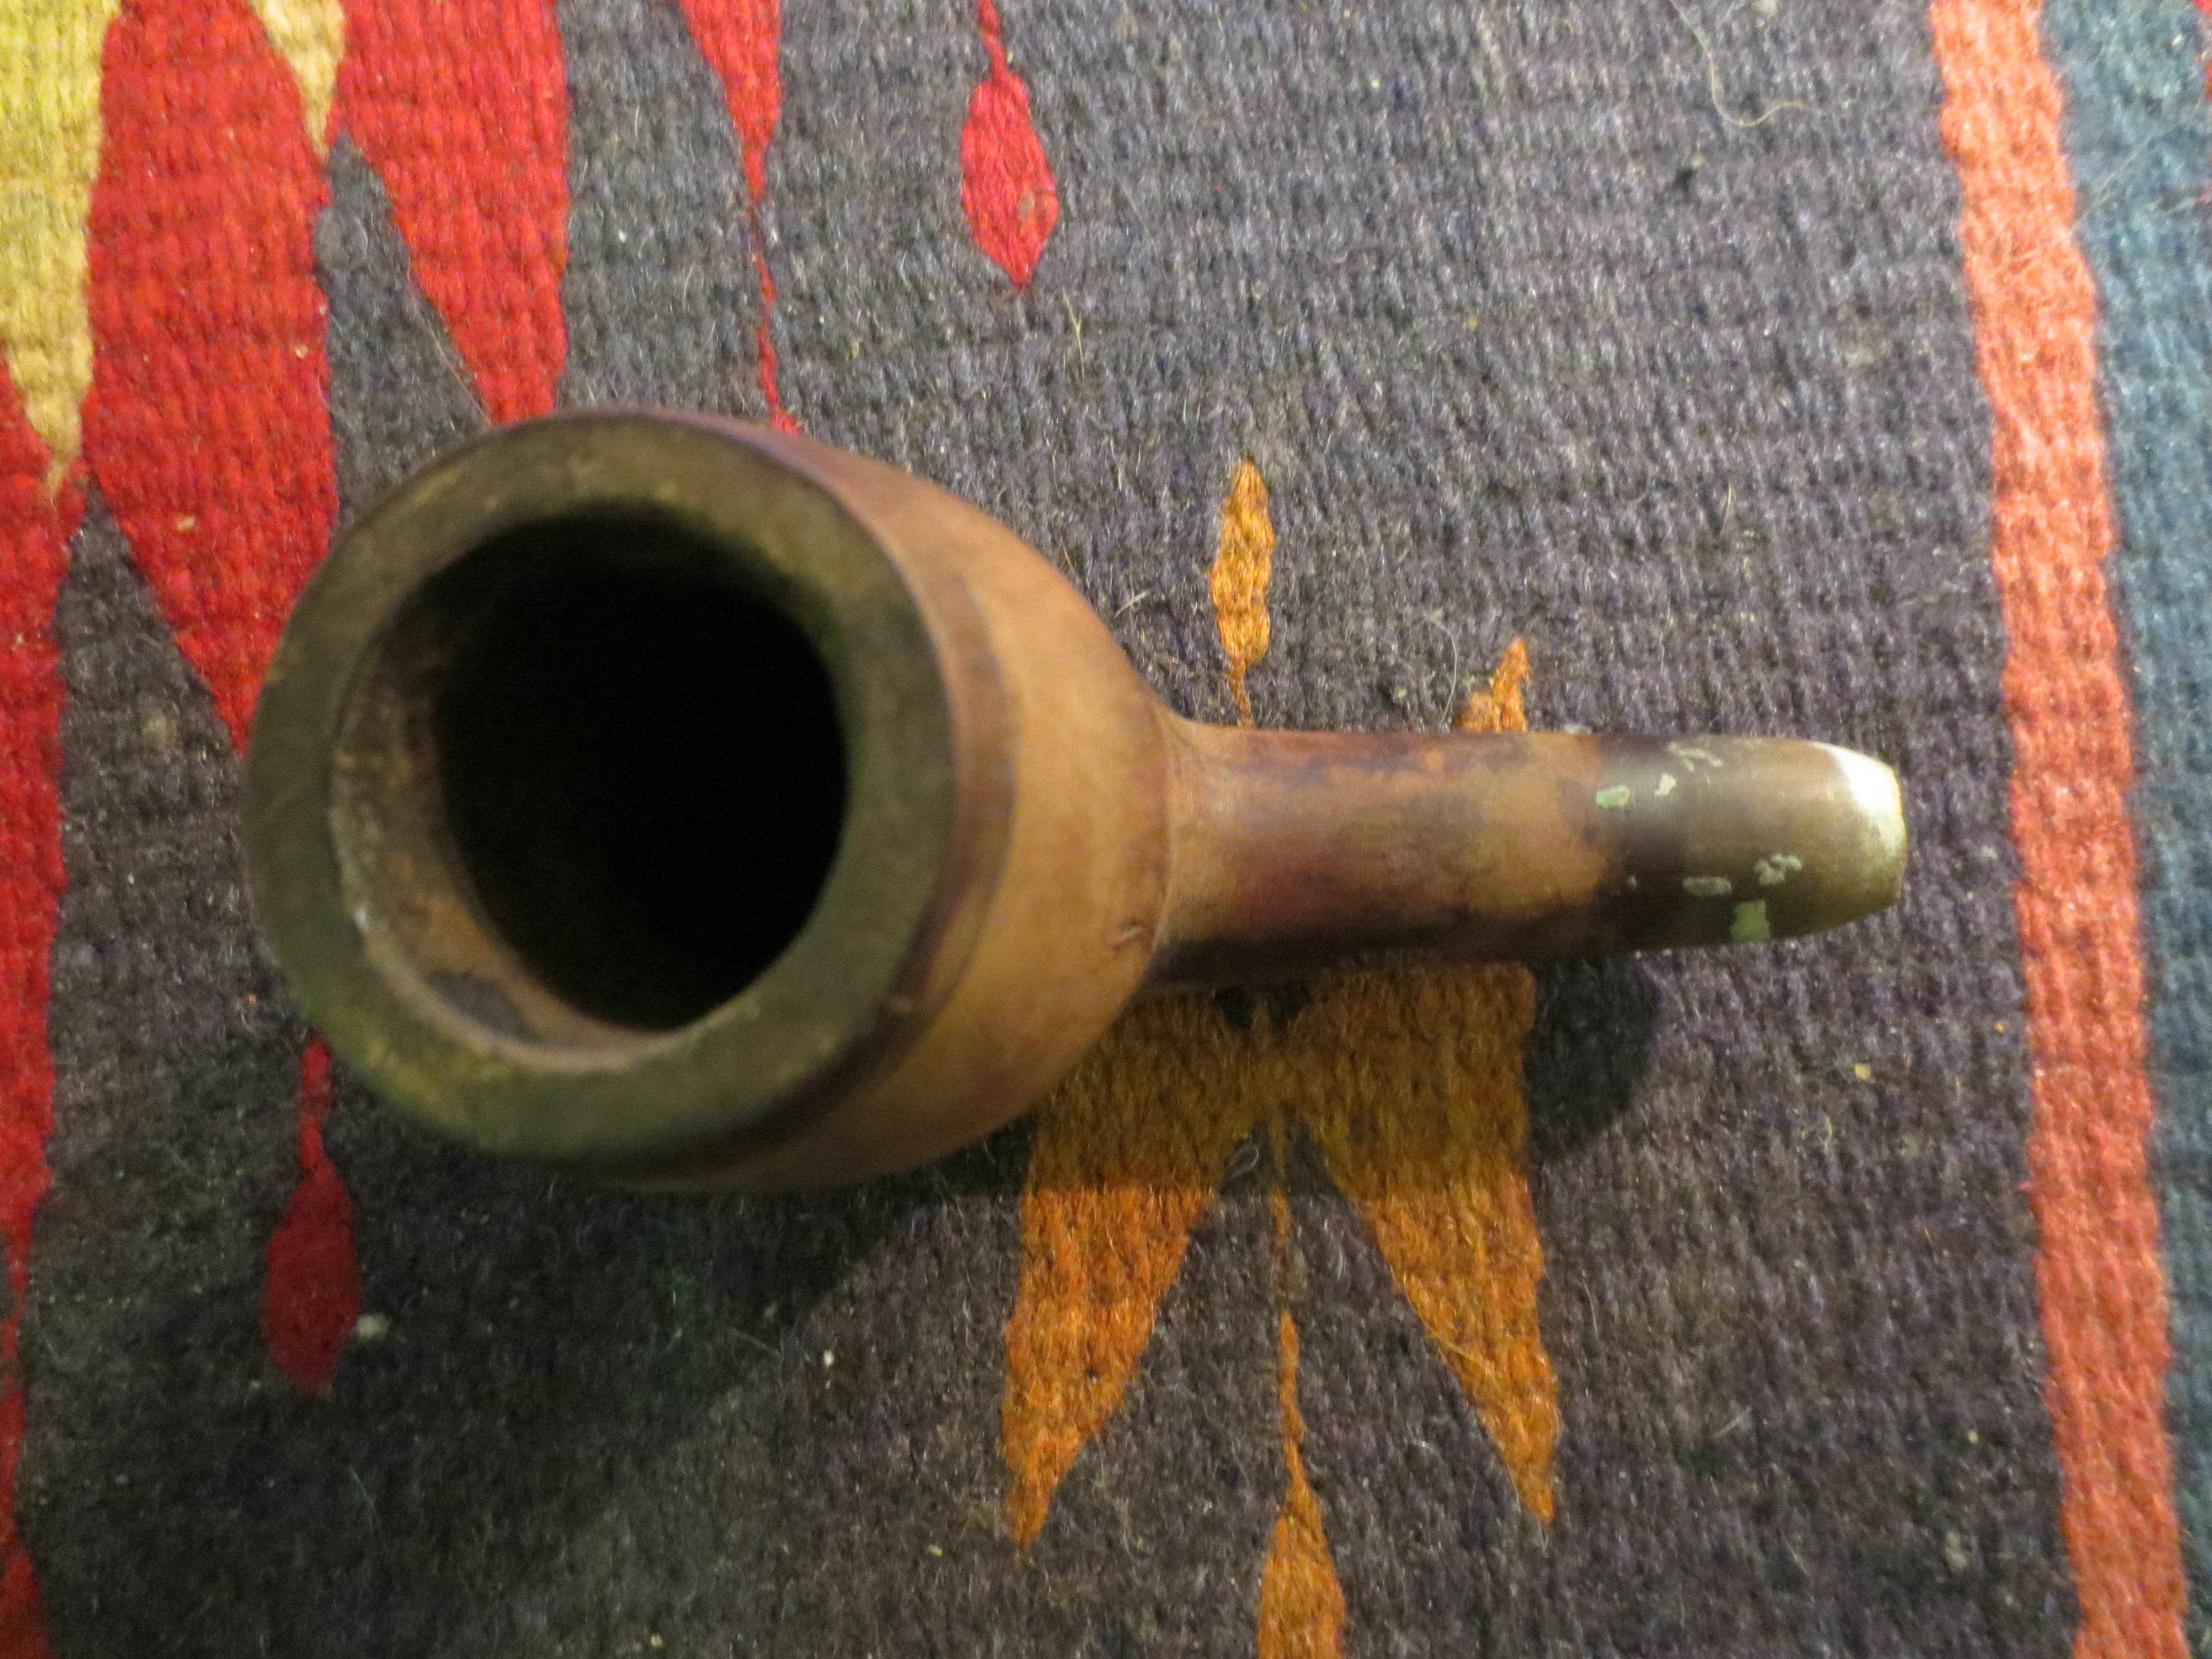
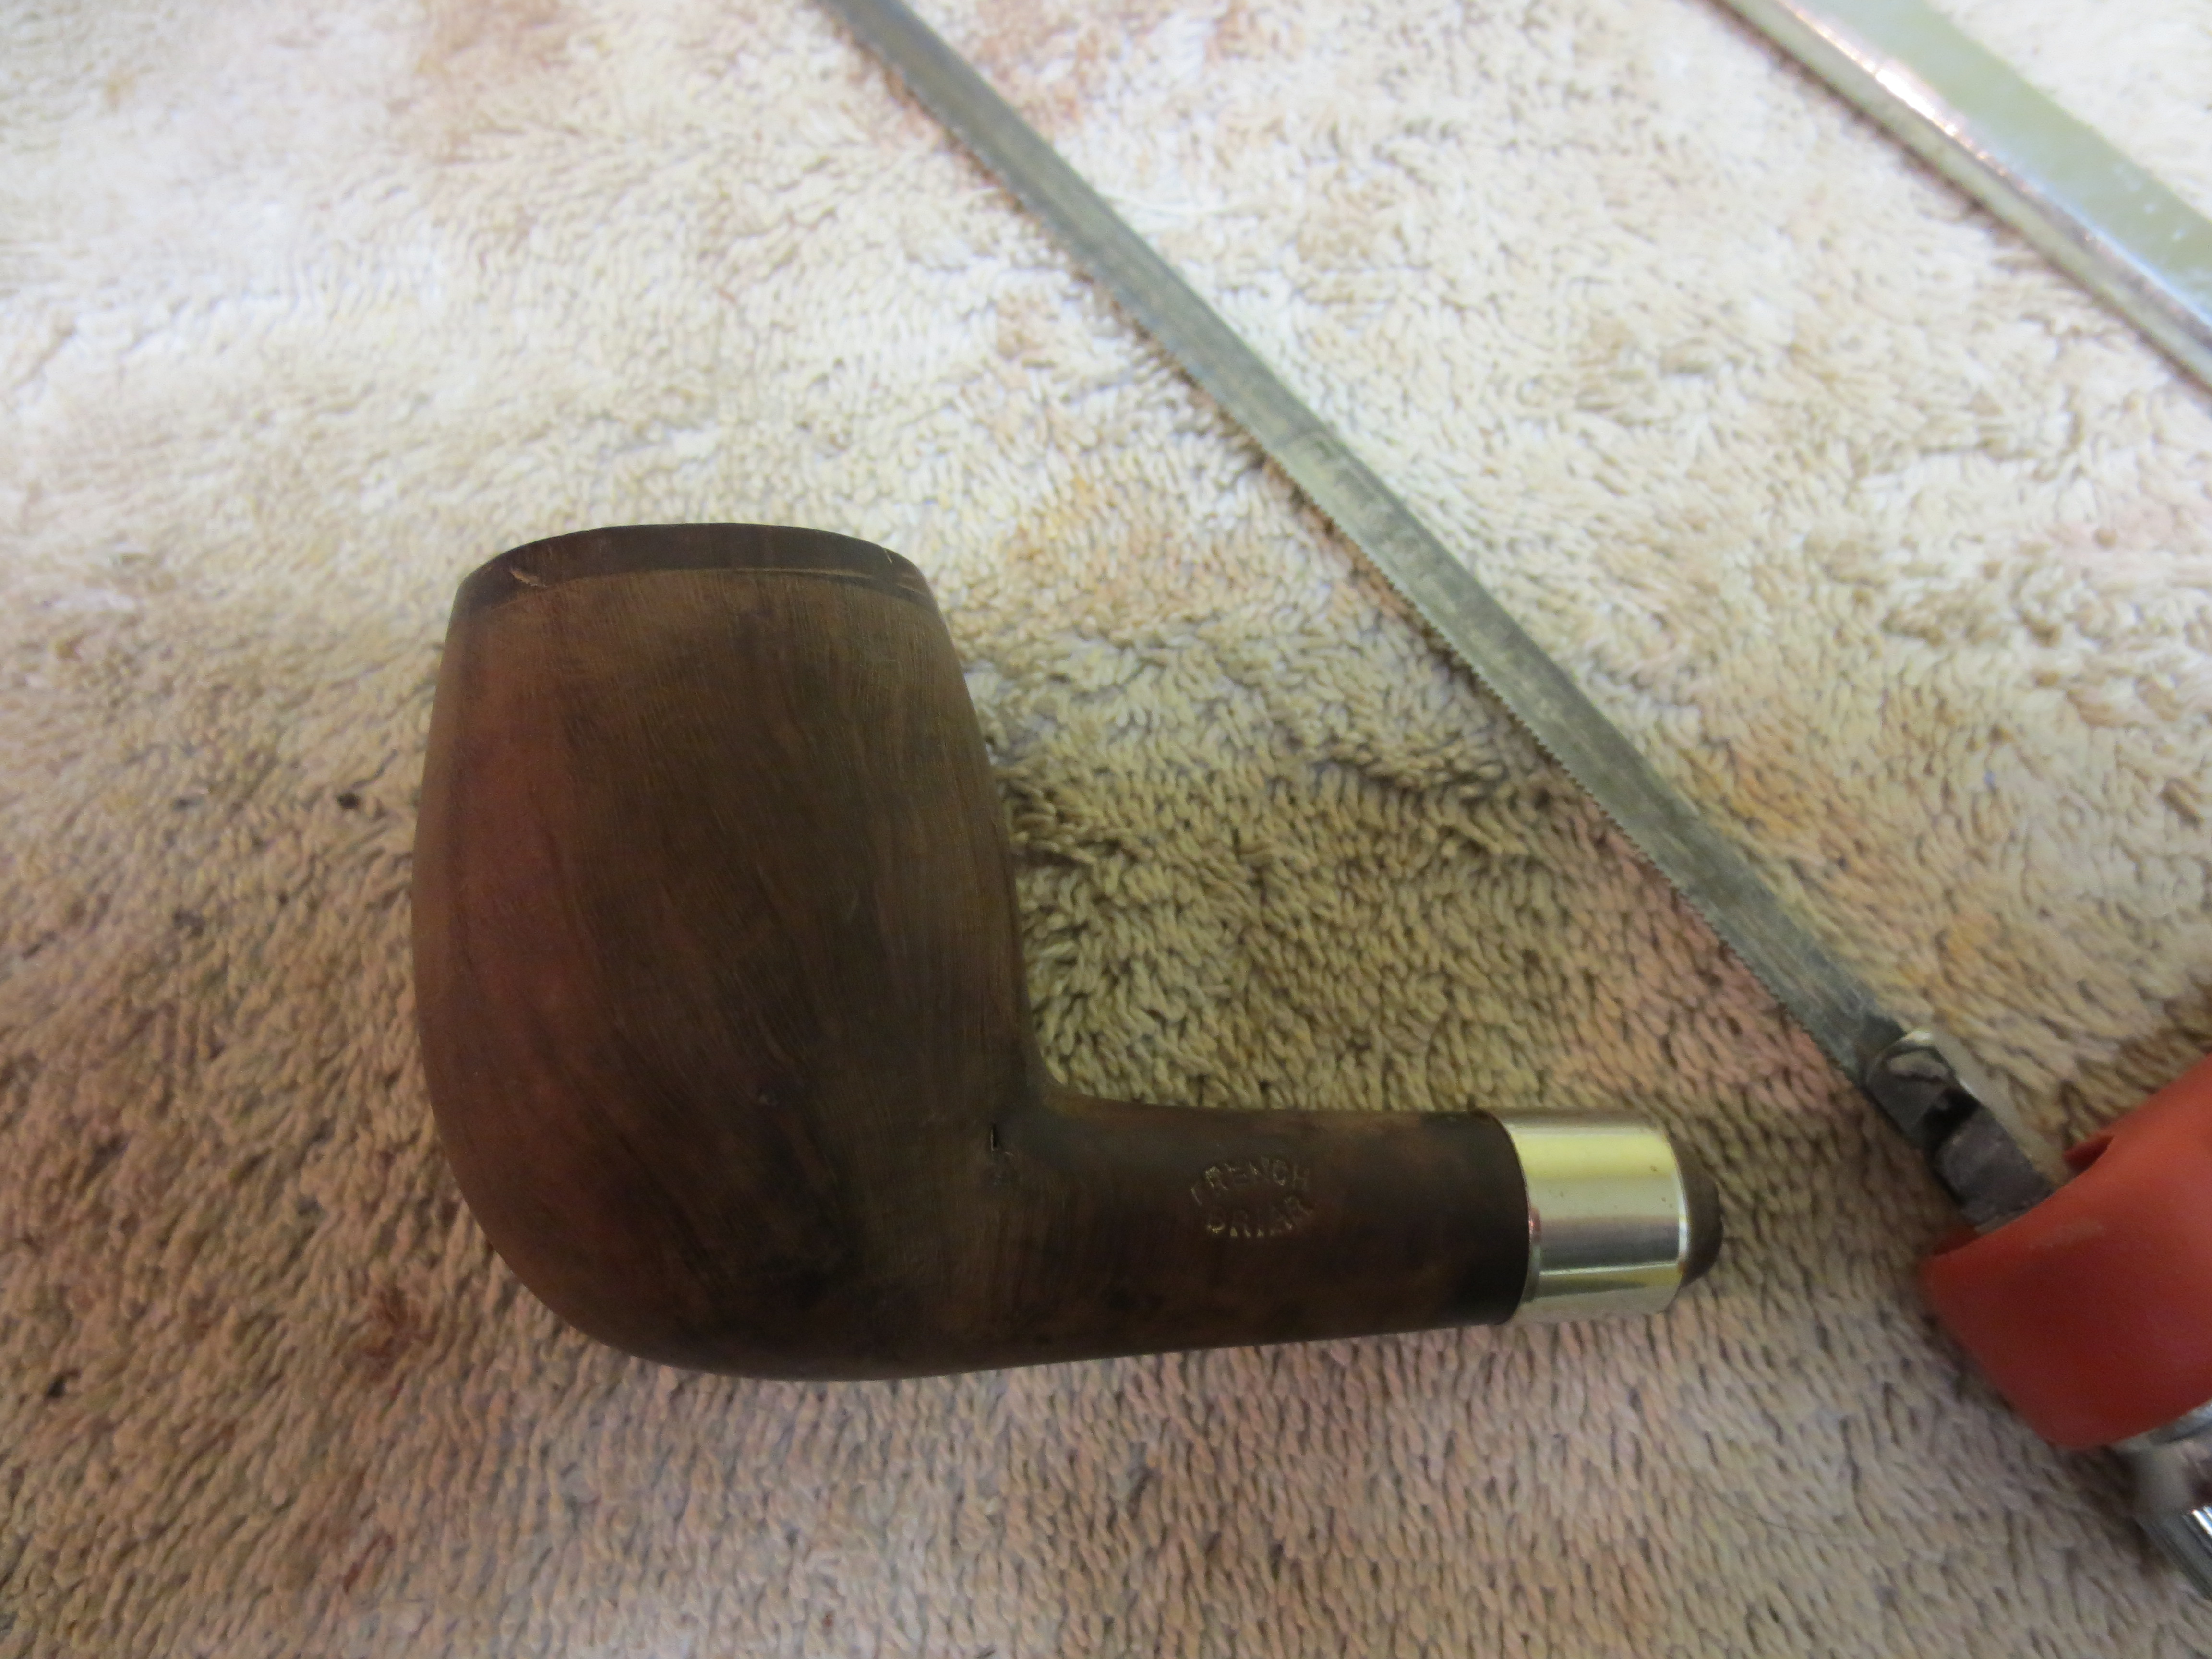
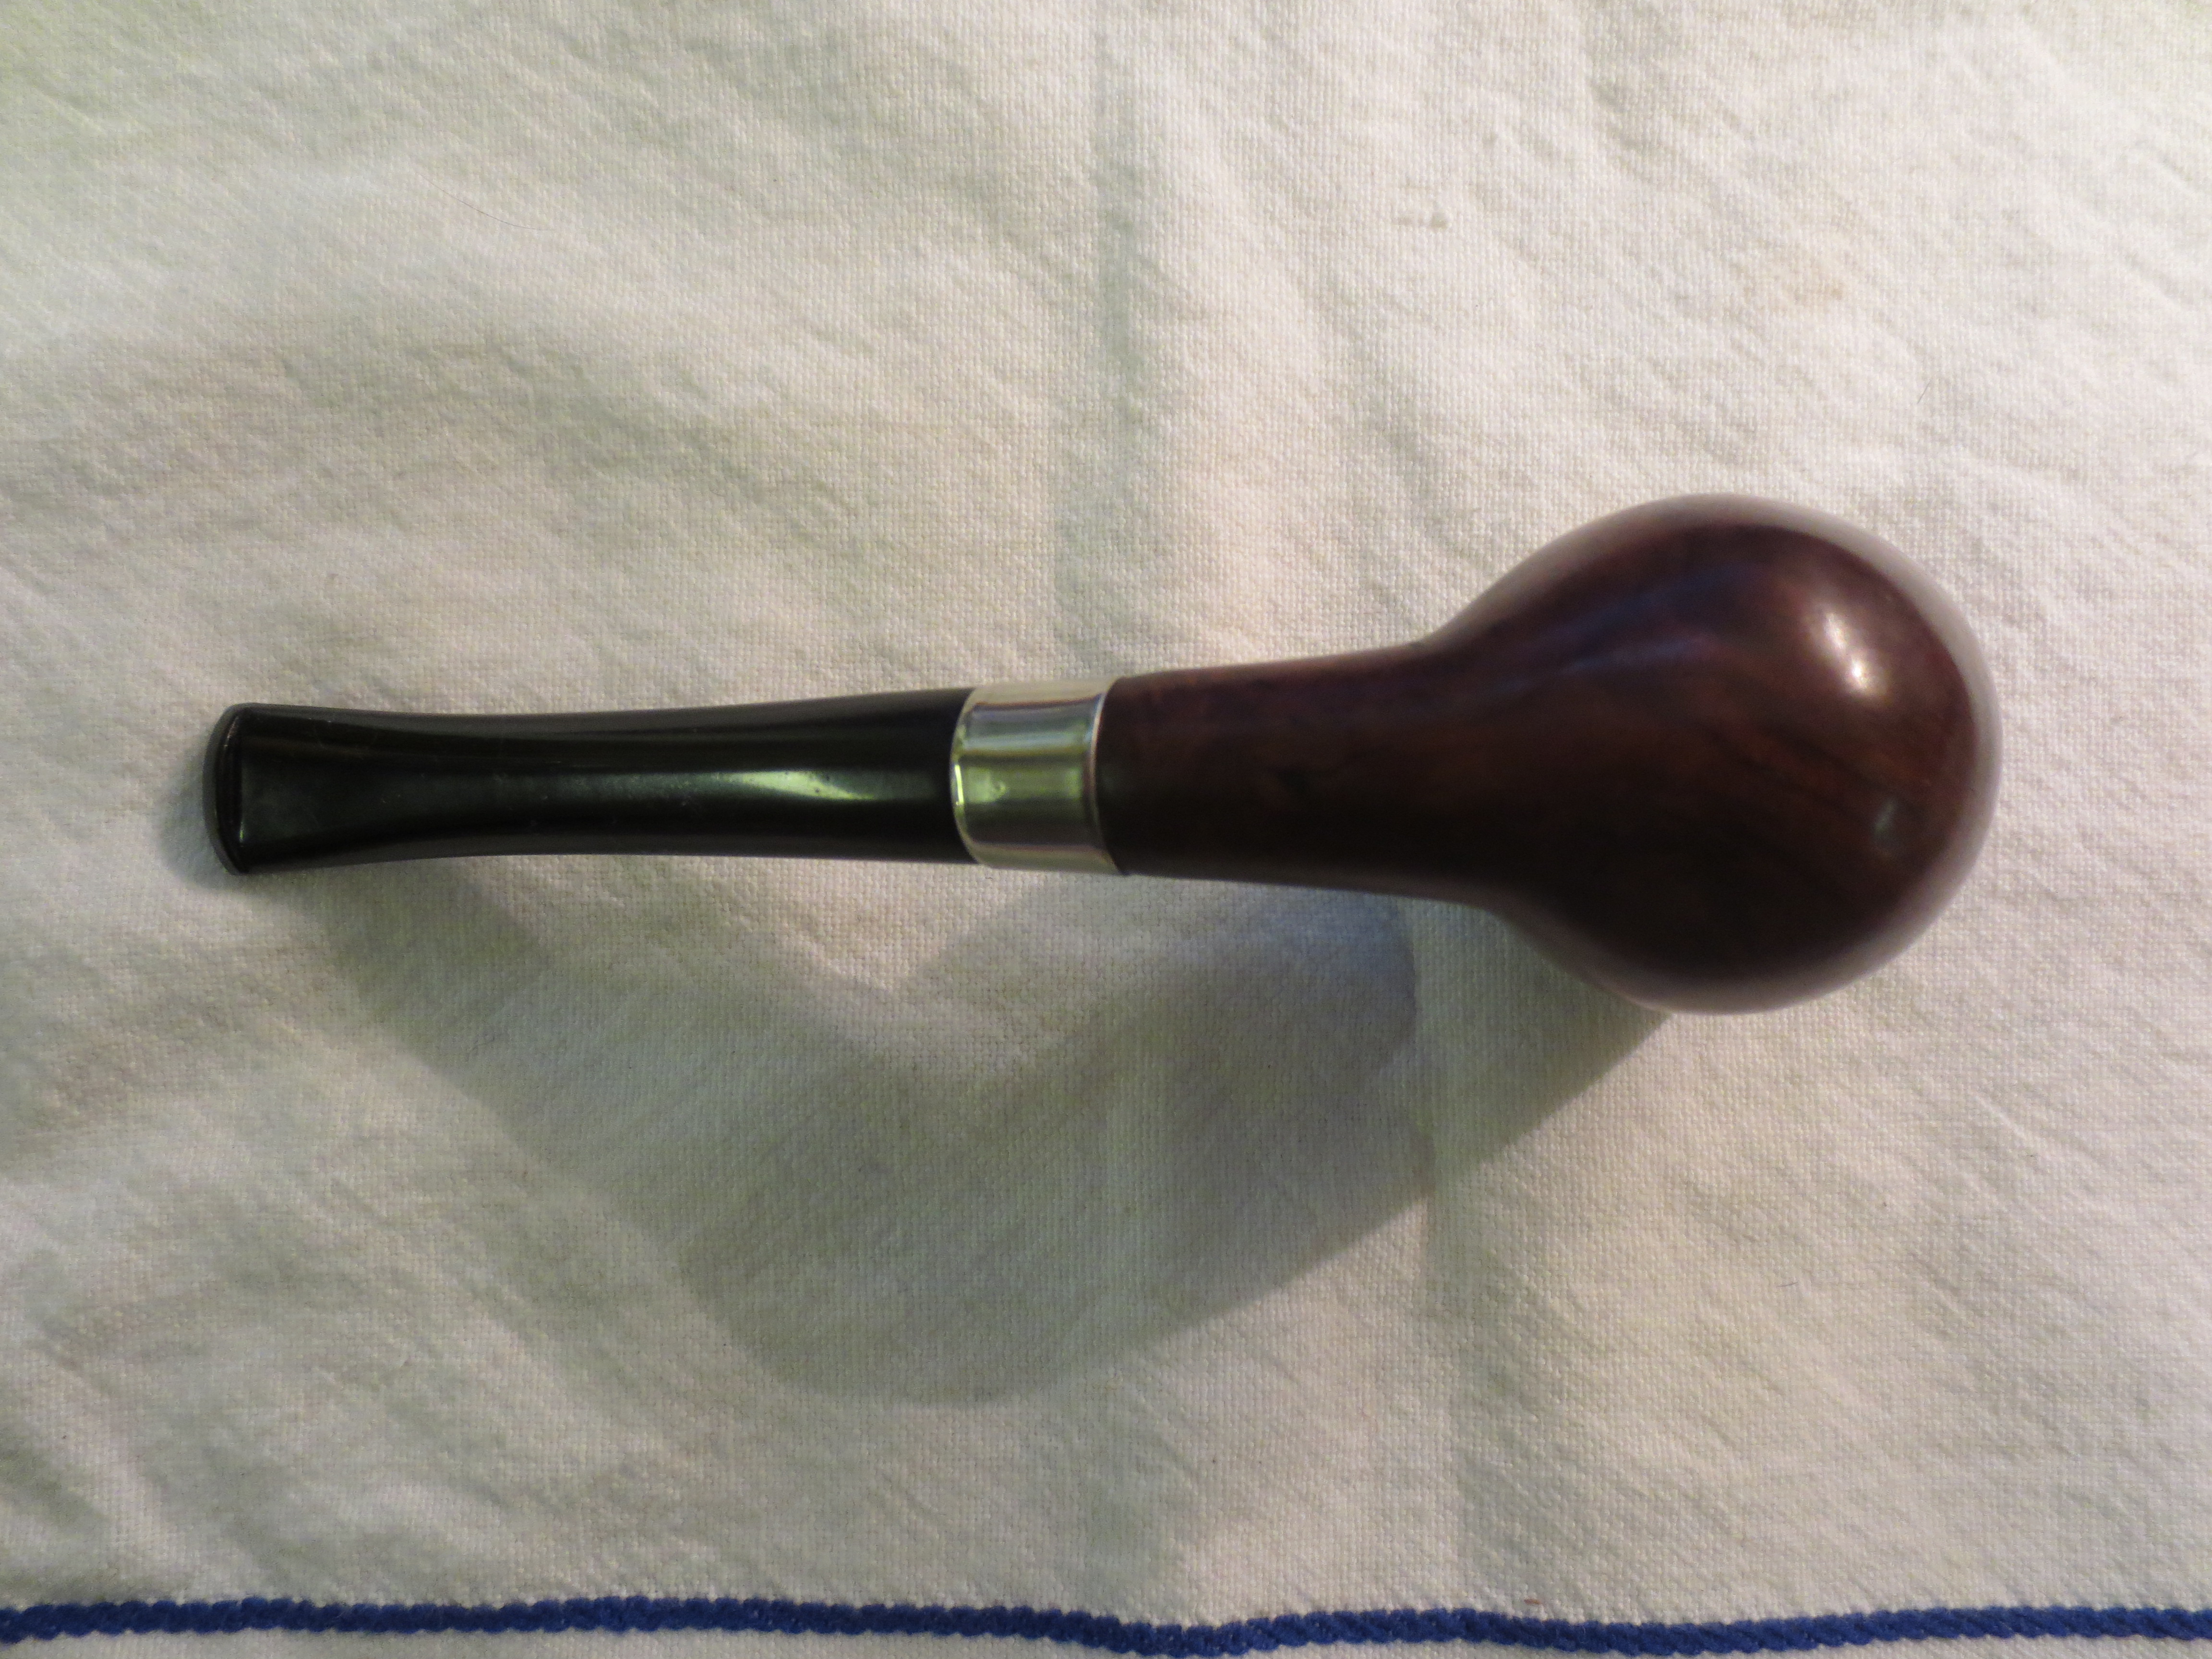
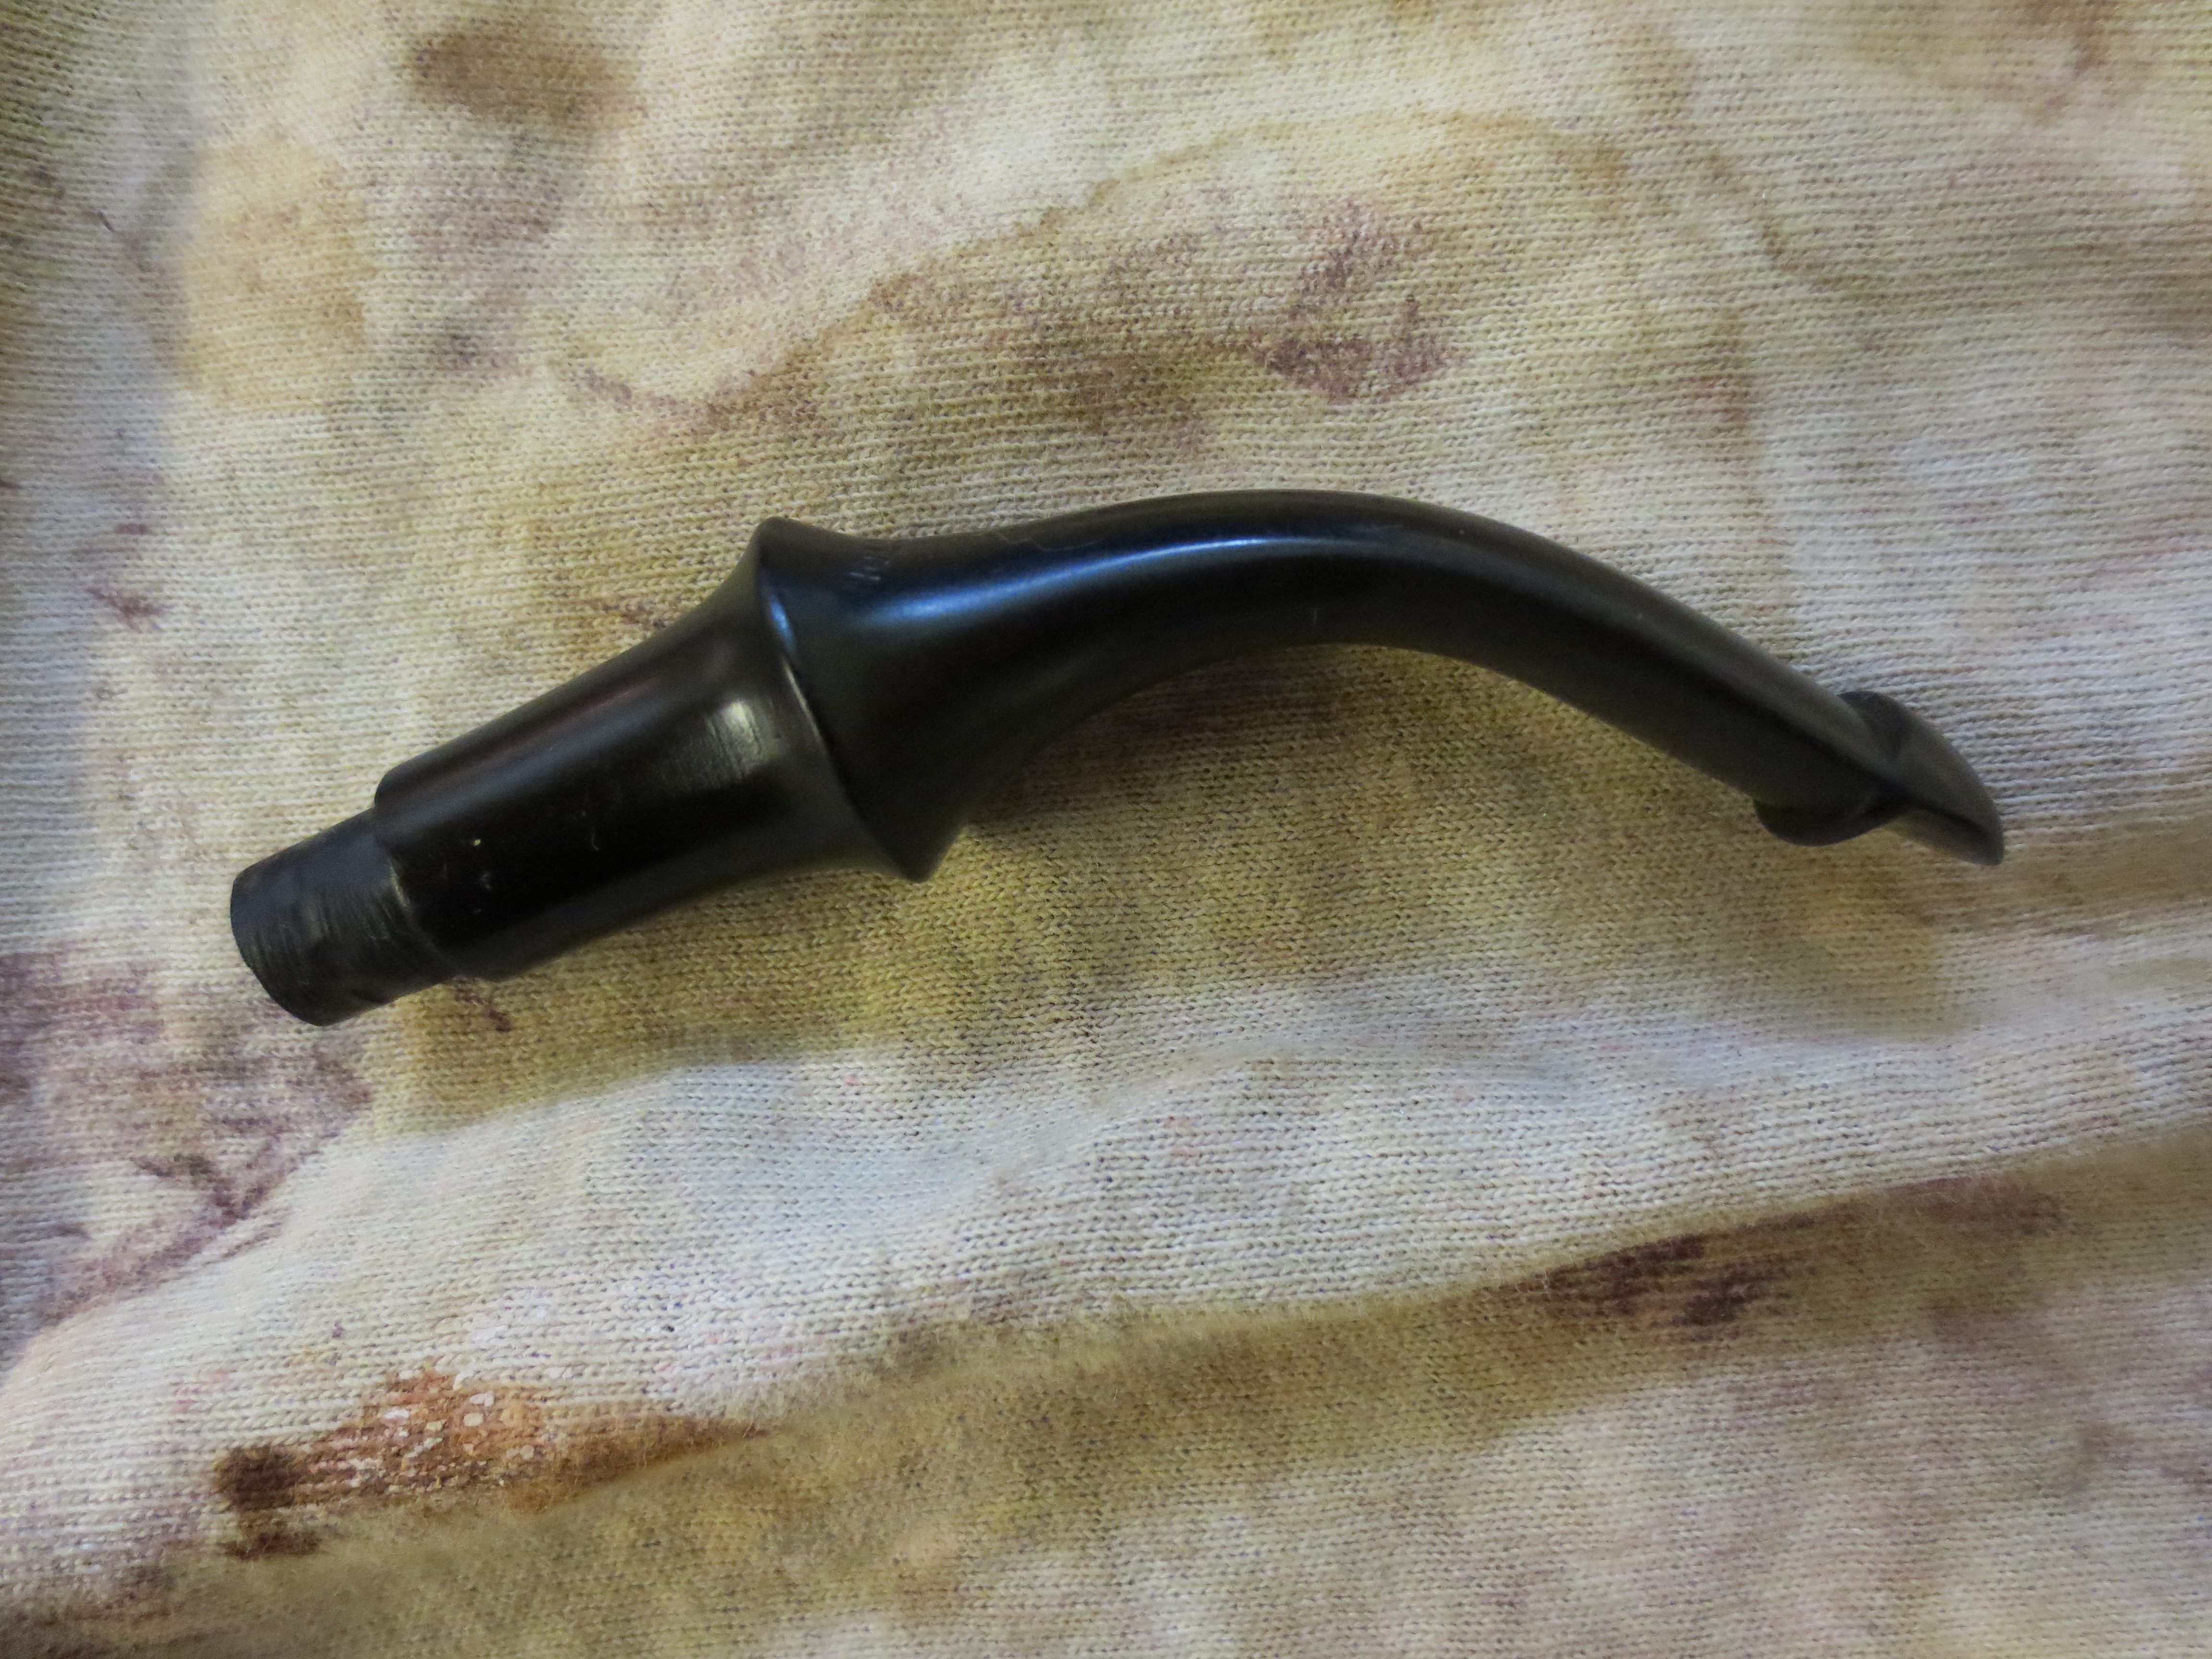
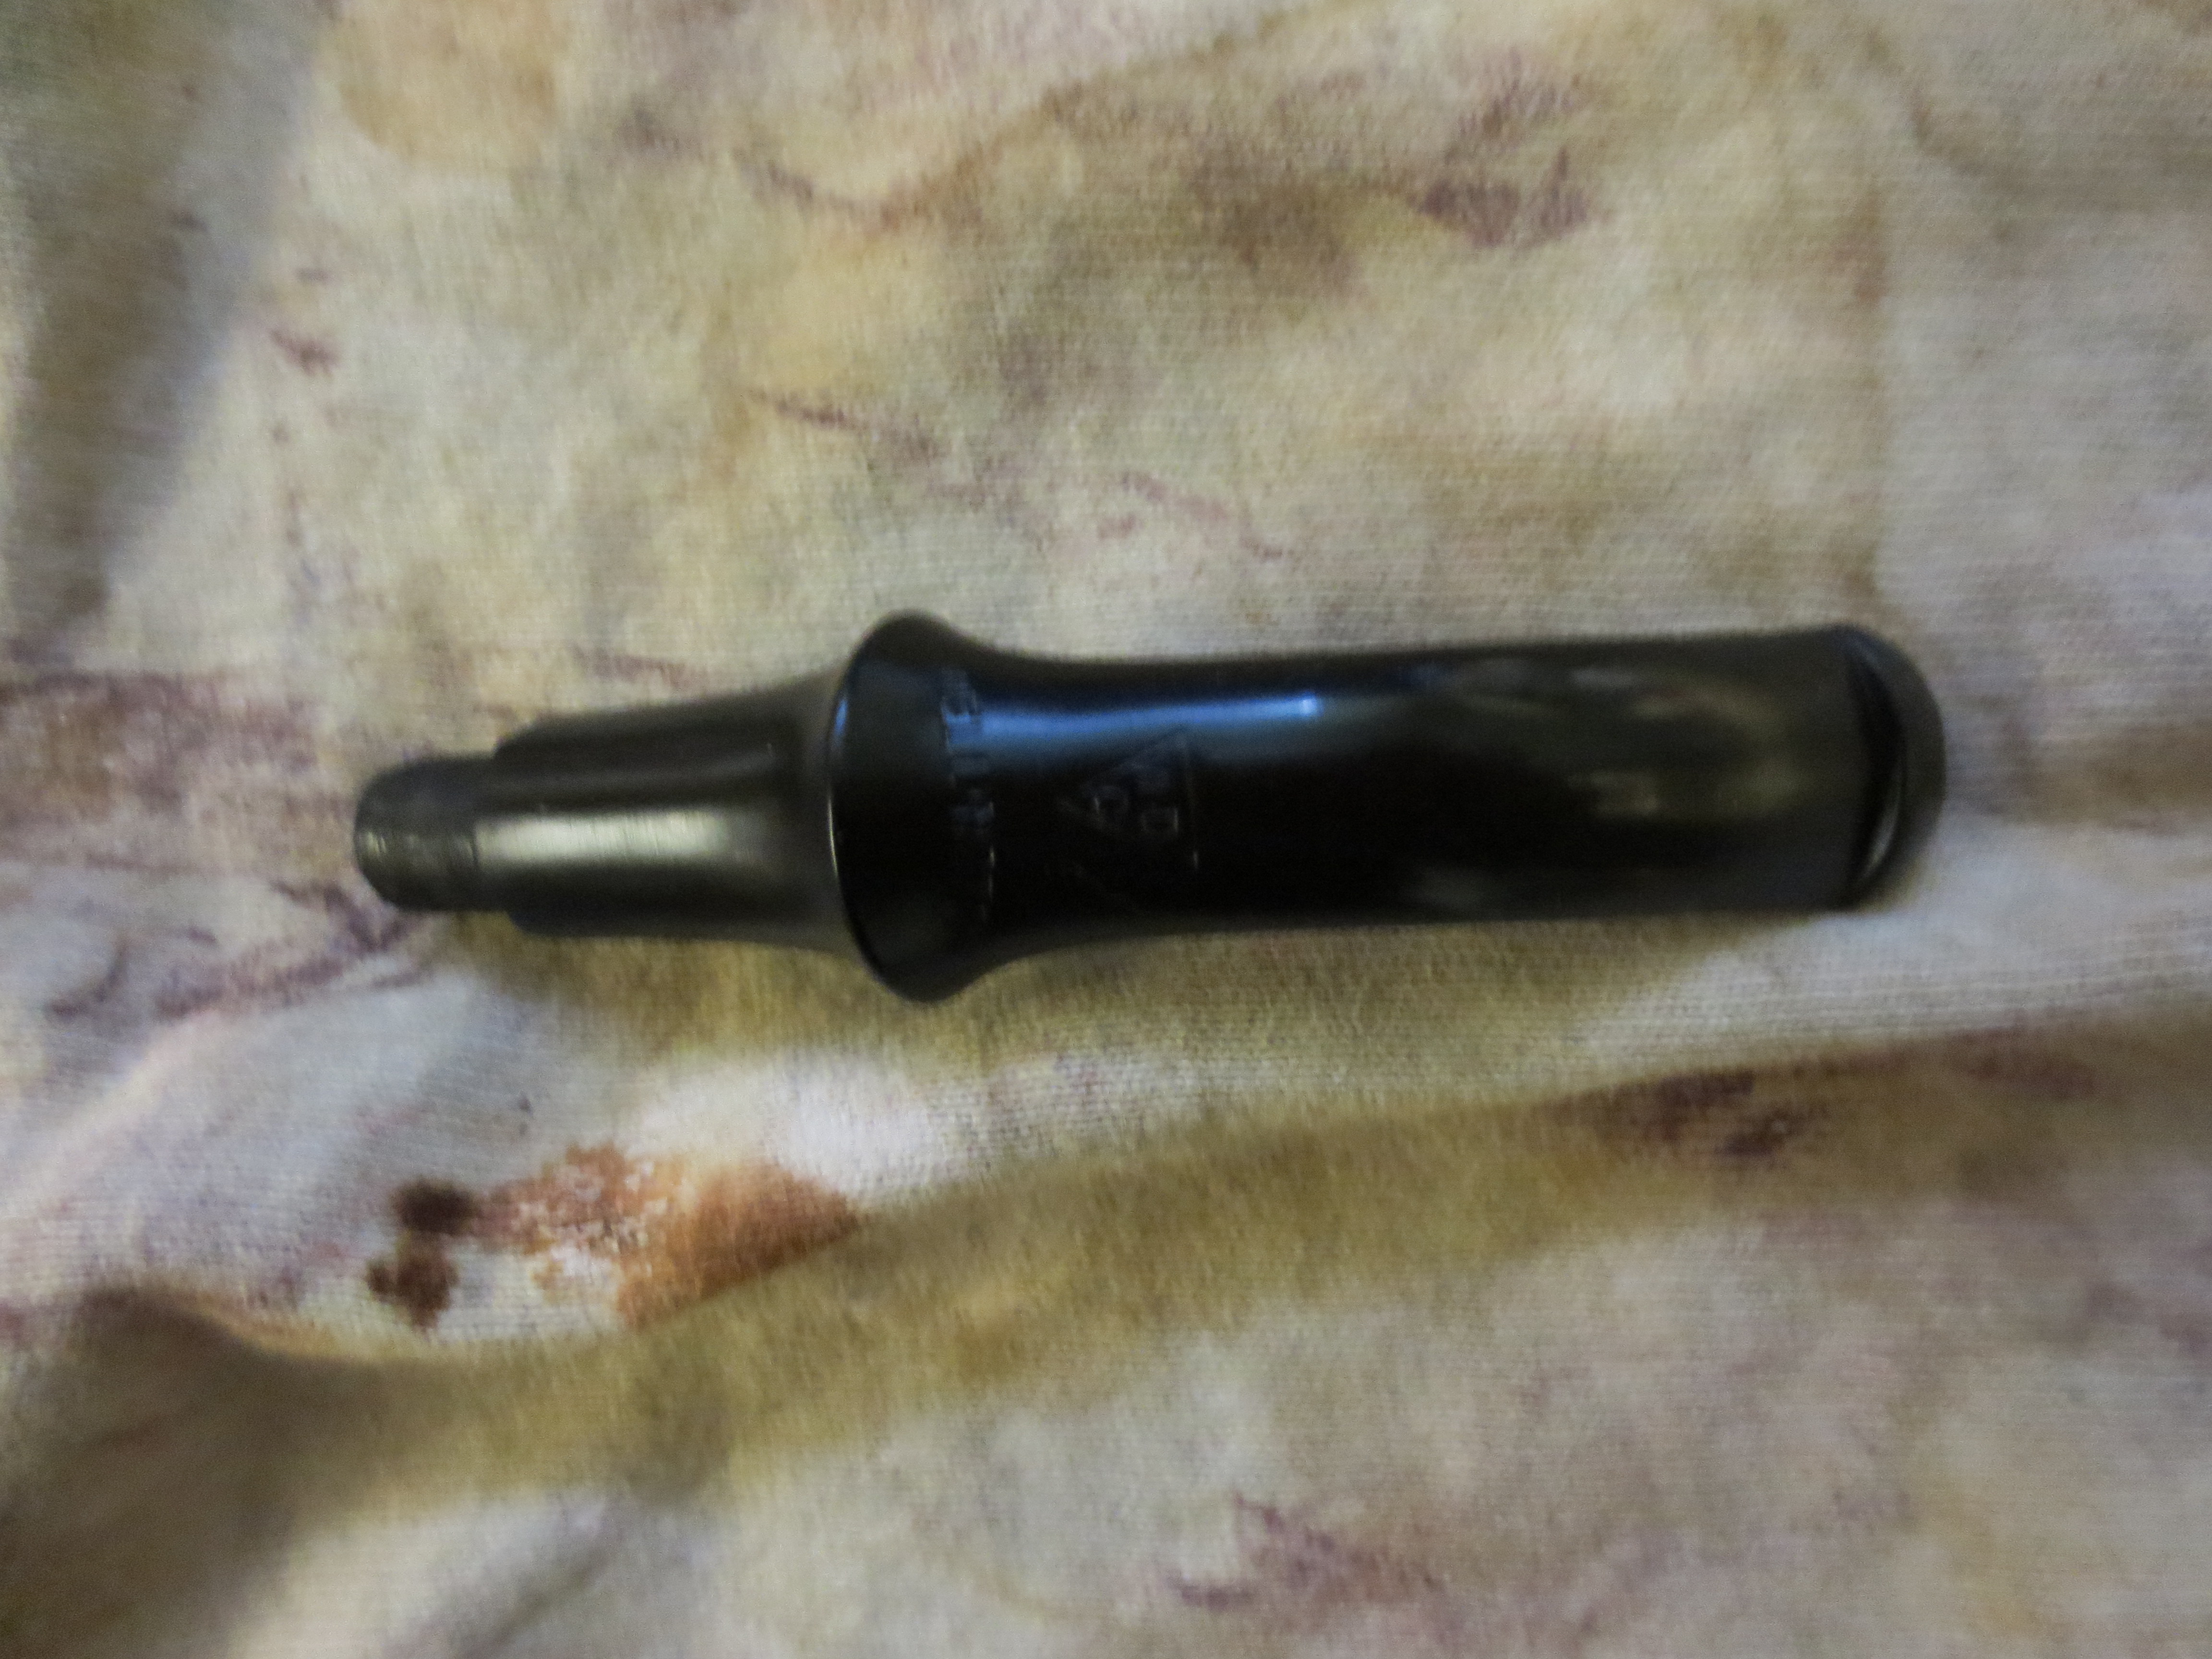
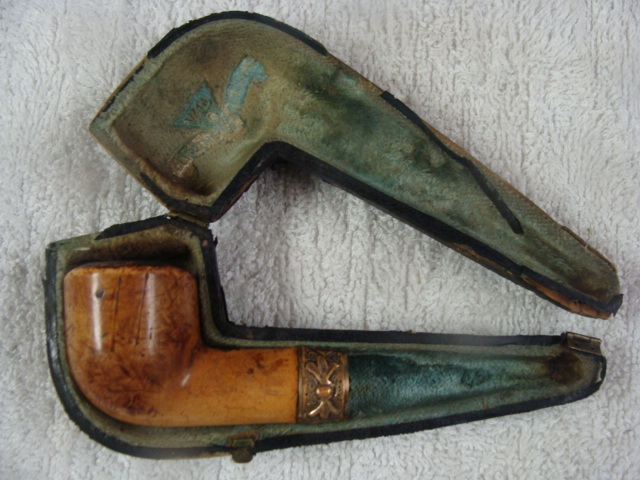
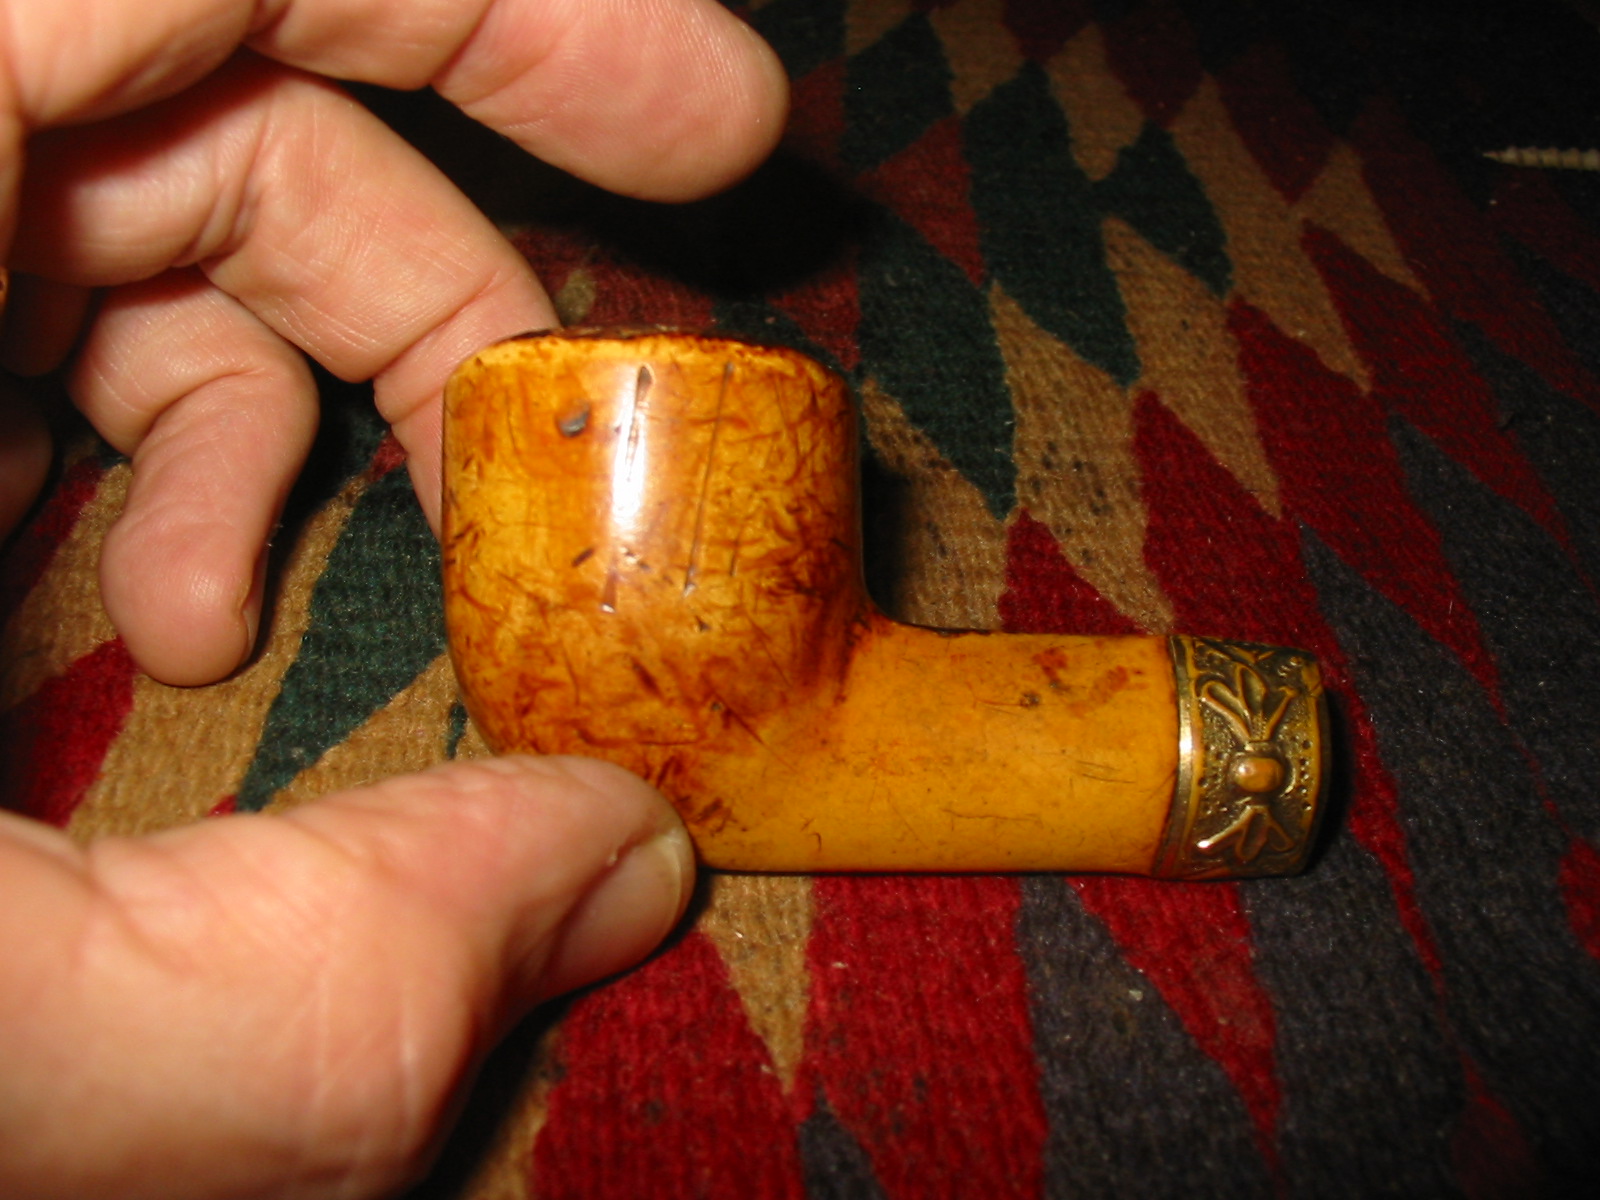
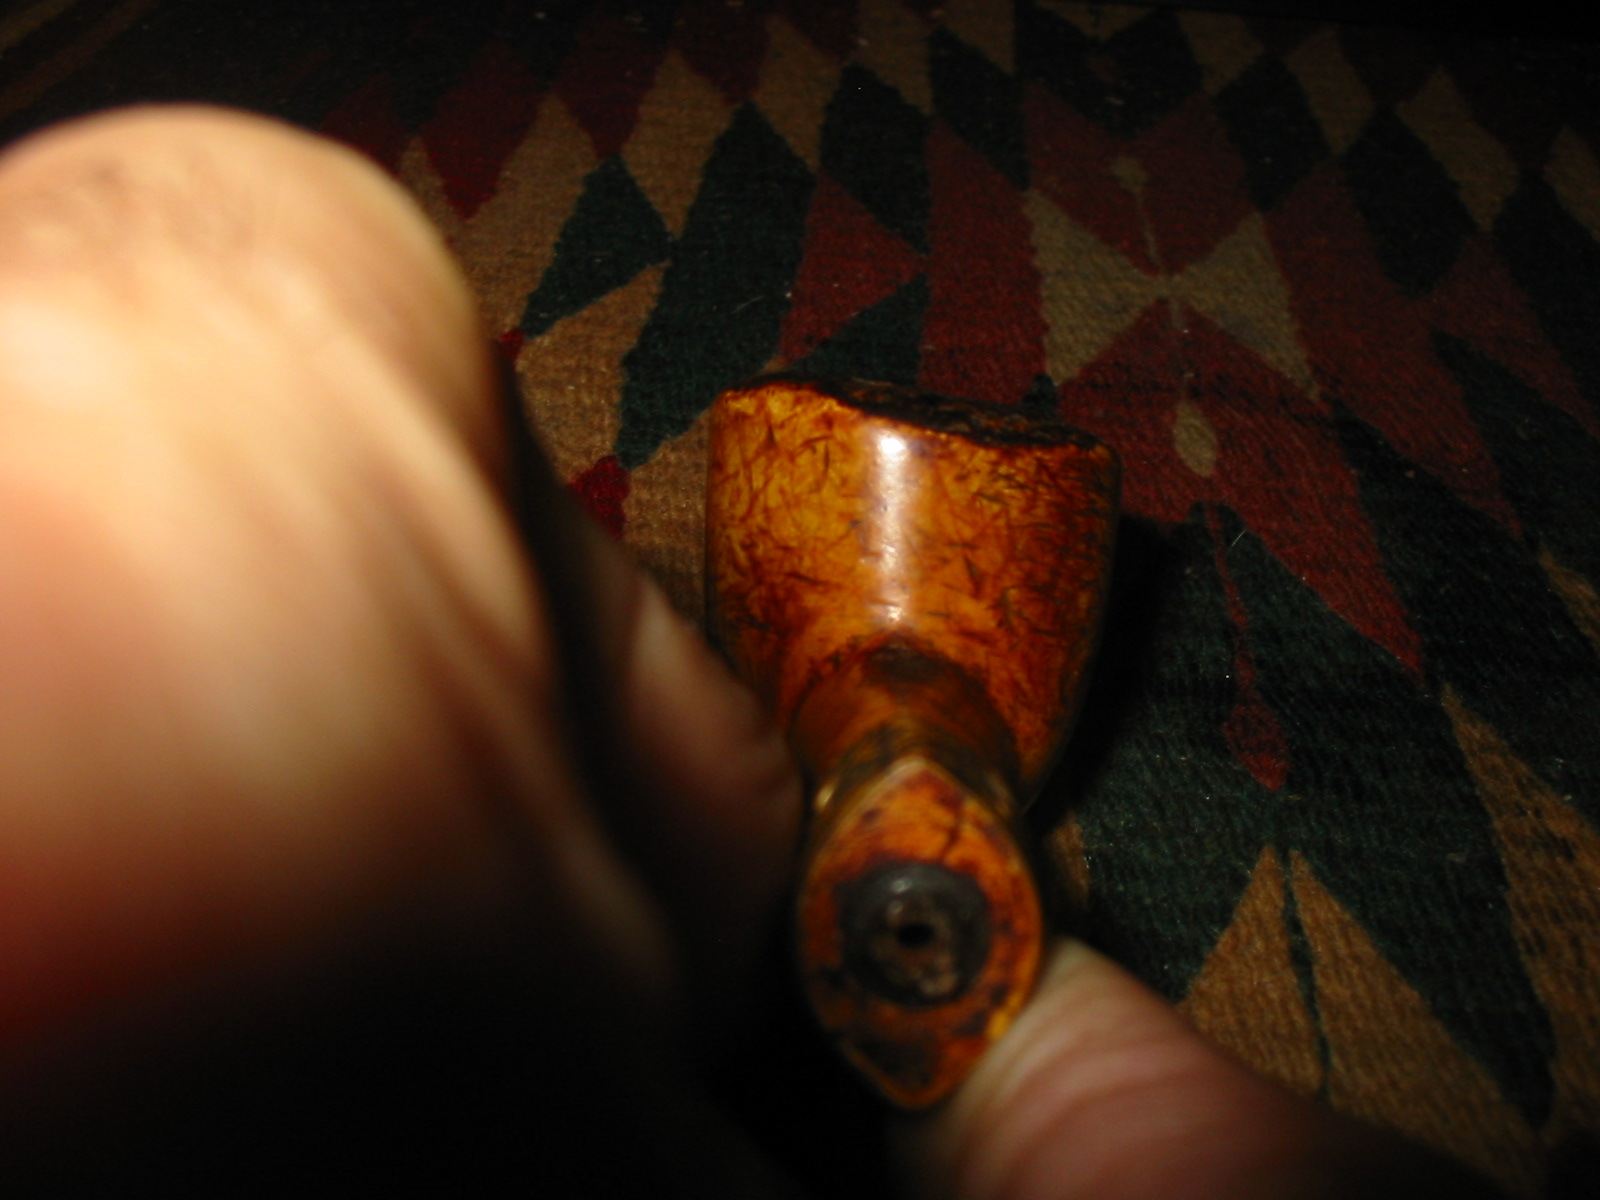
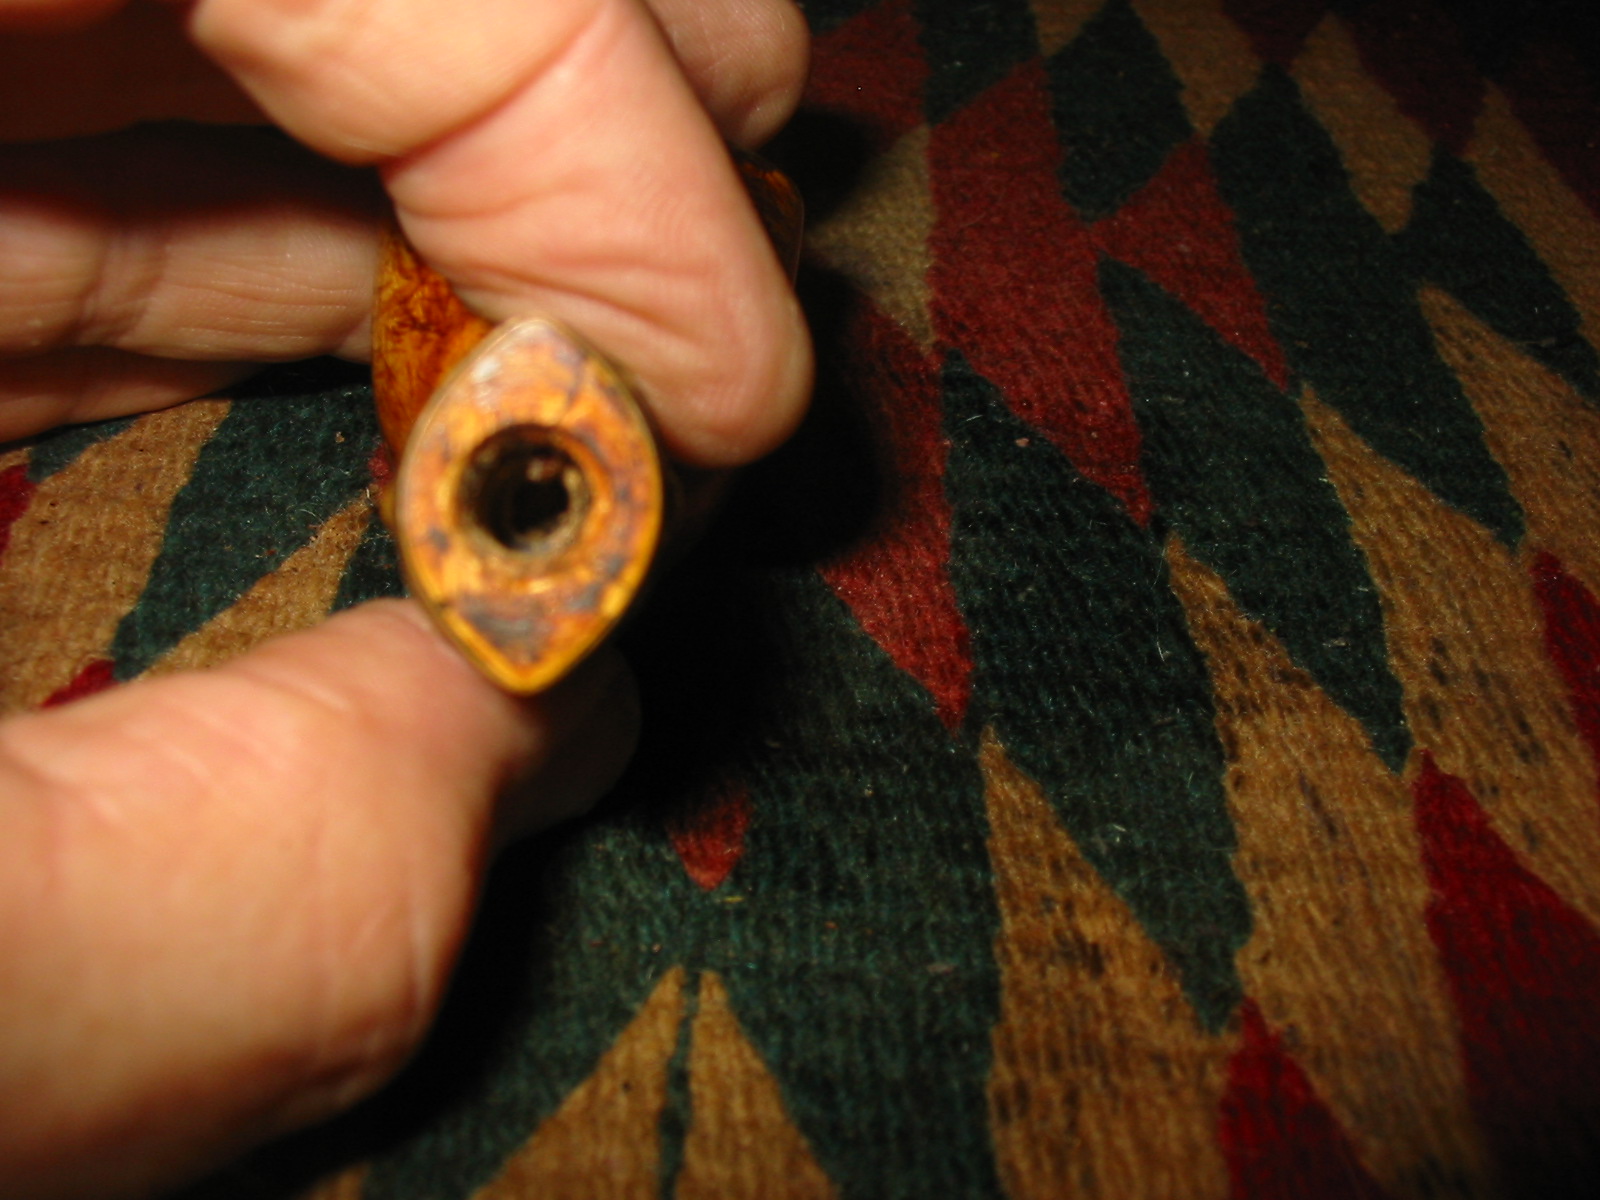
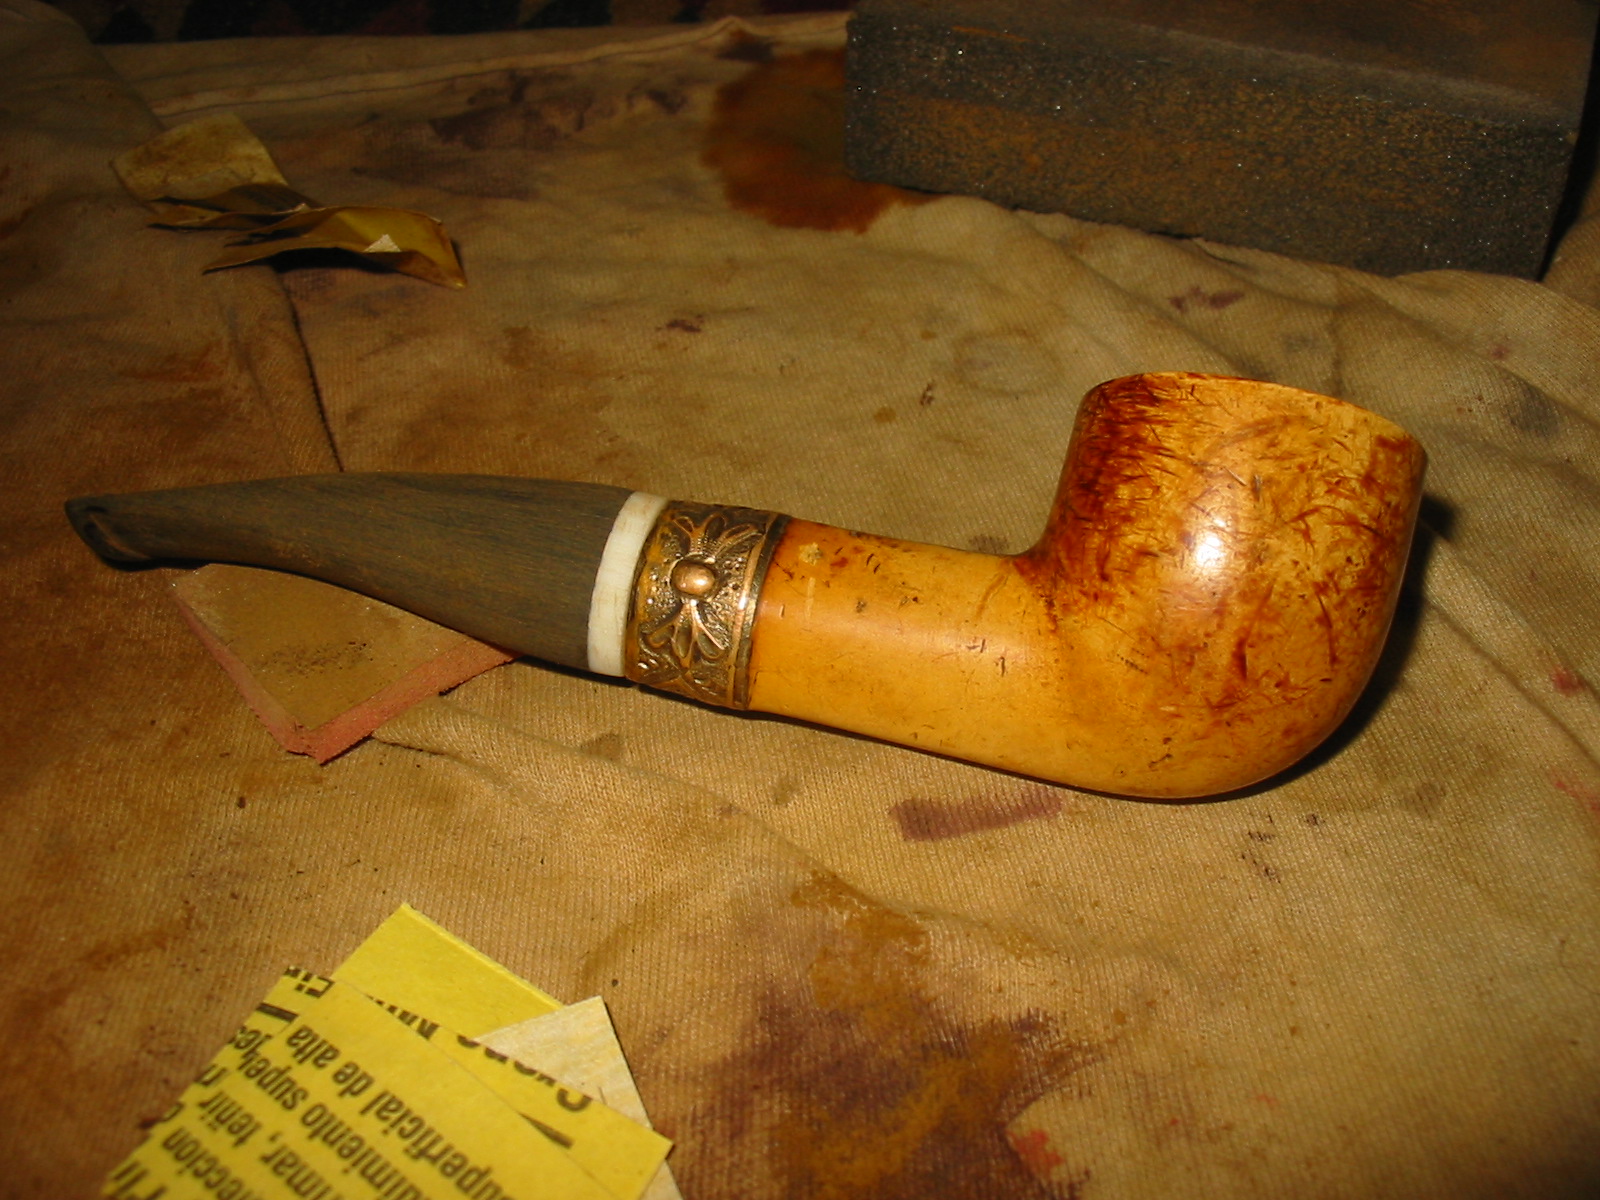
I saw this old Meerschaum pipe bowl on Ebay and decided to put a low bid on it. I was not surprised to have won it and paid for it quickly. The seller packed it very well and shipped it off to Vancouver, Canada. Below are the Ebay photos that caught my attention. I think the thing that intrigued me the most was the vertical oval shank on the pipe. To restem that pipe would be a great challenge – find a stem large enough to work with and shape it until it fit. I thought I had just the stem in my box – a gift from a friend on Pipesmokers Unleashed Forum, Robert.

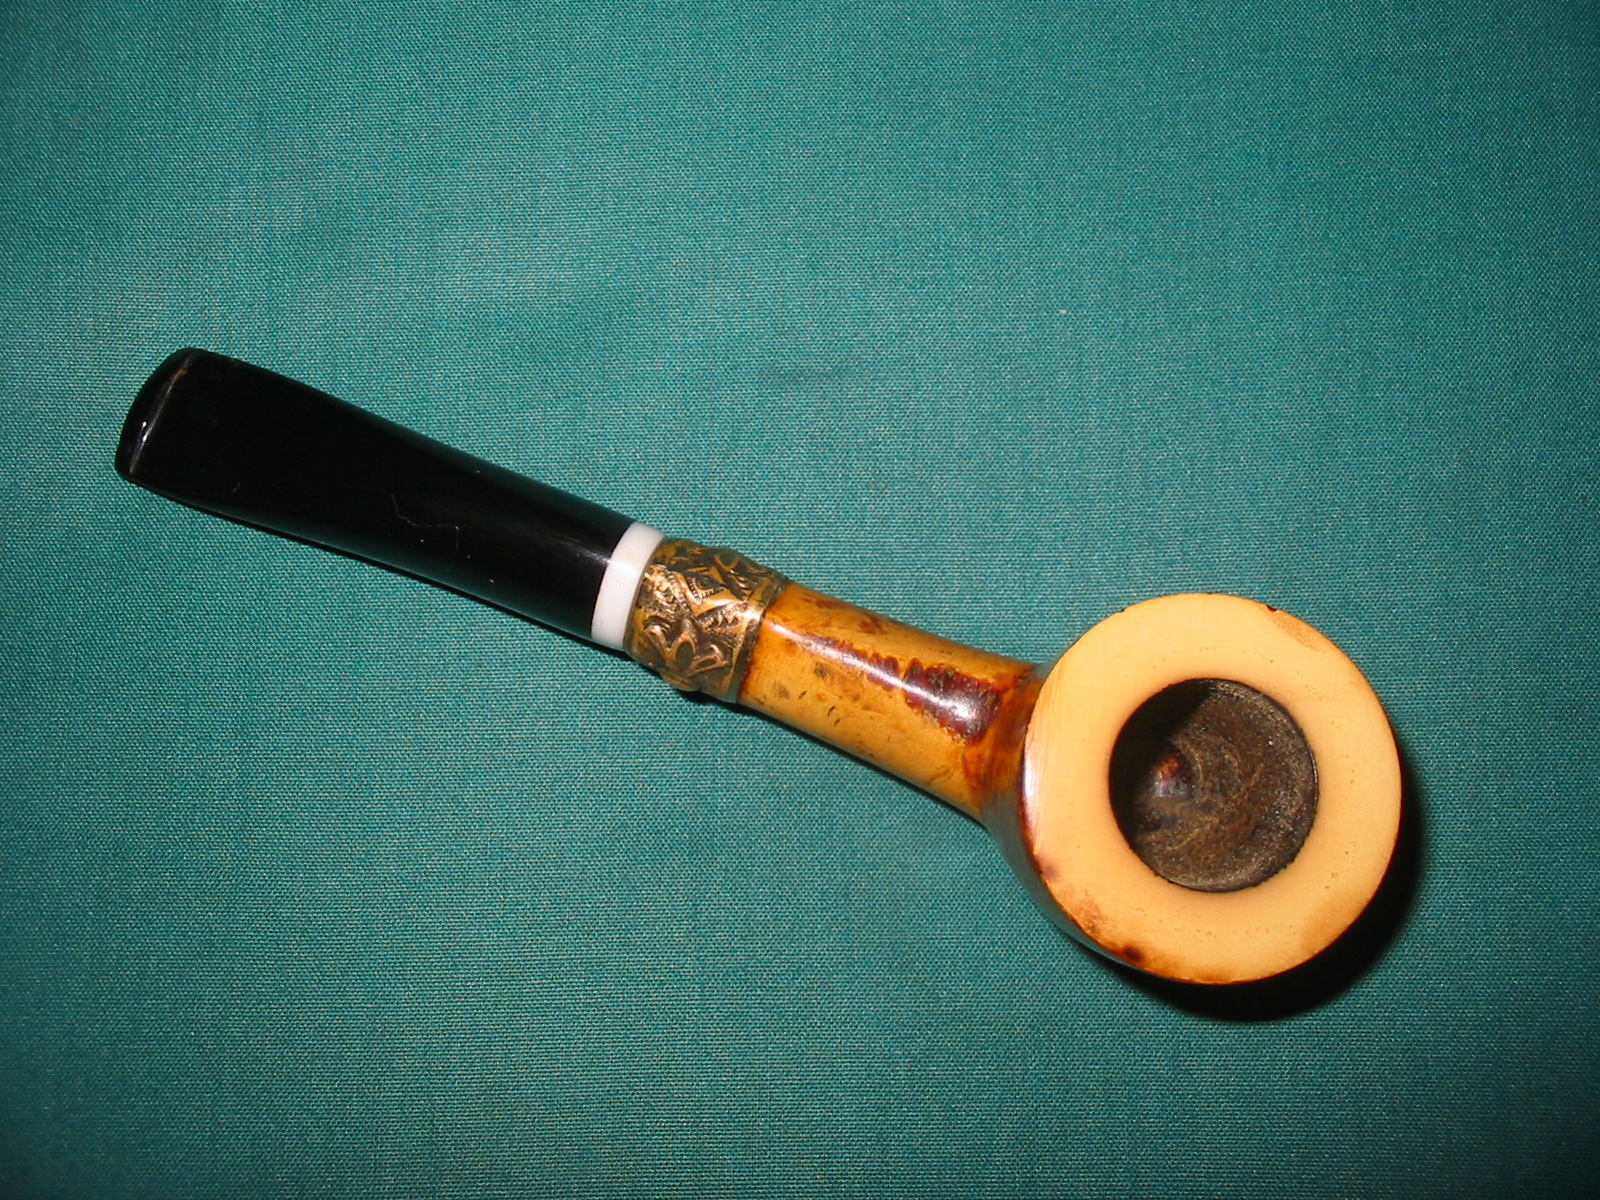
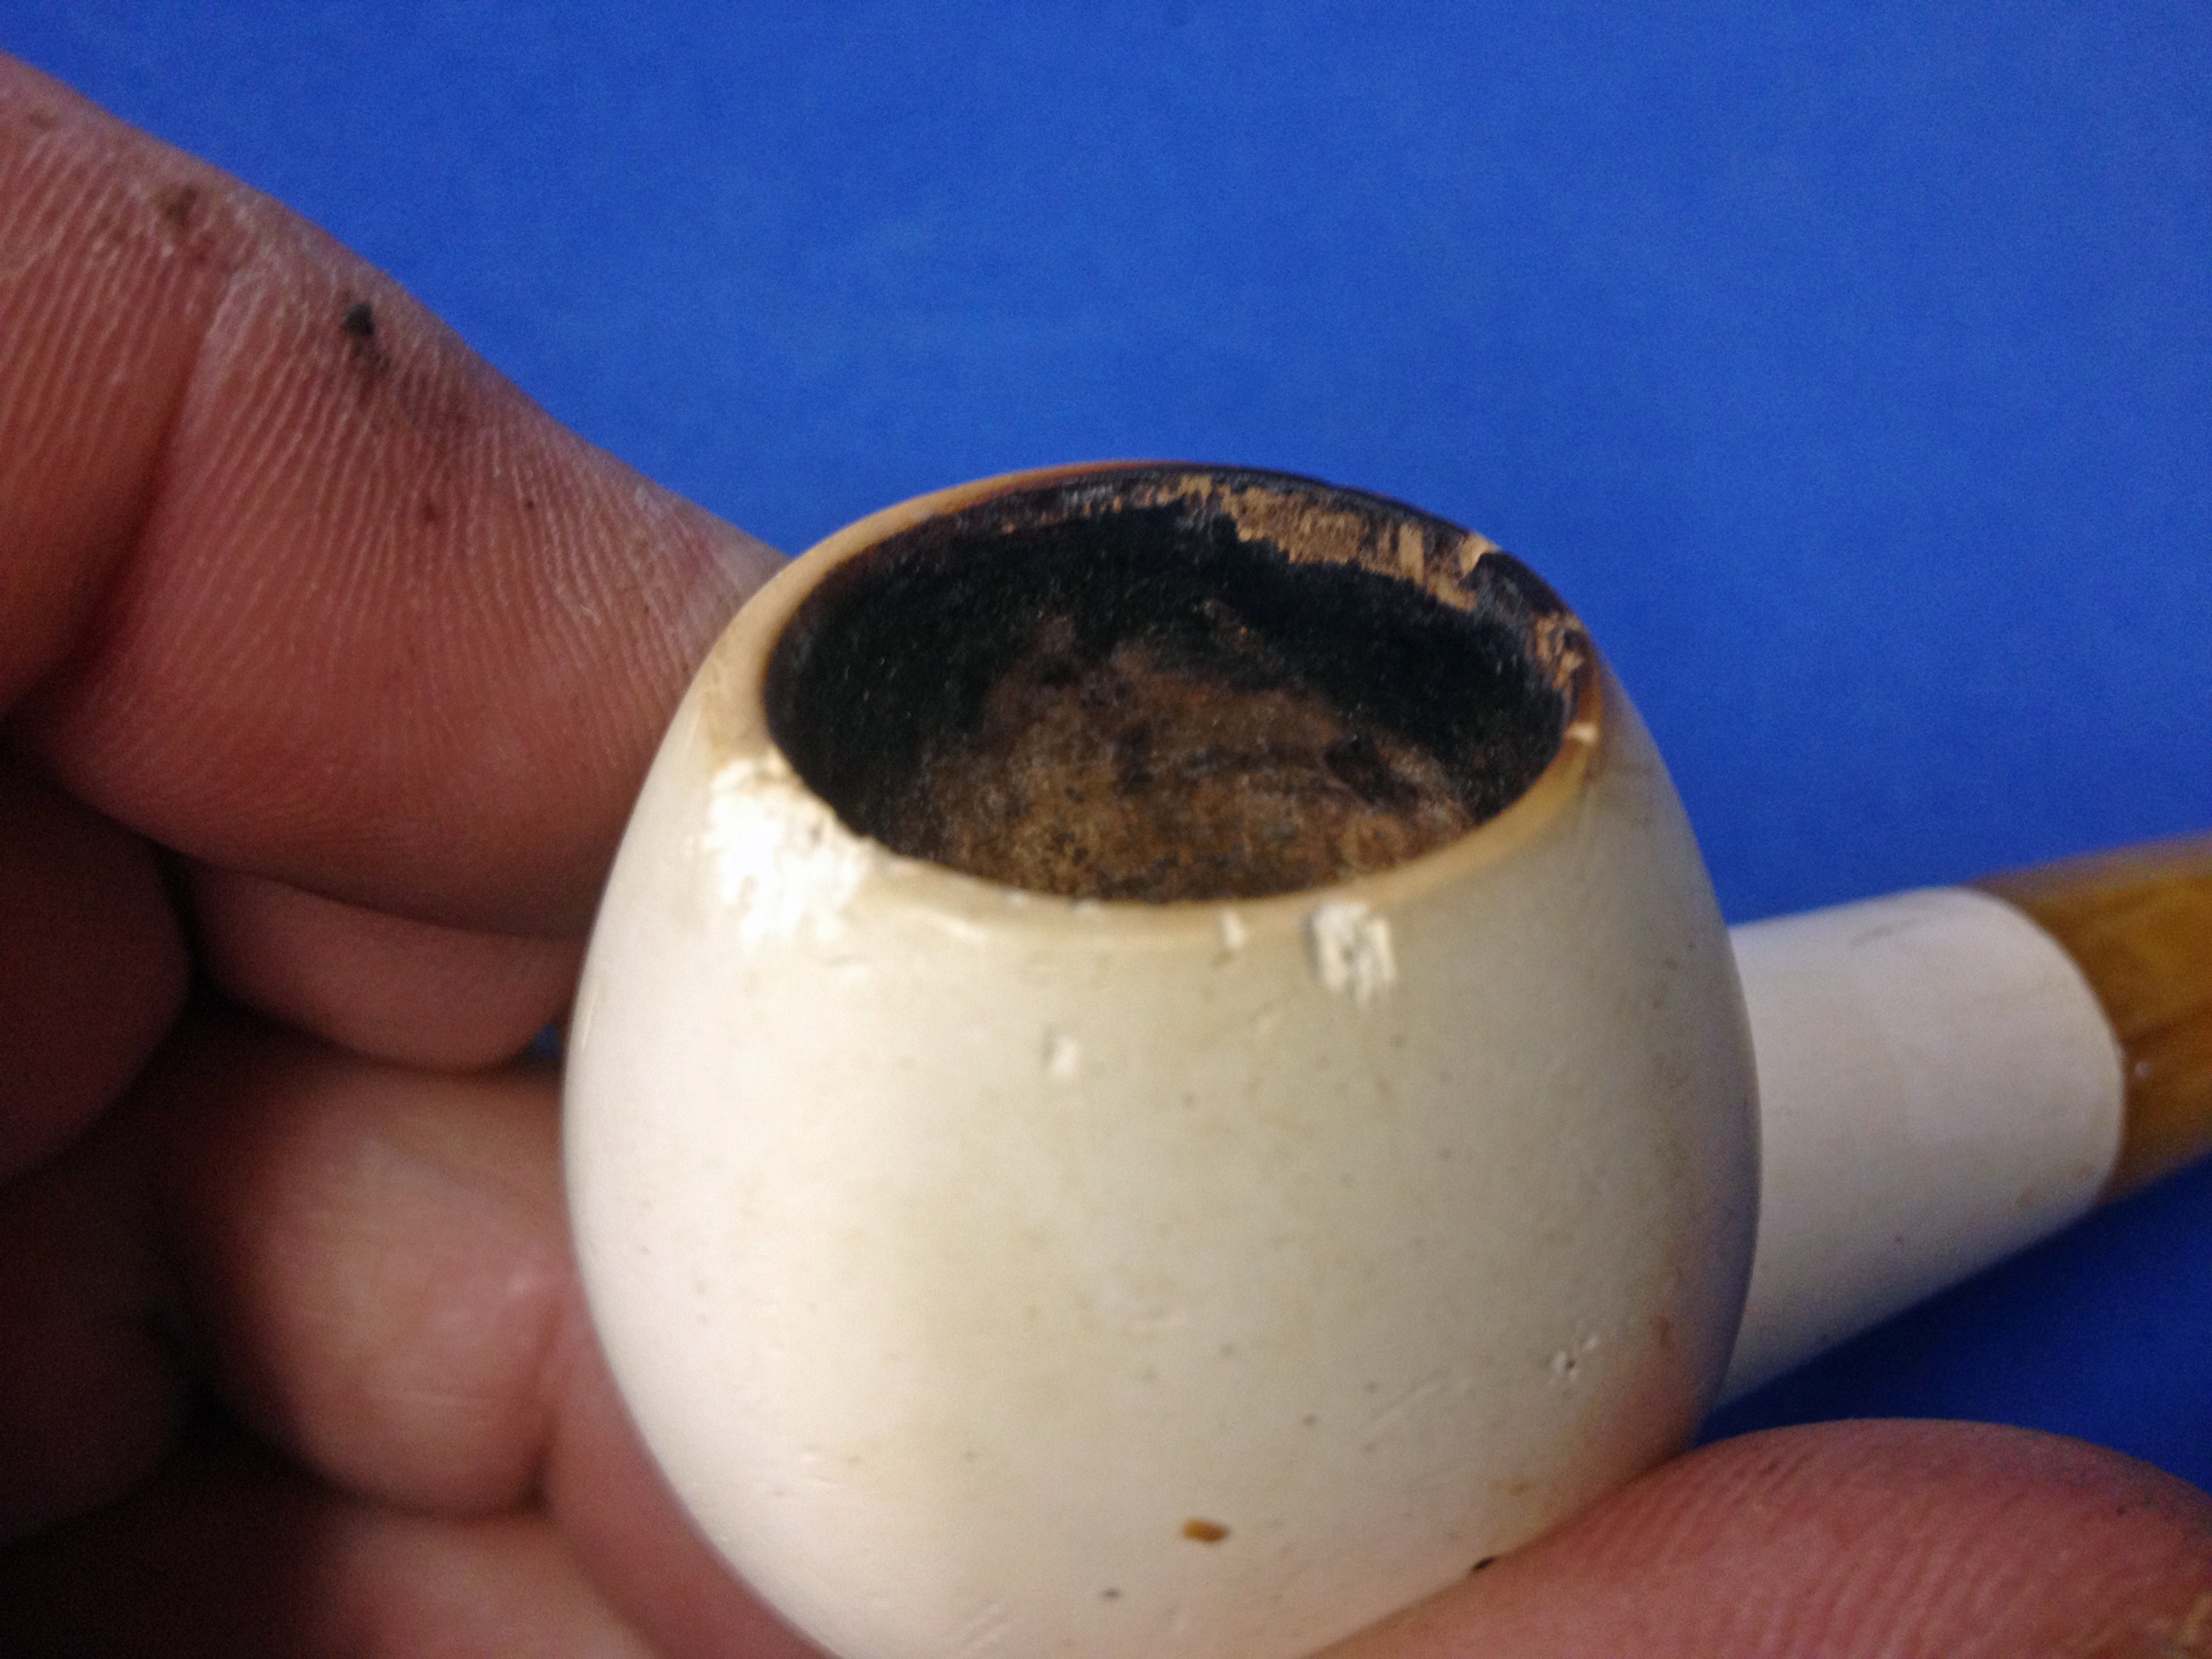
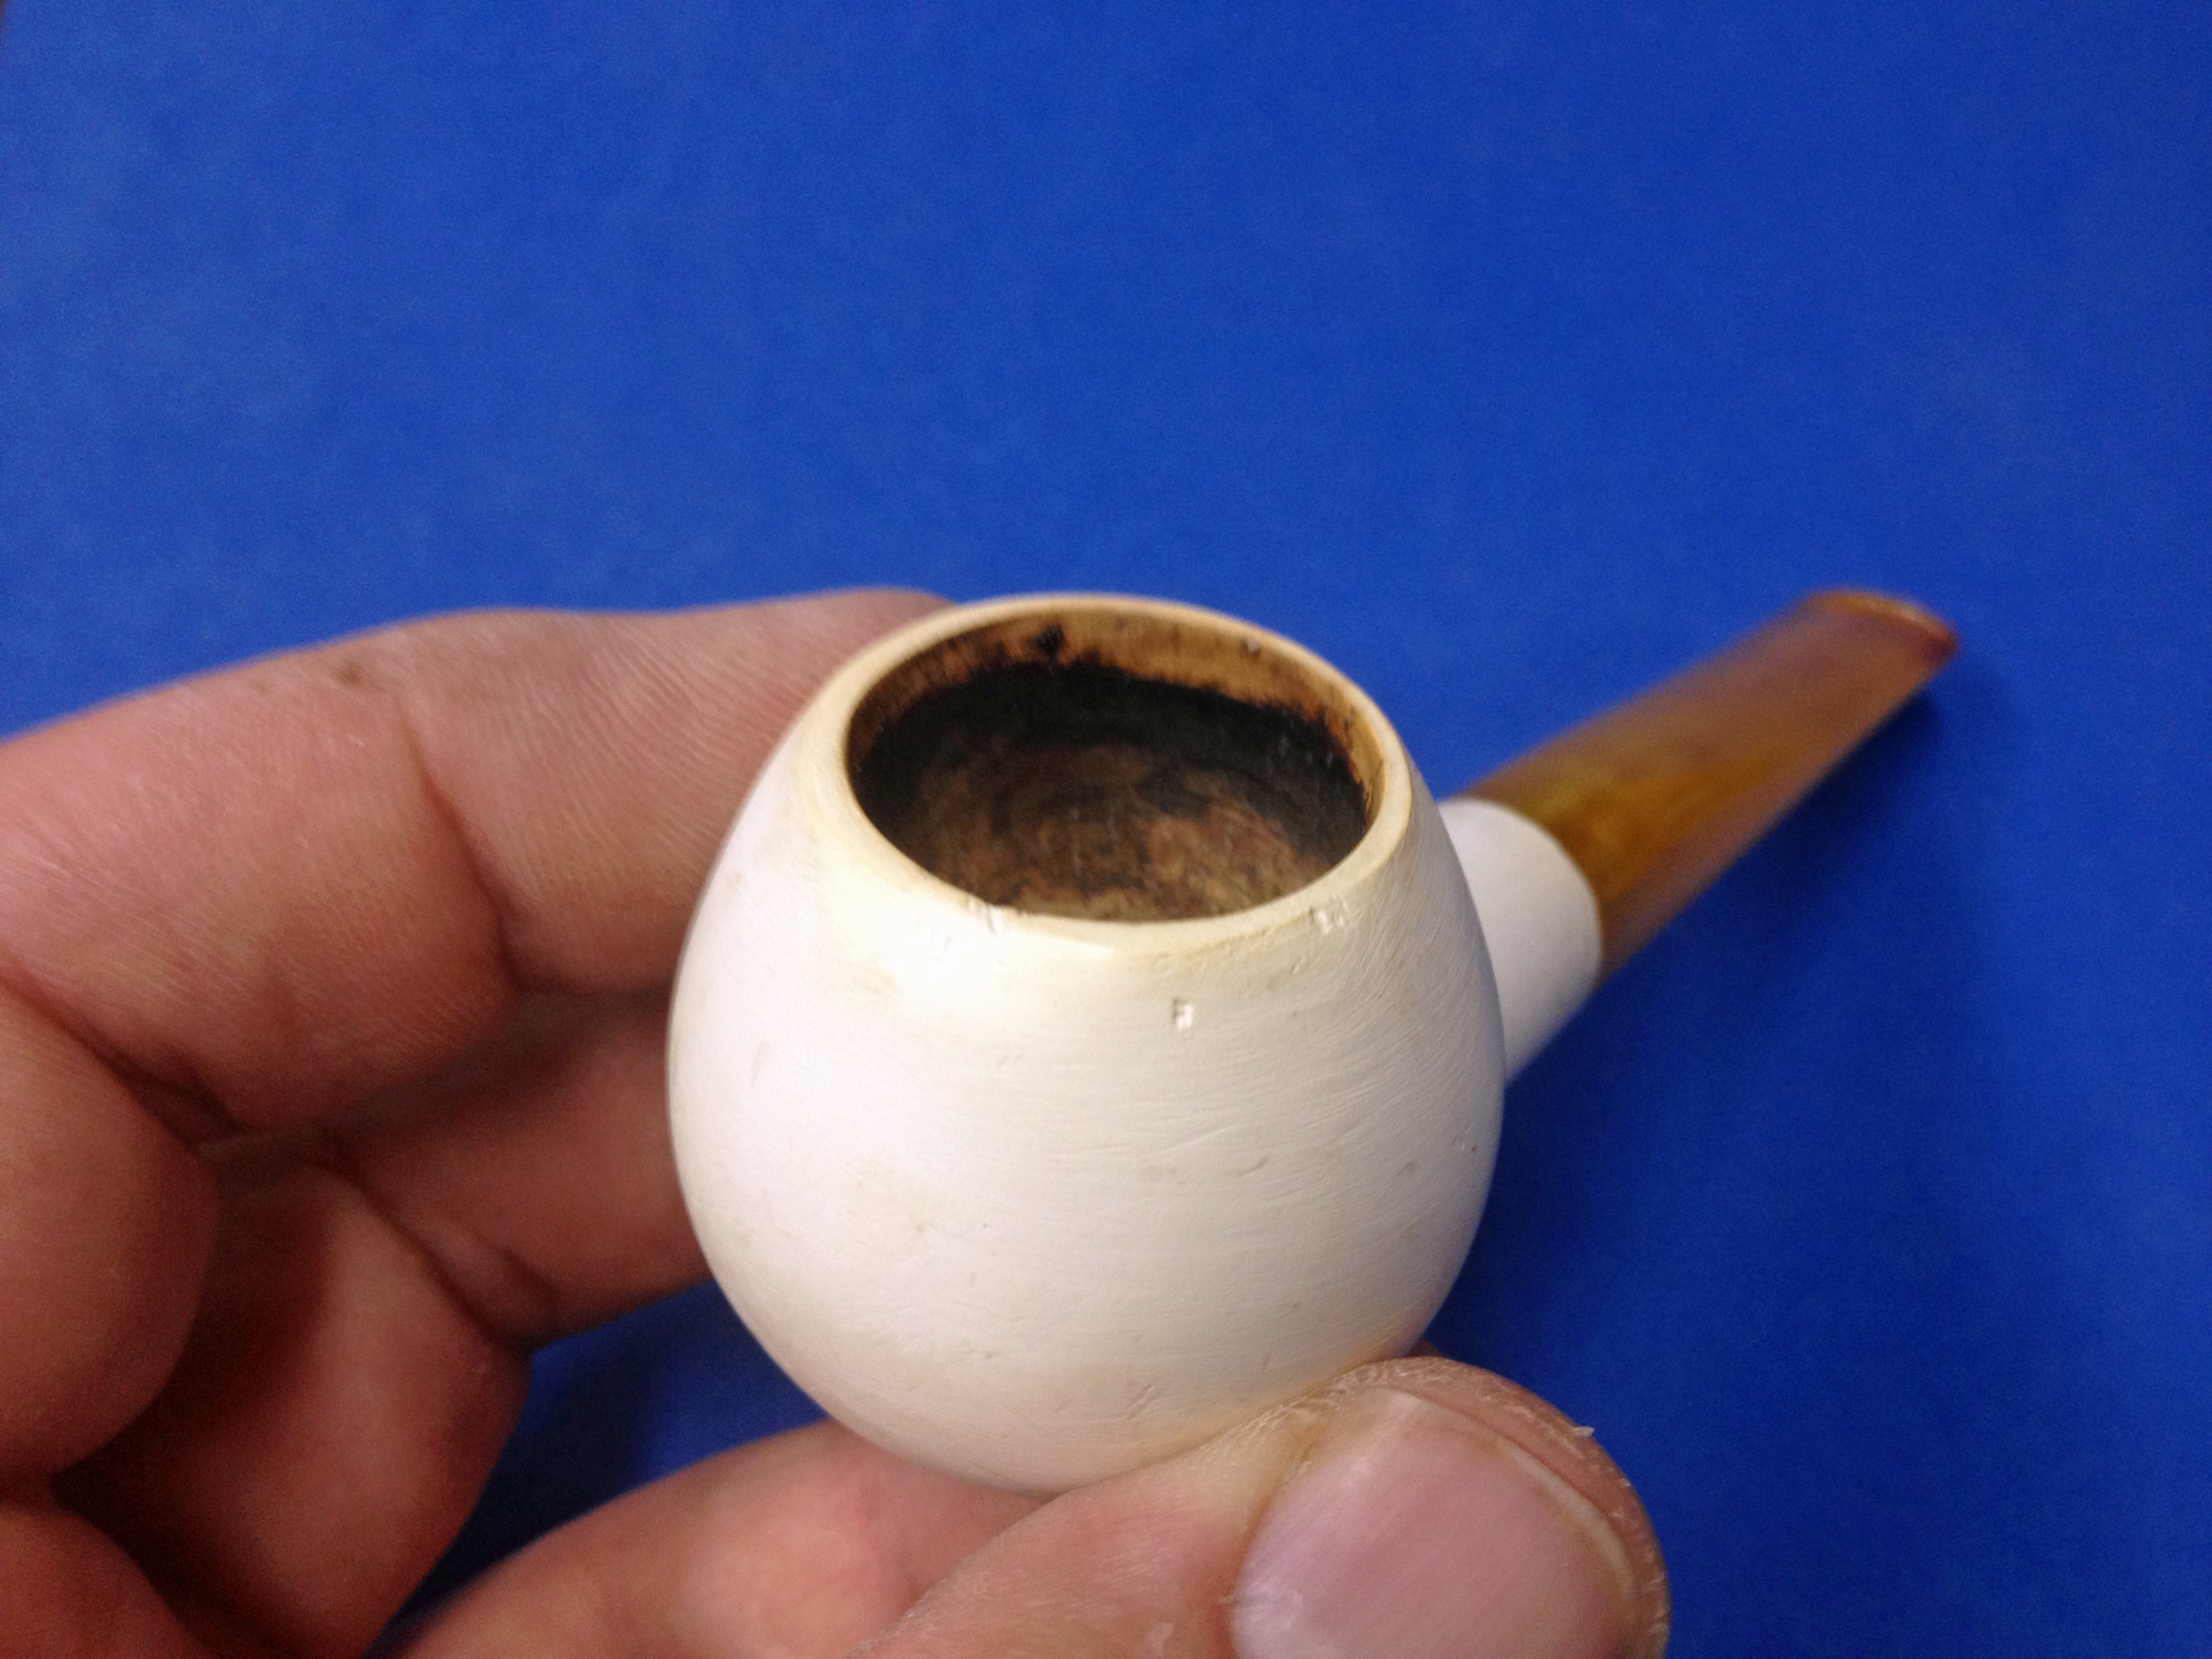
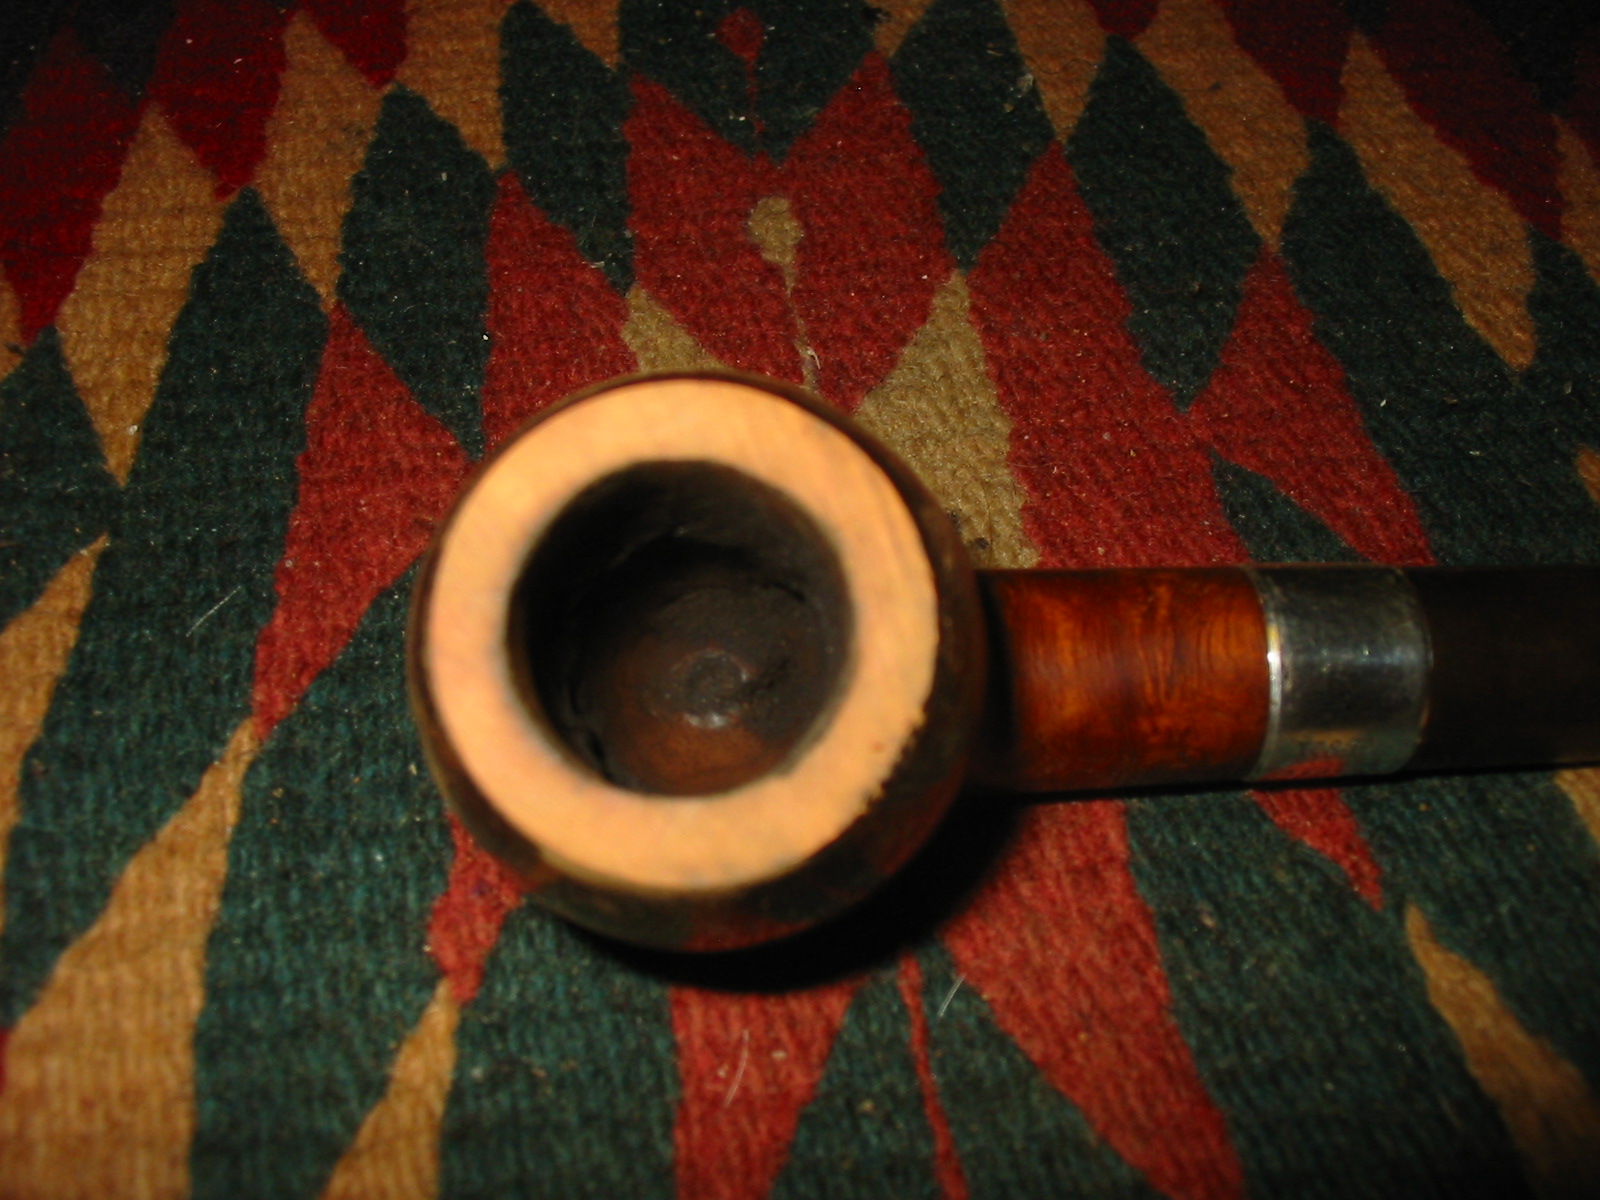
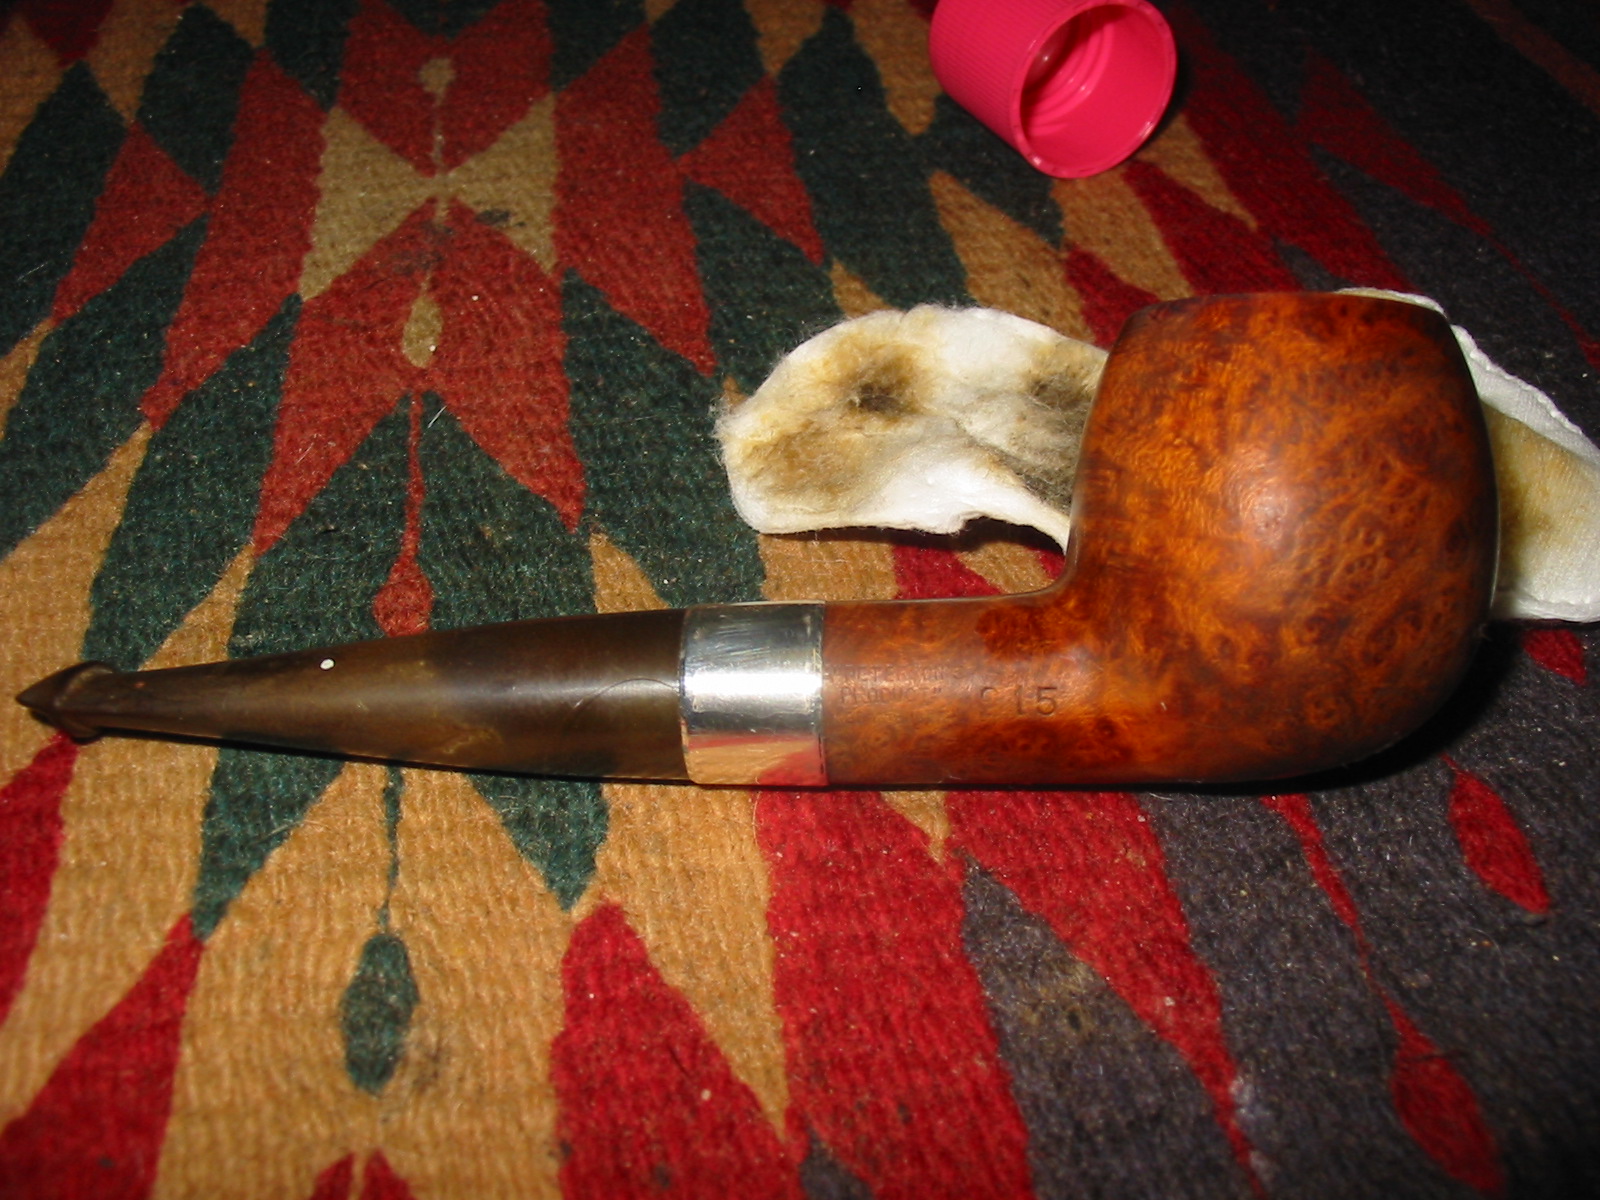
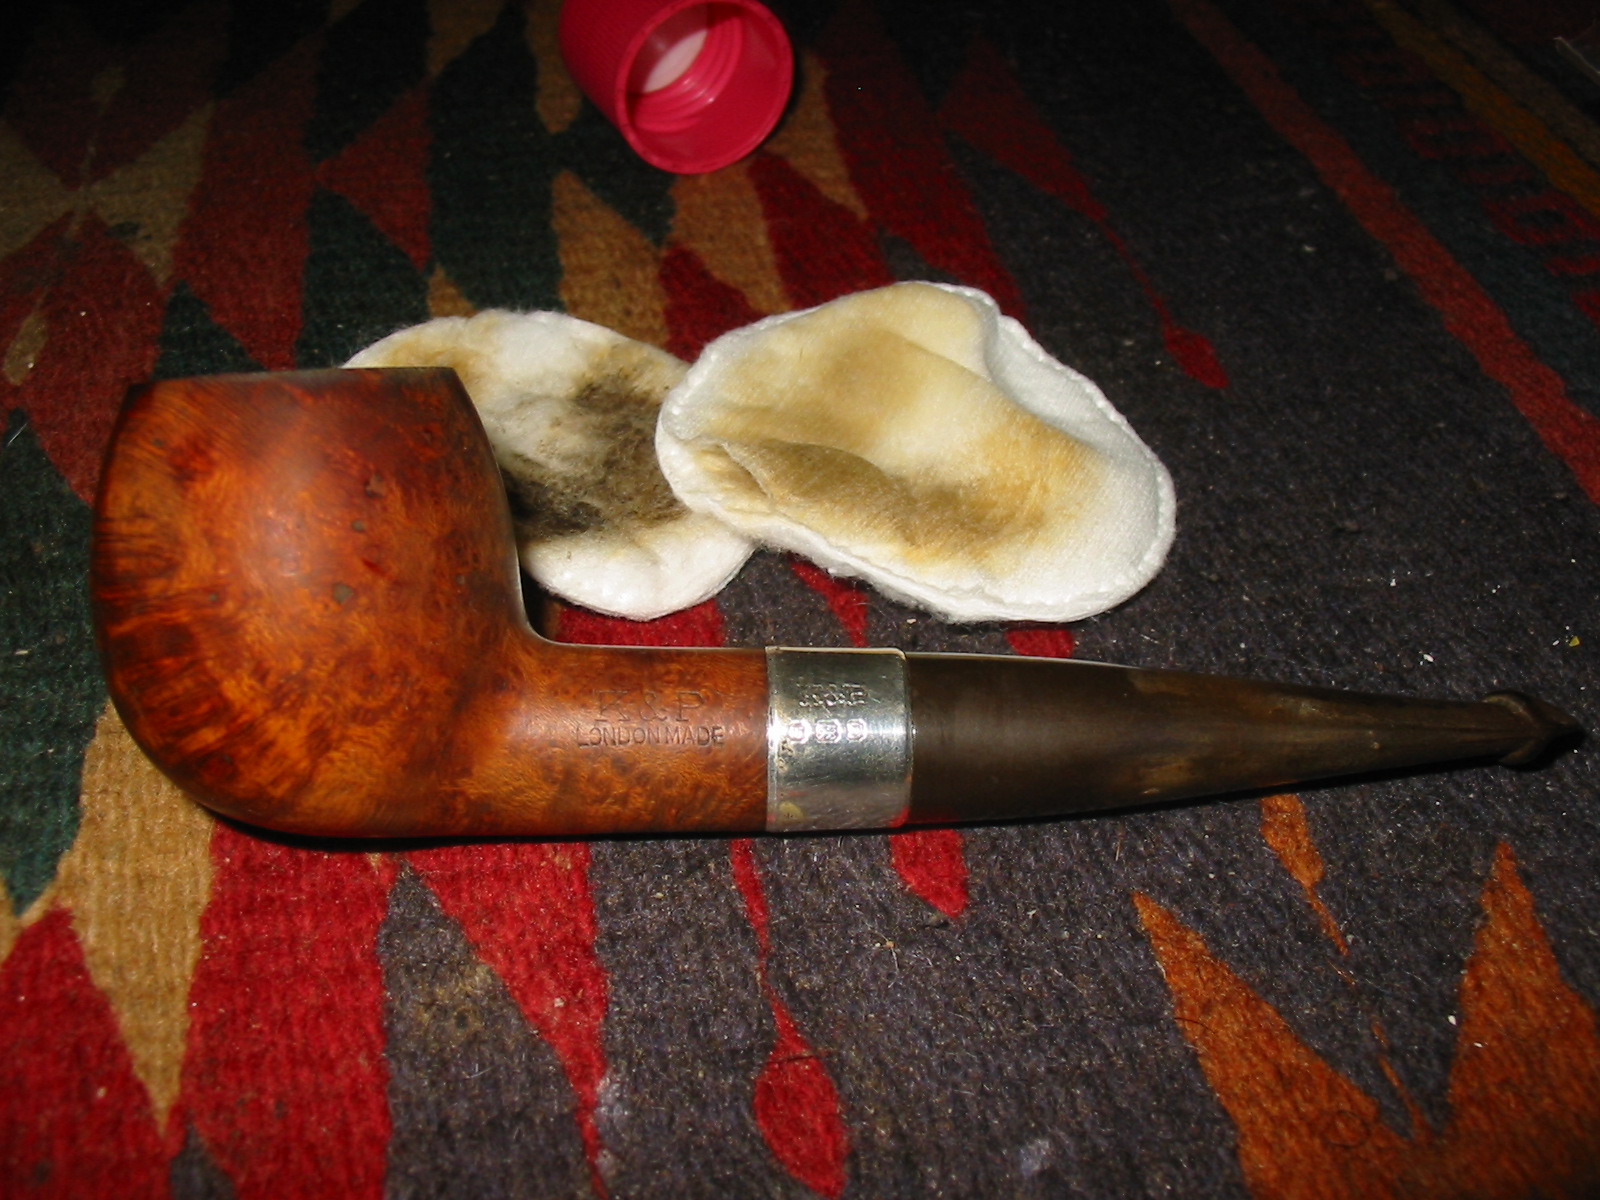
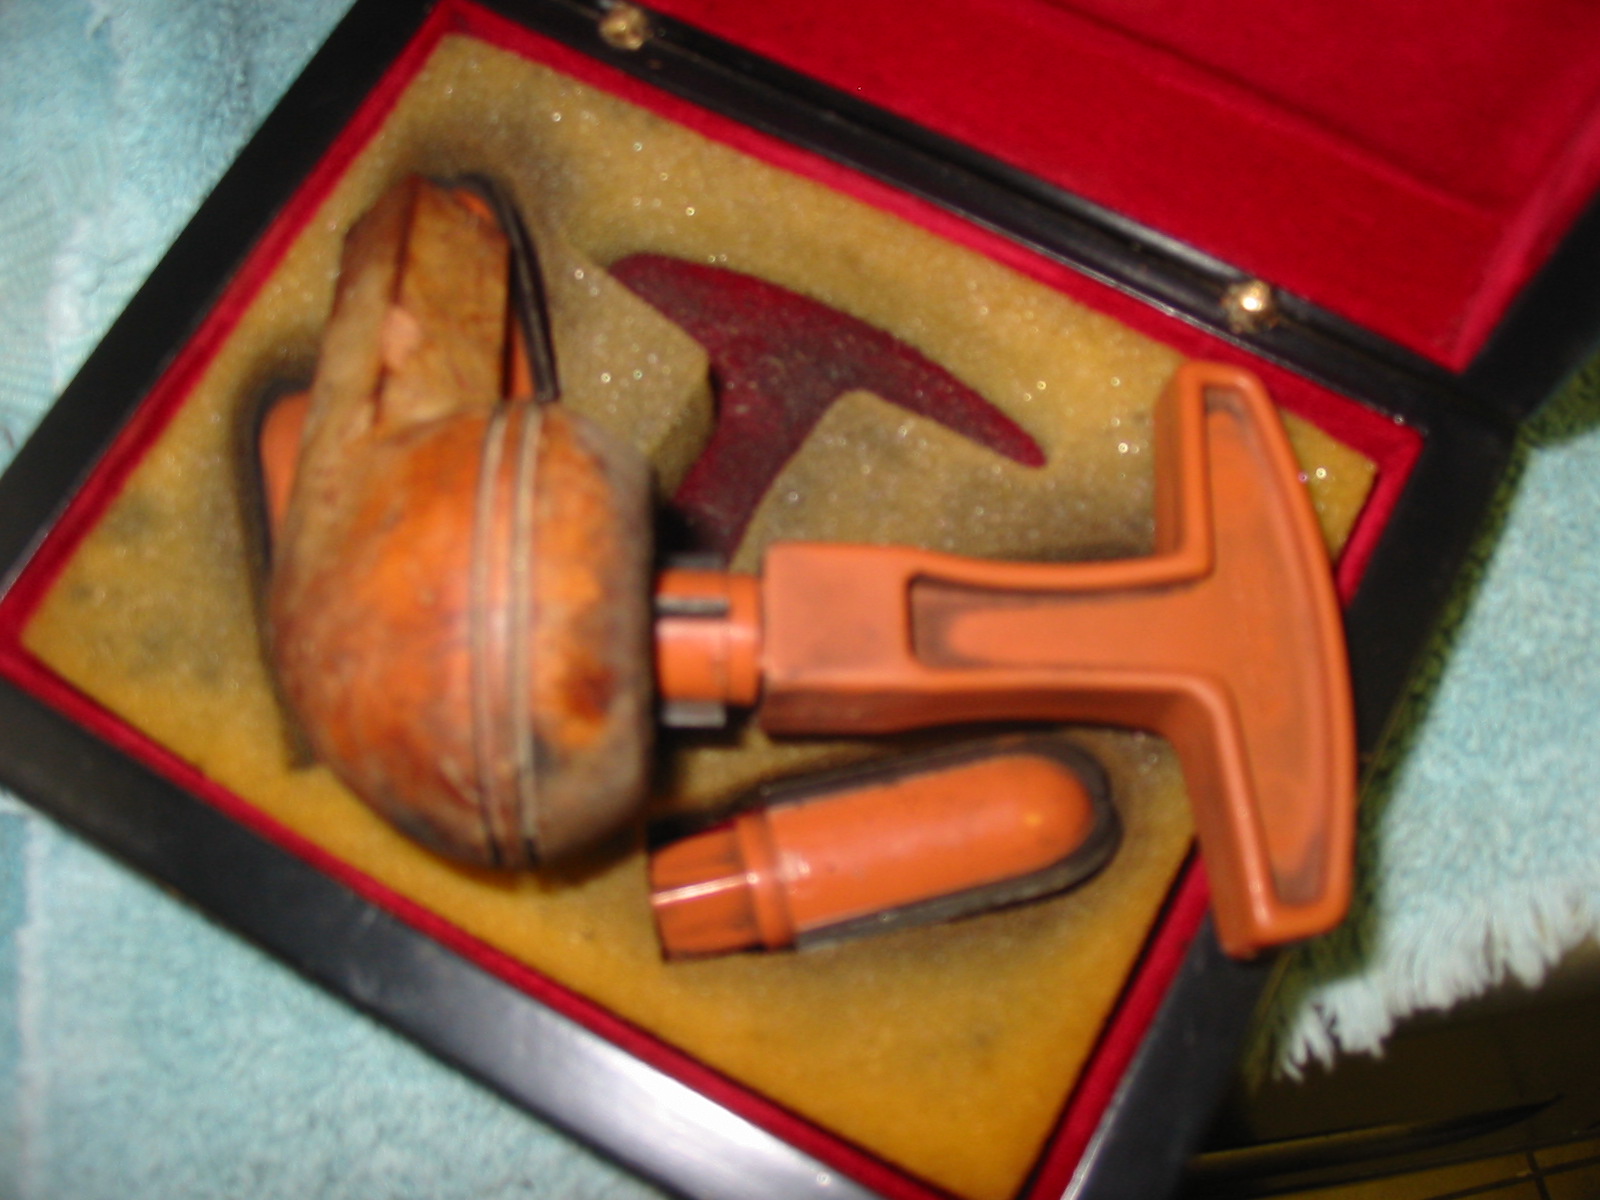
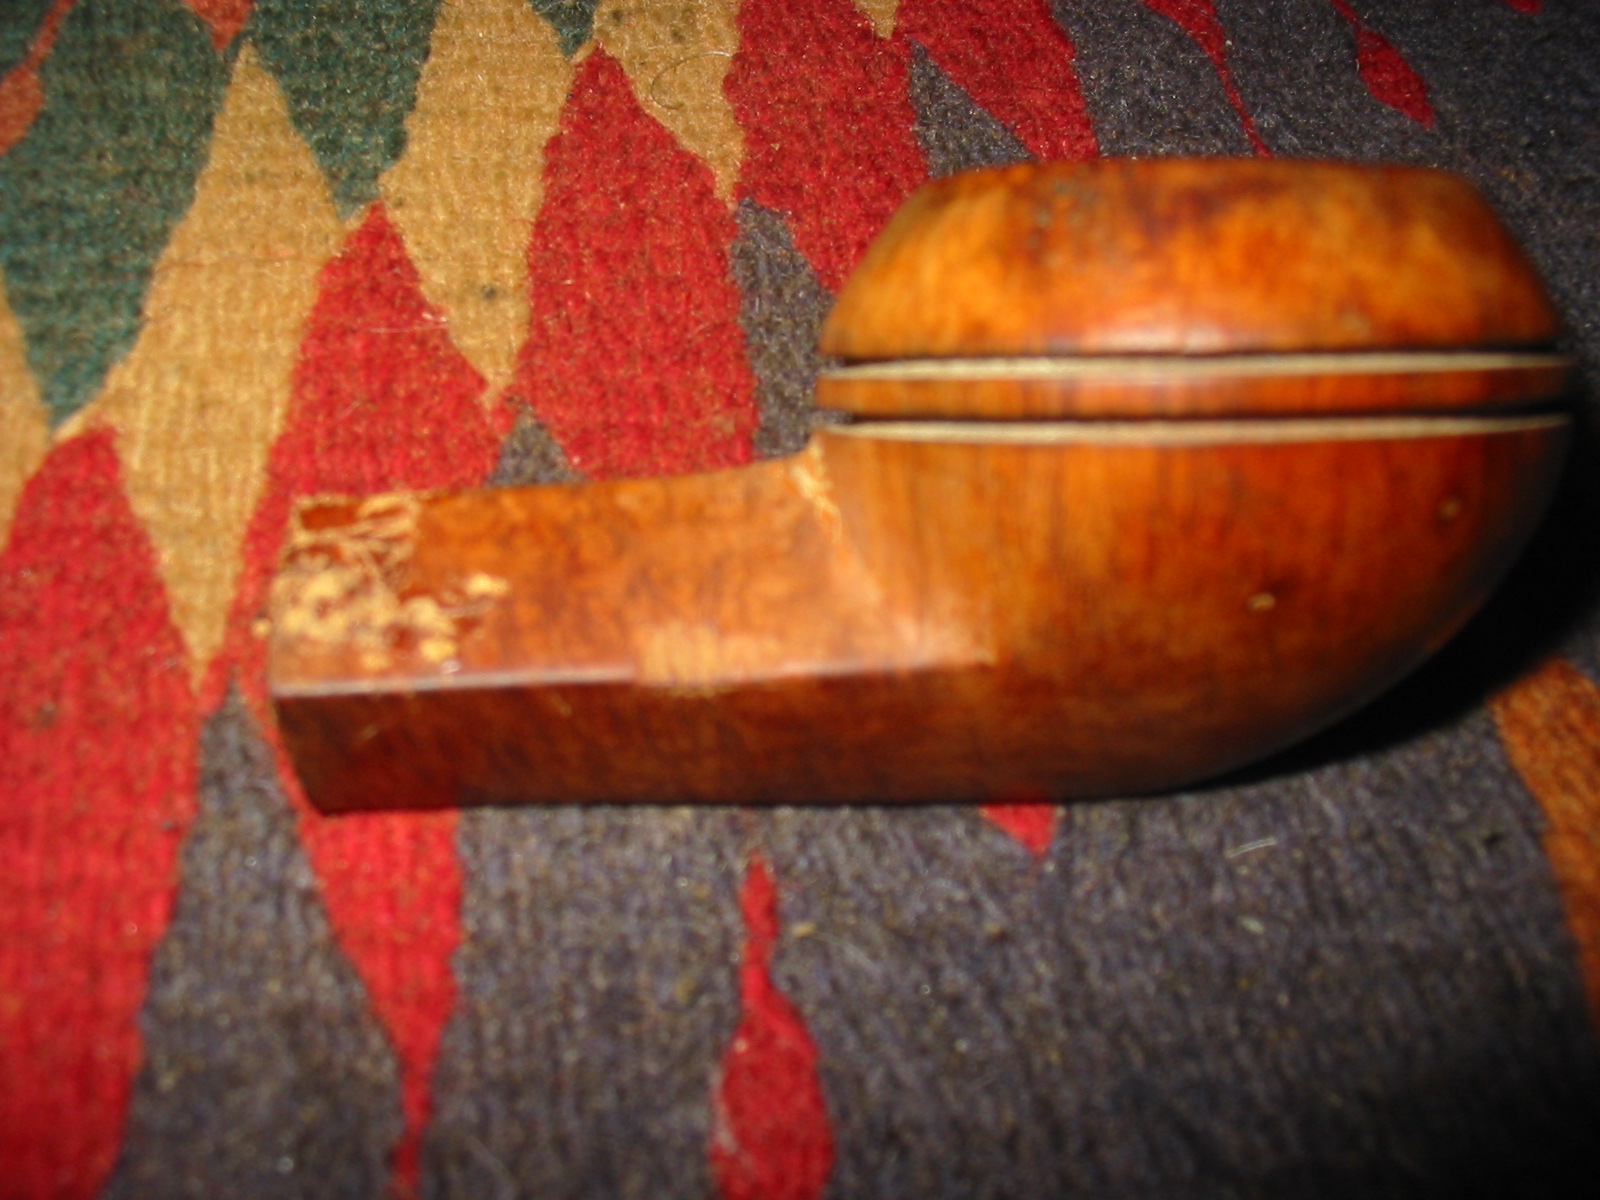
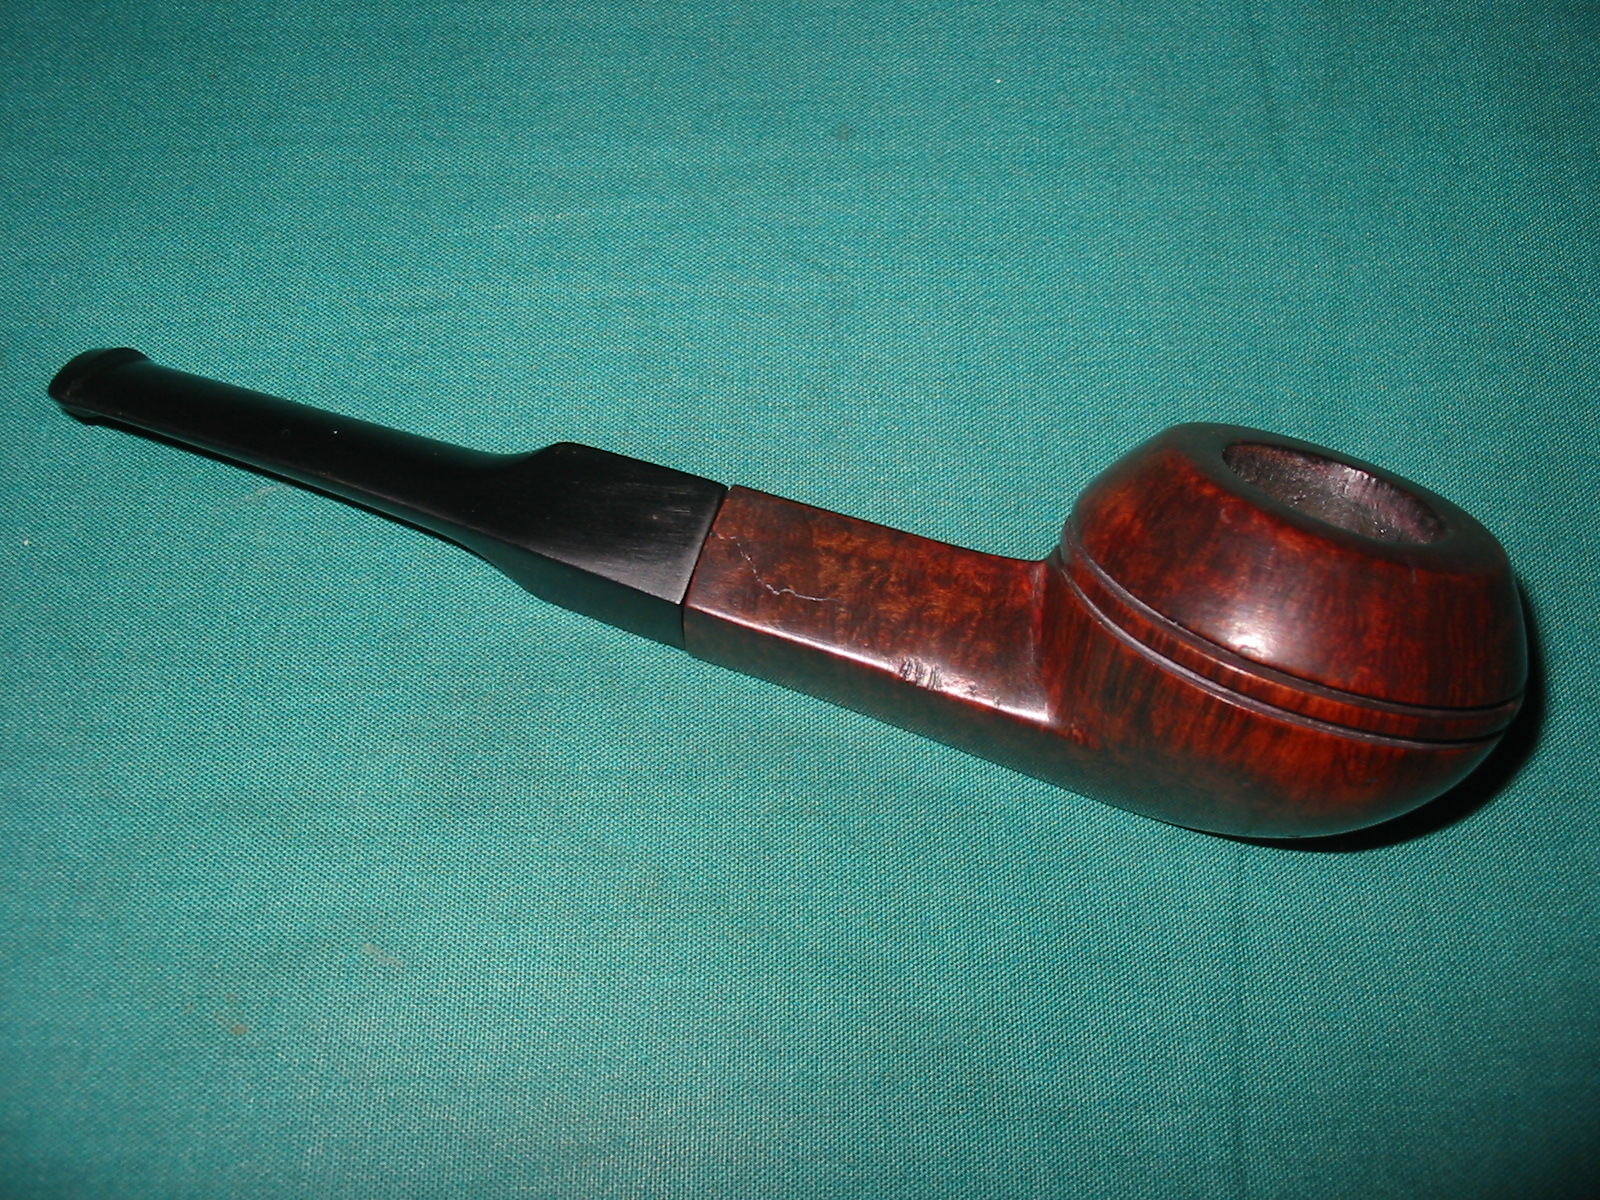
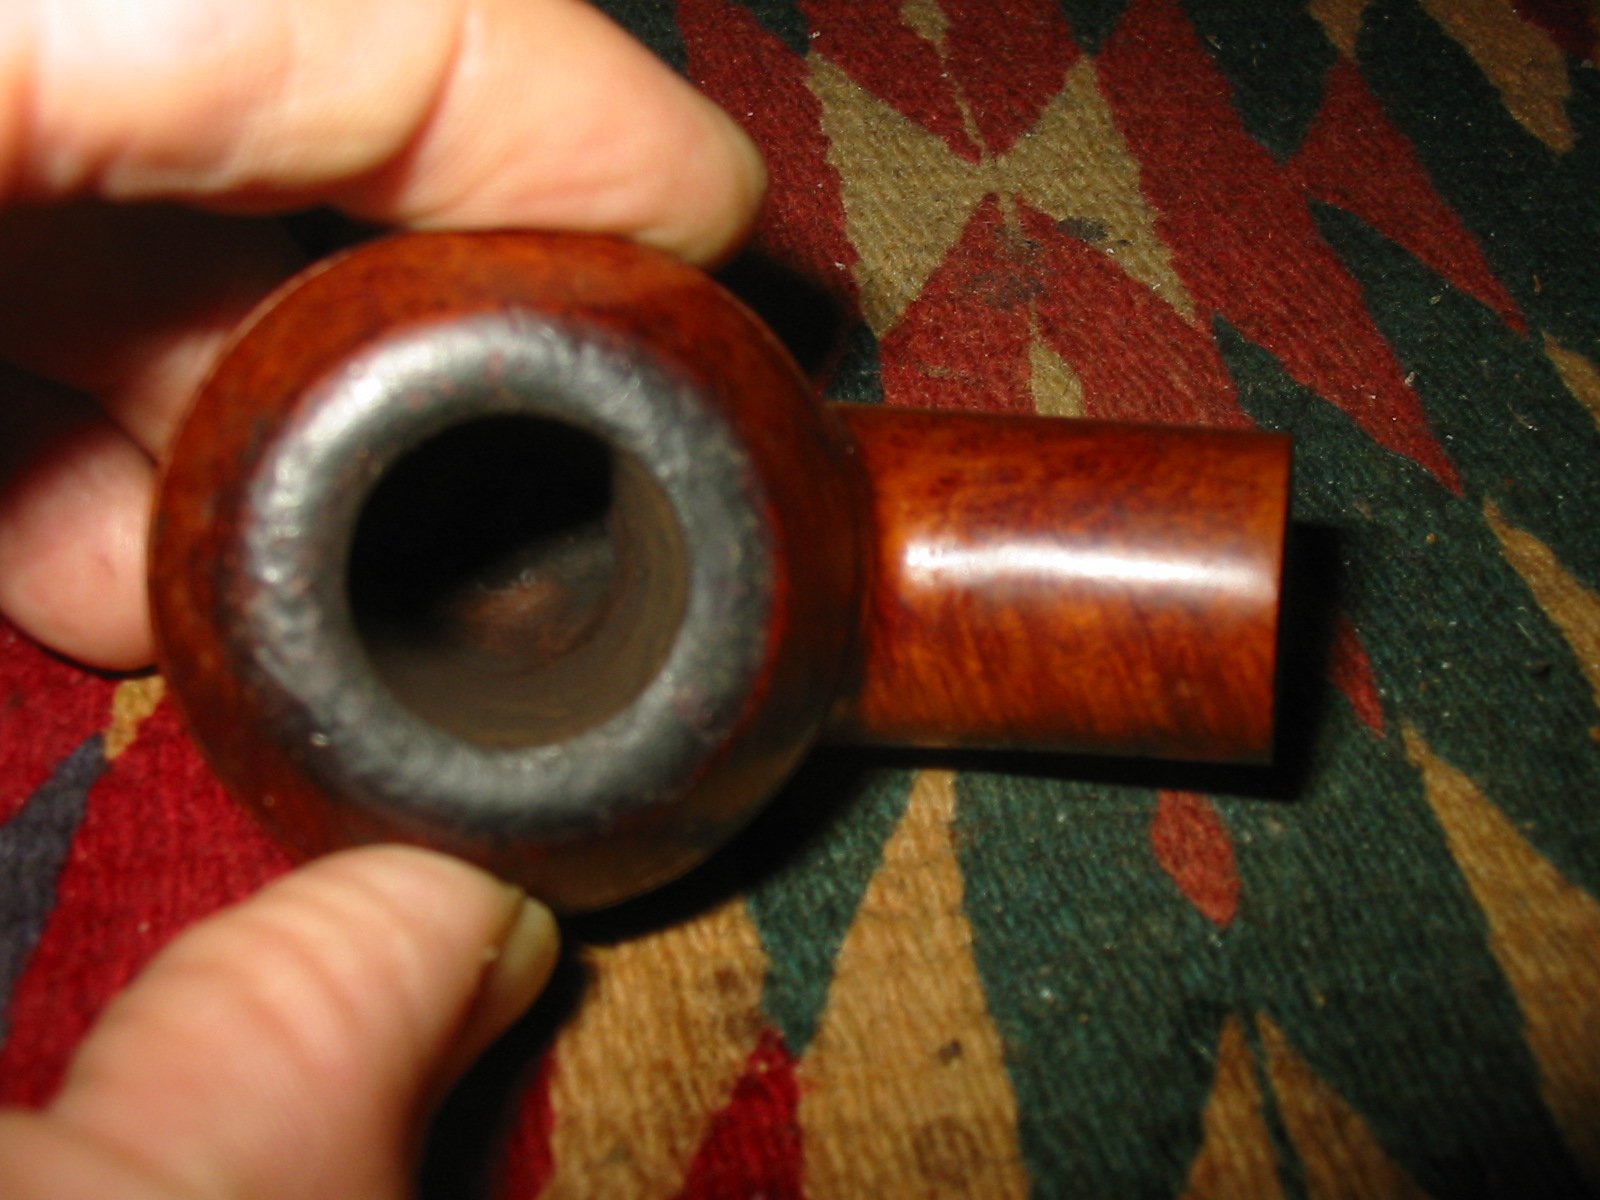
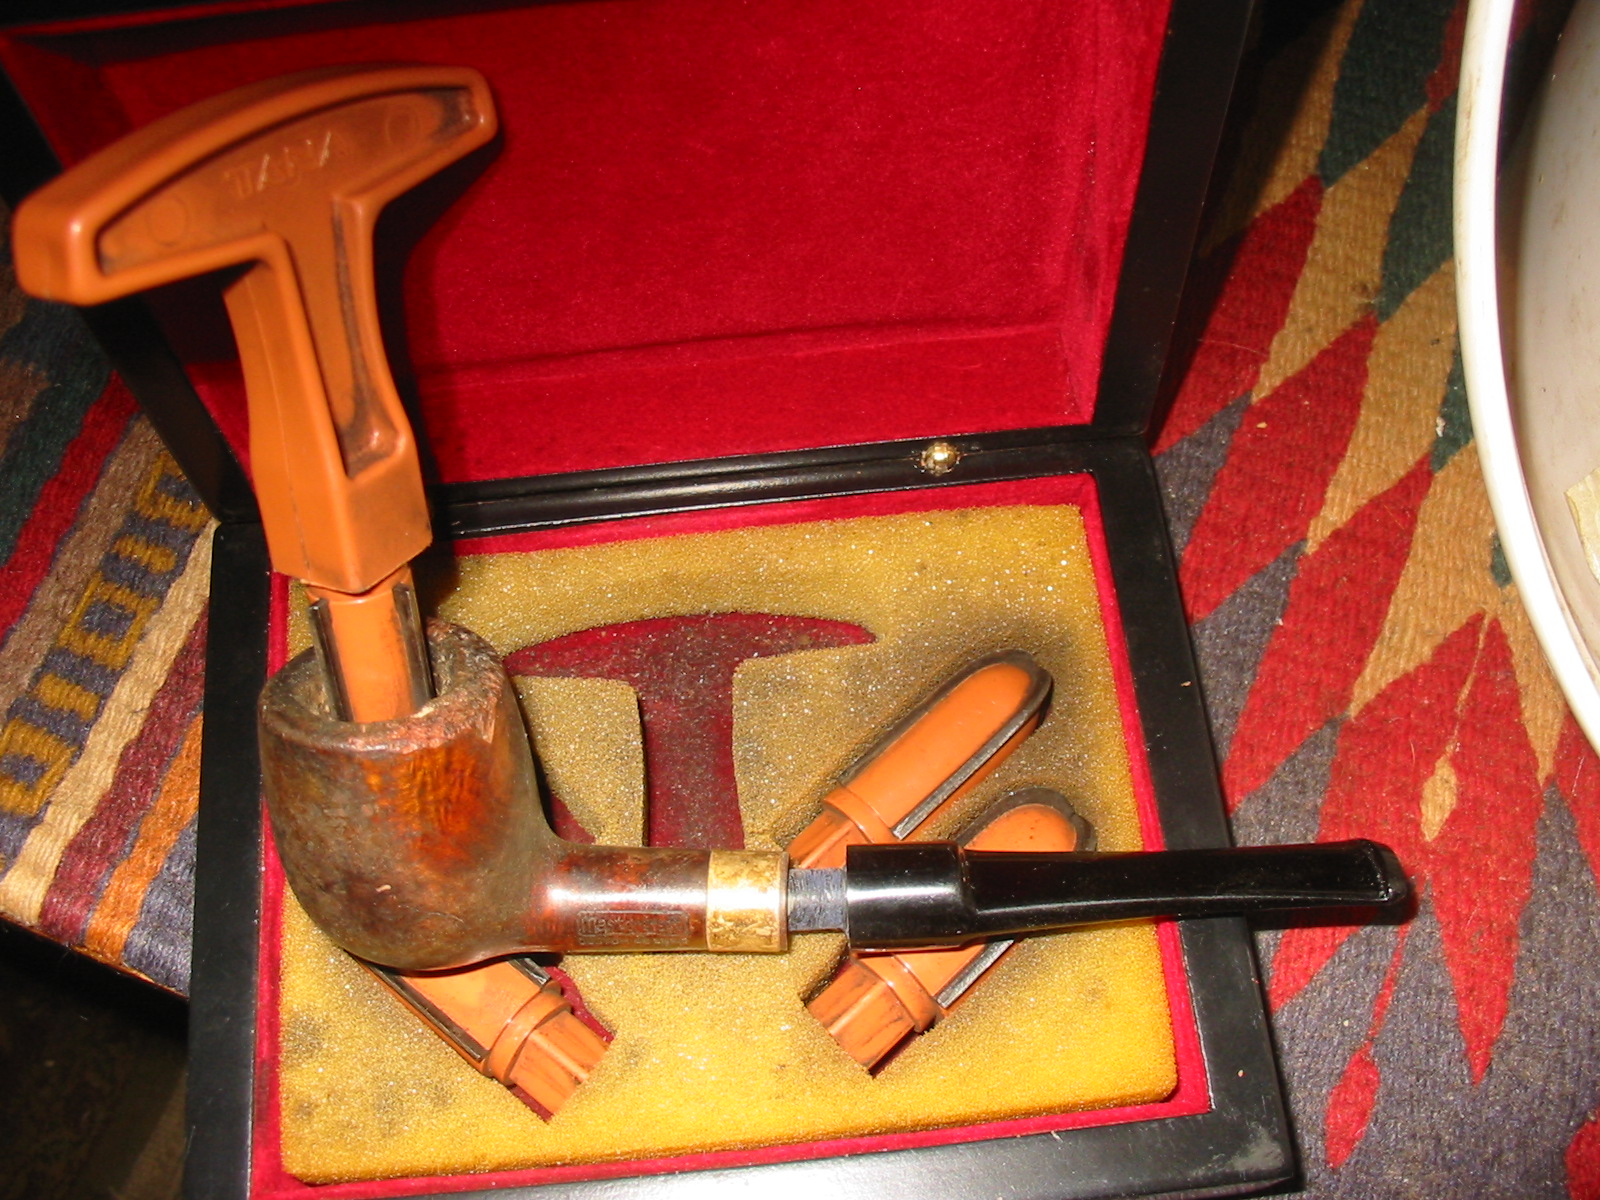
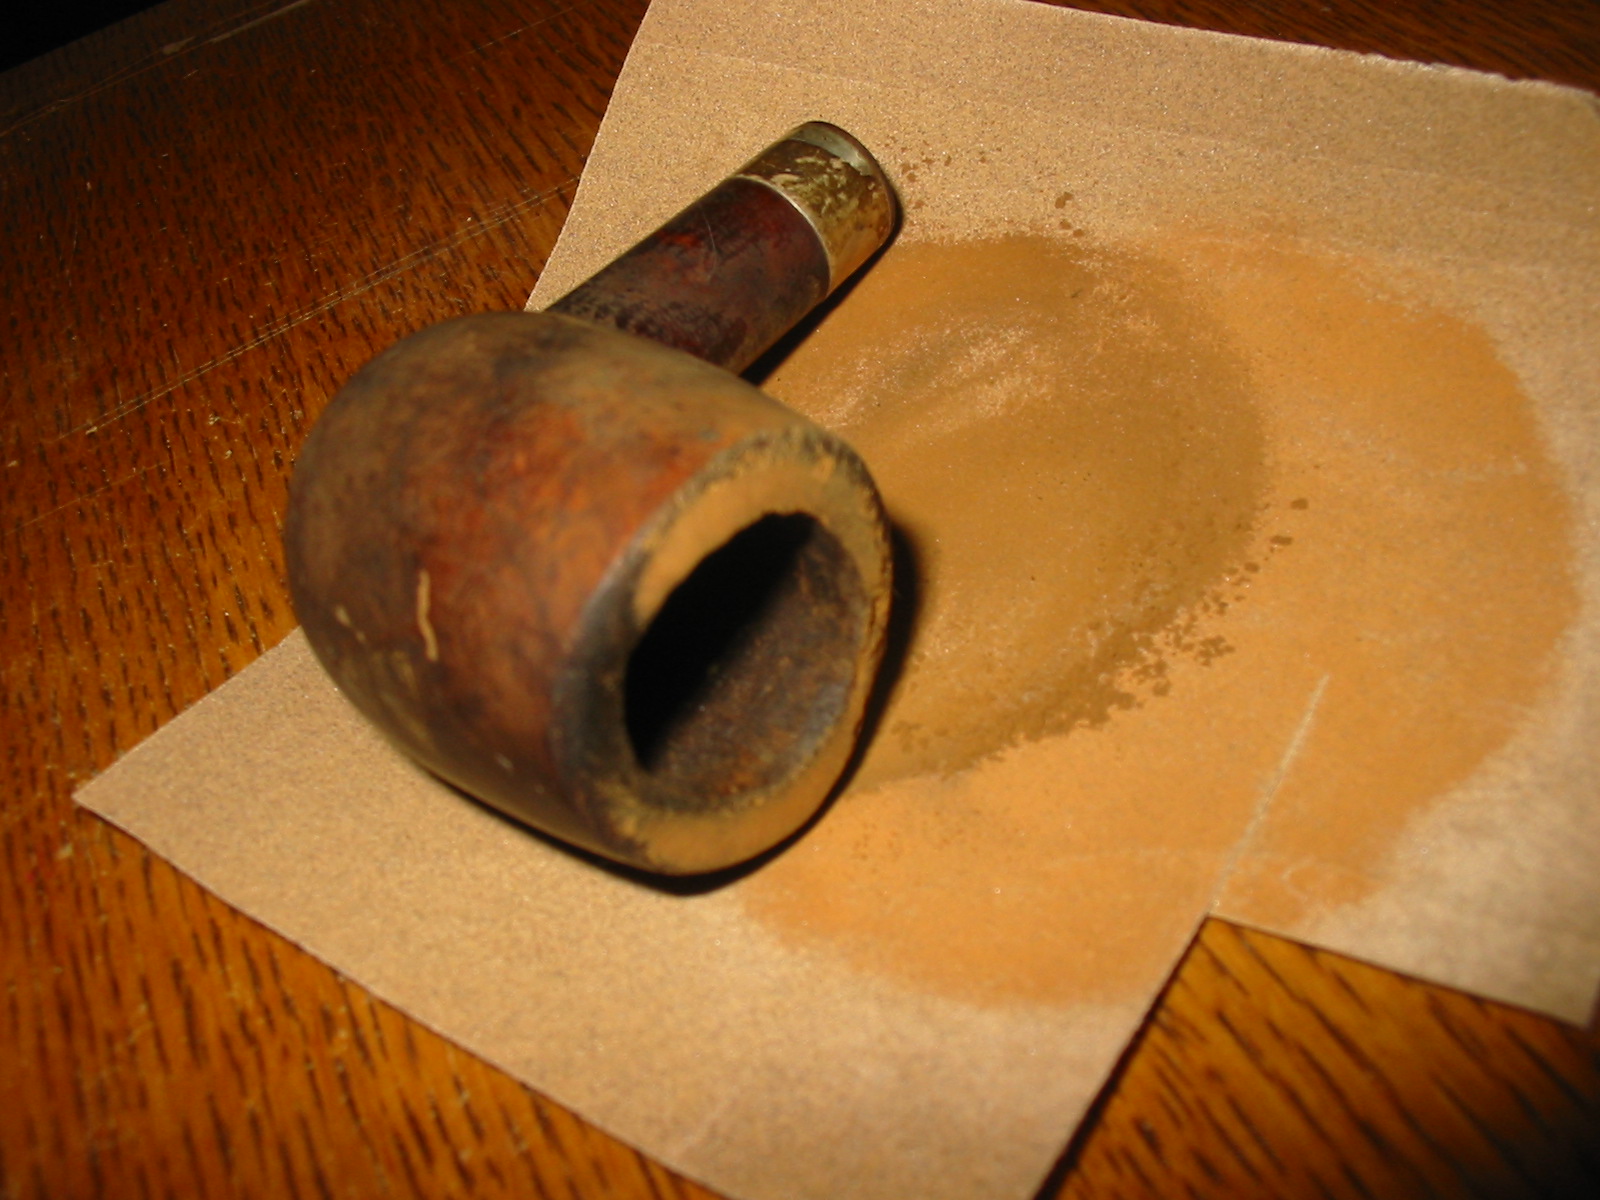
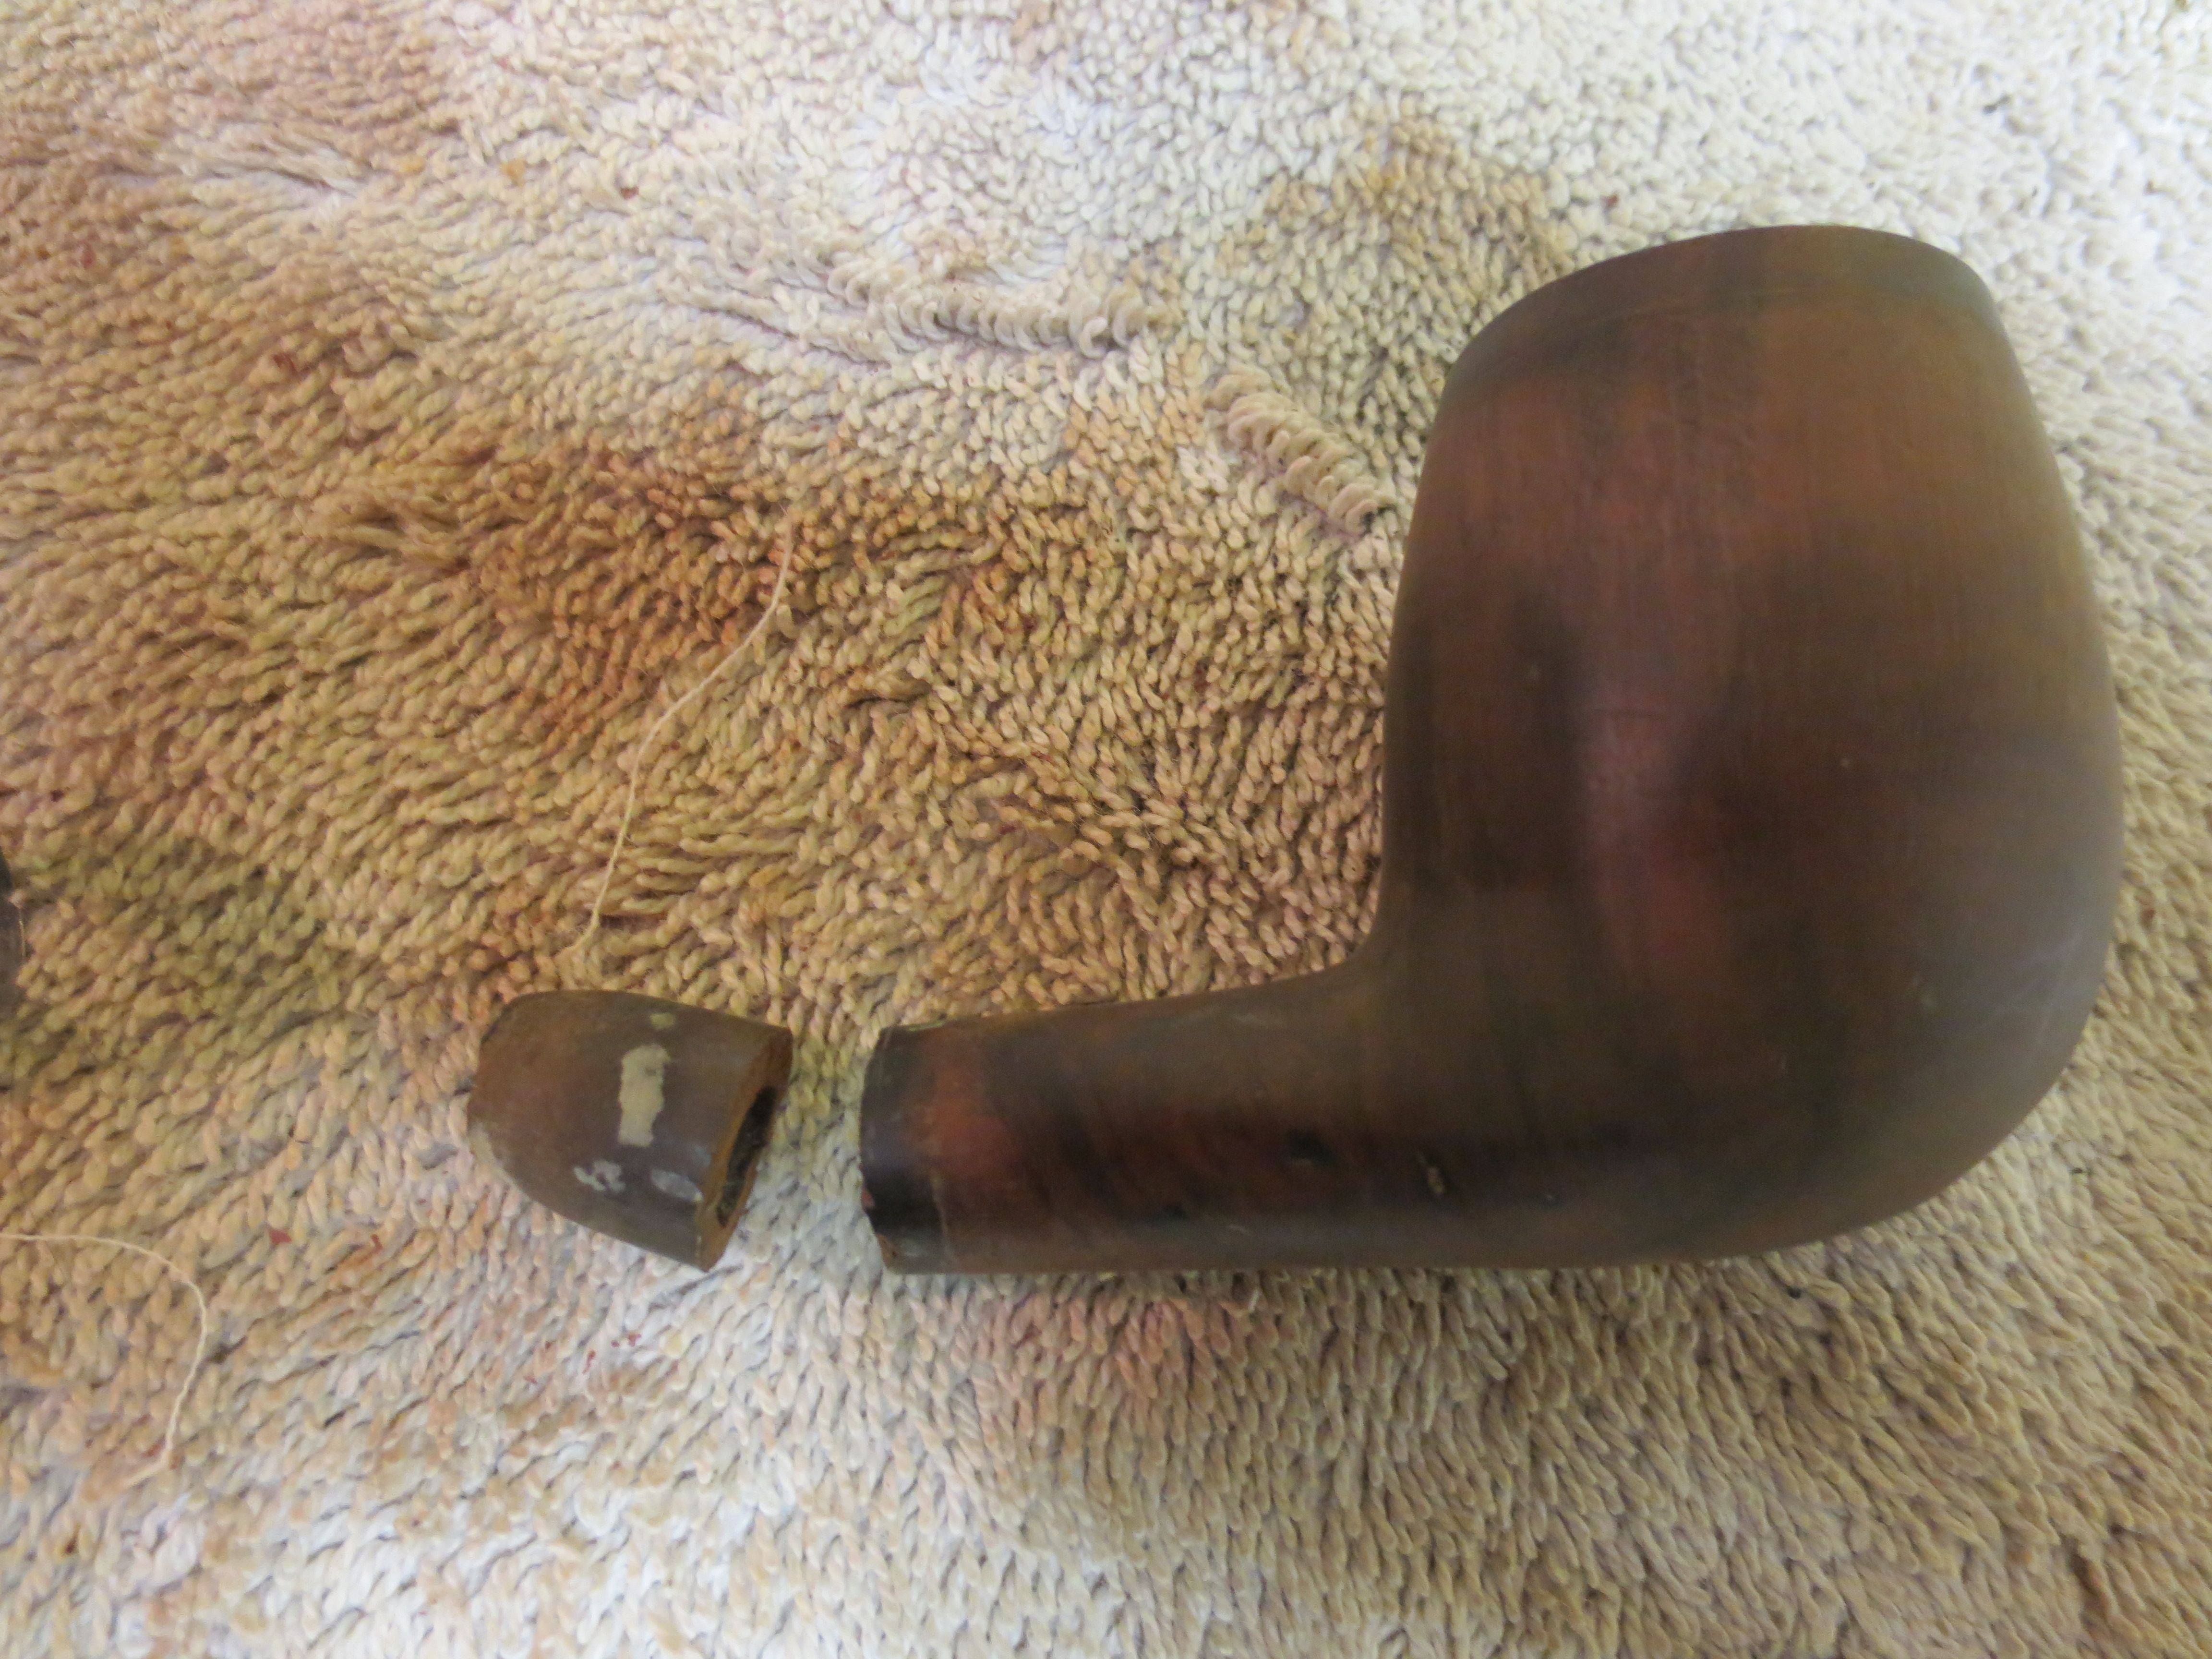
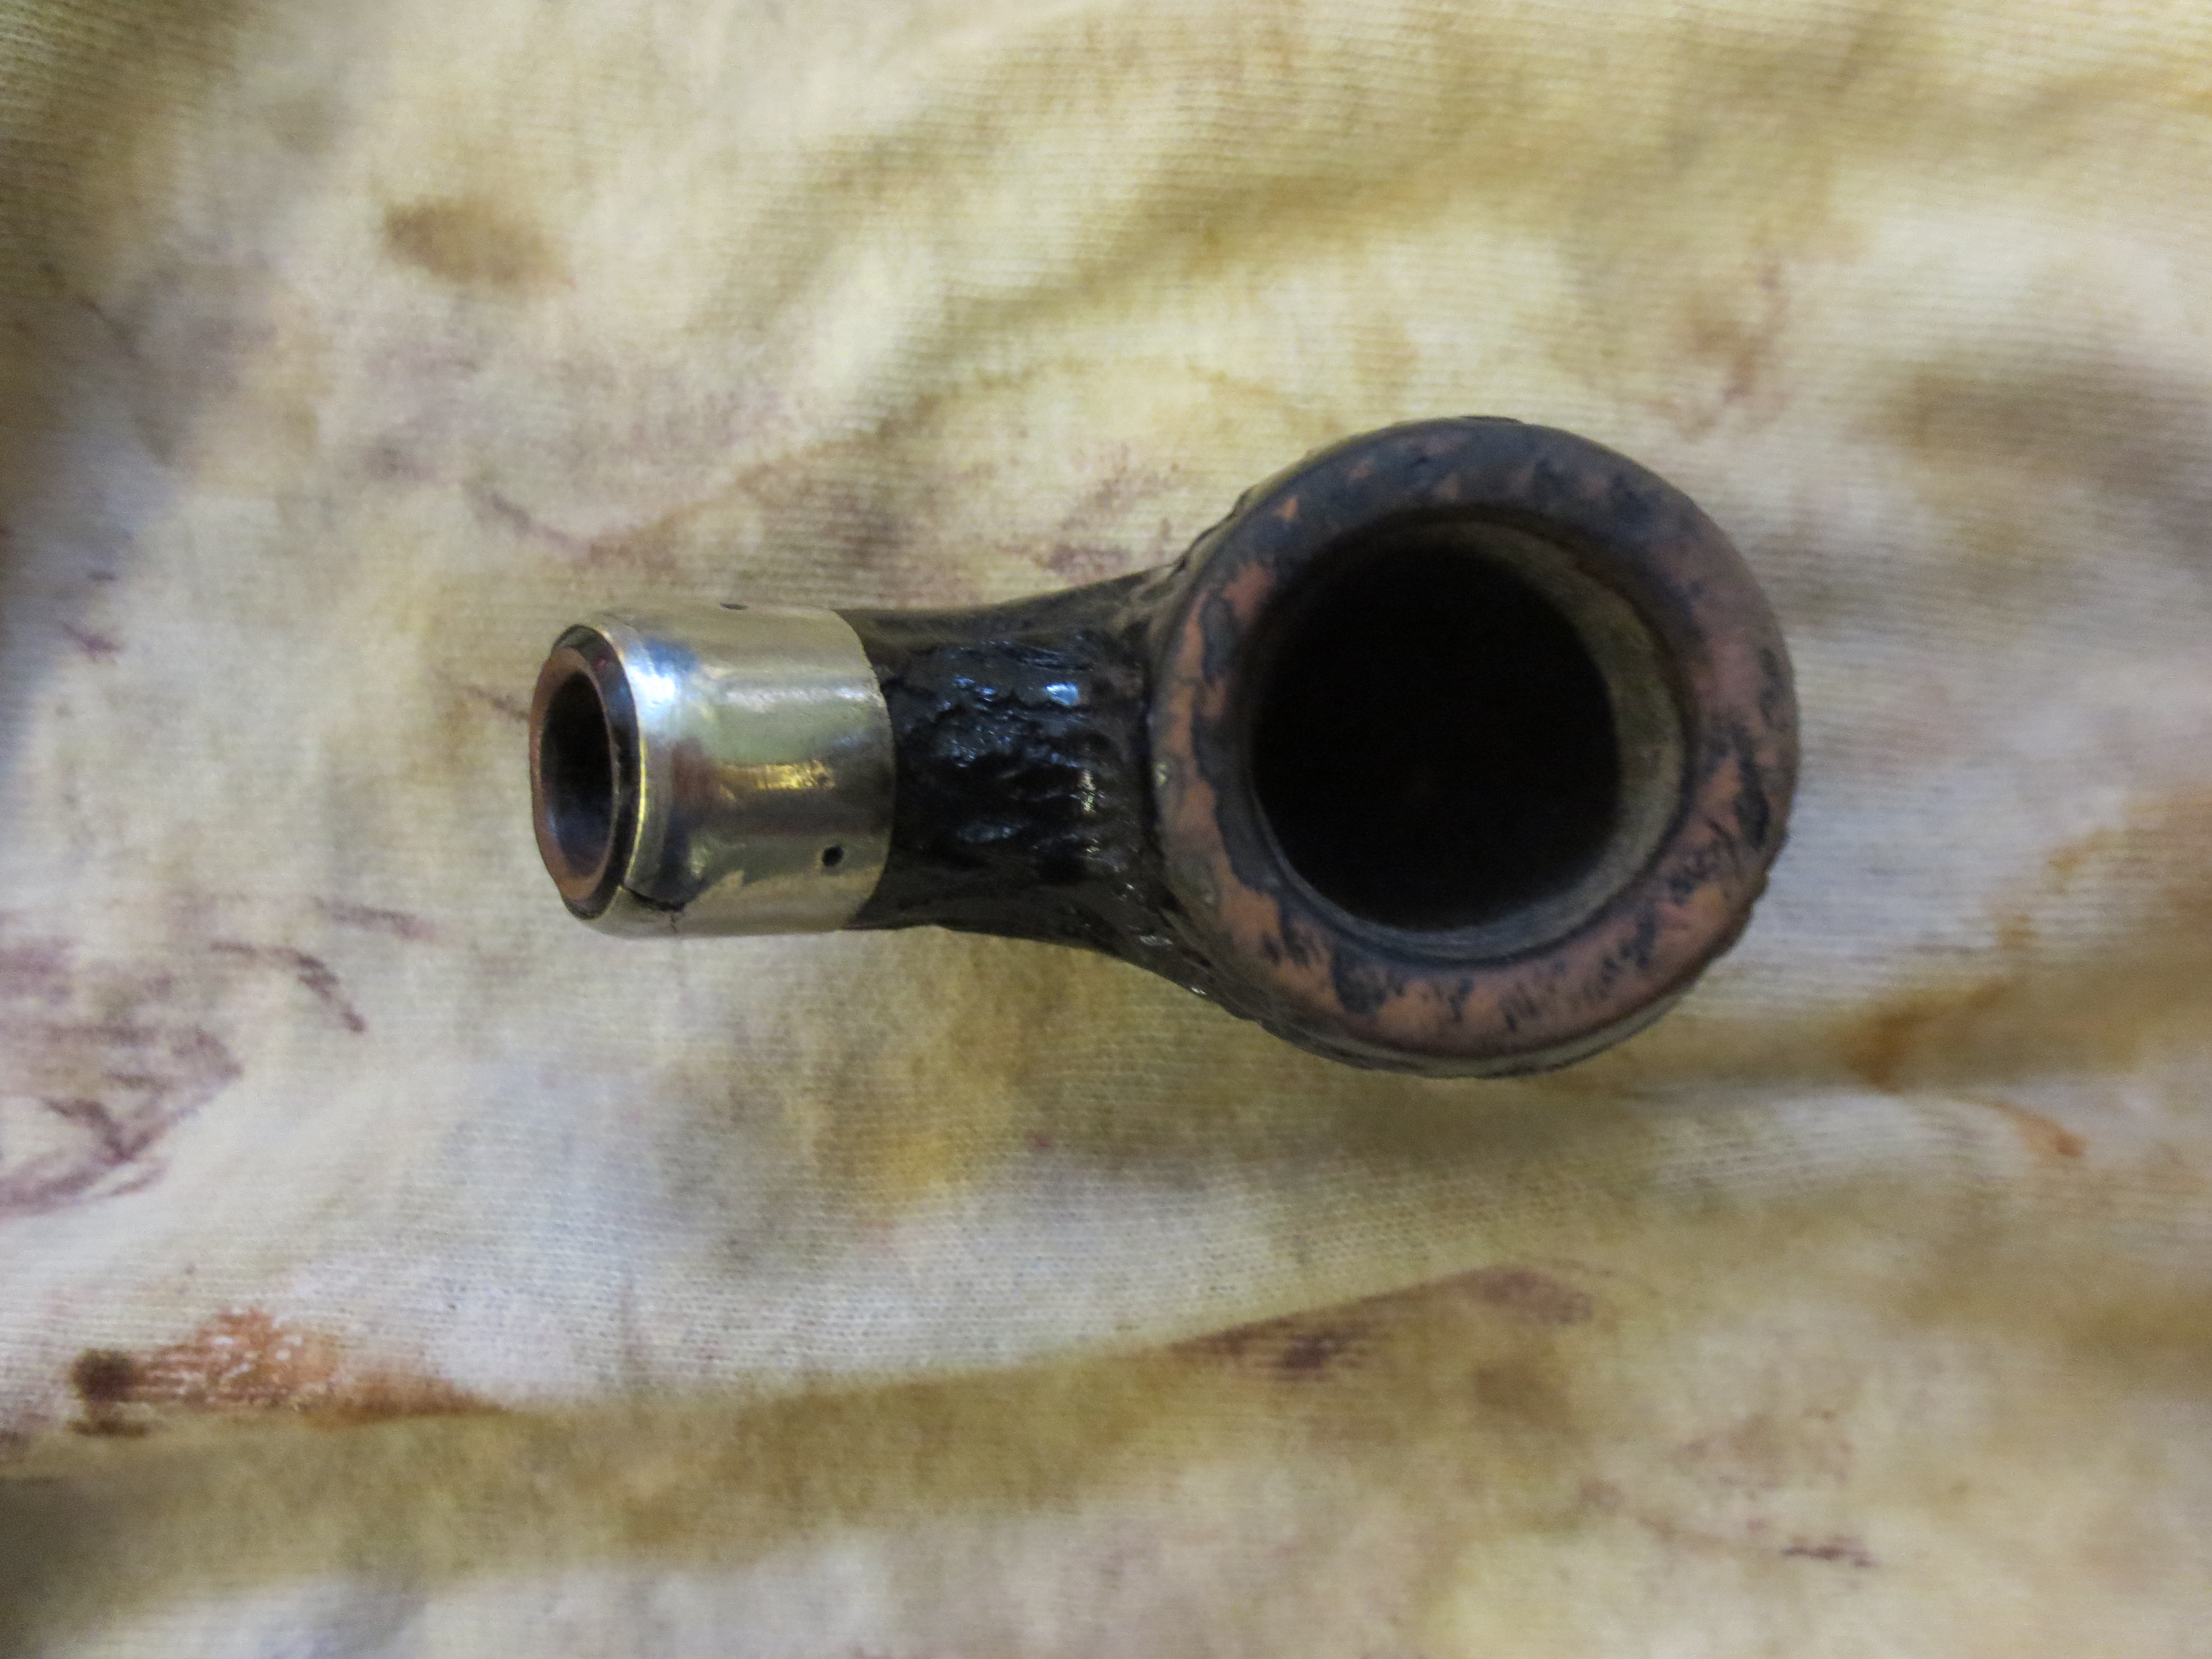
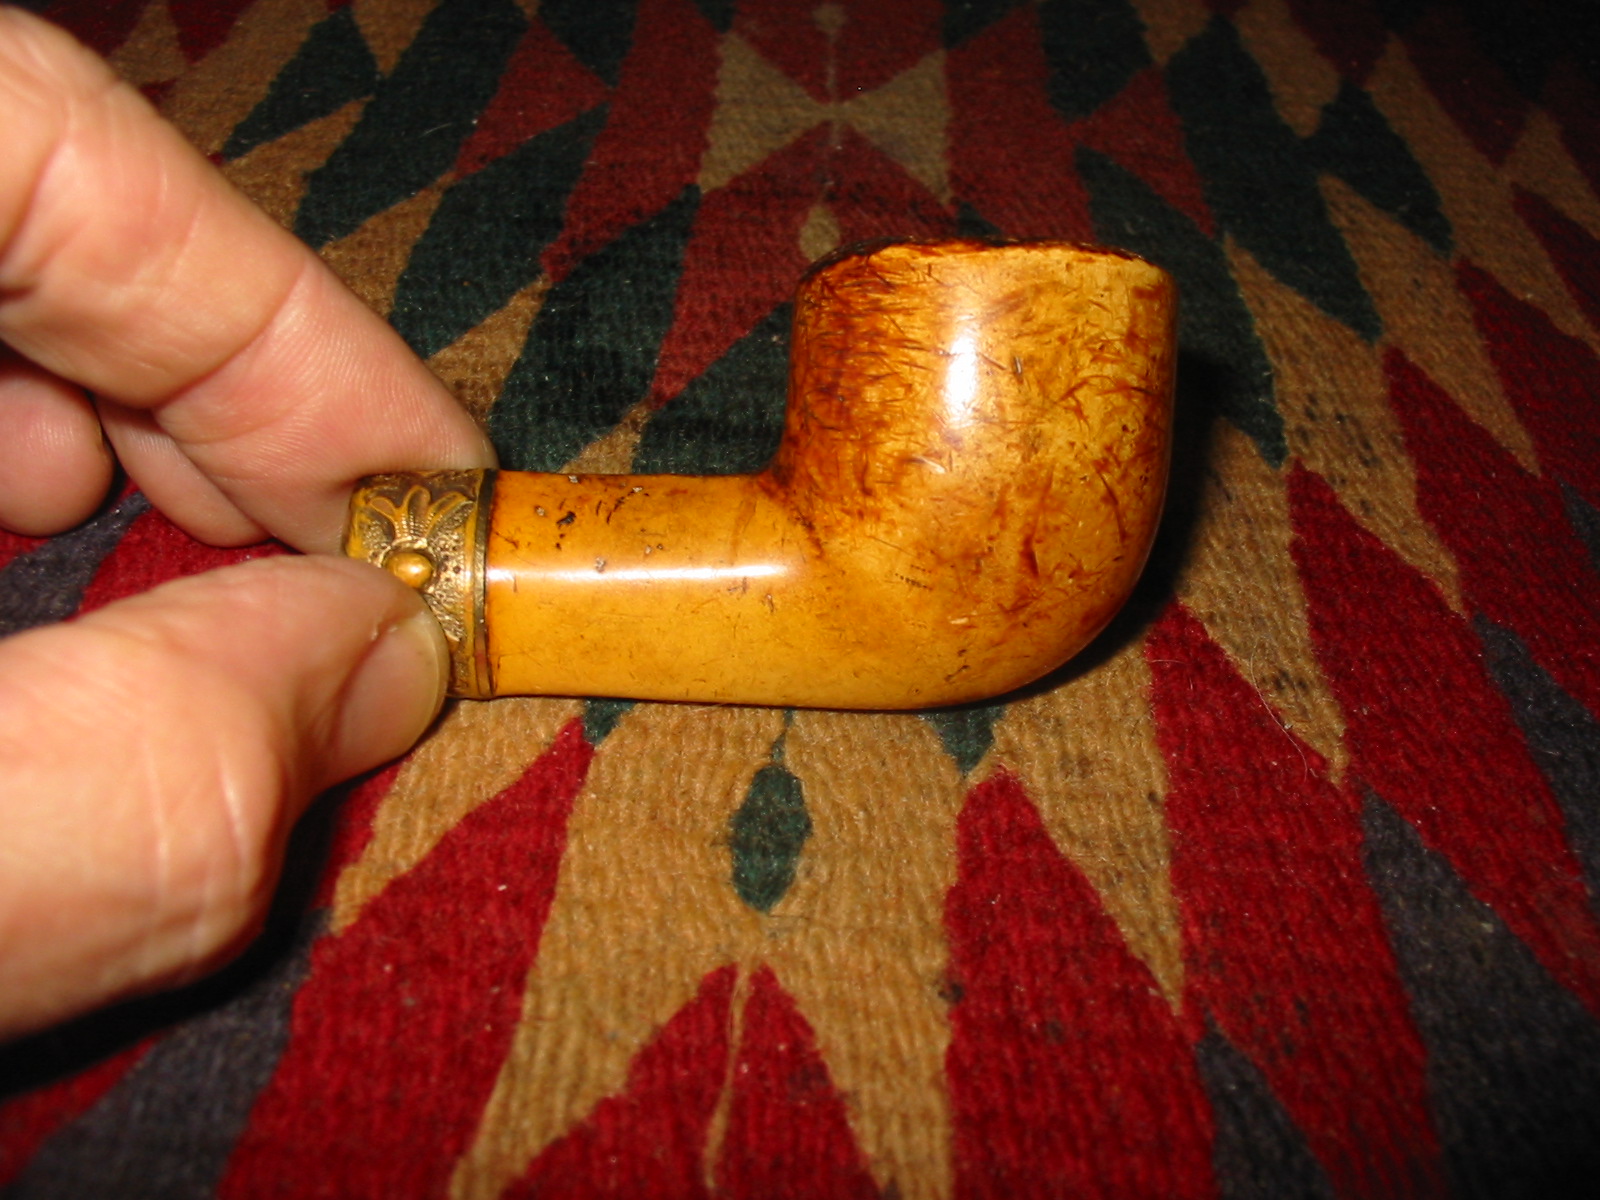
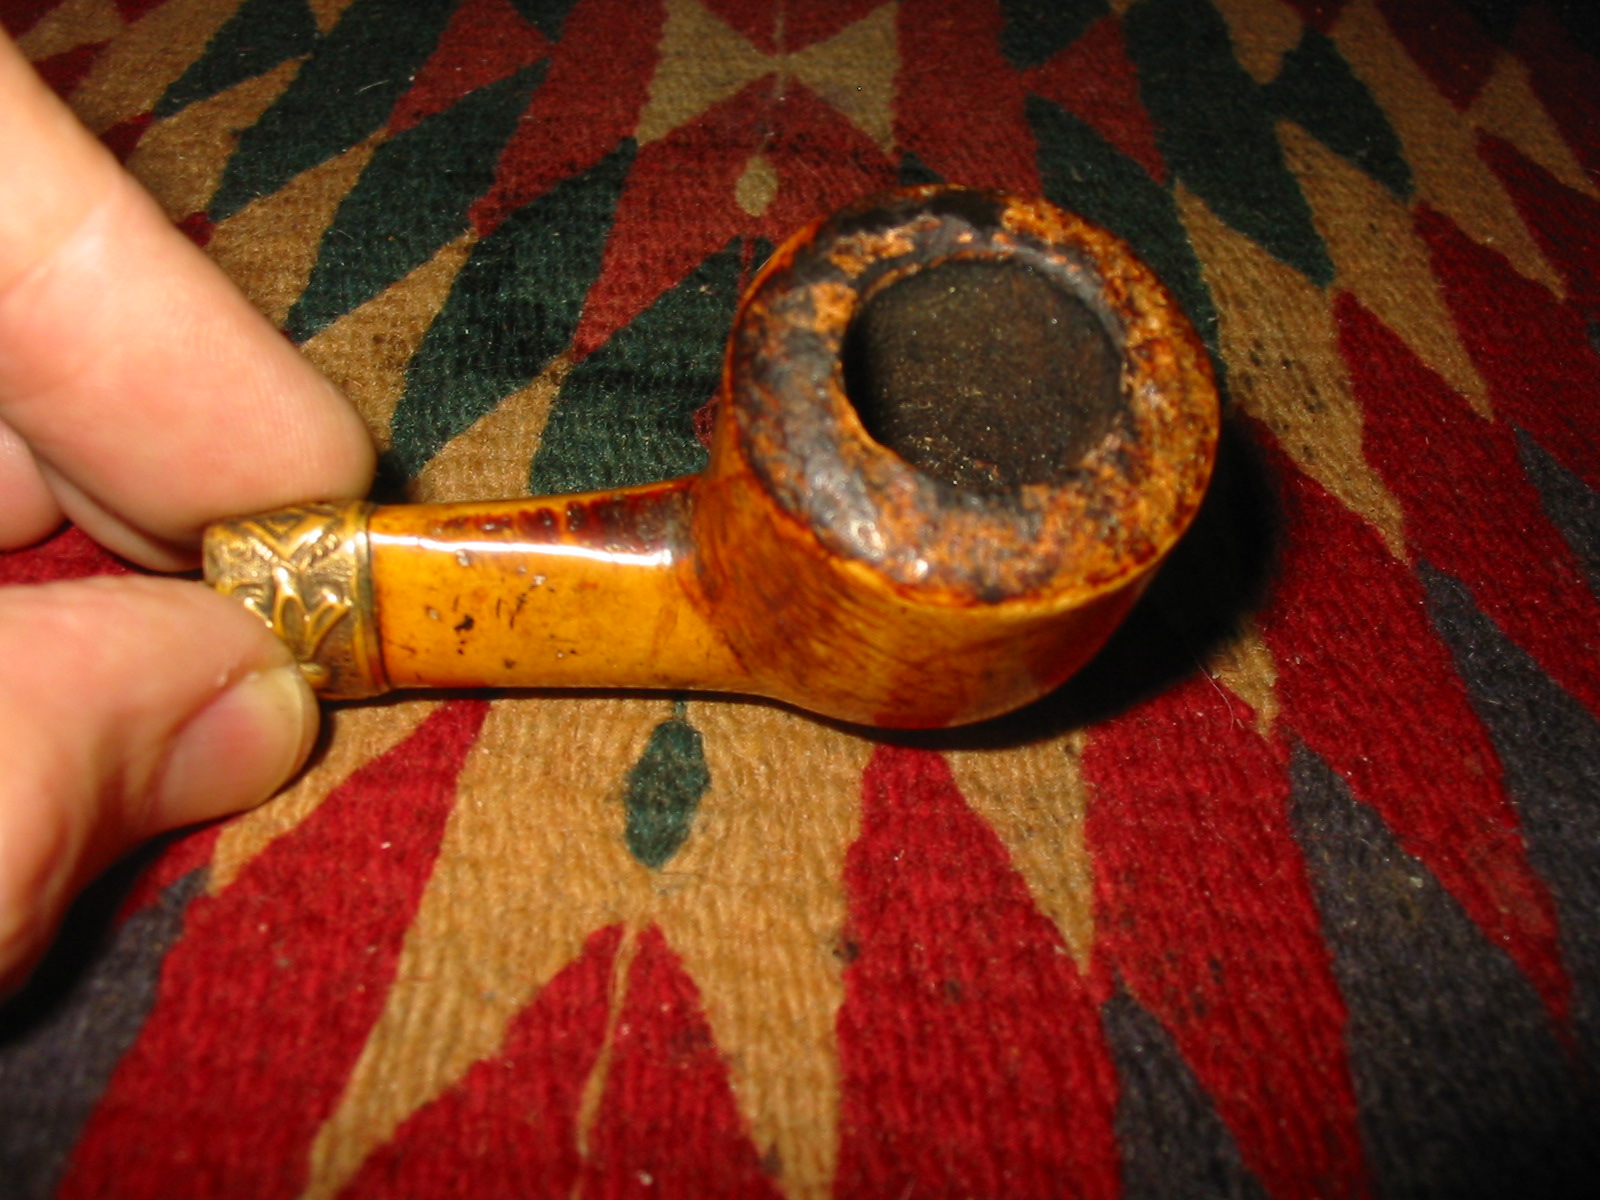
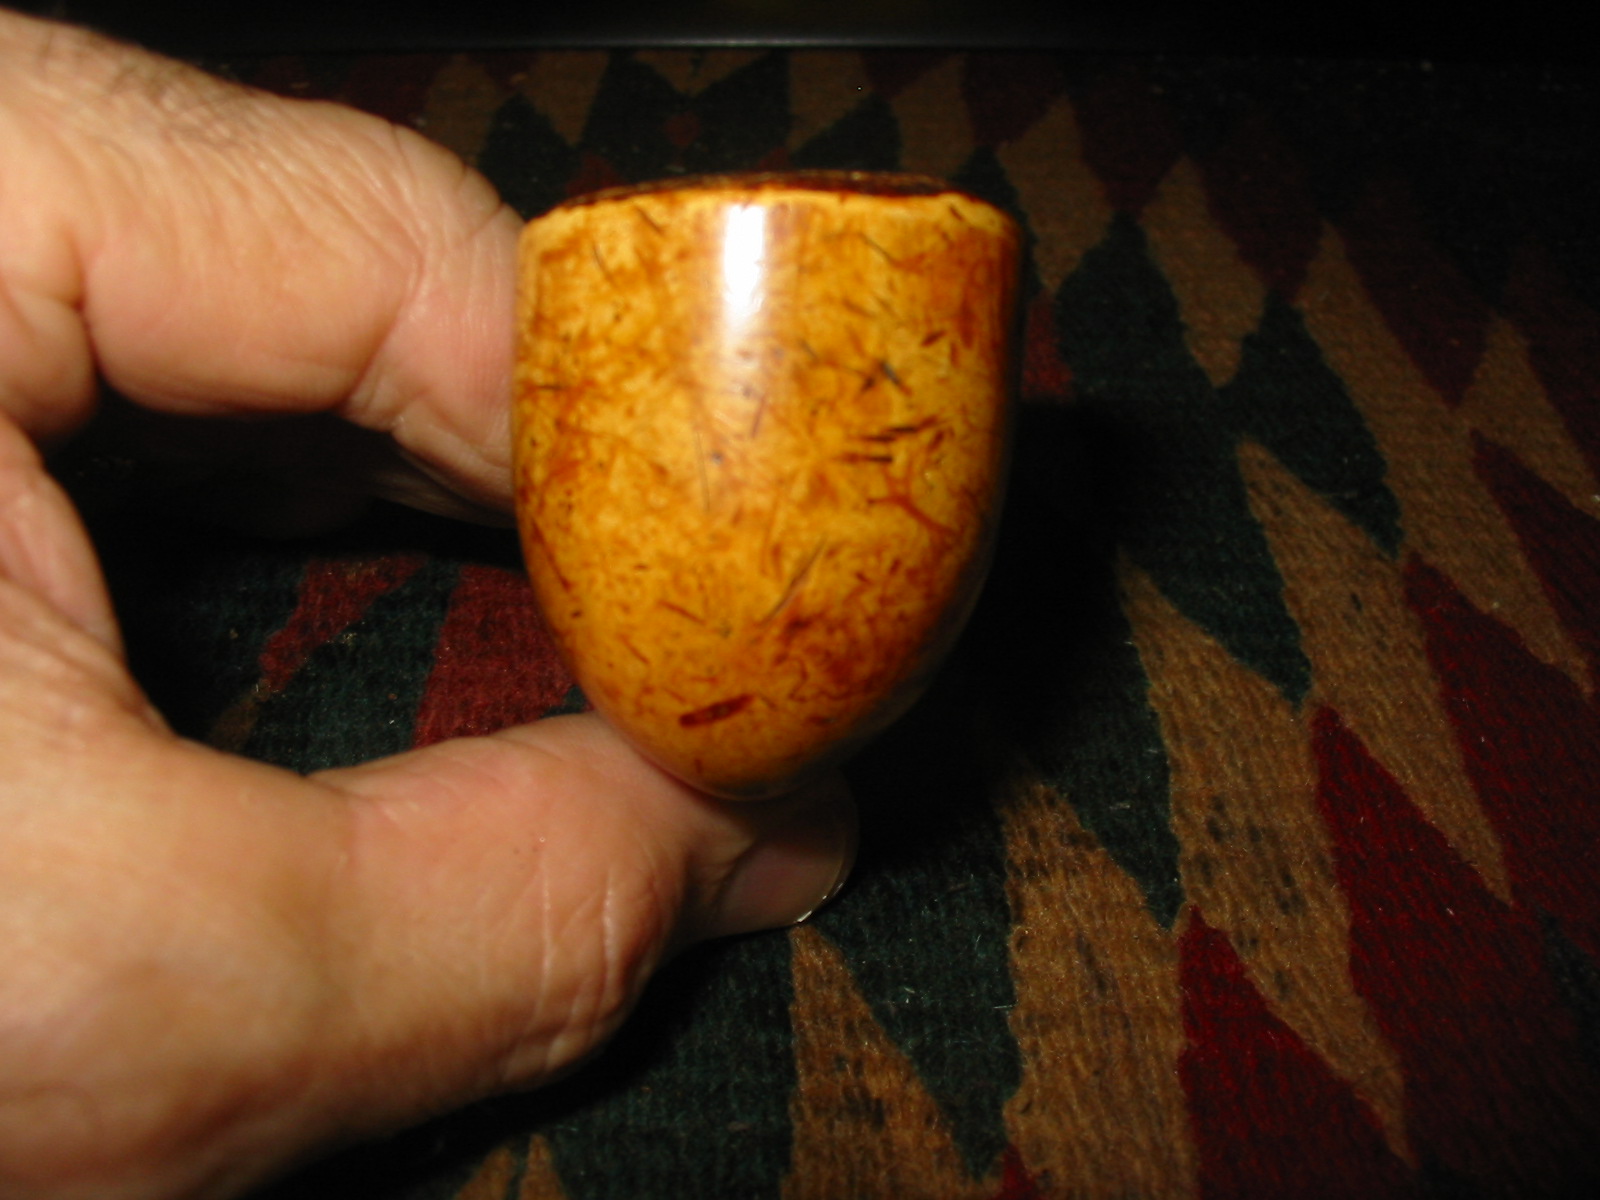
From the photos it looked to be in rough shape. The pipe case said it was a WDC but I have no way of knowing if that is true. The gold filigree on the band looks like the old WDC pipes of the late 1890s but I am still uncertain as to the maker. It was in rough shape as can be seen from the photos. There were many scratches and gouges around the outside of the bowl. The shank had marks on the top that looked like someone had taken a file to it. The rim was probably the worst. With the rough edges on the back right side of the bowl the rim/top appeared to be angled to the right side and worn down. The tar build up was heavy in the bowl and on the rim. The tenon was broken off in the shank. It appeared to be an old bone tenon and a bone insert in the mortise that was threaded to take the screw in tenon. I am assuming the pipe probably had an amber stem in its first appearance in the shop but that was long since broken and lost. The WDC case was also very rough – the edges were worn away, the wood broken and a hinge dangling unused. The inside was badly stained.

meer1

meer3

meer4

meer5

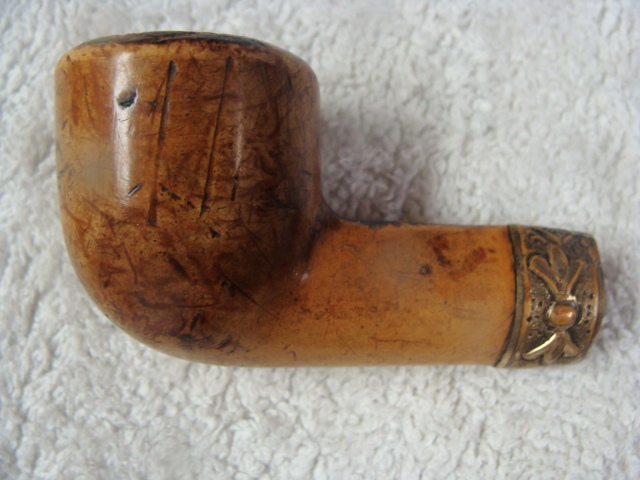
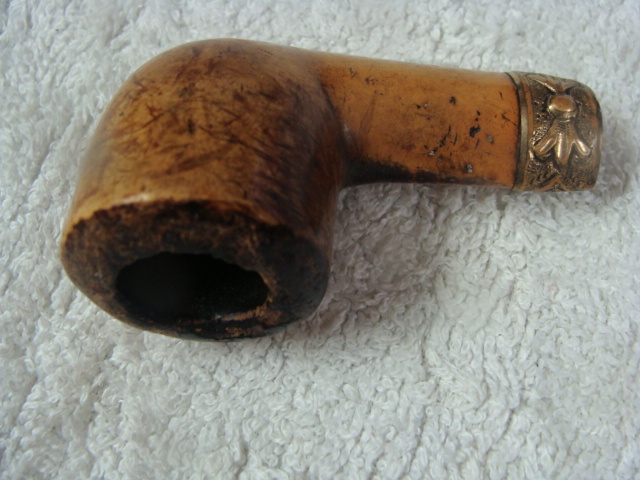
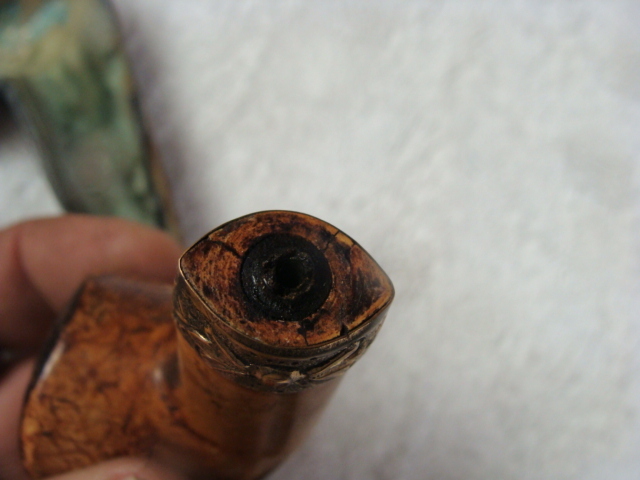
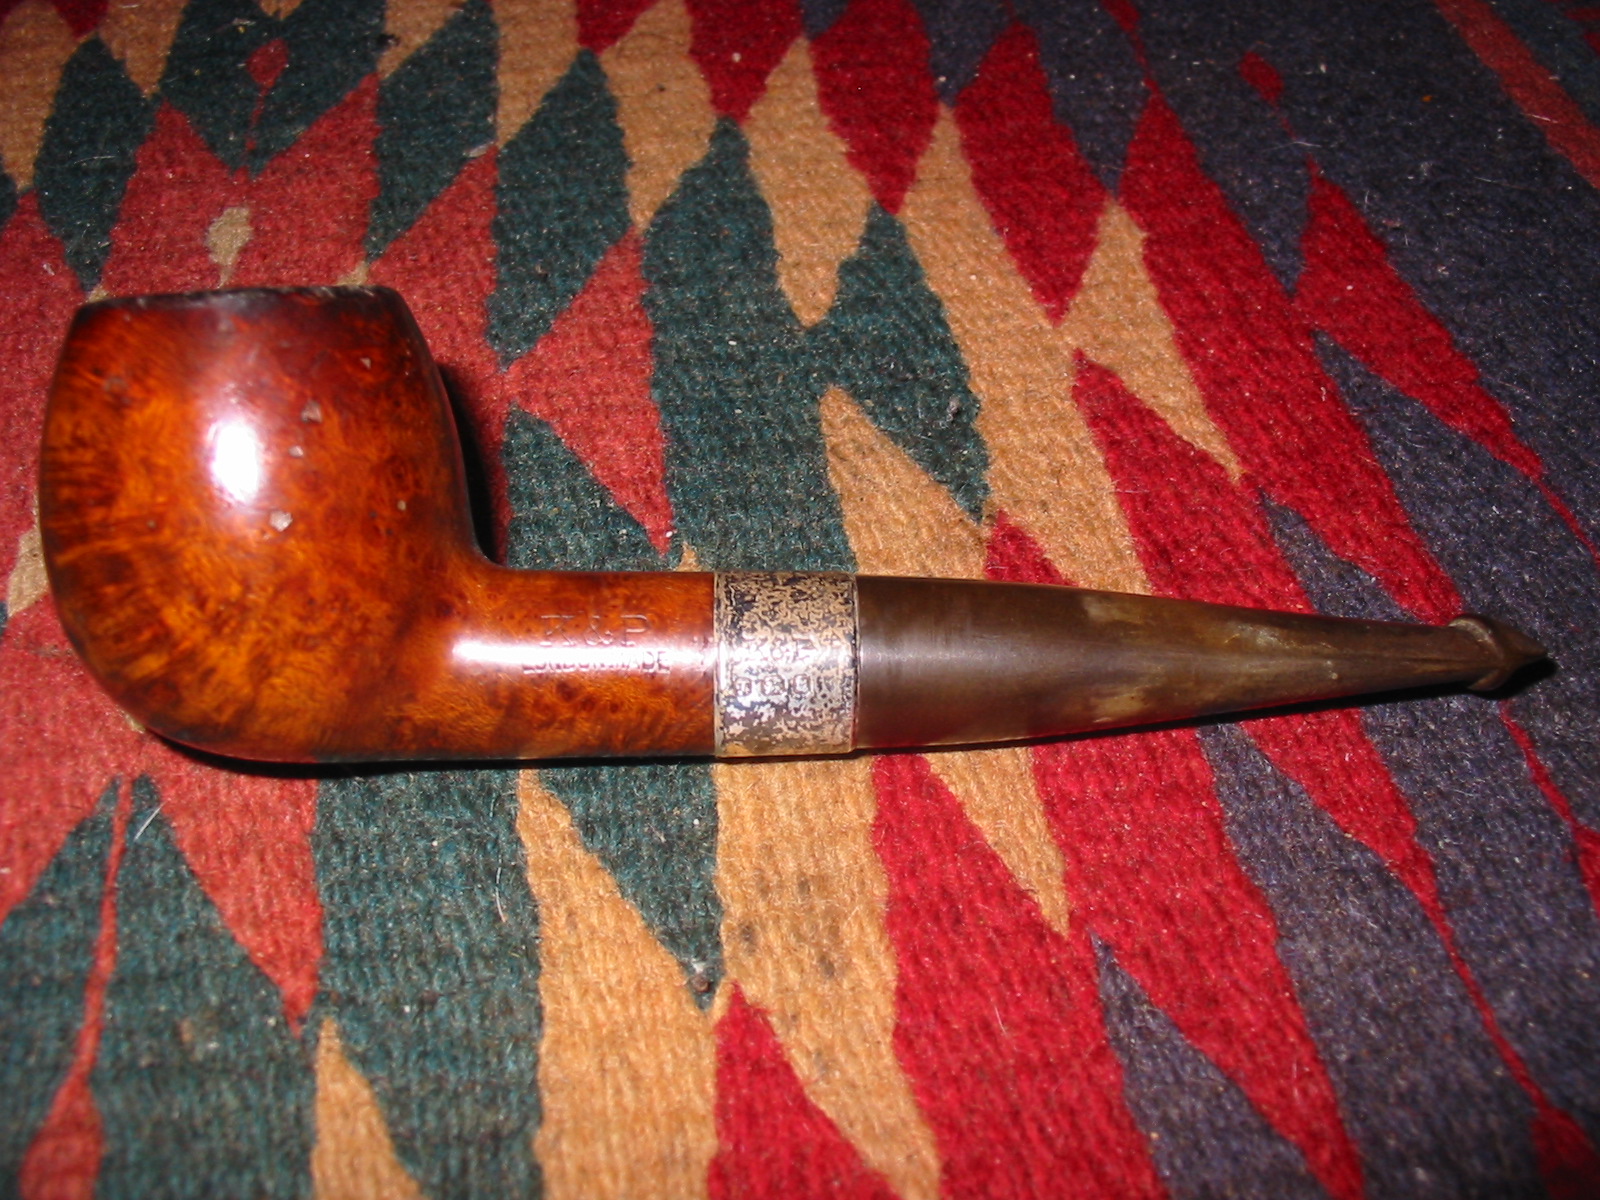
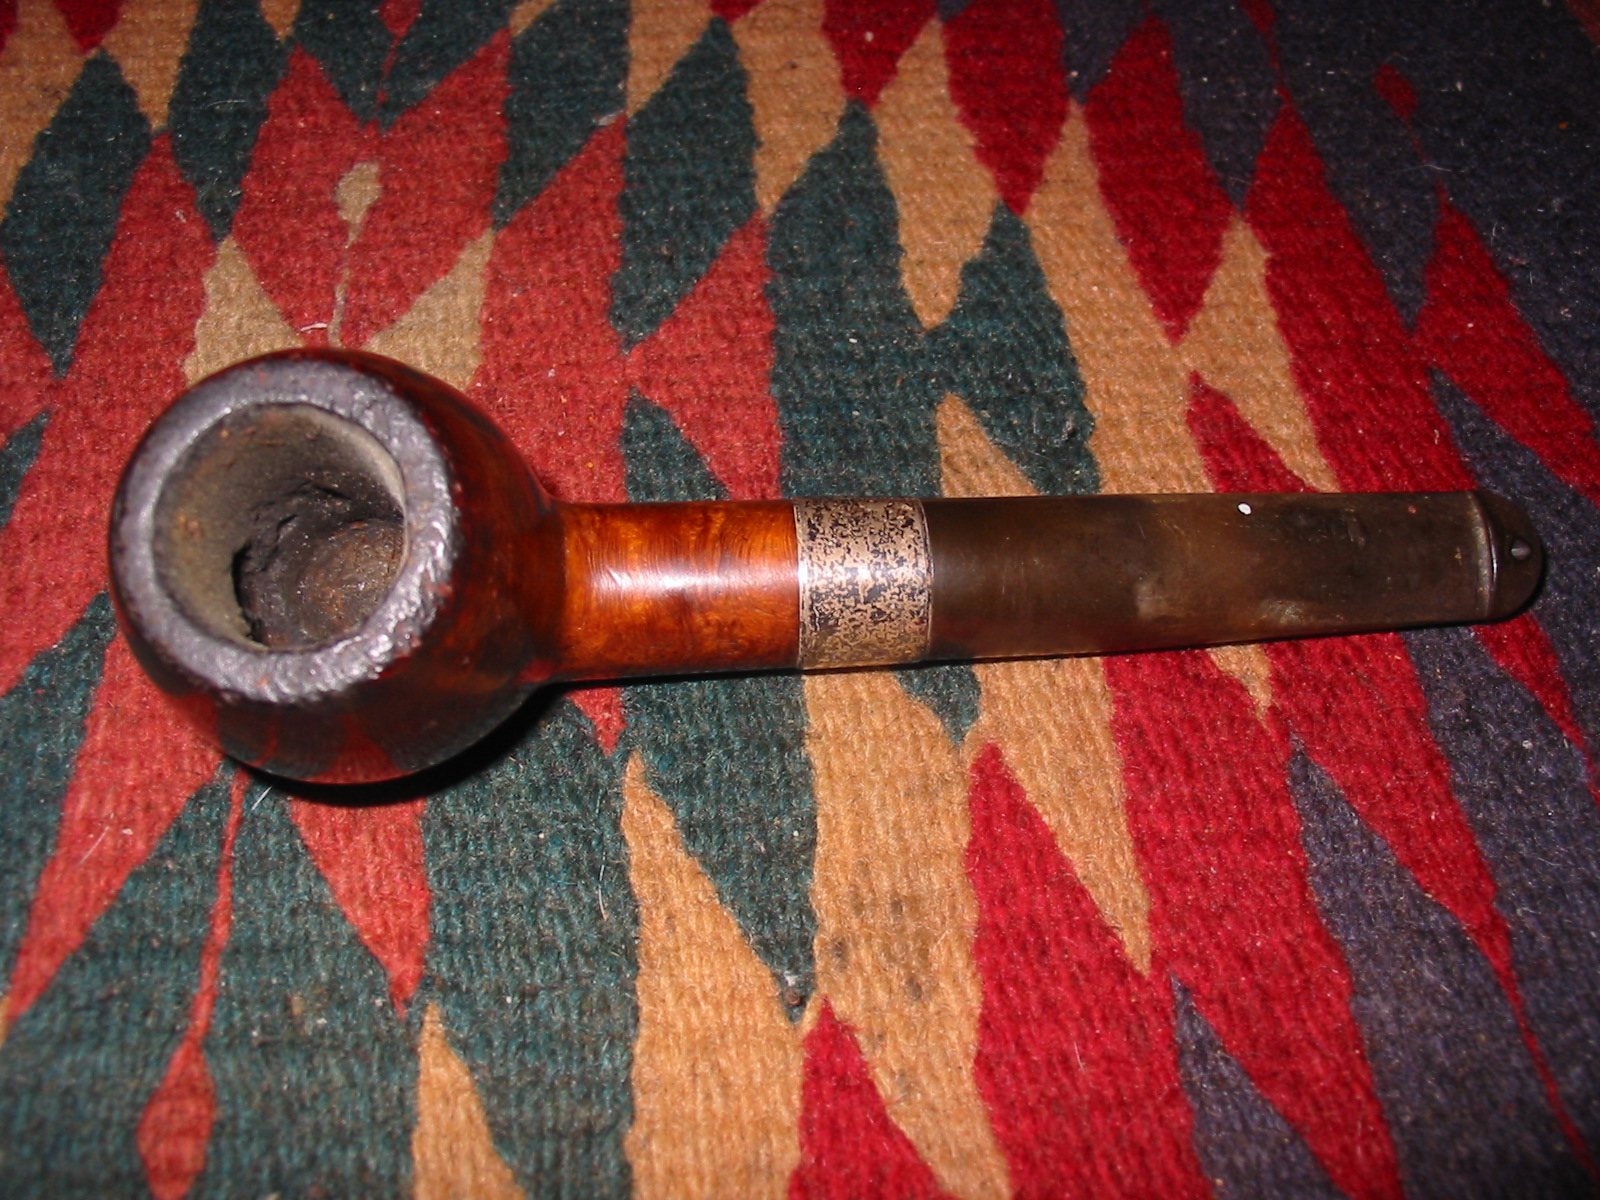
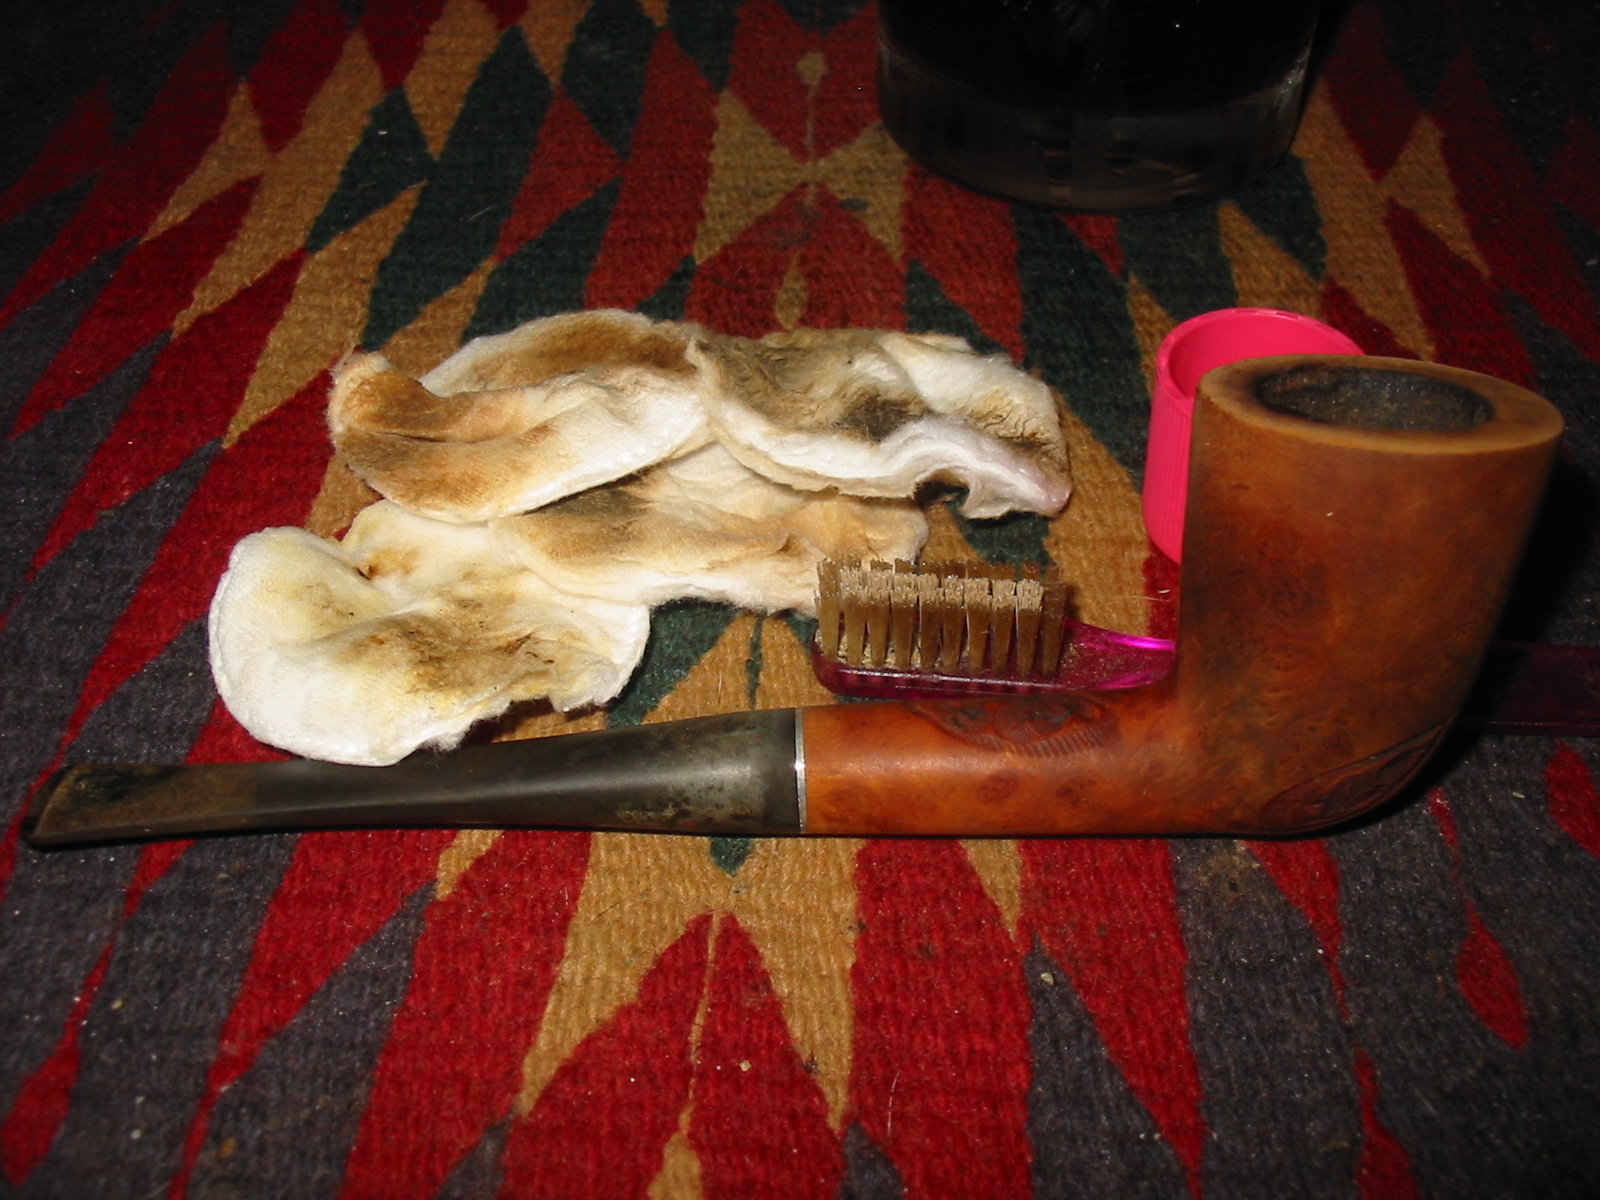
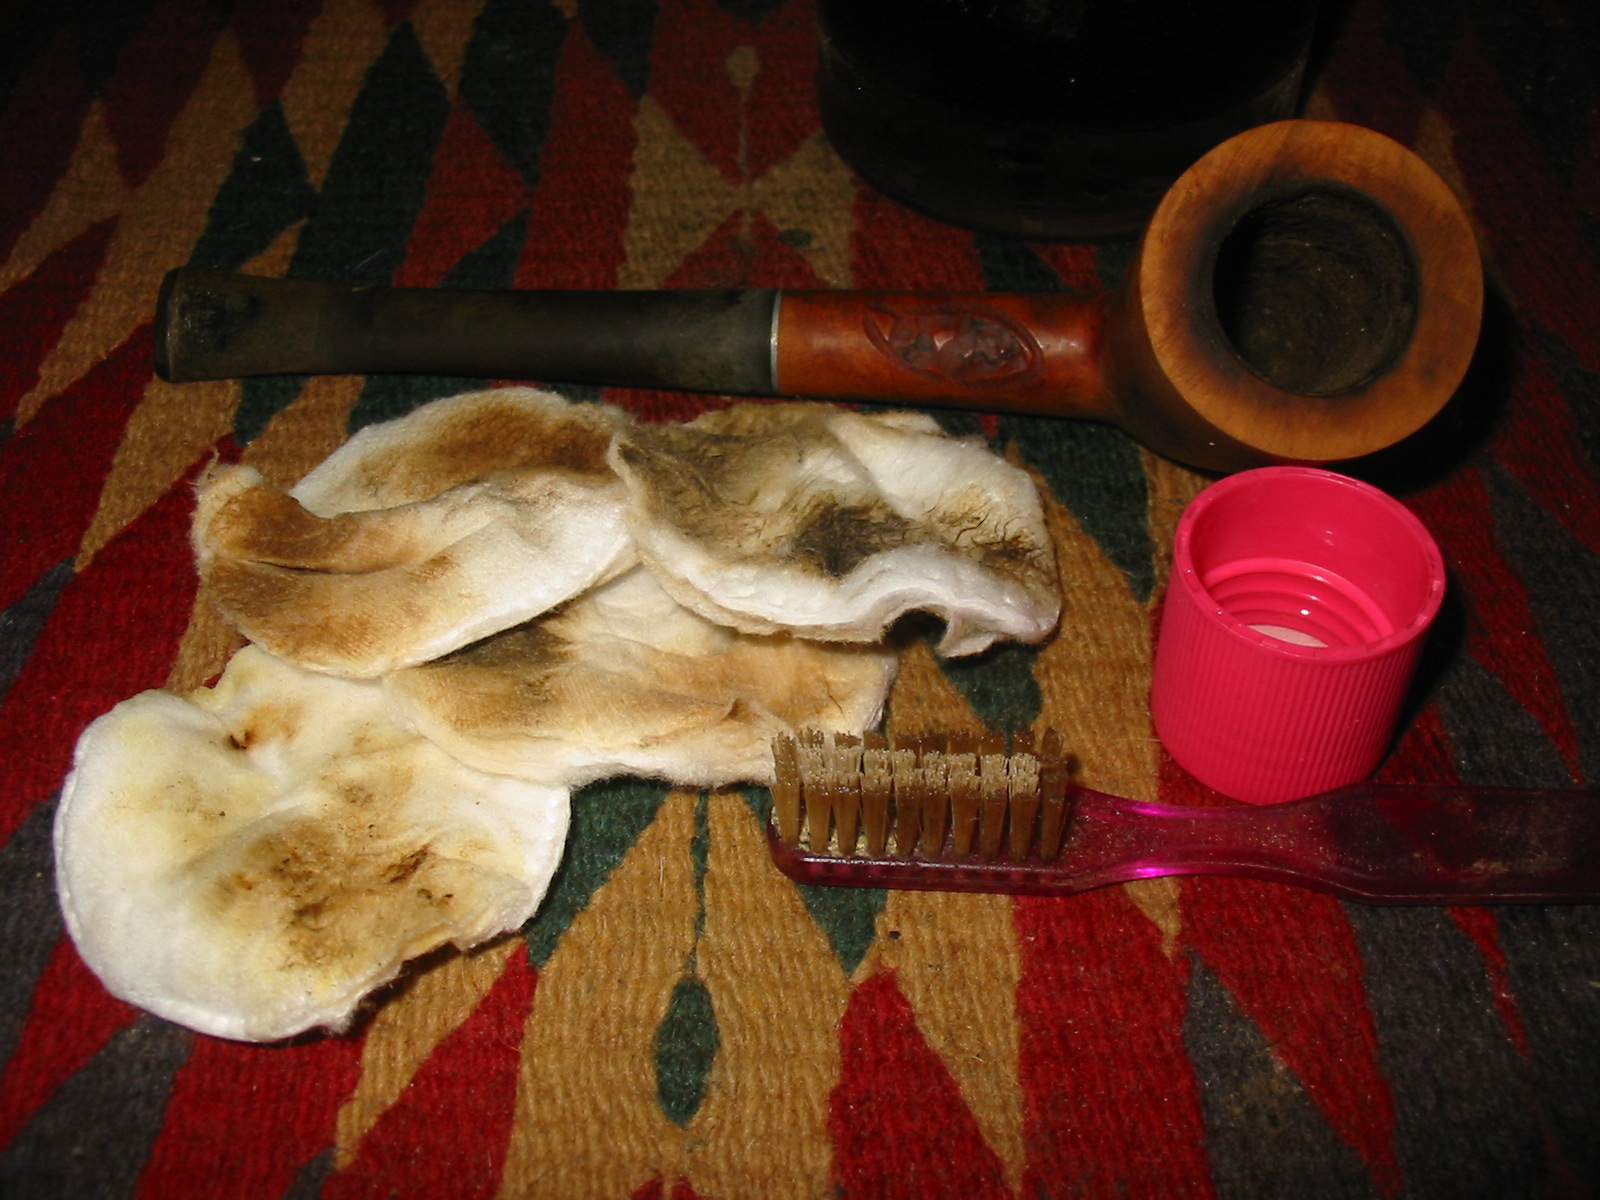
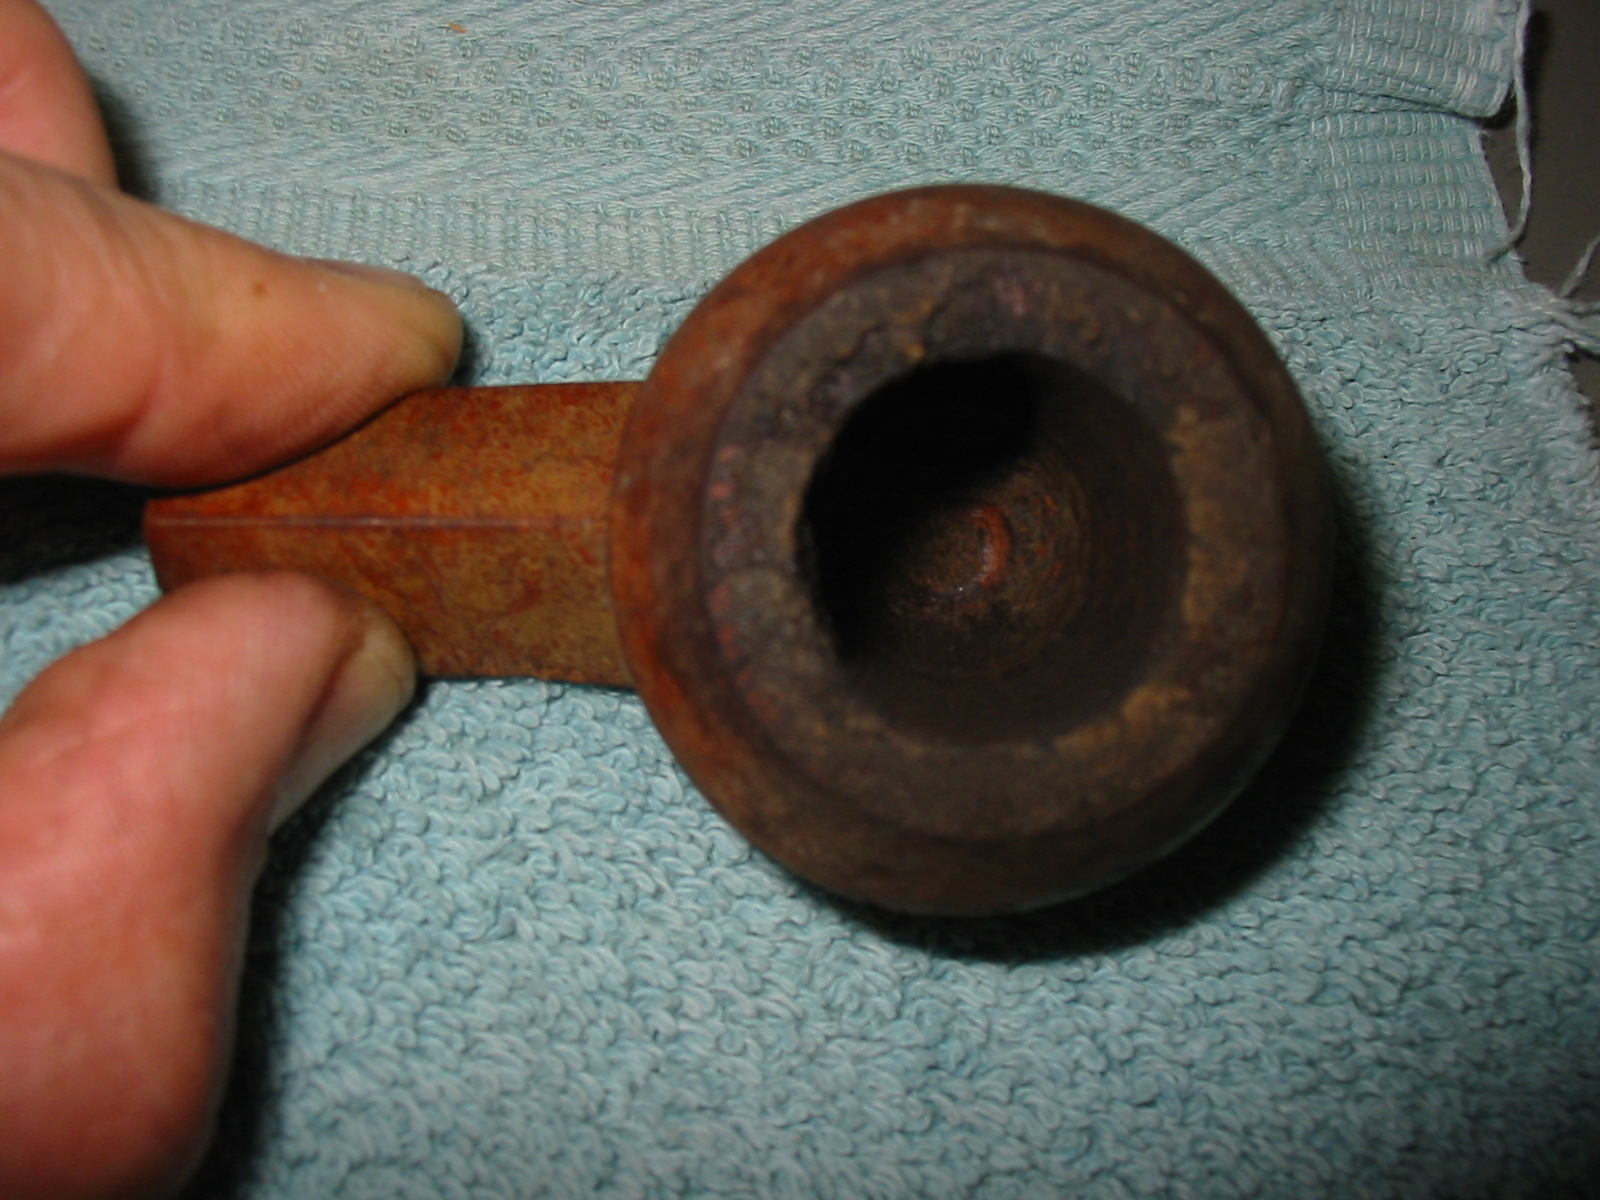
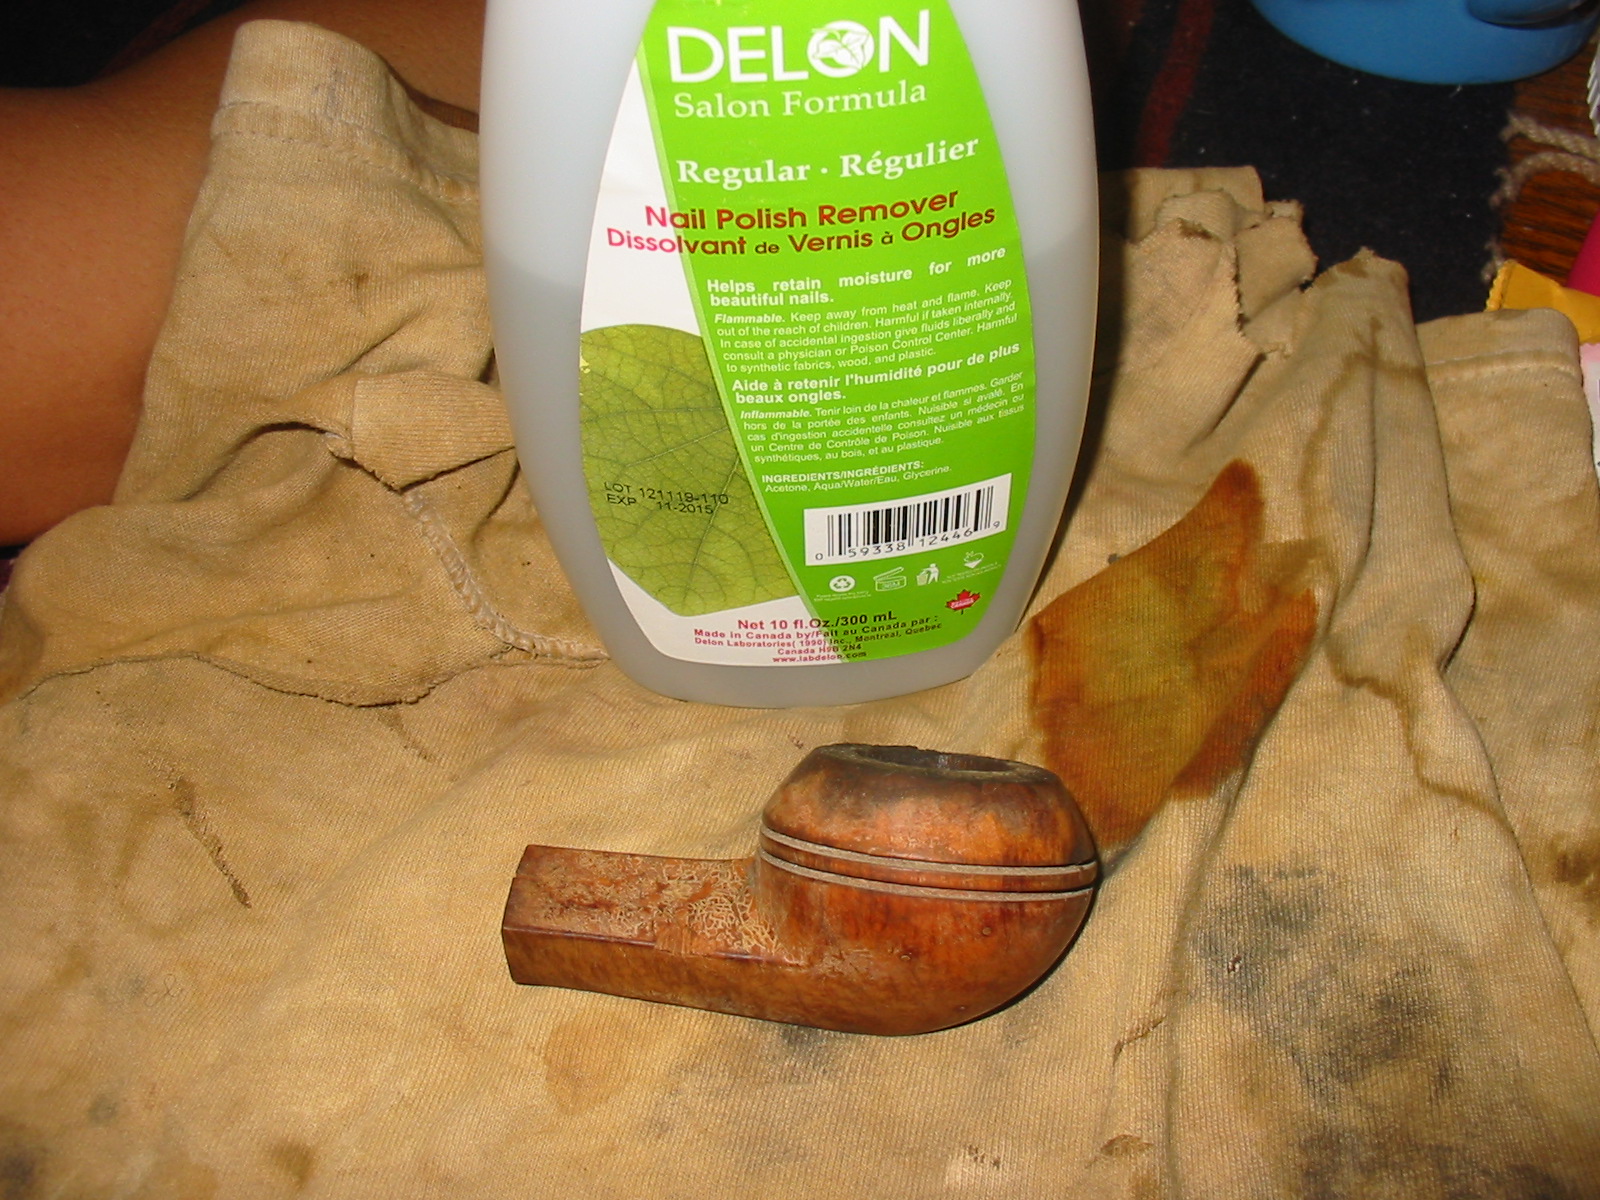
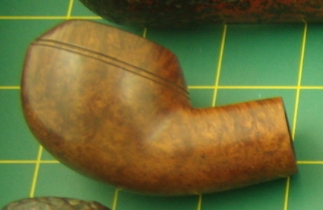
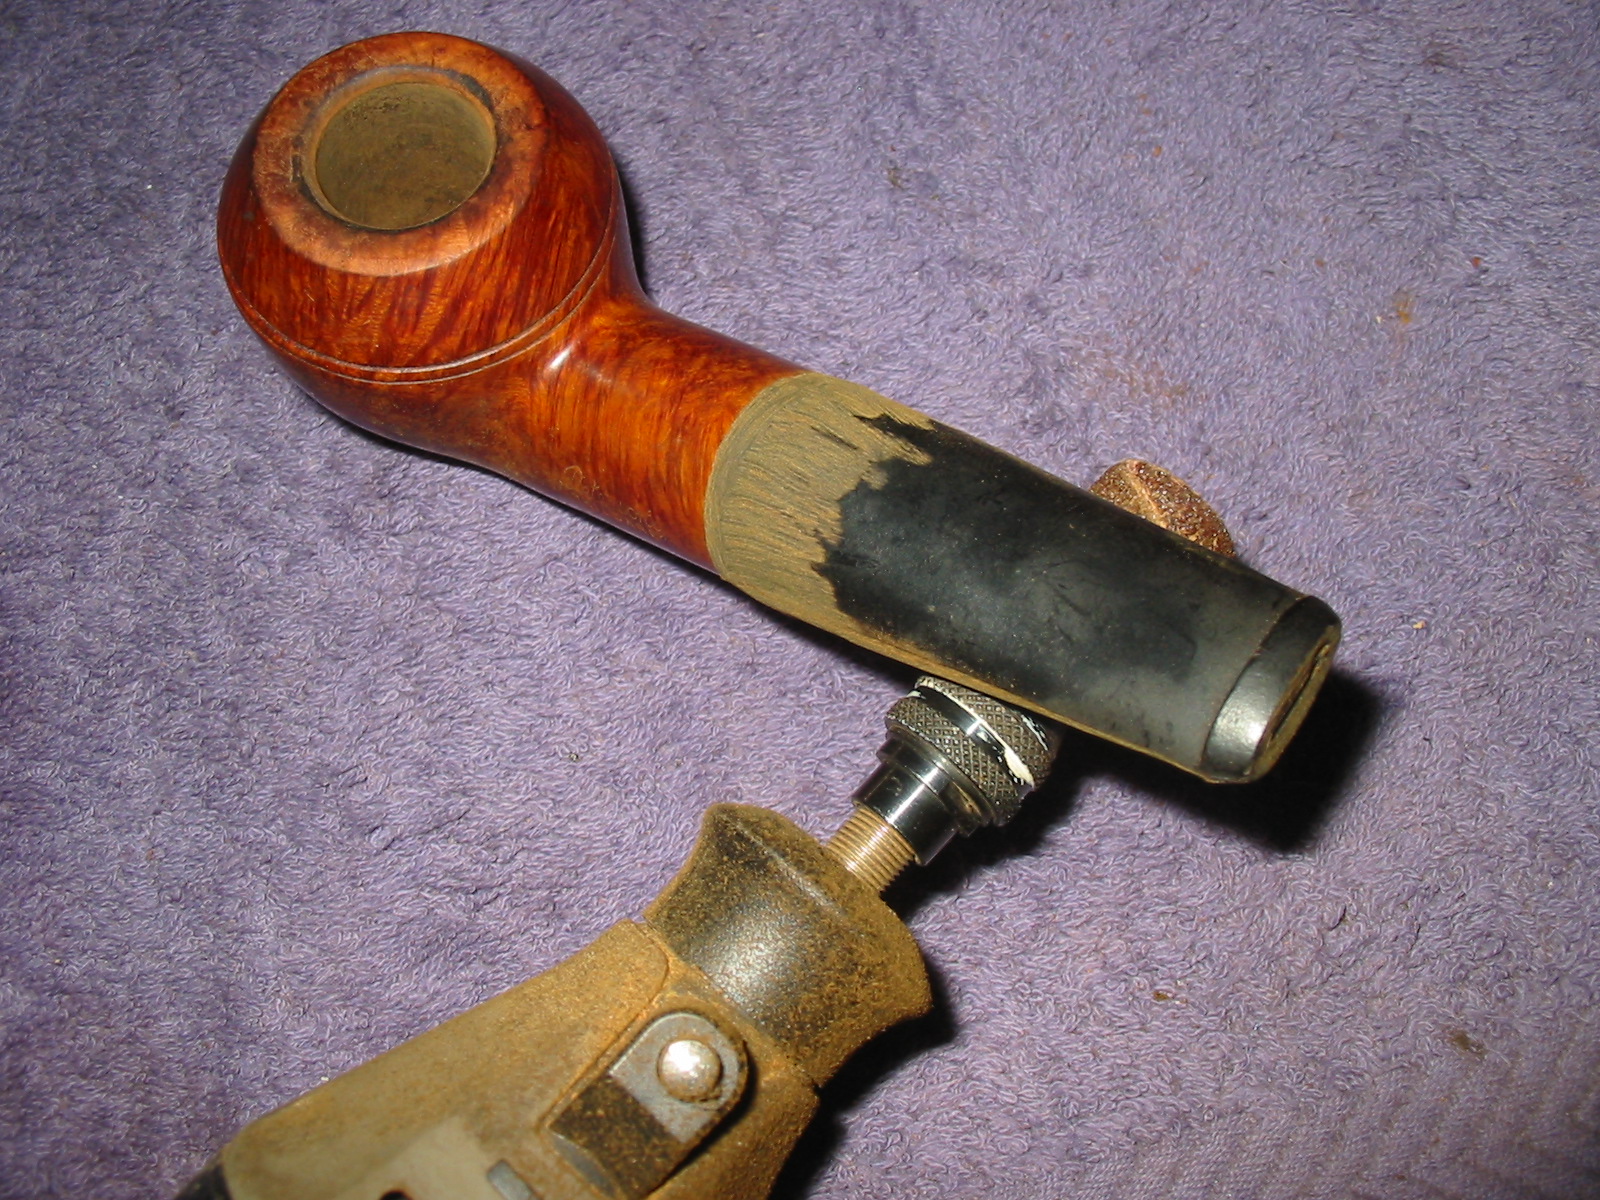
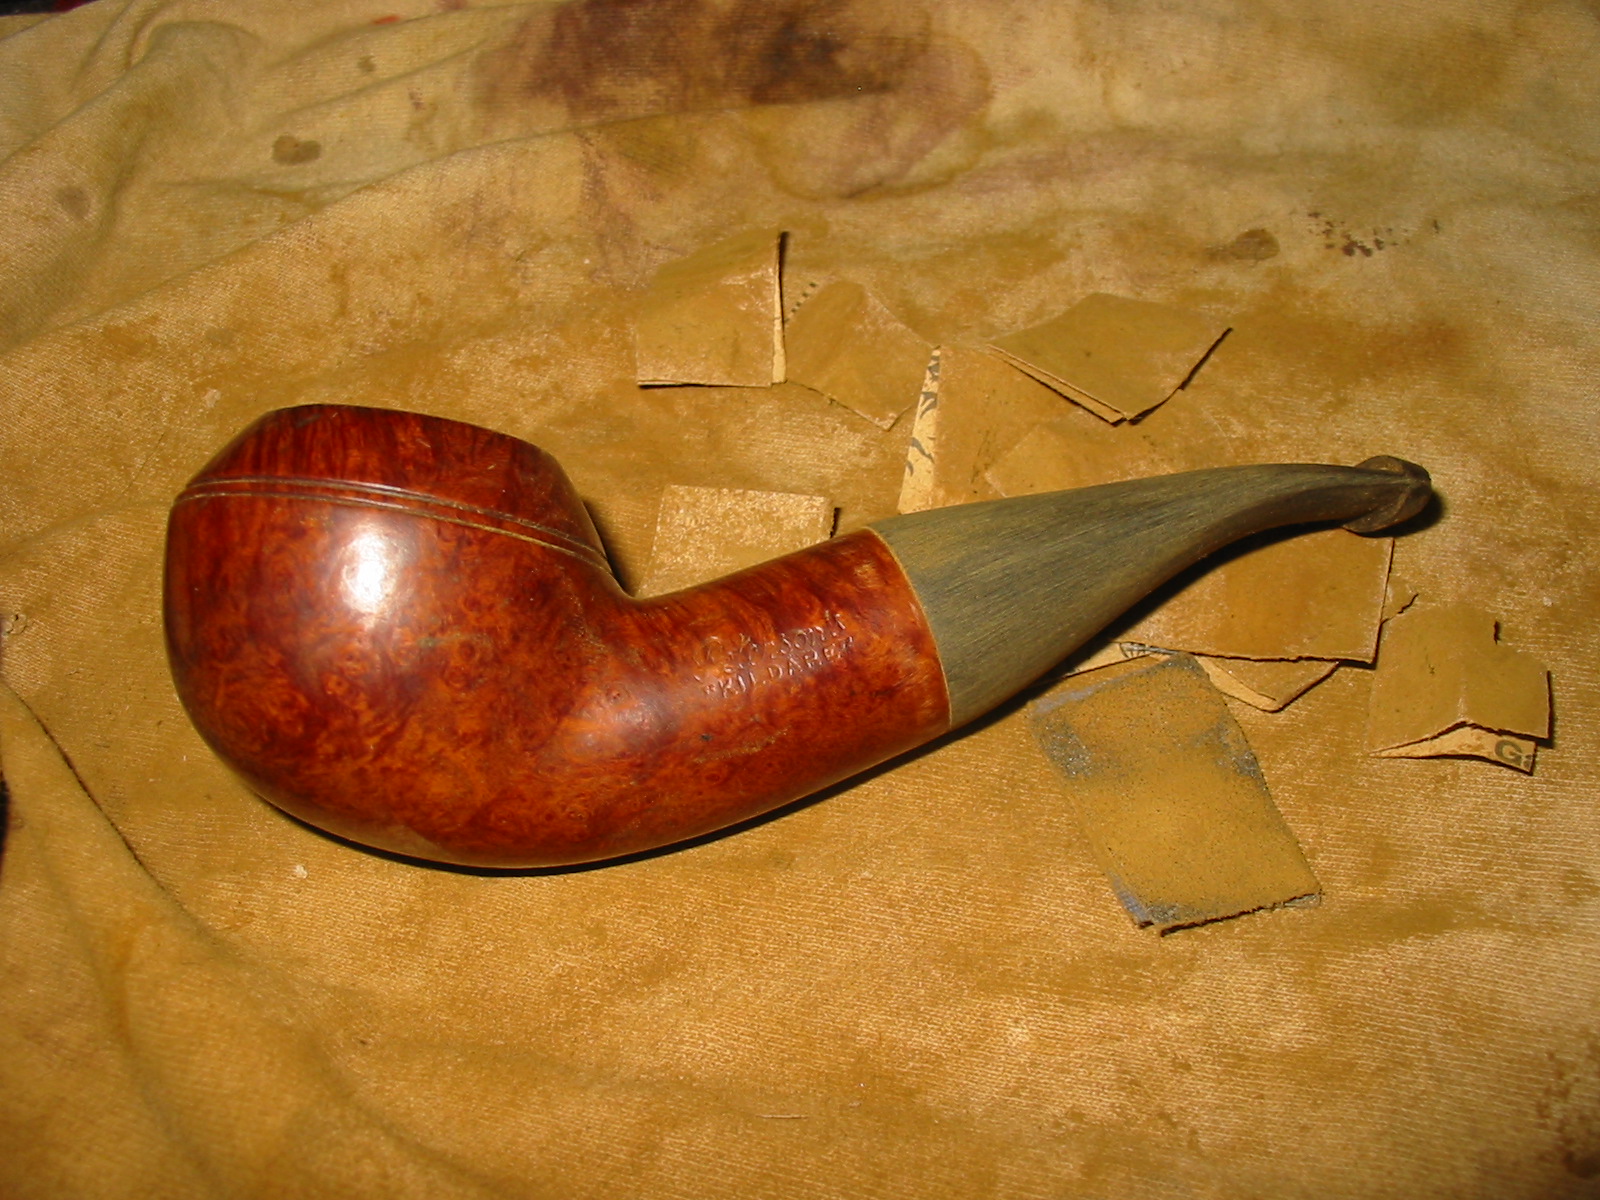
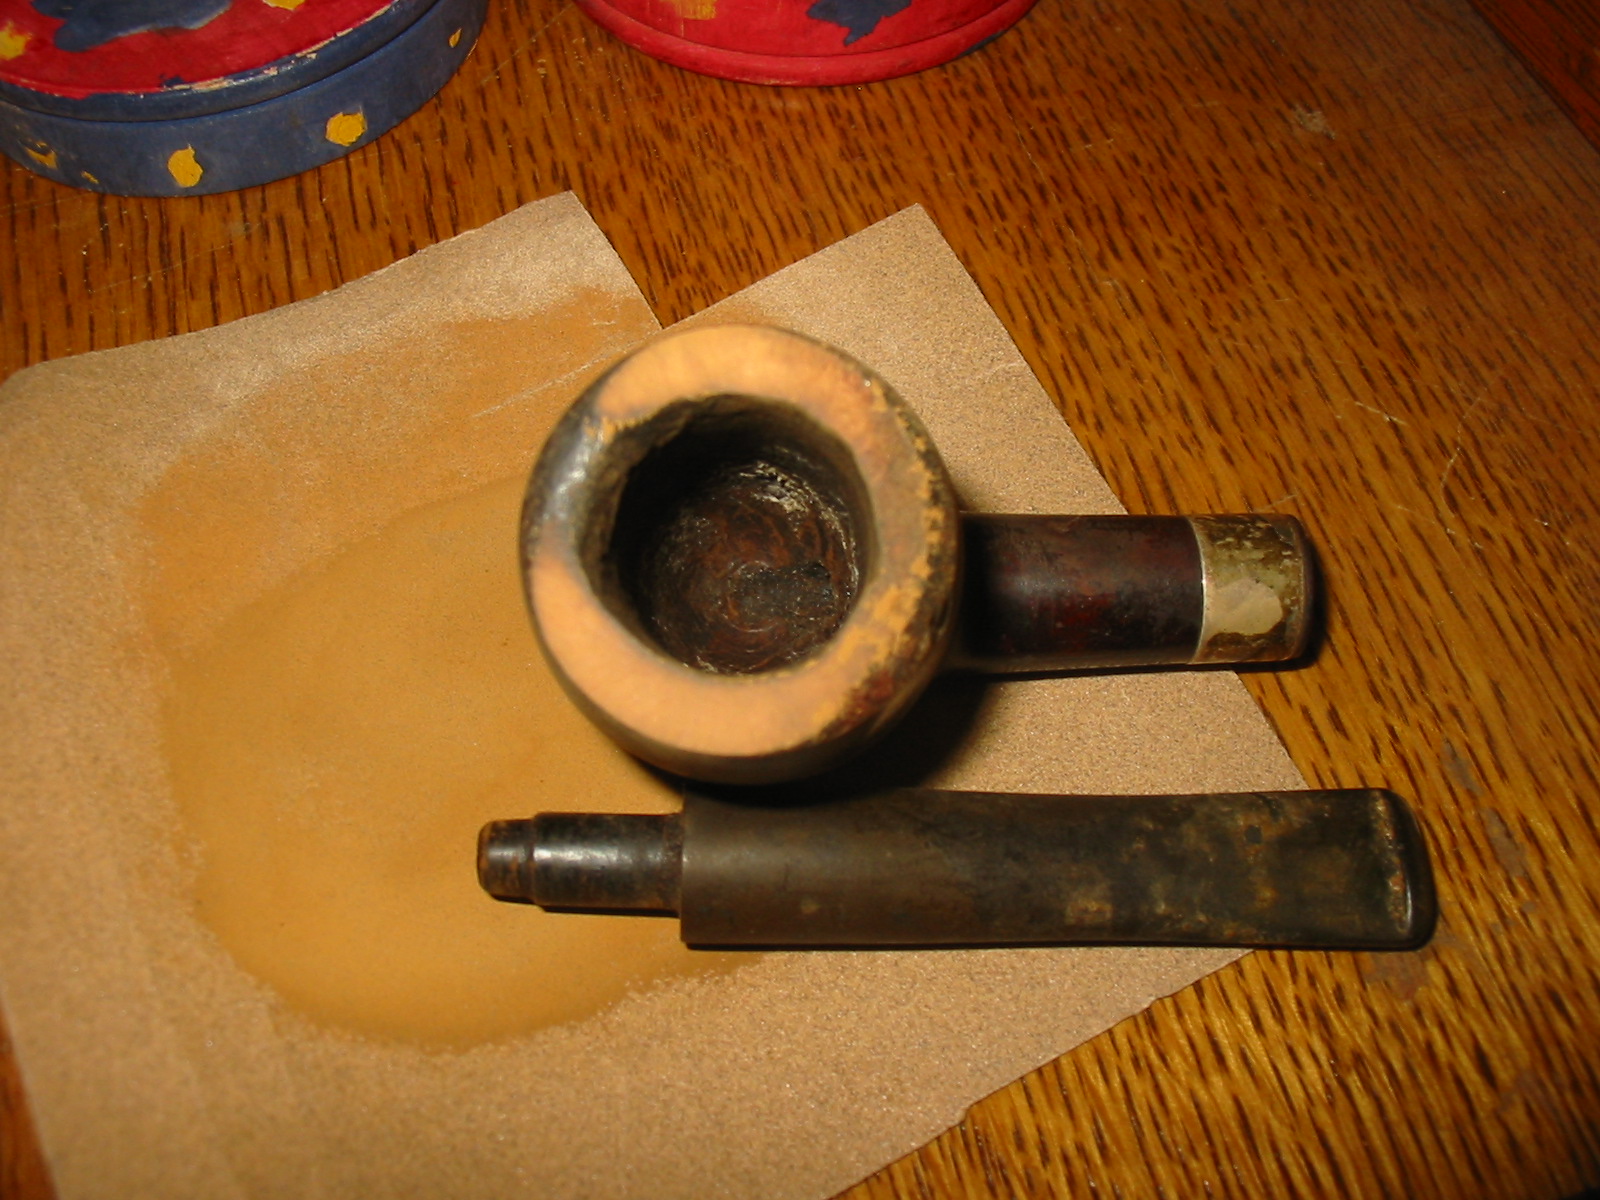
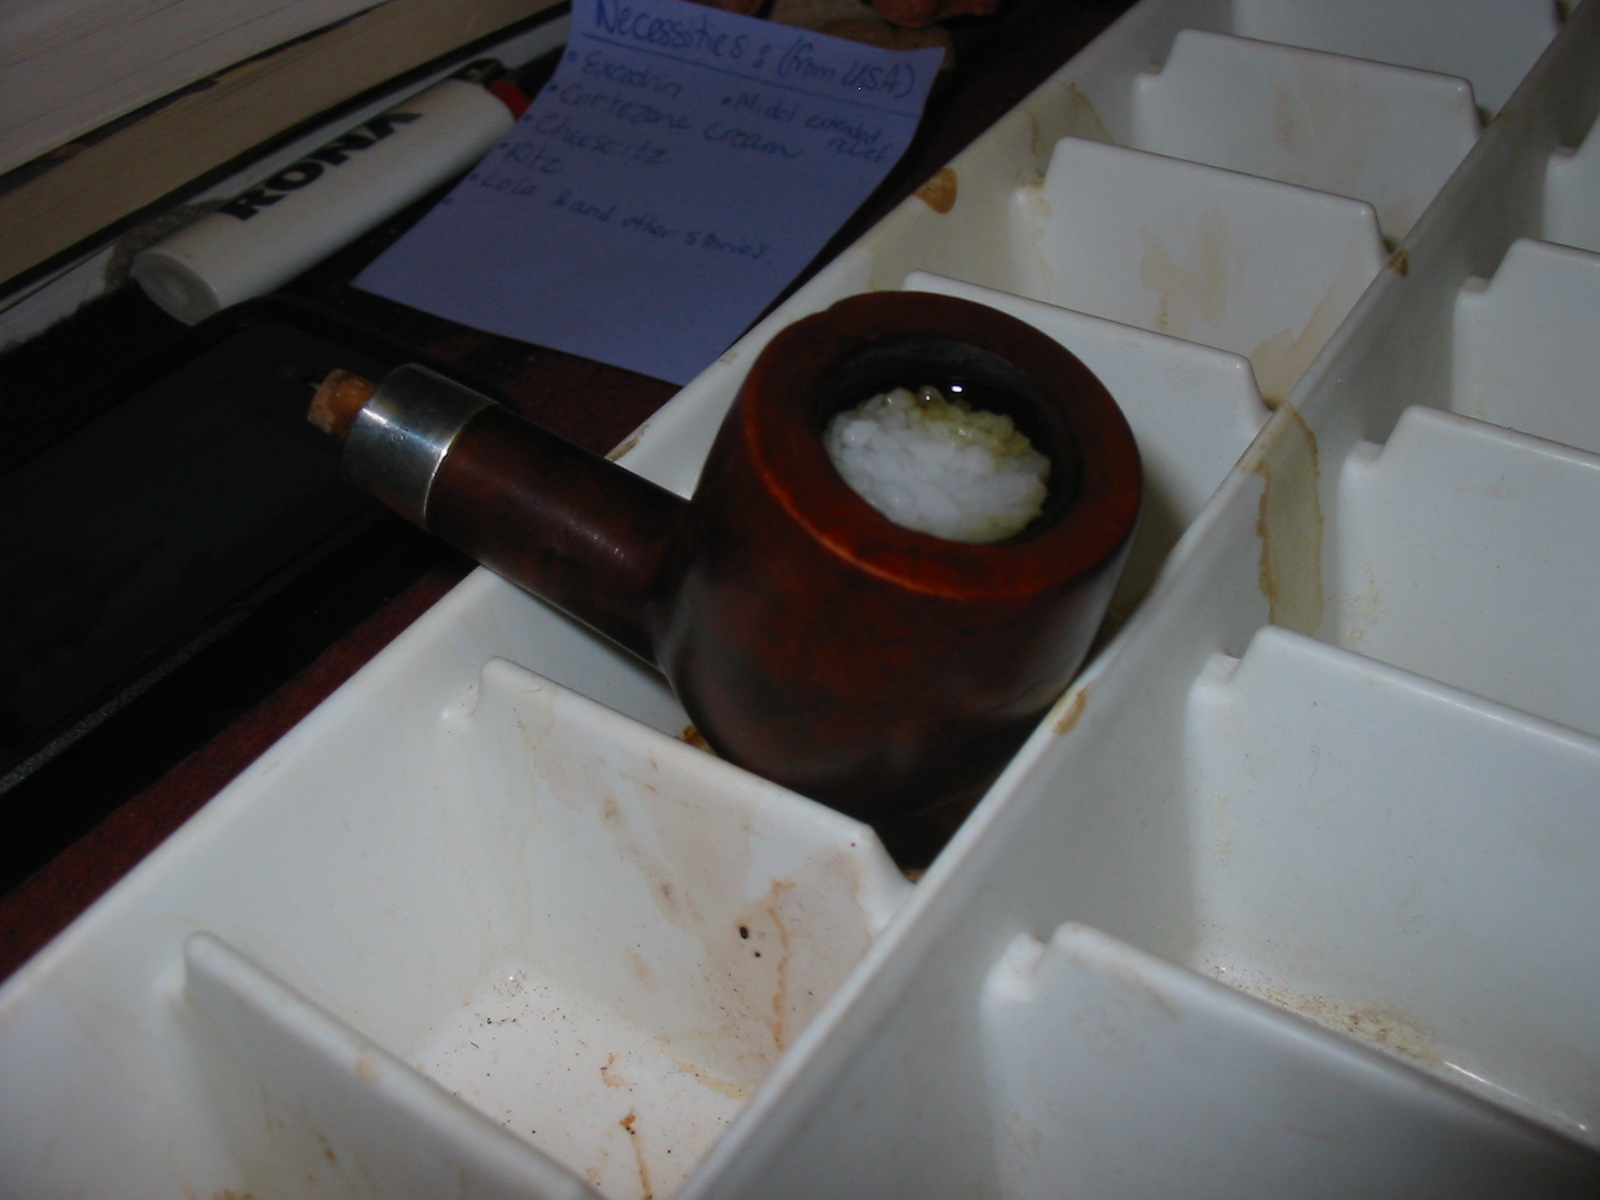
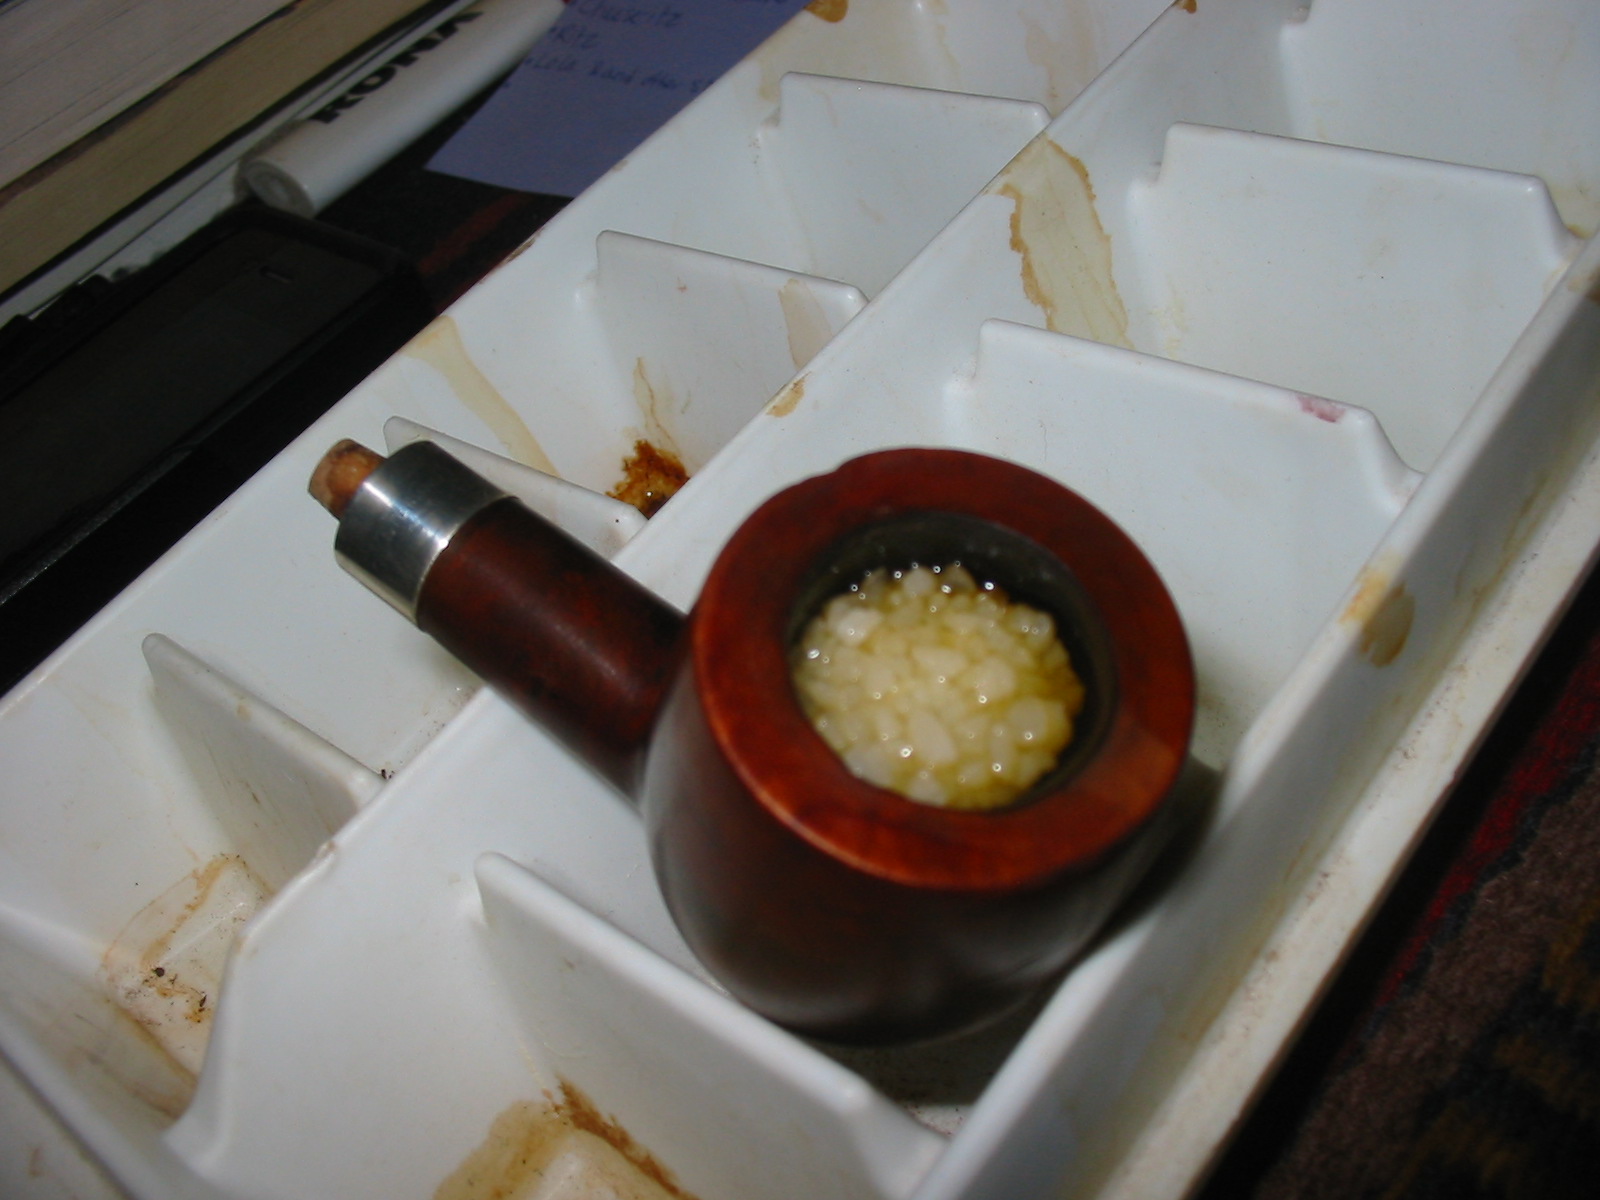
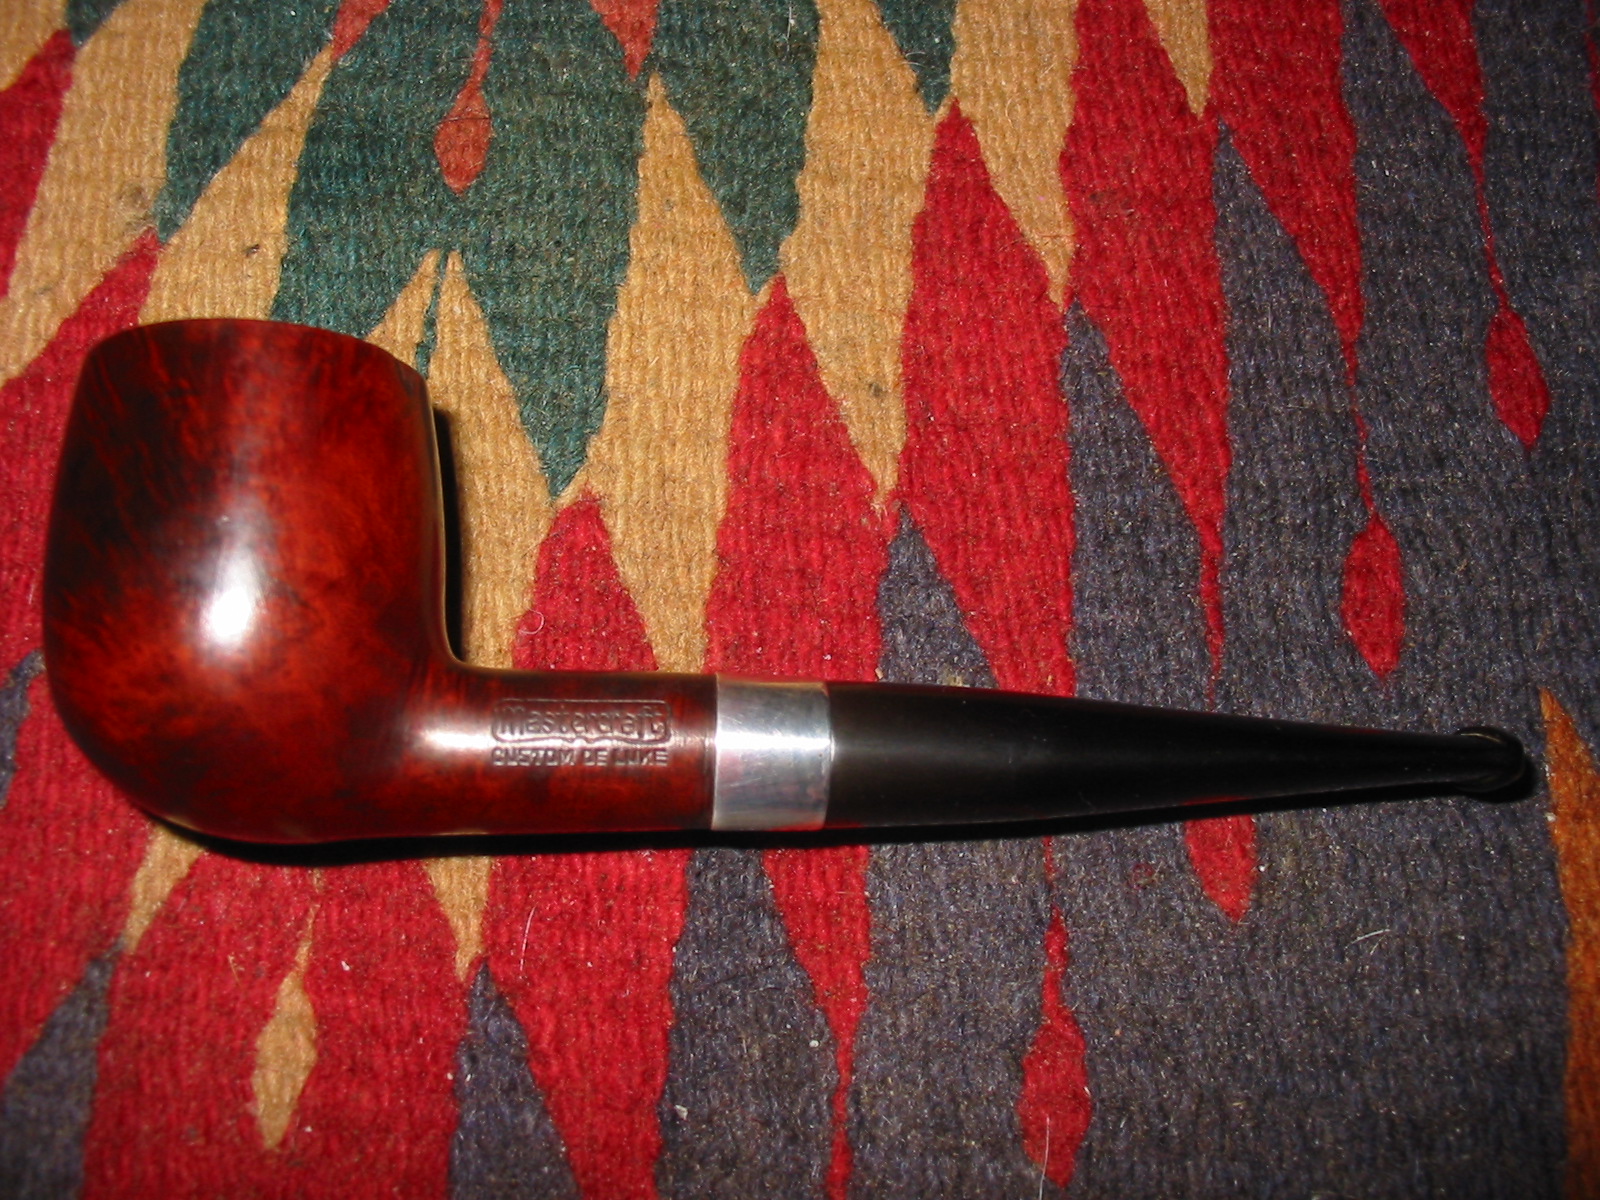
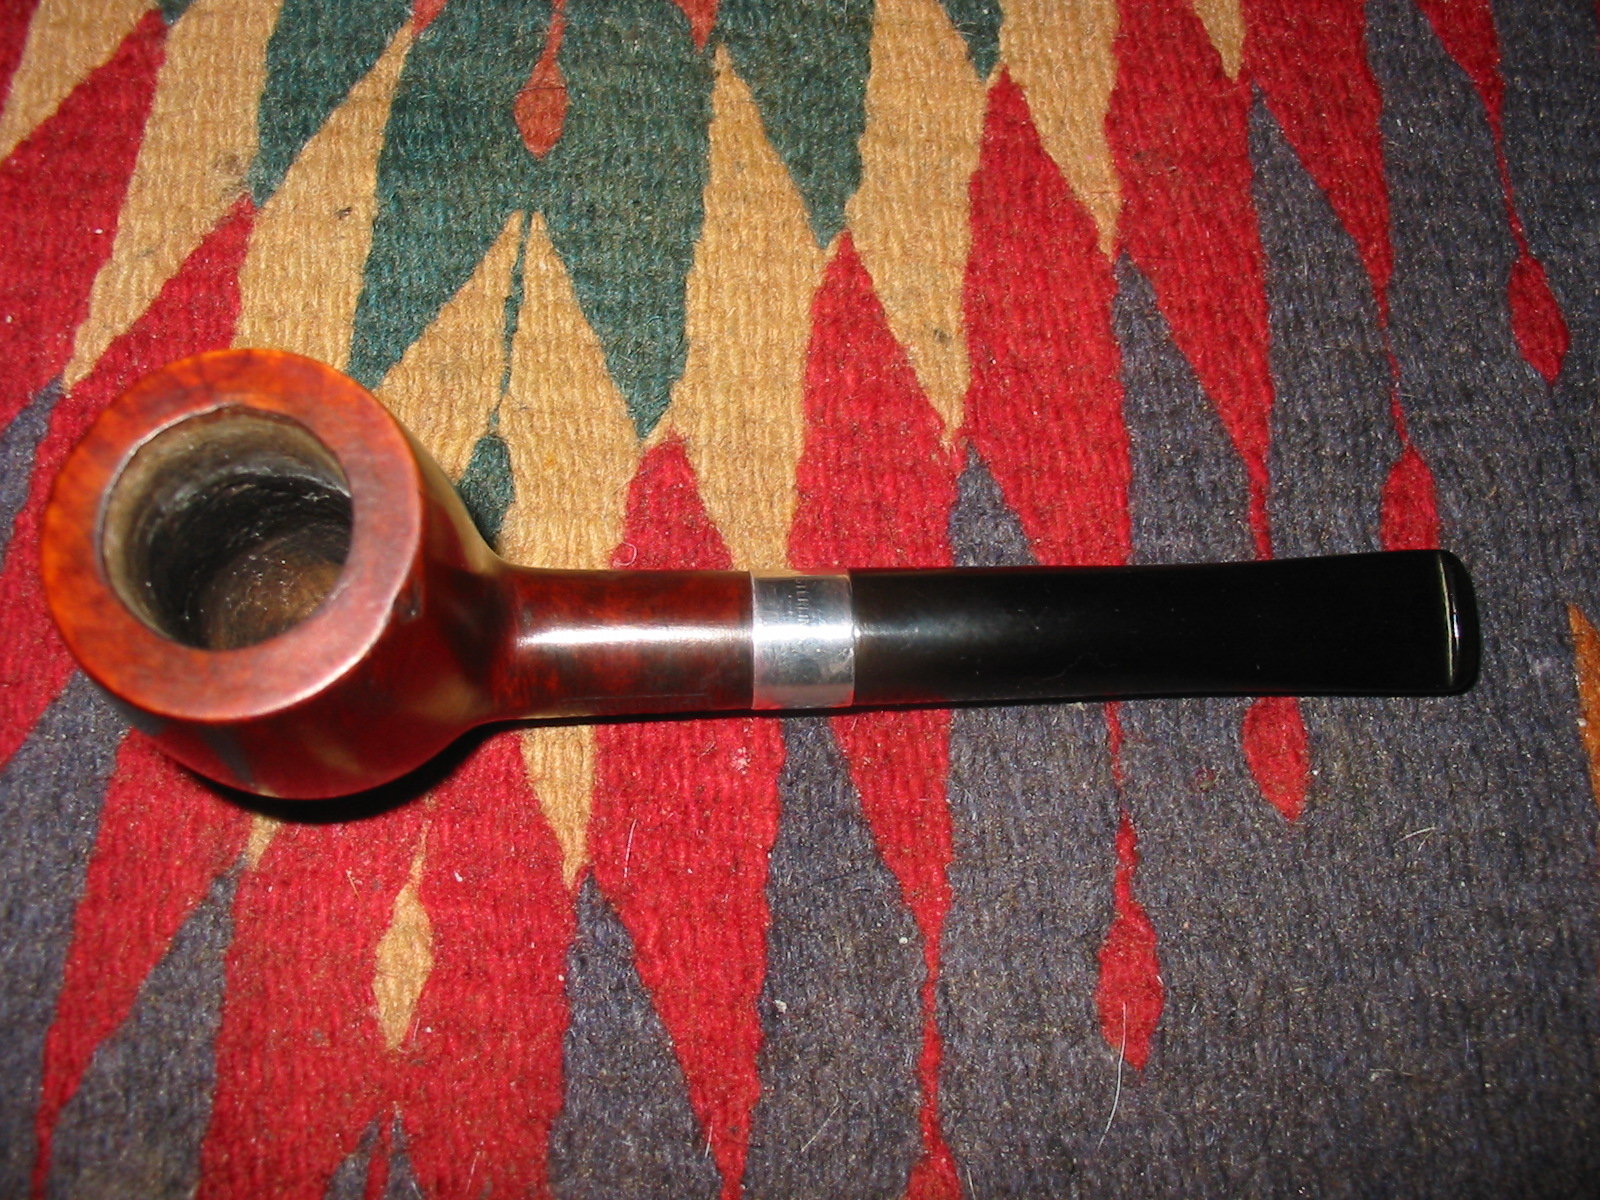
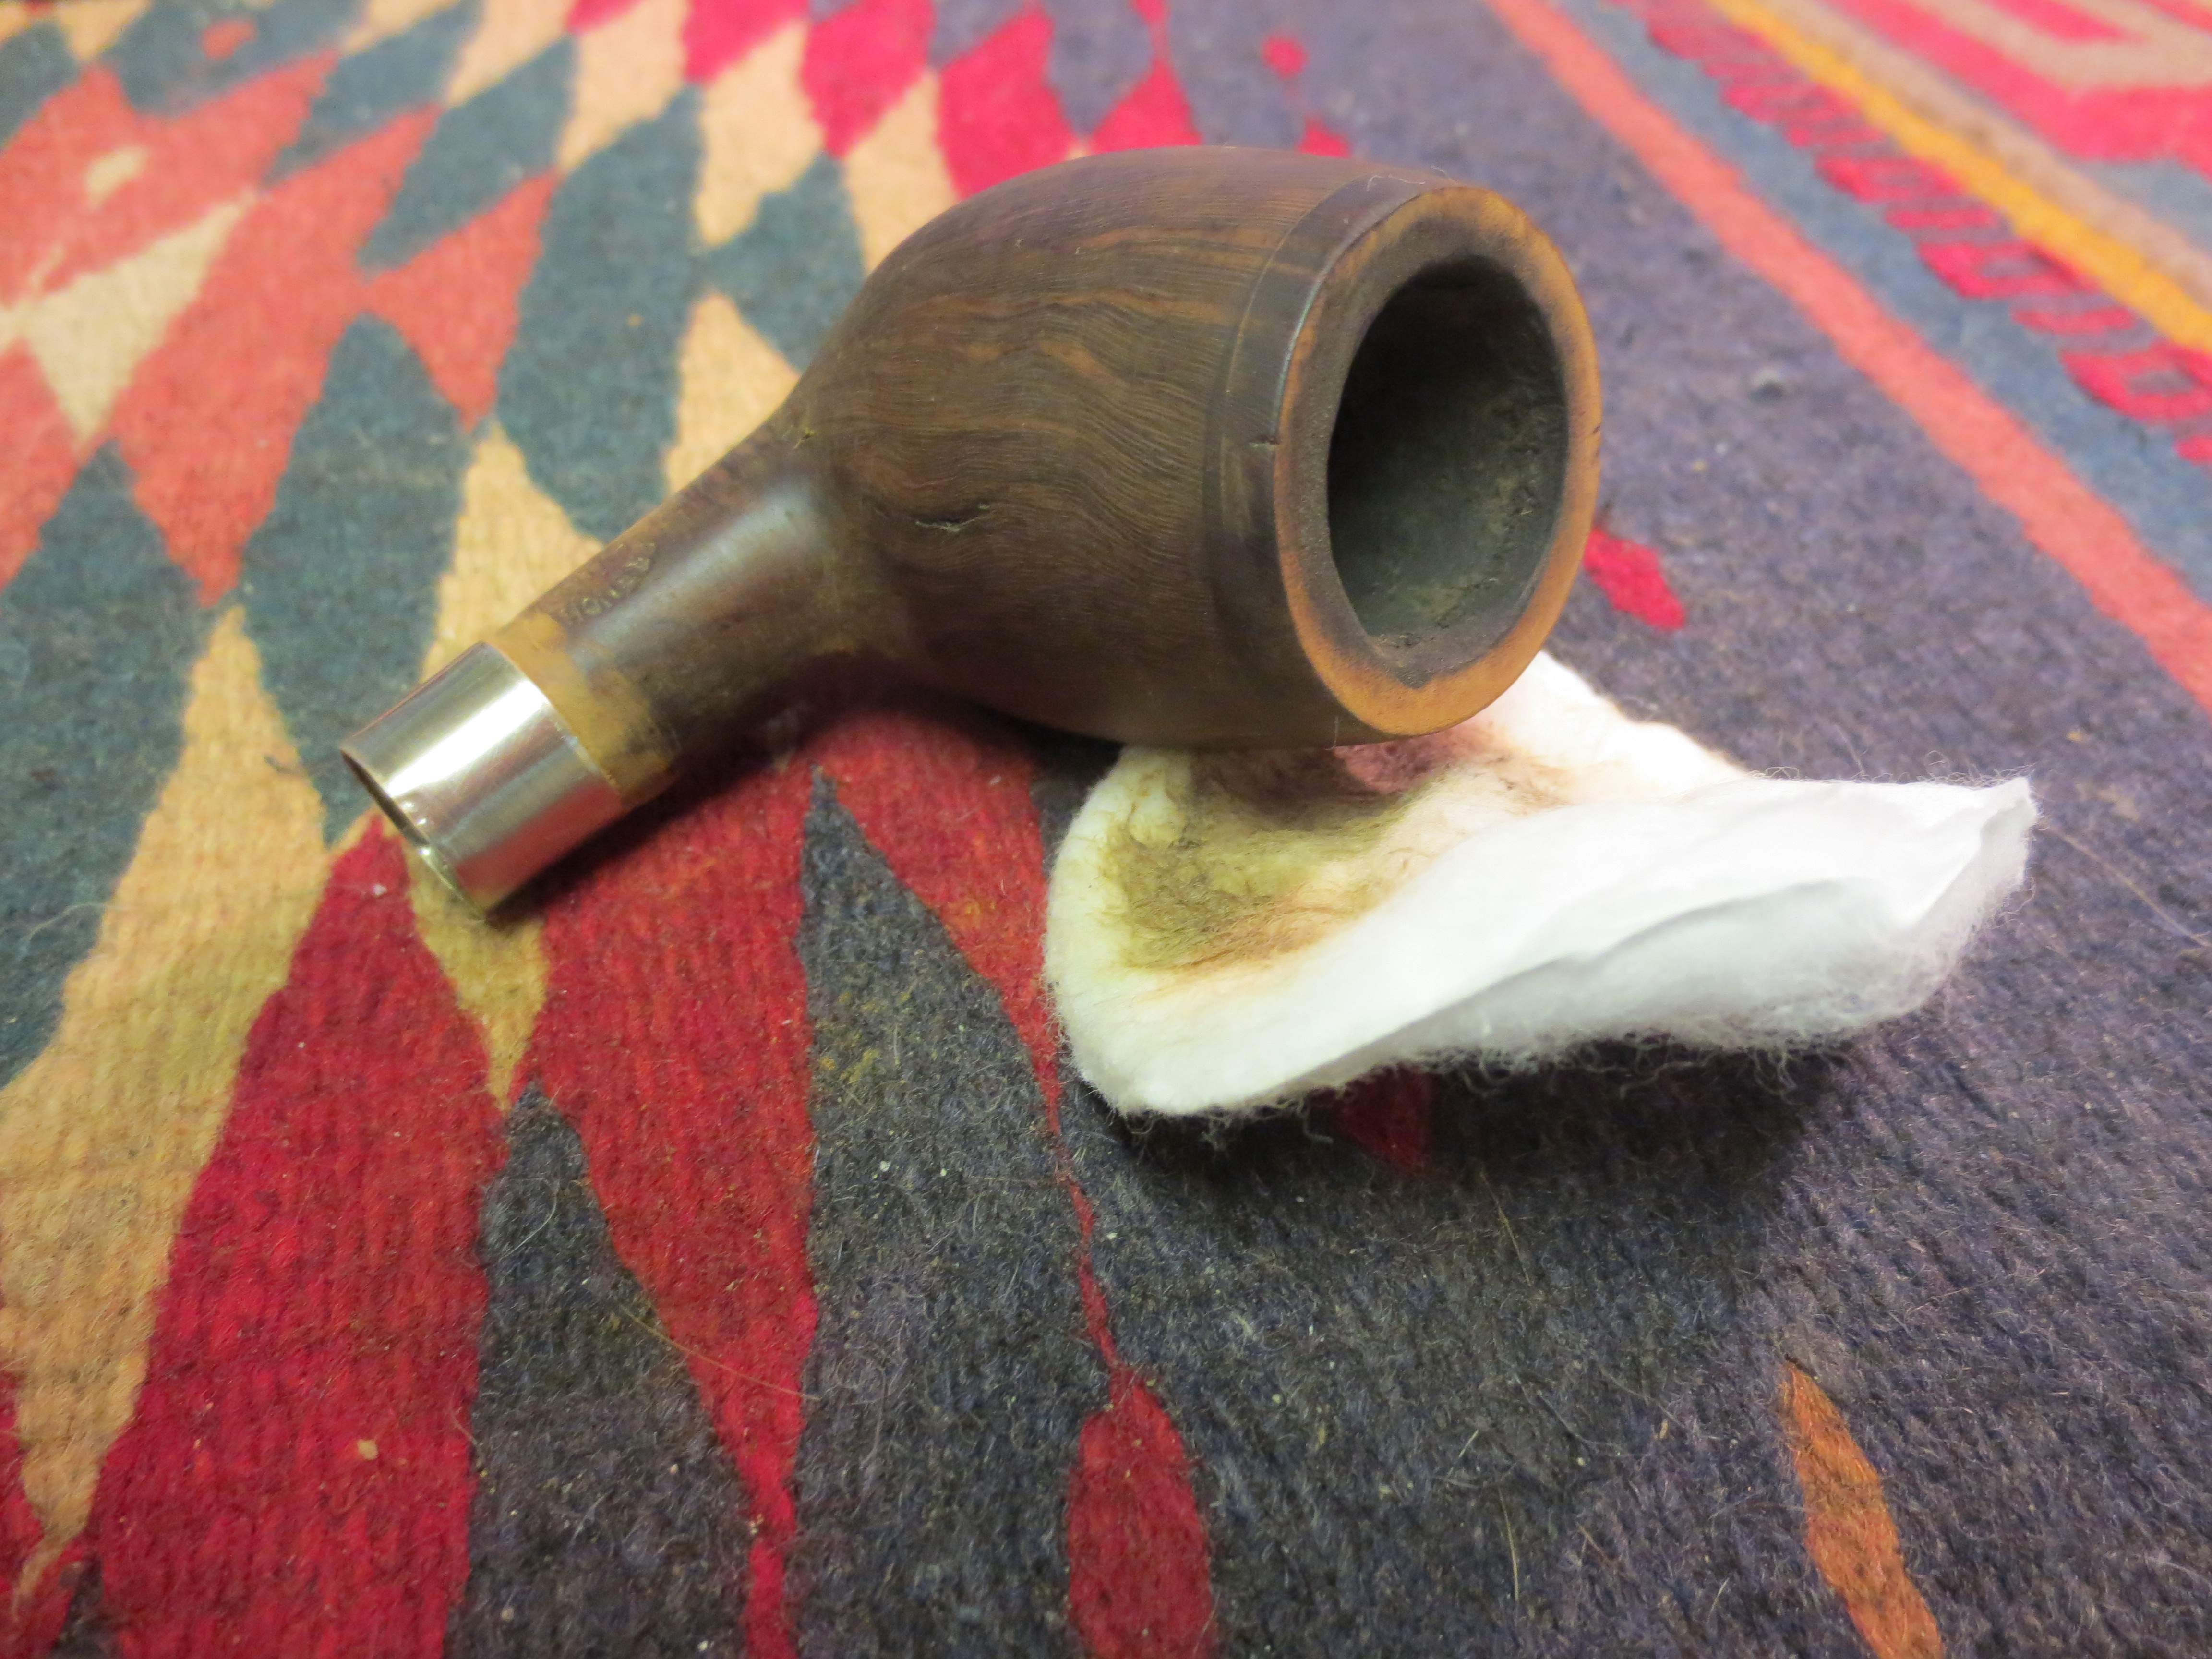
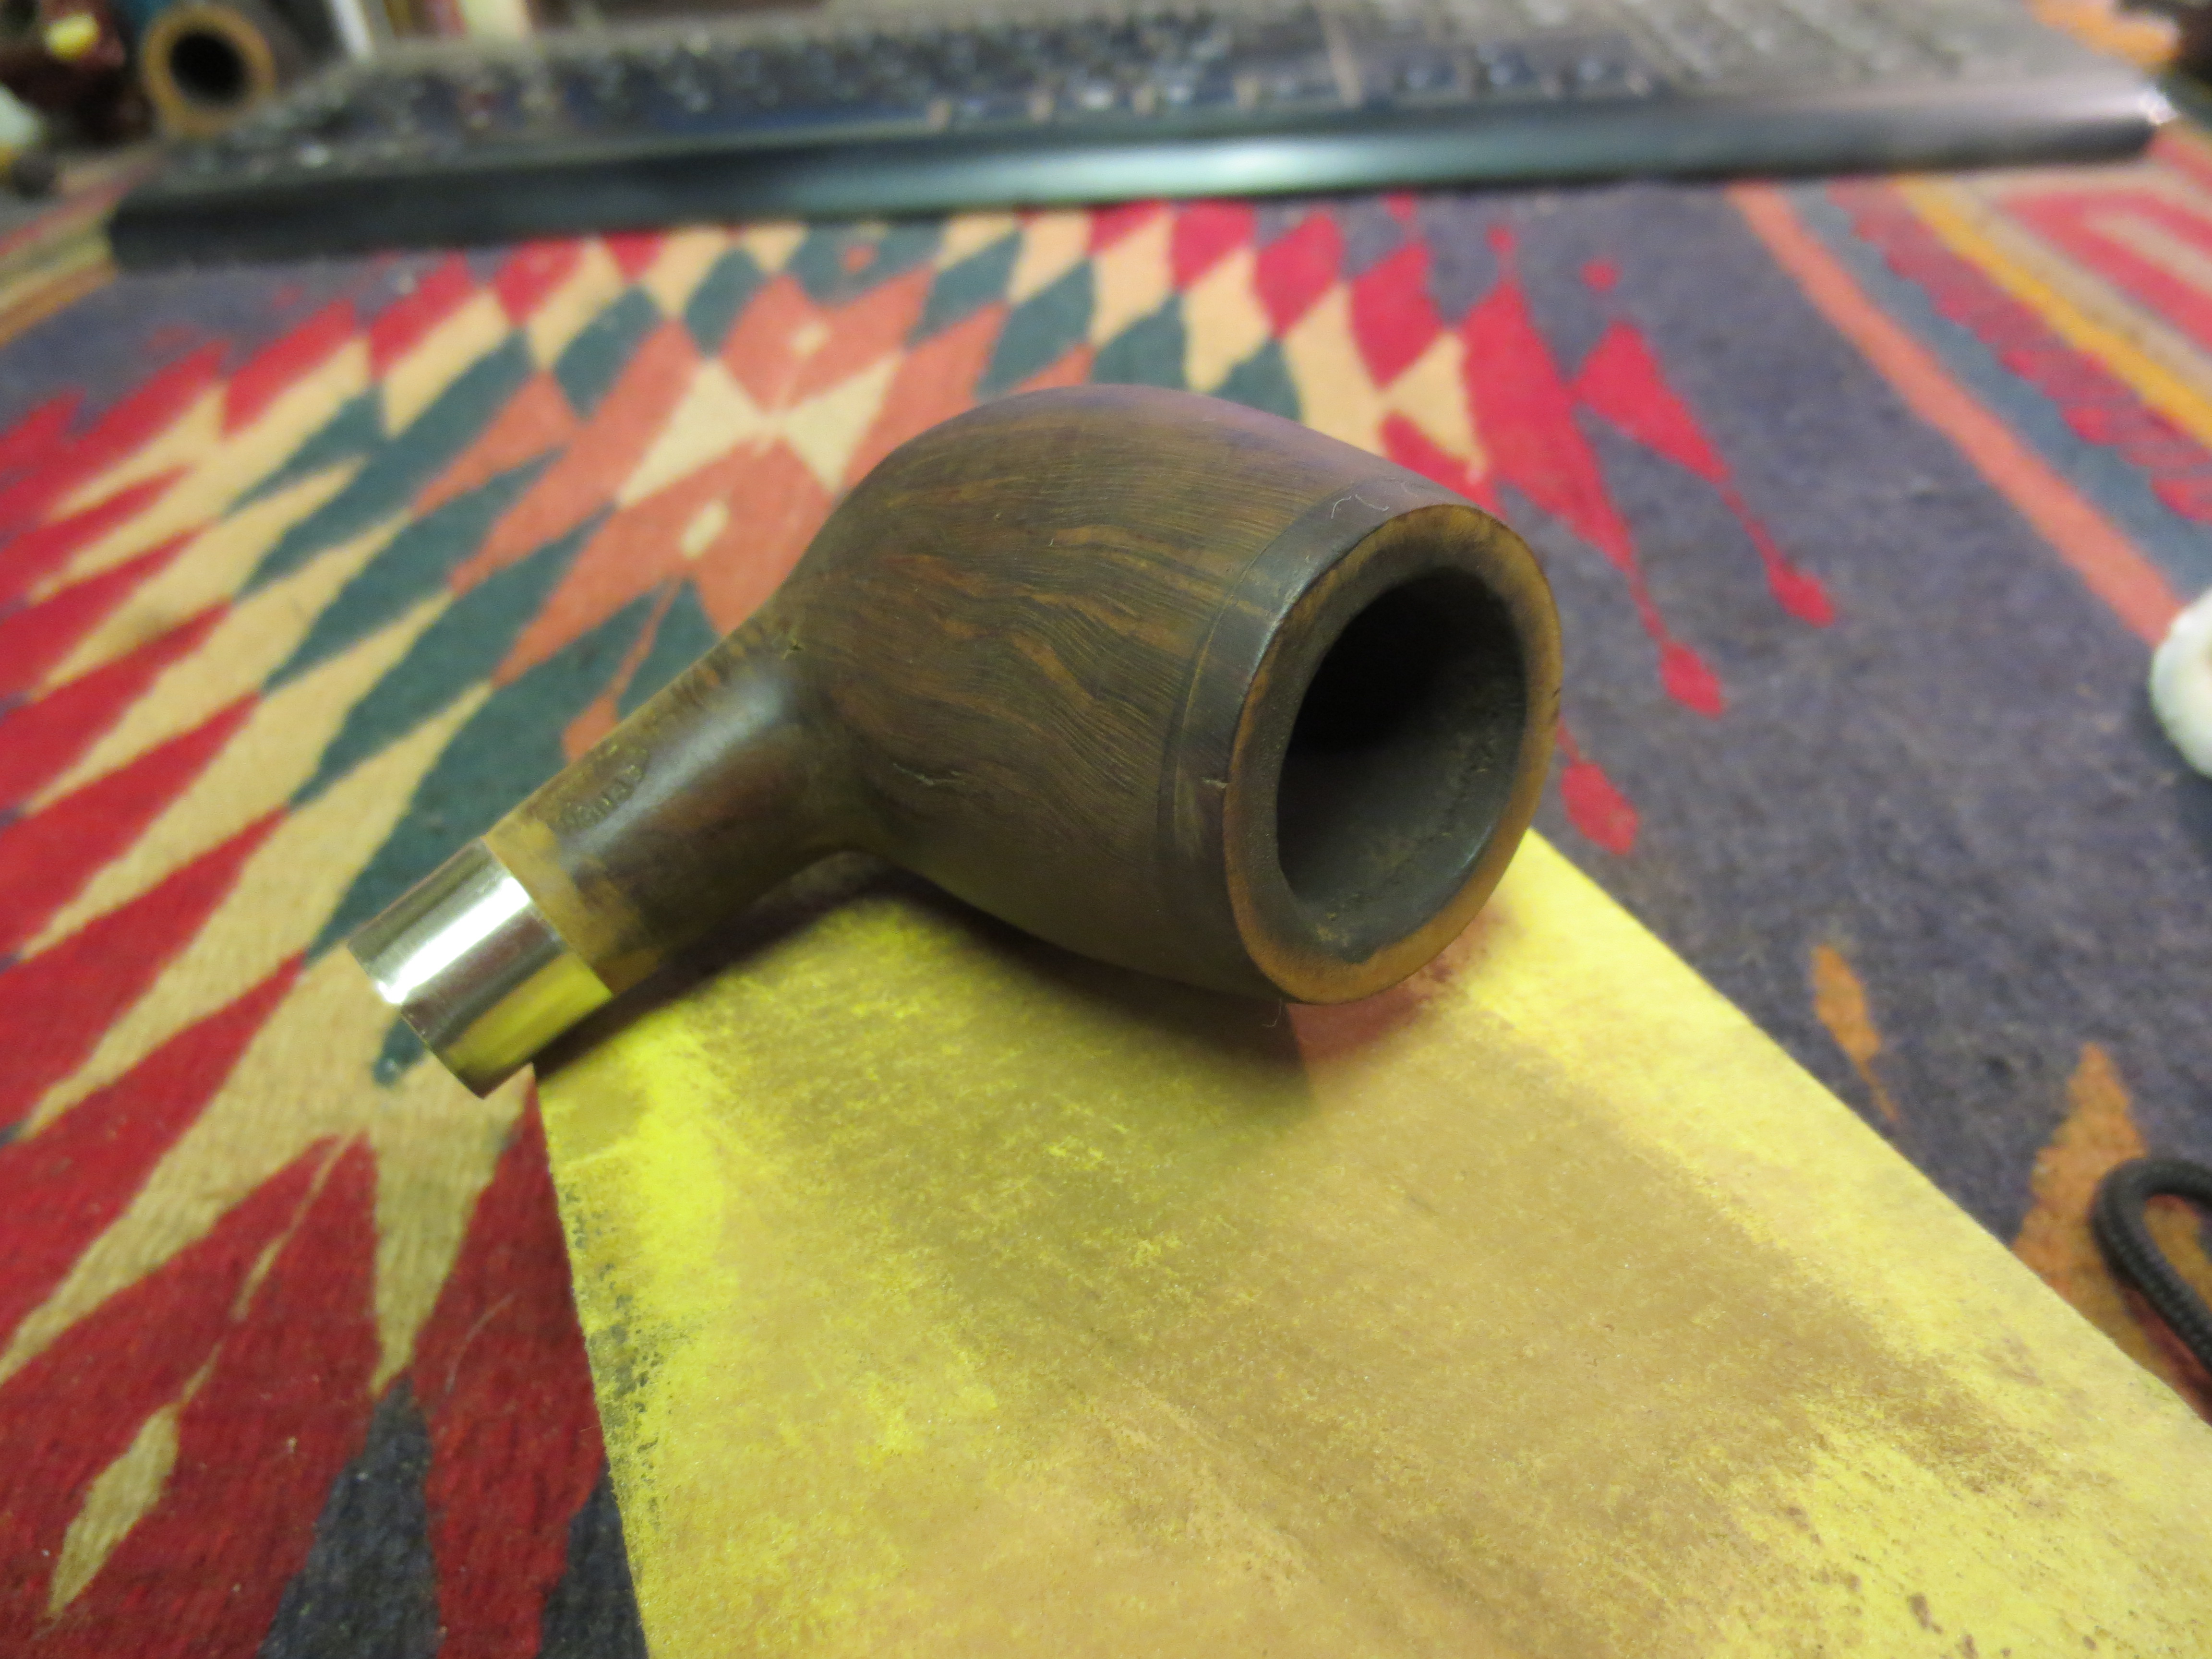
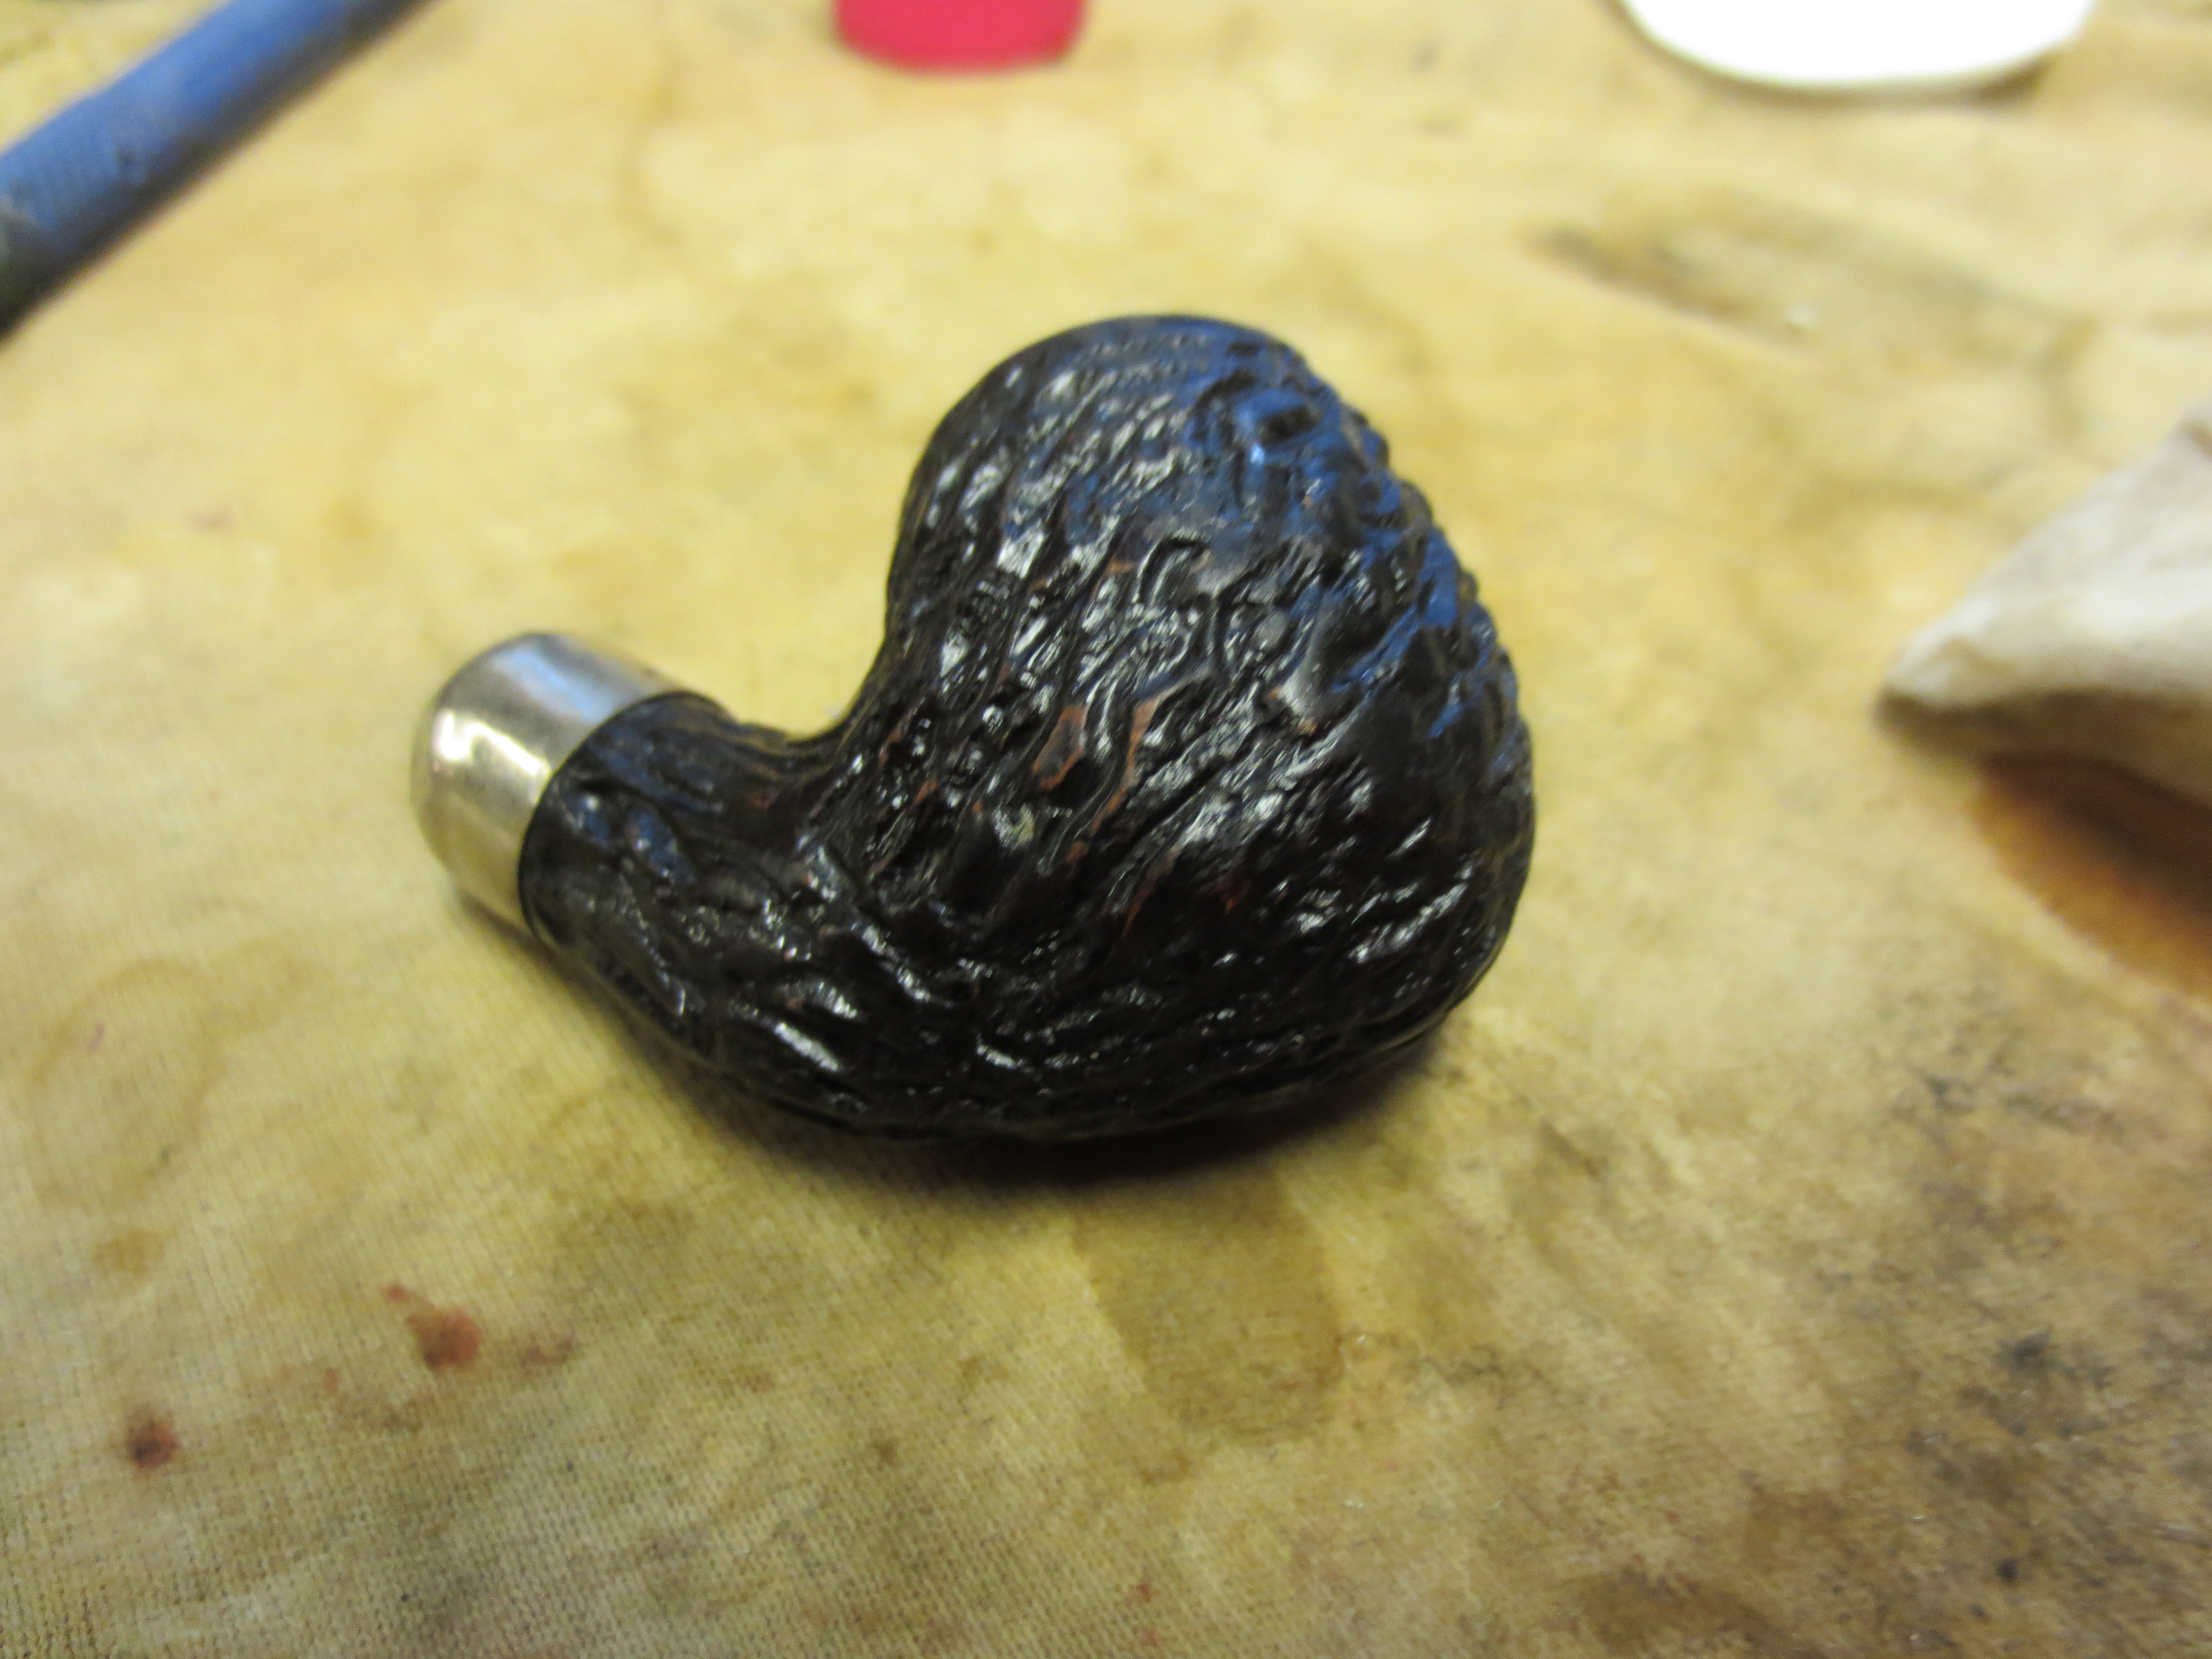
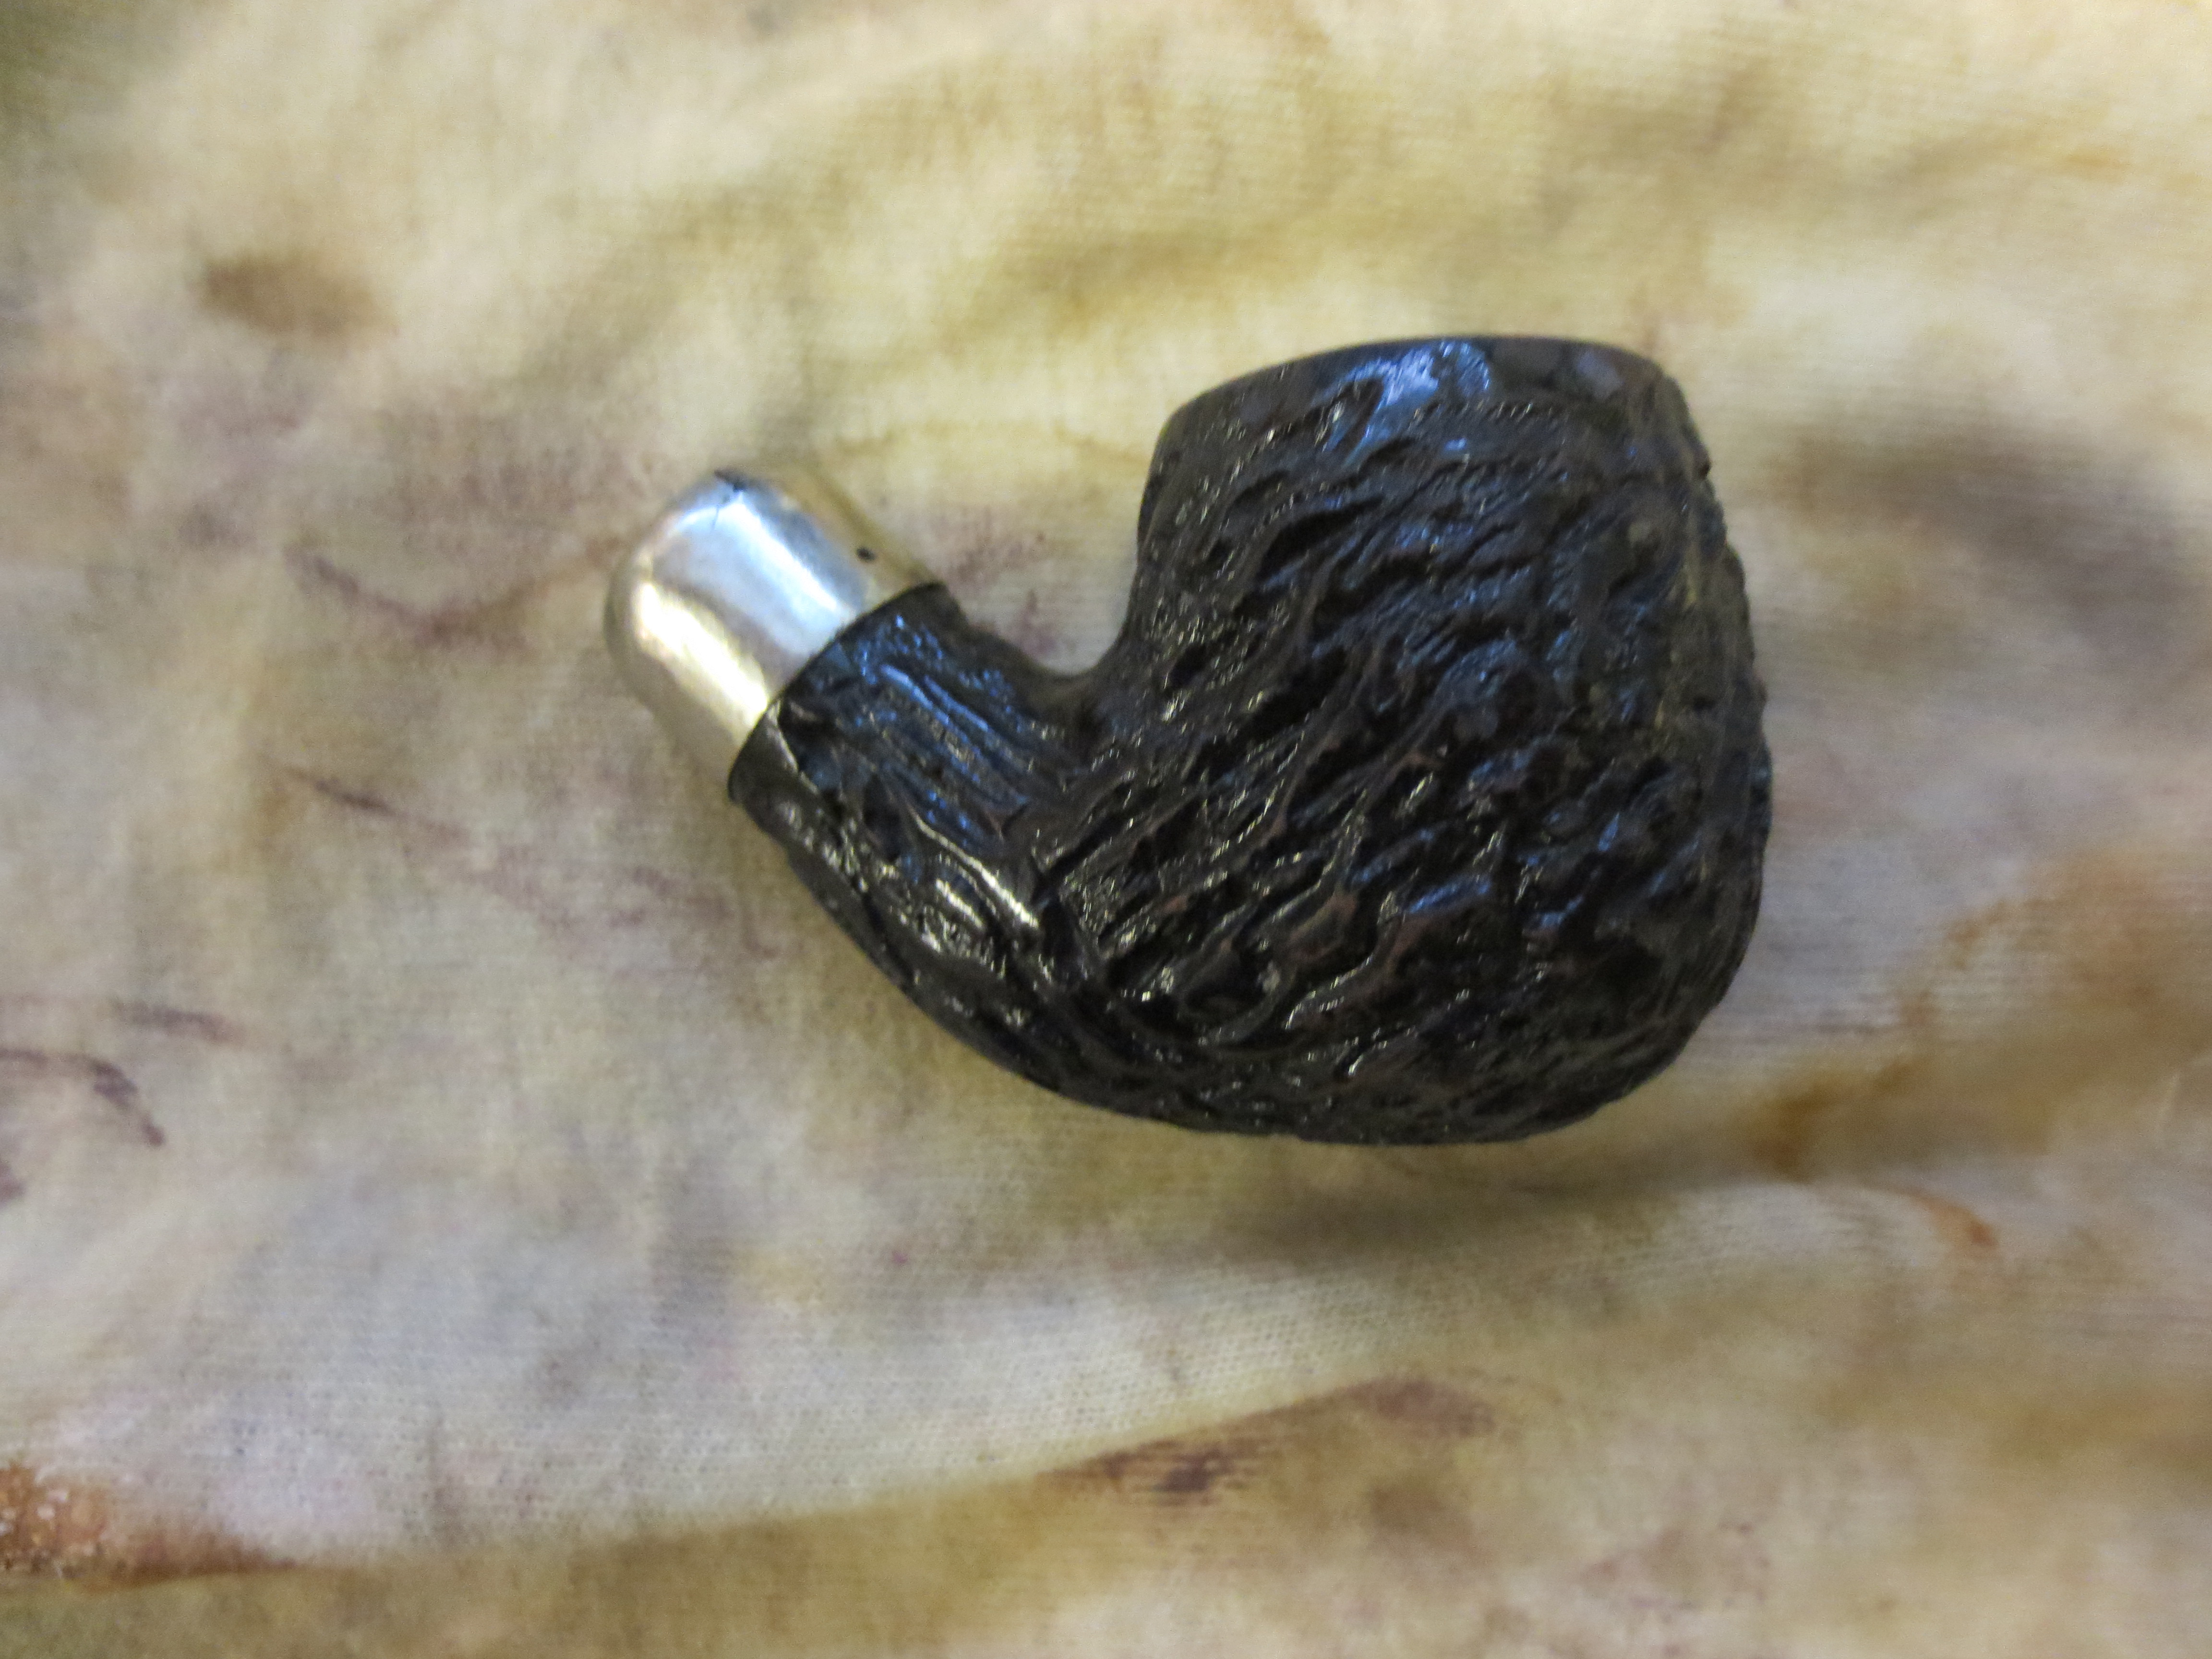
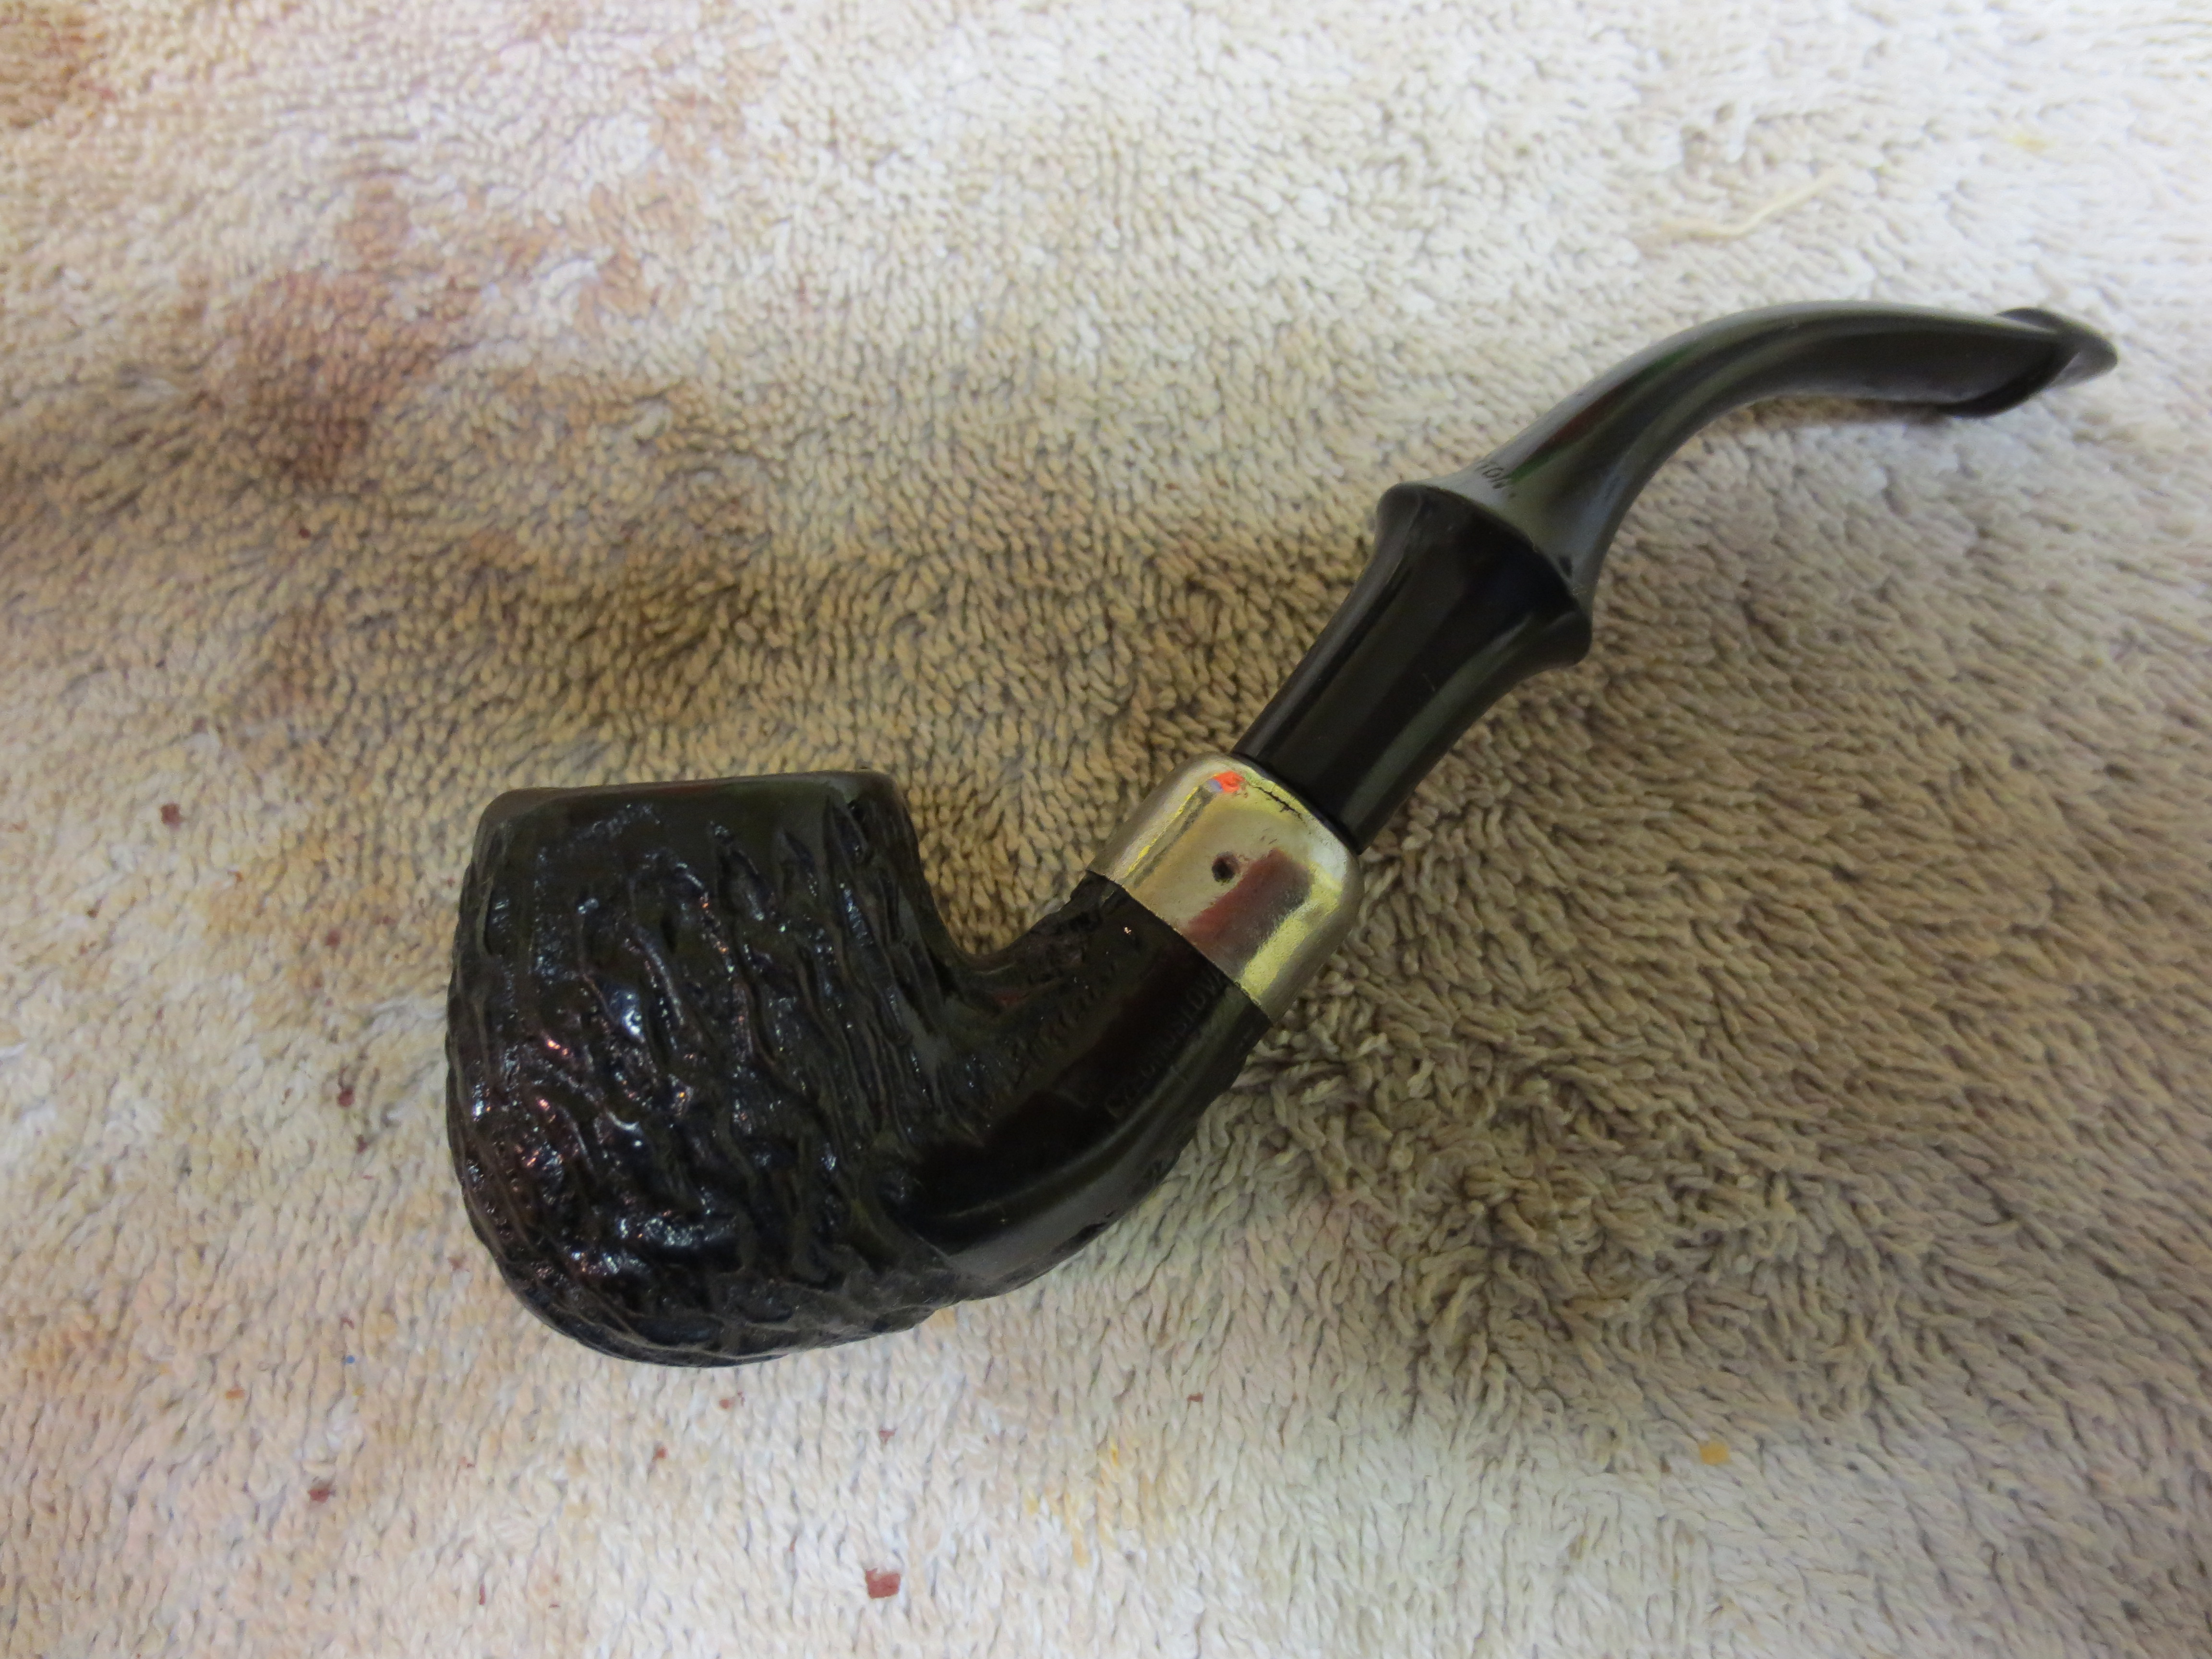
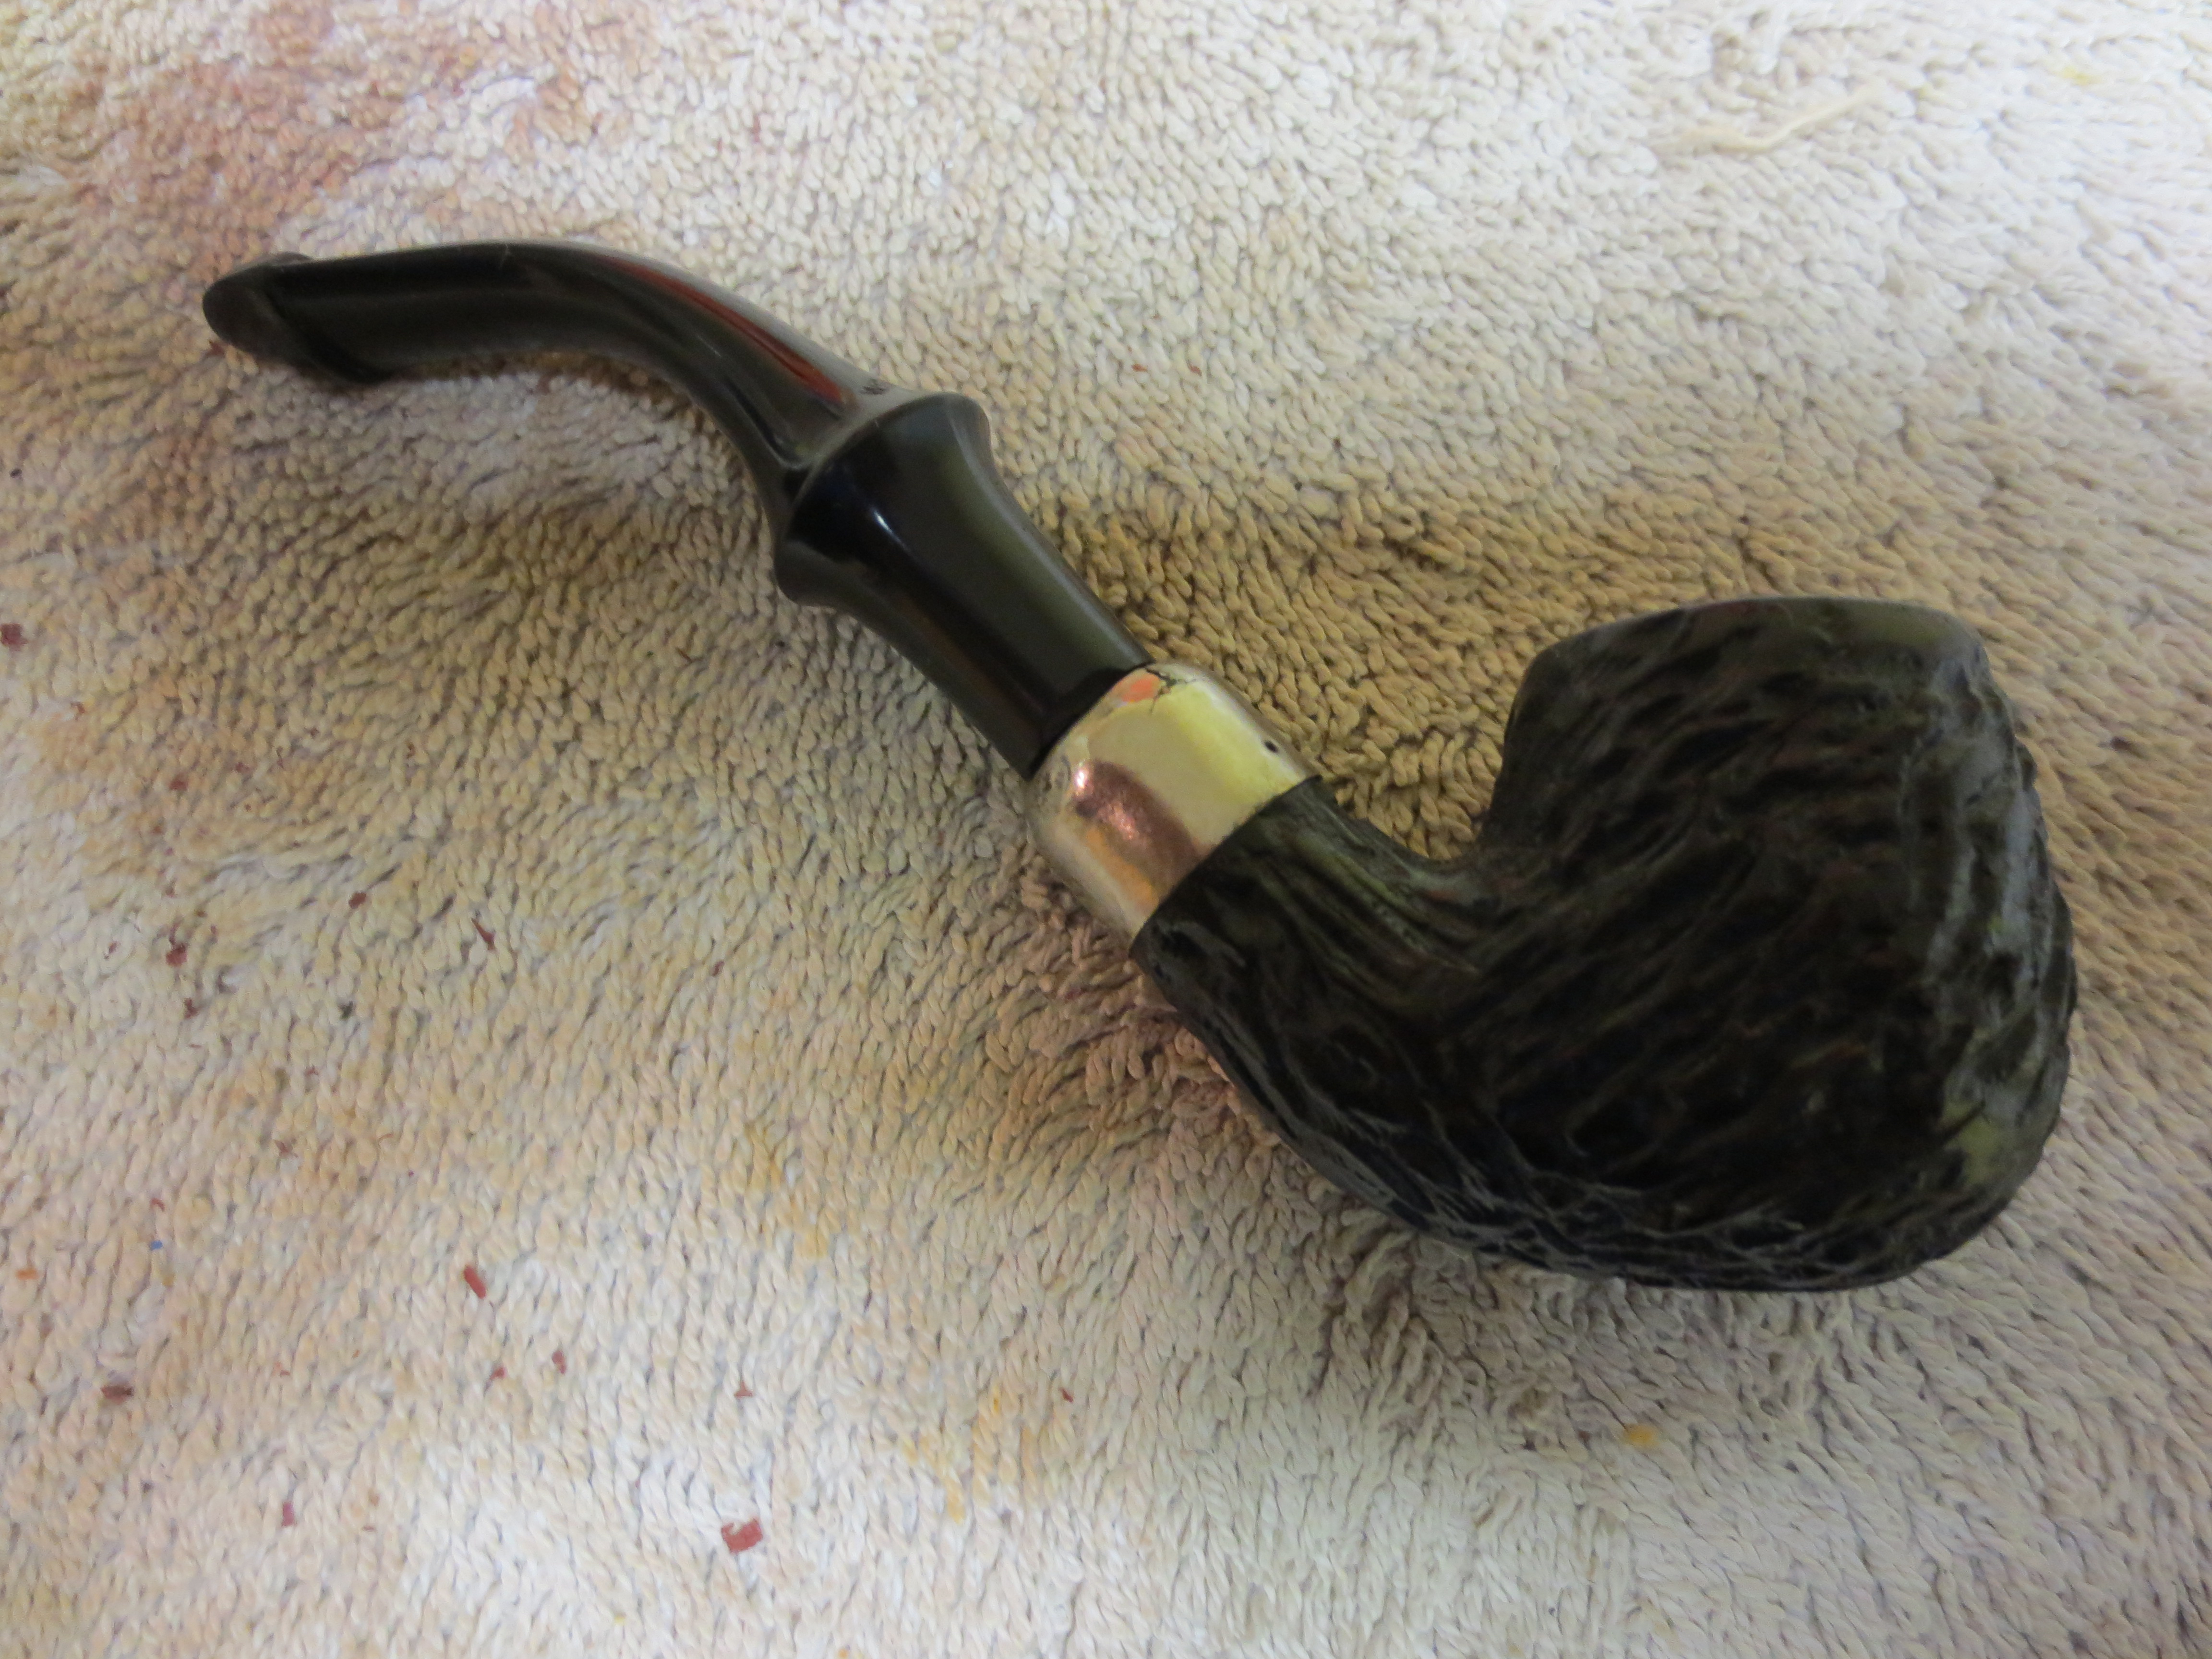
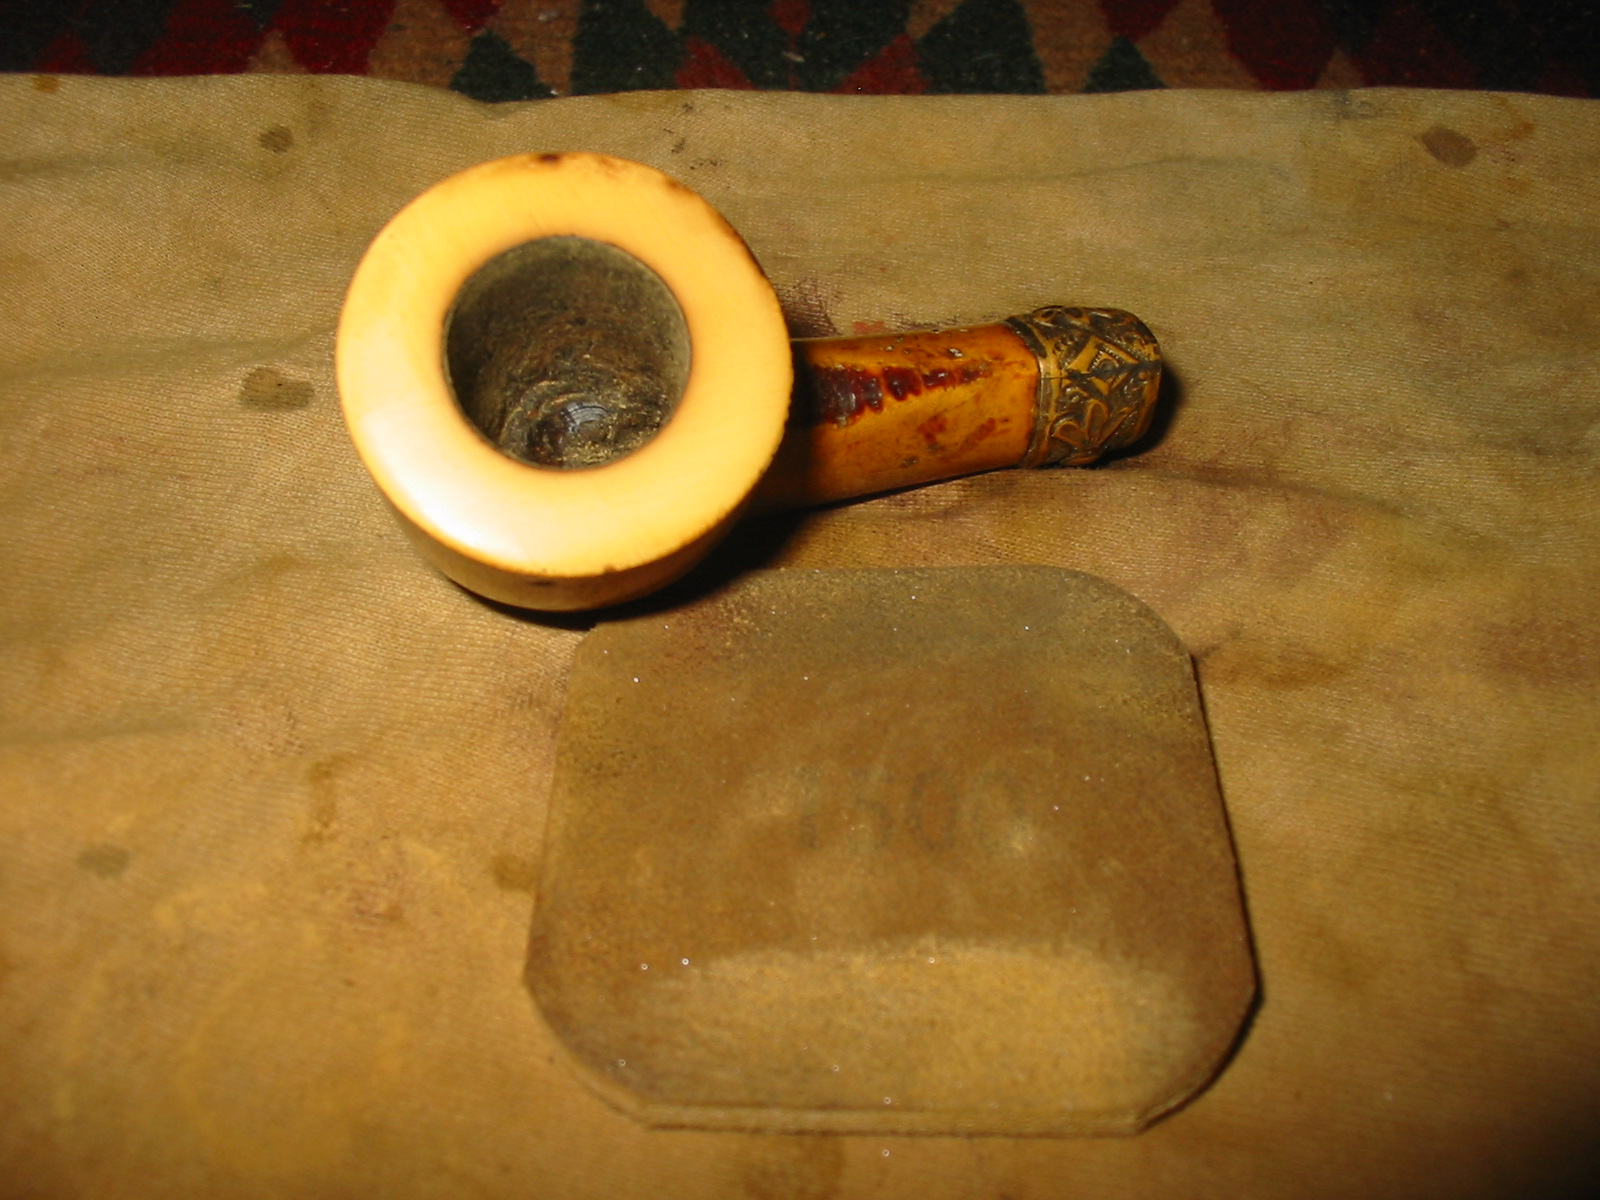
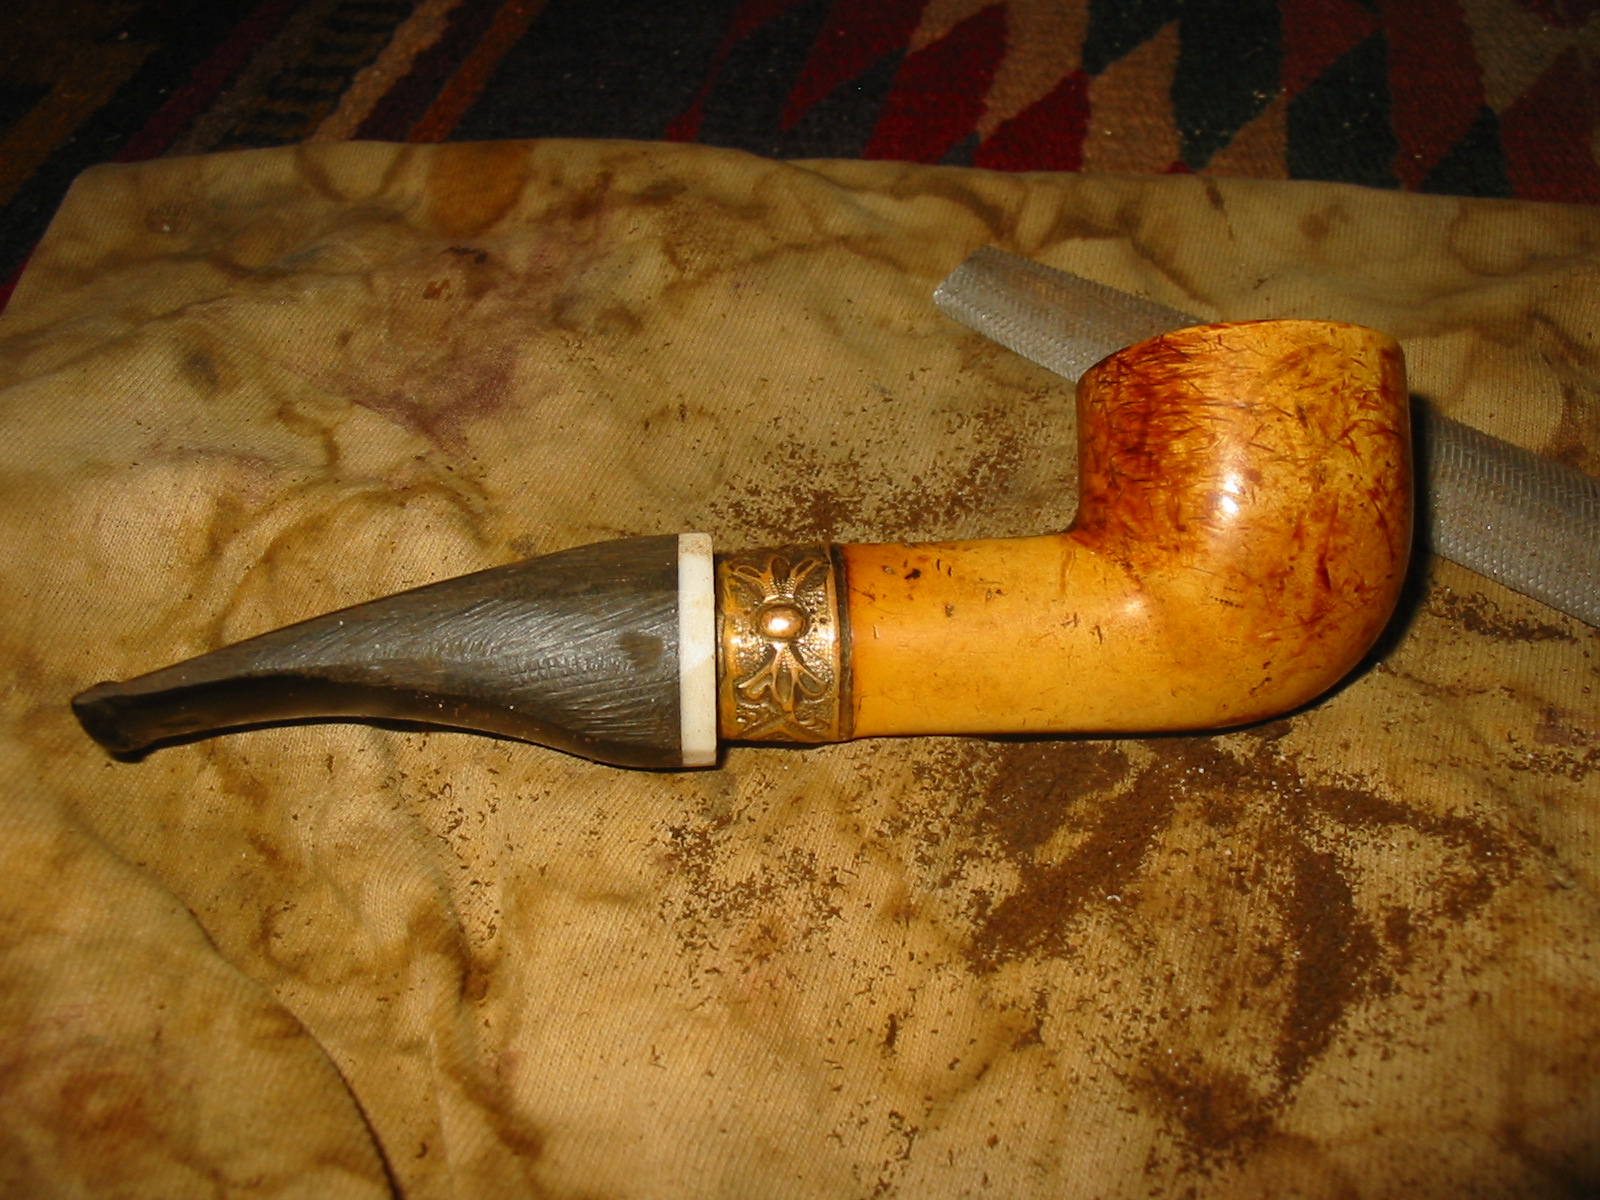
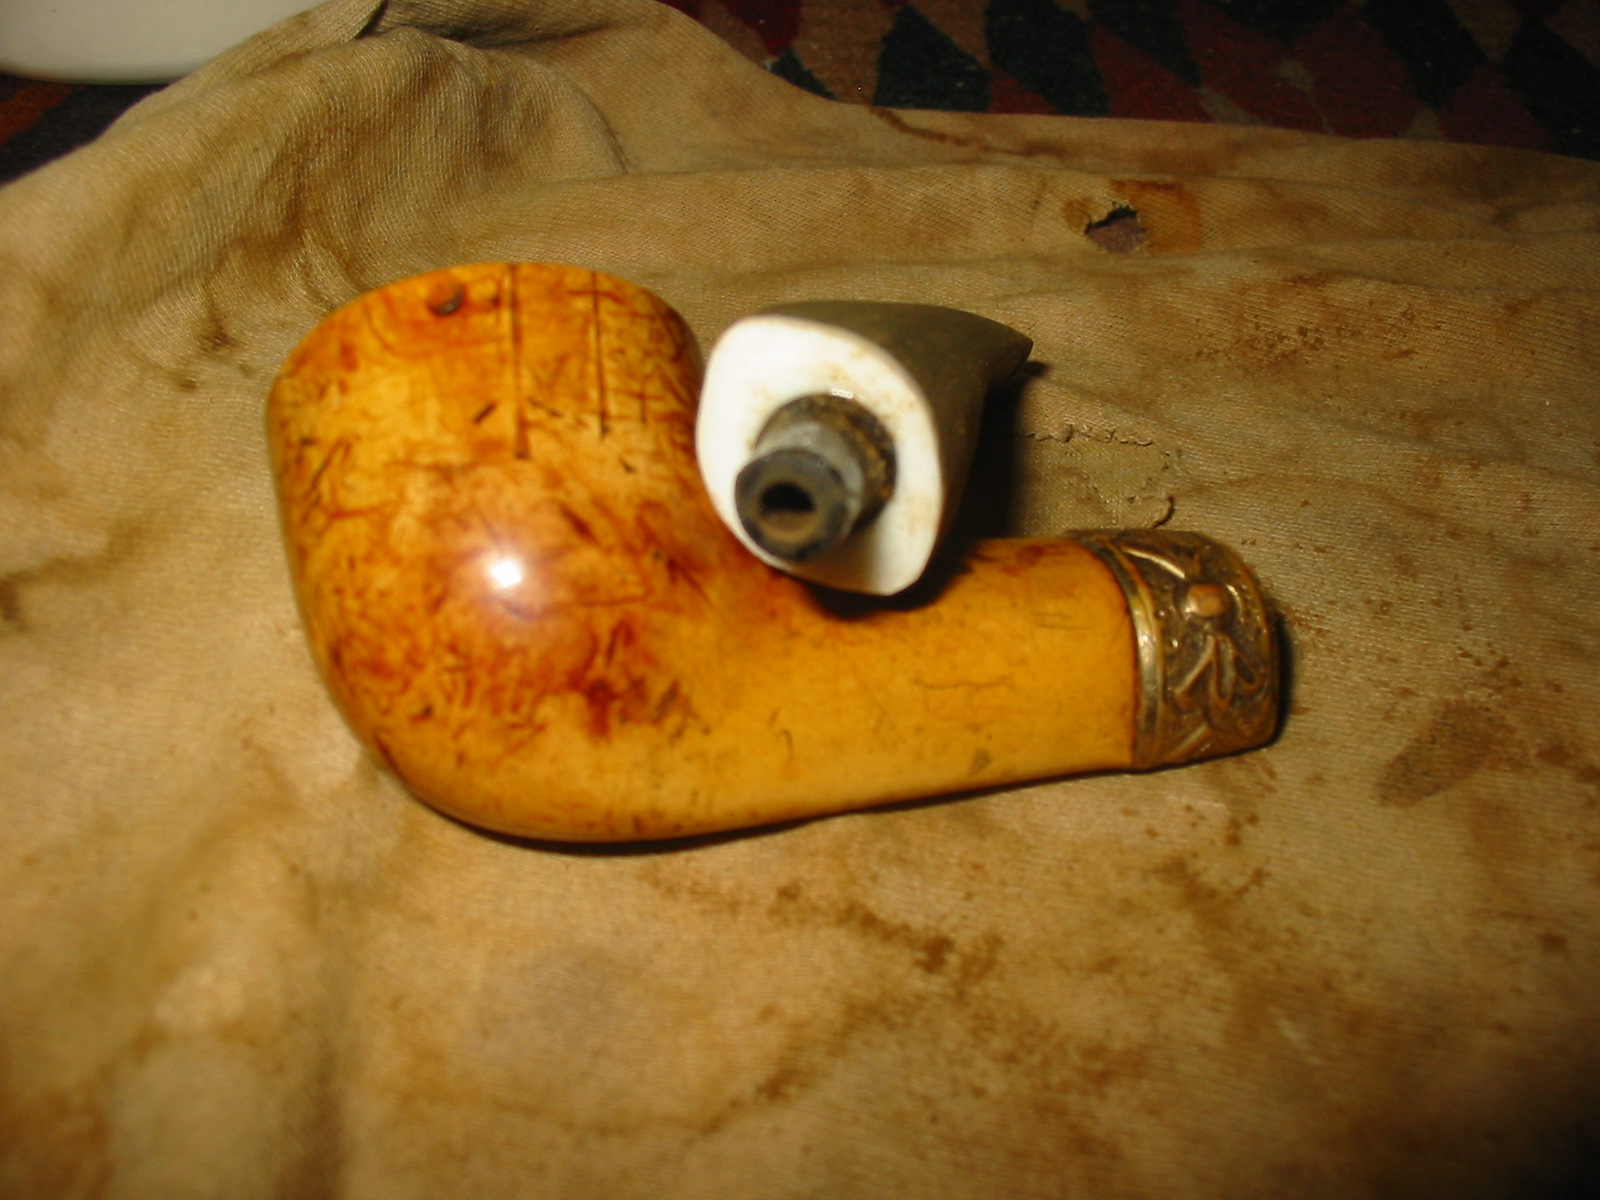
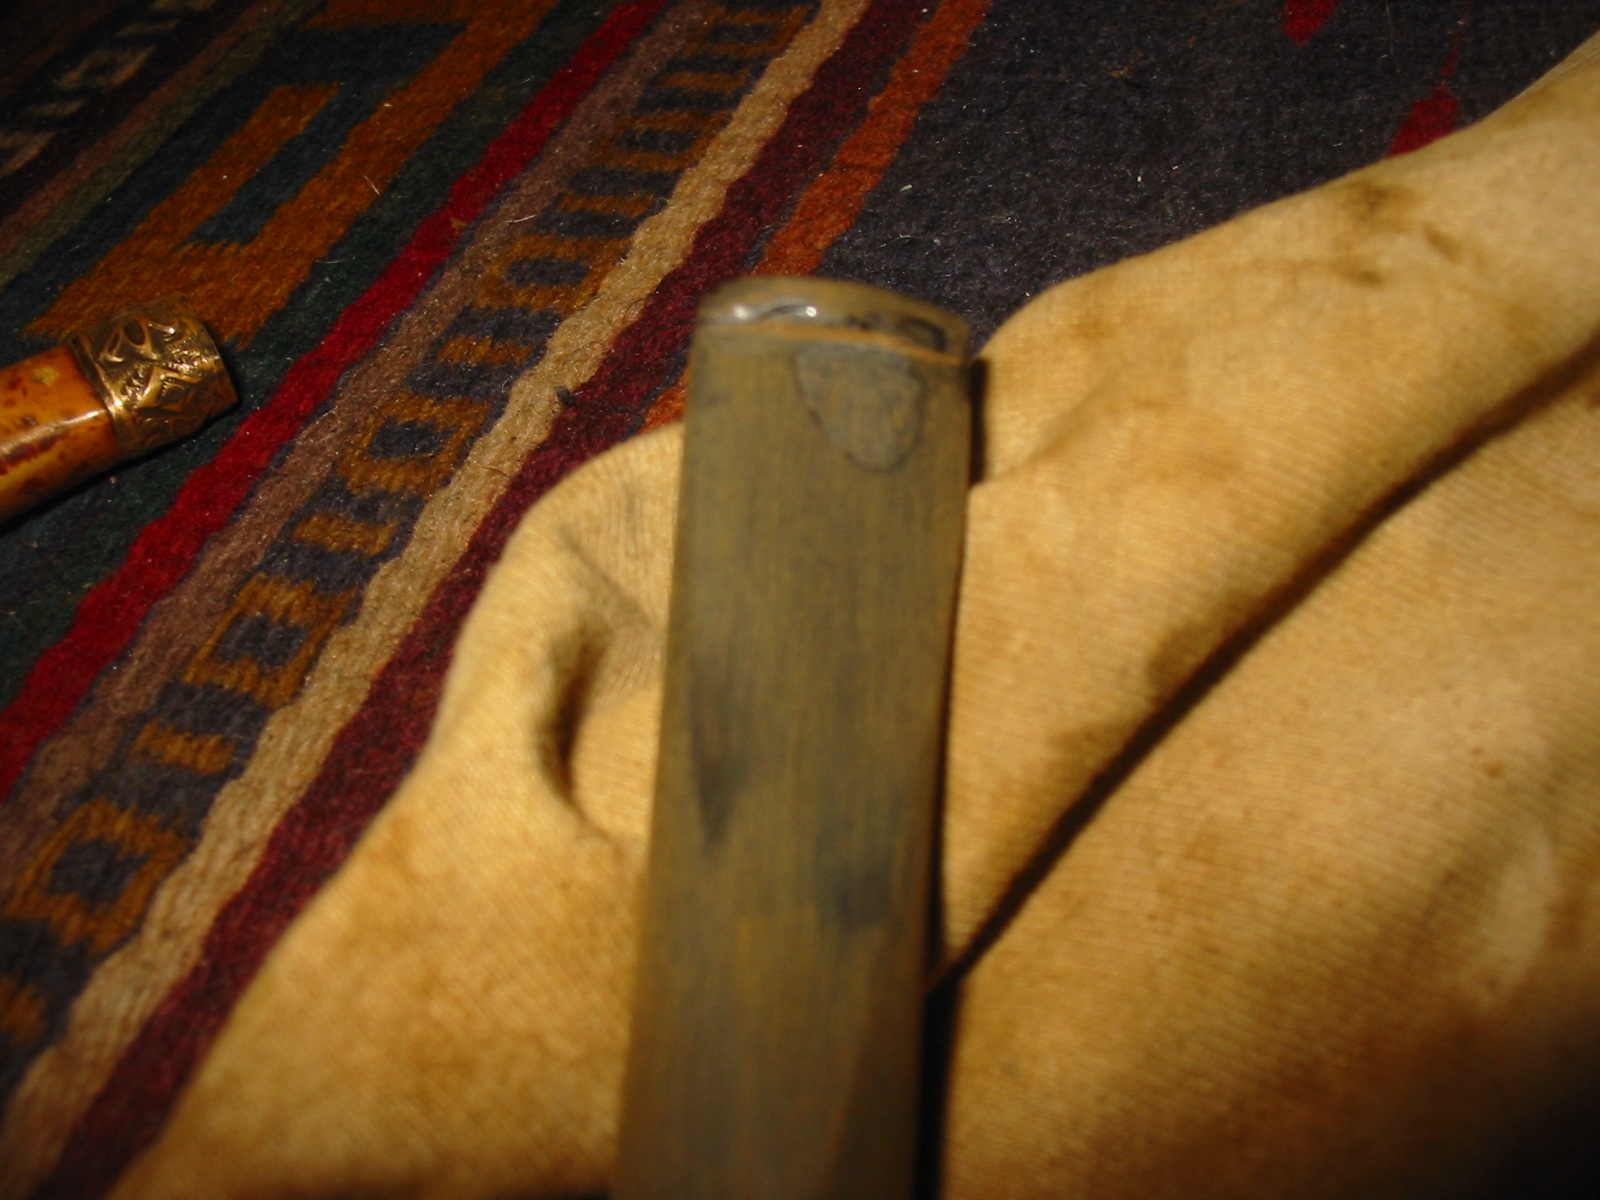
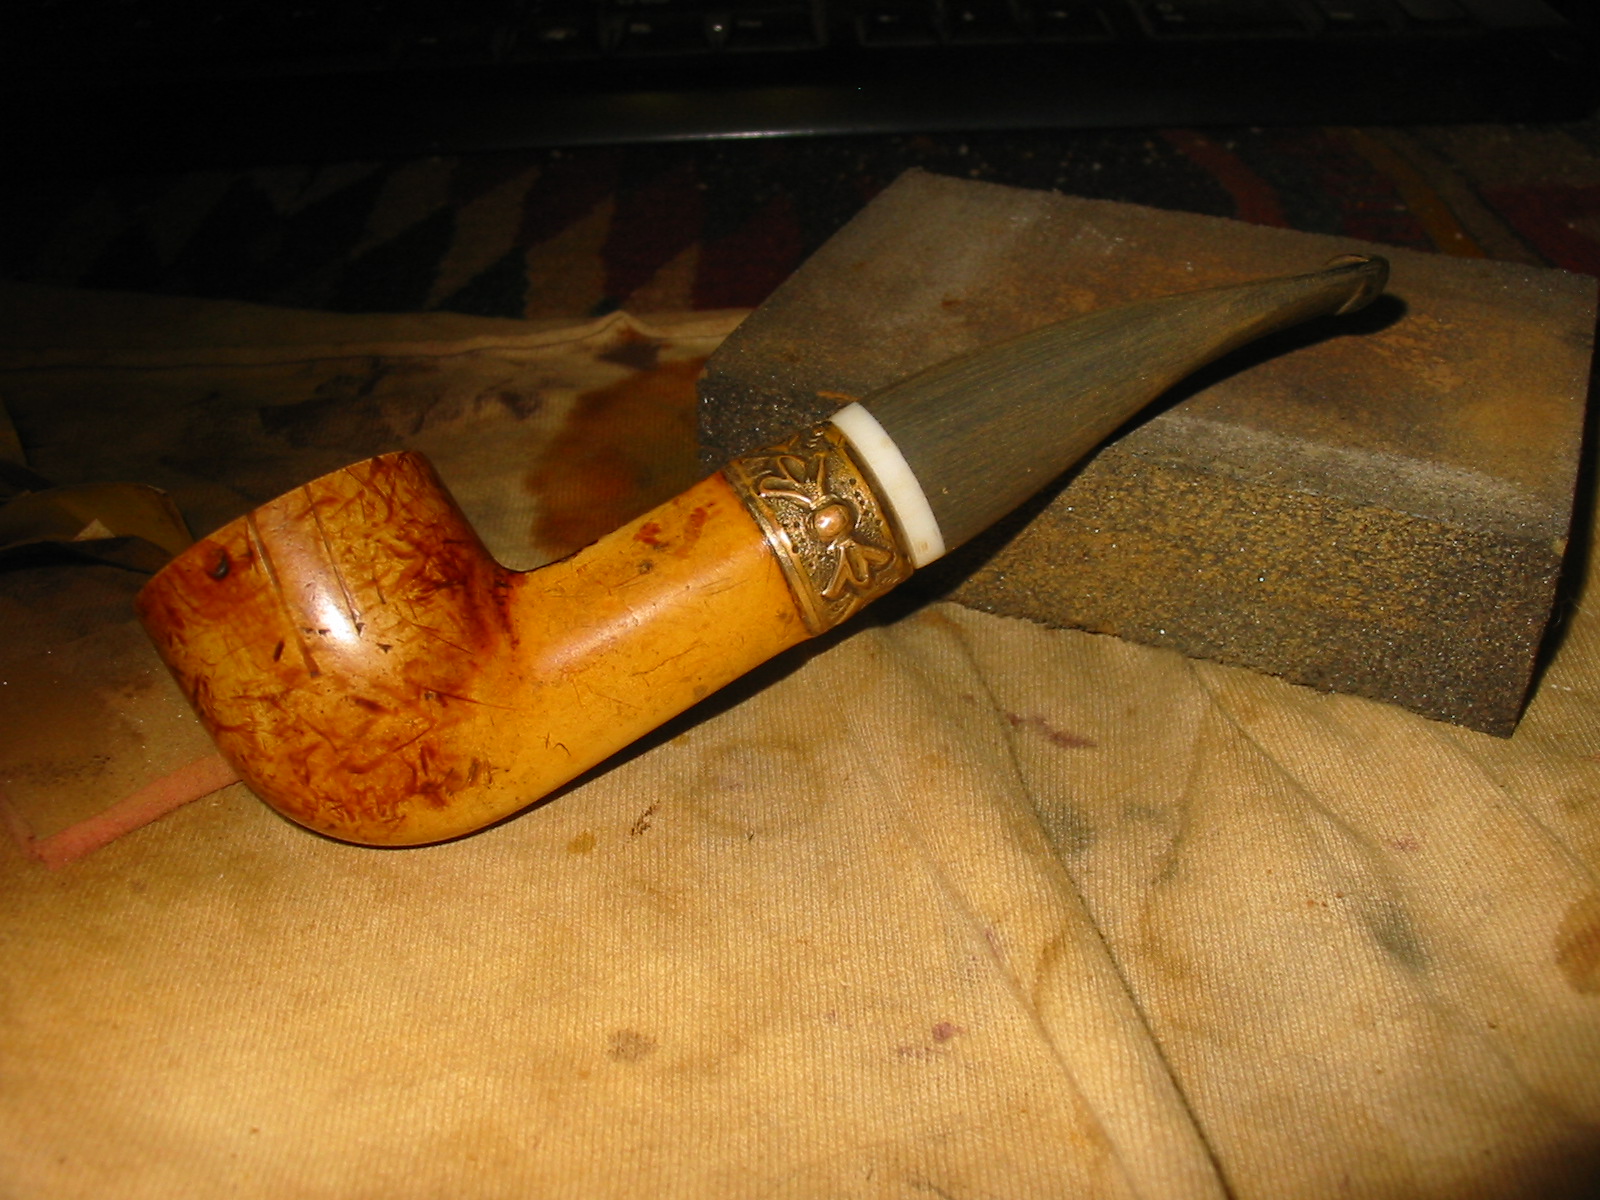
Yesterday afternoon I came home from work early and found a package awaiting me – I knew that the meer had arrived. I had to laugh when I cut open the box – it had a previous label a Funeral Home in Ohio. I don’t know if that was a commentary on the pipe bowl that resided inside the box or if a funny coincidence. I cut the tape and opened the box. The pipe inside was both in worse shape than I had imagined from the seller’s excellent pictures and in better shape. The meer under the band was cracked as can be seen in the photo above and that was as it was when it arrived. The scratches in the surface of the bowl were not as deep as they appeared in the photos and the pipe when place on the rim on a flat board was actually not slanted to the right – the damage to the outer edges of the right back side made it appear worse than it actually was in reality. The next photos show the pipe on the work table just out of the box.

IMG_1799

IMG_1800

IMG_1801

IMG_1802

IMG_1803

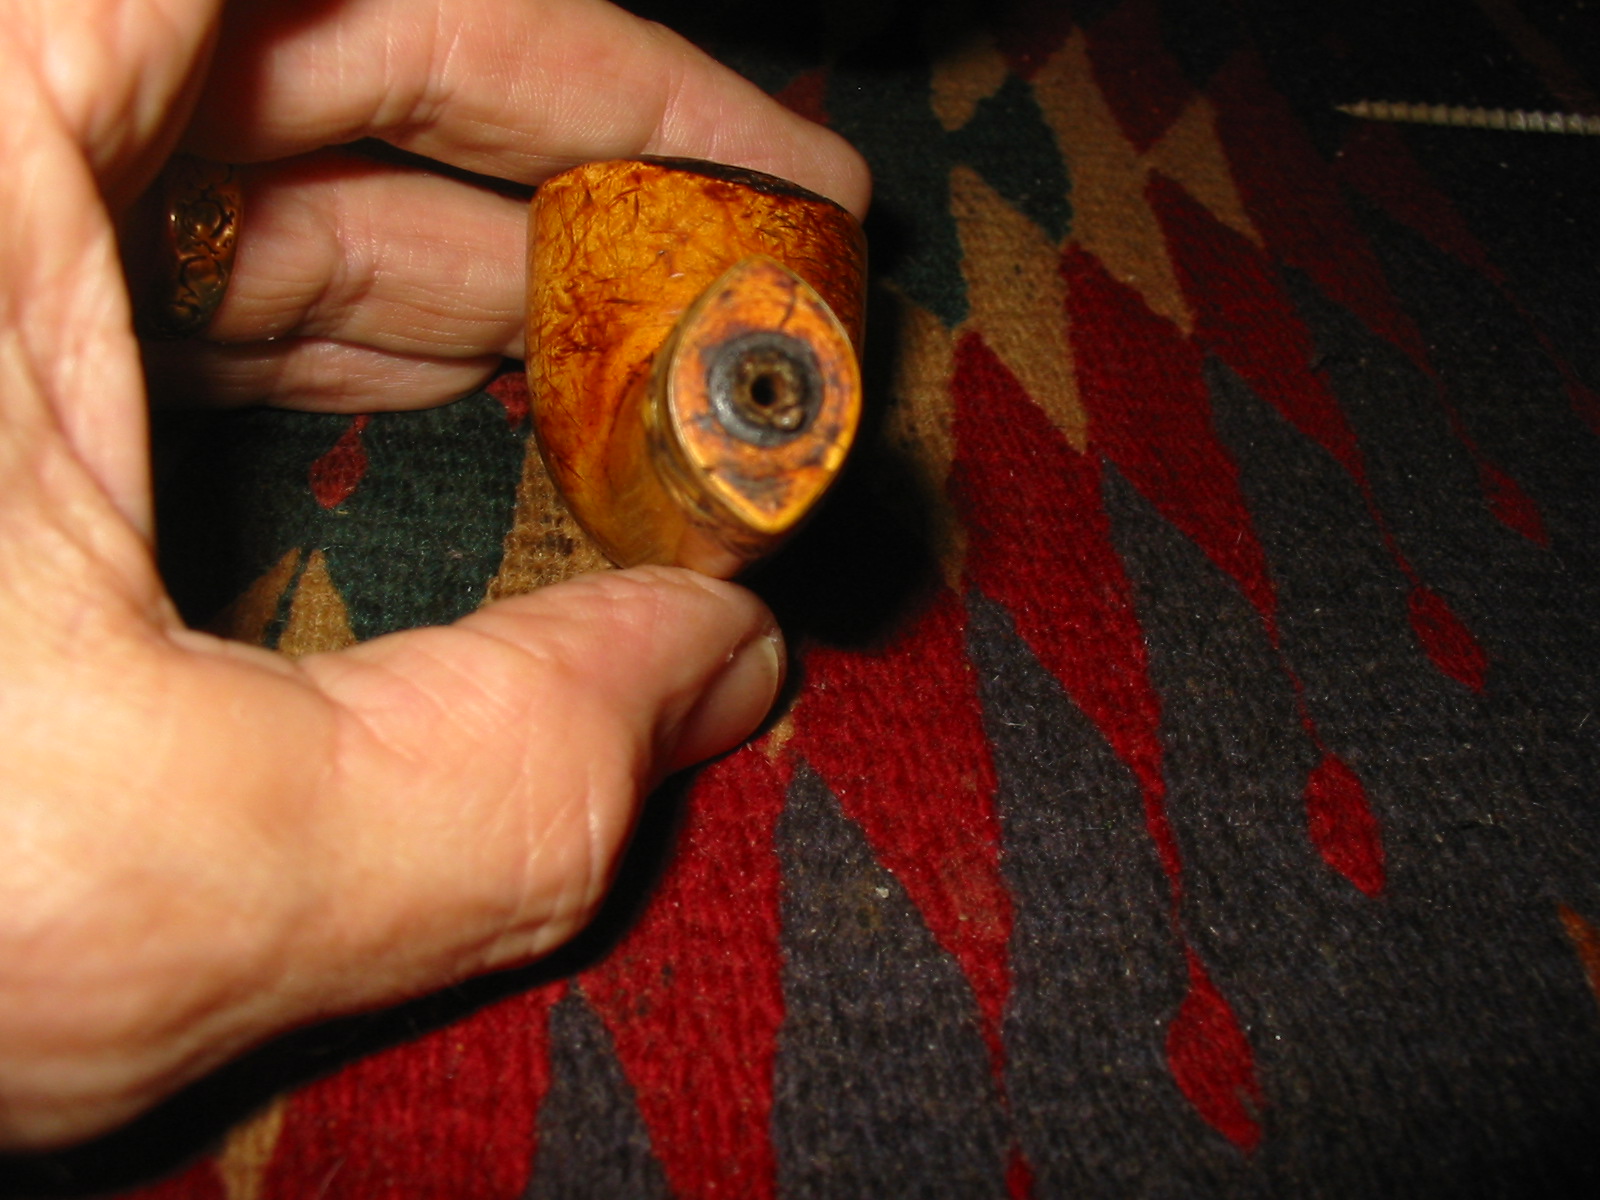
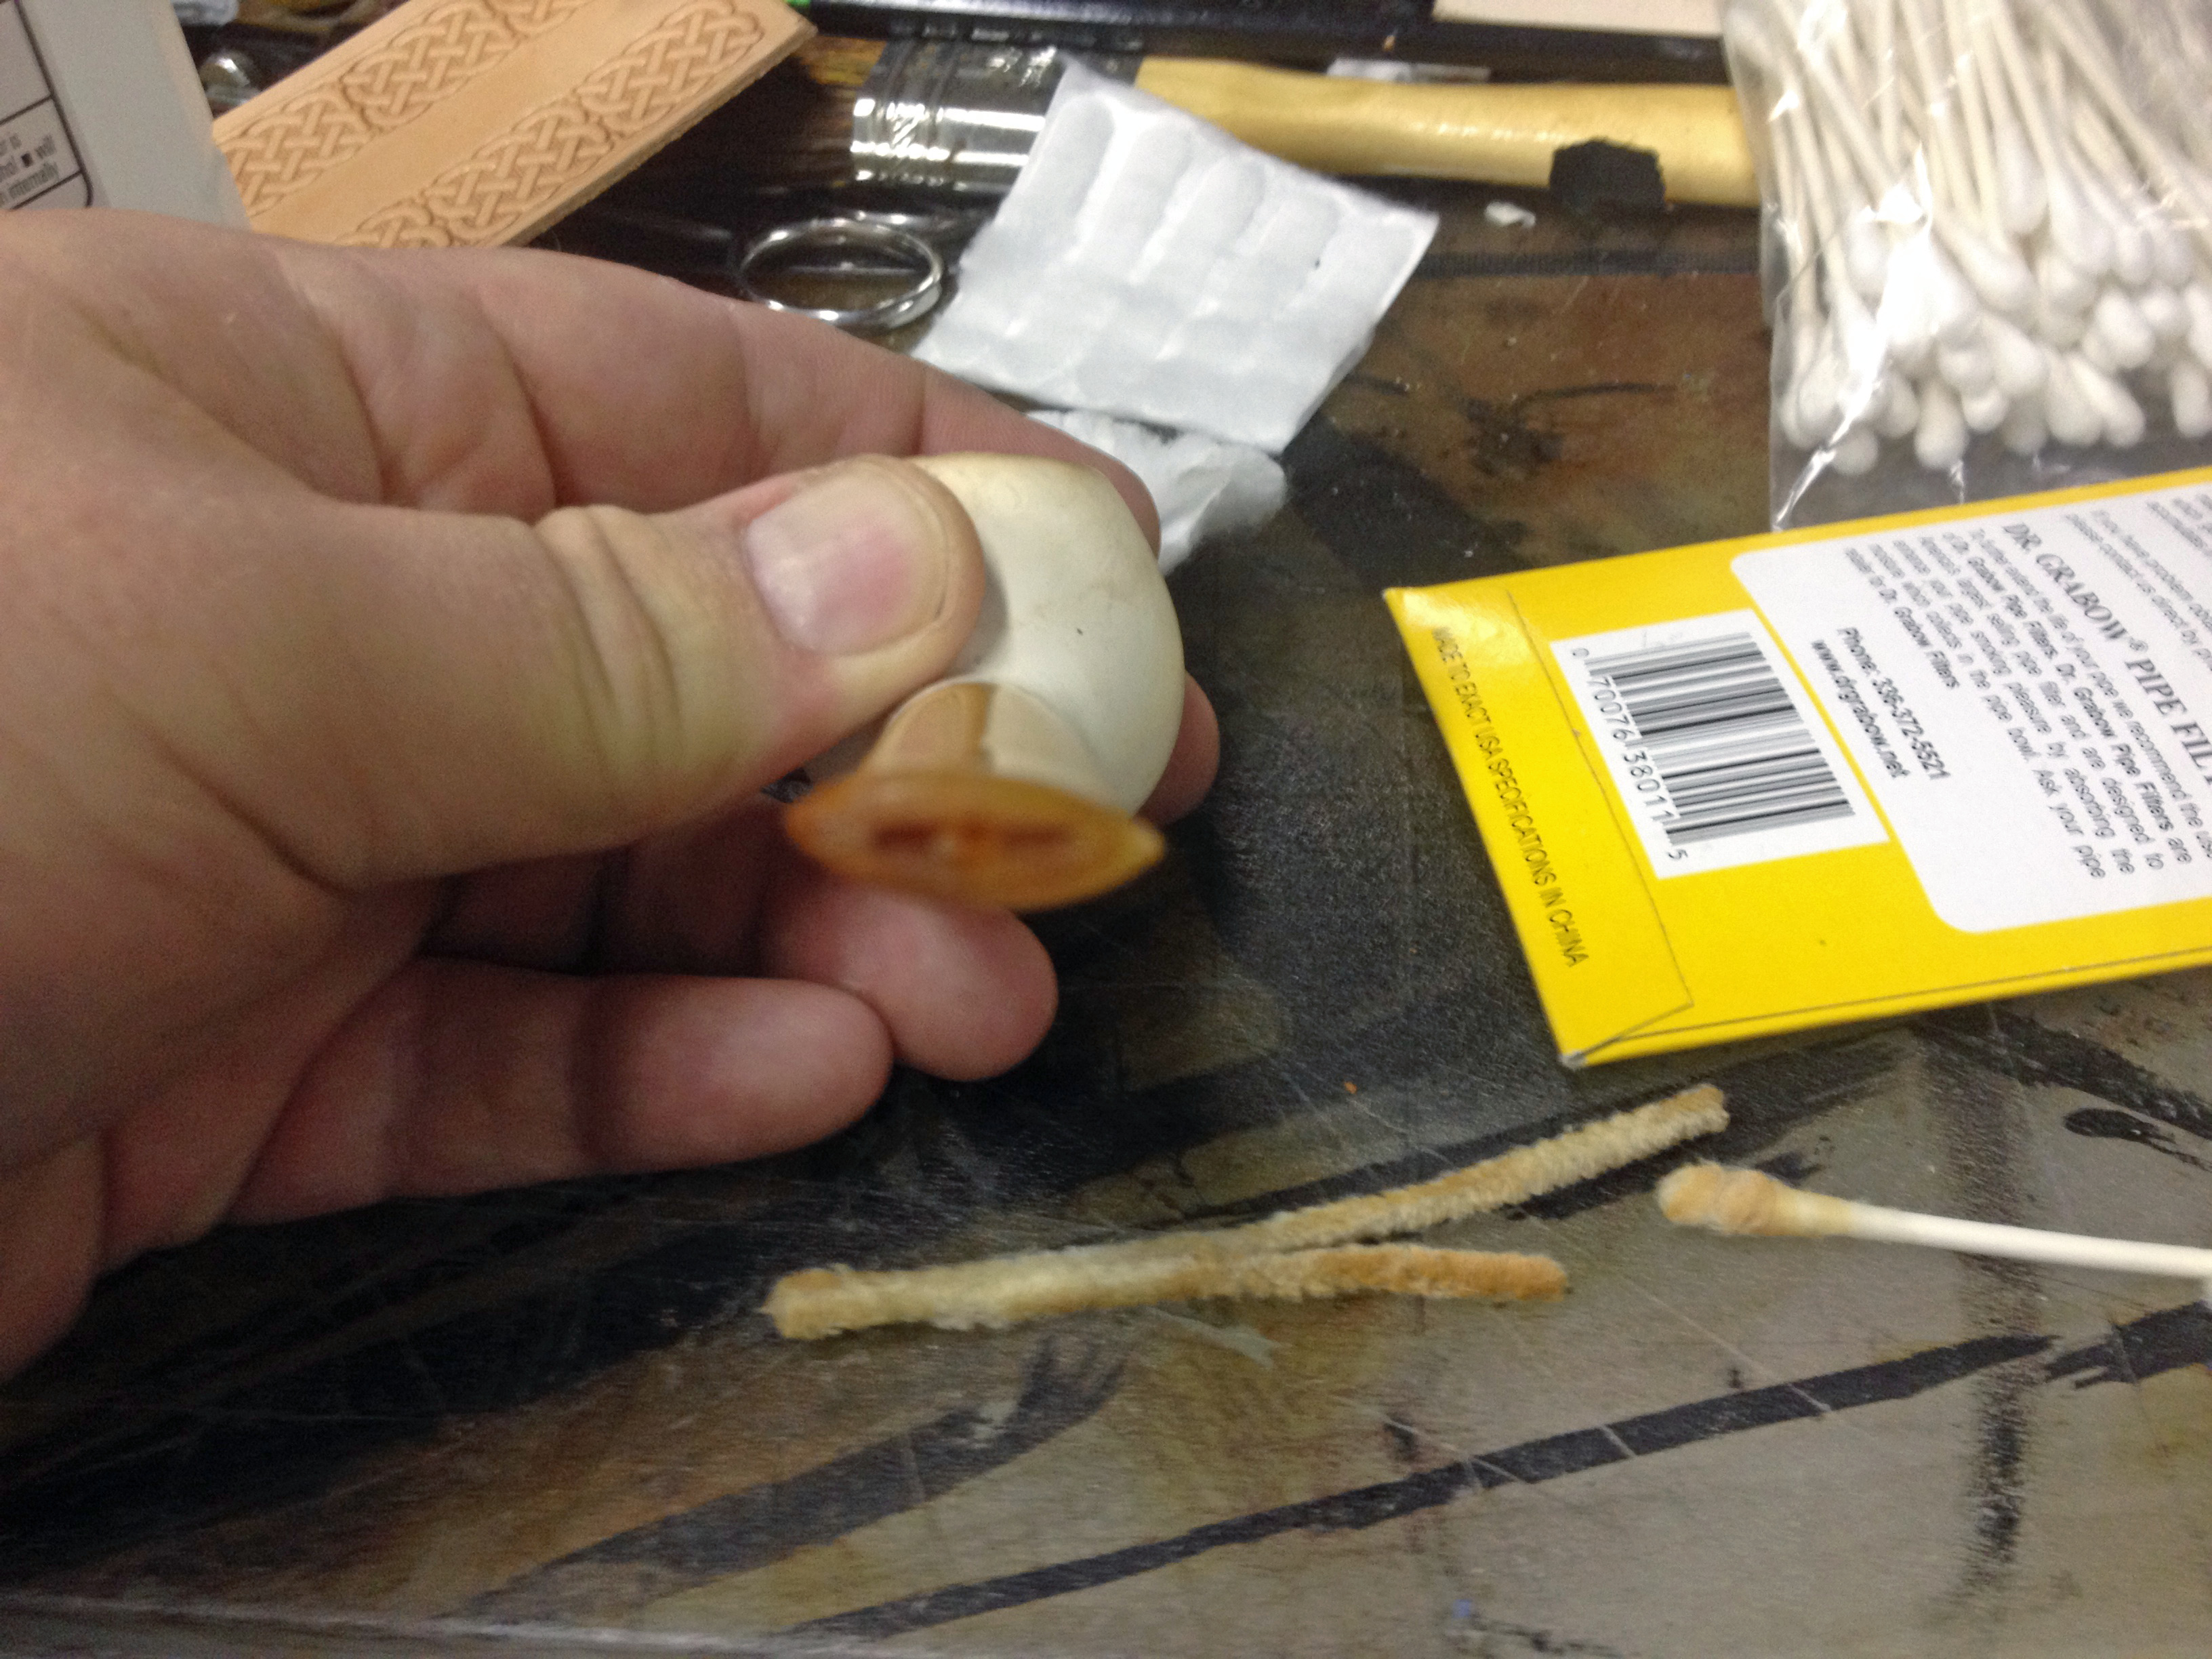
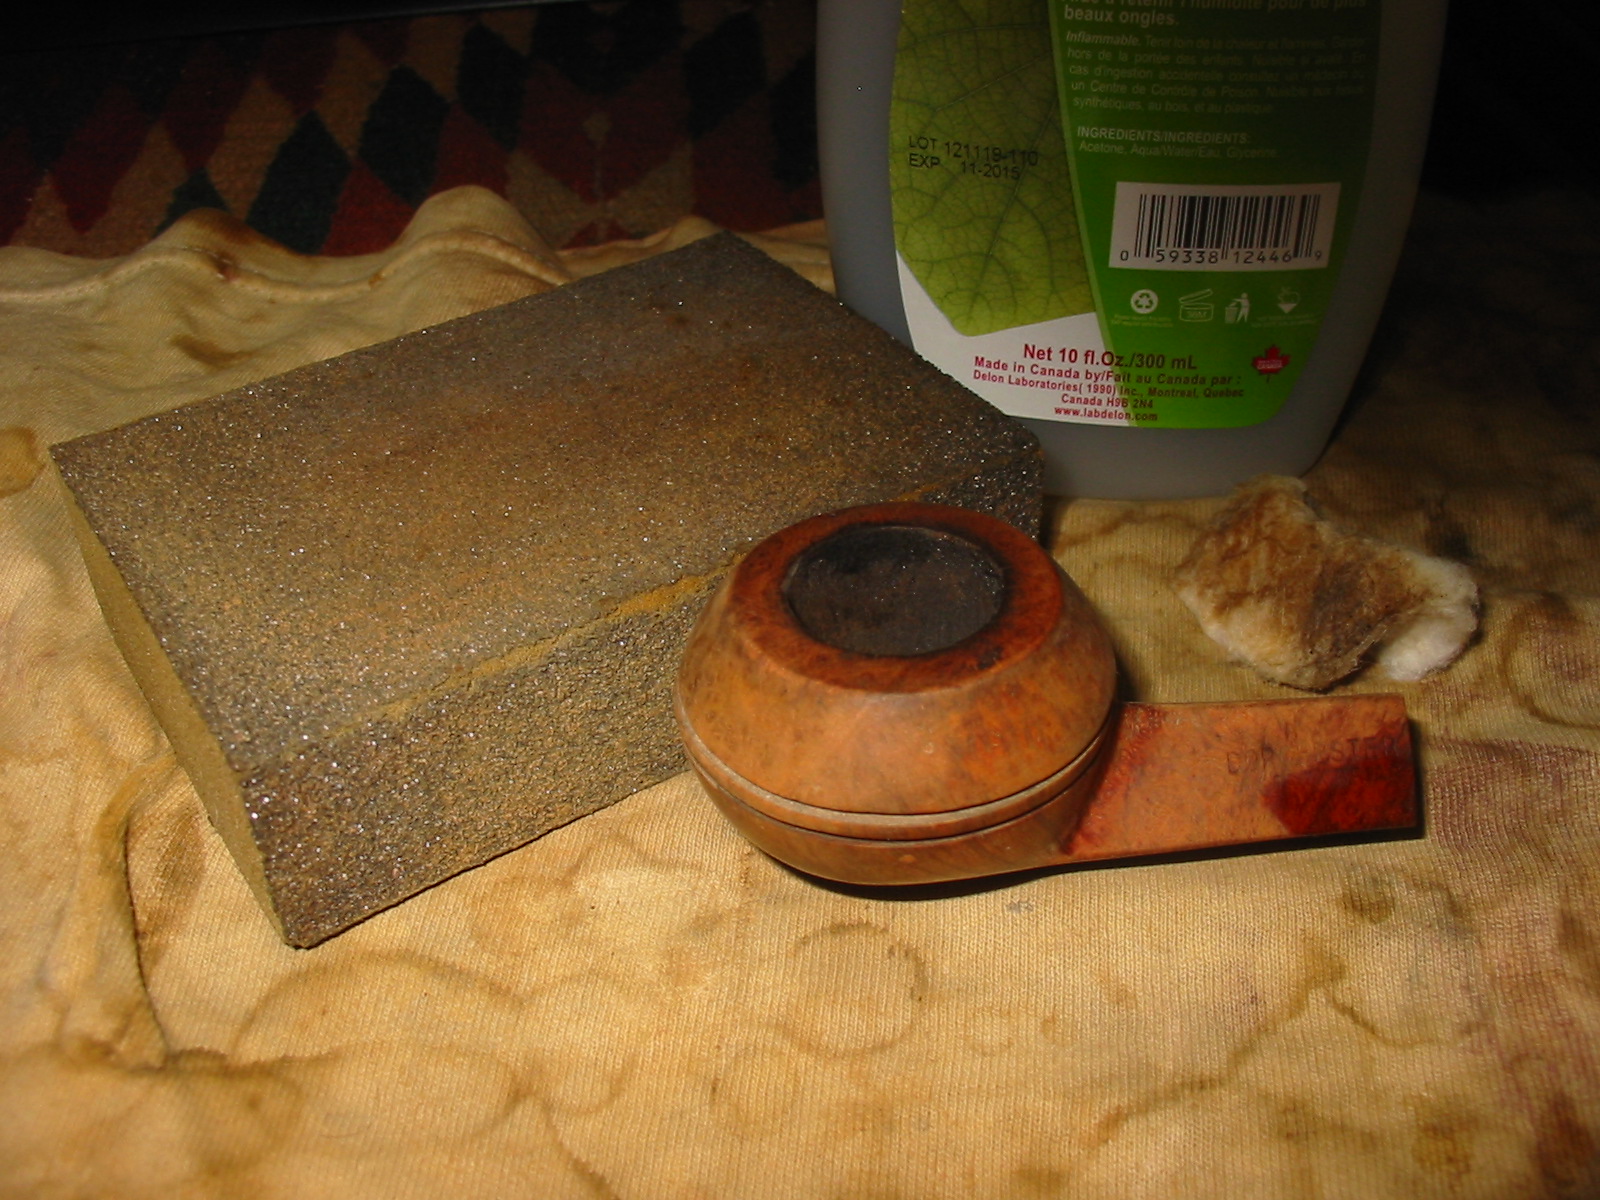
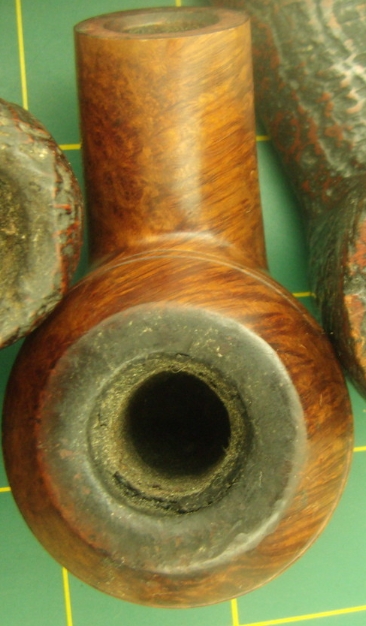
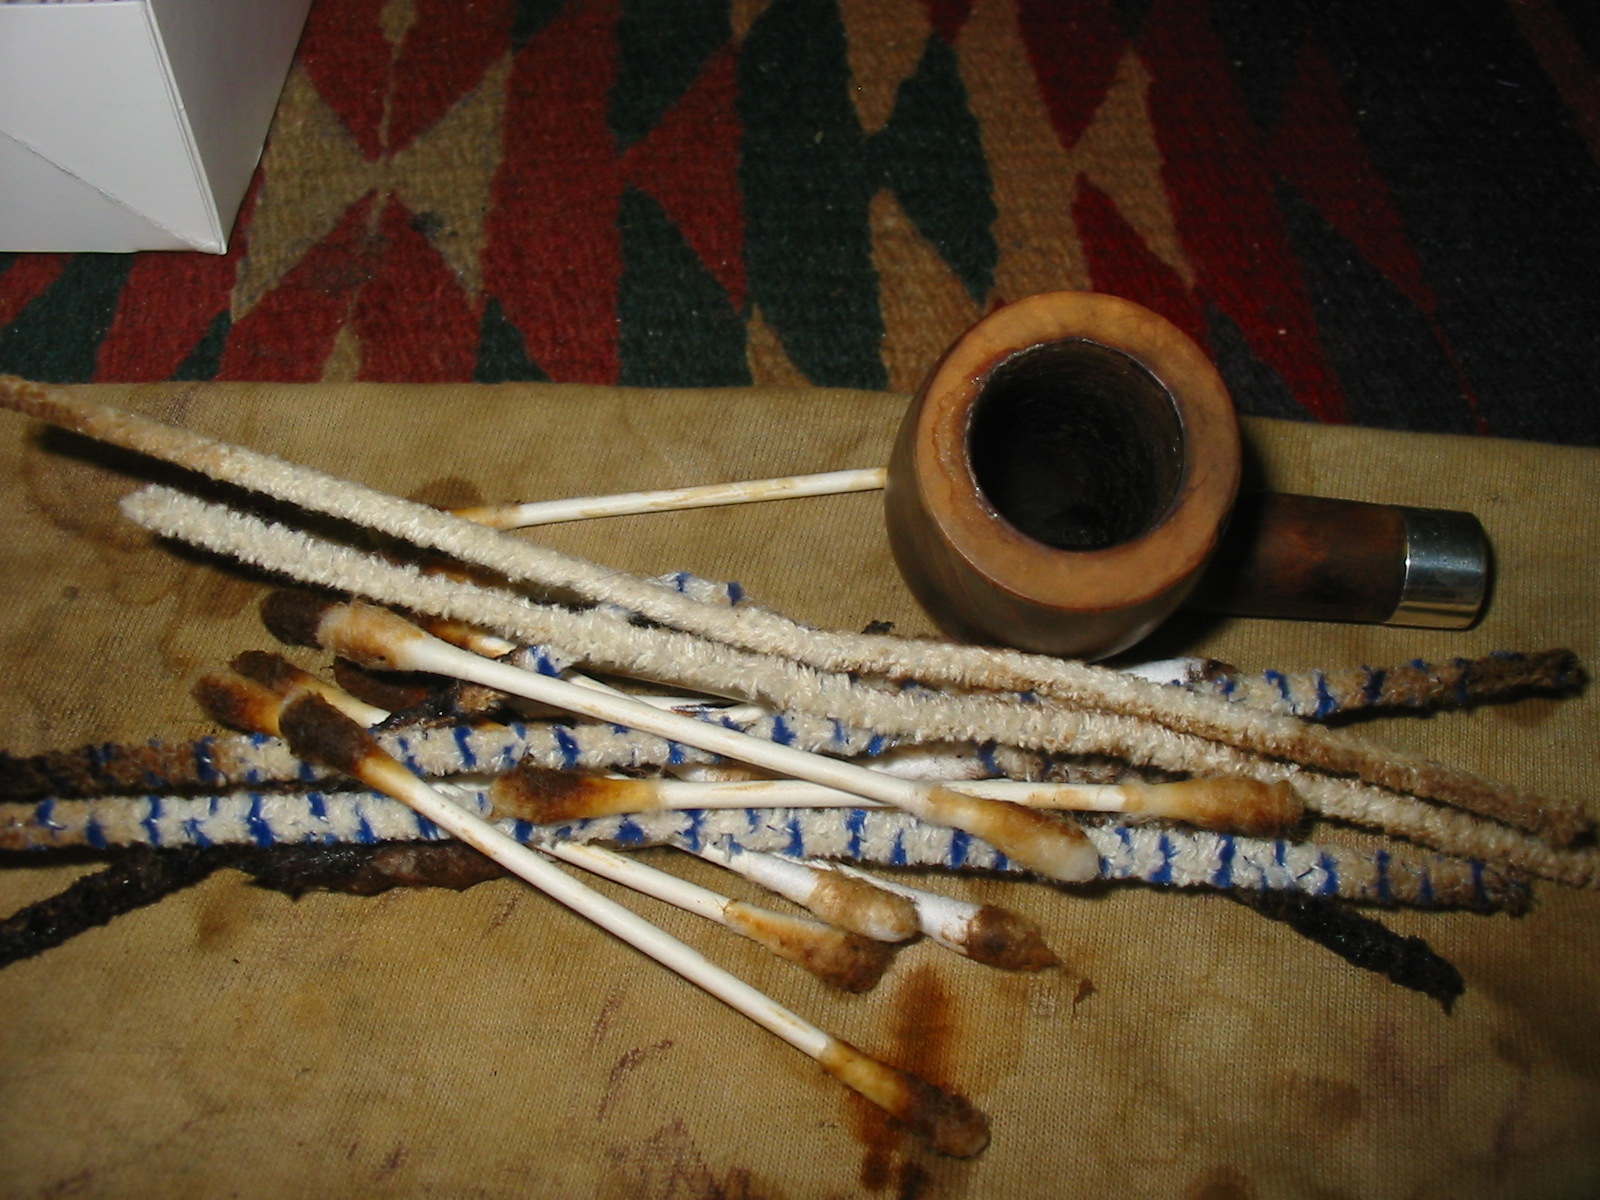
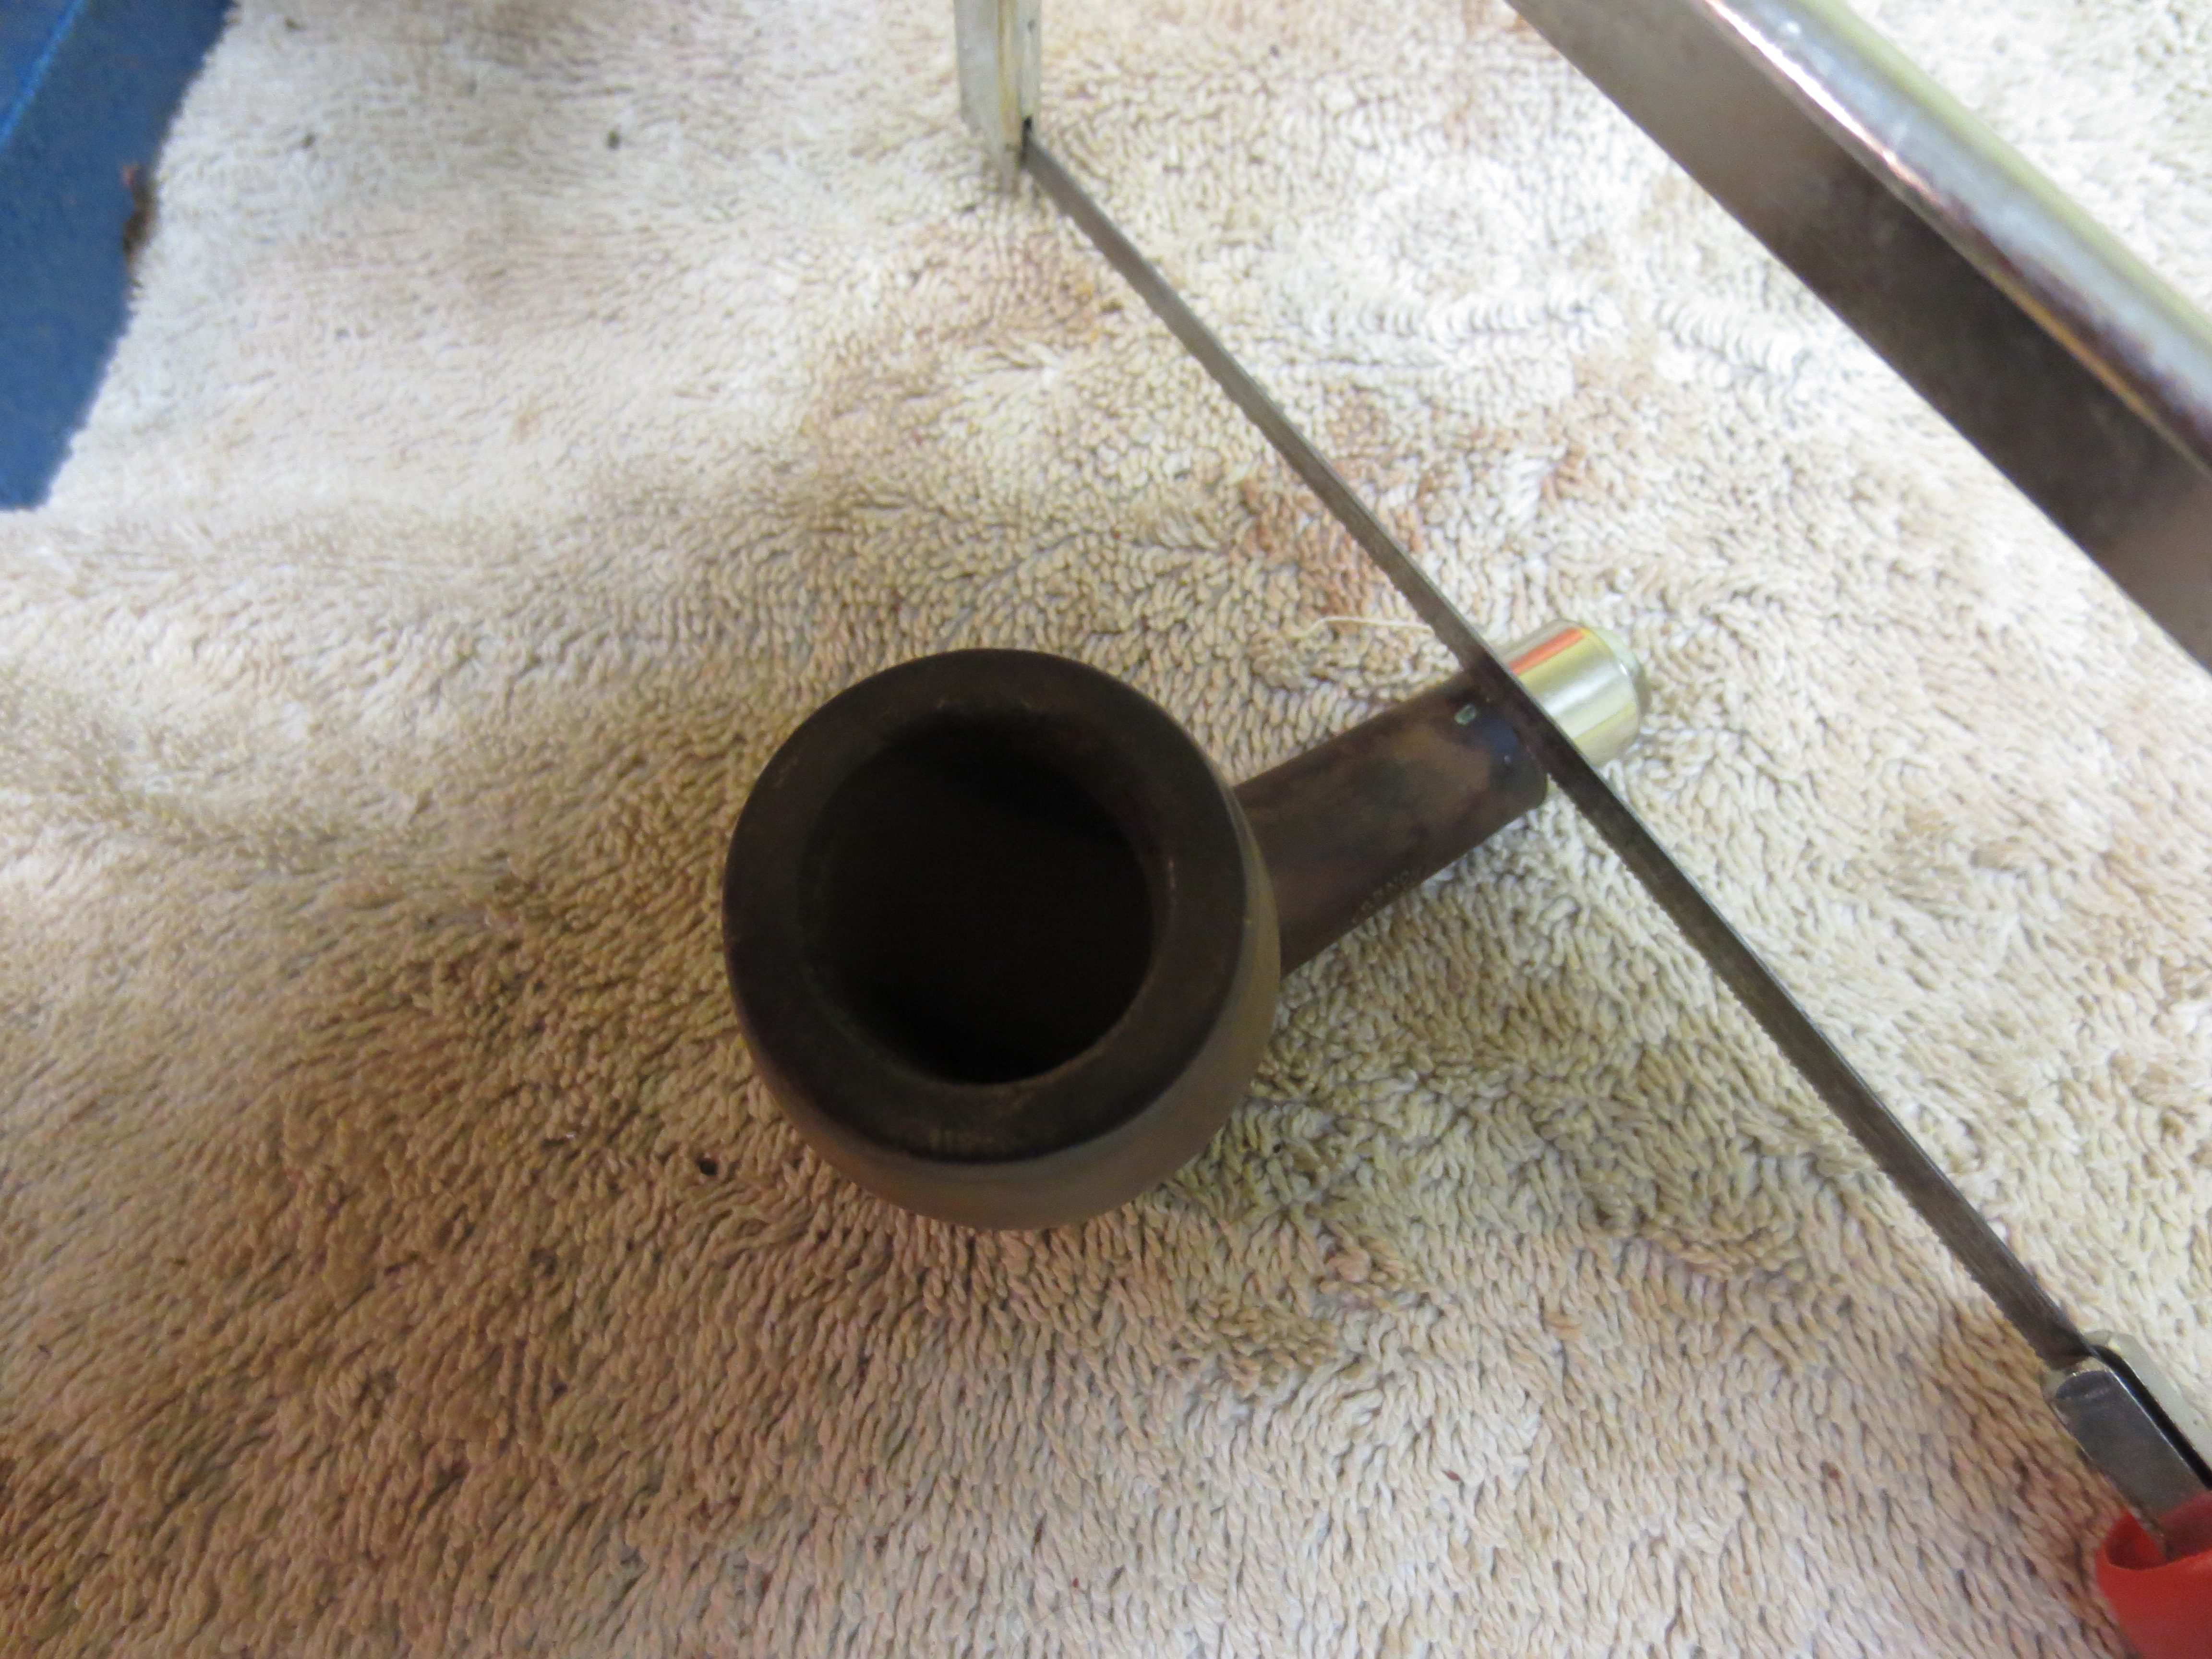
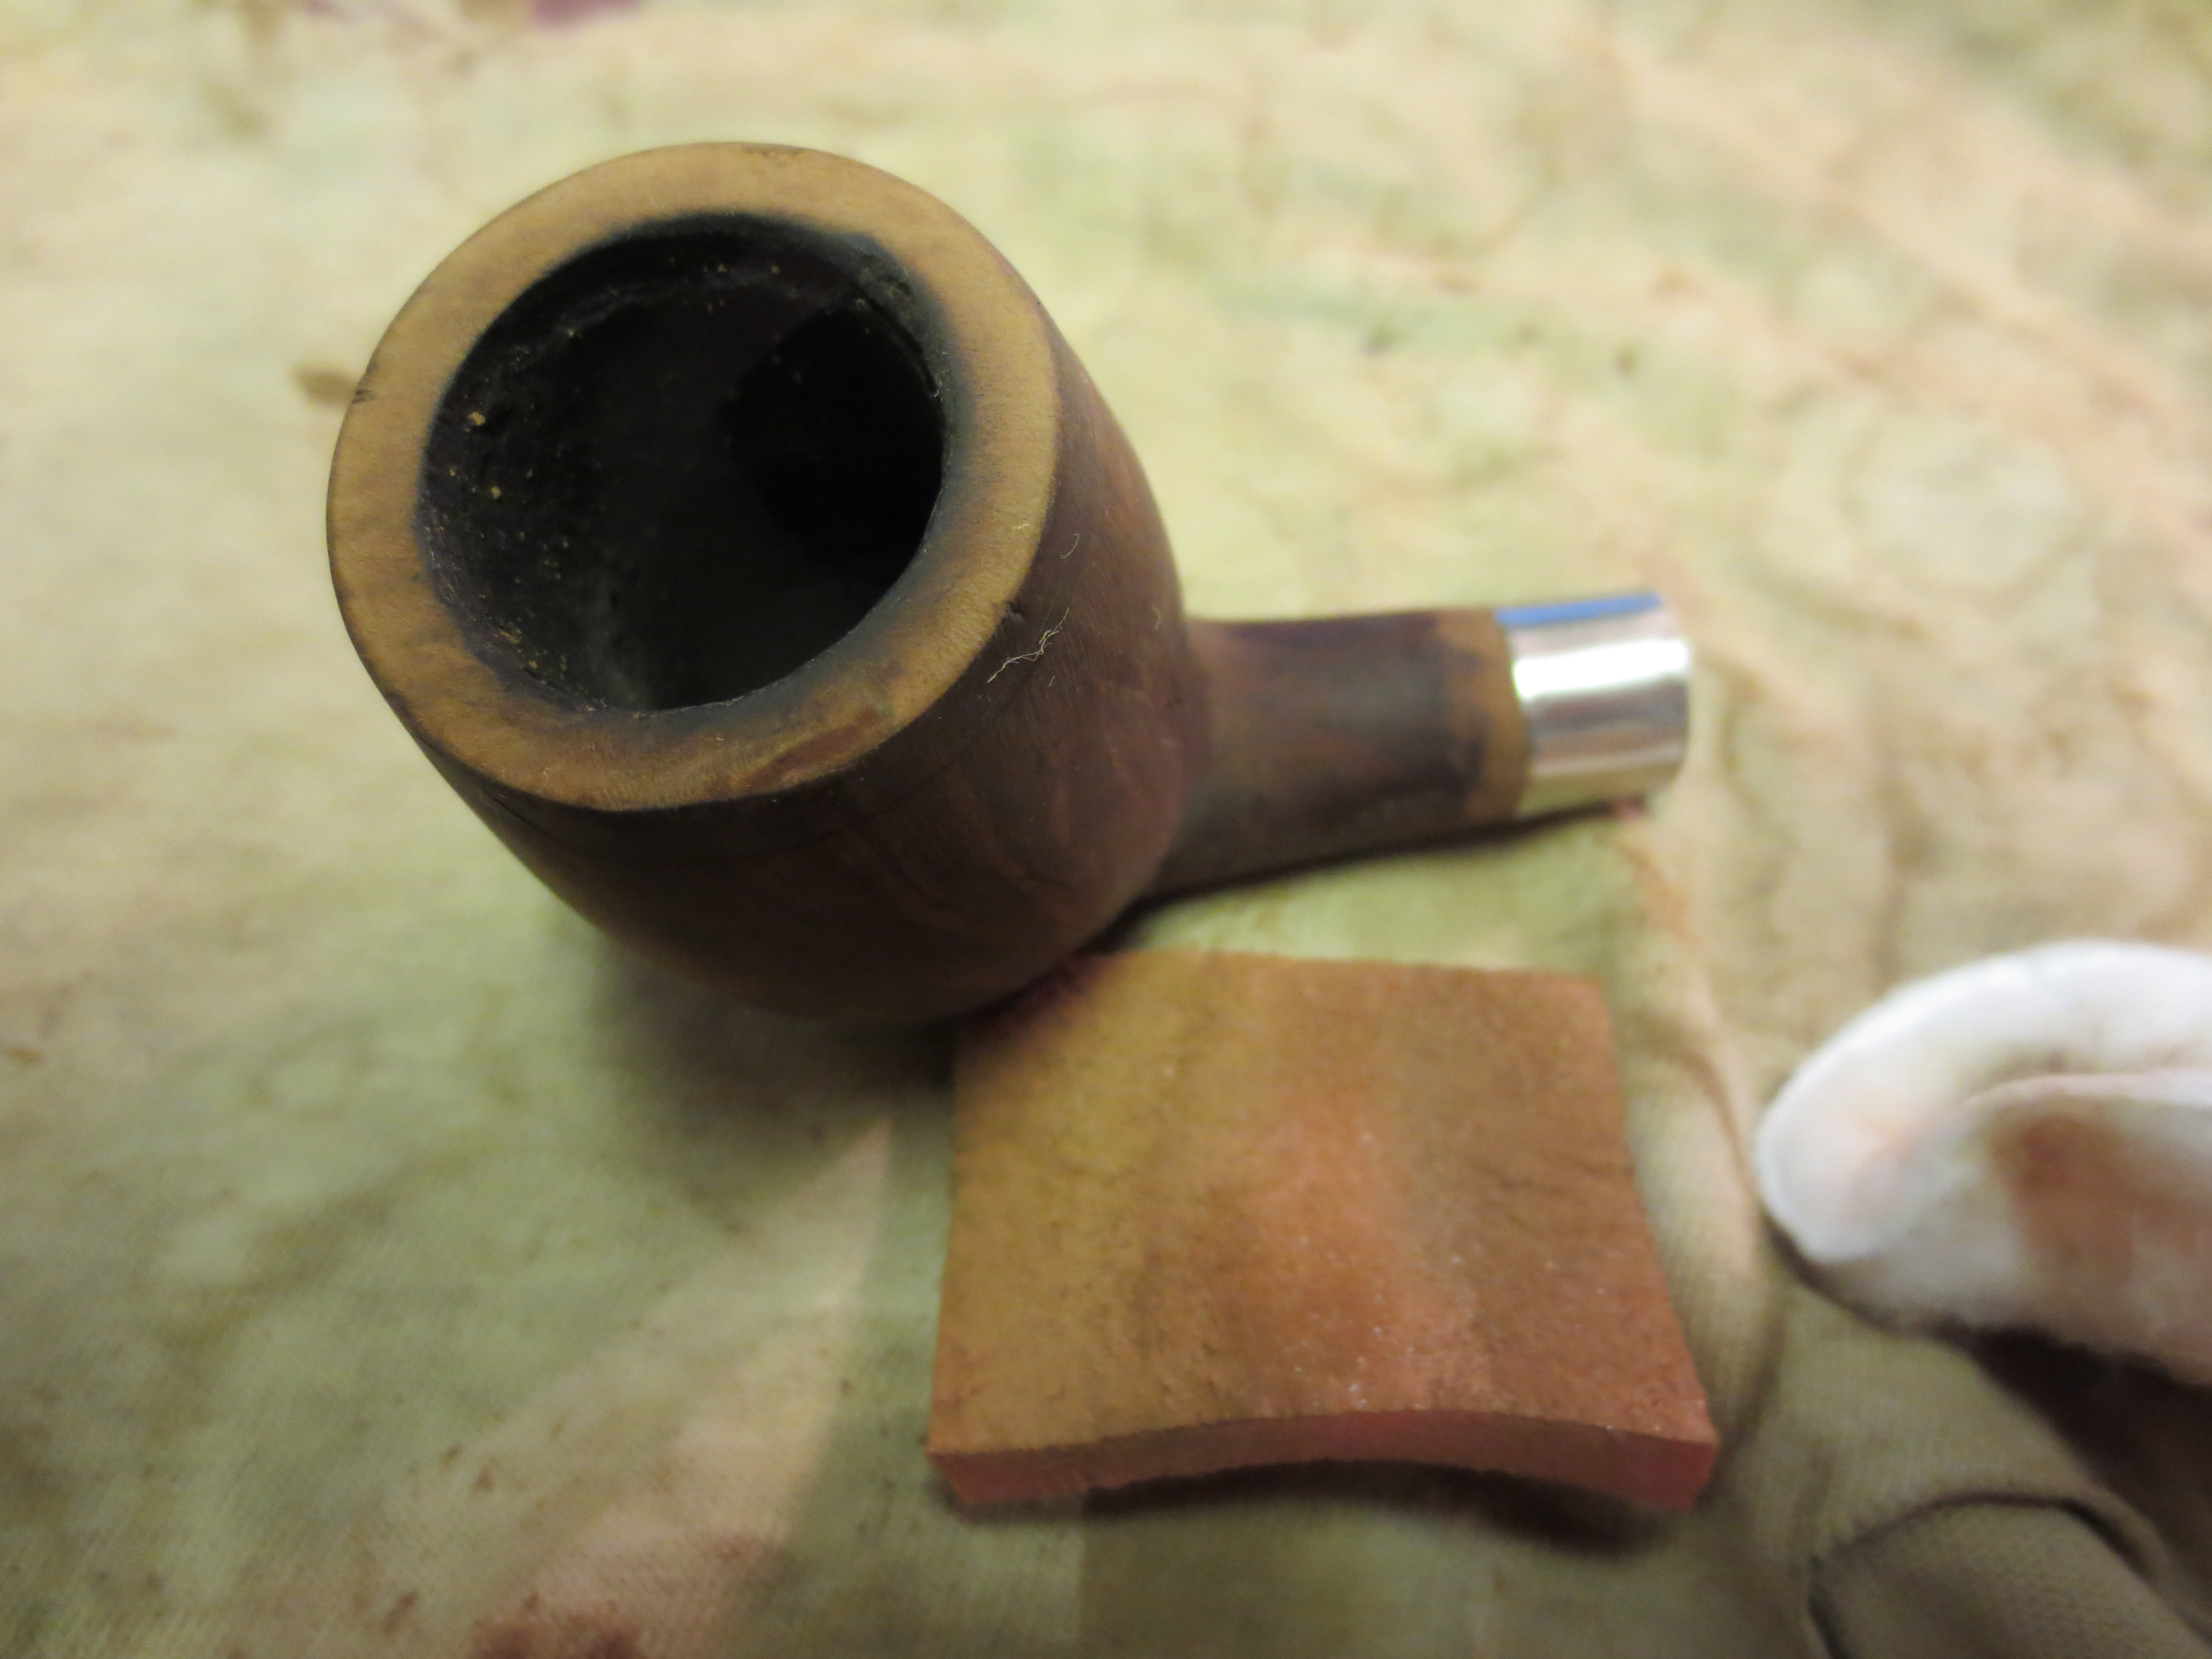
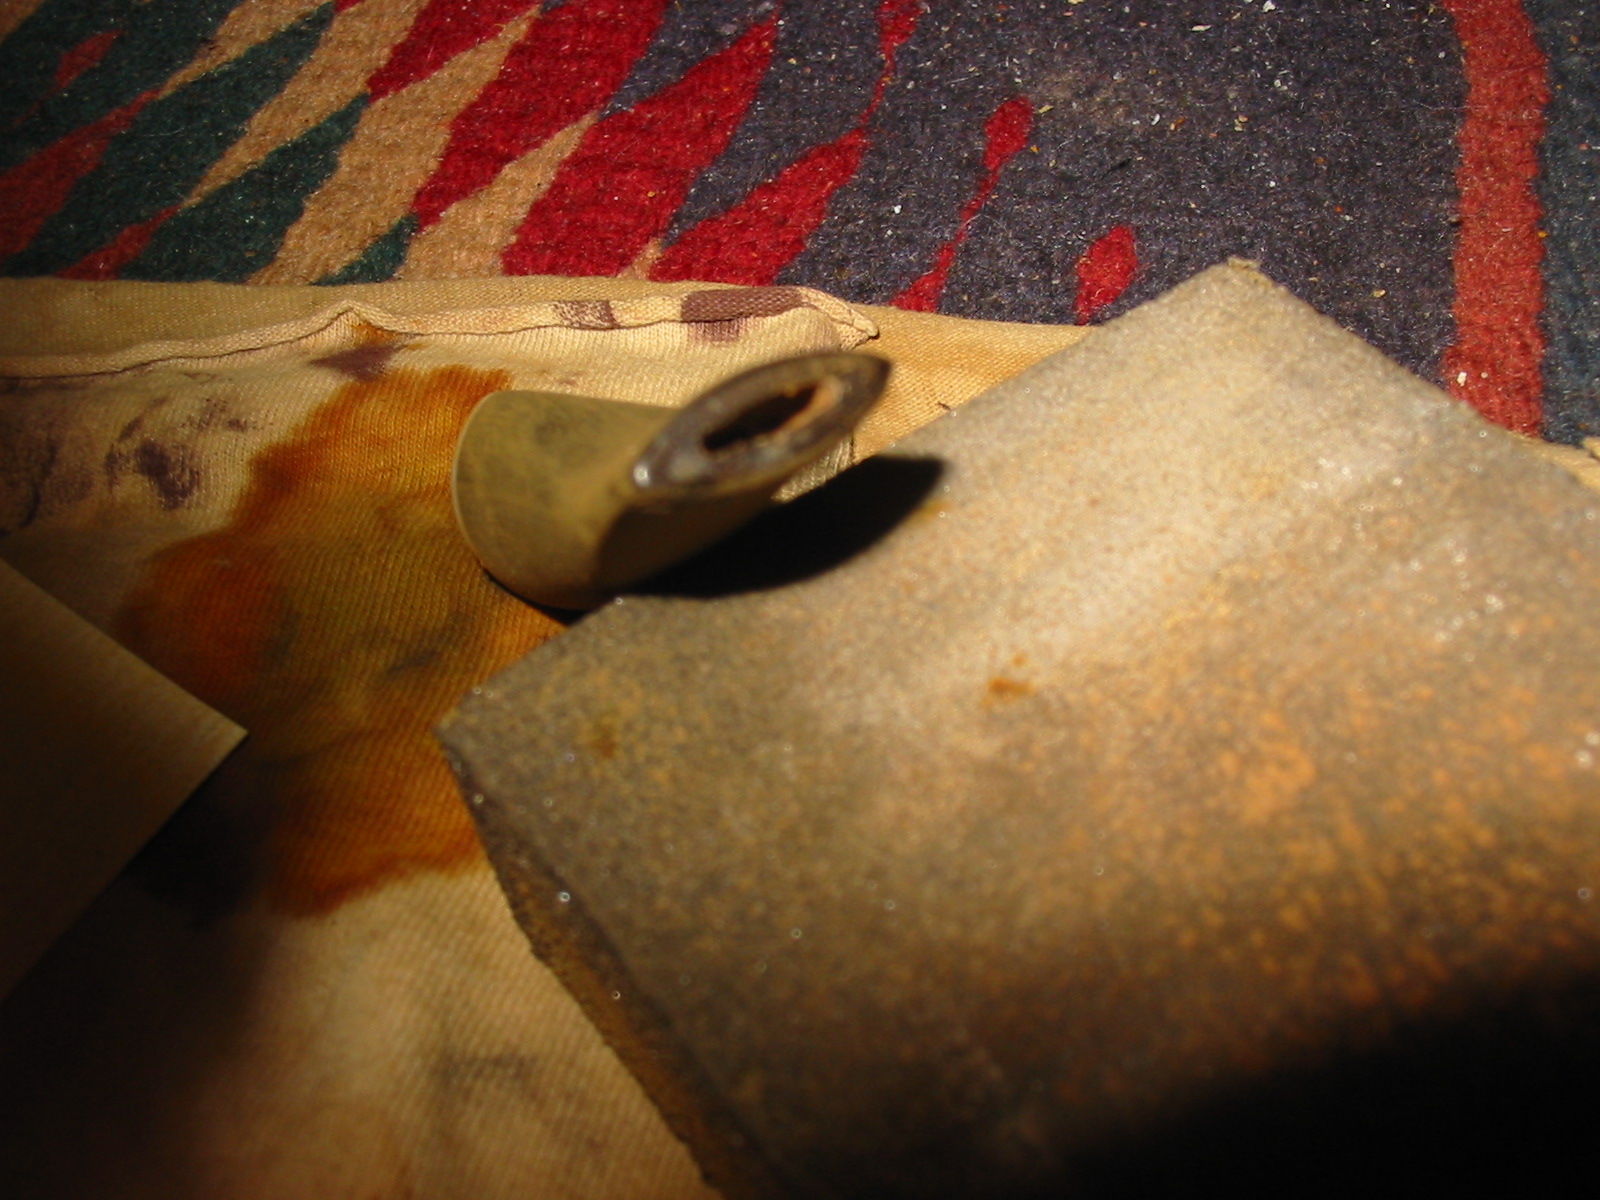
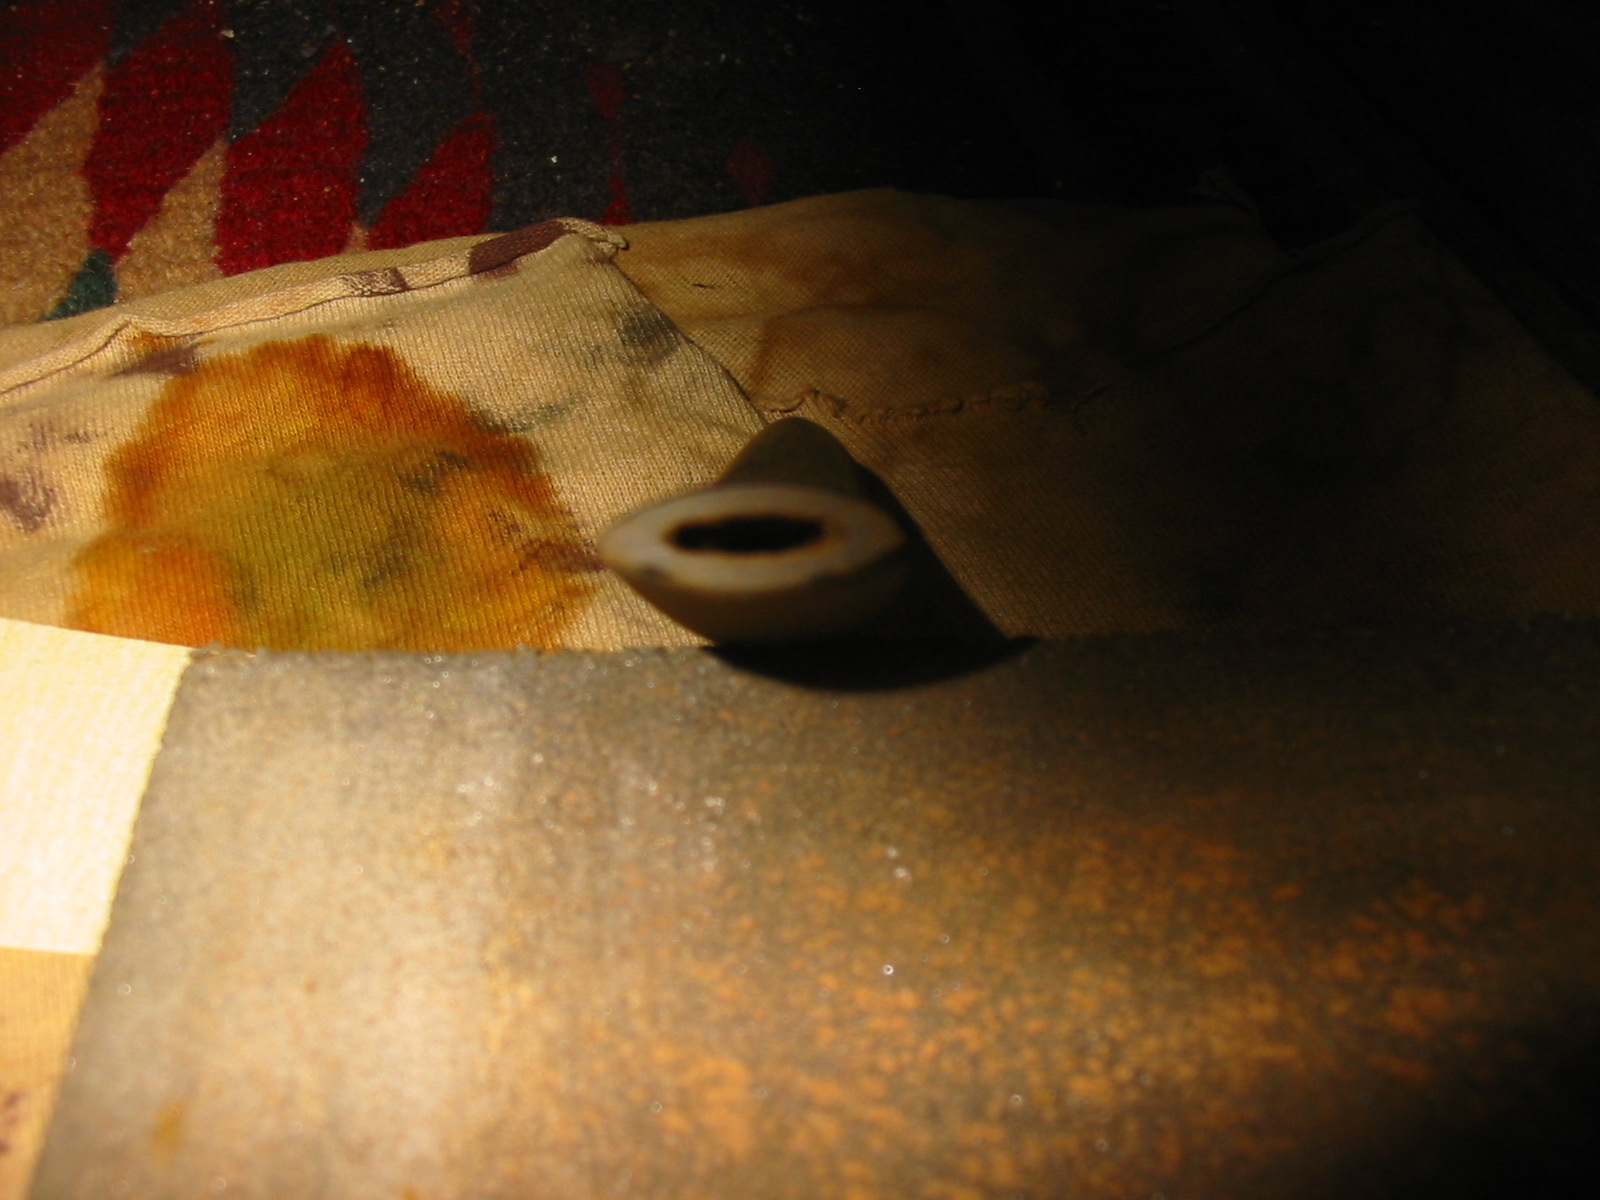
After examining it carefully with my lens and a dental pick I decided to begin the clean up by trying to remove the tenon. I used the screw that I generally use to remove a tenon to no avail. The threads in the mortise were locked tight around the tenon. I picked at it with the dental pick and was unable to remove it that way either. I decided to drill out the old tenon. So I set up a cordless drill with a drill bit slightly larger than the airway in the broken tenon. I slowly drilled the airway with the bit and exchanged it for increasingly larger bits until I had the airway cleared of the debris. I then used a ¼ inch bit to open the mortise and clear out the remaining debris of the mortise and tenon. The second photo below shows the mortise after I opened it up. I used a dental pick to clean out the remaining pieces and hand turned the quarter-inch drill bit into the mortise to smooth out the walls of the airway and open it to receive a new tenon.

IMG_1804

IMG_1806

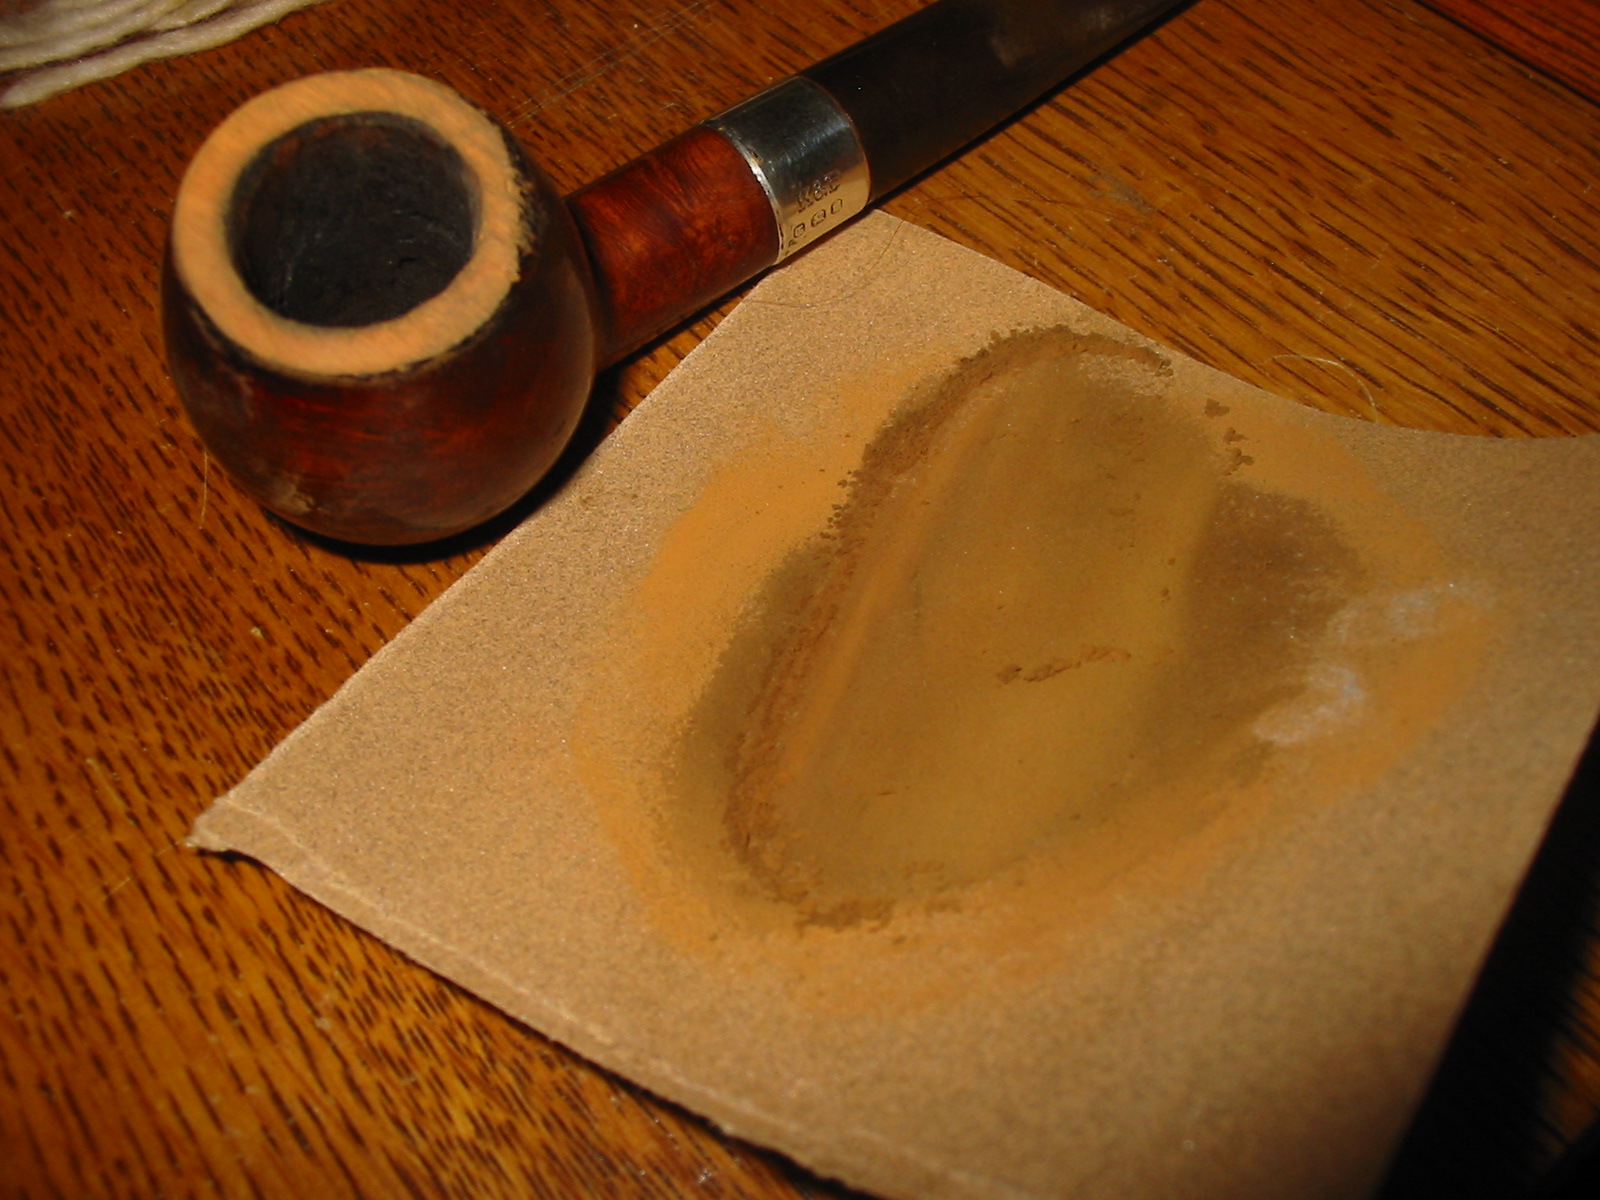
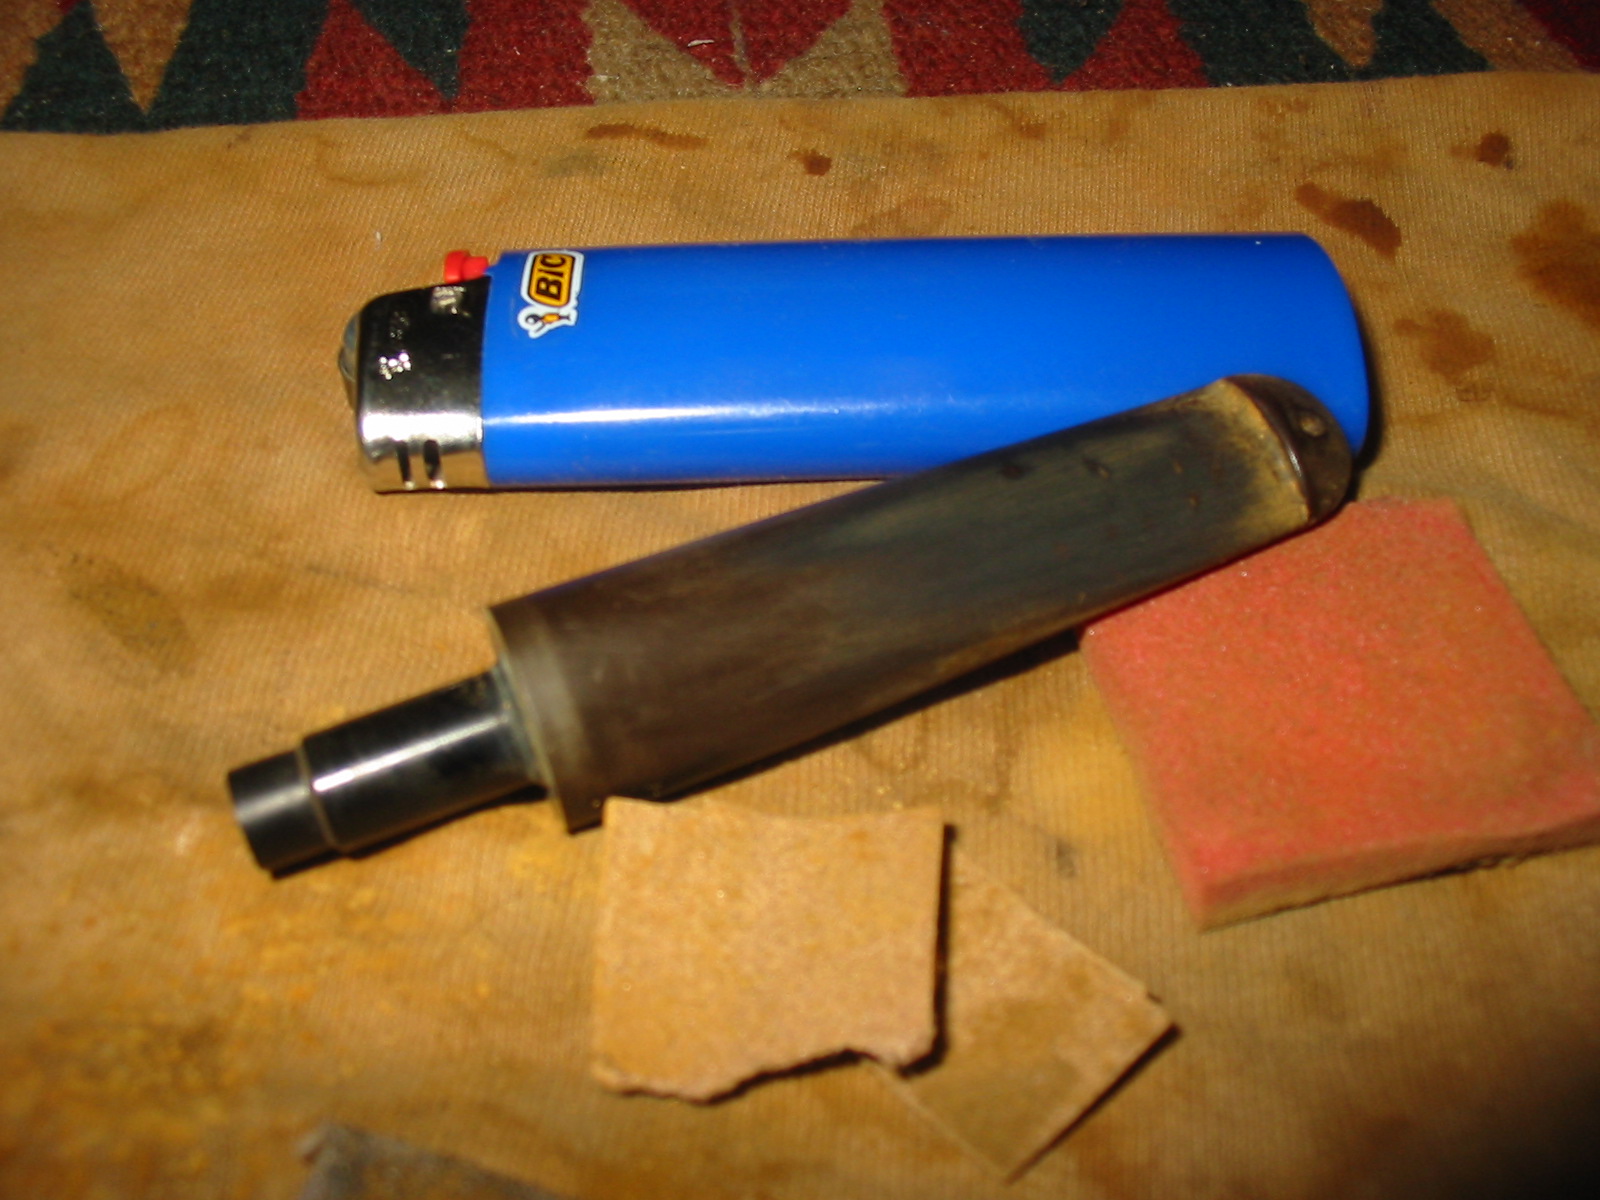
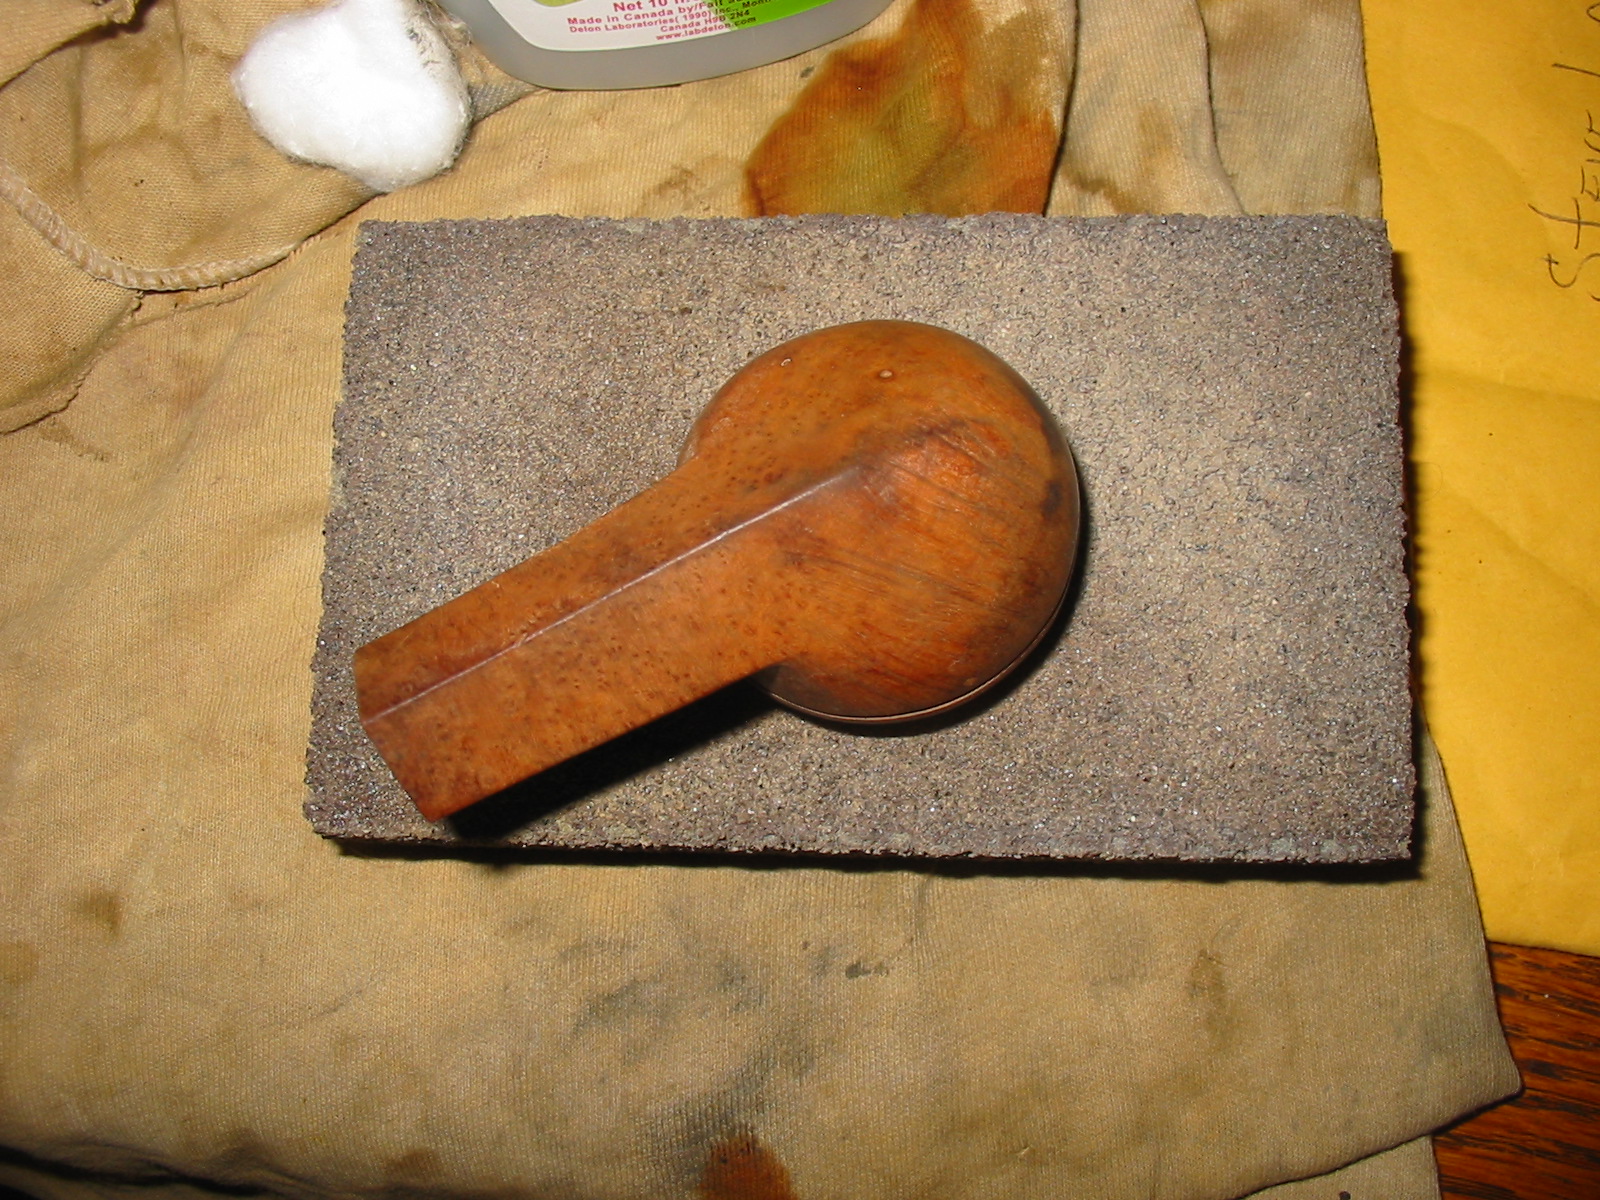
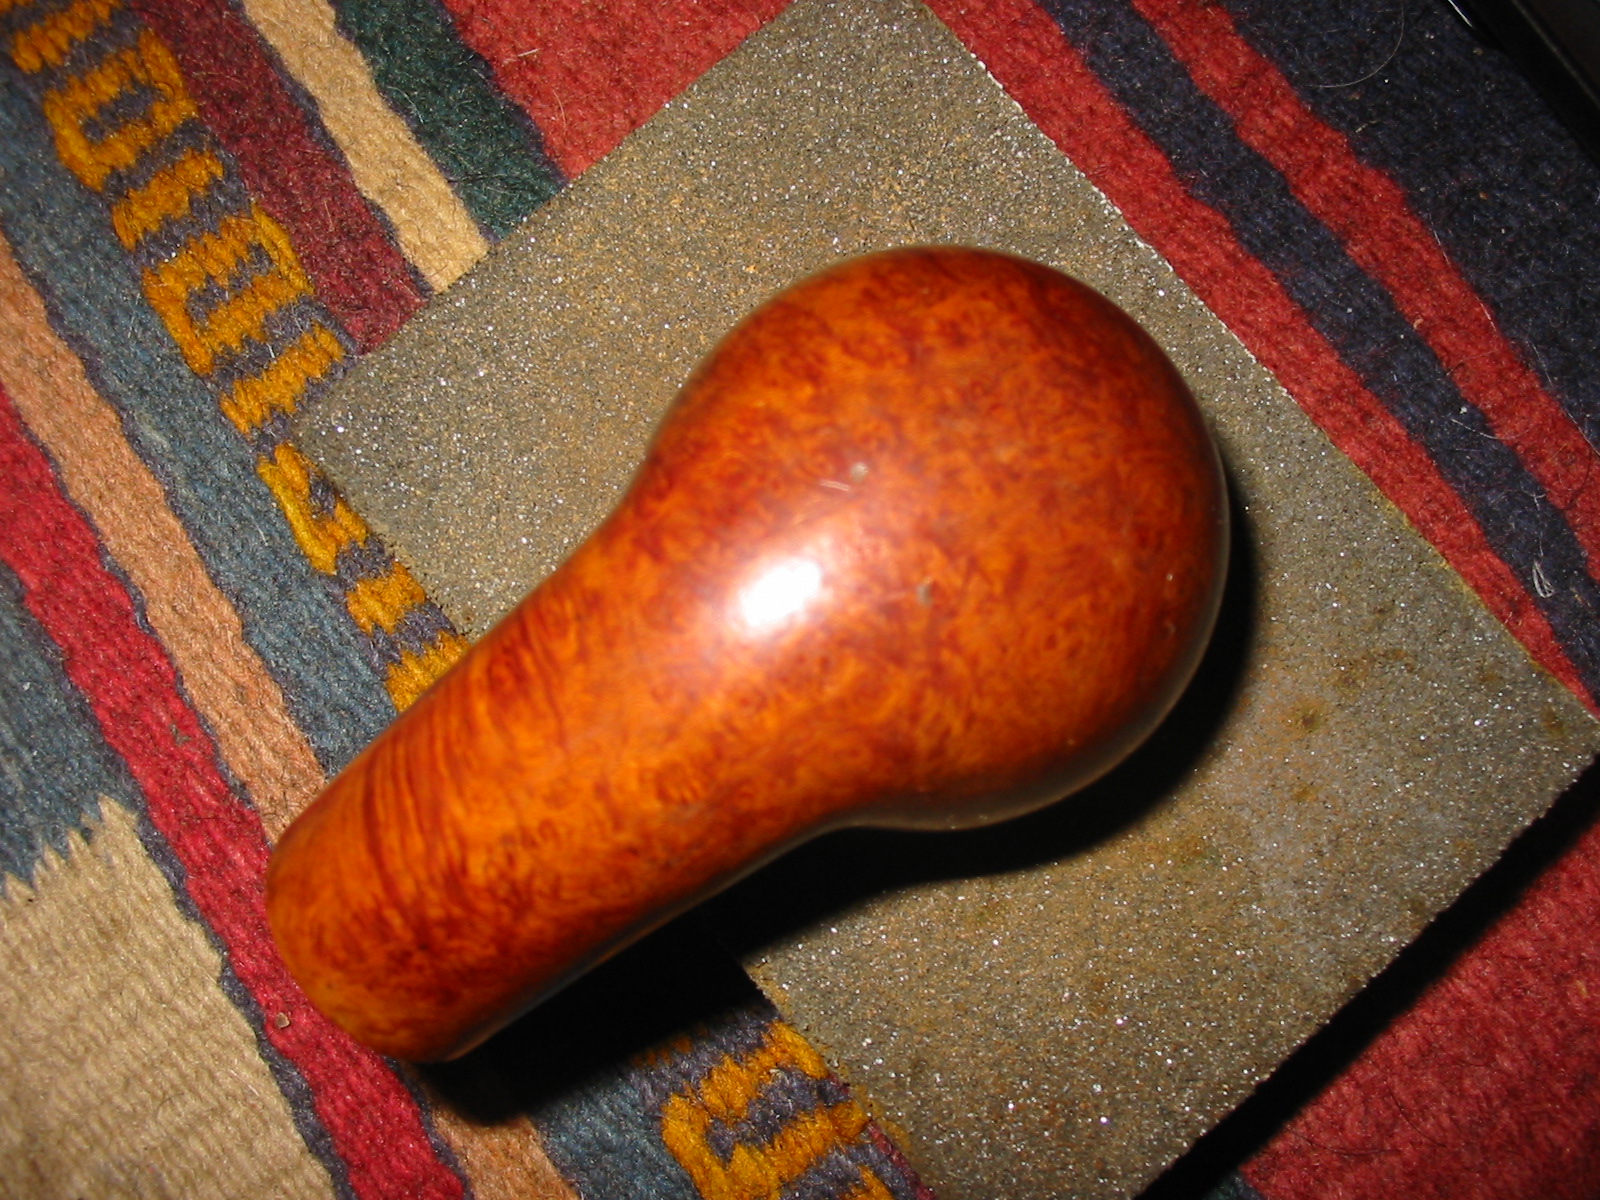
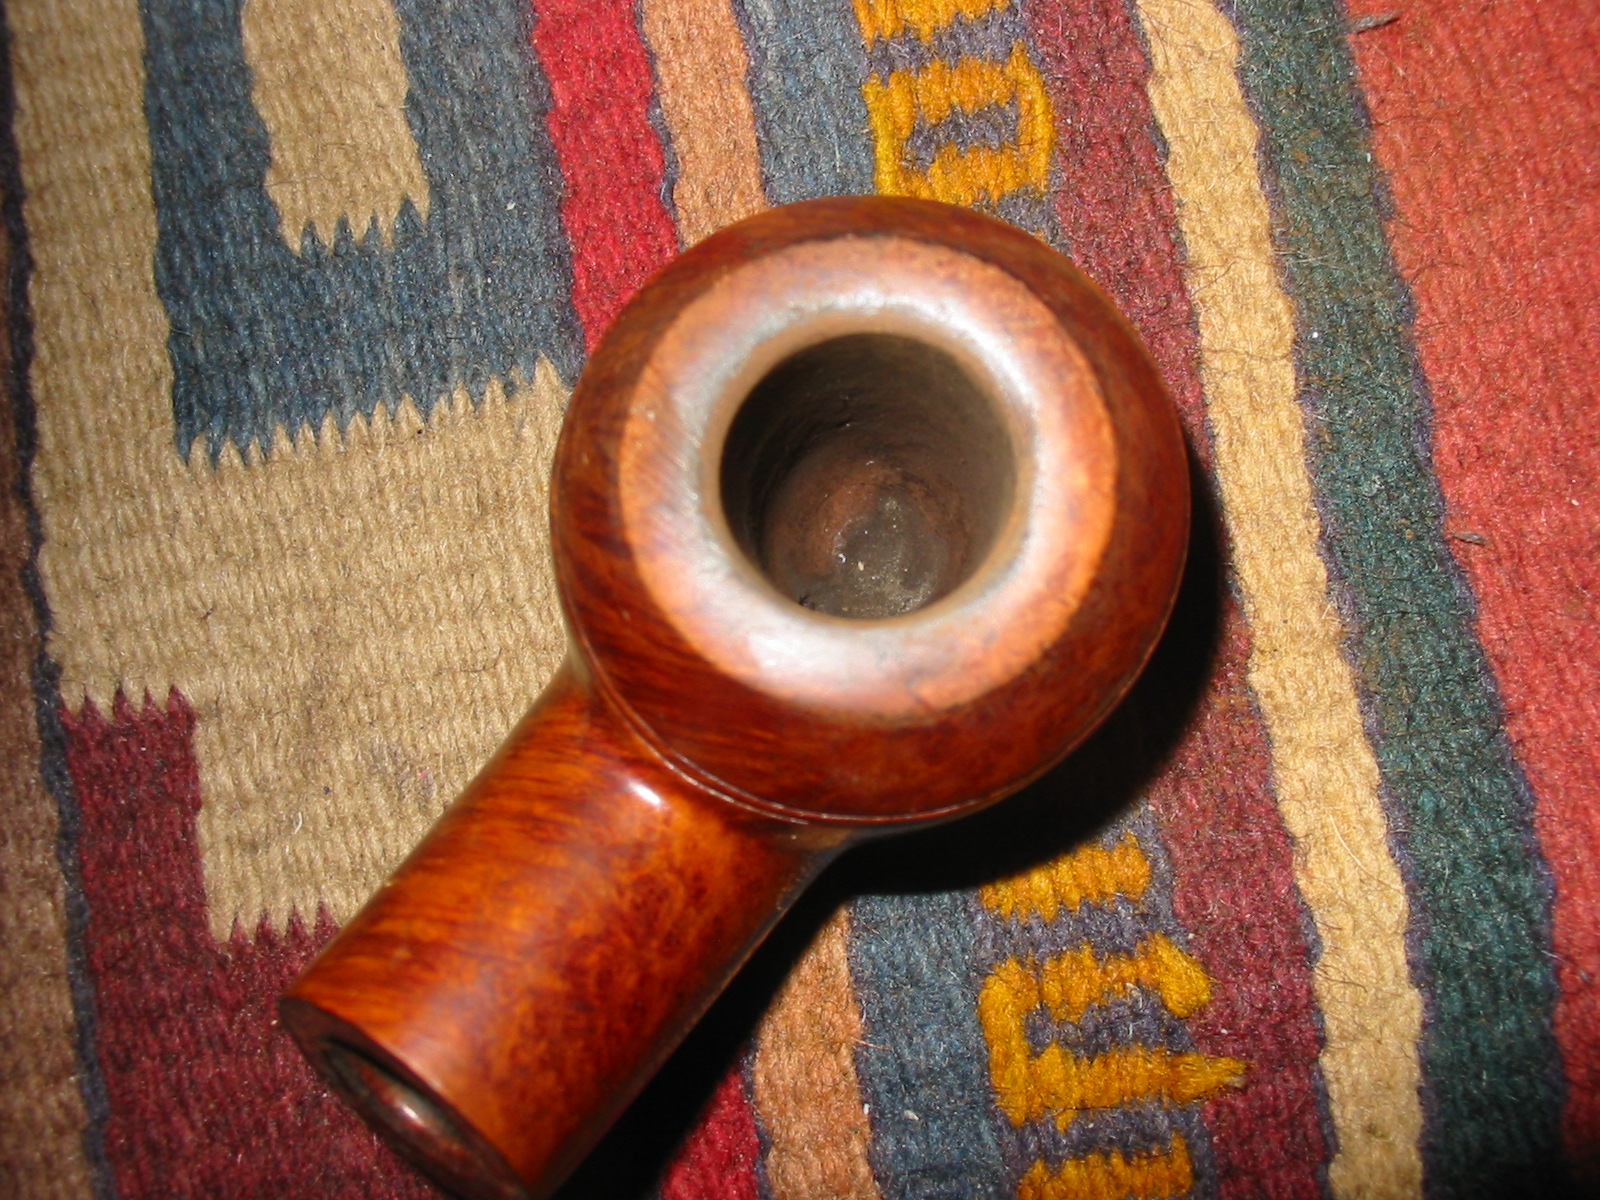
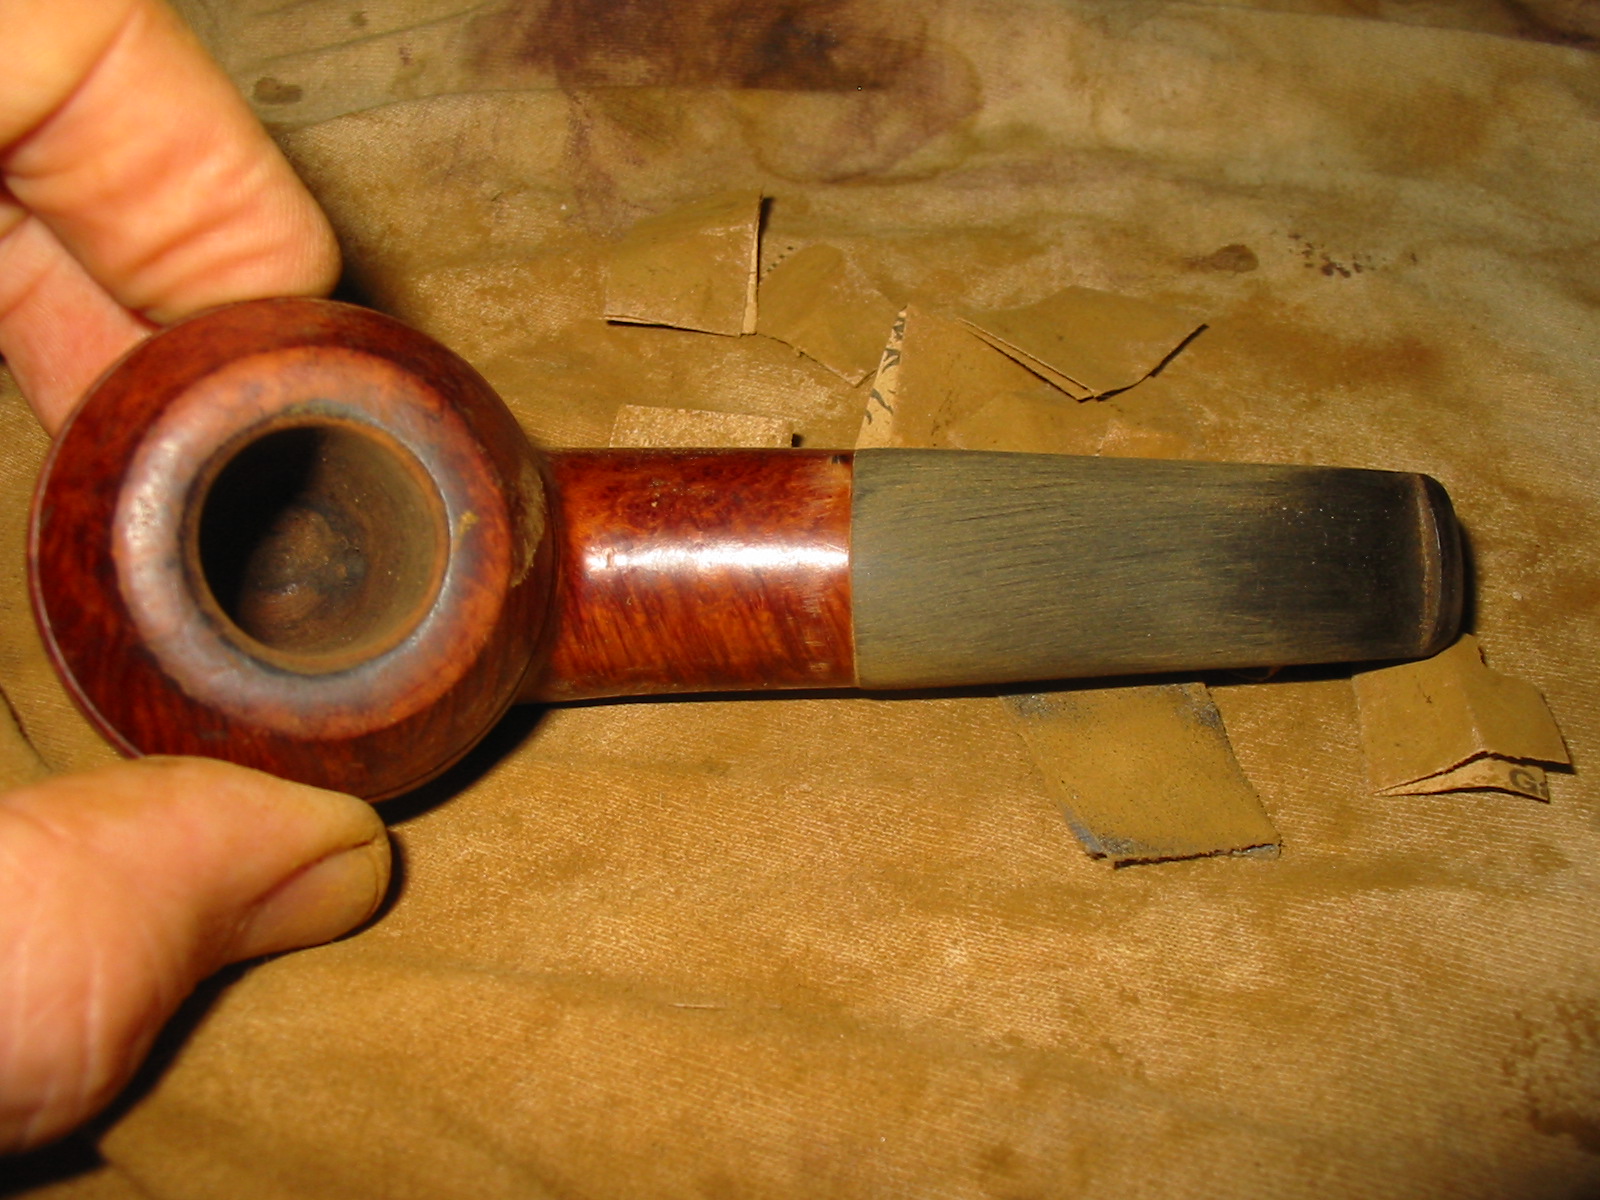
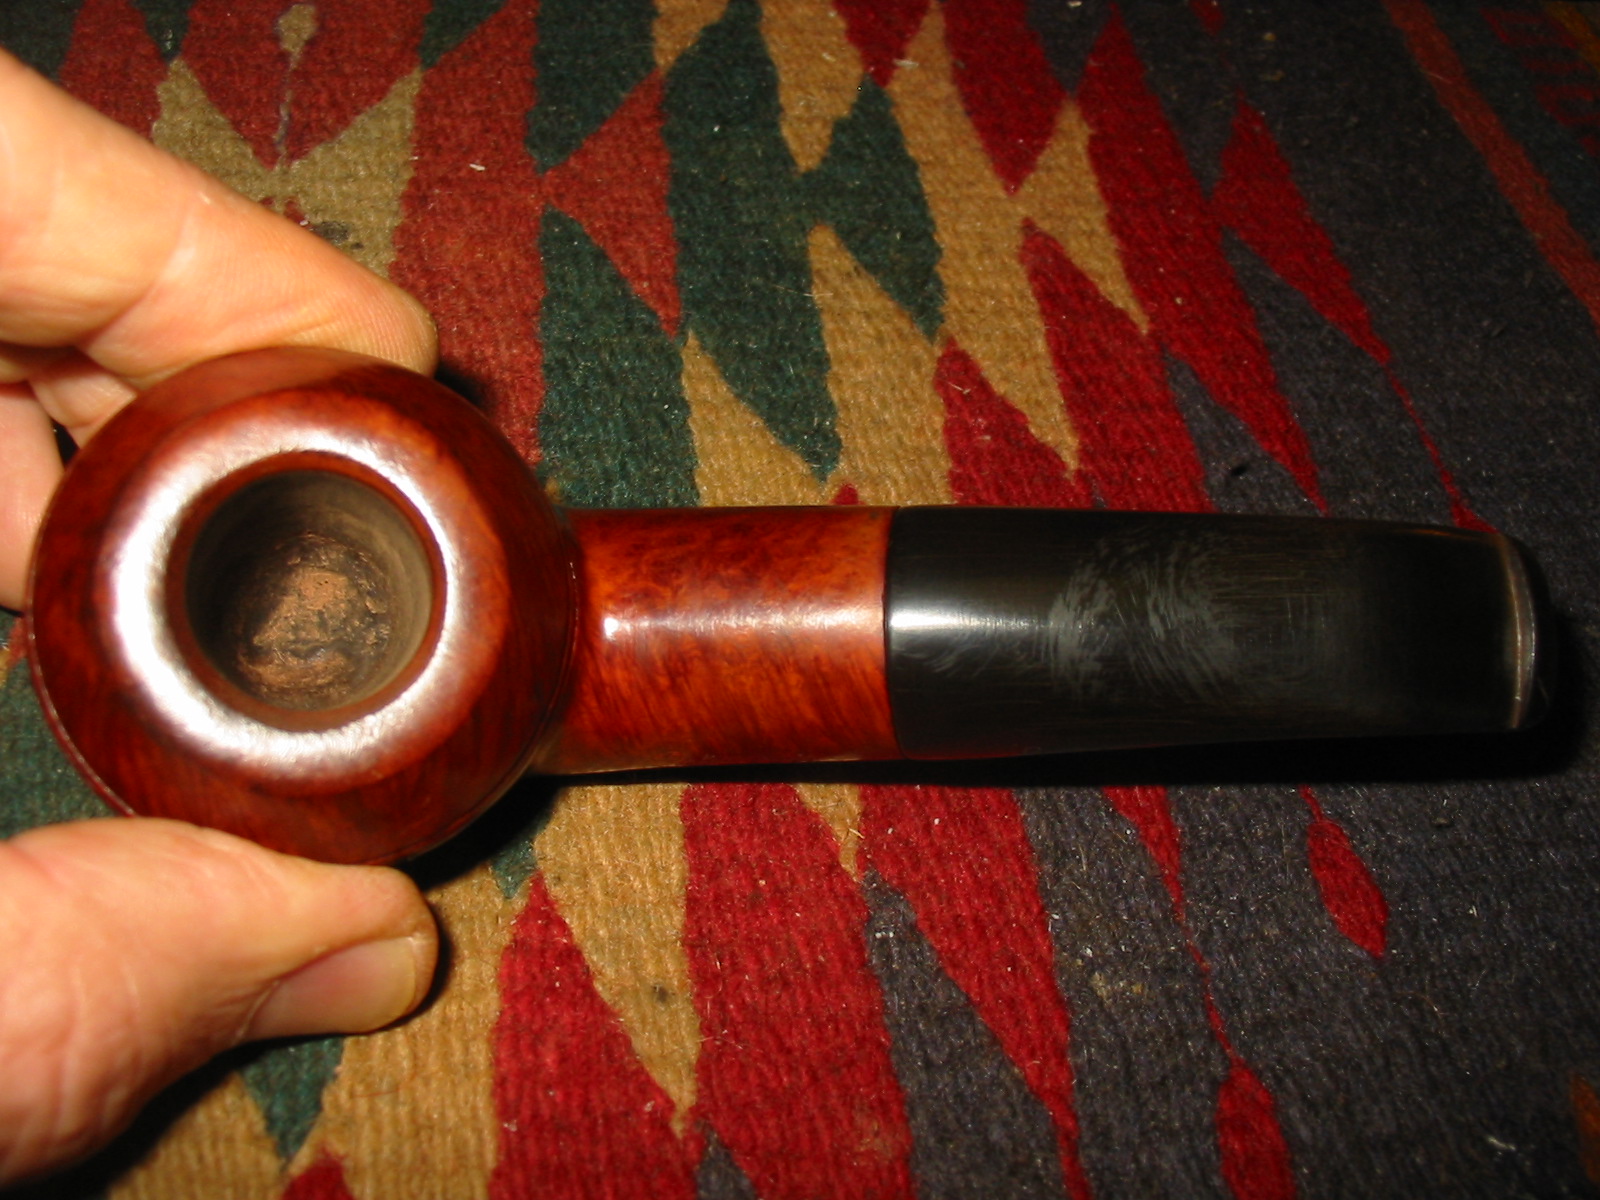
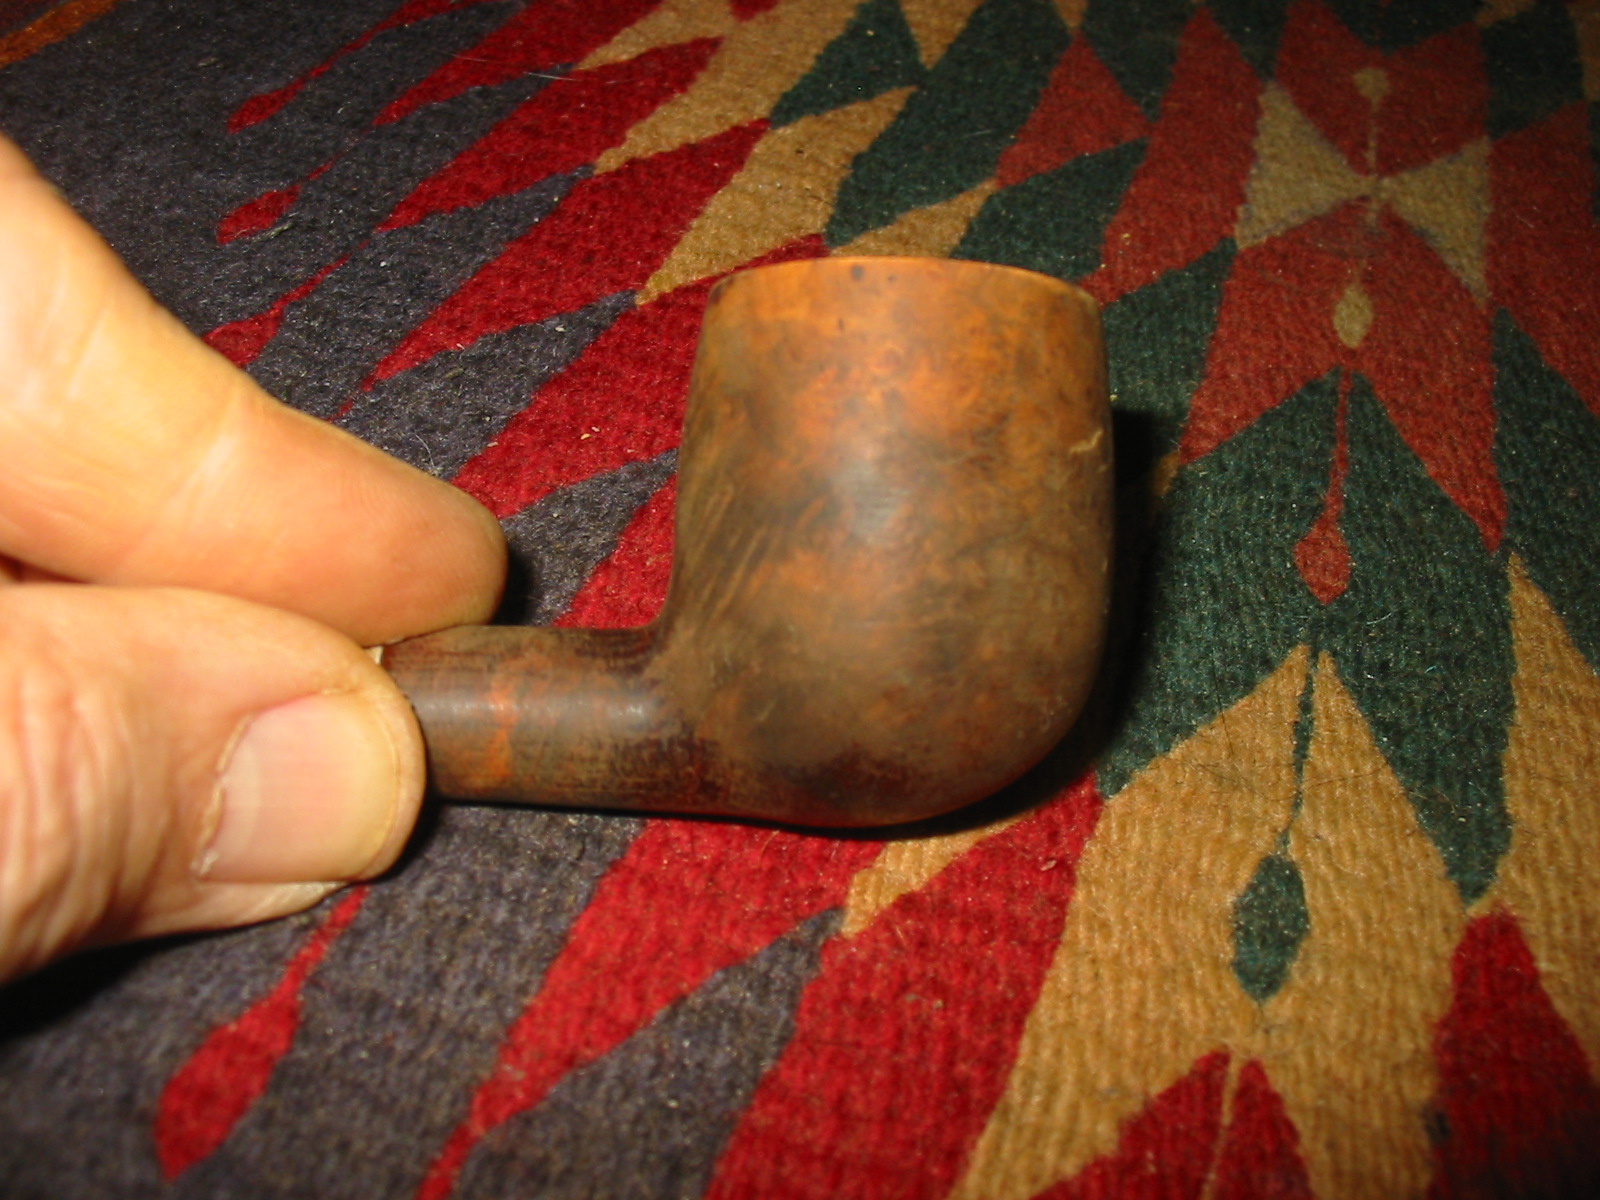
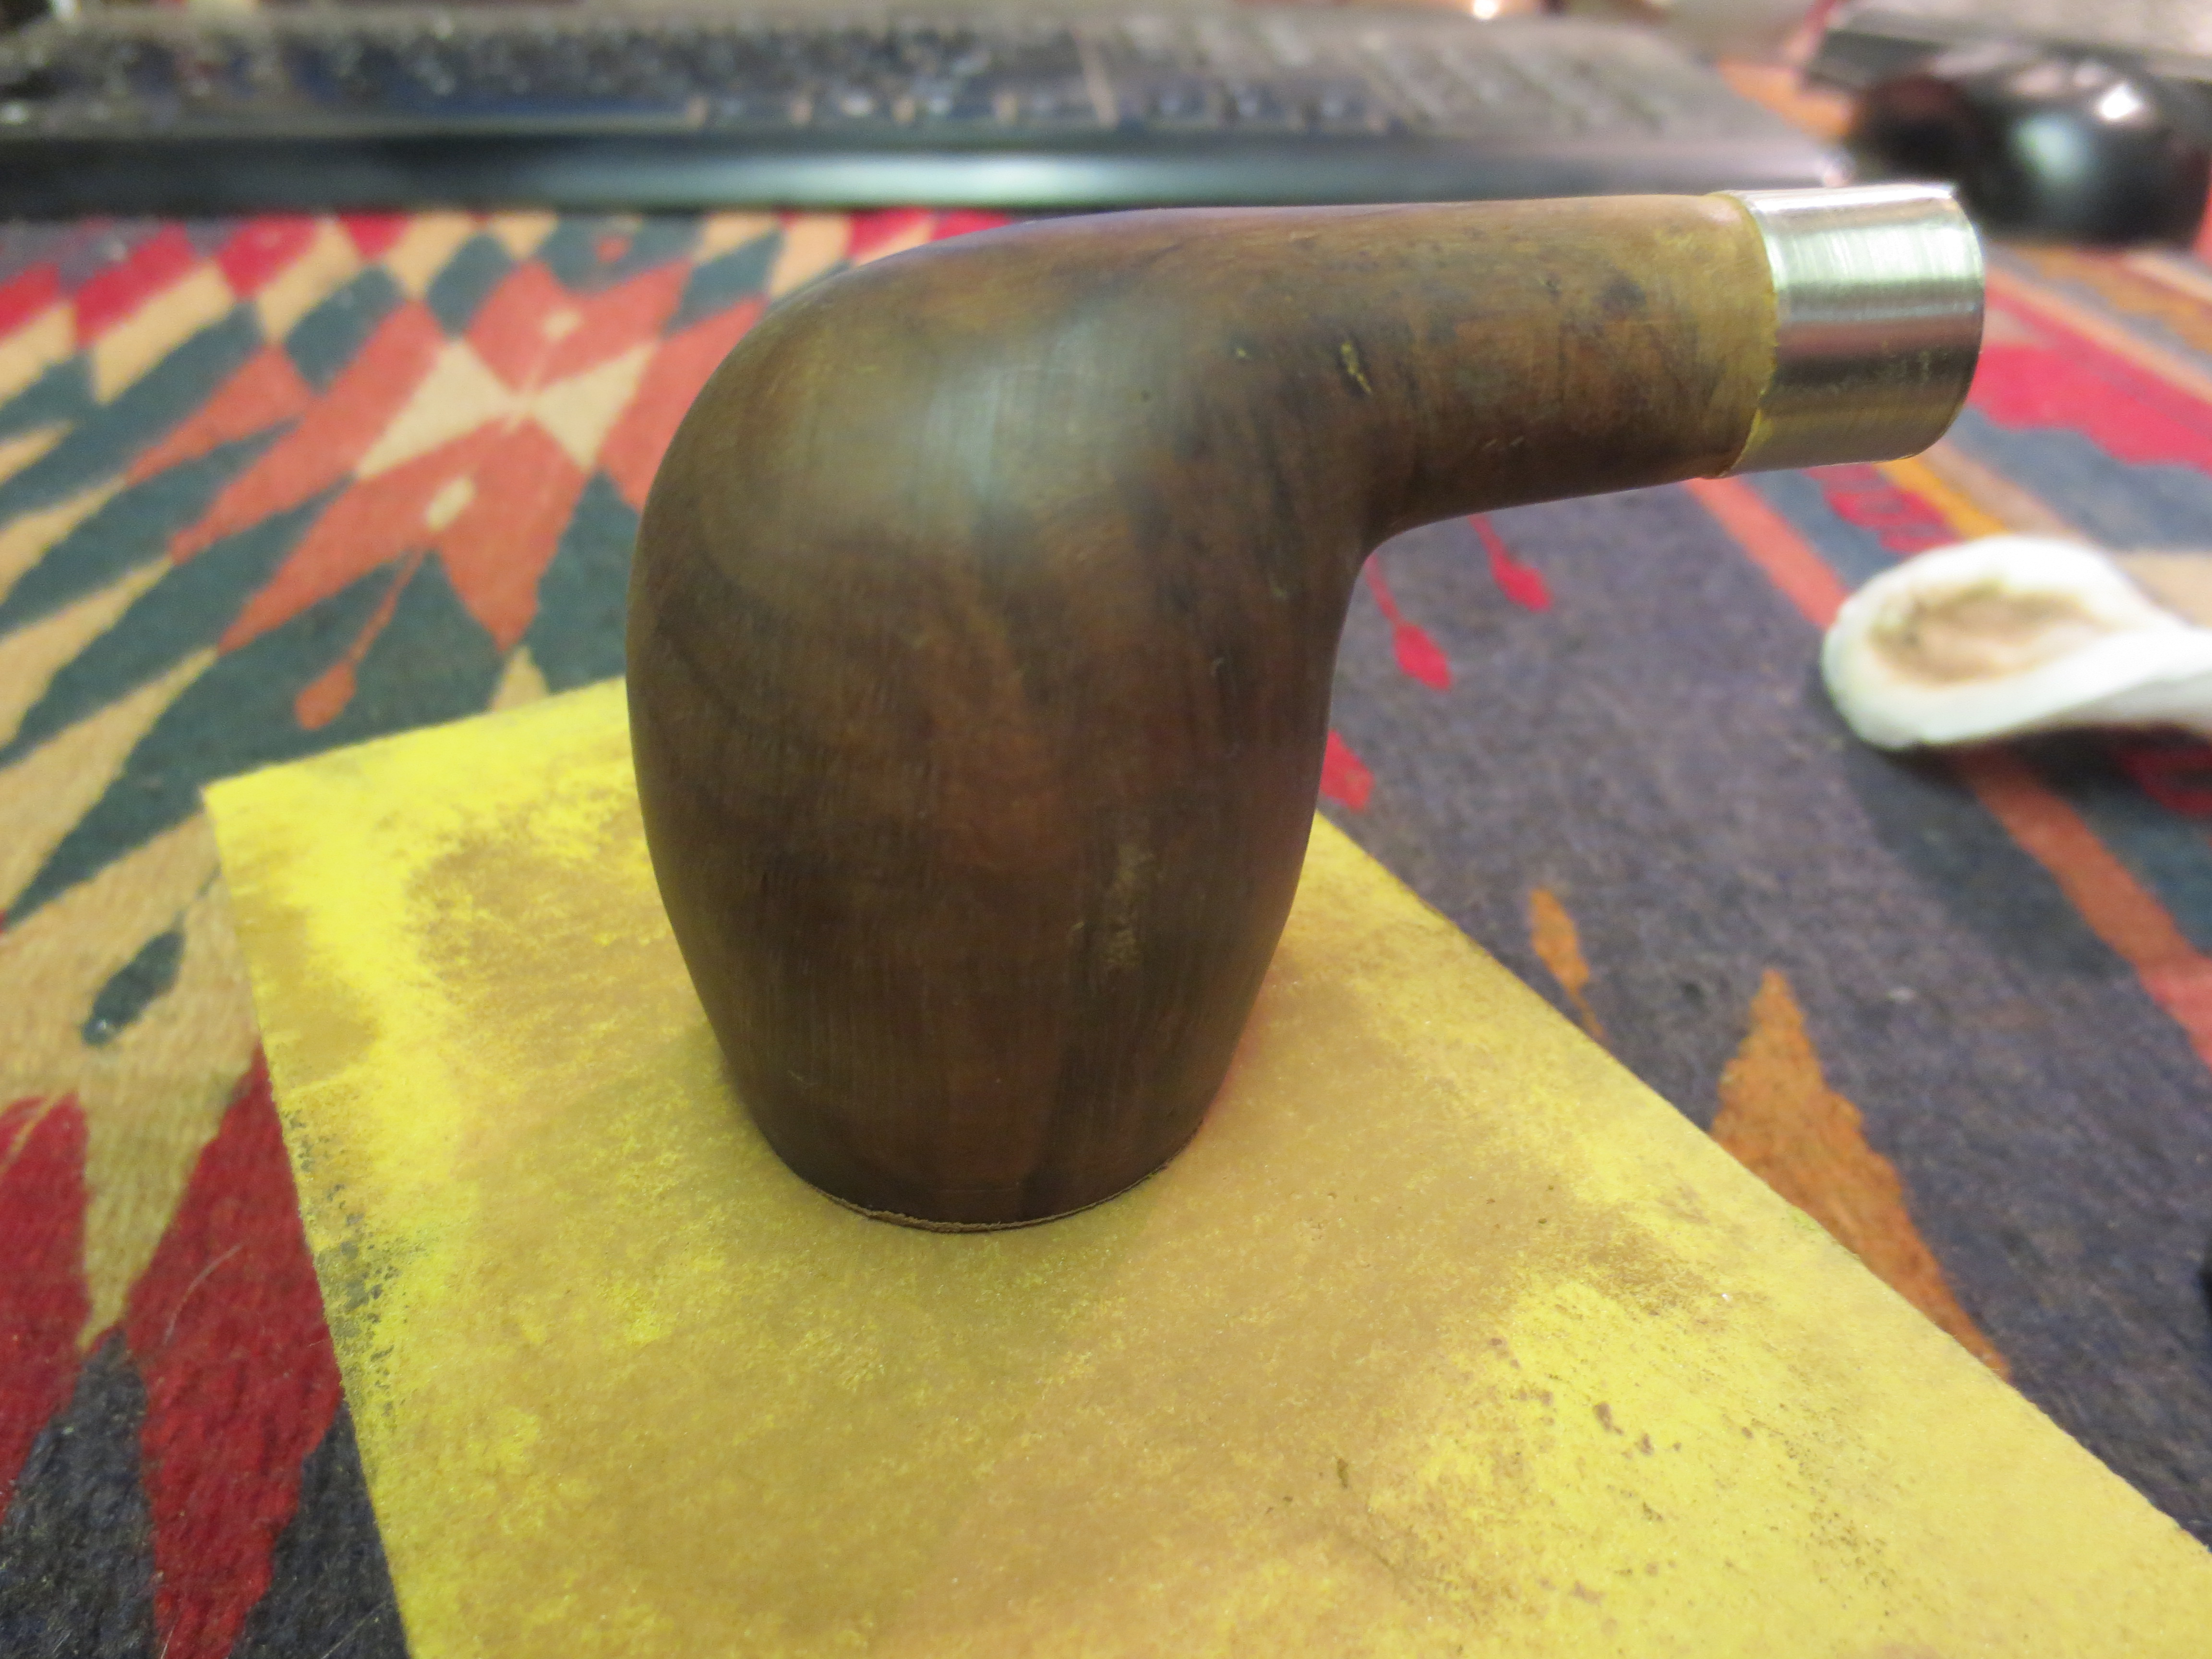
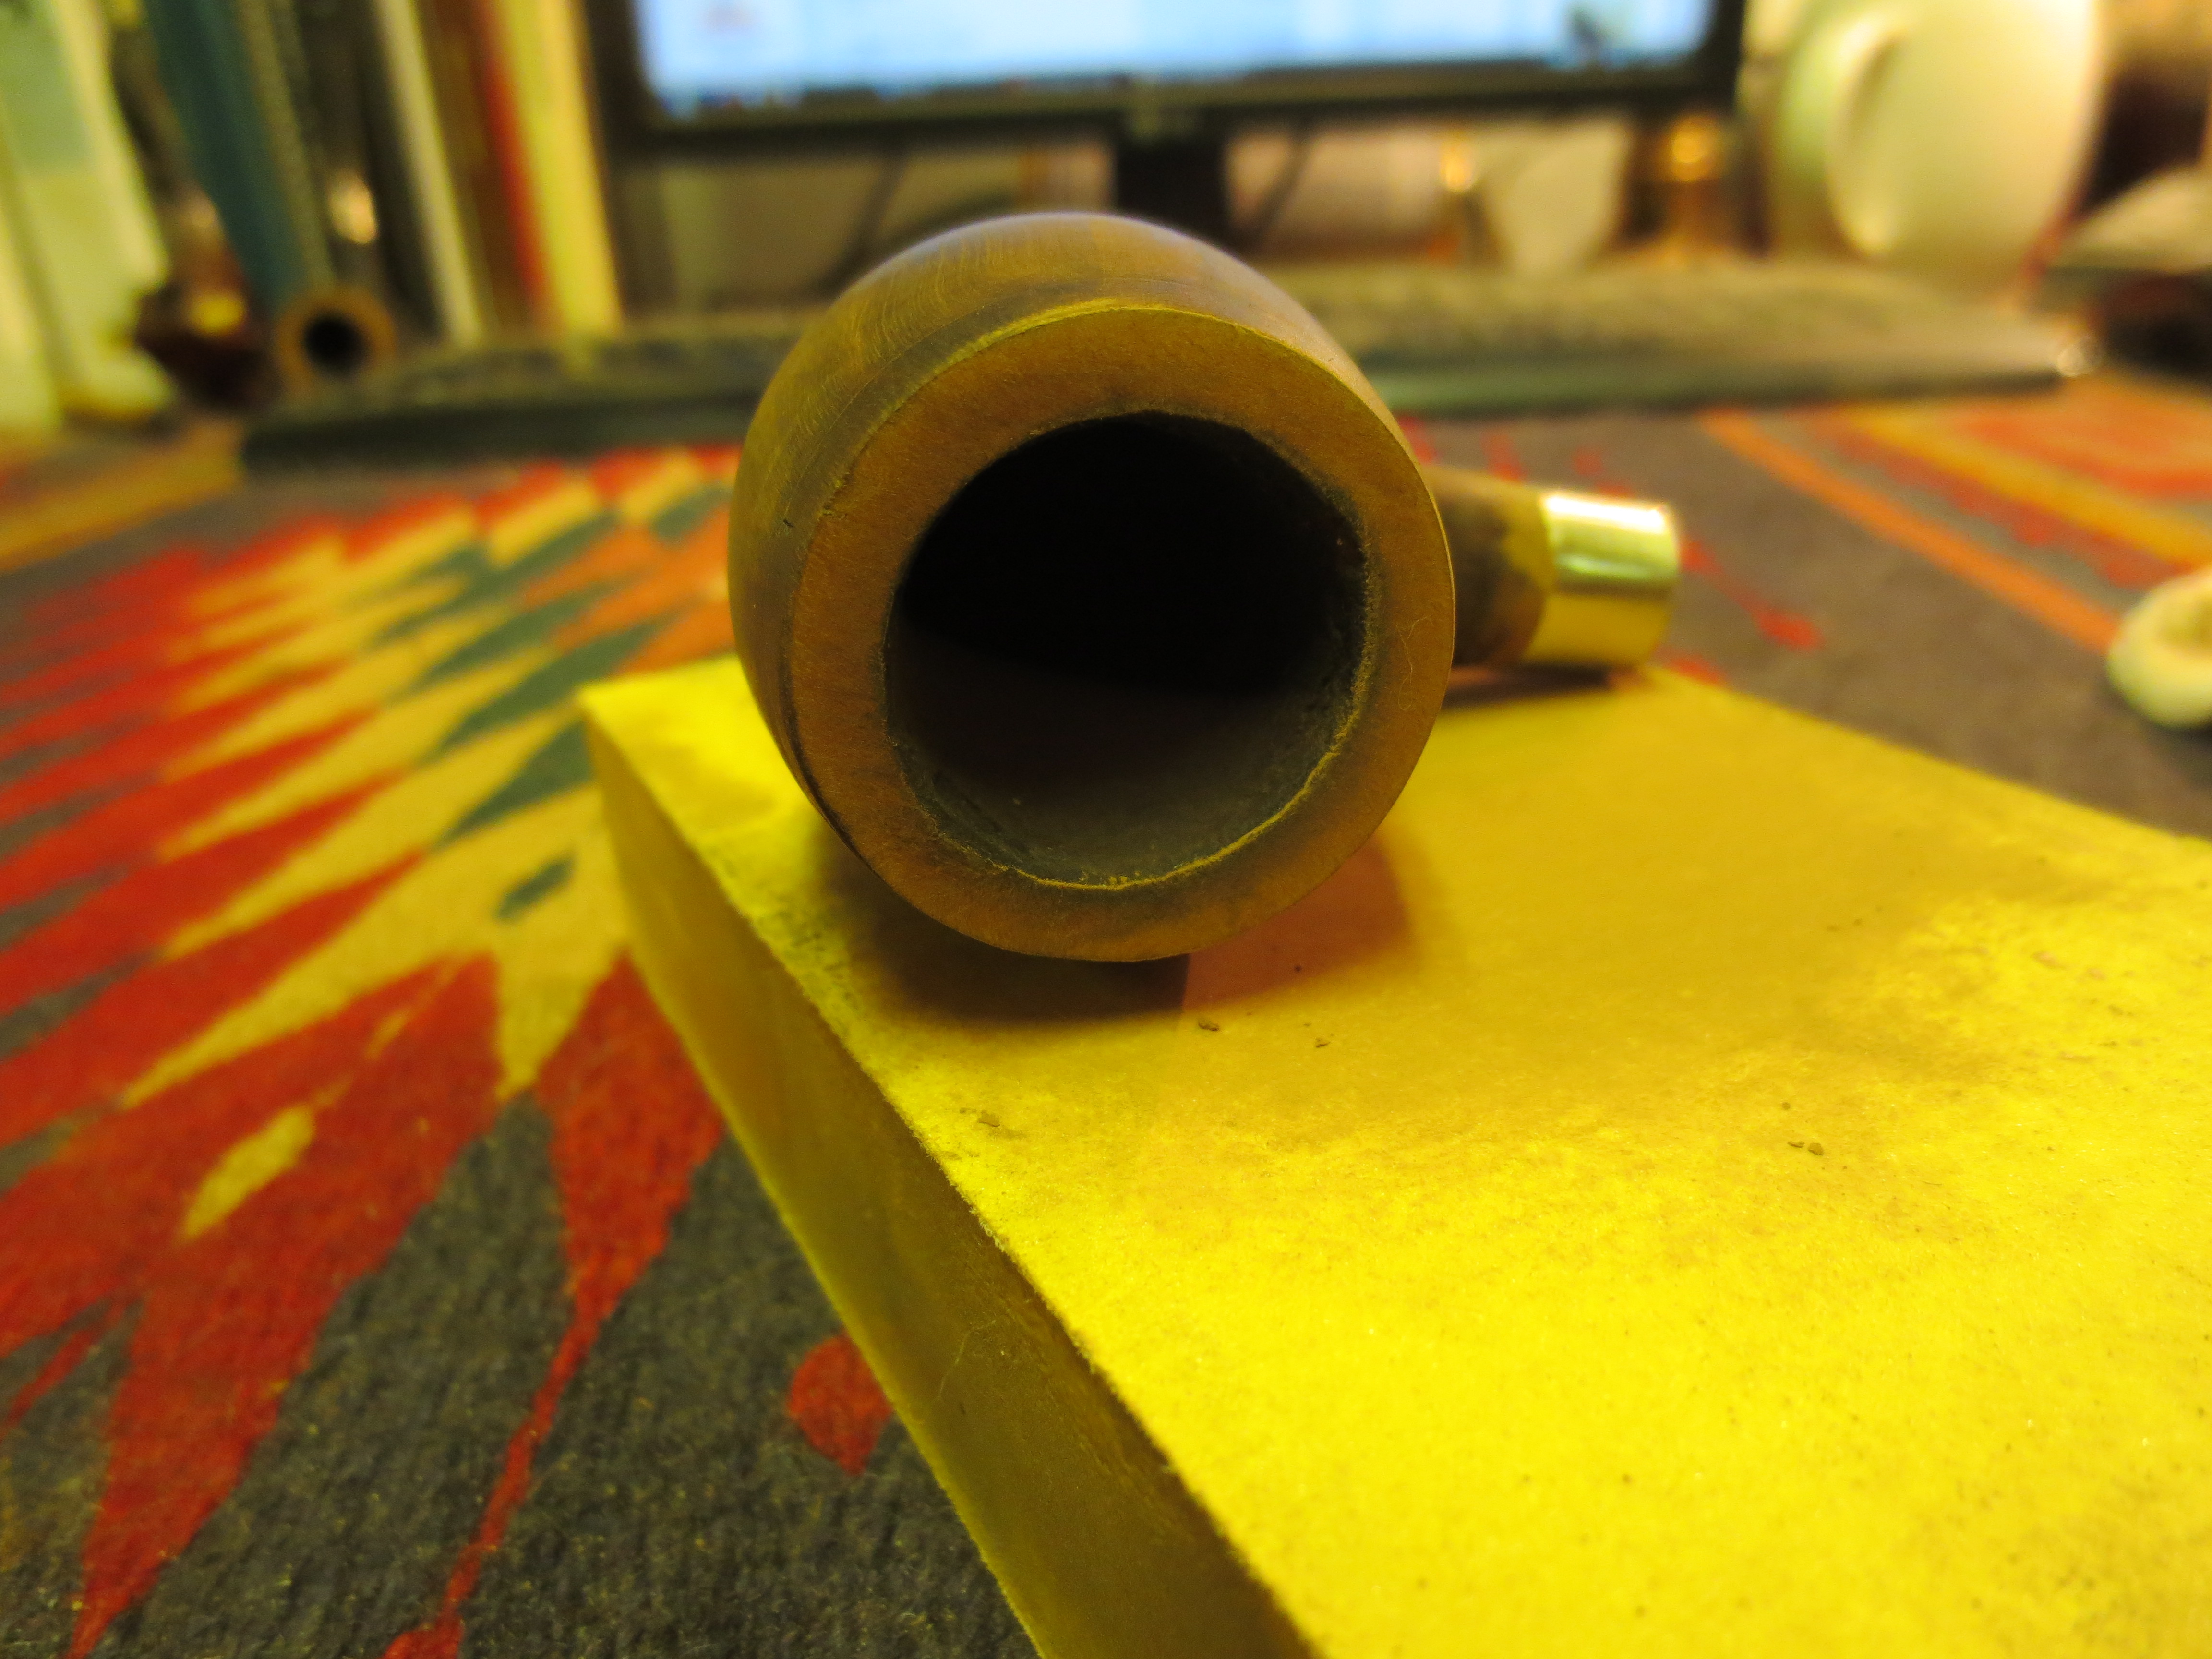
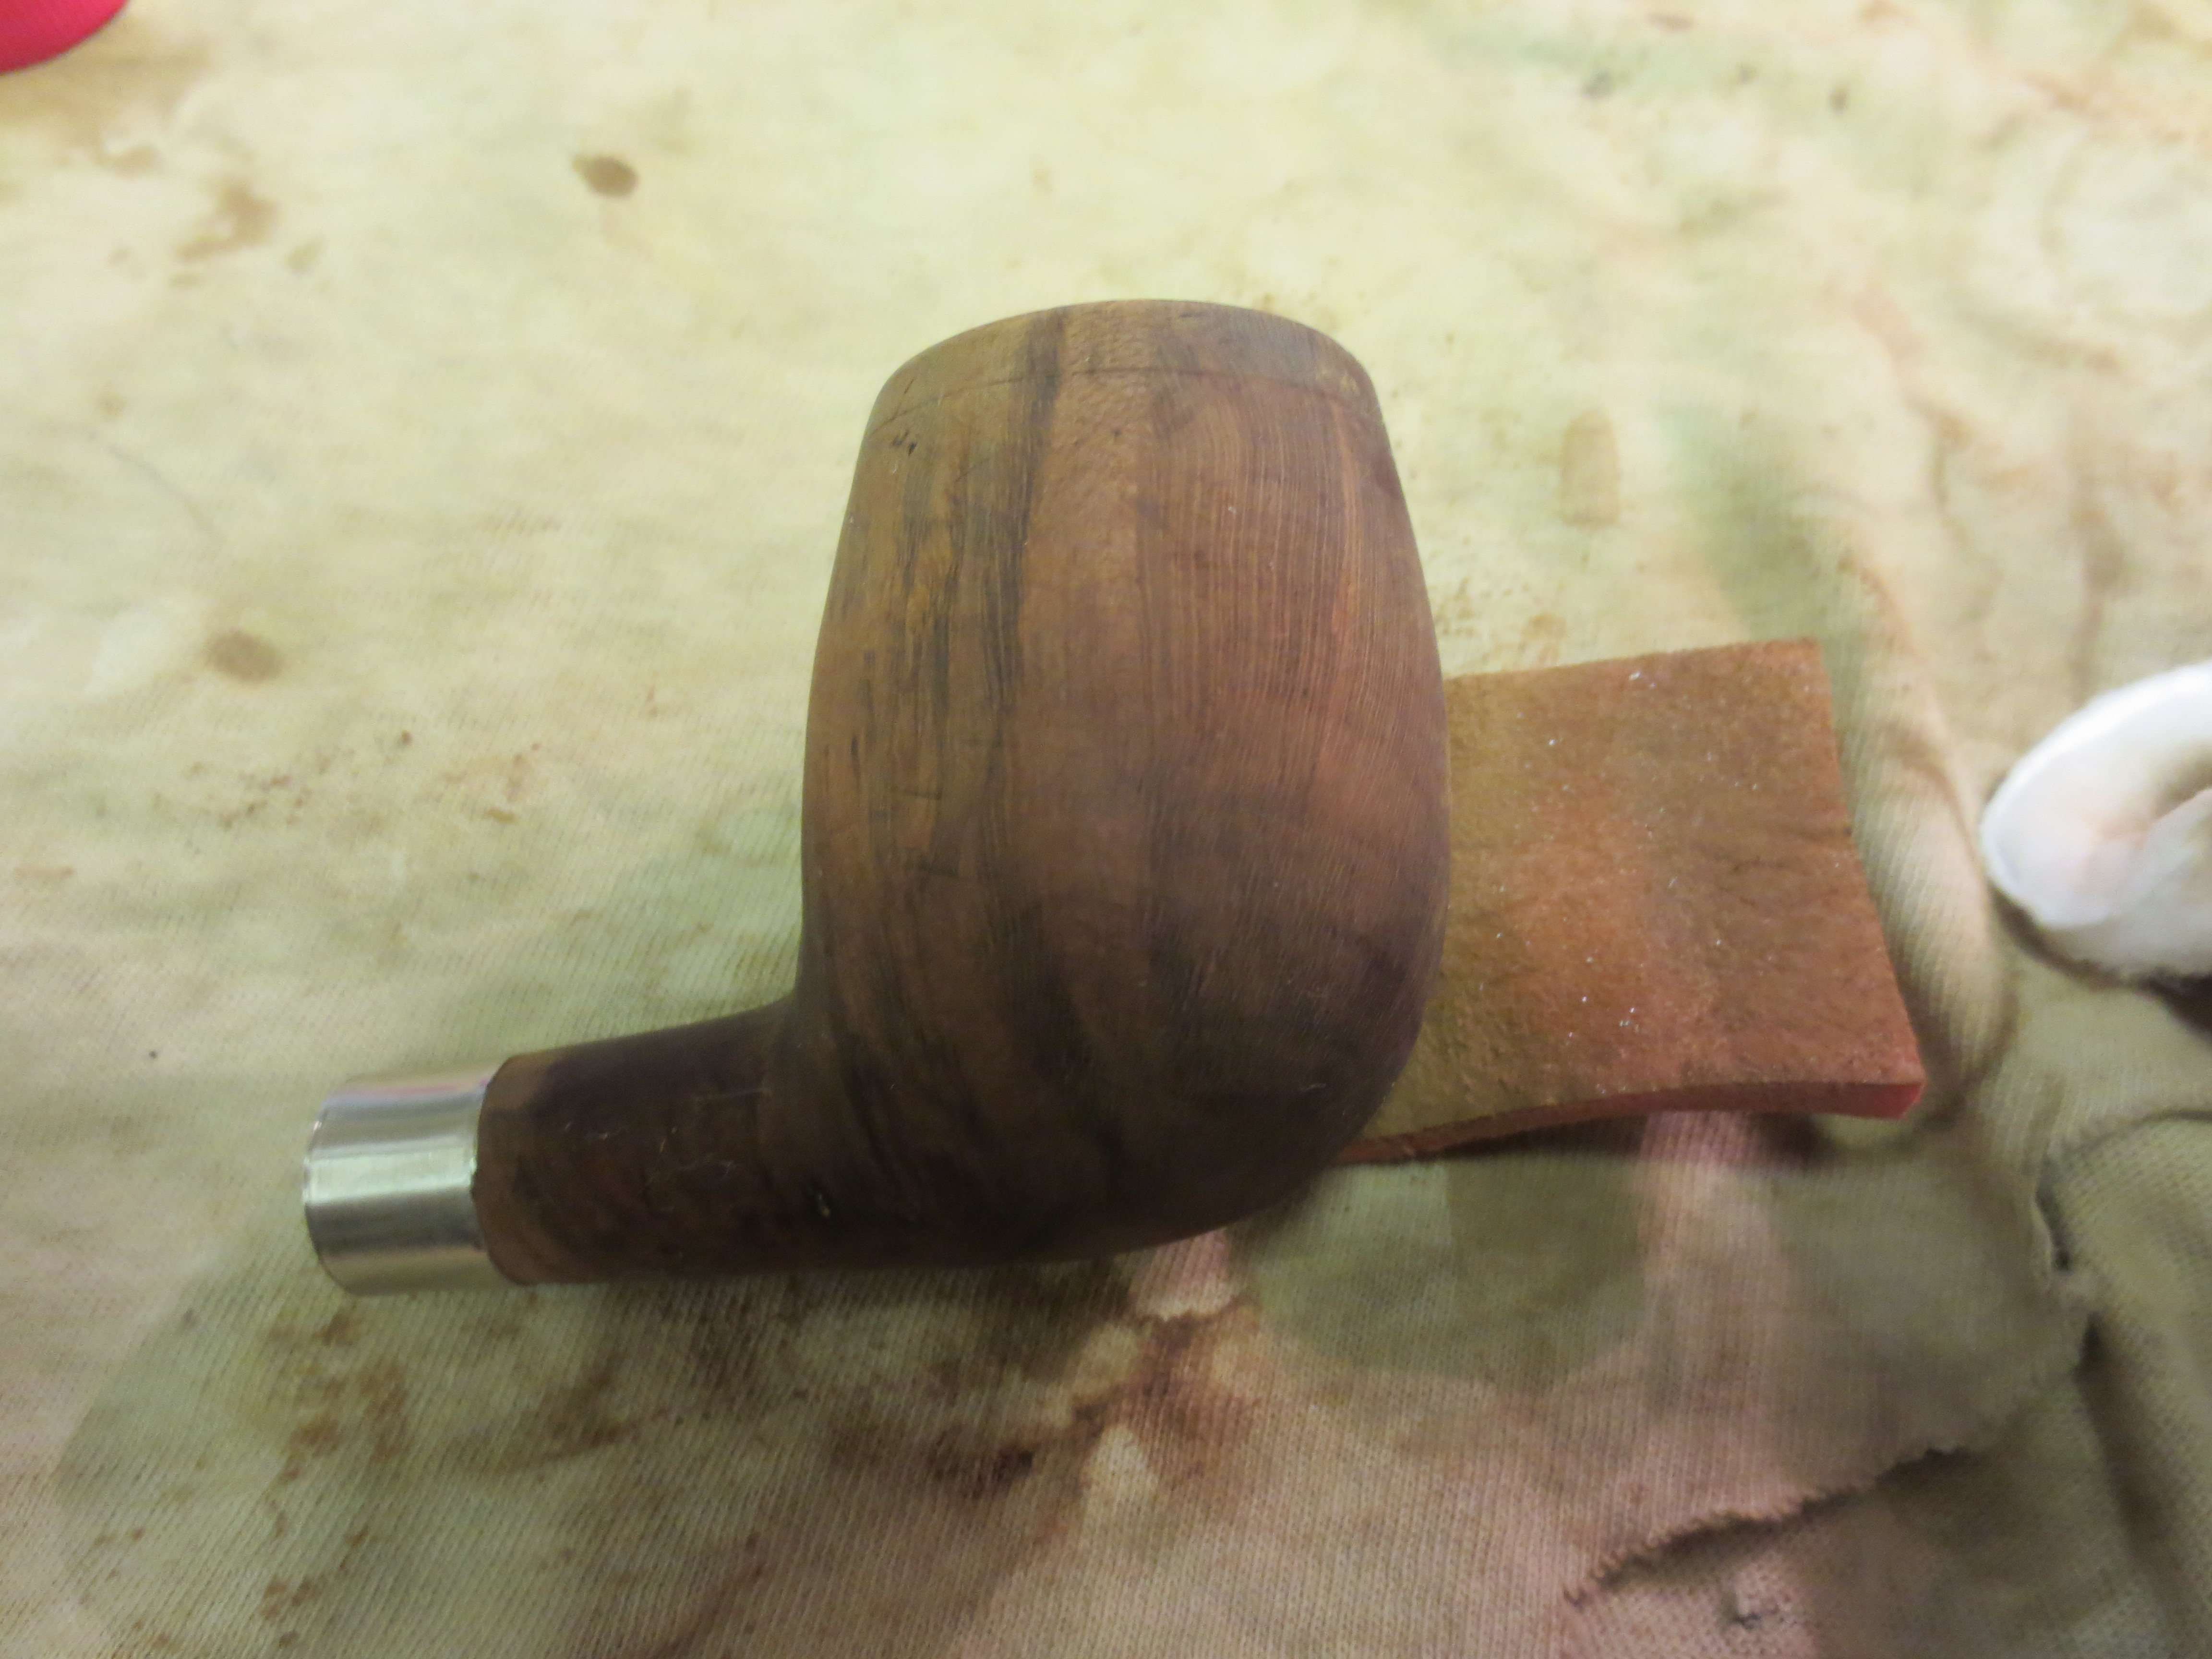
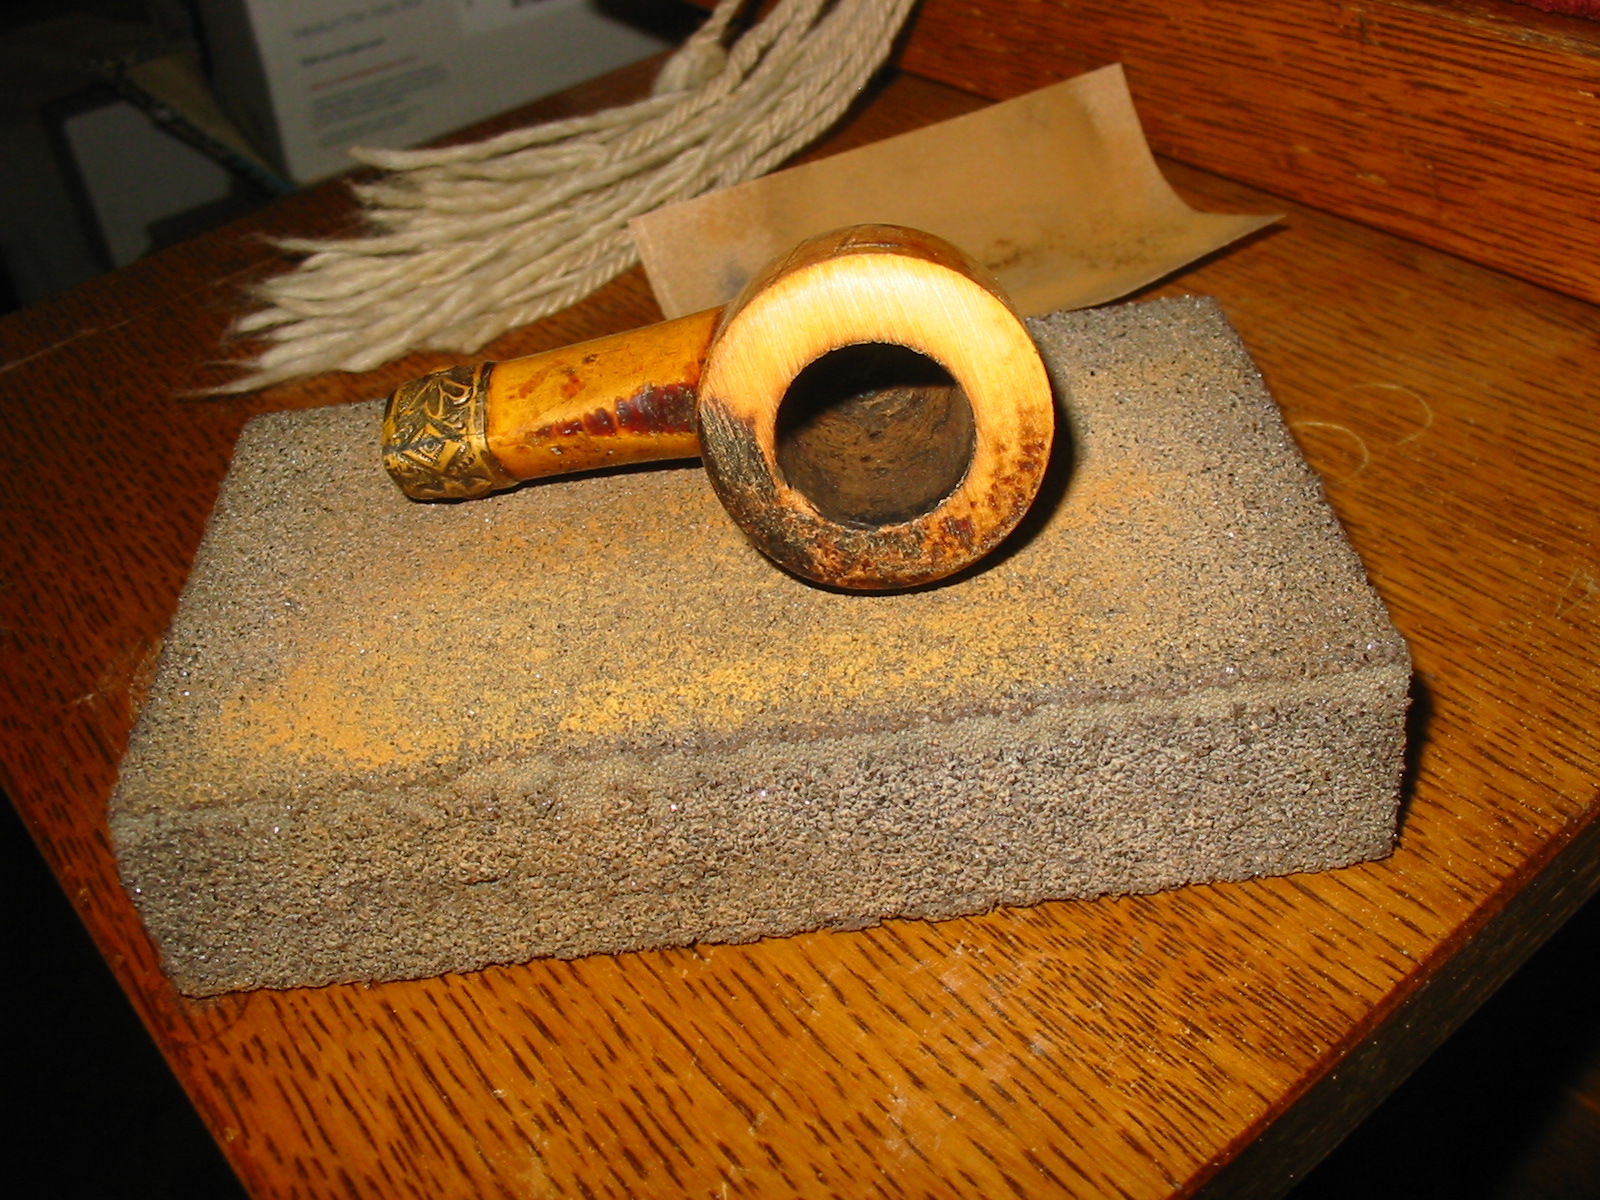
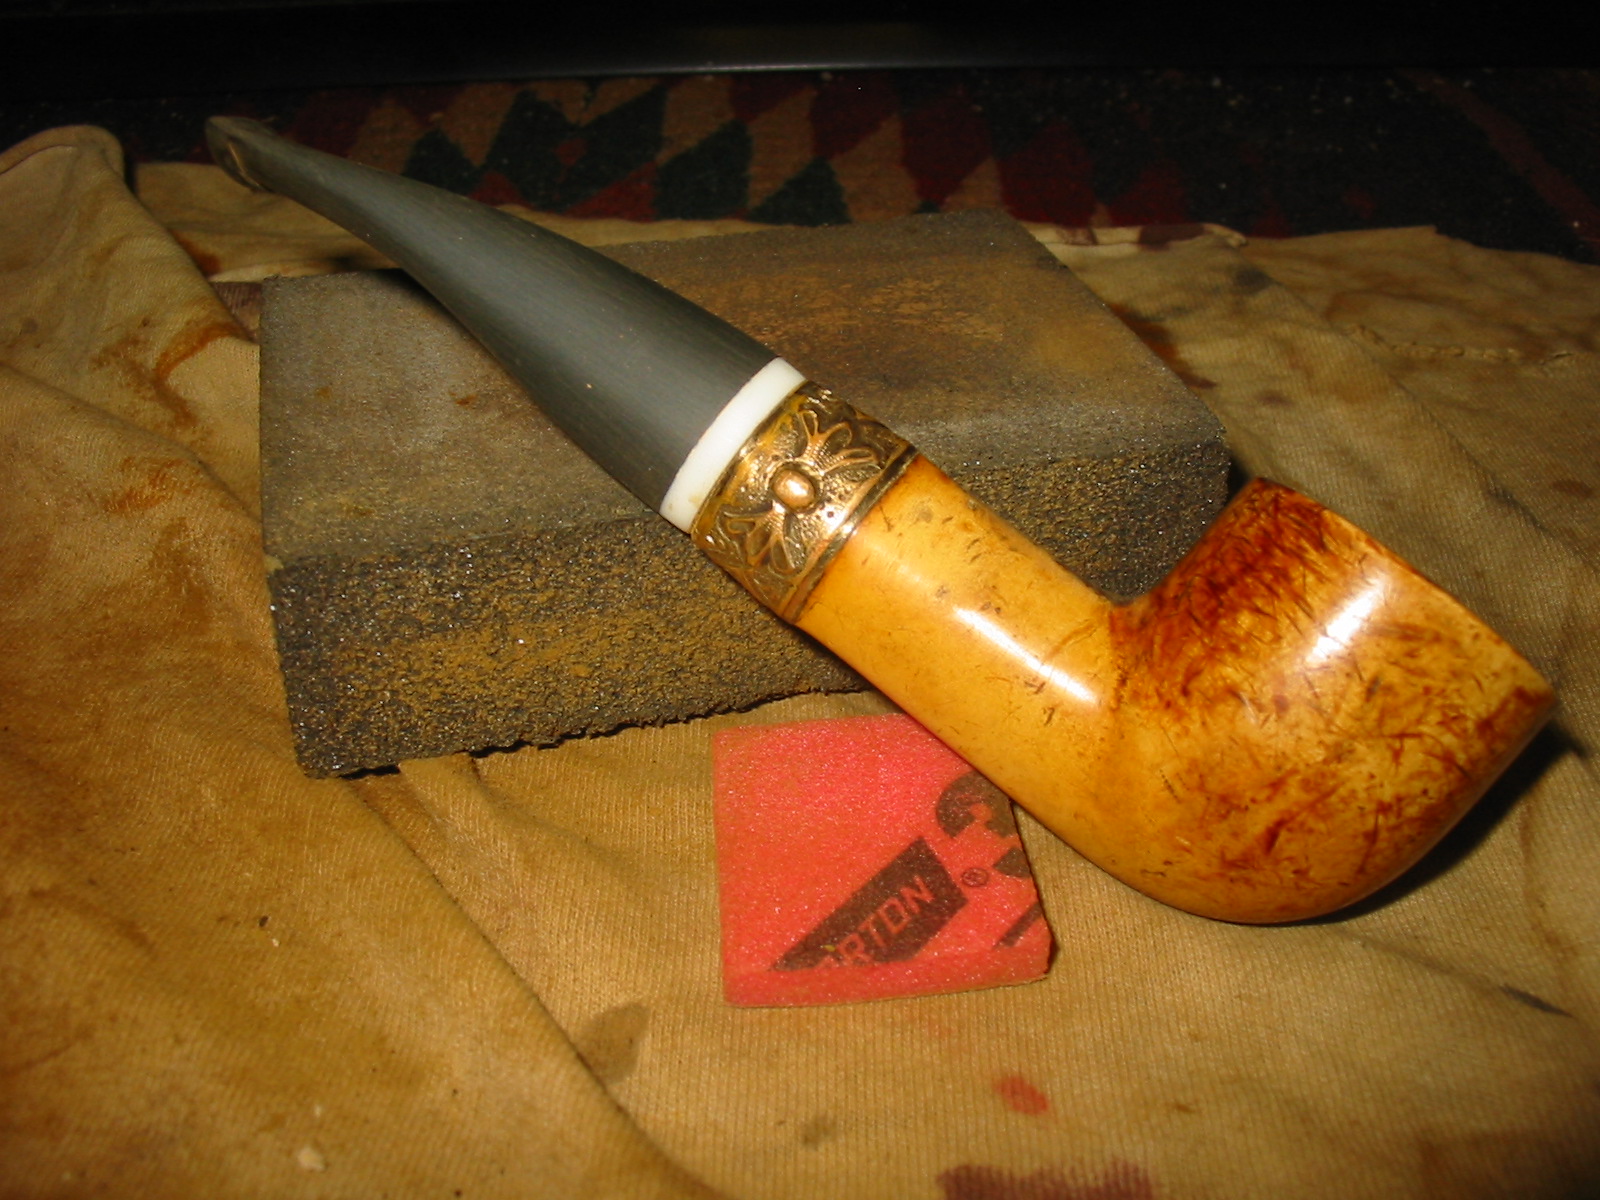
I took the pipe bowl back to the work table and set up a coarse sanding block on my worktable to top the bowl of the meer. I have used this block in the past with good success on the softer meerschaum material. I placed the bowl, rim down on the surface of the block and sanded it in a clockwise direction (no reason for that other than I am right-handed). I sanded it, checking often to see how the rim was cleaning up until the surface was clear and the top of the bowl once again level. Surprisingly I did not have to remove too much material from the rim to clean up the surface.

IMG_1805

IMG_1808

IMG_1809

IMG_1810

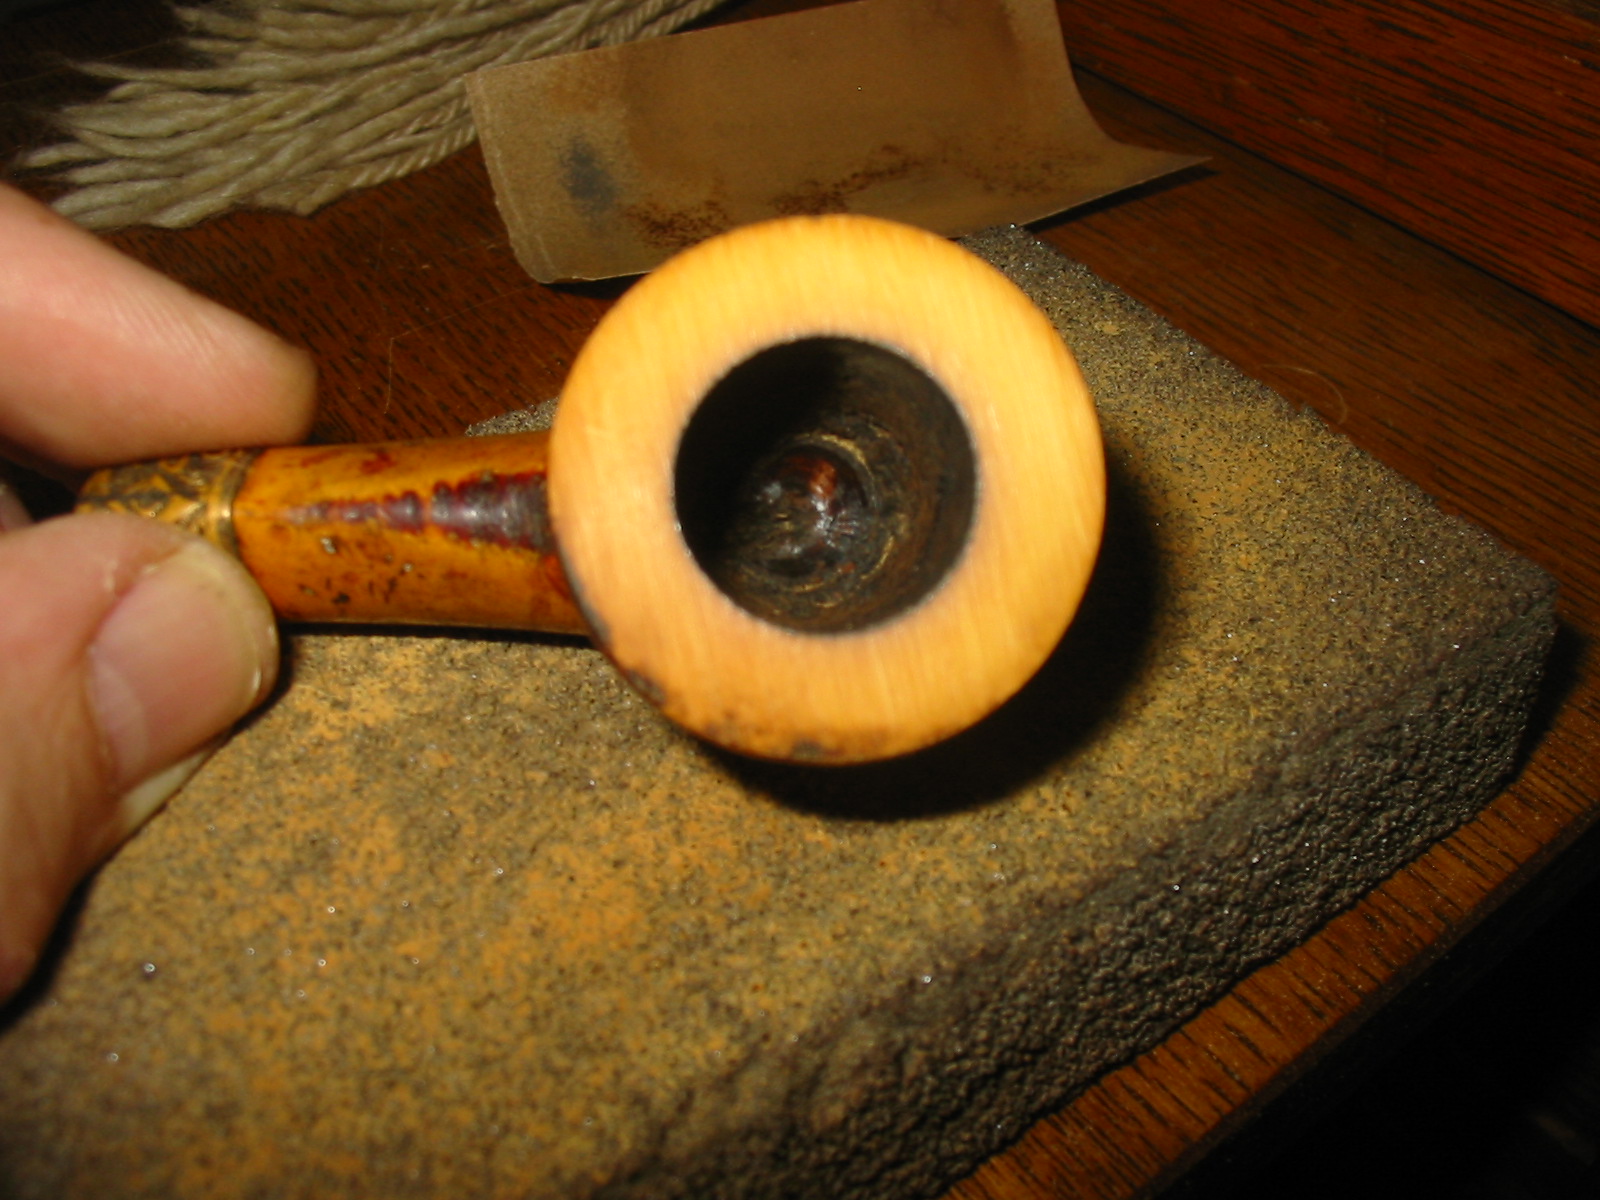
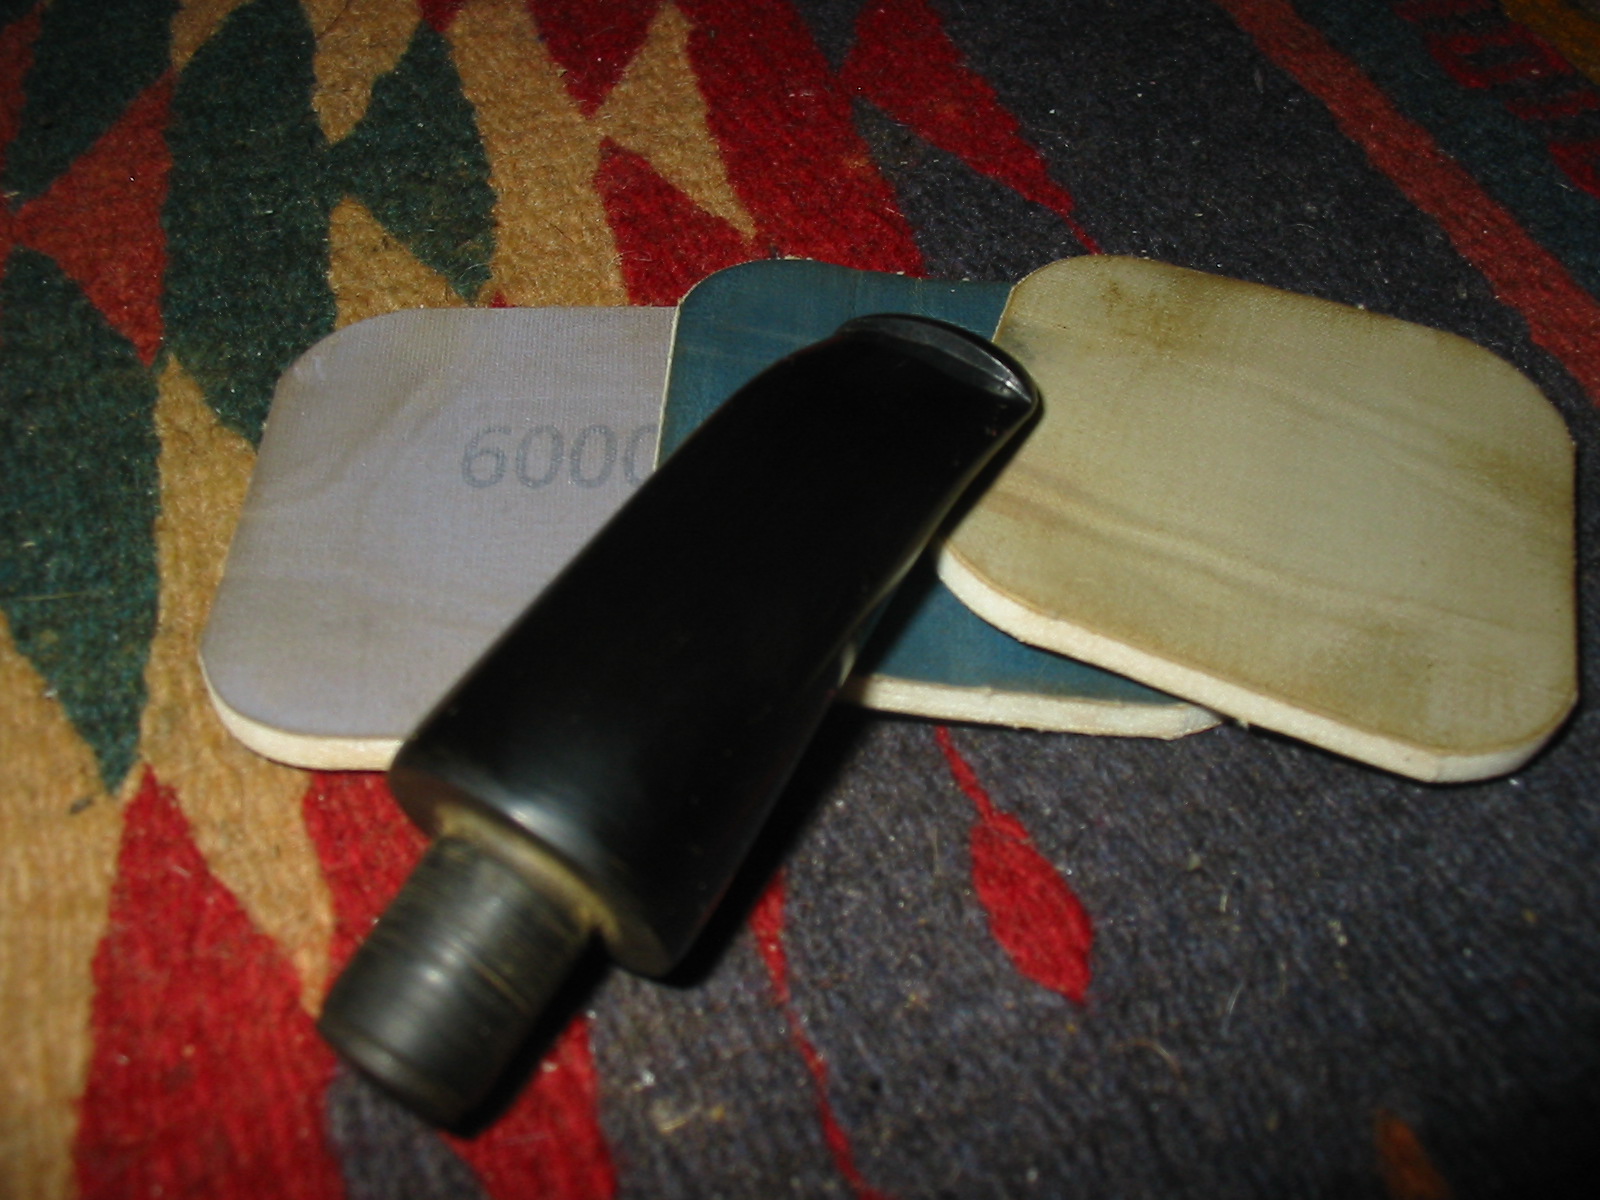
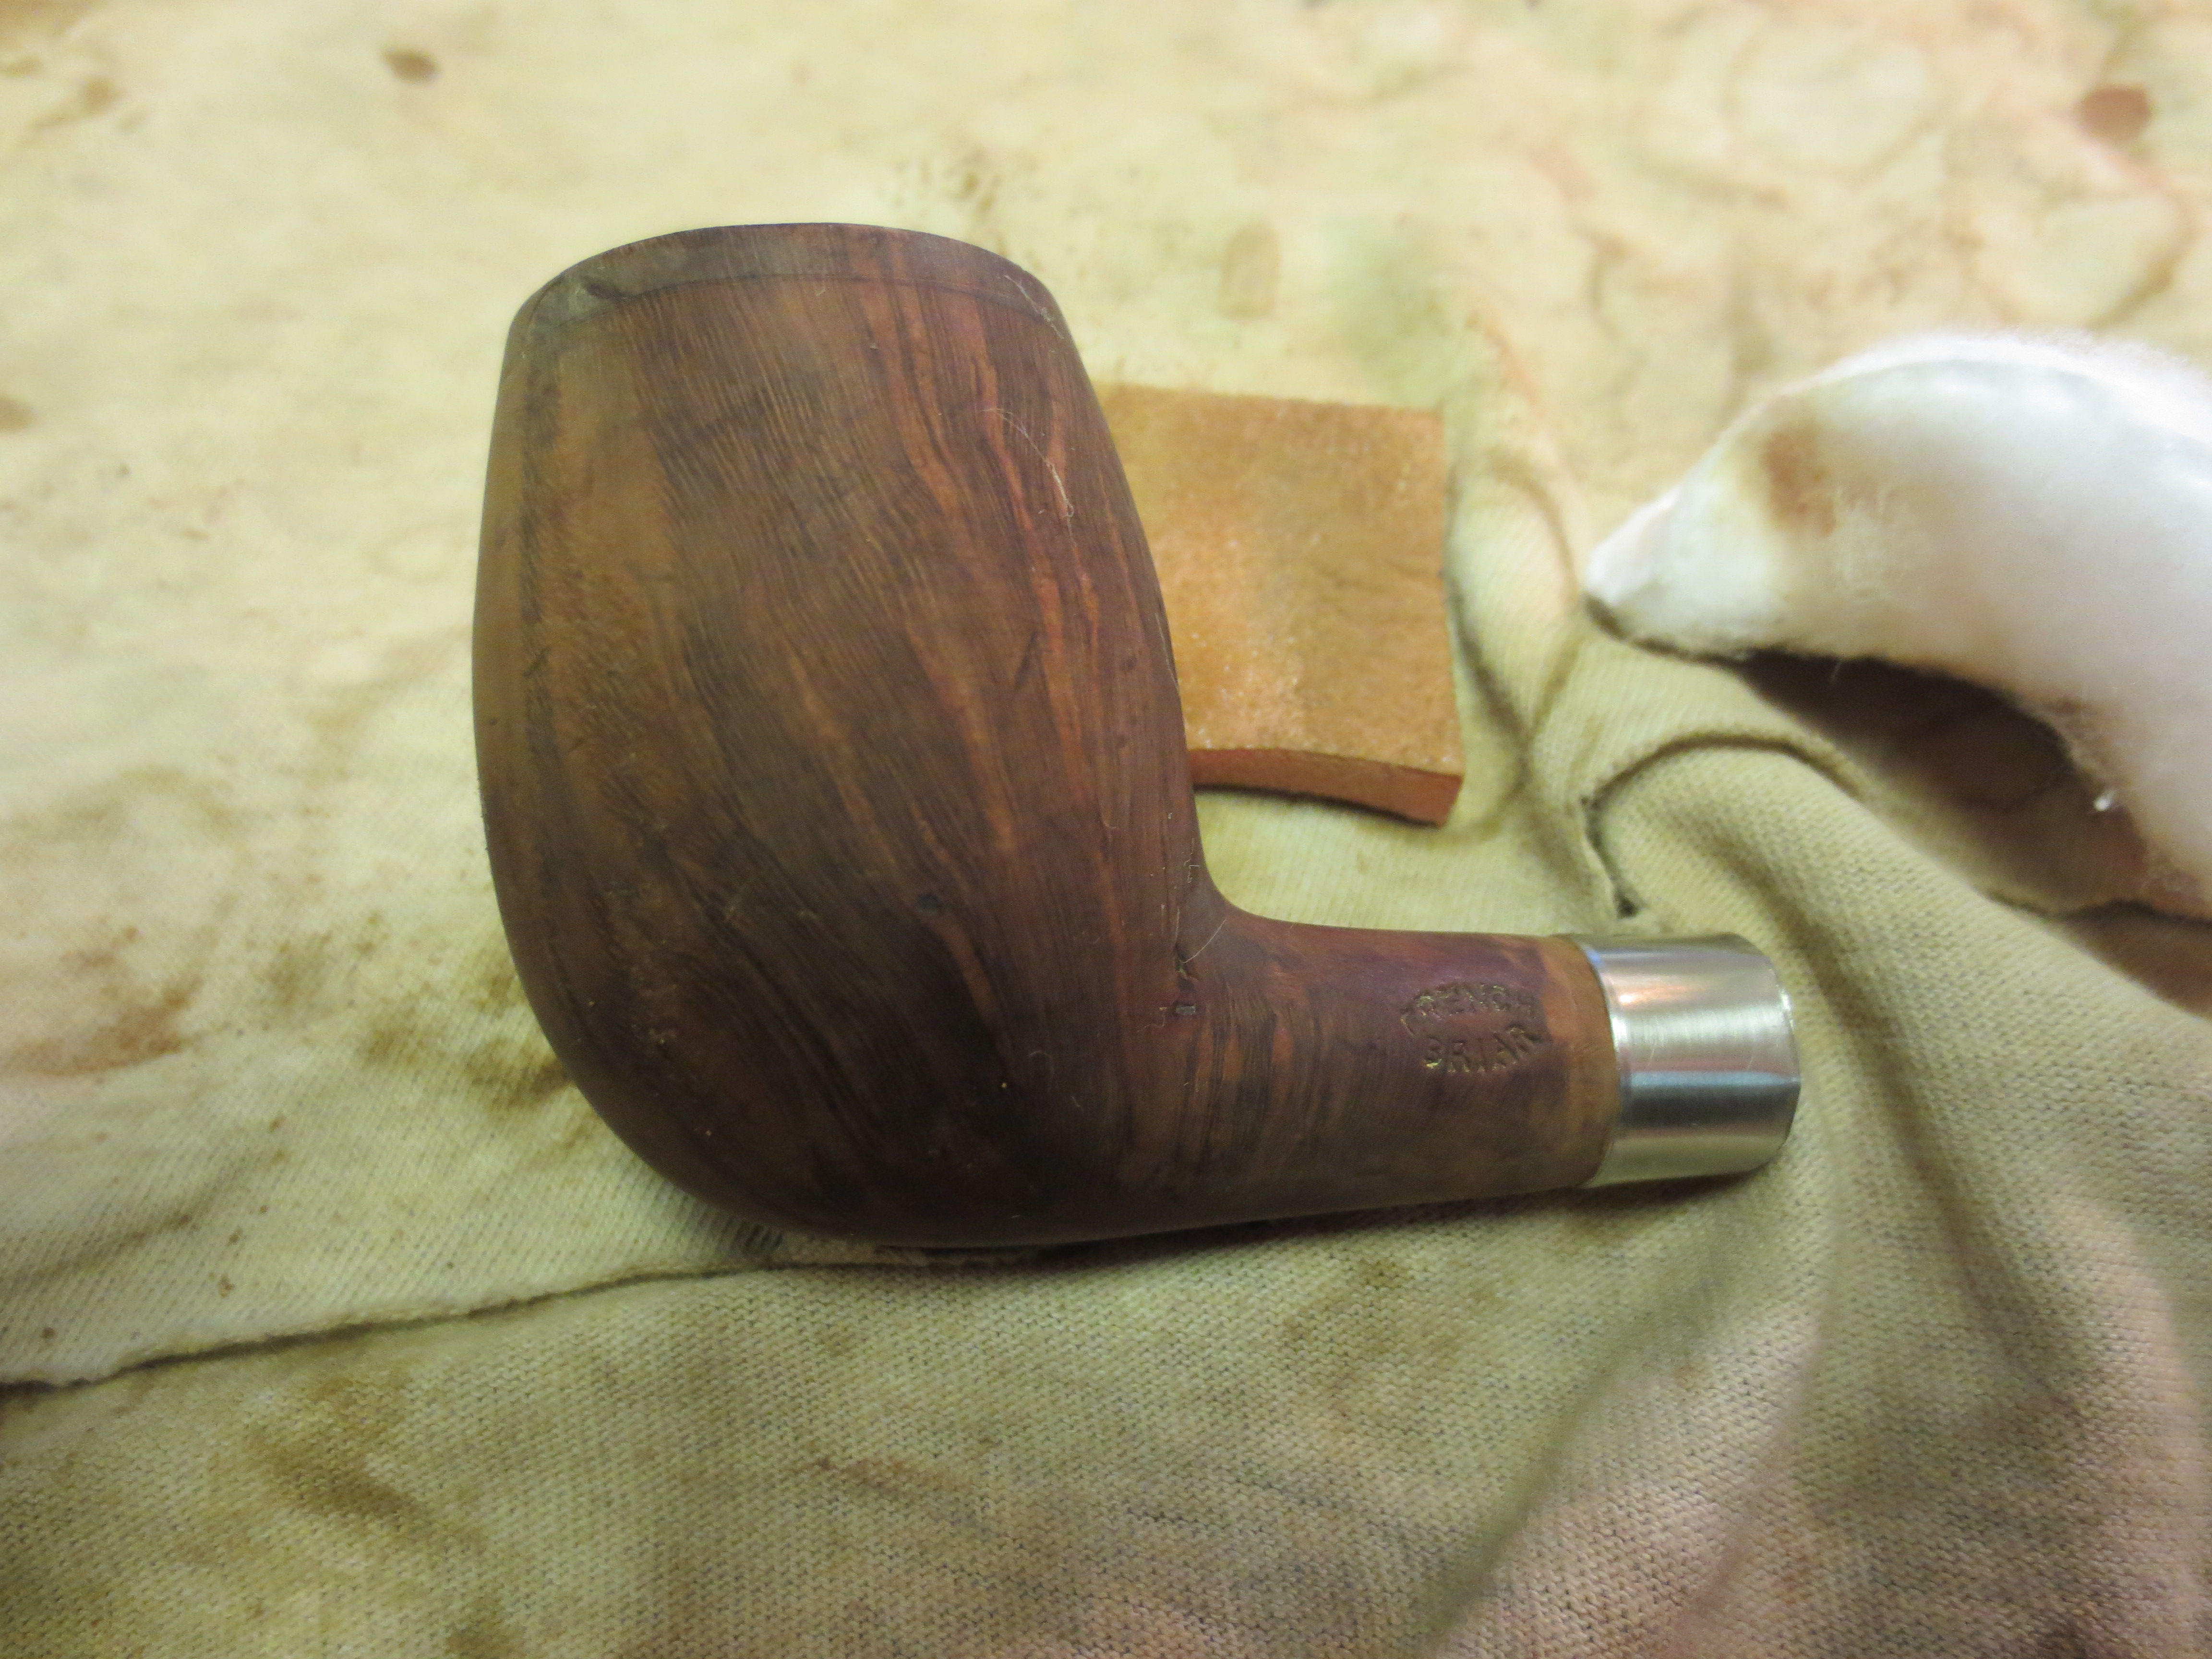
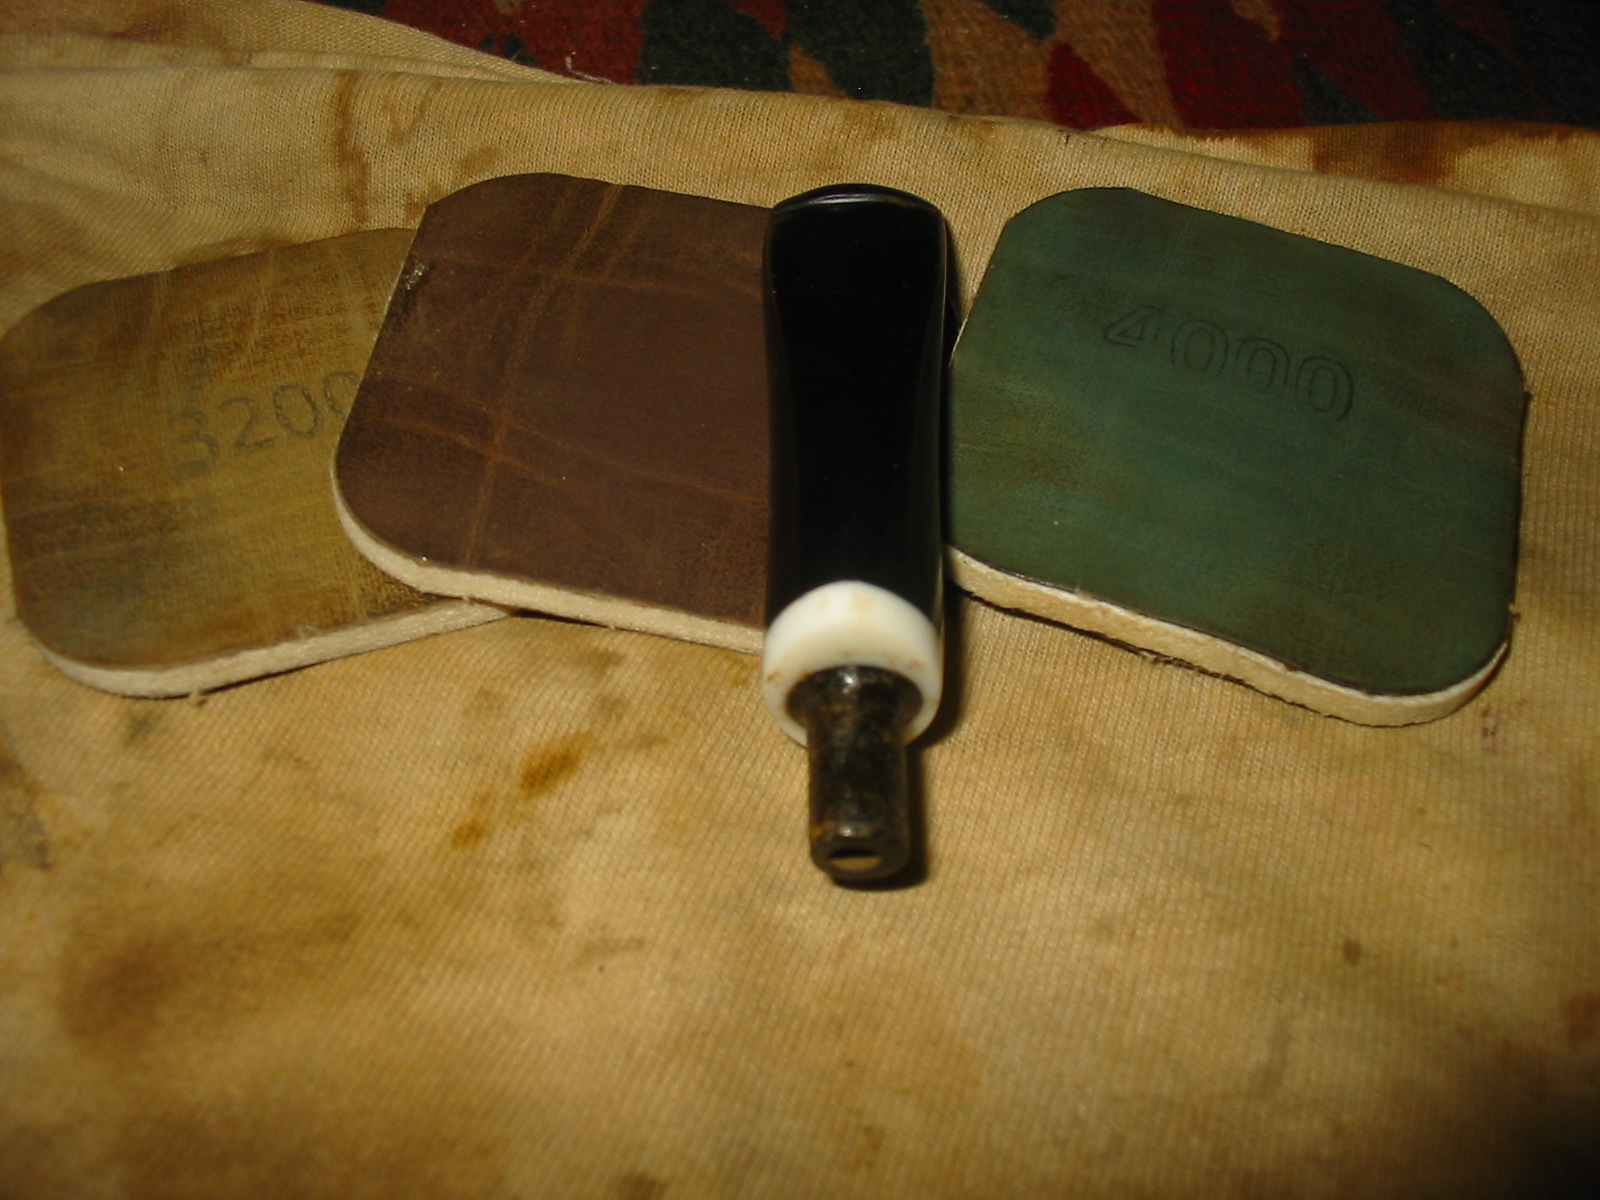
When I had finished the sanding, I used micromesh sanding pads to sand the top smooth once again and remove the scratches from the coarse sanding block. The micromesh sanding pads from 1500 – 12,000 grit bring a shine back to the surface of the meer and prepare it for rewaxing once the pipe is finished.

IMG_1811

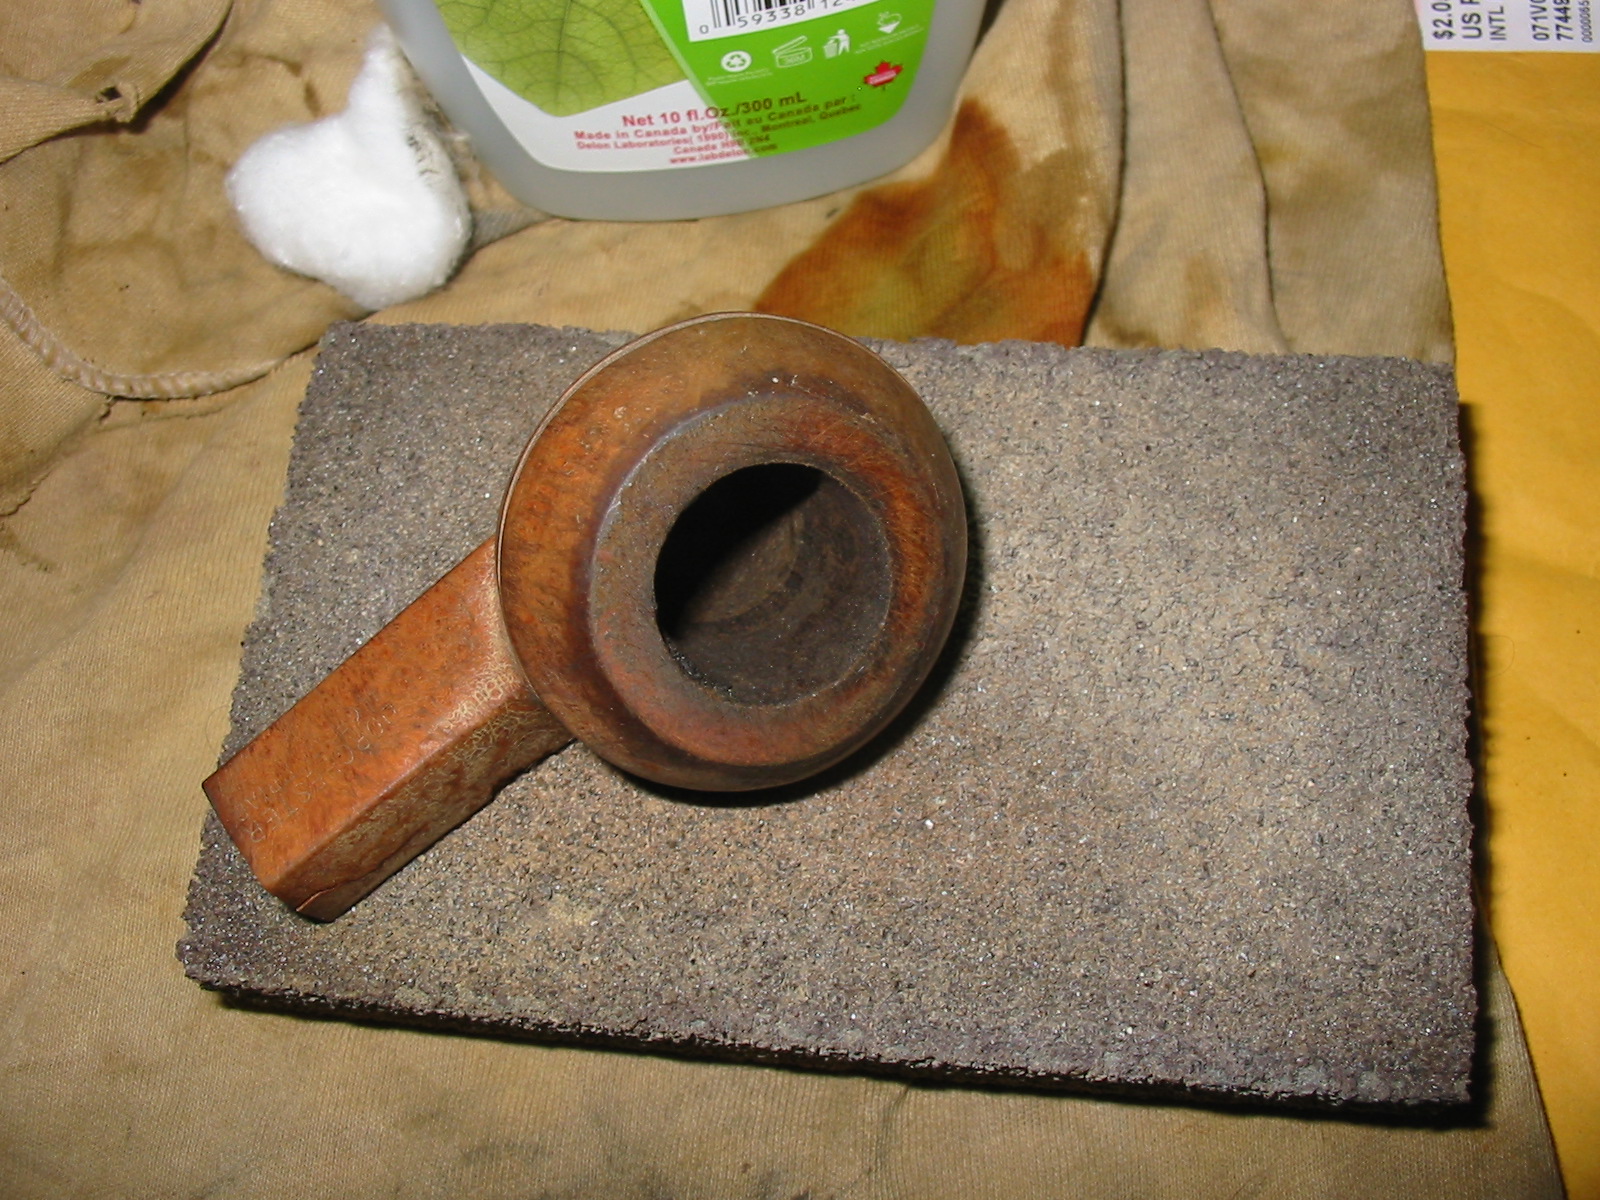
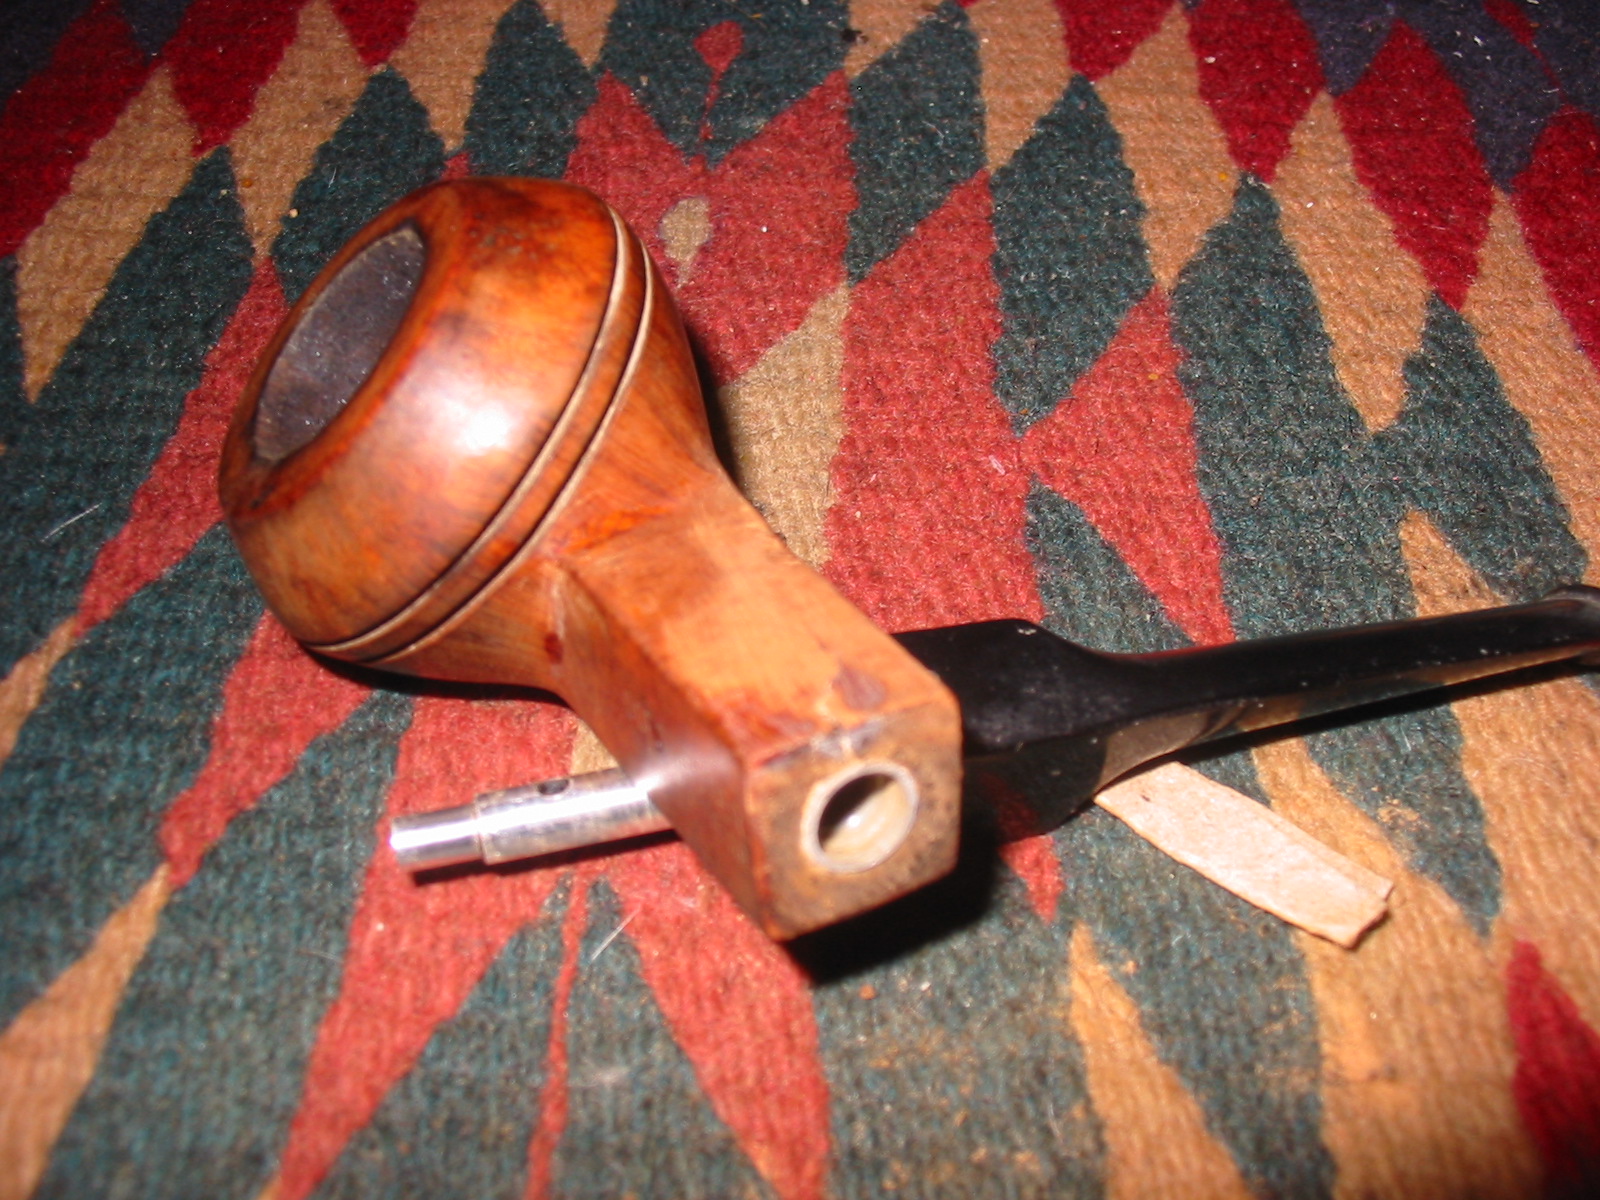
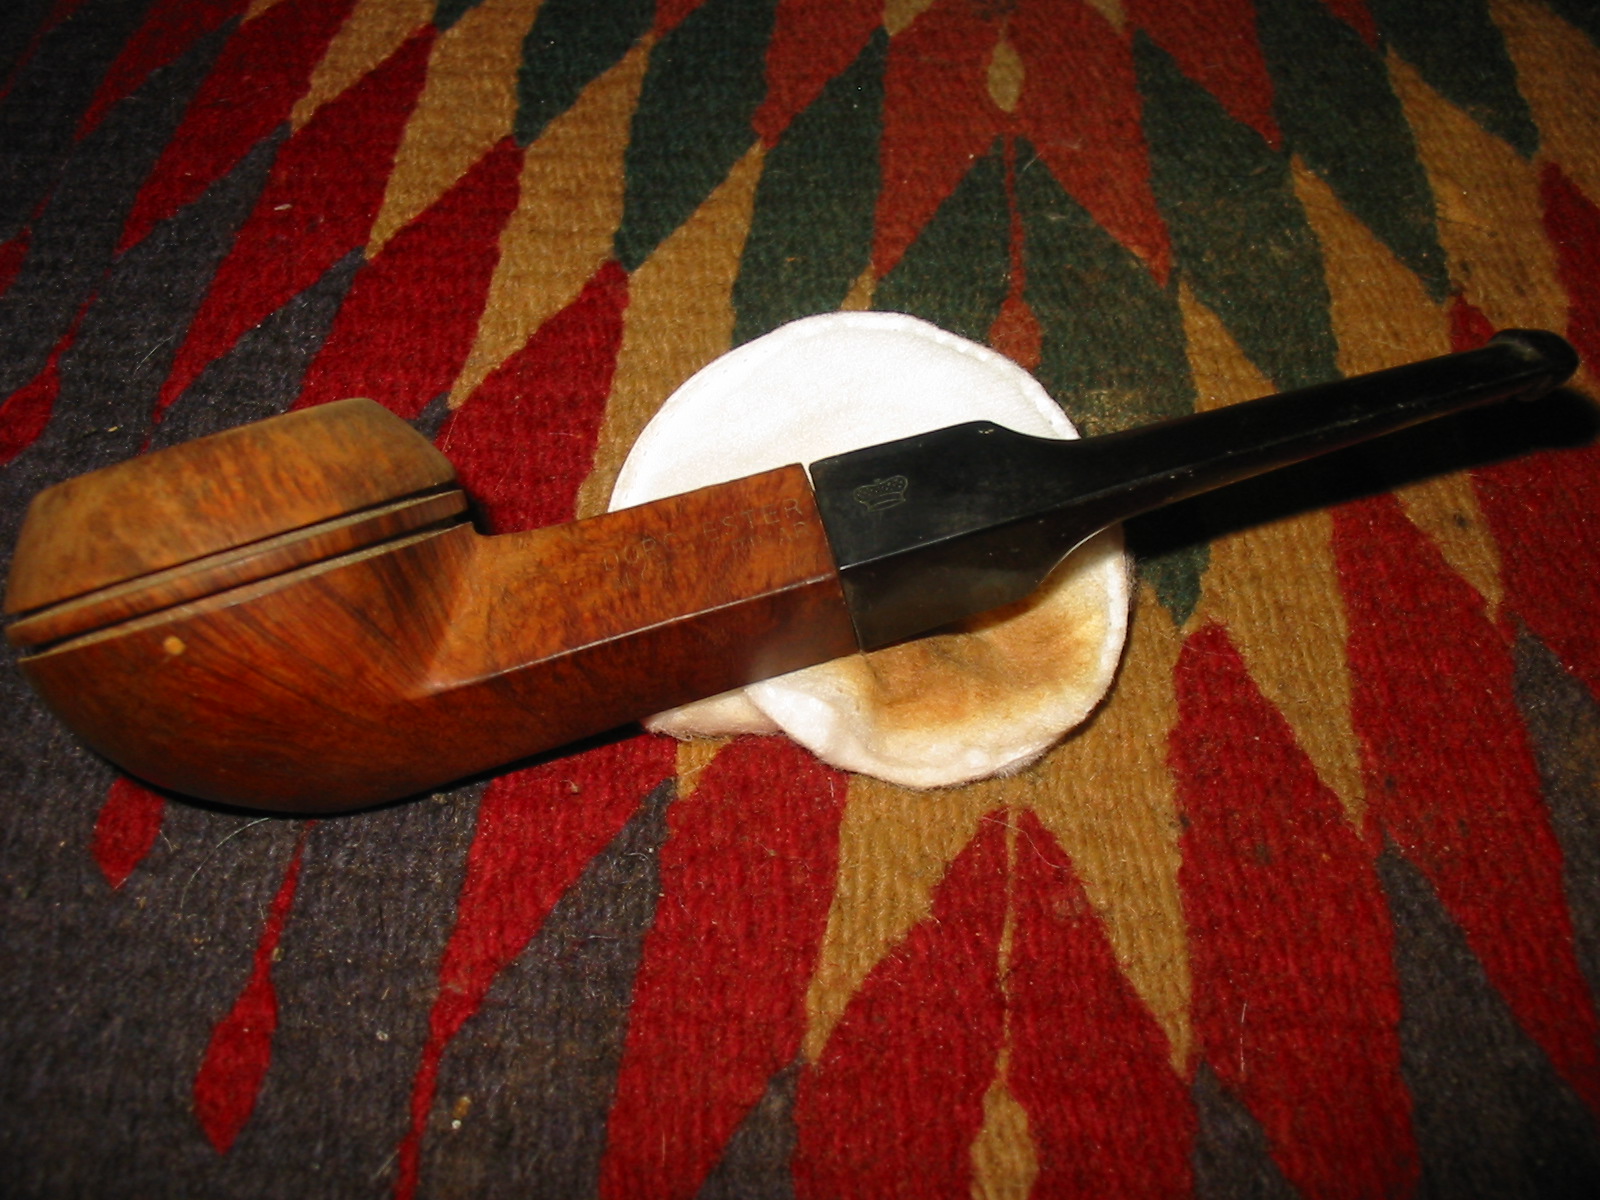
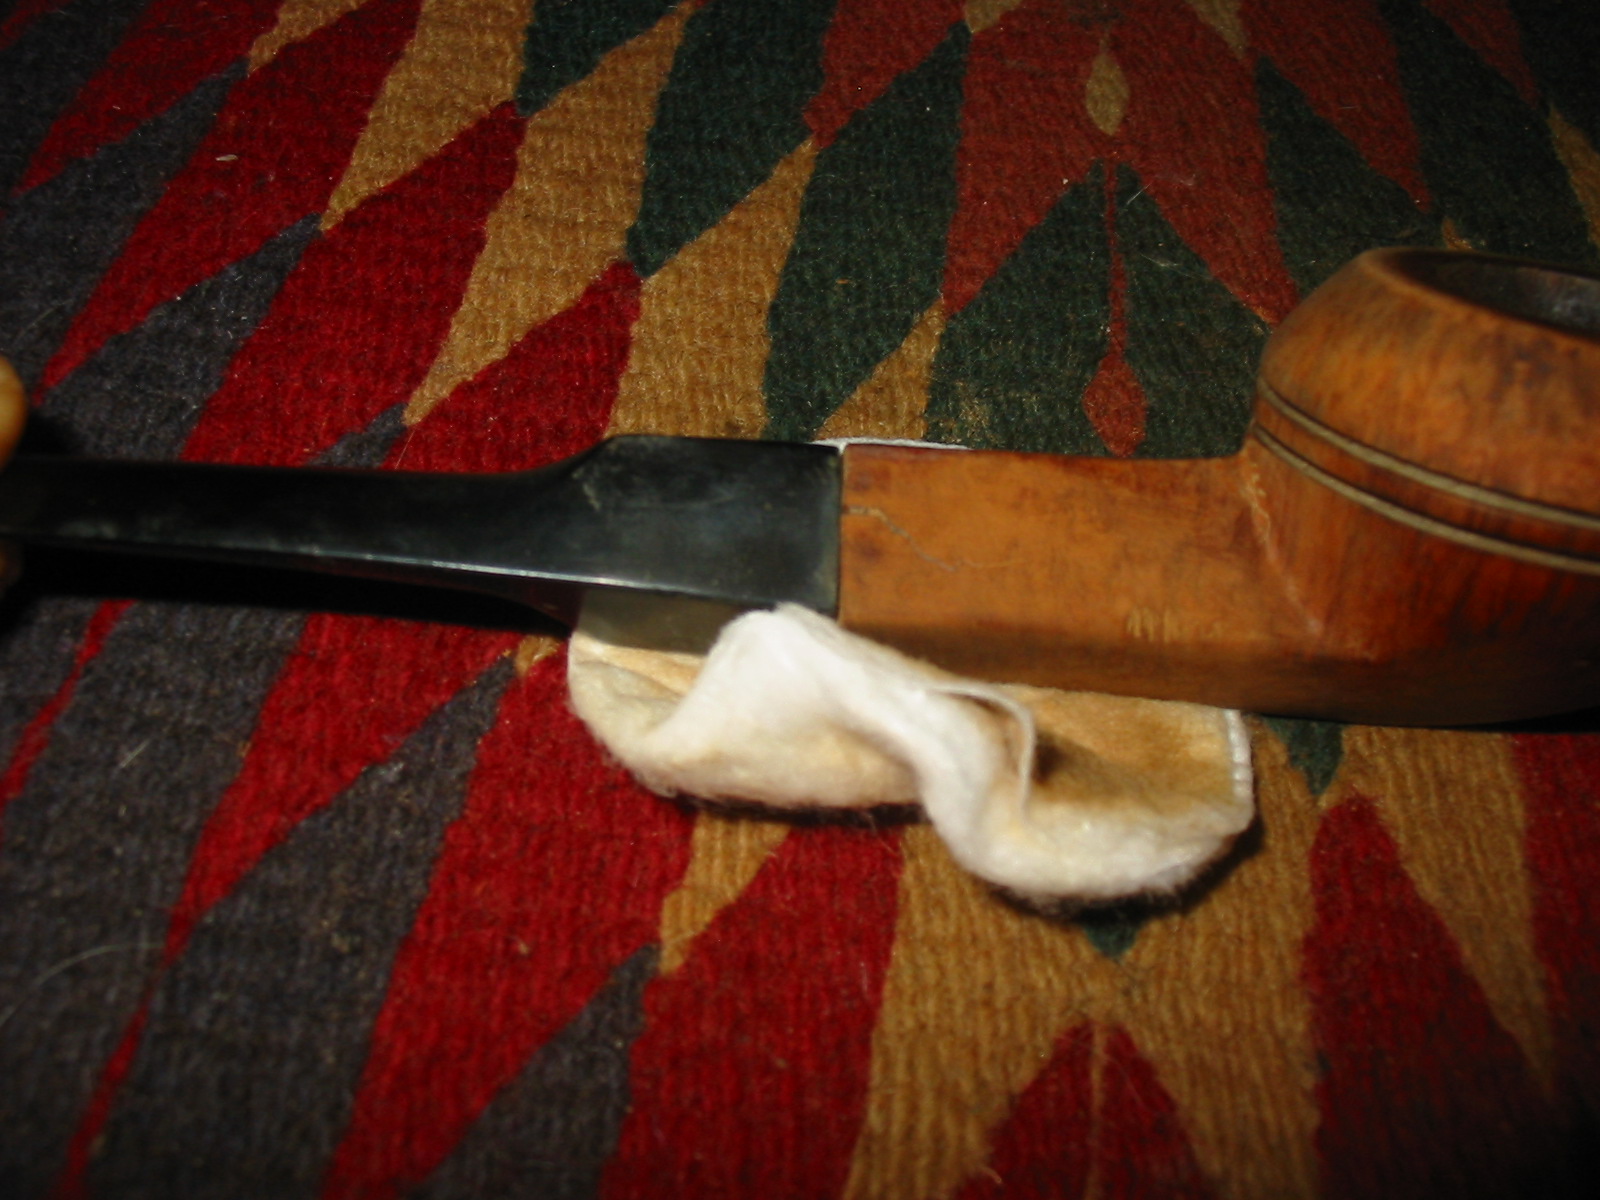
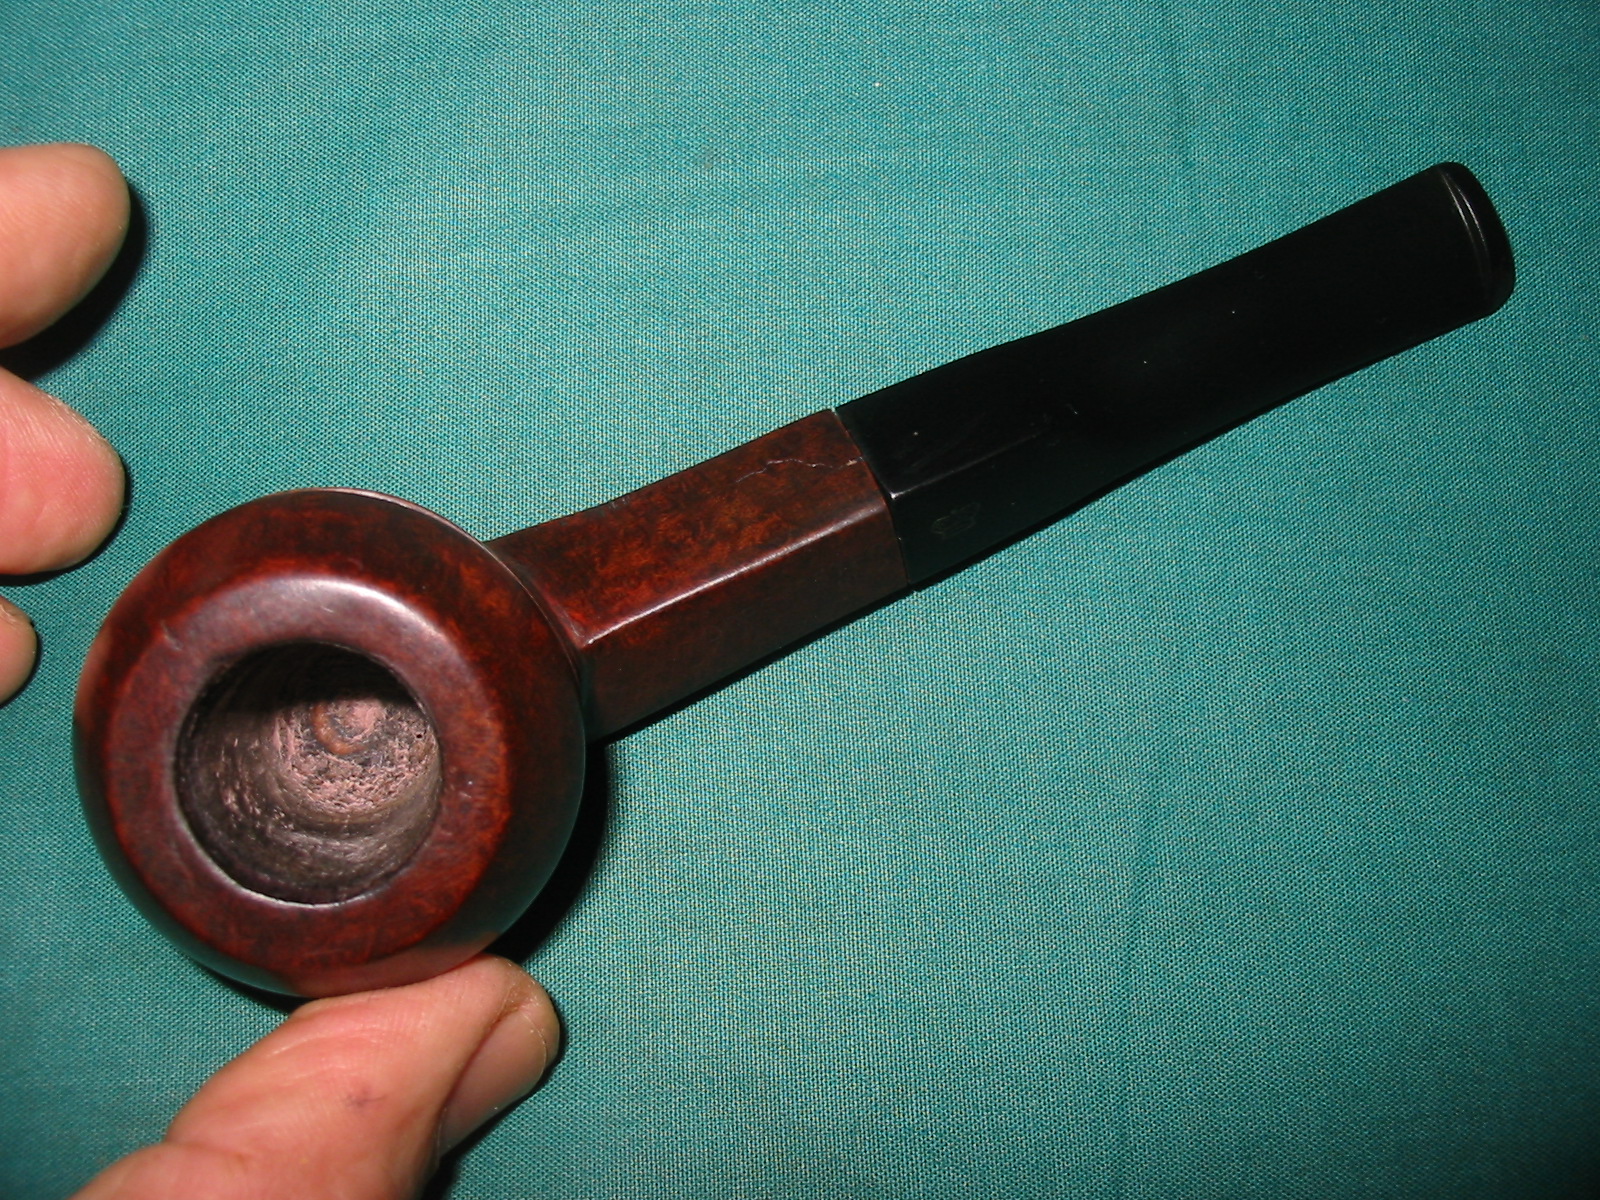
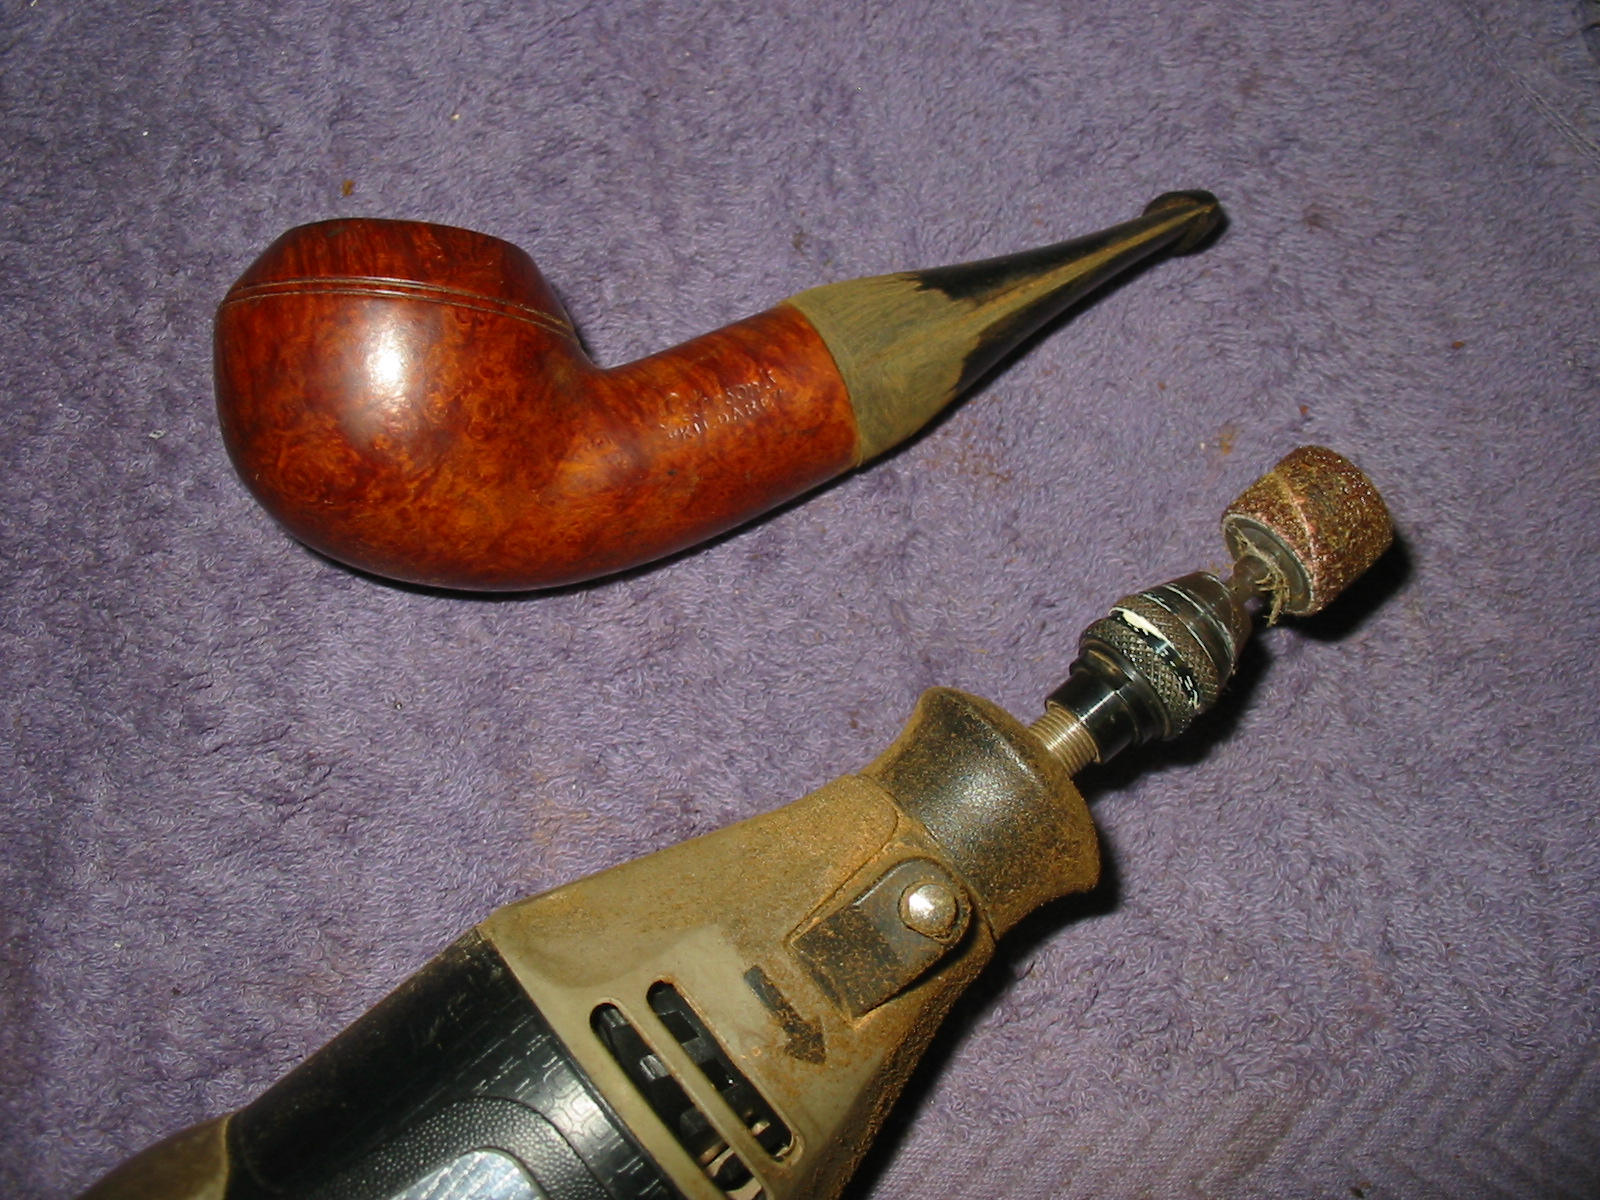
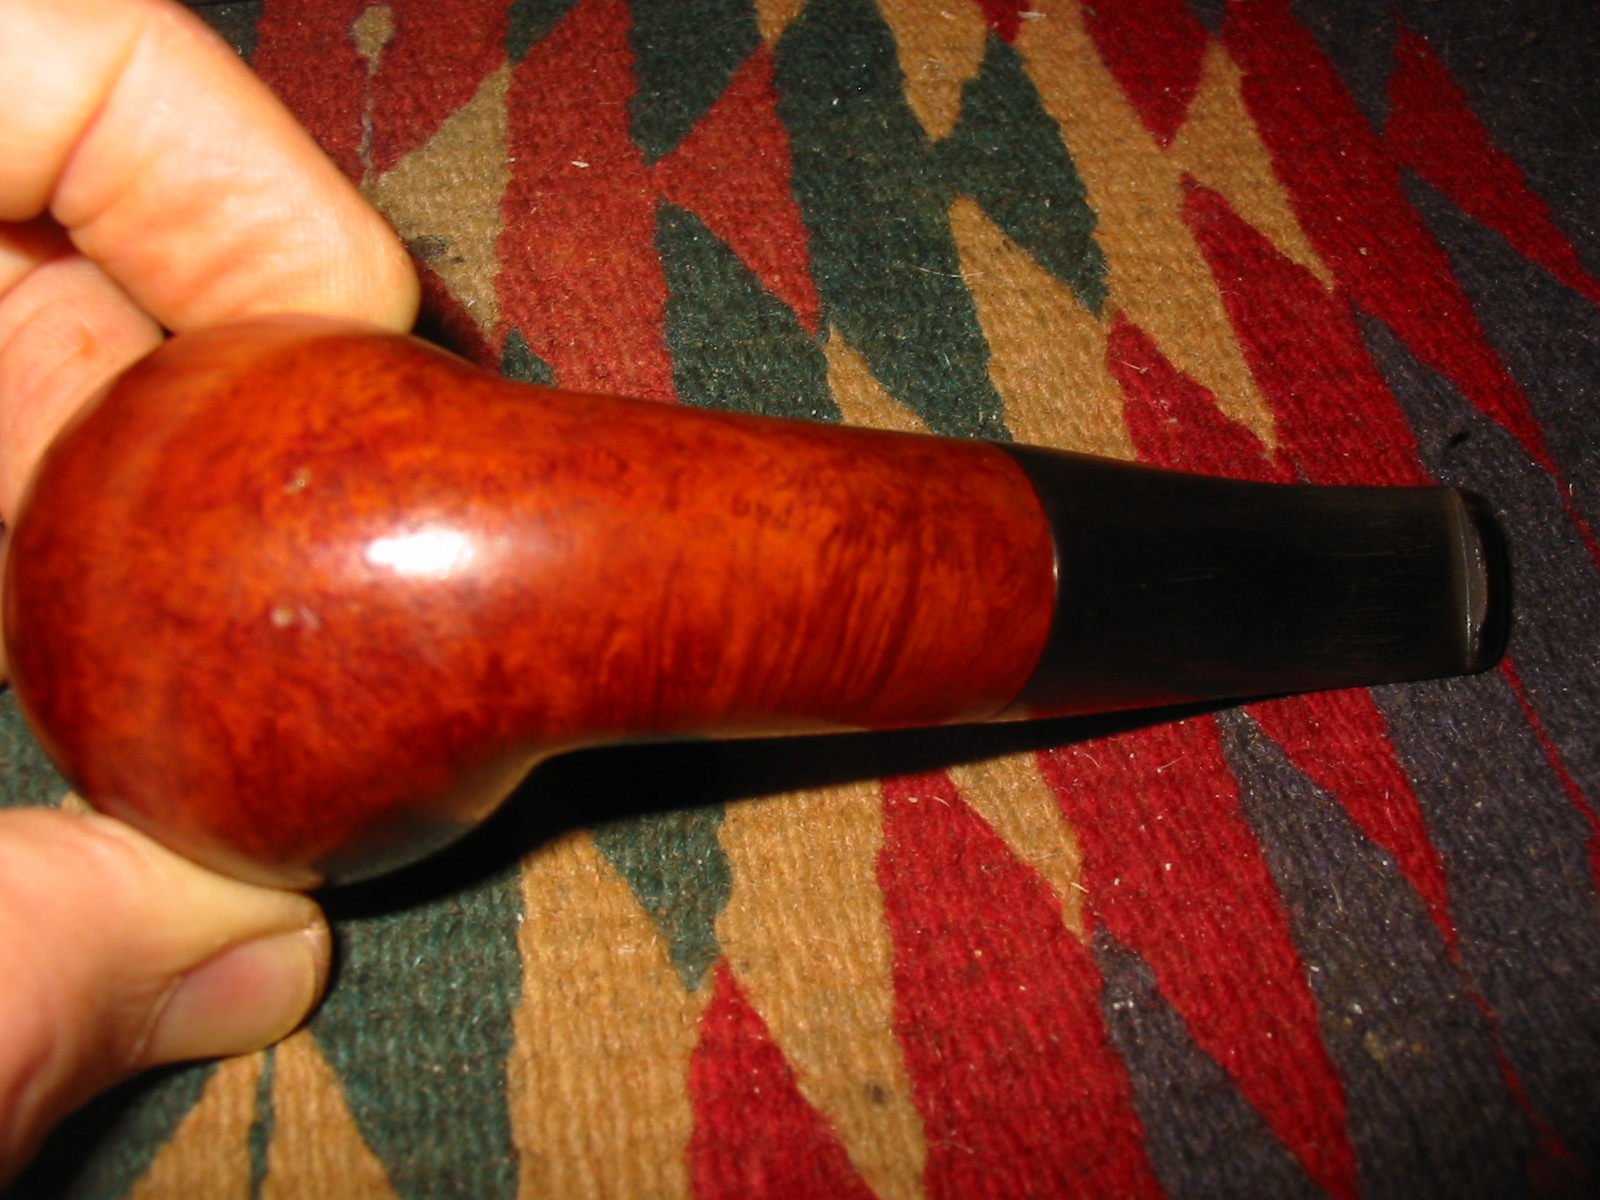
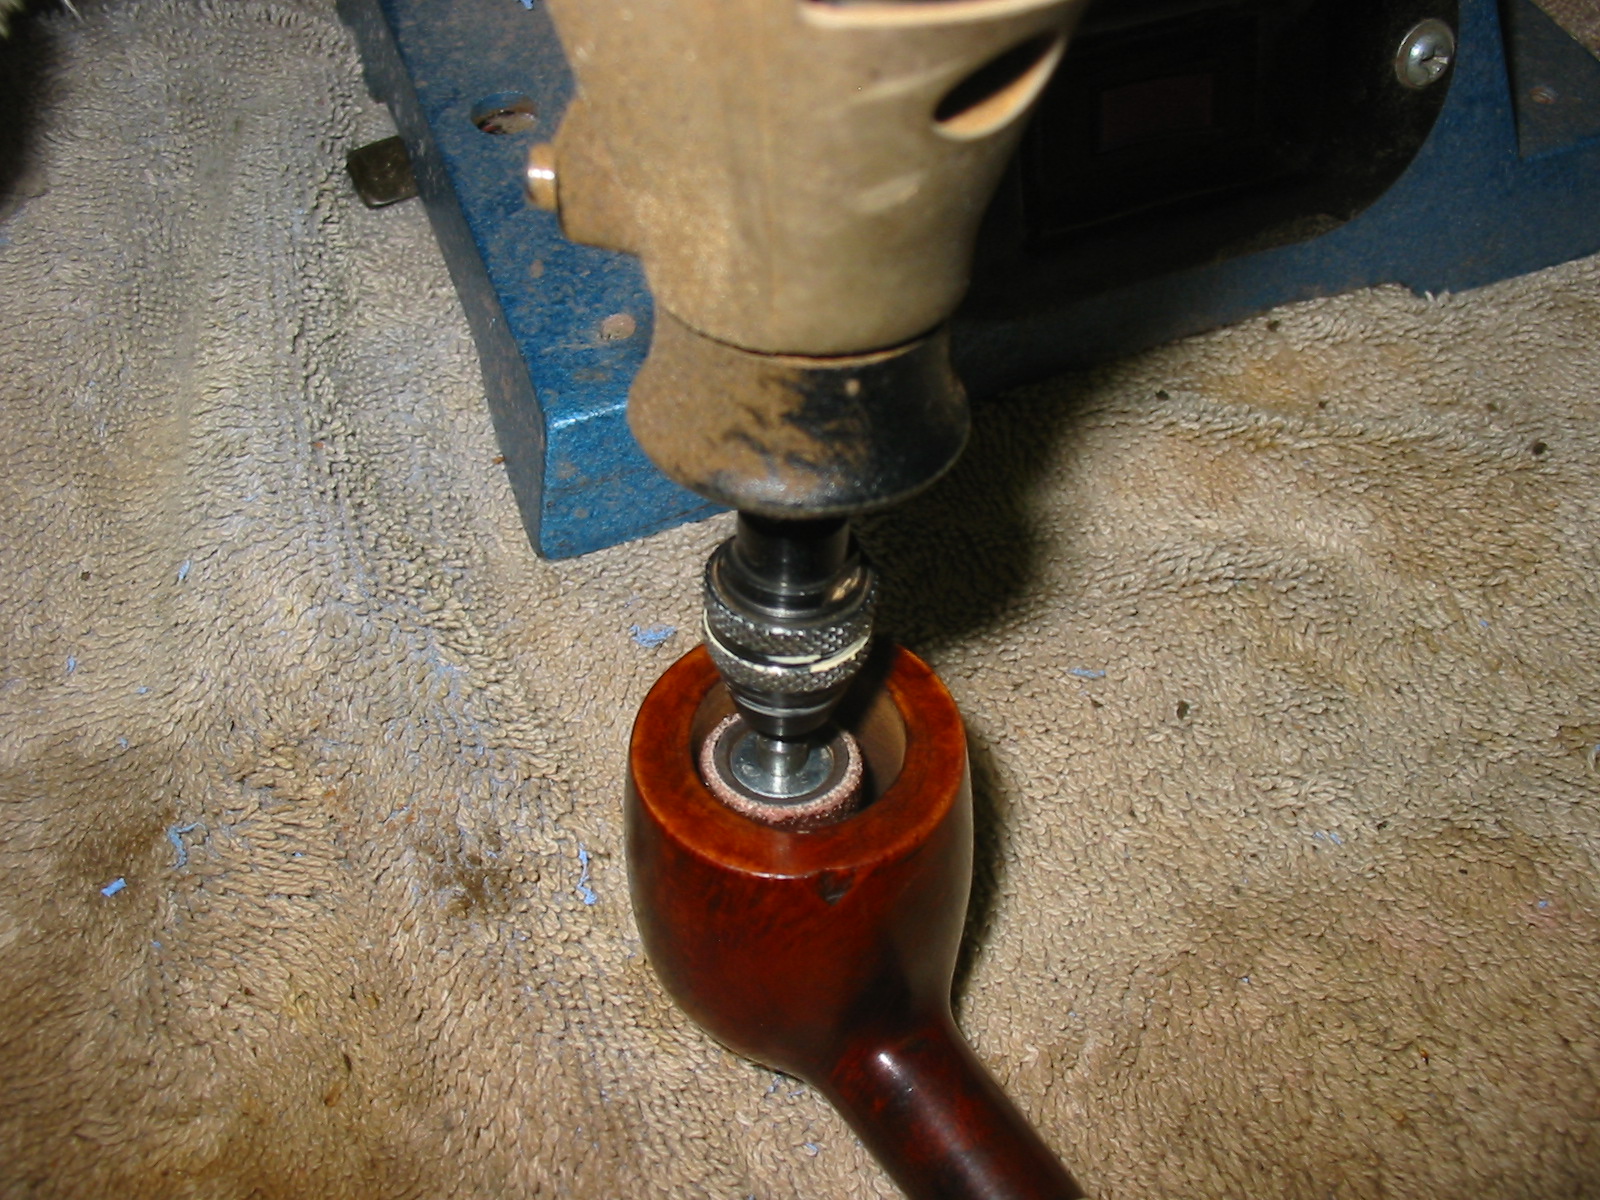
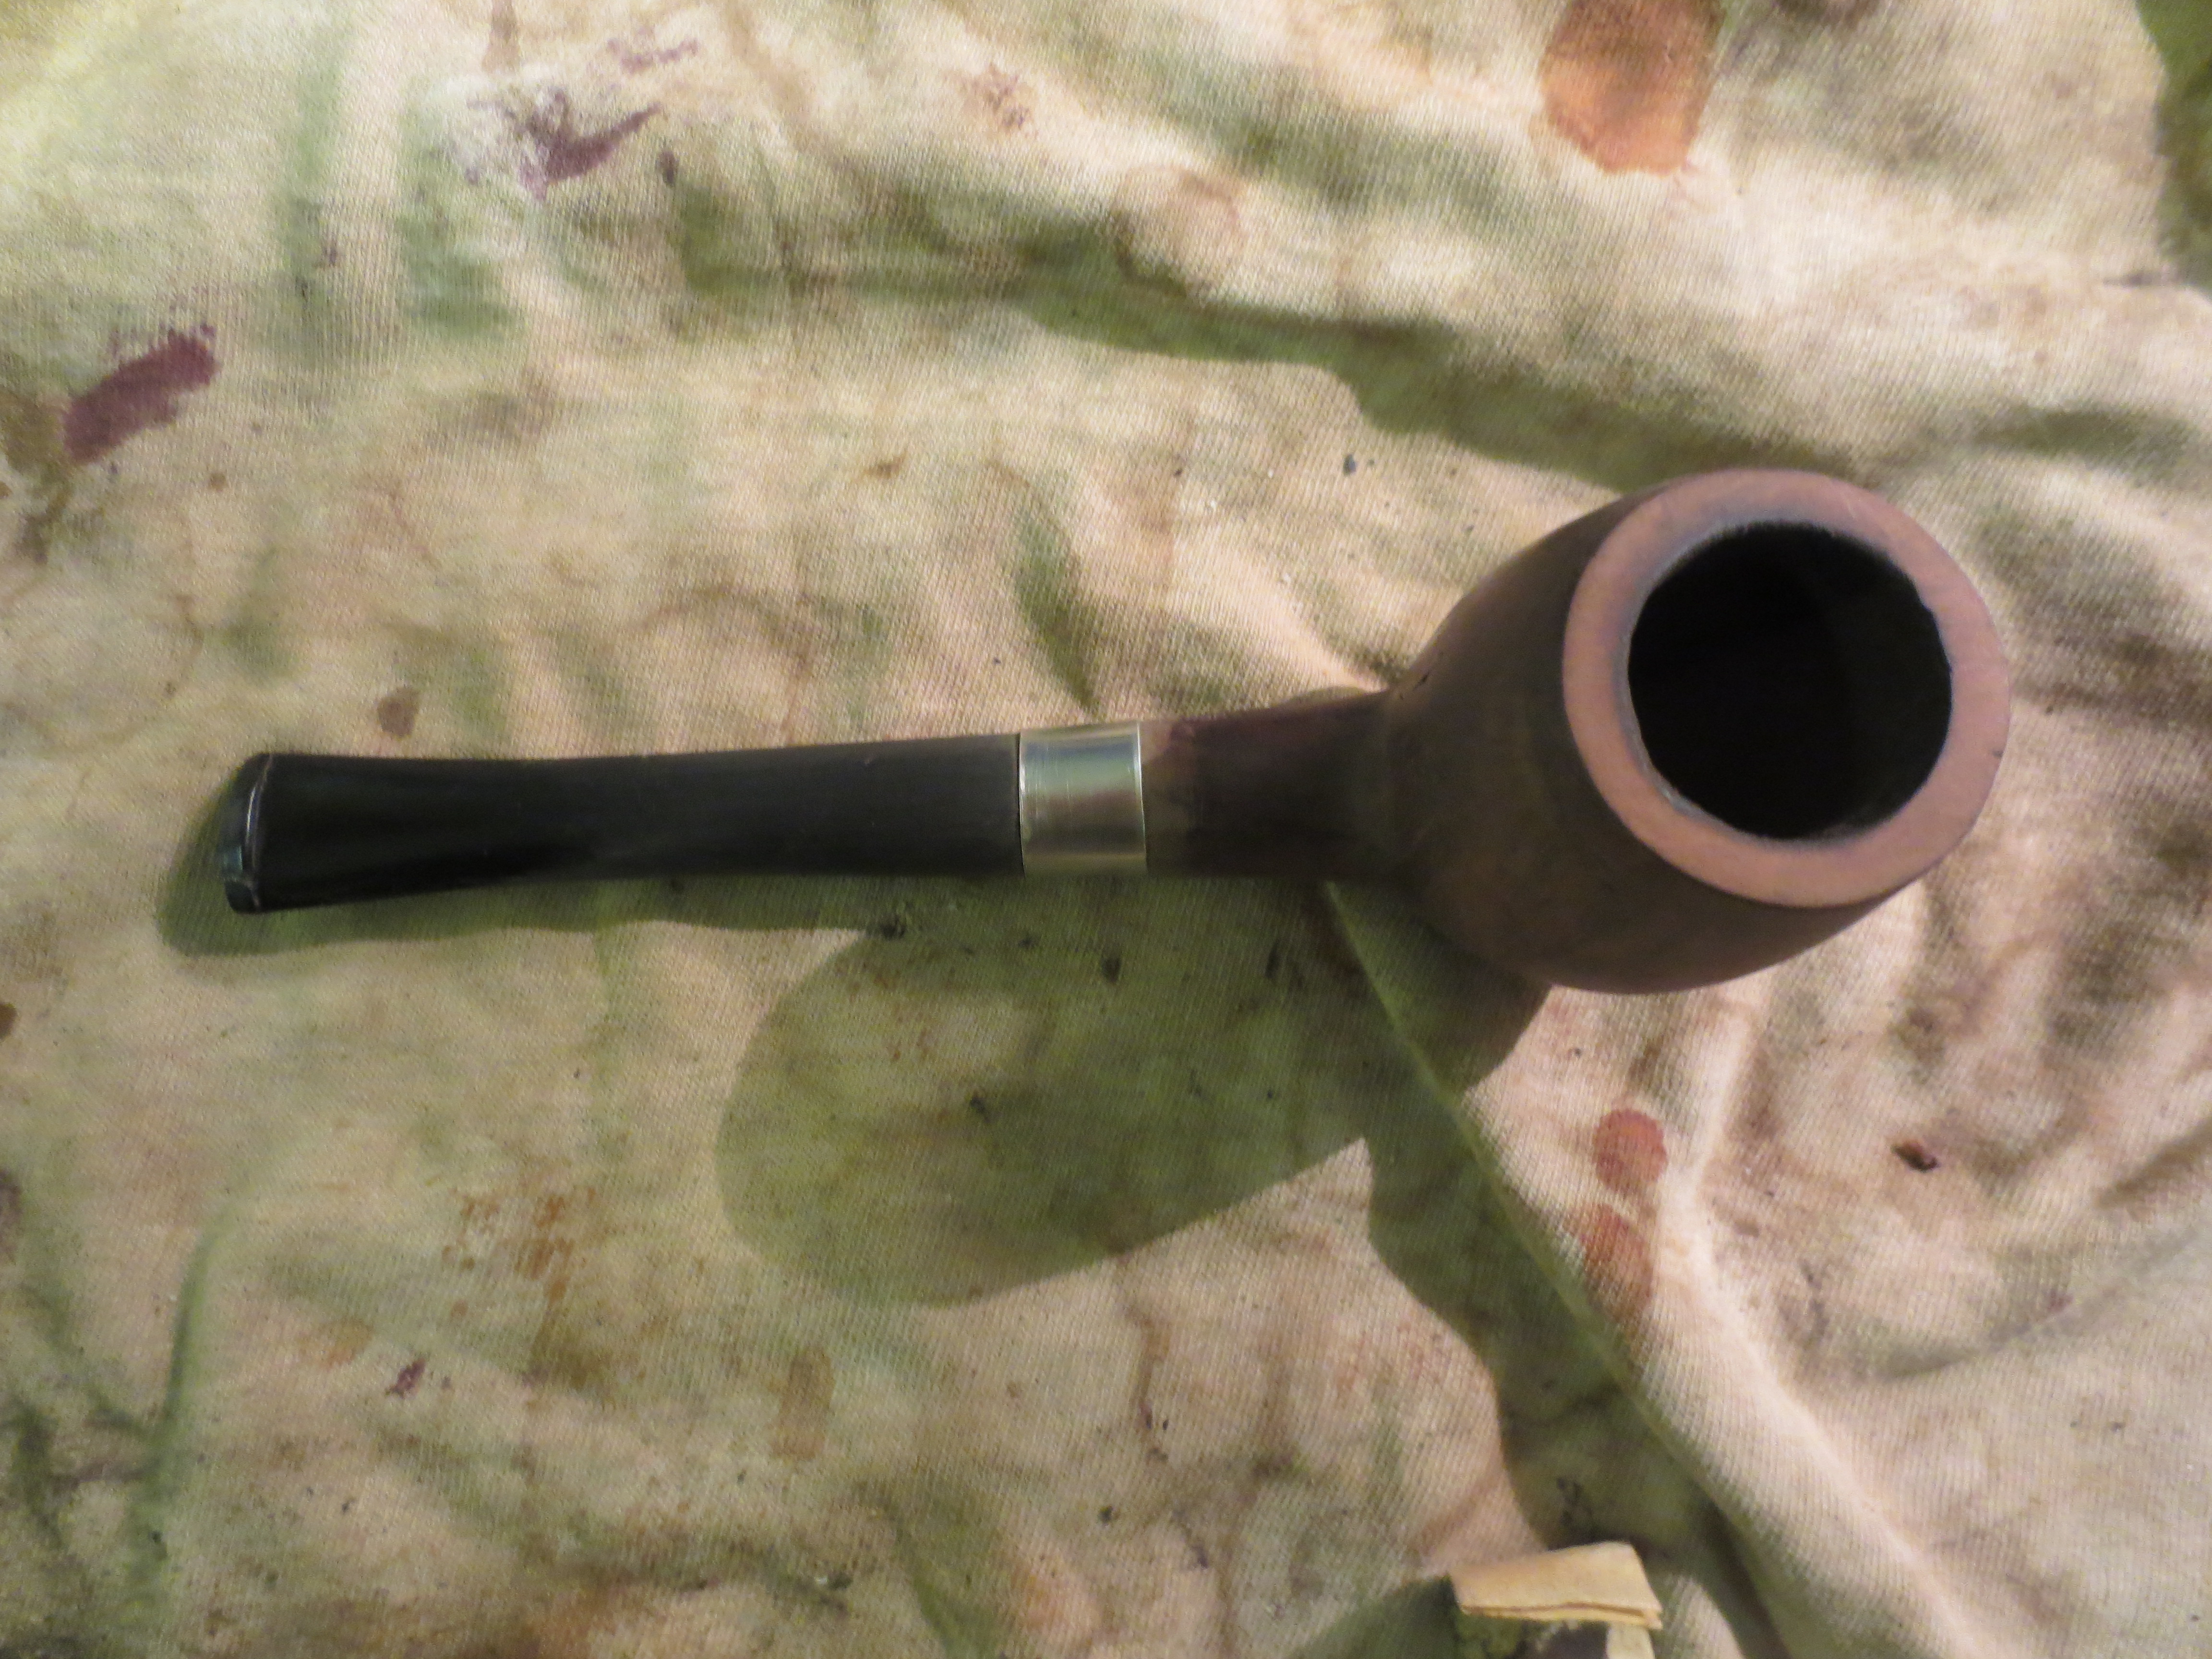
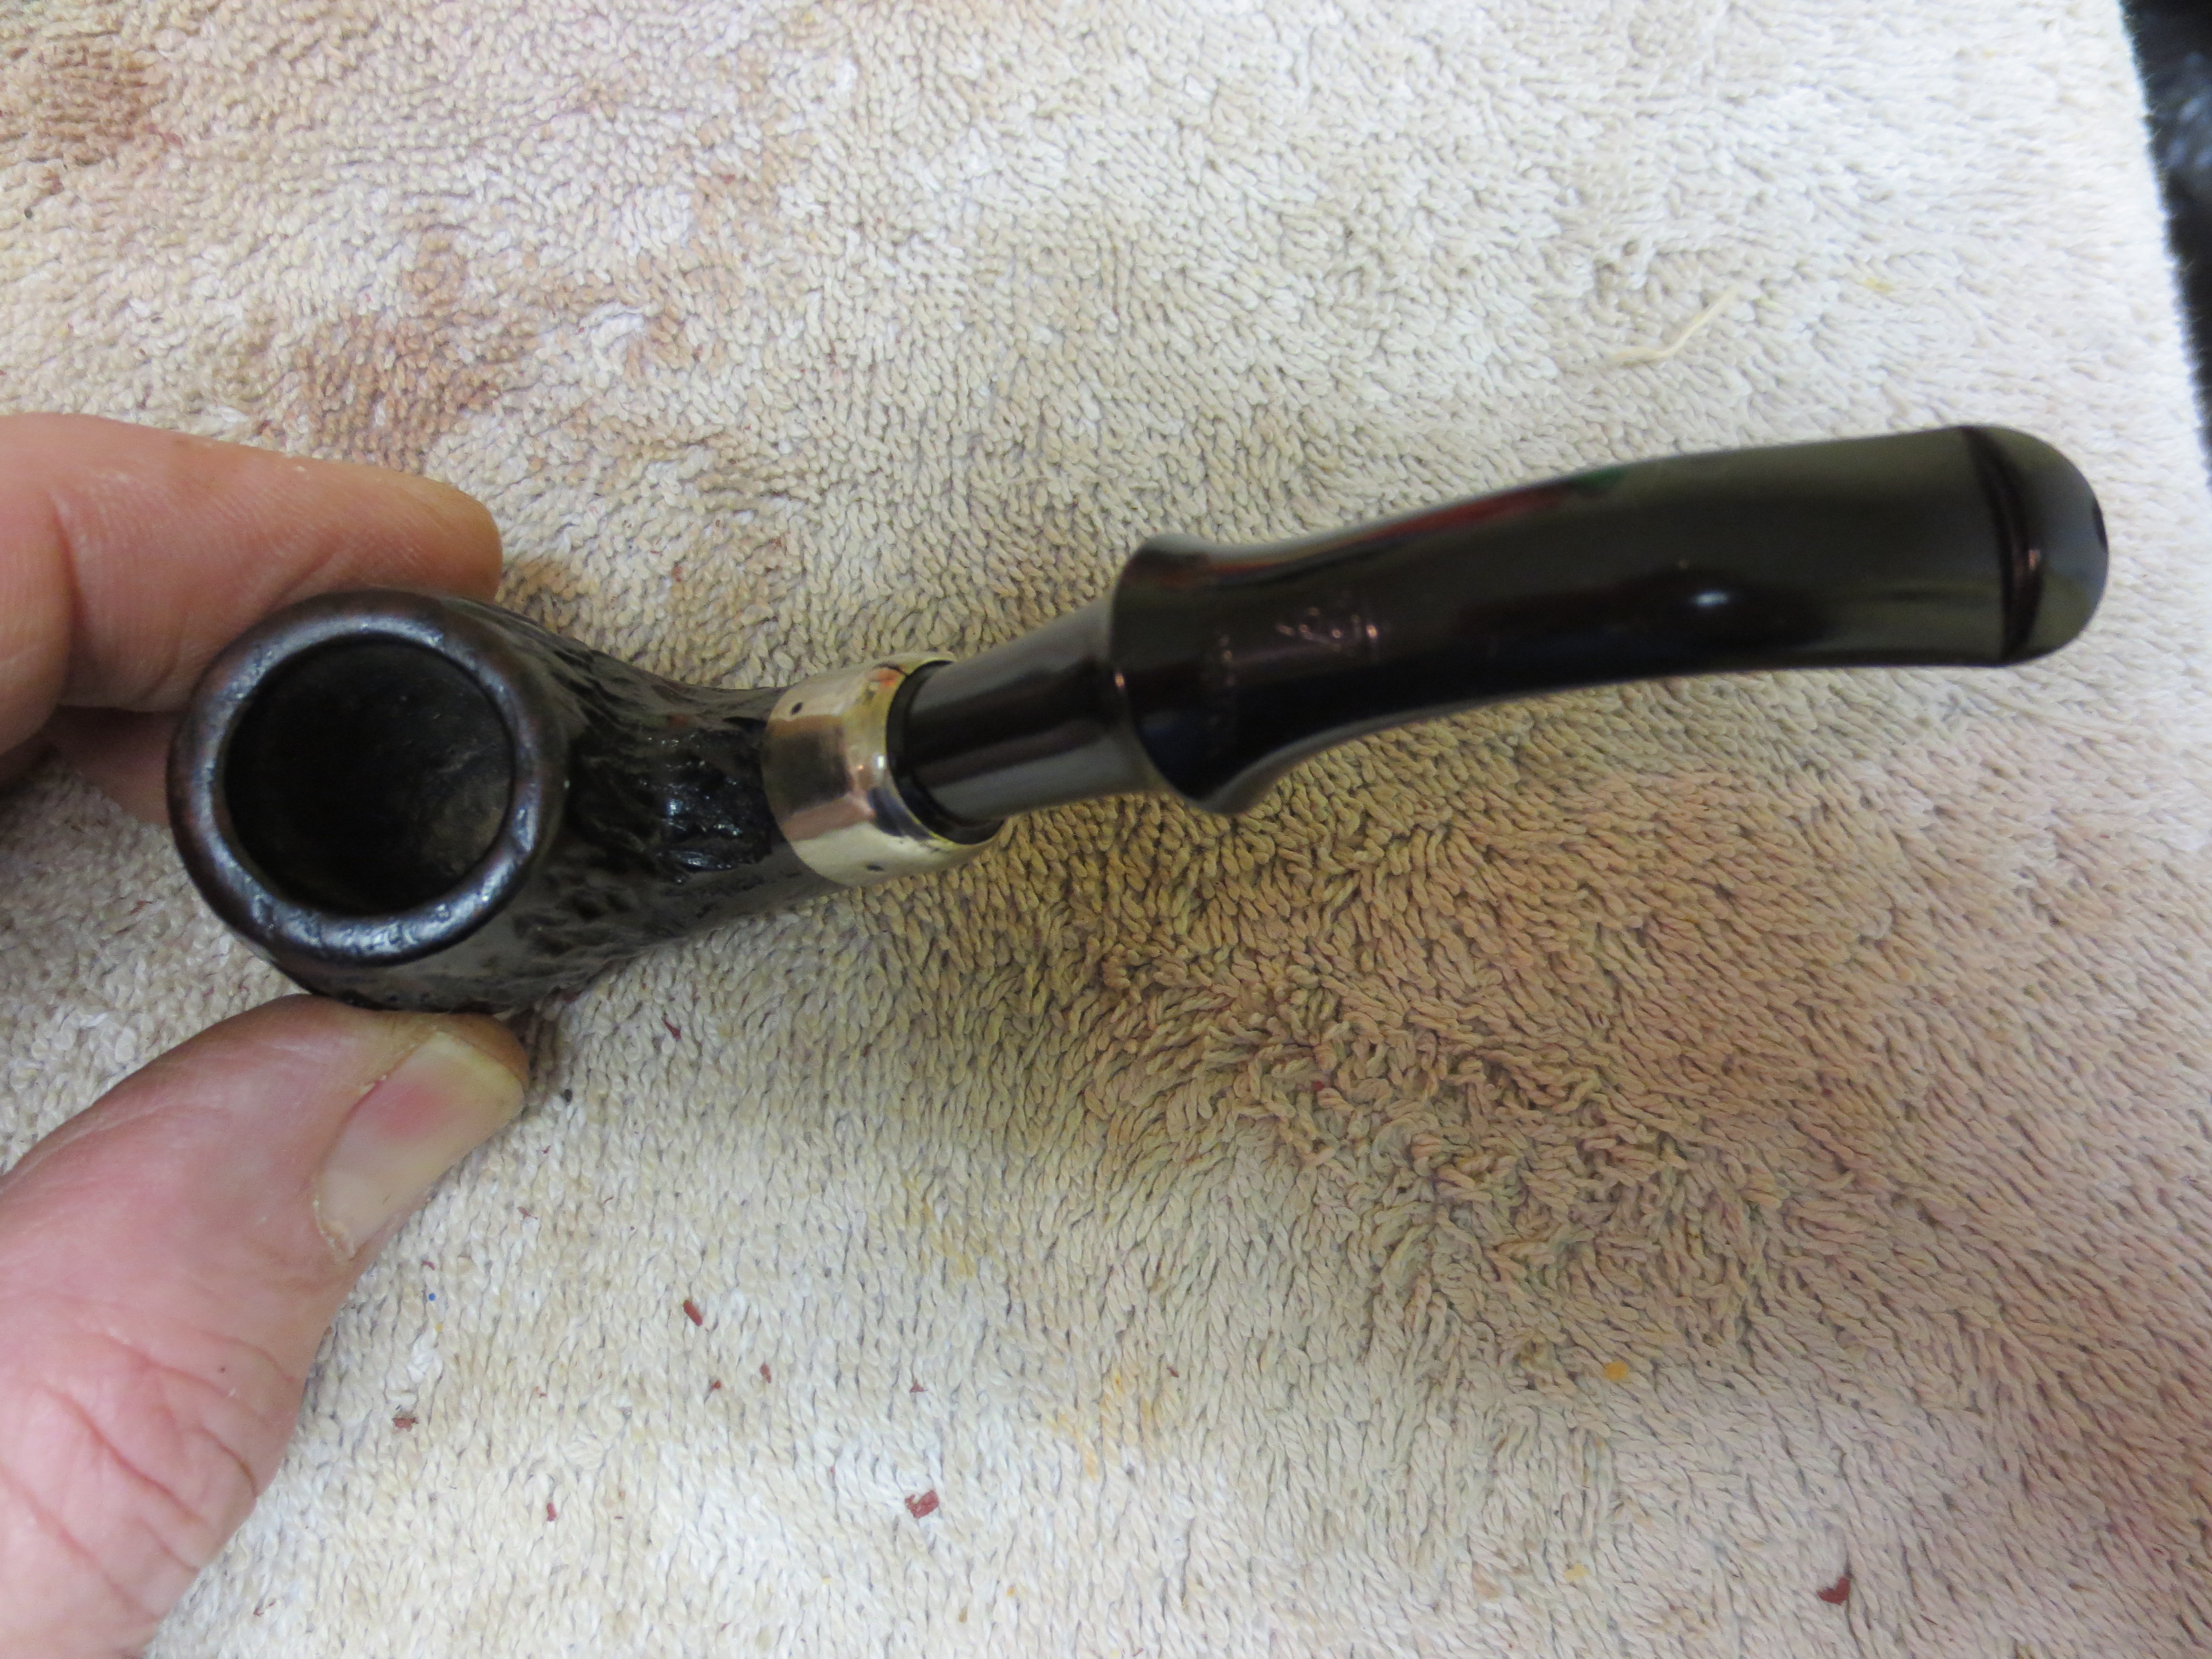
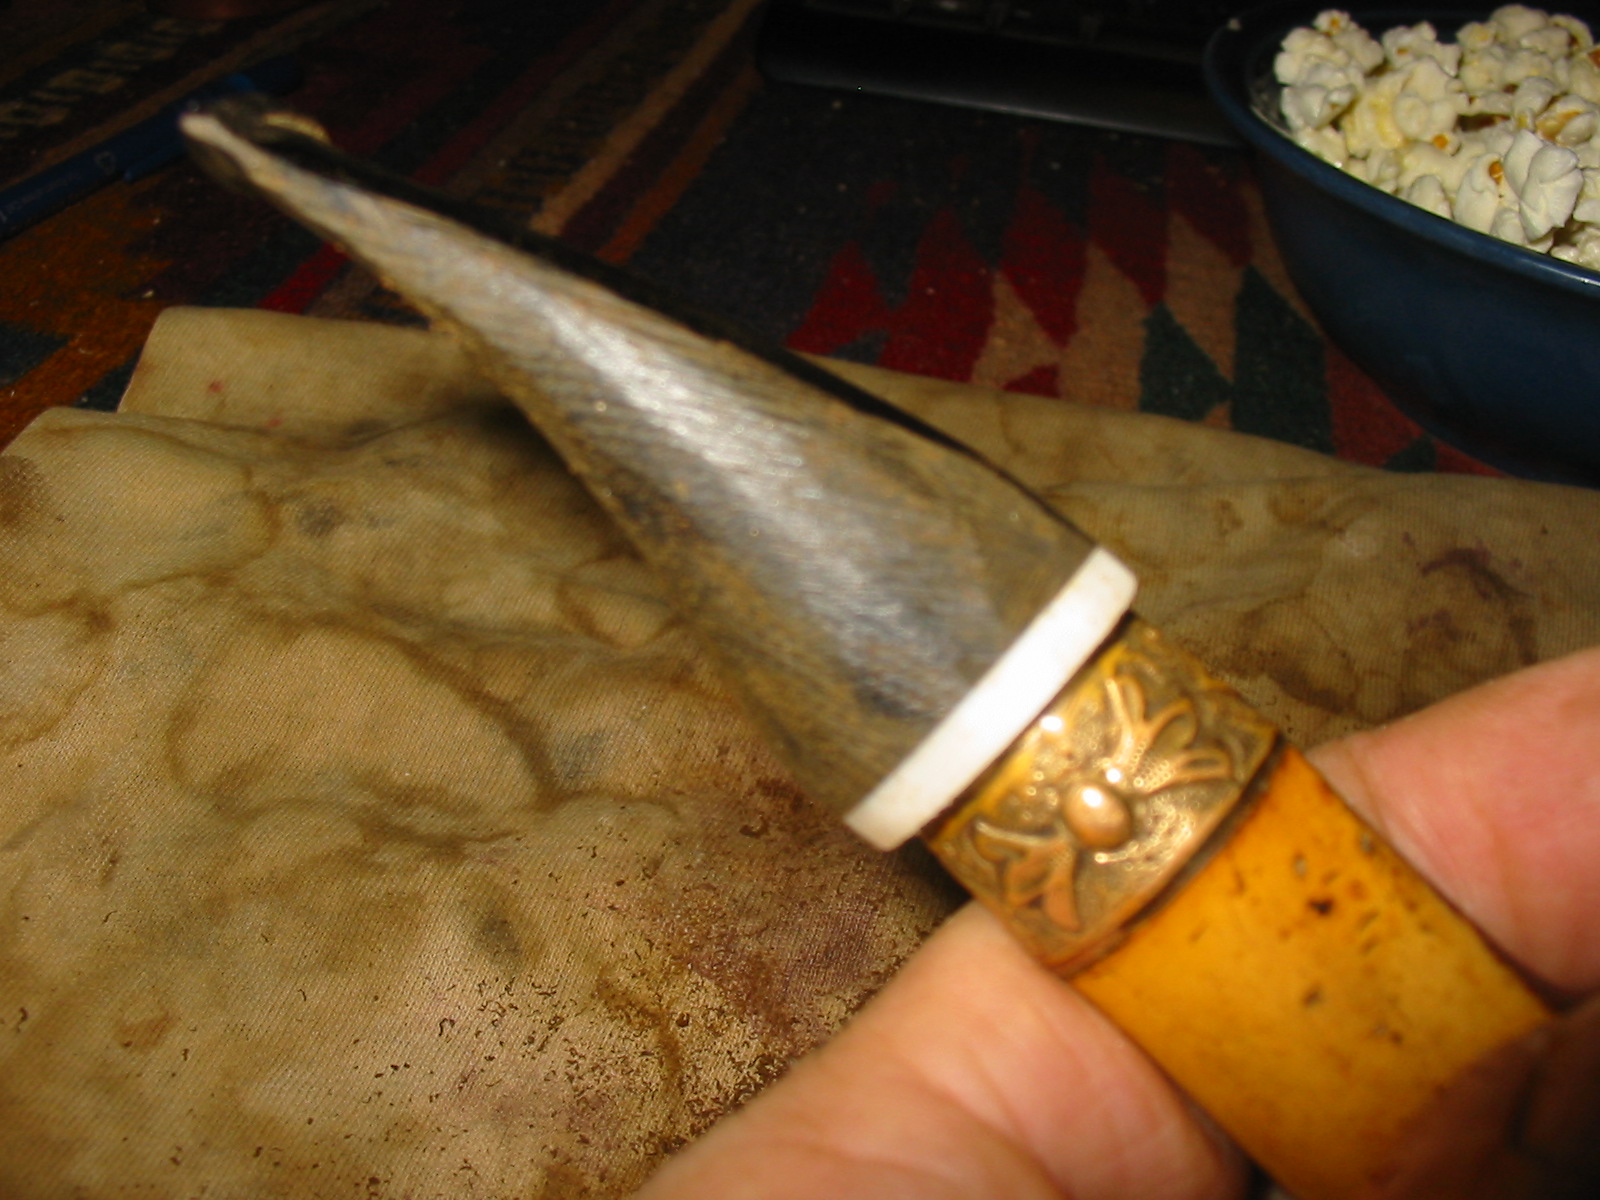
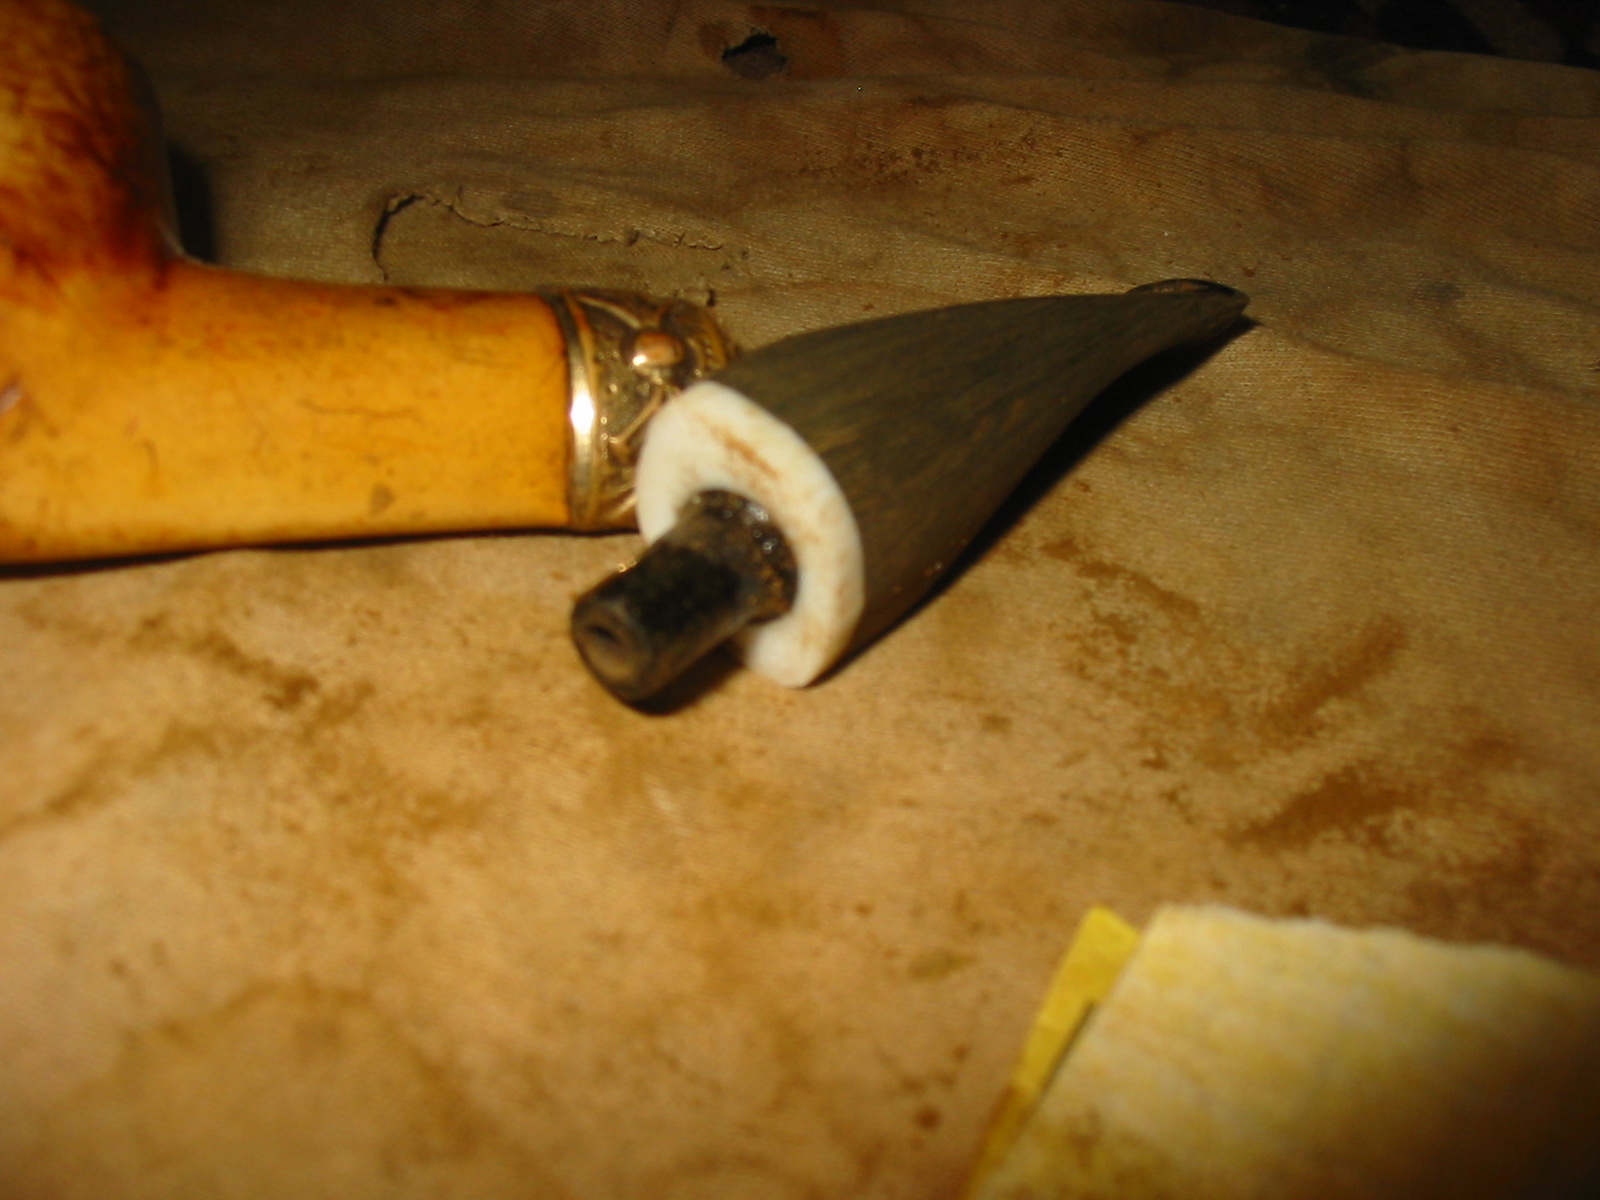
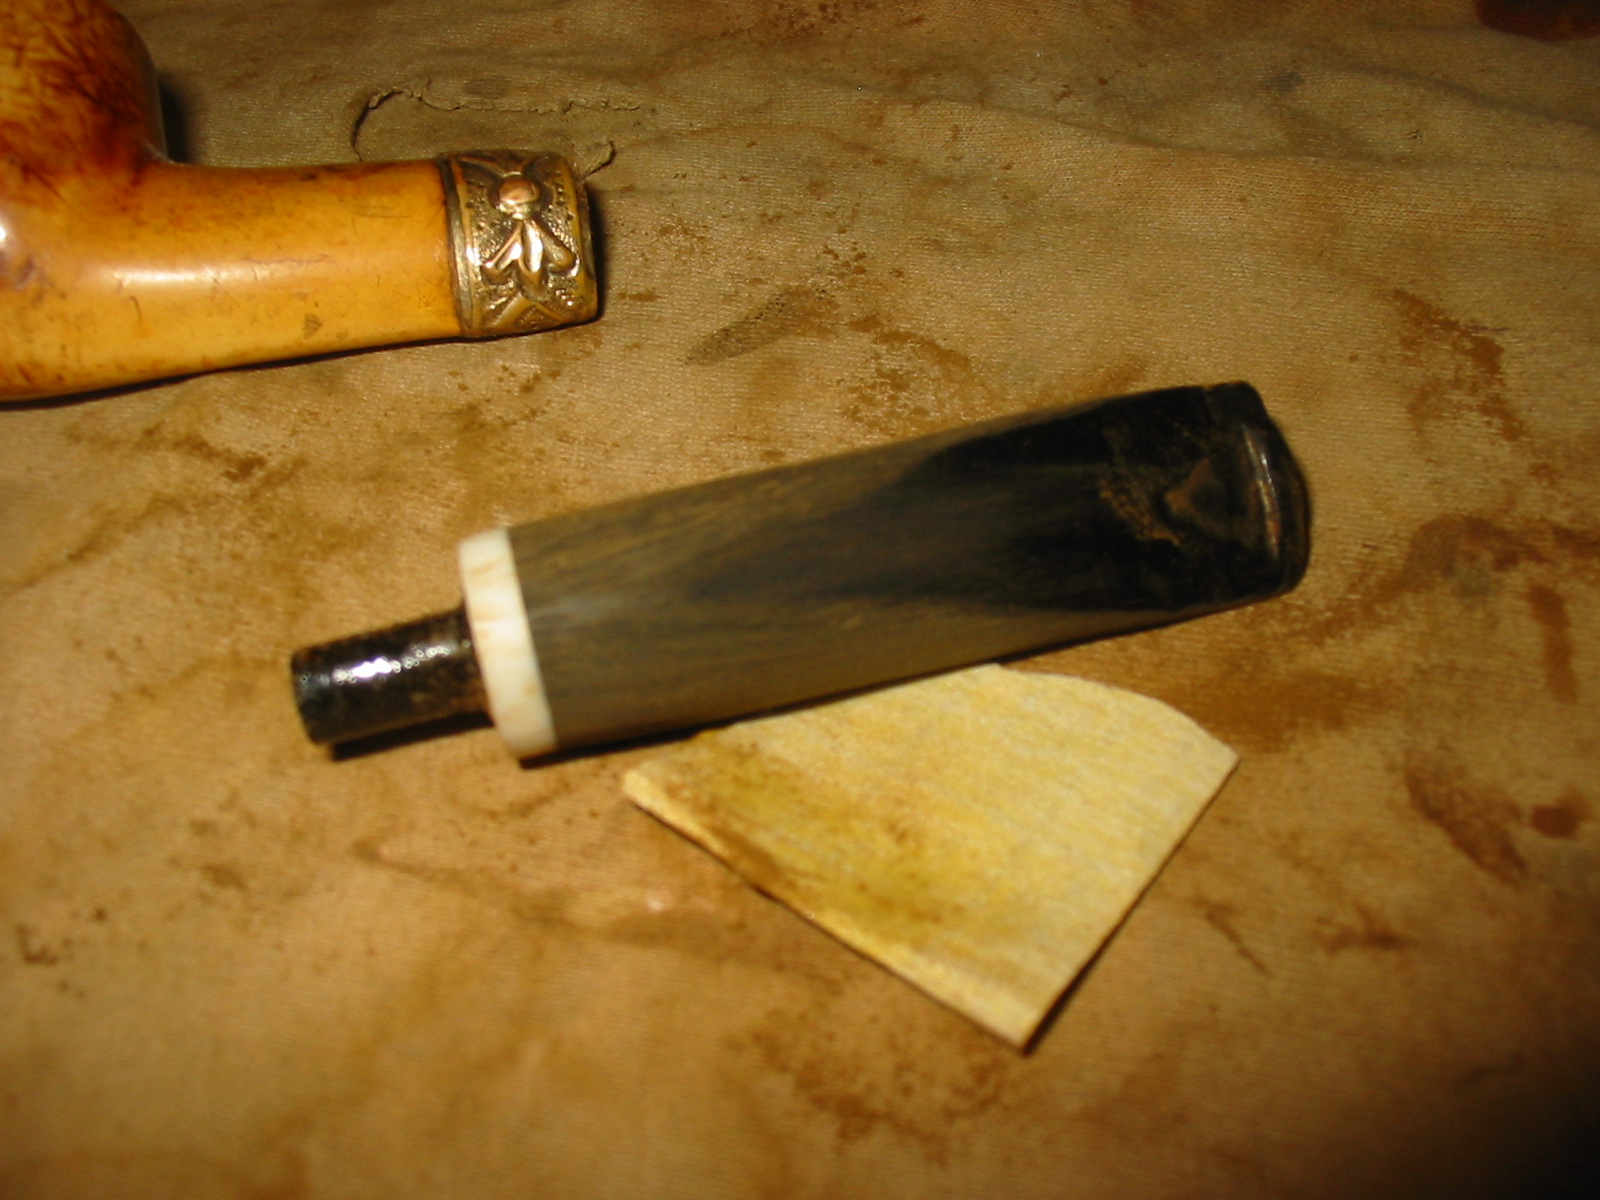
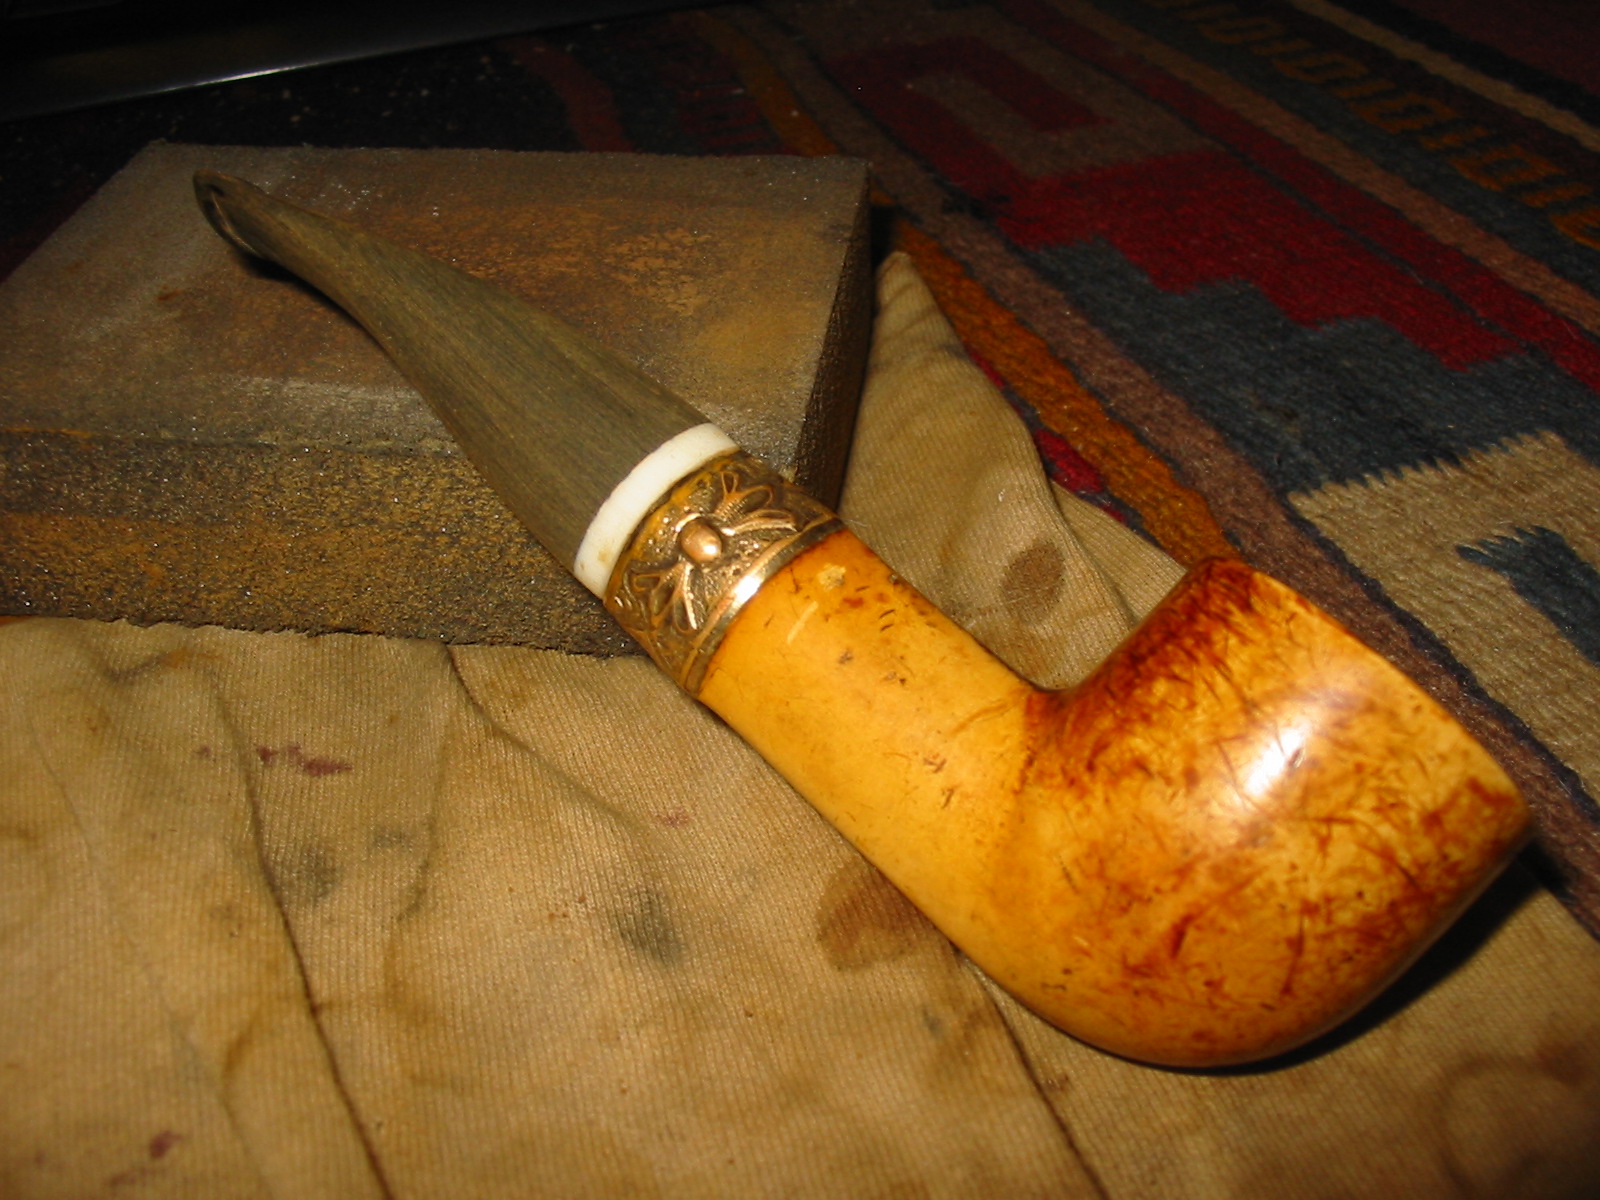
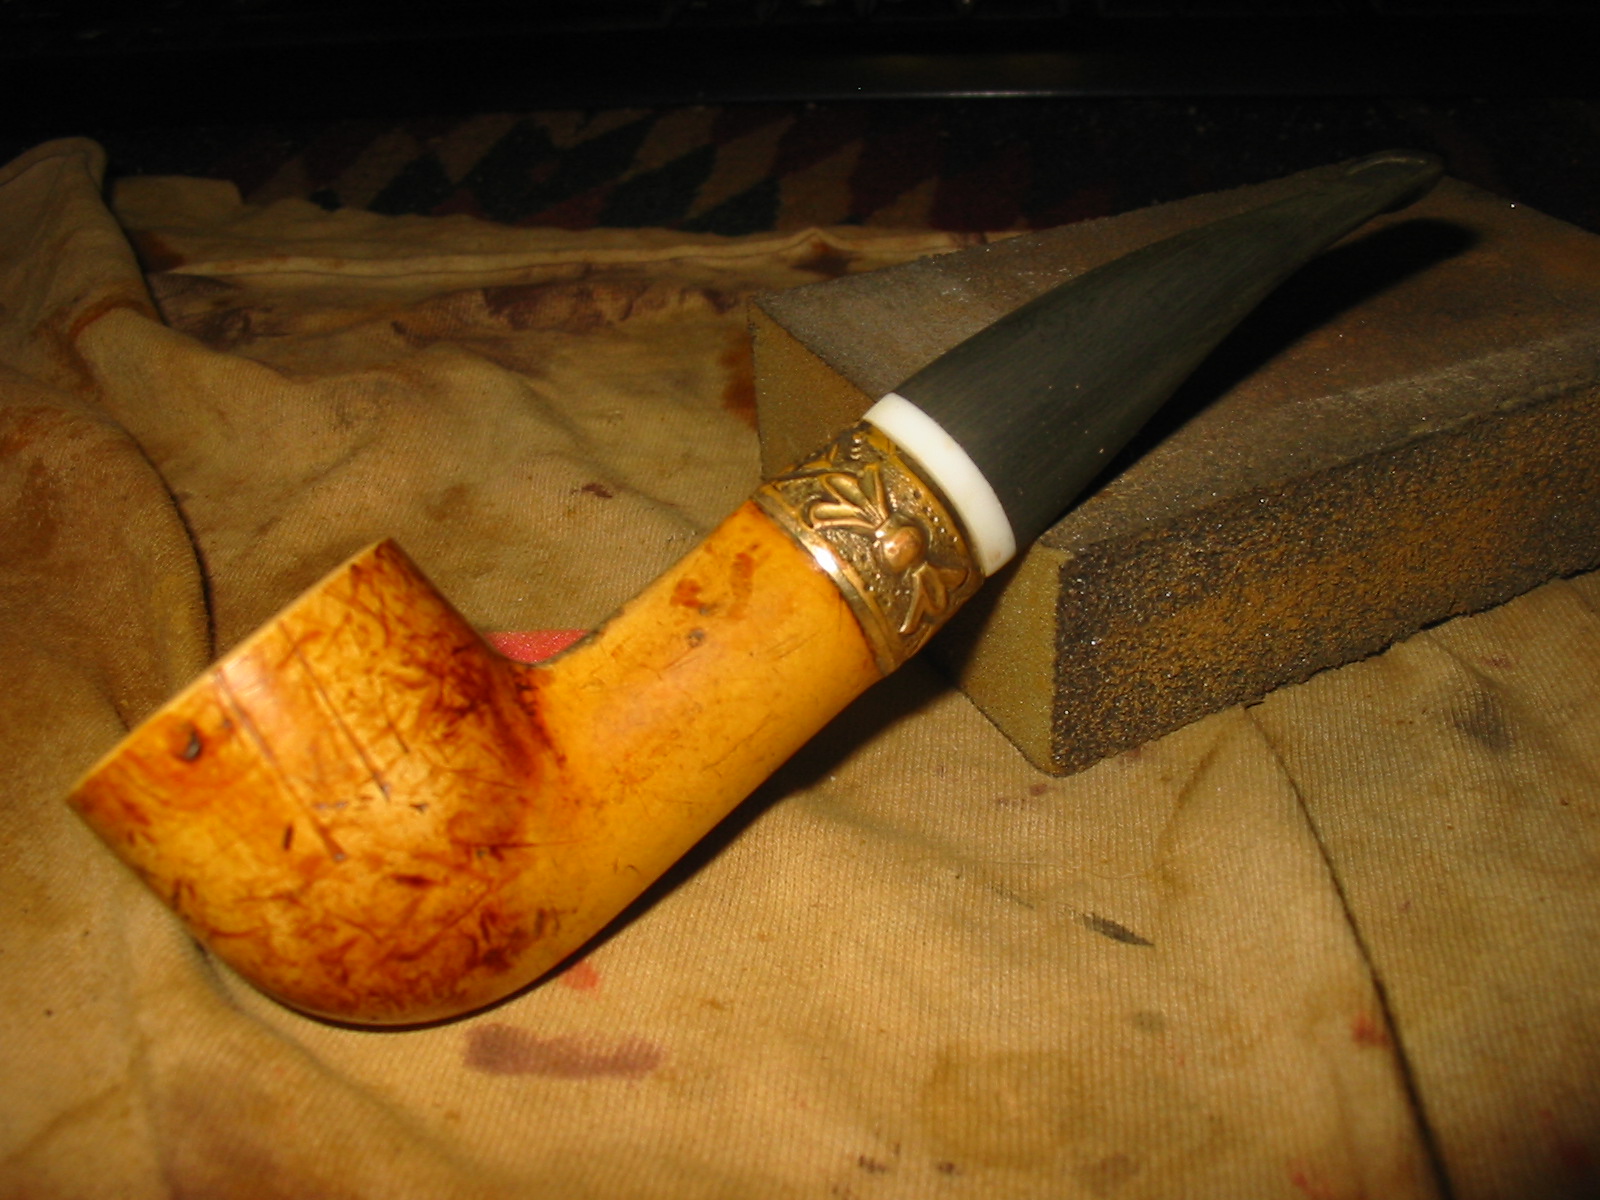
At this point in the process I decided to see if I could fit a new stem on the pipe. The diameter of the oval shank was quite large and would require a large diameter round stem. To make it an oval stem would require that much of the existing vulcanite of the stem would have to be removed in the shaping process. I had an old Brebbia stem that a friend on Pipe Smoker Unleashed Forum sent me for an old Peterson that I was restemming. The tenon was too small for the Pete but too large for the old meer. I used a Dremel with a sanding drum to remove the excess material from the tenon until the fit was very close. The remainder of the fitting was done with a wood rasp and sandpaper. Once the tenon was finished I pushed the stem into the old meer to check on the fit of the tenon in the newly opened mortise. As can be seen in the photo below, the fit was perfect. You can also see from that photo how much work would need to be done to fit the stem to match the shank of the pipe.

IMG_1812

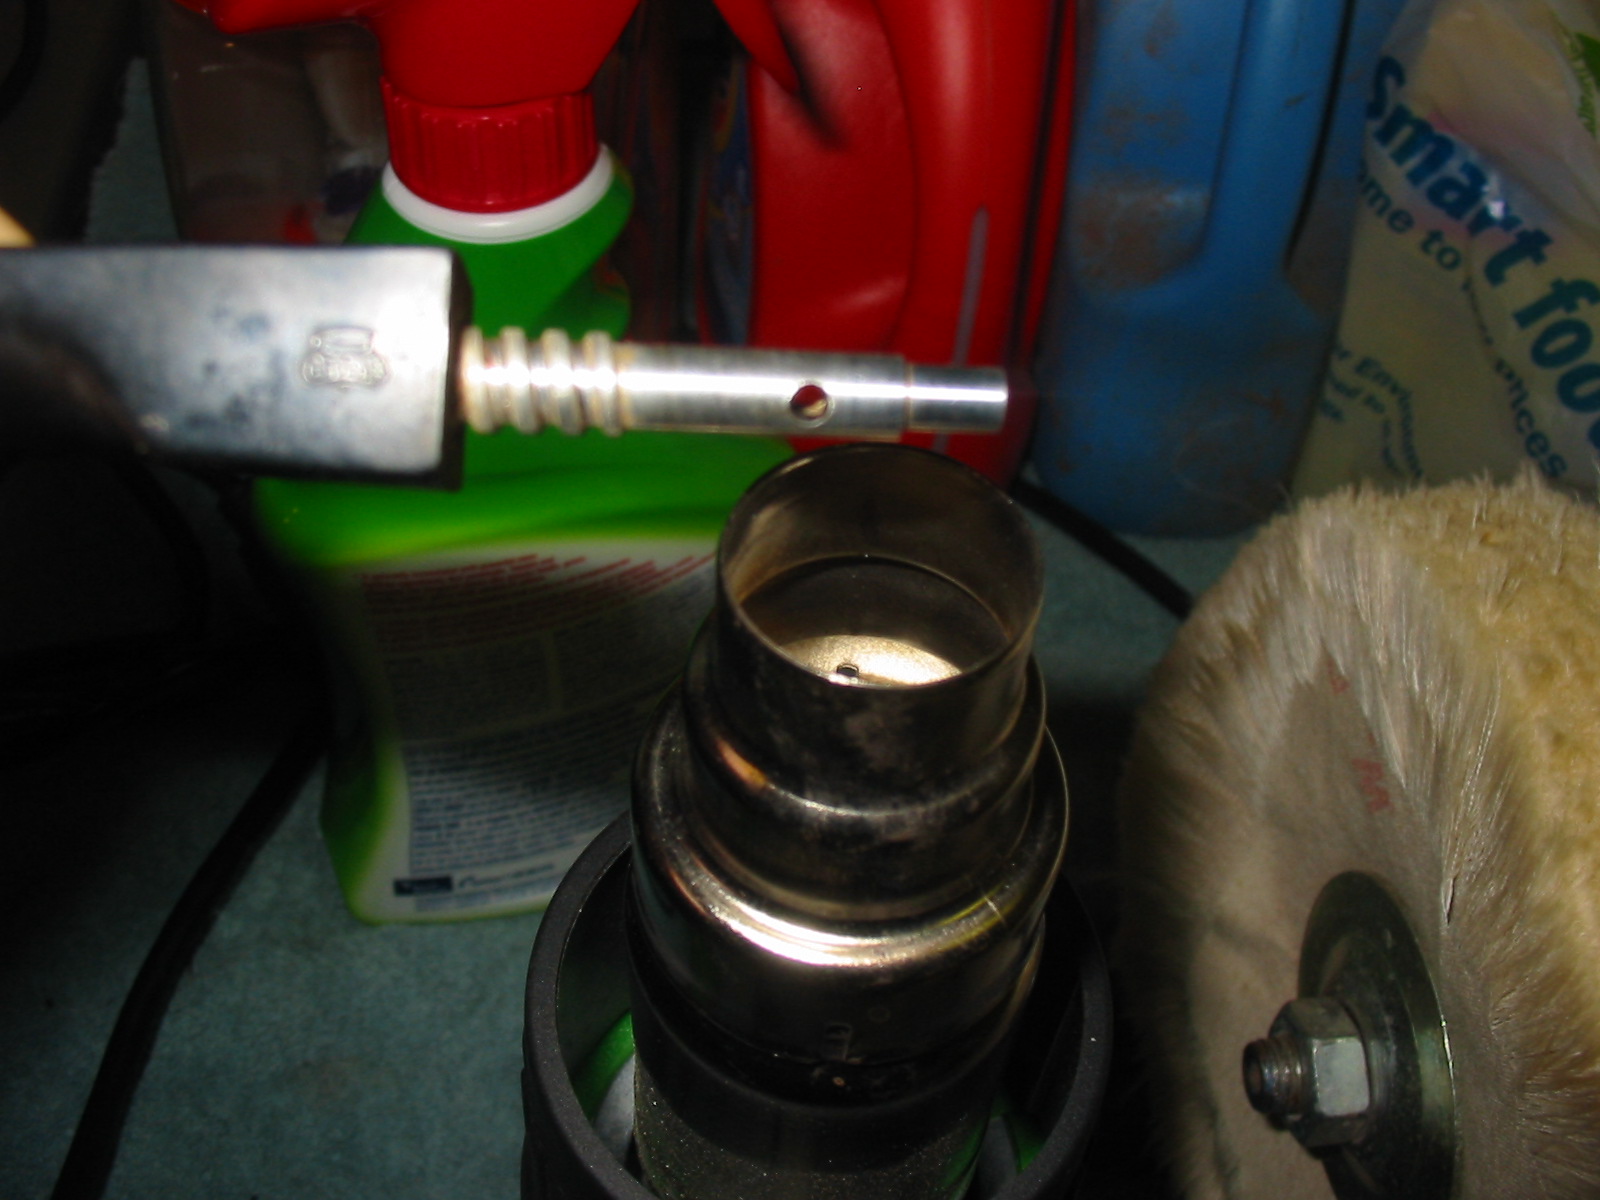
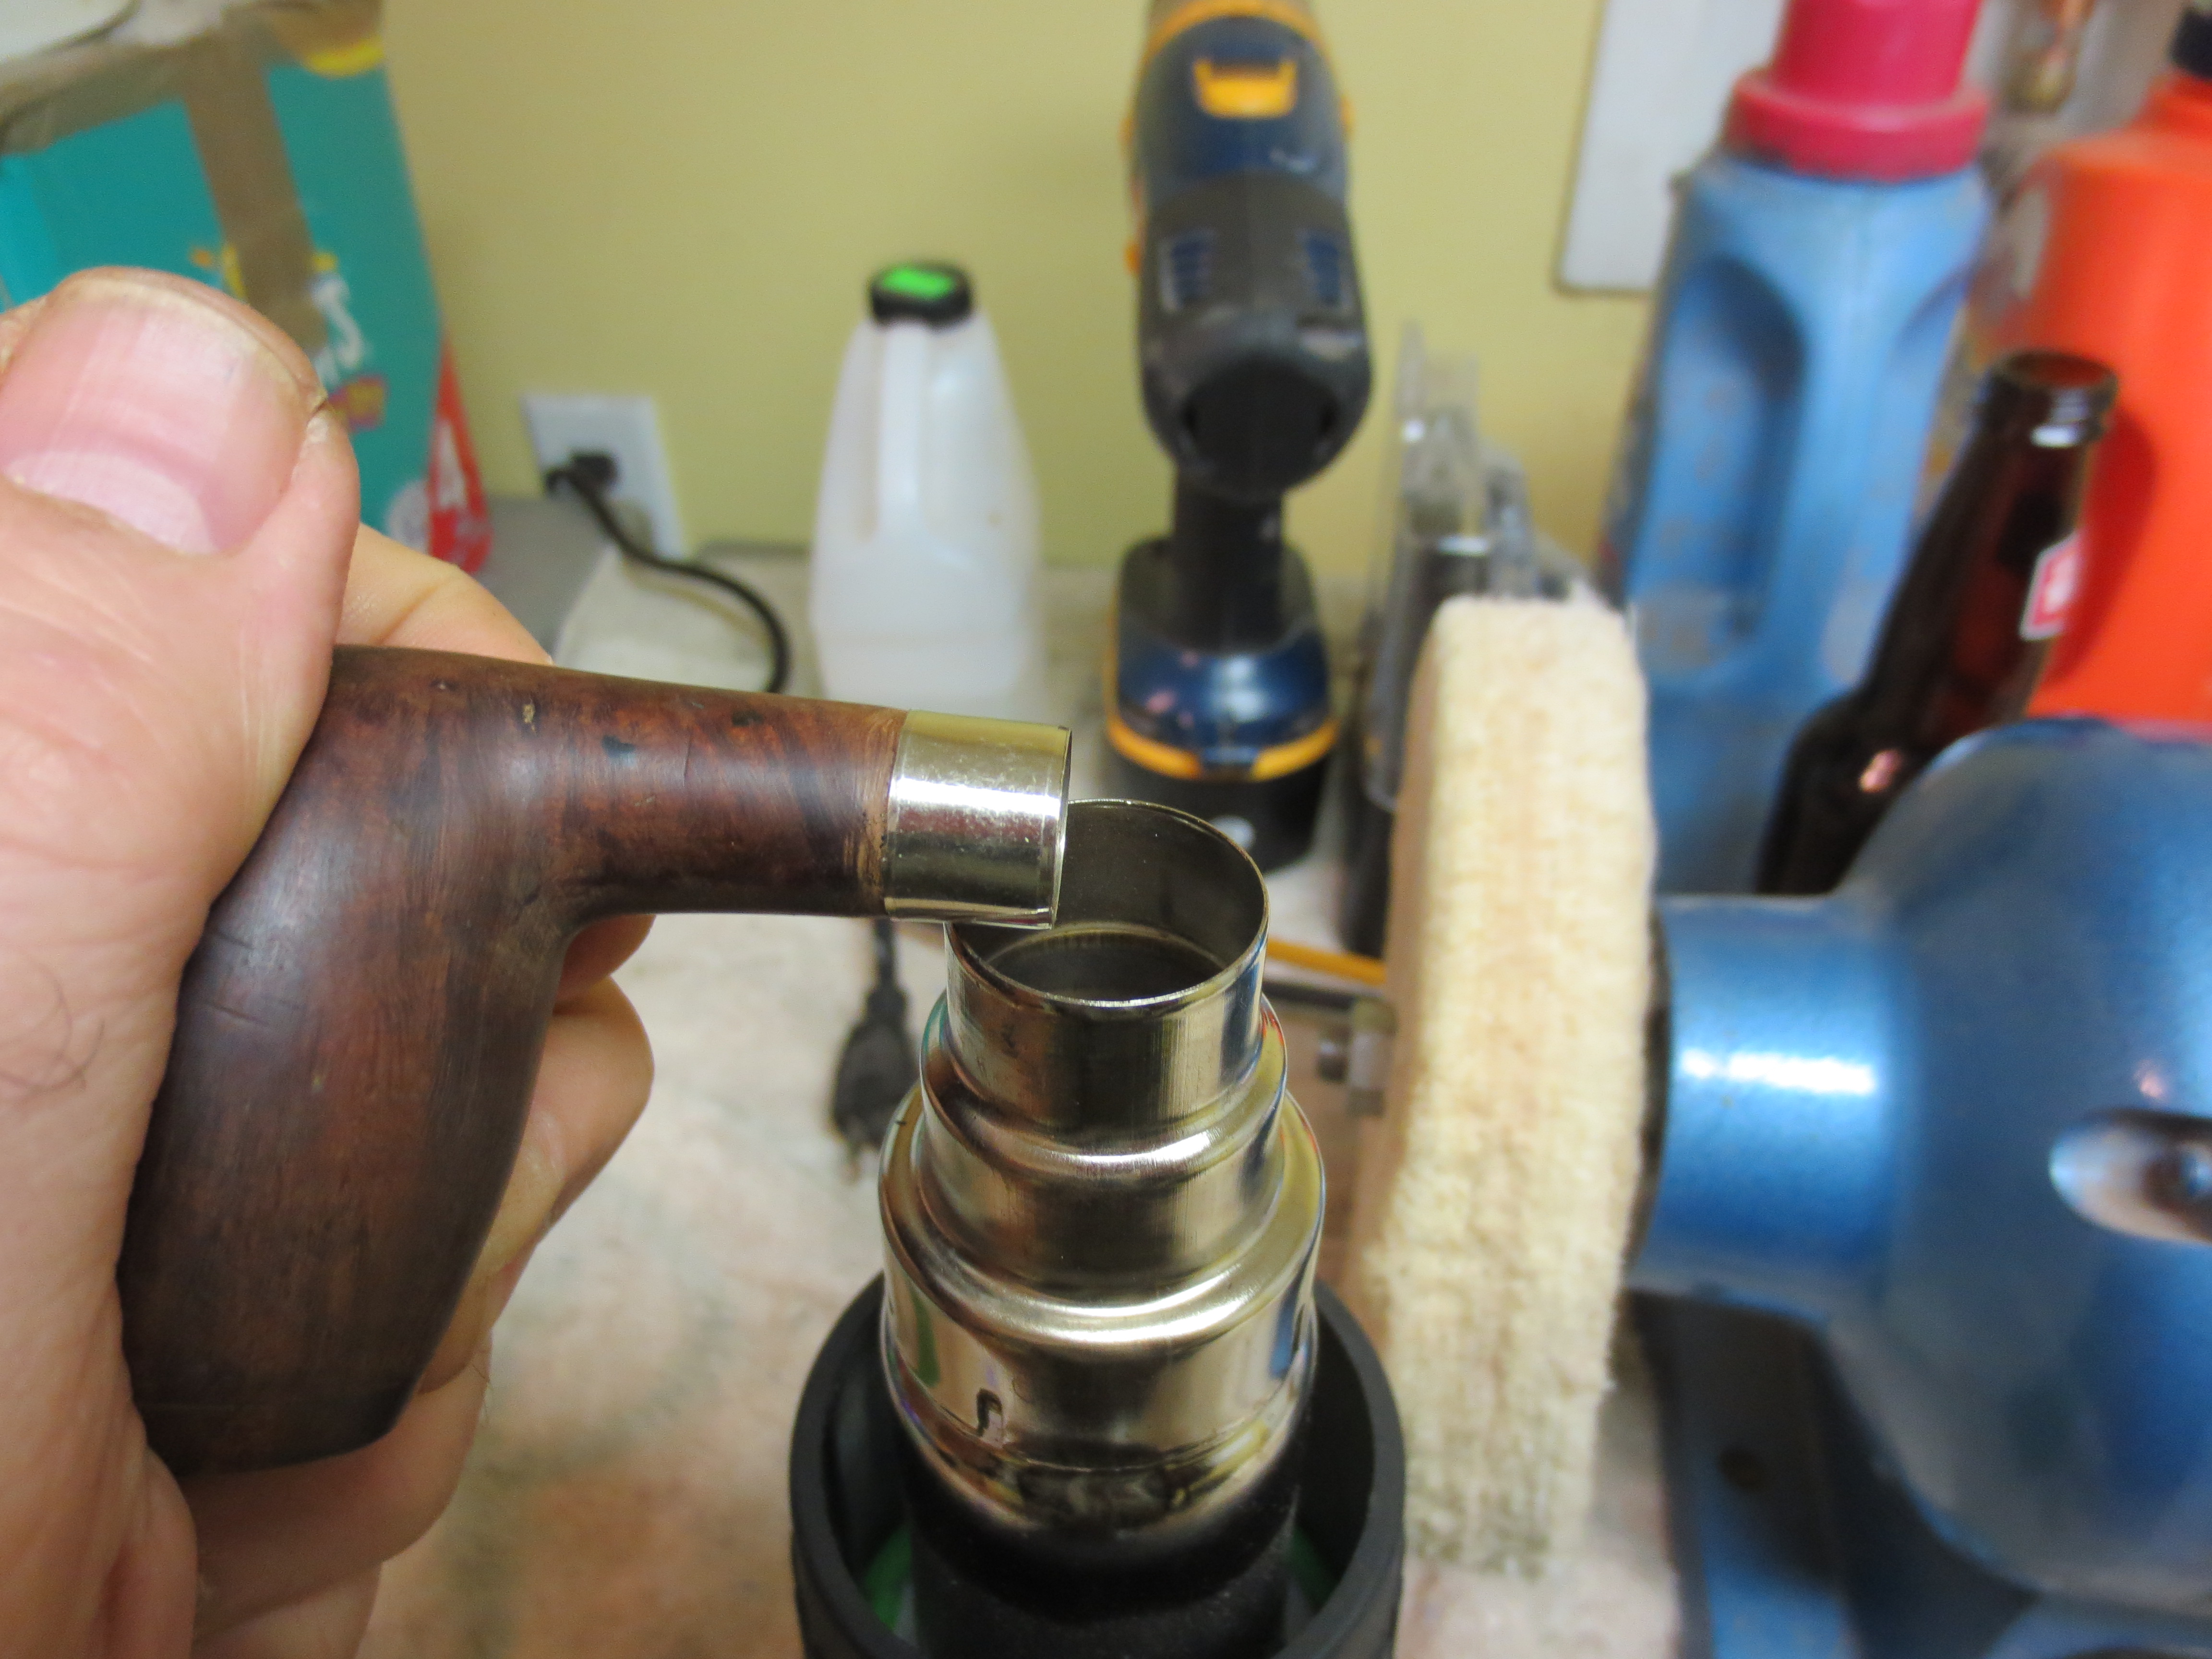
The stem had deep bite marks on the top and the bottom near the button. They did not break the surface of the vulcanite. I decided to heat the surface of the stem with a heat gun and try to lift the dents from both sides as much as possible. I also wanted to straighten the stem significantly to give a better profile to the pipe. The heat gun worked to achieve both aims. The tooth marks lifted quite a bit and would have to be filled with black superglue to finish the work and the bend straightened to the angle I wanted for the new stem.

IMG_1813

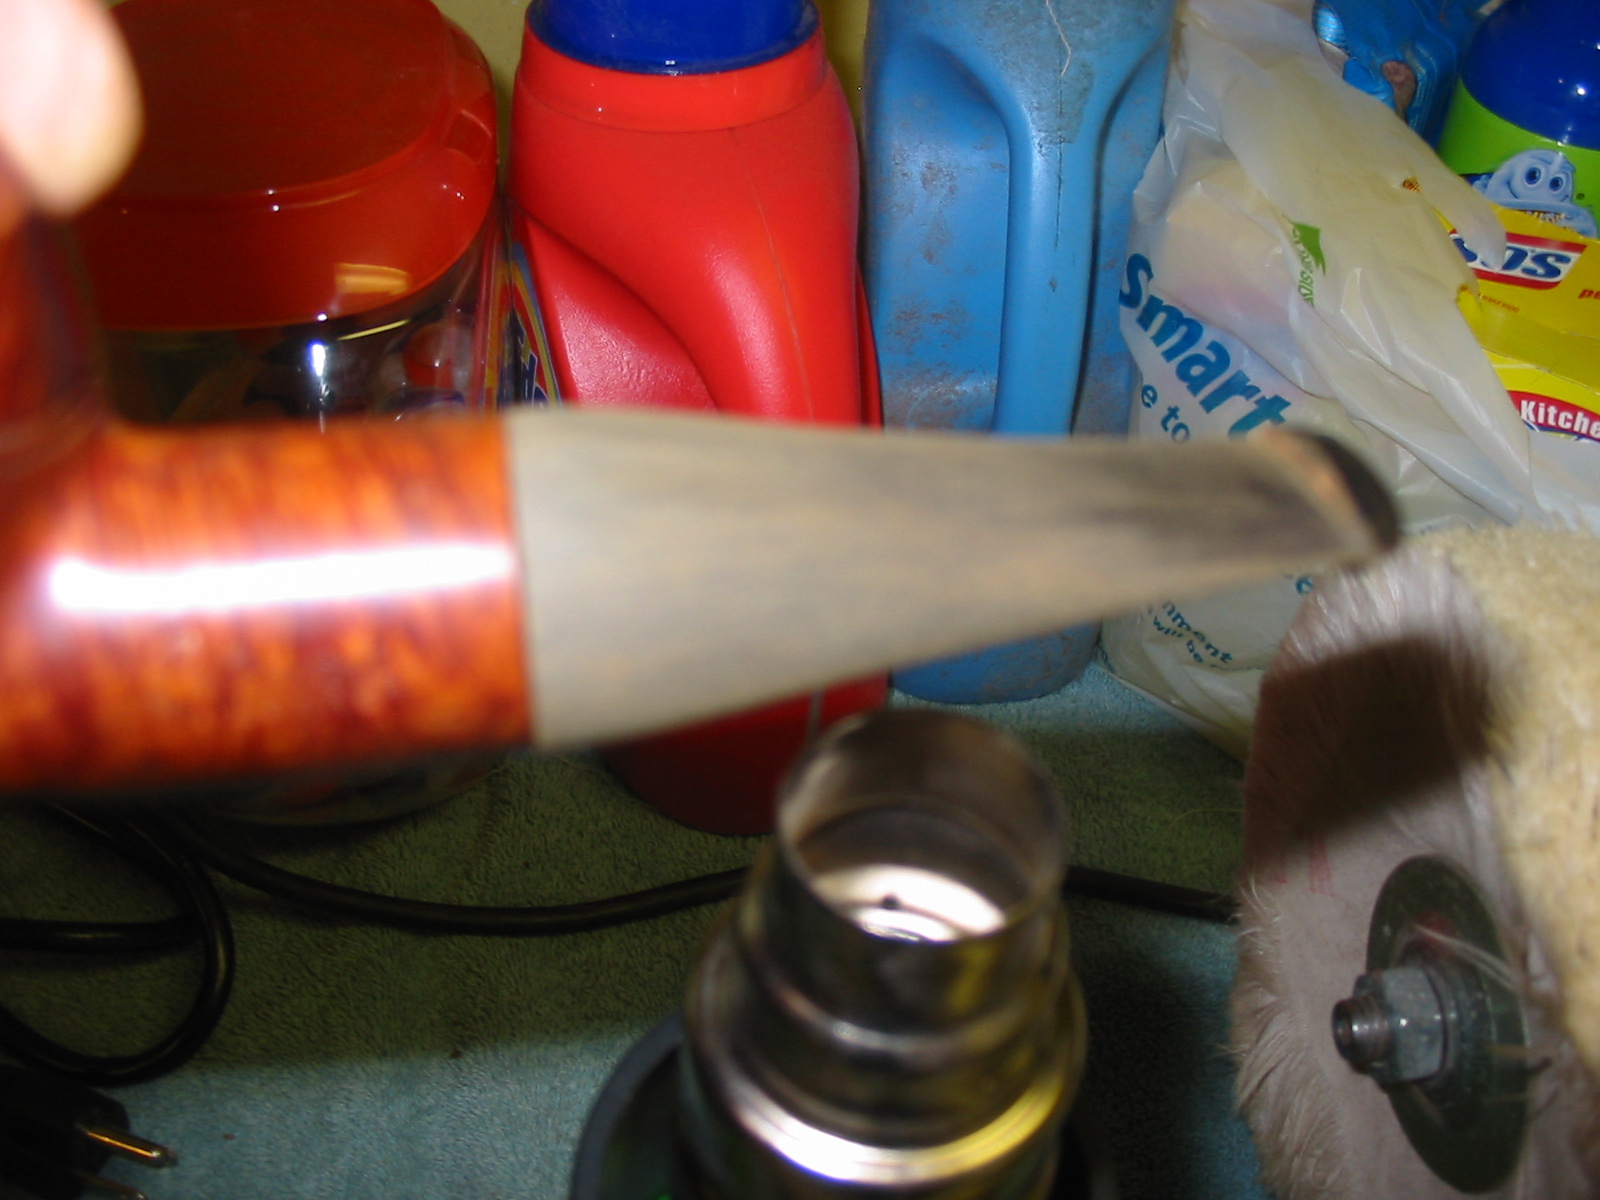
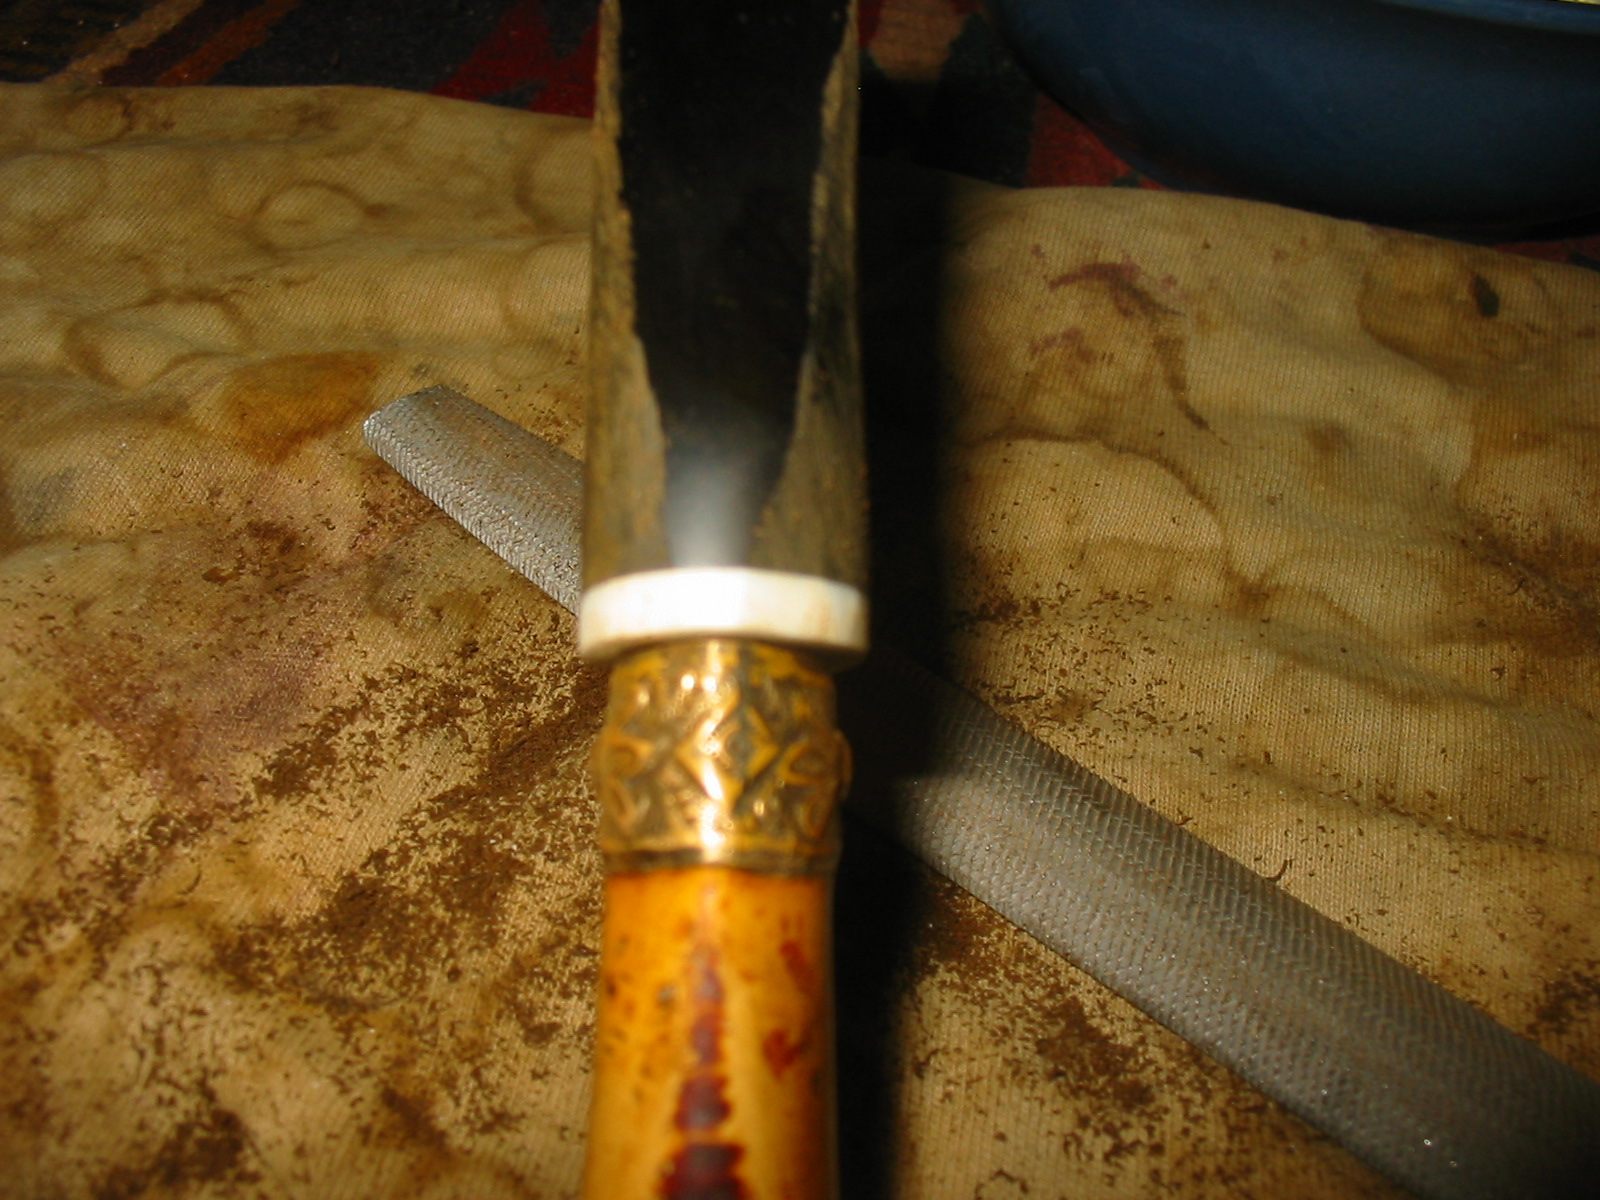
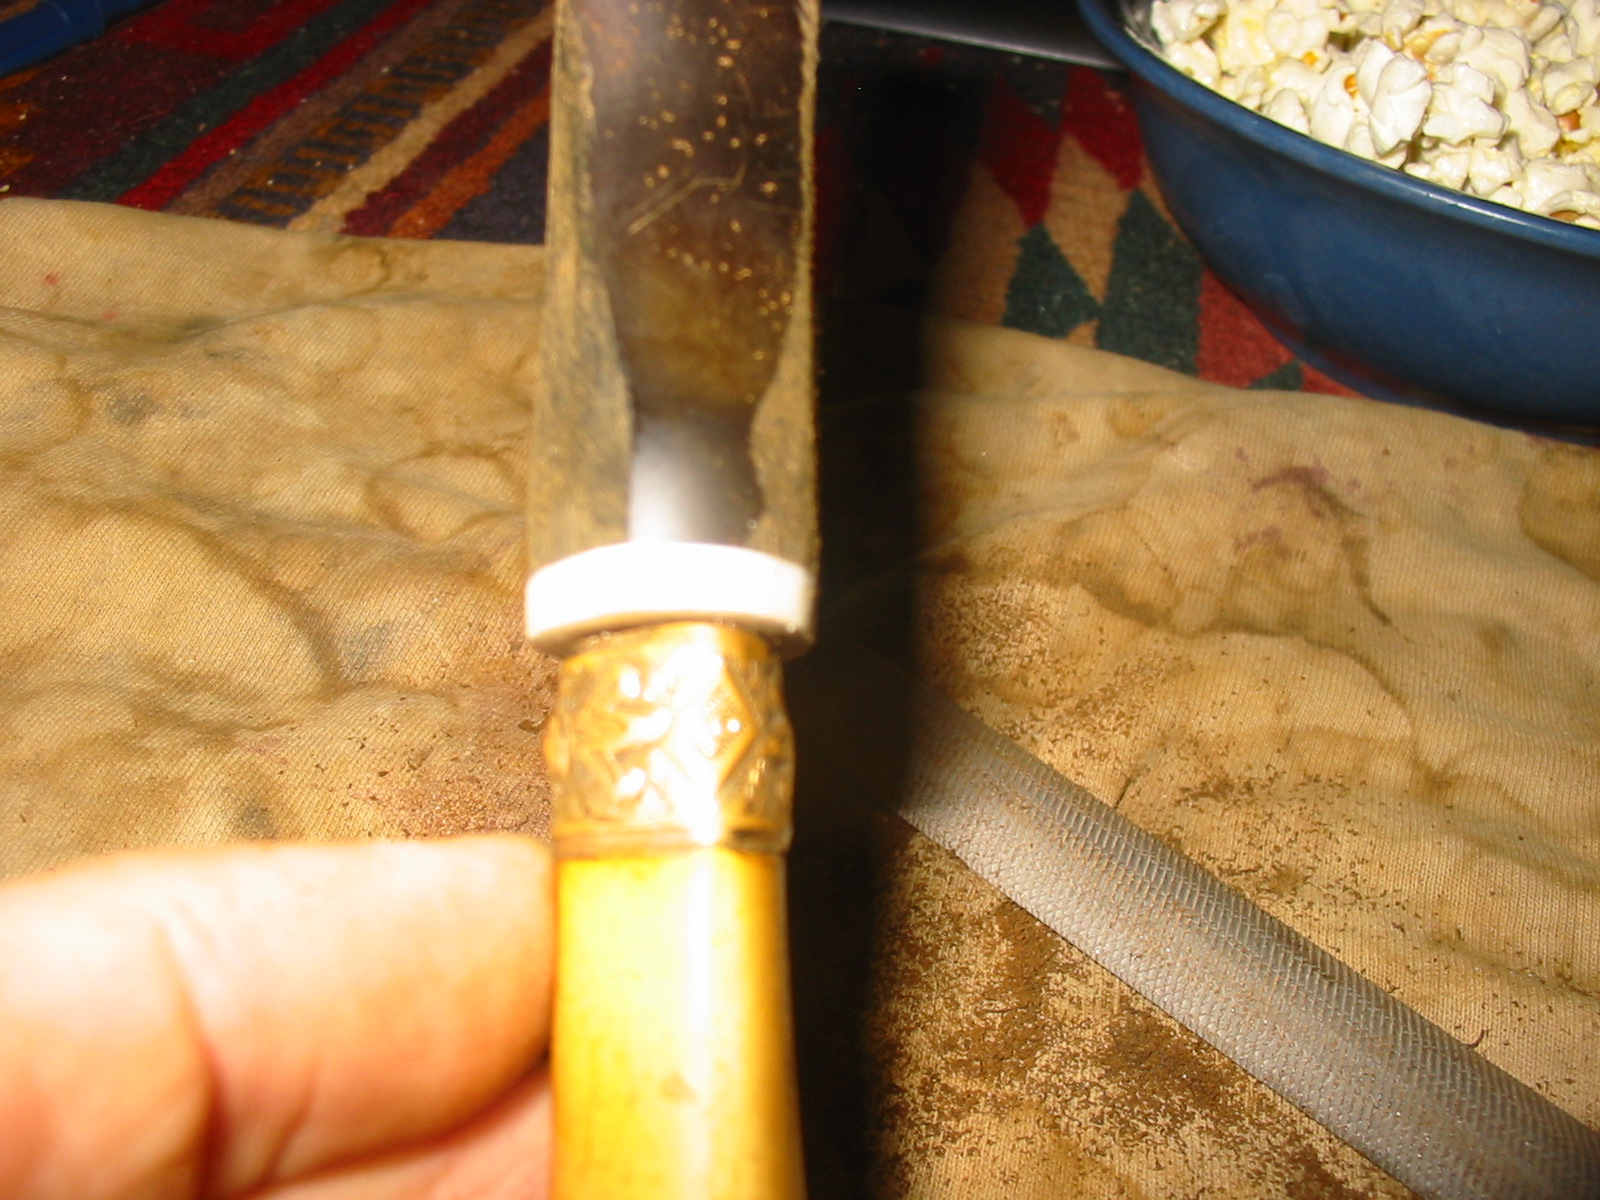
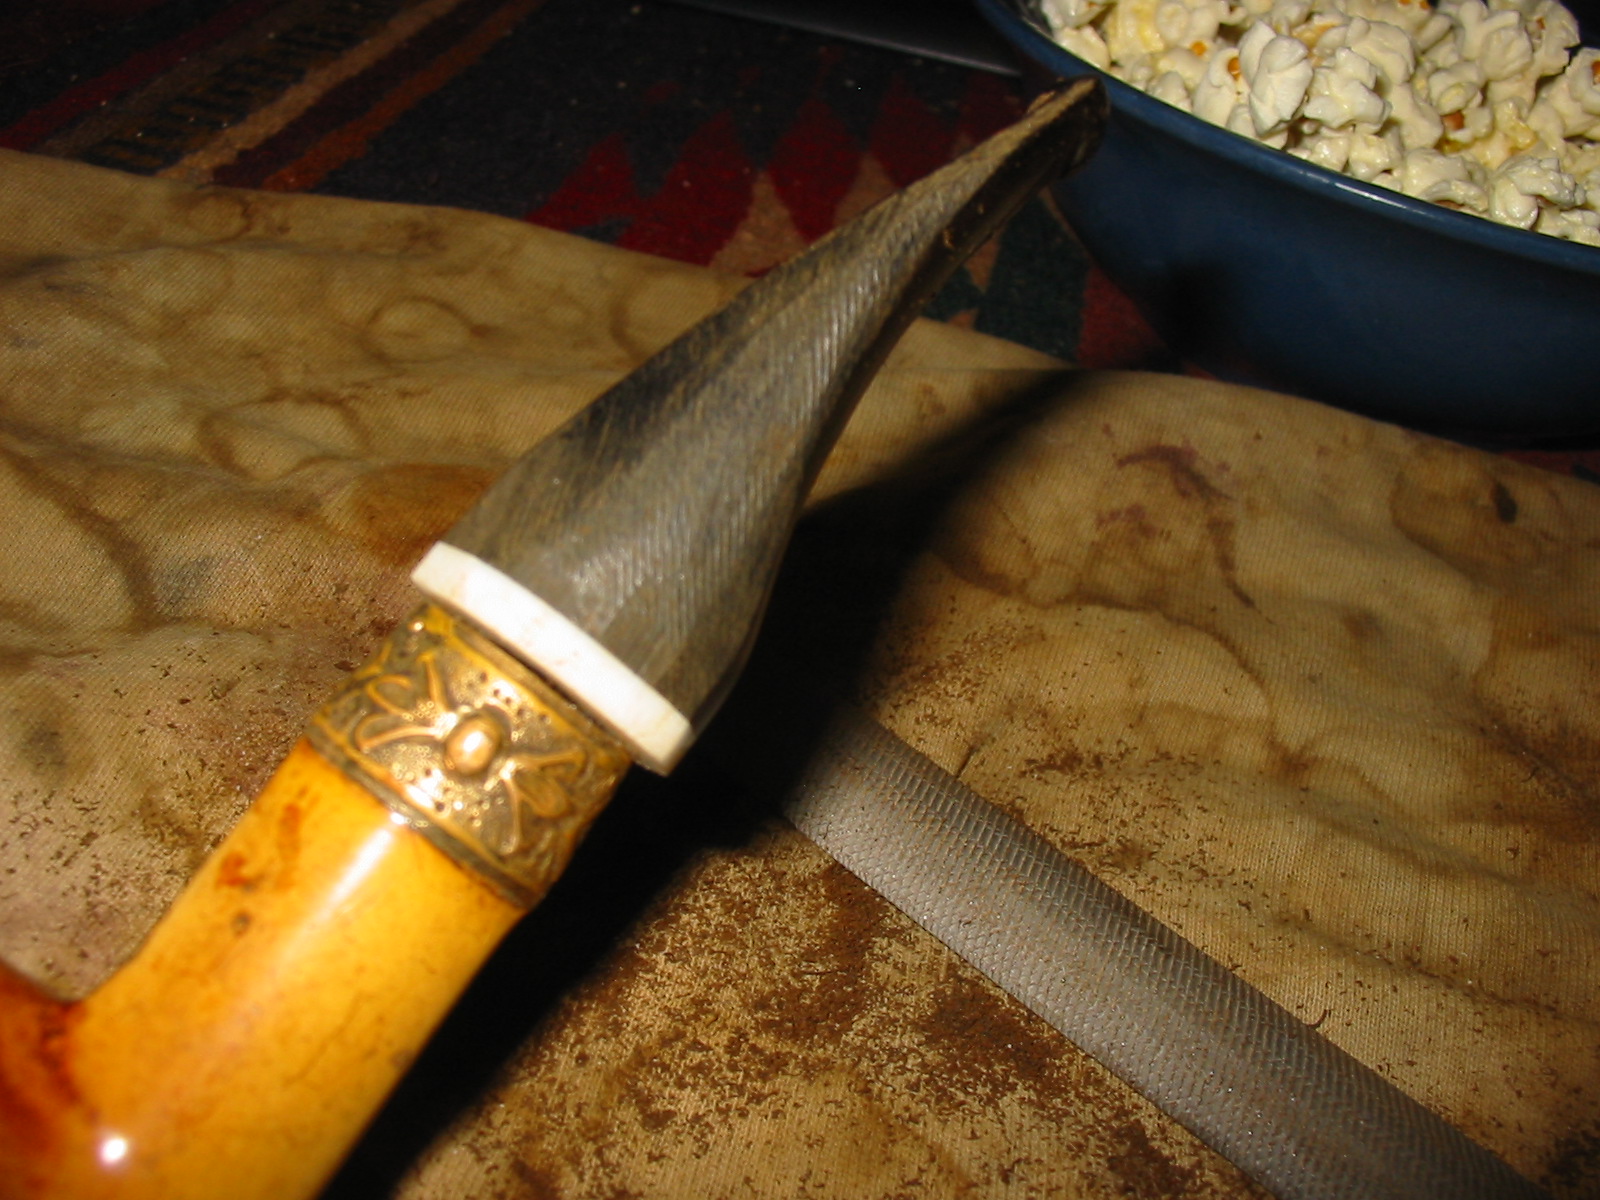
I sanded the initial excess vulcanite off the diameter of the shank with the sanding drum on the Dremel. Once I had removed a large portion I took it back to the work table and used a rasp to continue to shape and reduce the stem to the right proportions. The next series of eight photos shows the effectiveness of the rasp in shaping the stem. (In the midst of the shaping my daughters brought down a bowl of popcorn for a snack while I worked – that appears in several of the photos.)

IMG_1814

IMG_1815

IMG_1816

IMG_1817

IMG_1818

IMG_1819

IMG_1820

IMG_1821

I removed the stem from the shank and cleaned up the tooth dents so that I could fill them with black superglue. The glue takes quite a bit of time to cure so I waited until I was finished for the evening and then filled the dents and set the stem aside to cure over night.

IMG_1822

IMG_1823

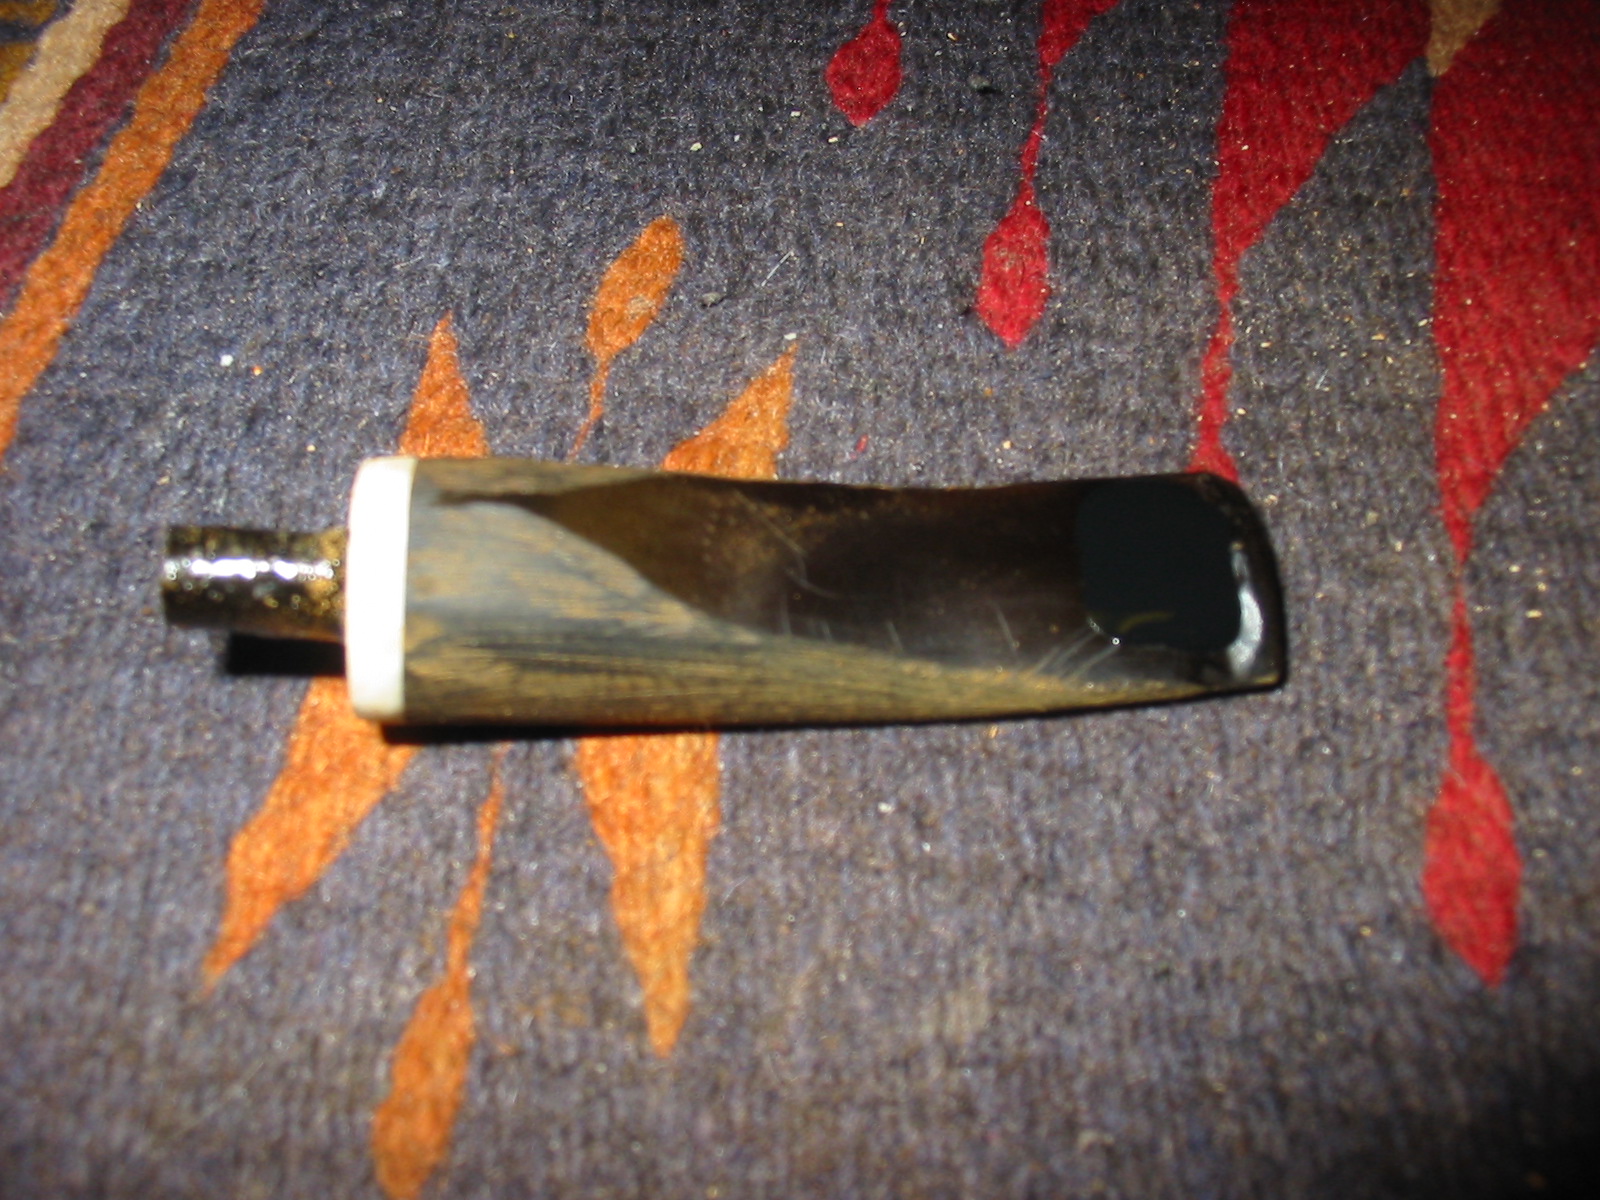
This morning I sanded the stem with 220 grit sandpaper and also sanded the superglue patch on the underside of the stem. The next four photos show the stem as it begins to take shape and the repaired spot on the underside of the stem. The oval is coming along nicely but there was still a lot of excess material that still needed to be removed.

IMG_1824

IMG_1825

IMG_1826

IMG_1827

I continued to sand the stem to further tune the shape of the oval to match the shank. I used 220 grit sandpaper to remove the excess and shape the stem. I worked on the superglue patch on the underside of the stem with the 220 grit sandpaper as well. In the next series of three photos you can see the shape I am aiming for with this stem. You can also see the size of the patch on the stem. The patch is still larger than the marks it covers so more sanding will need to be done on it to blend it into the vulcanite.

IMG_1828

IMG_1829

IMG_1830

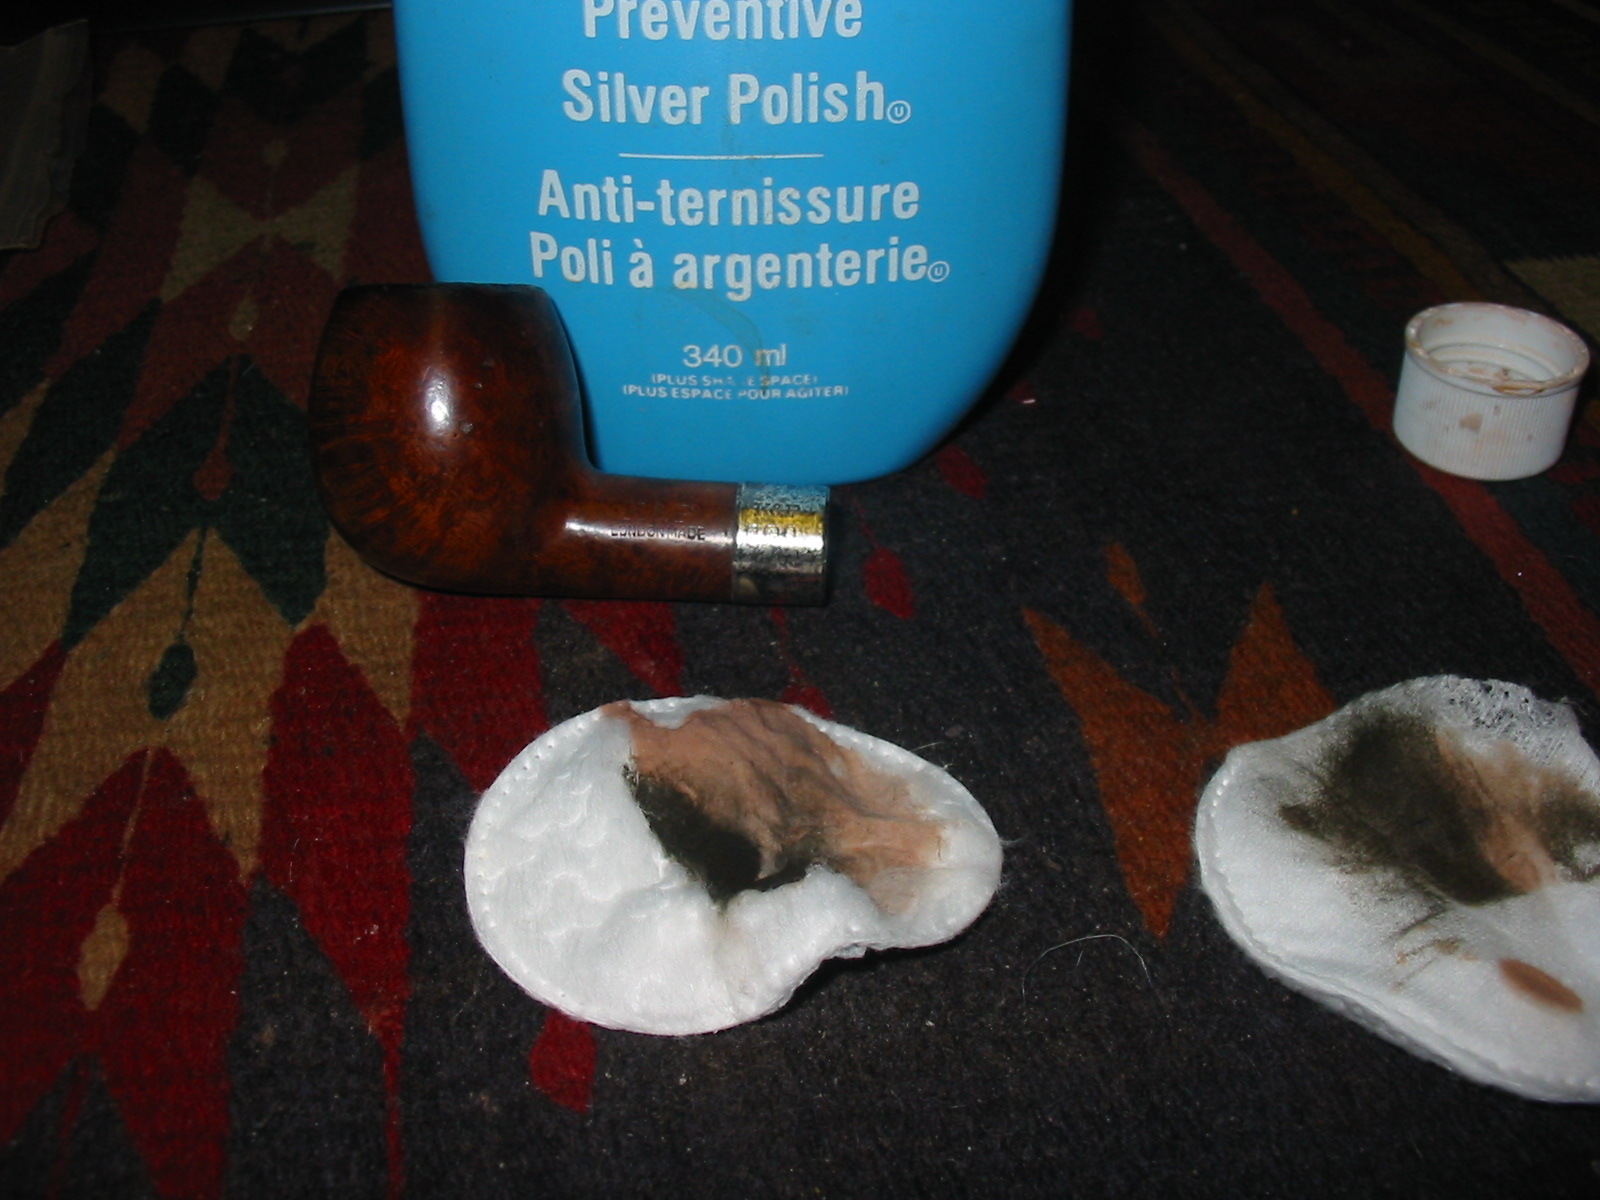
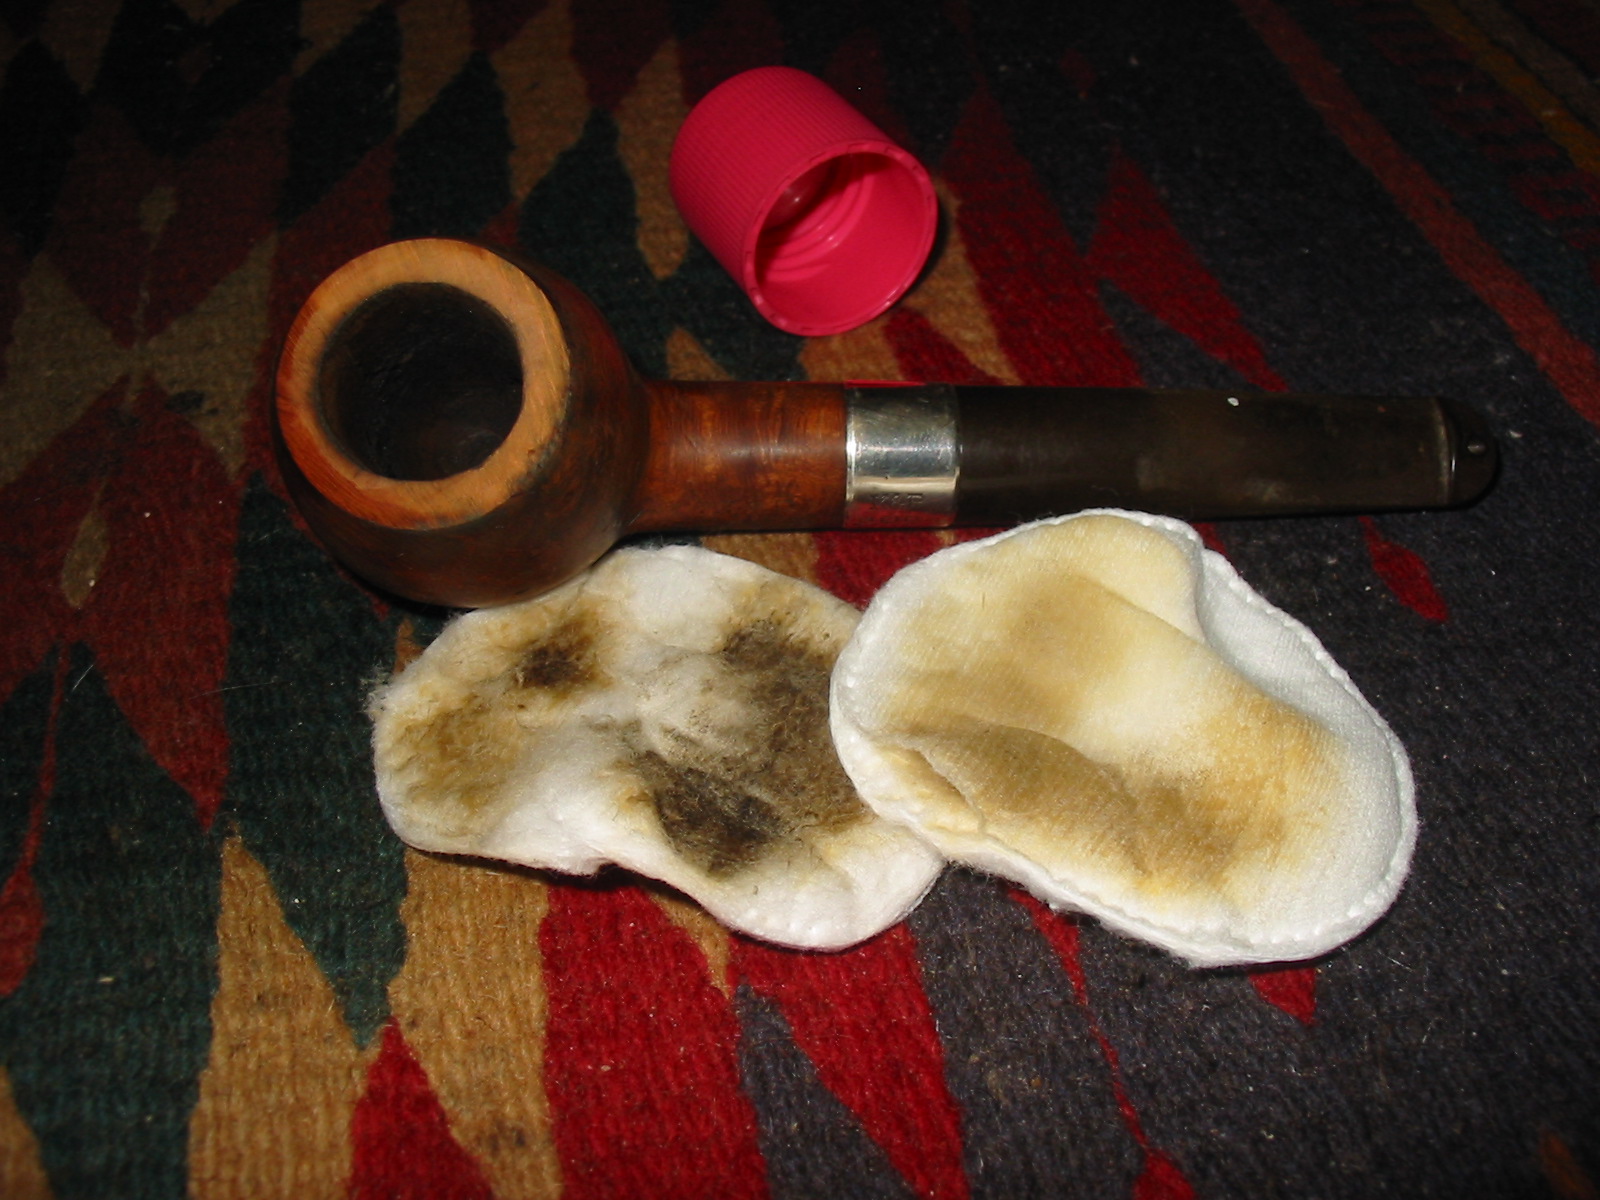
I cleaned up the bite marks on the top of the stem and applied the black superglue patch to that surface as well. I set it aside while I worked on the bowl. I wiped the bowl down with Murphy’s Oil Soap on a cotton pad to clean off the grime on the surface while leaving as much of the old patina as possible. The first photo below shows the superglue patch. I applied it and used a dental pick to push it around the surface and also build up a few tooth marks on the edge of the button. The second photo below shows the patch after it had dried and I had sanded the patch with 220 grit sandpaper.

IMG_1831

IMG_1833

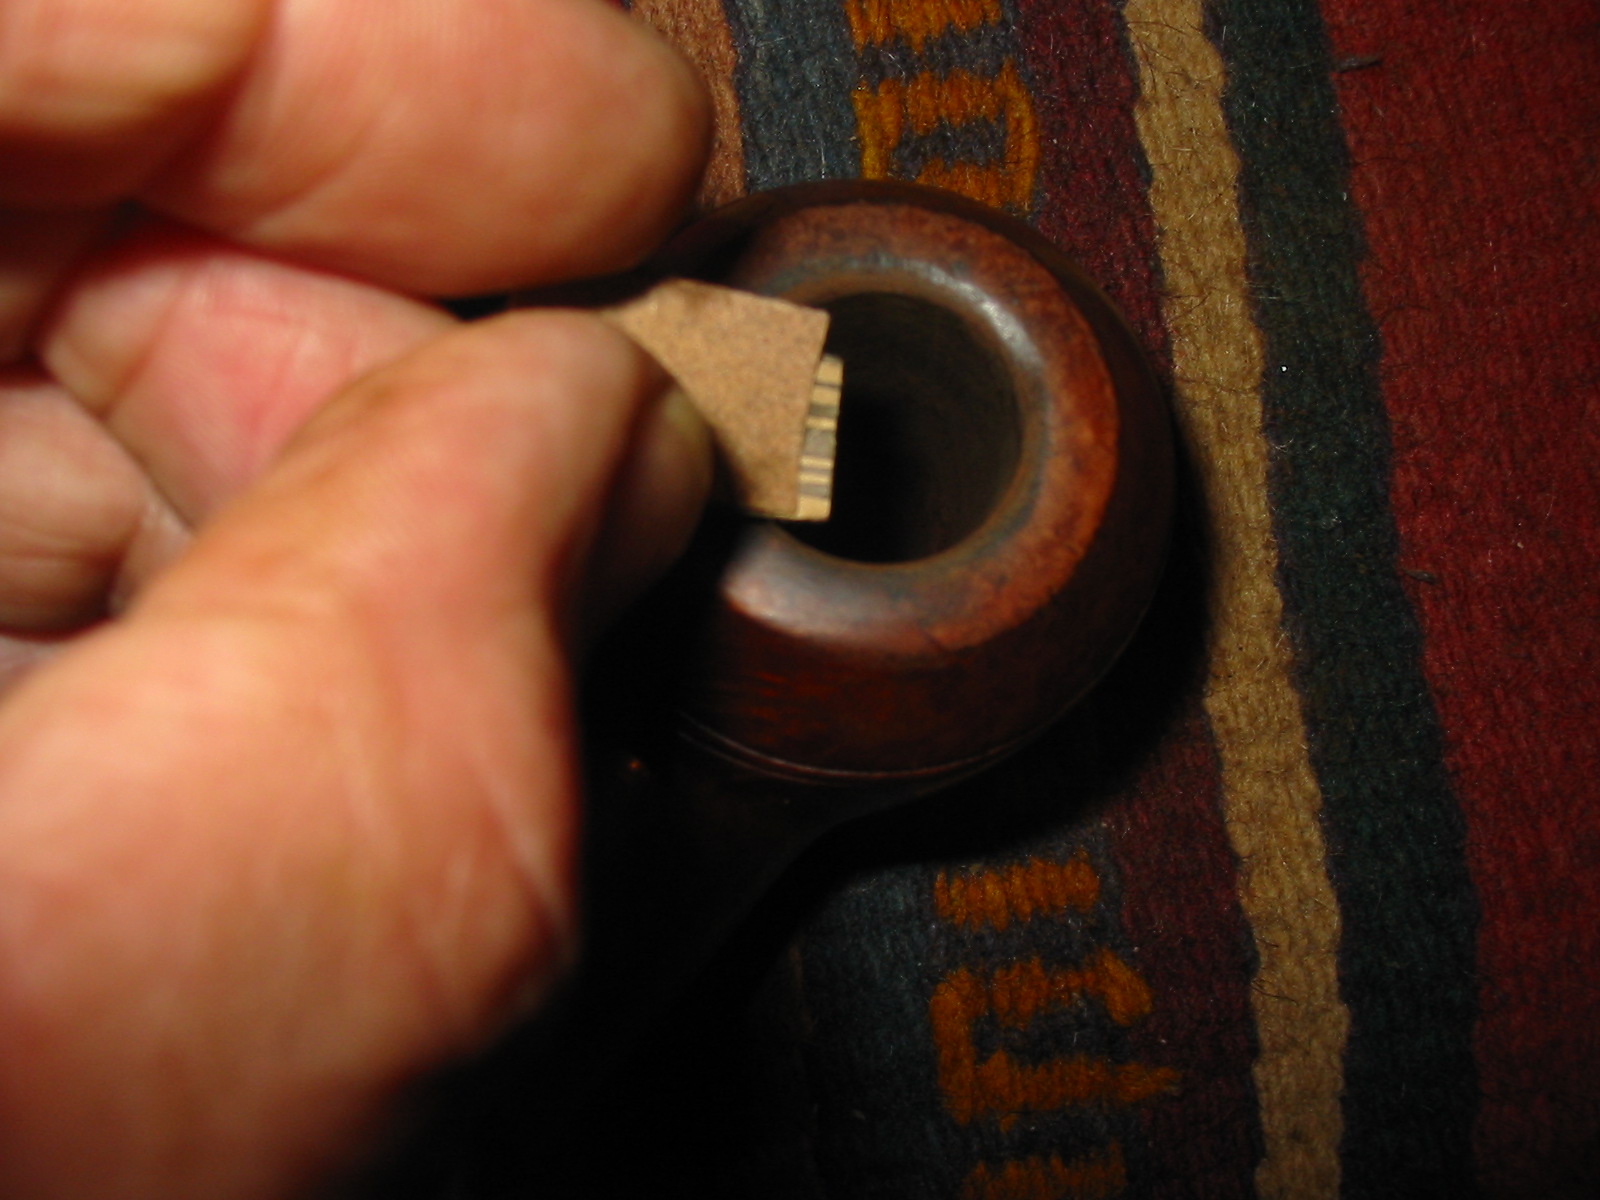
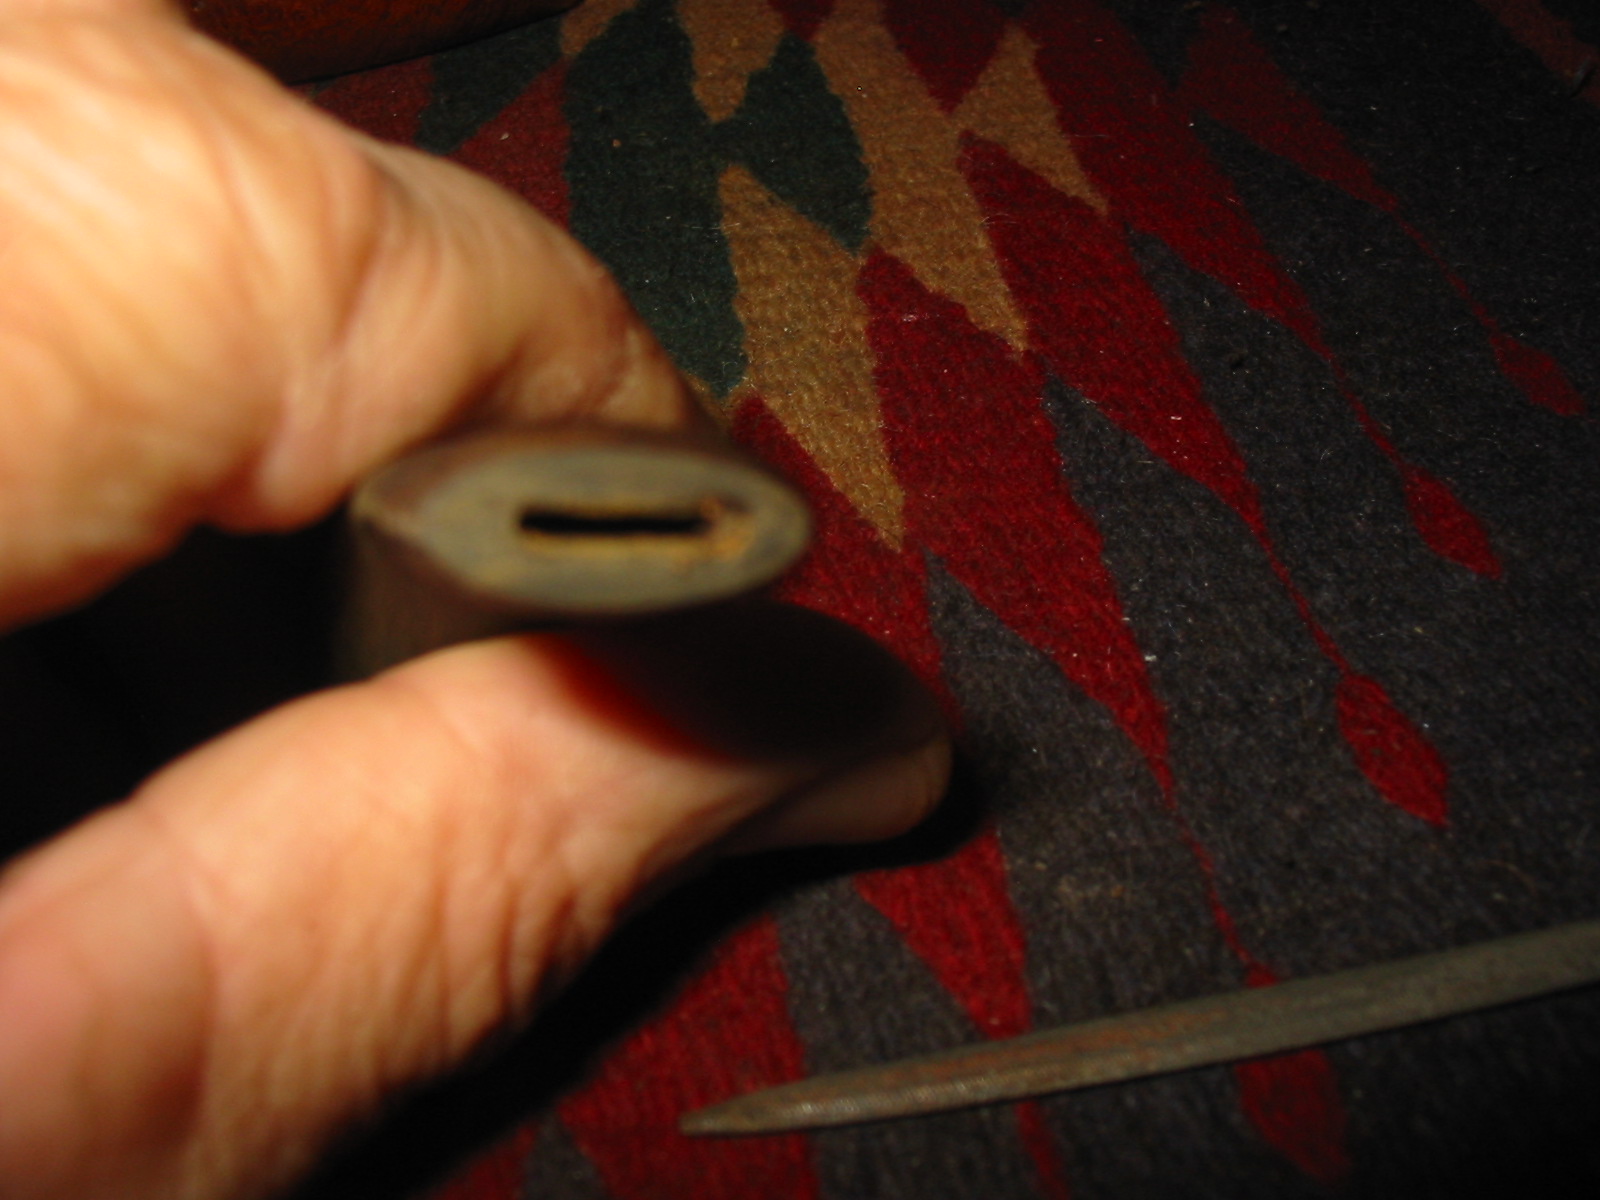
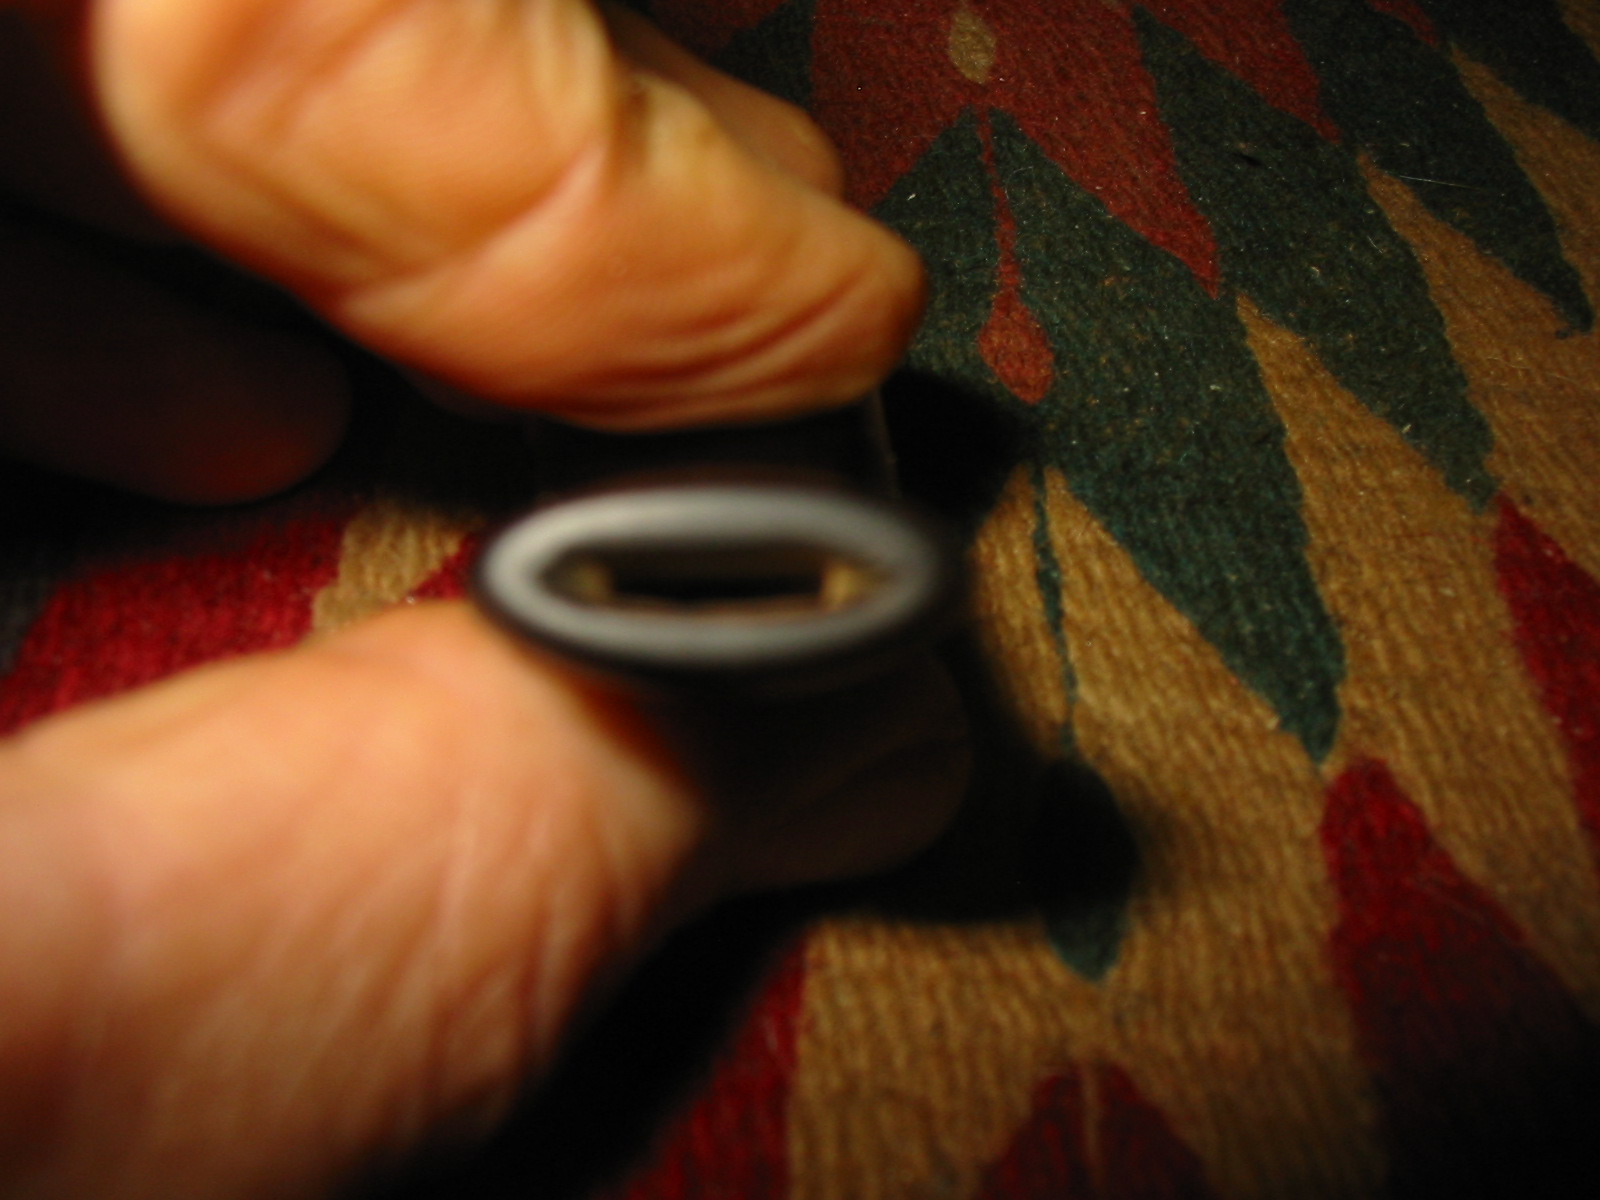
While working on the stem I decided to open the button to make it simpler to insert a pipe cleaner. I used needle files to make the slot larger. The second photo shows the opened slot in the button. I sanded the inside of the slot with a folded piece of sandpaper to smooth the surface and polish the slot.

IMG_1834

IMG_1835

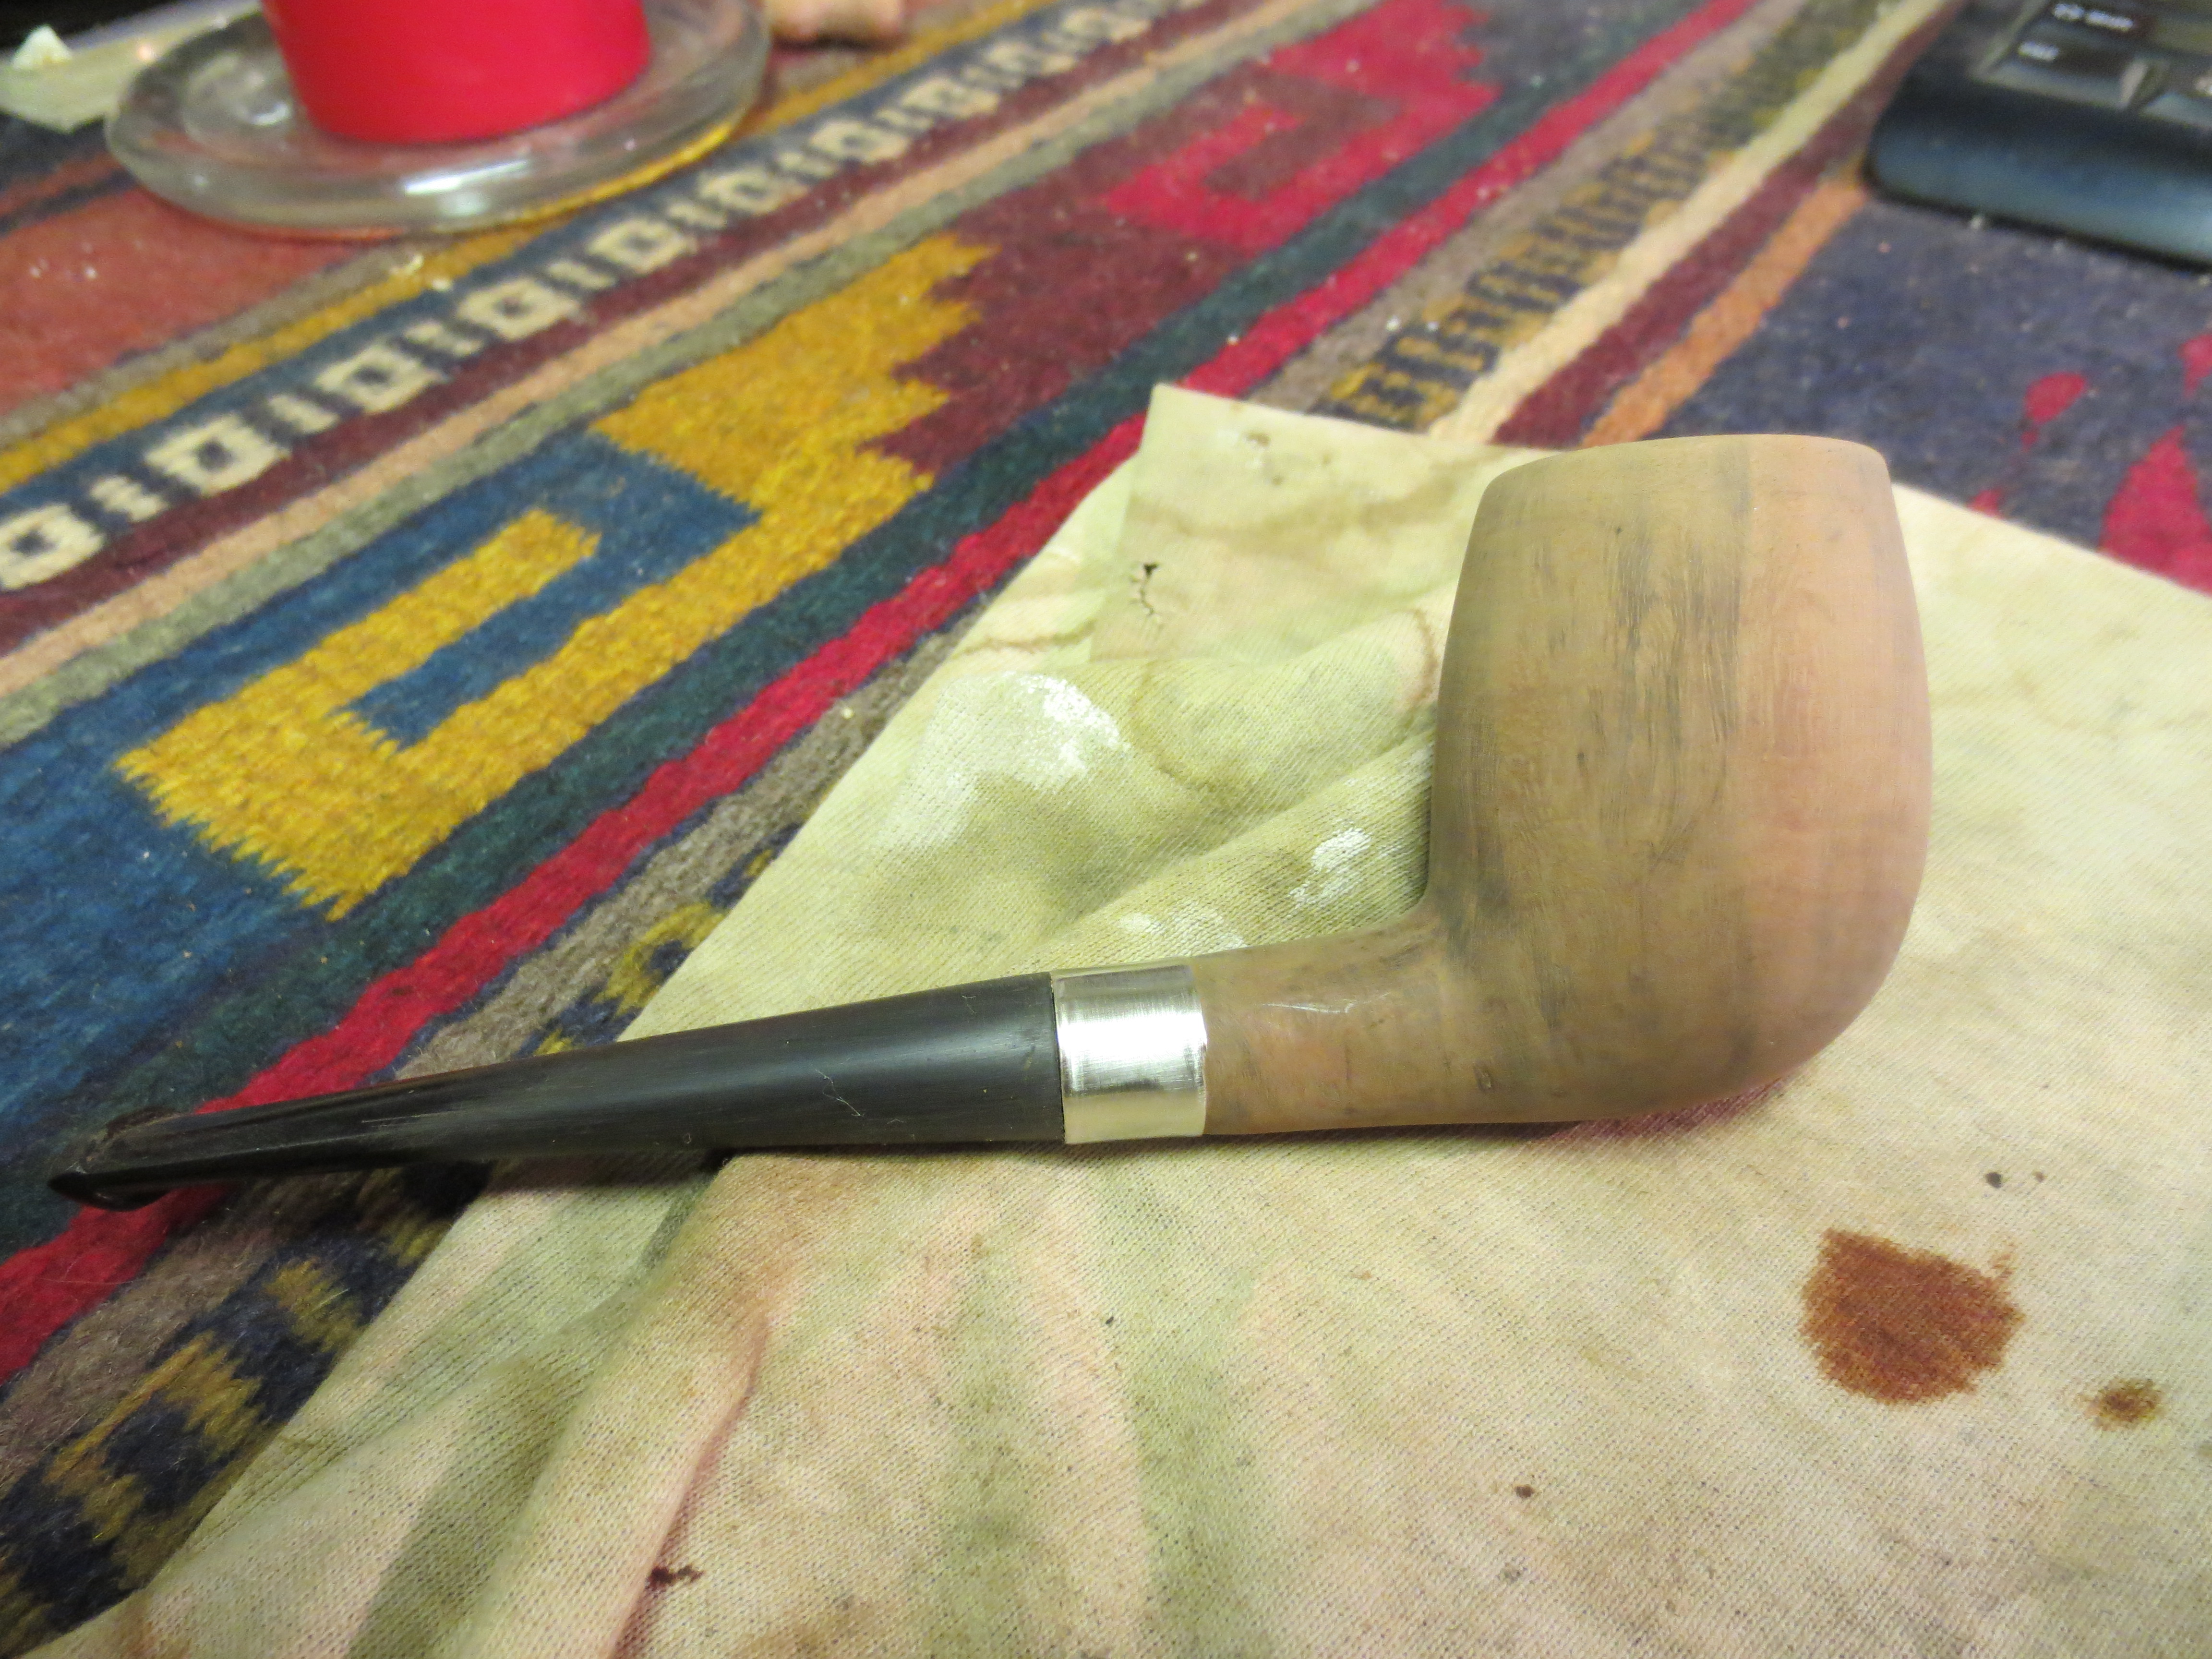
I took the pipe back to the Dremel and sanding drum to remove more of the excess vulcanite. I had the basic shape in hand and just wanted to get it closer to the size of the shank before doing the finish sanding. I brought it back to the work table and sanded with 220 grit sandpaper until the fit was right. The next four photos show the progress in the fitting of the stem.

IMG_1837

IMG_1838

IMG_1839

IMG_1840

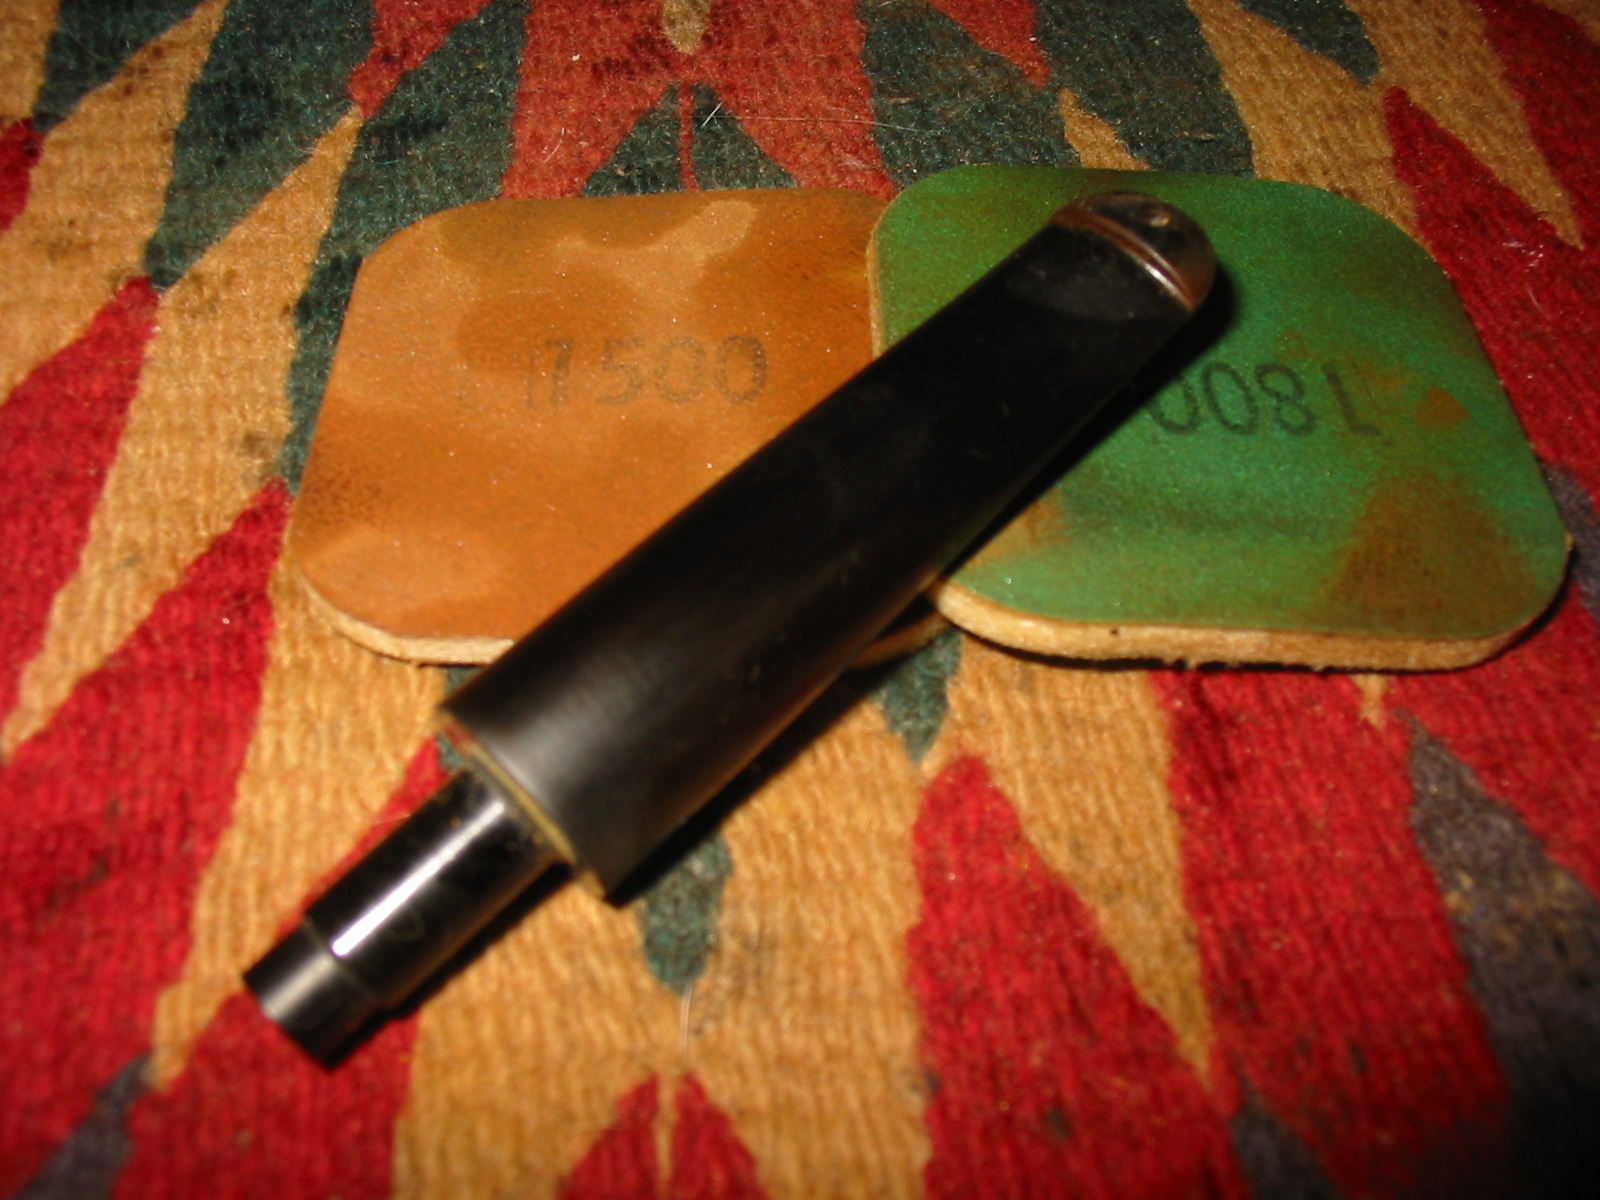
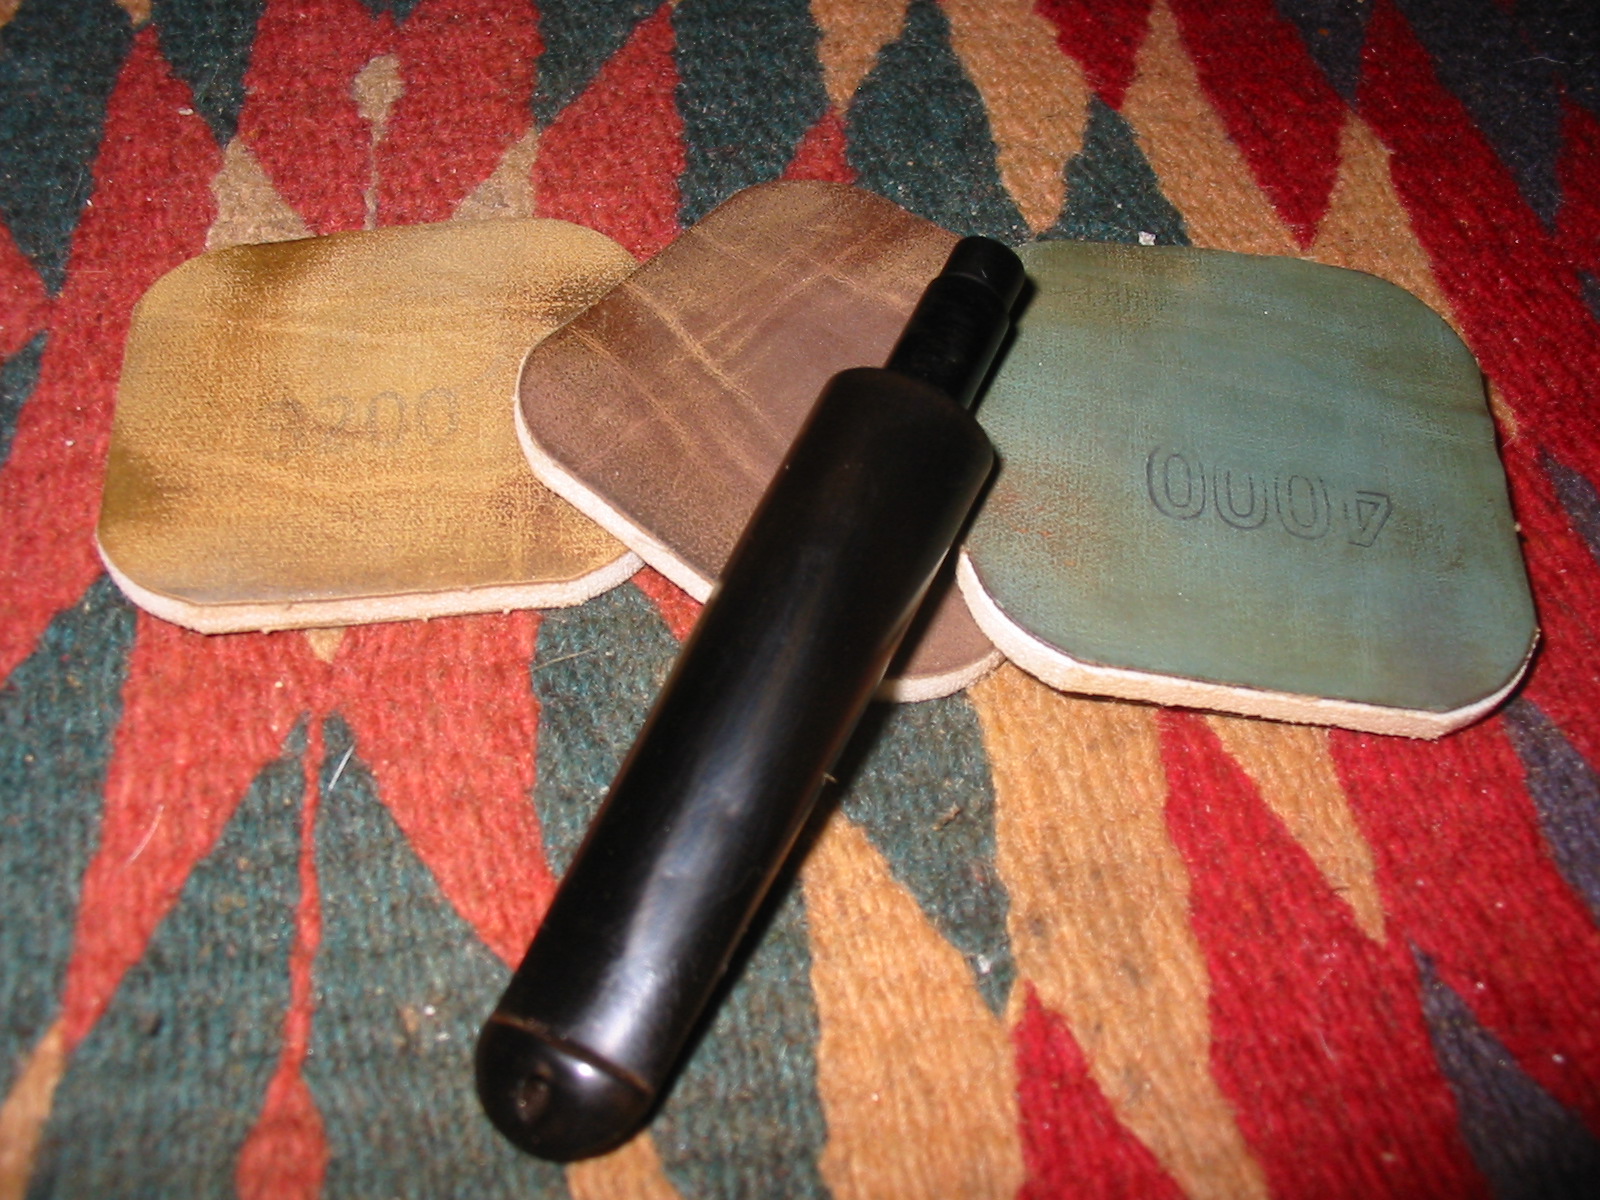
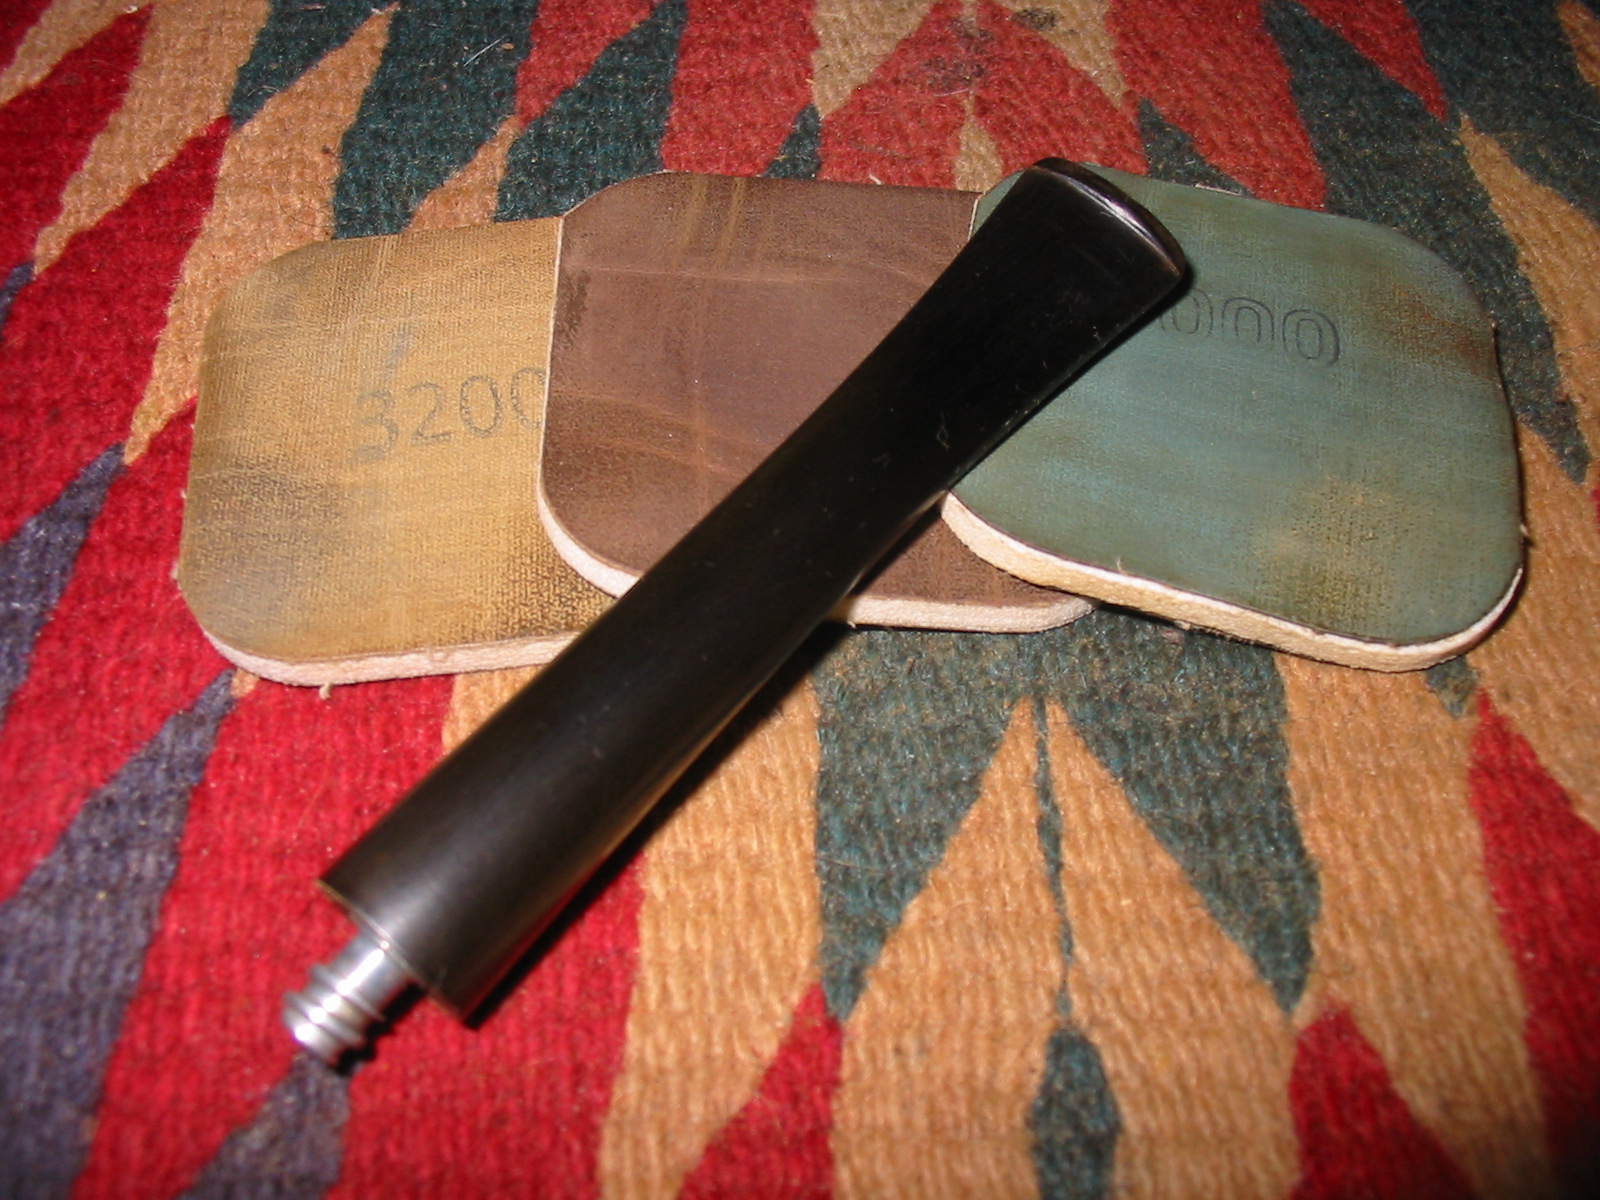
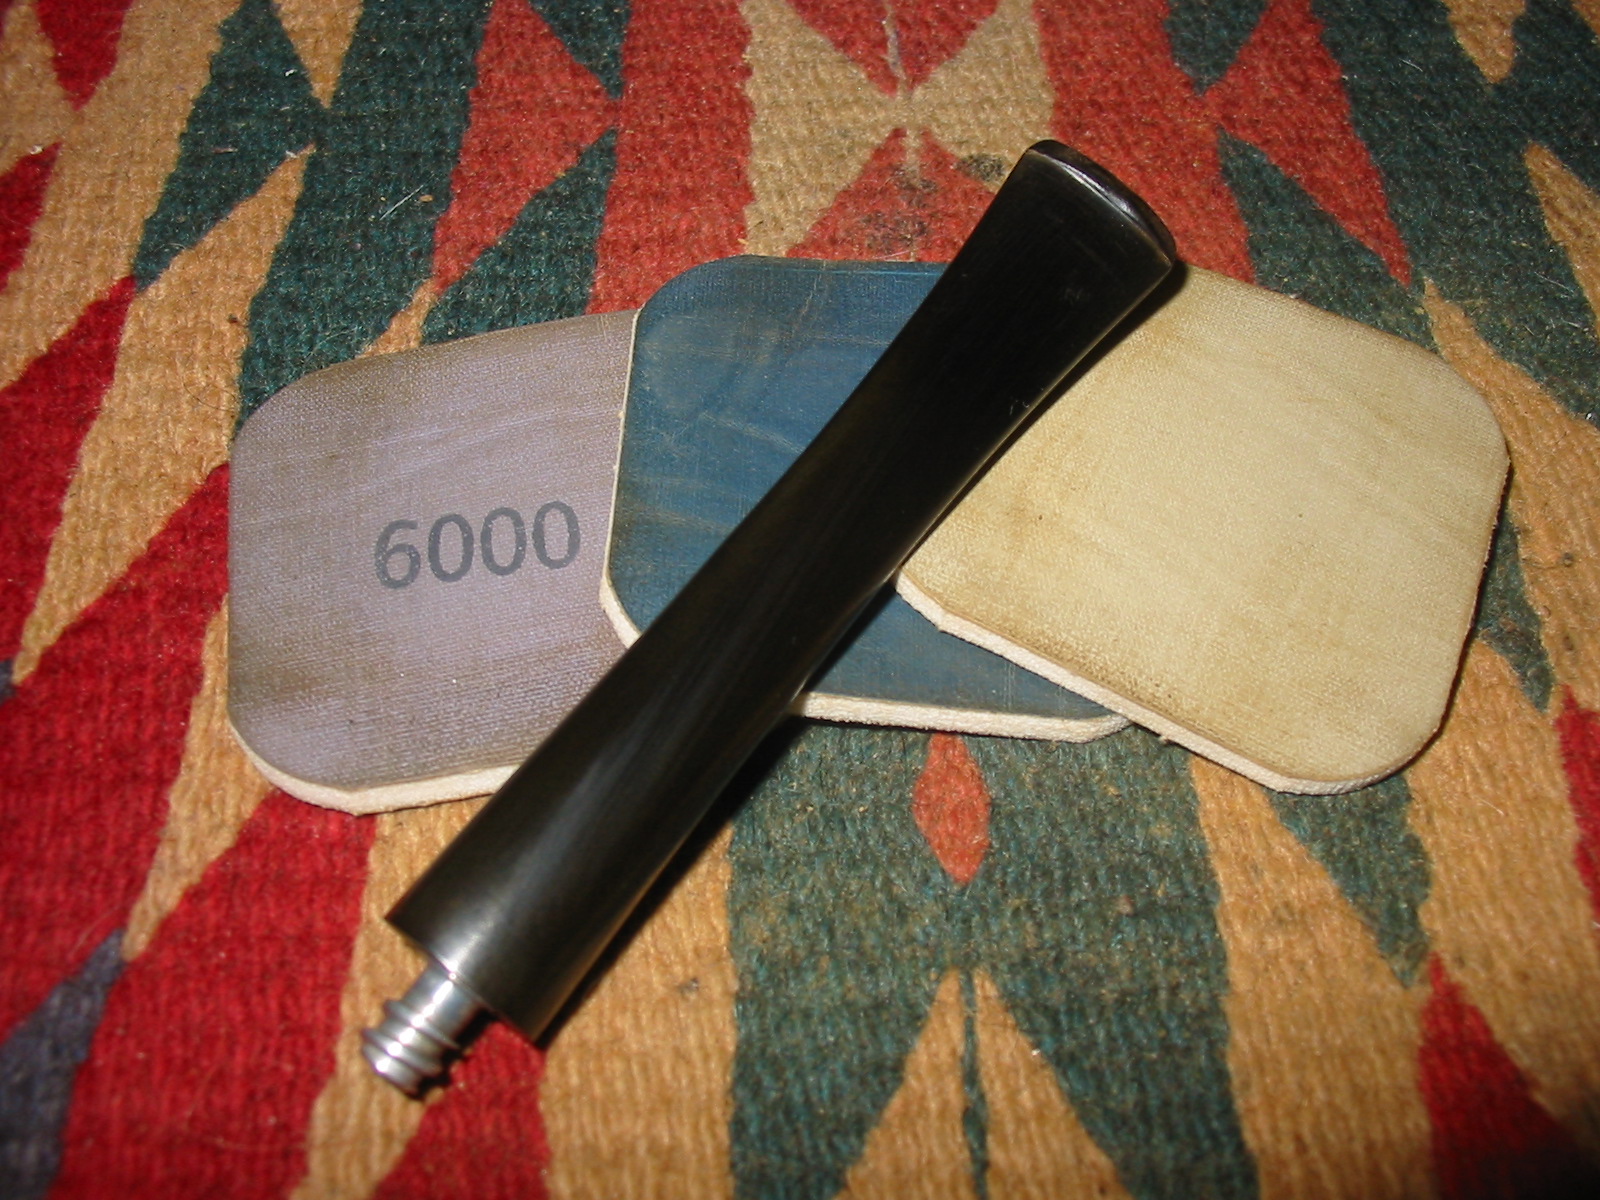
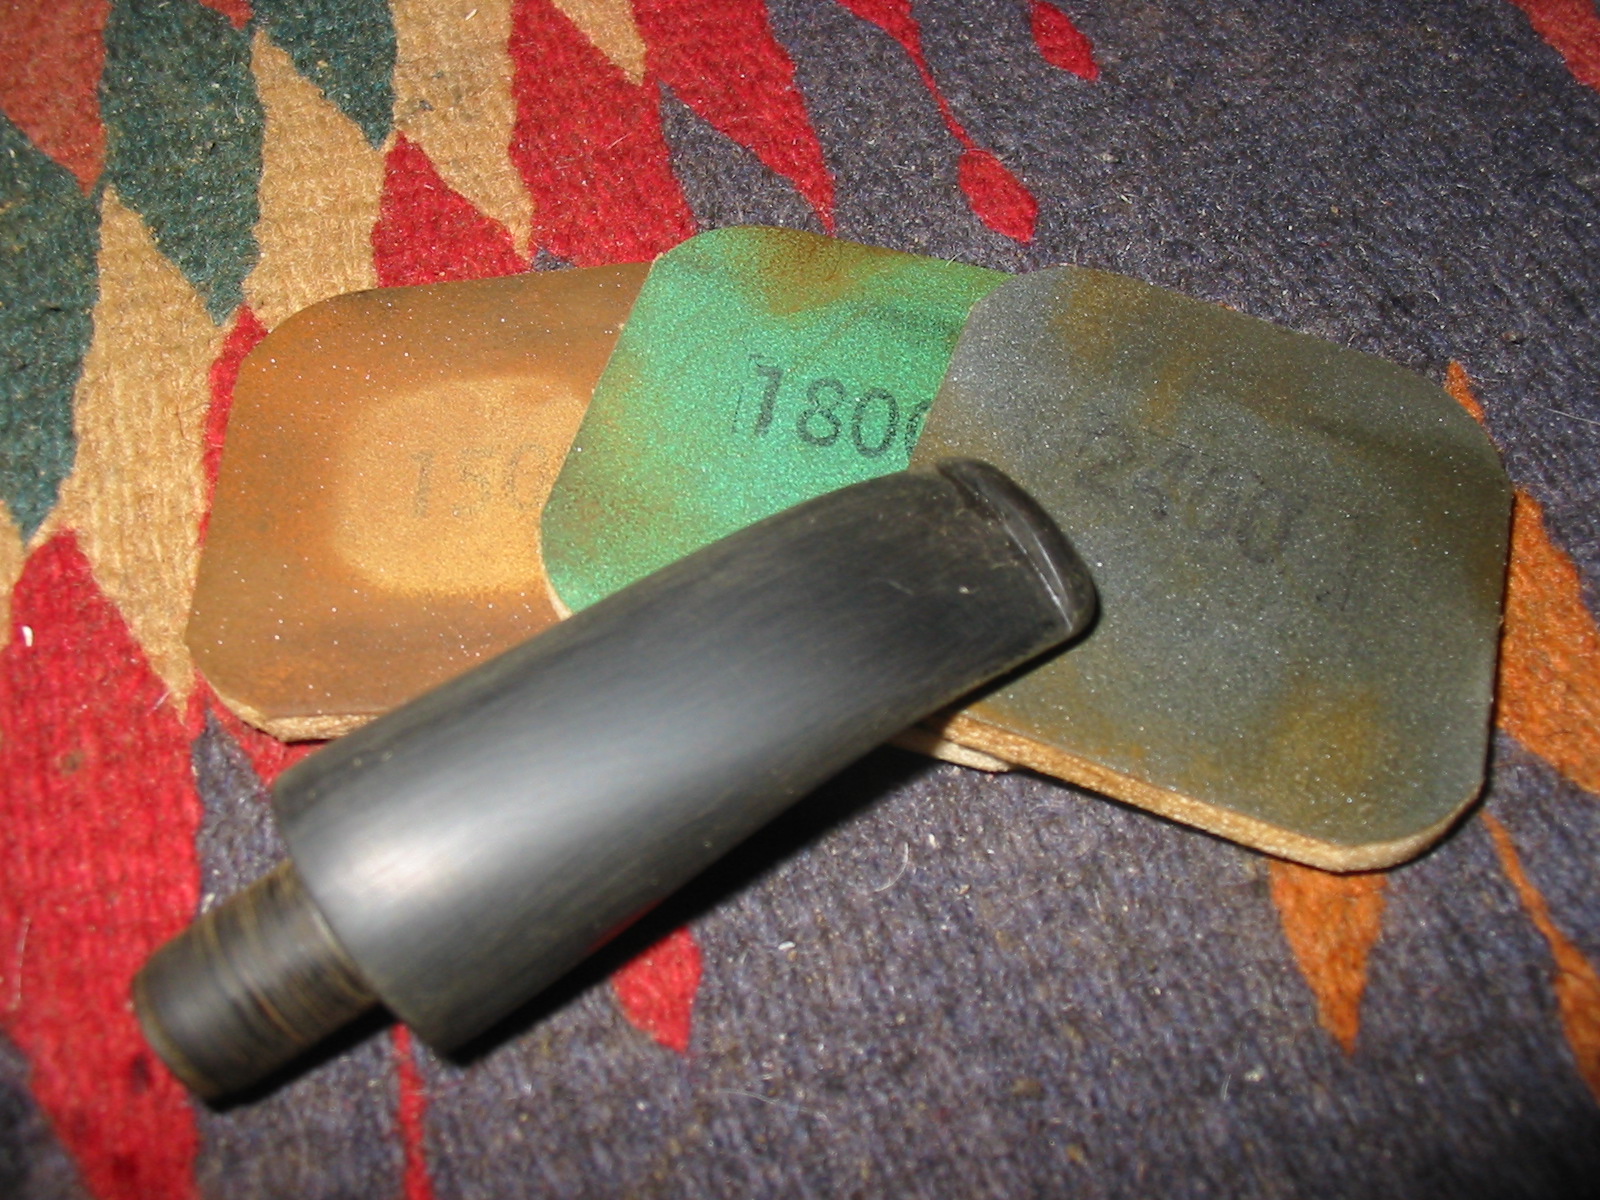
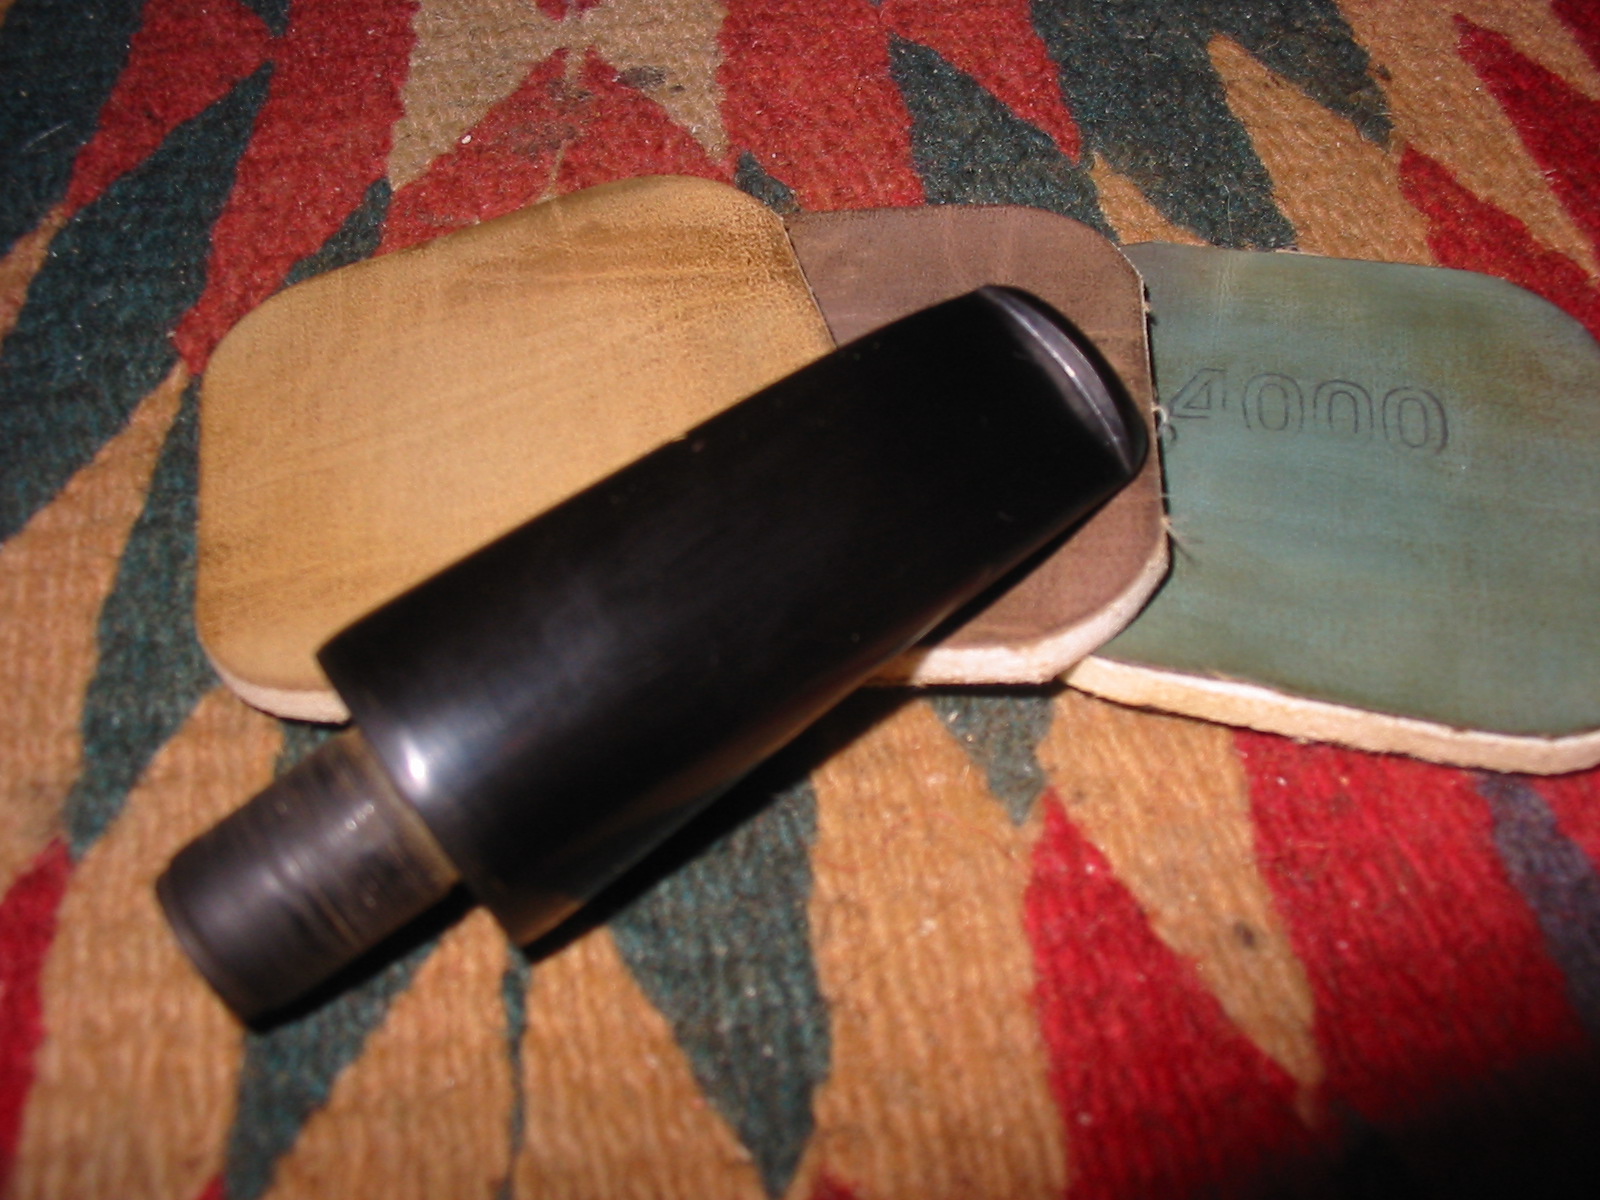
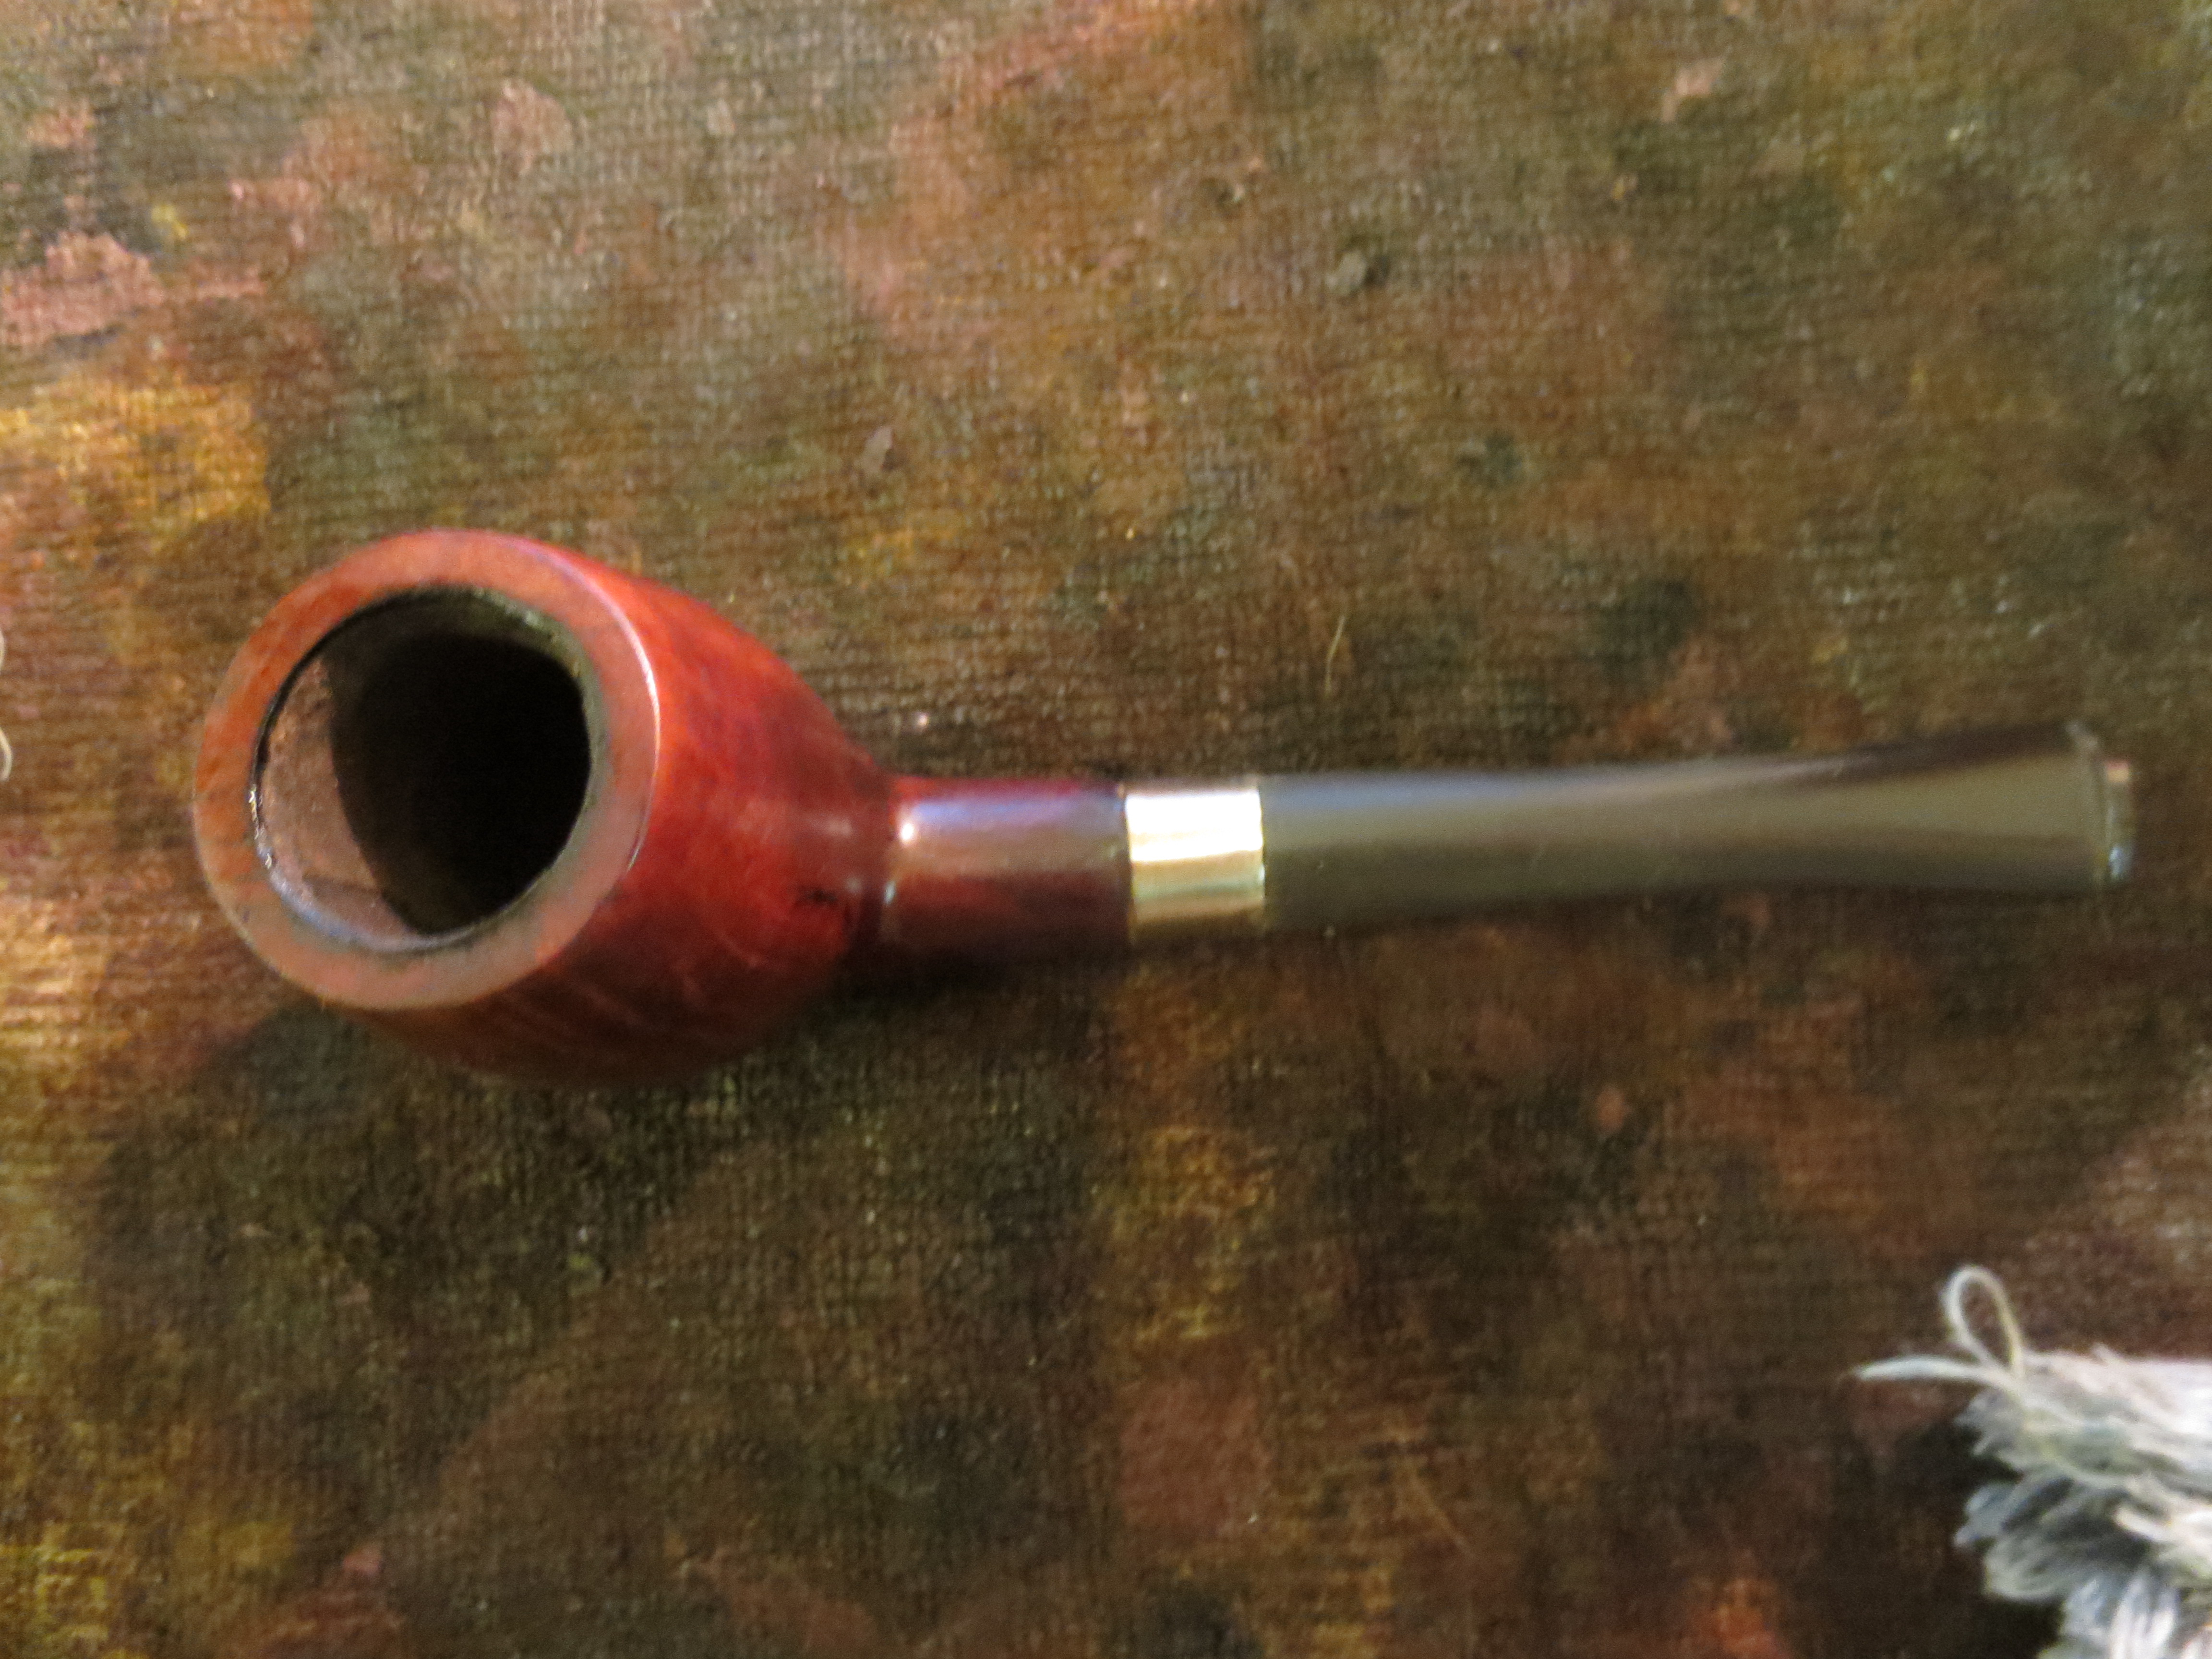
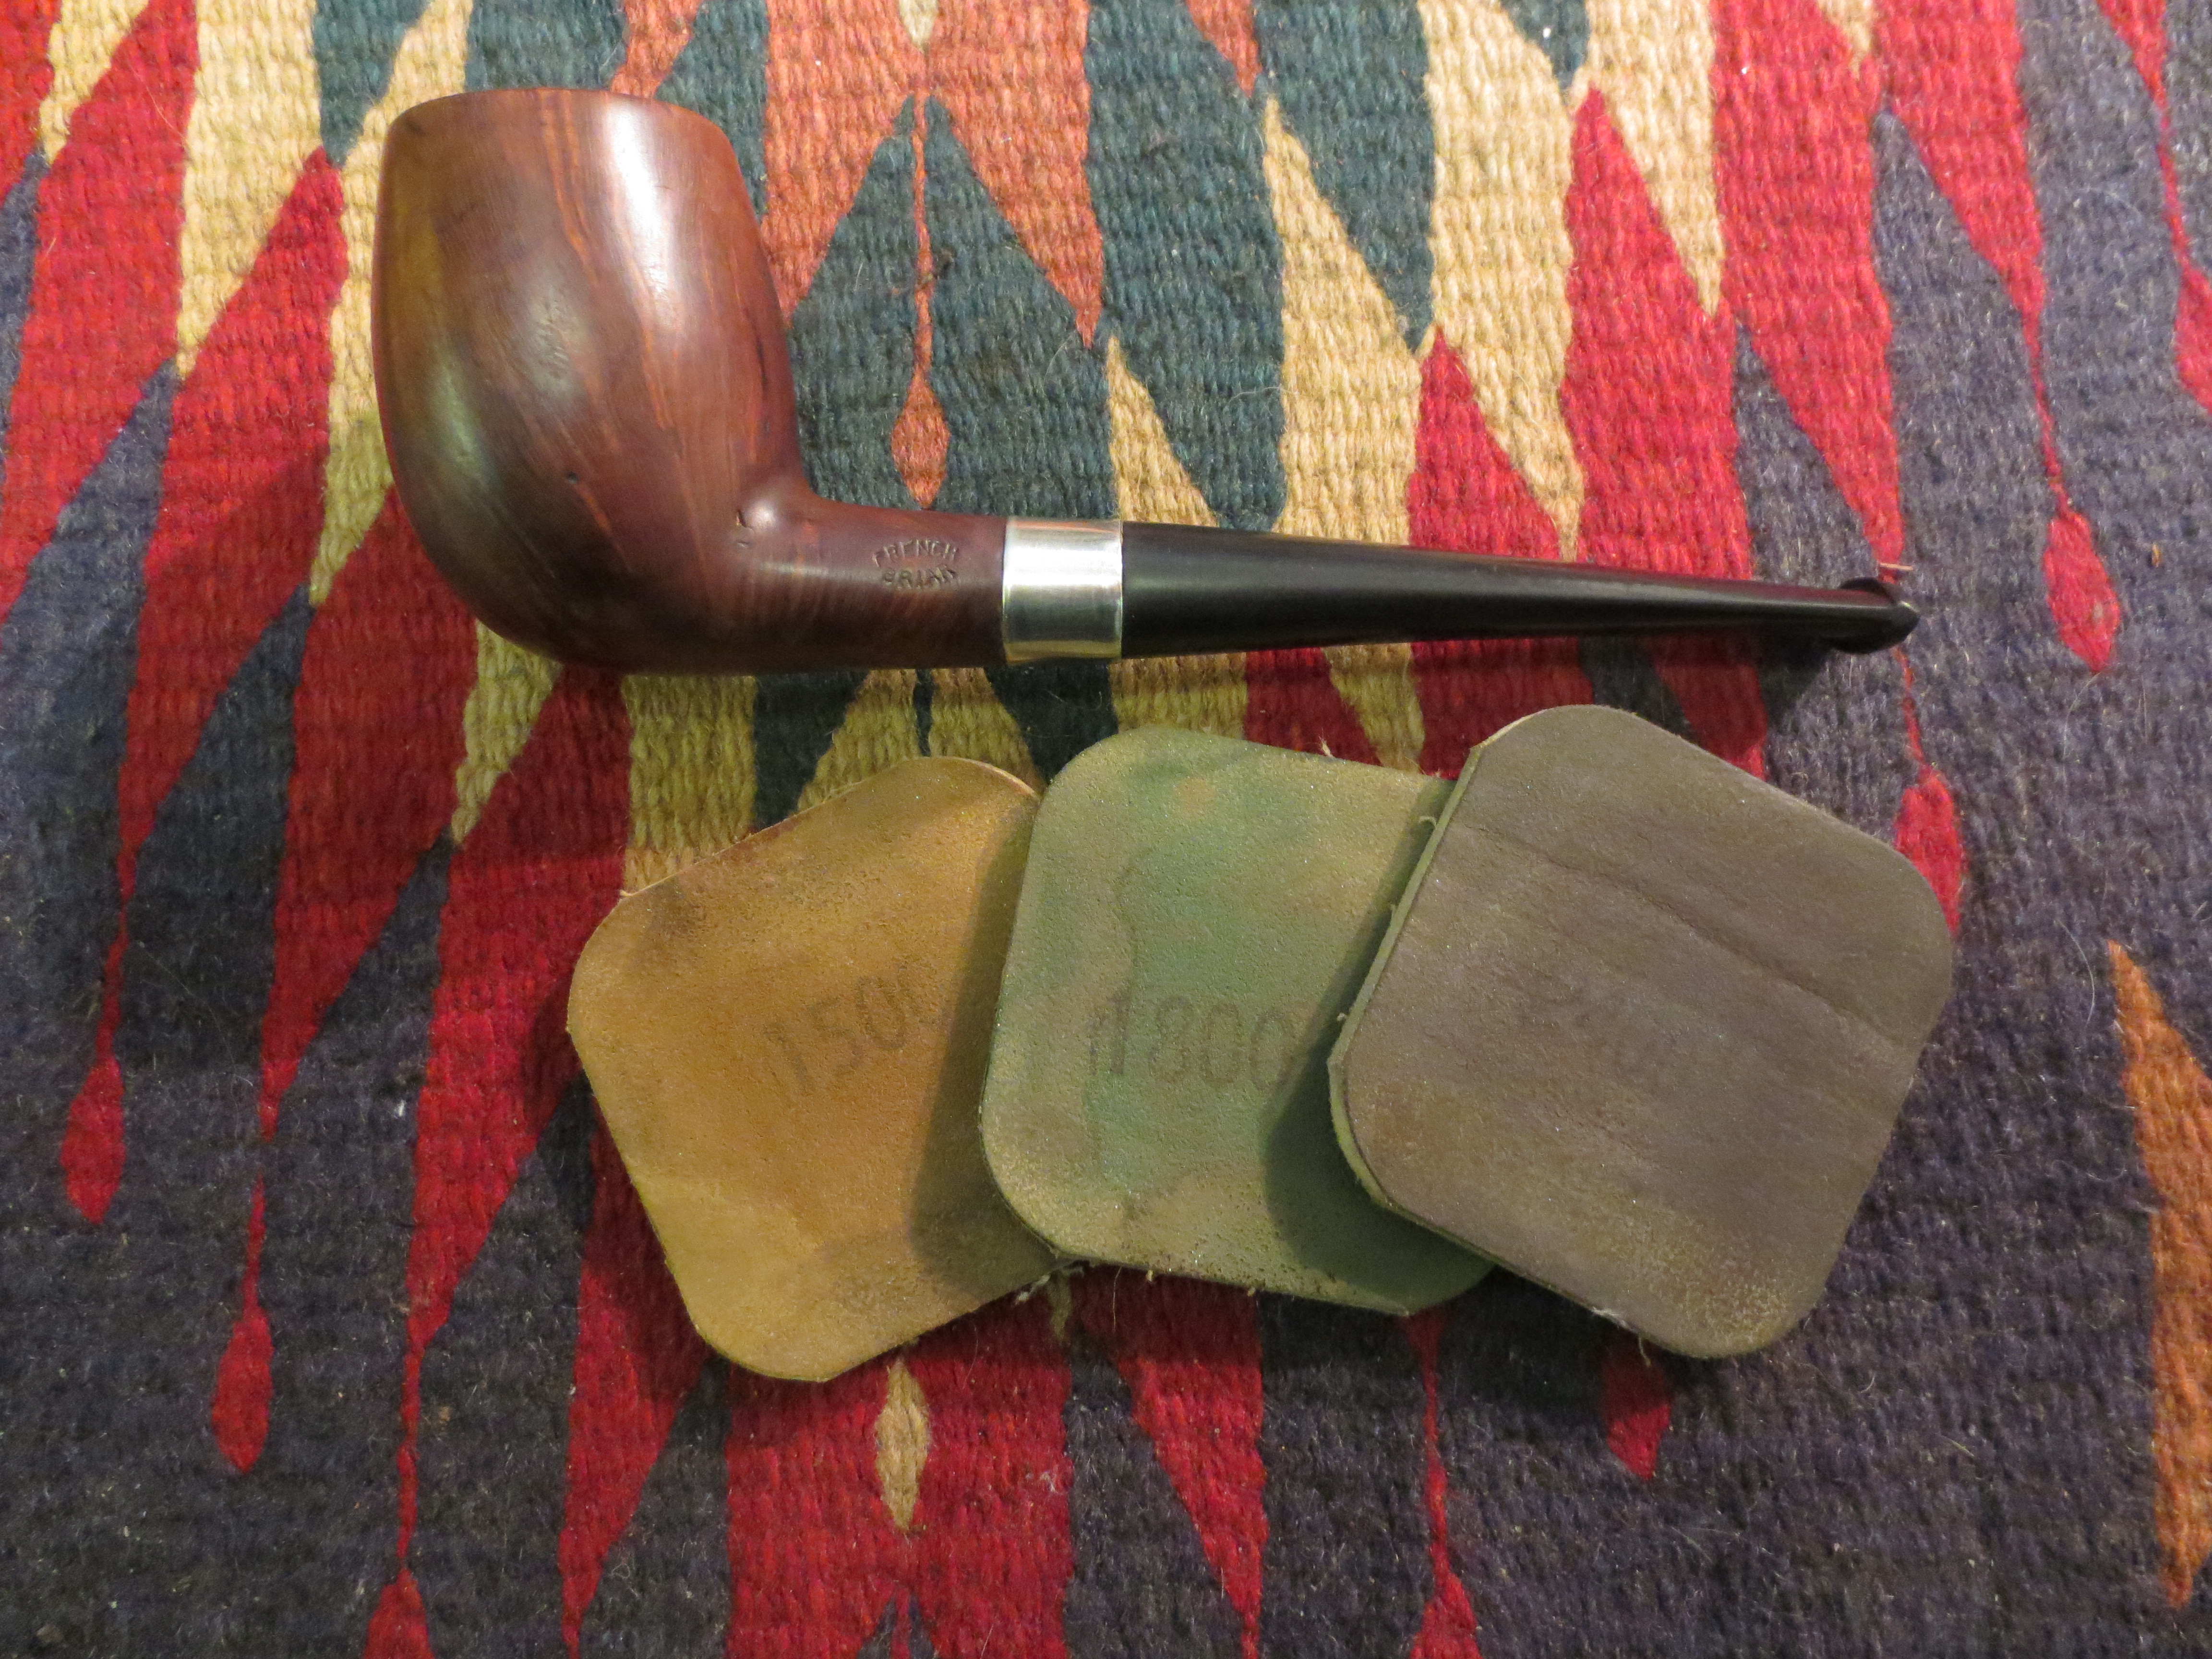
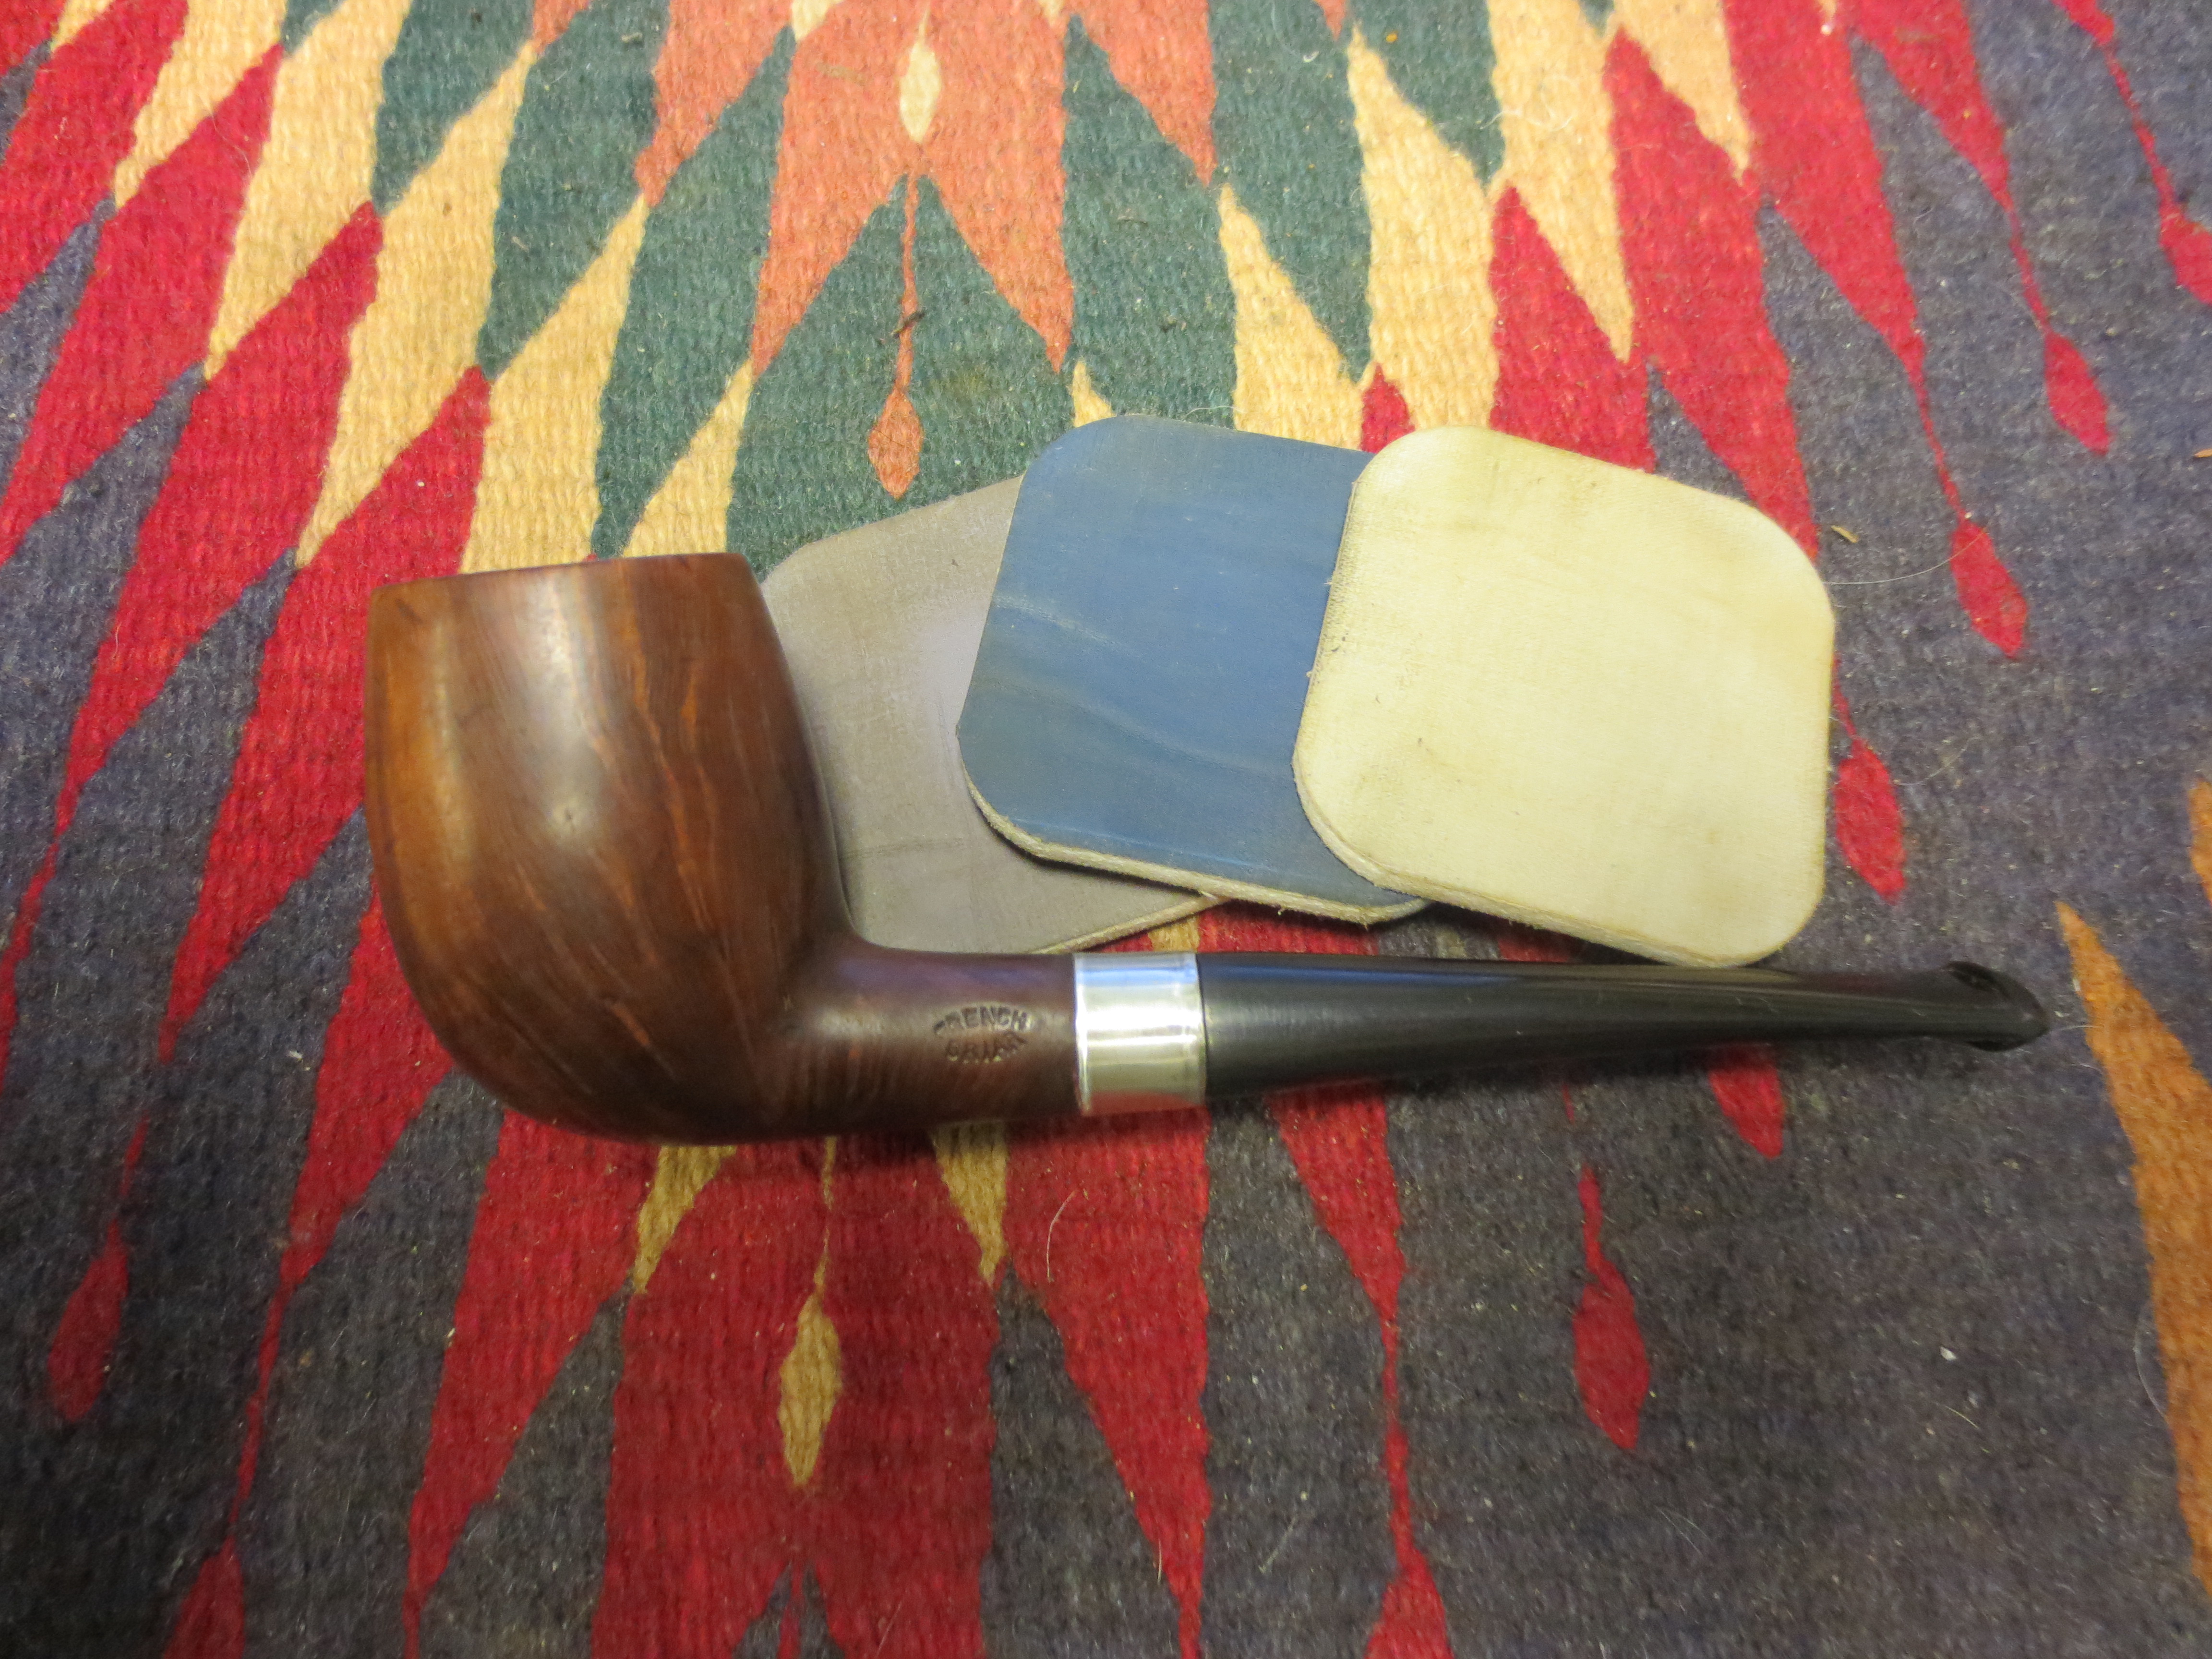
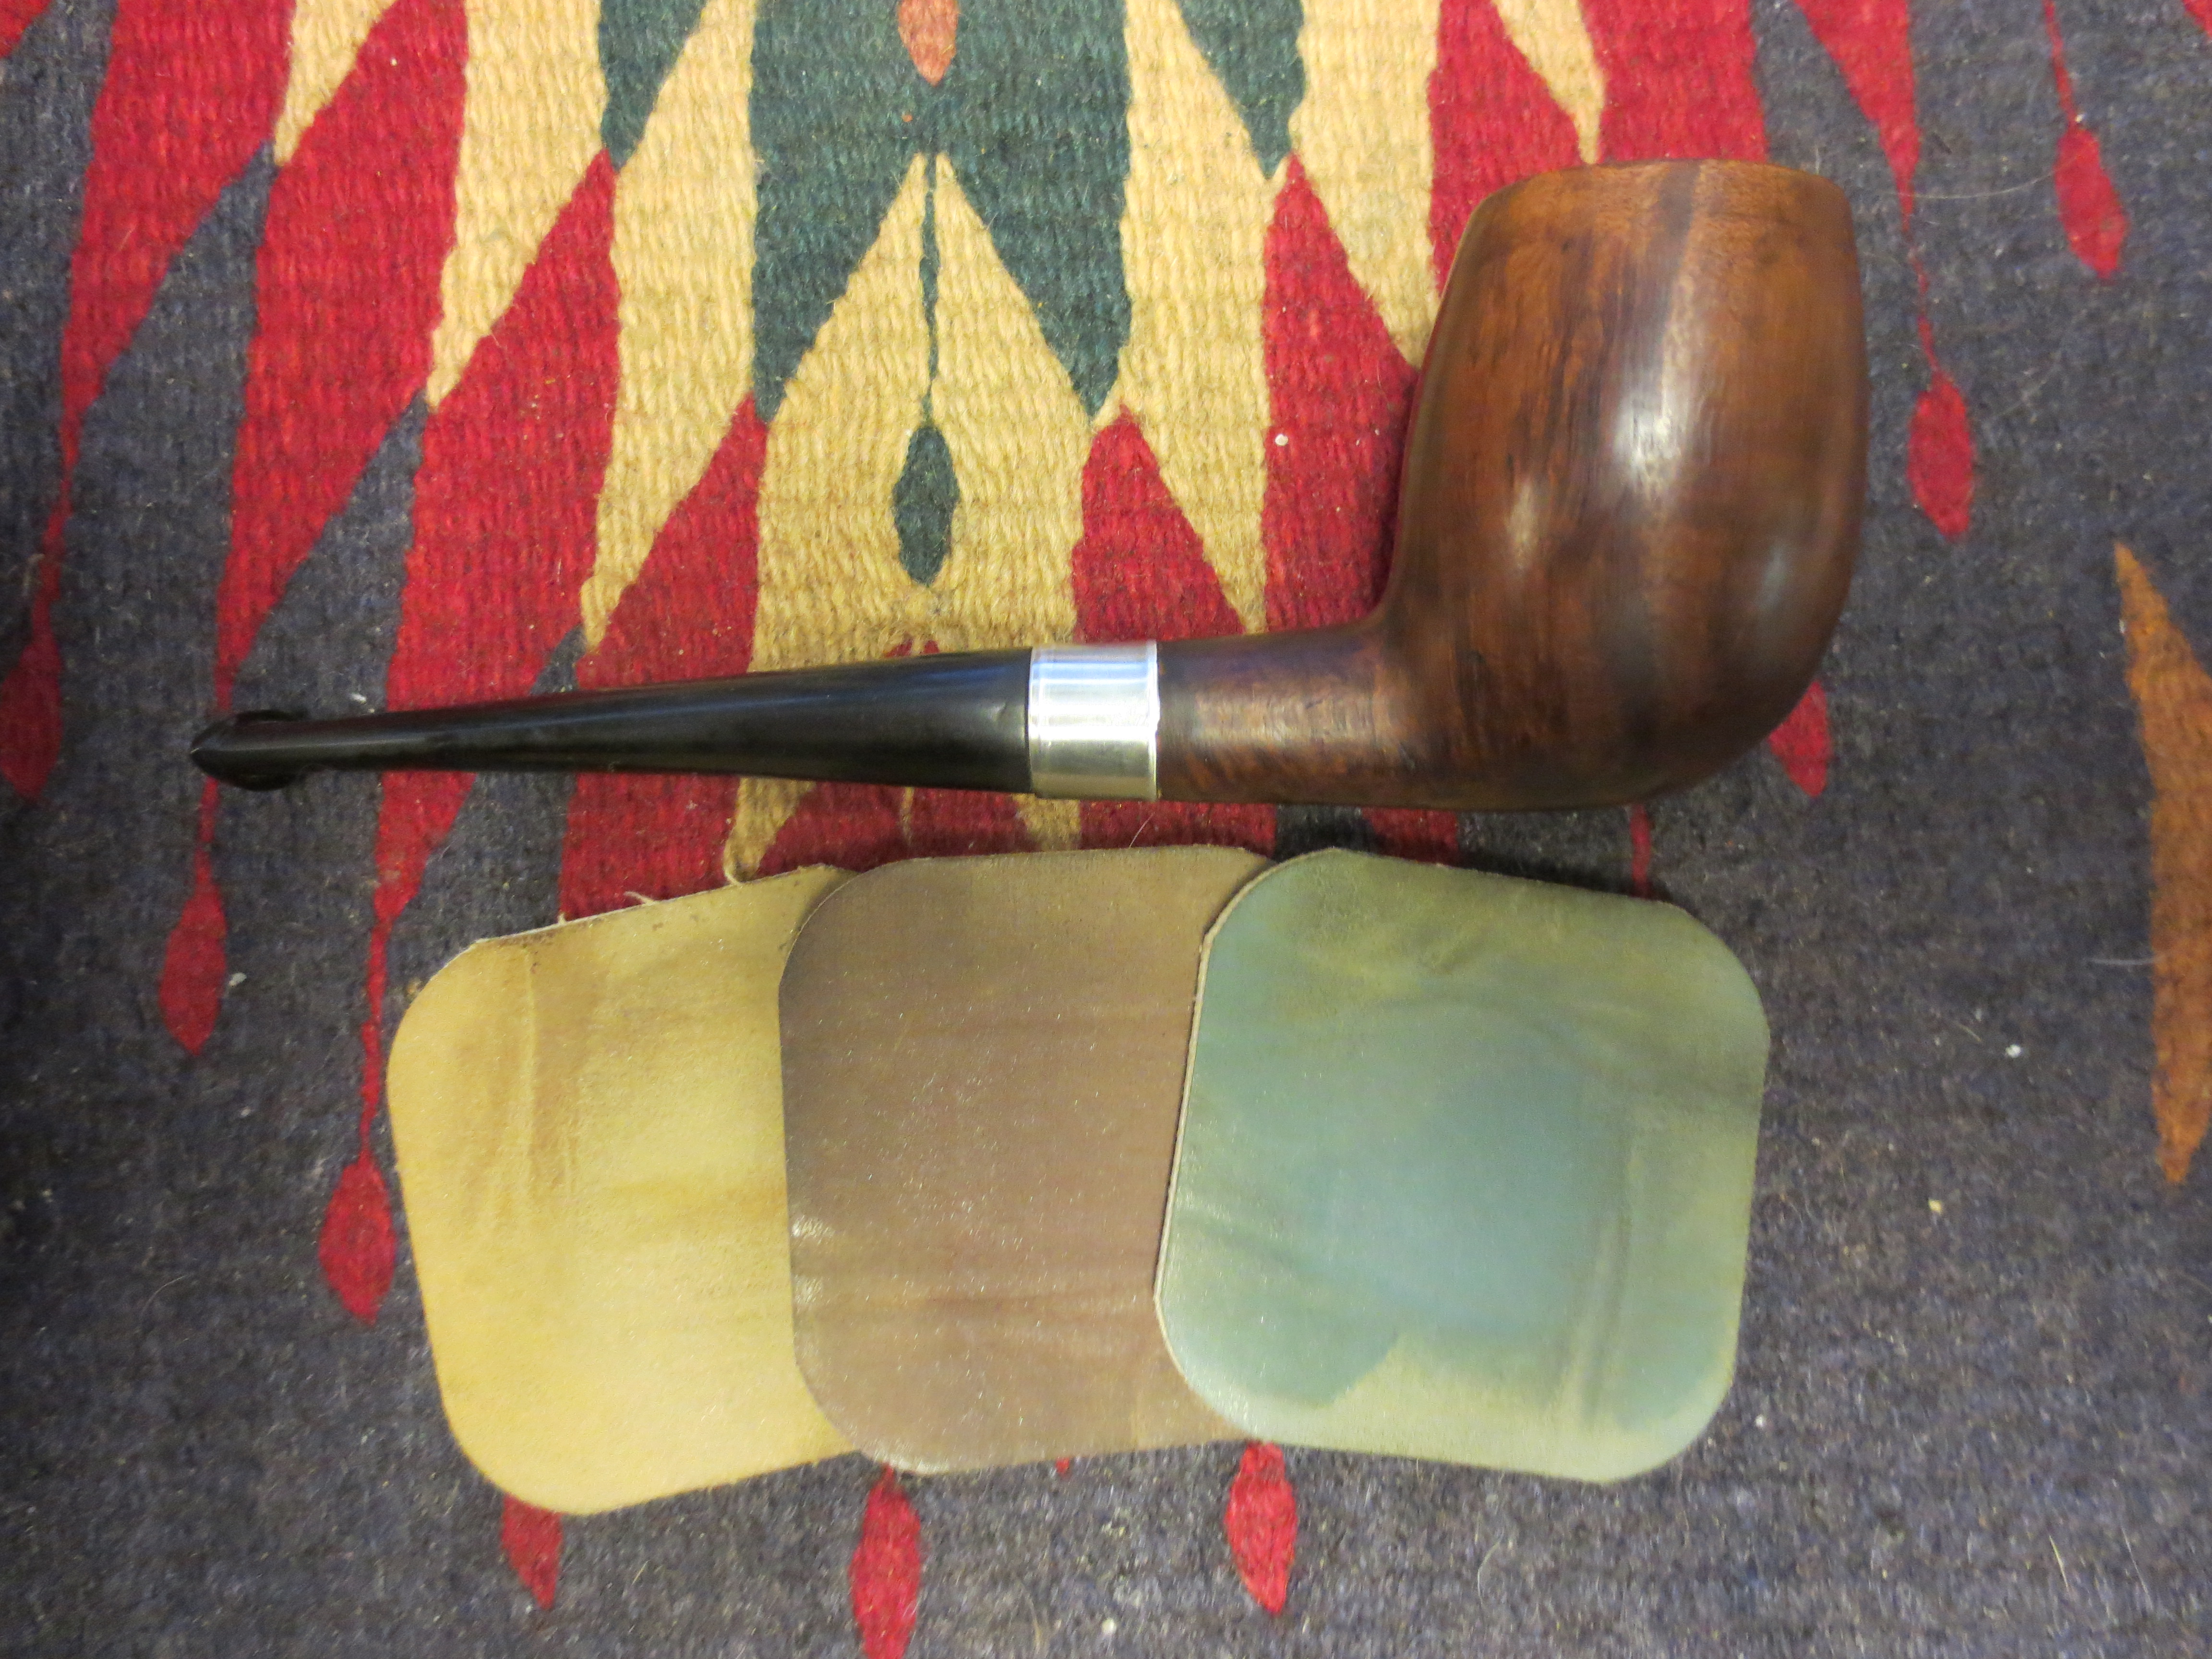
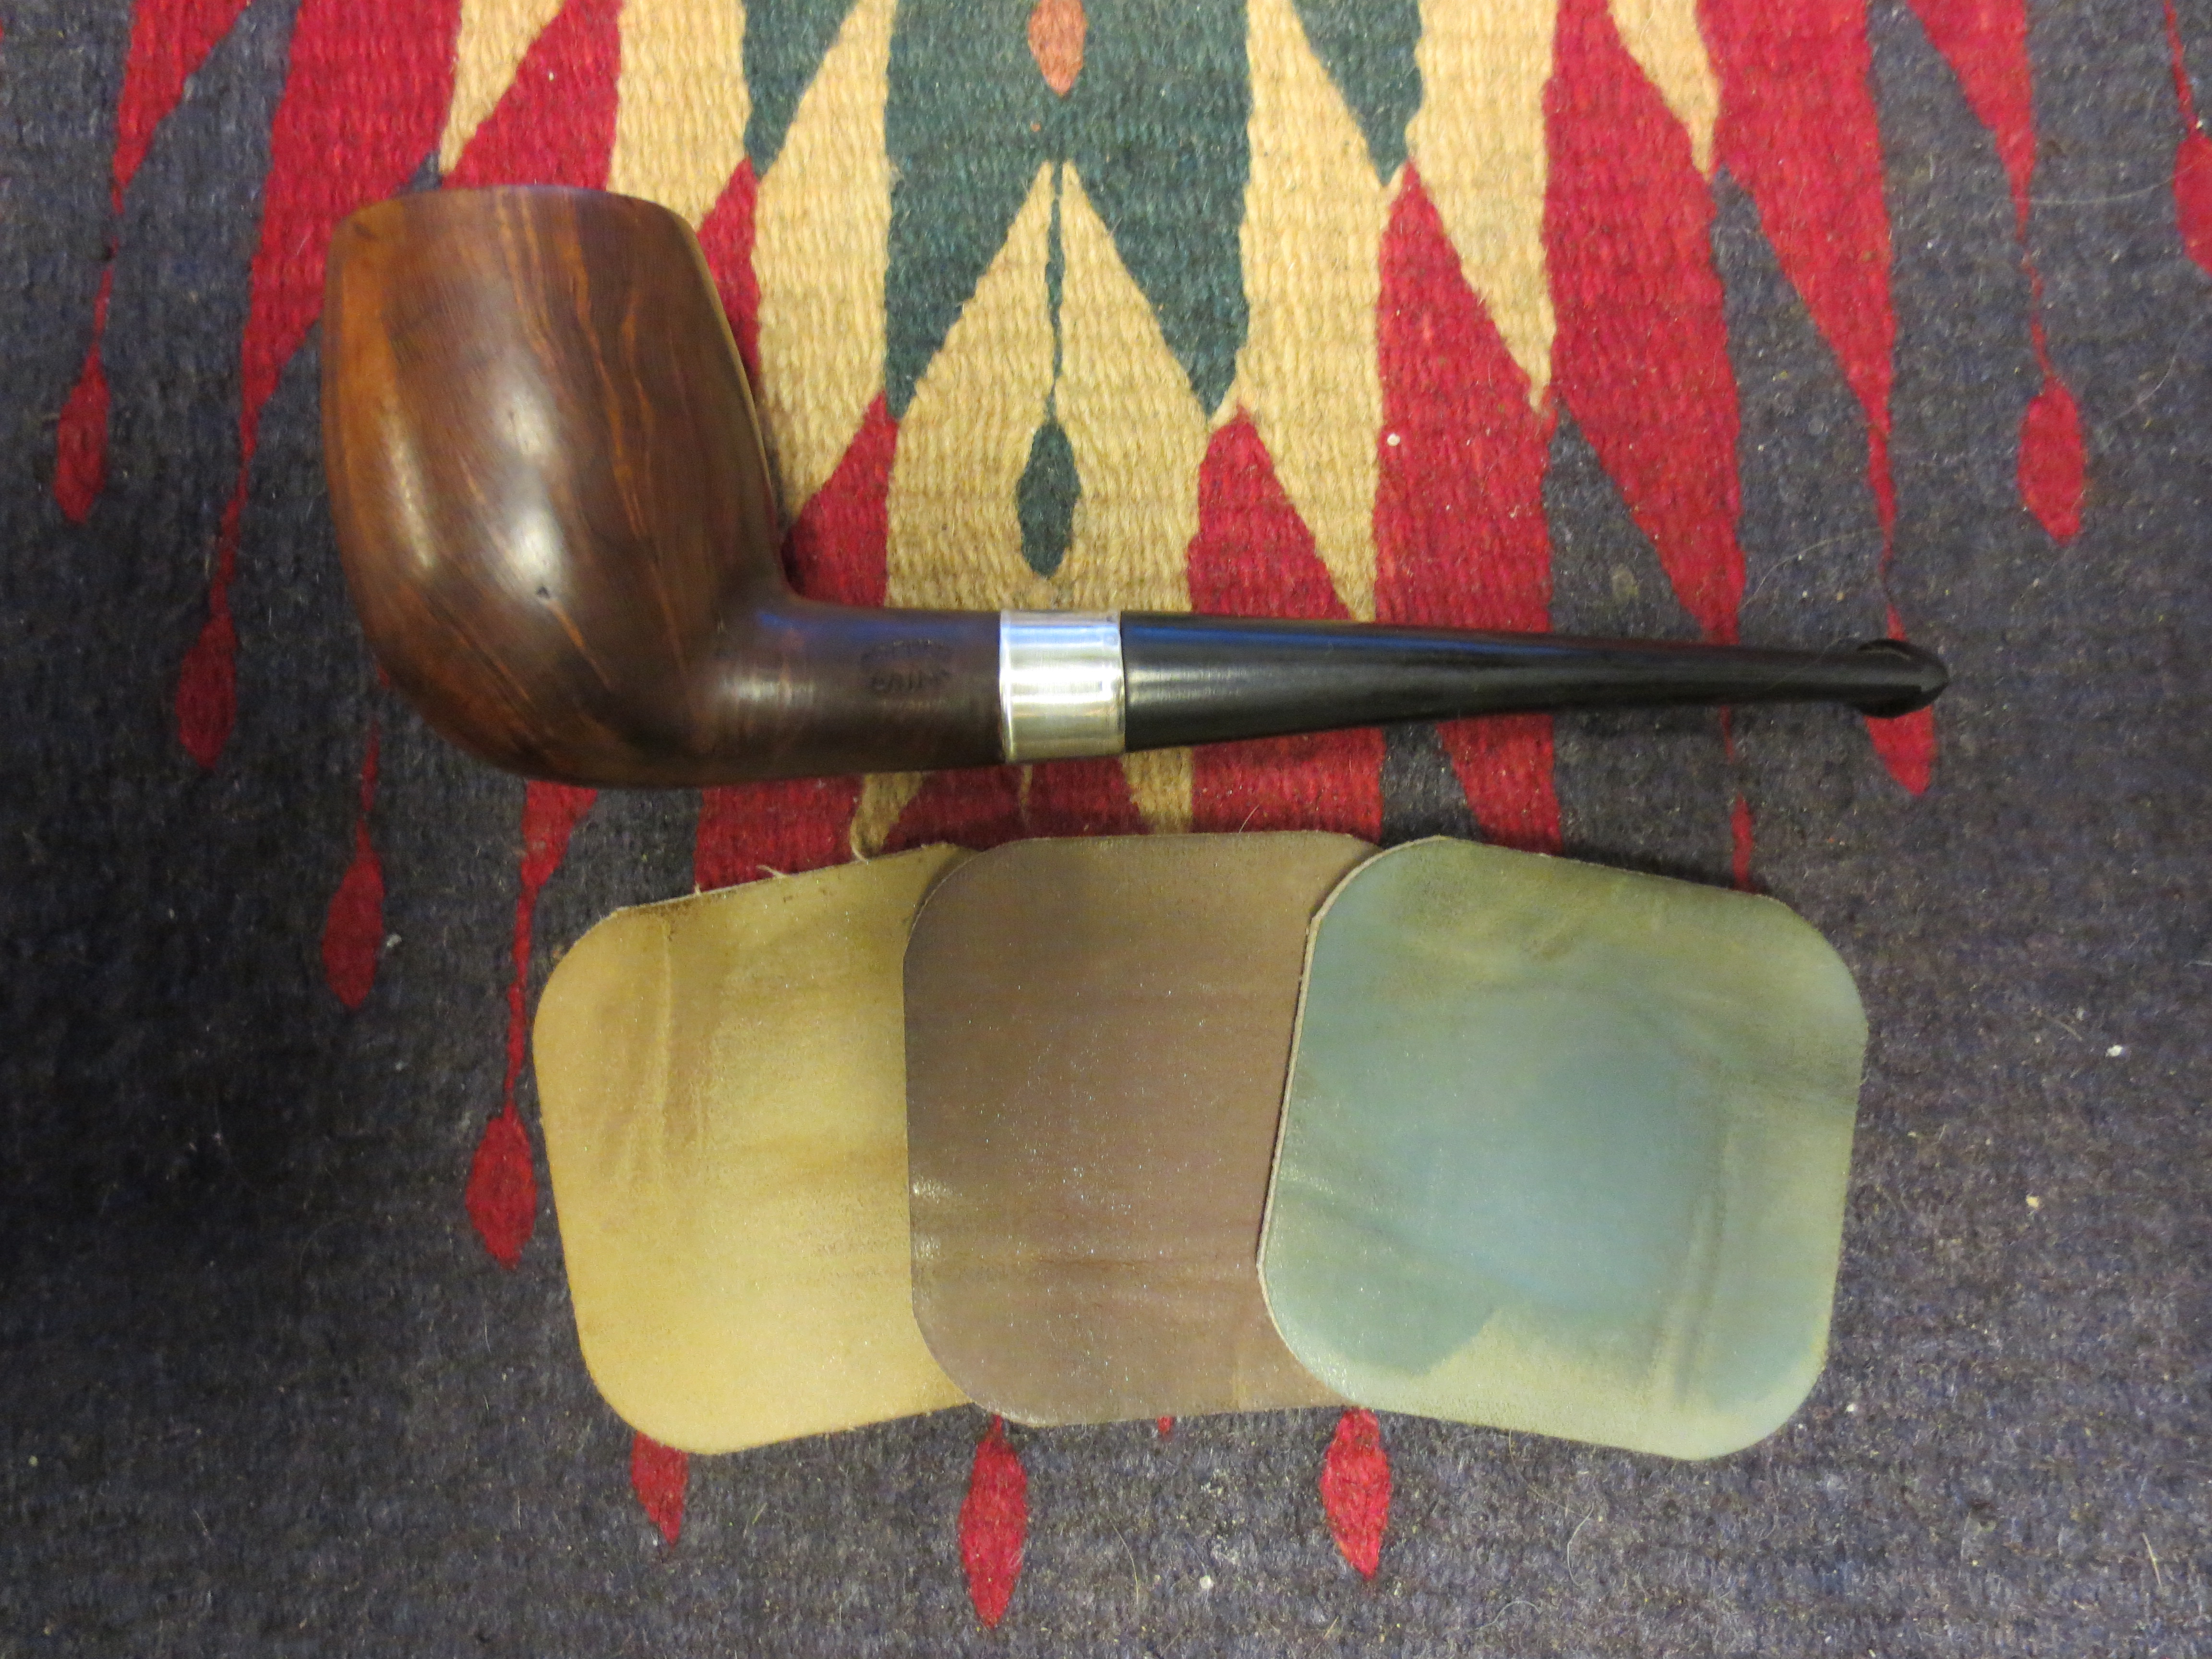
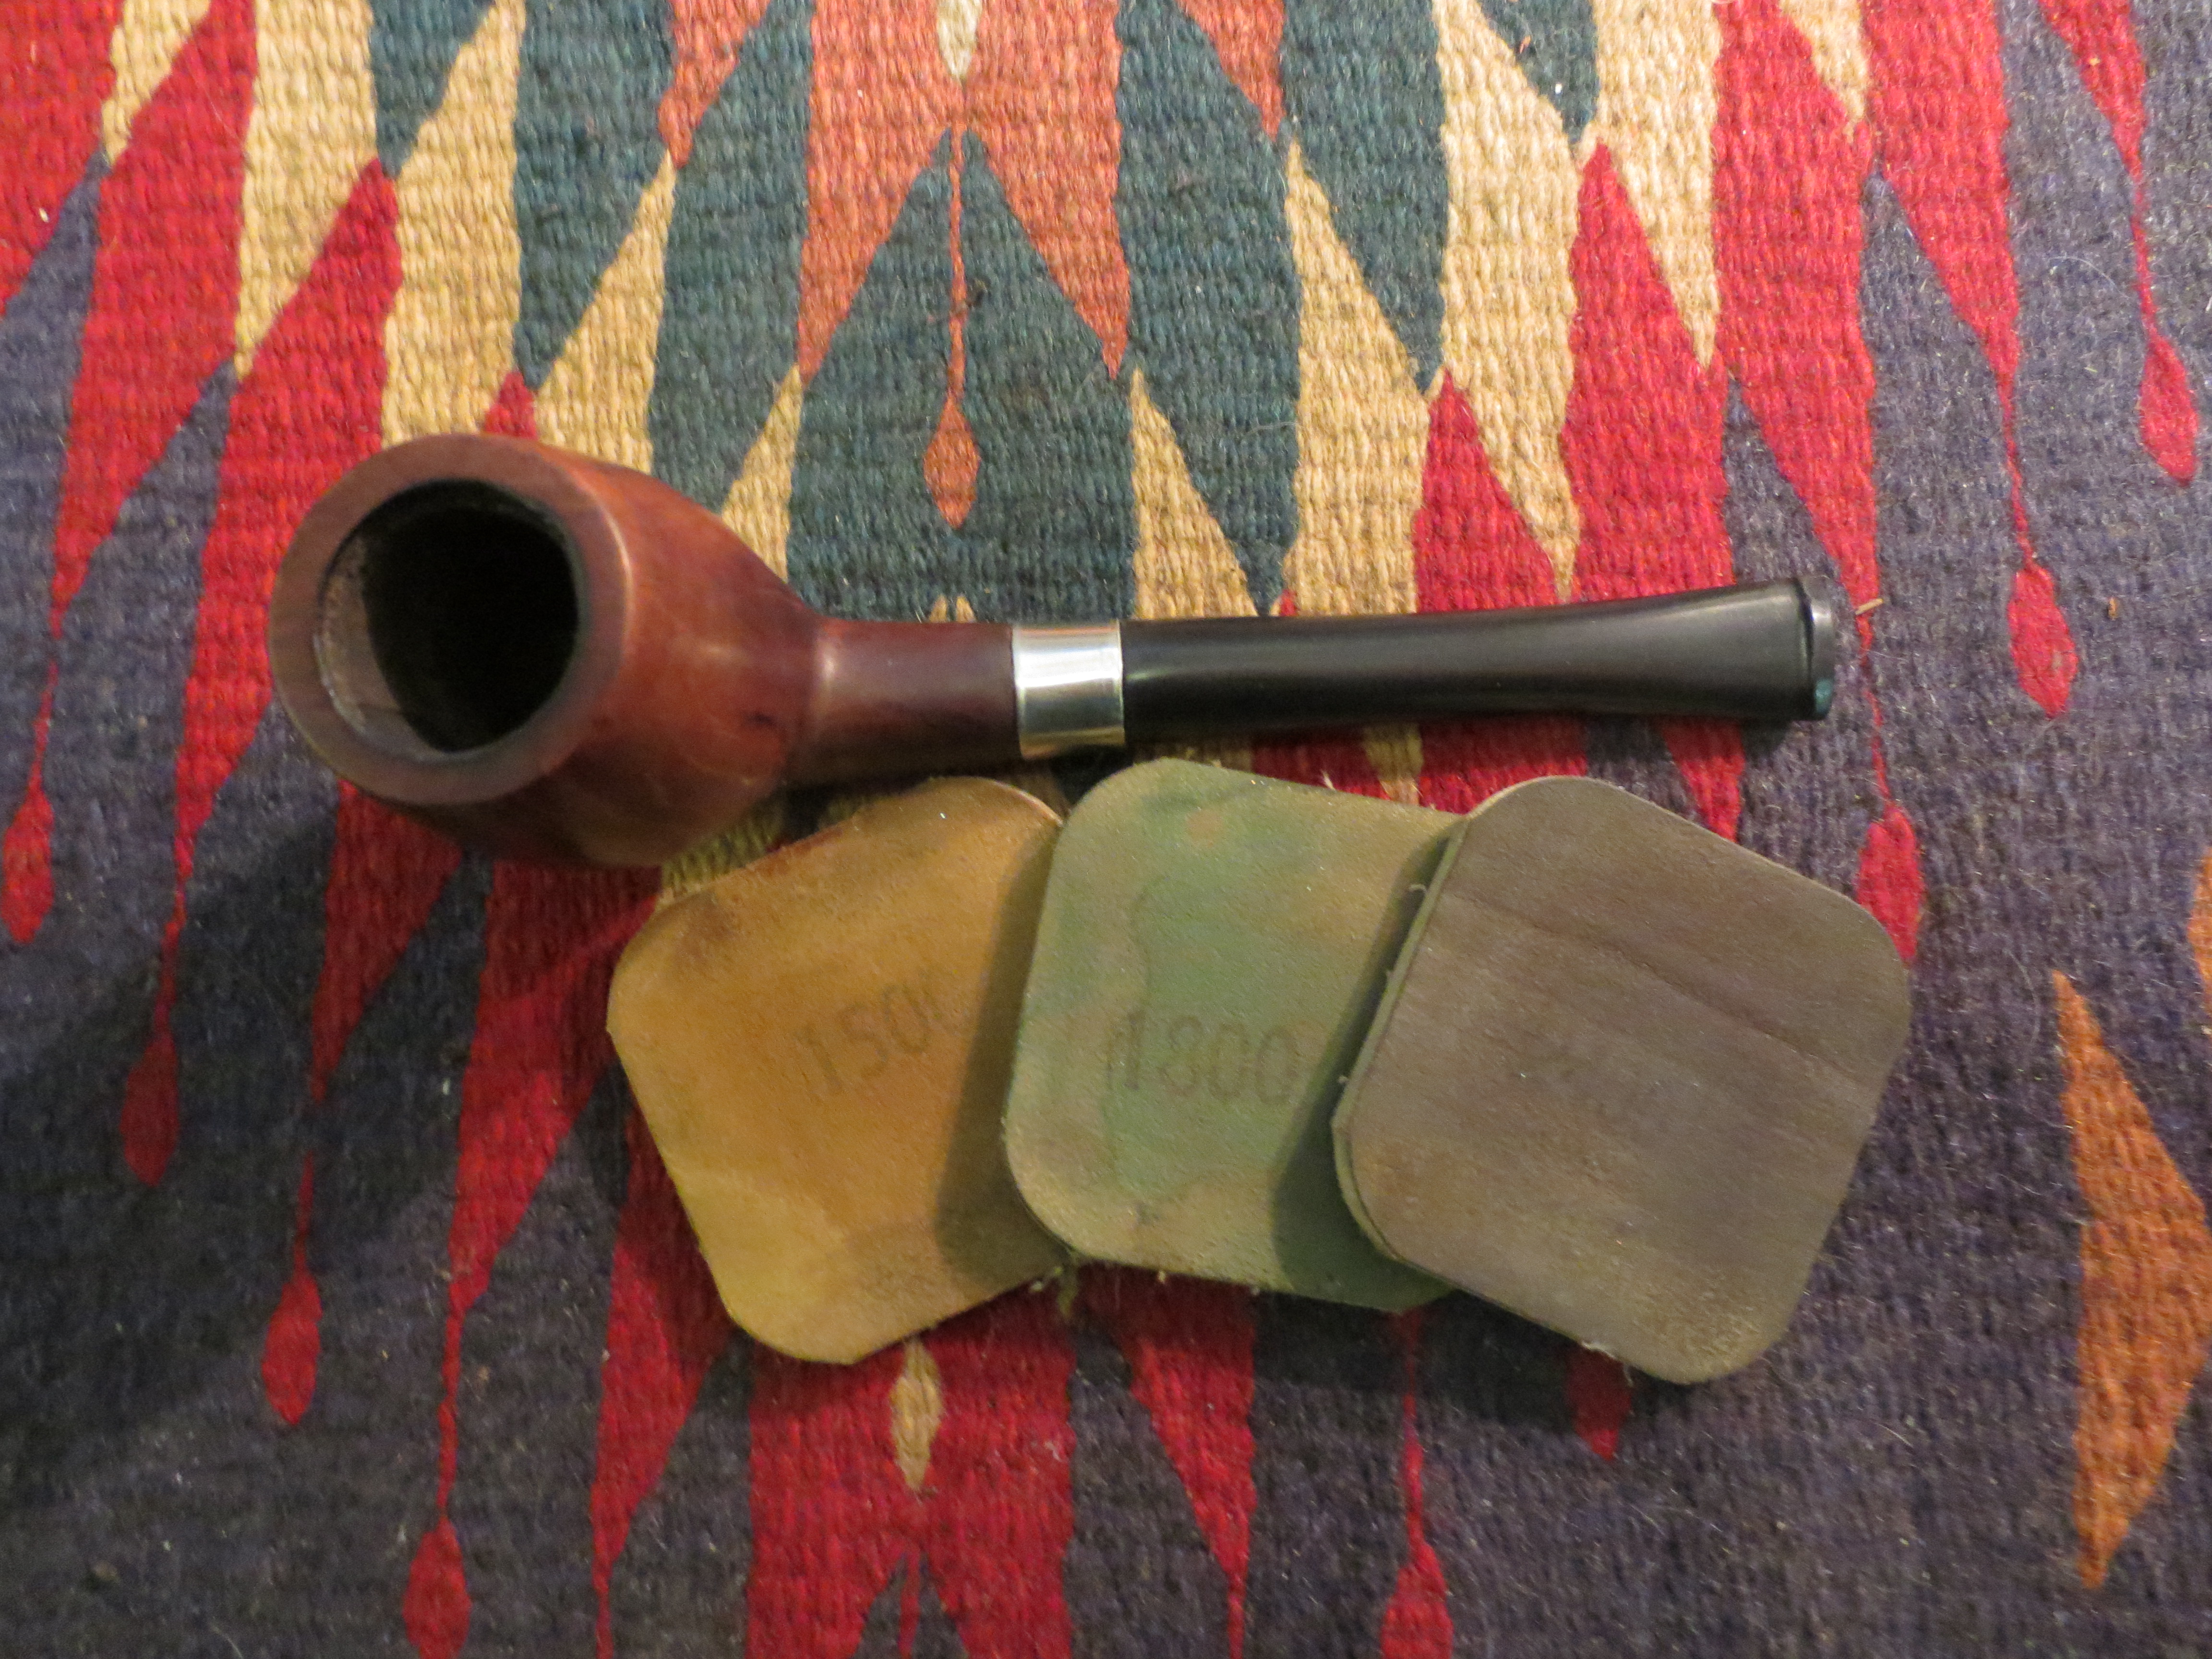
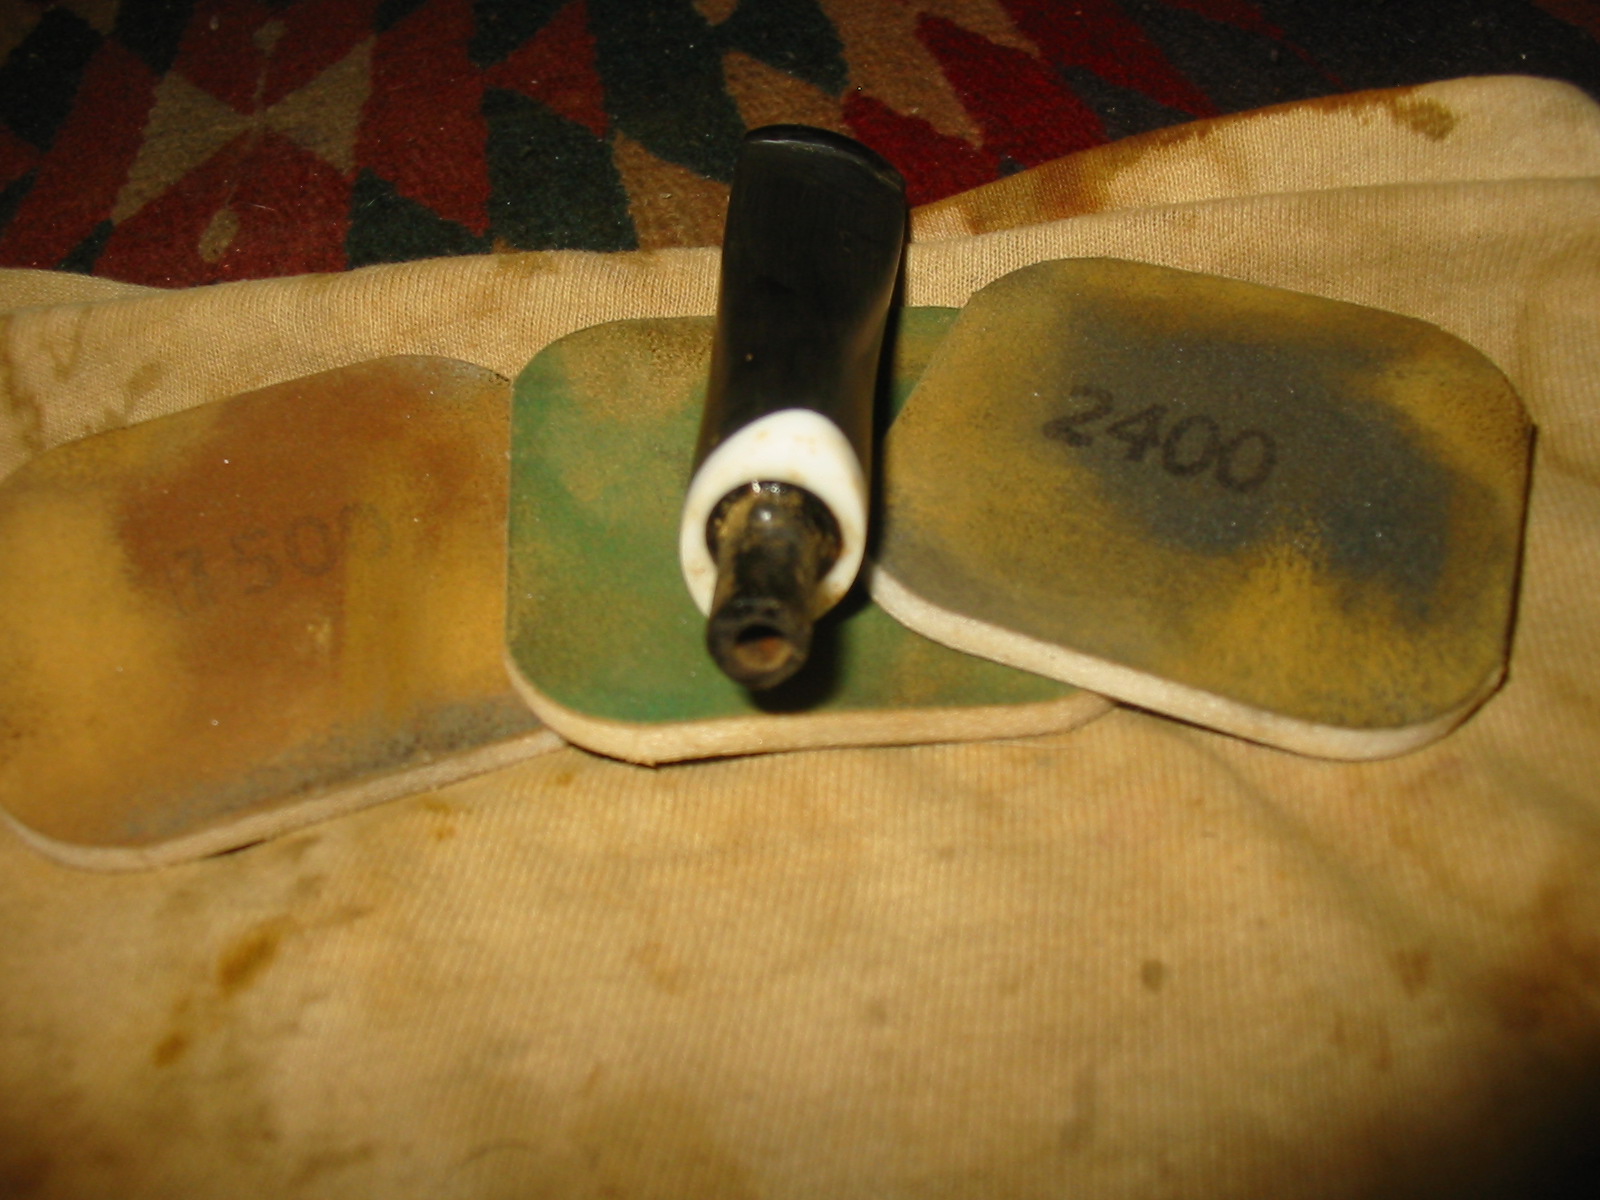
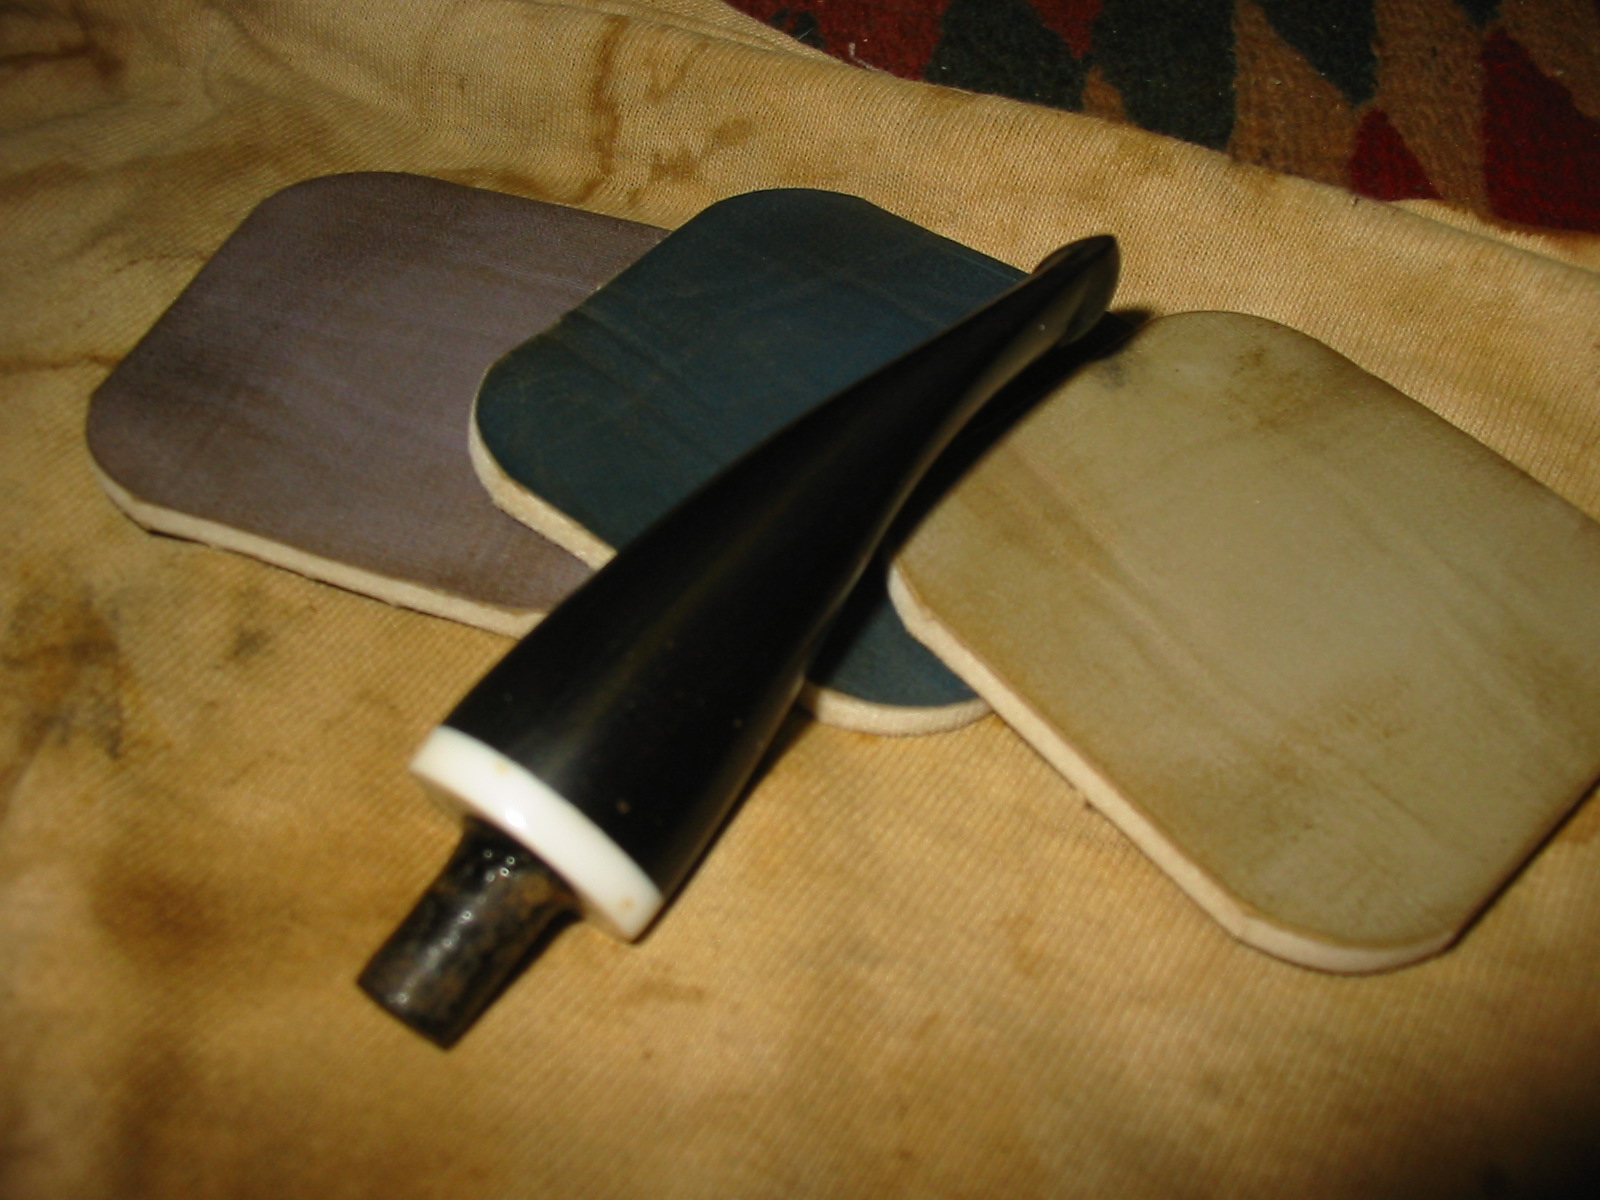
I sanded the stem with a medium grit sponge backed sanding pad. It helped to remove the scratches left behind by the 200 grit sandpaper. Then I sanded the stem with micromesh sanding pads from 1500-12,000 grit to polish and shine the vulcanite and the patched areas. The white Lucite band that was a part of the stem began to take on a shine as well in the process. The next nine photos capture what took about an hour to achieve in the sanding process. I wet sanded with the 1500, 1800 and 2400 grit sanding pads and dry sanded with the remaining grits of micromesh.

IMG_1841

IMG_1842

IMG_1844

IMG_1845

IMG_1846

IMG_1847

IMG_1848

IMG_1849

IMG_1850

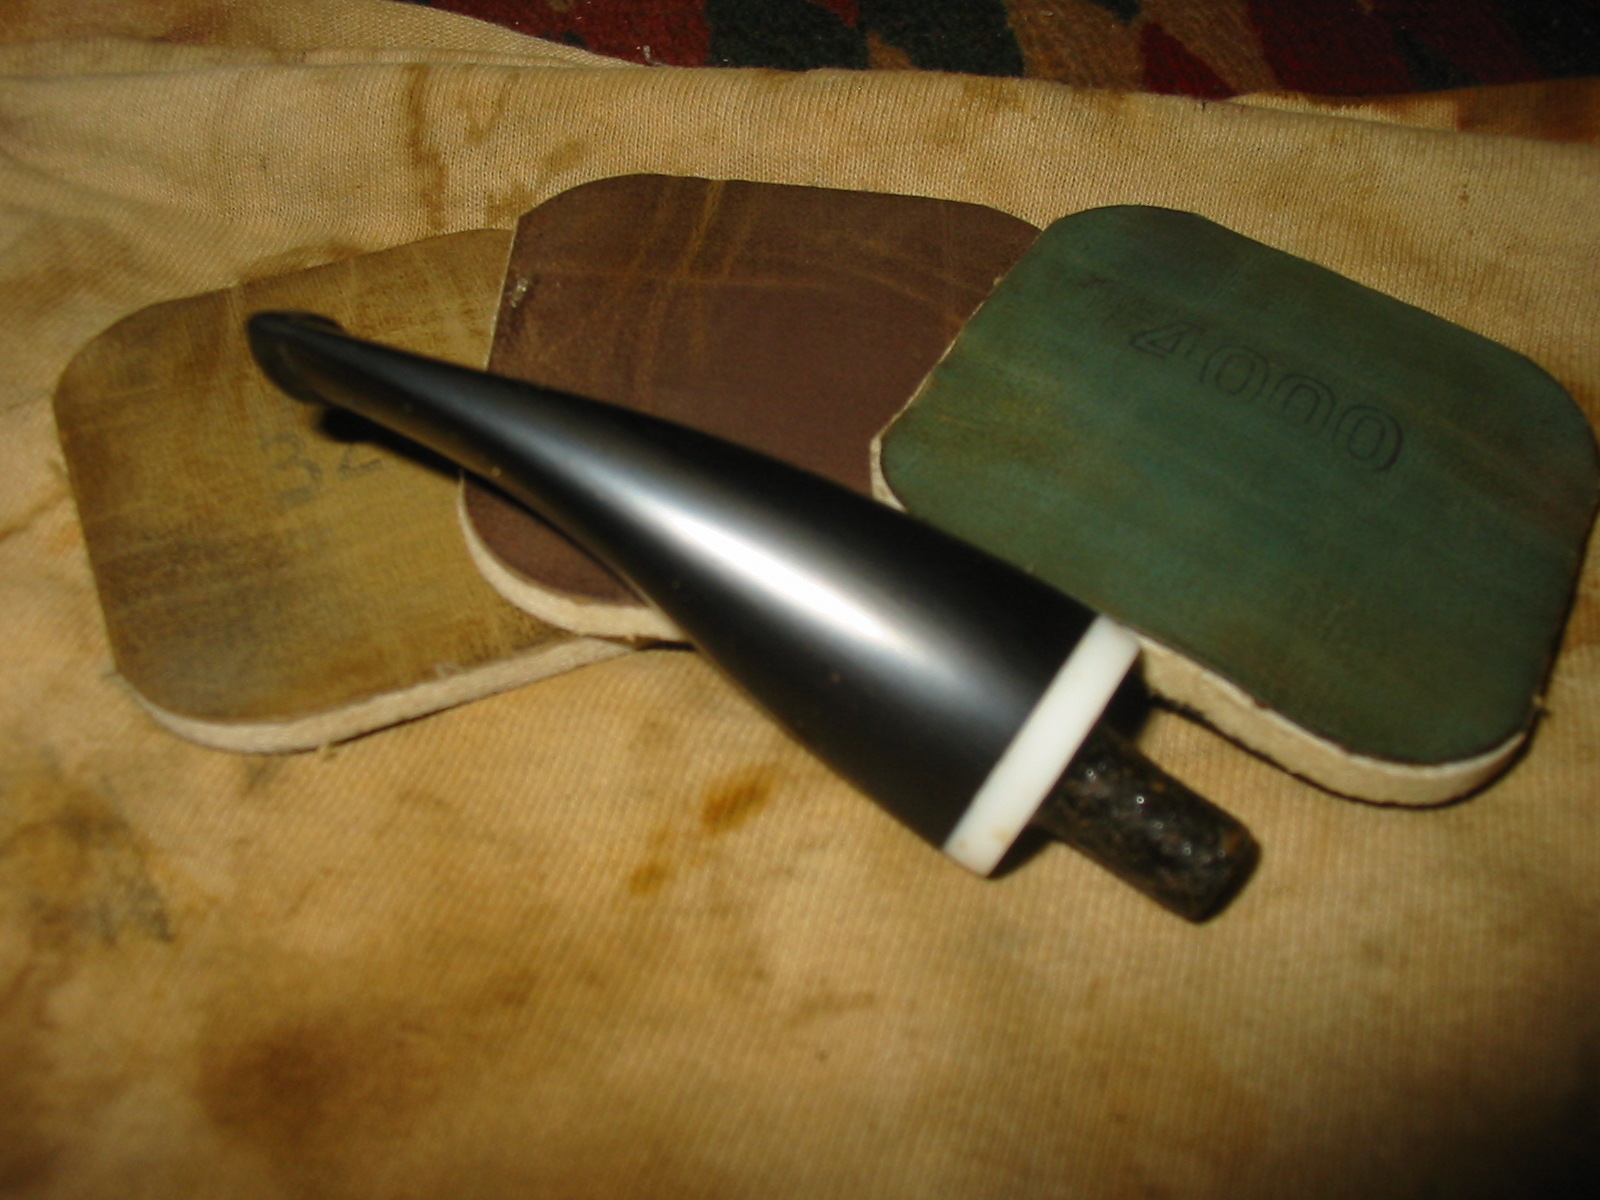
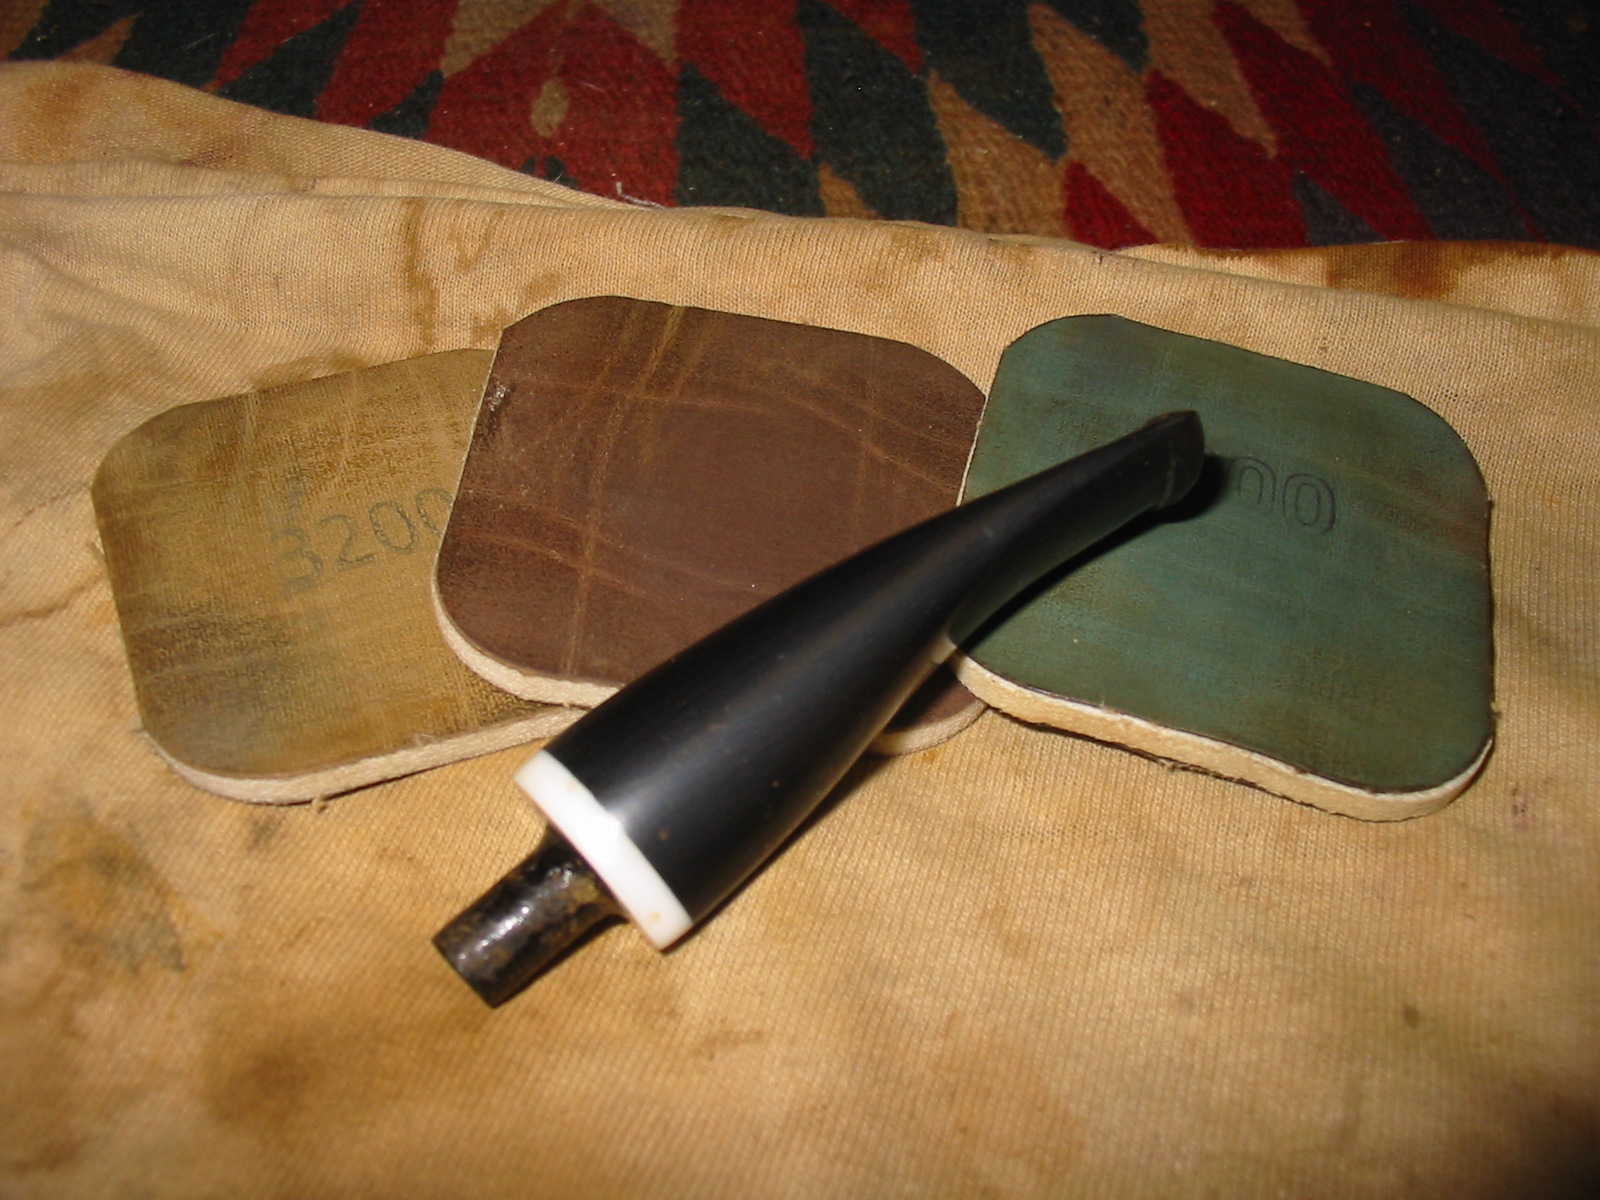
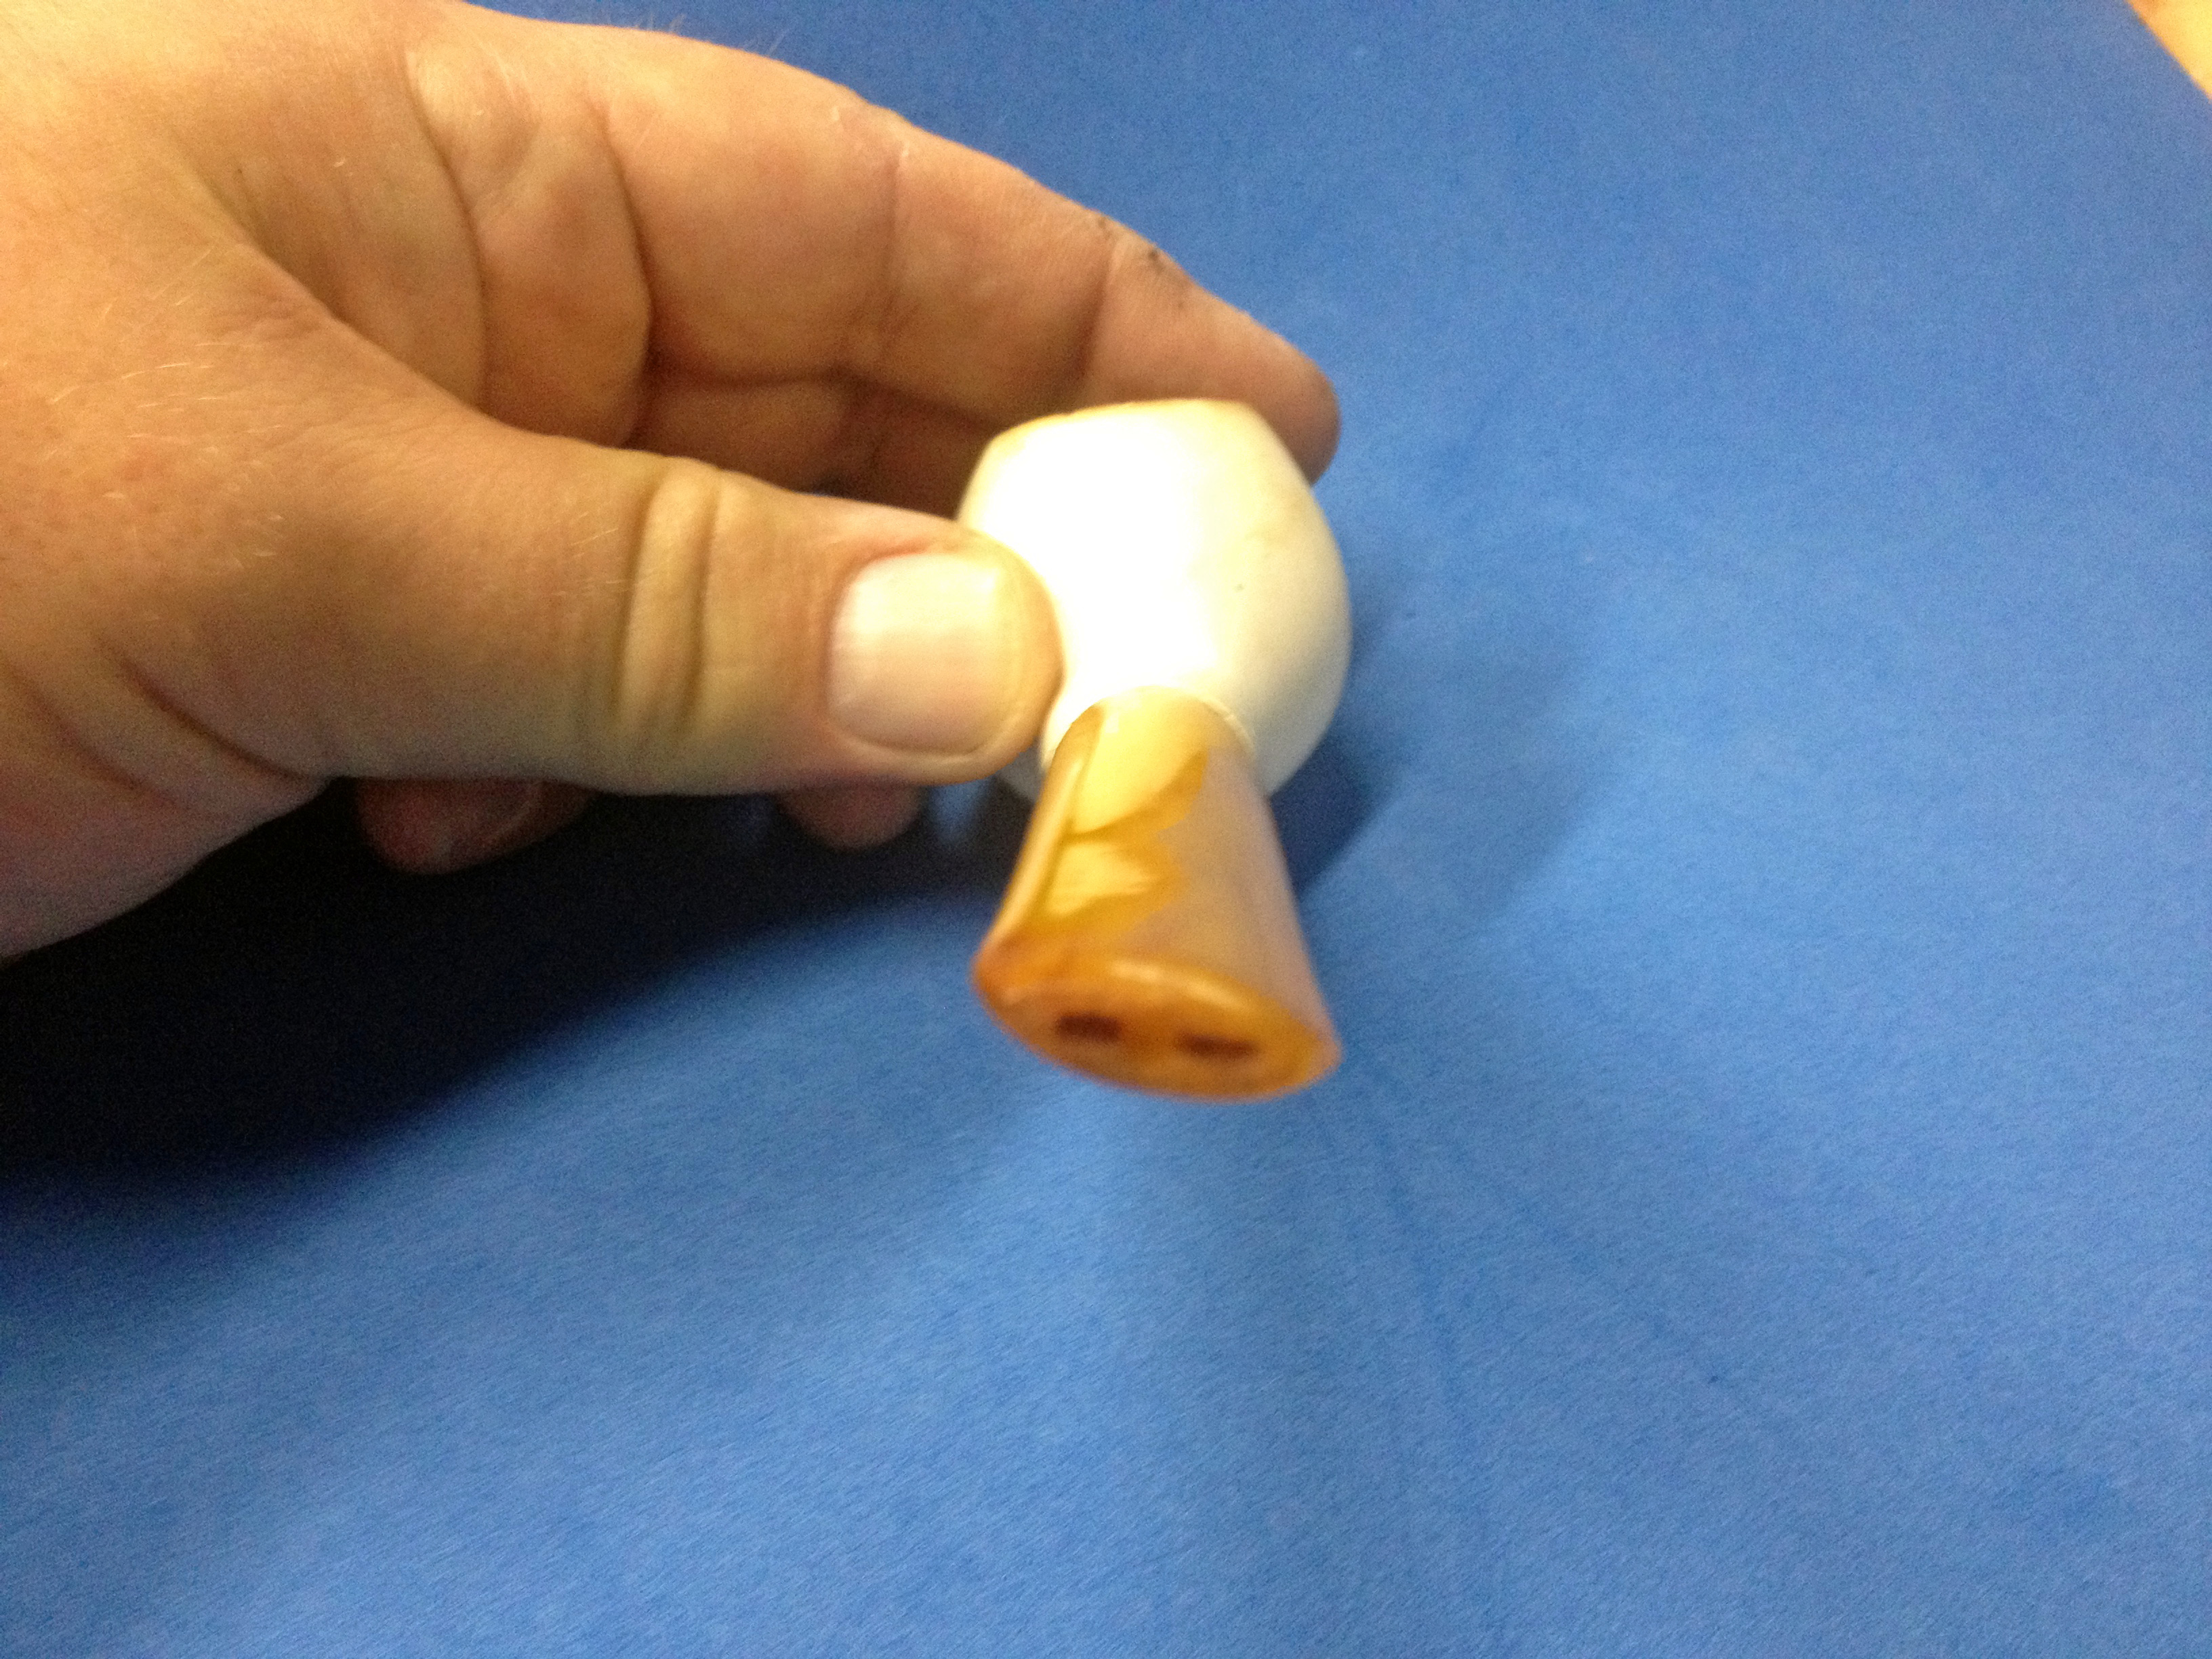
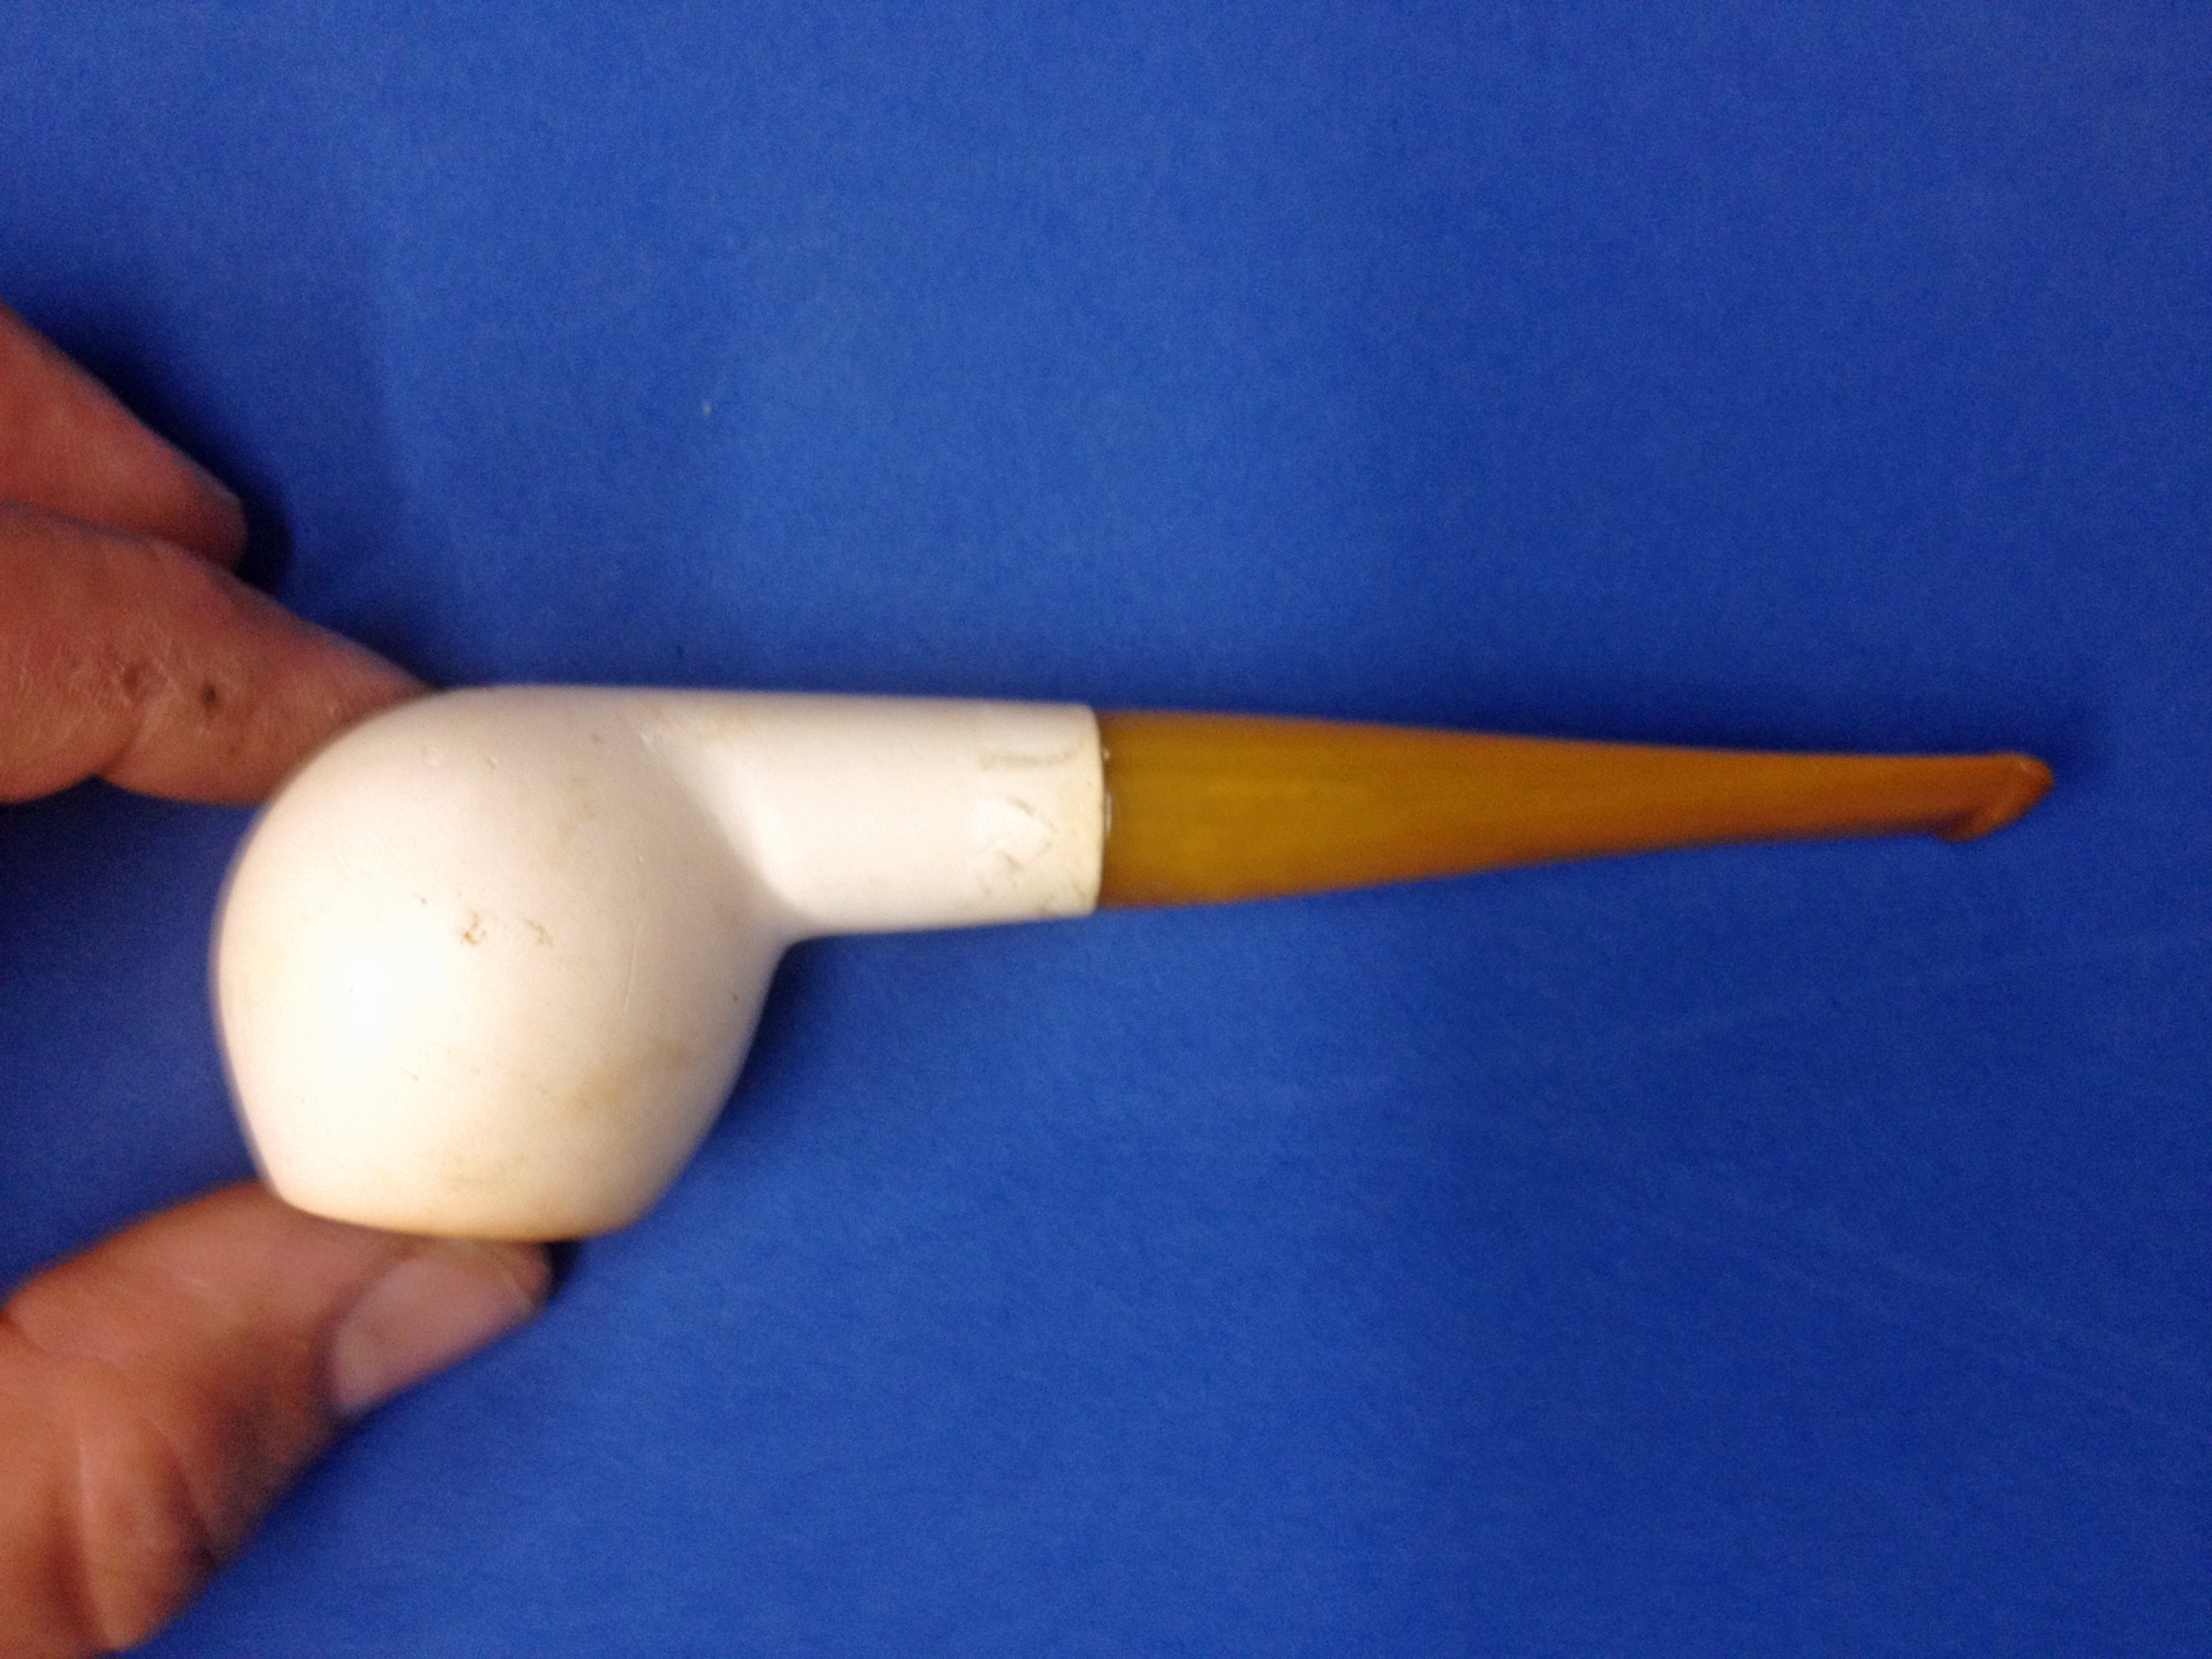
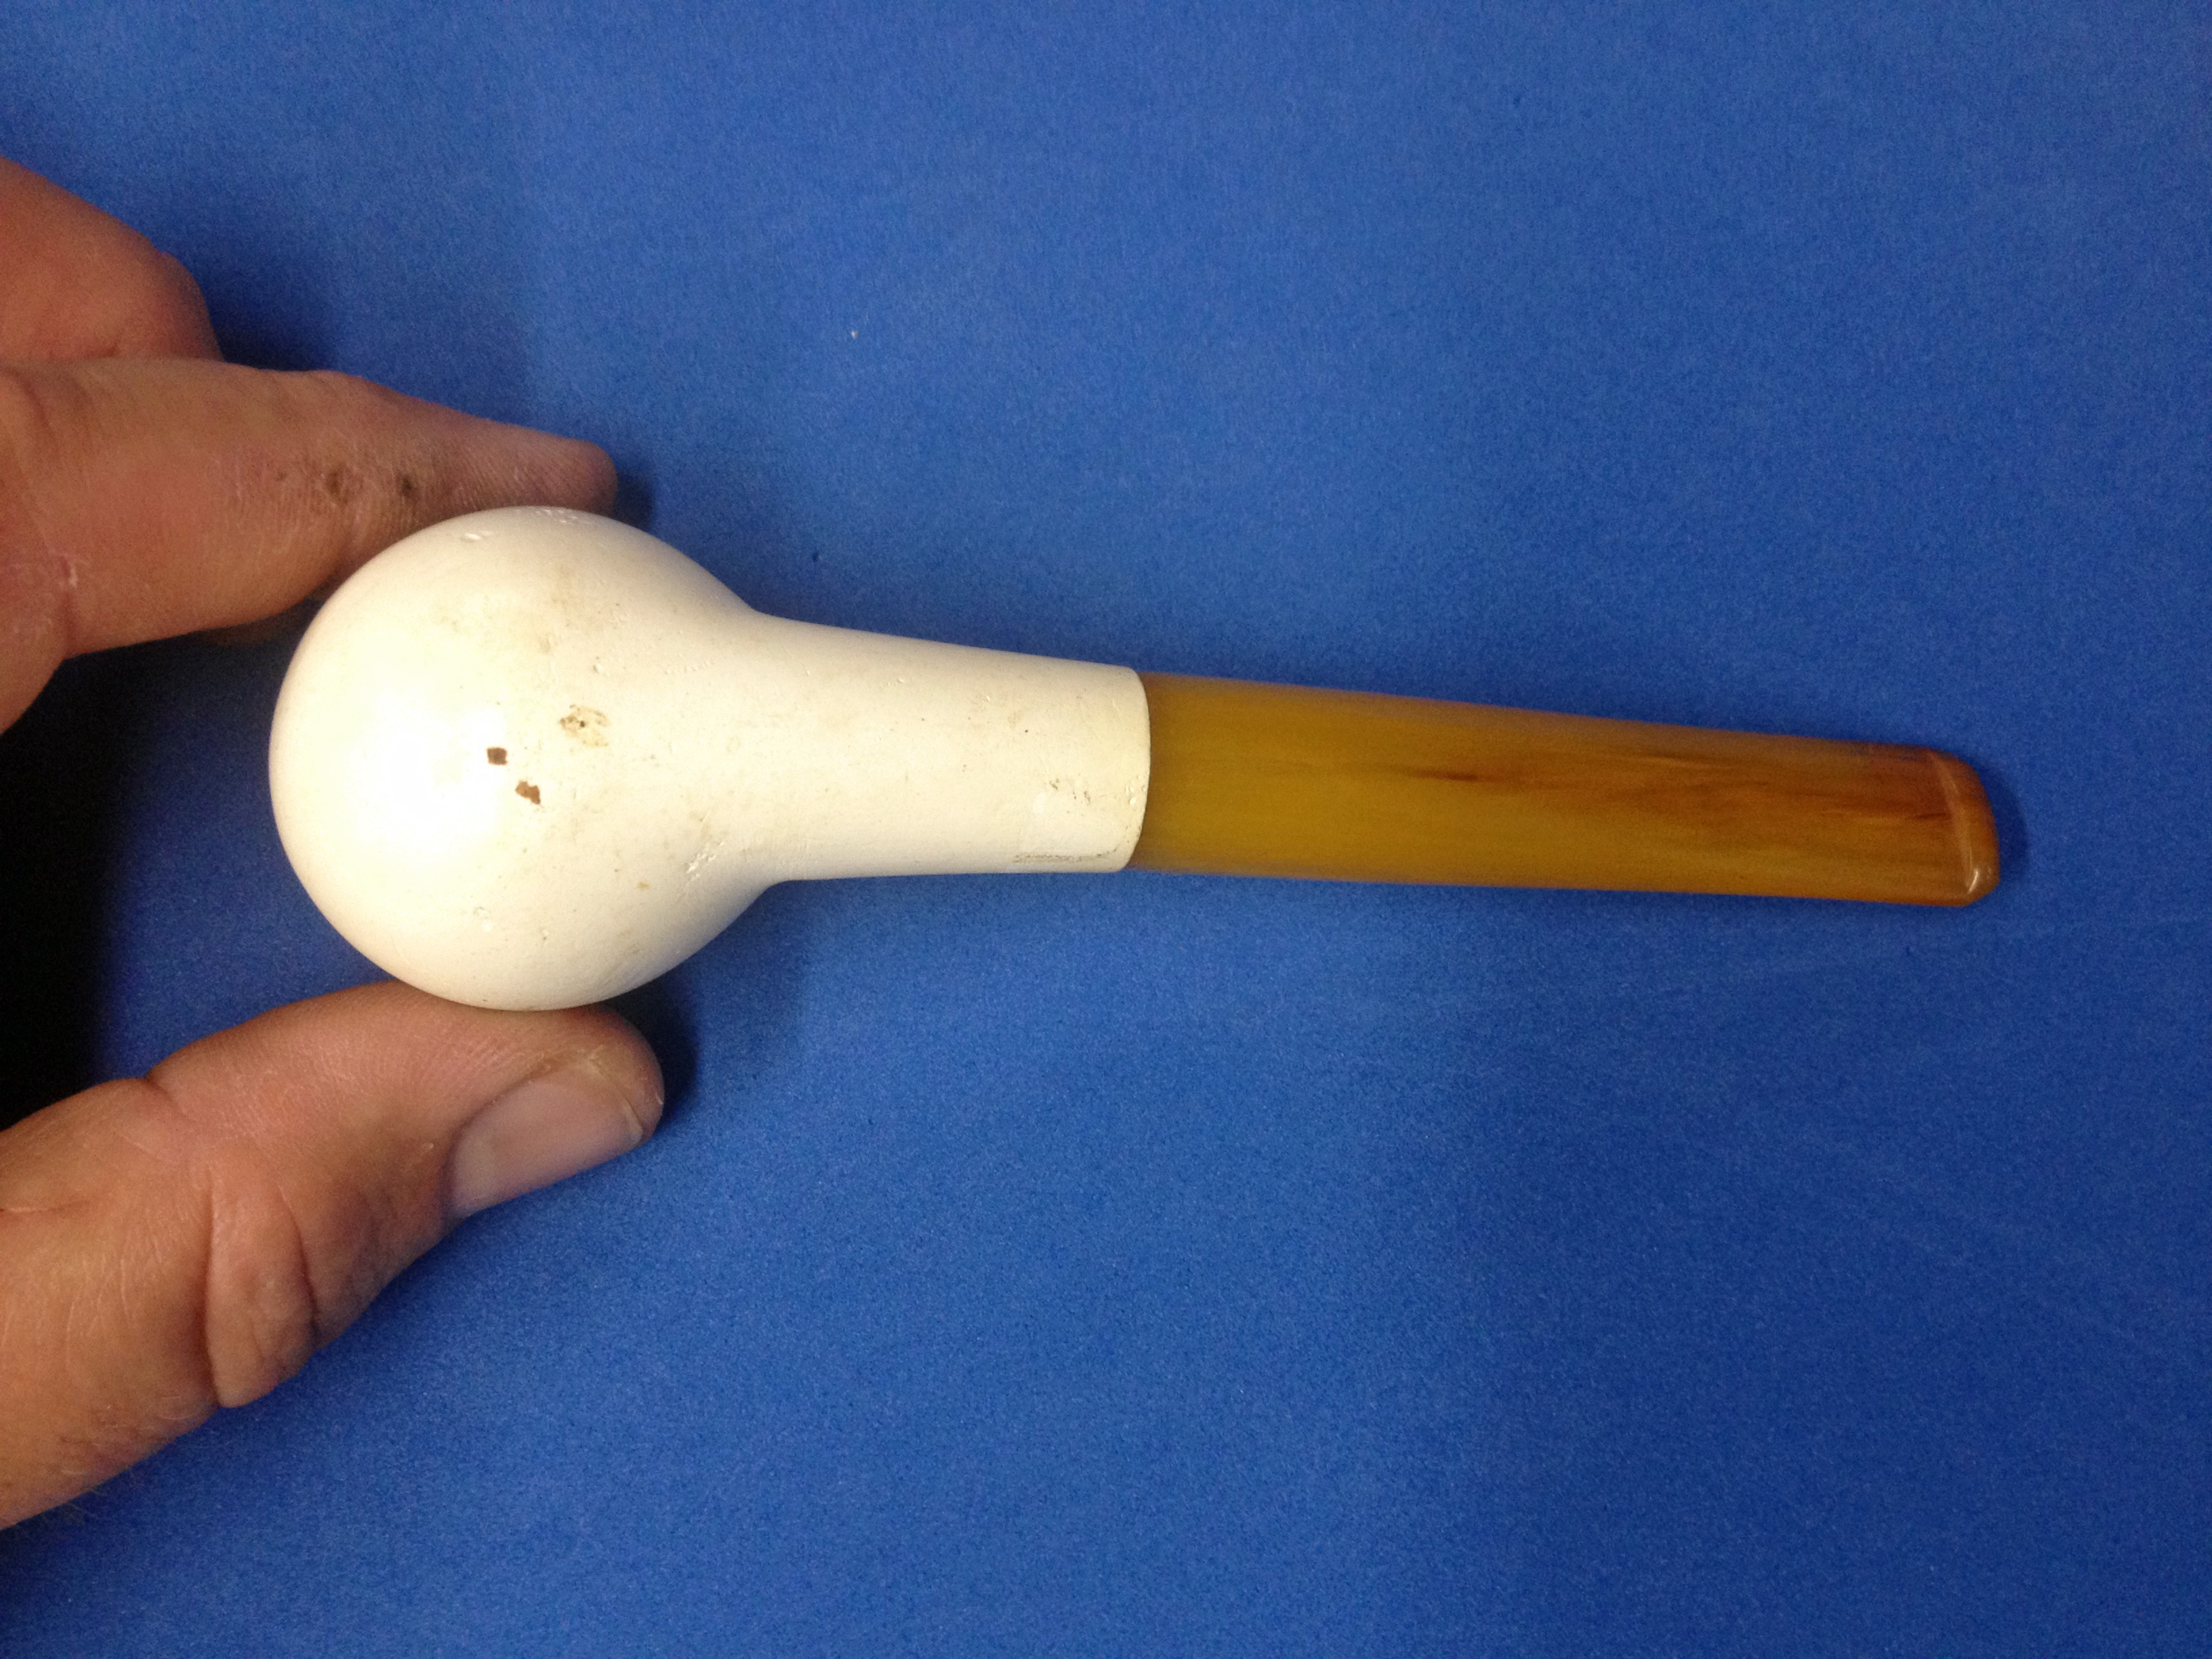
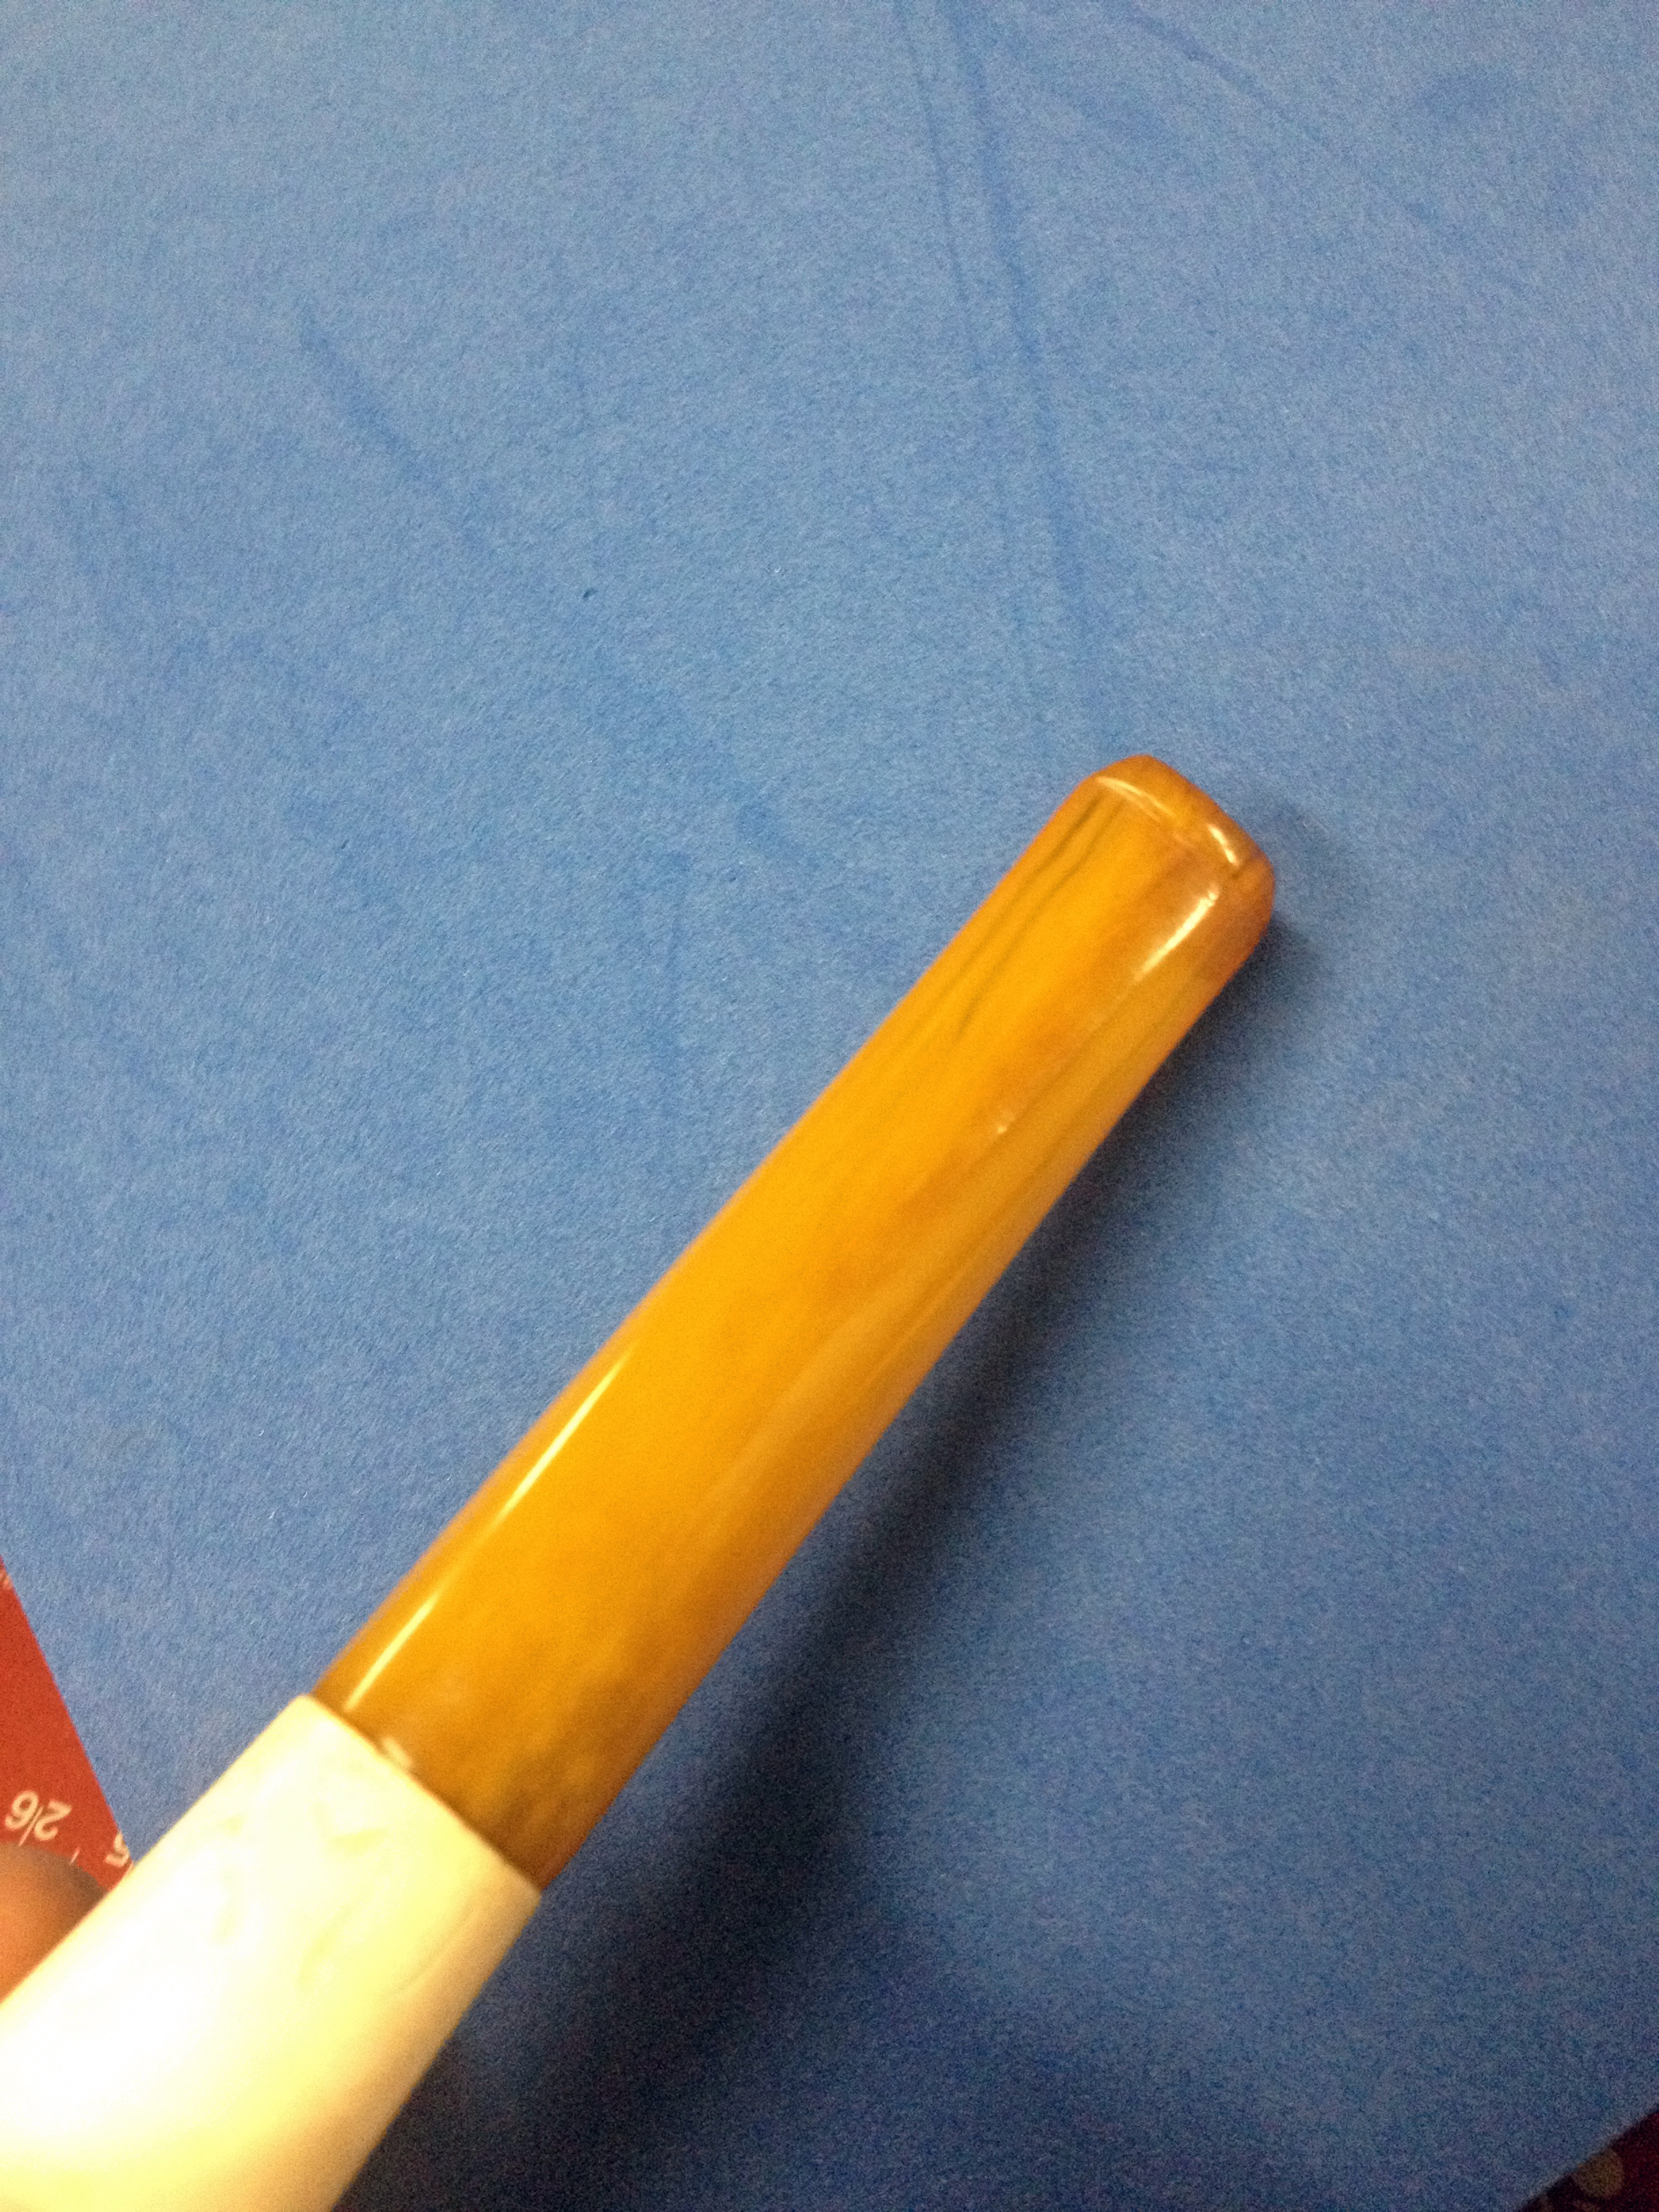
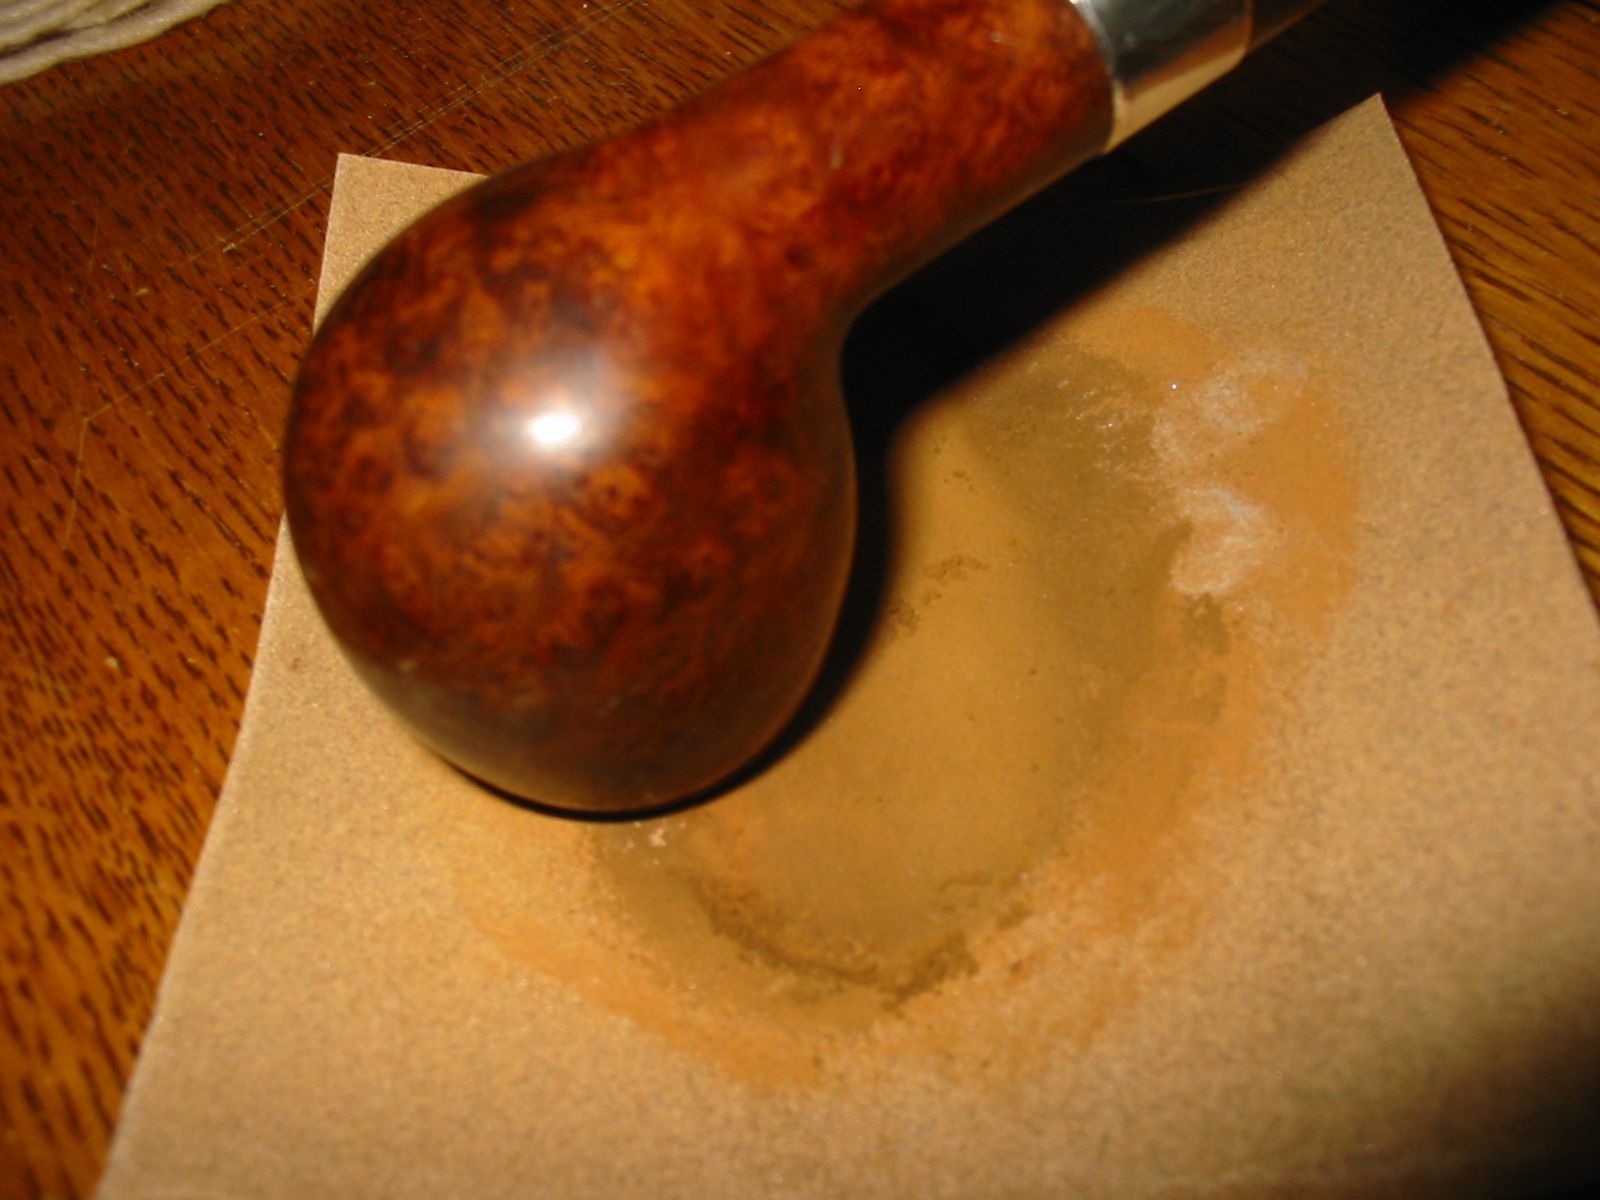
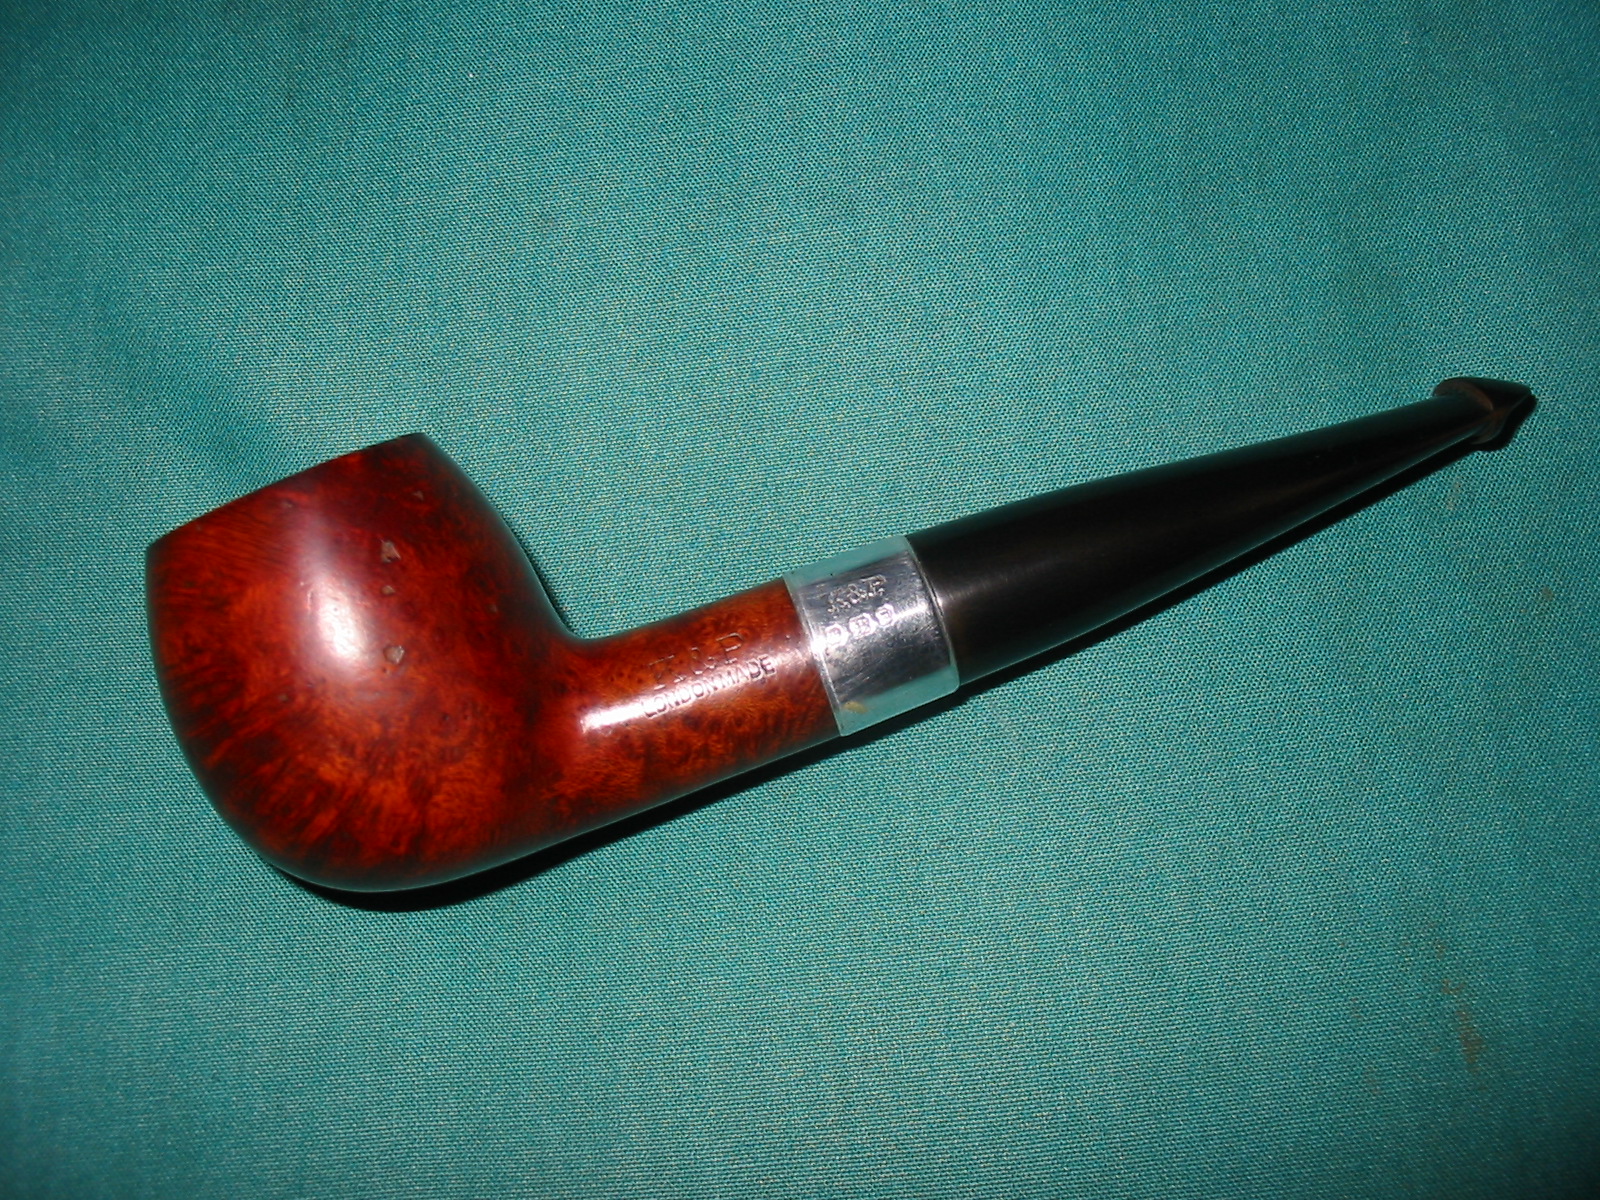
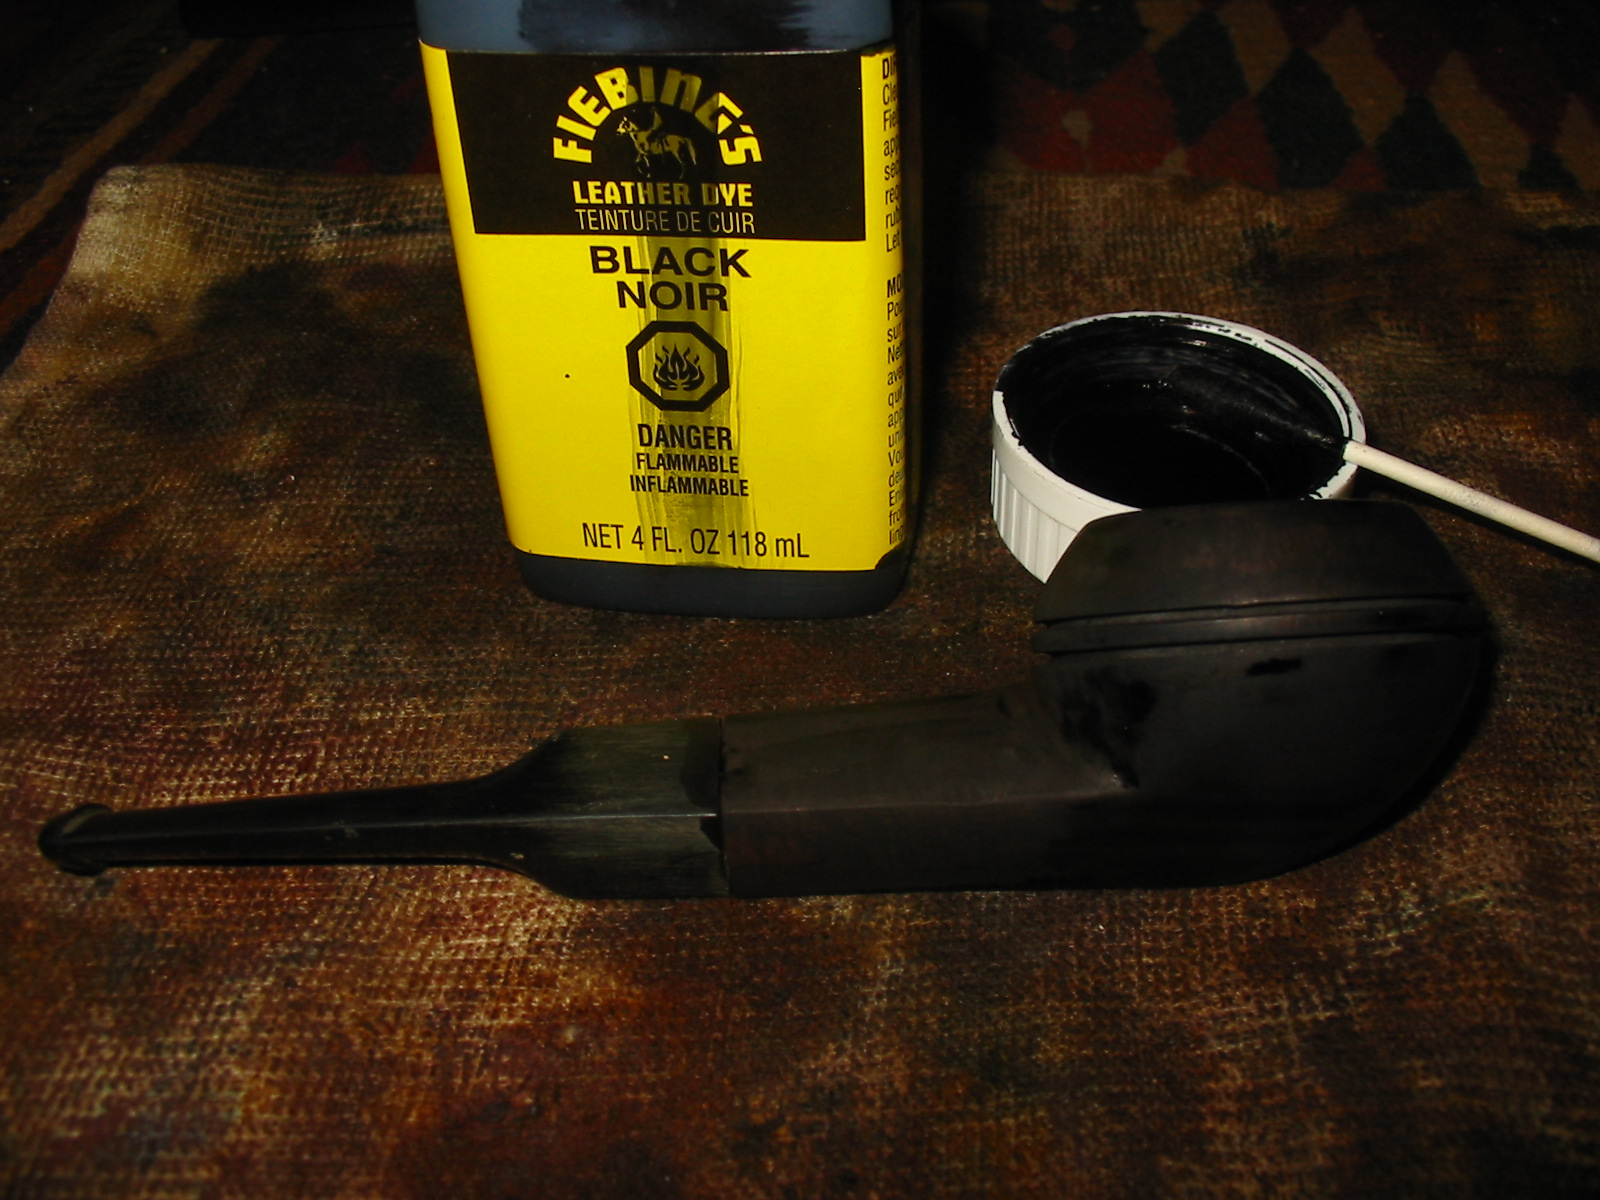
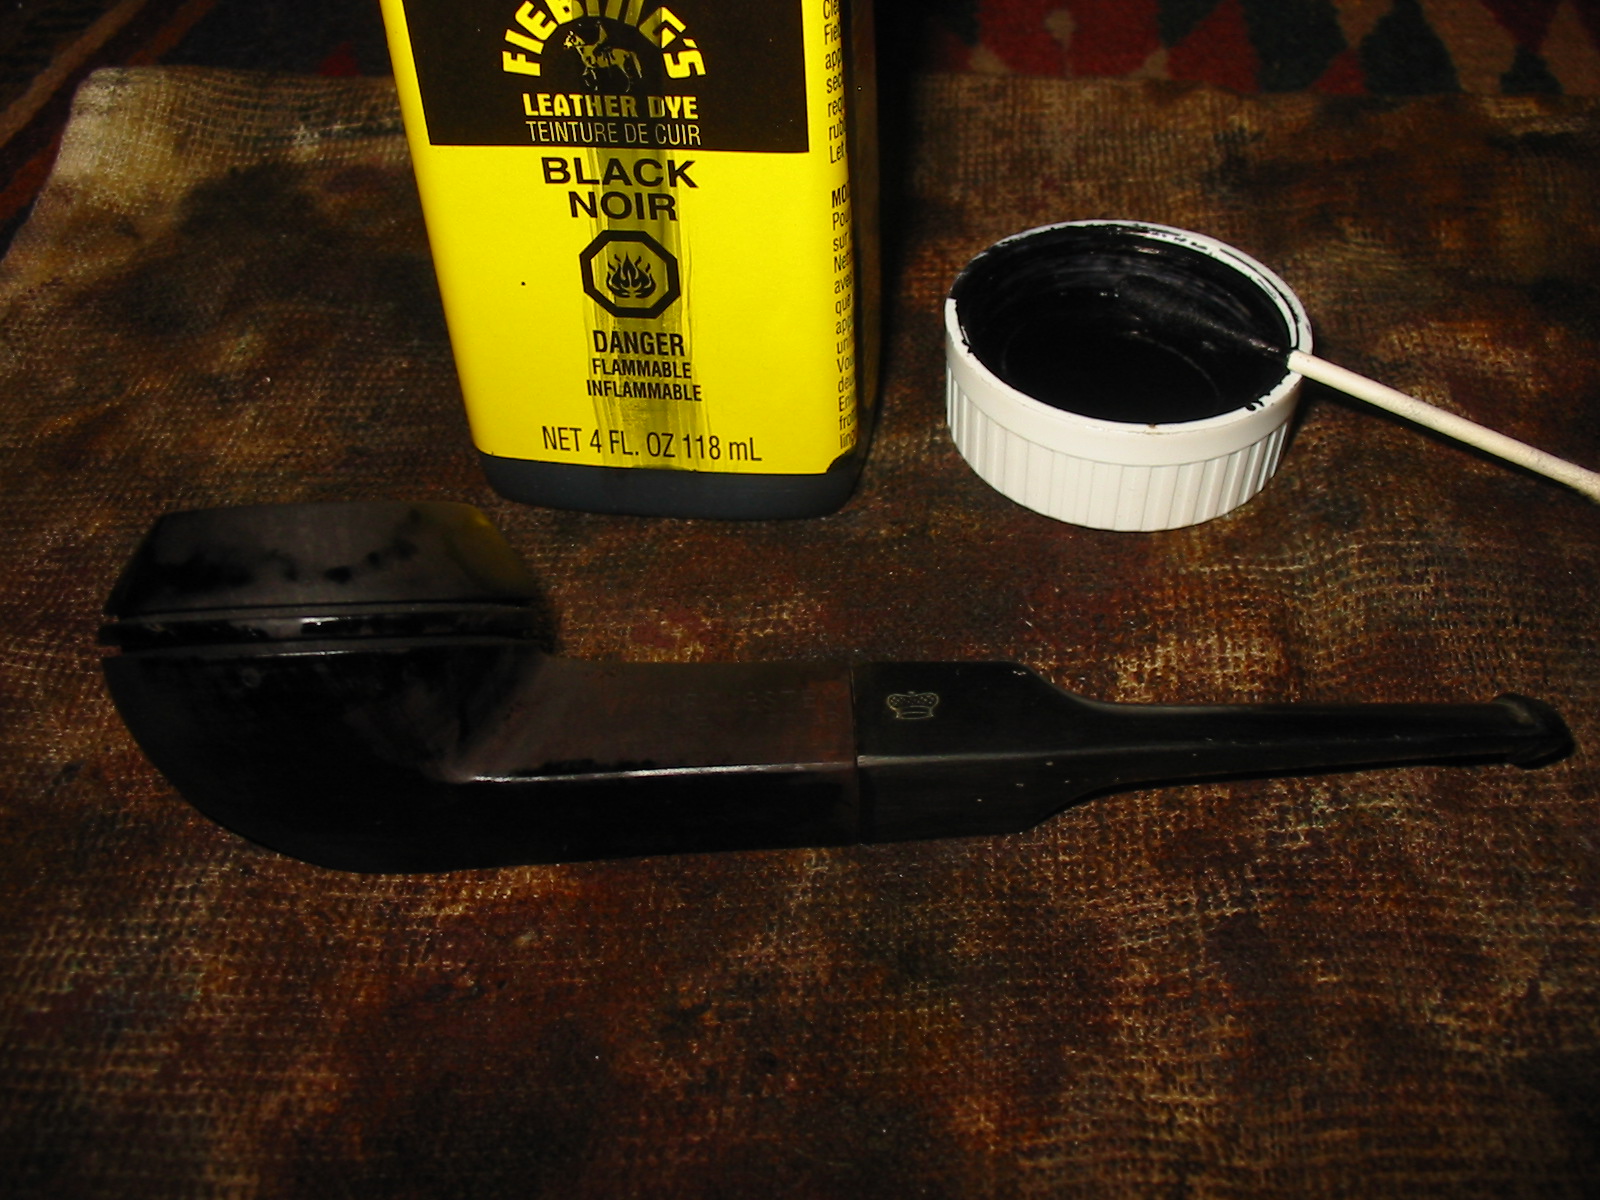
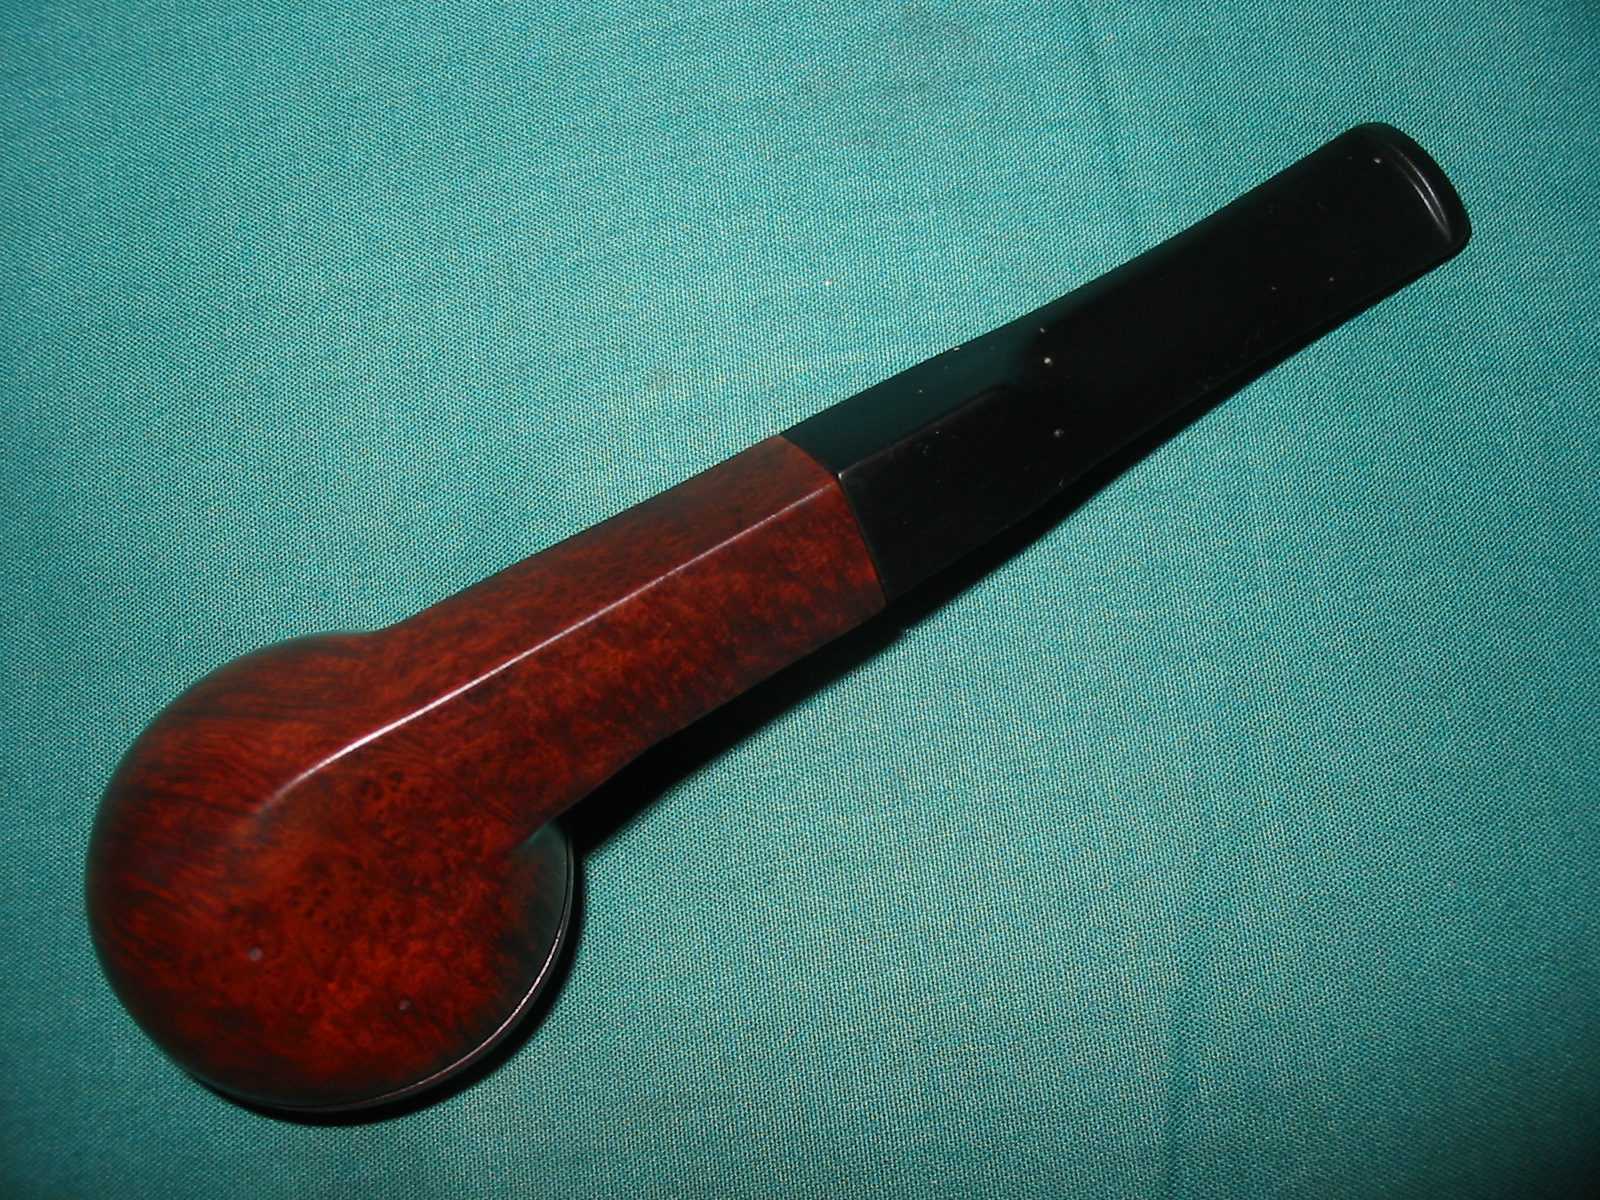
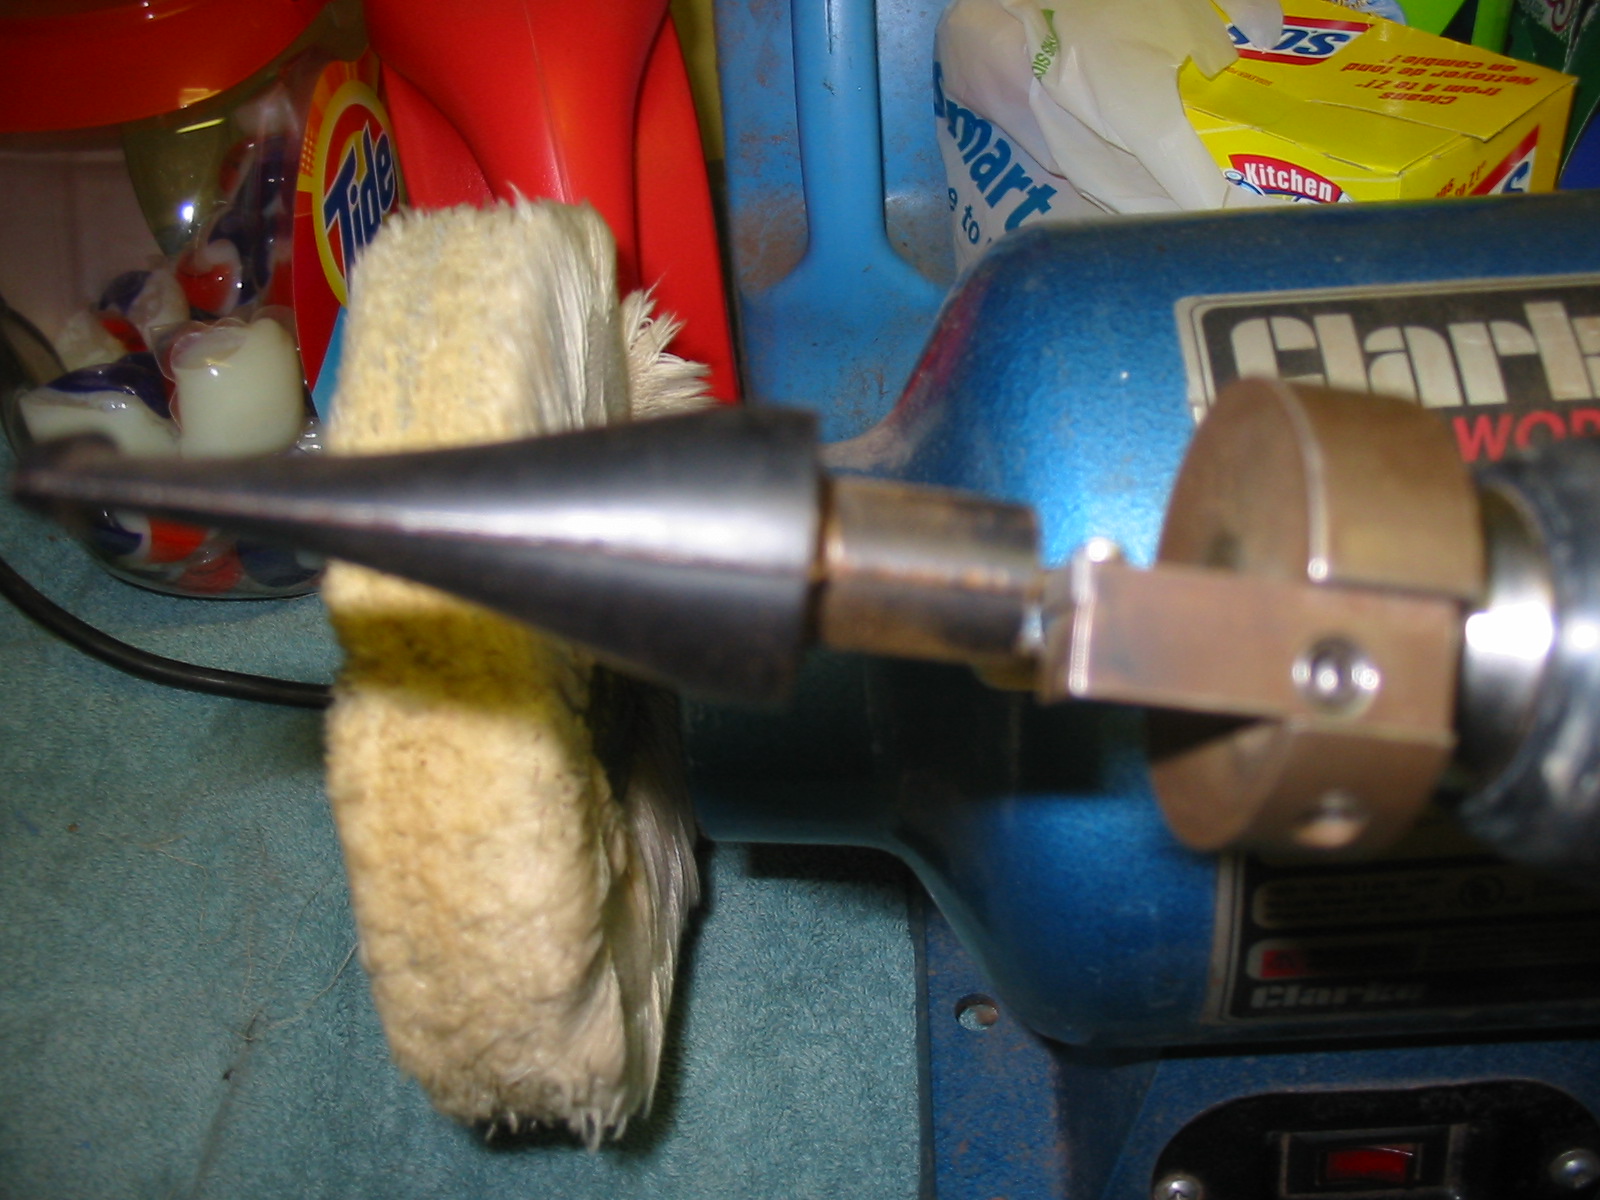
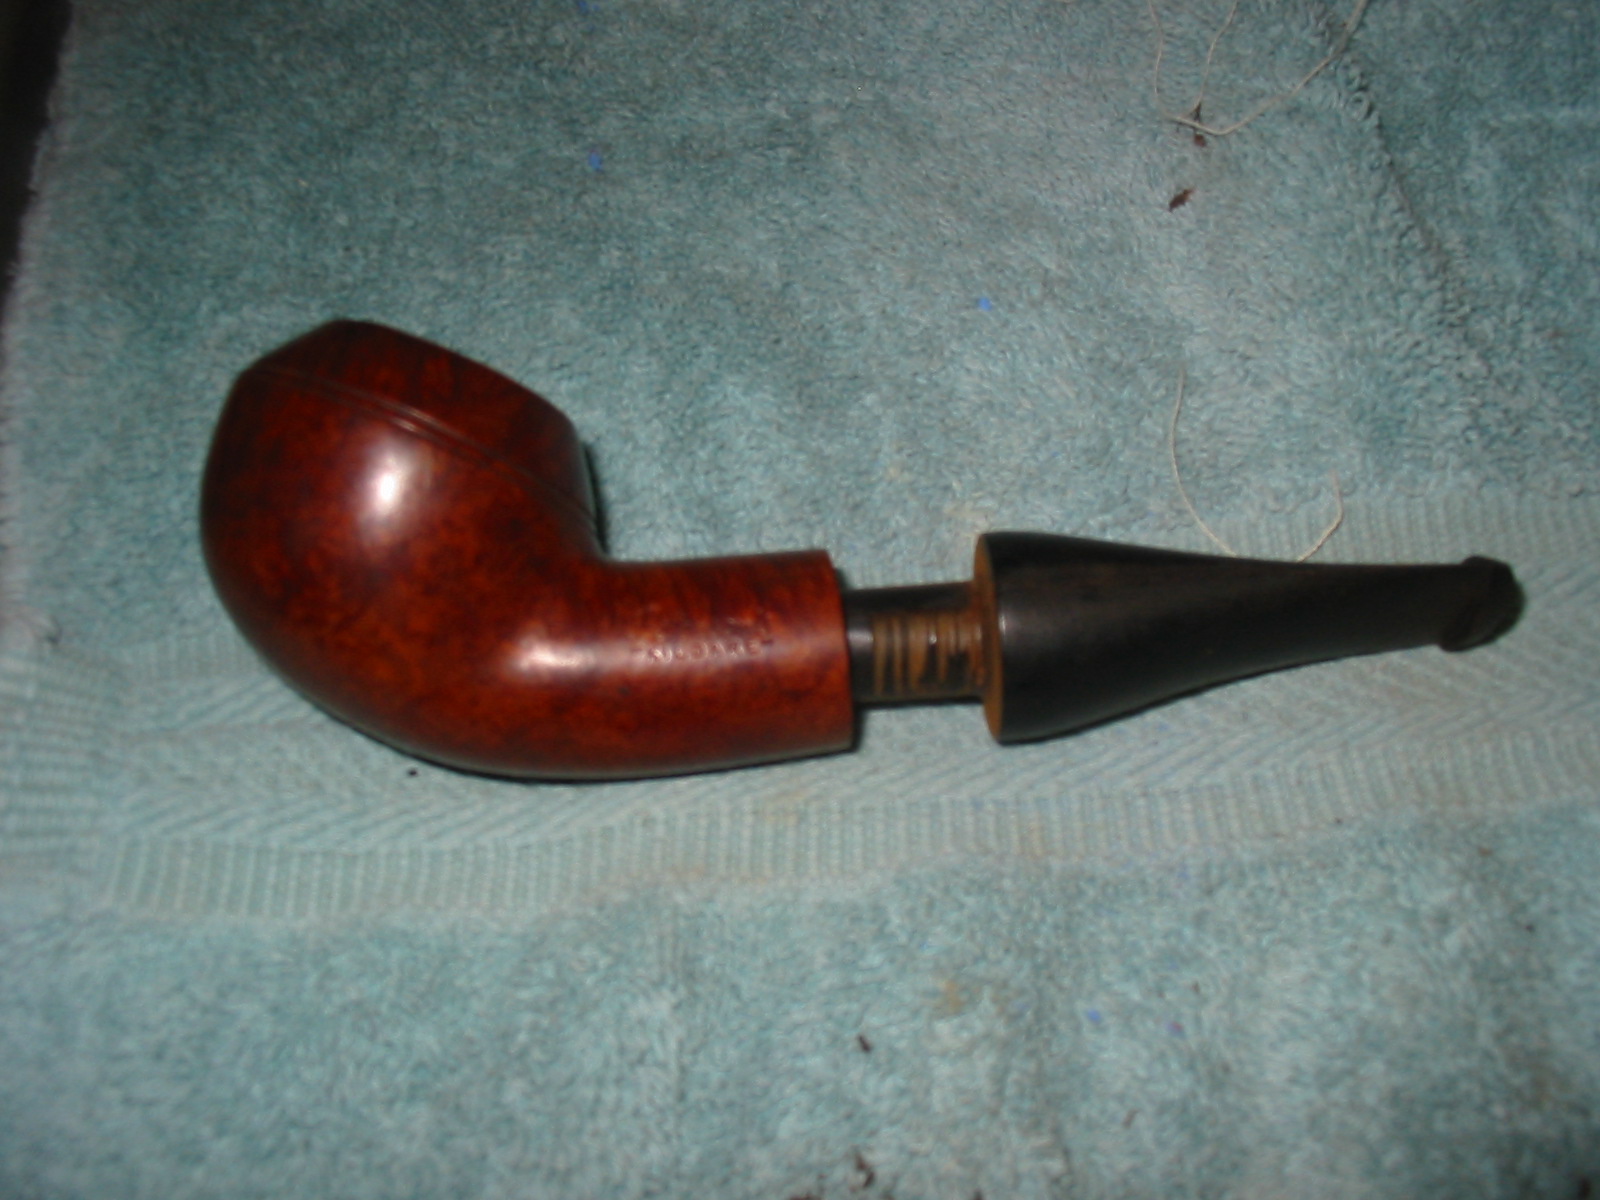
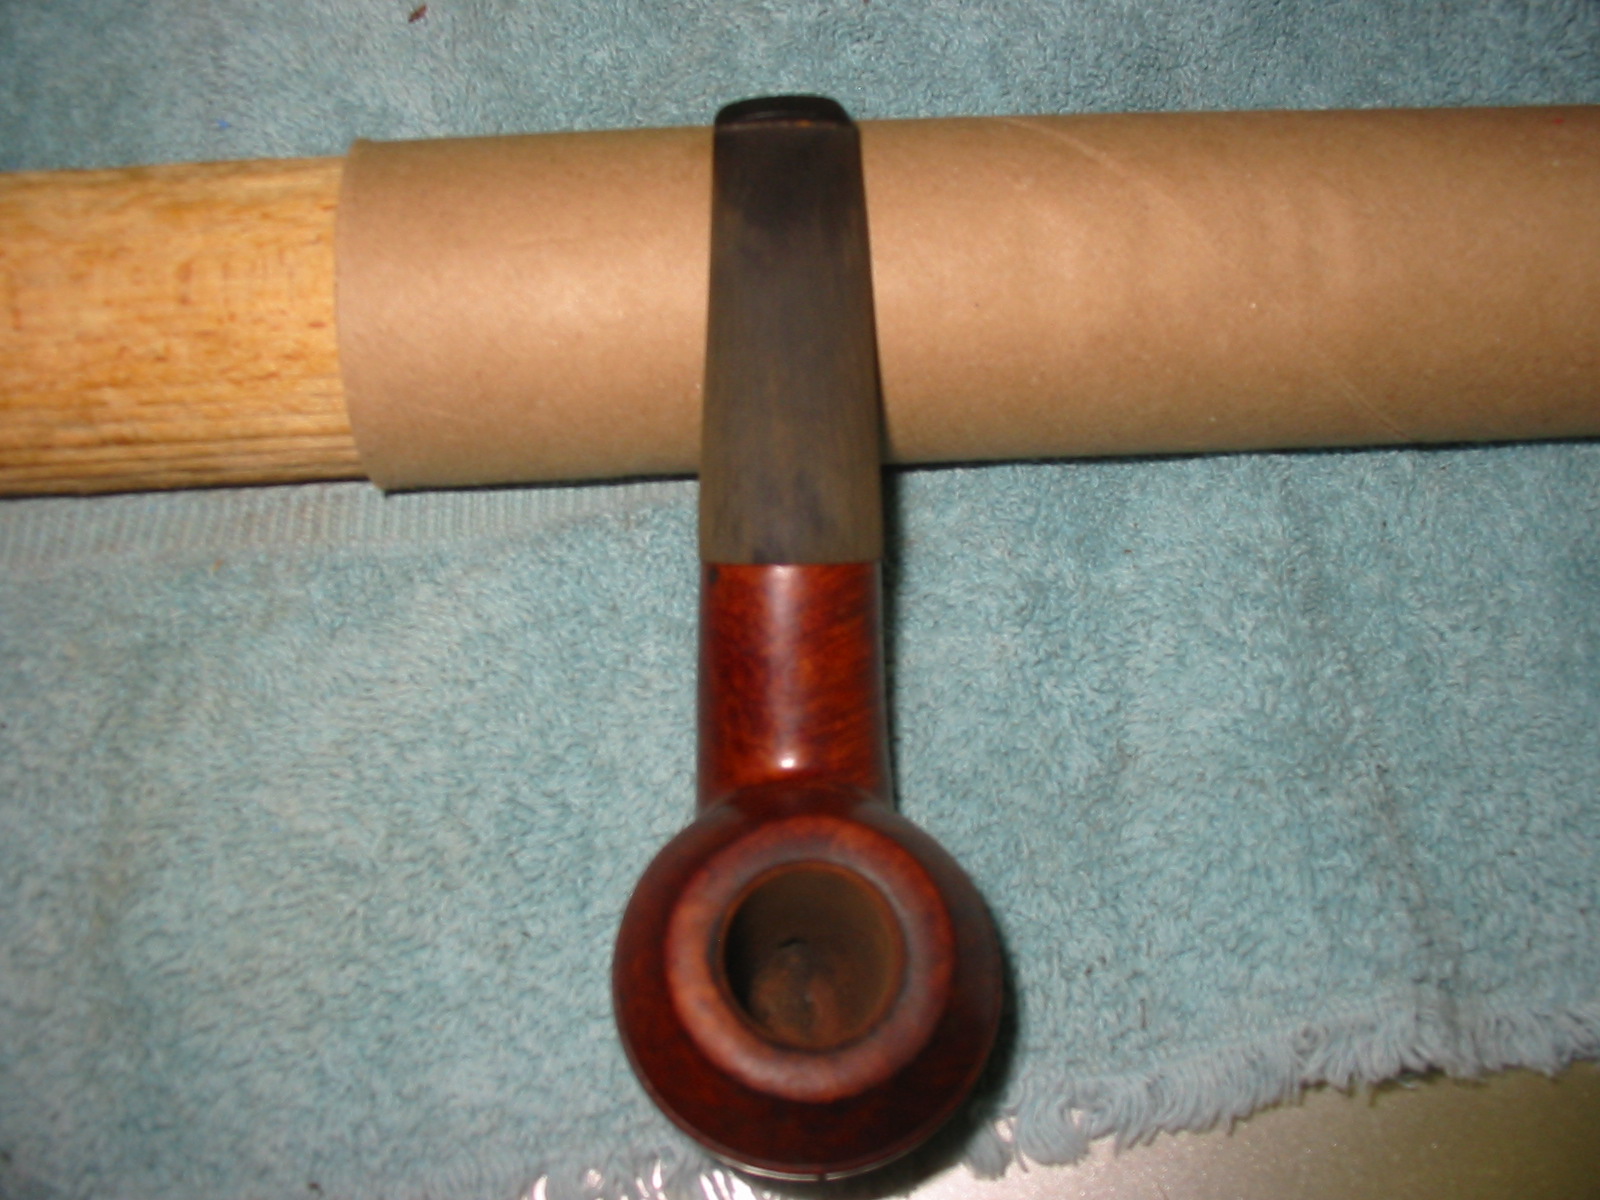
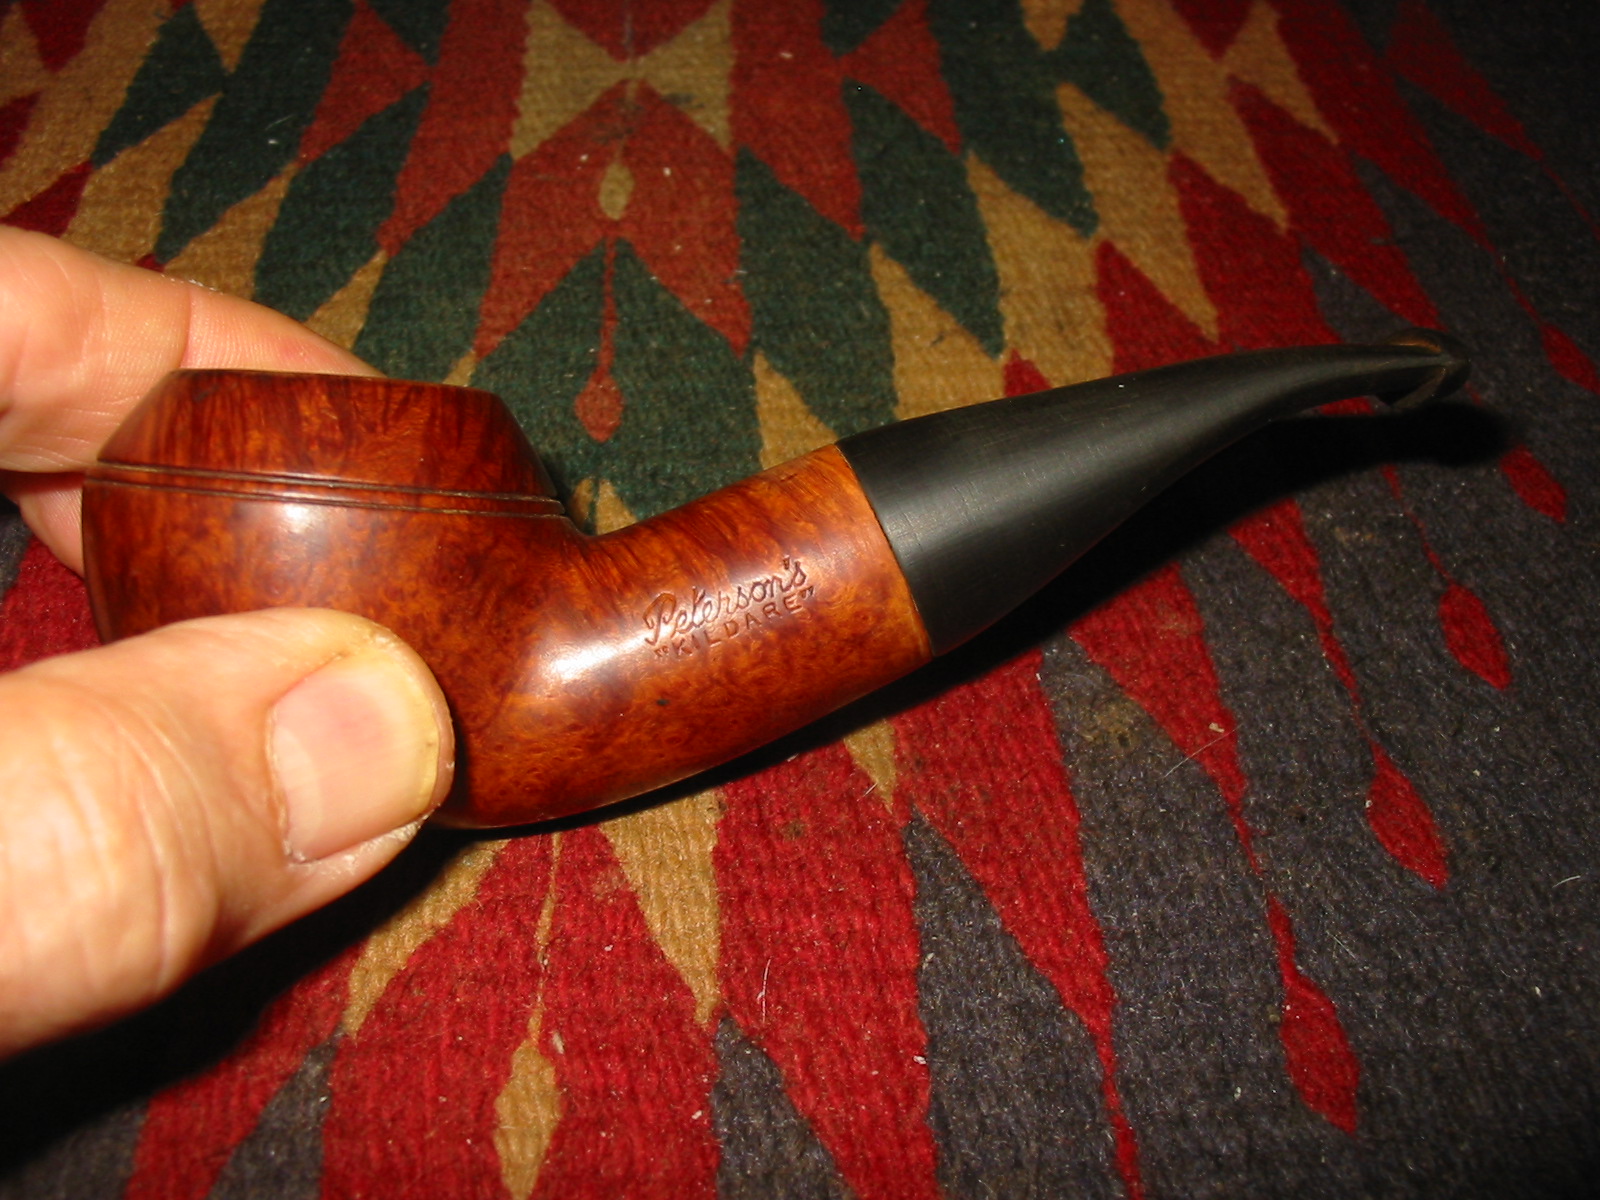
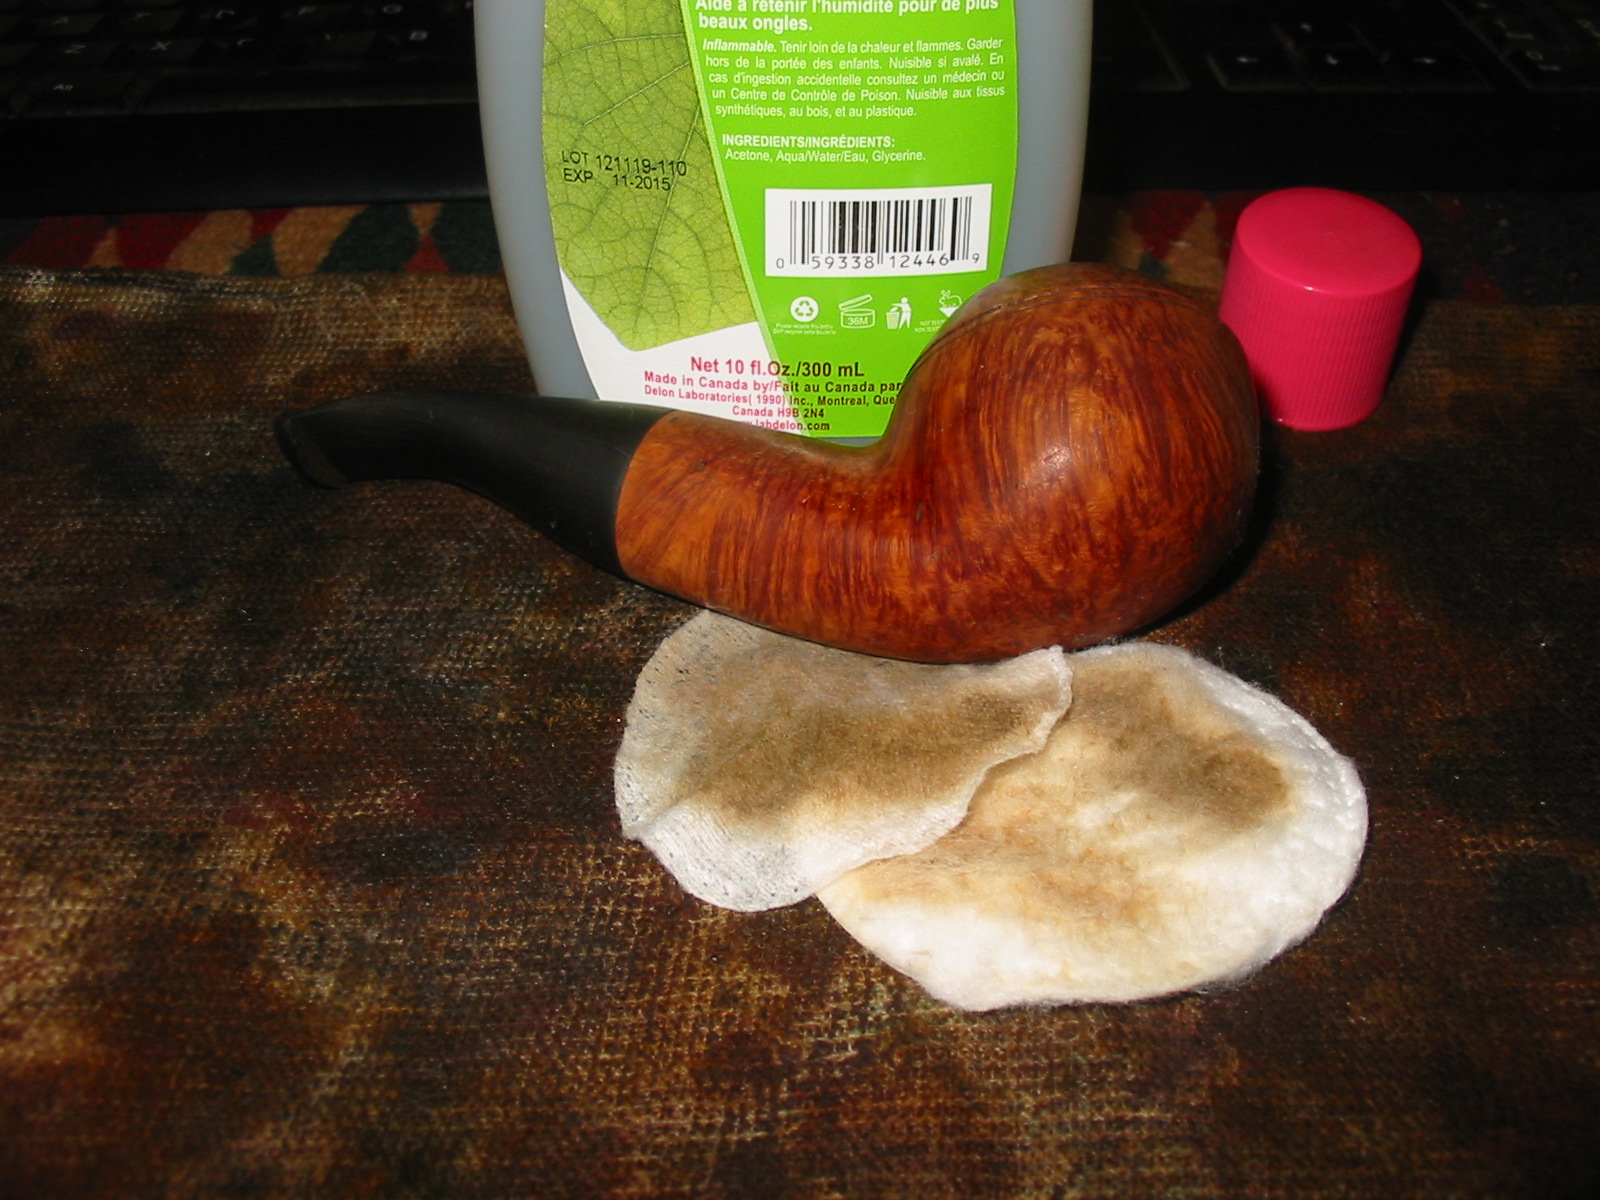
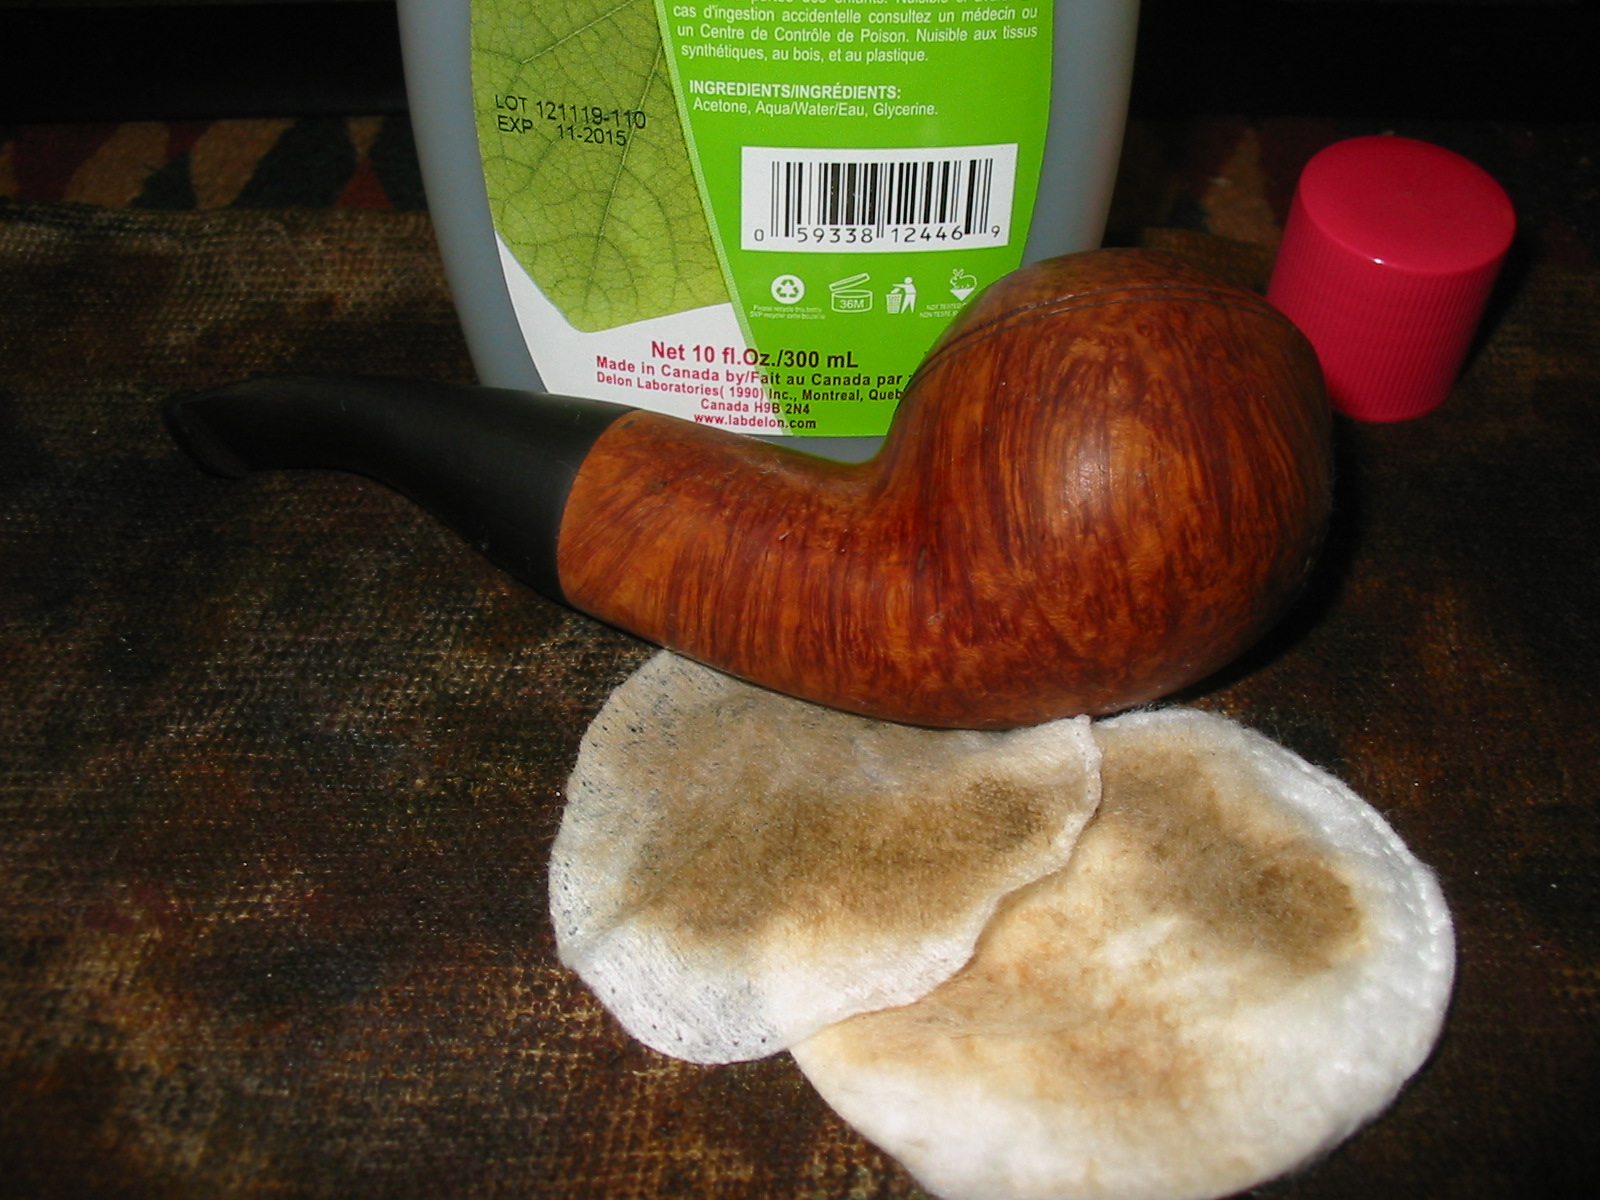
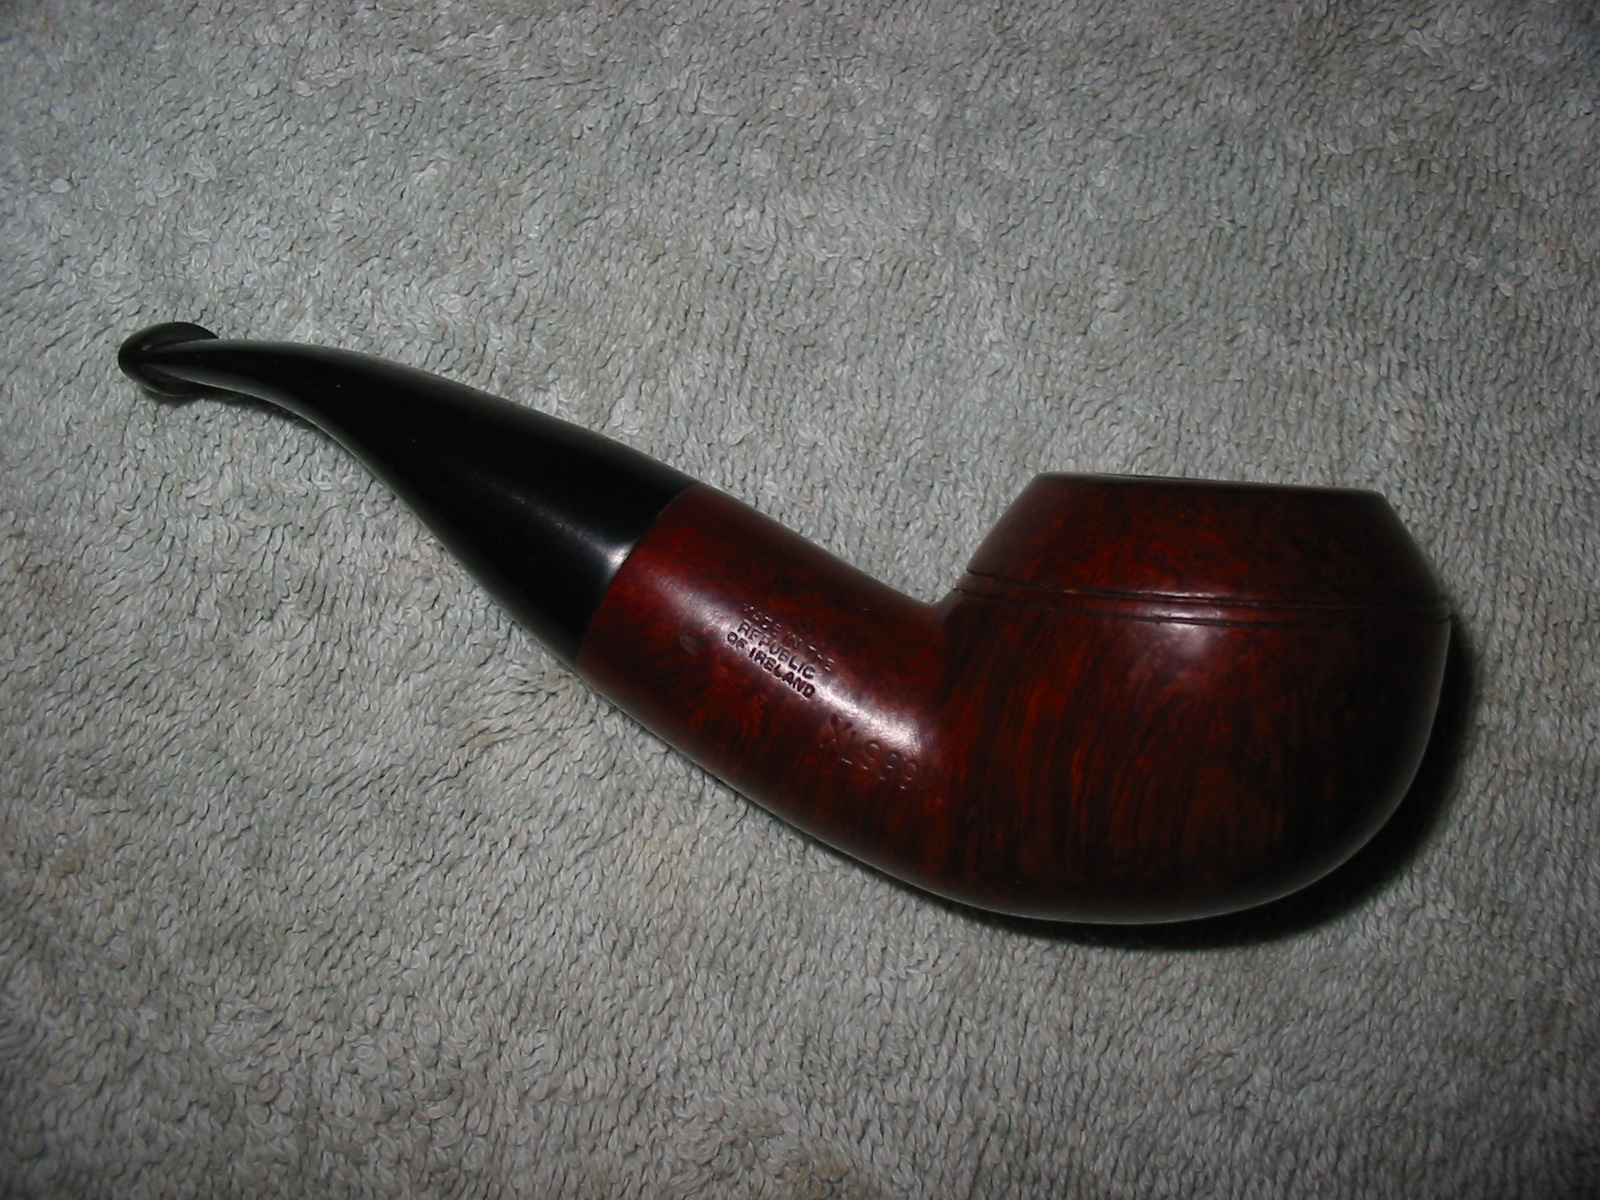
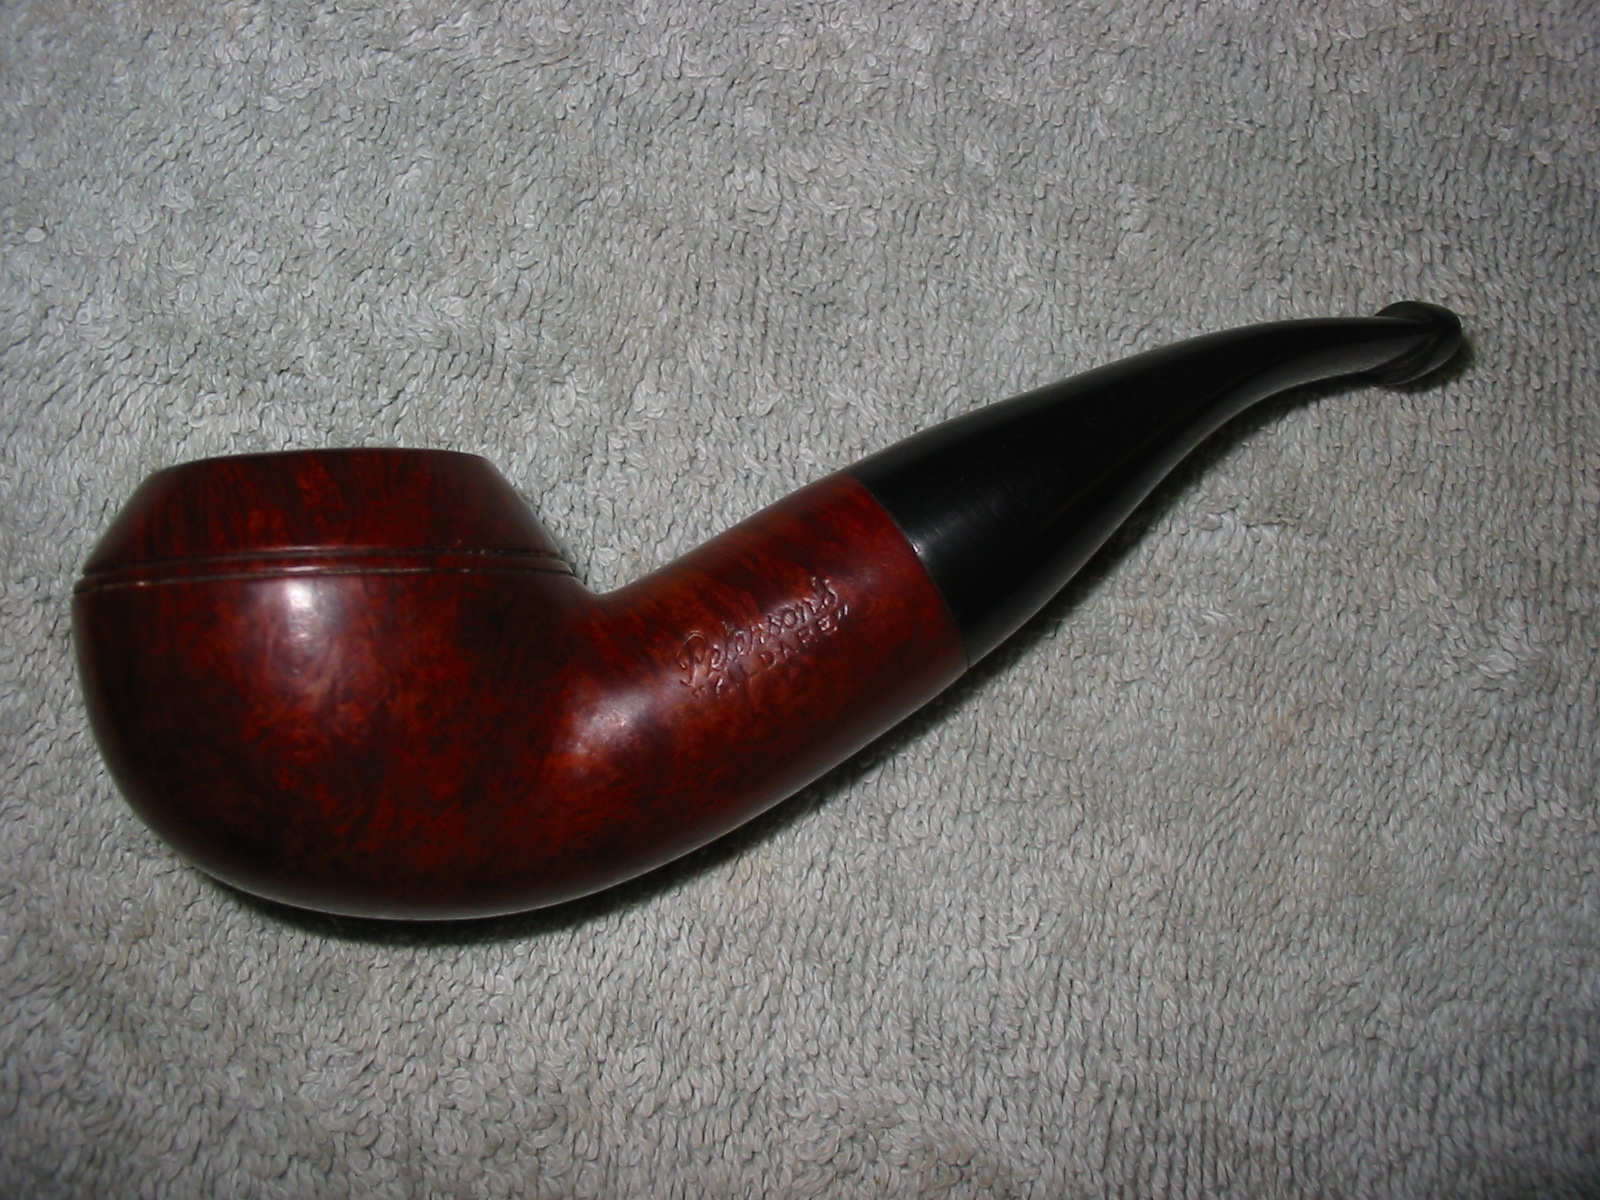
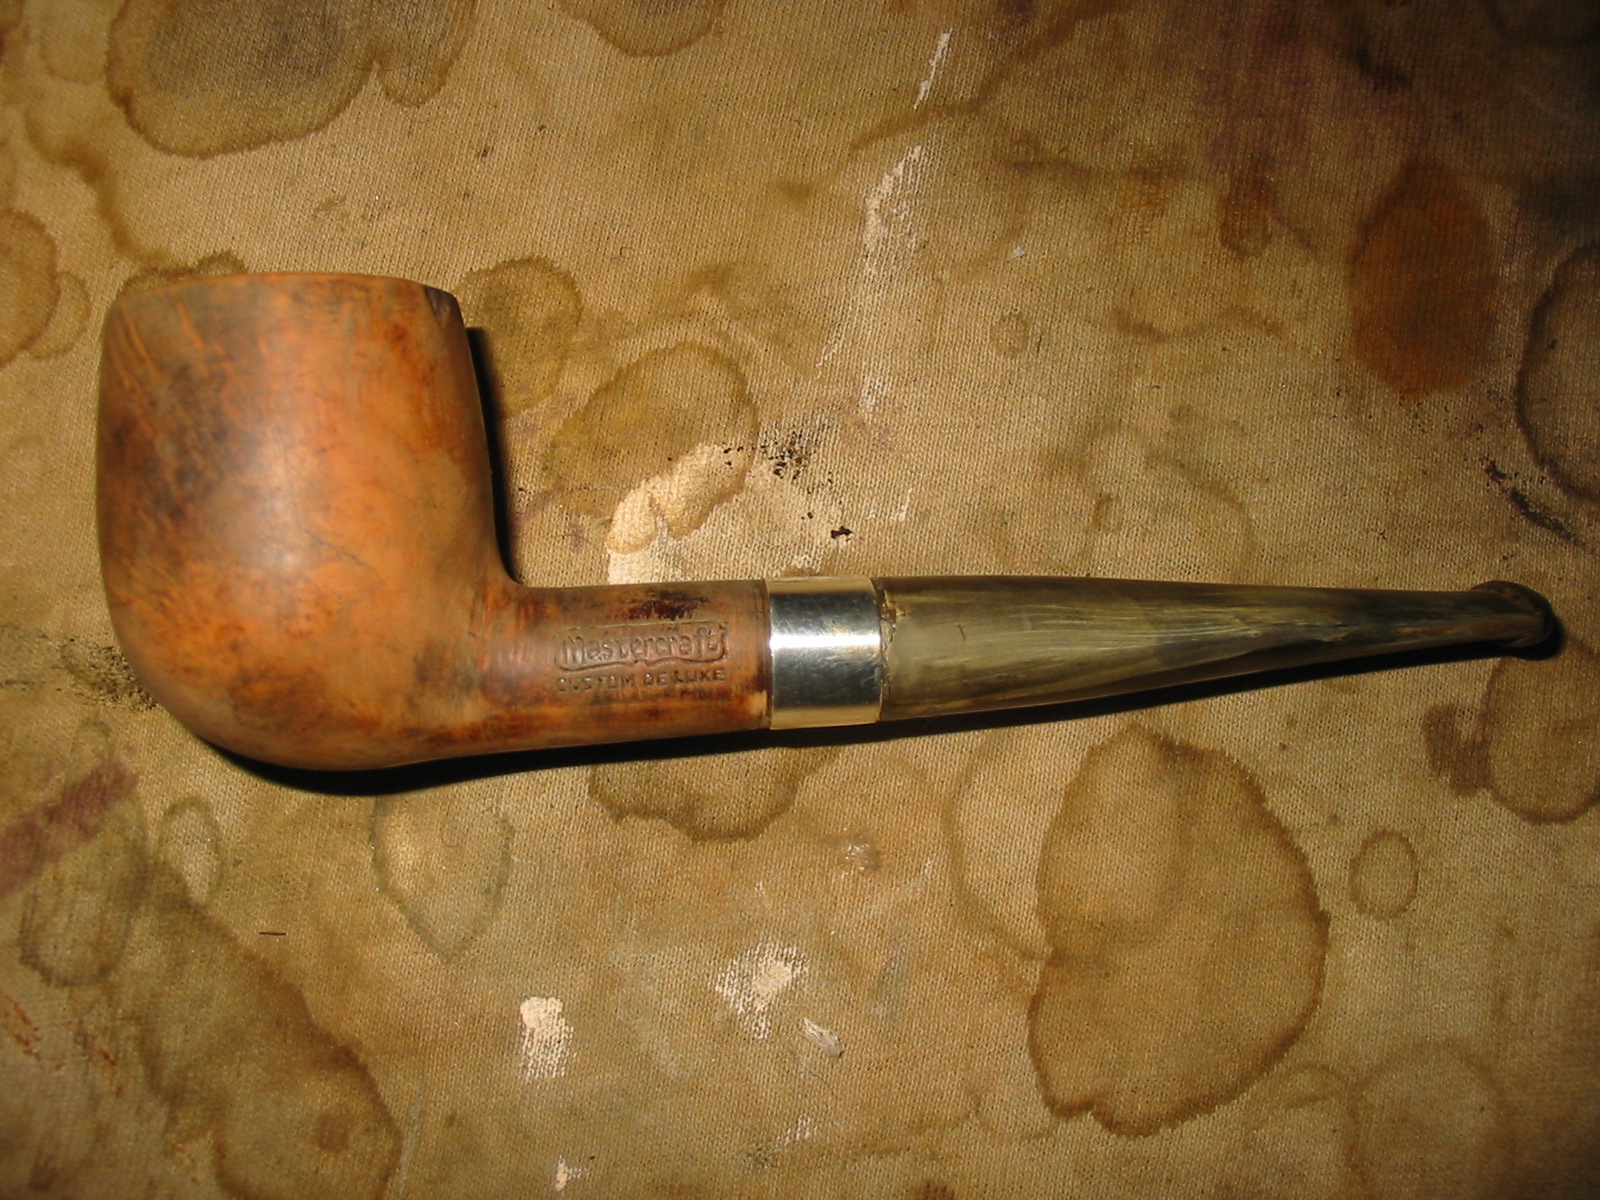
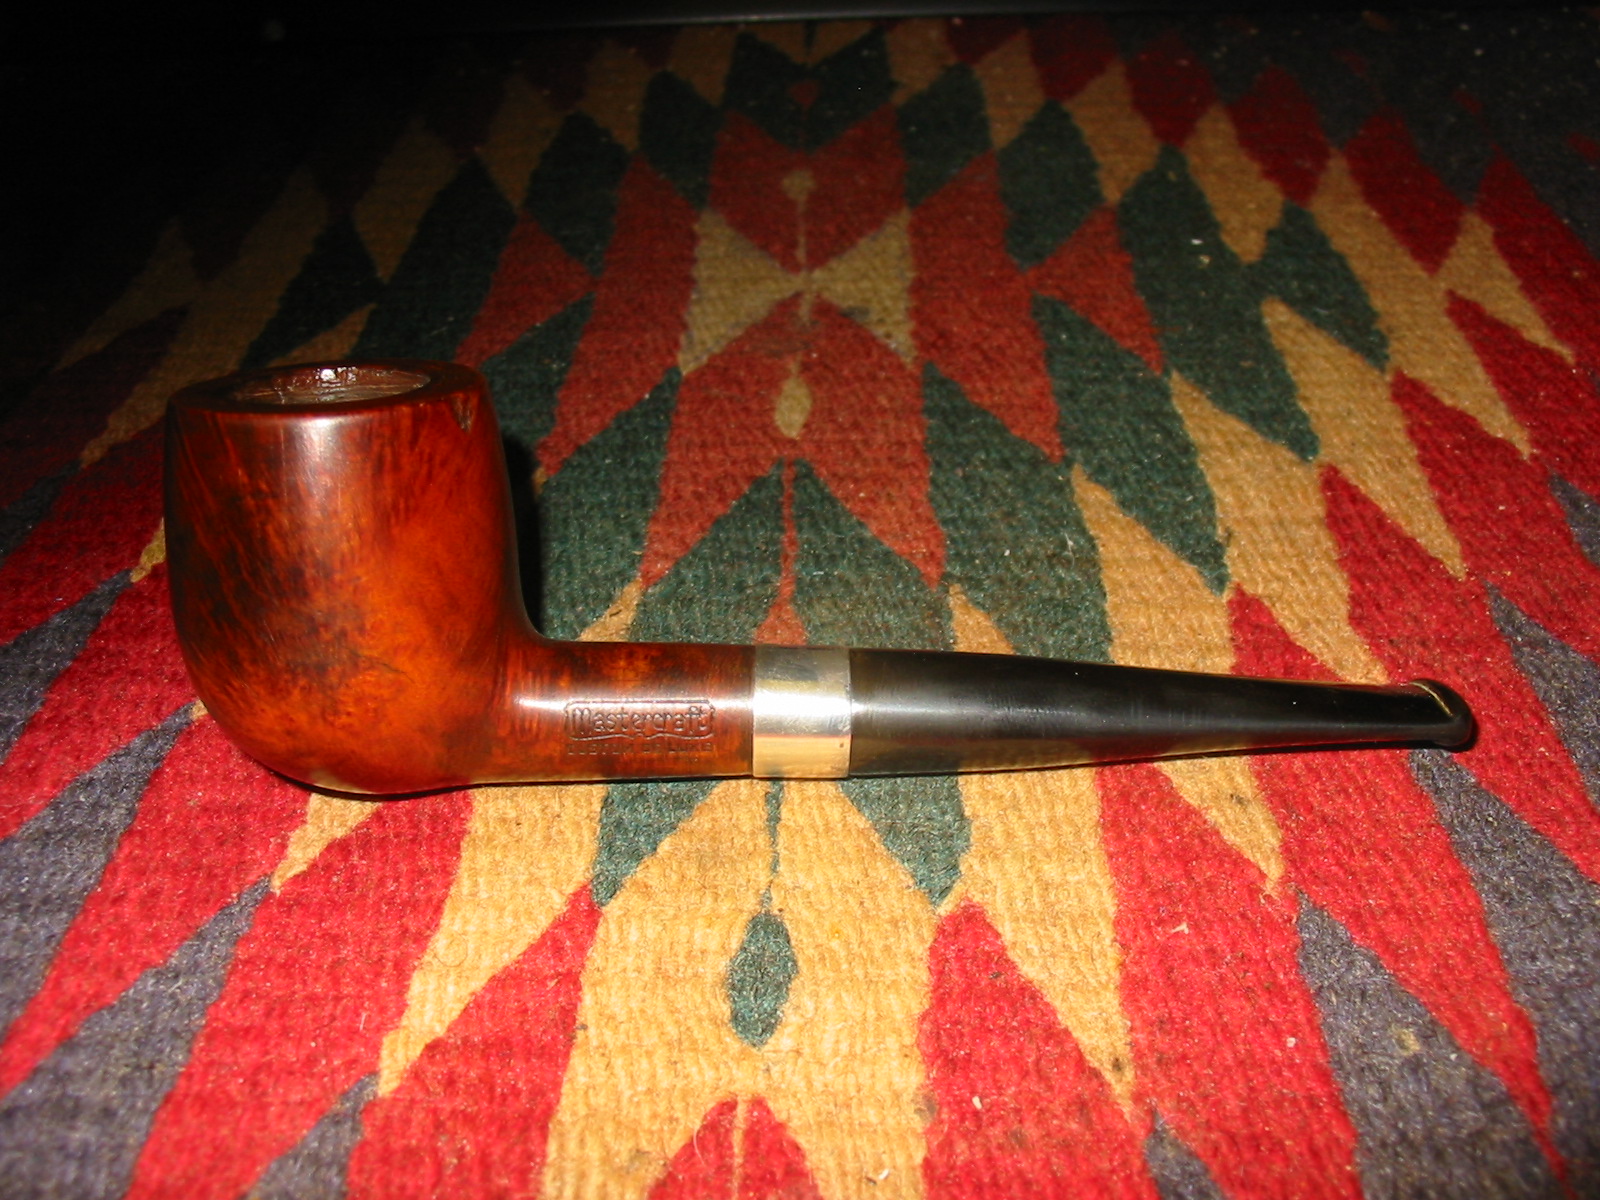
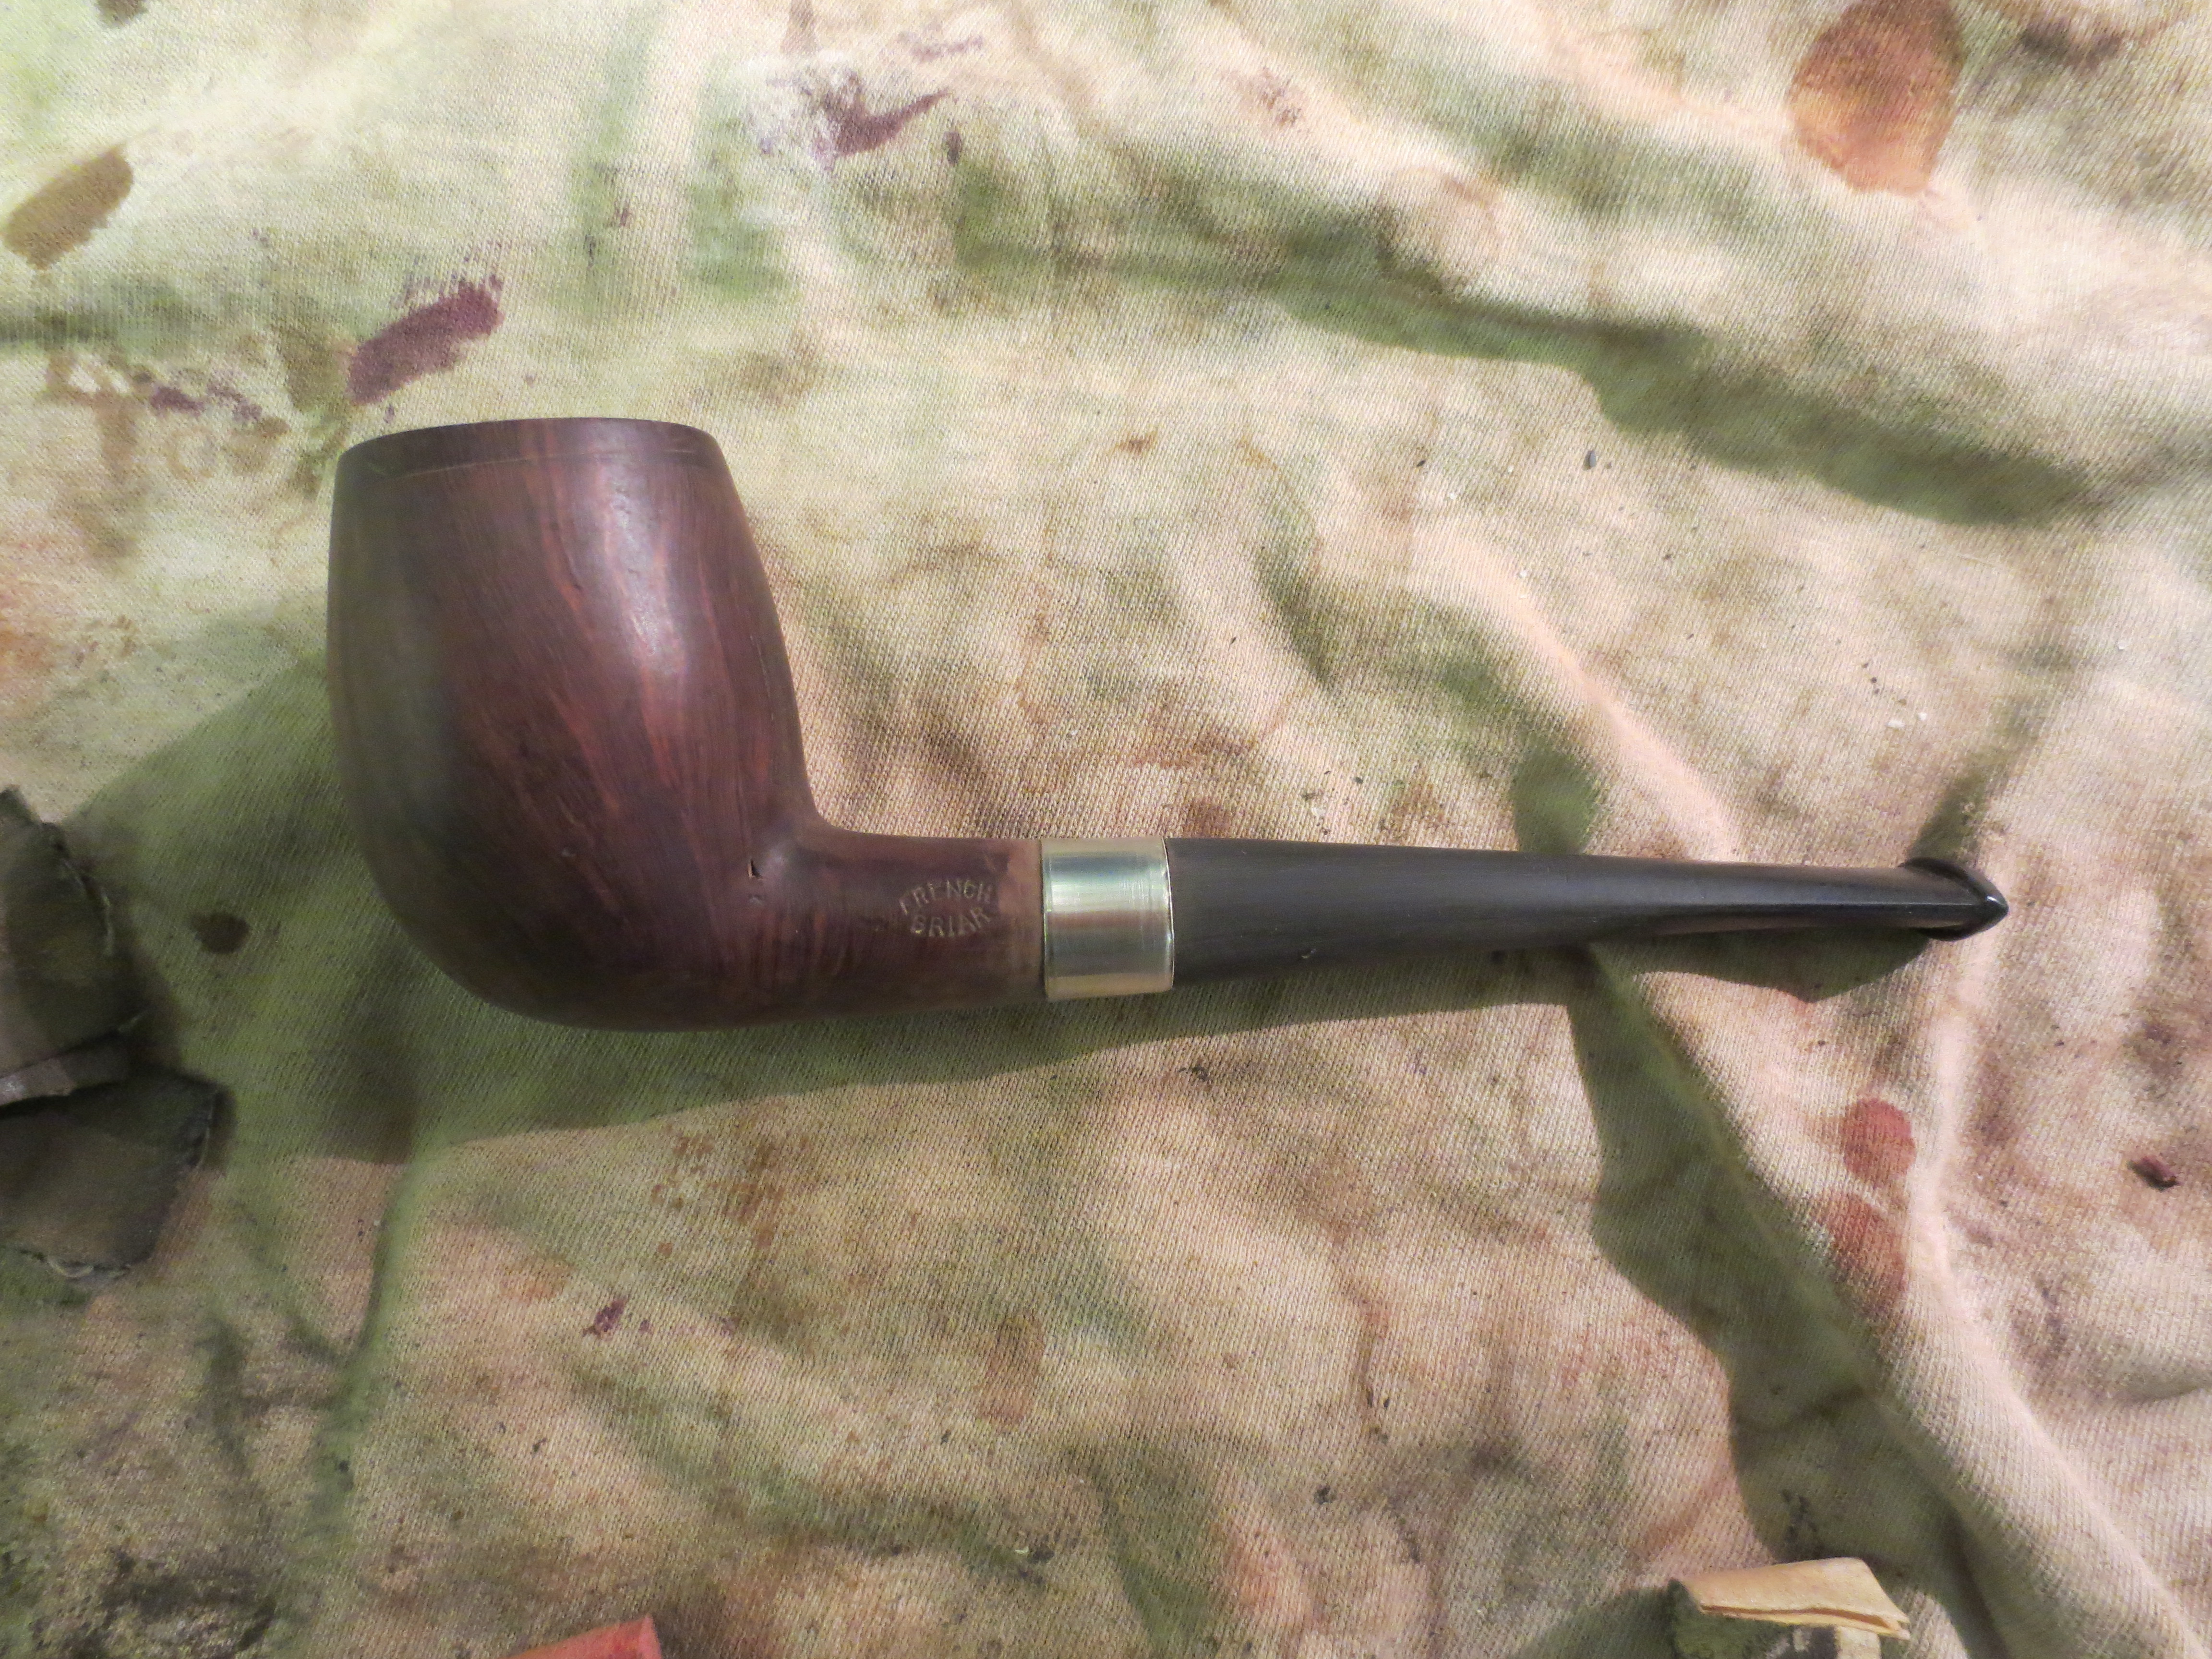
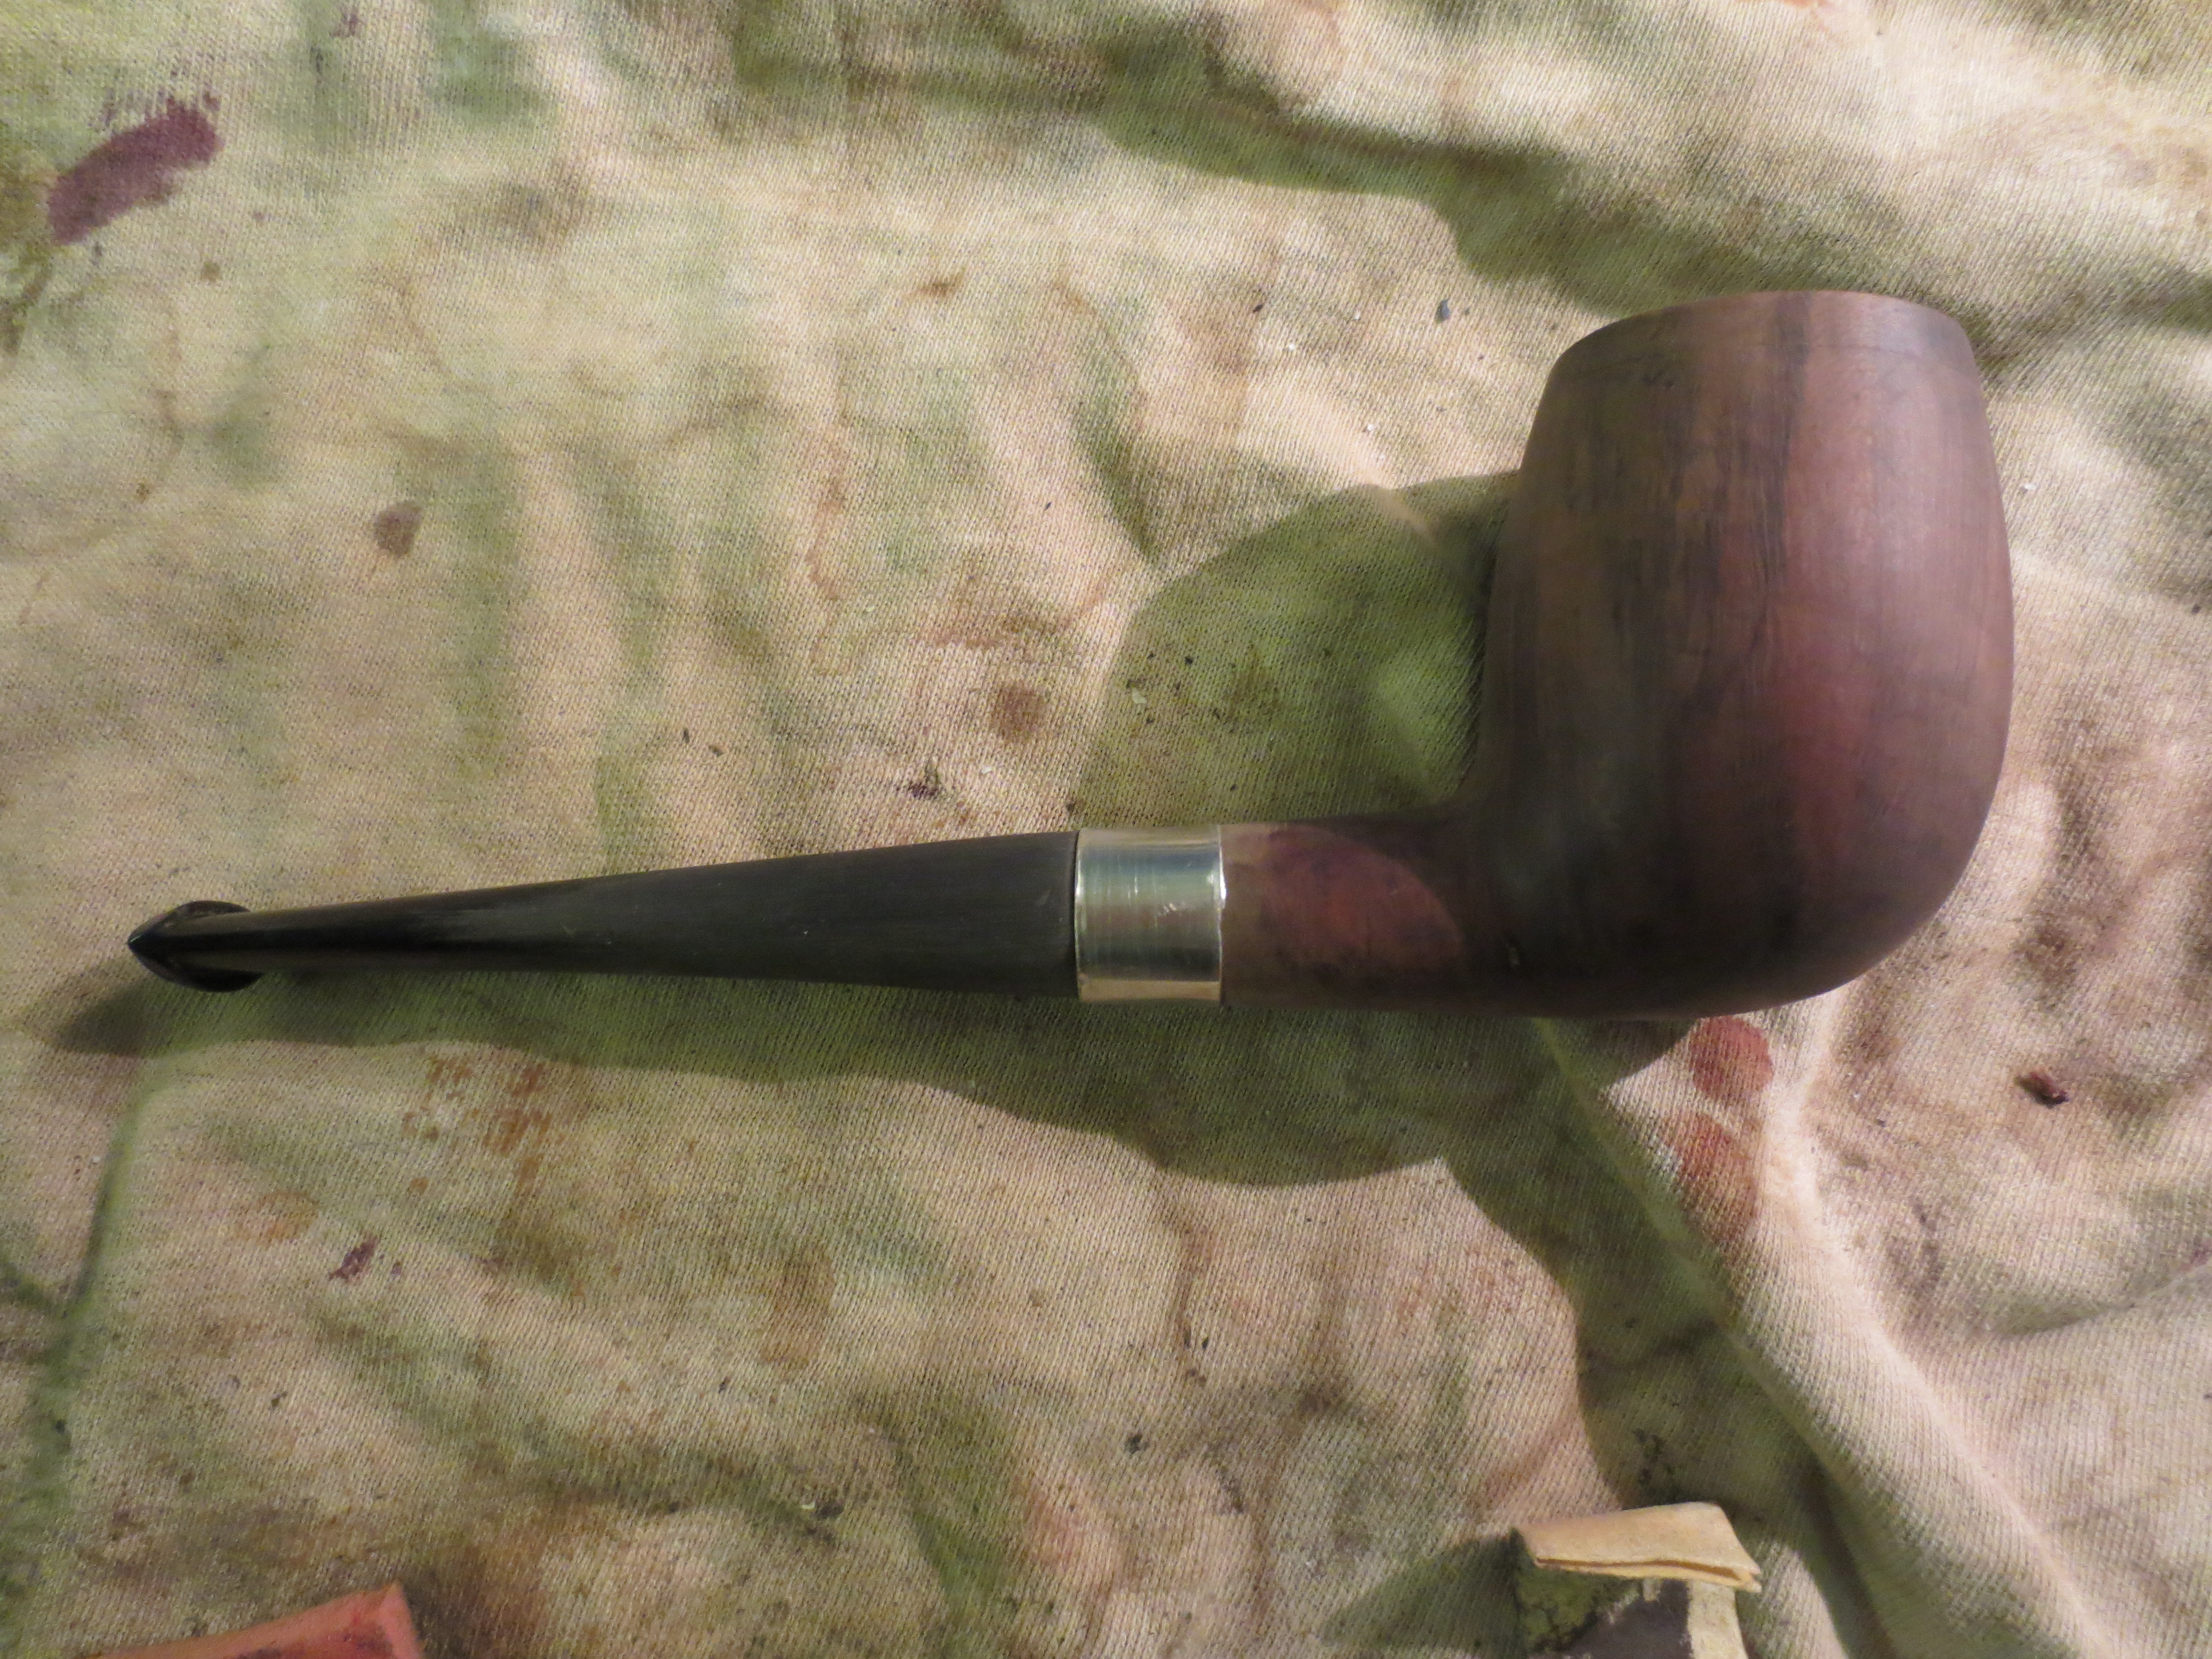
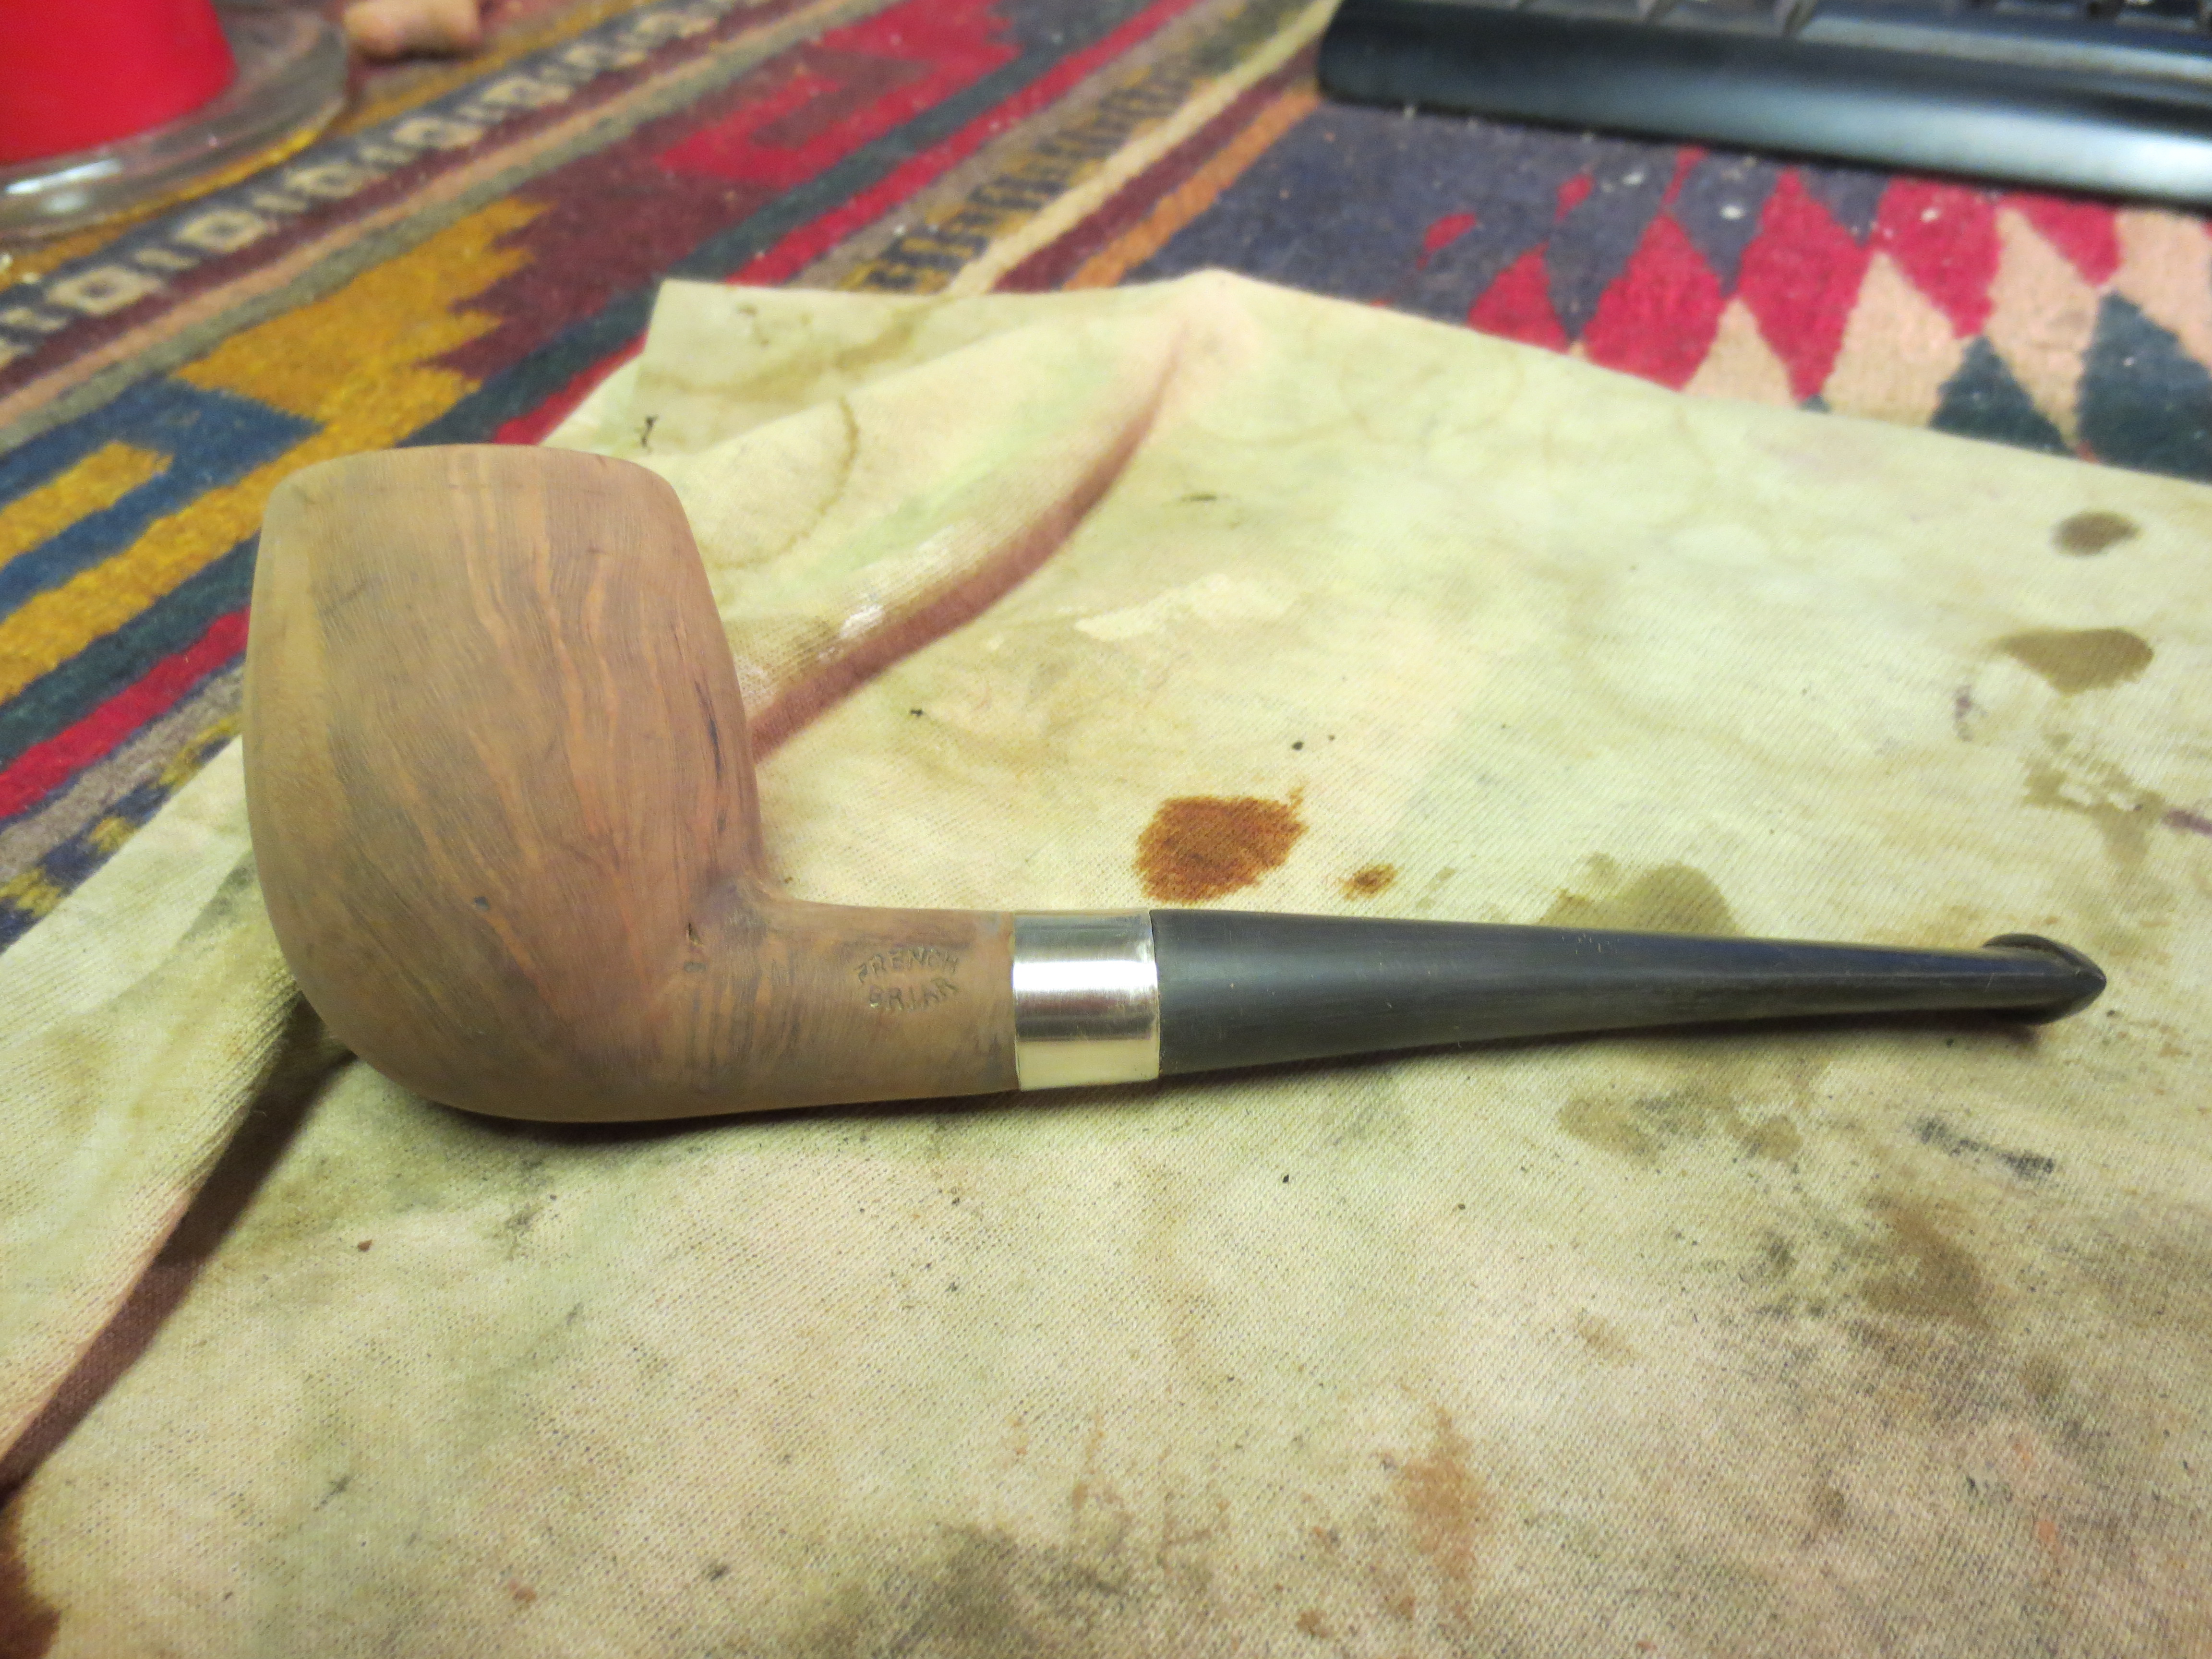
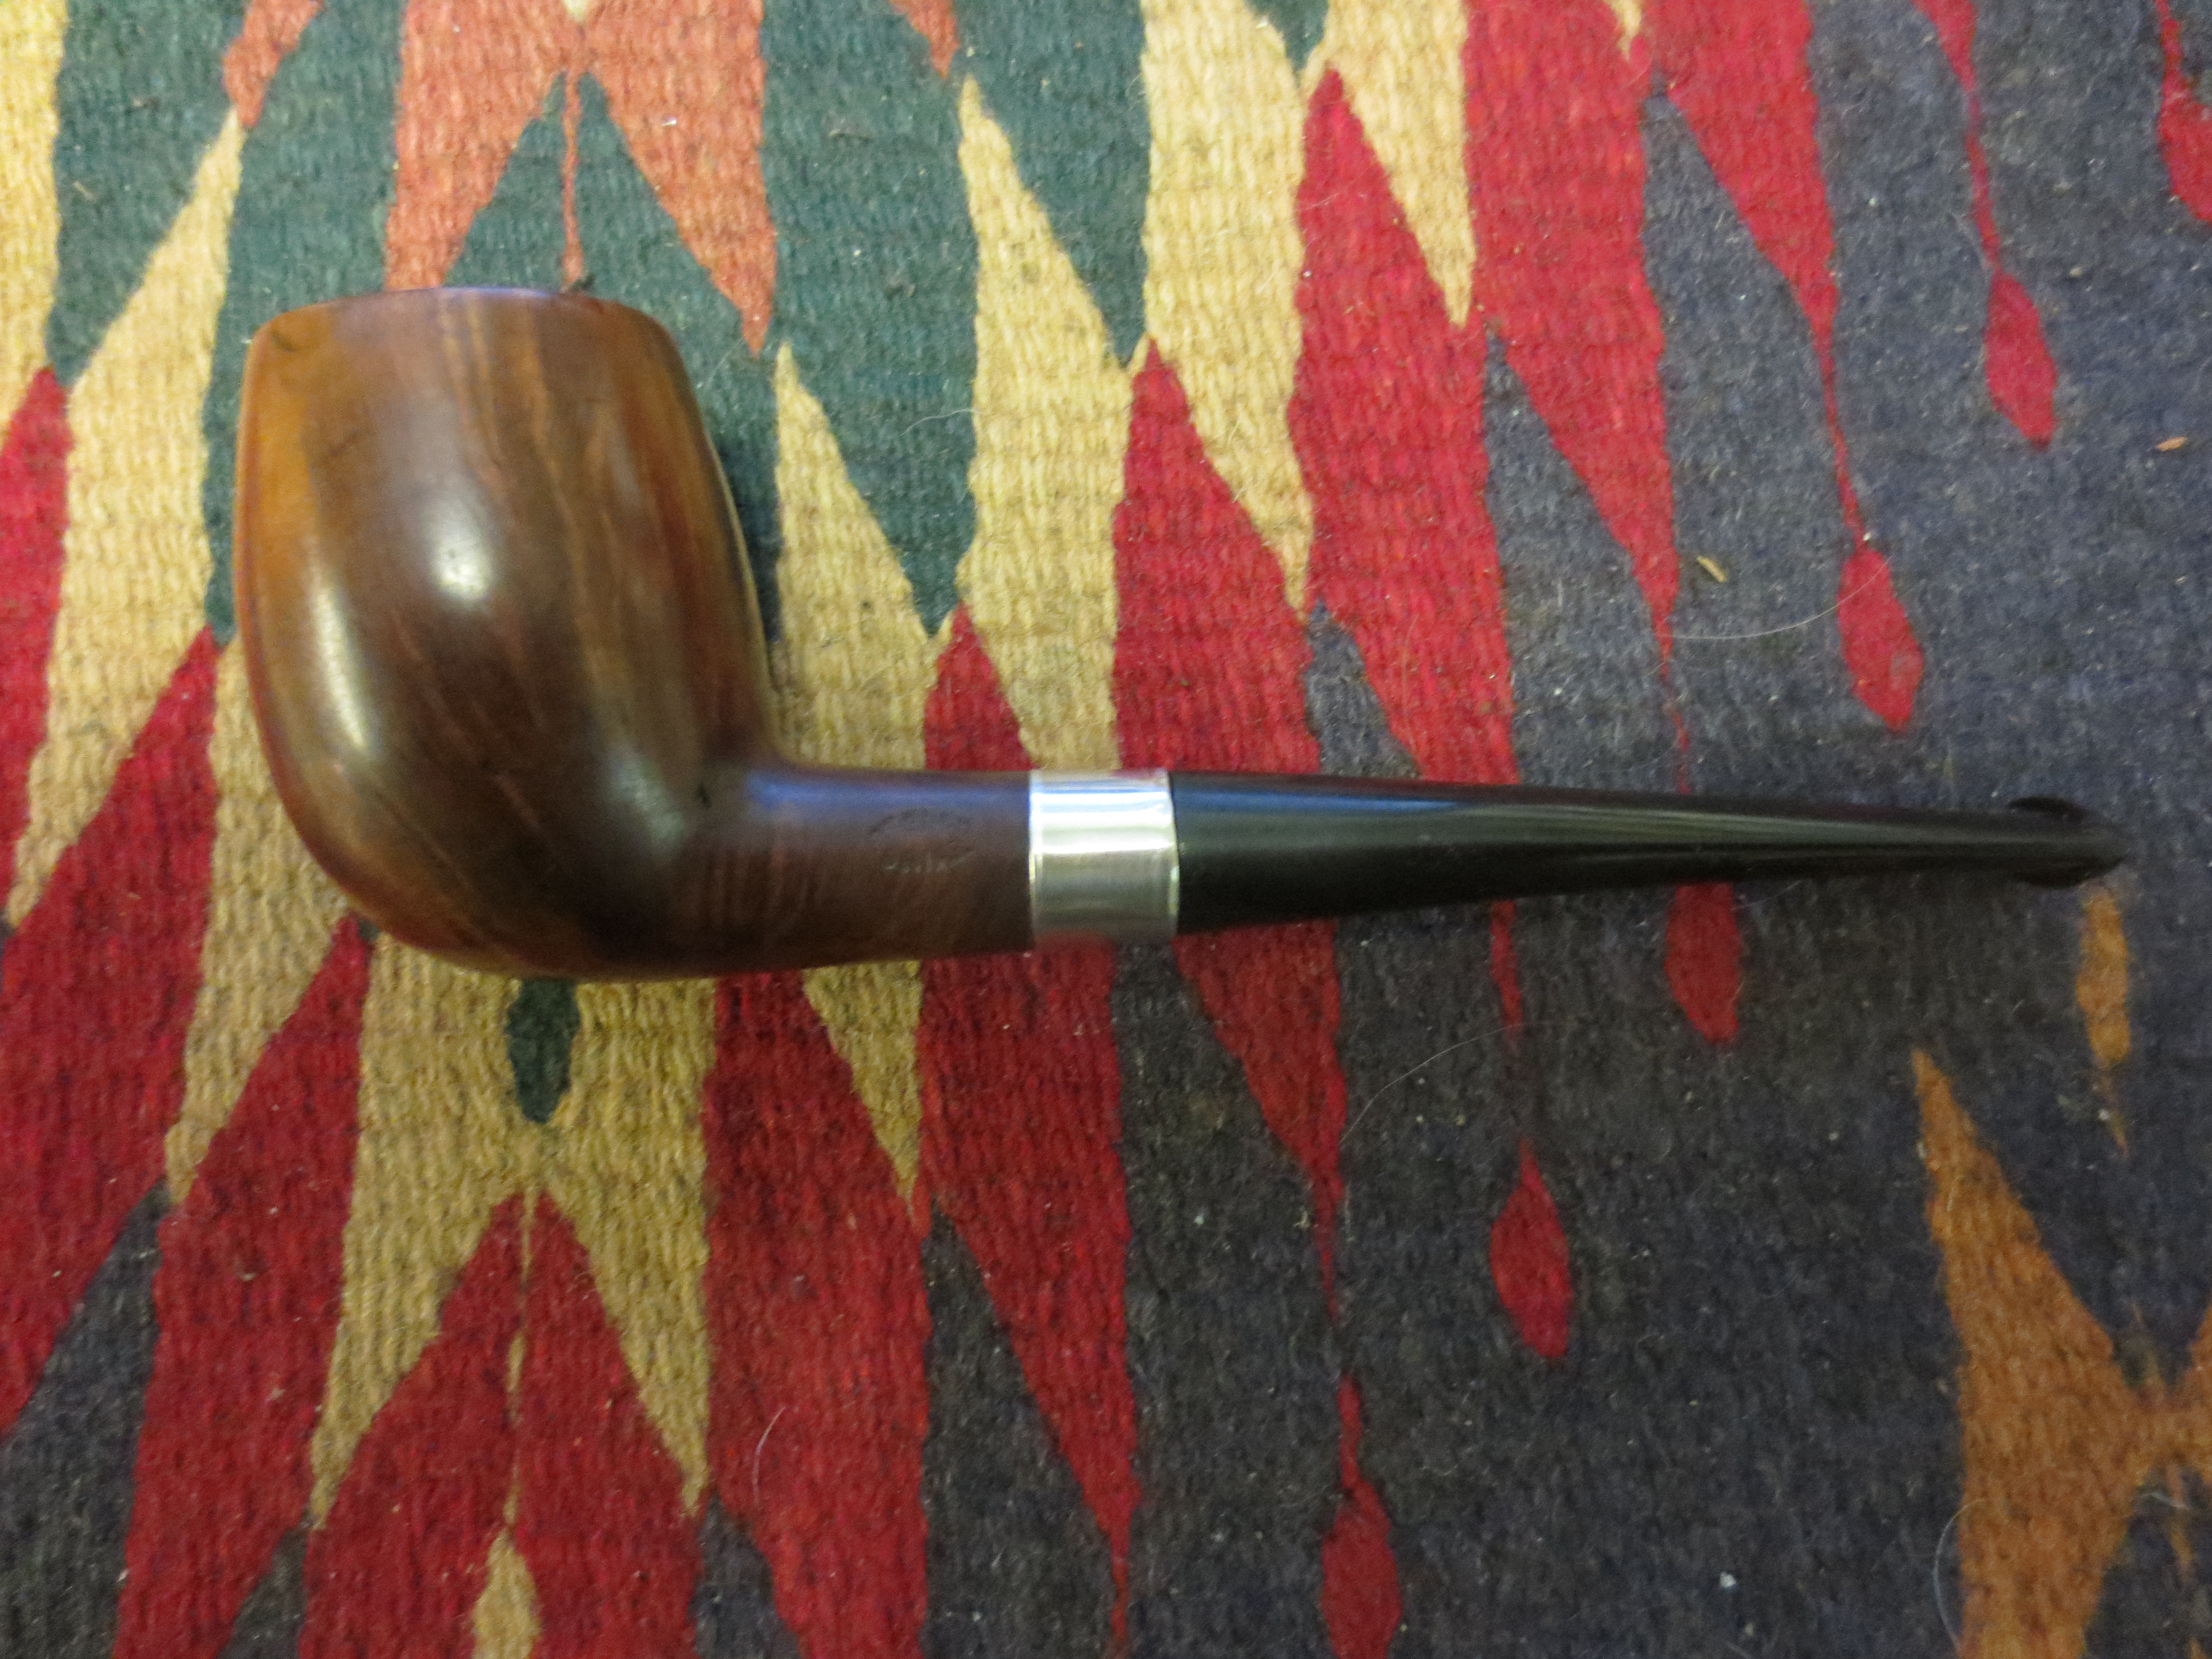
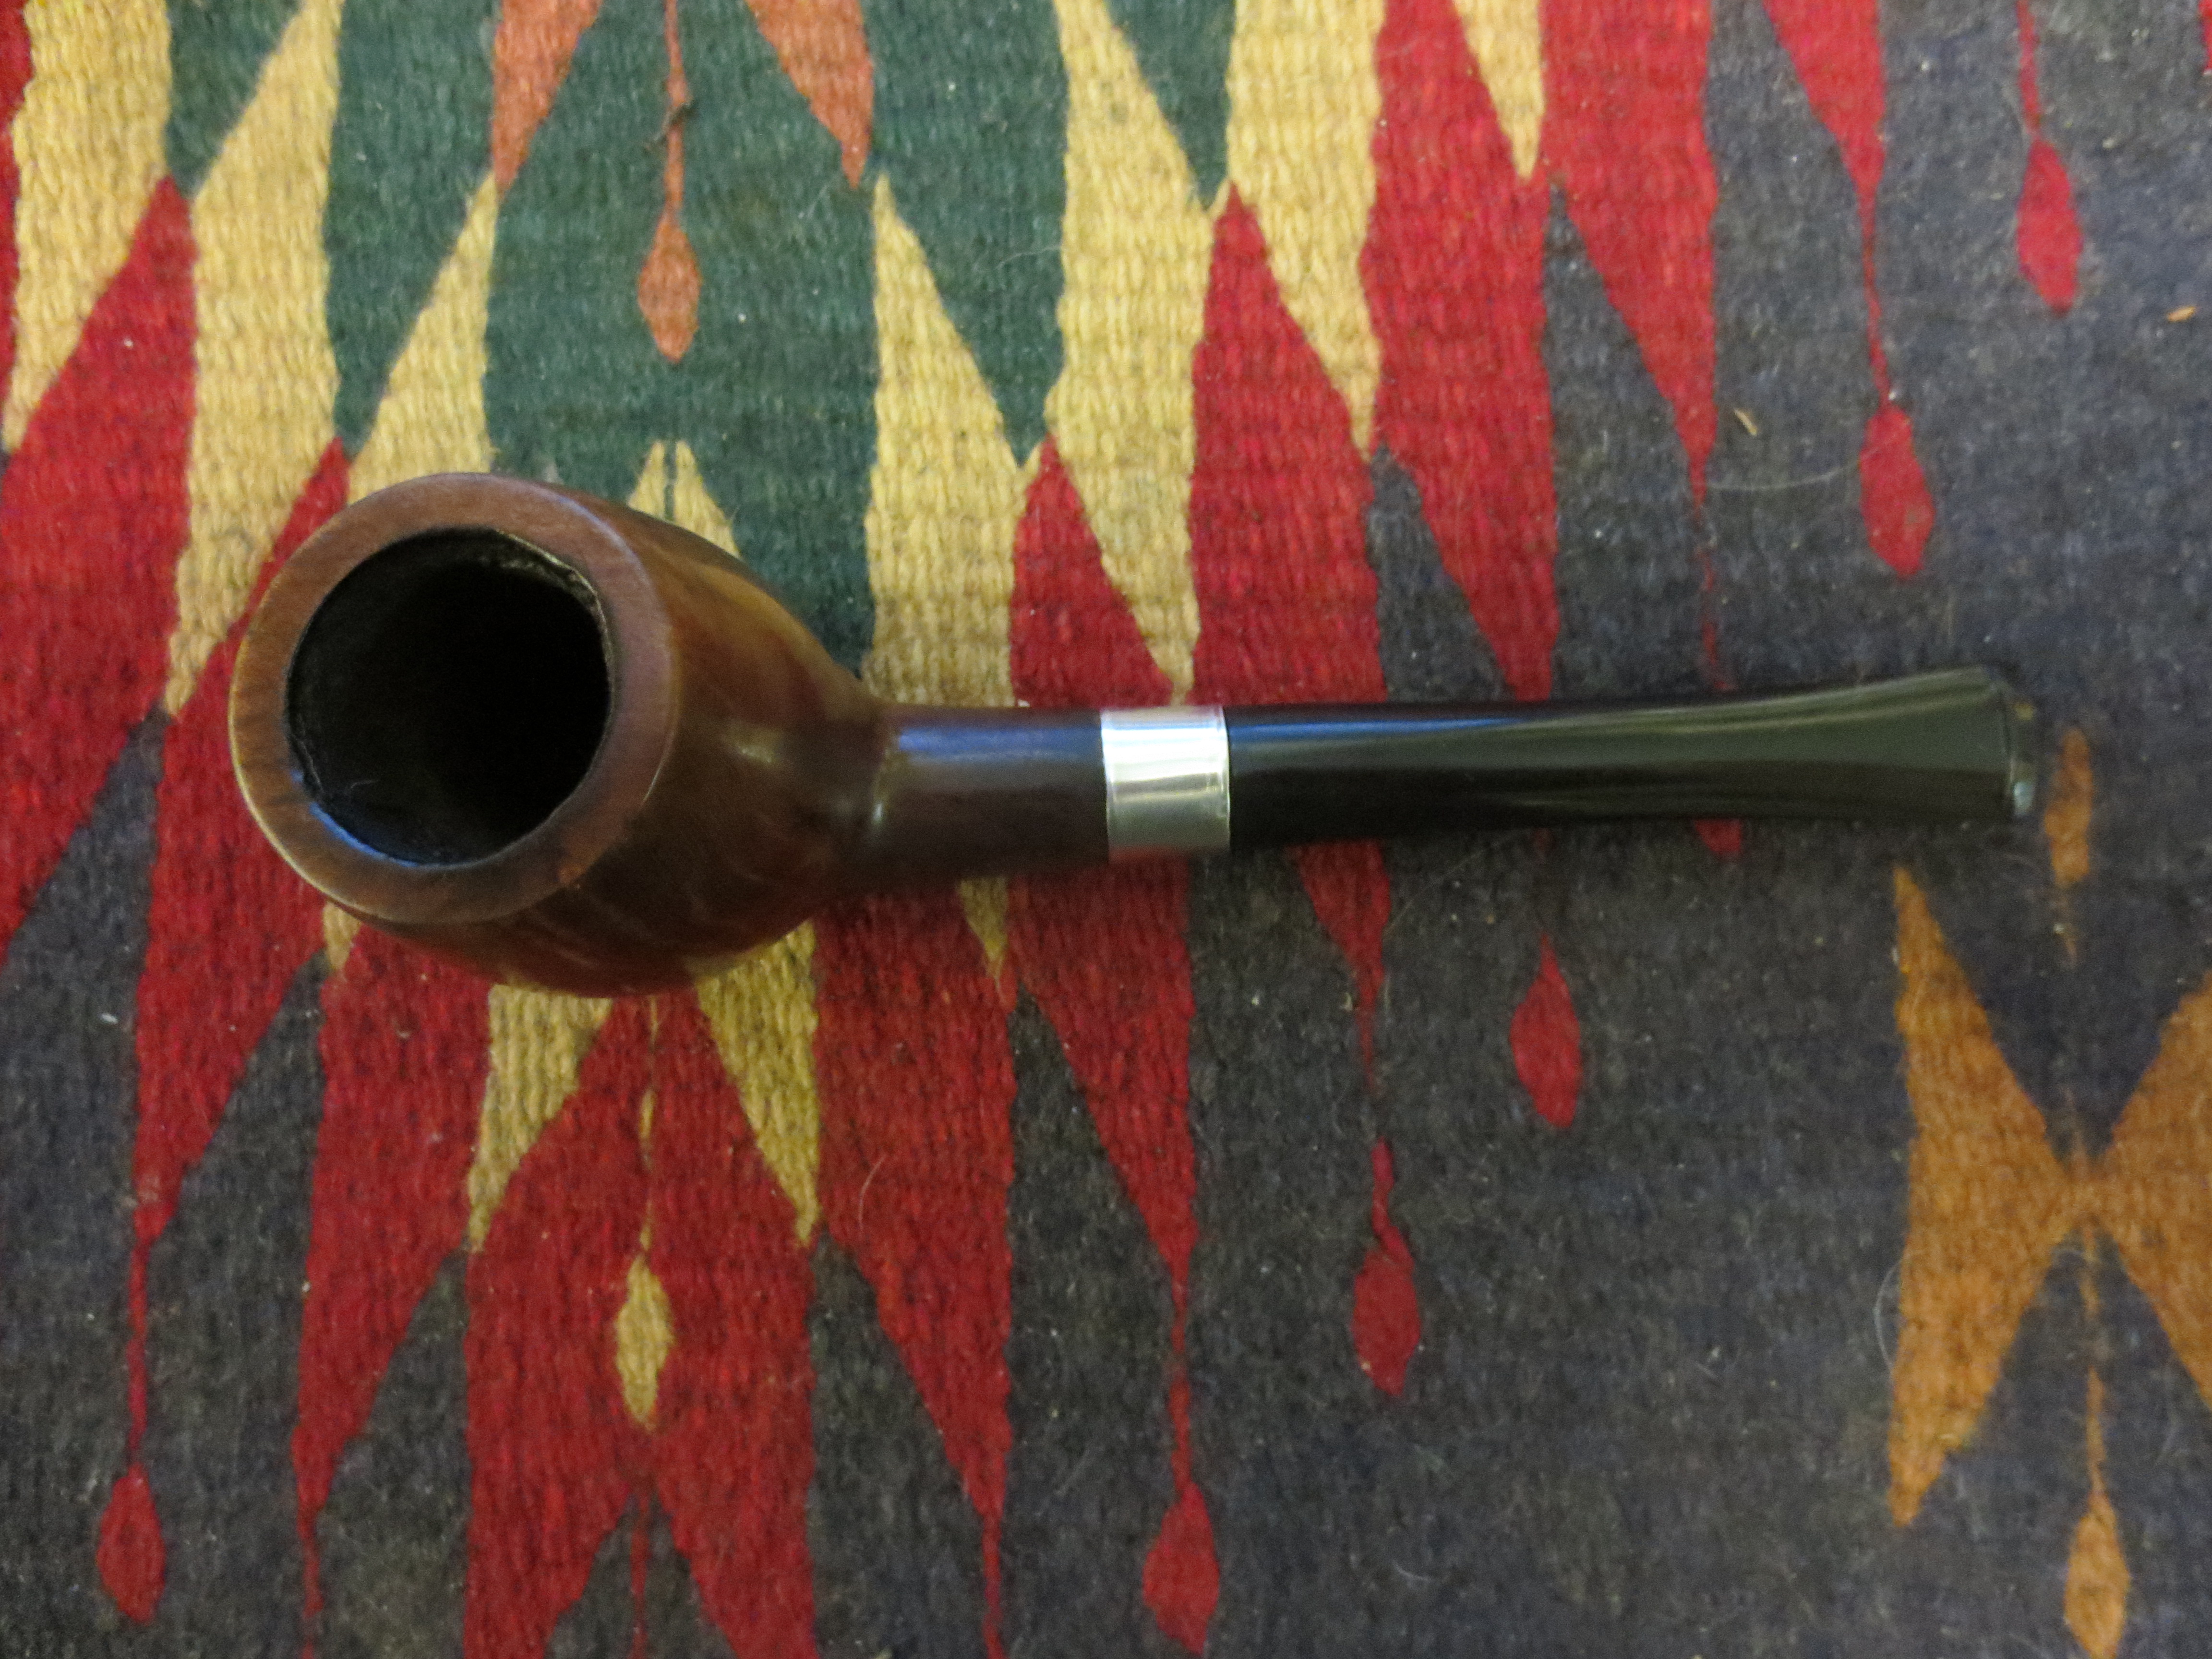
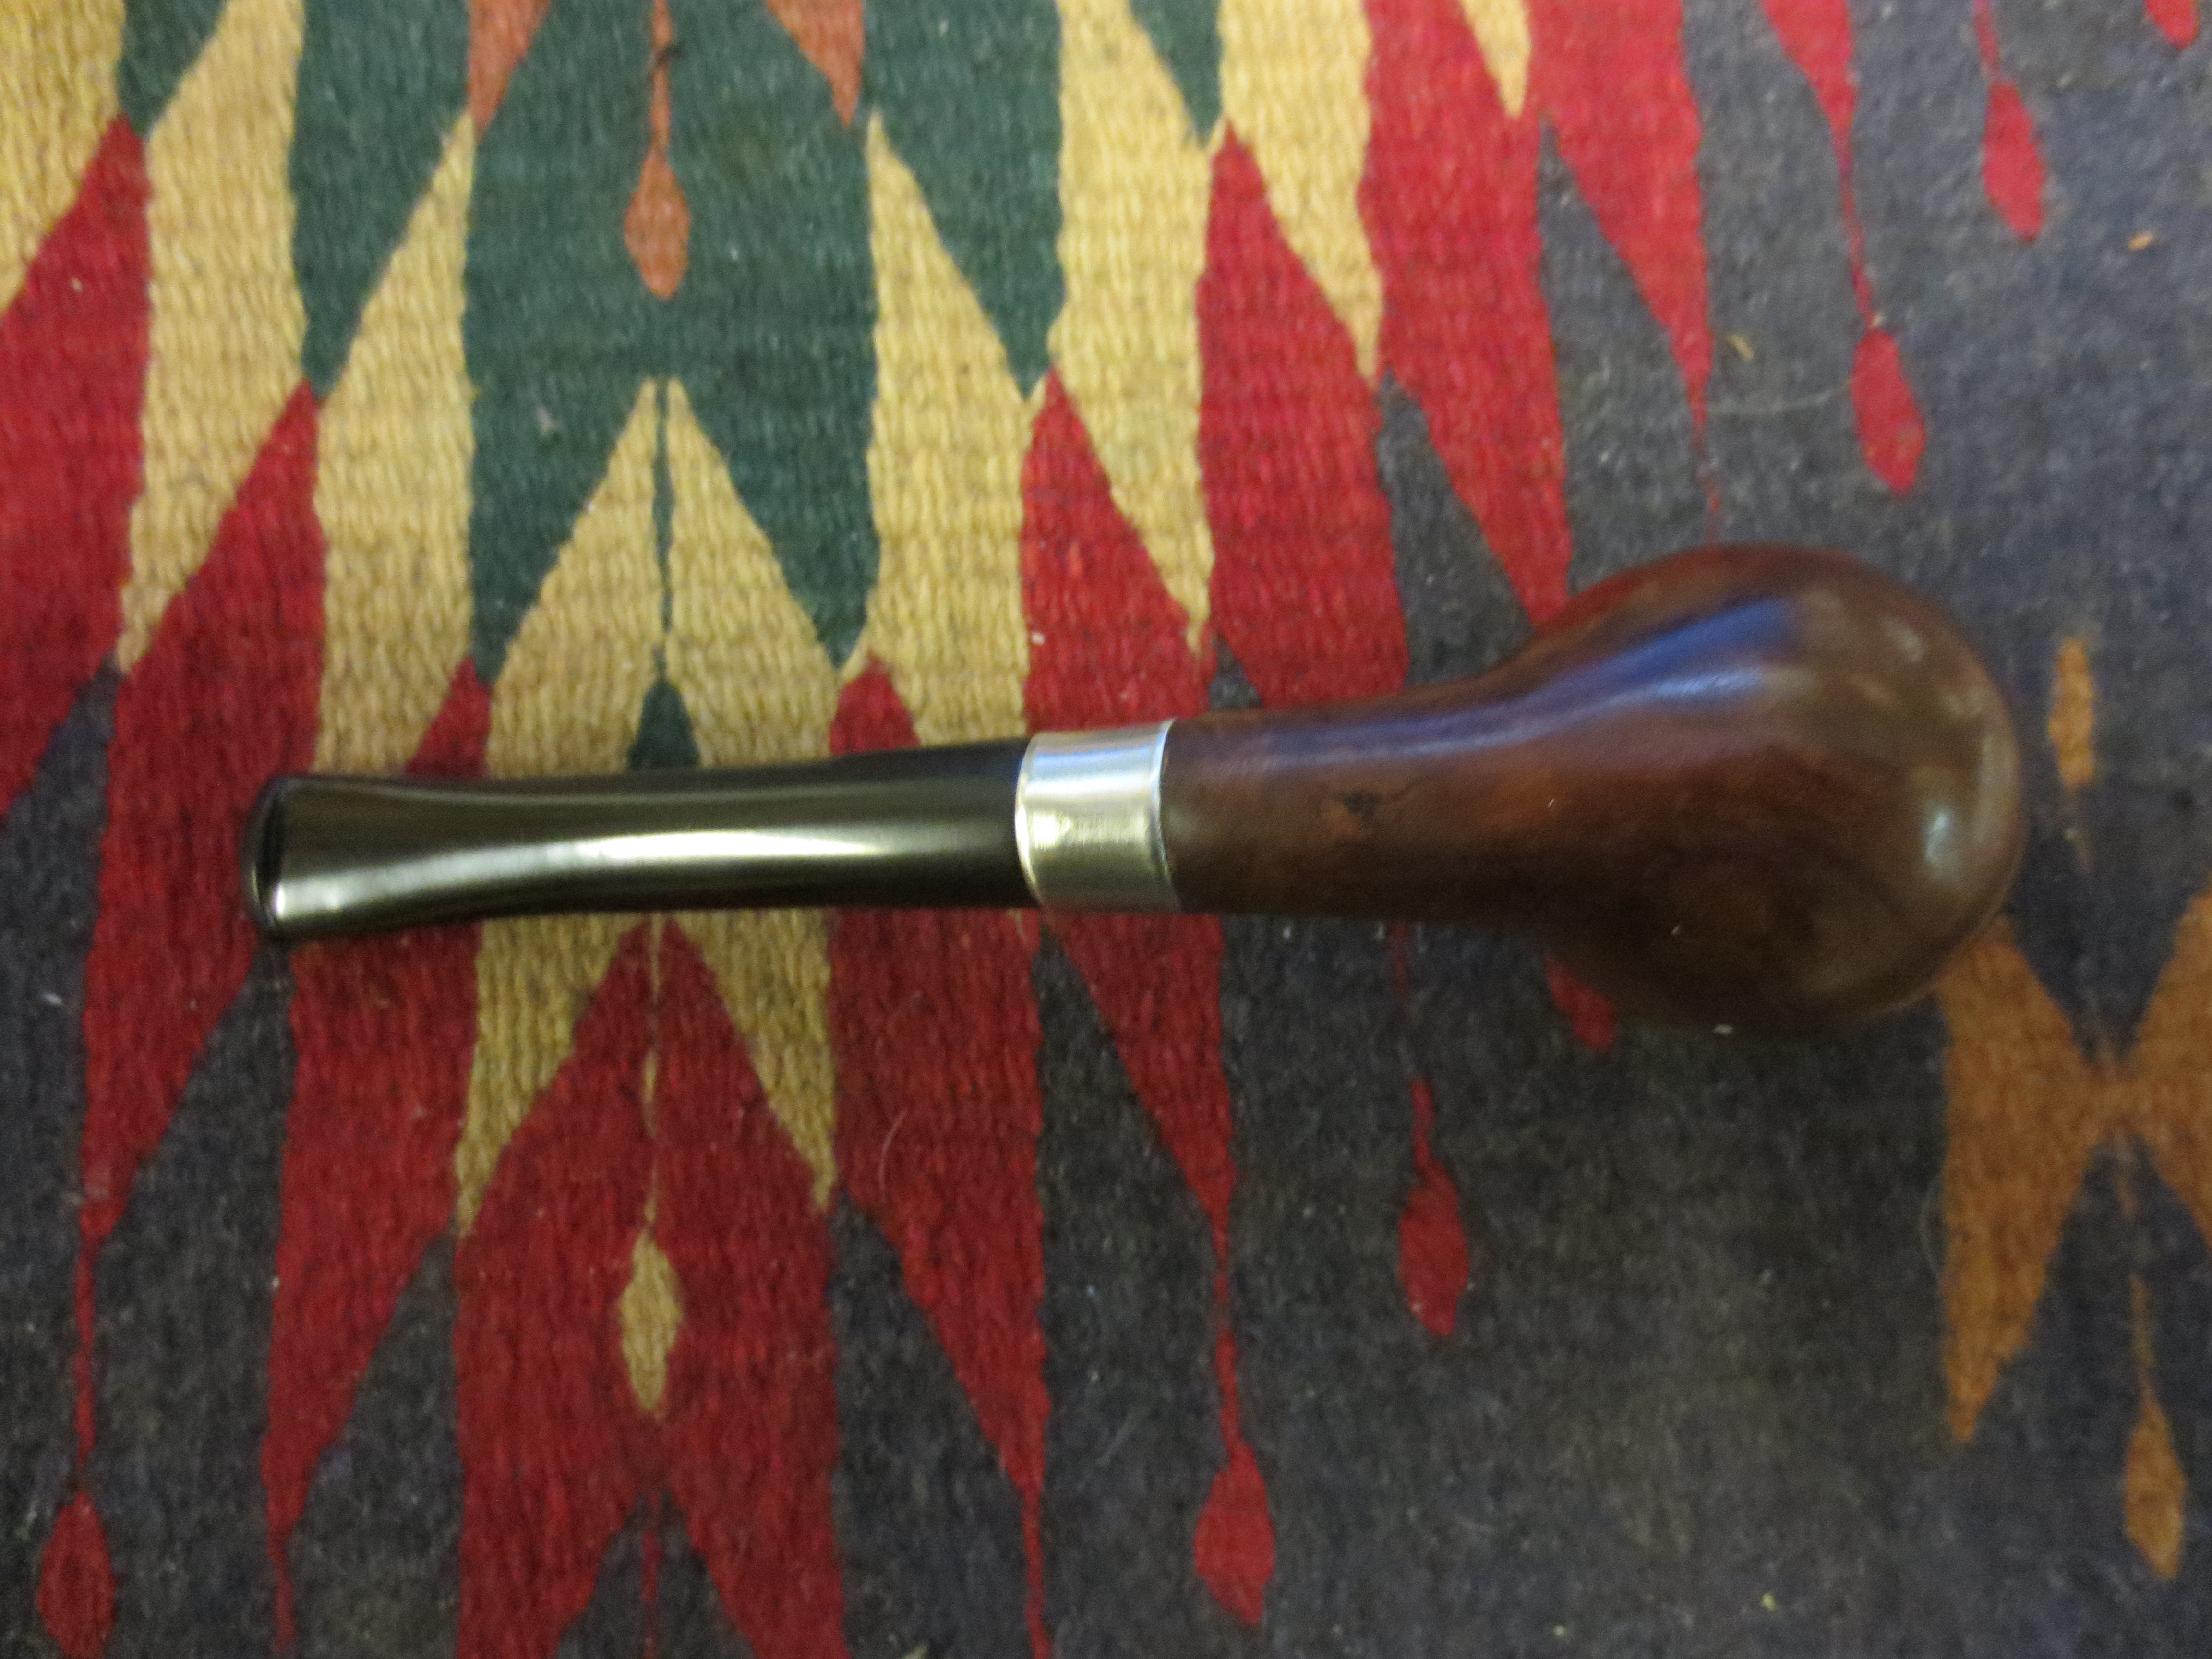
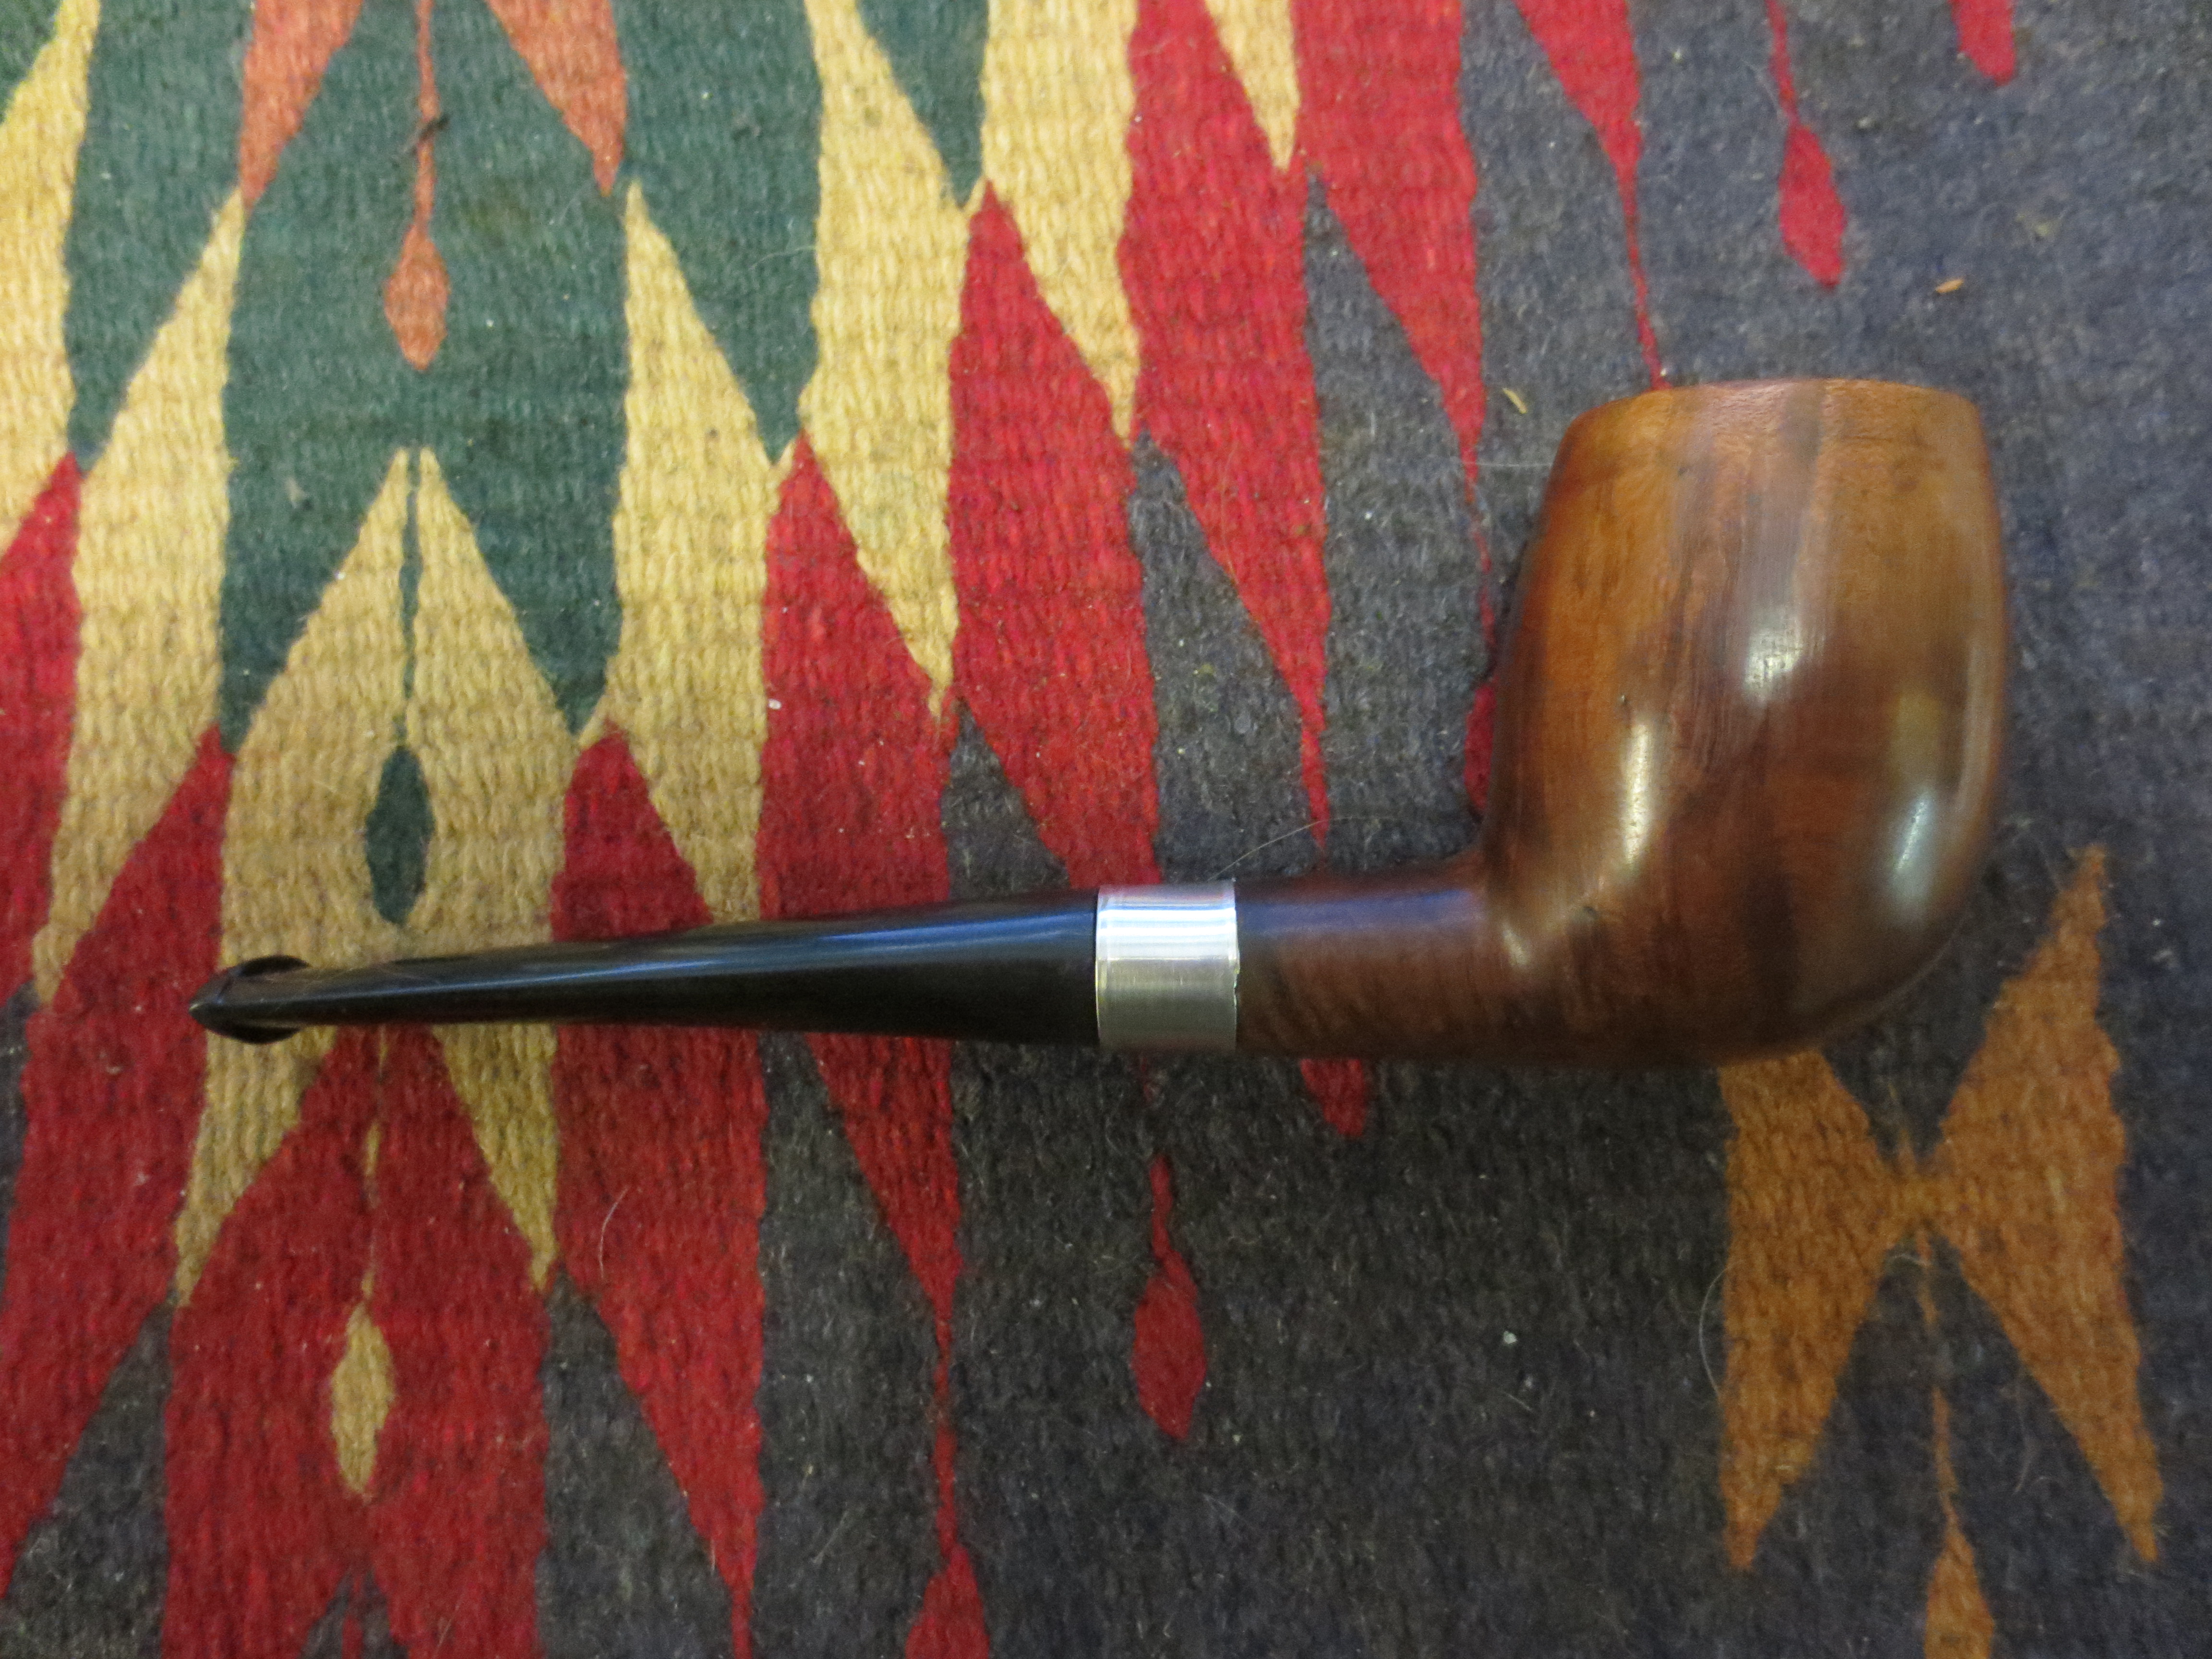
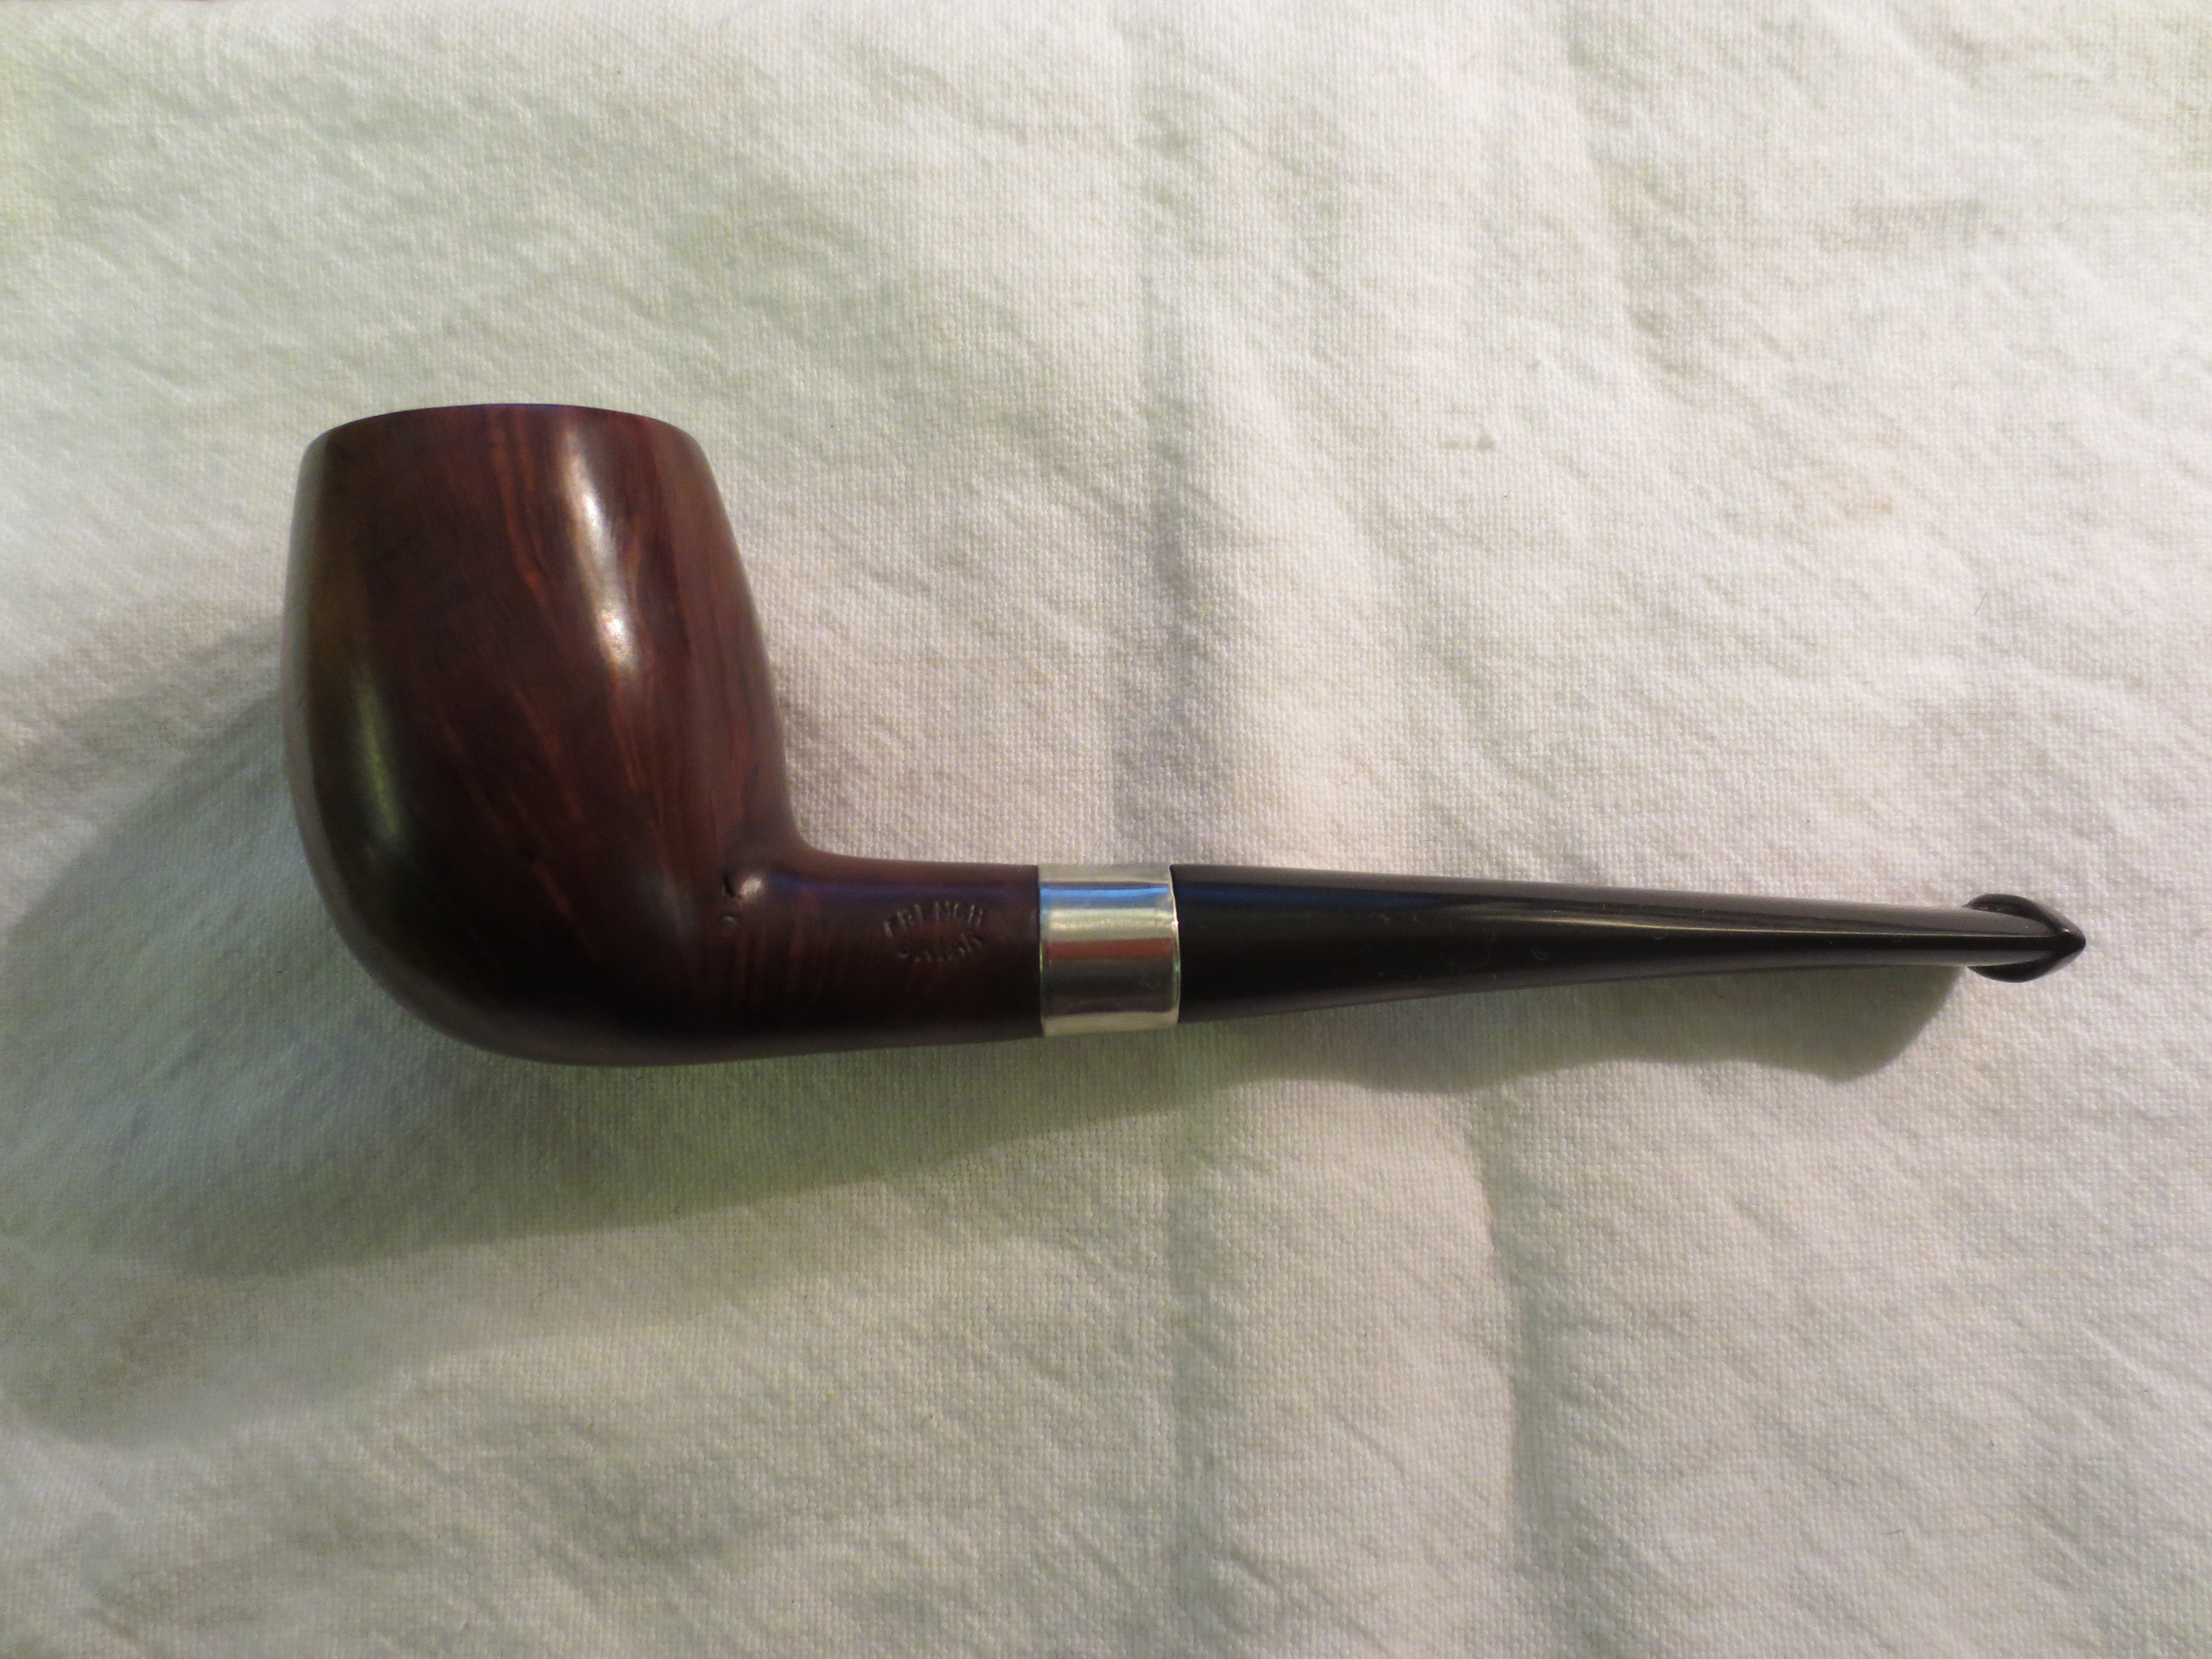
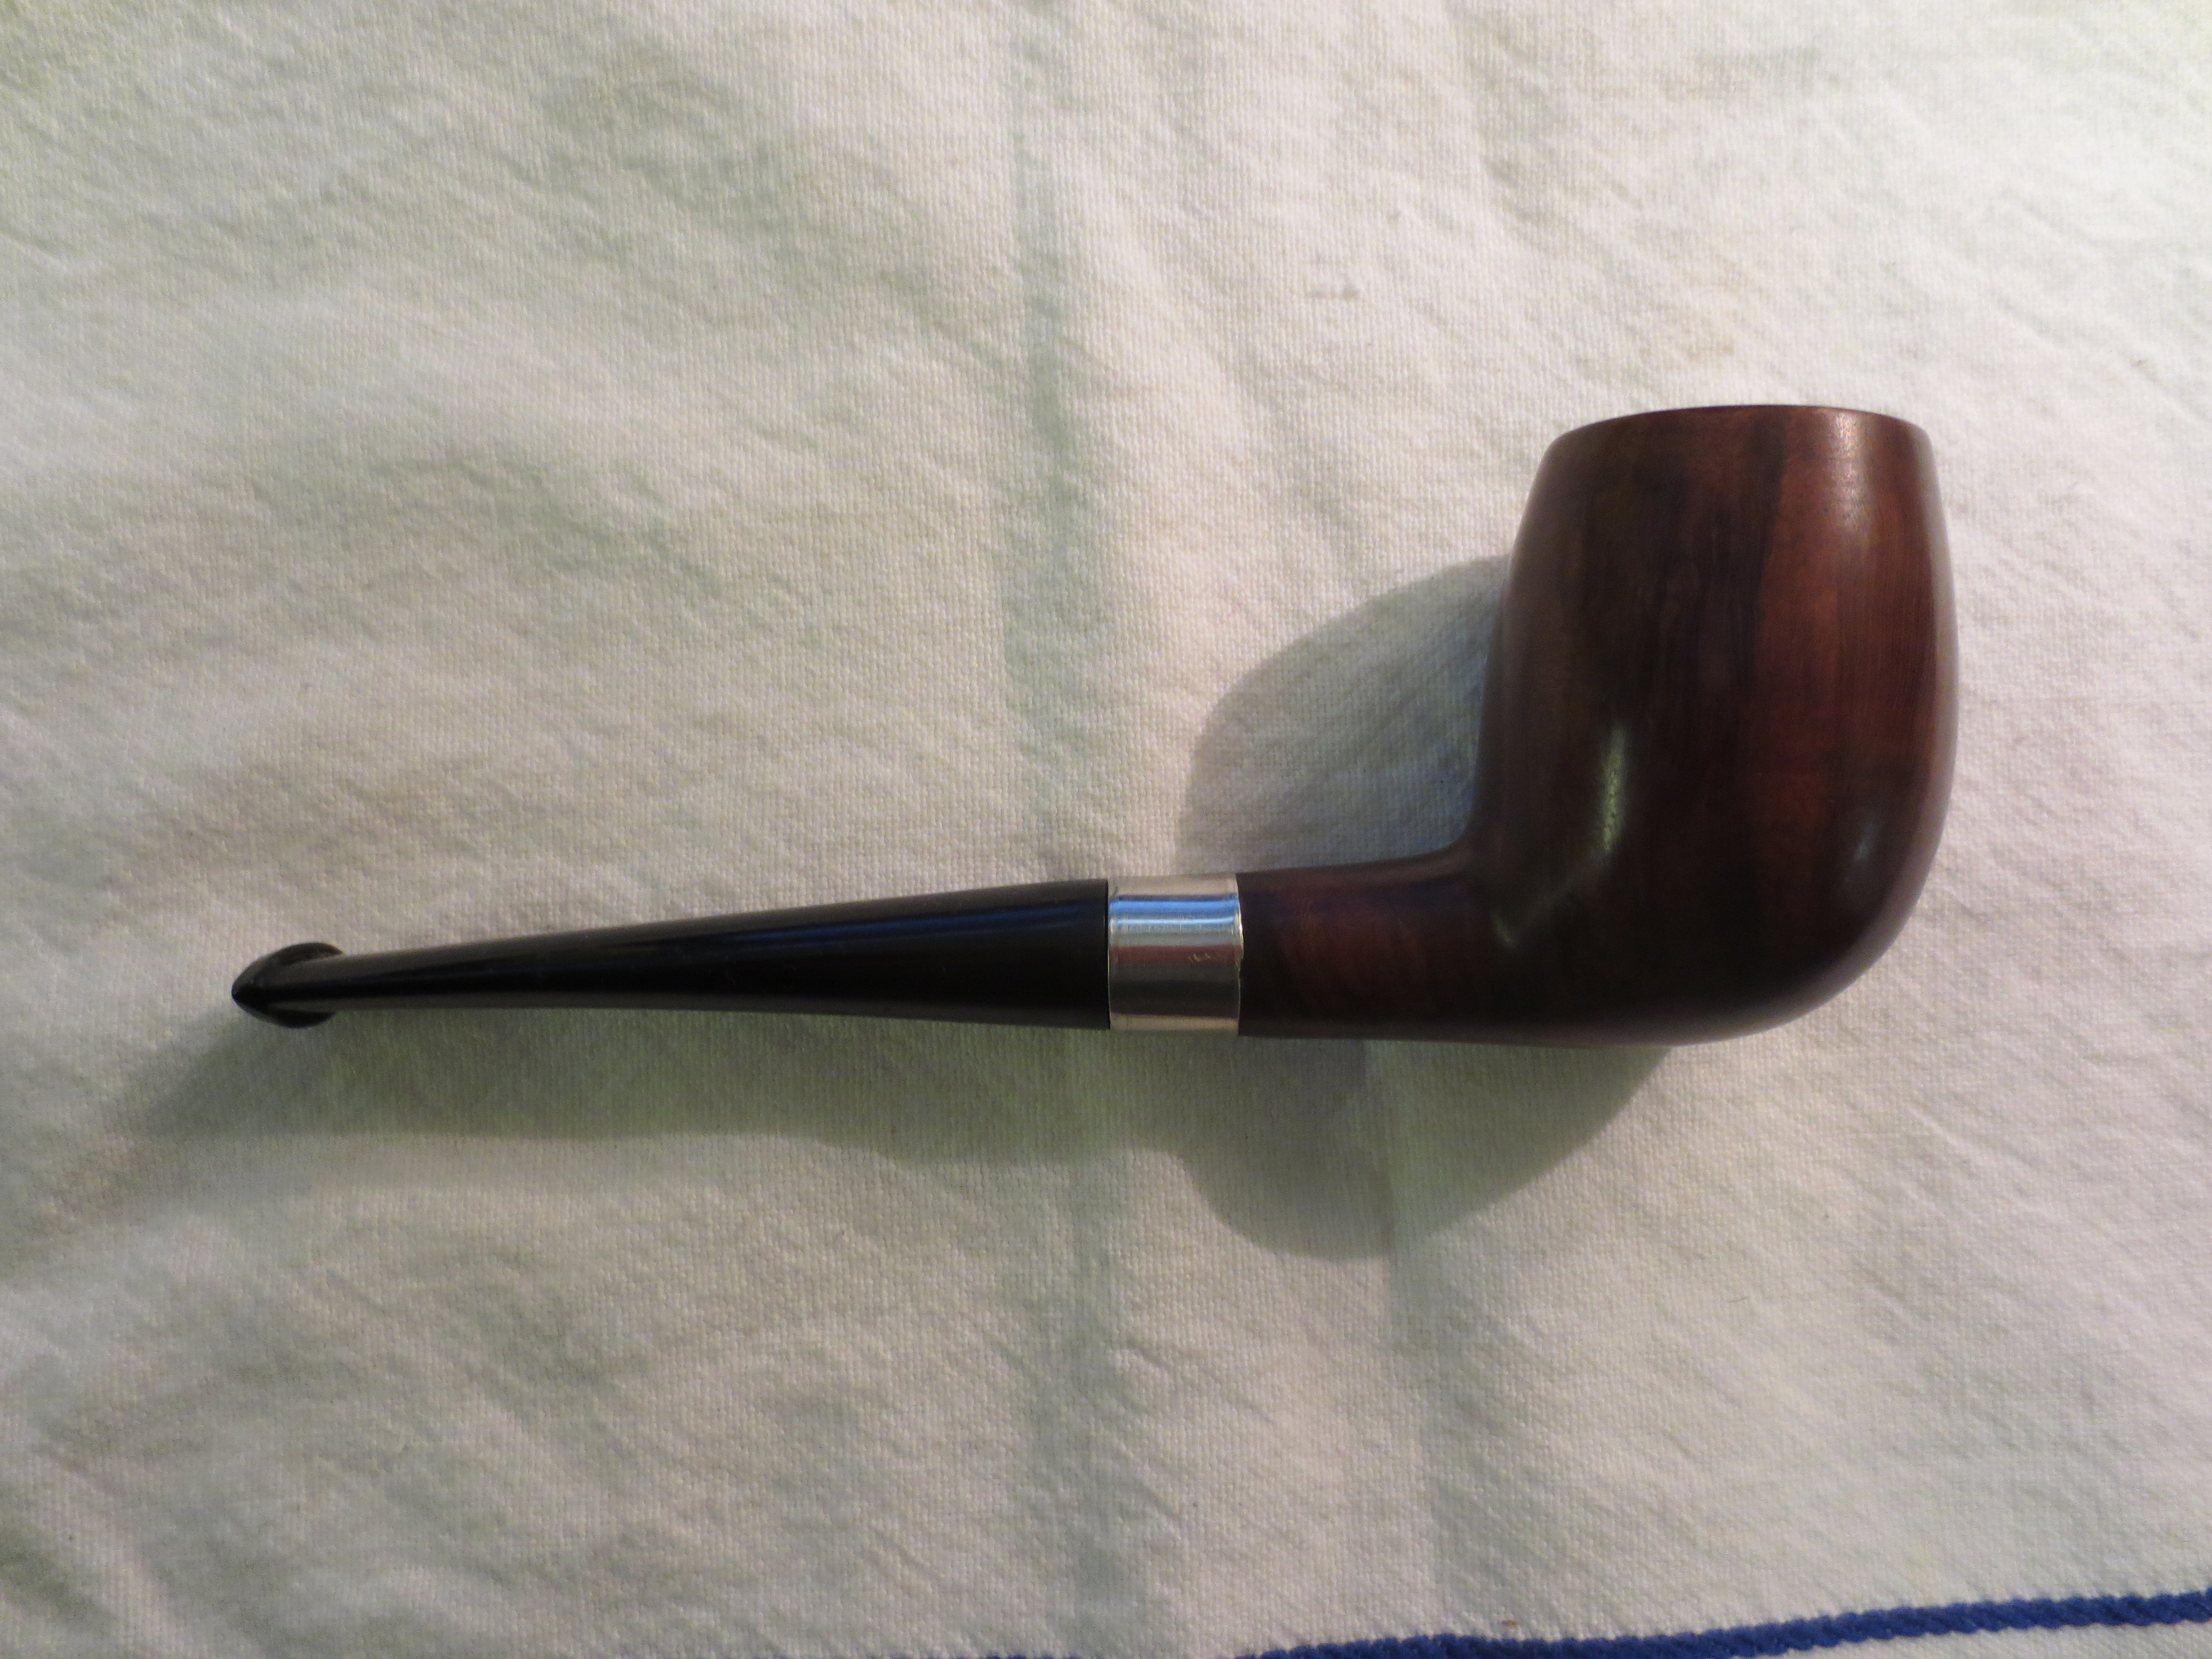
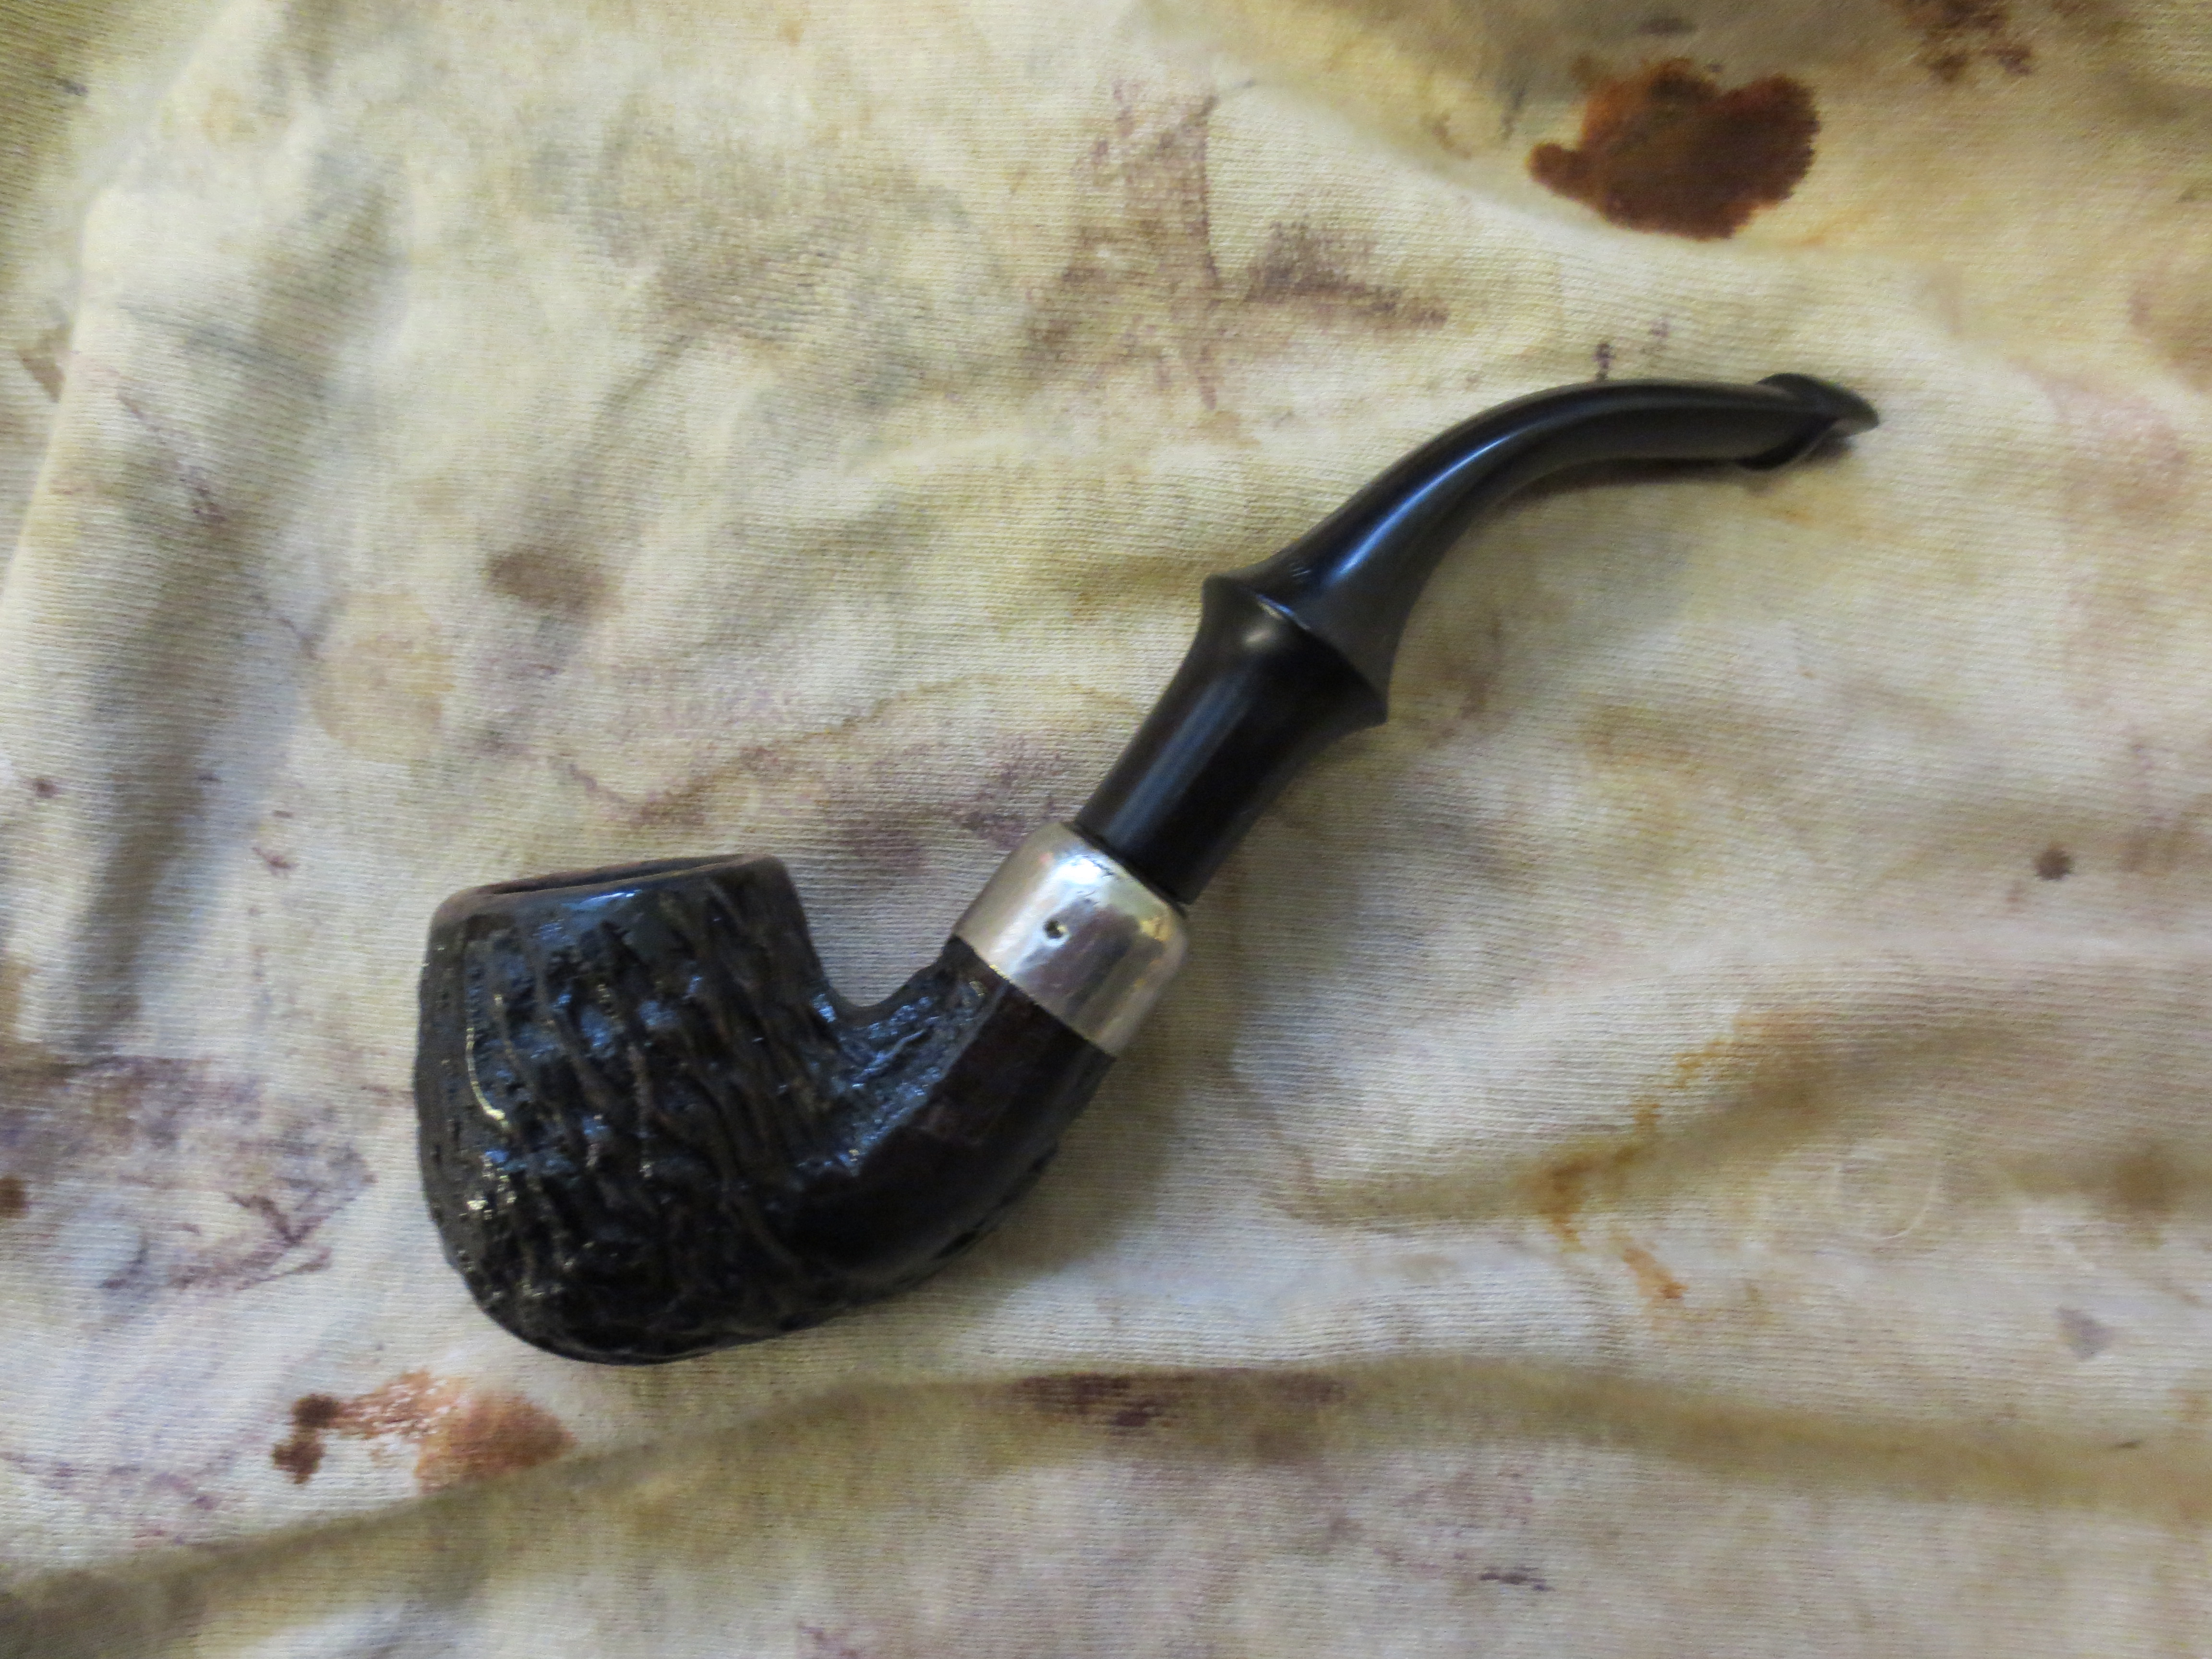
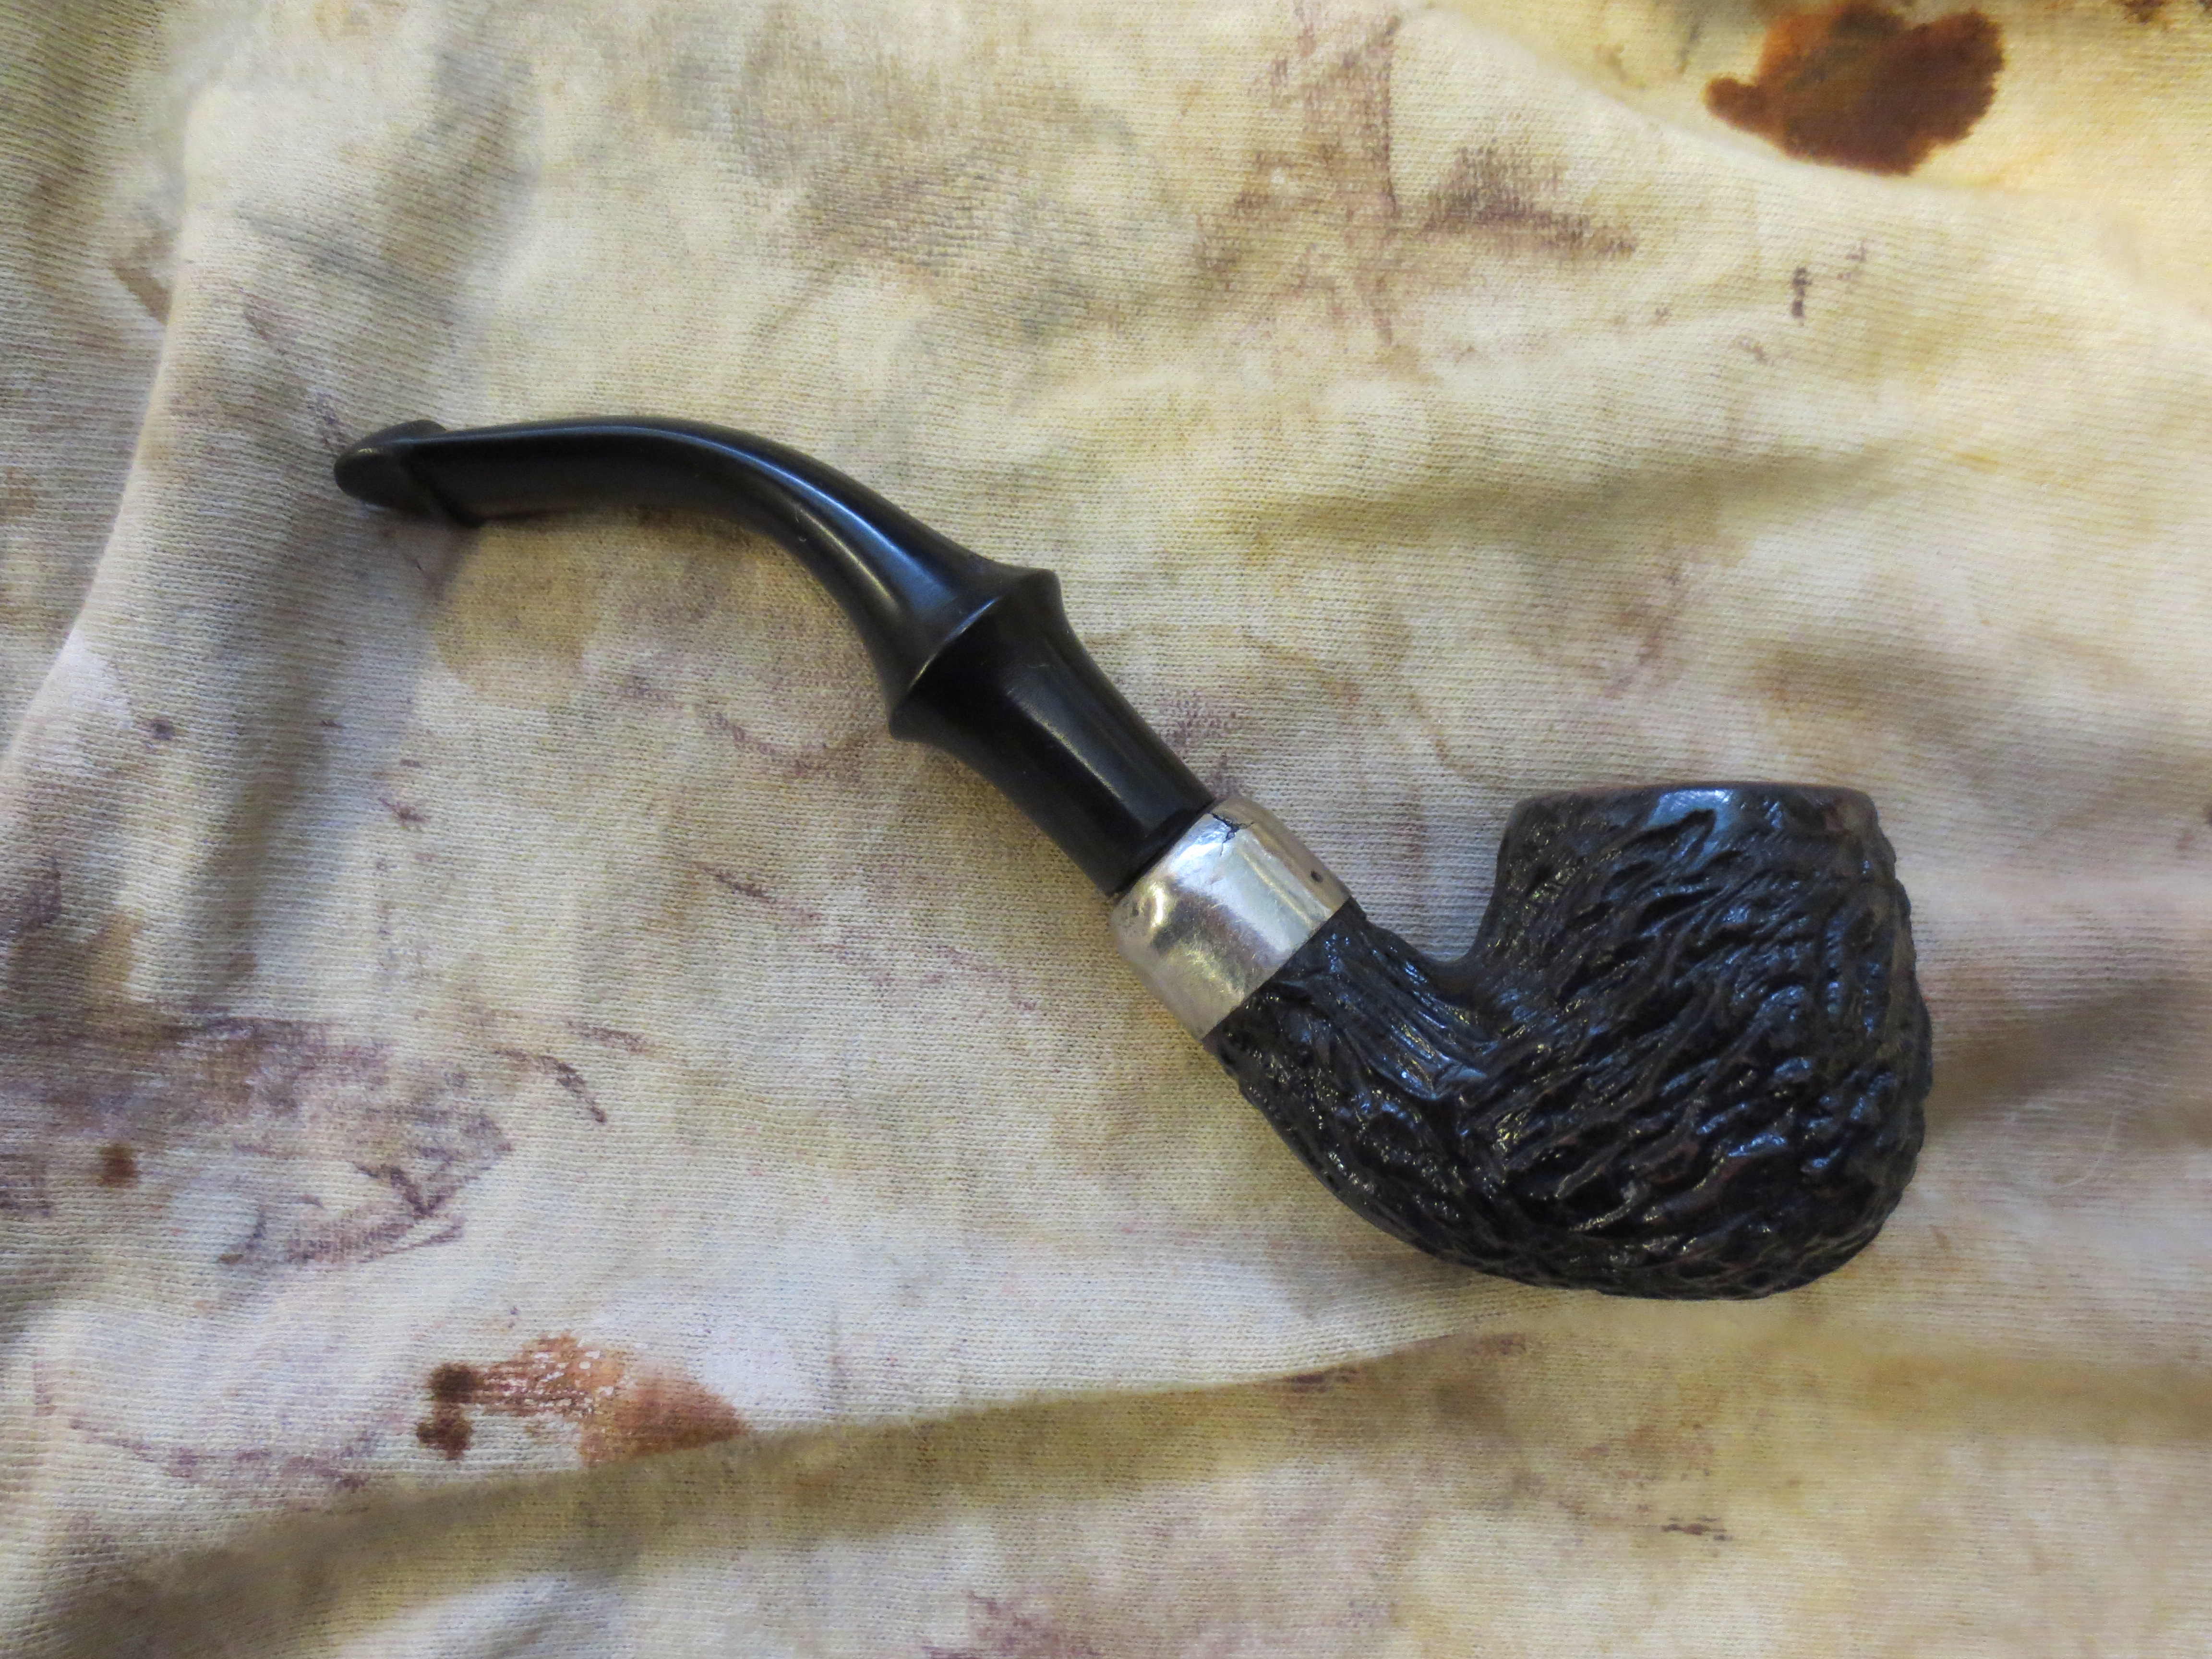
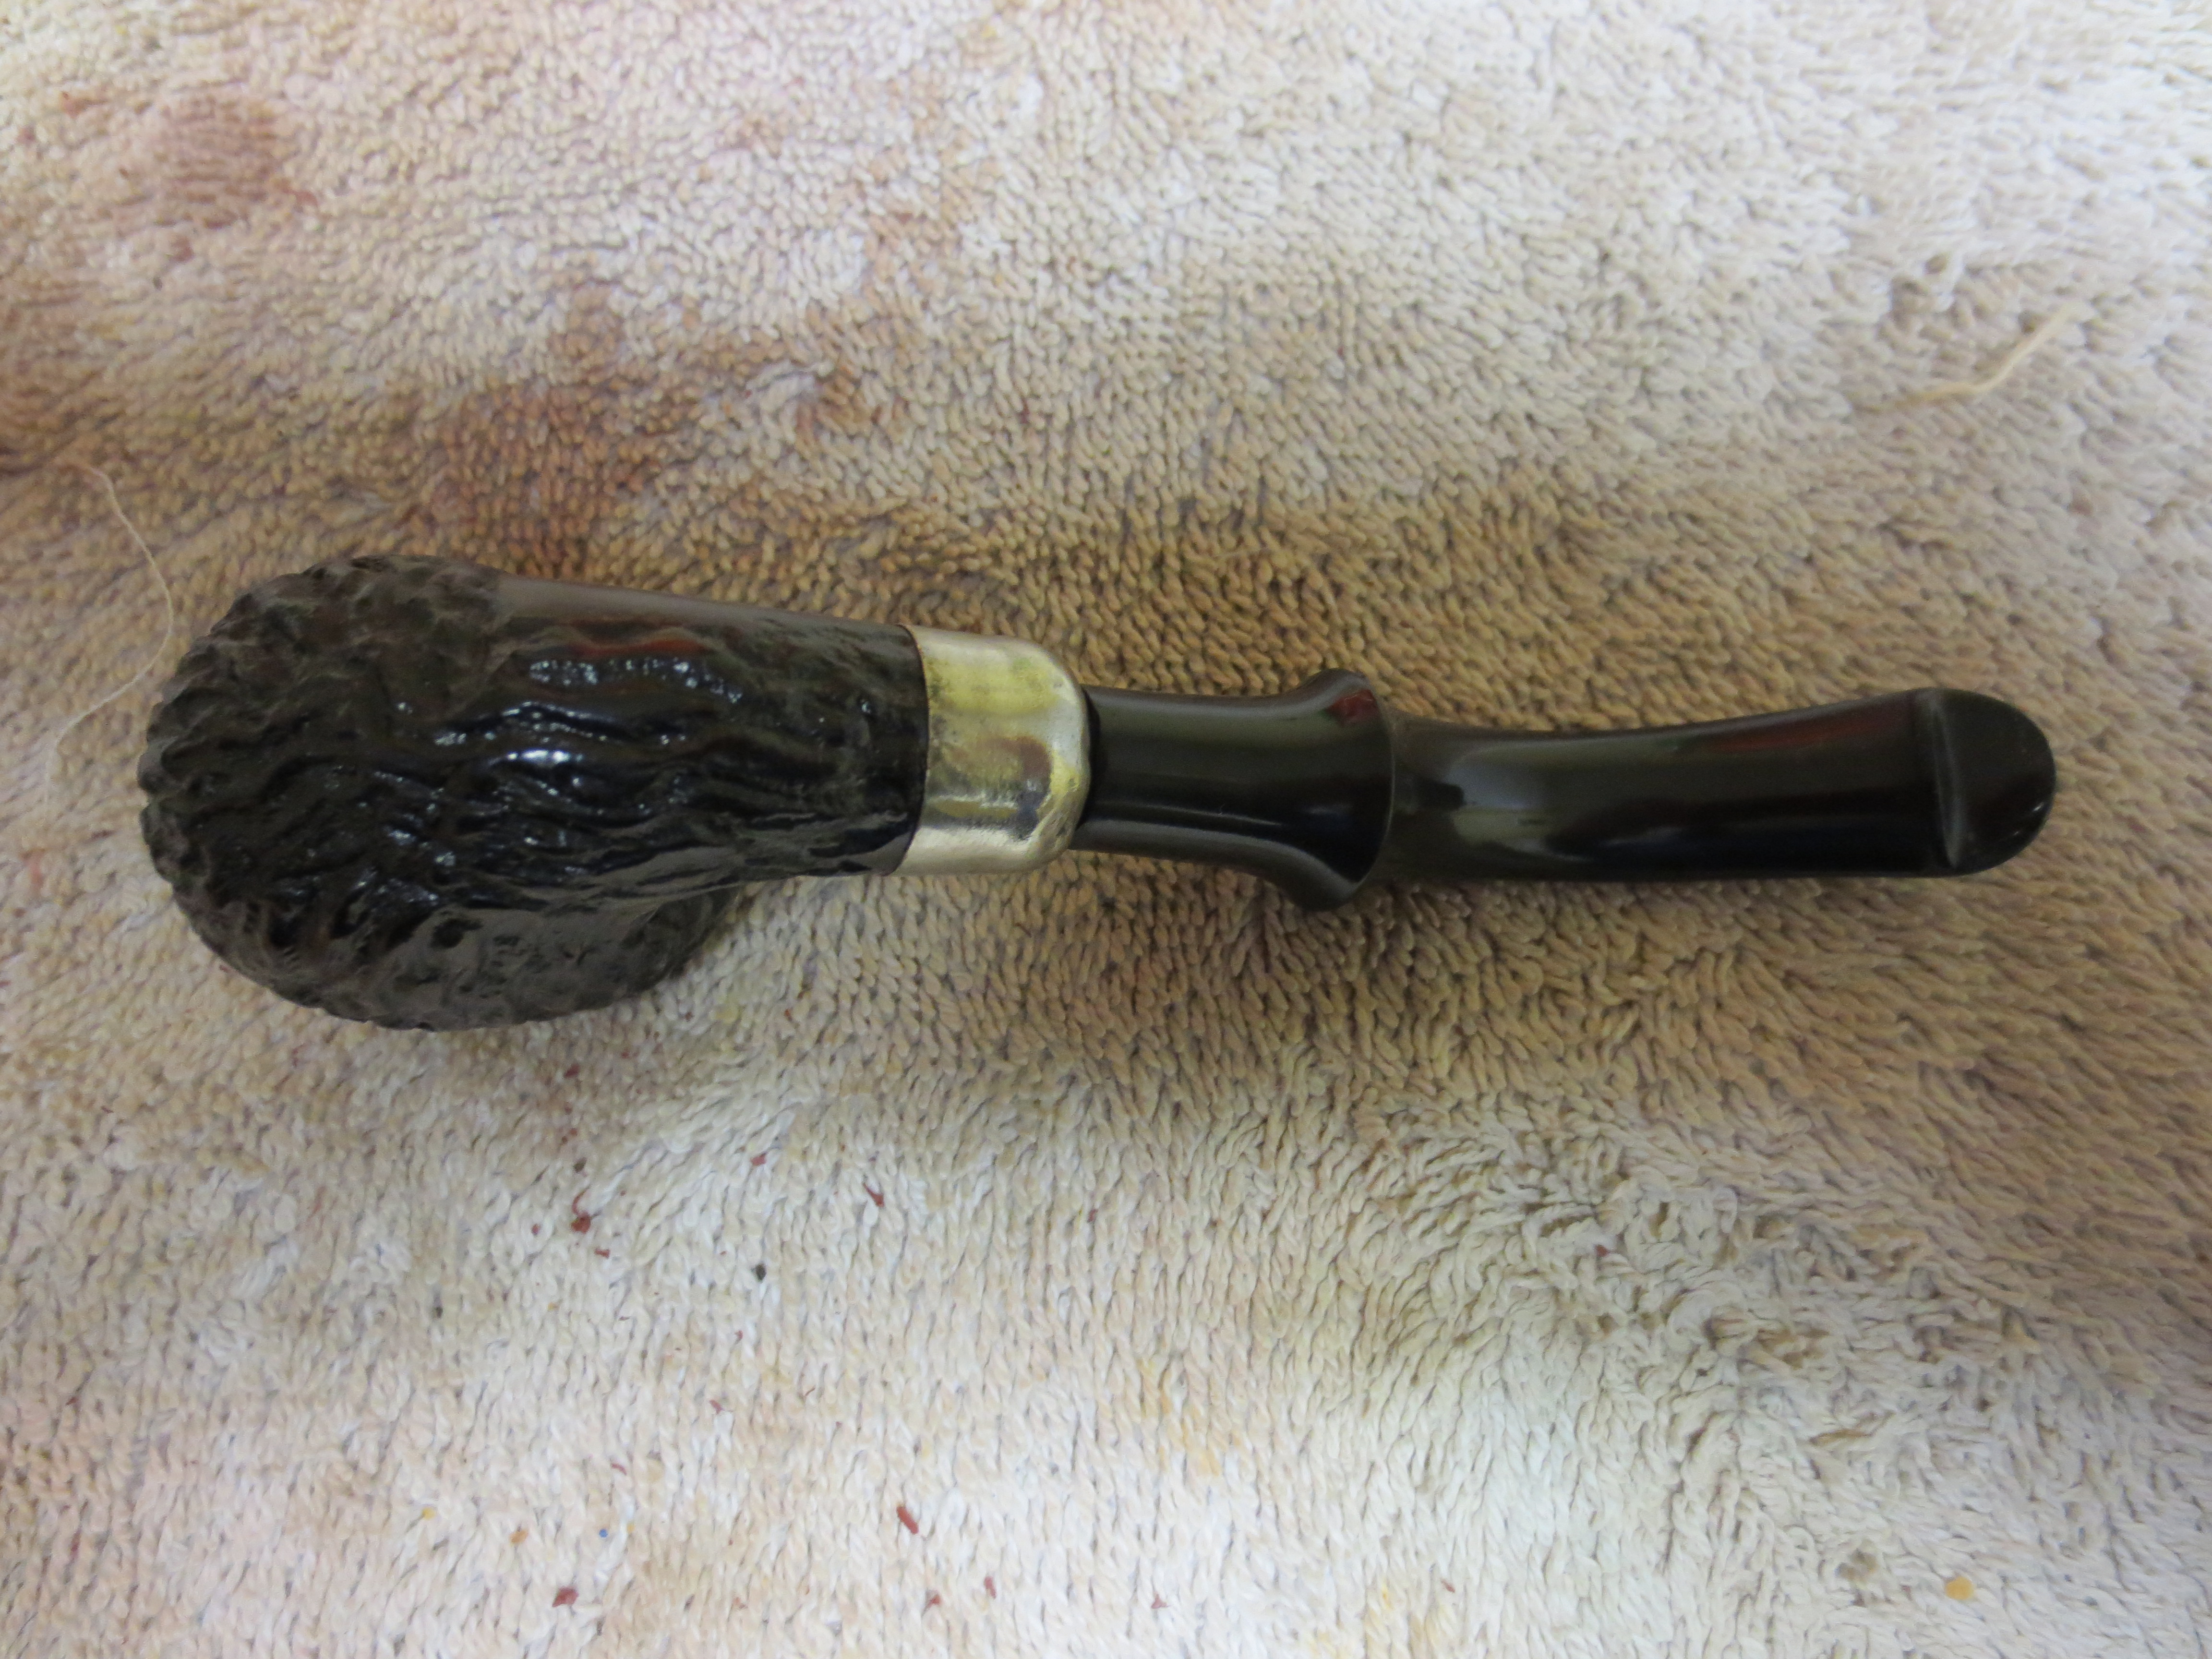
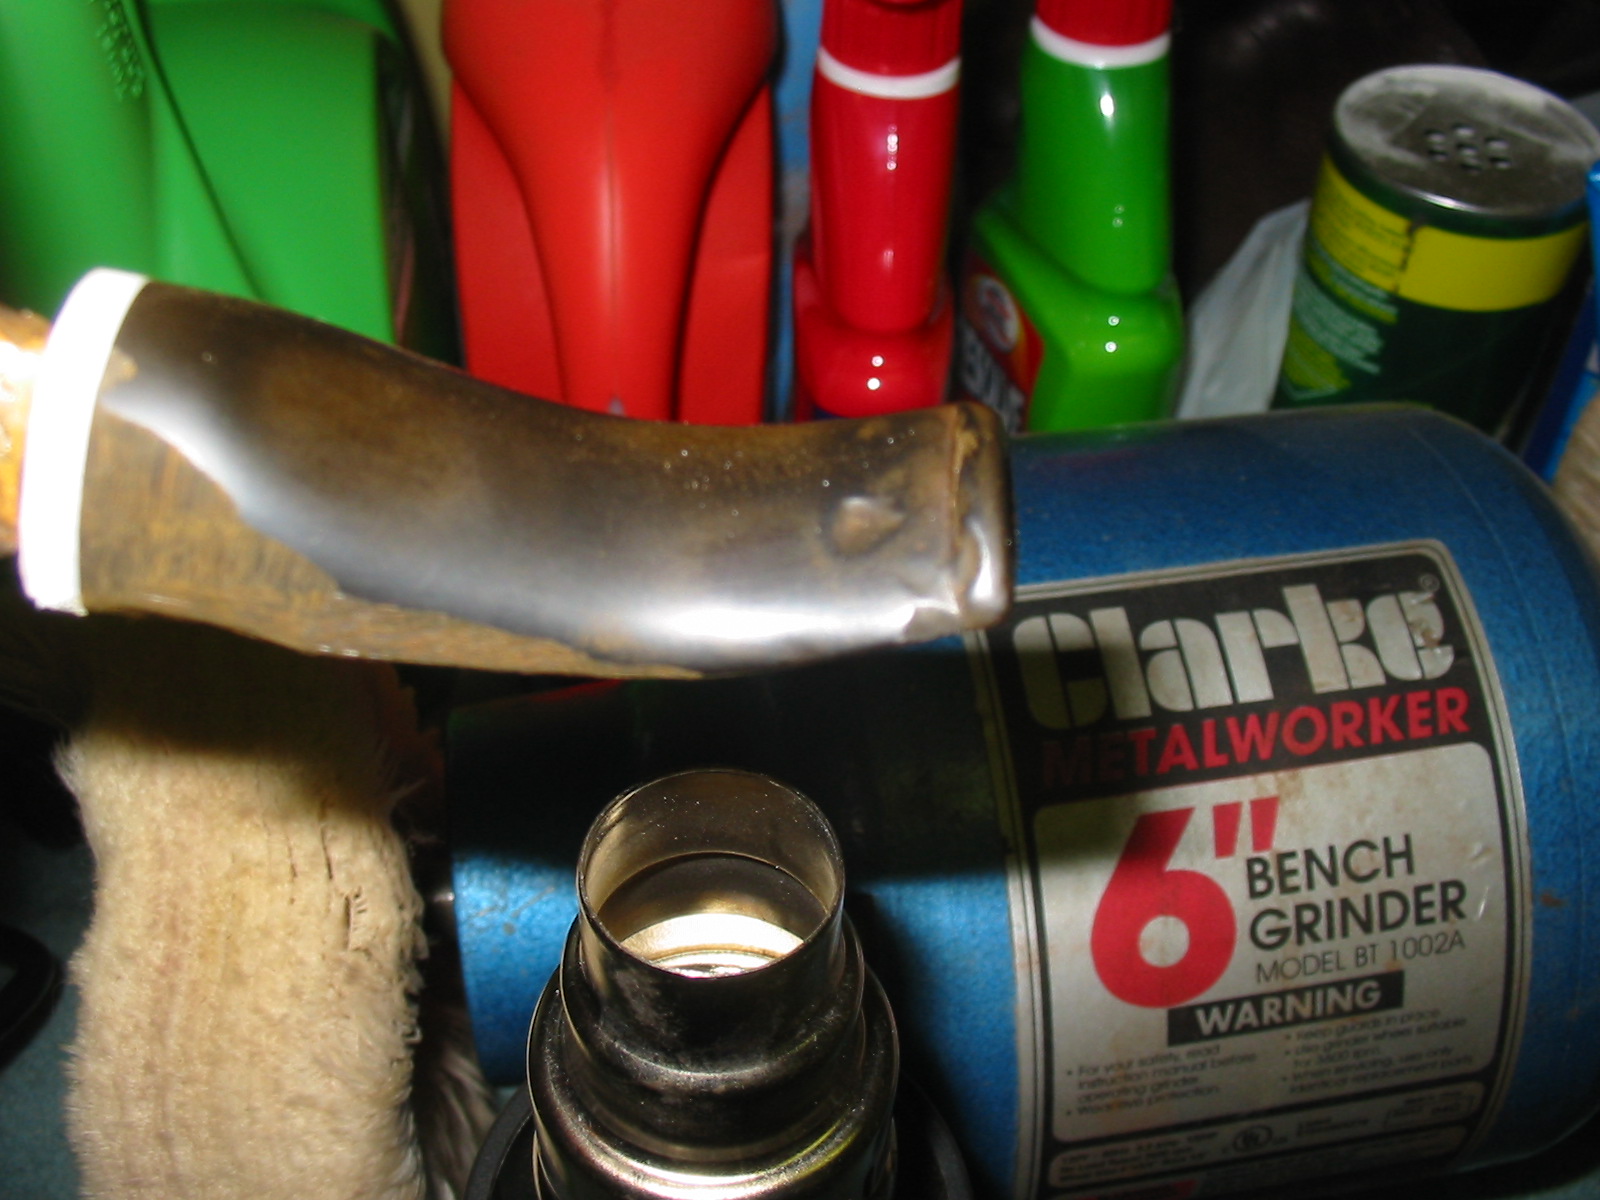
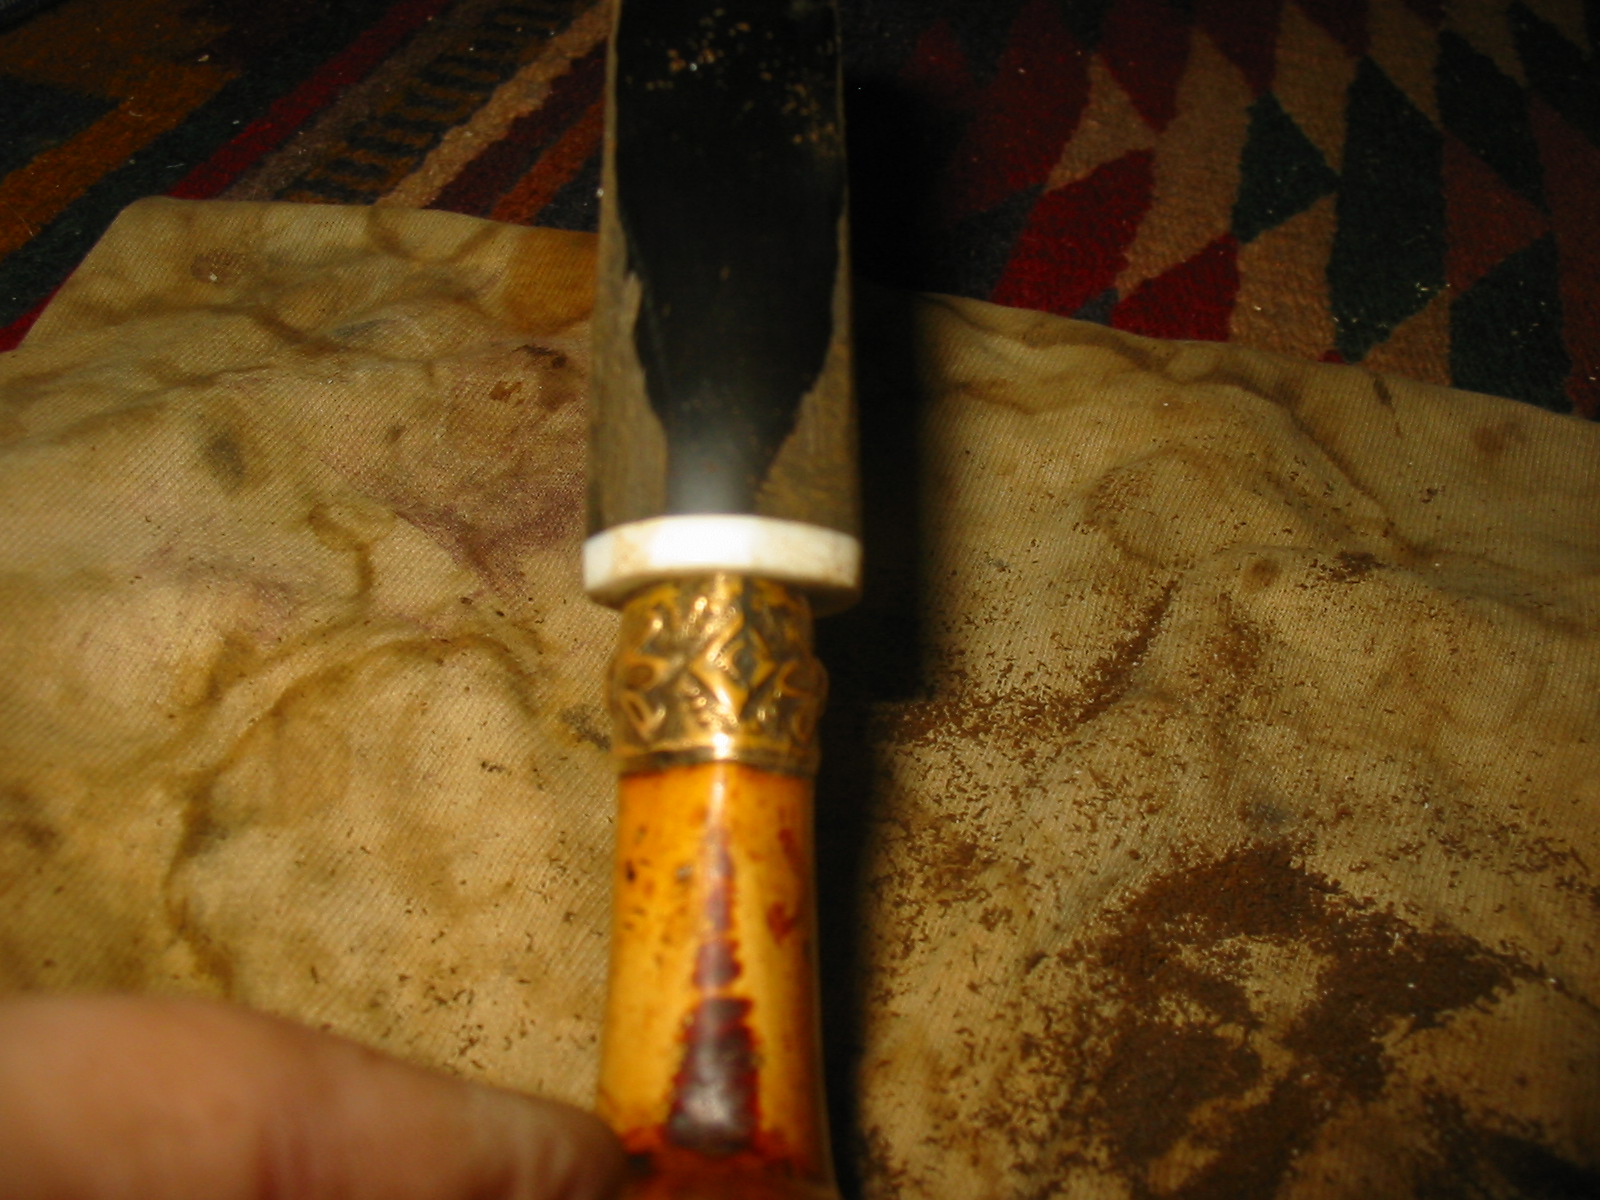
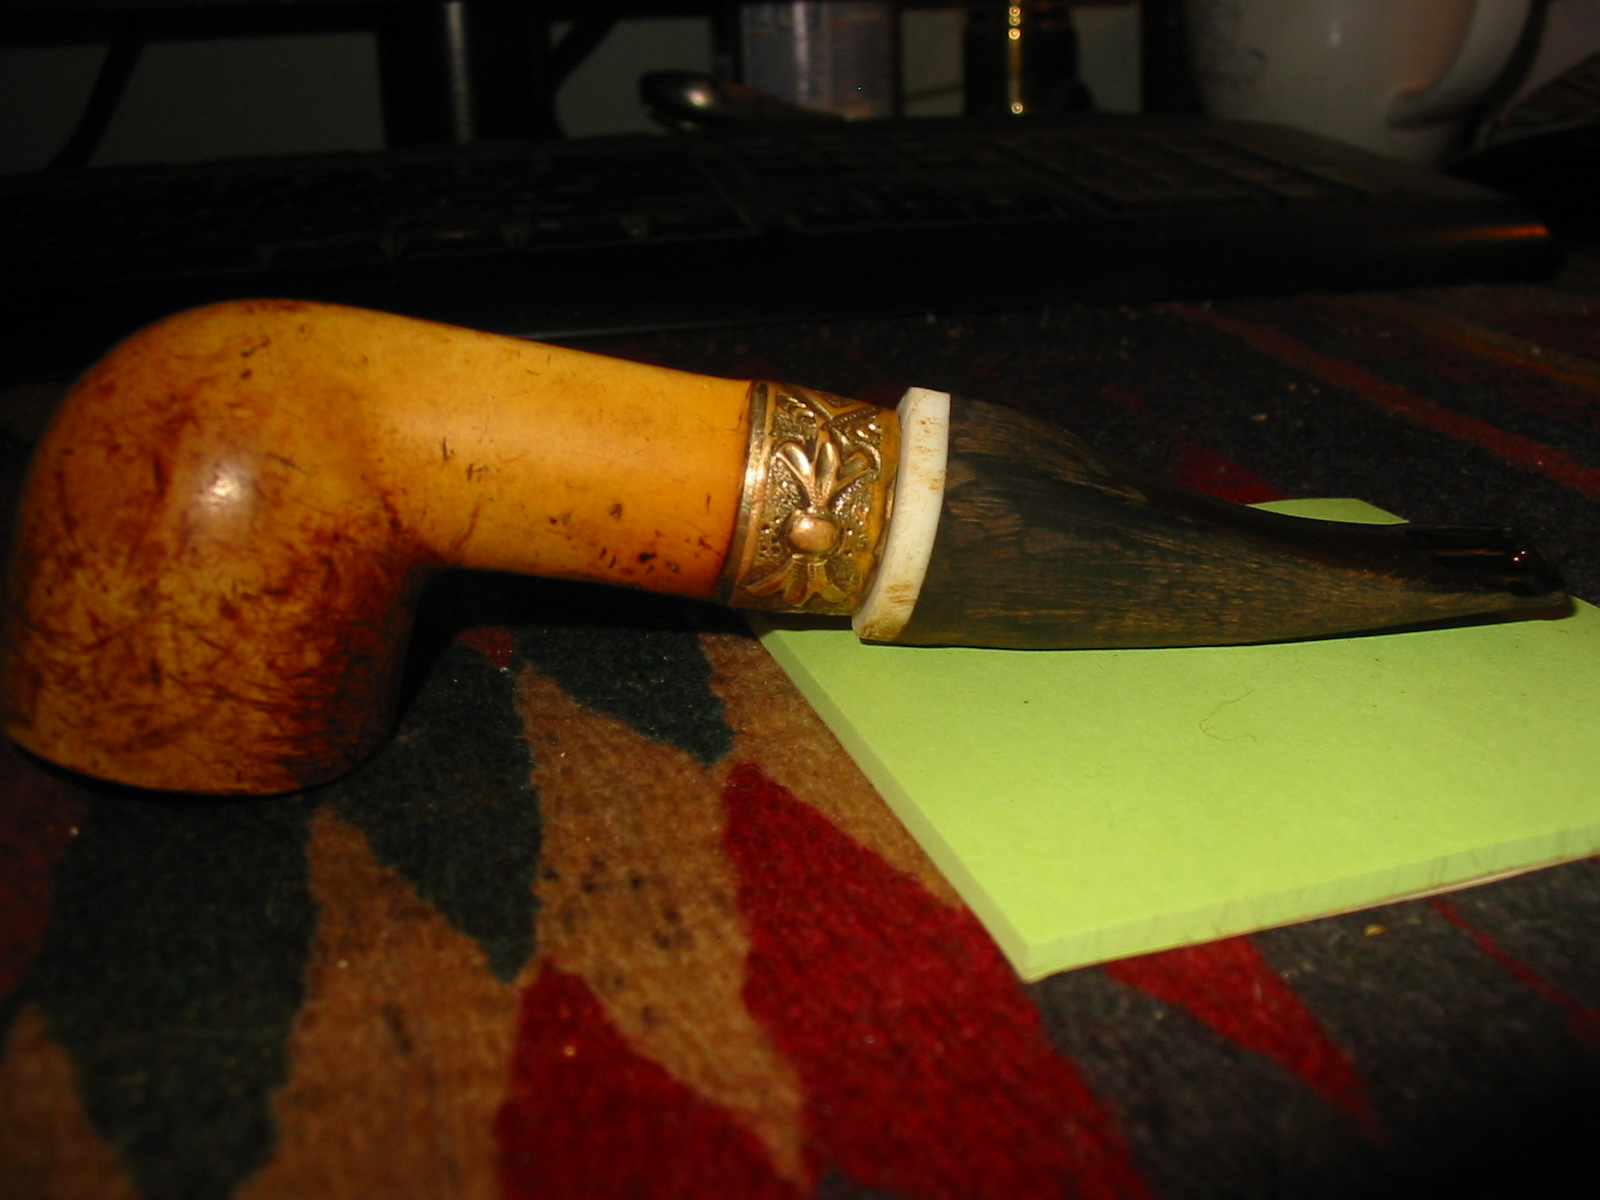
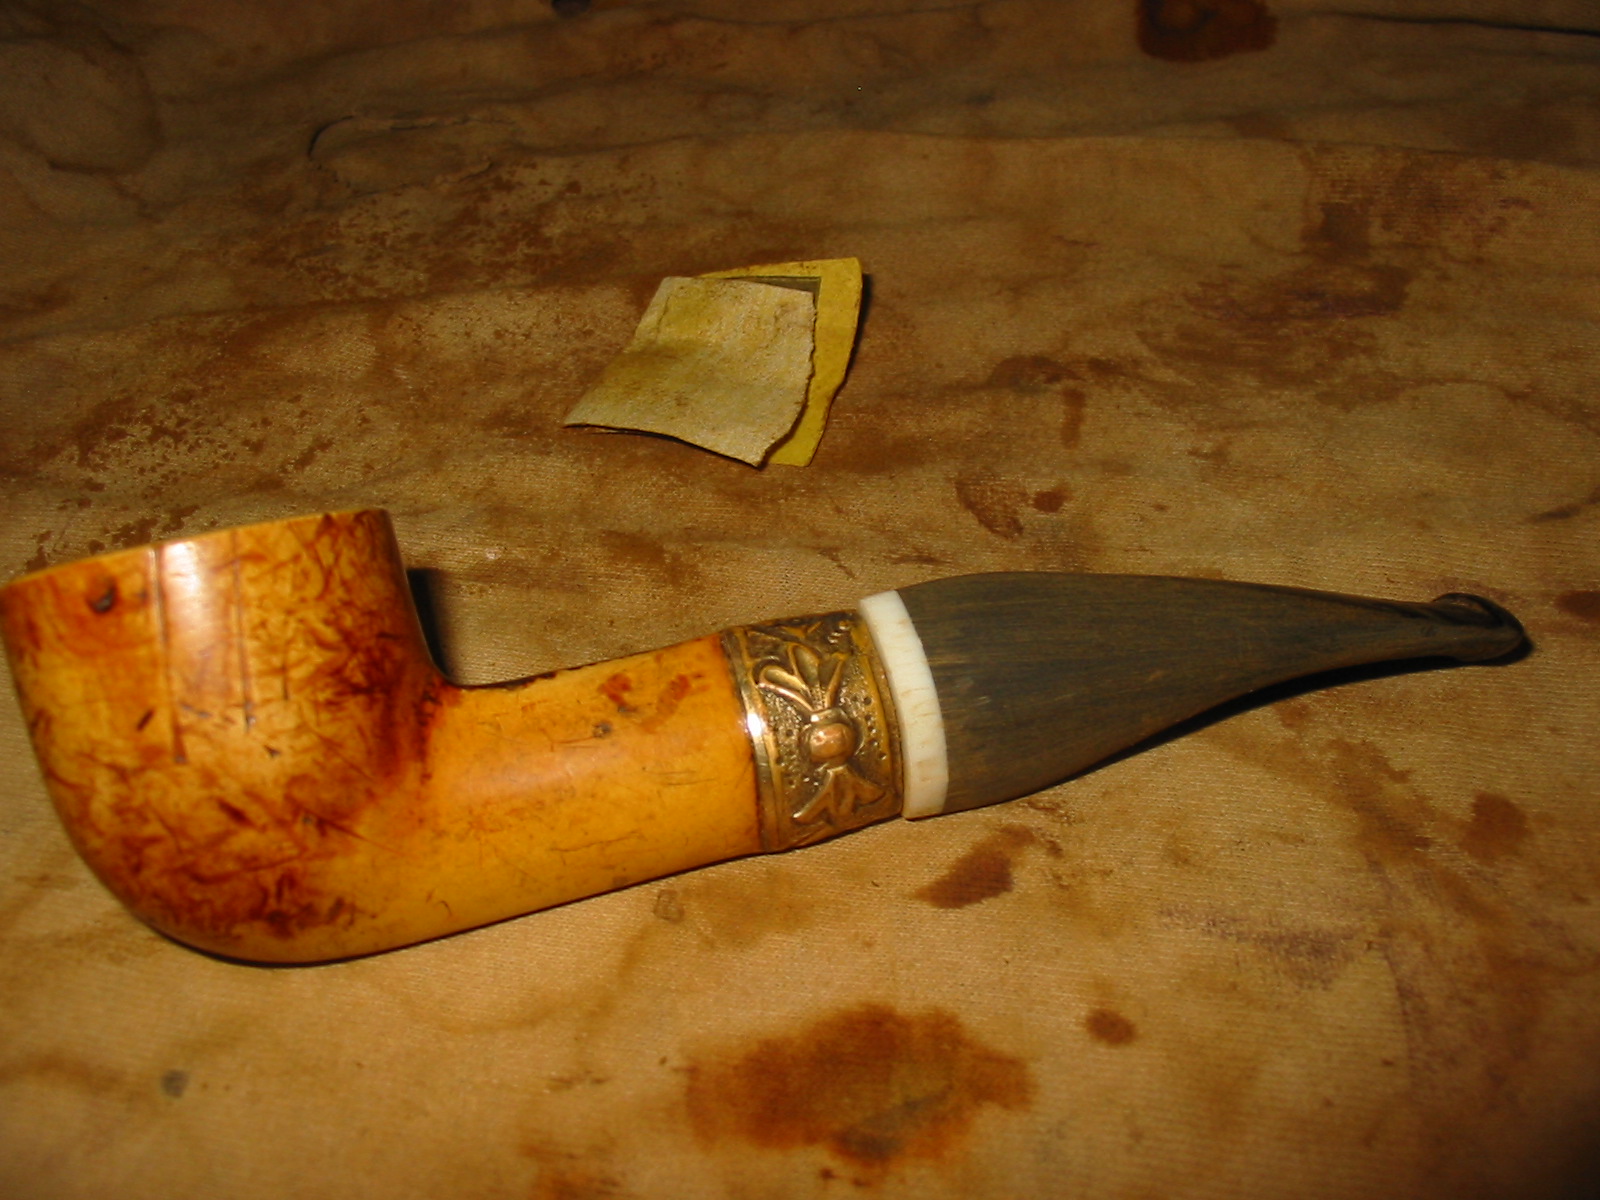
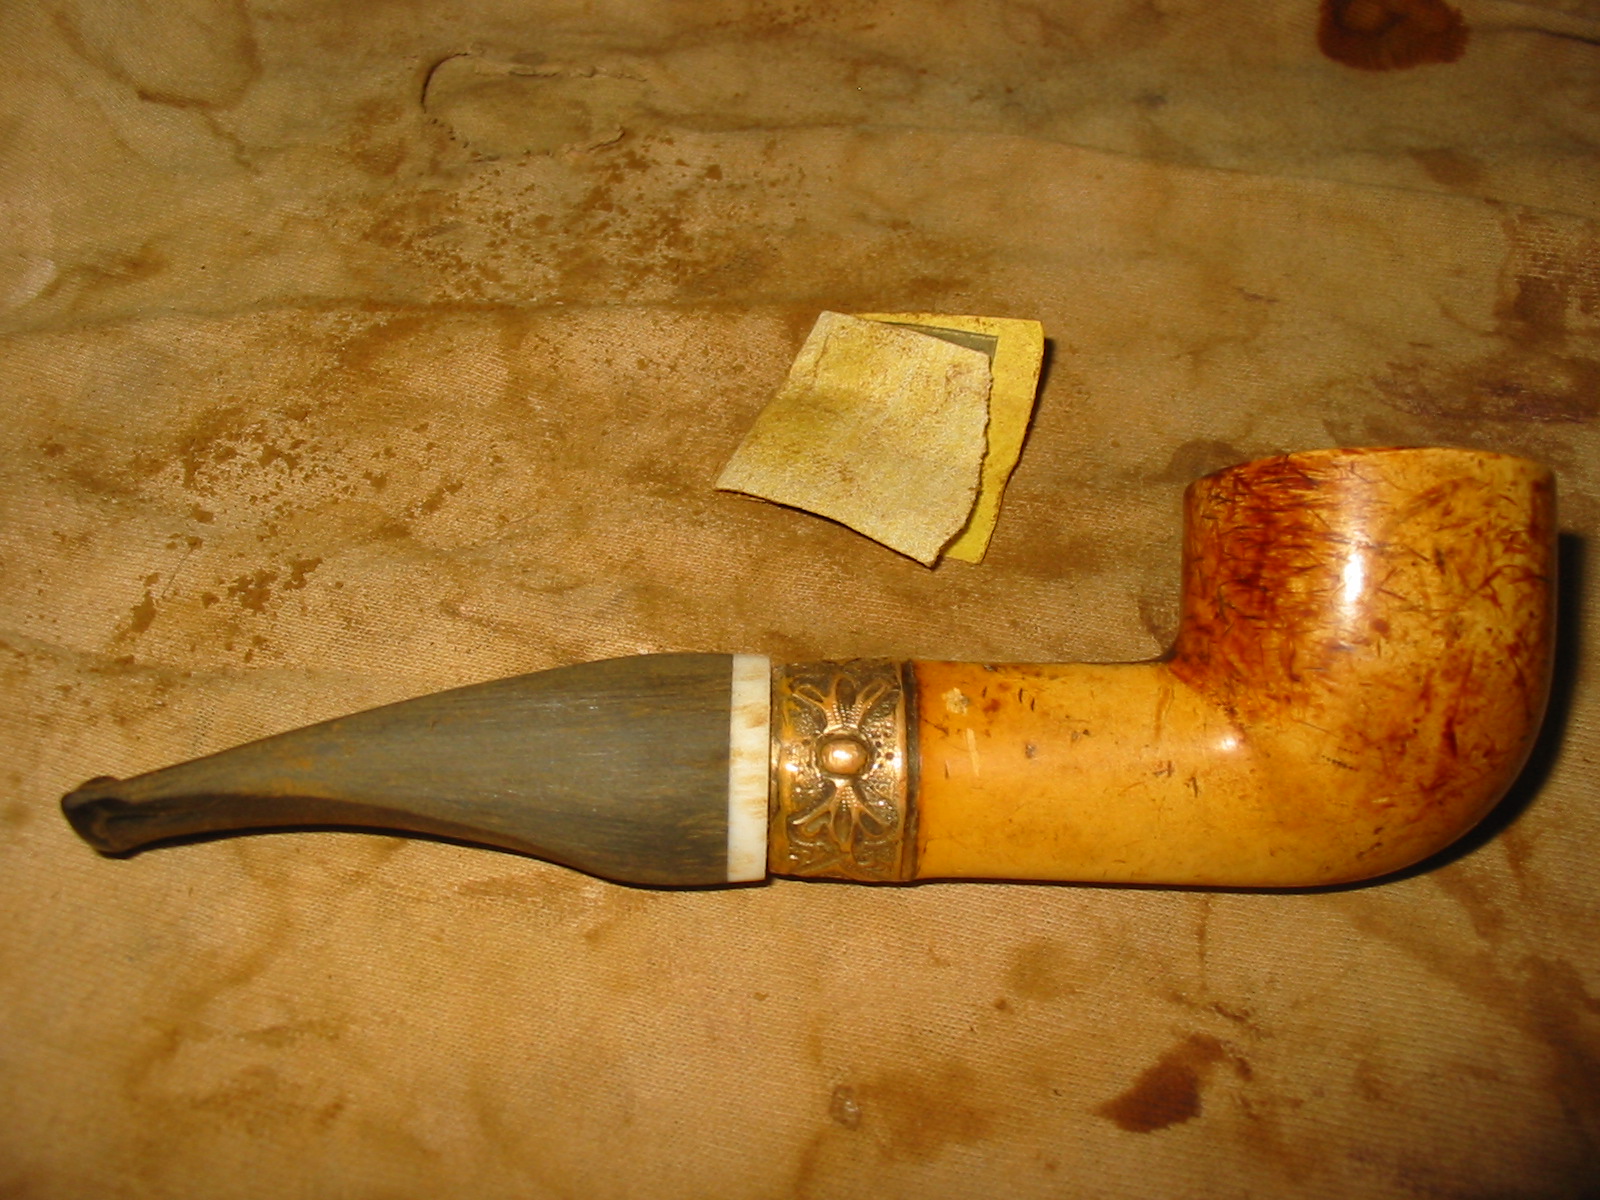
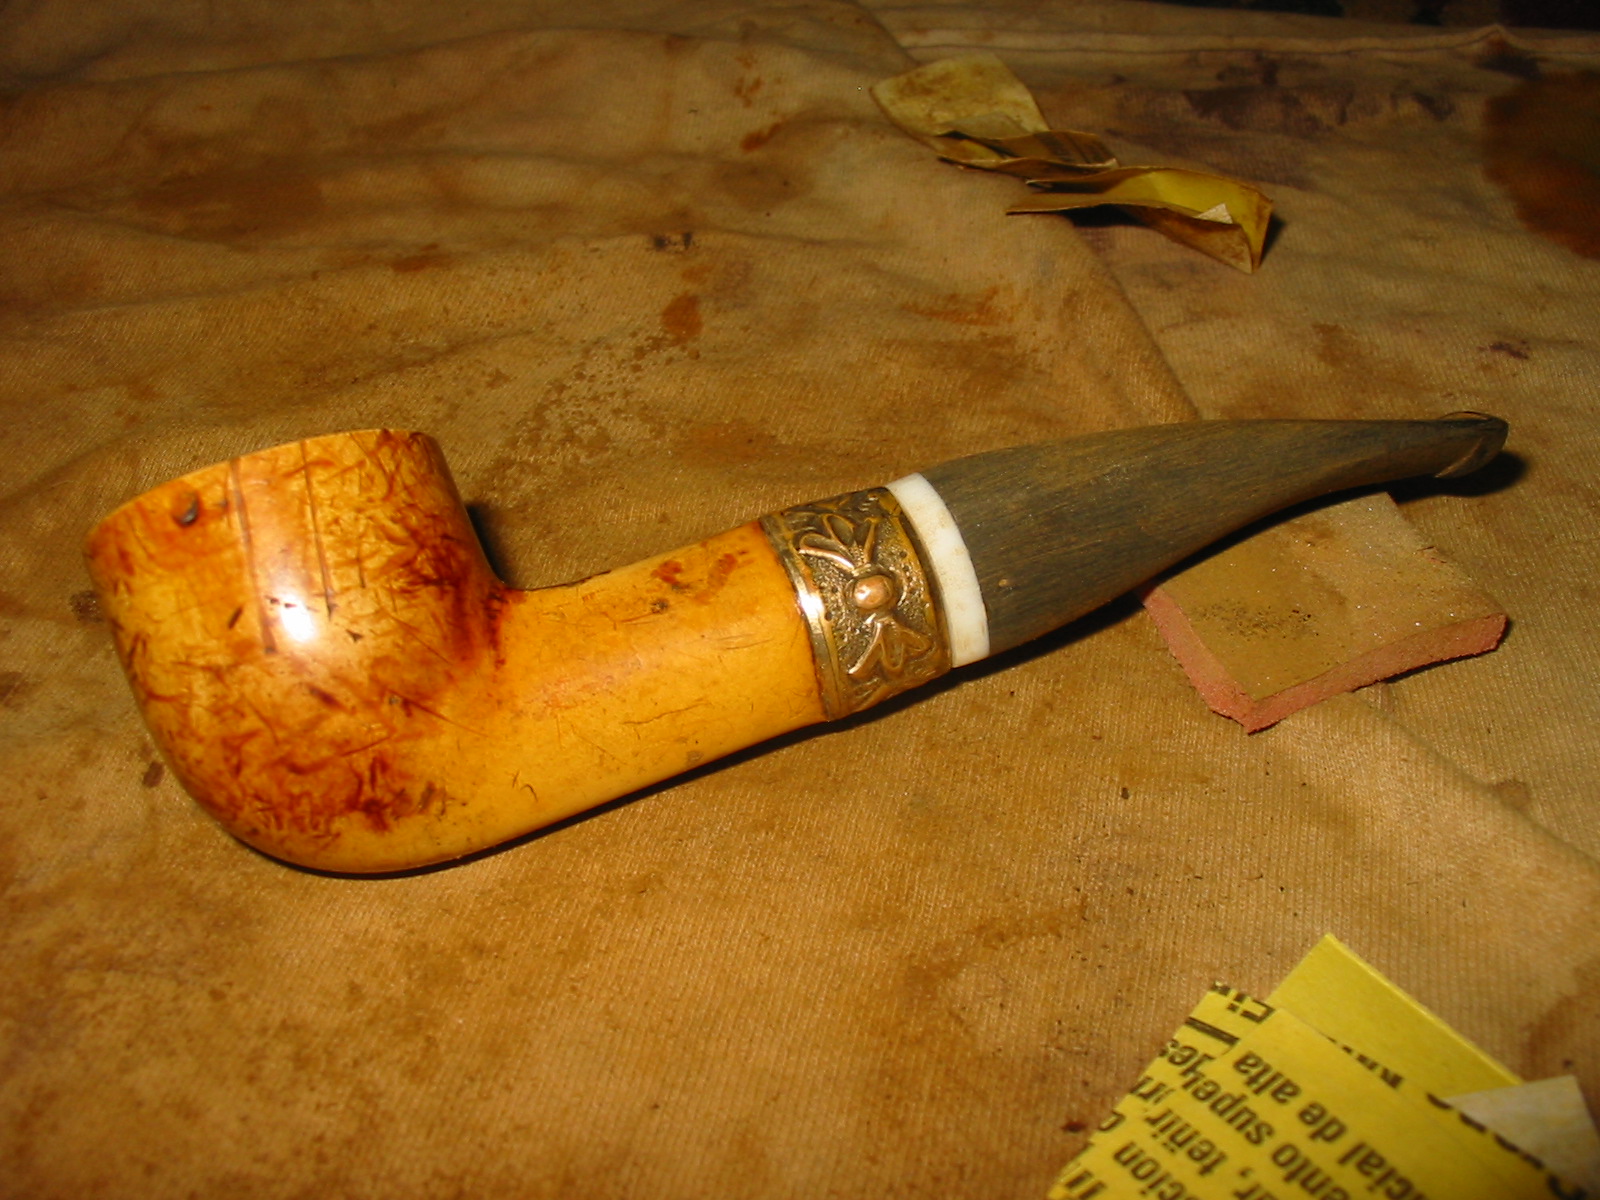
I buffed the stem with White Diamond and a blue plastic polishing compound to bring out the final shine on the stem. I hand waxed the meerschaum with beeswax and hand buffed it with a shoe brush. The next four photos show the finished pipe with the new stem. I like the marks and scratches in the meer as they seem to speak of the long journey the pipe took to get to me. The white Lucite band on the stem fits nicely in my thinking against the gold of the filigree band. The slight bend it the stem works nicely for me. From the last two photos you can see the oval shape of the stem now that it is completed. It has come a long way from the round stem I received as a gift from Ron.

IMG_1851

IMG_1852

IMG_1853

IMG_1854

Restoring on an Old Meerschaum Cutty with Amber Stem


Blog by Greg Wolford

I own two meerschaum pipes: an old African block estate pipe and a Turkish bulldog shape my son bought me for Christmas two years ago. Both of these pipes smoke well but they are also both quite large, for my evolving taste anyway, as a result, I don’t smoke either of them very often. So of late I have been on the lookout for a smaller ‘meer that was both affordable and appealing to my eye in local flea markets and antique shops. Most of what I find locally is priced too high, either in general or for my budget, and often they are in poor condition. But a couple of weeks ago I stumbled upon a little pipe that met all of my conditions and it became mine. I took it (and an old Kaywoodie that I’ve yet to touch) home and it waited in my “to do” basket until yesterday.

At first glance I saw that the pipe was dirty and likely had never been waxed. The screw in stinger was also out of time. But these were small things considering the price and my intended use: As a smoker not a show piece. The pipe also appeared to have a Bakelite stem that looked dirty but in good shape. Here are a few photos of it before I began:

IMG_7253_edited-1 IMG_7257_edited-1 IMG_7256_edited-1 IMG_7255_edited-1 IMG_7254_edited-1

I knew that I wanted to re-clock the stem and also to even out the bigger chips on the bowl and rim. For the chips I remembered Steve’s post on the meerschaum bowl he modified to fit a Kirsten pipe. So I got out some wet/dry paper in about 400 grit and also some well-worn 1000 grit to sand/polish the bowl and rim. after setting the needed paper out, I removed the stem to clean it and the shank well before anything else.

The first thing I noticed was that the stem looked and felt different from I expected; at the antique mall I didn’t look too closely since I was hoping to score a better deal on the pari of pipes. The stem seemed heavier and just, well, different from the Bakelite stem on my African meer. Not owning a pipe with an amber stem I had nothing to compare it to so I messaged Steve and sent these photos:

IMG_7261_edited-1 IMG_7260_edited-1

After a few exchanges, he directed me to a link to test to see if I had real amber. I started with the alcohol test: pass. Then I moved to the acetone test: pass again. In fact, after the tests and then cleaning the stem well with alcohol it was much shinier and better looking! The final test, which was inconsequential, was the taste test: Not only a pass but I could really feel a different in the mouthfeel of this stem versus any other I have. Now I was excited to get her cleaned up and tried out! As sort of a last test, I heated the stinger with my heat gun to see if I could loosen and straighten it; there were no bite marks to remove, thankfully. After a bit of heat the stinger did loosen but the stem didn’t soften like Bakelite or acrylic would. I began to adjust the stinger to find that the metal apparatus was a screw in tenon, threaded into the amber. So I removed it and dropped it (the tenon) into a bit os alcohol to loosen and dissolve the grime in the threads. While it soaked I began to clean the shank and stem with cotton swabs and pipe cleaners and alcohol. To my great surprise the shank and stem were very clean. I only used two pipe cleaners and two cotton swabs and they were not at all grimy:
IMG_7259_edited-1

After cleaning and drying everything I reassembled the pipe. I wasn’t able to get it 100% straight but it is better. I tested the draw now and it was open and clean tasting, though the air hole in the stem is not very large. There were, after the cleaning of the stem, some scratches and dings, all small, present. But the shine was pretty good and since I don’t feel comfortable with it I opted to not try to sand/remove them. I may at some point go back and wax it but I’m in no hurry for that. Time to move to the bowl.

I began by gently sanding at the deep chips, especially on the bowl.

IMG_7258_edited-1

This took some time with the 400 grit paper because I didn’t want to remove too much material. When it was close to what I wanted, I topped the bowl slightly to clean up and even the rim. I then moved to the well-worn 1000 grit to polish off the entire stummel, removing some stuck on pieces of tobacco and most of the dirt/grime. Then I tore off a piece of the 1000 grit paper and polished the bowl out a bit. There was some grime, some scratches and some “digging” marks in the bottom of the bowl. I wanted only to smooth it a bit as I thought it would remove too much material to attempt to fully even it out. Lastly I wiped the entire pipe down with a barely dampened with alcohol cotton pad to remove any dust that might have been remaining. This is the result:

IMG_7262_edited-1 IMG_7266_edited-1 IMG_7265_edited-1 IMG_7264_edited-1 IMG_7263_edited-1

I let it dry out for a few hours and loaded it up with a rubbed out bowl of Peterson Irish flake last night and rubbed beeswax on it as I smoked it. I must say it smokes as well or better than either of my other ‘meers! Unfortunately, I accidentally grabbed up a non-lint free rag to polish it after it had cooled and now have some lint specks in the wax. But I’ll be re-waxing it soon anyway and will fix it then. I also may sand it a bit smoother with 800 grit paper; there are a few scratches still visible but not too irritating to me. This morning I triad a little Rattray’s Accountant’s Mixture in her as I was writing this article and she smoked equally well. This is a look at her after the first wax application.

IMG_7272

All in all, I’m very pleased with my new no-name ‘meer. She is exactly the size I was hoping for, smokes great, looks pretty good and will look better with time and I got an amber stem that I’d not bargained for! The joys of the hunt and the rewards of the work: That’s why I love bringing these old pipes back to a useful, if not beautiful, state.

K&P London Made Found in a Bargain Shop


Blog by Steve Laug

Yesterday afternoon I went with my eldest daughter to Walmart here in Vancouver. Across the street is a bargain shop that sells lot of movie set items and other things that are collectible and antique. I have found quite a few good pipes there over the years. I went to the shop while she was in Walmart and looked over the lot they had this time. There were quite a few pipes in the case and most of them while interesting just did not capture my attention. Then I moved a few of them out of the way and underneath was this little P-lip apple. I could tell it was a Pete and an older one because of the thick shank and stem. I held it up to the light and my guess was confirmed. It was a Peterson. It was marked $28 and I offered $25 for it. They accepted the offer and I paid the bill and put the pipe in my pocket. I picked up my daughter and headed home to check it out.

I wiped off the shank with a cotton pad dampened with saliva and found that it was stamped K&P LONDONMADE on the right side of the shank. On the left side it was stamped 215 and A “PETERSON’S PRODUCT” Made In London. So I had found an English made Peterson’s shape 215 pipe. The band was silver and was badly tarnished but I could see from the hallmarks that it was also stamped with English hallmarks. The first was an anchor which told me that the band was made in Birmingham. The second was a reclining lion which is the stamping for Sterling silver. The third mark was hard to see with the grime and tarnish but looked like an animal face in the cartouche. Closer examination would have to wait until I had cleaned up the tarnish.

The pipe was in fair shape. The bowl had nicks in the sides in several places as well as a very rough rim. It looked as if it had been hammered about and was damaged. It would require topping to remedy that problem. The bowl had been reamed and was slightly out of round and then smoked again for some time – long enough to build up an uneven cake with most of the cake at the top of the bowl and the bottom of the bowl was bare wood. The silver band was loose and had turned about a quarter turn clockwise. The stem was very tight in the shank – which thankfully had kept the band in place on the pipe. The stem had many bite marks and tooth dents up the shaft from the button for about an inch. It looked as if the individual who had smoked it held it far back in his teeth. Both the underside and topside of the stem were damaged with tooth marks and a series of grooves from a tool. The button itself and the ledge on the underside were in very good shape. The round opening in the button was elongated from years of pipe cleaners.

I was able to carefully remove the stem and the inside of the shank was darkened with tars but not terribly dirty. The end of the tenon is stepped down and the fit in the shank was very snug. After cleaning the stem would fit well. There was no stamping on the oxidized stem and appeared to be no remnant of stamping. The oxidation on the stem was heavy at the shank stem union and also around the button on the top and bottom.

IMG_1664

IMG_1665

IMG_1666

IMG_1667

I wrote about the stamping to Mark Irwin who is my Peterson’s go to contact for information on Peterson pipes. He is a wealth of information that I have been unable to find in other places. He was on the road but sent me the following information. “…The “Peterson Product” indicates the pipe is a lower line. They began using this stamp in the 1930 catalog for their “K” pipes, but if it was this, you should’ve seen a “K” on it. There were several “200” series shapes, but the “215” is not in a catalog I have here. The London factory was much smaller than the Dublin, but I’ll have to ask Gary about the hallmarks, as I’m unfamiliar with the Brit system. Best my guess tonight is that the pipe dates anywhere from 1920-1940. I have photos of a thick-shanked and thick-stemmed straight apple hallmarked Dublin 1920–I can send you a .gif when I get home if this sounds like the pipe. If so, the shape itself goes back to at least that year.”

That was helpful information on the dating of the pipe. I sent Mark the photos last evening and then this morning received this reply concerning the pipe. “… Gorgeous! Yup, it’s the same shape as the photo I have, which means the shape itself goes back to at least 1920.” In the mean time I had cleaned up the band with silver polish and scrubbed it with a soft cotton pad. I reset it with white glue on the shank and examined the hallmarks under a bright light with a jewelers loop. It became clear that the last of the hallmarks was not an animal but rather a letter in the cartouche. It was well worn but from the outlines on the mark it appeared to be the letter “T” which dates the pipe to 1943.

IMG_1669

I reamed the bowl with a PipNet reamer using the smallest cutting head and the next size as well. I removed the cake back to the wood to even out the broken cake. I cleaned out the shank with cotton swabs to remove all the tars and oils in the shank. Once I had cleaned out the shank I also cleaned the stem with pipe cleaners. I used Everclear with cotton swabs on both. When it was finished I put the stem back in the shank and the fit was snug.

IMG_1670

I topped the bowl with my usual method – 220 grit sandpaper on a flat board and turned the bowl clockwise as I pressed the rim into the sandpaper. I sanded the top until the damaged portion of the rim was removed. One side benefit of the process was that it also removed some of the damaged inner rim as well bringing the bowl back into round.

IMG_1671

IMG_1672

IMG_1673

To prepare the bowl for restaining I wiped it down with acetone on a cotton pad. I wanted to remove as much of the finish as possible so that I could more easily blend the new stain on the rim with the stain on the bowl. I have found that if I thin down the original stain on the bowl I can generally make a good match with the rim when I stain the entire pipe. The rim always takes several more coats of stain than the bowl but the match comes out very well. I wanted to end up with a stain colour that matched the original stain colour as much as possible. Between each coat of stain I flamed the stain to set it in the grain of the briar. The stain I used was an aniline stain in a dark brown that I thinned 2:1 with isopropyl alcohol. Once it was dry I hand buffed it with a shoe brush to blend the colours of the stain and give me a clear look at the stain to make sure it was evenly applied.

IMG_1674

IMG_1675

IMG_1676

IMG_1680

IMG_1681

IMG_1682

I set the bowl aside and worked on the stem. I sanded the stem with medium grit emery paper to remove the oxidation and also clean up the vulcanite around the tooth dents. Once clean, I heated the dents by passing the flame of a lighter across the tooth marks. The heat of the flame lifts the dents to the surface. The key is to keep the flame moving quickly and not allow it to sit in one place too long or the stem will burn. The first photo below shows the tooth marks on the top side of the stem. There were matching tooth marks on the underside. The second photo shows the stem after the heating with the flame. I sanded the stem with 220 grit sandpaper and also a fine grit sanding sponge to remove the scratches and remnants of the dents. I filled the two remaining dents with super glue, sanded the glue down to match the surface of the stem and then finished the sanding with micromesh sanding pads from 1500-12,000 grit (Photos 3 – 5).

IMG_1677

IMG_1678

IMG_1679

IMG_1683

IMG_1684

Once the stem was sanded with the 12,000 grit micromesh pad I wiped it down with Obsidian Oil and when dry rubbed it into the stem. I gave the stem several coats of wax and returned it to the bowl. I polished the silver band a final time and also waxed that. I buffed the pipe lightly with White Diamond and gave it multiple coats of carnauba wax and buffed it with a clean flannel buffing pad. The finished pipe is pictured below. It has some beautiful grain on it. There are also some flaws in the briar that I chose to leave as I find they add character to the pipe.

IMG_1685

IMG_1686

IMG_1688

IMG_1689

Refurbed No name Dublin


I am once again down to the remnants of the box of pipes to refurbished. This one is a no name Dublin with a large bowl and a long stem. The only stamping on the pipe is the words Imported over Briar on the left side of the shank. It is a screw mount metal tenon but the condenser attachment is missing. The stem was oxidized and had tooth dents on the top and bottom near the button. The inside of the stem was sticky black tar and smelled of sweet aromatics with goopy topping. The bowl was caked but not too badly so. There were flakes of tobacco stuck to the walls of the bowl. There was some darkening to the briar on the outside that made me wonder what I would find underneath the uneven cake. The exterior of the bowl was very dirty. There was a lot of oil ground into the finish on the smooth parts of the bowl and the carved feathers/leaves had dirt built up in the grooves. There was also a large drop of green paint on the lower left side of the bowl. The rim was caked and dirty and was slightly out of round.

IMG_1640

IMG_1641

IMG_1642

IMG_1643

I reamed the uneven cake from the bowl with the PipNet reamer set. Underneath the surface of the cake there were some fissures in the surface of thin cake I left on the wood of the inside of the bowl. The pipe may be a candidate for quick bowl coating or pipe mud to protect it from any damage or burn out. I scrubbed the exterior of the bowl with acetone wetted cotton pads. It took many pads before I was down to the clean surface of the briar. I topped the bowl with a medium grit sanding block to remove the buildup on the surface. I followed up on this with a fine grit sanding block to remove the scratches and then with a fine grit sanding sponge. I used a tooth brush and acetone to clean out the grooves of the carvings.

IMG_1644

IMG_1645

I sanded the entire bowl and shank with a fine grit sanding sponge to remove the remaining finish. I also sanded the stem with 220 grit sandpaper and then followed up with the same sanding sponge. I heated the bite marks with a Bic lighter to lift them and then sanded the surface smooth with 220 grit sandpaper. I sanded that area of the stem with fine grit sandpaper and a sanding sponge. Once the bowl was sanded and ready to be stained I wiped it down a final time with an acetone wetted cotton pad to remove the sanding dust from the grooves and carvings.

IMG_1646

IMG_1647

IMG_1648

I sanded the stem with micromesh sanding pads from 1500-12,000 grit to bring back the shine. I rubbed down the stem with Obsidian Oil and buffed it with White Diamond. I coated the stem with carnauba wax and hand polished it with a shoe brush.

IMG_1649

IMG_1650

IMG_1651

I stained the bowl with a dark brown aniline stain that I mixed with isopropyl alcohol in a 2:1 ratio to get it to be the colour I wanted for this pipe. I applied the stain with a cotton swab and flamed it to set it in the grain. I repeated the staining until the colour was on target and even around the bowl. Each time I flamed it to set it in the briar. Once it was dry I buffed the pipe and stem on the buffer with White Diamond and then gave it repeated coats of carnauba wax and buffed in between with a soft flannel buffing pad. The finished pipe is pictured below.

IMG_1652

IMG_1653

IMG_1654

IMG_1655

It appeared to be a hopeless case, but was it really?


Blog by Steve Laug

This pipe was posted on Smokers Forums as one that was in rough shape. http://www.smokersforums.co.uk/showthread.php?273-Whew! As soon as I saw it I thought it would be fun to take on as a challenge and see what could be made of it. It was truly in very rough shape. So I put in a low bid on EBay and it was mine. Only the wait remained before I would see what I got myself into.

Worchester Dog

When it arrived I opened the box and took it out to see what I had to deal with on it. The stem was stuck in the shank and it was off center. I made a guess that it was a screw in stem – metal tenon and some kind of condenser. The finish was absolutely ruined. There was an opaque film all over the bowl and shank of varnish that had gone bad. There were crackles in the finish. The shank was crack badly and the shank was no longer square – the crack had expanded away from the angles of the pipe. The rim was invisible and the bowl was caked with a thick cake but upon examination it was full of cracks and crevices rather than a hard cake of carbon. Looking at what I could see of the inner edge of the rim it seemed like it was not damaged – at least not by reaming! There were several burn spots on the outside of the bowl around the rim and left side of the bowl from laying the pipe in an ash tray with a cigarette. It would indeed be a challenge and one that I wondered seriously about for a few moments.

I immediately put it in the freezer for a half an hour to see if I could loosen the stem from the shank. Once I took it out I was able to twist off the stem and remove it from the shank. I took it to my work table and examined it to see what I had to work with. I was quite happy to see that the shank had a metal tube inside that was threaded to receive the tenon. The tube extended into the shank about an inch. This would make a repair on the crack quite simple and not require that I band the pipe. The stem was overturned and the tenon would need to be heated until it was loose and then realigned on the shank. The insert in the shank extended further than the end of the shank and kept the stem from seating correctly against the shank. I also noted that the stamping did not read Worchester as the seller had listed it but that it read Dorchester and underneath that Algerian Briar. There was also damage on the shank near the bowl on the right side where the edge was pretty chewed up by what looked like a pair of pliers used to try and remove the stem from the shank. The slot in the button was clogged with oils and tars so I was assuming that insides were the same way. The stem had white spots on it that at first appeared to be paint but were actually pits in the stem. It appeared to be made of something other than vulcanite. I was not sure what it was but it was not rubber. All of the issues with this pipe, and they were many, but it was very repairable.

IMG_1583

IMG_1584

IMG_1585

IMG_1586

I reamed the bowl with a PipNet reamer using the smallest cutting head first and gradually working up to the diameter of the bowl. I wanted to ream the pipe back to bare briar to give a fresh start and be able to see if there were any burn out issues in the bowl. There were none.

IMG_1588

IMG_1589

IMG_1590

With the bowl reamed and the cake gone it was time to clean the exterior of the bowl and rim. I wiped it down with acetone to remove the finish and break up the crackled varnish that is visible in the above photos. I also lightly topped the bowl with a sanding block to remove the crumbly build up on the rim. I was guessing from my examination that the rim itself was not damaged so a light topping to remove the buildup would be all I would need to do. The next series of photos show the process of wiping down the bowl, topping it and wiping it down a second time after topping. While most of the varnish finish was gone, not all of it would come off with the acetone wash. So in the last picture below you can see the crackly finish on the shank and at the bowl junction.

IMG_1591

IMG_1596

IMG_1595

IMG_1594

IMG_1593

IMG_1592

I decided to drop the bowl in my alcohol bath to soak while I worked on cleaning up the stem. I use an alcohol bath to soak the pipe bowl and get underneath the varnish coat. Once it comes out of the bath it is relatively simple to wipe off the remaining finish. While it soaked I scrubbed the stem with Everclear and a soft bristle tooth brush. I scrubbed off the surface grit and grim and also worked on the button and slot to loosen the grit. I scrubbed the condenser as well with the Everclear and also used 0000 steel wool to polish it. I cleaned out the inside of the stem with thick and bristle pipe cleaners. Once it was clean it was time to take the bowl out of the bath.

IMG_1600

IMG_1601

I removed the pipe from the bath and scrubbed it with the tooth brush. I worked on the grooves in the bowl and also at the shank bowl junction. I dried it off and prepared it for work on the cracked shank. The crackled finish was finally gone and the pipe was clean.

IMG_1602

IMG_1603

IMG_1604

I scrubbed the area around the crack in the shank and picked out dust and particles with a dental pick. I dripped clear superglue into the crack and packed in briar dust with a dental pick. I clamped the cracked area and set it aside to cure for about a half hour.

IMG_1613

Once I removed the clamp the crack was sealed and the shank was returned to its original shape. I sanded the shank area to remove the excess superglue and the briar dust that was on the surface. The photo below gives a clear picture of the end view of the repaired shank and how it was squared up.

IMG_1614

The next step in the repair process was correcting the overturned stem. I removed the stem and sanded the metal end of the mortise insert flush with the shank end. Then I heated the tenon over a heat gun and when it was warm screwed it on to the shank and turned it until it lined up well with the shank.

IMG_1615

IMG_1616

IMG_1617

With the stem and shank aligned I sanded the shank area to clean up the damage to the right side where the marks were from someone’s pliers. I also sanded the stem shank junction and the repaired crack with a sanding block until the sides were all smooth in their transition from stem to shank. I wiped it down with an acetone wet cotton pad to remove the sanding dust and prepare it for staining. I used a black permanent marker to cover the fills in the bowl. I have found that when I follow the grain pattern with the marker before restaining the stain works well to mask the fills.

IMG_1618

IMG_1619

IMG_1620

IMG_1621

I chose to do a contrasting stain on this pipe, a black understain and an oxblood/mahogany top stain. I heated the briar and then applied a black aniline stain to the pipe. I applied it with a cotton swab and flamed it with a lighter. I reapplied the stain and also flamed it again to set the stain in the briar.

IMG_1622

IMG_1623

IMG_1624

I wiped the bowl down with acetone to lighten the black stain and make the grain stand out on the pipe. I also sanded it with a fine grit sanding sponge.

IMG_1625

IMG_1626

IMG_1627

From the above photos you can see the coverage of the black stain and the way in which the black permanent marker blends into the grain of the pipe. I wiped the pipe down repeatedly until it was the colour I wanted before I put on the next coat of stain. For the top coat I chose to use an oxblood or mahogany coloured aniline paste stain. I rubbed it on with cotton swabs and wiped it off with a soft cloth.

IMG_1628

IMG_1629

IMG_1630

IMG_1631

IMG_1632

IMG_1634

At this point I wiped the bowl down a second time with acetone wetted cotton pads and lightened the reddish finish. The fills are slightly visible but once the pipe is buffed and polished they will be blended in better. I buffed the bowl with White Diamond to remove more of the excess stain and help the contrasting under stain to show. I sanded the stem with a fine grit sanding pad, and then with micromesh sanding pads from 1500-12,000 grit until it shined. I then gave it a rub down with Obsidian Oil and finally with multiple coats of carnauba wax. Here is the finished pipe. It is ready to smoke and will in all likelihood last longer than I will. The lightweight aged Algerian briar evidently made this a great smoking pipe for the previous owner and it will remain that I am sure for the owners to come.

IMG_1636

IMG_1637

IMG_1638

IMG_1639

An Engagement Pipe (GBD 548 Seventy-Six)


My family had a pretty big life event here last week. My daughter came home from New Orleans for a week of vacation, with the boyfriend of two years in tow again. He had called us a few weeks prior to ask permission to marry her, the first of our daughters to get engaged. This young man is quite a gentleman, as you might have guessed (who knew guys still ask for permission?). He and I share a number of interests, including pipes. I enjoyed my week with him and we were able to spend some time in the shop where I shared with him some estate pipe restoration techniques. He left here with a few briars that he cleaned. I miss him and her already.

As they were getting ready to depart, I found this GBD Seventy-Six, shape 548, on Ebay. I later learned it was sold by our own Bob Landry. The pipe had some issues and I was a bit skeptical that a good outcome could result. I’m a fan of the Seventy-Six line and I liked the tall bulldog shape. The bowl top had some chips on it but the tall bowl looked like there was plenty of briar there to top it just a bit. The stem was in great shape, just oxidized and I rationalized that if it didn’t work out, at least I had a brass rondell for the parts box. The big concern was the two burn marks on the briar (photographed and described well by Bob). I knew it would require a restain. Here is the pipe as it was received.

GBD_584_76-Before

GBD_584_76-Before (1)

GBD_584_76-Before (2)

GBD_584_76-Before (3)

GBD_584_76-Before (4)

I reamed the bowl and found it to be in great shape. I used a sheet of 800 grit paper on my flat work bench to top the bowl and work past the damaged area. That fix came out great and the tall bowl definitely lent itself to that repair. Next up, I soaked the bowl in alcohol to remove the stain. This really exposed the burned areas. I tried to sand past them, but that was not possible and I was afraid of putting a flat spot on the bowl, particularly on that right side. This work exposed some other nicks on the bottom of the bowl. I was able to buff/sand out most of those.

GBD_548_76_Work (4)

GBD_548_76_Work (3)

GBD_548_76_Work

GBD_548_76_Work (2)

The GBD Seventy-Six line used a two stain process that I really like, much like Comoys used. I stained the bowl black but must have put it on too heavy, as I had a hard time getting the black off. The plan was to sand off the black, leaving it to highlight the grain and then apply a very light brown stain. I mulled over just leaving it black, but that didn’t set well with me either. I was a bit frustrated at this point and almost bagged the whole project and save the stem for a future project. I left it on the bench for the better part of a week, working on other projects. I decided to soak off the black stain and left it in an alcohol bath for several days. That finally did the trick and afterwards, I sanded the briar smooth with some 2000 grit paper and then 8000 grit micromesh.

GBD_548_76_Work (5)

GBD_548_76_Work (6)

GBD_548_76_Work (9)

GBD_548_76_Work (8)

GBD_548_76_Work (7)

I then applied a very light brown stain using Feiblings Medium Brown heavily diluted with alcohol (20:1 ratio or so?) The combination of the black and brown stain finally hid the burn marks rather well and I was pleased with the outcome. The bowl was then polished with White Diamond and then several coats of carnuba wax was applied.

With the bowl completed, I turned my attention to the stem, which didn’t require nearly as much work. Using a piece of plastic, cut into a round shape I inserted it as a shield between the stem and the briar for the sanding work. I sanded the stem with 800, 1500 and 2000 grit paper, all wet. I then moved to 8000 and 12000 grit micromesh sheets. The stem was then buffed with White Diamond and an automotive plastic polish.

This shows the plastic shield.

GBD_584_76_Work (10)

As I was finishing the pipe and thinking about my daughters marriage, it struck me that there were some similarities in this pipe project and a successful marriage. Like a marriage, at times things don’t always go the way you anticipated and being patient with your spouse or a project always pays off. I sent the pipe off to my future son-in-law with a note welcoming him to our family. I hoped when smoking the pipe, he would remember the week he spent here and his proposal to my daughter.

GBD_584_76-Finished (4)

GBD_584_76-Finished (3)

GBD_584_76-Finished (2)

GBD_584_76-Finished (1)

GBD_584_76-Finished

Making a New Stem for a Peterson’s Kildare XL999


The Peterson’s Kildare is the second pipe down in the left column in the photo below. The second and third photos are of the pipe bowl apart from the lot. The externals were in pretty decent shape but the rim has a heavy buildup of tars and the cake in the bowl is quite thick and hard. To give an idea of the thickness of the cake I was unable to put my little finger in the bowl. The shank was quite large – the tenon is ½ inch in diameter for a snug fit in a clean tenon. The shank itself is 7/8 inches in diameter. It is a large mortise and airway. The pipe is stamped Peterson’s “Kildare” on the left side of the shank and Made in the Republic of Ireland XL999 on the right side of the shank. The finish is quite clean. The top will need to be topped to remove the buildup and dents. I also will need to chamfer the inner edge of the rim to repair the damage that is present on the surface of the rim.

bowls1

Pete999

Pete9992

I reamed the pipe with a PipNet Reamer beginning with the smallest cutting head on the T handle and working up to the diameter of the bowl. I carefully ream the cake so as not to damage the bowl roundness or the inner edge of the rim any more than it already is. I emptied the carbon out of the bowl repeatedly until it was clean and empty. I reamed the cake back to bare wood to begin to rebuild on a clean surface. I scoured the bowl and shank with Everclear and cotton swabs and pipe cleaners.

IMG_1379

IMG_1380

Once the inside was clean I decided to gently top the bowl. I used a medium grit sanding sponge flat on the table top and worked the rim against that to remove the buildup of tars. The first photo shows the set up and the second the result of the topping. Very little briar was removed from the rim, mostly tars. The finish however also was removed so the rim would need to be restained. The third photo shows how I used a folded piece of 220 grit sandpaper to bevel/chamfer the inner rim to repair the damage that had been done to the rim.

IMG_1381

IMG_1382

IMG_1383

I sent out several emails and private messages to folks on the online forums to see if I could find a Peterson stem with these dimensions. I received many answers and several possible stems that could work for this pipe. Thanks to those who sent them. For the most part they were either too long or the diameter of the stem was not large enough to fit the shank. Chuck (desertpipe on SF) sent me several that would work. I also have a piece of brindle rod coming that Todd (Sasquatch on SF) was willing to cut for me. So in the end I will have two different stems for the pipe. While awaiting the arrival of the Cumberland stock I decided to turn the tenon on a vulcanite stem blank from Chuck. I turned it with a PIMO tenon tool and fit it to the bowl. The end fit was a ½ tenon for the mortise so I did not need to remove much of the existing vulcanite on the cast stem to make it fit well. To fit the stem on the tool I drilled the airway so that it slid easily over the pin on the tool but did not have too much play. I held the stem and ran the drill over the tenon for a first pass (second photo below) I adjusted the cutting tip and spun it several more times until the fit in the mortise was close. I used the Dremel with a sanding drum to take off more of the material and fine tune the fit (third photo below). I spun it one last time to clean up the face of the stem where it sat against the shank. I want that surface to be smooth and seamless in its fit.

IMG_1427

IMG_1428

IMG_1429

After fitting the tenon to the mortise I used the Dremel with a sanding drum to remove the excess vulcanite on the diameter of the stem. I carefully sand with the Dremel and bring the stem as close to the diameter of the shank as possible without nicking the briar. I also sand down the sides of the stem to remove the casting overrun on the stem and button. The idea is to get as close as possible to the stem diameter and then sand the rest of the fit by hand with medium grit emery cloth and 220 grit sandpaper.

IMG_1438

IMG_1443

IMG_1444

I took the pipe back to my work table and removed the stem and sanded it until the fit was perfect and the marks left by the Dremel were gone. The hand sanding is probably the longest part of the process of fitting a new stem. I sanded it repeatedly with emery paper and 220 grit sandpaper until it was smooth enough to move to the next step in the process. At this point I am not looking for a smooth and perfect fit but one that is getting close. I then heat the stem with my heat gun in order to bend the stem to fit the flow of the pipe. I heated it until it was pliable and then bent it over the rolling pin and cardboard tube that I use for getting the curve of the stem smooth and correct.

IMG_1445

IMG_1446

IMG_1448

I took the pipe back to my table and showed it to my sidekick and helper, Spence for his approval. He gave it a sniff and looked it over. It passed his inspection so I continued to sand and shape the shank/stem union. Lots of pieces of sandpaper and emery paper later the stem is getting closer and closer to a good fit.

IMG_1449

IMG_1450

IMG_1451

The button was very tight and I was not able to push a pipe cleaner through the slot so I opened the slot with needle files and reshaped it into an oval that was open and flared back to the airway in the stem.

IMG_1453

I sanded the stem with a medium grit sanding sponge and a fine grit sanding sponge to remove the scratches left behind by the sandpaper. Each step of sanding brought both the fit and finish closer to the look I was aiming for with the finished stem.

IMG_1460

IMG_1461

IMG_1462

I wiped the bowl down with acetone on a cotton pad to remove the finish and prepare the bowl for a new coat of stain. I have found that if I do not remove the stain then it is very hard to match the rim to the colour of the bowl. With the finish gone the staining is very simple.

IMG_1463

IMG_1464

I thinned the stain, a dark brown aniline stain, with isopropyl alcohol – 1 part stain to two parts alcohol. I had picked a stain that matched the previous colour of the bowl and also matched another 999 Peterson that I have here. I heated the surface of the bowl with my heat gun to warm the briar and open the pores in the wood. Once it was warmed I applied the stain with a cotton swab and repeated until I had good coverage over the entire surface. I flamed the stain, repeated the application and flamed it a second time. Once it was dry I took it to the buffer and gave it a light buff with White Diamond to even out the stain coverage and remove the excess on the surface of the briar. I wiped down the inside of the bowl where the stain ran in with a cotton swab dipped in Everclear.

IMG_1465

IMG_1466

IMG_1467

IMG_1468

IMG_1469

IMG_1470

With the bowl finished and ready to buff it was time to finish the work on the stem. I sanded it with micromesh sanding pads. I wet sanded with 1500-2400 grit and dry sanded with 3200-12,000 grit. Each successive grit brought more of a shine to the stem and removed the scratches left behind by previous sanding.

IMG_1471

IMG_1472

IMG_1473

I worked on the slot with a folded piece of sandpaper to smooth out the surface of the inside. I also shaped it with the sandpaper until I had the look I wanted. The oval slot now easily took a pipe cleaner no matter how fluffy.

IMG_1474

After much sanding and fitting, the vulcanite stem is finished. The pipe is smokeable while I wait for the Cumberland/brindle rod stock to come from Todd. I like the look and feel of the pipe as it is very close in size and design to the GBD 9438 with a tapered stem. The finished pipe is pictured below after buffing with multiple coats of carnauba wax and with a clean flannel buff.

IMG_1488

IMG_1489

IMG_1490

IMG_1491

Reworking a Mastercraft Custom Deluxe Billiard and Removing Mold


Blog by Steve Laug

This old Mastercraft billiard is the second pipe of the threesome that was sent to me last week as a gift. In his email asking if I wanted them he said they were either going to the rubbish bin or to me so I was not surprised when I opened the box and unpacked them. It had some nice looking grain underneath all of the grime and peeling varnish. But this one was in very rough shape. The stem was chewed in half so there was not enough to save. The inner tube apparatus inserted into the stem looked like it had been destroyed and then somebody bent it close to shape and cut a X cut in the end of the tenon so that it would fit into the stem. The shank was grimy and dark with a white mold residing inside both the bowl and the shank. The pipe reeked of mold. The bowl itself had a heavy but broken cake underneath the mold. It had a coat of varnish that was spotty and peeling where it was worn off the briar. In those worn spots the briar was almost black. The rim was also in very bad shape. The front was burned down from repeatedly lighting the pipe in the same spot with a torch. The back side of the rim looked like it had been scraped on concrete or hammered out on concrete because it was worn and broken down. The three photos below (I apologize for the poor quality – still getting used to this new camera!) show the state of the bowl and stem.

IMG_1009

IMG_1010

IMG_1011

I sorted through my stems and found two options that I thought might work on the pipe. The first one was an acrylic saddle stem that I thought might look good with the bowl (pictured in the first photo below). I turned the tenon and fit it to the pipe but did not like the proportion of the stem and shank length. I then took the second stem – a shorter, straight tapered stem and fit it to the pipe (pictured in the second – fourth photo below). It looked like it belonged on the pipe so my choice was made. It was an old previously used vulcanite stem from my collection of old pre-used stems that I collect. This one would take some work as it was oxidized and had a calcified buildup around the button area. It was also clogged and the slot was plugged to a small pin hole. But it had the right look so it would be worth cleaning up.

IMG_1020

IMG_1049

IMG_1050

IMG_1051

I set the stem aside and worked on the bowl. I reamed the pipe with a PipNet reamer to get rid of the cake and the mold. I cleaned the reamer with alcohol before putting it away. I cleaned the bowl and the shank with cotton swabs, pipe cleaners and Everclear to remove as much of the tars and oils and moldy smell as possible.

IMG_1021

IMG_1022

IMG_1023

When I finished it still smelled moldy, but I had several plans in mind for addressing that. But first I topped the bowl with my usual flat board and 220 grit sandpaper. I place the bowl rim down flat against the sandpaper and work in it a circle to remove the damage on the rim. This one took quite a bit of work to even out the top and get rid of the damage from the burn on the front side of the rim and the roughened back edge done by beating the pipe against concrete. I sanded it, repeatedly checking to see if I was removing enough of the damage to get a sharp edge on the bowl. On the outer rim next to the shank there was a chunk of briar missing that I would try to minimize after topping the bowl. I was able to remove all of the damage of the burned area and most of the damage of the battering the old pipe had taken. The rim looked good. I used a folded piece of sand paper to work on the inside edge of the rim and clean up the damage that was done there and keep the bowl in round.

IMG_1053

IMG_1054

IMG_1055

IMG_1056

IMG_1057

IMG_1058

I wiped the exterior of the bowl down with acetone on a cotton pad to remove the grime and the finish that remained. I repeated this until I could not remove any more finish or grime. The next two photos show the wipe downed bowl.

IMG_1059

IMG_1060

I placed the bowl in an alcohol bath for several hours while I worked on the stem and worked on several other old pipes that I have on the go. When I took it out of the bath, I dried it off with a cotton cloth and scrubbed it with a tooth-brush dipped in alcohol from the bath. I dried it again to check on the finish. There were still several spots where the varnish remained – the shank and the bottom of the bowl. One benefit of the bath was that the glue softened on the over pressed band and I was able to remove it from the shank. I sanded and scrubbed the old glue off the shank and sanded the bowl with a fine grit sanding sponge. I wiped it down with another acetone cotton pad. It still needed to soak a bit longer to finish breaking down the varnish that remained. While it soaked I cleaned up the silver band with silver polish and the jeweler’s polishing cloth. Under all the tarnish I found that the band was stamped Sterling.
I removed the bowl from the alcohol soak and dried it off. I used a lighter to burn off the alcohol from inside the bowl and the shank. I then recleaned the inside of the bowl and the shank with Everclear and many more pipe cleaners and cotton swabs. The amount of tars and sticky oils and grit that came out of the shank was incredible. It was no wonder that the pipe still reeked like mold. The next series of three photos show the pipe after soaking and sanding.

IMG_1061

IMG_1062

IMG_1063

I scoured the shank until it was fairly clean and then set up a retort to do a more thorough clean. The retort sends vaporized alcohol into the bowl and shank and in essence boils out the grime with hot alcohol. As the alcohol cools it returns to the tube and with it the grime and oils from the pipe. I repeated the retort three times on the pipe until the alcohol came out clean. I then took apart the pipe and cleaned out the shank with pipe cleaners and cotton swabs a third time. There was even more oil and grime that came out of the shank. I cleaned off the surface with an acetone wipe and then reset the silver band with Weldbond glue. I turned it so that the Sterling stamp was on the top of the shank and pressed it on to the shank until it was even with the edge of the shank. Weldbond dries fairly quickly to touch so that the band would not be loosened when I went on to the next step in my cleaning process.

IMG_1064

IMG_1065

IMG_1071

After removing the retort I cleaned the bowl and shank. Yet even more grime came out. I put the stem back on and took the four photos below to show the state of the pipe at this point. I did this more for an encouragement to me as this one was proving a difficult rework. The photos gave me a picture of what I was aiming for in cleaning this one up. If I lose sight of that it will end up in the bin as rubbish.

IMG_1066

IMG_1067

IMG_1068

IMG_1069

When the alcohol dried in the bowl and the visual showed a clean bowl and shank I took a sniff of the bowl. After all of this work the moldy smell still was present in the bowl and shank. This called for more drastic measures. I used the Dremel with a sanding drum on it and sanded the inside of the bowl until the briar was bare and clean. Then I filled the bowl with salt and alcohol to leach out the oil from the inside of the bowl and shank. My hope was that in doing this I would also kill the stench. I plugged the shank with a cork, filled the bowl with kosher rock salt (I was out of my normal cotton bolls) and set it up on an old ice-cube tray. I used an ear syringe to fill the bowl with 99% isopropyl alcohol. I set it aside and went to bed to let the treatment do its work while I was sleeping. The two photos below show the bowl after filling with alcohol.

IMG_1072

IMG_1073

In the morning the salt was a dark brown as pictured below. I emptied the now darkened salt and dried out the inside of the bowl by flaming the alcohol with my lighter. It still smelled like mold though the smell was definitely losing strength.

IMG_1070

I cleaned out the button area of the stem with the dental pick and then ran several bristle pipe cleaners through it and then followed up with regular pipe cleaners. I soak both in Everclear to clean out the stem. I then sanded the stem with 220 grit sandpaper to remove the calcification that was all over the stem. I also gave the stem a quick sand all over with the 220 grit to remove the top oxidation. I ran the flame from the Bic lighter over the surface to burn off the oxidation. It did a great job of removing what I had loosened with the sandpaper. I continued sanding it with a fine grit sanding sponge to remove the remaining oxidation. I rubbed down with Obsidian Oil and set it aside with the bowl while I went off to work. The Obsidian Oil sat on the stem and soaked in for the 9 hours I was at work.

IMG_1074

IMG_1075

IMG_1076

IMG_1077

I refilled the bowl with salt and put a cork in the shank. I again used the ear syringe to fill the bowl with alcohol and set it aside to work on the stem. It too sat for the nine hours I was at work.

IMG_1072

When I got home from work the stem looked quite good. It was significantly more black and the oxidation was gone except around the stem shank union. More work to do there. The salt was a dark brown, but slightly lighter than the first treatment. I dumped out the salt and cleaned out the bowl and shank with cotton swabs again. When I finished the smell was better but present nonetheless. I cleaned out the bowl with alcohol and cotton swabs again.

IMG_1078

I needed another bit of encouragement at this point so I decided to stain the pipe with a dark brown aniline stain cut 2:1 with isopropyl alcohol. I applied the stain, flamed it and then buffed it on with Tripoli and White Diamond (photos 1-4 below). The brown did a fair job of coverage but I would need to give it a second coat of stain using a oxblood colour to do some blending with the dark areas on the bowl.

IMG_1083

IMG_1084

IMG_1085

IMG_1086

I worked on the stem with fine grit sanding sponges and 1500-2400 grit micromesh sanding pads. There were some minor tooth dents that still showed up so I passed over them with a Bic lighter and was able to raise them. More sanding was needed and I repeated the sanding described above.

IMG_1079

IMG_1080

IMG_1081

IMG_1082

Once the bowl dried out it still smelled so I decided to repeat the salt and alcohol treatment a third time. I filled the bowl with salt and isopropyl and set it aside over night (photo 1 below). In the morning the salt was little lighter brown this time (photos 2-3 below). I dumped the salt out and cleaned the bowl and shank again. This time the cotton swabs came out fairly clean. I flamed the inside of the bowl. Once the bowl dried out it still smelled so I decided to repeat the salt and alcohol treatment again. I filled the bowl with salt and isopropyl and set it aside over night. In the morning the salt was once again a dark brown. I dumped the salt out and cleaned the bowl and shank again. This time the cotton swabs came out fairly clean. I flamed the inside of the bowl. Though the inside of the bowl and the shank was very clean the musty smell still remained, though less prevalent. This was one stubborn pipe bowl to clean.

IMG_1087

IMG_1088

IMG_1089

While the inside of the bowl dried out I decided to restain the bowl. For the second/top coat I used a oxblood stain. I applied it and wiped it off (first photo below). The coverage this time was much better. The dark reddish stain blended well and covered the dark areas of the bowl. The finished colour is a nice older deep reddish brown look (second-fourth photos below).

IMG_1090

IMG_1091

IMG_1092

IMG_1093

I decided to sand back the inside of the bowl yet again. I used the Dremel with the sanding drum a second time. When I was finished the inside of the bowl was very clean and fresh looking. The smell was still there. I stuffed the bowl with cotton bolls and then used an ear syringe to fill it with white vinegar and set it in the ice-cube tray to let it work. I have used that in the past to remove stubborn ghosts so I thought I would give it a try on this one.

IMG_1094

While the bowl soaked I worked on the stem with the remaining grits of micromesh sanding pads – 3200-12,000 to bring back the deep shine on the stem. Sanding them with the higher grits of micromesh really gives a deep shine to the stem. It is amazing to see the difference between each of the successive grits of micromesh. I did not take photos of the steps as almost all of my refurbishing posts have shown the polishing process with the micromesh. The next two photos show the finished stem. Once the bowl is finished I will buff the bowl and stem with White Diamond and then give the whole a buff with multiple coats of carnauba wax to polish.

IMG_1141

IMG_1142

Once the vinegar had soaked in the bowl for several hours I removed the cotton boll and dried out the bowl. I then used a Dremel with a sanding drum to sand back the sides of the bowl yet again. This time I extended the diameter of the bowl to get rid of the surface area of the bowl interior. Once I was finished with the Dremel I hand sanded the bowl with 220 grit sandpaper to smooth out the small ridges left behind by the drum sanding. The last two photos in this sequence show the newly sanded bowl.

IMG_1126

IMG_1127

IMG_1119

IMG_1120

I took the bowl outside and put it in the bright sun on my patio. I wanted to let the heat and the UV rays from the sun do more work on the potential mold in the bowl. The evening is cooling down and the sun is no longer as warm. I brought in the bowl and wiped down the inside of the bowl and shank with an alcohol based anti bacterial wipe. I took it to the buffer and gave the whole pipe a buff with White Diamond. I then gave it several coats of carnauba wax and buffed it with a clean flannel buff. The pipe is like new and it SMELLS GREAT. I finally beat the moldy smell. The final four photos show the finished pipe.

IMG_1143

IMG_1144

IMG_1145

IMG_1146

Reworking and Reshaping an Old French Briar (CPF?) Billiard


Blog by Steve Laug

This old timer was one of the pipe bowls that I picked up in that EBay lot that had others with the French Briar stamping. The others had the same stamping but also had been stamped CPF on the shank or on the end cap. This one was missing the end cap so it remains a bit of a mystery as to its maker. It was also stemless. From the photos below you can see that at one point in its life it also had a rim cap that was also missing. What was left was the line around the top of the bowl and a darkened rim where the silver cap had covered it. The end of the shank was in pretty good shape but the likelihood of finding another end cap that fit or in making one was pretty low for me. The four photos below show the general state of the pipe when it came to my desk top. The finish was gone. There were several visible fills that stood out. It was one that I had to give a little thought about how I was going to tackle it. I knew that I would have to modify the shank and rework the bowl. I would also have to redrill the mortise way and fit a stem for the newly formed pipe. Ah well… let’s begin the work.
IMG_0789

IMG_0792

IMG_0791

IMG_0790
After many failed attempts over the years to get a good straight cut on the shank and end up with a smooth and even mortise I finally figured out a way with my limited tools to accomplish that. I slip a nickel band on the shank to the place that I want to cut it off. I use the band as a guide for my hacksaw to follow. So far this method has worked for me and left me with some nice evenly cut shanks. The next three photos show the process from start to finish.
IMG_0793

IMG_0795

IMG_0794
After cutting off the shank I sanded the area where the new band would be fitted. I used my Dremel with a sanding drum to begin the process of cutting back the shank to receive the band and finished by hand sanding it with medium grit emery cloth. I set up my heat gun on it end stand, slipped the band in place and set the heat on low to warm the band so that I could press it into place. The next two photos show that process.
IMG_0796

IMG_0797
With the band in place I wiped down the bowl with acetone on a cotton pad to clean off the grit and the remnants of the finish on the pipe. After I had cleaned the bowl I topped the rim with a medium and fine grit sanding pad to remove the damage to the rim edges. The next four photos show that process. During that time I also used superglue and briar dust to fill the obvious sand pits on the bowl (at the back of the bowl near the shank and on the underside). I sanded them once they were dry and was able to blend them into the bowl quite well. In the first photo below you can see the first large sand pit clearly. It was quite long and fortunately flowed with the grain so that it was easy to blend in with the briar dust and superglue. The one on the bowl bottom was a bit more difficult to blend in. In either case both are now smooth surfaces that the finish sanding would blend in as much as possible.
IMG_0798

IMG_0799

IMG_0800

IMG_0801
I sanded the bowl with a medium grit sanding sponge to remove the damage caused by the rim cap and to remove the darkened line around the top of the bowl. The next series of three photos show how the bowl is shaping up after initial sanding. The wood is stamped French Briar but as I work it I am wondering. It is very hard, dense wood with interesting grain. It is very light weight and the feel of the sanding dust and the wood itself calls this into question for me. Maybe it is only a question of age on the pipe as it is probably from the late 1800’s or early 1900’s.
IMG_0802

IMG_0803

IMG_0804
I inserted the stem and took it to the buffer to see what it looked like at this point after buffing. I buffed it with Tripoli. The next four photos show the pipe after buffing. There was a natural reddish colour to the wood that came out more and more as I sanded it.
IMG_0805

IMG_0808

IMG_0807

IMG_0806
After buffing the pipe I reamed it with my PipNet reamer to clean out the crumbling and broken cake that was on the surface of the bowl (Photo 1). I sanded it some more and then wiped it down with an alcohol dampened cotton pad and prepared tit for restaining (Photos 2 & 3).
IMG_0809

IMG_0811

IMG_0810
I receive regular tweets from Grant Batson, pipemaker. In one of the latest he wrote of experimenting with Danish Oil in finish the bowl of a pipe. I have several cans of that around from my refinishing furniture days so I decided to use some medium walnut coloured Danish Oil on this bowl. The next four photos show the stained pipe. I had yet to buff it or polish it at this point in the process. I just rubbed on the Danish Oil and then rubbed it off.
IMG_0812

IMG_0815

IMG_0814

IMG_0813
I set the pipe aside for the evening so that the finish had a chance to dry well. This morning I worked on the stem and the bowl with the micromesh sanding pads. I used all grits that I have available from 1500 – 12,000 grit to sand both the bowl and the stem. The next series of six photos shows the progressively developing shine on both the stem and the bowl.
IMG_0816

IMG_0821

IMG_0820

IMG_0819

IMG_0818

IMG_0817
After finishing with the micromesh sanding pads I took it to my buffer and buffed it with White Diamond. I find that this buffing with a light touch really sets the shine to a glossy finish. The next four photos show the pipe after buffing. I still had to put on the wax but the shine is very evident.
IMG_0822

IMG_0825

IMG_0824

IMG_0823
The final series of four photos show the finished pipe. I gave it multiple coats of carnauba wax and buffed it with a soft flannel buffing pad. I am pleased with the way it turned out. The pipe is ready for smoking and should provide service for many years to come.
IMG_0826

IMG_0827

IMG_0828

IMG_0829

A Little Czech System Pipe Reborn


I had this little Czechoslovakian rusticated bowl in my box. I decided it was the day to work on it so I took it from the box and gave it the once over to see what needed to be done. The finish was a bit spotty, and the shiny varnish on it was peeling so I dropped it in an alcohol bath to try to break down the finish. The next three photos show the bowl after I had taken it out of the bath. While it was still wet I used a wire brush and some Everclear to scrub the surface of the bowl to remove the flaking finish and the varnish coat. I also topped the bowl to remove the damage that had been done to it from tapping it out. The fourth picture below shows the topped bowl

ImageImageImageImage

I went through my can of stems to find one that would fit. I had a nice p-lip style stem stamped WDC Wellington that came from a pipe of similar size and shape. I was able to sand it a little to make a good fit tight fit to the shank. I cleaned up the stem with micromesh sanding pads 1500-12,000 and then gave the stem a polish with Maguiar’s. I sanded it a final time with the 12,000 grit micromesh before wiping it down with Obsidian Oil. The two photos below show the finished stem.

ImageImage

I restained the bowl with dark brown aniline stain, flamed it, restained and flamed it a second time. The restained pipe is shown in the next two photos. Once it was dry I took it to the buffer and buffed the stem and the bowl with White Diamond.

ImageImage


I brought the pipe back to the work table and gave it multiple coats of the Halcyon II wax as I find it does a great job giving rusticated pipes a nice sheen. I also coated the stem with carnauba wax and hand buffed the entire pipe with a shoe shine brush. The hand buffing brought out a nice shine on the pipe.

ImageImageImageImage