Blog by Robert M. Boughton
https://www.roadrunnerpipes2k.com/
https://www.facebook.com/roadrunnerpipes/
Copyright © Reborn Pipes and the author except as noted
Once upon a time there was a man who was about to go on a long journey, and right before his departure he asked his three daughters what he should bring back to them. The oldest wanted pearls, the second, diamonds, but the third said, ‛Dear Father, I’d like to have a singing, springing lark.’ — The Brothers Grimm, Jacob and Wilhelm, from “The Singing, Springing Lark,” in Children’s and Household Tales (1815)
RECAP
Part 1 hypothesized that the discontinuation, illegality and dwindling or total unavailability of vital materials, used in antique and other very old pipes, will lead to a serious crisis in restoring these heirlooms and otherwise prized implements of contemplation to their original conditions. My main theme was the need for those of us in the business – having considerable, moderate or little experience under our belts – to learn how to overcome these difficulties that will become more acute all too soon. In hindsight, I should have emphasized better the need for those who now have the know-how to use their own perhaps self-discovered and unique (read proprietary) heroic measures to cooperate in sharing them with the rest of us, as Part 4 will demonstrate without the help I would have preferred but with other expert assistance that is very much appreciated.
Part 2 described the first of three such repairs I have completed, its example being a Colossus Pipe Factory (CPF) Best Make turned lion’s head meerschaum with a gold band and genuine cherry red amber stem that needed reconnecting with a new bone screw tenon. Five years after I began searching for the one part, I was compelled to send the otherwise restored CPF to a specialized repair service that may have been the only place capable at the time to affect the rehabilitation, for lack of a proper bone screw tenon or anyone to whom I could turn for instruction on how to repair the damage to the inner shank. Now I know the necessary work was relatively minor. Having determined the approximate technique used to repair my CPF, I will share the knowledge with anyone who cares to read the next and final installment, in which I mend a more damaged meerschaum shank and re-stem the pipe.
SIR DARYL AND THE GOLDEN BLUELINE BAKELITE
Once upon a time, in the sixteenth year of the third millennium, there lived a young man who dwelt in the center of a place of medium size. When it was founded by Spaniards three centuries earlier the sage brush- and tumbleweed-blown burg was a dukedom known as Alburquerque, with two r’s, named in honor of a now long-forgotten duke of the proud nation that settled it. But long before our tale began, the name was shortened, probably because of common misspelling, to Albuquerque, with only one r.
At the time the events of this account began to unfold, more than half of the almost one million souls who called the Land of Enchantment home tried to get along in its fast-growing and biggest metropolis, but perhaps lacked faith in the higher powers. Gun-related deaths and evils in general were far above average compared to the other 49 quasi-independent lands of the constitutional federal republic they composed. This was before Puerto Rico, Guam, the Virgin Islands and Panama were granted the same status, although they did not ask for it, and despite the attempts of Texas, Hawaii and California to rule themselves Most of the people still believed they were part of a true democracy, which of course does not exist.
The young man, whom we will call Sir Daryl, had a high-tech job that his life in general and education and training in particular had prepared him to perform with the greatest skill. He also enjoyed his work, as much as any man likes the chronic rising from bed day in and day out and spending long hours away from home and friends, so that was a good thing.
But Sir Daryl’s real love in life was going on quests for beautiful and rare tobacco pipes that were bestowed with magical powers. Sir Daryl’s keen eyes and a preternatural knack for recognizing the magic when he saw it aided him in his never-ending search. Even when he traveled for business purposes, without fail he seemed able to sniff out the rare and hidden examples of the craft that awaited him All of the precious shapes and styles he discovered in this fashion were his for the taking at prices so low he could not bring himself to turn them down. Sometimes Sir Daryl wondered at his aura of luck in locating the treasures but did not spend much time fretting over his ostensible good fortune. As his tastes grew more refined, which such appetites always arouse, Sir Daryl turned to antiques.
Unaware that his friends were beginning to notice the signs of a peculiar spell that was known to afflict many pipe collectors of his period, before counter-spells were found to eliminate the problem, Sir Daryl became obsessed with the thrill of the chase and ultimate liberation of these fine prizes from their previous, unworthy guardians. And they were much admired by all who beheld them
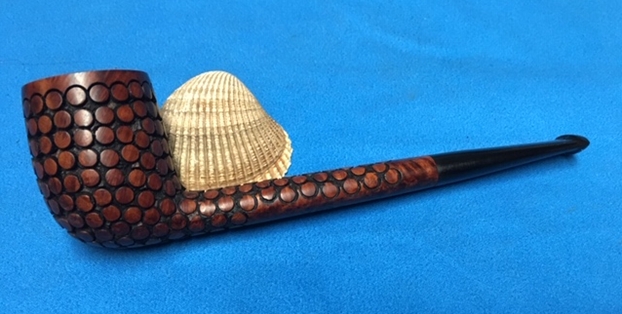
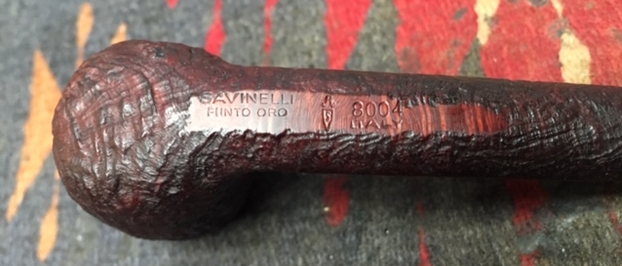
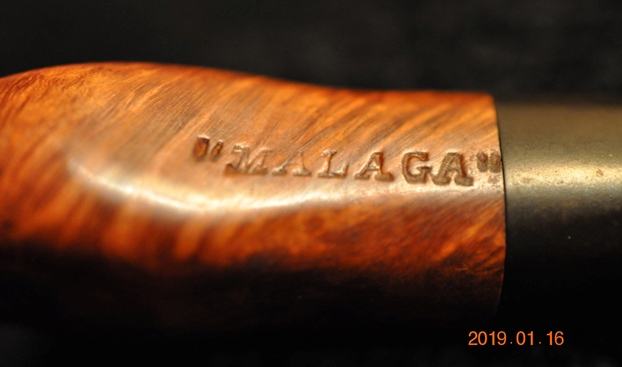
One of Sir Daryl’s most splendid finds was crafted by the renowned house of Kaufman Brothers & Bondy and given the enticing name Blueline Bakelite, the creation of which he was able, with his considerable fact finding skills, to pinpoint to the second year of the second decade of the twentieth century.
Alas! Sir Daryl so wanted to savor the gold-banded billiard beauty that he took it with him to his weekly informal pipe get-together early one Friday evening, still in the box in which it arrived with the day’s mail. He settled back in the cushioned chair that had his name on it and prepared a bowl with an excellent Virginia Perique concocted with miraculous properties that made his body seem weightless and his mind travel to far-off places, not all of which he had ever seen outside of these visions.
With the slowest possible deliberation, Sir Daryl struck a wooden match and kindled the top layer of the divine amalgam in expectation of an ethereal treat, Almost immediately, his typical serene and content composure twisted into a spasm of intense revulsion apparent to his friends all about the low, round table where everyone had set out tins and other glorious, colorful containers with concoctions from around the globe that group custom made free for the trying. Sir Daryl began to retch and reached for a tissue paper to spat out the evil spell that began its sorcery in his mouth and thence to wind an insidious path into his throat. With the greatest of luck that was his hallmark, Sir Daryl cast out the vile spirit.
Being a naturally kind, trusting soul, the only mistake Sir Daryl made was in believing the minion who sold him the pipe with the false claim that it had been cleansed of all evil. As Sir Daryl’s breath returned with the color in his face, one of his peers, who sat closest to him in another deep cushioned chair to his right, happened to be gifted with the power of perception. Suspecting the foul truth of the matter, the wise aficionado asked if dottle was the problem.
Still unable to speak in a clear voice, Sir Daryl handed his newest prize to the other man, one of several Restorers present round the small table, and sipped from a bottle of mineral water, the better to wash away the diminishing remnants of old leaf and other substances too frightful to mention in this story conceived for young, impressionable children.
The Restorer scrutinized the various parts of the instrument and offered his services to Sir Daryl, for a modest fee, of course, and a deal was struck. The trustworthy Restorer said with his natural sense of fidelity that he would return the treasured and still un-tested Blueline Bakelite the next day. Little did he then know of the otherworldly obstacles that would befall him, beginning later that very night.
Enchantment, as a point of interest and special significance, concerns the subjection to or bewitchment by magical influences. Some enchantments are made for good – and others not.
THE RESTORER TELLS OF HIS ODYSSEY, IN HIS OWN UNCOUTH VOICE
Thank you, Omniscient Narrator, for that lovely, florid introduction, and for providing the most charming and flattering title you could come up with for my chapter in some other hero’s tale. I don’t mean to be rude, but I must set a couple of facts straight, if only for the sake of dispelling that whole fidelity thing you pinned on me.
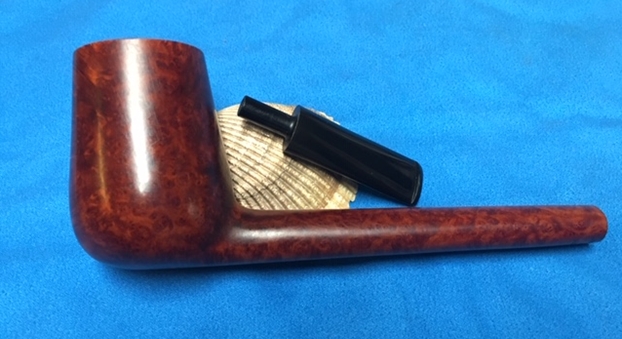
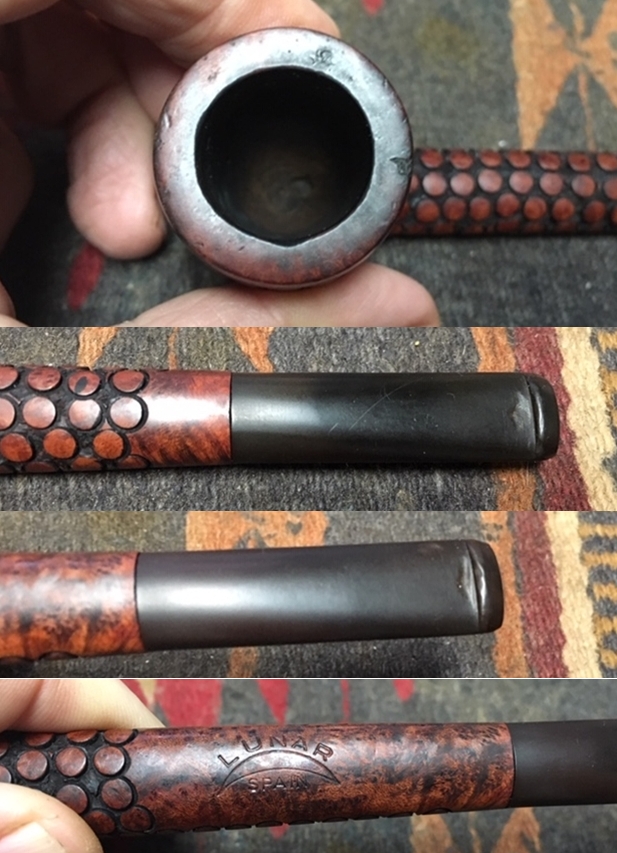
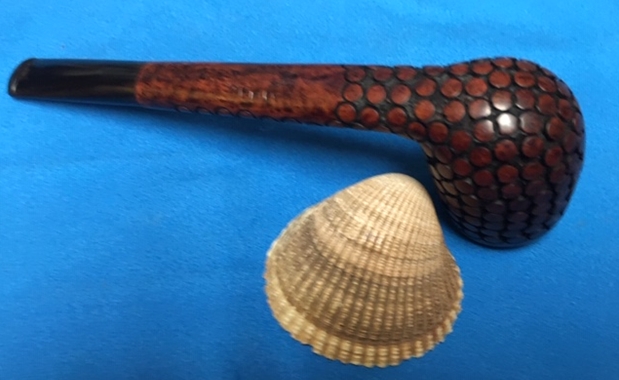
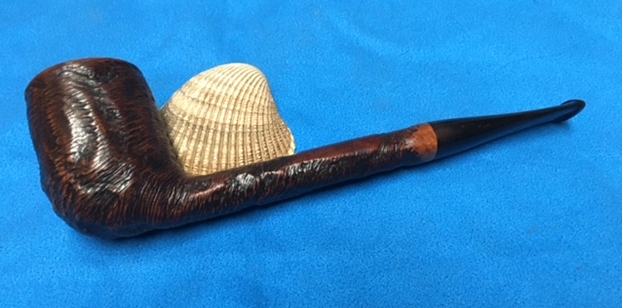
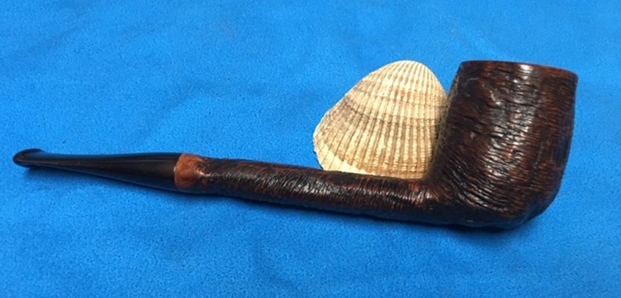
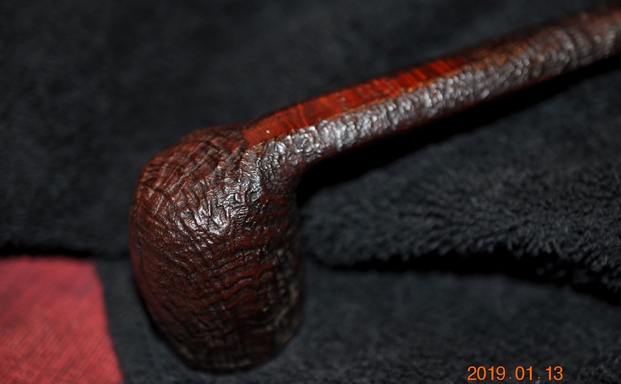
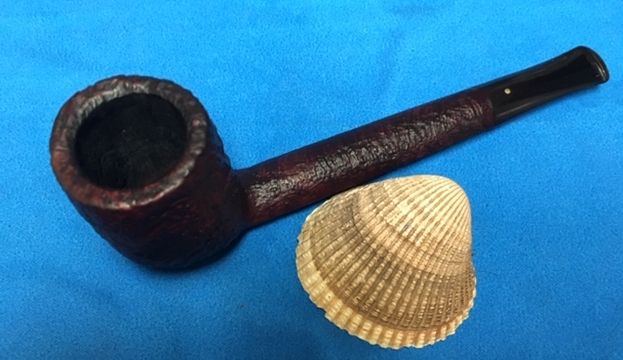
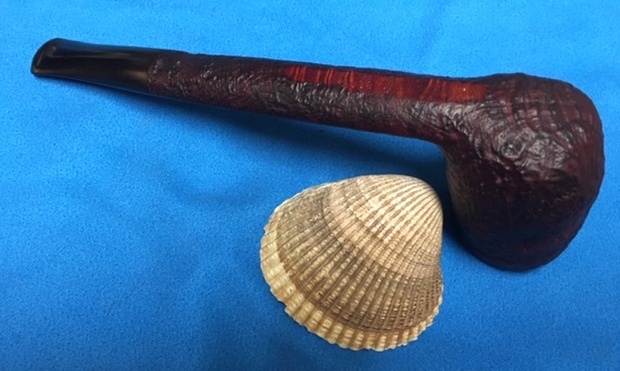
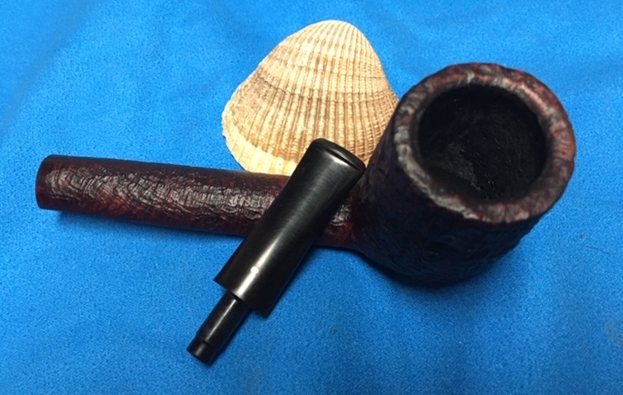
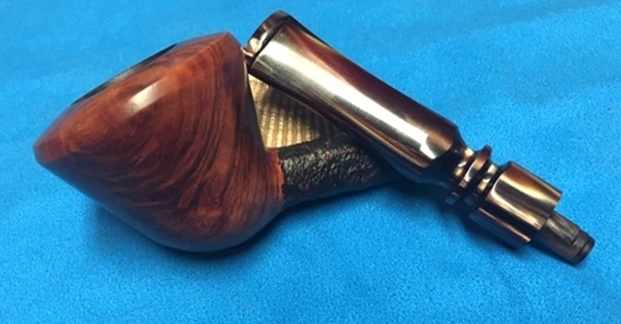
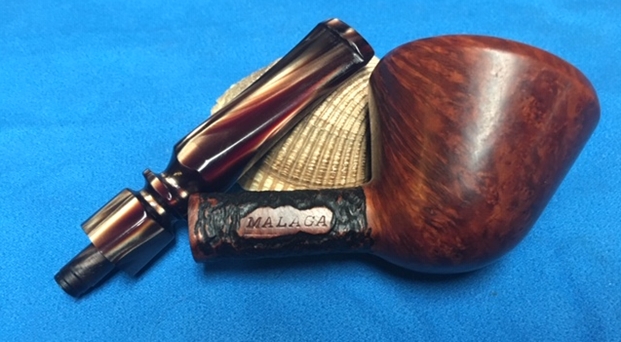
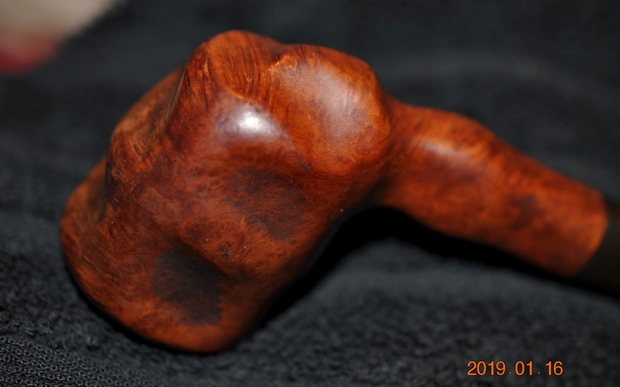
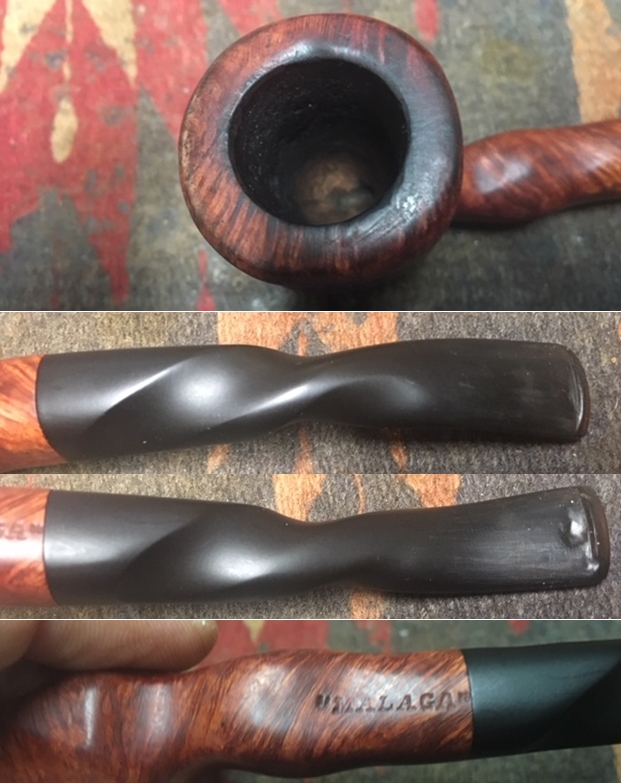
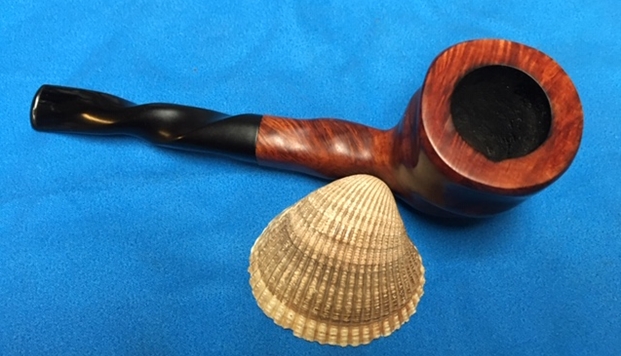
For one thing, I didn’t “offer” my services, it was more like begging Sir Daryl to grant me the honor of taking his beautiful but badly marred and filthy 1911 billiard – yes, that’s the year our Narrator meant to say in his own rather prosaic, ho-hum way –home with me. I asked whether he wanted the final stain to adhere to the original dark brown or be lighter and was not surprised when he opted for the former. Anyone with eyes will see the KB&B was messed up outside from the shots of it I snapped as soon as I was home, which I’ll dig up some place and show in a minute. As far as its innards go, I know more than I really needed to about that because I just had to see what Sir Daryl’s little fit was all about and later tried it in private with some of the cherriest aromatic there is. The consequence indeed was every bit as nasty as my friend Sir Daryl let on!

Daryl in the chair with his name on it
And enough with your Sir Daryl nonsense. He’s just a man like I am, and his name is Daryl Loomis. Even if I didn’t know him for going on five years now, I should know his real name because he’s bought about nine pipes from me, and that’s by far the record for one person. I suppose, based on what you said about his taste in pipes and all, this must mean I sell some pretty good ones, although I admit I never let an antique go to Daryl or anyone else.
One last thing: if I had known what was going to happen in the middle of the night, I never would have accepted the $25 Daryl paid me in advance. Come to think of it, I would not have taken the unique pipe at all. Then again, maybe if I had the power to see back and forth and all over Time like a certain Narrator, I suppose I would have just avoided the whole mess in the first place. I’ve always hated trippy thoughts like that. At any rate, at least then you wouldn’t have this grand fable to tell, would you, big guy? And forget about any singing, springing larks popping up! Quite the opposite is in store, in fact. I’ll bet the old codger of a Narrator ends up claiming he knew that all along and only meant it as foreshadowing.
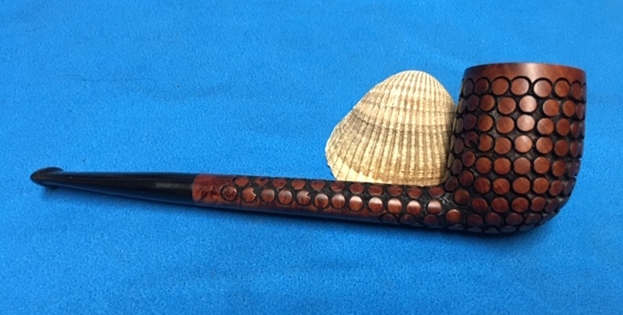
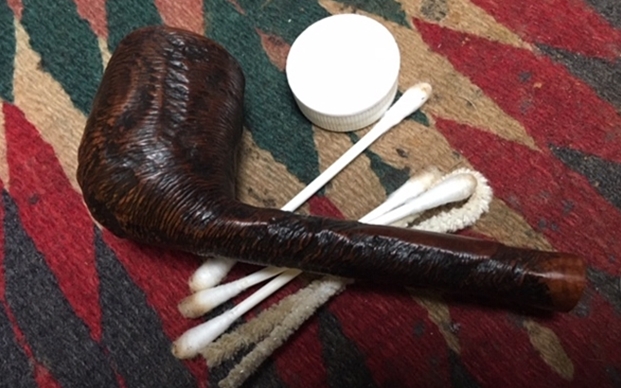
Anyway, I found the shots I snapped, and here are the first of them.

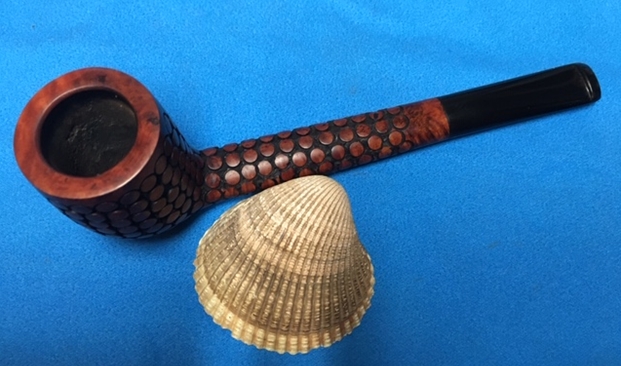
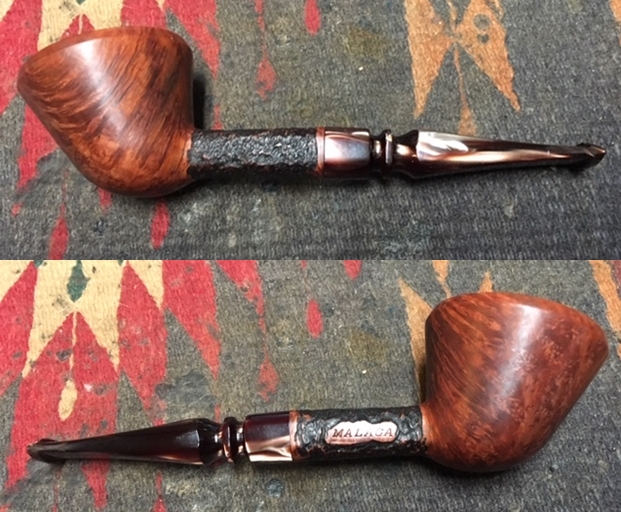
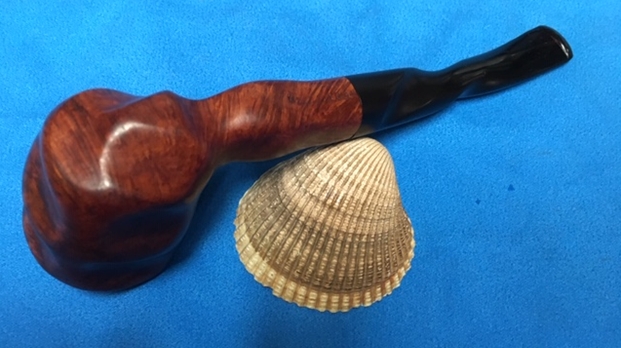
 When held to the light, as I did and will prove in good time, the Bakelite stem is remarkable in its similarity to genuine cherry red amber. That is a seeming contradiction in terms, I’m aware, as the word amber, from the Latin and Greek origins, means orange. However, the actual stem material is a synthesis of phenol and formaldehyde resins made in a process of intense heat and pressure known as thermosetting. The first synthetic plastic, Bakelite provided a cheaper alternative, when amber was the rage, that was difficult to differentiate from the real thing with the naked eye and was therefore popular in the manufacture of pipes during the early 20th century.
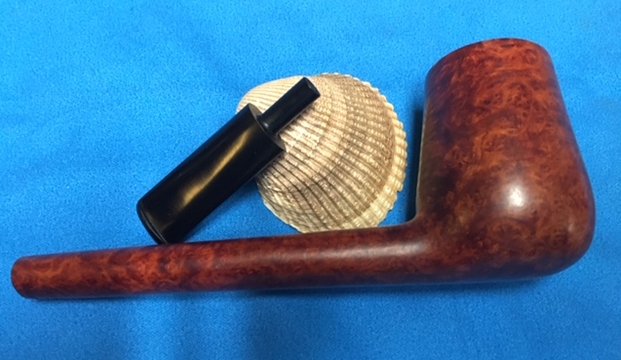
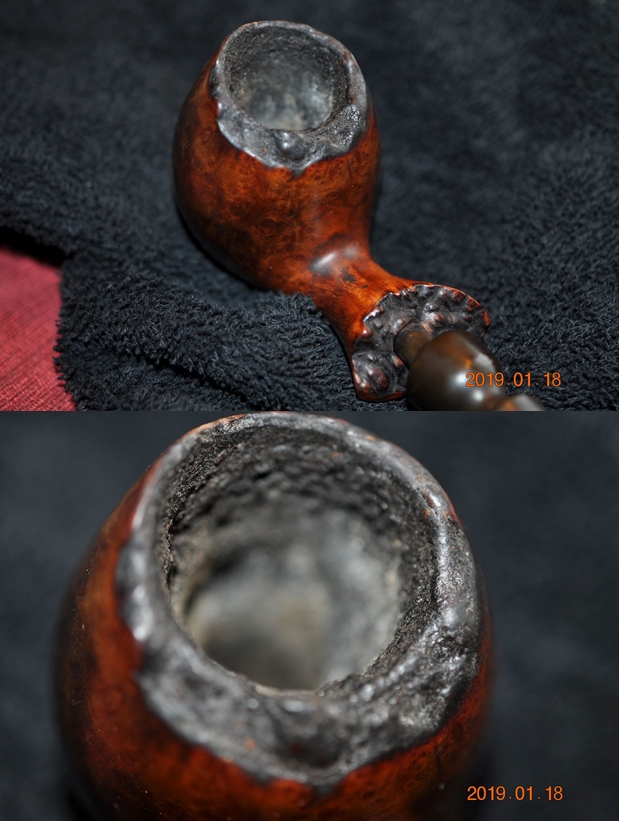
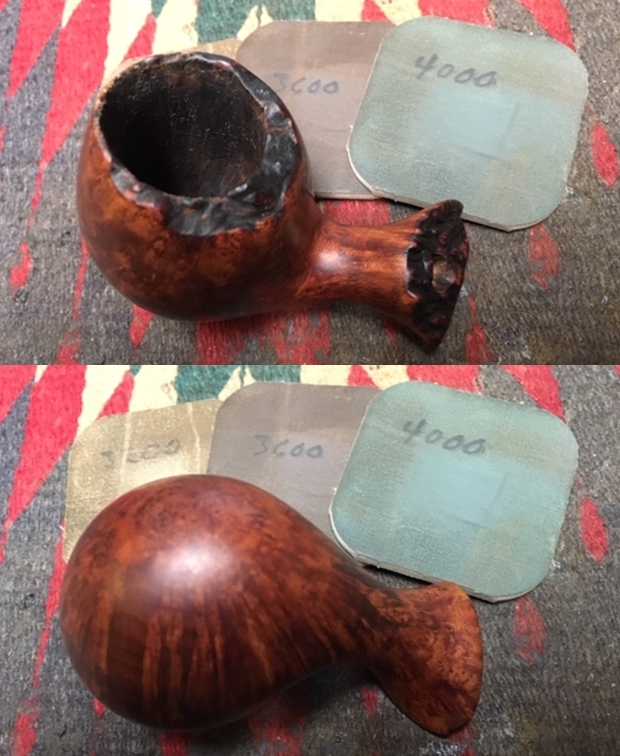
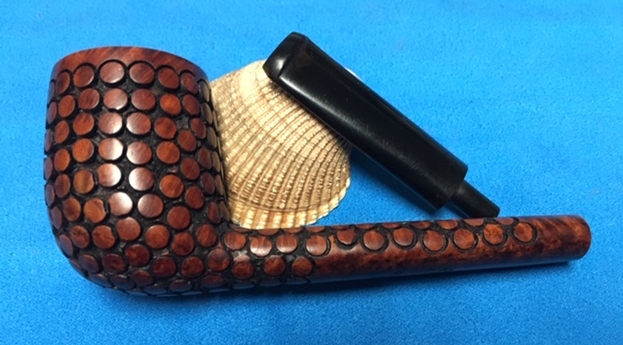
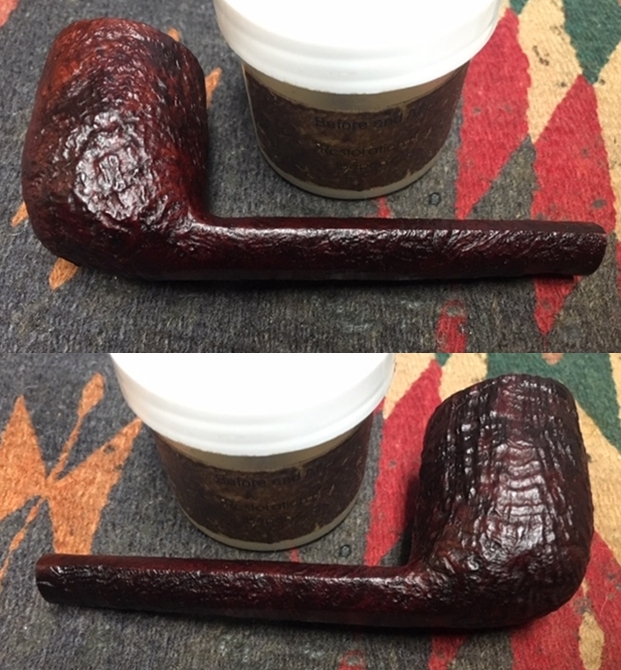
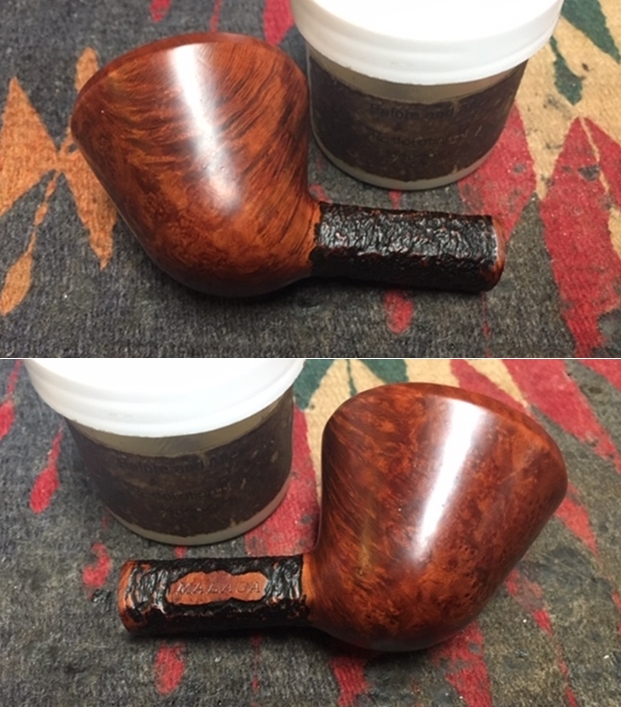
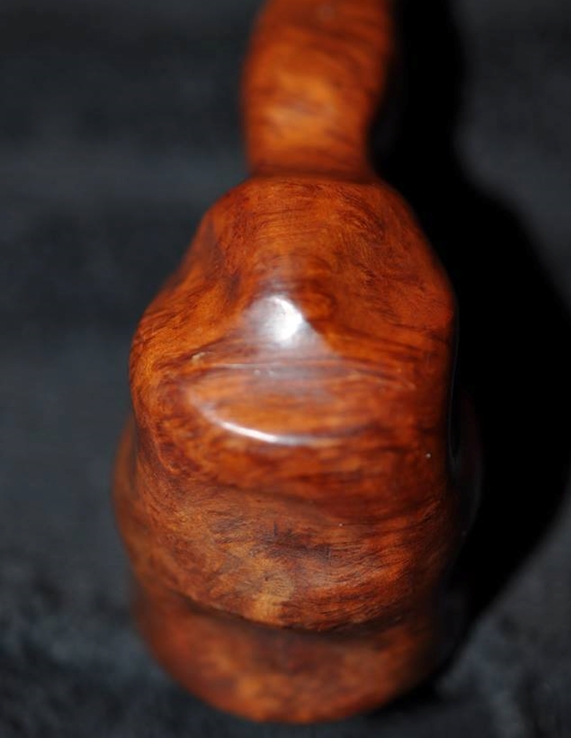
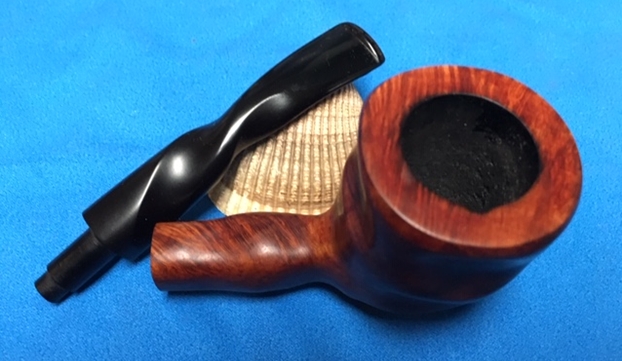
Other than the need for a serious cleaning and retorting of the inner pipe, Daryl’s Blueline Bakelite had inexplicable dark black blotches on the left middle and right rear sides of the bowl. I never determined the cause of the stains, as I ended up having no better option to choose as the source of the marks, but there were two I ruled out: scorching with long-inflicted match or lighter flames and burnouts. Scorches would have come out much easier than these deep flaws, and burnouts never would have cleared up. There was also the telltale damage to the chamber that was not present. By the way, the restoration process will be shown in a time lapse style rather than my usual frame by frame style.
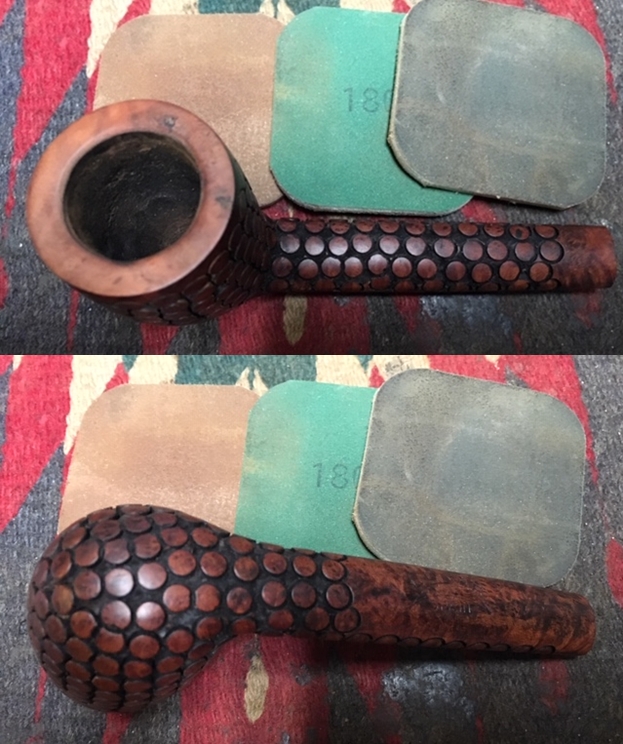
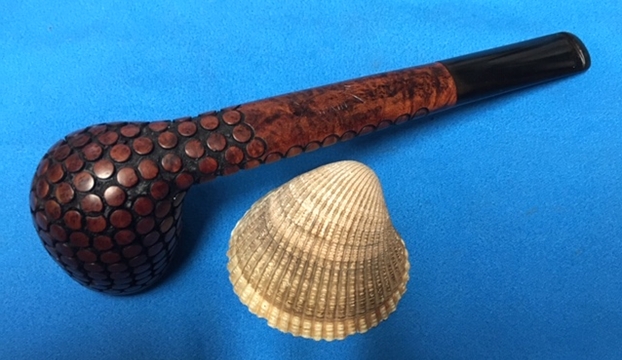
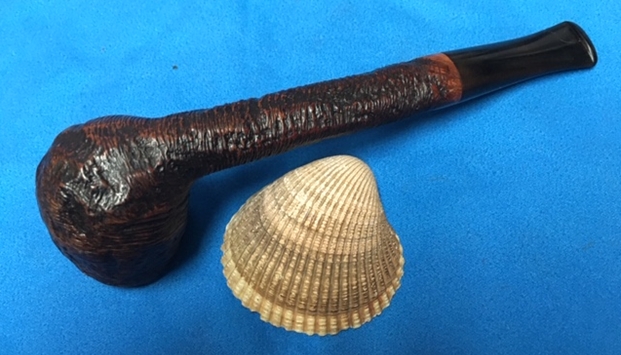
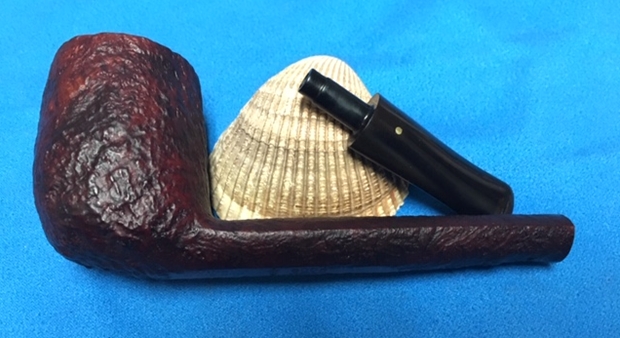
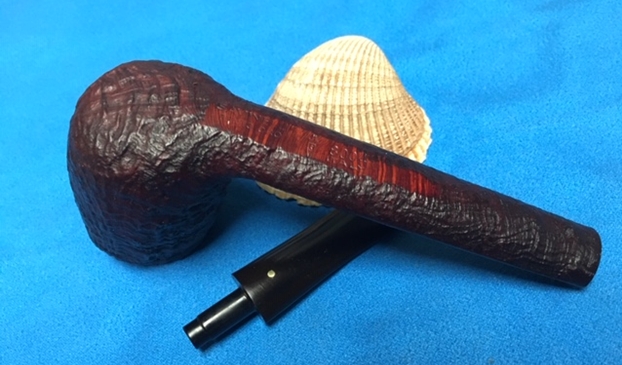
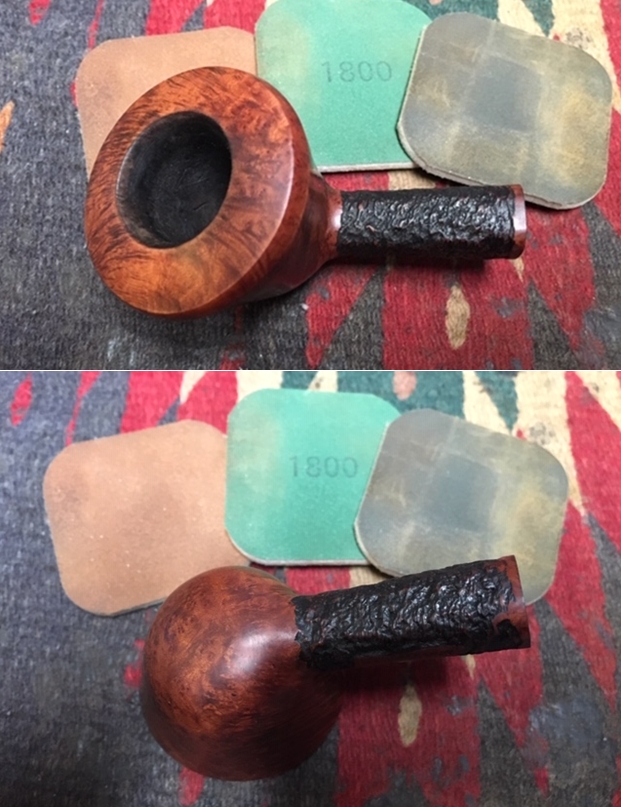
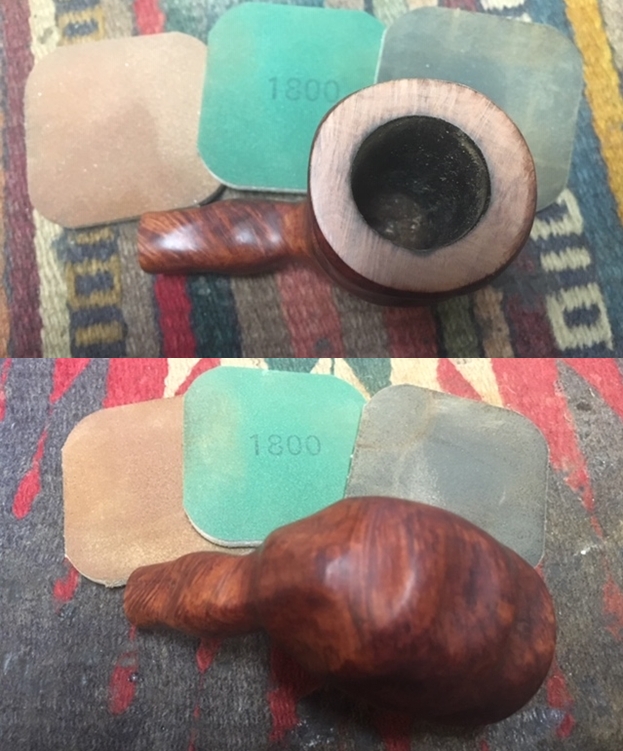
The following photos were taken after a preliminary Everclear soak, during which the band came off. I followed that with a light sanding using 600-grit paper. 
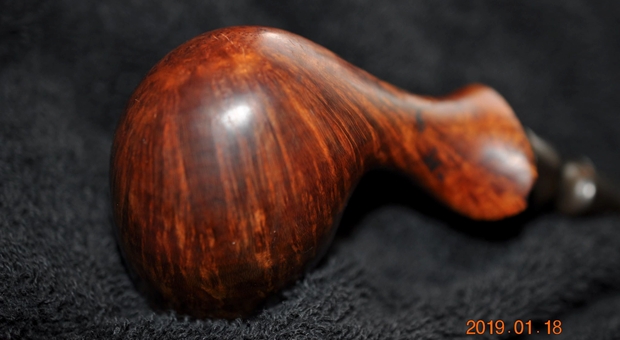
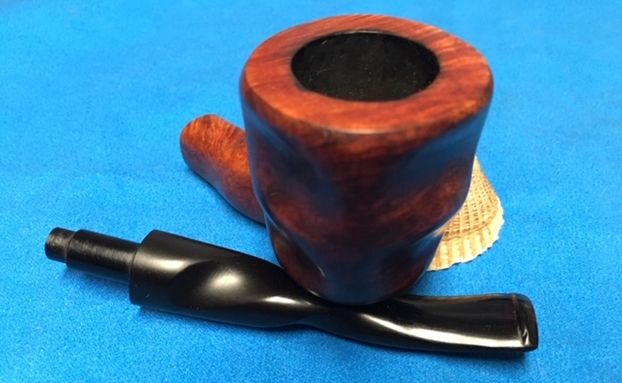
 I reattached the band with Super Glue. A whole lot of sanding later, starting with 150-grit paper and working back up to 800, succeeded in eliminating the blotch on the left shank, but a specter remained on the right. A terrible slope, lacking a better word, on the right side of the rim is also apparent now for the first time in the photos I took after the scar on the left was eliminated with considerable work. But that would have to wait to be righted.
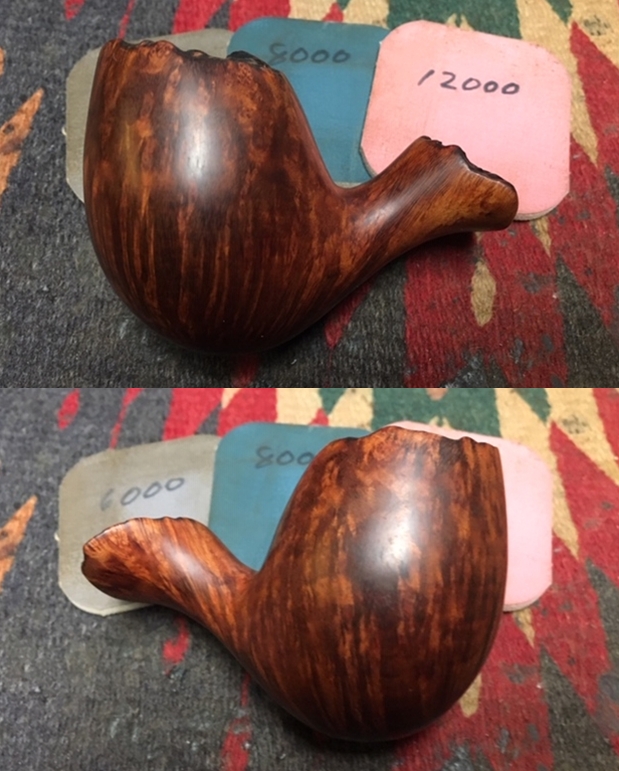
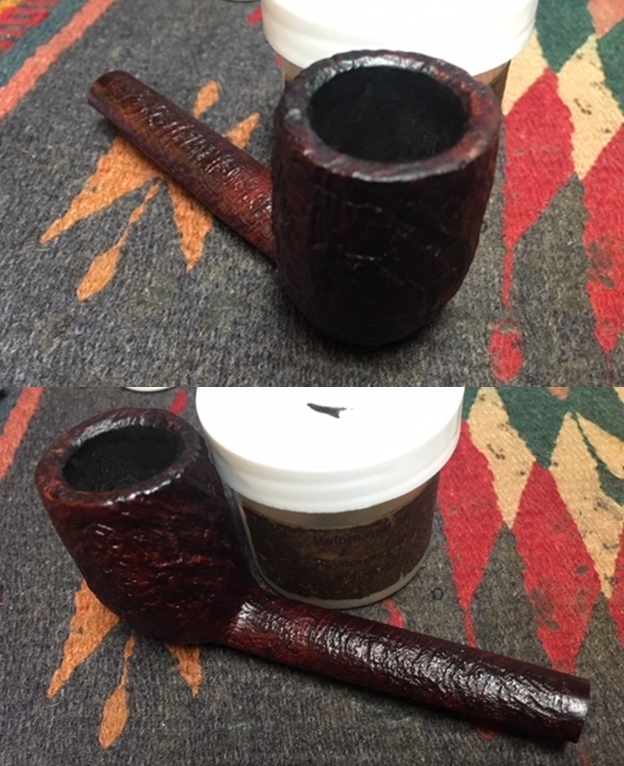
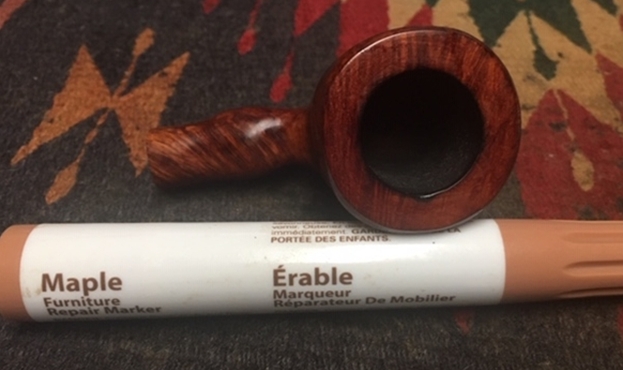
 I know this was cockeyed thinking, but I wanted to see if staining would cover the spot on the right of the bowl rather than continuing to abrade the wood. I used Lincoln Brown aniline stain, flamed it with a Bic and micro meshed to the correct shade. Obviously, the attempt failed.
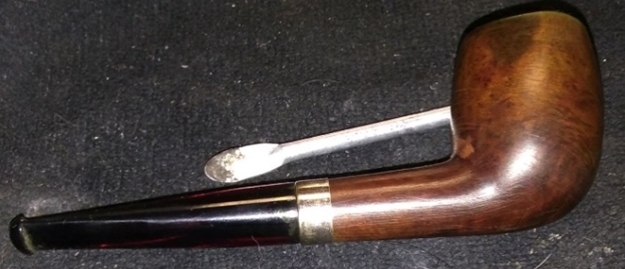 I had worked on the pipe from roughly 8 p.m. the previous night, after returning from my pipe get together, and it was sometime around 4 a.m. Saturday. True enough, I could have used a break for sleep, but I don’t blame the unthinkable calamity that happened next on my own fatigue. Although I accept full responsibility for what followed by the simple fact that the rare and precious pipe was in my custody, and would even be happy to blame myself for some error, that was not the cause of the awful event that occurred without warning.
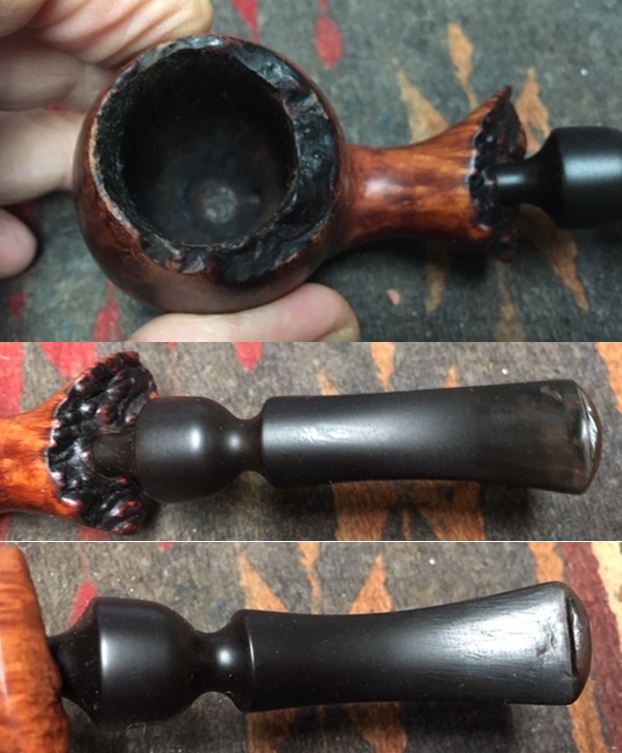
As I had done many times, with the same great care and patience, I unscrewed the stem from the bone tenon. There was no resistance, no mis-threading, nothing whatsoever wrong – until the sickening sound and feel of bone that was, one second, solid, and the next, several disjointed pieces that didn’t even fit together and more or less pulp left in the shank and stem. And the infernal softness of the sound it made when it shattered, not a snap, crackle or even a pop, but as closely as I can describe it, like the effortless breaking between a pinkie and a ring finger of the softest piece of chalk. There I was, exhausted as I readily admit, with the bone tenon broken and crushed in my hands, the remnants scattered on the floor in bits and fine powder. Almost three years after the pipe restoration went all the way south (and I’m sure everyone knows the figurative distance and final destination I’m suggesting), I still remember most how the unimaginable tragedy lacked any definitive sound. I know now that the bone material had passed its life expectancy long before and might have failed at any moment. In hindsight, I am grateful it happened to me rather than Daryl.
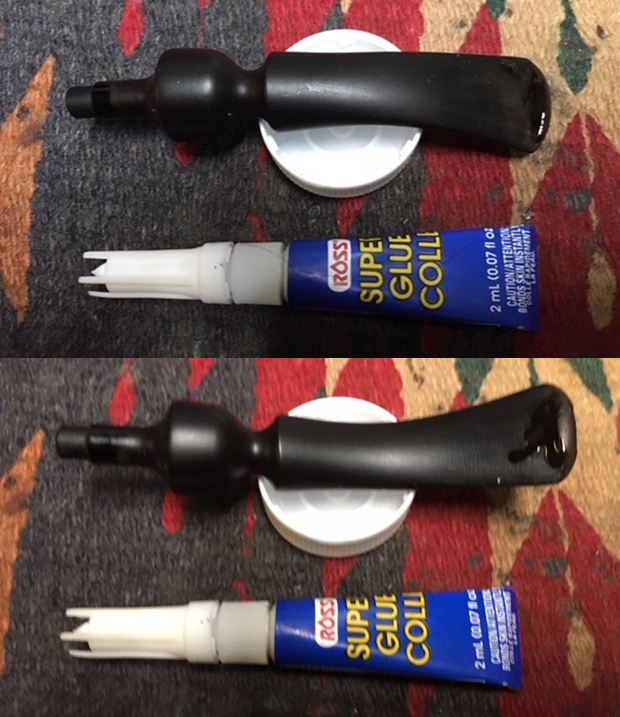
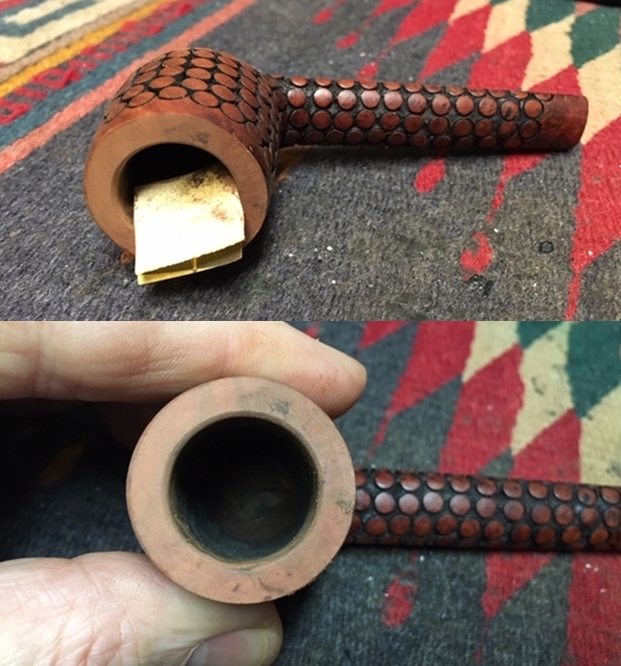
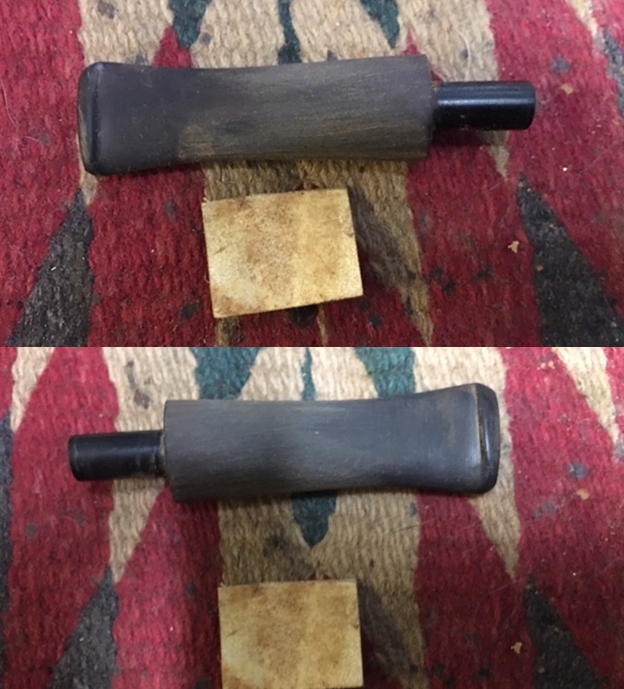
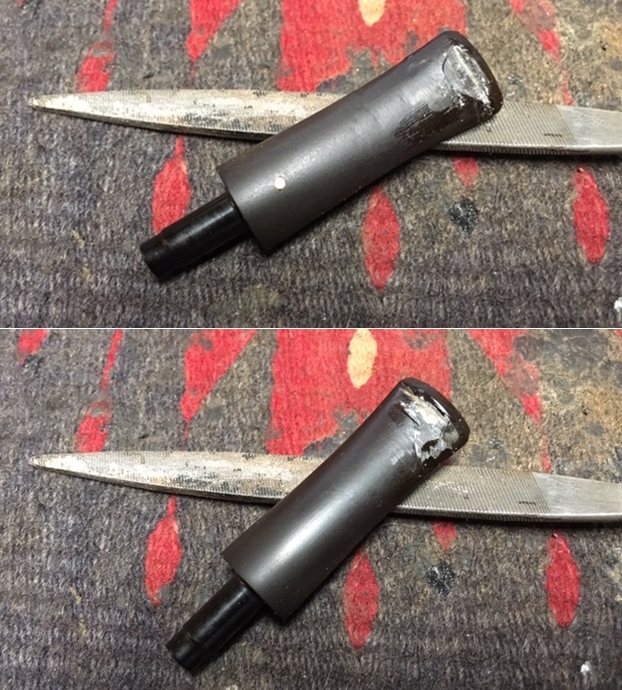
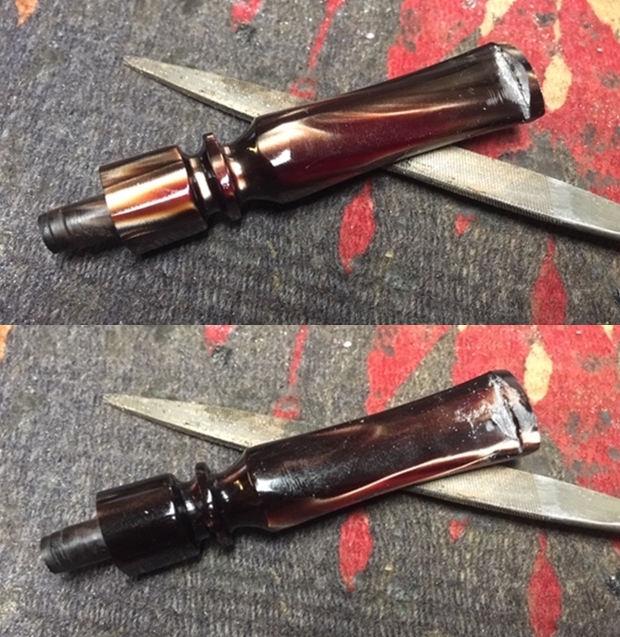
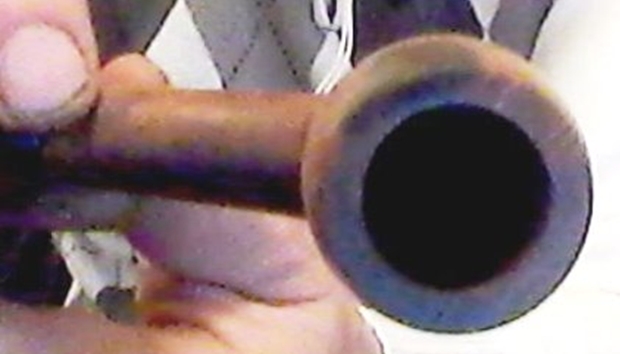
Here is the ghastly reality my numb mind had not even processed yet as I saved the horror for the record, by pure dazed habit, after frantically trying to graft the three tangible splinters of the tenon together with Super Glue. Note the Frankensteinian product of my mad attempt at surgery on the tenon and the perfect evenness of the fault line leading to a total impaction of the stem hole.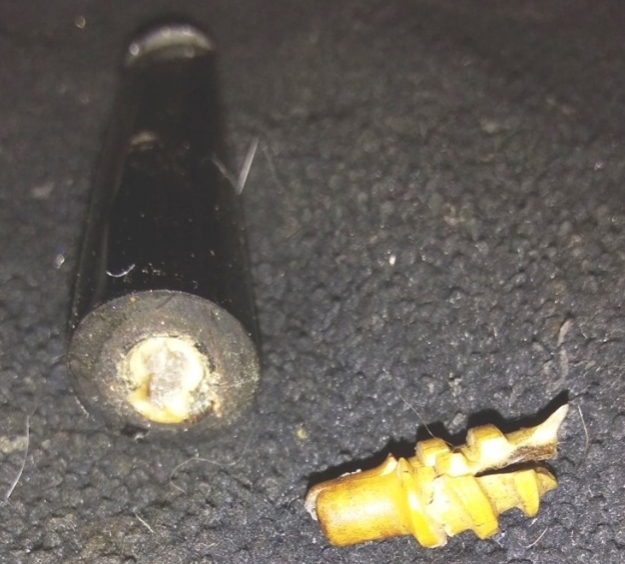 I tried my best to sleep and, late in the morning when I got up, considered the remains, my hope to find I had dreamed the whole fiasco obliterated with less noise than the plan-changing event a few hours before. I decided to put the stem aside for the time being. Why tempt further catastrophe when such things have a way of finding us, like the only two certainties in life of which Christopher Bullock seems to be the first person to warn us, in his 1716 farce, The Cobler of Preston.
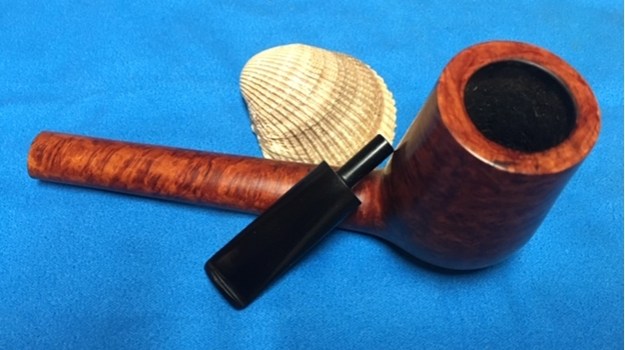
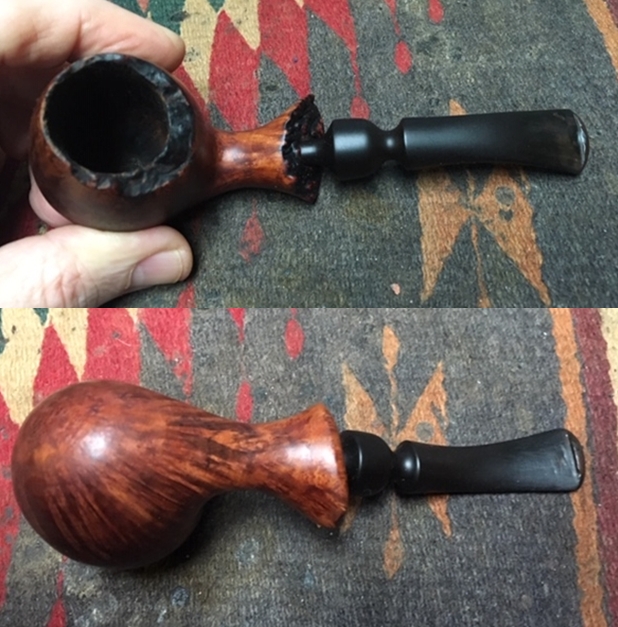
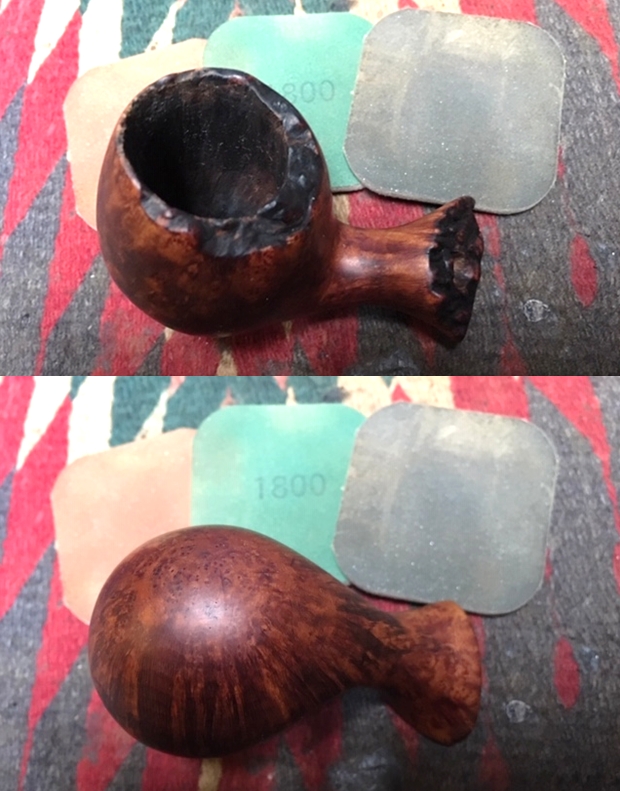
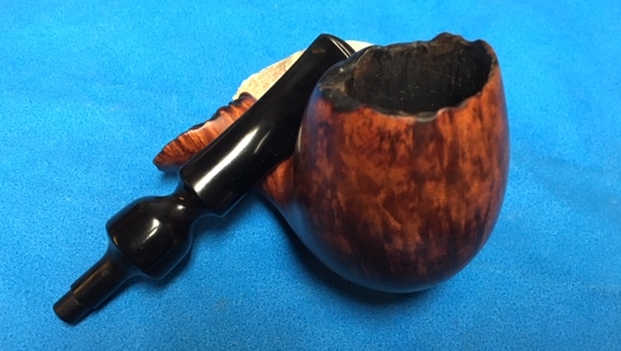
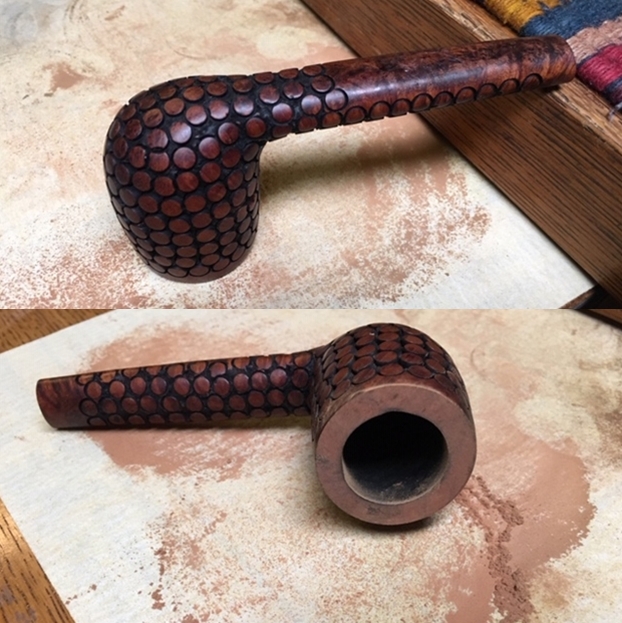
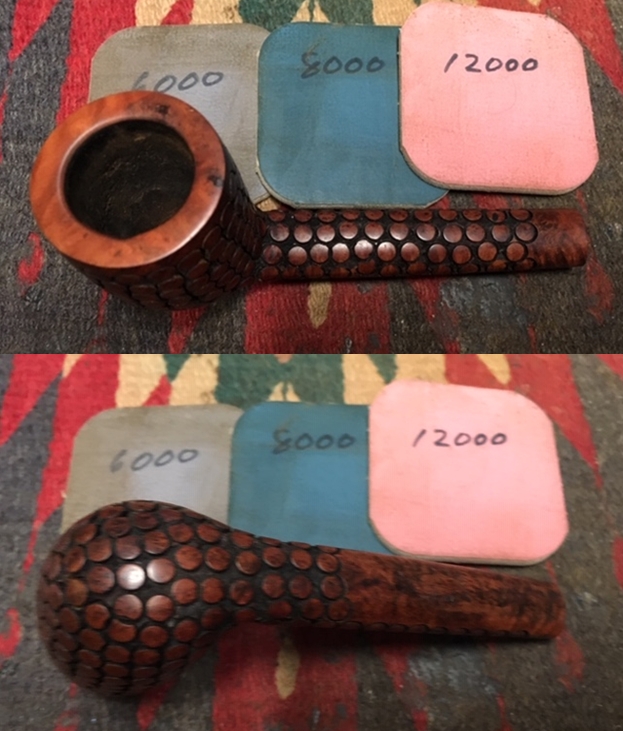
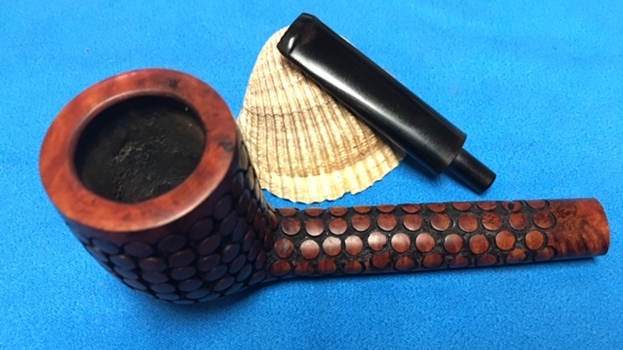
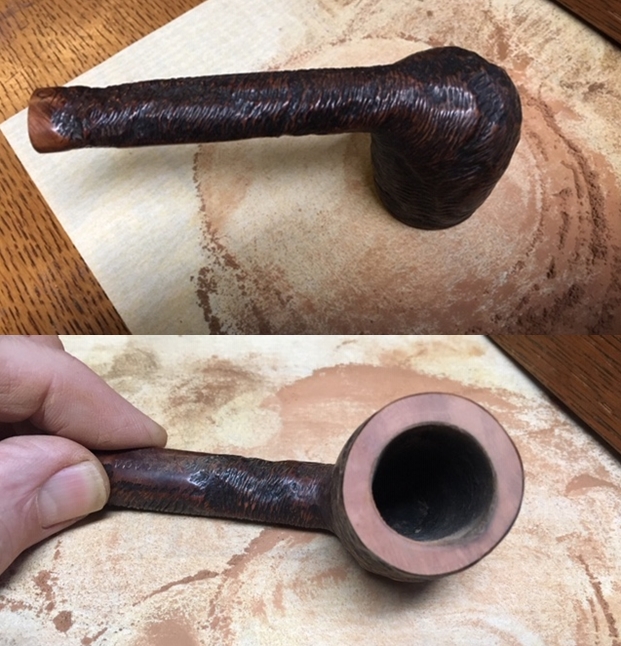
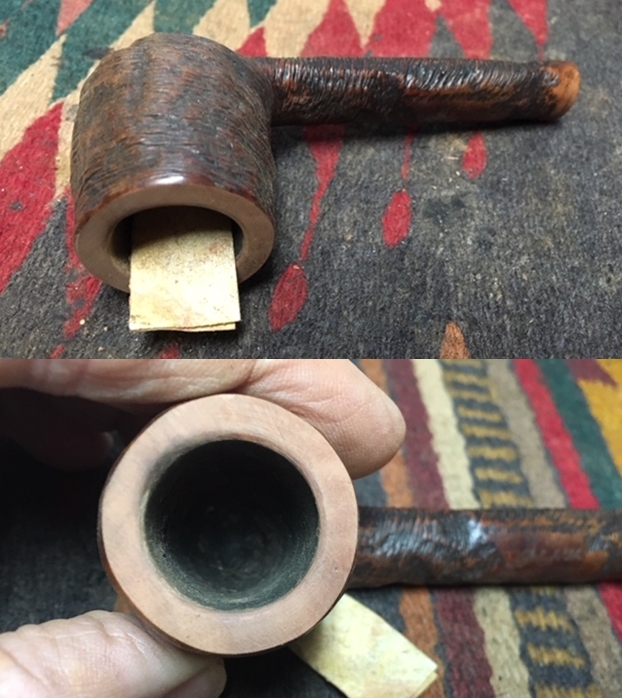
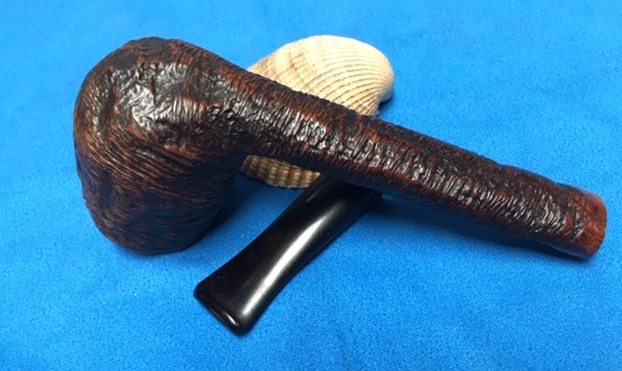
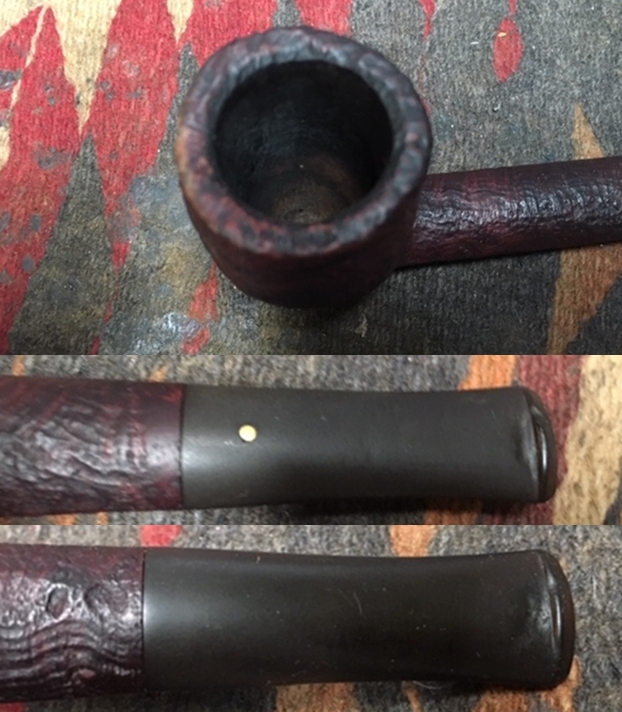
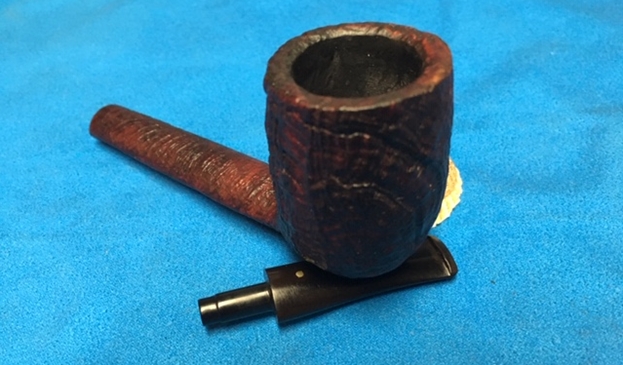
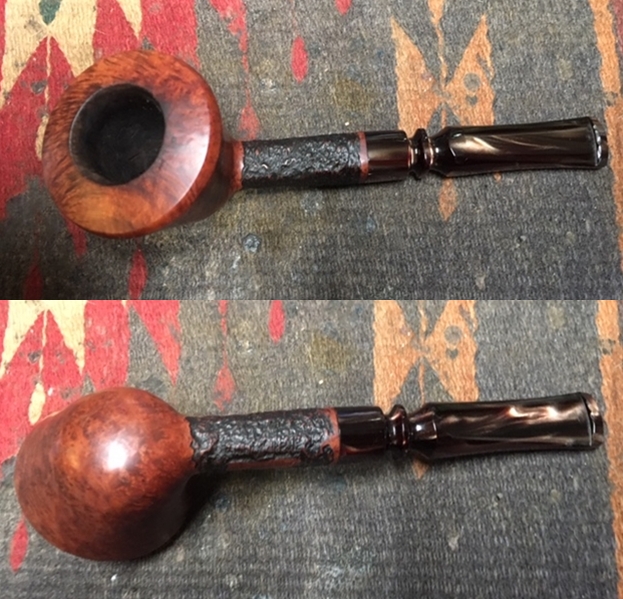
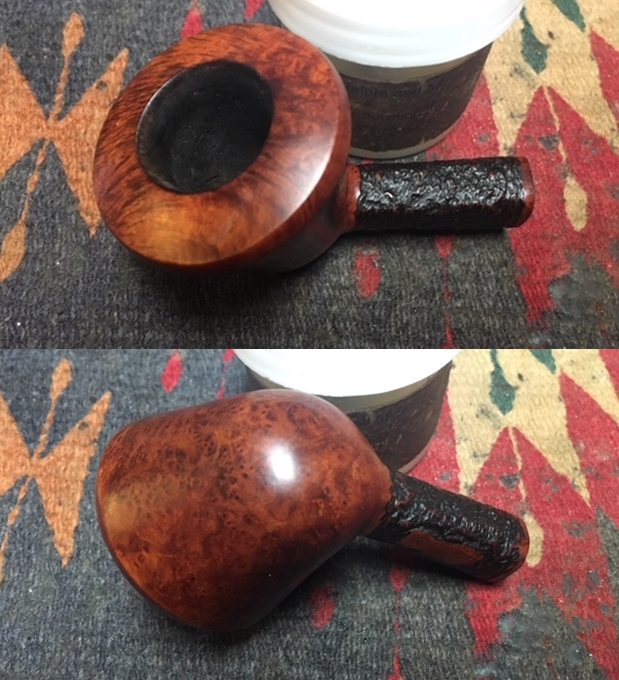
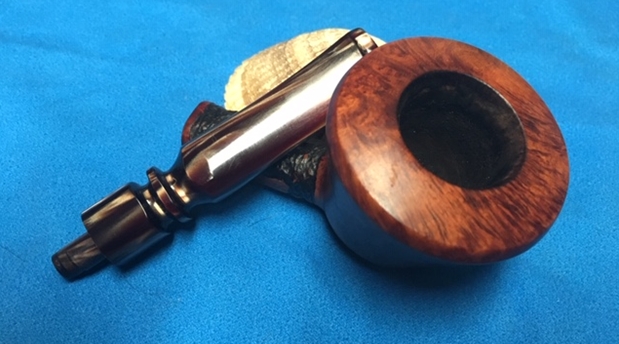
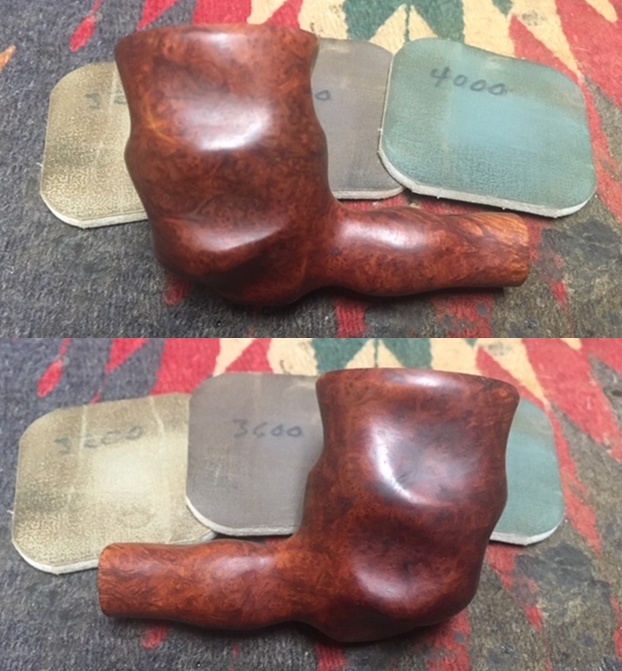
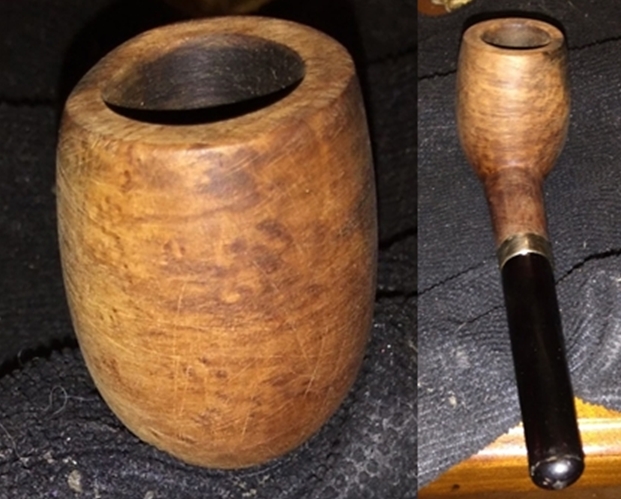
Instead, I turned to the mangled rim and working with a double-sided 150/180-grit sanding pad painstakingly returned it to full health.

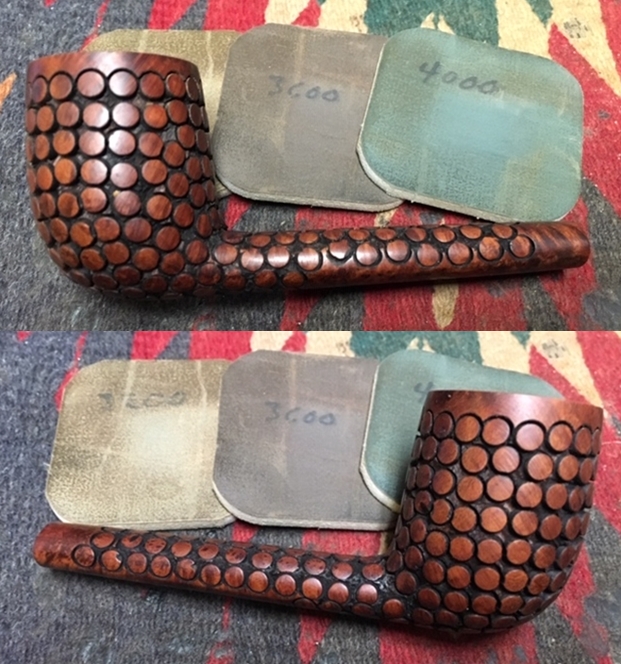
 When I was finished with the rim, it was looking good. I even managed to give it a slight inward slant before reaming and sanding the chamber smooth.
 Other than the missing tenon, everything was beginning to look up again. Outside was warm and sunny, bare wisps of clouds here and there in the blue sky. When the other incomprehensible disaster struck, I felt like a lightning rod on an old barn swaying and creaking in the storm of the century.
This time, no ifs ands or buts, it was my fault despite the inherent danger of meddling with Bakelite or any other synthetic plastic. I had no trouble with some dental tools I somehow got my hands on, wheedling out a chunk of packed bone here and another there from the shank, and the mother lode popped out nice and easy Then it was the stem’s turn, and it was ornery. I just started to make a decent dent on the harder bone inside the tiny stem hole when I just plain blew it. I heard it that time, the crack amplified by my ears the way a bolt from Zeus struck the railroad tracks a few yards from me as I walked home from work in Granby, Colorado just before my 21st birthday. I was watching the storm coming closer and saw nature’s electricity hit the rails. That flash up in the Rockies made me jump a foot in the air, but the explosive soundwave a heartbeat later sent me flying across U.S. Hwy. 40, forget about the non-stop two-way traffic between the Berthoud and Rabbit Ears Passes..
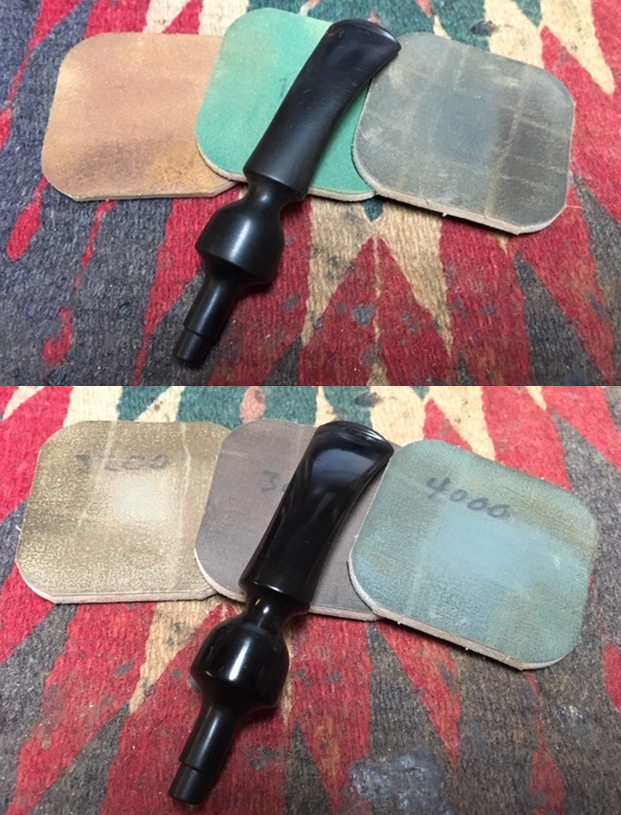
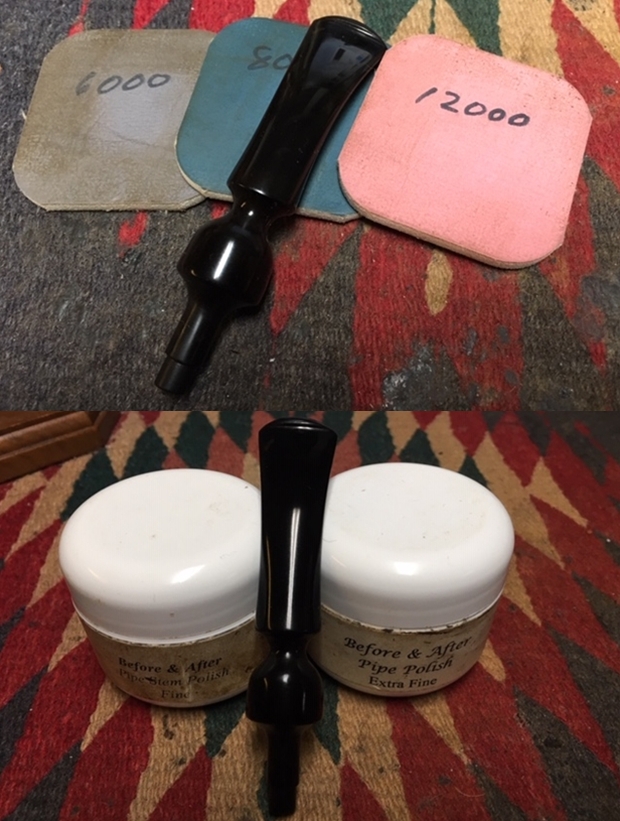
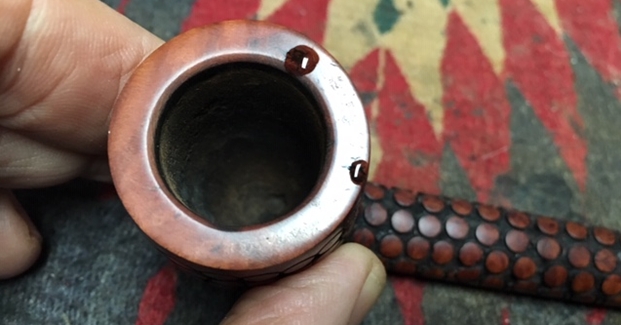
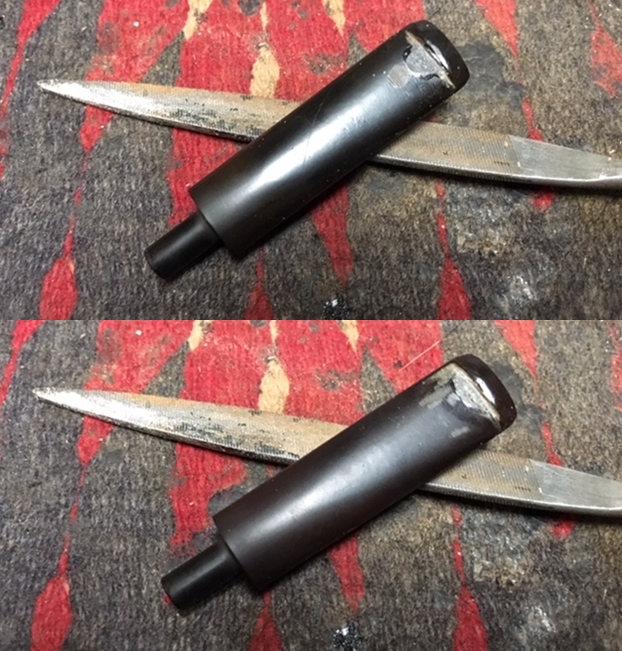
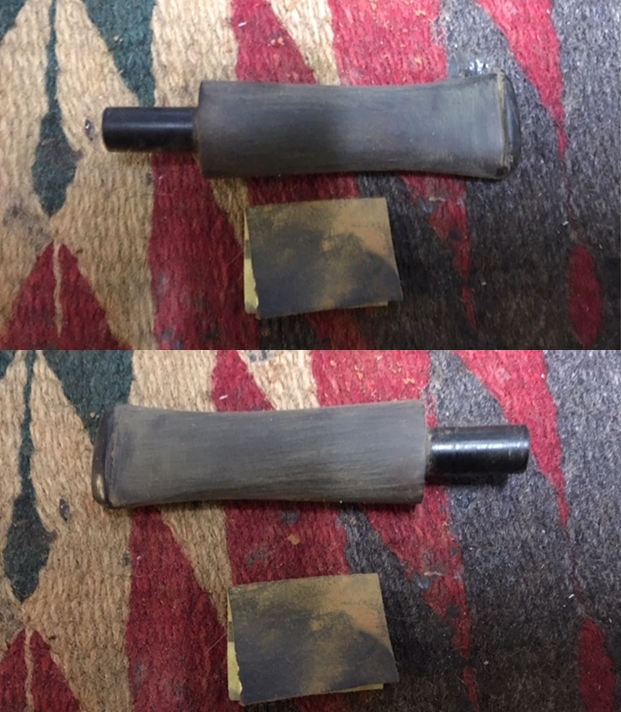
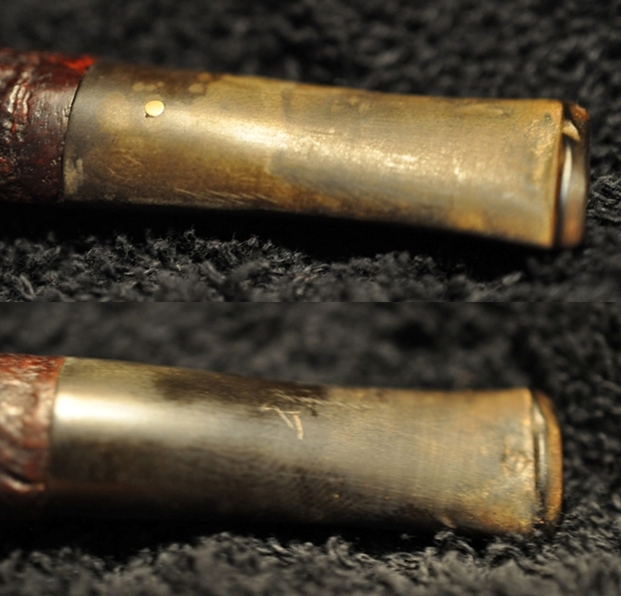
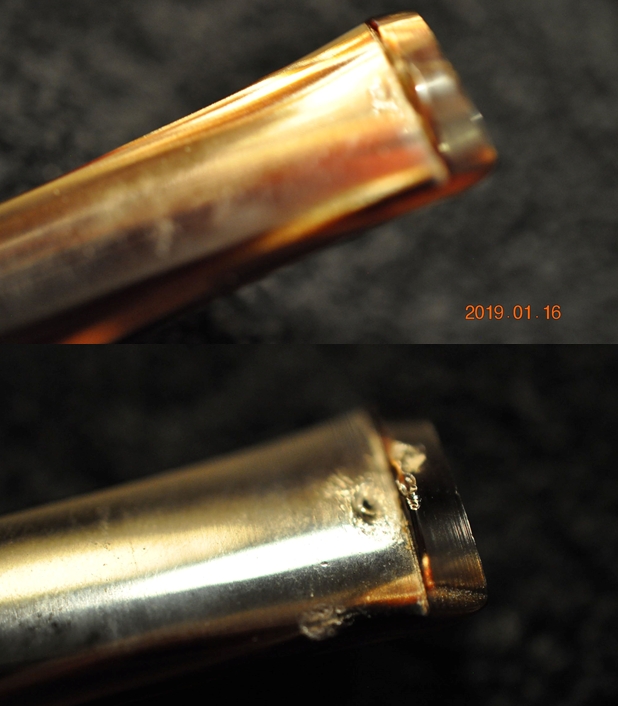
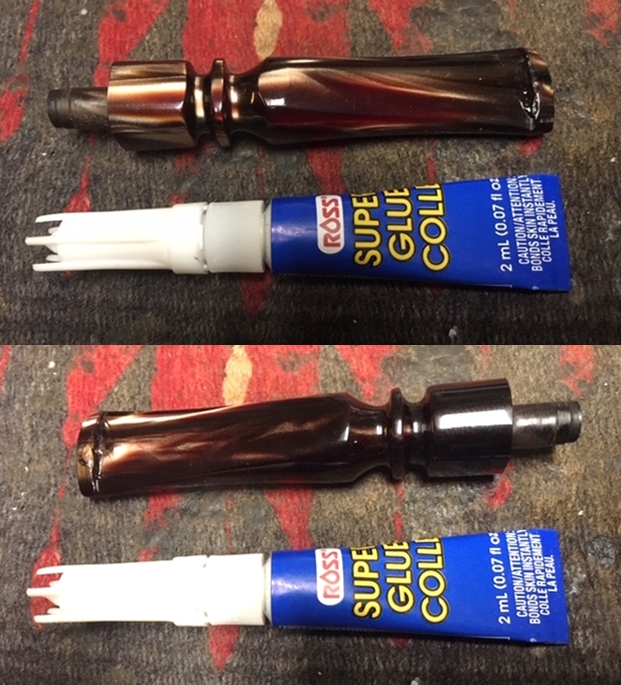
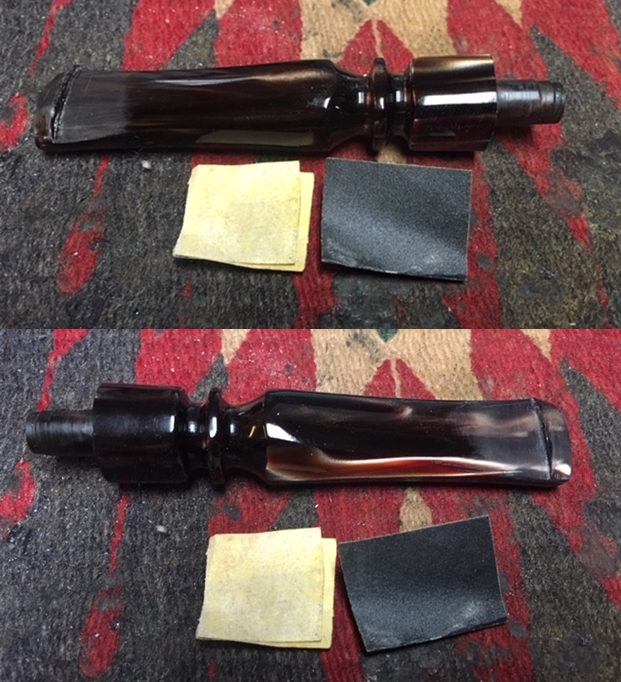
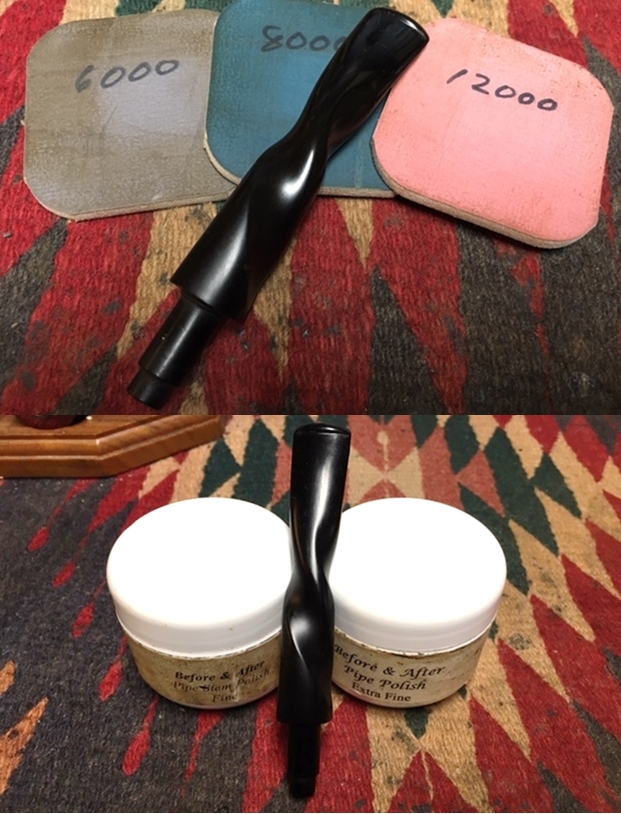
Once again, in the frenzy of emotions over my double-destruction debacle starting with the bone tenon and then the stem, I hastened to glue the two pieces of the stem together before taking pictures. The first was while the glue was still setting, the second after I micro meshed off the excess glue and to show the great color as well as how closely the small piece fit into the big, and the third just for the sake of showing the end view.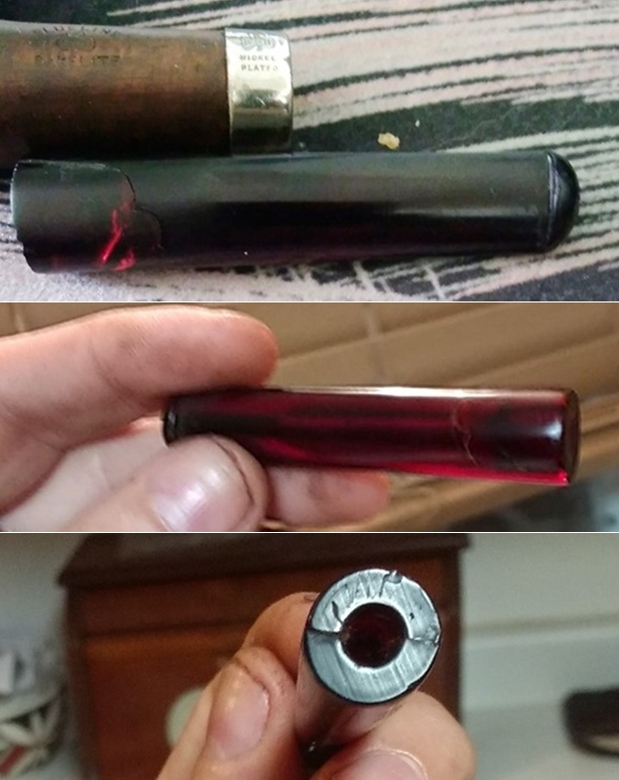 Regardless of my initial frazzled audacity to think I might be able to right this wrong, my sense of morality is intact enough that I know I would have rejected the notion of passing off the fatally flawed stem as undamaged no matter how seamless the result may have been, but I was still relieved to have any temptation removed.
The star-crossed shadow that came to lurk around every corner began to seem a curse. Since the day I restored my first pipe, until then the thought of giving up the whole endeavor for good never occurred to me. At that lowest point of all my work reclaiming old and worn estate pipes, to crib from Steve’s site motto, I came a breath away from scattering all of it with my arms and hands to the walls about me or wherever else they might crash and shatter – the remains of the KB&B, dozens of other pipes awaiting my attention and every tool I had acquired, all of which I didn’t yet know was soon to be stolen from me anyway. But that’s a different story I’ll tell when I’m ready. This was in the spring of 2016, when my life in general was, to me, dangerously pointless. I considered selling what I could and scraping together everything I had to find Daryl a suitable replacement. That was really all I cared about, but it was enough.
I am well aware that some readers of my blogs view my style of writing as feigned or, a little worse, contrived. My unorthodox approach to blogging pipe restorations doesn’t help, and my habit of falling into literary mimicry now and then may annoy many of the more experienced contributors to this forum. That’s just not how I approach any writing project, which happens to be with the same imagination and enthusiasm I try to put into the actual pipe work. I needed a year from the completion of this particular trial merely to face the unpleasant truths of the experience and find the words to describe it, however fanciful they may strike some folks.
But I did finish the job, although it took two years and the unwavering patience of my friend Daryl to be done with it. In that respect, the Narrator’s appellation of Sir Daryl is well warranted. Now I can finally let everyone know something that’s been on my mind for too long: anyone who doesn’t buy the bald self-analysis of my strengths and weaknesses I just finished sharing once and for all can believes what he will and sod off. I’m not going away, and this is for the rest of you, who hopefully know who you are and that I appreciate the encouragement.
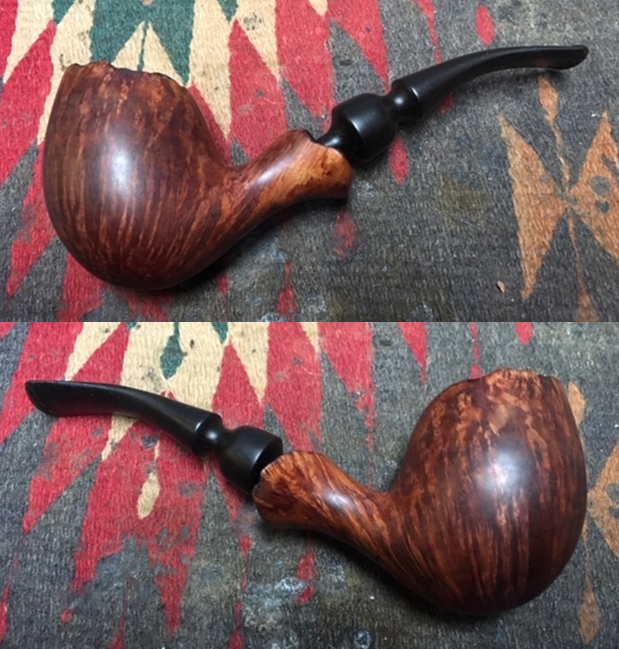
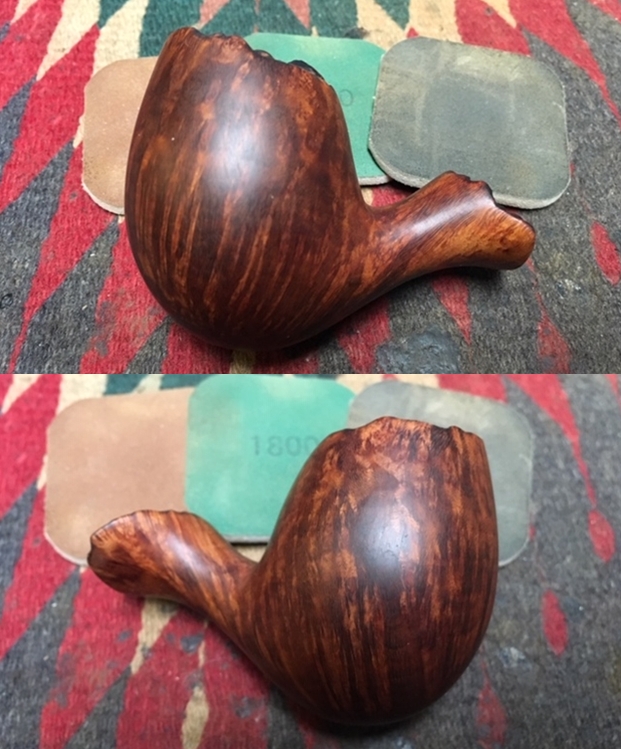
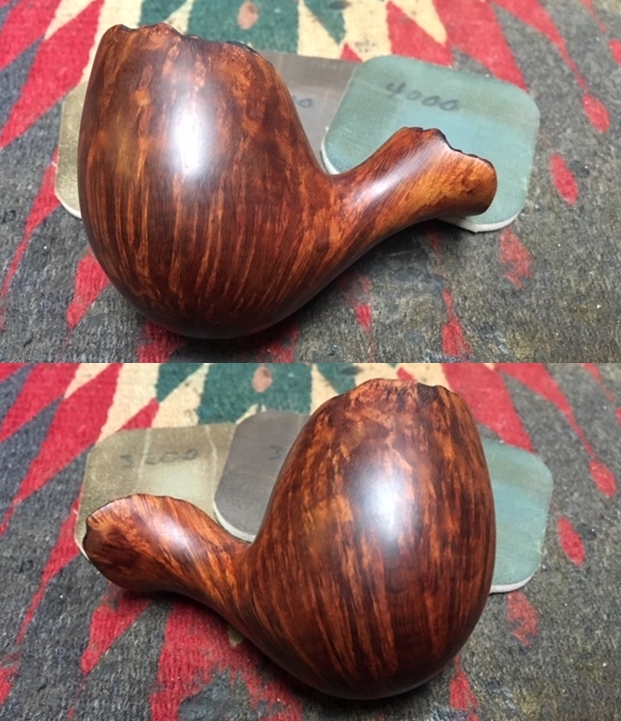
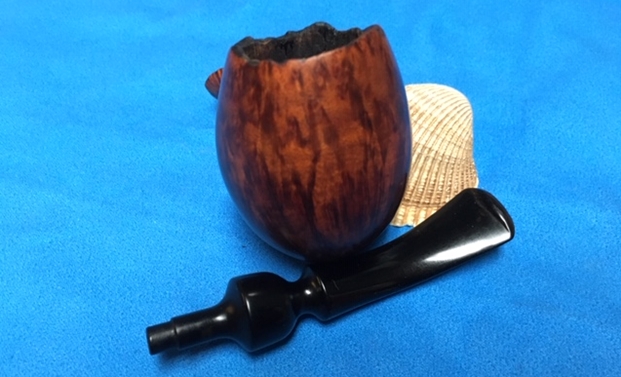
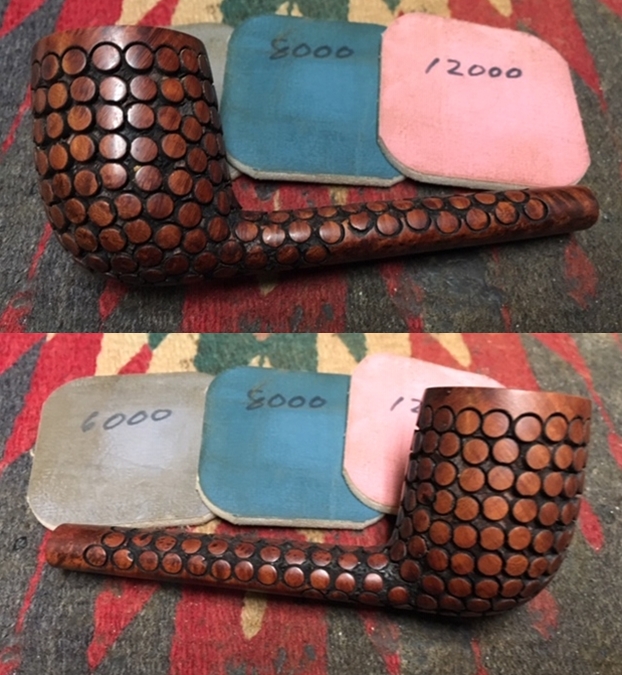
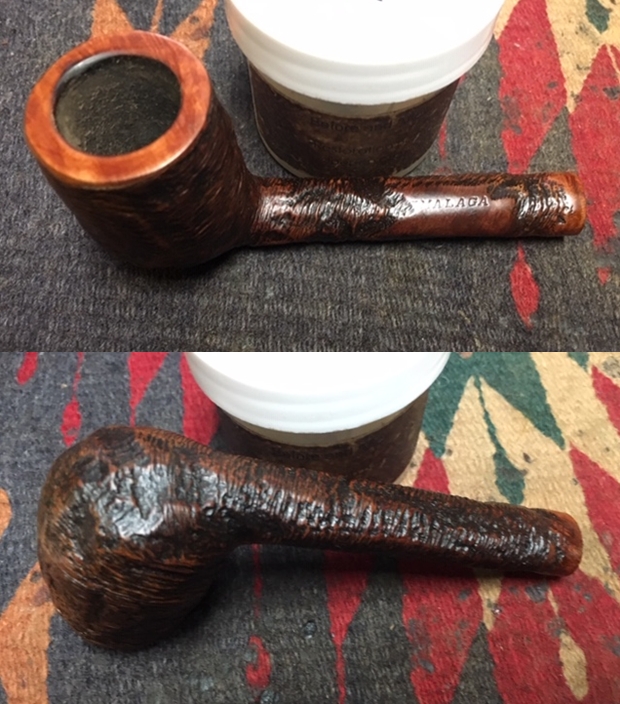
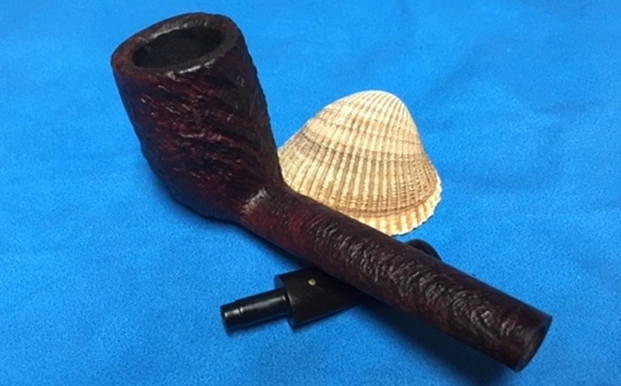
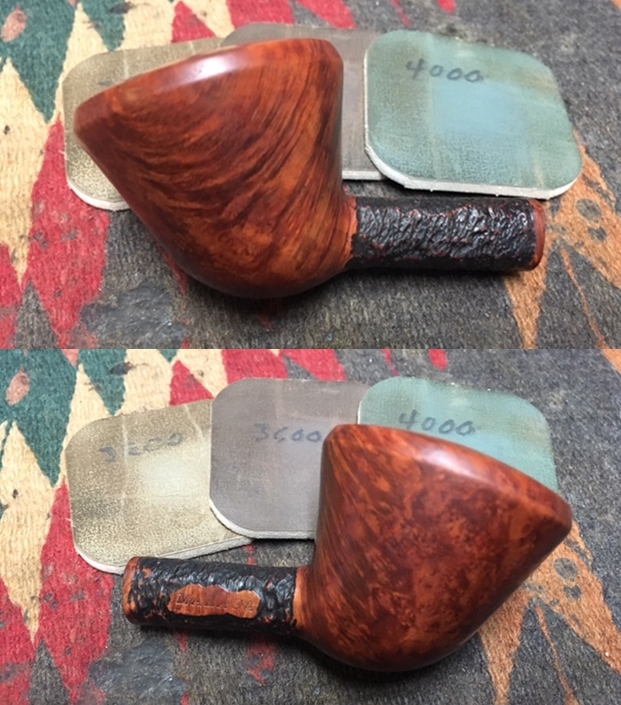
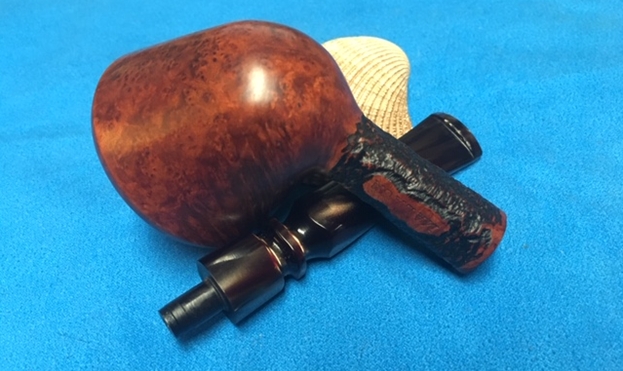
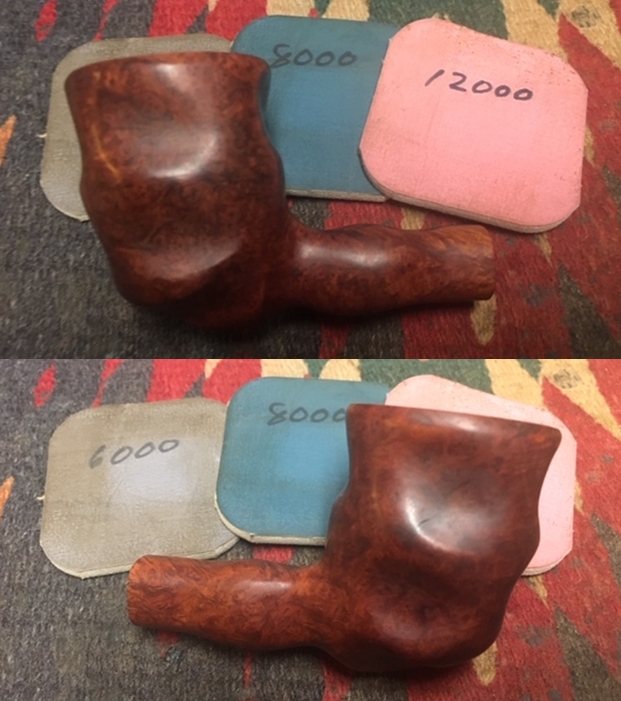
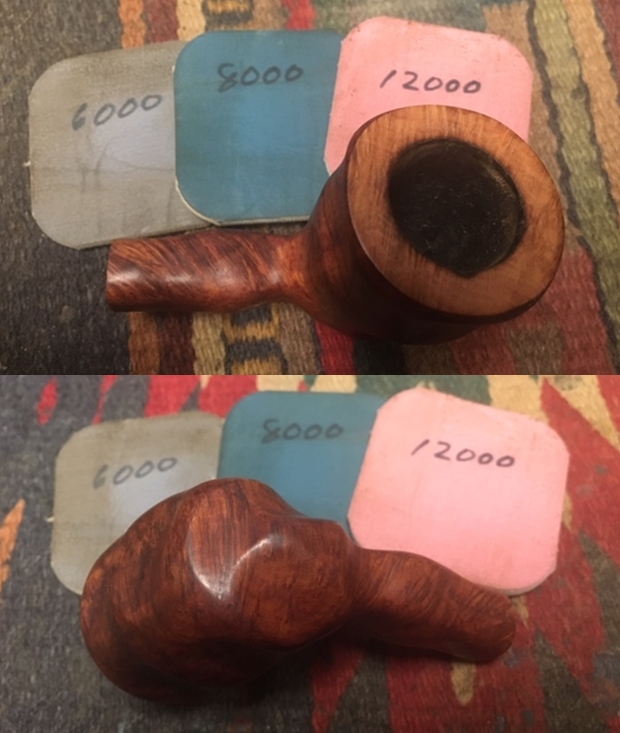
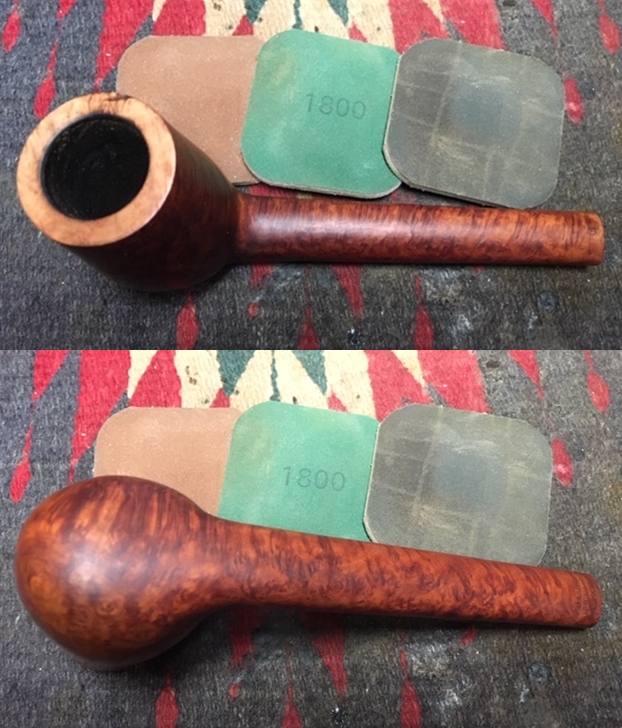
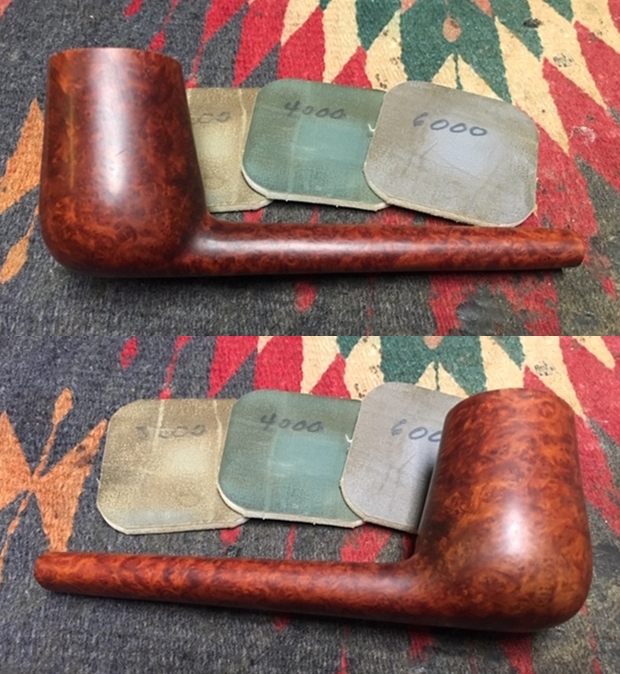
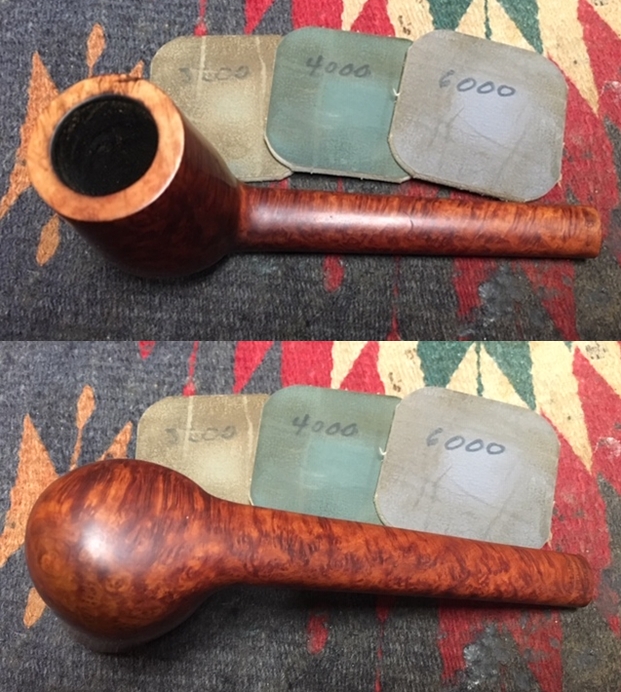
With more time to work on the pipe afforded to me by the unhappy but, for Daryl, fortunate destruction of the tenon if not the stem while both were my responsibility to replace, I was able to eradicate the mark on the right side of the bowl. The next shots show the re-staining and micro meshing to the correct original dark shade of brown. Thanks to the intrinsic problems with Windows 10, the key shot of the right side was lost, and I only have one showing the final result after eliminating the remaining scratches from the excessive but necessary sanding used to make the black marks disappear, which I accomplished with every sanding and smoothing resource at my disposal.

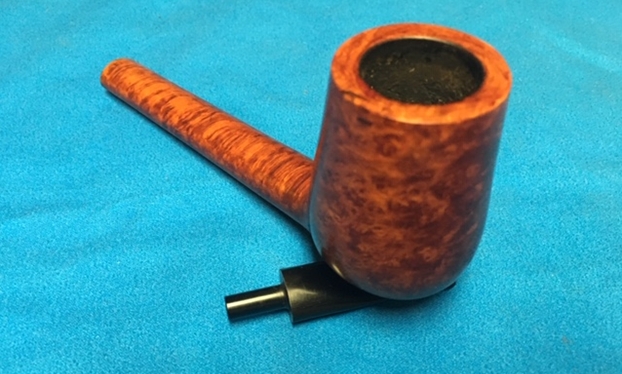
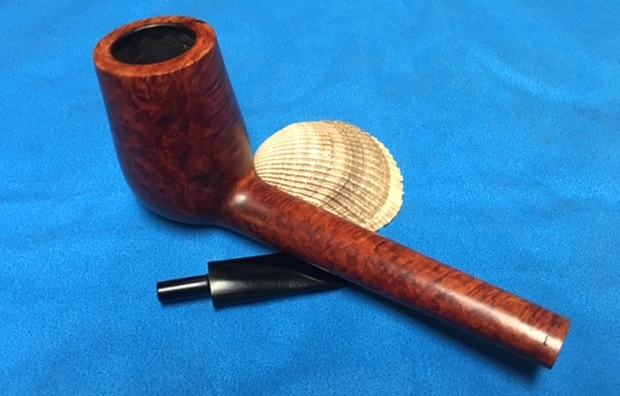
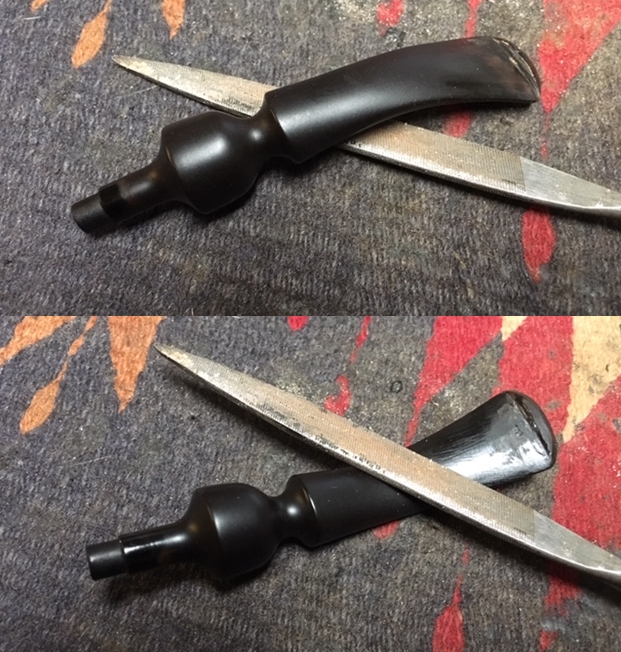
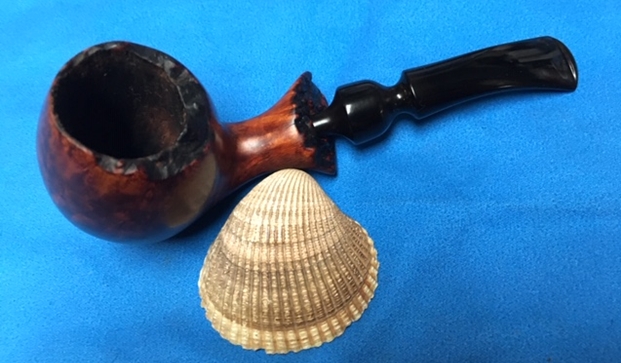
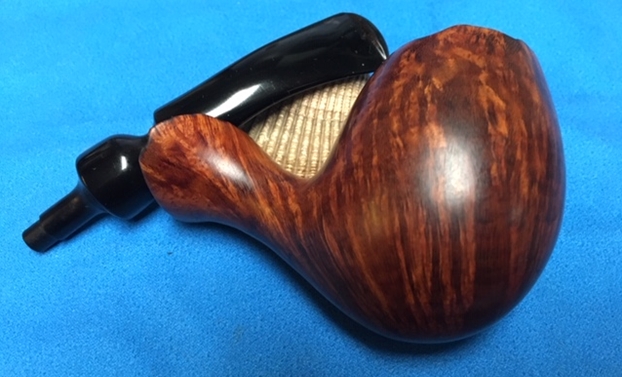
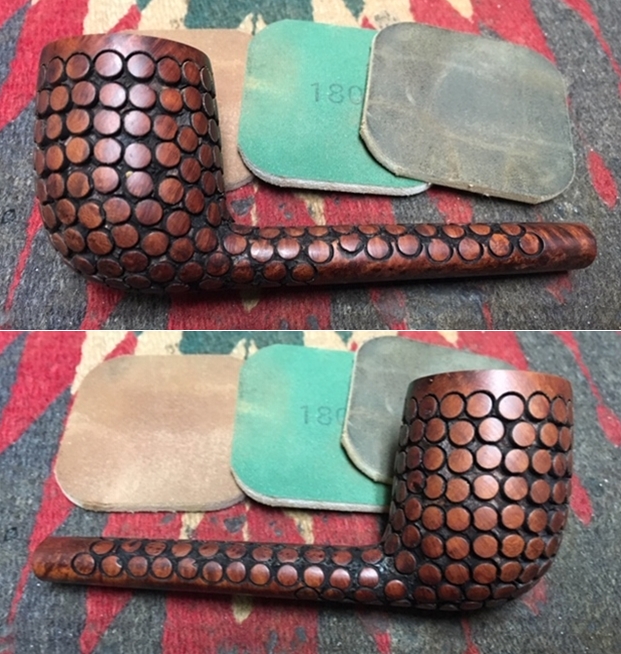
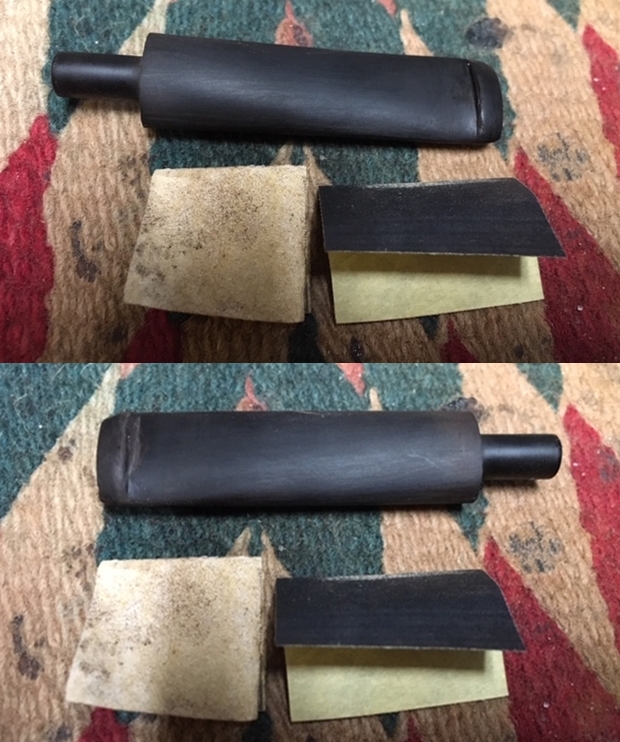
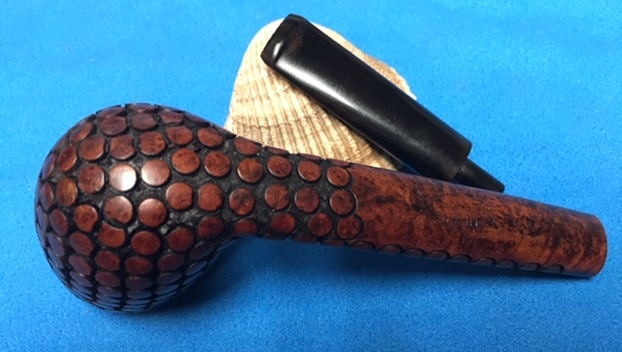
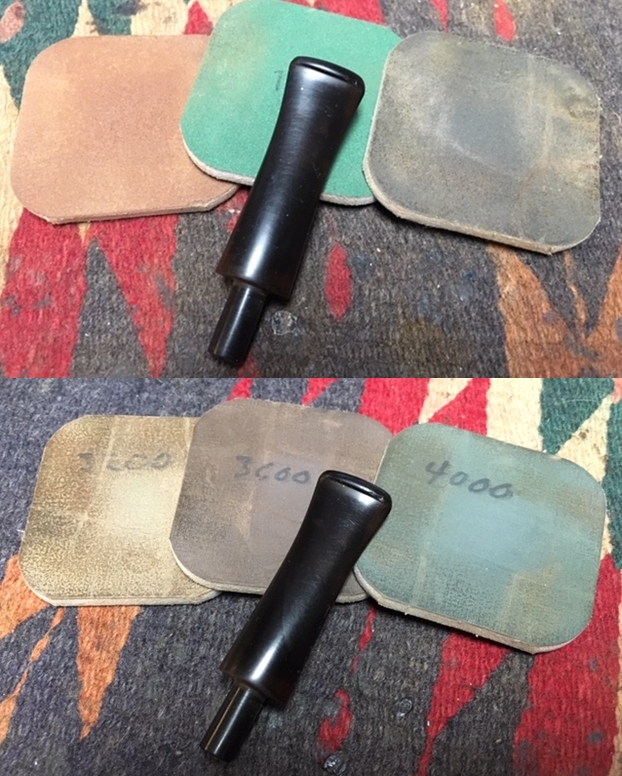
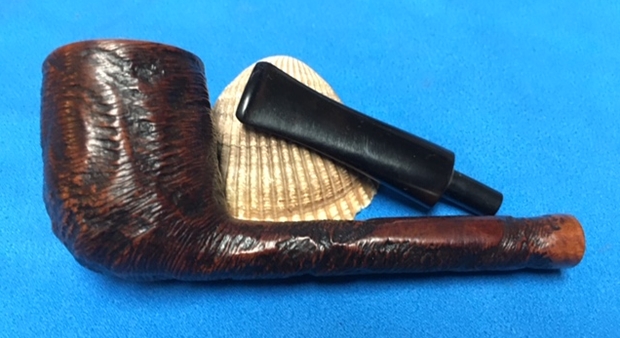
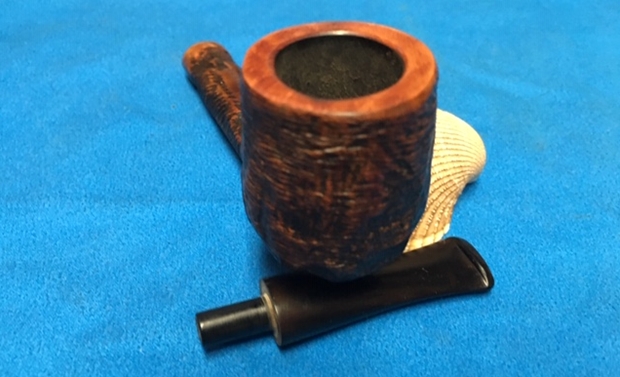
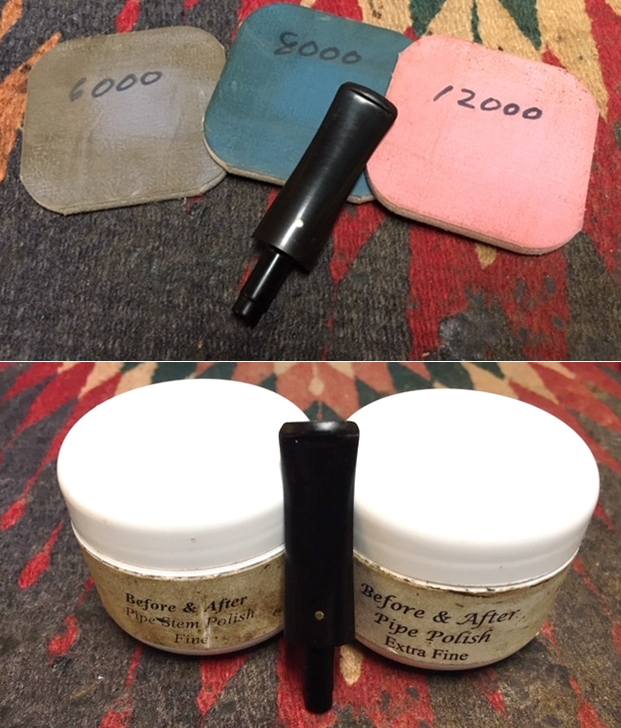
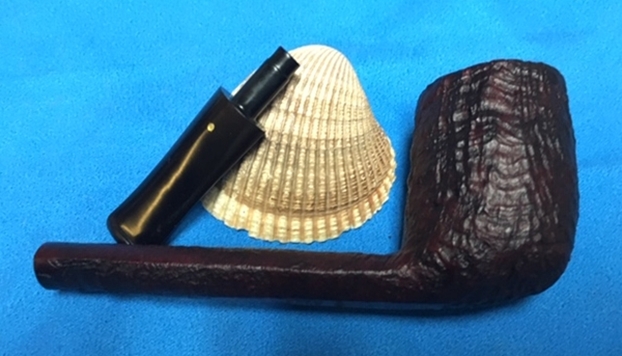
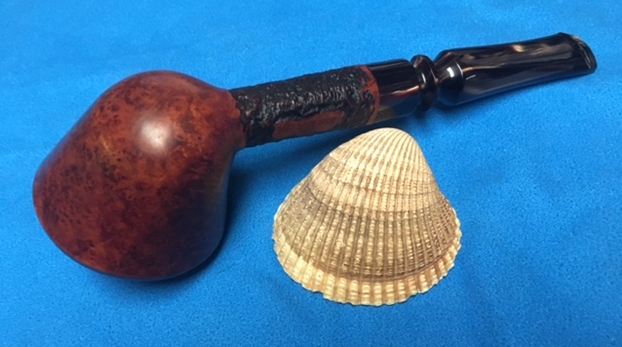
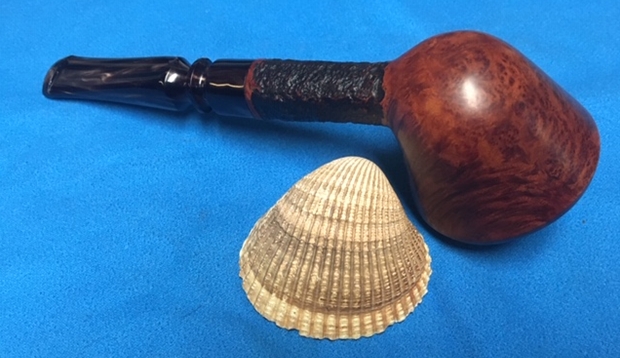
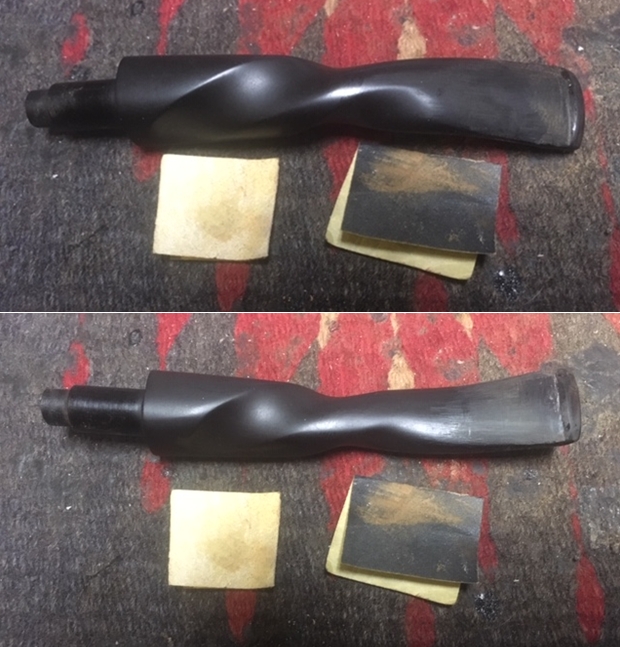
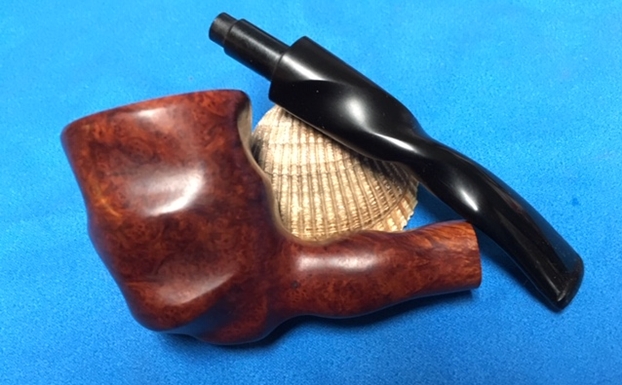
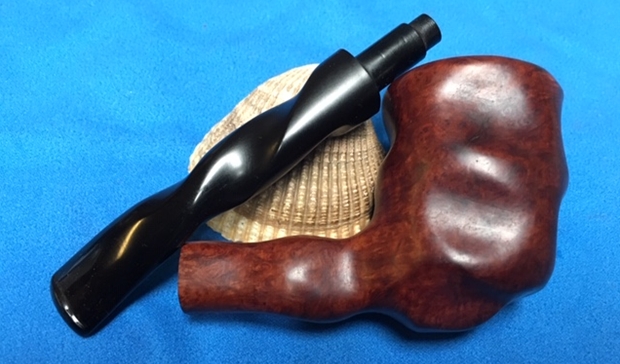
 Desperate to get Daryl’s pipe back to him, I was willing to offer as a temporary solution my real cherry red amber stem from the CPF Best Make turned lion’s head meerschaum I restored in Part 2. Preparing for that possibility, I straightened the amber by heating it in the oven. The second pic shows the original Bakelite stem above the straightened amber stem, in which I had placed a bone tenon I happened to have on hand but that didn’t fit. The length of the amber stem is a little longer, but I expected it would at least mollify Daryl.
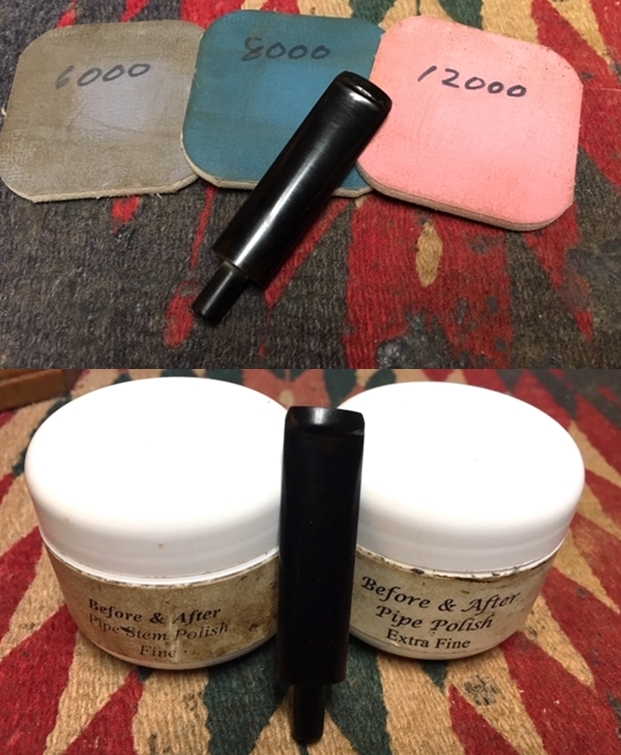
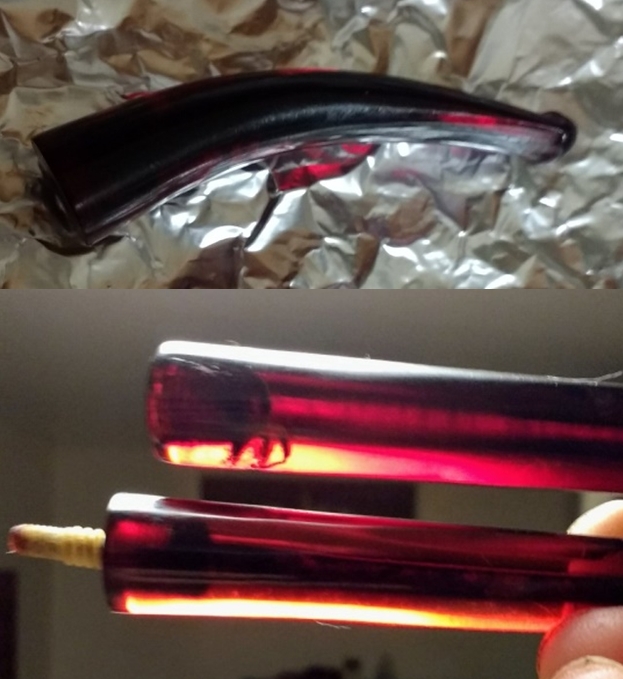 All of the events and work occurred during a relatively short period of time in 2016. Not until two more years passed did I find Norwoods Pipe Repair, and Kenneth Norwood assured me he could replace the bone tenon and even the same color of Bakelite stem. At last I can show the parts he returned with the pipe I sent him. The replacement, as it turned out, was also a little longer than the original, but I was confident Daryl would be more than pleased.
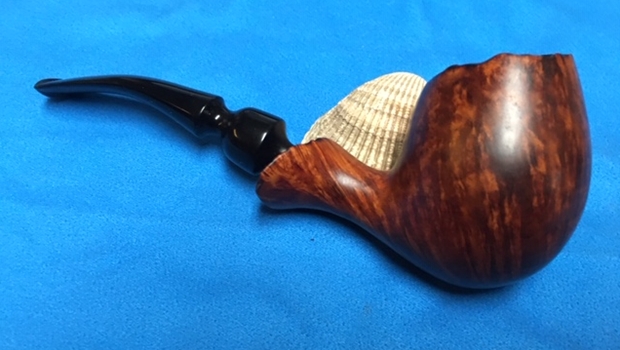
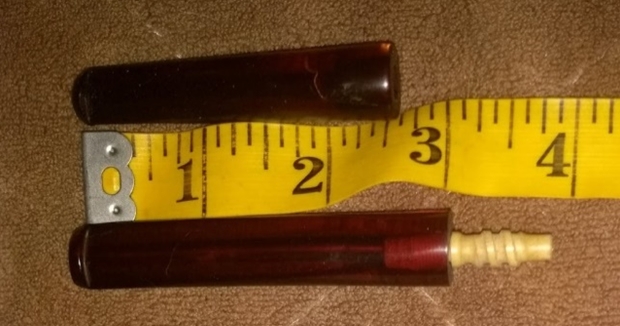 Only two years after taking on the task of cleaning and restoring the KB&B that had such wonderful potential, all I had to do was retort the pipe. I did so immediately, and as the replacement parts arrived, believe it or not, the same day as our monthly pipe meeting, I was able to return the gorgeous completed pipe to its owner that night.


 THE END OF THE LONG JOURNEY
Thus ends our tale of the long and arduous task of the unlucky but persistent Restorer…who almost never faltered in his pursuit of Right versus Wrong.
And everyone lived, happily ever after.
THE NARRATOR’S PREVIEW OF THE FINAL ADVENTURE
The fourth and final Book in this series will tell the tale of the first venture by the heroic Restorer, since thus he clearly needs to be described, into the small and secretive world of meerschaum repairers in his quest to be of service to a Good Lady. Anyone who has ever had dealings with this lonely coven will understand how they covet and guard above all else the alchemies they devise as theirs and theirs alone. But our hero will reveal, for the whole world to know at long last, the wondrous knowledge he has uncovered with the aid of unanticipated paladins – in particular an Artisan of high renown who dwells in the same town as the Restorer.
 SOURCES
https://norwoodspiperepair.com/index.html
http://freakonomics.com/2011/02/17/quotes-uncovered-death-and-taxes/
https://rebornpipes.com/tag/kbb-kbb-pipe-history/
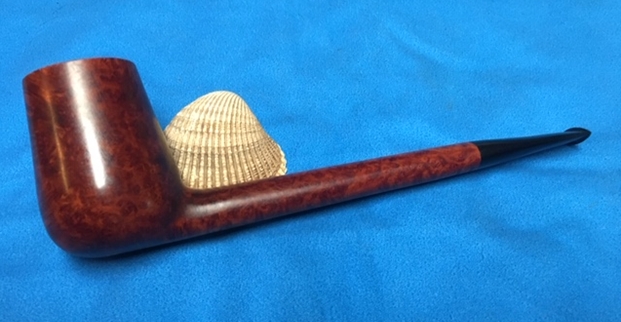
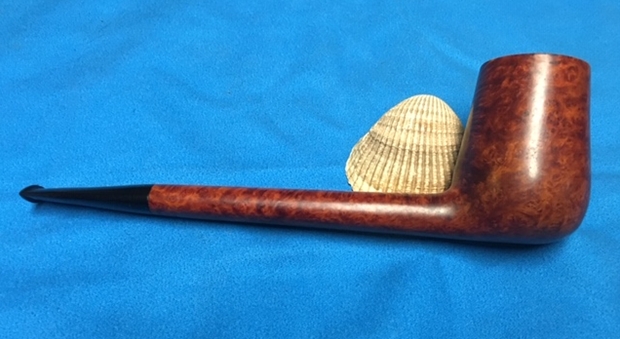
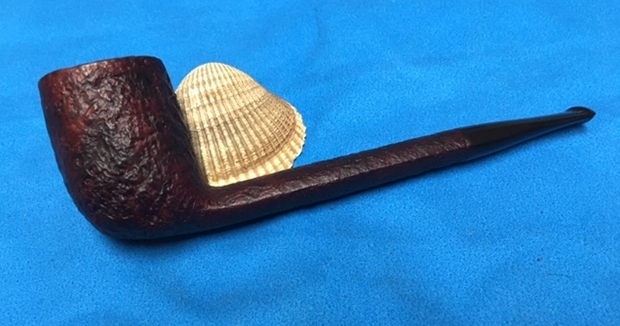
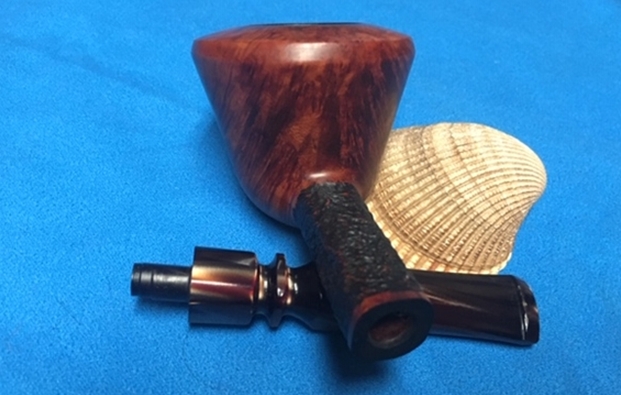
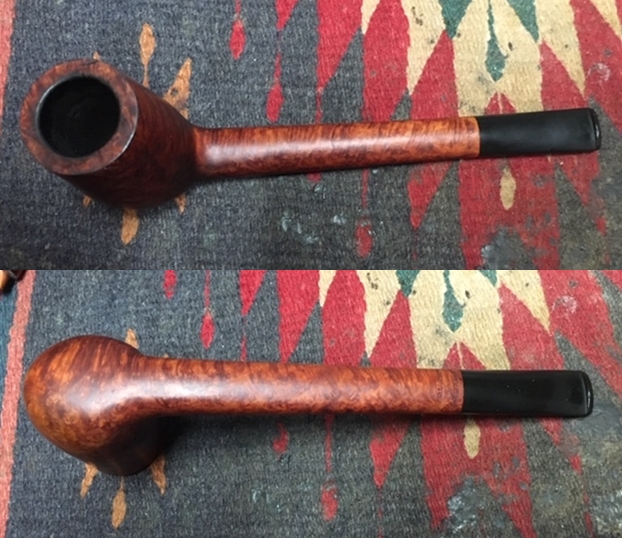
 The next pipe in the queue is from a fellow in Florida who picks up some pipes for Jeff and me. It was one of several that he found and sent to us. It is a well-made W.O. Larsen Select, Brandy shaped Canadian. The entire pipe had some beautiful cross grain on the front and rear of the bowl and the top and underside of the shank. It had some great birdseye grain on both sides of the bowl and shank. The bowl has a Brandy snifter shaped bowl and a long, oval shank that defines the Canadian shape. The pipe has a rich medium brown finish that really makes the grain on the pipe stand out. The carver at Larsen did a great job utilizing the block of briar to maximize the grain. The pipe is stamped on the underside of the shank. It reads W.O. Larsen over Handmade over Made in Denmark. On the topside of the shank it is stamped SELECT. The stamping is horizontal on the end of the shank on both sides next to the stem/shank junction. The stem is short, tapered vulcanite and has no marking or stamping on it. This is a beautiful example of the work coming from W.O. Larsen.
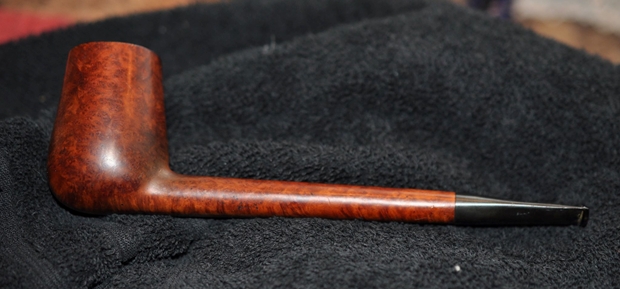
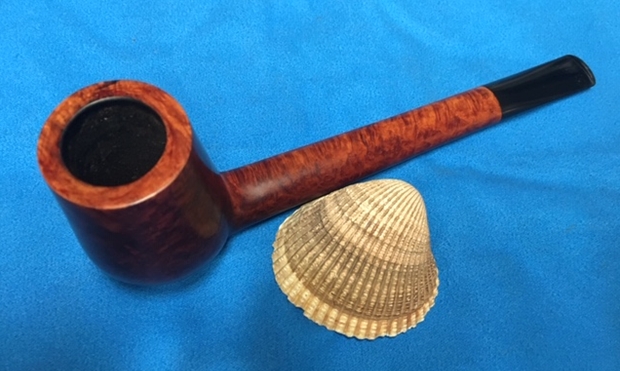
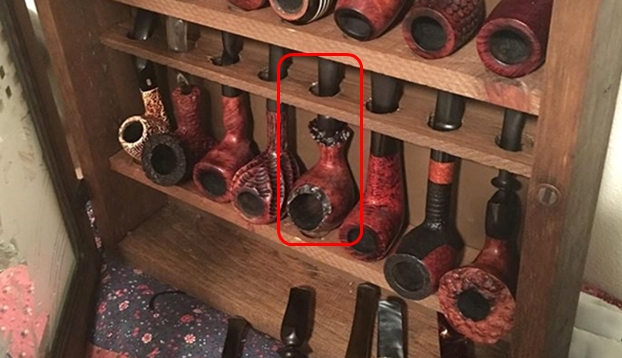
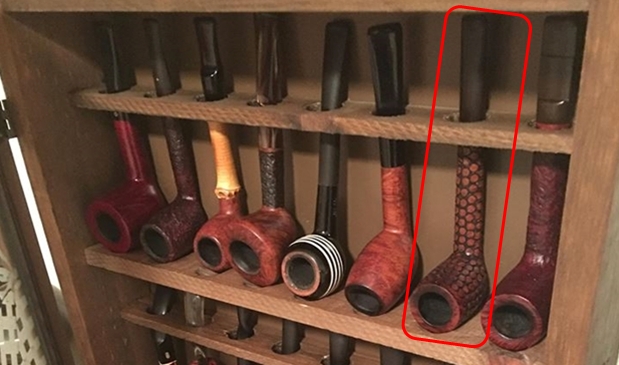
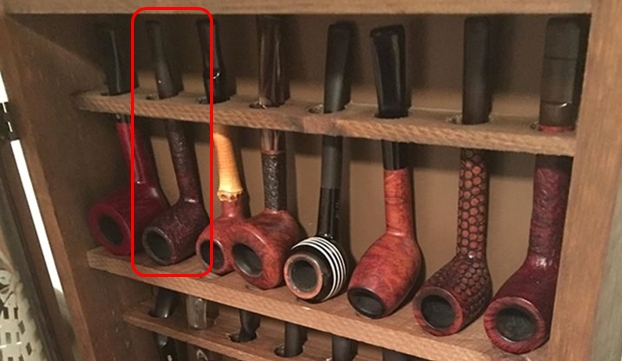
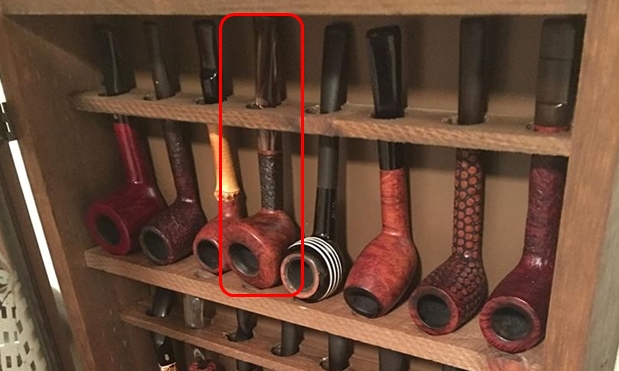
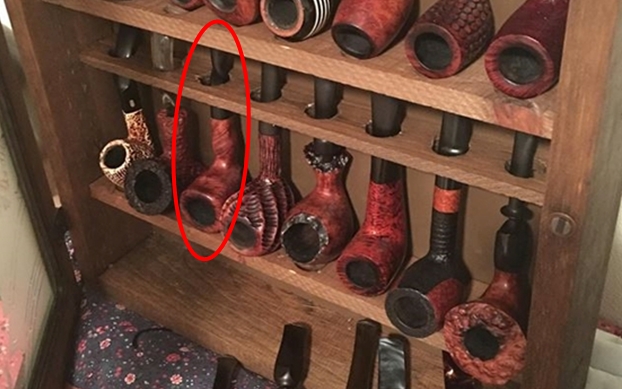
 Jeff took photos of the bowl and rim to capture the condition of the pipe before he started his cleanup work. There was a thick coat of lava on the rim and the cake in the bowl. It shows the mess this pipe was in when we received it. The thick lava overflow on the rim top made it hard to know what the inner edges of the bowl looked like. The outer edge appeared to have deep gouge on the right side of the rim top. I have circled it in red to identify the issue. There is also a general accumulation of grease and grime ground into the finish on the rest of the bowl and shank.
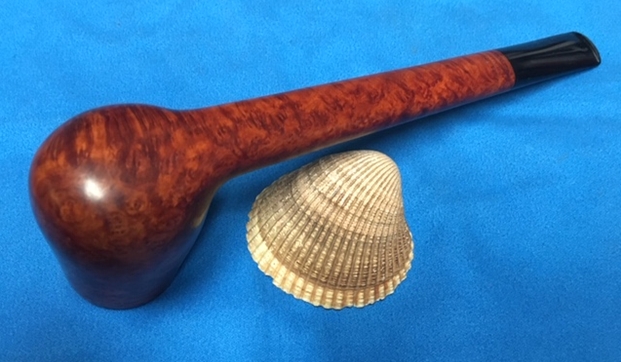
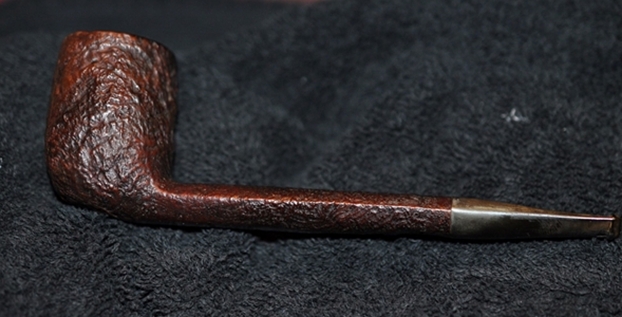
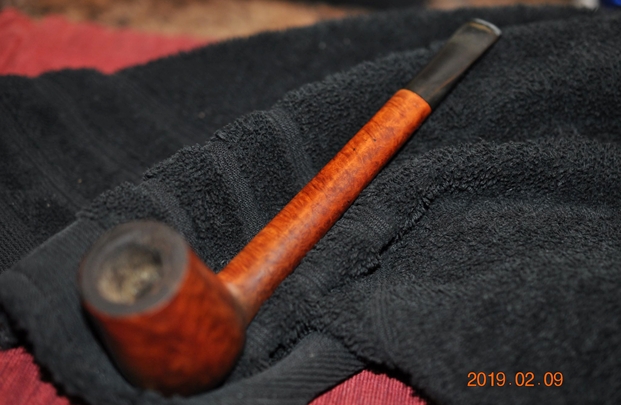
 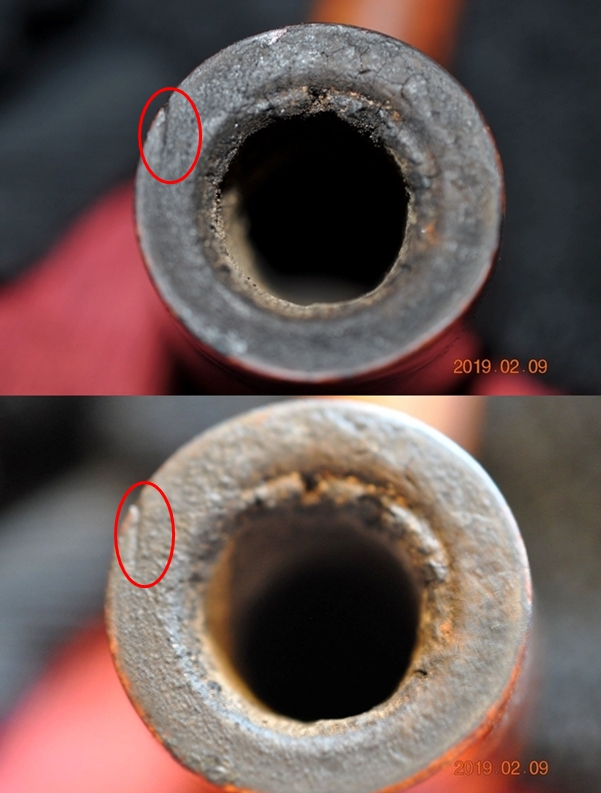 He also took a photo of the right and underside of the bowl and shank to show the interesting grain around the bowl and shank. The finish is very dirty but the grain is visible in the photos.
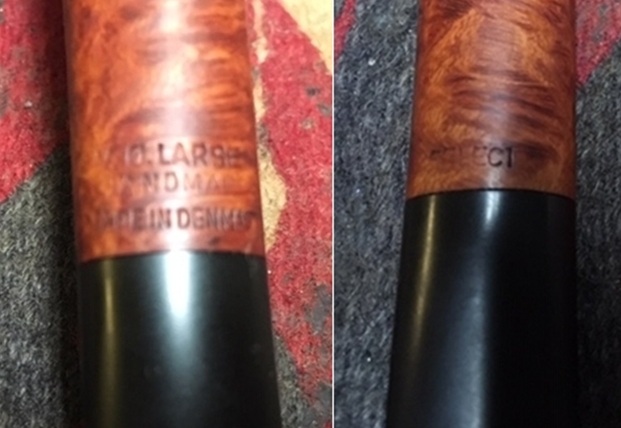
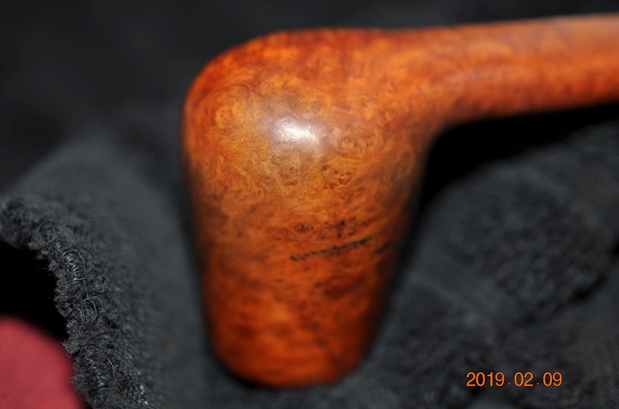 Jeff took photos of the stamping on the top and underside of the shank. It reads as noted above and is clear and legible.
 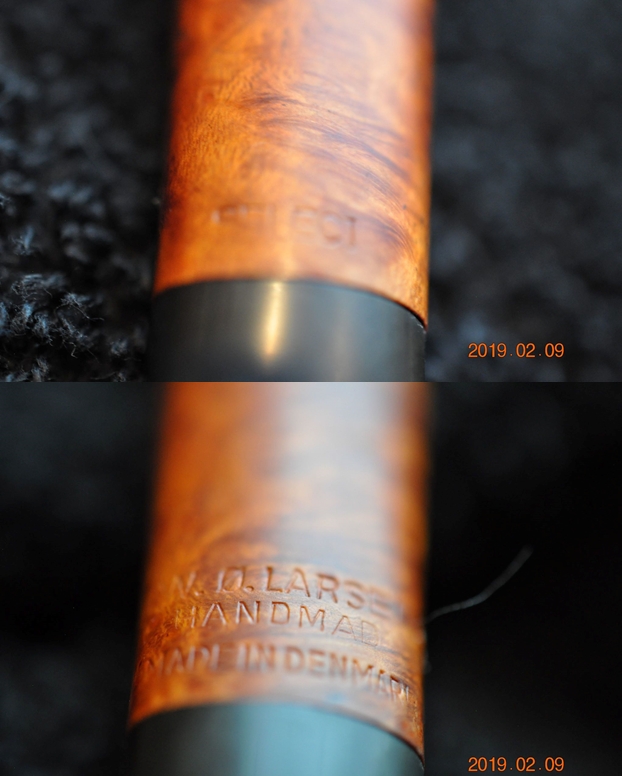 The next two photos show the stem surface. They show the tooth marks and chatter on both sides near the button. There are also some marks on the sharp edge of the button. The stem is dirty and is covered in scratches.
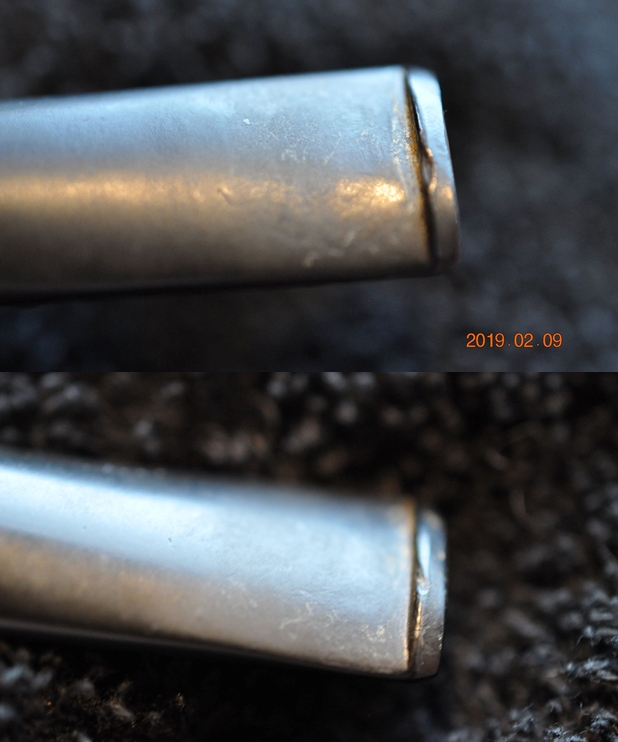 I wanted to refresh my memory about the pipes coming out of Ole Larsen’s Copenhagen tobacco shop. I knew that many famous Danish Carvers started their careers carving for the shop. I turned first to the pipephil wesite to get and over view of the brand. Here is the link (http://www.pipephil.eu/logos/en/logo-l2.html). I did a screen capture of the section on the site showing a summary of the brand and the typical stamping.
  I then turned to Pipedia to do a bit more reading about the brand and the various lines making it up. Here is the link (https://pipedia.org/wiki/W.%C3%98._Larsen). The link took me to some pages on the finepipes.com website. Here is the link to the summary of the history of the brand. I quote it in full. I have marked the pertinent section with bold font to mark out the section on the SELECT series (https://www.finepipes.com/pipes/danish/w-o-larsen?sort=20a&page=2&zenid=562ff4b9d62f4f612d0f6ee60cab1224).
 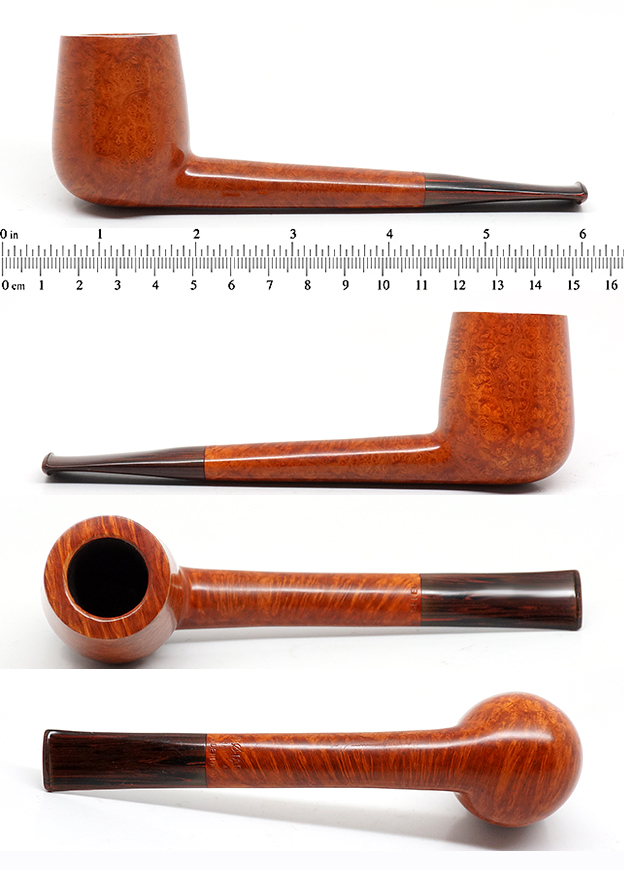 From the above information I knew that the pipe came from the 1960s and was carved by some of the Danish greats who were responsible for the SELECT and STRAIGHT GRAIN series. Names like Teddy Knudsen, Tonni Nielsen, Jess Chonowitch, Peter Hedegaard and others are some of those associated with the series pipe that I am working on. In many ways it is a high grade pipe made by a great maker but a pipe that I may never know the actual carver who crafted it in WO Larsen’s studio.
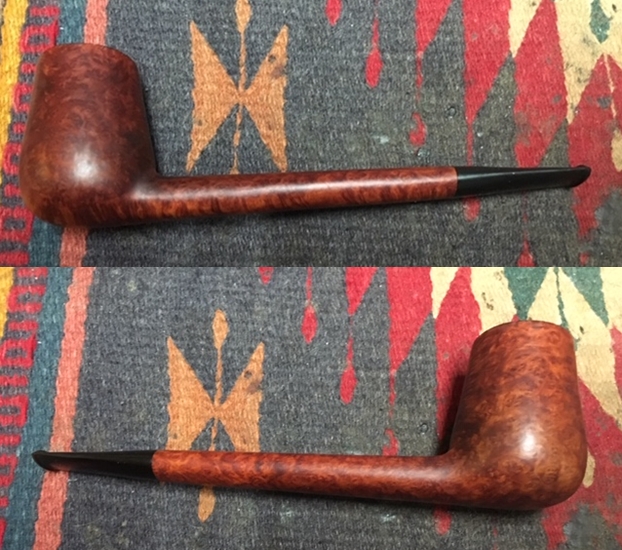
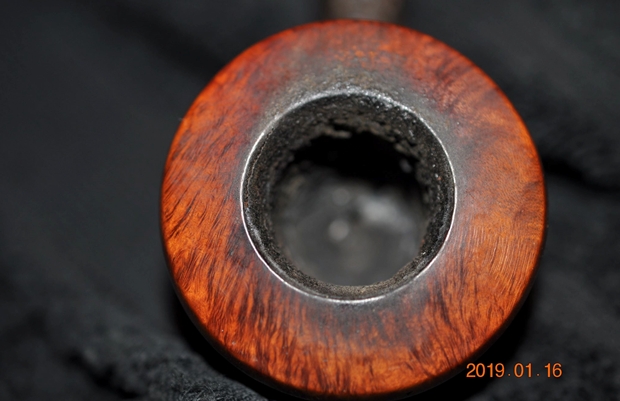
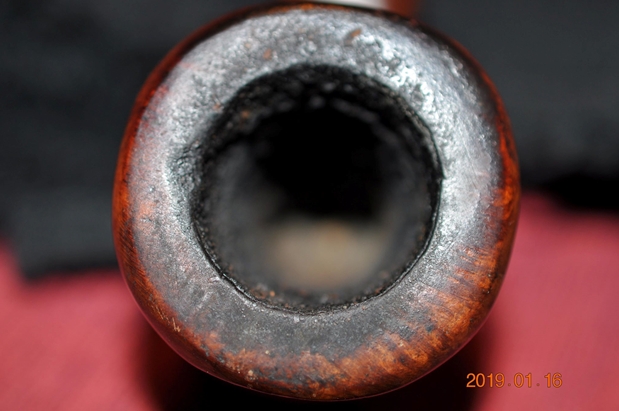
 I took a close up photo of the rim top to show the darkening on the top and the deep gouge on the right side of the outer edge of the rim top. Jeff had done an amazing job cleaning off the lava buildup. The outer edge of the rim has some deep nicks on the front of the bowl. The inner edge of the bowl had some darkening and some wear on the left side. The vulcanite stem photos show the tooth marks and the wear on the button surface on both sides. I also decided to take photos of the stamping on both the top and underside of the shank to show its condition.
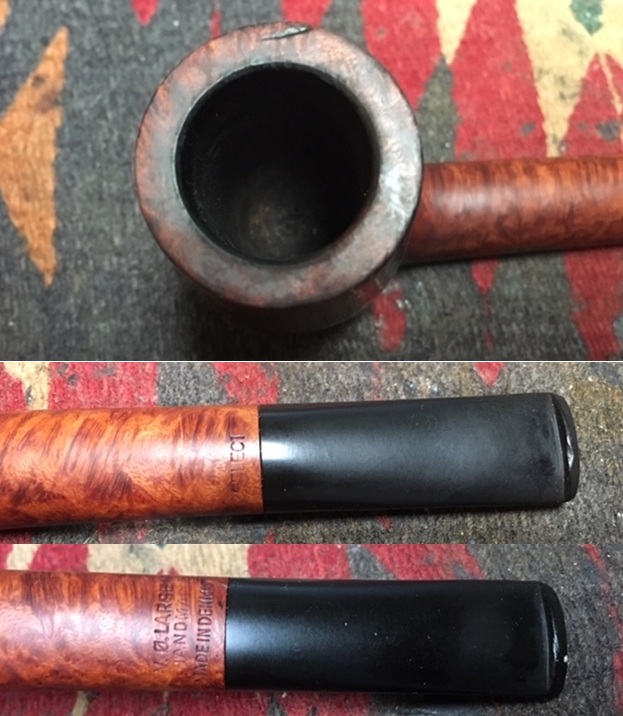
 I decided to start my work on the pipe by addressing the darkening and damage to the rim top and edges. I topped the bowl on a topping board with 220 grit sandpaper to remove the damage and minimize the outer and inner edge damage. I was able to remove much of the damage. To address the gouge in the rim top on the right side I filled it in with clear super glue and continued the topping until it was smooth. I cleaned up the inner edge with a folded piece of 220 grit sandpaper to minimize the damage to the edge.
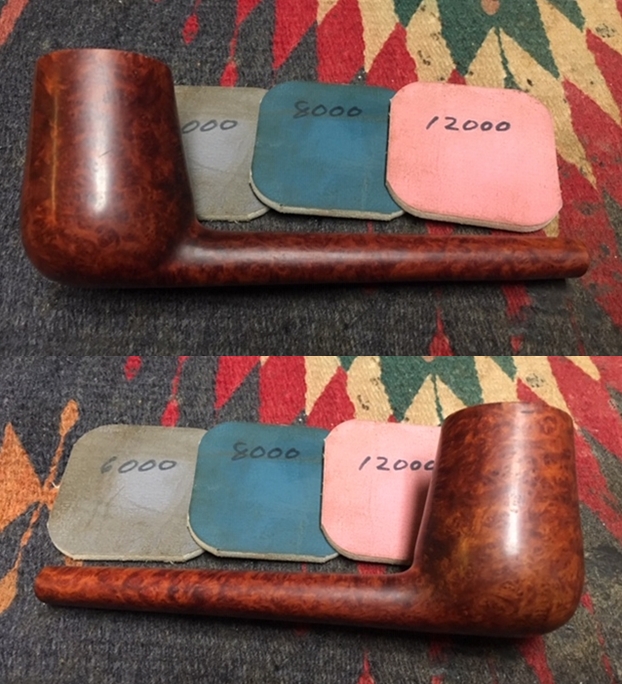
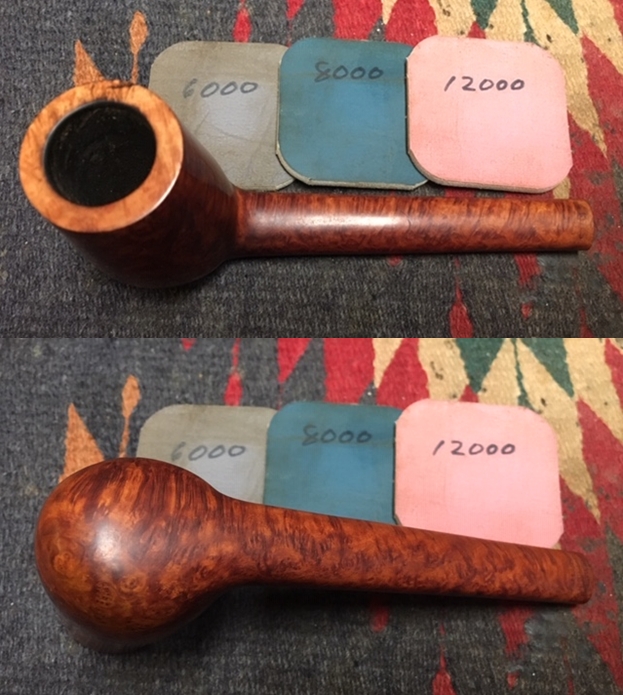
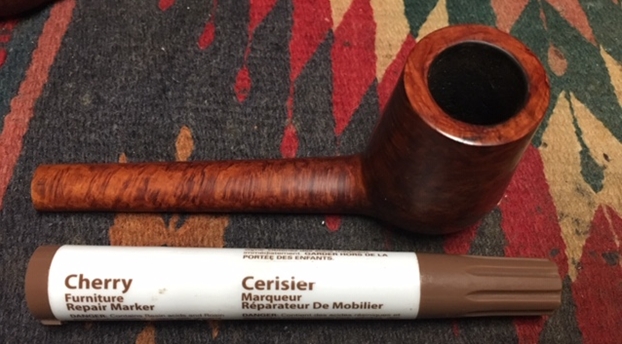
 I polished the bowl sides and rim top with micromesh sanding pads. I wet sanded with 1500-2400 grit pads and dry sanded with 3200-12000 grit pads. I wiped the bowl and rim down with a damp cloth after each pad. As I polished it the sanded rim top began to shine and blend in with the rest of the briar. When I finished polishing the rim top I stained it with a Cherry stain pen to match the colour of the rest of the bowl.
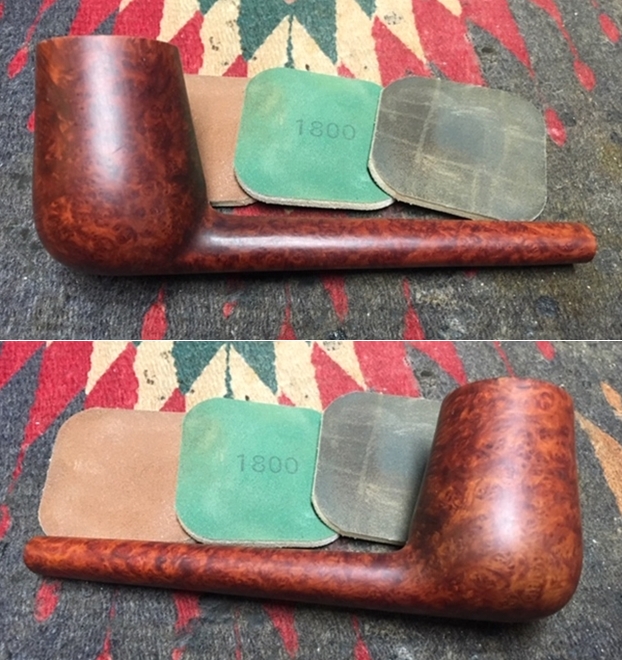
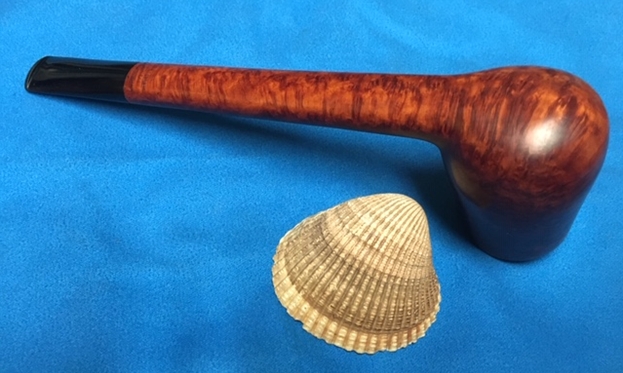
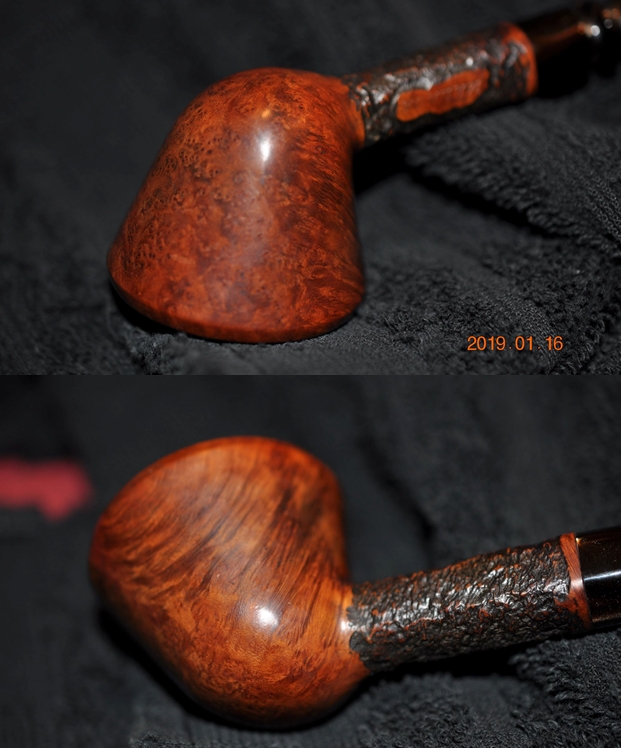
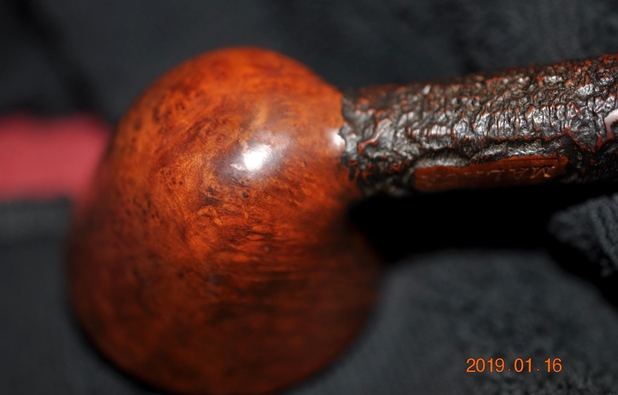
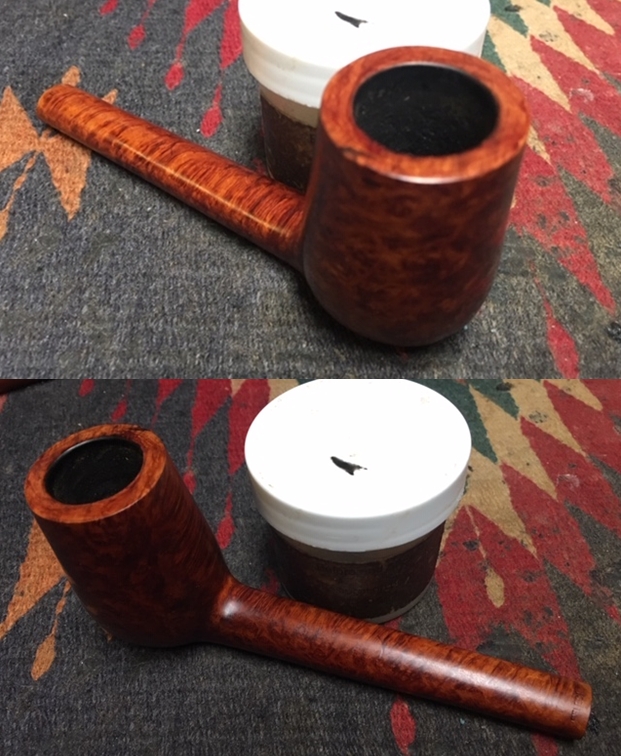
 Once the stain had dried. I worked some Before & After Restoration Balm into the surface of the briar with my fingertips to clean, enliven and protect it. I let the balm sit for a little while and then buffed with a cotton cloth to raise the shine. The following photos show the bowl at this point in the restoration process. The bowl and the rim top look really good. The pipe looks very good with the rich finish on the bowl and rim. I am very happy with the results.
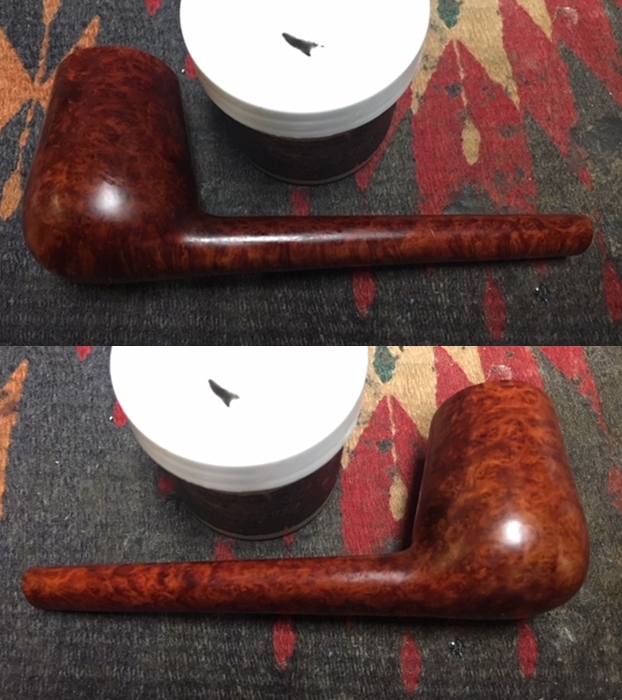
 I used a folded piece of 220 grit sandpaper to smooth out the damage to the stem and reshape the button. Once the surface was smooth I sanded out the scratch marks and started the polishing of the stem with a folded piece of 400 grit sandpaper. I wiped the stem down with Obsidian Oil and took the following photos.
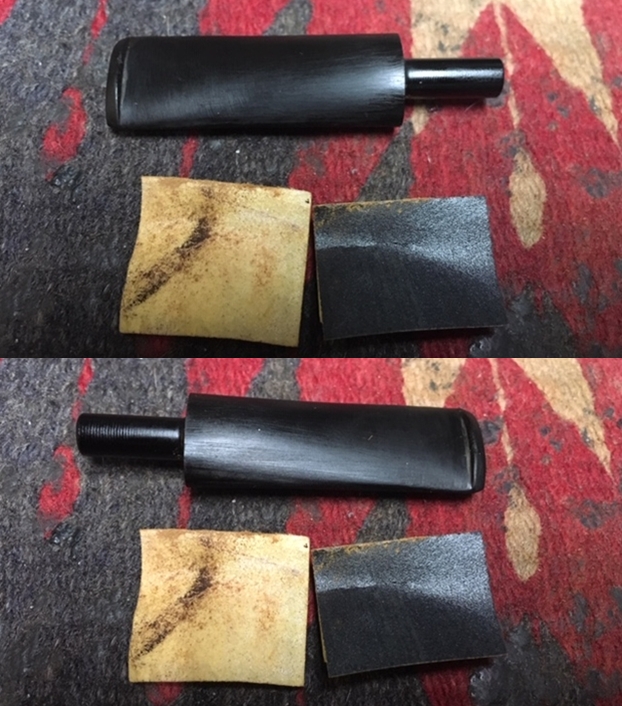 I polished the stem with micromesh sanding pads – wet sanding it with 1500-2400 grit pads and dry sanding it with 3200-12000 grit pads. I wiped the stem down with a damp cloth after each pad. I polished it with Before & After Pipe Stem Polish – Fine and Extra Fine. I wiped it down with a coat of Obsidian Oil and set it aside to dry.
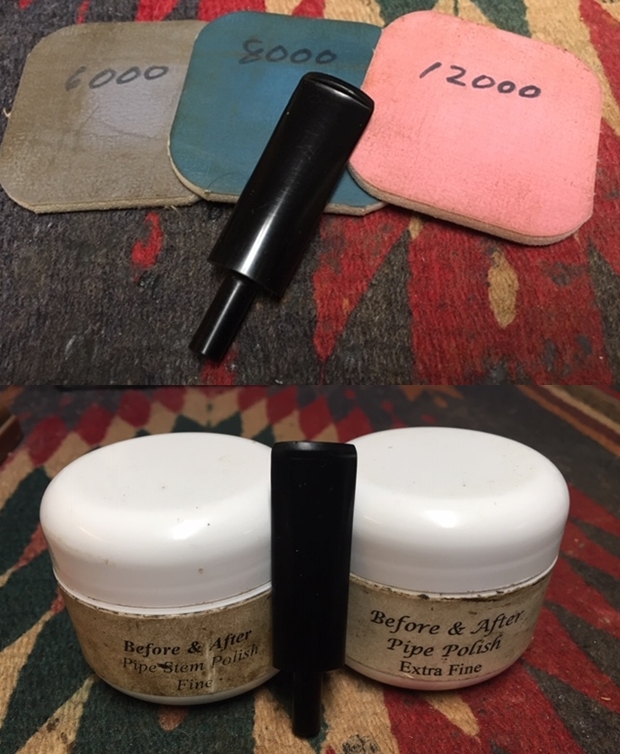
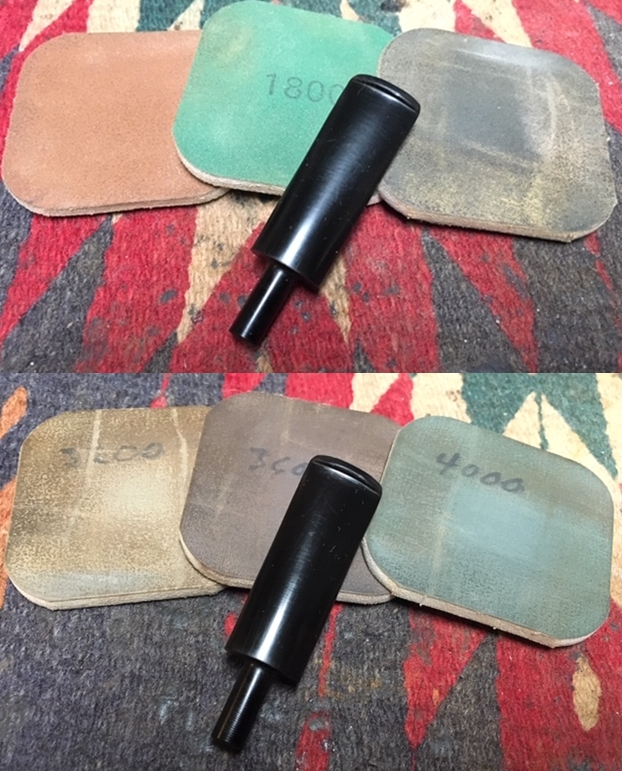
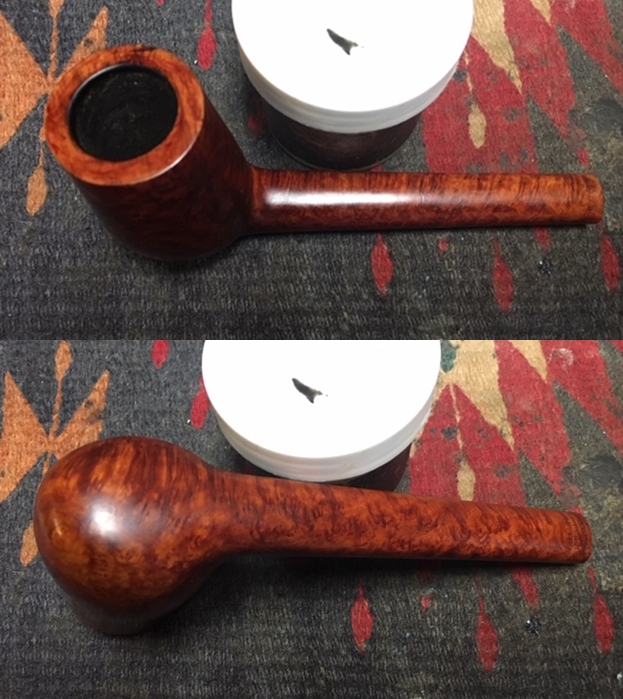
 I put the stem back on the bowl and polished them both with Blue Diamond polish on the buffing wheel. I gave the bowl and stem multiple coats of carnauba wax. I buffed the pipe with a clean buffing pad to raise the shine. I hand buffed it with a microfiber cloth to deepen the shine. The pipe polished up pretty nicely. The grain on the natural brown briar that had darkened over time came alive with the buffing. The finish worked well with the polished black vulcanite stem. Have a look at it in the photos below. The dimensions are Length: 7 inches, Height: 2 1/4 inches, Outside diameter of the bowl: 1 3/8 inches, Chamber diameter: 3/4 of an inch. This beauty will soon be on the rebornpipes store. It would make a beautiful addition to somebody’s pipe rack. Thanks for walking through the restoration of this Danish take on the Canadian/Brandy shape from the 60s with me as it was a fun pipe to work on.