Refurbishing a Piece of History – A Marshall Field Co. Supreme – English Made


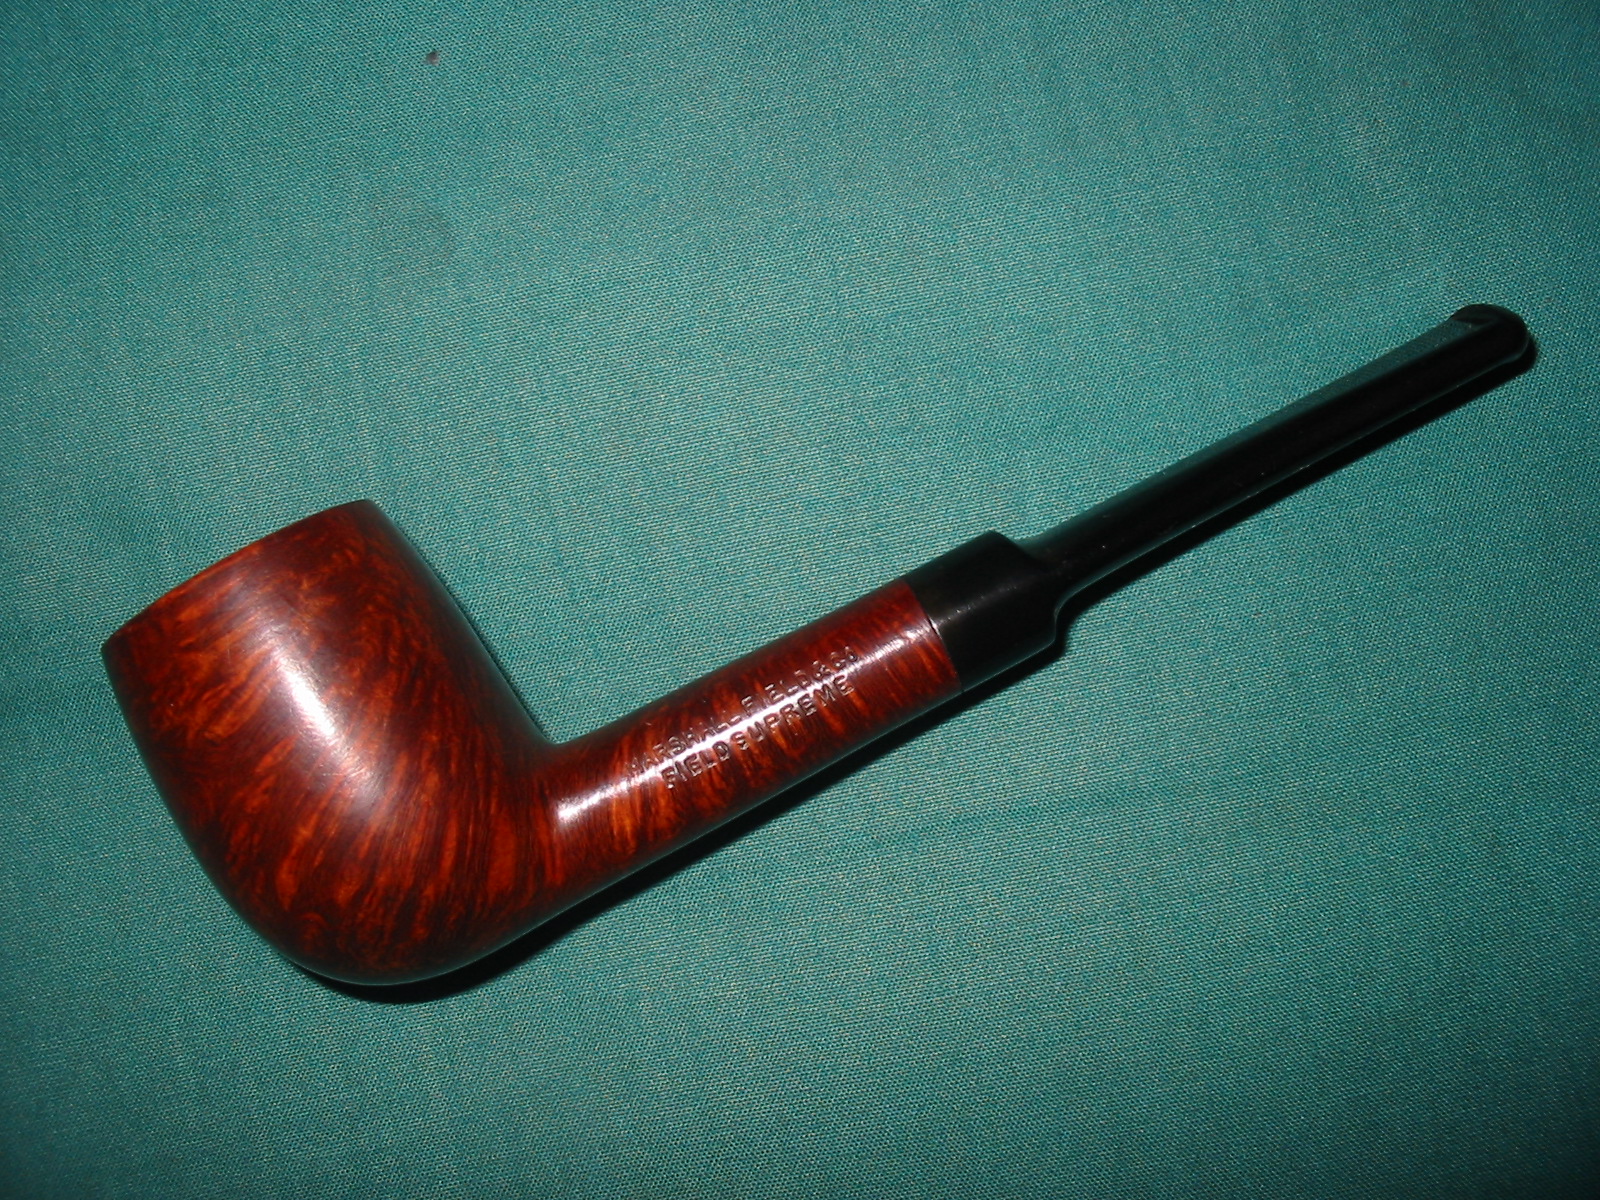
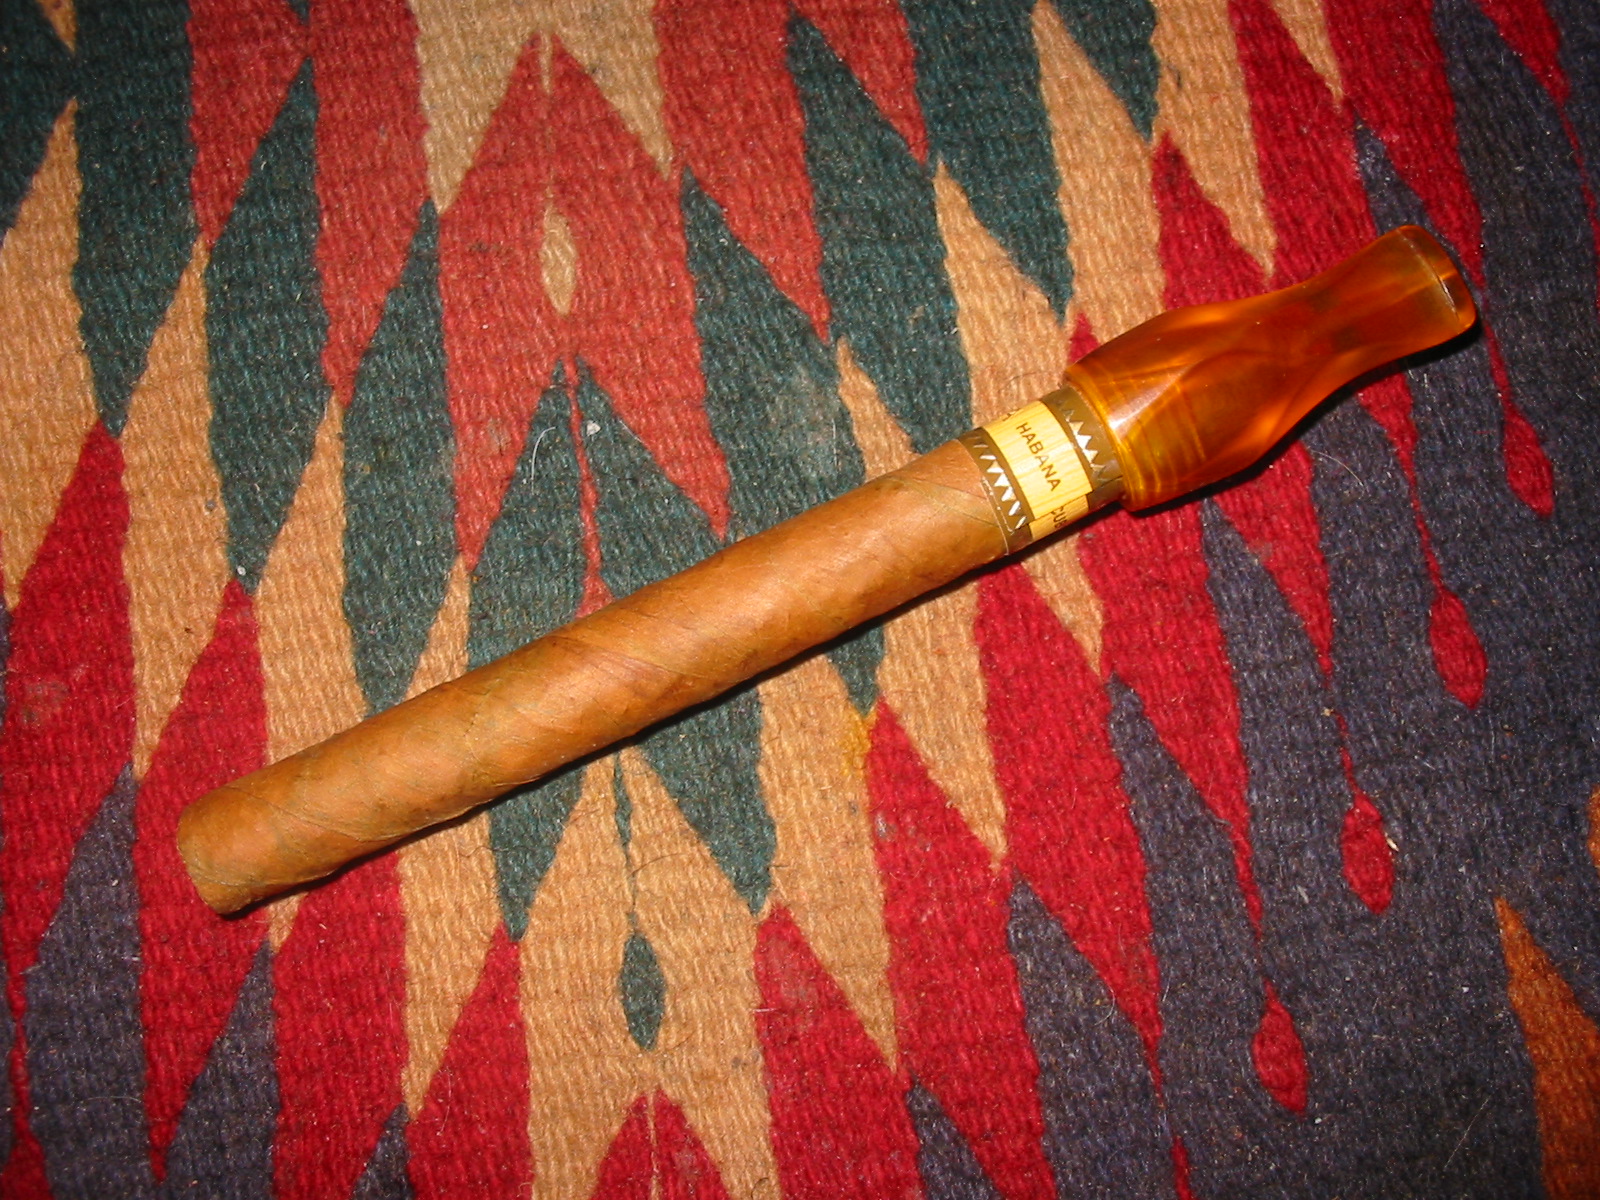
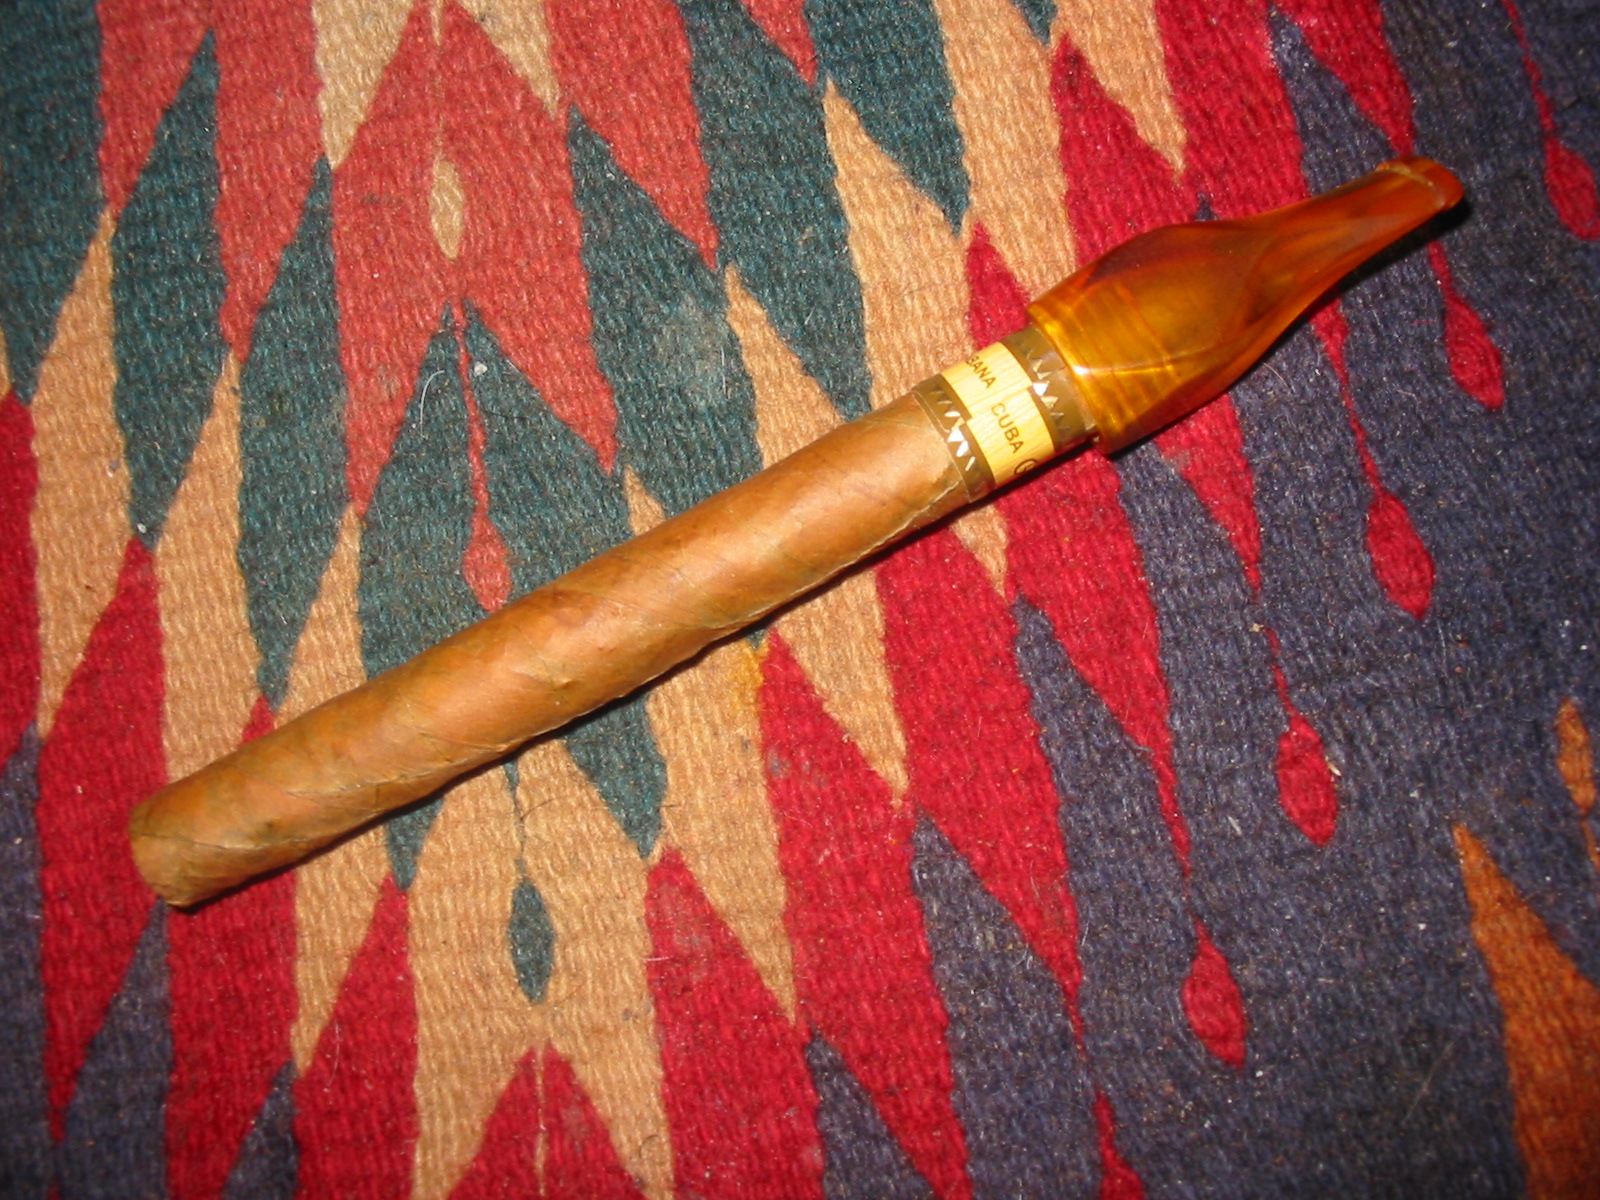
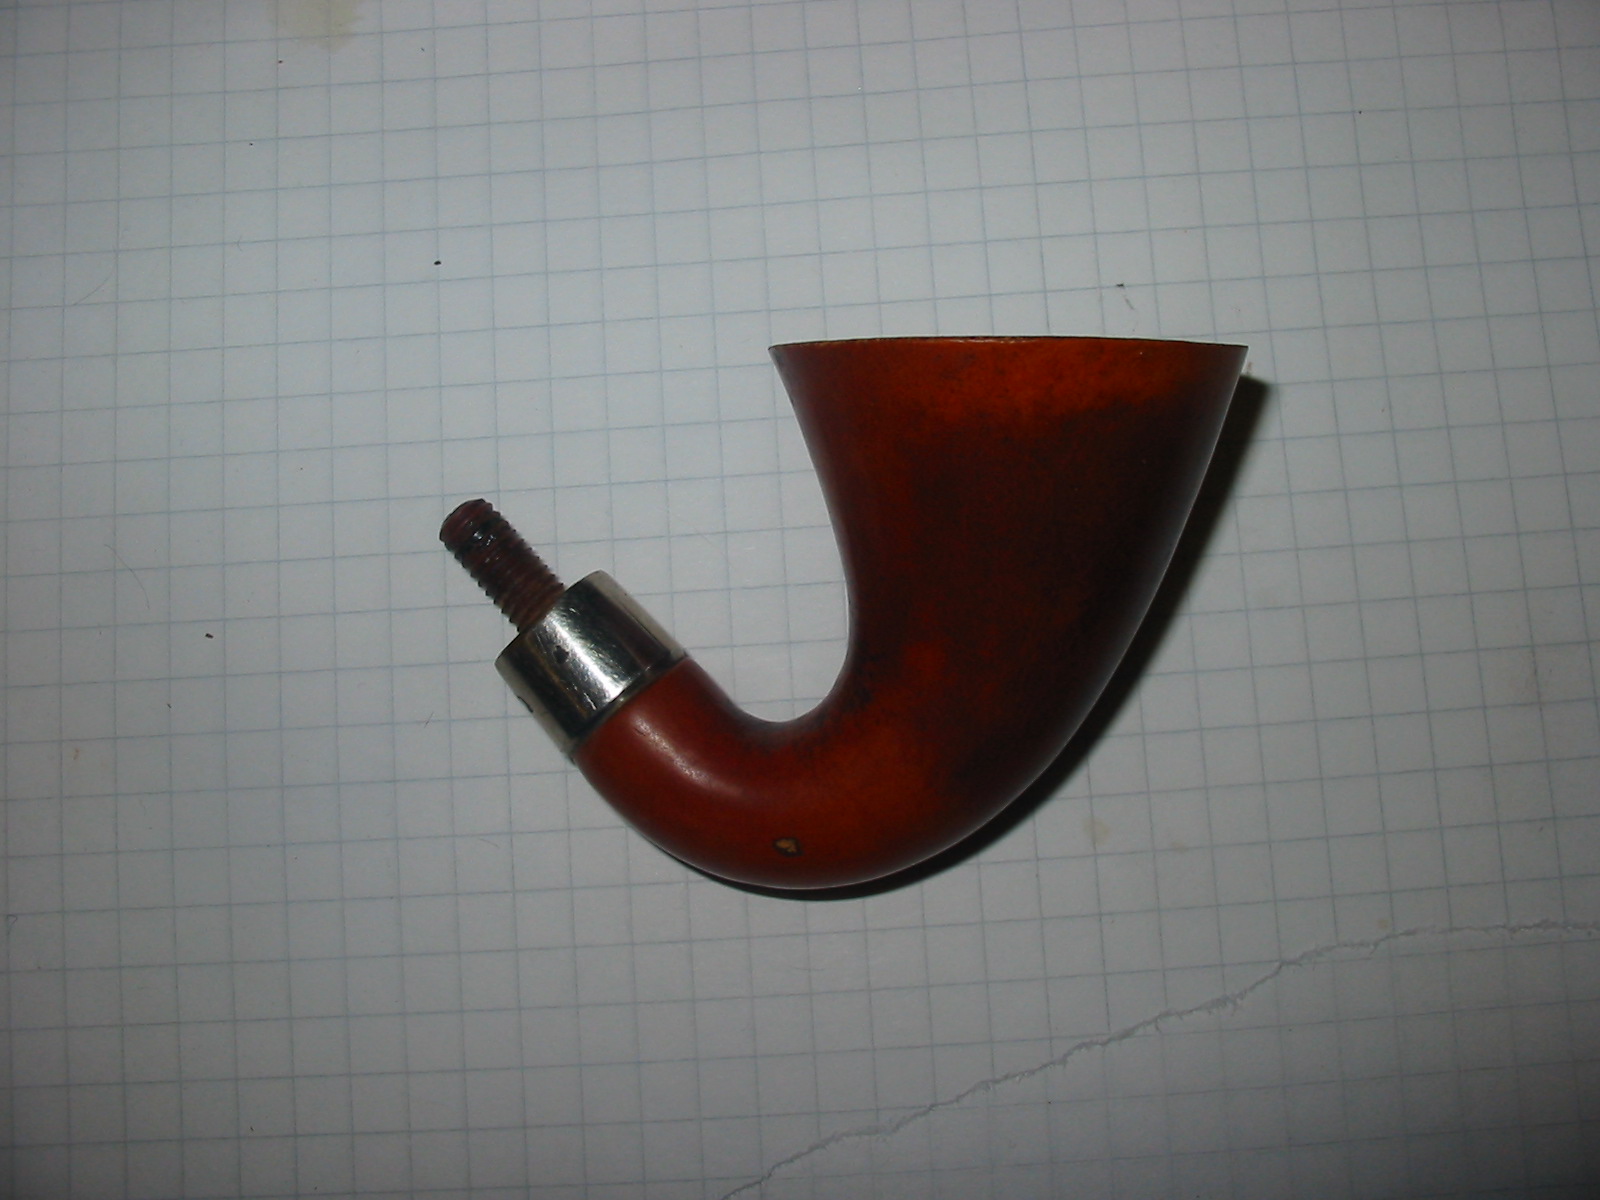
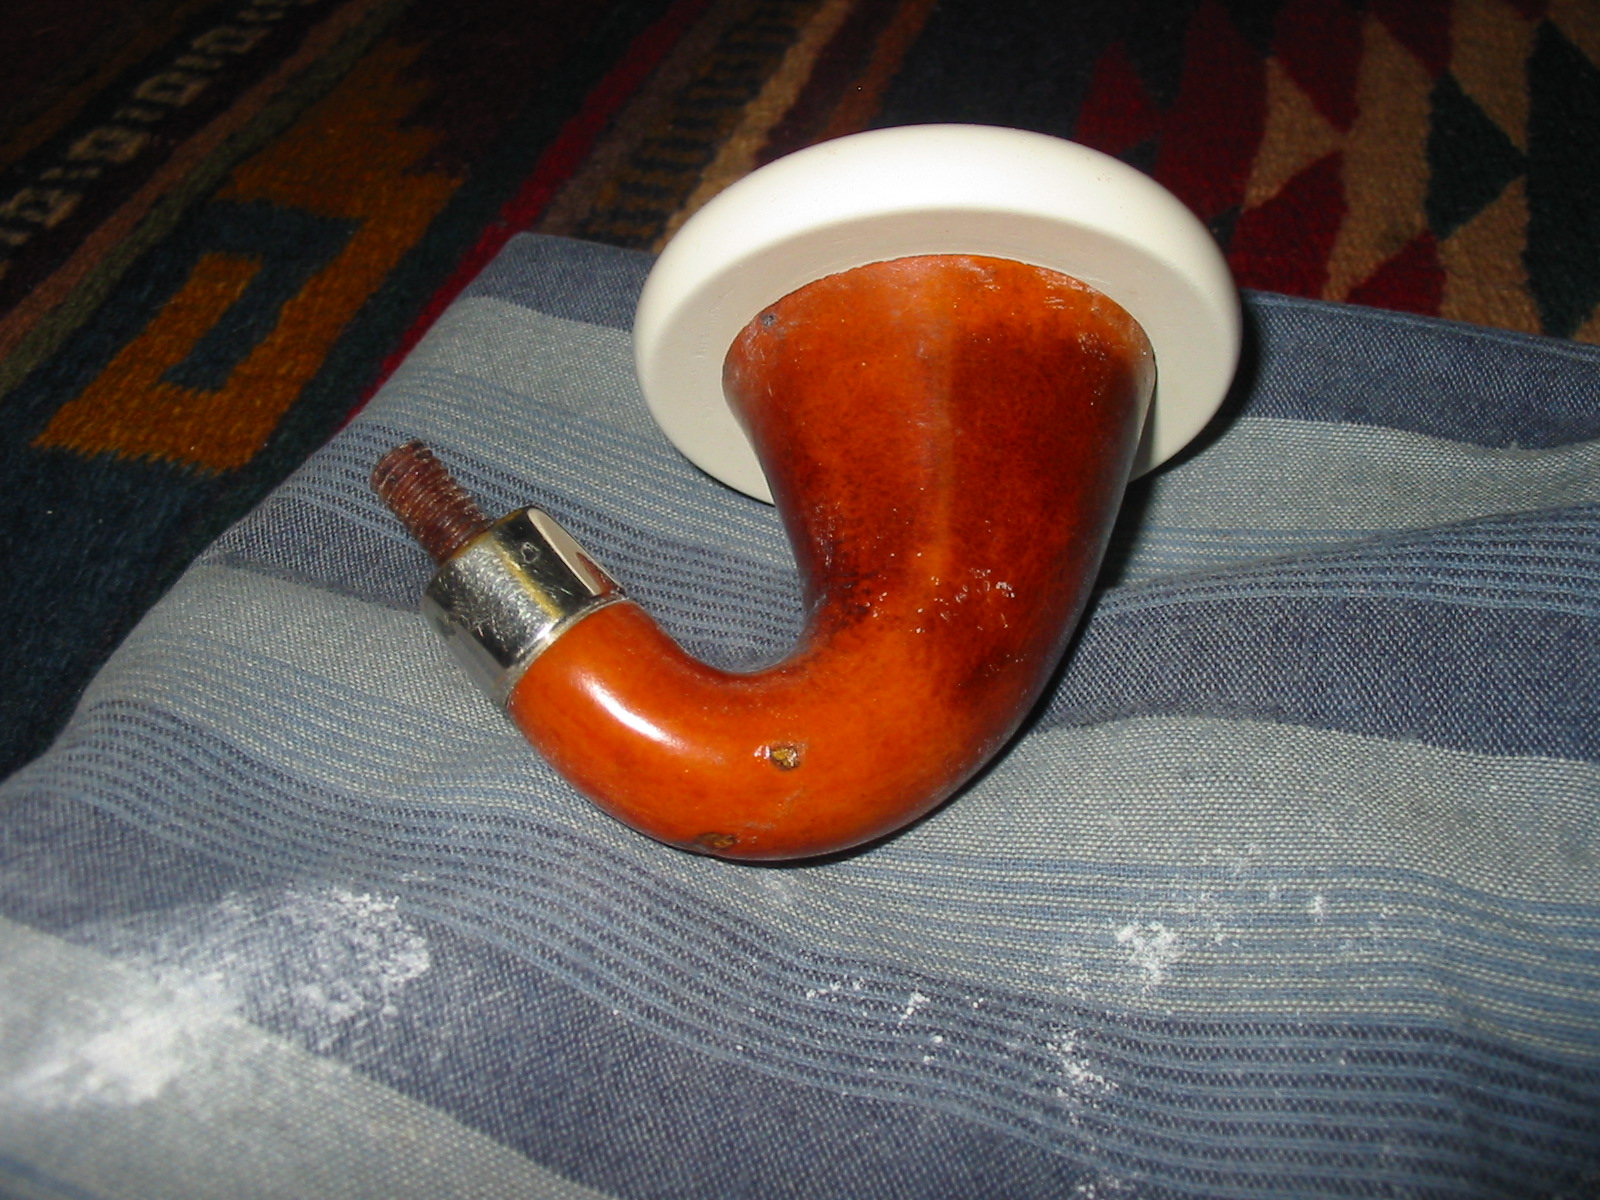
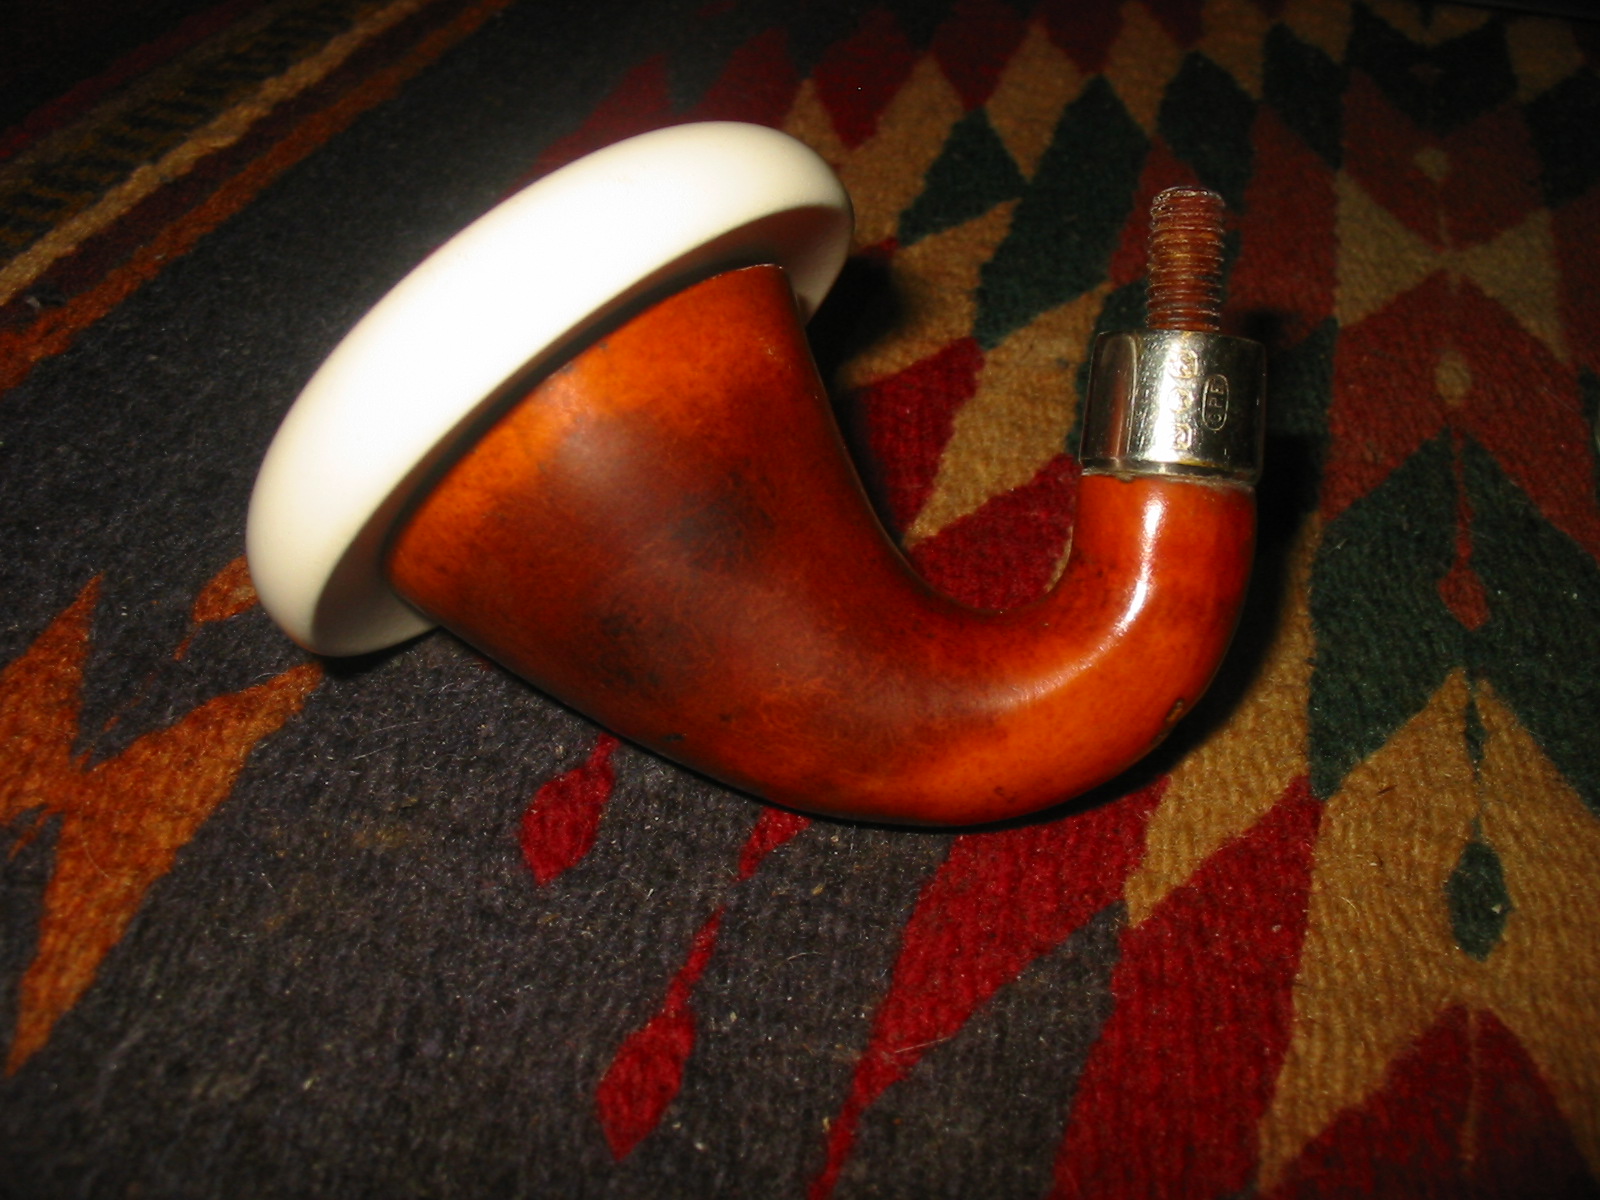
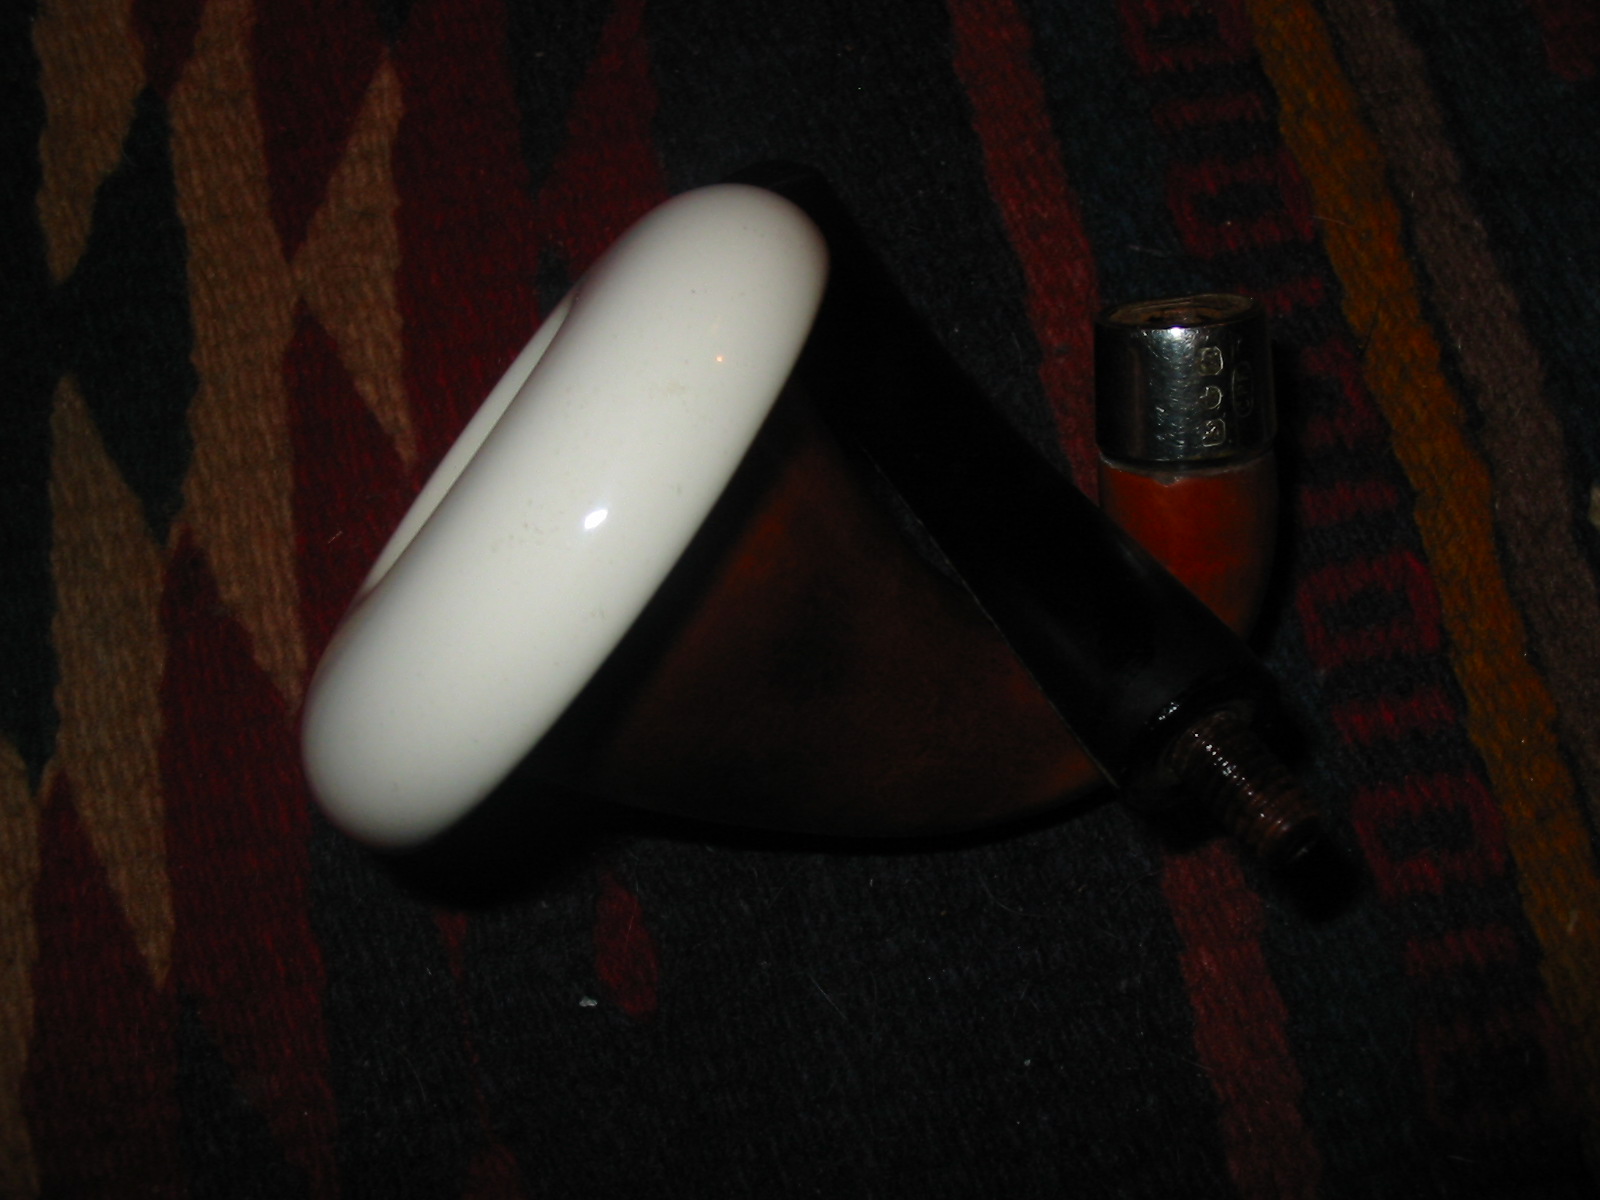
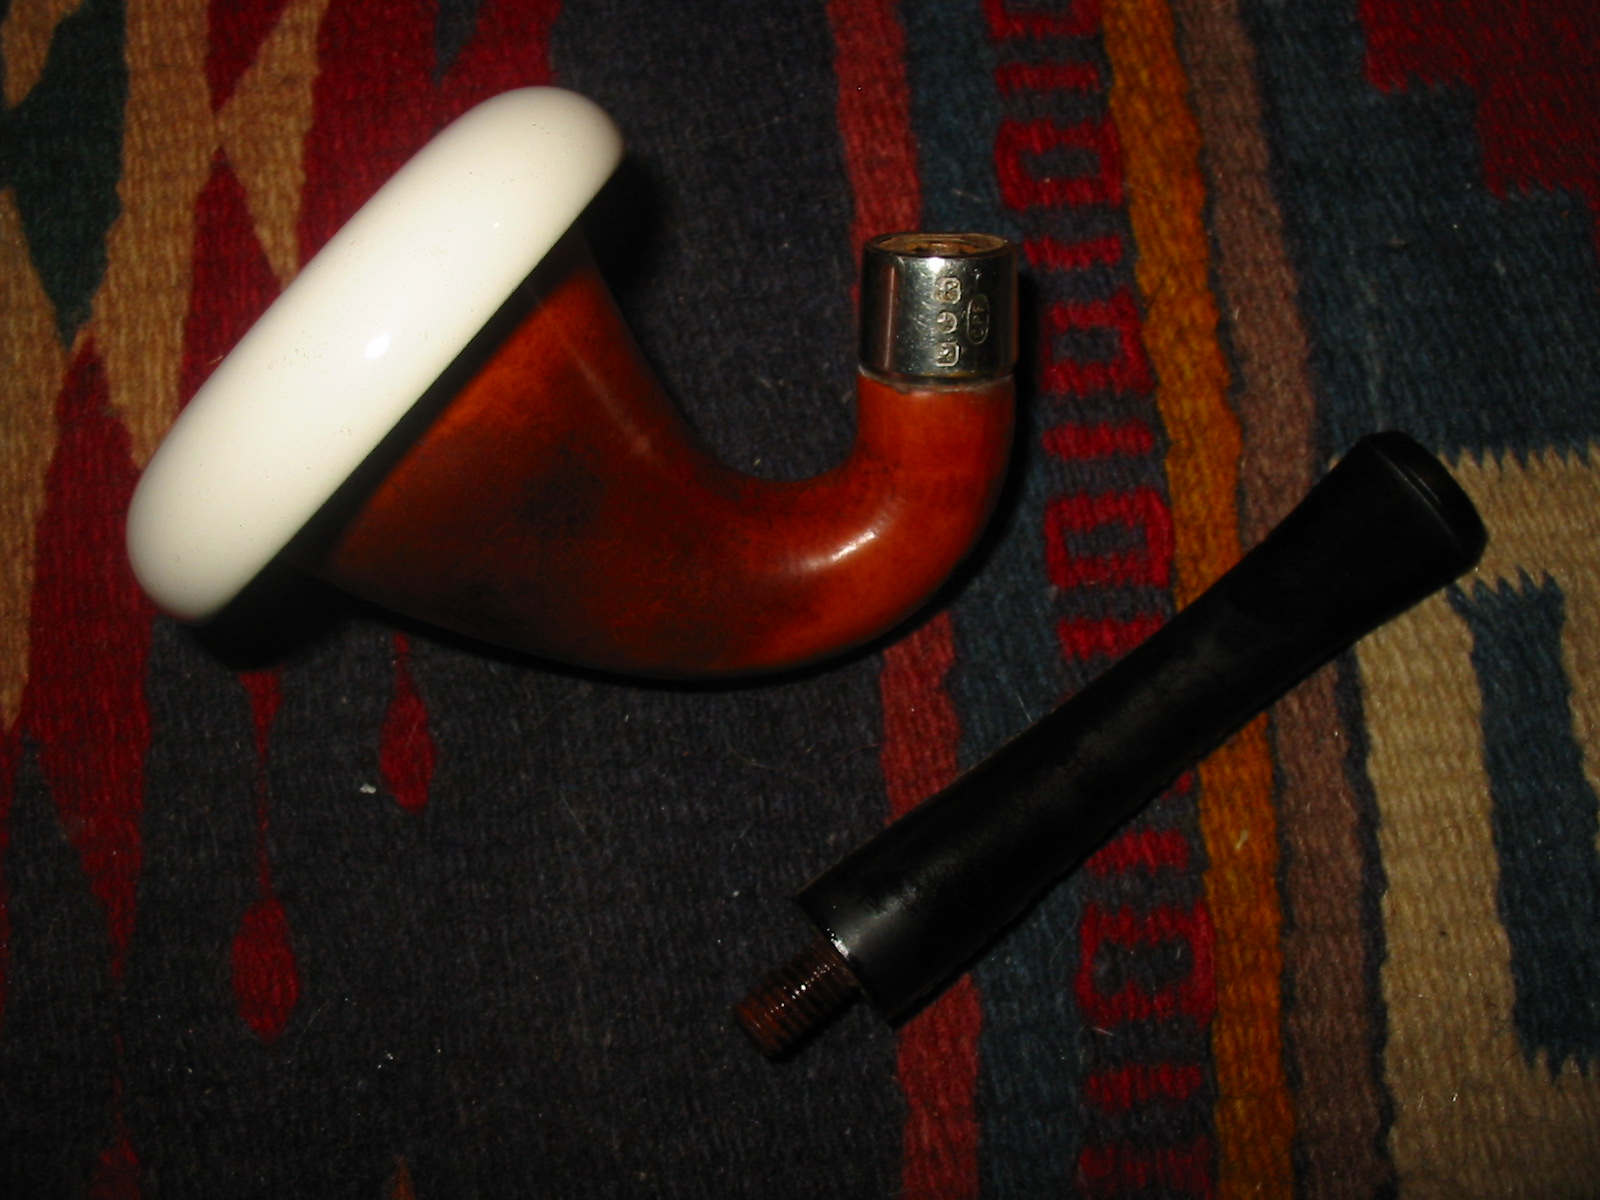
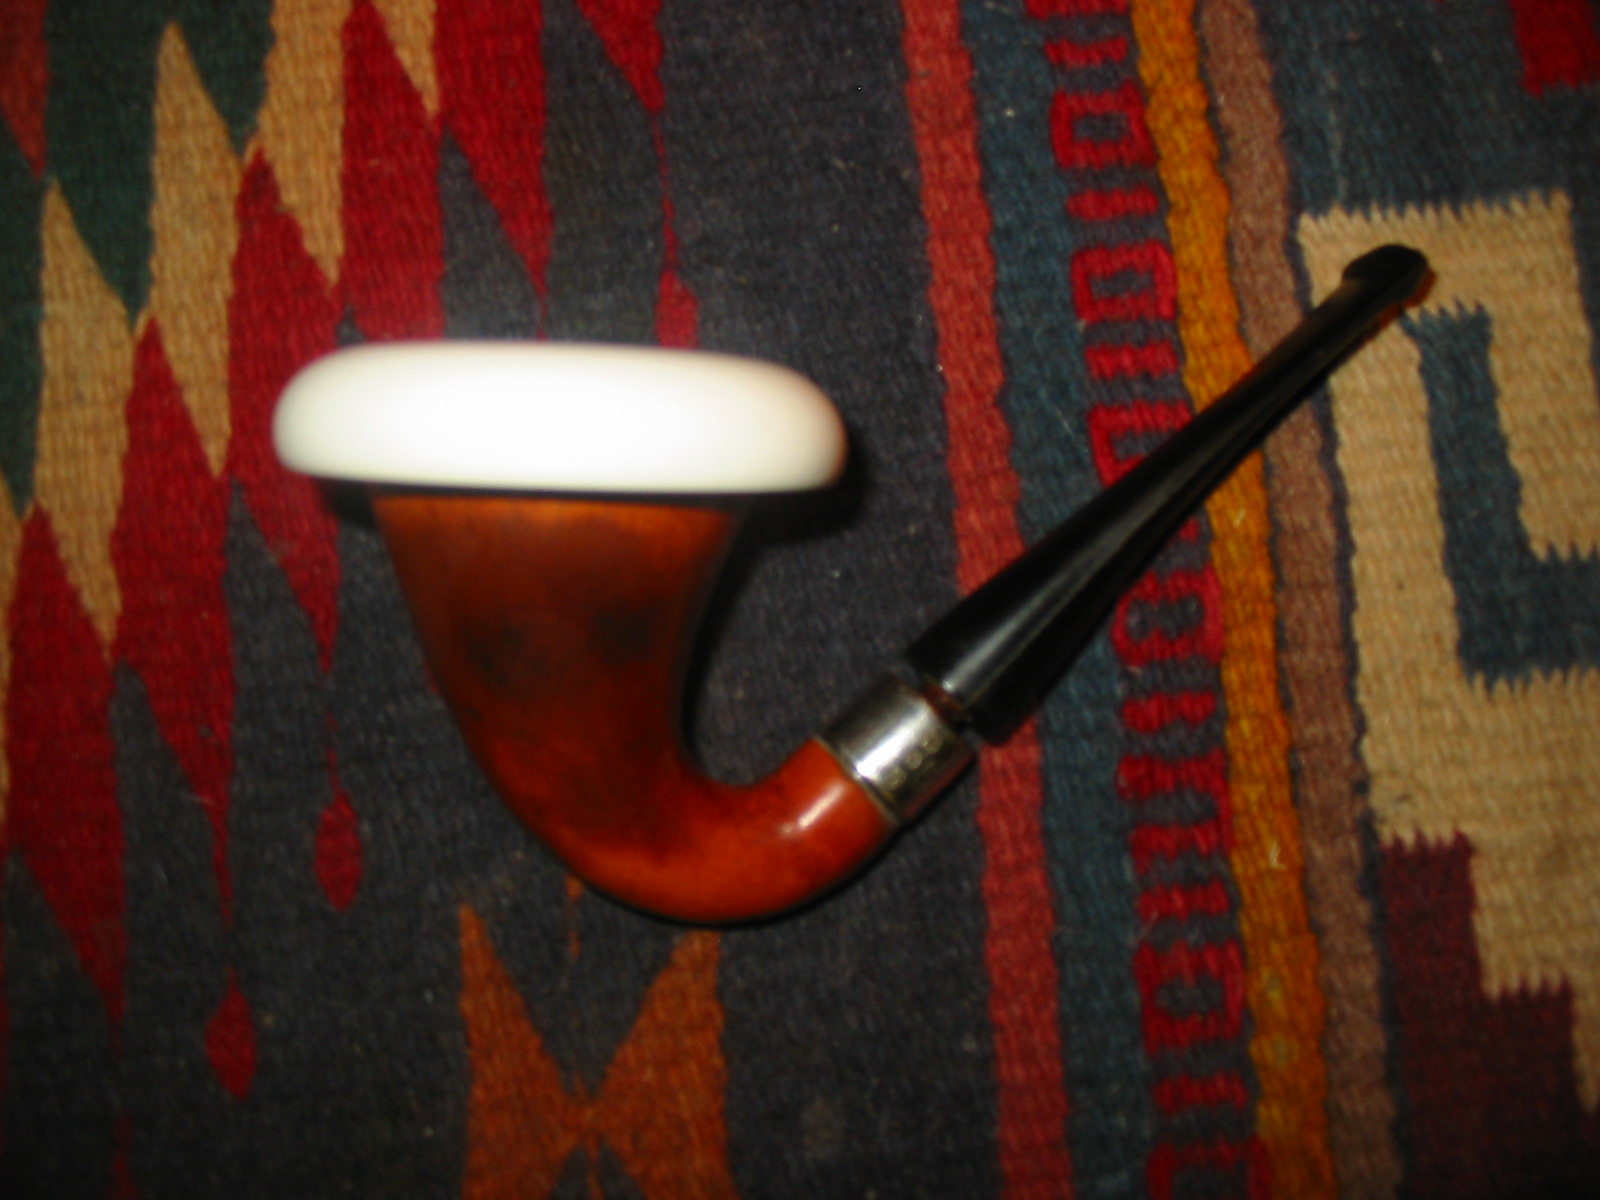
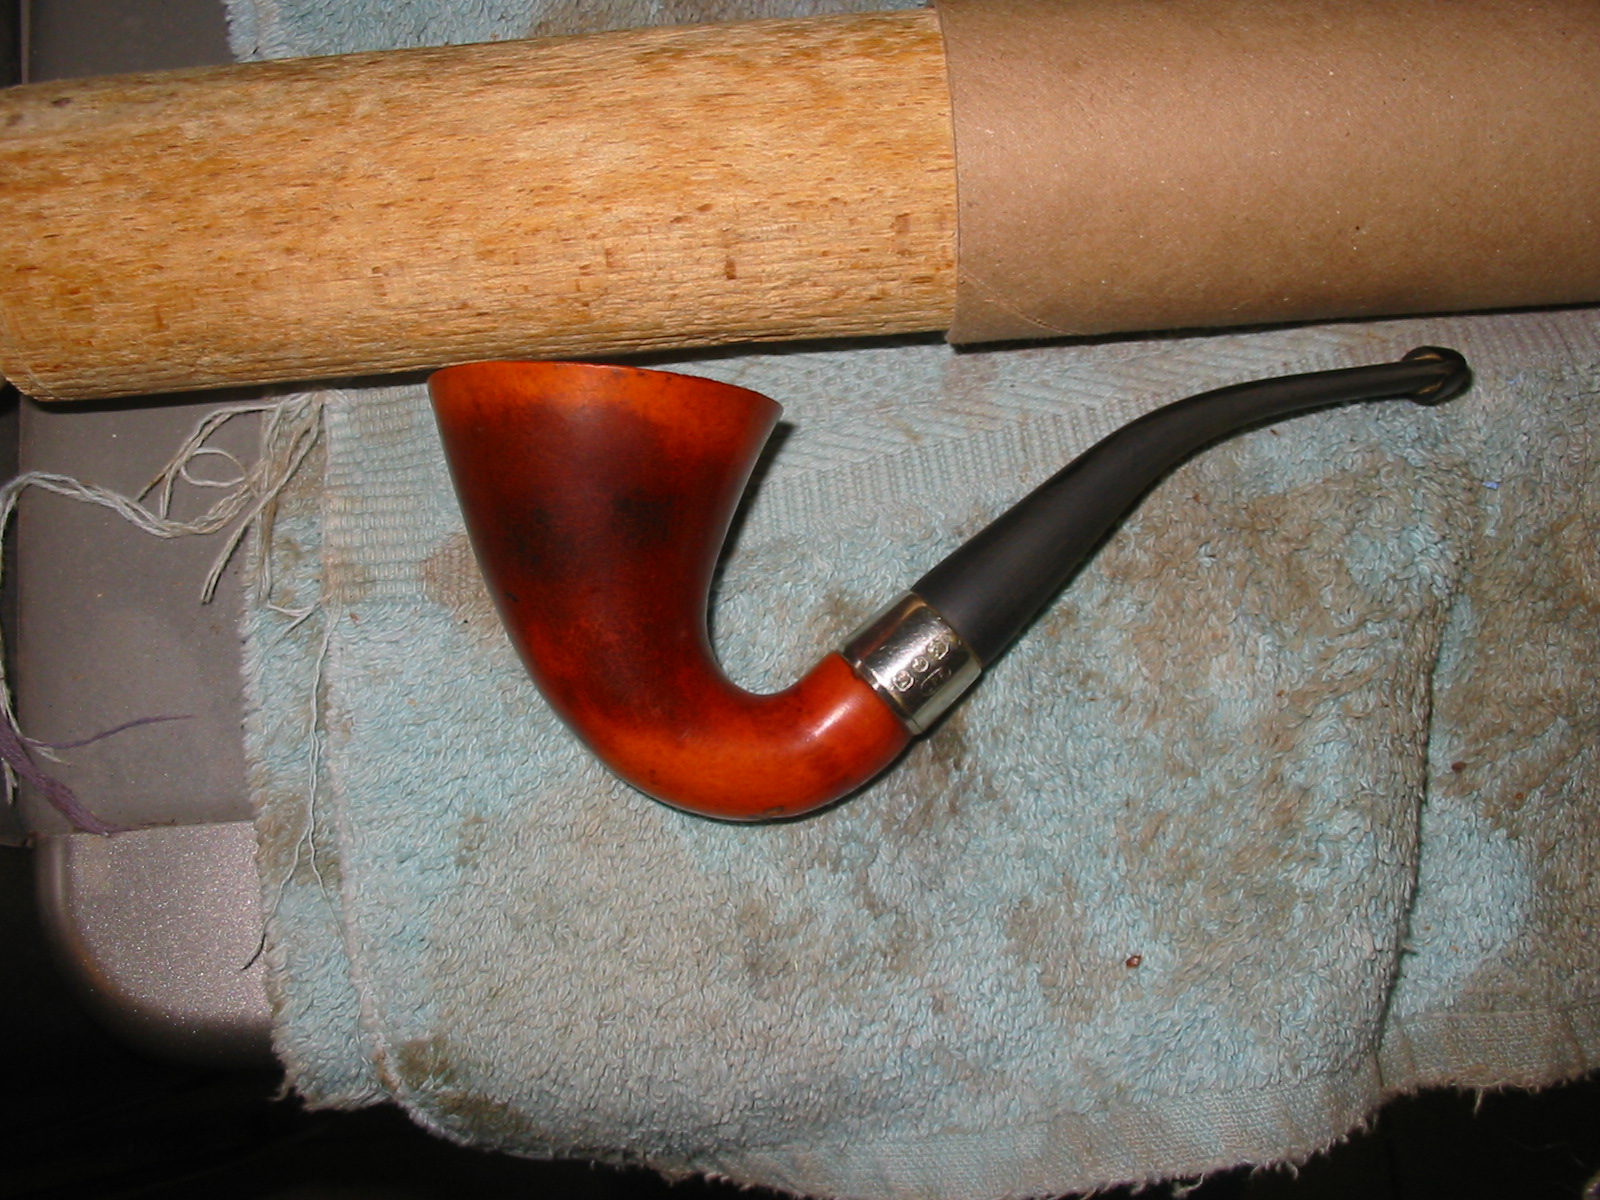
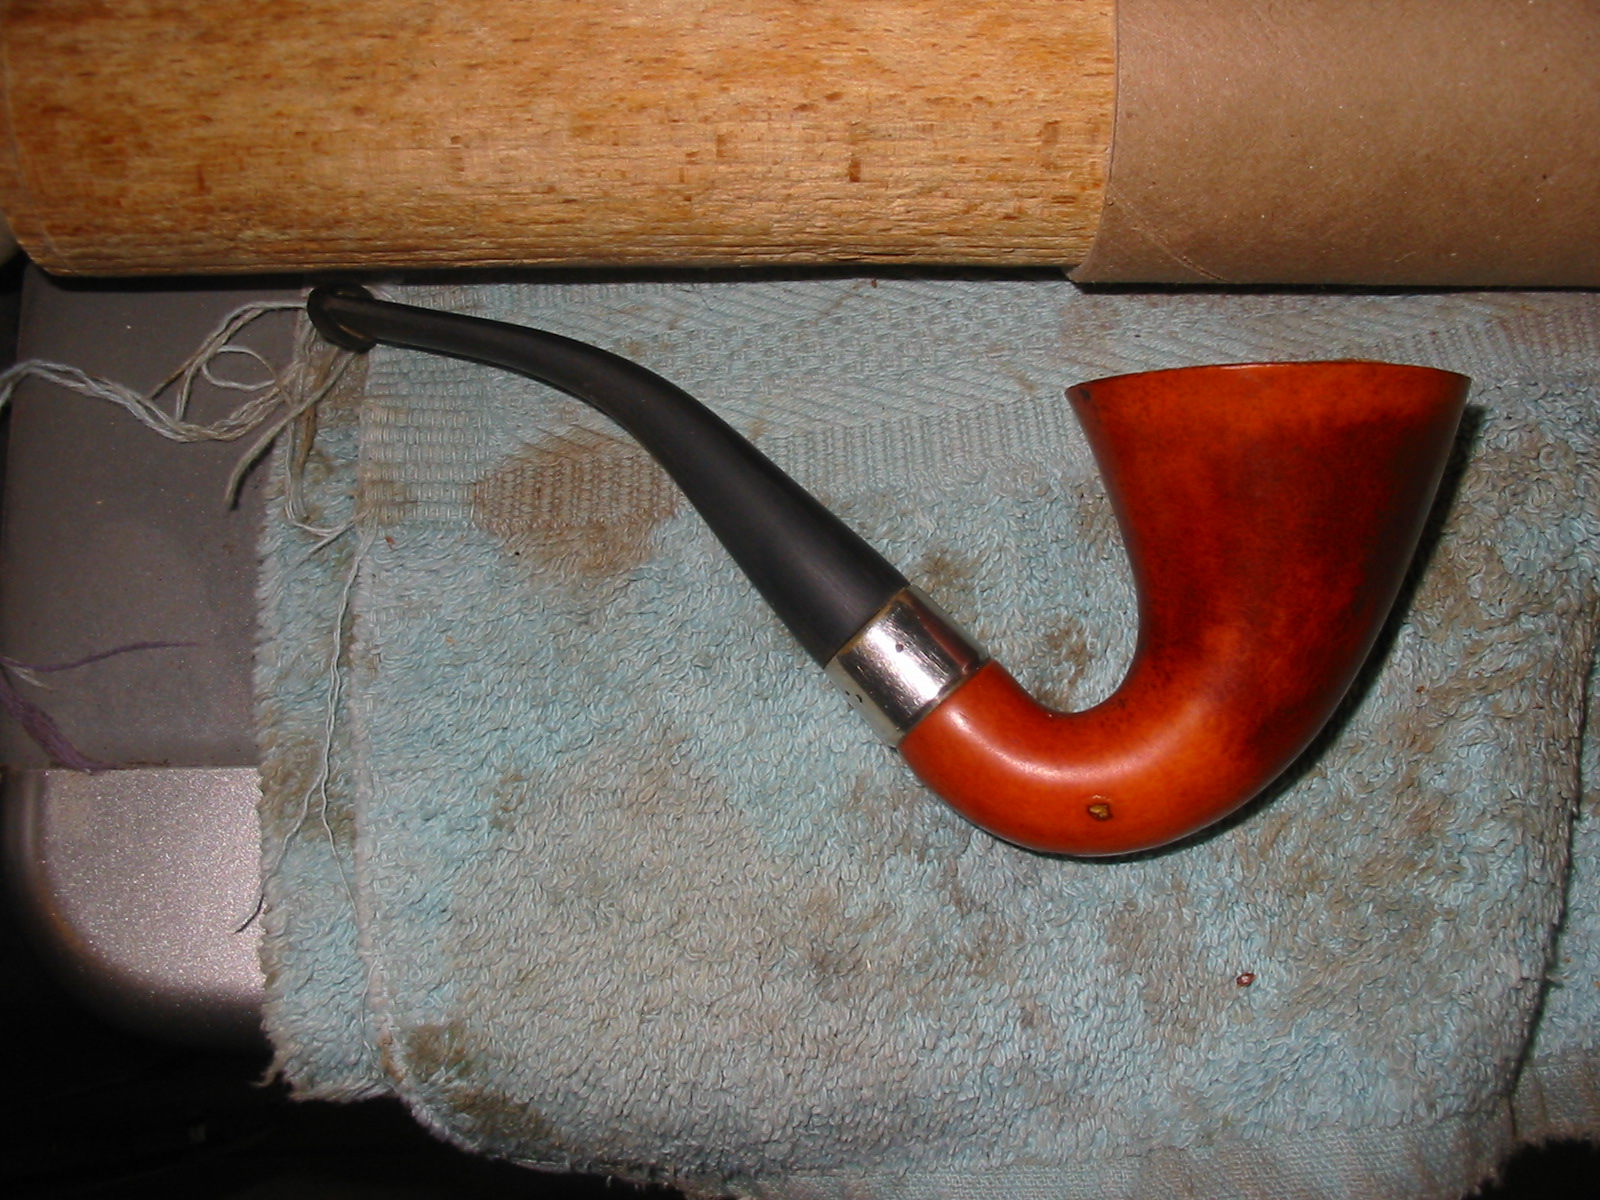
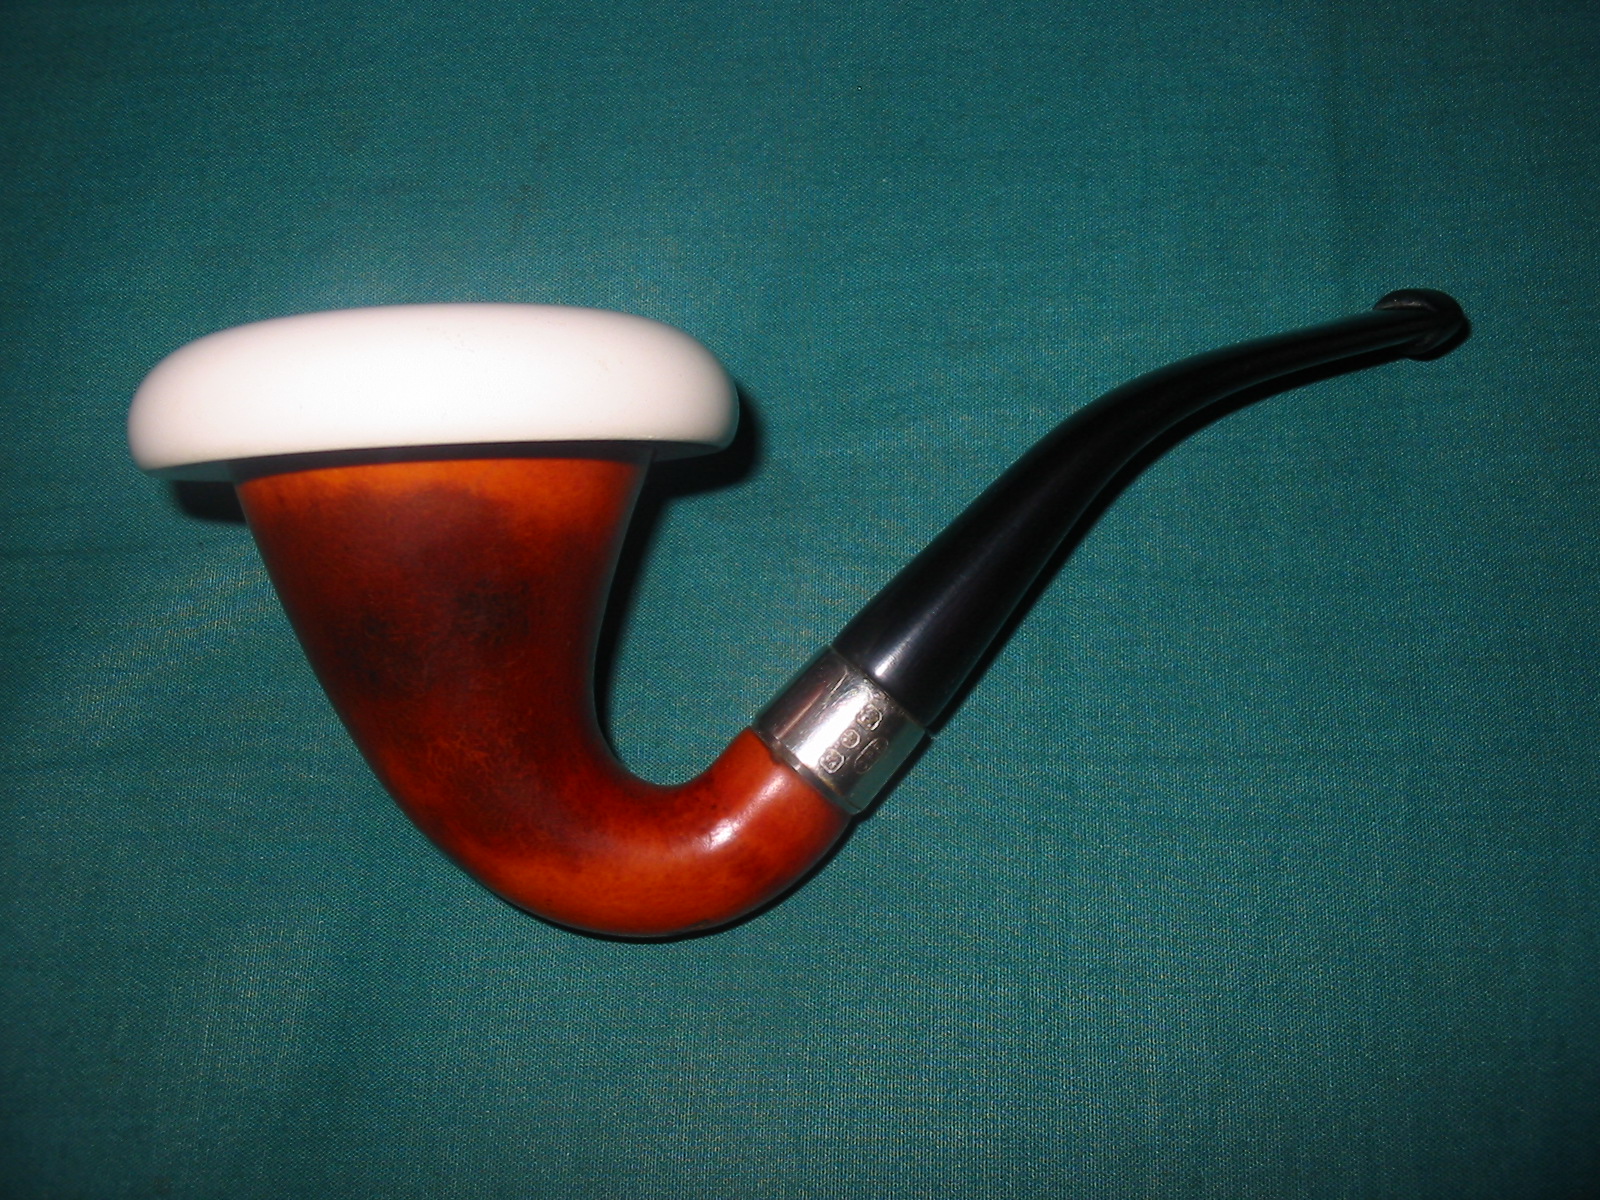
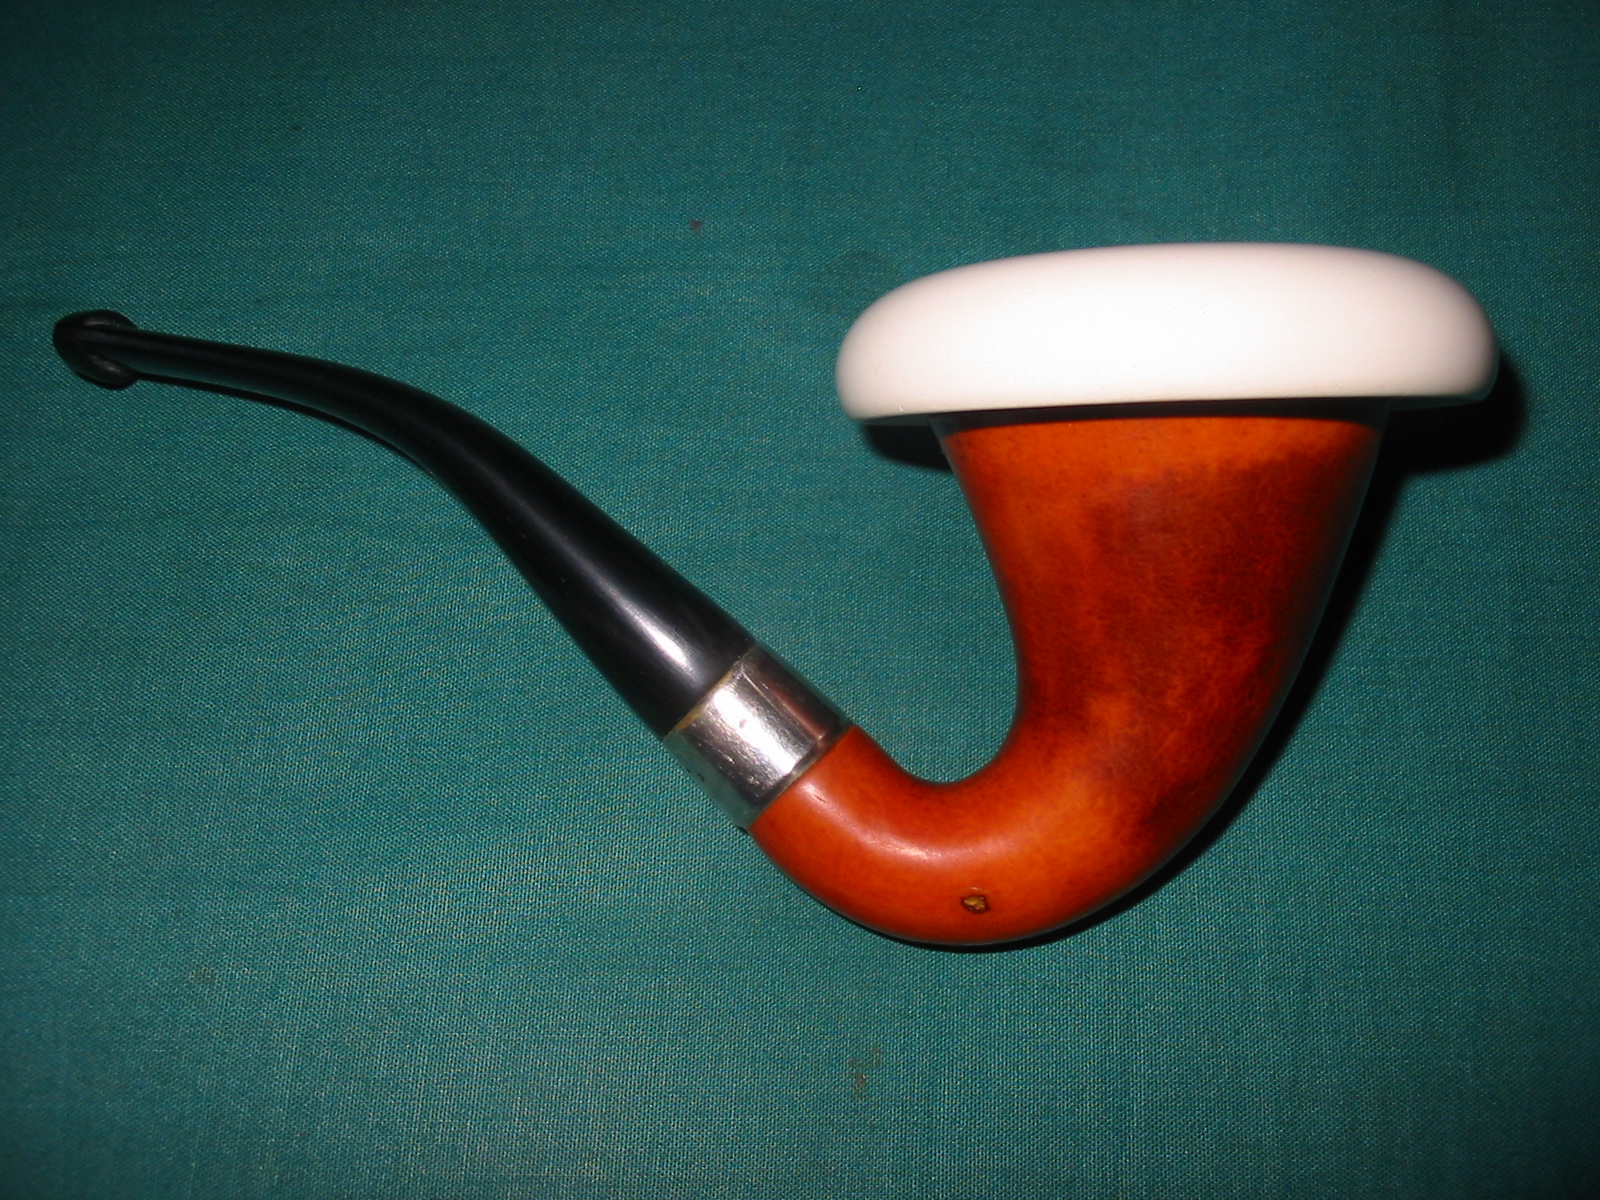
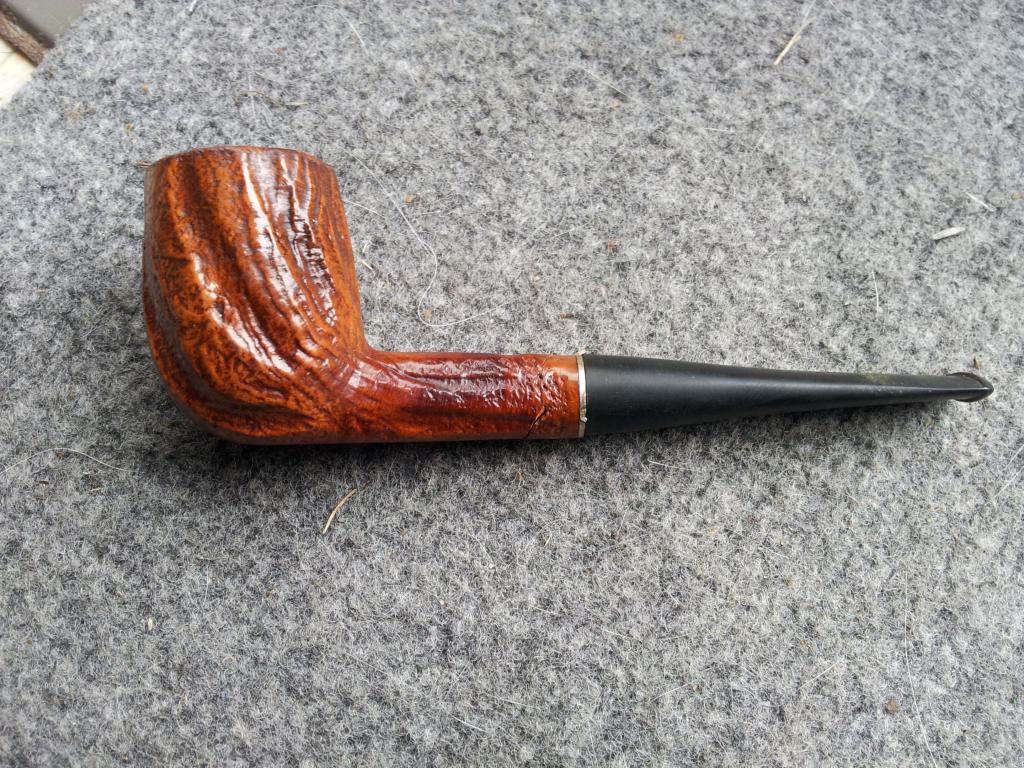
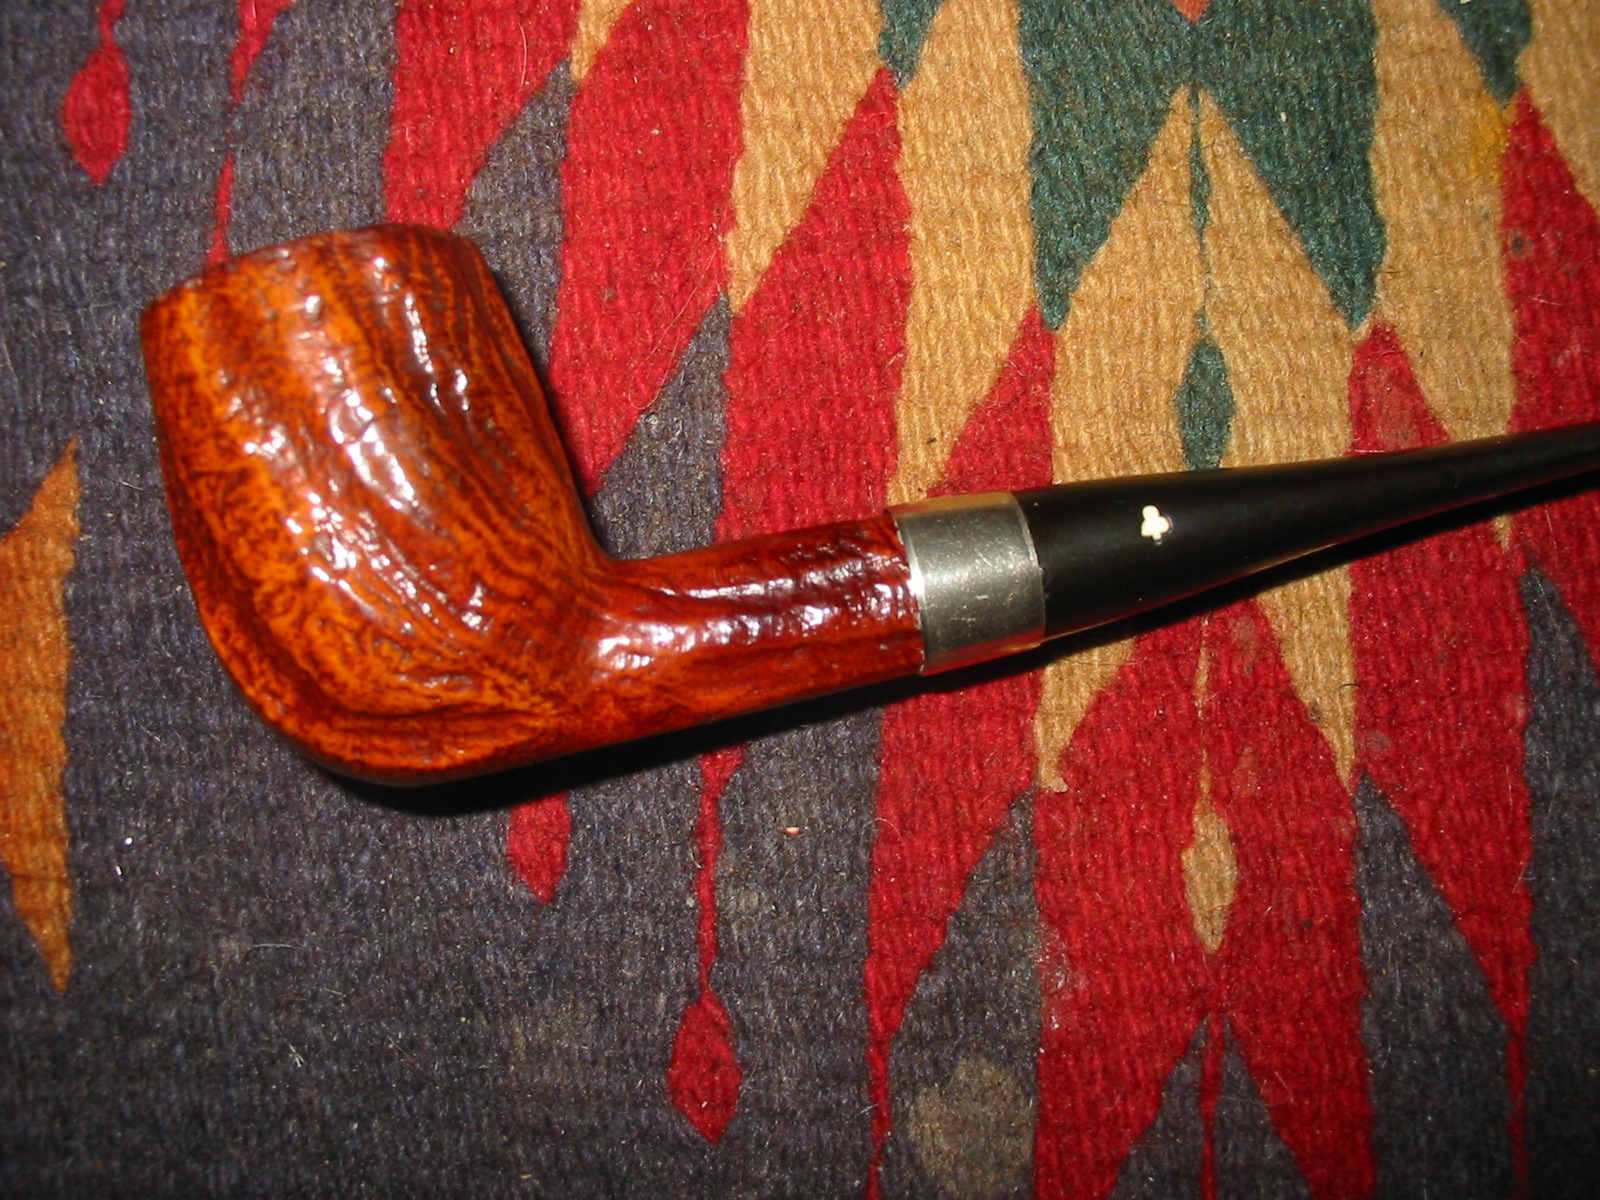
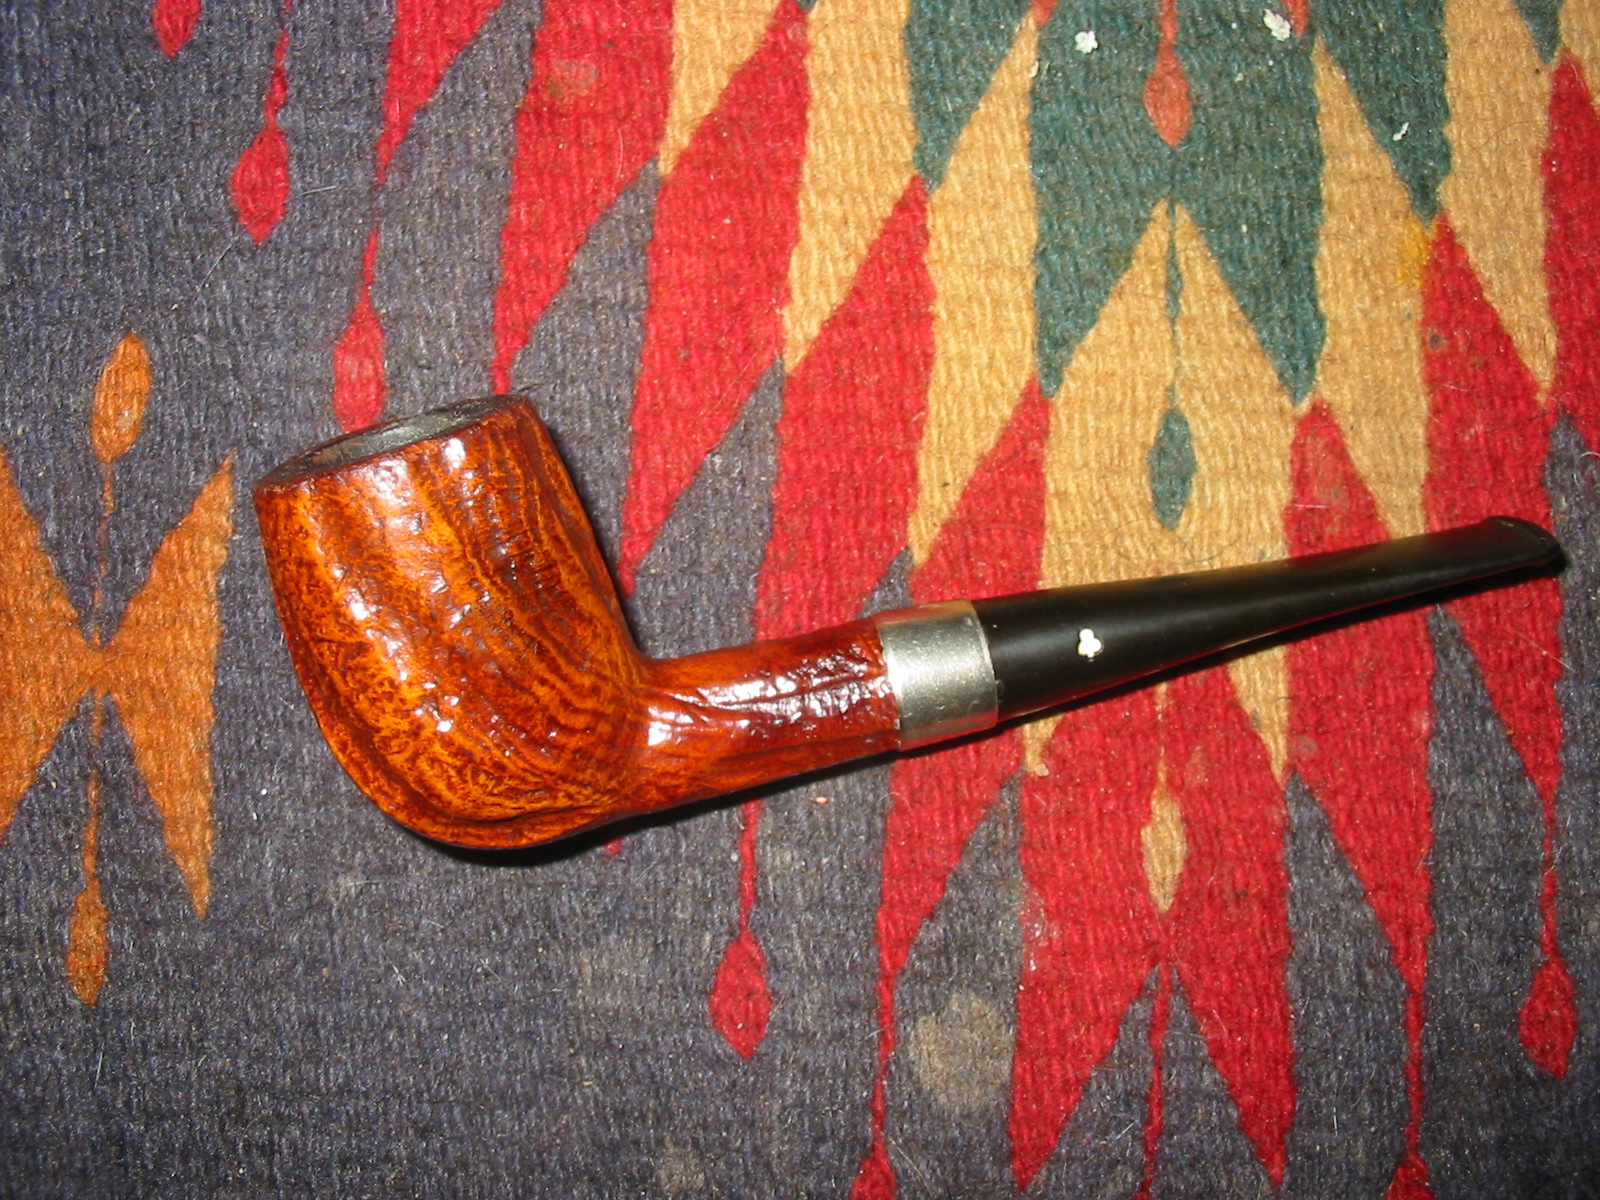
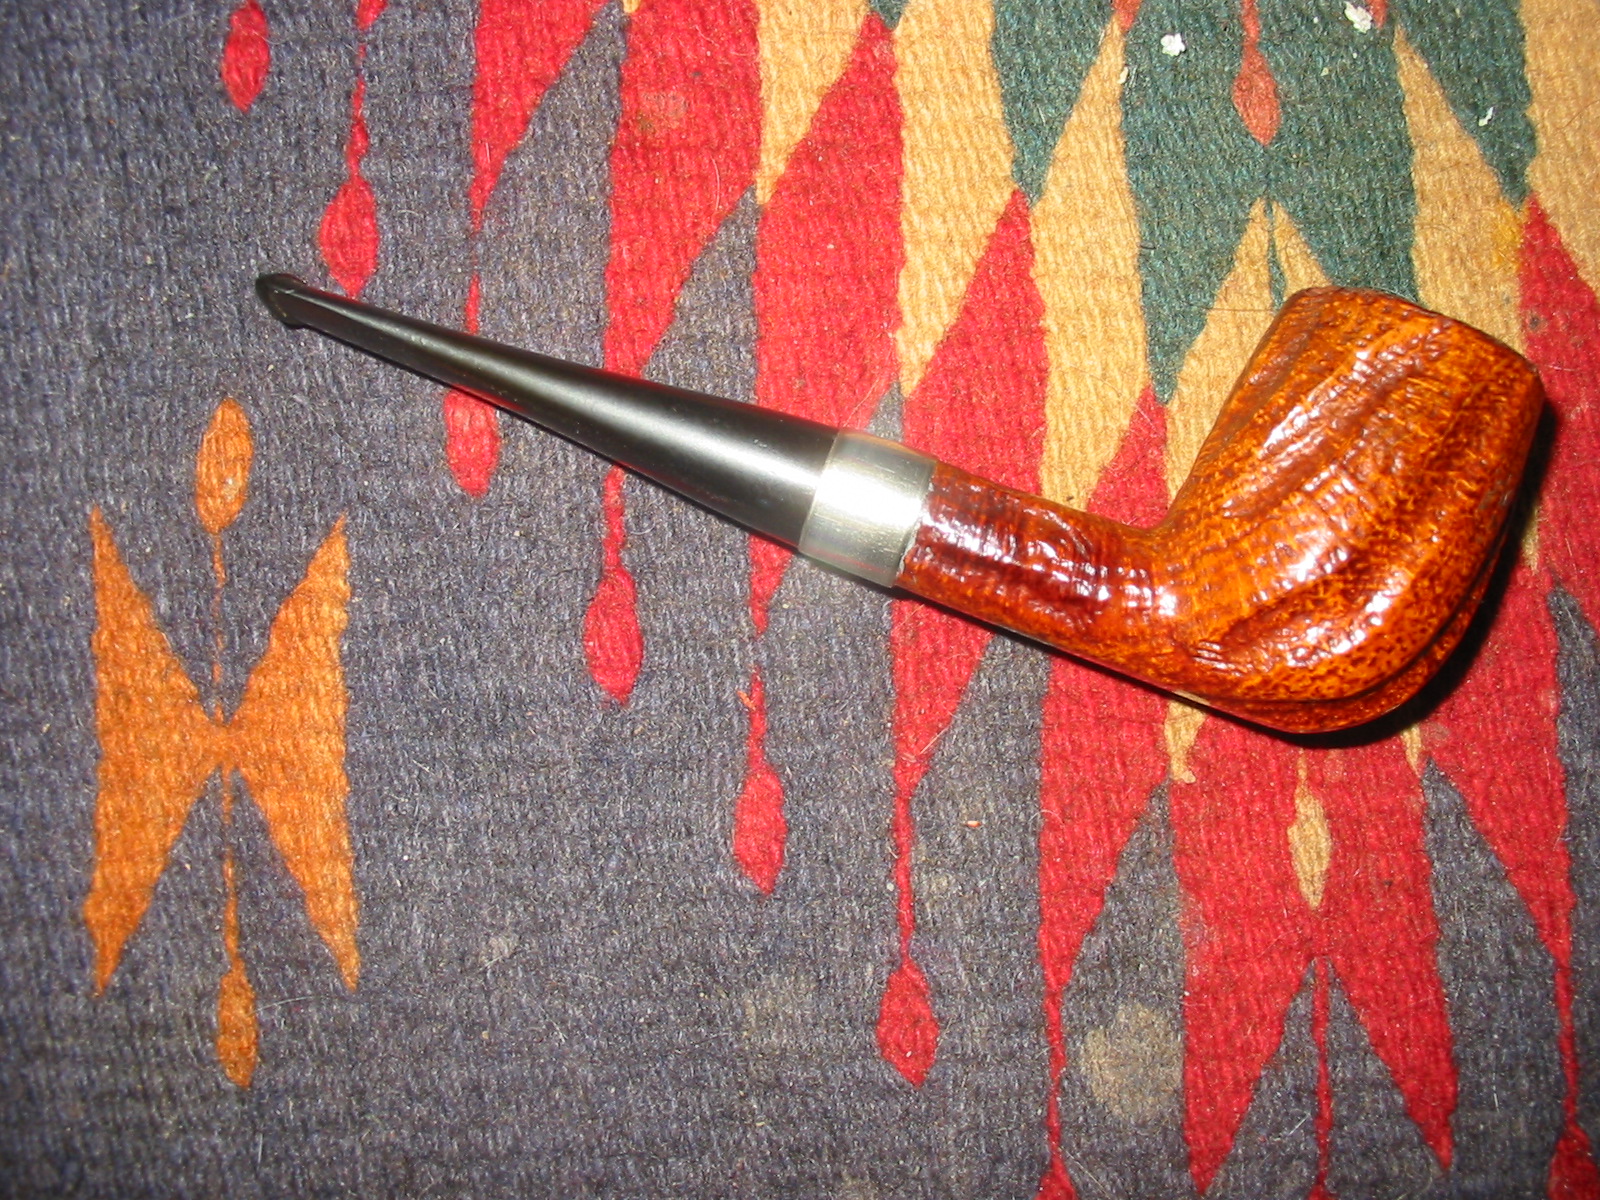
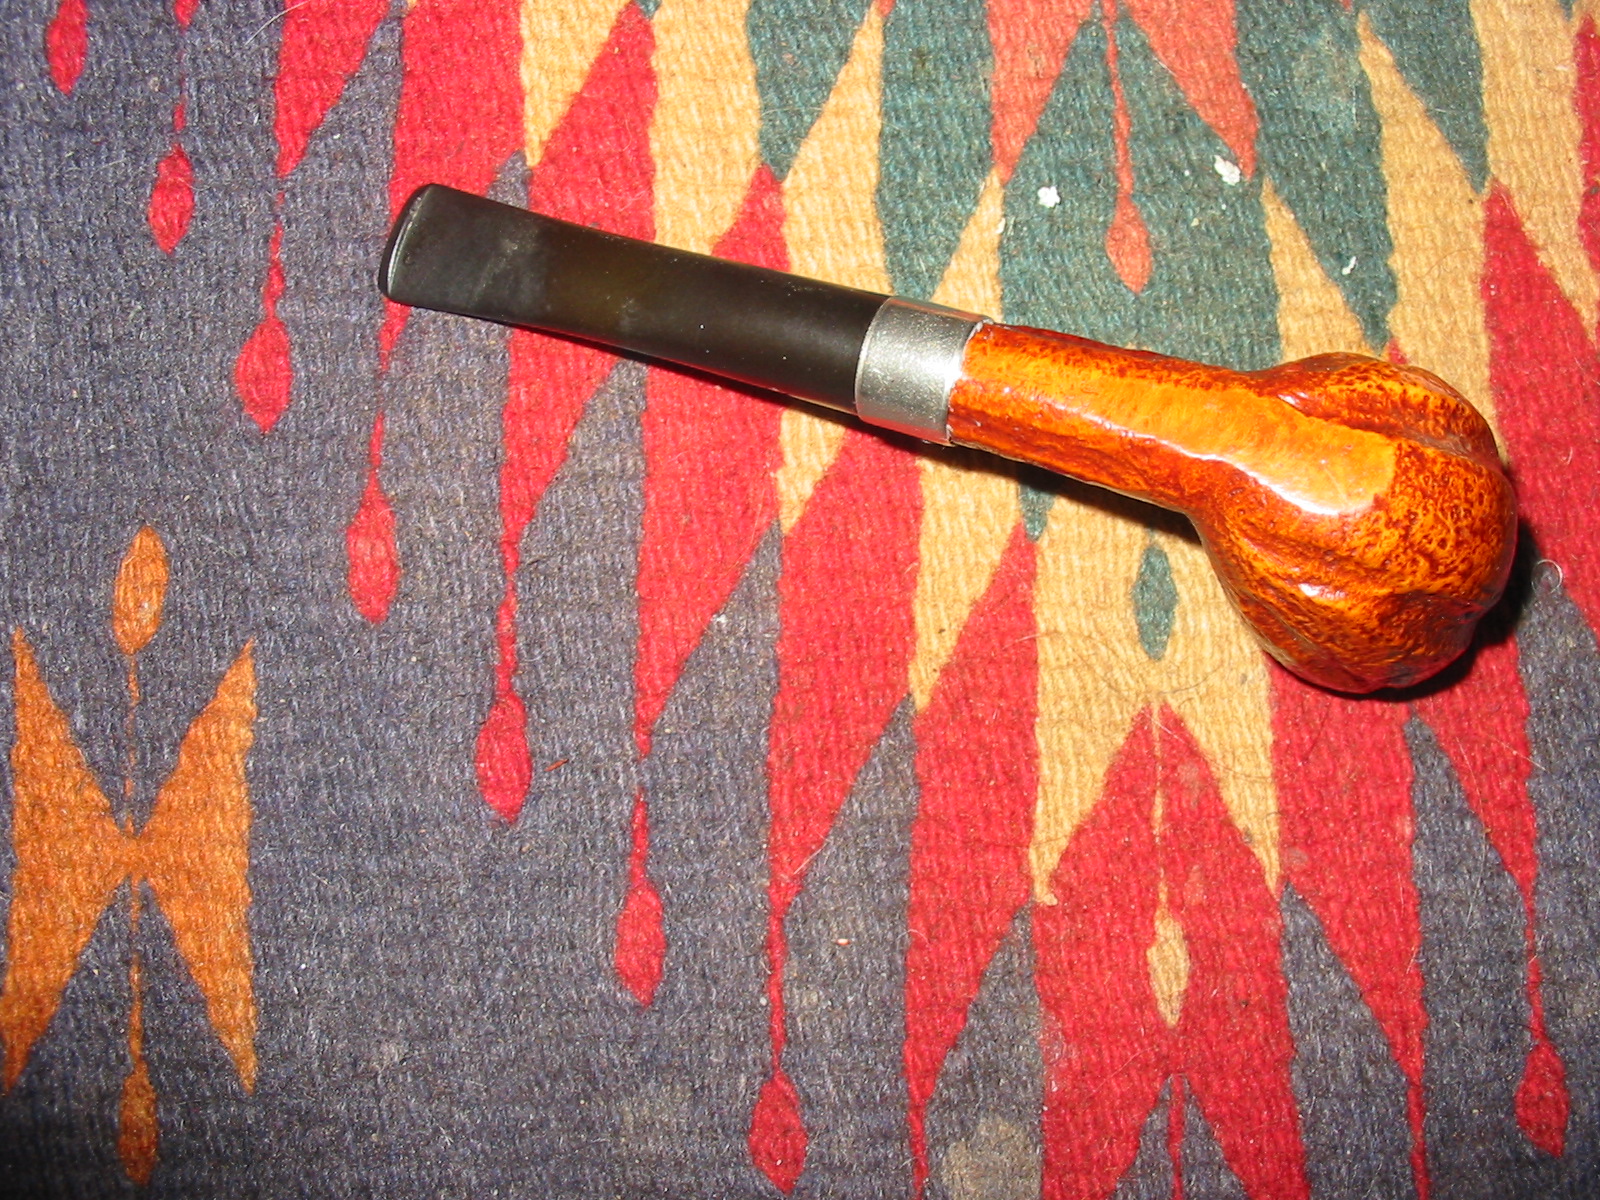
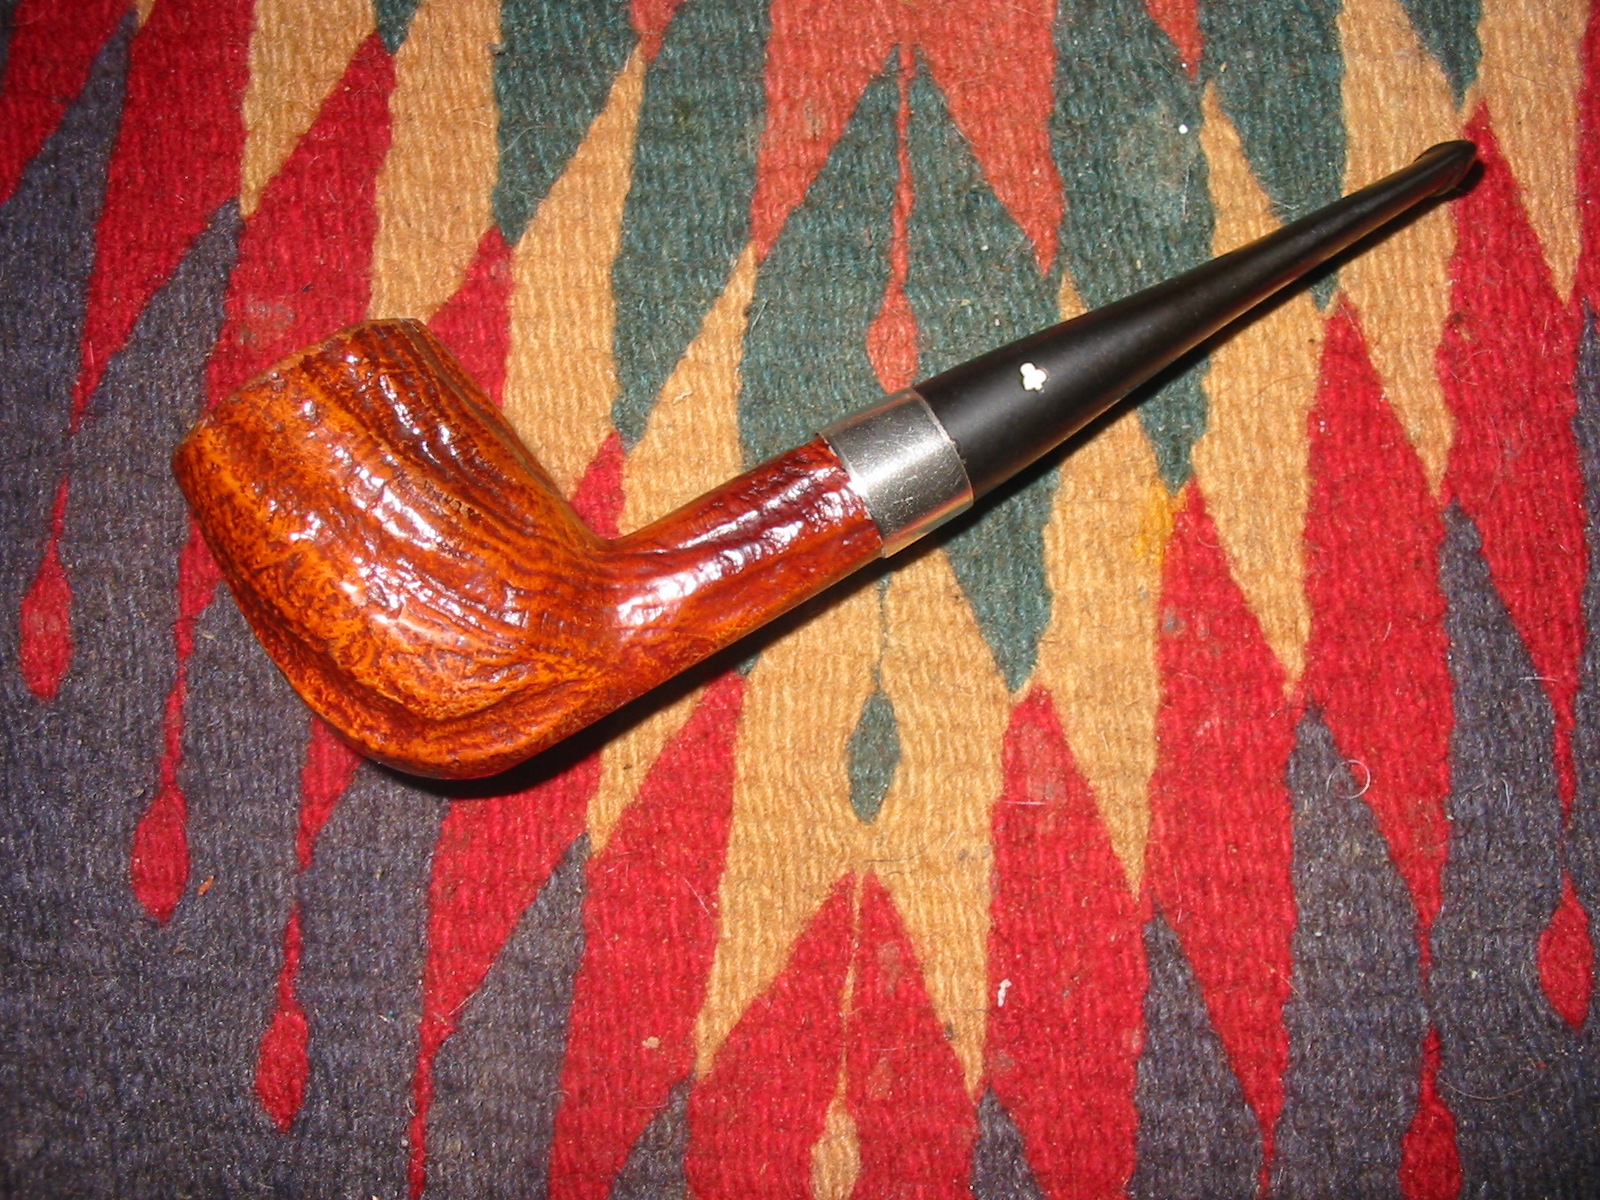
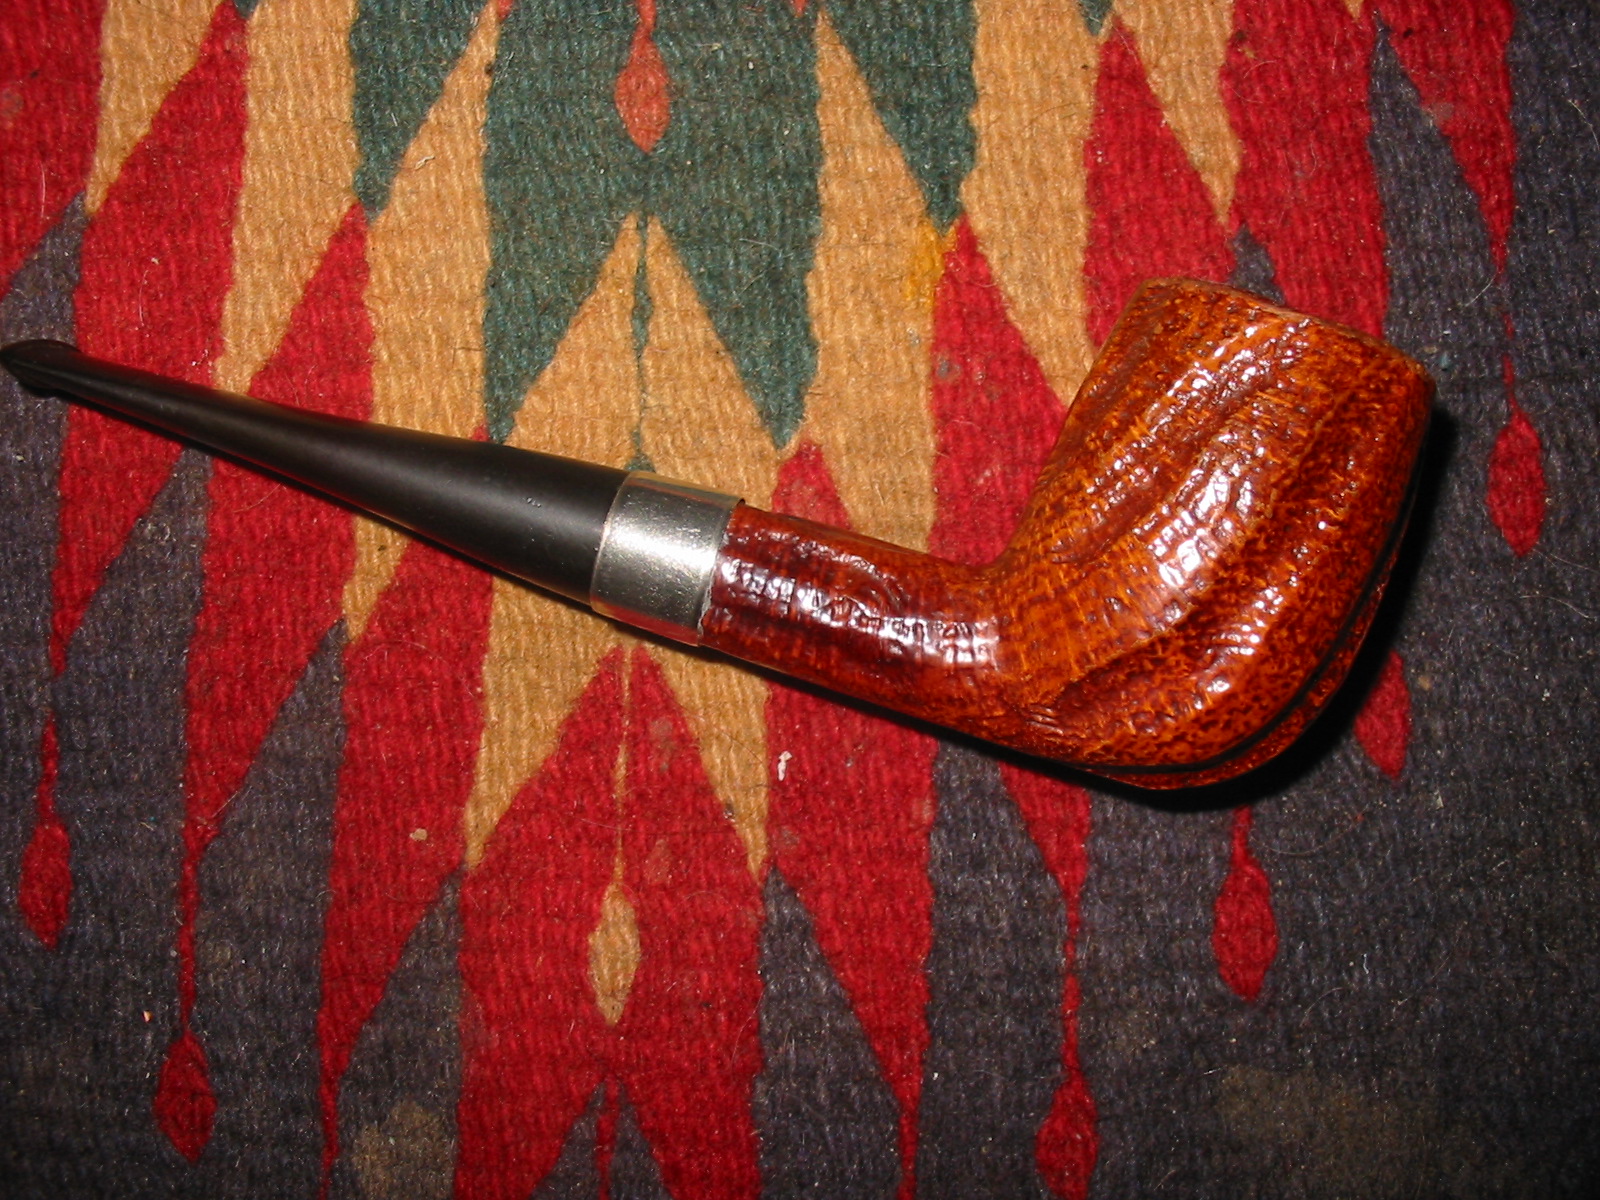
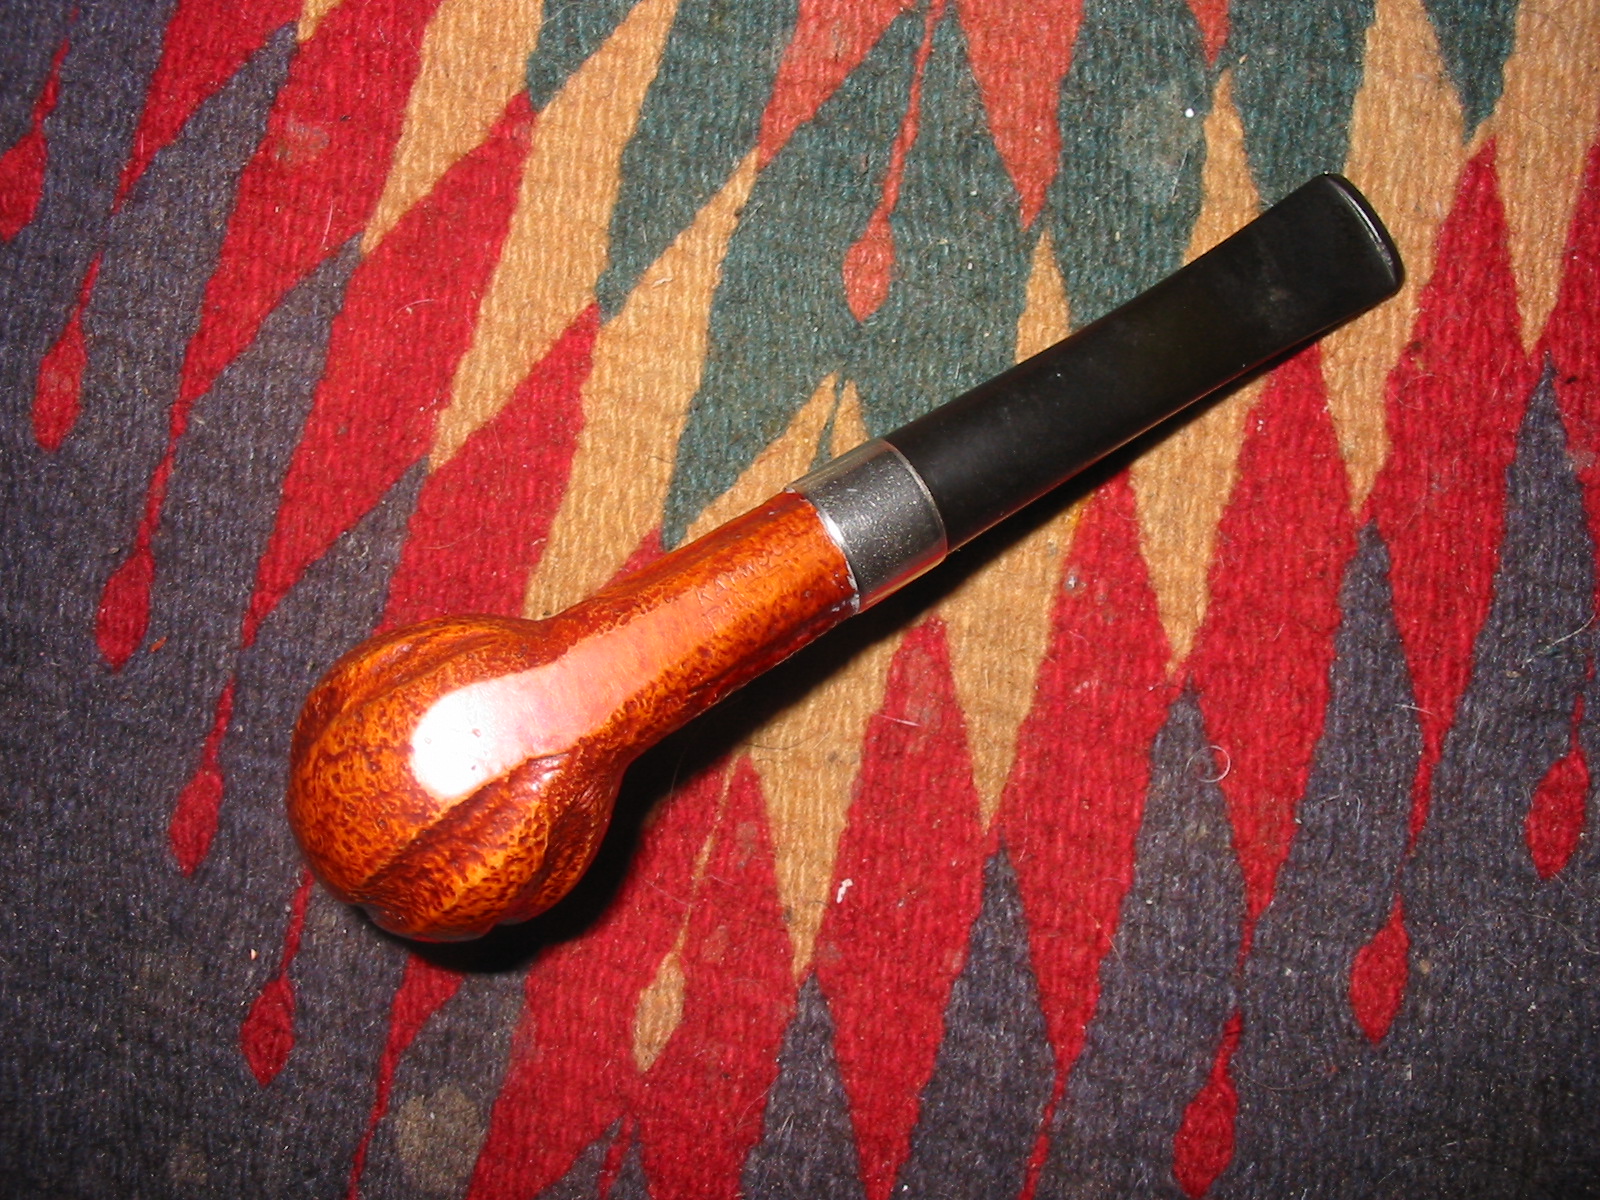
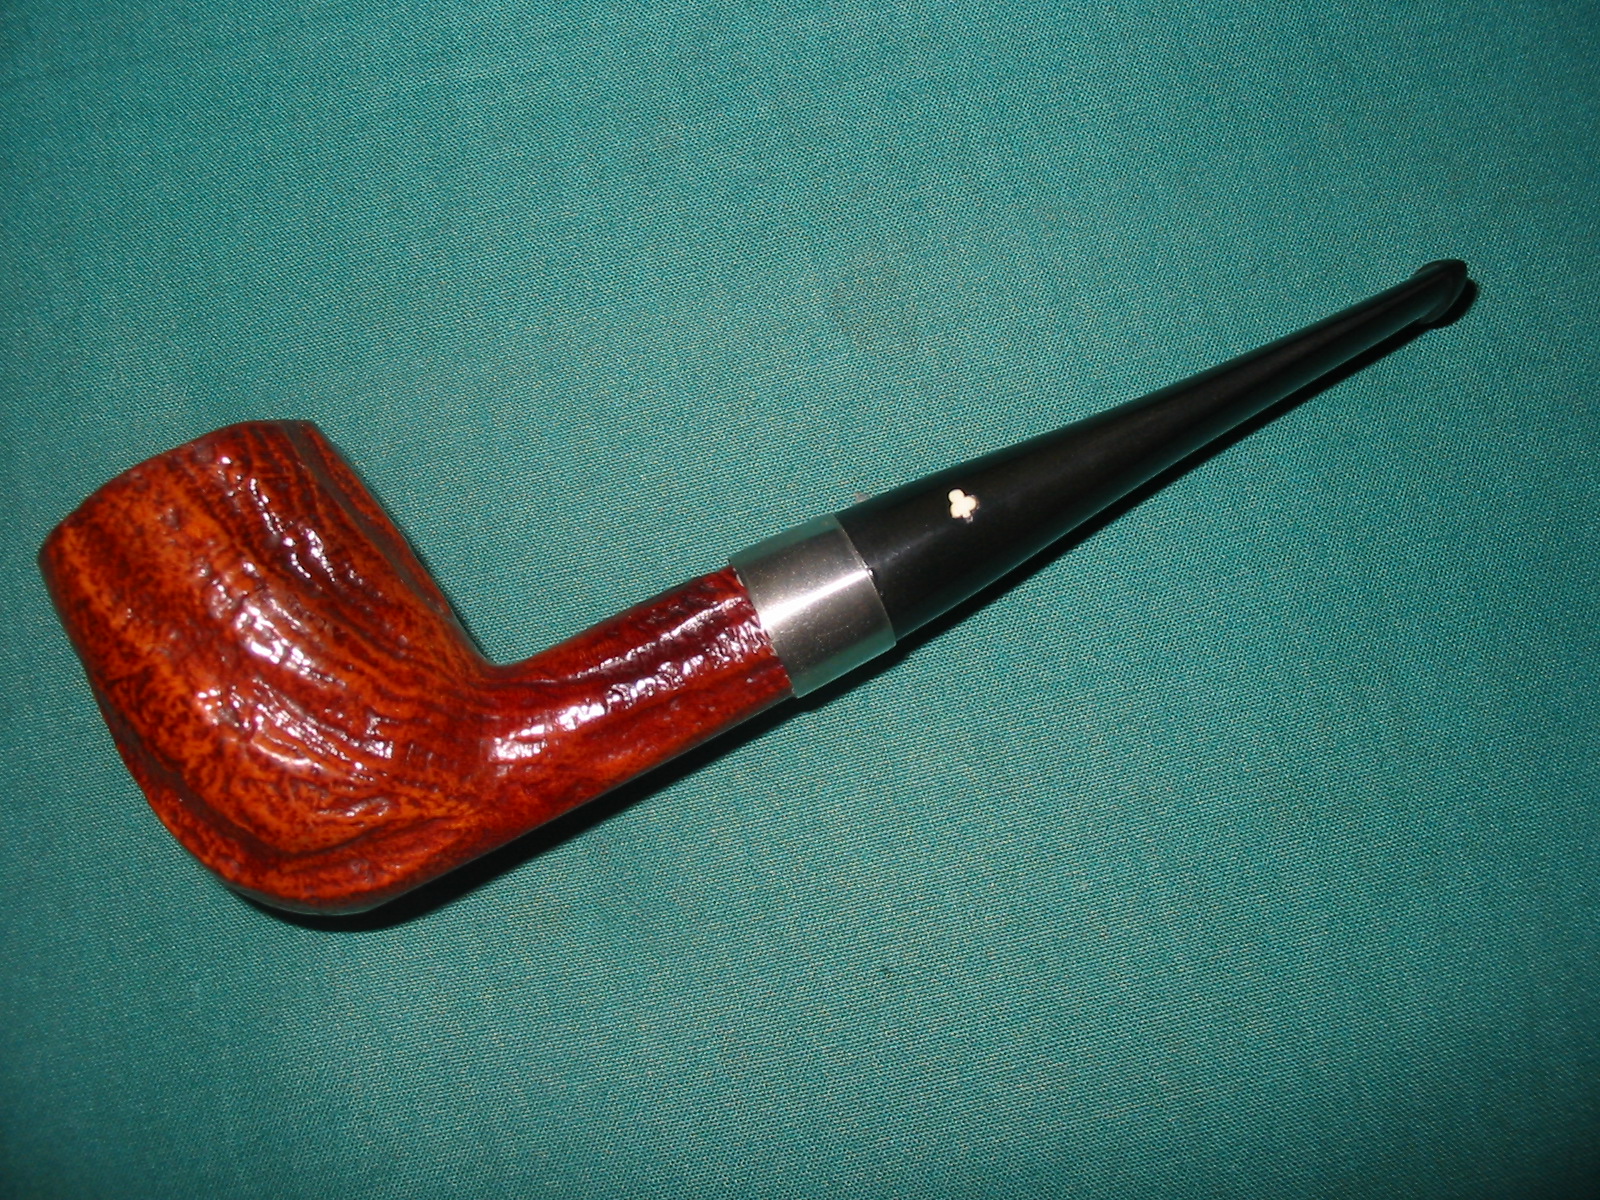
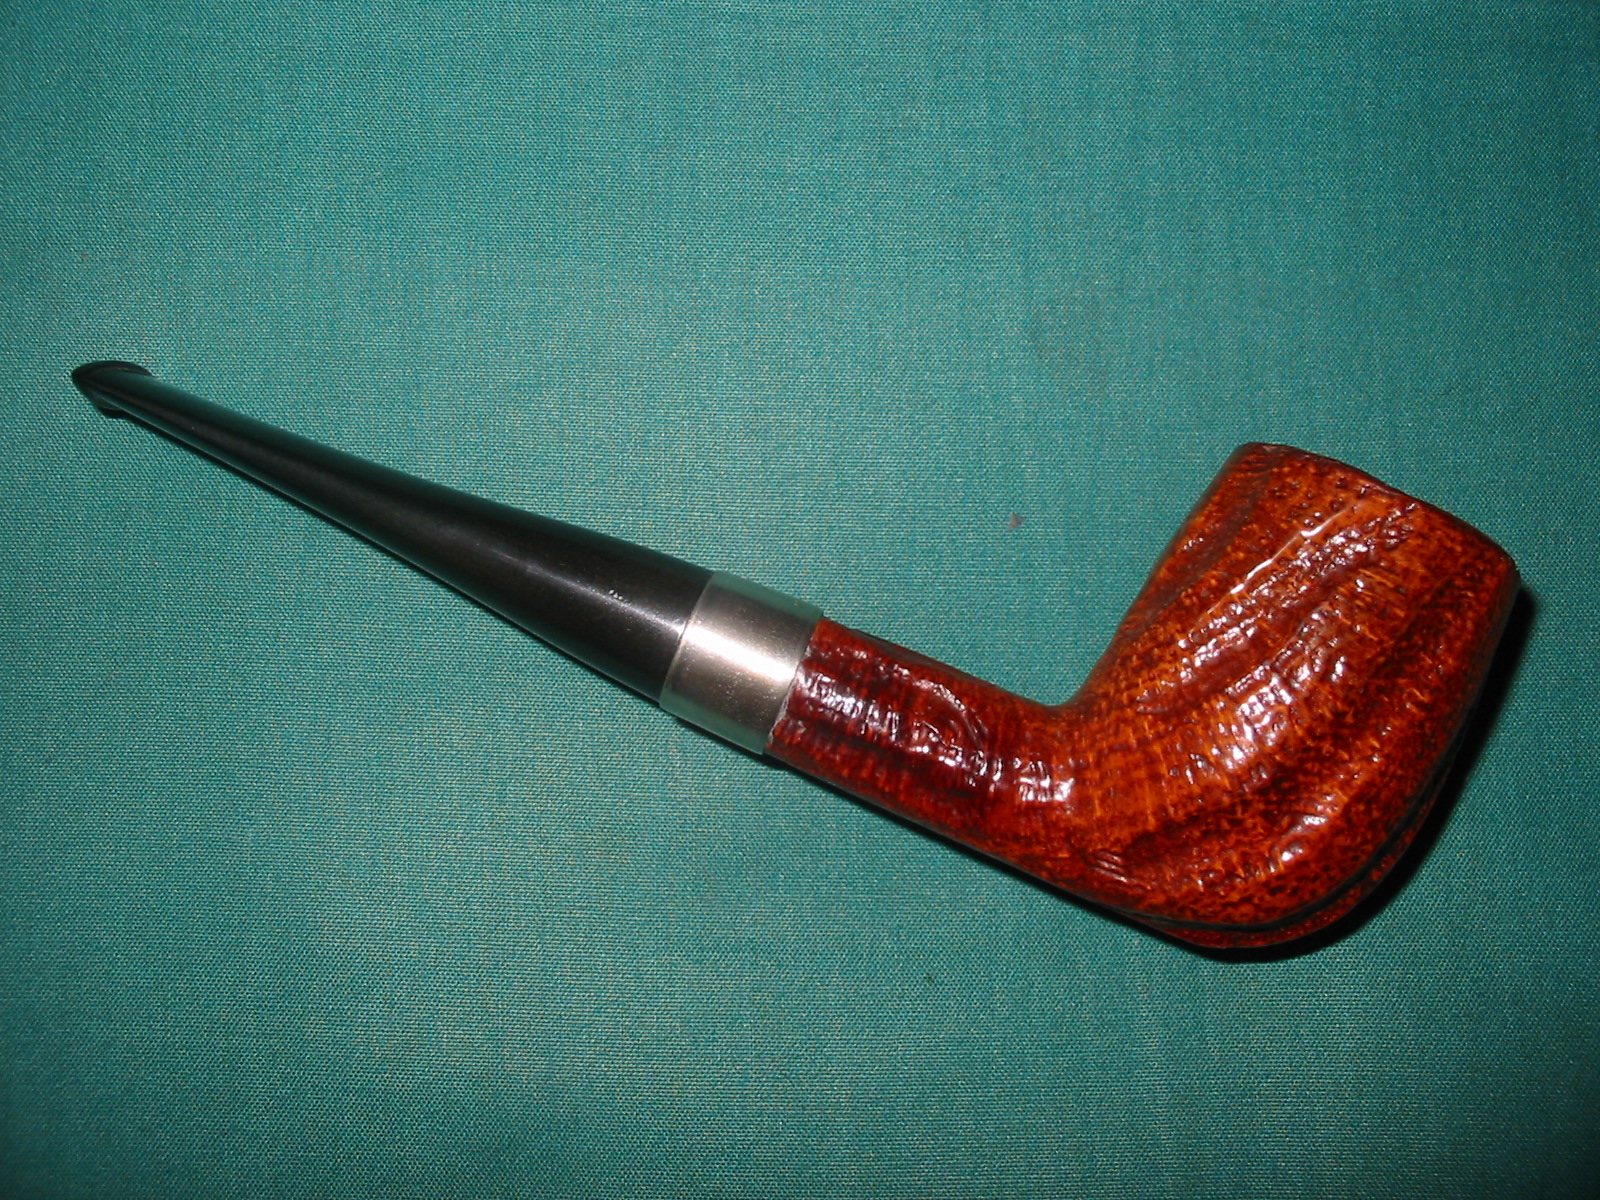
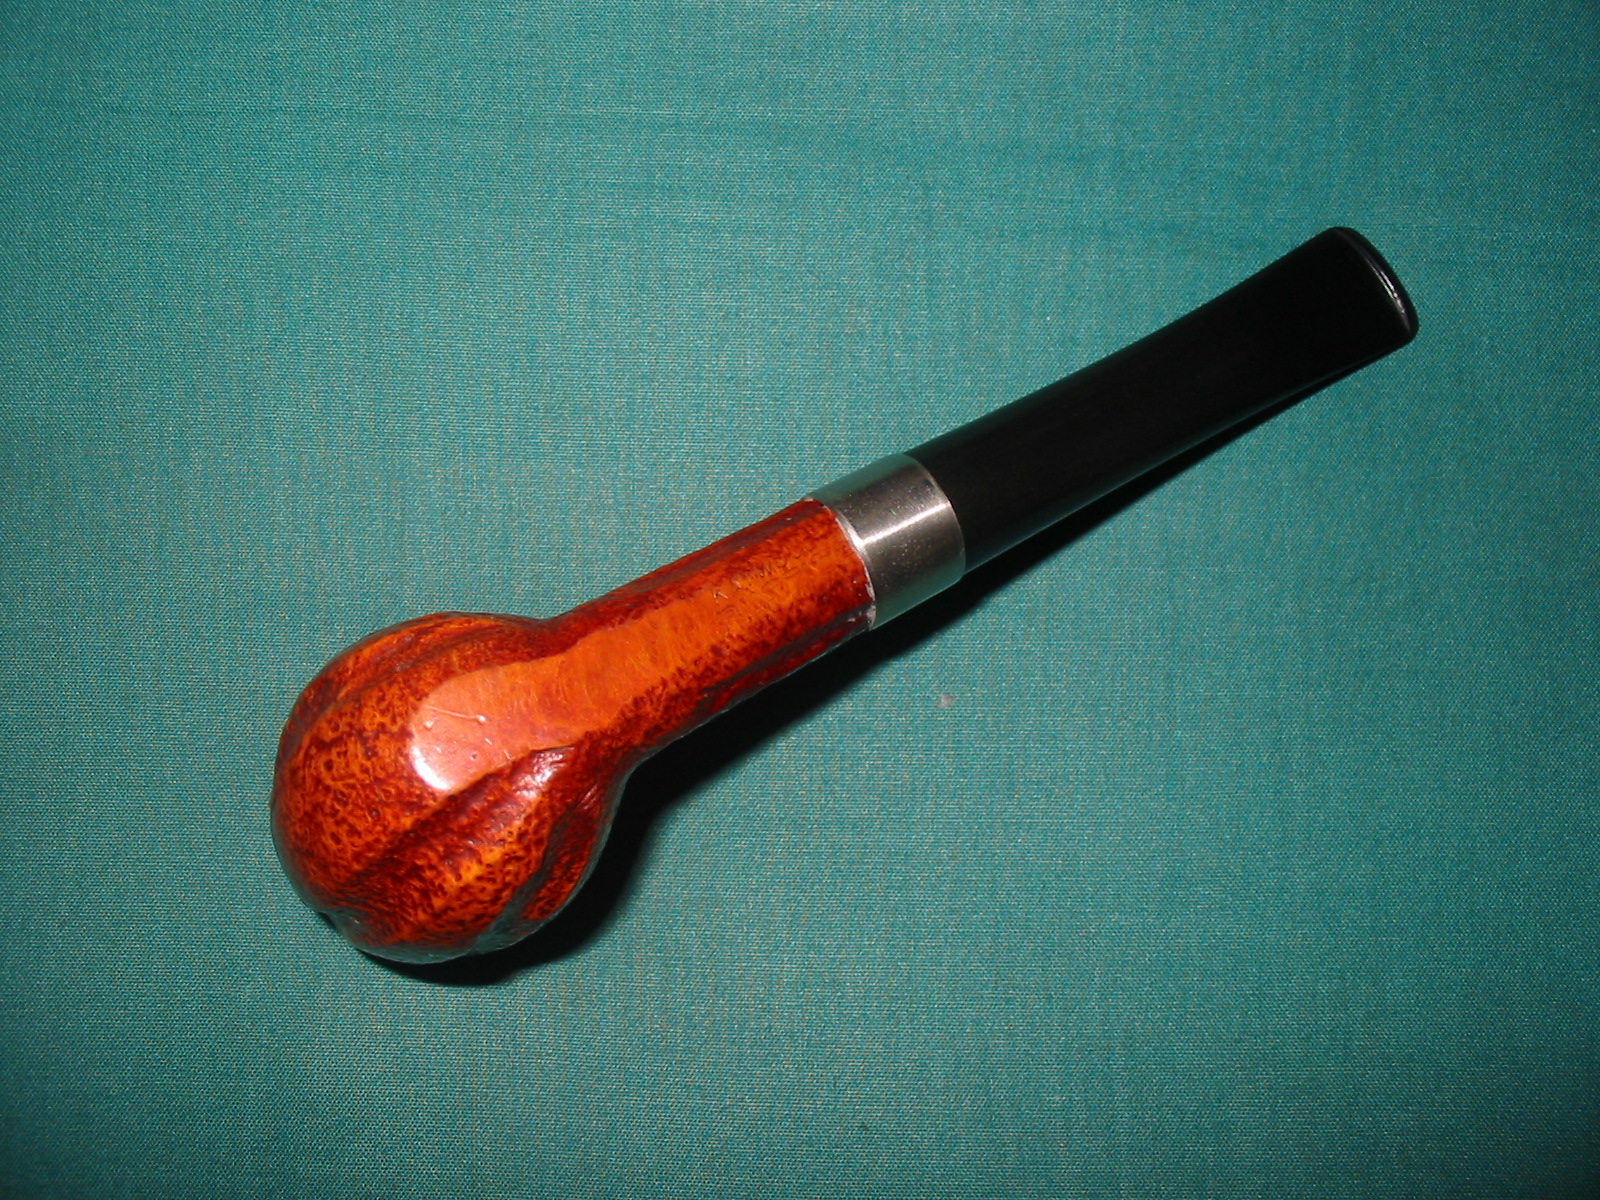
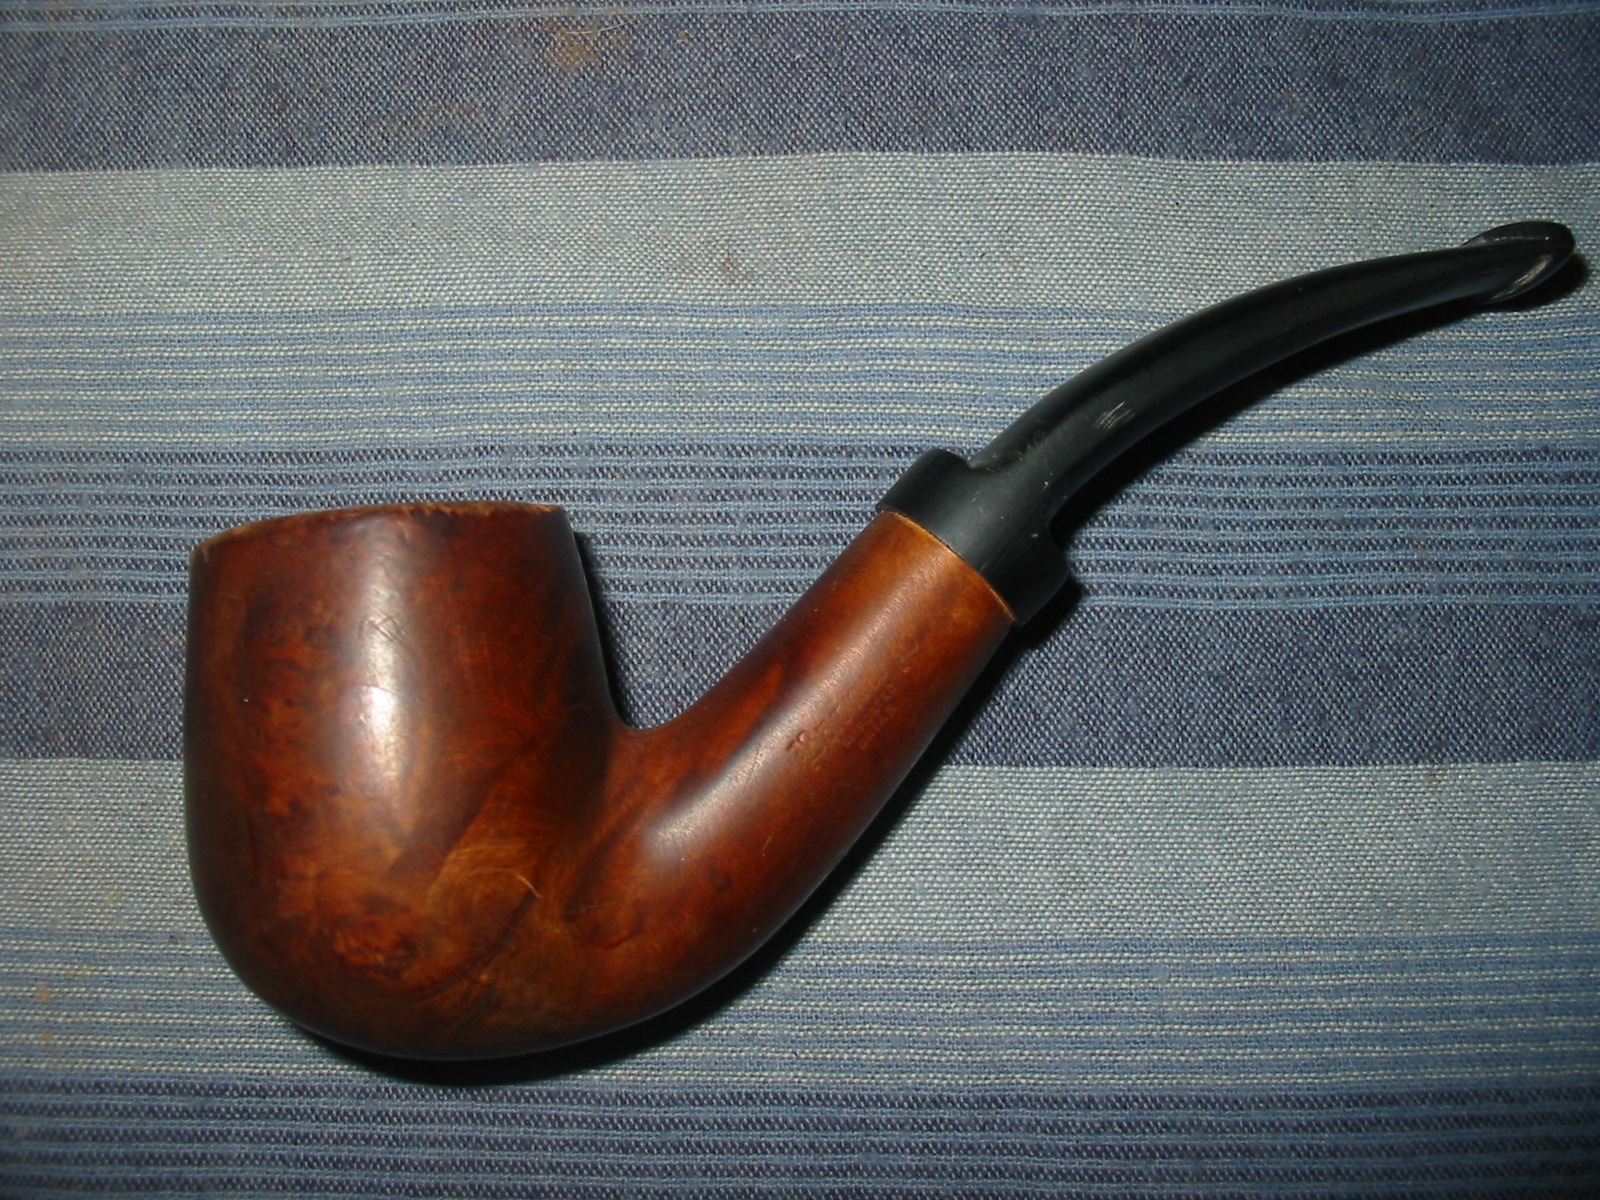
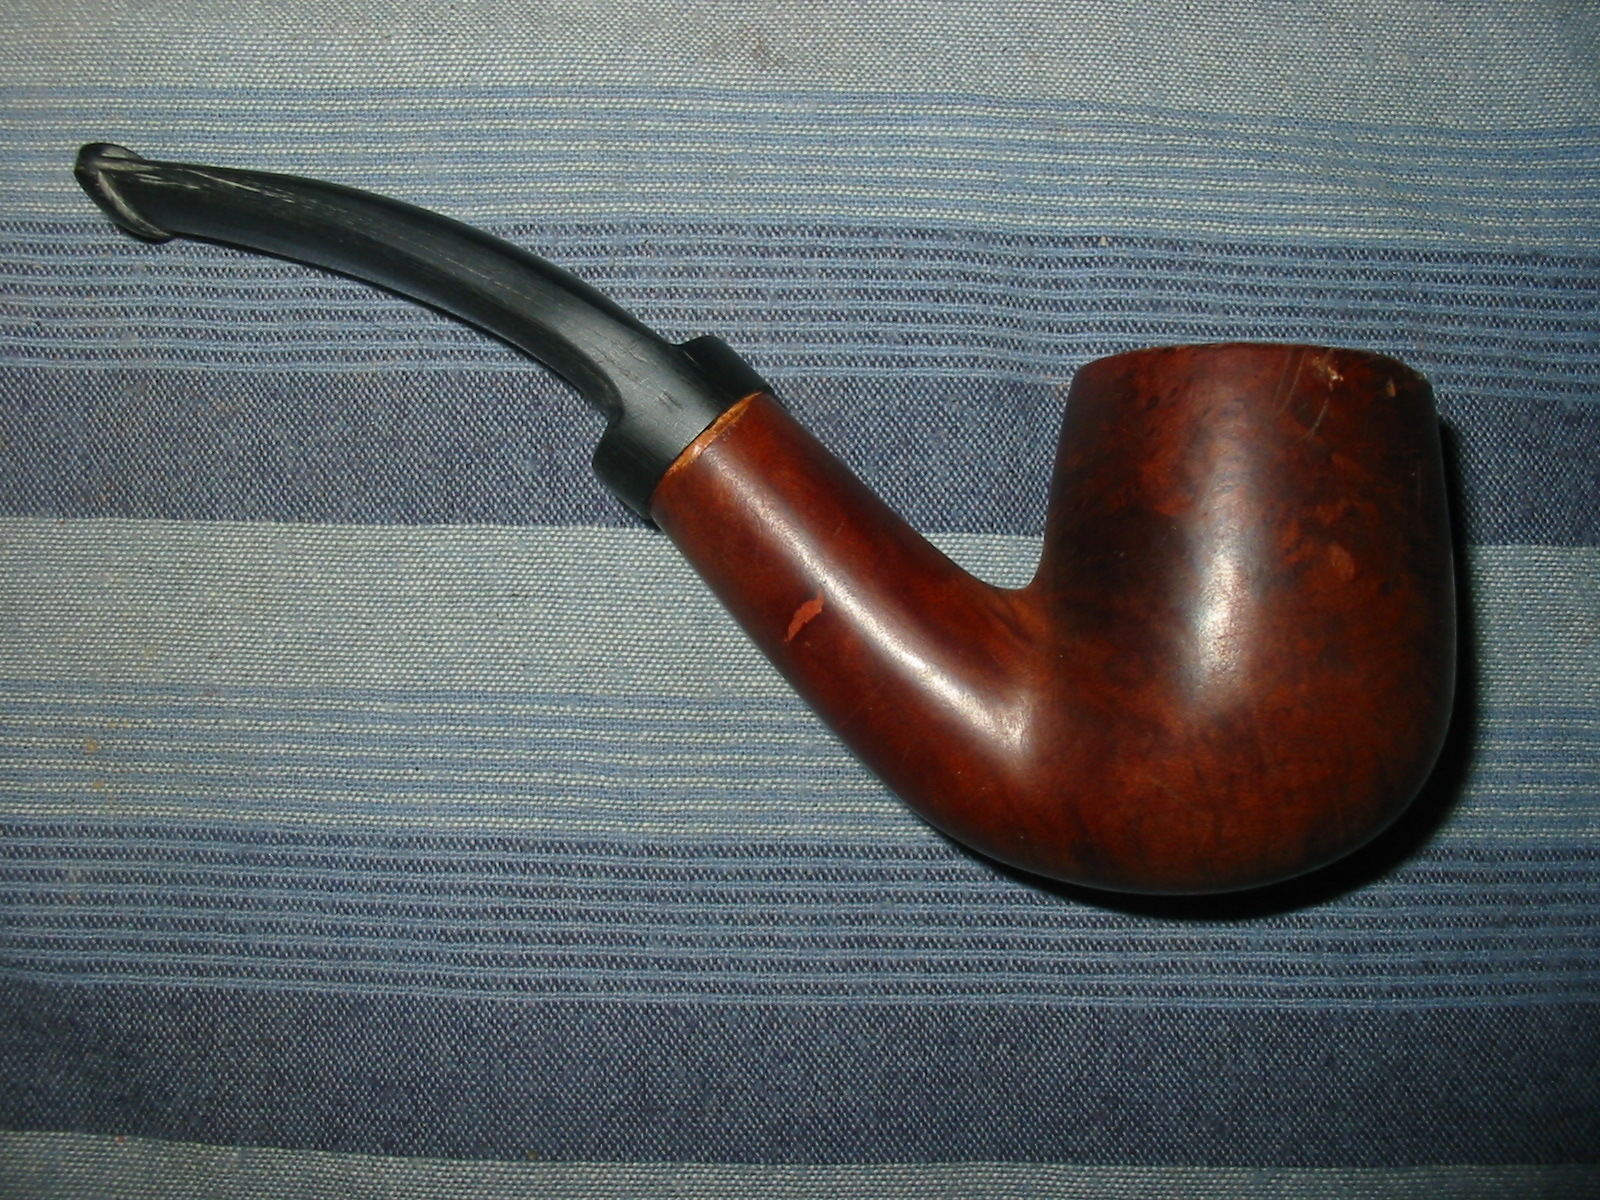
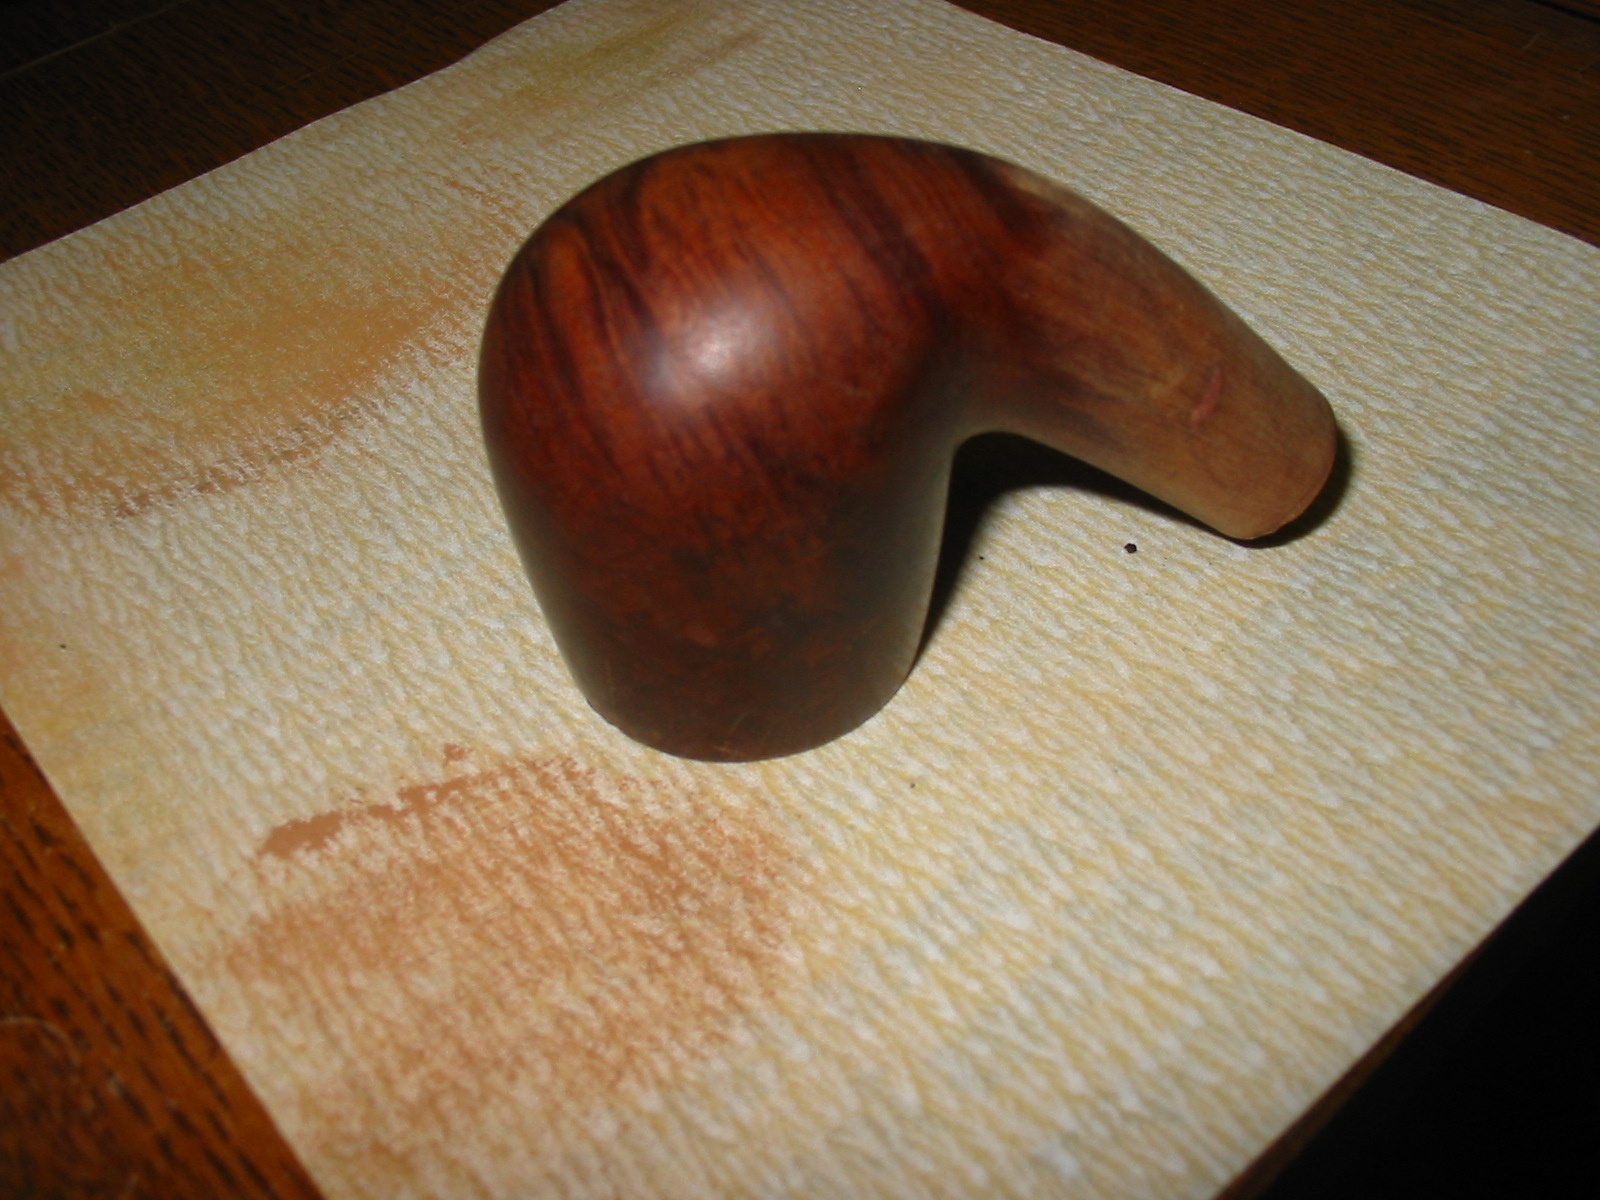
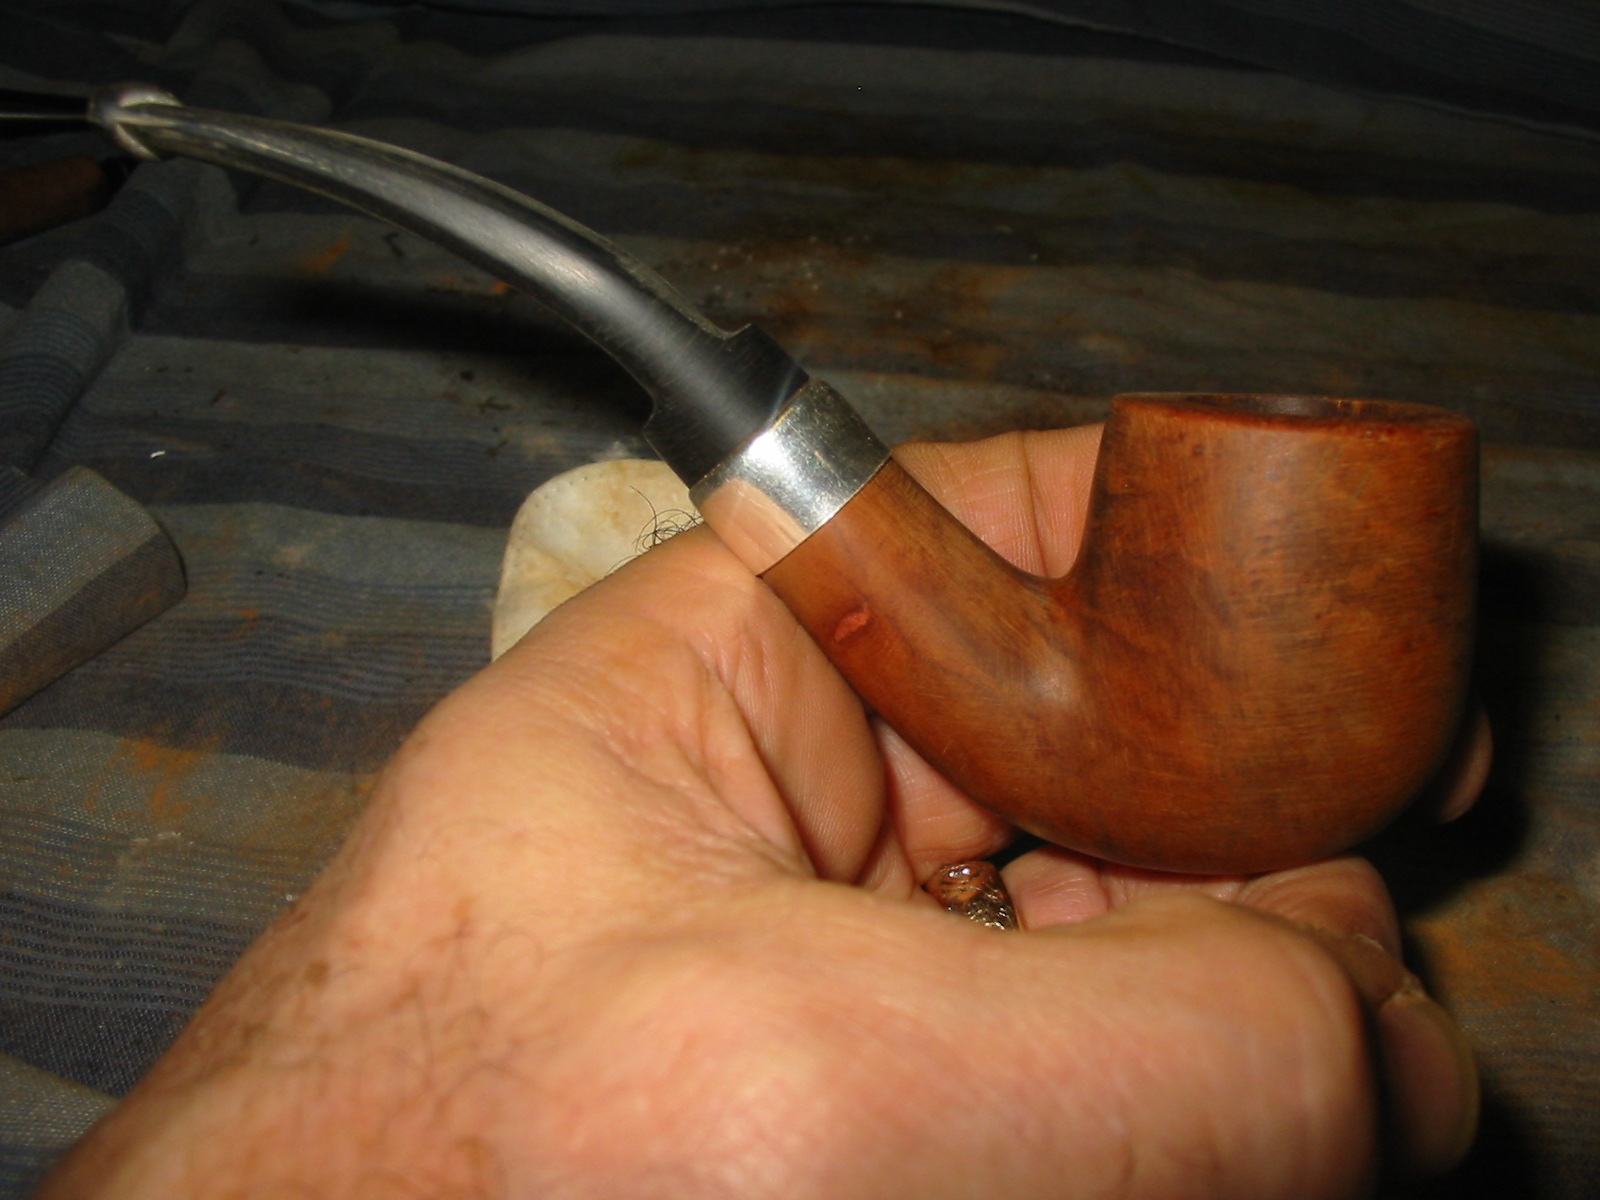
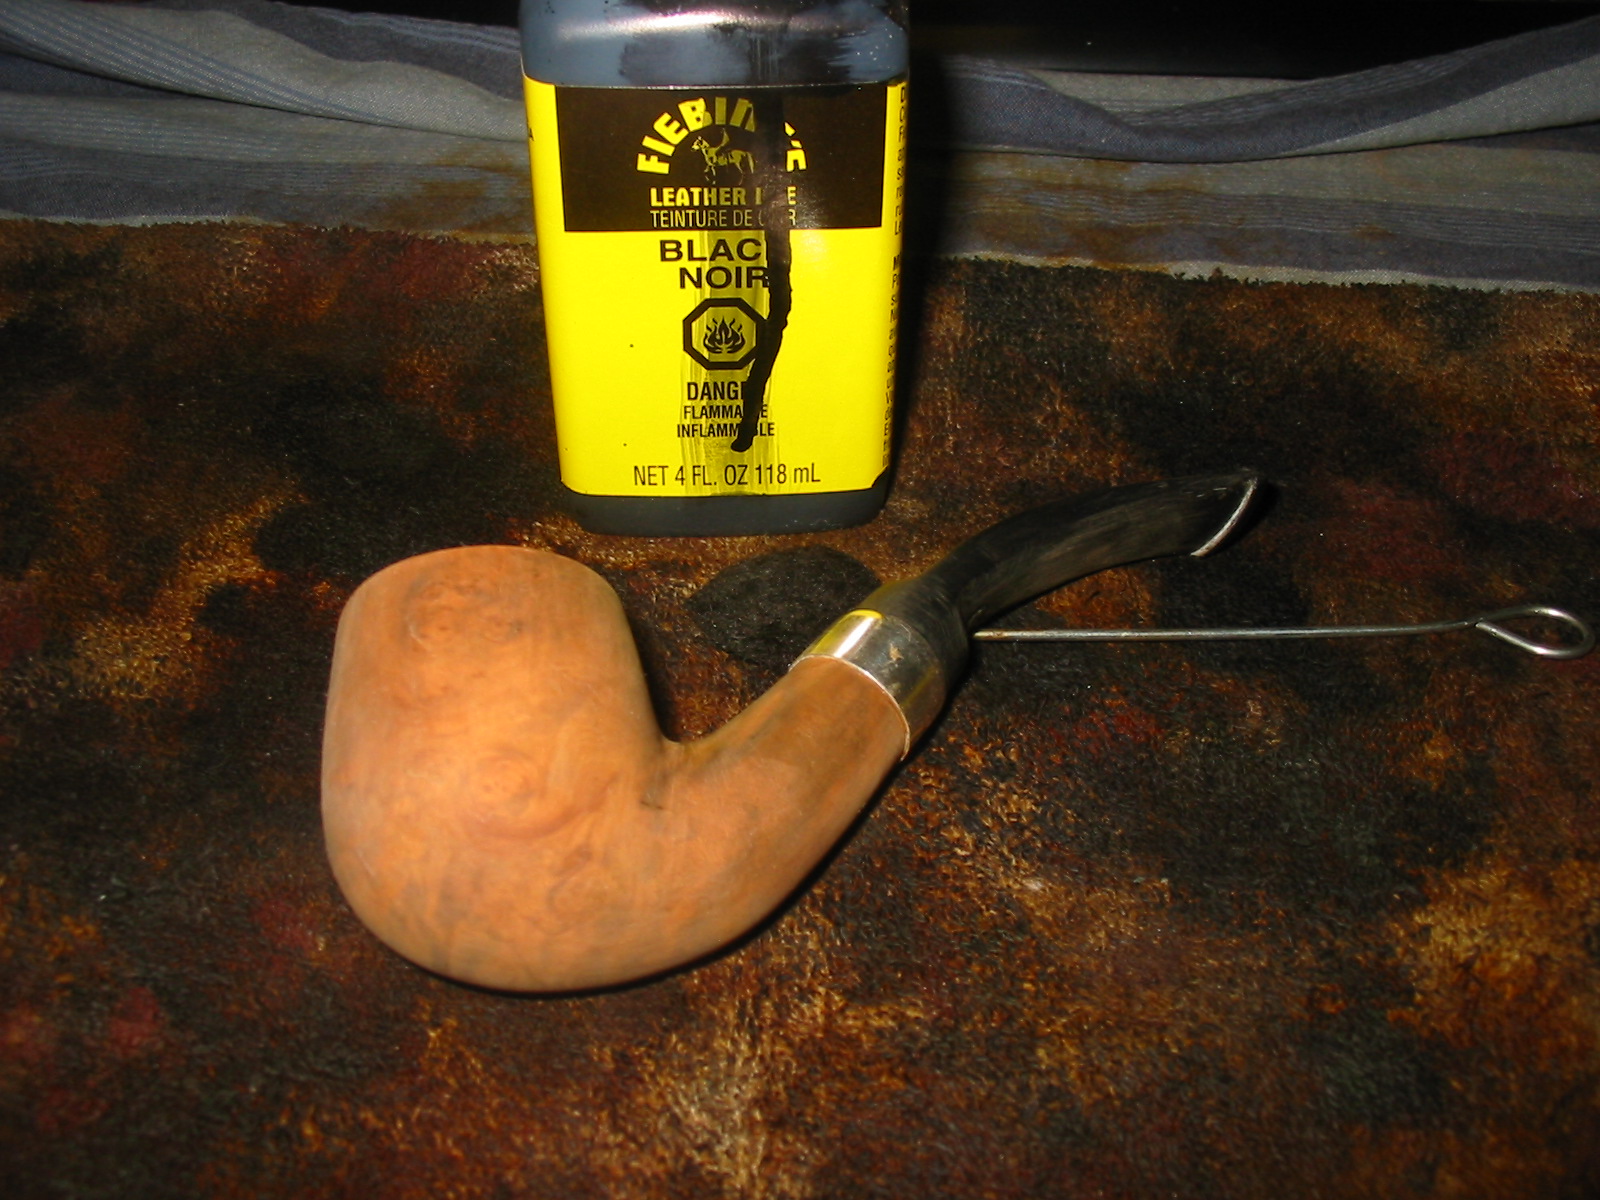
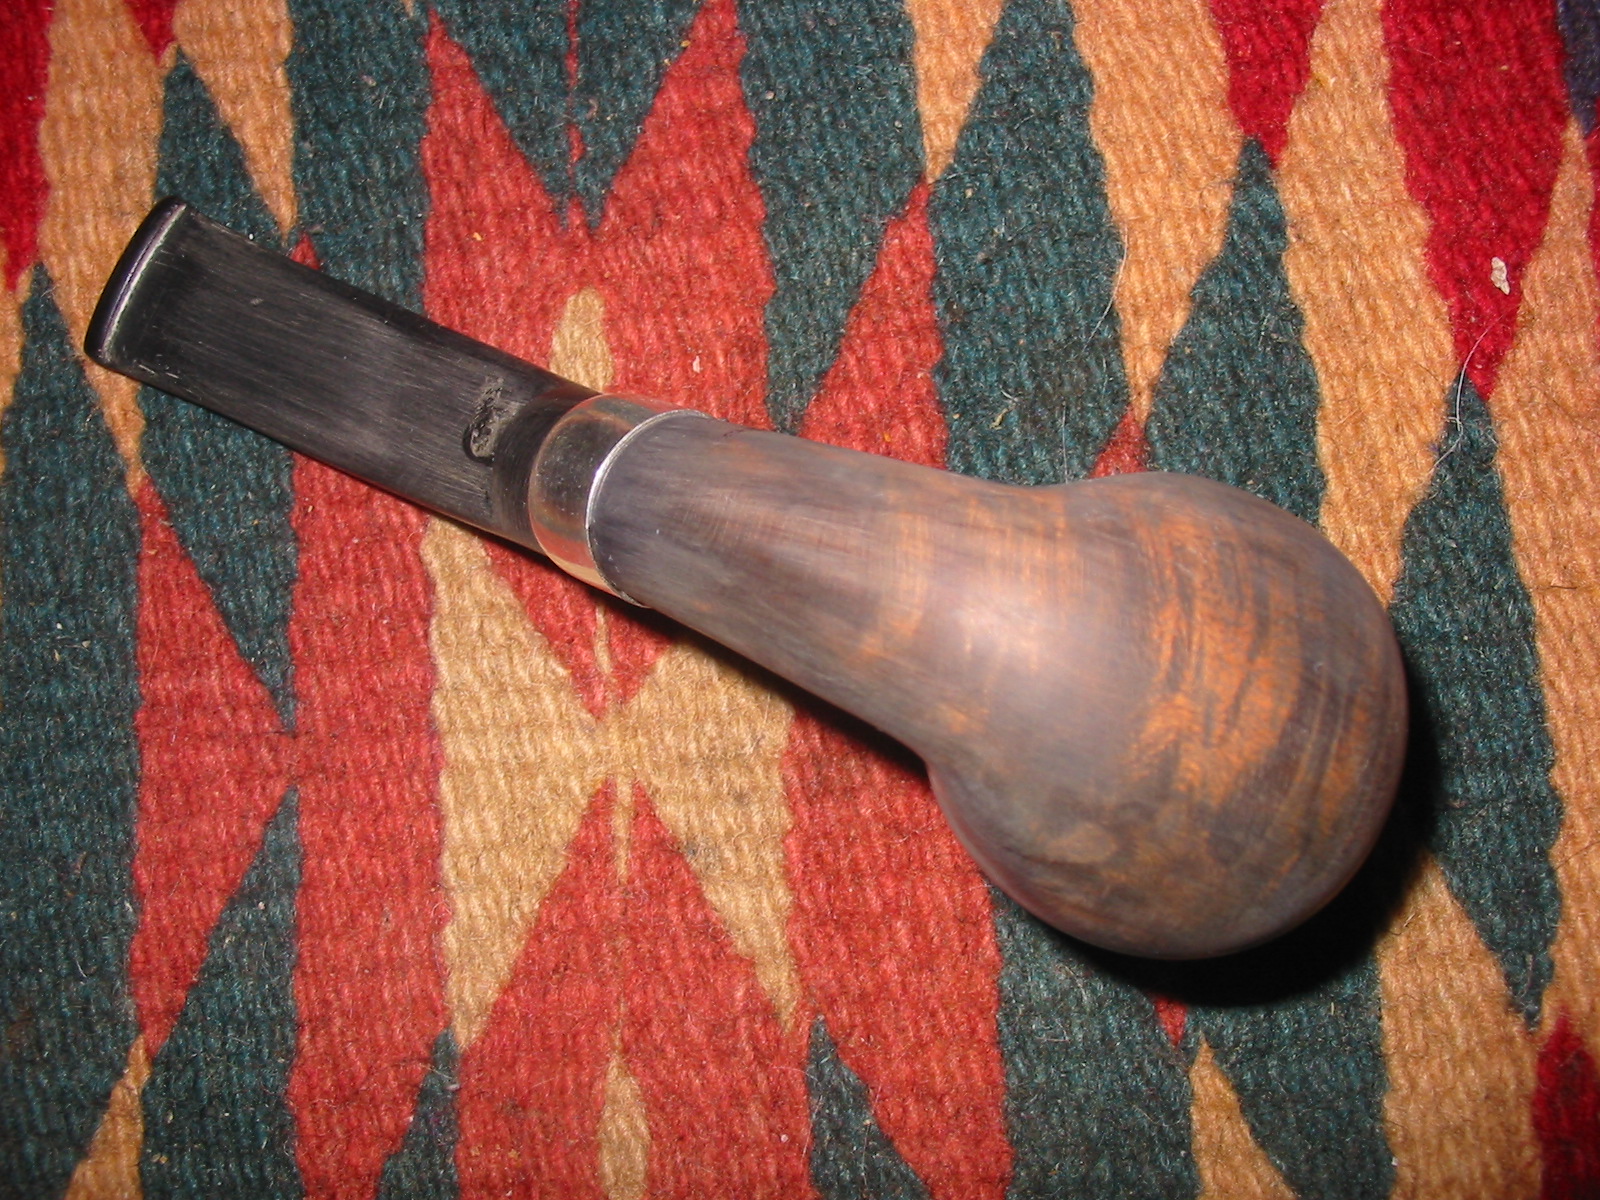
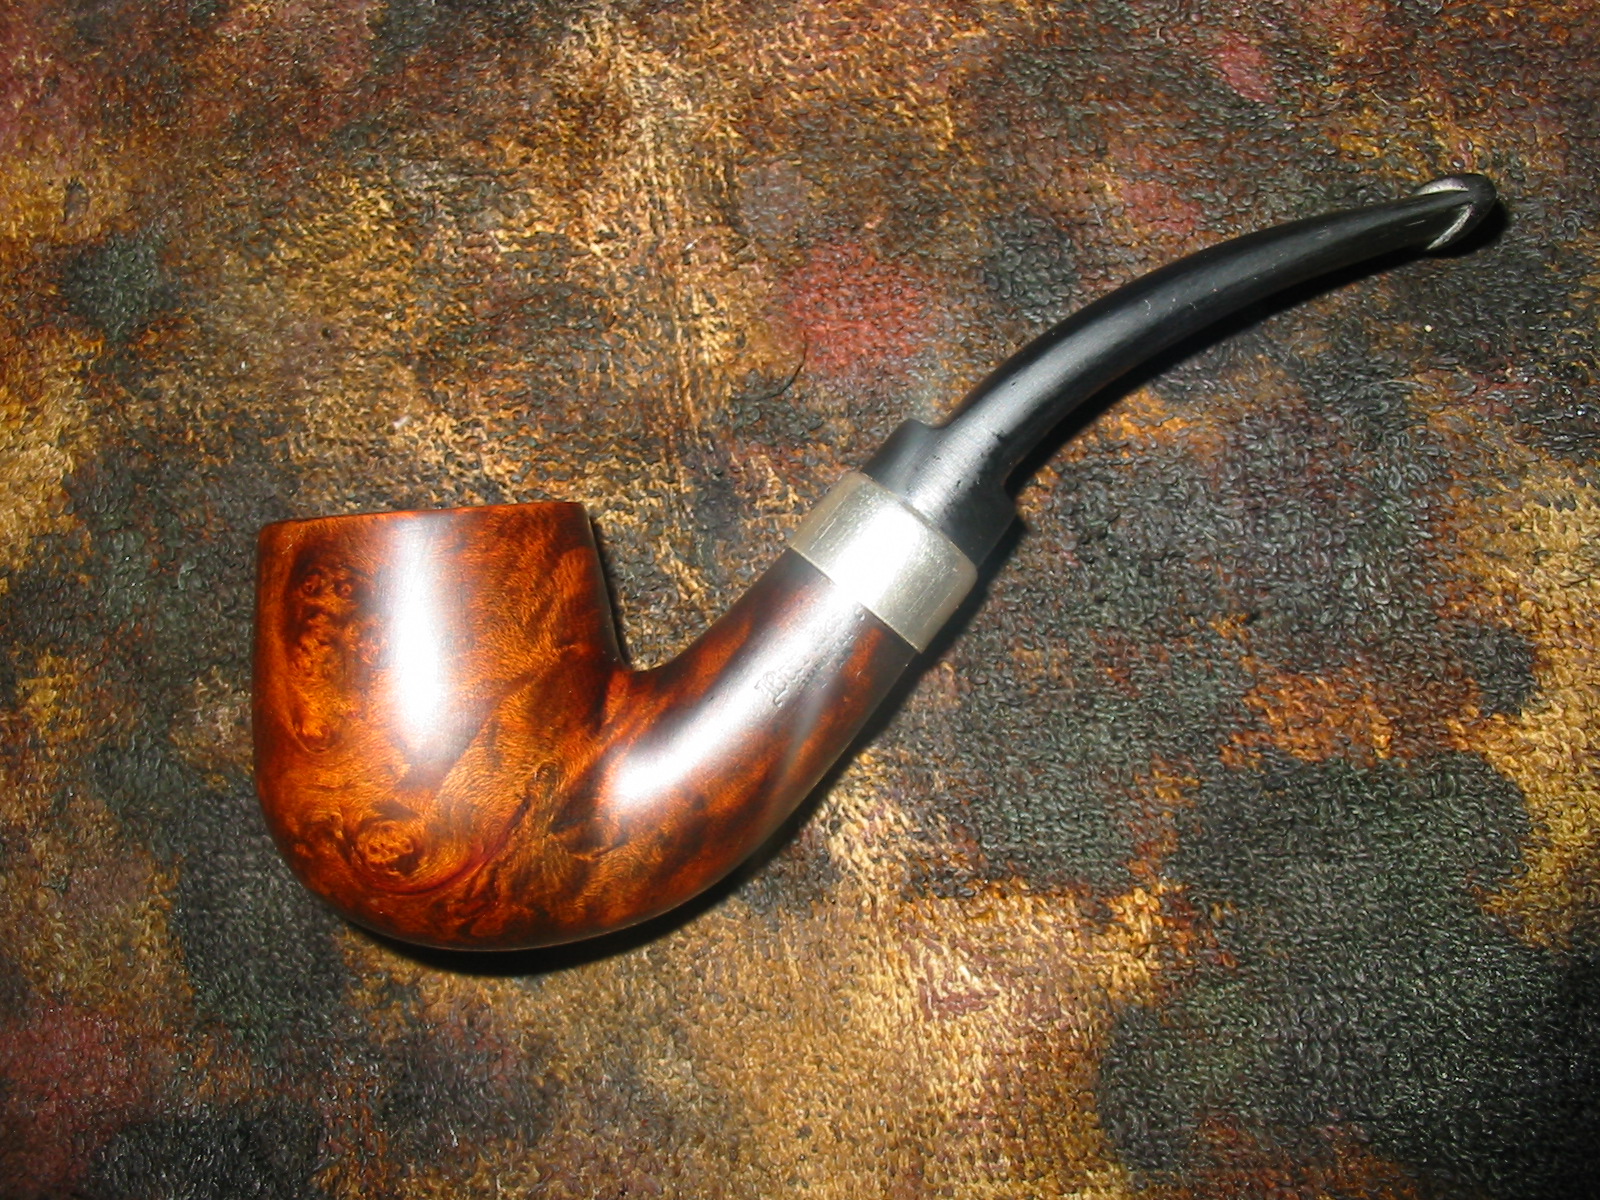
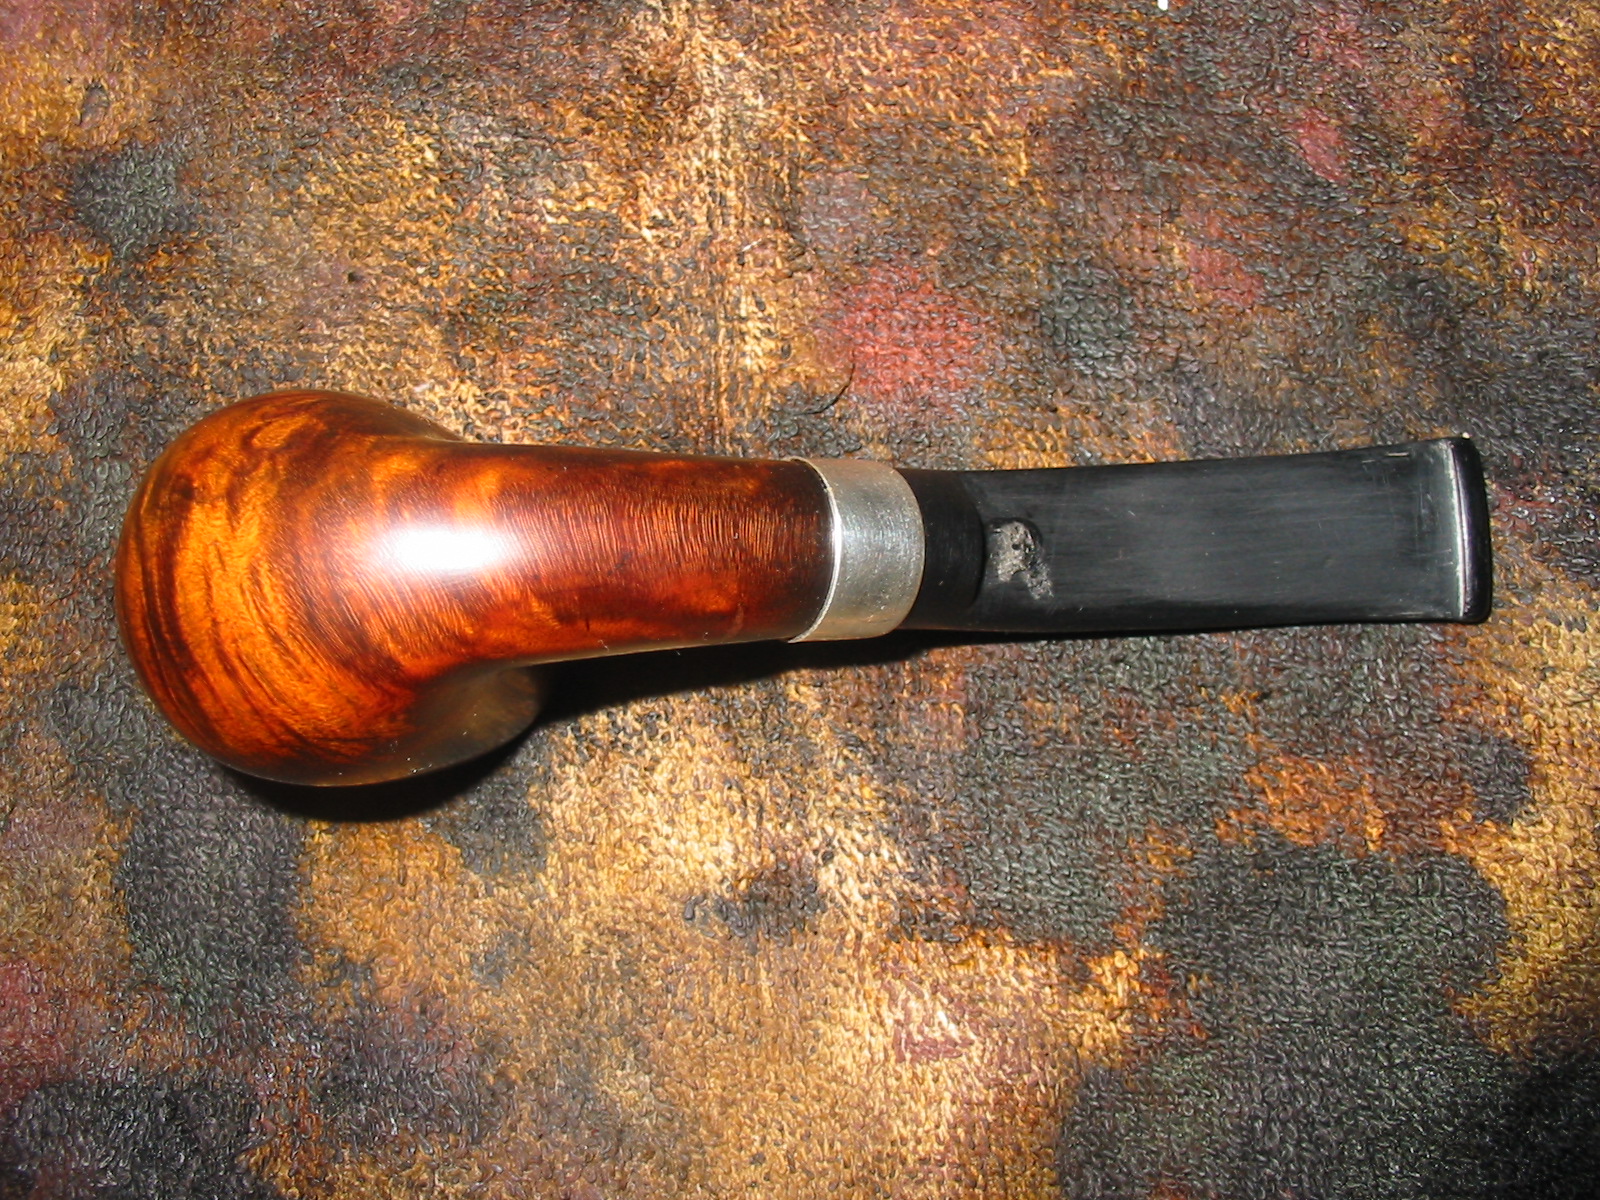
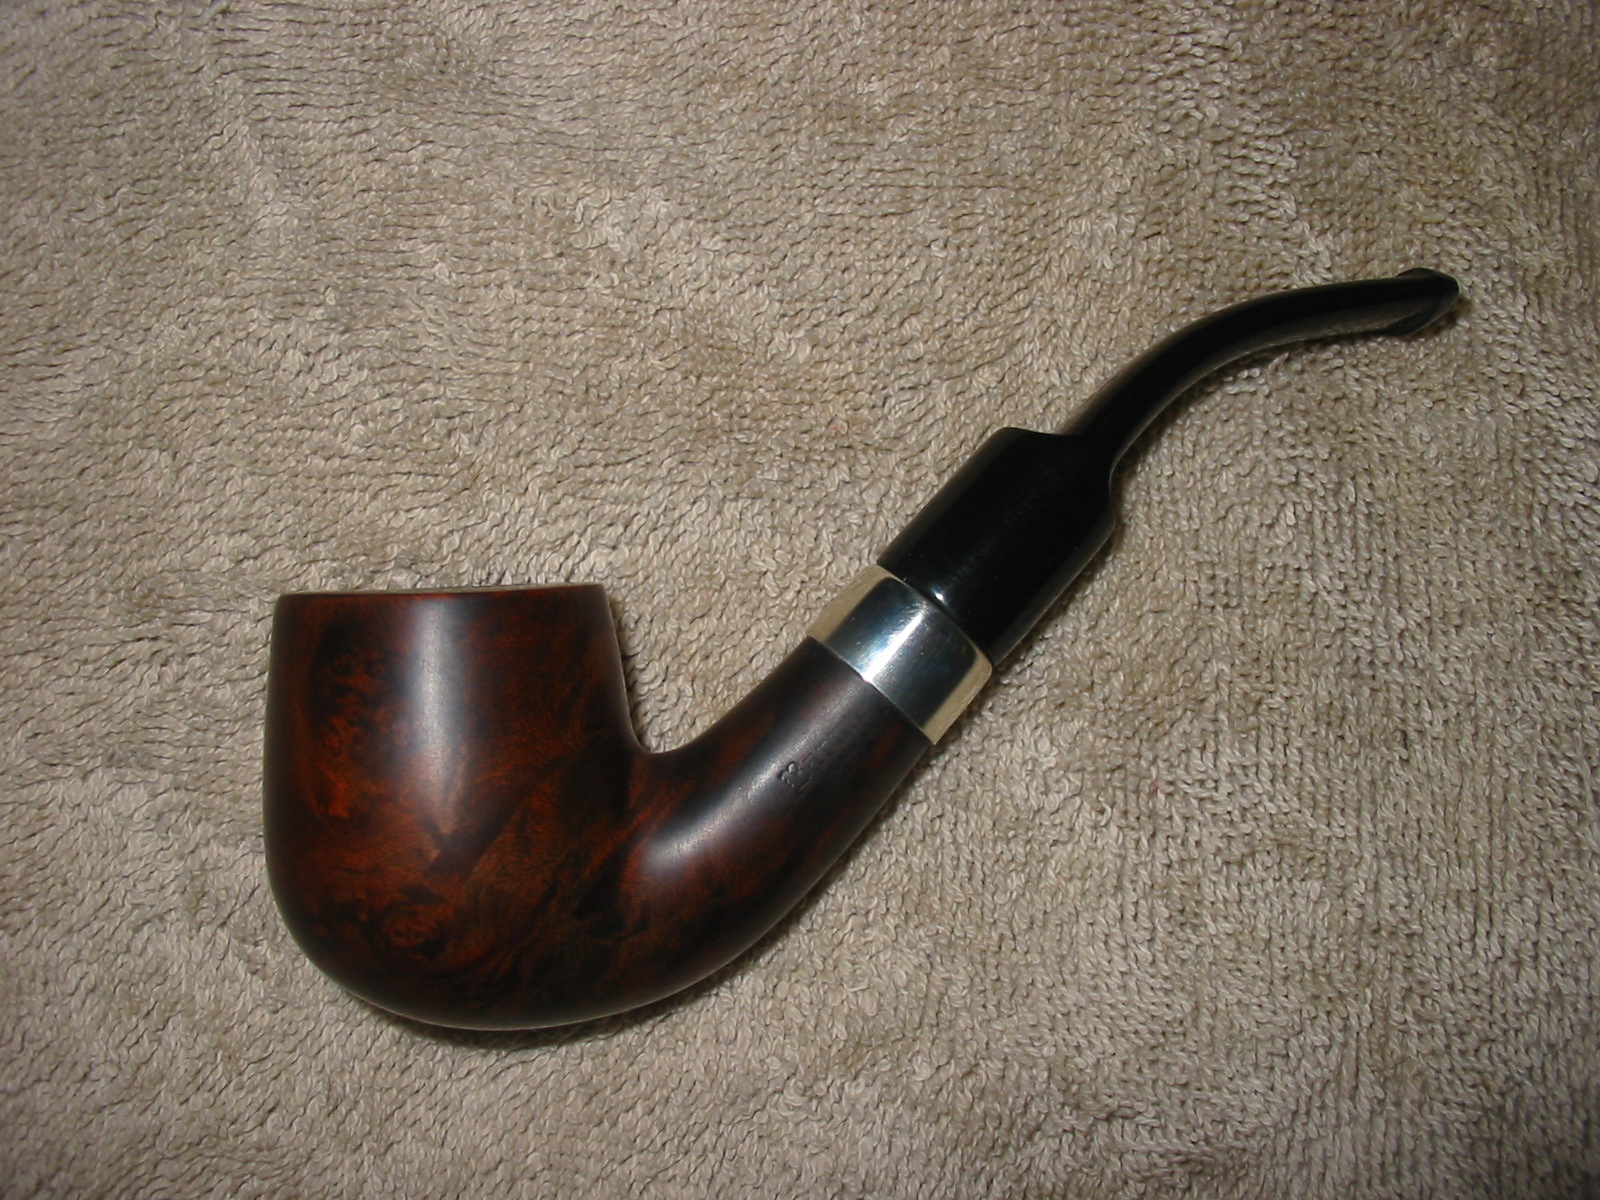
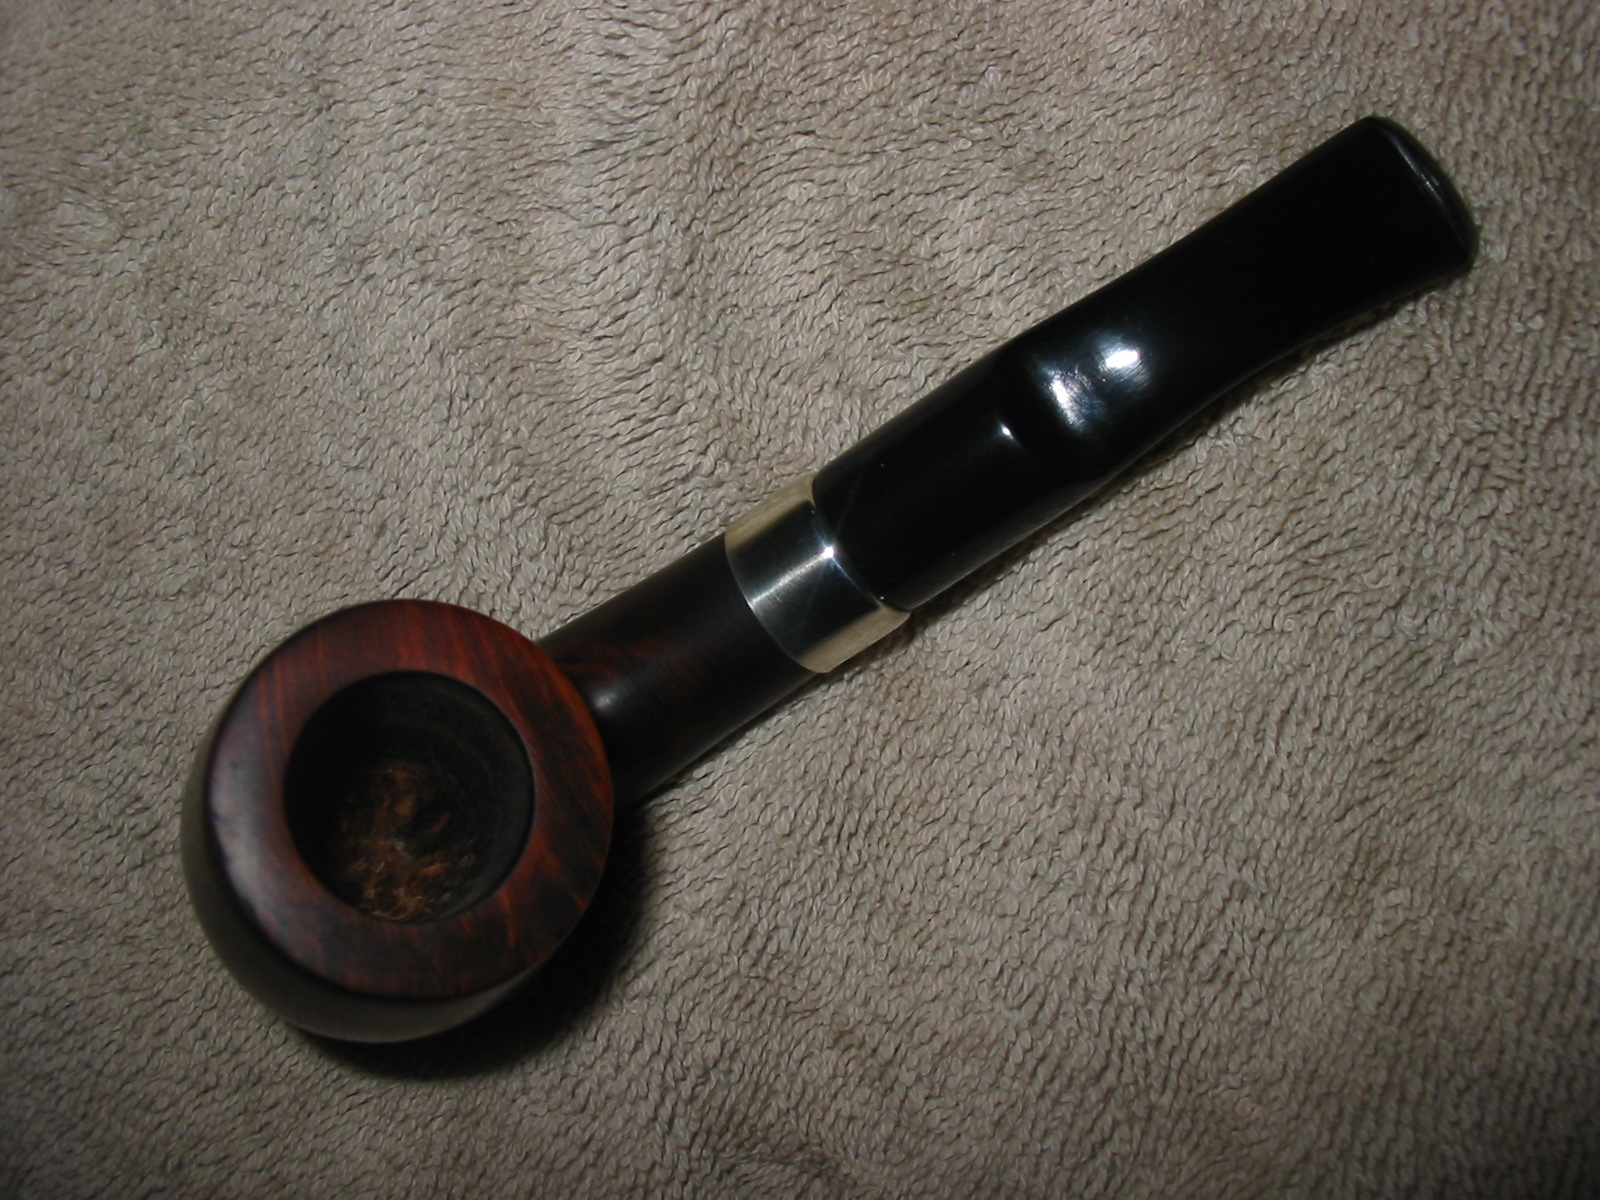
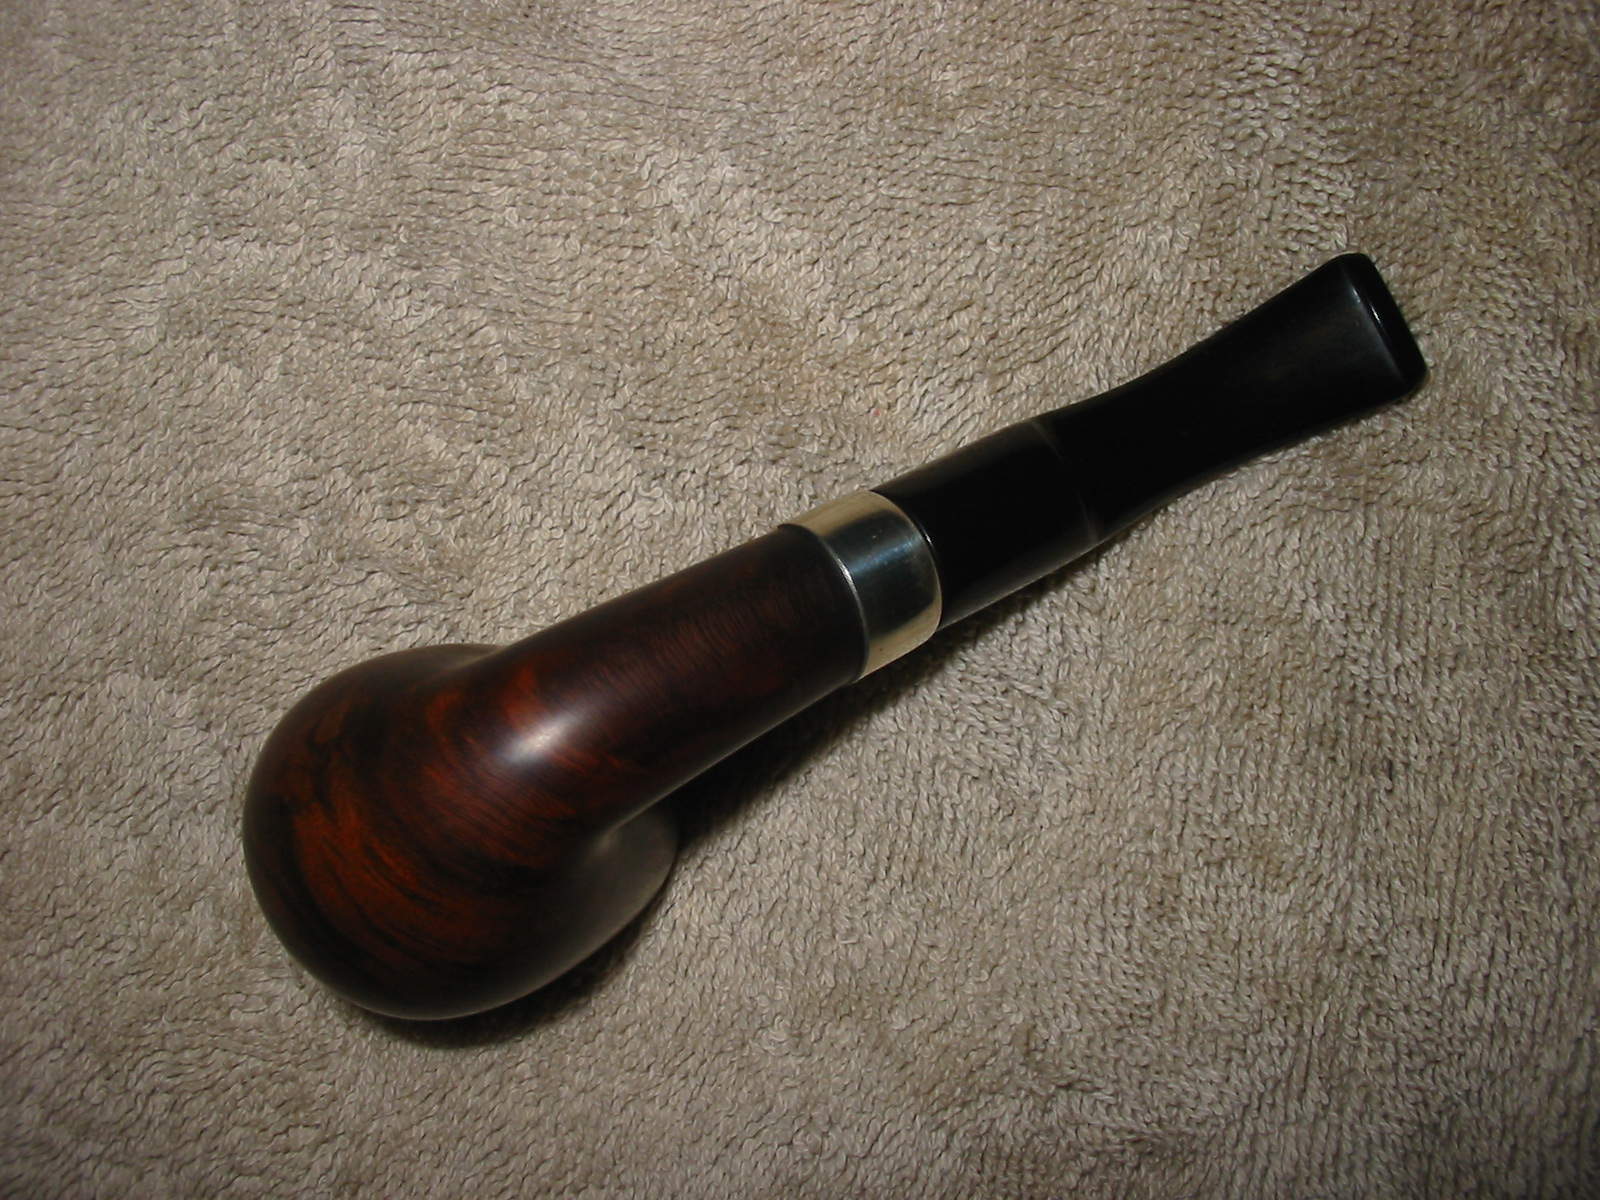
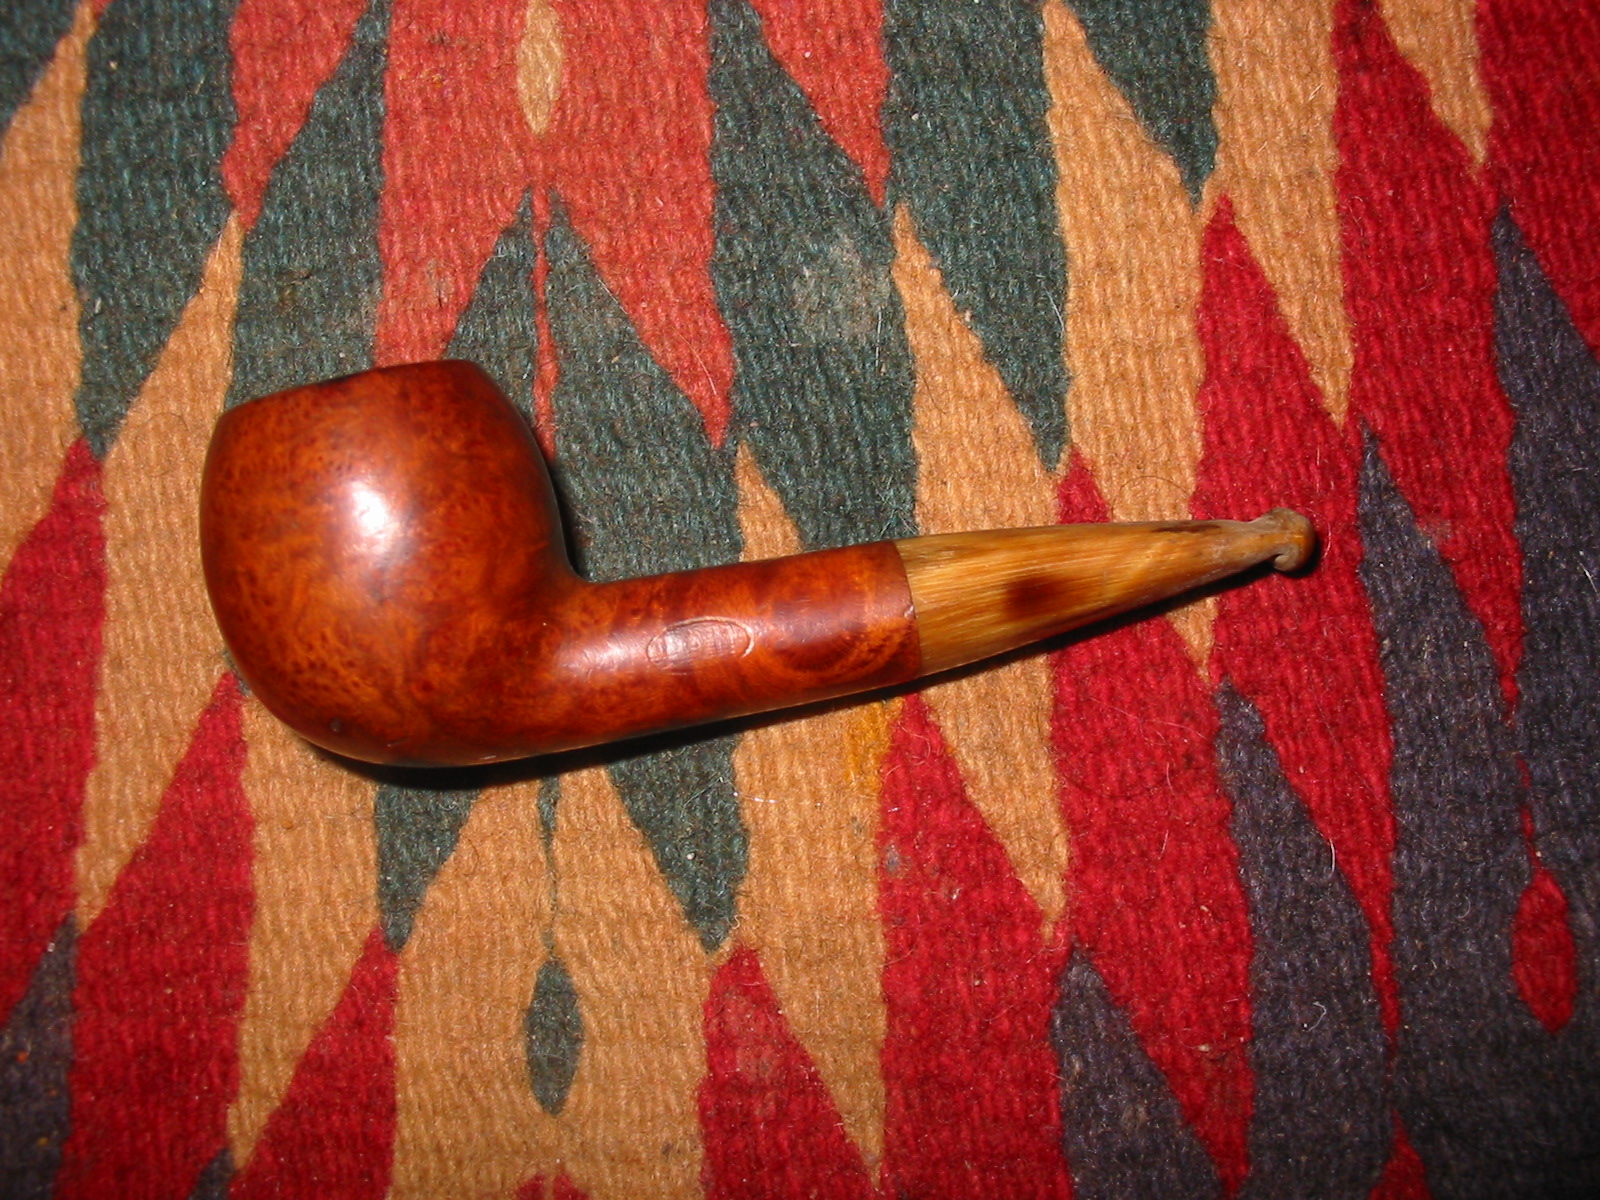
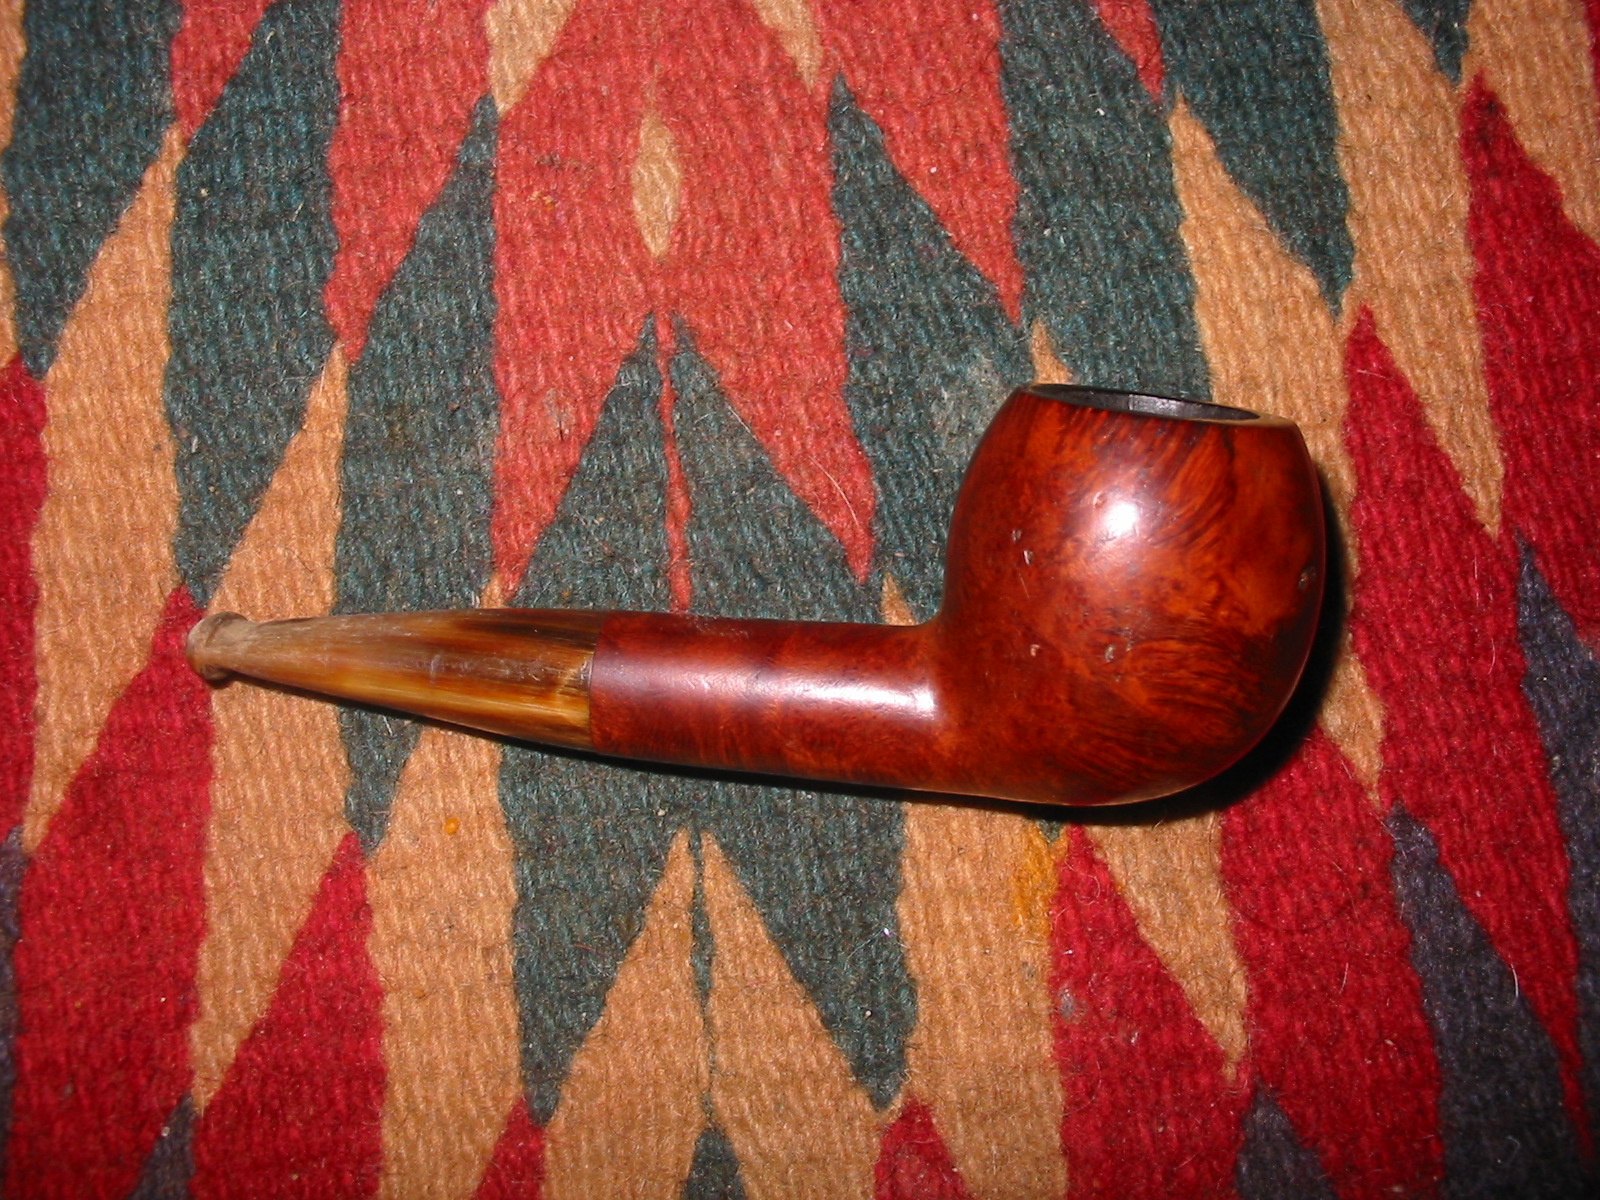
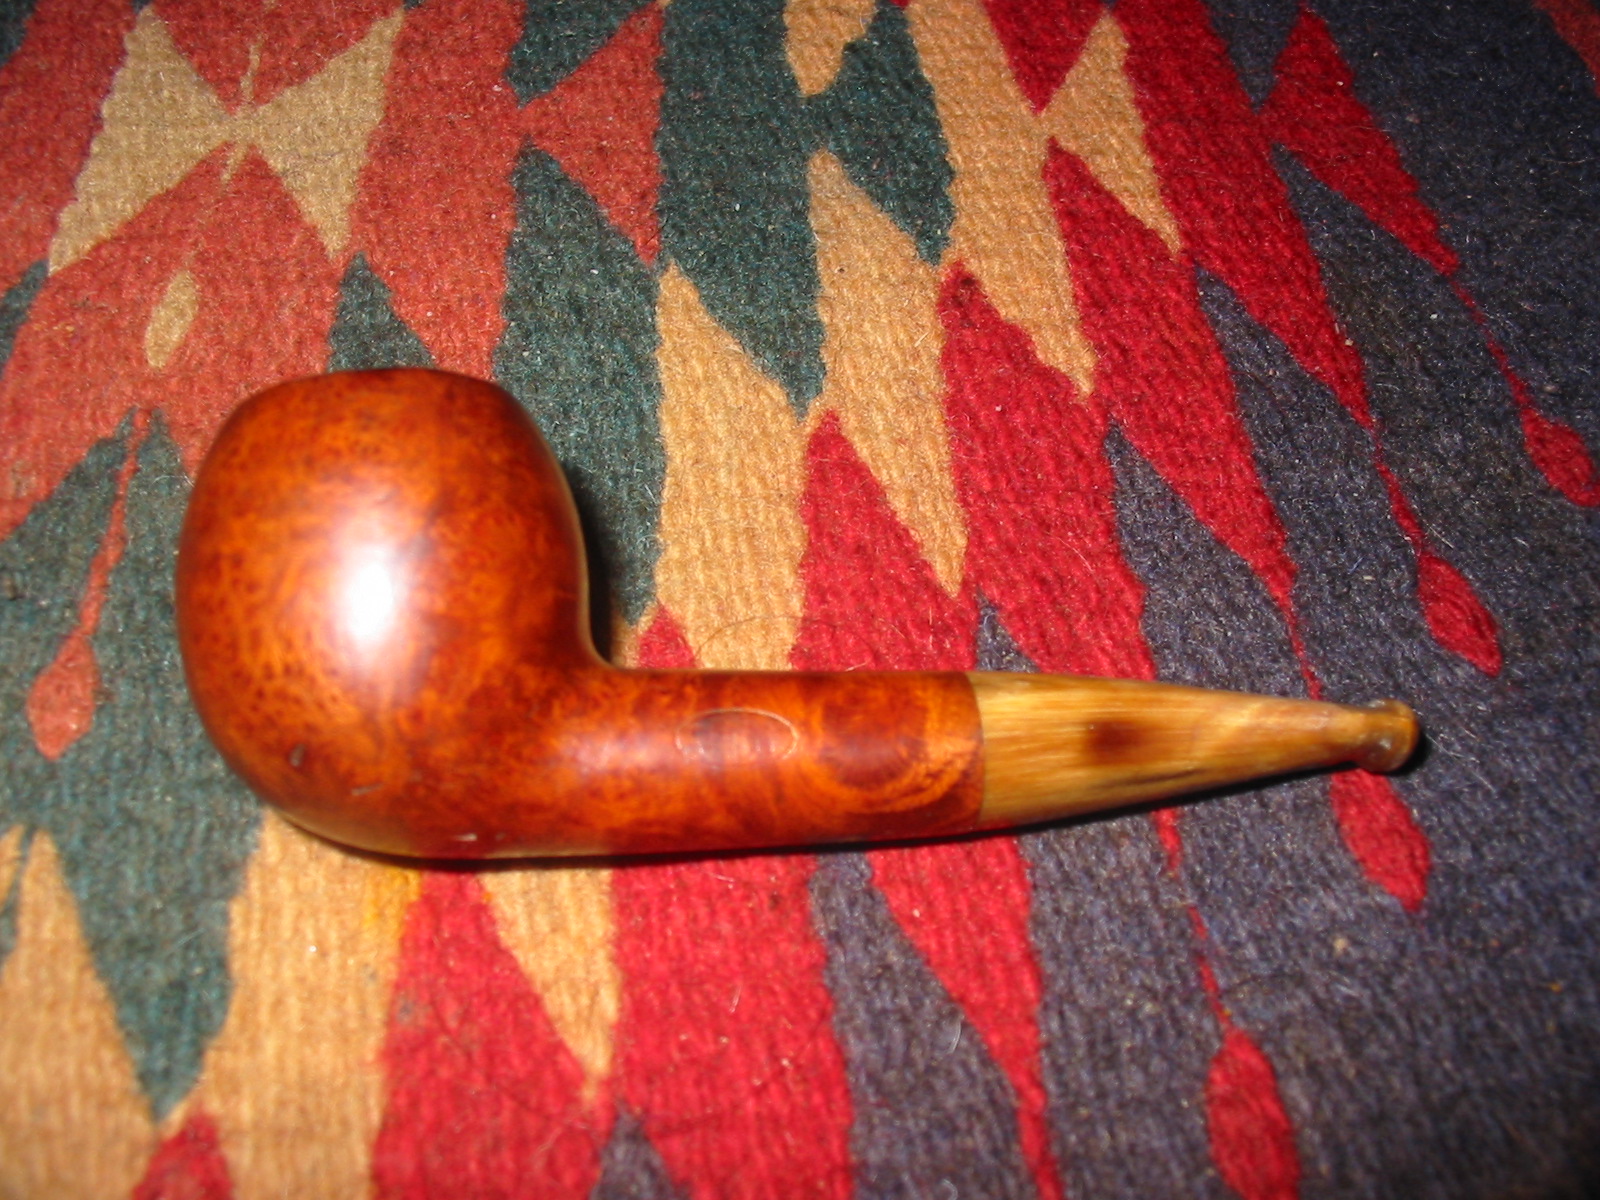
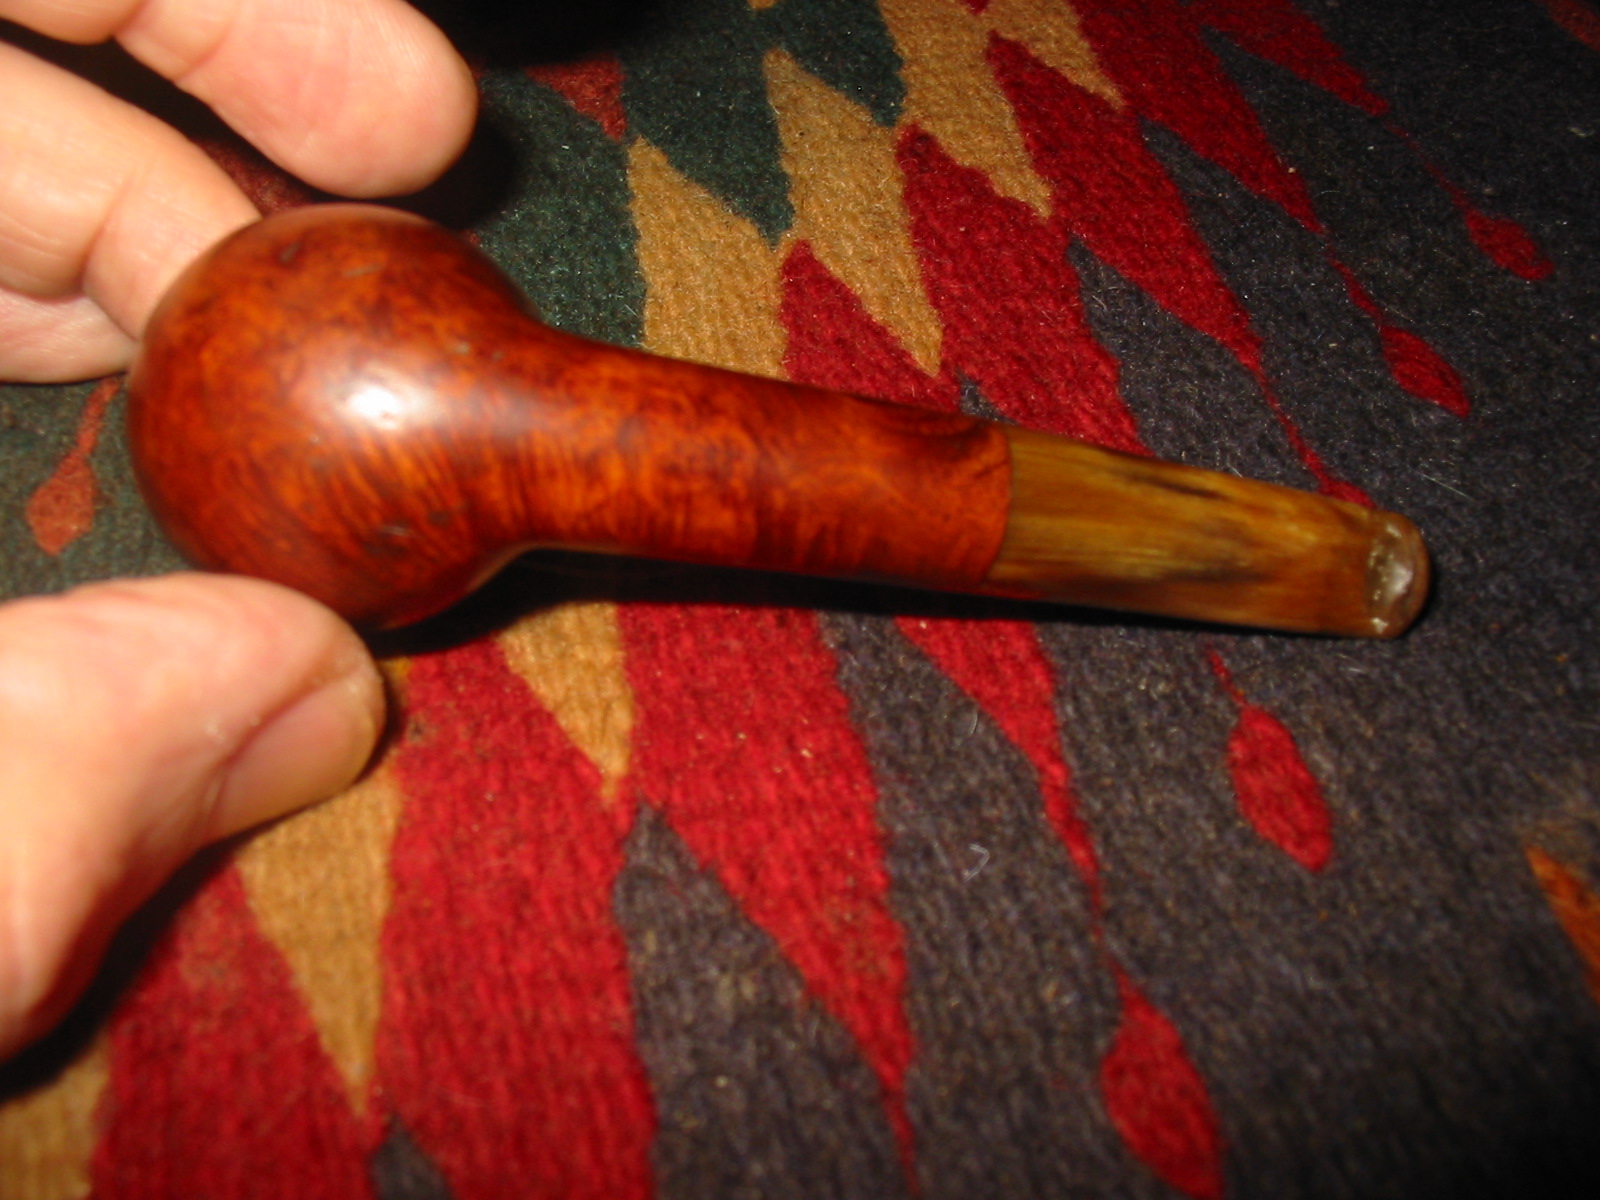
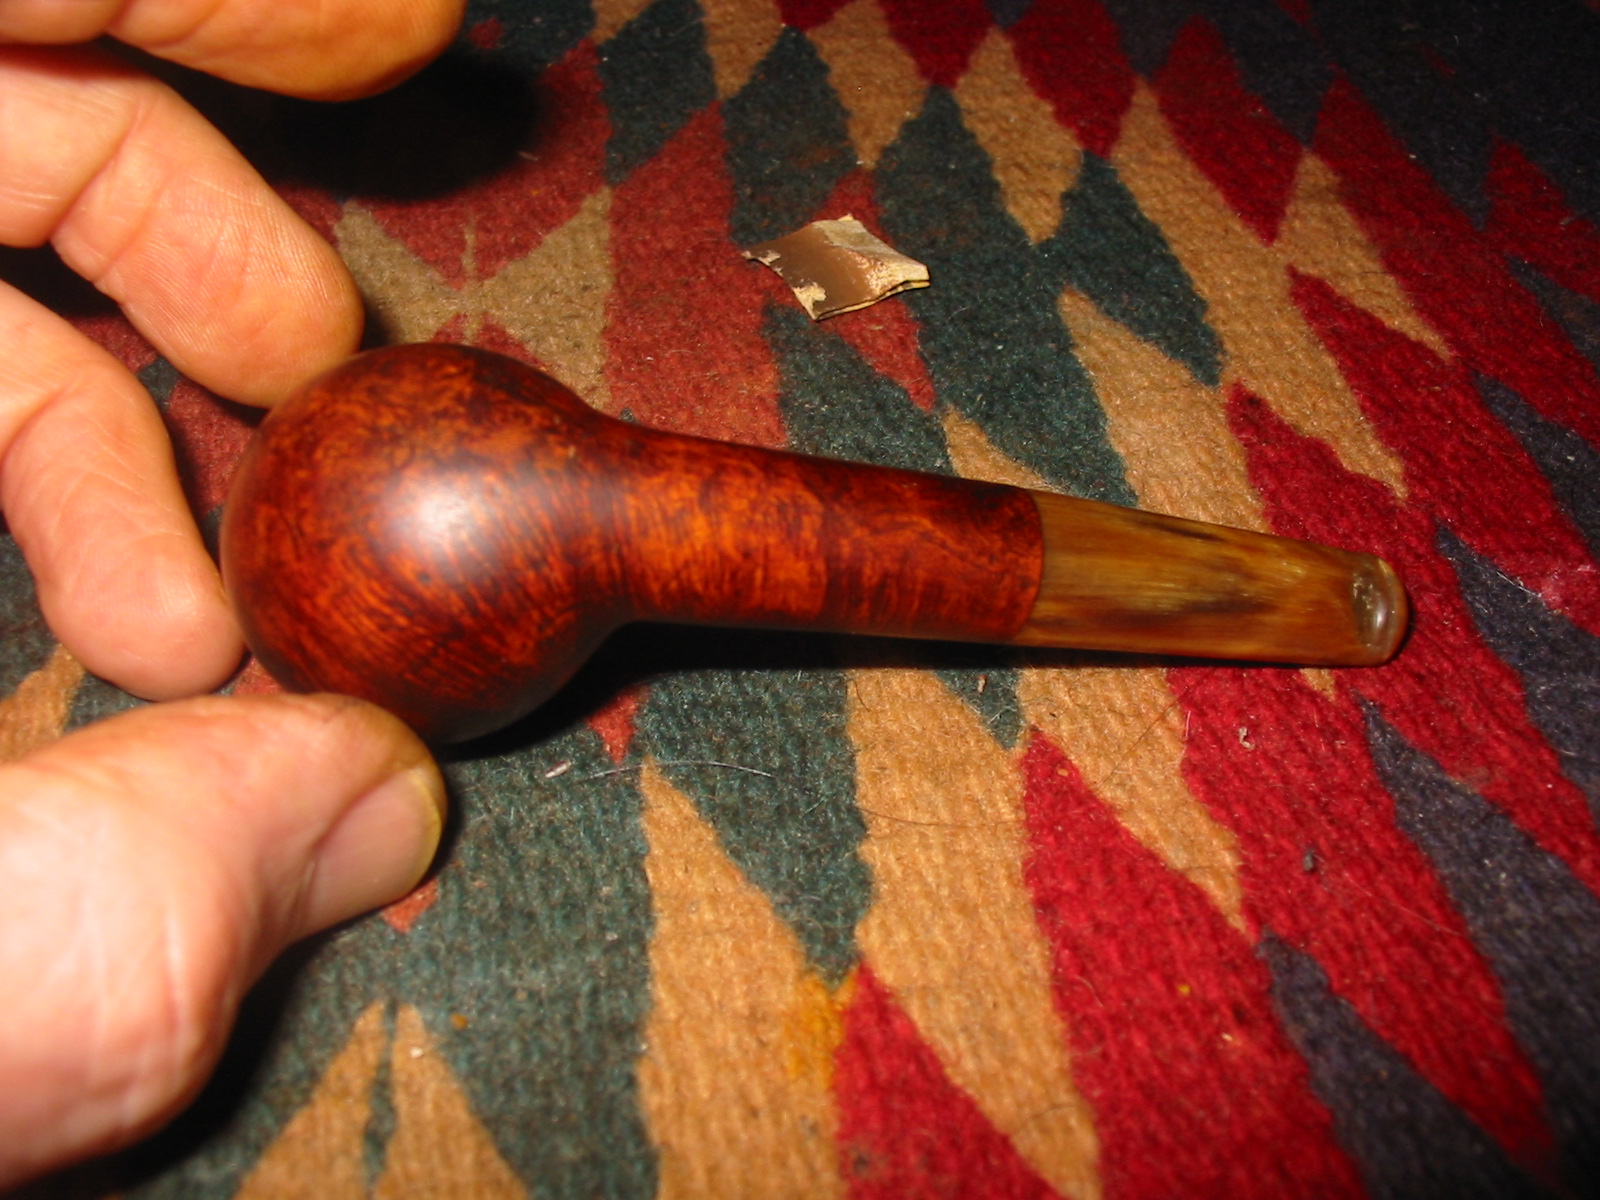
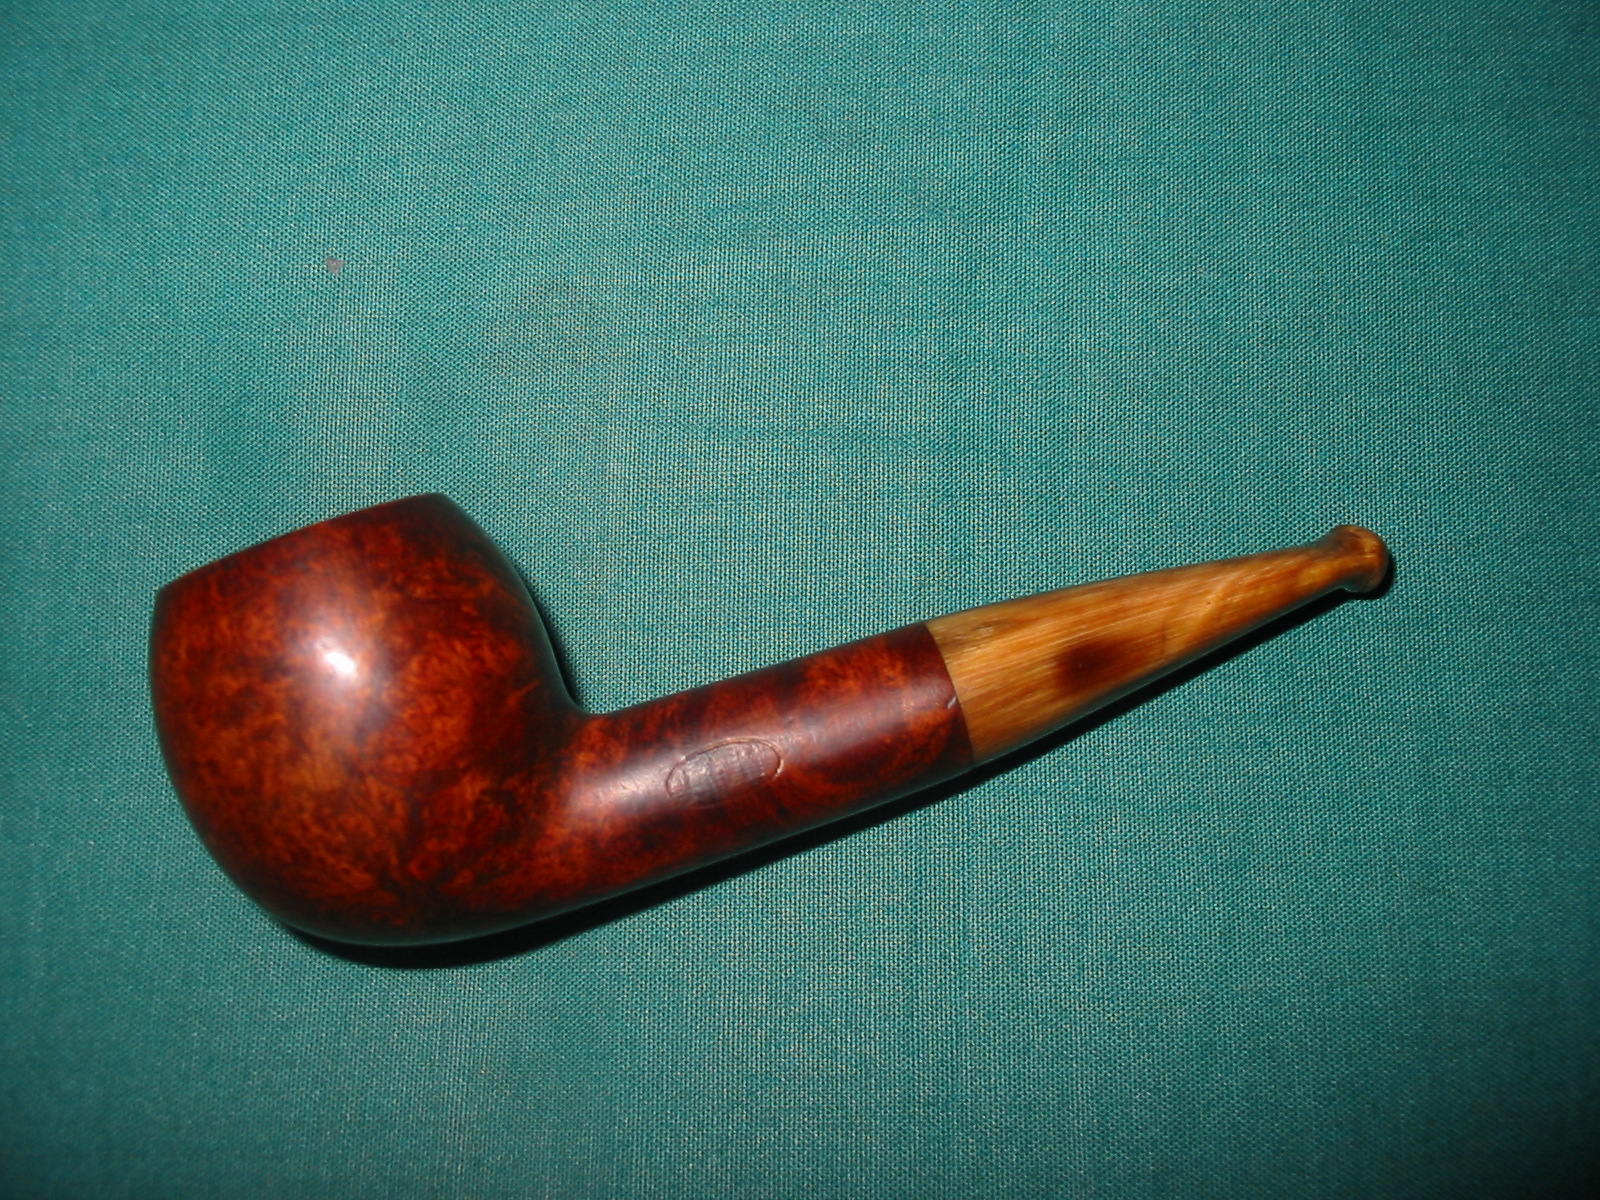
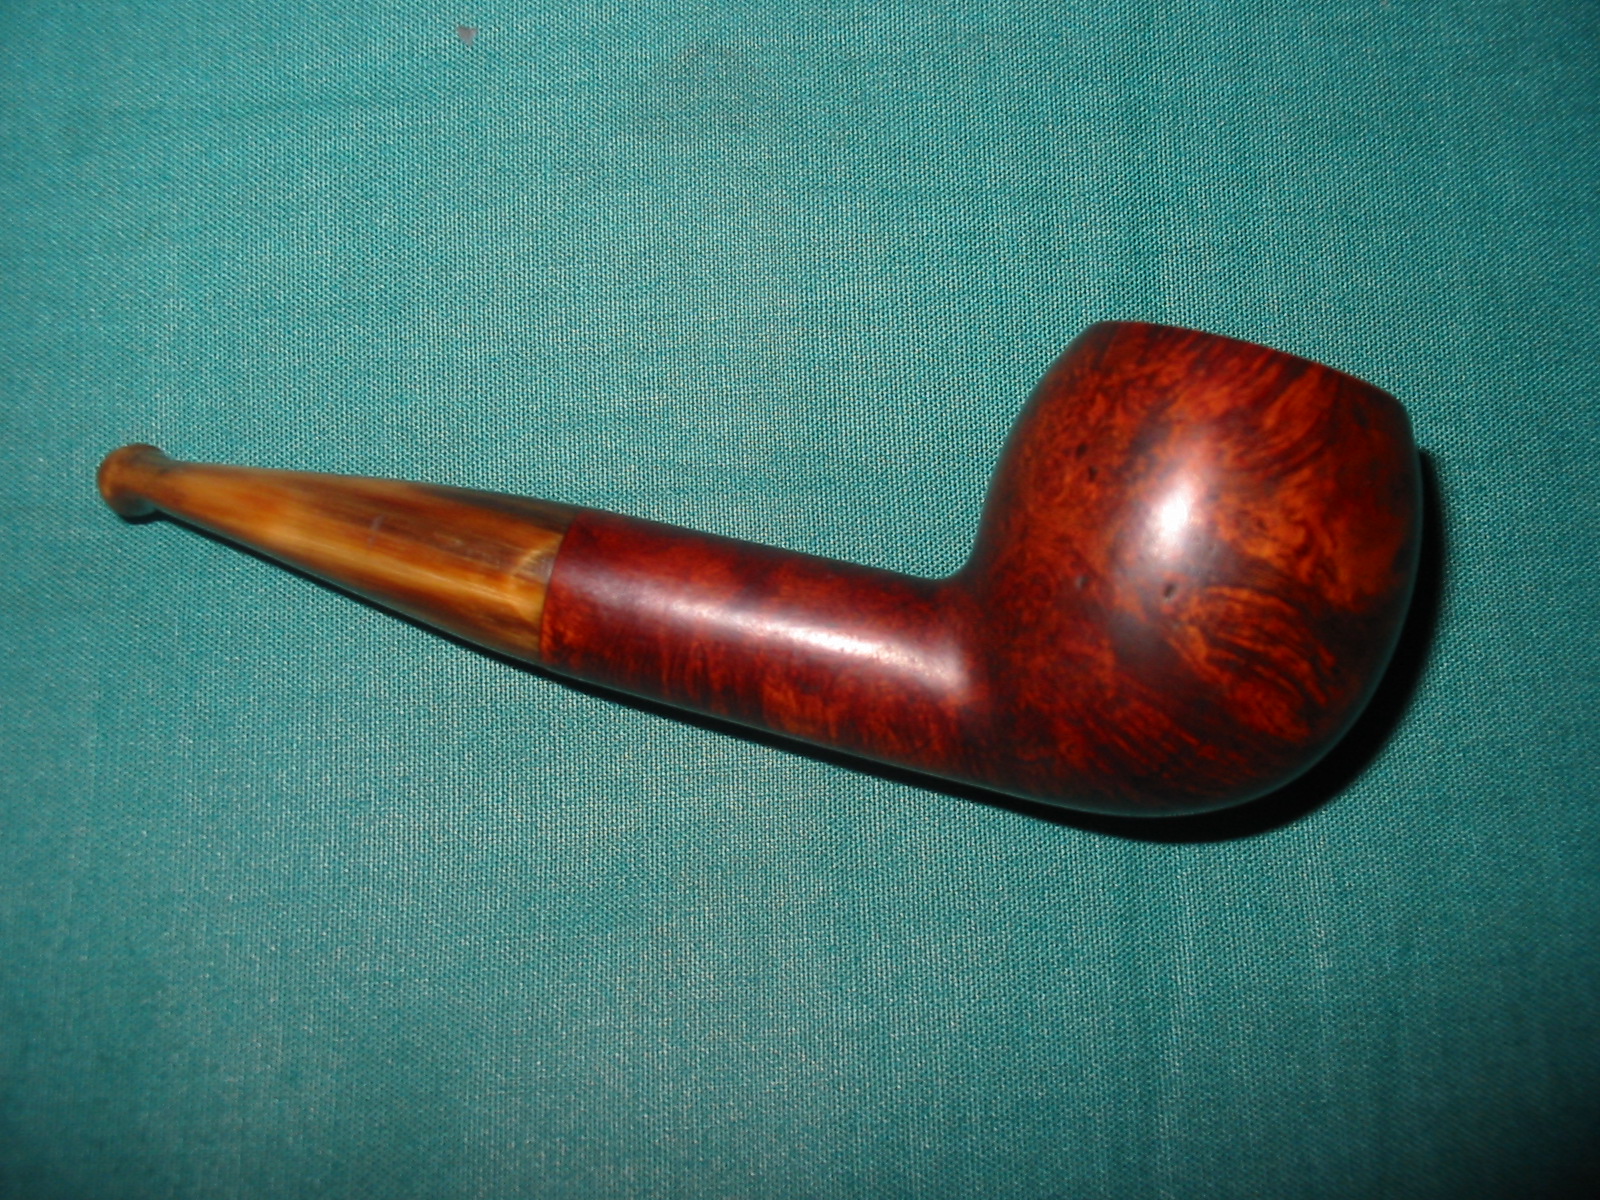
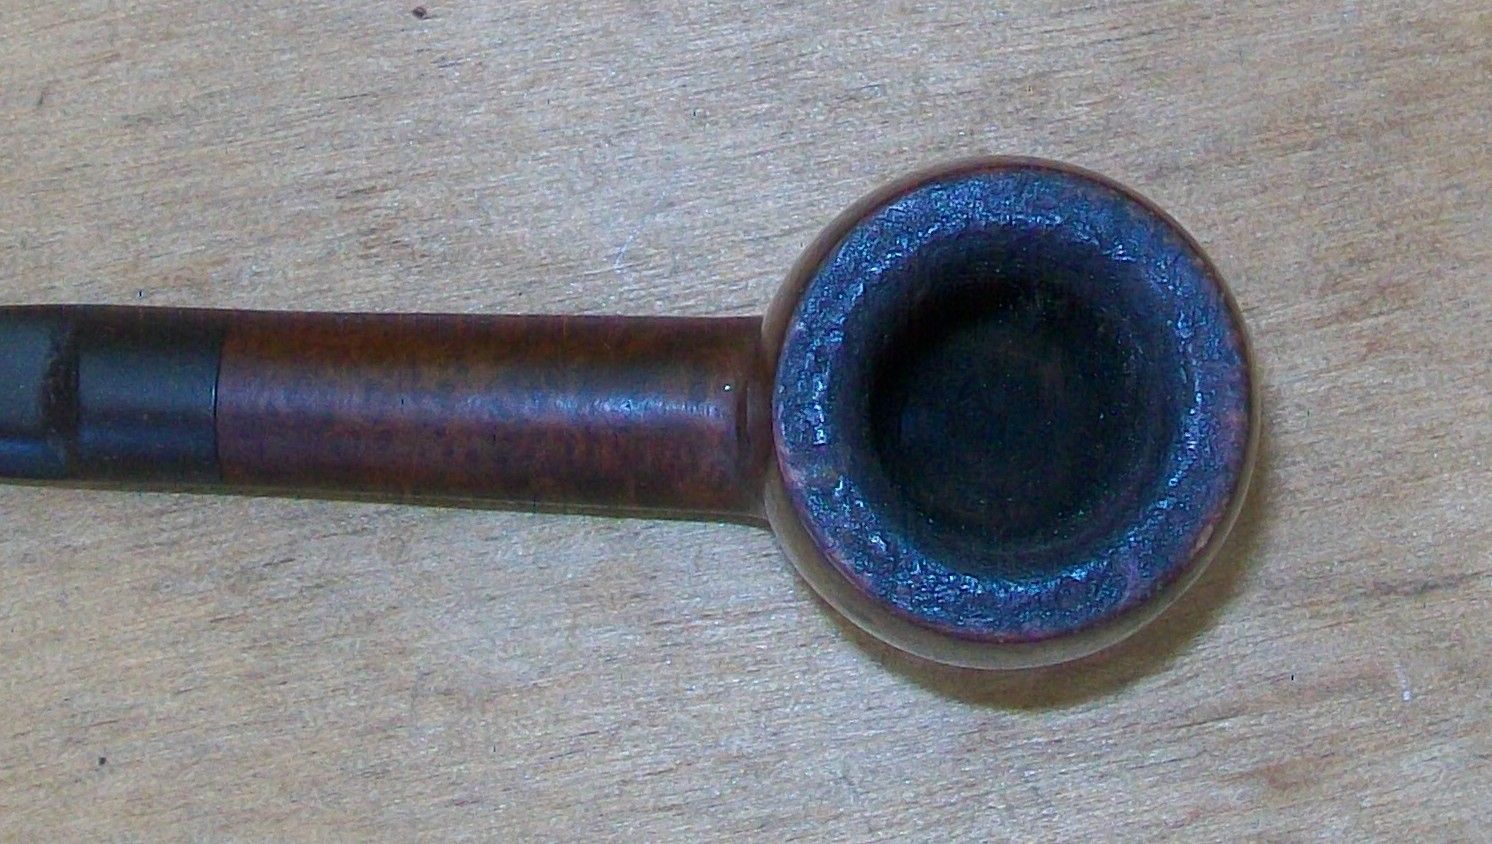
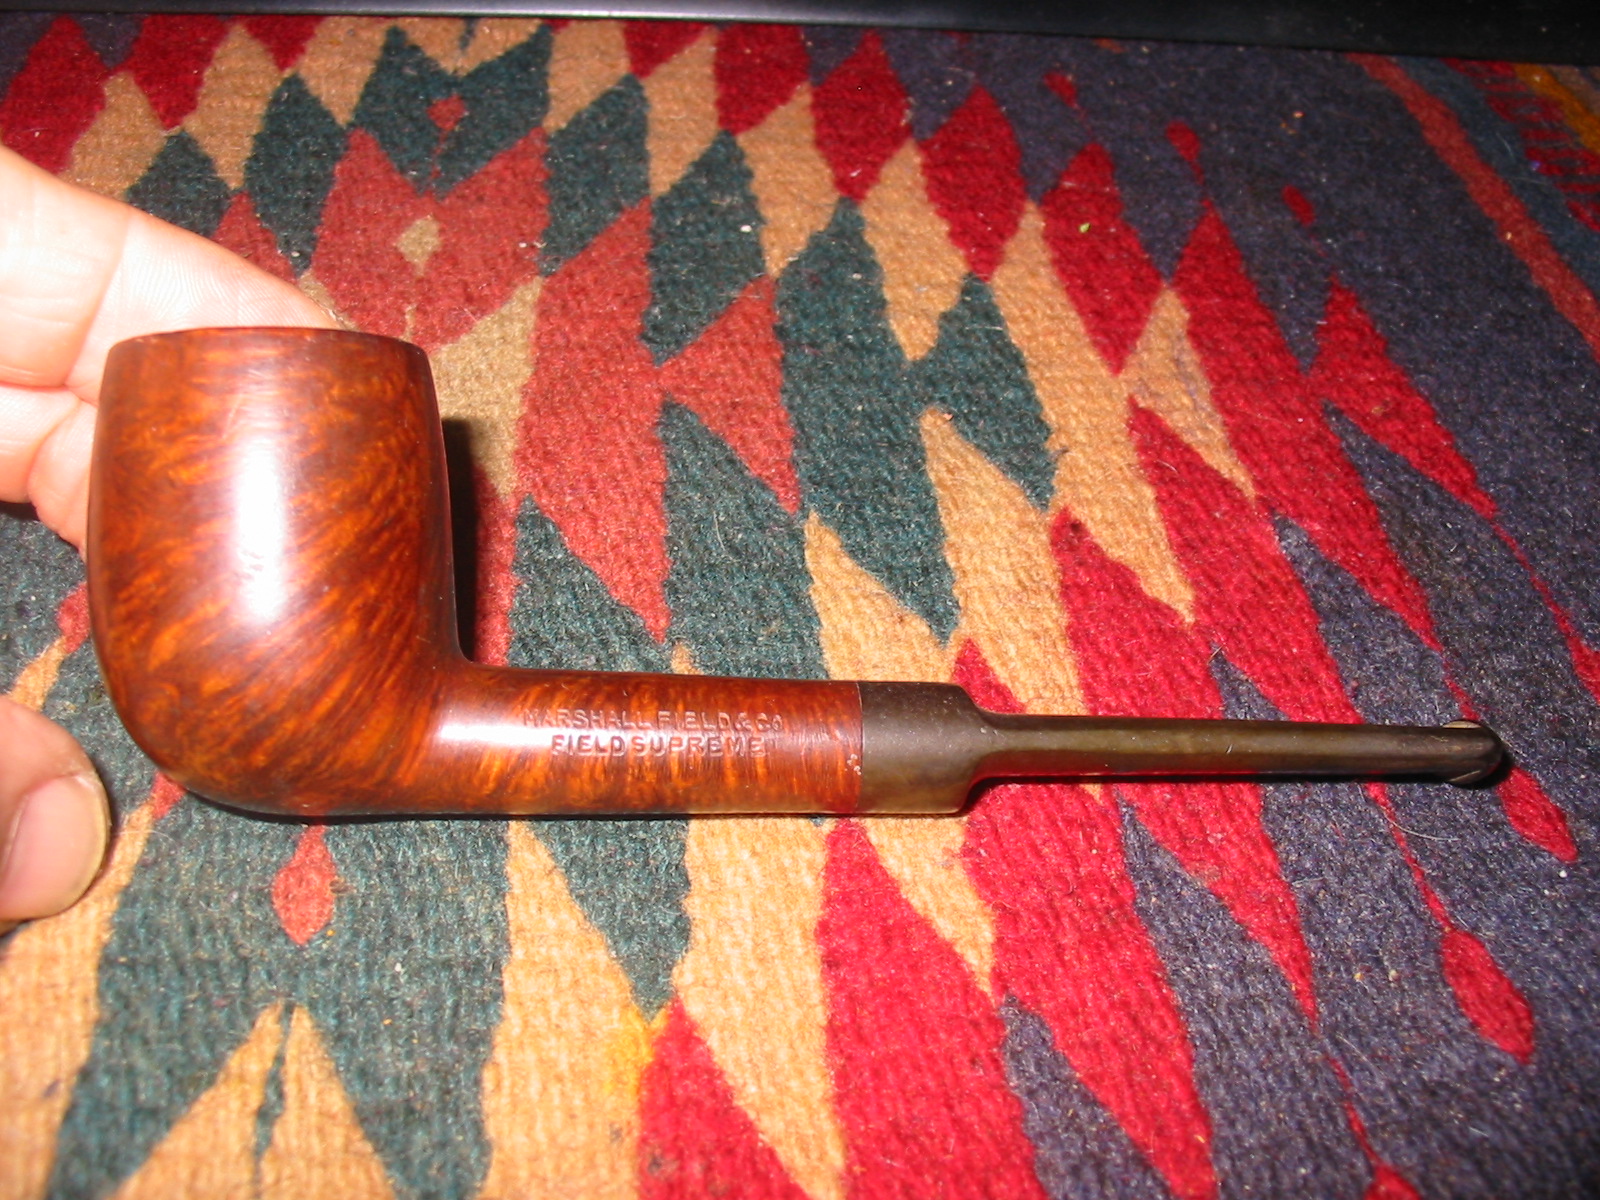
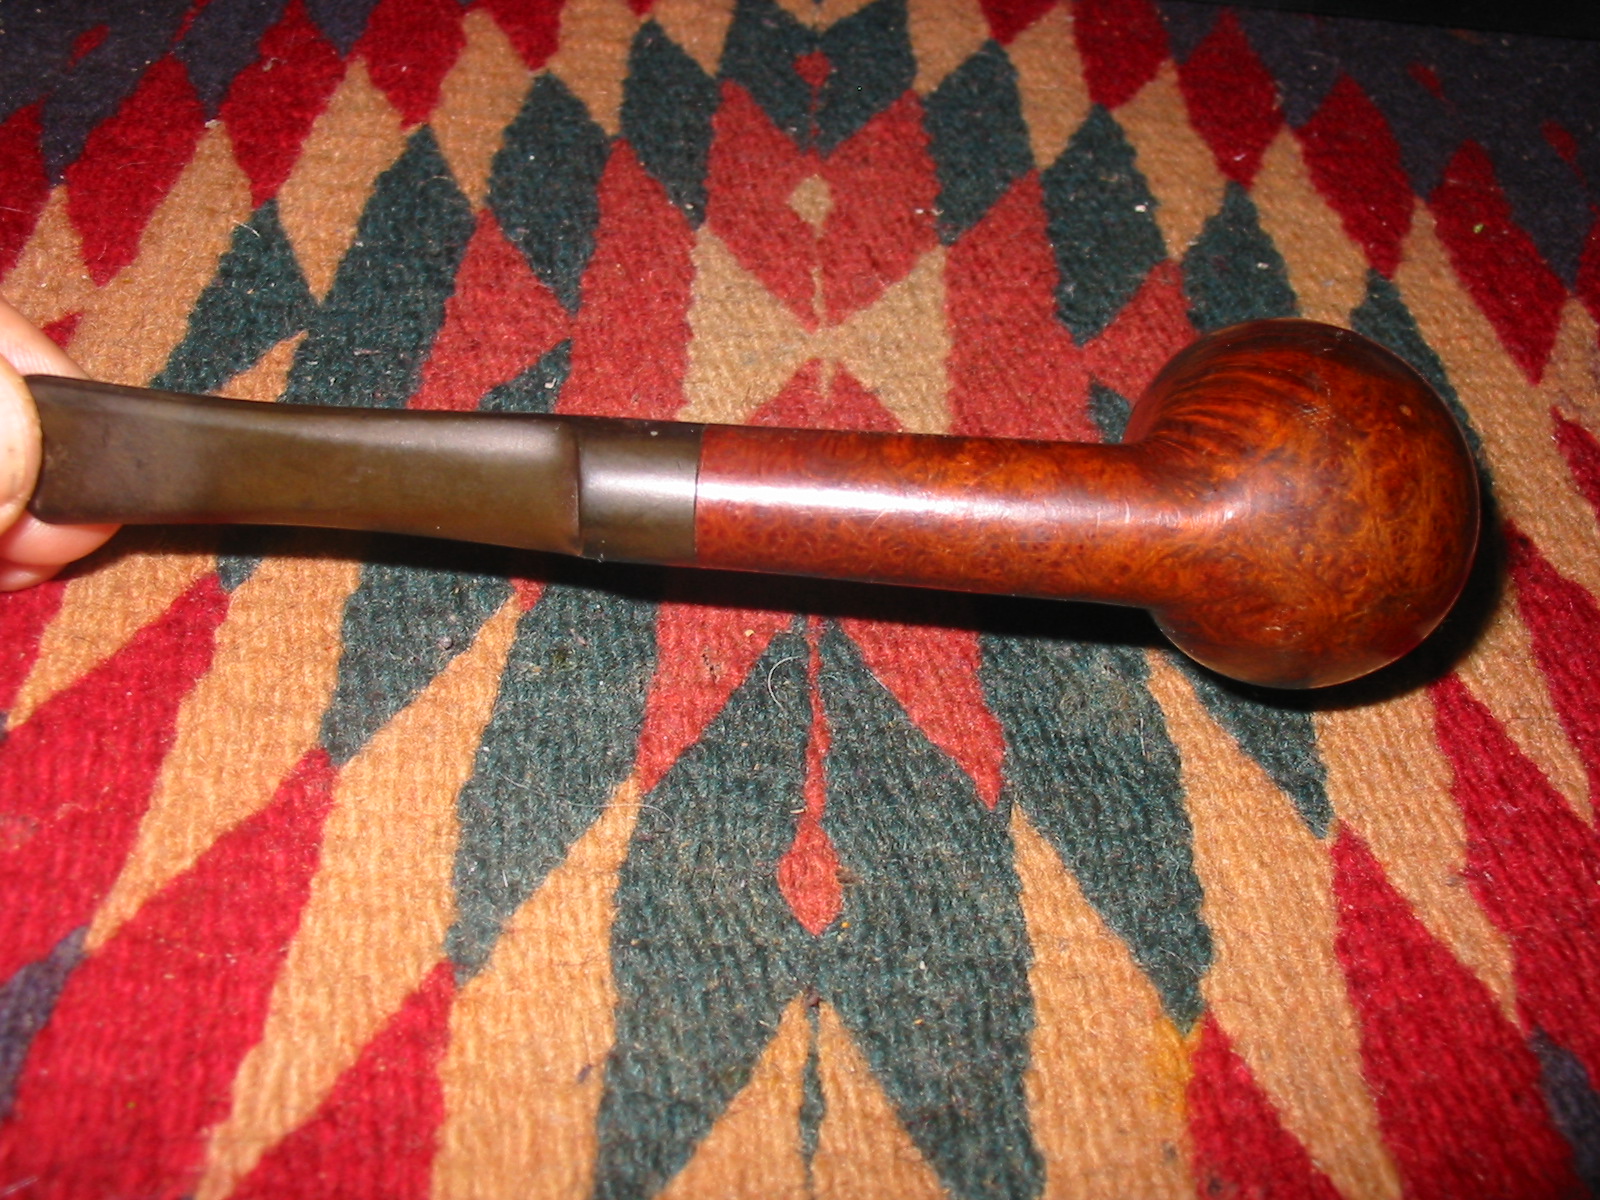
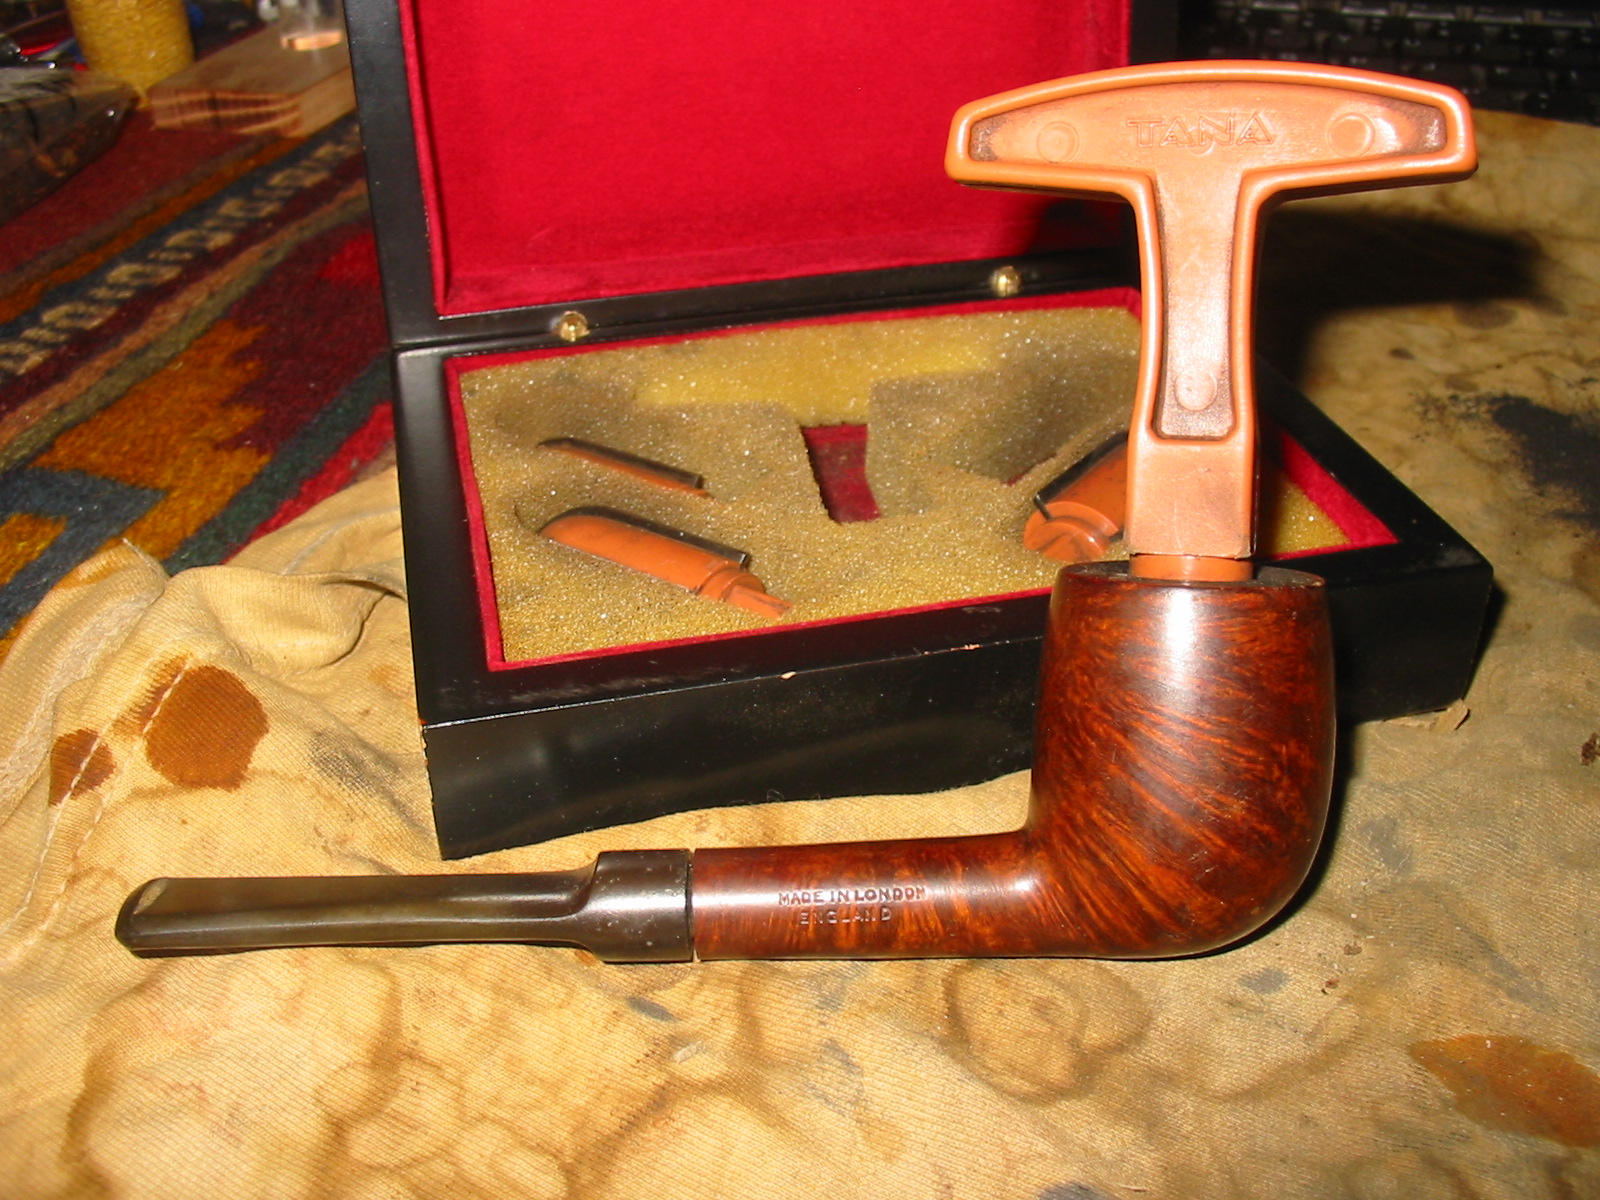
The grain on this one really caught my attention before I even noticed the name on the pipe. It has some amazing grain on the bowl and shank. The sides of the bowl and shank some stunning cross grain that has been highlighted with a contrast stain to make it stand out. The front and back has some quality birdseye grain. The carver did a great job laying out the shape of the pipe to highlight the grain, though I suppose it may merely be a fluke as blocks were turned and cut in the factory. After admiring the grain I turned to look at the stamping on the pipe. It looked like and English made pipe and my mind thought immediately of Comoys both by the shape and the contrast stain on it.
MF1

MF2

MF5
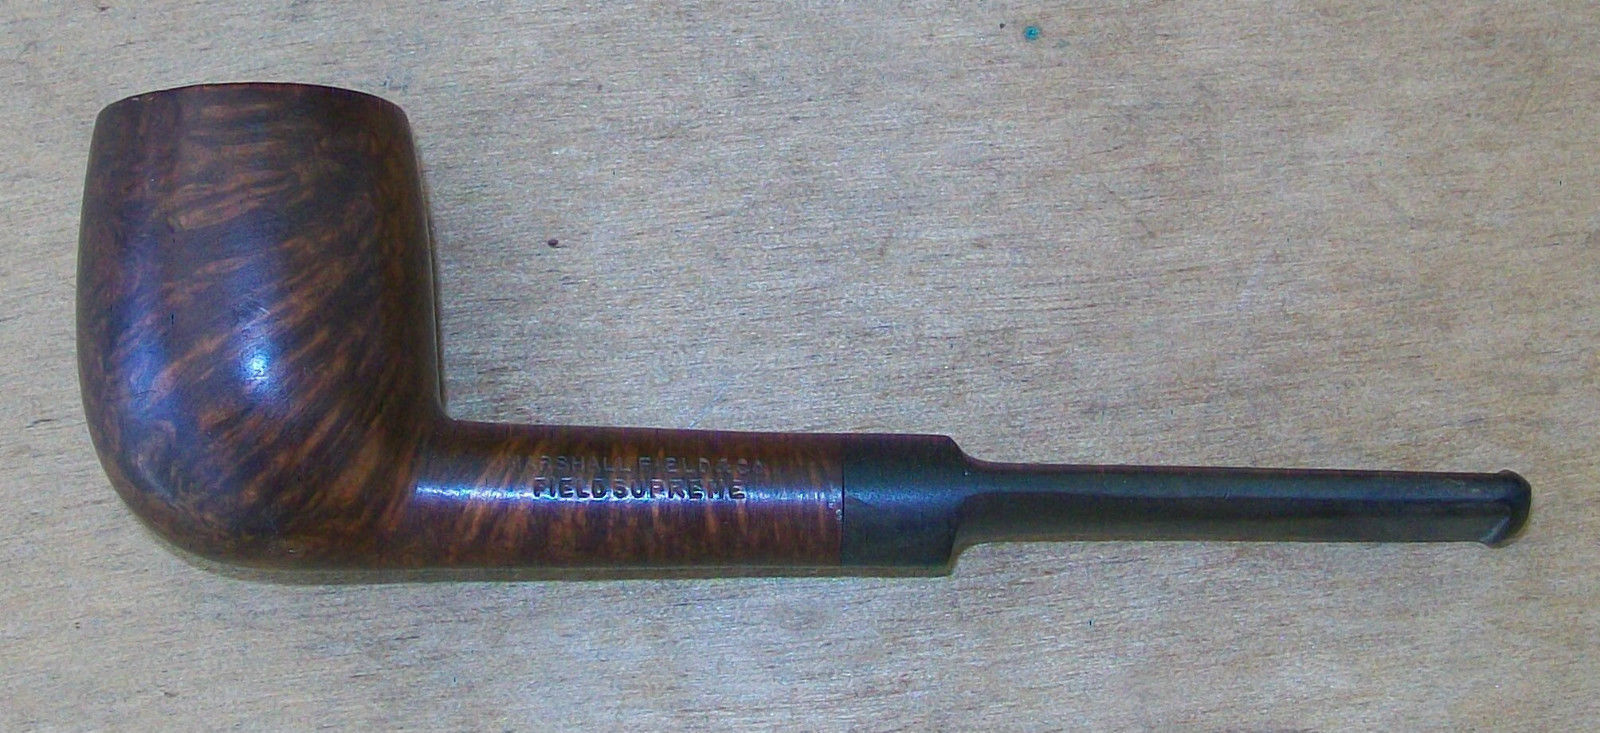
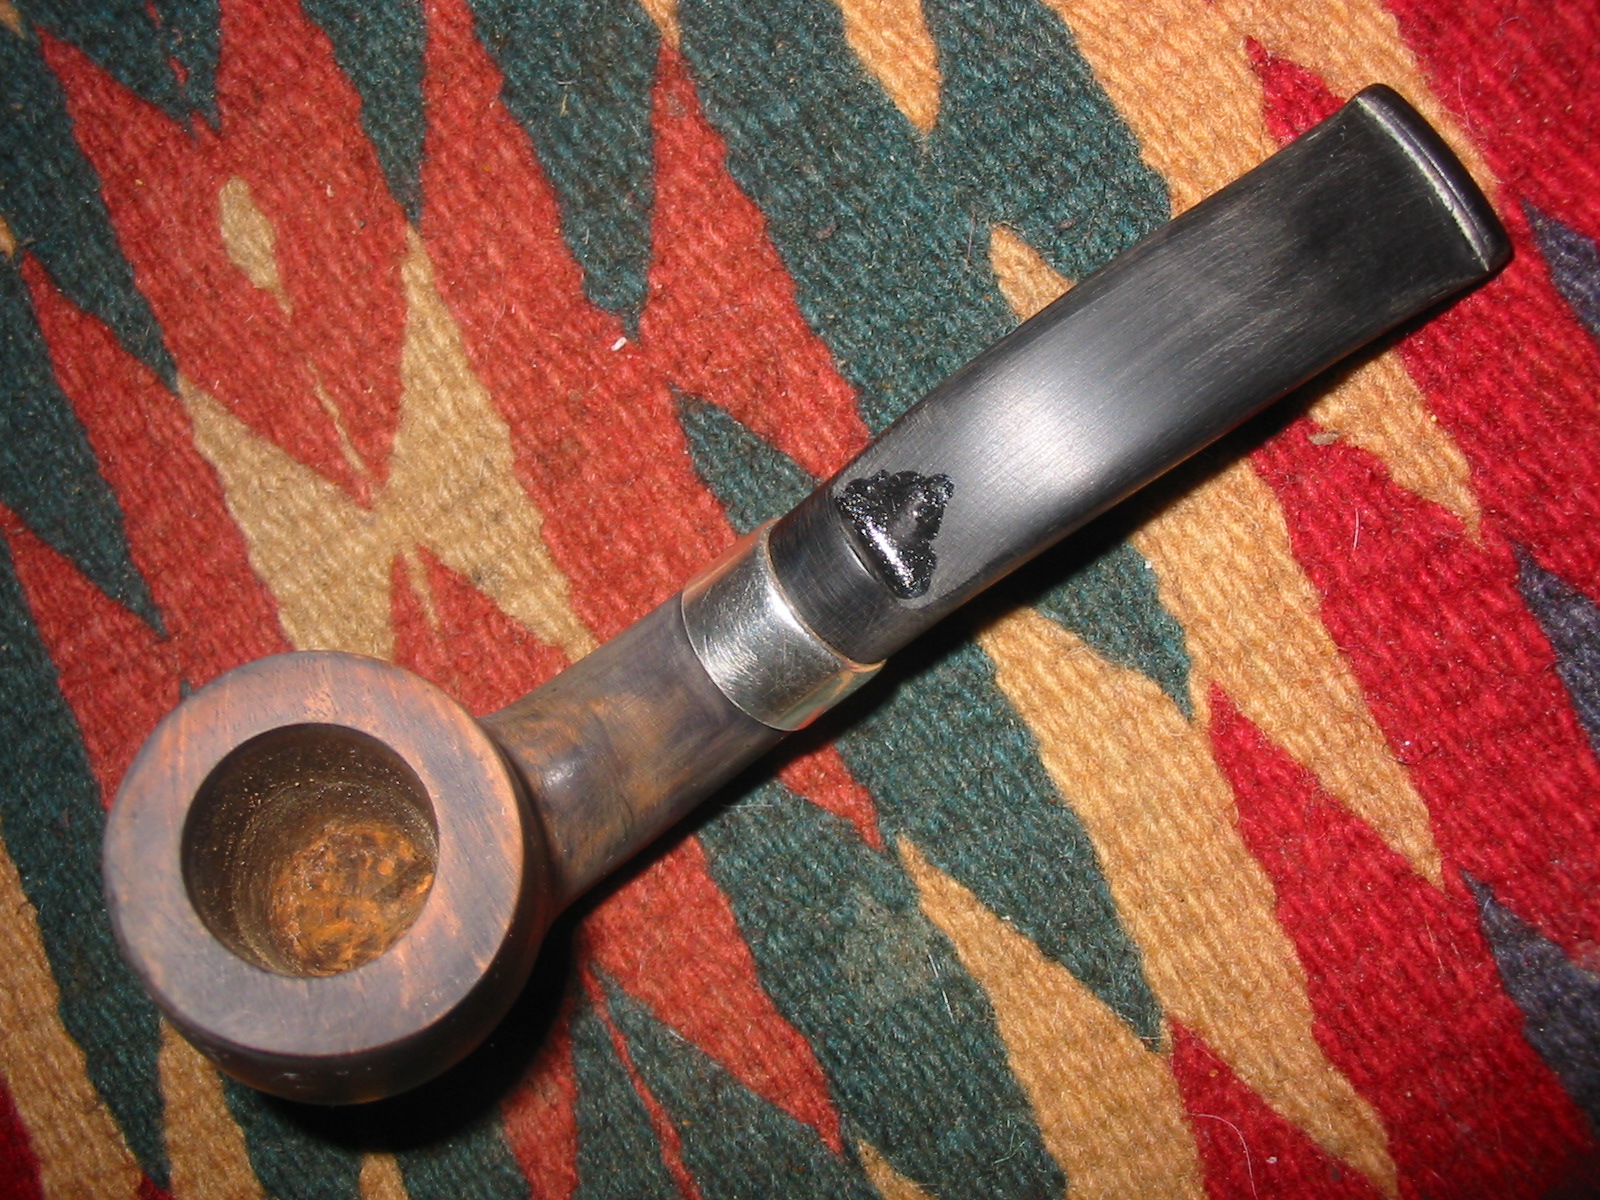
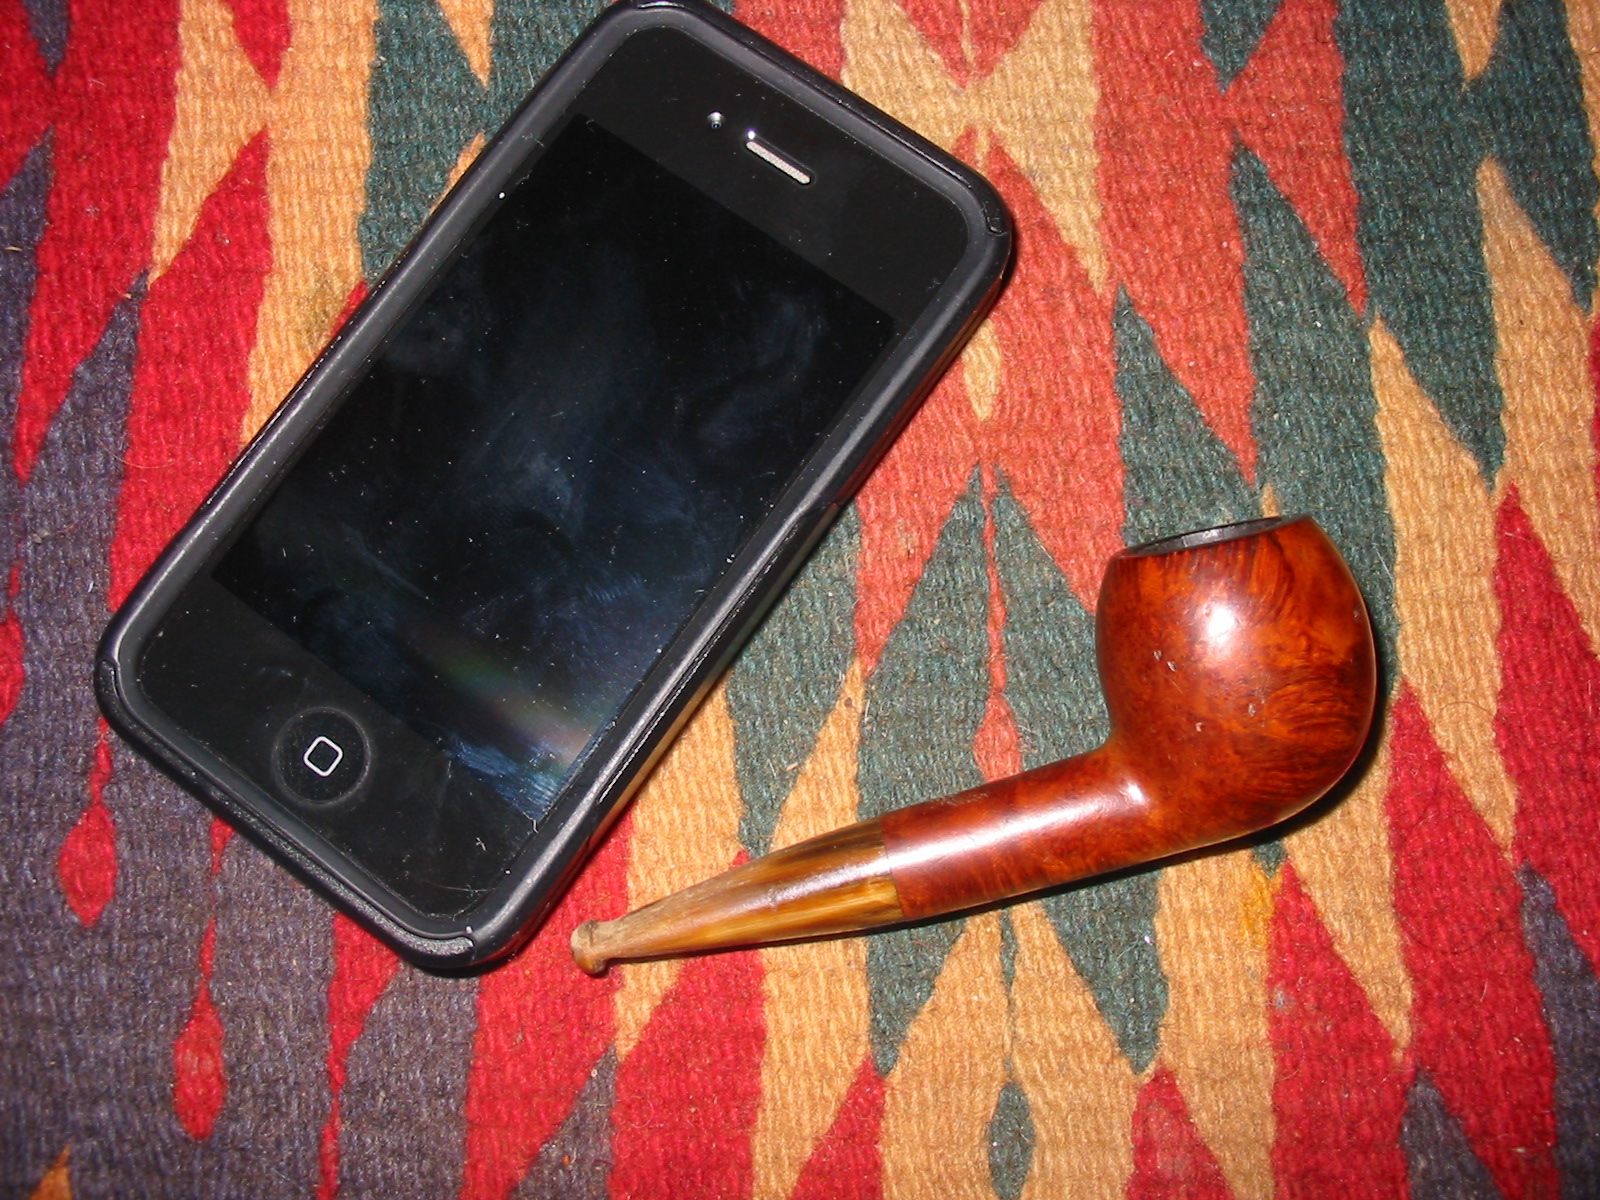
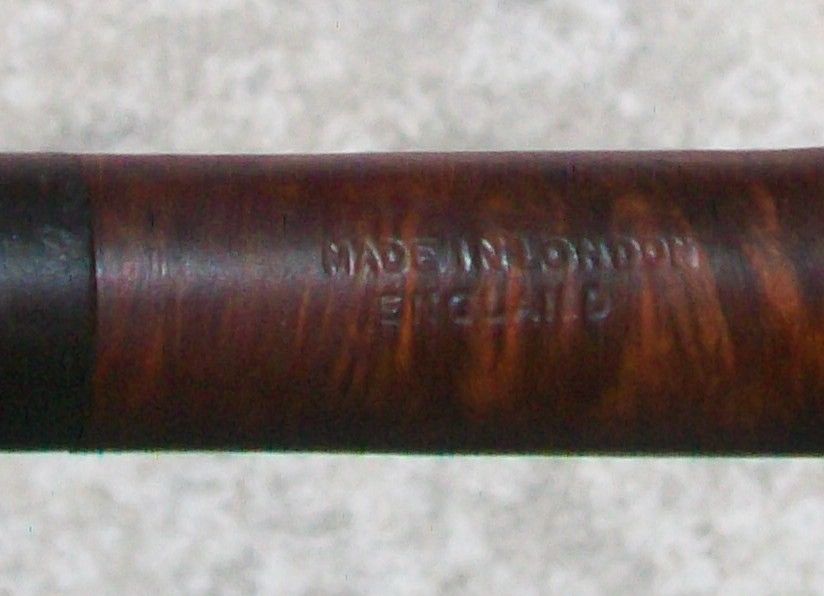
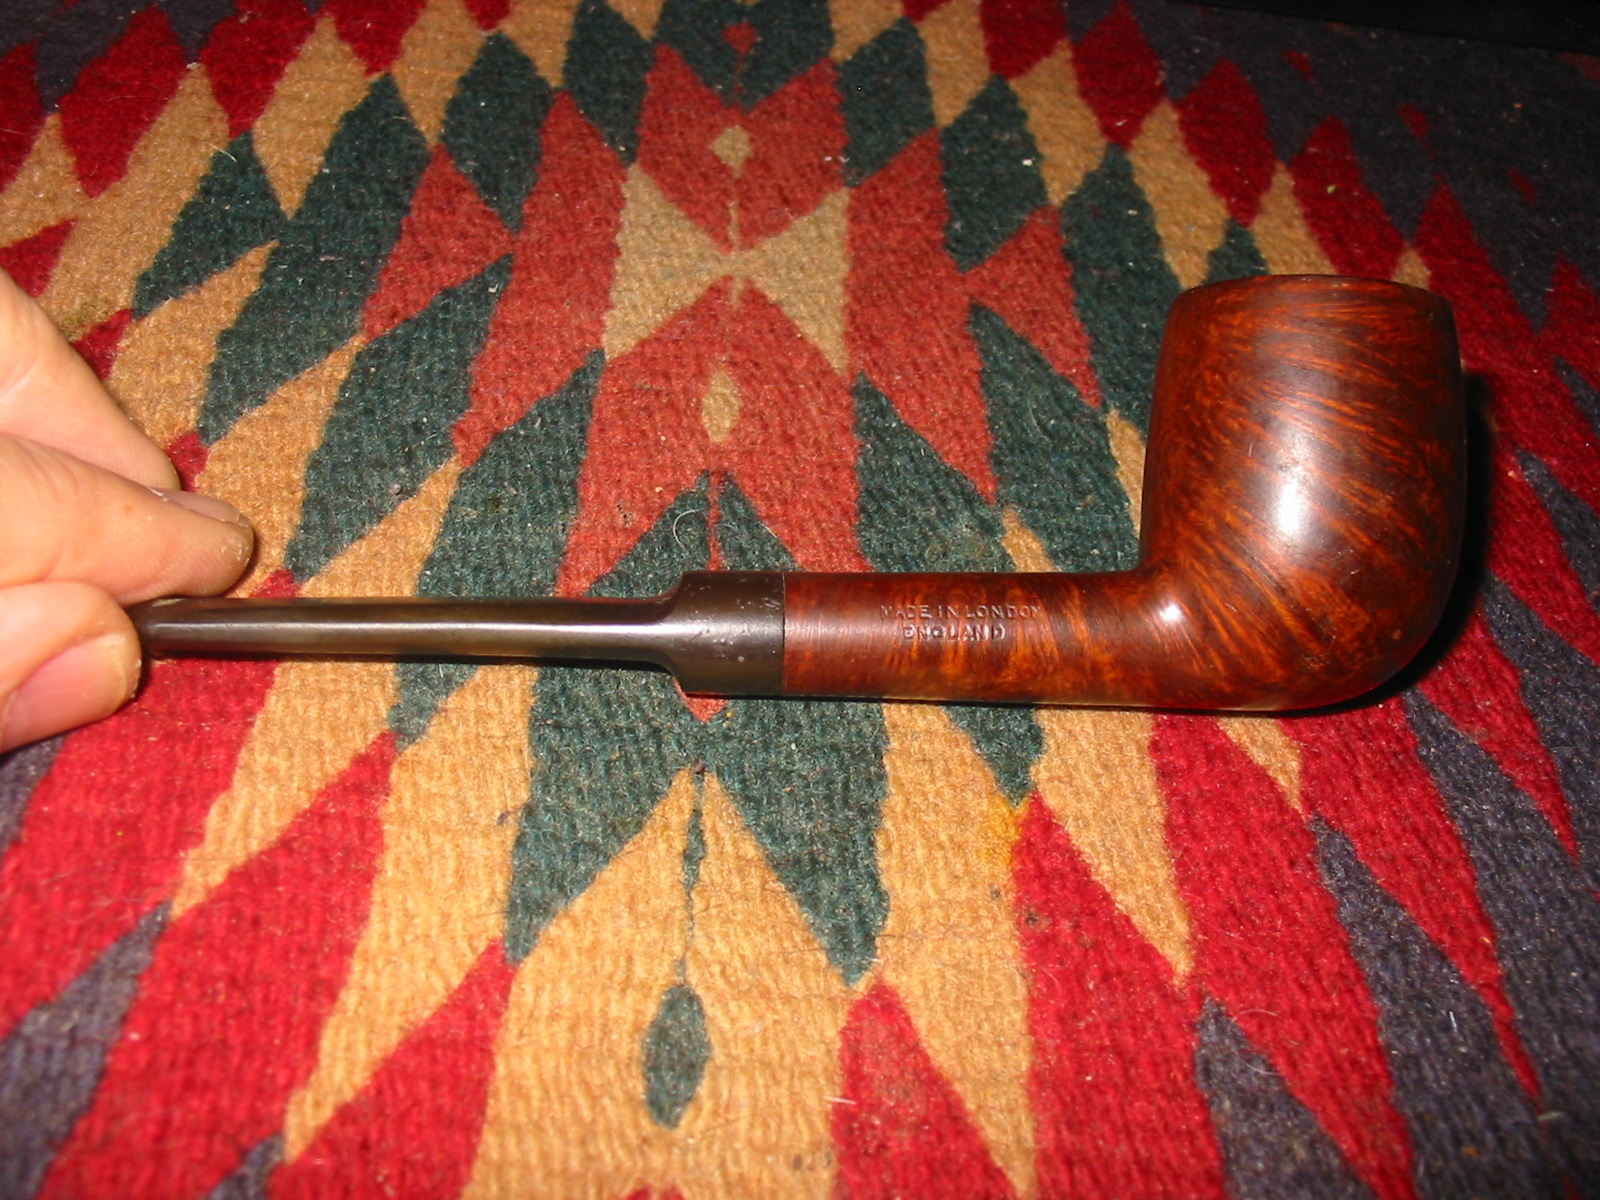
The pipe is stamped Marshall Field & Co. over Field Supreme on the left side of the shank and on the right side it is stamped Made in London England. There is no shape number stamped on the pipe. Since I paid $16 and change + $8 to ship it to Canada, I think I did well on it! The pictures below were included by the EBay seller and caught my eye.
MF3

MF4
Once I won the bid on EBay, I posted a question on Smokers Forums and Pipe Smokers Unlimited, two online pipe forums that I frequent, to see if anyone knew who made the pipe. I had hunches about who I thought were possible makers. But I wanted to see what others thought. I got several responses that confirmed my thinking.

Bill, a reader of the blog and an online friend sent this reply: “Not saying this will help but go to this page and click where it is highlighted”click here” and you can go through the Comoy’s pages and see the shapes. http://search.getitnext.com/beta/mar…arshall+fields Edit: My link didn’t work. It’s funny I clicked on it the first time and there was a write up about a guy who wrote an article about a Made in London Marshall Field pipe. He wrote to the Marshall Field Co. historian and was sent a link to a Comoy’s catalogue with shapes that were very similar. Now when I go back in my search history to click the link it won’t come up.”

Several others commented that Who Made that Pipe should a French Company name Marshal that made pipes. However, this was one made for the department store so I am pretty certain that the French company was not the manufacturer.

Dave, another reader of the blog and an online friend also replied: “I’m going to tack away from Comoy’s and go in a different direction. Here is my thinking, most of the off label pipes I’ve seen by Comoy’s still have the Comoy’s style COM stamp, be they pre-war or post war, and also retain a shape number in the very distinctive Comoy’s font. I’m going to focus on the word Supreme.

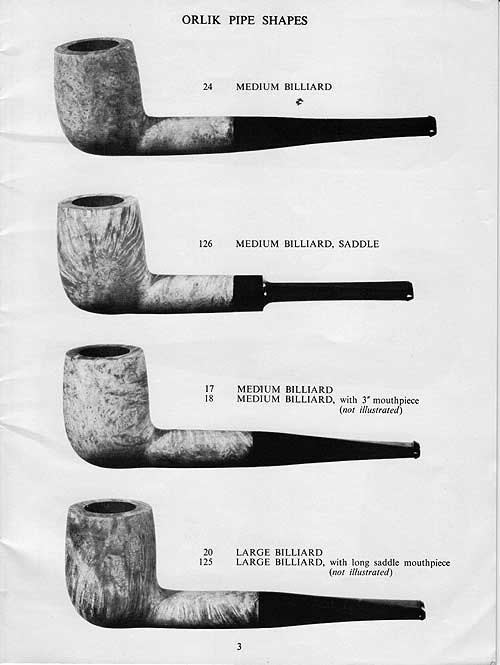
Charatan’s, no, Orlik, maybe. Here is a catalog image of the Medium Billiard, Saddle. The “Medium” works out to a grp 3 size pipe. Also the sans serif type font is the type Orlik used. Is this definite, of course not, it’s what makes trying to figure out English pipes a challenge!”
orlmedbill
In searching the web for information I came across an interesting post by the late Mike Leverette who wrote on the Grabow Forum in response to a post on L.L. Bean pipes as follows: “… By the way, all of the big chains carried pipes at one point in time, such as Sears, Marshall Fields, M. Ward, etc. Did any of these carry pipes made by the different Grabow owners? …The only Marshall Fields I have was made by Comoy and takes a paper filter.”

Either Comoy’s or Orlik. That was the overarching thought of others as they looked at this pipe. It also concurred with my thinking. If I put the Comoy’s shape chart up on the screen and compare it to the pipe it could well be a Comoy’s and when I look at the chart Dave shows it could well be an Orlik. Dave’s comments about stamping are interesting to me as I think about the maker. The typeface used in the stamp is certainly very similar to that used by Orlik while the Comoy’s stamping is a typical Serif font. Some of the pipes I have found on EBay have shape numbers that fall in the range of shape numbers for Orlik pipes. None of them fall in the Comoy’s shape numbers that I can find. A definitive answer may be a long time coming but for now I am leaning toward Orlik as the maker of these pipes.

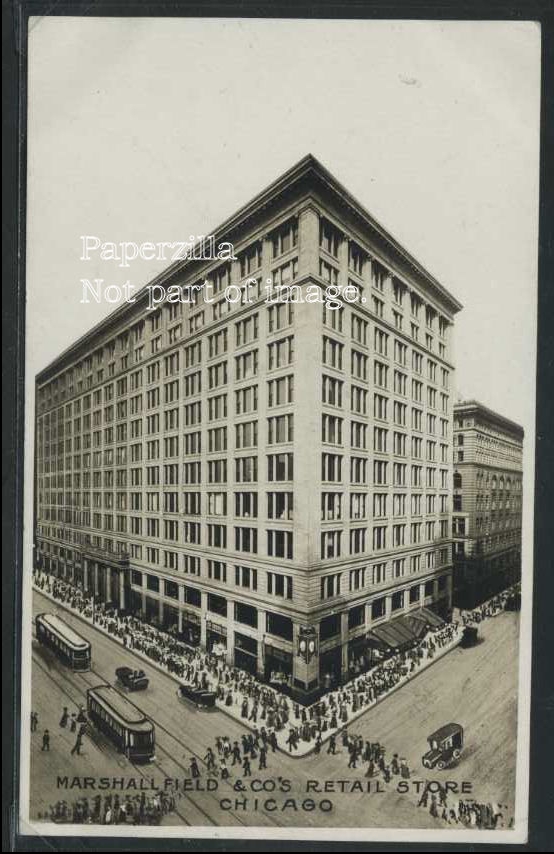
While I may not be 100% certain of the English maker of the pipe it is indeed a Marshall Field pipe. These were sold by the Chicago based department store and chain at least through the 60’s if not longer. Field’s was a huge department store chain that in its Chicago location had reading, writing and rest lounges, restaurants, men’s departments and a broad range of the features of the good life. I still remember my mother taking me there when I was little.
Noname
The pipes seemed to have been graded in a variety of ranges or lines. I am still trying to hunt down information on the various lines of pipes that they sold. I have found several pipes on EBay that bear different line stampings. All have the same style stamping and all have the MADE IN LONDON ENGLAND stamping. I have included the list below to show what I have found so far. I have arranged them in what appears to be in the order from highest to lowest grade as I can determine. I have also found two leather covered pipes that were stamped Marshall Field Smoke Shop and appear to have been made by Ropp. They were identical to the Ropp leather clad pipes that have seen.

1. SUPREME (I have seen both a billiard and a pot with this stamping. Both have a smooth finish and exhibit beautiful straight, flame or cross grain.)
2. SPECIAL GRAIN (The first one I saw on EBay and was a bent billiard shaped pipe, stamped 85. The second on EBay was a straight apple shaped pipe. Gary, an online friend responded on Smokers Forum and posted a picture of a bent billiard that was stamped Special Grain. All were smooth finishes but did not have the same density and grain consistency as the Supreme.)
3. FIELD DELUXE (This was also seen on EBay and was a Zulu or yachtsman shaped pipe, stamped 87. The Marshal Field stamping was in a script which was different than any of the other pipes that I found. The grain was a mixed pattern.)
4. FIELD GRAIN (These were seen on EBay was as well. The first was a smooth billiard with a saddle stem (bearing the shield logo) and stamped with the #6. The second was a sand blast billiard version. On the smooth one the grain was mixed and on the blast it was a deep craggy blast.)
5. STORE FOR MEN 3 GROUP 2 (There was one of these on EBay for sale as well. It was a smooth finish, square shank pot. The grain was mixed and clean.)

All of the smooth pipes were decent briar with no visible fills or sand pits. All the English made pipes that I have seen online were well made and all had the same style of saddle stem. The French made ones all had taper stems and were leather clad.

I will continue to hunt down these pipes to build a picture of the various lines. Any information you may have will be greatly appreciated.

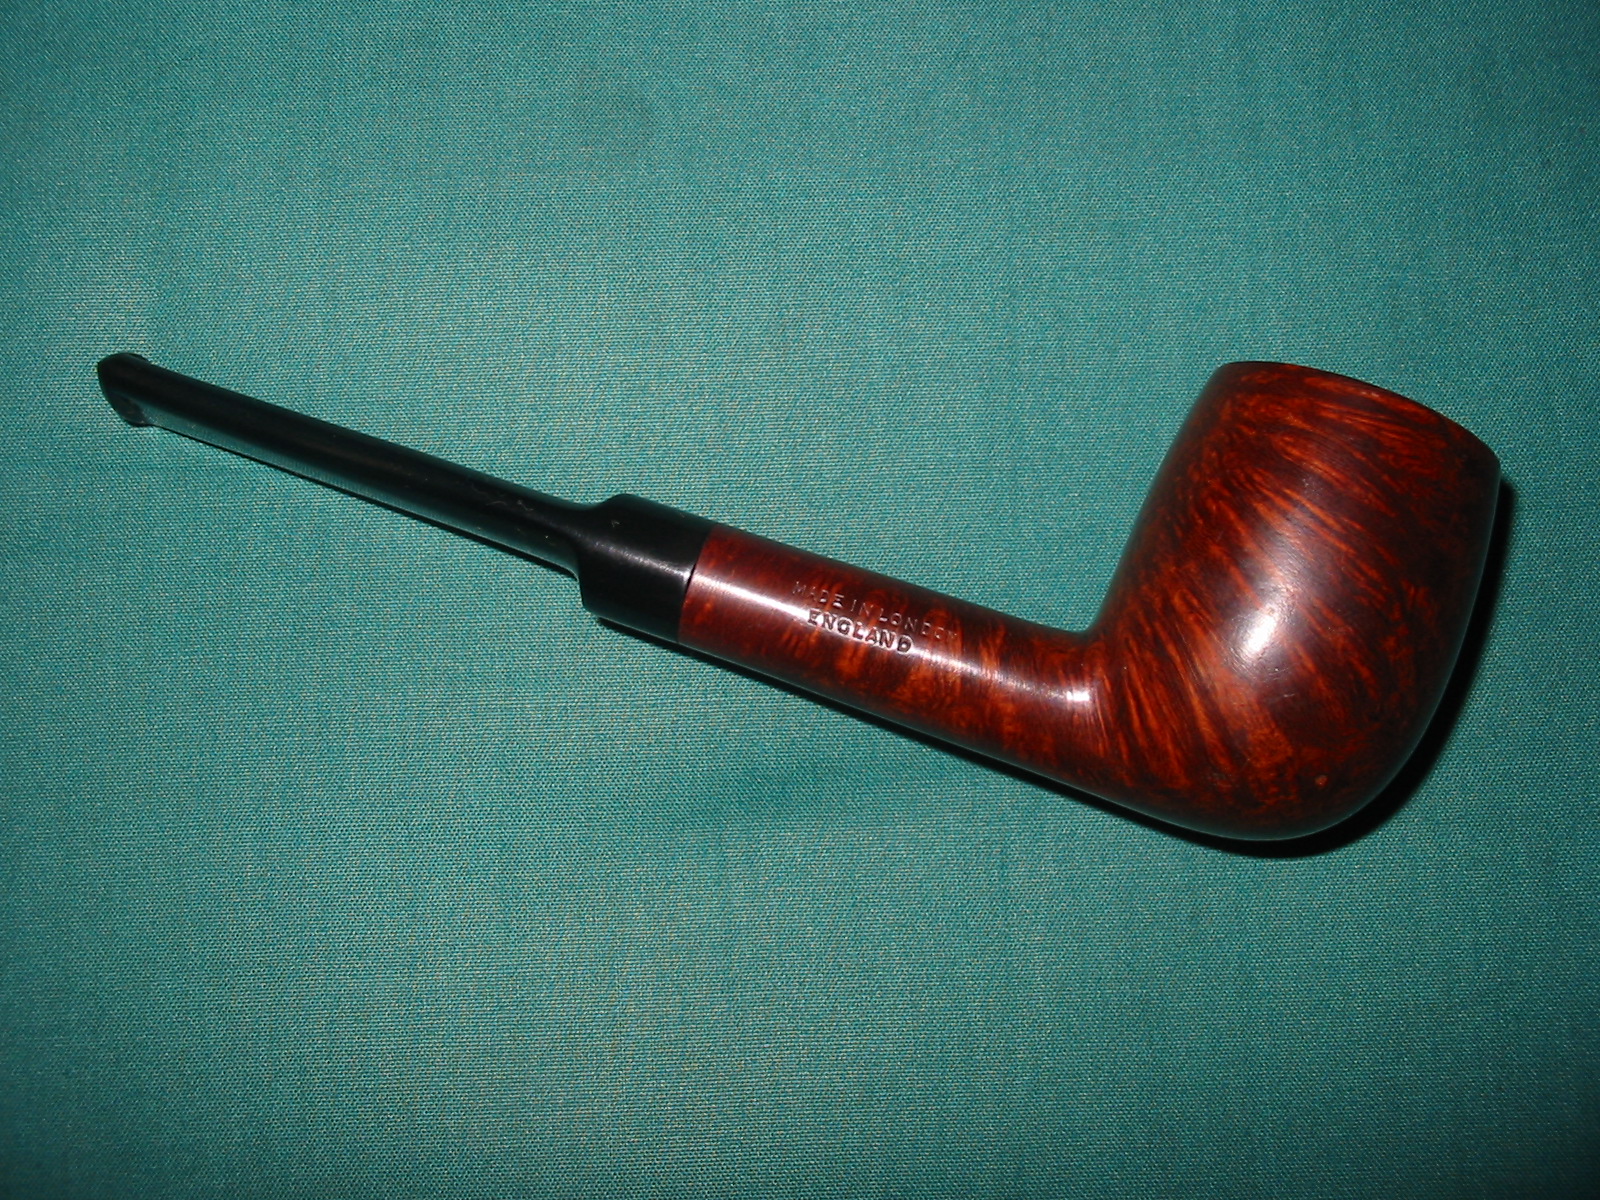
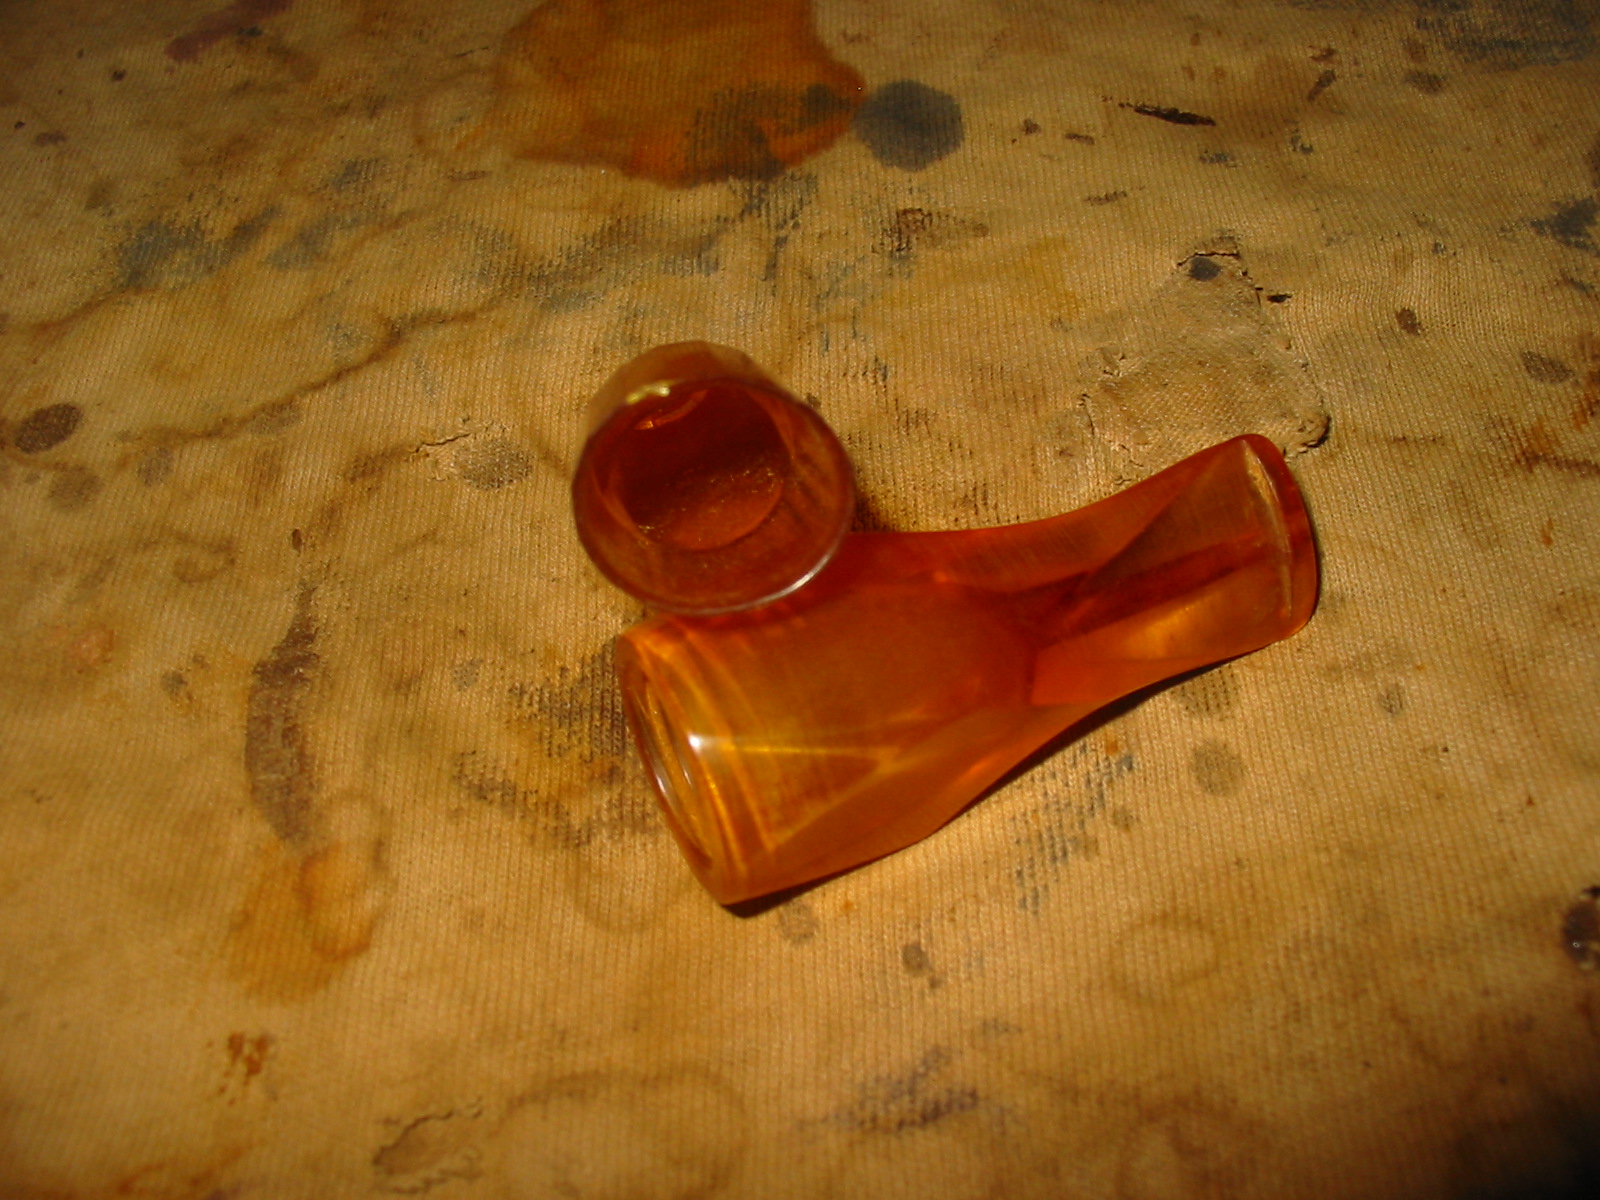
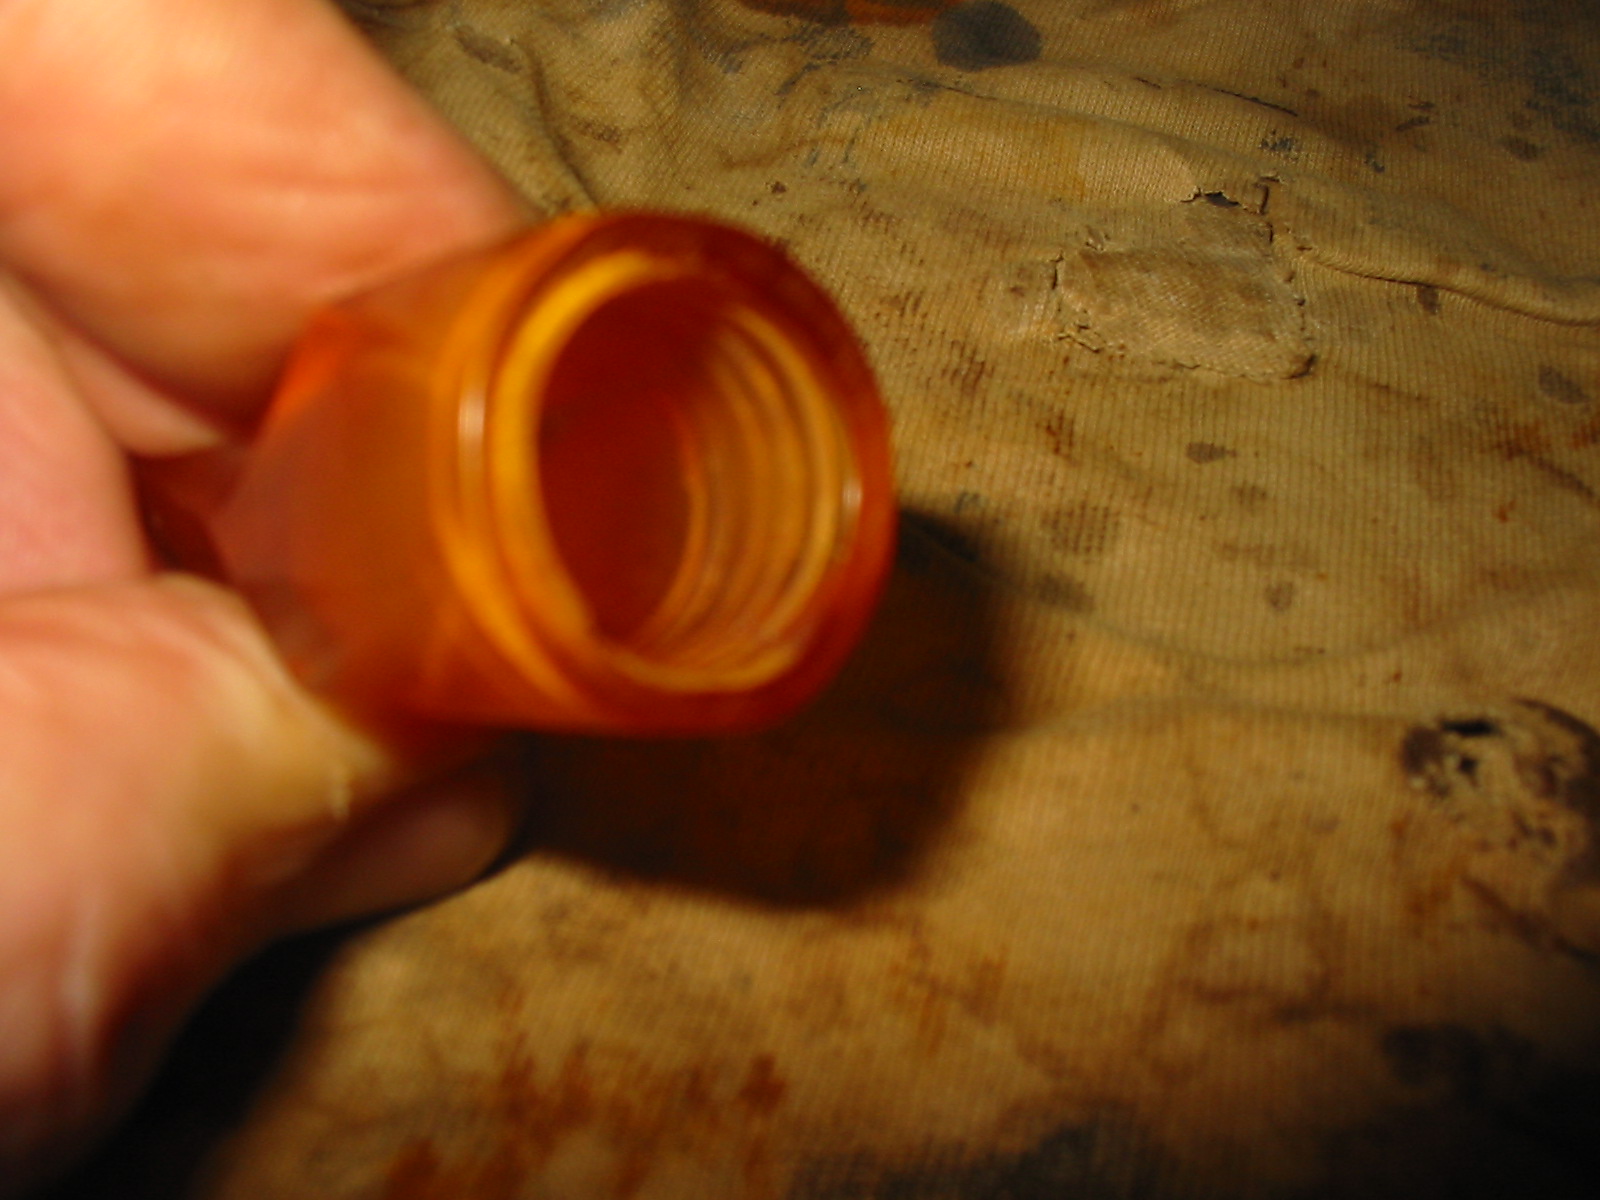
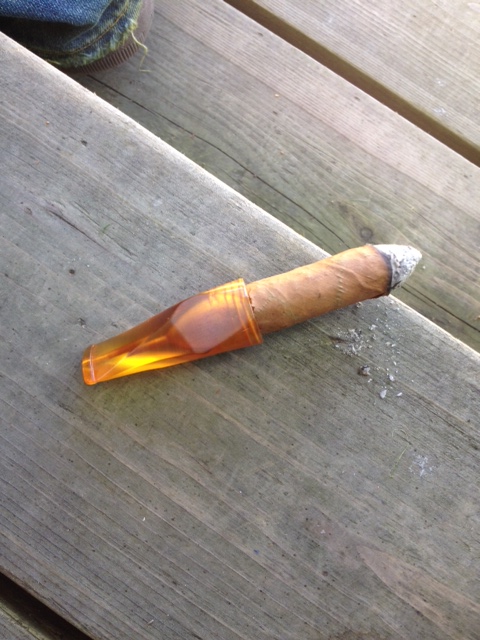
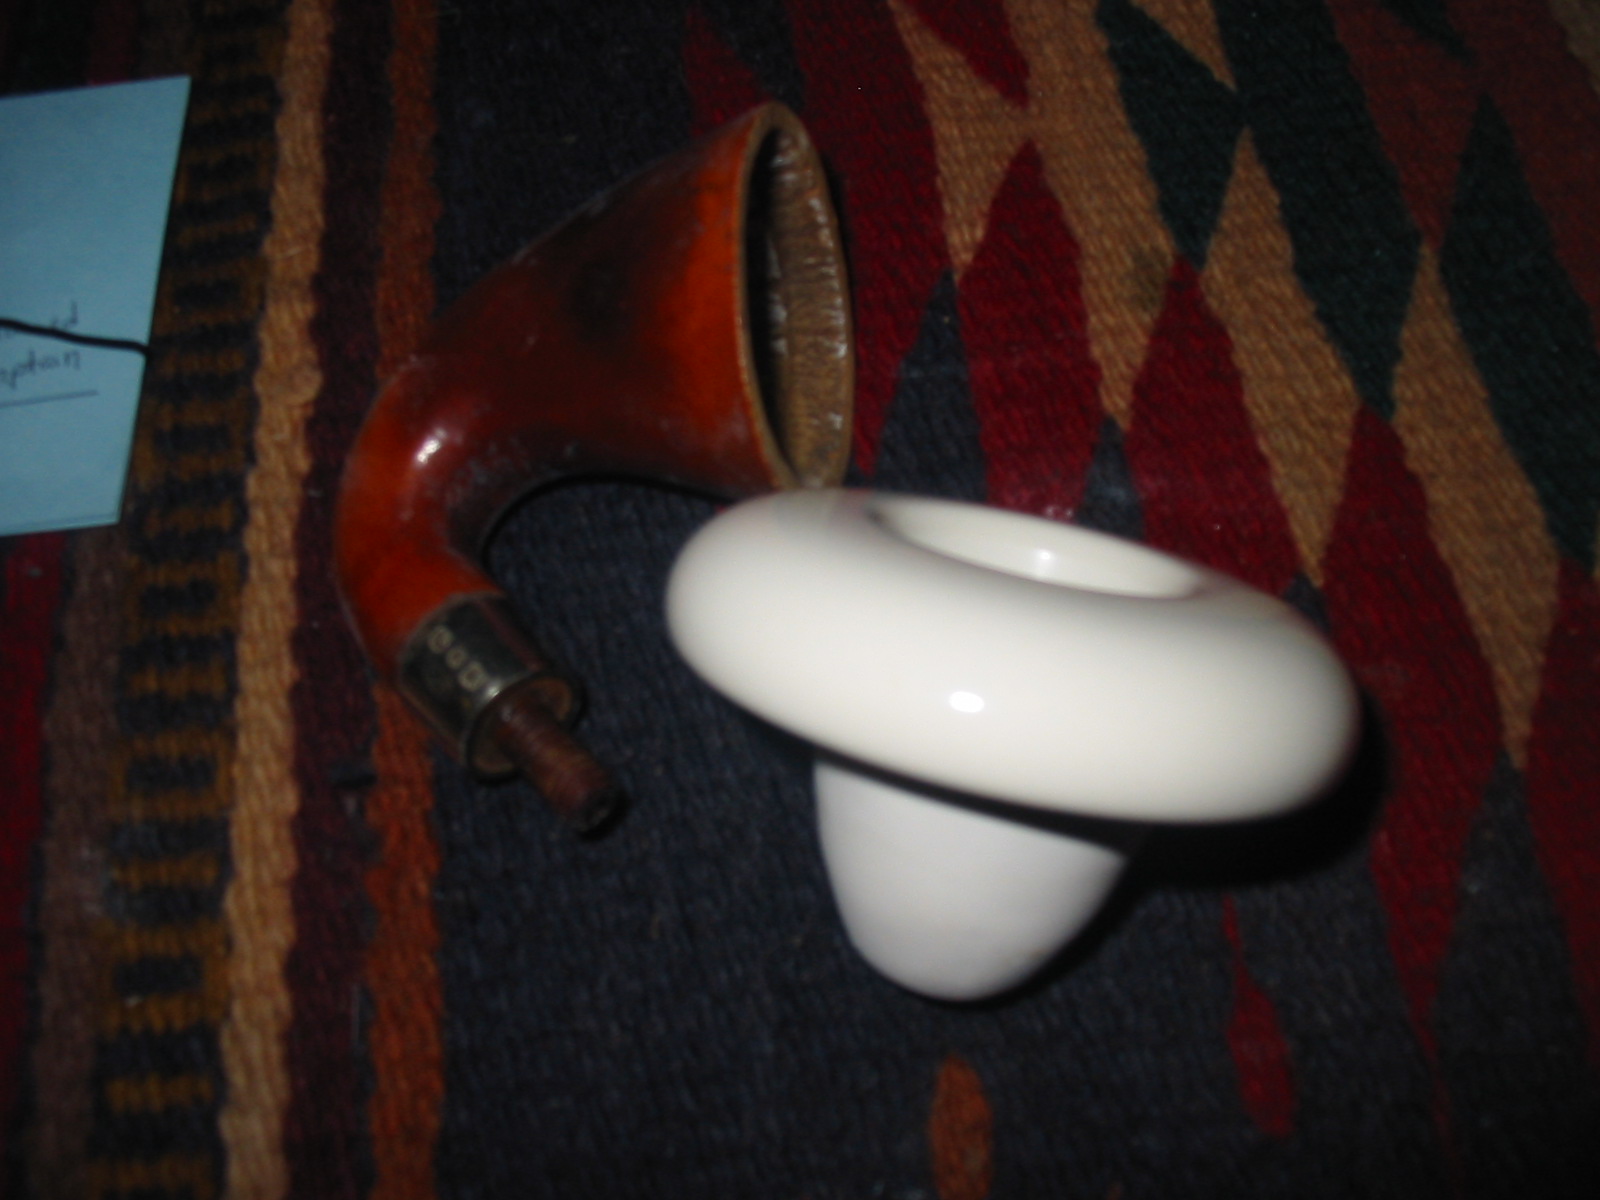
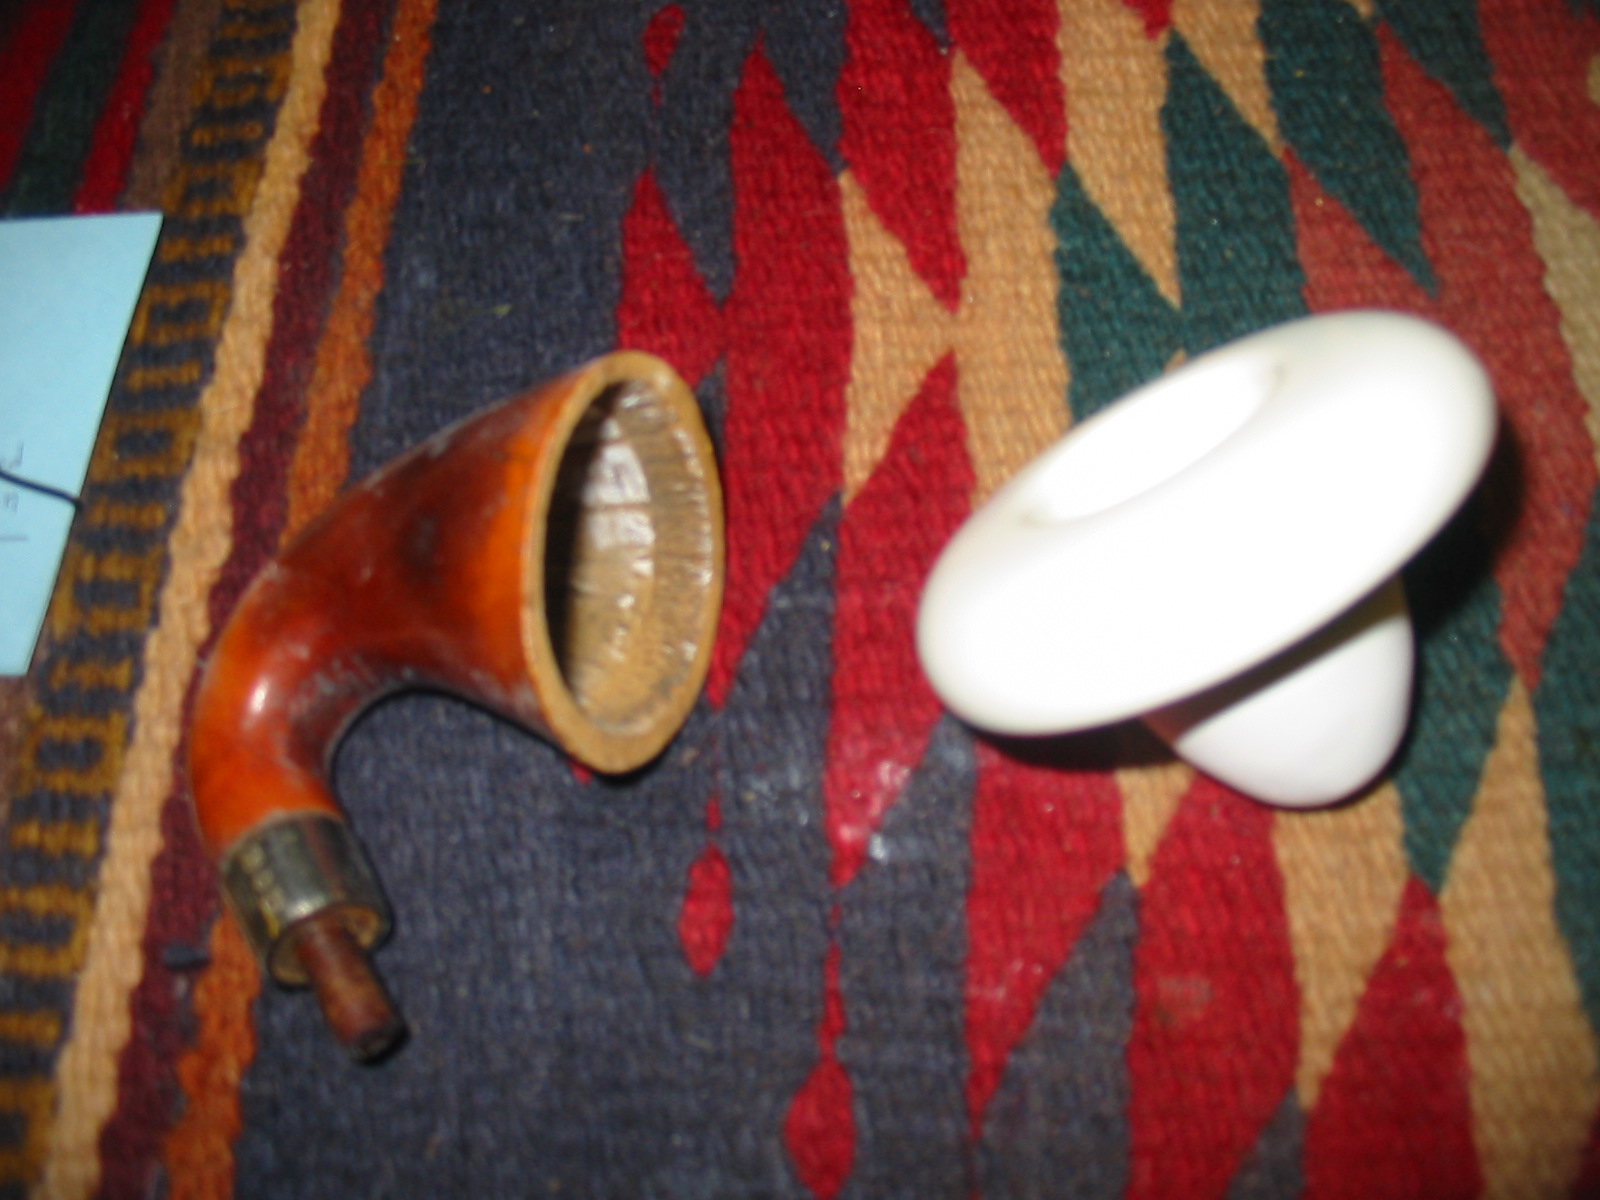
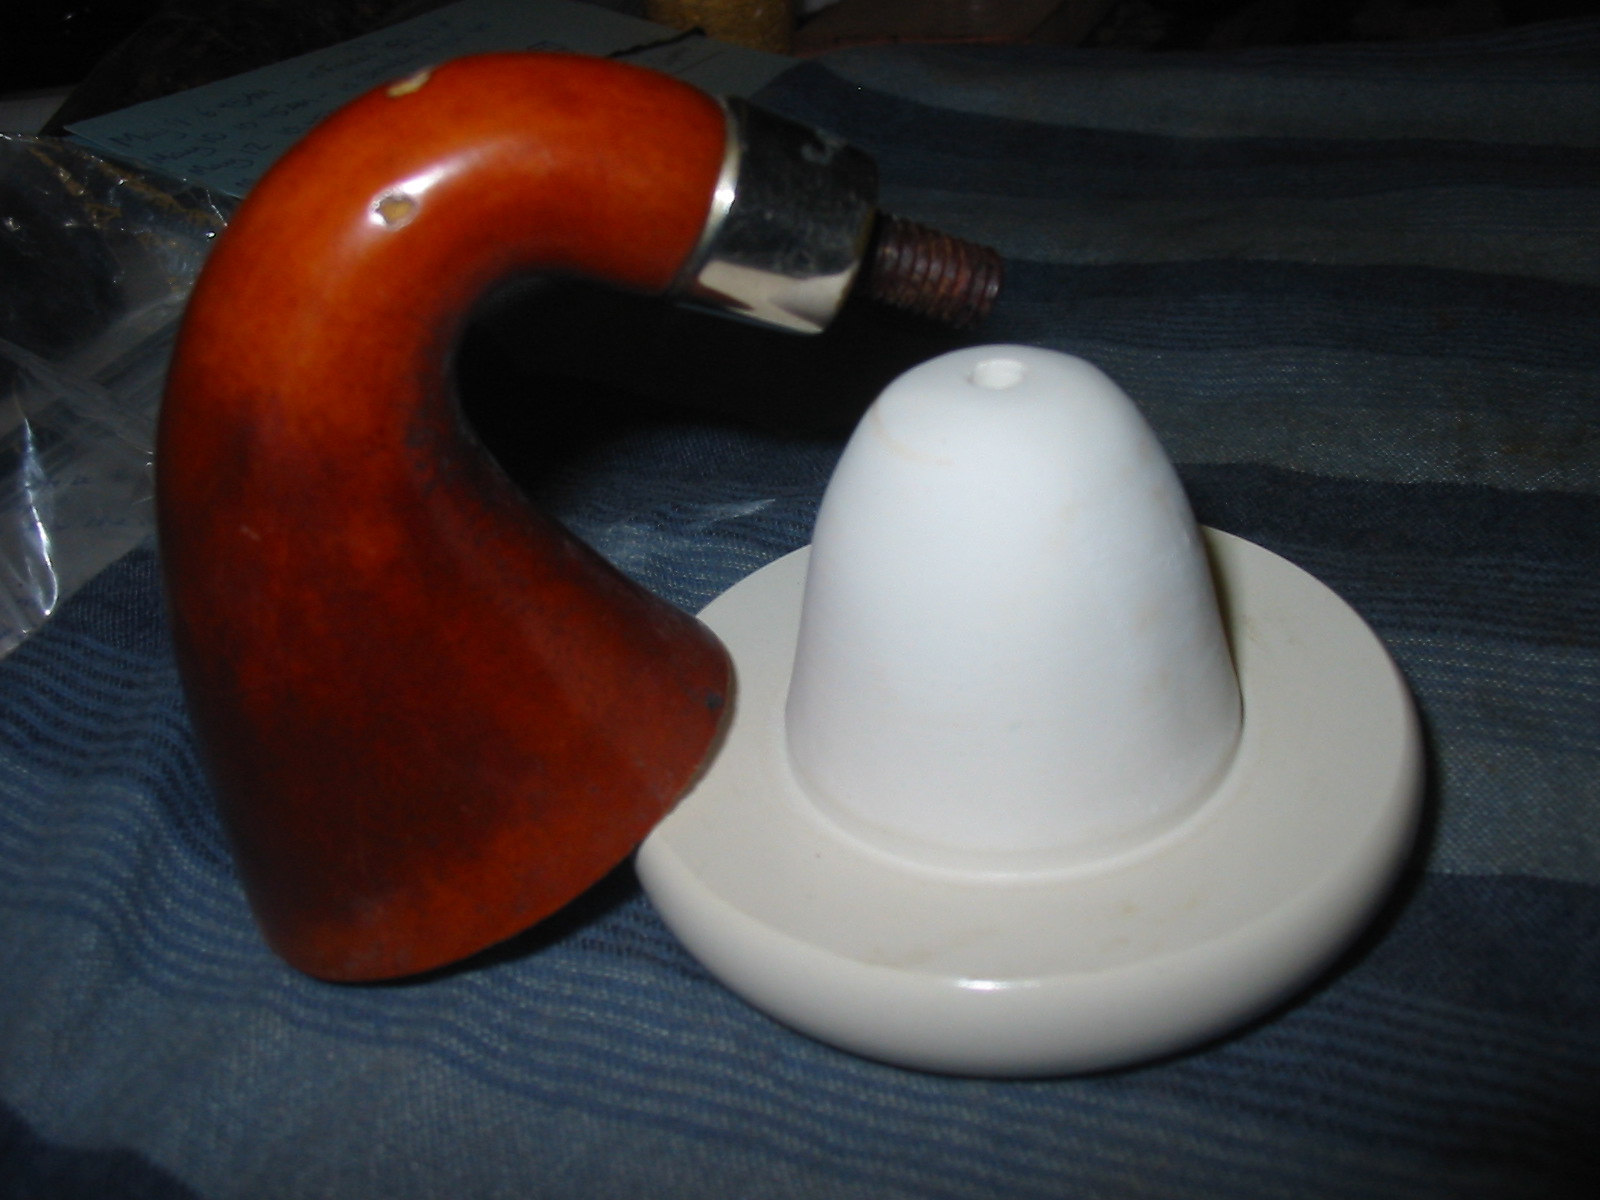
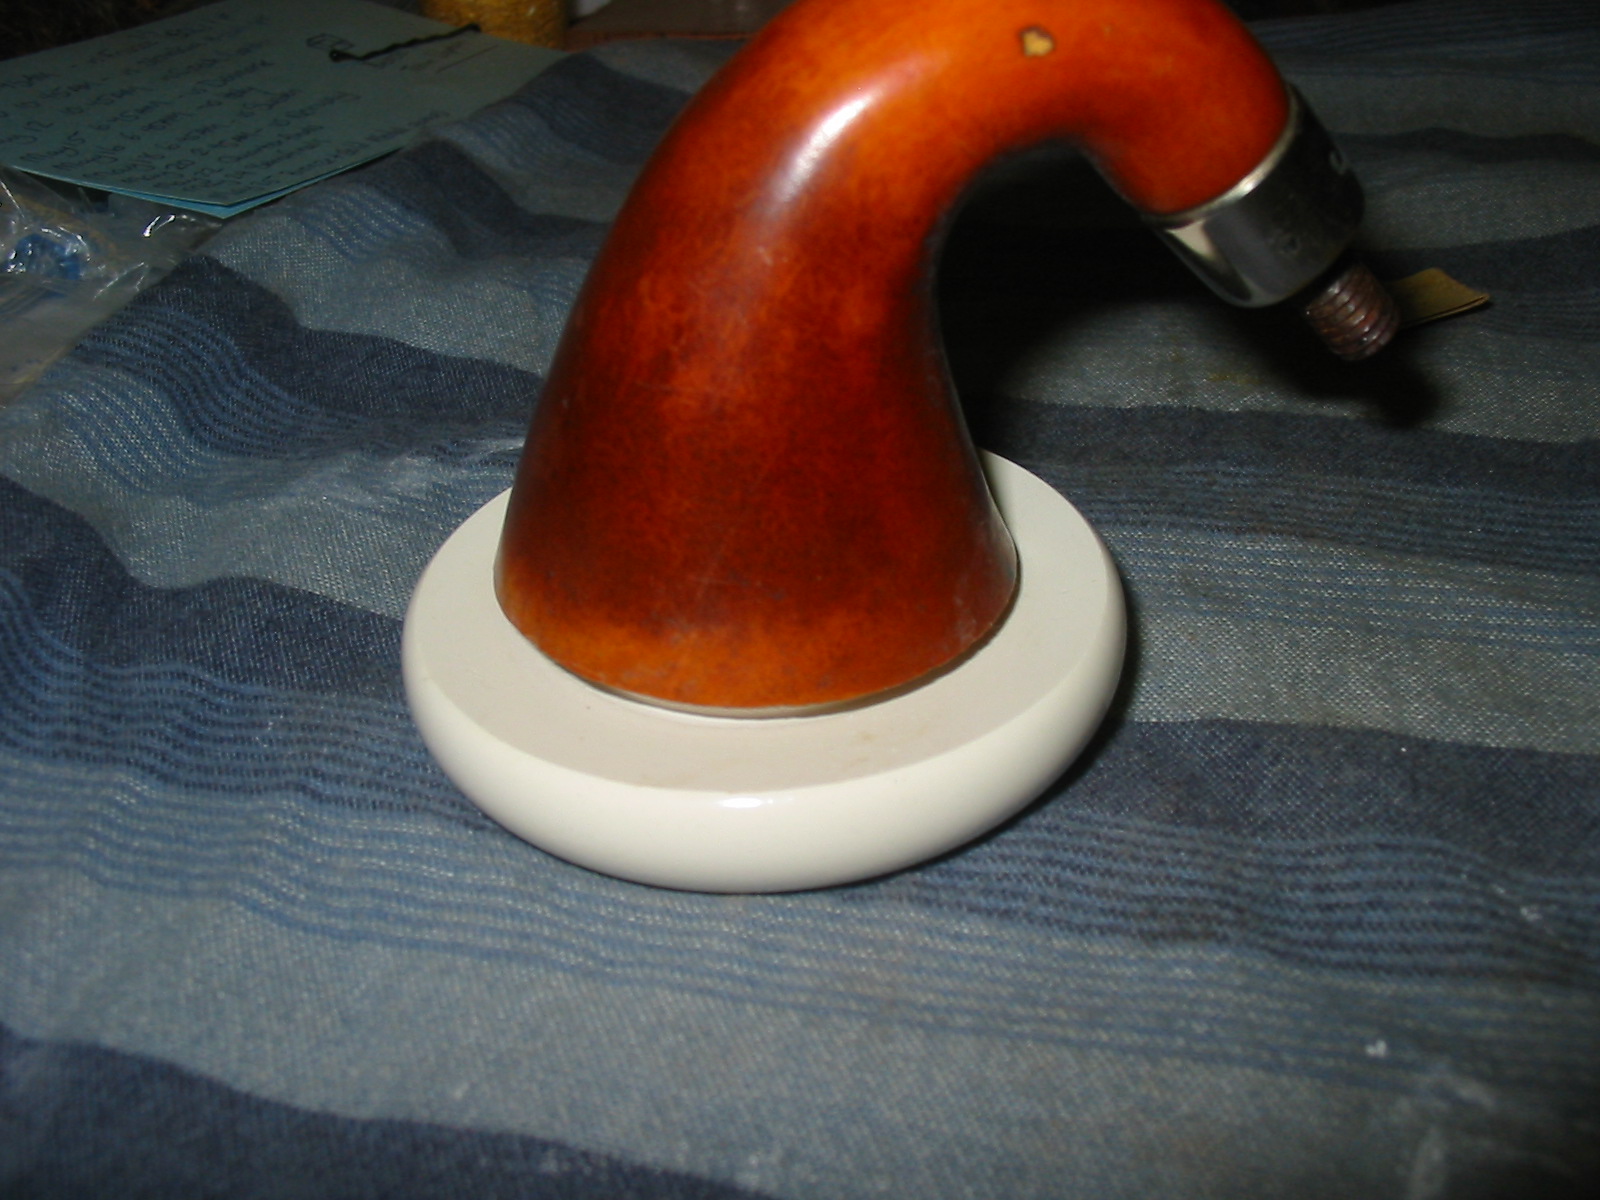
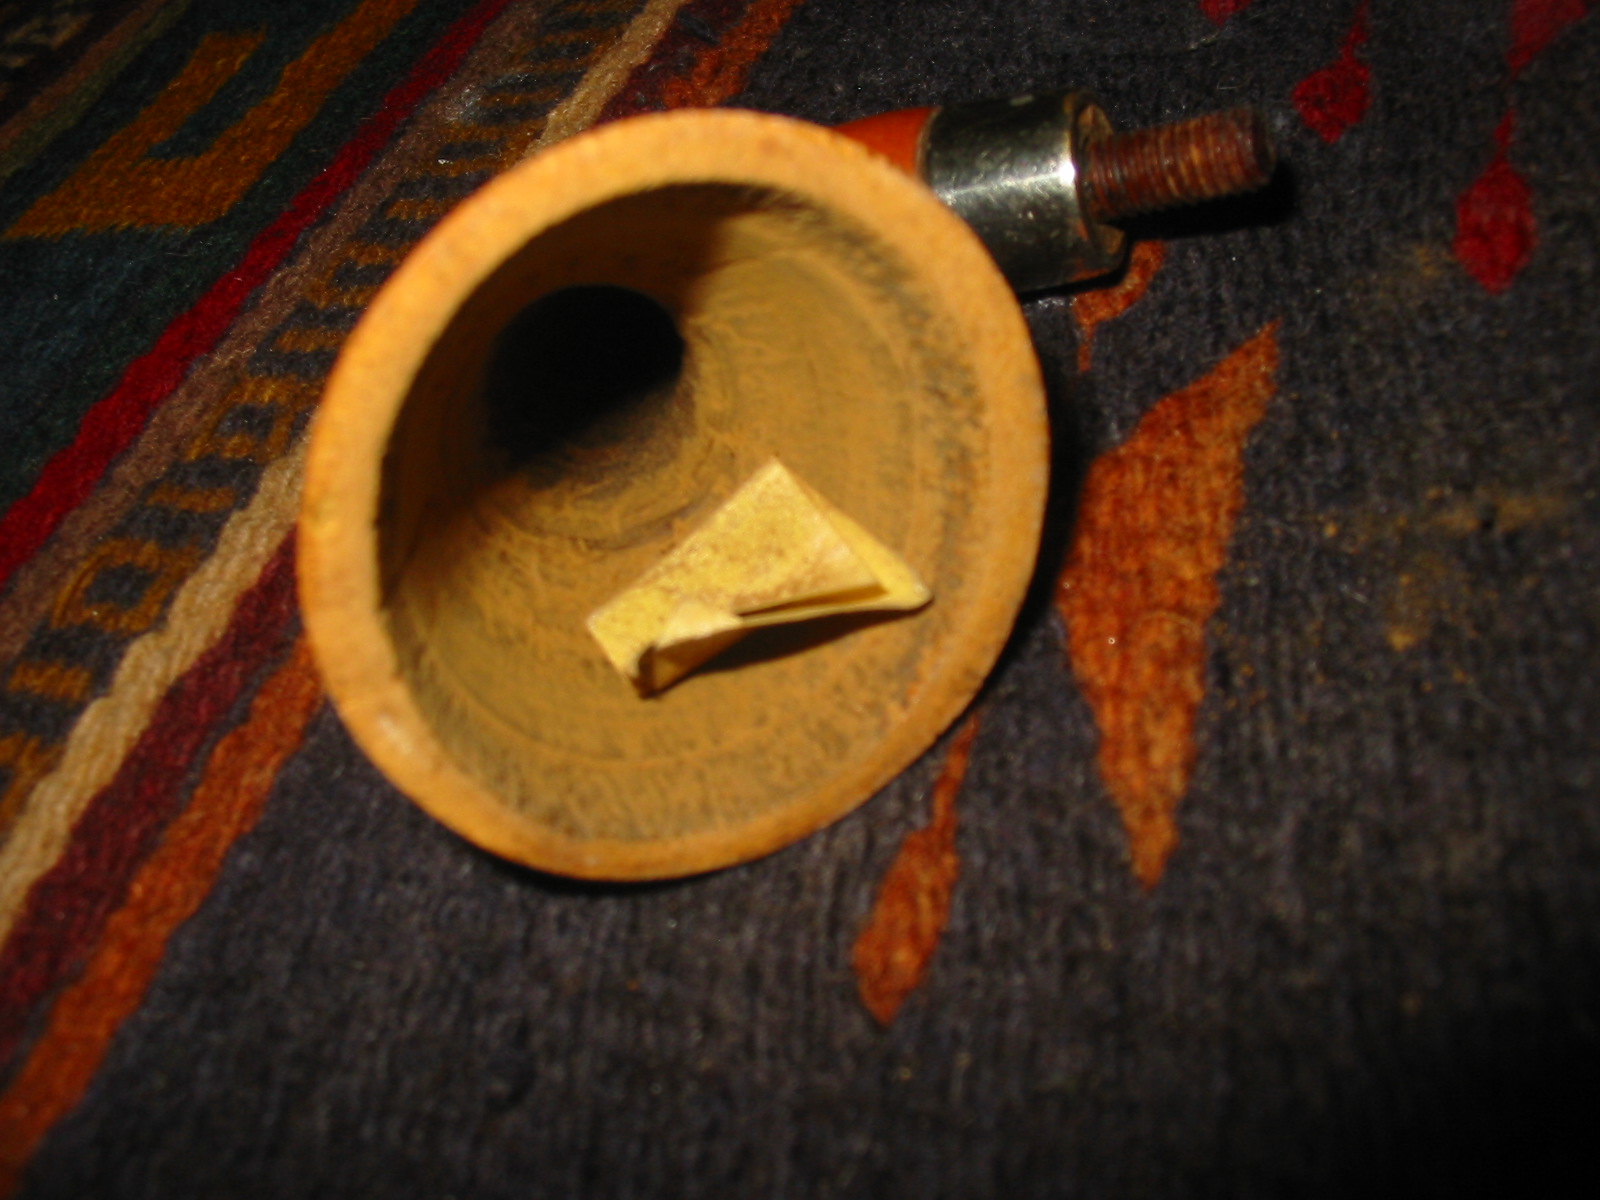
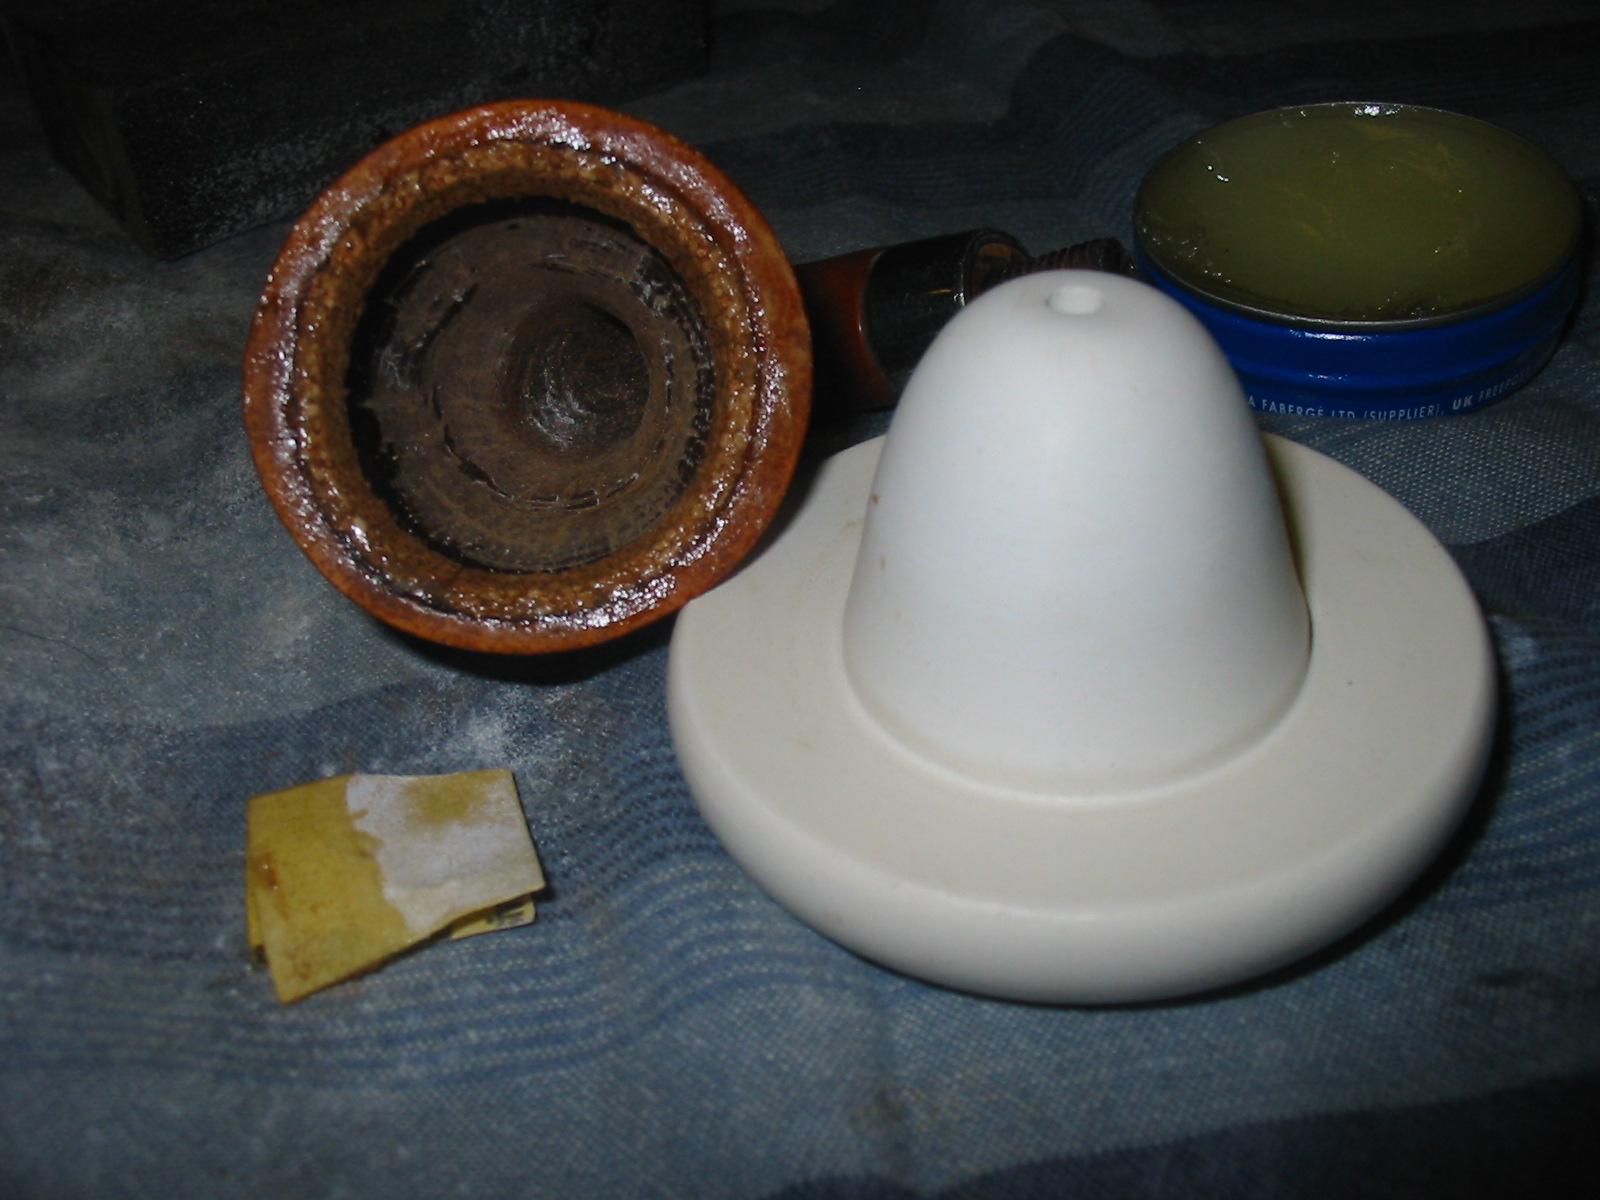
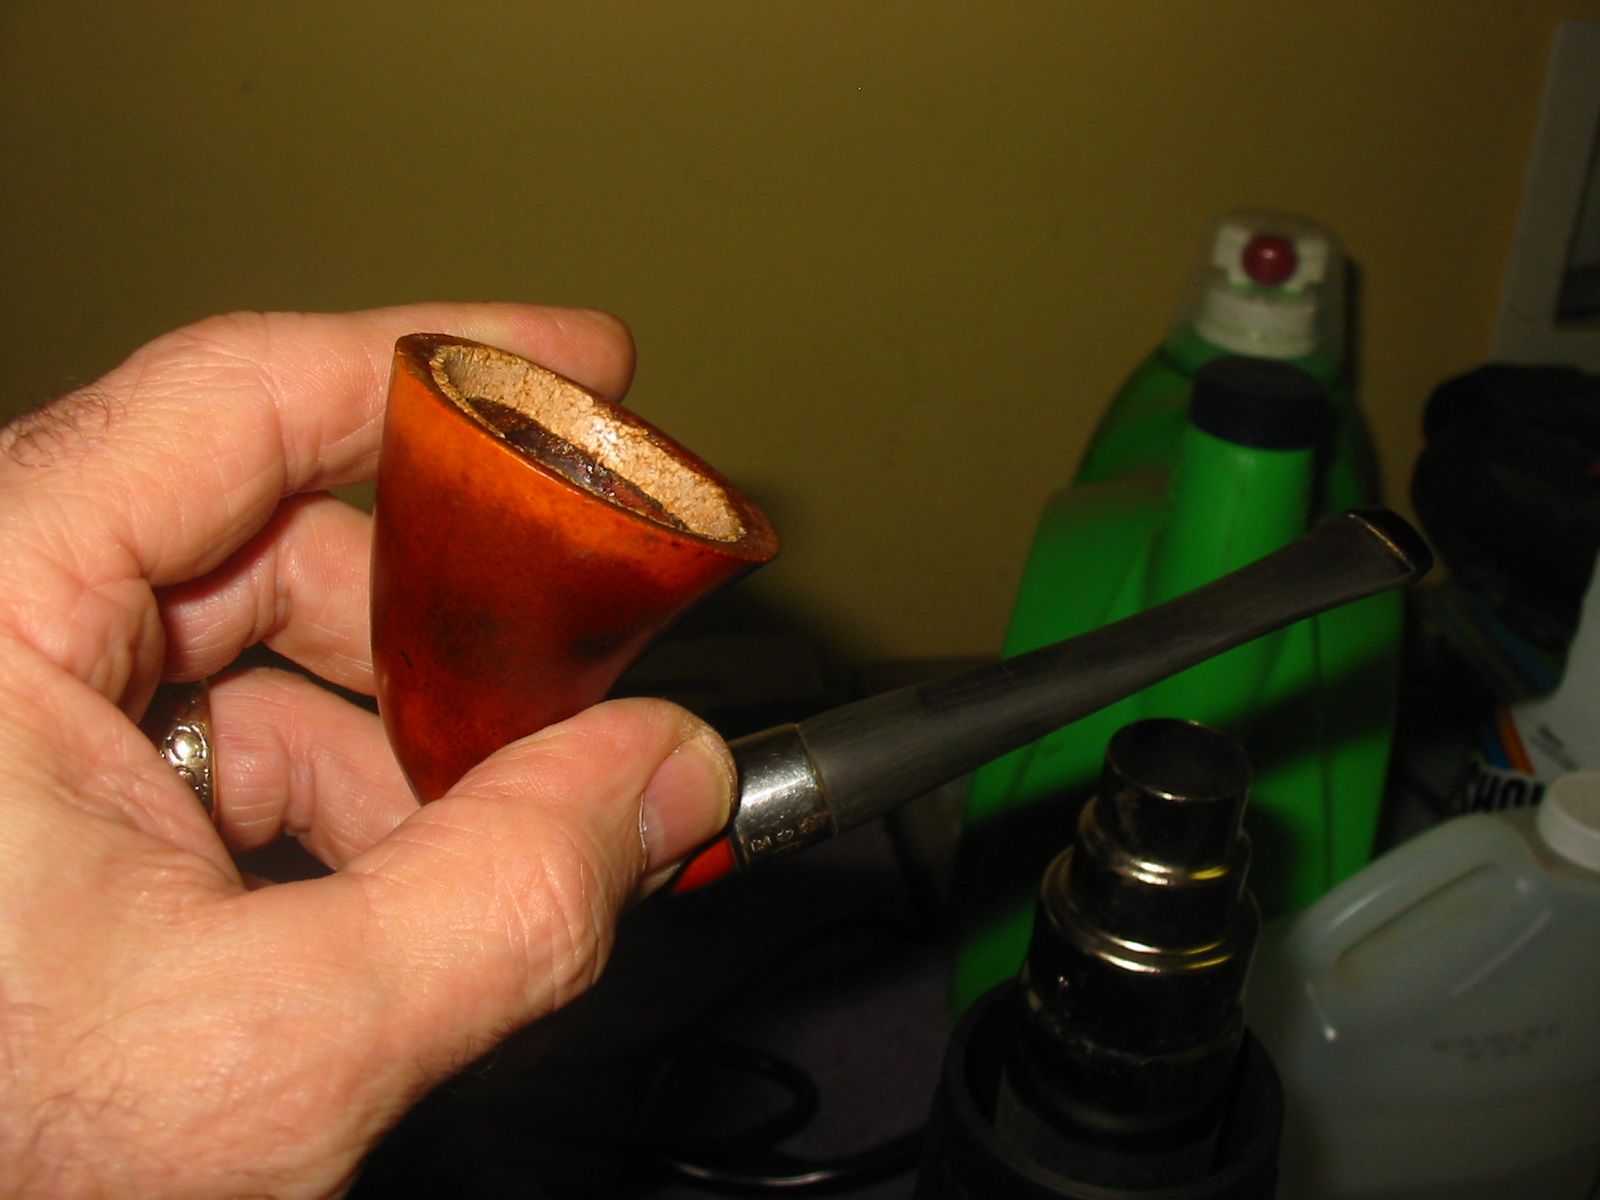
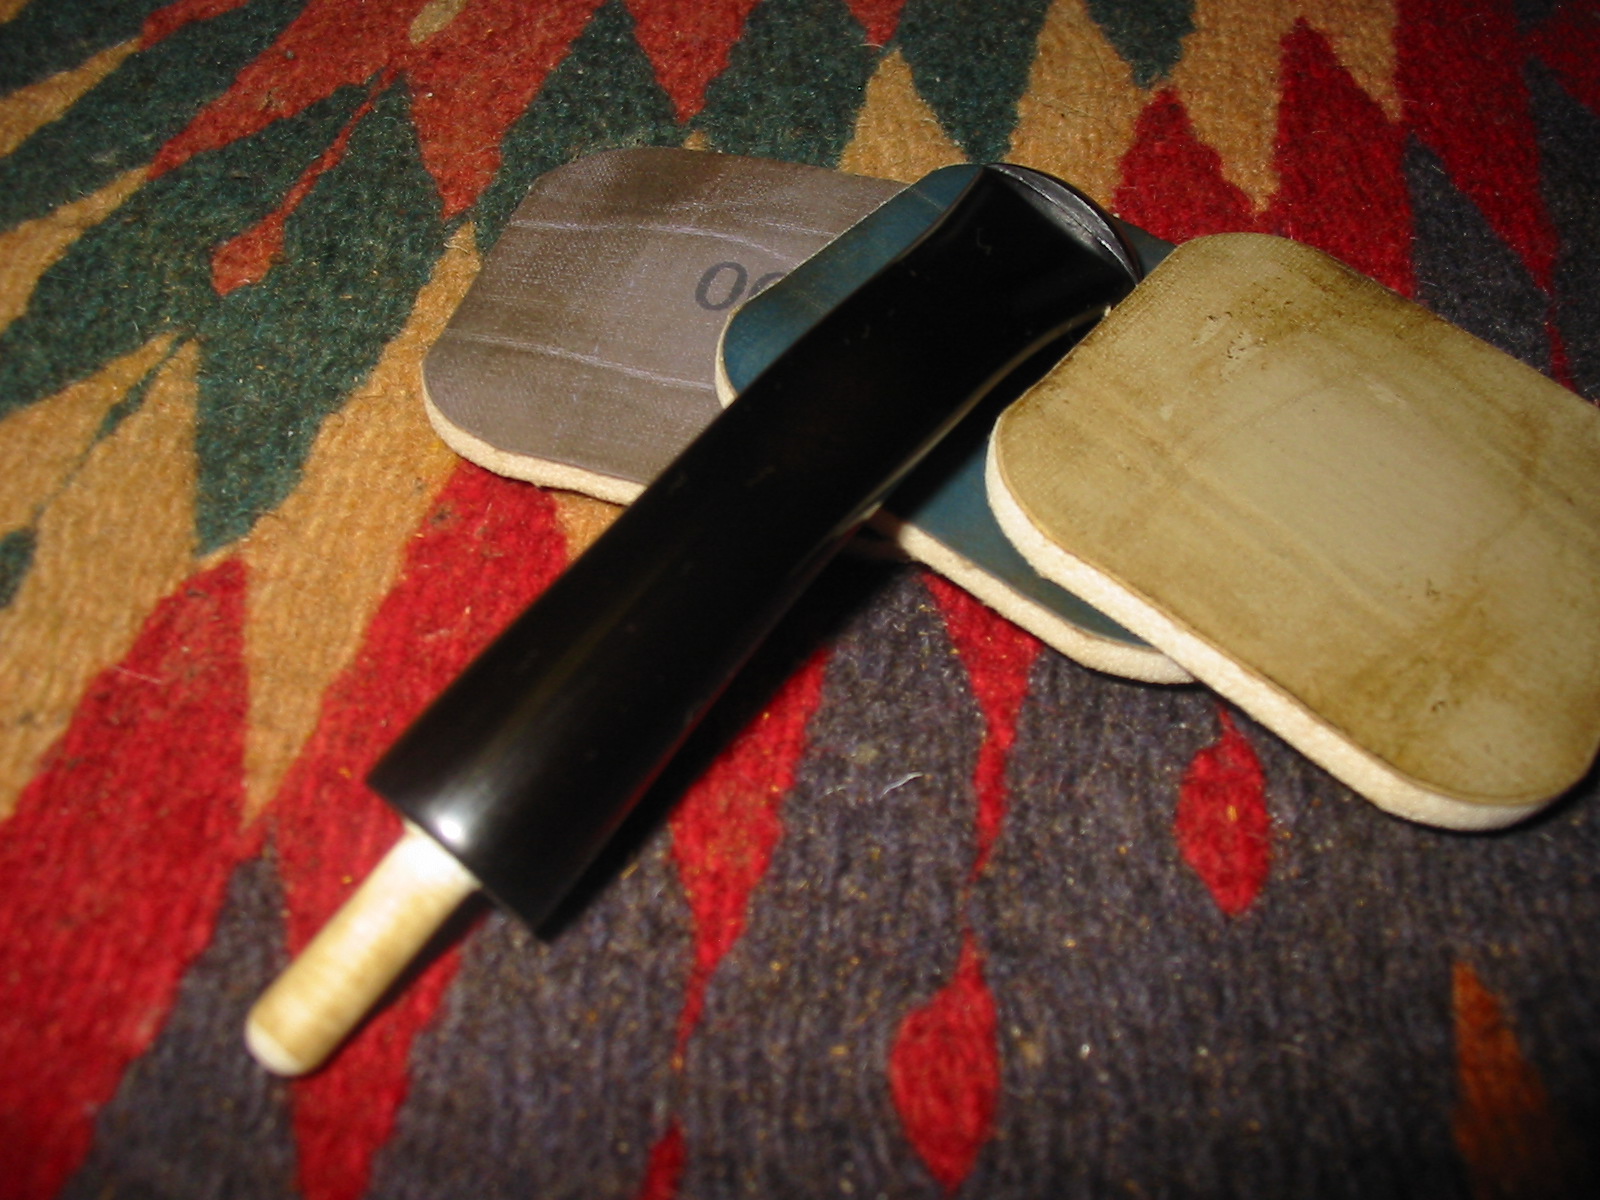
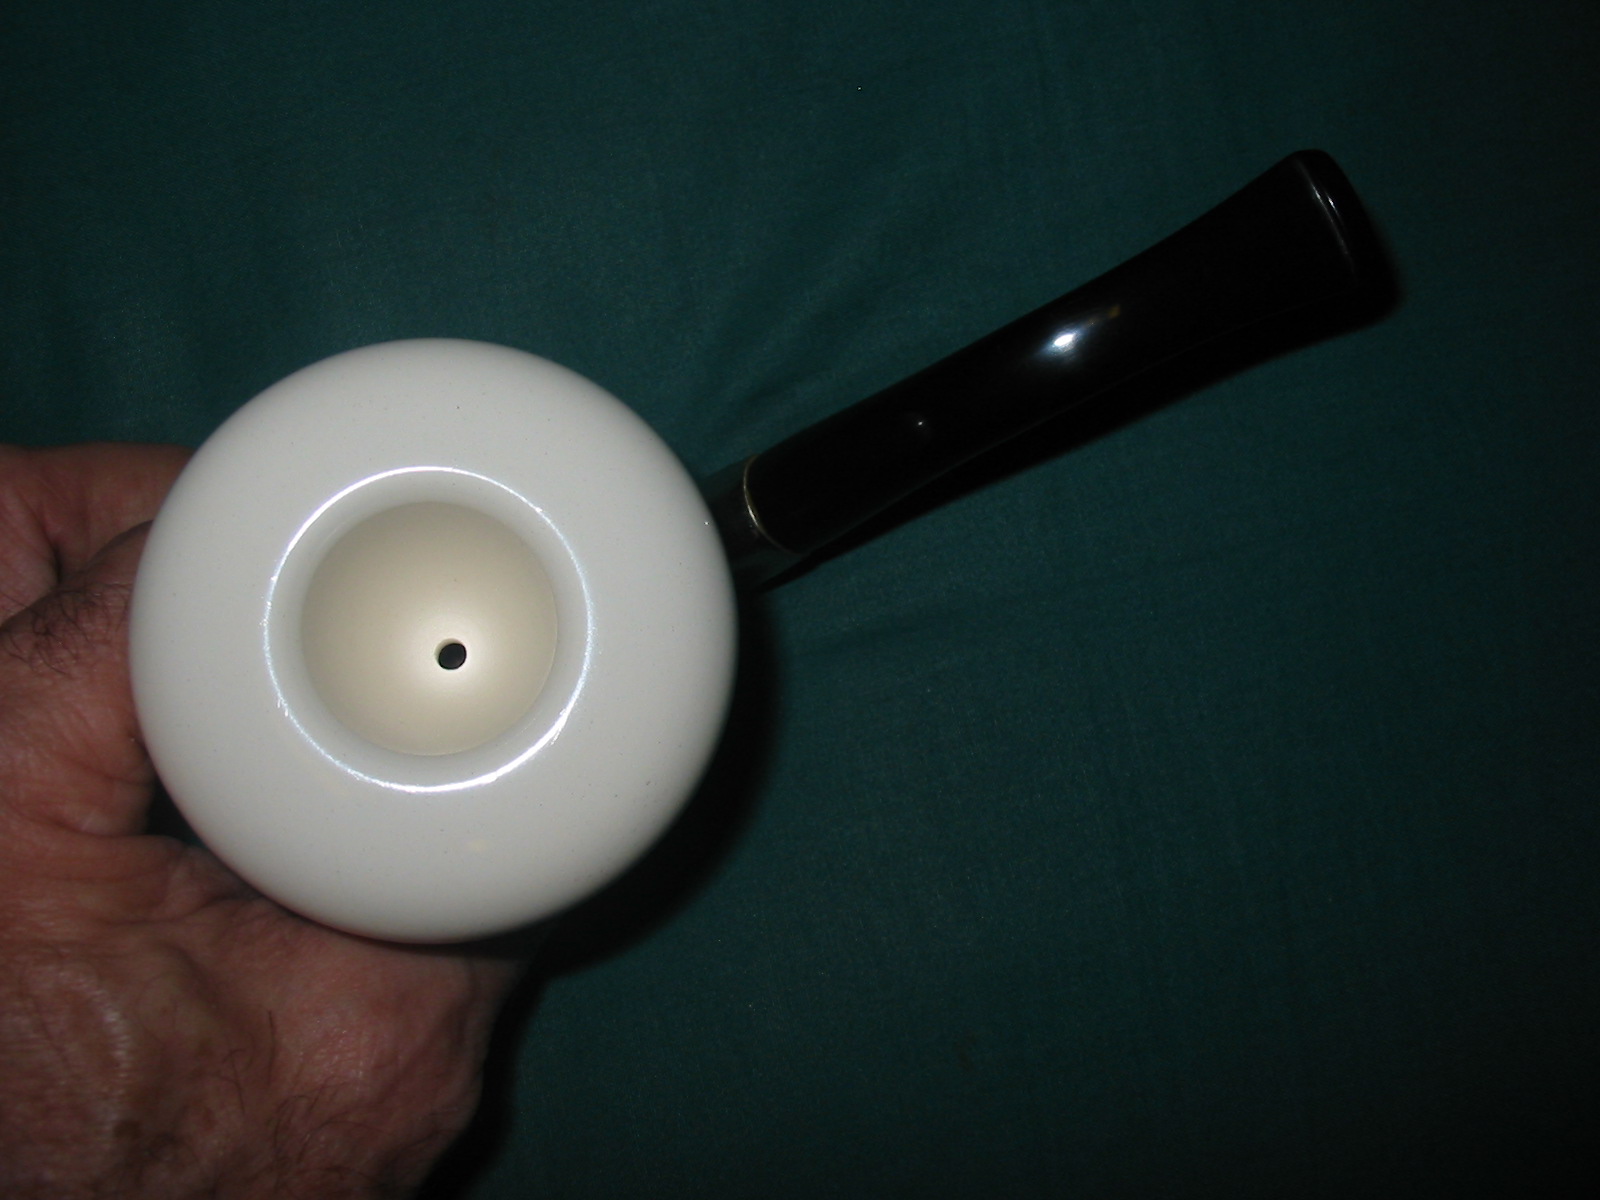
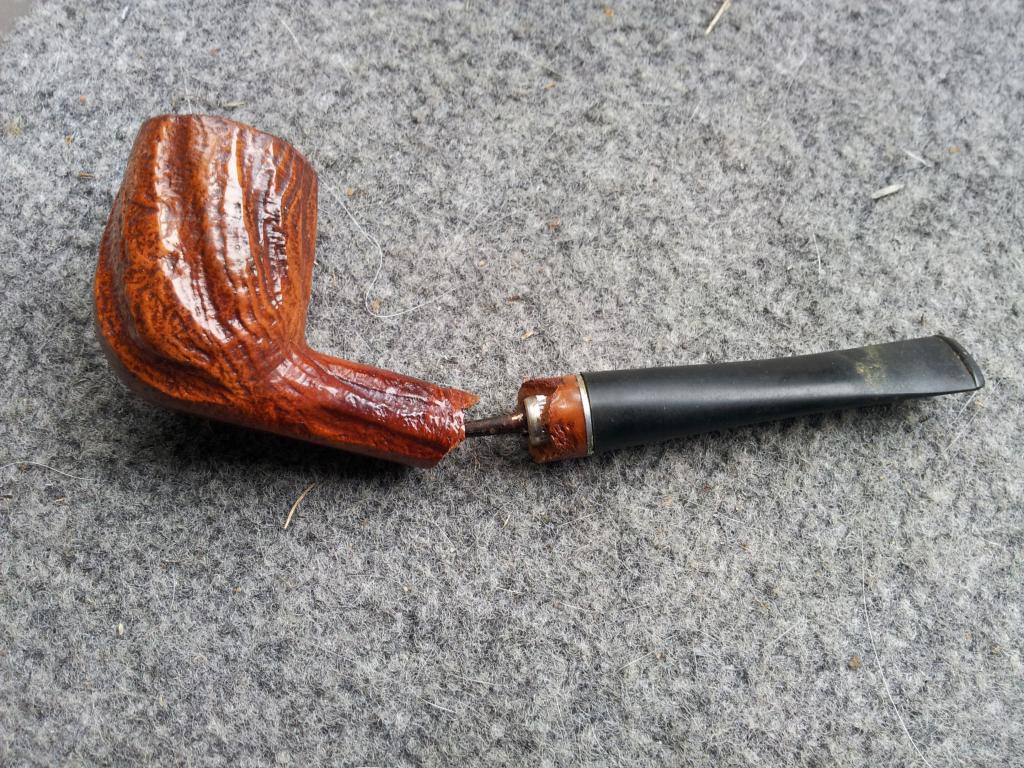
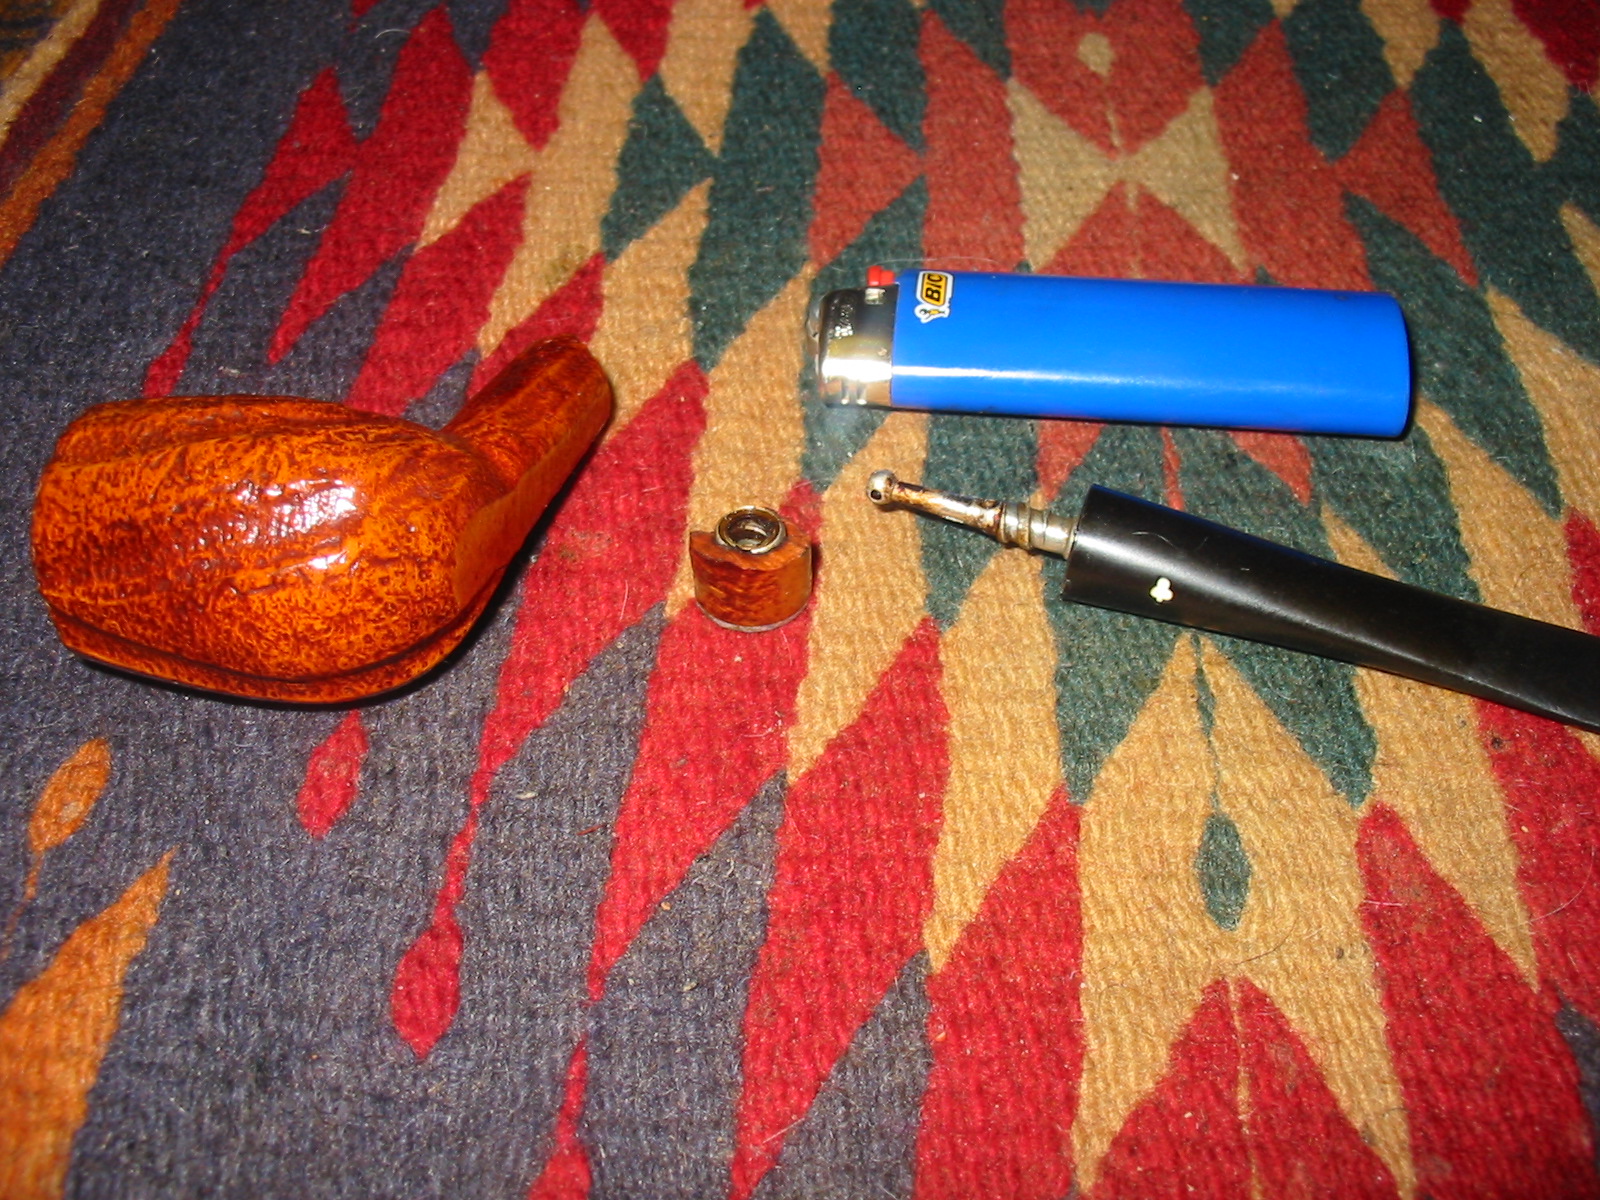
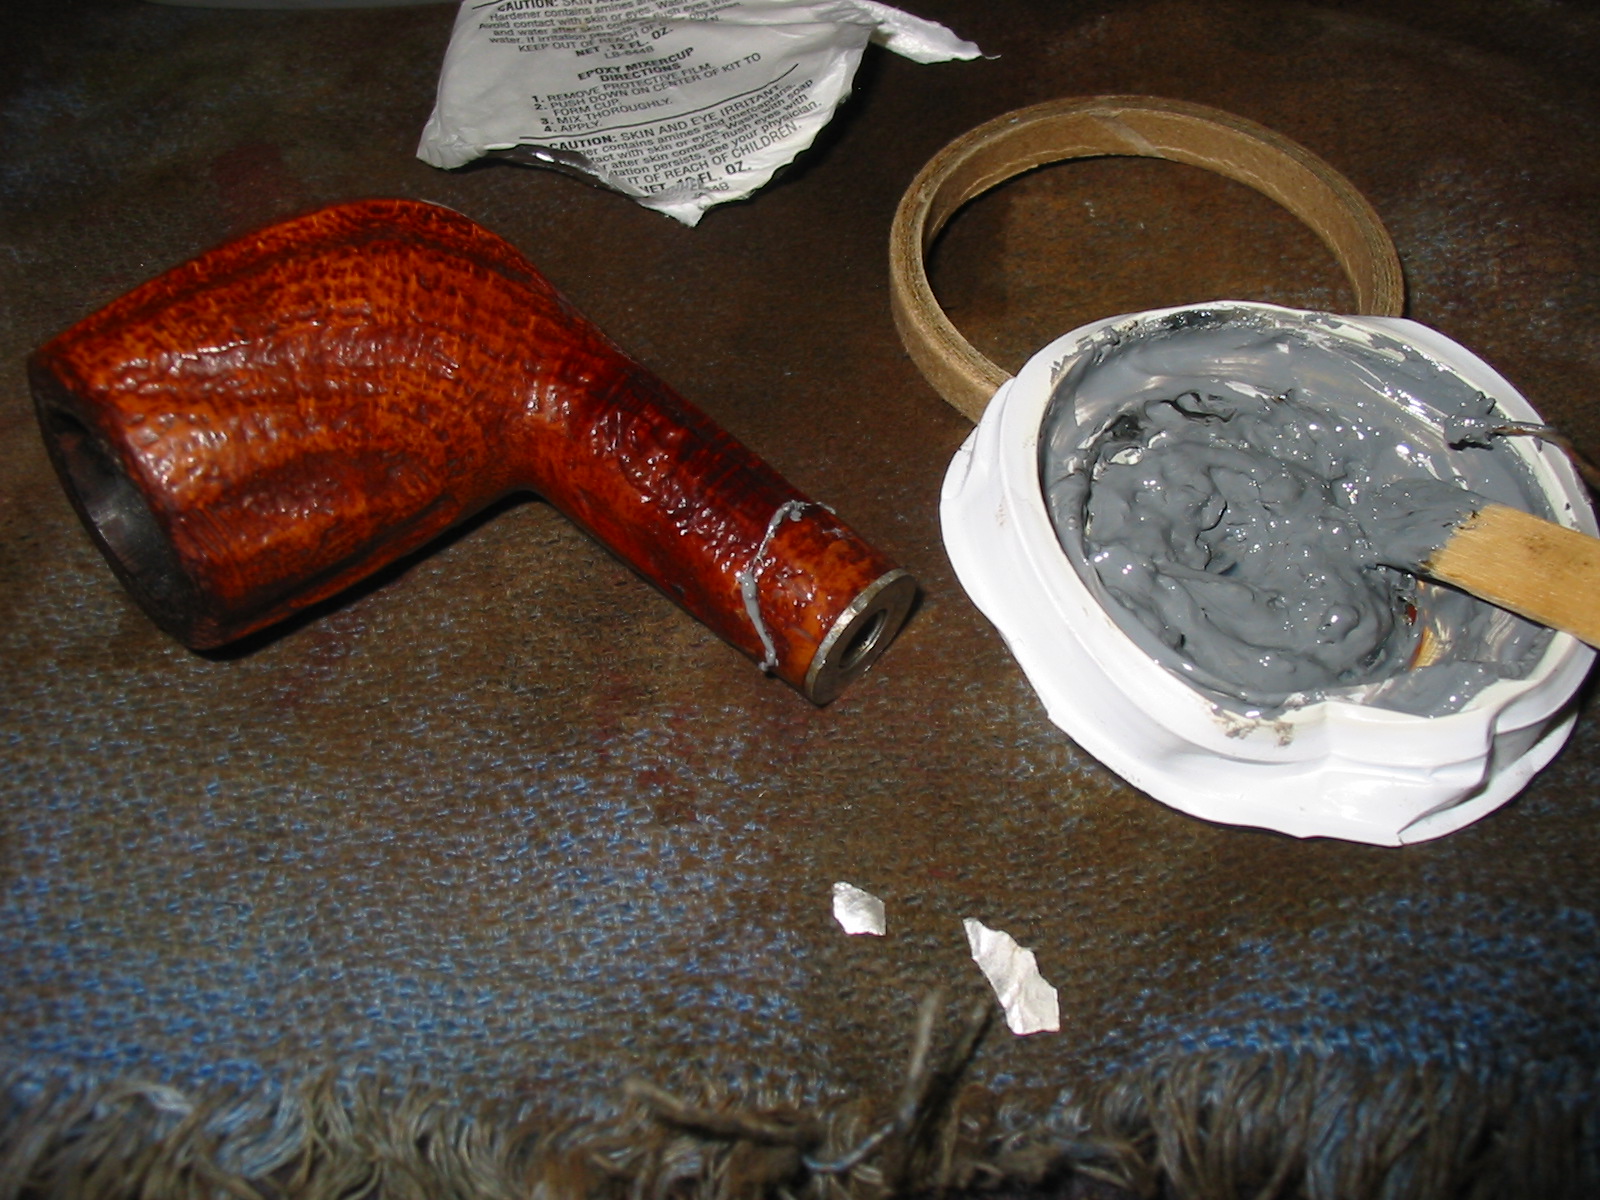
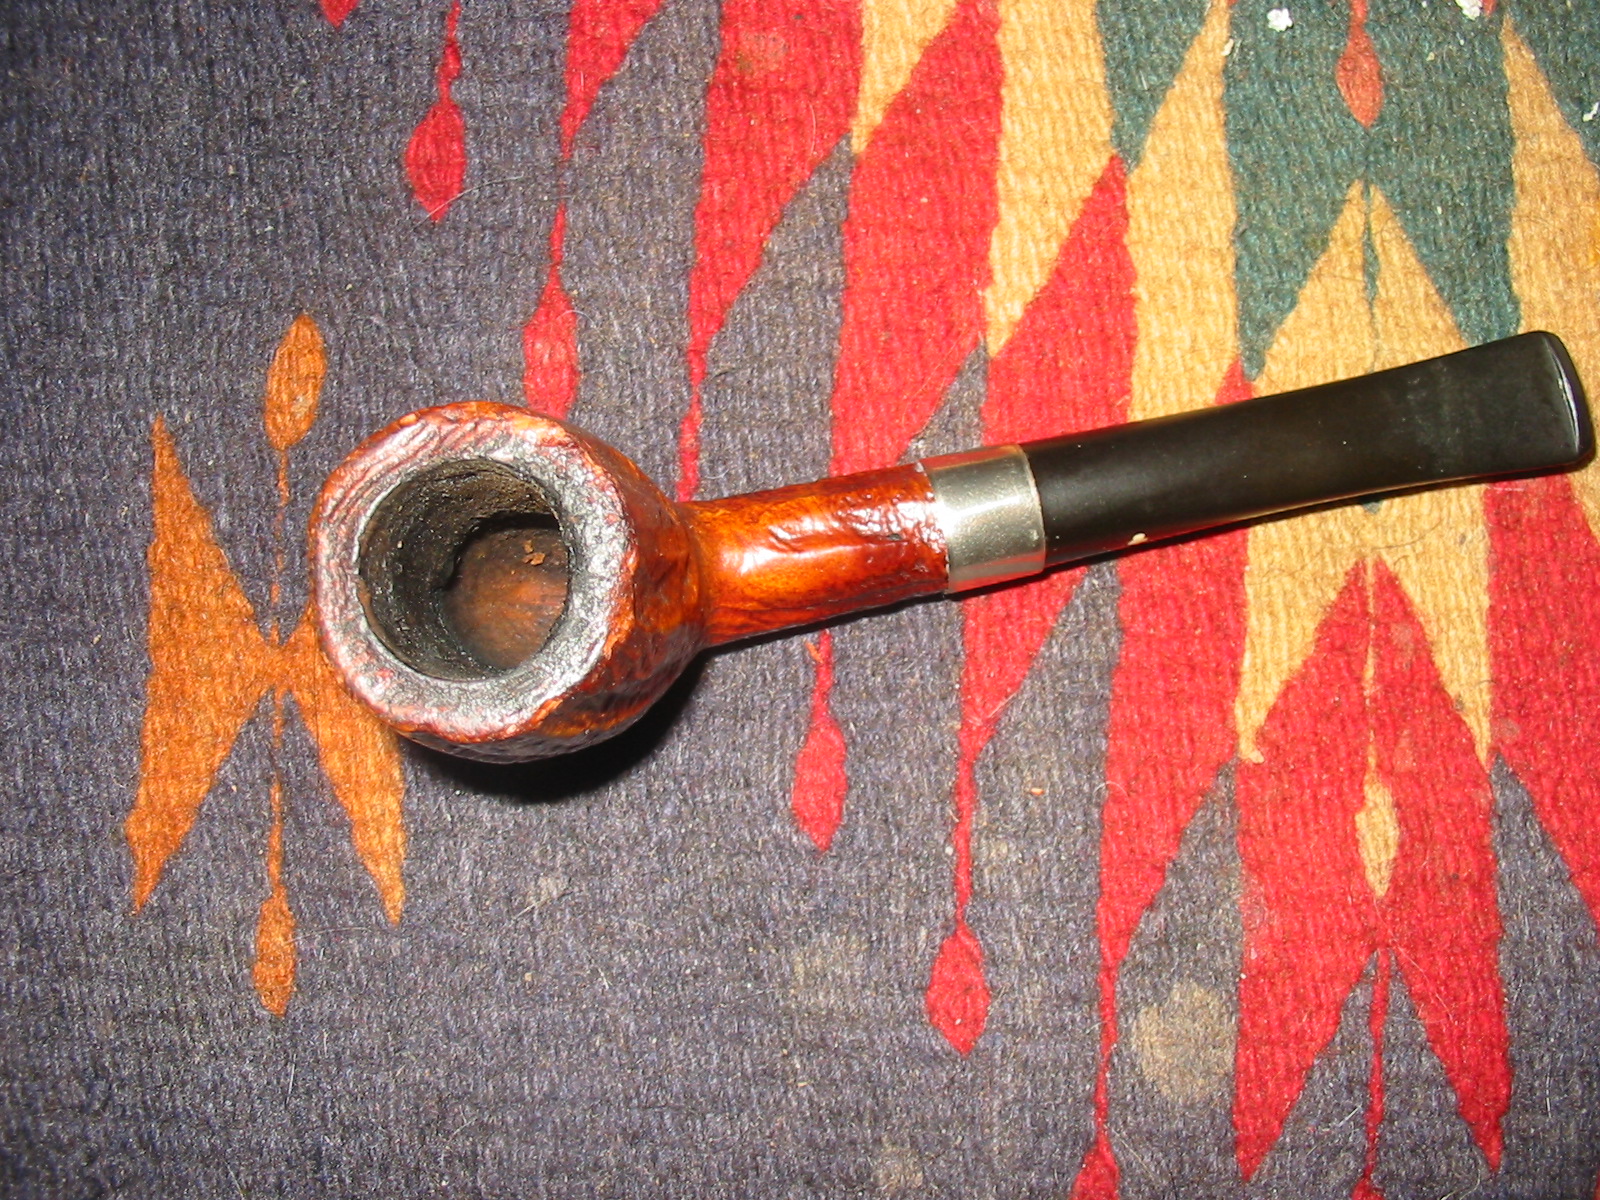
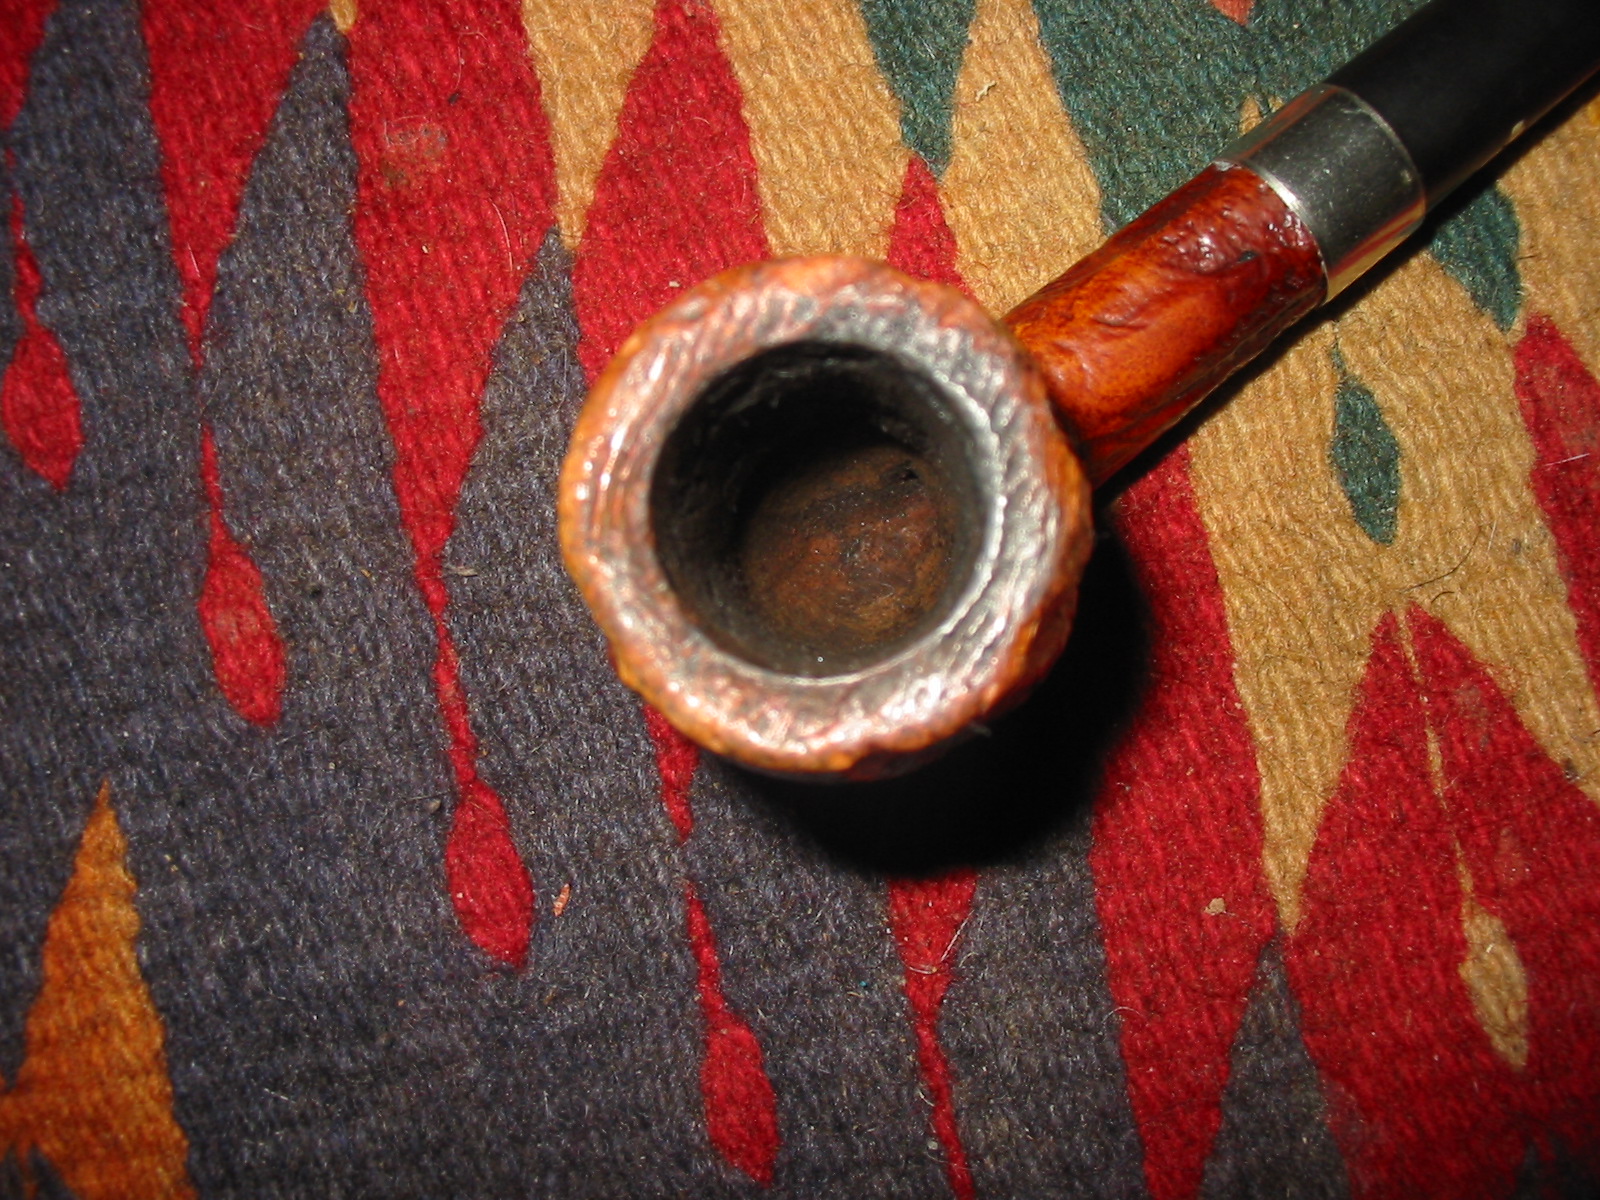
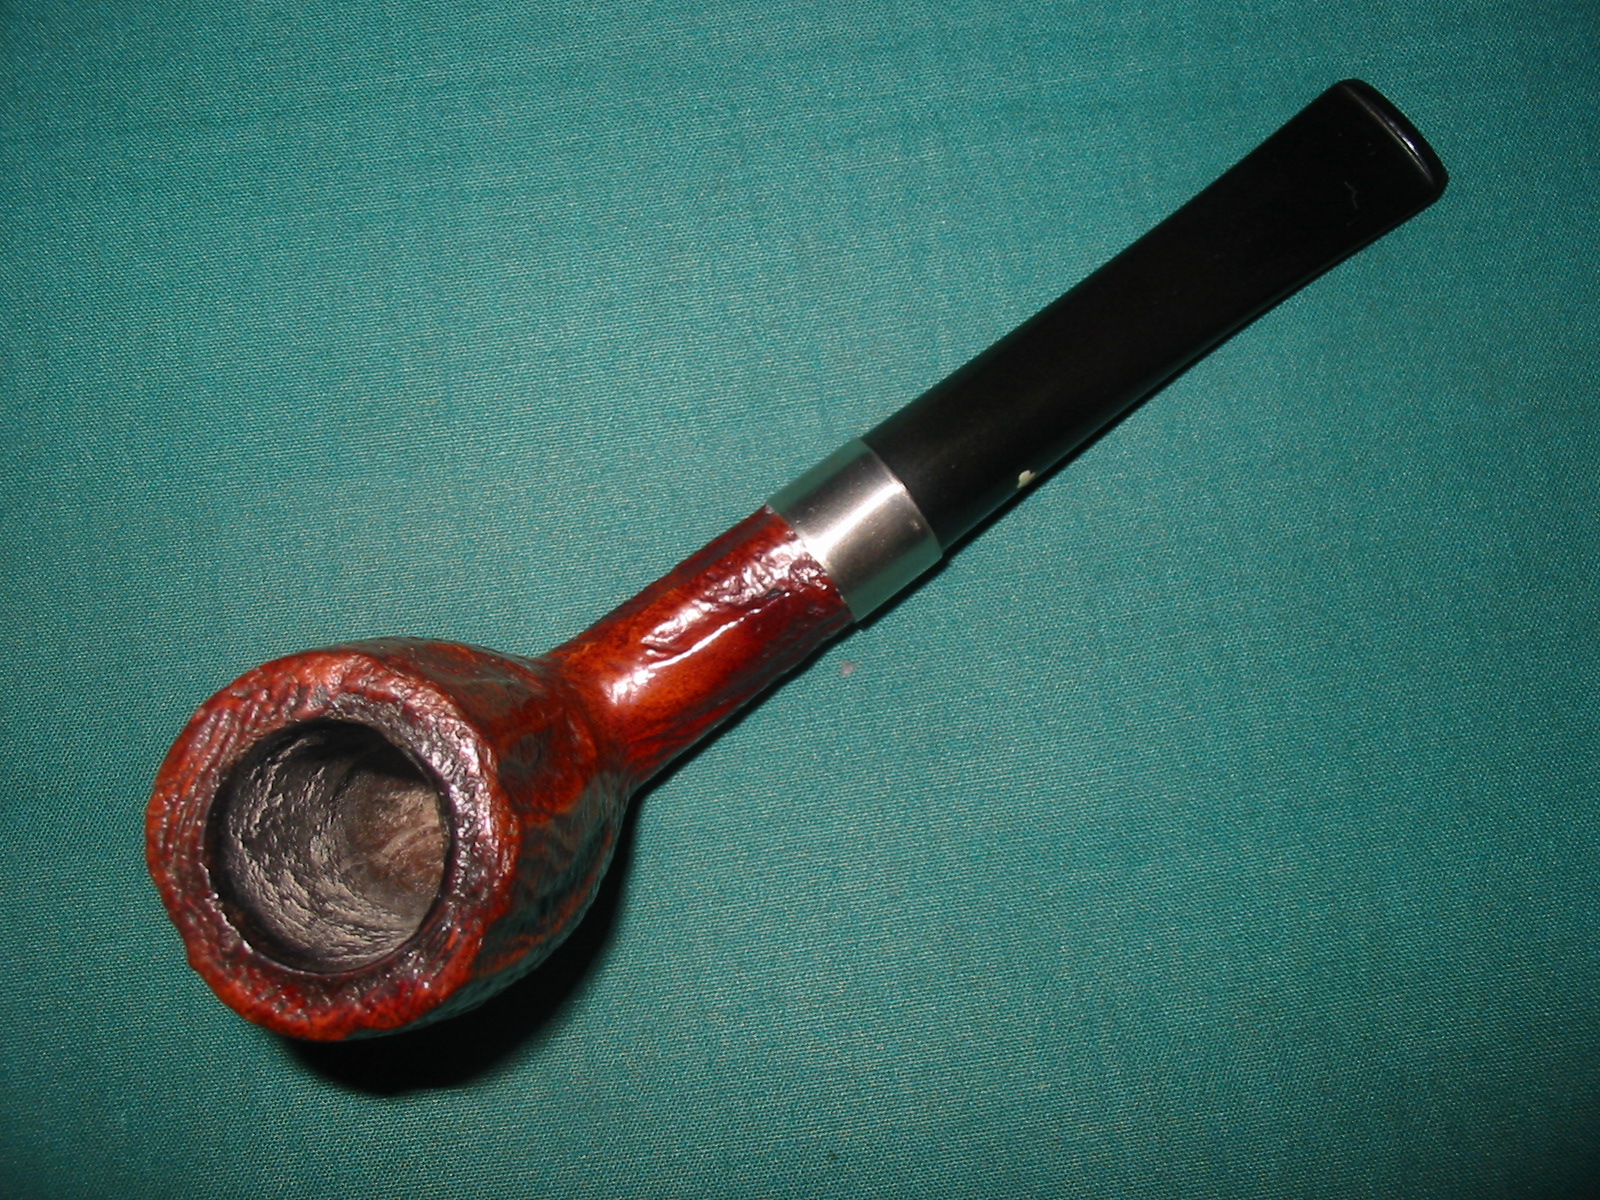
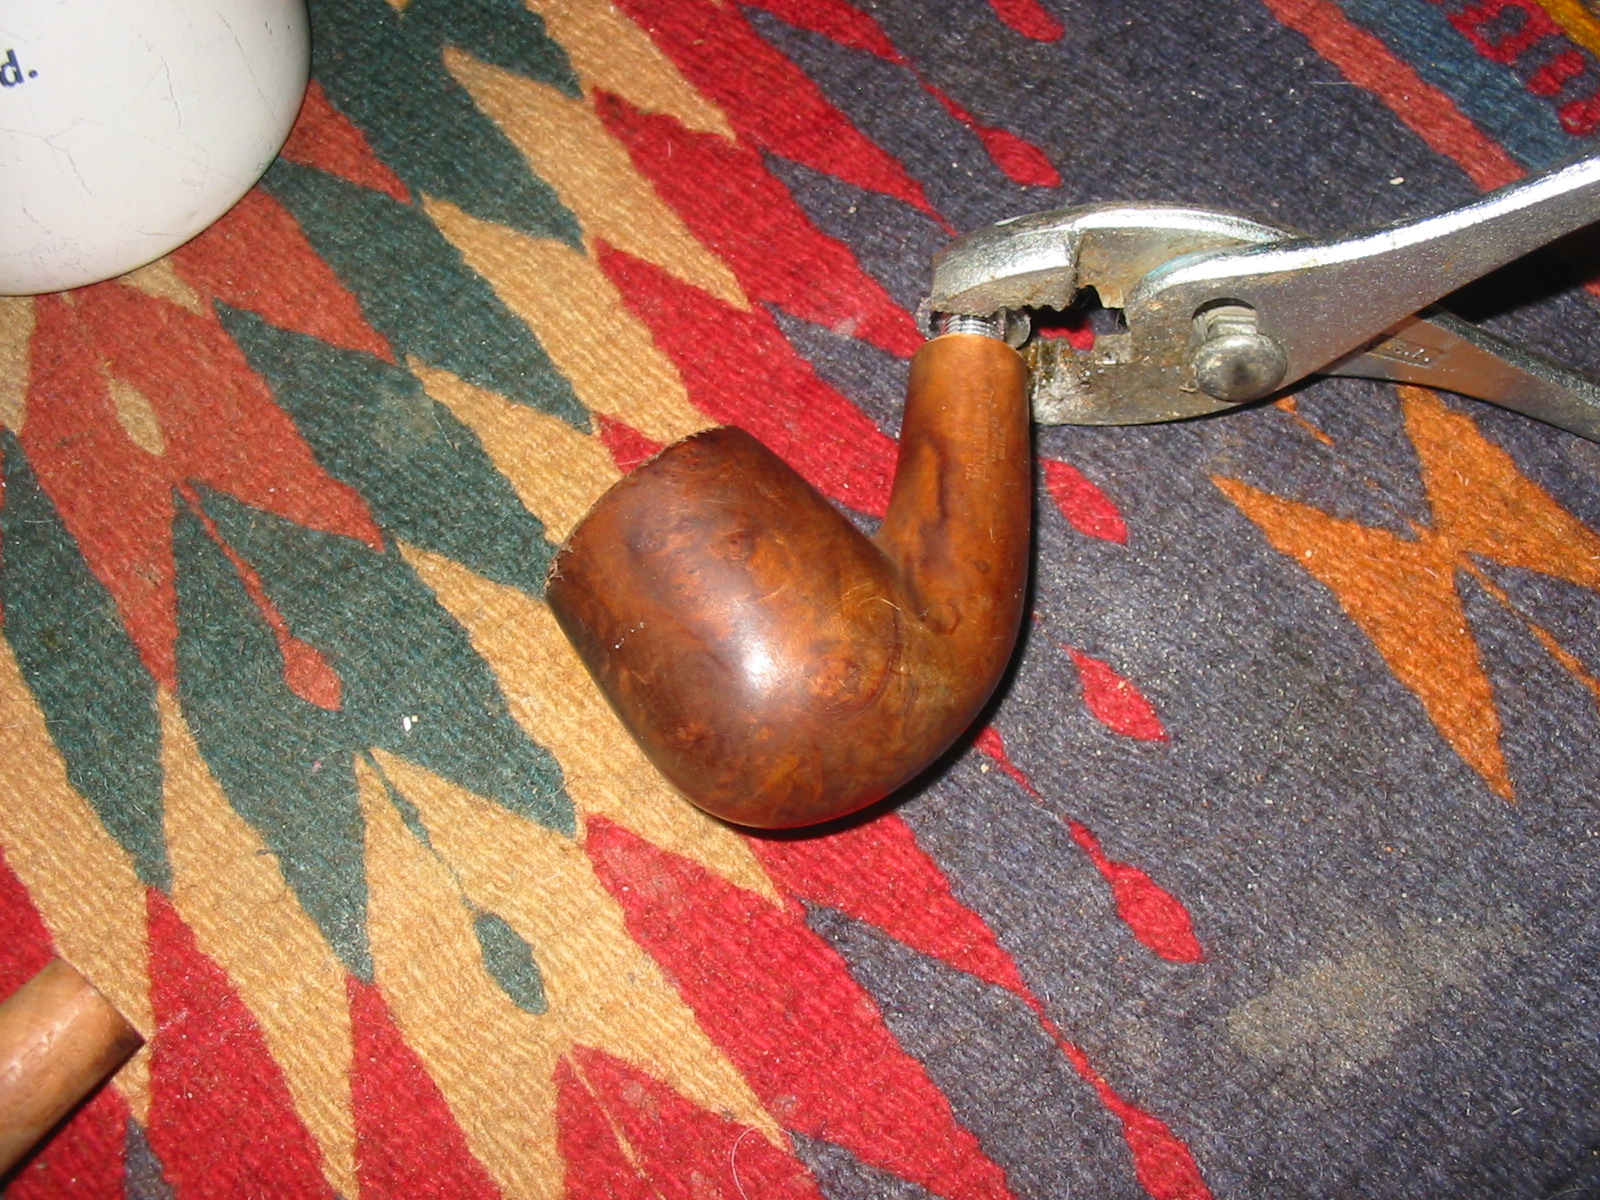
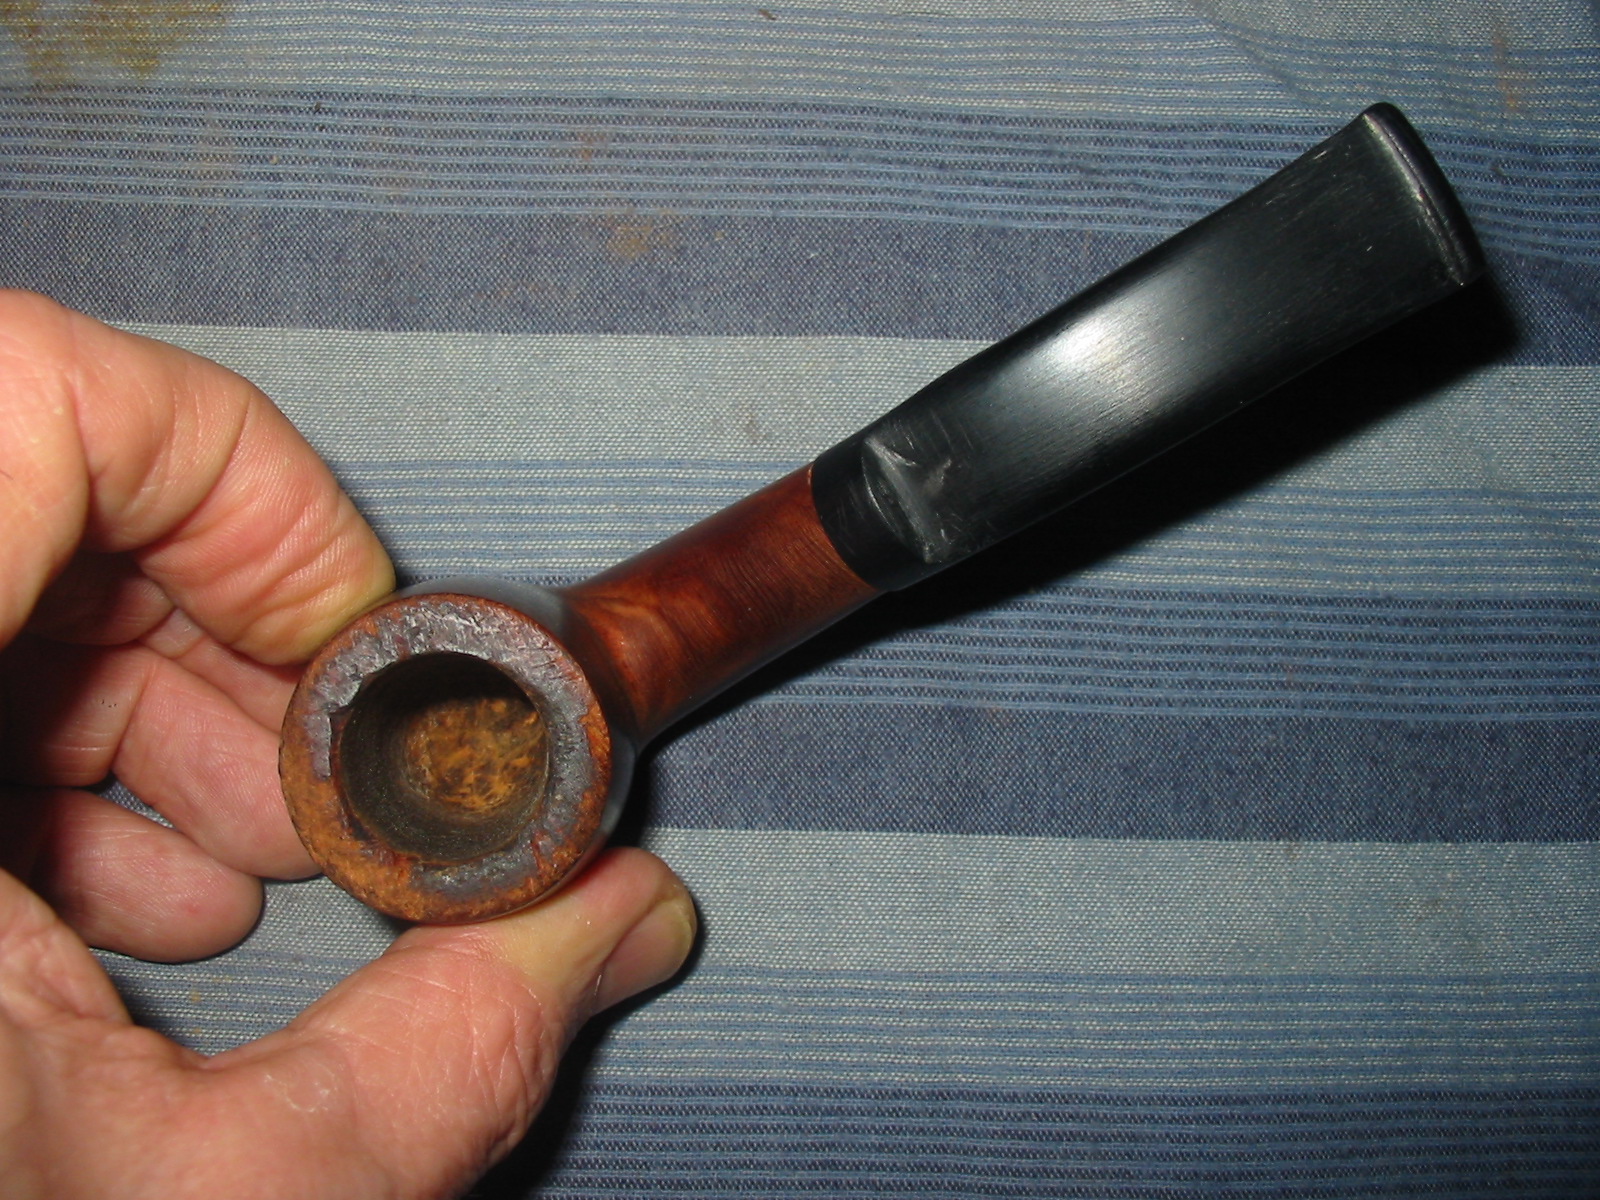
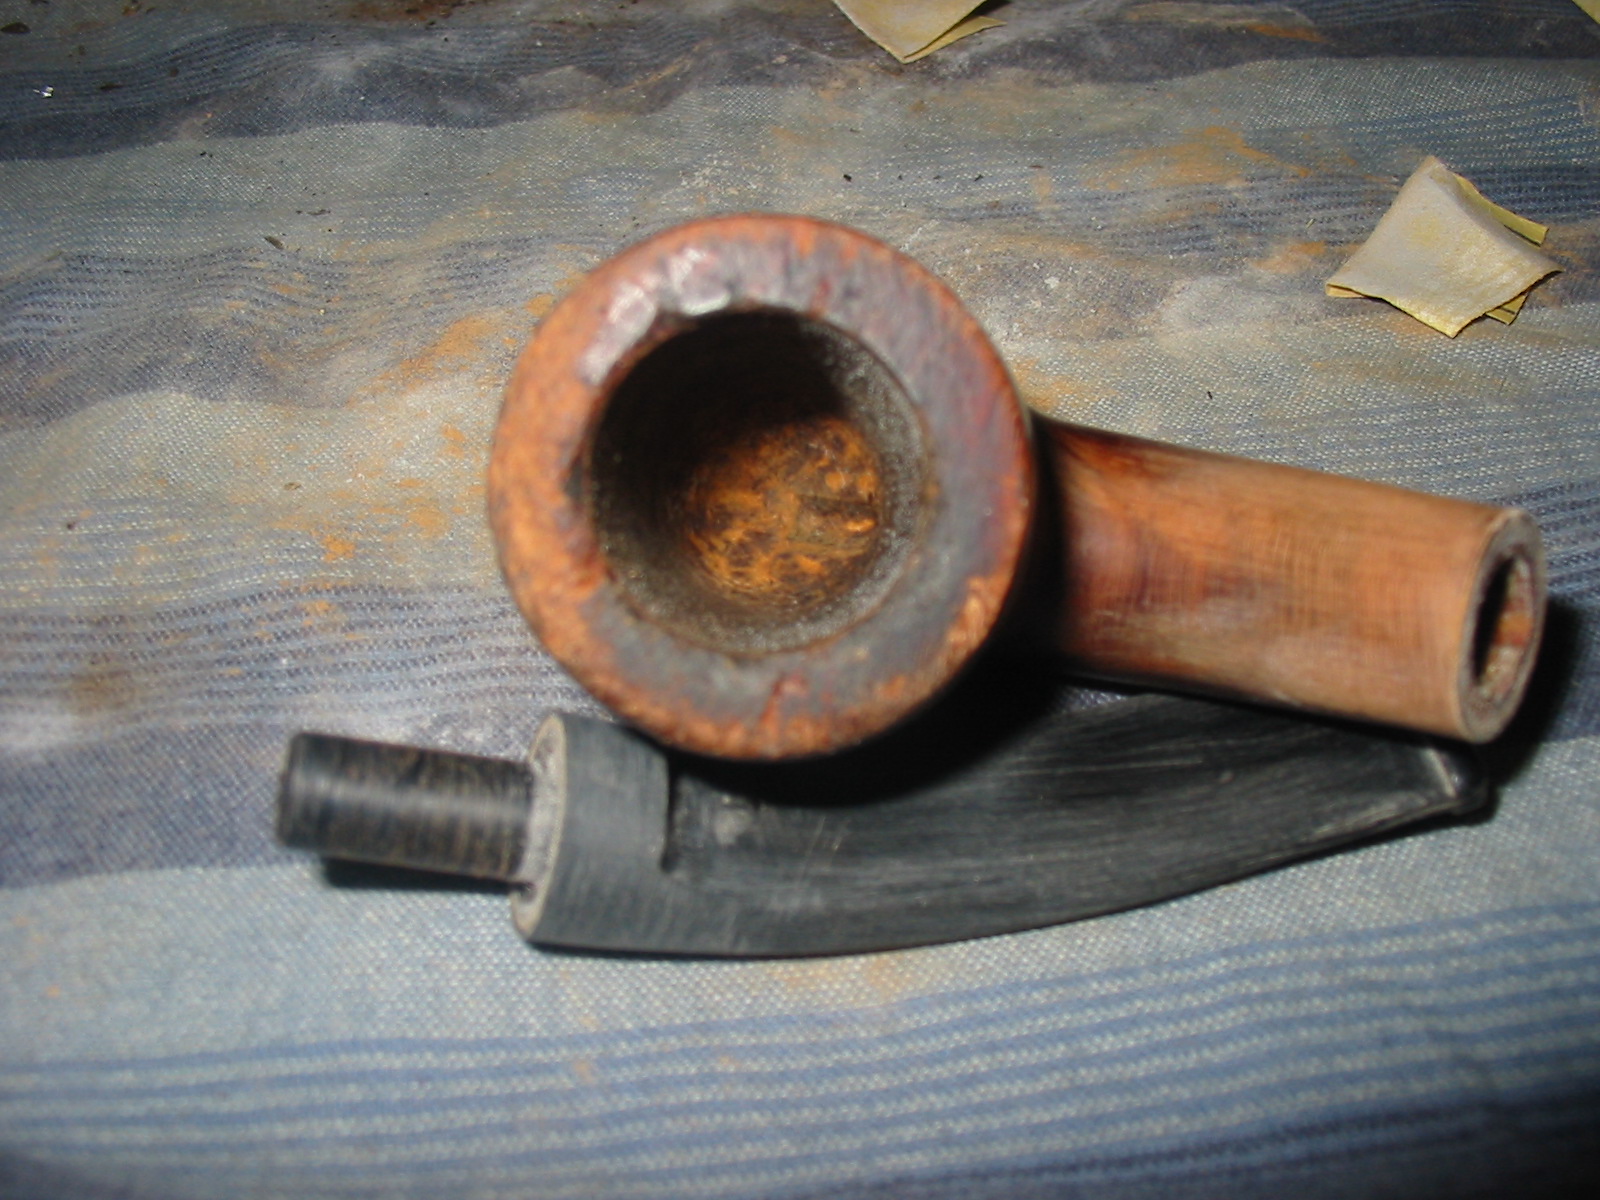
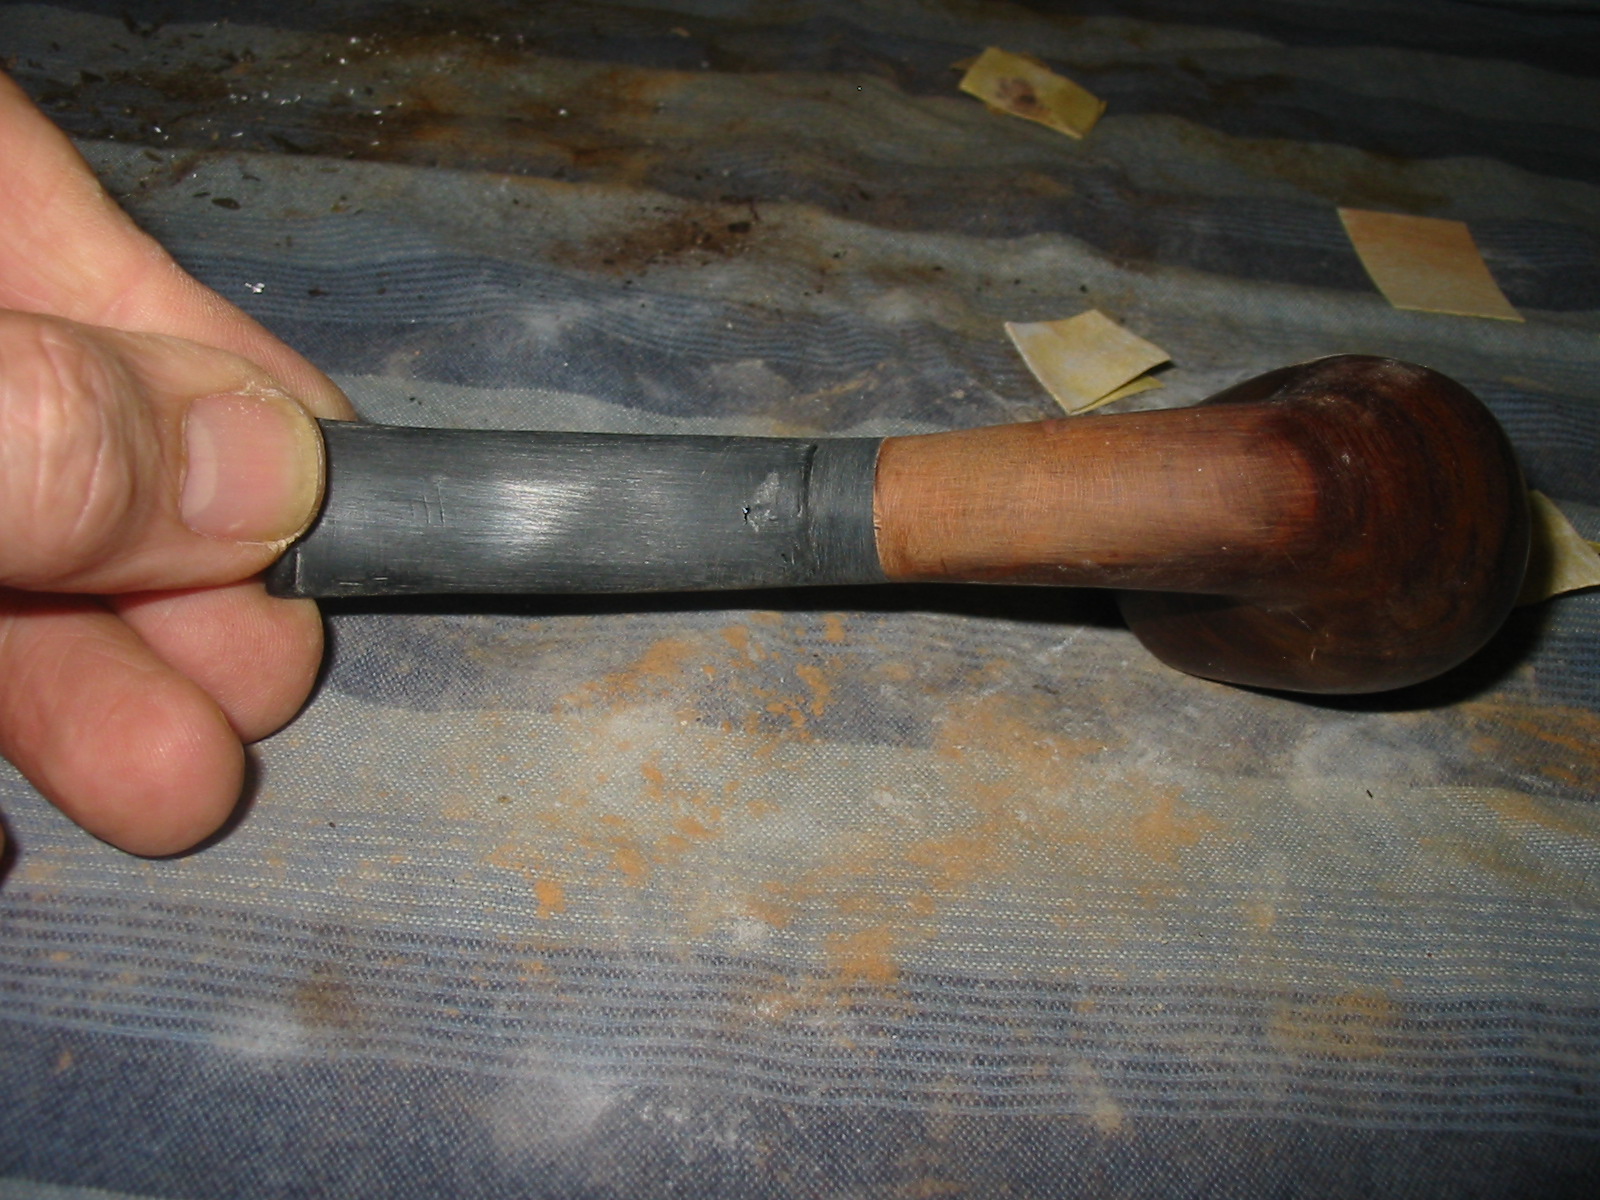
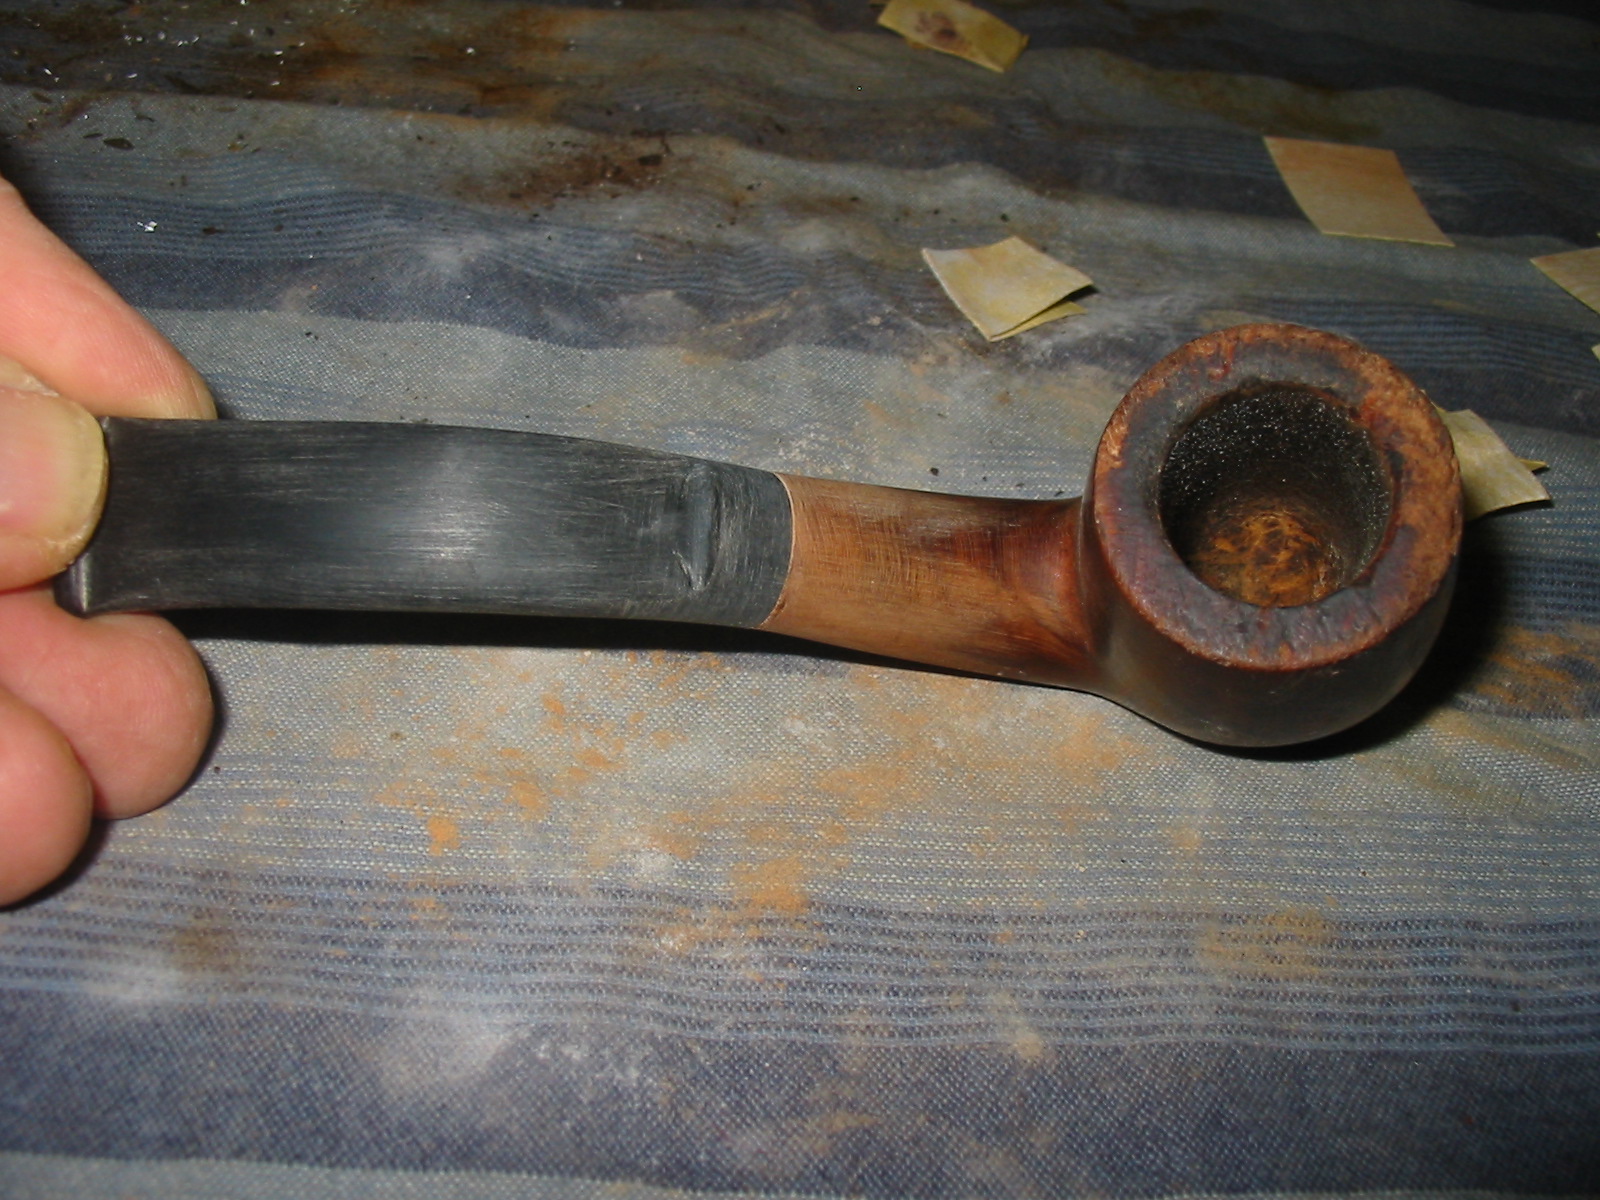
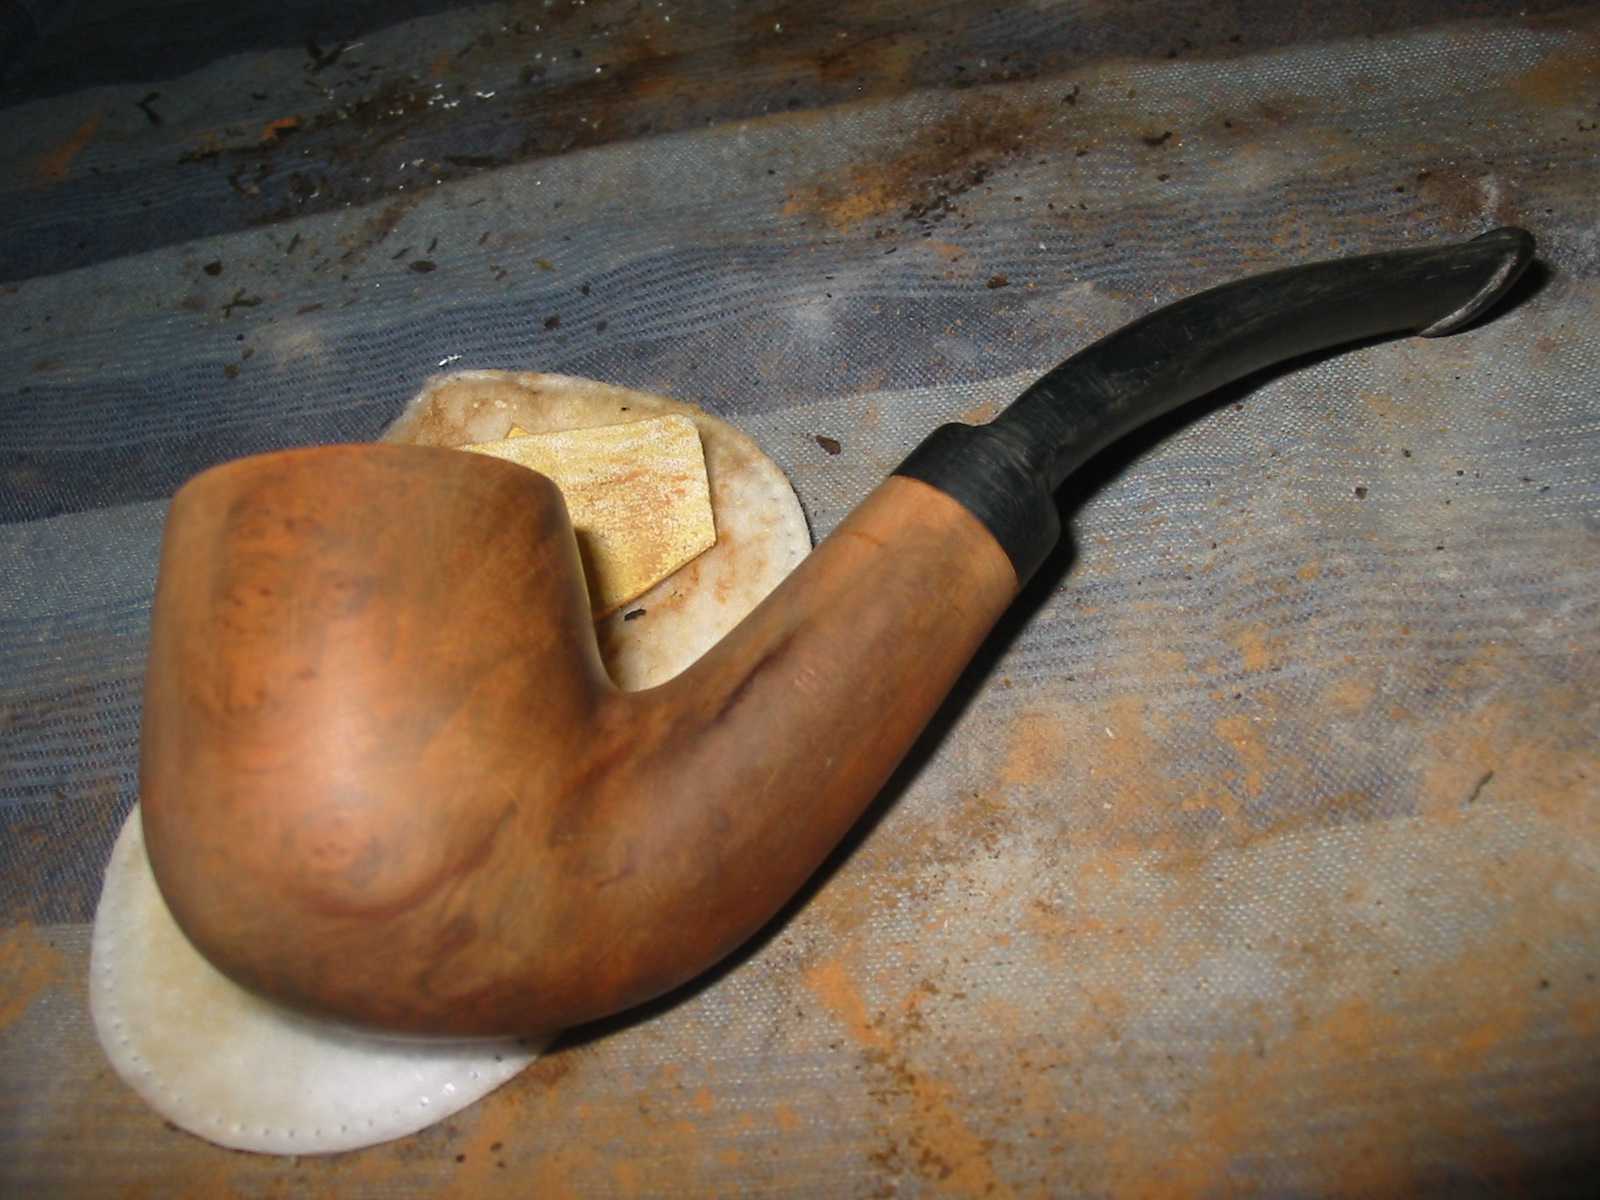
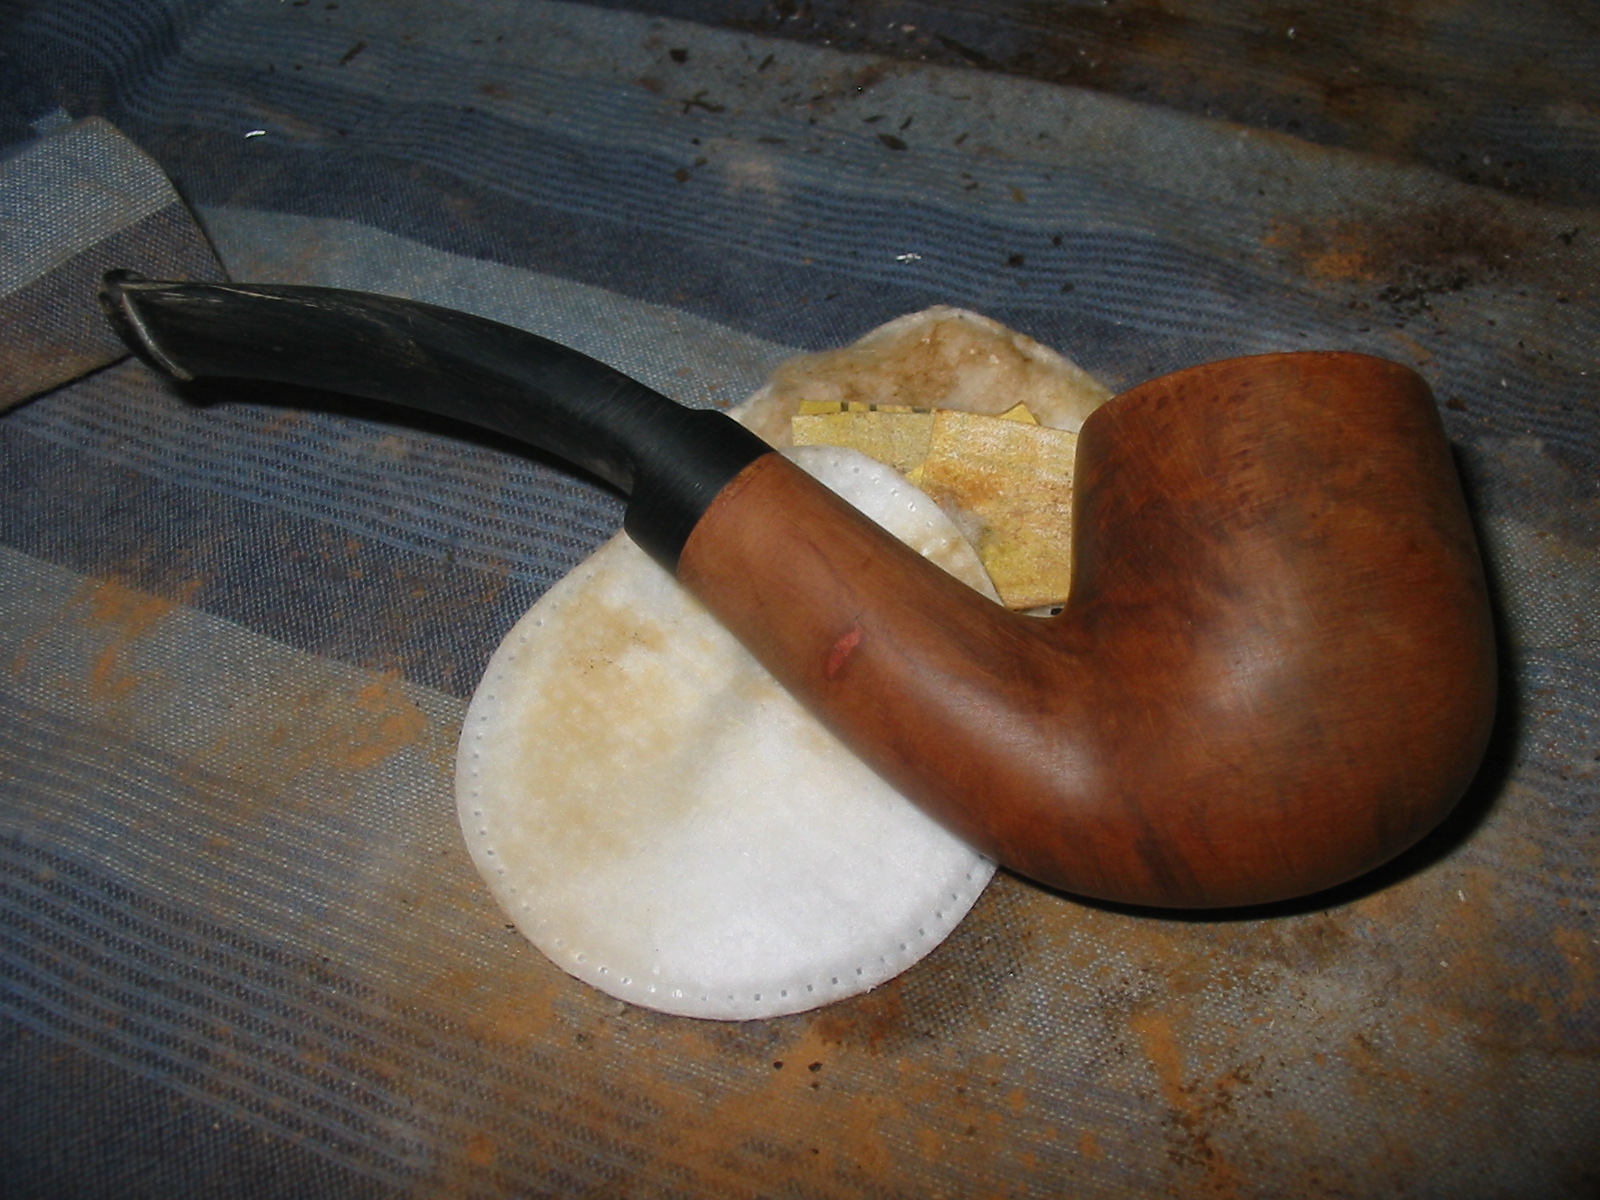
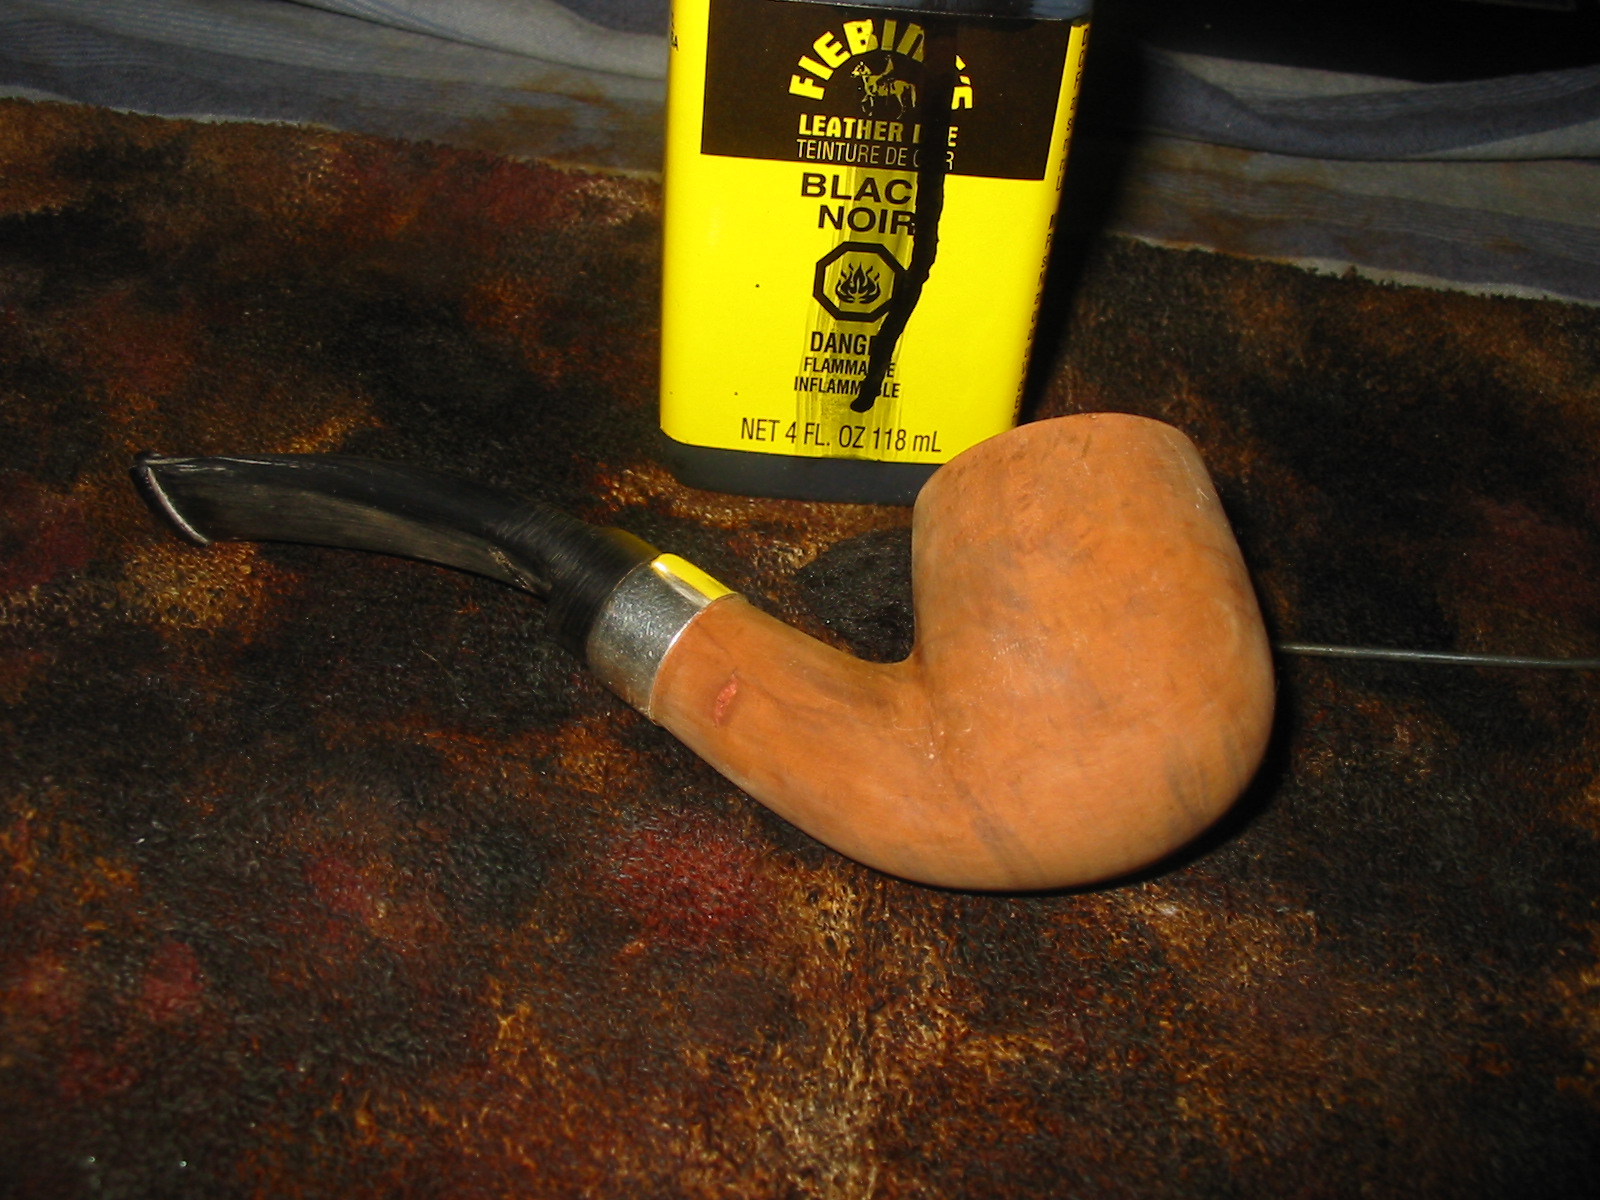
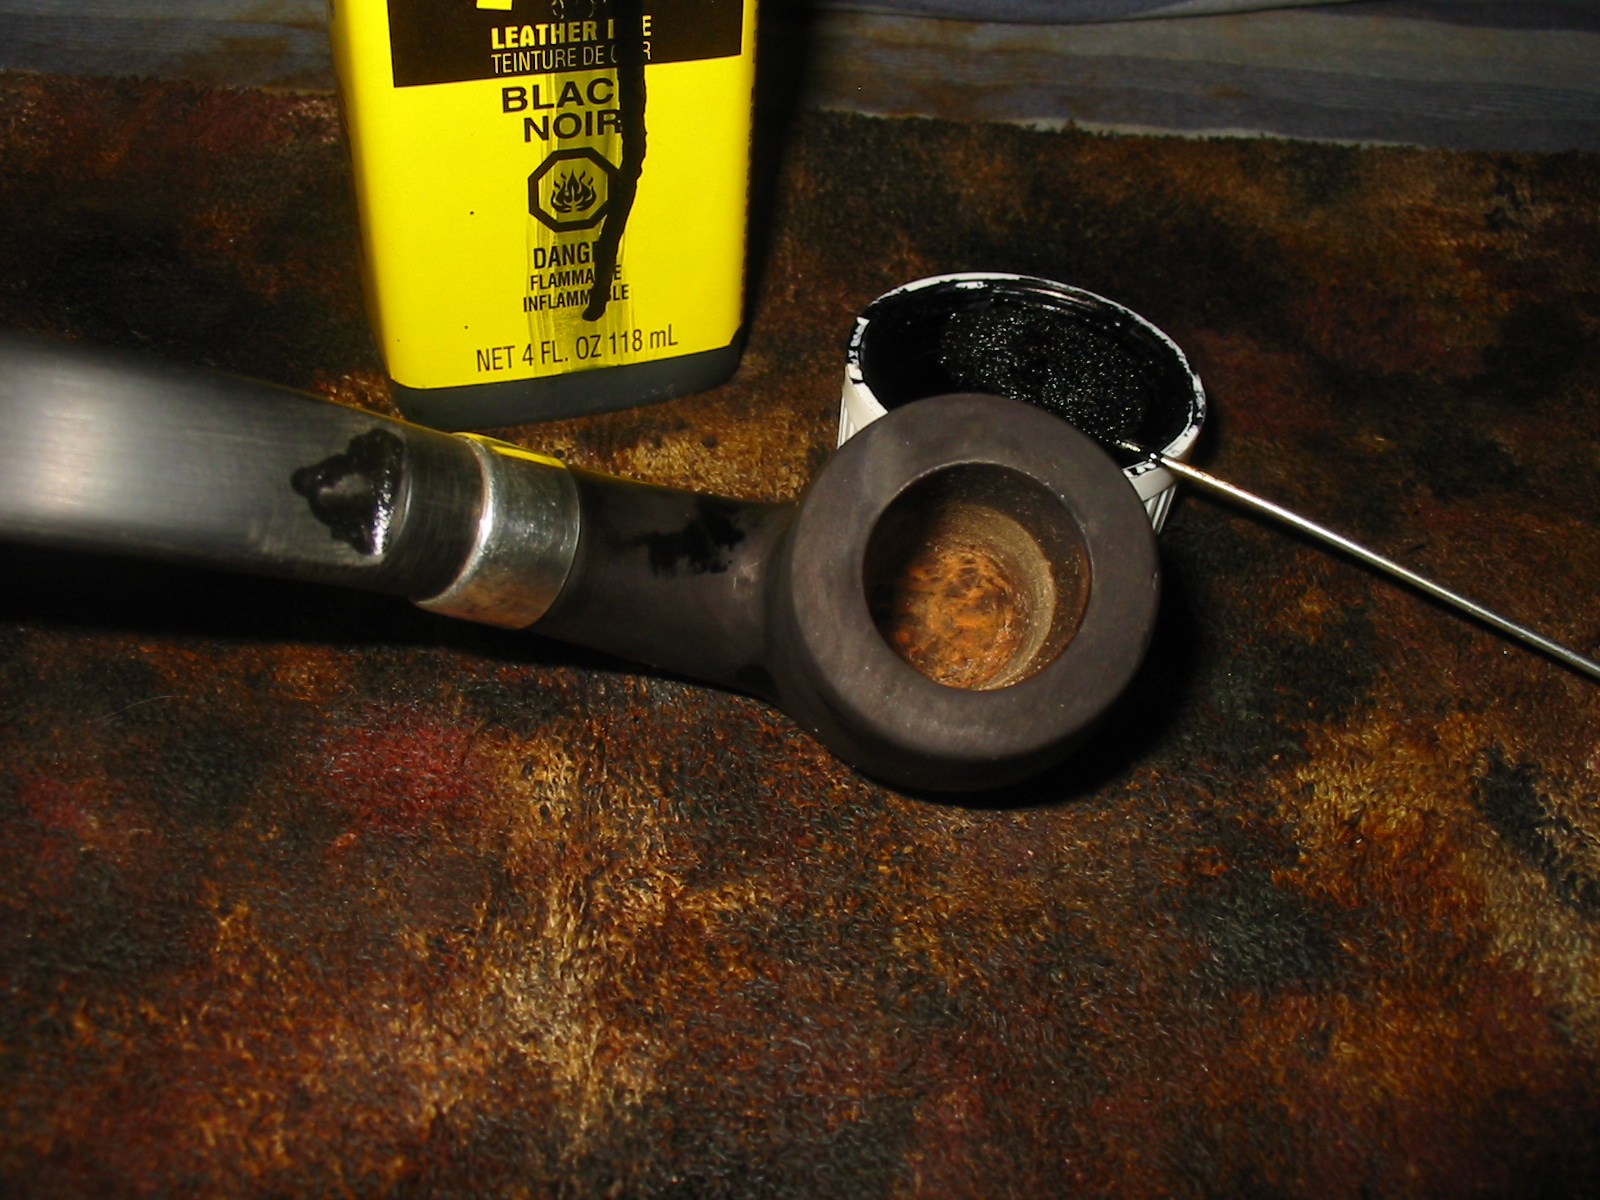
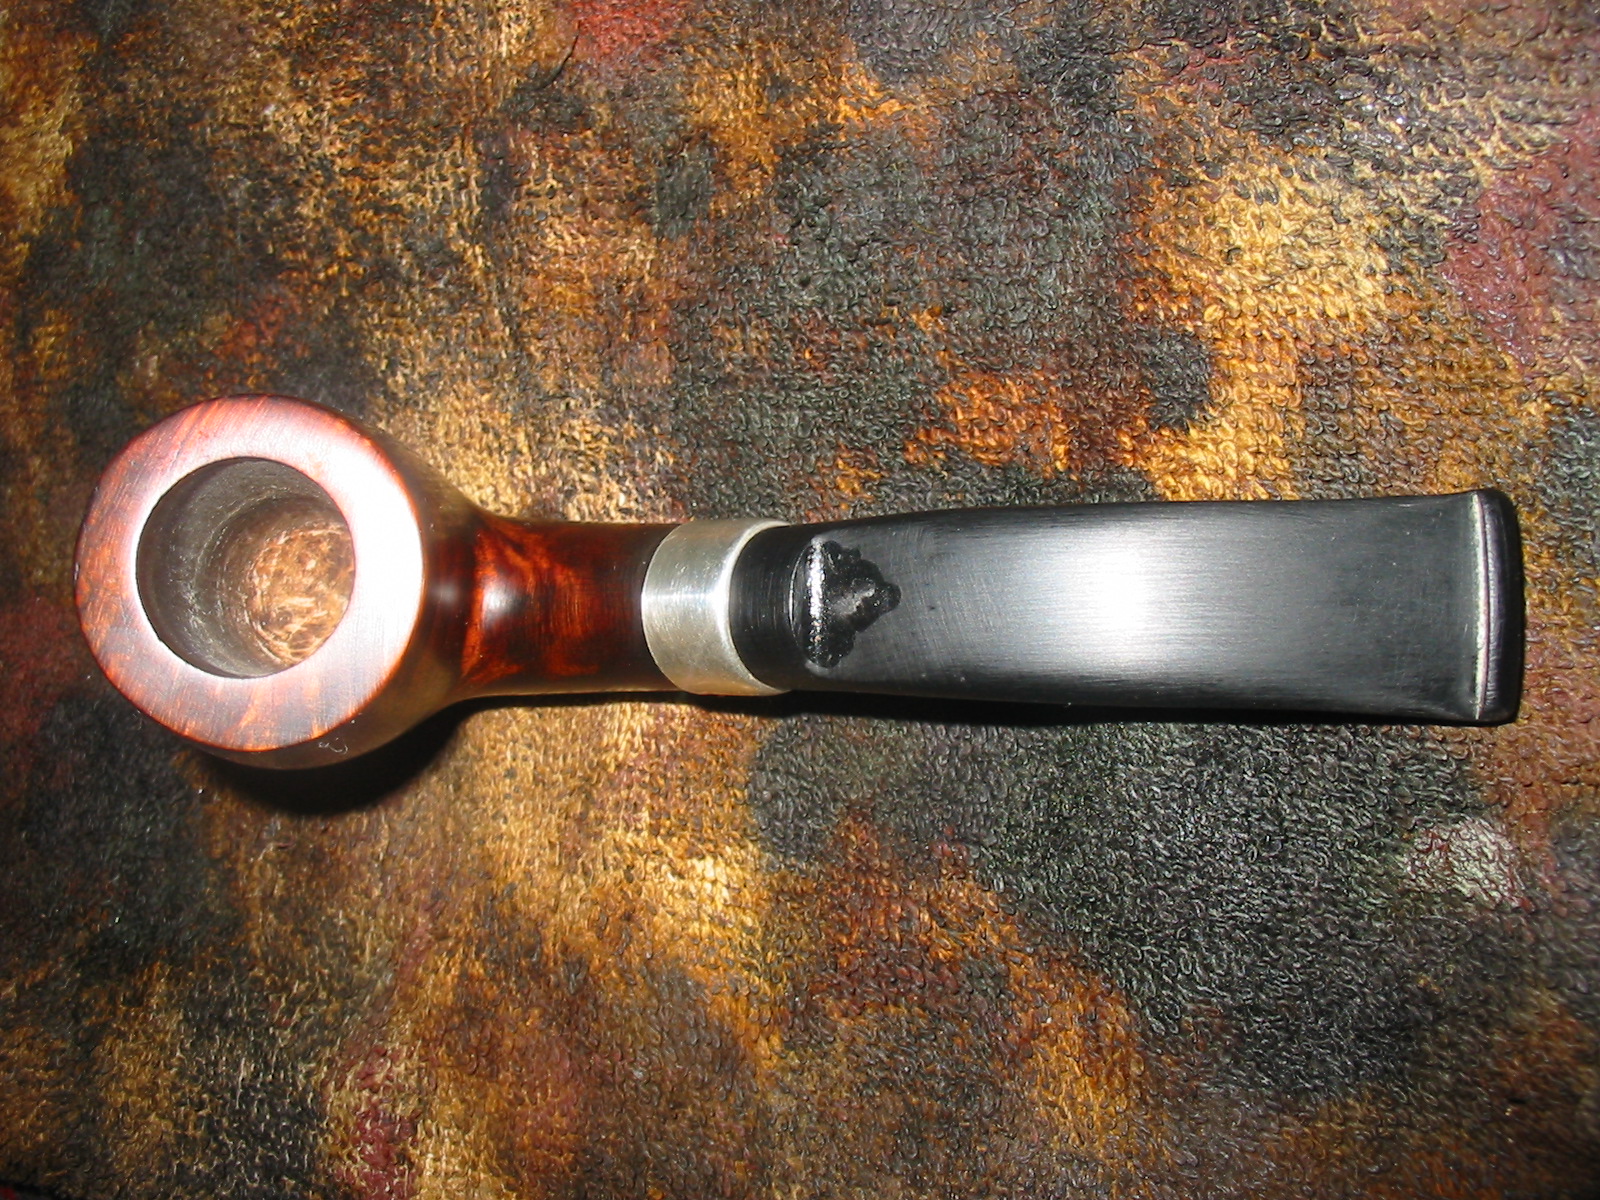
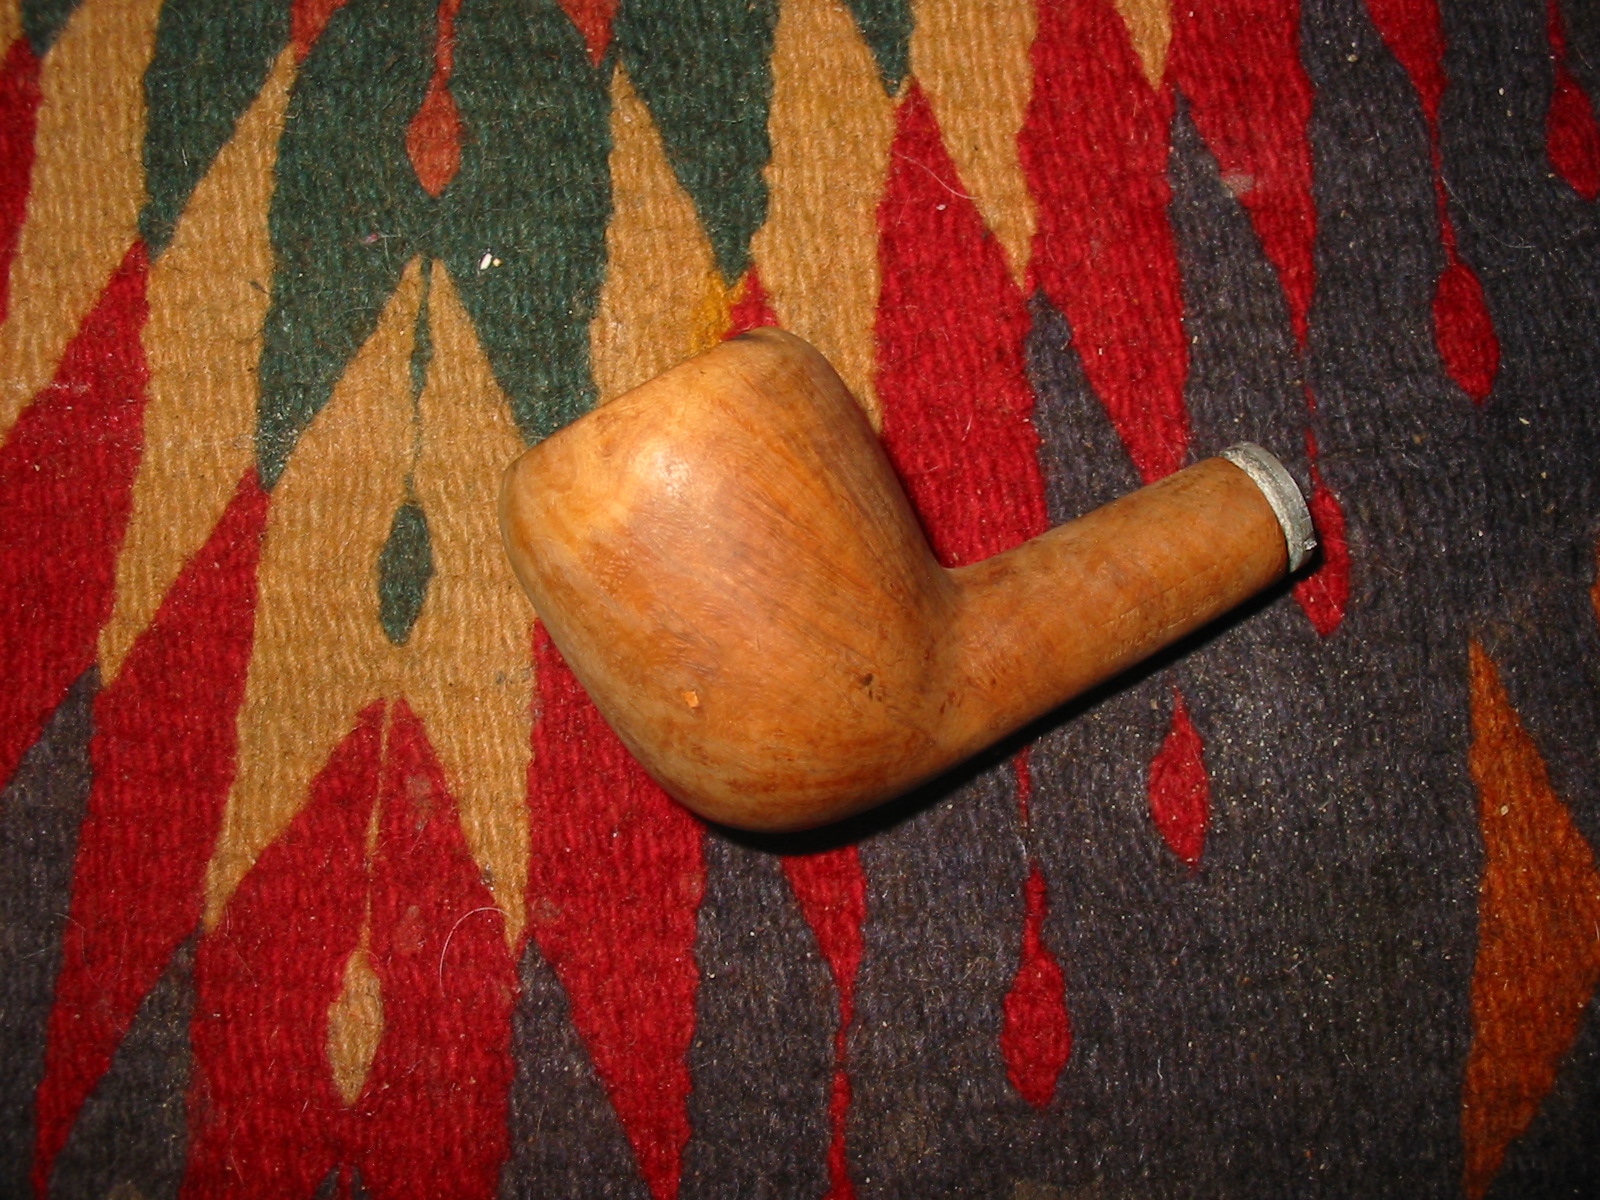
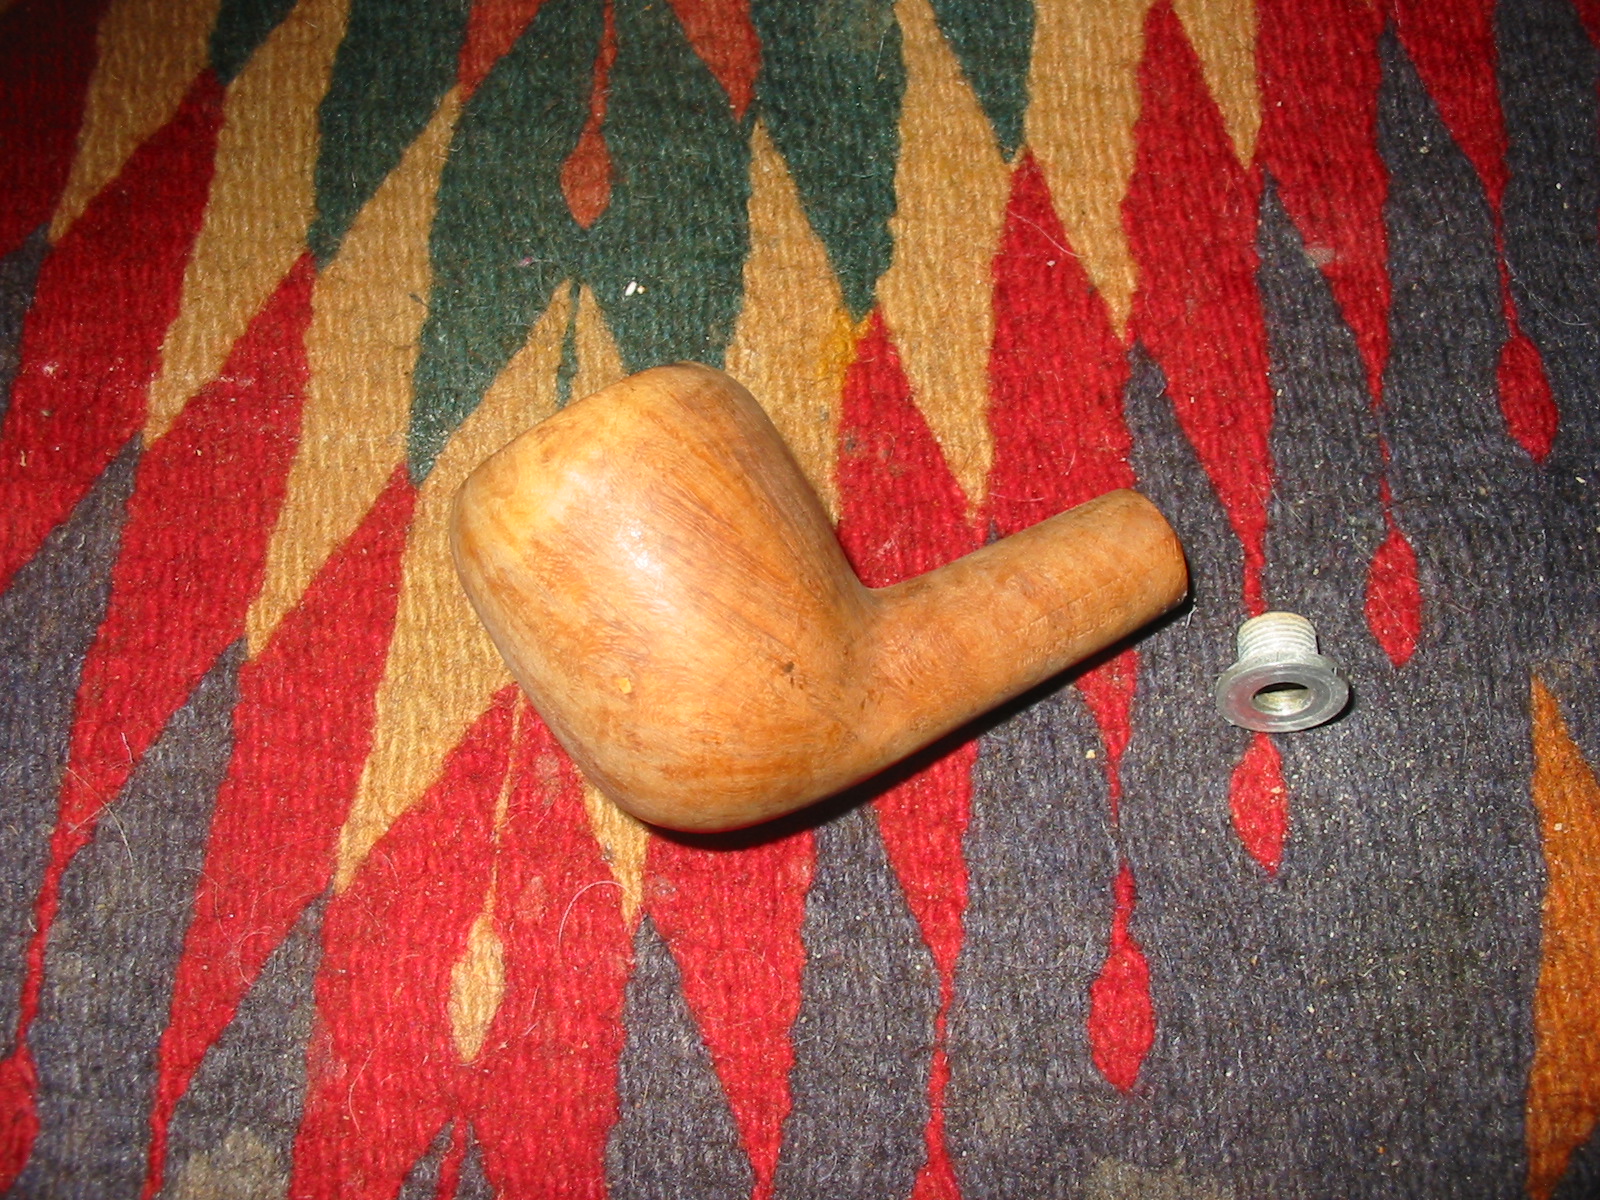
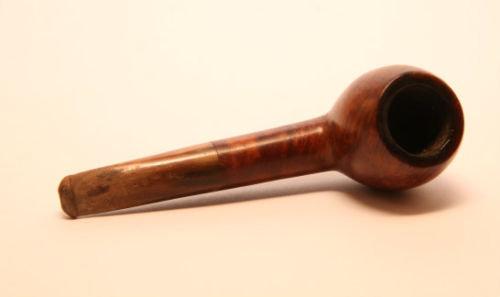
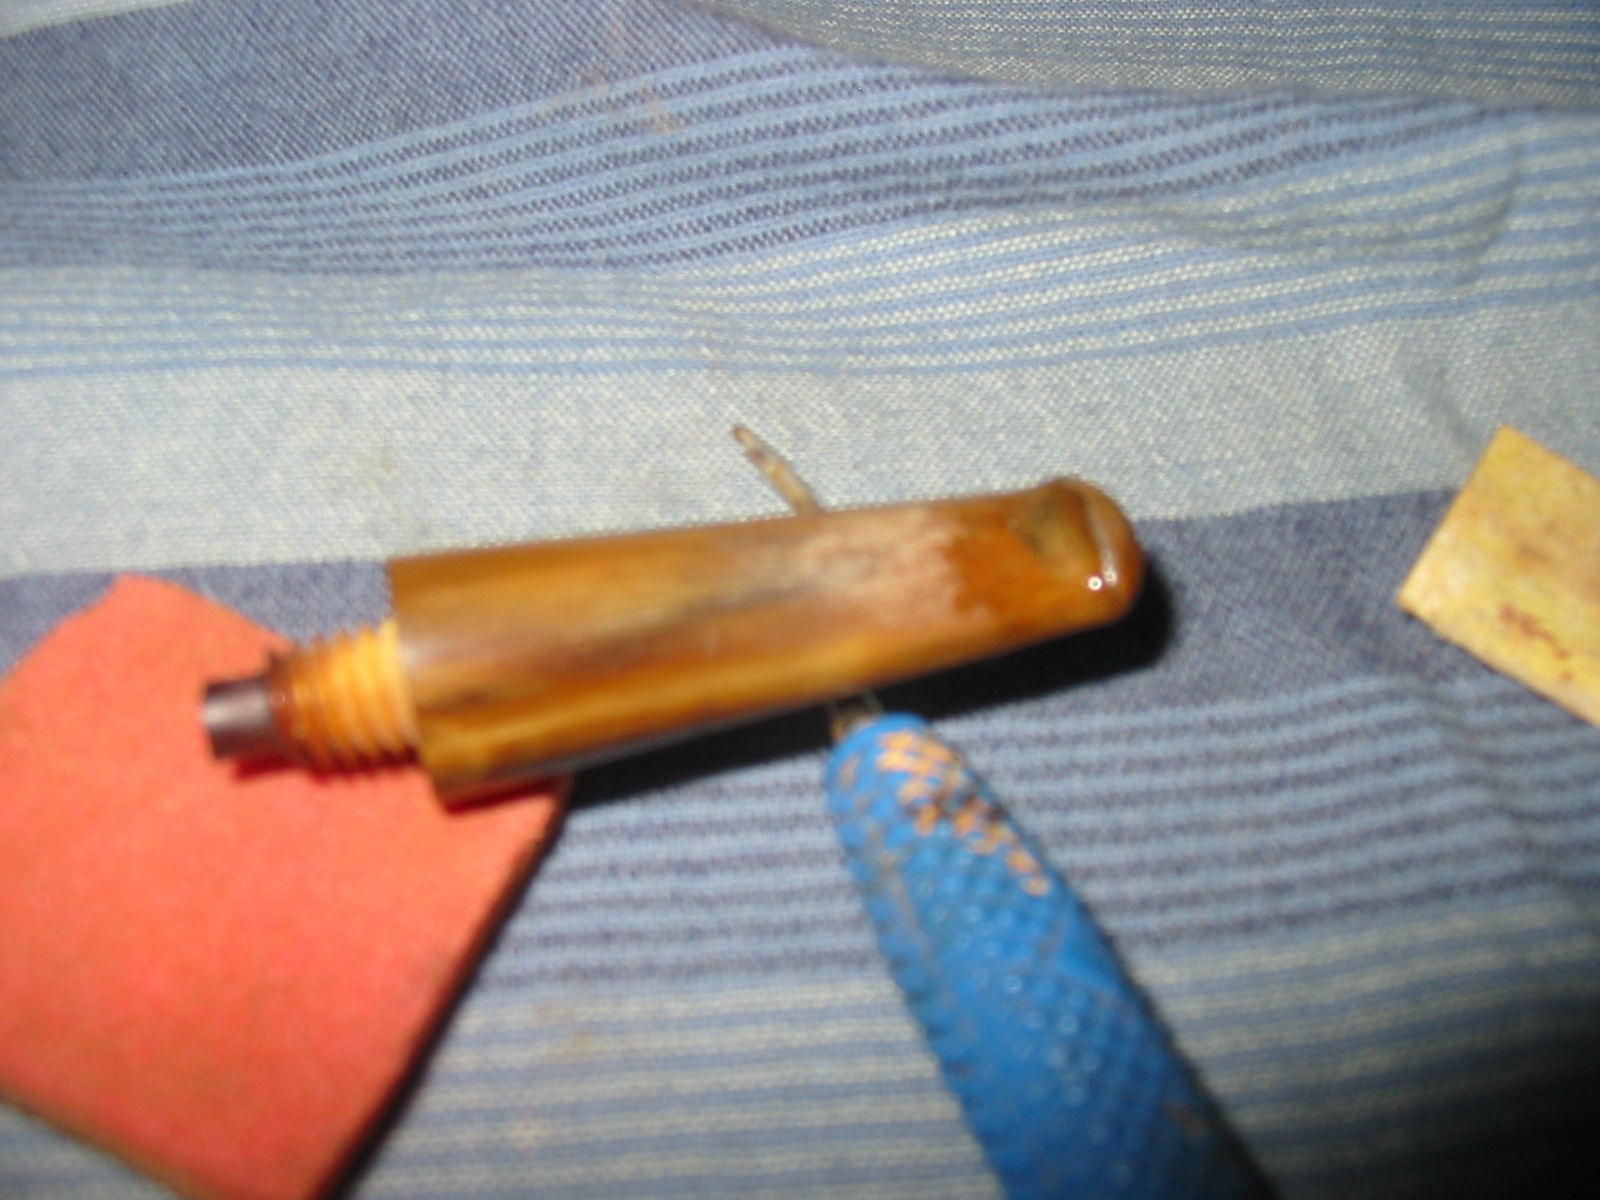
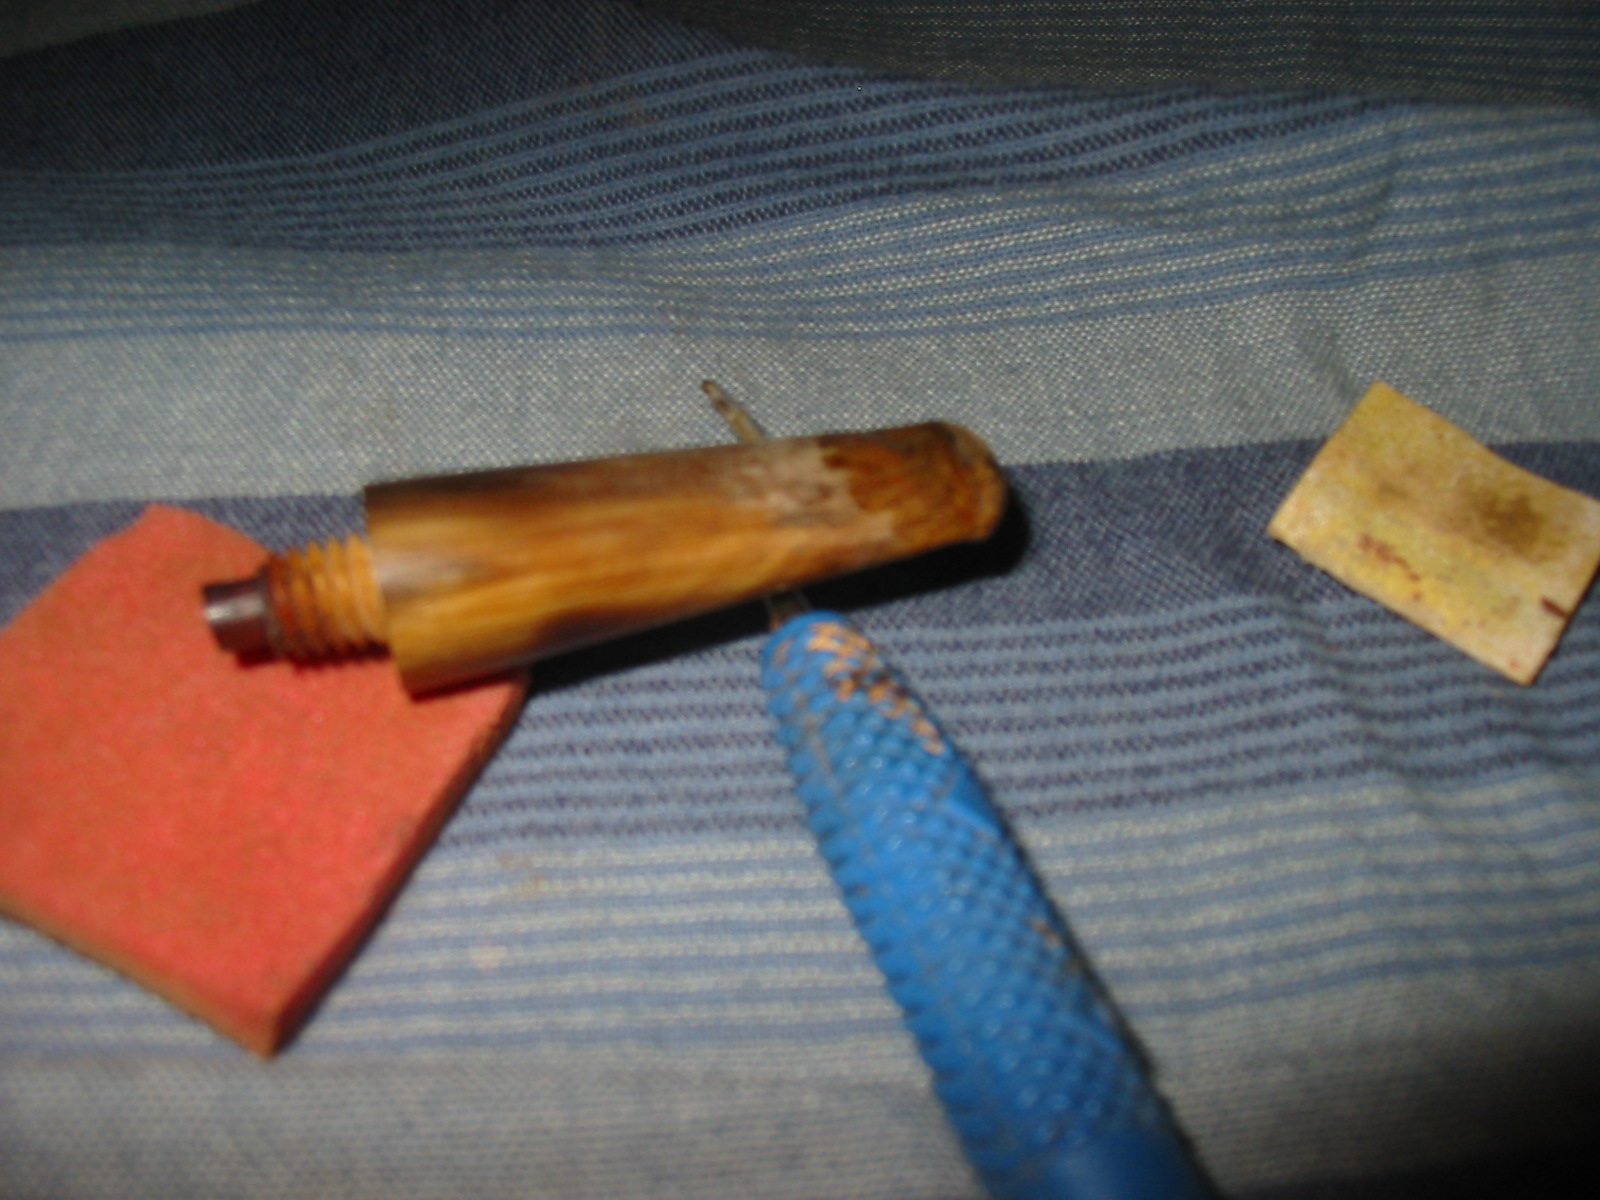
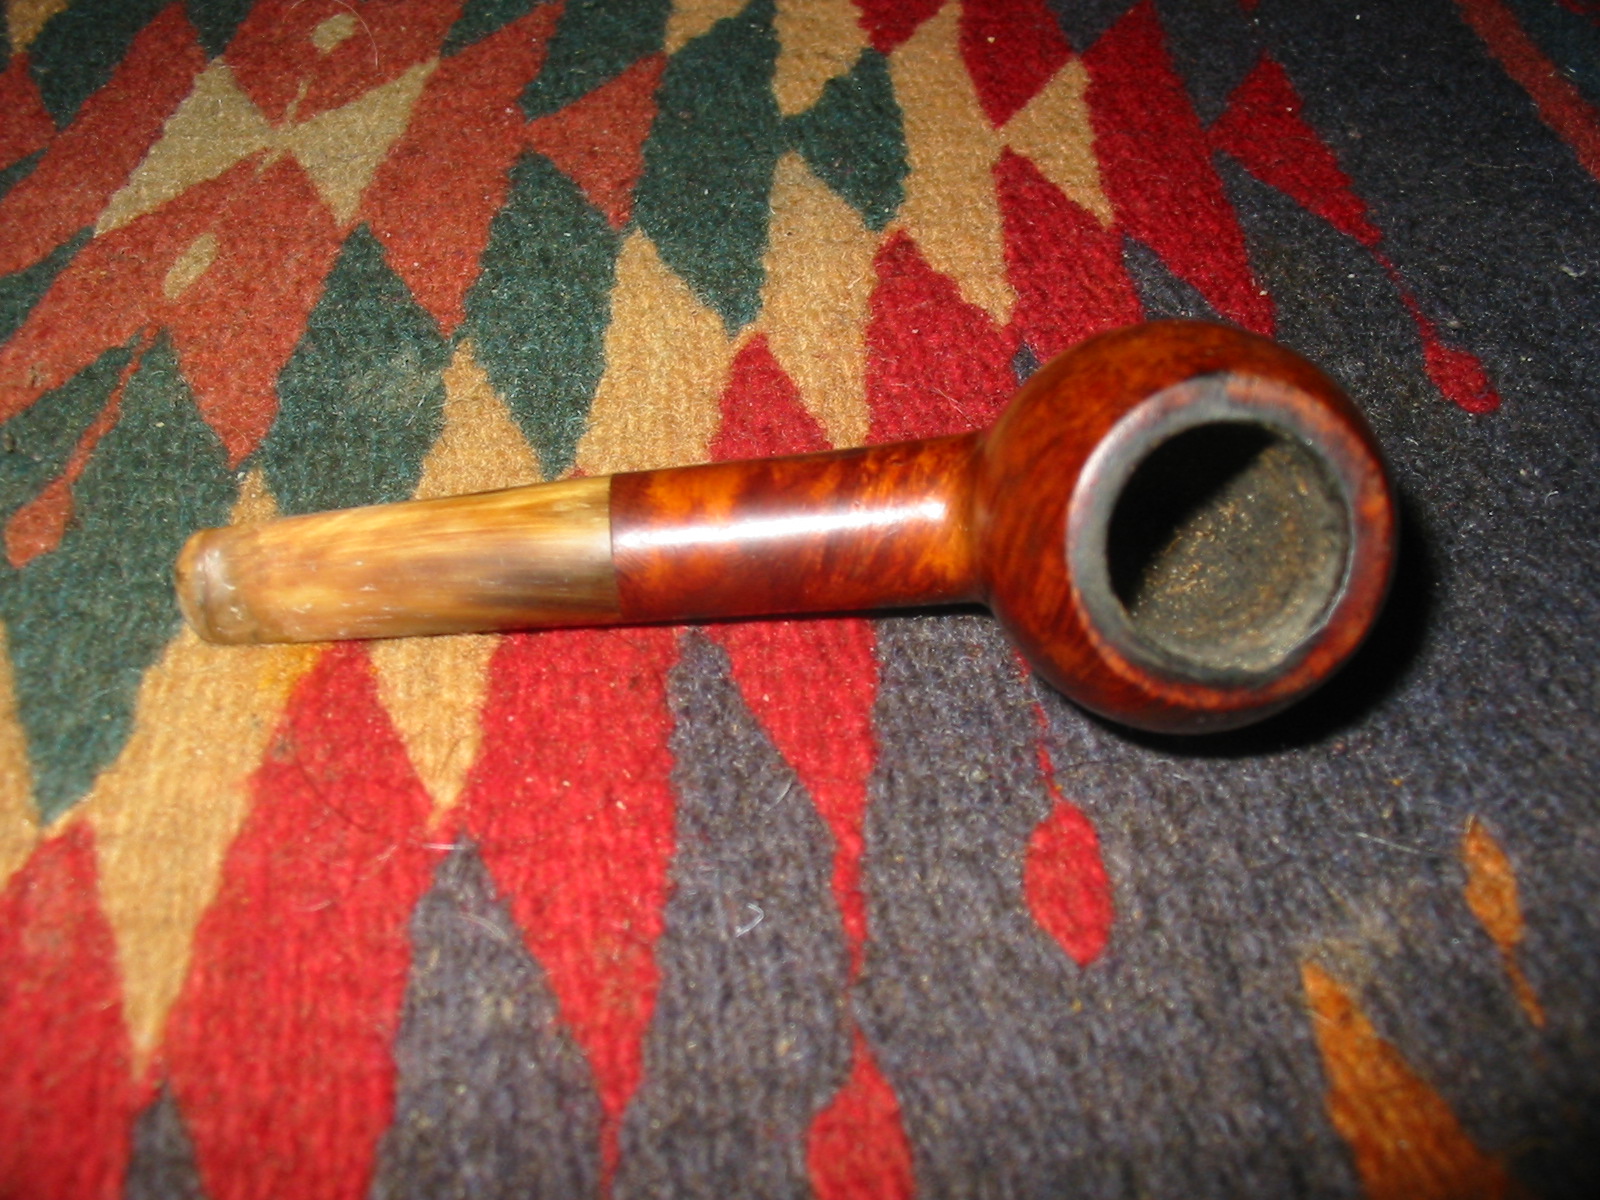
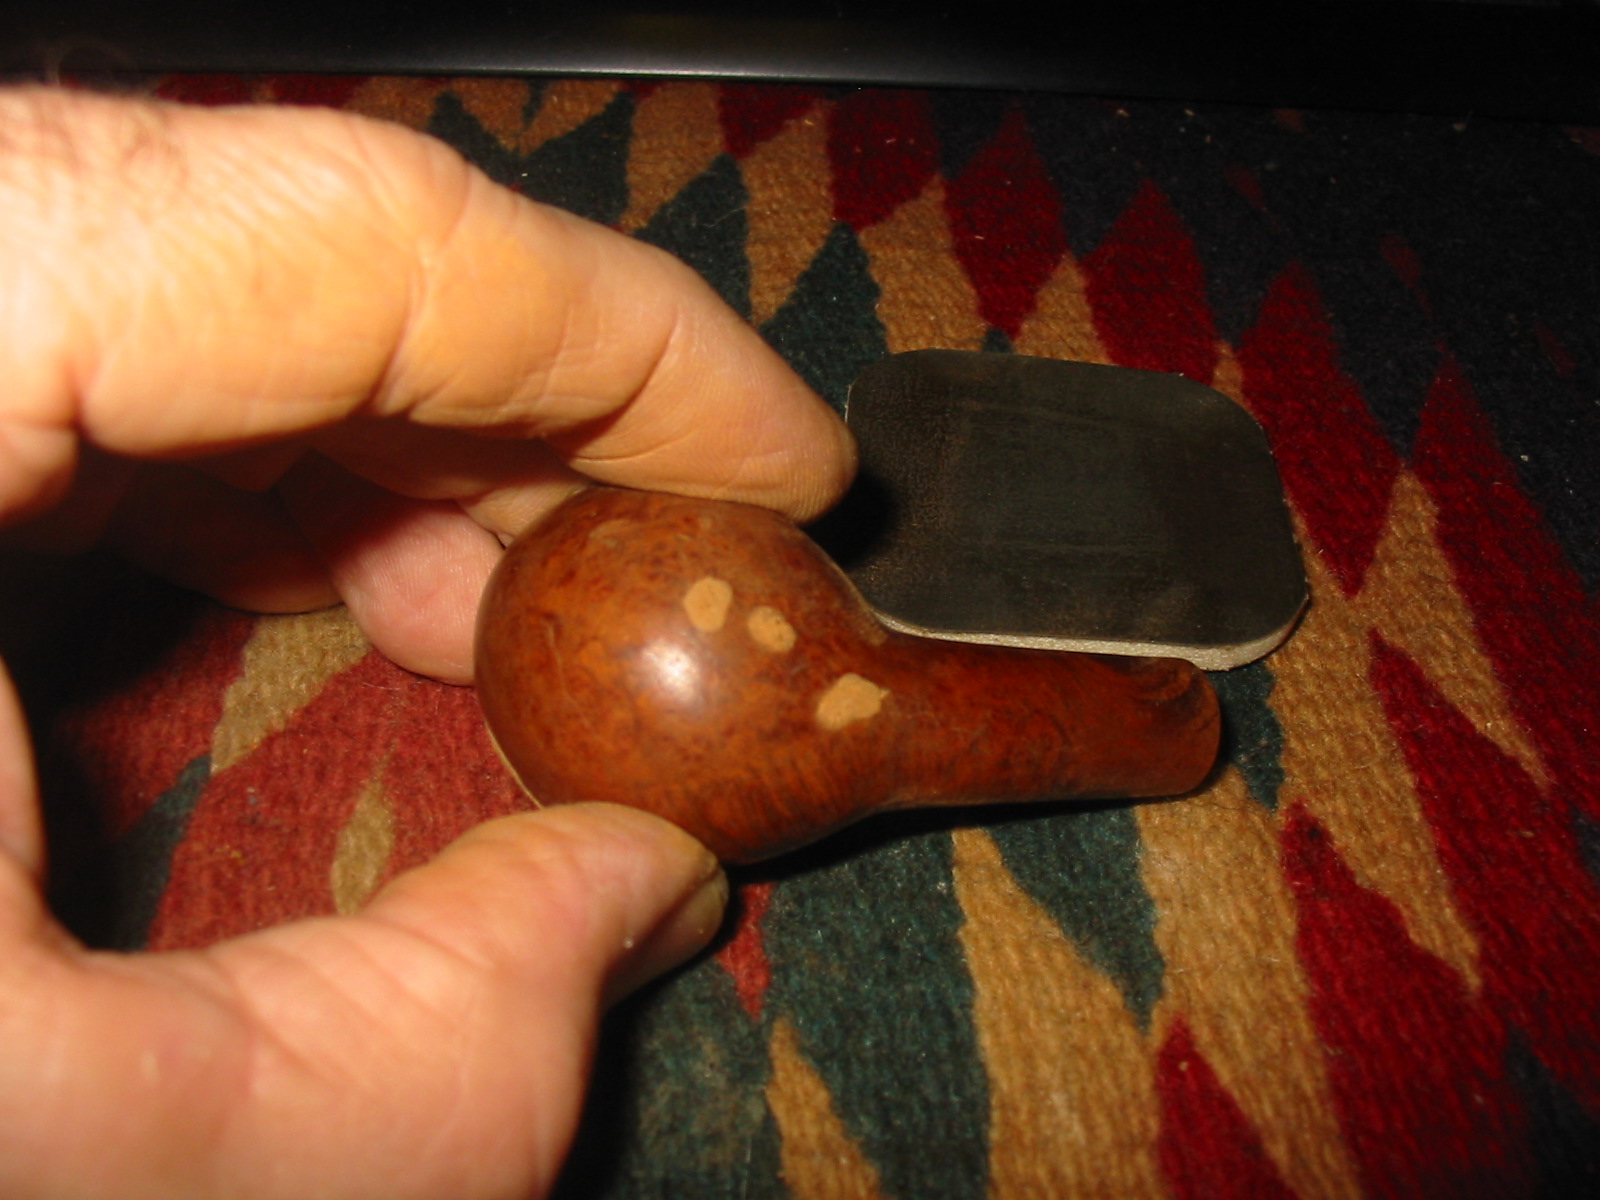
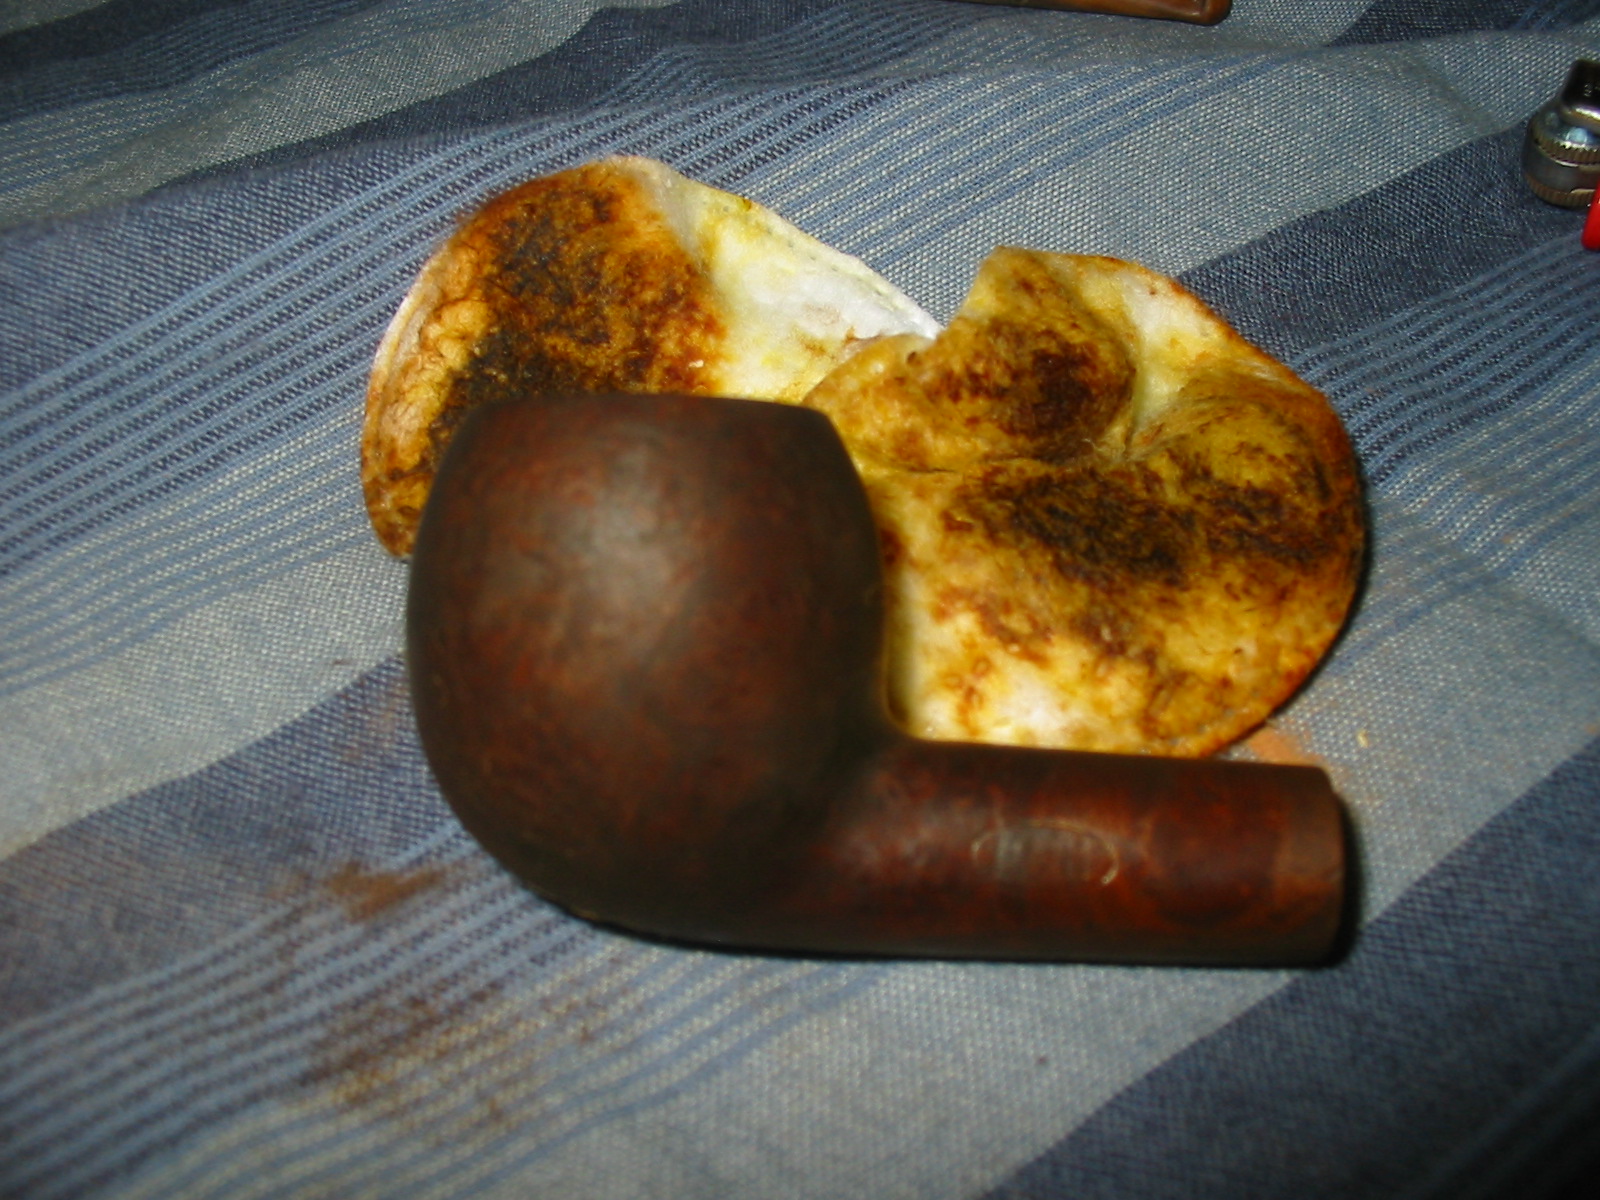
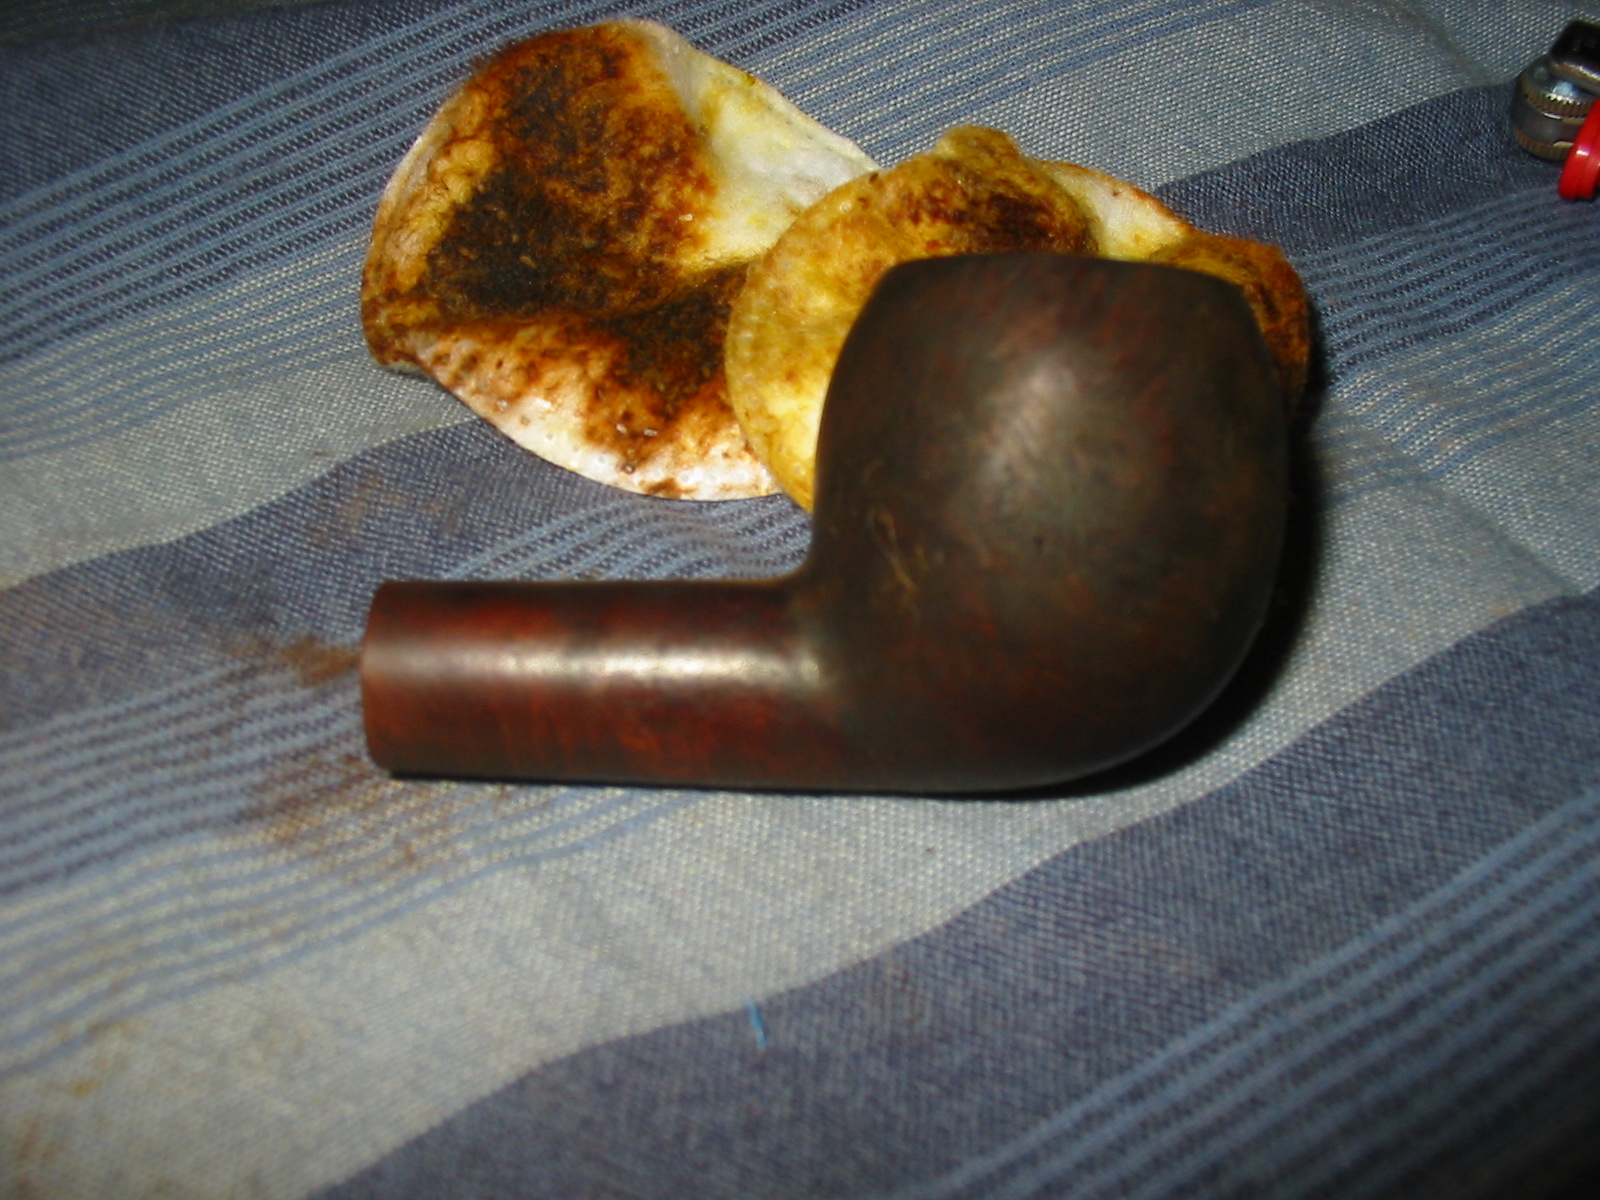
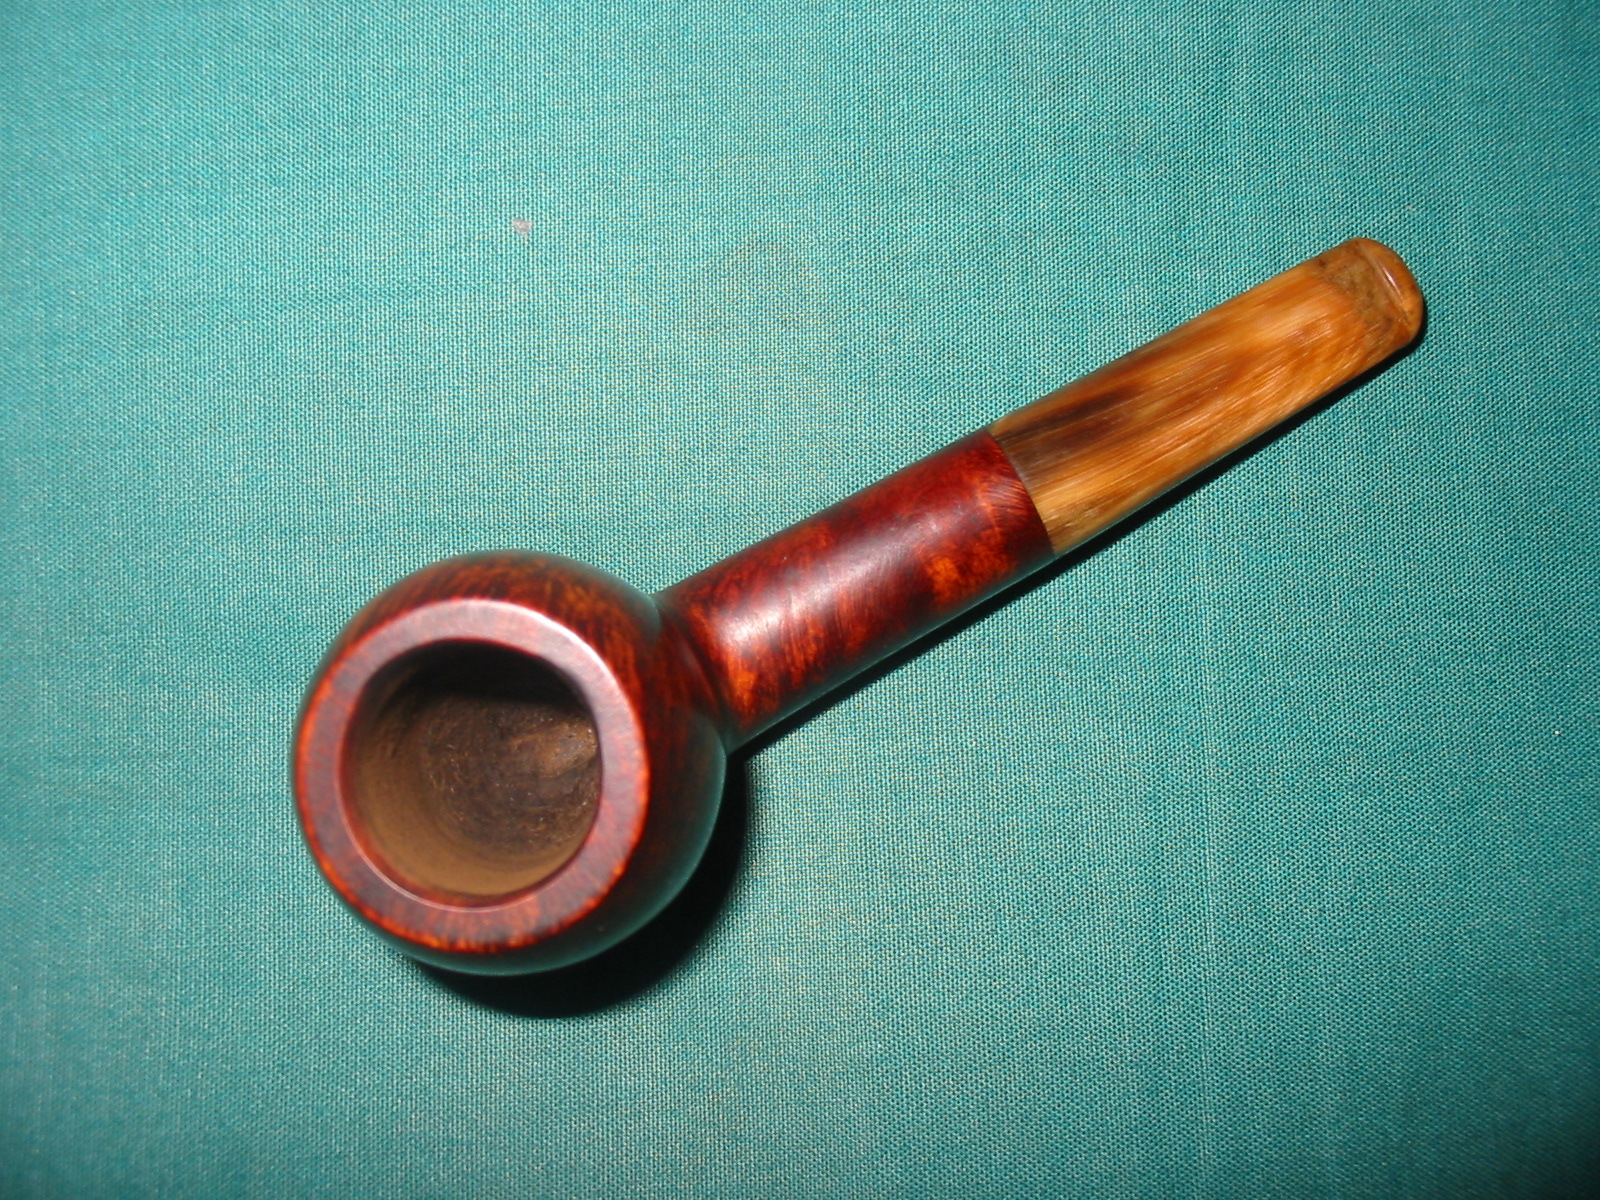
I took the billiard that I purchased to my work table this morning. Before I worked on it I examined it for what needed to be addressed. The bowl had an uneven cake on the inside and did not extend to the bottom of the bowl. The bottom was still clean briar and it went up the sides about ¼ inches. The rim was clean but had a tarry buildup. The inner bevel on the rim was undamaged and showed no sign of over reaming or damage. The finish on the outside of the bowl was clean and undamaged. There were no dings or dents in the surface of the briar. There was an oily buildup on the surface of the pipe. The stamping was crisp and distinct. There were two slight marks on the left and the right side of the shank next to the stem. The stem itself was clean but oxidized. There was tooth chatter on the top and bottom of the stem next to the button. The inside of the stem and the shank were very clean.
IMG_6796

IMG_6797

IMG_6798

IMG_6799
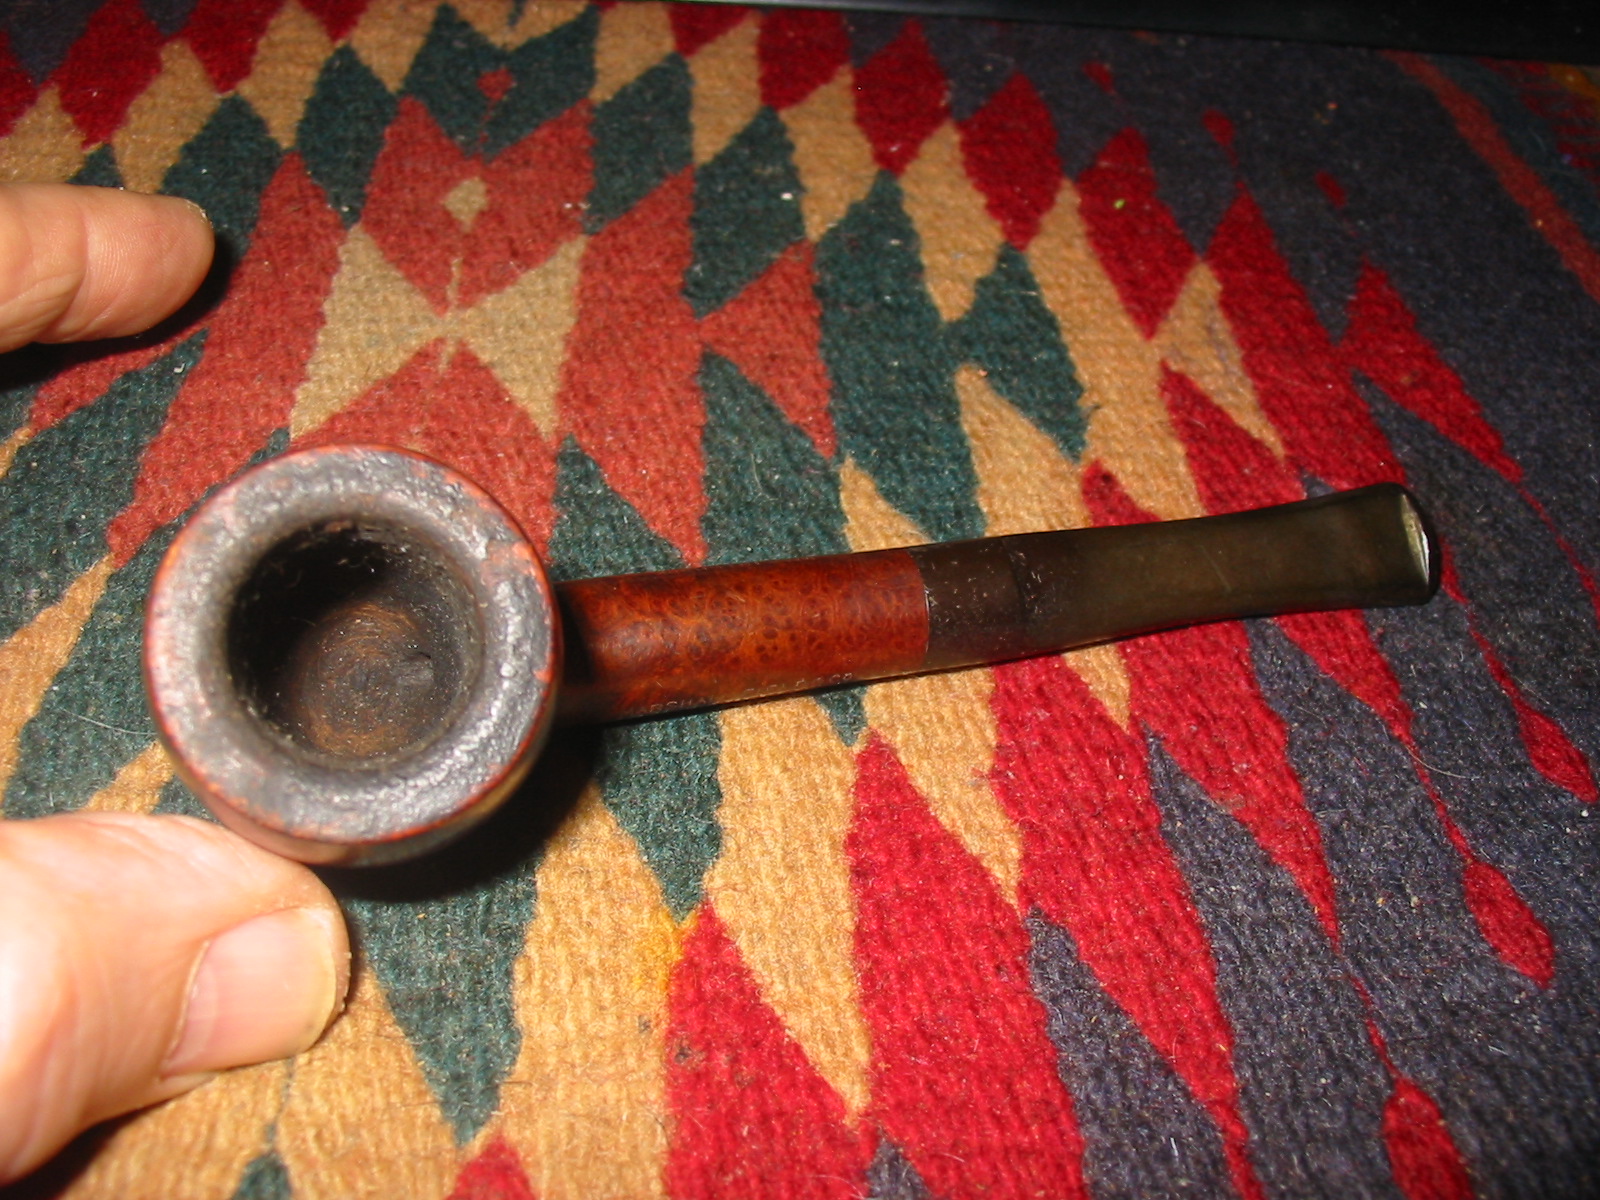
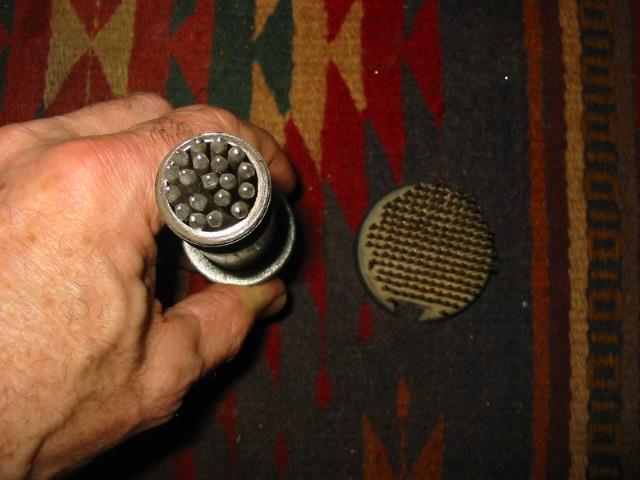
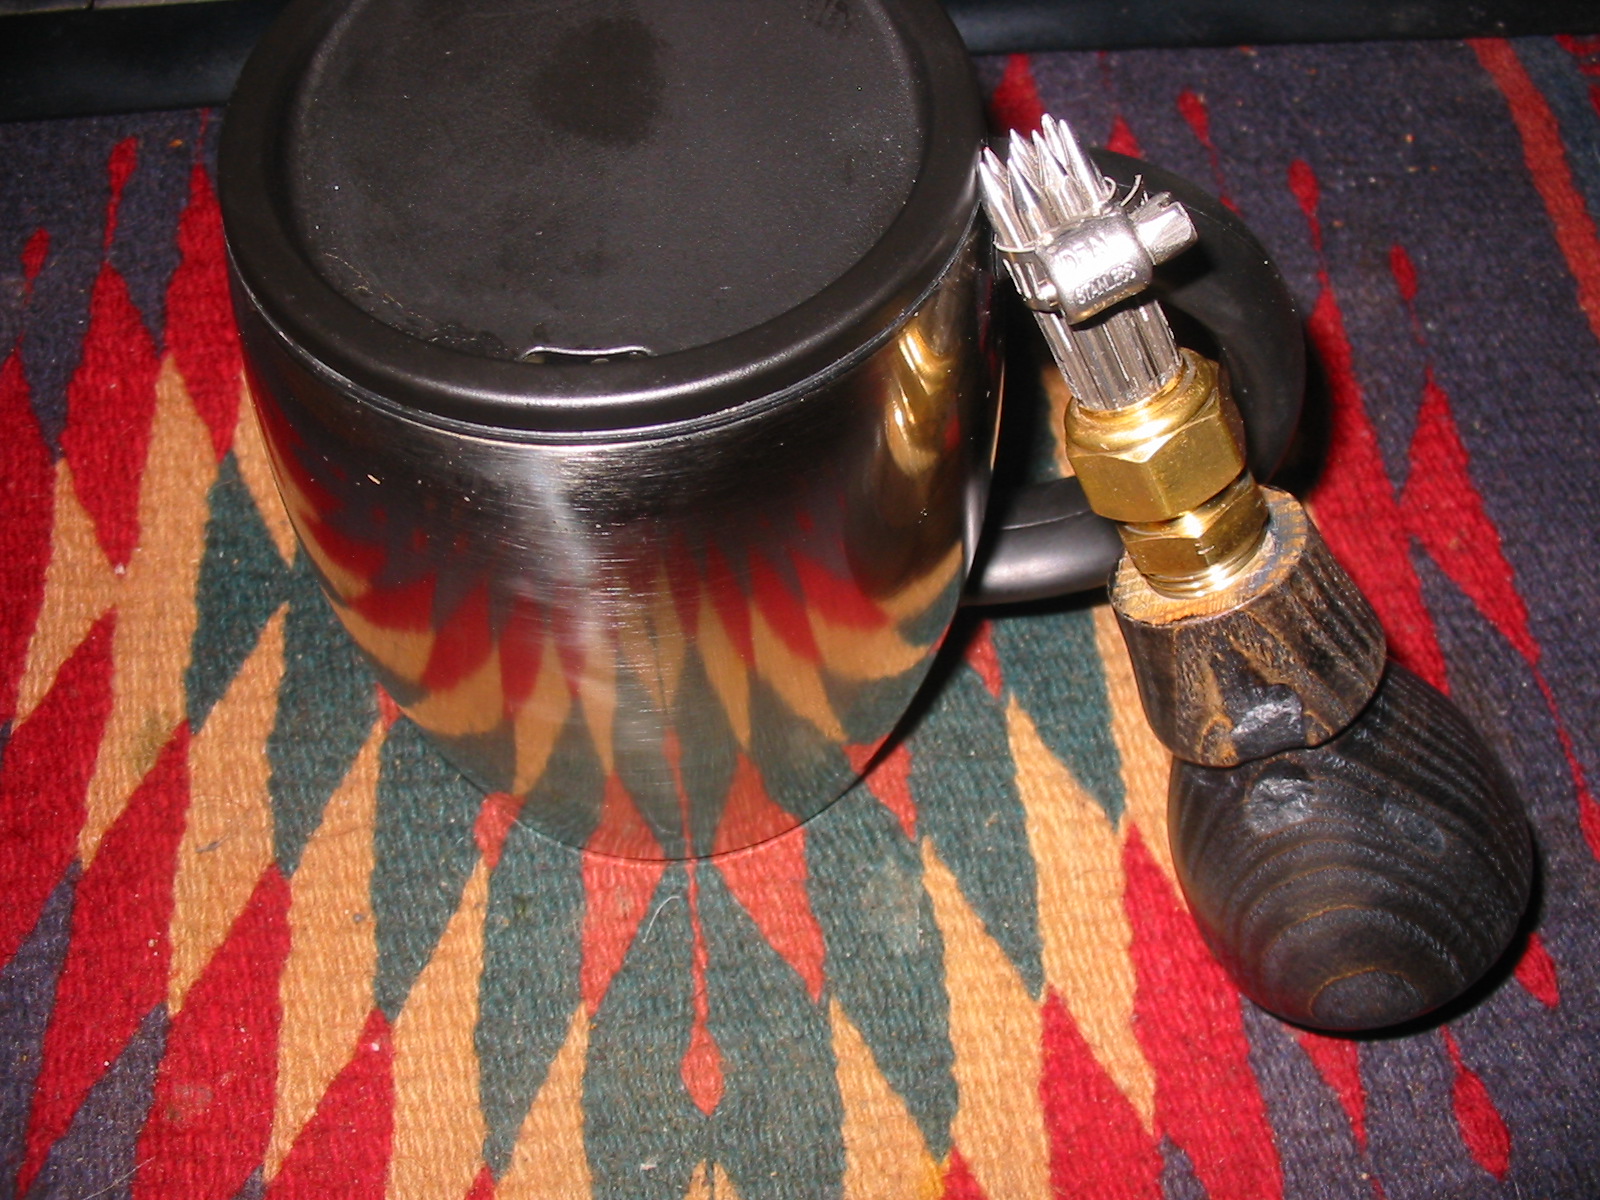
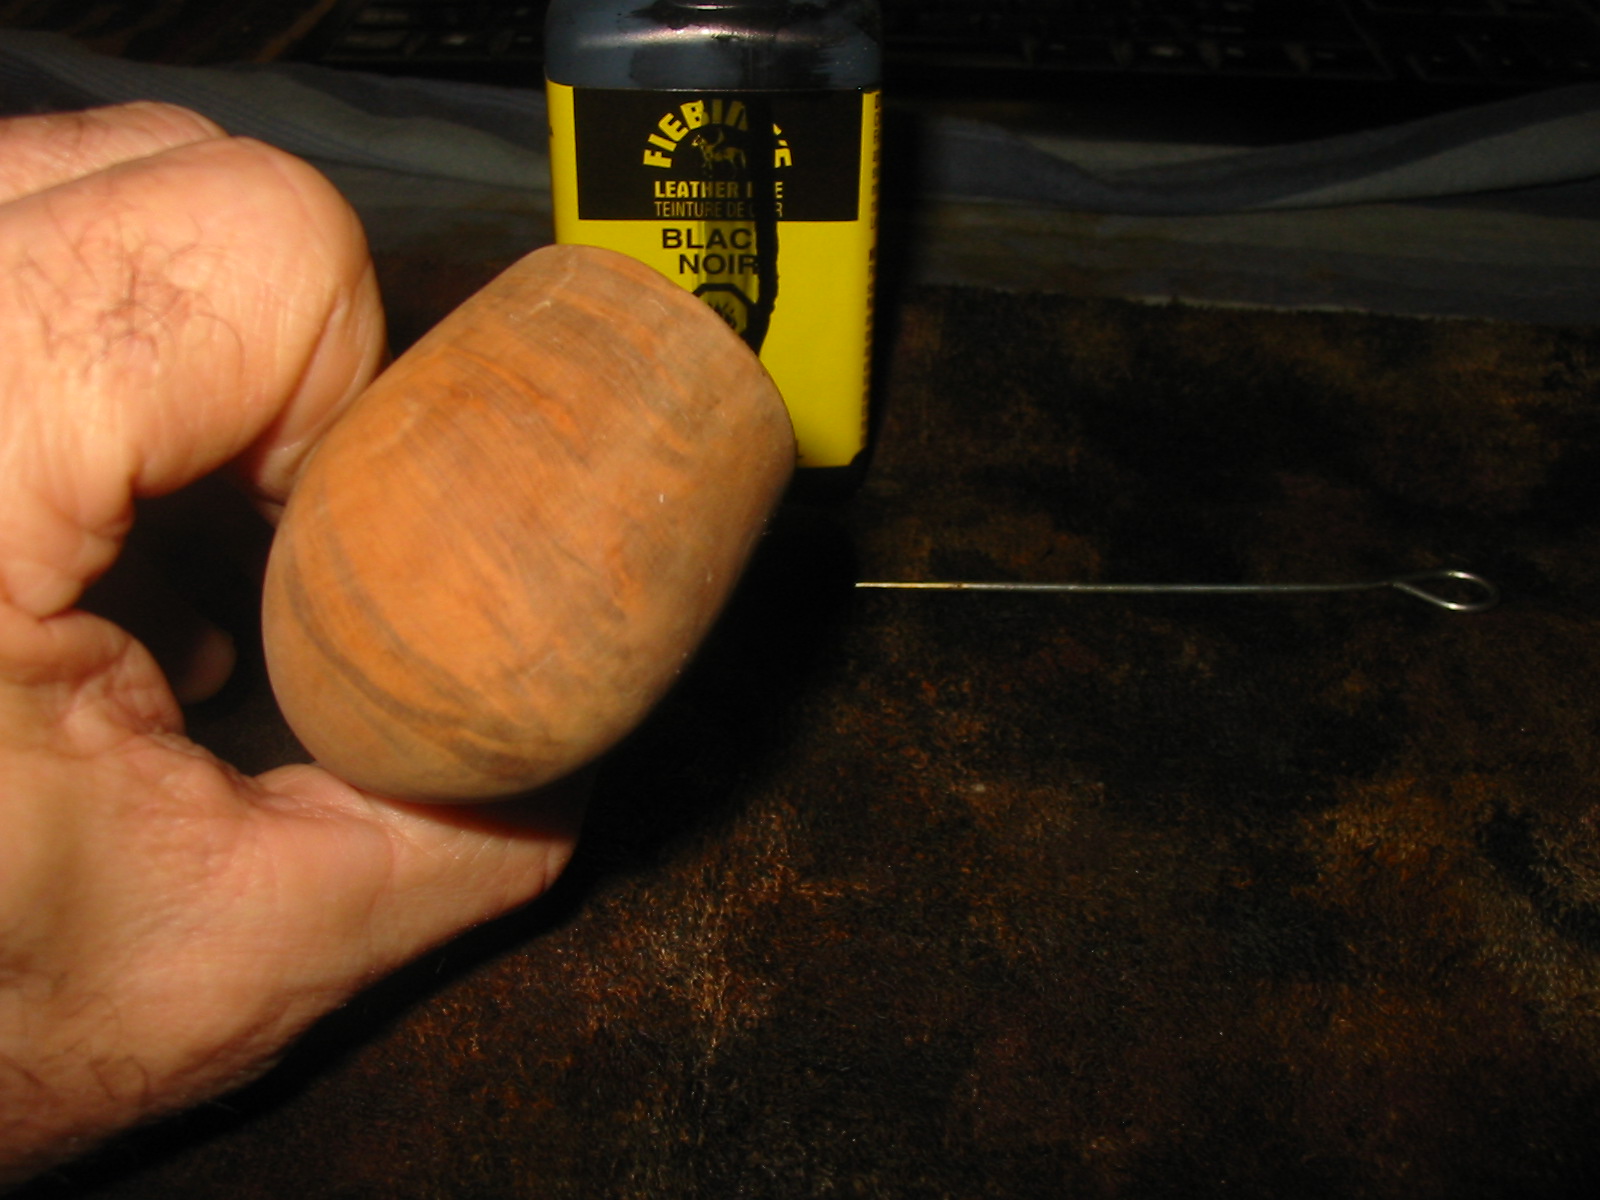
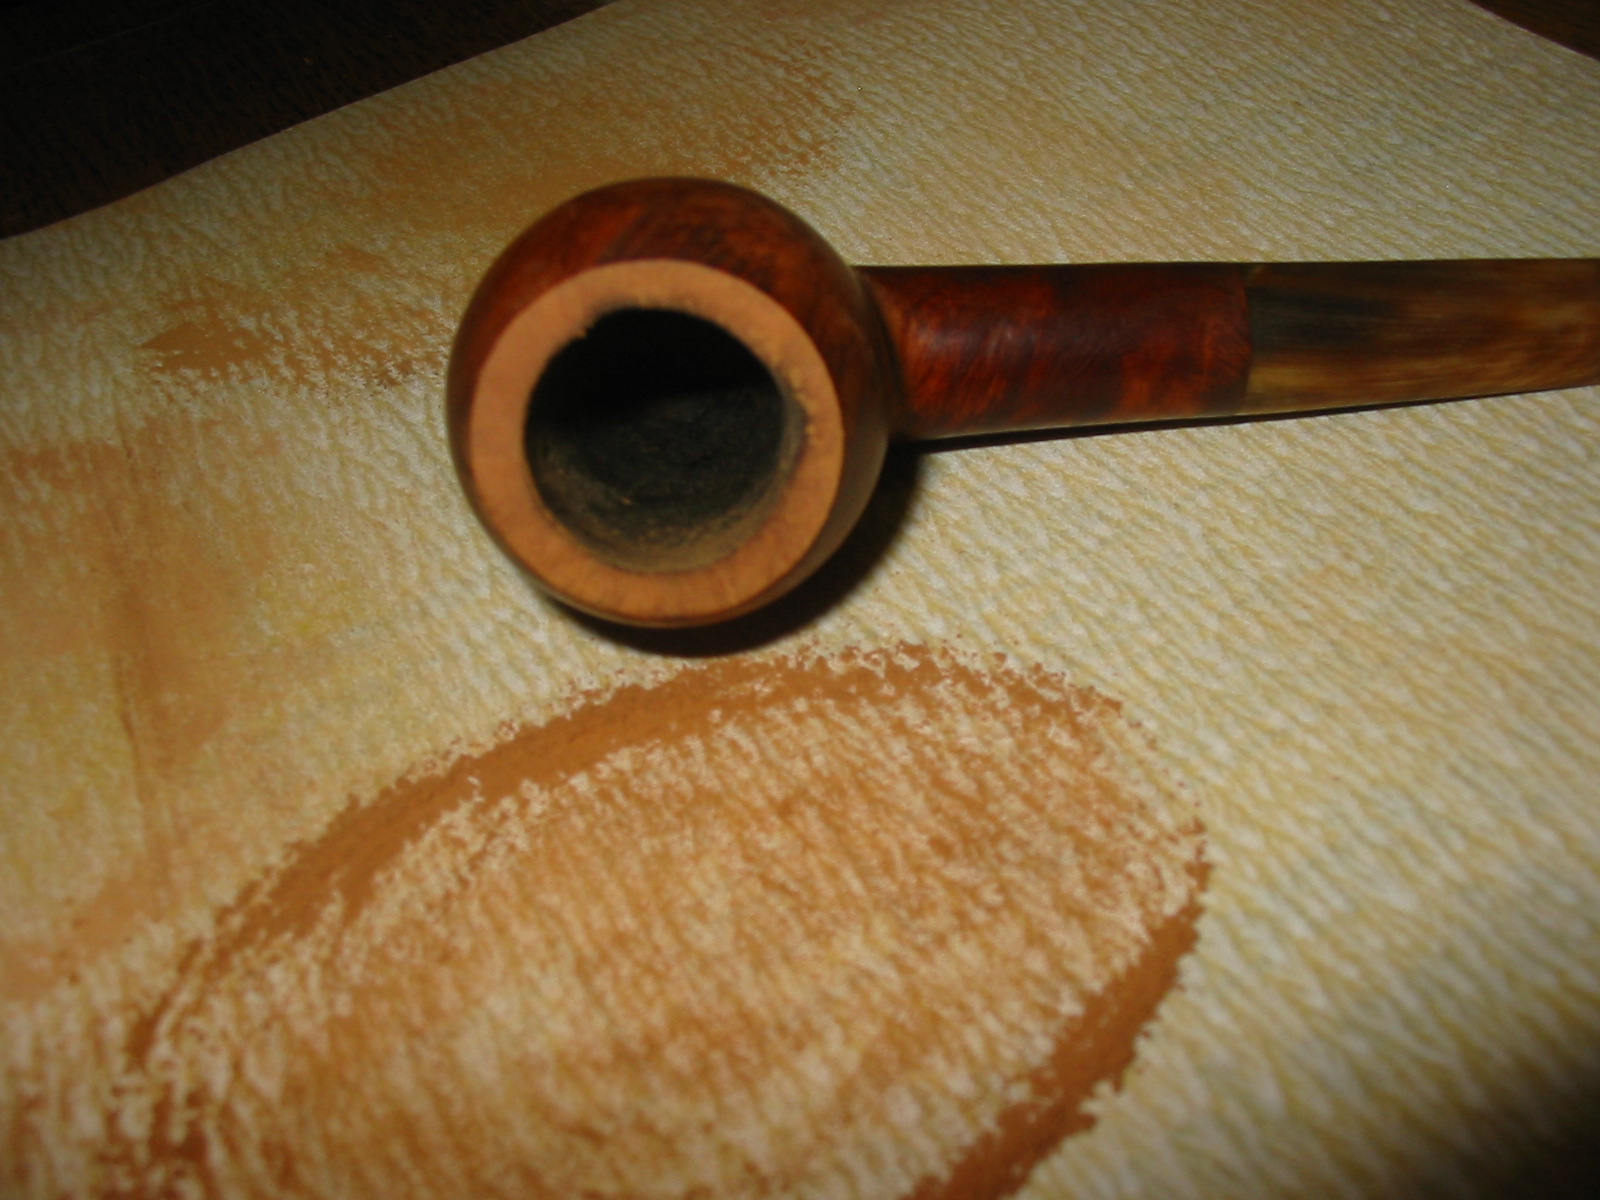
I reamed the bowl with a PipNet reamer and took it back to bare briar. I wanted to remove the buildup on the upper portion of the bowl and provide a clean surface to rebuild the cake. I scrubbed the rim of the bowl with spit on a soft cotton pad to remove the tarry buildup. I also had to wipe it down with alcohol until the tars were gone and the rim and bevel were clean.
IMG_6800

IMG_6801

IMG_6802
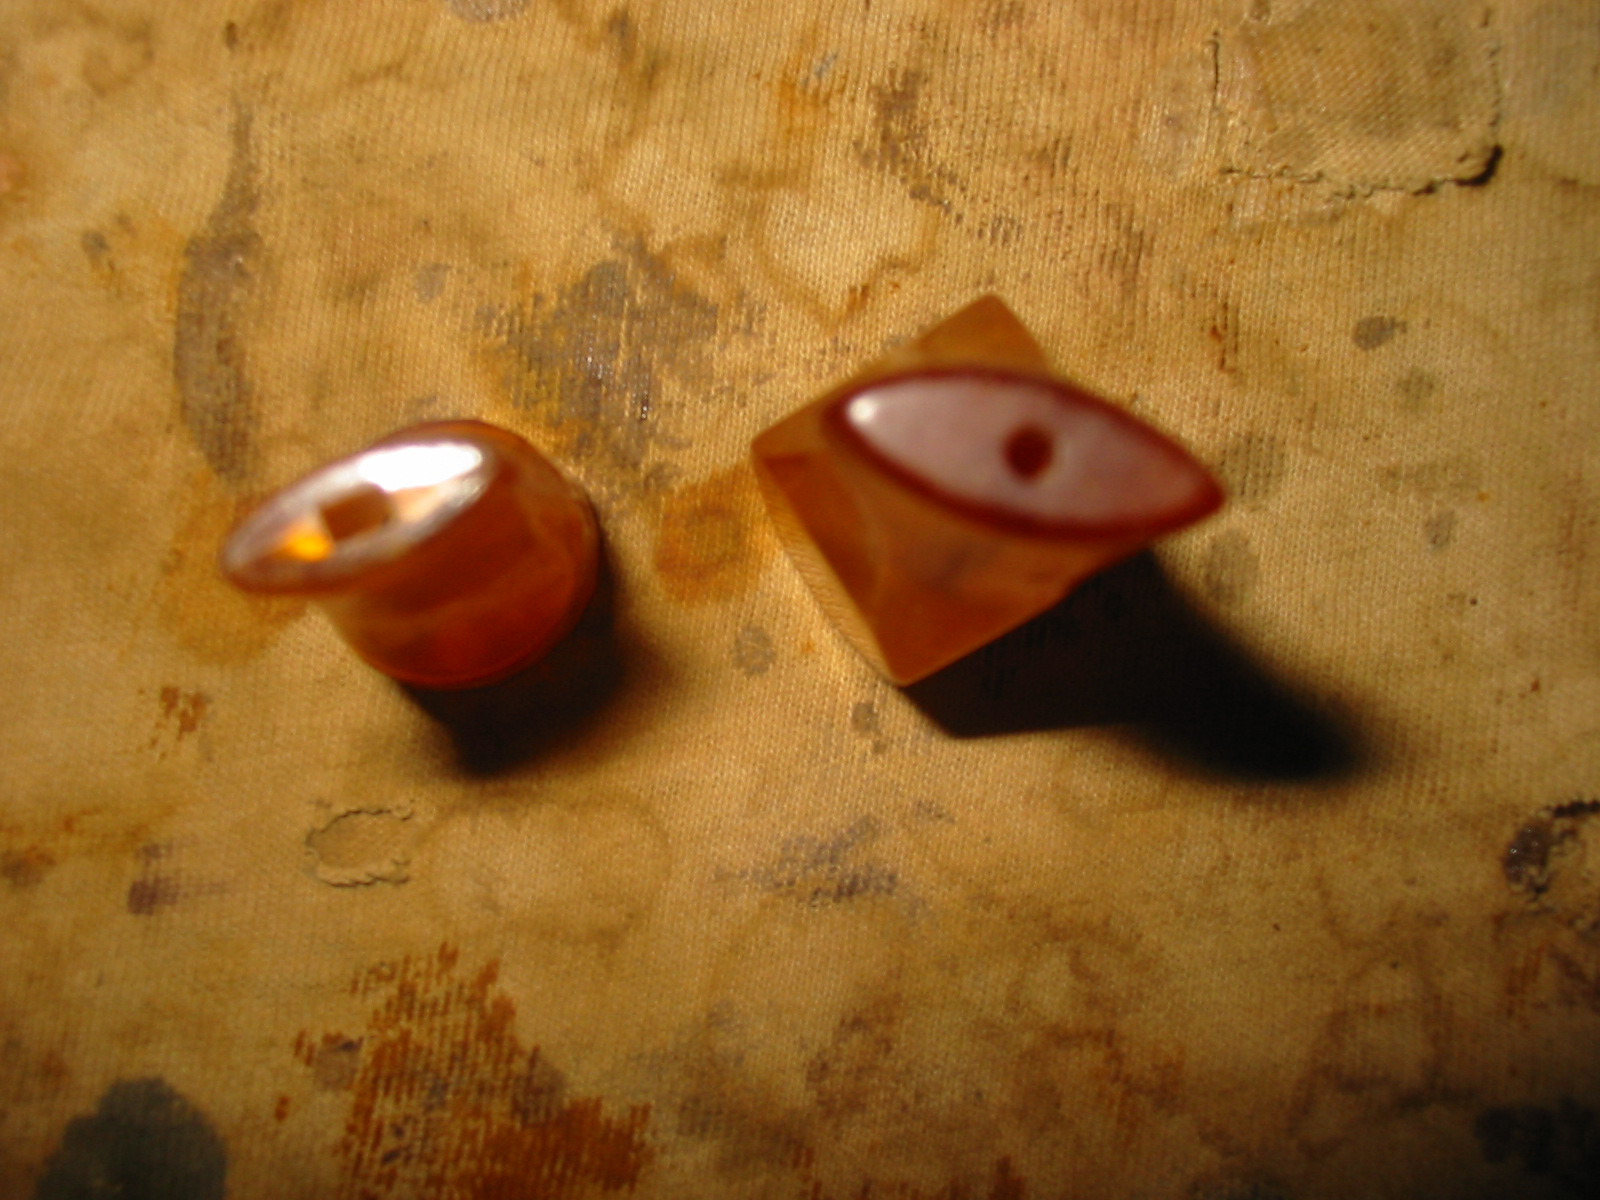
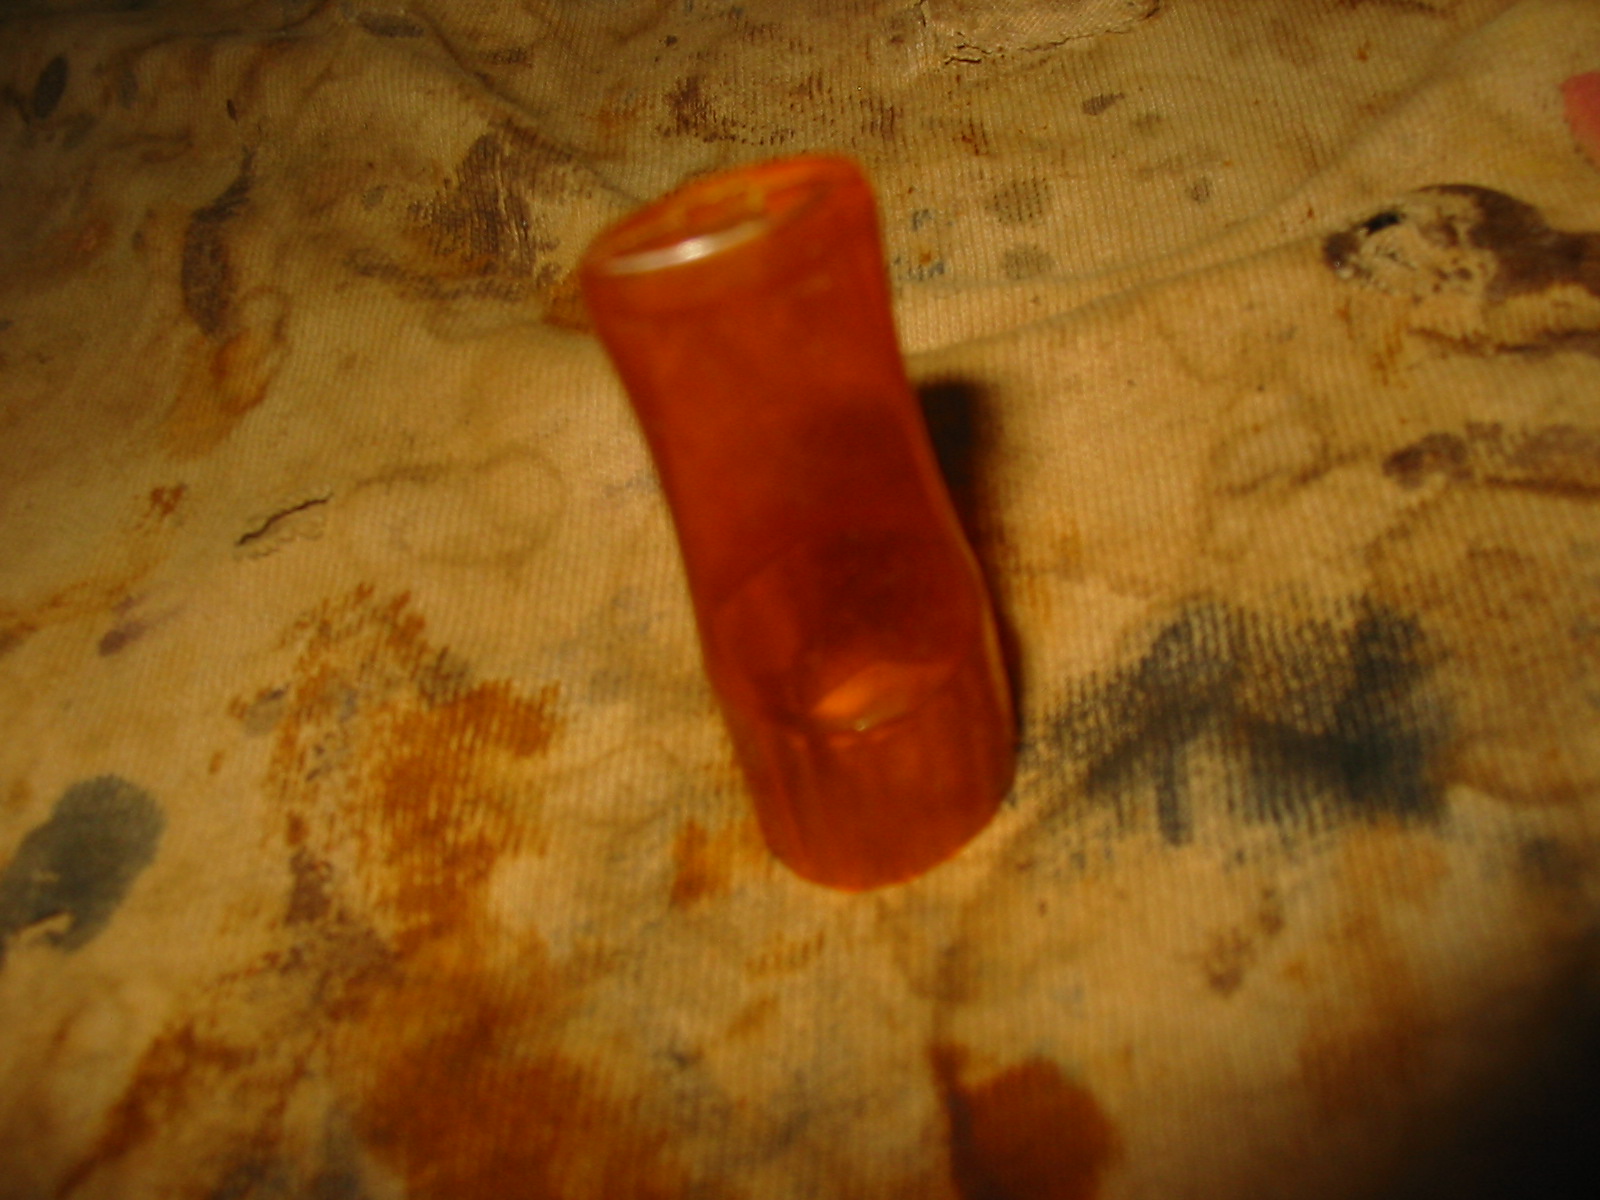
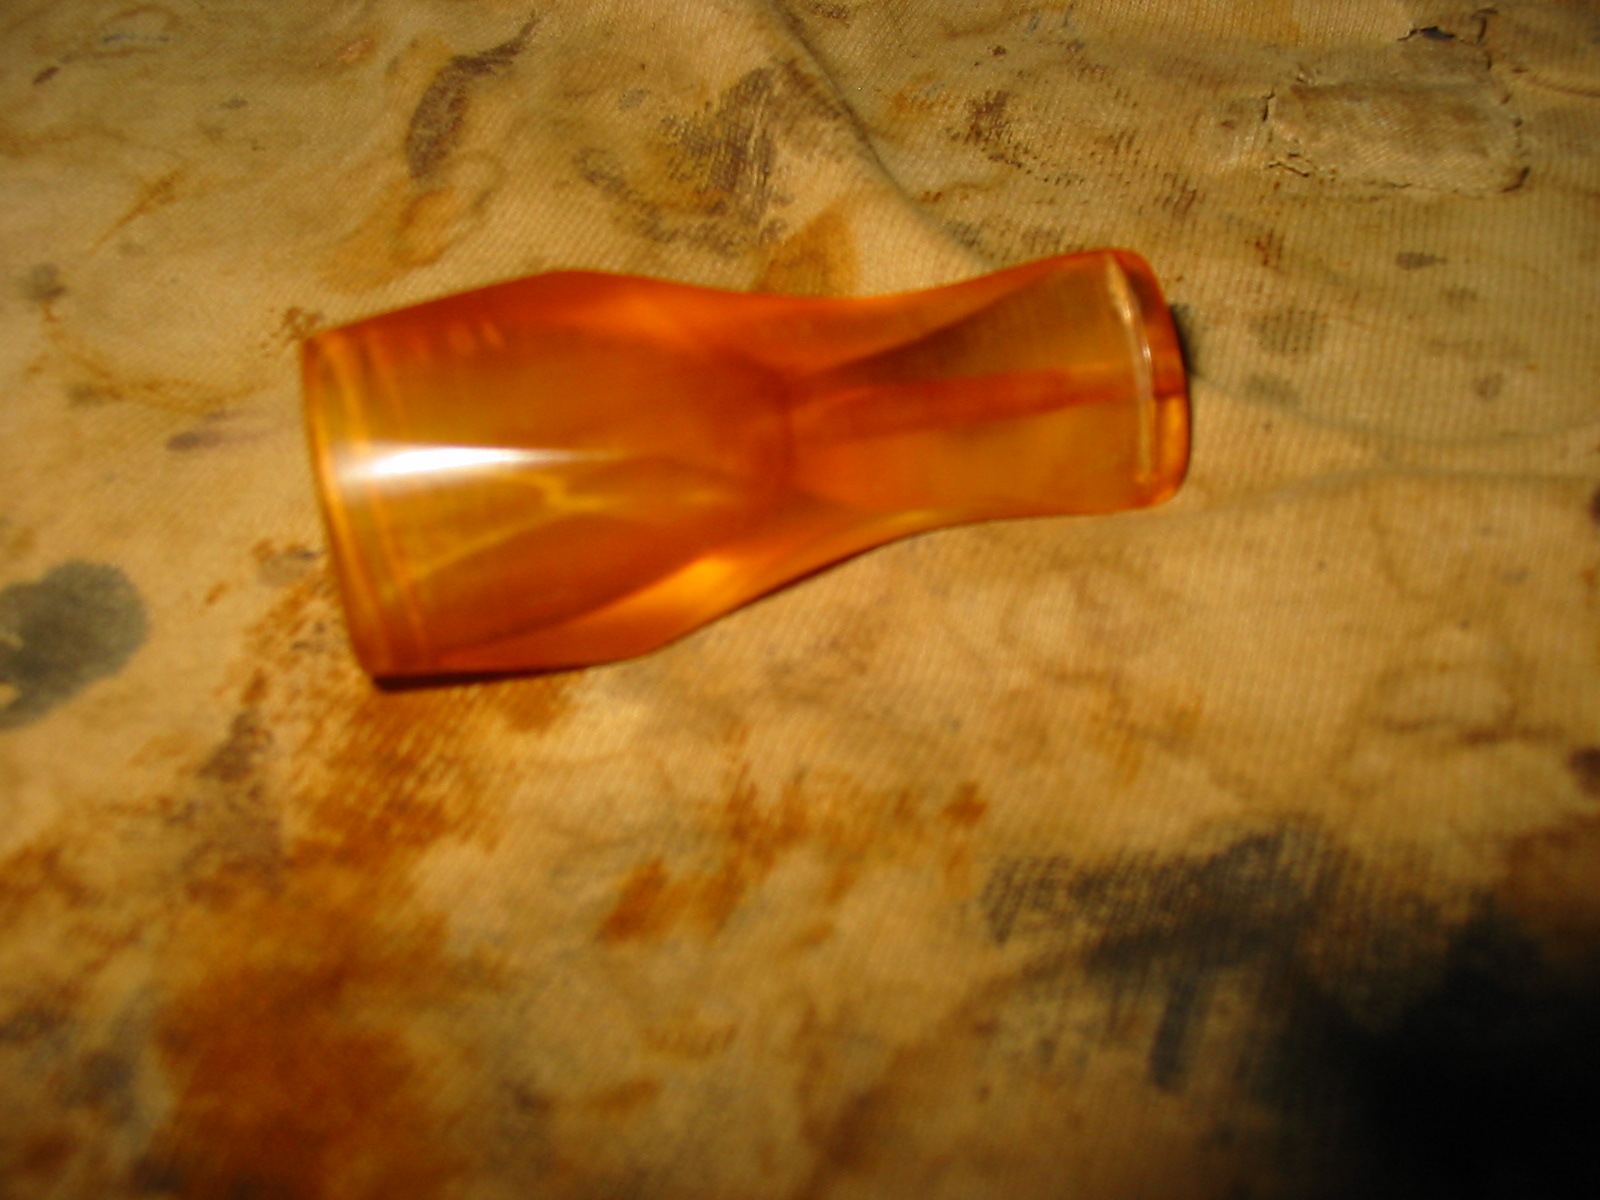
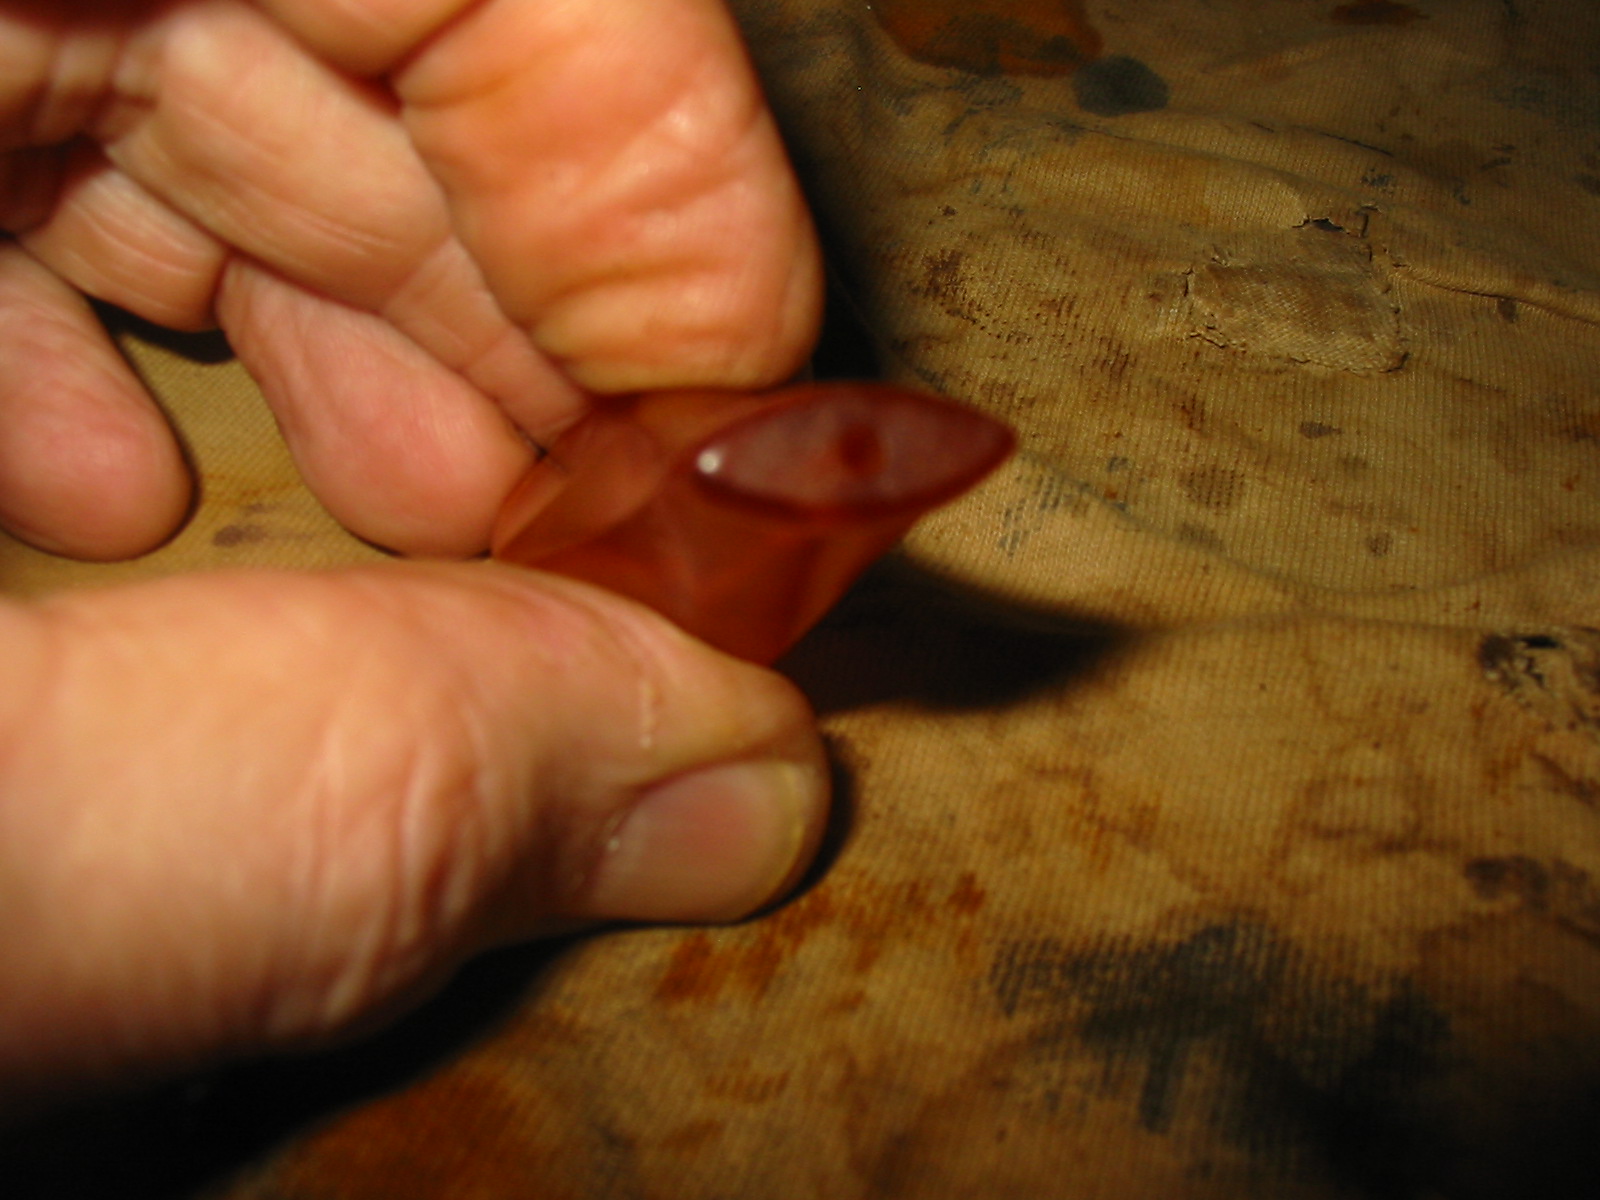
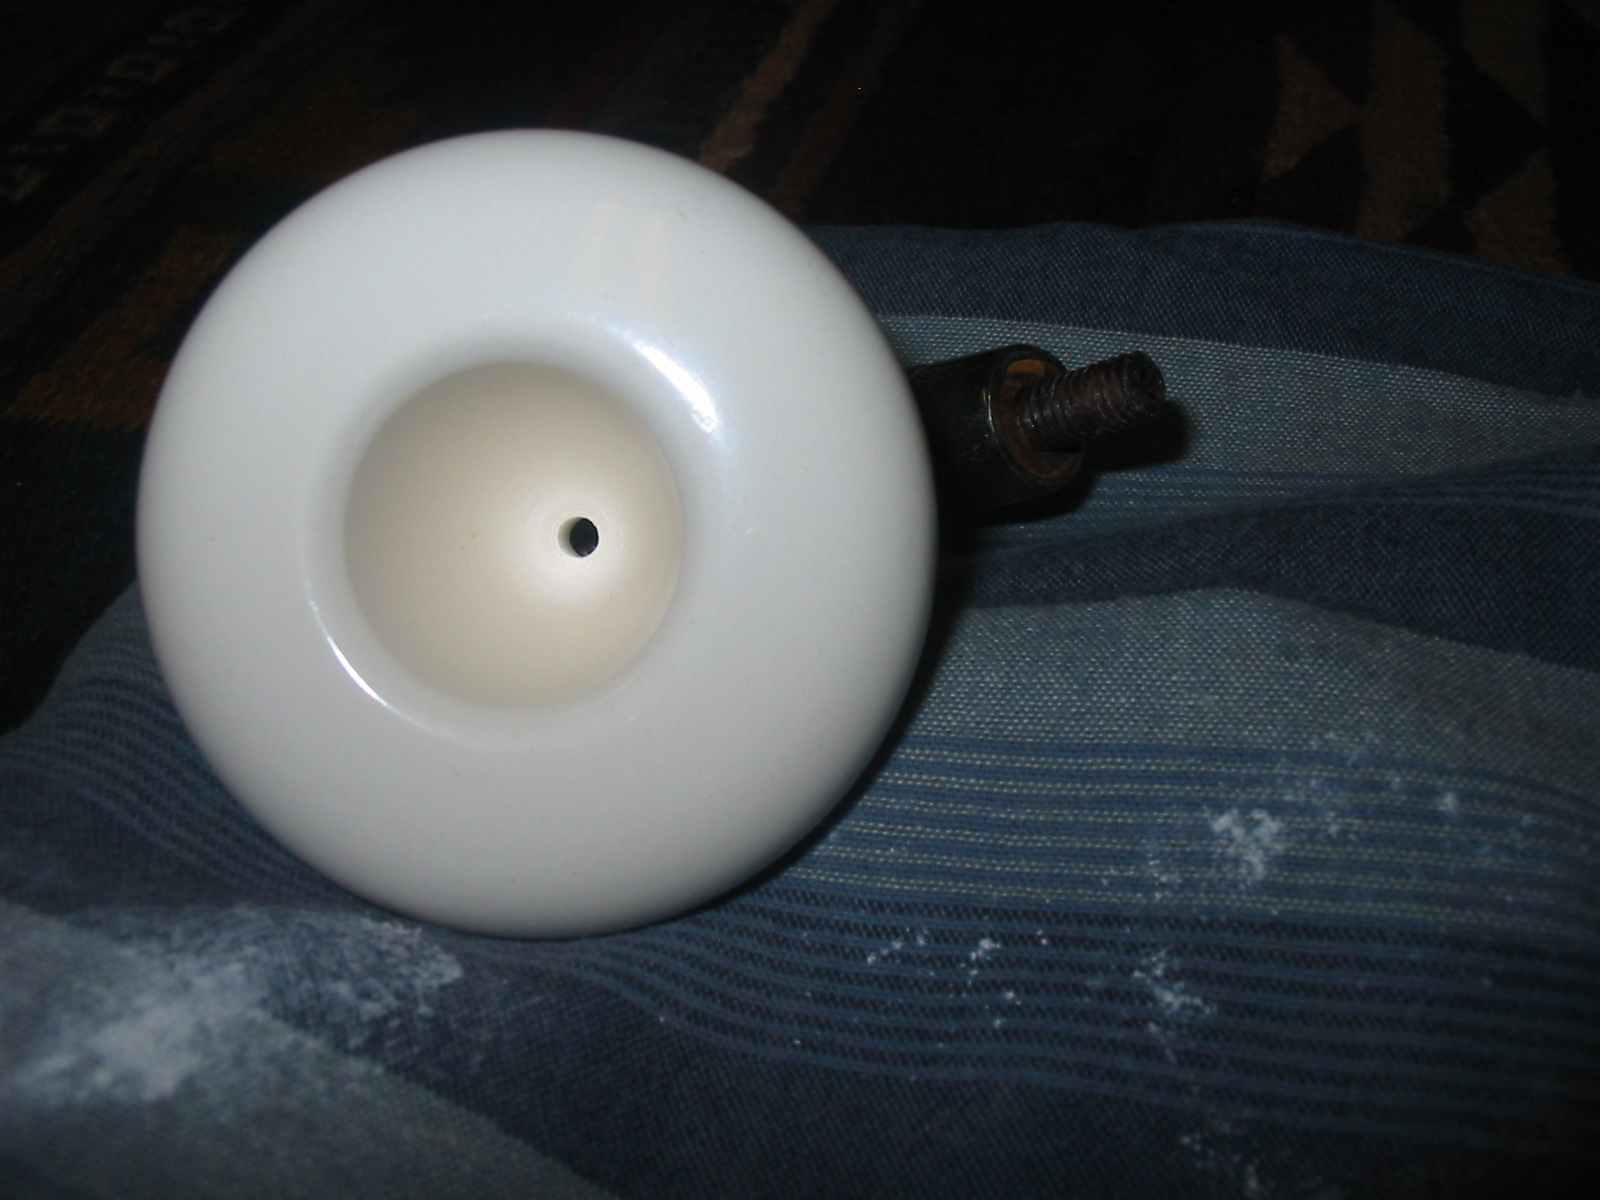
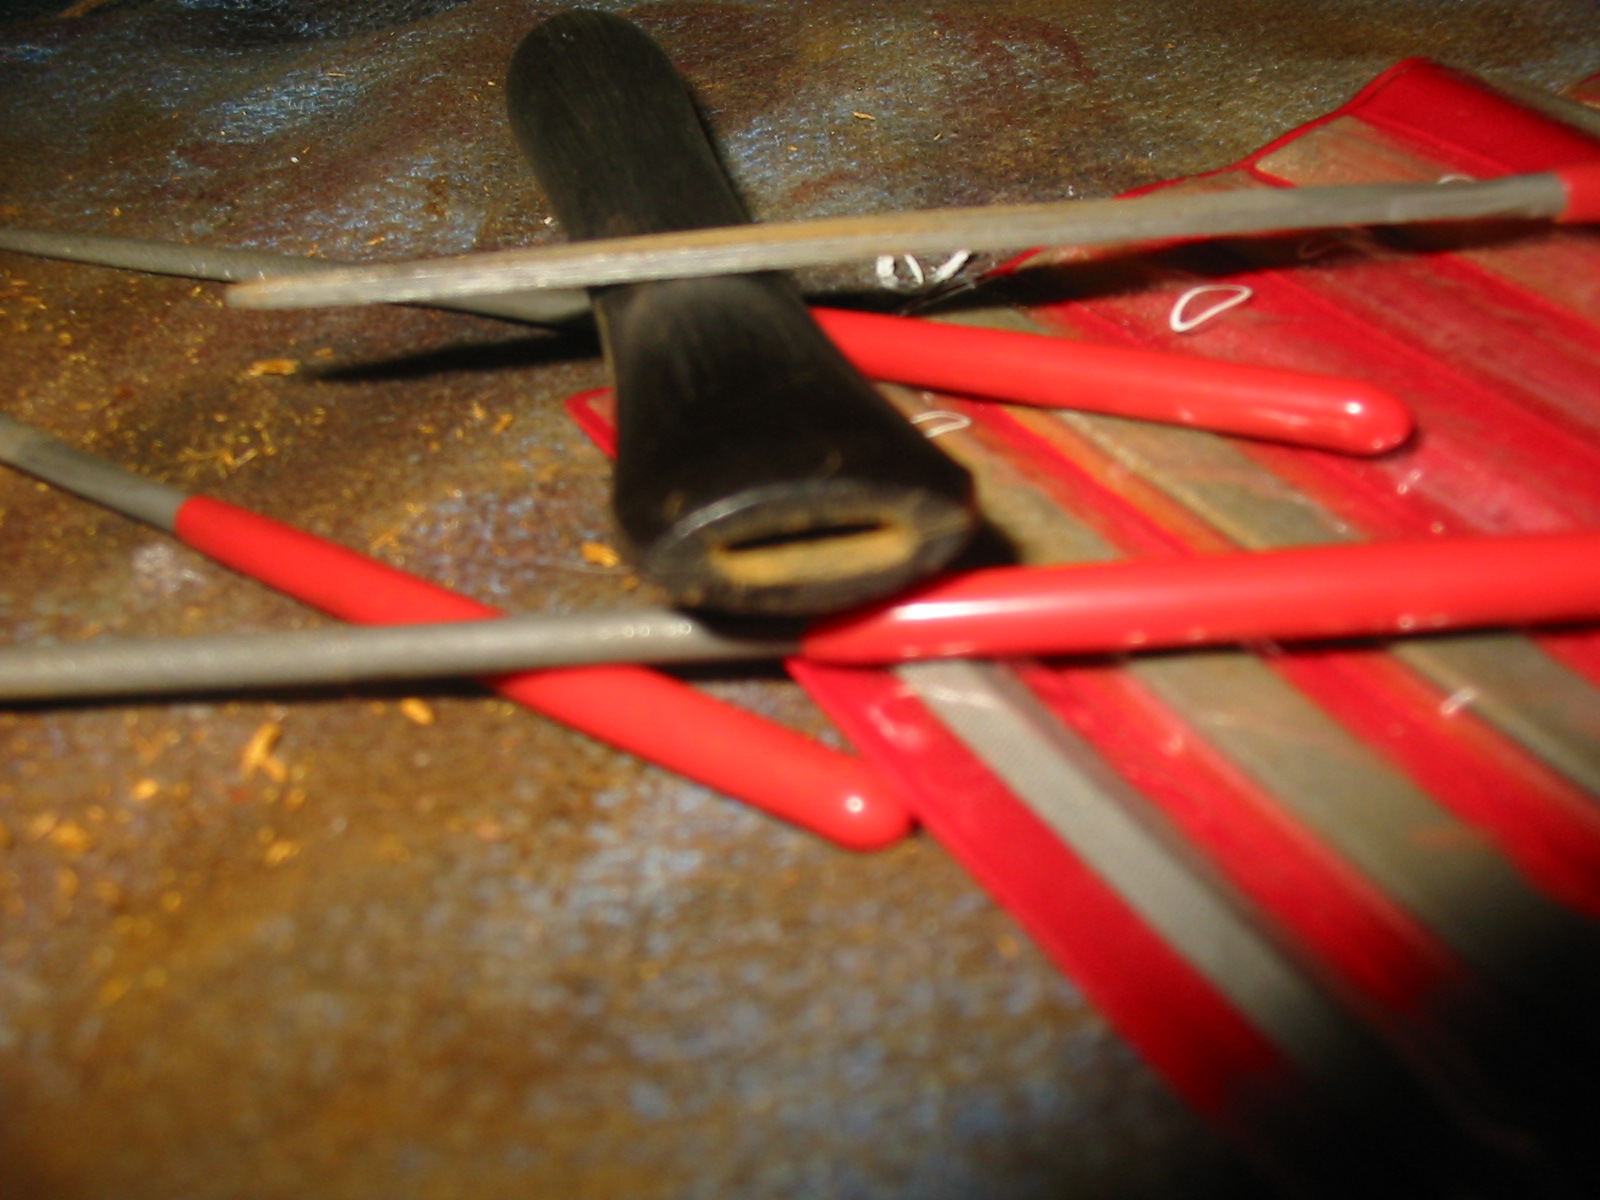
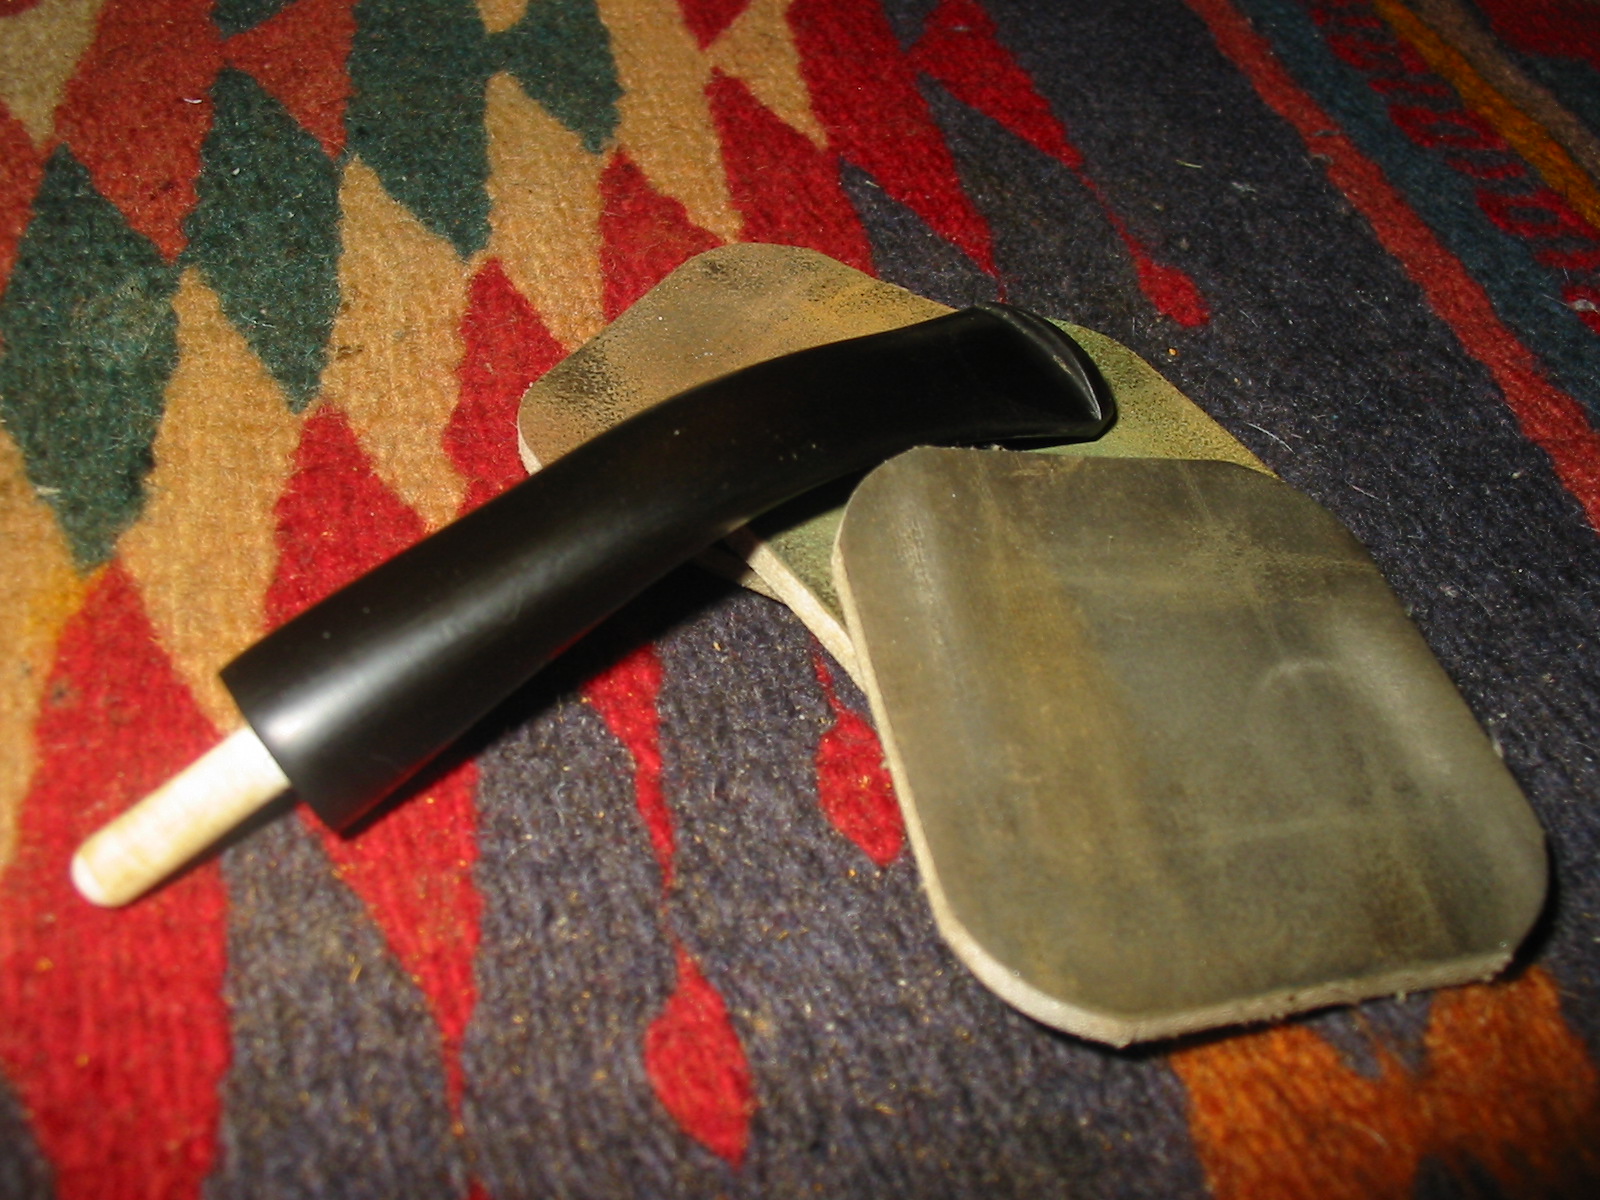
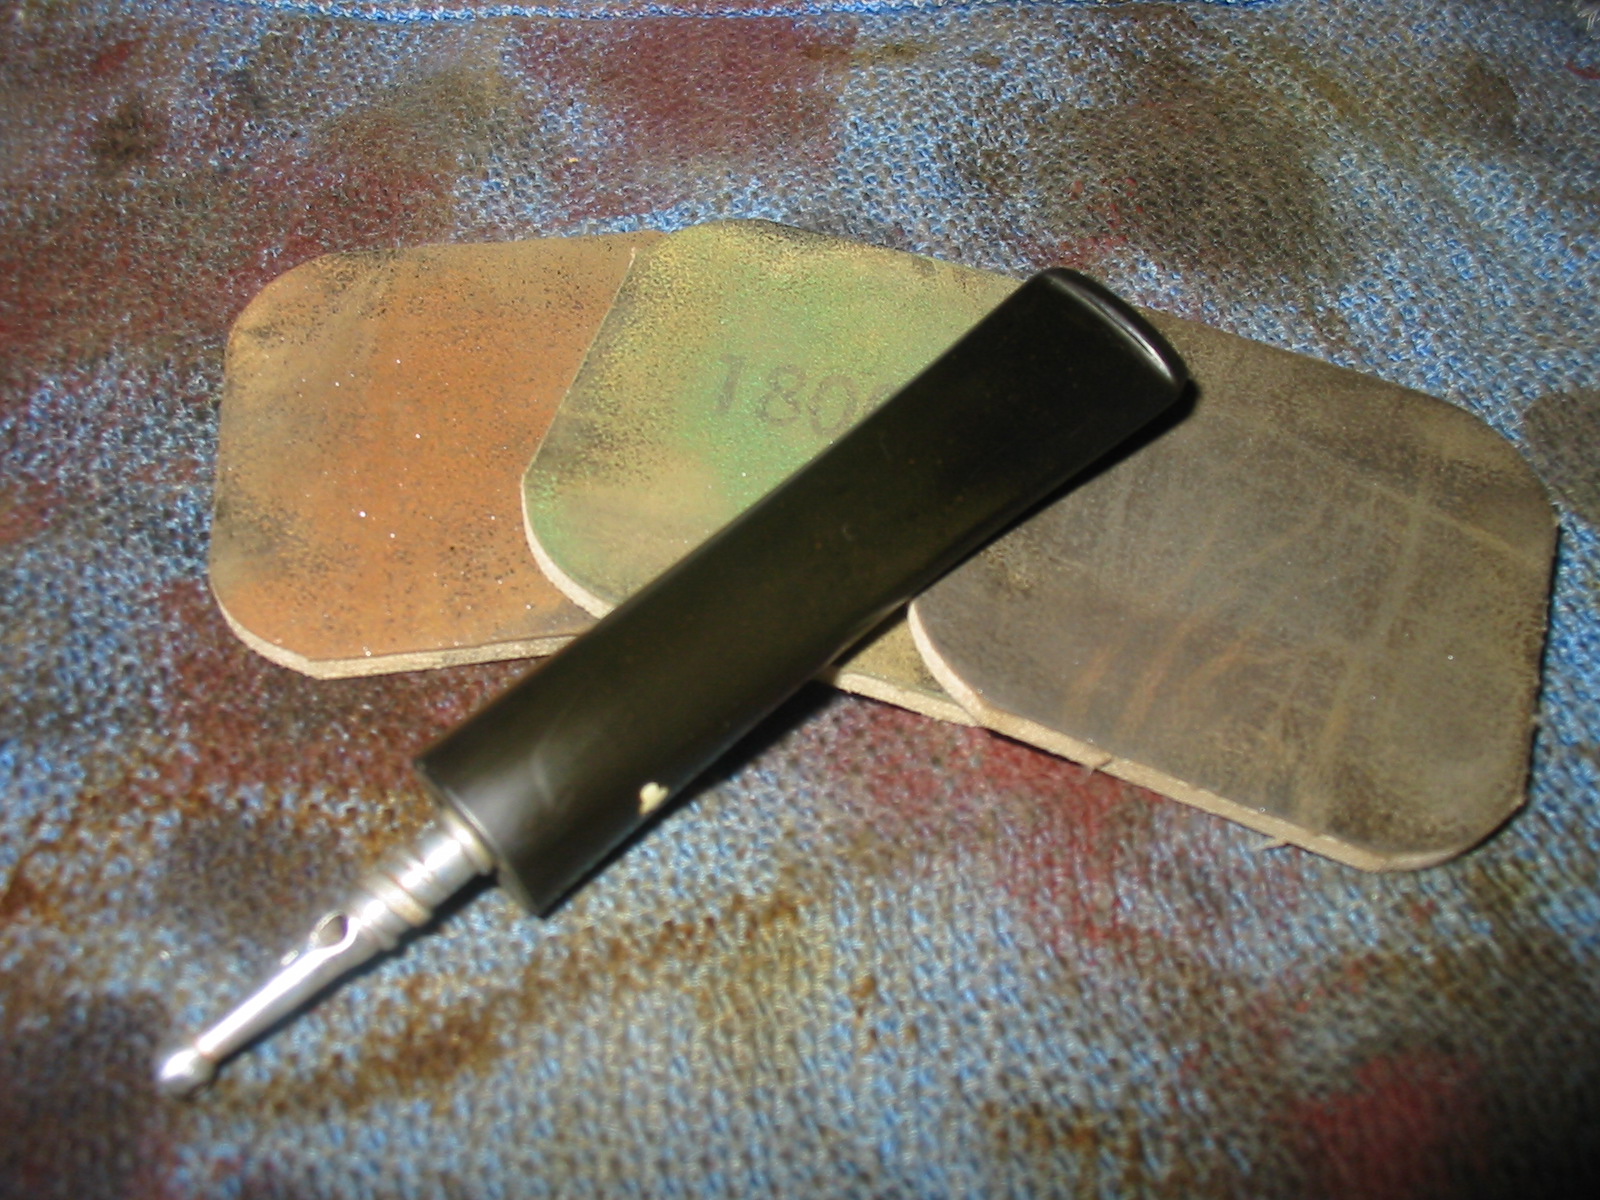
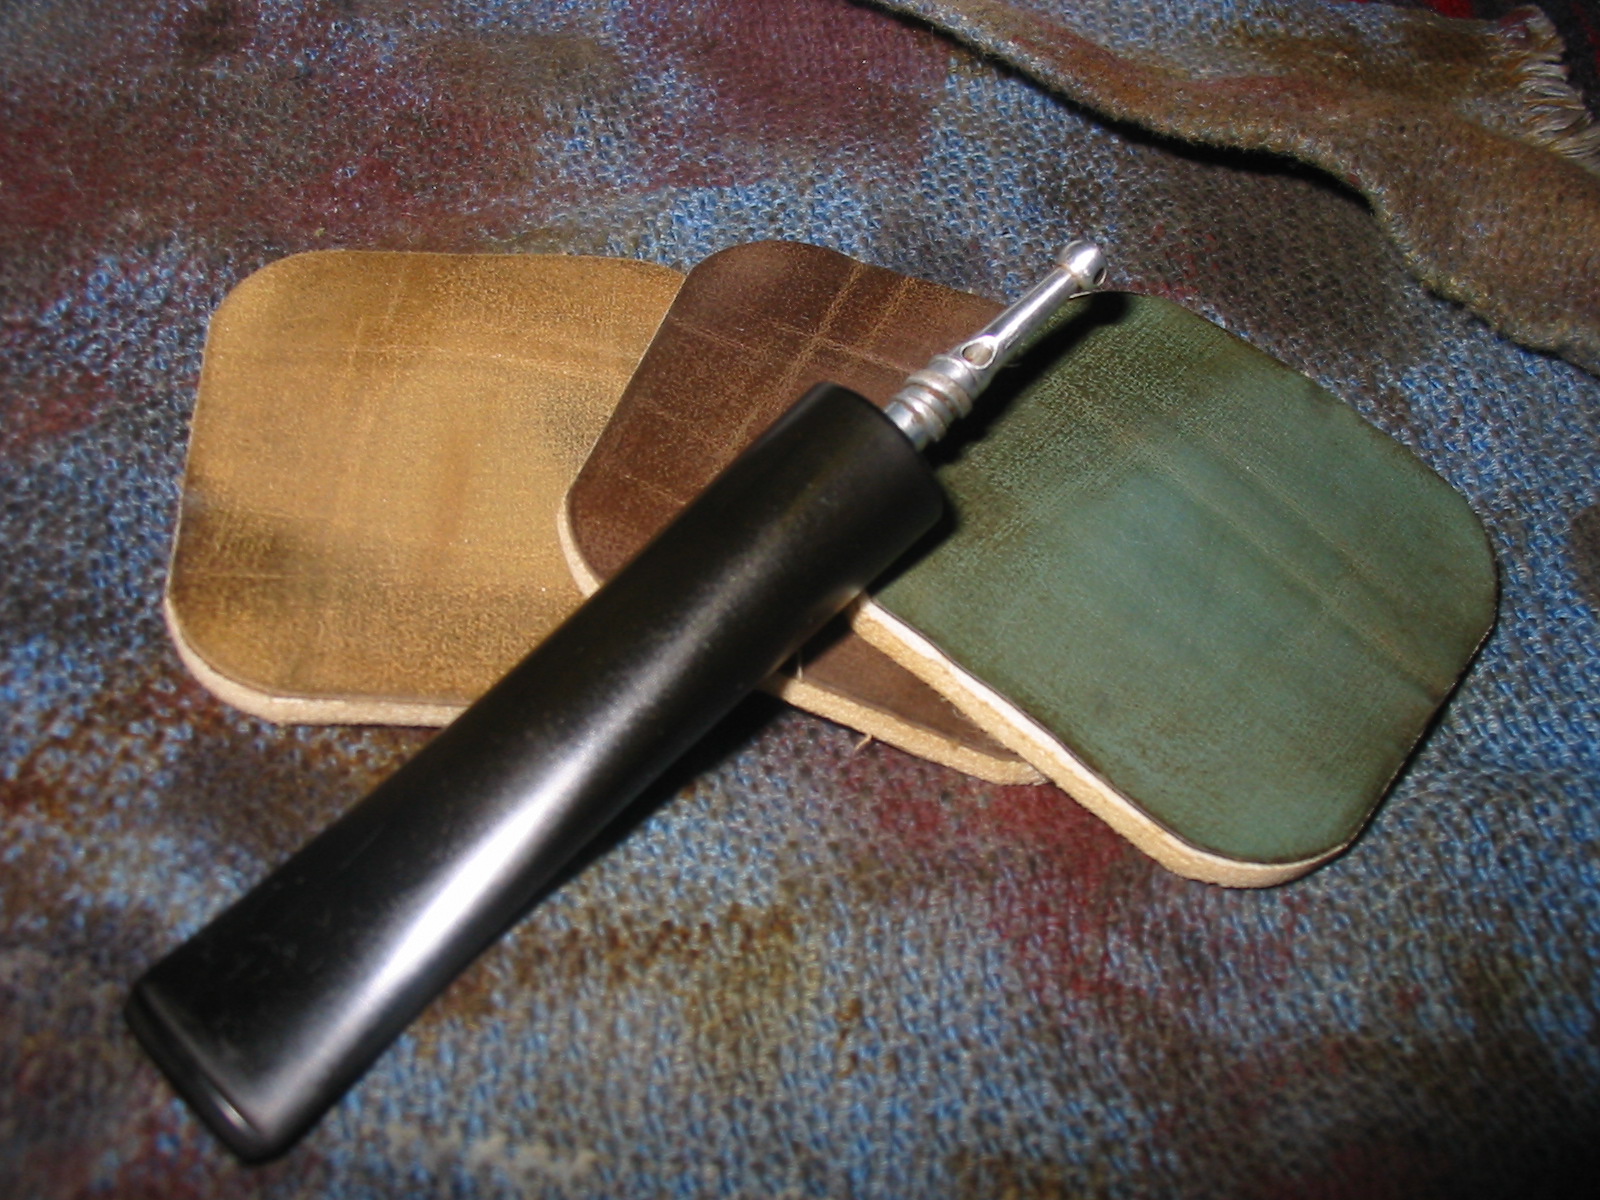
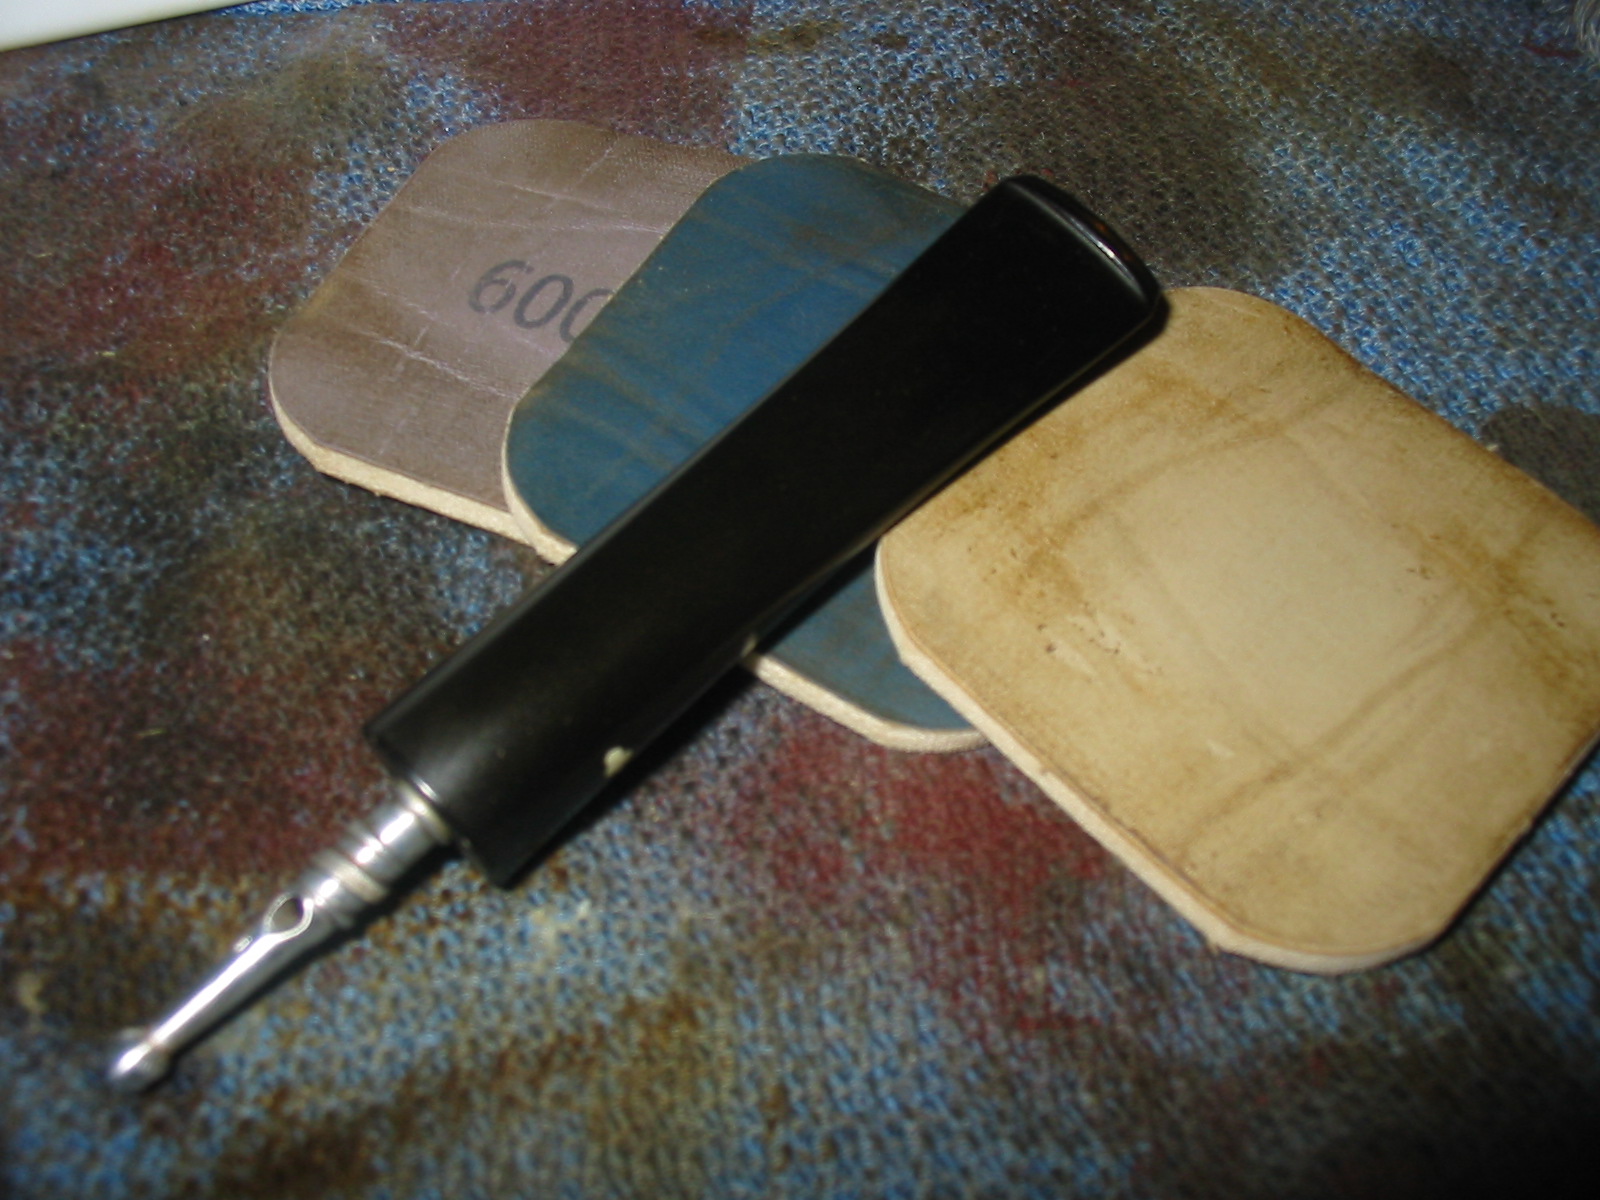
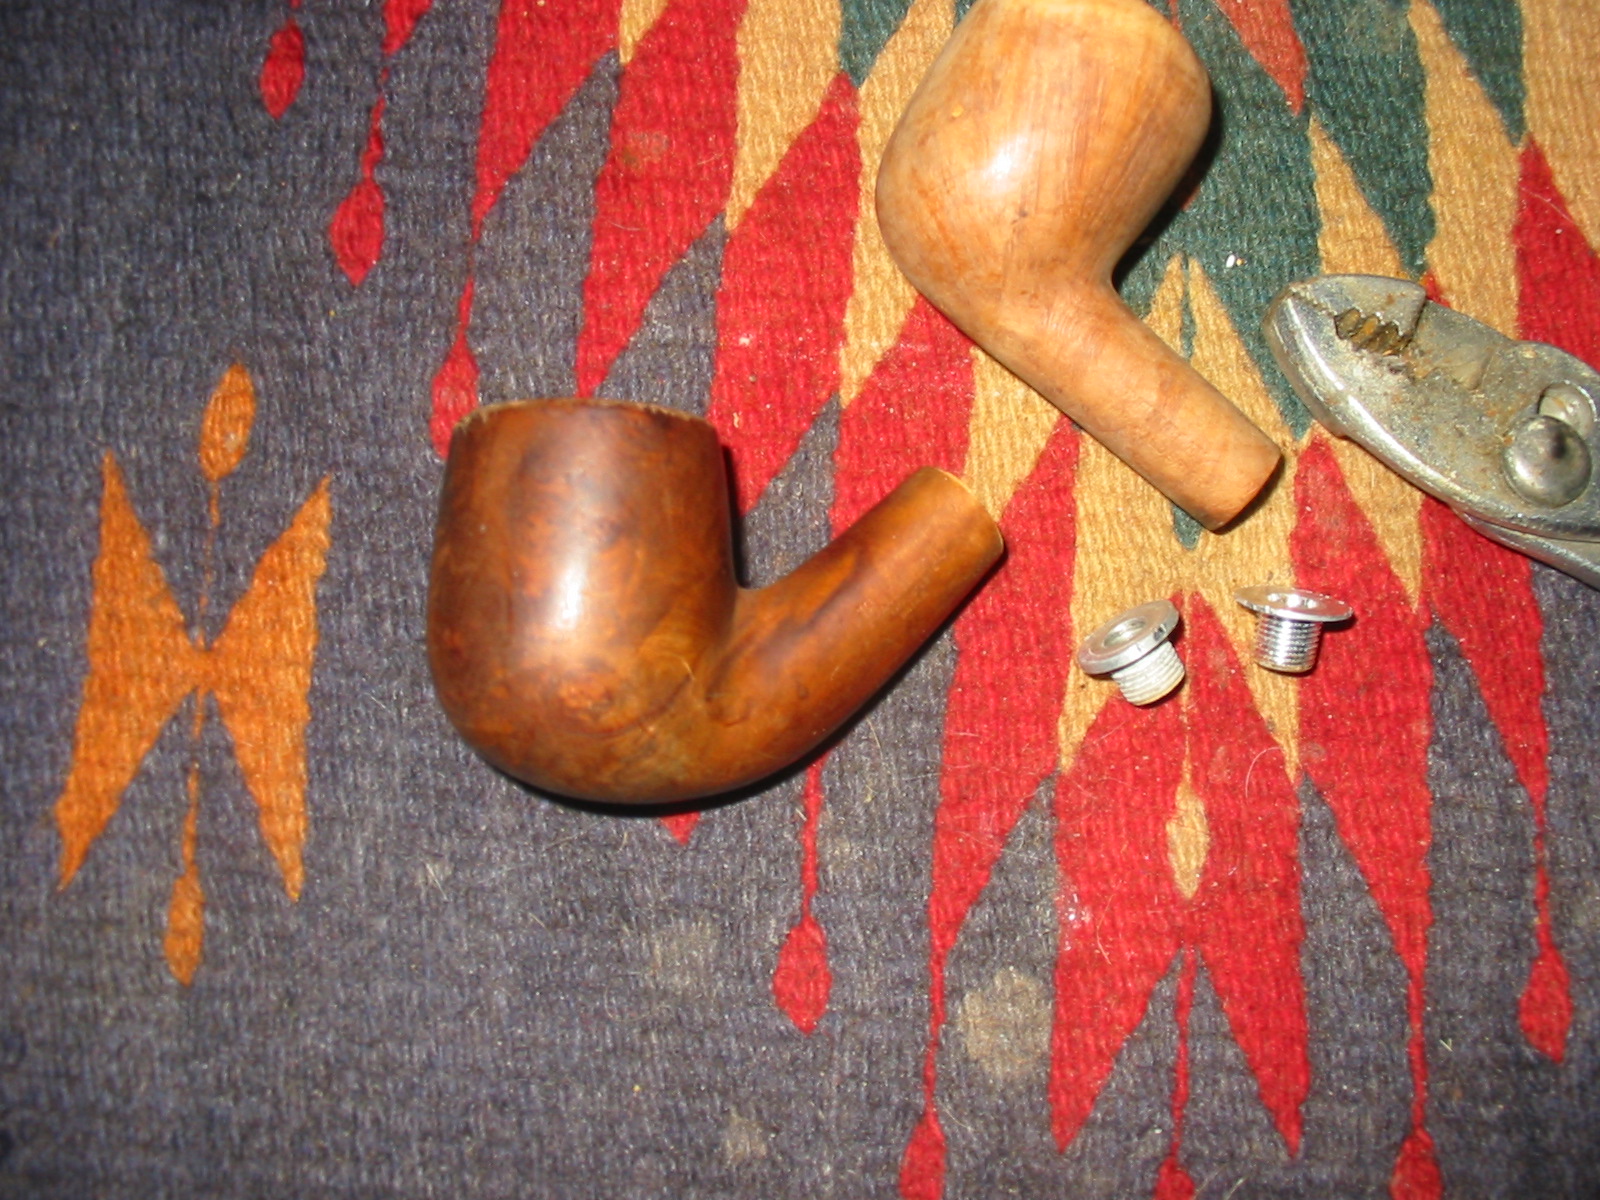
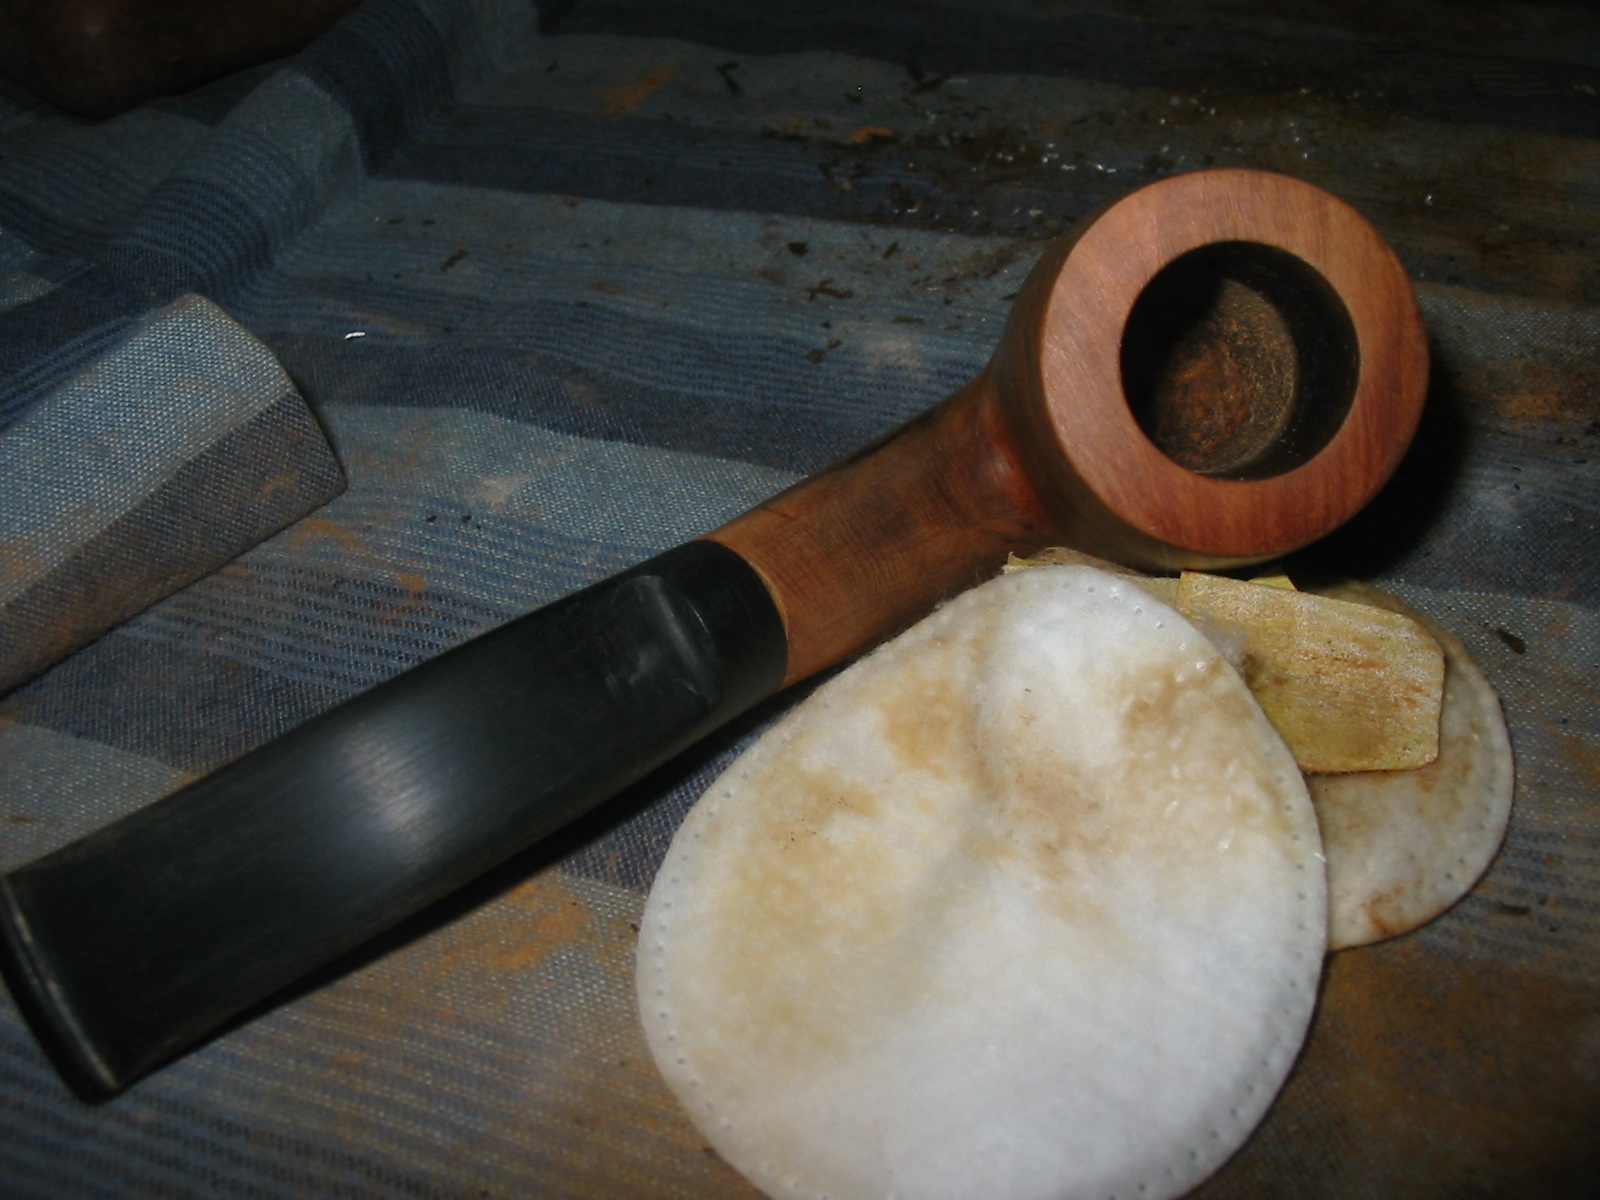
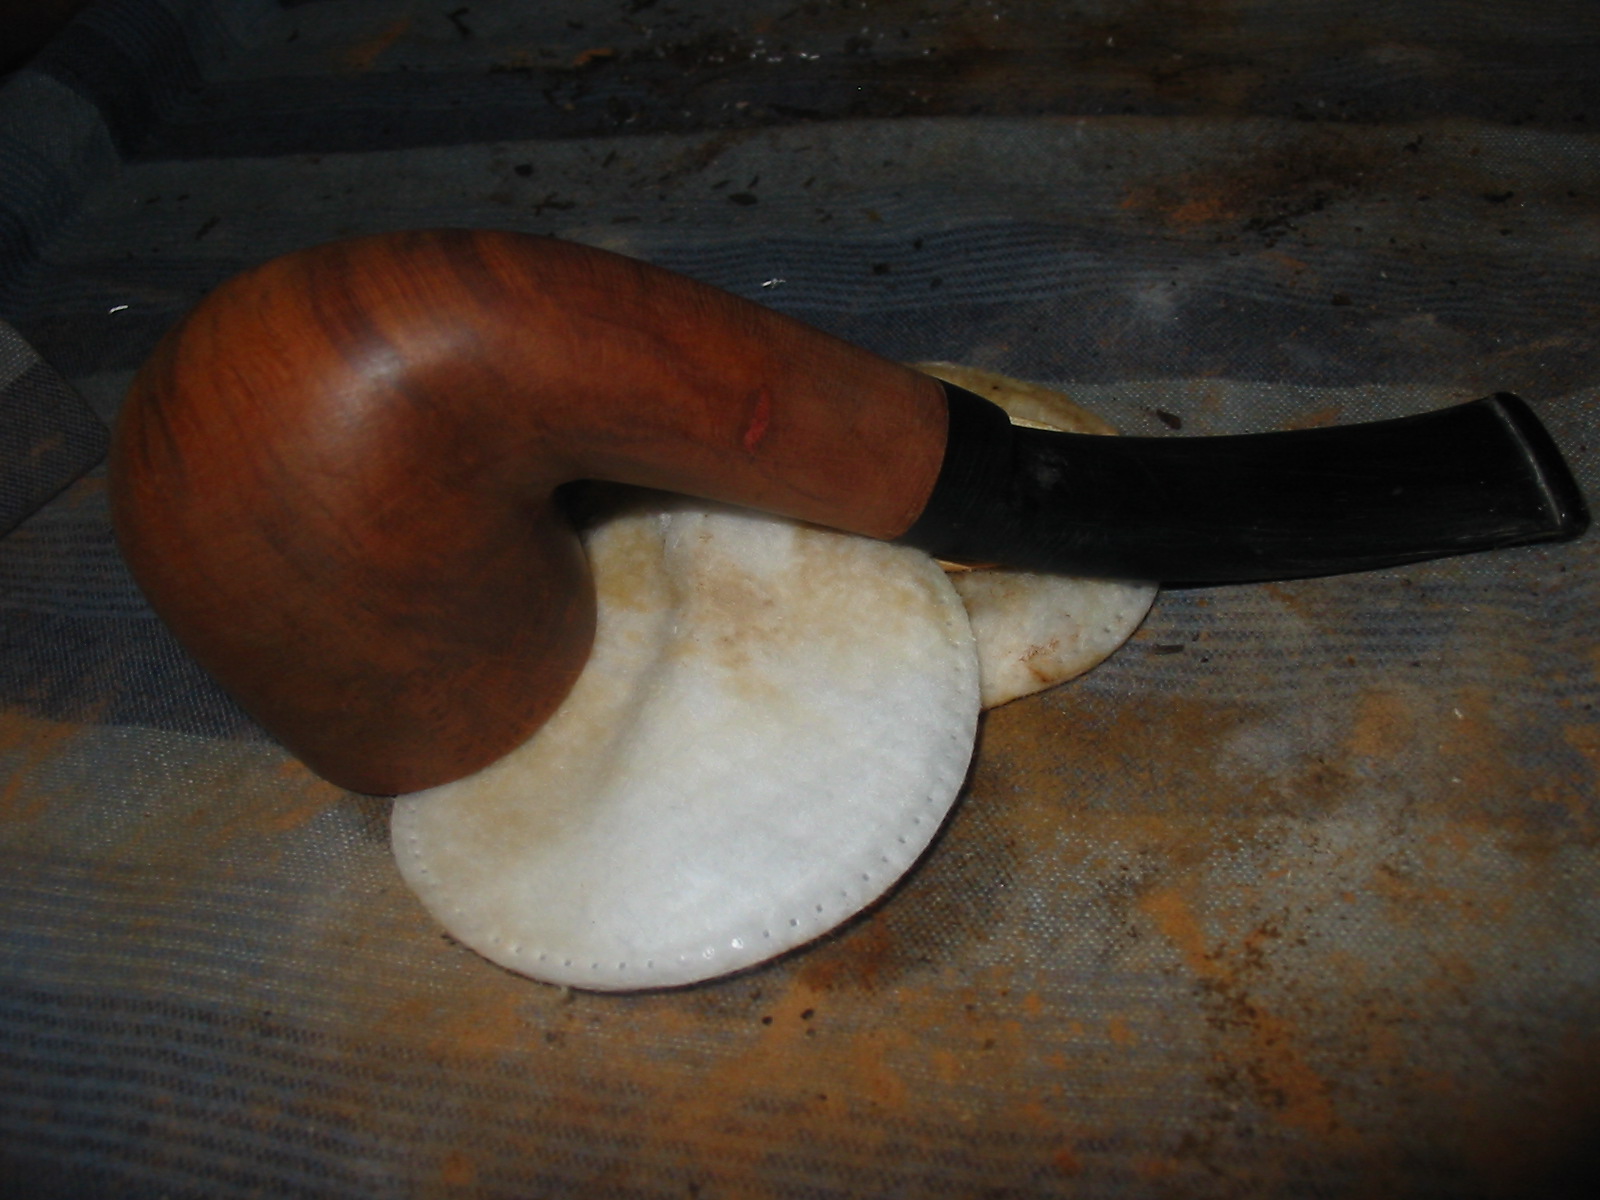
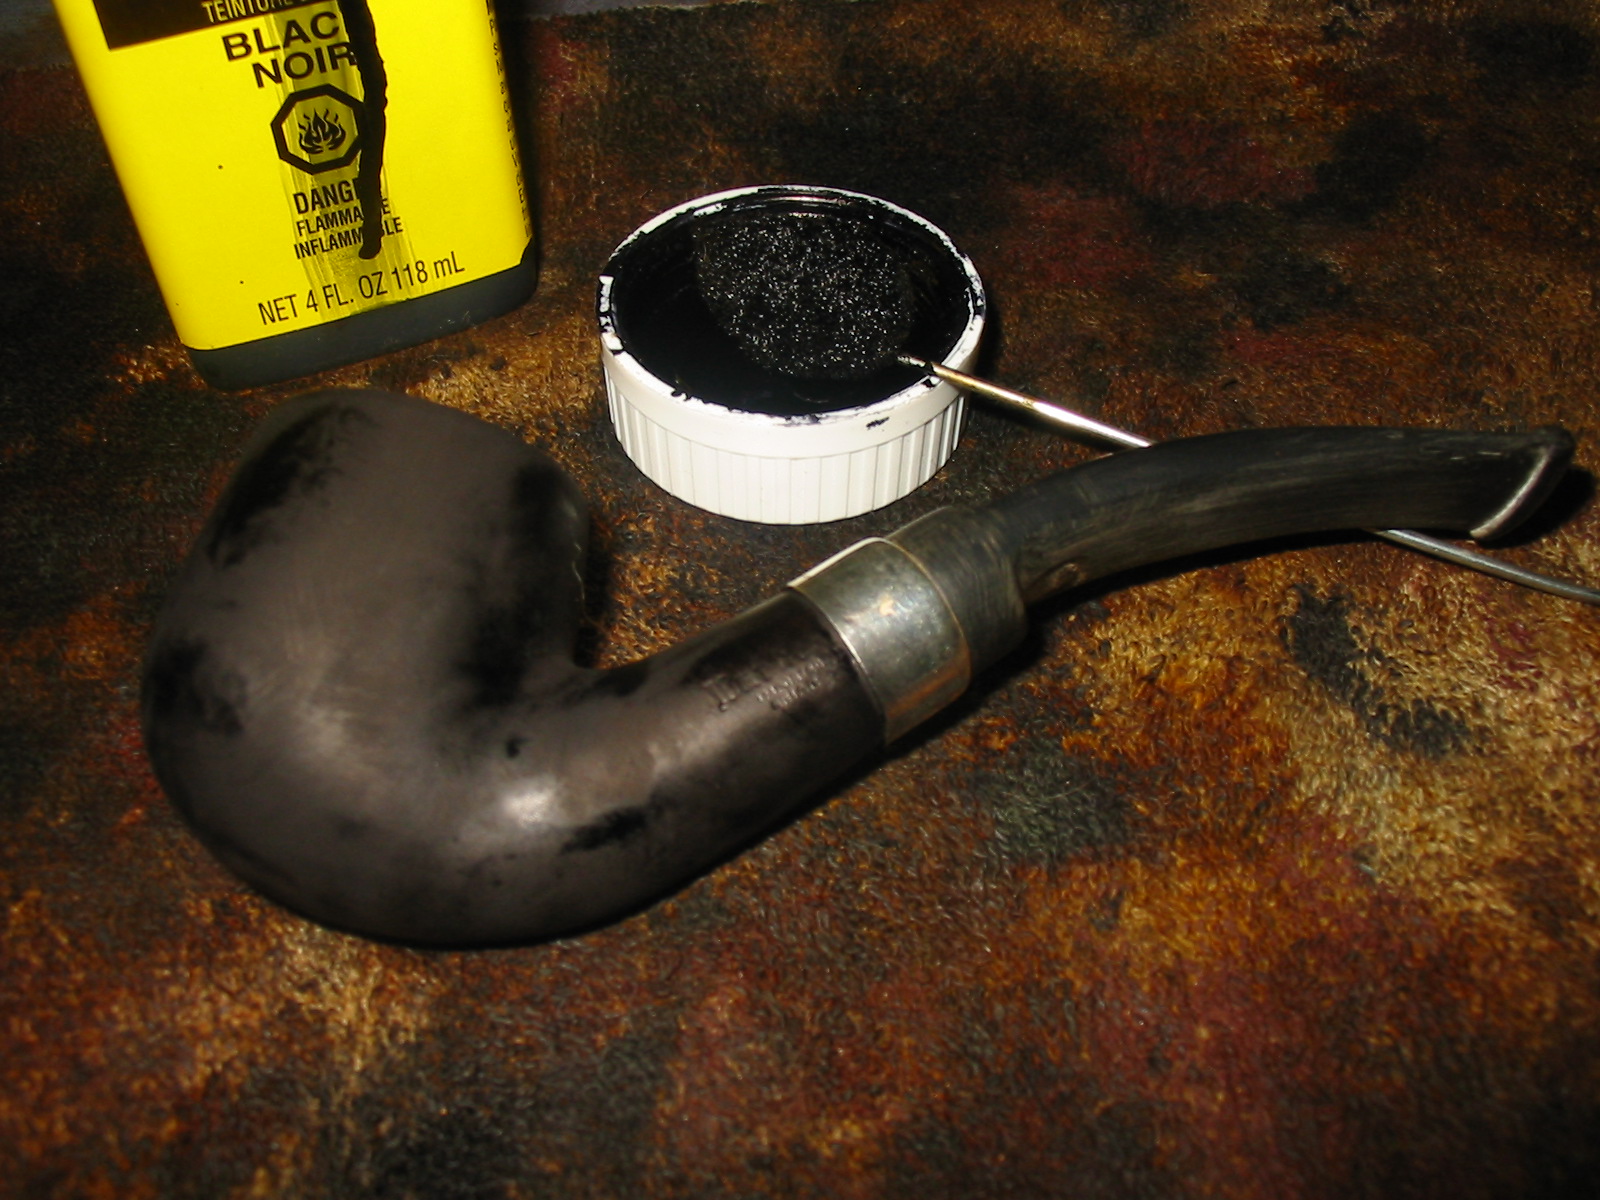
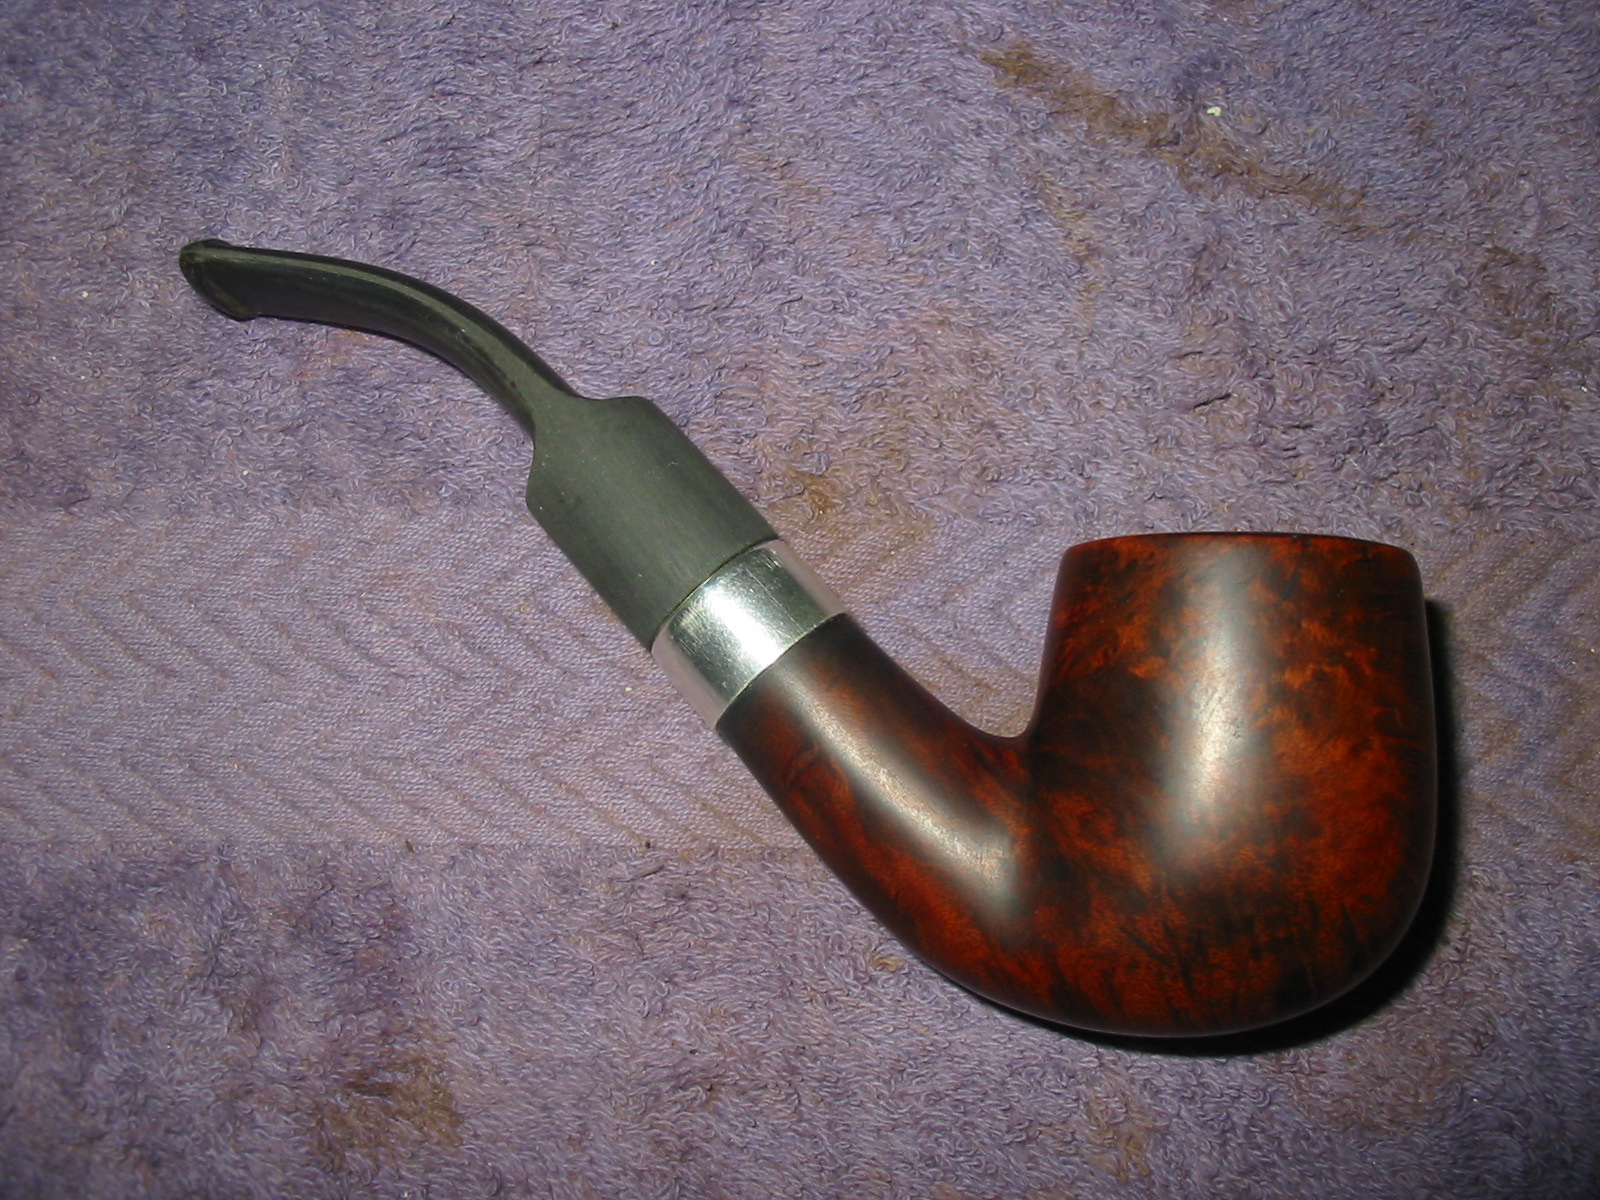
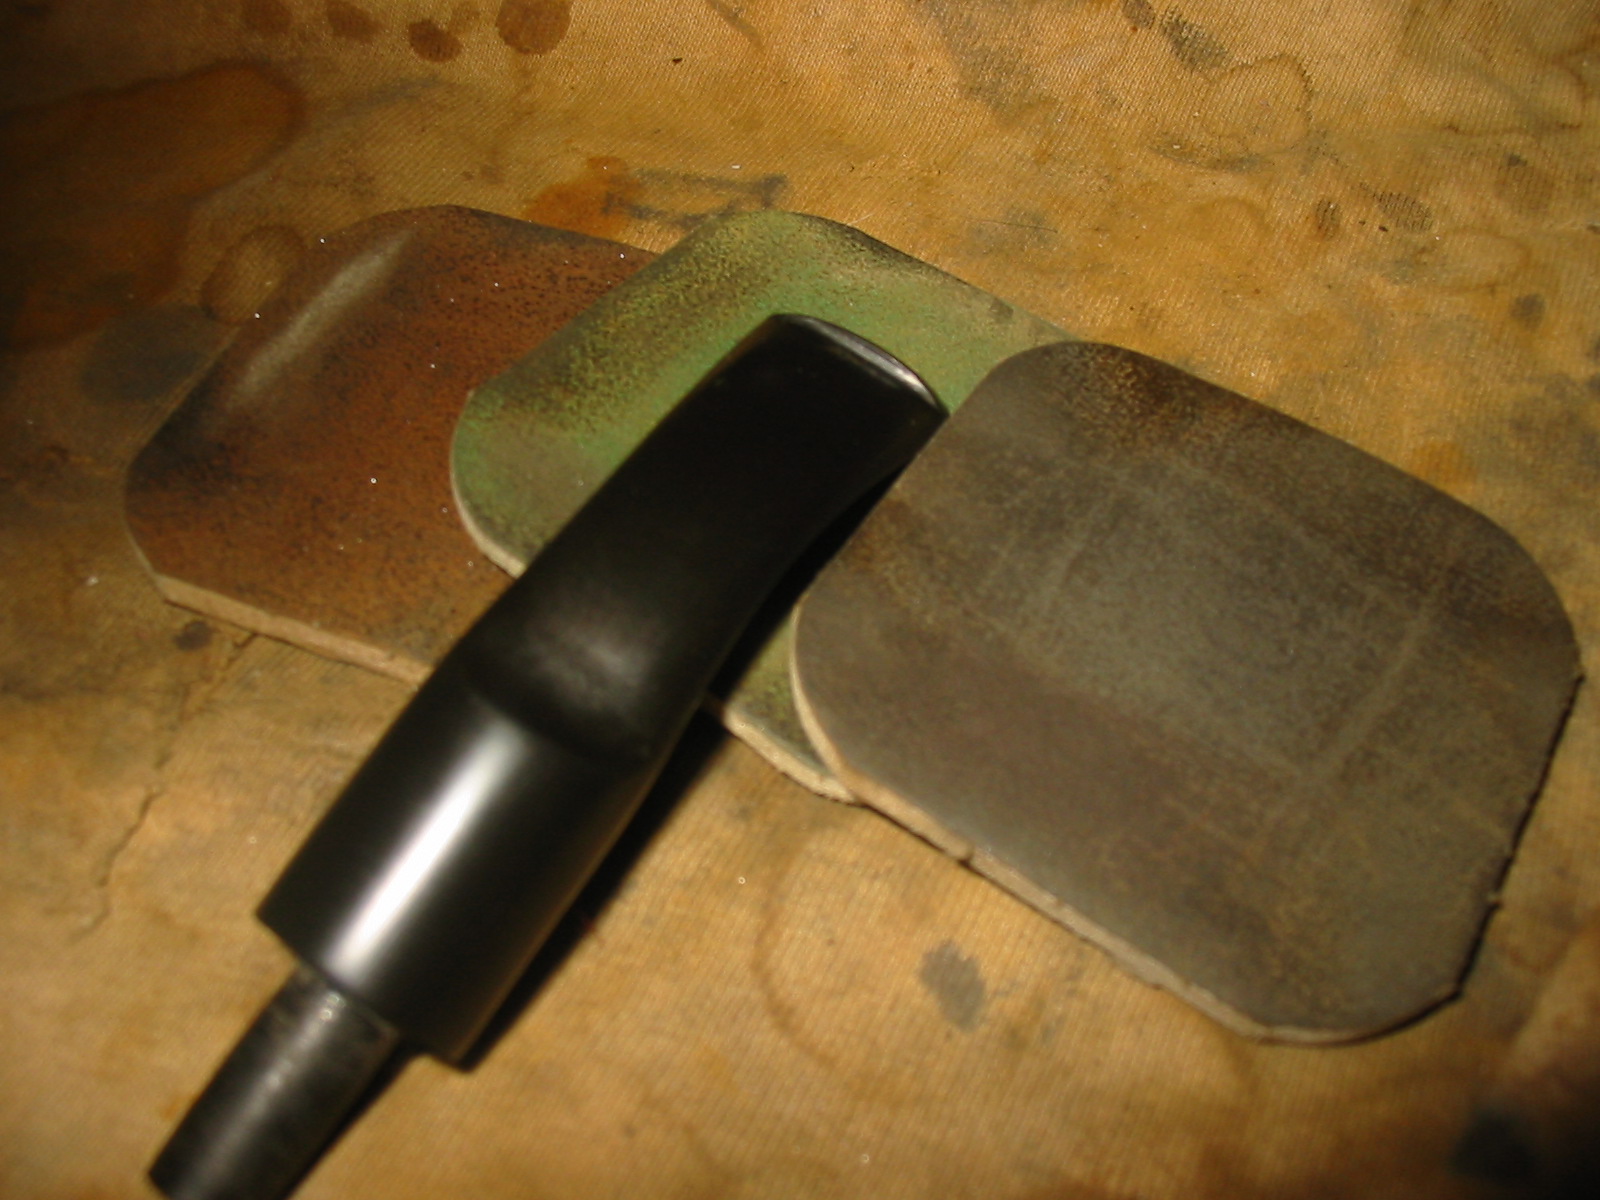
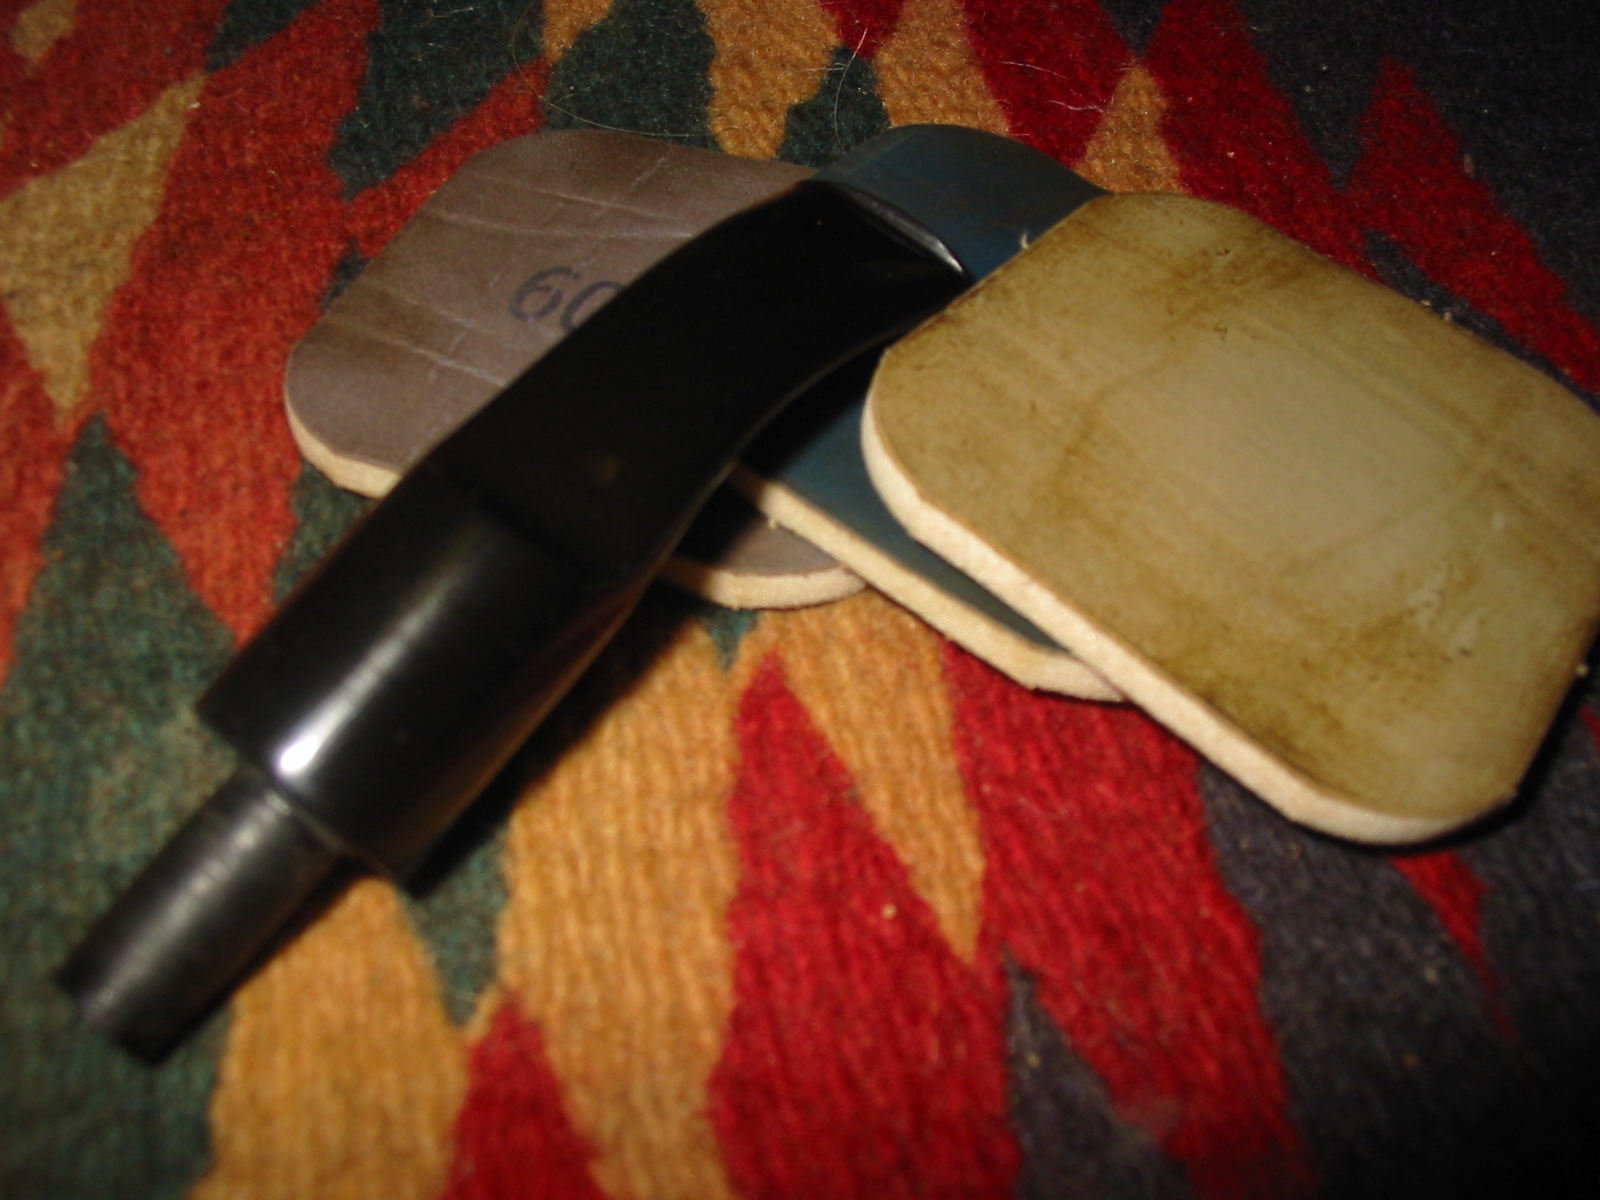
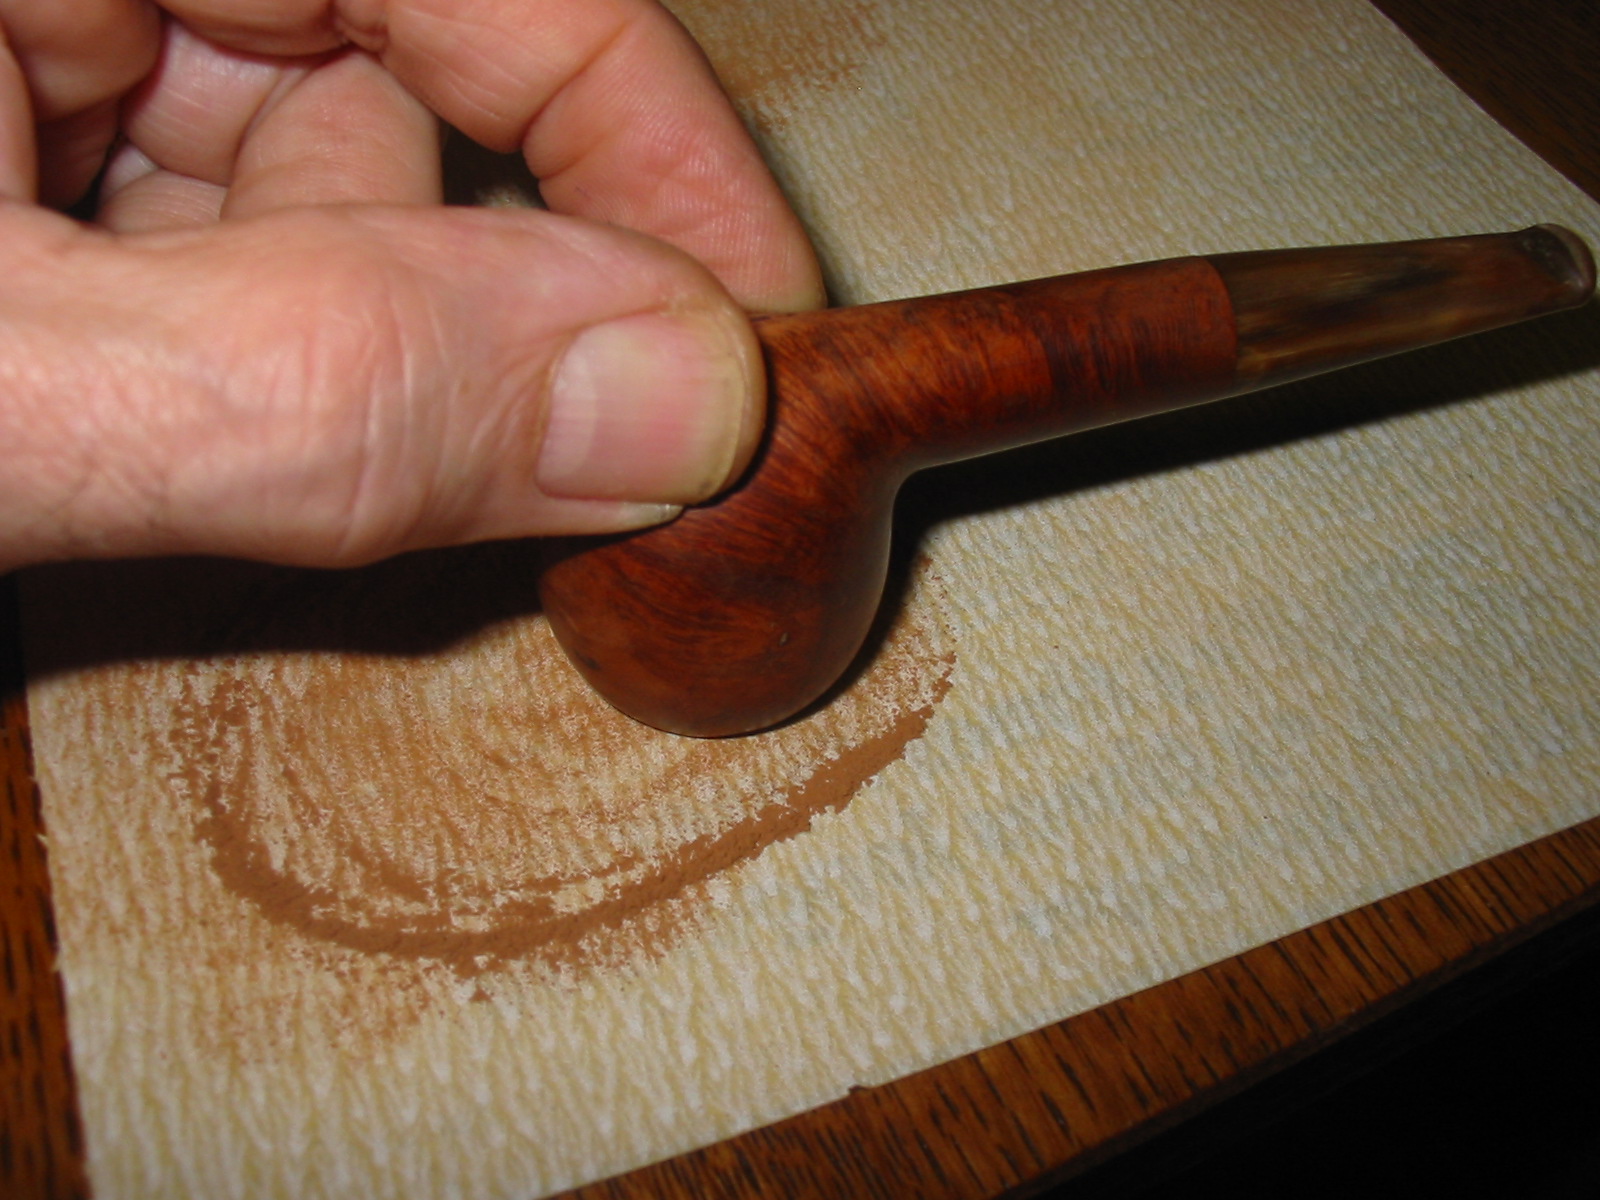
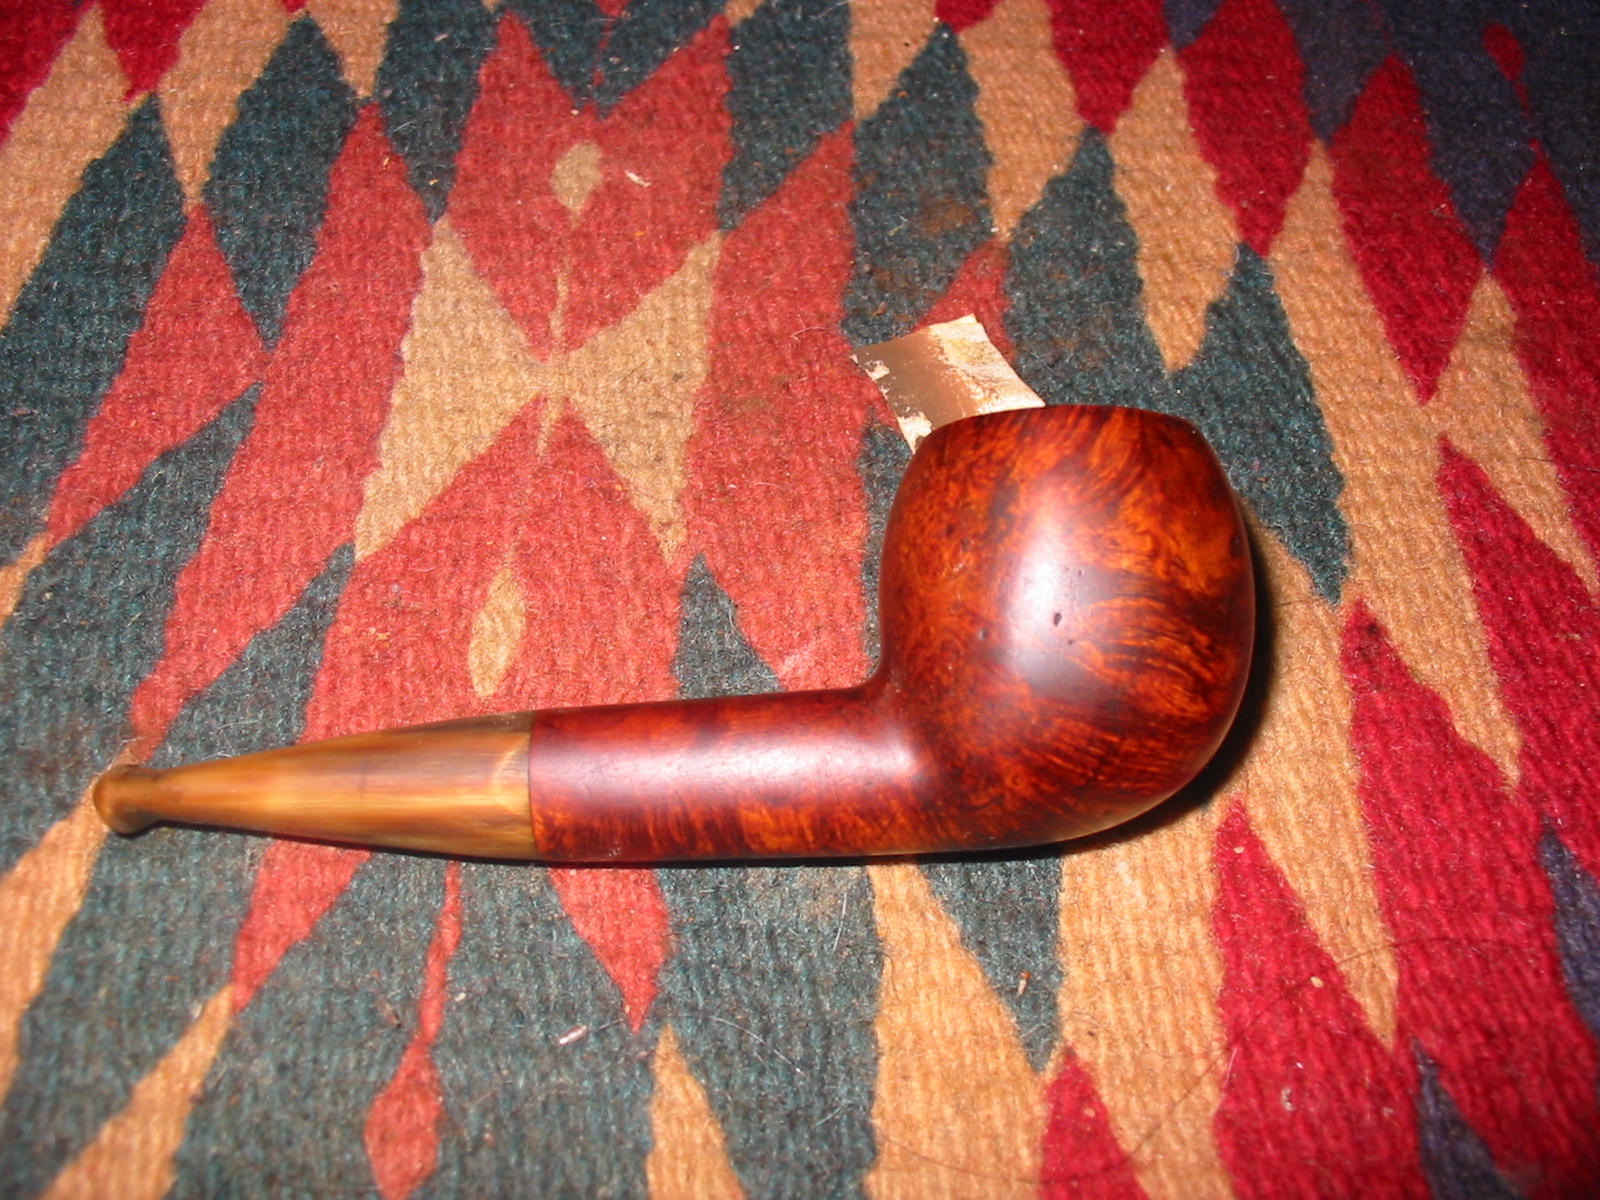
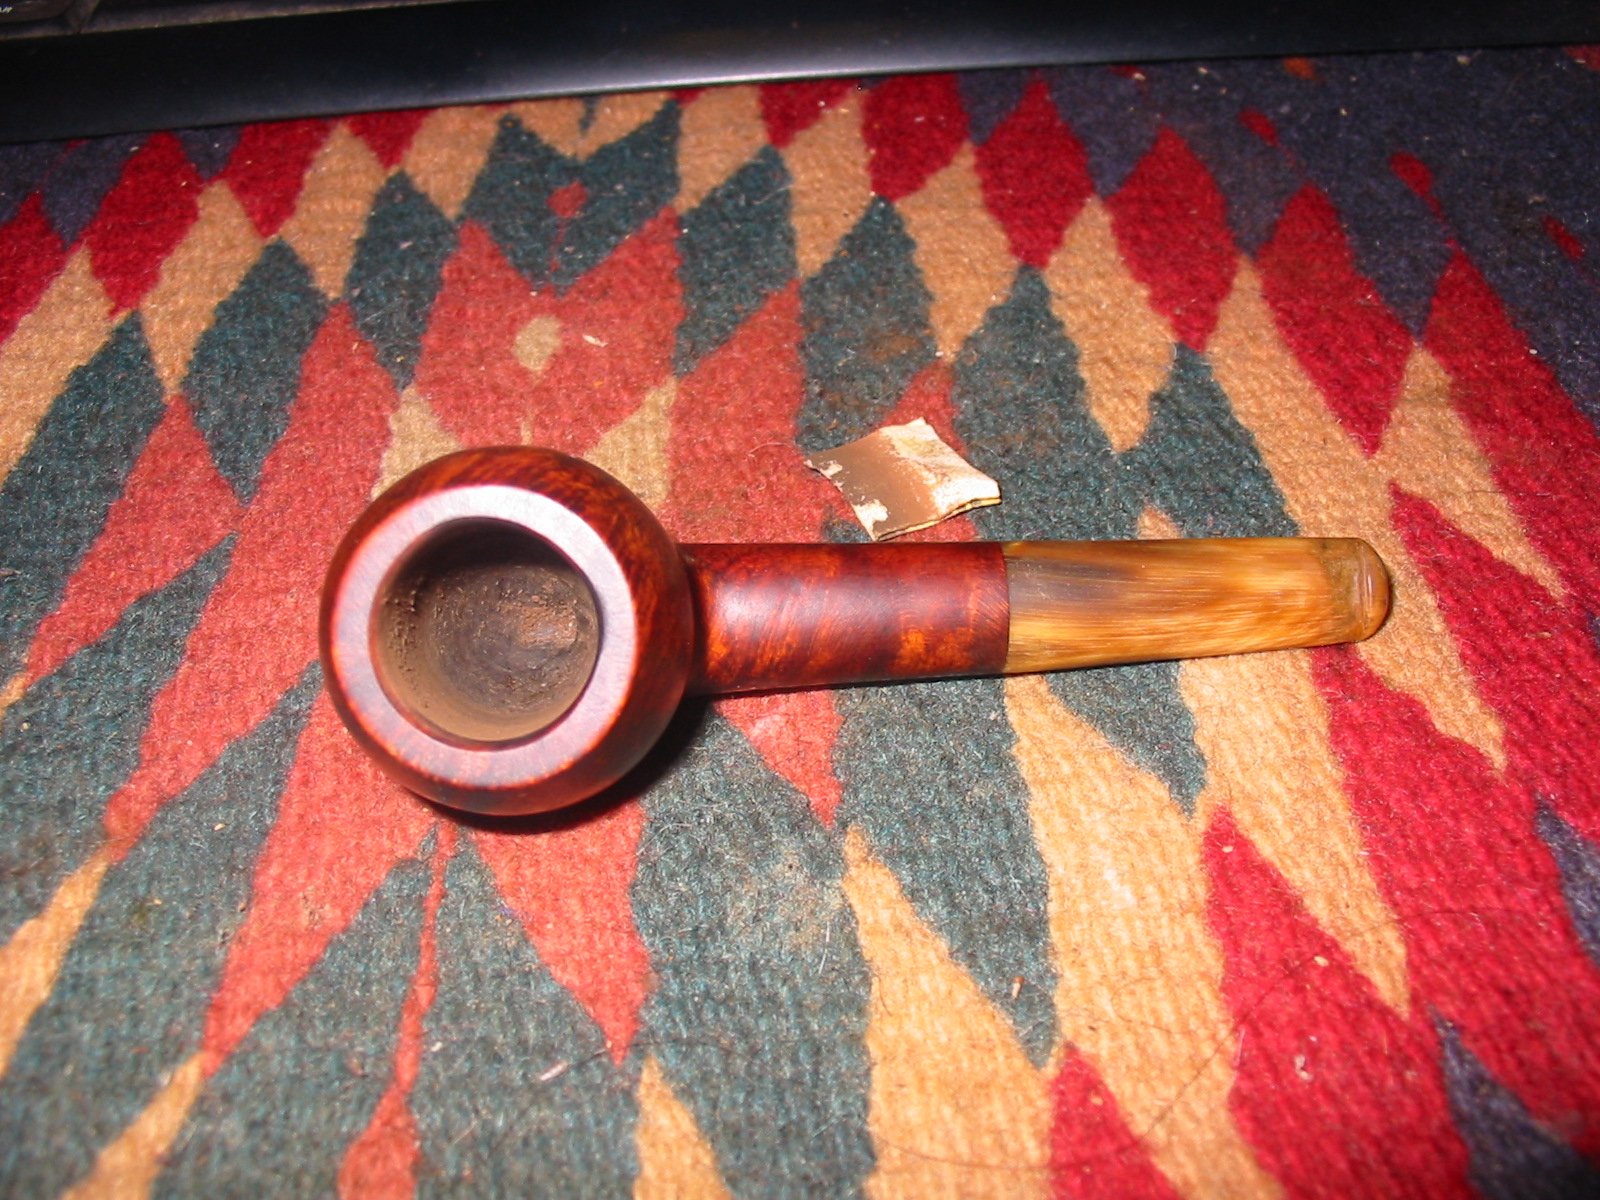
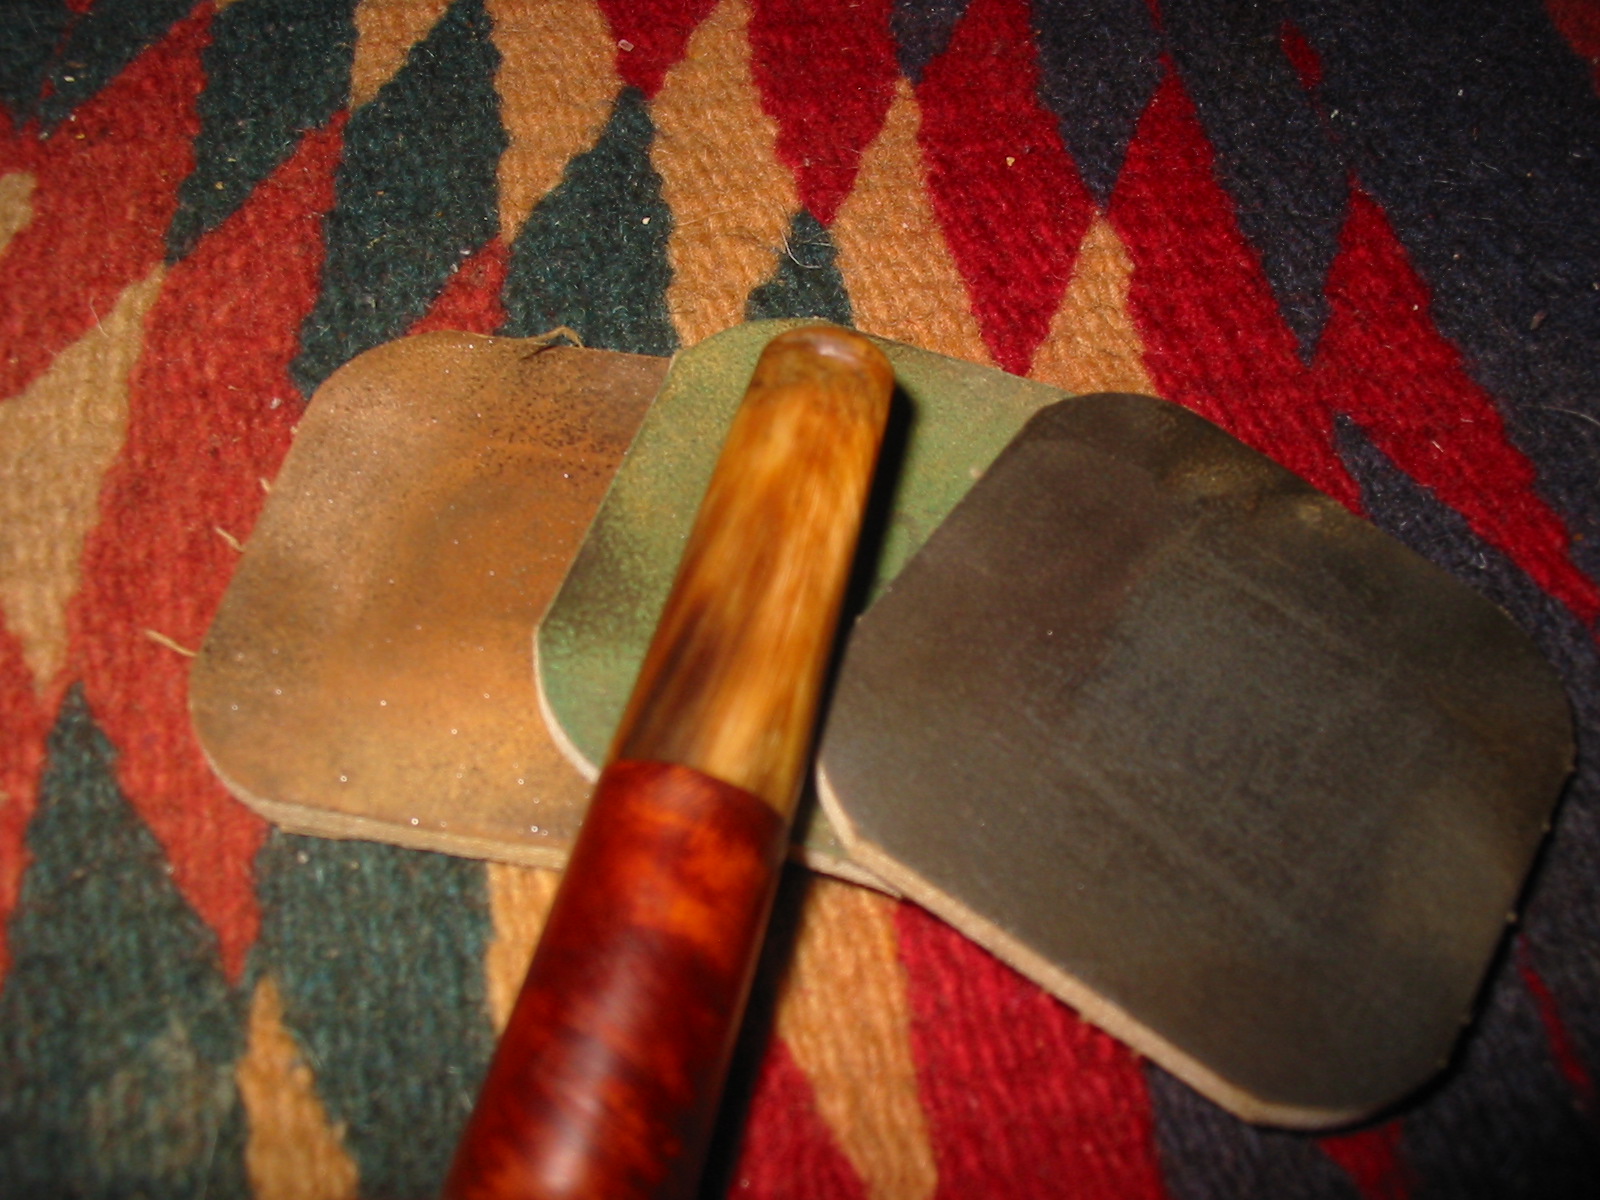
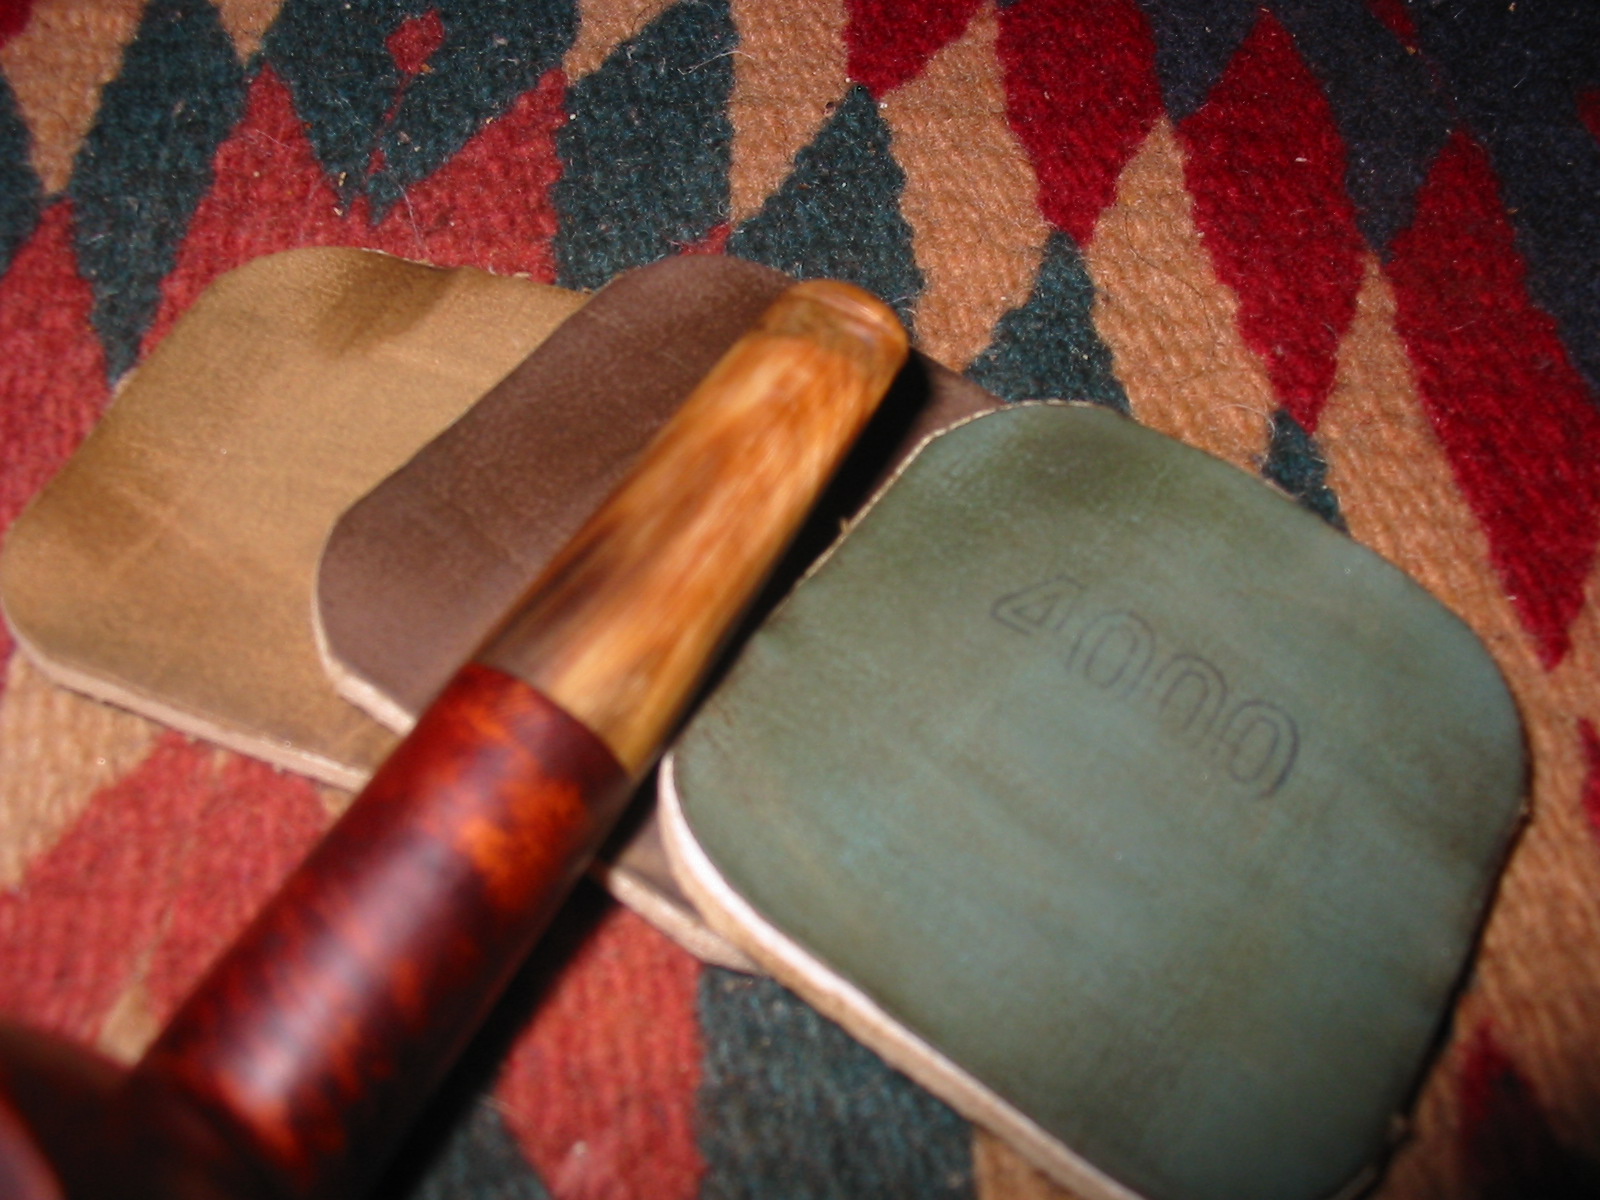
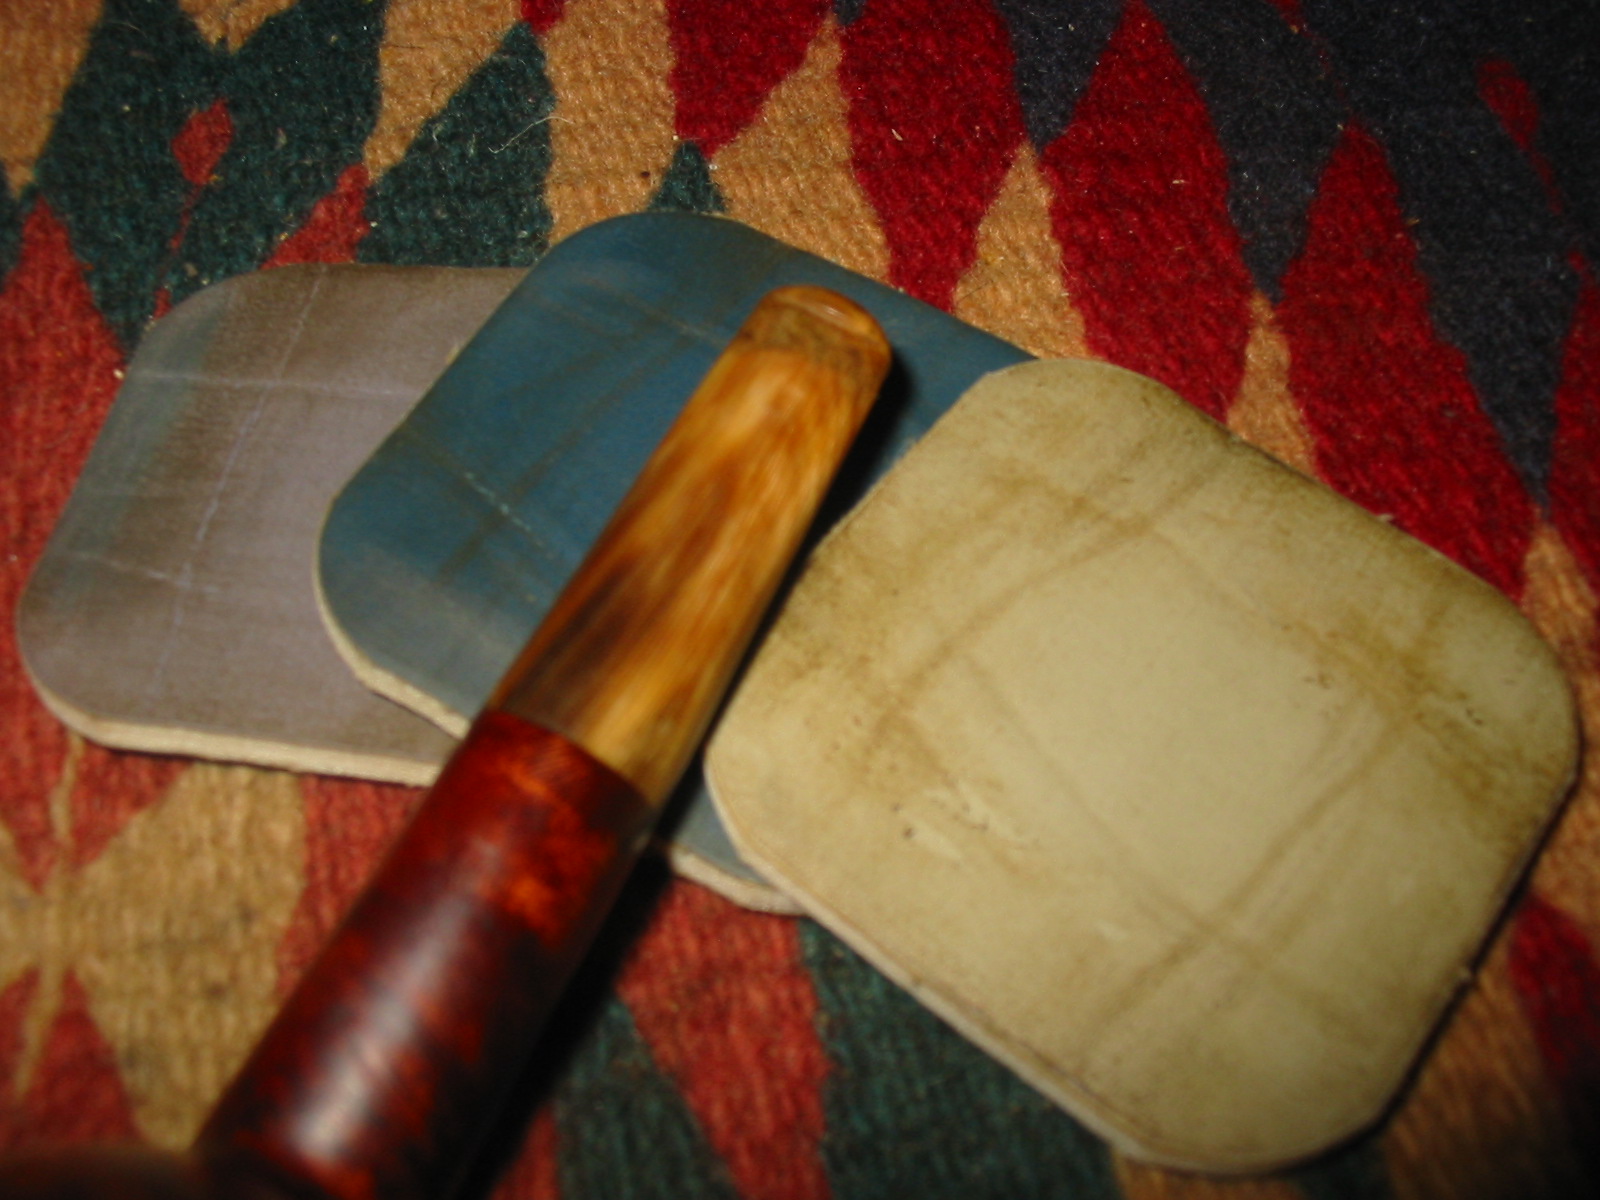
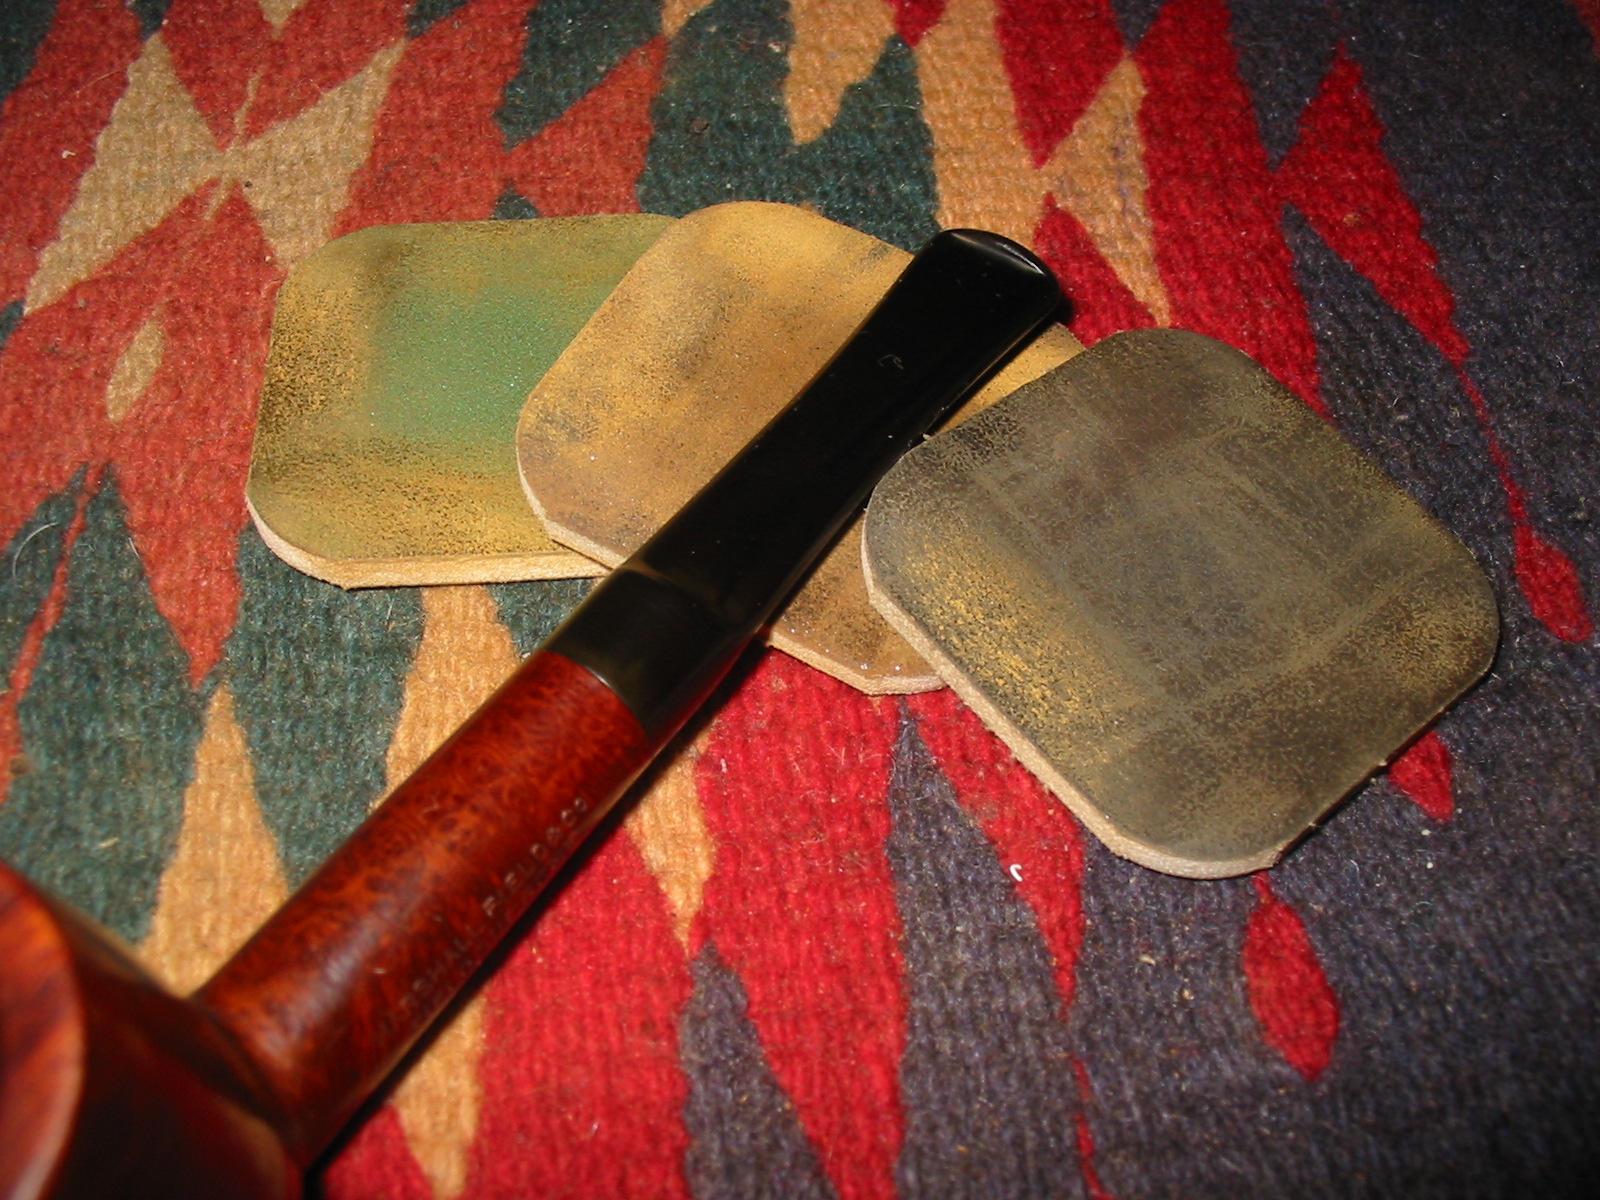
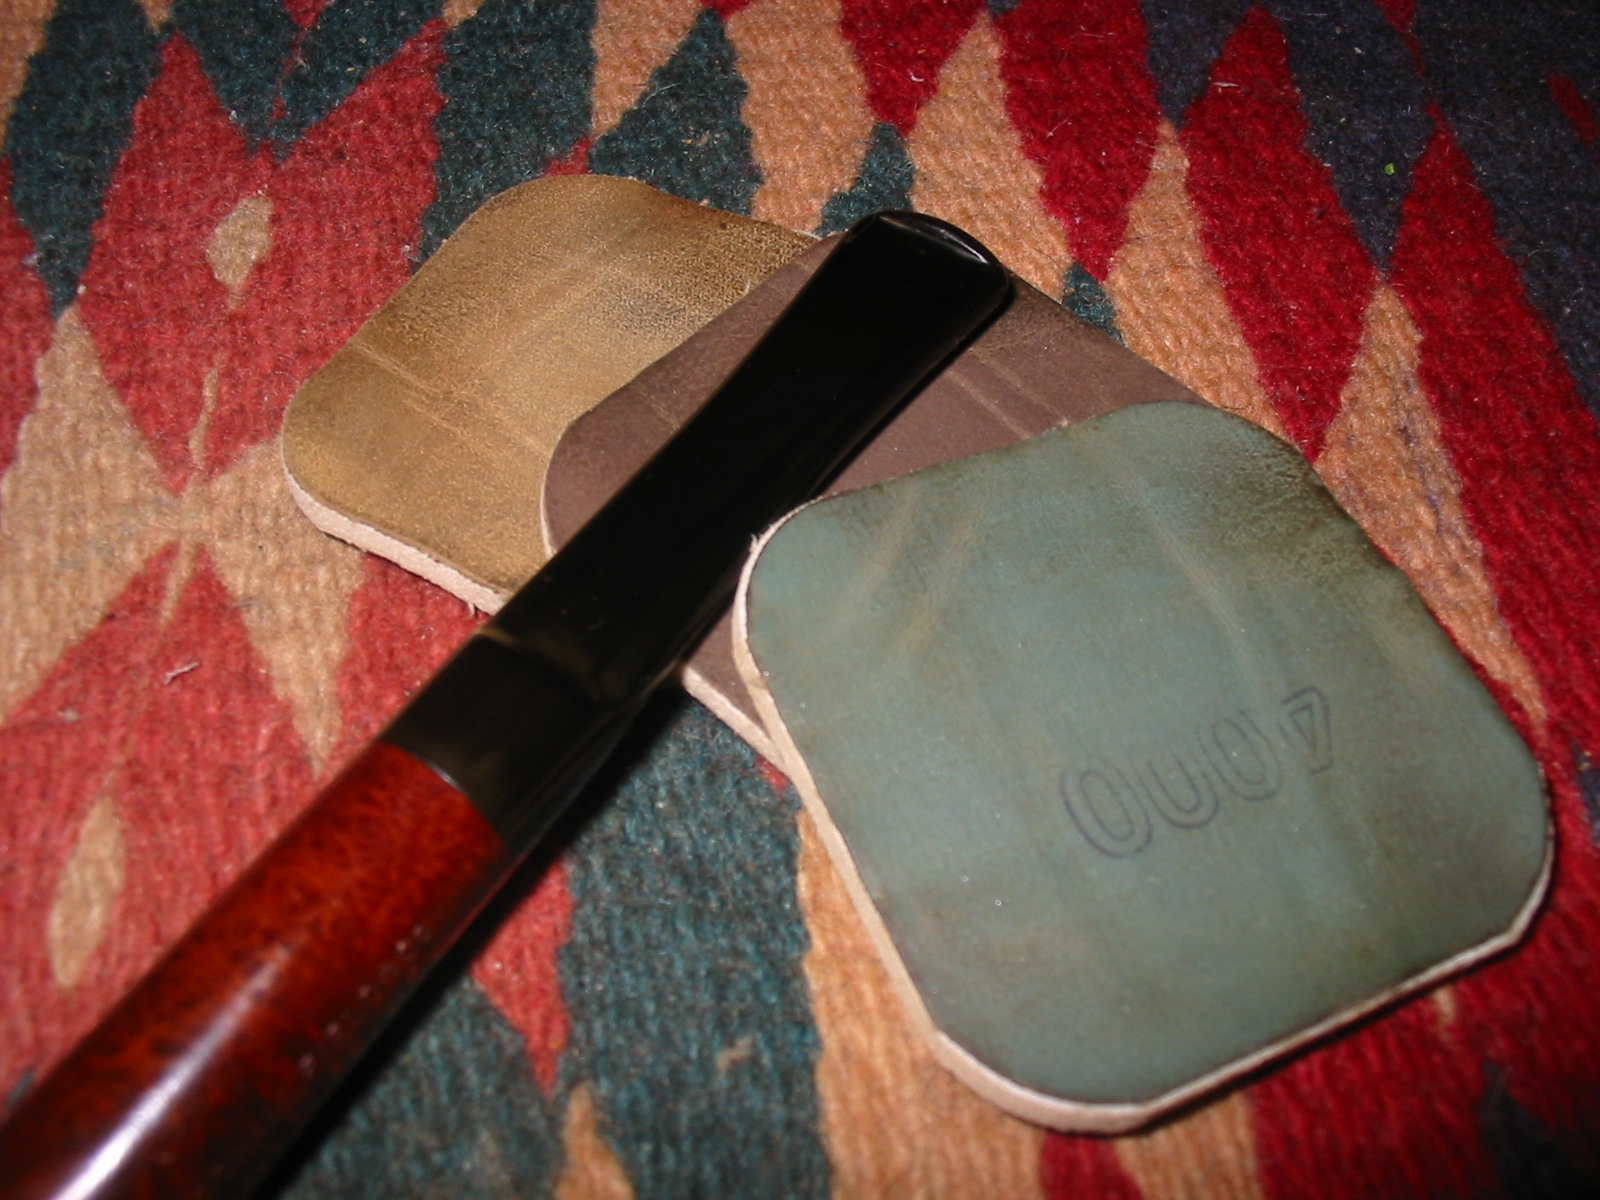
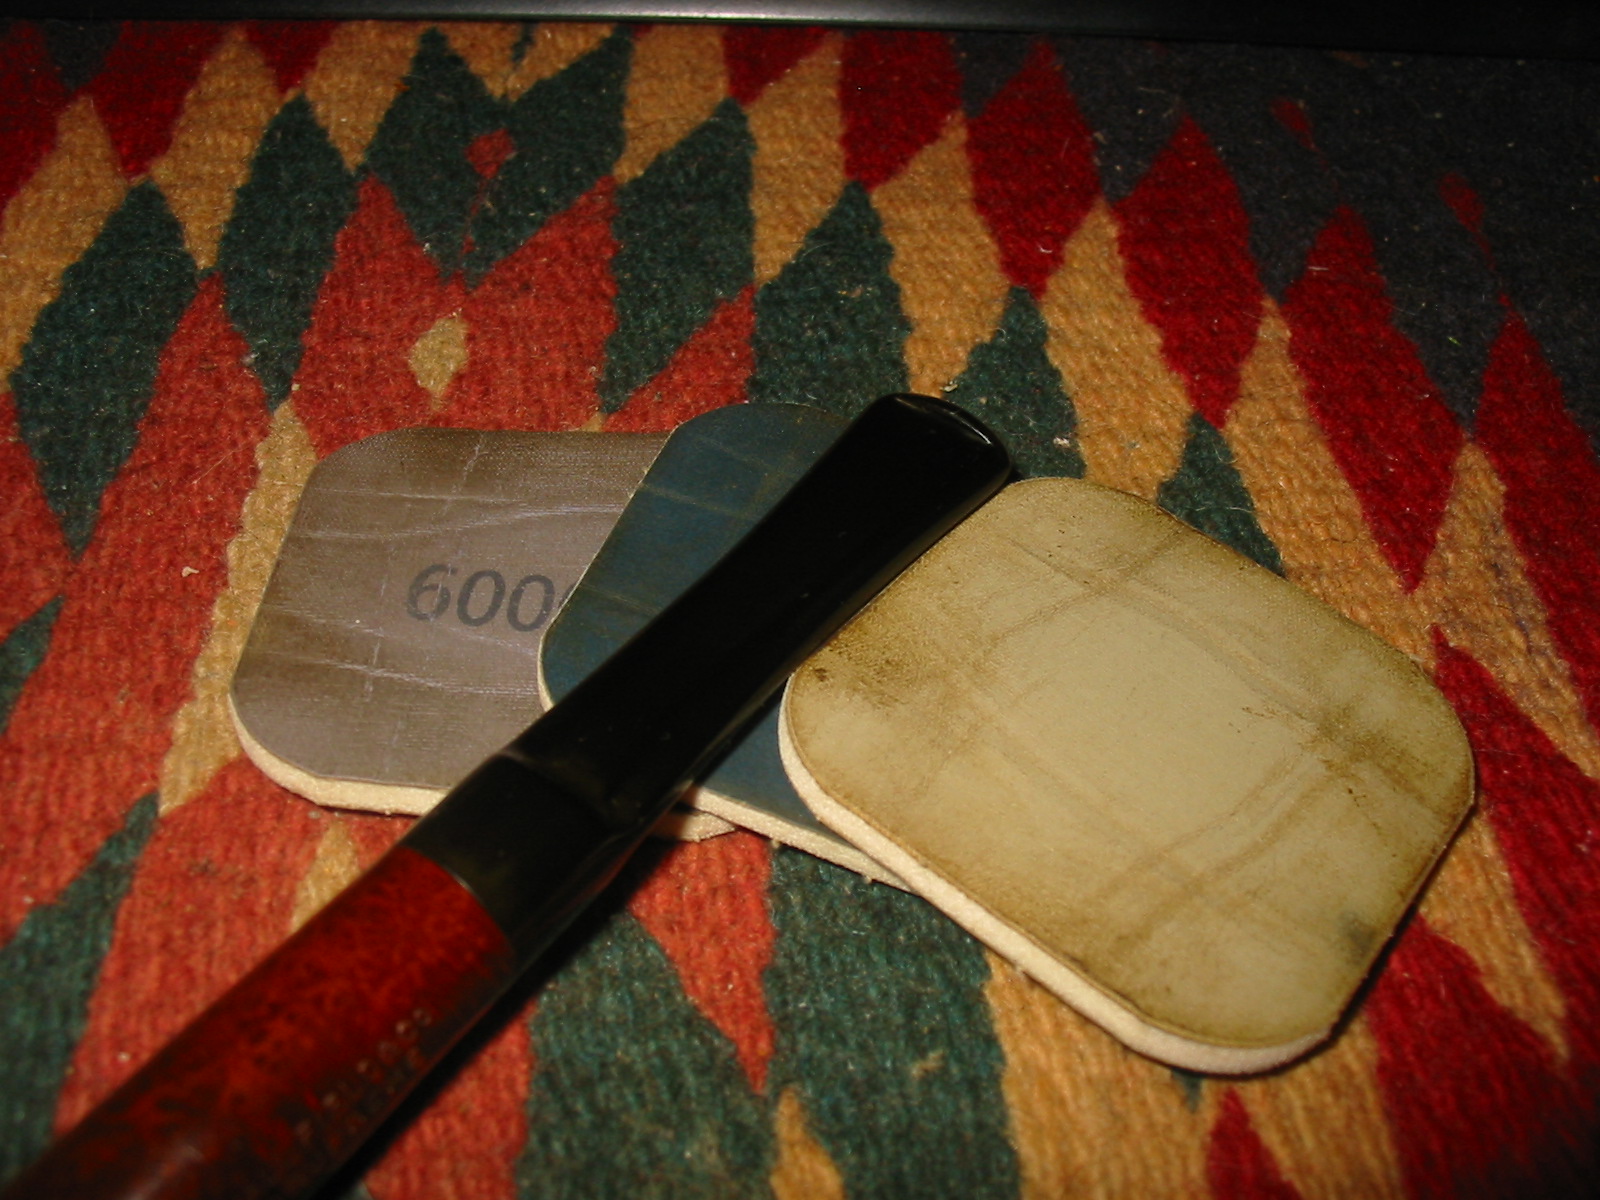
I sanded the stem with a medium and fine grit sanding sponge to remove the tooth marks and chatter and to remove the oxidation on the surface. I followed that up with my usual habit of sanding with micromesh sanding pads. I wet sanded with 1500-2400 grit sanding pads and then dry sanded with 3200-12,000 grit pads. I polished the stem with Meguiar’sScratch X2.0 polish and then buffed with Tripoli and White Diamond. I rubbed the stem down with Obsidian Oil and when dry gave it a final buff with White Diamond.
IMG_6803

IMG_6804

IMG_6805
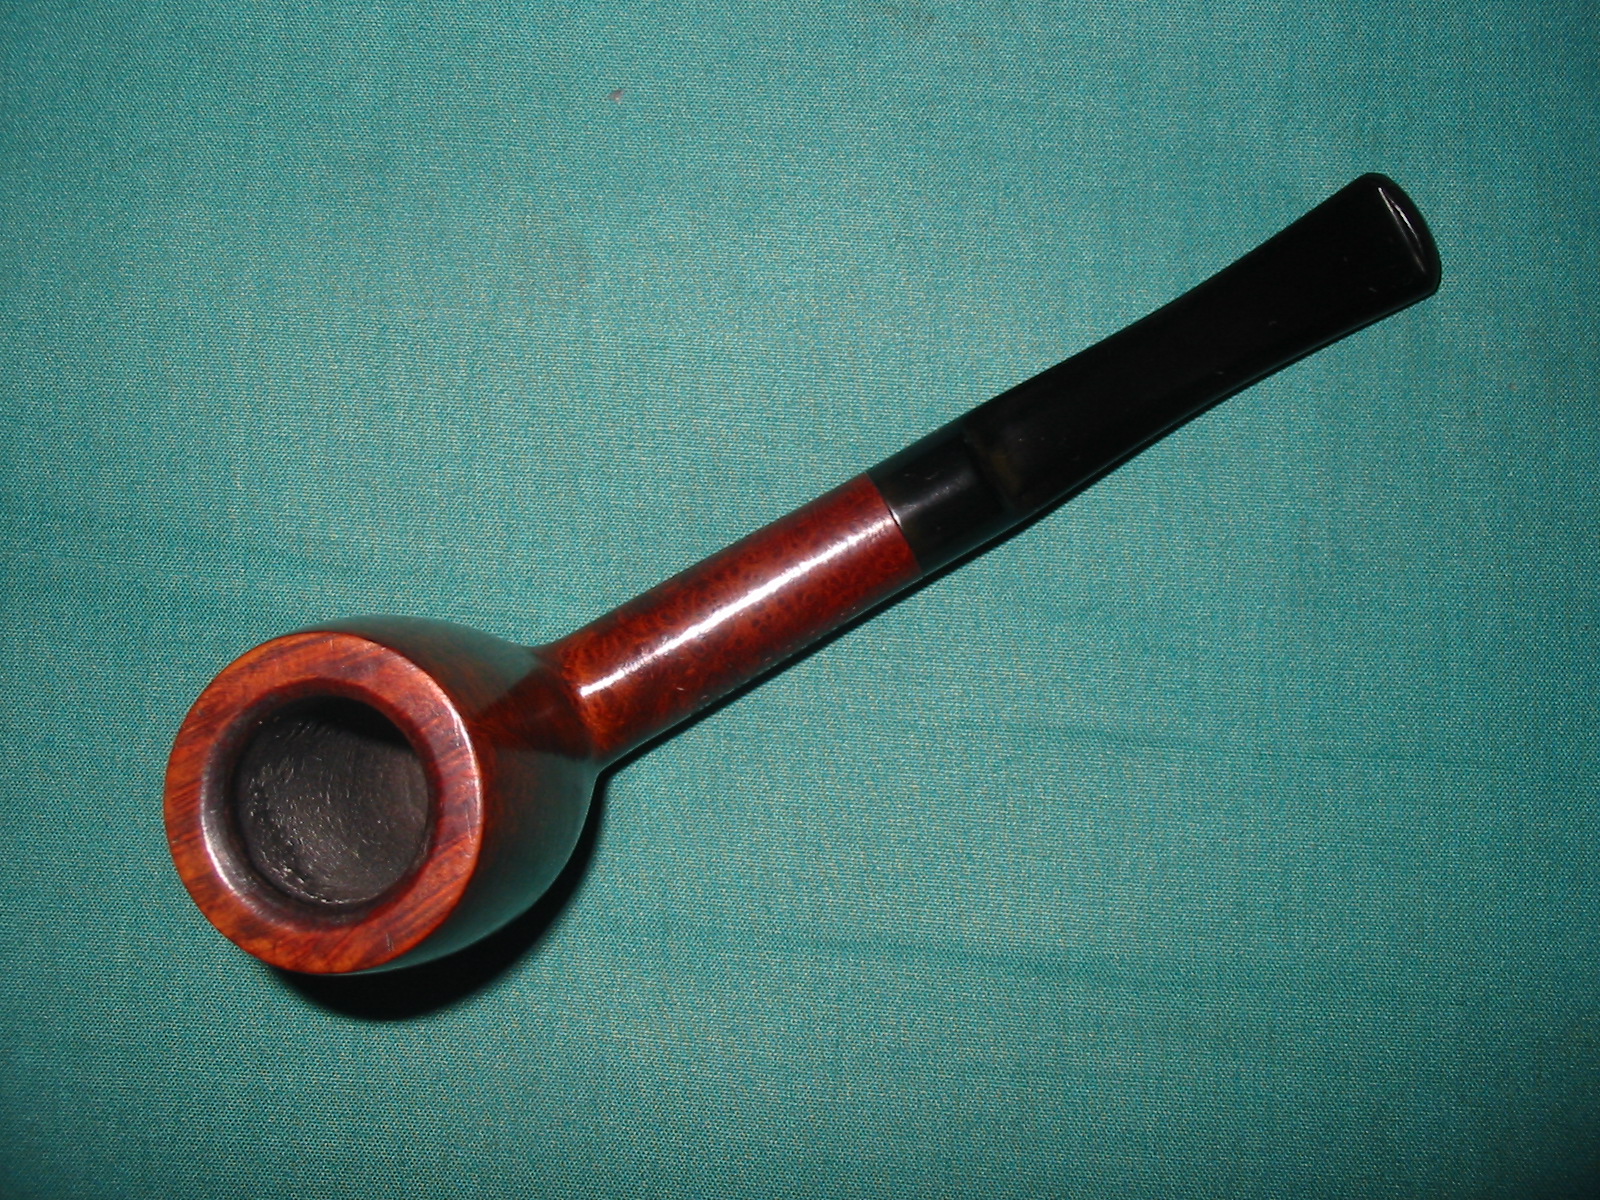
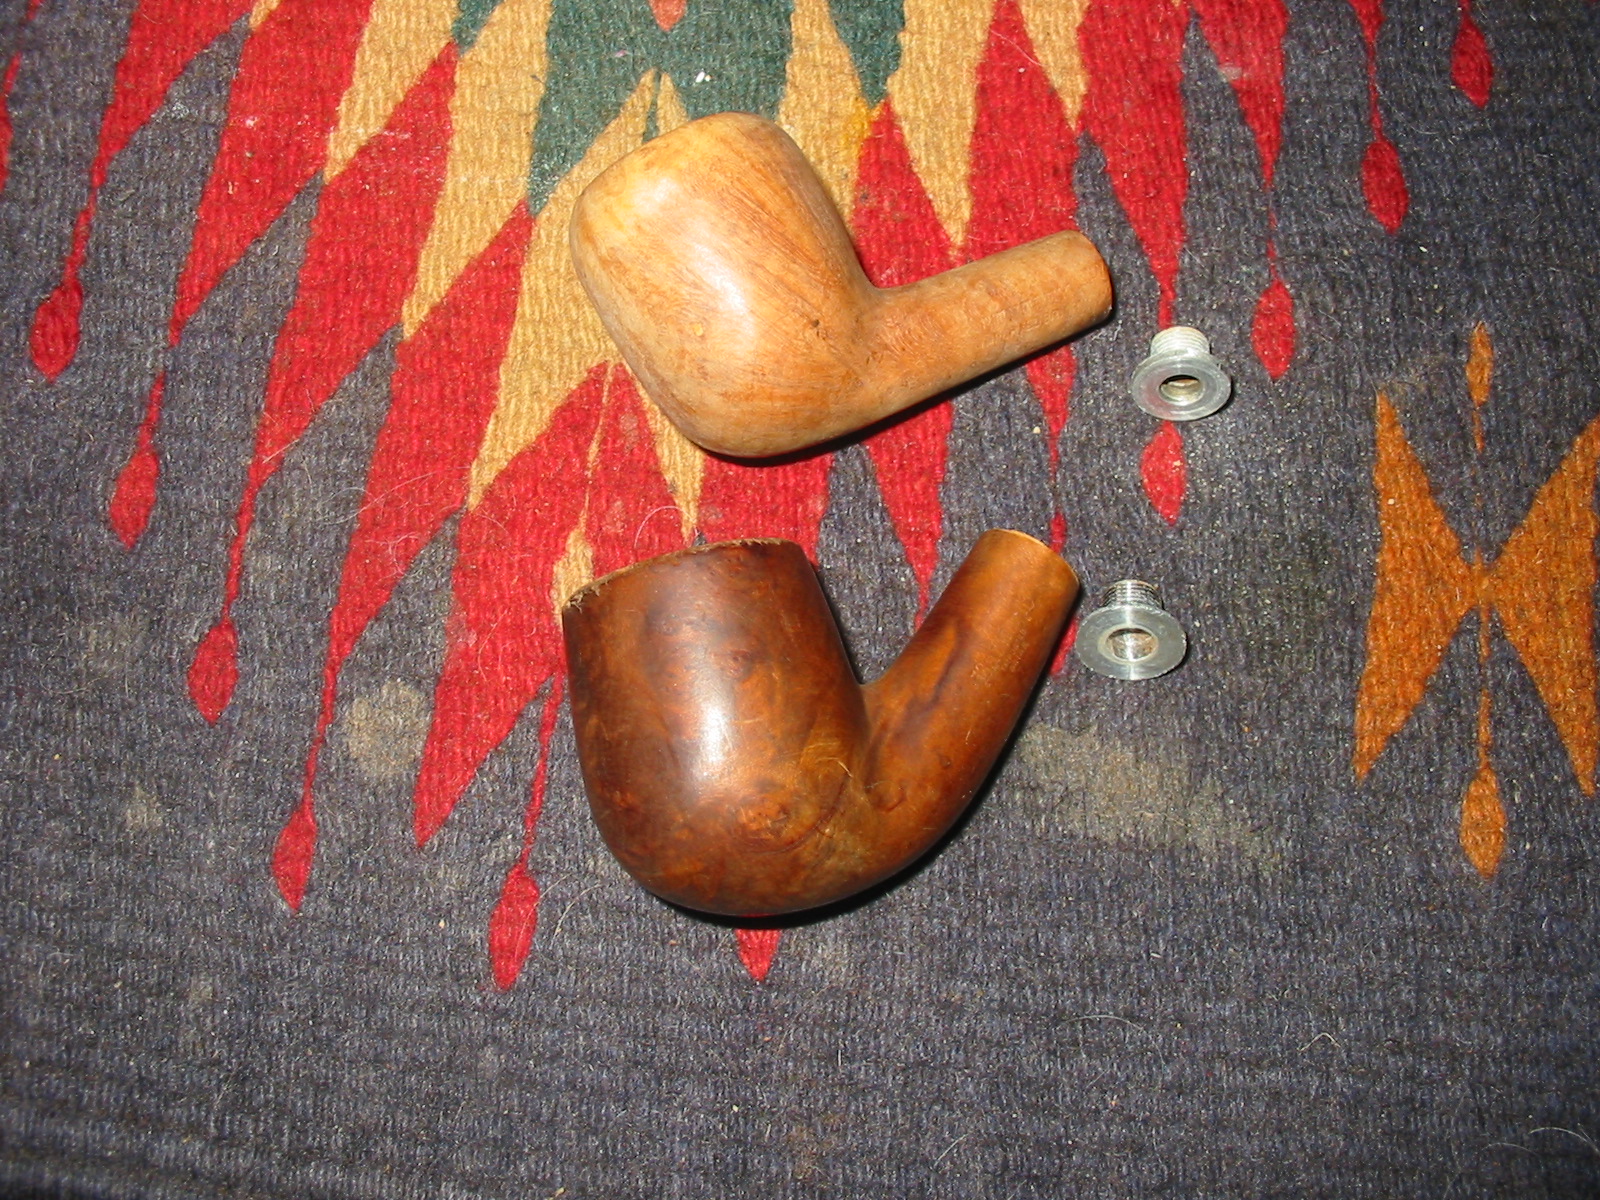
I gave the pipe and stem multiple coats of carnauba wax and then buffed it with a soft flannel buffing pad. The pipe is finished and ready to break in. The grain stands out because of the contrast finish on the pipe and the stem is like glass with the buffing and polishing. To me it looks like it must have the day its previous owner purchased it at Marshall Field’s. If only I had the box and the pamphlets that must have come with it when it was new, it would be an even more amazing pipe.
IMG_6806

IMG_6807

IMG_6808

IMG_6809

A Tale of Two Cigar Holders


Blog by Steve Laug

It was the best of times and the worst of times. I apologize for the literary reference but I could not help myself as I typed the title to this post. It took me to one of my favourite novels. Ah well, my post is nowhere near as interesting a read as that. It involves two of the finds in my recent antique mall grab bag – two very different cigar holders. Upon first glance, looking through the walls of the plastic bag they could have been easily confused as being similar in age and style. They both were amber coloured and mixed among the pipe bowls and stems they look similar.

But once I had taken them out of the bag it became very clear that they were two very different cigar holders from two widely separated times in history. The amber colour was all that they had in common. One was thick and heavy – probably made of Bakelite and showed the signs of age and antiquity while the other was a lightweight plastic obviously from a more recent time in history.
IMG_6562
The differences will become clearer as I enumerate them in the next lines. On the inside they are different. The thick walls of the older one, shown clearly below, show a threaded look and feel for gripping the end of the cigar. They hold the cigar tightly in place and as the cigar is smoked the leaf swells and holds tightly to the holder.
IMG_6564
The second, newer holder pictured below, has much thinner walls on the sides and tip. It is a pressure fit that is not that different from the plastic tips found on inexpensive cigars. It does not have the heft and feel of the first holder. I think it was probably designed as a cheap throw away tip.
IMG_6565
Looking at the two holders from the end the difference is also clear. The tip on the left is the newer one and has a straight slot cut in the plastic. The seams of the pressed plastic cut straight across the sides of the slot. They are rough to the touch and no care was taken to sand them down and smooth them out. The exterior is also thinner and more squashed in shape. The older one, on the left has an orific slot – a round hole in the button that is smooth and does not show signs of the casting. The shape of the oval is fuller and the walls are thicker. The other obvious difference is in the shape of the holder itself. The newer one is round while the older is diamond shaped. The overall effect of the shape is one of substance. The round one can be seen as an extension of the cigar while the diamond shaped one makes a statement – the old holder is not just an extension of the cigar it is an elegant holder of the cigar and will last beyond the cigar it holds.
IMG_6563
In the next paragraphs let’s examine each holder in more detail and measure what each has to offer. The newer holder is made of a thin plastic and is quite flimsy. It is easily squeezed between the fingers and the material is quite flexible. It reminds me of the plastic tips that come on Panatelas or Colt Cigars. It makes me wonder if it was some novelty that came with a box of cigars as a gift to provide them with a tip that kept the end of the cigar from getting soggy in mouth. On the interior of the holder that slips over the cigar there are vertical ridges that run from the saddle on the bit to the opening where the stick sits when it is inserted. These grip the cigar and keep it from turning in the holder. Because of the design the cigar is pressed into place and the ridges cut into the outer wrapper. The diameter of the hole is 5/8 of an inch so it will not hold big stogies. In the mouth it has a very plastic feel – similar to plastic cutlery that is made to be used and thrown away. To my thinking this is a disposable tip meant to be replaced often and lends credence to the idea that it came in a box of cigars. A new tip would be included in each new box.
IMG_6567

IMG_6568

IMG_6570
The second holder is more substantial. It is heavy and seems to be made of Bakelite or some kind of older amberoid substance. It has the look of amber but not the fragility or weight. It too is a saddle stem but instead of being at the end of a round saddle it is diamond shape flattening out to a taper on the bottom and the top portions. It cannot be squeezed between the fingers and the material solid and inflexible. On the interior of the holder that slips over the cigar there are threads, like the inside was tapped. They run around from the saddle for the first ½ inch of the holder. These grip the cigar and keep it from turning in the holder. Because of the design the cigar is turned or twisted into place and the threads turn into the outer wrapper. The diameter of the hole is 3/4 of an inch so it will not hold big stogies. In the mouth it has a very different feel from the other one. It is similar to some of the older pipes in my collection that have Bakelite stems. It is hard like newer Lucite stems and is cool to touch. It is substantial between the fingers and has the feel of a fine holder like some of the older smooth meerschaum cheroot holders. It is meant to be kept in the humidor and reached for again and again.
IMG_6571

IMG_6572

IMG_6574
This afternoon I opened the humidor and took out a cigar that would fit in the holder. It was a Guantanamera Habana. The stick was a perfect fit in the holder. I moistened the end of the cigar, cut off the end cap and then turned the holder on to the cigar. It was a perfect fit.
IMG_6794

IMG_6795
I had just finished the yard work for the weekend and set up a set of chairs on my front porch. I went out and sat down. I toasted the cigar with the lighter and drew the flame into the centre of the cigar. Once I had a good burn going I sat back to relax and enjoy the smoke. I find that a cigar that size can last me up to an hour so I was in for the duration. The tip certainly is older than me though today it may not look like it. It feels good in the mouth, a lot like a Bakelite pipe stem. It keeps the end of the cigar intact and the smoke that drifts into the mouth seems to be slightly cooler than that drawn directly through the stick. It is comfortable to hold and to clench. This one will be a keeper for me.
image2

image (2)

image (5)
I set the cigar down for a moment on the steps of the porch while I moved the chair out of the sun. It was getting to the end of the smoke. It still was cool and tasteful; it had none of the residual moisture that collects in the end of a cigar normally when I smoke it. I smoked it to within a ½ inch of the holder and then took it out and stubbed it out. I was impressed with the dry cool smoke that the mouth piece delivered. I am first and foremost a pipe smoker so the occasional cigar that I have is not something that I really enjoy. I tend to smoke one when I am in need of pipe mud so I collect the ash for that purpose. I don’t often reach for a cigar even though I have a humidor with quite a few good Cuban cigars in it. But I can see that with the holder I may well reach for one more often. Smoking it was more like smoking a pipe. I am sure I will give it some more tries in the future. As for the other holder- I think I will probably end up throwing it away. There is no need to keep the cheap imitation around when I have this good old timer.
image (6)

A Handmade Rustication Tool – Gifted by a Friend and Reader of rebornpipes


Several weeks ago now I was in correspondence with Chris, a reader of the blog and an online friend, regarding the design and crafting of a rustication tool. I had sent him pictures of the one I was currently using. I had made it using a piece of pipe. I enumerated some of the issues that I had found with the tool as I used it. These mainly concerned comfort and ease of use. The pipe worked well to stabilize the nails and keep them in place. There was no flex in the nails as I pressed them into the briar. The configuration and number of nails was fine in terms of coverage on the briar. Adding more or fewer nails did not seem to be a relevant concern as doing so would either broaden or reduce the area covered per twist of the tool. The comfort issue predominantly revolved around the end cap that I used to hold the nails in place and form the handle on the tool. When pressed into the briar the cap pressed into the palm and was uncomfortable. The pressure on the palm of the hand made it necessary to pause frequently to give the palm rest. I had modified the tool with a “T” handle and found that though it was better but still did not give comfortable hand feel when pressing into the briar.
rusticator 5

rusticator 4
Chris decided to improve on the design and come up with a far more functional and beautiful edition of the tool. It certainly would not be hard to improve on the looks and functionality of hte tool. He wrote and asked me questions regarding the tool I had and as he worked on the rusticator we exchanged a series of back and forth emails. It saw several iterations before he arrived at this version of the rustication tool. He turned the handle on his lathe to try and address the comfort issues that I had raised in our discussions. He tapped and fitted the threaded brass coupling on the handle to hold the nails. He cut back the nails with a grinder and inserted them in the brass coupling. To hold them in place he screwed on an end cap. At this point the tool looked great and was certainly easier to hold and press into the block of briar. We wondered about the length of the nails and the effect on them when the tool was pressed and twisted into the briar.
rusticator 2Before getting into the trial of the tool on the block of briar I want to point out one of the best features of the tool in my opinion. That is the method Chris used to install the nails in the brass coupling makes the nail head changeable. The coupling can be unscrewed and a new head replaced. That alone fascinates me as it will make it possible for me to do some experimenting with a variety of nail configurations and sizes in the future.

I have always wondered if the size and configuration of the nails affects the pattern of the rustication. It seems logical to me that smaller nails will make a finer rustication and approximate a sandblasted look if done properly. Larger nails will give it a more pebbled look. One of my next steps with the tool will be to craft a series of nail heads that I can experiment with.

Chris tried it out on a block he had present. He found that the nails wobbled and splayed with the pressure into the block. The major difference in this model in comparison to my pipe model is that the nails extended from the brass cap further. This length made them less solid and accounted for the play in them when used on the briar. Chris and I discussed how to stabilize them. He sent me photos of the tool with an adjustable hose clamp applied to the nails about 1 inch from the tip. This worked well but took away some of the natural beauty of the tool.

I suggested that he bind the nails together using JB Weld and see what that would do. He did and once the Weld had dried and cured he tried the tool. He found that the nails still flexed and the JB Weld broke loose.
rusticator 1

rusticator 3
After the test runs he put the hose clamp back in place for this version of the tool and sent it to me. He wrote that in future versions of the tool he will shorten the length of the nails. That should give the tool stability when pressing and turning it into the briar.

The tool arrived here in Canada while I was travelling and was waiting for me when I got home. I opened the box and took the tool out to look at it. Chris did an amazing job in crafting this rusticator. I want to thank him for sending it to me. I appreciate his willingness to pass it on to me. It will certainly get some use from me. I look forward to using it and making further recommendations for future versions. One thing I can say with certainty at this point is that it fits more comfortably in my hand than the pipe version that I was previously using. I will keep you posted on how it works. Thanks again Chris.

Here are some photos of the tool when it arrived here in Canada.
IMG_6790

IMG_6792

IMG_6793

Restoring an old CPF Gourd Calabash Pipe


Blog by Steve Laug

In my grab bag from the antique mall was a gourd calabash bowl. It has the original silver band with the CPF logo stamped on it and some faux hallmarks – an anchor, star and a figure. The CPF stands for Colossus Pipe Factory – a brand I researched and wrote about previously on the blog – https://rebornpipes.com/2013/04/14/so…-on-cpf-pipes/. The hallmarks on the band are an anchor with chain, a star and a figure of a man. From my research these are faux hallmarks. CPF pipes were made in New York and later became linked with KB&B pipes. Here is a link to an old catalogue linking the brand to KB&B that I posted previously on the blog https://rebornpipes.com/2014/03/05/an…cpf-catalogue/. Sadly there are no meerschaum pipes in the catalogue so I cannot ascertain the date for sure. I am fairly confident from comparing the band with others that I have which have similar bands that the pipe can conservatively be dated to the early 1900s or late 1890s. So it is a gourd bowl that has some age on it.
IMG_6432
The bowl came with the band and a threaded bone tenon that was easily removed from the mortise. The gourd had darkened areas around the exterior of the bowl from the hand of the previous owners. There were several nicks in the gourd on the bottom of the shank next to the band and on the right side next o the band. The band had been pressed onto the gourd and it was obvious from the fit and the way it pressed into the shank ahead of it that it was original. The inside of the gourd had hard tars and tobacco oils on the walls down into the shank itself. There was nothing soft or sticky in either the shank or bowl. A pipe cleaner came out clean regardless of whether it was dry or wet. The top edge of the rim was pristine with no dents or nicks. There was a slight crack that ran down about ½ inch on the front of the bowl. I liked the shape of the gourd from the moment I took it out of the bag. It was not oddly shaped but was elegant in both the flare of the bowl and the curve of the shank. It would be well worth bringing back to life.
IMG_6430

IMG_6431
I measured the diameter of the bowl and the diameter of the bone tenon and made a call to Tim West at J.H. Lowe (http://www.jhlowe.com/) with the dimensions to see what he had in terms of a meerschaum bowl and a potential stem for the pipe. He asked for a photo of the bowl so he could have a look before recommending sizes of the stem or bowl. I told him that I was thinking about an amber acrylic a Bakelite stem. Once he saw the pictures Tim talked me out of that and said a vulcanite stem would be perfect for it. I asked if he would tap the stem for me before he shipped it. He said he would do it, no problem. He did a bang up job and sent it along with the meerschaum cup. Both of them arrived here in Vancouver quite quickly. I unpacked the bowl and stem from the box that Tim sent and that was the beginning of the issues that I faced with restoring this pipe. I will spell them out in detail as I write about the restoration of the pipe.
IMG_6747

IMG_6748
I tried fitting the meer cup into the gourd and found that there were several issues that I would have to deal with before it would fit well. The diameter of the bowl was perfect. The mushroom cap was big and draped over the top of the gourd and looked passable to me. The first problem was that the bowl had a lip around the top edge under the cap that was shaped the wrong direction – absolutely the opposite of the angle of the bowl. Because of that ridge the bowl would not sit in the gourd bowl correctly. Secondly I found that even without the ridge the cup was too deep to fit the depth of the gourd. The gourd tapered much more sharply than the meer cup so the bottom of the cup sat high in the gourd bowl. I would need to change the taper on the cup and shorten it so that it would sit in the gourd correctly and I would need to remove the lip around the top under the cap.

I measured the thickness of the bottom of the bowl and the thickness of the walls of the bowl around the cup to make sure I could remove the ridge and shorten the bowl without ruining the meer cup. I was happy to see that I had a lot of room to work with and could easily remove what was needed for a proper fit in the bowl. I used the Dremel to remove the ridge from under the cap edge. It was big enough that hand sanding would have taken a very long time. I took it down to match the rest of the bowl. I also used the Dremel to shorten the bowl. I flattened it out and took off approximately ½ inch. I then hand sanded the bowl with 220 grit sandpaper to reshape it and smooth out the Dremel work. I reshaped the taper of the cup to match the taper of the gourd. I sanded the flat edges of the bottom and reshaped it into a gentle curve. The photo below shows the newly reworked bowl. It fit well in the gourd after all of this work.
IMG_6749

IMG_6752

IMG_6751
I set aside the meer cup and cleaned out the inside of the gourd removing the tars and build up. I washed down the outside with undiluted Murphy’s Oil Soap to remove the grease and buildup on the gourd. I did not want the soap wet as I did not want to wet the gourd. I rubbed the soap on with a cotton pad and scrubbed and removed it the same way. Once it was clean I noticed that the small hairline crack along the front of the bowl was slightly open. I opened it slightly and dripped some super glue in it to bind the crack and clamped it until the glue cured. Fortunately for this impatient man the super glue dries very quickly and I could move on to the inside of the gourd. I sanded it out with a folded piece of 220 grit sandpaper. I was able to reach quite far down into the shank and sanded the ridges of tars and oils out of the bowl. There was a thick ridge at the bottom where the original cup had rested against the walls of the gourd. I used a dental pick to loosen that area and then sanded it smooth. All of this cleaning work served to renew the inside of the gourd but also made a smooth base for the new meer cup.
IMG_6750
I cut a piece of cork to fit the inner edge of the gourd. It had to be trimmed in both height and length to fit properly. I glued it into place with white all-purpose glue. I pressed on it to make sure that it sat tightly against the gourd. This cork would serve as a gasket for the cup and also it fit perfectly against the small crack that I had repaired on the exterior. Together they would bind together the crack and provide a functional repair to that surface.
IMG_6753
Once the glue dried I sanded the cork with 220 grit sandpaper (my go to sandpaper for much of the initial work I do on the pipe). I wanted it to be a smooth pressure fit that would hold the bowl in place. I rubbed down the cork gasket with Vaseline to soften it after the sanding. I find that cork left unused gets dry and brittle and the Vaseline brings it back to life. I pressed the bowl in place to check the fit and found that it still needed some adjustment to sit properly in the bowl. The top edge under the cap needed to be sanded some more to reduce the diameter of the cup.
IMG_6755
I took it out of the gourd and sanded it with the 220 grit sandpaper until it fit correctly. I polished the cup exterior with a fine grit sanding sponge and 1500 grit micromesh sanding pads before pressing it back into the gourd.
IMG_6754
This time it fit was far better. The cup sat in the gourd like they were made for each other. The two photos that follow show the fit and look of the new bowl. At this point the calabash is showing great promise.
IMG_6757

IMG_6756
I cleaned up the mess of the meerschaum sanding dust that was everywhere on my work table. It is a messy fine powder that gets into everything if left to its own devices. Once I had done that I wiped down the exterior of the bowl and cup one more time and took a couple of photos to get a good look at the pipe.
IMG_6758

IMG_6760
With the work on the bowl and cup finished I turned my attention to the stem. Tim’s drilling was spot on. The diameter was exactly what I had sent him – ¼ inch. The second problem I faced with this old calabash was that the bone tenon was not quite the 1/4 inch measurement I gave him. It would not fit in the tapped hole in the stem. I measured it again and found that is was closer to 3/8 inches than a ¼ inch. I re-tapped the stem to 3/8 and was able to thread the tenon into the stem. It looked great and it fit well in the mortise. I glued the tenon in place in the stem with all-purpose white glue and set it aside to cure over night.
IMG_6762

IMG_6763
In the morning I slowly and carefully turned it into the bowl. Things were going really well. It looked like I would need to reduce the diameter of the stem slightly on one side and the top to match the diameter of the shank band. As I was turning it I heard a noise that is dreadful to me and to anyone who has heard it. It generally is not a good sound when you are this far along in a repair and signifies more work. The bone tenon broke in half. It obviously had been cracked and I had not seen that when I examined it. When I had turned it into the shank it had shattered. I was left with the broken half glued into the stem and the threaded half stuck in the shank of the pipe. Talk about frustration. I set the pipe aside and took a deep breath. Now I would have to go back to the drawing board in terms of how to attach a stem. I would have to drill out both the stem and the shank in order to move forward.
IMG_6764
I pulled out a can from my drawer where I keep replacement tenons – threaded Delrin, straight Delrin rods cut to fit as tenons and some push stem conversion kits that had a mortise insert and tenon for converting threaded shanks in old meers to accommodate a push tenon. The conversion kit would work nicely in this situation. I would have to modify the shank of the calabash as the diameter of the mortise insert was too big for the 3/8 inch opening. I had to drill out the end of the gourd and then re-tap it to be able to put the insert in place. The thickness of the shank did not give me much wiggle room so I would only have one chance at this. I was able to drill it and tap it. I mixed the two part epoxy and inserted the mortise in place in the shank.

The tenon was a much simpler to repair. I carefully drilled out the broken bone tenon in the stem and was able to salvage the threads. Once I had blown out the dust from the stem the push tenon screwed neatly into the 3/8 inch tapped end of the stem. I removed it a final time and epoxied it in place. However, it too was not trouble-free. The tenon had a 1/16th inch lip that would not sit in the end of the drilling on the stem. I ended up having to carve it with a sharp knife to remove the lip. In the photo below you can see the epoxied insert in the shank and the tenon in the stem. The insert still needed to be countersunk and cleaned up and the tenon needed to have the lip trimmed away.
IMG_6768
I set aside the calabash until the epoxy set. Once the stem was set I decided to work on the other end of the mouthpiece. It had a very tight slot on the end that was hard to push a pipe cleaner through so I opened that up with needle files. I used a flat oval file, an oval and a round file to do the majority of the work. I finished opening it with a flat angle file to open the top and bottom of the slot.
IMG_6770
When the epoxy had cured I carefully pushed the stem into the shank to check out the fit. The next two photos show the look of the pipe at this point. I removed the stem and countersunk the mortise slightly. I did not want to use a drill and countersink to do the work so I used a very sharp knife and did it by hand. Once it was completed I replaced the stem in the shank and the fit against the band was clean and snug. My initial mission was accomplished. I had not only broken the bone tenon, I had removed it from the shank and stem and converted the pipe to a push stem. There was still work to do but at least I had salvaged the pipe from the damage I had done in my initial repair. Whew…
IMG_6775

IMG_6776
I sanded the stem with a medium and fine grit sanding sponge to remove the scratches left behind by the 220 grit sandpaper. I gave it a light buff with Tripoli on the wheel and then set up a heat gun to bend the stem. I held the stem about three inches above the heat and moved it around as it heated. I have learned that to leave it in one place as you heat it can damage the vulcanite and create more work. Once the stem was pliable I bent it over a wooden rolling pin that I use for that purpose. Lately I slid a cardboard tube over the pin to give a softer, smoother surface to bend the stem over. I had to do it twice to get the bend correct. It takes a bit longer to heat the thicker portion of the stem that needed to be bent so the repeated step made that possible.
IMG_6777

IMG_6778
The finished bend is shown in the next two photos. I still needed to polish the stem before it was finished but the finished look is beginning to appear. The calabash is just about reborn.
IMG_6779

IMG_6780
I removed the stem and worked on it with the sanding sponges and the micromesh sanding pads. I wet sanded with the 1500-2400 grit pads and dry sanded with the 3200-12000 grit pads. Between the wet and dry sanding I rubbed the stem down with Meguiar’s Scratch x2.0 and then buffed it with White Diamond. I finished the sanding and then rubbed the stem with Obsidian Oil. Once it was dry I gave it a quick buff with White Diamond and then gave it multiple coats of carnauba wax and buffed it with a soft flannel buff.
IMG_6782

IMG_6783

IMG_6784
I scrubbed the surface of the gourd with Oil Soap and a light sanding with the fine grit sanding sponge to remove some of the deeper grime and oils in the gourd. I then applied several coats of Paragon Wax and hand buffed the gourd with a shoe brush to raise a shine. I polished the silver band with some silver polish and then reinserted the stem. I gave the whole pipe a final buff with the brush before setting the meerschaum cup in place. The finished pipe is shown in the photos below. It is a deep bowl and should hold a good pack of tobacco. The broad mushroom cap of the meerschaum cup looks good to me. The pipe is ready for its inaugural smoke. Now the only problem remaining is what tobacco to use to christen this restored calabash. Ah well that will sort itself out soon enough. Time to post this on the blog.
IMG_6785

IMG_6786

IMG_6787

IMG_6788

Kaywoodie Rustica Repaired and Refurbished


When I first saw this pipe it was on Pipe Smokers Unlimited online forum and Bill was lamenting the fact that when he was trying to unscrew the stem the shank had broken. The stinger was welded in place in the aluminum mortise insert and in twisting the stem it broke. What was odd was that the stem freely spun around on the stinger so evidently the glue had loosened enough to allow it to turn without it coming off. Bill posted these two photos on-line and asked for help.

It looked to me that there was darkening around the area of the break which suggest from the photos that a potential burn through was happening. The break was clean and the two pieces lent themselves to a potential repair. The metal shank insert would serve to strengthen the repair from the inside so I suggested that Bill put a silver band on the pipe and the combination of the internal metal tube and the band would provide stability to the repaired shank.
20140430_114107

20140430_114121
Bill thanked me for the suggestion and then shortly sent a message that the pipe was on its way to me and it was now mine.

When the pipe arrived it was indeed a clean break. The darkening on the shank near the break was not a burn through waiting to happening it was merely darkening. There were other spots on the pipe that makes me think that it was part of the finish. I took the pipe to the work table and tried to remove the stem from the piece of the shank. It did indeed freely twist in the mortise but the stem would not turn. The stinger stayed stationary while the stem turned. I used some WD40 to try to loosen the tarry build up on the stinger and penetrate into the joint. I let it sit and it still did not move. I thought about what to do next so I cleaned up the stinger and then used a Bic lighter to heat up the end of the stinger. My thinking was that the heat on the metal would also warm the tars that bound the stinger to the mortise. It worked better than I expected and in short order the stem was free. The bonus was that the glue that held the stinger in place in the stem also heated and when it cooled the stem no longer spun on the stinger.
IMG_6729
I cleaned up the broken ends of the shank and the visible end of the metal insert with acetone and qtips (cotton swabs) and then dried it and cleaned it again with isopropyl alcohol. I mixed up a two part epoxy and applied it to both sides of the broken shank and around the end of the inserted mortise. When the glue was tacky I pressed the two parts into place and held them tightly until the epoxy was initially set. That usually takes 3-5 minutes with the brand of epoxy that I am using so it is not a terribly long wait. I keep the pressure firm so that there is no give in the bond. I need to pick up some clamps that allow me the freedom to press it together and set it aside but I do not have them at the present. Before the epoxy dried hard I cleaned up the slight seepage at the joint with a soft cloth.
IMG_6730
After the epoxy had cured several hours I put wood glue on the outside of the shank and pressure fit a nickel band in place on the shank. The band was not overly deep so it did not obscure the stamping on the underside of the shank and also did not go too deeply into the rustication on the shank. It extended just beyond the deepest point of the break. The combination of the band and the internal mortise would strengthen the repair. The next series of photos show the repaired shank with the band in place.
IMG_6731

IMG_6733

IMG_6734

IMG_6736

IMG_6737
With the shank repair finished it was time to clean up the rest of the pipe. I reamed the bowl with a PipNet pipe reamer to take the cake back to the briar. I wanted to examine the walls of the bowl for potential damage so this was my means of doing so. There was a slight burned area on the inside edge of the rim at the back of the bowl that would need some attention. I used a brass tire brush to scrub the top of the rim as well as the inner edge to clean off the tars and carbon buildup. The soft brass bristles work very well with a rusticated finish. I was able to clean up the rim quite nicely with the brush.
IMG_6738

IMG_6739
The exterior of the bowl had a thick coat of urethane on it that gave it a permanent shine. I tried to remove it with acetone but it did not even scratch the surface of the finish. I used several solvents and was not able to remove any of the finish so I decided to leave it alone. I used a lighter to brush flame over the rest of the bowl to further darken the crevices and grooves in the finish to highlight them. This seemed to work very well. I restained the rim with a dark brown aniline stain and repeated it until the surface was well covered. I wiped it down with alcohol on a cotton pad to thin it to match the colour of the bowl and then flamed the surface to darken it slightly. I finished by taking the bowl to the buffer and buffing it lightly with red Tripoli and White Diamond to polish and give the rim the same shine as the bowl.
IMG_6740

IMG_6741

IMG_6742
With the work on the bowl finished it was time to address some of the issues with the stem. There was light tooth chatter on the top and bottom of the stem next to the button and there was a slight oxidation to the overall stem. I cleaned out the internals of the stem and the stinger with isopropyl alcohol and pipe cleaners until I had removed all of the buildup inside. Then I sanded the stem with 220 grit sandpaper and a medium and fine grit sanding sponge to remove the tooth chatter and then followed that with my usual regimen of micromesh sanding pads. I wet sanded with the 1500-2400 grit sanding pads and dry sanded with the 3200-12,000 grit pads. I rubbed the stem down with Obsidian Oil.
IMG_6743

IMG_6744

IMG_6745
When the stem was dry I buffed it with White Diamond. I polished the nickel band with the higher grades of micromesh sanding pads and then silver polish. I put the pipe back together and gave it a light buff with White Diamond. I applied carnauba to the bowl and stem to protect and preserve the stem and rim. I was pretty certain that the hard finish on the bowl would last longer than I would so it did not need a lot of wax. The finished pipe is shown below. The shank repair is very stable and solid so I think the pipe will provide many more years of service. Thanks Bill for the challenge and the gift you sent my way. It is greatly appreciated.
IMG_6771

IMG_6772

IMG_6773

IMG_6774

Civic Company 1921 Trade List


Blog by Steve Laug

In the course of refurbishing some Imperial Pipes and some French Briar pipes my research unearthed this document. It is a 1921 Trade List or catalogue of Civic Pipes. The introductory page from the scan says the following:

The 1921 Price List is owned by John Adler.
All of these pages, including both sides of the cover and the flyer have been scanned as JPEG and
PDF files and lodged in the National Pipe Archive in Liverpool.
P J Davey/21 April 2010

I found the scanned document on the Academie Internationale de la Pipe website. http://pipeacademy.org/ They have a large repository of old pipe materials that I have found invaluable. I saved the document to my hard drive as a pdf and have included the pages here for others to use.
Civic 1

Civic 2

Civic 3

Civic 4

Civic 5

Civic 6

Civic 7

Civic 8

Civic 9

Civic 10

Civic 11

Civic 12

Civic 13

Civic 14

Civic 15

Civic 16

Civic 17

Civic 18

Civic 19

Civic 20

Civic 21

Civic 22

Restoring a Bent Billiard – Converting a threaded mortise to a push mortise


When I picked up these two pipes in the antique mall grab bag my intention was to hunt down threaded metal tenon stems for them both. But I soon finished cleaning up the rest of the lot and was down to these two and an old Medico. These two were in far better shape to start with than the old Medico so I looked them over for a while. I decided to drill out the threads on both of them and fit a push stem to the shank. I started with the bent billiard as it needed the most work to clean up the rim damage. While I was setting up to do it I got to thinking that the odds were very high that the inserts were reverse threaded into the shanks of the pipes. I took out a pair of pliers and carefully locked onto the metal edge of the insert on the bent billiard. I turned it counterclockwise and after a few moments of not moving it came loose and screwed out with ease. I did the second pipe bowl at the same time so I now have two pipe bowls that have been modified with a simple fix to that the mortises will accommodate a push stem.
IMG_6668

IMG_6669

IMG_6667
I had a saddle bit in my can of stems that had a Delrin tenon and with a little sanding fit the shank perfectly. It had a short saddle and quite quickly went to a blade. It was still quite thick in the mouth so I would need to sand it thinner for comfort. The fit against the shank was snug and only the diameter of the stem would need to be adjusted to fit properly.
IMG_6670

IMG_6671

IMG_6674
The pipe has some interesting grain on it and only one fill on the side of the shank. The stamping reads something like Barnard B over Imported Briar on the left side of the shank. The Barna is very clear the next two letters are faint and the end there is a Germanic Style B. Not much information available on the brand that I can find. The rim was really badly beaten up. It was rough and chewed up looking. The outer edge was ruined with chunks missing. The inner edge surprisingly enough was quite clean and in decent shape. There was a thin cake around the top half of the bowl while the bottom half was still unsmoked briar. The finish as worn around the rest of the bowl but surprisingly there were no nicks or dings on the rest of the briar.
IMG_6672

IMG_6673
I took a close up photo of the top of the rim to give an idea of the condition it was in when it arrived at my work table. I fit the stem to the shank and then used the Dremel and sanding drum to take down the excess diameter of the stem. I then sanded the stem and shank with 220 grit sandpaper to make a smooth transition between the two materials. In the photos taken of the top and bottom you can begin to see the damage on the stem near the saddle. At this point it did not go through the Lucite material but it was definitely a grey colour instead of black.
IMG_6678

IMG_6679

IMG_6680

IMG_6681

IMG_6682
With the fit of the stem finished I topped the bowl. I set up the topping board and the 220 grit sandpaper and turned the bowl into the sandpaper in a clockwise direction. I sanded the outer edge of the rim with a folded piece of sandpaper to smooth out the damage that the topping did not remove. I then wiped the bowl down with acetone to remove the finish and clean up the bowl.
IMG_6683

IMG_6686

IMG_6684

IMG_6685

IMG_6687

At this point I got an urge to put a silver band/end cap on the shank just to have a look. I liked the look of the cap but did not particularly like the look of the short saddle stem with the band. I almost pulled the band and decided against it but decided to leave it and stain the bowl to see what the finished look of the bowl would be. I could always make another stem for it should I desire to do so.
IMG_6688

IMG_6689

IMG_6690
I sanded the bowl with medium and fine grit sanding sponges and then wet sanded the bowl with 400 grit wet dry sandpaper. Once the scratches were removed and the briar was smooth I stained it with a black aniline stain. I applied it, flamed it, applied it again and flamed it again. I then heated the bowl with a heat gun to further set the black stain in the grain.
IMG_6691

IMG_6692

IMG_6693

IMG_6694

IMG_6695

IMG_6696

IMG_6697
I wiped the bowl down with isopropyl alcohol and followed that with acetone on cotton pads to remove the excess stain. I wanted to leave it deep in the grain and remove it from the surface of the bowl. I sanded the bowl with medium and fine grit sanding sponges and then wet sanded it with 400 grit wet dry sandpaper. When I had finished the bowl looked almost grey and the dark striations of grain stood out on the heel and underside of the shank.
IMG_6698

IMG_6699

IMG_6700

IMG_6701
I wiped the bowl down with alcohol again and then restained it with a oxblood aniline stain to bring out the contrast in the briar. I really like the way the finish had turned out on the bowl. The stem was looking more and more problematic. It seemed that I had sanded through the blade next to the saddle and sanded into the Delrin tenon. In the top and bottom view photos below you can see the grey area in each of those spots next to the saddle. This stem was ruined and needed to be replaced.
IMG_6702

IMG_6703

IMG_6704

IMG_6705
I took the stem off the pipe and sanded the two sides some more to see if I could feather out the damage or maybe repair it with a super glue patch. Looking at the photos you can see that patching and repairing the stem would not work.
IMG_6706

IMG_6707
I found a vulcanite saddle stem in my can of stems that would fit the shank. I turned the tenon with a PIMO tenon turner and then sanded it until it fit snuggly in the shank. The outer diameter of the stem needed to have some of the vulcanite removed to center the stem against the silver end cap.
IMG_6709
I sanded casting ridges off the stem and used a Dremel and sanding drum to remove the excess stem material. I sanded the diameter and the edges to remove all of the scratch marks. I used 220 grit sandpaper and then medium and fine grit sanding sponges to finish. I set up the heat gun and turned it on the low setting and held the stem over the heat. Once the stem was flexible I bent it carefully over an old rolling pin I use as a base until it was the correct angle. I set the angle with cold water.
IMG_6711

IMG_6712

IMG_6714
I sanded the stem with micromesh sanding pads – wet sanding with 1500-2400 grit pads and dry sanded with 3200-12000 grit pads. I buffed it with White Diamond and then rubbed it down with Obsidian Oil and let it soak into the rubber of the stem.
IMG_6715

IMG_6716

IMG_6717
I buffed the pipe and stem with White Diamond and polished the silver band with silver polish. I gave the entire pipe multiple coats of carnauba wax to preserve and protect the finish. I finished by giving it a light buff with a soft flannel buffing pad. The finish pipe is shown in the photos below.
IMG_6722

IMG_6725

IMG_6728

IMG_6727

Removing the threaded metal inserts from the shank of a pipe


Last week I posted on several online forums that I was looking for a couple of threaded stems to fit two bowls that I had here. Both needed threaded tenon stems. No one seemed to have any that would fit. So I set them aside thinking it might be a long wait before I came across any stems. This afternoon I was sitting at my desk and picked up the two pipes and turned them over in my hands to look them over. They both were pretty decent bowls, each having only one fill that would not be an issue. I made a decision to drill out the threads on the bent pipe and see if I could fit a push stem to the shank. I have done that before and it worked quite well so there was no reason to think that it would not work this time. You just have to start with a drill bit roughly the same size as that mortise and work slowly upward until the mortise is ready for the push stem tenon.

I set up my cordless drill, inserted the appropriate bit and began the process of drilling out the insert. I worked through three drill bits slowly turning them into the aluminum insert. I notice at one point that the insert seemed to shift when I reversed the drill bit out of the shank. That got me wondering about the way the insert was held in place in the shank. The odds were very high that the inserts were reverse-threaded into the shanks of the pipes. I decided to stop drilling and test my hypothesis.

I positioned a pair of pliers on the aluminum end of the shank, being careful to only put them on the metal and not the briar. I did not want to damage the briar of the shank and make more work for myself. Once I had them positioned I carefully turned the insert counterclockwise. I was careful to hold the briar shank tightly in hand so as not to create stress on the shank and snap the briar (having experienced that in the past). After initial resistance the insert turned slowly and gradually I was able to turn it out of the shank.
IMG_6668

I followed the same procedure with the second bowl – a straight shank billiard style with a metal mortise insert. It came out even more easily. I had two bowls that could now be restemmed with push tenon replacement stems. This was yet another great trick to add to the tool kit as it provides a new way of dealing with these bowls with threaded mortise inserts.

IMG_6665

IMG_6666

IMG_6667

IMG_6669

An Old Horn Stem, Bone Tenon Apple Restored


Blog by Steve Laug

When I saw this old-timer on EBay I decided it had my name on it. The combination of shape and stem material are something that I love. It looked to be in pretty fair shape, just a bit of darkening at the rim, some nicks in the briar which is to be expected in a pipe this age. The stem looked all right – a few tooth marks on the surface but the horn material did not appear to have any splintering or cracks. The threaded tenon looked like it was a bone tenon and it too appeared to be in good shape. I put in my bid and was the only bidder. I have included the photos that the seller included in the sale. The pipe is delicate – a mere 4 inches.
Apple2

Apple3
The seller did not include any information on the stamping on the pipe. I wrote and they responded that it was not readable but that there was an oval on the left side of the shank. When it arrived I took it to my work table and did a cursory clean up and tried to read the stamping on the shank. I could see that the oval had remnants of gold in the marks. Under a bright light and using a jeweler’s loupe I could see that there was a letter visible on the right side of the oval that was readable – “N”. I wetted the stamping and looked more closely and could see what appeared to be the long straight leg of another letter on the left of the oval. It could easily have been a “K”, “R” or an “L”. On closer examination it seems to have a base on the bottom of the left leg. That would make it an “L”. So armed with that I did some digging in “Who Made That Pipe” and found several possibilities. The most likely was “LMN” and through continued observation of the logo I think that is what it is stamped. For me, a good part of the enjoyment of the hobby of refurbishing is the pipe mysteries that come along with the pipes I work on. So this pipe was going to be fun to work on and to research.
IMG_6620
I used the information in WMTP to research more into the maker of the pipe (at least according to the book). The pipe seems to have been made by a company called Jacobs, Hart & Co. England. I searched the various online directories of business in London at the time and found the following information on the hallmark site. It simply says that in 1889 in London there was a tobacco merchant named Joshua Michael Jacobs. I found his hallmark which interestingly is an oval as well with the JMJ letters stamped on the silver. I also found that members of the Jacobs family were gold and silver smiths as well as involved in the tobacco industry.

Apple4

At this point the trail went cold and I could find nothing else regarding the firm in the records. I knew that the family was involved in the industry but I could not find any information on the pipe brand itself. The only connection at this point was the listing in WMTP.

I searched the web for information on the second name in the company – Hart, and found that the name was held by an Australian who was a tobacco merchant as well. I have no idea about the migration from England to Australia but the link is certainly possible. I have included some information from the records I read through on the Hart family to show at least the tobacco connection.

The first document I found was a birth announcement for an Alfred David Hart. The birth announcement reads in part: “Born at Franklin Cottage, West-terrace, Adelaide. Birth certificate held – Father, general merchant, Franklin St., Adelaide, number Vol 3, pg 140 Adelaide.”

Further information found in the Biographical Register of Australia shows that he is included. Quoting in part: “Partner Feldheim, (I), Jacobs (qv) & Co (later Jacobs Hart & Co) tobacco merchants (emphasis is mine), managing director at William Cameron Bros & Co, tobacco manufacturers 1895; director of British Australian Tobacco Co from inception, chairman to 1925; dir Foster’s Beer Co: left estate of at least Pounds 183,252. The references given are: British Australian (Lond) 5 Apr 1928 cover p ii, 14 June 1928 p 21; Brisb Courier 12 Apr 1928 p 6; Argus 18 Feb1928 p 31; Vic LA PP 1894 2 no 37, p 417, Vic LA, V & P 1895 6 1 no D4 p 52, 62, 1895/6 2 no 3 p 8 ? 34.” http://metastudies.net/genealogy/PS04/PS04_230.HTM

The last bit of information on this partner in the company I found was his obituary. It too links him to the tobacco company that is associated with this pipe.

Hart, Alfred David (1851–1928)
http://oa.anu.edu.au/obituary/hart-alfred-david-13552
Mr. Alfred David Hart, who died on Thursday night at his residence in St. Kilda road, in his 78th year, was one of the founders of the modern tobacco trade in Australia. Mr. Hart was born in Adelaide in November, 1850, and he came to Melbourne in youth. His long association with the tobacco trade began at that time. For some years he was with Feldheim Jacobs and Co., and afterwards the firm became Jacobs Hart and Co., with establishments in Melbourne and Adelaide. At a later time Mr. Hart retired from the firm and became chairman and manager of Cameron Brothers and Co. Pty. Ltd. When the tobacco companies of Australia amalgamated he became chairman of directors in Melbourne of the British Australian Tobacco Company Pty. Ltd. From that position he retired in 1925, though he still held large interests. At one period Mr. Hart was chairman of directors of the Foster Brewing Company, and to the time of his death he was one of the directors of the Swan Brewery Company and chairman of directors of the United Insurance Company Ltd. Mr. Hart had many other business interests. He was the proprietor of Elizabeth House, the large building at the corner of Elizabeth and little Collins streets.

Apple5 That is the extent of that information as well. Once again there is no written link to the information noted in WMTP. I did some more research on the LMN brand and came across several pipes with that stamping for sale on various sites. Once of those was found on Worthpoint. It is pictured below. I have also included the link to the site. http://www.worthpoint.com/worthopedia/vintage-lmn-hallmarked-bent-chimney-169605160 I did find that LMN was registered as a trademark in Australia and belonged to WD & HO Wills Australia LTD. Here is the trademark information:

Trademark number 4727 was lodged on 30/07/1907 and has a status of Removed – Not Renewed. The applicant/owner of the trademark is registered as W D & H O Wills (Aust) Limited Business names for this company include AMERICAN PALL MALL, AMERICAN PALL MALL CO, BROWN & WILLIAMSON TOBACCO CO, BROWN & WILLIAMSON TOBACCO CO., BROWN & WILLIAMSON TOBACCO COMPANY, BROWN AND WILLIAMSON TOBACCO COMPANY, CIGARETTE DISTRIBUTORS, CUSTOMPHONE, GENERAL CIGAR CO, GEORGE TICKLE & CO, LAMBERT & BUTLER, OGDENS TOBACCO CO, THE NATIONAL TOBACCO COMPANY OF AUSTRALIA, THE STATESMAN CIGAR CO, TICKLES TOBACCO SERVICE, W.A. AND A.C. CHURCHMAN, WILLIAM BUTLER TOBACCO COMPANY

With that I decided to put my research to rest for a while and went to work on the pipe. The next photo gives a clear picture of the size of the pipe. I have it resting next to my iPhone 4 for comparison sake.
IMG_6621
The next four photos show the pipe as it was when I started the refurbishing. The bowl itself was in good shape. There were nicks and marks all around the bowl. On the bowl front there was an area where a fill had fallen out and left a deep hole in the briar. The bowl interior was fairly clean with a light cake and some remnants of tobacco left in the bowl. The inner edge of the rim had two areas that were burned. The burned area extended to the top of the rim in those two spots. The stem was quite clean. There was no evidence of the horn delaminating which was good news. Next to the button on both sides of the stem there were troughs left behind from tooth marks. There was tooth chatter over the surface, both top and bottom a 1/3 of the way up the short stem. The bone tenon was in excellent shape with no damage or broken threads. There was some staining on the end but other than that it was flawless.
IMG_6622

IMG_6623

IMG_6624

IMG_6625
Because I love the finished look of horn I worked on the horn stem first. I sanded the surface of the stem with 220 grit sandpaper to smooth out the tooth chatter and the deep troughs around the edges of the button. As I worked on them I realized that the horn material was thin in those spots. I roughened the surface and built it up with clear super glue. My goal was to level out the troughs and give a clean flow to the taper of the stem to the button. This took several applications of super glue. After each application dried I sanded it with 200 grit sandpaper and a medium grit sanding sponge to make sure that the surface was level before adding a new layer.
IMG_6626

IMG_6627
When the troughs were filled and level I screwed the stem back into the bowl and took some photos to check out the taper of the stem to the button. I wanted to make sure that the taper was smooth and the flow correct. I find that taking a photo gives me some distance from the pipe and I can examine it more critically than in real life at this point. I would need to work on the button area but the taper was correct.
IMG_6628

IMG_6629

IMG_6630

IMG_6631
I gave the bowl a light reaming with a PipNet reamer. I decided address the deeper nicks and crevices on the bowl with briar dust and superglue. Before doing that I wiped down the bowl with acetone on a cotton pad to remove the finish and clean the bowl.
IMG_6633
I packed briar dust into the nicks and holes in the briar and then added drops of super glue followed by more briar dust. I always over fill the patches as it is easier to sand the patches than to continue to fill them as they shrink. The next two photos show the patches.
IMG_6635

IMG_6636
I sanded the patches with 220 grit sandpaper to remove the thicker portion of the repairs and then followed up with a medium and a fine grit sanding sponge. The repairs are smooth and match the surrounding briar. They are dark spots but I have found that I don’t mind those as much as putty fills. I also have found that they can be blended into the briar more easily when stained with a dark brown or black aniline stain. They are still present but do not stand out.
IMG_6637

IMG_6638
To remove the burned areas on the inner edge and top of the rim I topped the bowl using a topping board and 220 grit sandpaper. I move the bowl across the sandpaper in a clockwise circular pattern – more out of habit than anything else though I find that it minimizes the scratches left behind and is easier to smooth out with later sanding.
IMG_6640

IMG_6641
I took the top of the rim down until the burn marks were minimized and the top of the bowl was smooth to the touch. I sanded the bowl top with a fine grit sanding sponge to remove scratches. I did not go on to sand with higher grit paper as I would be sanding after I stained the bowl. I wiped the bowl down with isopropyl alcohol and then applied and flamed the dark brown aniline stain. I repeated the process until I had good coverage on the bowl and rim. The stain was very dark and hid the grain. It was also very opaque and not what I wanted as the final stain on the bowl. I wiped the bowl down with isopropyl alcohol to remove much of the stain. Doing this removes the surface coat but leaves the stain deep in the grain of the briar.
IMG_6642

IMG_6643

IMG_6645
I buffed the bowl with White Diamond on the wheel to further remove some of the stain and smooth out the surface of the briar. I avoided the area of the stamping so as not to further damage the already faint stamping. I then folded a piece of sandpaper and worked on the inner edge of the rim to remove the damage and work the bowl back into round afterwards. I have included the photos below to give an idea of what the stain looked like at this point as well as the way the repairs were hidden by the stain. There is some great grain on this old pipe.
IMG_6646

IMG_6647

IMG_6648

IMG_6649
I sanded the bowl and stem with micromesh sanding pads. I wet sanded with 1500-2400 grit pads and dry sanded with 3200-12000 grit pads. I rubbed the stem down with Obsidian Oil to preserve the horn and renew it.
IMG_6634

IMG_6650

IMG_6651
I buffed the bowl and stem lightly with White Diamond and then gave the pipe multiple coats of carnauba wax. I buffed it lightly with a soft flannel buff and then hand buffed the area around the stamping. The finished pipe is shown in the photos below. The horn has a rich shine to it now and the briar looks very good. The contrast between the rich brown stain and the striations of colour in the horn stem give the pipe a distinctive look. There are still some battle scars that add character to the pipe in my opinion. Overall the pipe looks almost new. It is cleaned and ready for a smoke.
IMG_6652

IMG_6653

IMG_6655

IMG_6656

From Annoyance to Enjoyment – the British Buttner Pipe


At least that is the headline for an advertisement for the British Buttner Pipe. I was going through some of my files on the computer and came across this old insert for the Buttner pipes. I remember finding it but don’t remember where. It is a fascinating read and well worth a laugh. It is part of the ongoing saga of building a “better mouse trap” or pipe as the case may be. What made the ad interesting to me is that I have two of these old pipes in my collection and they are certainly a novelty. I am not sure that they fulfill the claim to remove annoyance. As you can see in the photos they are quite a complicated contraption. The outer bowl, or stem and keeper are Bakelite. The inner lining is a replaceable clay bowl that can readily be cleaned like any clay pipe by hot fire. This clay liner sits inside the Bakelite base and then there is an insert that is also clay that can be set into the clay bowl. The tobacco burns in this final bowl and the oils and tars are trapped by the clay insert and a cool clean smoke is delivered through the stem to the smoker. The airway in the final bowl is centered in the bottom.
buttner2a

buttner2b
Here are some photos of my pair and a replacement inner bowl lining. The first photo shows a top view of the pipes and the added insert. The insert came in a metal tin with a Bakelite lid that is pressure fit. The inner clay insert is pristine white and there is a piece of clay that sits in the middle of the bowl. I have never seen these in a functioning pipe so I think that they were part of the packing of the inner lining for shipping. The pipe on the left has a vulcanite stem while the one on the right has a Bakelite stem. The left one is somewhat newer in age than the right pipe. The second photo gives a side view of the pipe.
IMG_6657

IMG_6658
The next two photos show the pipe in an exploded view. The first one I have unscrewed the tobacco chamber or bowl from the Bakelite outer keeper. You can see the ring of Bakelite that encases the clay bowl of the tobacco chamber. The chamber itself is shaped like a meerschaum cup. Inside each Bakelite bowl is the clay inner liner. The one on the left is worn and has some damage though it is still smokable. The one on the right is intact. I tried to burn out the tars on this one in my barbeque and was able to remove much of the black buildup on the inside of the liner.
IMG_6659
The next photo shows the inner liner removed from the Bakelite keeper. All three parts of the Buttner system are clearly shown in this photo. Sadly the extra clay inner liner does not fit either of the bowls that I have. You can see the scalloped edge on the liner on the right. When it is in place smoke is drawn from the hole in the bottom of the tobacco chamber into the clay liner where it circulates and tars and oils are collected in the clay. The smoke then exits the liner through the scallops around the upper edge of the liner and is drawn into the airway in the shank and stem. Having smoked these pipe several times I can say that it delivers a dry and cool smoke. As for freeing the pipeman from annoyance – well that is certainly a matter of opinion.
IMG_6660