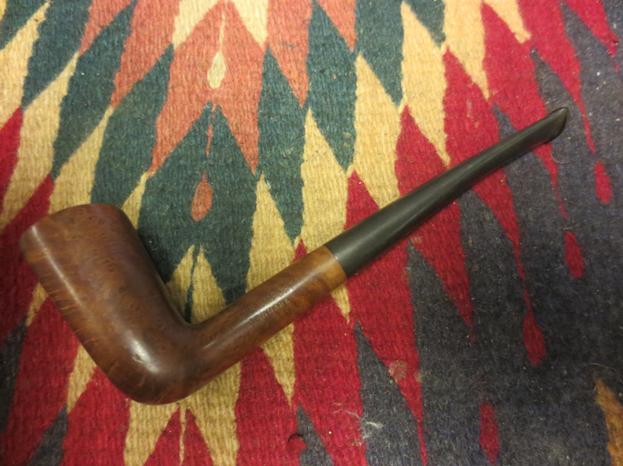
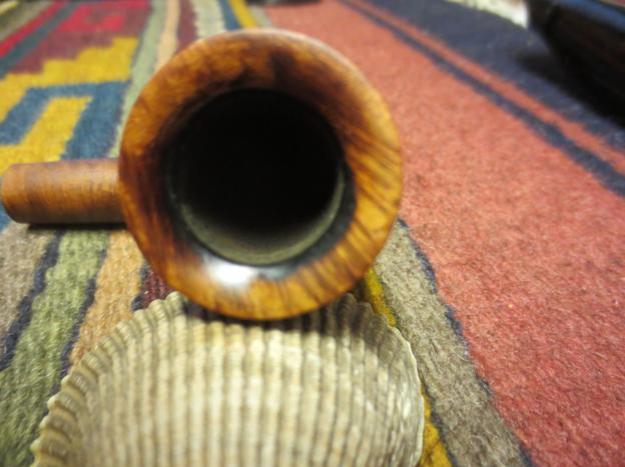
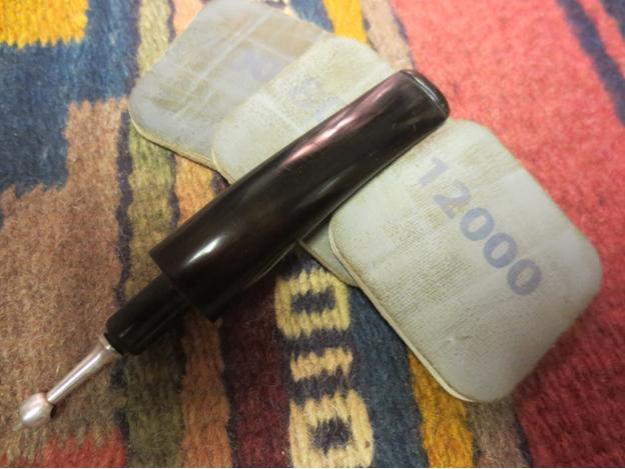
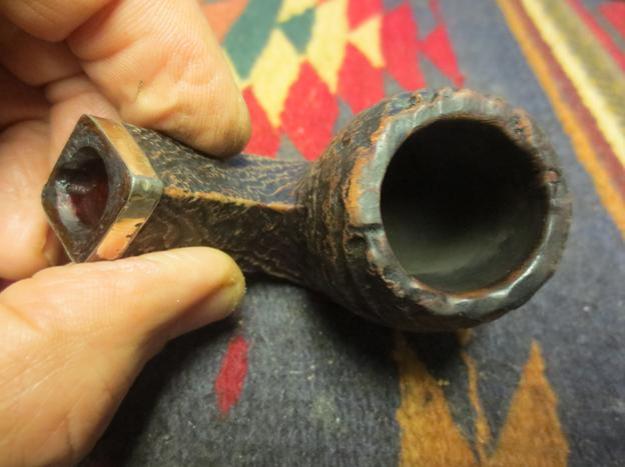
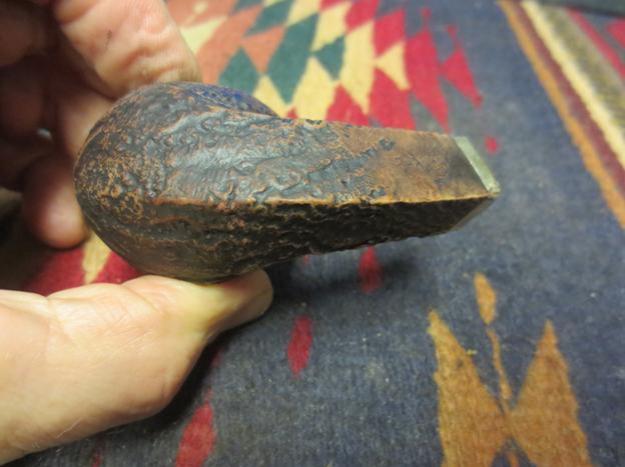
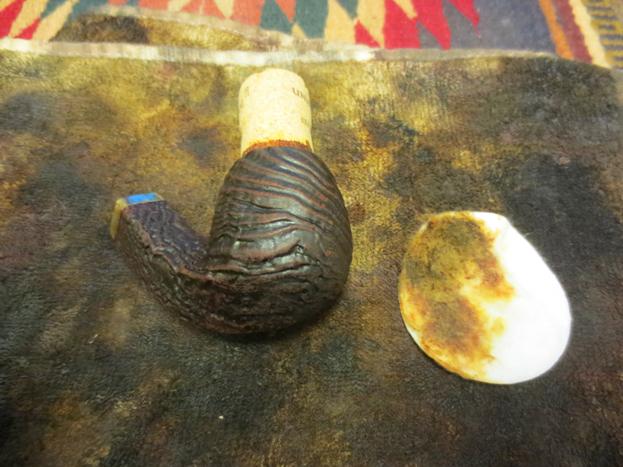
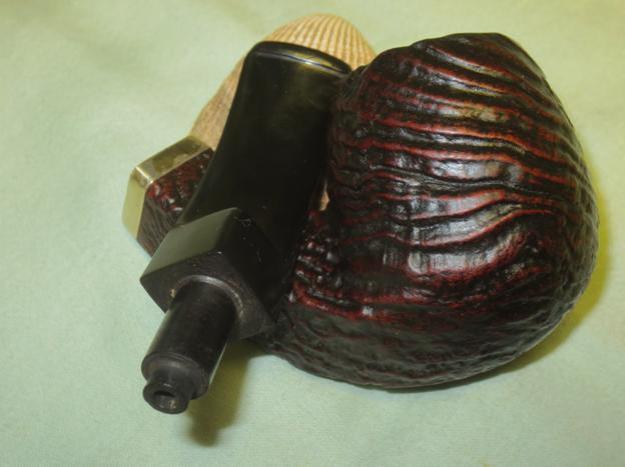
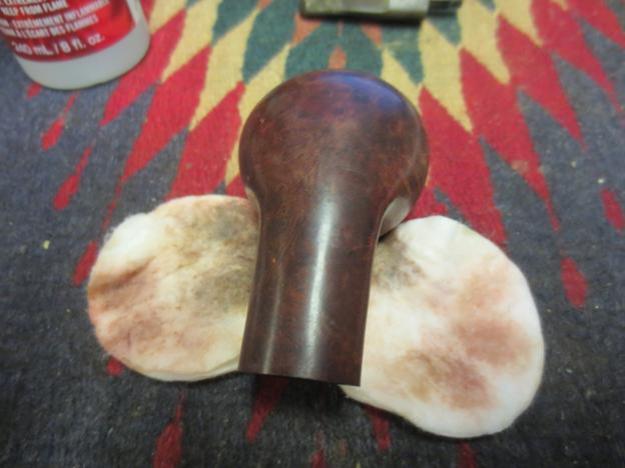
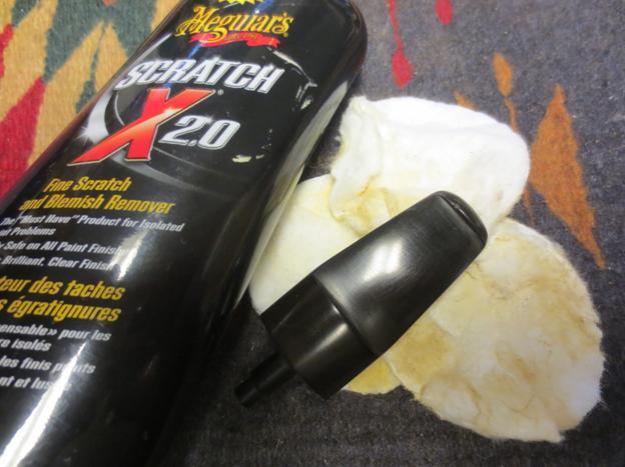
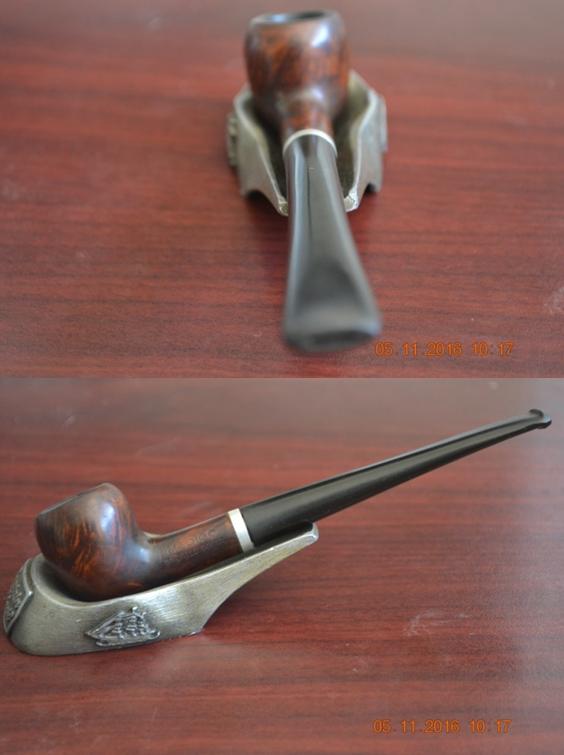
Father Tom – After the prayers have been said


Blog by Steve Laug

Avatar3It has been a long time since I posted a new Father Tom story. I have been fiddling with this one for quite a while now. I think it captures the thoughts that I wanted it to so I am putting it up here for those of you who have enjoyed the earlier stories to read. I am in the process of putting the earlier Father Tom stories into a book. I had hoped that it would be finished by now – but it is not. I may well get it done this summer as I have some time that I can spend writing as my travels for work are less this year. Besides that, I have three or four more Father Tom stories that I am working on that I will post here in the days ahead.

Father Tom closed his prayer book and stood quietly as the last people left the graveside and dwindled away. There were just a few people who had come out to the graveside for the burial service of the older woman he had just committed into the ground and God’s care. She had no family and very few friends in the city. She had outlived most of her peers in her hometown and had only lived in Vancouver for a few years – not a lot of time to gather close friends.Those who had come out were an odd assortment of people from her retirement home. Even the ones that came to the cemetery were mere acquaintances and really they had no fond memories of the deceased. It seemed to Father Tom that funerals always seemed to bring out interesting spectators. He had learned this through the years of his ministry. He waited in silence by the grave as they made their way back to their cars.

It was a sunny afternoon with no wind – an unusual respite from the normal October rains. The grass was dry and the gravel paths through the Mountainview Cemetery were nicely laid out. It would be a great place for some time to walk and think. He had ridden with the funeral director to the graveside and had told him he would walk home. He was looking forward to some time alone without interruptions or demands – just the quiet that only cemeteries offer. He needed the space and time to think and reflect; and God knows that he had lots to think about today. He had received some disturbing news yesterday.

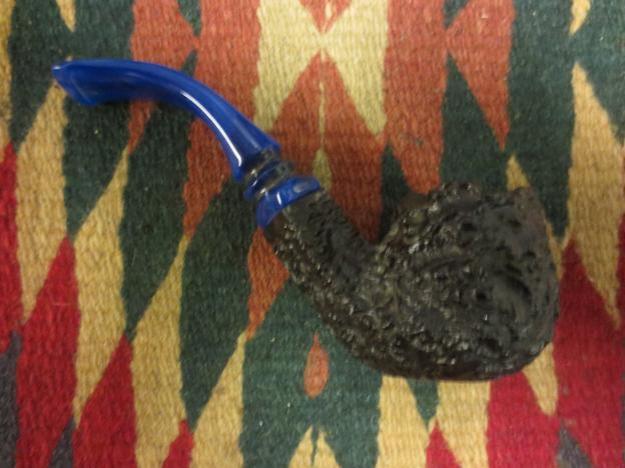
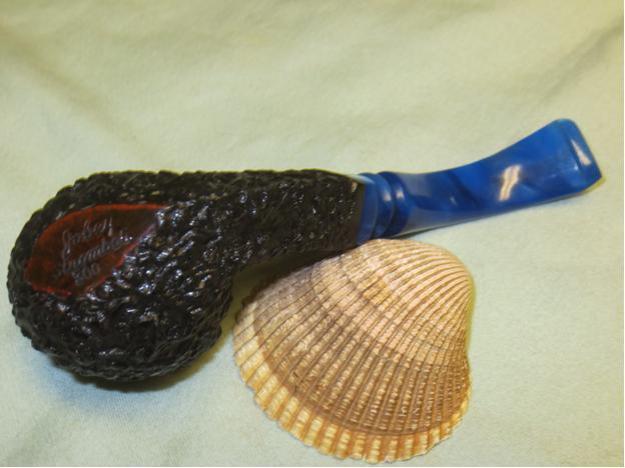
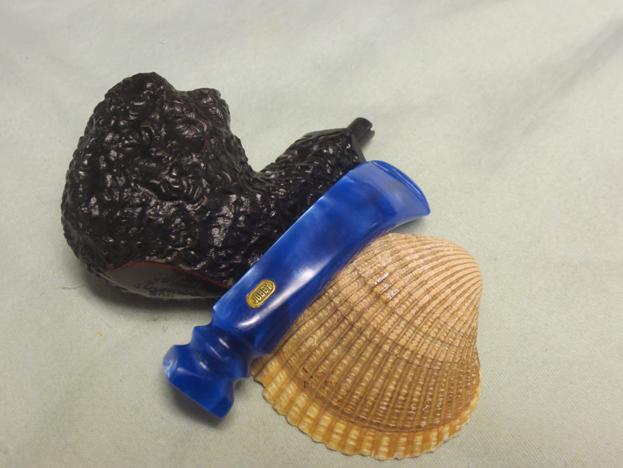
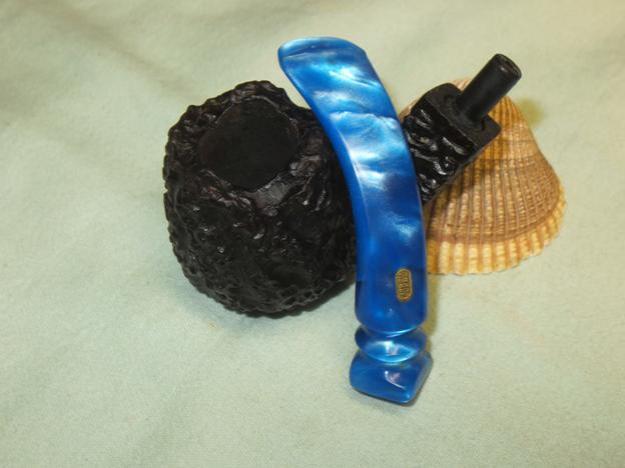
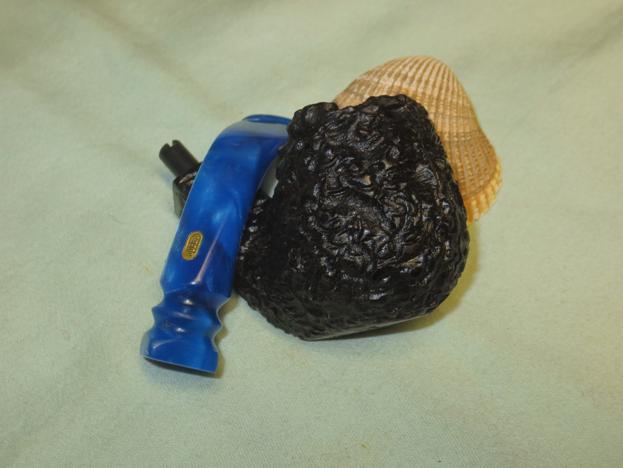
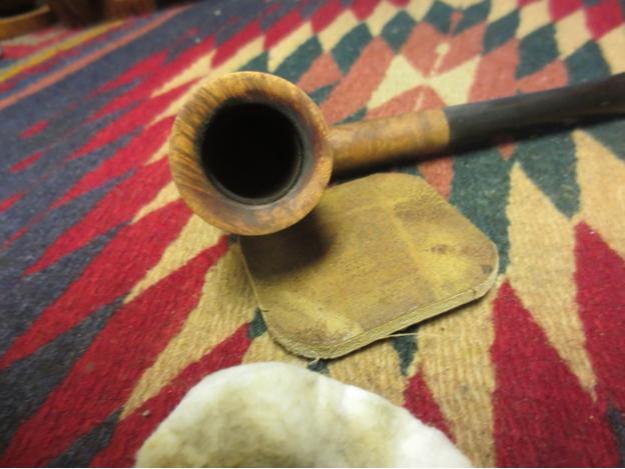
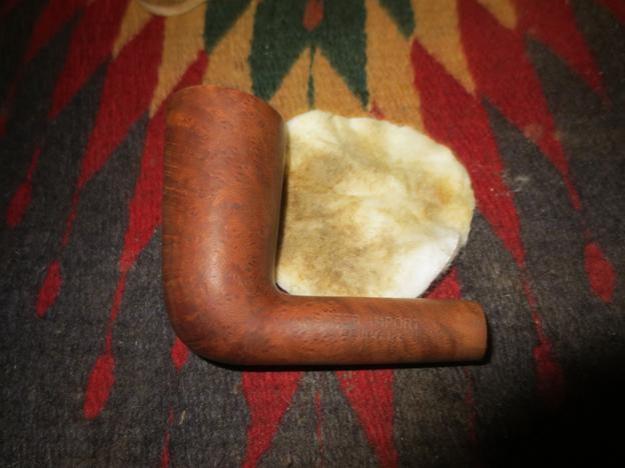
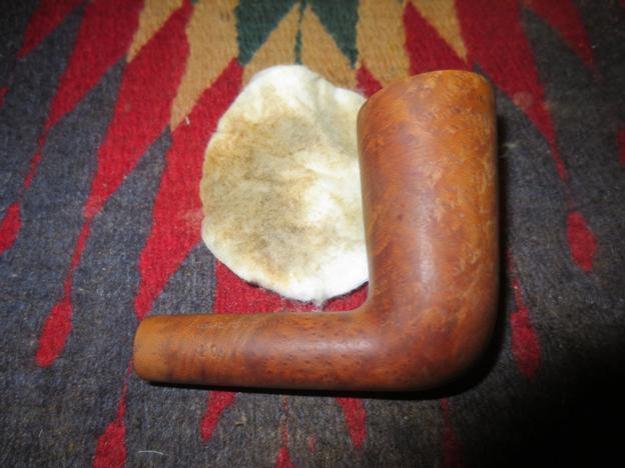
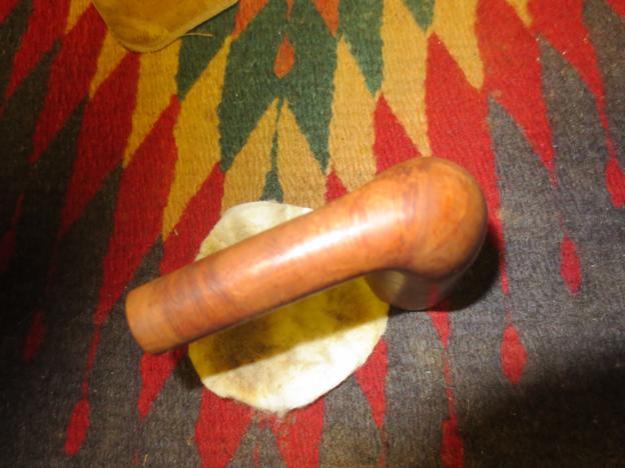
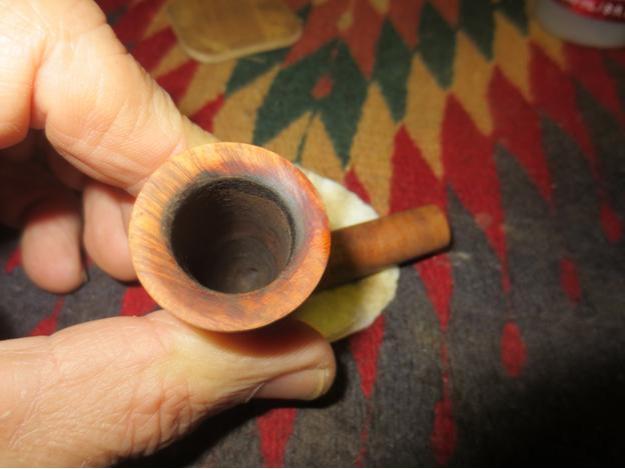
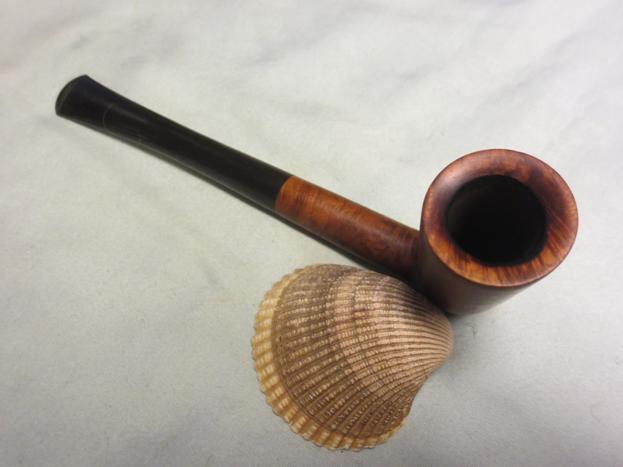
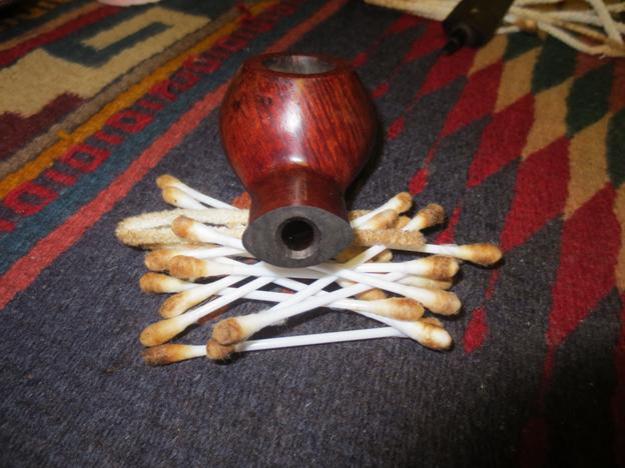
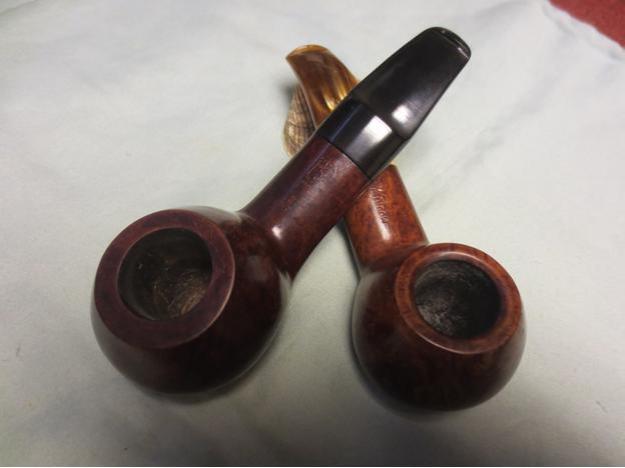
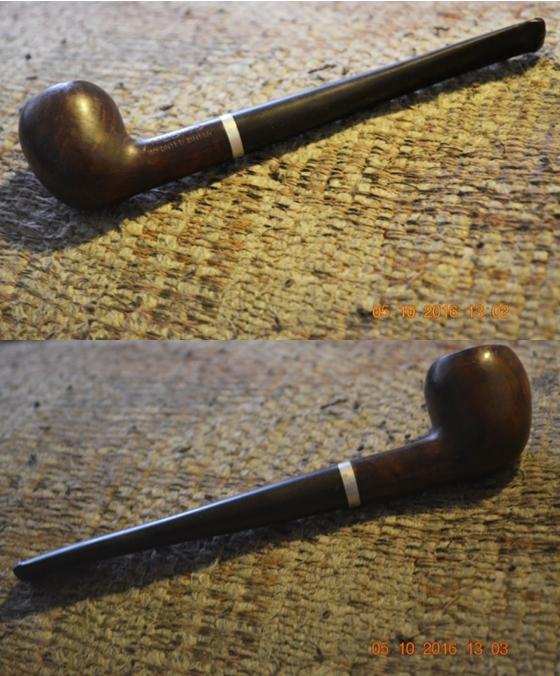
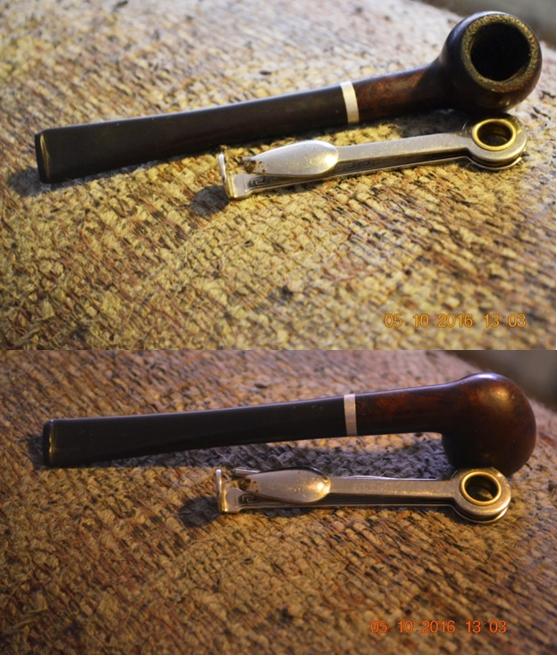
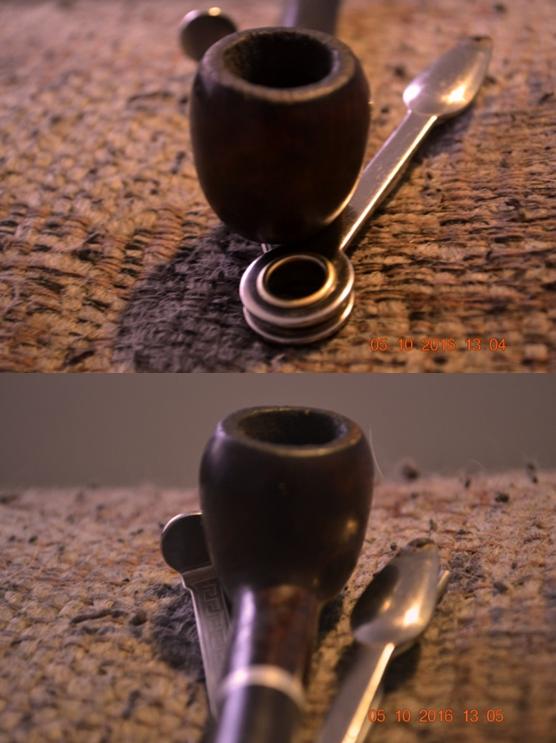
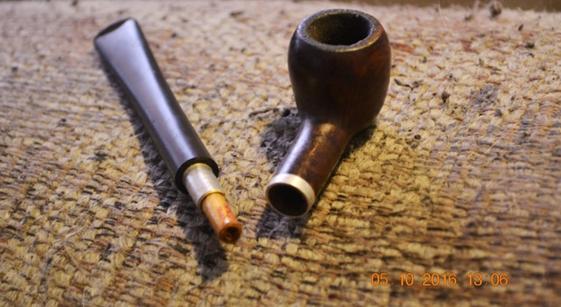
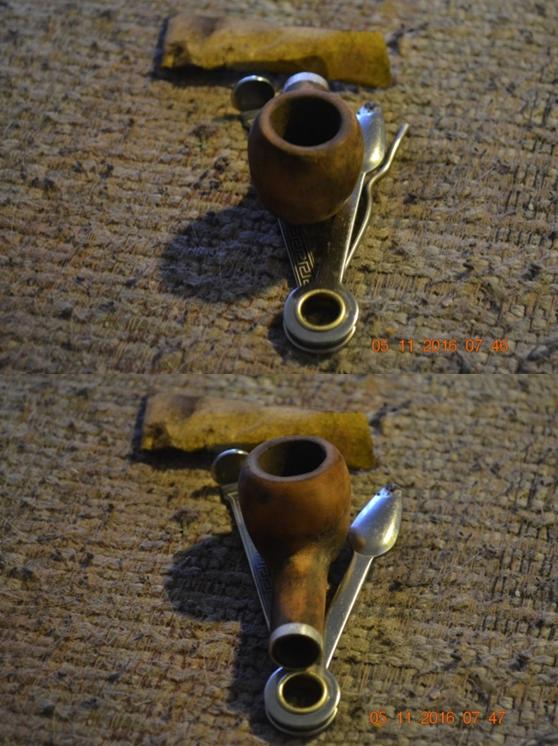
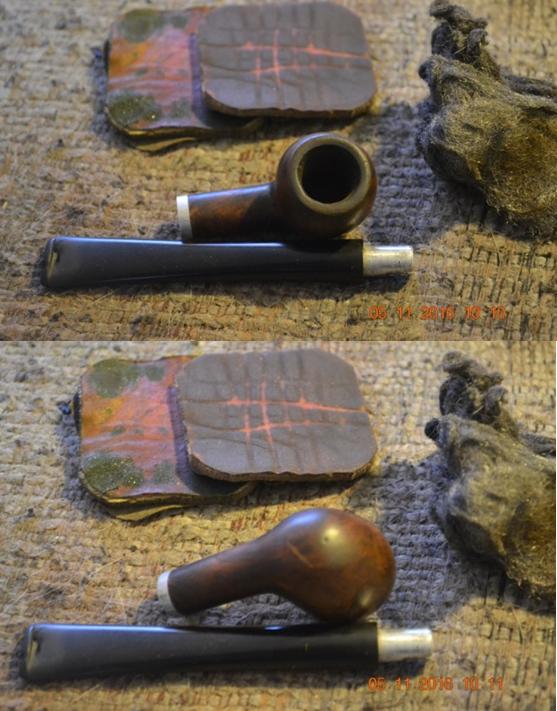
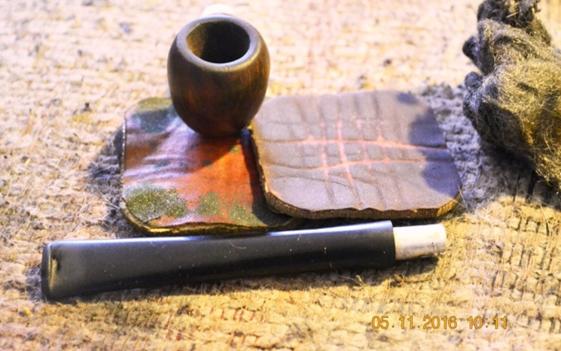
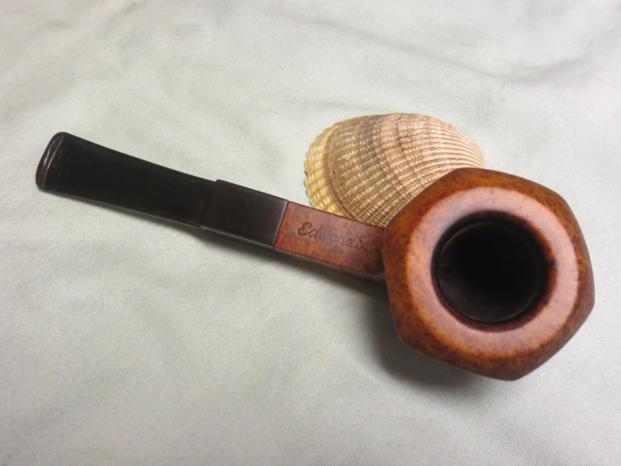
As the backhoe appeared at the graveside to refill the hole he stepped back and reached in his pocket for his pipe and pouch. He opened the pouch and loaded a bowl with some new tobacco that he was trying. It smelled wonderful and the few bowls he had smoked of it already were delightful. It was just what he needed to move him from a place of fretting to quiet. He pinched some tobacco with his fingers and stuffed it into the bowl until it full. He put the pipe in his mouth and checked the draw as he lit the tobacco with his lighter. He tamped it and relit it. The second light took and soon he stood lost in his smoke, oblivious to the sounds of the backhoe.

He mulled over the news that he had received from Doctor Mac aided by the distance that a pipe gave him. The doctor’s office had called about some of the results of his recent physical. The doctor had wanted him to go for a bit of blood work prior to the physical and he had complied. The trouble was that the lab had not sent the results in time for the doctor’s visit. That was no big deal normally. His blood work was usually clear so it had caused him no worries. But the doctor’s office had called and said they wanted him to stop by as there some concerns regarding his blood work. He always found that kind of call unnerving. His mind spun through a list of horrible possibilities. He hated that tendency in himself but that was where he always went. He hoped that the walk home through the quiet cemetery, smoking a bowl or two of tobacco would take his mind off his worries and give him some much needed perspective. The pipe always gave him the ability to look at his concerns from a distance and weigh them objectively. It was one of the reasons he loved his pipe and considered it his favoured companion.

As he walked along the path through the cemetery he was transported from the uncertainty of the doctor’s news to a place of quietude that a good pipe delivers. He was lost in the flavours, the textures of the pipe, the smells that invaded his senses and the cloud of rich smoke that gathered around his head and trailed behind him. His mind was quiet and his scattered and anxious thoughts slipped away with the cadence of puffing his pipe. Slowly he disengaged from his fears and troubles, calmed by the familiar comfort of his pipe. In the quiet space that it created he recited one of his favourite prayers from the AA Big Book – The Third Step Prayer and relaxed. The words like the smoke lifted his thoughts outward. Here are the words he prayed.

The Third Step Prayer
from page 63 of the Big Book of Alcoholics Anonymous
God, I offer myself to Thee-
To build with me
and to do with me as Thou wilt.
Relieve me of the bondage of self,
that I may better do Thy will.
Take away my difficulties,
that victory over them may bear witness
to those I would help of Thy Power,
Thy Love, and Thy Way of life.
May I do Thy will always!
Copyright © Alcoholics Anonymous World Services, Inc.

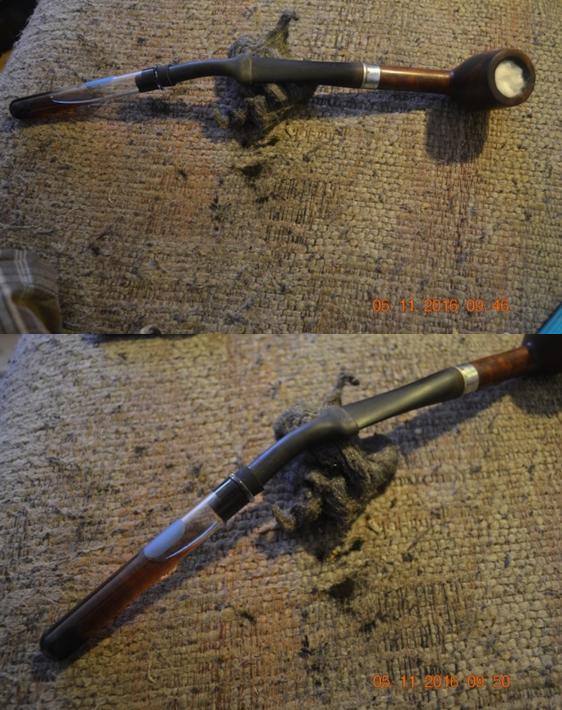
Praying those words and puffing his pipe he made his way homeward. Finally he was able to have a bit of perspective that enabled him to cease struggling and be still in the midst of the questions that had earlier plagued him. He would face tomorrow as tomorrow came. He had well learned the lesson that each day had trouble enough in its own right to have to borrow more from tomorrow. He finished his first bowl as he crossed King Edward and headed down the hill on Fraser toward Kingsway. He paused on the north side of the cross walk and loaded another bowl of tobacco to smoke for the remainder of his walk.

When he arrived at his home, he opened the gate and climbed the stairs to his porch. Standing at his front door he found himself wondering about what to do for dinner. He had given Mrs. Conti the day off so he was on his own. He put his keys back in his pocket and sat on a chair while he surveyed the options from the comfort of his porch. He continued smoking his pipe without a thought of the concerns that had captured him in the cemetery. With his mind made up he went down the stairs, out the gate and headed up the street to his favourite Chinese noodle house. A chicken hot pot with some spring rolls on the side would do him well. He could sip some nice Oolong tea and enjoy the quiet space while he waited for his dinner. Besides that, Eva, the waitress there knew him well and knew how to keep him on his toes.

With his pipe still in his mouth he pushed open the door of the Noodle House, greeted Eva, the waitress he had come to know from years of eating in the same establishment and went to his normal booth. Eva brought him a glass of hot tea, and without a comment regarding his pipe laid a menu down in front of him. Both Eva and Tom knew he did not need the menu but it was part of their ritual. He took his pipe from his mouth and laid it down, picked up the menu and thumbed through its pages. Eva chuckled as he finished and ordered his usual. He sipped the tea and turned the pipe over in his hands while he waited for the hot pot to arrive. Once again his mind began to worry at the impending doctor’s visit but quietly repeated the prayer he had prayed earlier in the afternoon. Just as he finished Eva brought the clay pot of chicken and vegetables. She gave her standard warning as she placed in front of him, “Be careful, very hot, very hot”.

She turned and left Tom to his own devices. She had long ago learned that he liked to at least pretend he knew how to use chopsticks and the soup spoon. He picked the tools up and opened the lid of the hot pot. The aromas of the baked mixture rose to his nose and he began to navigate the bowl. He ate in silence and savoured the meal. It was always good to eat a hot pot at the Noodle House. It satisfied his hunger and left him feeling satisfied. When he finished he tamped the tobacco in his pipe, put it in his mouth and went to the counter to pay his bill. He stood inside the door and lit the pipe, waved to Eva and headed home.

He hesitated on his front porch, not wanting to go inside and have to start thinking again. So he sat on a chair and finished his bowl of tobacco and enjoyed the end of a good bowl. He tapped out his ashes over the edge of the railing and went to the front door. He turned the key in the lock and went into his home. He hung his hat and jacket on the hall tree and went to change into his comfortable clothes. He shed the collar and black priestly uniform and put on his favourite flannel shirt, cardigan and jeans. He slipped on his moccasins and headed out to the parlour. It was time to have a sip or two of good bourbon and enjoy another pipe while he read for a while. No one knocked on the door, the phone did not ring and as the pipe went out he soon fell asleep in his chair. In the morning when Mrs. Conti came in to make breakfast she found him fast asleep in his chair. He still clasped the pipe in his hand and the empty bourbon glass sat on the table next to him.

“Poor man. It must have been a hard day with the funeral and such. Not an easy job for any human being. Hmmph”, she said as she made her way to the kitchen. She went about her morning ablutions of creating Father Tom’s standard fare. She knew what he liked and as a creature of habit rarely if ever veered from his normal pattern. She made a pot of fresh coffee that brewed while she fried the bacon. She sliced some of her home made marble rye bread and prepared it for toast. She laid out the table for the breakfast and waited to cook the eggs until the good Father finished his morning ritual. She had worked for him long enough to know his routine. She knew that very soon he would make his way to the kitchen. She waited to hear him rouse and then would pour a cup of coffee and have it in hand when he came through the kitchen door.

The smell of coffee and bacon soon roused Father Tom and he sat up with a start. It took him a few moments to orient himself to where he was. He rubbed his eyes and took in the parlour and had to chuckle at himself when he realized that he had slept in his chair. He emptied the pipe that he had in his hand and refilled the bowl to smoke with his coffee. He lit the pipe and once he had a good burn on the tobacco he got up and stumbled to the kitchen for the cup of coffee. When he came through the door Mrs. Conti held out the cup of coffee to him and he took it with a nod of his head. Not a word came from his mouth. The smoke billowed from his pipe as he stood there with cup in hand. He took his first sip and sighed with contentment. Mrs. Conti had long ago learned that he did not communicate until he had had that coffee. He sipped the first cup of coffee as he made his way to the shower and finished it as he adjusted the water. He stood under the water for a long time just letting the spray wash over him; slowly but surely he began to wake up and his mind began to recognize his world.

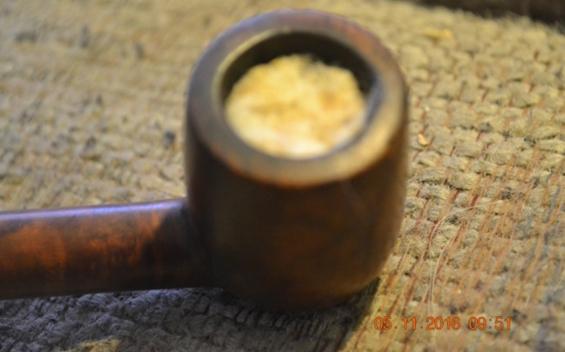
He turned off the water and dried himself off. He brushed his teeth and then reached into the tin of tobacco that sat on the counter top. One of his habits was to leave a tin in almost every room. That way no matter what room he was in he could load a bowl. He filled the pipe, packed it and drew on it. It was perfect so he lit it with the lighter in his pocket. He ran a comb through his hair and adjusted the clothes he had on and made his way to the table. As he passed through the kitchen he could see the eggs were frying in the pan. He poured himself a refill of coffee and took a pull on the pipe. He savoured the good taste of the tobacco and sipped his second mug of coffee. He felt almost human. He finally was able to say good morning to Mrs. Conti and made his way to the breakfast table.

The place had been set; he laid down his coffee mug and took a sip of the orange juice that was waiting. He set his pipe on the table and took a deep breath. Mrs. Conti brought him a plate of bacon and eggs with a side of toast and jam. He settled into the morning ritual of breakfast. There was comfort for him in repeated patterns. He repeated the prayer from the day before and finished his breakfast. He pushed back his chair and sat for a while finishing his pipe. He was quiet and thoughtful this morning – no harm in that. He thought about getting dressed for the day and then walking to his doctor’s office. All would be okay with the impending doctor’s visit today. He would move ahead a day at a time and see what awaited him.

Before he left the table he refilled his pipe and lit it. He sat quietly for a few more minutes until he had the pipe smoldering well. He sipped on the smoke and let the cares of the day ahead fall off him. It never ceased to amaze him how the smoke of a pipe seemed to slow down his mind and give him the ability to cast off his cares. It seemed that there was something sacramental almost in the very act of smoking a pipe. Whatever it was it had the ability to lift a pipeman above his troubles and give the space needed to refocus his thoughts. He dressed and went back to the kitchen to tell Mrs. Conti he would see her later. He closed the front door behind him and headed out the gate for the walk to the appointment. The distance to the office would give him time to enjoy a bowl or maybe two and prepare for whatever news that awaited him there.

Comoy’s Heritage 120 Restored (1977)


By Al Jones

I’ve seen a few “Heritage” pipes go thru Ebay in the past few years, but I wasn’t able to locate anything about the line. The ones I’ve seen are packaged with an upgraded presentation box and red silk sleeve. I believe they may have also come with a matching tamper. This one has an 18k Gold, Hallmarked band with the date letter “C”. I learned that gold hallmark dates are the same as silver. The C means it was made in 1977. The C logo on the pipe is also the 3 part type, which was used until around 1981. The pipe had some scorching and nicks on the bowl top, the gold band was dented but the stem was nearly mint.

Here is the pipe as it was received.

Comoys_Heritage_102_Before (1)

Comoys_Heritage_102_Before (2)

Comoys_Heritage_102_Before (3)

Comoys_Heritage_102_Before (4)

Comoys_Heritage_102_Before (5)

I’ve never previously worked on a Gold band. This band was loose and slipped right off. Fortunately, there is a custom jeweler on the PipesMagazine forum. He runs a jewelry business in Alabama called “Cosmic Folklore”. I contacted him for advice on how to make the band more presentable. He volunteered to work the band himself, as I found (and assumed) that the gold layer was quite thin and fragile. I received the pipe and band back after a week. It was much improved and I was relieved of the worry of ruining the band. Thanks Cosmic!

I glued the band back in place with a few drops of wood glue, which seemed to work fine. The bowl was reamed of the slight cake and soaked in alcohol and sea salt. Once the soak was completed, I used a series of bristle brushes dipped in alcohol to clean the interior of the shank.

The rim had some problems that needed to be addressed and I wanted to alter the bowl top and shape as little as possible. I used some Oxy-Clean solution on a rag to rub off the tar build-up. The rim was darkened underneath. I used some 2000 grit wet paper to carefully remove as much of the rim darkening as possible. I was also able to work out some but not all the dings around the bowl top. I used some lightened Fieblings Medium Brown stain to revive the color. The bowl was then polished with White Diamond rouge and several coats of Carnuba wax.

The stem took little effort. I removed some of the light oxidation with 1500 and 2000 grade sandpaper. Next was the 8000 and 12000 grade micromesh.

Below is the finished pipe. If you have any information about this Comoy’s series, please let me know.

Update: I did receive some information from a member of the Pipes Magazine forum. He has a 1975 Comoy’s catalog which describes the Heritage pipe, detailed below. I had assumed that the 120 stamp was a shape number, but now I believe that to be the serial number.

Heritage: Once in a while we come across a bowl so beautiful that we hate to part with it, almost preferring to lock it away for our own private pleasure. But when we do release these beauties, we give them a 22 ct.gold mount, a hand cut mouthpiece and a casket to match. Deservedly rare and consequently expensive. Each pipe carries it`s own serial number.

That forum member was nice enough to scan and email me that referenced catalog page.

Heritage_Line_Catalog_Info

Comoys_Heritage_120_Finish (1)

Comoys_Heritage_120_Finish (4)

Comoys_Heritage_120_Finish (2)

Comoys_Heritage_120_Finish (5)

Comoys_Heritage_120_Finish (6)

Comoys_Heritage_120_Finish (7)

Comoys_Heritage_120_Finish (8)

Comoys_Heritage_120_Finish (3)

Comoys_Heritage_120_Finish (9)

Comoys_Heritage_120_Finish (12)

Comoys_Heritage_120_Finish (13)

Comoys_Heritage_120_Finish (11)

Breathing New Life into a Jobey Stromboli 500 Bent Sitter


Blog by Steve Laug

It’s funny how some brands escape my attention. I cannot explain it or give some rationale for not being interested in Jobey pipes. But I know that until my brother, Jeff started picking them up because he liked the looks of them they did not appear much on my radar. I know that a few years back I picked up a Stromboli ¼ bent author because I liked the look of the rustication but that was the long and short of my interest. Now since my brother has been buying pipes more of them are crossing my work table and I am gaining a new appreciation for them.

In the case of this pipe, I know that the blue stem on this Stromboli is what caught my brother’s eye. It is a gorgeous shade of blue that stands in stark contrast to the dark deep rustication of the bowl and shank of the pipe. He sent me the link to the eBay sale and I too took an interest in the stem and the shape. From the photos I could see that the finish on this pipe was in decent shape overall. There was some wear on the rim. It appeared that some of the finish had chipped off and there were some worn spots on the front and the back outer edges of the bowl. The cake was uneven (varying thicknesses from the photos) in the bowl and an overflow of lava on the rim top and edges. The stem had some stains or dark substance on the grooves of the turned portions. The pipe is stamped on the smooth bottom of the sitter bowl with the words Jobey over Stromboli and the number 500. The stem also has some wear and tooth marks on and in front of the button on the top and bottom sides. All in all, I was looking forward to receiving this pipe and seeing what I could make of it. I have included the seller’s pictures below to show some of the issues that I mentioned above.Jobey1 Jobey2 Jobey3 Jobey4 Jobey5 Jobey6When the pipe arrived it looked precisely as the pictures had shown it. The dirty finish was a little worse than the photos showed. There was more grime in the grooves of the rustication. The stamping on the bottom of the bowl had a wax buildup in it that made it appeared blurred and double stamped. The stem was also a bit more of a mess than I had originally thought. The brown areas around the grooves and lines on the stem were actually thick and hard and did not come off by scraping. I am not sure what the substance was but it seemed to be stubbornly permanent. There were also tooth marks on stem on both the top and the underside of the stem near the button. The top of the button was also worn down on the inner sharp edge. The slot was almost closed off with grime and debris. The stem was loose and easily fell of the Jobey Link in the mortise. I took some photos of the pipe before I started working on it.Jobey7 Jobey8 Jobey9 Jobey10I took a close-up photo of the rim and also the bottom of the bowl to show the stamping. The rim was dirty with tars and oil and some lava in the grooves. The bowl had a light cake remaining even after I had field reamed it when I was visiting in Idaho. The stamping on the bottom of the bowl is visible in the second photo. It had wax and grime in the grooves so it looked almost blurred and out of focus.Jobey11 Jobey12I removed the stem from the Jobey Link and then used a flat blade screw driver to turn the link out of the shank of the pipe. I took a photo of the parts of the pipe to show the size and shape of the link. (You can also see the brown buildup on the grooves and ridges of the stem).Jobey13I scrubbed the rustication with Murphy’s Oil Soap and a tooth brush to remove the grime from the deep grooves. I also used a brass bristle brush to scrub the rim and the grooves there. The bristles of the brass brush easily removed the tars and lava from the rim surfaces. Once the bowl was scrubbed I rinsed it under warm running water to remove the soap and grime and then dried it on a soft towel.Jobey14 Jobey15I used a dark brown stain pen to touch up the worn areas on the outside edge of the rim and the top surface as well. The dark brown perfectly matched the stain on the rest of the bowl. Jobey16With the link removed from the shank I was able to clean out the mortise with alcohol, pipe cleaners and cotton swabs. I worked on the threads as well to remove the buildup on them. I clean out the airway on the stem with pipe cleaners and alcohol and picked the slot clean with a dental pick. I used a pipe cleaner to also clean out the airway in the link. With the inside of the stem clean the link fit snugly in place and the stem was no longer loose.Jobey17 Jobey18With the inside of the stem clean it was time to work on the rock hard substance on the grooves of the turned stem. The substance was impermeable to alcohol and was also on the flat diamond sides of the saddle portion of the stem. I wrapped a metal tube that was approximately the same diameter as the grooves with 220 grit sandpaper and worked on cleaning out the grooves and an emery board to sand the flat surfaces. Jobey19I used a needle file to redefine the edges of the button on both sides of the stem and to also smooth out the tooth chatter and marks.Jobey20 Jobey21I sanded the stem at the button and grooves with 150, 280, 320, 400 and 600 grit wet dry sandpaper to smooth out the scratches left behind by the 220 grit sandpaper. I took photos of all sides of the stem to show how well the sanding removed the hard substance on the stem in the affected areas.Jobey22 Jobey23 Jobey24 Jobey25I cleaned out the stamping with a dental pick and then used a black Sharpie Pen to colour in the text of the stamping. I buffed the bowl bottom lightly on the buffer to blend the black pen into the rest of the bowl bottom. I turned the link back into the shank and gave the bowl a light coat of Conservator’s Wax. I buffed it with a shoe brush to raise the shine.Jobey26 Jobey27I did a final scrape of the interior of the bowl with a Savinelli Pipe Knife to remove the remaining cake on the bowl walls.Jobey28I wet sanded the stem with 1500-2400 grit micromesh sanding pads and then wiped down the stem with a clean cloth to remove the dust. I dry sanded the stem with 3200-12000 grit pads to continue to polish and shine the stem.Jobey29 Jobey30 Jobey31

I lightly buffed the stem with Blue Diamond on the buffing wheel. It is important with Lucite to keep a light touch as you move the stem against the wheel as you can easily melt the stem and make more work for yourself. I hand gave the stem several coats of carnauba and buffed it with a clean buff. I brought the pipe back to the work table and buffed the bowl with the shoe brush and also with a microfibre cloth. The finished pipe is shown in the photos below. It is a beauty. I love the contrast between the dark brown/black of the craggy rustication and the smooth deep, royal blue of the stem. Thanks for looking.Jobey32 Jobey33 Jobey34 Jobey35 Jobey36 Jobey37 Jobey38

This Beauty is a Peer Import Danish Handmade Dublin Stack 20


Blog by Steve Laug

My brother found this old timer on eBay and made an offer for it. He showed me the pictures of the pipe when he bought it. The pipe is stamped Peer Import over Denmark on the left side of the shank and Made by Hand over 20 on the right side of the shank. It is a Danish take on a tall Dublin Stack. I believe the 20 is the shape number. The pipe was in excellent condition from the photos and showed very little wear. There was some rim darkening. Here are the photos that the seller included with the listing. It is clear that the stem is upside down which accounts for the sloppy fit of the stem at the shank. Peer1 peer2 Peer3The pipe arrived while I was visiting him in Idaho. I reamed the bowl and removed the light cake that had formed around the top 1/3 of the bowl. I have found on these tall pipes that the cake usually does not goes all the way to the bottom of the bowl as it is rarely smoked to the bottom. The condition of the pipe was pretty clean. The natural briar finish was dirty and there was a lighter portion at the stem shank joint. It made me wonder if the pipe had been restemmed but once I turned it over in the shank the fit was perfect. The rim had an inward bevel that had some lava overflow on the top surface but the inner and outer edges were clean and undamaged. The stamping on the shank was readable but it was not sharp. The slightly bent stem had tooth chatter at the button but no deep tooth marks. It was oxidized and there were a few deep gouges on the surface of the stem toward the middle top. The button and slot were undamaged. The interior of the pipe and stem were relatively clean.Peer4 Peer5 Peer6 Peer7I took a close up photo of the bowl rim and top as well as the stamping to show the condition. The rim top needed a thorough scrubbing to remove the lava buildup but it did not appear to be burned or charred. The edges were very clean. The stamping in the second and third photos shows that it was lighter on the left side than on the right but it is still readable.Peer8 Peer9 Peer10I did some research online to see if I could gather information about who made Peer Import pipes. All I knew was that they were Danish “Made by Hand” pipes but there was not much information on them. However, I was able to find several for sale on line. I read through each of the sale write-ups and also the etsy connection. On smokingpipes.com there was a Peer Import pipe that to my eye looked like a Kriswell Clipper was for sale. The pipe was nothing like the one that I am working on but the blurb by Adam Davidson gave some potentially helpful insight. His comment was: “This piece is a classic Danish shape from the 1950s. Possibly made by Pipe Dan or another house, it’s the lovely bowl and lean, tapered shank that makes it so popular”. Here is the link to that pipe and comment: (https://www.smokingpipes.com/pipes/estate/denmark/moreinfo.cfm?Product_ID=102766).

With that in mind I did some refined searching under the Pipe-Dan name. I put in the shape number with the name and was taken to Pipephil’s site (http://www.pipephil.eu/logos/en/logo-p3.html) and gleaned some more information. While I am still not sure of the absolute connection to Pipe-Dan the shape number of the Peer Import matches the brand. So I read what I could find on the brand on that site.

That link told me that the brand was created in 1943. The shop (Danish name: Pibe-Dan) which closed in 1991 was run by H. Dan Christensen. He sometimes designed pipes but he is merely renowned for having helped young artisans like Tom Eltang, Preben Holm, Jes Phillip Vigen, Hans Hartmann… Pipe-Dan let the pipe maker stamp his own name on a pipe along with the shop’s name. The line name “Shape-Reformed” means that a traditional shape had been redesigned.

While this pipe does not say that it is a Pipe-Dan pipe and it has no other stamping that would lead me to claim that I am pretty confident that the shape number connection also points to that connection. Armed with that information I went to work on the pipe. I cleaned the rim with saliva and cotton pads followed by sanding with 1500-2400 grit micromesh sanding pads. I was able to remove the lava buildup and smooth out the surface of the rim. There was still some rim darkening but no char.Peer11I scrubbed the natural finish with acetone on cotton pads to remove the oils and grime on the finish. The acetone removed all residual oils from the previous owner’s hands and the debris from the years that the pipe sat. It also cleaned up the lightening of the colour at the shank stem junction.Peer12 Peer13 Peer14 Peer15There was a flaw in the vulcanite stem – a small, ¼ inch long pit in the top of the rubber that had collected debris. I cleaned the stem surface with alcohol and picked out the white waxes and dust that had collected in the flaw. I filled it with superglue and set the stem aside to dry.Peer16I gave the bowl a rub down with a light coat of olive oil and hand buffed the natural matte finish with a piece of soft cotton. The pipe has some beautiful grain. The tall stack and thinness of the shank and bowl give the pipe a quiet elegance.Peer17 Peer18 Peer19 Peer20 Peer21When the glue dried I sanded it with 220 grit sandpaper until the patch was flush with the stem surface. I took the next two photos to show how well it blended in with the rest of the stem.Peer22 Peer23This pipe was internally so clean that I almost forgot to clean out the inside. I scrubbed the airway and mortise on the bowl and airway on the stem with pipe cleaners, cotton swabs and alcohol. You can see from the photos that there was not much work to be done in the internals.Peer24 Peer25I wet sanded the bowl with 1500-2400 grit micromesh sanding pads and gave it a coat of Obsidian Oil. I dry sanded it with 3200-4000 grit pads and gave it another coat of oil. I finished sanding it with 6000-12000 pads and gave it a final coat of oil. I set the stem aside to dry.Peer26 Peer27 Peer28I buffed the pipe with Blue Diamond polish on the wheel and multiple coats of carnauba wax. I buffed it with a clean buffing pad and hand buffed it with a microfibre cloth. The finished pipe is shown in the photos below. I love the elegant tall, thin bowl and shank. The 1/8th bent stem works really well with the overall flow of the pipe. It is a beauty. Thanks for looking.Peer29 Peer30 Peer31 Peer32 Peer33 Peer34

A fun pipe to restore – a Straight Grain Algerian Briar Horn


Blog by Steve Laug

There has always been something intriguing to me about horn shaped pipes. This old timer is stamped on the left side of the shank with the words Straight Grain in script with a swirled underline. On the right side it is stamped Algerian Briar also in script. The finish was dark and dirty with a lot of grime ground into the bowl sides. The stamping was readable but faint in the middle on both sides of the shank. The rim was rounded and covered with a thick coat of tar and lava. There was a light cake in the bowl as I had field reamed it when I was in Idaho with my brother. He picked this old timer out on eBay and he did a good job picking it. The stem had some interesting oxidation – a thick brown on the top of the stem and little on the underside. There was a about an inch of calcification on the surface of the underside near the button. The top of the stem had tooth marks that were sanded out and the surface had a slight ripple. The button edges were no longer distinct and sharp but had been dented and worn down. The slot on the button was clogged with debris. The overall look of the pipe was pleasing and the shank and stem were thick at the middle.horn1 horn2 horn3 horn4I scrubbed out the inside of the mortise and shank with pipe cleaners, cotton swabs and alcohol.horn5I reamed out the remaining cake in the bowl with a Savinelli Pipe Knife and took it back to bare wood. I scrubbed the bowl with acetone to remove the finish and the grime. There was some really nice straight grain on the bowl sides, back and front as well as some nice birdseye on the bottom and on the rim. horn6 horn7I scrubbed the rim with acetone on cotton pads as well I sanded it with 220 grit sandpaper and 1500 grit micromesh sanding pads to remove the lava on the rounded/crowned rim.horn8 horn9I sanded the bowl with micromesh sanding pads to smooth out the finish and remove the fine scratches that were present in the finish. I sanded the stem with 220 grit sandpaper to remove the oxidation on the top side of the stem and to smooth out the tooth marks on the top side near the button.horn10 horn11The stinger was stuck in the tenon so I heated the metal stinger with a lighter to loosen the gunk that held it in place. I wrapped it with a cotton pad and pulled it with some pliers. I cleaned out the airway in the stem with pipe cleaners and alcohol. horn12 horn13I wet sanded the stem with 1500-2400 grit micromesh sanding pads and rubbed it down with Obsidian Oil. I dry sanded with 3200-4000 grit pads, gave it another coat of oil and then finished sanding with 6000-12000 grit pads. I gave it a final coat of oil and let it dry.horn14 horn15 horn16I buffed the pipe with Blue Diamond on the buffing wheel and then gave it multiple coats of carnauba wax. I buffed it with a clean buffing pad and then with a microfibre cloth to add depth to the shine. The finished pipe is shown in the photos below. I really like the way it came out. The carver followed the grain exceptionally well as the straight grain flows with the shape of the bowl. Thanks for looking.horn17 horn18 horn19 horn20 horn21 horn22

Gotta Love this Sandblast on the Ehrlich Diamond Shank Bent Billiard


Blog by Steve Laug

When I saw this Ehrlich Sandblast Diamond Shank bent Billiard I was immediately drawn to the cragginess of the blast on the bowl. The deep lines and grooves of the blast that go all around the bowl are really nicely done. The ridges and grooves flow with the cut of the pipe and give it a distinctive flare that I was taken by. The finish was worn but in decent shape in the EBay photos but it still looked good. When I picked up the pipe from my brother on an April visit I could not wait to work on it. I took these photos to show the state of the pipe when I received it. The finish was worn and dirty – lots of grime in the deep grooves. The rim was pretty clean. I field reamed it when I was at my brothers and took back the cake that was there to bare briar. The shank had a smooth portion on the left underside where the EHRLICH stamp resides. I have no idea how to tell the age of their pipes as all the ones I have had over the years have had the same stamping. Some added a second line – Supreme, etc. – but this one only had Ehrlich. The band on the shank end is stamped Sterling. It was obviously put on the shank after the blast and was a shop cosmetic addition. It does not hide any cracks in the shank. The stem was oxidized and had some serious bite marks on the underside that would need to be addressed. I liked the shortness of the stem as it gave the pipe a compact look that worked with this pipe.Erl1 Erl2 Erl3 Erl4I took some close-up photos of the rim and the stem to show their condition. The rim had no buildup or tars on it. The thin edges were lightly grooved – almost looked like the pipe maker had rusticated the rim to match the look of the bowl rather than risk sandblasting it. The stem was another story. The top side had lots of small dents that looked like they had been buffed out and the result was a wavy top surface. The underside had deep bite marks and tooth indentations that amazingly did not break through the surface and leave holes. I think that the thickness of the stem prevented the bite marks from going through to the airway. The sharp edge of the button and the top and bottom surfaces were pretty much obliterated by the “chomper” who had previously owned this pipe. Erl5 Erl6 Erl7I cleaned out the deep tooth marks on the stem with alcohol and cotton swabs. I removed the debris in the pits and grooves with a dental pick. I dried off the stem and then filled the bite marks with black super glue. I built up the button and filled in the sharp groove. I would need to recut that once the glue had cured. I laid the stem aside to let the glue harden.Erl8I scrubbed the grooves and ridges of the bowl and shank with a tooth brush and Murphy’s Oil Soap. I rinsed the bowl under running water and dried it off. The scrubbing had done a great job removing all of the grit and grime in the ridges and grooves of the sandblast.Erl9 Erl10 Erl11 Erl12 Erl13While the stem repair cured I worked on the bowl. I wiped it down to remove any remaining dust and then put a large cork in the bowl so that I could hold on to it while staining the bowl. I used a dark brown aniline stain that had been thinned to 50% with isopropyl alcohol to restain the bowl. I flamed it to set the stain in the blast.Erl14 Erl15 Erl16 Erl17I wiped down the bowl with alcohol on cotton pads to make it a bit more transparent and allow the dark black in the grooves to show through.Erl18 Erl19I hand buffed the bowl with a shoe brush to get a bit of a shine on the briar.Erl20With the externals pretty well cleaned up and restored I addressed the internals of the bowl and shank. I cleaned out the mortise and shank with pipe cleaners, cotton swabs and alcohol. To my surprise there was not much tobacco debris or oil in the shank. What came out with the cleaning was the original brown stain. Evidently the bowl had been dipped in stain. The amount of stain that came out on the pipe cleaners and cotton swabs was amazing. You can see it in the photo below. I scrubbed it until it was clean and I could see bare briar on the sides of the mortise.Erl21I sprayed the stem repair with some accelerator to harden the super glue more quickly. I decided to use it this time. I usually let the repair cure over night, but this time I was a bit impatient. When the glue was hard to the touch I used a series of flat needle files to begin flattening the repair and shaping the sharp edge of the button on both sides of the stem.Erl22 Erl23 Erl24 Erl25With the button edges cleaned up and the slot opened slightly with the files I sanded the stem surface with 180 and 220 grit sandpaper to smooth out the repairs and minimize the file marks in the vulcanite.Erl26 Erl27I wet sanded both sides of the stem with 1500-2400 grit micromesh sanding pads to blend in the repair on the underside. I rubbed it down with a coat of Obsidian Oil. Erl28 Erl29I dry sanded both sides with 3200-4000 grit sanding pads to further blend in the patch on the underside. By this point it was beginning to disappear into the shine of the stem. I gave it another coat of oil. Erl30 Erl31I finished sanding it with 6000-12000 grit pads and gave it a final coat of oil and let it sit until the oil was dry.Erl32 Erl33I buffed the stem with Blue Diamond and lightly touched the blast with the polish. Too heavy a touch and the grooves fill in with the polishing compound so it is critical to have a very light touch. I gave the stem multiple coats of carnauba wax and buffed it with a clean buffing pad. I sparingly applied some Conservator’s Wax to the bowl and hand buffed it with a shoe brush and with a clean buffing pad. I finished by hand buffing the pipe with a microfibre cloth to give depth to the shine. The finished pipe is shown in the photos below. I really like the way the stain turned out and I am pleased with the repair to the stem. Thanks for looking.Erl34 Erl35 Erl36 Erl37 Erl38 Erl39 Erl40

Restoring a Pair of Mountbatten Authors


Blog by Steve Laug

My brother sent me pictures of the first pipe in this pair of Mountbattens and wondered what I thought of it. We decided that it was worth a bid as the shape interested me. I had no idea who produced Mountbatten pipes, but this one had the look of an older one. The narrow taper on the stem back to the button, the darker stain, the narrow slot in the rounded button and the stepped down tenon all pointed to a pipe from an older time period. This one was stamped on top of the shank Mountbatten over Made in England. On the right side of the oval shank it bore the shape number 819. The finish was in decent shape other than a badly beat up rim top. The cake in the bowl was pretty thick. The stamping was distinct and clear. There were some dents and dings in the bowl sides. The stem had what appeared to be a surface logo on top of the saddle. It was not stamped and was peeling on one edge. It was oxidized and had some tooth marks on the top and underside near the button edge. The slot was so narrow that a pipe cleaner would not easily pass through to the bowl.Mt1Mt2 Mt3 Mt4He sent a picture of the second one as well – same shape as the first but having a different shape number and a Lucite stem. It was a newer version of the pipe. The shape was similar but slightly smaller. The taper on the stem was not as drastic and flowed to the button ending at the button almost the same width as the beginning at the saddle. The button shape, the shape and style of the slot in the button end, the stamping of the M on the top of the saddle all were signs of a newer version. This one was stamped on top of the shank Mountbatten over Royal. On the underside of the shank it was stamped Made in London over England. Under that near the stem shank union was the shape number. It was different from the older one – 207. The finish on this one was lighter and more of a matte. There were also quite a few fills in the sides of the bowl that were pink putty. They were pretty well blended into the grain so they would be fine. The bowl had a light cake in it and the beveled inner edge of the rim was darkened and had some lava that ran over the top edge. The Lucite stem was in good shape with some small tooth marks on the top and underside near the button.Mt5 Mt6 Mt7 Mt8This would be a fun pair of pipes to clean up and restore. Before I started to work on them I decided to do a bit of research on the brand. I started with my usual first stop – PipePhil’s Logo and Stampings site. I found out there that the pipe was made by Charatan. There were pictures of a variety of stampings on the stem and some beautiful looking pipes but no other information. Here is the link to that page: http://www.pipephil.eu/logos/en/logo-m7.html.

I did some further digging and found a link on Pipes Magazine’s forum where the brand was discussed: http://pipesmagazine.com/forums/topic/mountbatten-pipe. There was a discussion on that thread regarding the brand. Quite a few of the respondents originally said that the brand was a Charatan second. There was one dissenting voice that led to more responses similar in tone. The fellow said that the pipe was not a second. There was a quote from another site.

I googled the information and found that the quote came from a thread on pipes.org. Here is the link: http://pipes.org/forums/messages/23/45025.html?1169997817 I quote the original dissenter on the Pipes Magazine site in full because of the information that it gives. The original poster was Bill Ramsey. Here is Bill’s reply:

“Friends, after 40 years of nosing around pipes, what I have gleened is this: Charatan sold its seconds under private labels and later acquired the English rights for Ben Wade for just this purpose. Mountbatten, on the other hand was not a “second”(in that there was some physical deformity in the pipe) but rather a first line production from Charatan’s apprentice program. Each Charatan carver might have four or six apprentices at any one time of various skill levels. As they improved and started cutting pipes themselves, these pipes had to move… thus the Mountbatten. These were made on Charatan tooling with Charatan materials and teaching. Bear in mind that there was a high attrition rate and , perhaps, one apprentice in nine or ten made it to cutting their own bowls much less a Charatan carver. This is why you see more Charatans than Mountbattens on the market. You’re never going to put your kid through college by selling one but you’ve got a day to day workhorse of the first order. Good luck and happy puffing.”

That was just the kind of information I had been looking for. I close this section on the history of the brand with a quote that pretty well sums up the details that I had learned. It is taken from the same conversation that is traced in the last link above. “Yup now I know Mountbatten pipes were the fruit of an apprentice’s labor made under the supervision of a Master Pipe Maker at Charatan, most likely in the pre-Lane era; not a second, but a “sub-brand” (even though many experts still classify them as seconds anyway).”

A bit better educated about the pipes I was working on I was ready to start the refurbishing process on them both. I took some close up photos of the rims of both pipes. The first one is the older 819 pipe and the second is the newer 207 bowl. The damage to the first bowl would require topping while that on the second was less extensive and would only need a cleanup.Mt9 Mt10I set up my topping board and topped the 819 carefully so as not to remove more of the top than necessary to flatten and remove the damage to the outer edge of the bowl and rim.Mt11 Mt12

I reamed the bowl of the newer bowl with the Savinelli Pipe Knife and took out the thin cake that was on the walls. I used a flat penknife blade scrape the lava from the rim face and the inner bevel on the rim and then wet sanded the top with 1500-2400 grit micromesh sanding pads. The photo below shows the cleaned up rim surfaces.Mt13 Mt14 Mt15I carefully scrubbed the bowl walls and shanks with alcohol on a cotton pad to remove the grime. It did not take much scrubbing to clean up both bowls.Mt16 Mt17 Mt18 Mt19 Mt20 Mt21 Mt22 Mt23 Mt24

I sanded the topped bowl on the older, darker pipe with 1500-2400 grit micromesh sanding pads until the scratches left behind by the topping were gone. I then stained the top of the bowl with a dark brown stain pen. I stained the top of the lighter, newer bowl with a light brown stain pen to match the bowl sides.Mt25 Mt26

I cleaned the internals of both pipes: mortise, airway in the shank and stem and the slot in the button with alcohol, cotton swabs and pipe cleaners.Mt27 Mt28 Mt29 Mt30

The stem clean up on each of the pipes was slightly different. The vulcanite stem needed the most attention. I sanded the tooth marks on the top and bottom side of the stem next to the button with 220 grit sandpaper and followed that with 280-600 grit sandpaper. I soaked it in Oxyclean overnight to soften the oxidation. I removed it in the morning and after drying it off scrubbed it with Meguiar’s Scratch X2.0 to remove the softened oxidation.Mt31 Mt32 Mt33The Lucite stem was much easier to work on. I sanded the tooth marks on both the top and underside of the stem at the button with 220 grit sandpaper to remove them. It took some focused sanding to remove the two marks but once I was done sanding them they were no longer visible.Mt34 Mt35With the oxidation taken care of on the vulcanite stem and the tooth marks removed from both stems it was time to work on them with micromesh sanding pads. I wet sanded both stems with 1500-2400 grit micromesh sanding pads.Mt36 Mt37I wiped the vulcanite stem down with Obsidian Oil and then dry sanded both stems with 3200-4000 grit micromesh sanding pads.Mt38 Mt39I wiped down the vulcanite stem with another coat of oil. I sanded both stems with 6000-12000 grit micromesh sanding pads. I gave the vulcanite stem a final coat of oil and set it aside. Once the oil dried I would put the stems on the bowls and buff them.Mt40 Mt41I put the stems back on the pipes and gave them a final buff with Blue Diamond polish on the wheel. I gave both multiple coats of carnauba wax and buffed them with a clean buffing pad to raise the shine. I hand buffed them with a microfibre cloth to add depth to the shine. The finished pair are shown in the photos below. The young apprentice carvers at Charatan did a great job in shaping and finishing these two pipes. They look great together. The mystery to me is the different number stamps on the pipes. They are similar in shape even though the newer is a little smaller. They look like they came from the same shape chart in terms of appearance. I suppose I will never know why the numbers are different but I do know that both should be great smoking pipes. Thanks for looking.Mt42 Mt43 Mt44 Mt45 Mt46 Mt47 Mt48 Mt49 Mt50 Mt51 Mt52

Turkshead meerschaum cleaning and rewaxing


Blog by Bill Hein

Bill1I don’t remember exactly how I got this pipe. I believe it came in a lot off of ebay. I had taken it to show a friend of mine and tossed it in my glovebox. That was a few months ago and I just recently refound it. This guy was treated pretty rough. It was scratched, had some cracks in the shank, and the bowl is actually a bit out of round which I have never seen in a meerschaum before.

Tearing it apart, I found the tenon was metal, again something I haven’t seen on a meerschaum before. I sanded out the cake in the bowl and took a wire brush to the tenon to knock all the crud off. I decided not to mess with the crack as the metal shank looked like it went past the cracks and they didn’t seem to be growing. I figure the glue holding the tenon is also stopping the cracks from getting worse. I couldn’t really do anything about the bowl roundness or I would have lost the top of the turban.Bill2I took the stem off and cleaned the airway with both bristled and soft pipe cleaners and alcohol until they came out clean. The threads inside the stem were pretty full of gunk. I used q tips and alcohol to clean them up as best as I could. I did the same with the shank. I also dampened a paper towel with alcohol and wiped the inside of the bowl. It helps to take the old pipe smell out of the bowl. I then wet sanded the stem with 1500 and 2000 grit sandpaper to polish it up a bit.Bill3I set the stem aside and prepared the outside of the bowl for cleaning. I filled a pot with water and set in a jar of my home wax. It’s a mixture of beeswax and medical grade mineral oil. It’s good for many things. I use it on stems as well as my wooden pipe stands and cutting boards (You could use straight beeswax but this mix is what I had on hand). I also set my oven to 170 degrees Fahrenheit. While I waited for the wax to melt and oven to heat up I started cleaning the outside of the bowl. I poured a bit of rubbing alcohol in a small bowl and using a toothbrush, cotton balls, and qtips I scrubbed all the nooks and crannies on the outside of the bowl. Not only does this get the old wax off but much of the grime as well.
I then put the bowl upside down in the oven for 10 minutes. I wanted to warm the bowl and open the pores. Bill4I pulled out the bowl and stuffed a cotton ball in it. Paper towels also will work. I also put a pipe cleaner in the shank to use as a handle. I then dipped the pipe in the melted wax mixture. The cotton ball doesn’t keep all the wax out but it helps. I let the excess wax drip off and then put the bowl back in the oven. Again I placed it upside down.Bill5 Bill6I let the bowl bake for another 10 minutes to allow the wax to seep into the bowl. I removed it from the oven and hand buffed it with my wax mixture and a microfiber cloth. Finally I took the stem to the buffer and gave it a coat of carnauba wax. Bill7In this final picture you can see the re waxing darkened the bowl a bit. I have found many times this will bring out hidden colors or darken the colors already shown on the outside of the pipe. I do this to just about every meerschaum pipe I come across.


Spotlight: Ladies Pipes, Part 3/7, a Tiny Medico Acorn


Guest Blog by Robert M. Boughton
Member, International Society of Codgers
Member, North American Society of Pipe Collectors
http://www.naspc.org
http://www.roadrunnerpipesnm.biz
http://about.me/boughtonrobert
Photos © the Author

Two old buddies are heading off on their Annual Fishing Trip. For argument’s sake we’ll call them Kevin and Bob.
Bob notices that Kevin is being more grumpy than usual and tries to lighten things up by way of conversation.
Bob: “So Kev, last week was your birthday, happy belated.”
Kevin: (grudgingly) “Thanks.”
Bob: “Say, did, Laura, buy you that Estate Dunhill that you were constantly hinting at?”
Kevin: “Na”
Bob: “Well what did she get you instead?”
Kevin: “SUV.”
Bob: “New or used?”
Kevin: “New of course.”
Bob is extremely puzzled as Kevin is still driving the same beat-up pickup that was already old when Saddam was considered an ally.
Bob: “You know, Kev, you and I have been friends for a long time, and I’m entitled to say that you are an ungrateful sour puss. Laura buys you a New SUV instead of a second hand pipe, and that has you in a bad mood.”
Kevin: “Humph!”
Bob: “Well what kind of an SUV was it anyway?”
Kevin: “Socks, Underwear, Viagra”
— Thanks to mate on smokingpipes.com/forums. (I don’t know, but for some reason this struck me as a good gift idea for the next man who gives a lady grief for enjoying a pipe.)

INTRODUCTION
Steve comments now and then on the pleasure he gets from researching a pipe’s history. I know his motivation is not to tuck away, in his mind and for his own use, the information he gathers. I can’t say for sure what drives Steve, but I suspect he, also, is a natural born reporter – which is to say collector and sharer of information – with an insatiable longing to spread his news to readers as well as to supplement or in some cases create new pipe lore available online. Steve laughed at this when I suggested the notion, but I would say his crowning achievement so far is the definitive and exhaustive research that got to the bottom (which was deep) of the complex origins and Byzantine life of Brewster pipes – a close second to his exposé on the history of the Colossus Pipe Factory (CPF).

As a former freelance news reporter/photographer and still a spot news enthusiast, not to mention aspiring literary writer and pursuer of other investigative endeavors, I have a knack of my own for probing. When I can’t find any mention whatsoever of a pipe brand, I therefore become somewhat vexed. This was the case in particular with the first two pipes I restored for this series. One was a Frasa (or maybe FRASA as an acronym) French natural bent billiard;. The other was a Clinton natural straight oval that was neither the Israeli Alpha brand type nor the U.S. variety. Forever a dogged reporter at heart and also having a serious case of Obsessive-Compulsive Disorder, however, I intend to stay on these stories and others until I uncover the facts. The truth is out there.

As for Medico, there is much to be found online and in actual bound and printed books on pipes and the long, glorious history of their peaceful enjoyment. Indeed, the latter tools still exist, however tenuous their future. I hope and pray they survive for as long as Mankind occupies this planet, if not beyond. The history of Medico began with S.M Frank & Co.in New York in 1851, giving S.M. Frank the claim to the oldest pipe manufacturer in the U.S. By the time Frank formed Medico Pipes in 1957, it had already consumed eight other pipe makers, some still celebrated and others less remembered: the Manhattan Briar Pipe Co. in 1922; William DeMuth & Co. (WDC) in 1937; The Kaywoodie Co. (later Kaywoodie Pipes Inc.), Yello-Bole, Kaufman Brothers & Bondy (KB&B), the Reisss-Premier Corp. and the New England Briar Pipe Co. in 1955, and the New Jersey Briar Pipes Co. in 1956.

Discussions today about Medico pipes, in person or online forums, can become downright nasty, pitting vehement supporters against rabid critics. Nevertheless, older Medicos certainly possess a certain heightened quality and charm, and the brand’s lines are still made to be inexpensive and durable. As cigarsinternational.com put it, Medicos are “no-nonsense pipes made for the everyman.” That, they no doubt definitely are, at prices ranging from $15.99-$39.99. Medico has made pipes with materials including traditional briar, Brylon (an S.M. Frank synthetic invention of high temperature resin and wood flour) and even a unique bent tall billiard covered with a mysterious material described by Pipephil as either felt, synthetic fur “or a piece of wall-to-wall carpet.” Well, that settles that. To tell the truth, I would love to own one of those, if only for show-and-tell and to be able to call myself a carpet piper, despite the risk of static-electric charges and burns.Lady1SOME FEMALE SMOKERS AND PIPE MAKERS
I have put out various general calls for help in my local and online pipe communities searching for women who smoke pipes and would be willing to share some of their experiences and preferences, and my friend Liz invited me to become a Friend of her Facebook Ladies of the Briar Group. I still need to pursue that line, but at least have four blogs left to do so.

Since my second ladies pipe blog, I have re-focused my research on areas of interest I had not even considered until some other friends mentioned them. The one was revealed to me by Jennifer, the owner of Stag Tobacconist in Albuquerque where I am a very frequent fixture. The other, suggested to me by another Smoking Forums UK friend, Ed, was a fact that struck me as so obvious I was embarrassed to have overlooked the idea. Both, I believe, will prove of great interest.

Unknown to me until Jennifer’s revelation, was that Samuel Gawith Fire Dance Flake – a Virginia mix with blackberry, vanilla and brandy flavorings that was a favorite of mine back in my aromatic-heavy days but remains a blend I still enjoy on occasion – was formulated by one of the few female tobacco blenders in the U.S. The light flavorings and Best Brown Virginia used give Fire Dance a nice little bite.Lady2Of more significance is the presence of females – ye gads, what’s the world coming to? – in the business of making pipes. Ed mentioned the following names and provided a few links, worried these were not enough, and I looked up the rest to get samples of their work: Vilma Armellini, one of three daughters of the great Italian pipe maker Mauro Armellini and who regularly assisted her father in making many of his pipes and took over the business upon his death; Anne Julie; Nanna Ivarssen, and two newcomers who have been crafting fine pipes for the past several years, Sabina Santos and Scottie Piersal. Alas, I have been unable to locate a pipe made entirely by Vilma Armellini, but the first photo below shows her father’s work that likely included her help. I will, you can bet, continue looking.Lady3 Lady4 Lady5 Lady6 Lady7In light of my severe case of P.A.D., I expect to add samples of these brilliant women’s pipe crafting art to my collection as soon as possible.

RESTORATION
Now, for the drab little Medico Real Briar acorn as I first saw it.Lady8 Lady9 Lady10 Lady11The bit looked like this close up.Lady12I put it in an OxiClean bath and the stummel in used Everclear (not to drink, but to strip prior pipes).Lady13I took the bit out after a half-hour or so and wet micro meshed it. Then I went ahead and buffed it with red and white Tripoli, White Diamond and carnauba.Lady14I apologize for the gunk in the last photo. I just noticed it, but I assure you it came off with a wipe, or I wouldn’t have sold it the next day. About an hour after putting the stummel into the Everclear, I removed it and swabbed the chamber with one small soft cotton square and the outside with another.Lady15 Lady16 Lady17As usual, there was still old stain to remove, but other than uncommon situations such as removing that awful red varnish used on almost all pipes made in China , for example, I prefer not to let the wood soak too long. A little sanding with 220-grit paper in easy, even strokes, for the most part in the same direction, worked off the rest of the drab and dreary cloaking stain on the briar that had left darkness there and nothing more, as Edgar Allen Poe wrote.Lady18 Lady19 Lady20Call me anything other than Ismael, but I always get a distinct rush when the stummel is ready for micro meshing. In an average restoration of this type, with no serious, time-consuming obstacles, micro meshing most of the time is the halfway + 1 point, or the hump of the project. However, with five steps to go before completion of the pleasant task – it was better than the movie, which I had seen 10 times already – I was exactly halfway finished. The point, however obtuse, is that in my mind I was almost to the finish line. Oh, never mind! Alright, then, I proceeded to micro mesh from 1500-12000.Lady21 Lady22 Lady23Next up was re-staining the stummel, using Lincoln brown alcohol-based shoe and boot leather dressing.Lady24I also enjoy the brief puff of blue fire after holding my Bic or a good kitchen match close to the stain-wet wood, like flaming baked apples served with ice cream. Sort of. But that doesn’t make me a pyro. I prefer to think that life is like a bowl of ice cream, even if it’s served up on fire at times. Consequently, a few minutes after torching the stummel, I started with 2400 and 3200 micro mesh to remove the charred neon green coating. That broke through to dark brown, at which time I switched to super fine four-ought steel wool to take the darkness down a few notches.Lady25 Lady26 Lady27Ready for the second to last step in this somewhat off-the-norm order of events, I retorted the pipe at last.Lady28 Lady29After running a fluffy cleaner through the shank and clearing more last-minute soot from the chamber with a cotton cloth square, I buffed the stummel with white Tripoli, White Diamond and carnauba, using the wheel I keep clean after each to work the compounds further into the briar and keep them from smudging.Lady30 Lady31 Lady32CONCLUSION
So far, by an eerie coincidence if there is such a thing, all three of the pipes I have restored for this ladies pipes series have sold. The Frasa (or FRASA) went to my good friend and fellow pipe club member, Ashley. The Medico Acorn of this installment was snatched up by another woman, Rita, whom I met last night when she saw me smoking a pipe and mentioned that her husband “used to enjoy his pipes all the time” (I took this rather ominous wording as either a sign that the good man is no longer with us or just not with Rita), as well as the fact that she gave up cigarettes by puffing on a pipe of her own with tobacco until she weaned herself off both, and she added that she missed the feeling of the pipe in her mouth. No comment. The third pipe, a Citation Real Briar oval, sold to an 18-year-young man who also approached me because of the fine pipe in my mouth at the time. Ashley reserved hers before it was even restored while the others fell victims to my persuasive sales technique and the fortuitous circumstance that I had my available pipes with me. Still, I didn’t push any of the ladies pipes on anyone. They were all picked out of the box by the happy buyers.
SOURCES
http://pipesmagazine.com/forums/topic/smoke-jokes
https://rebornpipes.com/tag/brewster-pipes/
https://rebornpipes.com/2013/04/14/some-reflection-on-the-historical-background-on-cpf-pipes/
http://www.smfrankcoinc.com/home/?page_id=2
https://pipedia.org/wiki/S.M._Frank
http://www.pipephil.eu/logos/en/logo-medico.html
http://www.smfrankcoinc.com/home/?page_id=143 Medico pipes
http://www.cigarsinternational.com/brands/1552/medico/
http://www.tobaccoreviews.com/blend/1965/samuel-gawith-firedance-flake
http://www.theitalianpipe.com/artisans/armellini.htm
http://www.annejulie.com/pipes.html
https://pipedia.org/wiki/Ivarsson,_Nanna
http://www.sabinapipes.com/
http://mypipeclub.com/forum/index.php?PHPSESSID=18ed18b6fd1b7cfa581ca18da56449f7&topic=805.0 Scottie Piersal

Cleaning up an Edwards Unique – Hexagonal Straight Dublin


Blog by Steve Laug

Over the years I have cleaned up, traded or kept many Edwards smoking pipes. The natural finish briar has always made these pipes attractive to me. The briar is always light weight and beautiful. Many have had a few fills in them but that in no way detracted from the beauty of the pipe. This one from my brother Jeff is different than any of the others that I have had pass through my hands. It is a square shank hexagonal Straight Dublin that has a shape that I have never seen before. The grain on it is quite stunning even though there are some small fills on the shank and on the right side of the bowl. The finish was in decent shape under the light grime on the surface. The beveled inner edge of the rim had some lava build-up and it spilled over to the flat portion of the rim toward the back side. I had field reamed the cake while I was staying with my brother in Idaho. The bowl was pretty clean and the inner edge of the rim was round. There were no dings or dents in the rim or the curved cap on the bowl. The stem was oxidized and had some fairly deep tooth marks at the button.Ed1Ed2Ed3

The shank was stamped on top with the word Edward’s and on the underside Algerian Briar with the shape number 87 underneath. There was a large #7 near the flat bowl bottom.Ed4Ed5

I took a close-up photo of the bowl and the rim to highlight the cleanness of the bowl and the lava on the bevel.Ed6

I sanded the rim with a worn piece of 220 grit sandpaper to remove the lava on the rim surface and also to rework the inner bevel.Ed7

I scrubbed the bowl with Murphy’s Oil Soap and cotton pads to remove the grime. I scrubbed around the rim surface as well. I sanded the rim with 1500-2400 grit micromesh sanding pads and then scrubbed it again. I was amazed at how well the rim came out.Ed10Ed9Ed10Ed11

With the externals clean I scrubbed the airway and the mortise and the stem with cotton swabs, pipe cleaners and alcohol. I used a dental pick to clear out the slot in the button.Ed12Ed13

I sanded the stem with 220 grit sandpaper to remove the oxidation. I worked on the area around the tooth marks next to the button on both sides. I scrubbed out the tooth marks with alcohol and once they were clean prepared them for the patch. I patched the tooth marks with black super glue and set the stem aside so the glue would cure.Ed14Ed15

While the glue dried I decided to work on masking the fills on the shank and the bowl of the pipe. I used a Black Sharpie and lightly drew lines across the fills on the right side of the bowl and the middle of the left side of the shank, working to blend them into the surrounding grain.Ed16Ed17

Once the patches on the stem had cured I sanded the stem with 220 grit sandpaper to blend the patch into the stem material. I sanded it with 280-600 grit sandpaper to smooth out the scratches and used a medium grit sanding stick to sand in the angles of the saddle. The oxidation on this stem was stubborn. I scrubbed it with Meguiar’s Scratch X2.0 and then spent a significant amount of time wet sanding it with 1500-1800 micromesh pads. Finally I got through the oxidation. It was not deep in the stem it was just stubbornly hard so breaking the surface took a lot of sanding. Ed18Ed19Ed20Ed21Ed22

With the oxidation finally conquered and the patches blended in I sanded the stem with 1500-2400 grit micromesh some more – this time working to polish the stem. I gave the stem a coat of Obsidian Oil and sanded it with 3200-4000 grit pads. I gave it another coat of oil and sanded it with 6000-12000 grit pads. I gave it a final coat of oil and let it dry.Ed23Ed24Ed25

I buffed the pipe with Blue Diamond on the wheel and gave the bowl and stem multiple coats of carnauba wax. I buffed it with a clean buffing pad and hand buffed it with a microfibre cloth. The finished pipe is shown in the photos below. I was able to clean up the rim so it looks almost new – little darkening on the inside bevel toward the back. The fill on the side of the bowl disappeared and the one on the shank is less glaring. The stem repairs look good and I was finally able to remove the oxidation. All in all it is a beautiful pipe with lovely grain and it should provide many more years of service. Ed26Ed27Ed28Ed29Ed30Ed31Ed32