Blog by Paresh Deshpande
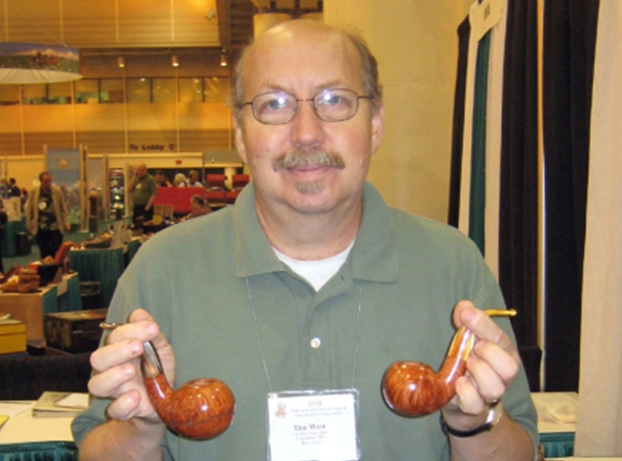
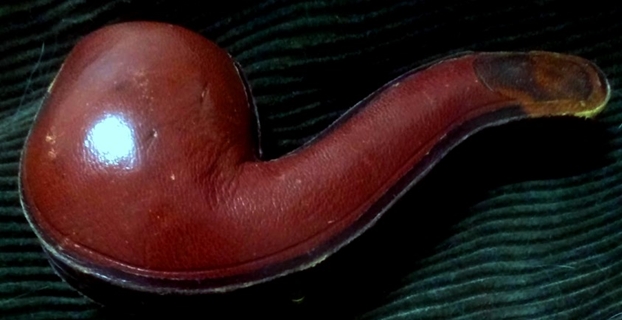
Tim West with a couple of his pipes
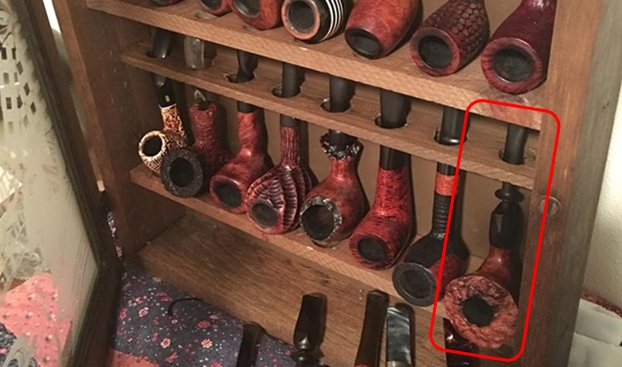
This sure is going to be an embarrassing while being a challenging project. Why? It’s embarrassing because the pipe that I have decided to work on now is made by a living legendary pipe repairman and a pipe maker from USA and here I am one who has just embarked on a journey into the world of pipe restoration with minimum of equipment, materials, spares and experience!!! It’s challenging because he is very well known to my friend and mentor, Mr. Steve Laug and living up to their standards is always a huge challenge. The project that I have selected to work on is a huge freehand pipe from Tim West!!
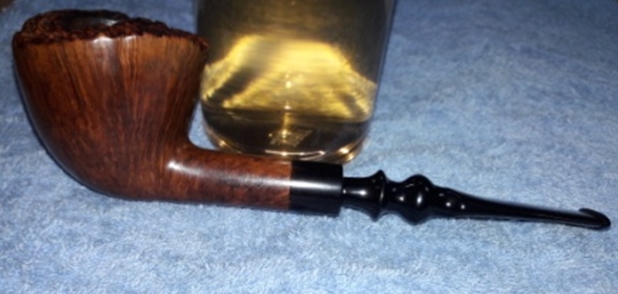
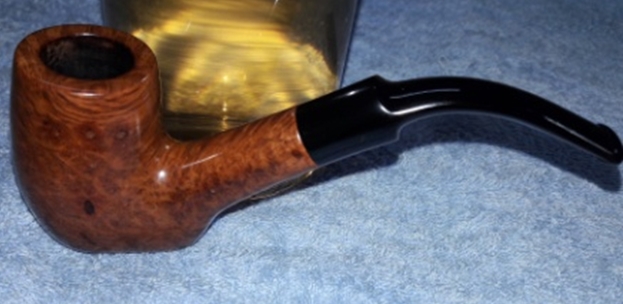
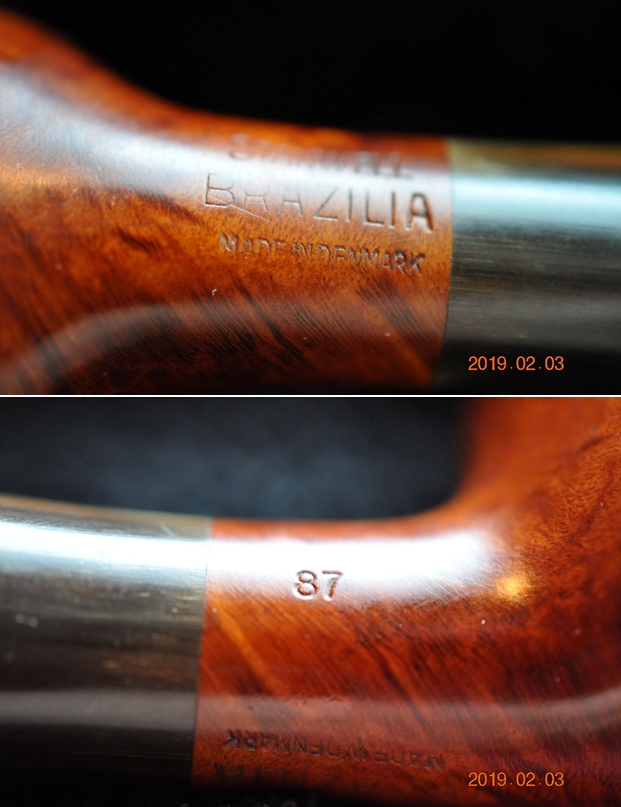
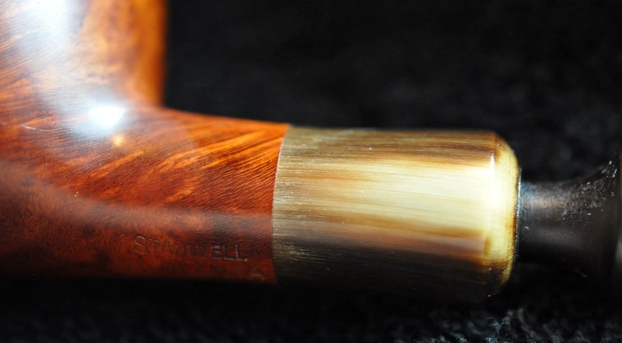
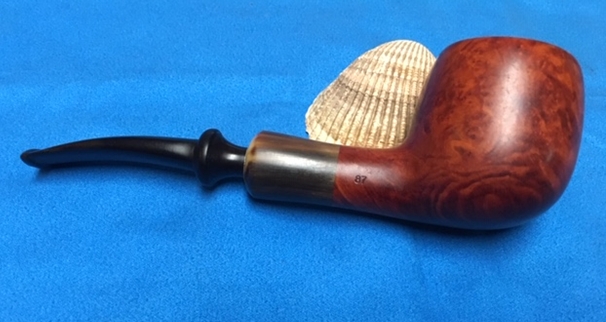
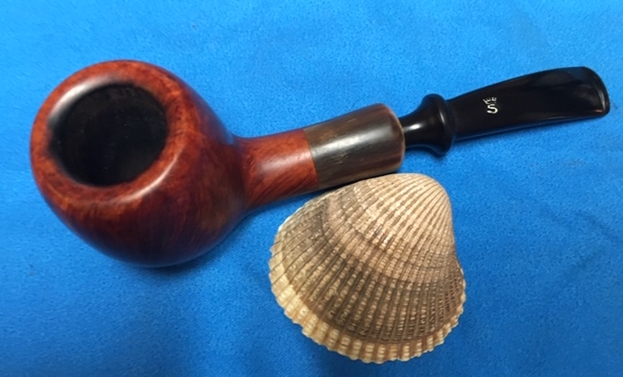
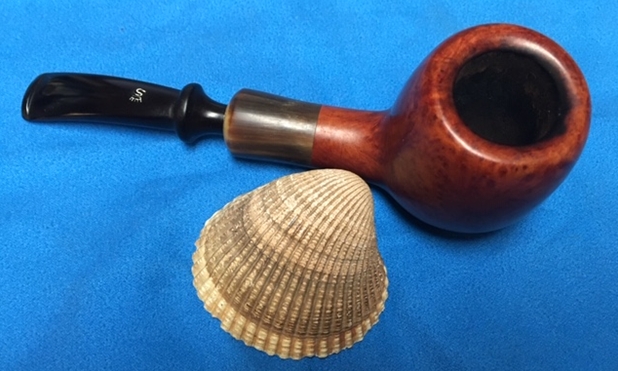
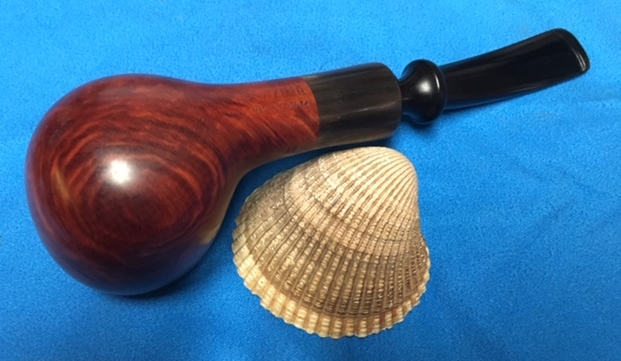
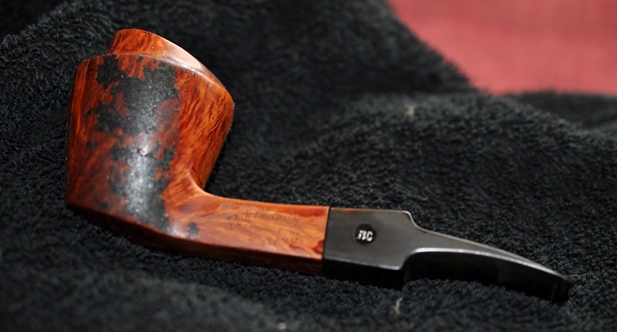
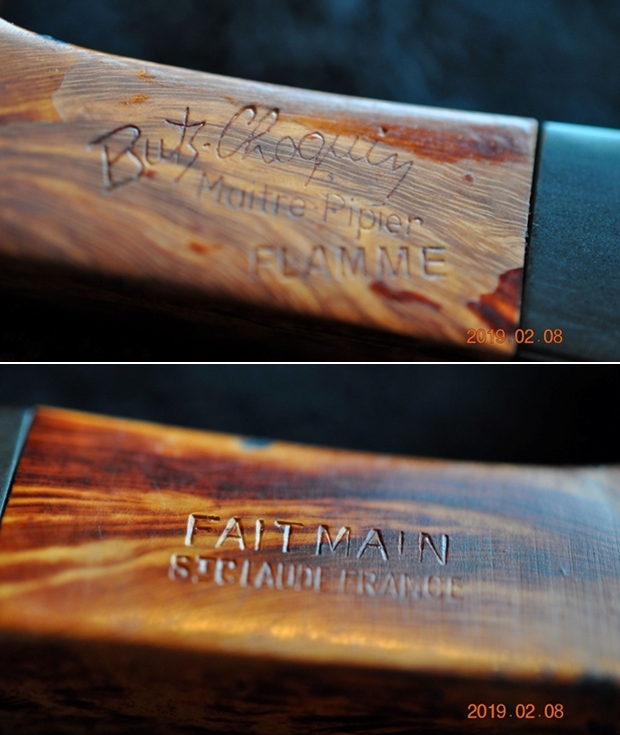
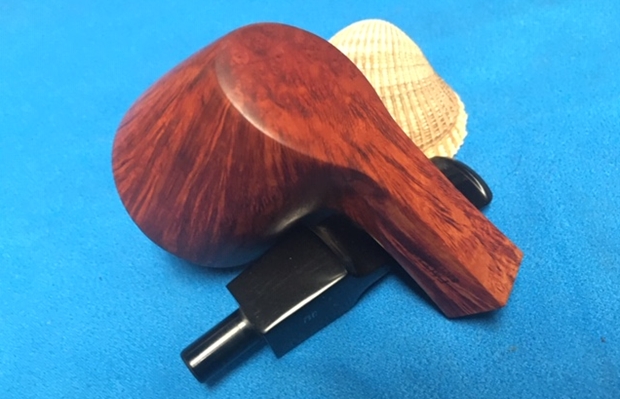
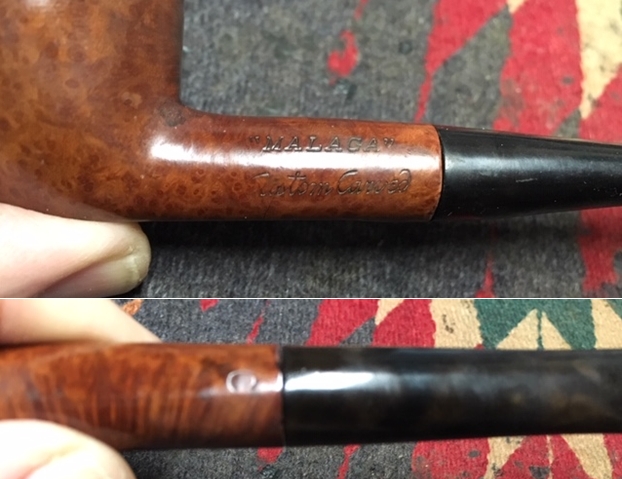
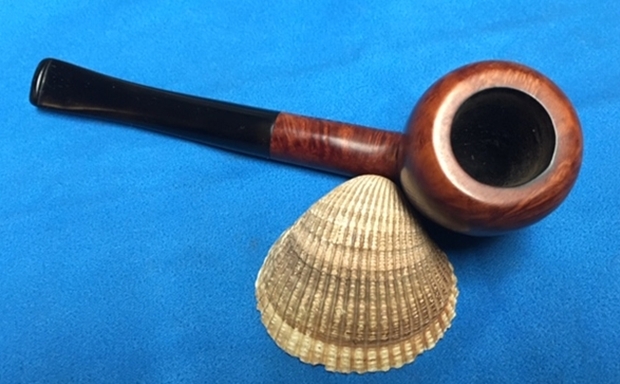
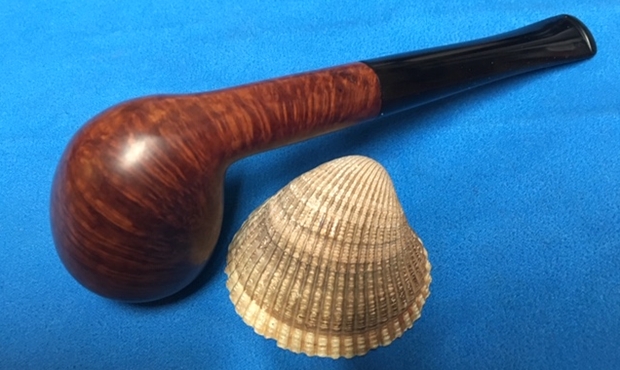
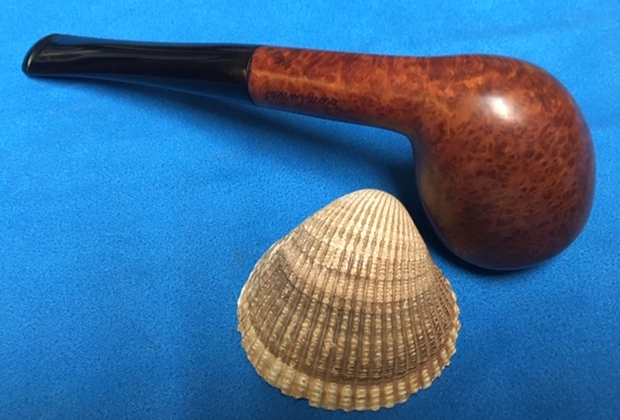
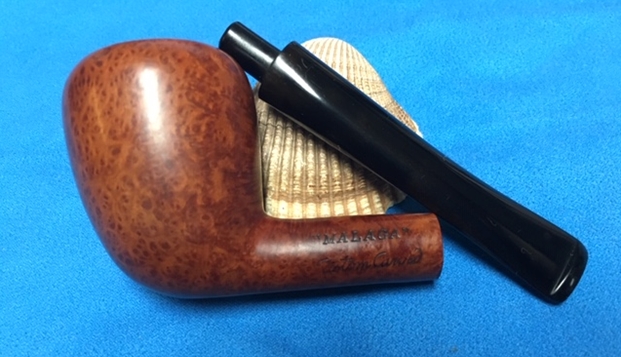
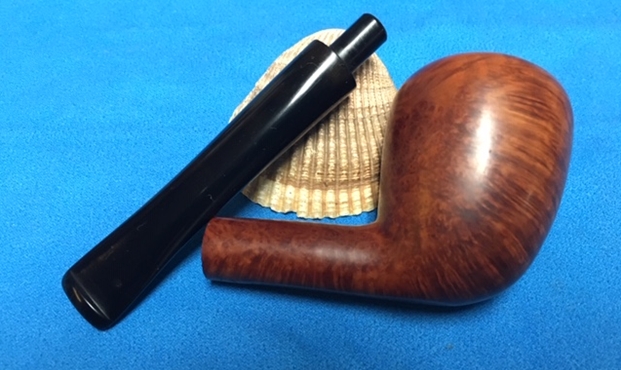
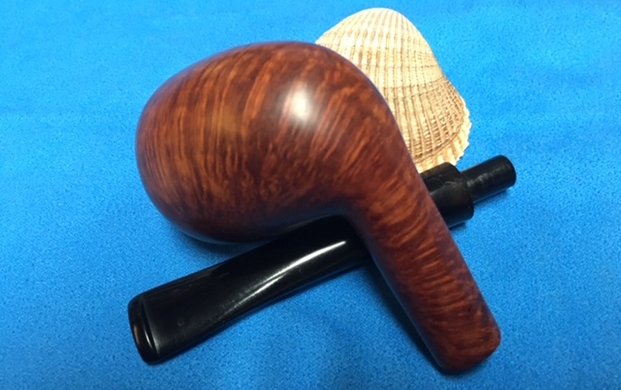
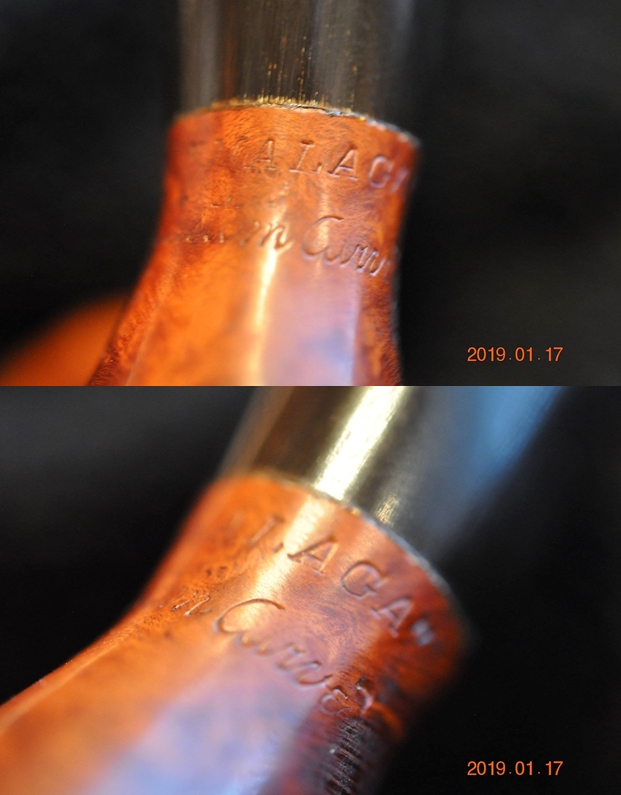
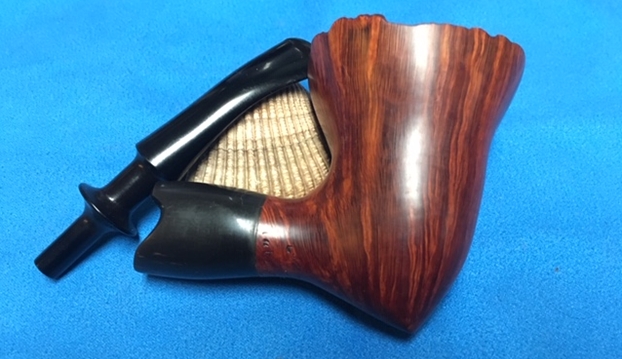
No, this pipe did not come to me in inheritance, but was purchased on eBay about 9 months back. Boy, am I glad that I made this purchase!! It’s a huge and heavy piece of briar with beautiful straight grain all around, including on the shank, with a plateau rim top and a vulcanite shank extension in to which fits a fancy, straight vulcanite stem. It has a shiny ring insert (or so it appears) between the shank and the shank extension. The shank extension helps in breaking the monotony of the briar while easing the flow of the humongous stummel in to the stem. The pipe has minimalistic stamping with “TIM WEST” in a slight arch over “PIPE” on the left side of the shank. I was keen to know more about Tim West, the carver and repairman, his pipe making techniques and philosophy. I searched pipedia.com and there is a very nice write up on him. I reproduce snippets information available on pipedia.com from his interview in December 1995, for a quick read.
Tim made his first pipe in 1967 and went full-time as a pipe maker in 1975. Only the best quality fully cured natural Greek Briar goes into a Tim West Briar Pipe. Tim’s designer shapes are designed for eye appeal and a great smoke. All processes, step by step, are natural processes insuring a sweet cool smoke for every recipient of a Tim West Briar Pipe.
In 1980, Tim opened Tim West Pipes, a retail shop in the Ohio Center near downtown Columbus. He closed the shop in 1991 and moved the entire business to his home workshop to concentrate on wholesaling. The workshop takes up most of the basement of his house, but it isn’t very big–some tools, racks of briar blocks, cabinets full of stems and boxes of half-finished pipes. To this day, Tim believes that he is much less mechanized than most pipemakers he knows of. He does have a top turner and a frazer, but they’re not hooked up, and the top turner is his television stand.
Tim acknowledges that, as a pipemaker, he is entirely self-taught, having learned through trial and error. He believes that pipemakers who have had the chance to study pipemaking or to work with established pipemakers are lucky because ‘it just mystified me for years wondering how they did it–while I was doing it.” And though he does use some power equipment today to drill, shape, sand and buff, everything is still set up, guided and shaped by hand.
When I asked Tim about his philosophy of papermaking, he laughed for some time. We talked further about the changes in his pipemaking over the years, and he allowed as how, during his first year at Monkey’s Retreat, a good 50 percent of his pipes were sculptured (piano pipes, toilet pipes, guitar pipes, etc.) because he had lots of time and could take a week to carve a pipe for someone. It might be his only sale for a week but would still provide enough cash to keep him in business. As his popularity grew, he needed to make more pipes and thus increasingly produced smooth shapes, either freehand or standard.
The entire interview makes for a very interesting read and is a highly recommended. Here is the link to the interview: https://pipedia.org/wiki/West
INITIAL VISUAL INSPECTION
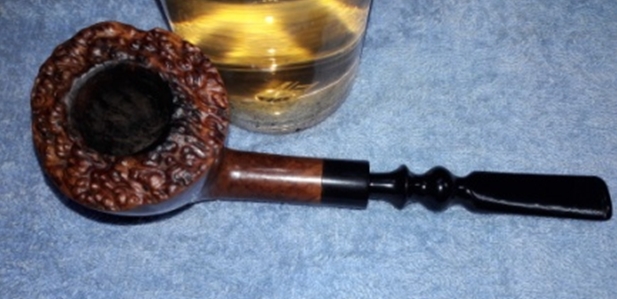
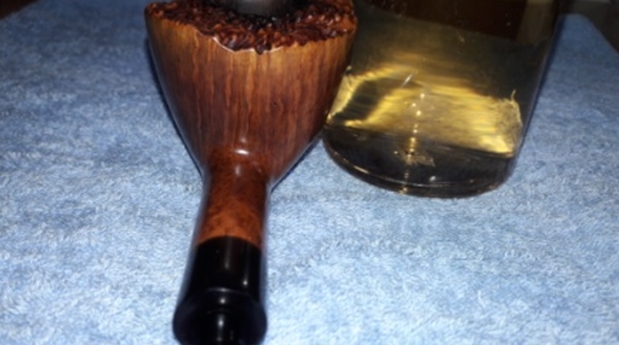
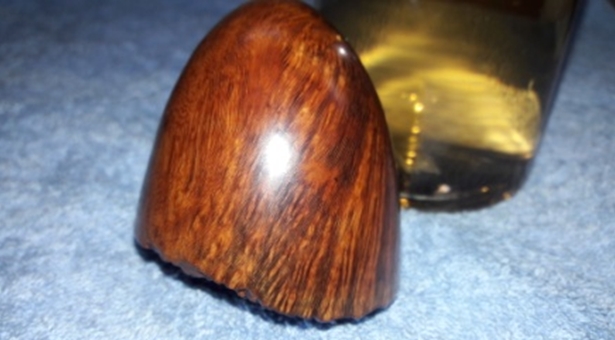
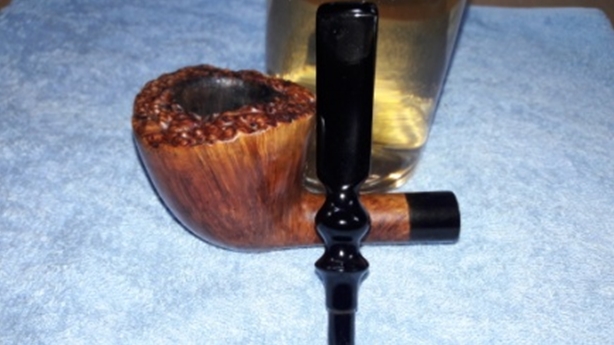
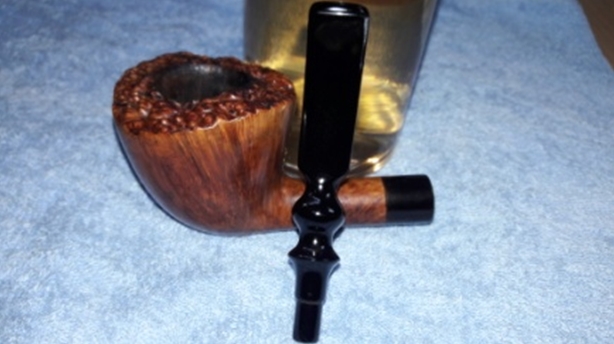
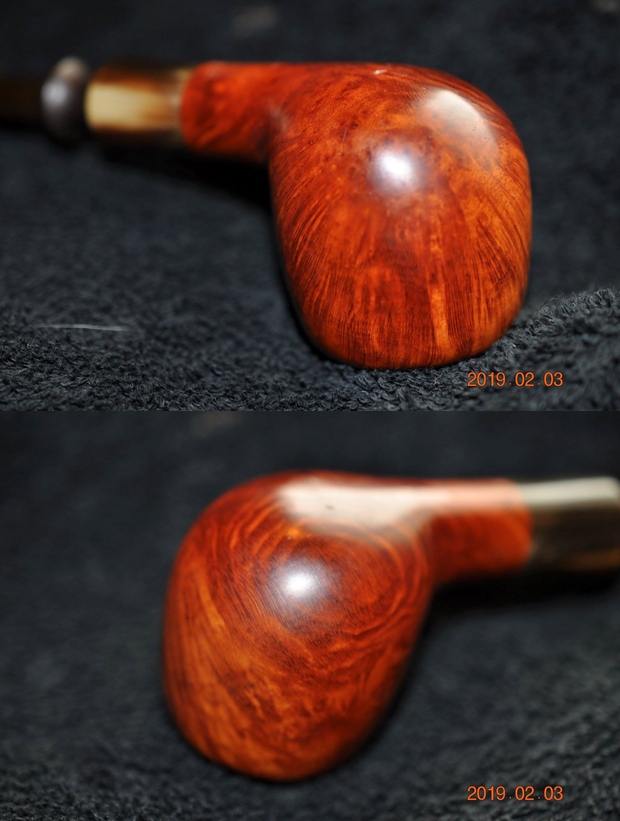
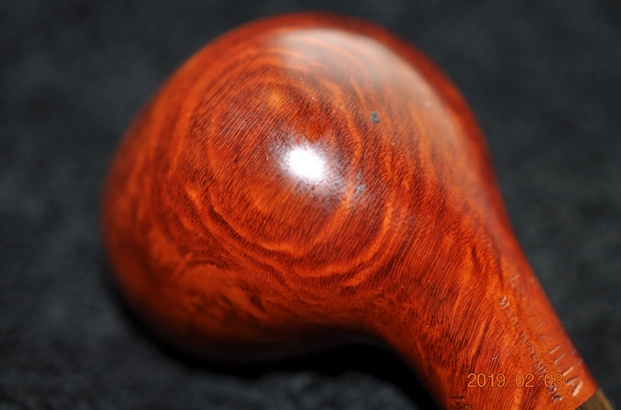
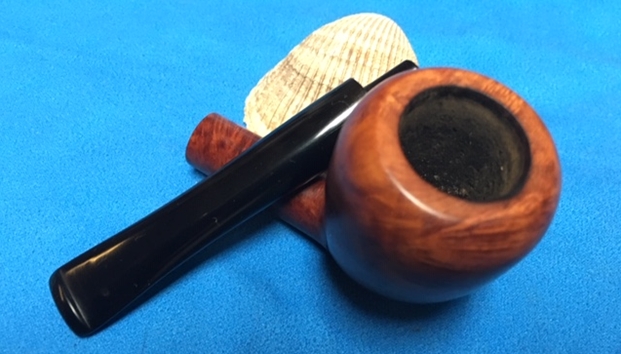
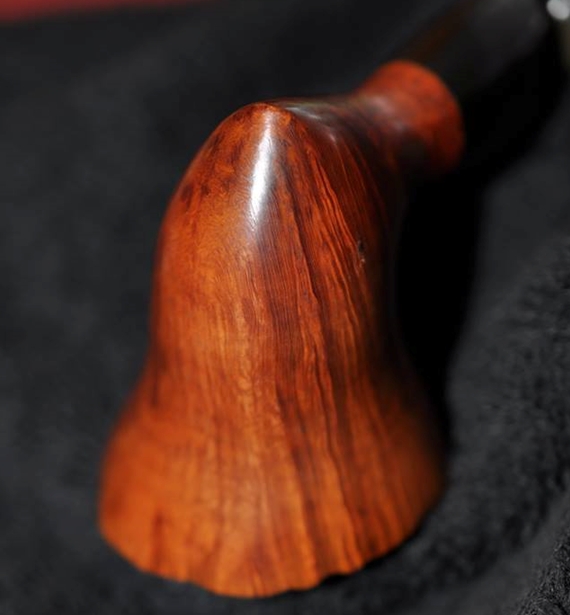
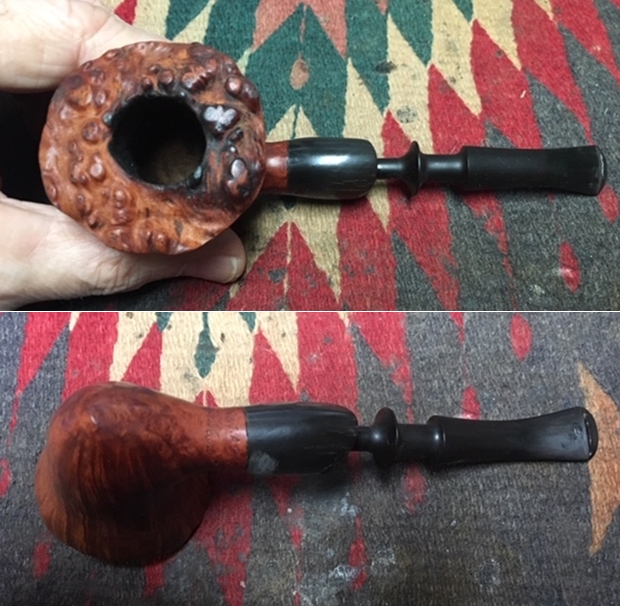
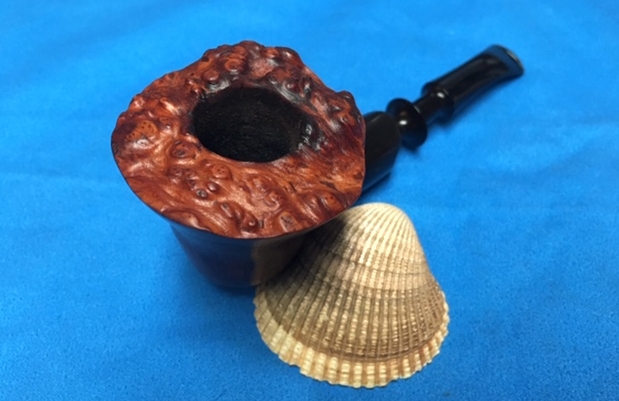
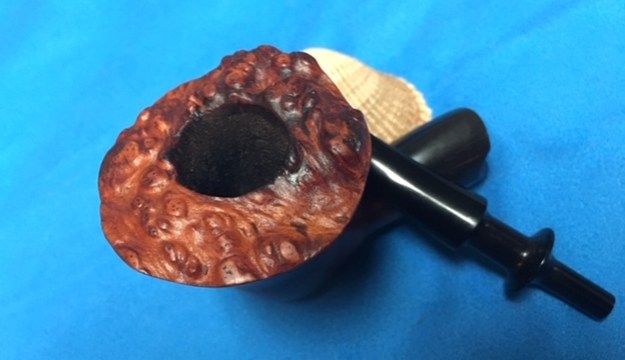
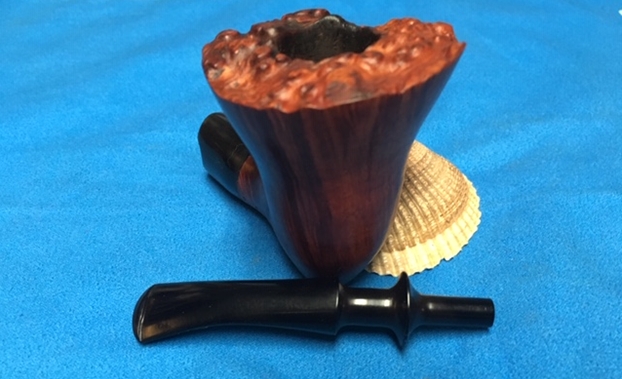
The stummel surface of this pipe boasts of beautiful straight grain all along the stummel surface as well as on the shank. The stummel surface is covered in heavy overflow of lava which in turn has attracted a lot of dust and grime and has a few dents and dings likely due to uncared for storage. The briar is dull and lifeless and has taken on a layer of aged patina, through which one can make out the beautiful grains all round. This beautiful piece of briar will definitely clean up nicely.

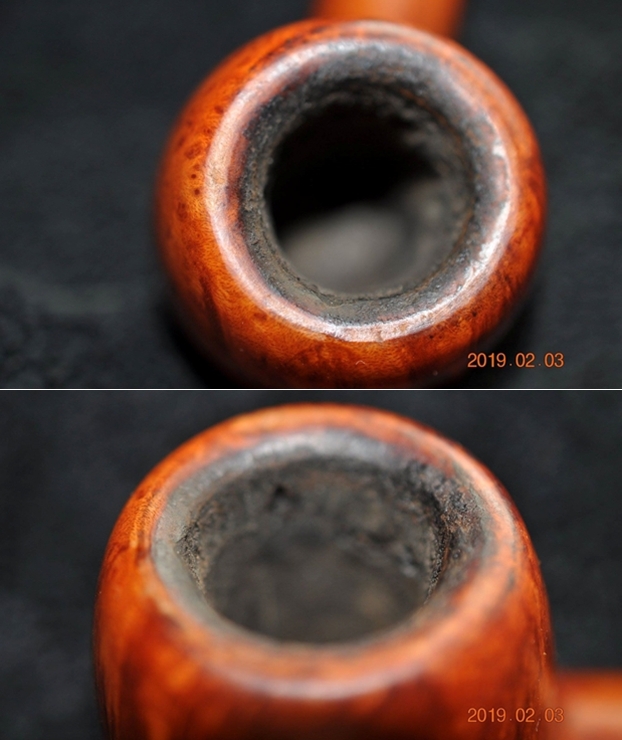
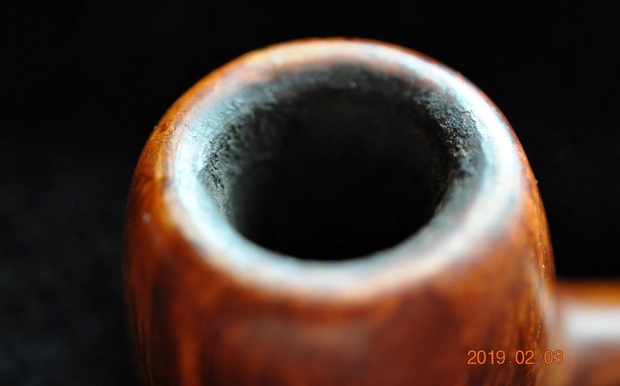
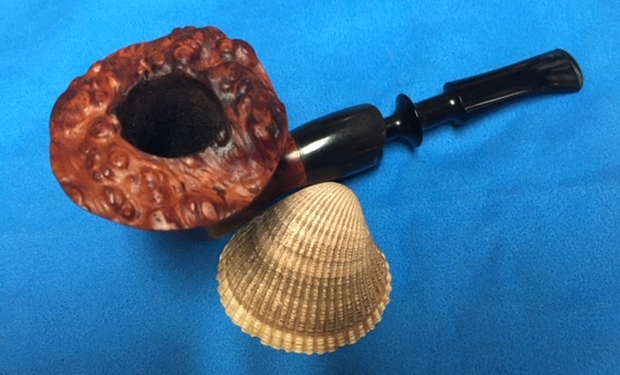
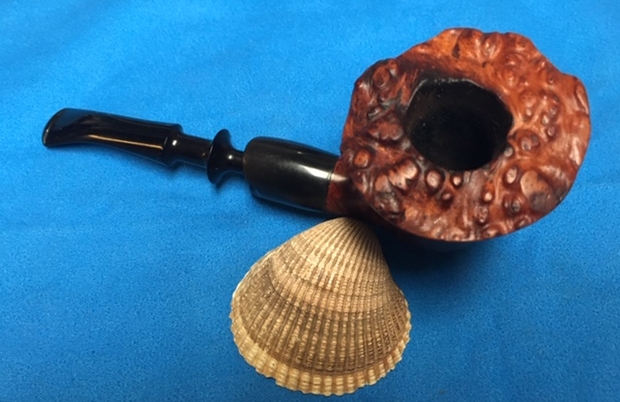
 This pipe must have been a favorite of the previous Steward (I really like this address of a pipe smoker as coined by Mr. Dal Stanton and his reasoning for calling them as ‘Steward’) and has seen considerable use as evidenced by the thick layer of cake in the chamber. The condition of the inner walls of the chamber can be ascertained only after the cake has been removed completely and taken down to bare briar. However, the bowl feels robust and solid to the touch from the outside. This issue should be a breeze to address. There is a very strong but pleasant smell in the chamber.
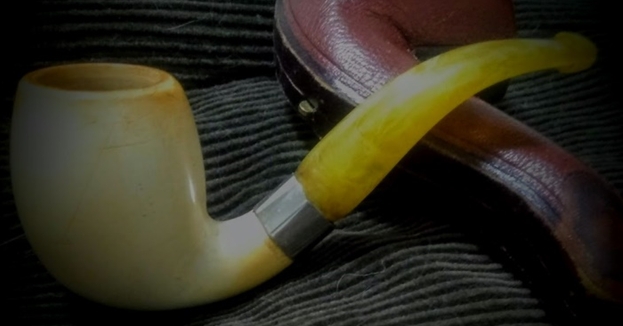
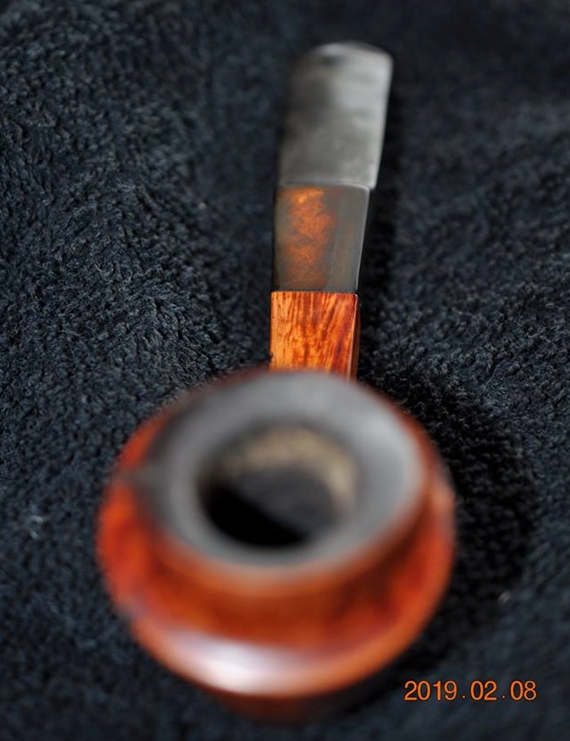
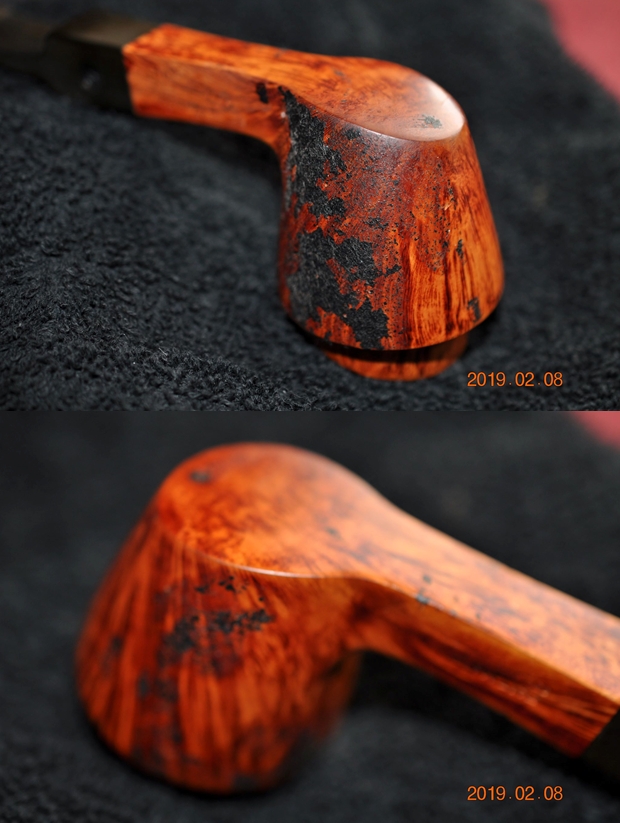
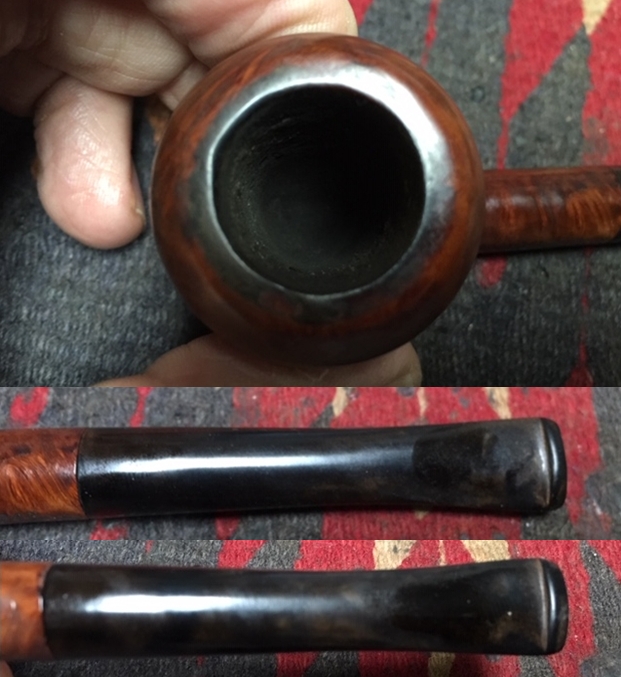
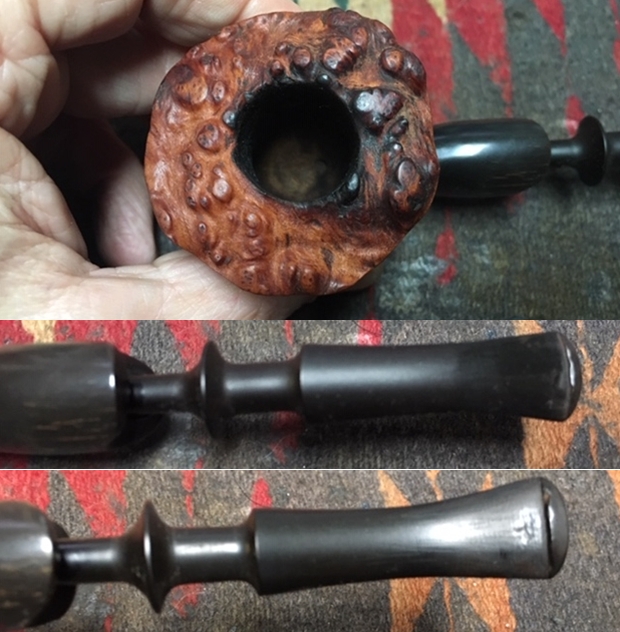
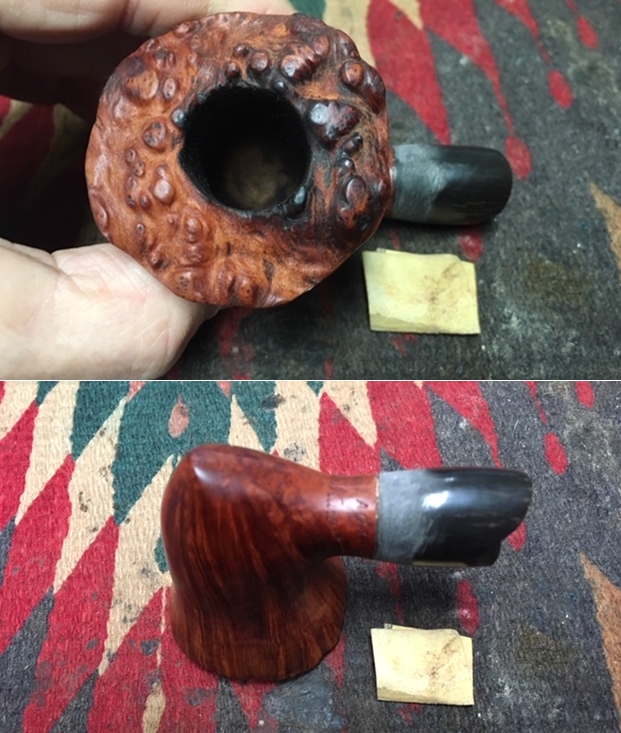
 The plateau rim top has darkened considerably, due to frequent lighting, on the back side of the rim. There is a very heavy overflow of lava on the plateau rim top and covers the surface completely. This can be seen in pictures above and below. The condition of the inner edge and rim top can be commented upon only once the rim has been cleaned. The vulcanite shank end extension is heavily oxidized and is also covered in oils and tars and grime from previous usage. The mortise does show heavy accumulation of dried oils, tars and remnants of ash, greatly restricting the air flow.
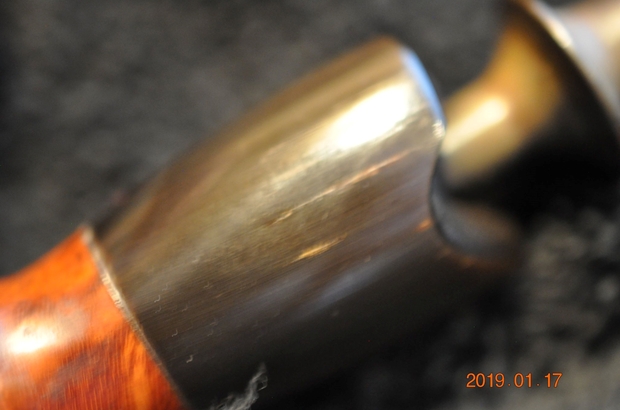

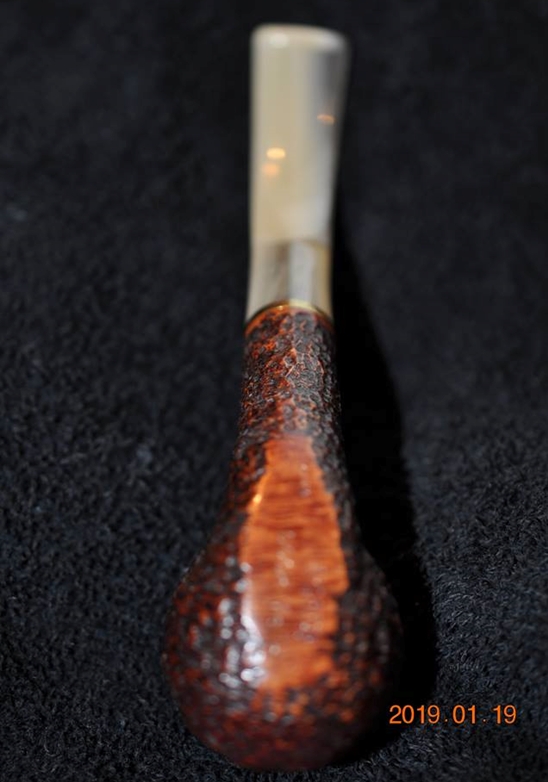
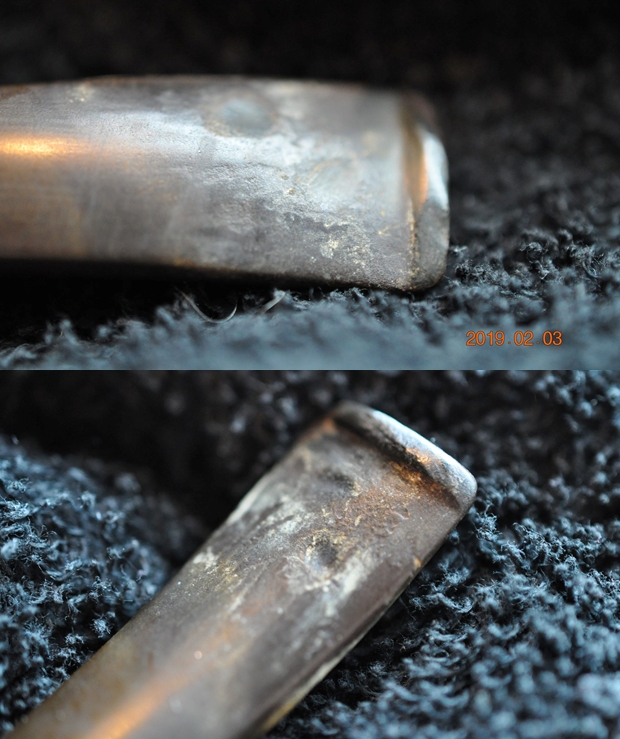
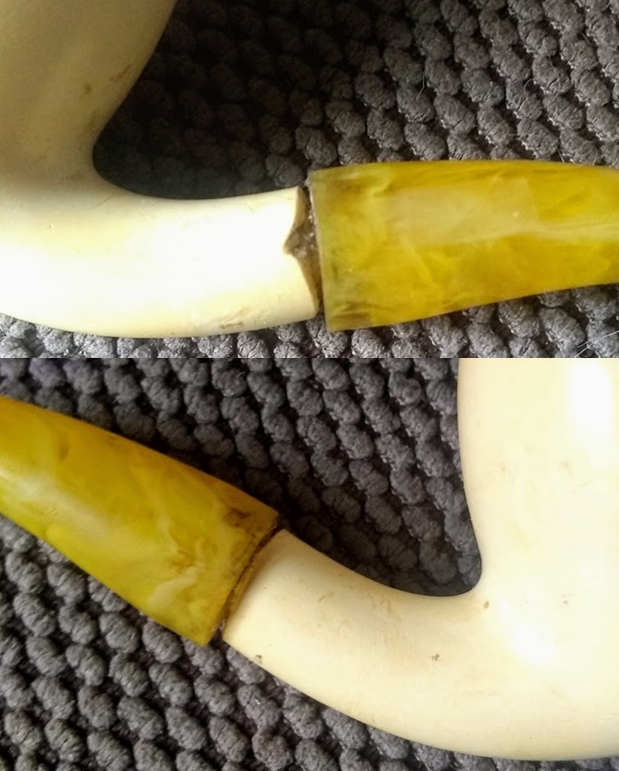
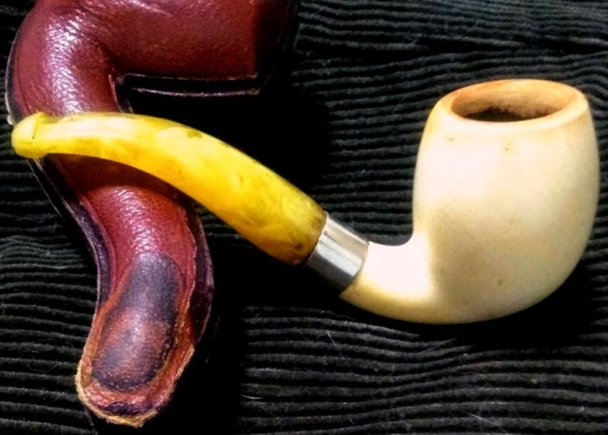
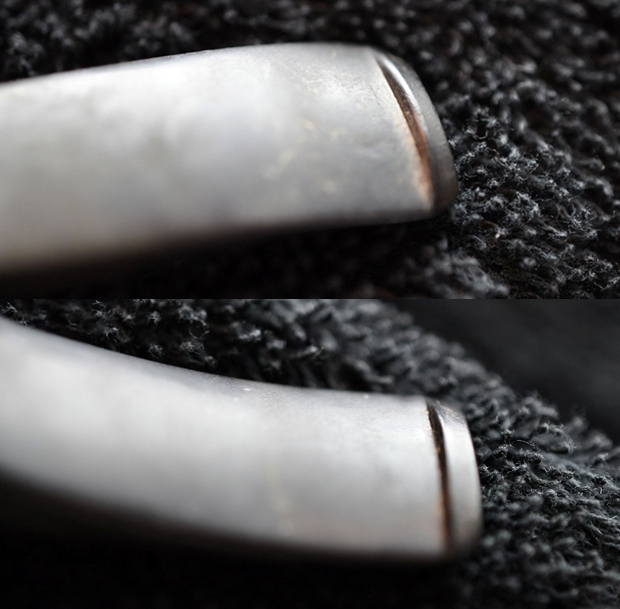
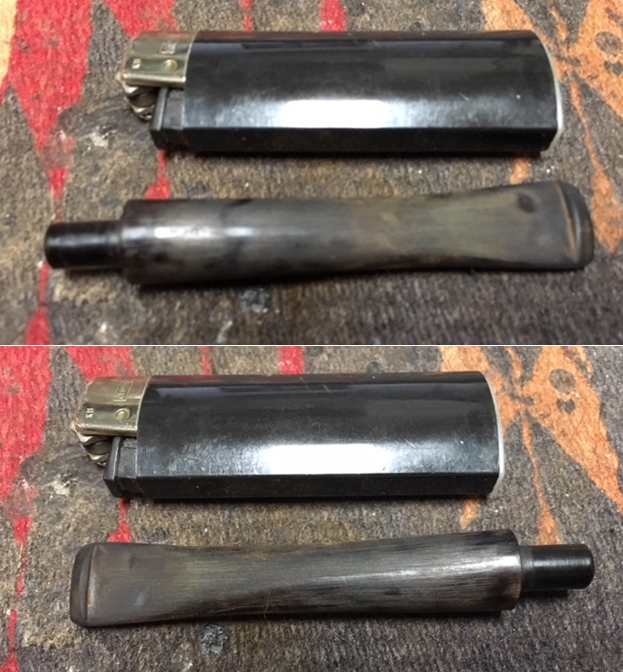
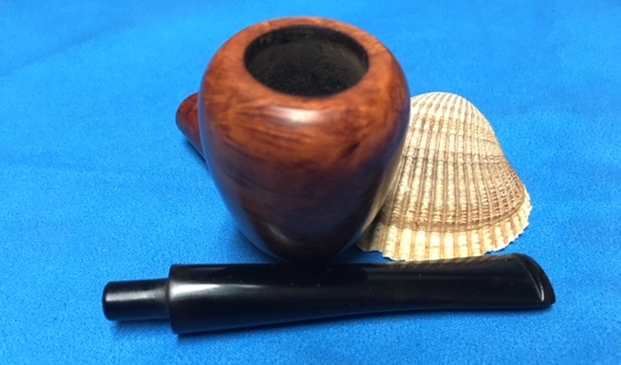
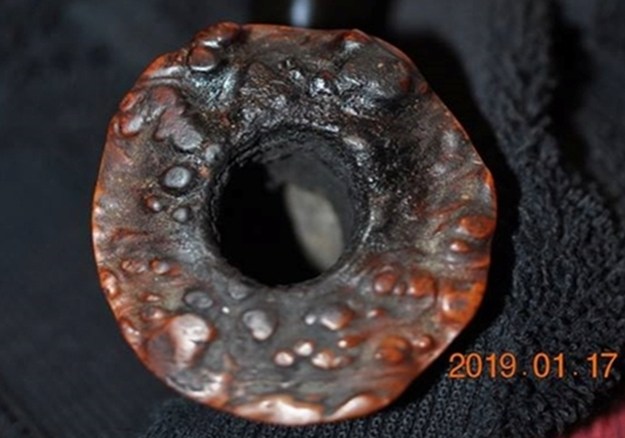
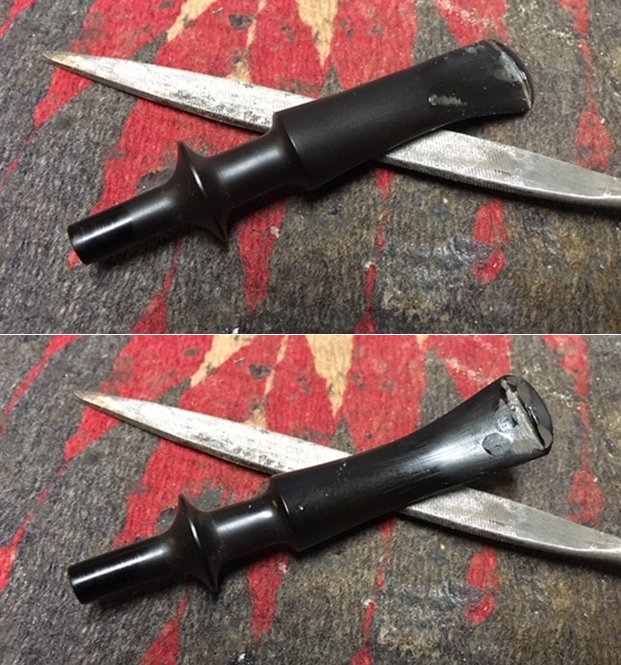
 The vulcanite stem on this pipe is where the maximum damage is seen. The previous Steward must have been very fond of clenching his pipes while smoking. This is apparent from the damage that is seen towards the end of the stem. The stem has significant damage in the form of deep bite marks and cinching on the upper stem surface near the edge of the lip, while the lower surface has a through hole, exposing the stem’s airway. The stem’s surface around the damaged portion has become very brittle and considerably thin. The tenon on stem is covered in dried oils and tars and so is the airway. The button end hole is completely blocked save for a small opening, greatly constricting the airflow. The air flow through the stem is laborious to say the least. The fit of this stem in to the mortise is very tight and the stem does not seat completely in to the mortise (marked in yellow circle). This issue may get addressed after the mortise and tenon have been cleaned. All in all, restoring the stem will be the biggest challenge in this project.
 THE PROCESS
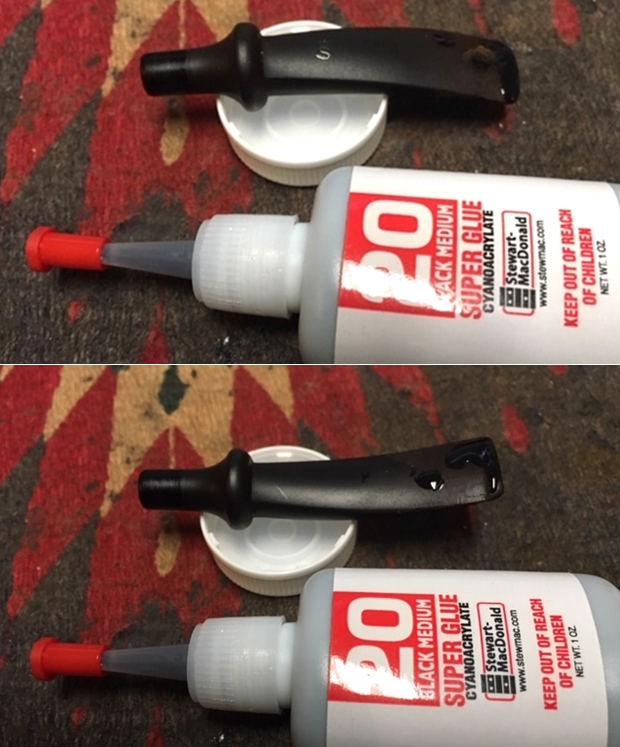
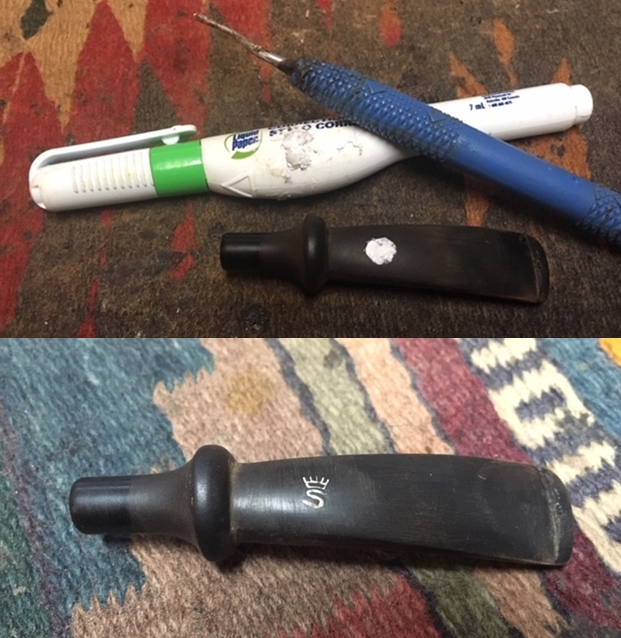
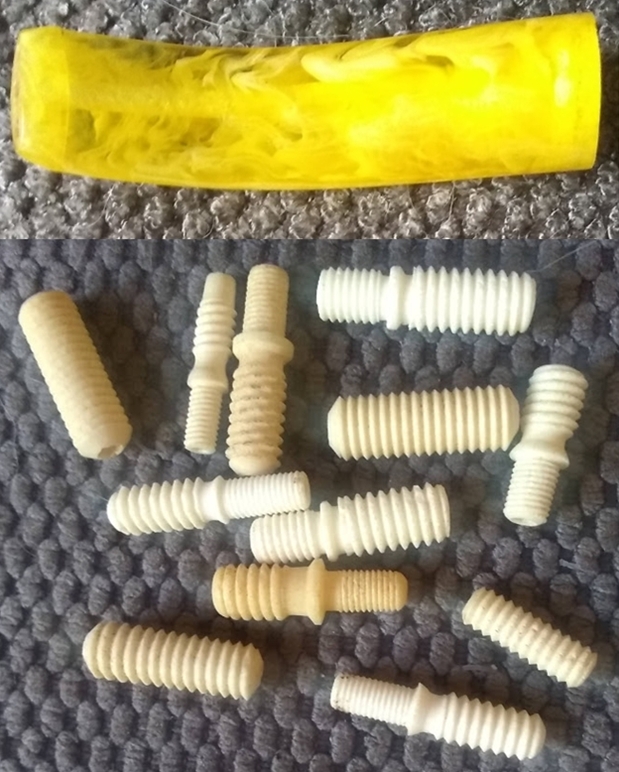
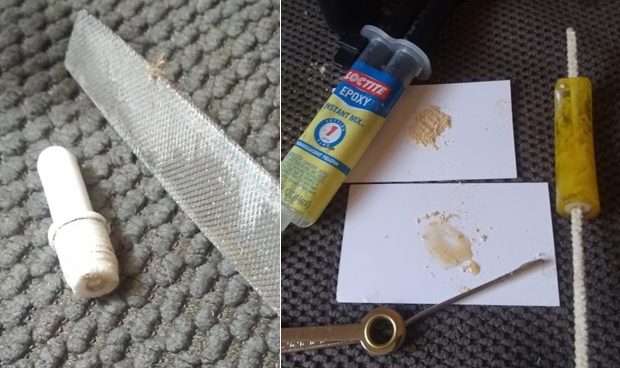
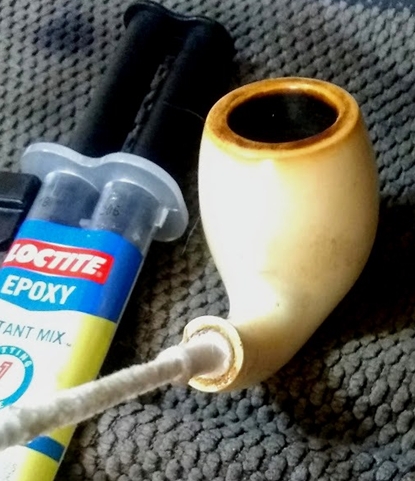
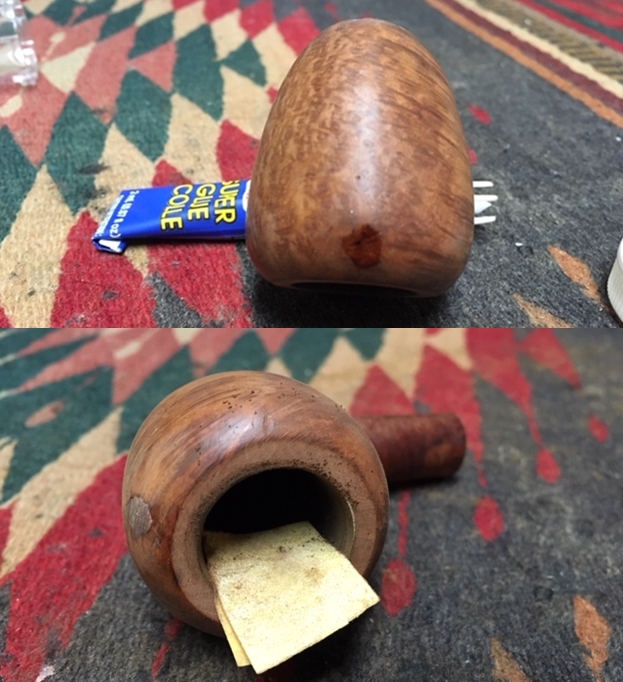
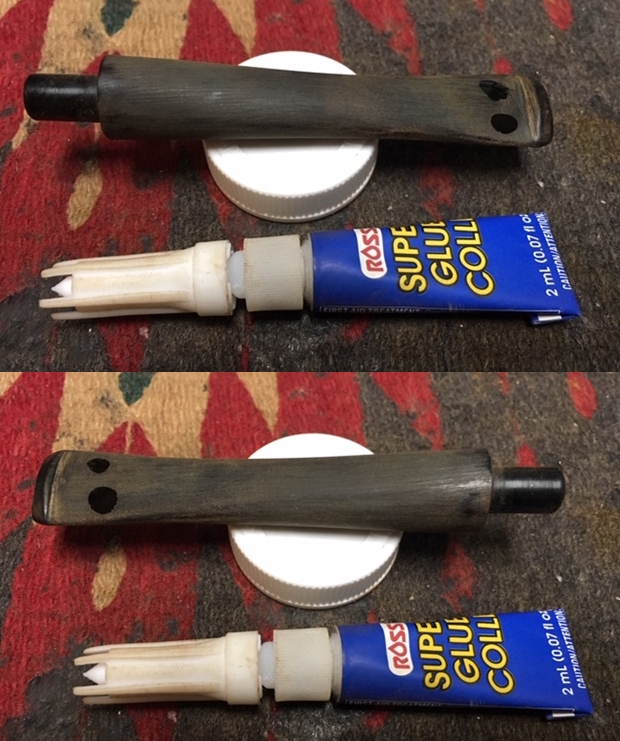
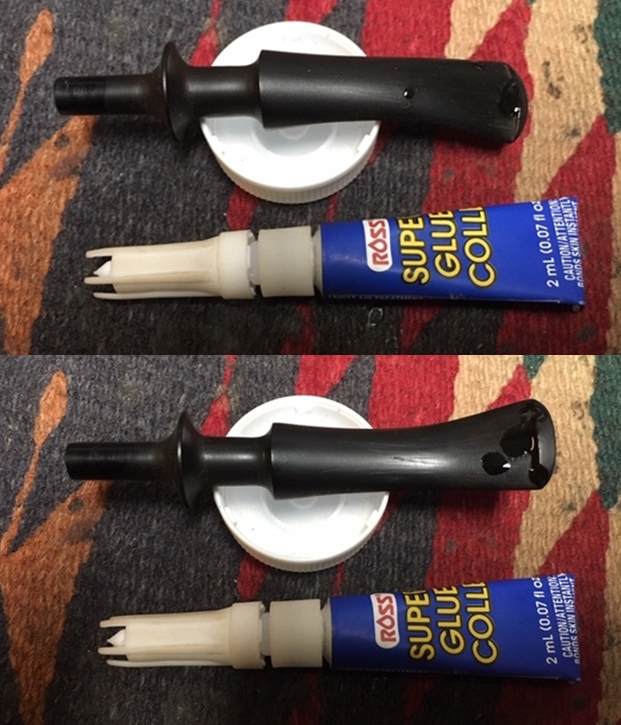
I embarked on the journey of restoring this pipe by addressing the stem first since it was damaged the most and would take considerable time to repair. First thing to do was to clean up the external surface and the internals of the stem. Since the button hole was clogged up, I used all the tools available to me in clearing up the button hole. It was not surprising at all to see chunks of dried gunk which had accumulated in the airway coming out of the airway. Once satisfied with the internal cleaning, I wiped the external surface of the stem with a cotton pad dipped in isopropyl alcohol to get rid of all the dirt and grime accumulated over the surface. The number of pipe cleaners used does not tell the real story of how difficult it really was to get the internals of the stem cleaned up. I followed up this cleaning regime by gently removing the thin and cracked chips of vulcanite from around the damaged stem surface till I reached the solid vulcanite. I did so because I planned on anchoring the stem fill on solid surface. To begin the stem repairs, I smeared a pipe cleaner with petroleum jelly and inserted it in to the stem airway. I prepared a mix of CA superglue and activated charcoal and applied it over the gaping hole and cinched surface of the stem and set it aside for curing over night. For the discerning reader who would have noted that I did not resort to the trick of using the Bic lighter, the answer is that I was apprehensive that the heat from the flame of the Bic lighter would put additional stress on the expanding vulcanite resulting in greater damage to the stem. What followed this stage were endless hours and days spent in sanding, layering with a coat of charcoal and superglue mix and again following the same sequence till I achieved a solid fill. I am afraid that I have not taken enough pictures to show the progress as I had three beautiful pipes, all with their button end chewed off for about an inch and inch and a half, being worked on simultaneously. These projects were also proving to be very difficult and tedious.
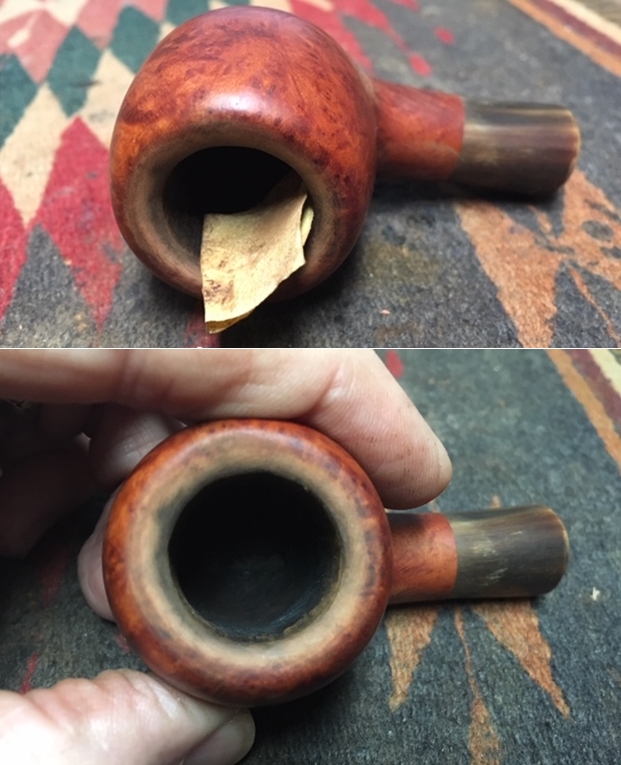
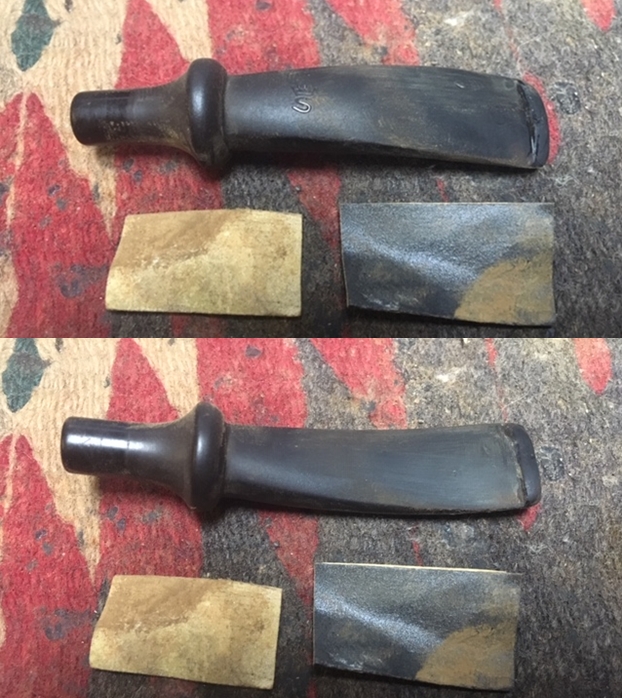
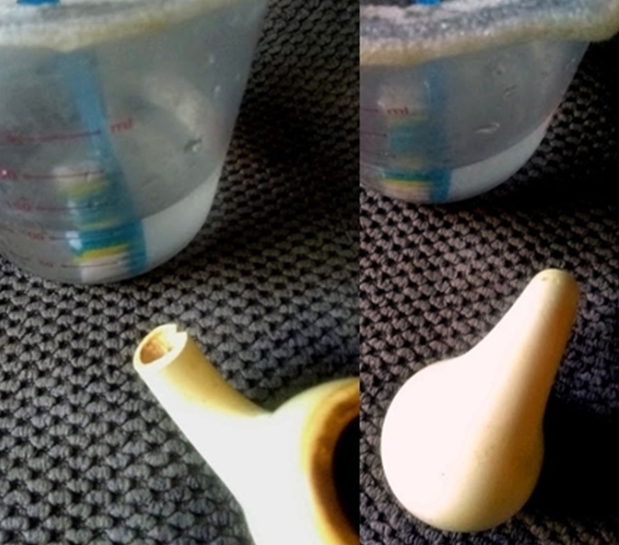
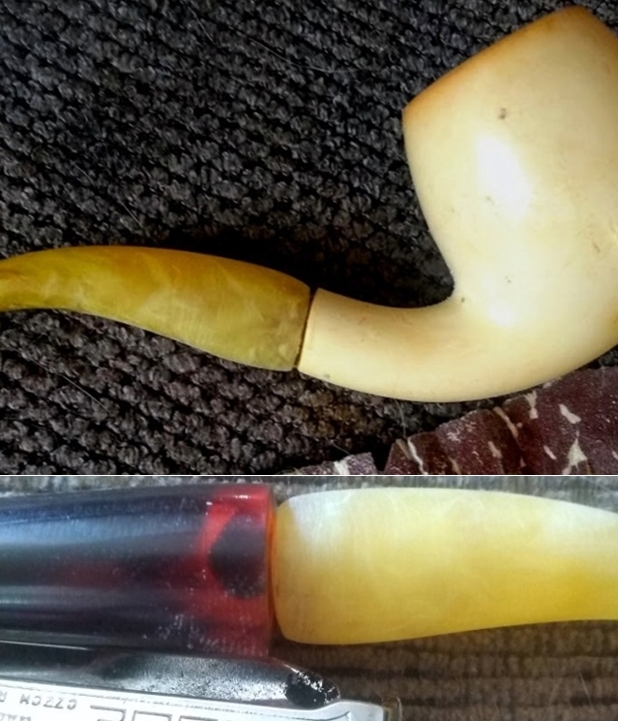
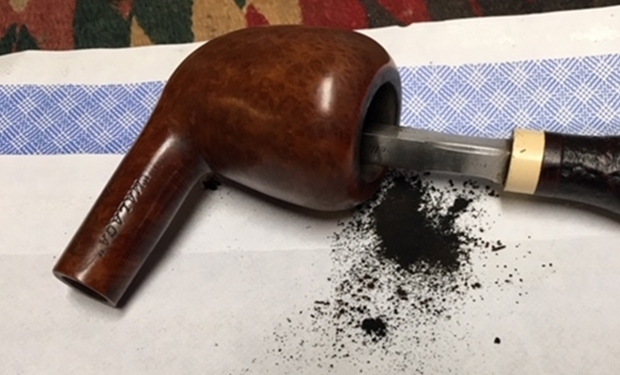
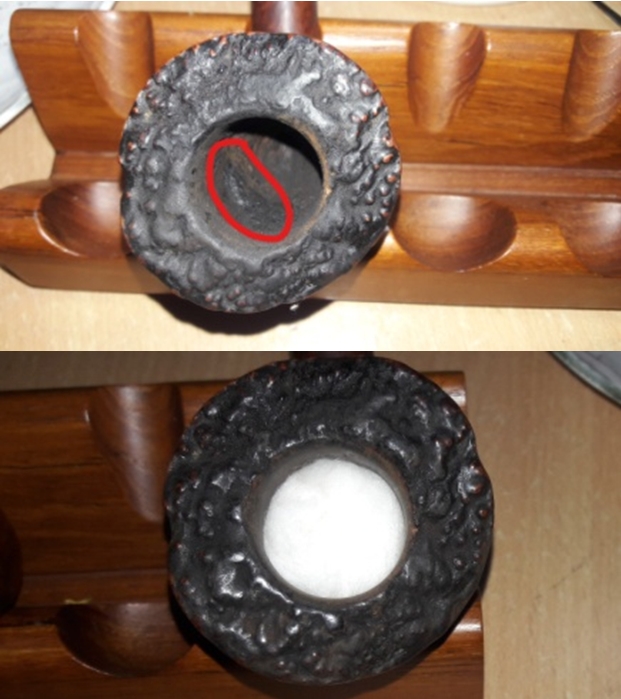
 While the stem fillings were curing, I worked on the stummel. I started by reaming the chamber with size 4 head of PipNet reamer. The size of the chamber was so huge that I had to use the Kleen Reem reamer also. This is where I hit the second hurdle in the restoration of this pipe. There was a bump (circled in red) on the chamber walls that had hardened to an extent that the blades of the PipNet or Kleen Reem reamer could not cut through it. I began wondering with wrenching guts, if the bump is not a JB Weld repair. To further probe this bump, using my fabricated knife, I gouged at the corners and realized that it was not a JB Weld repair but just a very, very hard accumulation of cake. I decided to soak the chamber in alcohol to loosen the cake. I packed a few cotton balls half way in to the chamber and soaked it in isopropyl alcohol for a few hours. A few hours later and the hardened cake came off easily. I used a 220 grit sand paper, pinched between my thumb and forefinger, to sand the inner walls of the chamber. Once I had reached the bare briar, I wiped the chamber with a cotton pad dipped in isopropyl alcohol. This removed all the residual carbon dust. However, in spite of the alcohol soak and removing all the cake, the ghosting was still all too pervading!! Hopefully after the completely choked mortise has been cleaned, the smells will also fade away to oblivion.
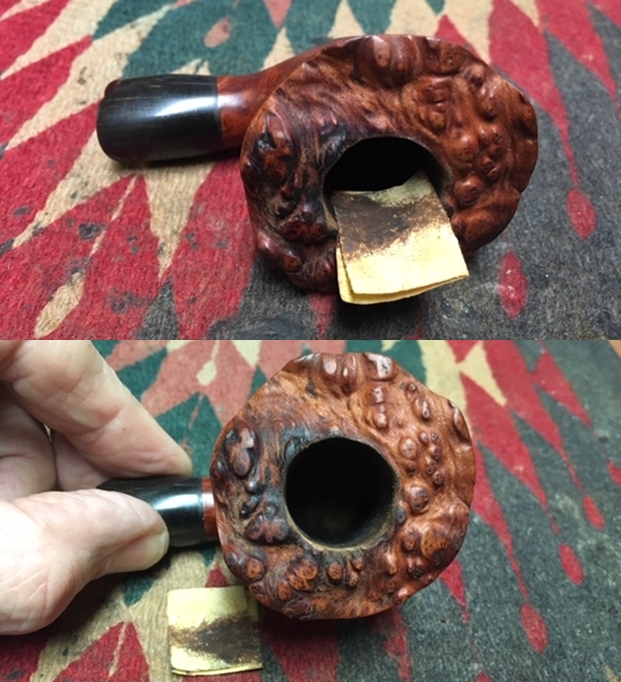
 I followed up the reaming by cleaning the mortise and air way of the pipe, using hard bristled and regular pipe cleaners, q-tips and shank brush dipped in alcohol. The mortise and the draught hole was so chock-a- block with all the dried tars, oils and gunk that I had to use my fabricated spatula and the drill bit from the Kleen Reem pipe reamer!!!! Chunks of the gunk that were removed from the mortise are a testimony to how badly this pipe was abused by the previous Steward. I gave a final clean with shank brushes dipped in alcohol and dried the mortise with a rolled paper napkin. The shank internals and the draught hole appear to be clean. But the strong ghosting still persists. I shall address this issue later by giving the chamber an alcohol bath.
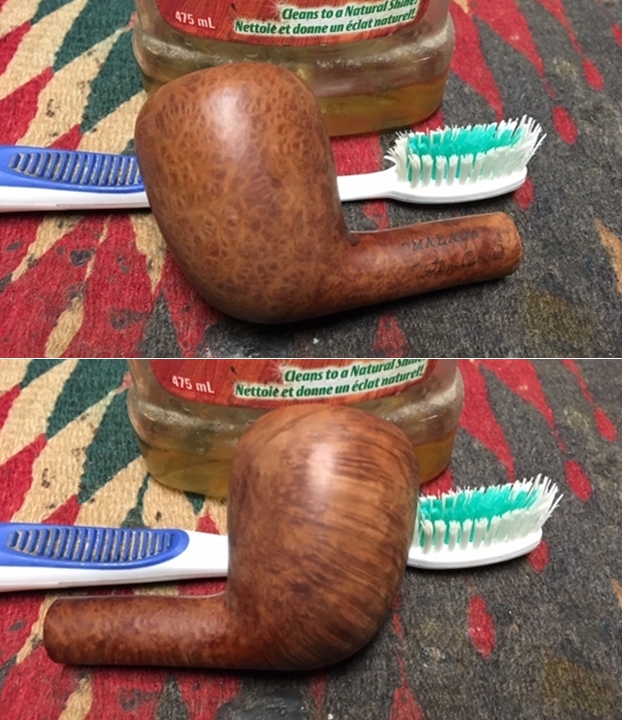
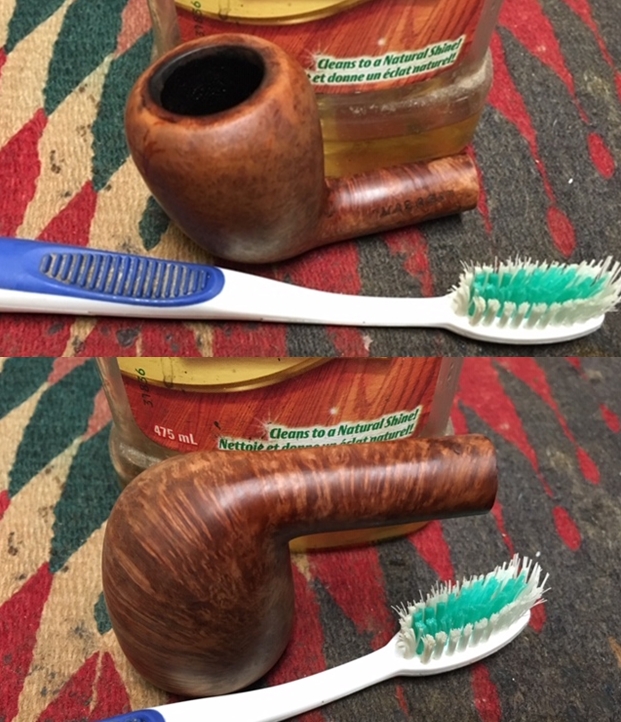
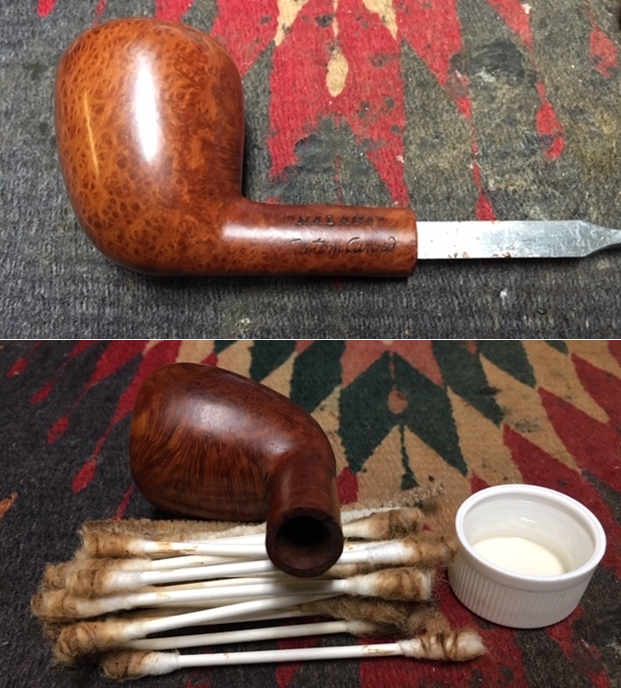
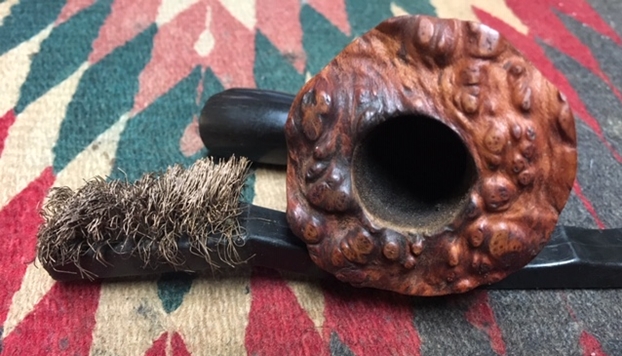
 Before progressing any further, I had to get the stummel all cleaned up. Using a hard bristled tooth brush dipped in undiluted Murphy’s oil soap, I very deliberately scrubbed the stummel, cleaning the surface thoroughly. Special attention was paid to scrub out all the dirt, dust and lava from the crevices in the plateau rim top with a brass wired brush. The stummel and plateau rim top were dried using paper napkins and soft cotton cloth.

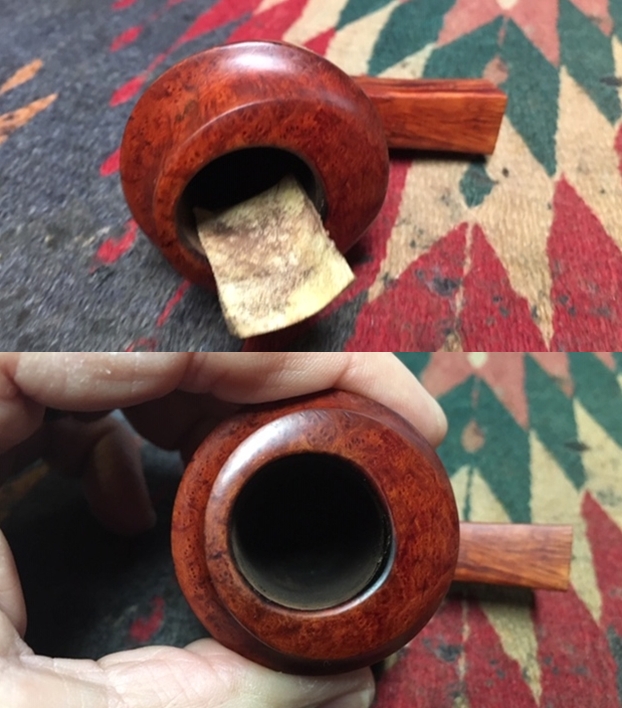
 To eliminate the ghost smells from the pipe, I had decided to treat it with salt and alcohol. I do not use Kosher salt as it is not readily available here and if available, it’s very expensive. I use cotton balls which is an at par substitute as I have realized over the last year or so. I draw out a wick from the cotton and along with a folded regular pipe cleaner; insert it in to the mortise and through the draught hole in the chamber. Thereafter, I pack the chamber with cotton balls to about quarter of an inch below the rim inner edge. I soak the cotton balls with isopropyl alcohol up to the brim. About half an hour later, the level of alcohol has gone down, having being absorbed by the cotton. I top it up once again and set it aside overnight. By next afternoon, the cotton and alcohol has drawn out all the remaining oils and tars from the chamber and mortise and the cotton and alcohol had fulfilled its intended task. I removed the cotton balls and ran pipe cleaners through the mortise to clean out all the loosened tars and gunk. My, was I surprised to see that the pipe cleaners come out all sticky, black and dirty. I persisted with the cleaning till the pipe cleaners came out clean!!!! The next set of pictures tells the story by themselves. Finally, after hours of toiling and large number of pipe cleaners, I can say that the mortise is now well and truly cleaned. Also the ghosting is now consigned to history.
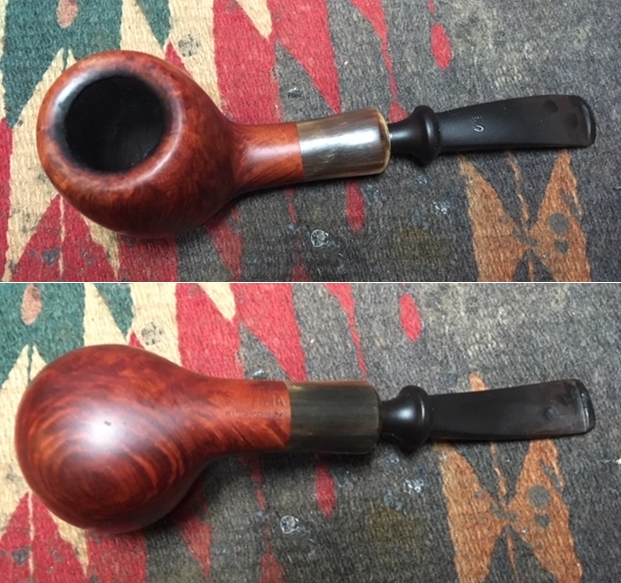
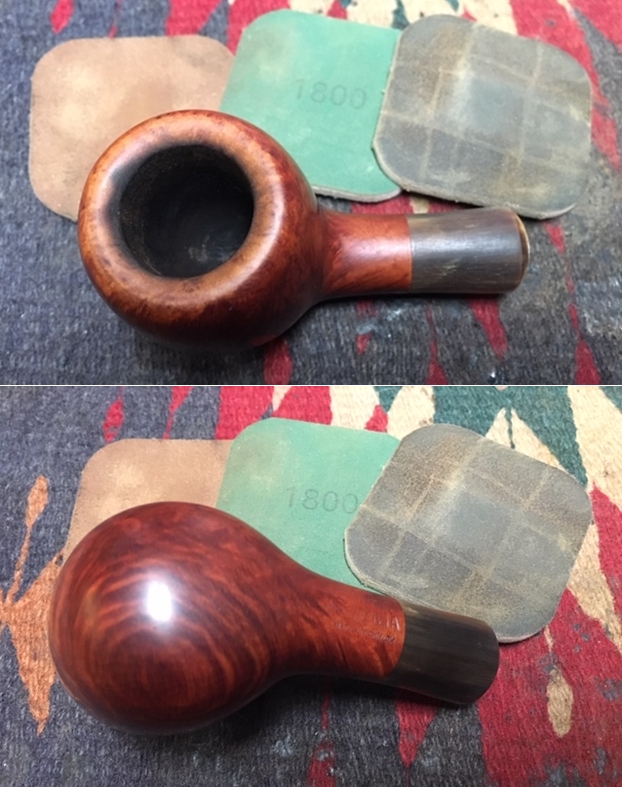
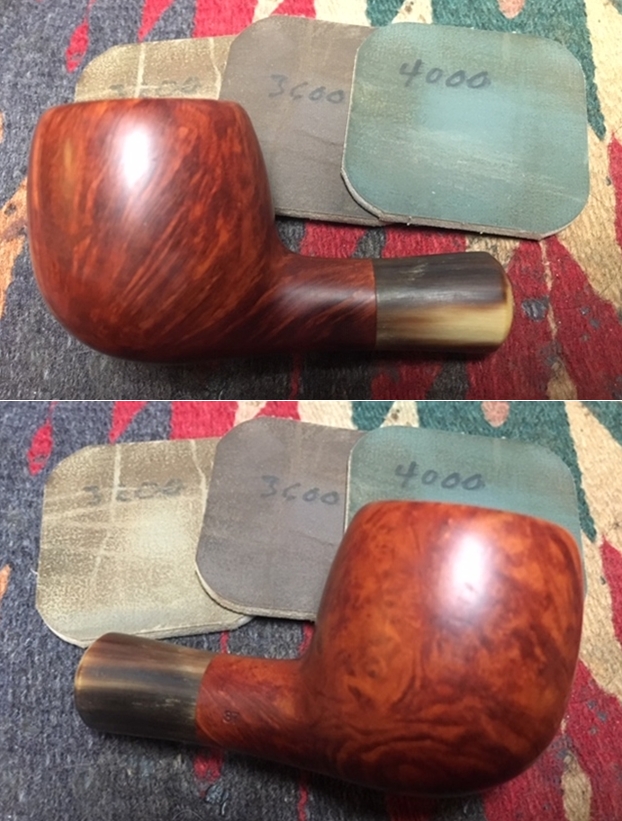
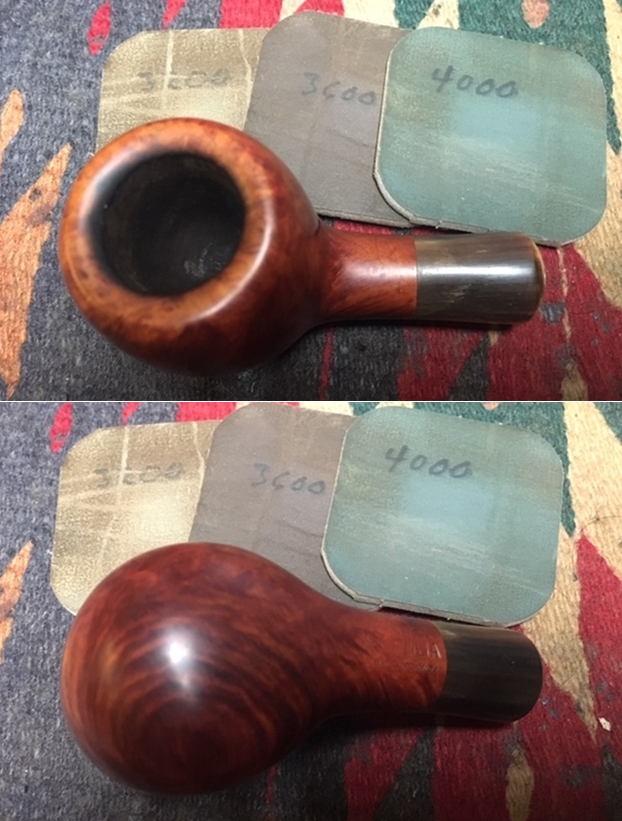
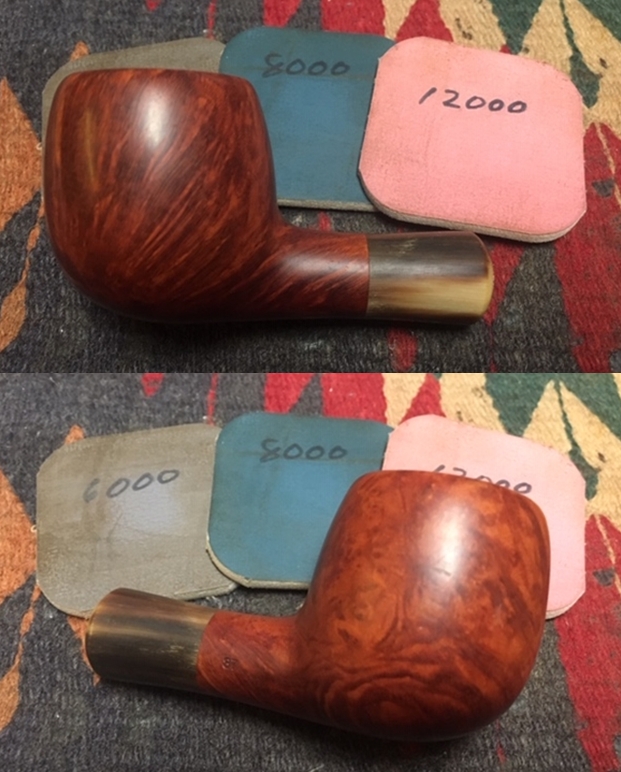
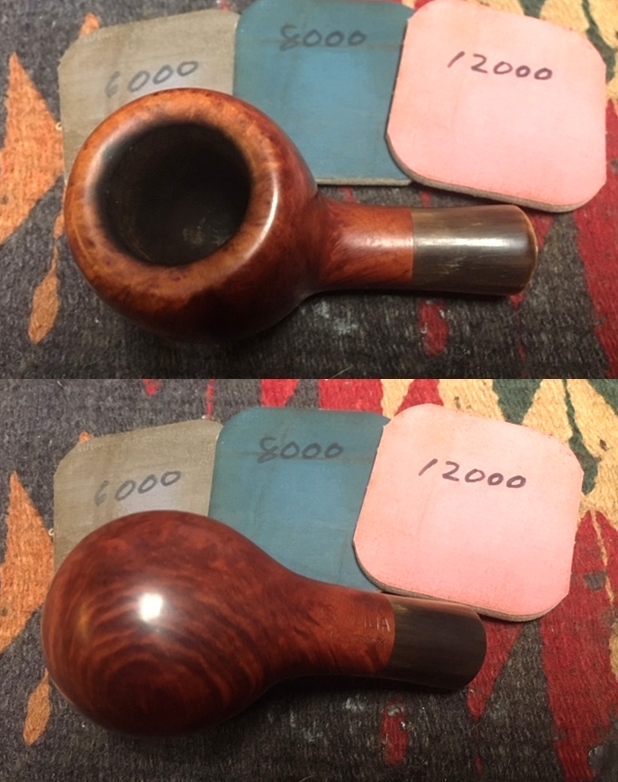
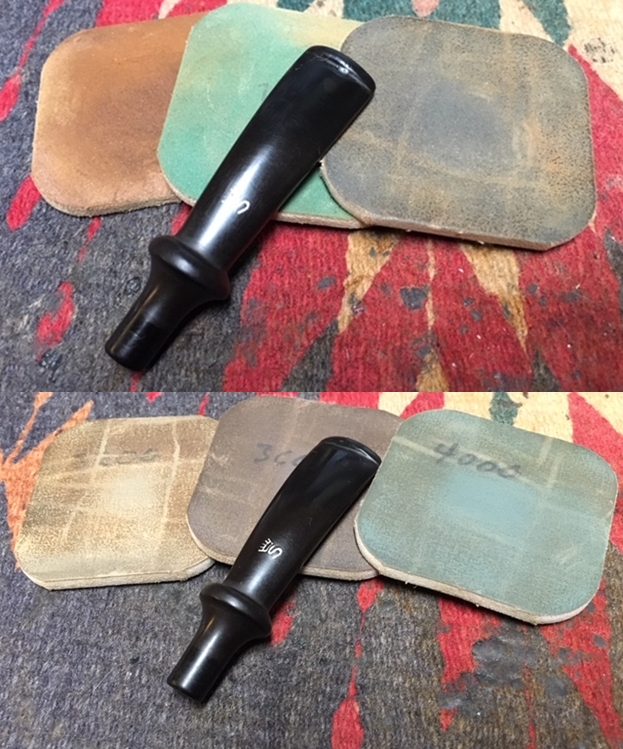
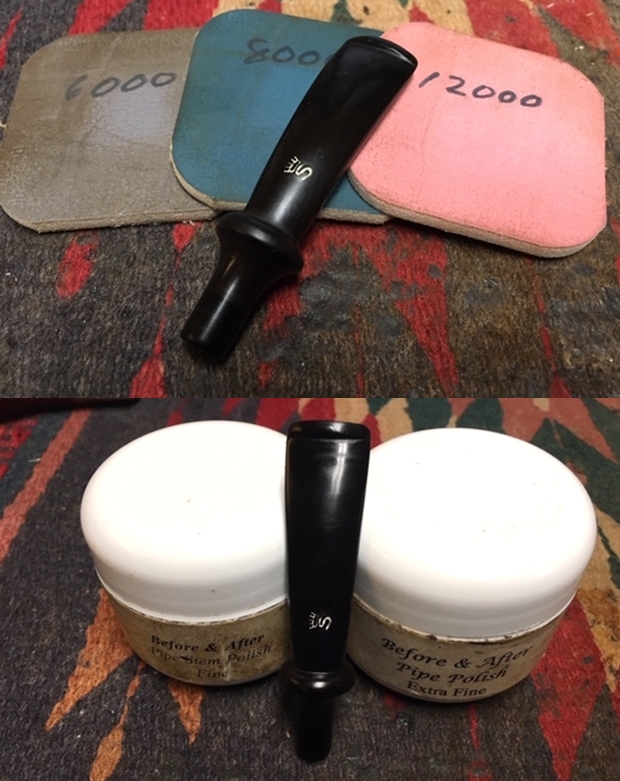
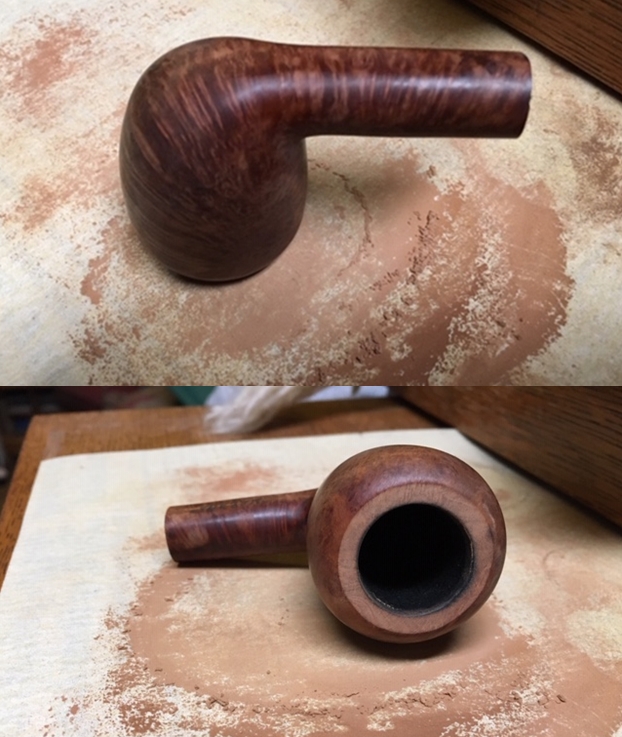
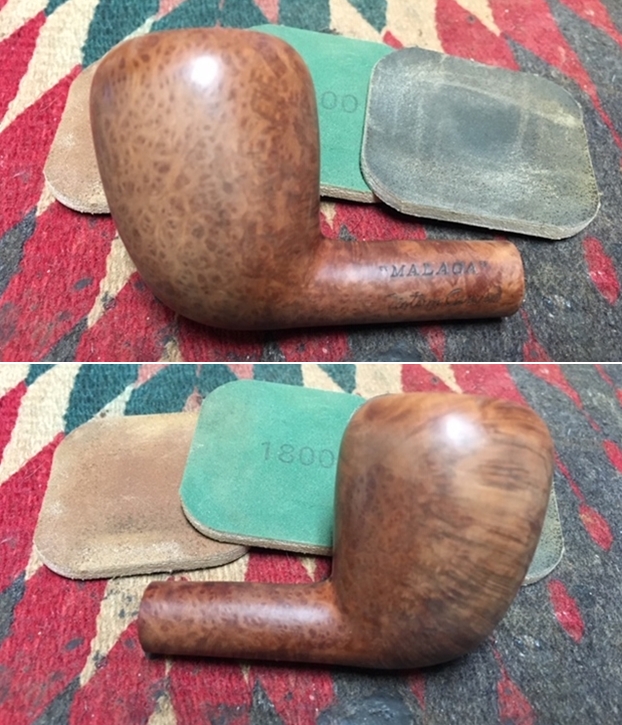
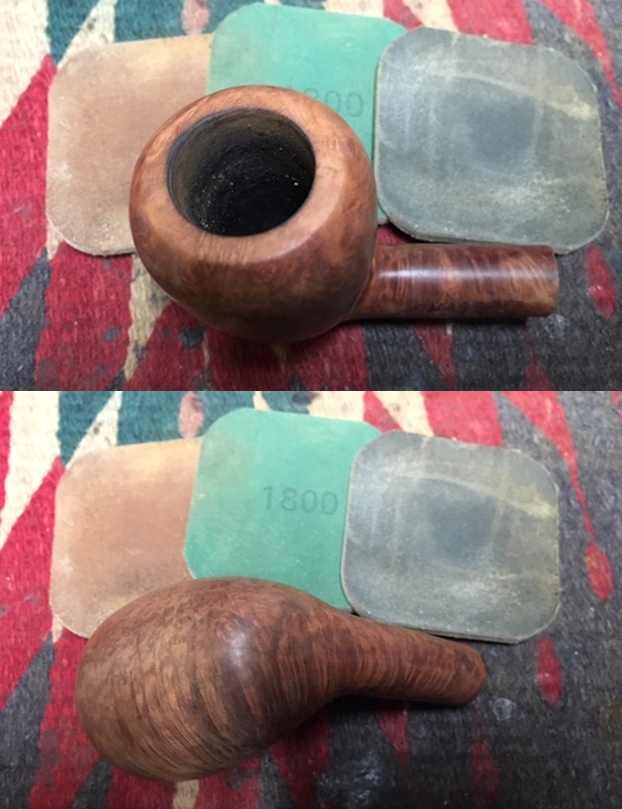
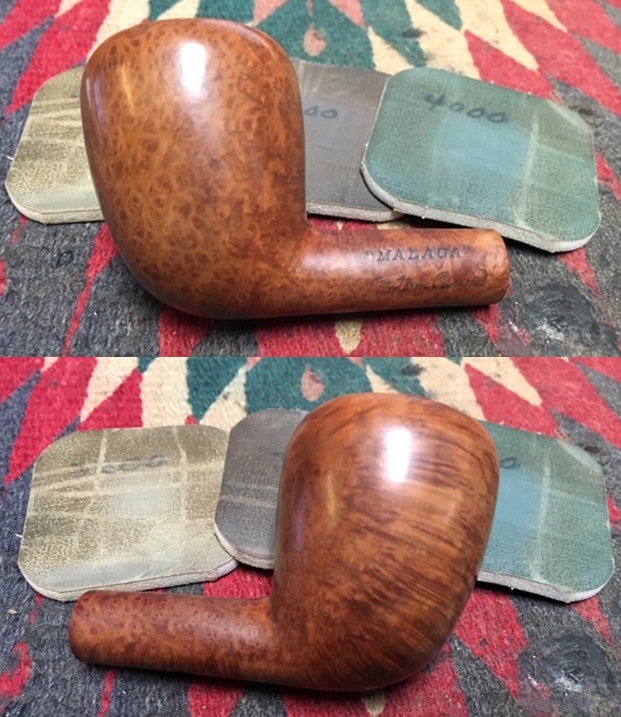
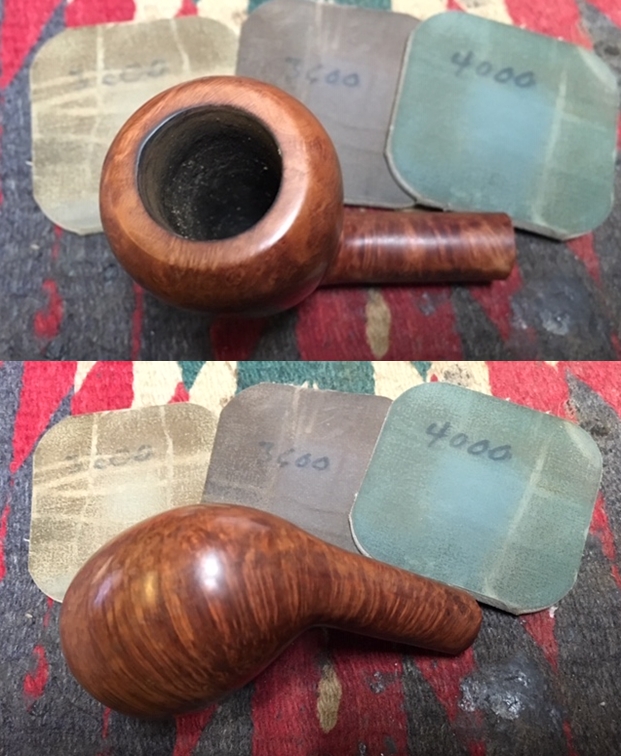
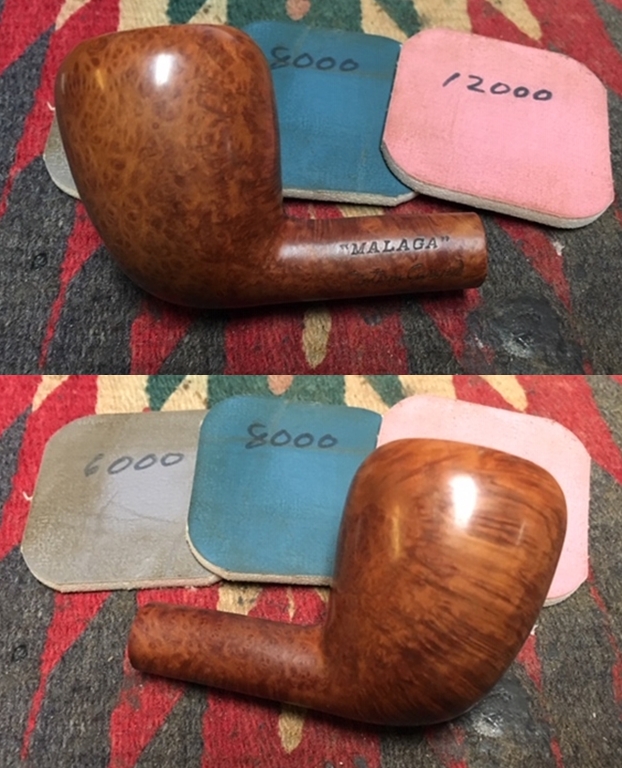
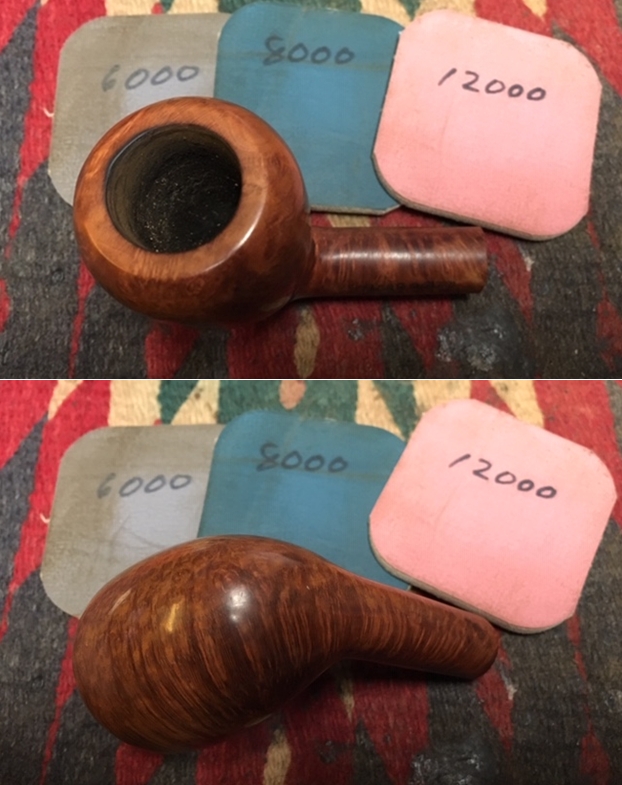
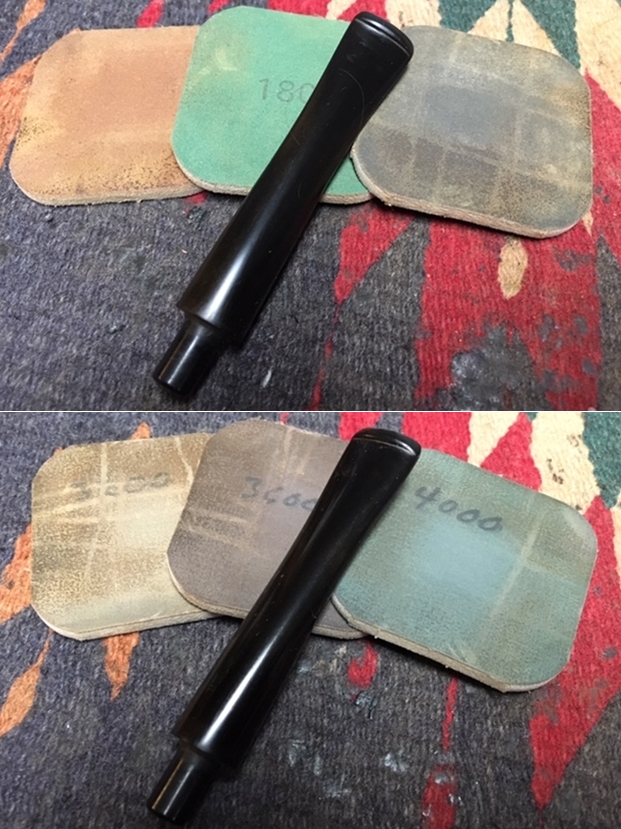
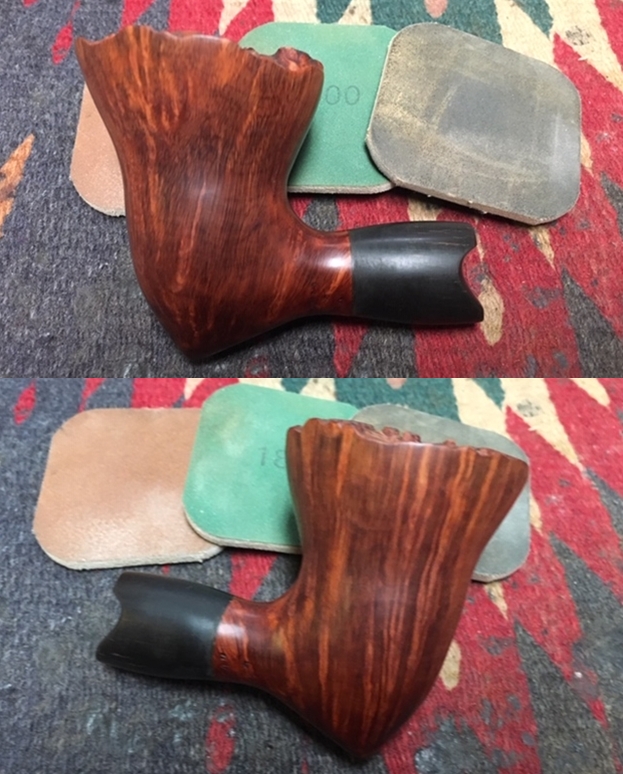
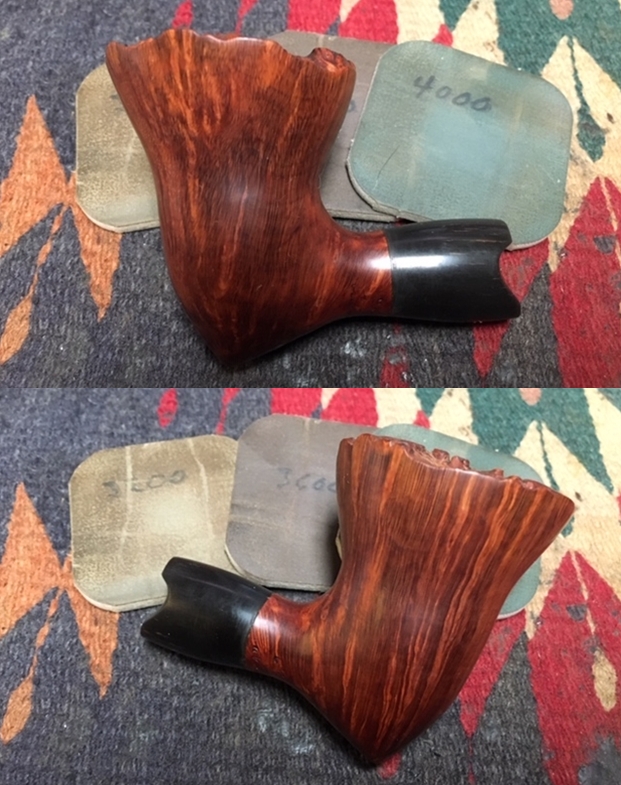
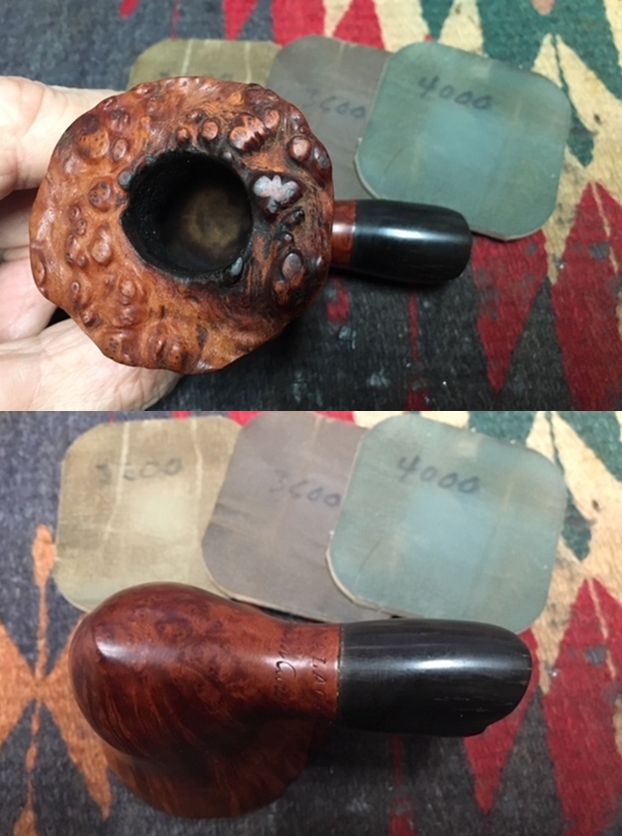
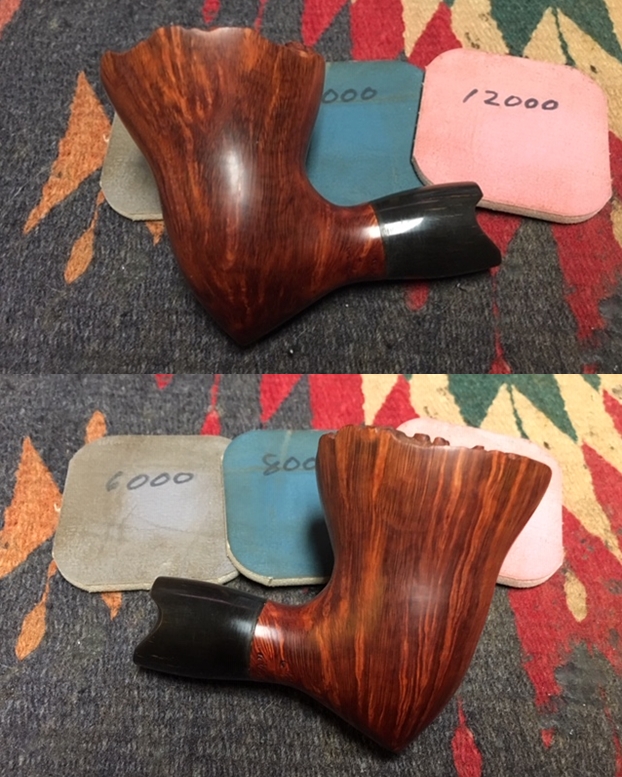
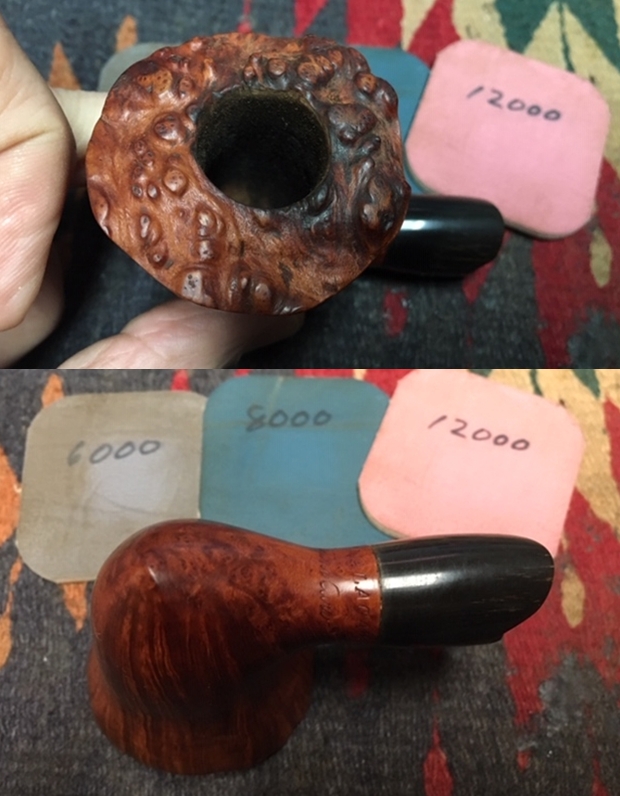
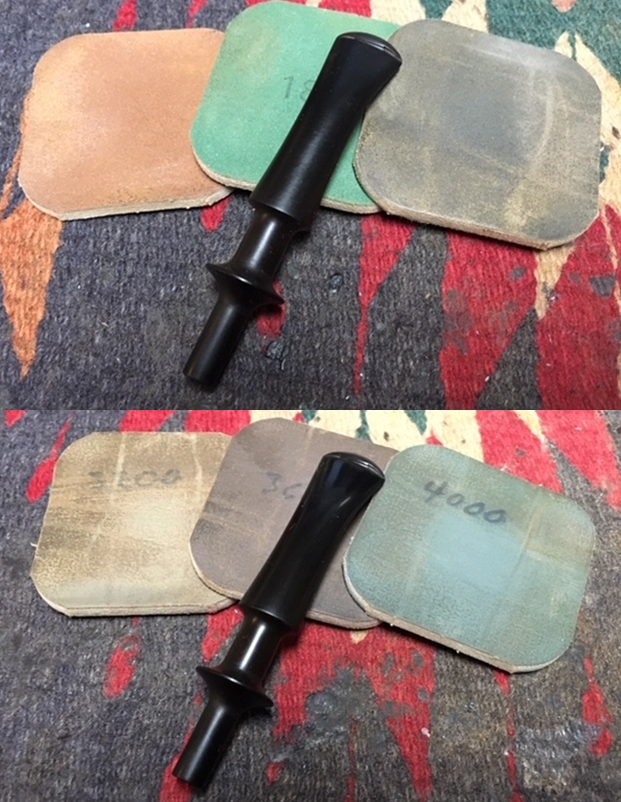
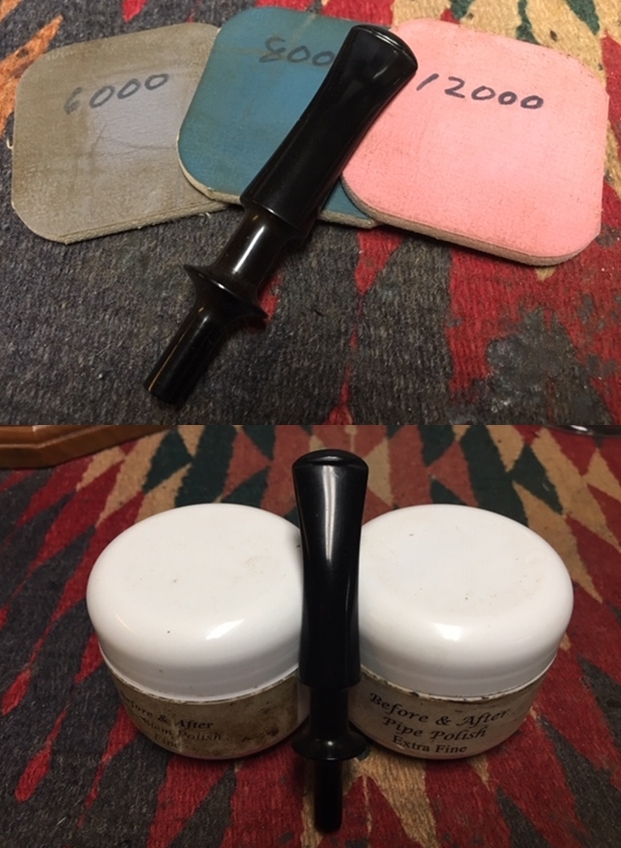
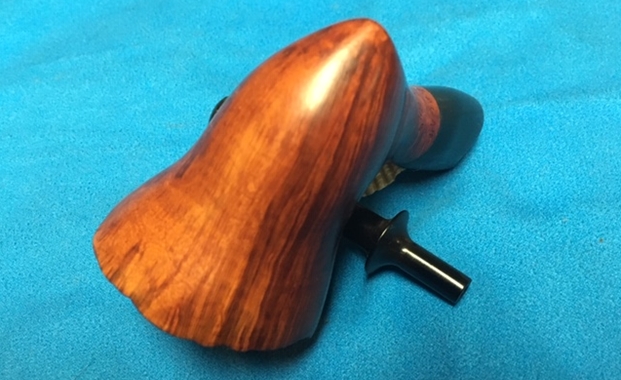
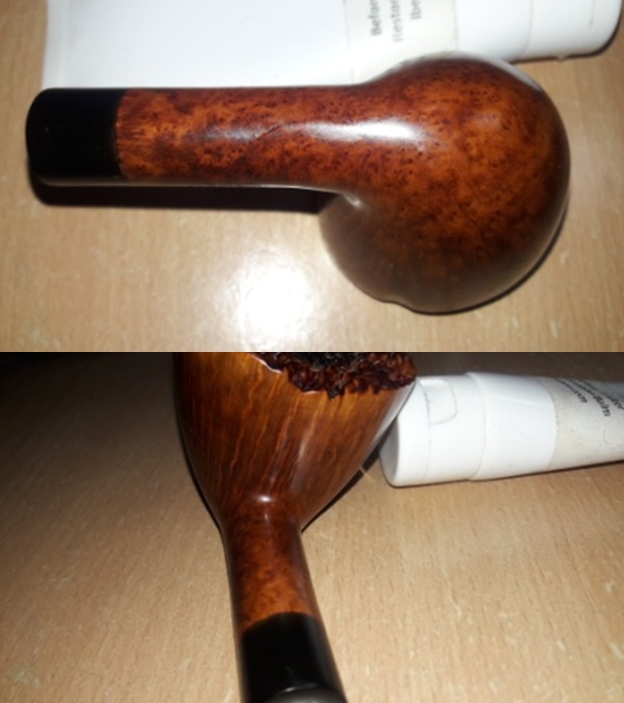
 Now that the internals of the stummel are clean, I work the external surface. I sand the vulcanite shank extension with 220 and follow it up with 320 and 600 grit sand papers and got rid of all the oxidation. I wanted to further highlight the grain seen on the stummel. To achieve this aim, I sand down the stummel using micromesh pads, wet sanding with 1500 to 2400 grit pads and dry sanding with 3200 to 12000 grit pads. The stummel now has a deep shine with grains popping out with magnificent contrast. Though this part of restoration is the second most time consuming and laborious, the end results are also the most satisfying. The play of grains, the contrast and the smooth surface are well worth the efforts. I rub a small quantity of Extra Virgin Olive oil in to the shank extension and set the stummel aside for the oil to be absorbed by the vulcanite shank extension.


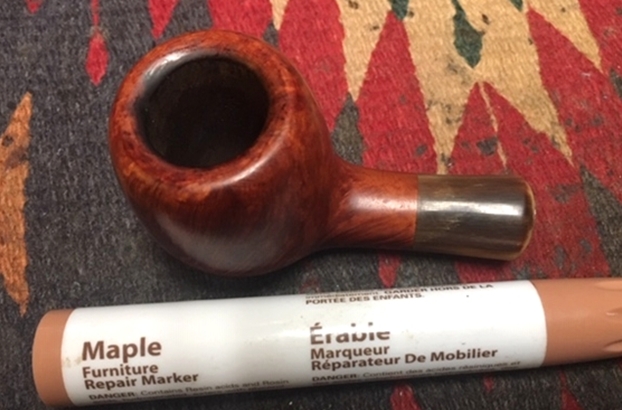
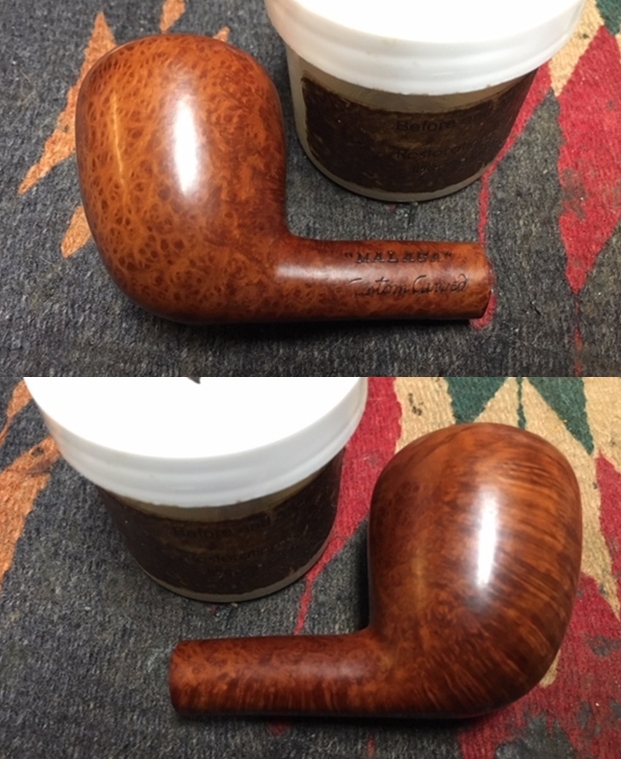
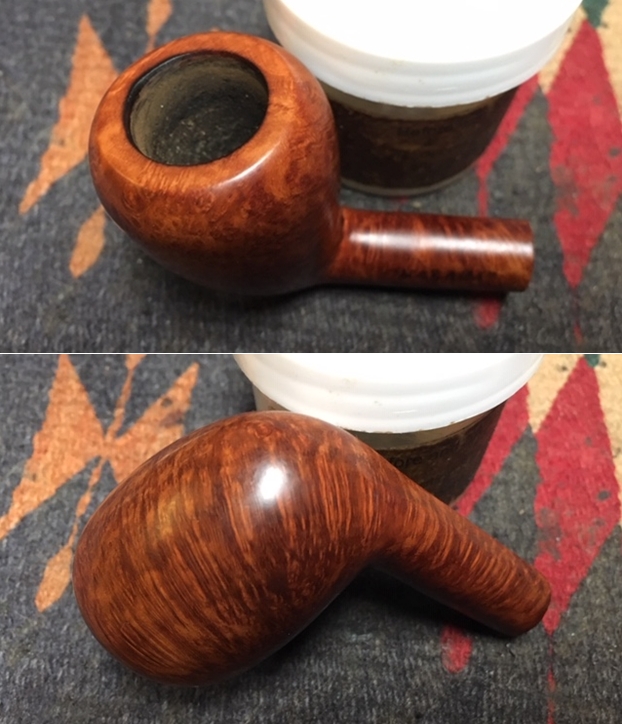
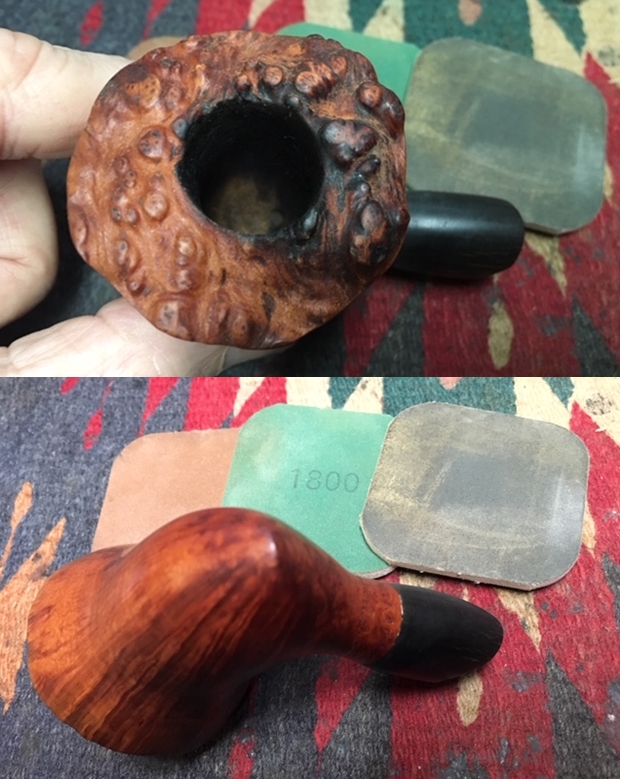
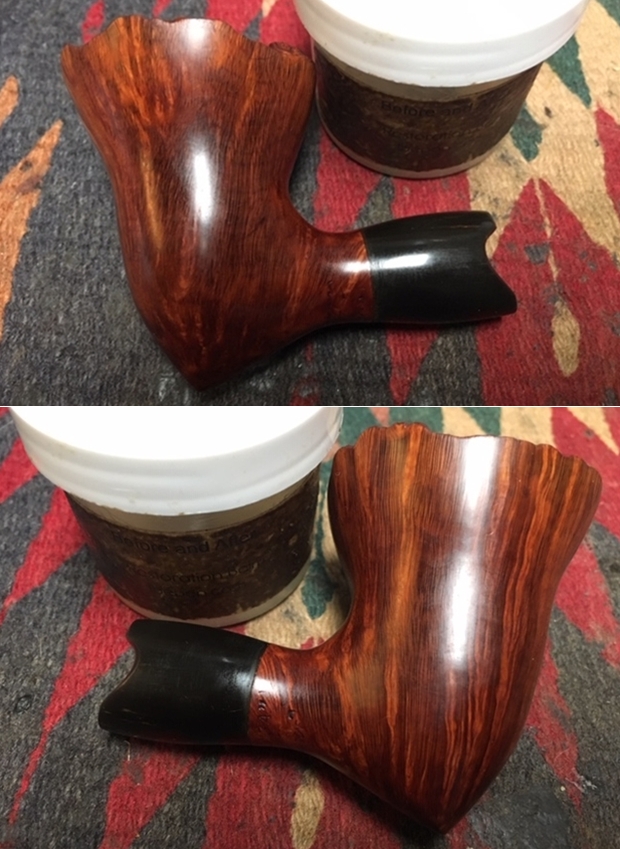
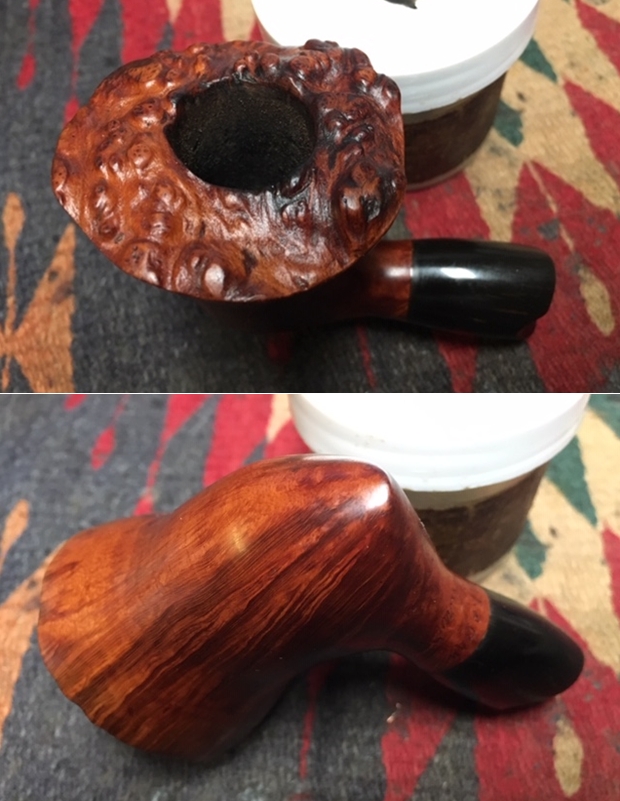
 I rub a small quantity of “Before and After Restoration Balm” in to briar and let it rest for a few minutes. I took some extra efforts to work the balm in to the plateau rim top of the bowl. The balm almost immediately works its magic and the briar now has a nice vibrant appearance. I further buff it with a horse hair shoe brush.

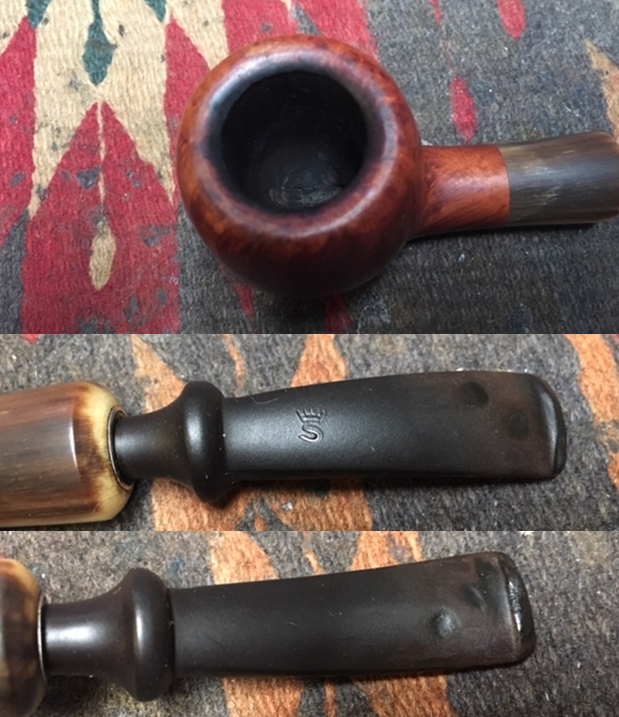
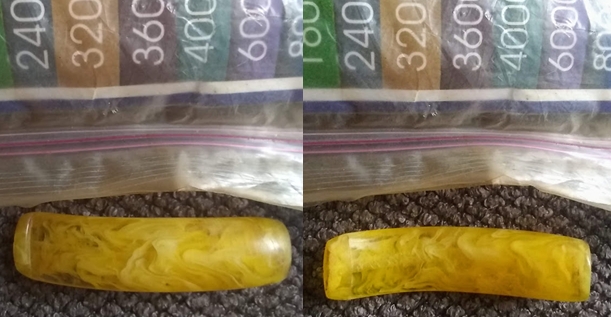
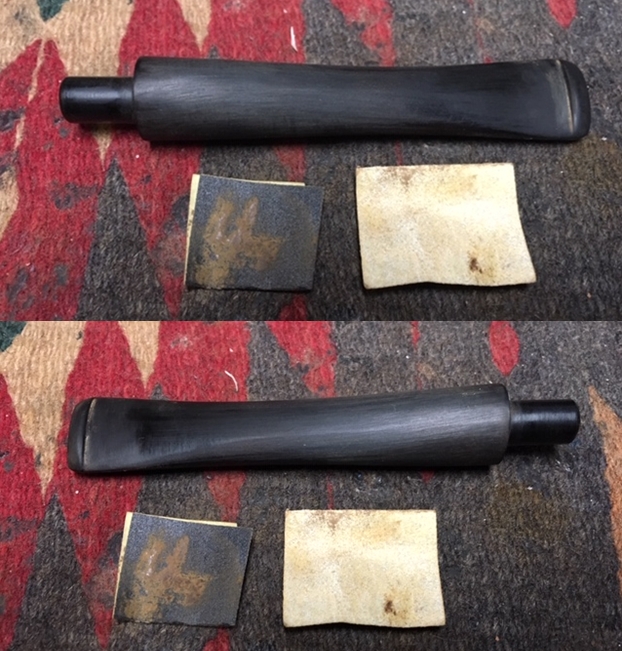
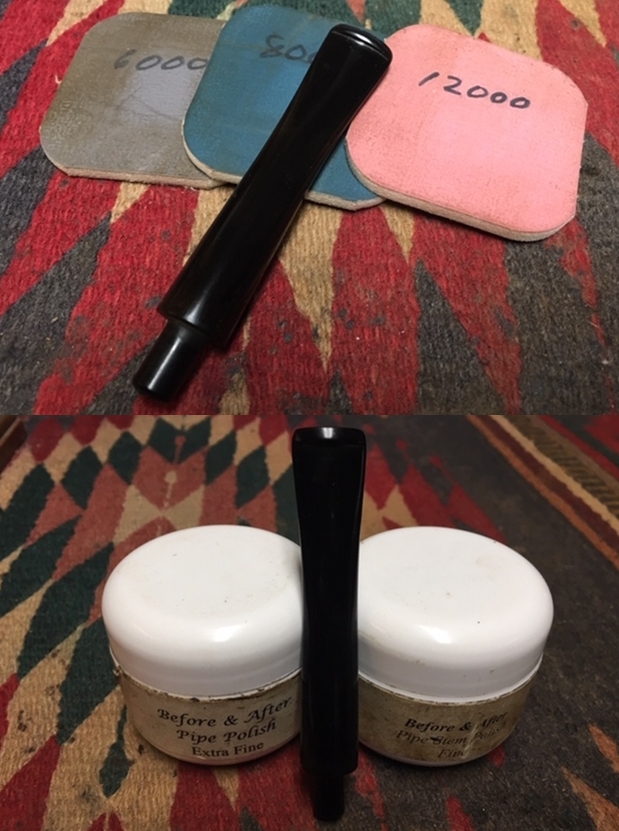
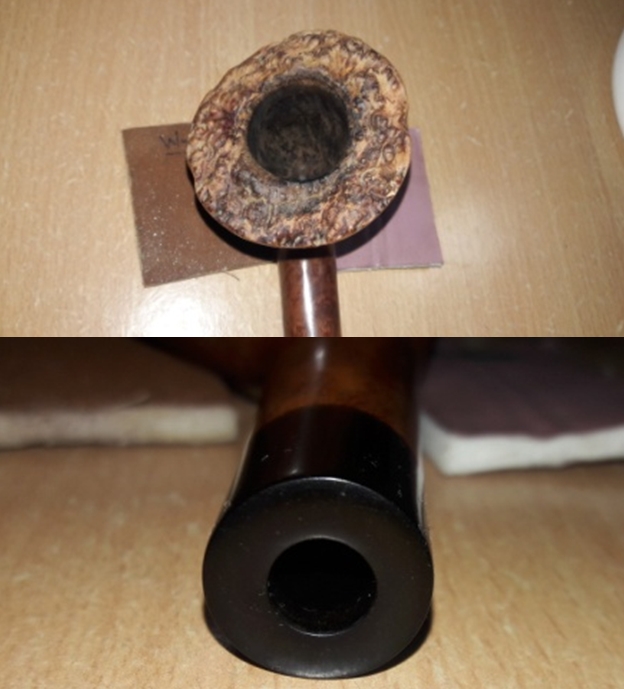
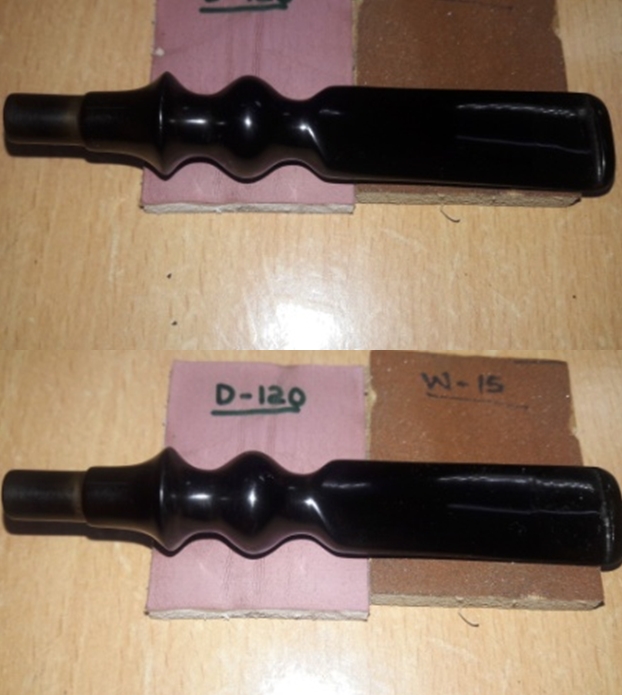
 With the stummel nice and clean and attractive, I worked the stem of the pipe. The fill on the stem had cured nicely and I sand it down with a flat head needle file. I sharpened the lip edges using a needle file and sand the entire stem with 220 followed by 400, 800 and 1000 grit sand paper. This helps to reduce the sanding marks left behind by the more abrasive 220 grit paper. To bring a deep shine to the vulcanite stem and the tenon, I went through the complete set of micromesh pads, wet sanding with 1500 to 2400 grit pads and dry sanding with 3200 to 12000 grit pads. I wiped the stem with alcohol after each pad and rubbed it down with Extra Virgin Olive oil. The pictures of the final results are shown below. What is not stated and pictured here is the fact that the fills on this stem had caved in thrice and that many times I had to rebuild it from the scratch. Every time I tried to match the fill to the surrounding surface, the fill area would get thinned out and break apart. In the end, I left the fill slightly higher than the rest of the surface and was better masked during the micromesh cycle. At this point, I check for the seating of the tenon inside the mortise the find that the stem sits flushed in the mortise.
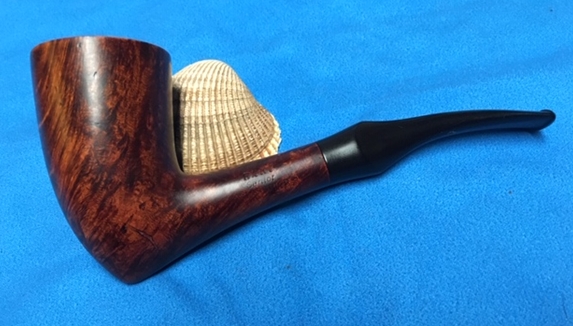
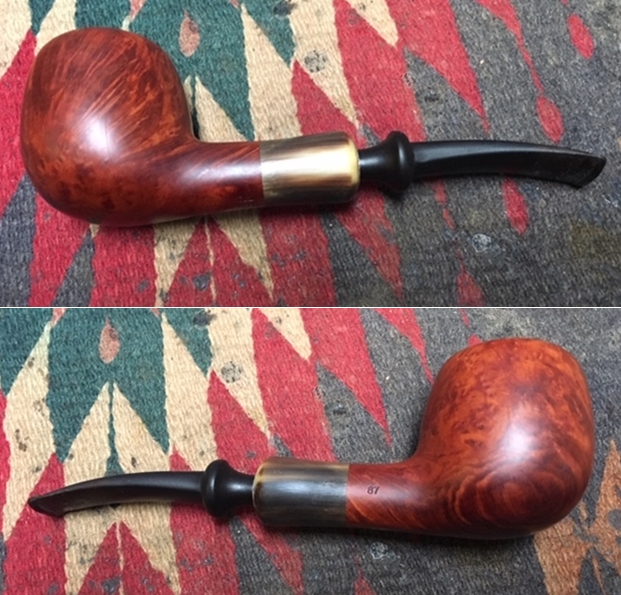
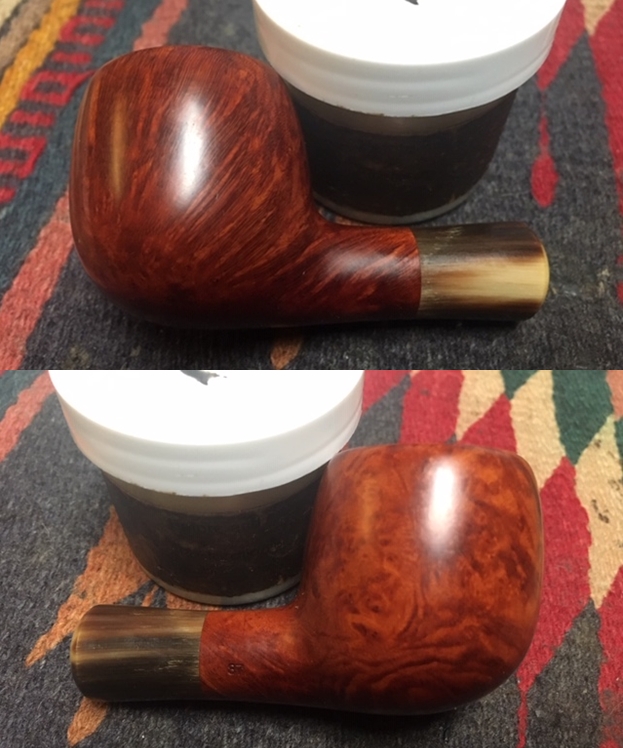
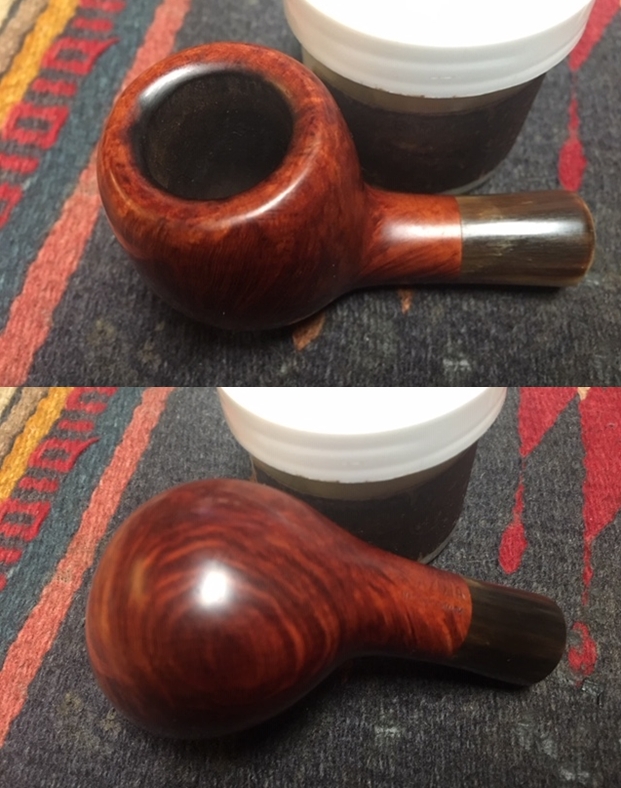
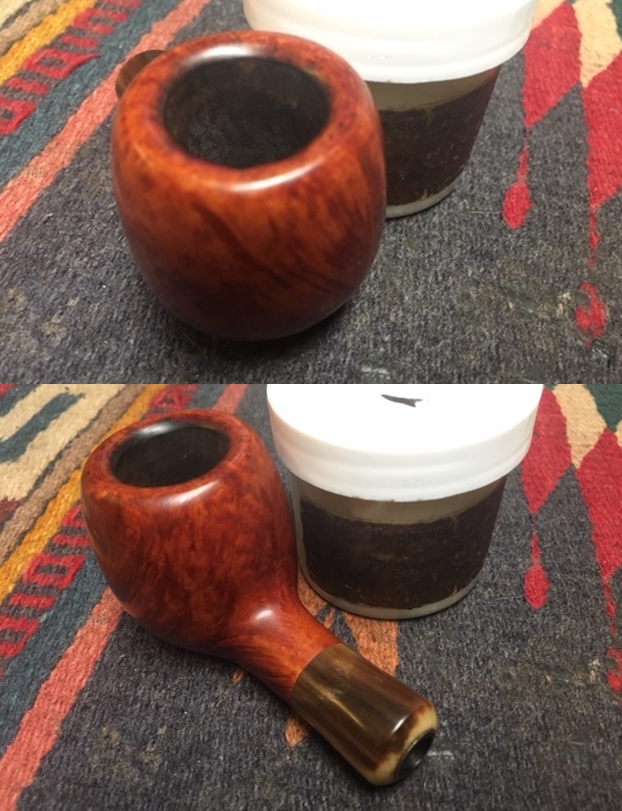
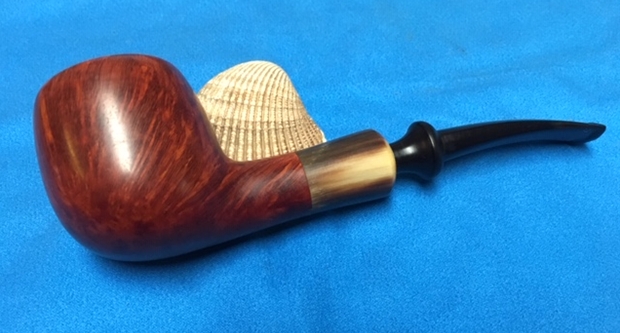
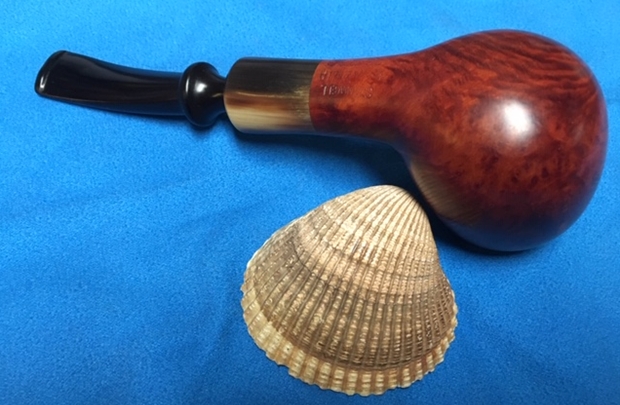
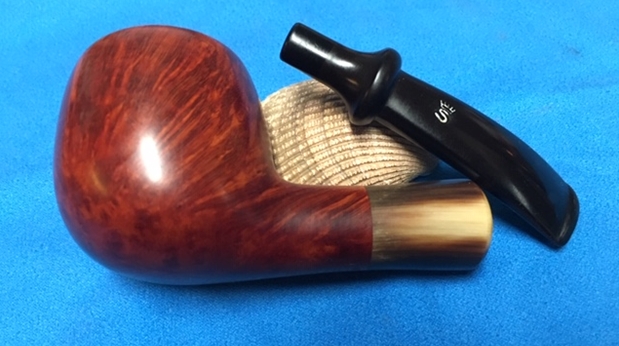
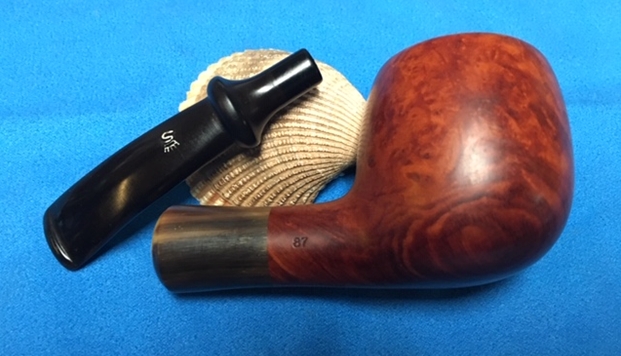
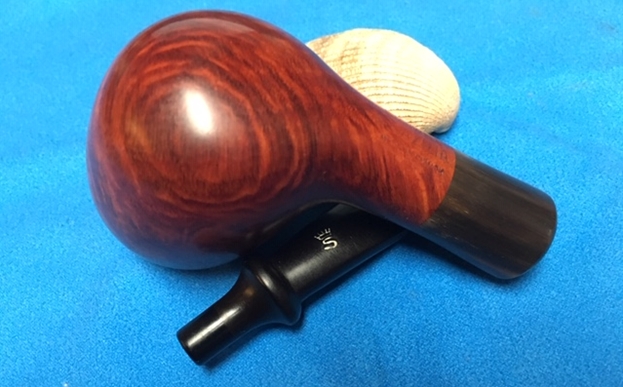
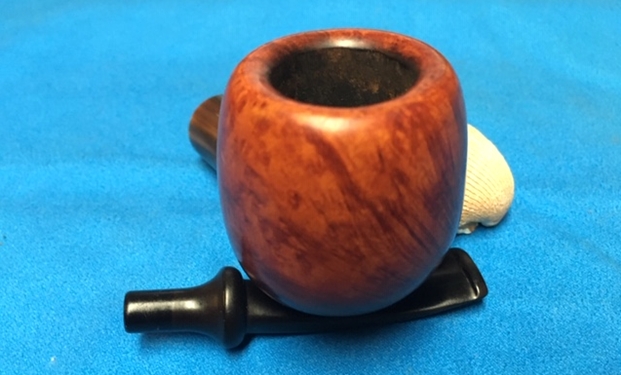
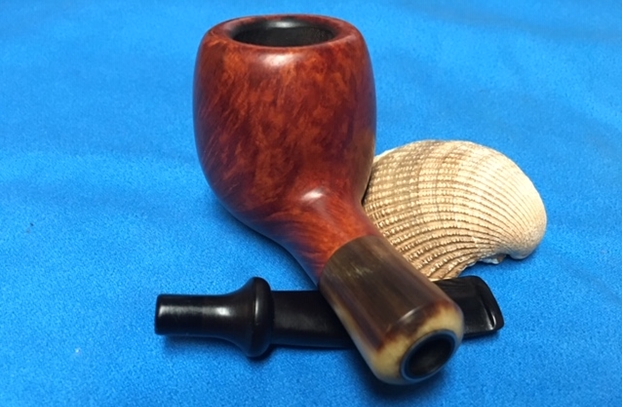
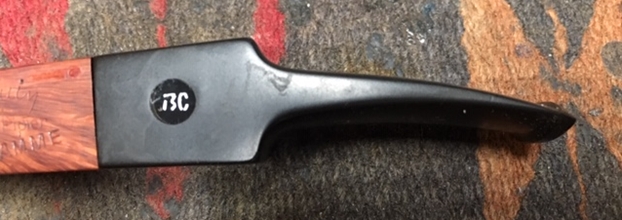
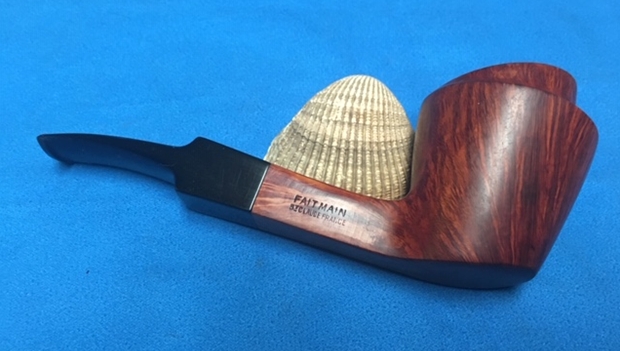
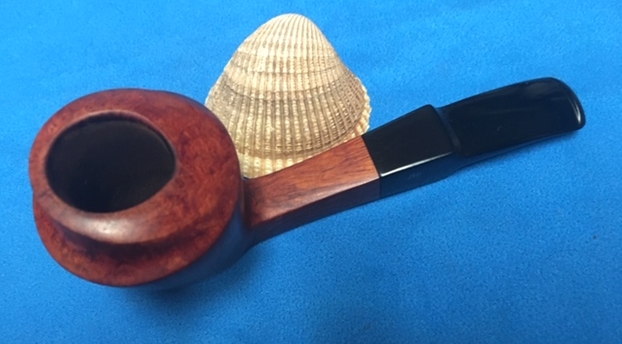
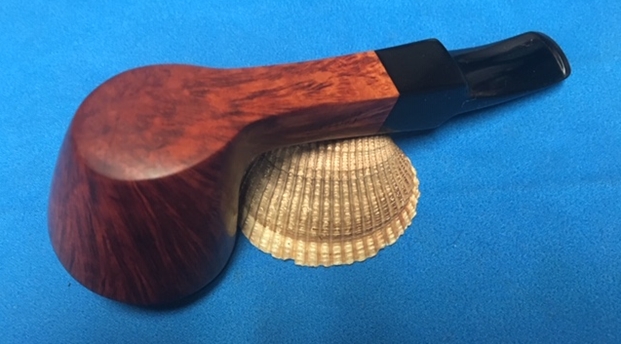
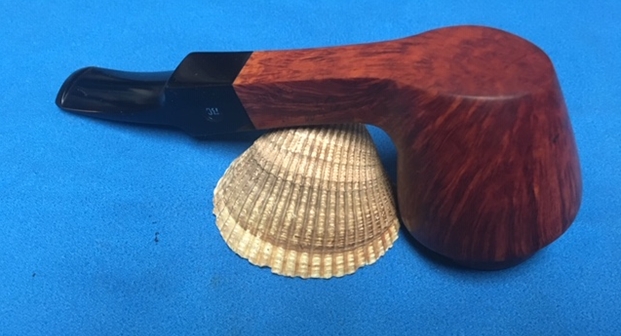
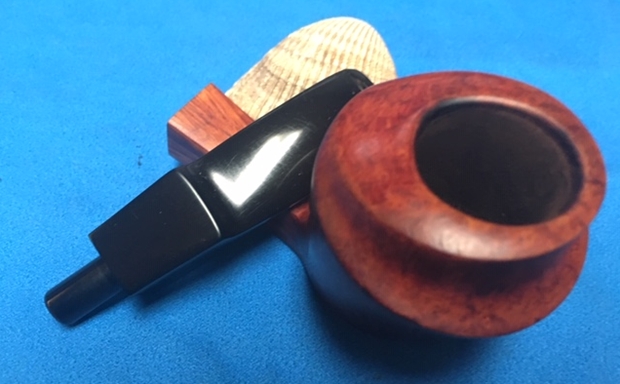
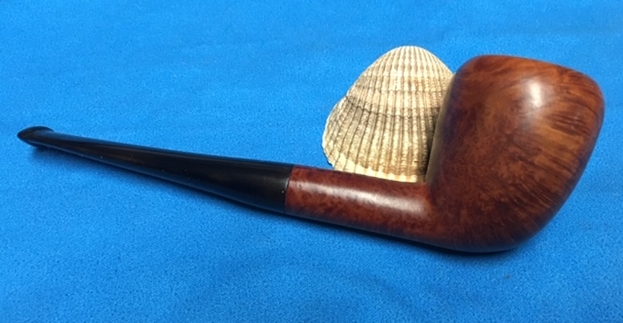
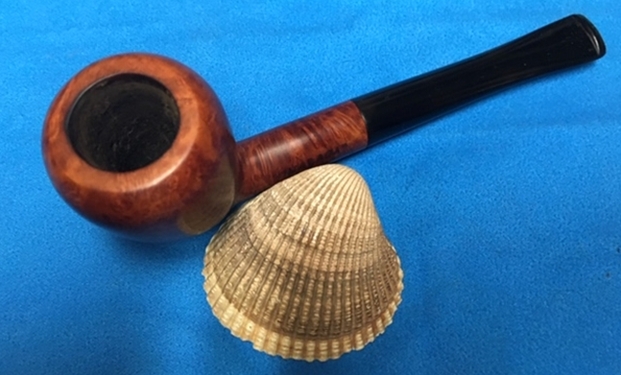
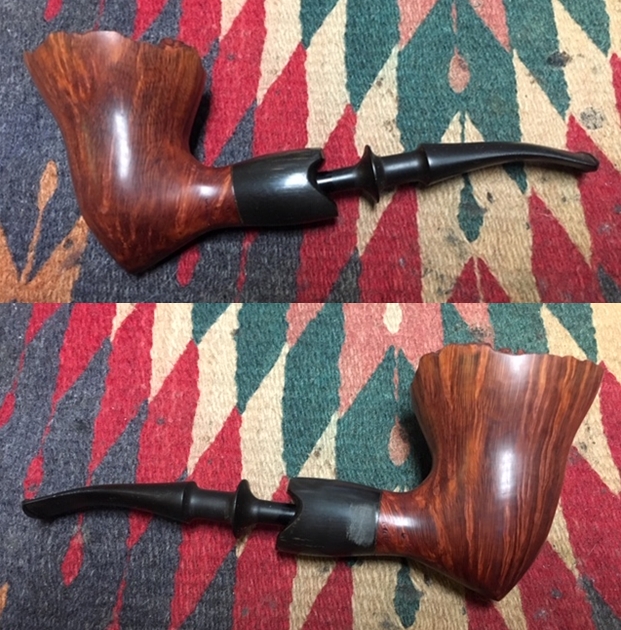
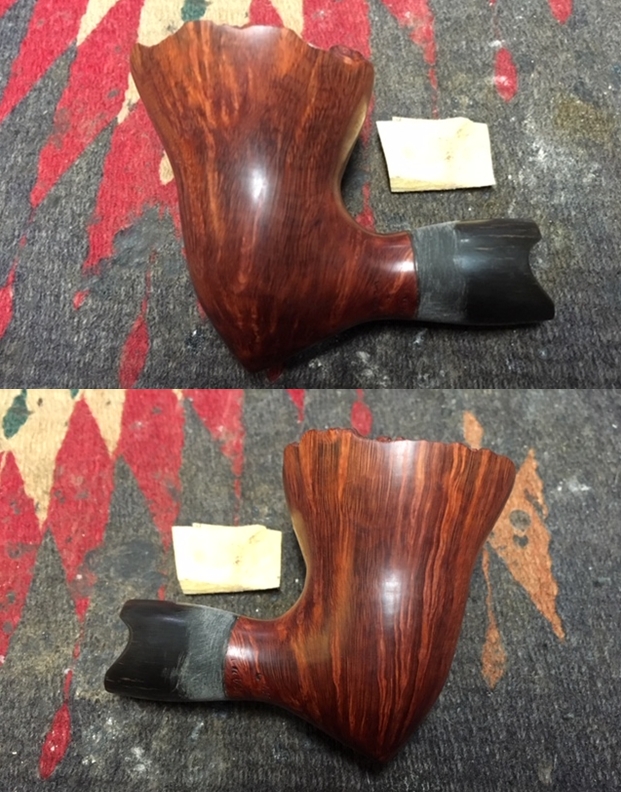
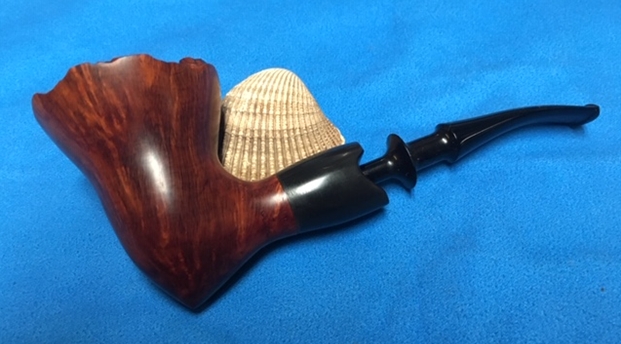
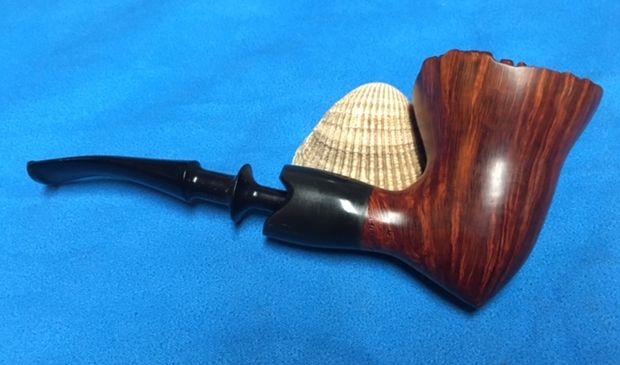
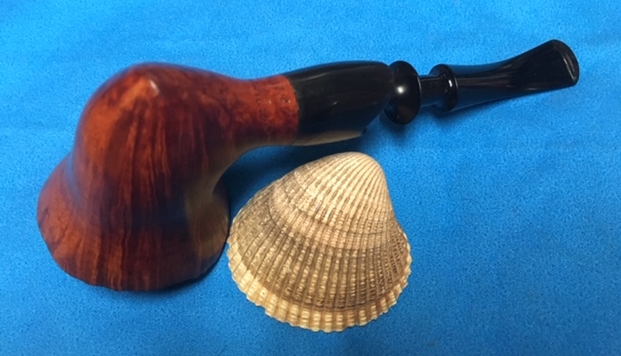
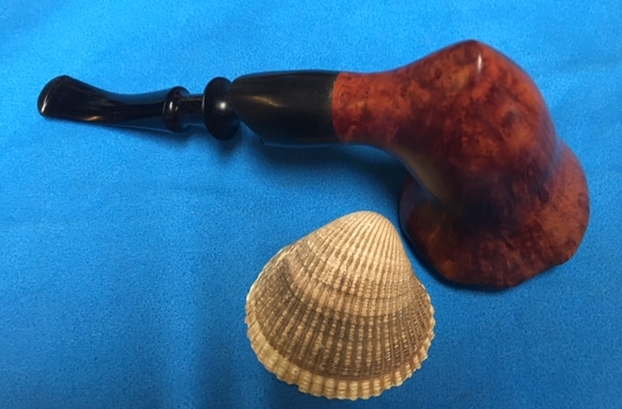
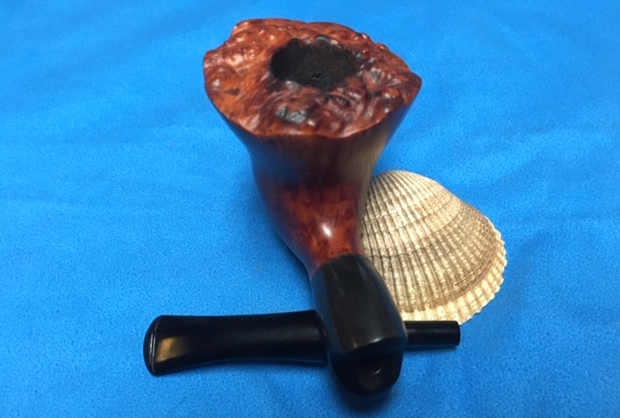
 To finish, I re-attach the stem with the stummel. I mount a cotton cloth buffing wheel on to my local machine which is similar to a Dremel. I set the speed at about half of the full power and applied White Diamond compound to each of the three pipes. I wiped/ buffed the pipe with a soft cotton cloth to clear it of any leftover compound dust. I then mounted another cotton cloth wheel on to the polishing machine and applied several coats of carnauba wax over the stummel and the stem of the pipe. I finished the restoration by giving the pipe a rigorous hand buffing using a microfiber cloth to raise the shine further. The completed pipe, with the dark brown hues of the stummel contrasting with the shiny black shank extension and stem, looks lovely, fresh and vibrant; the photographs speak for themselves. The beauty, size and shapes of this pipe make it one of my favorites and will find a place of pride in my modest collection. If only the pipe could tell some of the stories and techniques used by Mr. Tim West while carving pipes….Cheers!!