New Life for a Republic Era Irish Second, Silver Banded Lovat


Blog by Steve Laug

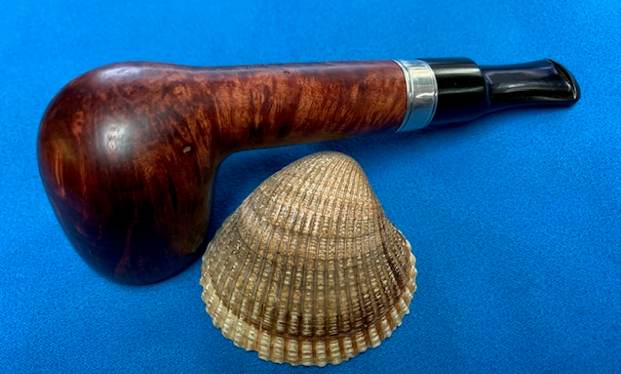
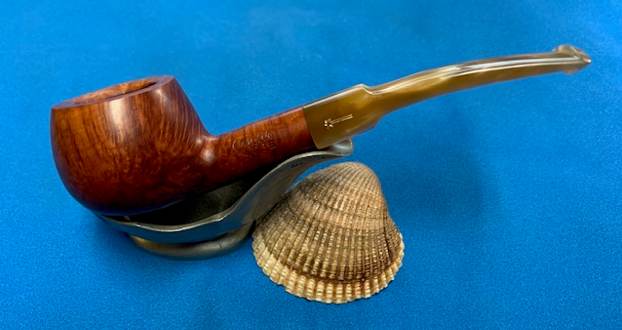
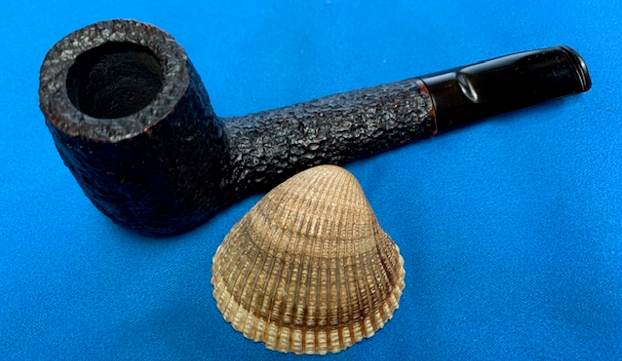
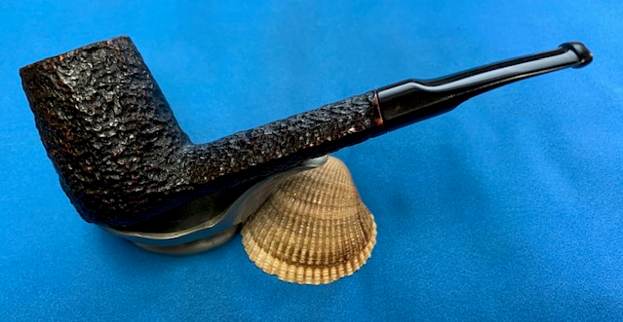
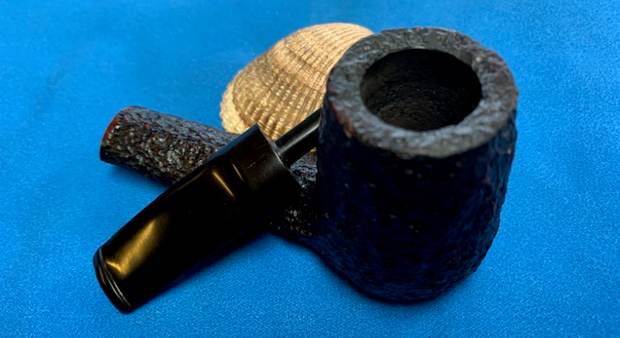
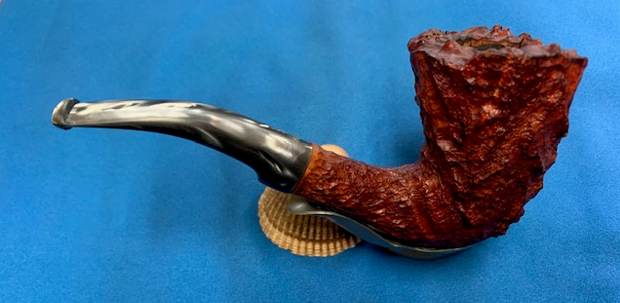
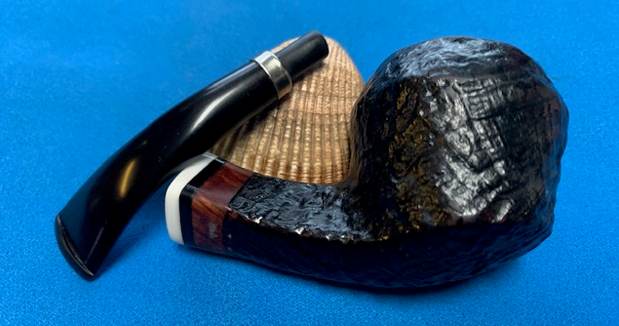
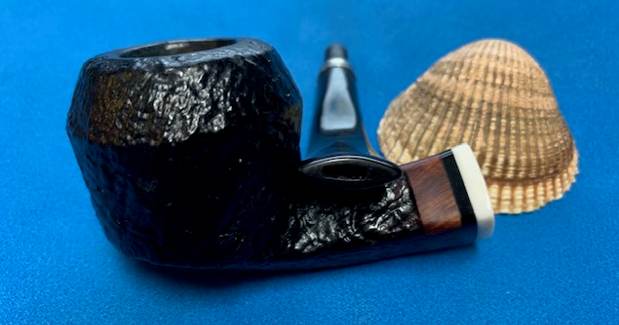
The next pipe on the work table came to me in a group of six pipes I bought from a fellow in Eastern Canada. It included two Canadian made pipes – a Blatter of Montreal and a Trypis. In the mix was an English made Charatan second stamped Mountbatten and two Peterson’s and an Irish Second. The pipes were well used and all had been smoked. The seller sent me a photo of the pipes so that I could see what he was selling. We discussed some options together and arrived at an agreement and the pipes were on their way to me in Vancouver.
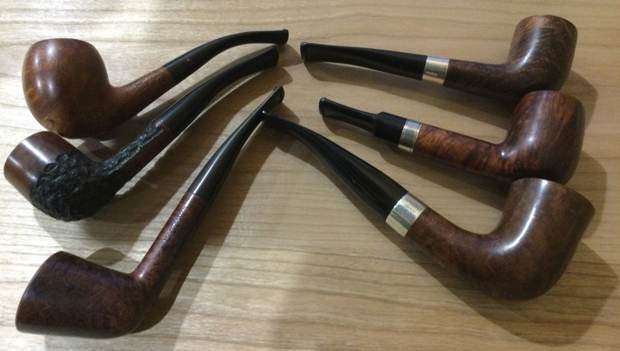
There was something about the chunky Lovat, the second one down in the right column that grabbed my attention and made me want to start with it. I brought it to the worktable and examined it before starting my work. It had a thick shank, a stamped silver band and a vulcanite saddle, fishtail stem. The pipe is stamped on the underside of the shank and reads IRISH SECONDS [over] 2. On the fancy silver band on the shank end it is stamped Peterson [over] Dublin. To the right of that there are three hallmarks – a seated woman (Hibernia), an oval with 925 centered in it (quality of the silver used) and the letter F (the date letter). There are a few fills in the bowl so it is clearly a Peterson’s second, but it is odd that the band is Sterling Silver. The finish had some grime ground into the finish on the bowl but still looked to be in good condition. The bowl was thickly caked with some light lava on the top at the back and some darkening on the top and the beveled inner edge of the rim. The stem had some calcification and tooth chatter on the top and underside near the button. There were not markings or a logo on the stem. It had promise but it was dirty. I took some photos of the pipe before I started my cleanup work. 
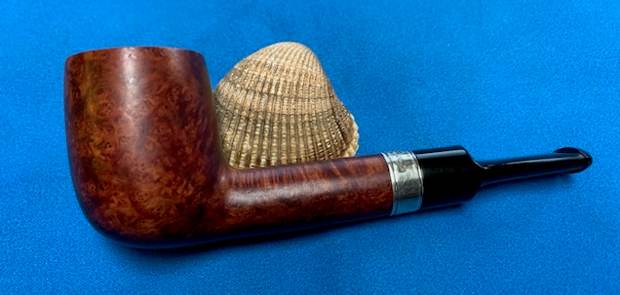
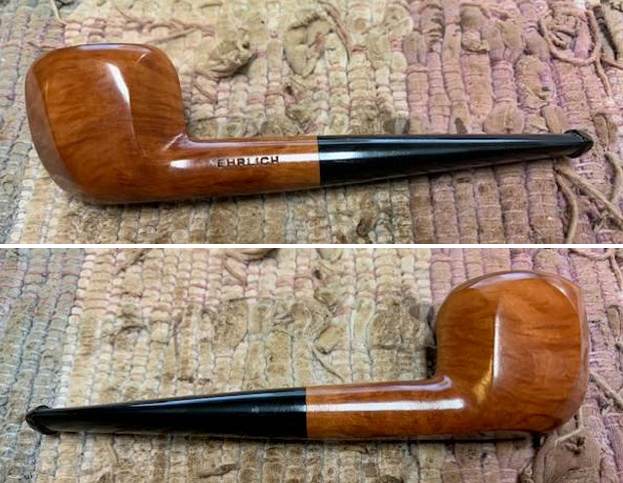
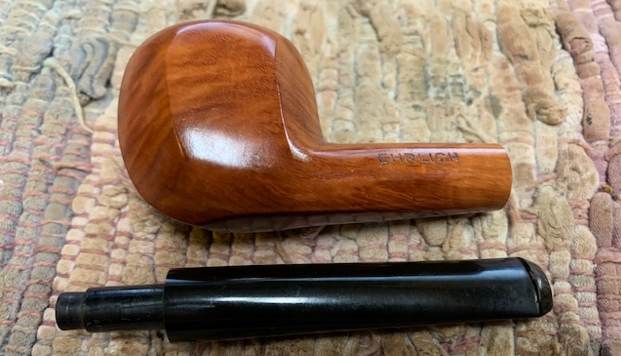
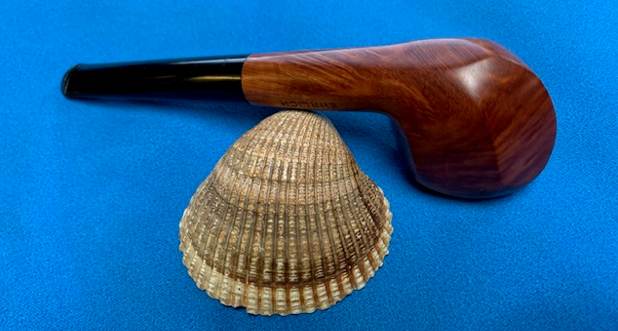
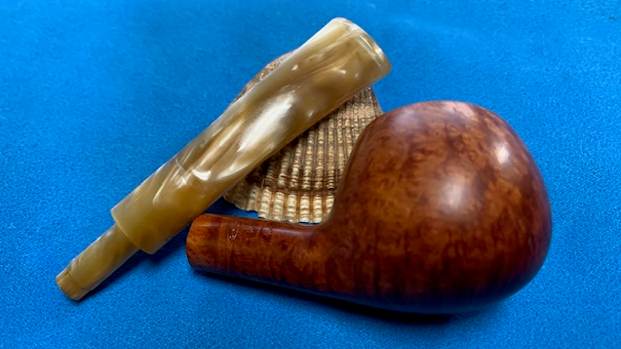
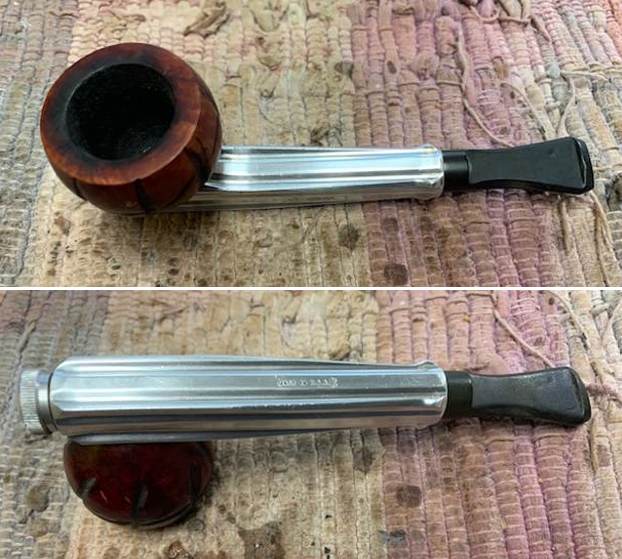
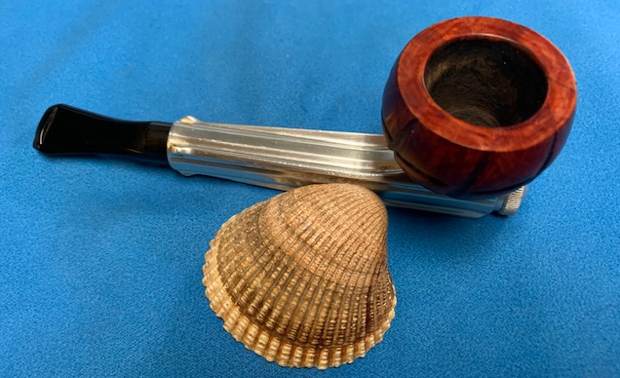
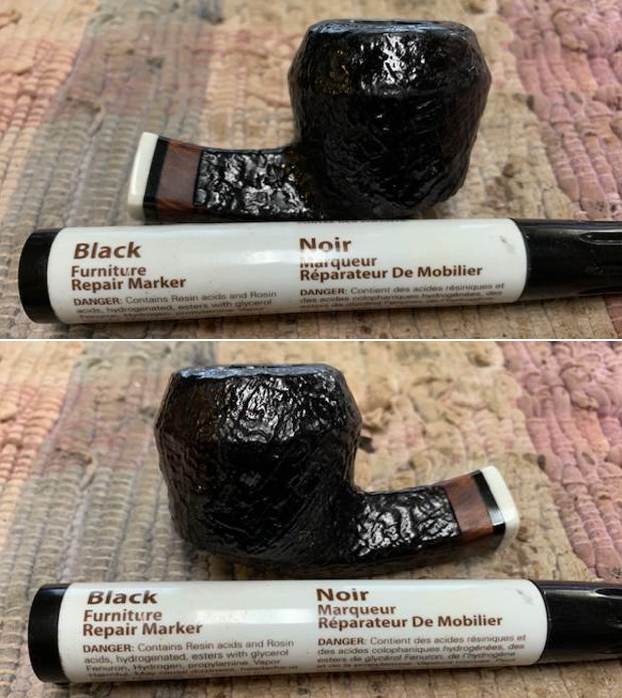
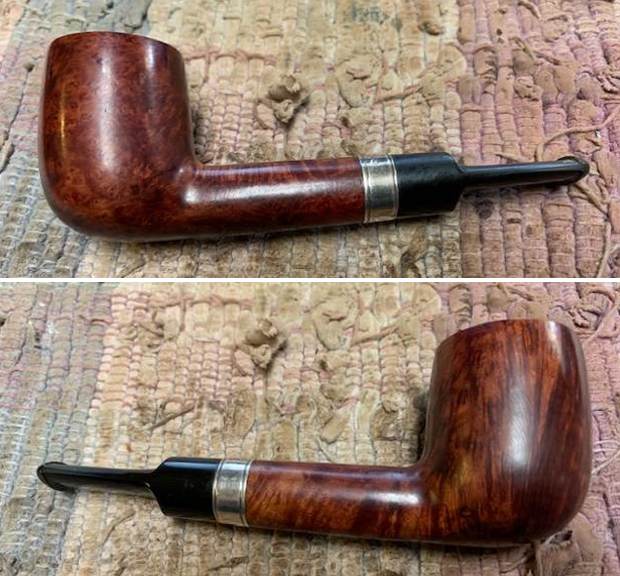
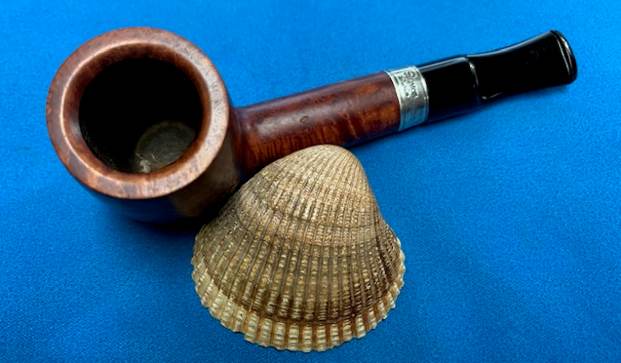
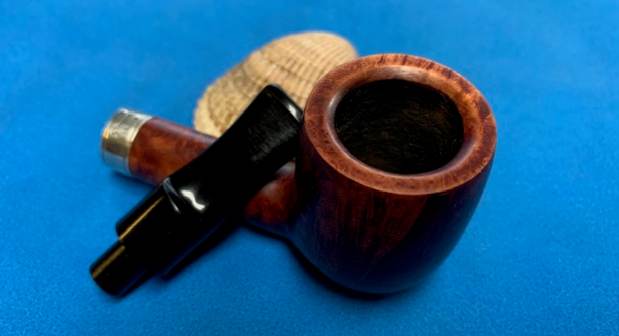
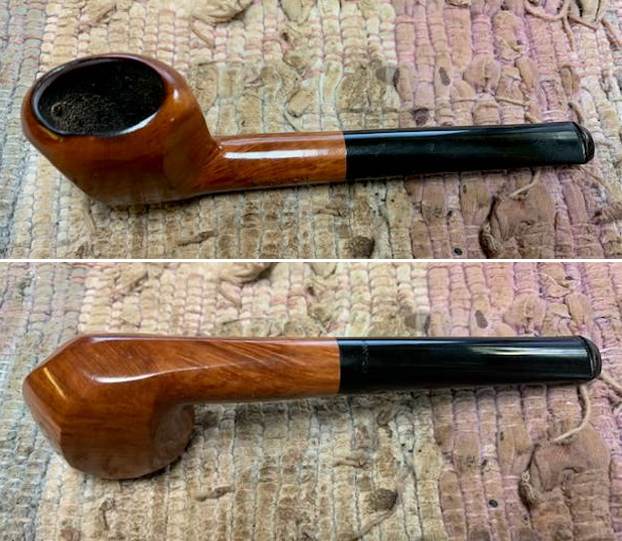
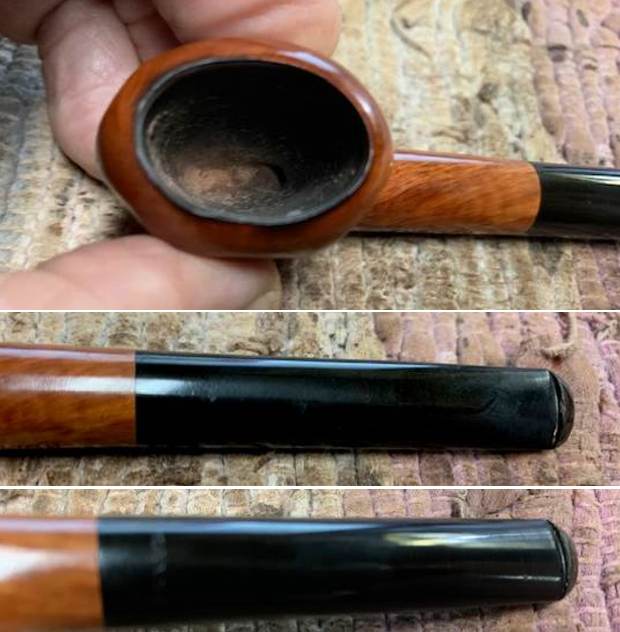
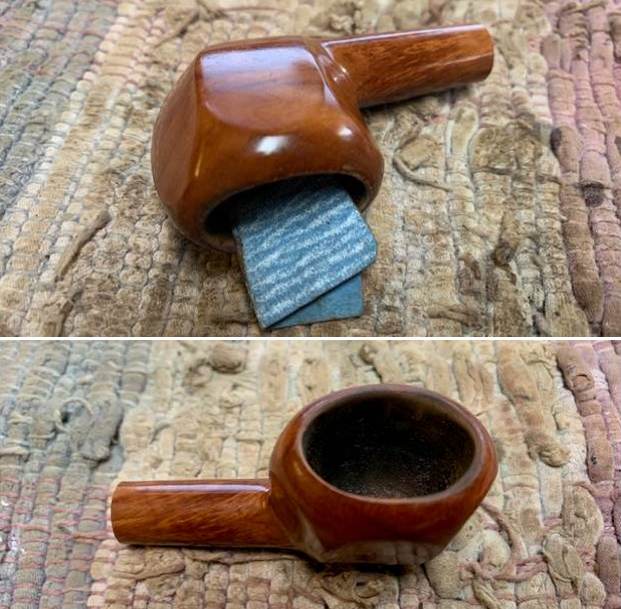
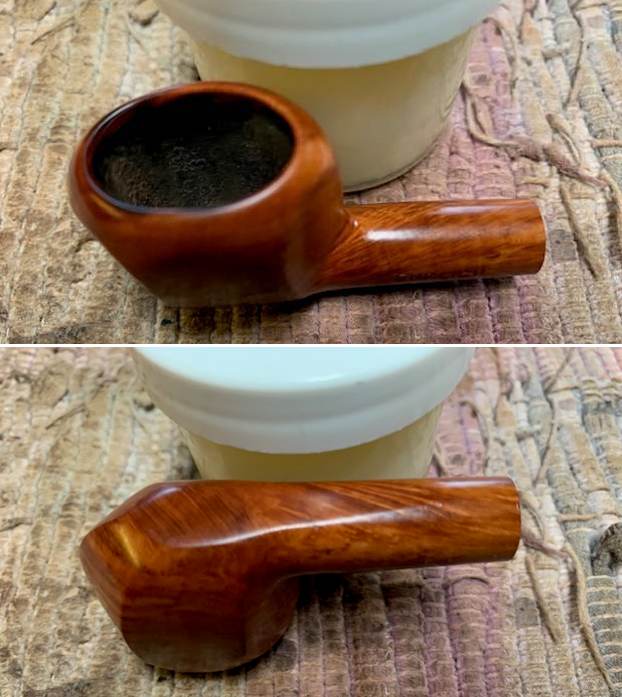
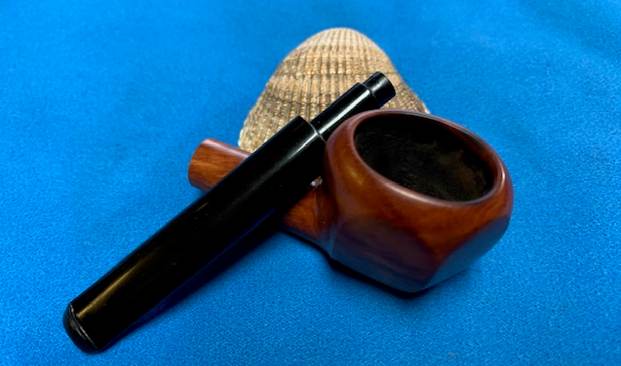
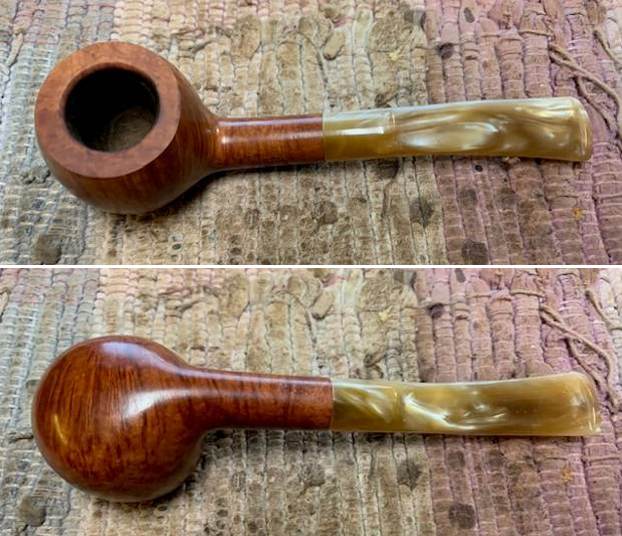
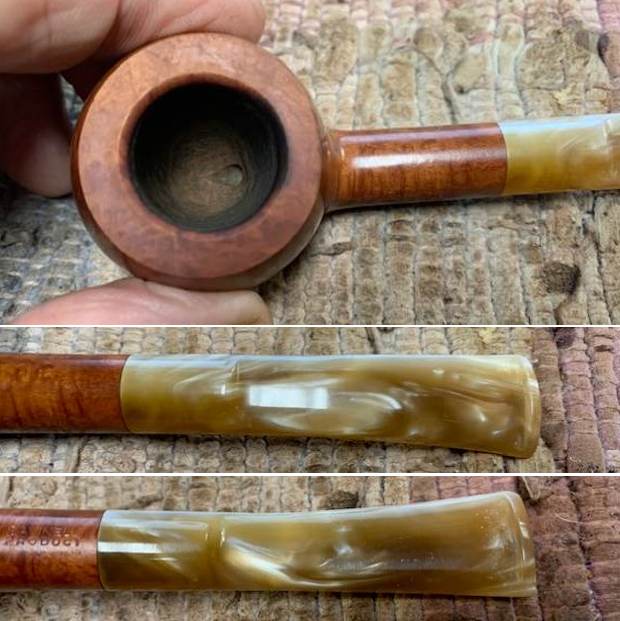
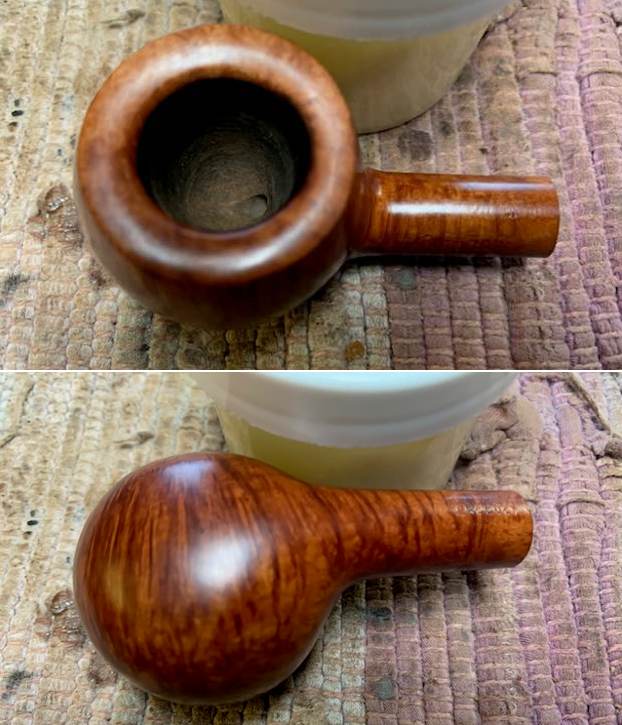
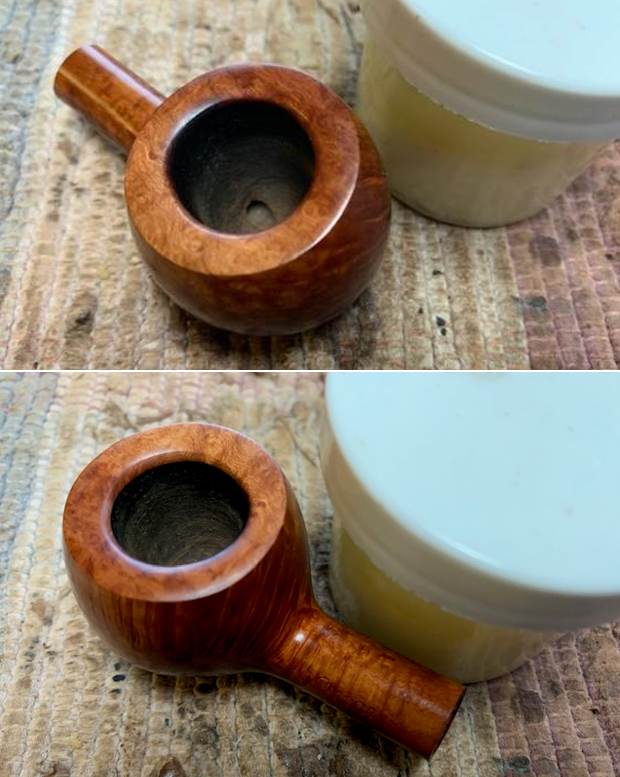
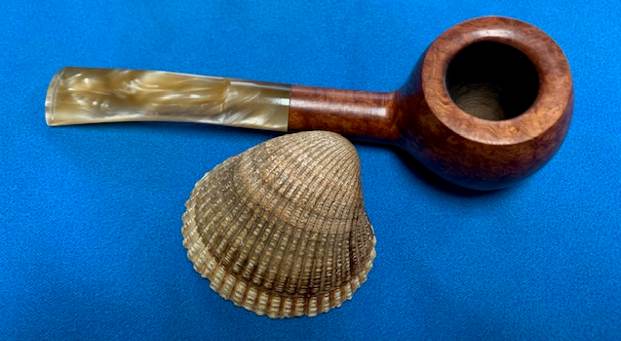
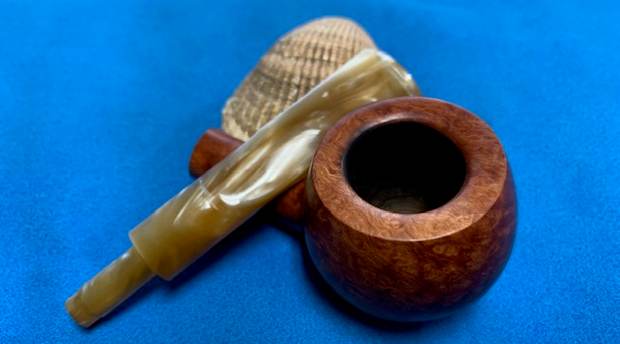
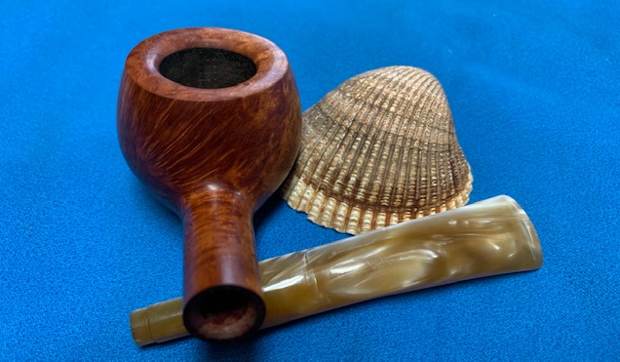
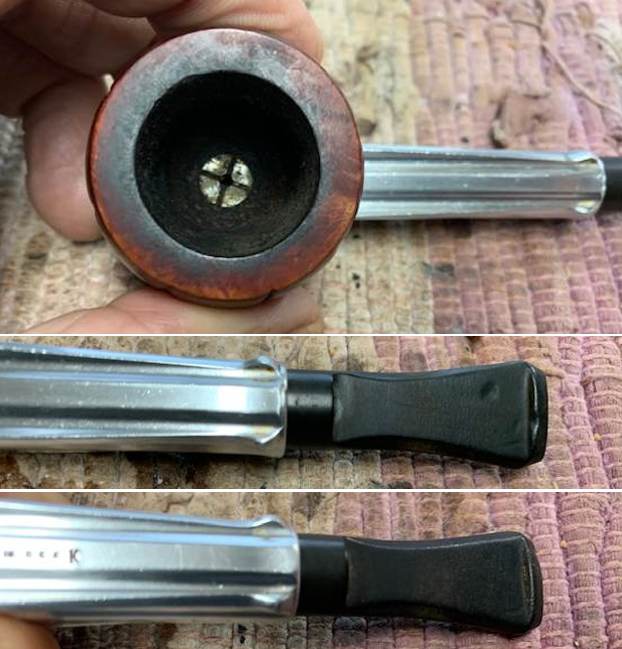
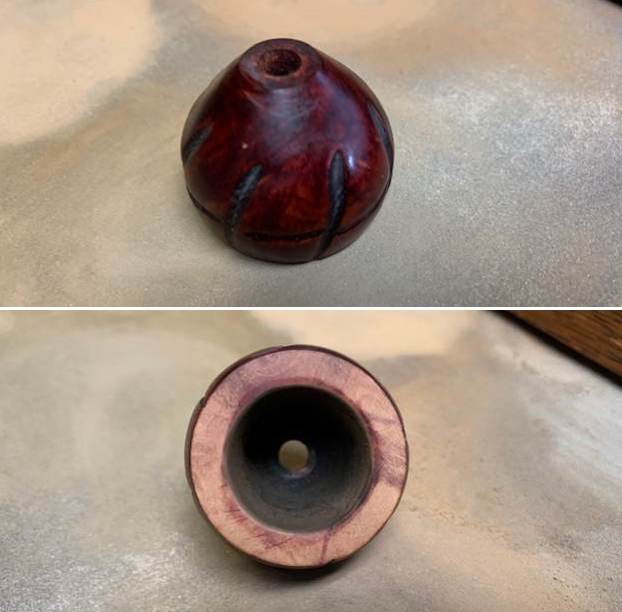
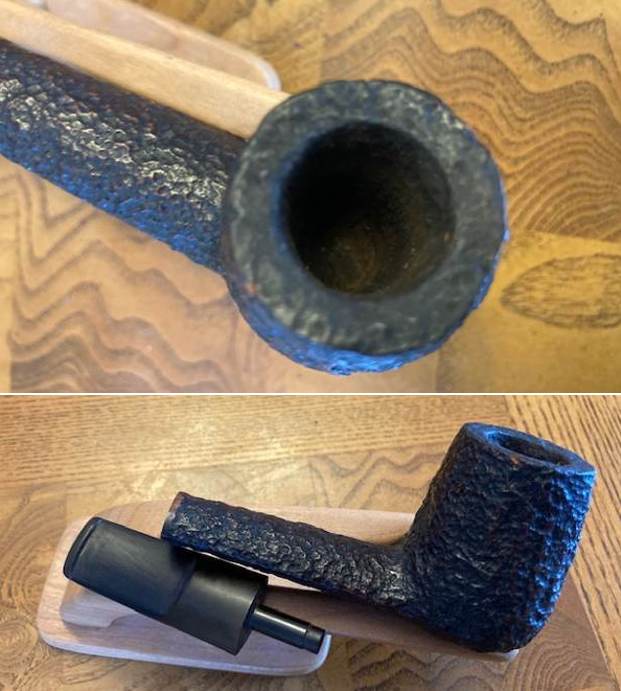
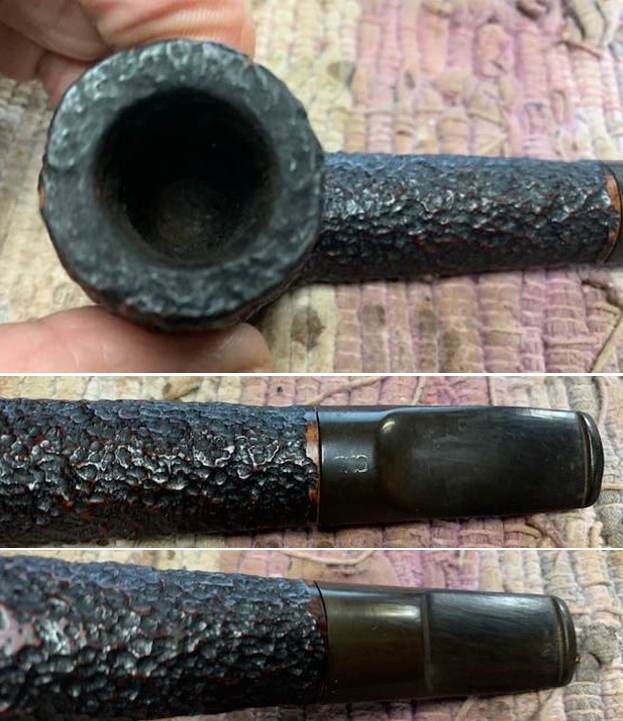
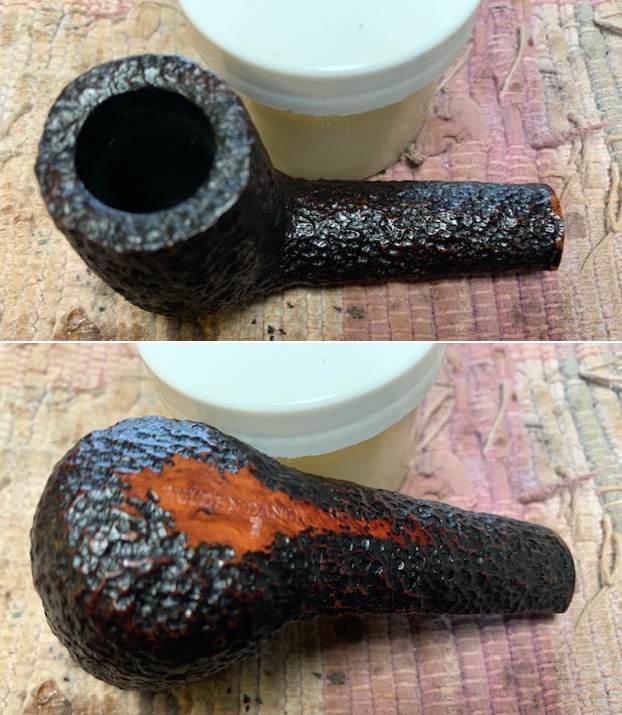
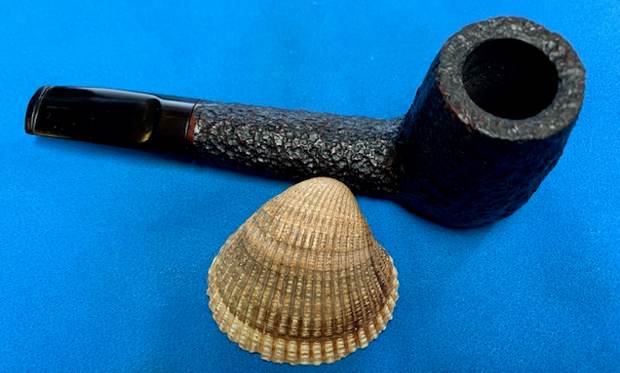
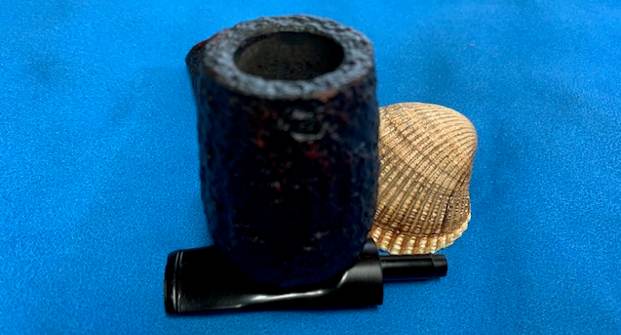
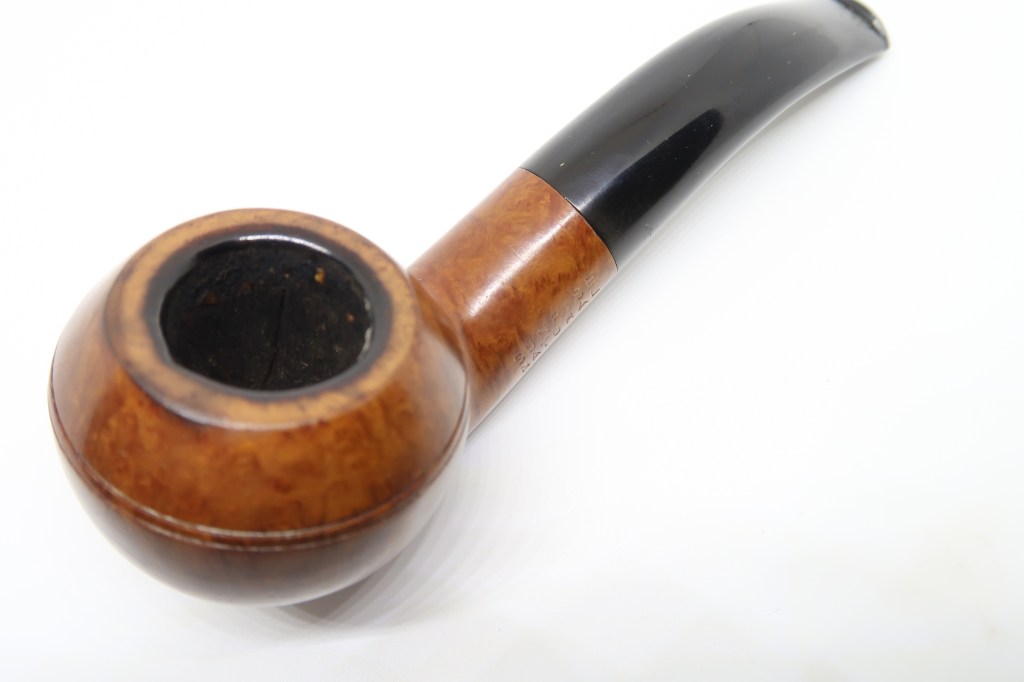
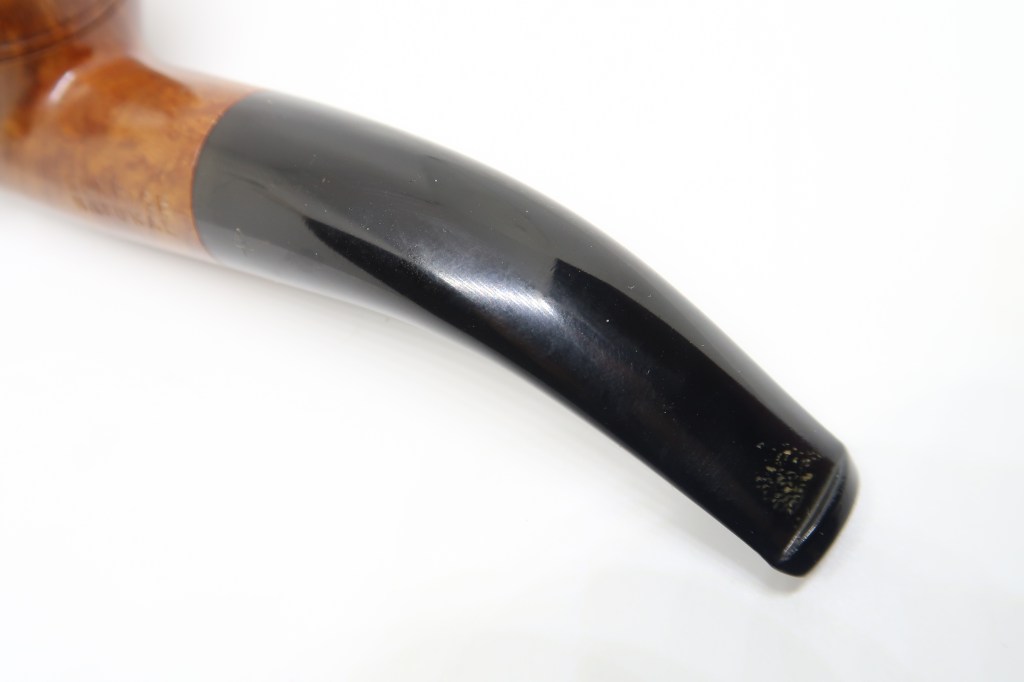
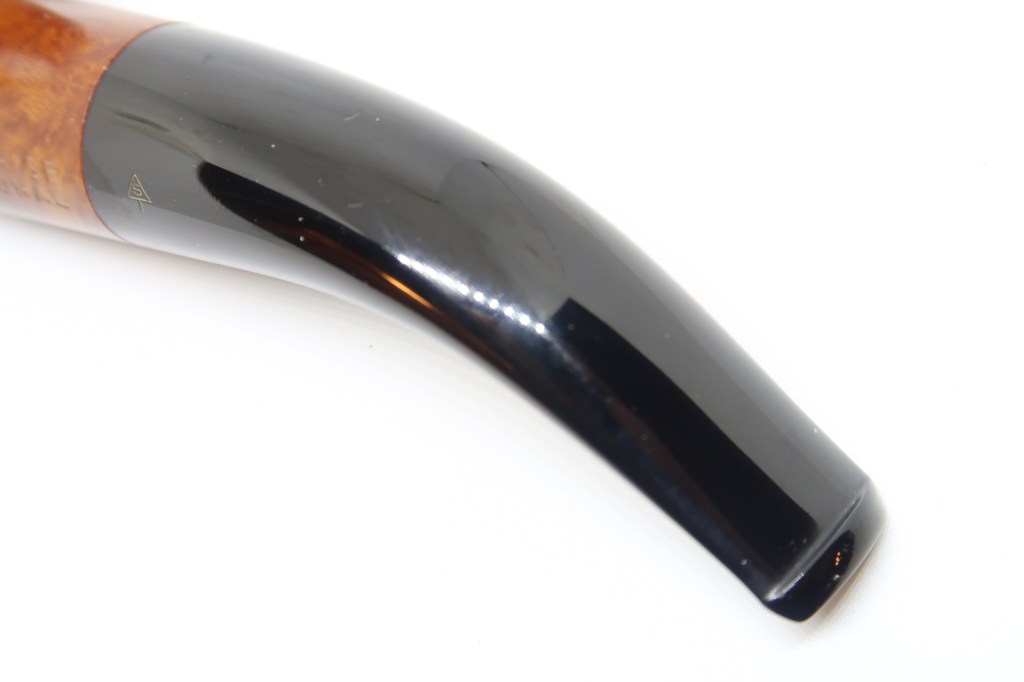
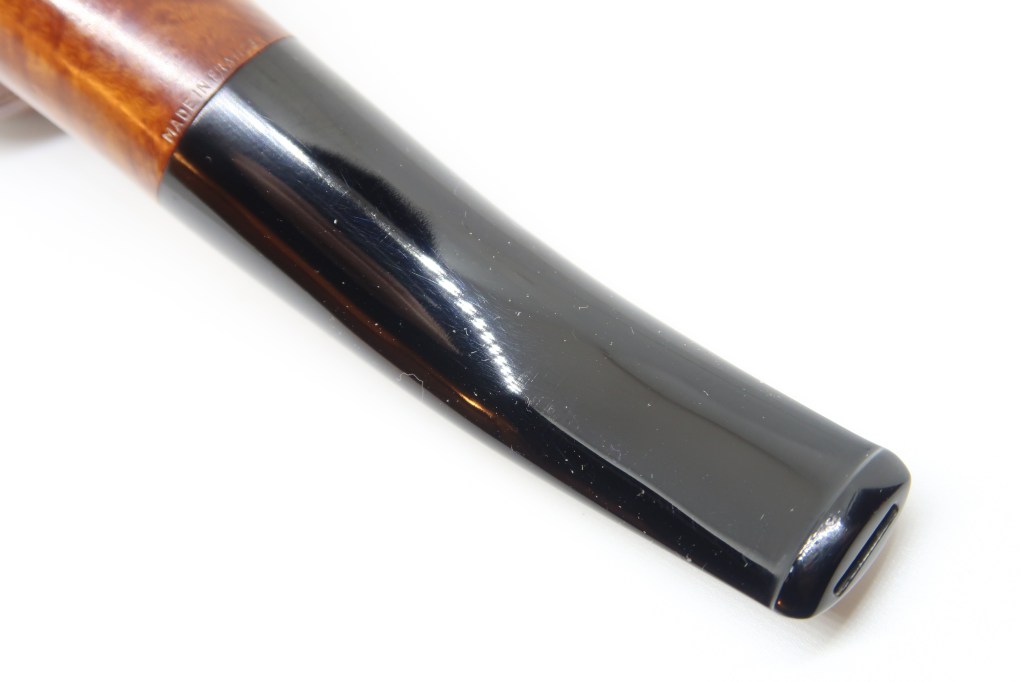
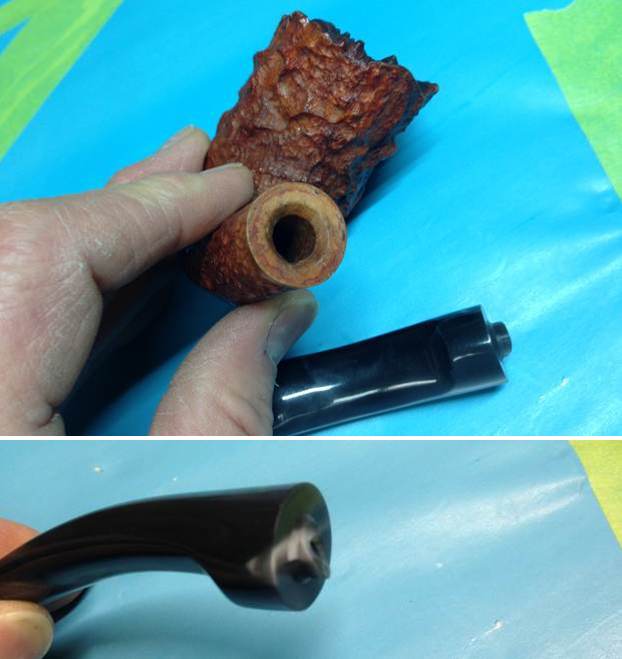
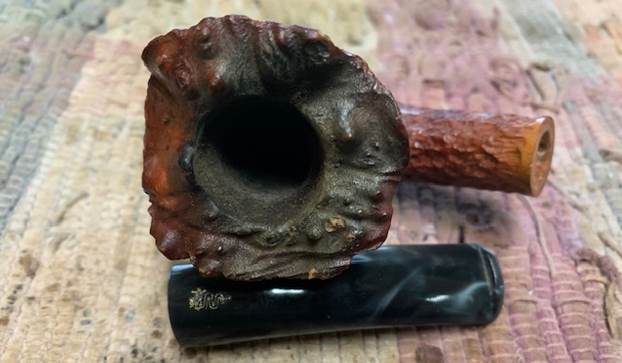
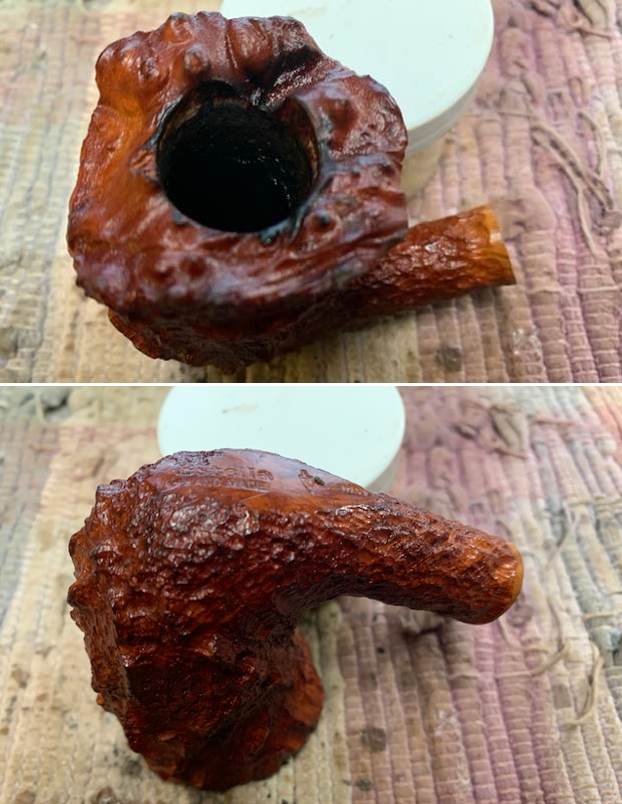
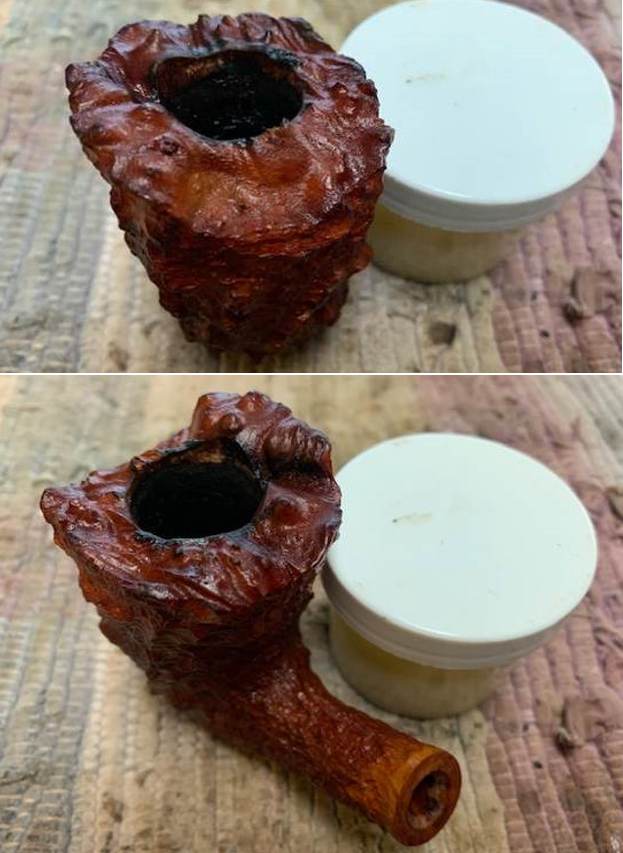
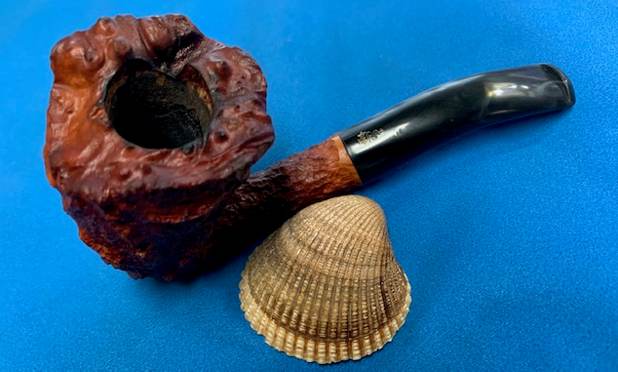
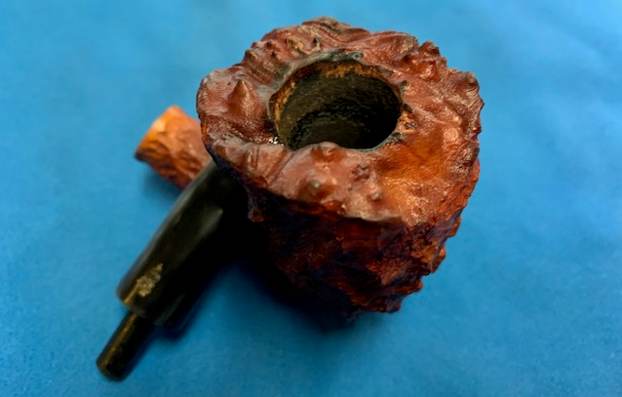
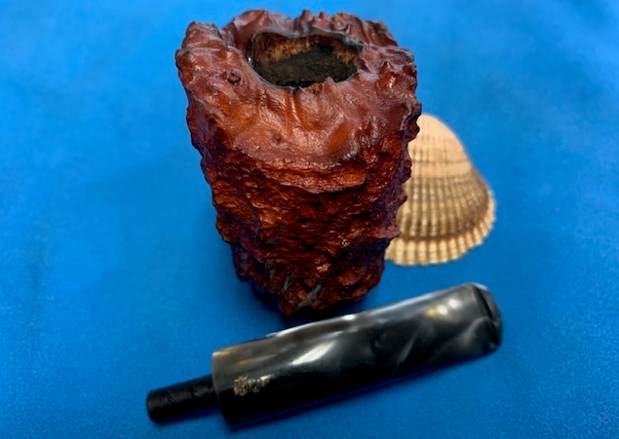
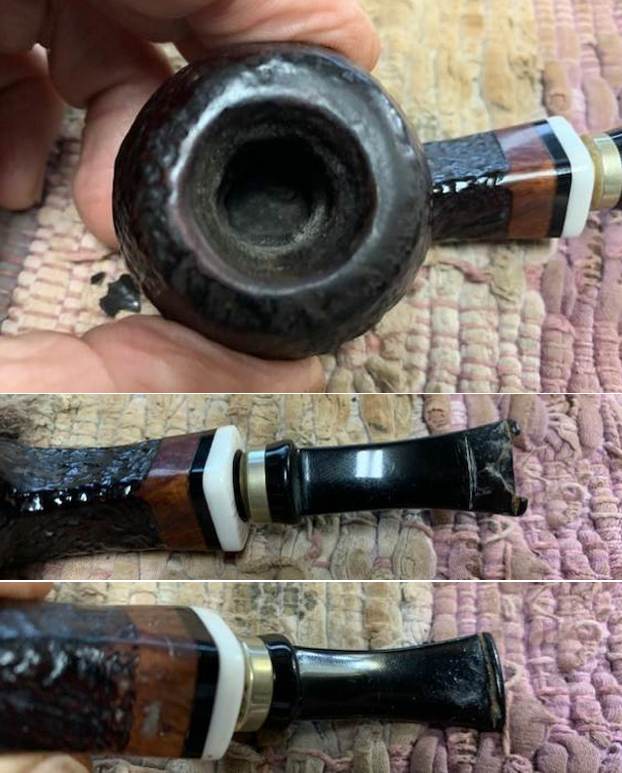
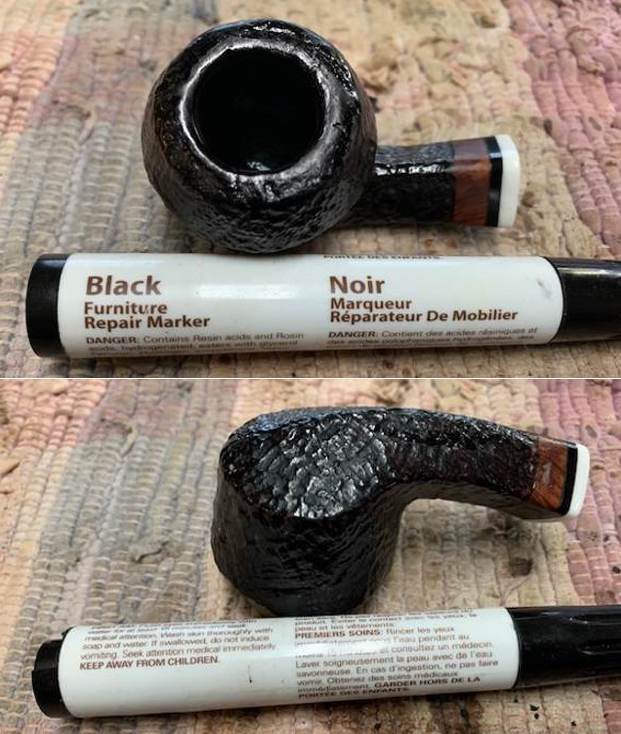
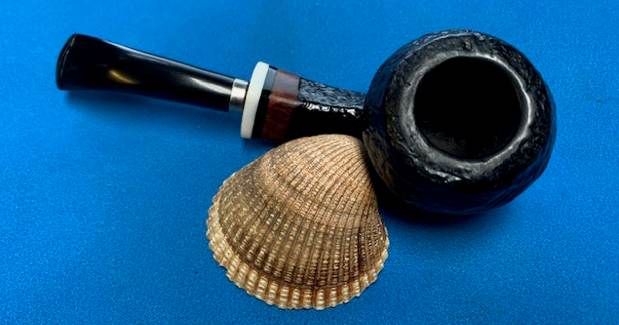
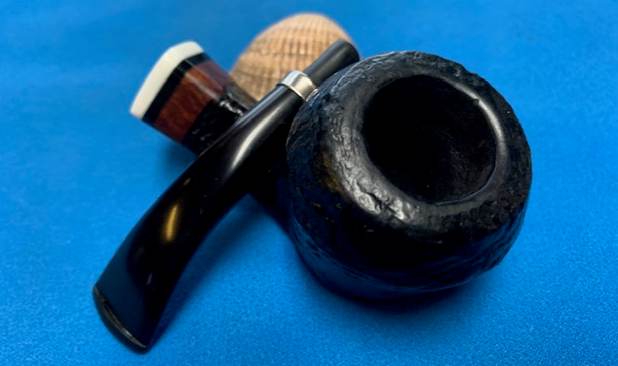
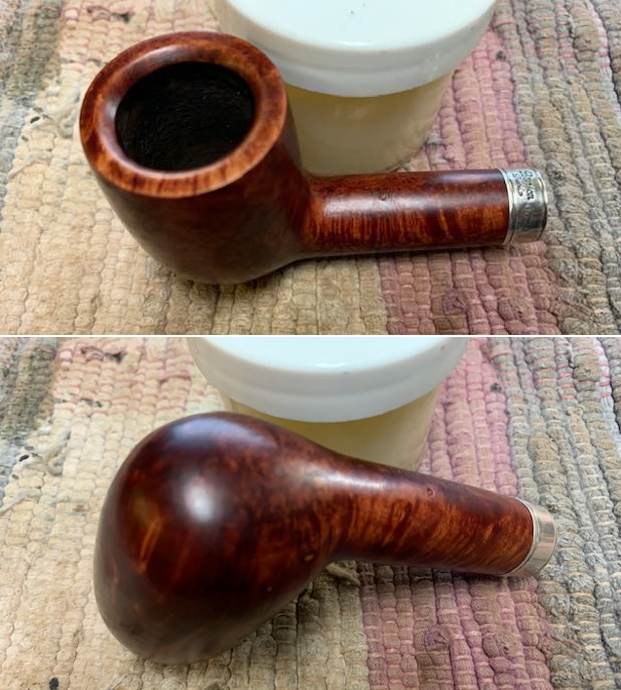
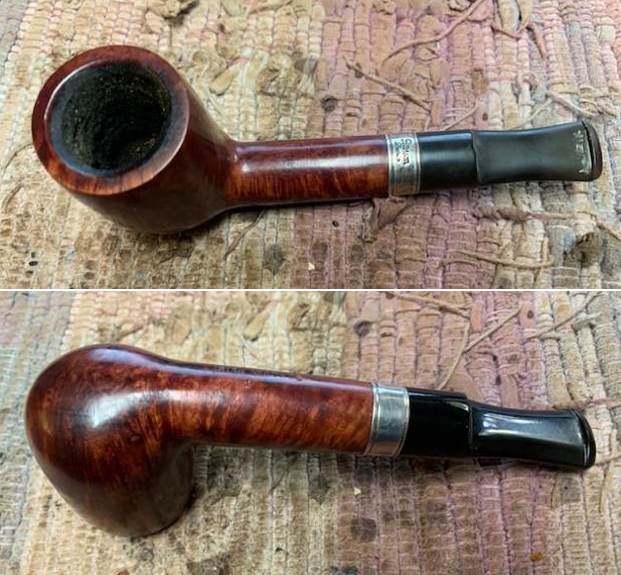
I took photos of the rim top and bowl to give a clear picture of the thickness of the cake and the overflow of lava on the rim top. I also took photos of the top and underside of the stem to show the oxidation and the chatter and tooth marks.    
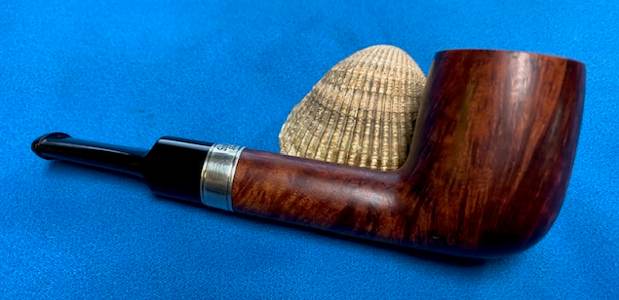
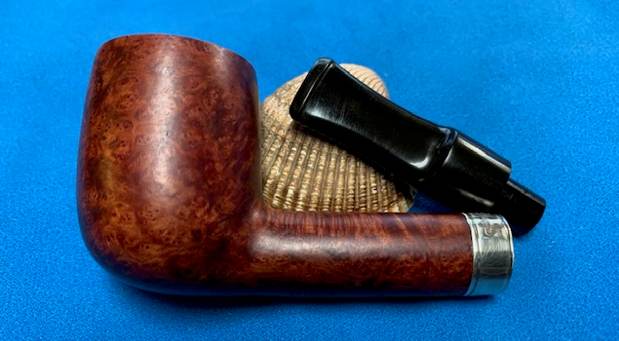
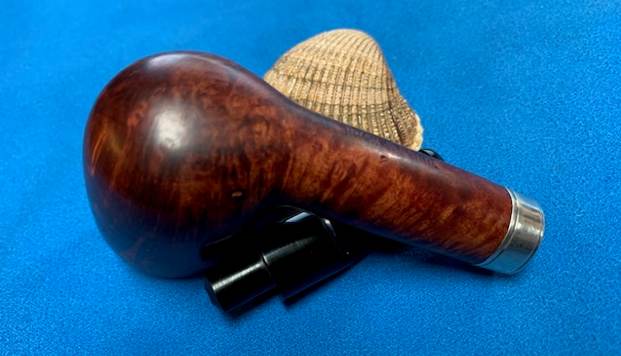
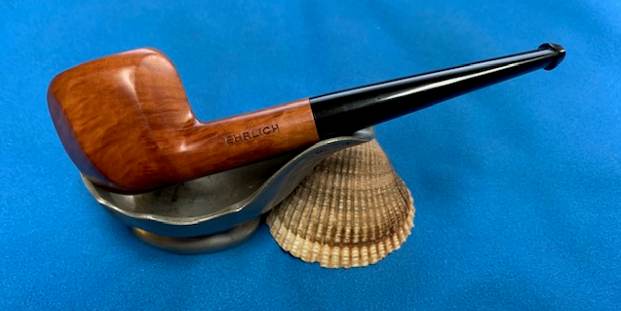
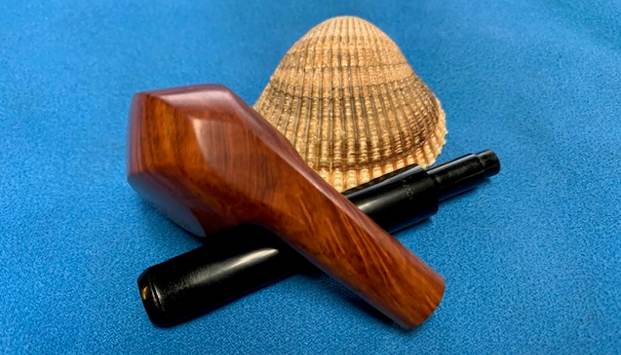
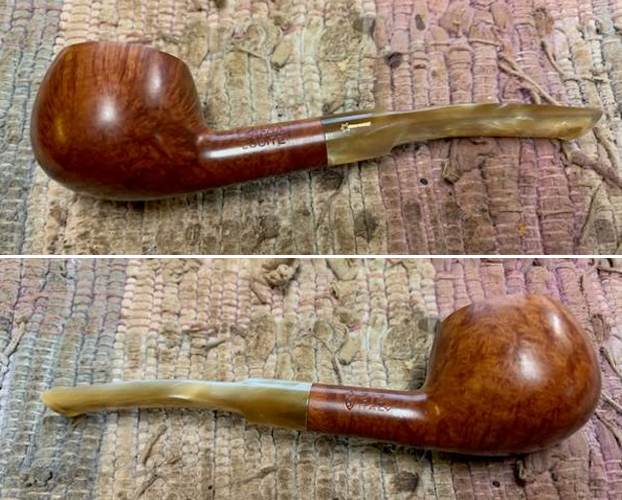
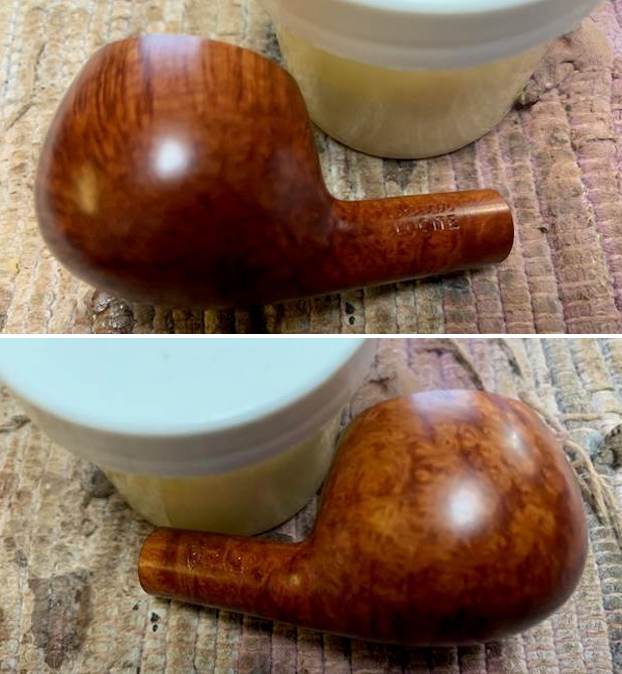
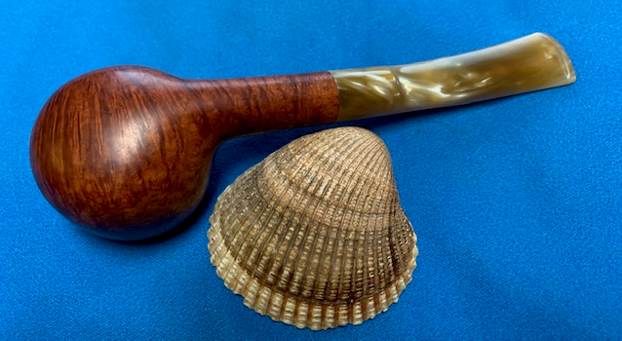
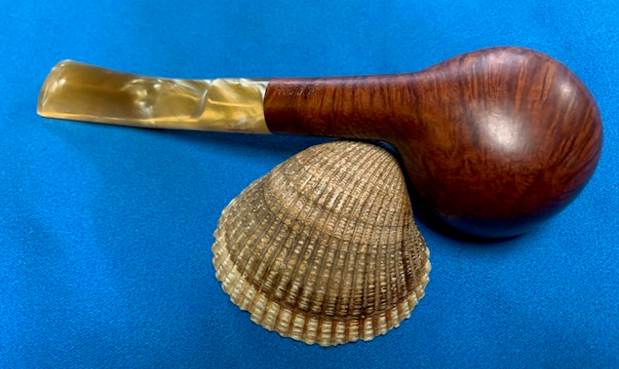
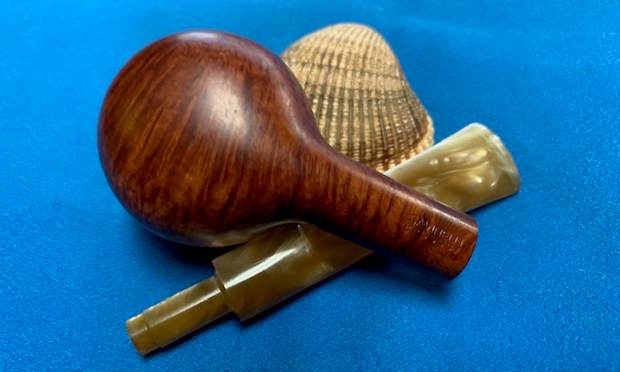
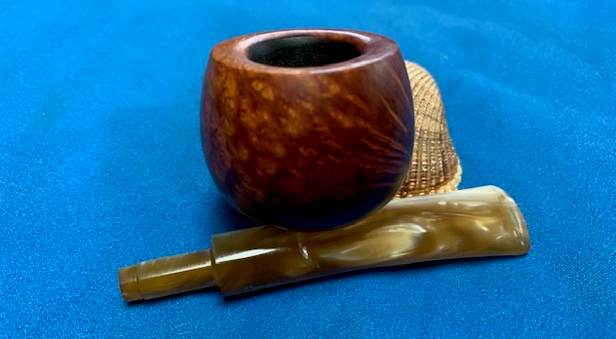
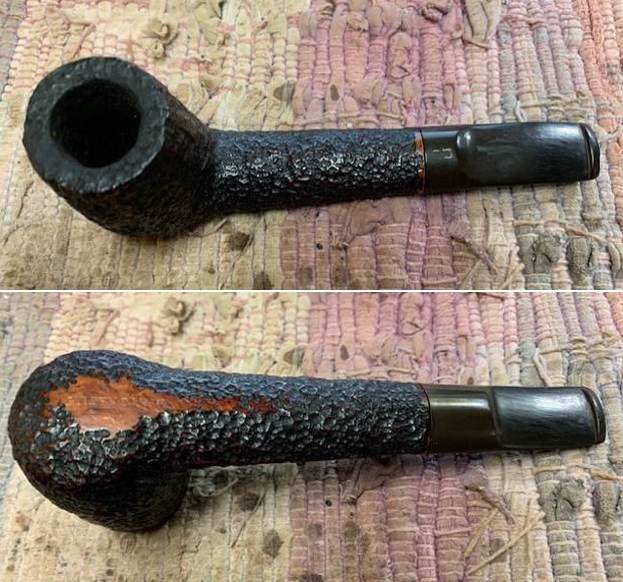
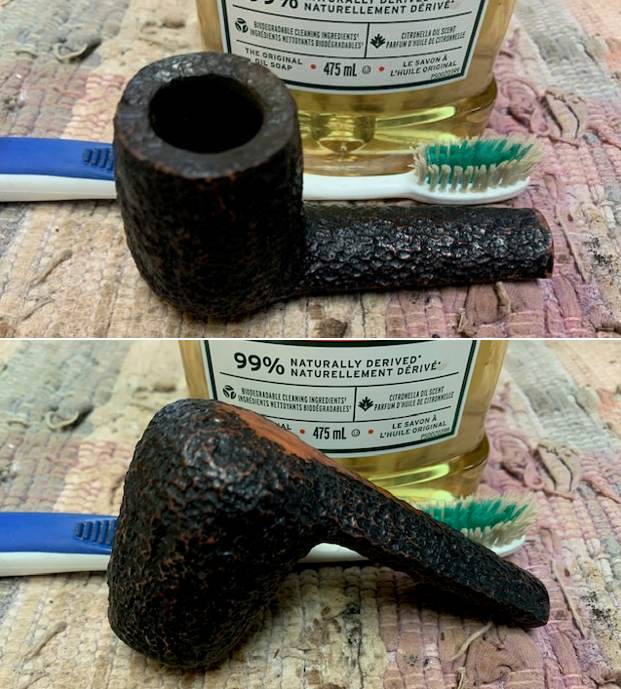
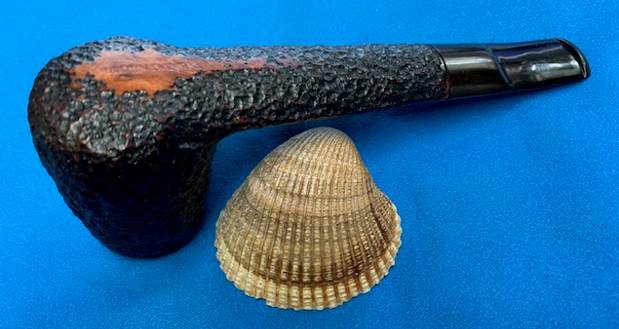
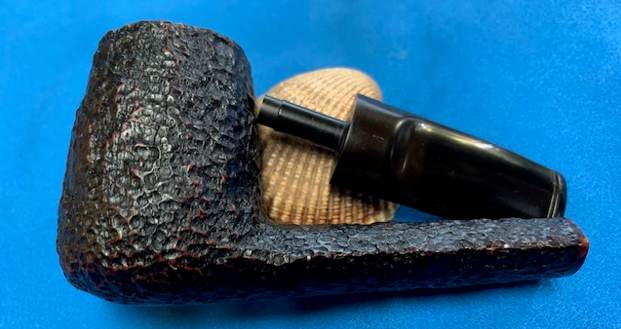
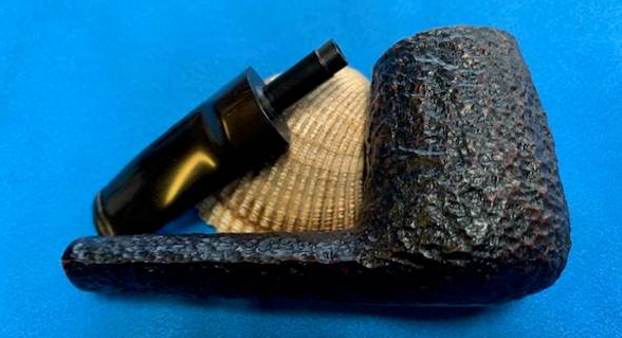
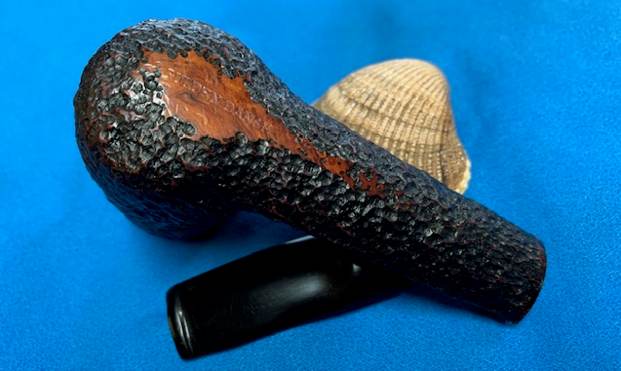
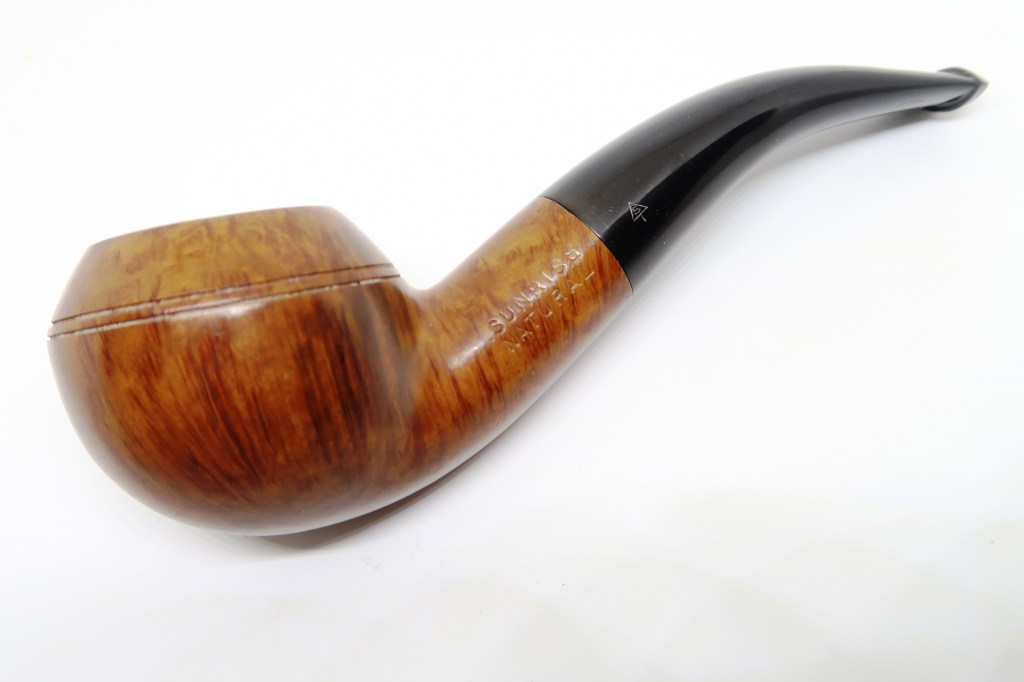
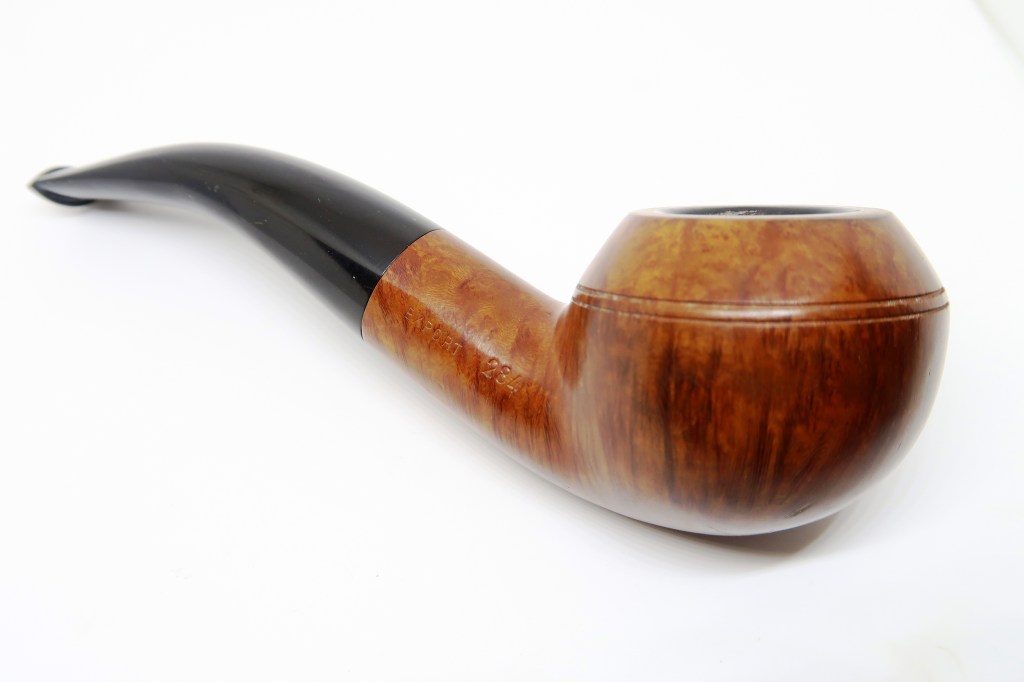
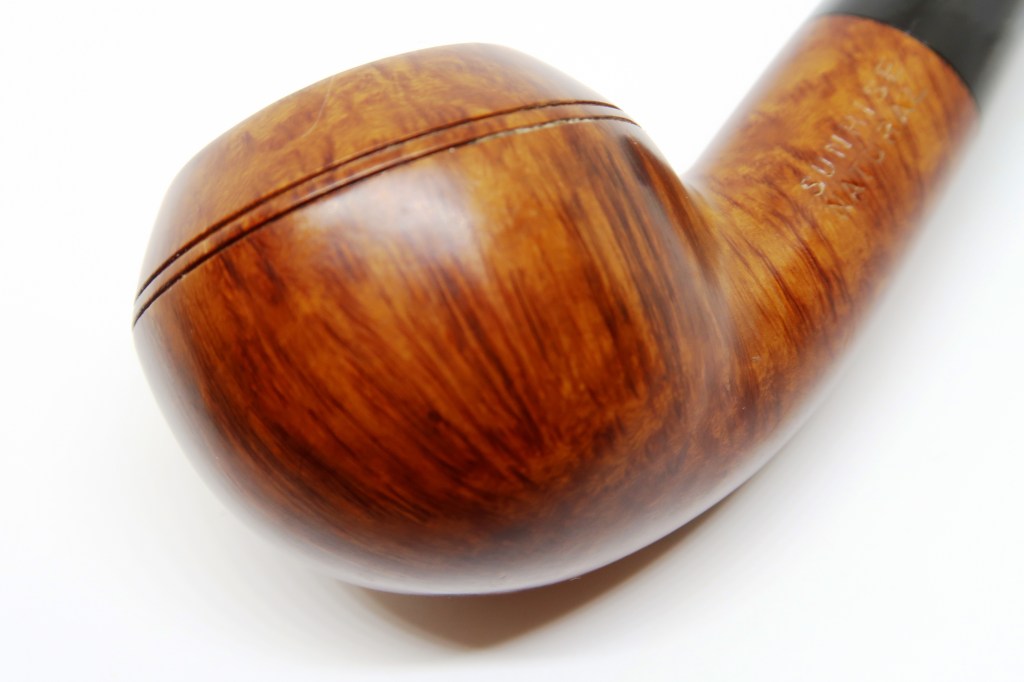
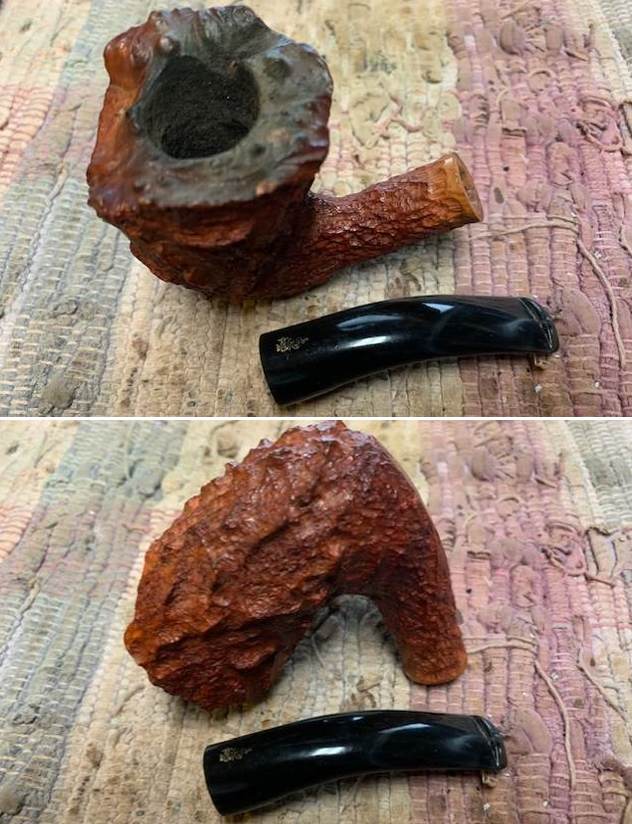
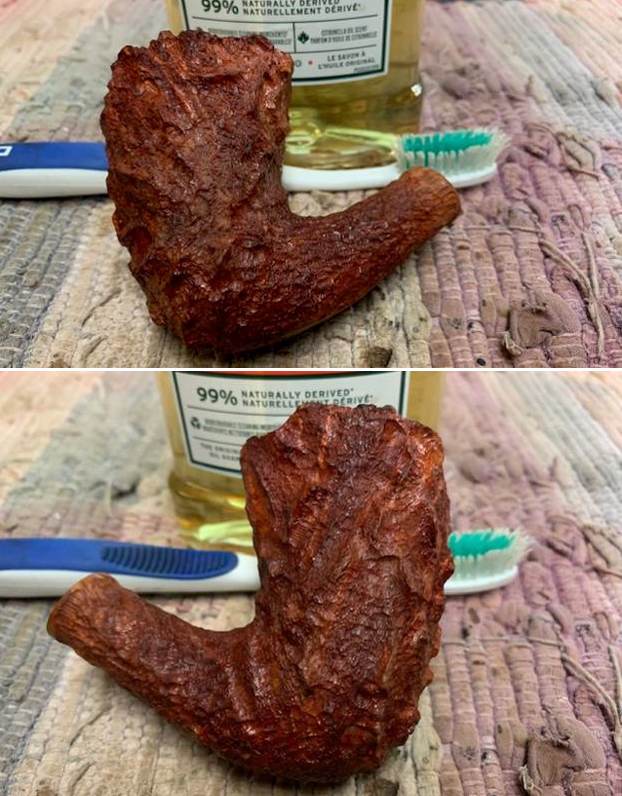
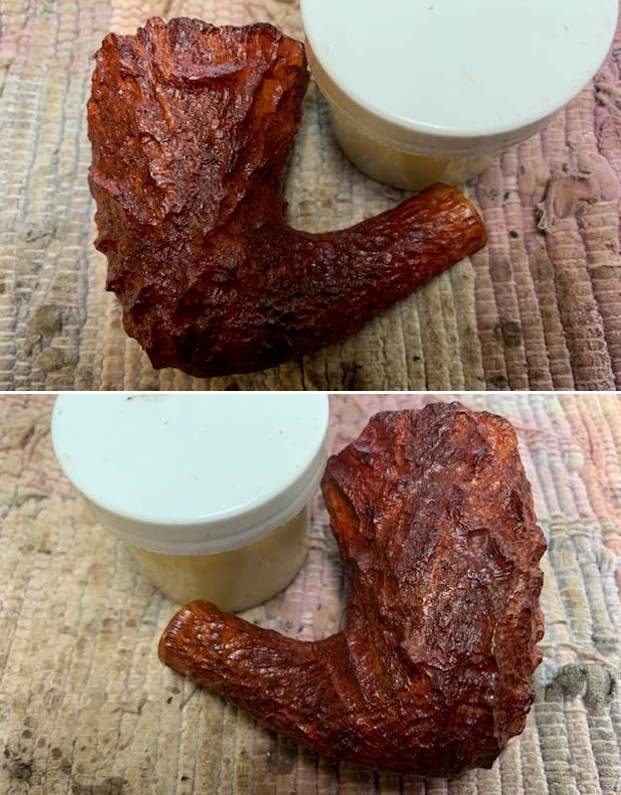
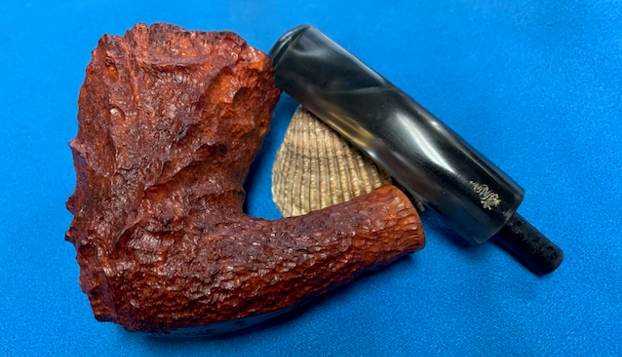
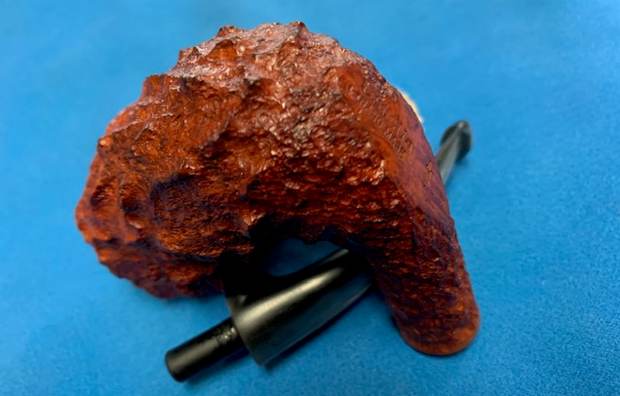
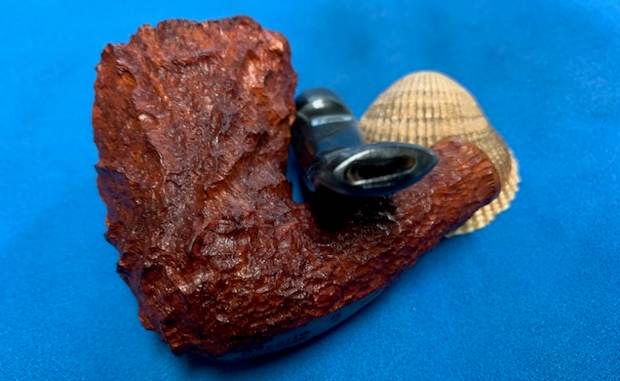
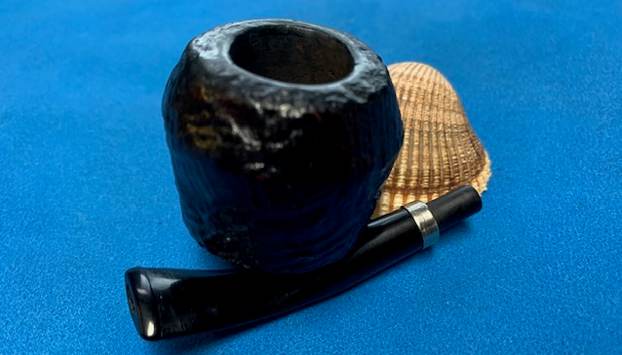
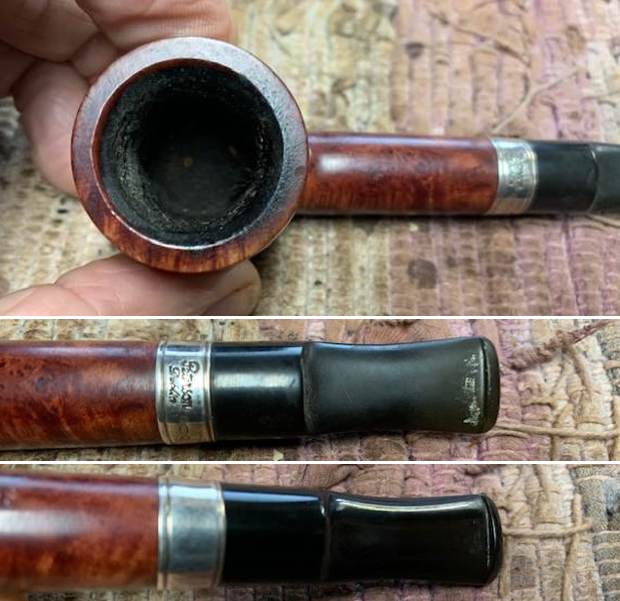
I took photos of the sides and heel of the bowl to give a picture of what the briar around the pipe looked like. There is some stunning grain under the grime.  
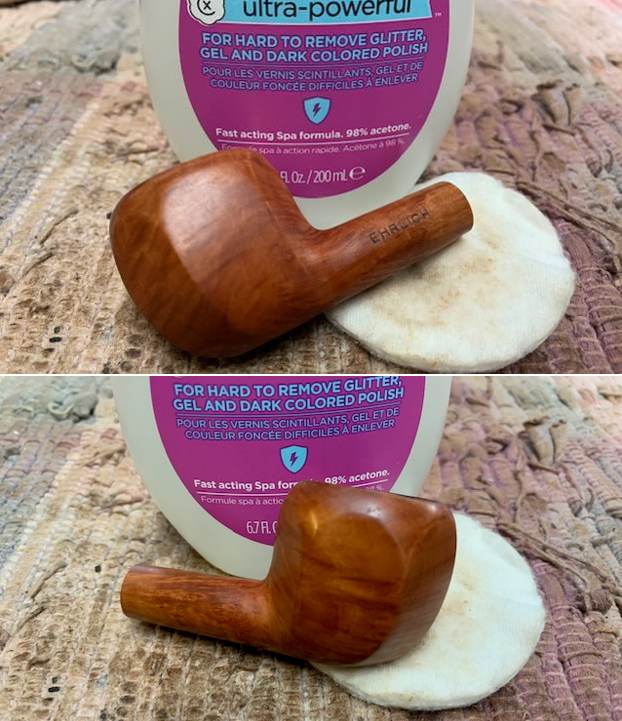
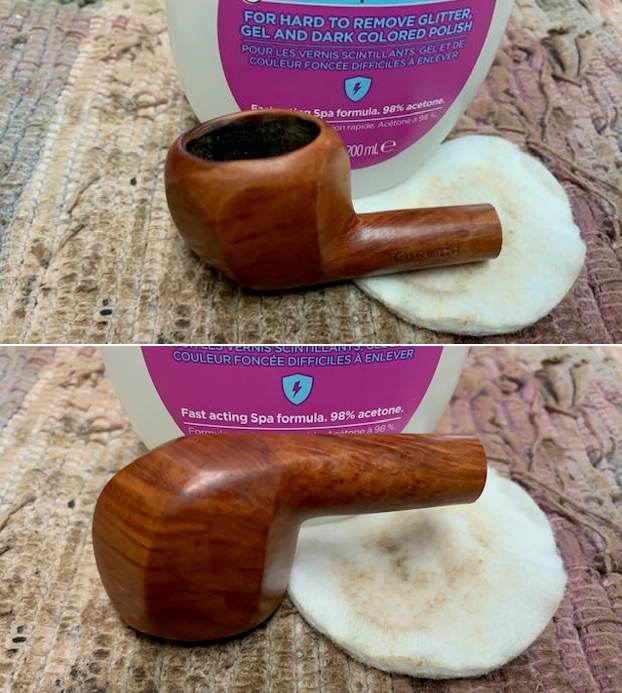
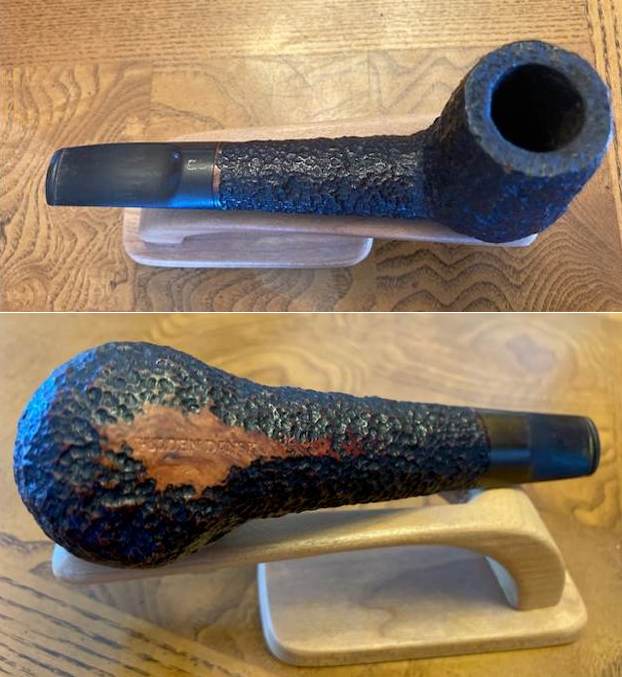
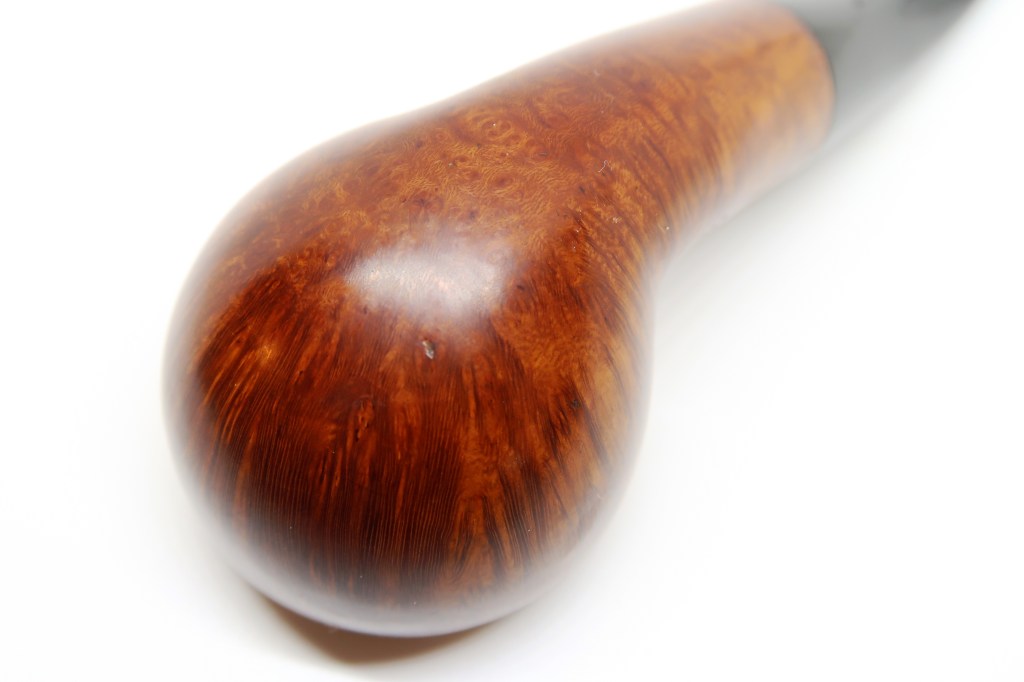
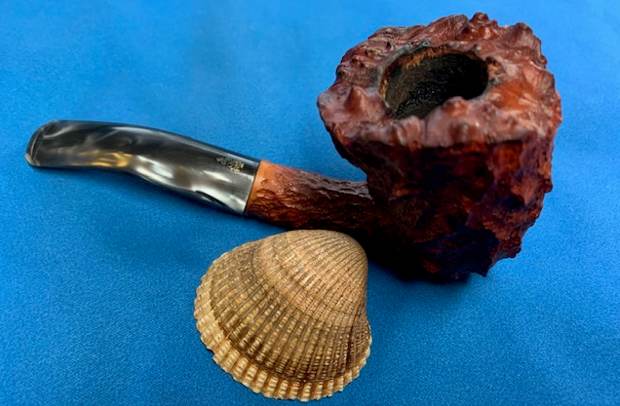
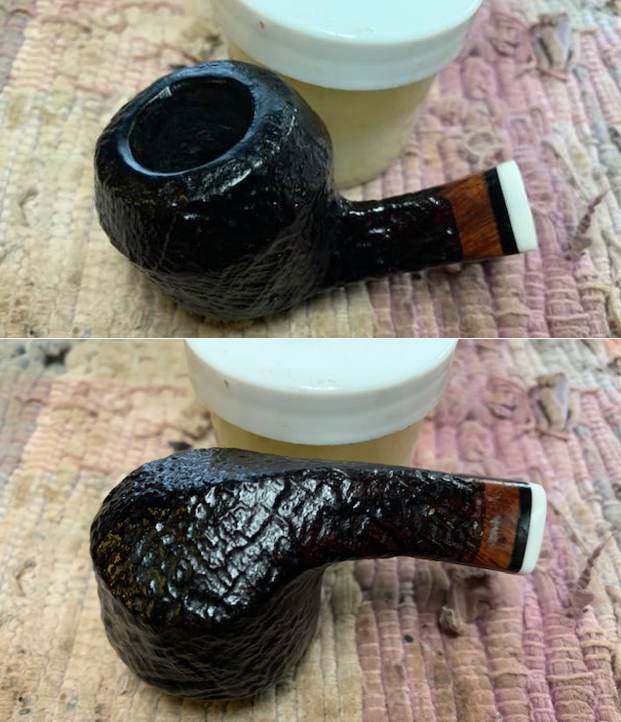
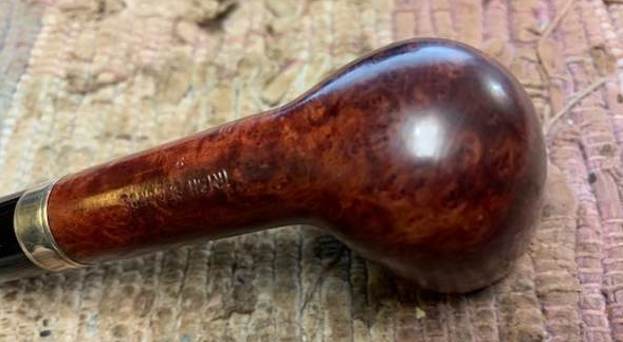
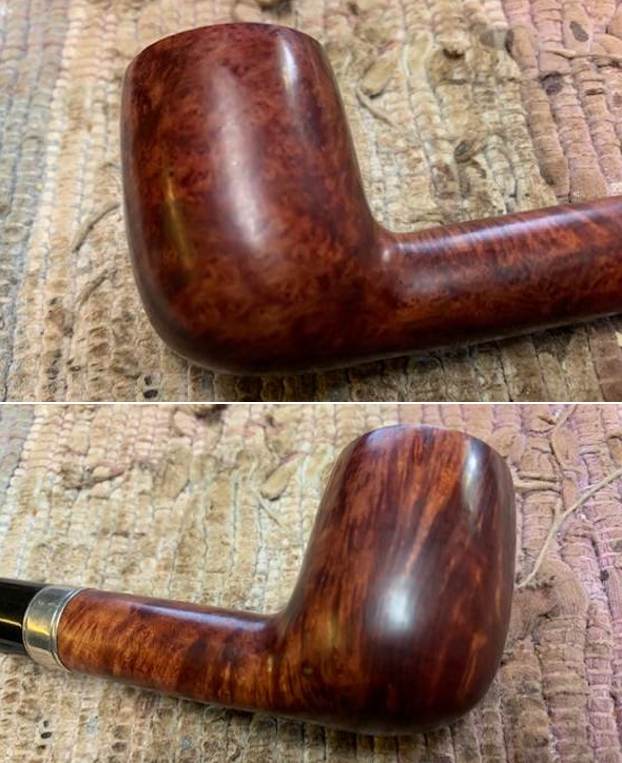
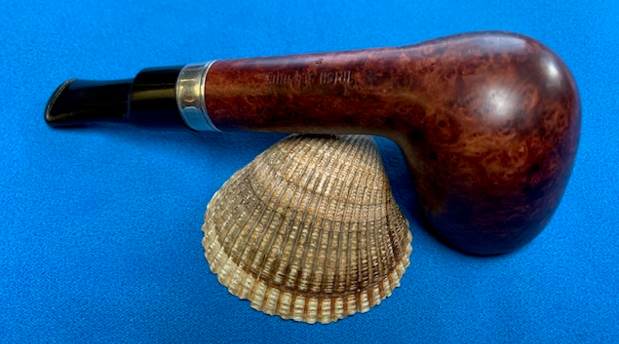
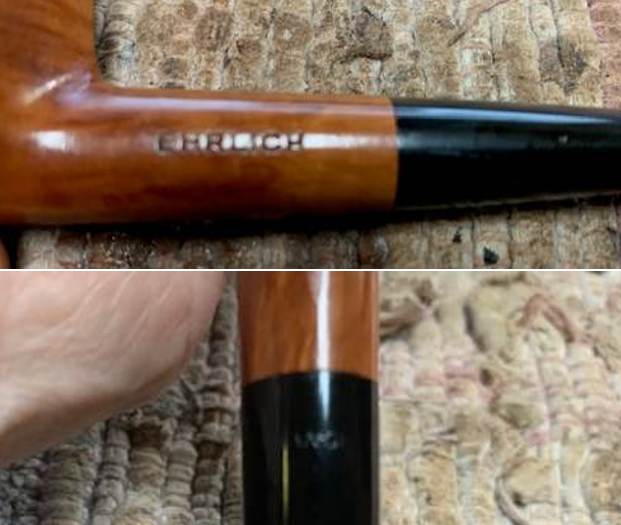
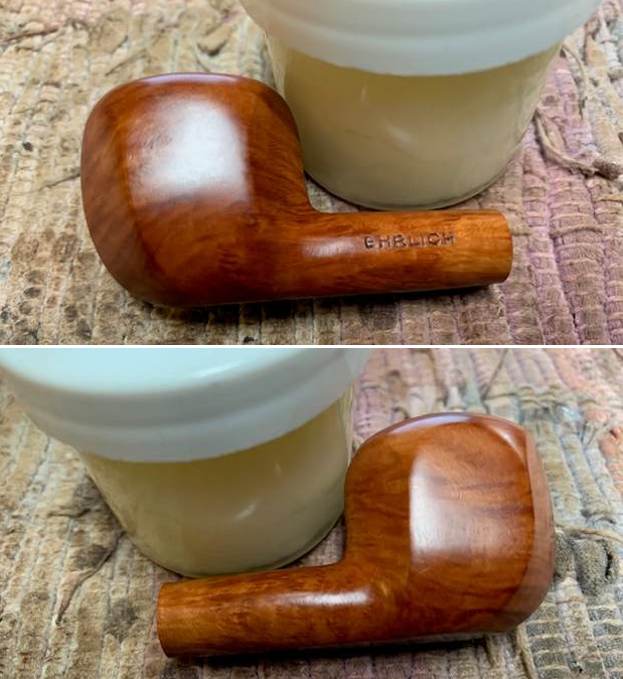
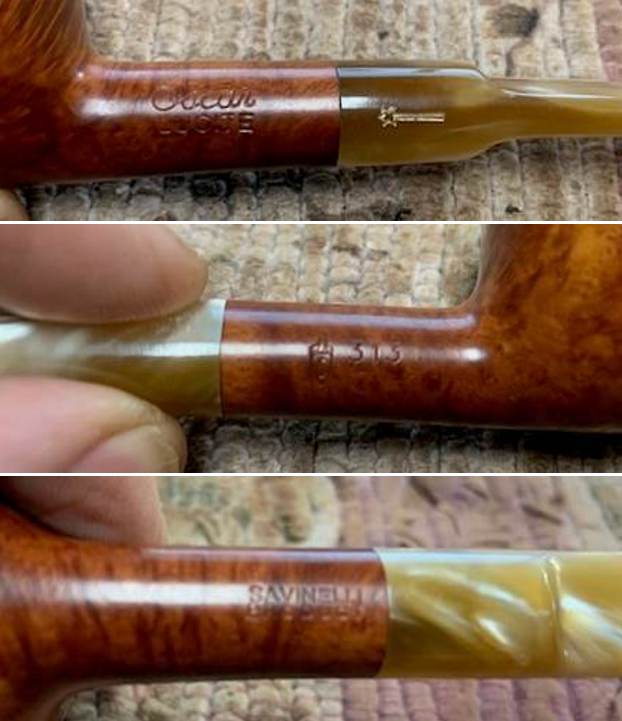
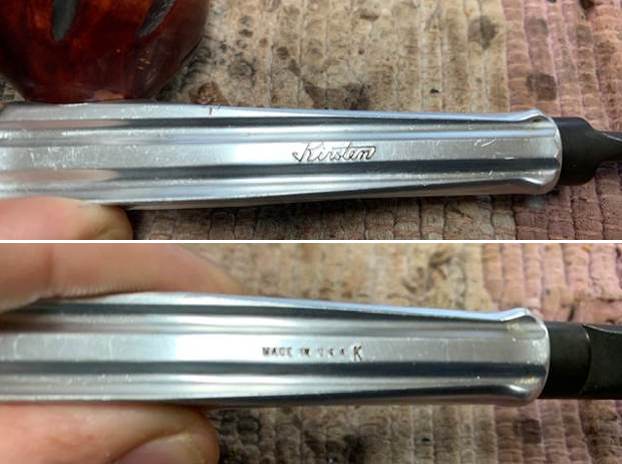
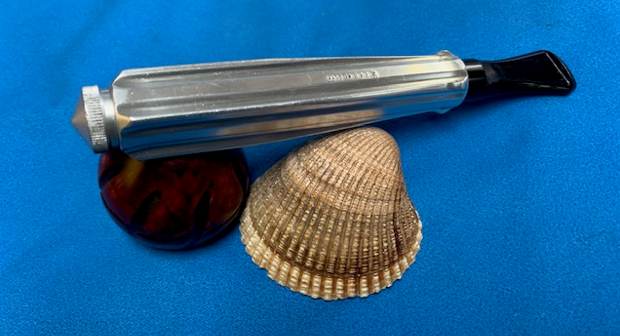
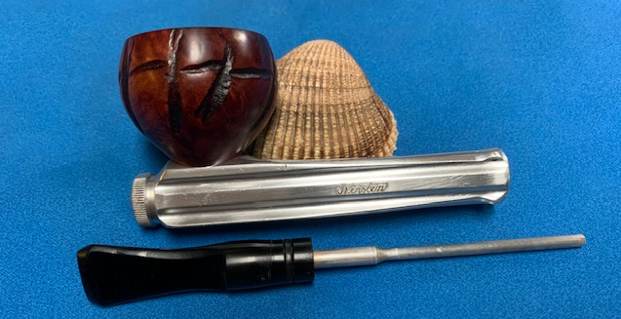
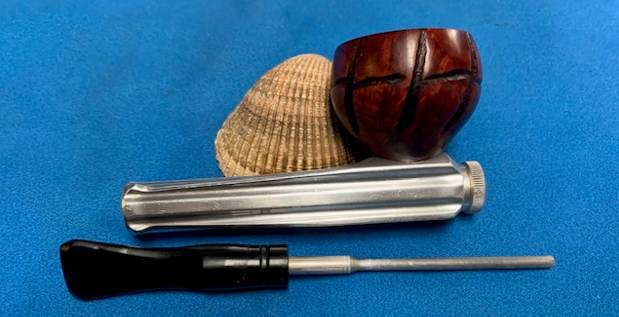
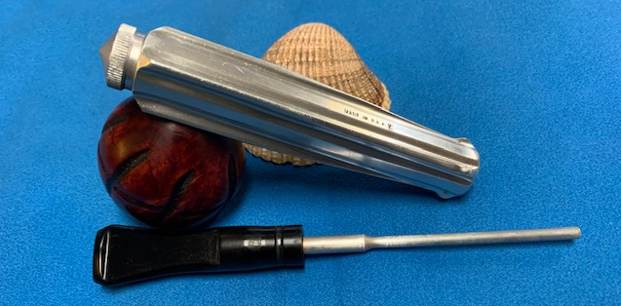
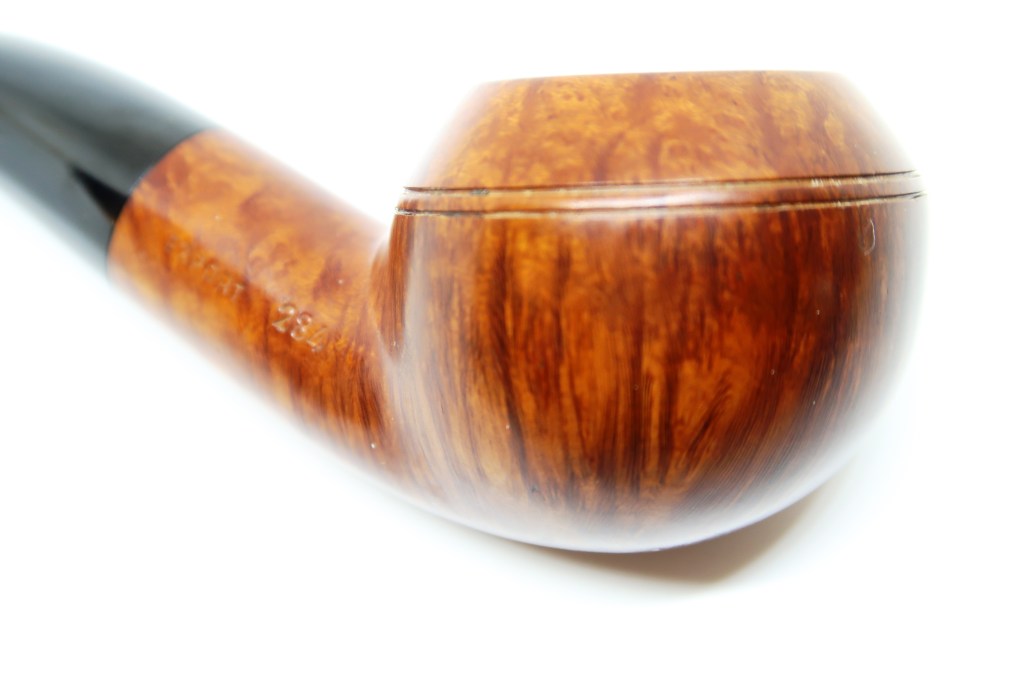
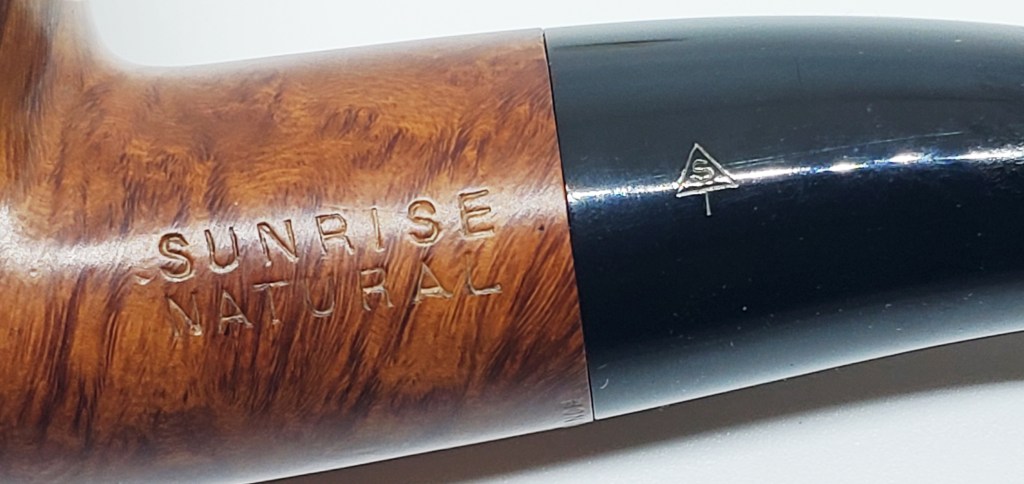
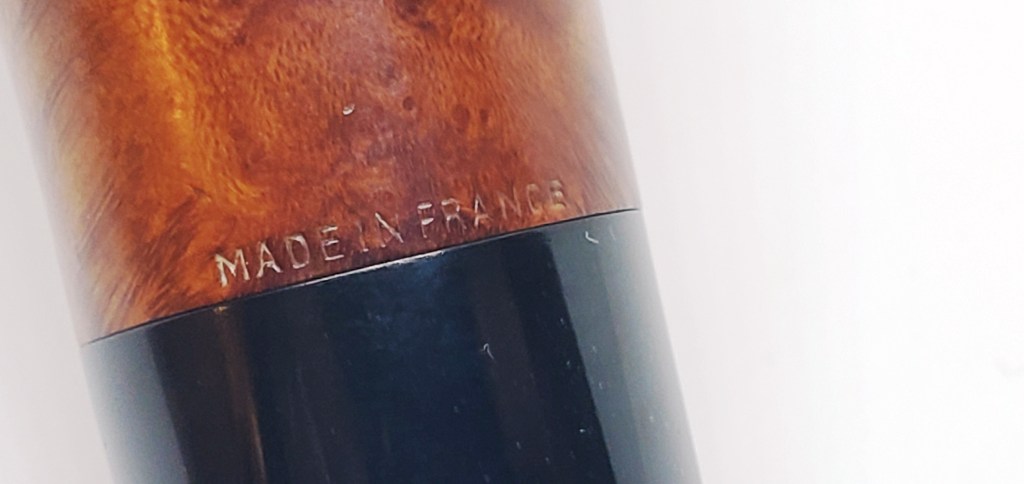
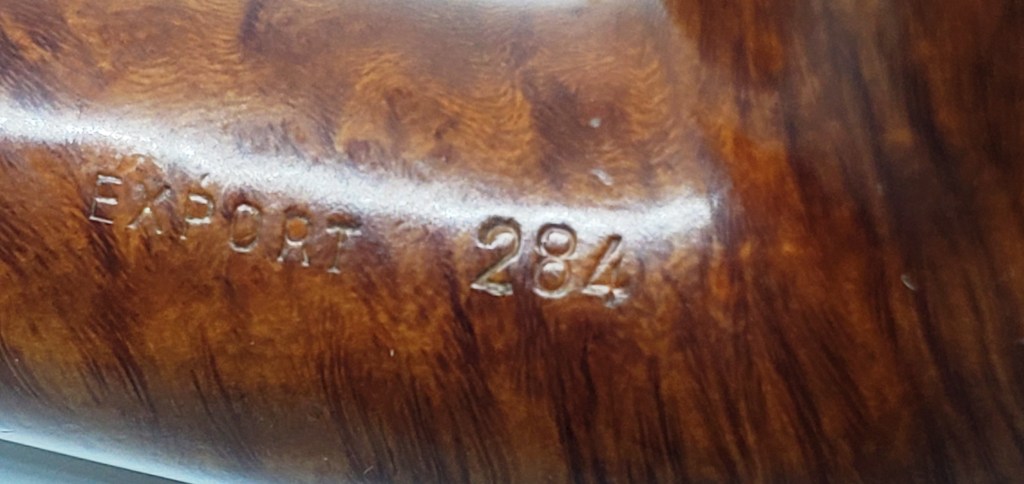
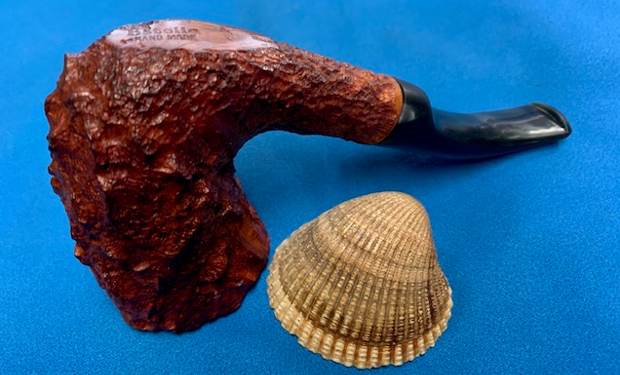
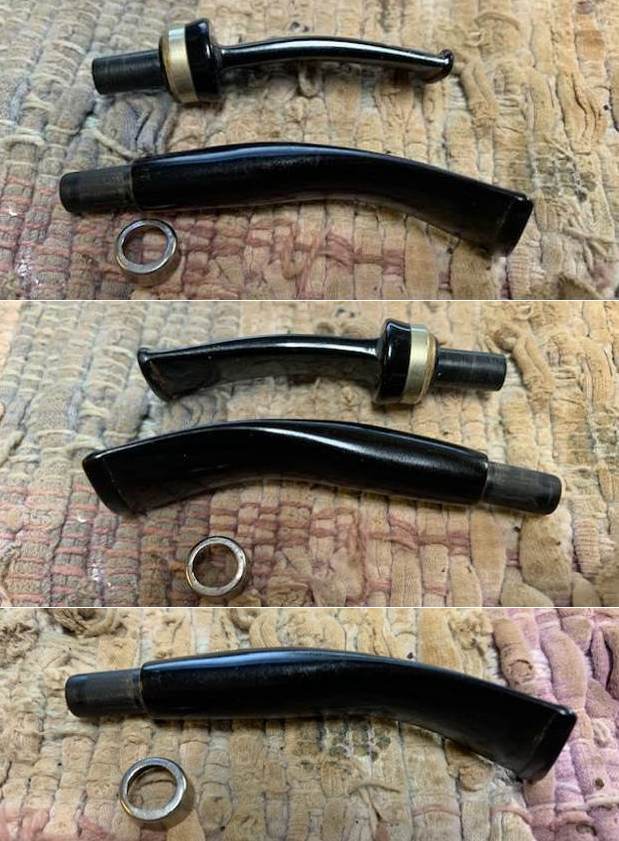
I took photos of the stamping on the underside of the shank and on the band. It reads as noted above and is clear and readable. 
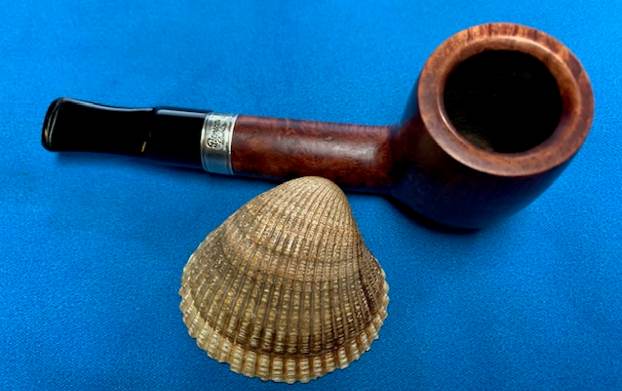
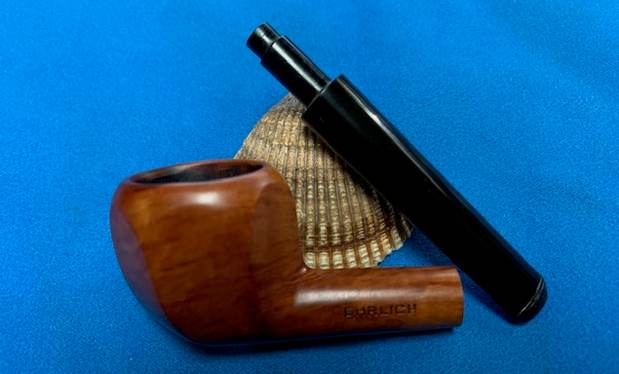
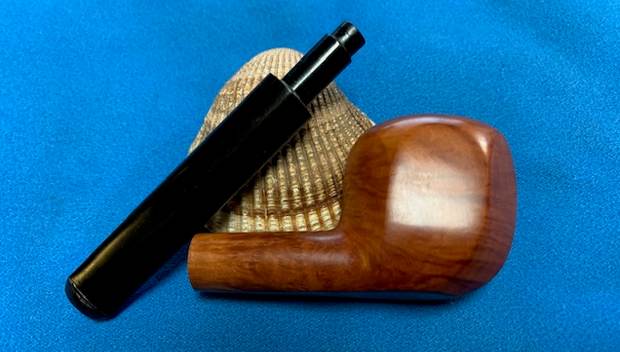
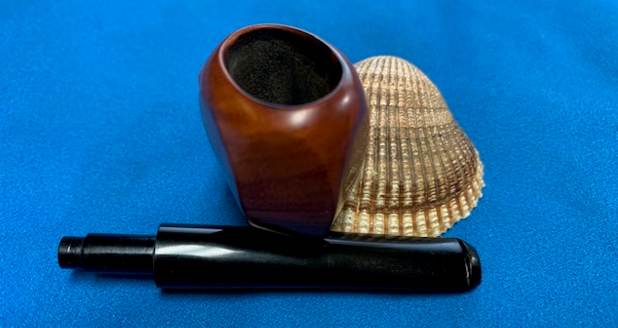
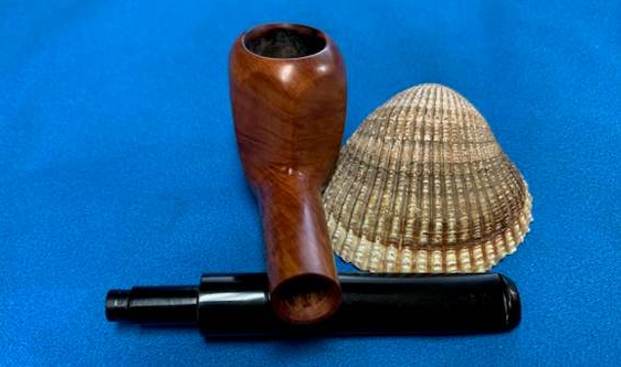
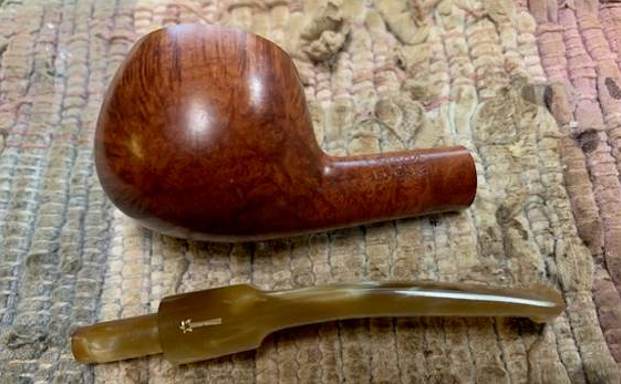
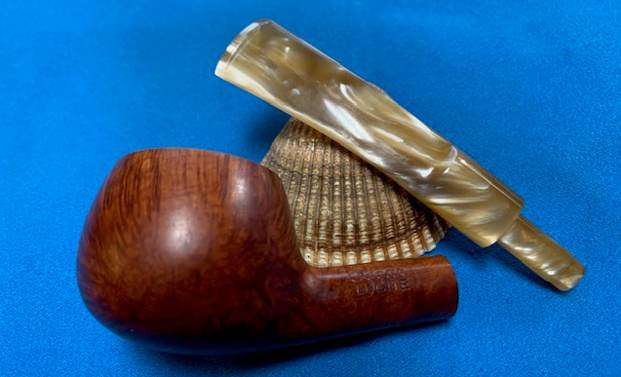
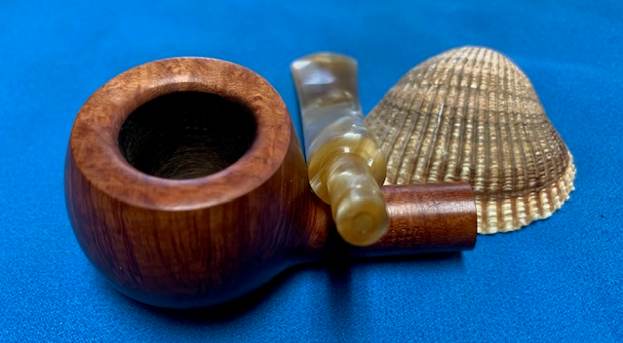
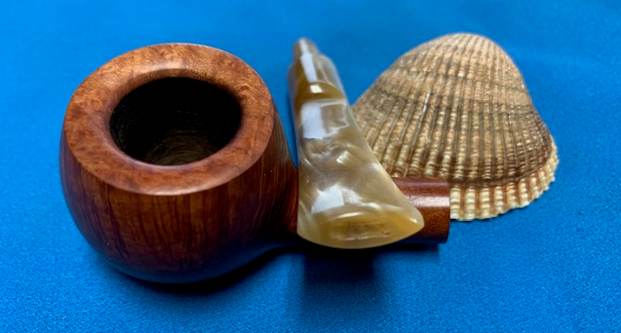
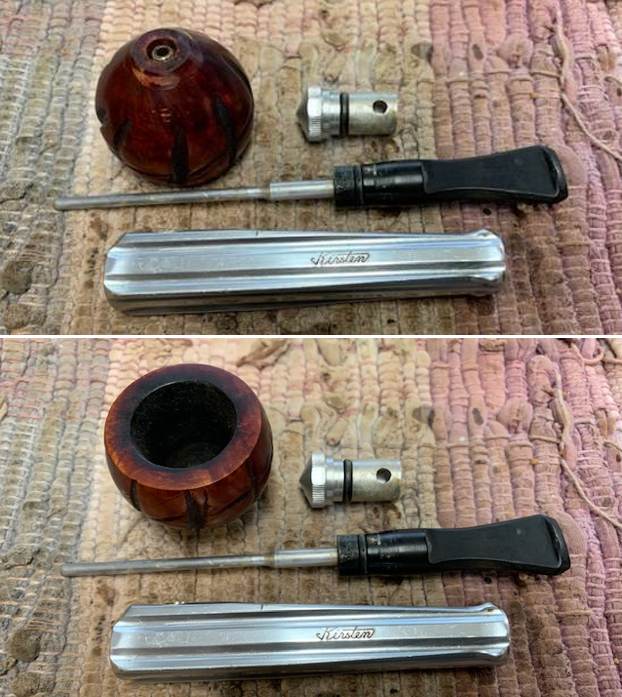
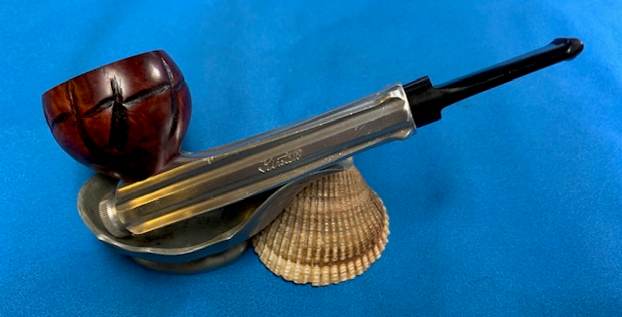
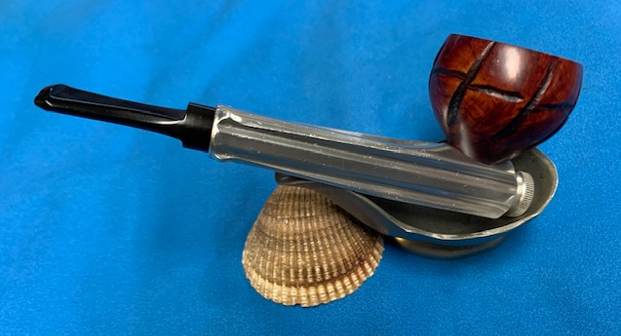
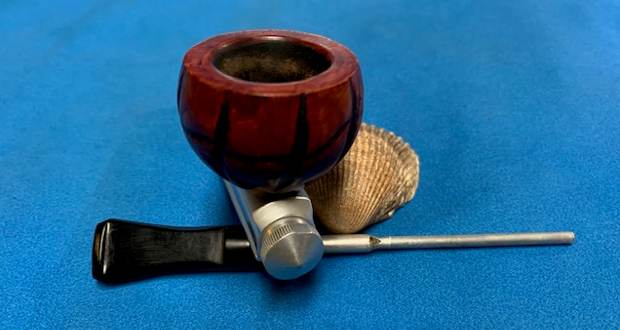
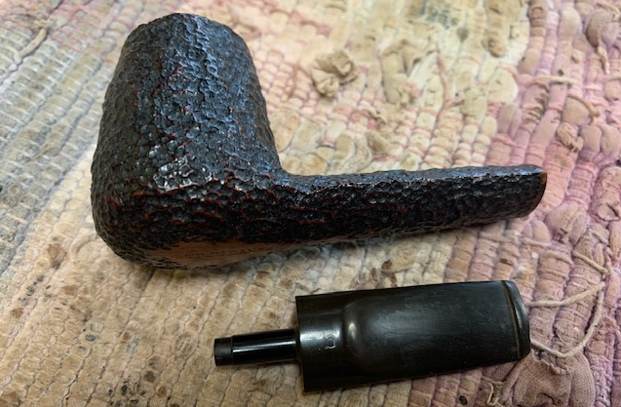
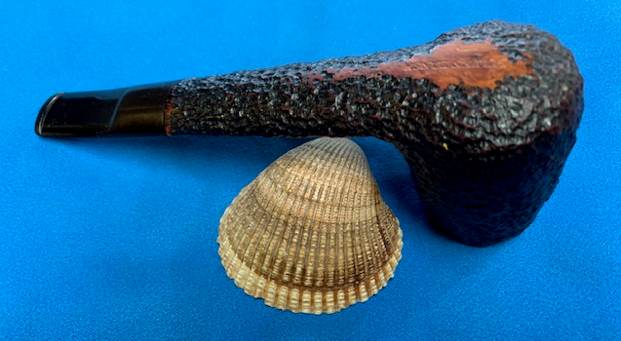
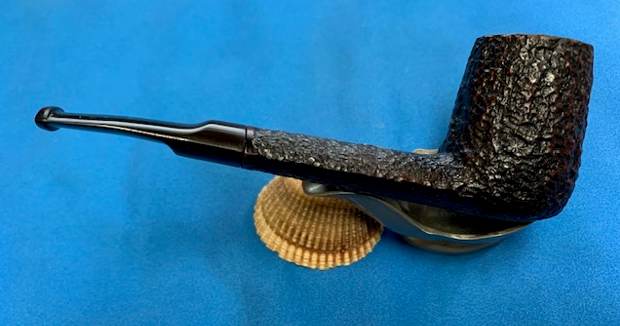
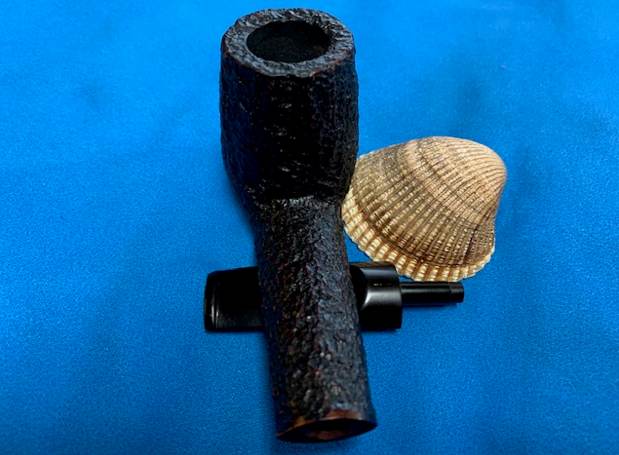
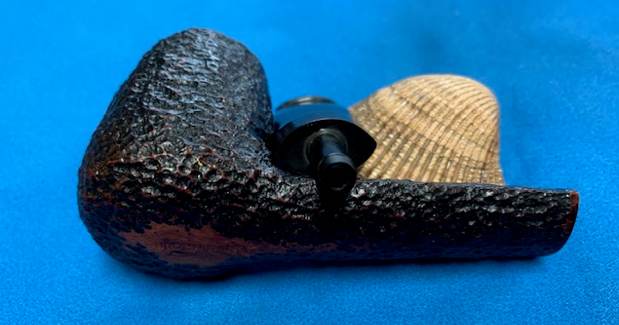
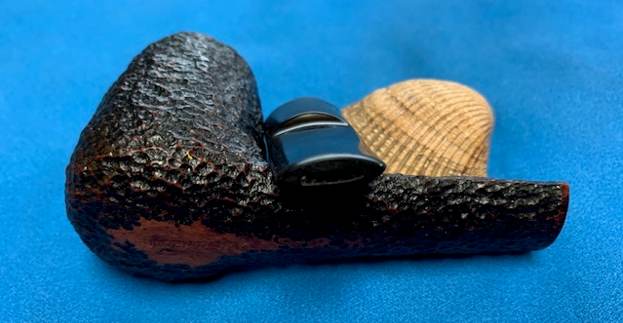
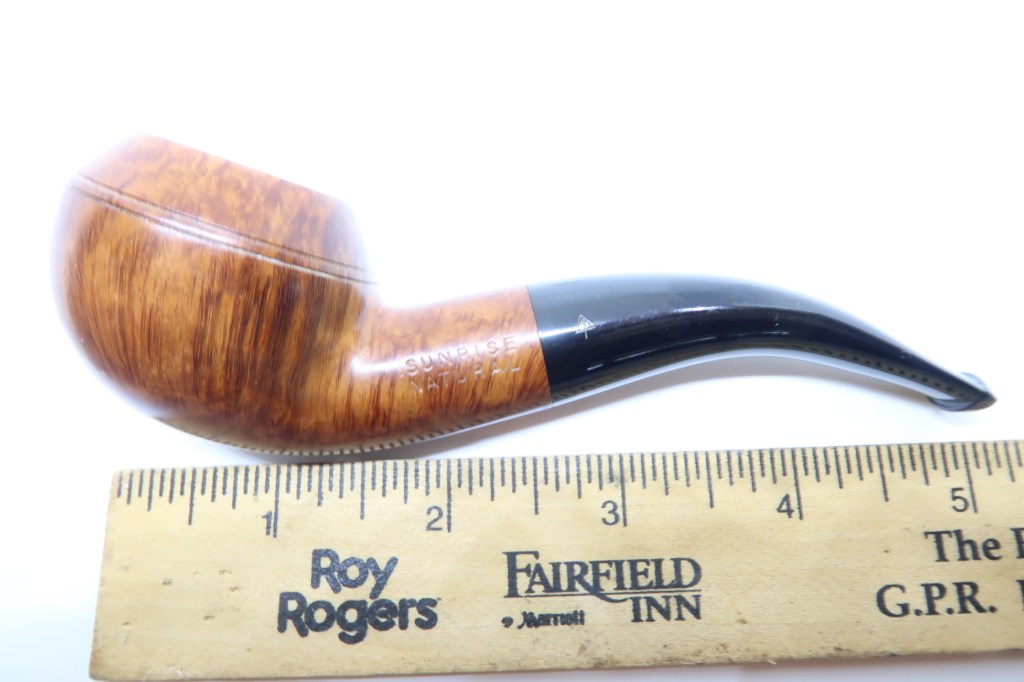
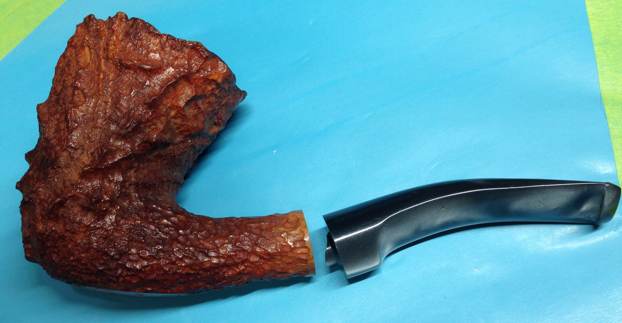
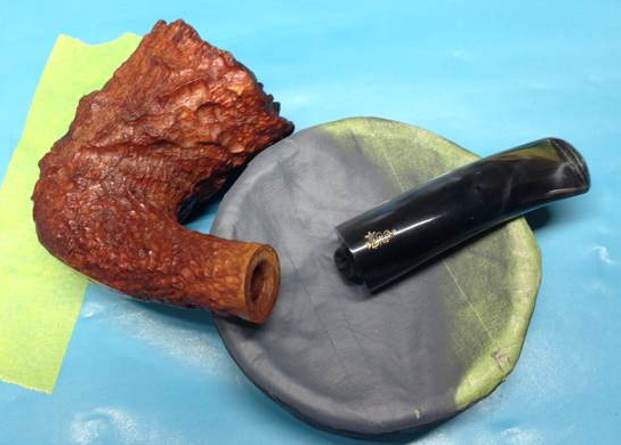
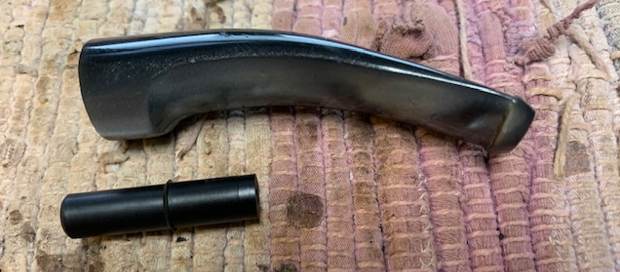
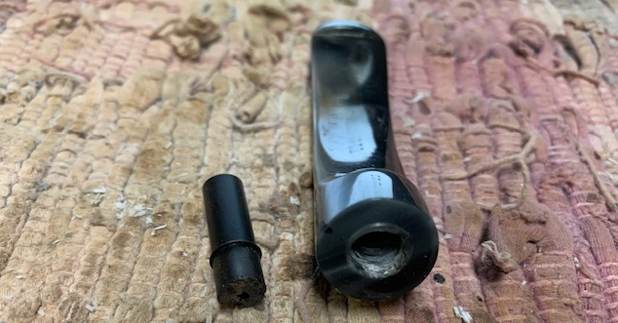
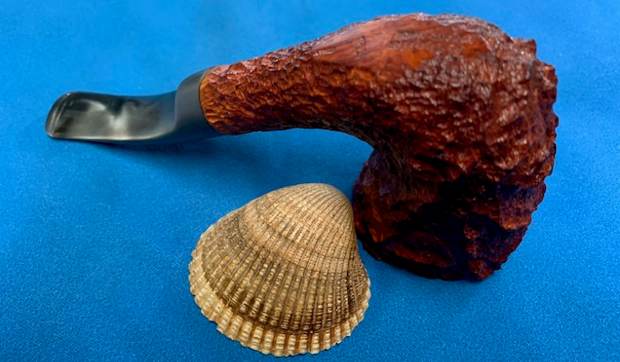
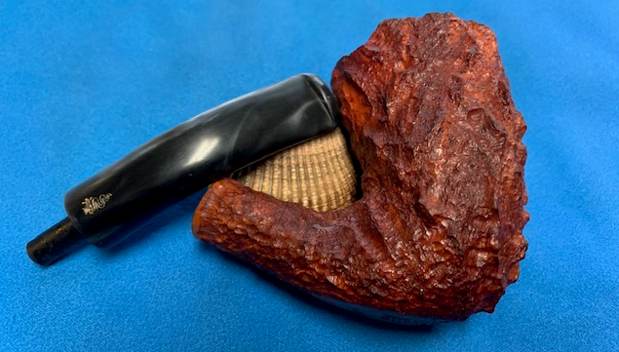
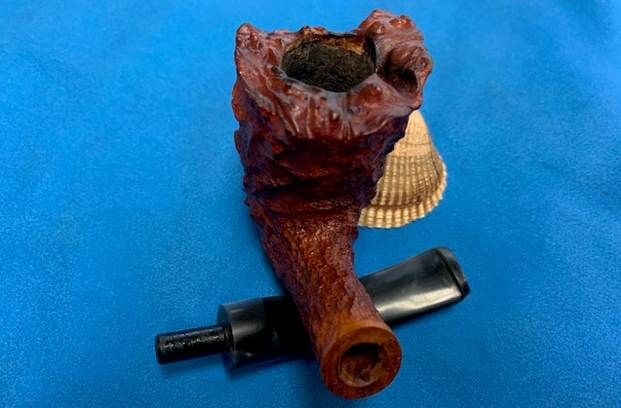
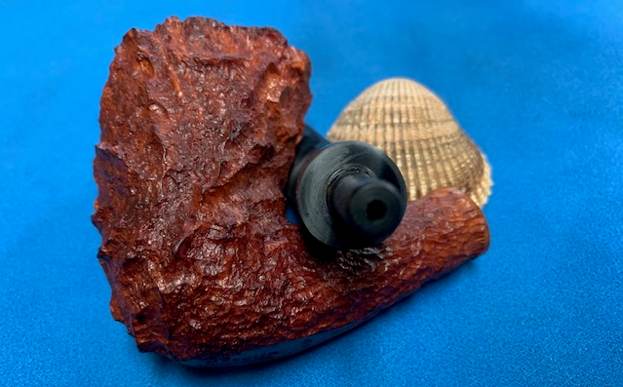
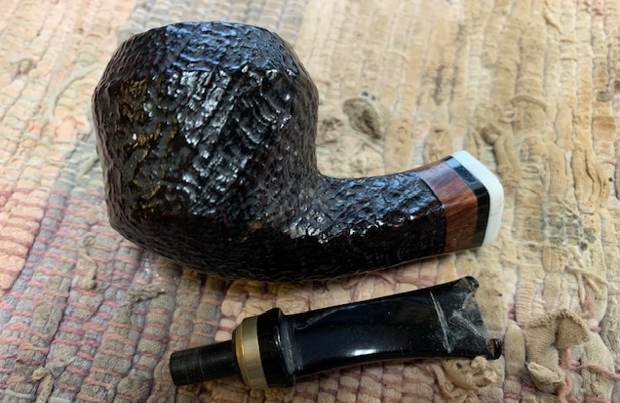
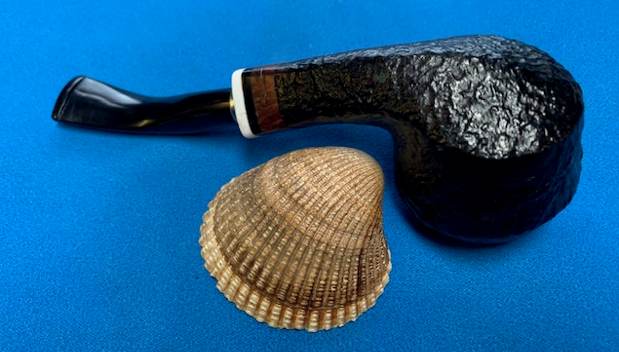
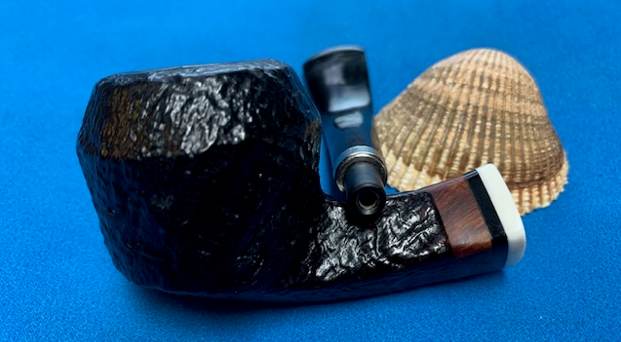
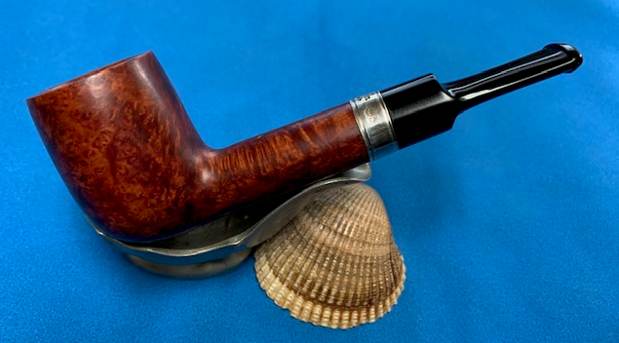
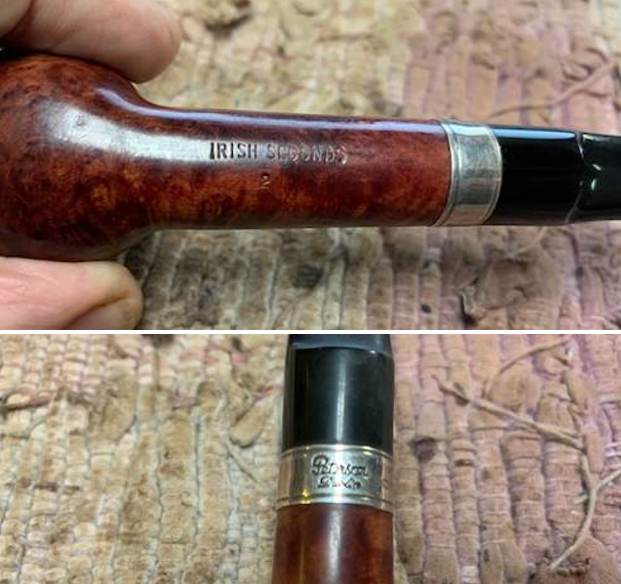
I removed the stem from the shank and took a photo of the pipe to give a sense of the proportion of this thick shank Lovat.
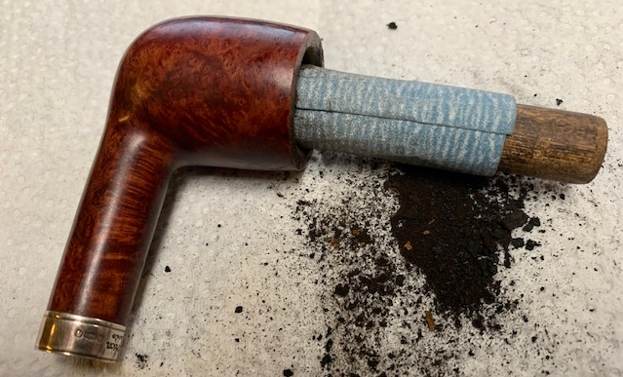
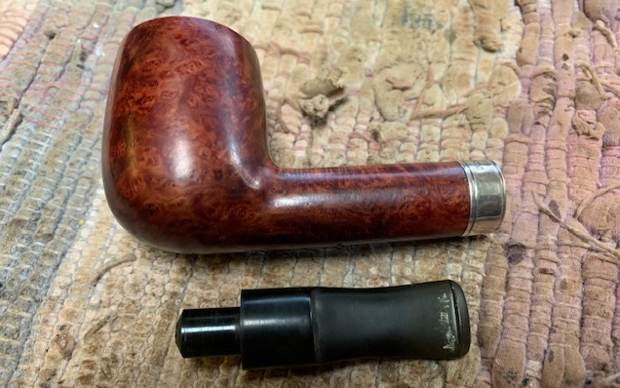
I turned to Pipedia to read the article on Irish Seconds (https://pipedia.org/wiki/Irish_Seconds). I quote it below in full.

Irish Second pipes begin life alongside Peterson pipes in Dublin, but at some point a flaw appears making future life as one of those celebrated pipes impossible. At this point the pipes were roughly finished, given a standard vulcanite stem instead of a P-Lip, and stamped only with “Irish Second” and “Made in the Republic of Ireland”. These pipes were sold at a far more affordable rate than Peterson pipes, but are believed to no longer be sold new.

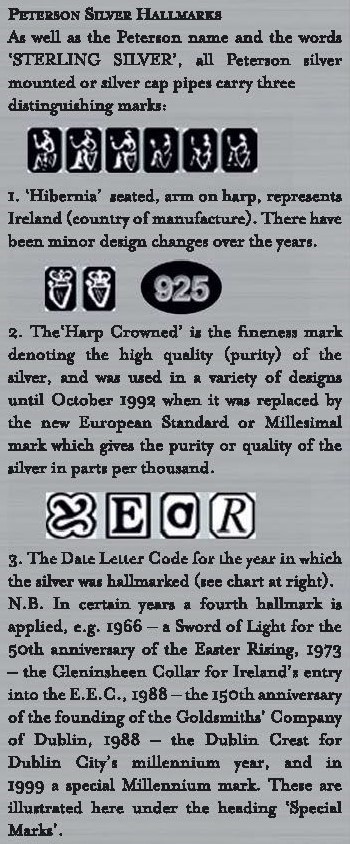
I also wanted to be able to interpret the hallmarks on the silver band. I have captured a portion of the chart that include below that helps to clarify the meaning of each of the three hallmarks. I like the Hallmark feature on the higher end Peterson pipes with Sterling silver bands. It helps to pin down the date even further.

“Hibernia” seated, arm on harp represents Ireland (country of manufacture). There have been minor design changes over the years.

The “Harp Crowned” is the fineness mark denoting the high quality (purity) of the silver, and was used in a variety of designs until October 1992 when it was replaced by the new European Standard or Millesimal mark which gives the purity or quality of the silver in parts per thousand.

The Date Letter Code for the year in which the silver was hallmarked (see the chart below). In certain years a fourth hallmark is applied – for example 1966 – a Sword of Light for the 50th anniversary of the Easter Rising 1973. There were also other marks used for the fourth hallmark.

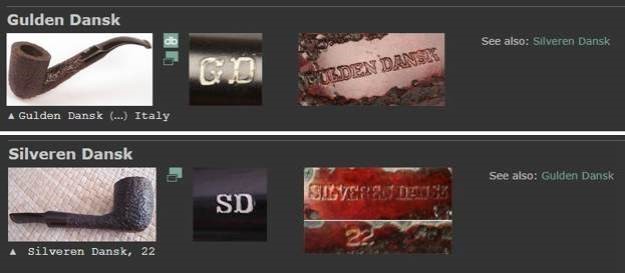
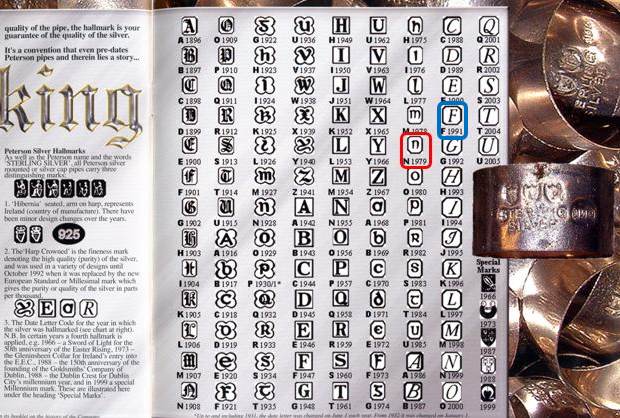
I turned to a blog I wrote on rebornpipes that had a Peterson’s catalogue and a hallmarking chart (https://rebornpipes.com/tag/peterson-hallmark-chart/). I have included it below. On the chart I looked for an upper case italic F in a hexagonal cartouche. I also included a enlargement of the chart and drawn a box around the “F” in blue in the second photo below showing a close up of the dates. From that I am able to date the  pipe to 1991.Now I knew I was dealing with a pipe made in 1991. I am not sure how it became an Irish Second rather than one of the first grade lines. Perhaps it is the small fills in the bowl and shank but I have seen others that are full grade that have more fills than this one. It really is a beautiful pipe. Now it was time to work on the pipe itself.

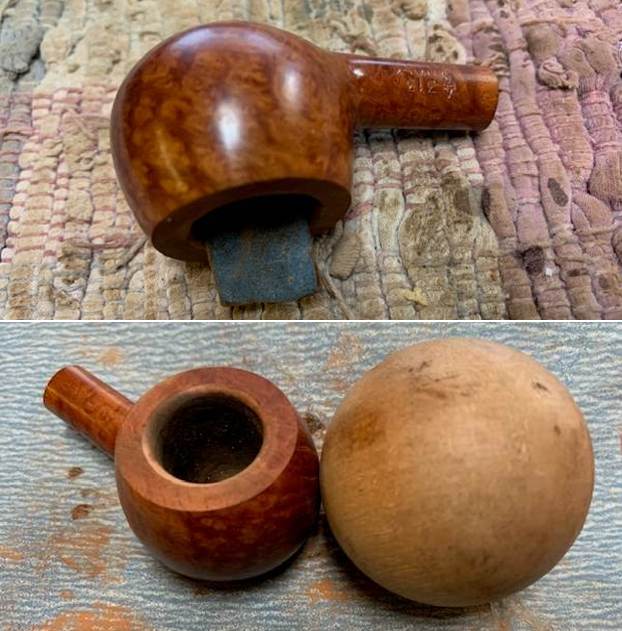
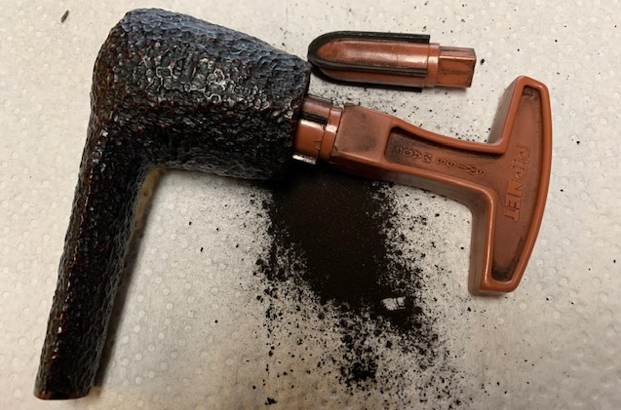
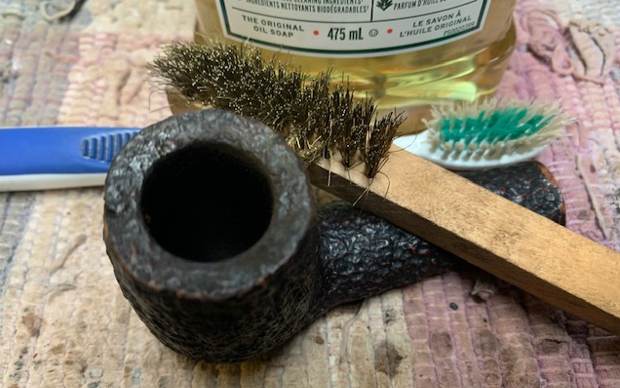
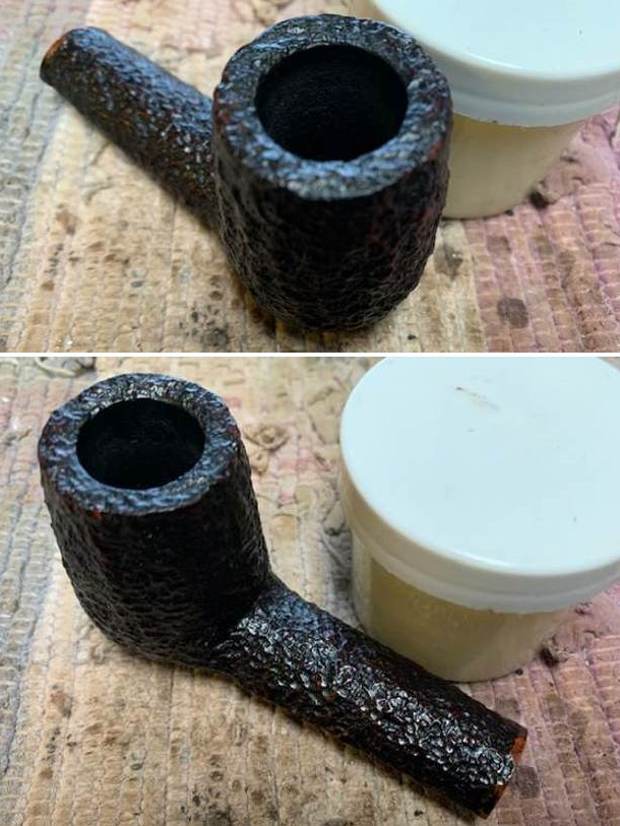
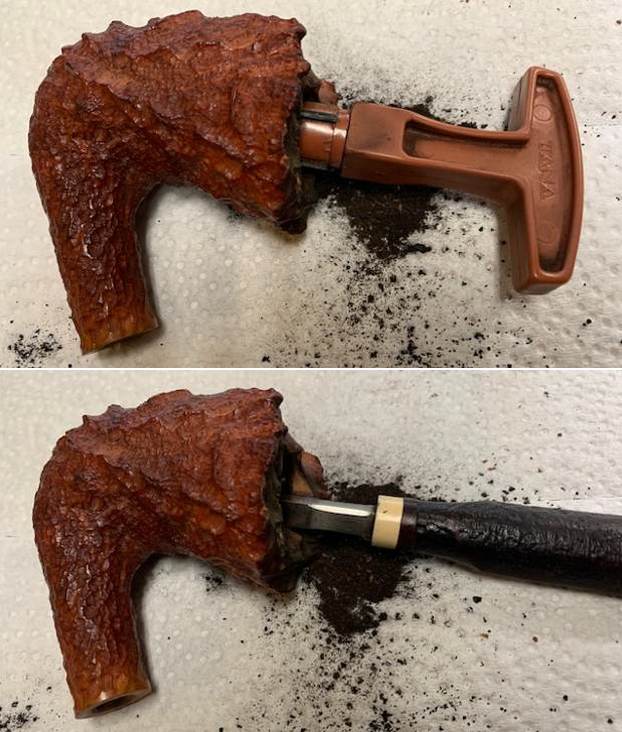
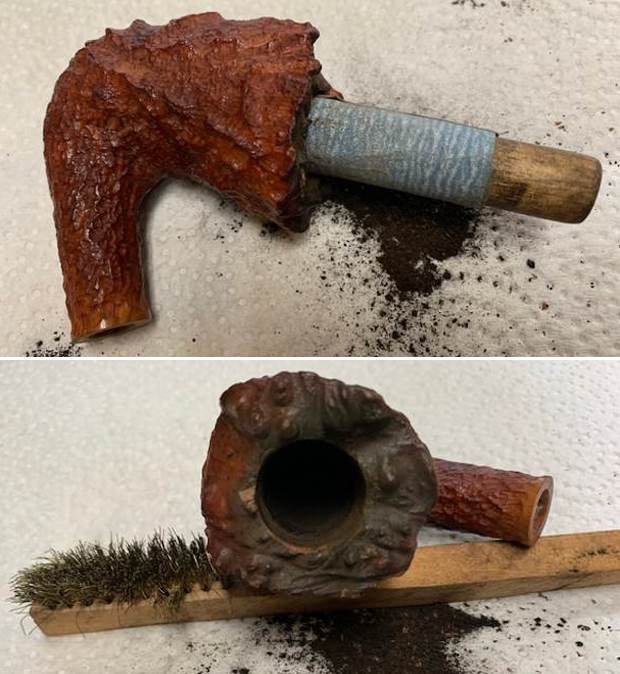
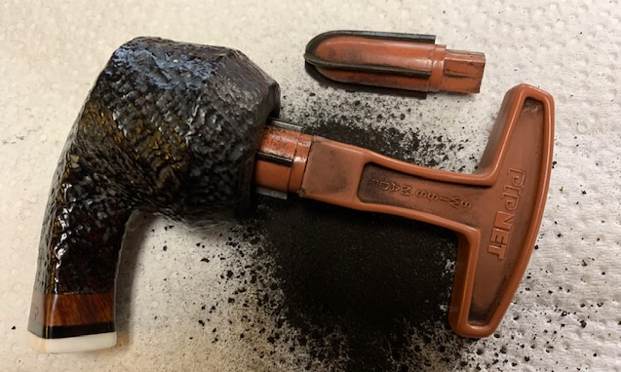
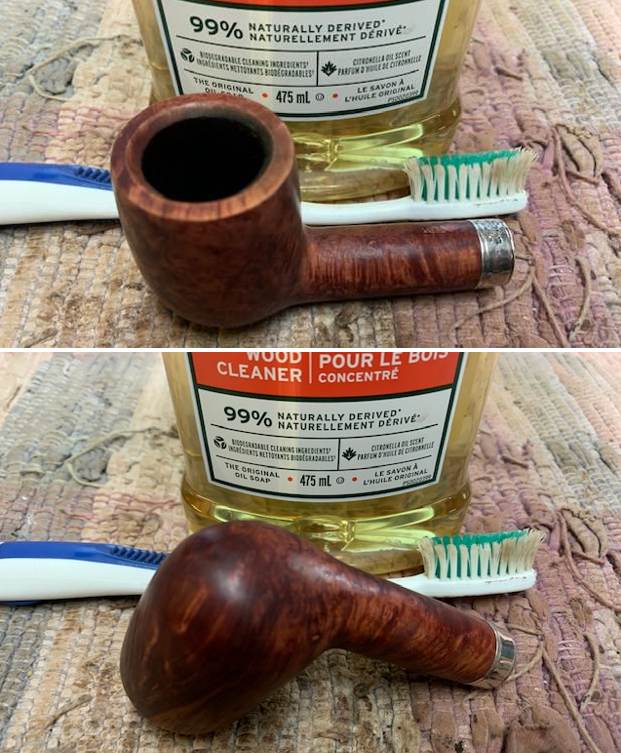
I started my work on the pipe by reaming the bowl the pipe with a PipNet Pipe Reamer using the first and second and third cutting heads to remove the cake. I cleaned up the remnants of the cake on the walls with a Savinelli Fitsall Pipe Knife. I finished by sanding the bowl smooth with 220 grit sandpaper wrapped around a piece of dowel. I scrubbed the externals of the pipe with undiluted Murphy’s Oil Soap with a tooth brush. I rinsed it under running warm water to remove the soap and grime. The bowl and rim top cleaned up really well with the lava coat removed. The inner edge of the rim was in good condition. 
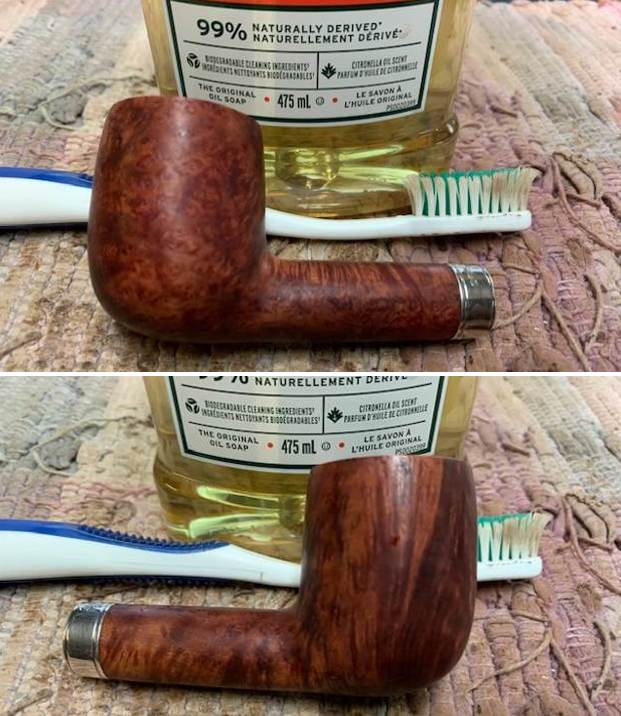
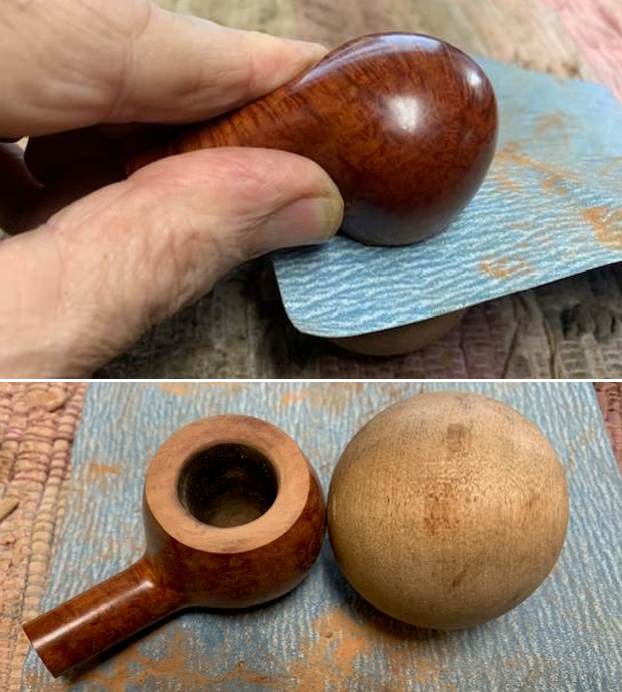
I cleaned up the inner edge of the rim with a folded piece of 220 grit sandpaper. I was able to remove almost all of the darkening with the sandpaper. 
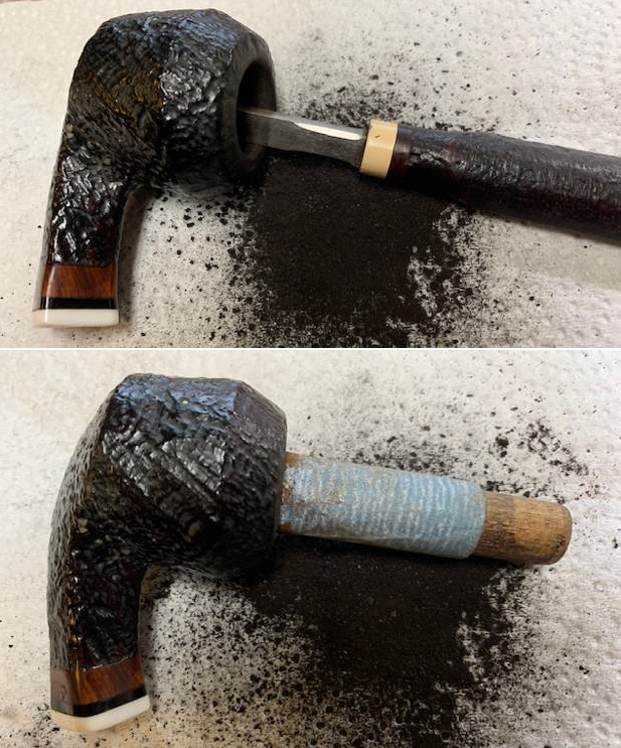
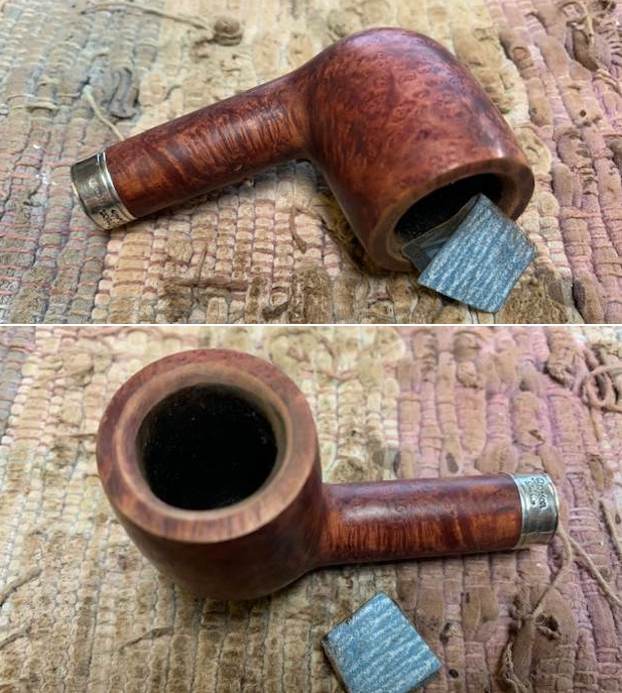
I cleaned out the inside of the mortise, shank and the airway in the stem with isopropyl alcohol, cotton swabs and pipe cleaners. 
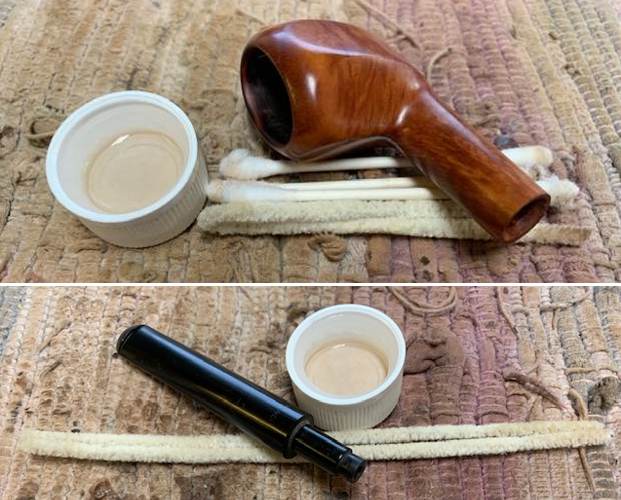
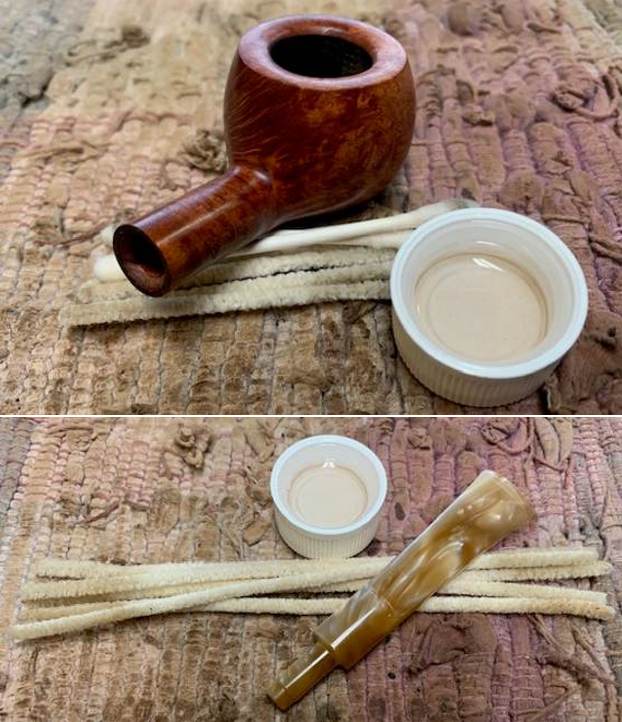
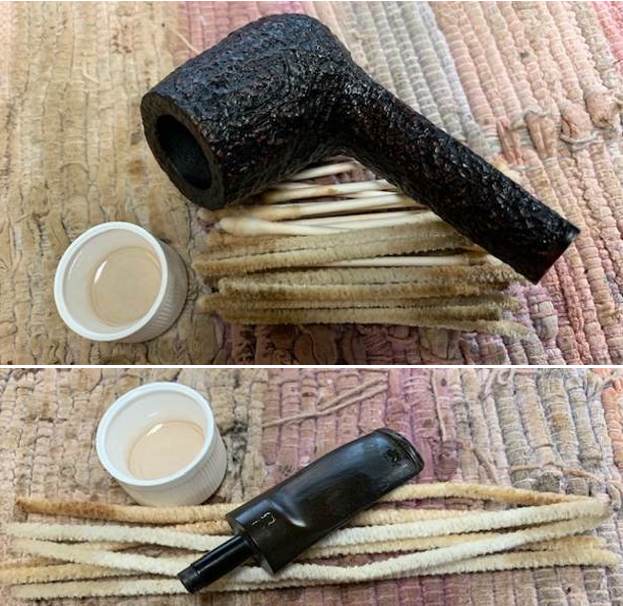
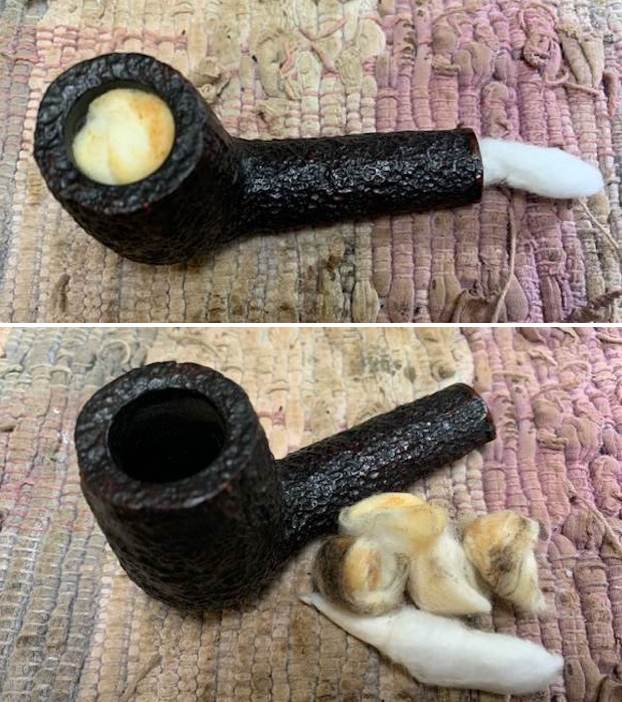
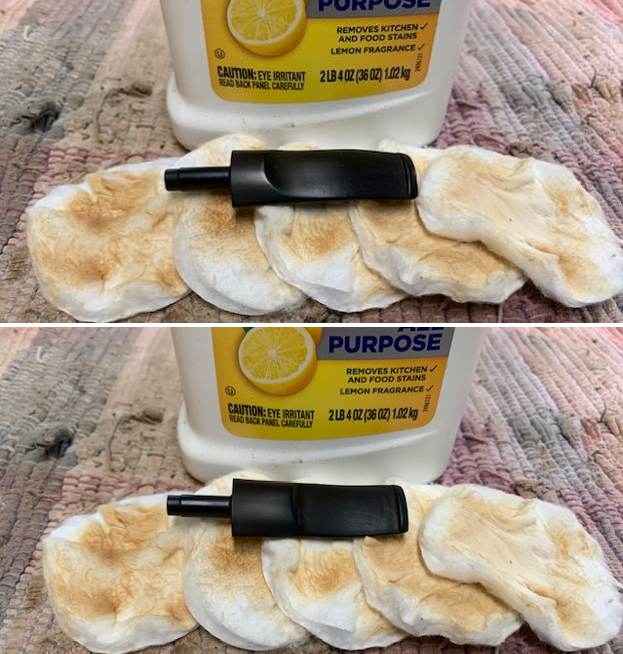
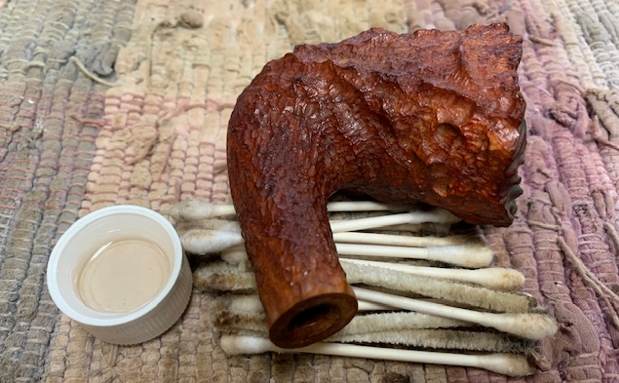
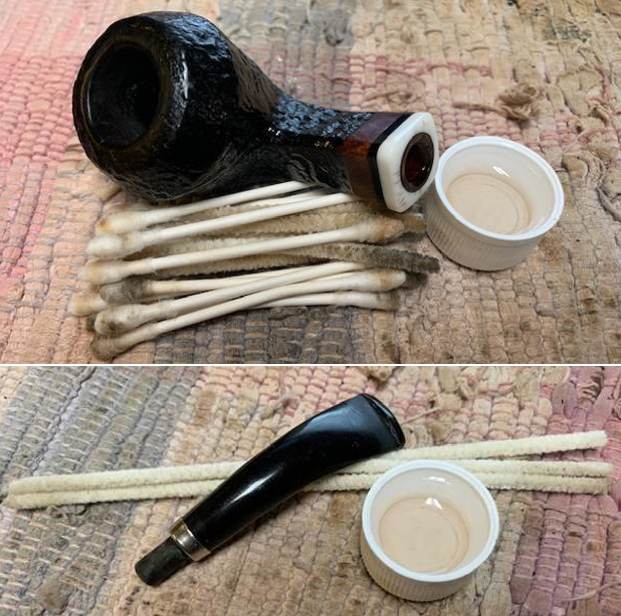
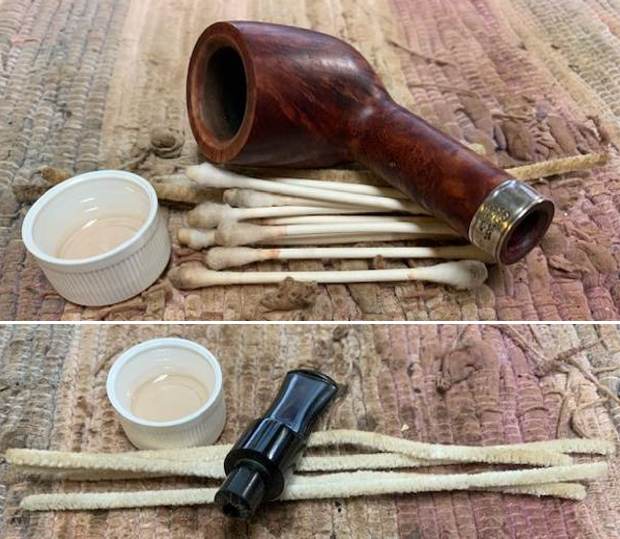
The pipe had a strong aromatic smell like a mix of fruit and vanilla so it needed to be deghosted. I filled the bowl with cotton boles and twisted a plug into the shank end. I used and ear syringe to fill the bowl with alcohol. The alcohol will eventually evaporate from the bowl wicking out the oils and tars in the briar into the cotton. I let it sit over night and in the morning pulled it out and took photos of the cotton at that point. 
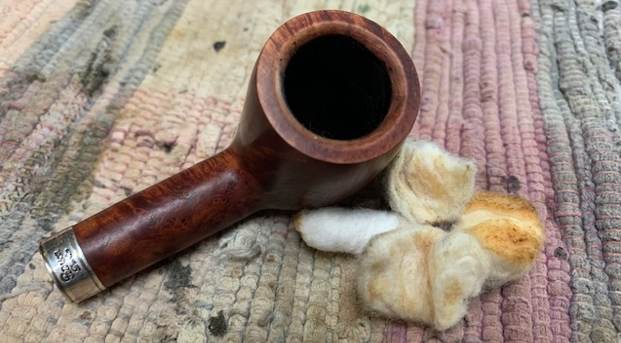
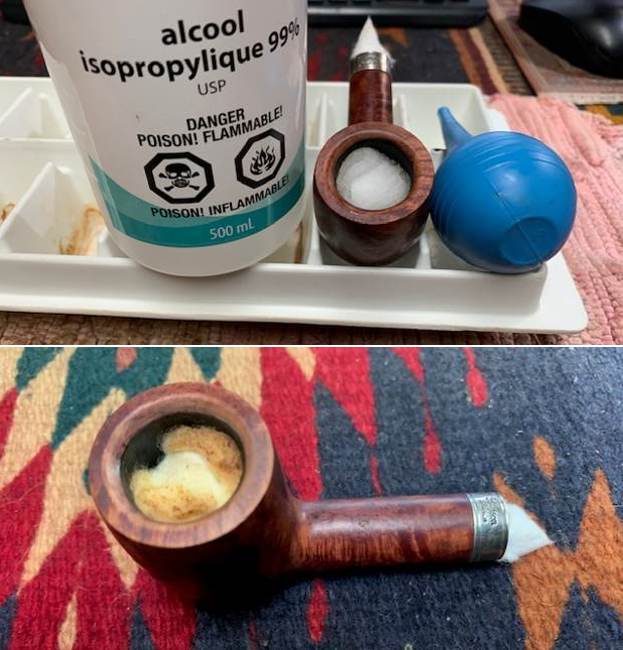
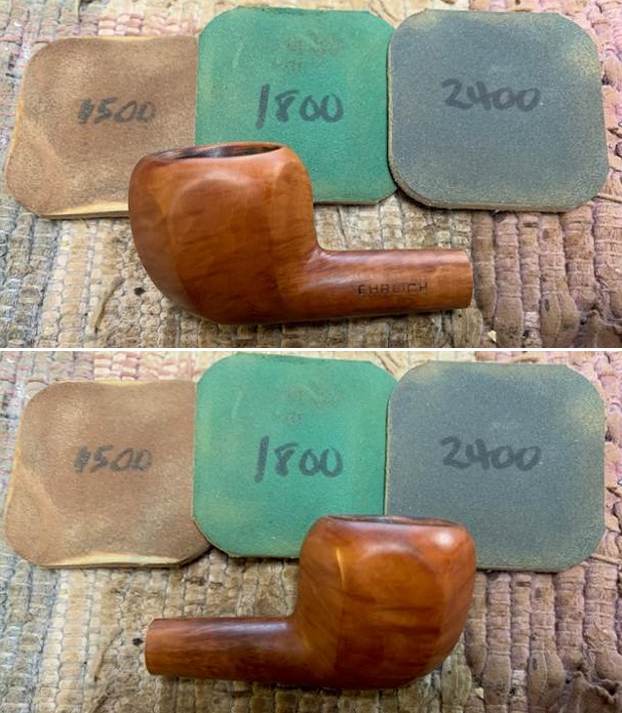
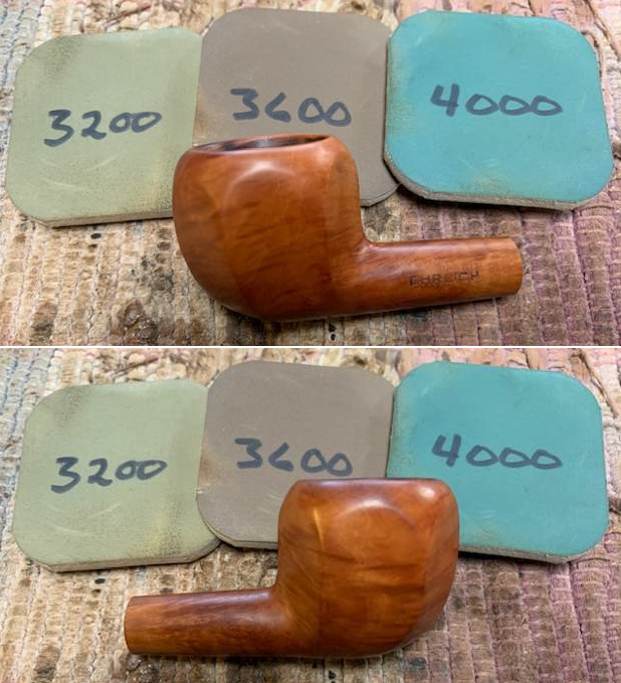
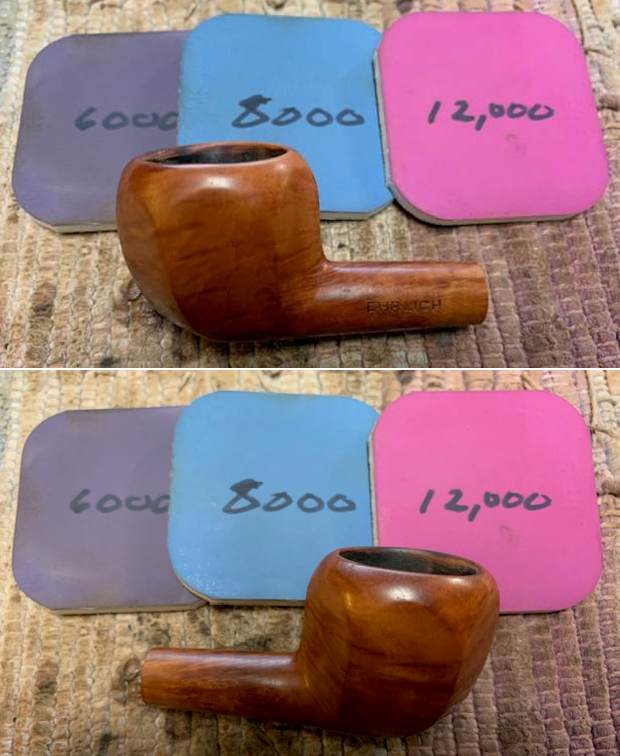
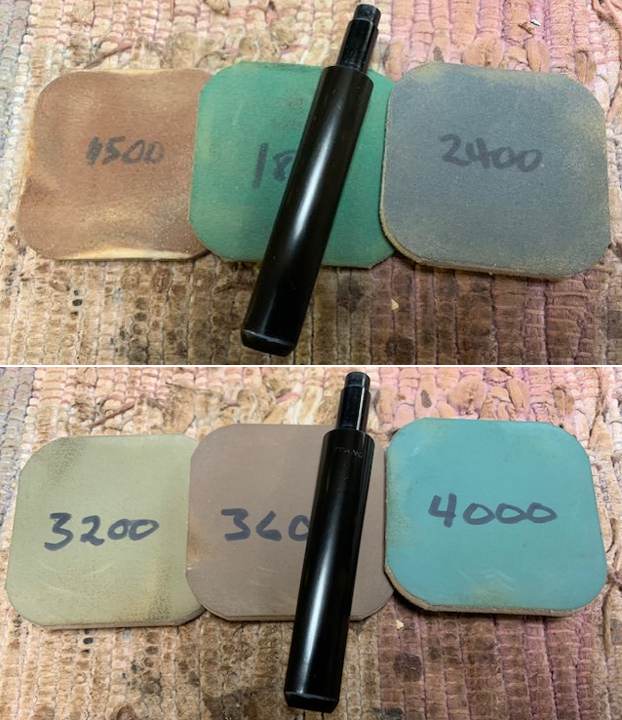
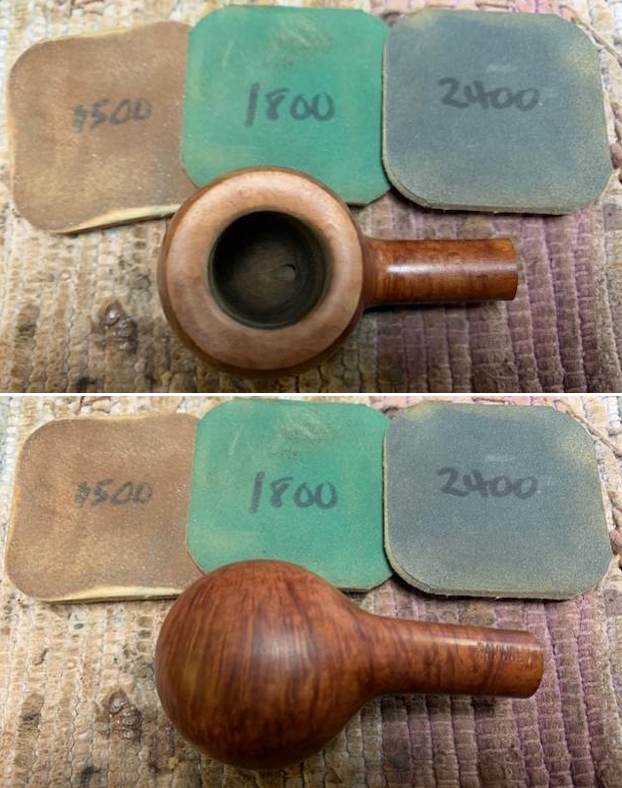
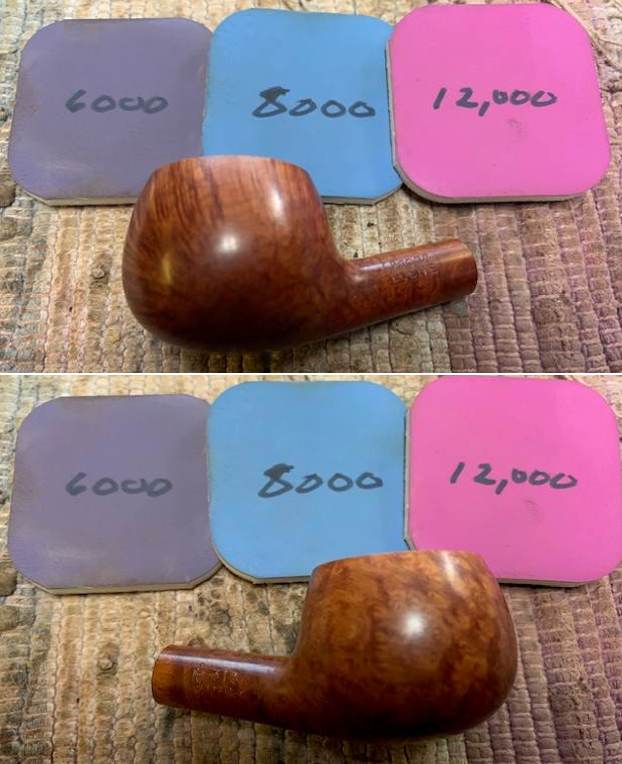
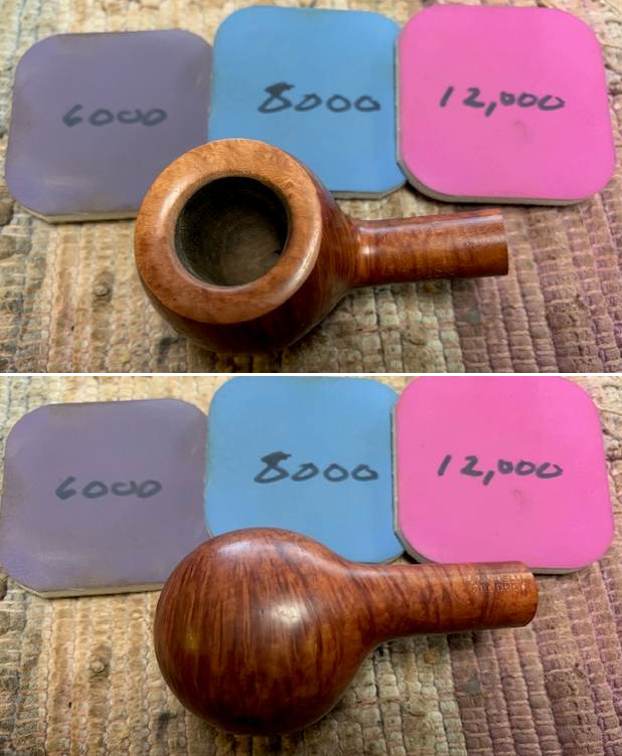
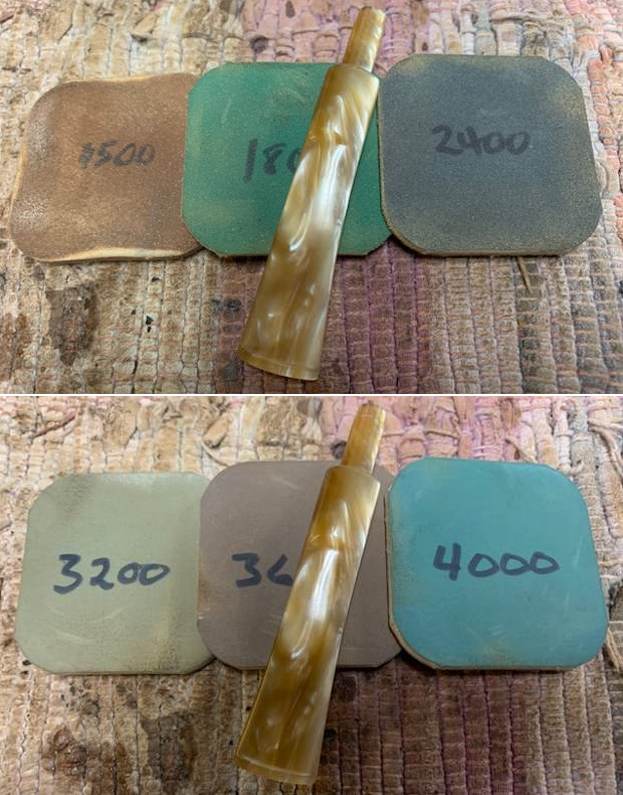
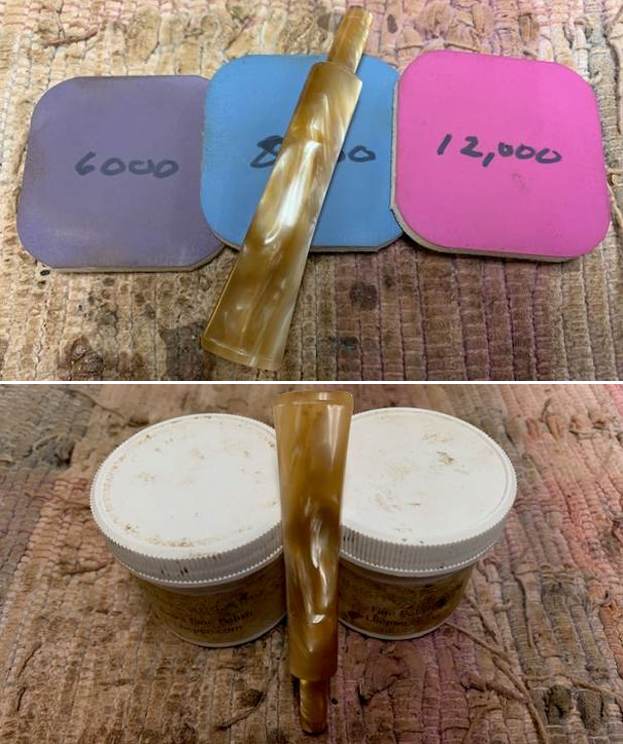
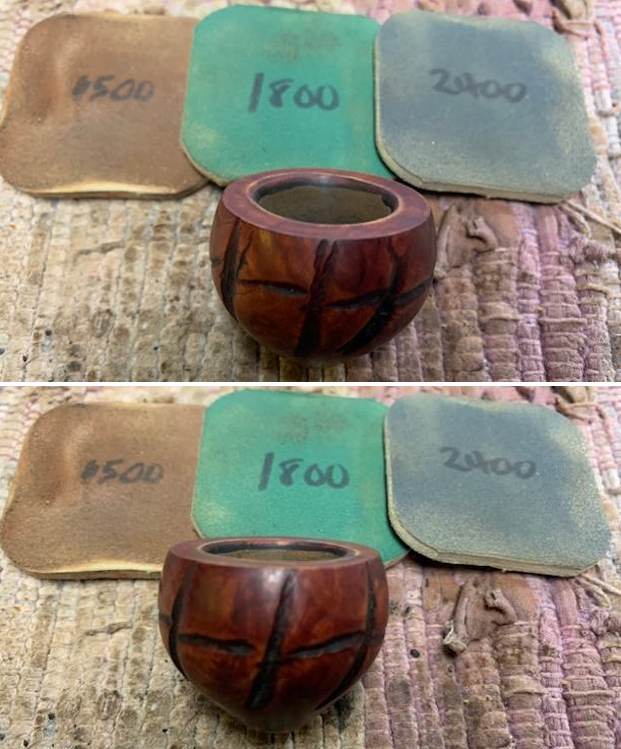
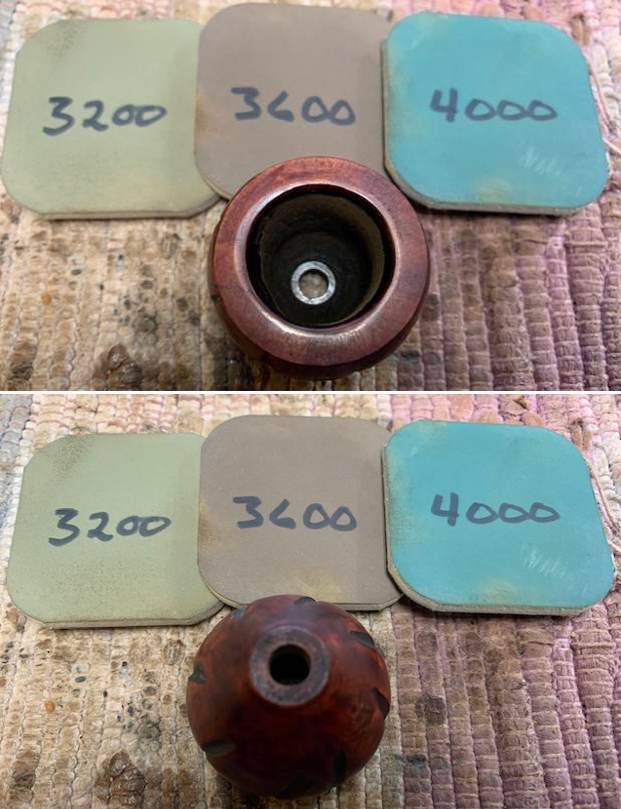
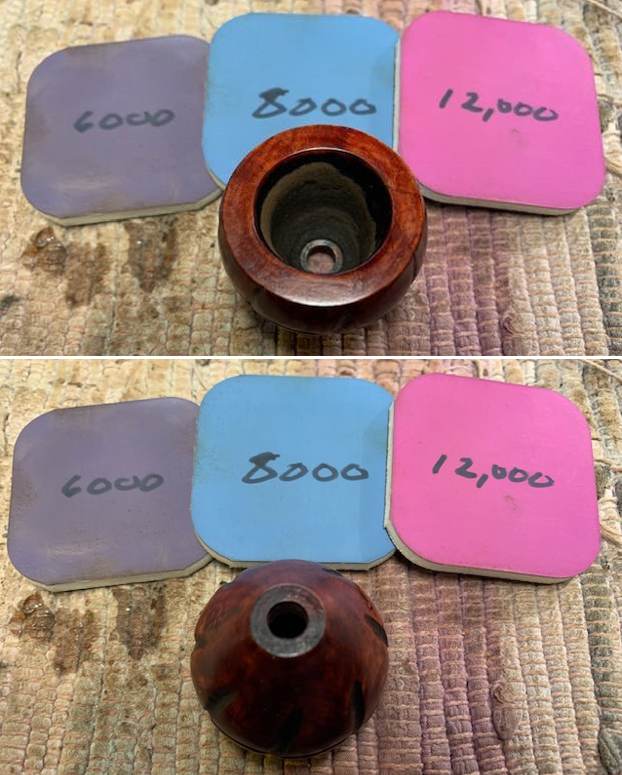
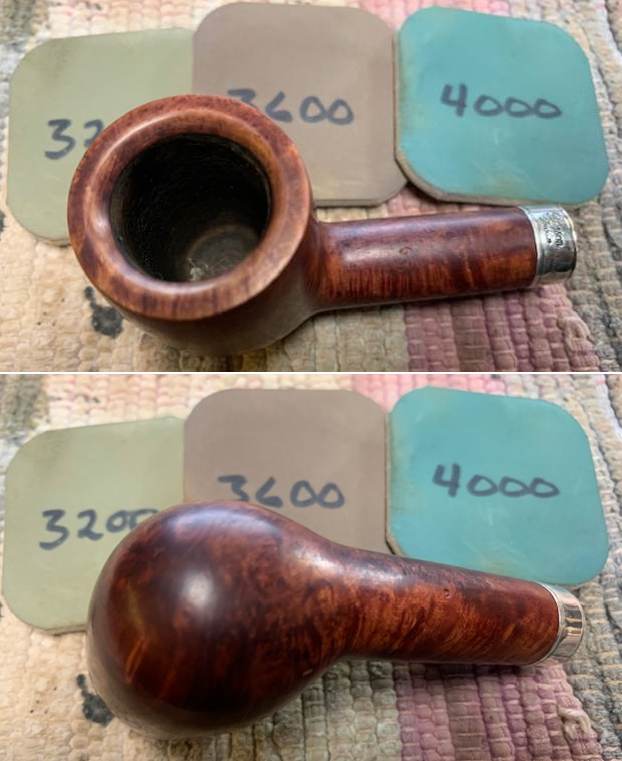
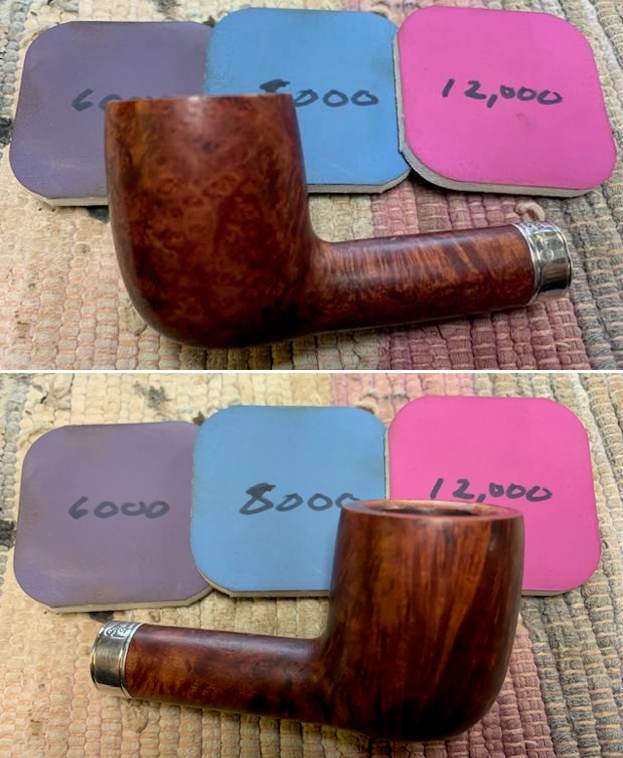
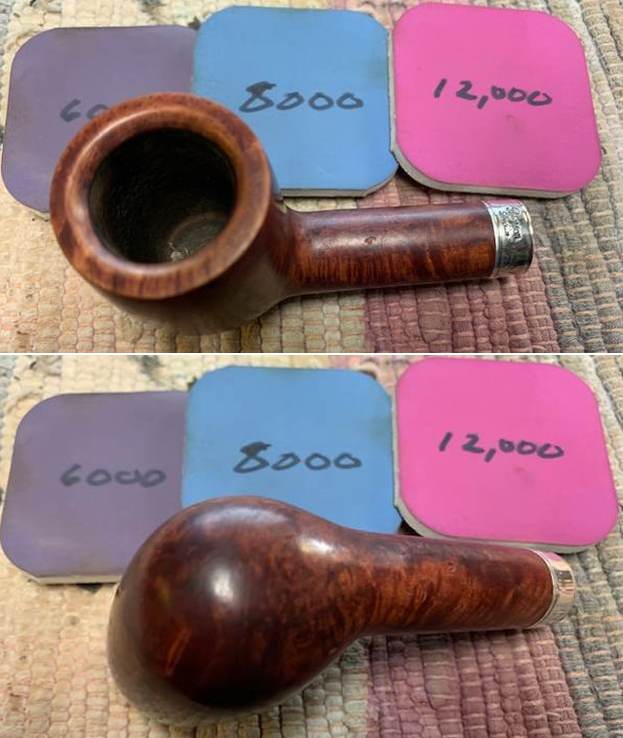
I polished the smooth briar with micromesh sanding pads – dry sanding with 1500-12000 grit pads and wiped it down with a damp cloth after each sanding pad. 
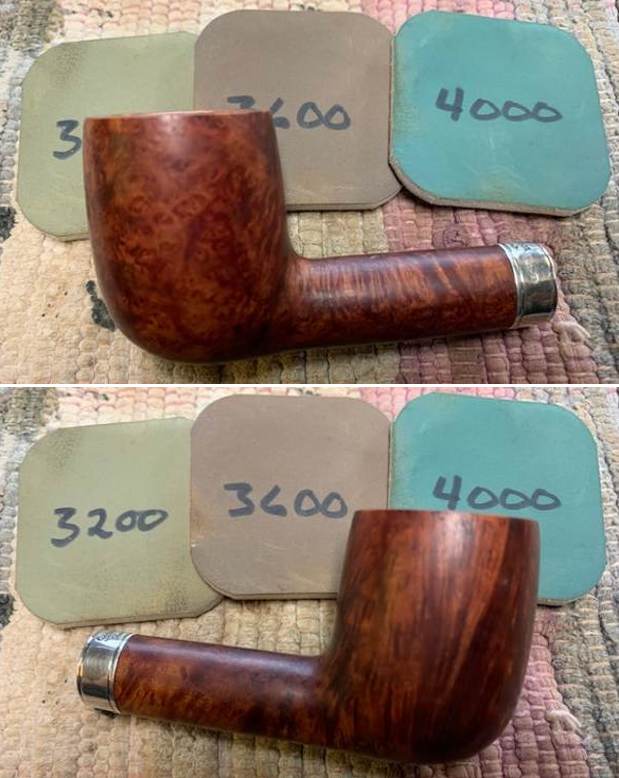
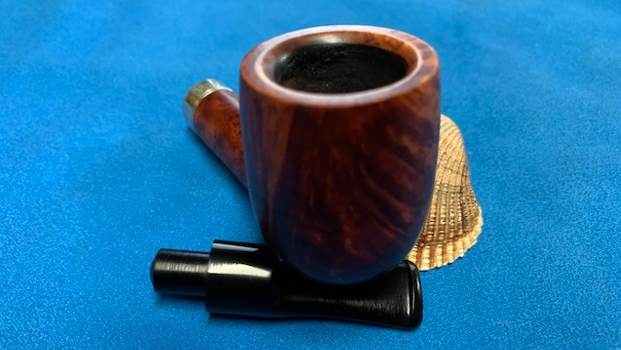
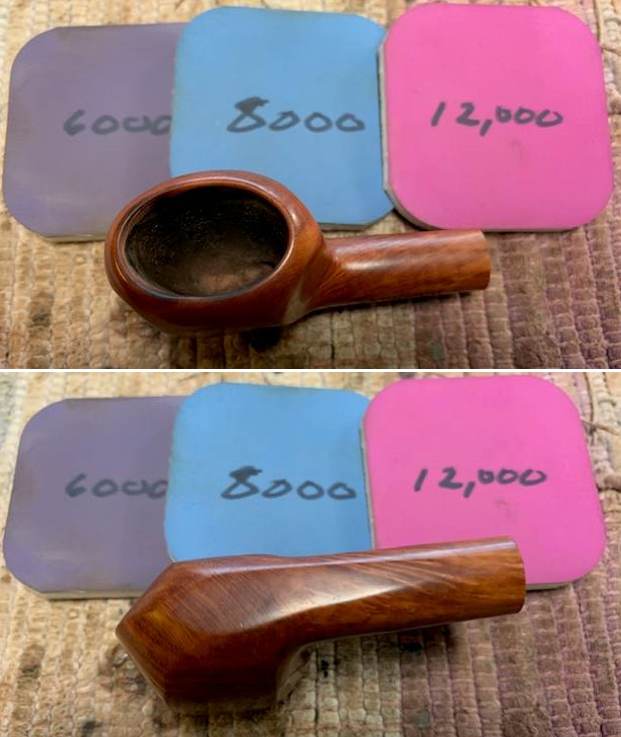
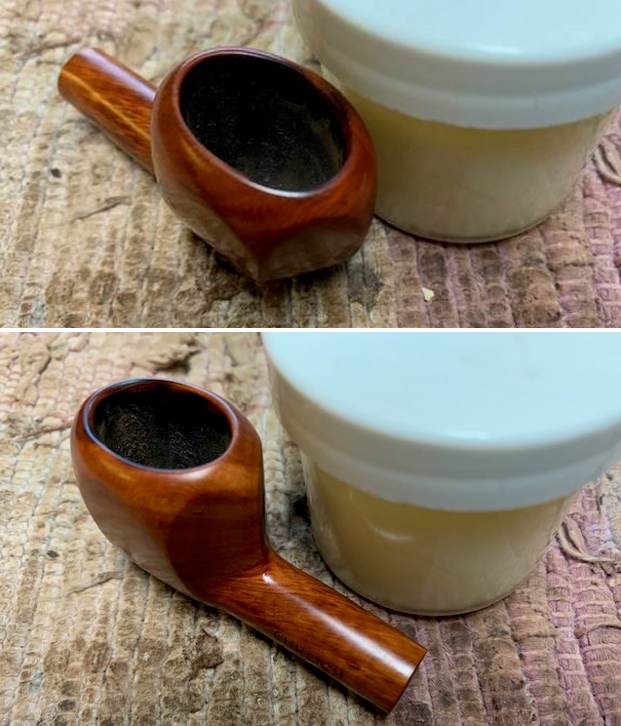
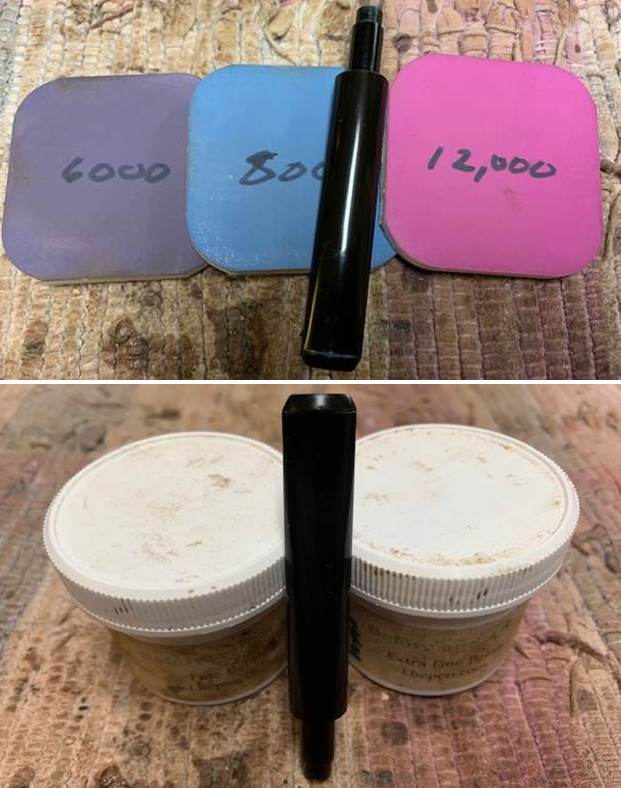
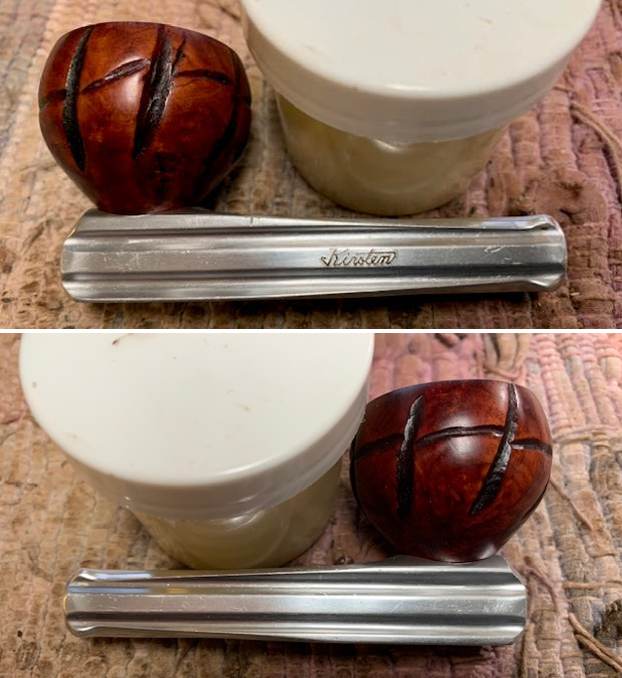
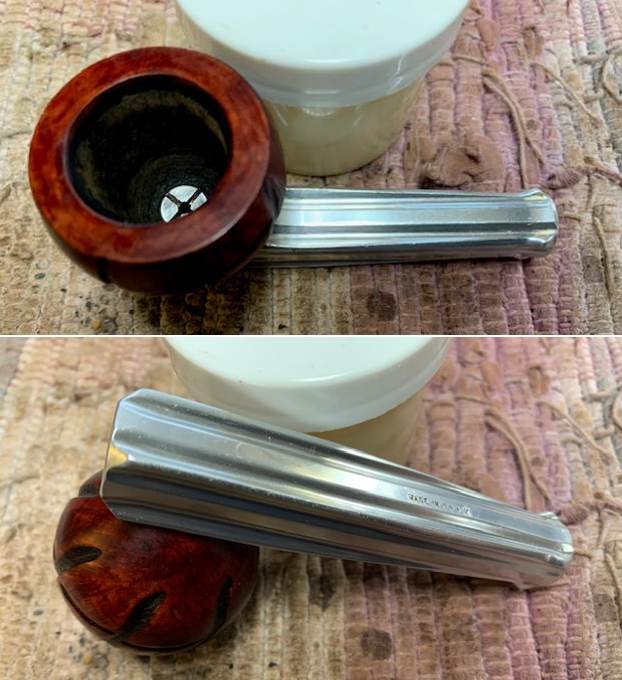
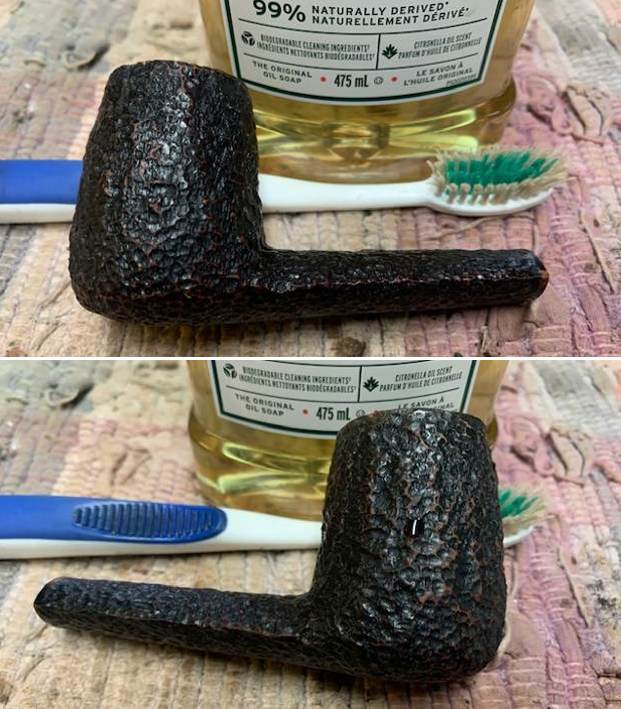
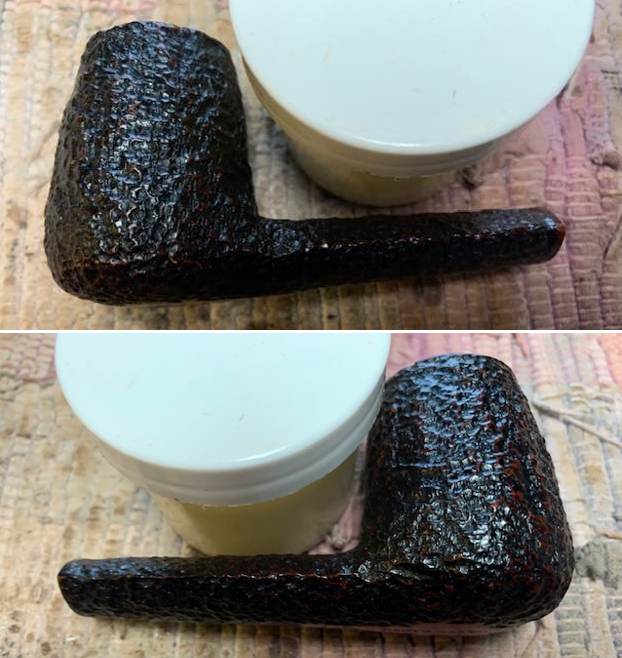
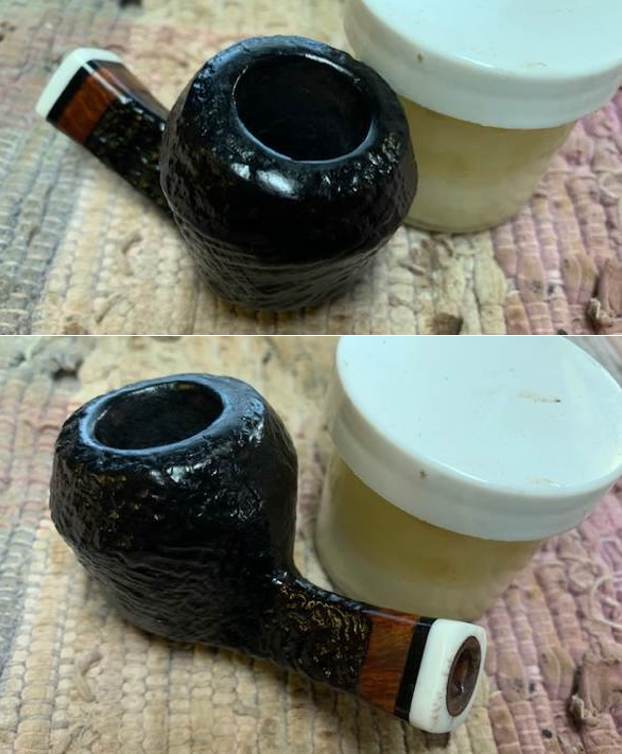
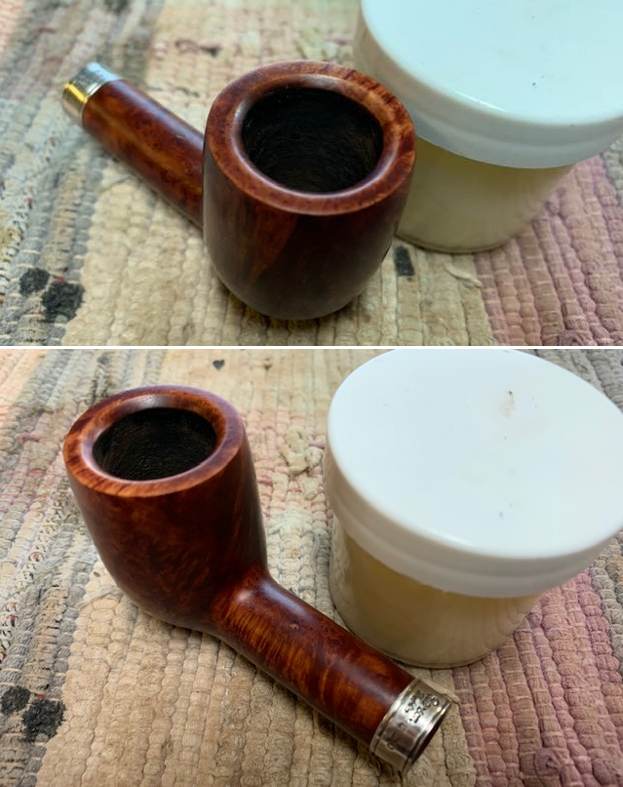
I worked some Before & After Restoration Balm into the surface of the briar with my fingertips to clean, enliven and protect the briar. I let the balm sit for 15 minutes and then buffed with a cotton cloth to raise the shine. The photos show the bowl at this point in the restoration process. 
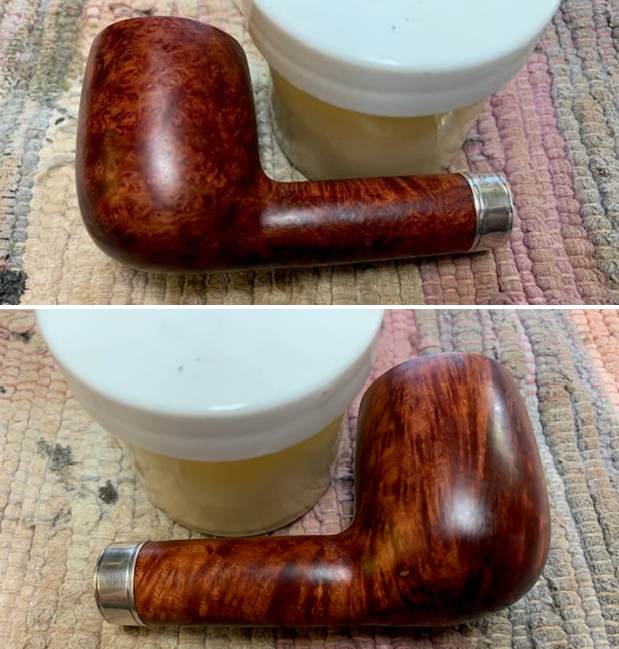
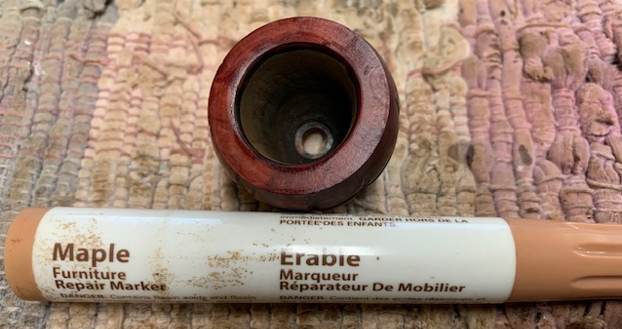
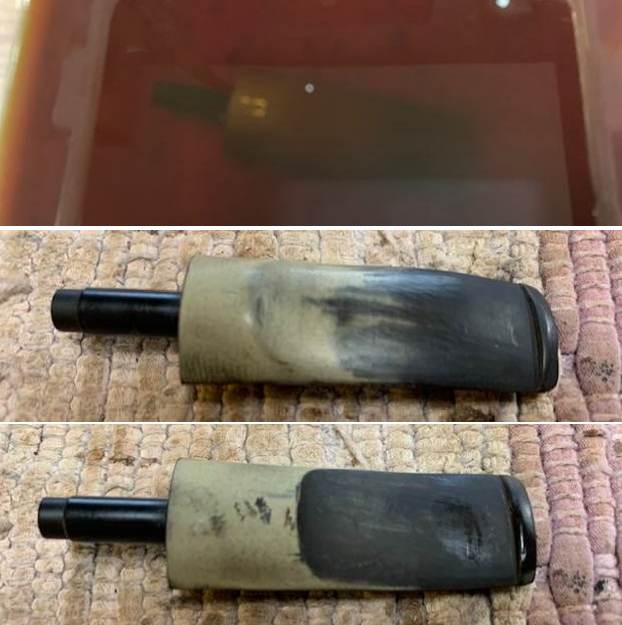
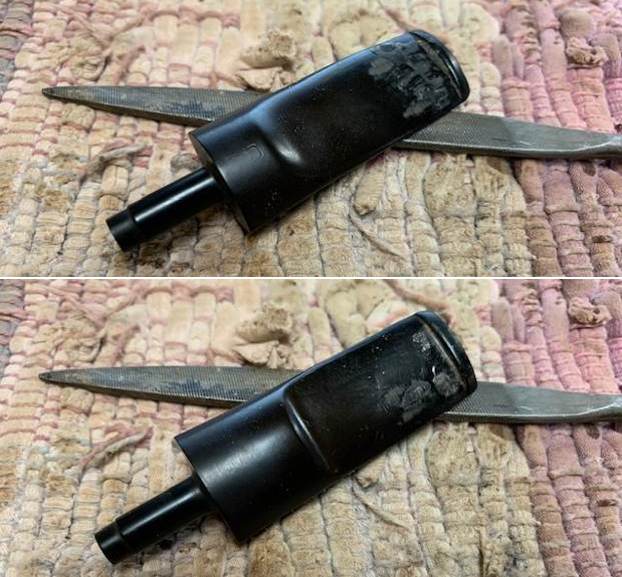
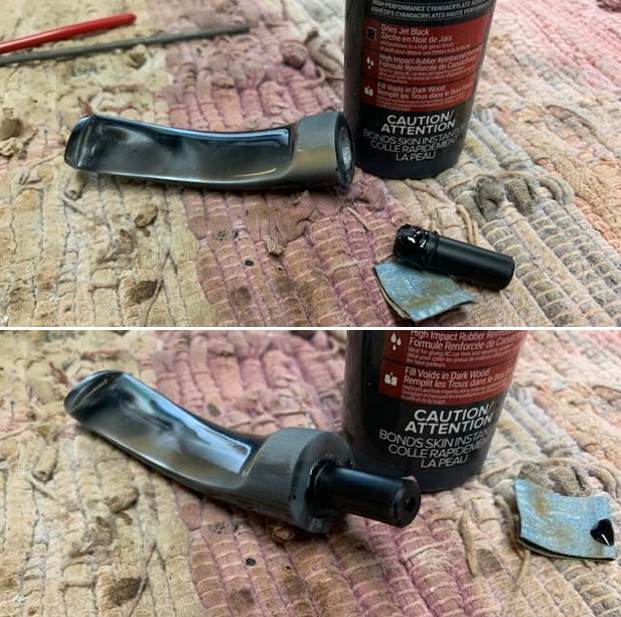
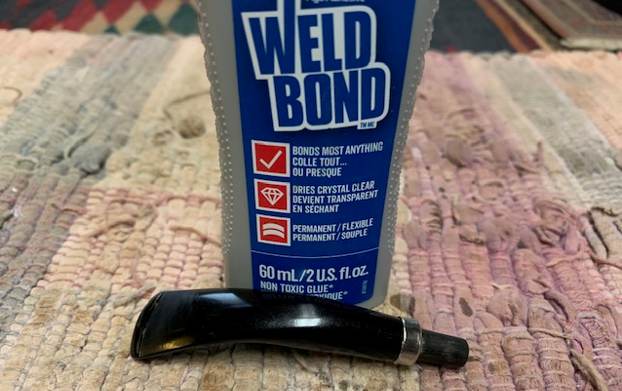
I used a folded piece of  220 grit sandpaper to smooth out the repair and then started polishing it with 400 grit wet dry sandpaper.
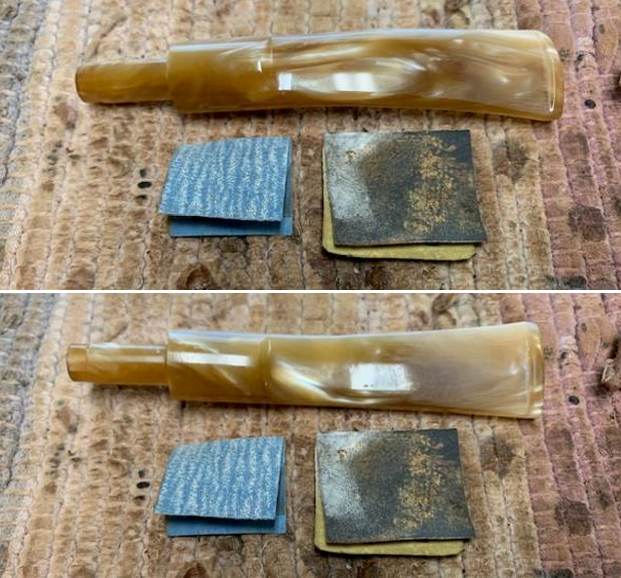
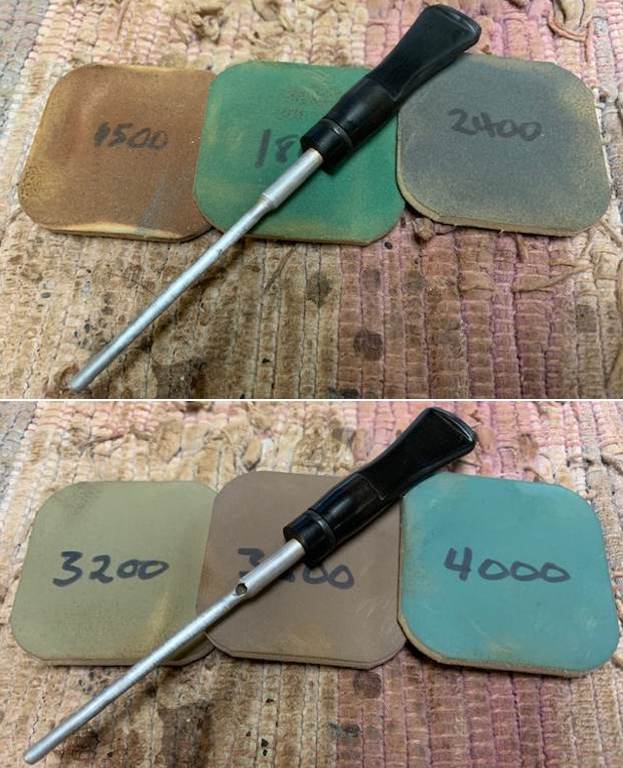
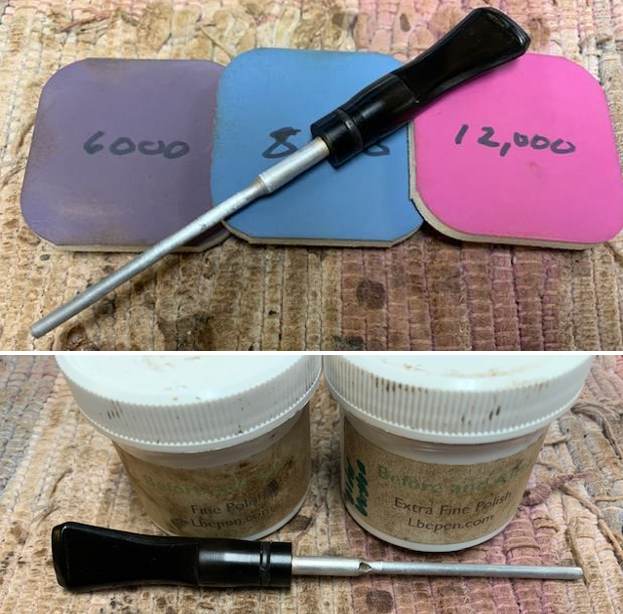
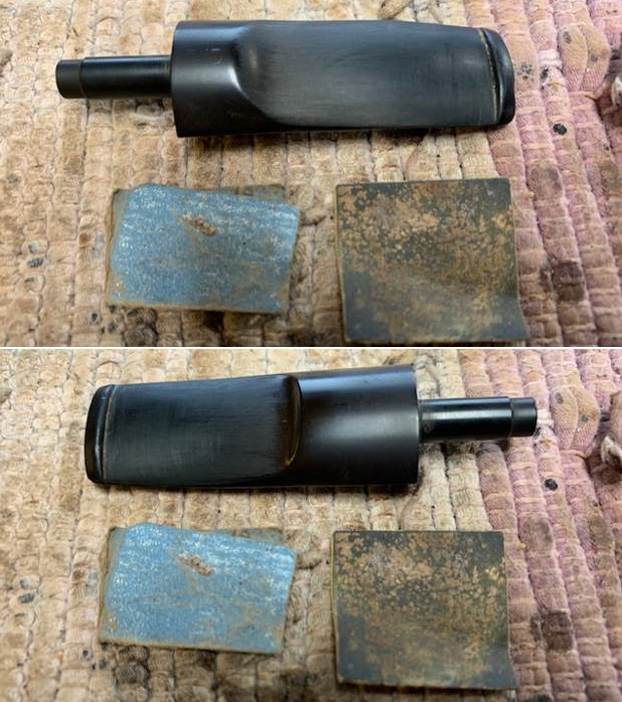
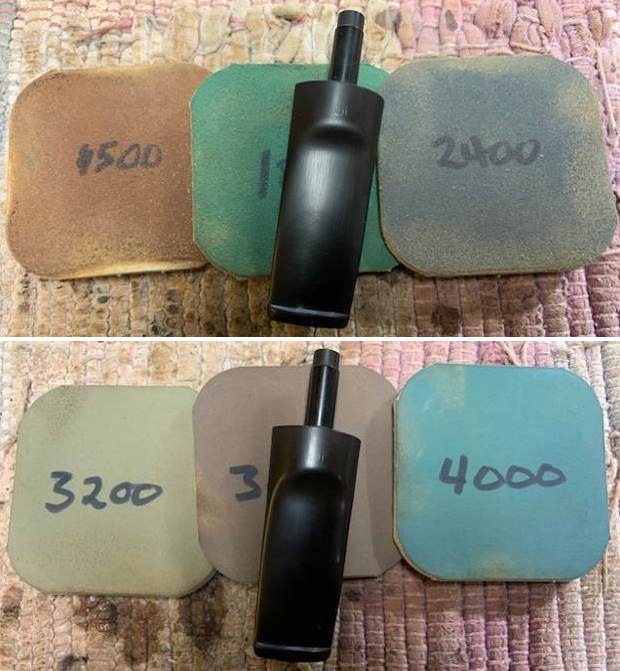
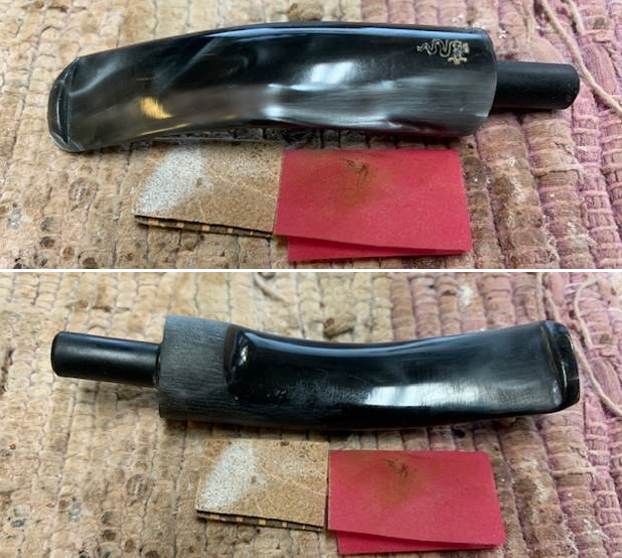
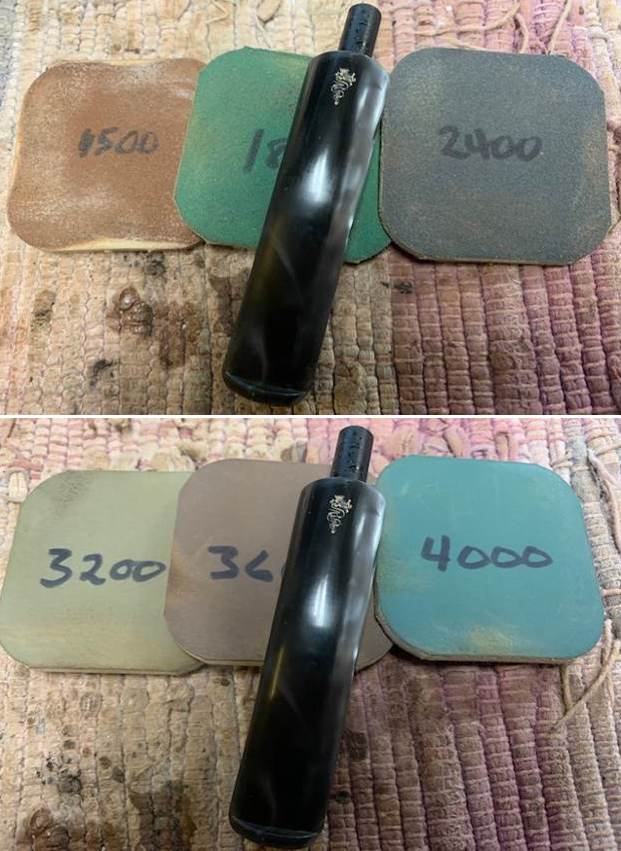
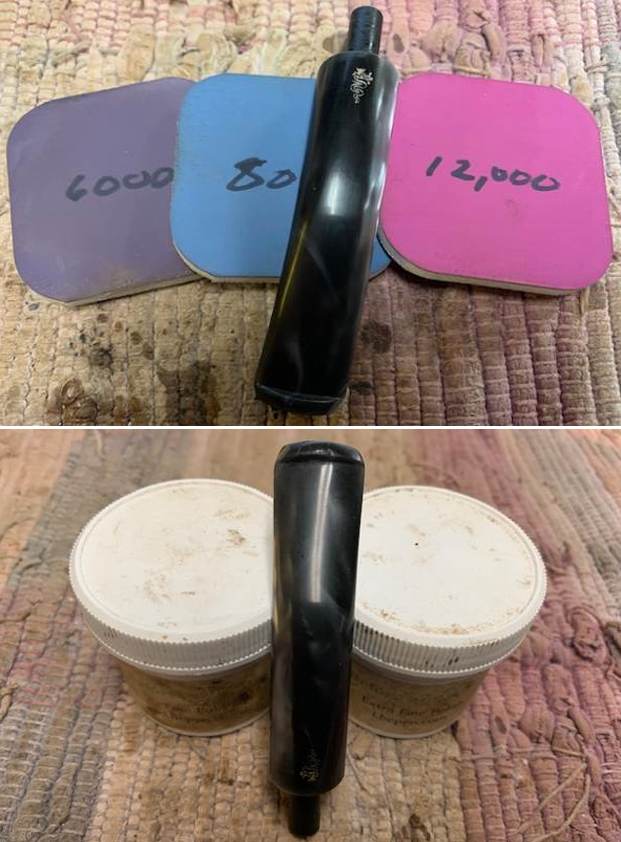
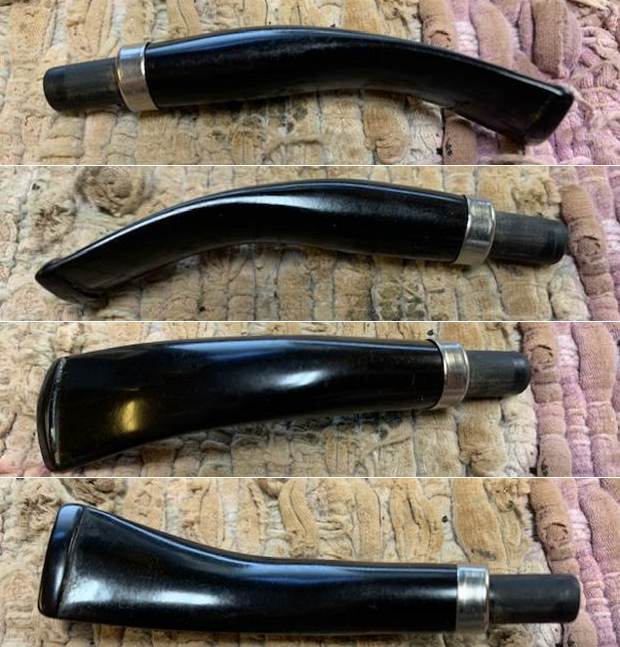
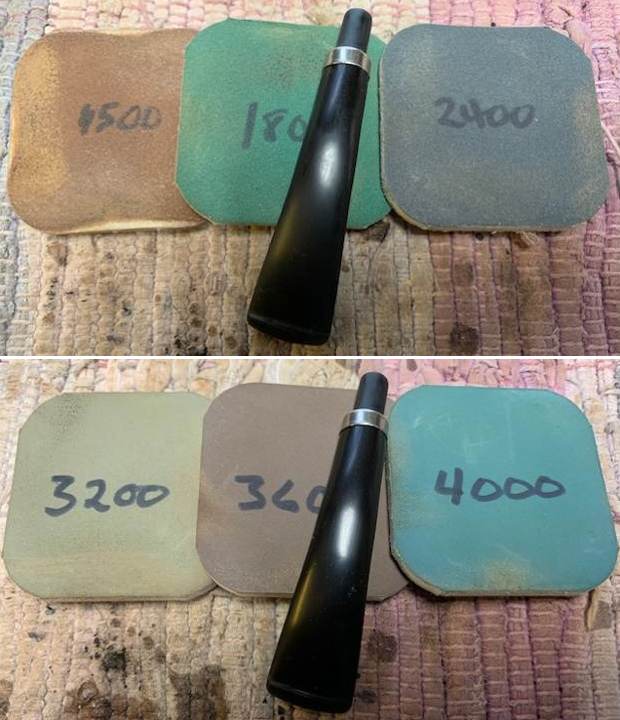
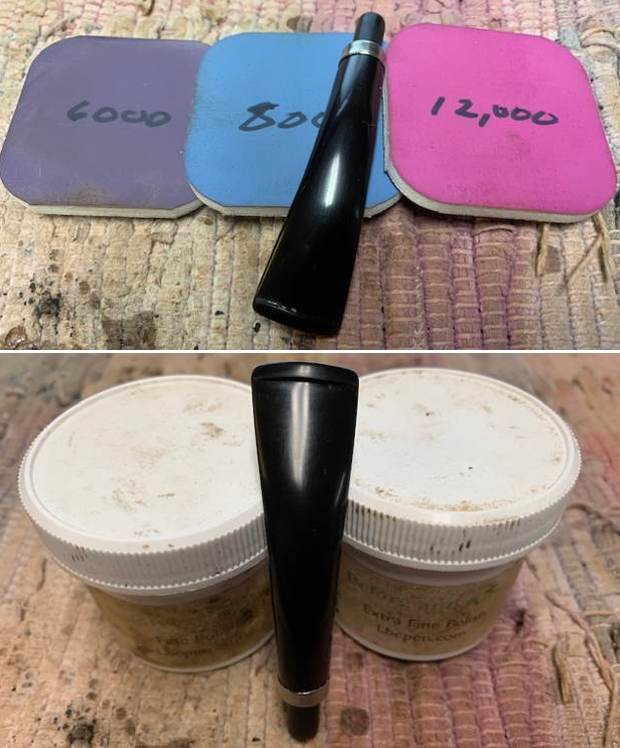
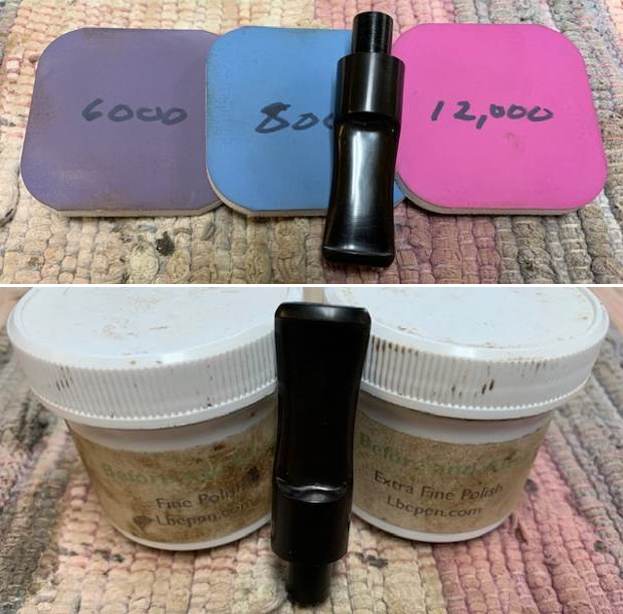
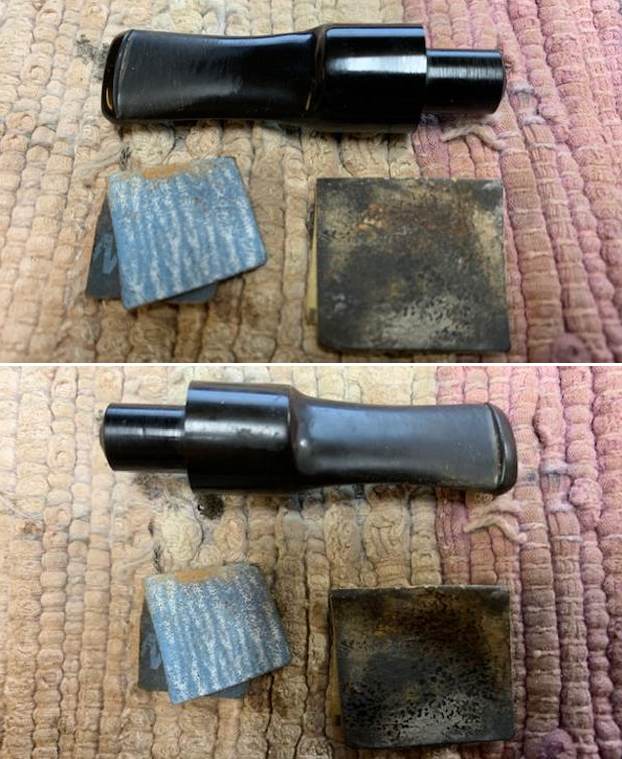
I polished the stem with micromesh sanding pads – wet sanding with 1500-12000 grit sanding pads. I wiped it down after each sanding pad with Obsidian Oil. I polished it with Before & After Pipe Stem Polish – both Fine and Extra Fine. 
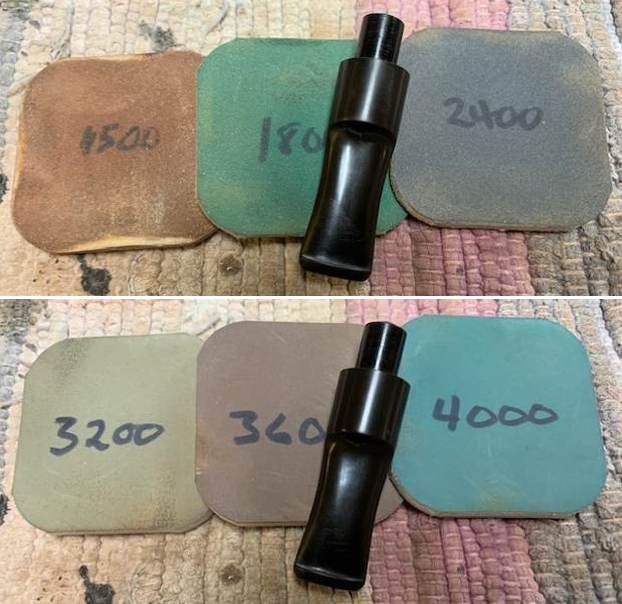
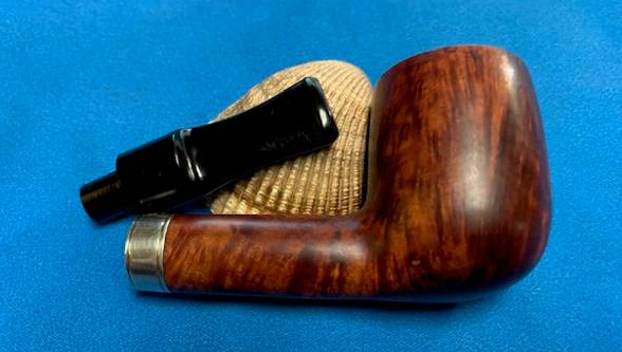
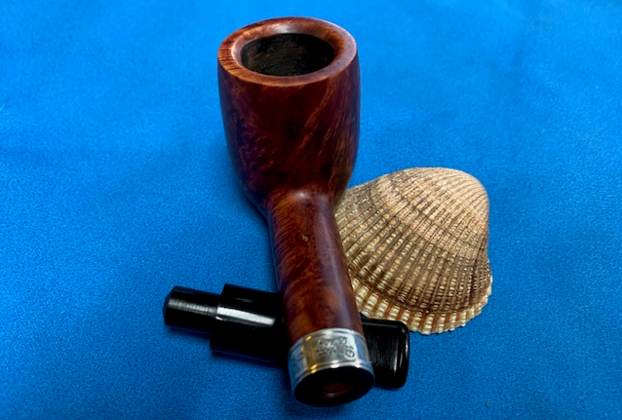
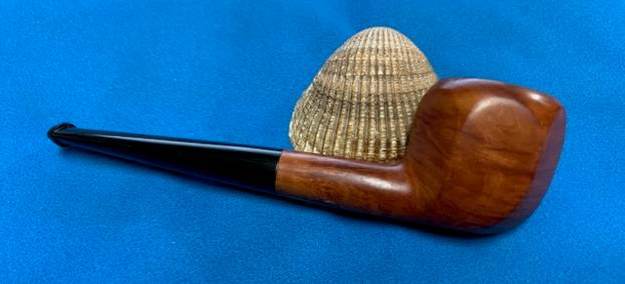
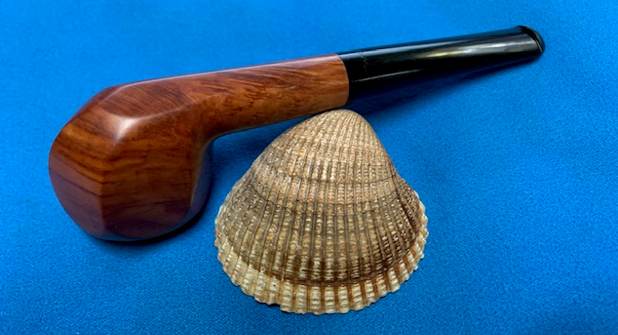
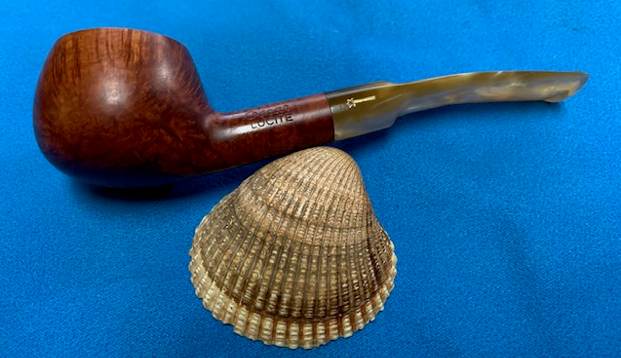
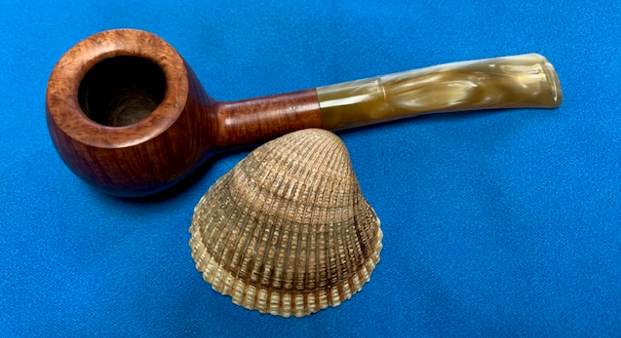
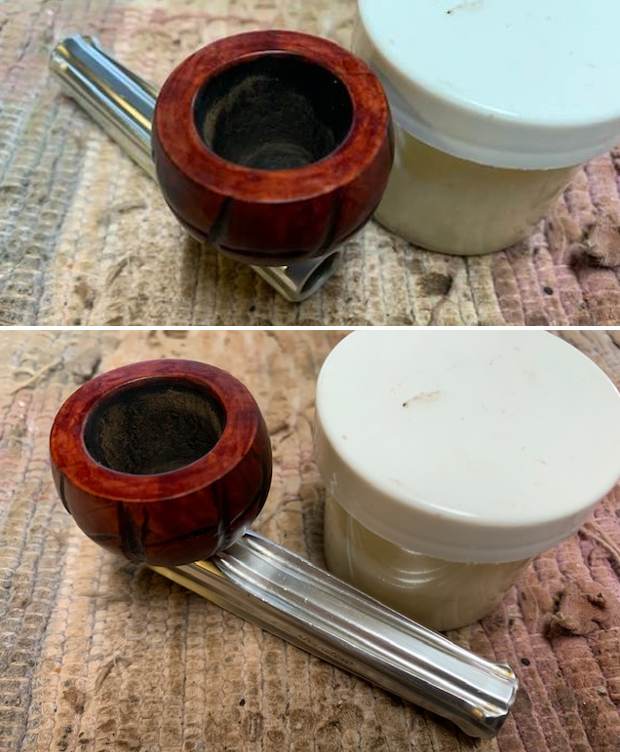
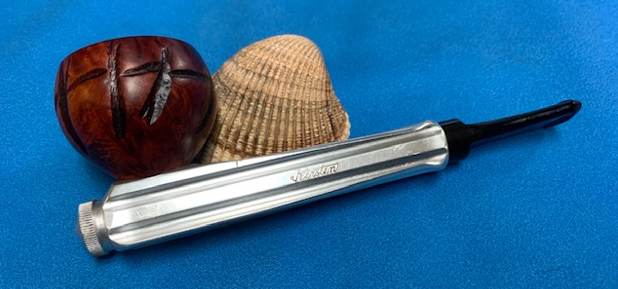
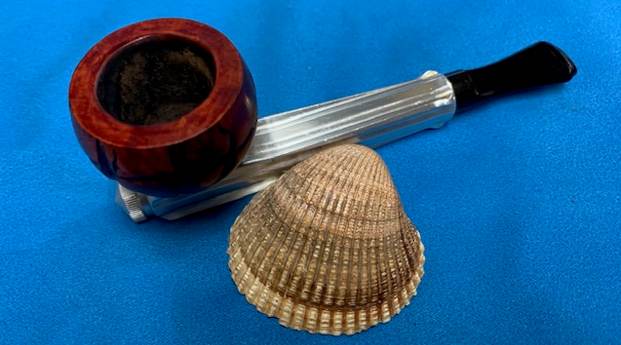
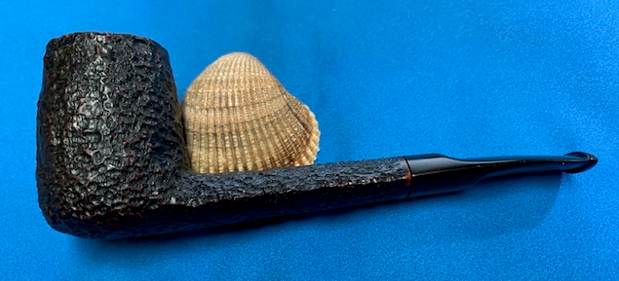
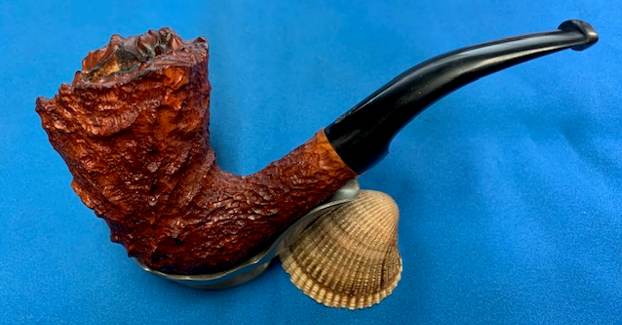
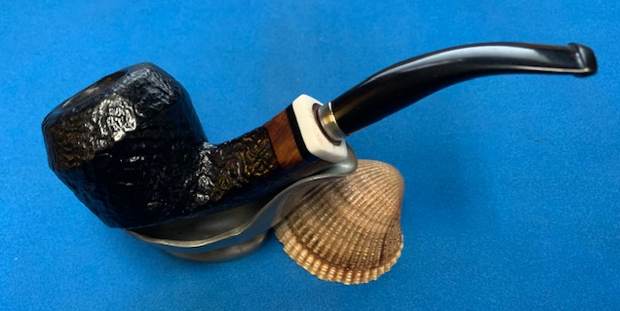
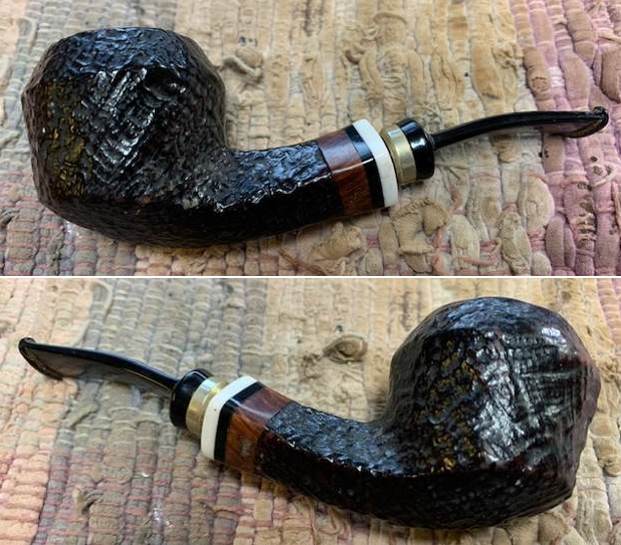
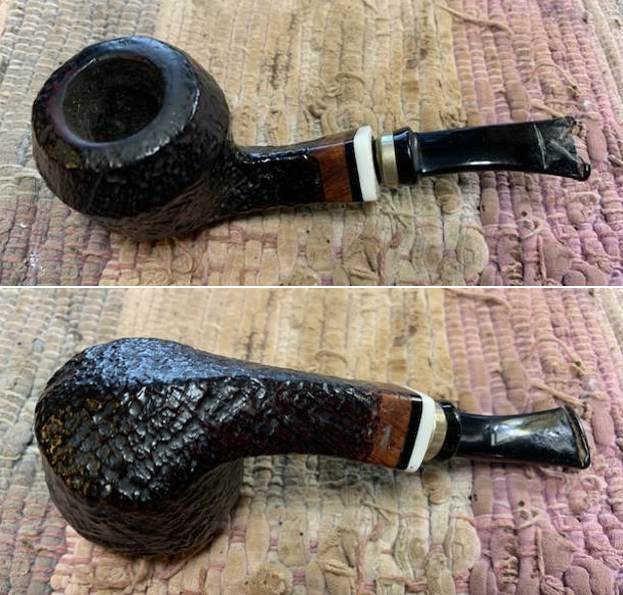
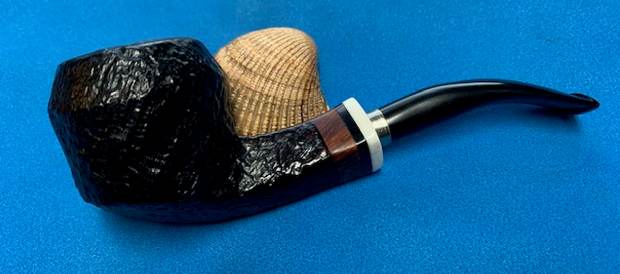
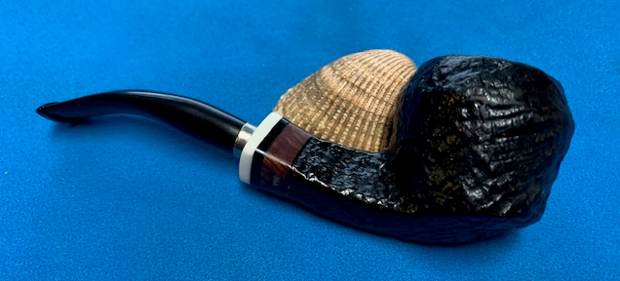
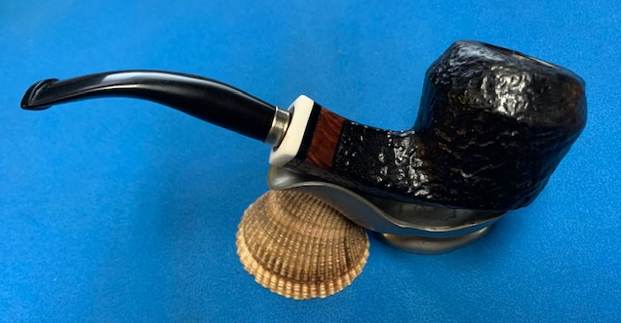
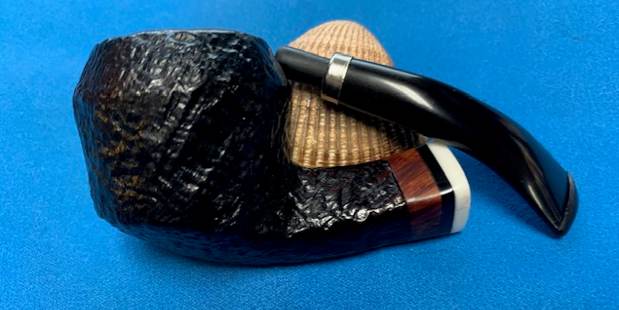
It was great to finish this Peterson’s Made Irish Seconds 1991 Lovat. I put the pipe back together and buffed it with Blue Diamond on the buffing wheel. I gave the bowl multiple coats of Conservator’s Wax and the stem multiple coats of carnauba wax. I buffed the pipe with a clean buffing pad to raise the shine. I hand buffed the pipe with a microfiber cloth to deepen the shine. It is fun to see what the polished bowl looks like with deep sandblast all around it. Added to that the polished black vulcanite stem was beautiful. This Silver Banded Irish Seconds Lovat is great looking and the pipe feels great in my hand. It is light and well balanced. Have a look at it with the photos below. The dimensions are Length: 5 inches, Height: 1 ¾ inches, Outside diameter of the bowl: 1 ¼ inches, Chamber diameter: 7/8 of an inch. The weight of the pipe is 39 grams/1.41 ounces. It is a beautiful pipe and one that will soon be on the rebornpipes store in the Irish Pipe Makers Section of the store. If you want to add it to your collection let me know. Thanks for walking through the restoration with me as I worked over this pipe. Thanks to each of you who are reading this blog.

Yet another one of my own – an Ehrlich Hexagonal Opera Pipe


Blog by Steve Laug

This is another pipe that I have taken out of my personal collection as I do not use enough to warrant keeping it. This pipe was one that I kept from a group of pipes Jeff and I purchased a few years ago. It was not used very often and I believe it is one that I actually found in a lightly smoked condition when I picked it up. I cleaned the pipe but never smoked it after the clean up work. The airway in the shank and the mortise were quite clean. The smooth finish and rim top were in good condition. There was some darkening on the inner edge of the bowl around the bowl. The stamping on the pipe is very simple and on the left side of the shank it is stamped EHRLICH. On the underside of the stem it is stamped FRANCE. The finish is a natural brown with a shiny coat of varnish that gave it a rich look. The rich brown finish goes well with the black, taper vulcanite stem which is in excellent condition with no tooth marks or chatter on either side. I took photos of the pipe before I did my clean up work on it. I took a photo of the bowl and rim top to verify the description above. I also took photos of the stem surface showing the light chatter and tooth marks on both side. I took a photo of the stamping on the left side of the shank and the underside of the stem. It is clear and readable as noted above. I took the stem off the bowl and took a photo of the pipe to give a sense of proportion of the pipe. You can also see the grain around the side of bowl and the shank and it is a beauty. Now it was time to work on the pipe. I worked on the inner edge of the bowl 220 grit sandpaper to give the inner edge a slight bevel and clean up the damage that was present there. I used a ball and a piece of 220 grit sandpaper to smooth it out. The rim came out looking quite good.I wiped the bowl down with a cotton pad and acetone to remove the varnish coat on the briar. I find that once the varnish is removed the grain really stands out and can be appreciated. That was certainly true with this one. I polished the rim top and the briar with micromesh sanding pads – dry sanding with 1500-12000 grit pads. I wiped the bowl down with a damp cloth after each sanding pad to remove the dust and debris. The rim top polished out and matched the oil cured look of the bowl and shank. I cleaned the mortise and airways in the shank and stem with cotton swabs, pipe cleaners and isopropyl alcohol to remove the debris and tars from my smoking. You can see that it was not too bad as I tend to keep my pipes clean. The bowl was in such good condition that decided to give the bowl and shank a coating of Before & After Restoration Balm. I worked it into the surface of the briar with my fingertips and a horsehair shoe brush to clean, enliven and protect the briar. I let the balm sit for 15 minutes and then buffed with a cotton cloth to raise the shine. The photos show the bowl at this point in the restoration process. I set the bowl aside and turned my attention to the stem. I polished it with micromesh sanding pads – dry sanding with 1500-12000 grit pads. I rubbed it down between pads with Obsidian Oil. I polished it with Before & After Fine and Extra Fine Pipe Stem Polish. I wiped it down with some Obsidian Oil and buffed it off. It is a beautiful stem. It is good to put the final touches on another of my own pipes that I am selling – Ehrlich Hexagonal Bowl Straight Opera Pipe. I put the pipe back together and buffed the stem with Blue Diamond on the buffing wheel. I gave the bowl and the stem multiple coats of carnauba wax. I hand buffed the pipe with a clean buffing pad to raise the shine. It is fun to see what the polished bowl looks like with the beautiful grain and the polished vulcanite saddle stem. This smooth Ehrlich Opera Pipe is great looking and the pipe feels great in my hand. It is light and well balanced. Have a look at it with the photos below. The dimensions are Length: 5 inches, Height: 1 ¼ inches, Outside diameter of the bowl: 1 inch x 1 ½ inches, Chamber diameter: ¾ of an inch x 1 inch. The weight of the pipe is 22 grams/.78 ounces. It is a beautiful pipe that I will soon be putting on the rebornpipes store in the American Pipe Makers Section. If you are interested in adding it to your collection send me an email or a message. Thanks for walking through the restoration with me as I worked over this pipe. Thanks to each of you who are reading this blog.

Moving yet another one of my own – a Savinelli Oscar Lucite 313 Prince


Blog by Steve Laug

This is another pipe that I have taken out of my personal collection as I just do not use enough to warrant keeping it. This pipe was one that I kept from a group of pipes Jeff and I purchased a few years ago. It was not used very often and I believe it is one that I actually found unsmoked or lightly smoked when I picked it up. It smells of faint Virginia tobaccos so there is no real ghost in the pipe. The airway in the shank and the mortise were quite clean. The smooth finish and rim top were in good condition. There was some darkening on the inner edge of the bowl on the backside. The stamping on the pipe is very simple on the left side of the shank it is stamped Oscar [over] LUCITE. On the right side it is stamped Savinelli S shield logo followed by the shape number 313 [over] Italy. On the underside it is stamped Savinelli [over] Product. There was a gold shooting star on the left side of the stem. The finish is a natural brown with just time and some light polishing adding colour. The rich brown finish goes well with the Lucite/acrylic stem which is in good condition with some light tooth chatter and some tooth marks ahead of the button on both sides. I took photos of the pipe before I did my clean up work on it. I took a photo of the bowl and rim top to verify the description above. I also took photos of the stem surface showing the light chatter and tooth marks on both side. I took a photo of the stamping on the sides of the shank. It is clear and readable as noted above.  I took the stem off the bowl and took a photo of the pipe to give a sense of proportion of the pipe. You can also see the around the side of bowl and the shank and it is a beauty. Now it was time to work on the pipe. I worked on the inner edge of the bowl 220 grit sandpaper to give the inner edge a slight bevel and clean up the damage that was present there. I used a ball and a piece of 220 grit sandpaper to smooth it out. The rim came out looking quite good. I polished the rim top and the briar with micromesh sanding pads – dry sanding with 1500-12000 grit pads. I wiped the bowl down with a damp cloth after each sanding pad to remove the dust and debris. The rim top polished out and matched the oil cured look of the bowl and shank. I cleaned the mortise and airways in the shank and stem with cotton swabs, pipe cleaners and isopropyl alcohol to remove the debris and tars from my smoking. You can see that it was not too bad as I tend to keep my pipes clean. The bowl was in such good condition that decided to give the bowl and shank a coating of Before & After Restoration Balm. I worked it into the surface of the briar with my fingertips and a horsehair shoe brush to clean, enliven and protect the briar. I let the balm sit for 15 minutes and then buffed with a cotton cloth to raise the shine. The photos show the bowl at this point in the restoration process. I set the bowl aside and sanded out the tooth marks and chatter on the stem surface and button with 220 grit sandpaper. I was able to smooth out the marks on the surface of both sides.  I polished the stem with micromesh sanding pads – dry sanding with 1500-12000 grit pads. I rubbed it down between pads with Obsidian Oil. I polished it with Before & After Fine and Extra Fine Pipe Stem Polish. I wiped it down with some Obsidian Oil and buffed it off. It is a beautiful stem. It is good to put the final touches on another of my own pipes that I am selling – Savinelli Made Oscar Lucite Prince 313. I put the pipe back together and buffed the stem with Blue Diamond on the buffing wheel. I gave the bowl and the stem multiple coats of carnauba wax. I hand buffed the pipe with a clean buffing pad to raise the shine. It is fun to see what the polished bowl looks like with the beautiful grain and the polished vulcanite saddle stem. This smooth Oscar Lucite 313 Prince is great looking and the pipe feels great in my hand. It is light and well balanced. Have a look at it with the photos below. The dimensions are Length: 5 ½ inches, Height: 1 ¼ inches, Outside diameter of the bowl: 1 ¼ inches, Chamber diameter: ¾ of an inch. The weight of the pipe is 38 grams/1.34 ounces. It is a beautiful pipe that I will soon be putting on the rebornpipes store in the Italian Pipe Makers Section. If you are interested in adding it to your collection send me an email or a message. Thanks for walking through the restoration with me as I worked over this pipe. Thanks to each of you who are reading this blog.

Restoring a Generation 1.5 Kirsten – Made in U.S.A. K


Blog by Steve Laug

This past week I received an email from a fellow named George. He was hunting for a specific Kirsten Pipe that he wanted as a gift for his son. I am including his first correspondence with me about the pipe.

Hi Steve

I am inquiring about the Kristen Companion K Straight Pipe. I read the posting on this pipe and am wondering if there is any place where I can purchase this style pipe. My father had and used this style pipe. It was his favorite of all the pipes he had. He had purchased it because the bowl was replaceable. He was very poor growing up, coming out of the Depression and WWII times and every penny counted. Having a pipe that he could replace just the bowl and not have the expense of purchasing the entire pipe appealed to him. My son is looking for this pipe to remind him of his grandfather and I want to find one for my son. Any leads you could provide me would be deeply appreciated. Thank you.

I wrote him back and sent him a picture of an anodized Kirsten Companion K and polished aluminum Kirsten K both of which I had here in my clean up queue. I asked him to have a look and get back to me on whether one or both would fit his needs.He wrote me back and gave me a bit of the back story on the pipe he was seeking. I have included a portion of that email below.

Hi Steve,

Thank you so very much for getting back to me. As with any pipe, there is always a back story, but I will only relate the Reader’s Digest version.  I have a son who remembers his grandfather’s (my dad’s) pipe of this style and regrets that he was only 14 and too young to speak up and get one of my dad’s pipes when he passed in 1982.  I am trying to surprise my son with this replica of my dad’s favorite pipe.  I am thrilled you have two of this style and are willing to sell one or both… I do like the bowl on the lower one better since my dad had only very plain bowls…

George

I corresponded with George and answered his questions regarding the difference on the two pipes and he wrote back with his choice. I quote from that email as follows.

Steve,

Thank you for your reply and your clear explanation of the difference in the pipes.  I would be interested in the smooth finished as that is the type pipe my dad had.  The less ornate, smooth finished, brown bowl would be the one I would like. Please keep my informed, but there is no rush on getting the pipe to me as I want to send it to my son on my father’s birthday which was on 18 February… Thanks for your help in doing this for my son and my dad’s memory.

George

With his choice made I knew what pipe I was working on next – a Kirsten metal pipe with a smooth briar Dublin bowl with carvings around the smooth finish. It is stamped on the left side of the shank, Kirsten in a cursive script. On the underside it is stamped Made in U.S.A. – K.

Here is some background information on the brand. These pipes were made for a long period of time in the Seattle, Washington area of the US. They came in four generations or iterations – Generation 1, 1.5, 2 and 3. The stamping on this one, the absence of a metal cap to hold the bowl, and the presence of the rubber O rings on the metal valve and on the stem insert, point to it being a Generation 1.5 pipe or a transitional one.

I am thankful to Dave Whitney for the information he provided for an earlier blog on Kirstens to help date this pipe (https://rebornpipes.com/2012/11/03/kirsten-generation-1-1-5-2-3/). The blog gives following information on the Generation 1.5 – transitional period – mid to late 50’s.

This was an experimental stage. Kirsten realized that the bit and insert were prone to seizure as the condensate dried. This model always has O-rings on the metal insert, and later models can have O-rings on both. Same markings, as I remember it. There is no metal cup spacer under the bowl. This generation has O rings either on the valve or mouthpiece but no O rings on the other end. This transitional period is stamped “Pat. Pending” and “Pats. & Pats. Pending” some with “Made in U.S.A. It seems like the company was using surplus parts to combine into this series of pipes. This particular pipe is stamped K after the U.S.A. thus making it a Companion.

With that I knew that the Kirsten K I was working on was a Companion (what George had asked for). It was made from the mid to late 1950s during the transitional period of Kirsten manufacture. It will be a great, smokable piece of both Kirsten history and George’s family history once it is finish. Now it was time to work on the pipe itself.

Somewhere along the journey of this pipe Jeff had done a great cleanup on the pipe. He reamed the bowl with a PipNet pipe reamer and followed up with a Savinelli Fitsall pipe knife to remove the cake. He scrubbed out the mortise and the airway in the shank and the stem with alcohol, cotton swabs and pipe cleaners. He scrubbed the bowl exterior and the aluminum barrel with a tooth brush and Murphy’s Oil Soap to remove the grime on the finish of the bowl and the lava from the rim top. He rinsed it under running water. One of the benefits of this scrub is that it also tends to lift some of the scratches and nicks in the surface of the briar. He dried it off with a soft cloth. He cleaned the internals and externals of the aluminum barrel and the vulcanite stem with alcohol, pipe cleaners and cotton swabs. He soaked the stem in Before & After Pipe Stem Deoxidizer and rinsed it off with warm water and cleaned out the airway in the stem with alcohol, pipe cleaners and cotton swabs. I took photos of the pipe as I saw it when I put it on the table.   I took photos of the rim top and stem to show the condition. The rim top and beveled edge looked amazing. The stem was vulcanite and there were tooth marks and chatter on both sides ahead of the button. I took photos of the stamping on the sides of the aluminum barrel. They are clear and readable as noted above.   I removed the stem from the barrel and the flow adjuster valve from the front of the barrel. I removed the bowl from the top of the shank and took a photo of the pipe to give a sense of the components of the pipe.I set the parts aside and worked on the bowl. I removed the screw from the bottom of the bowl so that I could clean up the bowl. I sanded the inside of the bowl and topped the rim top to remove the burning and darkening. I worked on the inner edge with a folded piece of 220 grit sandpaper to smooth out the darkened and damaged inner edge of the bowl. In the photo below there is a mark at the 5 o’clock section of the rim top below. The mark is actually a fill in the rim top. It is solid and undamaged. Once finished, the top and inner edge looked better.I used a Maple stain pen to restain the rim top to match the sides of the bowl. Once it was finished and polished it would look a lot better.I polished the bowl sides and top with micromesh sanding pads – dry sanding with 1500-12000 grit pads. I wiped it down with a damp cloth after each sanding pad to remove the grime. The finish began to look much better. I rubbed the bowl down with Before & After Restoration Balm and worked it into the grooves as well as the smooth surface of the briar. I let it sit for 15 minutes then buffed it off with a soft cloth. The bowl took on a rich glow and the grain shown through the finish. I polished the aluminum valve on the from of the barrel with 4000-12000 grit micromesh pads to polish off the oxidization that was on it when I first took it out of the box. It shined up very well. I coated the rubber gasket on the valve with some Restoration Balm as it worked to bring the rubber back to life. Once it had sat for awhile I wiped it off and put the valve back in the barrel of the pipe and the bowl. The valve was easily adjustable and would act like a flue on a wood stove when the pipe was smoked. I set the bowl and barrel aside and turned my attention to the stem. I “painted” the vulcanite stem surface with the flame to lift the tooth marks. I was able to lift them considerably. I filled in the remaining tooth marks with clear CA glue and set it aside for the repairs to cure. I used a small file to flatten the repairs and start the process of blending them into the surface of the stem. I then sanded them with 220 grit sandpaper to blend them into the surface of the vulcanite stem. I used micromesh sanding pads to polish the stem and bring back the shine. I dry sanded the stem with 1500 – 12,000 grit pads and rubbed it down with Obsidian Oil after each sanding pad. I polished it with Before & After Fine and Extra Fine Polish and then gave it a final coat of Obsidian Oil and let it dry. This Kirsten Gen. 1.5 Made in U.S.A. – K straight pipe with a vulcanite saddle stem has a smooth reddish finish. The rich reds and blacks of the contrasting stain makes the grain come alive with the polishing and waxing. I buffed the barrel lightly with the Blue Diamond and also buffed the bowl. I gave the bowl and barrel several coats of carnauba wax and then lightly buffed it with a clean flannel buffing pad to raise the shine. I put the vulcanite stem back on the bowl and carefully buffed the pipe with Blue Diamond on the buffing wheel using a light touch on the briar and followed that by buffing the entire pipe with a clean buffing pad. I hand buffed the pipe with a microfiber cloth to deepen the shine. This older Kirsten Companion K is a great looking pipe and the Dublin bowl gives it a distinctive look. Give the finished pipe a look in the photos below. The dimensions of the pipe are Length: 5 ½ inches, Height: 1 ¾ inches, Outside diameter of the bowl: 1 ¼ inches, Chamber diameter: ¾ of an inch. The weight of the pipe is 1.66 oz./46 grams. The finished pipe is shown in the photos below. It is ready for George to give to his son in memory of his grandfather. Thanks for reading this blog and my reflections on the pipe while I worked on it. There are many more to come!

Odds and Ends


Blog by Kenneth Lieblich

I was just going through some bits and pieces of tobacciana that I have unwittingly acquired in pipe collections – and I thought I’d share a few photos.

First is a bottle of Dunhill Holdaclean. This is a fluid used for cleaning filters and cigarette holders, but I wonder if it might have also been used (off-label) for cleaning pipes. This bottle was from my late grandfather, and he didn’t smoke cigarettes. I did a quick search online for “Dunhill Holdaclean” (and variations thereof) and found literally nothing on this product. If you know anything about it, please let me know. I can’t pin an exact age on this bottle, but it must be at least 47 years old because my grandfather died in 1975. Second is the tag/pamphlet that comes with a Murphy Pipe Tip. This was a bog-standard rubber tip for your pipe. I snapped photos of the front, back, and inside of the piece I have. I also included a photo I grabbed online of what a whole display would have looked like. I know that the patent on this item is from 1936, but I don’t know if this specific tag is from that date or not. It seems unlikely, as 25¢ in the late-30s is equivalent to about $5 today – but who knows. Cute little item. Third is a package of Comoy’s of London Pipe Polishing Cloths. The package is complete, albeit used, in its original bag. It had two cloths in it, as you can see. One cloth for the stummel and one for the stem. Once again, I have no idea of its age and would welcome any information you might have. Just like the bottle above, I did a search online and found no useful information. Finally, I have a box of Brigham Maplewood filters. This has a 1960s/1970s feel about it, but I’m just guessing at this point. It just so happens that I have a new box of Brigham filters and I wanted to compare. So, I laid a new one and an old one side-by-side and saw two differences. First, the old filter was notably thinner than the new one. Second, all the new filters were drilled off-centre, as compared with the old filters. You can make of that what you will! As it is Christmas Eve, I would like to wish you and your loved ones a joyous Christmastide. I look forward to sharing more pipe tales with you in the new year. Please continue to follow me here on Steve’s website or email me directly at kenneth@knightsofthepipe.com. Thank you very much for reading and, as always, I welcome and encourage your comments.

A Christmas Mending for a Snapped Shank – a Stanwell Royal Guard 581 Made in Denmark Pickaxe


Disasters happen and this pipe has made its way back to the worktable to see what I can do to help.  My son-in-law, Niko, commissioned this pipe from…

A Christmas Mending for a Snapped Shank – a Stanwell Royal Guard 581 Made in Denmark Pickaxe

Nicely done Dal.

Restoring an Italian Made Gulden Dansk Long, Oval Shank Brandy


Blog by Steve Laug

Last week I received an email from Sonny, the fellow I had restored the Gulden Dansk 9200 Freehand Dublin. He was sending me a package with what he called the brother to that Gulden Dansk pipe to work on that he wanted restored. It arrived this week and it was another old Gulden Dansk pipe made by Savinelli with a vulcanite saddle stem. He wanted me to restore it like I had the other one. It had the same rusticated finish with a tight pattern around the bowl. The finish was dirty with dust in the grooves but it was still quite pretty. The rim top was rusticated to match the bowl finish. The rim top was dirty with lava overflow filling in the grooves. The edges of the rim were very good. The pipe was stamped on the underside of the shank and read Gulden Dansk. It was quite lightweight and would clean up quite nicely. In chatting with him over email that he wanted the pipe cleaned up and restored. The stem was oxidized and the GD stamp was faded but the stamping looked to be deep enough to try to restain it. I am including the photos that Sonny sent me. It is an intriguing looking pipe. When I received the pipe in the mail on this week, I went back to the previous blog I did for Sonny and reread what I had written there from a Blog that Kenneth wrote about a pair of pipes he had worked on – a Gulden Dansk and a Silveren Dansk. I turned to his blog and read through what he had written about the brands there (https://rebornpipes.com/tag/savinelli-made-gulden-dansk/). I quote the research that Kenneth did on the brand before I started my clean up work. It is very helpful and tied the pipe brand to Savinelli as I assumed looking at it.

The brands Gulden Dansk and Silveren Dansk are ones about which there is very little information. I cobbled together as much information as I could, and I will do my best to record that here. Both brands are sub-brands of Savinelli, according to smokingpipes.com. You can see in the photo below that smokingpipes.com states this clearly, and they are quite knowledgeable. Pipedia had no information at all regarding these brands. Meanwhile, pipephil.eu had precious little info (see below). One small clue is their reference to Italy in the Gulden Dansk image. Comments from some old pipe forums suggest that the brand(s) might be made for the Canadian market and came to full prominence in the early 1980s. See below.The newspaper ad above (sorry for the poor quality) is taken from the Montreal Gazette, November 1st, 1980. It shows that, in addition to pipes, they also sold tobacco.Furthermore, I found Canadian trademark registrations for both brands. I have shown some of that information below. For reasons unknown, the Silveren Dansk trademark is still active, whilst the Gulden Dansk one has expired. I also found an Australian trademark registration for the same, but it was noted on the Australian site that the origin of the application was Canada. Kenneth concluded his work as follows:

In short, we can say a few things about both Gulden Dansk and Silveren Dansk. They were both made by Savinelli, probably for the Canadian market (and perhaps other markets). The Canadian connection obviously fits with the gentleman in Winnipeg. They made pipes and tobacco, and all the comments I could find on the quality of the pipes were very positive. If you have any further details on these brands, I would love to hear from you.

Now it was time to work on the pipe itself. I took photos of the pipe when I opened the box. It is a nice looking shape – a long, oval shanked Brandy with a saddle stem. It is a great looking pipe with a tight rusticated finish that was quite beautiful. The stem and shank have a slight cant and angle that looks good. You can see the finish as noted above and the oxidation on the stem as well. I took photos of the rim top and the top and underside of the stem. You can see how it fit against the shank. It is oxidized with light tooth chatter and marks on the surface on both sides. You can see the grime on the right side of the rim top and the moderate cake in the bowl. It is a nice looking pipe.The next photo shows the stamping on the underside of the shank. It is clear and readable as noted above.I removed the stem from the shank and took a photo of the parts to give a sense of the overall look of the pipe. It is really a nicely designed looking bent Dublin that will look great once it is cleaned up.I reamed the bowl with a PipNet pipe reamer using the first two cutting heads to take the cake down to briar. I followed up with a Savinelli Fitsall Pipe Knife to clean up the remnants. I sanded the walls smooth with 220 grit sandpaper wrapped around a piece of dowel. I scrubbed the exterior of the bowl with a tooth brush and undiluted Murphy’s Oil Soap. I worked over the rim top and edges and rinsed it with warm water scrubbing it while rinsing it. I scrubbed the rim top with a brass bristle wire brush to loosen up the lava coat. I dried it off and took these photos. I cleaned out the mortise and airway in the shank and the stem with cotton swabs, pipe cleaners and isopropyl alcohol until they came out clean.  With the pipe cleaned it still had a ghost of a smell to it. It was a sweet aromatic smell with lingering smells of vanilla. I stuffed the bowl with cotton bolls and twisted a plug of cotton and turned it into the shank. I used an ear syringe to fill the bowl with isopropyl alcohol and set it aside in an old ice tray to let the deghosting happen! In the morning I woke up to find the cotton bolls in the bowl to be brown around the edges and the shank cotton was also brown at the shank end. I removed it and cleaned the shank once more. The bowl smelled better and the ghost had been exorcised to a large degree. I rubbed the bowl and shank down with Before & After Restoration Balm. I worked it into the finish with my fingers and used a shoe brush to press it deep into the crevices of the sandblast. The product works to deep clean the finish on the bowl and shank and enliven and protect the briar. After it sat for 15 minutes I wiped it off with a soft cloth. The briar really came alive with a rich shine. I took some photos of the bowl at this point to mark the progress in the restoration. It is a beautiful bowl. While the bowl sat deghosting I put the stem in a Briarville Stem Deoxidizer soak. I let soak overnight. When I took it out in the morning the oxidation had risen to the surface of the vulcanite. The GD logo on the top lost its remaining colour and it is very faint.I scrubbed the vulcanite with Soft Scrub to remove the oxidation from the surface of the bowl. Once finished it looked much better.I “painted” the surface of the stem with the flame of a Bic lighter and was able to lift them a little. I filled in what remained with clear CA glue and set the stem aside to cure. I used a small file to flatten the repairs. I sanded them flat with 220 grit sandpaper and started the polishing with 400 grit wet dry sandpaper. I polished the stem with micromesh sanding pads – dry sanding with 1500-12000 grit pads. I wiped the stem down after each pad with Obsidian Oil to remove the sanding dust. I used the Before & After Pipe Polish to remove the small minute scratches left in the vulcanite. I finished by wiping the stem down with a final coat of Obsidian Oil and set it aside to dry.  As usual at this point in the restoration process I am excited to be on the homestretch. I look forward to the final look when it is put back together, polished and waxed. I put the Gulden Dansk Oval Long Shank Brandy back together. I polished the bowl and stem with Blue Diamond to polish out the scratches in the briar and the vulcanite. I gave the bowl and the stem multiple coats of carnauba wax. I buffed the pipe with a clean buffing pad to raise the shine. I hand buffed it with a microfiber cloth to deepen the shine. The pipe polished up pretty nicely. The grain really pops with the wax and polish. The shiny black vulcanite stem is a beautiful contrast to the dark browns of the bowl and shank. This rusticated Gulden Dansk Oval Long Shank Brandy was another fun pipe to work on. It really is a quite stunning piece of briar whose shape follows the flow of the grain on the briar. The pipe is comfortable pipe to hold in the hand. The finished pipe is shown in the photos below. The dimensions of the pipe are Length: 5 ¾ inches, Height: 2 inches, Outside diameter of the bowl: 1 ¼ inches, Chamber diameter: ¾ of an inch. The weight of the pipe is 1.80 ounces/ 51 grams. I will be sending this beautiful Gulden Dansk back to the pipeman who dropped it off. Thanks for reading my reflections on the pipe while I working on it.

Sunrise 284 Rhodesian Restoration (Comoy’s 2nd)


By Al Jones

The 284 shape from Comoys is one their iconic and beloved shapes. This one is stamped “Sunrise”, one of the numerous 2nd lines from that brand. This one is also stamped “Natural”, so they produced the line in different finishes. A previous Sunrise on my workbench was in the Amber finish. The grain lines were really nice and it holds no noticeable flaws. I suspect the stem once held a stinger, as the tenon is quite large (it has a great draught!)

Here is an excerpt about the Sunrise line, courtesy of Pipepedia:

Below is the pipe as it was received. It had some darkening on the rim and the beveled edge would also need work. The stem was in very good condition, with minor teeth marks and mild oxidation.

I reamed the mild cake and soaked the bowl with sea salt and alcohol. Once the overnight soak was completed, I cleaned the shank with a bristle brush dipped in alcohol, until it came out clean.

I used some 800 grit wet paper on a block to remove the burn mark from the bowl top. I used a small wine stopper bowl with a piece of 600 grit paper to remove the burn marks from the beveled edge, while still keeping the bezel. Don’t tell my wife I commandeered one of her decorative wine stoppers.

The bowl top was then finished with 1500 and 2000 grit paper. There were a few dents and marks on the bowl. I used a wet towel with an electric iron to steam out the marks.

The stem was finished with 800, 1500 and 2000 grit paper, followed by 8,000 and 12,000 micromesh sheets. I then polished it with White Diamond and Meguiars Plastic polish on my buffer.

The bowl was polished with White Diamond and several coats of Carnuba wax.

Below is the finished pipe.

Replacing a Broken tenon on a Savinelli Estella Hand Made Freehand


Blog by Steve Laug

Last week I received a from Curtis, a gentleman who had been referred to me by City Cigar. I asked him to email me some photos of his pipe so I could see what I was dealing with before I took on the project. He sent the following email and photos:

I was referred to you by Ben at City Cigar.  I was curious if I could send my pipe to you for repairs. Here are some photos of it, I know you probably can’t give a proper estimate until it’s in your hands.  Forgive my ignorance on pipe repair but I’ve never had any work done before.  If possible, after viewing my photos, would a “ballpark” estimate be possible ?  I don’t know if I’m looking at 100.00 or 1000.00.  The pipe might  not be “worth” much but my son gave it to me and it has sentimental value to me.  I’m just looking to get a new or used or repaired stem for the pipe, if possible.

Thanks for you time,

Curtis

I called him back and we arranged for him to mail the pipe to me. It was a very heavily rusticated Estella Hand Made with an acrylic stem with a tenon that had snapped off fairly close to the saddle on the stem. It is a bit of a bent Dublin with a fancy half saddle acrylic in variegated silver and grey colours. The stem is in pretty decent condition. The bowl has a light cake and the rim top has some lava in the valleys. It will need to be cleaned up as well as having the tenon replaced. He sent the pipe to me through Canada Post and when it arrived it looked just as Curtis had photographed it.The pipe is a heavily rusticated Freehand with a plateau rim top. It is stamped on the smooth heel of the bowl and onto the shank on the underside of the pipe. It reads Estella [over] Hand Made followed by Savinelli S Shield logo then Italy. The stem was a variegated grey and silver half saddle. The tenon had snapped very close to the spot at the end of the stem. The stem itself was quite clean with some light tooth marks and chatter on both sides ahead of the button. There was a moderate cake in the bowl that went half way down the bowl. There was a lava overflow on the rim top and some nicks on some of the high spots. There was also some grime on the bowl at the midpoint where it is held in the hand. It was a nice looking Freehand pipe that showed great promise. I took photos of the pipe before I started my work on it. I took a close up photo of the bowl and rim top to show the thickness of the cake and the condition of the stem when I received the pipe. It was a bit of a mess. You can see the lava overflow on the rim top and the inner edge of the bowl. The stem looked good other than having a broken tenon. There were some light tooth marks and chatter on both sides ahead of the button.The next photo shows the stamping on the underside of the shank. It is clear and readable as noted above.I reamed the bowl with a PipNet Pipe Reamer to remove the cake from the bowl – using the #1 and #2 cutting heads to take out the majority of the cake in the bowl. I cleaned up the reaming with a Savinelli Fitsall Pipe Knife and a piece of dowel wrapped with some 220 grit sandpaper. I cleaned up the lava on the rim top with a brass bristle wire brush and was able to remove much of the build up. I cleaned out the mortise and airway in the bowl and shank with isopropyl alcohol, cotton swabs and pipe cleaners until the shank and airway were clean.I scrubbed the bowl with Murphy’s Oil Soap and a tooth brush on the rustication on the bowl and rim top. I rinsed the bowl with warm running water to rinse off the soap and the grime left behind. It looked better. I rubbed the bowl down with Before & After Restoration Balm. I worked it into the rustication with my fingertips and a horsehair shoe brush to get it deep in the valleys of the rustication. I let it sit for 15 minutes and buffed it off with a soft cloth.  I set the bowl aside and turned my attention to the stem. I went through box of replacement tenons. I found one that was the right fit for the mortise. It was a little long for insertion into the end of the stem once drilled it. I would need to shorten the tenon in order to not have it break through the underside of the half saddle.I flattened the broken edges of the original tenon with a Dremel and sanding drum. I used a penknife to create a funnel in the stem end to guide the drill bit straight. I drilled it with a series of drill bits from one slightly larger than the airway in the stem and finished with a ¼ inch bit that was the same size as the tenon end. I cleaned up the drilled out stem with a round file and a half round file. I smoothed out the walls of the drilled out area. I roughened and rounded the end of the tenon that was going to be inserted in the stem. I coated it with some black superglue and twisted it in place in the stem end. I aligned it with the shank end to make sure the fit was correct.I cleaned out the airway in the stem shank with pipe cleaners, cotton swabs and isopropyl alcohol to remove the tars and oils. I sanded out the tooth marks and chatter with 220 grit sandpaper and started the polishing with 400 grit sandpaper. The marks are smooth and blended in. I also sanded the diameter of the stem slightly on the right side and underside to adjust the fit to the shank. I polished the stem with micromesh sanding pads – dry sanding with 1500-12000 grit sanding pads. I wiped the stem down after each sanding pad with a cloth impregnated with Obsidian Oil. The oil both preserves the rubber and also provides some needed friction for the micromesh pads. I polished it with Before & After Fine & Extra Fine Polish. I rubbed it down a final time with the oil and set it aside. This Estella Hand Carved Rusticated Freehand by Savinelli combines a great looking piece of rusticated plateau briar with a variegated grey/silver acrylic stem to make a beautiful pipe. The cleaned rustication on the bowl came alive with the polishing and waxing. I put the stem back on the bowl and carefully buffed the pipe with Blue Diamond on the buffing wheel. I gave the bowl multiple coats of Conservator’s Wax and the acrylic stem multiple coats of carnauba wax on the buffing wheel and followed that by buffing the entire pipe with a clean buffing pad. I hand buffed the pipe with a microfiber cloth to deepen the shine. The finished Estella Hand Carved Freehand really is a beauty and fits nicely in the hand and looks very good. Give the finished pipe a look in the photos below. The dimensions of the pipe are Length: 6 inches, Height: 2 ¾ inches, Outside diameter of the bowl: 1 ¾  x 2 inches, Chamber diameter: ¾ of an inch. The weight of the pipe is 2.05oz./58grams. It is the second pipe I have finished for Curtis. Next week I will put it in the mail and send it back to him. Thanks for reading this blog and my reflections on the pipe while I worked on it. There are many more to come!

New Life and New Look for a Neerup Made in Denmark Bulldog


Blog by Steve Laug

Last week I received a call from Curtis, a gentleman who had been referred to me by City Cigar. He called to inquire if I could repair a broken tenon on a Savinelli Hand Made Estella that was gift from his son and he had dropped it and snapped the tenon off. We chatted and he sent photos and eventually agreed on the repair. He sent the pipe to me through Canada Post and when the box arrived on Monday it also included a second pipe. I talked with Curtis about the second pipe and we decided to restem it as the chip on the top button edge and stem were too big for a repair. The pipe is a sandblast Freehand style Bulldog with a smooth briar band, a black acrylic band and a white acrylic band. It is stamped on the smooth underside of the briar band and reads Neerup followed by Made in Denmark. The stem was vulcanite and had a fitted brass cap above the tenon. It was a slight saddle stem with a gentle bend. It was seriously damaged. There was a large wedge missing from the topside and just ahead of that there was a carved line like a dental bit to facilitate holding it in the teeth. There was a very thick cake in the bowl that took up over half of the diameter of the bowl and the shank was filled with gummy tars and oils. There was an overflow of lava on the rim top and some damage on the back right outer edge from knocking out the pipe. It was a pretty little pipe that looked great. I took photos of the pipe before I started my work on it. I took a close up photo of the bowl and rim top to show the thickness of the cake and the condition of the stem when I received the pipe. It was a bit of a mess. The stem was in rough condition as noted above. You can see the damage on both sides of the stem – the chipped and broken top of the stem and button as well as the tooth damage on the underside of the stem. Looking at it you can see why we chose to restem it.The next two photos showed the stamping on the underside of the shank. It is faint but readable as noted above.I removed the stem and took a photo of the pipe to give a sense of perspective to the parts.I reamed the bowl with a PipNet Pipe Reamer to remove the cake from the bowl – using the #1 and #2 cutting heads to take out the majority of the cake in the bowl. I cleaned up the reaming with a Savinelli Fitsall Pipe Knife and a piece of dowel wrapped with some 220 grit sandpaper. I scrubbed the bowl with Murphy’s Oil Soap and a tooth brush on the sandblast and the a brass bristle brush on the rim top. I rinsed the bowl with warm running water to rinse off the soap and the grime left behind. It looked better. I touched up the nicks and marks on the sandblast bowl and rim top with a black stain pen to blend them into the rest of the bowl. I rubbed the bowl down with Before & After Restoration Balm. I worked it into the sandblast with my fingertips and a horsehair shoe brush to get it deep in the grooves of the sandblast. I let it sit for 15 minutes and buffed it off with a soft cloth. I went through my stem and found this slightly longer taper stem that would need very little adjustment to fit in the shank. I also found a metal ferrule cap in my collection that would fit on the end of the stem and approximate the one that was on the original stem. I took pictures of the old stem with the replacement stem in the photo to show the difference.I glued the polished aluminum ferrule onto the end of the stem – sliding it over the tenon to give a metal end decoration and create a metal look to the stem. I cleaned up the excess glue and took a photo of the finished look of the stem. I liked it.Then I remembered that I had not cleaned out the shank and the internals of the pipe or the new stem. I did it now. I cleaned out the shank and the mortise with pipe cleaners, cotton swabs and isopropyl alcohol to remove the tars and oils. I also cleaned out the airway in the stem I had chosen to use as well.I polished the stem with micromesh sanding pads – dry sanding with 1500-12000 grit sanding pads. I wiped the stem down after each sanding pad with a cloth impregnated with Obsidian Oil. The oil both preserves the rubber and also provides some needed friction for the micromesh pads. I polished it with Before & After Fine & Extra Fine Polish. I rubbed it down a final time with the oil and set it aside. This Neerup Made in Denmark Freehand Bulldog carved by Peder Jeppesen combines a great looking piece of sandblast briar with a multi-banded shank extension and a vulcanite stem to make a beautiful pipe. The removal of the thick shiny coat allows the grain to come alive with the polishing and waxing. I put the stem back on the bowl and carefully buffed the pipe with Blue Diamond on the buffing wheel. I gave the bowl and the stem multiple coats of carnauba wax on the buffing wheel and followed that by buffing the entire pipe with a clean buffing pad. I hand buffed the pipe with a microfiber cloth to deepen the shine. The finished Neerup Made in Denmark Bulldog really is a beauty and fits nicely in the hand and looks very good. Give the finished pipe a look in the photos below. The dimensions of the pipe are Length: 5 1/2 inches, Height: 2 inches, Outside diameter of the bowl: 1 ¾ inches, Chamber diameter: ¾ of an inch. The weight of the pipe is 1.80 ounces/51 grams. Once I finish the second pipe this one will be going back to Curtis to enjoy. Thanks for reading this blog and my reflections on the pipe while I worked on it. There are many more to come!