Blog by Steve Laug
Last week I received a from Curtis, a gentleman who had been referred to me by City Cigar. I asked him to email me some photos of his pipe so I could see what I was dealing with before I took on the project. He sent the following email and photos:
I was referred to you by Ben at City Cigar. I was curious if I could send my pipe to you for repairs. Here are some photos of it, I know you probably can’t give a proper estimate until it’s in your hands. Forgive my ignorance on pipe repair but I’ve never had any work done before. If possible, after viewing my photos, would a “ballpark” estimate be possible ? I don’t know if I’m looking at 100.00 or 1000.00. The pipe might not be “worth” much but my son gave it to me and it has sentimental value to me. I’m just looking to get a new or used or repaired stem for the pipe, if possible.
Thanks for you time,
Curtis
I called him back and we arranged for him to mail the pipe to me. It was a very heavily rusticated Estella Hand Made with an acrylic stem with a tenon that had snapped off fairly close to the saddle on the stem. It is a bit of a bent Dublin with a fancy half saddle acrylic in variegated silver and grey colours. The stem is in pretty decent condition. The bowl has a light cake and the rim top has some lava in the valleys. It will need to be cleaned up as well as having the tenon replaced. 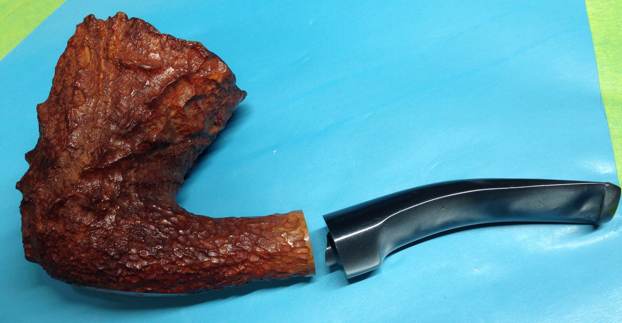
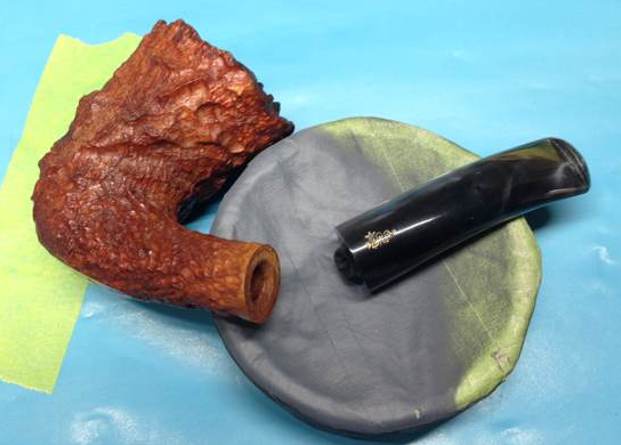

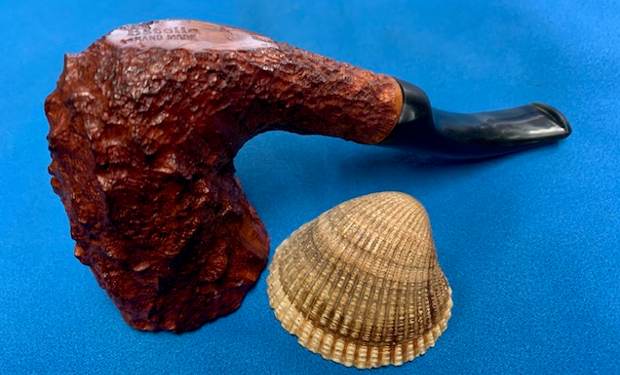
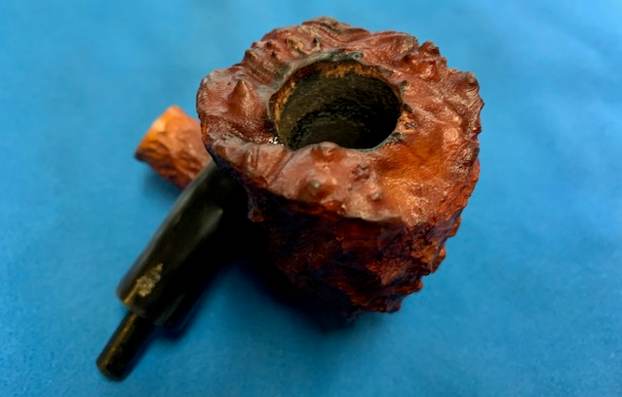
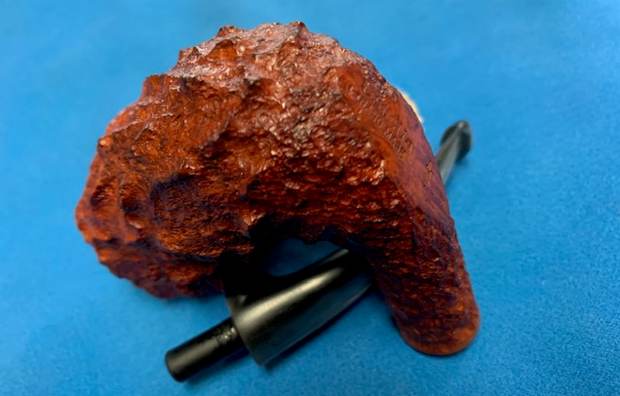
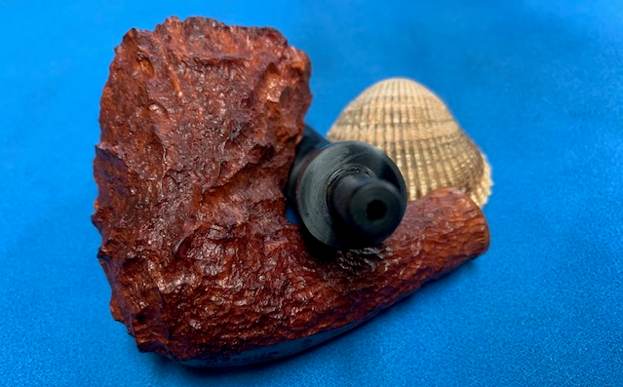
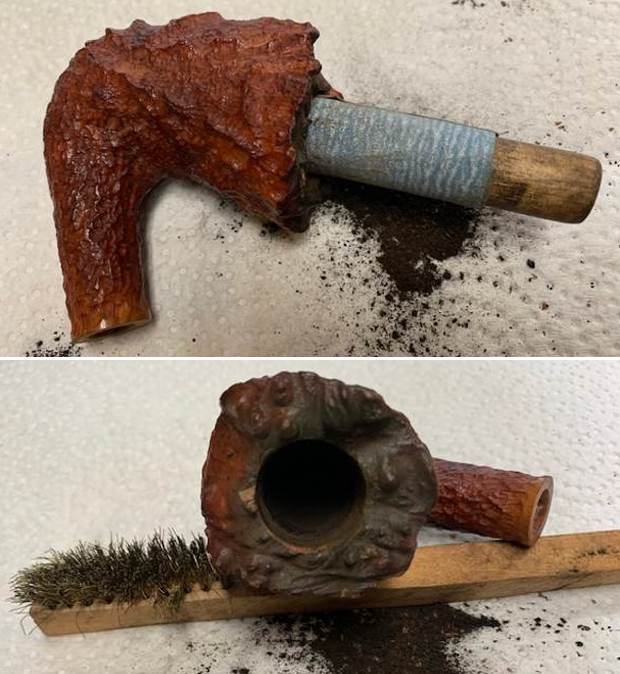
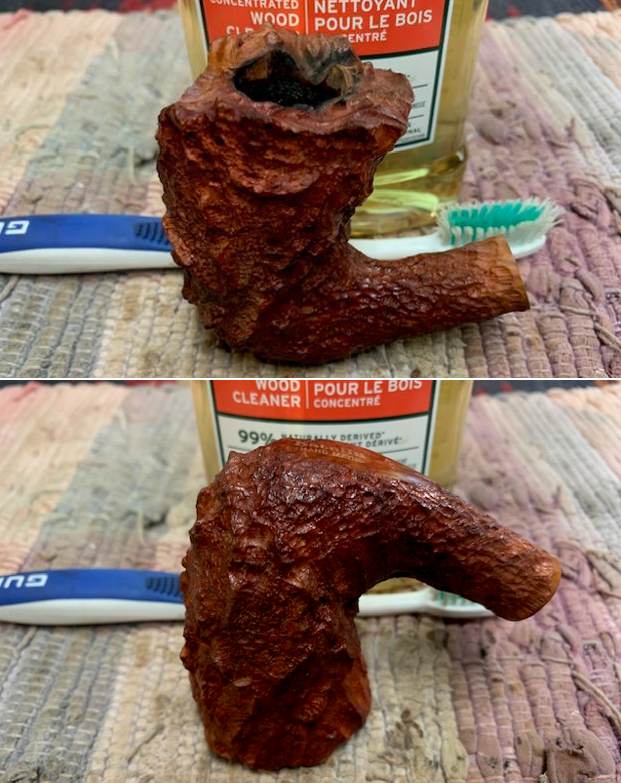
 He sent the pipe to me through Canada Post and when it arrived it looked just as Curtis had photographed it.The pipe is a heavily rusticated Freehand with a plateau rim top. It is stamped on the smooth heel of the bowl and onto the shank on the underside of the pipe. It reads Estella [over] Hand Made followed by Savinelli S Shield logo then Italy. The stem was a variegated grey and silver half saddle. The tenon had snapped very close to the spot at the end of the stem. The stem itself was quite clean with some light tooth marks and chatter on both sides ahead of the button. There was a moderate cake in the bowl that went half way down the bowl. There was a lava overflow on the rim top and some nicks on some of the high spots. There was also some grime on the bowl at the midpoint where it is held in the hand. It was a nice looking Freehand pipe that showed great promise. I took photos of the pipe before I started my work on it.
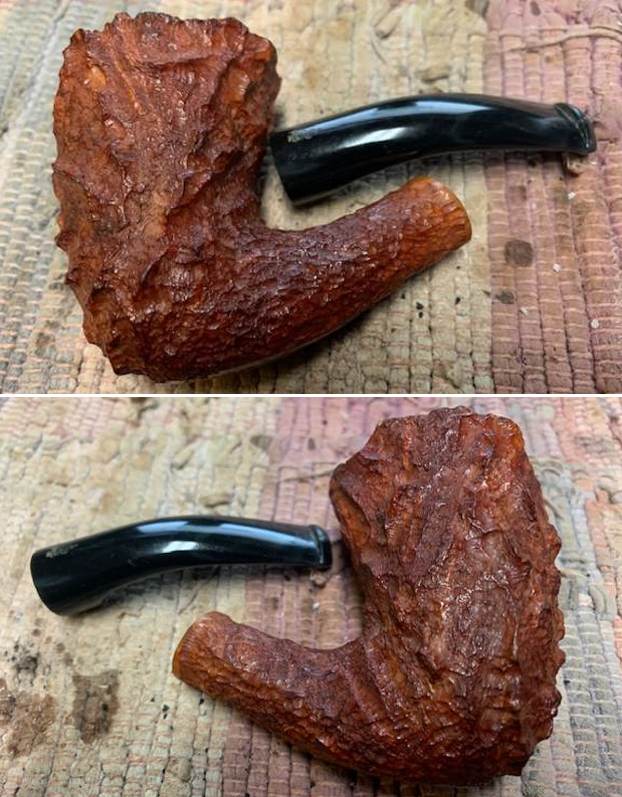
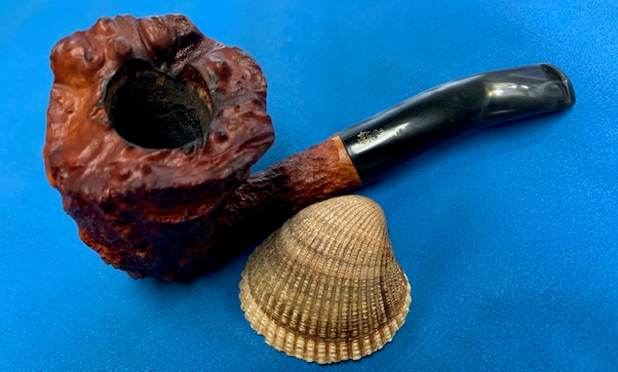
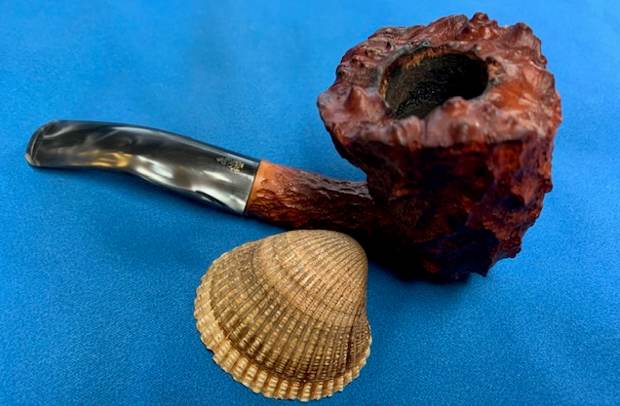
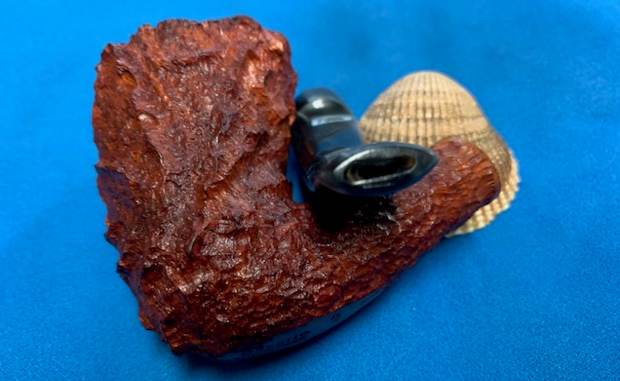
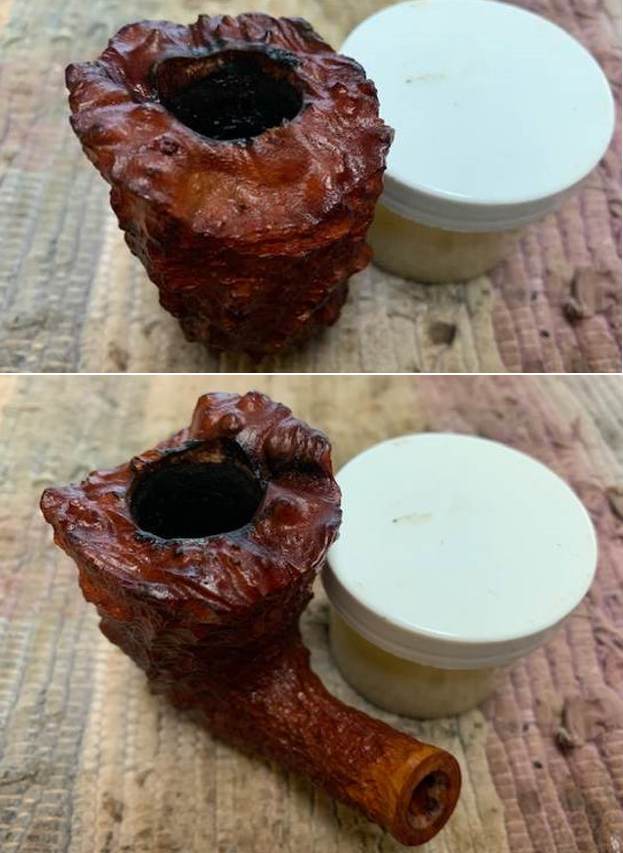
 I took a close up photo of the bowl and rim top to show the thickness of the cake and the condition of the stem when I received the pipe. It was a bit of a mess. You can see the lava overflow on the rim top and the inner edge of the bowl. The stem looked good other than having a broken tenon. There were some light tooth marks and chatter on both sides ahead of the button.
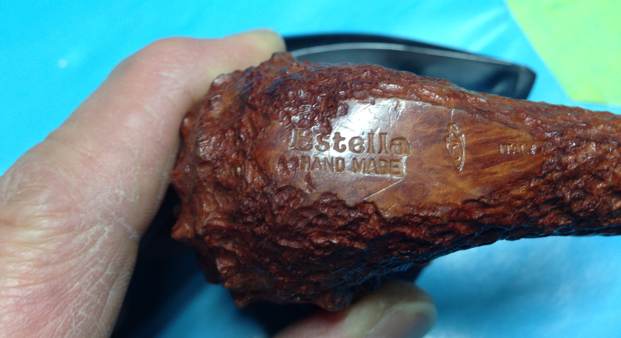
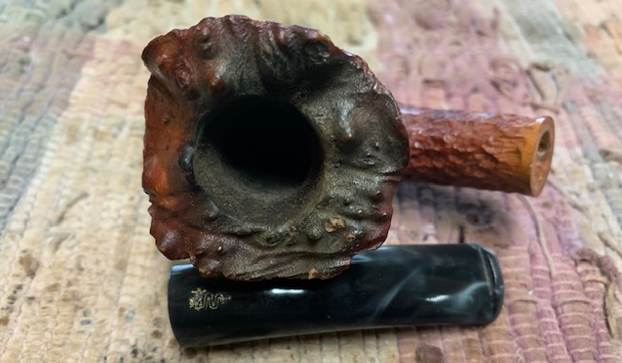 The next photo shows the stamping on the underside of the shank. It is clear and readable as noted above.
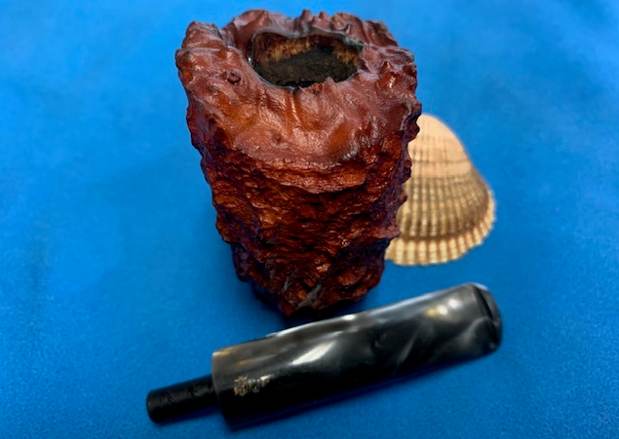
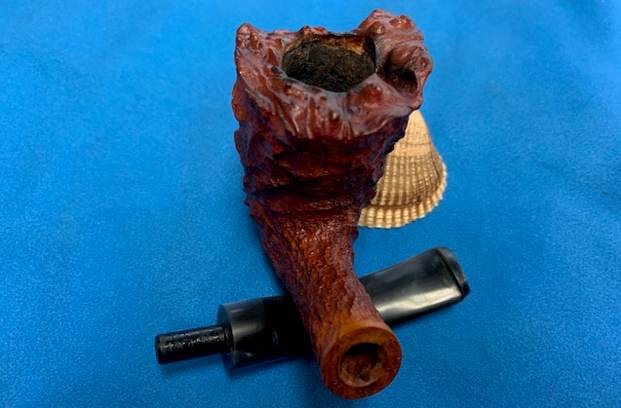
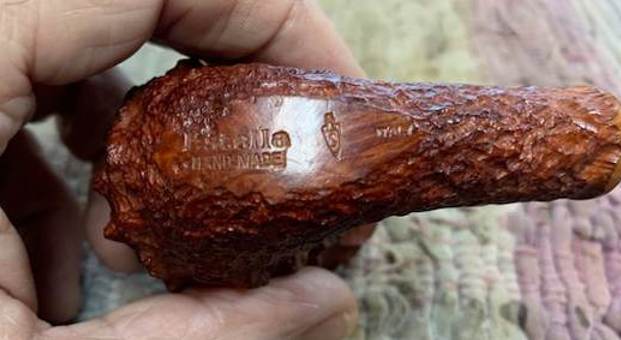 I reamed the bowl with a PipNet Pipe Reamer to remove the cake from the bowl – using the #1 and #2 cutting heads to take out the majority of the cake in the bowl. I cleaned up the reaming with a Savinelli Fitsall Pipe Knife and a piece of dowel wrapped with some 220 grit sandpaper. I cleaned up the lava on the rim top with a brass bristle wire brush and was able to remove much of the build up.
 I cleaned out the mortise and airway in the bowl and shank with isopropyl alcohol, cotton swabs and pipe cleaners until the shank and airway were clean.
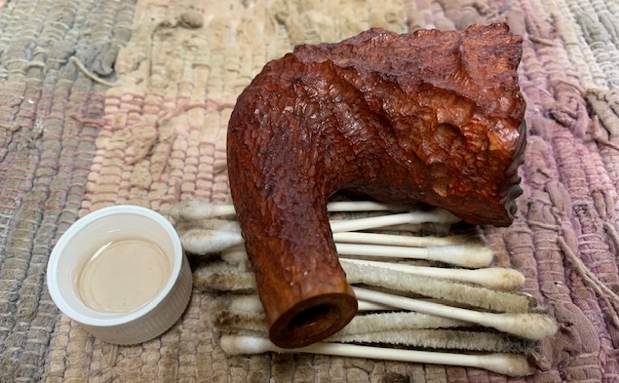 I scrubbed the bowl with Murphy’s Oil Soap and a tooth brush on the rustication on the bowl and rim top. I rinsed the bowl with warm running water to rinse off the soap and the grime left behind. It looked better.
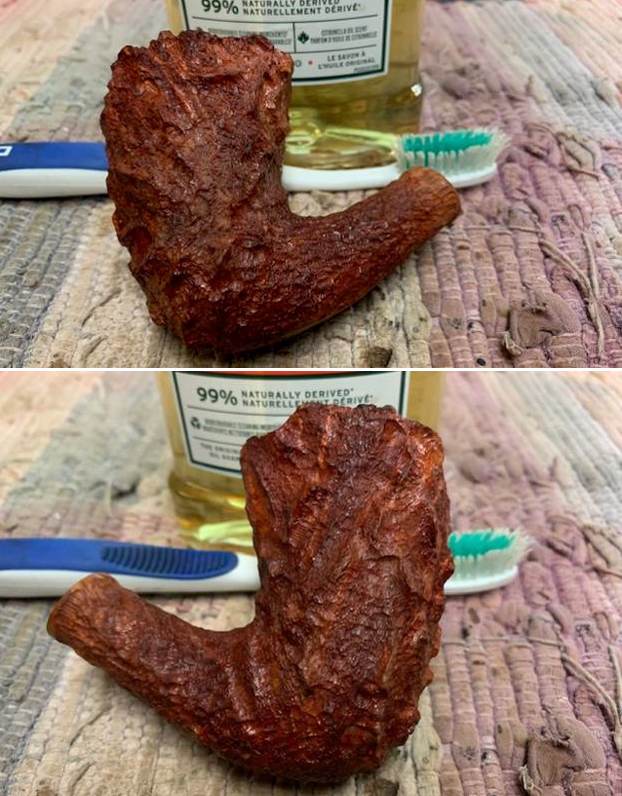
 I rubbed the bowl down with Before & After Restoration Balm. I worked it into the rustication with my fingertips and a horsehair shoe brush to get it deep in the valleys of the rustication. I let it sit for 15 minutes and buffed it off with a soft cloth.
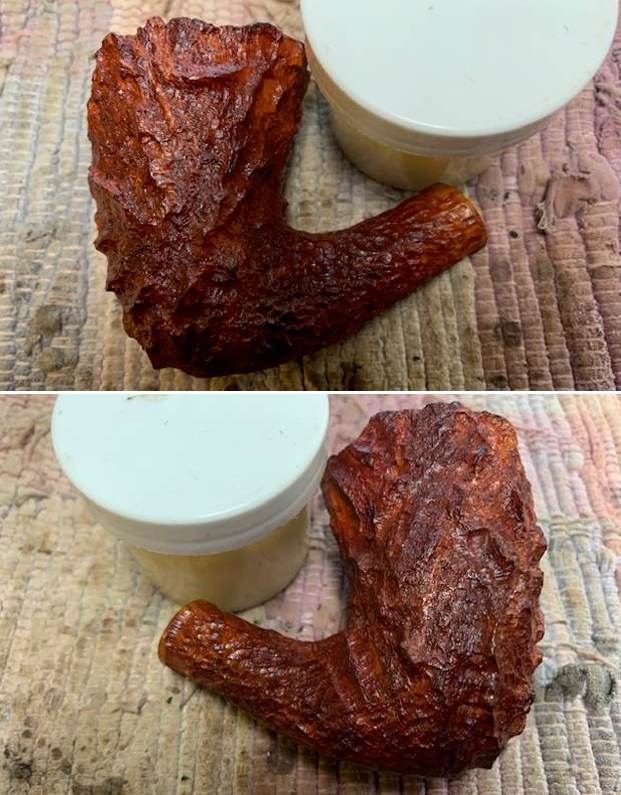
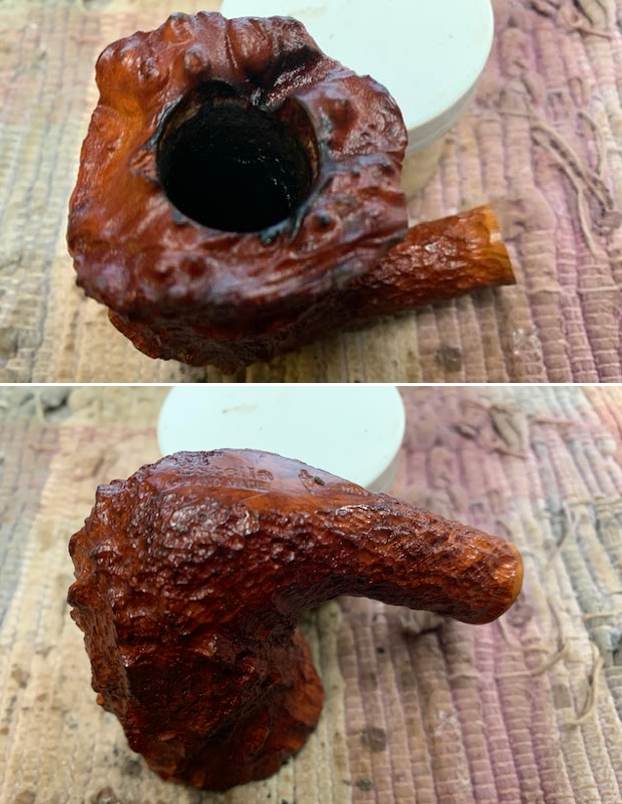
 I set the bowl aside and turned my attention to the stem. I went through box of replacement tenons. I found one that was the right fit for the mortise. It was a little long for insertion into the end of the stem once drilled it. I would need to shorten the tenon in order to not have it break through the underside of the half saddle.
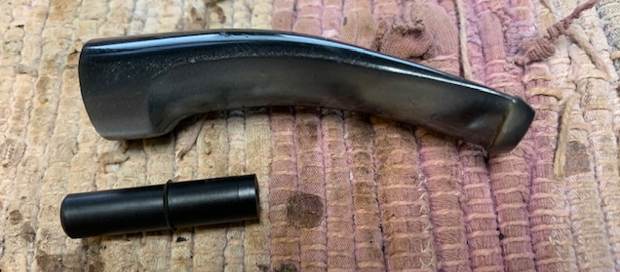 I flattened the broken edges of the original tenon with a Dremel and sanding drum. I used a penknife to create a funnel in the stem end to guide the drill bit straight. I drilled it with a series of drill bits from one slightly larger than the airway in the stem and finished with a ¼ inch bit that was the same size as the tenon end.
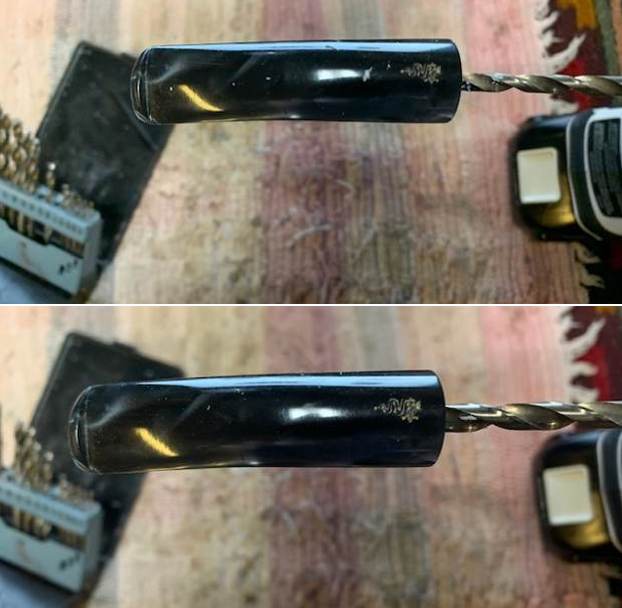
 I cleaned up the drilled out stem with a round file and a half round file. I smoothed out the walls of the drilled out area. I roughened and rounded the end of the tenon that was going to be inserted in the stem. I coated it with some black superglue and twisted it in place in the stem end. I aligned it with the shank end to make sure the fit was correct.
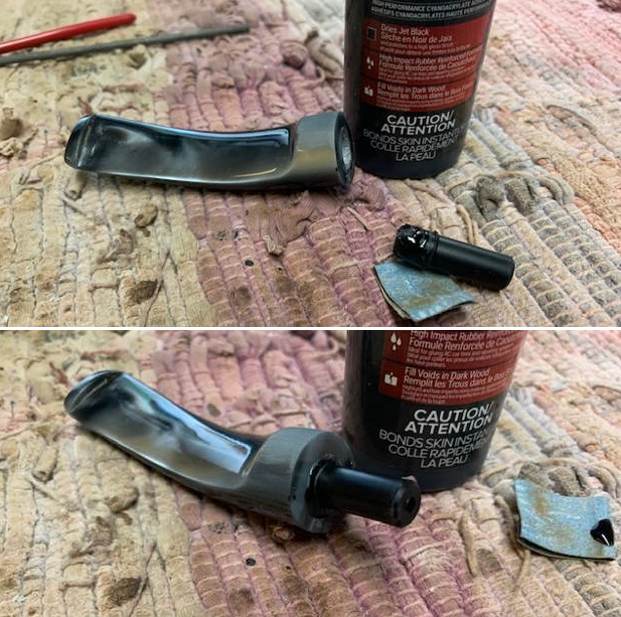 I cleaned out the airway in the stem shank with pipe cleaners, cotton swabs and isopropyl alcohol to remove the tars and oils.
  I sanded out the tooth marks and chatter with 220 grit sandpaper and started the polishing with 400 grit sandpaper. The marks are smooth and blended in. I also sanded the diameter of the stem slightly on the right side and underside to adjust the fit to the shank.
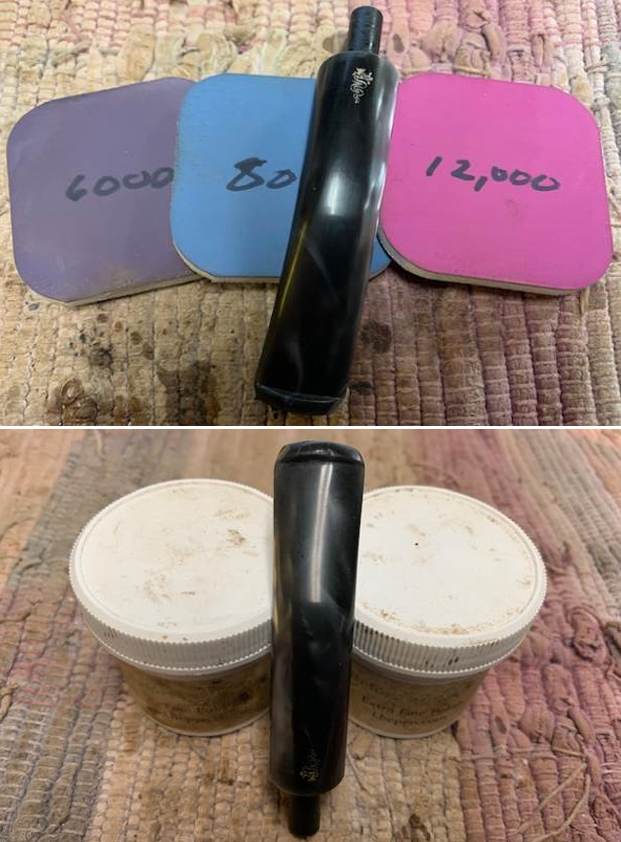
 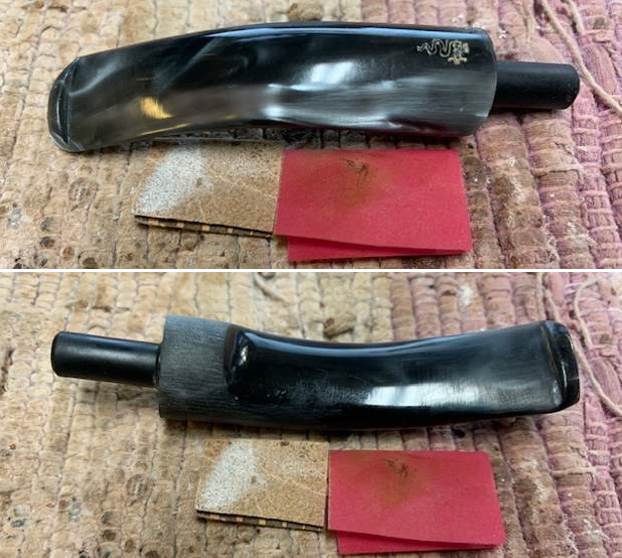 I polished the stem with micromesh sanding pads – dry sanding with 1500-12000 grit sanding pads. I wiped the stem down after each sanding pad with a cloth impregnated with Obsidian Oil. The oil both preserves the rubber and also provides some needed friction for the micromesh pads. I polished it with Before & After Fine & Extra Fine Polish. I rubbed it down a final time with the oil and set it aside.
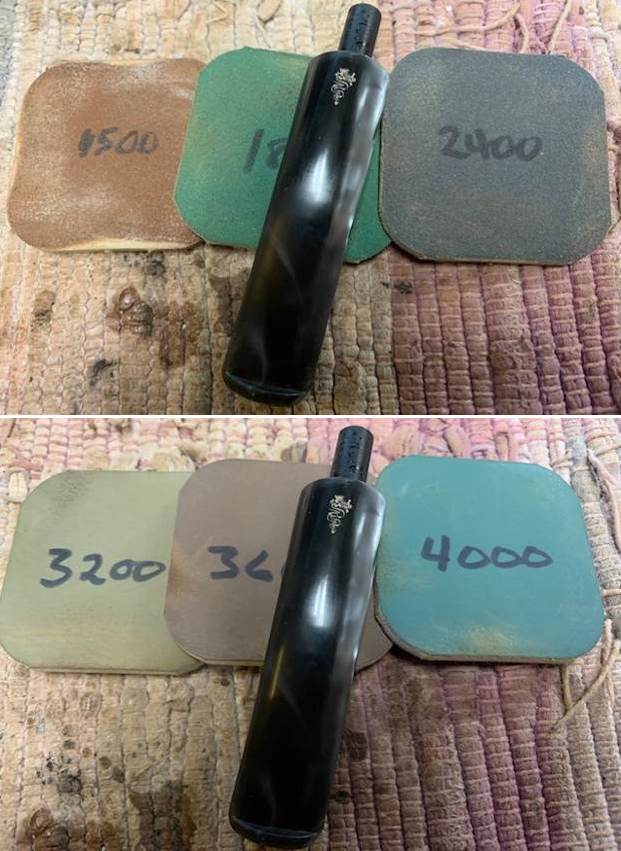
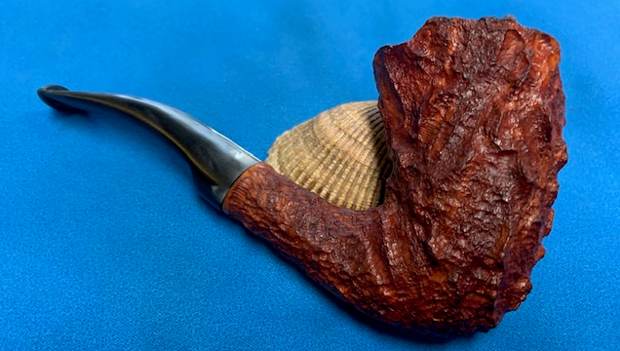
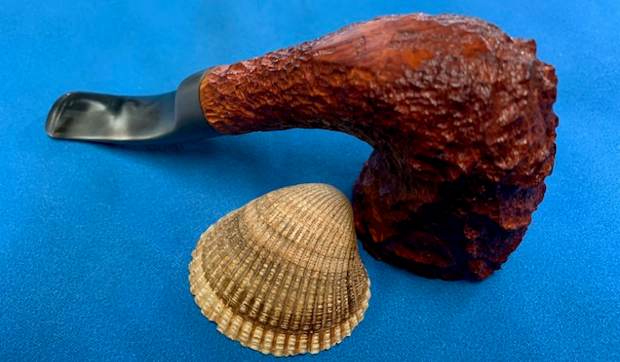
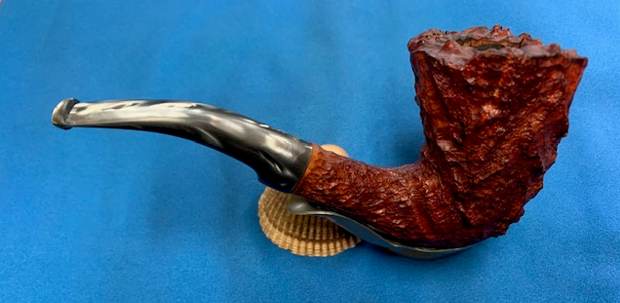
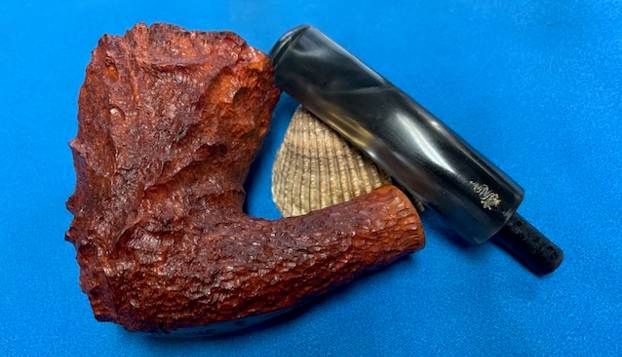
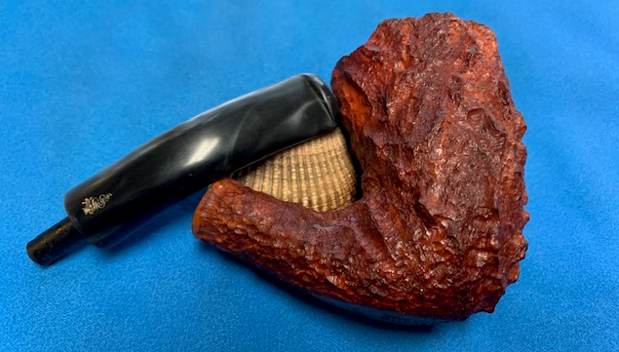
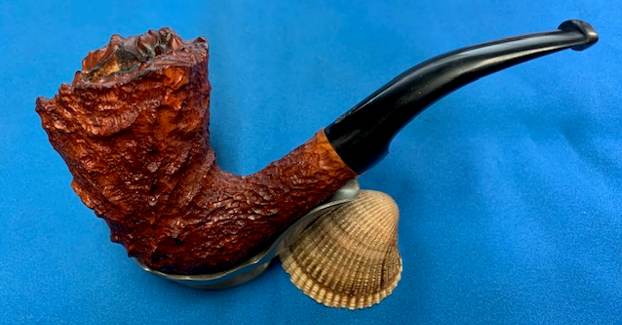
 This Estella Hand Carved Rusticated Freehand by Savinelli combines a great looking piece of rusticated plateau briar with a variegated grey/silver acrylic stem to make a beautiful pipe. The cleaned rustication on the bowl came alive with the polishing and waxing. I put the stem back on the bowl and carefully buffed the pipe with Blue Diamond on the buffing wheel. I gave the bowl multiple coats of Conservator’s Wax and the acrylic stem multiple coats of carnauba wax on the buffing wheel and followed that by buffing the entire pipe with a clean buffing pad. I hand buffed the pipe with a microfiber cloth to deepen the shine. The finished Estella Hand Carved Freehand really is a beauty and fits nicely in the hand and looks very good. Give the finished pipe a look in the photos below. The dimensions of the pipe are Length: 6 inches, Height: 2 ¾ inches, Outside diameter of the bowl: 1 ¾ x 2 inches, Chamber diameter: ¾ of an inch. The weight of the pipe is 2.05oz./58grams. It is the second pipe I have finished for Curtis. Next week I will put it in the mail and send it back to him. Thanks for reading this blog and my reflections on the pipe while I worked on it. There are many more to come!