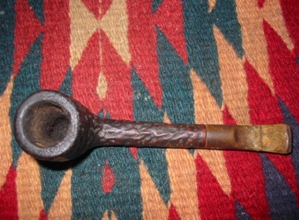
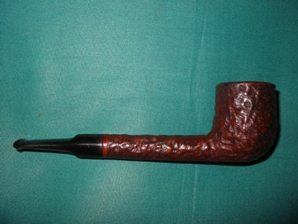
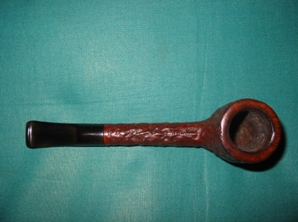
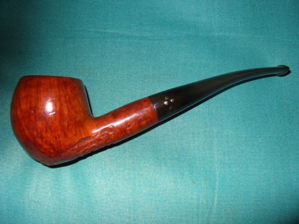
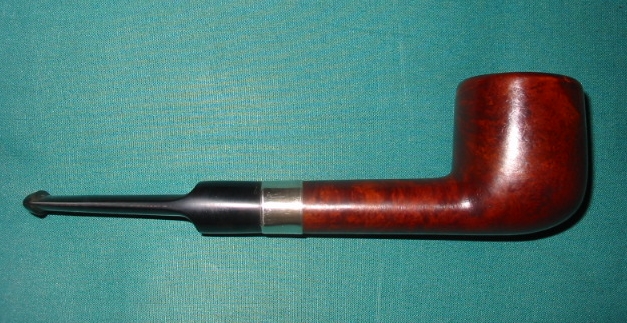
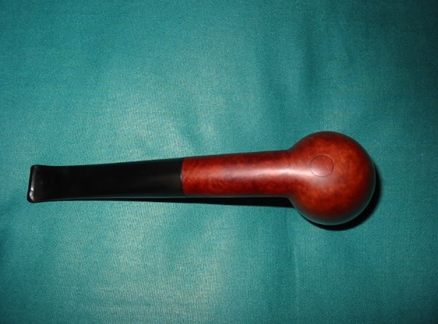
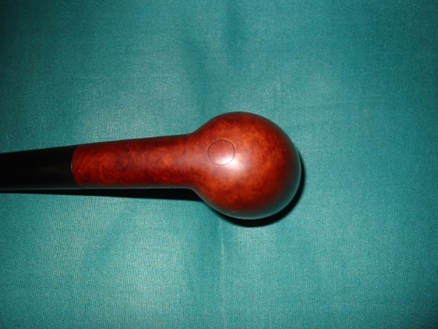
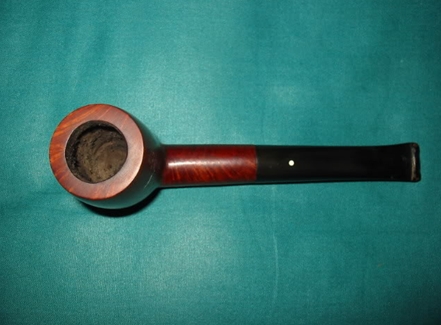
Category Archives: Pipe Refurbishing Essays

Essays and pictorial essays on the art of refurbishing

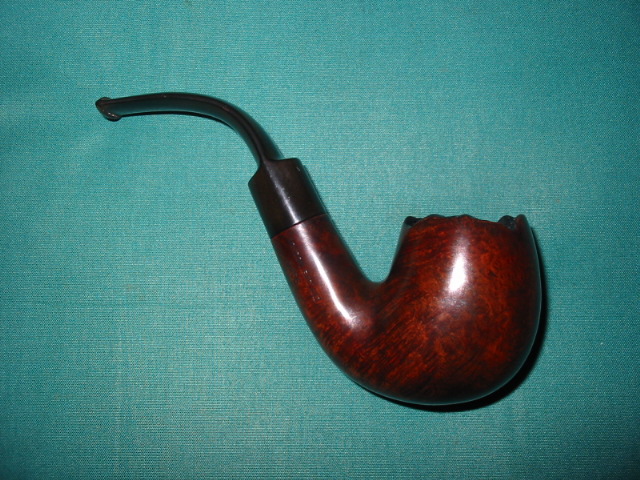
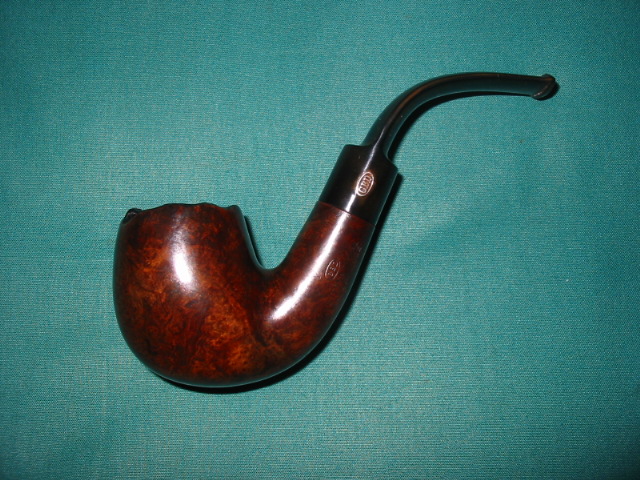
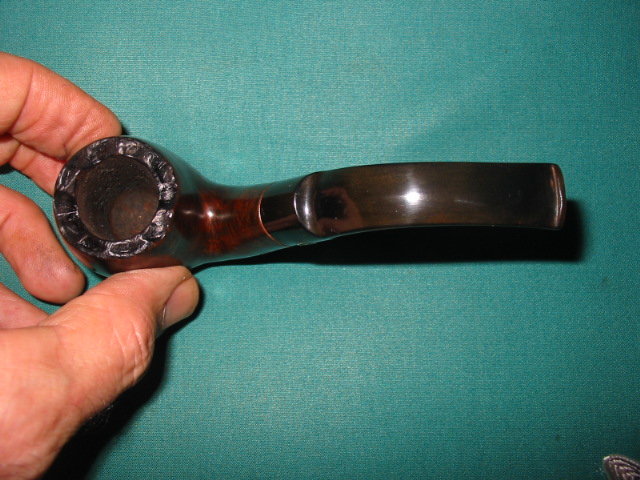
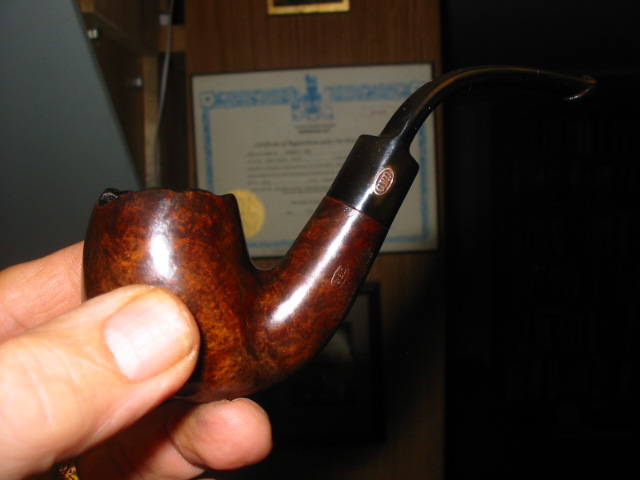
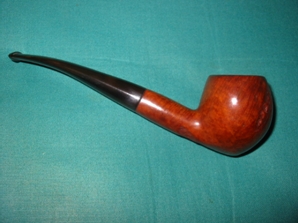
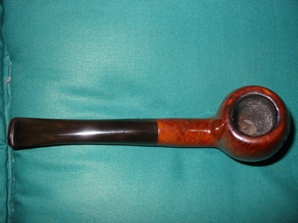
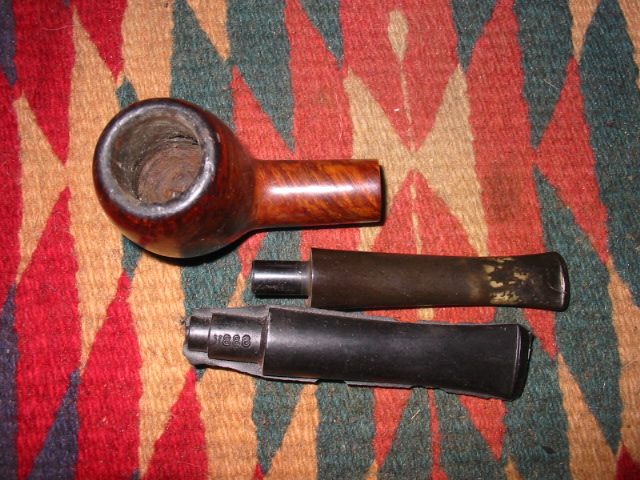
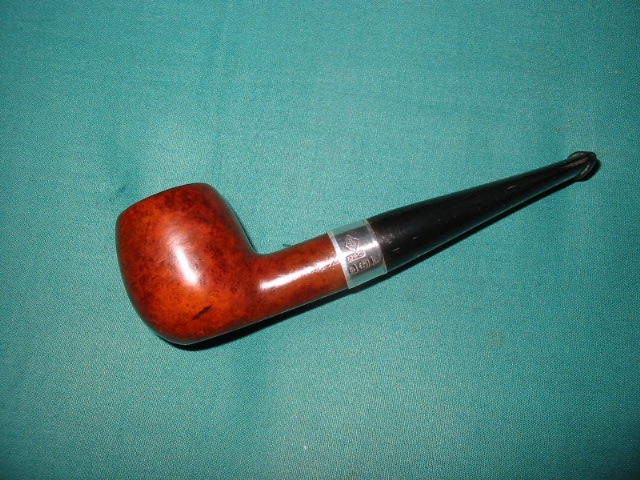
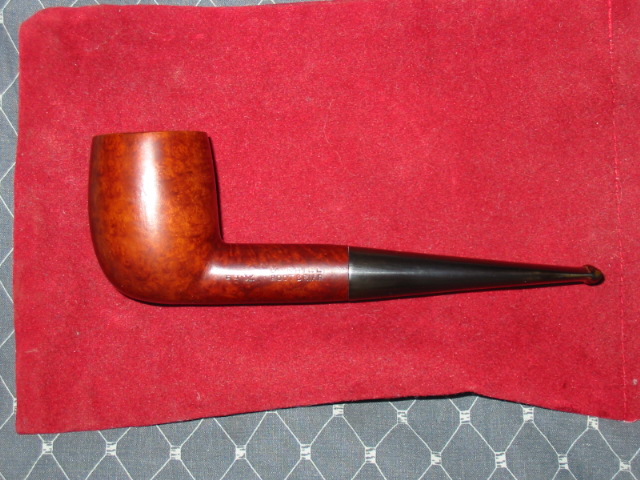
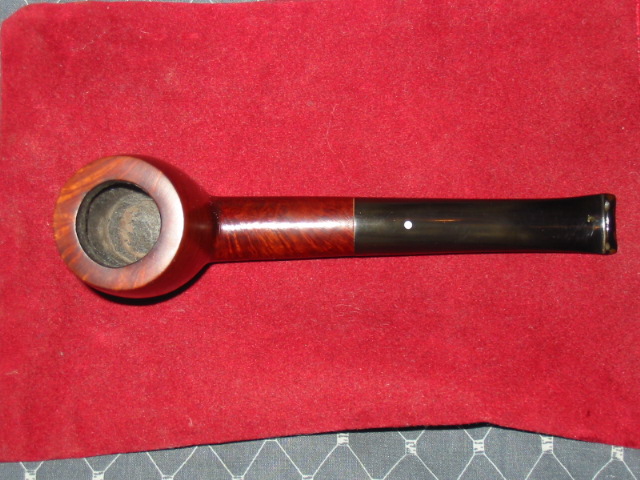
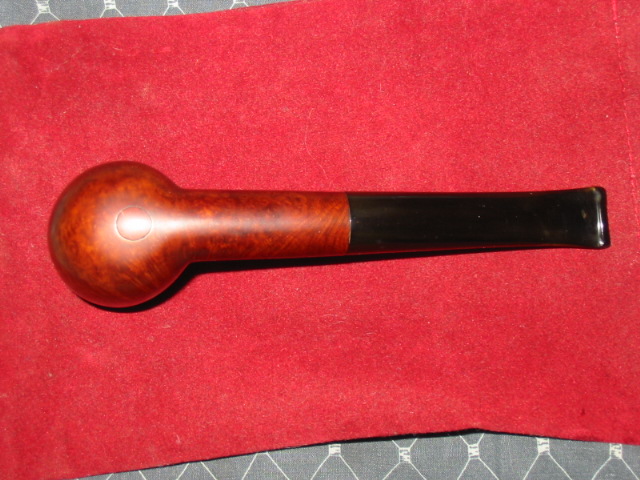
An Interesting Wellington Straight Billiard


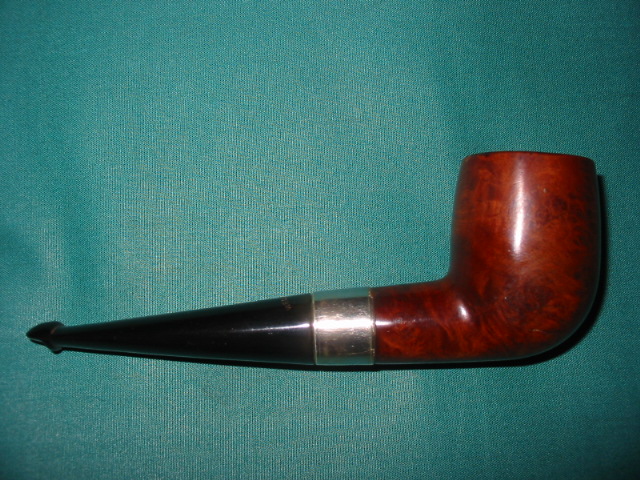
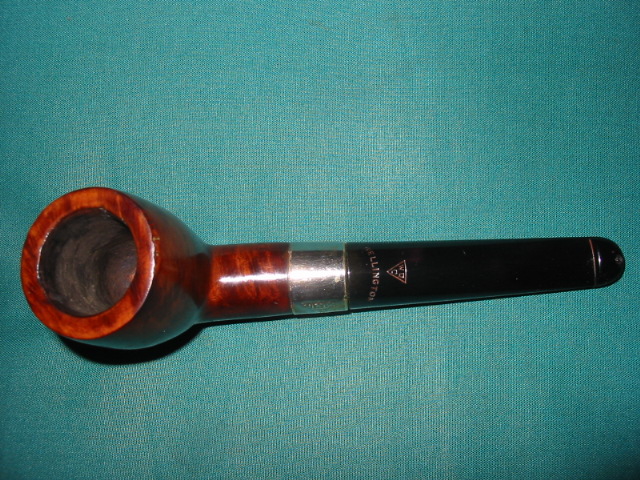
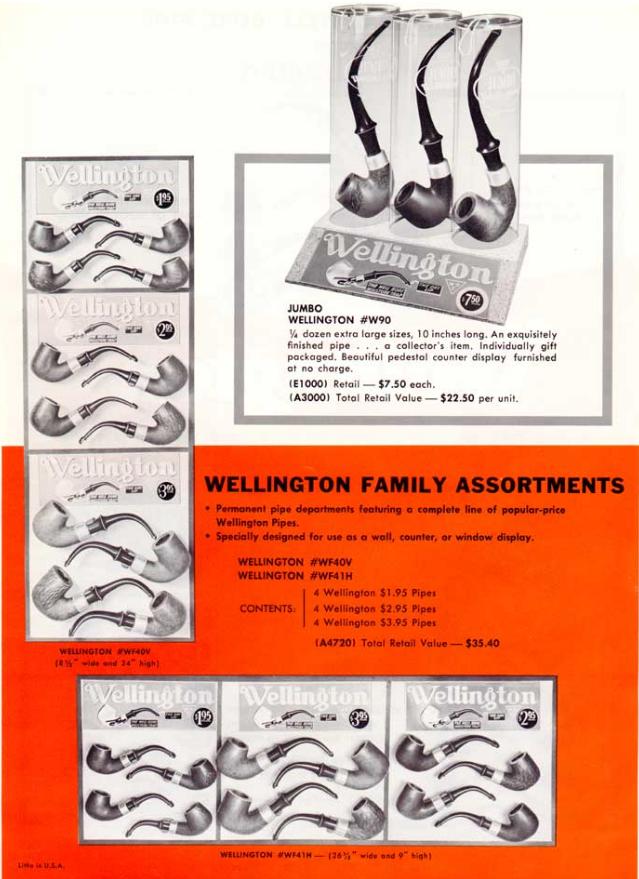
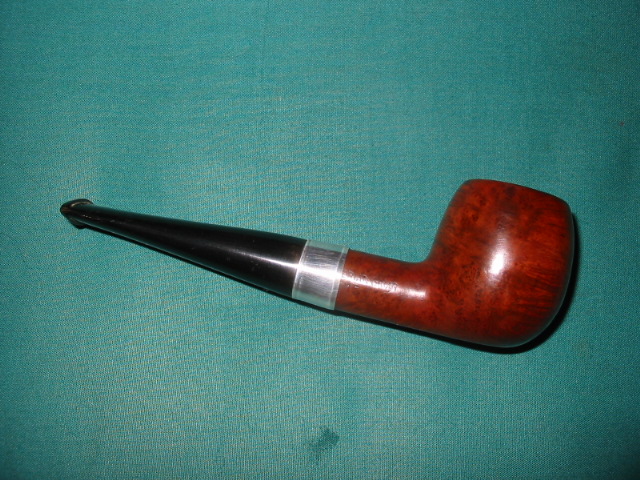
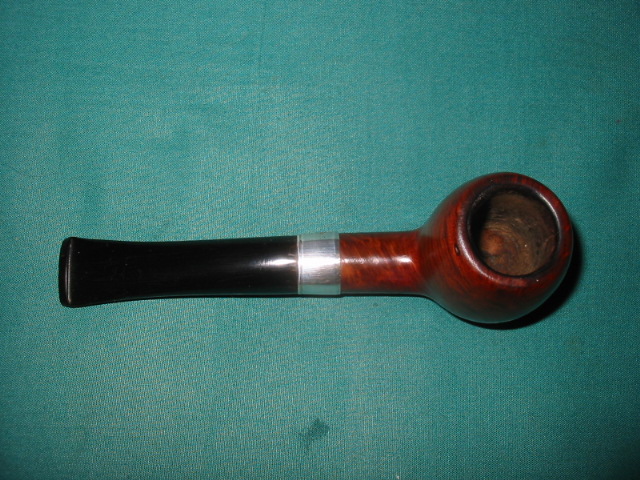
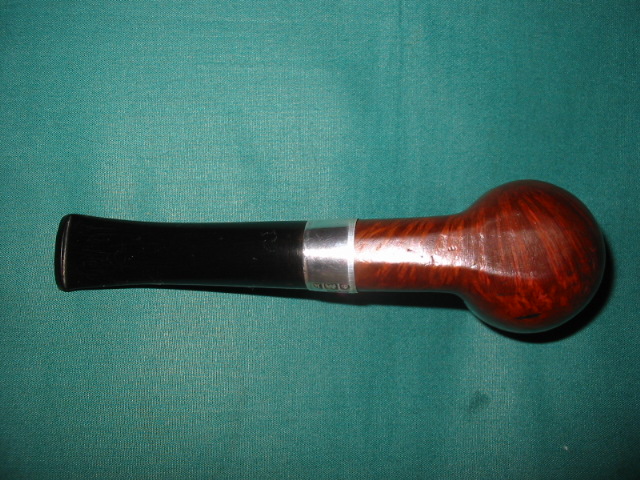
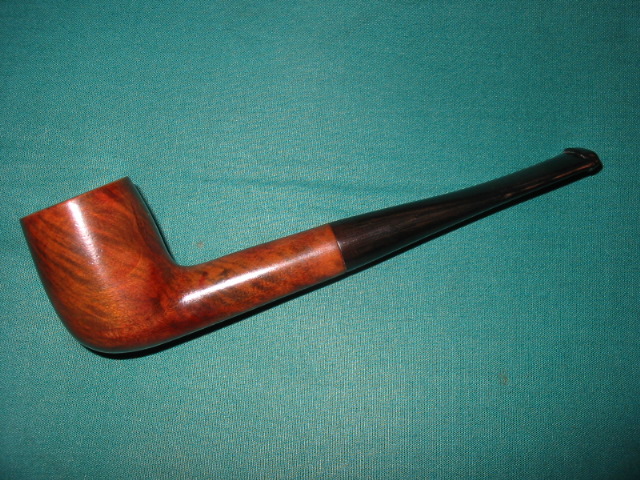
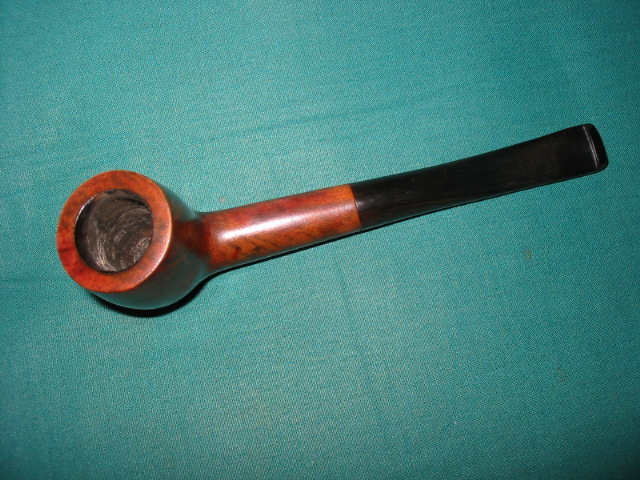
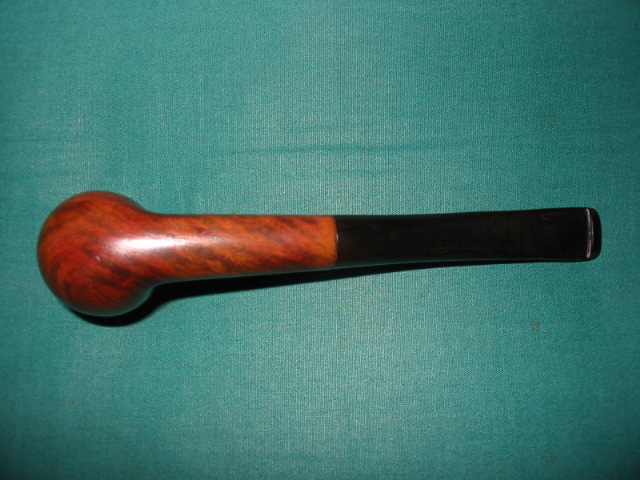
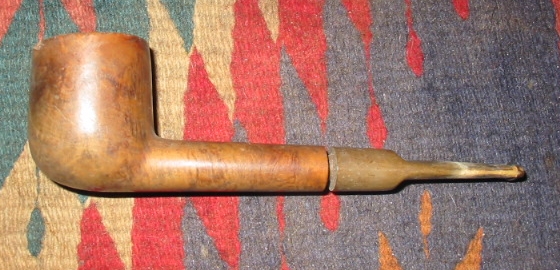
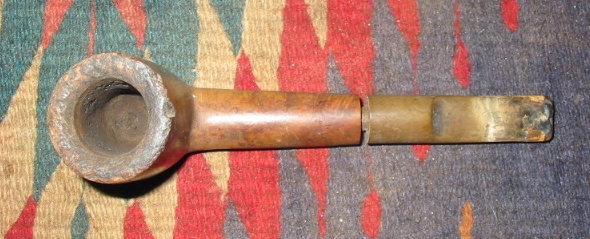
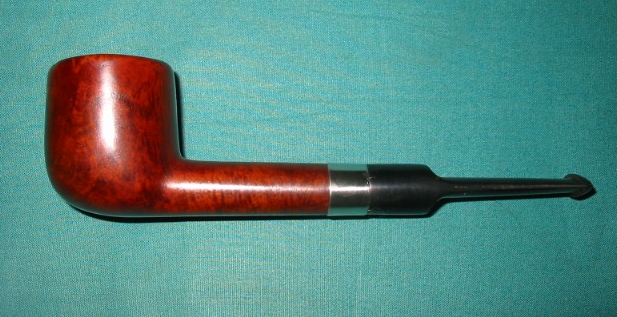
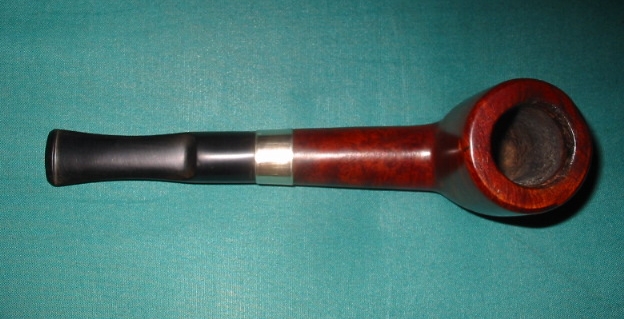
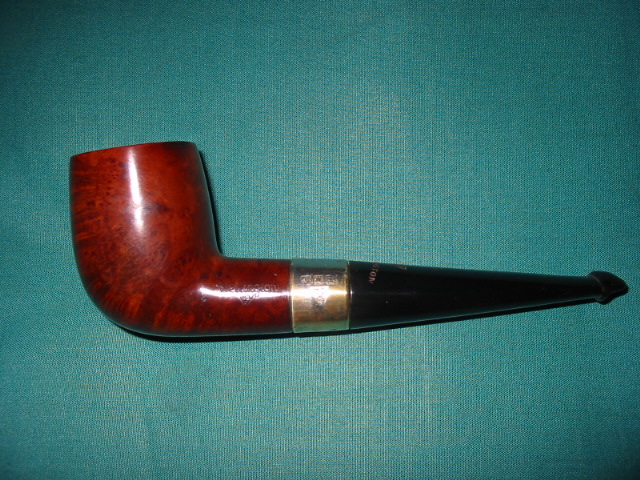
Just finished researching a bit on WDC Wellington Pipes. Yet in all of the research I cannot find the one that I picked up. It is a straight billiard. It is chunky and 5 1/2 inches long. It is a system pipe like the Wellington Bent pictured below but it is a standard P-lip stem with a regular tenon. The band is sterling silver and has the WDC triangle and hallmarks stamped in it – an anchor, a five point star, and an eagle. The shank is also stamped WDC in a triangle under a script Wellington. The stem is stamped the same way. The bowl is U shaped with draft hole at the shank side as usual. From there it drops down into the shank where there is a chamber – a bit different than the well in the picture below. It is more of a wide open chamber that tapers a bit to receive the end of the tenon. Very interesting design.

It was rough so I reamed and cleaned the bowl. Cleared out the reservoir and the shank with pipe cleaners folded in half and then gave the bowl an alcohol bath. I left it in for about a 1/2 hour and then took it out and cleaned it again. It did not need to be re-stained as it retained its colour. I buffed it with White Diamond and then gave it a coat of carnauba wax. The stem needed a buff as well. It was a bit oxidized. The stem is unique as well in that the tenon end is very open and tapering back to the whole in the Plip. Here are the after pics.

ImageImageImage

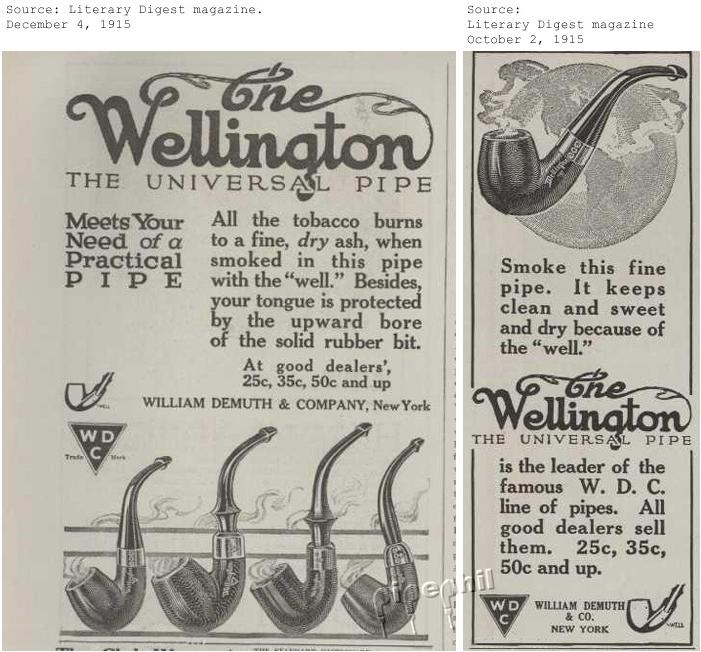
I have also included a couple of adverts that I came on that are interesting bits of history of the brand.

ImageImageImageImage

Had fun with this one – GBD International


I just finished this beauty – a GBD International. It is a beautiful little pipe. The shape #9456 says it is a bent apple – I suppose that is so. I did some work on what they originally looked like. They had a plateau (Faux?? not sure) top that was stained black and the bowl was a medium warm brown.

This one was pretty well stained with dirt and grit. The finish was blown and the bowl was caked and dirty. The stem was brown and it was a pretty gross mess. It was one I was going to put off but today I decided to work on it. I am glad I did as it was actually quite fun to work on.

I cleaned the stem as usual. It was tough and still shows some oxidation under the flash of the camera. I will do a bit more in brighter light. But it looks good to the natural eye. The bowl was reamed and cleaned and put in the alcohol bath. I removed any of the bits of left over stain left. Then I used a pipe cleaner and stained the plateau black. Once I did that I had the notion to stain the whole pipe black as well. I then wiped off the stain on the bowl and washed it with a damp alcohol rag to get it to the tone of brown I was looking for. I am really pleased with the stain and how it came out. I love the contrasts of the brown undertones and the black overstain. The wipe and then sanding with micromesh really worked to highlight the birdseye and grain in it.

Thanks for looking.

ImageImageImage

Image

Here is a final picture to give you an idea of the size.


A New Rustication Method


Blog by Steve Laug

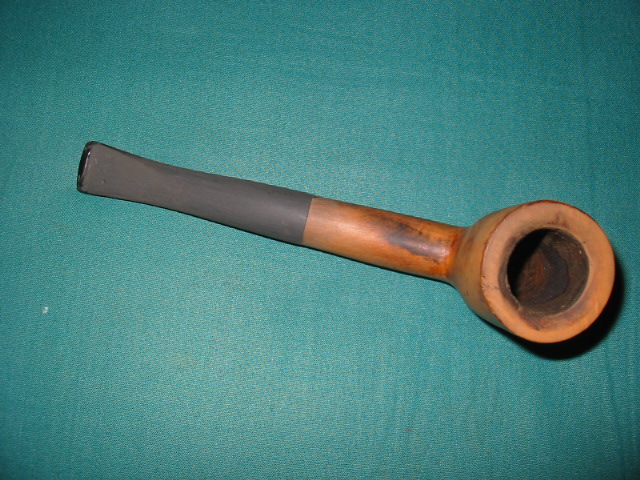
I finished cleaning up a pipe bowl, turned the tenon and fit the stem on it this afternoon, but then I was stuck. The pipe is stamped D in a circle and next to that Dover Cliff, it had a pleasing shape but was almost entirely without grain. I know this sounds impossible to most of us, but truly there was very little grain even visible on the bowl or shank. Rather, it was a piece of briar that was made up of bald spots connected by a few straight grains. It also had three significant burn marks – on the bottom of the shank, the top of the shank and on the rim. Added to that problem, there were probably 20 or more fills per side of the pipe that looked like scratches but were actually filled with black putty. They are visible in the sanded and clean bowl pictured below. The front and the back of the bowl also had fills. Interestingly, the rim was without fills as was the shank. The rim was chamfered inward toward the bowl but had burn marks all around the bowl as if it had been lit with a torch. My question was what to do with the finish on this pipe. I knew from experience that a coat of stain would only highlight the many flaws rather than hide them. The burn marks were significant enough that even sanded, they had permanently coloured the wood. No amount of stain would hide the burns on the shank and the rim. I could give it a solid stain of black or brown but I was not interested in using a solid body stain. That left me with two options – put it back in the box for another day or rusticate it. I decided to rusticate it and then stain it.

ImageImageImageImage

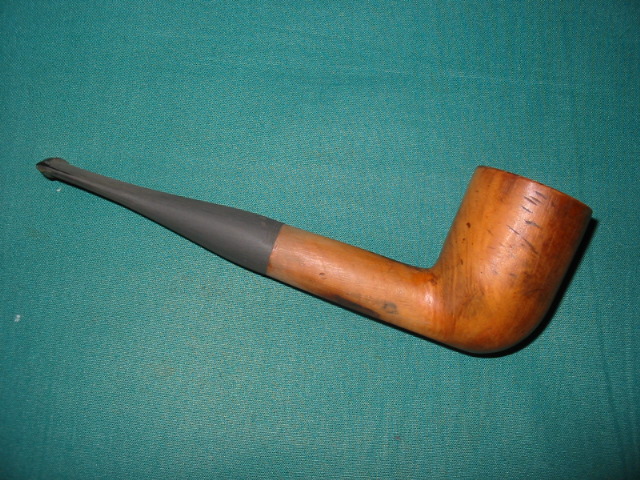
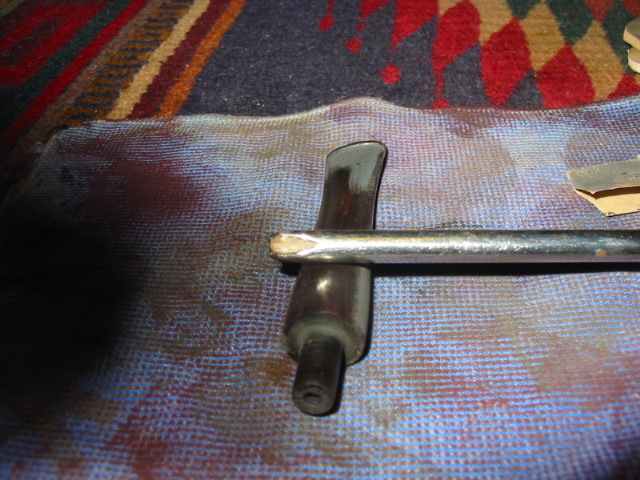
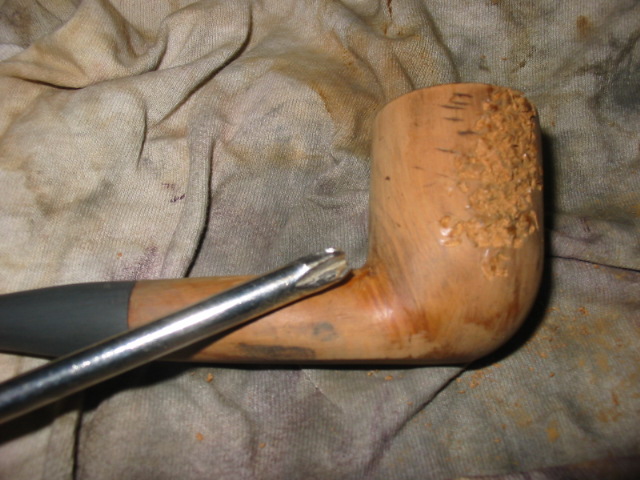
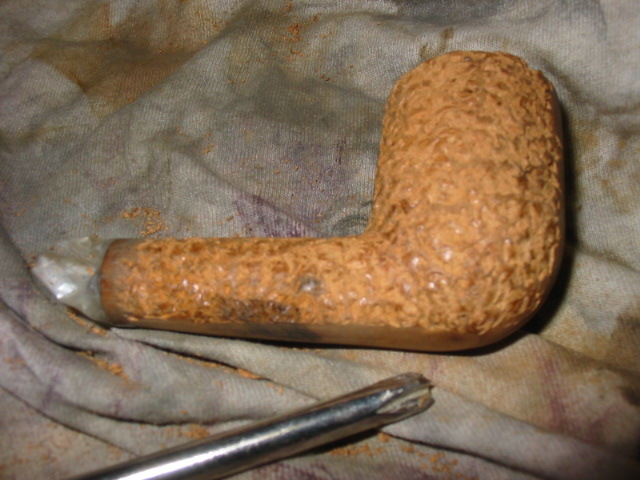
I took out my rustication tools and looked them over – the fistful of nails and the florist frog, (I have shown these both in a separate post on rusticating) and decided it was time to try something different. I took out my Dremel and put on the cutting/grinding wheel and took a Philips screwdriver and ground the tip off of it. Once I had ground the point off I used the grinding tool to cut a trench both ways across the remaining + to create what I was looking for. Once that was done the screwdriver was left with four points on the head of the shaft. These four points were sharp teeth. I polished the steel with my buffer and my new tool finished. The great thing was that it even had a comfortable handle which would allow me a bit of creature comfort as I pushed it into the briar and twisted it to rusticate the wood. It also would provide a very different rustication pattern in the briar than my other tools. It would produce a very rough rustication pattern that should be interesting on this particular pipe.

ImageImageImage

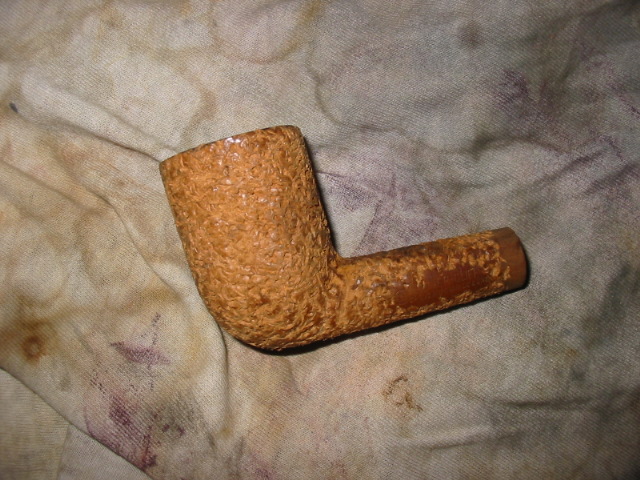
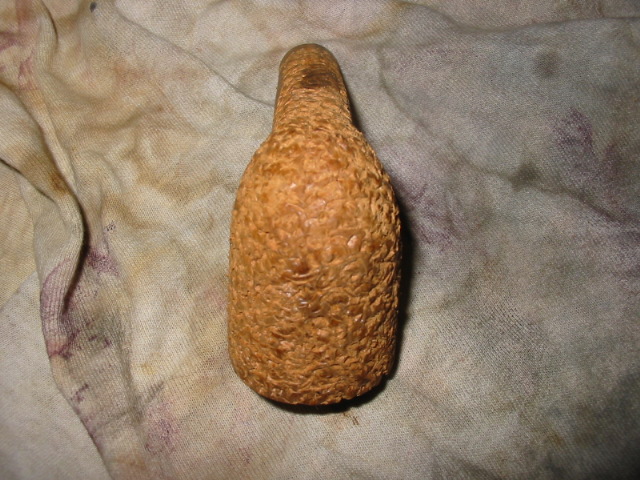
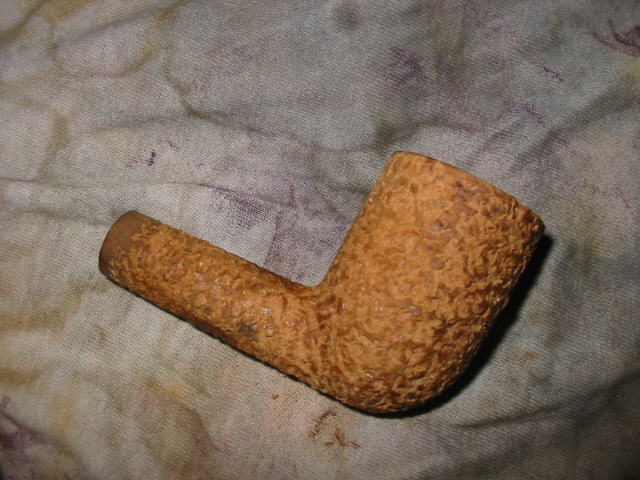
I decided to take my time and document the process as I worked on the pipe. As I worked on each step of the rustication I took photographs and wrote down what I had done. The tool worked very well and was a good fit in the hand. The sharp teeth cut deeply into the briar and left a rough finish to the surface of the briar. The process went quickly. It took me about a half hour to complete what turned out to be the first level of rustication. I left the rim of the pipe smooth and left a smooth rectangular area on the shank where the stamping remains. I decided to also leave a smooth band around the shank where it joins the stem. I find that it makes it much easier to match a stem to the smooth surface than to a rusticated chipped surface. All of these smooth spots stand out nicely. To protect the shank and create a band near the stem I wrapped the shank with cello tape up the shank about ¼ inches. The tape would protect it from the points of the tool and provide a straight edge for me to work against. I also put a strip of tape over the area where there was stamping on the shank to protect it. I avoided the rim as I rusticated the pipe so there was no need to tape it off. One of the great features of this new tool is the small tip size that allows me to rusticate very closely to the shank/bowl junction and up to the top edge of the bowl. It also was very easy to work near the band that I was creating at the stem/shank junction. The ease of control  made this a great tool to use.

Image

Image

I worked my way down the sides of the pipe from top to bottom. From there I moved to the shank sides from the bowl to the stem and the top of the shank from the stem to the bowl. I used the same pattern on the other side of the shank around the stamping and then on the underside of the shank and bowl. Once I had it completed it that far I took a few pictures and then proceeded to rusticate the remaining side of the pipe and back end at the shank/bowl junction. I finished the rustication with working on the front of the pipe. Once the pipe was fully rusticated the burn marks were pretty much obliterated and were definitely less visible. The many fills in the bowl were hidden under the rustication. I used a wire brush on the pipe bowl to knock of the loose chips of wood before I gave it an initial coat of dark brown stain.  I flamed the stain to set it deeply in the briar. It burned with the signature blue flame for quite awhile setting the stain in the deep grooves. Once it was dry I laid it aside for a bit and then took it to the buffer and gave it a light buff with red Tripoli. The finished pipe still needed more work in my opinion before it would be acceptable.

ImageImageImageImage

I took time to look over the pipe and handle it to get a feel for the rustication. I like a random look to the rustication rather than a repeated pattern. To me it looks more natural once it is finished. After this inspection I decided to give it a second level of rustication with the tool to make it even more rustic and more random in its look. This second rustication was much easier to do and took less time. One of the benefits of having the brown stain on the bowl is that the new places I rusticated were raw and stood out clearly. I could easily see where I needed to do more work on the bowl.  I worked my way around the bowl and shank again. I checked to see if it was in keeping with the look I wanted it to have and gave it a few more twists of the tool. Now it was ready for the finish stain.

ImageImageImage

Before I stained the pipe I needed to do some work on the rim. To address the burned areas on the rim the best decision was to top the bowl. It was not only burned but also worn around the inside edge of the rim and that needed to be addressed. I sanded in a slight bevel on the inner rim to restore the roundness of the bowl and give it a finished look. I re-stained the rim with the dark brown and let it dry before I re-stained the whole pipe with oxblood stain applied with the wool dauber that came with the stain. The pipe soaked up the stain nicely. I stained the top of the bowl and the smooth portions on the side of the shank and the band around the shank near the stem. I let it dry for several hours before I polished the smooth portions.  This drying also revealed some places on the bowl that needed a bit more stain to adequately cover them. So I re-stained those portions that showed bare wood in the crevices.

ImageImageImageImage

I used the micromesh sanding pads (1500 through 6000 grit) on the smooth parts of the pipe to polish them.  Once that was done I waxed the smooth portions. Then I buffed them with a soft cloth to give them a bit of contrast to the rusticated portions. I decided to leave the rusticated part with a matte finish. The pipe is finished in terms of the rustication and the staining. I will need to let the oxblood stain dry overnight before it is thoroughly dry.  The bowl feels amazingly good in the hand. The tactile nature of the rustication really gives it a rough yet pleasant feel.

ImageImageImage

The bowl is finished and ready for the stem. The above pictures give you the idea of what it looked like once it was finished. The contrast on the rim and on the smooth parts of the shank added a nice touch and highlighted the rustication. In person the pipe is a deep rich oxblood/cordovan colour that is not captured in the pictures above. The pits and crevices actually show the red and give depth to the rusticated surface. I gave the pipe one more once over under a bright light and touched up spots on the finish that did not get a good coat of the stain. I then went over the smooth surfaces with another coat of wax and hand buffed them before setting the pipe bowl aside for the night.

I then tackled the stem to remove scratches that showed up in the bright light. I used some 240 grit to take out some of the deeper grooves and some tooth dents in the reclaimed and reworked stem. My method is to remove the deeper grooves with the 240 grit and then use the 400 and 600 grit wet dry sandpaper afterwards. I find that if I use those first it seems to only polish the grooves rather than remove them. The 240 grit gives a solid base to work with in the polishing that takes place with the wet dry sandpaper and then the further polishing with the micro-mesh pads. I finished the polishing with 1500, 1800, 2400, 3200, 4000 and 6000 grit micro-mesh that was kept wet in a bowl of water that I kept by the work table. I changed the water between grits to keep it clean and to ensure that I was not polishing the older grime into the stem. The stem came out beautifully and was ready to be put back on the pipe while it rested overnight.

The next morning I polished the stem and the smooth areas of the pipe and rechecked the rustication to make sure that all areas were covered by the stain. I took the pictures below after it had been polished and was ready to smoke. The new rusticated finish creates a far better looking pipe in my opinion and provides a very tactile pipe for the pipe smoker who likes rusticated finishes. The new tool worked so well that I will have to sort through my box of bowls to re-stem to see if there is another pipe that could benefit from this kind of face lift. Thanks for looking.

ImageImageImageImage

Steve Laug

June 04, 2012

You Just Found a Pair of Dad’s Old Pipes?


Blog by Steve Laug

They are both in very rough shape and need help but you want to keep them anyway. There is dried out old tobacco in both and the finish is about shot. The rims and sides of the bowls are both covered with dark grime and the mouth piece, or stem, is covered with bite marks and hard white lime like crust. The rest of the family tells you they are not worth saving and should just be thrown out but something inside you rebels against that. You still have memories of your father smoking those pipes and the associated feelings and smells still linger for you. It is hard to let go of these pieces of history. Something inside you wants to restore them but you just don’t know where to start. If this sounds like your situation, then you have come to the right place.

Image

You have already begun the first step in the process of refurbishing and that is to respect what you hold in your hands. These pipes are a piece of family history that can be passed down through future generations and when cleaned up and maintained, will last longer than any one of you. If they could speak to future generations can you imagine the stories they would tell? But if you listen to the wood, the old tobacco in the bowl, the dents and dings and the smells that still linger in it you will hear it speak. It will tell you what your Dad smoked. It will tell you how much he loved that old pipe and it still held the half smoked bowl of the last tobacco he smoked in it. It will tell you in the decimated finish where his fingers curved around the bowl. As you remember, you will know the stories that give meaning to dents – one from the fishing trip you took, one from the dash on the car when he laid it down and it hit the gear shift before bouncing off to the floor. All those bits and pieces add to the myth that surrounds story of a family. Be sure to take some photos of the old timers before you go to work on it. You will be amazed at the transformation that still respects the history of your Dad’s pipes.

The first step in the process is to do what I call field dressing of the pipe. It starts by laying out some newspaper on a table top where you can work on the pipe. Sit down with the pipe and begin to clean it. Use a small screw driver, ice pick or a dental pick, if you have one, to clean out the remnants of tobacco in the bowl. Put it to the side on the paper. You can purchase a pipe reamer on eBay for reaming the bowl or you can carefully use a knife with a rounded end to scrape out the old carbon. If you use a knife be sure to proceed slowly and carefully to ensure that bowl stays round. Scrape slowly, bit by bit, until you have a thin even cake all around the bowl. Once that is done you can wrap a piece of dowel with some sandpaper and use it to sand the bowl back to smooth. Use a paper towel or a soft cloth and some Isopropyl alcohol to wipe down the surface of the bowl and remove the dirt and oils of the past. This should also help to soften the remaining finish on the bowl. This cleaning will go deeper as we progress through the process but start with a cleaning of the outer surfaces of the bowl and the stem of each pipe. I have learned that it is always more pleasant to work with a clean pipe than one that is oily and tarred.

The stem needs to be separated from the shank. This may sound like an easy thing to do, but sometimes with the amount of tars and use the pipe has seen, the stem will be stuck in the shank. Put the pipe in the freezer. You don’t need to bag it or tag it, just sneak it in when the family is not paying attention and leave it there for an hour or so, long enough to sip a coffee and relax a bit. The different materials in the stem and bowl of the pipe make them contract at different rates and I have found that when I remove it from the freezer the stem is easily removed. If it is still stuck then put it back for another cup of coffee.

ImageImageImage

Once the stem is removed I fill a jar with Isopropyl alcohol and place the pipe bowls in it and let them soak for awhile. The length of time depends on the depth of the grime. I put the lid on the jar and give it a bit of a shake to churn the alcohol through the pipe. I leave it and turn my attention to the stem.

The stem will take a bit of work and will take the better part of a couple of hours to get back into shape. I clean the inside of the stem with pipe cleaners and cotton swabs until they come out clean. I dip them in the Isopropyl and run them through to remove all the grimes from inside the stem. Once I have it clean then fill a bowl with some water and put it in the microwave and set it to boil. I dip the end of the stem with the bite marks in the boiling water repeatedly to lift the bite marks a bit. Vulcanite, which is the material the stem is made of is said to have memory and will return to its original state. This method does wonders in lifting the bite marks. When they have raised as much as they are going to dump the water and take the stem back to your table. Using 240 grit sandpaper, remove the brown oxidation and calcified white stuff that are on the stem. Be careful as you sand to not round the sharp edges on the stem at the mouth end (button) or the pipe end (tenon). You want to leave a good tight fit with sharp clean edges when you are finished. You will find that the sandpaper scratches the surface but do not worry about it as the goal at the moment is to return it to a dull black. Once it is clean of the browns use 400 grit and then 600 grit wet dry sandpaper to smooth out the scratches and remove any remaining oxidation.

The stem should be a dull or flat black once you have finished with this step in the process. Now you have a choice to make. There are several steps that can be taken next depending on what choices you make. You can either use repeatedly higher and finer grades of wet dry sandpaper or you can use micromesh sanding pads – I use 1500, 1800, 2400, 3200, 4000 and 6000 grit pads to finish the stem to a gloss. These pads are readily available at woodworking shops or online – just Google Micro-mesh pads. If you use the sandpaper it works well but is a bit more labour intensive. After you have the stem restored to a gloss you can use a bit of olive oil to polish it – wiping it on and then off or you can use some softened beeswax or carnauba wax. I have even used Kiwi Neutral shoe polish which is a carnauba based wax.

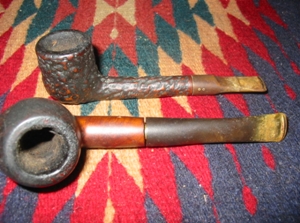
I then set the stem aside and retrieve the bowls from the alcohol bath. Before I take them out I use the alcohol in the bath to scrub the bowls using an old tooth brush as it just gets into the cracks and crevices and gets the dirt out of the surface. Once that is done I dry off the pipe with a soft cloth and get to work on the finish. For the rough surfaced ones like the smaller pipe in the picture I will often use the tooth brush repeatedly to remove all the grime on the pipe. With the smooth pipes like the second pipe in the picture I wipe it down with alcohol dampened cloths until it is clean. I then sand the smooth one with either the 400 and 600 grit sand paper or the Micro-mesh pads to smooth out the finish. If the top is rough you will need to decide what to do with it. I have posted on the blog how I repair those issues so have a look on there for the article on topping a pipe bowl.

When both bowls are clean and free of dirt and tars I wash them down with a fresh alcohol cloth and then they are ready to stain. I use Feibings Shoe Dye for the stain and have found that the Medium Brown dye works well and matches most of the stains on these old pipes. Both pipes in the pictures were stained with the same Dye. I use the dauber that comes with the Dye (the dye is available at most shoe repair shops for about $4-$5). I coat the bowl while holding the stem. As the stain will turn your hands brown, wear rubber gloves for the staining. Once it is stained light the stain on fire with a match to set it. You will think I am nuts in suggesting this and think you will catch things on fire but like the alcohol in Baked Alaska it only burns blue for a short while and really sets the stain into the grain of the wood.

Set the pipe aside over night to let it thoroughly dry. The next day use the 600 or higher grit wet dry sandpaper to remove the excess stain on the exterior of the smooth bowl. Wipe it down regularly with a damp cloth to see what it is looking like. With the rough surfaced pipe I use a piece of flannel fabric and buff the surface until it glows. Once both pipes are finished and look acceptable to you give them a good coat of wax or polish. Some folks use Pledge on the bowls and have done so for years without ill effect. This gives them a rich glow. The only thing left to do is join the family heritage by smoking a bowl of your own tobacco in the pipe. When you are done with that smoke, wipe the pipe down with a soft cloth and clean it inside with a pipe cleaner. With a little care the finish that you have done will last until you own grandchildren need to refinish it once again. But take delight in smoking a piece of the family history and adding another generation’s story to the life of this old pipe. Enjoy.

If you have any questions on the process feel free to post a response or question here.

Here are the same pipes after finishing the process I laid out above.

ImageImageImageImageImageImage

Reworked Old Apple


Blog by Steve Laug

I had this old apple with very faint stamping that looked like it could have been stamped Edwards but not clear. I decided yesterday to rework it. The old stem had a split in the button and was shot. I decided to fit a new stem for it. I reamed and cleaned the bowl and fit the stem. While I worked on the stem I dropped the bowl in my alcohol bath for an hour. Once it was done I sanded the bowl and cleaned it some more. There were a couple of spots on it where small fills had fallen out so put some briar dust in them and then a spot of super glue. Once dry I sanded them smooth so that the stain would take around and in them. I put the stem on and stained the bowl with an oxblood stain as I figured that would match what was originally on the pipe. Once it was all polished it reminded me of an old timer that I had seen and been hunting for – a straight shanked BBB apple. Well that got me thinking and I dug through my box of bands and sure enough I had an old BBB silver band hallmarked 1909 that fit perfectly. The stem and pipe look older so the band added some more age to it. I really like the final look of this one.

Before pictures:
ImageImage

And the finished pipe:
ImageImageImageImage

Unique old pipe – “The Rubywood”


Blog by Steve Laug

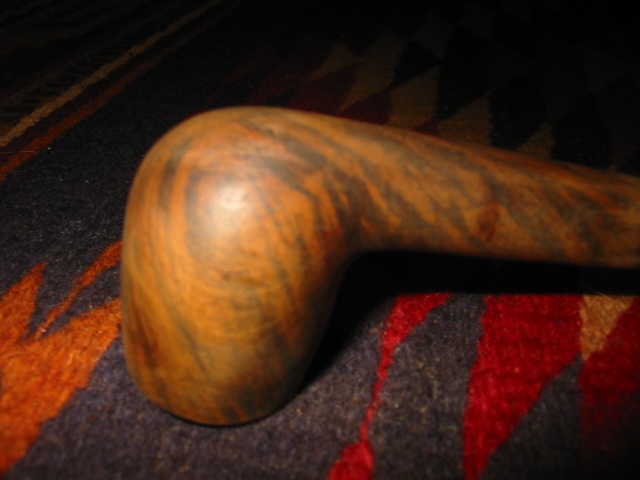
I enjoy working with alternative woods that over the years have been used in pipes. I have worked with pear wood, cherry, walnut, manzanita and mountain laurel. But last evening I finished restoring an old pipe that revealed more than I expected as I worked away the old finish. It became more than speculation that I was not working with briar. It was too light in weight and just felt different. Once the black grime was gone I could see graining that was very different. The pipe is stamped “the Rubywood” that is all. I researched a bit and found that ruby wood is red sandal wood that is very hard and used for fine furniture. I don’t know about that but this is amazing looking wood. It has dark graining that is deep and then swirls that go through the grain as well. There are dark spots of ruby/red colouration that have come out in the refinishing. I turned the tenon and fit a stem for this one. Then restained it with an oxblood stain to highlight the natural reddness of the pipe.

Here are some pictures of the wood with the finish removed.
Image

Here are some pictures of the refinished pipe:

I wondered about toxicity of the wood so I posted it on Smokers Forums to see if anyone knew about this wood. I got this reponse from a friend there:
“I found quite a few pipes (made in China and India) made from Red Sandal Wood. Apparently parts of the tree are used in herbal medicine. Heck, if it gets rid of wrinkles I wouldn’t mind smoking that pipe

Pterocarpus Santalinus Uses : It is an astringent and a cooling agent and is used in several skincare preparations. It is used in the treatment of pimples, acne, wrinkles etc. It us also used internally in chronic bronchitis, gonorrhoea and gleet, chronic cystitis with benzoic and boric acids. Much used as a perfume for different purposes. The wood is used for making fancy articles and is much carved. It has been used in Ayurvedic medicine as an anti-septic, wound healing agent and anti-acne treatment. A paste of the wood is used as a cooling external application for inflammations and headache. A decoction of fruit is used as an astringent tonic in chronic dysentery.”

Thanks for looking.

Removing Oxidization on Vulcanite Stems


Blog by Steve Laug

In May 2011 I started a thread on Smoker’s Forums asking people how they dealt with oxidation on vulcanite stems. Many of the members of the Forums responded in the ongoing posts to that thread. Unfortunately that thread and others were lost when the Forums were attacked and decimated. I collected their answers and compiled them into the document that became the basis for this blog post.

For this blog I have rewritten the first document and clarified my explanations. I have followed the same format for reporting the various methods I gathered. I have arranged them according to the main component in the process. As you read them you will note that several of the categories overlap and are combined in the processes. I have found that there is no one method for removing oxidation. I have used one or all of the methods below in combinations to conquer the dreadful browning of the vulcanite stem. Hopefully this document will prove to be a helpful reference to those who venture into the realm of cleaning and polishing stems. Please remember that the methods below are to be used at the risk of the amateur pipe “refurbisher”!

The first step in breaking down the responses to my initial post involved organizing the respondents into two broad categories regarding the use of a presoak or not using a presoak. From there both groups went on to use micro mesh pads or sand paper in their work on the stems. There are two main pre-soaks that are used to begin the process of removing oxidation – Bleach and OxyClean. Interestingly there were also two additional pre-soaks that have been used by the respondents – Goo Gone and Simply Green. All of the methods have adherents that swear by their choice. In each of the categories below I will summarize the methodology and give a basic explanation of the process.

PRESOAKING

Bleach Soak
Mix bleach and water (50/50) to remove the oxidation. Use a pint jar or a bowl that allows you to reach in to remove the stem once it is finished. I insert a pipe cleaner in the stem and bend it into a hook that I can hang on the side of the bowl or jar. I then coat any stamping or logo symbols with Vaseline to protect them from the bleach. The stem is immersed in the mixture and allowed to sit for differing amounts of time until the oxidation is removed.  Note that this mix, no matter the strength, does cause pitting or roughening to the surface of the stem. Sand and buff the stem with Tripoli and White Diamond.

OxyClean Method
Mix a scoop of OxyClean in a pint jar of hot water, put the lid on and shake vigorously to mix the solution. The water should be deep enough to completely cover the stems that are put in the jar. Soak the stems in OxyClean and hot water for 30 minutes to 1 hour and then use micromesh pads to remove softened oxidation. Repeat this as often as necessary in the process. Then it takes a trip to the buffer. Note that the mixture does not remove the oxidation but merely softens it making it easier to remove with the buffer and sanding. I have tried various strengths of mixture and the single scoop seems to be a perfect mixture for how I use it.

Goo Gone Method
Goo Gone is applied to the stem either after soaking in bleach or OxiClean or is used without the prior soaking. Once the Goo Gone is dry the stems are sanded to remove the softened oxidation. Then the stems are taken to the buffer or are sanded to finish removing the oxidation. Once that is done wax is applied to protect the newly cleaned stem.

Simple Green Method                                                                                                         Simple Green is mixed with water and placed in a jar, placed in the jar full strength or wiped onto the stem with a cloth. If the stem is left to soak it usually soaks for an hour or more and then rinsed off and buffed. If wiped on it is wiped on and off until the oxidation is gone. The stem is resoaked or rewiped as often as necessary to complete the project. Once done the stem is buffed with Red Tripoli, White Diamond and then waxed to protect the newly cleaned surface.

NO PRESOAKING – STEM POLISHES

Others do not use presoaks but use a variety of stem polishes or cleaning polishes to remove the oxidization. These include cleaning kits as well as some other non-conventional polishes. I have included Mr. Clean Magic Erasers in this category though some might argue it should go with the Microfiber materials. I find though that it is in essence a polishing product and thus fits well in this category.

Walker Briarworks Stem Restore Kit
The Walker Briar Works Stem Restore Kit can be directly ordered from Walker Briar Works, an online pipe repair service http://www.walkerbriarworks.com/html/stem_restore_kit.html for $20 plus shipping. The kit comes with two jar each containing 1.5 ounces, enough for at least 50 stems. The first is a Deoxidizer and cleaner, the second is the Carnauba Wax/Polish/Sealer. Using a soft cloth, rub the Deoxidizer/Cleaner on a Vulcanite stem until it feels smooth. Then rinse the stem with warm water and let it dry. Once dry, apply the Carnauba Wax/Polish/Sealer by rubbing it on with a soft cloth.  Let it dry for about 10 minutes and then polish the stem.  Many have used it with success. Personally I find that it works well on stems that are less oxidized. Heavily oxidized stems do not seem to be affected by the application of this product.

Other Brand Name Stem Polishes
Other products such as Denicare Mouth piece polish, Outwest Pipe Stem Scrub, Brebbia Pipe and Mouthpiece Polish, Dunhill Mouth piece polish are used with varying degrees of success. All come in small tins or tubes and are applied by hand with a finger or a cloth, left to dry and then buffed off with a soft cloth. In my opinion they work well in maintaining a clean stem but are all less effective in removing the oxidization.

Flitz
Flitz is a polish that is similar in application to the Walker Briar Works Kit, but is a bit more effective according to those who use it regularly. It is said to be readily available in Hardware Stores and other convenience shops in the US, though I have not been able to find it here in Canada. Those who use it say that stems treated with Flitz will remain un-oxidized for approximately 18 months to two years before needing another treatment and buffing.

Toothpaste
Over the years I have read and heard about those who use tooth paste to clean oxidation on their pipe stems. I have tried Crest and Colgate toothpaste applied with a soft tooth brush and scrubbed until the oxidation is gone. The micro abrasives in the tooth paste work to remove the oxidation. Personally I have found that this takes a lot of hard scrubbing to get the kind of results that I am looking for. The plus to this method is that it removes little or no stem material and thus is relatively safe in maintaining the original shape and integrity of the stem. The method has been spelled out in the following step by step procedure:

1) Submerge offending stem into hot water (just off the boil), to bring all the oxidisation to the surface.

2) Apply a thin coating of toothpaste to the surface of the wet stem.

3) Rub vigorously with the rough side of a green plastic scouring sponge, (some use a soft bristle tooth brush instead).

4) Keep rubbing…and then some!! Apply more toothpaste as necessary

5) Finish by waxing the clean surface to protect it from further oxidation.

Magic Eraser: (polishing compound)
Mr. Clean Magic Eraser or generic brand eraser is wetted with water and used to scrub the stems. It removes oxidation without visible loss of material and without scratches. I have used this as a follow up to some of the above methods with good success. The magic eraser needs to be periodically rinsed and wrung out to remove the removed oxidation. It is a melamine micro abrasive and once it has been used and the stem is dried it should be followed by polish as the stem is left smooth but with a matte finish. Regular ebonite polish brings it to a good shine then quickly and easily.

Automobile Polishing Compound                                                                                       Others have used automobile polishing compound and rubbed it vigorously into the stem material to remove oxidation. It is used to remove the same on headlamps and plastic parts on the exterior of the vehicle so the logic is sound in using it on vulcanite stems. However, I have avoided that product as it does not seem like something that I want to put in my mouth.

HAND SANDING

Many who work to remove oxidation skip all the pre-soak, scrubbing and polishing and attack the problem head on with sandpaper and/or micromesh pads. Others use the soaks above and then proceed to the sanding. Many combine the processes and find that in the combination they have a tool that works for them.

Micromesh pads:
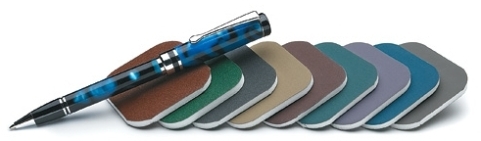
Micromesh pads have proven to be my tool of preference in my battle against oxidation in the old estates that I refurbish as well as in maintaining my own pipes. A variety of pads with the following grits – 1500, 1800, 2400, 3200, 3600, 4000, 6000, 8000, 12000 are all used. I find that for the most part I use these various pads up through 6000 and that they work extremely well. I keep a bowl of water next to me while I am sanding with them as they have a far better bit when they are wet. I sand and wet the pad and then sand and clean it in the water. I change the water between grits of the pads. While I keep the pad wet others suggest keeping the stem wet while working on it. It seems to me that both achieve the same purpose. Many people use all 9 grits for badly oxidized stems. Before moving on to the next grit pad be sure to dry the stem to see if it’s ready to move up to the next pad. Look for any vestiges of brown or green oxidation. Stay with the coarse grits until all the brown-tan-green is gone. Those who use the upper grits say that the change that occurs between the 6000 and 8000 with respect to shine is amazing. Each time I have ordered the pads on line the higher grits were out of stock. After finishing with the 12000 the only thing left is the buffer for carnauba or rubbed with a bit polish. Periodic maintenance of the stems can be done using the 2 finest grit pads rather than the buffer with white diamond.
Image

Sandpaper:
You can also remove oxidation with 400, 500 or 600 grit sandpaper, depending on the condition of the oxidization. Continue to sand the stem to remove scratches with consecutive grits up to 2500. These sandpapers are of the wet dry variety and work very well with a bowl of water nearby to keep the stem wet while it is being worked on. The same principle of drying the stem between grits as mentioned above is use with the sandpapers. Finish the process by waxing the stem to protect the newly cleaned surface.

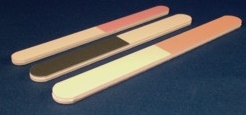
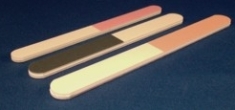
Sanding sticks are available from wood working suppliers and interestingly enough at beauty supply houses. Nail polishing files that have four grades of “sandpaper” on a thin bar of Styrofoam can be purchased there or in the cosmetics department of the local drug store. They can also be used to remove tooth marks and tooth chatter near the button. I have used these for years and always have a set in my refurb kit.
Image

POLISHING WITH POWER TOOLS

After the removal of the oxidation from the surface of the stem, whether by one of the above mentioned methods, one of your own or a combination of several of them, the stems are ready to be polished with power tools – buffers, drills with buffing pads or a Dremel. Some refurbishers do not feel this necessary after the use of the micromesh pads. But many still finish the job on a  buffer.

Dremel:
The variable speed hand held Dremel can be used with a 3 inch fibre wheel or a polishing pad loaded with red Tripoli and White Diamond polishing compound followed by a pad loaded with carnauba wax to give a final sheen to the stem. The drawback with the Dremel is that you must be extremely carefully in applying pressure to the stem surface or you will end up with wavy patterns in the vulcanite.

Buffer:
Personally, I use two bench grinders with two polishing wheels on each one. I removed the grinding stones and the protective shields over each wheel that was standard equipment and mounted 8 inch buffing pads on the spindles. My process is as follows:

– Polish with Tripoli, 8 inch stitched muslin buff
– Polish with White Diamond, 8 inch stitched muslin buff
– Wax with carnauba, 8 inch unstitched flannel/muslin buff
– Finish on a clean 8 inch flannel buff with no wax

Drill:
Buffing pads can also be mounted on a hand drill – cord or cordless. I have used a drill before I got my buffers. I anchored the drill in a bench vise so that I have both hands free to maneuver the pipe while polishing. I used four different 3 or 4 inch buffing pads my drill. I have not used it since picking up the two buffers.

Thanks to the many from Smokers Forums who responded to my initial thread on cleaning oxidized stems. Over the years many have contributed to my methodology on these processes.

From Sow’s Ear to Silk Purse


Blog by Steve Laug

This morning I decided to do a few more refurbs on pipes from my box. It is getting low on options as I have reworked the majority of the interesting ones. There are about 25 or so pipes to choose from now and many are in a real state of disrepair. As I sorted through them I came upon this one. I took it out of the box and turned it over in my hands. The bowl was clogged with the remnants of the last smoke – dried tobacco and sticky tars. I decided that this was the first pipe I would work on today. It would be a challenge to see if anything beautiful could come from this mess. It was a beat up old pipe. I think the previous owner must have always had it in mouth and chewed on it like a piece of straw and then used it to hammer nails. The top was chipped and dented with valleys and mountains and the whole covered in a thick coating of tars – pipe lava. The stem was gnawed on had deep dents and tooth marks. It was oxidized to a rich brown that stank of sulfur.

The first step in the process for me is always to ream the bowl and clean out the detritus of the past. I used a dental pick to get the remaining dottle out of the bowl and to make way for my reamers. I find that the dental pick works well as it is sharp enough to break into the hardened ball of tobacco remnant and remove it quickly. I work it around to clean out any loose leftovers so that I can work on the hardened cake that is left in the bowl. This one had a thick cake that was a bit crumbly and soft once the tobacco ball was removed. It would need to be reamed back quite a bit. I generally ream back to bare wood on these old timers as I want to start a hard cake that is not built upon the old crumbling base cake that was in the pipe when I started. I used the PipNet reamer on this one. I fit the cutting head into the T handle and began to carefully turn the reamer into the bowl. I generally do this over a plastic bucket as it is a mess. The coarse dust of the carbon that is cut away is a black cloud if you are not careful. I proceed slowly as it is easy to angle the cutting head and take the bowl out of round. Once it is done I tap out any dust that remains before moving the pipe to my work desk.

 ImageImage

On the desk I had placed a work surface that was washable and then took out the soft cotton wash cloths that I use to remove grime and stains and wet them with Isopropyl. I washed down the outside of the bowl including the rim. It removed much of the dirt the first pass and I continued to scrub until the cloth came back clean. For this part of the process I leave the old stem in place as it serves as a handle for me to hang on to while I am working with the bowl. I picked at the grime on the top of the bowl a bit with the dental pick and decided that indeed this one was a candidate for topping. The two pictures above show the pipe after the reaming and cleaning of the bowl. It is ready to be topped.

In preparation for topping the bowl I use a flat surface – either a hard flat board or a piece of glass to which I anchor the sand paper. This time however I wanted to try out a new trick that I had learned from a friend on one of the online forums so I anchored a piece of 240 grit sand paper on a Masonite clipboard and put the clipboard on the desk top. Topping the bowl is a careful process that involves keeping the rim flat on the sand paper and turning it either clockwise or counter clockwise until the chips and dents are minimized. The trick is to take if far enough to remove the majority of the dents and chips without changing the overall profile of the bowl. Too much of the top removed changes the pipe rather than merely restoring it. As I sand the top of the bowl I stop to check it regularly to see if I have removed enough of the damage to the bowl. On this particular pipe it took me quite a bit of time to take it down slowly to the point it was smooth enough to do the next step in the process.

Often once the top is close to being smooth enough the last remaining dents can be steamed out and then a minimal amount of sanding will finish the job. On this particular pipe the top was smooth after sanding it. There was no need to remove any further dents. However there were some major chips out the outer edge of the rim. To remove them would have involved sanding off a fairly significant amount of the top and would have changed the overall look of the pipe. I decided instead to chamfer the edges on the outer portion of the rim. I used a piece of sand paper held at an angle that I maintained throughout the sanding. The idea was to hide the battered edge and remove some of the damage while minimizing some of the larger chips. Once I had the outer rim repaired to my satisfaction I did the same to the inside rim to regain some of the roundness of the bowl. The previous owner seemed to have used a knife to remove cake so there were major chunks taken out of the inside edge. Chamfering the inner edge took care of most of the damage and made the rest relatively invisible to a quick glance.

I then cut a stem to fit – turning the tenon on a precast stem and also taking off the excess vulcanite on the area where the stem joined the shank. I wanted to get the fit to be precise without gaps. Once I had the fit correct and just needed to sand out the scratches I put the bowl in the alcohol bath to let it soak and remove the stain. I continued to work on the stem while it soaked. I generally leave the bowl in the bath for a minimum of 30 minutes and have even left them over night in an extremely dirty bowl. Once I take it out of the bath I wipe it down with a dry cotton cloth and let it dry. I then sand the bowl down to remove any scratches in the surface. I start with a 400 grit wet dry sand paper and work my way through the Micro-mesh pads 1500, 1800, 2400, 3200, 4000, and 6000 to get a good smooth surface. As I worked on the shank I noticed a fine crack that became evident as I removed the grime from the inside of the shank. I heated a nickel band and pressure fit it to the shank to take care of the crack.

I finished the bowl by re-staining it with a medium brown stain as an undercoat and then buffed and sanded it yet again. A top coat of oxblood stain followed that sanding. I find that the two coats of stain complement each other and add some depth and patina to the pipe that only the one colour does not give. It was then polished on the buffing wheel with White Diamond and then given several coats of carnauba wax. I had also finished the stem and put it on the bowl and buffed and waxed the entirety.

This is the finished product. I think you would agree it has ceased to be a sow’s ear and has become a silk purse!

ImageImageImage


Plugging a burnout


Blog by Steve Laug

I picked up an old Dunhill Root Briar off eBay that I knew would have to have a lot of work done to make it smokeable once again. It was obvious that it would need a plug as it was burned out. Many probably would not have bid on it but I got it for cheap and thought it would be worth learning how to do a briar plug to repair it. With not a huge amount invested in it I figured it was worth the education I would get doing a repair. I often will buy pipes on eBay that are rejects for the sole purpose of learning a new skill in the repair department.

When the old Dunhill arrived I opened the package for the initial inspection of the pipe. I wanted to have a clear picture of what I would be dealing with in the repair. On the underside of the bowl there was some kind epoxy fill that had been injected into small burnout spot. It had been also daubed on the bowl to provide a layer of “insulation” or something. It was really a mess in terms of the application of the epoxy. No amount of wiping the bowl down with alcohol or acetone would remove the goo from the surface of the pipe. I sanded it until the bottom was back to briar alone and the glue was gone. I then used a dental pick to check the integrity of the bottom of the pipe. I wanted to find out from the outside how far the damage had gone into the briar. If it was charcoal like and soft I would know the extent to which I would have to drill out the bottom of the bowl. I marked the extent of the damage with a permanent marker to show how far the burnout had damaged the briar.

Once I had the outside of the bowl cleaned up and the burn out clearly marked I turned my attention to the inside of the bowl. Once I had cleaned out the grit and grime from the inside of the bowl I found that the previous owner had reamed far too aggressively and compromised the thickness of the bottom of the bowl. It was almost ¼ inch below the bottom of the airway. The bottom of the bowl was in fact very thin. Using my dental pick I probed the bowl bottom to identify the extent of the damage around the burn out hole. It was virtually the same as the outside. With that information in hand I was ready to drill out the spot on the bowl.

I sanded out the inside of the bowl with a dowel and sandpaper to smooth out the hack job on the bottom. I then drilled out the burned out spot from the outside of the bowl with a drill bit slightly larger than the area I had marked with the marker. I was careful to get all the burned wood. Once the hole was open I again tested the soundness of the surrounding briar with my dental pick. I wanted to make sure that the damaged briar was removed. I re-drilled it a second time with a slightly larger bit to remove what remained of the damage. I then cleaned the pipe yet again. I wanted to make sure that the inside of the bowl was reamed and sanded to bare wood and that the bottom of the bowl that remained was free of carbon and dirt. I washed the entirety with isopropyl alcohol and then let it dry out.

I measure the outer diameter of the hole in the bottom and the inner diameter of the bowl. I then cut a piece of briar to those dimensions. The briar plug was shaped like a “T” and was actually significantly bigger than the pin hole that was originally in the bottom of the bowl. I had decided to create a new bottom for the bowl and a plug for the hole I had drilled. I used some wood glue and coated the bowl bottom and the inside of the hole. I then inserted the plug in the top of the bowl and used a rubber mallet and a piece of dowel to drive peg to the bottom of the bowl. The leg of the T extended through the hole in the bottom of the bowl that I drilled out. I had purposely made it longer than the thickness of the bowl so that it would extend below the bottom of the bowl. Once it was in place it not only was glued but in essence was pressure fit. I laid it aside to dry over night before I worked on sanding the leg of the T flush with the bottom of the pipe. The next morning I sanded it flush with the bottom of the bowl. It was a great fit as can be seen from the pictures that are included in this essay.

Once the exterior was smooth and ready to go I turned to the inside of the bowl. The top of the T formed a new thicker bottom for the bowl. I had made it thick enough to provide a new briar bowl. Because of the thickness I had used a spade bit to re-drill the bottom of the chamber and give it a concave feel like the original bowl. I also re-drilled the airway so that it would come out in the bottom of the new bowl. I again used the dowel and sand paper to smooth out the junction between the new surface and the old surface of the chamber walls. I wanted the transition between the two pieces to be smooth.

The final touch for this old timer was a good coating of pipe mud on the walls and on the bowl bottom. The mix I use for the mud is cigar ash and water. Others have used pipe tobacco or a mix of various things but I like cigar ash. The bonus is I get to smoke a good cigar in the process. I mix a good thick paste that I apply with a brush and a pipe nail. I brushed it on and tamped it into place with the brush and the nail. It gave a nice grey ash look to the inside of the bowl. The inside looked as good as new. I left it to dry through the night.

I sanded the rest of the bowl be careful to not damage the stamping. Once it was smooth and the scratches and nicks were gone I stained the outside of the bowl. I gave it a second and third coat with a Mahogany and then a brown stain. Between each coat of stain I flamed the stain by lighting it with a lighter. I find that this sets the stain a bit better than an air dry. I also buffed between coats of stain to make sure the coverage was even. The final coat of stain was applied, wiped off and then buffed with white diamond and then carnuaba.

I let the pipe mud cure for several days before I fired up the pipe. I was curious to see how hot the bottom of the bowl became. Success!! It smoked cool and dry to the bottom with no heat to the hand. The patch worked well. Next time I do a patch I will try to blend the flow of the grain a bit more!

I have been smoking it for a long time now and continue to be pleased with it. The patch is starting to blend in a bit more as it gets a patina. The pipe still smokes dry and cool throughout the bowl.

03/30/2012


This week my computer died!!! I was forced to dig out a very old laptop that I have sitting in the basement  so that I could at least have access to the internet. While I was cleaning up the hard drive I found these old photos of the same pipe. The repair may be a bit more visible in these photos if you are interested to have a look.

My choices in Pipe Reamers – a review


Blog by Steve Laug

In the process of refurbishing estate pipes, a thing that I enjoy doing, I use two pipe reamers almost every time I begin the work. Both of them have different strengths or advantages that I have come to count on in the process of using them. They work on the thickest and hardest cake that I have found in these old work horse pipes. I have written of the advantages and weaknesses of both in the review that follows.  

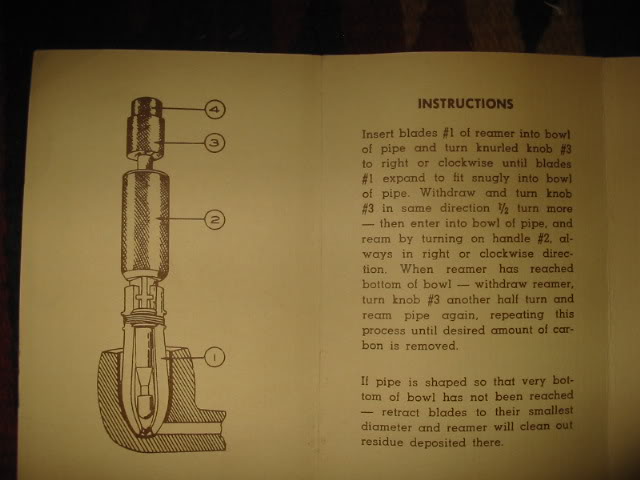
The first of these is readily available on EBay as Kleen Reem pipe reamers. There is also a similar reamer available going under the label of the Senior Reamer which can be purchased at most of the online pipe vendors. The reamer I have is pictured below. It is an adjustable three blade hardened steel reamer. The top is the adjustment knob and as it is turned it opens the blades wider or narrower. The utility of this reamer is that it is able to be adjusted to multiple bowl sizes. The blades remain vertical so that the bowl does not taper. It works very well for cylindrical shaped bowls. The hardened steel does a great job cutting back the carbon of the cake and can be adjusted to allow for different cake depths. The one draw back of this reamer is that it does not do a great job on the heel of the bowl in rounded or U shaped bowls. It is perfect for the conical bowl or V shaped bowl that tapers to a point. In the U shaped bowls I have to finish the reaming by using the second tool below or a piece of sand paper wrapped on a dowel.

Image

The case that the reamer came in is functional and strong. In the bottom edge of the case there is a banded group of cut pipe cleaners.

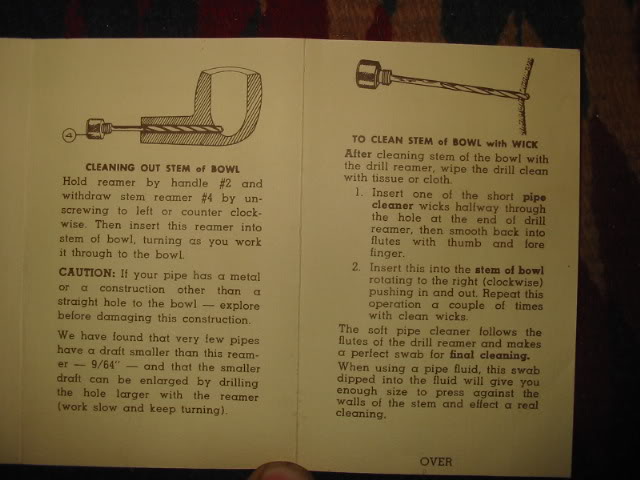
A brilliant part of this tool is found under the adjustment knob on the top. The knob can be turned to unscrew it from the main unit. Once it is removed it reveals a drill bit attached to the knob that is designed to clean out the airway in the shank. It can be twisted into the shank to reopened clogged and restricted airways without damaging the pipe. I use the drill bit by itself the first few times through the shank to remove the grime and tars. I then follow up with the pipe cleaners inserted and wrapped up the bit then dipped in alcohol to remove the loosened grime from the shank of the pipe. I have replaced the original ones that came with the kit many times with cut pieces of regular or fluffy pipe cleaners. The diagram below shows the bit inserted in the shank. It also shows the winding of the pipe cleaners on the drill bit that I referred to above.

Image 

The picture below shows the reamer as diagrammed with the instruction manual that came with the Kleen Reem kit. The numerals on the diagram are explained in the instructions on the right side of the picture. I use the reamer as a regular part of the cleaning routine I have established for working on estate pipes.

Image 

I would recommend either the Senior Reamer or the Kleen Reem Reamer for all those who clean and work on their own pipe and those who do refurbishing of estate pipes. When you purchase it know that you will need another tool or have to use sandpaper and dowel to maintain the heel of the bowl.

The second reamer that is in my refurbishing tool kit is called a Pipnet Reamer. I found this reamer when the one above left me with work to do at the bottom of the bowl. I was searching for a tool that did a better job in that part of the bowl. This reamer has also been packaged and sold in North America under the Castleford name. From my experience while these two versions of the reamer look the same, the Castleford set is not as well made as the Pipnet set. I will comment on that later in this article. Both sets come in a cardboard storage case and include a foam insert with cut spaces for the “T” handle and four heads of different diameters. To use the reamer the heads (tenons) are inserted into a square slot (mortise) on the bottom of the handle and then can be turned into the bowls for a thorough reaming. The picture below shows the Pipnet set that I have. I have reboxed it in an old wooden box that my kids had around. I found that it is a perfect fit and keeps the parts together.

 Image

The greatest asset of this tool in my opinion is that the interchangeable heads make it possible to work with a variety of bowl sizes and with various cake thicknesses. On older heavily caked bowls the reaming can be done in stages until it is the cake thickness matches the desired depth chosen by the refurbisher. This also makes it very easy to ream the cake all the way back to the wood or to leave any amount of cake you chooses. The size and shape of the combined handle and heads make it easy to keep the tool vertical in the bowl and avoid over reaming or ruining the roundness of the bowl by reaming at an angle.

Often when I am refurbishing older pipes I use both reamers mentioned in this article to complete the reaming to my satisfaction. I start reaming with the Pipnet and end with the KleenReem or the reverse depending on the bowl shape. I find that the design of the tool allows me to have a good grip on the handle as I turn the blades to cut the cake. I begin with the smallest head and work my way up to the size that brings the bowl to a place where I then use the KleenReem to finish the work.

Each cutting head of the Pipnet tool has four blades inserted into a hard plastic head. They are basically hardened steel “U” shapes that meet at the bottom of the head and go up the length of the head. The cutting head, though obviously designed for “U” shaped bowls, also can be used in conical bowls. Again the reaming process should begin with the smallest head that fits into the bottom of the bowl and then working up the varying sizes of heads until the bowl is completely reamed. The design and shape of the heads is visible in the picture of the Castleford Set below.

Image 

In terms of durability I have used the Pipnet set for five years without any damage to the handle or heads. I was concerned when the tool arrived that the stress on the handle head connection (tenon/mortise) when turning it into the bowl would be problematic. When twisted or turned I can feel the give or strain in the plastic junction. In the 5 years I have used the Pipnet set I have not had any problems with this concern. Last year I was given a Castleford set to use as a backup. It looked like it was the same tool at a glance. I broke the handle mortise connection after the first couple of uses. In comparing the two sets I can see that the Pipnet set is made of a heavier/thicker plastic in the handle connection than the Castleford. That is probably the reason that it has outlasted the Castleford.
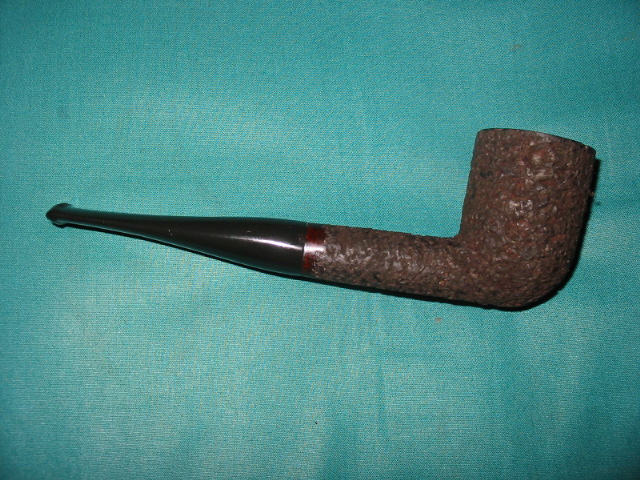
I purchased my Pipnet on EBay and continue to see sets show up there regularly. It is also available through various pipe and tobacco shops on the web. One or both of these reamers will serve the refurbisher well in the quest for a clean, restored pipe. Take into consideration the strengths and limitations of both and make your choices from an informed position. Enjoy your restoration work.