Category Archives: Pipe Refurbishing Essays

Essays and pictorial essays on the art of refurbishing

List of supplies for refurbishing


Blog by Steve Laug

I have had quite a number of emails over the past years asking for a list of tools and supplies that I use for pipe refurbishing. I have made a list and broken it down into 4 parts – two dealing with the bowl and two dealing with the stem. The first in each category is what I call field dressing the pipe. It involves the initial breaking down of the pipe and stripping and cleaning it. The second in each category is the finishing.

Refurbishing stems:

1. For the stems – field dressing

– Oxyclean for soaking oxidized stems. I use it to soften the oxidation rather than remove it. It works great. It does not remove oxidation as some have suggested but it does soften it so it is more easily removed.

– a pint jar or container with a lid that can be used for soaking stems (I use an empty Oxyclean container for the alcohol bath and another for the Oxyclean wash.)

– Sanding pads – coarse, medium and fine pads – these are 2″x3″ and about an inch thick. I find that they are firm but flexible. The edges work great against the button.

– 400 and 600 grit wet dry sand paper

– Pipe cleaners – both bristle and fluffy

– Dental pick for getting the corners of the button, the slot and the tenon

– Pliers for removing stinger apparatus

– Small microwave bowl or heat gun to lift bite marks and dents from the stem

– Retort system – available on eBay or from Shield on Smokers Forums http://www.smokersforums.co.uk/

2. For the stems – Finishing

– Sanding pads (see above), 240 grit sand paper and 400, 600 wet dry sand paper and Micromesh pads in 1500, 1800, 2400, 3200, 4000, 6000 grits.

– Buffer with pads – Tripoli, then White Diamond and then Carnauba. These are used after the sanding process. I don’t use a Dremel for this as it can cause ripples in the Vulcanite stem.

– I just started using Obsidian Pipestem Oil on the stems and it is fantastic. I rub it into the stem, let it sit for 30 minutes, polish and repeat.

– I then wax the stem with either Carnuaba Wax, Renaissance Wax or Paragon Wax. The first I apply with a buffing wheel the latter two can be applied by hand. When the latter are used apply them, let them dry and then buff with a soft cotton cloth.

– Soft cloths for hand buffing

– Bright light to identify scratches in the bowls and in the stems

 Refurbishing Bowls:

1. For the bowl – Field dressing

– Jewelers Loop to examine the hallmarks and stamping on the pipe before sanding

– Reamer (I use a Pipnet Reamer that is available from Synjeco. It is also made by Castleford. It is a ‘T’ handle with four different blade heads that fit in the bowl. Very easy to use and maintain roundness of the chamber. I also use a KleenReem or Senior Reamer as well. I have a review and comparison of the two on the blog.)

– Soft bristle tooth brush for scrubbing with the oil soap

– Brass bristle tire brush for use in scrubbing on plateau and in rustication

– 2×3 inch sanding pads of different grits (Coarse, Medium and Fine). I found these at a paint shop/hardware store as they are used in drywall patching and painting. Home Depot carries them as well. These are used to remove the tars and lava on the top of the bowls.

– Murphy’s Oil Soap

– Several soft rags for wiping and application of soap

– 100s of pipe cleaners – fluffy, bristle and thin

– Q-tips cotton swabs – I use these to clean out the mortise area of the shank as well as the sump in system pipes.

– Cotton boles that are used with the retort and also in using them for stuffing the bowl and adding isopropyl alcohol to draw out the tars a oils of old tobacco from the bowl.

– Silver polish for bands – both a liquid/paste application and a polishing cloth that is available through jewelry shops.

– A pint jar/container with a lid for the alcohol bath

– 99% isopropyl alcohol

2. For the bowl – Finishing

– 400 and 600 grit sand paper

– Micromesh pads in 1500,1800, 2400, 3200, 4000 and 6000 grit available online at Lee Valley Tools and other wood working suppliers.

– A knife that can be heated and a cloth that can be wet to use to steam dents from the bowls. You can use a knife – I heat the blade on my gas stove and then use a wet cloth on the dent and apply the hot knife to the dent and the steam lifts the dent. You can also use an iron to do the same with a damp cloth.

– Stains – I use Feibings Shoe dye – aniline based stains that are far cheaper than labeled wood stains. I use Medium and Dark Brown, Oxblood or Cordovan, and Black almost all the time but it is available in other colours as well. Those three match most of the older English and American pipes that I rework.

– Matches or lighter for flaming the stain once it applied

– Rubber gloves for applying stain unless you don’t mind wearing it for a while

– Q-tip cotton swabs or pipe cleaners bent in half for applying the stains

– Soft rags for wiping off stains and applying them

– You can get a polishing kit from Lee Valley that includes three buffer pads, and arbor and attachments for a bench grinder. That is what I have. It also comes with a bar of Tripoli, White Diamond and Carnauba wax in the kit. It will last a long time. I think it is about $70 or less for the kit.

– I also have a jar of Halcyon wax for use on blasts and rusticated. It is applied by hand and buffed off with a soft cloth. They also have Paragon wax for smooths. It is available on eBay for sale or you can Google it to get it – it comes from Fine Pipes.com

You can add other tools to the kit as you want to. I also have a specially cut screw driver for rusticating bowls, a tenon expander, a wood screw that I use to remove broken tenons, a battery terminal brush that fits the bowls, a plumbers 3/4″ wire brush for bowl reaming etc. Necessity is the mother of invention in the process of refurbishing. I am always looking for new tools and ideas.

Hot off the refurb desk


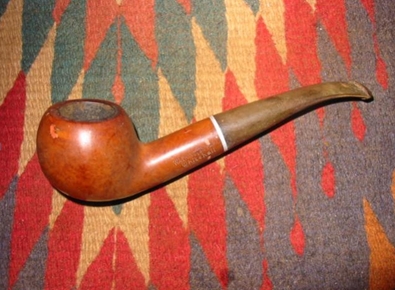
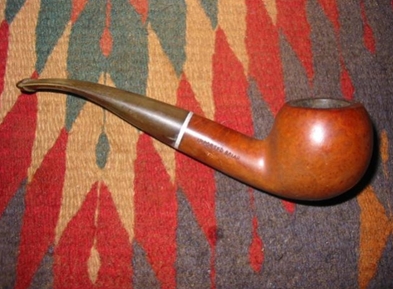
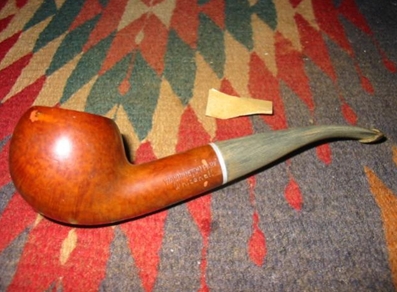
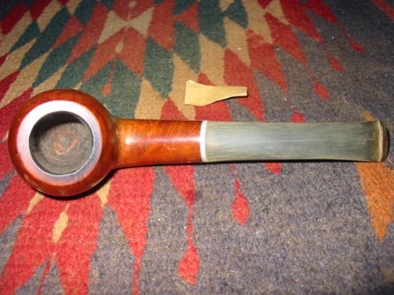
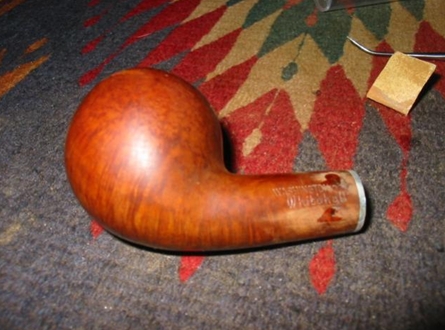
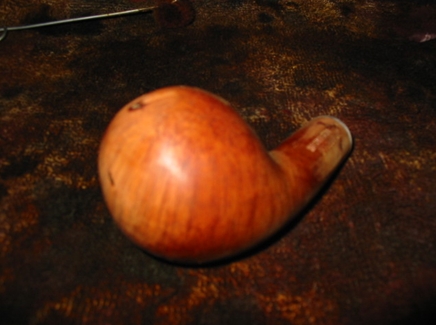
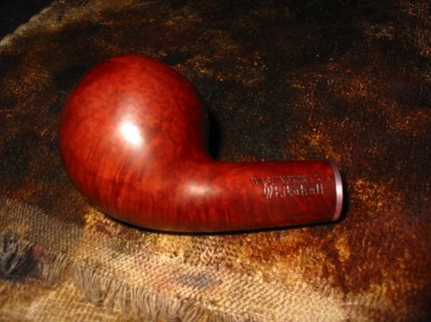
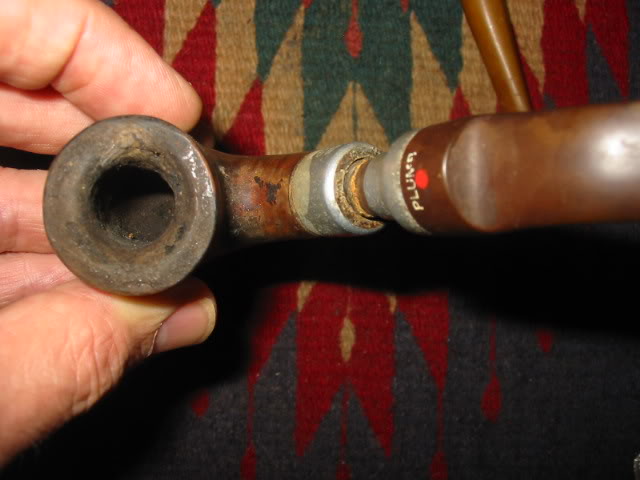
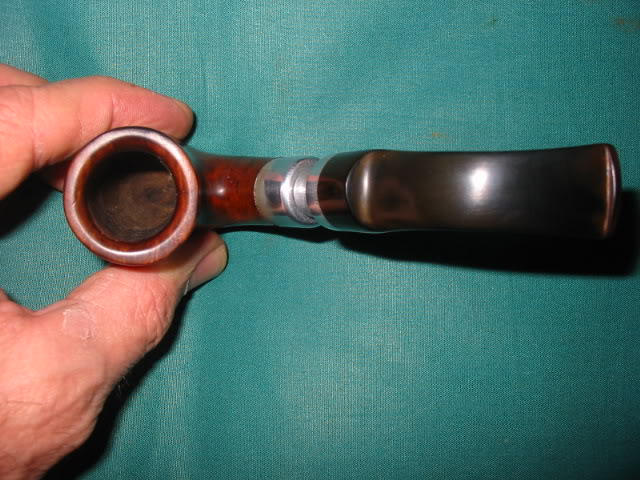
This is one that I just finished refurbishing. It came in a box of pipe bowls that I was given that needed re-stemming. I cleaned and reamed it and removed the tars on the rim. The shank had a small crack in it that needed to be fixed so before I re-stemmed it I cleaned the outside of the shank with a cotton swab of acetone to remove any finish that was on the area that the band would cover. I measured the outer diameter of the shank, picked out a nickel band. Just before placing the band I put some super glue in the crack and let it dry. Once done I dabbed a bit of all purpose glue where the band would go and then heated band so that I could pressure fit it in place. I re-stained the bowl with a dark brown aniline stain to give it a more even finish. I buffed it with Tripoli and White Diamond before giving it a coat of wax. Then I laid it aside.

I found an interesting stem blank that would give the pipe a pleasing look to my eye. I turned the tenon with a PIMO tenon turning tool until it was a close fit and then did the rest of the work on the tenon with sand paper by hand. Once I had the tenon fitting snugly I took my Dremel to the outer diameter of the stem to bring it as close as possible to the diameter of the shank of the pipe. I finished the exact fit by hand with varying grades of sand paper. Upon completion of the fit I used 240, 400 and 600 grit sand paper to remove the scratches and then 1500,1800, 2400, 3200,4000 and 6000 micro-mesh sanding pads to finish the polish on the stem. I put the stem on the pipe and then took it to the buffer and did a final buff with White Diamond buffing compound on a mixed felt/flannel wheel. Remember never buff a stem without it being in place on the bowl or you will round the edges at the stem/shank connection.

Once I had the stem as smooth as I wanted I gave it a coating of Obsidian Pipe Stem Oil and let it dry for half an hour and then buffed the entire pipe with a carnuaba wax buff.

Here is the finished product:

ImageImageImageImage

Poor draw on a stem


Blog by Steve Laug

I was working on a stem for a friend this evening. The bowl on the pipe had a great wide open draw. The stem by itself was awful – it was like sucking on a coffee stirrer. It was a Aerosphere pipe. He had plugged the carburetor which was good. Somehow the stem itself was not drawing. I heated it and straightened it. I pushed a pipe cleaner through the straight stem and a chunk of some kind of fabric fell out. I used a light and looked down the stem and saw that the airway was a half circle. I used a needle file to open it up and to open the slot on the button as well. I then reheated with a pipe cleaner inserted to keep the airway open and then bent it so as not to kink the stem. The draw is wide open now. This caused me to post here regarding opening airways on bent stems.

Here are a few things to consider:
1. Is there anything in the stem itself clogging the airway? Could be a chunk of pipe cleaner lint, or fabric or just plain gunk.
2. Is the button open or is the slot on it constricting?
3. Is there a kink in the airway caused by the bend itself? This can happen when the stem is bent too far for the thickness of the stem at the bend.
4. What is the shape of the airway from shank to button? Round? Oblong? Oval? half circle? Check it before you drill it?

Anyway just a heads up – check before you drill it open.

Correcting an overturn on screw mount stem


Blog by Steve Laug

In years past I remember posting on a variety of pipe forums I have been a part of regarding correcting an overturned stem with a screw mount. I have had old Kaywoodies and others that have this kind of stem and inevitably they were overturned so that the stem did not line up. It was semi tolerable on round stems but even then it was bothersome for me. The worst was on a bulldog with a diamond shank and stem. To not have the diamonds line up just bugged me. I knew there had to be a fix for this but I had no idea what it could be. I used various paper washers to help with the process. I used cardboard and even thin leather. All of these were less than satisfactory. Besides I am a bit anal about that kind of thing and I want it as it should be not half way there.

I don’t remember who posted the help for me or if I picked it up in talking with folks but I have been using this method for a long time now. I have seen others ask on various forums for a method for correcting the problem and have often typed out a response for them. Today I had a few moments to spare so I thought I would write up the procedure and share it with you.

My procedure is actually quite simple. I have a small microwavable bowl that I fill with enough water to cover the metal tenon and about a quarter inch of the stem when it is placed in the bowl. My bowl has a 2 ½ inch diameter so I can lay the stem in it at an angle with the button over the edge. Care should be taken as the water can and will bring out oxidation on the stem and it can be a pain to remove. I try to not allow the water to climb too high on the stem to minimize the work. I also place the stem in with the bend down on a bent stem. Vulcanite has memory and will straighten with heat so I have found that placing the stem with the outer bend in the bowl aids in keeping the bend.

Once the stem is placed in the water I place the bowl in the microwave and set it on high heat for 2 minutes. This generally gets the water boiling or just under boiling. If you worry about the metal causing trouble with your microwave you can heat the water without the stem and stick the stinger/screw mount end in the boiling water once it is removed. Once it is hot I let it stand in the water for another 2 minutes and then reinsert in the shank of the pipe. The glue should be softened enough to turn the stem until it is in the correct position. Once I get it straight I set it aside and let it cool and the fix is finished.

I have used one other method with good success as well and that is a heat gun as the source of the heat. For me it is a bit more labour intensive as you have to keep the stem moving so as not to burn the vulcanite. It does work well though and you do not have to fight the oxidation. Once it is heated use the same procedure as above to straighten the stem and fit. Let cool and you have it finished.

If the stem does not turn easily you have not heated it enough. Give it some more heat with the gun or the water until it is easily turned on the shank. I have used this method on all pipes with the screw mount tenon/stem and had good success.

Because it worked so well with the metal screw mounts I decided to give it a try with a bone screw tenon on a couple of older meerschaum pipes and an old deco Bakelite pipe. The pipes I chose to try the method on were pipes of little value so that if it did not work it would not be a loss. I put a cup of water in the microwave and stood the stem in it tenon down and set the timer for two minutes (time to boil a cuppa in my microwave). I took it out at a minute and gave it a try and it was better. I put it back in the water and let the two minutes finish. I don’t know if the tenon loosened or if it swelled but it is certainly fixed.

On these old timers my two concerns with the microwave were integral damage to the bone tenon from the heat moving from the inside out and secondly to the Bakelite stem. I did not want it to become brittle from the same process. I tried to minimize that by putting it in the water. I have learned on the metal ones to insert the stem and tenon while the water heated in the microwave for maximum effectiveness. I decided to do that as well. I have been smoking these pipes now for several months and taking them apart to clean them without any problems. It seems that they have not been compromised.

I have yet to try it on amber as I have not had an amber stem to sacrifice. I now know that it works on Lucite, vulcanite, Bakelite and on older bone tenons. I continue to experiment with these older pipes to learn what I can in terms of restoration. If you have suggestions or ways in which you have worked with this issue let me know.

You don’t have a buffer? Here is one refurbed without the use of a buffer.


I have one I am working on now that is interesting. It is a nice looking shape – Whitehall Washington Park Author. It had an overturned stem that did not line up and was oxidized and spotty on the stem

 ImageImageImage

I heated the stem in boiling water to loosen the glue this morning and turned it until it lined up then cooled it with water. The boiling water raised the oxidation and also softened it. The stem had a lot of marks like someone had used a pair of pliers to try to get it to line up. Pliers marks were all around the stem mid stem. The oxidation had some spots that were dark… so I sanded it and sanded it with 180 and 220 grit sand paper. I wanted to get the tooth marks and pliers marks out as well as the oxidation. The bowl is changing colours from the oils in my hands.

ImageImage
Still in the process of sanding the stem. Next I have to see what I can do to hide the bubblegum pink fills – argghh. We shall see. Will keep you posted.

I am planning on doing the stem with sandpaper and Micromesh pads only. I want to show how it can be done without a buffer. At least that is the plan for now.

This is with 600 grit wet dry sand paper.

ImageImage
The next are with 1500 and 1800 Micromesh pads. Going to work my way up to 6000 before waxing.

 ImageImage

Here is the stem after 2400 and 3200 Micromesh sanding

ImageImage

Here it is after 4000 and 6000 Micromesh sanding

ImageImage 

Here it is with the final sanding with the 6000 and then a coat of Obsidian Oil.

ImageImage 

Ok. Stem is finished. I just picked out the pink fills with a dental pick. Three of the four I have filled with briar dust and superglue.

The first picture is of the fills before picking.

Image

The next two show it picked and filled

ImageImage 

These two show the fills on the front of the bowl and the large one on the left side of the bowl. I picked out the fill in both of these larger ones and filled with the briar dust and super glue. I still need to do a bit of fine sanding as the stain will not go into the glue areas.

 ImageImage

Here is a shot of it ready for staining

Image
And here is the finished stained bowl. The fills at the shank have vitrually disappeared. The larger ones are still visible but are dark and blend in better.

ImageImageImage

And now the finished pipe:

ImageImageImageImageImage


Patching a bite through


I thought I would write an article on this topic as I just finished repairing a bite through on an old London Made pipe with a vulcanite stem. It is fresh in my mind so it will be easy to write it down, plus I enjoy passing on my refurbishing processes to others to experiment with.

To begin the patching process you need to make sure the stem is clean of all oils, waxes and oxidation. You want the patch to bond well with the original stem. I have also found that any oxidation will show through the patch and leave a blemish on the stem that is cannot be removed as it is under the patch. With that in mind I removed the oxidation from the stem with repeated soaks in a tub of Oxyclean. I mix it 1 scoop to a quart of hot water. I put the lid on it and shake vigorously to mix the powder. Once it is well mixed the stem goes into the water for its first soak. I wash it off and sand or buff between soaks to remove any oxidation that is soften enough to remove it. Then it goes back into the jar for another soak. I repeat the process until the stem comes out clean.

I take it from the final wash and I sand the stem with multiple grits of sand paper to get the stem back to a matte black finish. I don’t want a sheen on the stem yet as I want a bit of roughness in order that the patch will adhere well. Once completed, I use a dental pick to clean up the area around the bite through and remove any remaining rubbish in the hole. I then used a small needle file to roughen the broken surface of the spot to prepare it for the patch.

I soak a pipe cleaner in olive oil (not dripping oily but enough to make it slick as you do not want it gurgling out the hole and messing up the part you have just cleaned. Believe me Super Glue will not stick to oily slick surfaces and it will never dry when mixed with oil.) The pipe cleaner is inserted into the button on the stem just past the bite through. This provides a block on the underside of the hole and also a non stick surface so that the glue used in the repair does not fill the airway and cause the pipe cleaner to bond to the inside of the stem.

I used clear Krazy Glue/Super Glue (you can get black Super Glue from wood working supply sites online) and did an initial fill on the hole. The idea is to get a good bond on the hole itself and not try to over fill. Once it was dry (very quickly) I sanded the surface to roughen the initial patch and then filled the hole and surrounding dent to a bit overfilled (a bubble if you can picture that). I set it aside over night and then the next morning sanded it smooth to match the surrounding surface. If the hole is large the idea is to build out toward the middle with repeated applications of the glue.

I have experimented with different drying times that are optimal for the sanding process and found that the one I stated above works the best for me. The first application is a quick dry and is sanded while the glue is not cured. The second application is hard when I sand it. I use multiple grits (400, 600) of wet dry sand paper and then microfiber sanding disks (1800, 2400, 4000) to blend the patch to the surrounding stem area and then gave the entirety a buff with red Tripoli and then white diamond. I finished the polishing with 4000 grit microfiber disk and it is virtually invisible and has formed a hard bond with the stem.

I am just an amateur refurbisher sharing how I do a patch. I am sure others here, particularly the pipe repair folks, have other methods and better ones. But this one works for me. I will try to do a photo essay on the next pipe stem I patch to show pictorially what I do.

Oh… for information sake – I have pipes that I have repaired in this manner that I have been smoking for 10 years that show no breakdown in the patch.

A Pipe Refurbishing Journal


I have worked out a process of refurbishing old pipes as a hobbyist that has worked for me with ongoing improvements and learning being added almost every pipe I work on. That is not to say that I am even a wannabe professional because I am not. For me it is a way of doing something that I find relaxing and rewarding as well as something that I can actually finish. With my work I am involved in ongoing dealings with people and issues that seem never to really come to closure so to take a pipe and bring it back to life and enjoy a good smoke in it is something I take great pleasure in. I thought I would write a bit about my process using and old pipe that came in the mail that I picked up off of ebay as an example.

… I got home from Budapest, Hungary last week to find a package of pipes had arrived that I bought on EBay before I left. I opened the box to find a real mess waiting for me. The photos on eBay were not good and I was in no way prepared for what awaited when I opened the box. There were four pipes there – two Dr. Plumbs, a Stanwell with a broken tenon and a White Cliff meer-lined pear. The two Dr. Plumbs were what interested me in the lot and why I had initially bid. Dr. Plumb was an older second’s line of GBD and these two interested me. The first was a 9438 – GBD Rhodesian shape that I find is an all time favourite of mine. The second was a silver spigot Oom Paul – a shape that I have wanted to try for a long time.  I figured the Oom Paul would be one I kept – not sure of the others in the lot. The White Cliff and Stanwell went back in the box and I turned my attention first to the Oom Paul.

I took it out of the crumpled newspaper that wrapped it, being careful not to spill the ash and crumbling cake all over the place. It really was an ugly mess. I wanted to assess what needed to be done with it and whether it would be worth the effort. Sometimes even if it is really not worth it I will still clean it to practice methods and the use of new tools. This one was in desperate shape. The bowl was filled with crumbling cake and torn remnants of tobacco. The top was covered with a sticky and thick tar or lava that was about the thickness of a dime. The outside of the bowl had dark grime deeply embedded in the finish. It was muddy and dark enough that I could not see the grain at all. Now before you think it was an old patina finish – I assure that it was not. There was no way of even seeing the finish. It looked just like one of my dogs when he has been playing in the mud on a rainy day. I know somewhere underneath he has a black coat but it is not visible at all under the dirt and grime. This pipe was just unbelievably dirty.


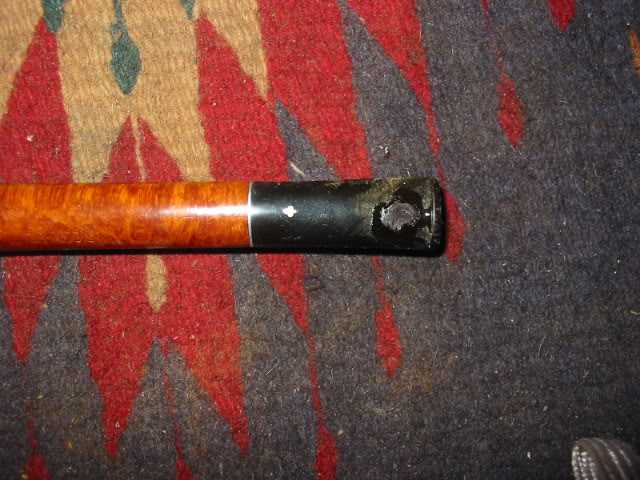
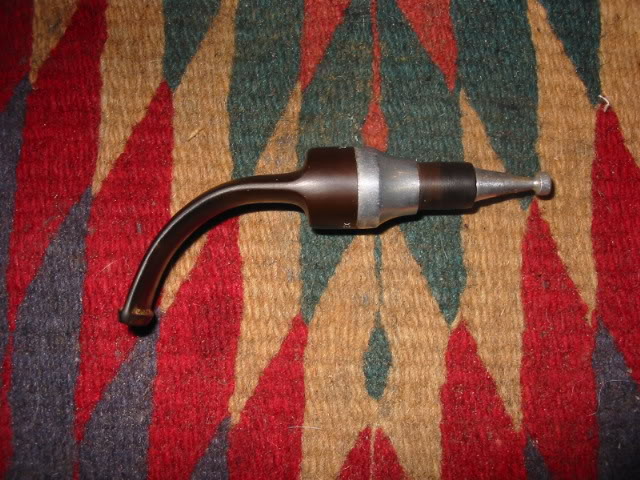
Working my way back along the shank of the pipe I came to the silver shank cap which was loose and very tarnished. It appeared to be sterling or at least silver plated under the tarnish. It had pulled away from the shank and was turned to one side. It appeared to have something engraved in it at about 1 o’clock but it was not clear under the tarnish and grime. The stem, a faux spigot, no long fit in the shank as it sat among the grime and crumbling build up of tars and a yellowish residue that erupted around the edges of the union of shank and stem. It was solidly embedded in this mess and was immoveable. The stem was an oxidized brown colour at the saddle and the curve. It had a silver cap at the end of the stem before it disappeared into the grime. That union of vulcanite and metal was a mottled edge of tarnish and grime. The button end of the stem was grimy and oxidized but it did not appear to have tooth marks or pits in it. It was merely encircled by that hard, white coloured material that can collect under a rubber bit protector. I moved to the lip of the pipe and looked at the slot. Unbelievable!! The airway was gone. The slot was filled and all that was left was a tiny hole the size of a pencil lead. The tar was erupting out of the slot and was a hard black semi circle that enclosed the button end.

I turned the pipe over in my hands to look at the underside of the bowl. I always like to check and see if I am going to be surprised by a burnout or a blackening spot that could signal an impending burnout. I scraped some of the grime off the bottom of the bowl and found a spot that appeared to be the size of a pencil eraser on the bottom. It was black but did not appear to be burned or soft in anyway. I used saliva to clean away the grime a bit for a better look at this spot. It cleaned up slowly and with a soft cloth and a bit of spit it showed that what I was dealing with was a repair in the bowl bottom – a plug of briar that had been inserted. It was a bit darker than the briar around it but it was a good solid repair and did not appear to be loose or damaged. That was a good sign.

I laid the old pipe down and gave it a good hard look. Would this be worth the effort or would I end up pitching it at some point in the cleaning process? That is always a question I ask before I get everything out to do the cleaning. I picked up and turned it over in my hands again. I checked it over one more time and figured I would start and see what happened in the process. I set up my desk top work bench with newspaper as a base and then laid out the tools of the craft! I put out a variety of reamers and brushes of different sizes. I put out the dental picks that I knew would be needed in the stem and the shank. I put out the pipe cleaners – bristle, thin and fuzzy, the alcohol and the alcohol bath that I keep handy for bowls that need a soak. I drizzled some clean alcohol around the shank stem union and with a bit of wiggling and more dripping the stem came free. I use an ear syringe for that part of the work as it allows me to control the placement of the alcohol.

I set the stem aside and turned my attention to the bowl. I wiped down the outside with a soft cloth and Murphy’s Oil Soap (undiluted) to get the grime off and get some idea of what was underneath the mess. It took several applications and wipes with the cloth to get through the grime. I also wiped it down with an alcohol wipe to get the last of it off. As I was planning on refinishing the pipe anyway I was not concerned with the finish. Underneath the grime the briar was actually quite nice – birdseye on one side and a variety of grains the rest of the way around the bowl. The shank was flame grain. It looked promising. I took a sanding block that is fine grit and sanded the top of the bowl to get the grime off. It was rock hard and since I was refinishing the pipe anyway it was the preferred method of removing the grime. Once that was done I reamed the inside of the bowl and the inside of the shank. I used my Senior Reamer to start with and then the T reamer with the four different cutting heads. The bowl was lined with a crumbling cake that needed to be taken back to the bare wood as it kept letting go and falling apart. Once it had been cleaned out I was able to inspect the bowl for cracks and burned out areas. Fortunately it was clean and uncracked.  The bottom of the bowl was below the airway so once it was cleaned I would need to use some pipe mud to build it up to the proper height.
The shank was really a mess. I could not fit a standard pipe cleaner through it and had to use a dental pick to open it up. Because it is a full bent a drill bit was unworkable past about the middle of the shank. I have a dental pick that have I straightened out a bit and it worked like a champ. The pipe had a sump in it like the Peterson system pipes and it was absolutely jammed packed with tars. The stem would not even fit in the shank it was so full of junk. I used a small brass battery terminal brush to work over the inside of the shank and the sump area once I had opened it up. I blew air through to make sure it was open. I used pipe cleaners and q-tips to clean it up. I kept at it until the airway and shank were clean. Once I finished with the interior of the pipe I put the bowl in an alcohol bath over night. I have found that this takes off all the grime that is rubbed into the finish and any remaining interior grime.
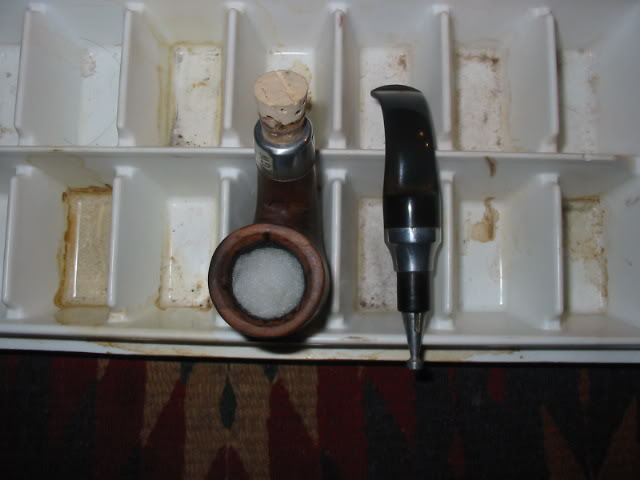
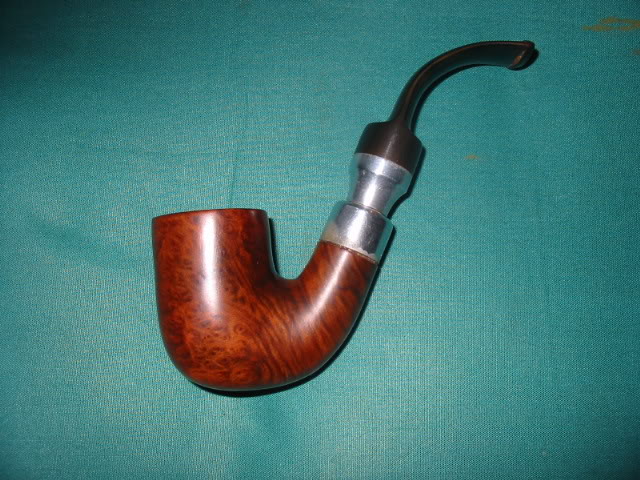
While it soaked I turned my attention to the stem. I opened the airway in the stem with my dental pick from the button end. I was able to remove the stinger apparatus in the tenon and then began to work on the interior of the stem. The stem itself was a mess on the inside – a pipe cleaner would not fit through so again the dental pick did the trick. I opened it up a bit then used over a 100 pipe cleaners and a bunch of q-tips to clean out the gunk. I also used a bristle shank brush to loosen things up. Once I cleaned it with lots of alcohol and many cleaners the inside was clean. The outside needed lots of attention. The Dr. Plumb painted logo (not stamped at all just a surface paint) was sacrificed to cleanliness.  I sanded the stem with 1200 and 1500 grit sandpaper to get the brown out that even the buffer did not remove. After that was done I polished it on the buffer with red Tripoli and White Diamond. The stem was actually in very good shape once the grime and oxidation was removed. I cleaned the silver portion of the stem and the faux military mount with silver cleaner and then polished that and buffed it with a soft cloth. I also used steel wool on the stinger apparatus until the roughness and grime was gone from it and it shone. I inserted it back in the pipe for the first smoke to see if it would remain. The stem was in great shape and ready to be inserted in the shank of the pipe once it was done. It still needed to be buffed with Tripoli and White Diamond before a good coating of Carnuba was applied to keep the oxidation at bay.


I removed the bowl from the alcohol bath and found that bath had done its magic. All the grime was off and the finish as well. What remained was a soft reddish briar that was clean and smooth to the touch. After bowl dried I sanded it with 1500 and 1800 grit sandpaper, being careful of the stamping that showed up on the bottom of the shank once the grime was gone. I finished the sanding with micro mesh pads in 1800, 2400 and 4000 grit. The top had some minor burned areas and the bowl was out of round so I bevelled the bowl top into the bowl to take care of the unevenness. When I finished sanding it I washed the outside down with a damp alcohol soaked rag to remove any dust and show any scratches that needed a bit more attention. Once those were taken care of I filled the bowl with cotton boles and using the ear syringe filled the bowl and shank with clean alcohol to remove any ghosts and residual tars in the bowl. I let it sit over night while the leaching process did its work.


While bowl was undergoing that treatment I took silver polish and a soft cloth and worked on the stem metal work. For the stinger apparatus I used some 0000 steel wool to clean off the staining. I buffed the stem with Tripoli and white Diamond and laid it next to the bowl.

The next day I removed the cotton boles and let the bowl dry out. I opened a can of cherry stain that I use on these old timers that matches the original colour really well. I shook the alcohol based stain until it was well mixed and then using a soft rag and a folded pipe cleaner I applied it to the whole bowl. Once it was well coated in the stain I lit it on fire with a lighter to set the stain. Once that was done I set it aside to dry well.

In the afternoon when the stain was dry I took it to the buffer and lightly buffed the stummel until it was smooth and shining. The finish looked really good. I gave it a good coat of wax and then polished the silver on the shank cap. I was able to turn the cap a slight bit and the initials that were engraved in it became visible – WGW. I took it back to the desk and inserted the mouth piece. It fit snugly into the shank and the look was as it should have been.


(In the last picture on the bottom right the plug in the bottom of the bowl is visible. I re-stained that area of the bowl and the plug is a little less visible.)

I then turned my attention to the inside of the bowl. I needed to raise the bottom of the bowl to meet the bottom of the draught hole and protect the plugged bottom of the bowl. I mixed a batch of pipe mud – cigar ash and water mixed to a pasty thick consistency and painted it with a folded pipe cleaner and packed it in place with a pipe tamper to raise the bottom of the bowl to the bottom of the airway. I let it dry for a day until it was hard and then prepared a bowl coating with activated charcoal and my secret ingredient and painted the inside of the bowl with it. I wanted this old timer to have a chance and with the cake gone I did not want to take a chance on burnout with it. I wanted it to have a fighting chance for a long life ahead. I set it aside to dry for two days and waited for the initial smoke once it was dry.

Two days went by and the bowl coating was dry and the mud was hard in the bottom of the bowl. I had packed the pipe in my brief case and took it to work with me for the ride home that evening. After work I packed the Dr. Plumb Oom Paul with Doc Piedmont and lit it with the Zippo. Wow what a clean, dry smoke. It was smooth and full of flavour. It is a great smoker and did not heat up at all during the smoke. I carefully knocked out the ash and inspected my bowl coating and the bottom of the bowl. It looked undisturbed and solid.

When I got home I removed the stinger that was in it to give it a go without the stinger to see what that does for it…my gut feel is that this pipe will be one of my go to pipes in the future.

Journal of a Stem Patch


I had this old four hole stinger Kaywoodie Drinkless Canadian that came to me in great shape other than a fairly large bite through on the top of the stem. It was in great shape otherwise, barely smoked and very clean. No other tooth marks no dents, and no chatter – just the big old hole in the centre on the top of the stem. I thought I would take pics of the process I go through to patch it. So here it is from start to finish.

Step 1: I cleaned the hole and picked out any bits of stuff with a dental pick and wiped it down with an alcohol rag. Once it was dry, I put some soft wax on a finger nail file and inserted it in the button under the hole. The wax or grease keeps the glue from sticking to the file and permanently binding it to the stem. Here is a picture:


Step 2: I drip Super Glue on the hole and build up the edges a bit. This one is a large hole so I want to make sure that there are no bits that break free around the edges of the hole.


Step 3: The next two photos show the addition of vulcanite dust to the mix. I sanded down an old clean stem that was in my box and that I use for mixing with the glue on these larger holes. I had about a 1/2 teaspoon of dust. I dripped glue into the hole and then added the dust to the mix. After the dust I added a few drops more of glue and then dust again until the hole was filled with the vulcanite dust and glue mixture.


Step 4: I left it to dry for a half hour while I worked on another pipe that I was cleaning. Once it was dry, I removed the file and tested to make sure it was dry. I sanded the first bit with 220 grit sand paper and then a sanding block with medium grit. Here is the next shot.


Step 5: Once I had the majority of the patch smooth I moved on to 400 wet dry sandpaper to keep working at the patch and blending it into the stem.


Step 6: Once it was smooth to the touch I moved on to 600 wet dry and sanded some more in a vertical and a horizontal pattern with a small folded piece of sand paper as I worked to blend the patch.


Step 7: When it got to the point of blending that can be seen in the next photo I switched to the 1800 micromesh pads and used a spot of water on the patch to assist the blending with the pads.


Step 8: When it was smooth to touch I used the buffer and hit it with Tripoli and white diamond and then brought it back to the desk to use the 2400 and 4000 micromesh pads. Here is the finished product, waxed and ready to smoke.


Re-staining Estate Pipes – A Pictorial Essay


Blog by Steve Laug

I am often asked by other hobbyist pipe refurbishers how I go about re-staining the pipes that I refurbish. I have answered the question in different ways over the years as I have worked out my own process. This past weekend I had some time and a box of pipes to work on so I decided to document the process I use. I took photos of four old pipes that I was reworking; these photos take you through my methods from start to finish. I have added written commentary to explain what I have done. The method I describe is how I work with estate bowls like these. I am certain that there are other methods that can be used with equal success. This is the one I have arrived at over the past ten years as I have been reworking estate pipes. I am sure that it will continue to evolve in the years ahead as it has over the past years. Here it is for your perusal and use. Feel free to use it, enjoy the process of rejuvenating the finish of an old pipe, adapt it and modify it as you will. Email your modifications and additions to the method to as we work to keep the fire alive in the home based pipe restoring hobby – slaug@uniserve.com.

I need to make a final confession before I jump ahead to describe and document the process. I totally forgot to take pictures of the state these old pipes were in when I received them. As is often the case for me, the cleaning process took on a life of its own and once it is moving along I find it hard to slow it down. So, with that out of the way, I begin with pictures of the pipes after I removed them from an hour soak in an alcohol bath.

Out of the alcohol bath
Once I have chosen the pipes to restore I remove the stems and place them in a soak of Oxyclean and water while I work on the bowls. I place the bowls in an alcohol bath. I use a plastic jar with a screw on lid to hold the 99% isopropyl alcohol for the bath. It is roughly a large mouthed quart sized jar and will hold four bowls. The size also allows me to reach in and retrieve them when they are finished. I reuse the alcohol in the bath for a long time. I find that it turns dark from the stains and the sediment settles to the bottom of the jar. I pour off the alcohol regularly and wash the jar so that there is no sediment remaining. I also top up the jar with fresh alcohol to keep the levels high enough to cover the bowls.

The first two pictures below show the four bowls after they have been removed from the bath and have been dried. (In each photo the bowls will be in the same order for ease of recognition.) Starting at the top left and working left to right you will see the effects of alcohol bath in removing finish. I have found that it does not remove all the stain but it removes the finish, waxes and oils that are over the stain. When the bowls are removed they have a flat finish look to them. The top left bowl has a slightly yellow stain once the varnish coat was removed. The top right bowl has a reddish stain that was also under a coat of varnish. The bottom left is a prehistoric GBD finish/sand blast with a dark red/brown stain. The pipe on the bottom right has a dark brown stain and had a coat of shellac or varnish over it. The varnish on the last pipe had turned milky white even before I put it in the bath and increased when I took it out of the alcohol bath. The fourth bowl will take the most work to remove the finish. All will need more hand work with an alcohol soaked soft cloth and a soft bristle tooth brush to remove the residual finish. The smooth bowls will be sanded and further cleaned.
restaining-1

restaining-2

Washed and sanded
The pictures below show the bowls after they have been washed in alcohol and sanded and rewashed and re-sanded repeatedly. The stain colour is removed as much as it will be at this point in the process. There is still a lot of work to do on each bowl before staining can be done. The top coat of varnish, wax and the grit and grime have all been removed at this point. From the pictures you can see that there is still some varnish on the bottom right pipe but the majority has been removed and the others are getting ready to go to the next step in the process. Once I finished this stage of sanding I washed them a final time with a tack (soft cotton material) cloth to remove dust and such and also let me see any remaining shiny spots on the finish.
restaining-3

restaining-4

Two of my favourite tools are shown in the following pictures (I use both constantly in the process of refurbishing and always have them near at hand) – a tooth brush and a dental pick. The dental pick allows me access to the rings on the bulldogs. I carefully use it to follow the rings around the bulldogs and clean out the grit that gets stuck in them. I follow that up with the tooth brush which allows me to rub the alcohol into the rings and to scrub other places in the blast on the prehistoric and stubborn shiny spots on the smooth pipes. They both are used in cleaning rims and the dental pick also precedes my pipe cleaners in the shank. I have straightened one end to make access to the shank easier. These pictures show the bowls after the third sanding and alcohol wash. I also sand the rims with 400, 600 and then finally with 1200 to remove any grit or rough spots on the finish. All the bowls have been sanded with 1200 grit sand paper. I sand them one more time with the 1200 grit sandpaper and then I use micromesh pads to get a good smooth surface on the bowl. If you choose to go for a scratch-free finish you can examine the bowls with a jewellers loop under a bright light and re-sand as necessary to remove any noted scratches. For the majority of the old timers that I refurbish, I sand until they are scratch free to the naked eye in a bright light. To my mind some of the deeper nicks and such lend character to the old pipe and contribute to the look of age. My main requirement is that they are smokeable when I am finished and that they look good for their age. Should you choose to go further with the finish the choice is yours as you re-work them.
restaining-5

restaining-6

The next picture shows the foursome after all the smooth pipe bowls and smooth rim on the sand blast have been sanded with 1800/2400/4000 micromesh pads. They are smooth to the touch and have a rich shine to them. This is a good time to give them an inspection for any marks or scratches that you want deal with further. After I inspect them this last time, I wipe them down with an alcohol damp cloth to get any residual grit or dust off the bowls and set them aside. The bowls are ready to be re-stained.
restaining-7

Re-staining the bowl
In preparation for staining each pipe bowl, I insert folded pipe cleaners in the shanks to enable me to manipulate them with ease while I am applying the stain. This gives me some flexibility in turning the bowl at different angles to apply the stain coat. You will note the Fiebing’s stain in the previous picture – that is the stain I use. It comes in a variety of colours and is an aniline (alcohol based) stain. It works extremely well on wood. All of these bowls were given a first coat of Fiebing’s Dark Brown stain applied heavily. While it is still wet I use a match to light the stain to set it in the grain. It does not light the bowl on fire at all but only burns off the alcohol in the stain coat. For these four bowls, I started with the blast and liberally applied the stain to the bowl. I start with the bowl held bottom up and let the stain flow toward the tops. I follow the flow of the stain to ensure that I have thoroughly and evenly covered the entire bowl surface. I finish the first coat using the dauber pictured in the lid below to stain the rim. I reapply the stain to make sure the coat is even and not streaked.
restaining-8

The picture below was taken after the second application and flaming of the stain. After the first coat of stain is dry to touch, I give each bowl a second coat of stain and set it aflame with a match or lighter. After flaming the stain the bowls are basically dry to the touch and I set them aside until they are thoroughly dry. (I often let the bowls sit over night to dry.) The next day (or later the same evening if I get impatient or curious) I take them to my buffers and see what they will look like with a light touch on the buffing wheel. I generally use the Tripoli buff with a light touch, though I have also used the White Diamond buff as well. For those who do not have a buffer I have also sanded the bowls at this point with 1200 grit sand paper or higher. If the stain is too dark to my liking I wipe the bowls with an alcohol damp cloth until I get the colour the way I want it on each pipe. That is one of the beauties of aniline stain! The briar in each pipe bowl will make them quite unique looking once the stain is buffed.
restaining-9

While the bowls are drying I turn to work on the stems. Throughout the process described above, the stems have been soaking in an OxyClean bath. I put a mixture of once scoop of OxyClean into a one quart plastic covered jar and mix it with hot tap water. I shake it until the powder is all dissolved and the liquid is a milky white. Then I place the stems in the bath to soak. Generally I soak them a minimum of two hours but often will leave them in the wash over night. They remain in the bath the entire time I am working on the bowls.

With this foursome I grew impatient and was curious to see the finished product once I buffed the stain off the bowls. The bowls were dry so I took them to the buffer. The following pictures show the bowls – stained, buffed and polished. At this point in the process, I still need to wax them with carnauba but the pictures give you the idea of what they look like. Each pipe bowl took the dark brown stain in its own way. To me one of the joys of the process is arriving at this step and seeing the freshly stained bowls. I love the contrasting colours and grain that comes through in the pipes.
restaining-10

restaining-11

restaining-12

restaining-13

The final pictures in this essay show the finished product using two of the pipes. I finished working on the stems while the stain was drying. They are both WDC pipes. The apple is an Aristocrat shape 11. The bulldog is a Royal Demuth shape 79. Both are screw mount stems with interesting diffusing apparatus in them.
restaining-15

restaining-14

Rustication – A Pictoral Essay


Over the years I have been developing a process for rusticating pipes. I have used it on old estates that I have been given or purchased where the finish did not work for me or it had too many fills or pits. The tools I use are pictured below. The one on the left is a variation of a tool that I made from plans on Tyler Lane’s Pipe making site. It is made of a piece of black 1 inch pipe. I packed it with galvanized nails and then a cap is put on the end of it. The cap is packed with steel wool to keep the nails from shifting. I plan to make another variation on this and use a T union that will serve as a handle. The current cap is hard on the palm of the hand as I twist it into the surface of the pipe. I also want to weld the nails in place to avoid any shifting of them as I use the tool. The second tool is a florist’s frog – it has a lead base with sharp spikes (watch your hands and fingers on this one) that is used in floral arrangements. I got this at an antique shop. I want to create a wooden handle for this one to give me a bit more distance from the surface of the briar when I am working it over the wood.

I start rusticating the briar with the large tool on the left and then finish with the smaller one on the right should I want to achieve a bit different pattern or rustication. Either individually or together they provide an interesting rustication. The larger tool does the gross work and the smaller one adds finesse to the rustication.

ImageImage 

For the sake of showing the process I have chosen the following old timer – a Dr. Plumb carved apple that had a finish that I did not like. It had a carved finish of lines around the bowl and then horizontally on the shank. The original pipe is pictured below in the first two pictures to give an idea of the original state of the pipe. I also include pictures of a Canadian that is riddled with fills. It smoked great but just looked awful in my opinion. I wanted to show pictures of both a previously carved finish and one with fills to show what I see as an improvement in both of these pipes after rustication. Each one has a slightly different rustication pattern to it as I was trying to achieve something different in each case. The pictures that follow will give you an idea of how the process works from start to finish. I conclude the essay with two added pipes that I rusticated to give a broad sampling of the finished look of my rustication method.

ImageImage 

To begin the process I want to work with clean pipes that do not have any finish on them other than the stain. I put the bowls in an alcohol bath for an hour to remove all the waxes, finishes and grime that is on the outside of the bowl. I also ream and clean the pipe as I will handle it pretty roughly as I rusticate it. I don’t want added grime on my work table and hands so for me a clean pipe is what I like to work with. On the Canadian I removed the band and set it aside so that it would not be damaged in the rustication process.

ImageImage 

For the purpose of this essay I will begin with the Dr. Plumb apple. I worked the rustication tool into the wood, twisting it back and forth until it had the rough look to it as can be seen below in the picture on the left. Once that was done I gave it a coat of black aniline stain. I find that the stain facilitates seeing any part of the wood that still needed to be worked or showed a pattern that was to uniform. I reworked the rustication with the larger tool to get it a bit more rough and random looking. Once I had the rustication the way I wanted it I stained the pipe a second time using a medium brown stain. This was to be the finish coat. I stained it, flamed it to set the stain, restained and set it a second time. The result was the matte finish pictured below on the right. In the light it showed some depth and variation in colour coming through from the earlier black stain that I put on after the first rustication. The third picture from taken from above shows the finished rustication before I buffed the stem and gave the entire pipe a light buff with white diamond.

ImageImageImage    


The next step is to take the pipe to my buffer. I buffed the stem with red Tripoli and then white diamond. I buffed the bowl with white diamond to knock off some of the rough edges and to soften the edges of the rustication a bit and polish the smooth areas to highlight them. From pictures below the effect of the buff can be seen. It helps to differentiate the smooth areas from the rusticated ones and give a nice contrast to the finished look. The smooth areas have been polished and have a sheen. The rough areas have a softer glow that highlights the depth of the rustication and the pebbled finish of the pipe. The tactile surface of the “new” pipe is pleasant to the hand. It also has a better look than the pipe that existed before with the carved finish.

ImageImageImageImage 


I have included the remaining pictures to show several other pipes that I have rusticated. These will give you an idea of the variety of finishes that can be achieved with the tools. It also shows a unique texture finish that I have developed that I like and repeat. The key here is to work the process repeatedly to develop your own distinctive look and feel. Rustication is an individual process as can be seen by the wide variety in rusticated pipes seen on the market. I continue to develop my method and try different patterns and also try to repeat the ones I like.

The first set of pictures show the finished Canadian that was pictured above before rustication. I used only the larger tool on this pipe. When I had finished rusticating it to my satisfaction I used a brass whitewall brush to smooth out the rustication. I took it to the buffer and used white diamond to soften and flatten out the roughness. I wanted to have a different look with this pipe which explains the process variations. I stained it with a medium brown aniline stain and was aiming for the look of old leather. The flaws and fills on this old Canadian are now hidden and a pipe that is much more pleasing to the eye is the result.

ImageImageImage Image


The second pipe is a John Bessai bent apple. I cannot find the pictures of the pipe before rustication but I remember it well. It had many fills and flaws in the wood and was a light tan colour. The pink putty fills stood out against this nice tan backdrop. They made me always bypass this pipe in my rotation. It smoked well but it was just ugly. I would pick it up and then put it down and take another one in hand. I was going to sell it but thought I would rusticate the bowl and see what it would look like. Again I was going for a leathery look. I used only the larger tool on this one as well. Once I finished the rustication I again used the brass whitewall brush to soften the rustication and buffed it with white diamond. The final rustication before staining looked much as it does in the finished pipe. The colour of the pipe is achieved by a combination of an oxblood undercoat stain and then a buff followed by a medium brown topcoat. I left the shank smooth with the stampings still visible. To me the much improved look draws me to it and the tactile nature of the pipe in hand is a bonus. As it heats up the feel is very pleasant.    

 ImageImage

The final pipe pictured below is one I carved. It was a kit I picked up from eBay. It was a small block and stem stamped Caveman pipes. I carved the shape I saw in the block. As I did, the flaws and sand pits became visible. It became clear that once more rustication was the solution yet again. I used the larger tool followed by the brass whitewall brush to soften the rustication and give the pipe my favourite old leather look. The first two pictures below show the unstained pipe after rustication. Note that I wrapped the shank with electrical tape at the stem/shank junction to protect the stem and to give a band of smooth briar. The third two pictures show the pipe after the undercoat of black stain. The final colour (seen in the last two pictures) was achieved by a combination of a black undercoat of aniline stain and a top coat of medium brown. I buffed between coats of stain. All of the above pipes were then polished with Halcyon wax and buffed with a flannel buff.

ImageImageImageImageImageImage 


The above process is demonstrated in the four pipes pictured. It is very simple. I stained each of the pipes before I rusticated them so that I could easily see where I was working. I used the larger rustication tool on all of the pipes. For the first one I used the second tool to change the rustication and then applied stain. In the last three I used a brass whitewall brush to soften the rustication and give it a leathery texture. Once I got the desire rustication I stained the pipe again for the finished colouring. The first was merely buffed with a soft touch on a white diamond buff. The remaining three were polished by hand with Halcyon wax and then buffed with a flannel buff to give it a polished look.

Give the process a try and see what you can come up with. It is a creative outlet and a means of exercising some creativity. Let us know what the finished product looks like.