Blog by Steve Laug
This morning I decided to do a few more refurbs on pipes from my box. It is getting low on options as I have reworked the majority of the interesting ones. There are about 25 or so pipes to choose from now and many are in a real state of disrepair. As I sorted through them I came upon this one. I took it out of the box and turned it over in my hands. The bowl was clogged with the remnants of the last smoke – dried tobacco and sticky tars. I decided that this was the first pipe I would work on today. It would be a challenge to see if anything beautiful could come from this mess. It was a beat up old pipe. I think the previous owner must have always had it in mouth and chewed on it like a piece of straw and then used it to hammer nails. The top was chipped and dented with valleys and mountains and the whole covered in a thick coating of tars – pipe lava. The stem was gnawed on had deep dents and tooth marks. It was oxidized to a rich brown that stank of sulfur.
The first step in the process for me is always to ream the bowl and clean out the detritus of the past. I used a dental pick to get the remaining dottle out of the bowl and to make way for my reamers. I find that the dental pick works well as it is sharp enough to break into the hardened ball of tobacco remnant and remove it quickly. I work it around to clean out any loose leftovers so that I can work on the hardened cake that is left in the bowl. This one had a thick cake that was a bit crumbly and soft once the tobacco ball was removed. It would need to be reamed back quite a bit. I generally ream back to bare wood on these old timers as I want to start a hard cake that is not built upon the old crumbling base cake that was in the pipe when I started. I used the PipNet reamer on this one. I fit the cutting head into the T handle and began to carefully turn the reamer into the bowl. I generally do this over a plastic bucket as it is a mess. The coarse dust of the carbon that is cut away is a black cloud if you are not careful. I proceed slowly as it is easy to angle the cutting head and take the bowl out of round. Once it is done I tap out any dust that remains before moving the pipe to my work desk.
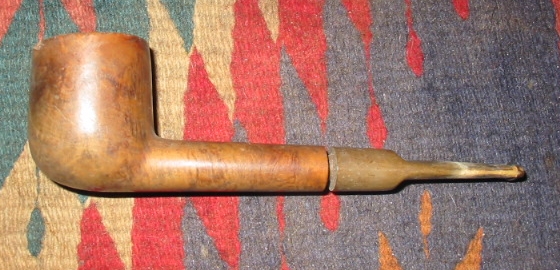

On the desk I had placed a work surface that was washable and then took out the soft cotton wash cloths that I use to remove grime and stains and wet them with Isopropyl. I washed down the outside of the bowl including the rim. It removed much of the dirt the first pass and I continued to scrub until the cloth came back clean. For this part of the process I leave the old stem in place as it serves as a handle for me to hang on to while I am working with the bowl. I picked at the grime on the top of the bowl a bit with the dental pick and decided that indeed this one was a candidate for topping. The two pictures above show the pipe after the reaming and cleaning of the bowl. It is ready to be topped.
In preparation for topping the bowl I use a flat surface – either a hard flat board or a piece of glass to which I anchor the sand paper. This time however I wanted to try out a new trick that I had learned from a friend on one of the online forums so I anchored a piece of 240 grit sand paper on a Masonite clipboard and put the clipboard on the desk top. Topping the bowl is a careful process that involves keeping the rim flat on the sand paper and turning it either clockwise or counter clockwise until the chips and dents are minimized. The trick is to take if far enough to remove the majority of the dents and chips without changing the overall profile of the bowl. Too much of the top removed changes the pipe rather than merely restoring it. As I sand the top of the bowl I stop to check it regularly to see if I have removed enough of the damage to the bowl. On this particular pipe it took me quite a bit of time to take it down slowly to the point it was smooth enough to do the next step in the process.
Often once the top is close to being smooth enough the last remaining dents can be steamed out and then a minimal amount of sanding will finish the job. On this particular pipe the top was smooth after sanding it. There was no need to remove any further dents. However there were some major chips out the outer edge of the rim. To remove them would have involved sanding off a fairly significant amount of the top and would have changed the overall look of the pipe. I decided instead to chamfer the edges on the outer portion of the rim. I used a piece of sand paper held at an angle that I maintained throughout the sanding. The idea was to hide the battered edge and remove some of the damage while minimizing some of the larger chips. Once I had the outer rim repaired to my satisfaction I did the same to the inside rim to regain some of the roundness of the bowl. The previous owner seemed to have used a knife to remove cake so there were major chunks taken out of the inside edge. Chamfering the inner edge took care of most of the damage and made the rest relatively invisible to a quick glance.
I then cut a stem to fit – turning the tenon on a precast stem and also taking off the excess vulcanite on the area where the stem joined the shank. I wanted to get the fit to be precise without gaps. Once I had the fit correct and just needed to sand out the scratches I put the bowl in the alcohol bath to let it soak and remove the stain. I continued to work on the stem while it soaked. I generally leave the bowl in the bath for a minimum of 30 minutes and have even left them over night in an extremely dirty bowl. Once I take it out of the bath I wipe it down with a dry cotton cloth and let it dry. I then sand the bowl down to remove any scratches in the surface. I start with a 400 grit wet dry sand paper and work my way through the Micro-mesh pads 1500, 1800, 2400, 3200, 4000, and 6000 to get a good smooth surface. As I worked on the shank I noticed a fine crack that became evident as I removed the grime from the inside of the shank. I heated a nickel band and pressure fit it to the shank to take care of the crack.
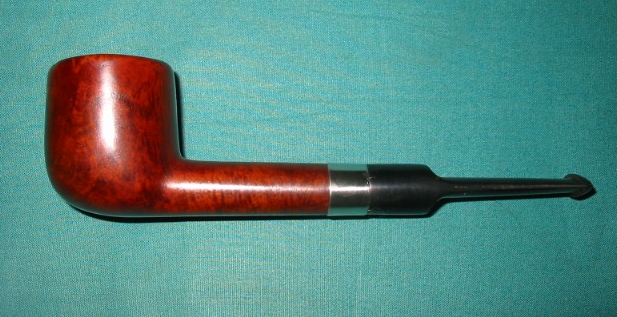
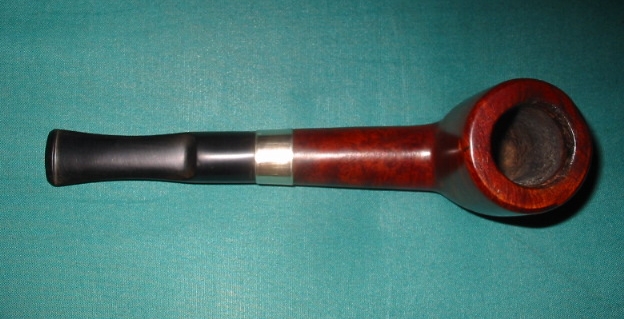
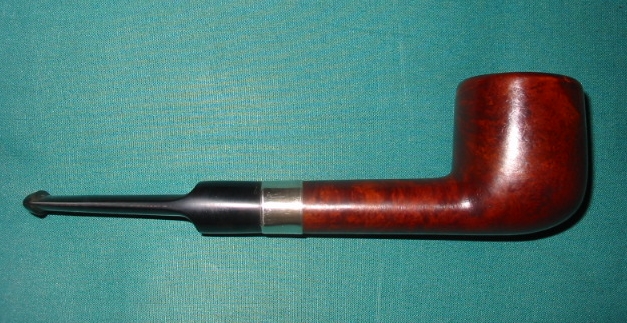
I finished the bowl by re-staining it with a medium brown stain as an undercoat and then buffed and sanded it yet again. A top coat of oxblood stain followed that sanding. I find that the two coats of stain complement each other and add some depth and patina to the pipe that only the one colour does not give. It was then polished on the buffing wheel with White Diamond and then given several coats of carnauba wax. I had also finished the stem and put it on the bowl and buffed and waxed the entirety.
This is the finished product. I think you would agree it has ceased to be a sow’s ear and has become a silk purse!