Category Archives: Pipe Refurbishing Essays

Essays and pictorial essays on the art of refurbishing

NEPAL PROJECT PIPE SALE 15 – From Ugly Toad to Handsome Prince. Converting an Ehrlich Special Grain Stack into a Beautiful Billiard


Blog by Steve Laug

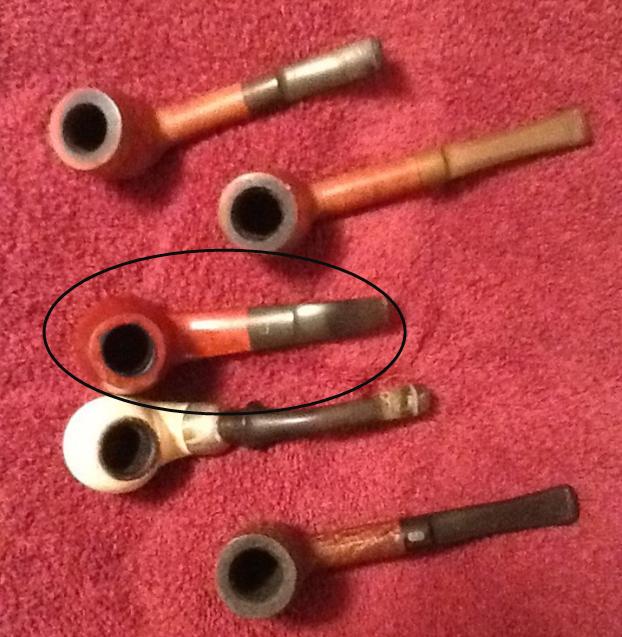
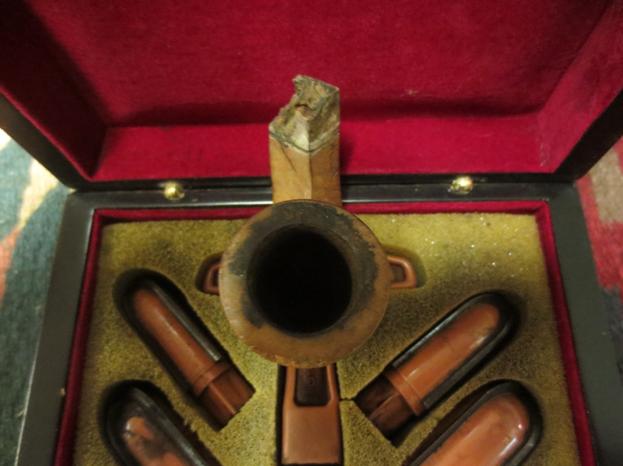
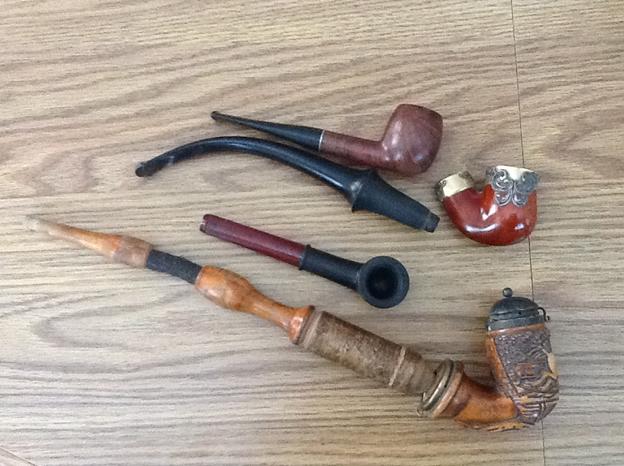
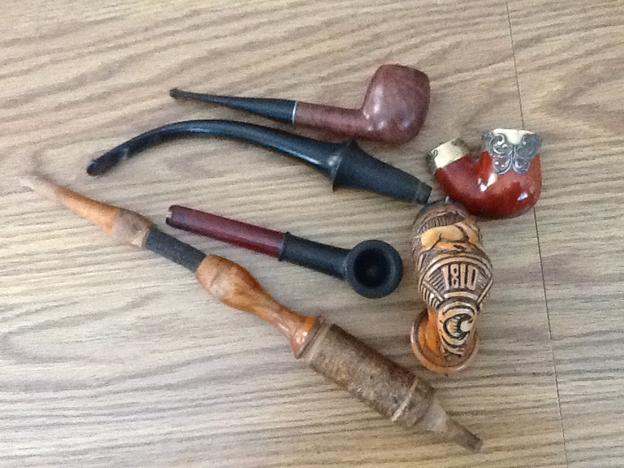
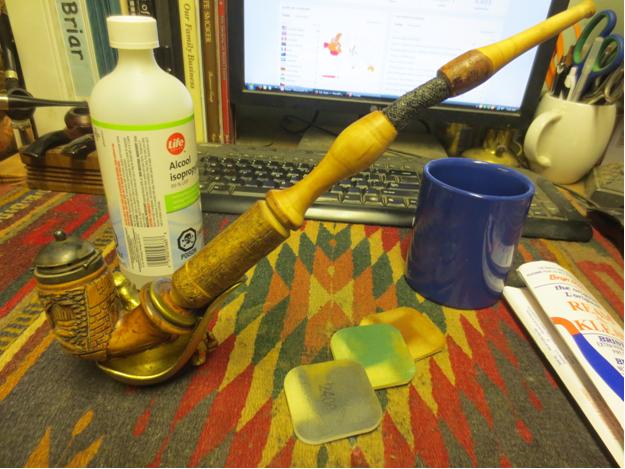
This is the fifteenth pipe that I have cleaned up and restored. It is a new addition to the box of pipes that I was gifted by a good friend of mine. He brought several more by the house last week with the same instructed purpose. I was to clean them up and sell them with all of the proceeds going to the aid of earthquake victims in Nepal. So far we have raised over $300 dollars for the Nepal project. All the funds that continue to be raised from the sale of these pipes will go to the SA Foundation, and organization that has worked in Nepal for over 15 years helping provide recovery, housing and job training for women who are victims of sexual exploitation and trafficking. The Nepalese are hard at work restoring their country and there is much to do. The SA Foundation Project there was able to find new housing for the women and help the staff as well. Every dollar raised from the sale of these pipes will go to the work in Nepal.

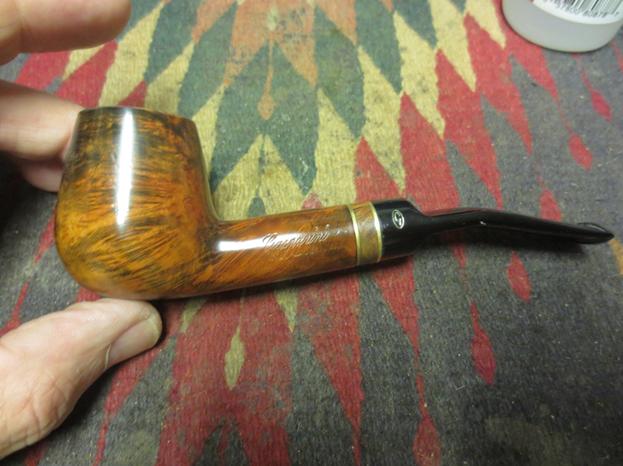
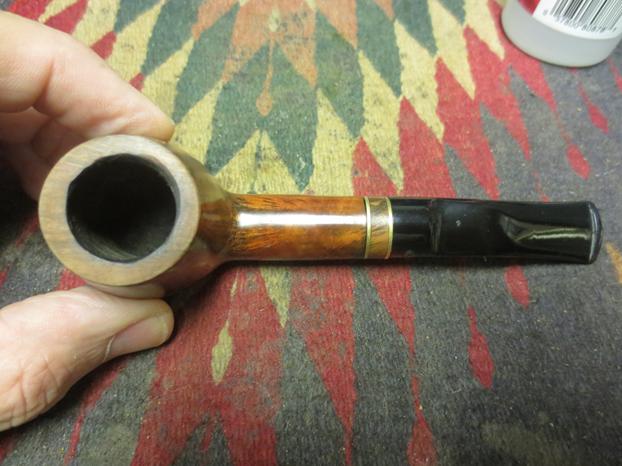
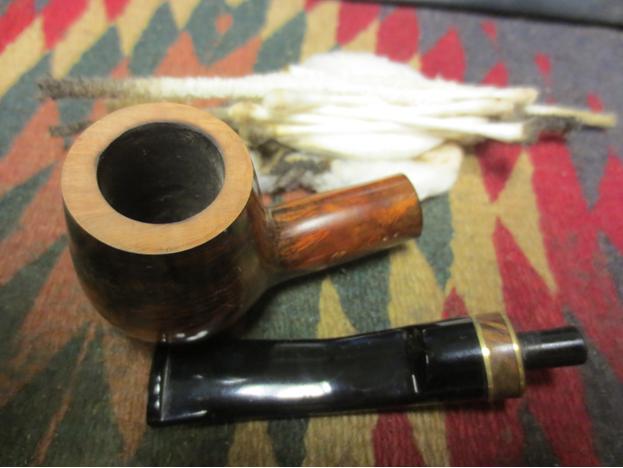
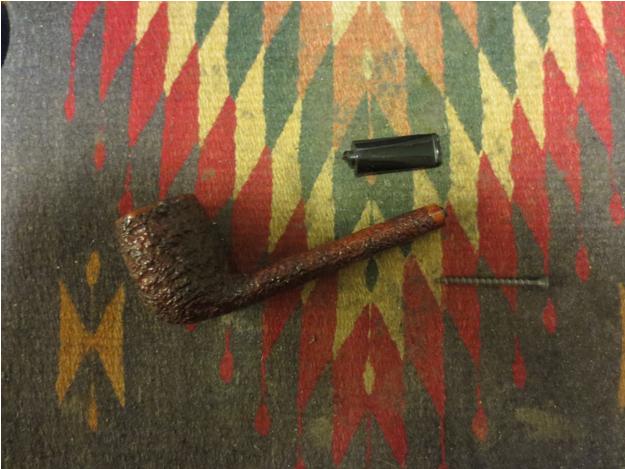
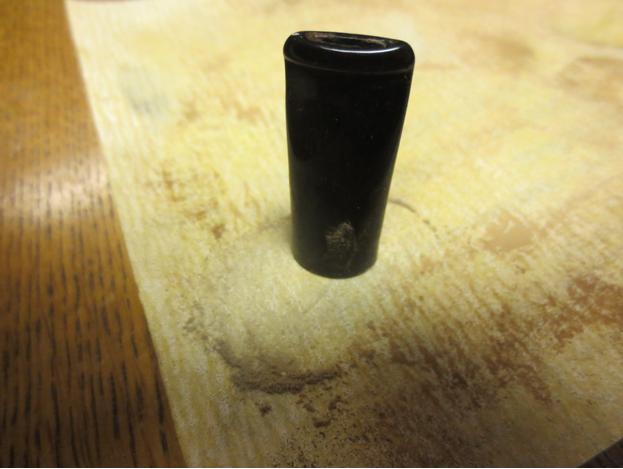
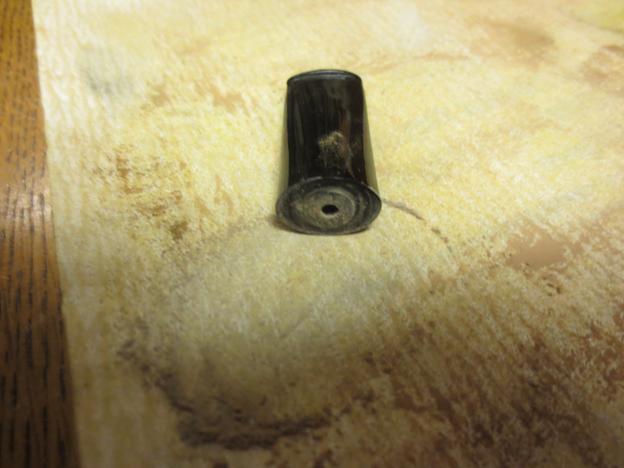
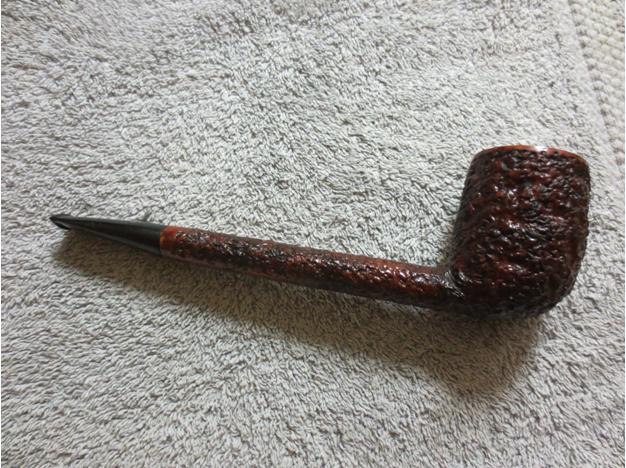
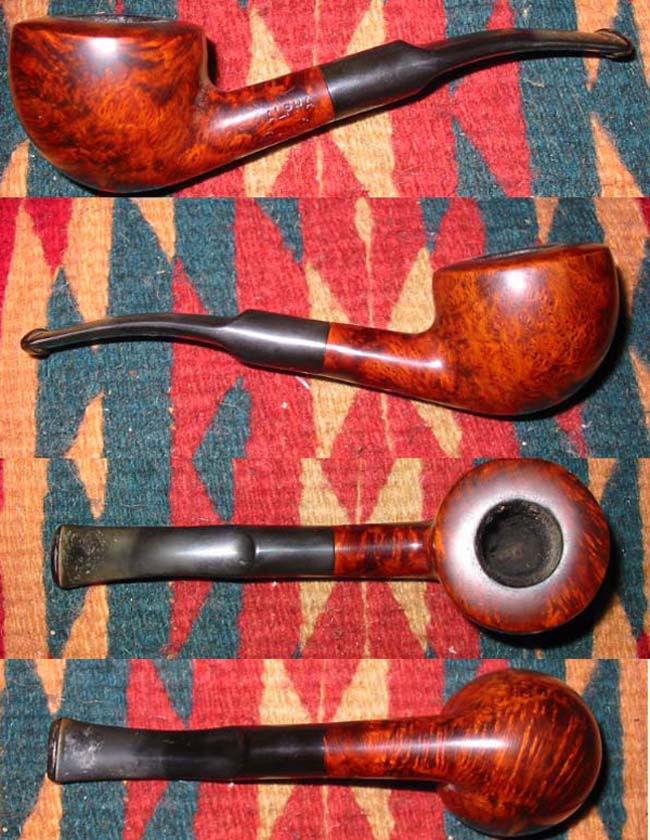
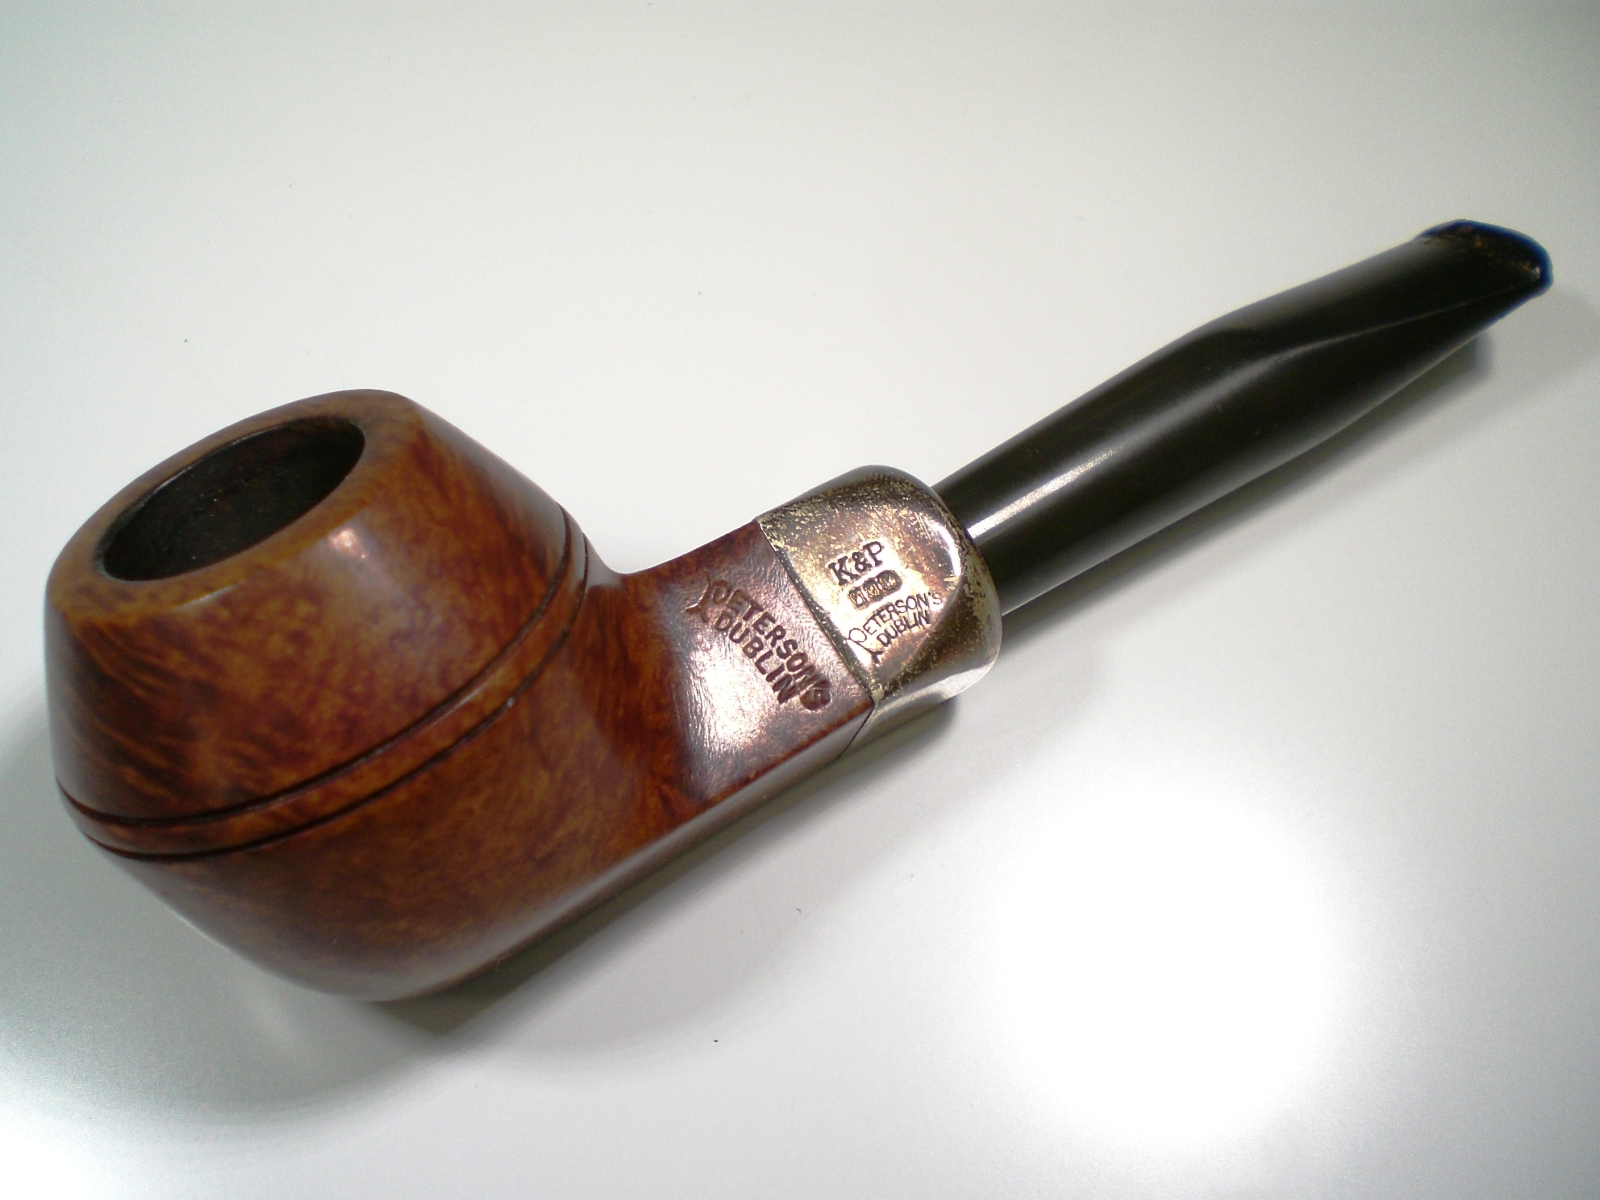
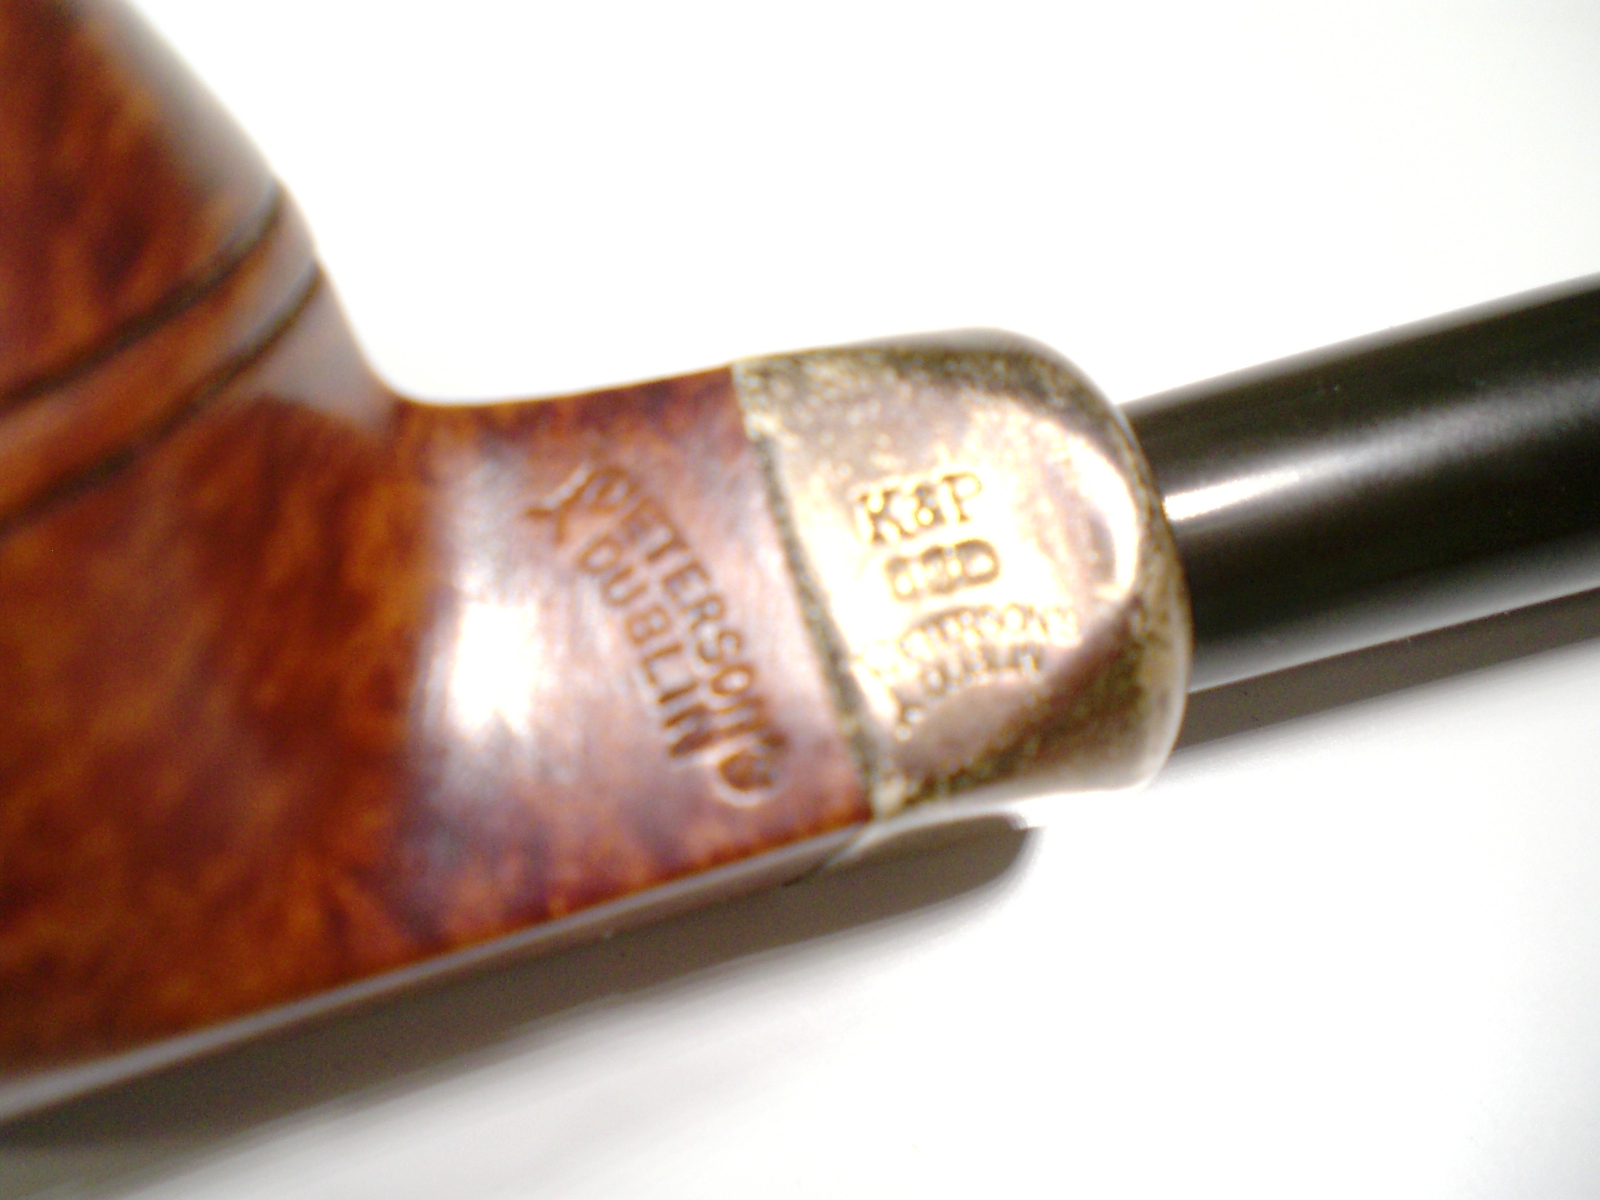
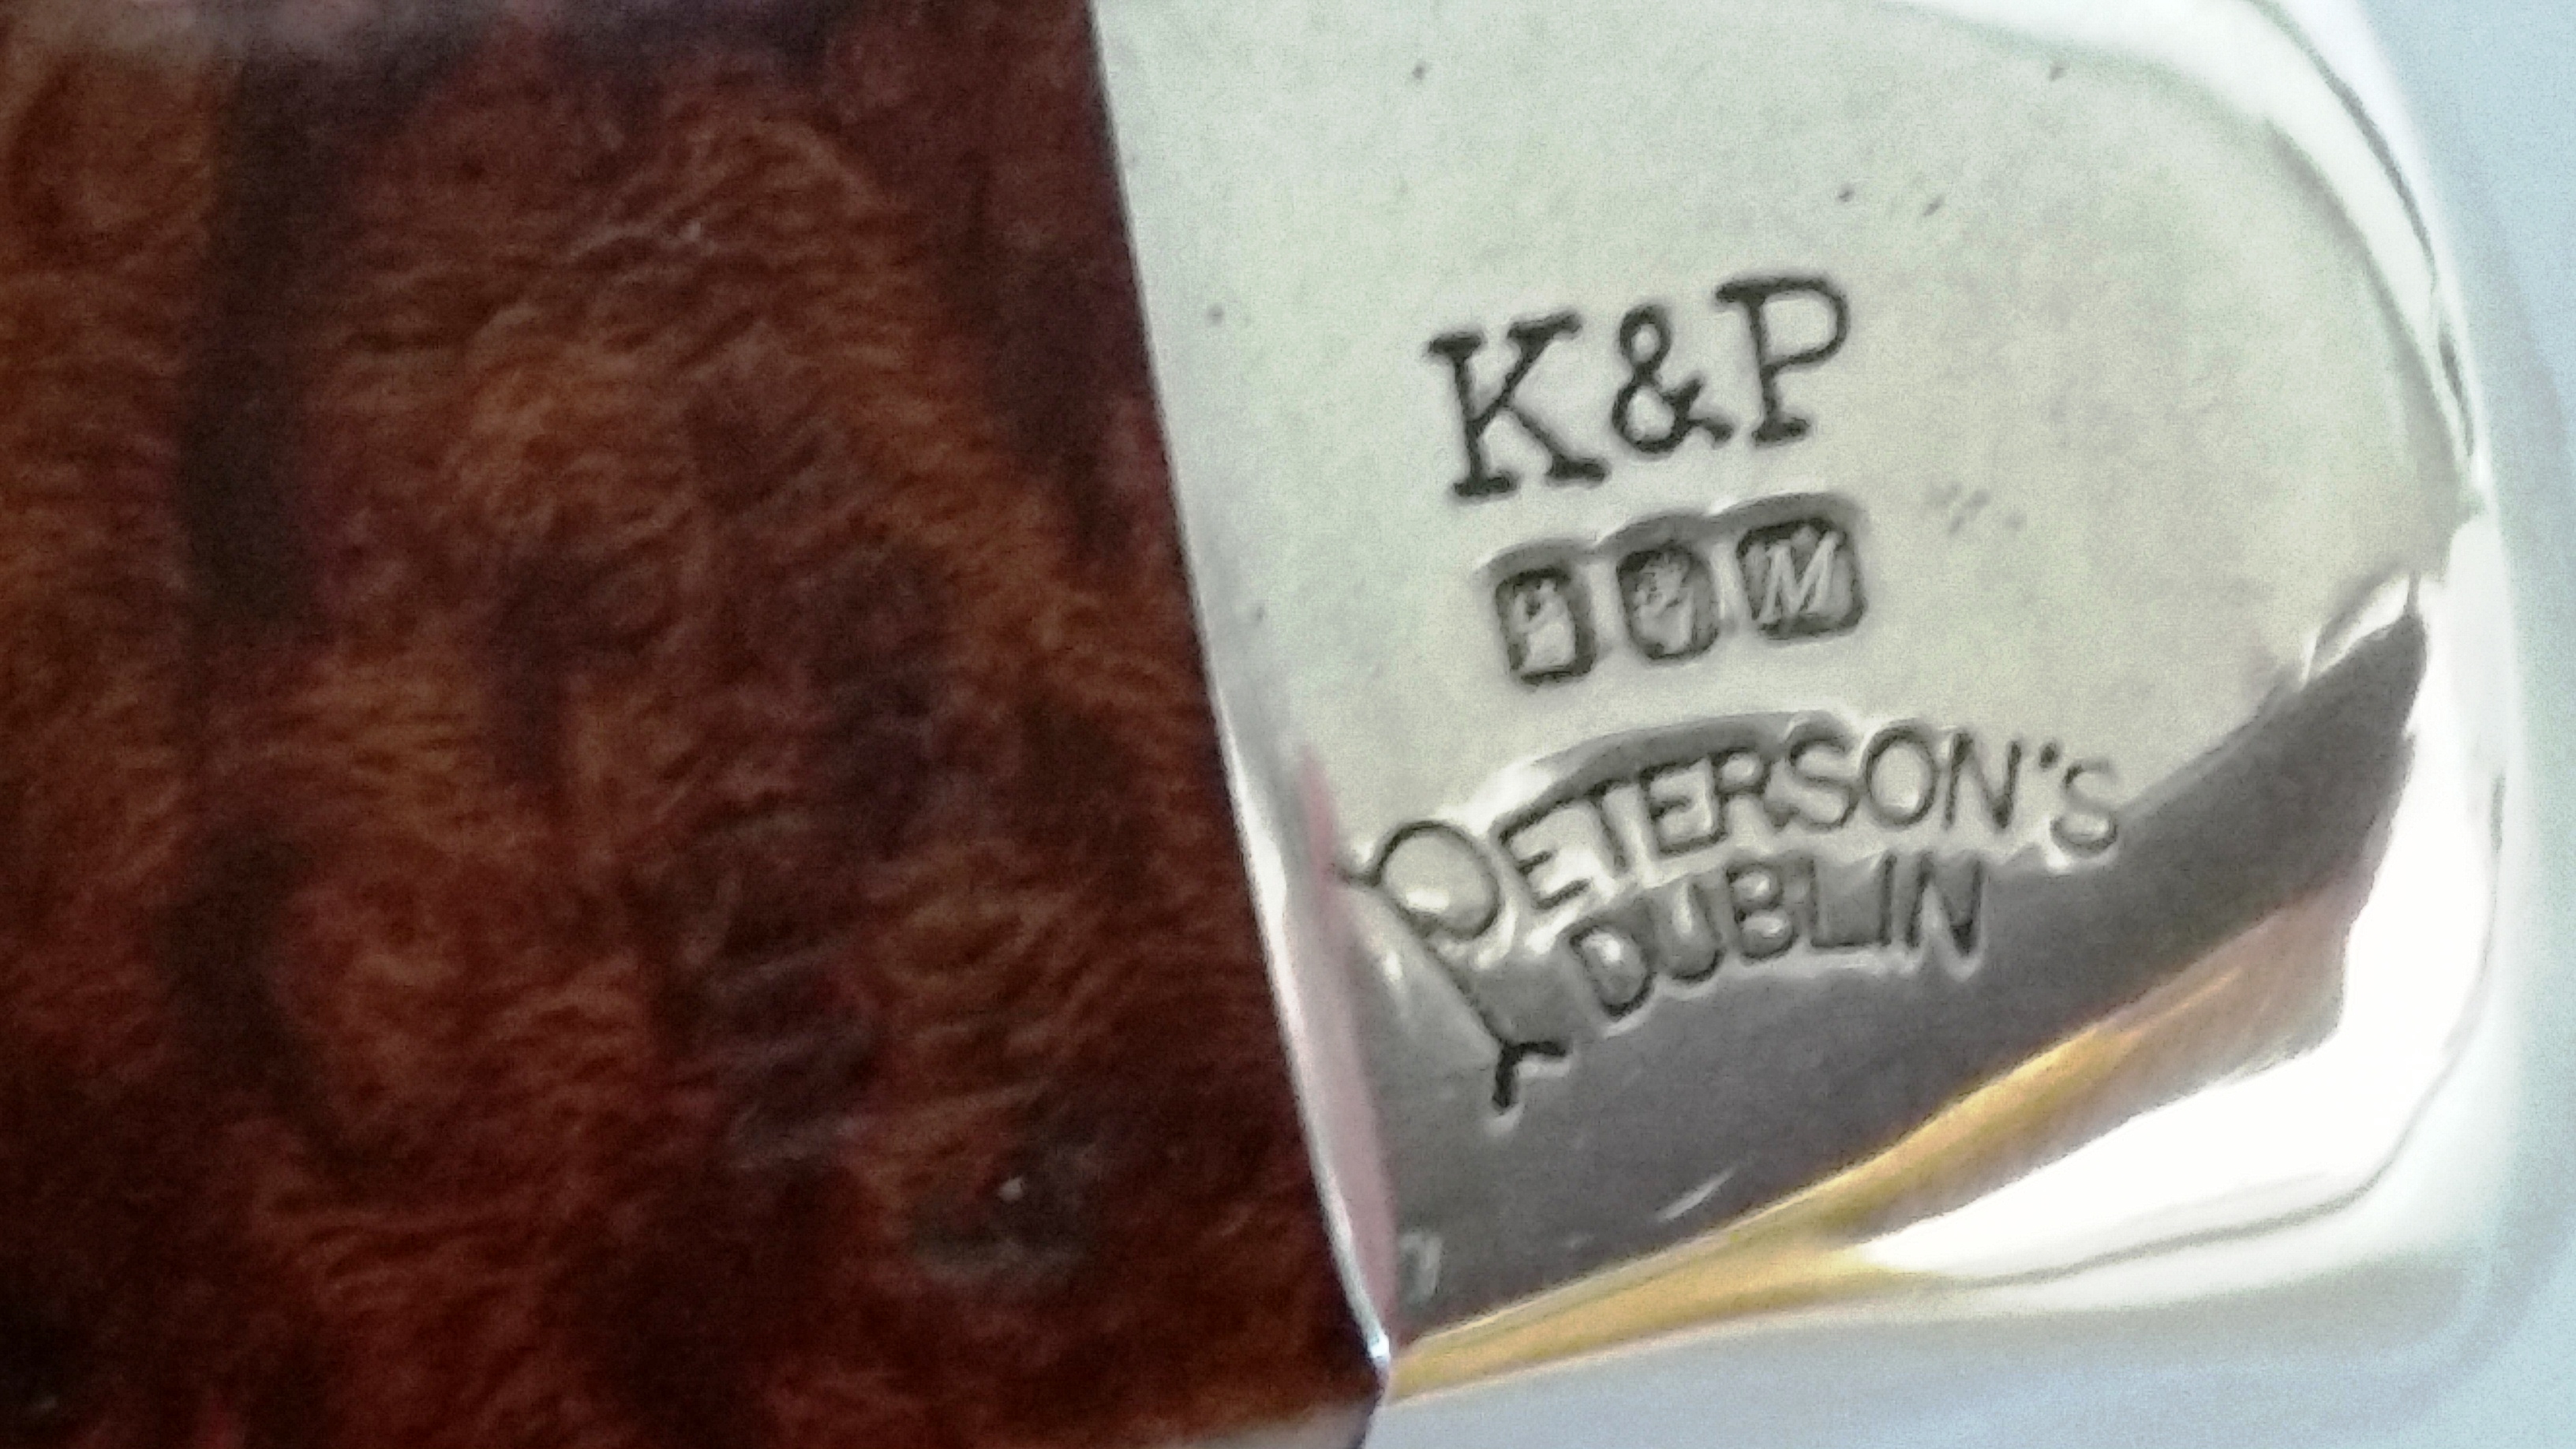
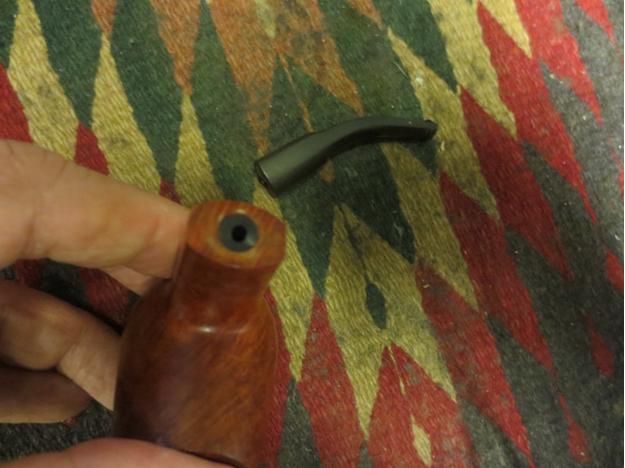
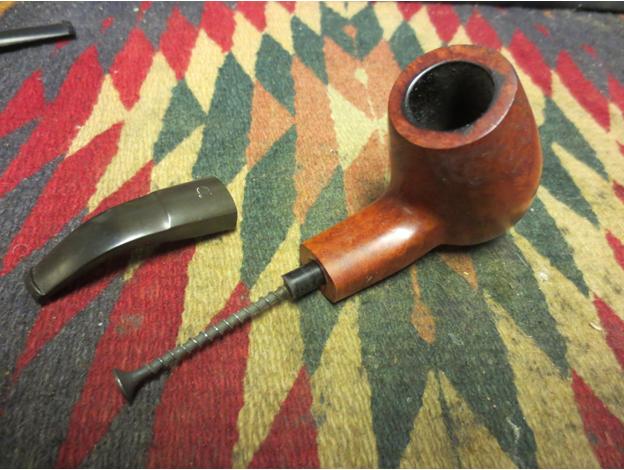
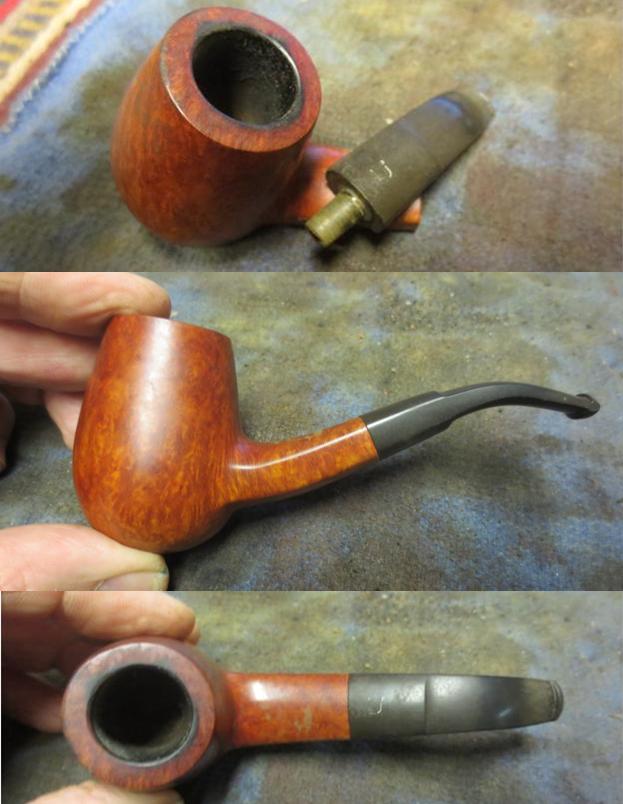
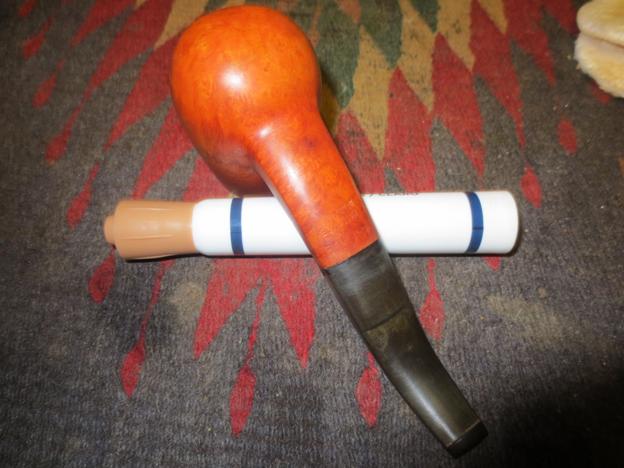
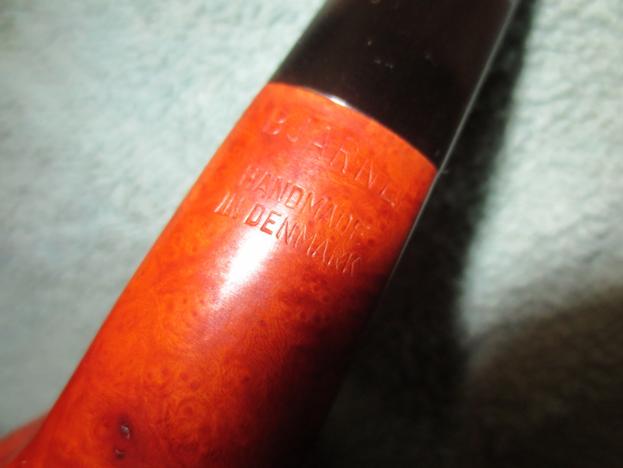
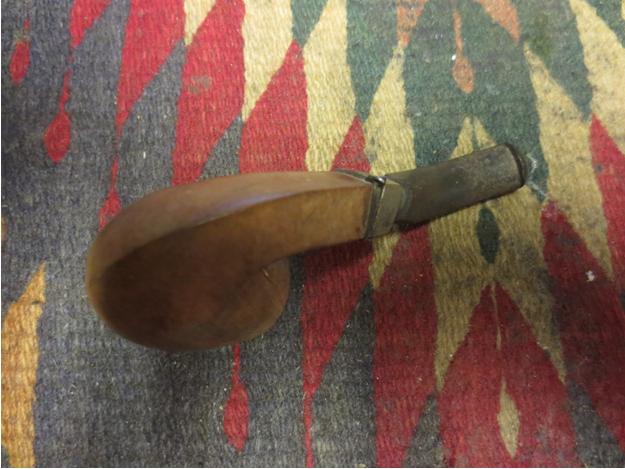
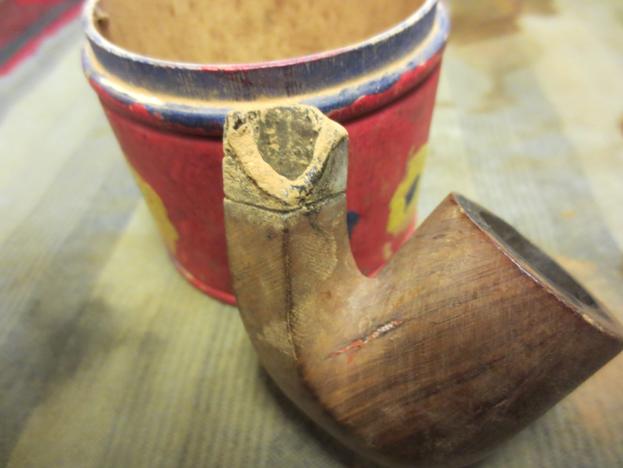
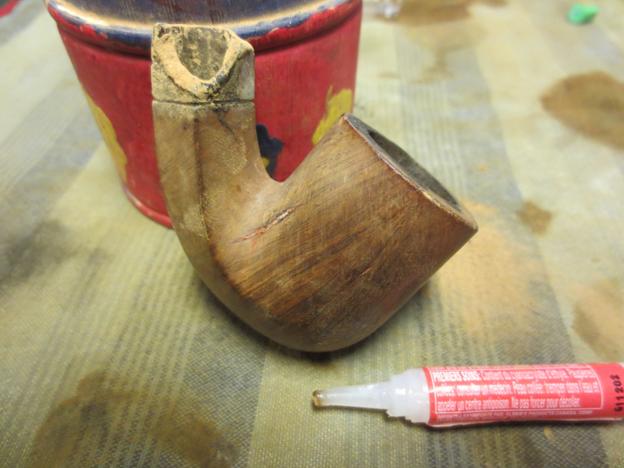
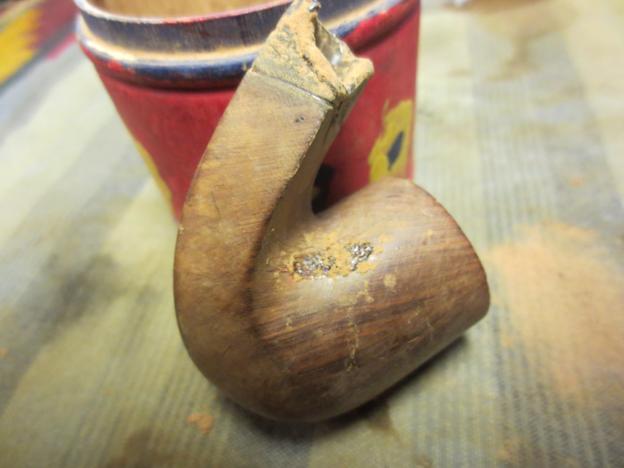
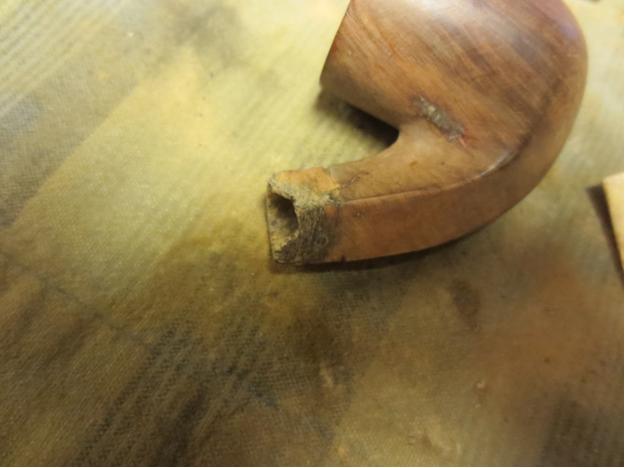
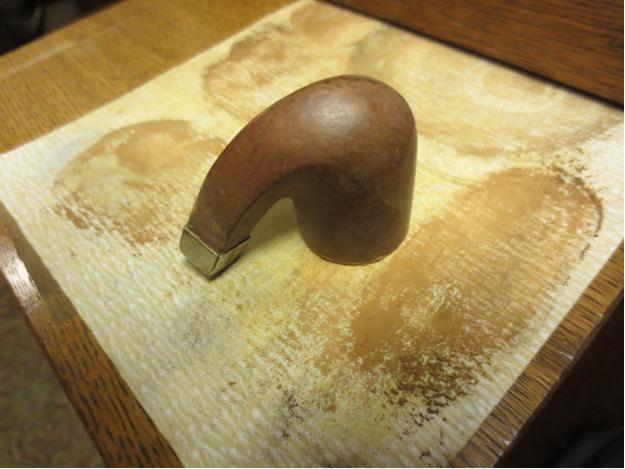
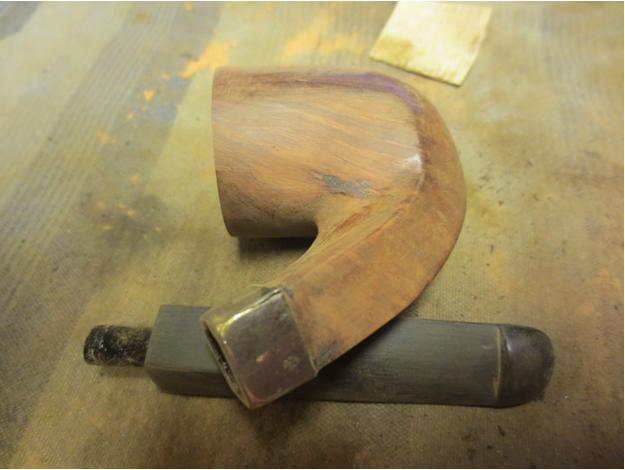
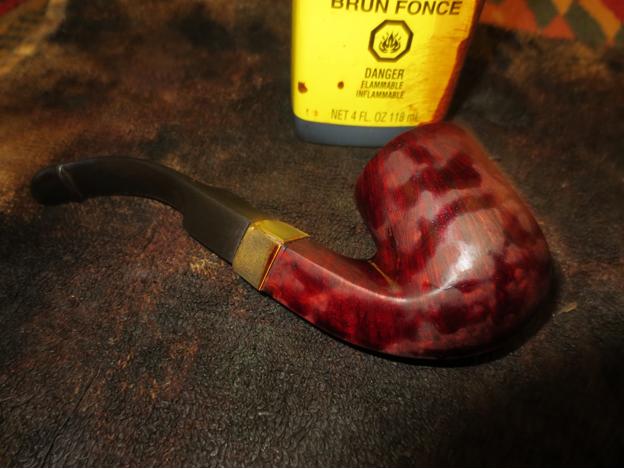
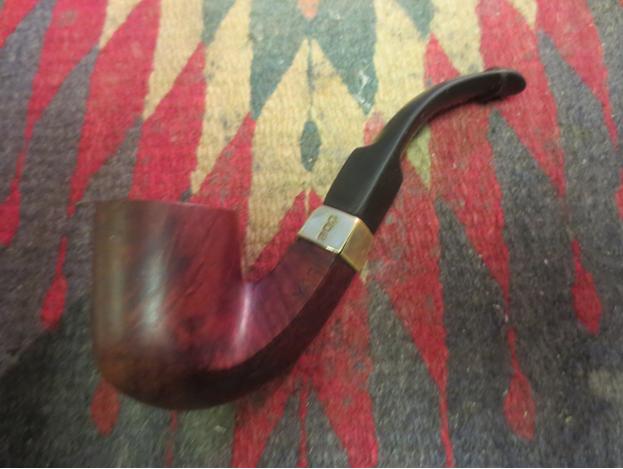
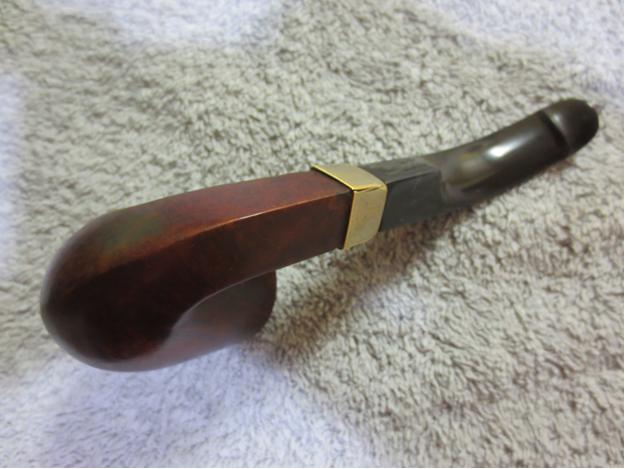
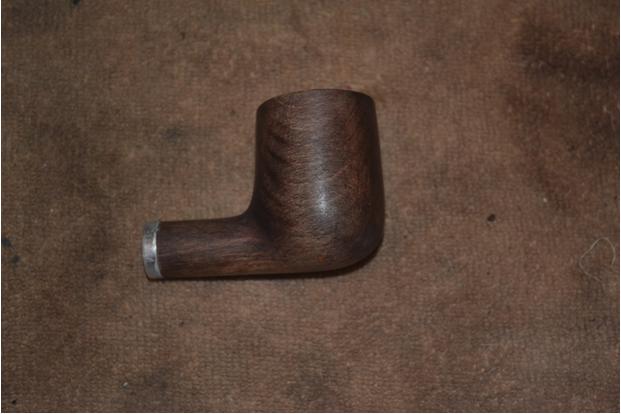
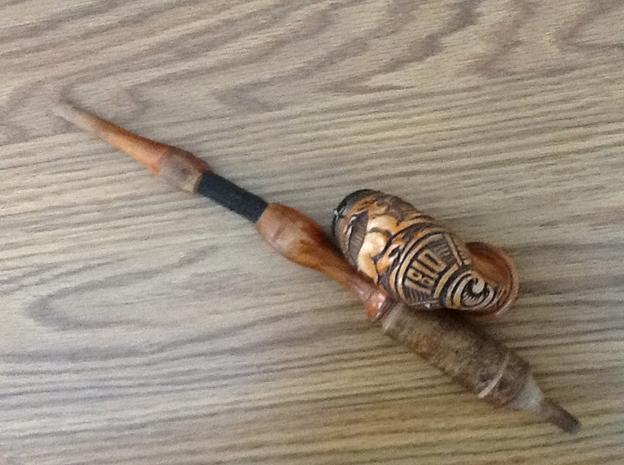
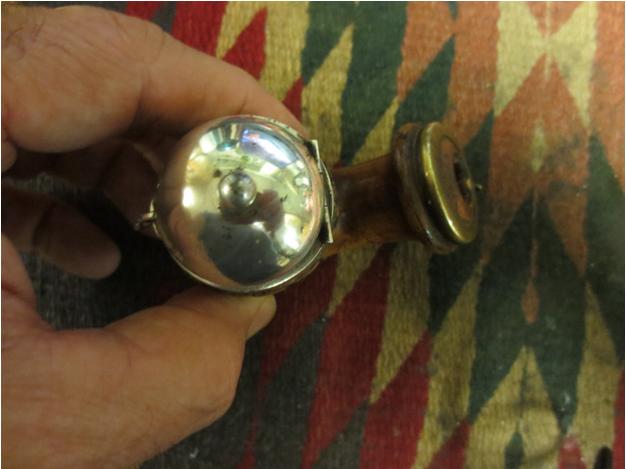
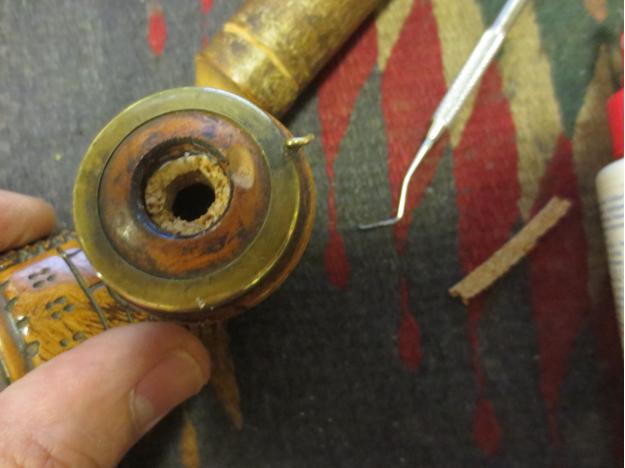
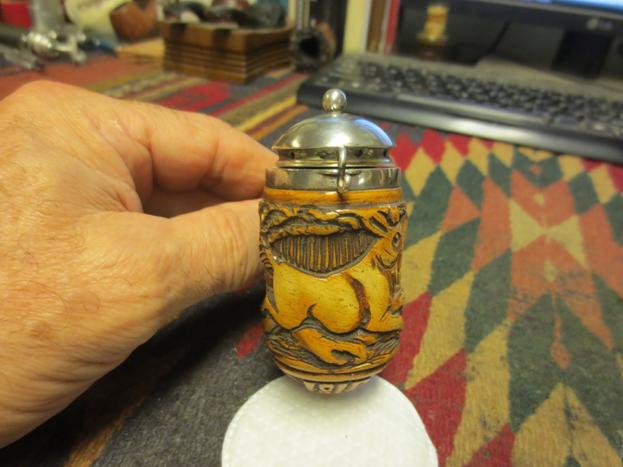
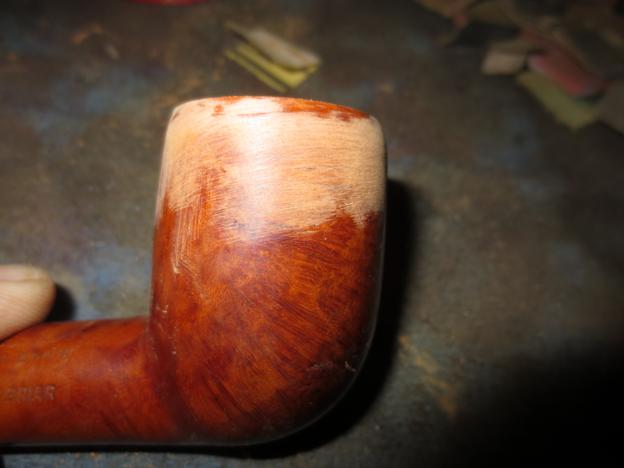
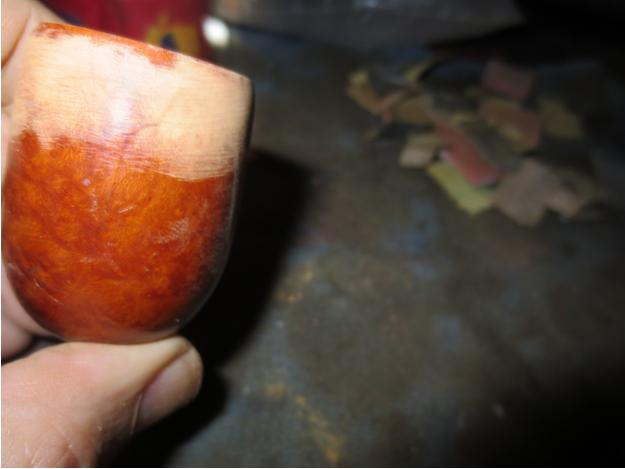
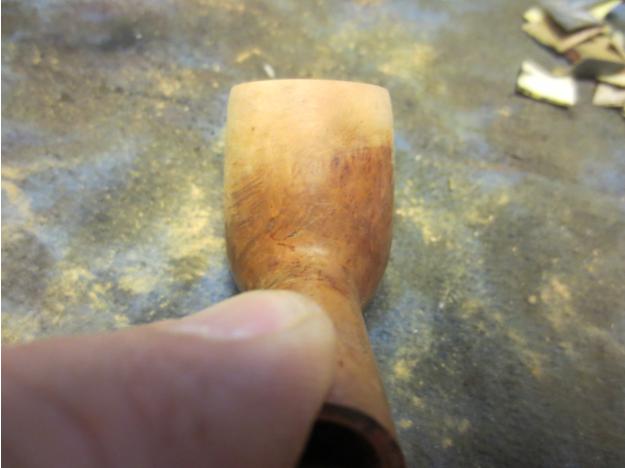
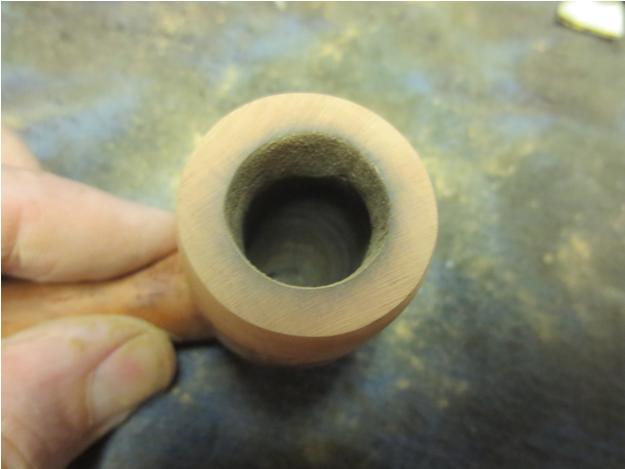
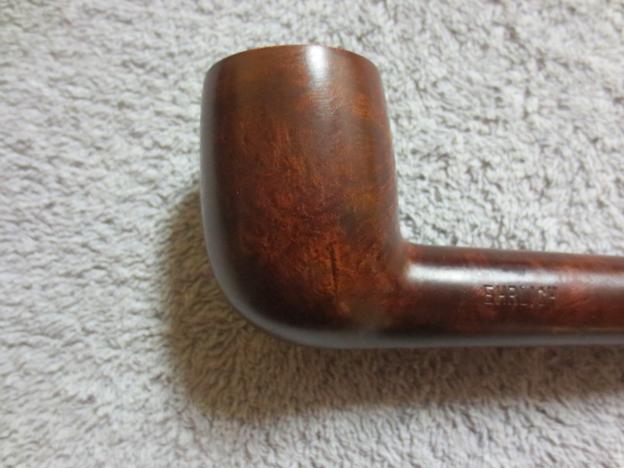
This one is an Ehrlich Special Grain. I think that when it was originally made it was a tall billiard or a stack. Whoever had it before it came to my friend really did a job messing up the rim and the top ¼ inch to ½ inch of the top of the bowl and rounding it. This would not have been bad if it was done evenly but it was done with what looked like a carving knife. It left the briar hacked and damaged. It was almost as if the owner had tried to round the top edges of the bowl to take care of damage to the rim. The pipe is stamped EHRLICH on the left side of the shank. On the right side it reads IMPORTED BRIAR. Just above that almost on the top of the shank it is stamped SPECIAL GRAIN. The stem was oxidized and also had some file marks in the surface on the top and bottom sides. The slot in the end of the stem was very narrow and hard to get a pipe cleaner through from that end. I had to clean the stem from the tenon end. That would need to be taken care of. The E in the circle that is the Ehrlich logo was in decent shape on the stem.Ehrlich1 
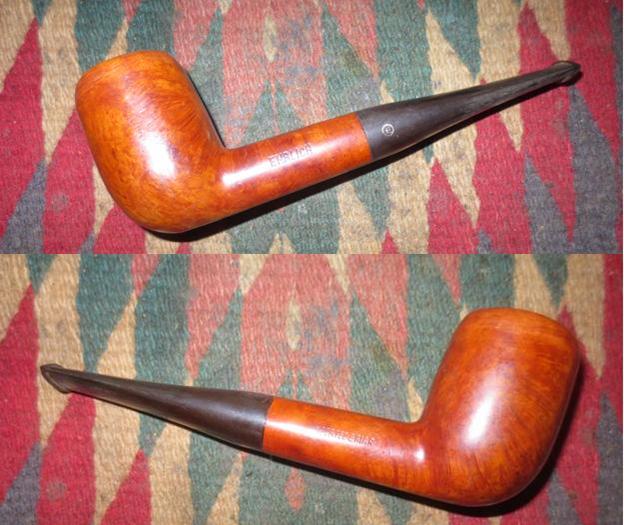
The top of the rim was very rough. The inner edge was no longer round. The flat top was cut and damaged with the carving knife that had been used on the outer edge of the rim to round it out. The underside of the shank was in good shape but the bowl sides and bottom had some dings and dents in it from knocking it about.Ehrlich2 
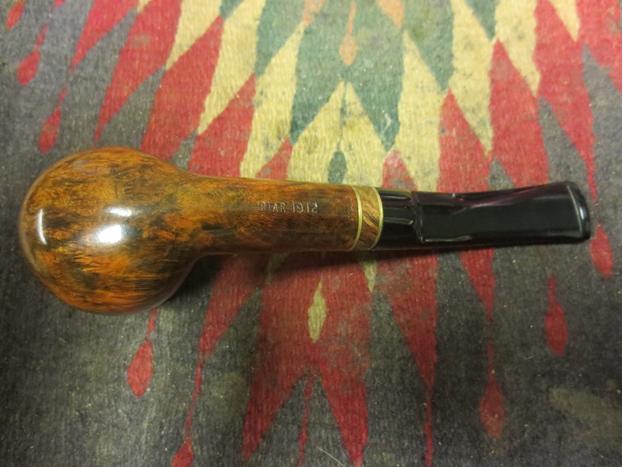
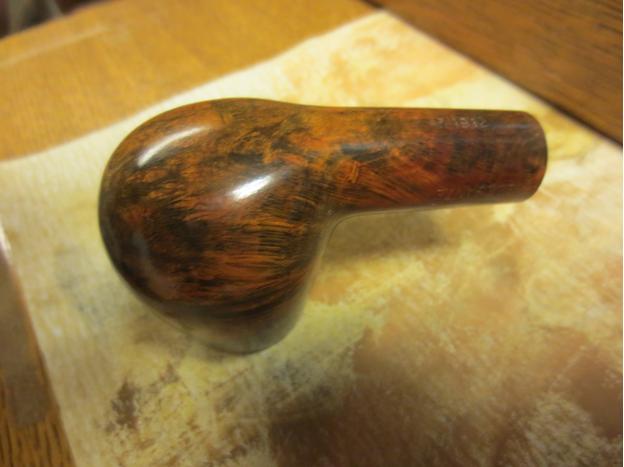
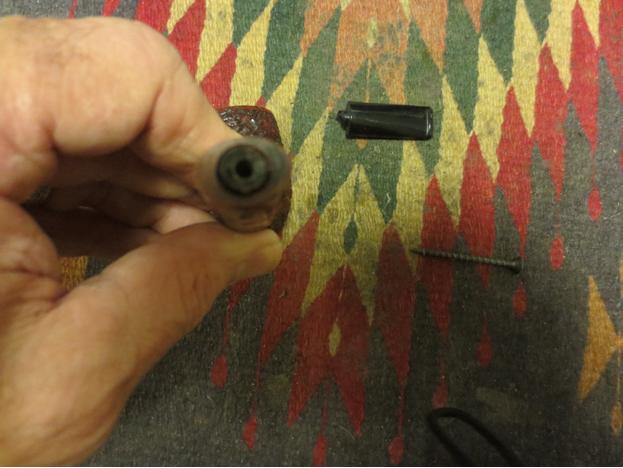
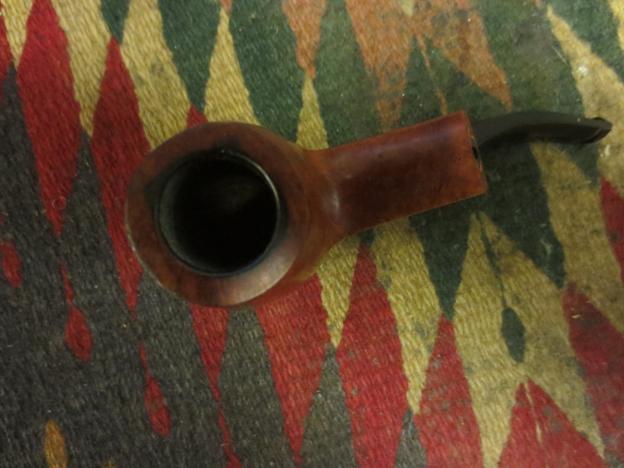
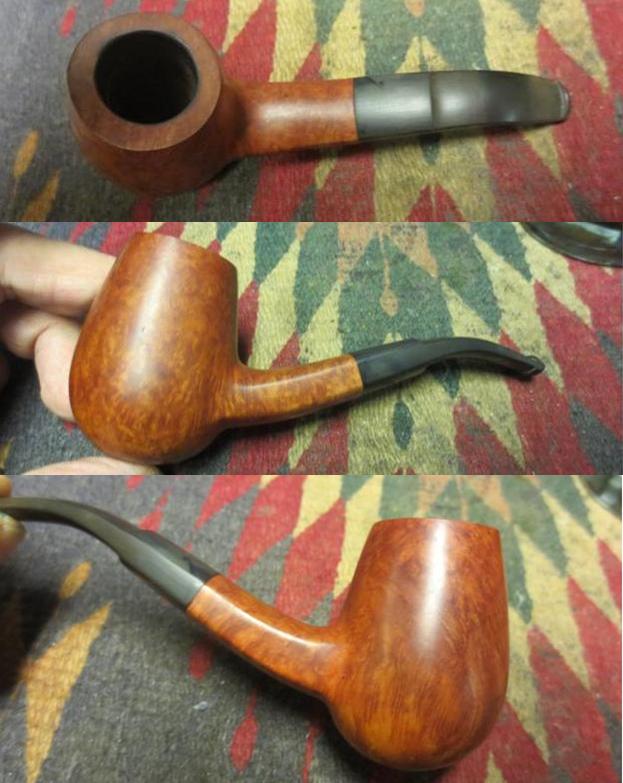
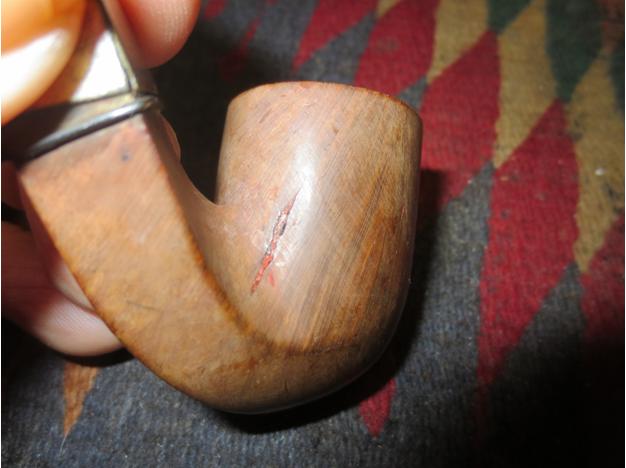
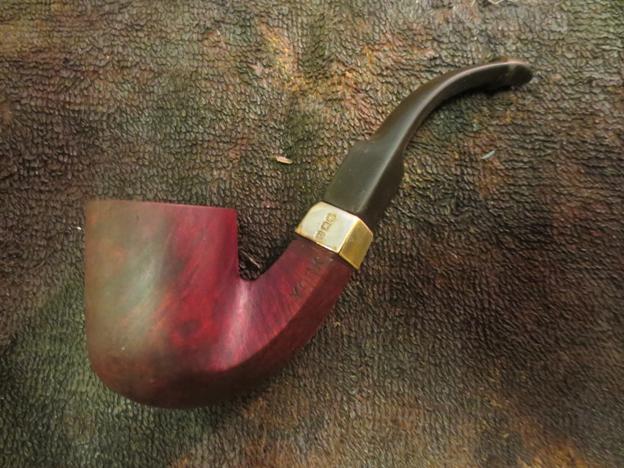
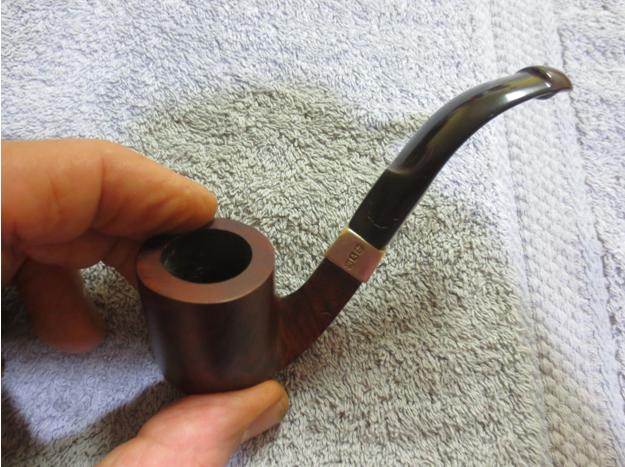
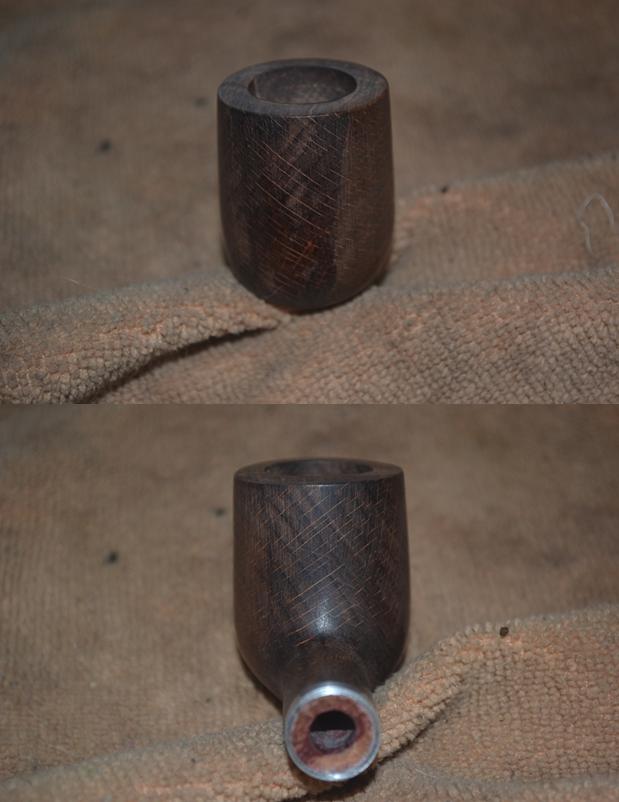
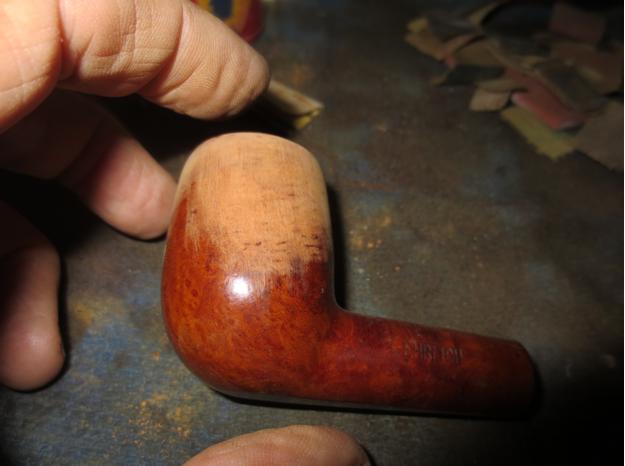
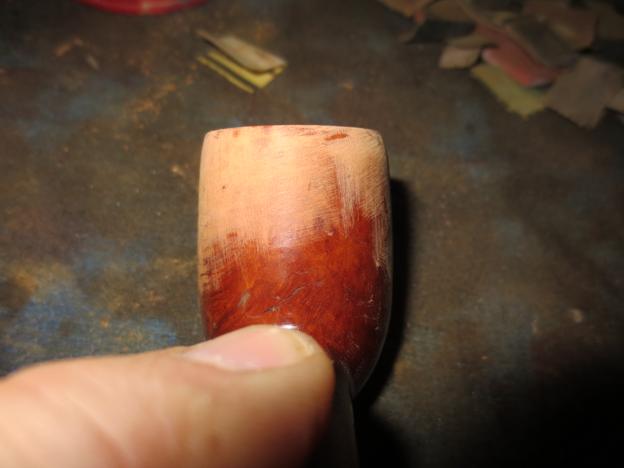
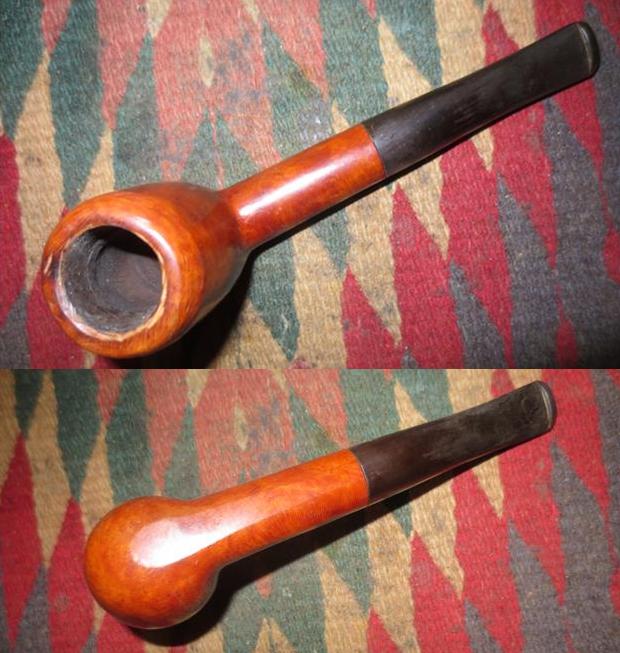
I took a series of close up photos of the rim and the sides of the bowl to show the knife damage that had been done. You can see from the first photo how the inner edge had been beveled with a knife and was quite uneven. The top of the rim was scratched and had deep grooves from where the knife had slipped. The second and third photo shows the sides of the bowl and how the outer edge of the rim had been rounded haphazardly with a knife. The front and back side also was rounded and hacked. It was very poorly done and left the pipe a mess. The finish was worn and had been covered with a coat of varnish that was bubbling.Ehrlich3

Ehrlich4 
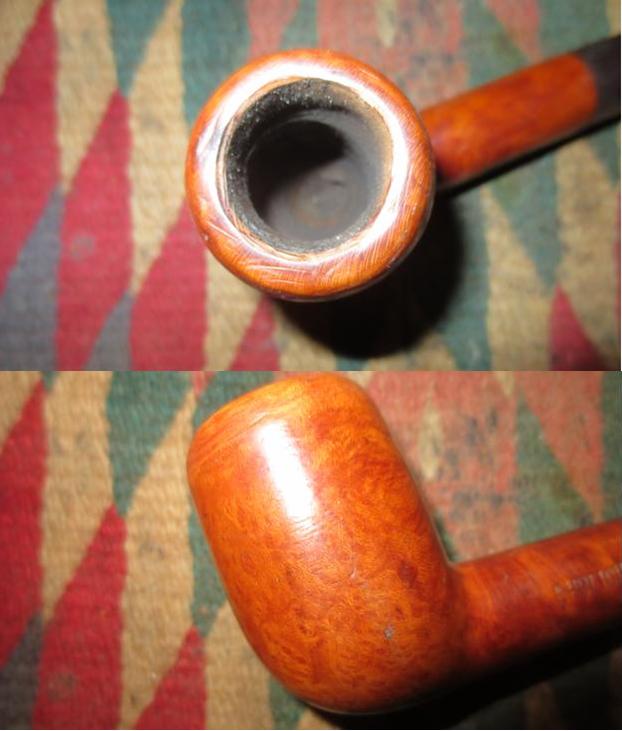
I decided to top the bowl first. It would need to be topped quite a bit to take out the rounded and cut sides of the bowl. The damage was significant and I would need to bring the top down at least a ¼ inch to repair it. I used the topping board and 220 grit sandpaper to remove the damaged wood. It took probably 30 minutes of continuous sanding to bring it down. I had to press the rim against the sandpaper to keep the rim flat and horizontal.Ehrlich5

Ehrlich6 
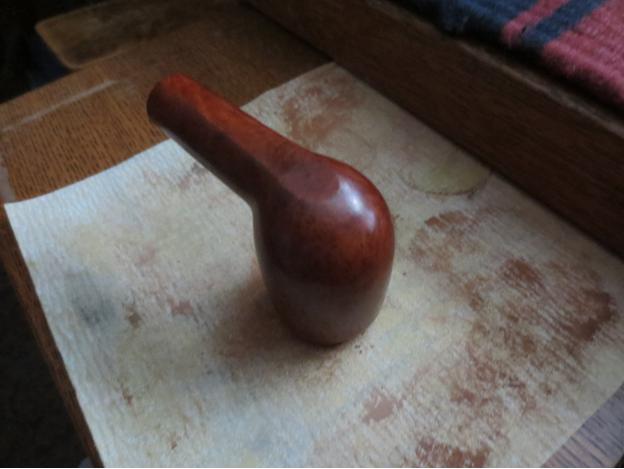
Once the top was flat and most of the damaged outer edge removed I used a folded piece of 220 grit sandpaper to smooth out the taper from the bowl side up to the outer edge of the rim. It took a bit of time to smooth out the transition and remove all of the nicks and dents in the briar.Ehrlich7

Ehrlich8

Ehrlich9

Ehrlich10

Ehrlich11 I wiped down the bowl with acetone on cotton pads to remove the finish and sanded the bowl sides until the transition to the rim was smooth.Ehrlich12

Ehrlich13

Ehrlich14

Ehrlich15

Ehrlich16 
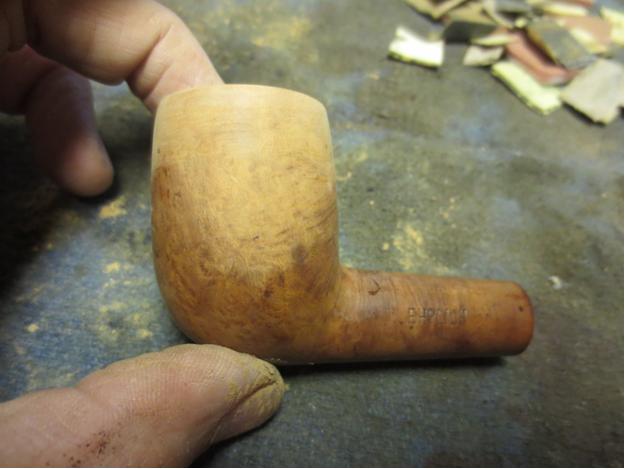
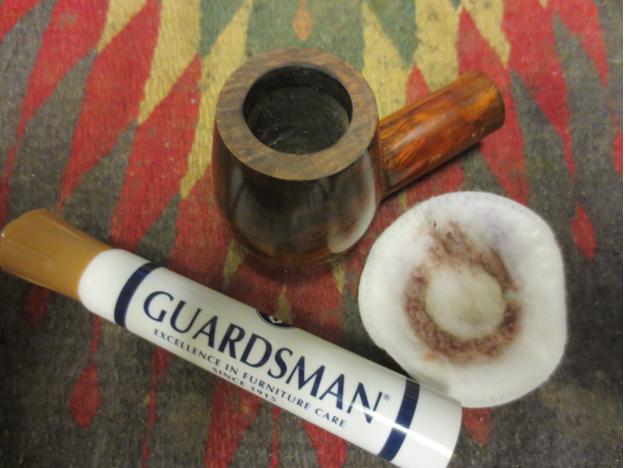
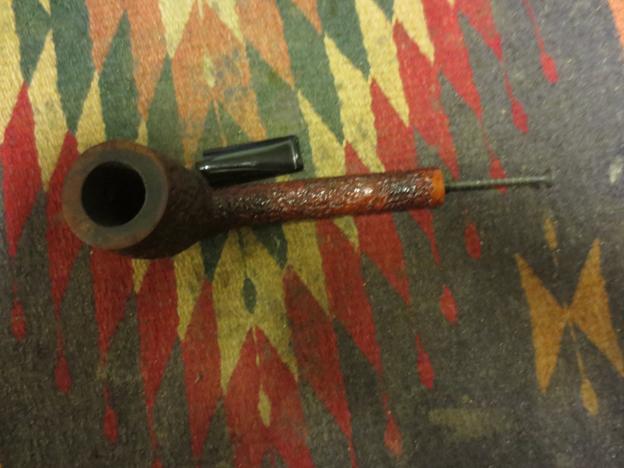
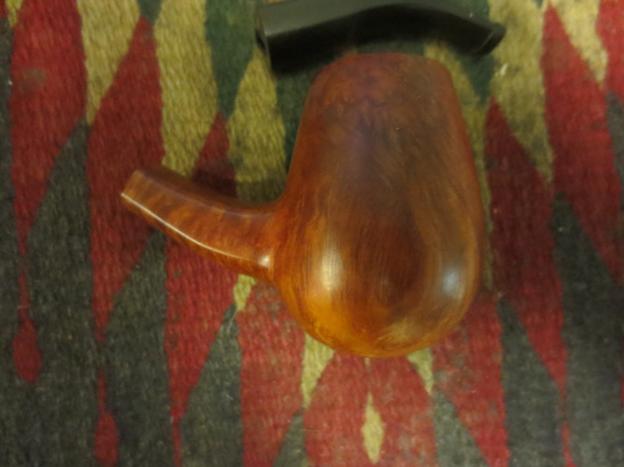
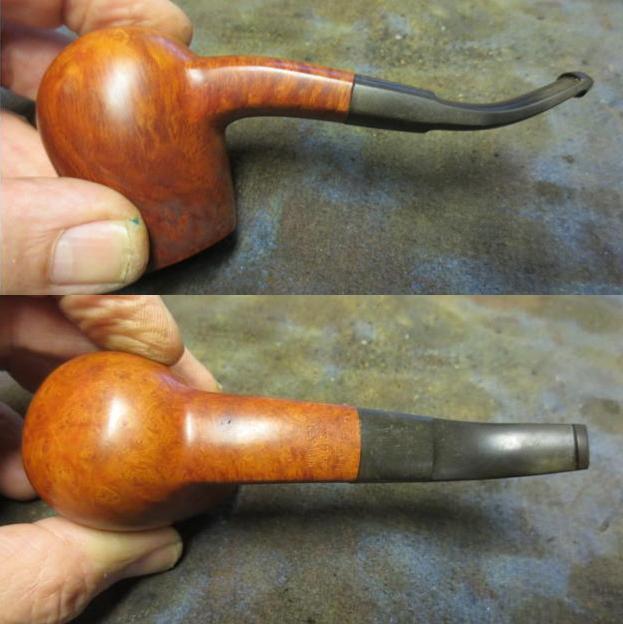
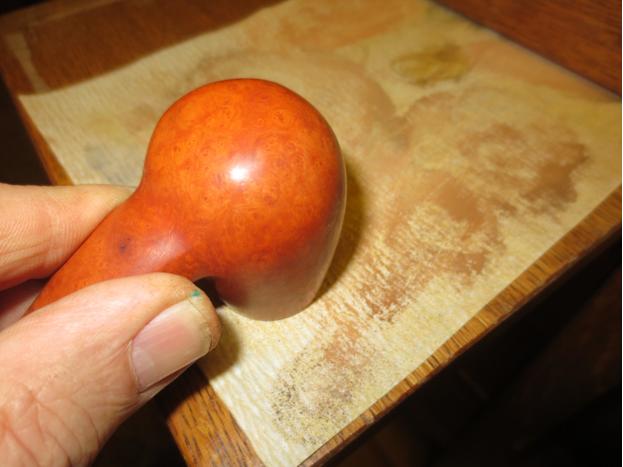
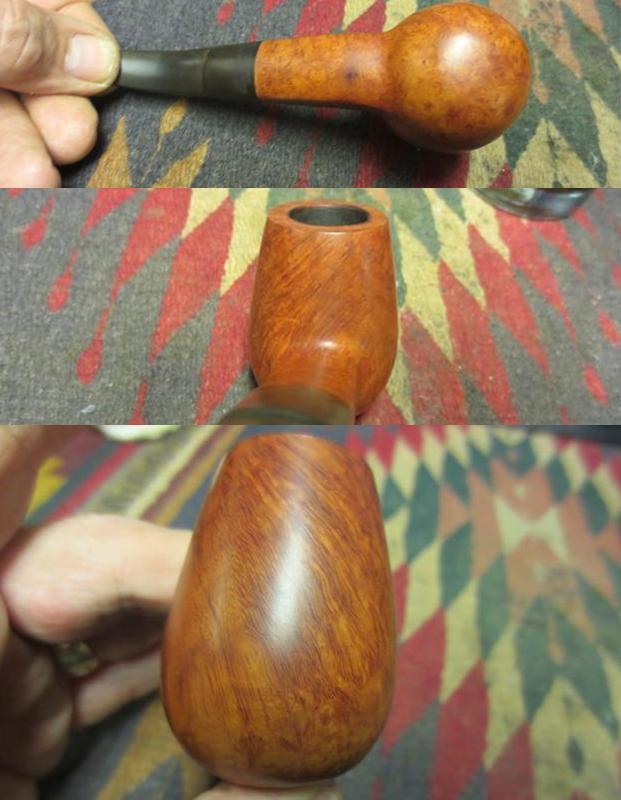
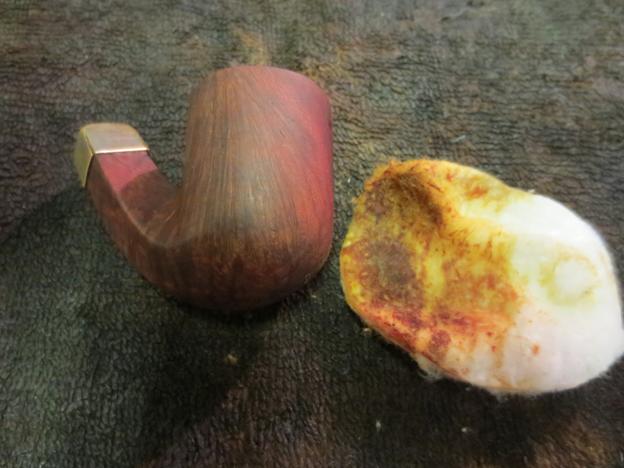
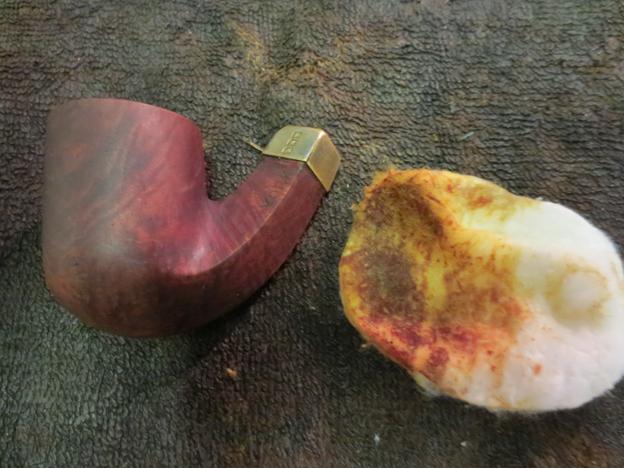
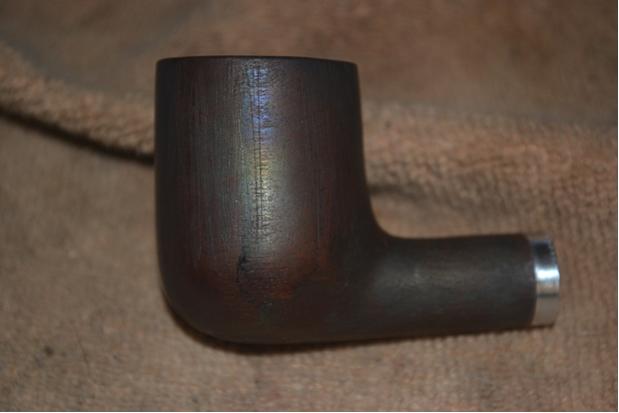
When the transition was smooth and the sides of the bowl flowed evenly to the top I wiped the bowl down with isopropyl alcohol to clean off the remaining finish and the sanding dust. I sanded the bowl with a medium and a fine grit sanding sponge and then took the following four photos to show the new look of the bowl.Ehrlich17

Ehrlich18

Ehrlich19

Ehrlich20 
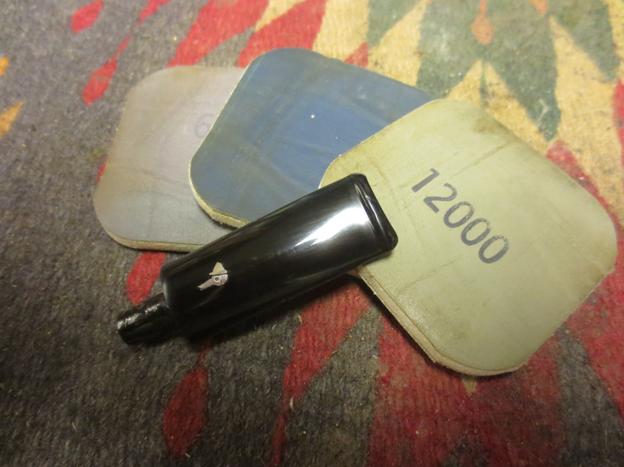
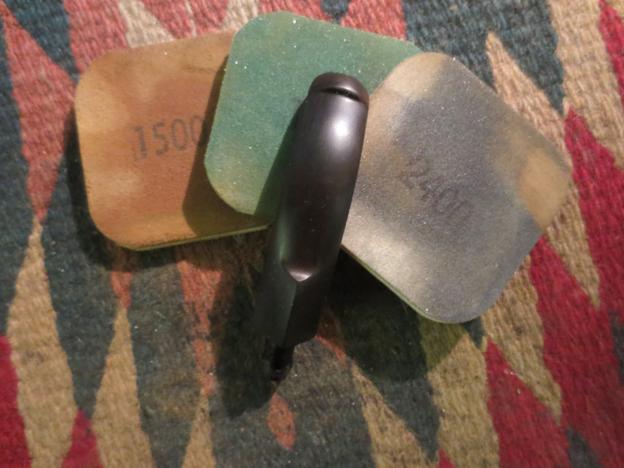
I sanded the bowl and rim with 1500-2400 grit micromesh sanding pads and then prepped it to be stained. I put a cork in the bowl so that I could stand it in the candle holder that I used for drying my stained bowls. I stained the bowl with a 50-50 mixture of alcohol and dark brown aniline stain. I flamed it, repeated the stain and the flame and set it aside to dry.Ehrlich21

Ehrlich22 
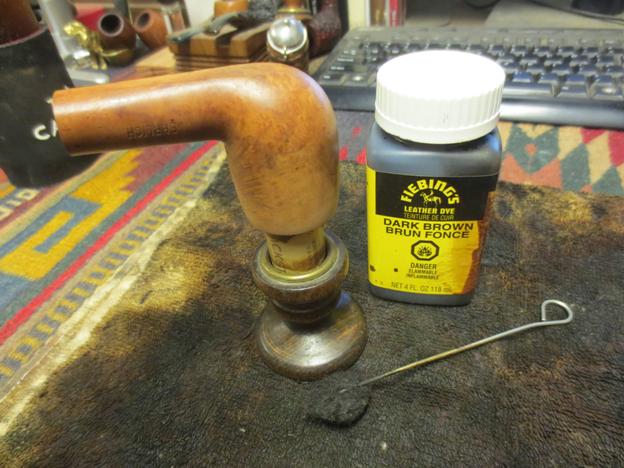
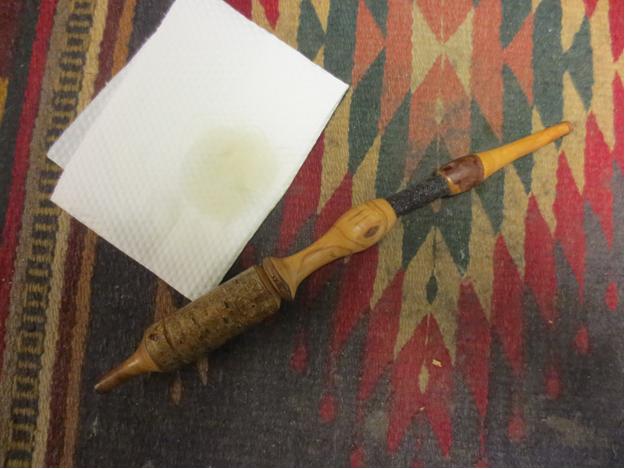
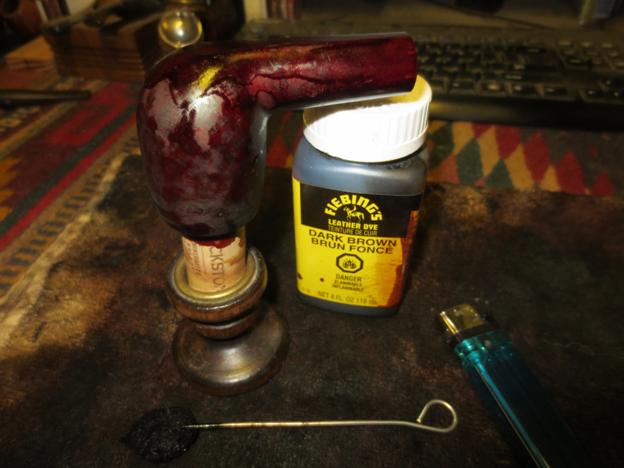
Once it dried enough to pick up I wiped it down with acetone on cotton pads to thin the dark coat and make the grain stand out better.Ehrlich23

Ehrlich24

Ehrlich25

Ehrlich26 
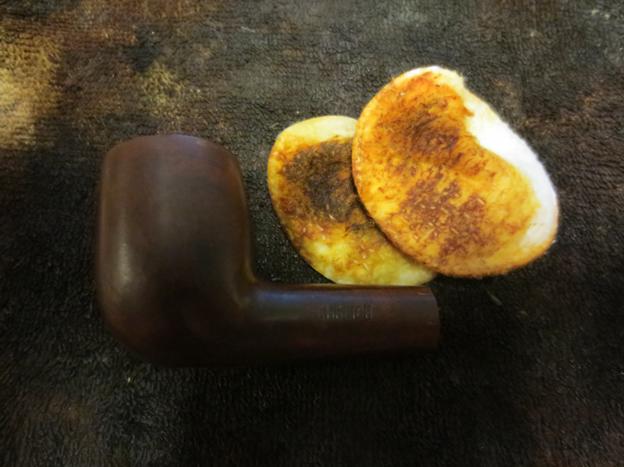
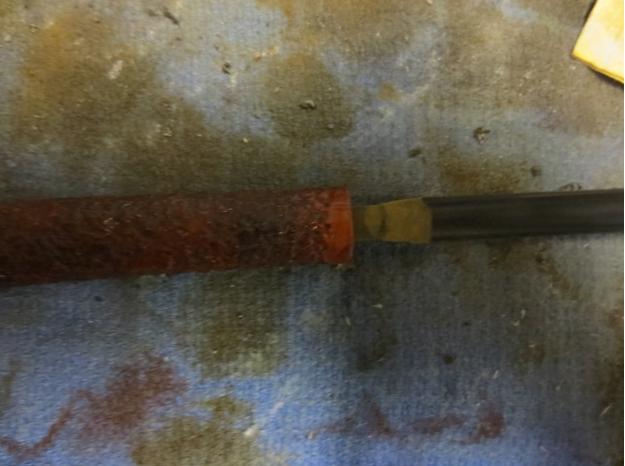
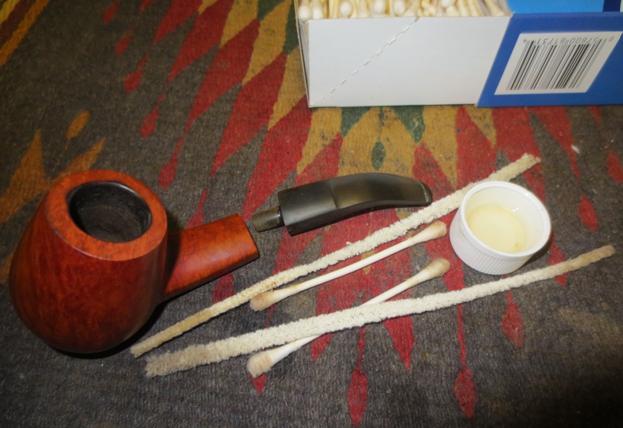
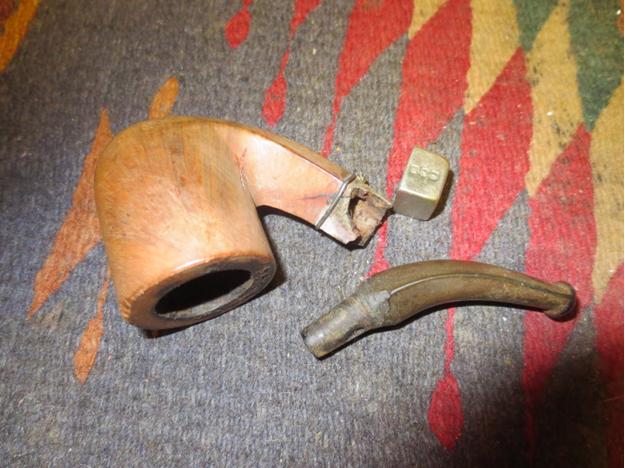
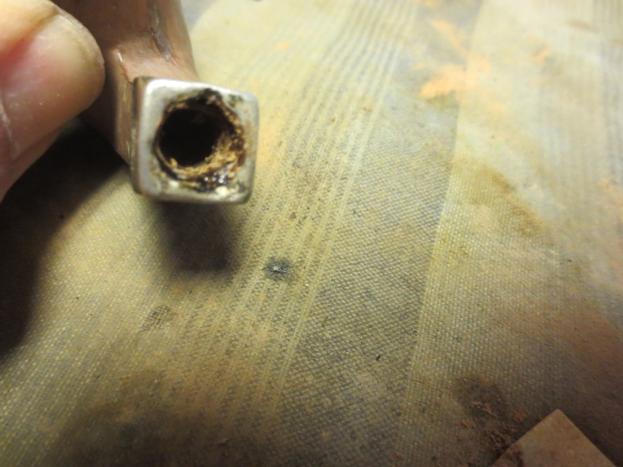
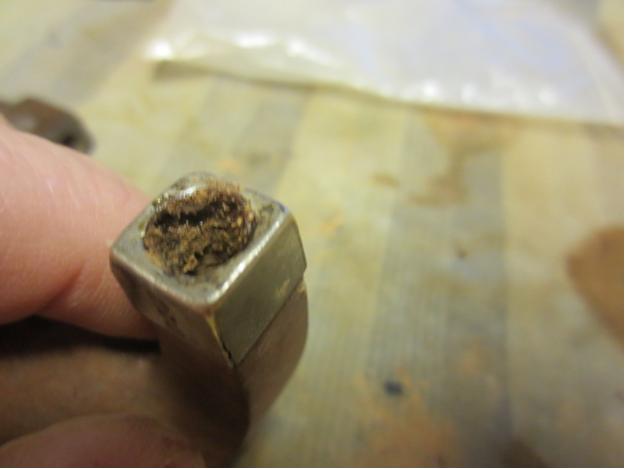
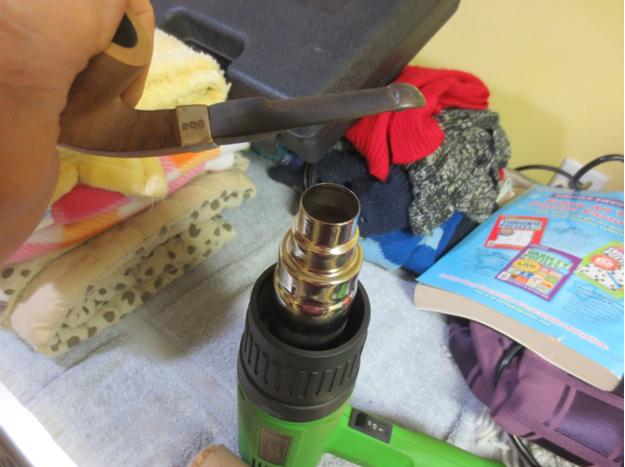
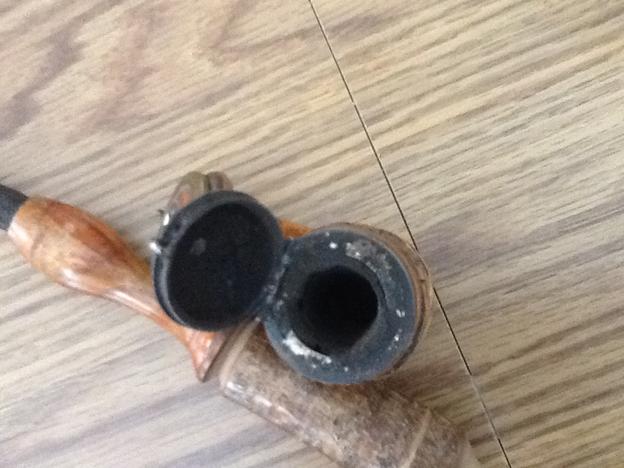
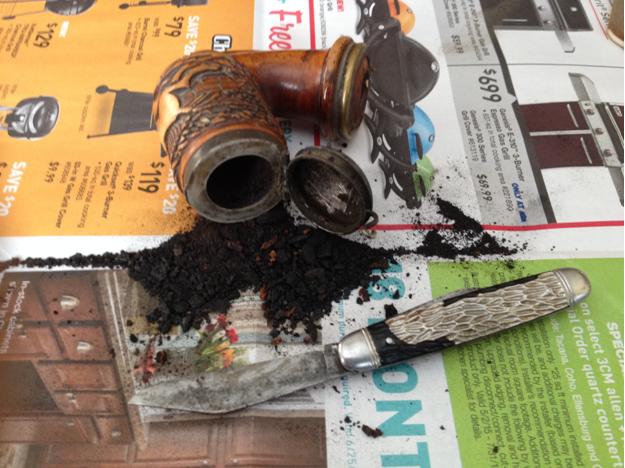
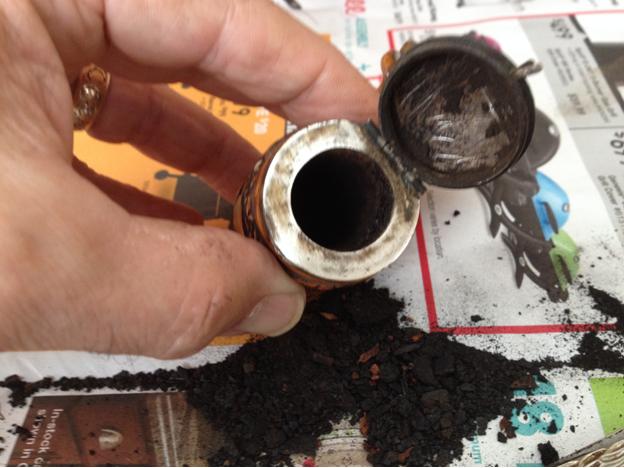
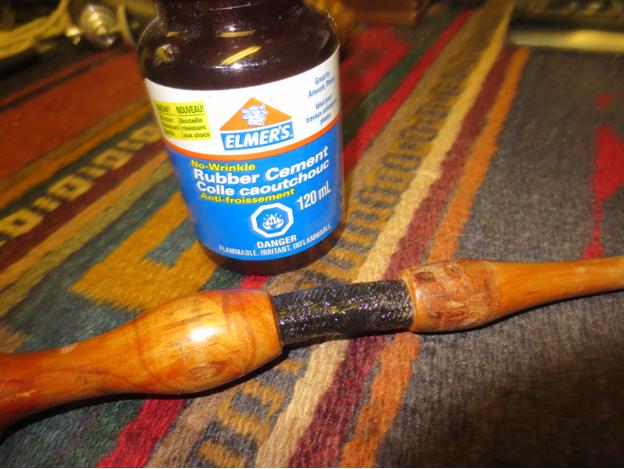
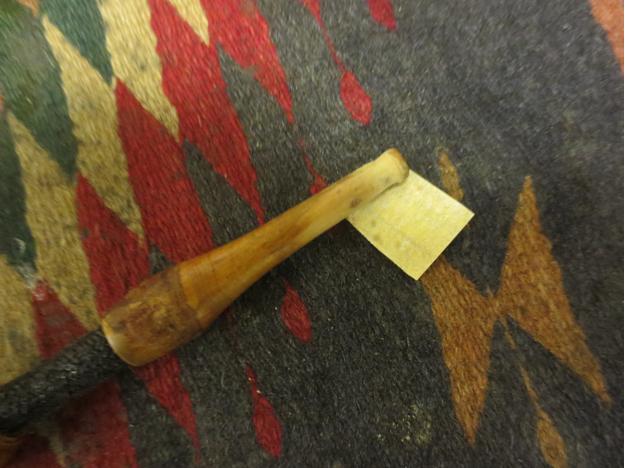
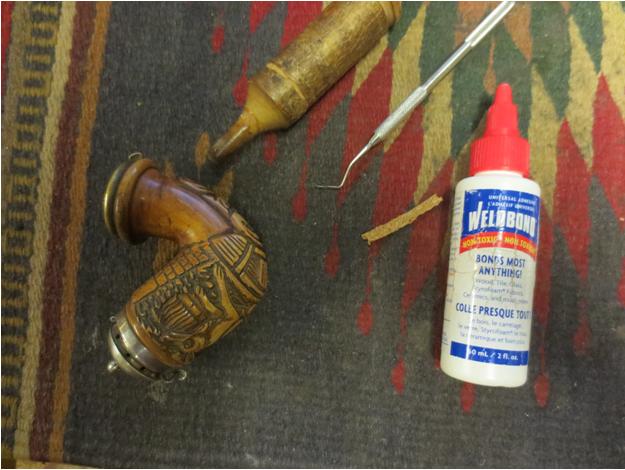
I cleaned out the shank and stem with alcohol, cotton swabs and pipe cleaners. I lightly reamed the bowl with a pen knife to remove the debris from the sides of the bowl.Ehrlich27 
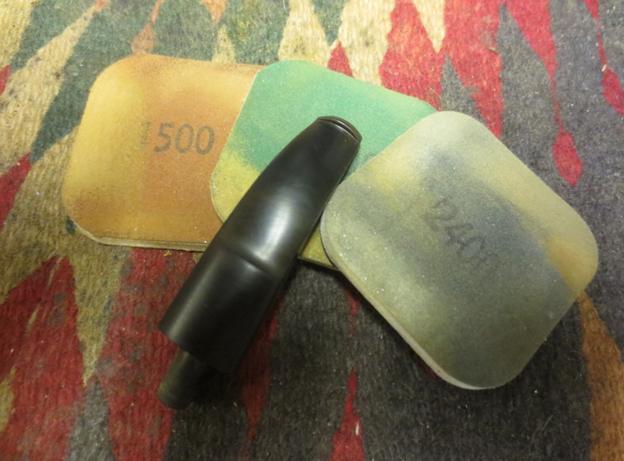
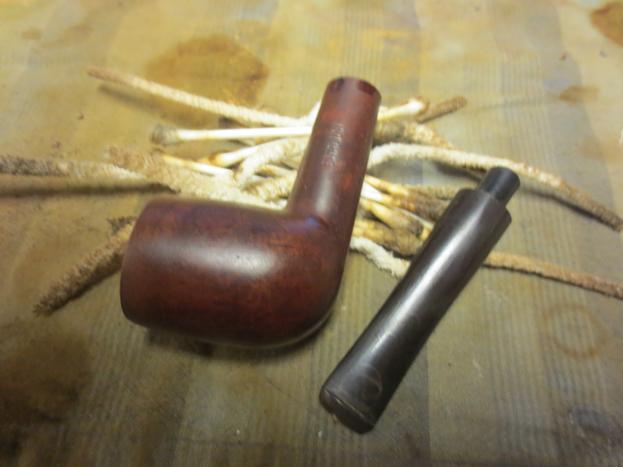
I sanded the stem with medium and fine grit sanding sponges. I followed that by sanding it with micromesh sanding pads – wet sanding with 1500-2400 grit pads and then rubbing it down with Obsidian Oil.Ehrlich28 
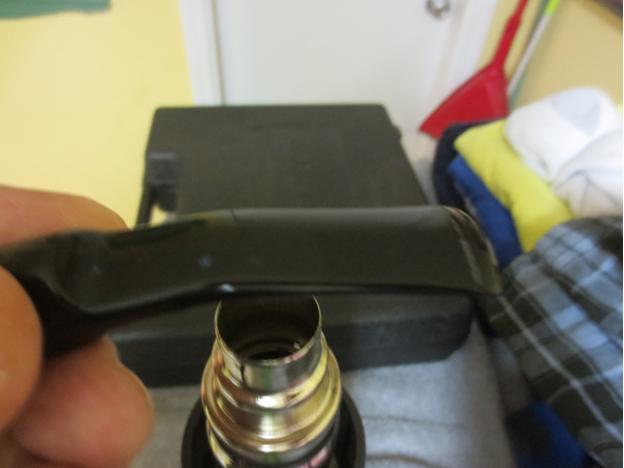
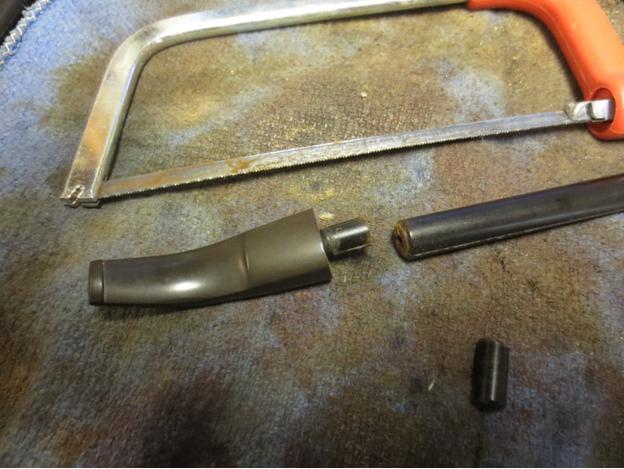
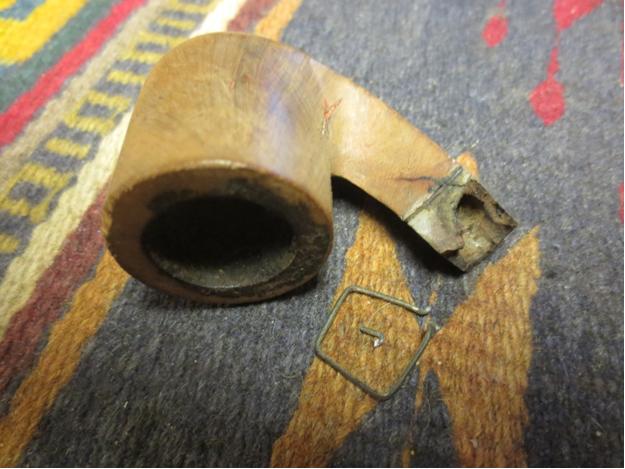
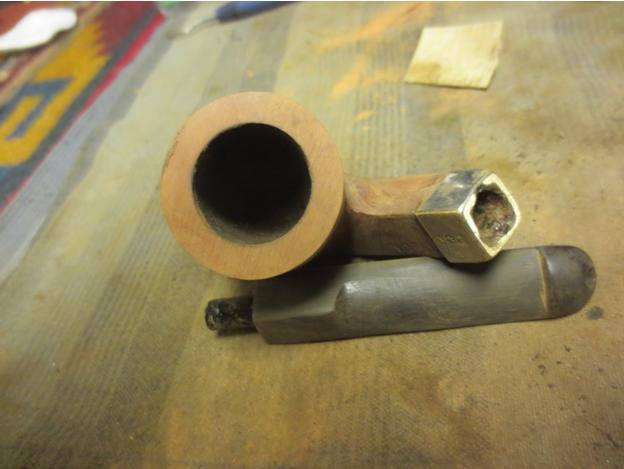
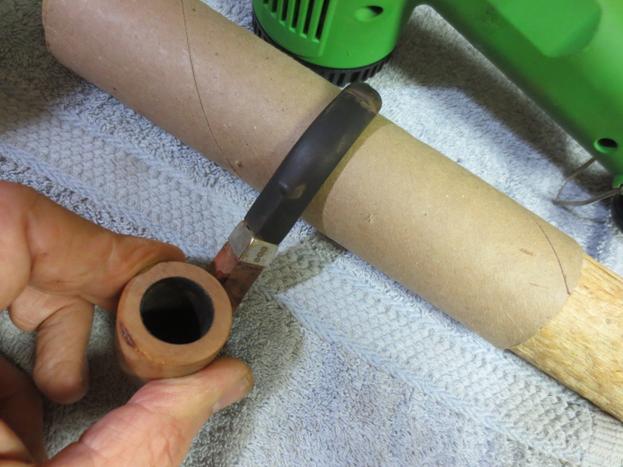
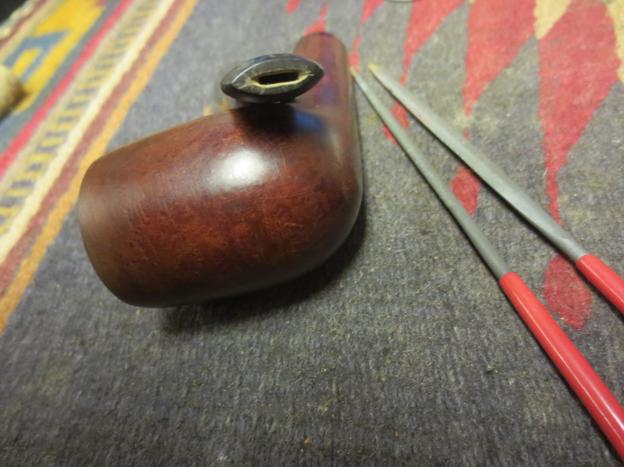
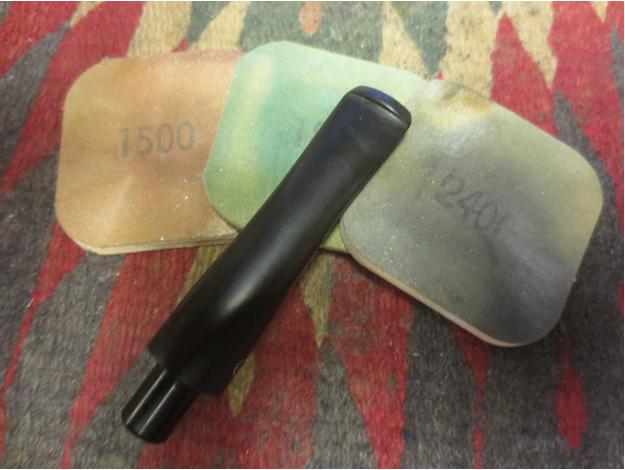
After the wet sanding I decided to open up the slot to make it easier to clean out the stem and shank with a pipe cleaner. I used a flat oval needle file to start the work and finished it with a thicker oval file. Once I had it opened I used a folded piece of sandpaper to smooth out the opening.Ehrlich29

Ehrlich30 
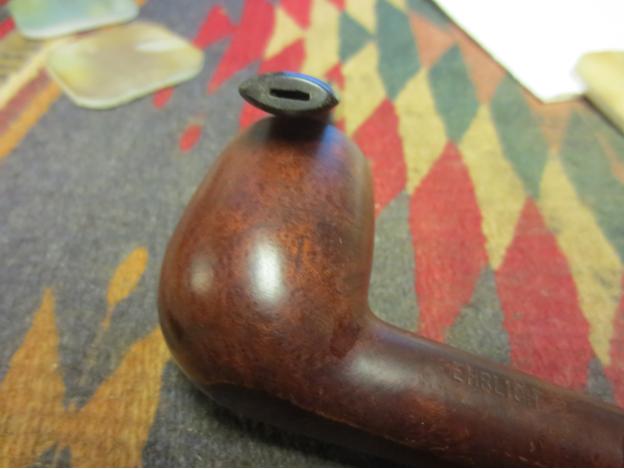
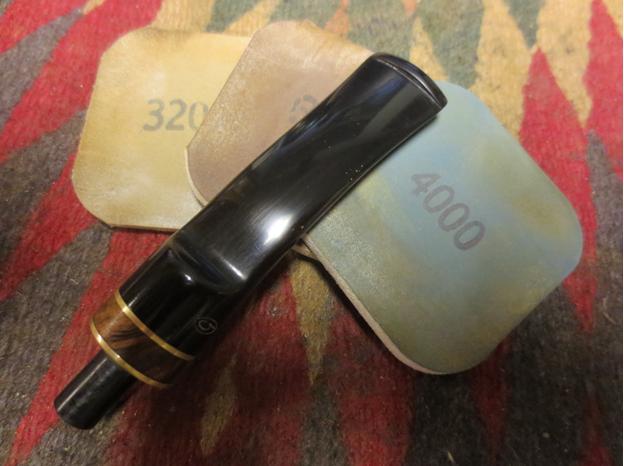
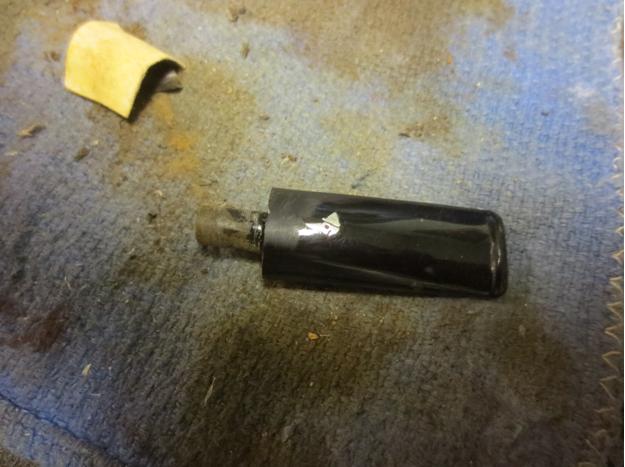
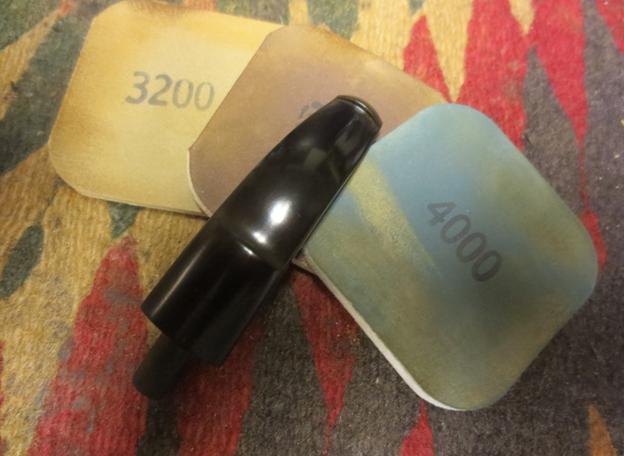
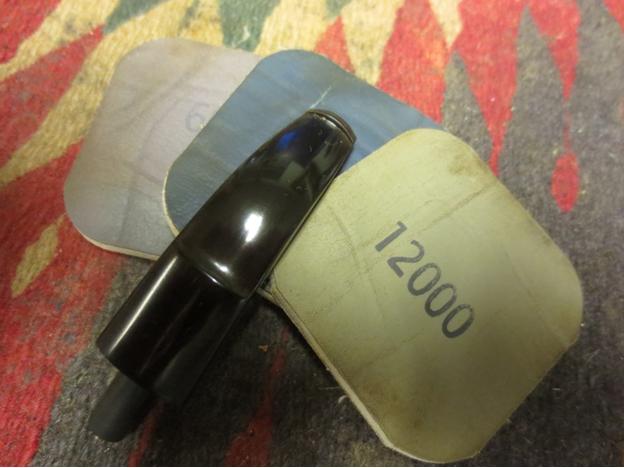
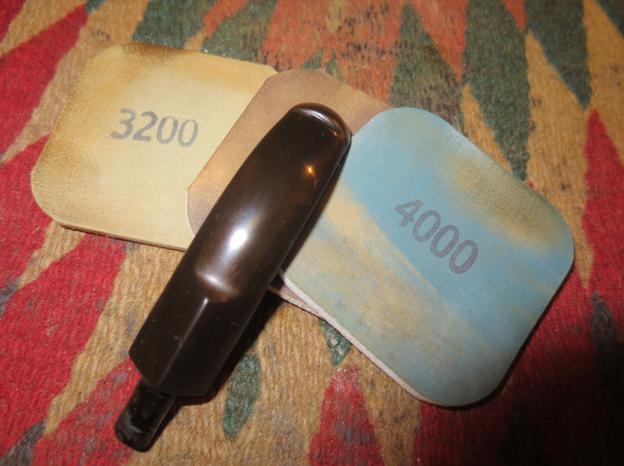
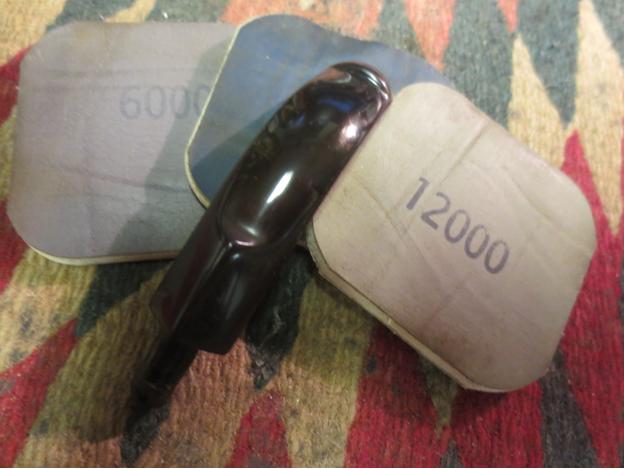
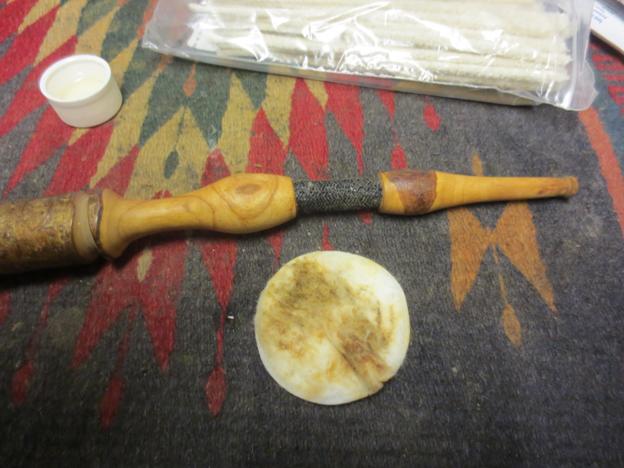
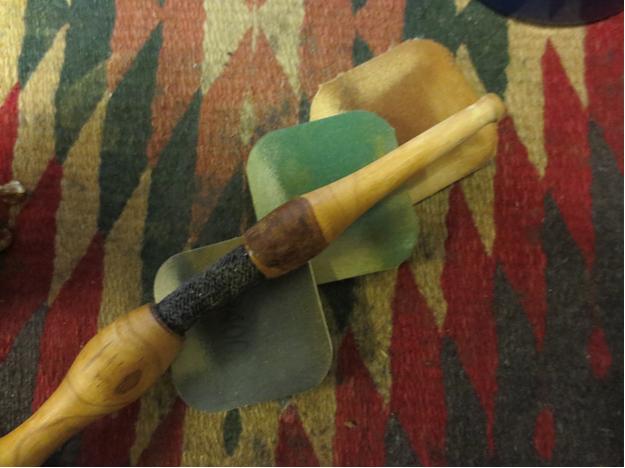
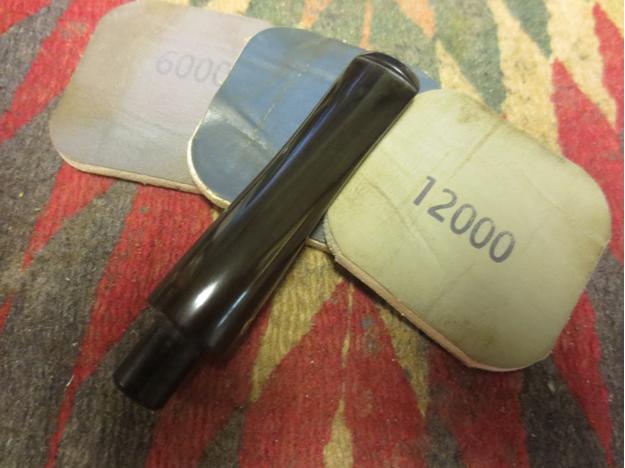
I dry sanded the stem and the end of the button with 3200-4000 and rubbed it down with oil a second time. I finished with the micromesh pads by sanding with the 6000-12000 grit pads, rubbed it down with Obsidian Oil. Once it dried I buffed it with Blue Diamond on the buffer.Ehrlich31

Ehrlich32 
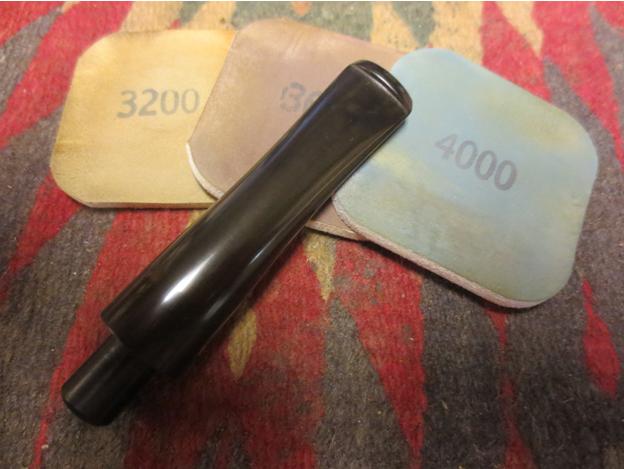
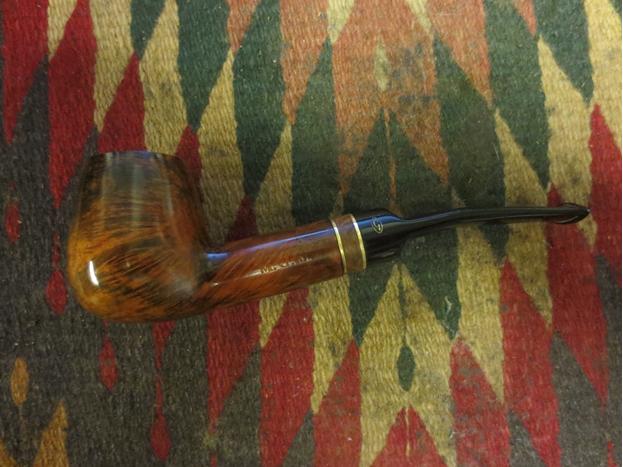
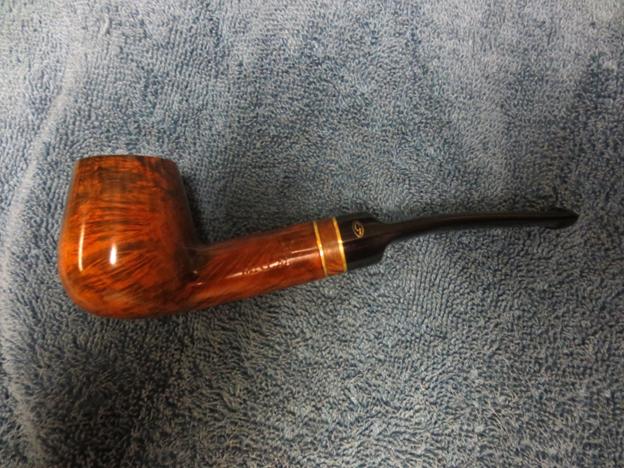
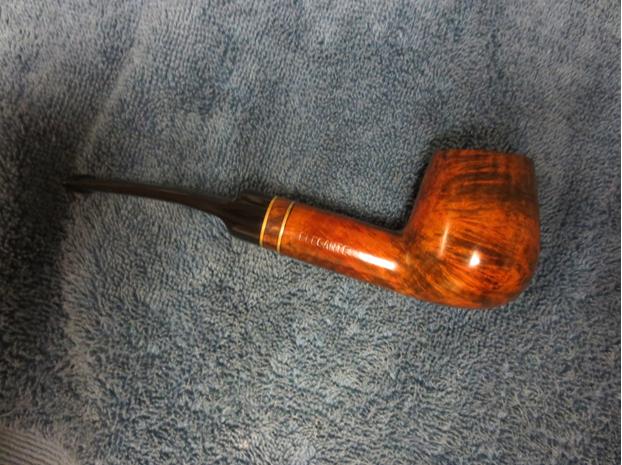
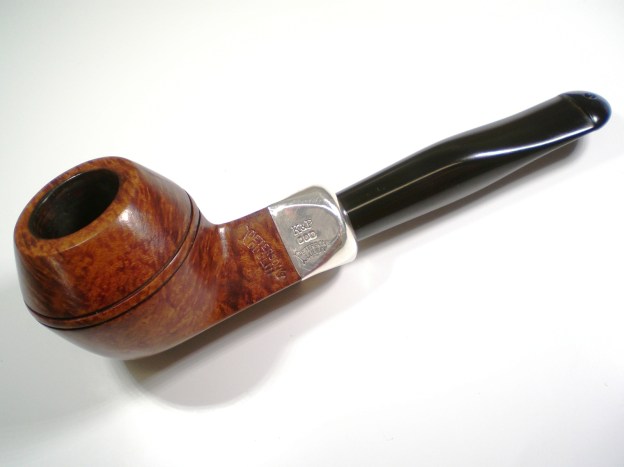
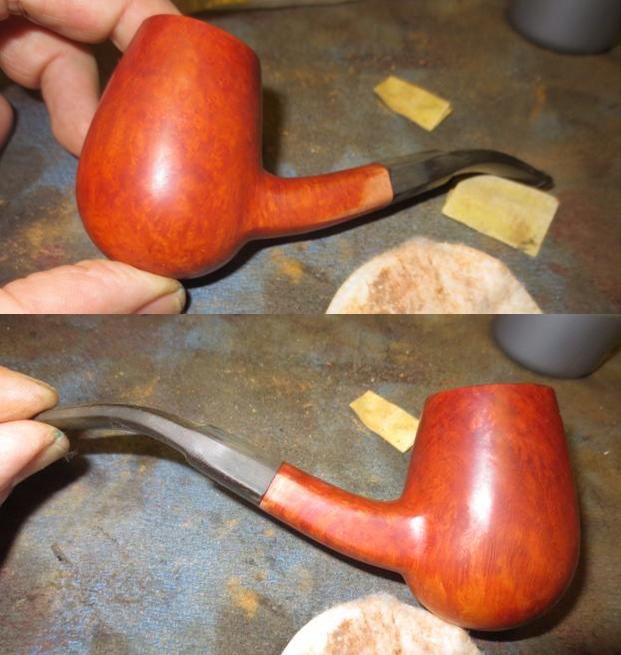
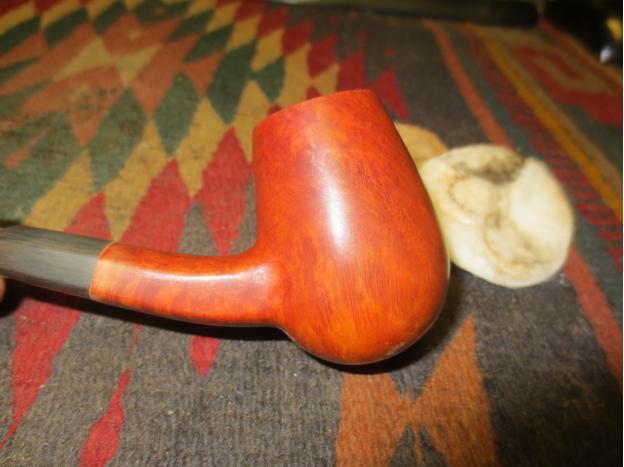
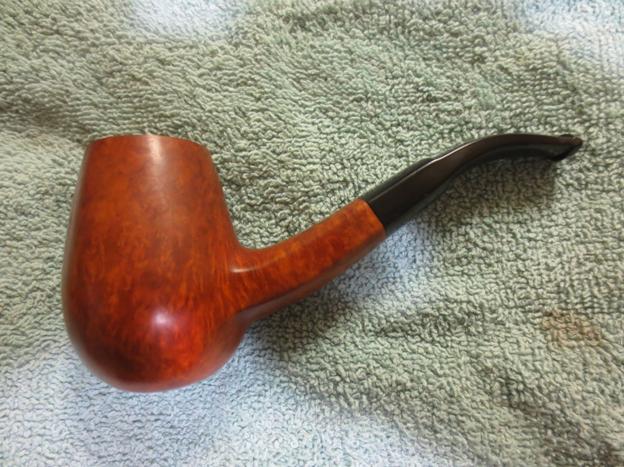
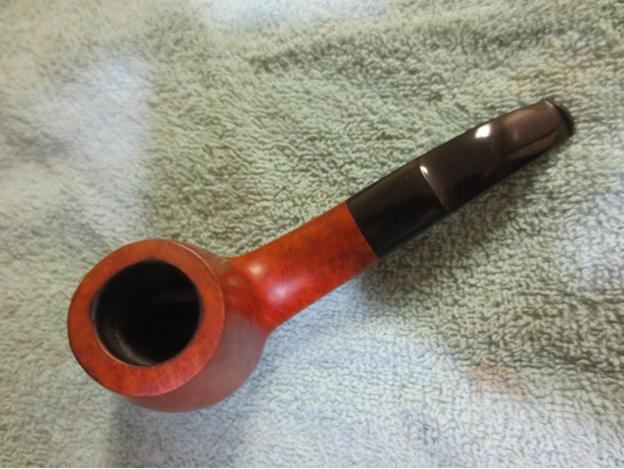
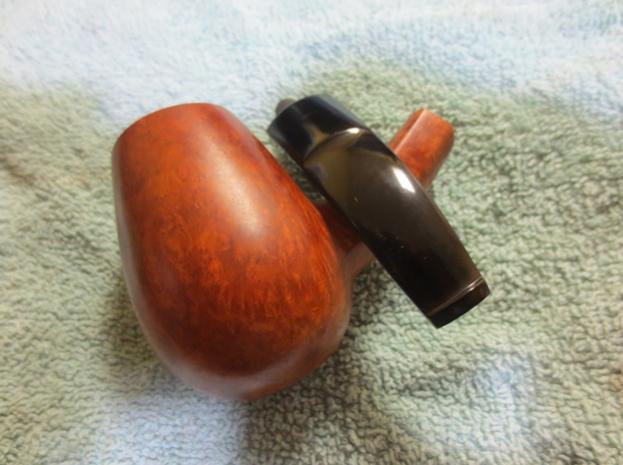
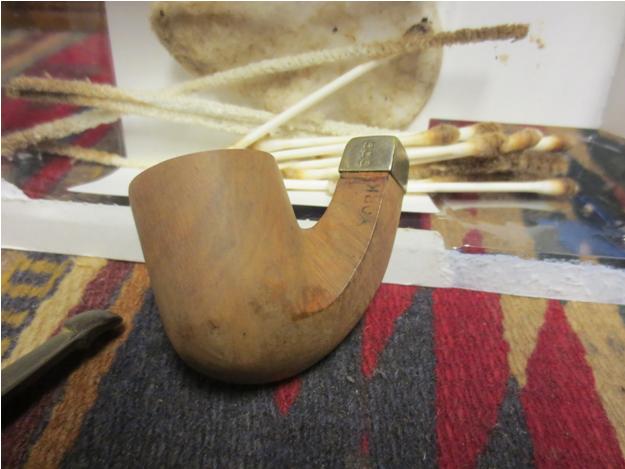
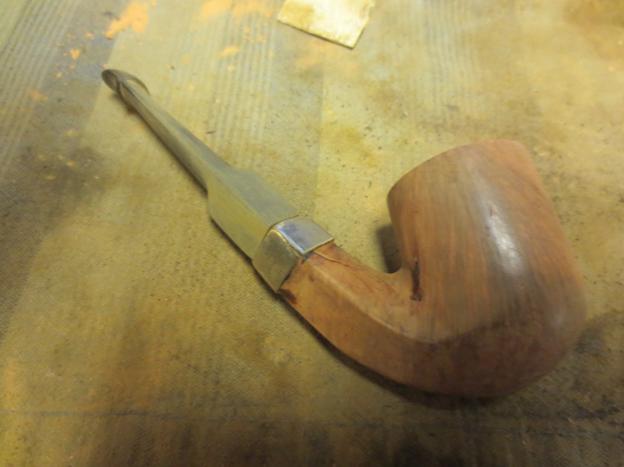
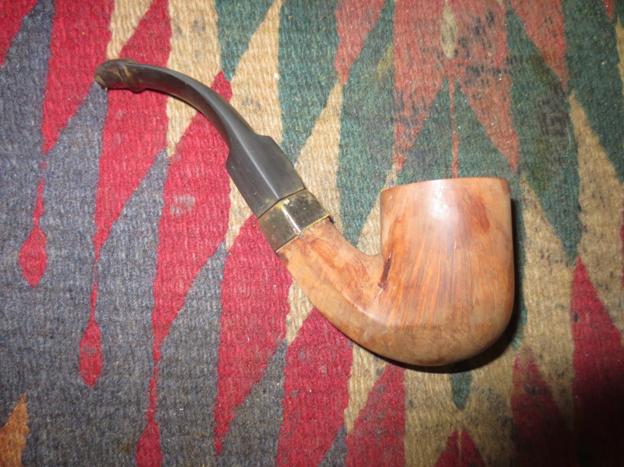
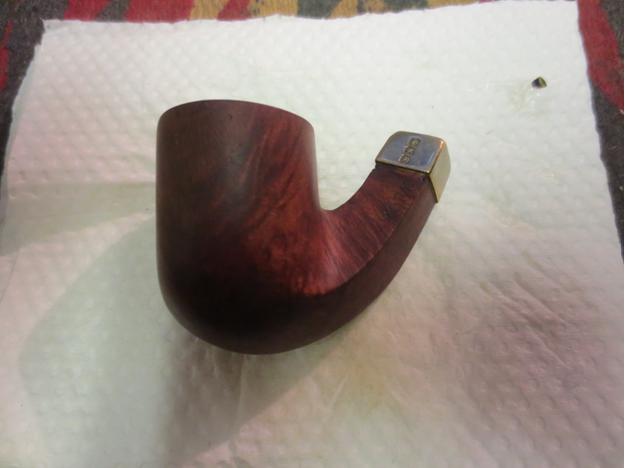
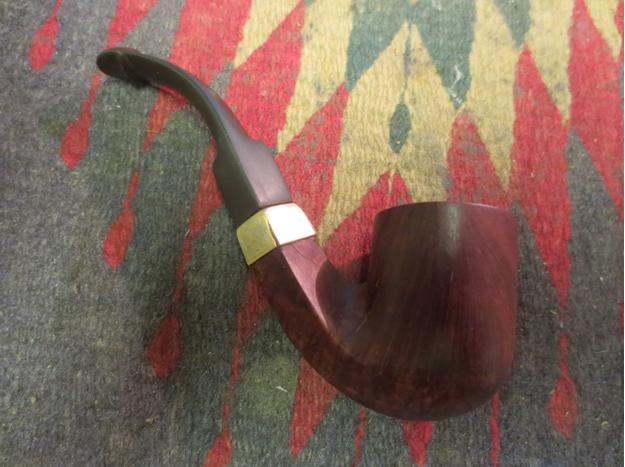
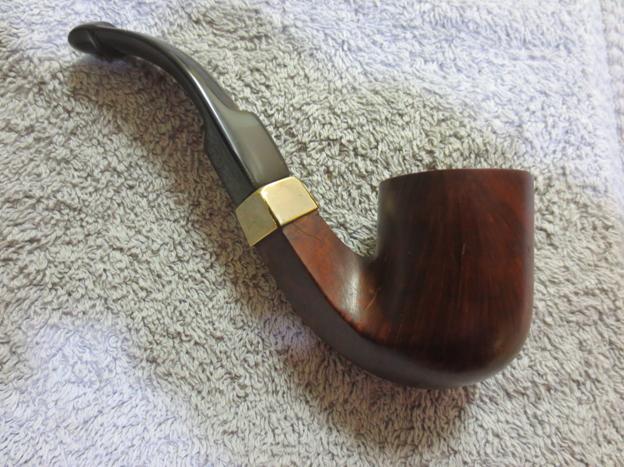
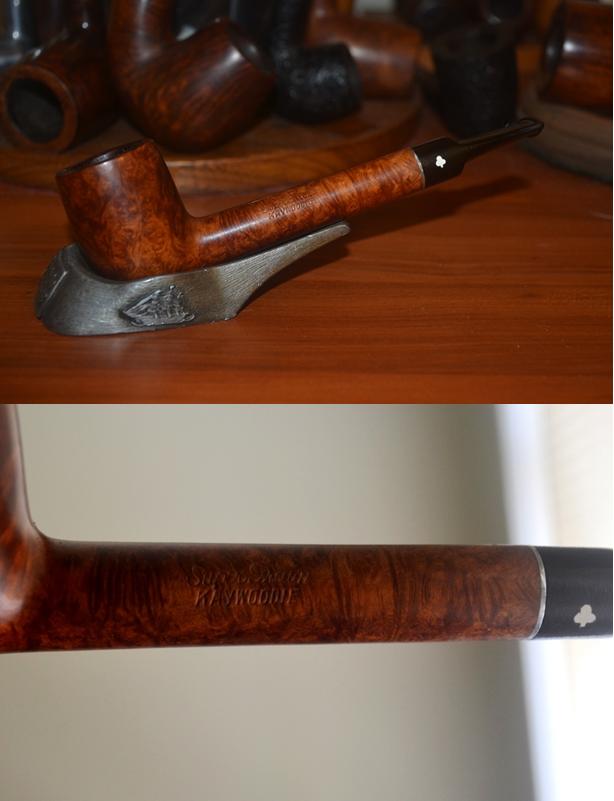
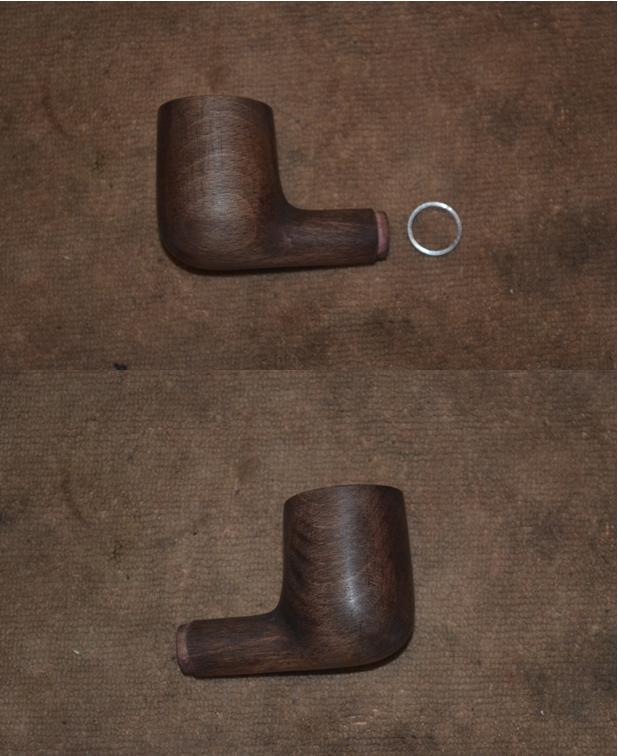
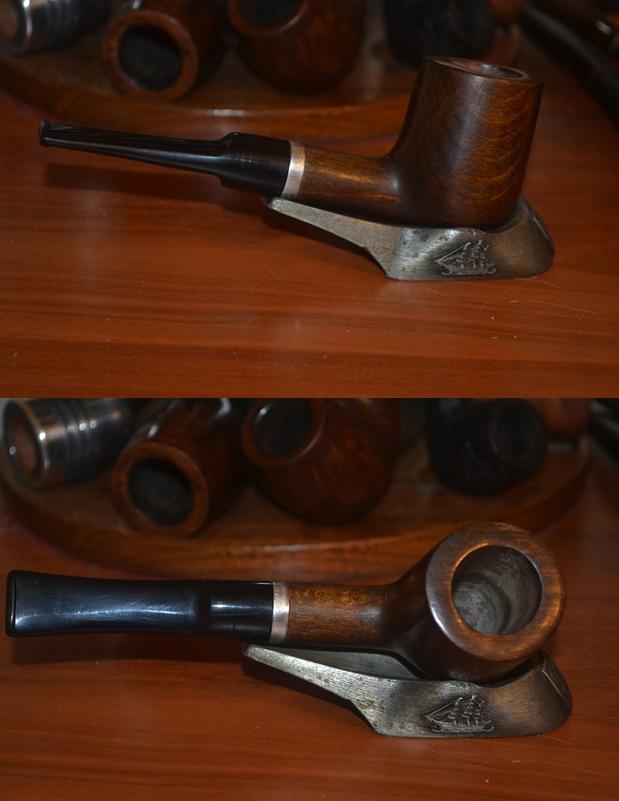
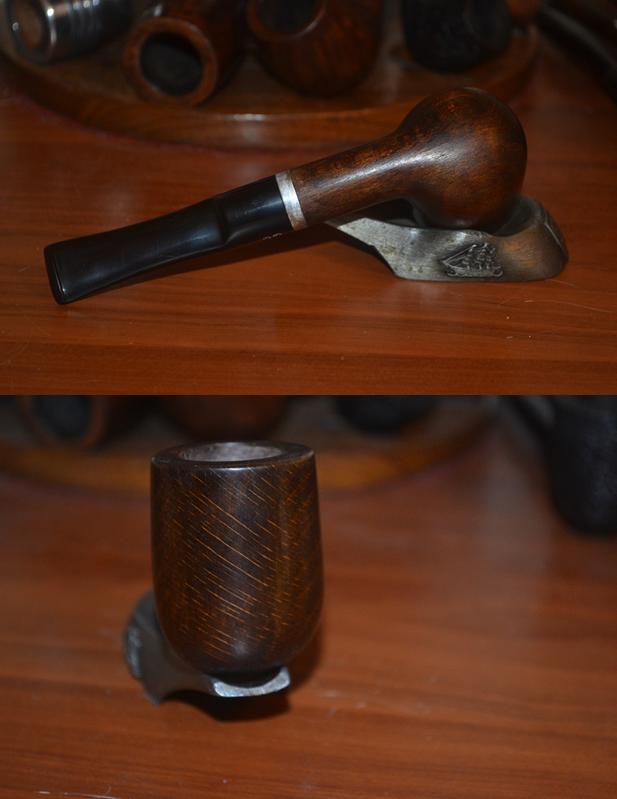
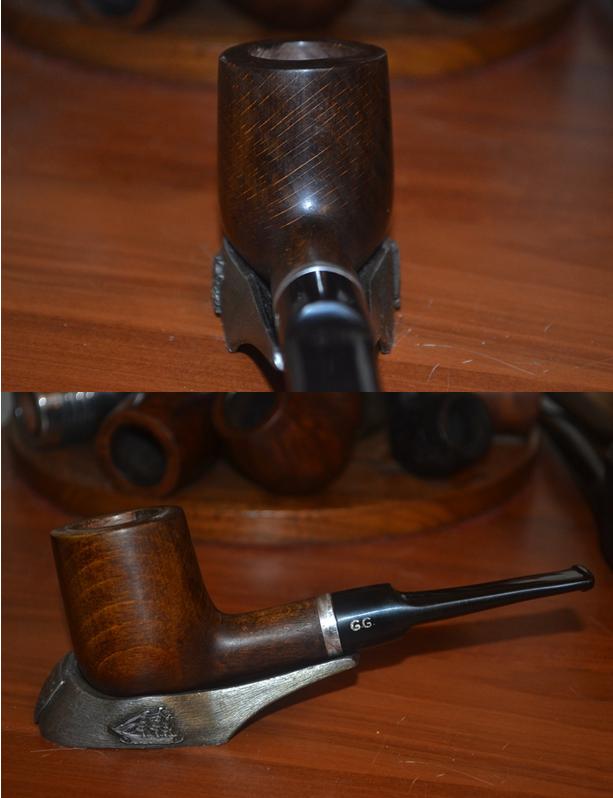
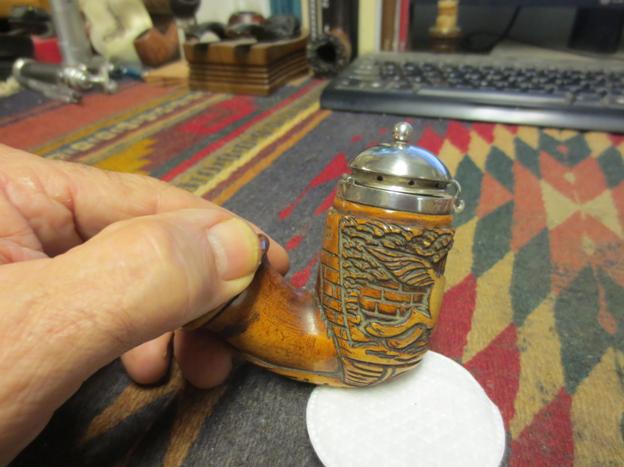
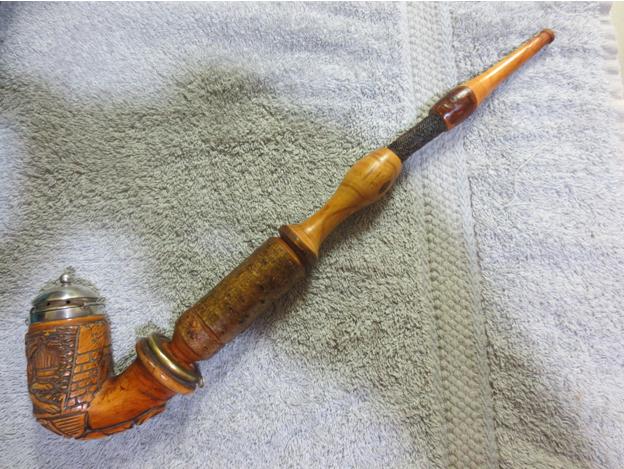
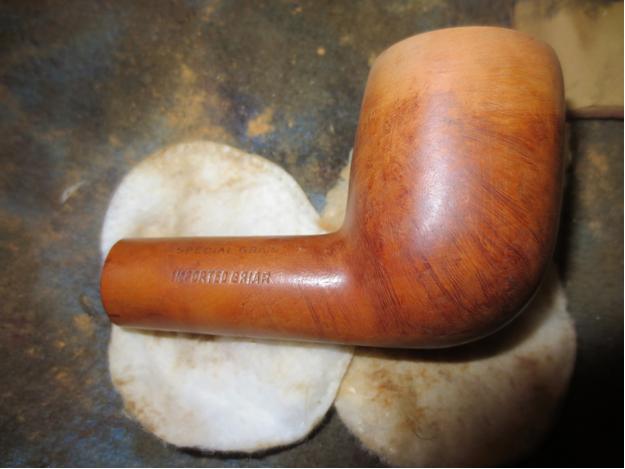
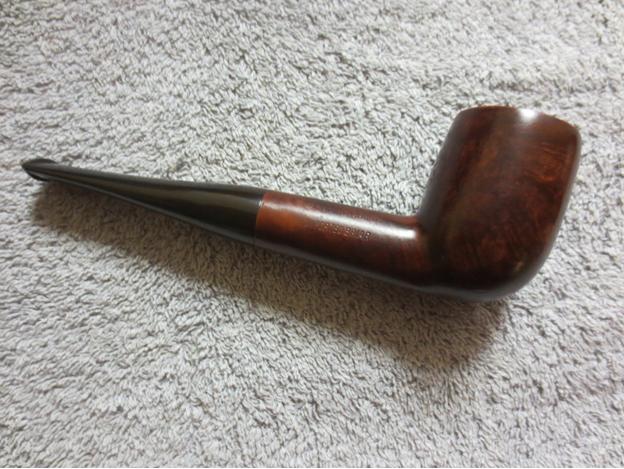
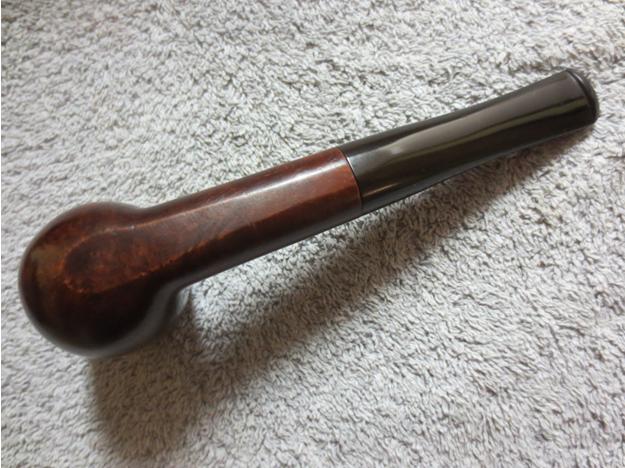
The reborn Ehrlich Billard is shown in the photos below. I was able to clean up the mess of the bowl and rim and open the stem for a better draw. The bumbled job on the rim and bowl had disappeared and a sharp billiard took its place. The slightly darker colour of the stain adds richness to the billiard that I really like. It is now ready to be sold into the hands of its next owner.Ehrlich33

Ehrlich34

Ehrlich35

Ehrlich36 
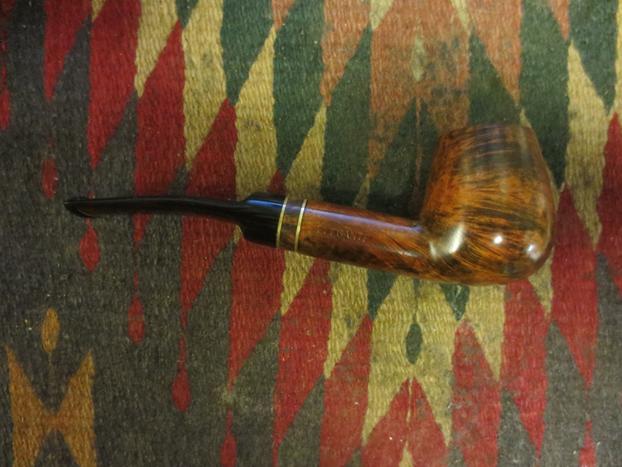
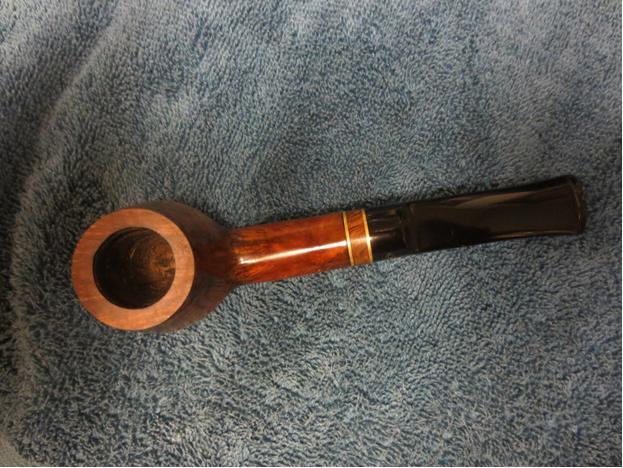
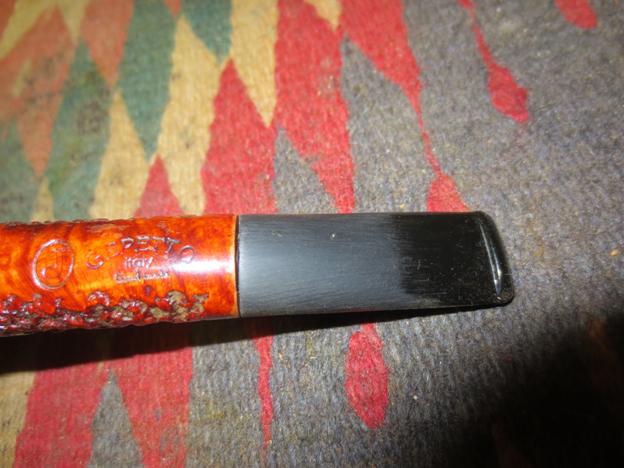
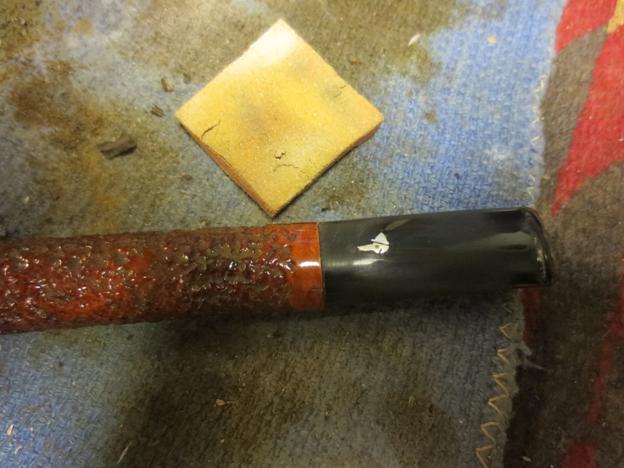
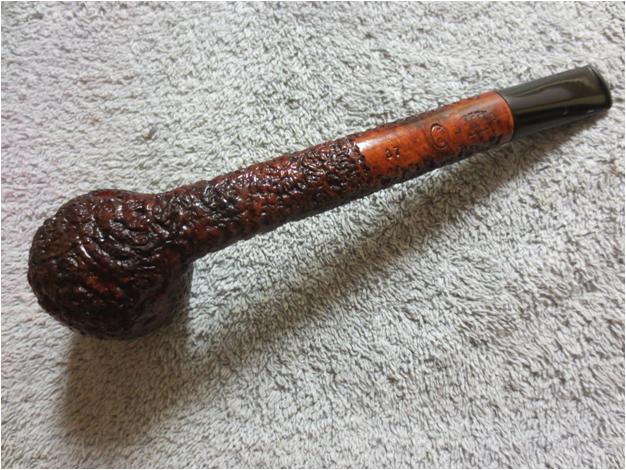
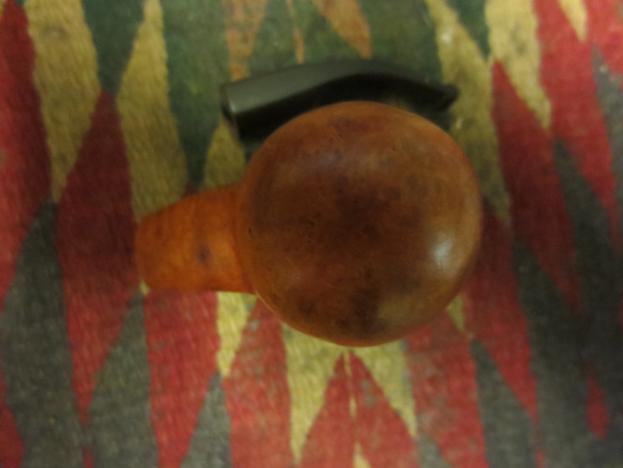
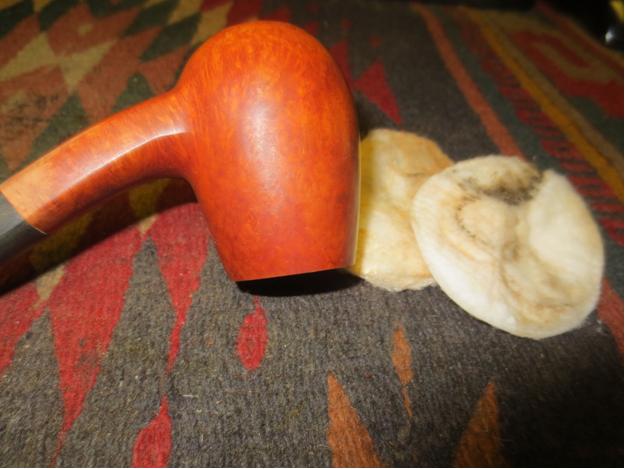
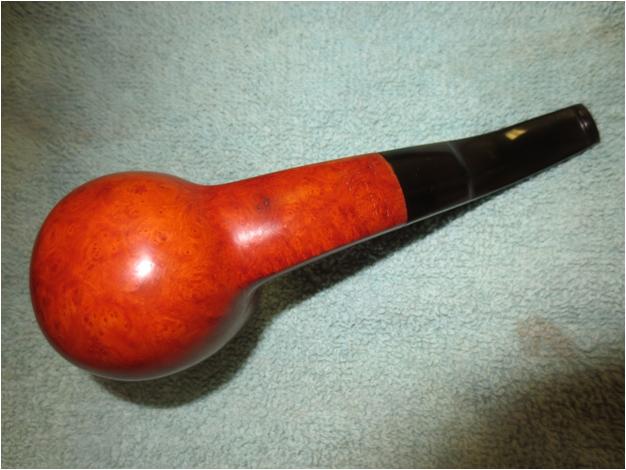
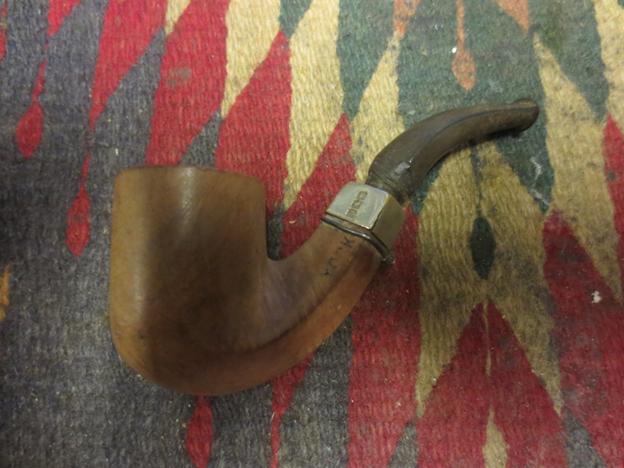
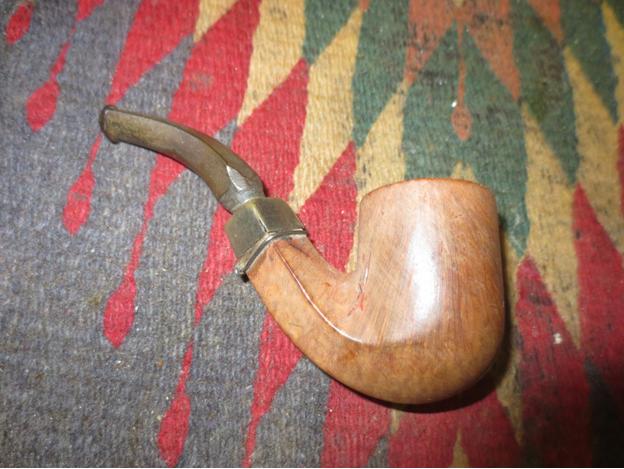
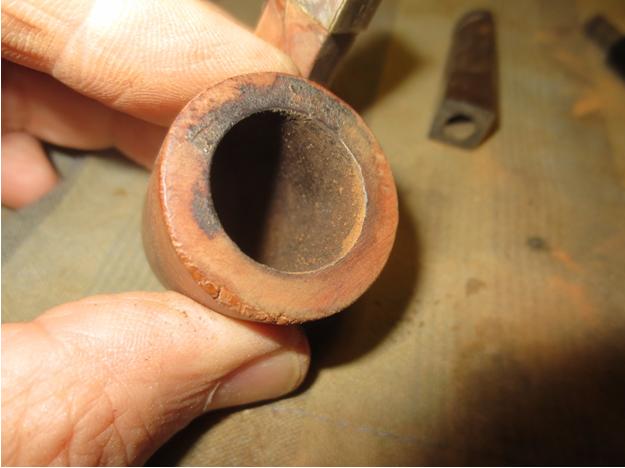
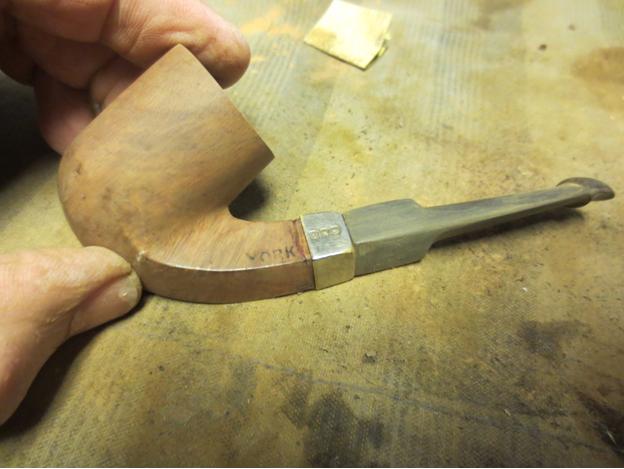
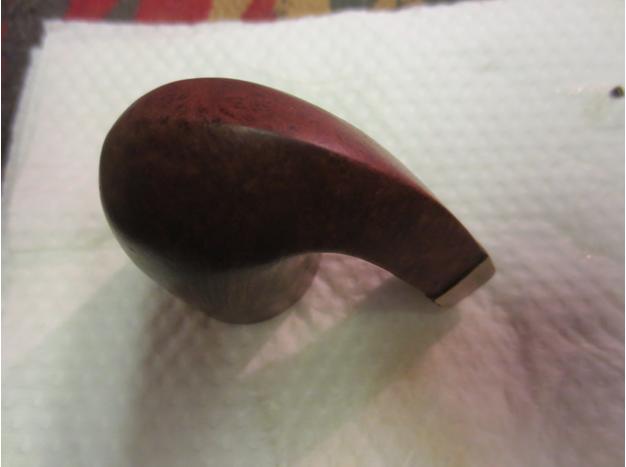
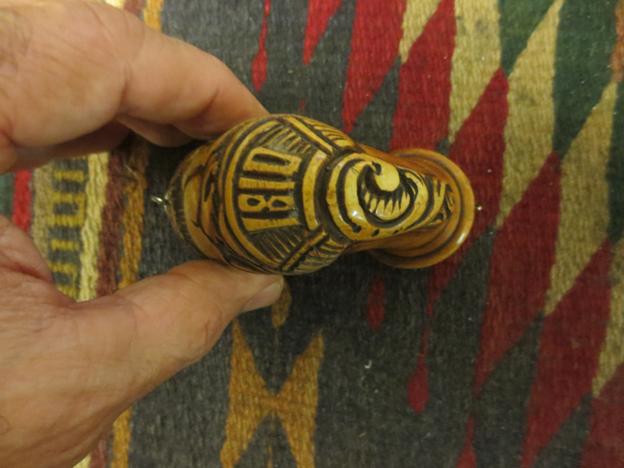
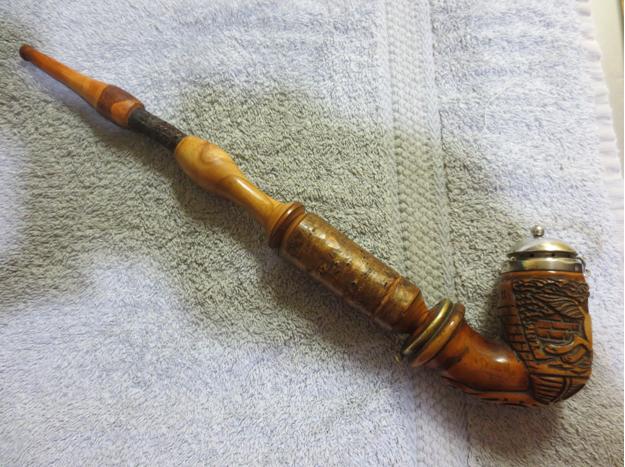
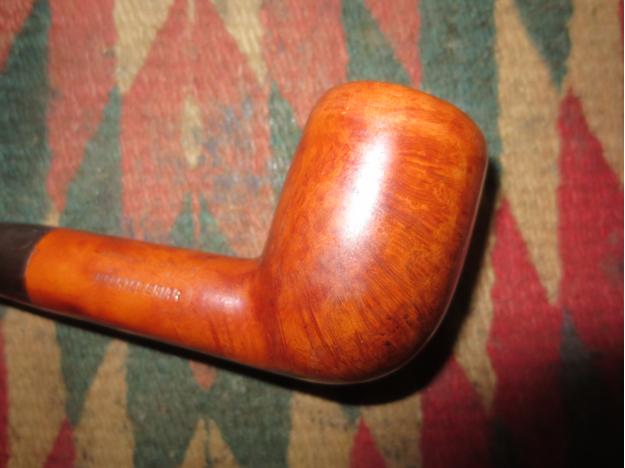
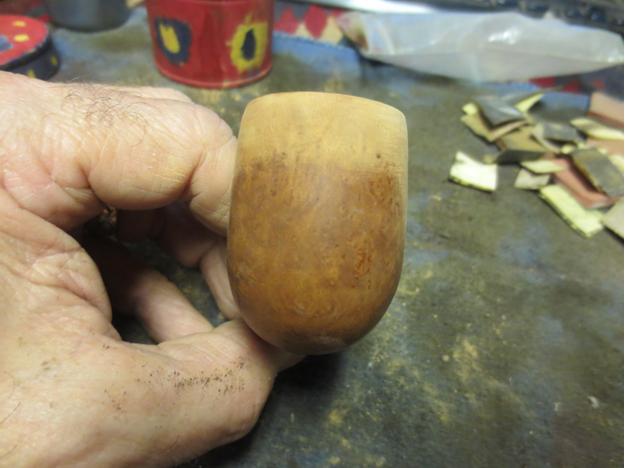
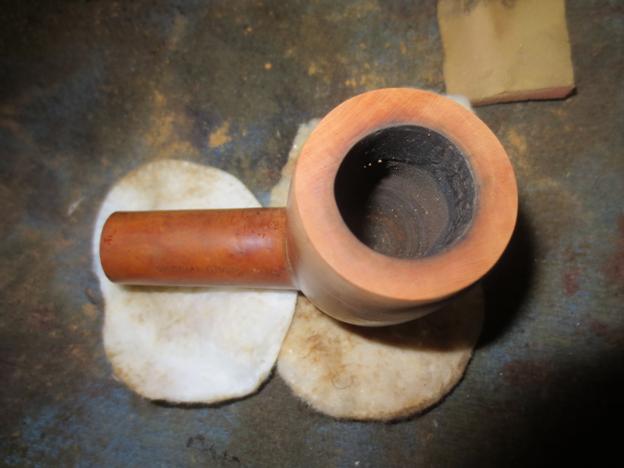
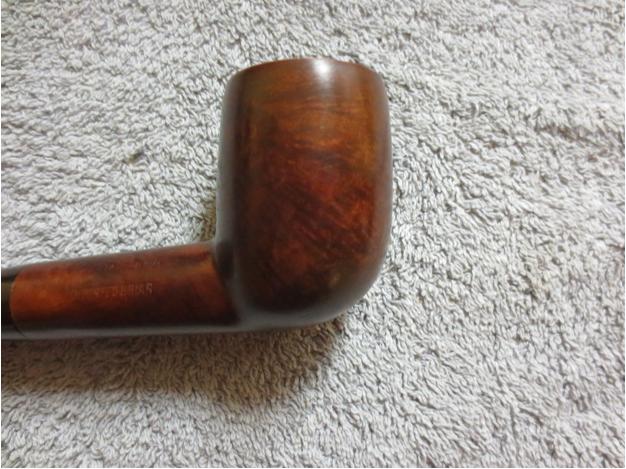
The next three photos give a clear picture of the rim top and sides of the bowl to show the grain.Ehrlich37

Ehrlich38

Ehrlich39 
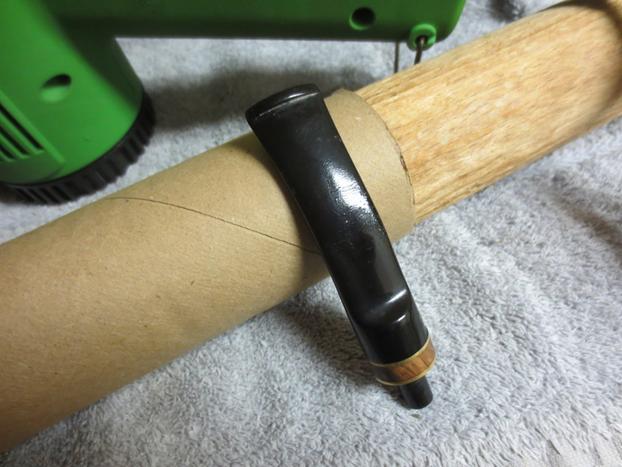
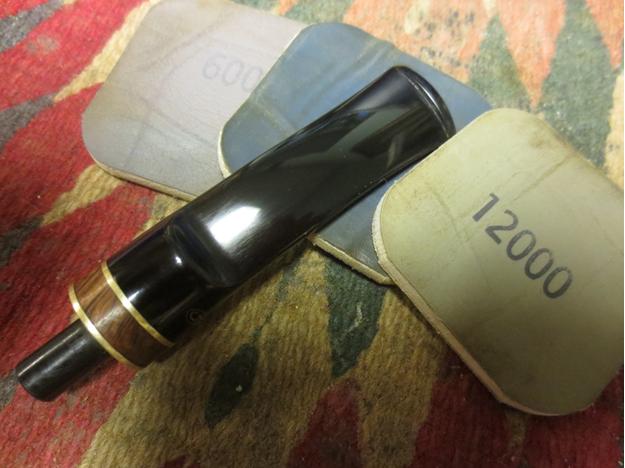
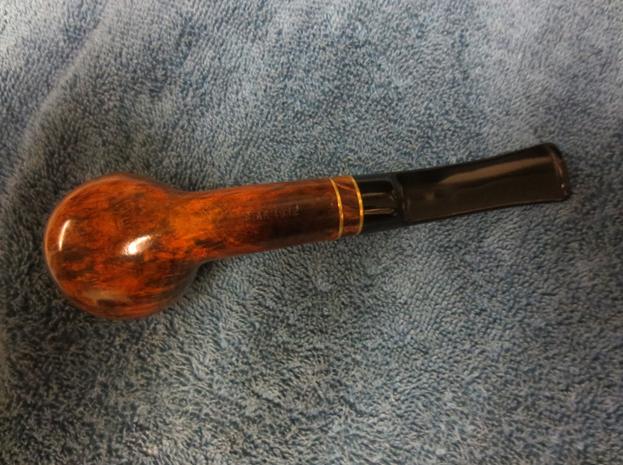
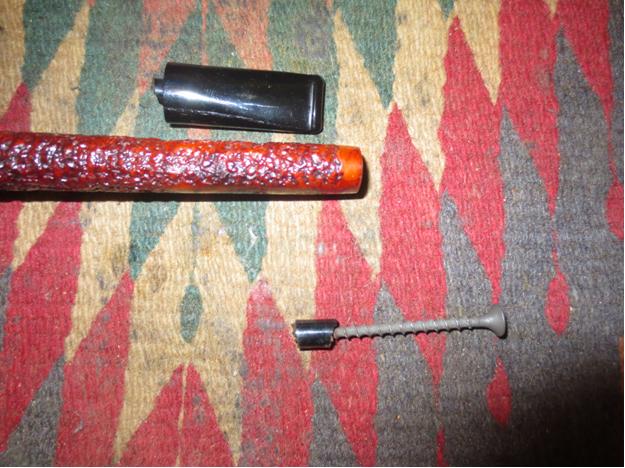
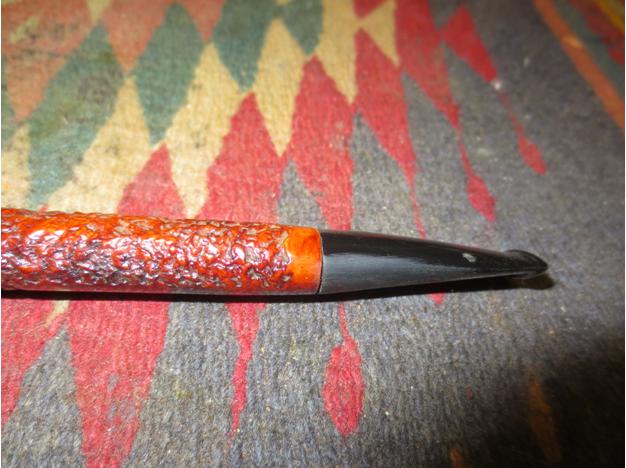
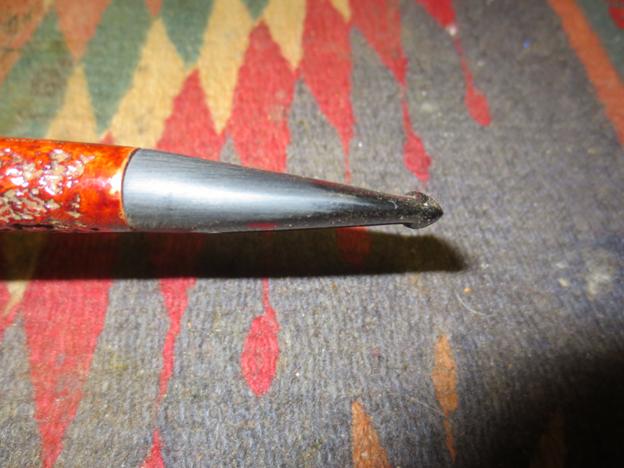
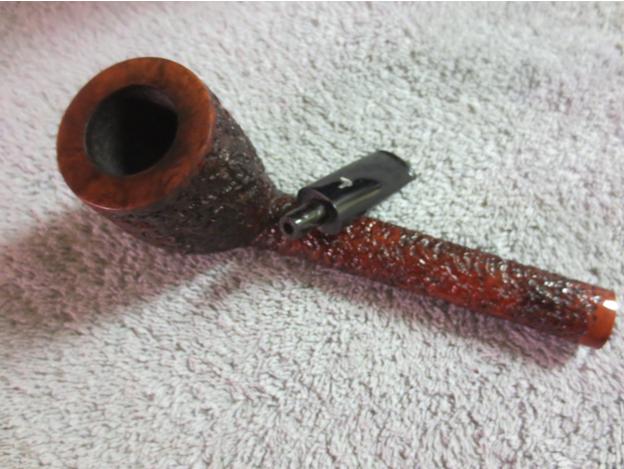
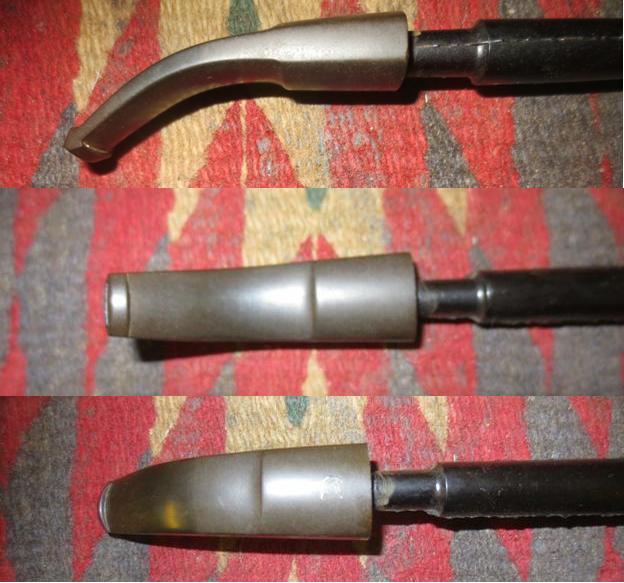
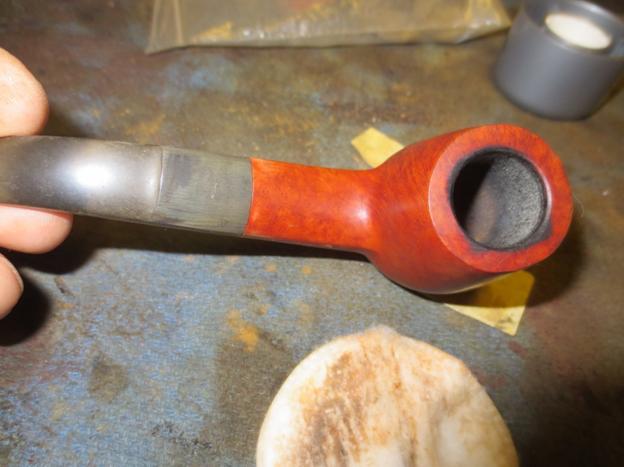
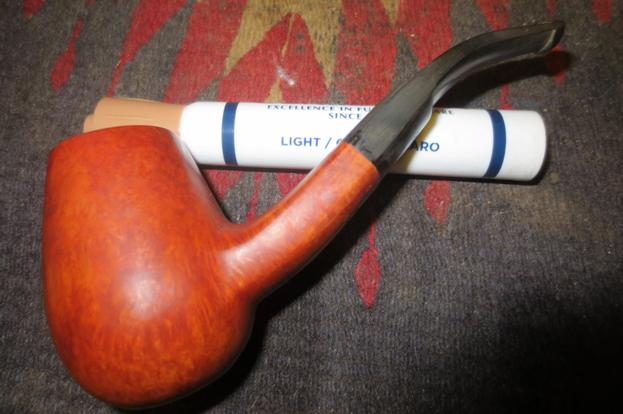
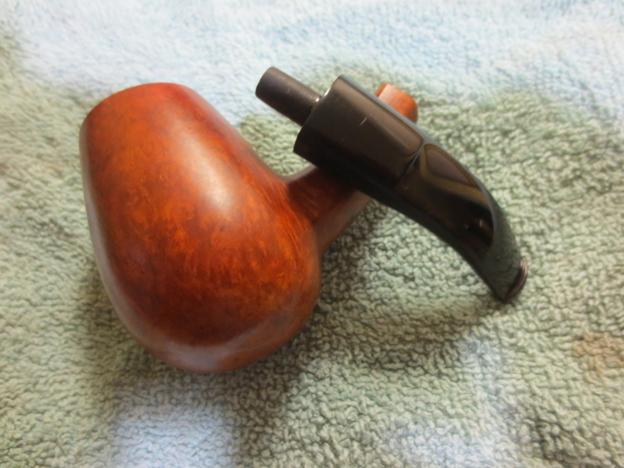
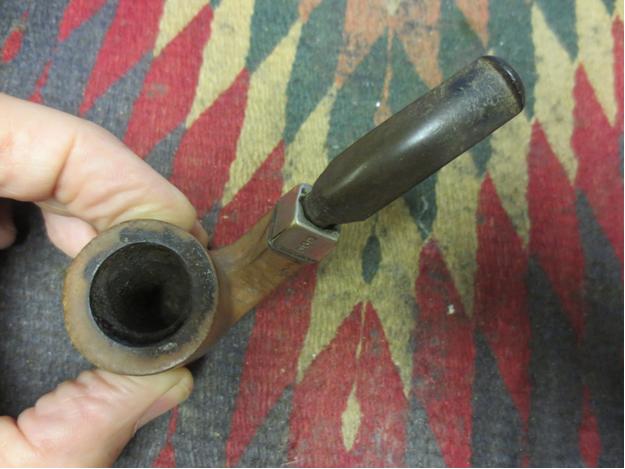
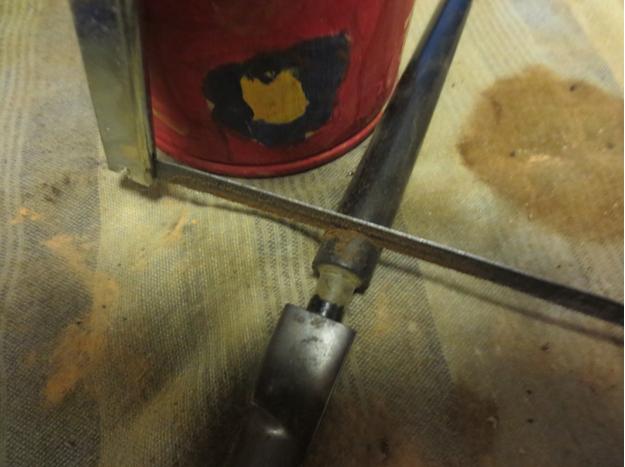
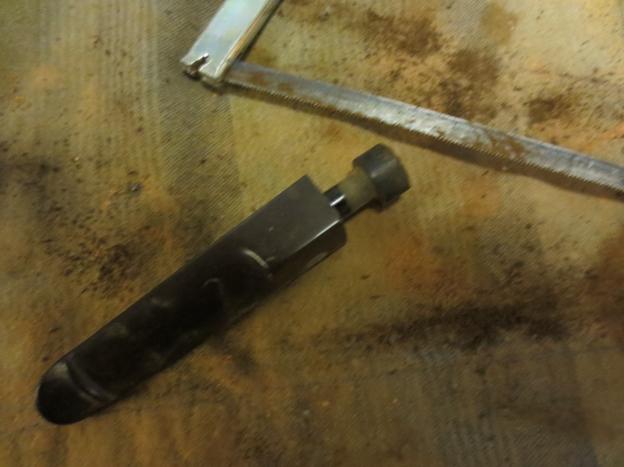
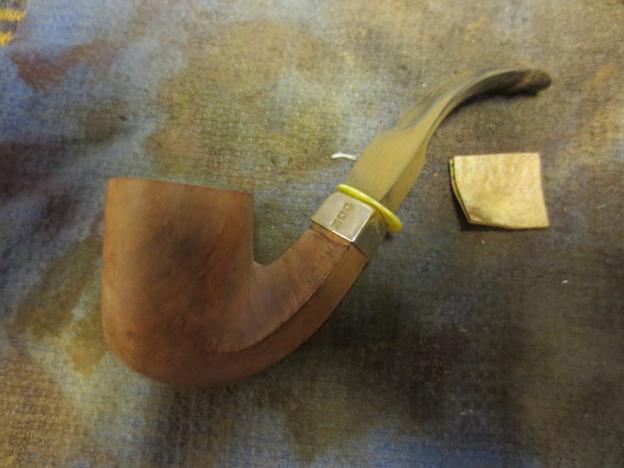
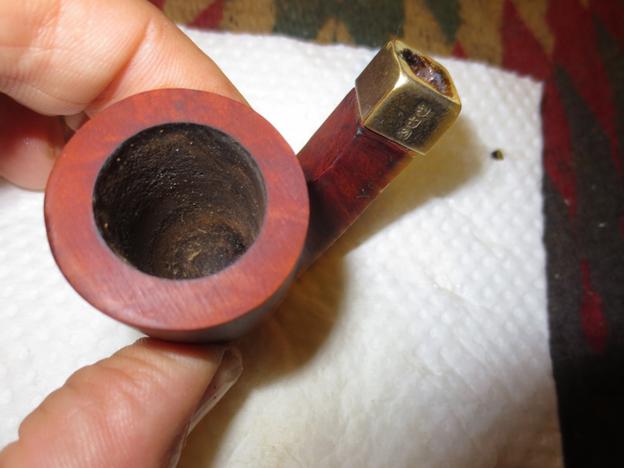
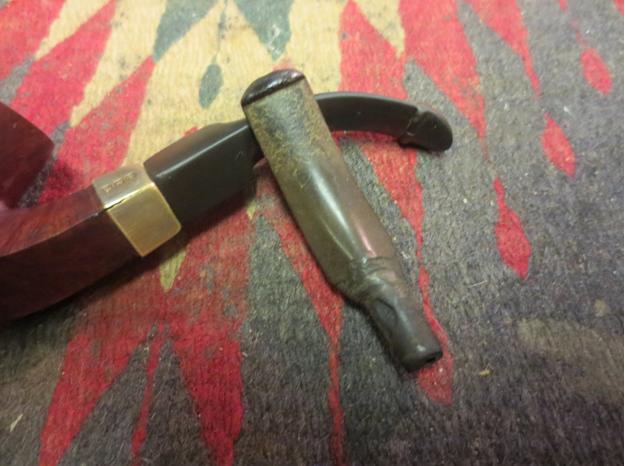
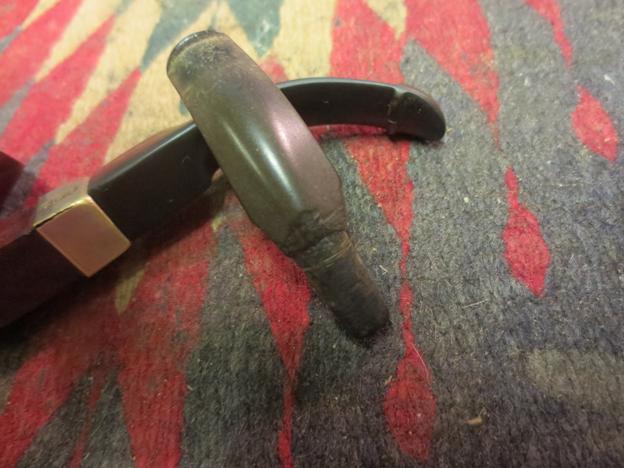
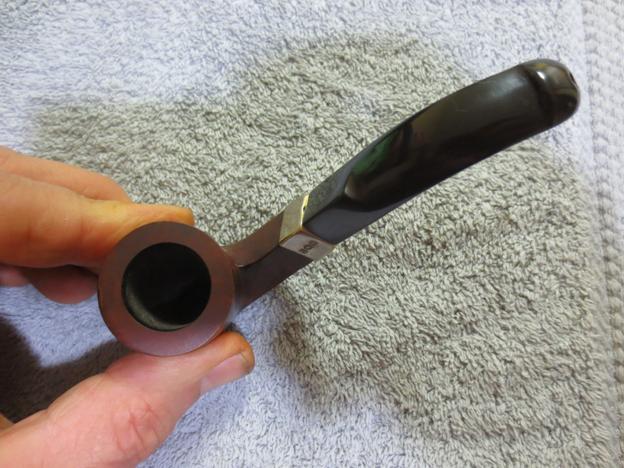
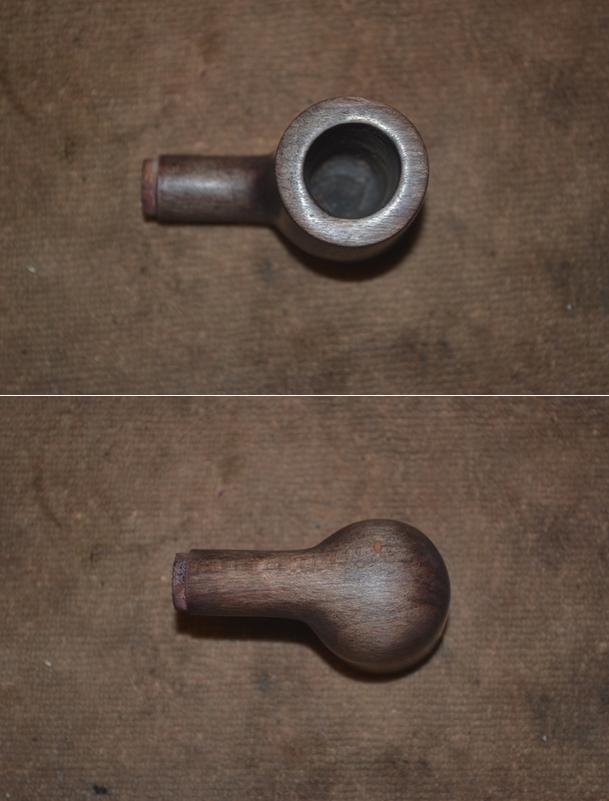
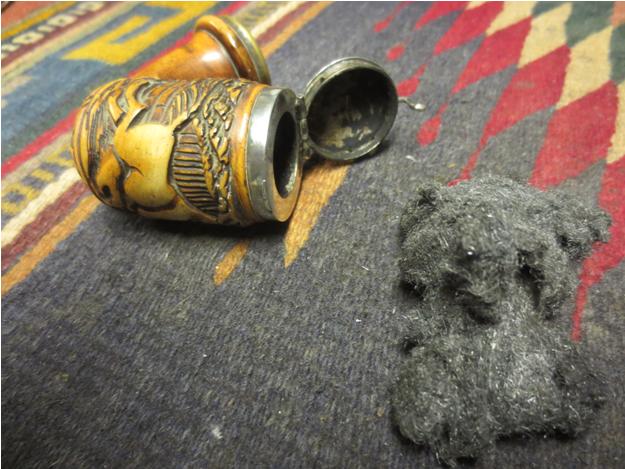
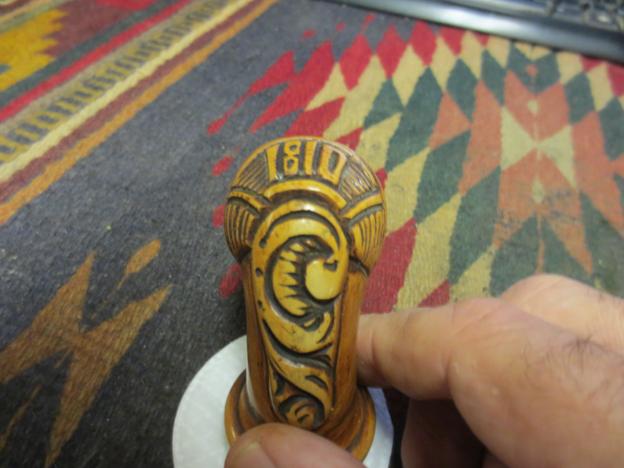
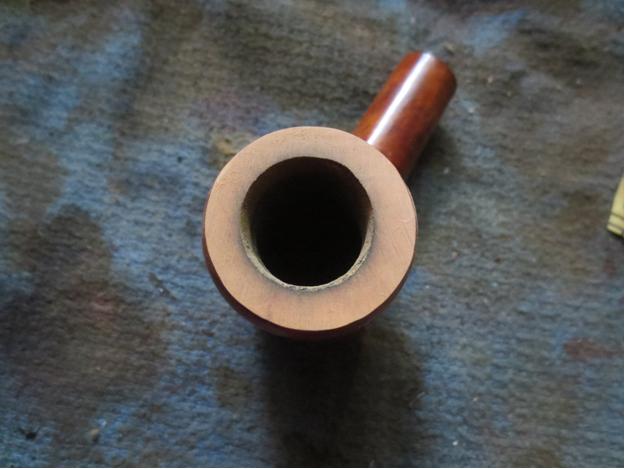
The last two photos show the tenon and slot on the stem.Ehrlich40

Ehrlich41 
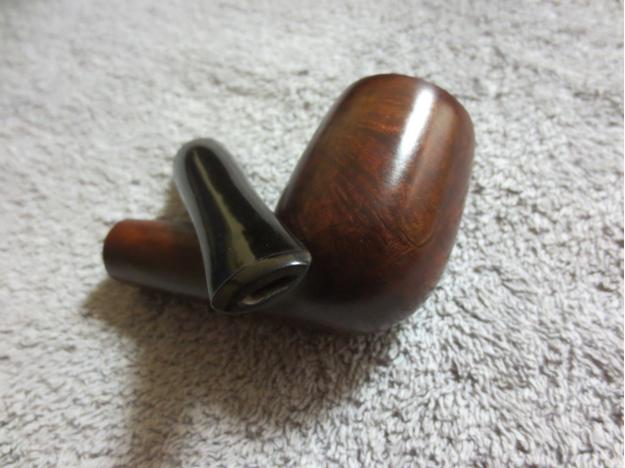
This Ehrlich billiard is a chubby shank larger sized pipe, probably the same size as a Group 4 in Dunhill terms. The grain is quite nice and the thinned dark brown stain allows the grain to show through to its advantage. It should make someone a great addition. If you are interested in this pipe email me with an offer at slaug@uniserve.com and we can discuss it. The entirety of the sale price will go to the Nepal project. I will pay the postage so that does not get taken off the proceeds. If you are interested in reading about the SA Foundation you can look at their website at http://www.safoundation.com.

Thanks for looking.

Bringing New Life to a Gift Pipe – a Gasparini MGM Elegante Brandy


Blog by Steve Laug

A few evenings ago my friend John stopped by to drop off some pipes for repair and to visit. We loaded up our pipes and sat on my porch while we chatted. He pulled a pipe out of his pocket and said it was a gift to me. It was a nice Brandy shaped pipe that was stamped Gasparini MGM on the left side of the shank and Elegante on the right side. On the underside it is stamped Briar 1912 and Italy. John had purchased the pipe and smoked it for awhile. He wanted to pass it on to me. I am honoured to have received his gift. Being an obsessive refurbisher I decided to clean it up and make a few modifications that I thought would make it look even better. I don’t know why I think like that but it is what goes through my eye every time I look at a pipe. It is like a small voice says, “hmmmm I could change that and tweak that and…. When I am done it will be better. Sometimes that voice gets me into trouble and sometimes it works.Gas1 When John gave me the pipe these are some of the things that I saw. The bend in the stem was too sharp of an angle. It needed to be gentler in its curve. The rim was slightly out of round and the inner edge was damaged on the back right side and the right front it had some nicks in the edge. The stain on the rim had worn off and it no long had a shine. It did not match the rest of the bowl. There was a thick urethane finish on the bowl. Other than those few small things it was a nice looking pipe. It had a lot of promise. I really liked the contrast stain on it and the mix of birdseye grain and cross grain.Gas2

Gas3

Gas4

Gas5 I decided to address the rim damage first. It would not take long and a light topping of the bowl would take care of the damage. I set up the topping board and some 220 grit sandpaper to do the job. I twisted the bowl against the sandpaper and removed the damaged part of the rim. It did not take long and the rim was flat and looked clean.Gas6

Gas7 I sanded the newly topped bowl with a medium and a fine grit sanding sponge and then with 1500-2400 micromesh sanding pads to remove the scratches from the briar. I coloured the top with a black permanent marker to get the black undertones, wiped it down with acetone and then used two different stain pens – a medium and a dark brown – to match the bowl colour.Gas8 With the bowl cleaned, repaired and restained I set it aside to work on the stem. I would buff the whole pipe once I finished the stem work. I set up the heat gun and straightened the bend in the stem first. Once it was straight I would then heat it a bit more and bend it over a rolling pin to get a gentle curve.Gas9

Gas10I put the newly bent stem into the shank and took a few photos to see the new look of the pipe.Gas11

Gas12 With the bend done it was time to polish the stem. Even with the stem held 6 inches above the heat gun there was some slight bubbling in the surface of the Lucite. I sanded it with 220 grit sandpaper and then with a medium and a fine grit sanding sponge to remove the bubbling and smooth out the surface of the stem. Once the bubbling and rippling were removed I went on to polish the stem with micromesh sanding pads. I wet sanded with 1500-2400 grit pads and then dry sanded with 3200-12,000 grit pads to return it to its original shine.Gas13

Gas14

Gas15 I buffed the bowl and stem with Blue Diamond Plastic Polish on the buffer and then gave them both a few coats of wax. I buffed it with a clean flannel buff and then with a microfibre cloth to raise a good shine. I was unable to permeate the urethane finish and since it was in decent shape I left it alone. The finished pipe is shown in the photos below. It is cleaned and ready to be loaded and smoked. I hope to do that later today. Thanks for the “new pipe” John. I know I am going to really like this one.Gas16

Gas17

Gas18

Gas19

Replacing a Broken Tenon on a Gepetto Canadian 37


Blog by Steve Laug

A good friend of mine stopped by for a bowl the other day and to drop off some pipes he was donating to the Nepal Pipe Project. He has given quite a few already and some of you have benefited from his generosity. This time he had a couple of surprises with him as well. He had two of his favourite pipes with him that needed some attention. The first was a handmade Gepetto Canadian made by Ser Jacopo. It was a shape #37 and had a rusticated finish. It was a beautiful pipe. He had been twisting the stem out of the shank and it was stuck. One little twist too much and the tenon snapped in the shank. It broke off quite deep in the shank and was solidly stuck in place. I would need to pull the tenon, drill out the stem and insert a new tenon.Gepetto1

Gepetto2 I used my drywall screw and twisted it into the airway of the broken tenon until it caught hold and then wiggled it loose. With careful wiggling and pulling the broken tenon came free of the shank.Gepetto3

Gepetto4 I used the Dremel and sanding drum to take off the majority of the remaining broken tenon on the stem itself. I faced it on the topping board with 220 grit sandpaper until it was flat against the rest of the stem face.Gepetto5

Gepetto6 The stem is Lucite and the original tenon was an integral part of the stem. I did not have any Lucite tenon and also no Delrin tenons. So once again I decided to do some improvisation. I turned down the tenon on an old thin vulcanite stem that I had in my stem can until it was a snug fit in the mortise of the shank. I wanted it to sit as deeply as the previous tenon so I turned it down accordingly with the Dremel and sanding drum. When the fit was correct I left it in place in the shank and carefully cut off the stem with a hacksaw. I left enough of the new tenon to sit in the hole I would drill in the stem face.Gepetto7 I set up a drill and turned the stem onto the drill bit by hand until it was deep enough to hold the new tenon but not too deep because of the sharp taper of the stem. If it was too deep it would have broken through the top and bottom side of the taper. I measured the depth I had to work with and drilled only that depth in the stem. I started out using a drill bit slightly larger than the airway in the stem and worked my way up to a ¼ inch bit. I used a round needle file to clean up the inside edges of the drilled out stem. I turned the end of the tenon down until it slid snugly into the hole. Once I had a good fit I coated the end of the tenon with super glue and pressed it into the hole. I did this carefully to keep the tenon straight both horizontally and vertically. Gepetto8 Once the glue set on the new tenon I cleaned it up with some sandpaper and then pushed it into the mortise of the pipe. The fit was good and the taper lined up correctly on the top, sides and bottom of the shank. The stem needed to be sanded to clean it up and polish it. I sanded it with 220 grit sandpaper to smooth out the edges and around the button.Gepetto9

Gepetto10

Gepetto11

Gepetto12 I continued to sand it with a medium and a fine grit sanding sponge. The fit against shank on the underside had a slight gap so I needed to do some adjustments. I heated the tenon and then pushed it in place and held it against the shank until it cooled and set. The fit was better.Gepetto13 I wet sanded the stem with 1500-2400 grit micromesh pads and then used some mineral oil to give the next grits of micromesh some bite. I then dry sanded with 3200-4000 grit pads and repeated the oil and then finished with 6000-12000 grit pads. I put the stem on the pipe and buffed it with Blue Diamond.Gepetto14

Gepetto15

Gepetto16 The rim had some build up of tars on the back top edge so I cleaned that off and then buffed the rim the rim to polish it. I lightly buffed the entire bowl. I used carnauba wax on the rim and the smooth portions of the pipe as well as the stem. I buffed it with a clean flannel buff and then buffed it by hand with a microfibre cloth. The finished pipe is shown below. It should be back in my friend’s hands soon and he can enjoy it once again. Thanks for looking.Gepetto17

Gepetto18

Gepetto19

Gepetto20

Gepetto21

Gepetto22

My Introduction to the World of Estate Pipes


Blog by Steve Laug

Many years ago, when I picked up the pipe again after leaving it aside for a time, I purchased a Medico billiard. I remember that I bought it from a 7-Eleven Convenience Store on the morning my oldest daughter was born in 1982. To me it was a thing of beauty, long and slender and light weight. It had a shine and it felt smooth in the hand. It was made out of Brylon – a mixture of briar and resin and had a nylon/plastic stem. I had no idea of what Brylon meant and how it would smoke but I did not care. I was ecstatic over the birth of my daughter and wanted a pipe to celebrate the event. It smoked hot for the longest time but eventually built a cake that cooled things down a lot. It was the only pipe I had and I never even thought of rotating pipes. I smoked Borkum Riff Whiskey flavoured tobacco as well as Captain Black Blue. I used pipe cleaners because somewhere along the way I had learned that they were necessary but I never let the pipe rest before loading it again and smoking a few more bowls. The only time it rested was when I did! I still have that old pipe – 33 years later. I have restemmed it with a churchwarden stem and still smoke it on occasion.MedicoWarden I can tell you when I changed my habits and bought more pipes and some better grade tobacco. I can’t tell you the date of that momentous event but I can tell you the story behind it. I visited a small tobacco shop near where I worked in Vista, California to pick up some more pipe cleaners and some tobacco. When I went into the shop there was an older gent was sitting behind the counter smoking an interesting pipe and the tobacco he was smoking smelled great. We got to talking and I showed him the pipe I had – the old Brylon. I have to give him credit because he did not laugh at or mock me. He just said that he thought I needed to think about picking up another pipe or two so that I could give this one a rest. He was very gentle with me, knowing full well just how green I was to pipe smoking. He asked me what kind of budget I had to work with and like all young fathers my response was a laugh and a question. “Budget?” I asked. He chuckled and did a midstream adjustment in his path to take me to the estate pipe rack.

From the many pipes on the rack he chose two pipes for me that he thought would work well for me. They would give me some variety as well as value for the money. They were very differnet from my Medico. The first was an Alpha Comfit in a modified Prince shape. It was smooth briar and dark and rich looking made in Israel. It had thick walls, a thin saddle stem (with a comfit dental bit) and was clean and ready to smoke. I immediately fell in love with the hand feel and the shape of this pipe. That was my second pipe. The Medico had a rack mate. At that point I had no inkling of the difference a briar pipe would make to smoking when compared with Brylon. It was all about how they looked – their shape and feel – to me. The old gent did not mock me but shook his head approvingly. He truly had my number.AlphaComfit2-1 The second pipe he chose for me was a sandblast Ben Wade Preben Holm made freehand. It was a piece of art to my eyes – almost what I have come to know as a Dublin shape, but had no idea of that then. The body of the pipe was a beautiful sandblasted briar. Then end of the shank and the rim were what he described as plateaux but to me just looked rough and craggy. It was very light weight. The stem was thin as well. I held the pipe and knew that I had to have this one as well. It too felt amazing in the hand.Ben wade
I told him I would take them both. Now, understand I had no idea what they cost or if I could afford them. I was in “love” with them and had to have them. He laughed when he saw the “teenage boy in love” look in my eyes. He gave me a price that fit well into what I could afford. I have no idea what I paid for those two pipes but looking back I know he gave me a very good deal. He led me over to the tobacco bar and handpicked two tobaccos for me – not packaged drugstore tobaccos but two of his own blends – I don’t remember the names and the shop is long gone now but I do remember that one was a Virginia and the other was an aromatic that he said smelled like plum pudding. He gave me 2 ounces of each blend to go with the pipes. He cleaned each pipe with a pipe cleaner and wiped them down with a cloth and put them in a pipe sock that he had for them – a no name felt sock. He put some pipe cleaners in the bag along with the tobacco and the pipes.

Then to my surprise he asked if I wanted to smoke one of them before I left the shop. He would guide me in the packing and lighting to make sure I had it right so I would get the most out of my `new` pipes. I remember choosing the Ben Wade and packing it up. He checked my load and then added a bit more. He had me feel the springiness and then showed me how to light it with a match. Then he relit his own pipe and we smoked a bowl together. I will never forget that old gent and the first two good pipes I purchased. The pipe smoked like a dream.

I put away the old Medico and smoked those two pipes for quite a few years. I frequented that shop for as long as I lived and worked in Vista. I went back to see if it was still there a few years ago but it was gone. However, it still lives in my memory. I still have those two pipes. I still smoke them, 33+ years later and I still relive the story with every good smoke that they deliver. The Ben Wade looks tiny now in comparison to the newer freehands that are on the market. The old Alpha has been restemmed by none other than Lee von Erck many years ago now. Both will continue with me through my life.

That was my introduction into estate pipes. Is it any wonder that I still have far more estate pipes than pipes I have purchased new? Somehow, that initial experience set the bar for me to be on the lookout for estate pipes and to add them to my collection. Today not only do they make up the majority of my collection but I have added to that the hobby of restoring and refurbishing estate pipes. I have been doing that for over 15 years now and love the feel of old briar and bringing it back to a life of usefulness. At this point in my life I don’t think my love of estate pipes will ever die. The hunt for them is a part of every holiday and trip that I take. Even my kids take part in the hunt now.

I read a post on one of the forums on this topic that included a quote from Kris Kristofferson that I remember hearing when I was growing up. It is an apropos way to end this blog. “I’d trade all my tomorrows for one single yesterday.” The author talked about the nostalgia of old briar and what a great addition that is to the value of the pipe. To me though the thing that makes estate pipes even interesting to me are the stories that come attached to the old pipe. Sometimes you can ferret out the stories of the pipe other times you have to use your imagination and create a story that fits the pipe. But in either case the memories that come along with these old pipes (if you can find them) and the ones you add over the years give these estate pipes a patina of dignity that it will take many years for a new pipe to gain. Do you buy estate pipes? Why? What are your reasons for buying estate pipes? If you do not, what keeps you from these dignified old timers?

Peterson 1910 Patent Reproduction Bulldog


I’ve been a fan of the Peterson reproduction pipes since reading about them on Mark Irwin’s “Peterson Pipe Notes” and Jim Lilley’s “Peterson Pipe Connoisseur” blogs.

While visiting one of my favorite Virginia shops, JB Hayes in Winchester VA, I spied this chubby beauty in the bottom of their estate case. The briar was in excellent shape, but the oddly, the stem was pretty much destroyed at the P-lip button end. While the pipe has “Made in Ireland” COM stamping, and the silver was stamped “1910” I was pretty certain it was a Reproduction pipe. The silver was tarnished, but I could make out the letter “M”. I keep a copy of the Peterson hallmark dates chart in my Drop-Box account and opened it up via my Smart Phone. The letter M was for 1998, which confirmed that the pipe was a Reproduction piece. The stem was so bad, I put it back in the case. After thinking about it overnight, I drove back down and struck a deal on the pipe. I thought perhaps it could be repaired and at the worst, I thought that I could acquire a new stem from Peterson. In fact I emailed Peterson and they quickly confirmed a replacement stem could be had for around $50 shipped from Ireland. I found this picture of the Reproduction set, which came with four pipes from 1903, 1905, 1909, 1910.

Peterson_Patent_Collection(4 Pipes)

Here is the pipe as it was found at the shop.

Peterson_1910_Patent_Before (4)

Peterson_1910_Patent_Before

Peterson_1910_Patent_Before (1)

Peterson_1910_Patent_Before (3)

I posted the pipe to the PipesMagazine.com forum (where I’m a moderator) in the British Pipes section. Of our the members, George Dibos, of Precision Pipe repair replied that he had the matching billiard Reproduction pipe. He prefers fishtale stems and had made a replacement for his pipe. He retained the original P-lip stem and I gladly took him up on his offer to send it to me.

The briar only required a light sanding of the bowl interior and I soaked it with alcohol and sea salt. The bowl was buffed with several coats of carnuba wax. I used a jewelers cloth to remove the oxidation on the silver collar. The replacement stem was in like new condition and it fit perfectly.

Now the hunt is on to locate the other three pipes in the collection.

Peterson_1910_Patent_Gallery

Peterson_1910_Patent_Gallery (4)

Peterson_1910_Patent_Gallery (1)

Peterson_1910_Patent_Gallery (3)

?

?

?

Update – 8/2/15
Mark Irwin was kind enough to contact me and offer the four pipe case for the Patent Reproduction set and I received it last week.  Thanks for your thoughtfulness Mark!  If you know me, I love a collecting challenge, so the hunt begins.

20150802_080316

Replacing a Broken Tenon & Doing a Simple Restoration on a Unique Bjarne Danish Handmade Egg


Blog by Steve Laug

I found this interestingly shape pipe in an antique mall in Idaho Falls. I was attracted to the egg shape, the hanging bottom and the rectangular shank and saddle stem before I even knew who had made it. I was pretty sure that it was a Danish made pipe but did not know who had made it. When the clerk took it out of the display case I saw that it was priced at $15 US – not a bad price these days for estate pipes. I turned it over in my hands and could see that it was well made and barely smoked. The bottom of the bowl still showed unseasoned briar. The stem was oxidized but free of tooth marks and tooth damage. The finish was in decent shape other than some sticky spots where the person selling it had put price tags. On the bottom of the shank it is stamped BJARNE over Handmade in Denmark. That is the only stamping on the shank. It is the pipe circled in the photos below.Bjarne1

Bjarne2 I was excited by this find. I liked the shape and the cleanup would be simple. I purchased it and took it back to my mom and dad’s place. But then the something happened that I have come to dread. I was carrying the bag across their parlour when the bottom fell out of the bag and the pipe bounced off the tile floor. There was a sharp crack and the stem had disappeared. I found it hidden in the pattern of the carpet about three feet from the bowl. I was sick to my stomach. The tenon had snapped off evenly in the shank. The stem and the bowl were undamaged otherwise. This meant that what was originally a simple restoration would now be a bit more complicated. I would need to replace either the tenon or the stem.Bjarne3 I took some photos of the bowl when I brought it to my work table. The briar was beautiful and not a flaw in the grain on the bowl itself. There was one small sand pit on the bottom side of the shank but it had only darkened from handling and was not that big a deal. The rim had some darkening and burn marks on the top near the back, the right side and the right front. These would have to be dealt with.Bjarne4

Bjarne5

Bjarne6 I used my tried and true method for pulling broken tenons. I twisted a drywall screw with wide threads by hand into the airway on the tenon. When it bit, I wiggled the tenon free of the shank. It did not take much to pull it out. If it had I would have put the bowl in the freezer for a half hour and repeated the process.Bjarne7 I faced the stem on my topping board to knock off the remnants of the broken tenon and then twisted the stem onto a drill bit slightly larger than the airway in the stem. I don’t use the power feature on the drill as I would rather turn the stem onto the bit by hand. This is critical when working on short saddle stems where it is very easy to over drill the airway and ruin the stem.Bjarne8 When I had the airway open for a new tenon I improvised by using a junk stem I had in my can of stems. I pressed the tenon on the thin stem into the freshly drilled airway on the stem. The fit was snug and the once I cut back the donor stem I would have a new vulcanite tenon. I glued the new tenon in place with super glue and pressed it until it set. The next three photos give an idea of how the new tenon and the donor stem fit in the stem as a replacement tenon.Bjarne9 I cut off the stem with a hacksaw. In this case, after measuring the depth of the mortise I knew I could cut of the tenon portion of the donor stem and be left with a tenon the right length for the pipe.Bjarne10 I turned the diameter of the new tenon down with a sanding drum on my Dremel until it was close to fitting and then finished the fit by hand with 220 grit sandpaper.Bjarne11

Bjarne12 As often happens with a new tenon I had to do a little fine tuning on the shank – not much really but a slight removal of briar on the left side and a little vulcanite on the left. I probably could have left it but I am picky so I sanded it lightly until the transition was smooth. I wiped down the bowl with acetone on a cotton pad to remove the mottled finish and the glue that was on the shank and the bowl from the price tags.Bjarne13

Bjarne14 I examined the burns on the rim and to repair/remove them the bowl would have to be lightly topped. I used the topping board and 220 grit sandpaper to take off most of the burn marks and minimize the damage.Bjarne15

Bjarne16 I sanded the rim with a medium and fine grit sanding sponge and then wiped the bowl down with a cotton pad to remove the sanding dust.Bjarne17

Bjarne18

Bjarne19 I restained the sanded areas on the shank and the rim with a stain touch up pen using the lightest colour stain. I was able to match the colour of the bowl and not have to restain the whole pipe. Bjarne20

Bjarne21

Bjarne22 I gave the bowl a quick buff with a coarse cotton rag to blend in the stained areas with the rest of the bowl and feather in the new stain.Bjarne23

Bjarne24 I took the stem off and cleaned out the shank and the stem. It was a pretty clean pipe which lent proof to my earlier assumption of the pipe being lightly smoked.Bjarne25 With the tenon replaced, the bowl stained and looking fresh all that remained was to remove the oxidation on the stem. I lightly sanded the stem with medium and fine grit sanding sponges and then went on to sand it with micromesh sanding pads. I wet sanded the stem with 1500-2400 grit pads and rubbed the stem down with Obsidian Oil. I “painted” over the saddle area and the edge of the button with the flame from a Bic lighter to remove the oxidation. I dry sanded with 3200-4000 grit pads, rubbed it down with oil once again and then sanded it with 6000-12000 grit pads. I gave it a final rubdown with Obsidian Oil.Bjarne26

Bjarne27

Bjarne28 Once the oil dried I buffed the stem and the bowl with Blue Diamond on the wheel and then gave it multiple coats of carnauba wax. I buffed it with a clean flannel buff to raise the shine. I then used the new addition to my order of things, learned from Dave Gossett and hand buffed the bowl and stem with a microfibre cloth to take the shine to the next level. The finished pipe is shown below. The fit of the stem makes the repair look like it came that way. The final photos of the stem and tenon show how the new tenon looks when it was completed. I am sure glad that the broken tenon did not ruin this old pipe and that once the new tenon was replaced the restoration was quite simple. This pipe should serve me well for years to come. Thanks for looking.Bjarne29

Bjarne30

Bjarne31

Bjarne32

Bjarne33

Bjarne34

Bjarne35

Repairing and Restemming a York (KBB) Diamond Shank Bent Billiard


Blog by Steve Laug

When I was traveling in Idaho my brother and I took the family for a trip to Jackson Hole, Wyoming. On the way we stopped in a little town called Victor, Idaho. There was an antique shop there in the town and I found four more old pipes. The first of these reminded me of an old WDC Diamond shank billiard that I have. This one was stamped YORK on the left side of the shank and from research it may have been made by KBB. It was in rough shape. The shank had been cracked and repaired with glue and a piece of twisted wire. The stem obviously had a broken tenon and the previous owner had carved it down to fit in the shank anyway. The bowl had a thick cake and the finish was gone. The rim was damaged on the front outer edge and there was some tar on the rim.York1

York2

York3

York4 On the right side of the bowl near the shank junction there was a pink putty fill that was coming out. Most of the putty had fallen out of the briar. This would need to be repaired.York5 When I got back home I took the pipe out of the bag to have a look. The silver end cap had some hallmarks but they were the faux hallmarks that I have found on older American made pipes to give them a touch of class. All four edges of the band were split. I removed the stem and looked inside the mortise and could see that a major part of the briar was missing on the right side of the shank under the cap. With little effort I removed the cap and sure enough a huge chunk was missing out of the briar. In fact the whole right side under the cap was gone. There was a small crack that had been repaired earlier. There was a small hole in the shank to stop the crack and the crack was glued and clamped with the wire. This was going to take a bit of work to bring it back from the brink of destruction. York6 I clipped the wire with a pair of wire cutters so that I could work on repairing the broken portion of the shank. This repair would take some careful and time consuming work to rebuild the missing portion of briar.York7 I reamed the bowl to clean out the thick cake. It was crumbling so I wanted it removed so that the repair of the shank would be less dirty. I use a PipNet reamer to take the cake back to the bare briar.York8

York9 The first step in rebuilding the broken area was to clean up the damaged ends of the remaining briar. Once it was clean I put clear super glue on the raw edge of the broken spot and tamped the end into some briar dust. I repeated the process until the edge was repaired as much as possible with this method.York10

York11 During the process I also picked out the broken putty fill and replaced it with briar dust and super glue.York12 I sanded the flat surface of each of the four sides of the diamond shank smooth with 220 grit sandpaper until the cap slid easily over the shank. I also faced the end of the shank on the topping board.York13

York14 The next step in the process of rebuilding the shank and the mortise was a little more difficult than the briar dust and super glue rebuild. It involved working on the internals of the shank. I glued the end cap in place with wood glue and clamped it in place to take care of small splits in the edges of the metal cap. Once that dried and set, I mixed white wood glue with briar dust to make putty. I tamped the mixture into the remaining areas of the shank with a dental pick and dental spatula until the area was filled solid looking once again. The next two photos show the rough repair on the inside of the mortise and shank. The broken area is gone! The holes are filled in and the repair is complete. Once the glue set I would have to clean up the mortise and make the walls smooth. The edges of the metal cap, looking at it from the end are damaged and I will not be able to repair them.York15

York16 While the shank repair cured I worked on the rim. There was a thick tar build up that was like rock on the back edge and the front edge of the rim had been knocked against something hard and was rough.York17 I decided to top the bowl to remove the rock hard tar and also minimize the damage to the front of the bowl. I used a topping board with 220 grit sandpaper and worked the rim against the sandpaper until the damage was minimized. Once I had it smoothed out I put some briar dust and super glue on the remaining divot on the front edge of the bowl as a fill. When it dried I sanded it smooth and lightly topped the rim once more to even out the repair with the rest of the rim. (That picture will be shown shortly.)York18 The stem that came with the bowl was damaged beyond repair. It had been repeatedly been cut off by the previous owner and hacked at until it fit in the damaged tenon. It was not a stem I would use again on this pipe. I went through my can of stems and found a faux p-lip stem – the airway came out the end of the button rather than on the top. It was old enough to work on this pipe and with some modification I thought it would look just right. The problem was that it did not have a tenon. When I found it the tenon was missing and the end of the stem had been drilled out to receive a replacement tenon. I am currently out of Delrin tenons so I used a thin vulcanite stem as the sacrificial tenon. I glued the tenon on the donor stem in place in the diamond shaped stem with super glue and then cut off the stem with a hacksaw. I left a piece of vulcanite that was longer than necessary so that I could work it to a proper fit in the repaired shank.York19

York20 The next photo shows the repaired stem and tenon and the topped bowl before I put the two parts together. I used a Dremel to remove the excess material on the new tenon and shortened it to the depth of the mortise in the shank.York21 The next photo shows the repaired fill on the bowl side with another photo of the new stem.York22 Once the shank repair was dry I used a needle file to clean up the rough areas and smooth out the inside of the mortise. I gave it several more coats of glue and briar dust to buildup the areas that had shrunk as the glue dried. I continued to work it with the files and sandpaper until the fit was correct. I cleaned out the airway to the bowl and the inside of the mortise with alcohol, cotton swabs and pipe cleaners in preparation for putting the new stem in place.York23 The next two photos show the newly fit stem. There was still work to do to fine tune the flow of the diamond stem sides to match the flow of the diamond shank but the look is clear at this point in the process.York24

York25 I sanded the stem with 220 grit sandpaper and with a medium and a fine grit sanding sponge to fine tune the fit. When I had it the way I wanted, it was time to bend the stem. I used my heat gun to do the work. In this case I quickly set it up on the dryer in our laundry room (shh don’t tell my wife I did this) and heated the stem. I bent it over an old rolling pin that I use for this purpose until the bend in the stem matched the curve of the bottom of the bowl. I set the bend by holding the stem under cool running water.York26

York27 The next two photos show the newly bent stem and give an idea of how it will look with the pipe once it is finished.York28

York29 With the easiest part of fitting a stem completed I went on to do the laborious and tedious part of sanding and more sanding to get the fit just right. To do this without rounding the edges of the stem at the shank stem junction I use a plastic washer placed between the two areas. I sanded the stem with 220 grit sandpaper to smooth out the transition and make the angles square (or at least as square as possible on these old pipes where every side has a different angle and width).York30 When I had the fit of the stem correct it was time to polish it. I wet sanded with 1500-2400 grit micromesh sanding pads and rubbed the stem down with Obsidian Oil.York31 I needed a break from the stem work so I turned my attention to the bowl. I rubbed it down with a light coat of olive oil to highlight the grain. I took a few photos to show what it looked like at this point. It is certainly looking far different than it did when I started working on it. There is a deep richness in the red tones of the briar.York32

York33

York34

York35 I decided to highlight those tones with a dark brown aniline stain thinned by 50% with some isopropyl alcohol. I applied it and flamed it to set it in the grain.York36 I hand buffed it with a cotton cloth to get an idea of the coverage. It was still too dark to my liking so I would need to address that.York37

York38 I wiped the bowl down with some acetone on a cotton pad to remove some of the stain and make the grain show through better.York39

York40 I buffed the bowl with White Diamond and then gave it the first of many coats of carnauba. I don’t know about you but by this point in a long refurbishment I get a bit anxious to see what I have accomplished. It always seems that it is going to go on forever so I rewarded myself by putting the stem in place and taking a few photos to see what I had achieved.York41

York42 For comparison purposes I took the next two photos of the pipe with the old stem next to the new one. You can see how badly hacked the vulcanite was from the previous owners salvage work on his broken pipe. The pipe is beginning to look like a very different pipe than when I started. That always encourages me!York43

York44 Now it was time to finish up with this long project and get the stem done. I dry sanded it with 3200-4000 grit micromesh sanding pads and then rubbed it down with Obsidian Oil once again. I then dry sanded it with 6000-12000 grit pads and gave it a final coat of oil and let it soak into the vulcanite.York45

York46 I buffed the stem and bowl with Blue Diamond and then gave them both multiple coats of carnauba wax. I buffed them with a clean soft flannel buff to raise the shine and then hand buffed the pipe with a microfibre cloth to finish. The completed pipe is shown below. It has come a long way from the pipe I started on this morning. I had a quiet day at home and between reading and napping finished the work on this old timer. From what I can find out in my research and from Who Made That Pipe, the pipe may well be from the old KBB pipe works. Thanks for looking.York47

York48

York49

York50

York51

York52

Take a Sad Pipe and Make It Better


Guest Blog by Robert M. Boughton
Member, North American Society of Pipe Collectors
http://www.naspc.org
http://www.roadrunnerpipes.com
http://about.me/boughtonrobert
Photos © the Author

“Only when you eat a lemon do you appreciate what sugar is.”
― Ukrainian proverb]

INTRODUCTION
The Beatles sang the idea more perfectly, to take the same liberty with the English language as Thomas Jefferson when beginning to pen the U.S. Constitution, and I’m not looking to start a revolution or create an international incident or any other uproar by saying that all Ukrainian pipes are lemons. My personal experiences have both been with the Veresk Company in Kiev, now the capitol city of the Republic of Ukraine. Before the fall of the former Soviet Union, the Veresk Cooperative factory was the only official outlet for tobacco pipes throughout the USSR. On the other hand, the following work of briar art was created by Ukrainian pipe crafter Konstantin Shekita, who made his start at Veresk.rob1 The Cooperative made all of its pipes during the Soviet days from fruit woods including cherry, pear, peach and apricot. After the collapse of the entire Soviet empire, brought about as an unforeseen consequence of Mikhail Gorbachev’s attempt to ease economic hardship for the common Russian with perestroika (rebuilding, reorganization) and to remove the iron-clad clamp on discussion of economic and political realities employing glasnost (openness), Veresk became a company and started to use briar imported from Tuscany, Italy. Although the fruit woods are still sometimes substituted, briar is now the preferred wood. This Golden Gate billiard, which with help from my mentor, Chuck, was determined to be pear wood, was probably made before the end of the Cold War.

On occasion, I find myself having to track down information on a given odd pipe every way I can: Internet engines using multiple query terms, emailing or calling friends, posting threads on various forums – even some Deep Web methods. Having a background as a newspaper reporter, I then try to verify the first source as well as I can. By and large, however, the first place I check is Pipephil, at http://www.pipephil.eu/logos/en/index-en.html. If that site has nothing on a pipe I have bought and/or restored, then I know I’m in for some real work. The contributions of Pipephil as a database trove of information on pipe brands, history, dating and other useful details is, for the most part, invaluable and irrefutable.

For example, about a week ago I saw a Kaywoodie Super Grain Lovat advertised as pre-1930s. Checking Pipephil, I learned that although that dating was not quite accurate, the placing of the Super Grain stamp above Kaywoodie and a four-digit shape number – in this case 5190 – dated the pipe to between 1931 and 1938. The inclusion of Imported Briar, introduced in 1935, narrowed the pipe’s manufacture to within three years during the latter part of the Great Depression. Lucky that no one else seemed to see these details, I won the very old but pristine Lovat for $32.50 with S&H.rob2

rob3 At about the same time, seeing the Golden Gate advertised on eBay as “Wooden Smoking Estate Pipe,” I was able to make my decision to buy it based on the GG I spotted on the bit, which Pipephil, with its amazing logo-finding resources, identified with certainty as a Ukrainian brand with the unlikely name Golden Gate. I was also warned that I was liable to receive a pipe made with very alternative wood, meaning something from a fruit tree. For $10 Buy Now with no S&H, I didn’t care. P.A.D., I embrace thee! There are so many worse things on which to spend one’s money.

However, in its entry on the Golden Gate brand, Pipephil gives the translation of Veresk as briar. I have been unable to determine from which language this assertion is drawn. The Russian word for briar, шиповник, transliterates to shipovnik (ship-ŌV-nee-yik), and the Ukrainian шипшина is shypshnya (SHIP-shnee-uh). The best references to Veresk in regard to Russian I can find are a sub machine gun known to players as the SR 2M Veresk, used in a computer role playing game (RPG) called Alliance of Valiant Arms [https://www.youtube.com/watch?v=R9BFocl97_Y], and a surname most common in Russia [http://forebears.io/surnames/veresk]. Hence I suspect Pipephil has this tidbit wrong, and Veresk is in fact derived from the last name of some Party-loyal old Comrade. I emailed Pipephil the details above and asked if perhaps Veresk is briar in another language or dialect. I’m hoping for a response.

RESTORATIONrob4 I snapped this first photo to add to my private collection, as I do all of my new and unused pipes that need no restoration, before I realized the peculiar stain probably hid something, such as a fruit wood that Pipephil identified as the most common type used by Veresk, whatever the company’s name means. Here is the Golden Gate after I stripped the old stain with an Everclear soak and then used super fine steel wool to begin the process of smoothing the assaulted pear wood’s skin, so to say.rob5

rob6

rob7 I’m no expert on woods, but this does most resemble pear to me, after comparing all of the possibilities. Any knowledgeable wood-workers who might read this, please feel free to correct me

I tried a couple of fills of favorite tobacco blends before beginning the restoration, and enjoyed them, and after the Everclear soak, I was sure the pipe needed no retort. In hindsight, it occurs to me that I should have taken a close-up of the chamber before soaking the wood in alcohol and then using my reamer and sandpaper to remove the unusual coating that came in it as the billiard arrived in the mail.

Researching that general subtopic of pipe knowledge after my instincts already led me to eradicate the harsh-feeling stuff, I was horrified and reached the conclusion that the somewhat sharp and definitely alien material used to coat the chambers of both Veresk pipes I have purchased was the so-called “waterglass.” This attractive sounding term is a euphemism for sodium metasilicate (Na2O3Si), a highly toxic chemical compound that is “[i}rritating & caustic to skin, mucous membranes. If swallowed causes vomiting & diarrhea.” Then there are the serious consequences of absorbing or ingesting this diabolical method of coating the chamber of a pipe that, when lit, cannot help delivering its sickening and potentially deadly payload directly into the hapless pipe smoker’s body, causing “[u]pper airway irritation, fever/hyperthermia [and] leukocytosis.” [http://pubchem.ncbi.nlm.nih.gov/compound/Sodium_metasilicate#section=Top. Also see its use in tobacco pipes at http://pipesmagazine.com/blog/out-of-the-ashes/bowl-coatings-the-good-the-bad-and-the-ugly-part-ii/.%5D

On a brighter note, I observed an unevenness of the rim.rob8 With the gentlest wood file I have, I corrected that minor problem and re-sanded and micro-meshed again until it was smooth.

I proceeded to sand the wood with 320-grit paper and used micromesh from 1500-4000.rob9

rob10

rob11 Although I liked the grain on most of the Golden Gate and considered buffing without stain, I recognized the need for something darker to lessen the flaws on the front and back of the bowl. I chose Lincoln Brown boot stain and flamed it after I applied a couple of coats.rob12 This time I took off the char with 4000-grade micromesh and some extra pressure on the pad instead of going down to 3600 and risking removal of the new color in spots.rob13

rob14

rob15 You can see in the first photo above that the small metal band came off from the alcohol soak, and so I used a few dabs of Super Glue to reattach it. Seeing the surface of the wood could use some slight further attention to prepare it for buffing, I took a small piece of super fine steel wool and only ran it over the surface of the wood with the gentlest touch, as though wiping dust or hand smears from the wood.rob16 With the pear wood ready to buff, I did so with white Tripoli, White Diamond and carnauba. The stem I left as it was.rob17

rob18

rob19 CONCLUSION
Altogether I think I took this sad billiard and, with a little help from a friend, as the Beatles also sang, made it better. At the very least I am now willing to offer it for sale, knowing it won’t send anyone to the hospital or perhaps even kill him.

Restoring an 1810 German Meerschaum Folk Art Pipe with a Story


Blog by Steve Laug

On Monday, June 29, 2015 after a weekend of celebrating with my parents and brothers in Idaho Falls, I went to visit one of my favourite pipe hunting haunts when I come to town. There weren’t any pipes on the three floors of the antique mall but before I left I asked the sales clerk if he had any pipes that somehow I had neglected to see. He said that there were not any on the floor but he had a few in a bag at home and if I would come back on Wednesday he would bring them with him and we could make a deal. Wednesday when I went back he had a bag of old pipes that are shown in the photo below. The top pipe is a Kaywoodie Apple with a three hole stinger. Tthe stem below it comes from a WDC Wellington but the pipe itself was missing. Next to it was an oval shank meerschaum with lots of bling on the shank and the bowl top. It had a broken tenon in the shank and would be an easy one to make a stem for. The third pipe down was a Bakelite stem and base but was missing the bowl. The bottom one was quite interesting to me. I had not seen one of these before intact. It was a meerschaum bowl with a wind cap and brass shank end. The stem itself was long with bark on the bottom portion and then hard wood ending with a woven hose and stem that was also wooden with bark on the portion next to the hose.Ger1

Ger2 I asked the sales clerk where the pipe had come from hoping that he would know the story behind this old meerschaum. It turned out that he knew a lot about the old pipe. I had belonged to his grandfather who was a German immigrant to Idaho Falls. The two meerschaum pipes were his. He had brought them with him when he came from Germany. He was brought over to be the beermeister for the Eagle Rock Brewery which only had a short life – 1896-1898. His own father (the sales clerk’s great grandfather) had purchased the pipes new in Germany and smoked them throughout his life. He had passed it on to his son, the brewmeister who smoked the pipe throughout his life even after the brewery closed. The sales clerk’s father had passed it on to him with the story of the pipe. The carved date on the pipe fits well with the four generations – 1810. I love these old stories behind the pipes I refurbish.Ger3

Ger4

Ger5 The bowl had a few little nicks in the meerschaum but none were detracting. The meer had a nice patina that was all over the bowl and shank. The carving on the bowl was a dog set in a background of carved bricks and wood making up a wall. On the front underside of the bowl was carved the year 1810. Someone had rigged some brass wire around the stem and the ring on the shank to keep the stem inserted in the bowl but it was very loose. The stem portion was in great shape on the bottom part up through the hose. The hose itself was dried out and had some cracking in the surface. The top portion, the stem was dry but had been chewed and there were tooth marks in the surface.Ger6 The wind cap was badly oxidized and the top of the rim was oxidized and covered in thick tar. I was not sure if it was silver or brass under the black of the oxidation. The inside of the cap had a heavy tar buildup that was like rock. There was a very thick cake that went to the bottom of the bowl and there was some unburned tobacco in the bottom 1/3 of the bowl. It was a bit of a mess and would take some work to bring it back to life and usability.Ger7

Ger8 I paid the clerk $40 for the lot and headed home to my parents. I put newspaper on the kitchen table and went to work cleaning up the bowl. I did not have a reamer with me so I used a sharp knife with a short rounded blade to ream out the carbon/cake in the bowl. I took it back to the meerschaum walls so that there was no cake left.Ger9 I scraped as much of the buildup on the inside of the wind cap and the rim as was possible with the tools that I had with me.Ger10 I put the pipe away carefully in my bag to be carried back to Vancouver. When I got home I worked some more on the pipe. I started by working on the hose portion of the stem. I gave it a thick coat of rubber cement to fill in the cracks and to provided the flexibility that was originally present when the pipe was made.Ger11

Ger12 I sanded the bit portion of the stem with 220 grit sandpaper to remove the tooth damage and reshape the button.Ger13 I cleaned out the inside of the shank and stem with pipe cleaners, cotton swabs and isopropyl alcohol until they came out clean. I used the brown tarred pipe cleaners to touch up the nicks on the bowl and shank.Ger14 The entire stem had a coat of varnish on it that was peeling on the centre portion. I wiped down the entirety with acetone on a cotton swab to remove the varnish coat.Ger15 I sanded the stem with 1500-2400 grit micromesh pads to smooth out the wood and minimize the tooth damage.Ger16 I removed the brass wire that held the stem to the shank and cleaned out the groove that had been carved in the bark of the lower portion. I put it in a pipe rest and took the next photo to show the look of the pipe at this point in the clean up process.Ger17 I scrubbed the wind cap with silver polish tarnish remover until the silver below all the black began to shine. The next photos show the silver beginning to shine through with each successive cotton pad.Ger18

Ger19

Ger20 I took the next set of photos to show the look of the bowl and cap after polishing the silver.Ger21

Ger22

Ger23 I used 0000 steel wool to clean up the inside of the wind cap. The tar was thick and some of the silver had deteriorated. I was able to smooth out the surface of the inside of the cap but it left some dark areas on the cap.Ger24 The tenon end of the stem was very loose in the shank and needed a little creativity to make a snug fit. As I looked at the inside of the shank it appeared that it had originally had some sort of gasket that was glued to the inside of the mortise. I cut a small strip of cork to fit in this area of the shank. I cleaned out the shank with alcohol and then coated the outside of the cork piece with white glue. I used a dental pipe with a flat spatula end to press it into the shank. When the glue on the cork dried I inserted the stem to have a look at the finished fit. It was perfect.Ger25

Ger26 I rubbed down the long stem with a light coat of olive oil to bring more life to it. I stained the long stem with some Danish Oil and cherry stain to protect the wood.Ger27

Ger28 I rubbed the silver cap and rim with a silver polishing cloth to give it a final polish. It really combines nicely with the brass ring around the end of the shank and sets off the darkening meerschaum bowl.Ger29

Ger30

Ger31

Ger32

Ger33 I hand buffed the stem and bowl with a microfibre cloth to raise a shine and polish it a final time. The finished pipe is shown in the photos below. It turned out far better than I had expected when I picked it up at the antique mall.Ger34

Ger35

Ger36

Ger37

Ger38

Ger39

Ger40

Ger41

Ger42Addendum

One of the readers of the blog just sent me this information regarding this pipe. It is much appreciated and answer questions that remained for me when I finished the restoration. Thanks Brad.

Regarding your post on the 1810 German Meerschaum pipe…

I’ve got a similar pipe and have been doing research on it. Mine has “1815” and has a portrait of the Duke of Wellington on it, likely commemorating the Battle of Waterloo. It has a horn mouthpiece with copper and mother of pearl inlay on the stem. While mine is missing a wind cap which would have the makers mark, it is very similar in look.

I’ve found through endless searching that these pipes are likely related to Josef Klinkosch, an Austrian metalsmith that worked from 1822-1888. If you google his name you will see similar work. There are similar pipes that have been sold through Gros & Delettrez online.

Since I finally found my answer, I figured I’d share it with you.