Monthly Archives: October 2020

Restoring A New-To-Me Brand – an LHS “Sternies”


Blog by Paresh

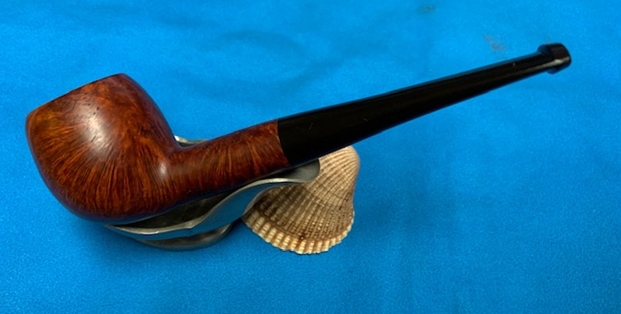
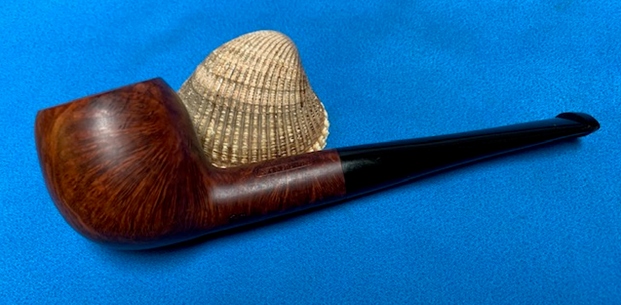
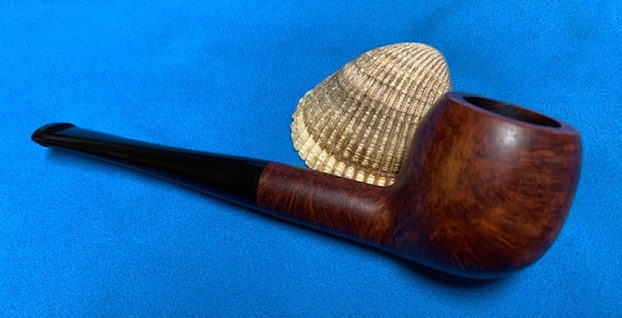
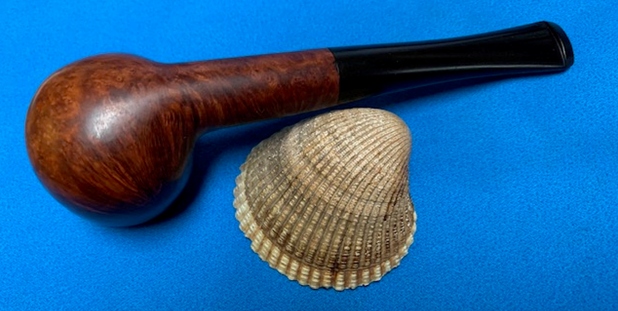
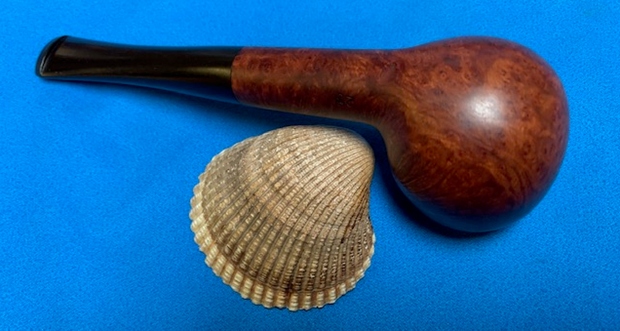
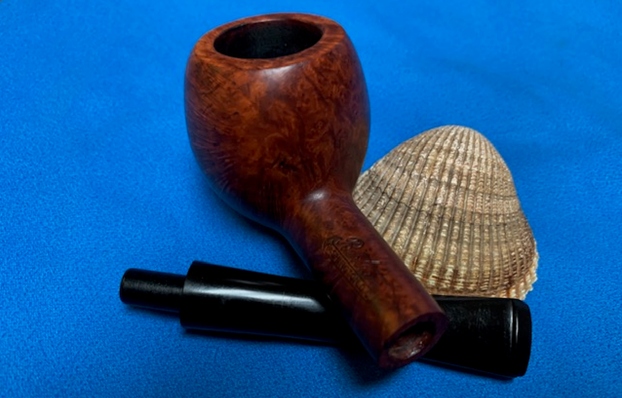
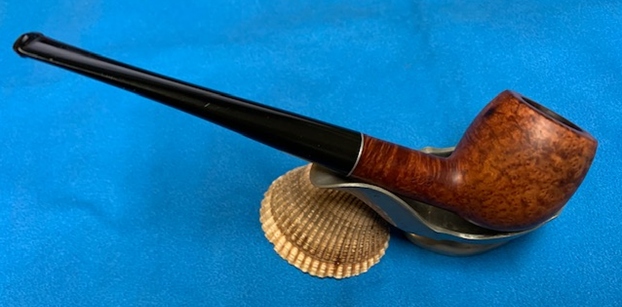
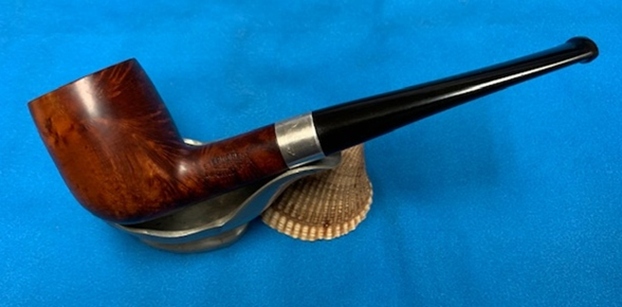
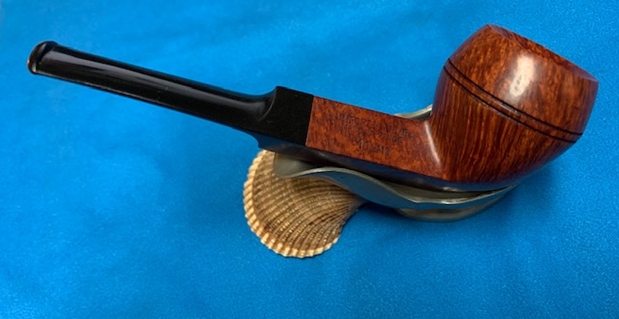
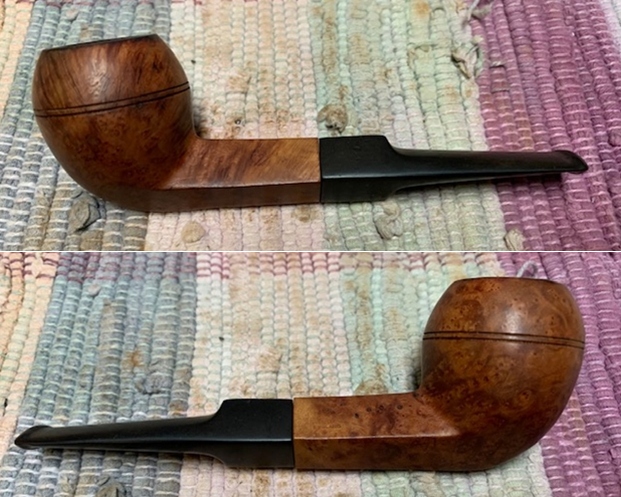
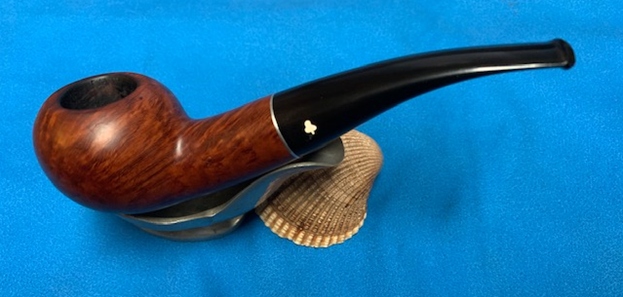
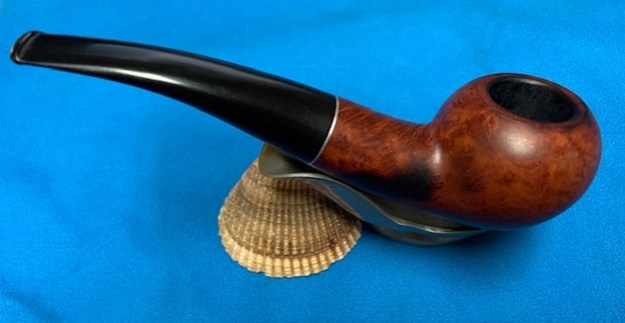
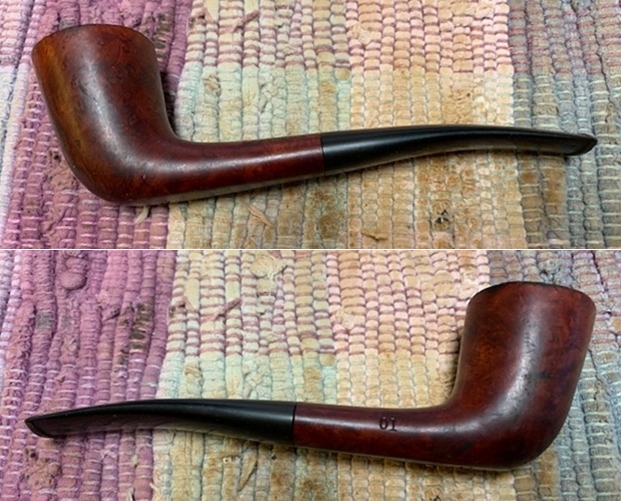
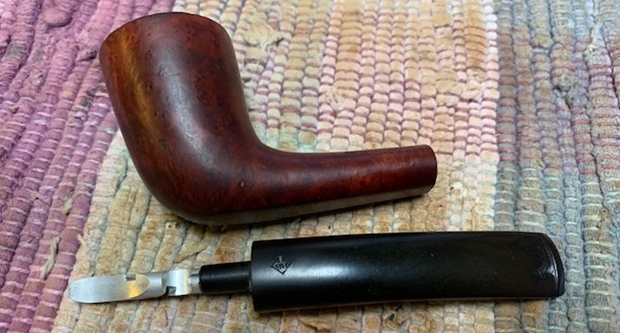
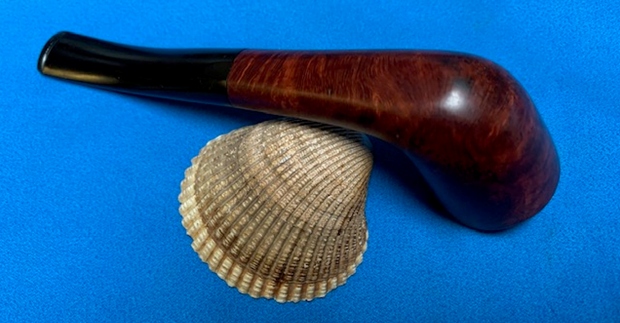
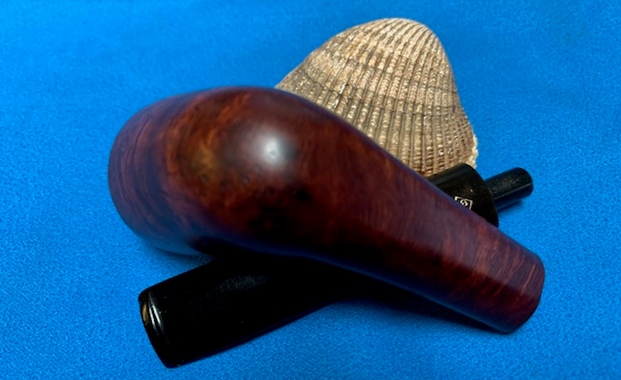
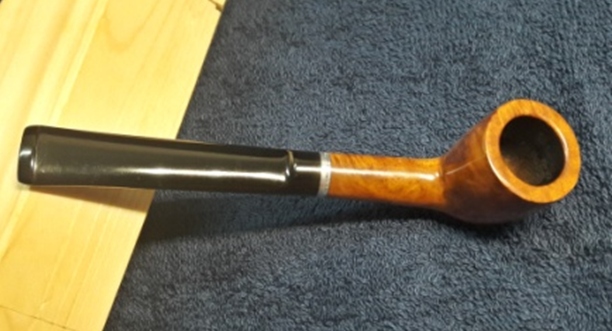
The next pipe that I picked up for restoration is a small sized classic straight Dublin shaped pipe that feels ultra light in the hand with a nice and comfortable feel in the mouth when clenched. This pipe came in one of couple of pipe lots that I had purchased on Etsy a few years ago and had been languishing in the lot of about 40- 50 pipes that Abha had done the initial cleaning for me. It languished at the bottom of the pile for no other reason than the fact that it was so nondescript that it did not attract my attention. However, with the continuing lockdown and partial suspension of work by Postal and Customs departments, my tobacco stock is fast depleting and this forced me to search for small bowled pipes. Thus, this pipe has now moved up in the line for restoration.

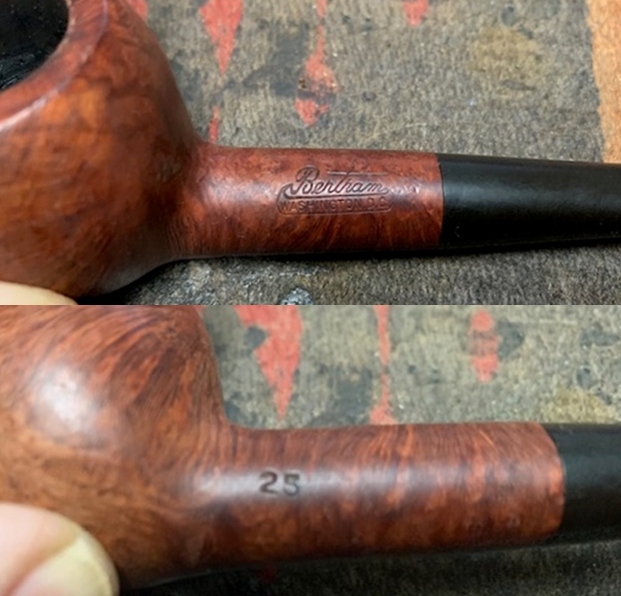
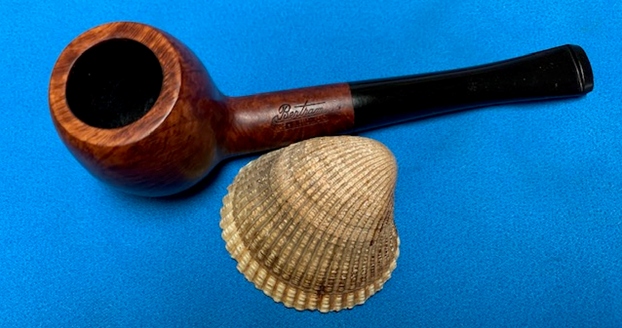
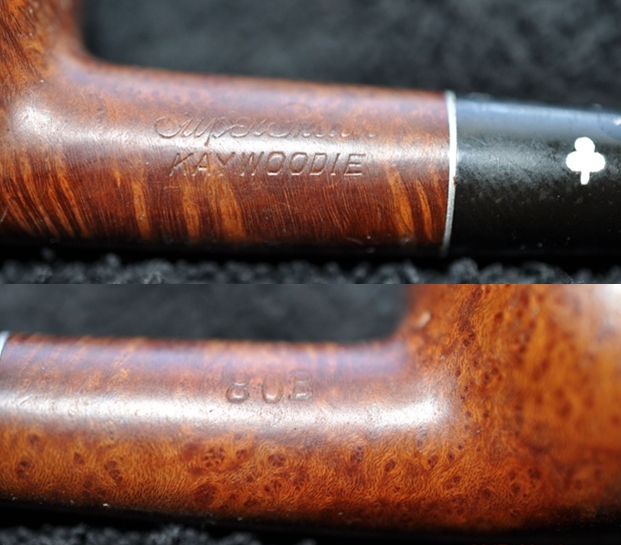
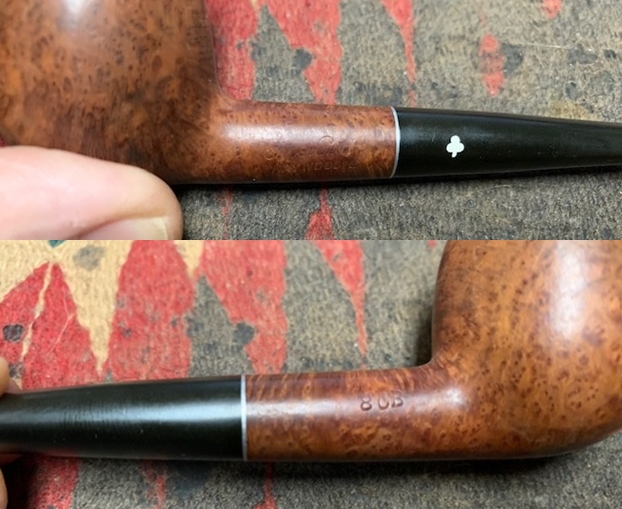
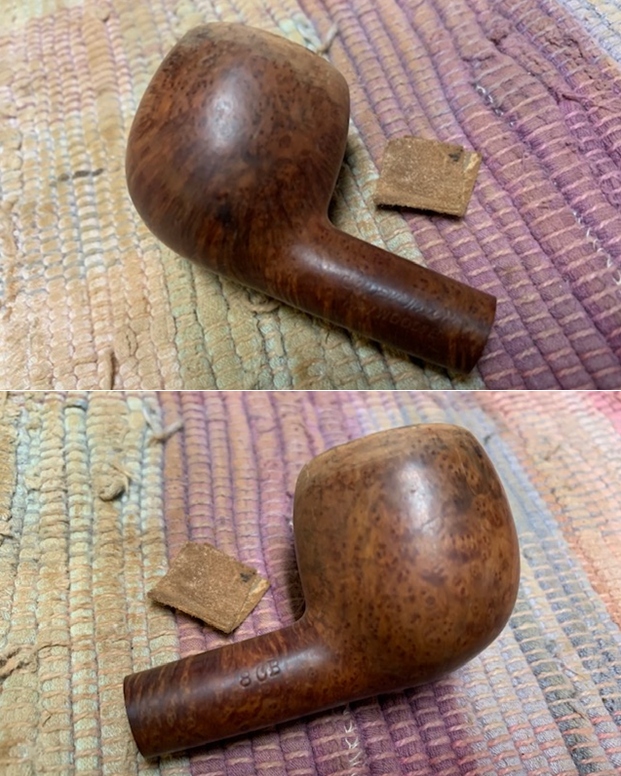
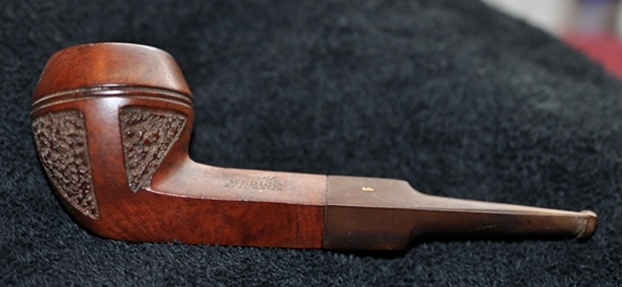
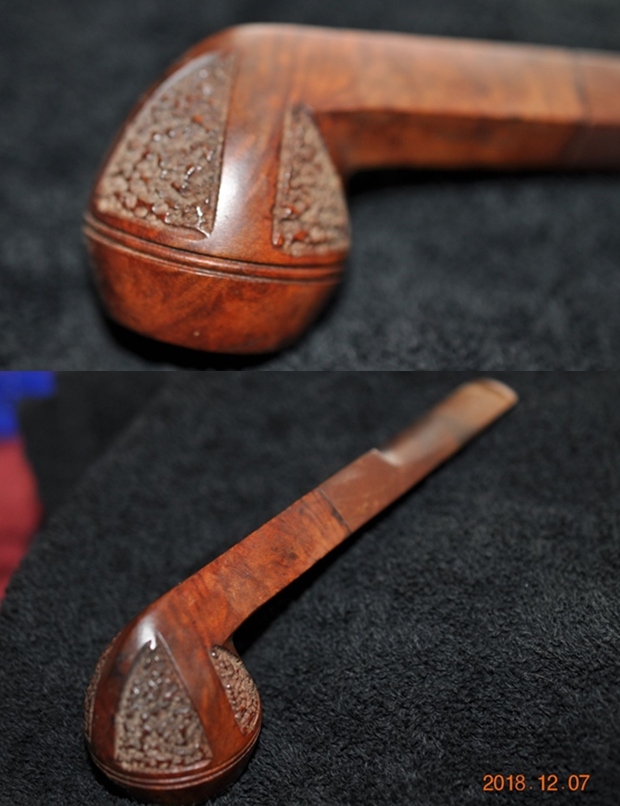
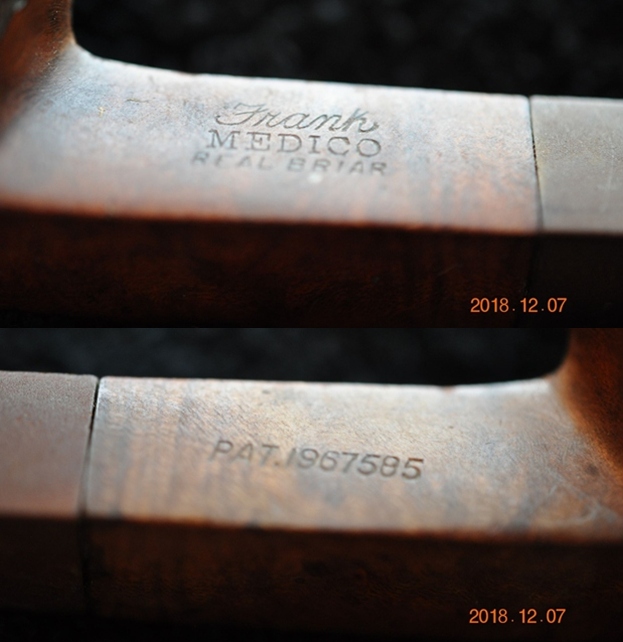
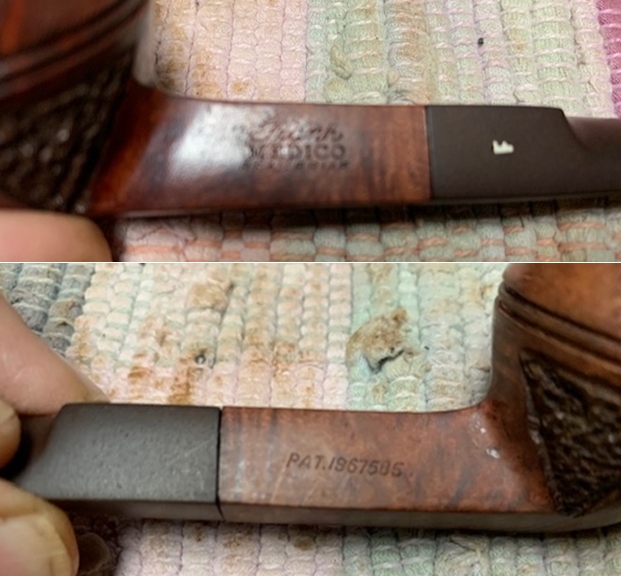
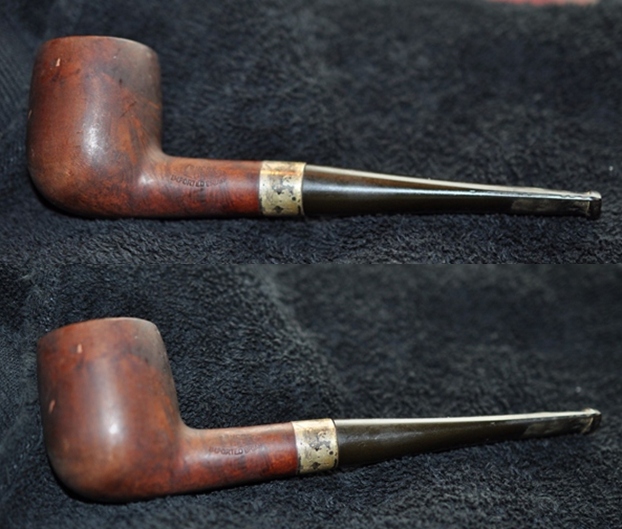
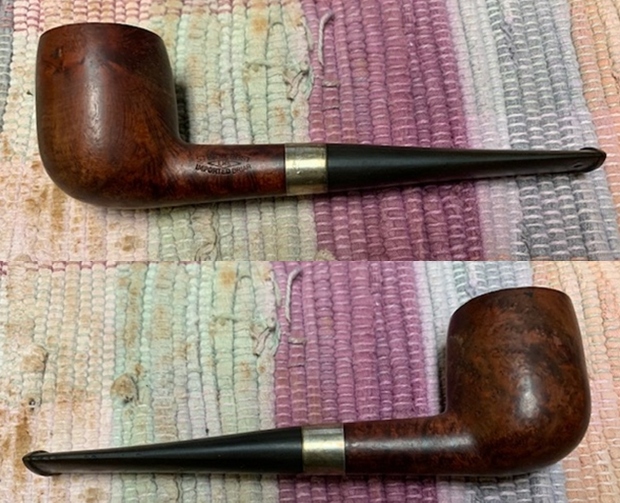
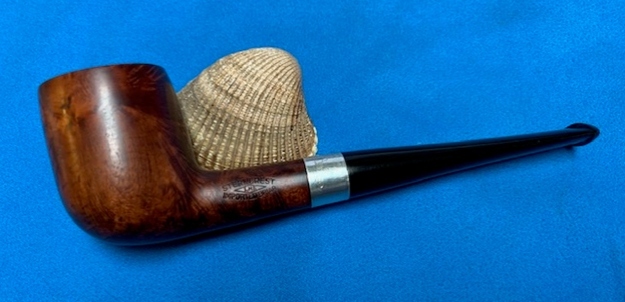
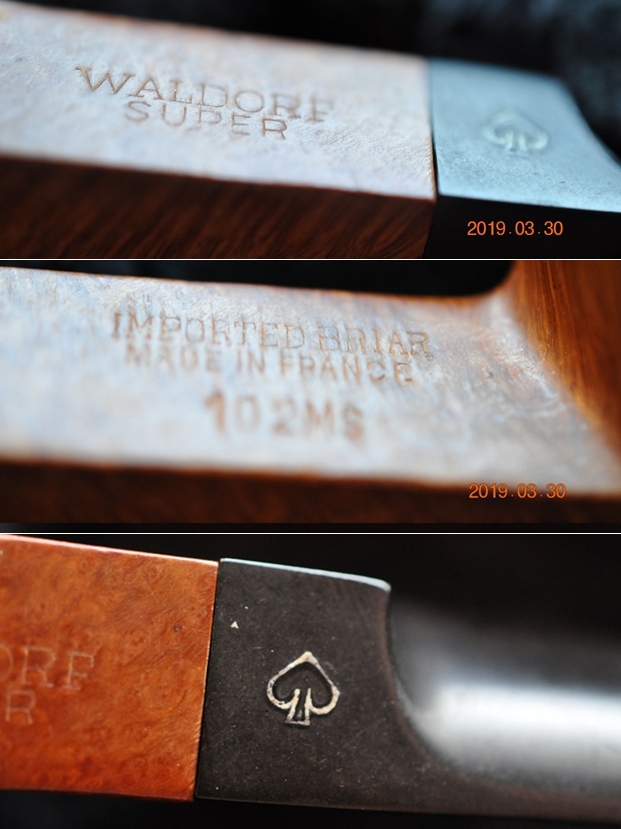
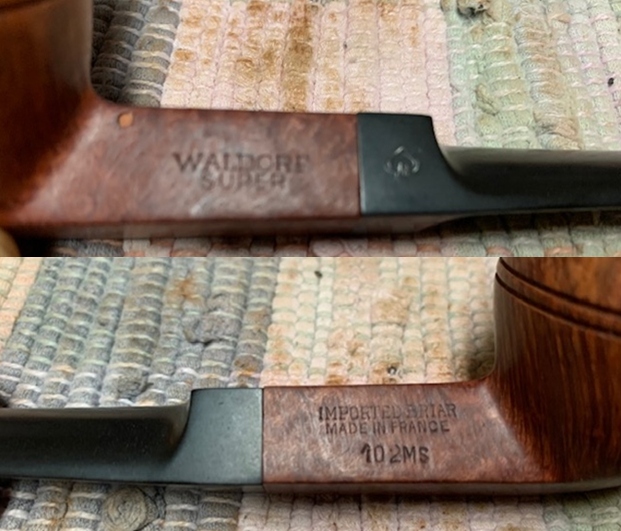
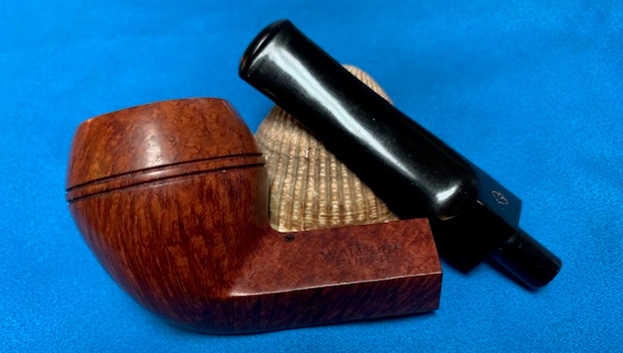
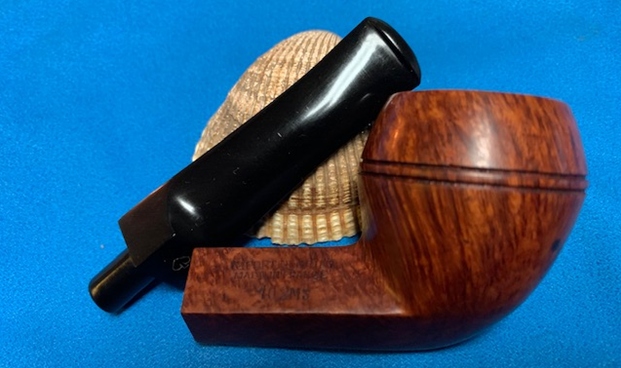
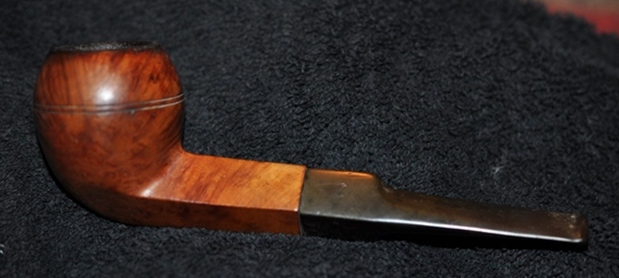
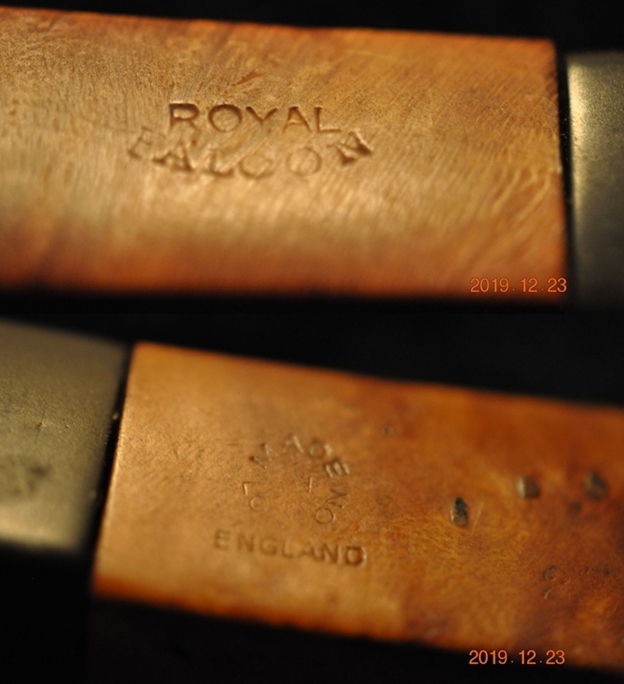
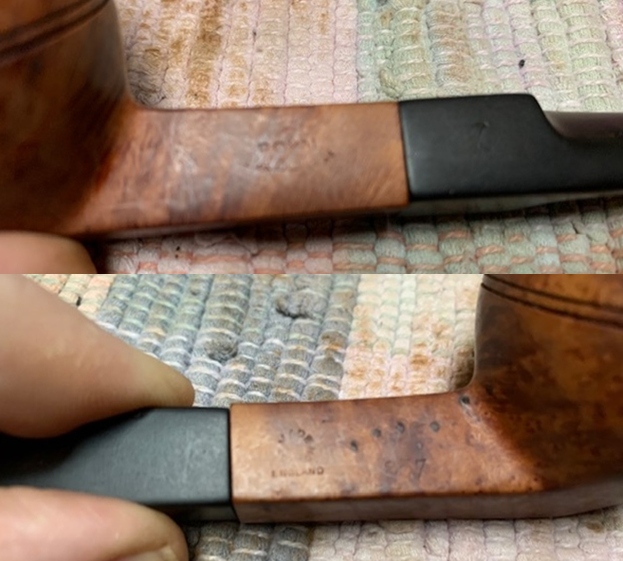
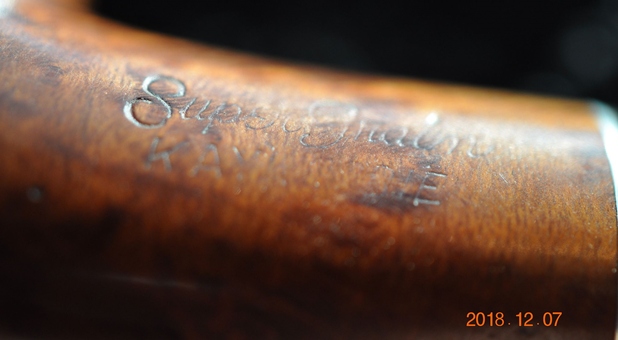
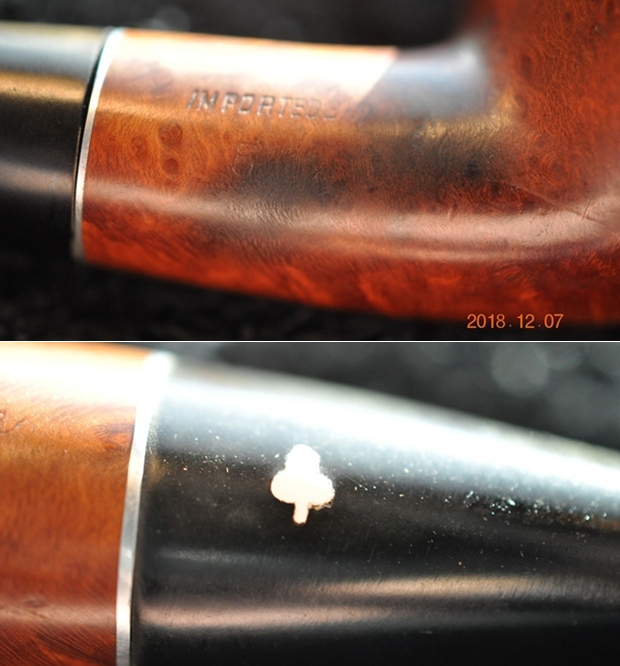
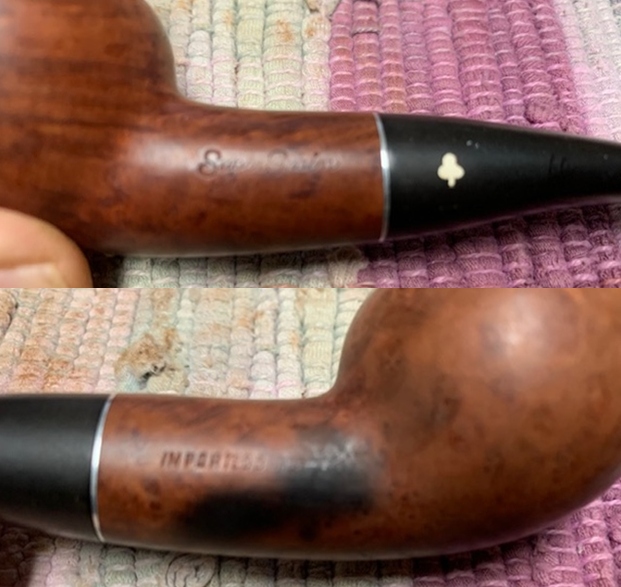
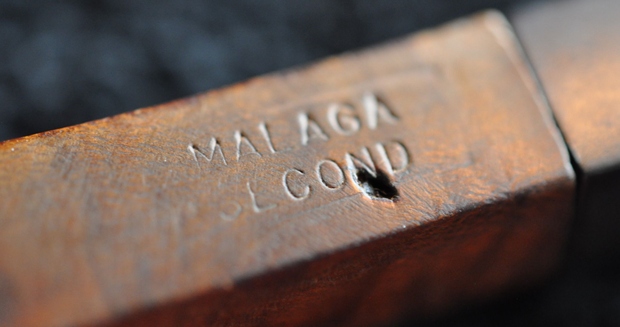
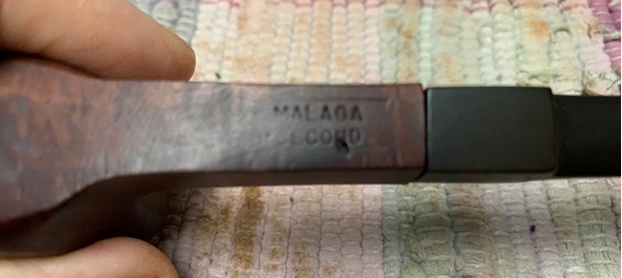
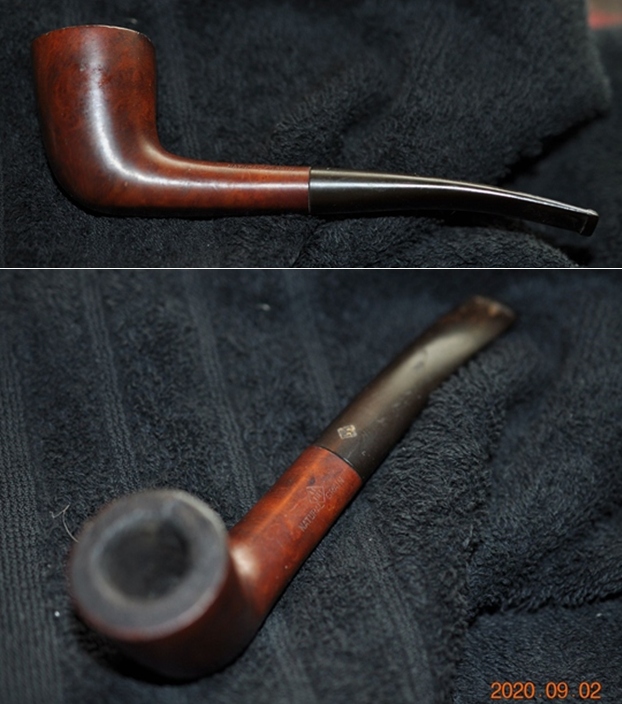
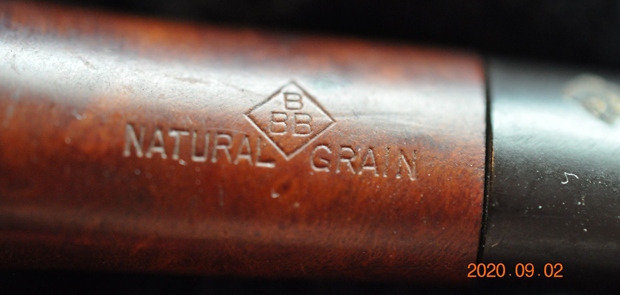
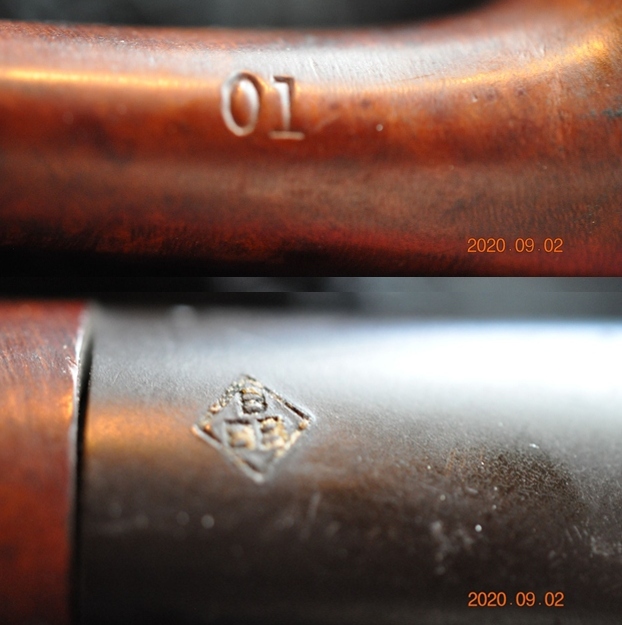
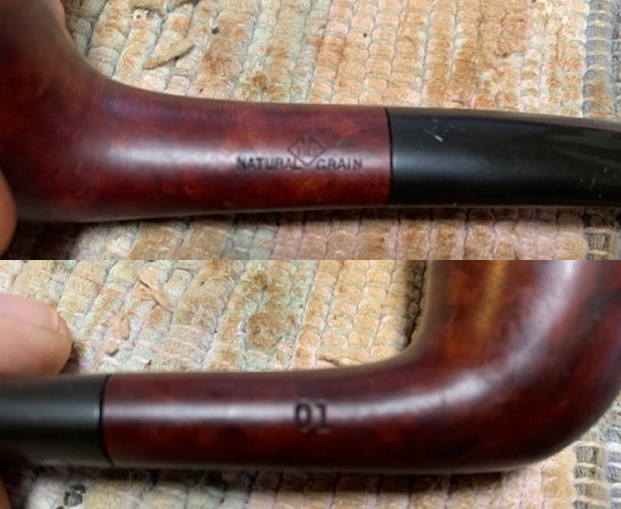
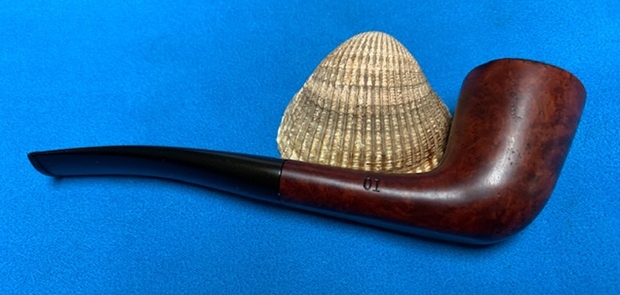
This pipe has a quaint little bowl size with some nice mixed grains. It is stamped on the left side of the shank as “STERNIES” over “LHS” in a diamond over “IMPORTED BRIAR”. The set of stampings on this pipe are all crisp and in block capital letters. The vulcanite stem is devoid of any stampings.While researching any pipe, the first site that I visit is rebornpipes.com since this is one site where I usually find well researched information on any brand that has anything, even remotely related, to pipes!! Now, till the time I got this pipe on my work table, I had not heard or read anything on this pipe brand and now that I have decided to work on it, rebornpipes does have a write up by Steve on this brand. He had thoroughly researched this brand and makes for an interesting read. Here is the link to the write up:-

https://rebornpipes.com/2020/09/01/new-life-for-an-american-made-lhs-certified-purex-pencil-shank-prince/

To avoid the proverbial ‘reinventing the wheel’, I urge readers to go through the above write up to get a better feel of the brand. However, only a few relevant excerpts of the information that would help me in establishing the provenance of the pipe are reproduced below.

The L&H Stern Inc. was established by Ludwig Stern (1877-1942) in 1911. His brother Hugo (1872-?) acted as vice-president & secretary. The firm moved to 56 Pearl St. Brooklyn in 1920. It closed down in the 1960s. LHS was one of the main pipe suppliers for US soldiers during WWII.

The brand had 8 pipe grades listed in the 1944 issue of Outdoor Magazine.

Sterncrest Ultrafine $ 10

Sterncrest 14K $ 7.50

Sterncrest Sterling $ 5

Certified Purex $3.50

Select Grain $2.50

Sivercrest $ 2

Superfine Purex $1.50

Sculpted Purex $1.50

 In addition to the above grades, a 1944 catalog also listed the following lines and models:

Barrister

Marwyn

Park Lane

Radmanol

Warwick

Additional notes: Some models were made before, during, and after WWII. LHS was one of the main pipe supplier for US soldiers during WWII.

Pre-war pipes were stamped Real Briar Root, or Briar Root. Some war time pipes were made from domestic briar or “American” briar and were void of any briar stampings. Many American pipe makers lost their overseas supply of Mediterranean briar shortly before and during the war. Post war pipes were stamped Imported Briar to assure customers that they were buying premium briar once again.

The grade “STERNIES”, as seen on the pipe on my work table, finds no mention in the 8 grades of pipe that have been listed in the 1944 catalogue. Also the fact that the stem bears no logo of two dots is a mystery (or has it been completely buffed off?). That fact apart, the stamping “IMPORTED BRIAR” points to post WW II production.

Thus, the LHS pipe currently on my work table is from the period 1945 to 1960s when LHS closed shop!!

Initial Visual Inspection
As I have mentioned above, this pipe was initially handled by Abha and she is not in a habit of taking many pictures as she works on each piece of briar. There are not many pictures to give the readers an idea about the condition of the pipe before she had worked her magic and presented me with a nice clean canvas to carry forward my repair and refurbishing tasks. I have included a description of the initial condition of the pipe as documented by her. 
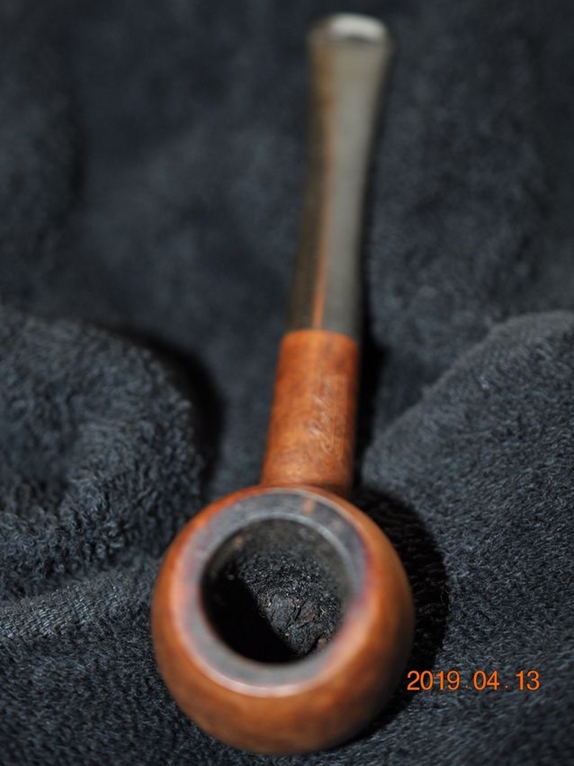
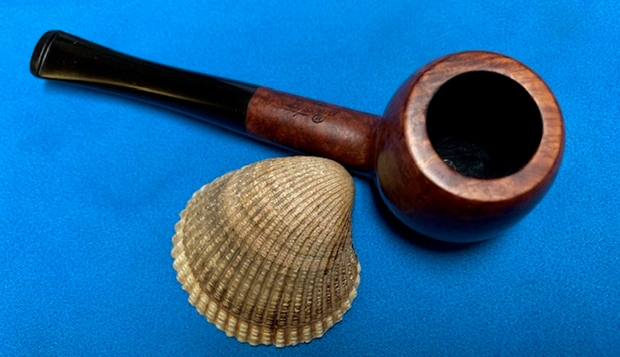
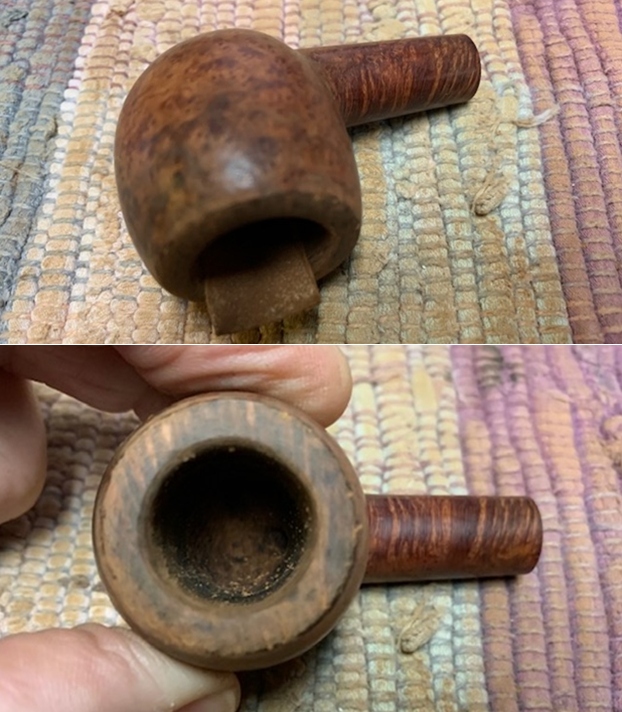
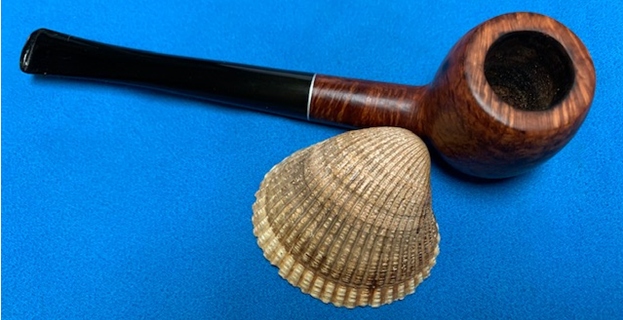
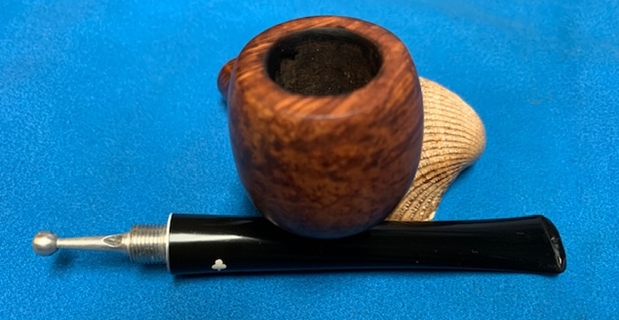
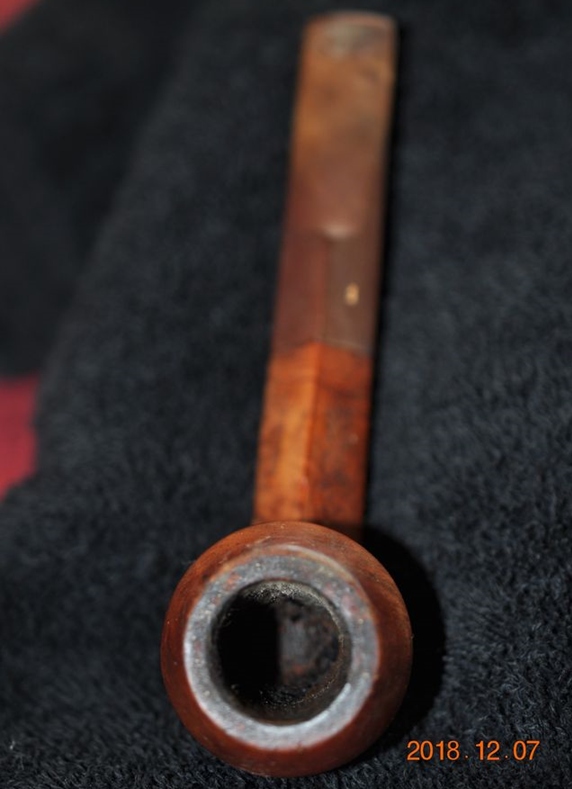
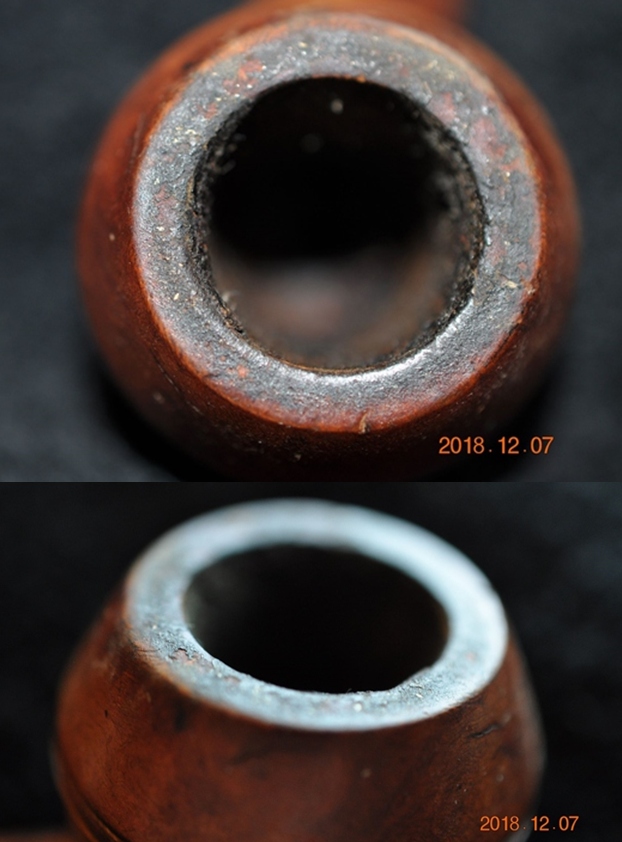
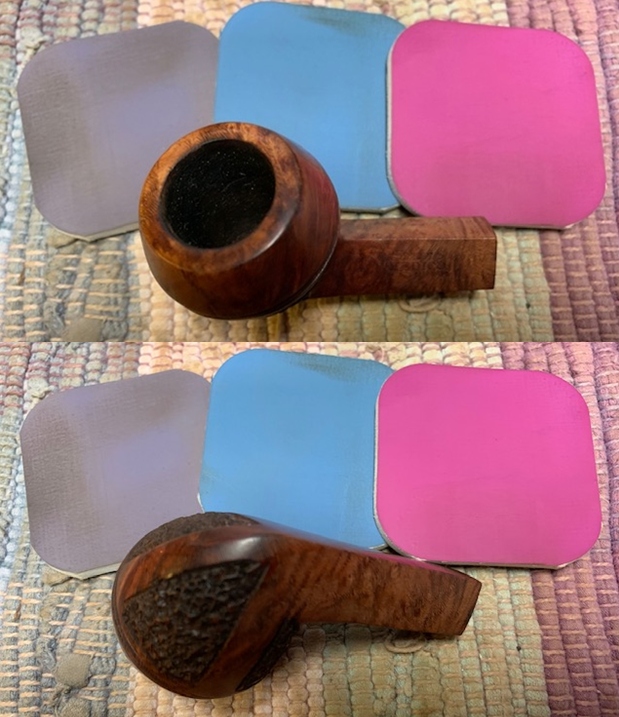
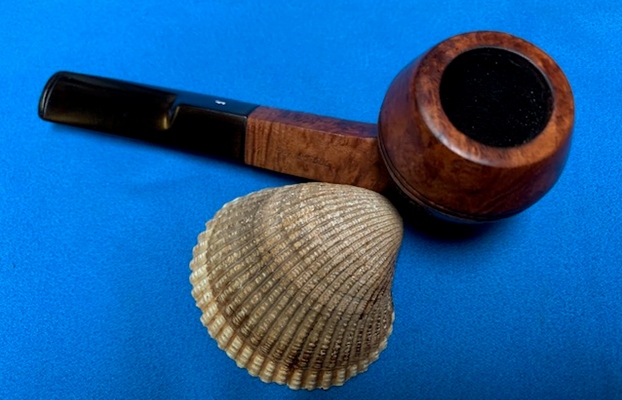
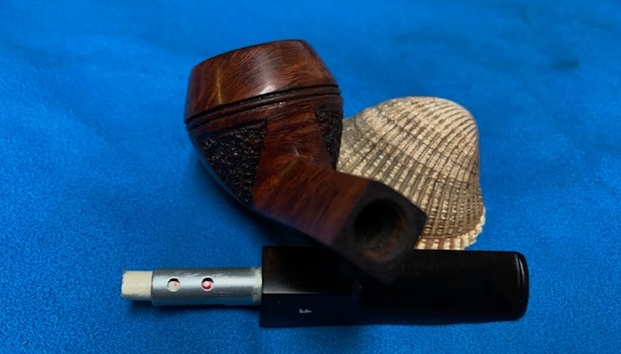
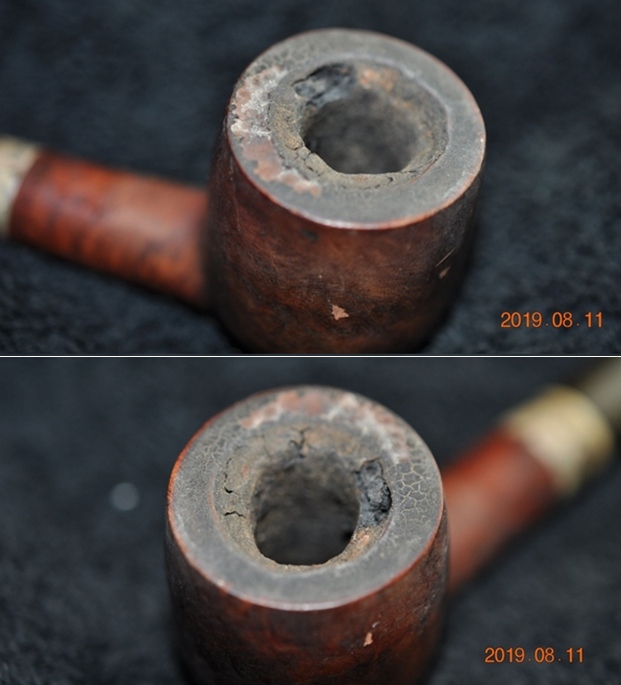
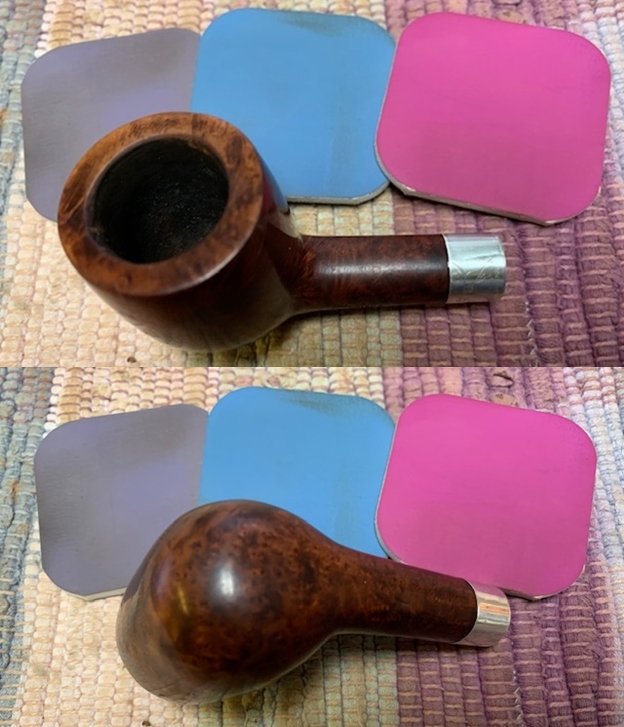
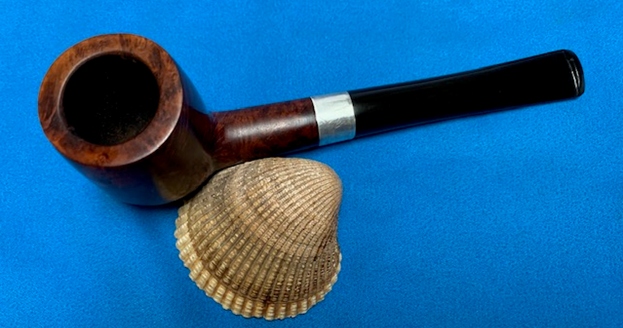
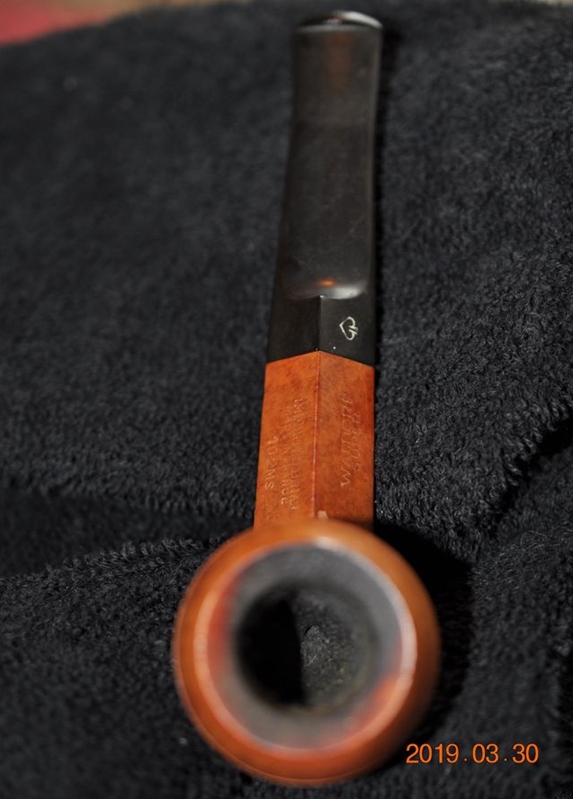
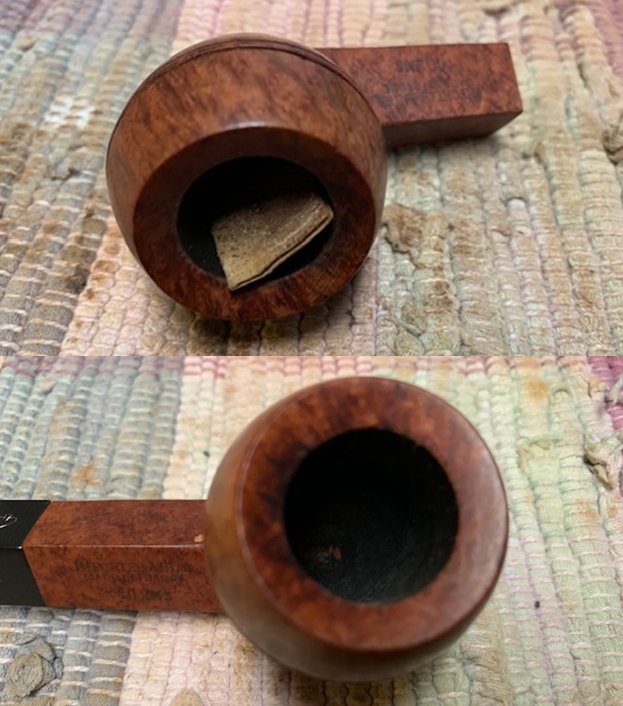
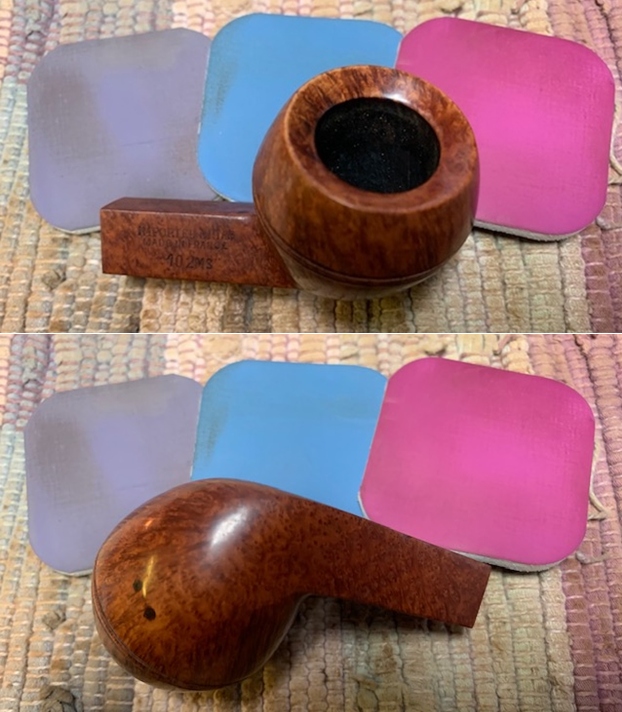
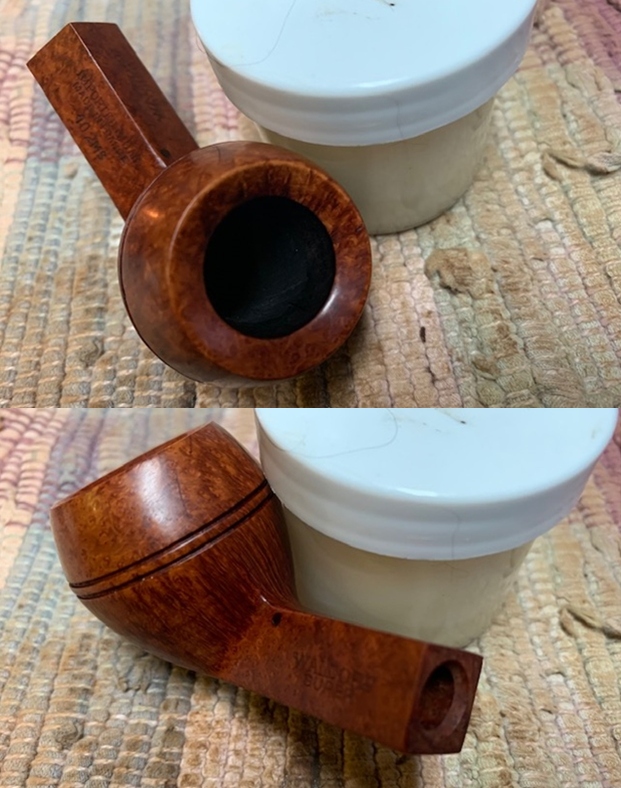
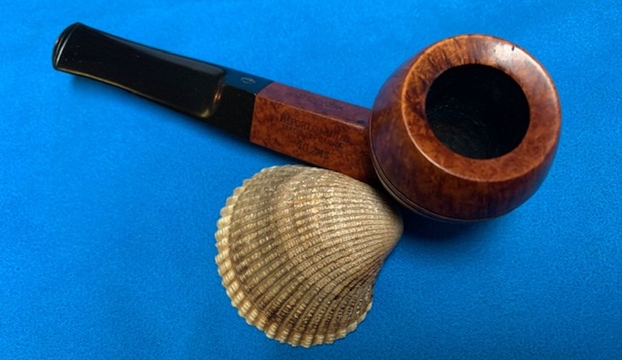
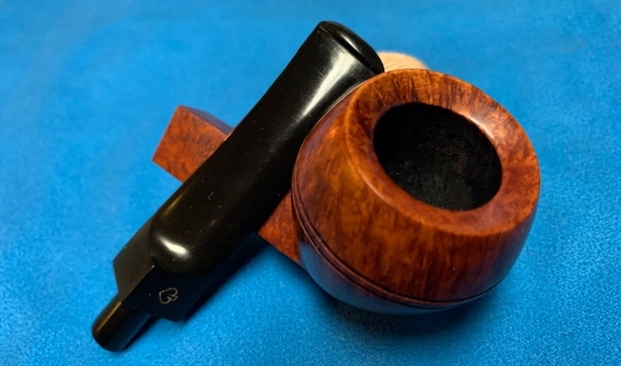
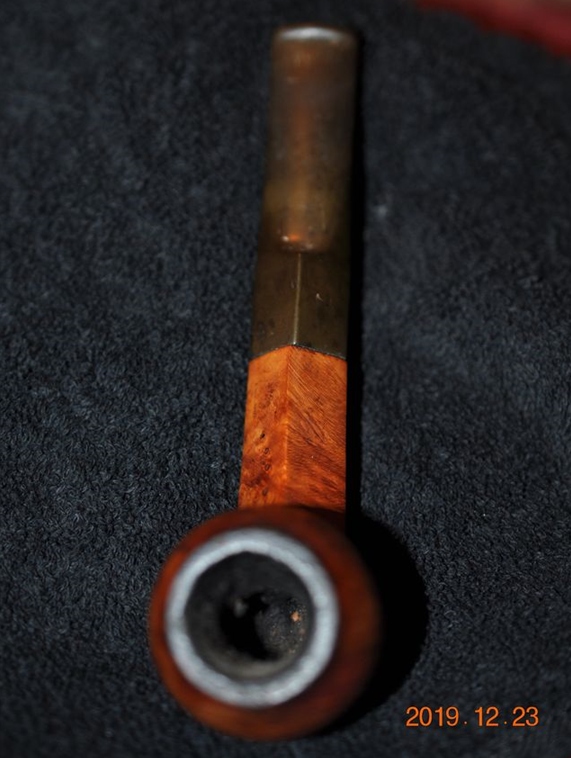
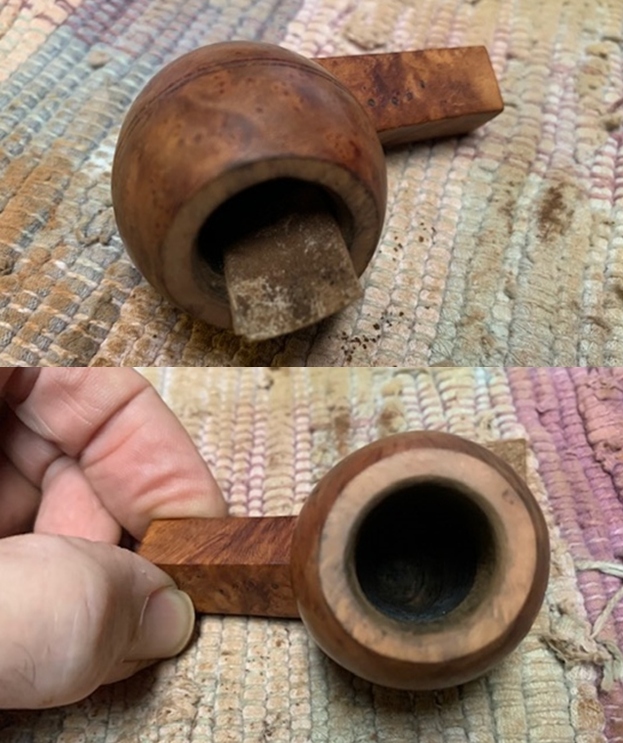
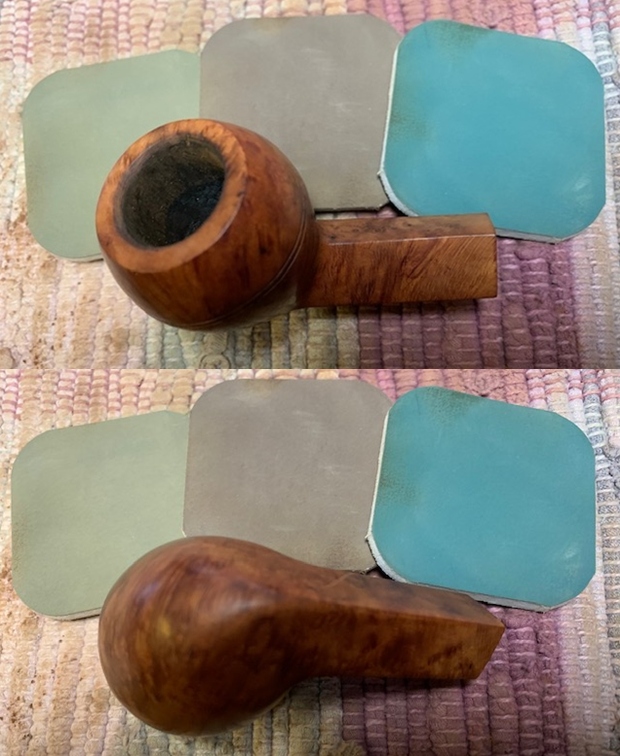
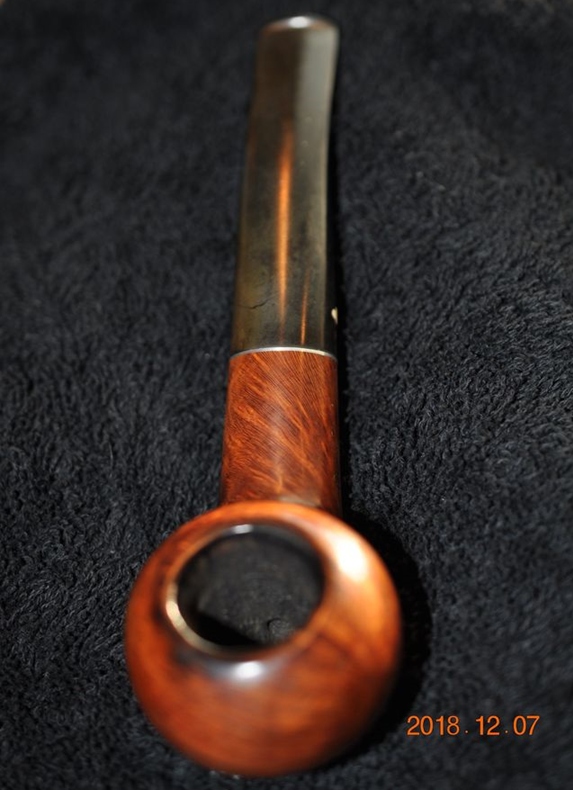
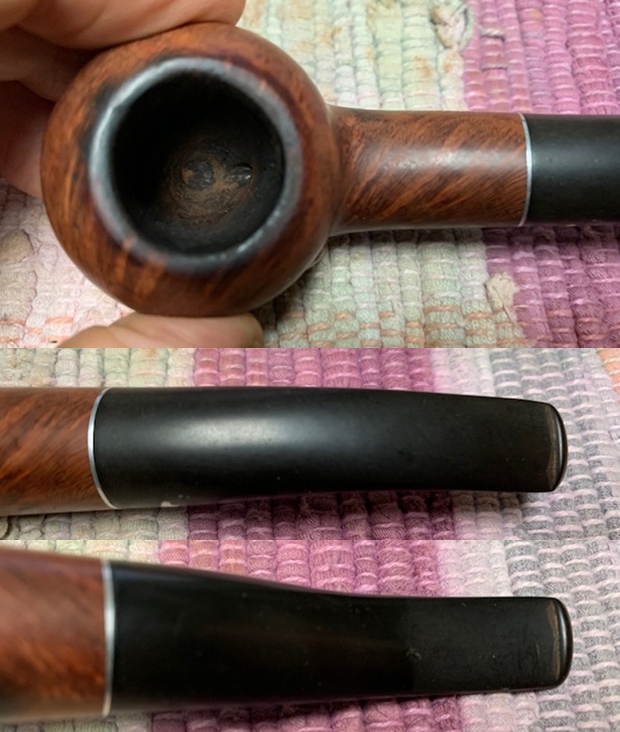
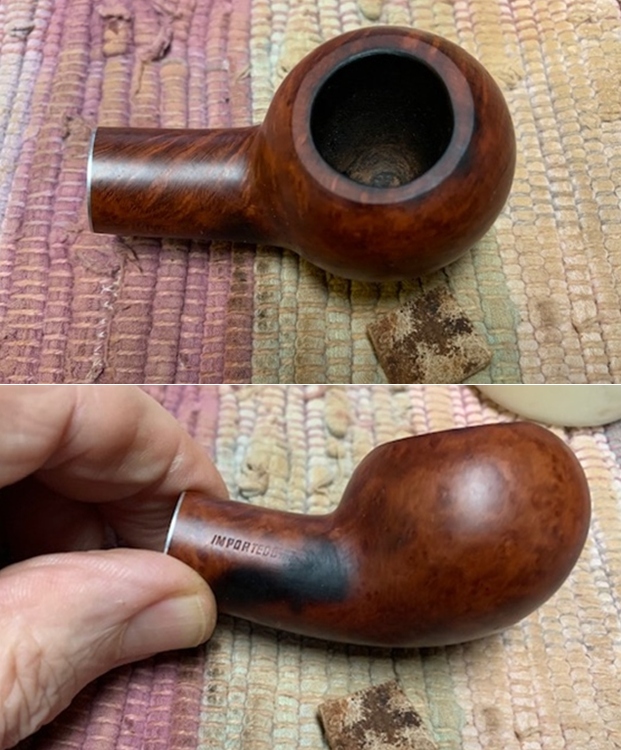
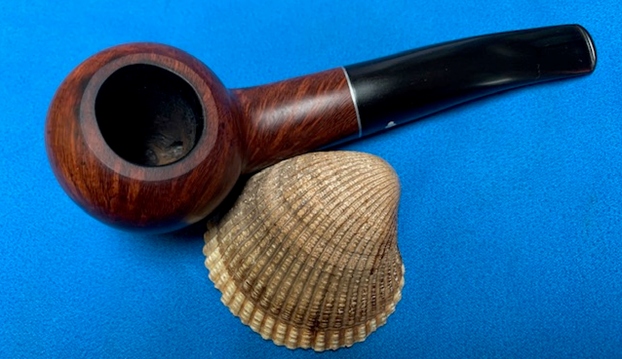
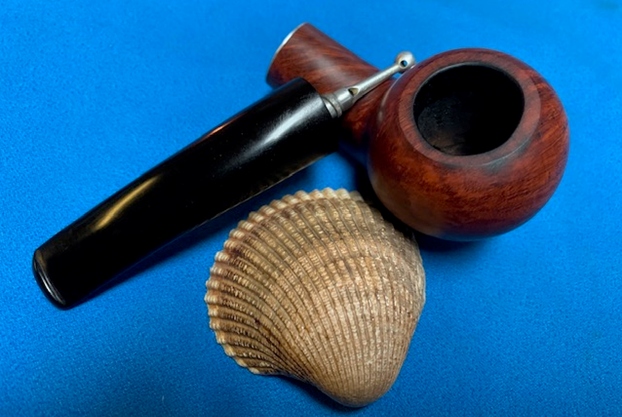
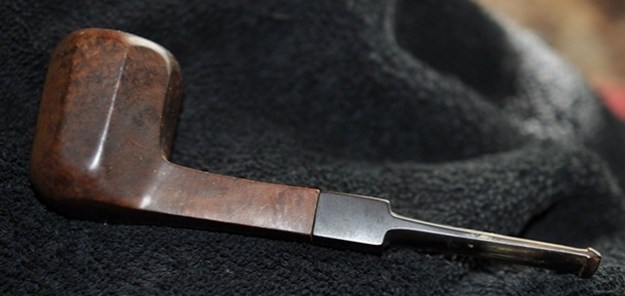
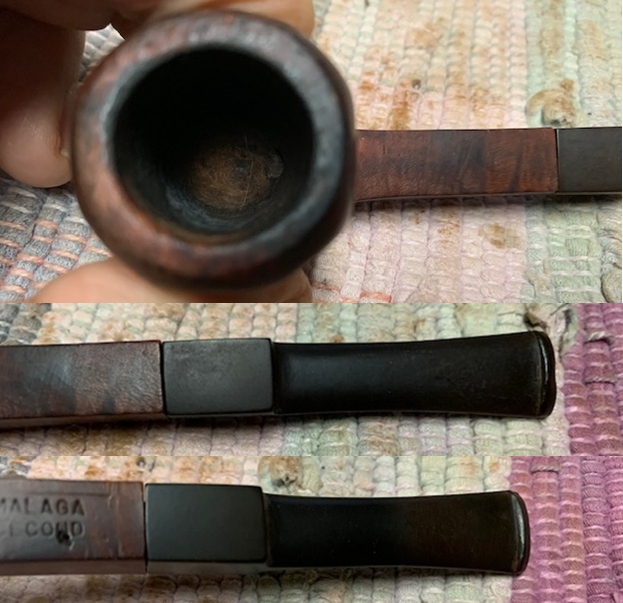
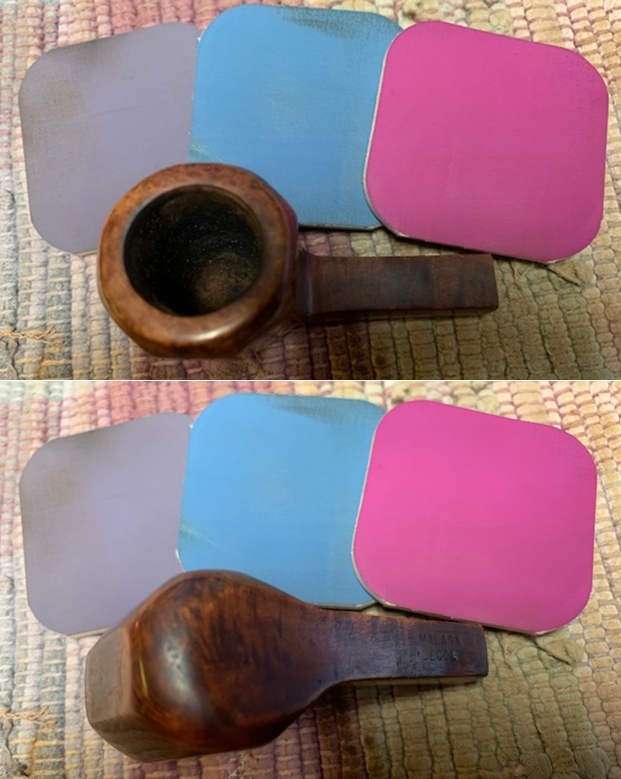
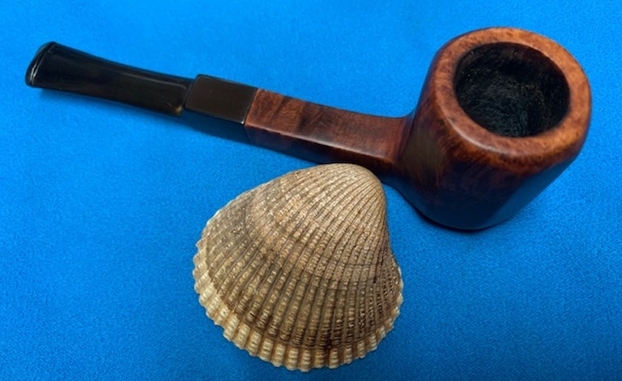
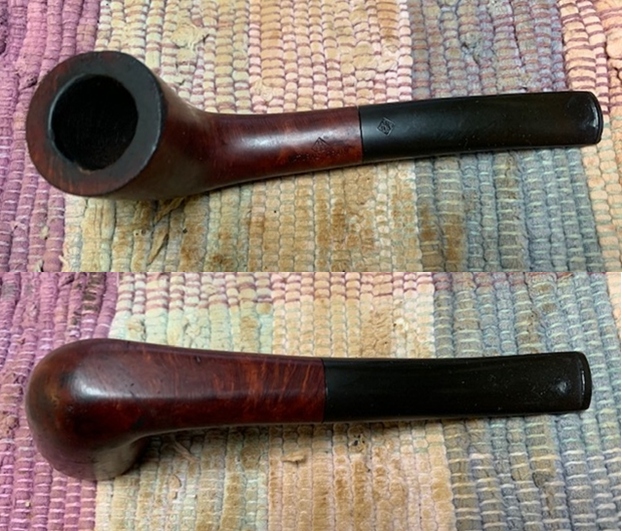
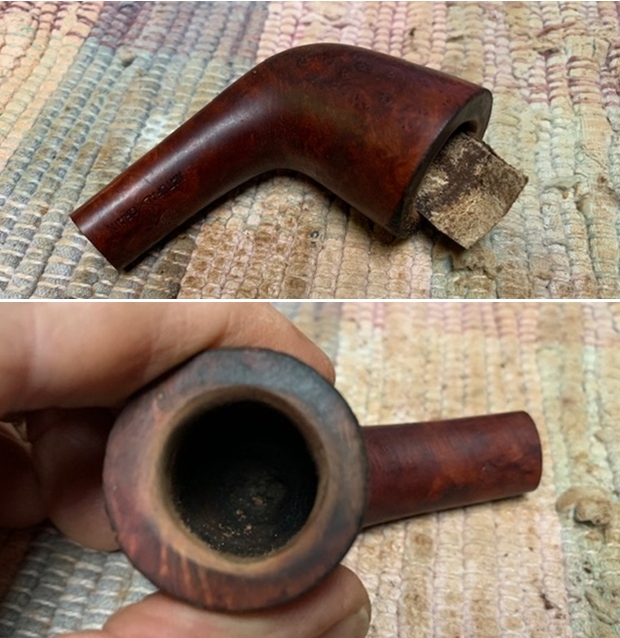
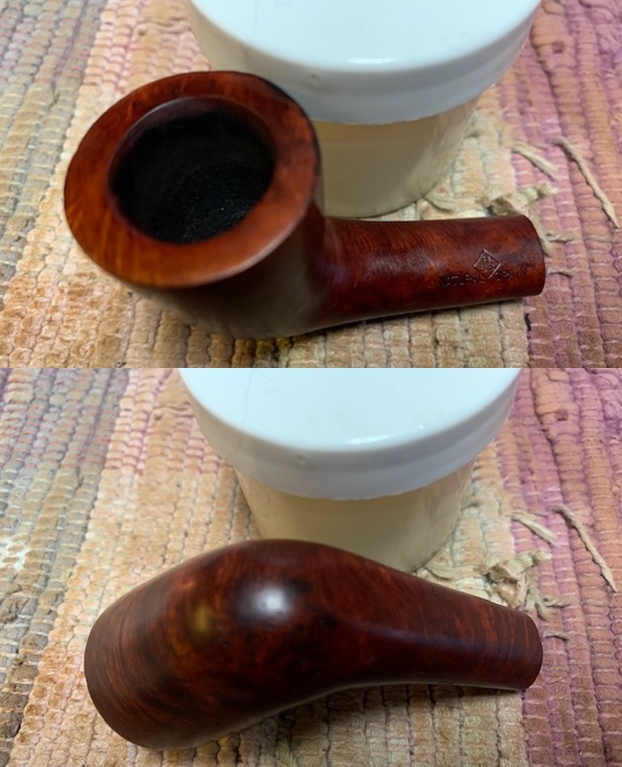
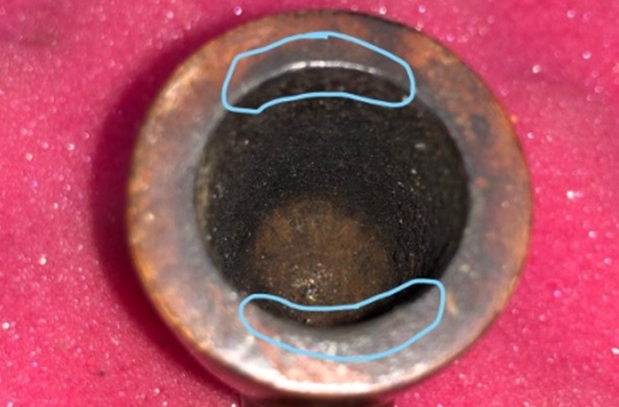
This pipe has a rather small bowl in a classic Dublin shape and has a chamber depth of about 1.1 inches. The chamber had an even layer of dry flaky cake which is not very thick. The condition of the inner walls of the chamber can be commented upon after the cake has been taken down to the bare briar. The rim top surface was covered in overflowing lava. The inner rim edge has minor charring in 6 o’clock and 11 o’clock directions (encircled in pastel blue) with some minor dings all along the edge. The outer rim edge is mysteriously darkened in the 12 o’clock direction. The draught hole is clogged and restricts the free flow of air through it. The ghost smells in the chamber are very mild. 
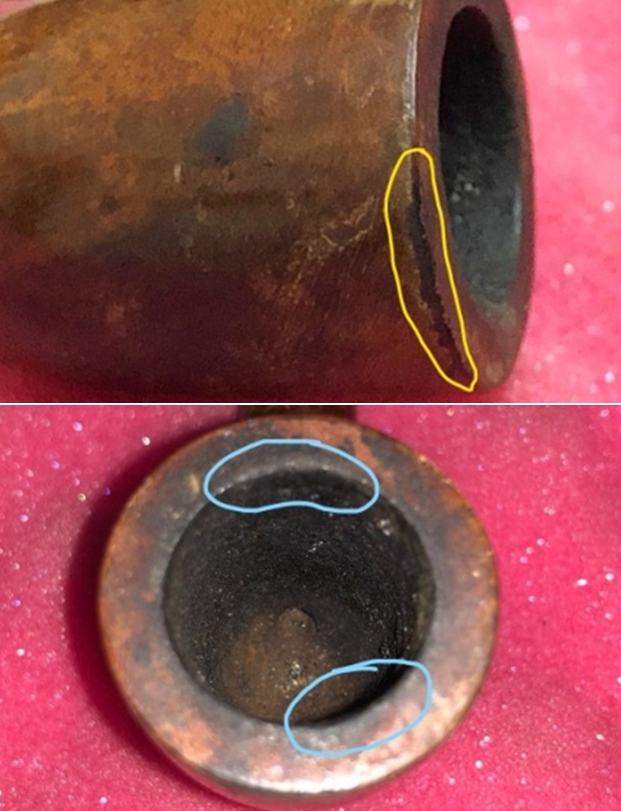
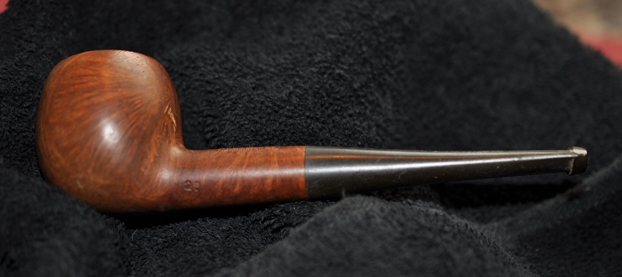
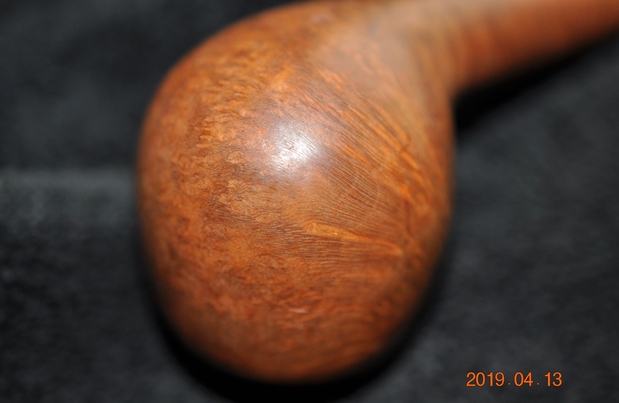
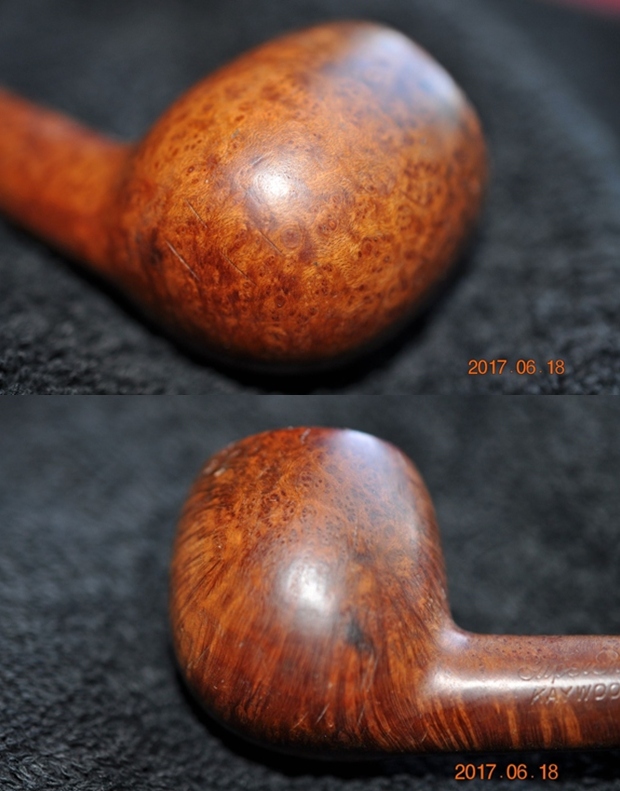
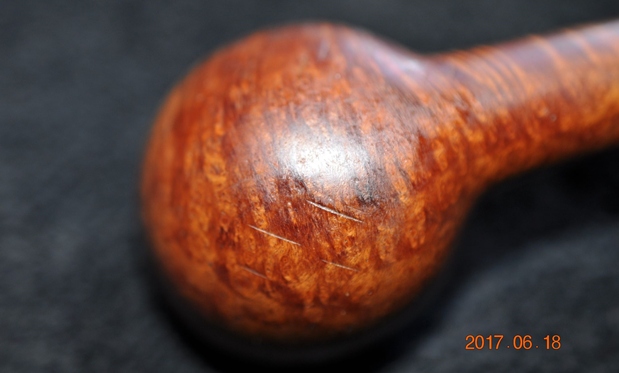
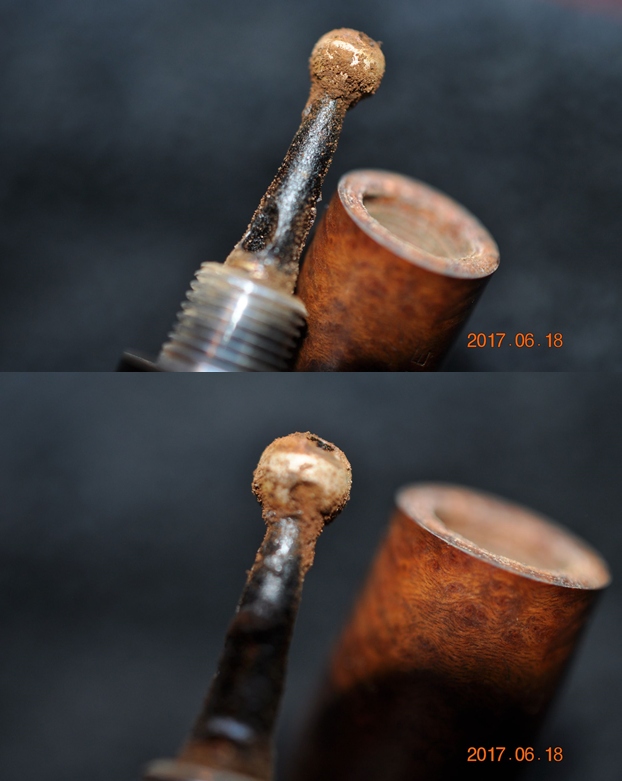
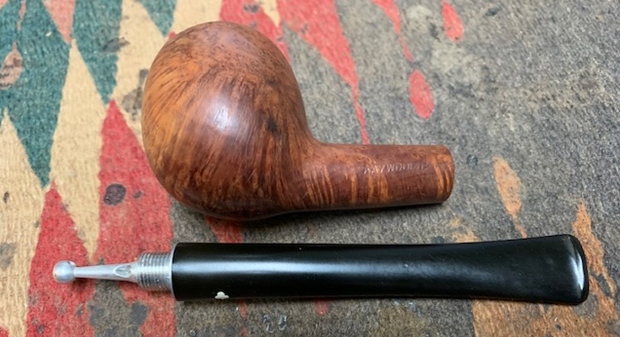
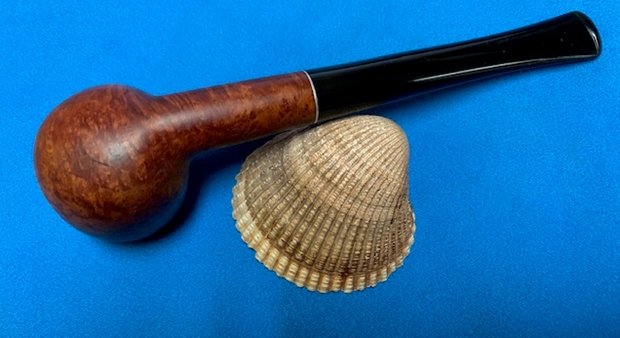
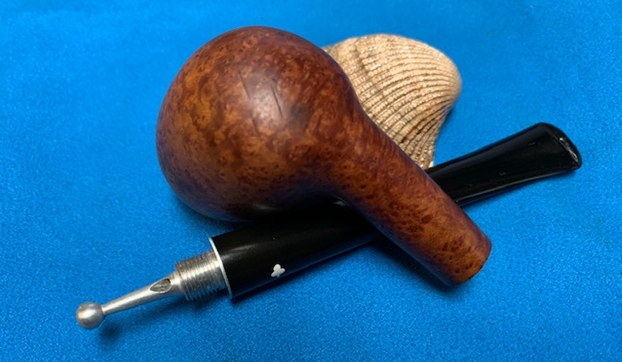
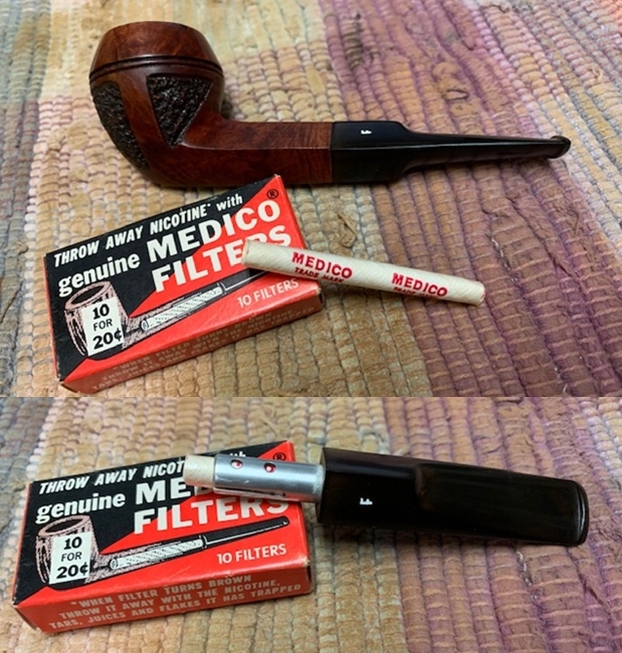
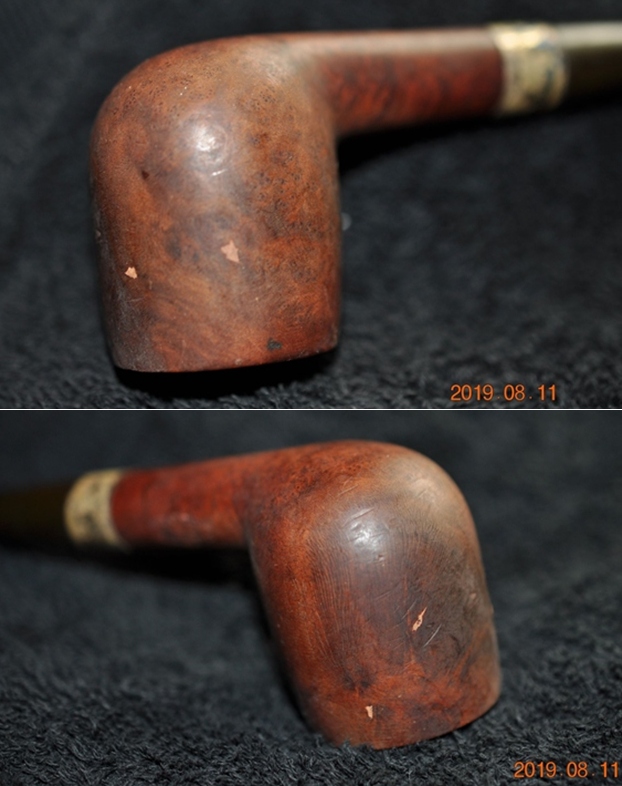
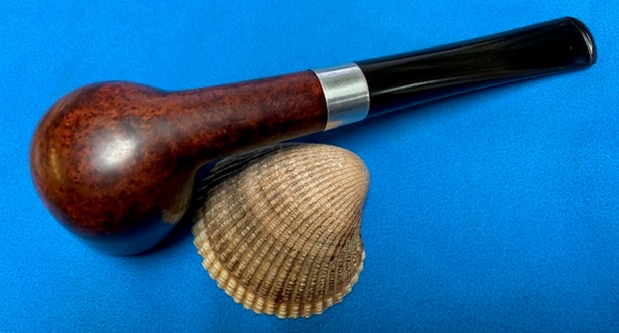
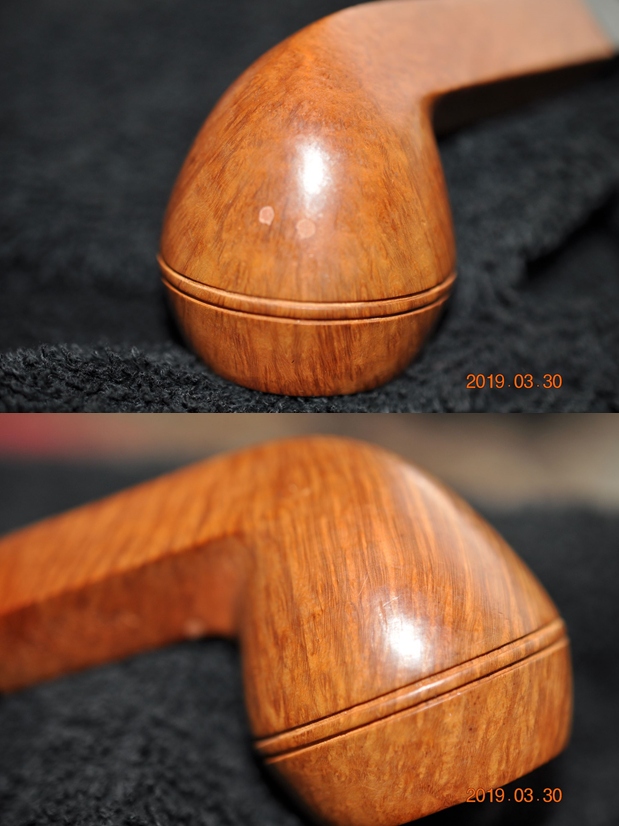
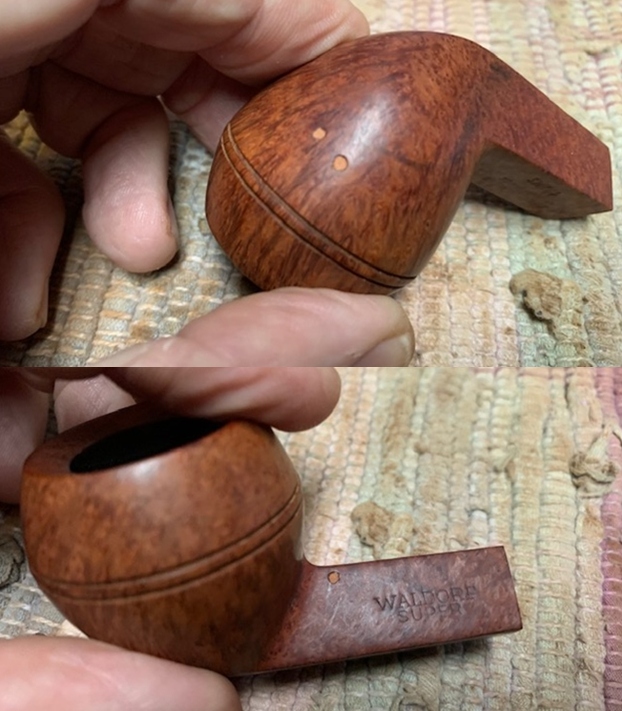
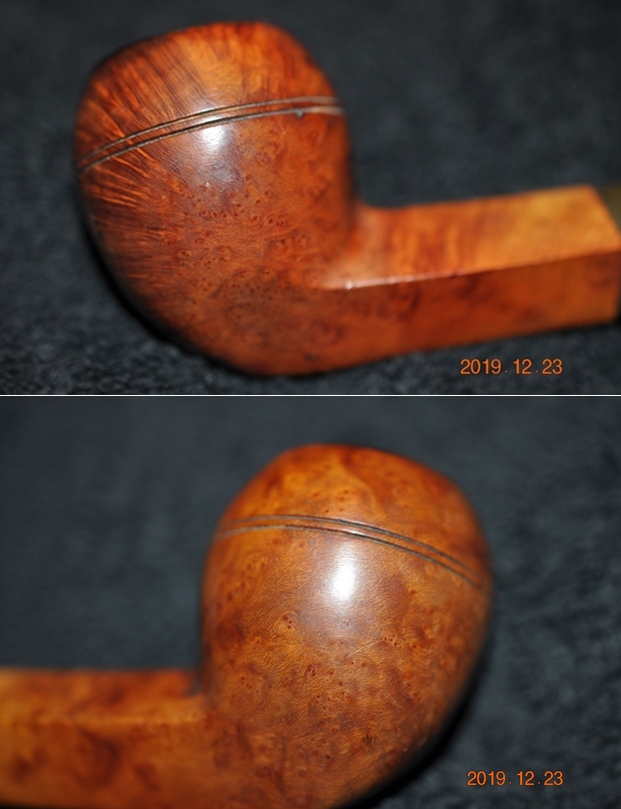
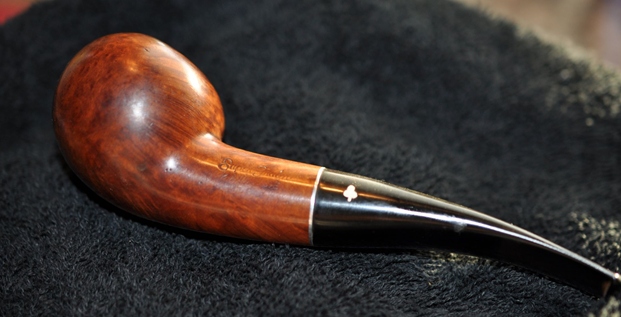
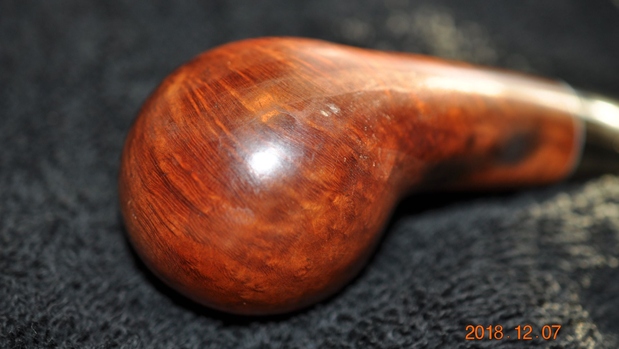
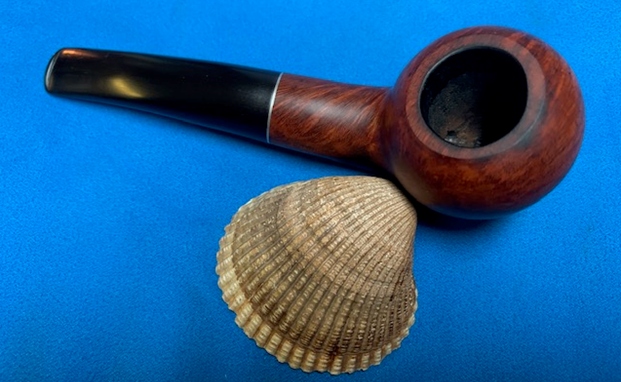
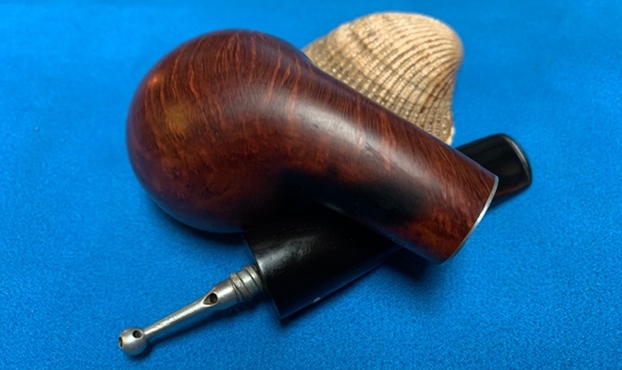
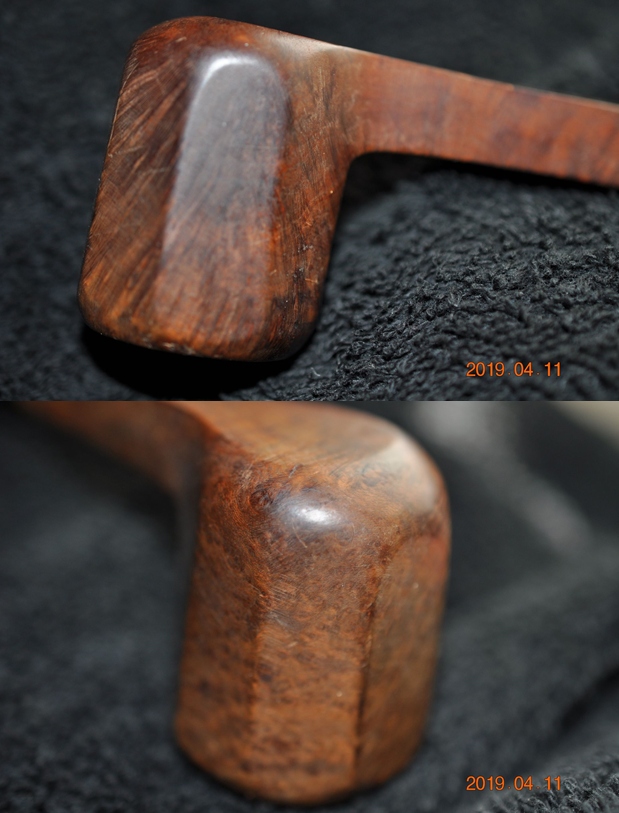
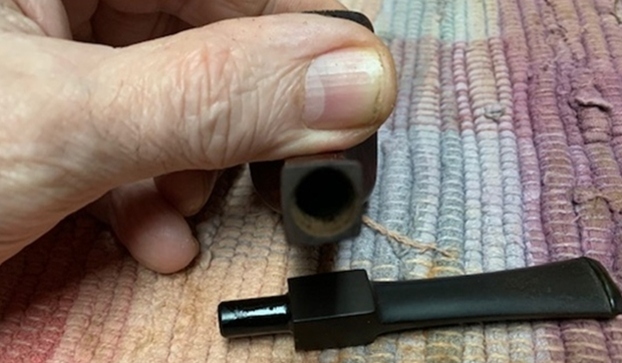
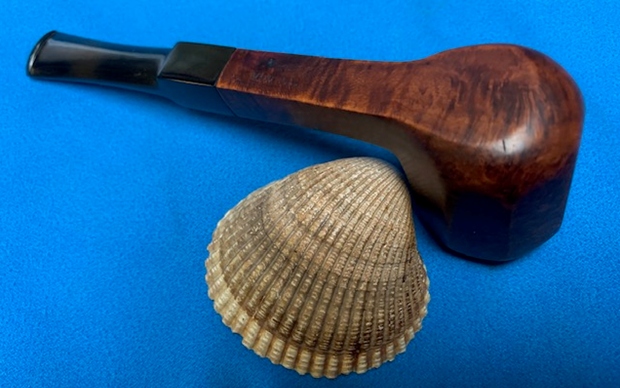
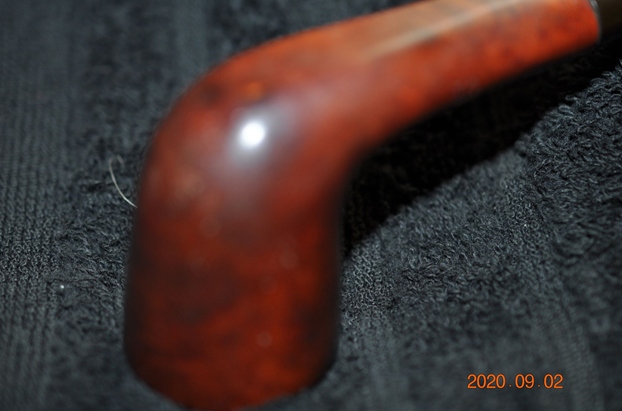
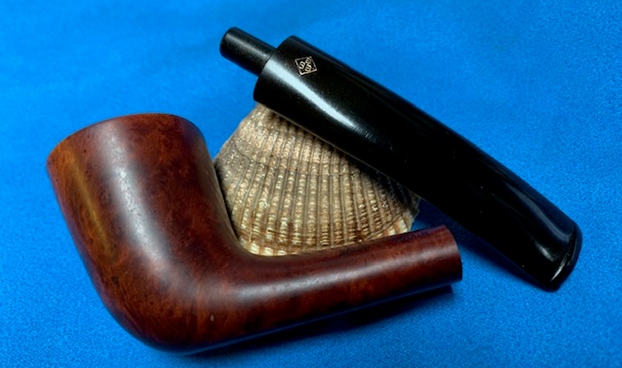
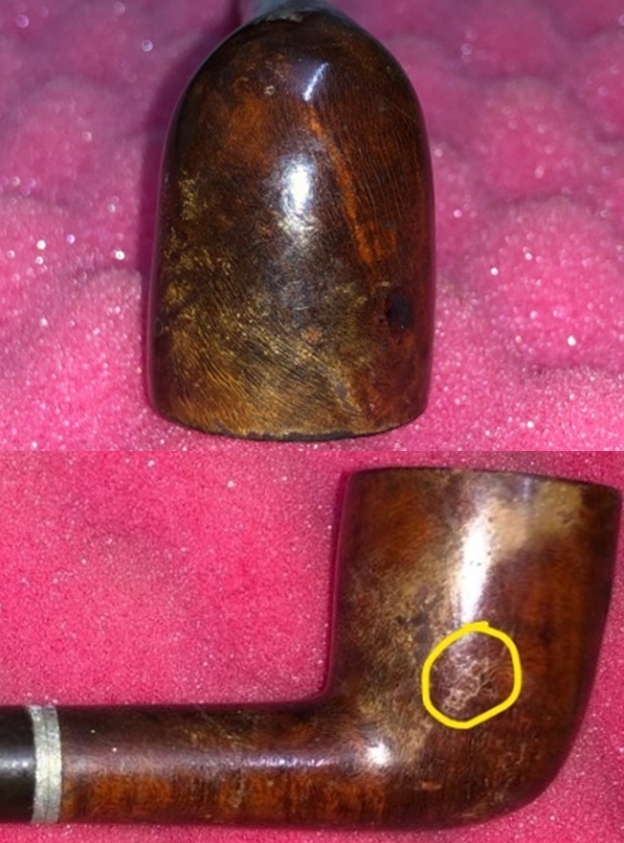
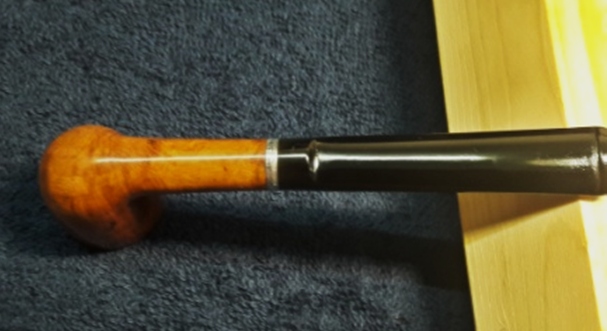
The smooth stummel surface has some very beautiful grain patterns and has a coat of lacquer that has worn off at a number of places giving the surface a blotched appearance. The stummel shows signs of vintage in the form of many scratches, dents and dings that it has acquired over a period of time. There a couple of fills over the stummel surface and are easily noticeable (encircled in yellow). The briar has accumulated a lot of grime and dust imparting the stummel a lifeless and bone dry appearance. The shank end has an aluminum spacer ring separating the shank end from the stem end when threaded in. On closer observation, it can be seen that a portion of this spacer extends into the mortise and is threaded which matches with the stinger threads.    
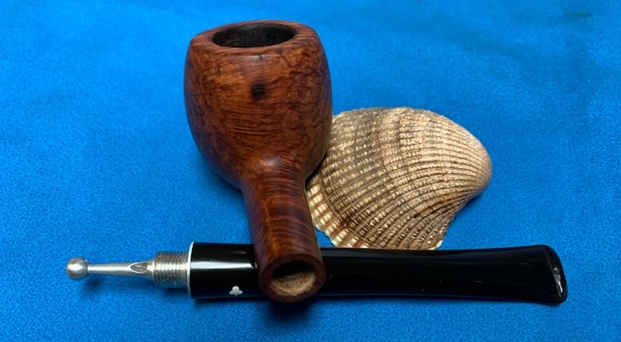
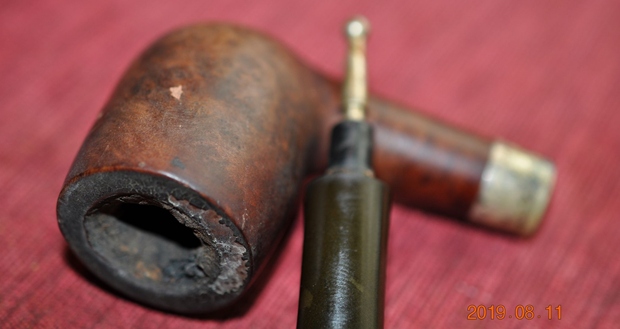
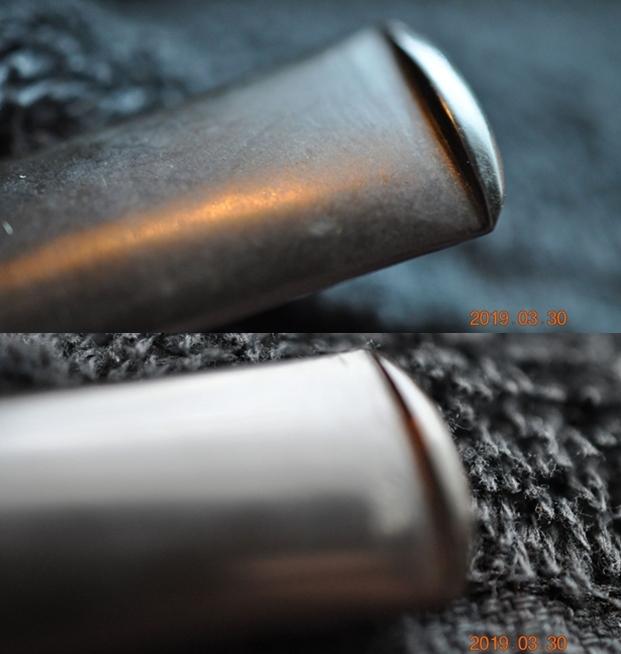
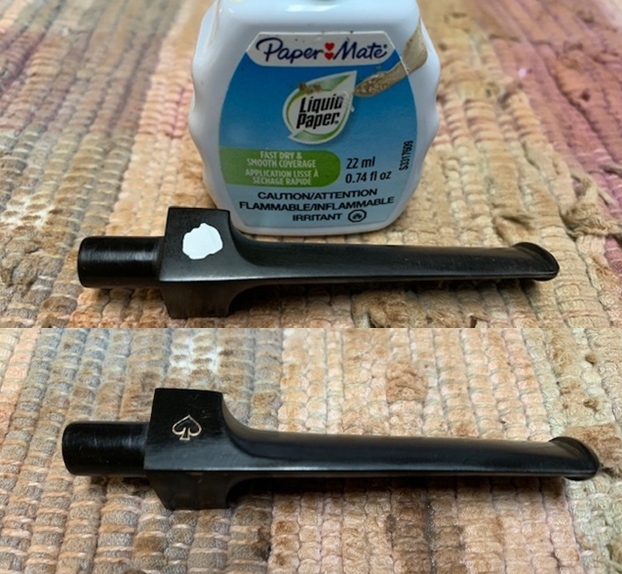
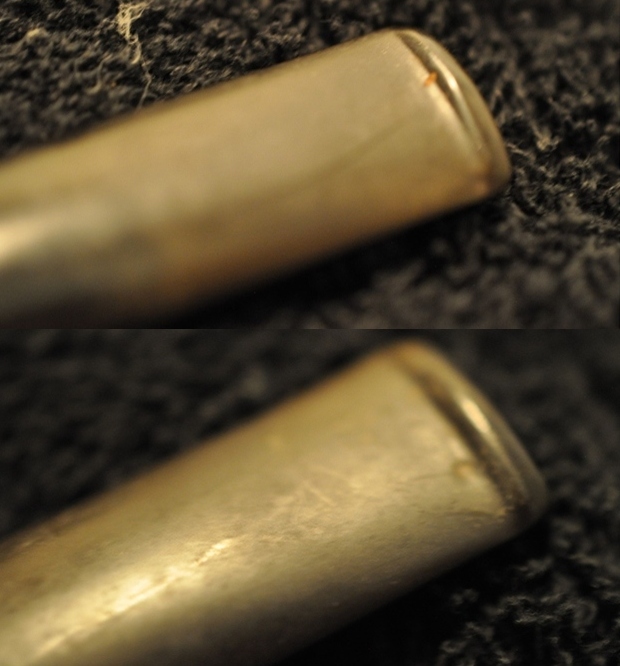
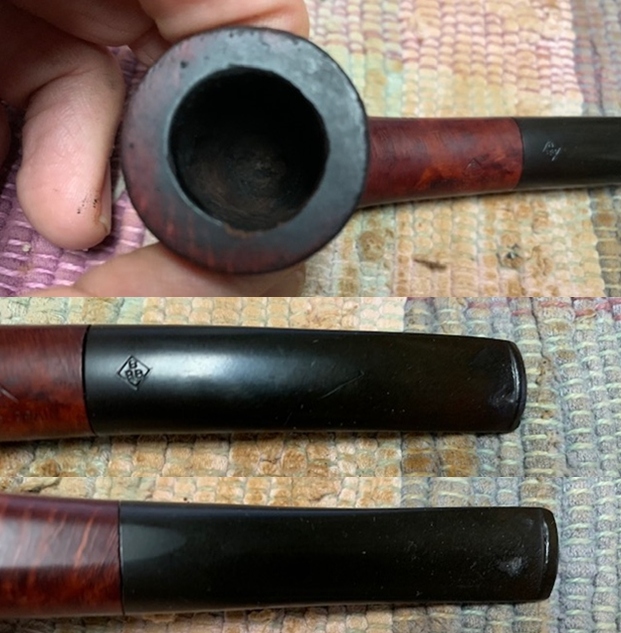
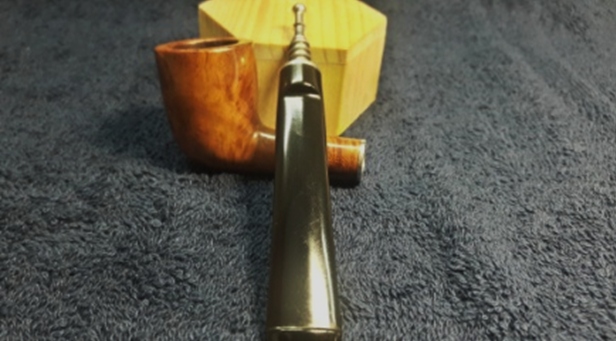
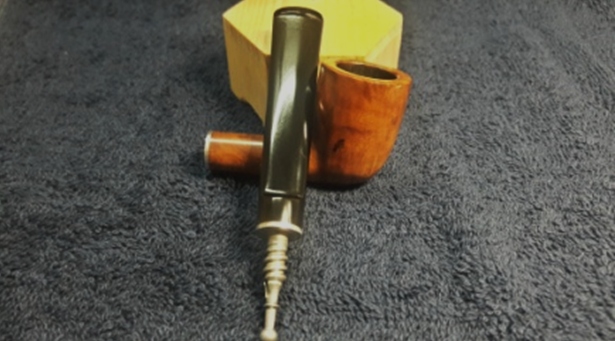
The vulcanite stem was lightly oxidized. Some minor tooth chatter and tooth indentations are seen on both the upper and lower stem surfaces in the bite zone and at the bottom of the button edge. The threaded aluminum stinger tenon end had accumulated ash and oils/ tars that had dried out on the inside as well as on the outside. The horizontal slot has dried gunk embedded in to it which will have to be addressed.Initial Cleaning By Abha…
Abha, my wife, reamed out the complete cake and further smoothed out the chamber walls with a folded piece of 220 grit sand paper and scrapped out the entire lava overflow from over the rim top surface. She further cleaned out the internals of the shank with pipe cleaners and alcohol and cotton buds. She followed the internal cleaning of the shank with external cleaning of the stummel using Murphy’s Oil soap and hard bristled tooth brush and dried it with paper napkins and cotton cloth. Next she cleaned out the internals of the stem air way using hard and regular pipe cleaners dipped in isopropyl alcohol. She cleaned the stem surface under running warm water and scrubbed the surface oxidation from the stem using Scotch Brite pad and dish washing soap. The aluminum stinger was also similarly cleaned. She further removed the oxidation by scrubbing the stem with 0000 grade steel wool and applied a little olive oil to rehydrate the stem.    Once The Pipe Is On My Work Table…
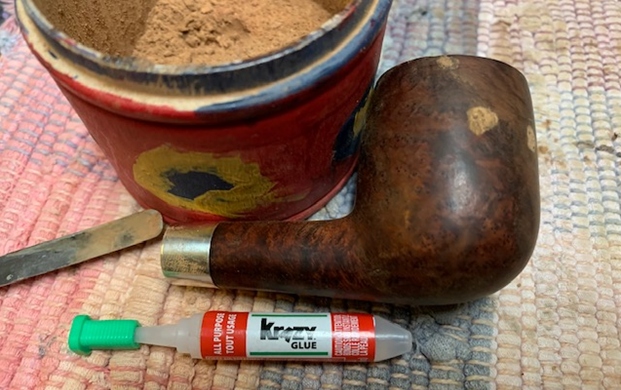
The cleaned up pipes presents a very clear picture of what needs to be done to restore this pipe to a decent and smokable condition. I really cannot thank Abha, my wife, enough for all the help and support that she extends me in my pursuance of this hobby. I proceed to carry out my appreciation of the work that needs to be done on this pipe to restore it.

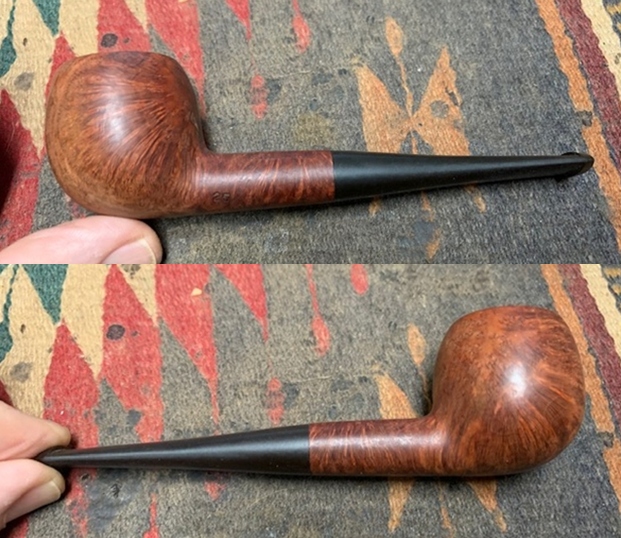
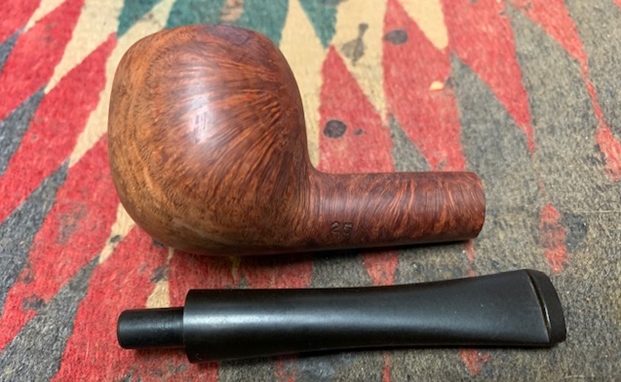
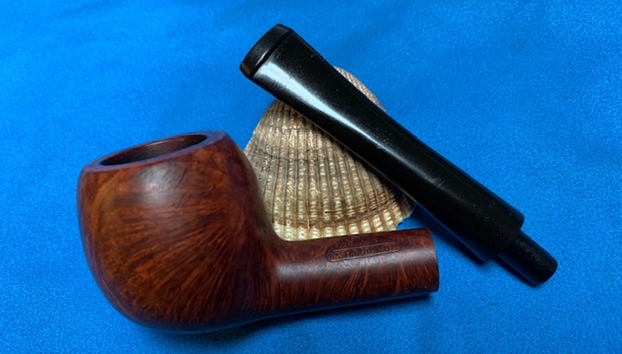
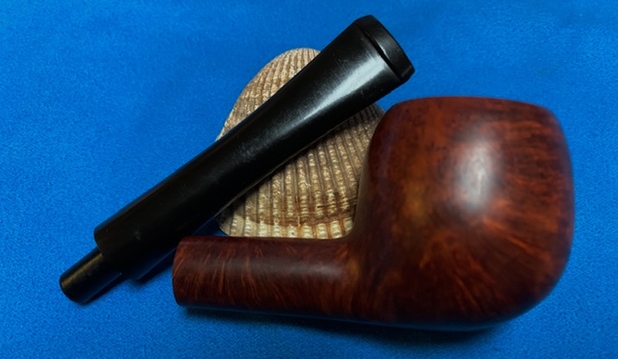
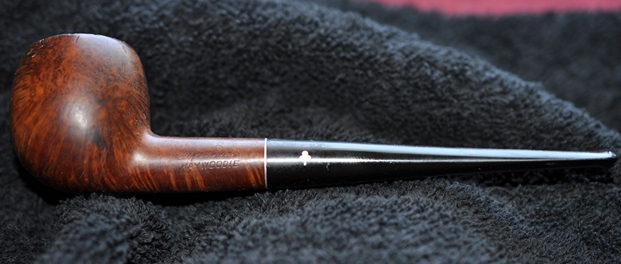
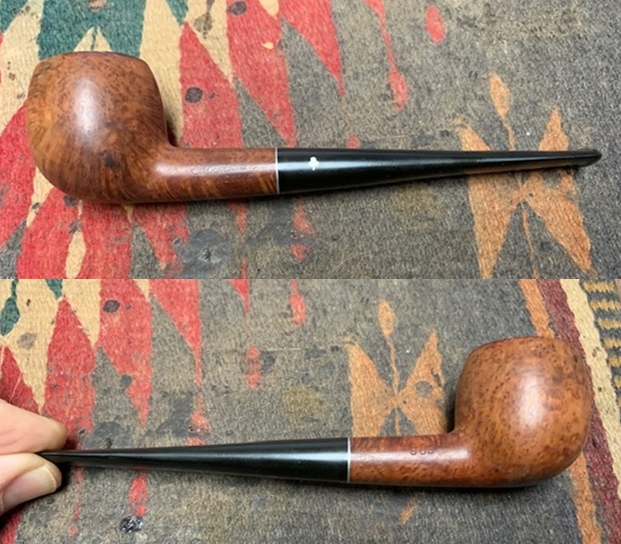
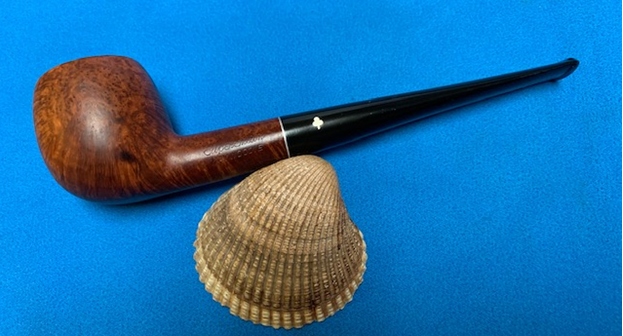
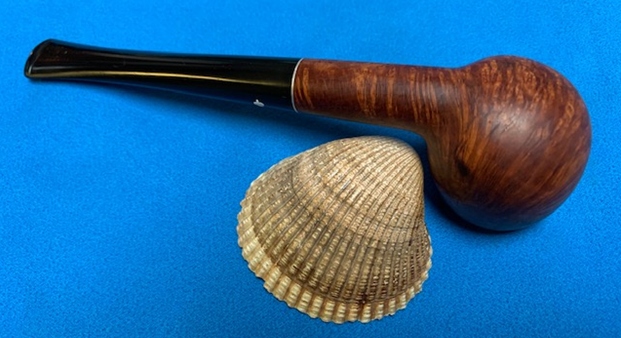
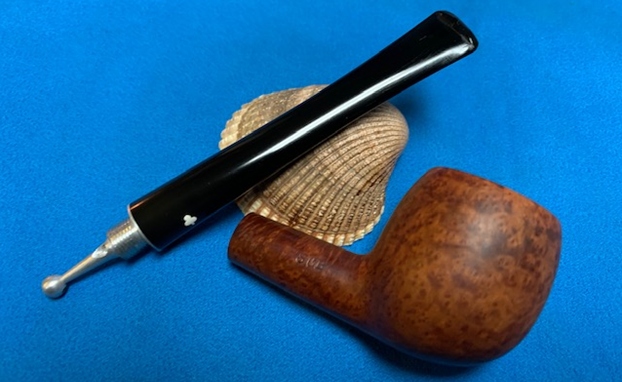
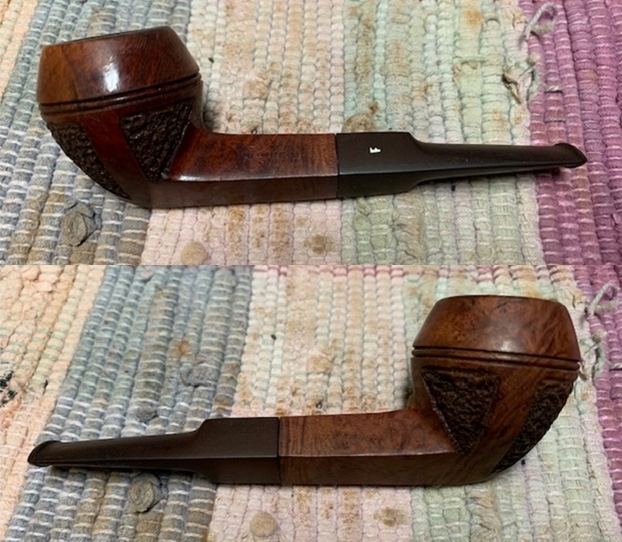
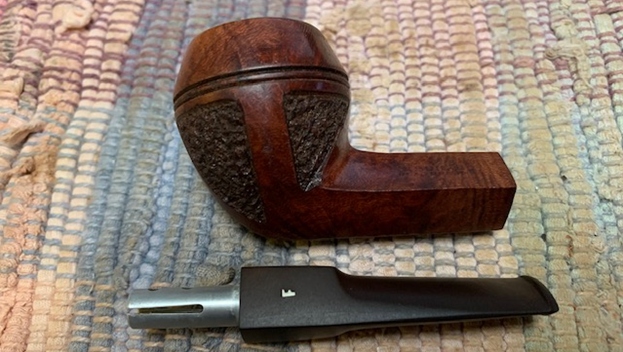
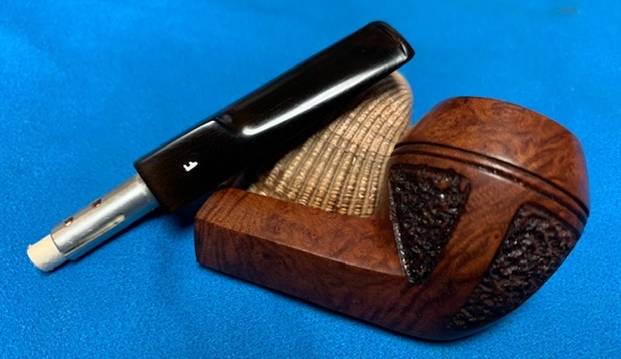
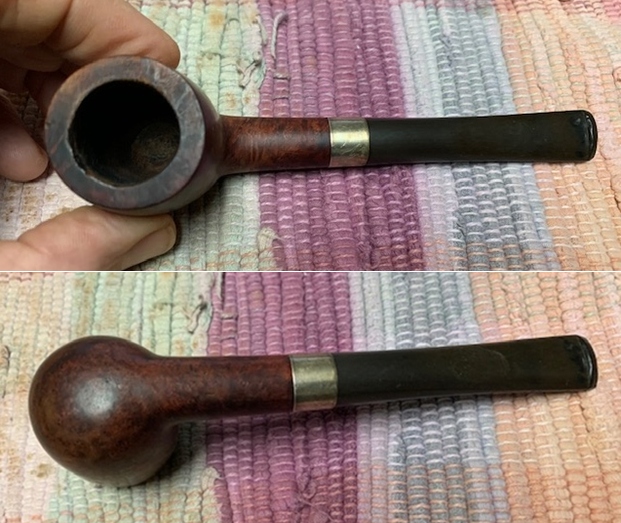
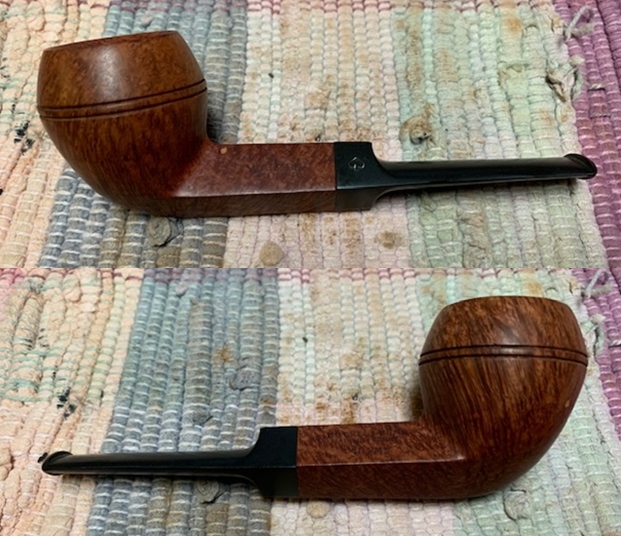
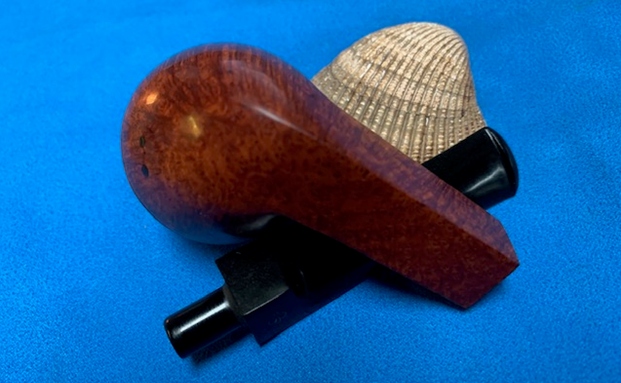
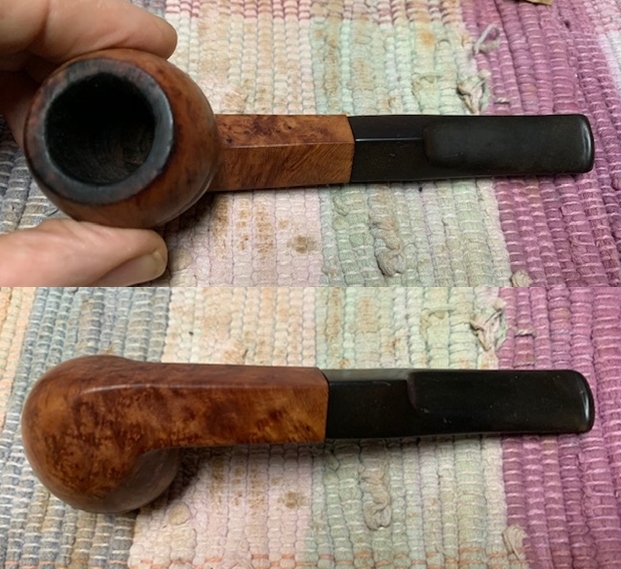
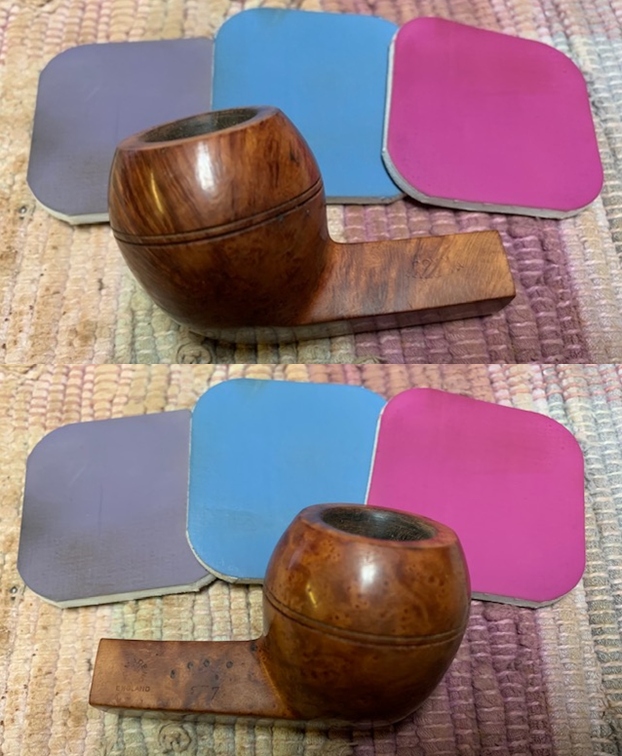
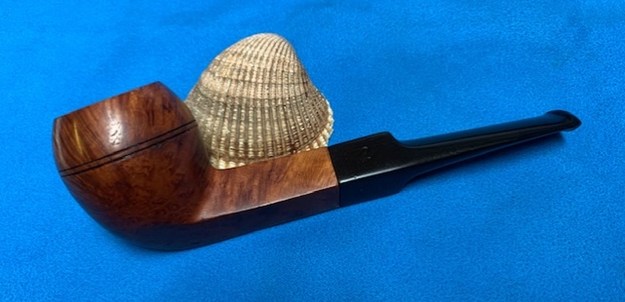
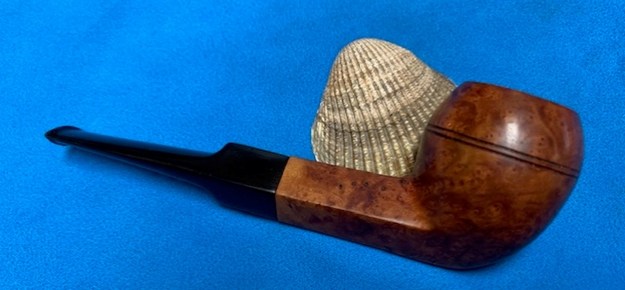
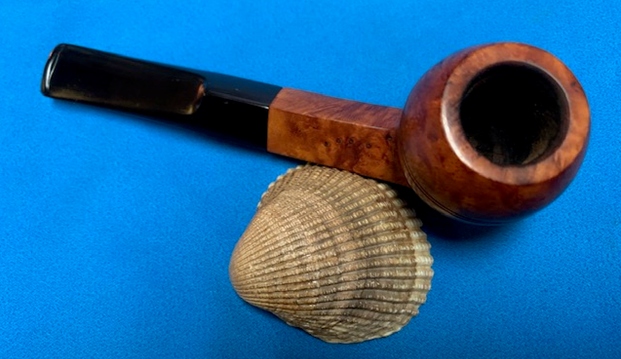
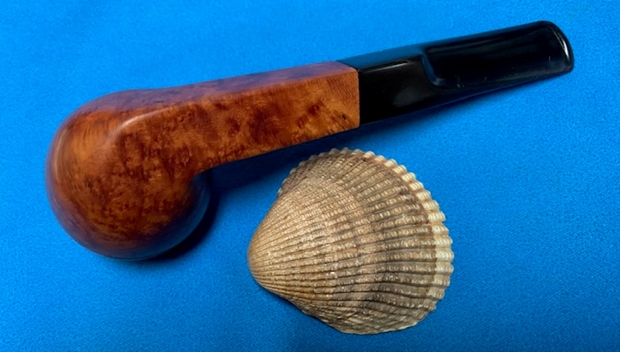
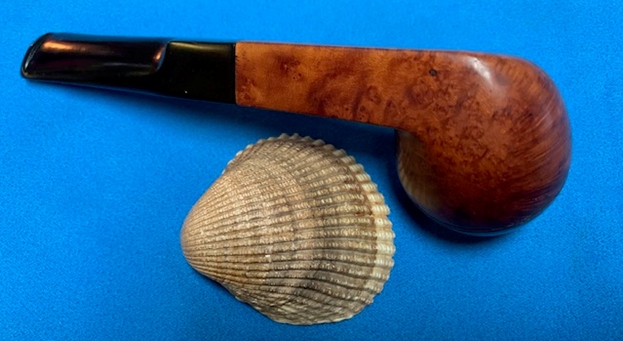
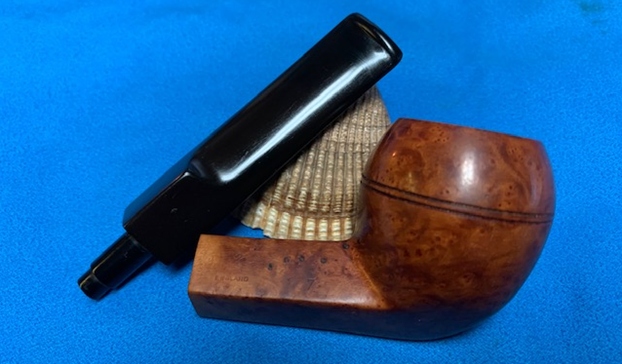
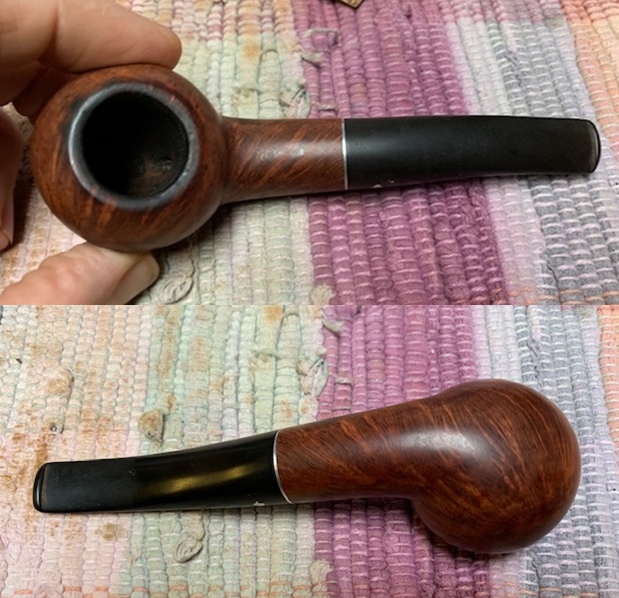
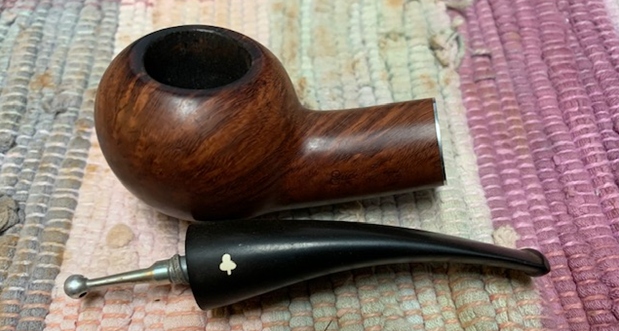
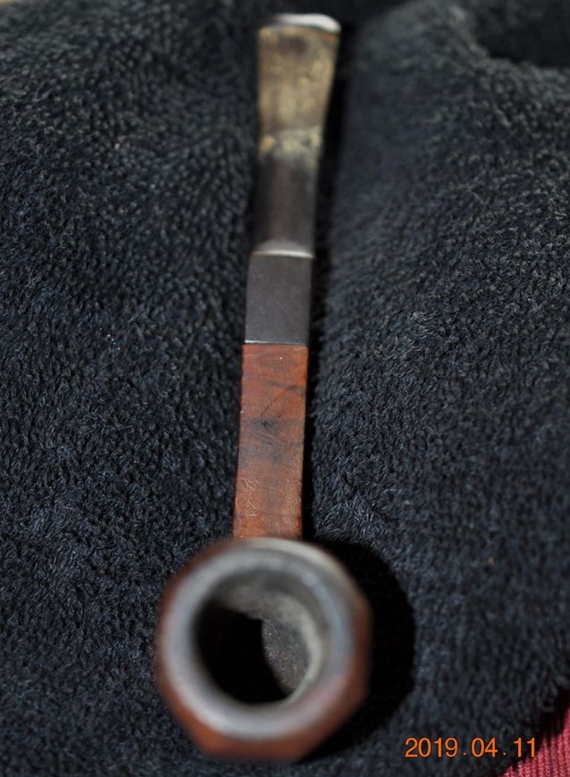
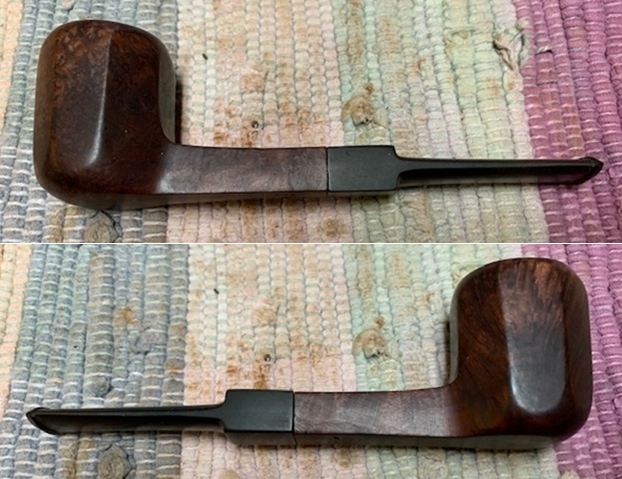
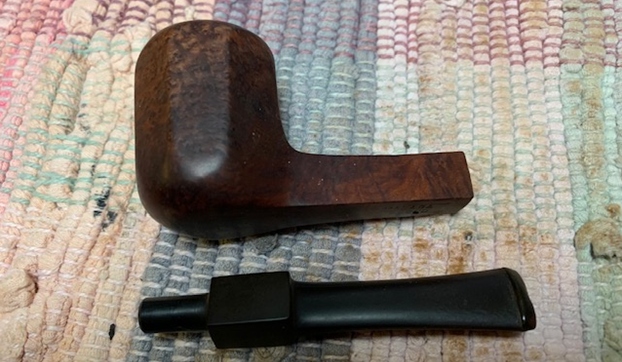
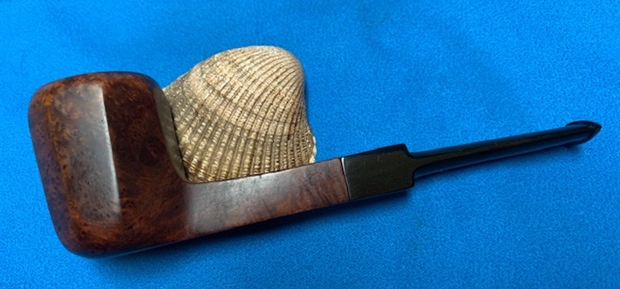
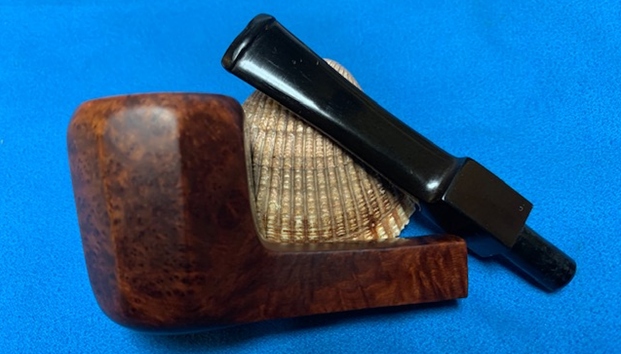
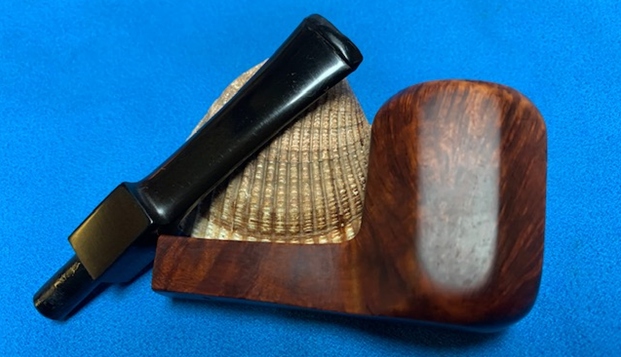
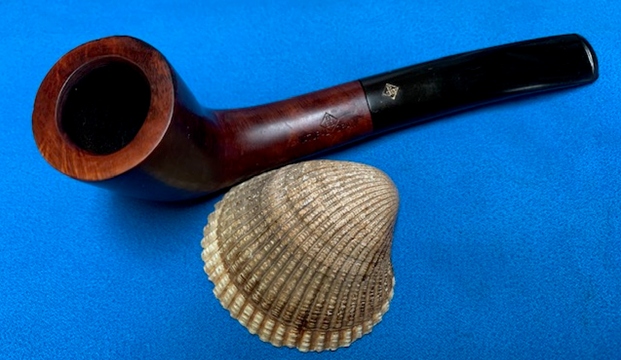
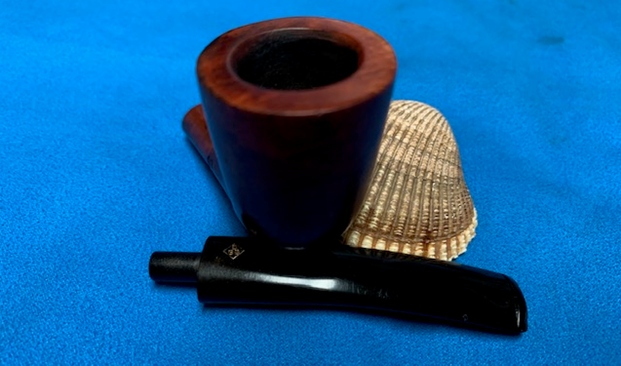
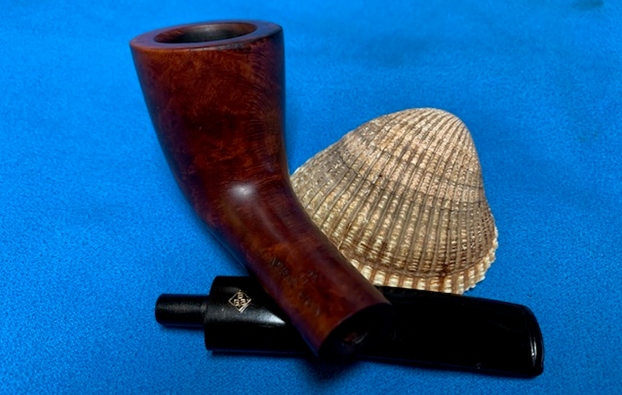
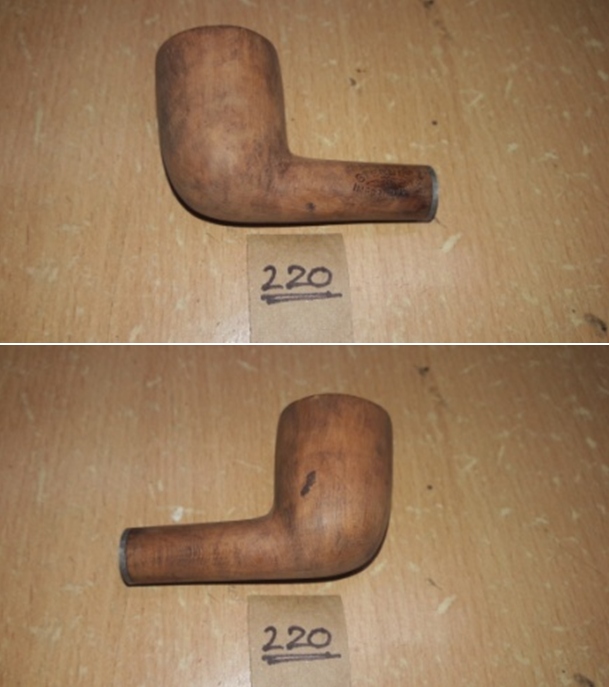
As with all the cleaned pipes that Abha packs, there was a note in the zip lock pouch with issues that she had observed in the pipe. The first point was that she had not dunked the stem in to “Before and After Deoxidizer” solution because of the metal stinger. The next issue that she pointed out was of the rim top surface not being even and the darkening of the inner rim edge. The third issue she pointed out was that the stummel surface had not cleaned up the way it usually does. Here are the pictures of the pipe as I had received. 
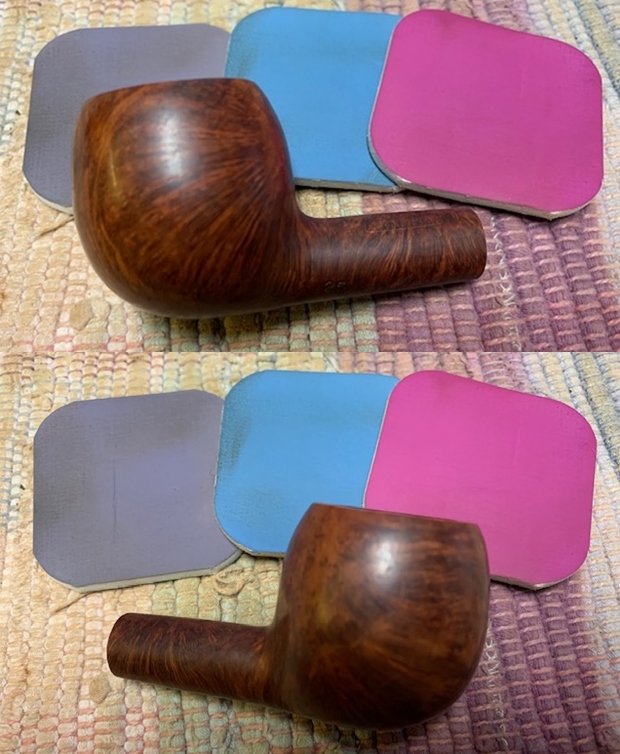
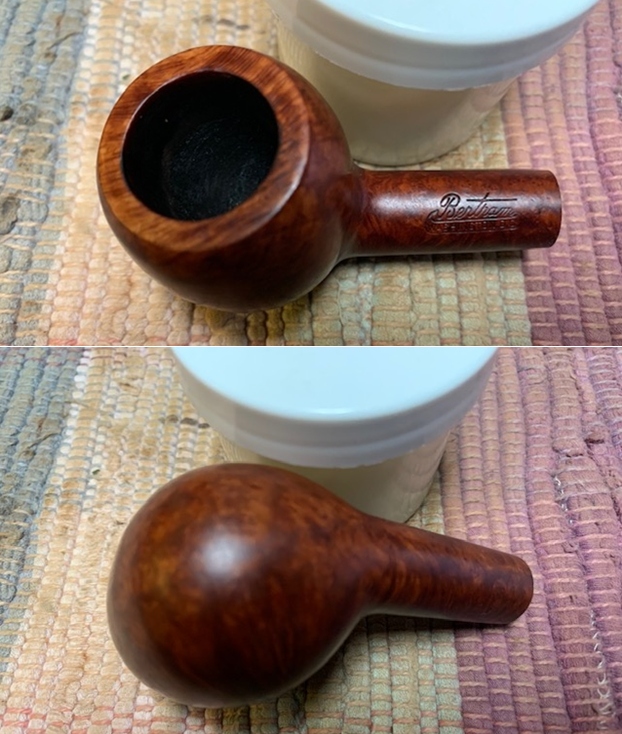
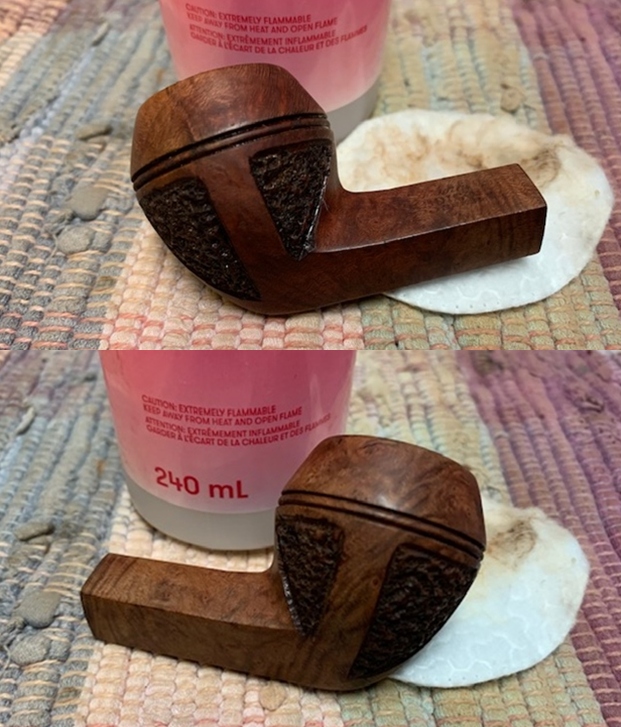
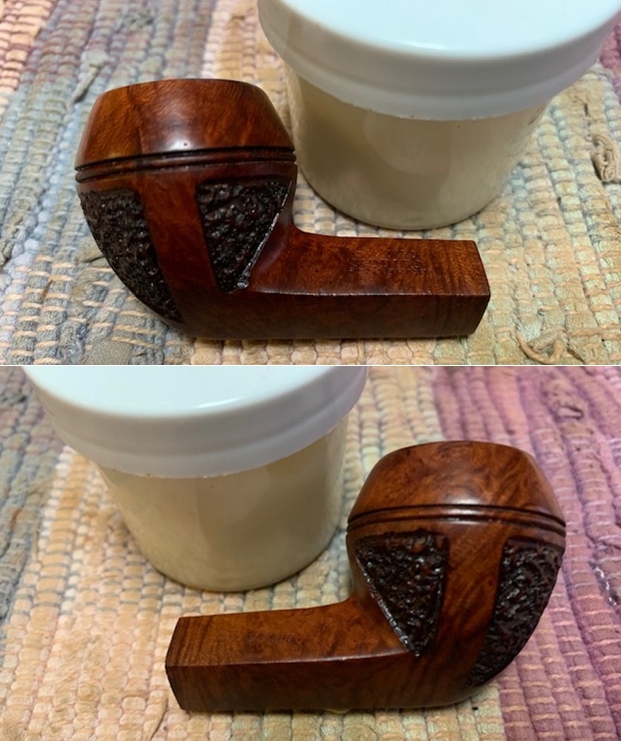
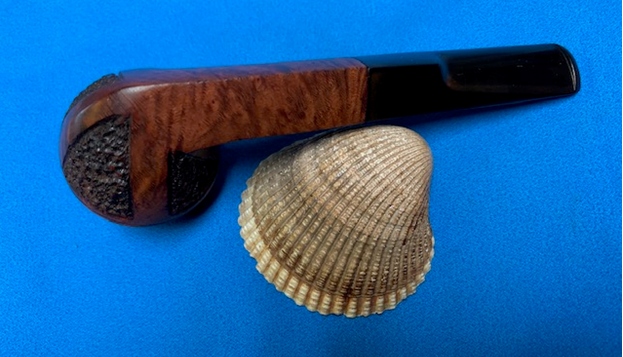
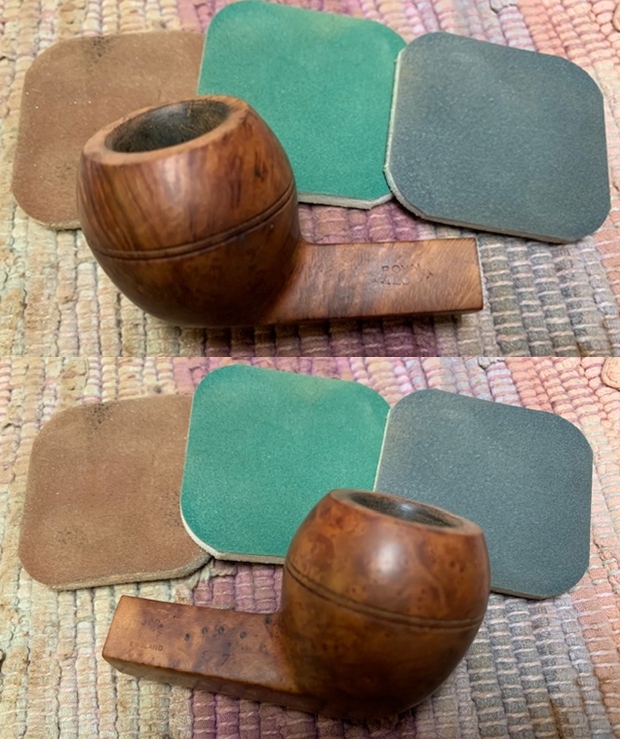
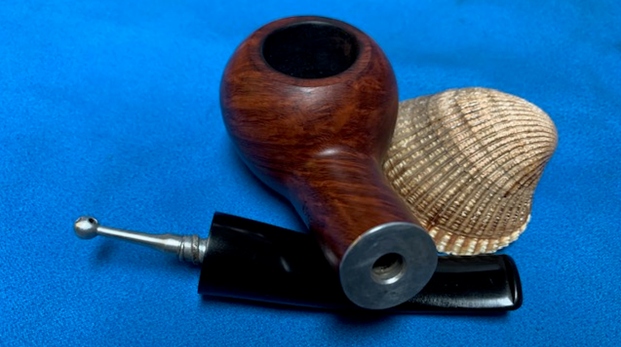
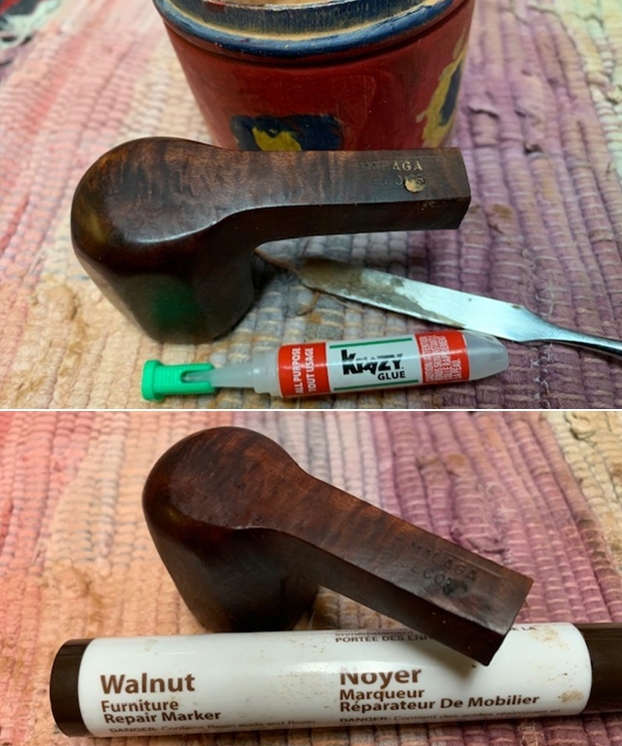
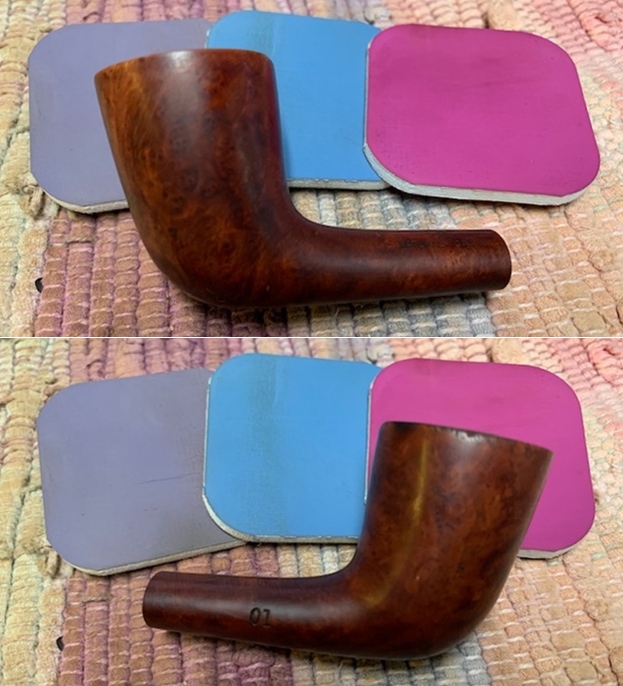
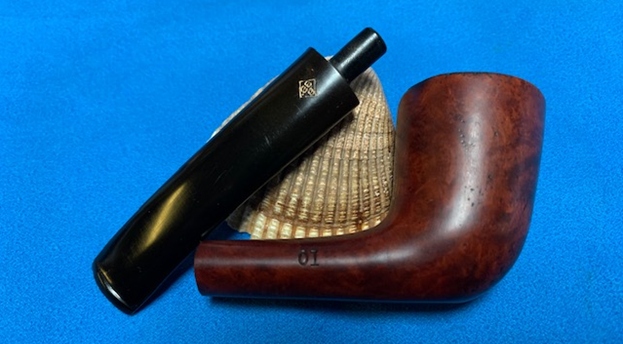
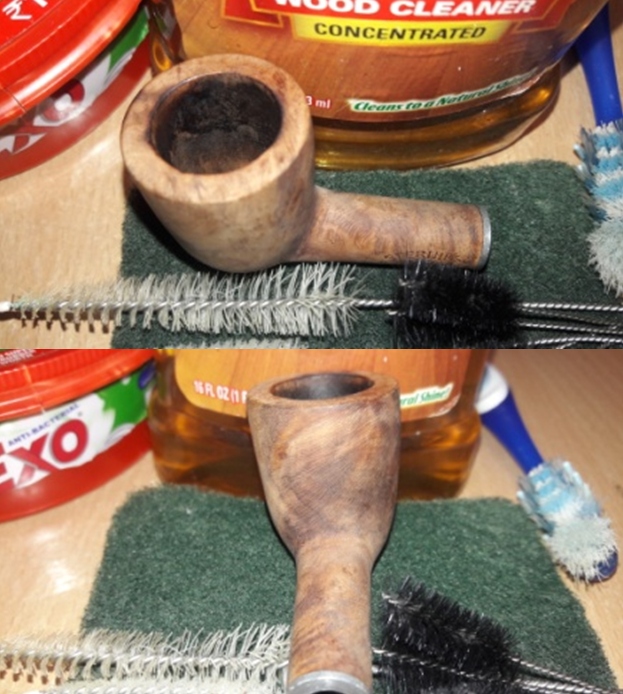
To be honest, the pipe had cleaned up nicely. What she thought was unclean stummel was in fact the old lacquer coat that had come off in patches. The two fills, encircled in yellow, are now plainly visible. The right side of the stummel shows a few dents/ dings. The aluminum spacer ring at the shank end is greatly oxidized and would need to be polished to a nice shine. The mortise is nice and clean. Sanding the stummel surface with a piece of 220 grit sand paper should address the issue of dings to a great extent. Once the stummel has been completely scrubbed and free of the old lacquer, I shall refresh the fills with a mix of briar dust and superglue. A vigorous scrub with Scotch Brit pad and Murphy’s Oil soap should suffice to remove the old peeling lacquer coat. In case this does not work, a wipe with pure Acetone on a cotton swab will definitely address this issue. After the aluminum spacer ring has been polished, it will provide a nice bling to the overall appearance of the pipe.   
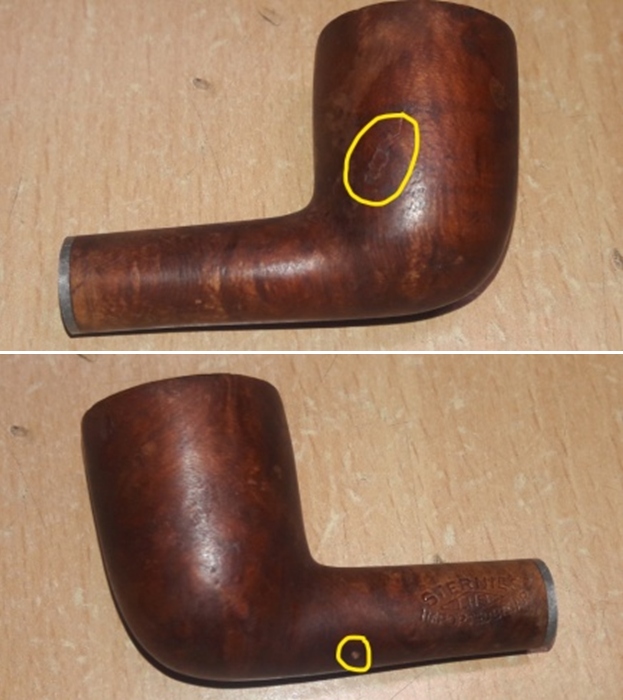
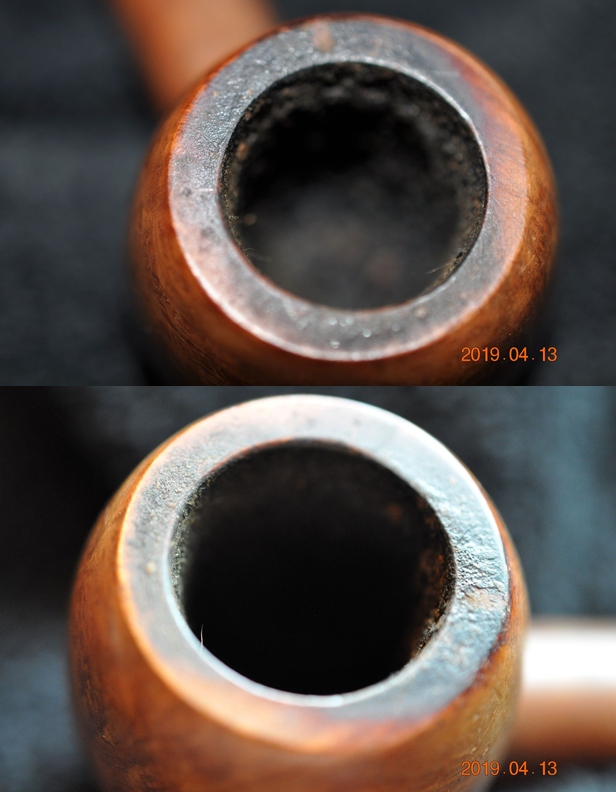
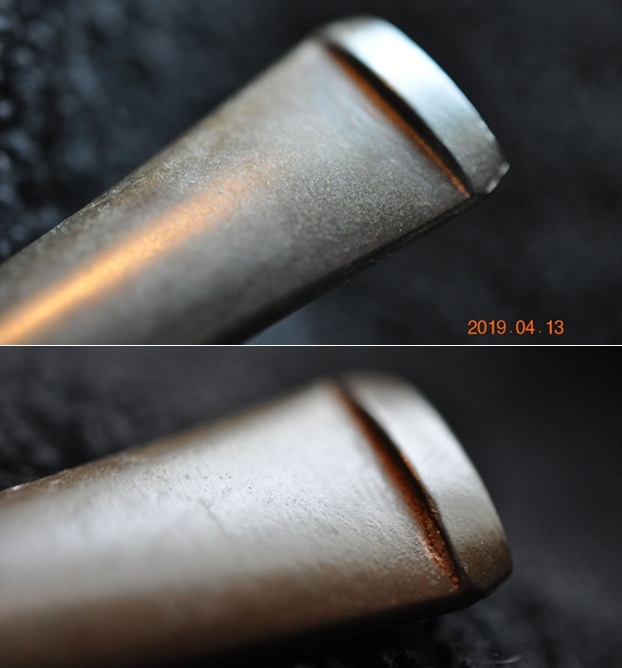
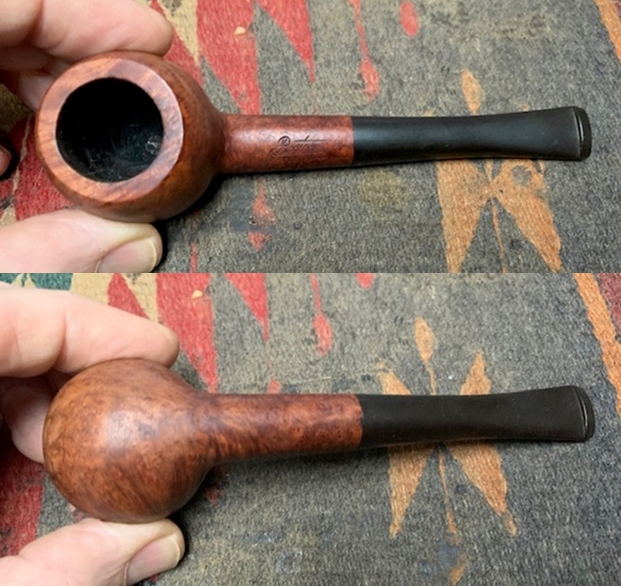
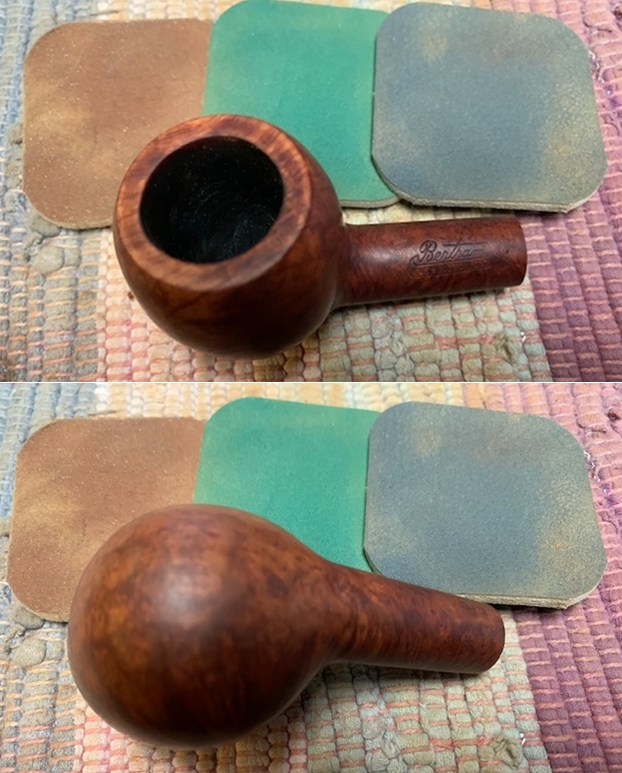
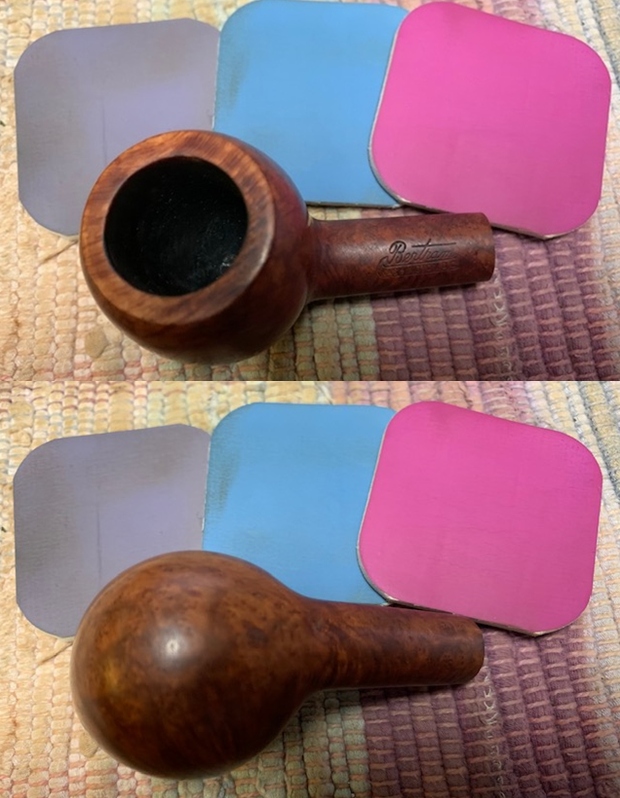
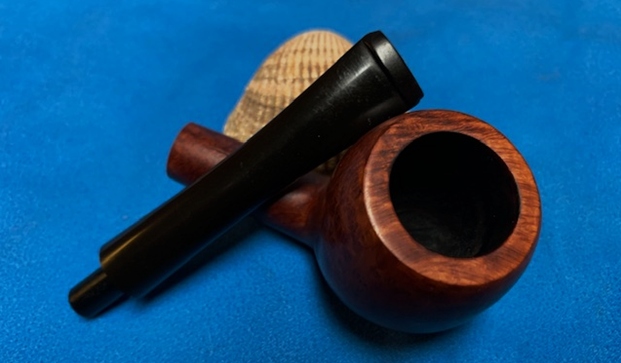
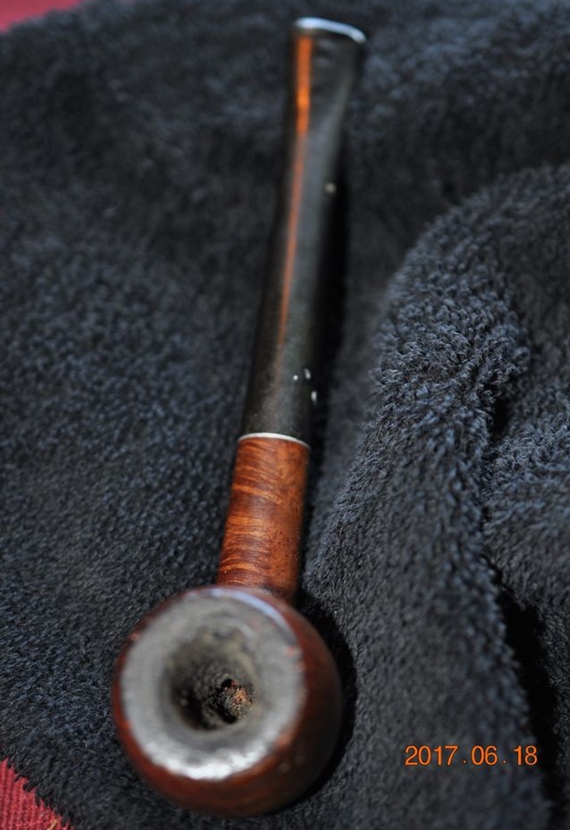
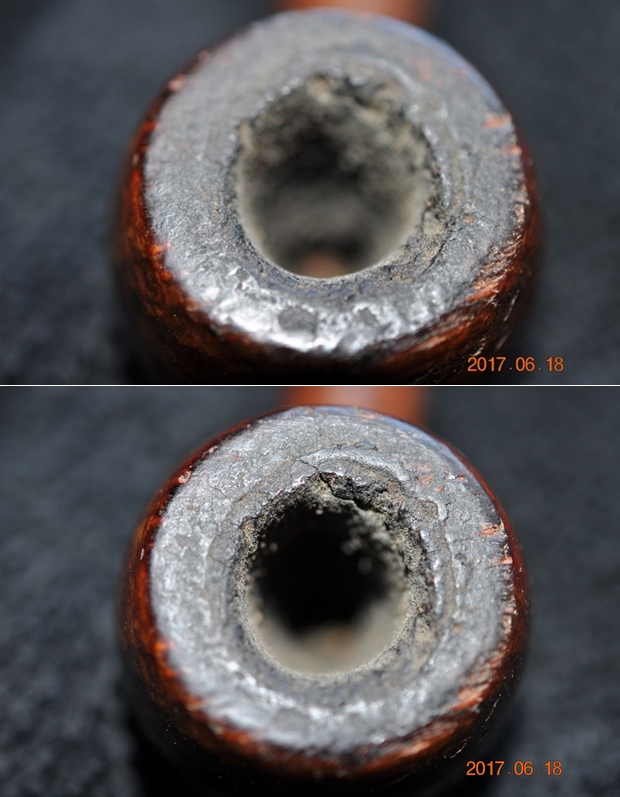
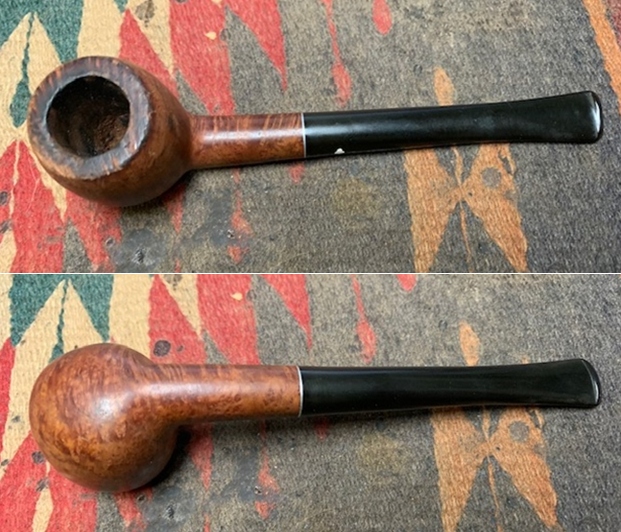
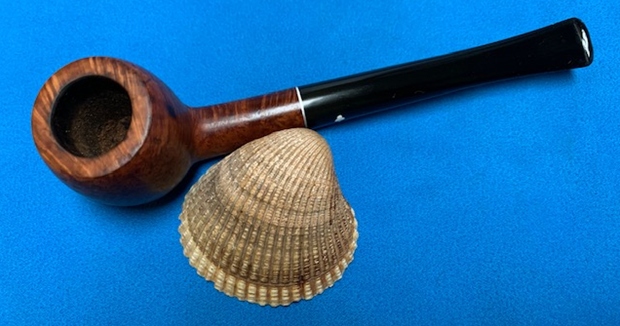
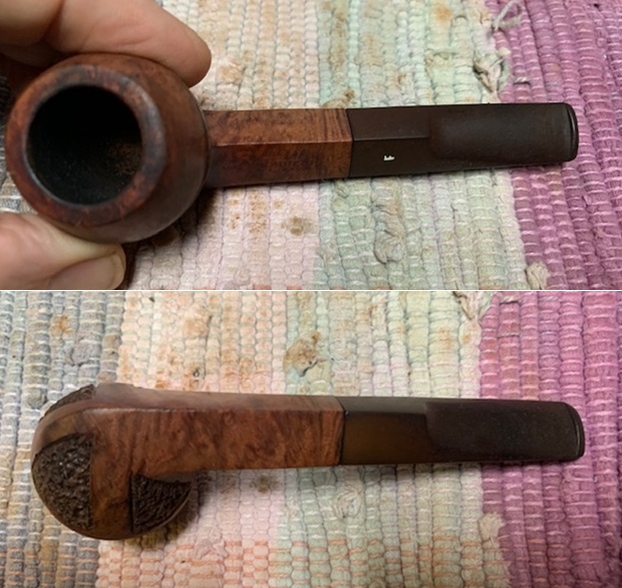
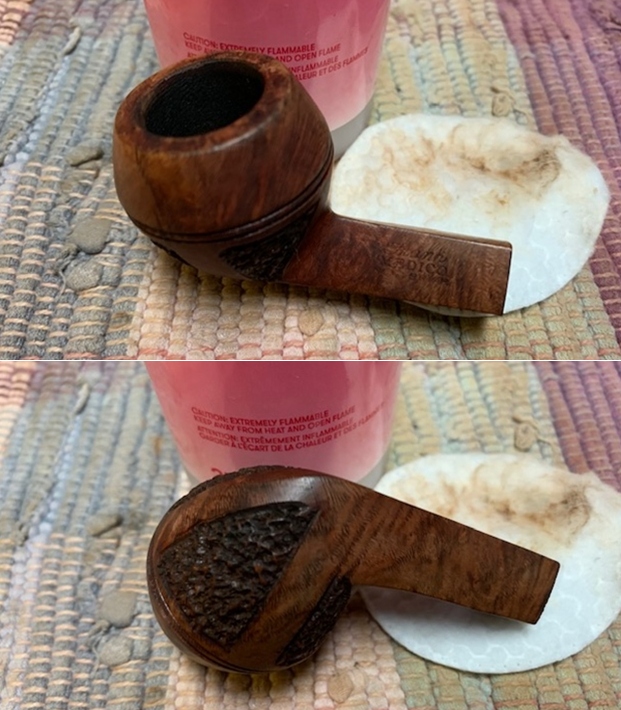
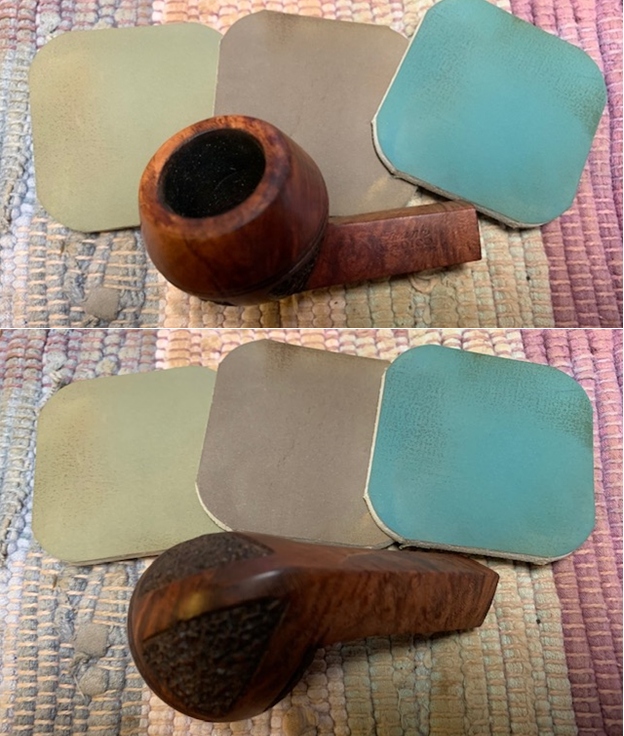
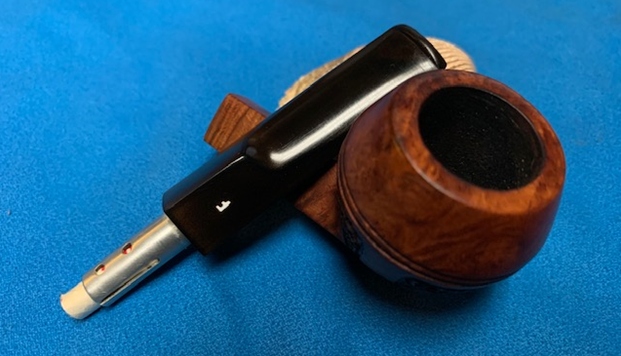
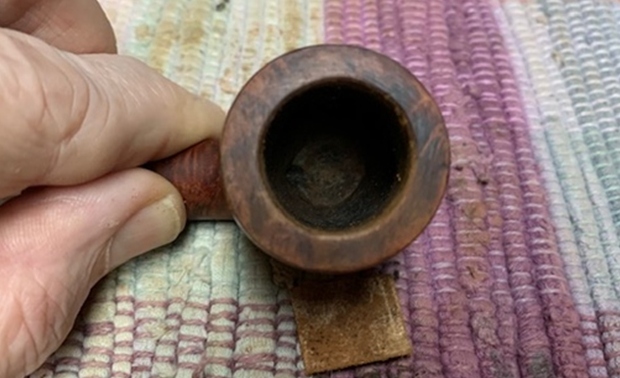
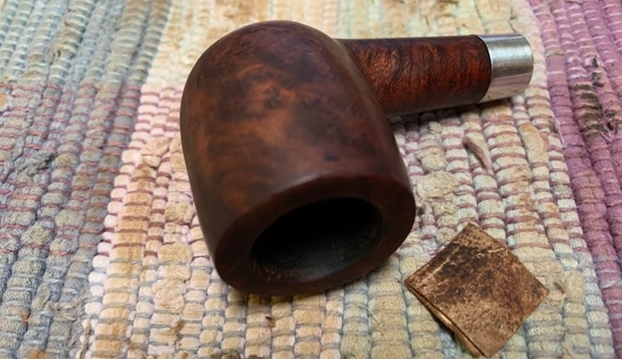
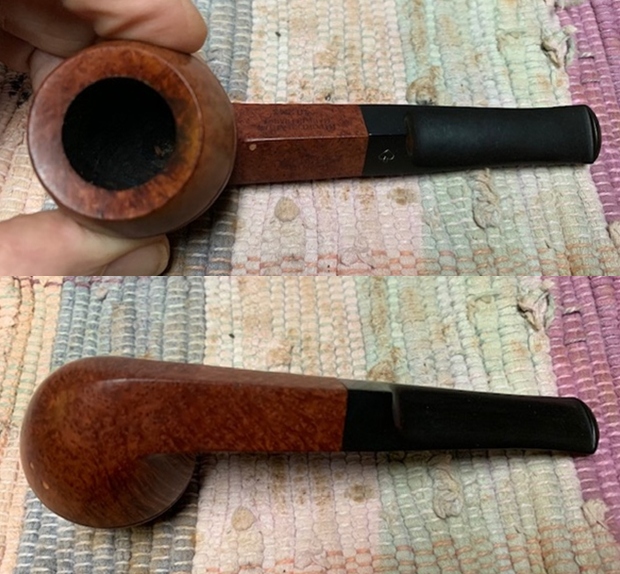
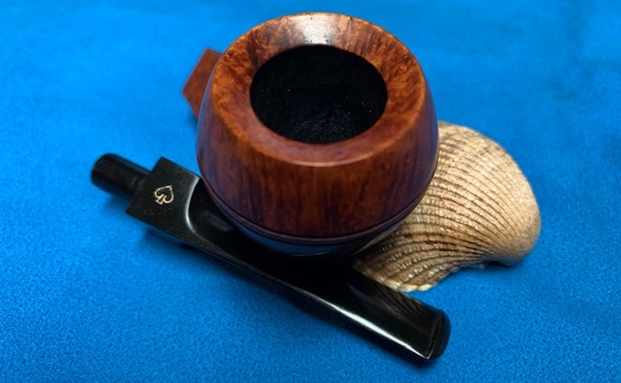
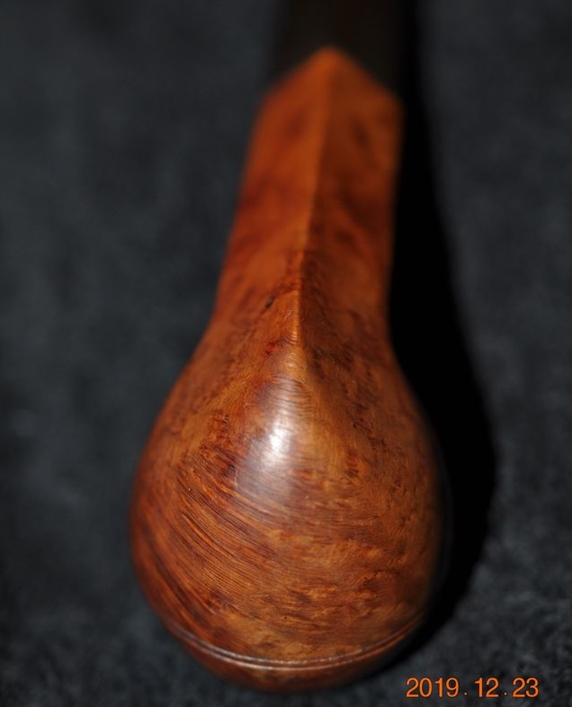
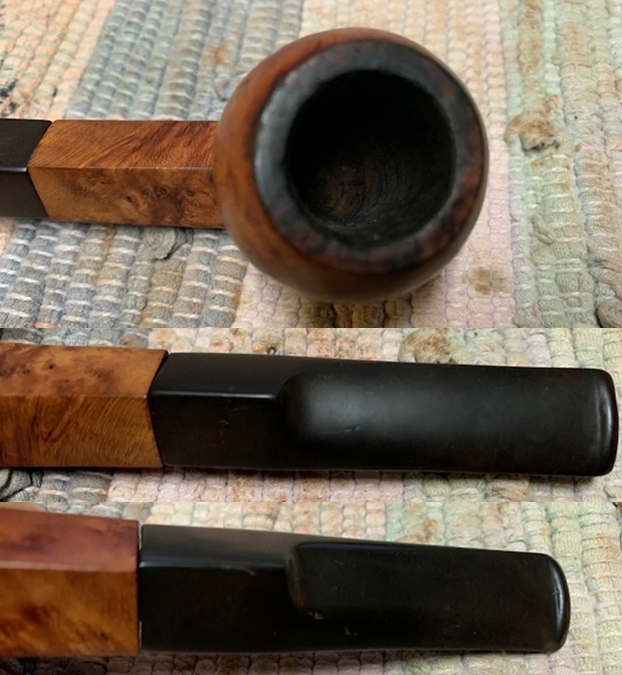
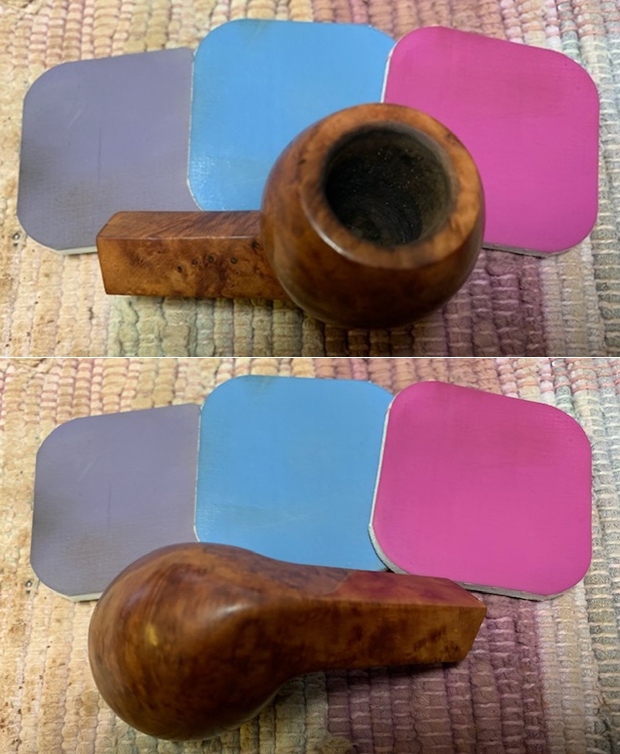
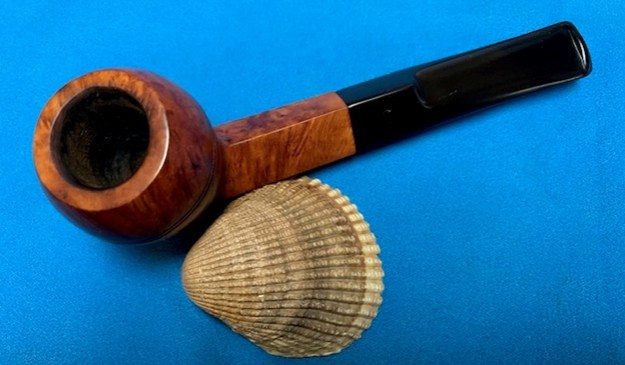
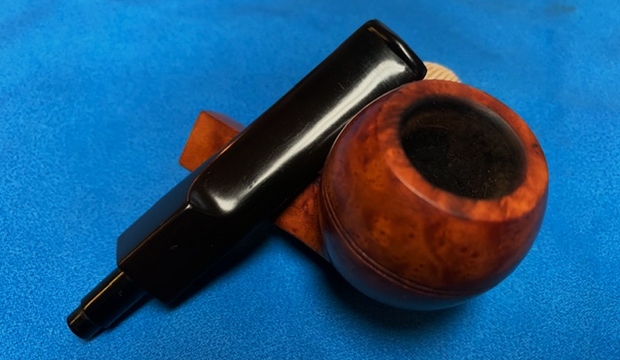
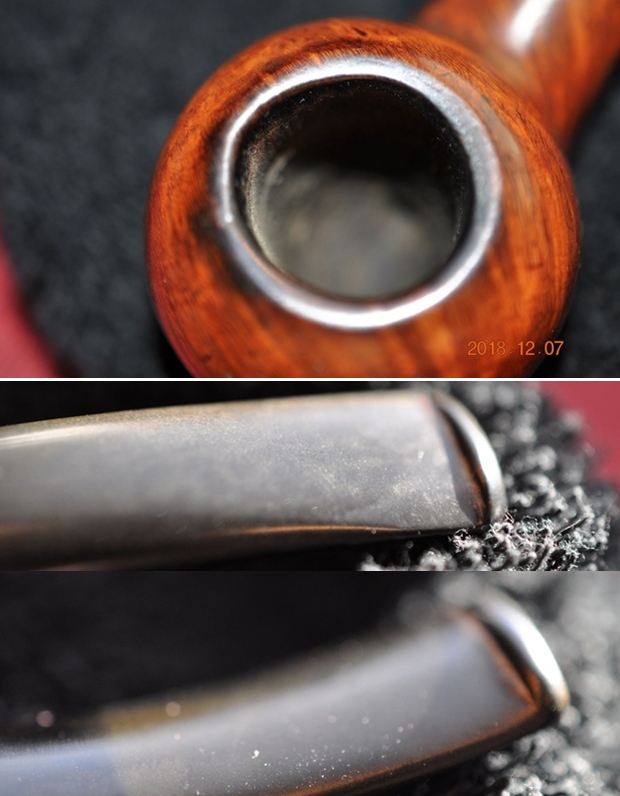
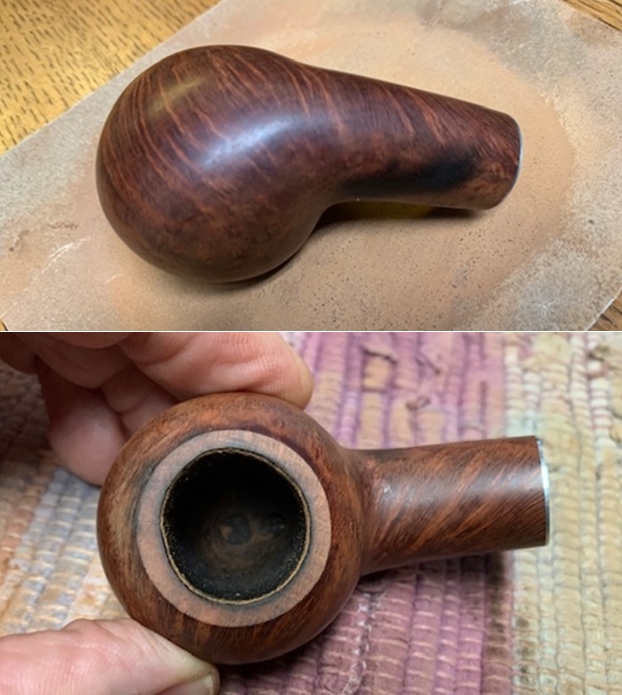
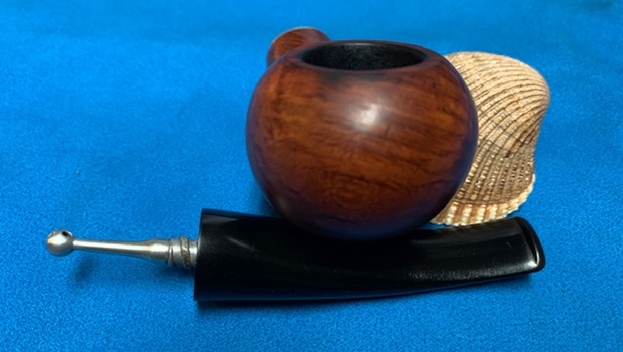
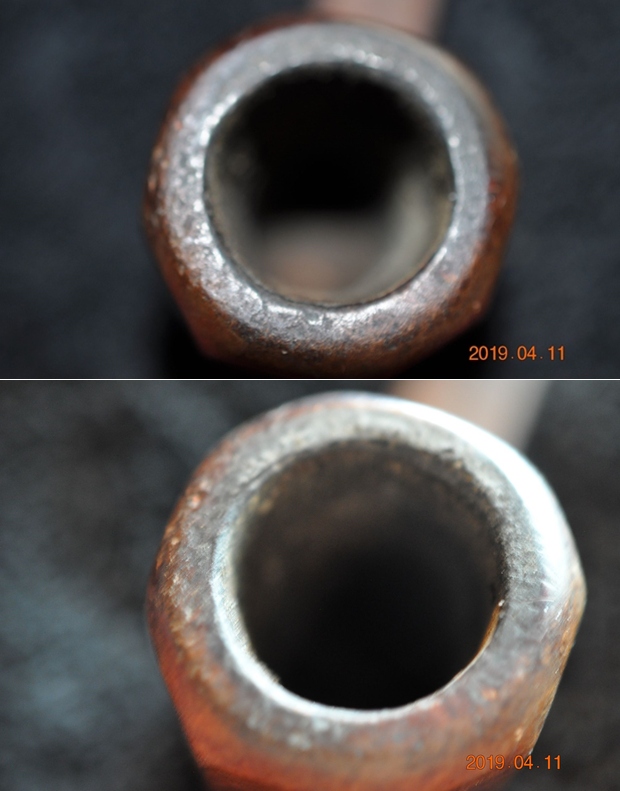
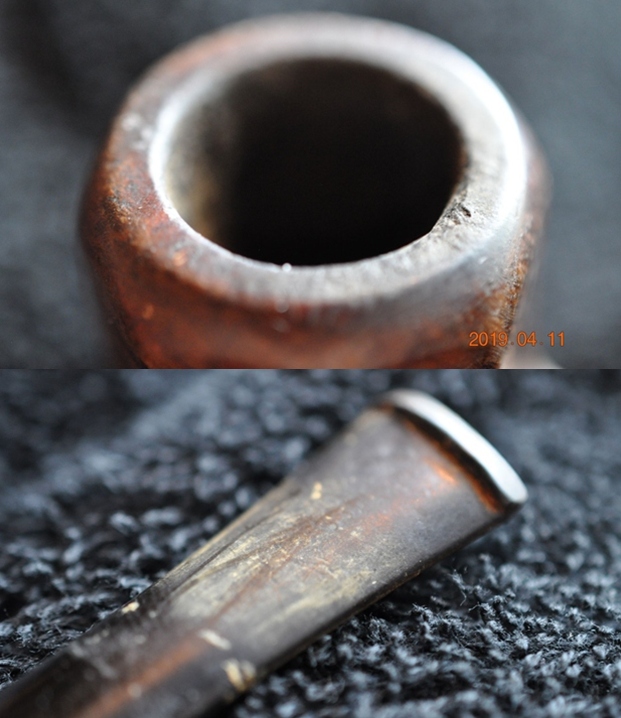
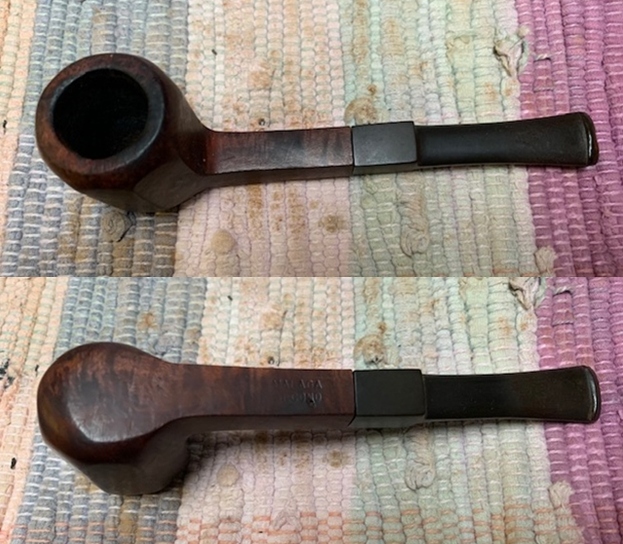
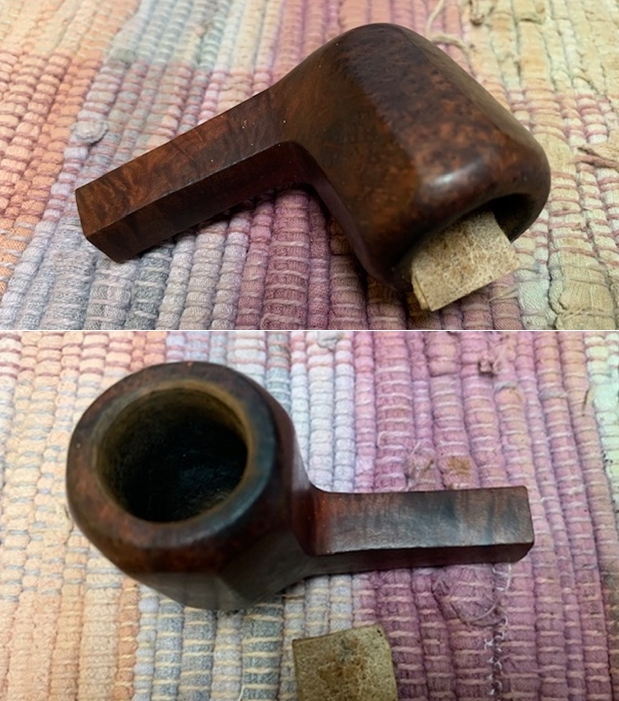
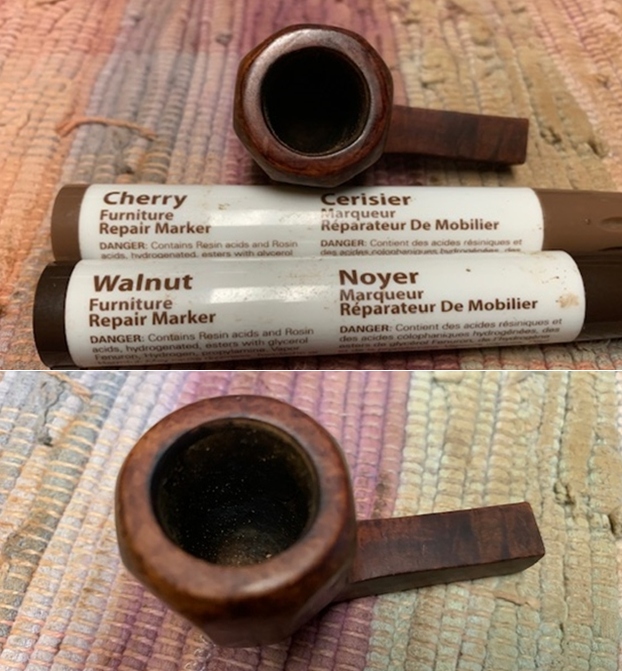
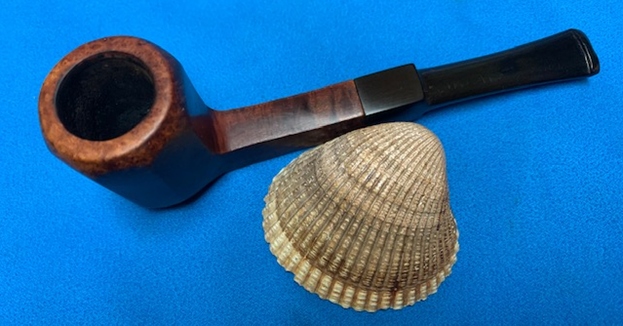
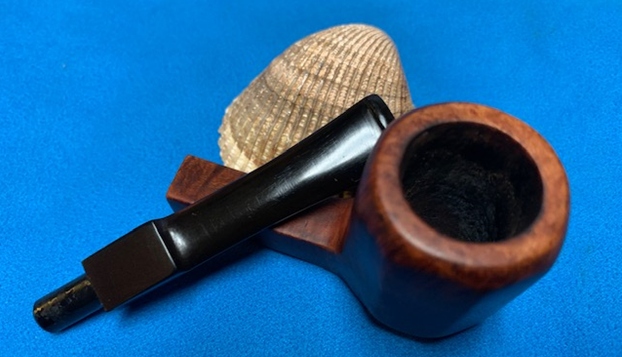
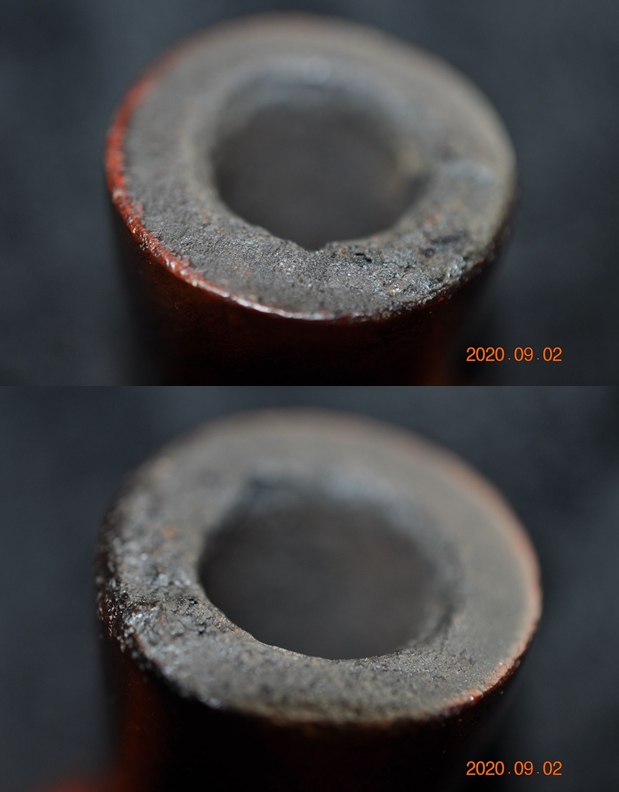
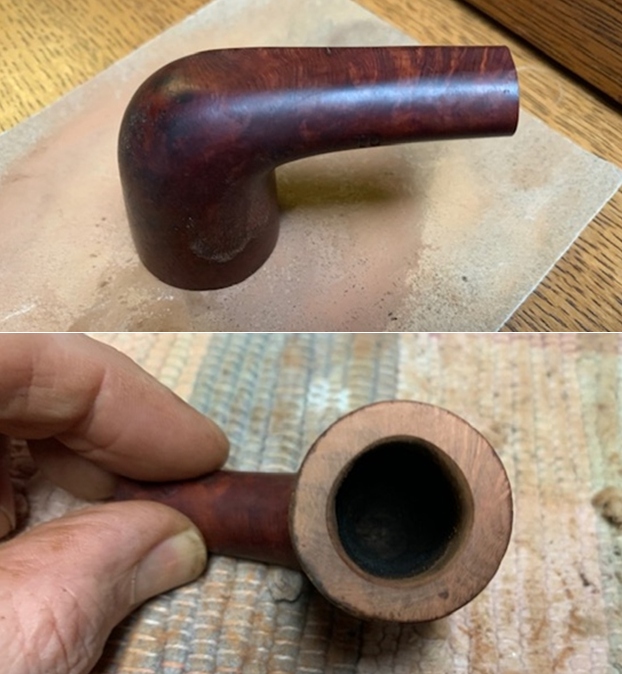
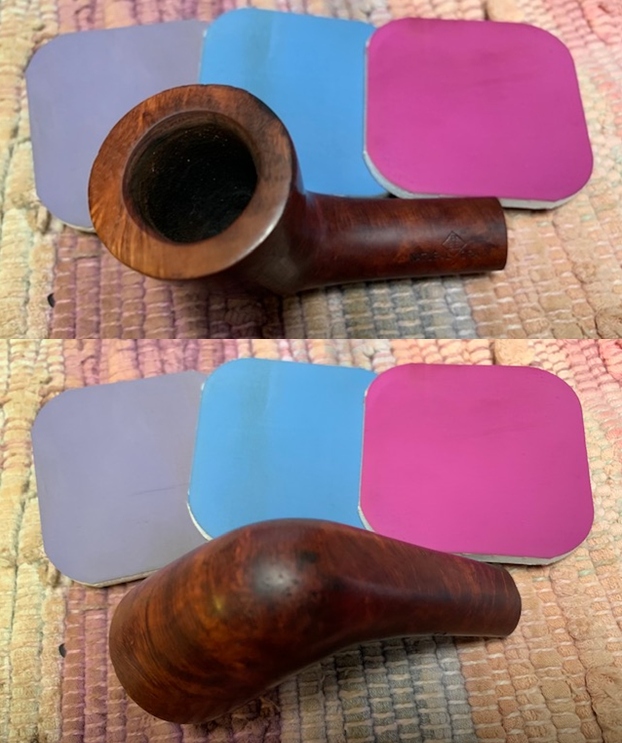
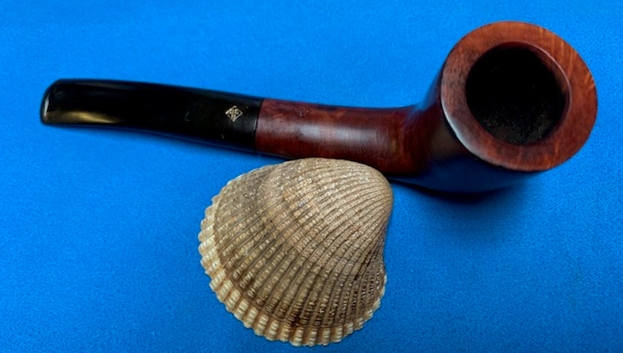
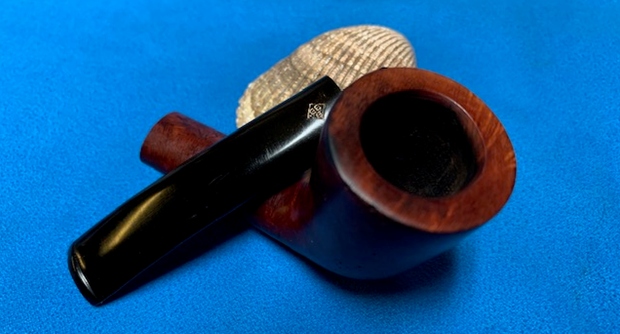
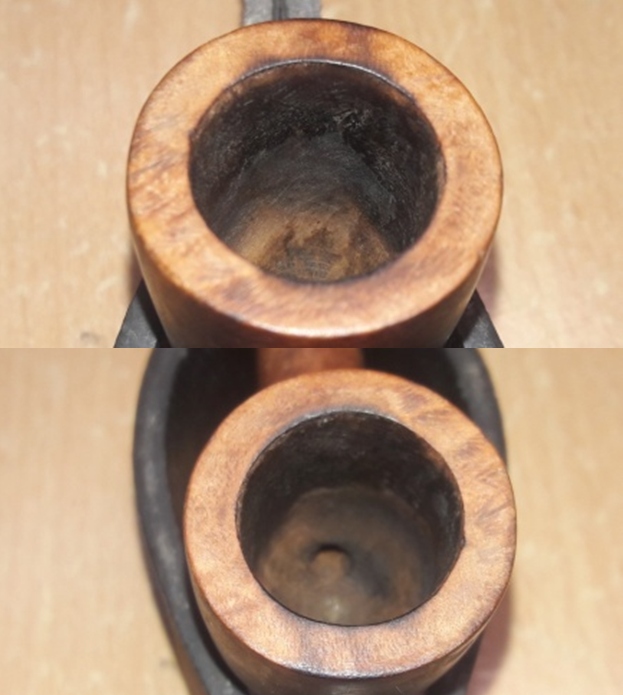
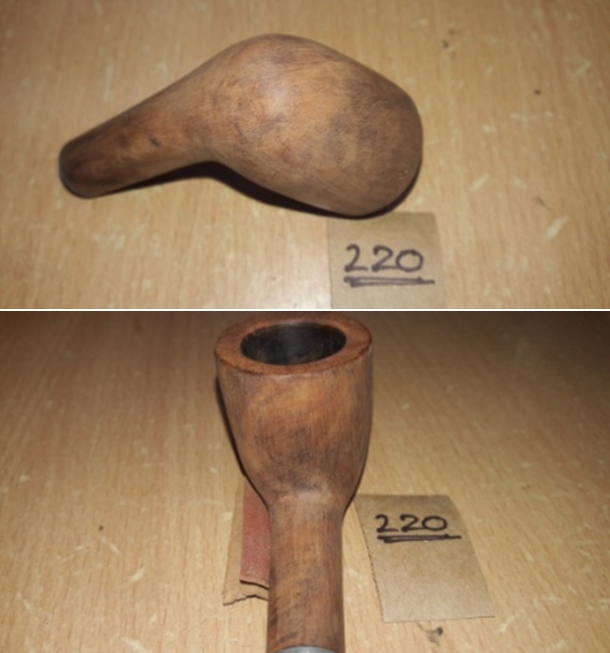
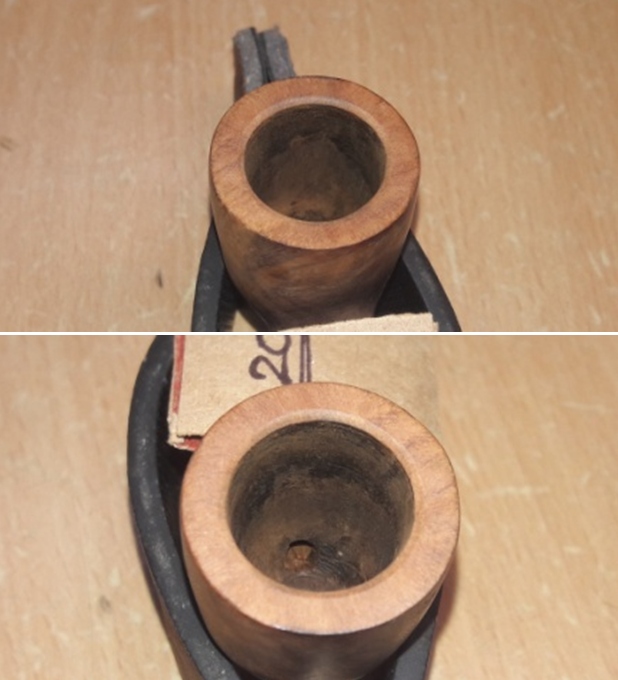
The chamber walls are sans any damage. The inner rim edge is in good condition save for light charring (encircled in green) and a chip (encircled in blue). The outer rim edge shows just a hint of darkening in 1 o’clock direction, but otherwise in excellent condition. The rim top surface is uneven to the touch. The draught hole is dead center and at the bottom of the heel and this construction geometry should make this pipe a fantastic smoker. Topping the rim surface should address the issues of uneven rim top, the charred outer rim edge while greatly reducing the inner rim edge damage. I shall, if need be, create a bevel to the inner edge to completely address the rim damage. 
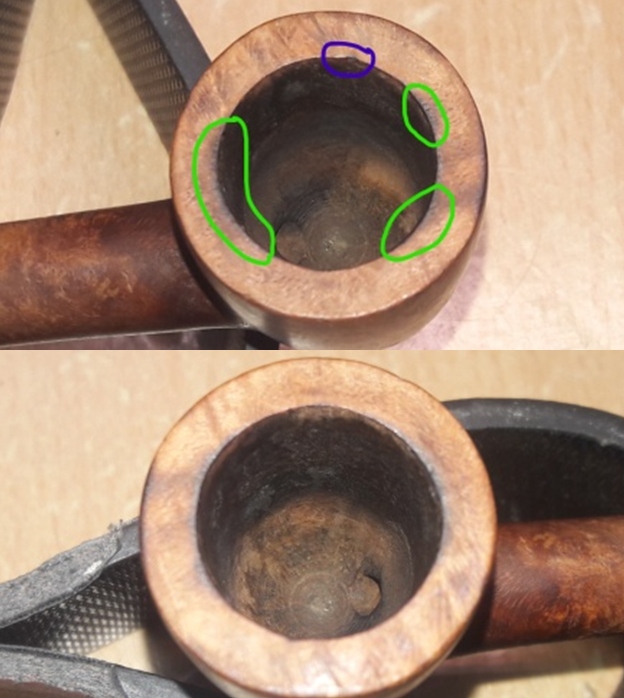
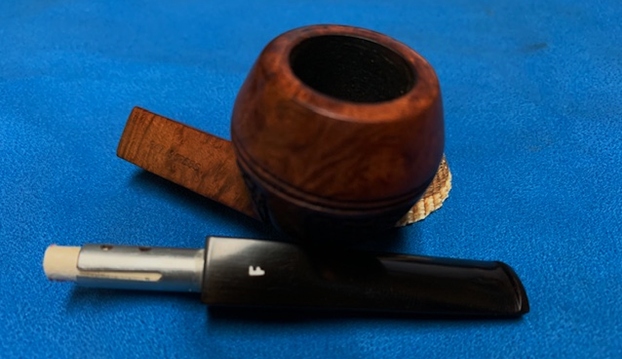
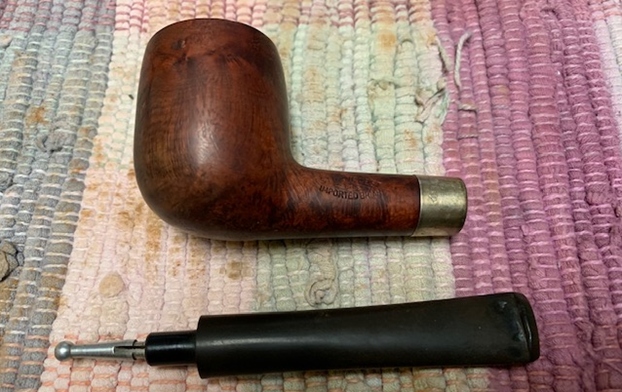
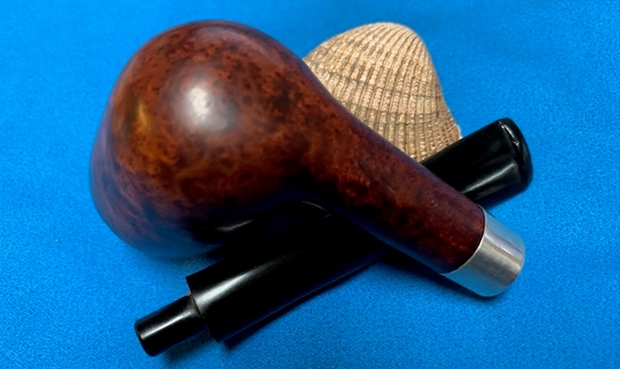
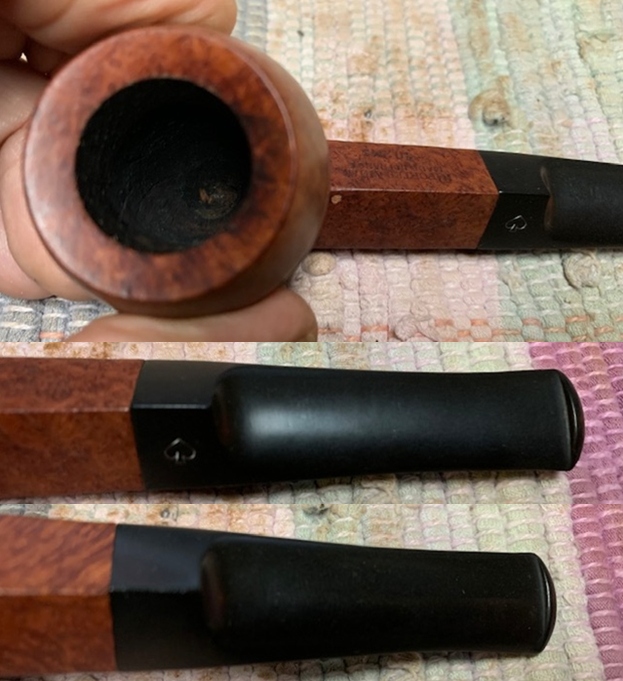
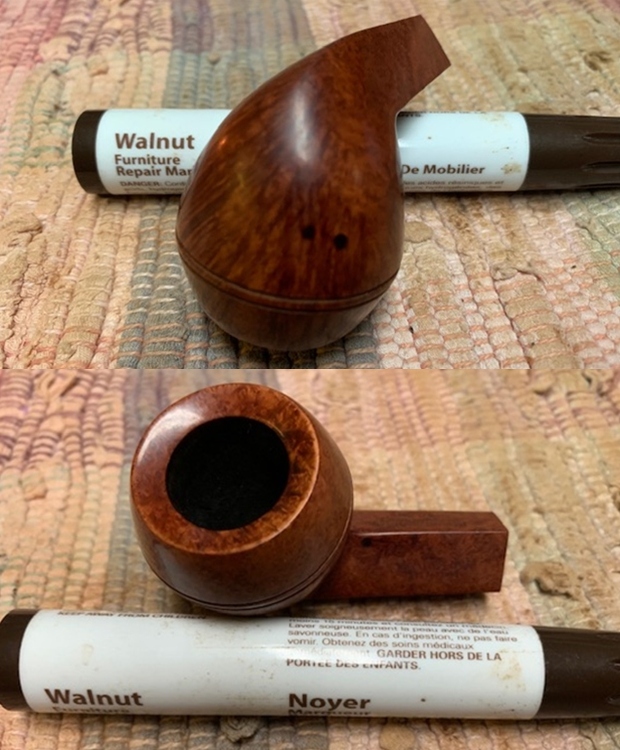
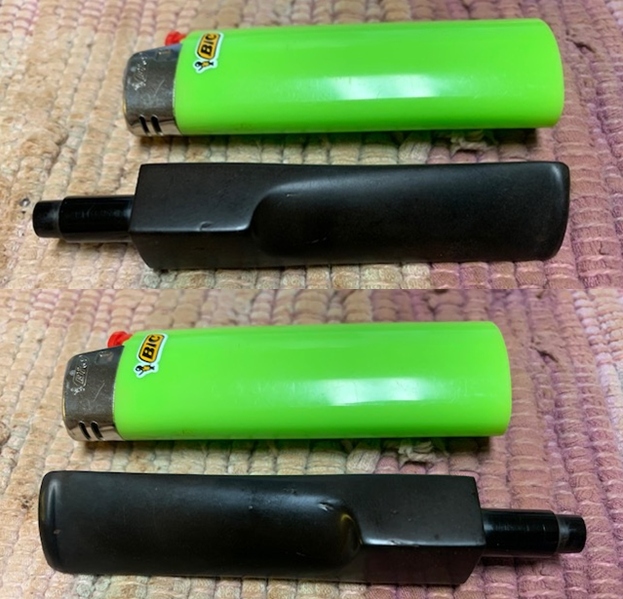
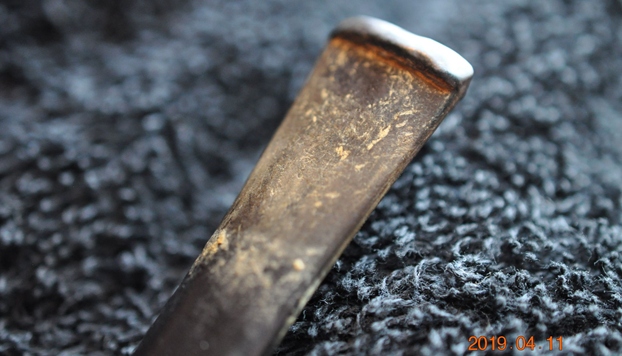
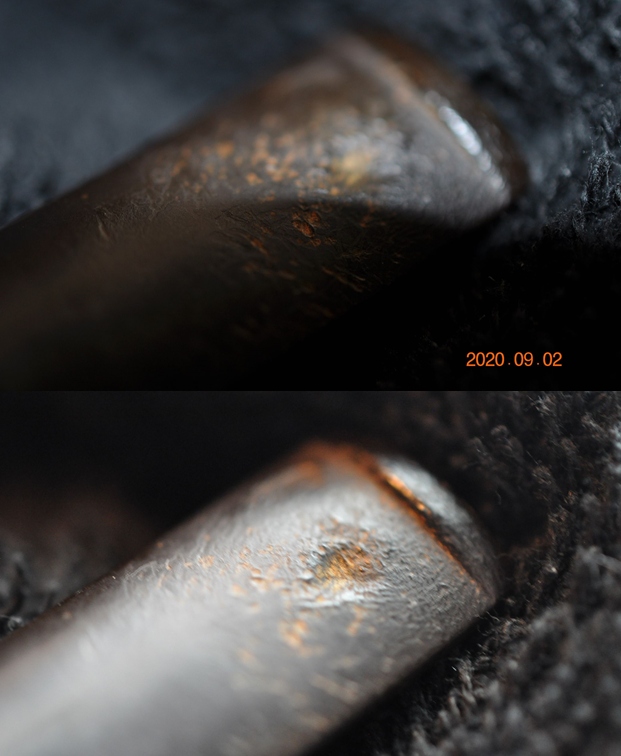
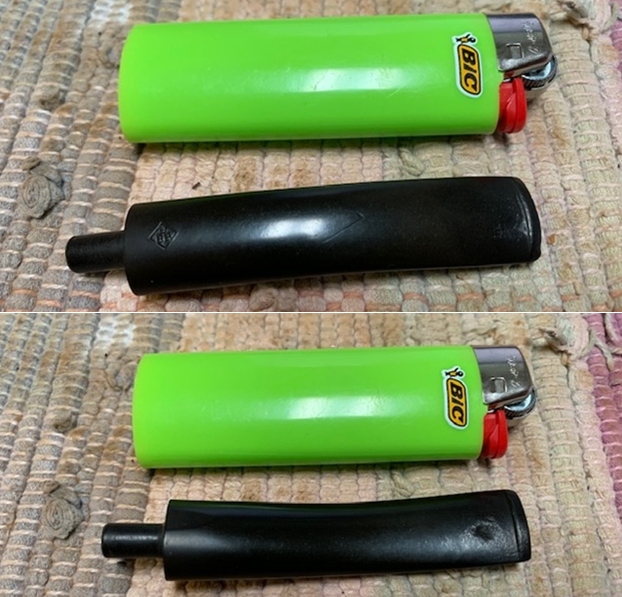
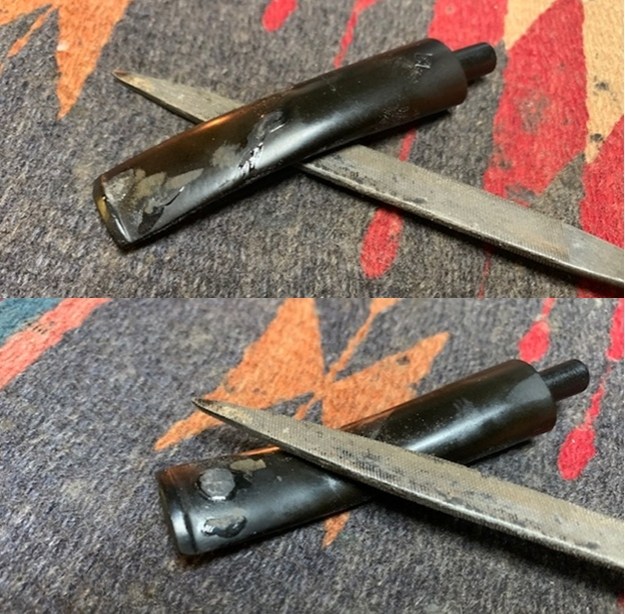
The moment I saw and held the stem in my hands, I was not sure if the stem was vulcanite or made of some plastic derivative. It was very light weight and considerably harder than vulcanite. It was lightly oxidized and had minor tooth chatter on either surface in the bite zone. The button edges on either surface are slightly deformed with tooth indentations. I shall not risk heating the bite zone with the flame of a lighter to raise the tooth chatter but would rather try and sand it out. In case required, I shall further use charcoal and superglue mix to address this issue. I need to sharpen the button edges and shall do so with a flat needle file. The Process
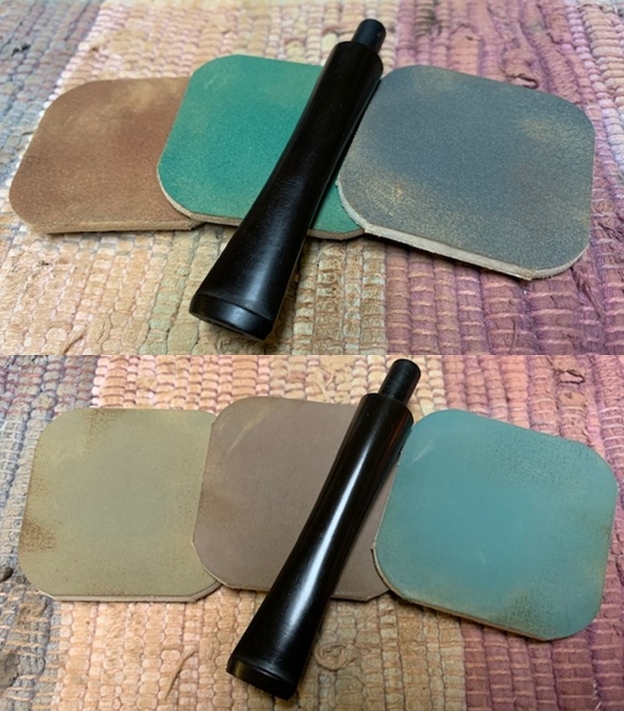
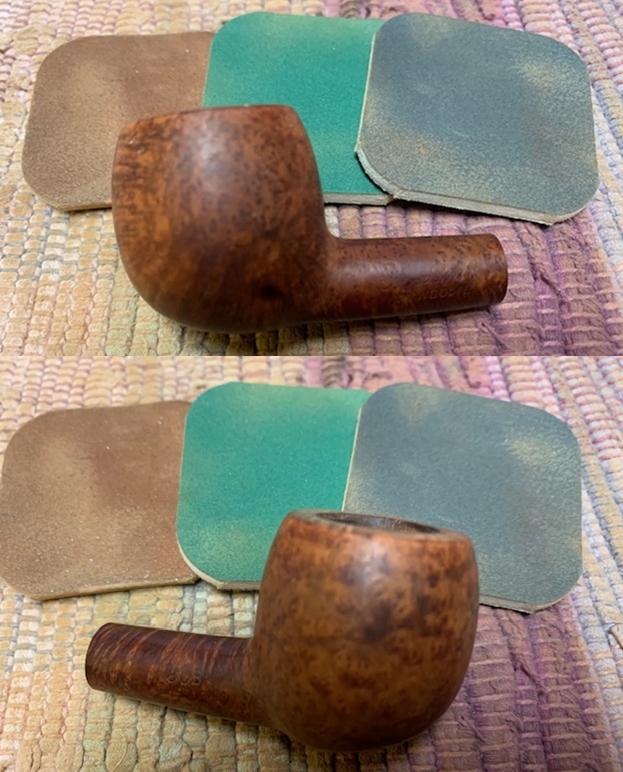
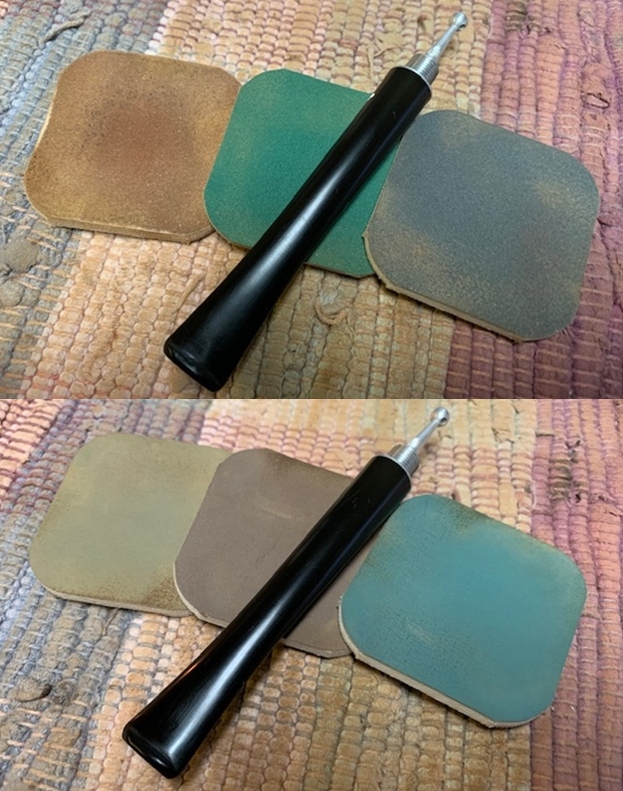
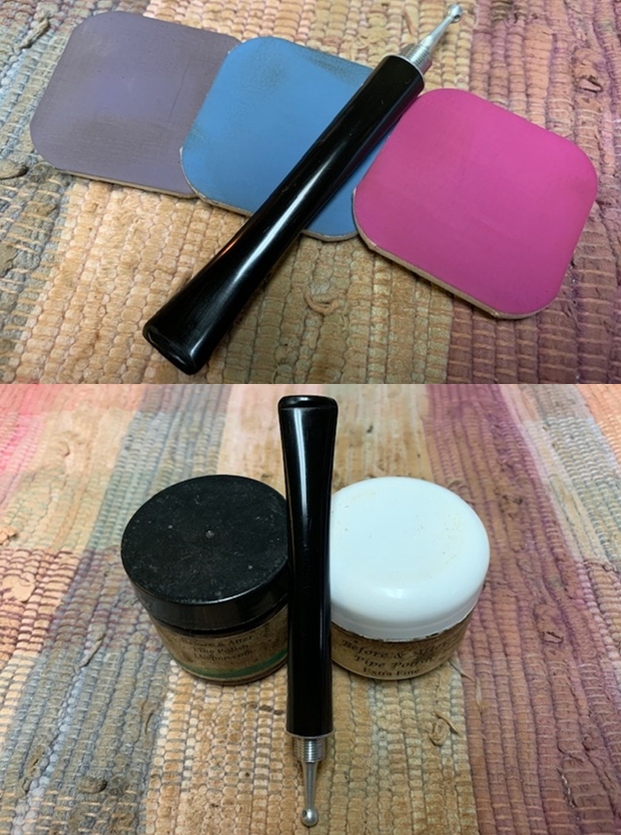
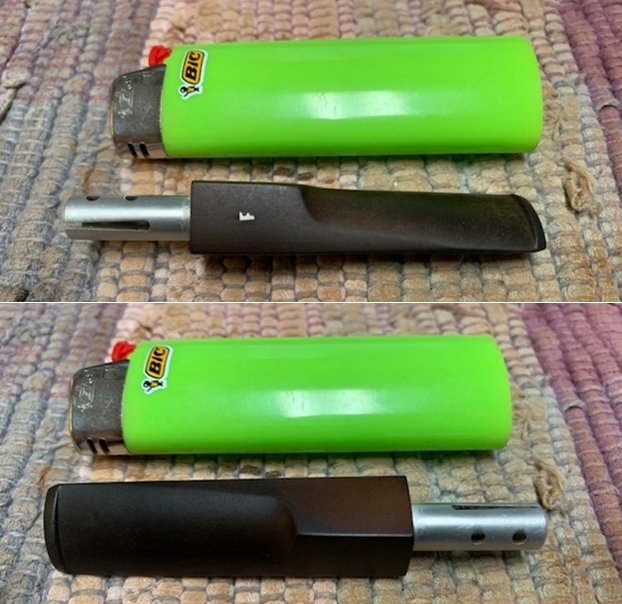
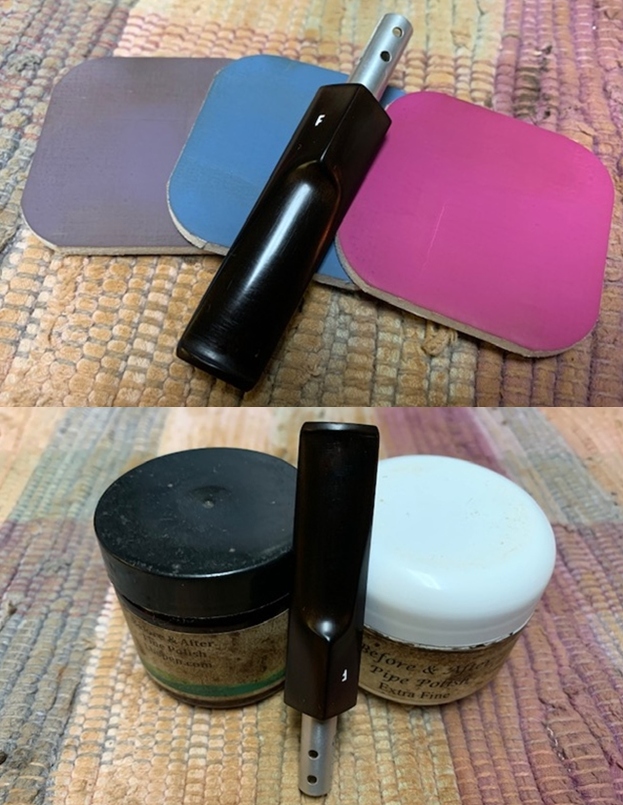
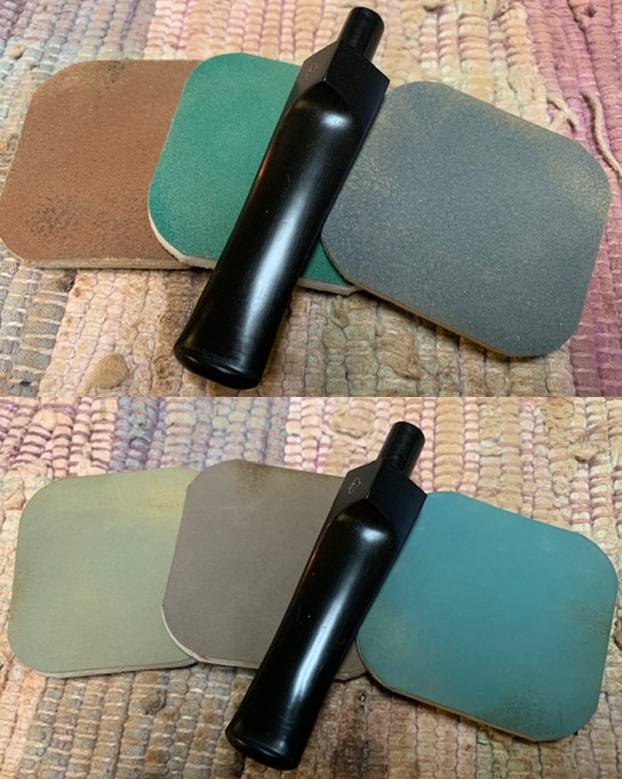
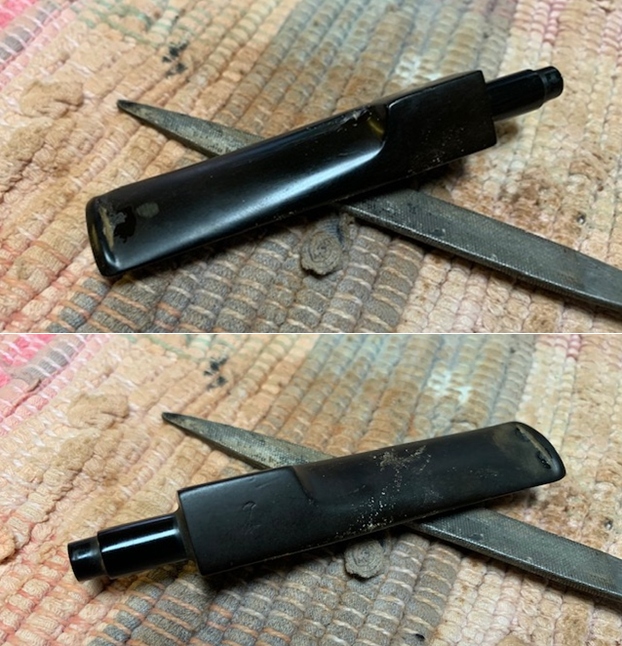
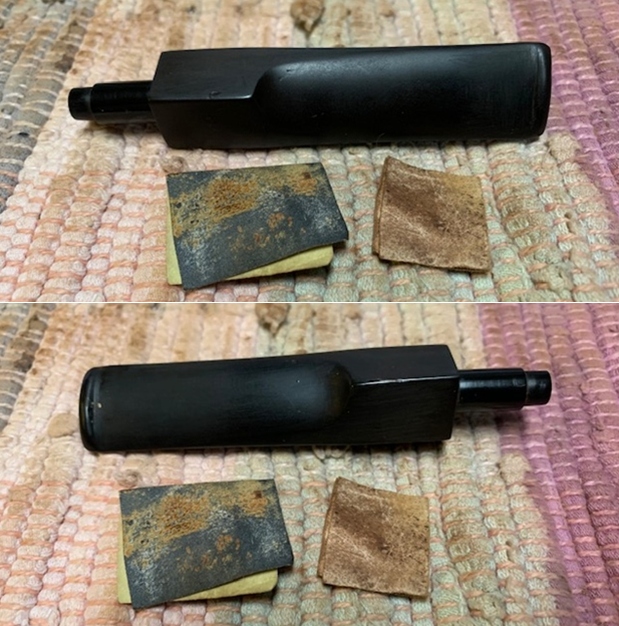
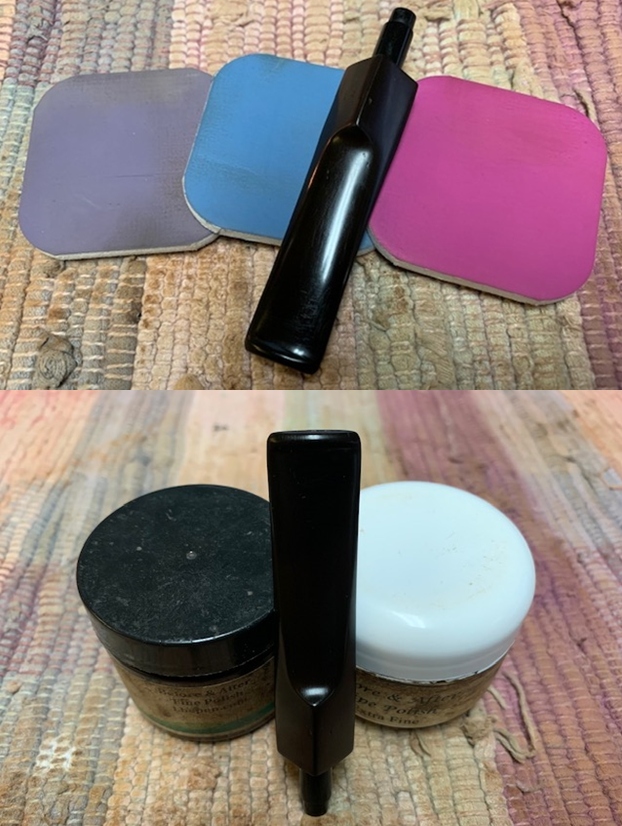
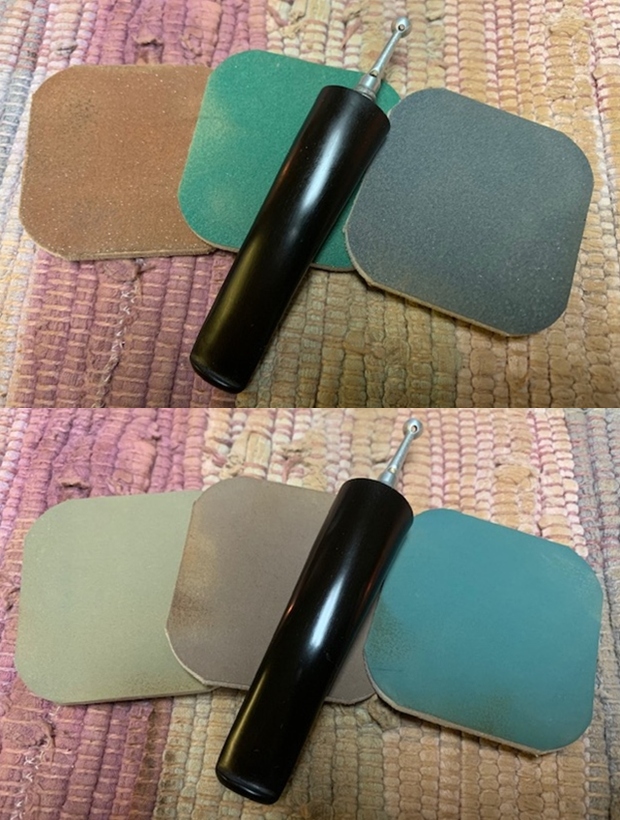
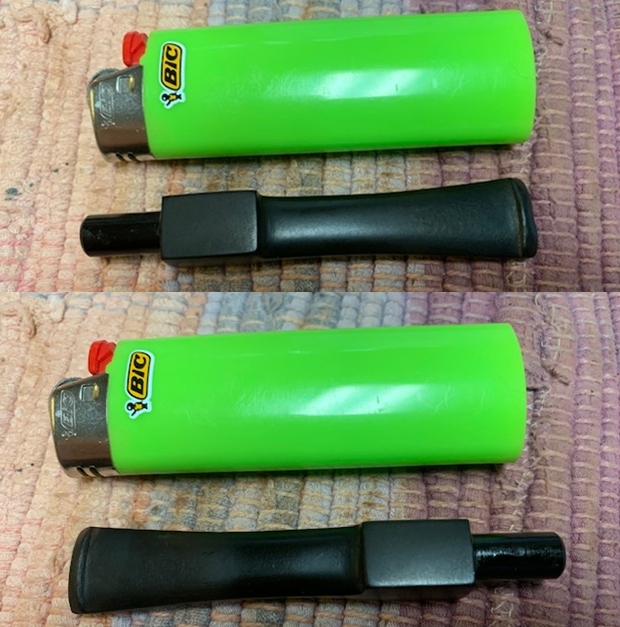
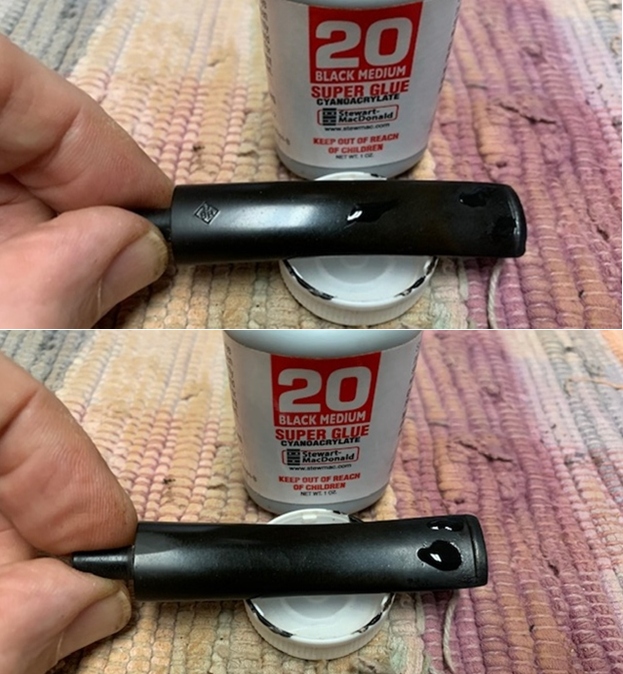
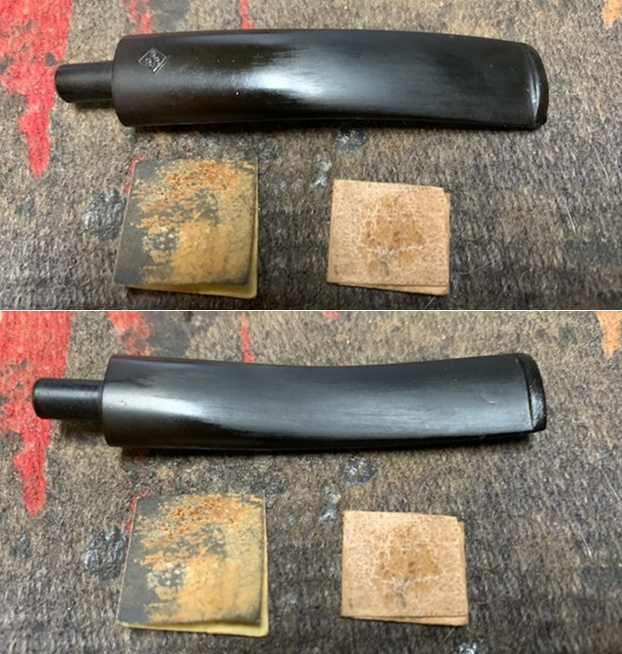
I embarked on the journey of restoring this pipe by addressing the stem first since it would take considerable time to repair and polish. Abha had done a fantastic job of cleaning the stem both internally and externally and this facilitated me to straight away sand the stem surface with a 220 grit sand paper to even out the raised tooth indentation and remove the oxidation from the surface. I follow it up by cleaning the surface with a cotton swab and alcohol. I wipe the stem with a cotton swab and Murphy’s oil soap to deep clean the surface. The tooth chatter has been addressed to a very great extent. The minor tooth marks that remain will further reduce after I had sanded the stem surface with 320 to 1000 grit sand papers followed by the micromesh pads. The button edges are a lot straighter and crispier than before.
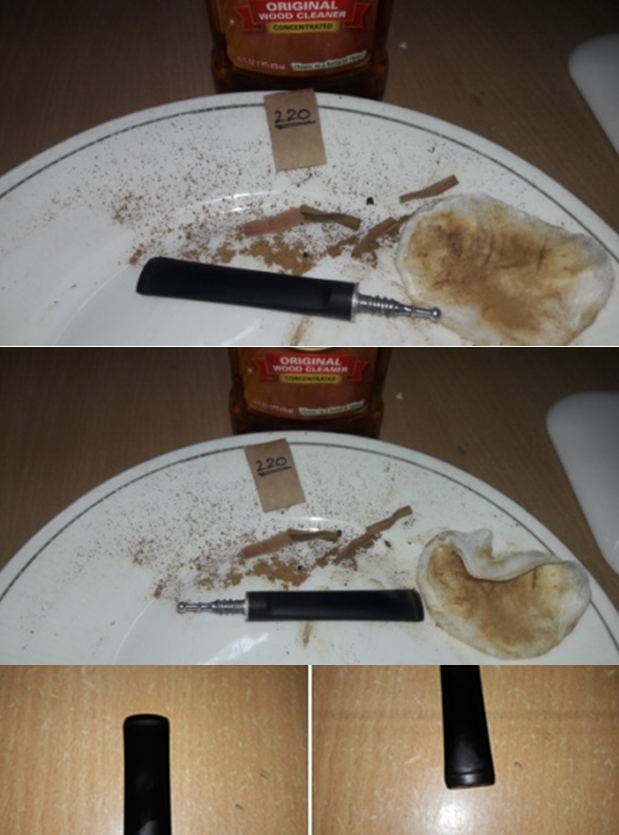
I further sand the stem surface with 320 followed by 400, 600 and 800 grit sandpapers. I finished the sandpaper cycle by wet sanding the entire stem surface with a piece of 1000 grit sandpaper. I wiped the stem with a moist cloth to remove the sanding dust and applied a small quantity of EVO to hydrate the stem.
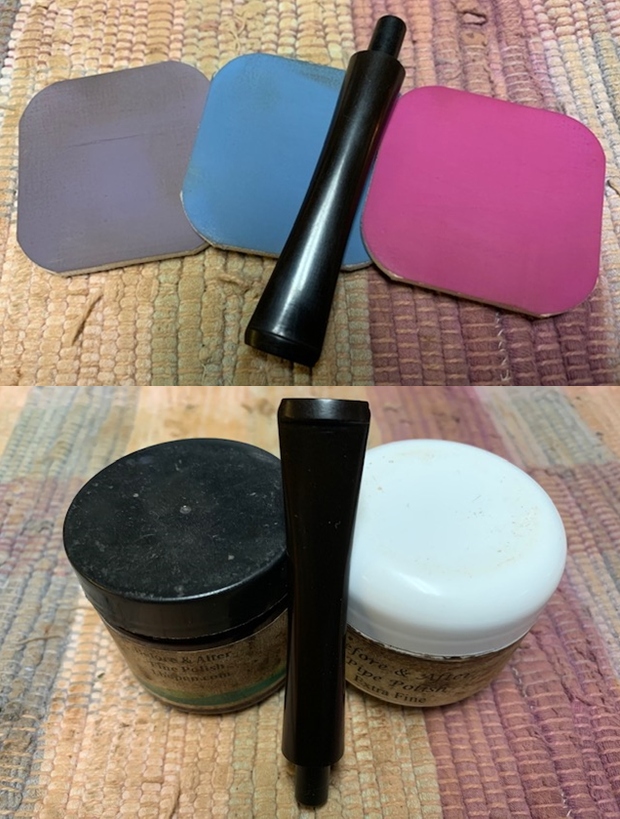
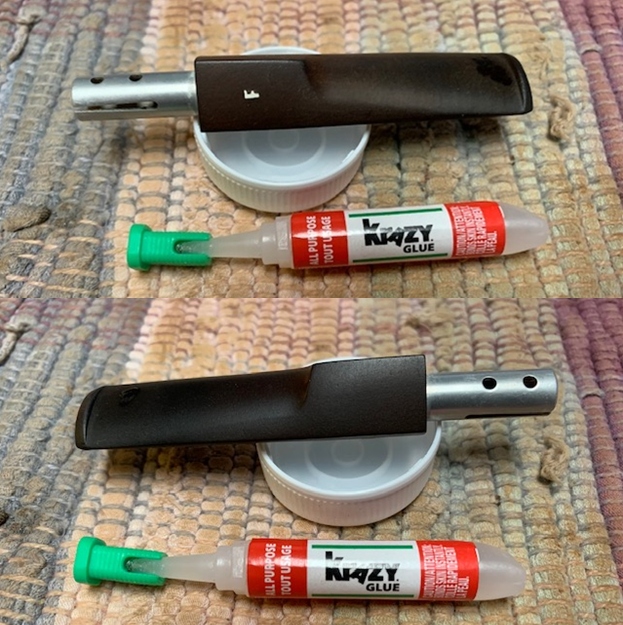
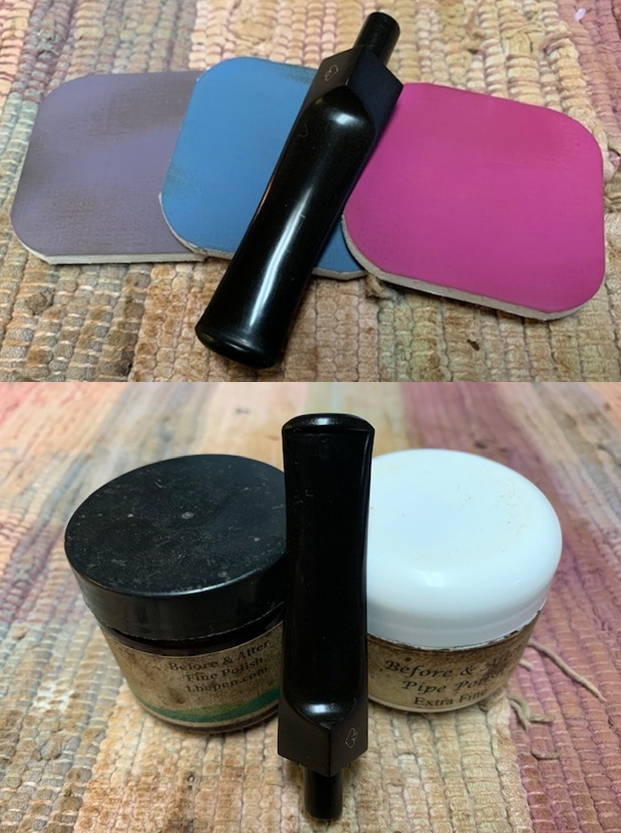
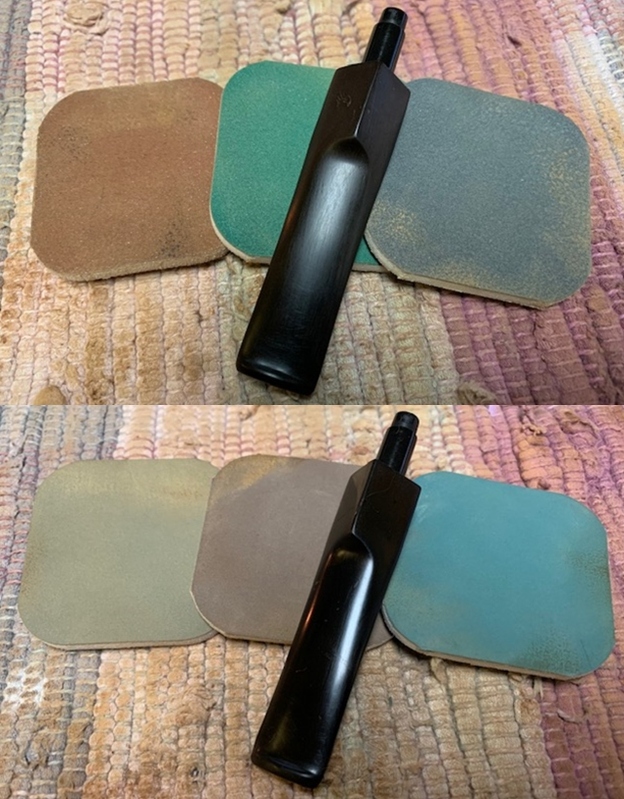
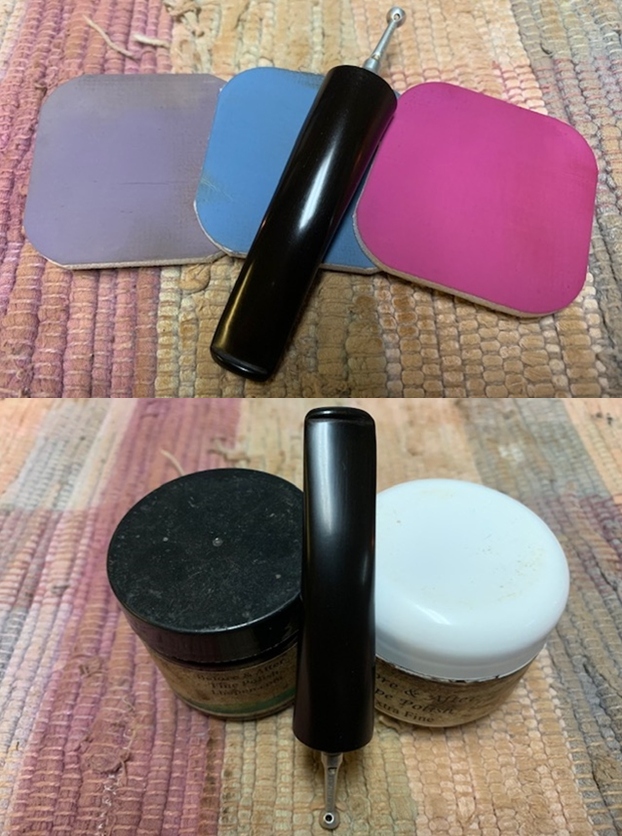
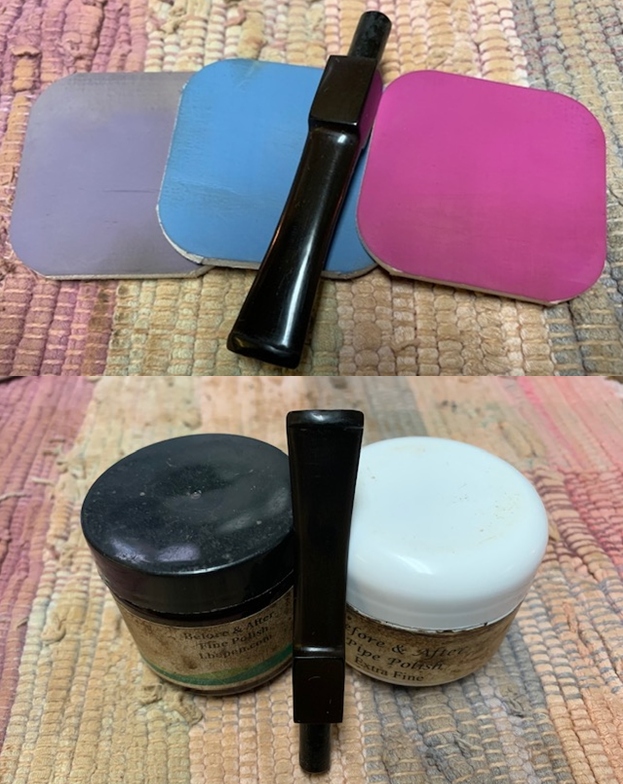
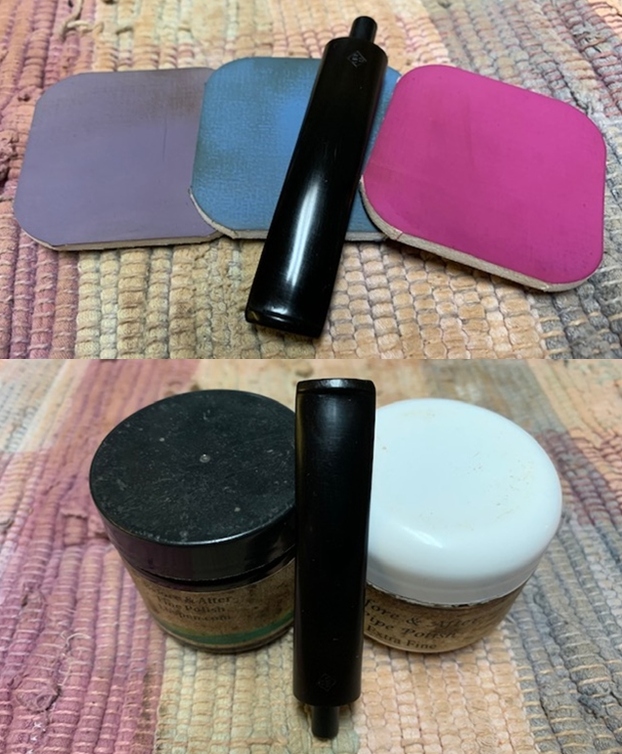
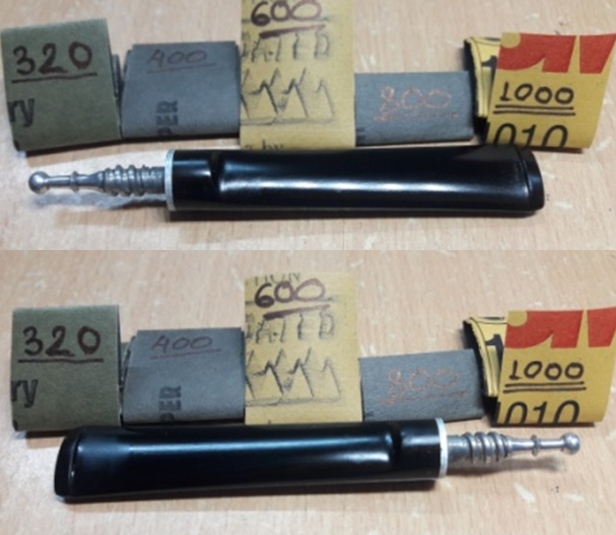
I completed the polishing cycle of the stem by wet sanding the surface with 1500 to 12000 girt pads. The stem looks great with the tooth chatter nicely matched with the rest of the surface. I also polished the aluminum stinger and the spacer ring with micromesh pads. I gave a final rub with “Before and After Extra Fine” stem polish compound to remove fine scratches from the stem surface. I rub a little quantity of Extra Virgin Olive oil in to the stem surface and set it aside to be absorbed by the vulcanite. The stem polished up nicely and I am happy with the appearance of the stem at this point in restoration.  
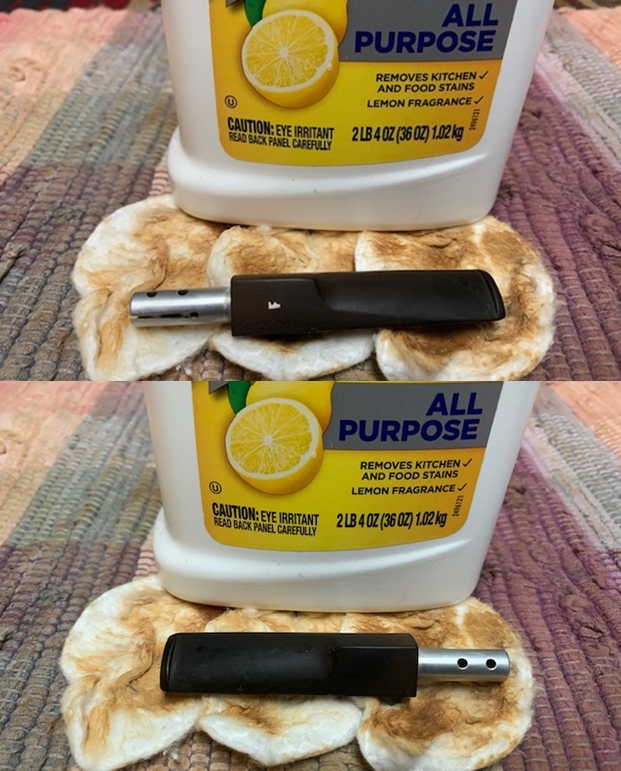
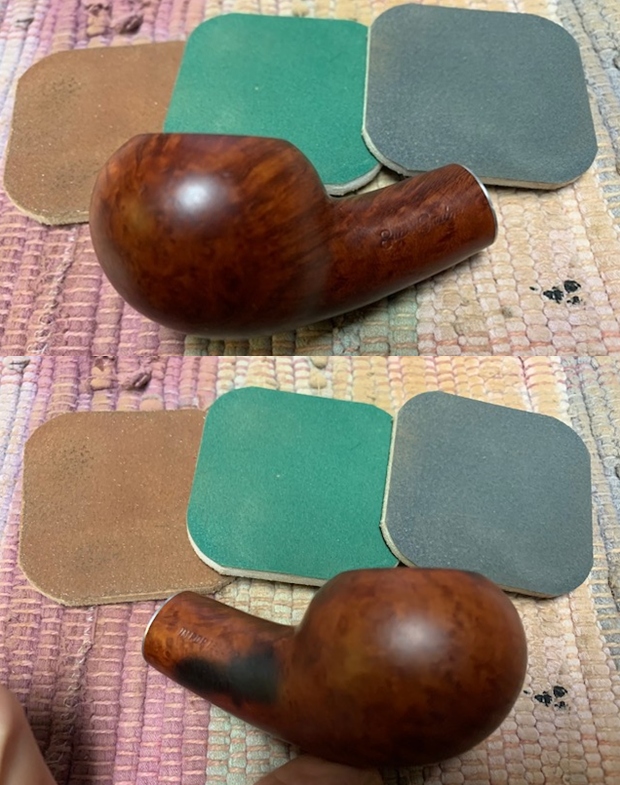
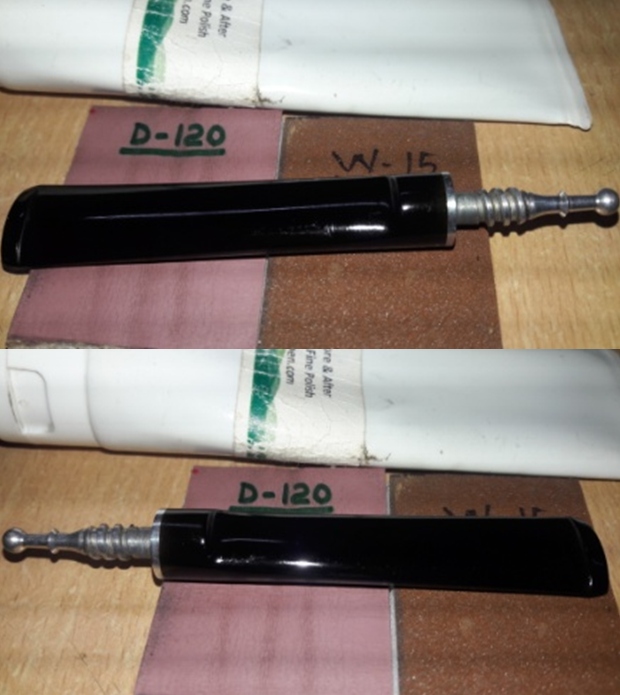
With the stem refurbishing nearly completed, save for final polish using Blue Diamond and wax, I move to clean the exterior of the stummel. I used a hard bristled tooth brush, Scotch Brit pad and Murphy’s Oil soap to scrub the stummel and rim top. I shall be candid in confessing that I was extra aggressive using the Scotch Brit pad as I was keen to completely remove the peeling lacquer coating over the stummel surface. After the scrub with oil soap, I washed the stummel under running warm water with anti oil dish washing detergent till the stummel surface was clean and dried it using paper towels and soft cotton cloth. I once again cleaned the shank internals with the detergent and hard bristled shank brush and set the stummel aside to dry out naturally. The two fills have gone soft and would need to be refreshed. The stummel has cleaned up nicely with the old lacquer coat completely removed from the surface. The ghost smells are completely eliminated and the pipe now smells fresh, odorless and clean. The shank air way is nice and open. I shall refresh the fills over the stummel surface with a mix of briar dust and superglue. 
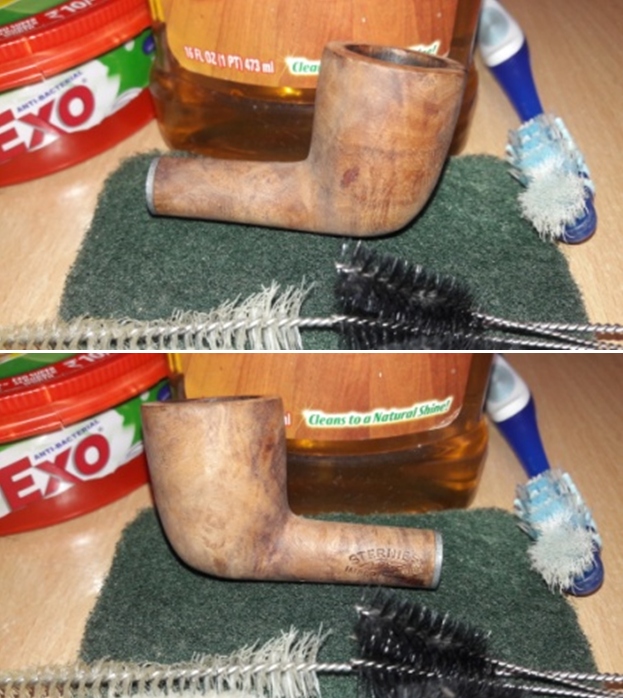
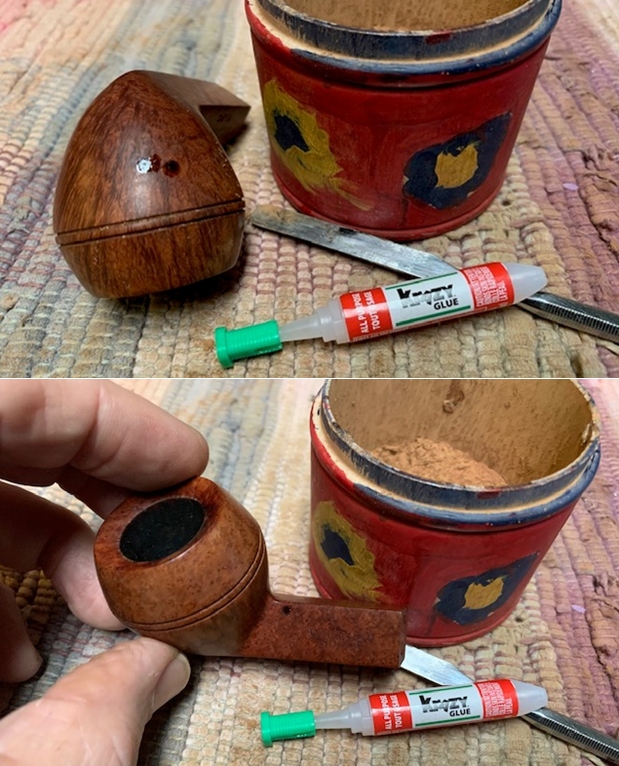
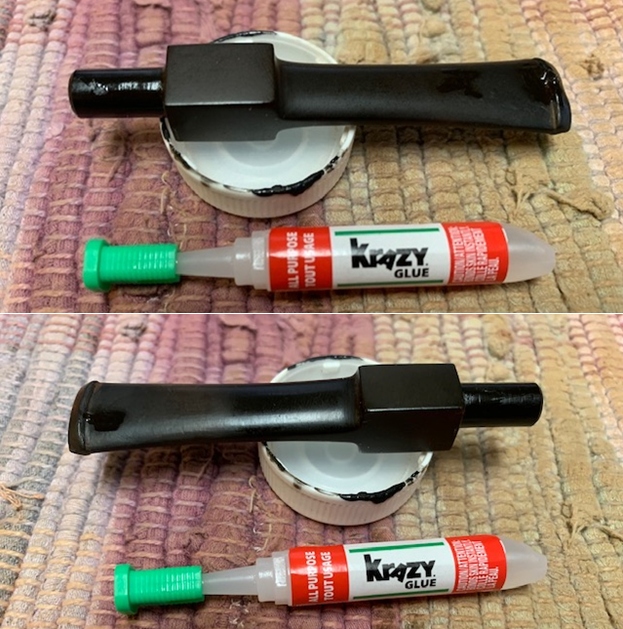
Next I addressed the issues of the two fills in the stummel surface. With a sharp dental tool, I gouged out the fill on the right side of the stummel and one on the left side of the shank. Using the layering method, I filled these gouges with a mix of briar dust and CA superglue till the mound of the mix was slightly above the rest of the stummel surface. This helps in a better blending of the fill with the rest of the stummel surface while sanding and reduces the scratches caused by the use of a needle file since you have a correct perspective of the sanding that is required. I set the stummel aside for the fills to cure. 
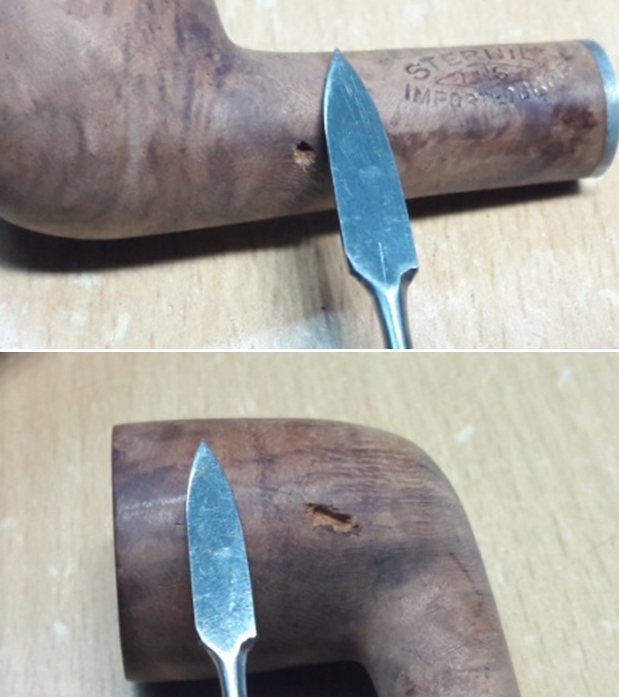
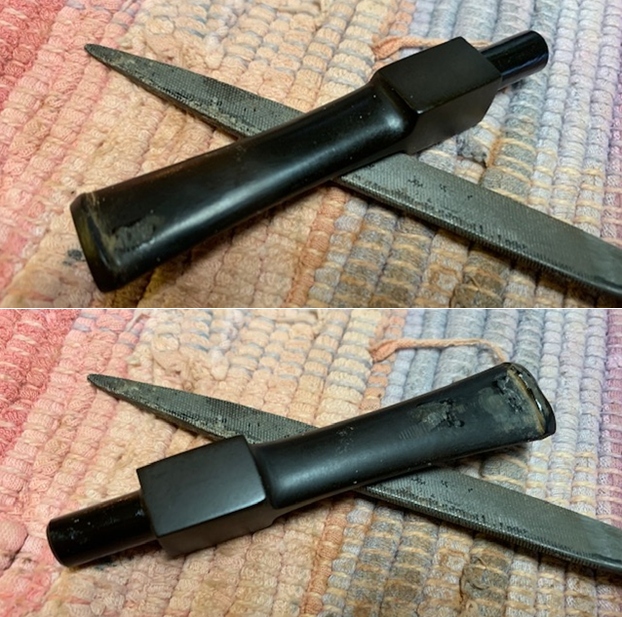
Using a flat needle file, I sand the fill till I had achieved a rough match with the surrounding stummel surface. I sand the entire stummel with a piece of 220 grit sand paper to further blend in the fills with the stummel surface.   
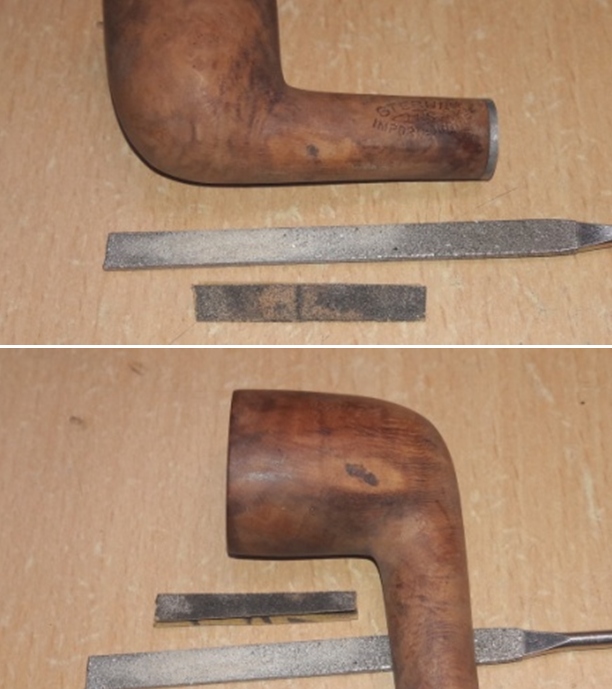
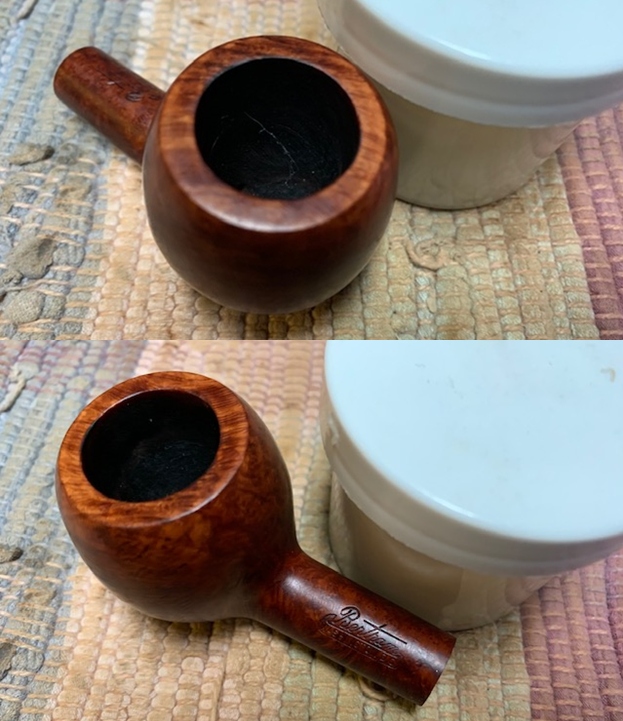
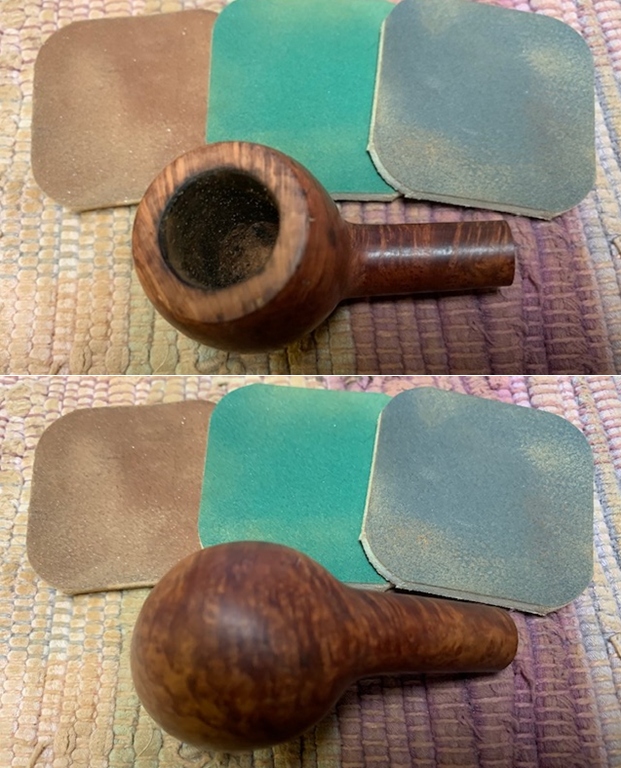
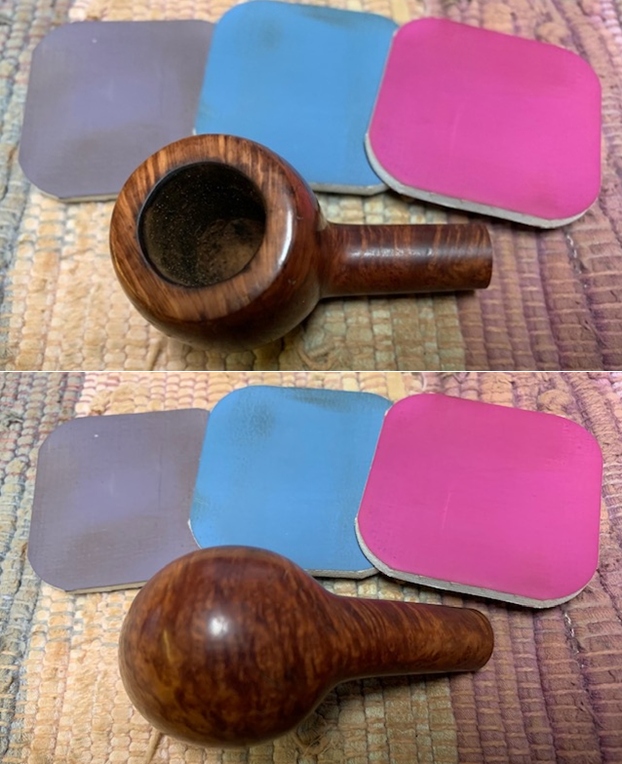
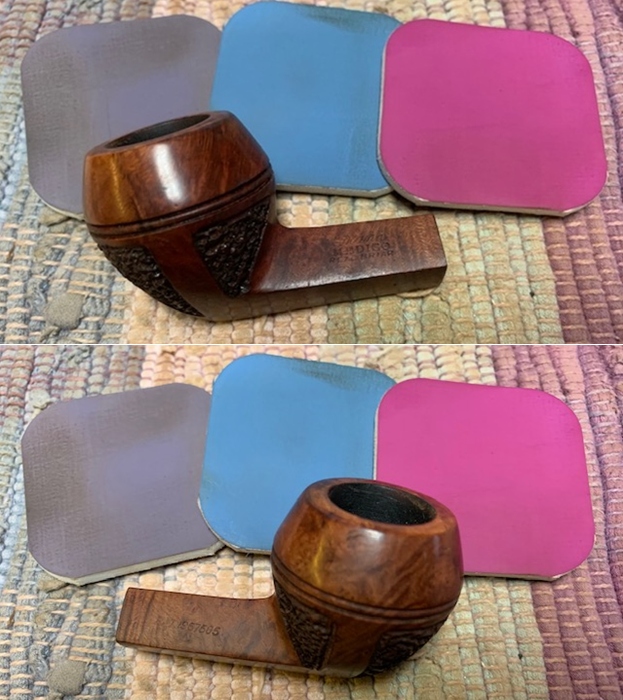
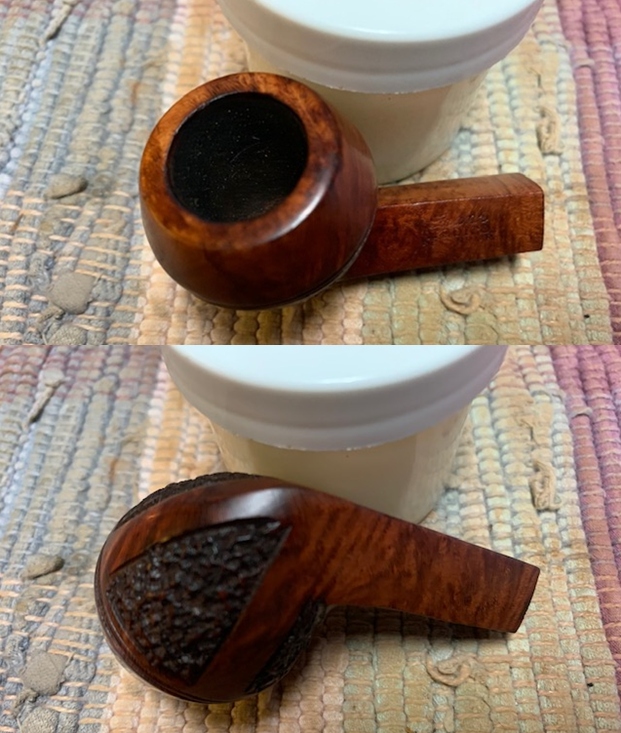
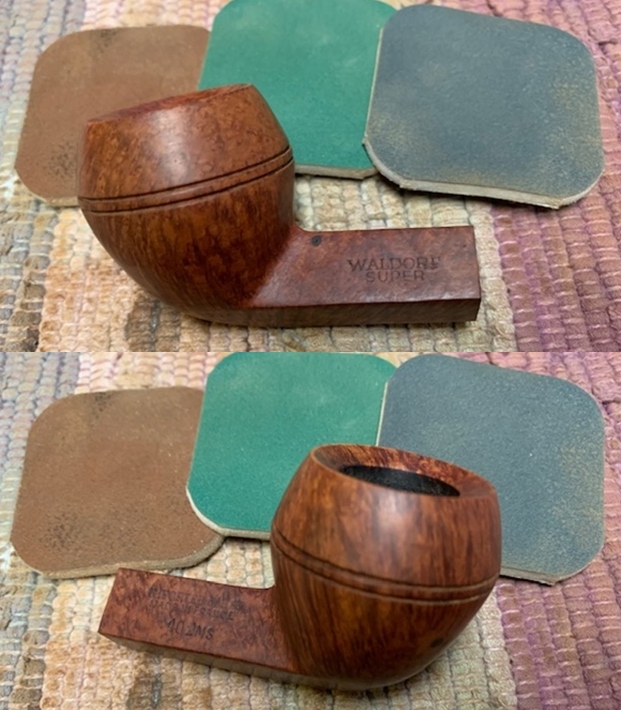
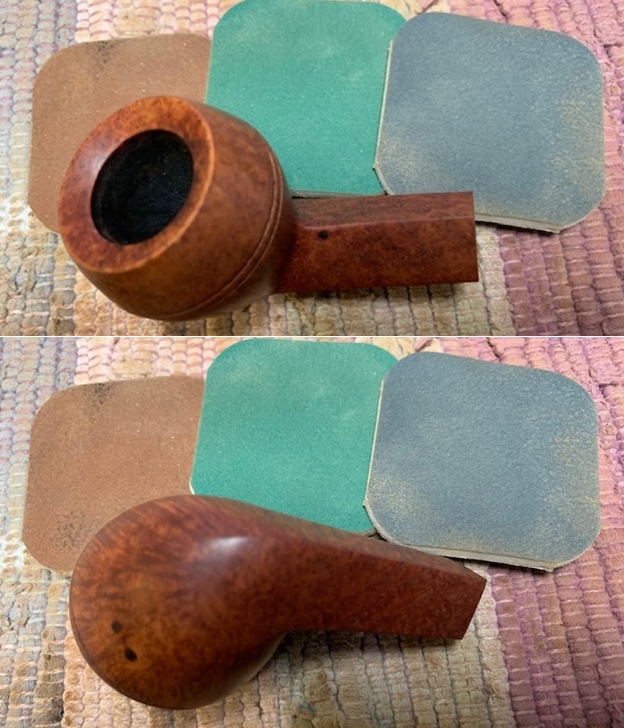
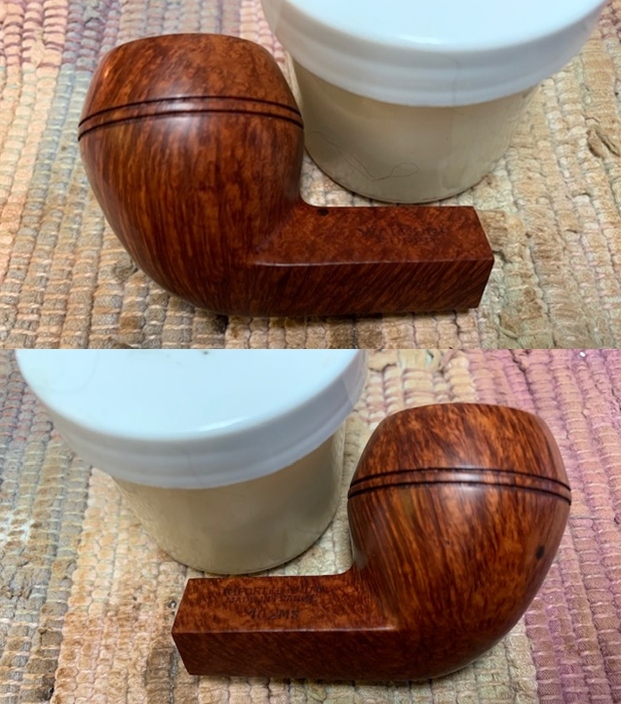
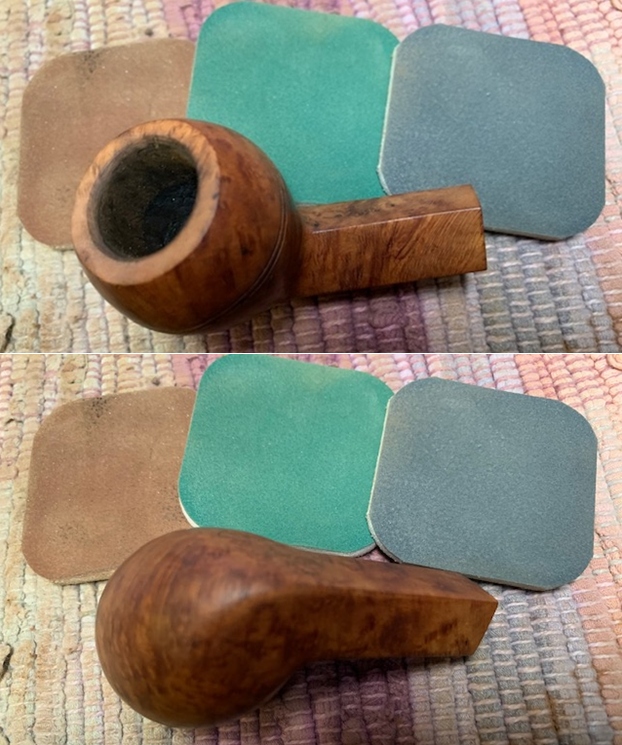
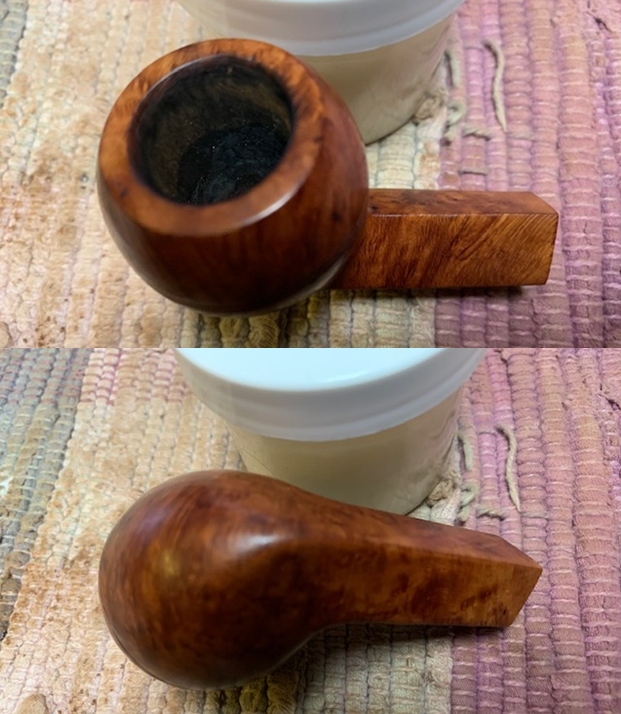
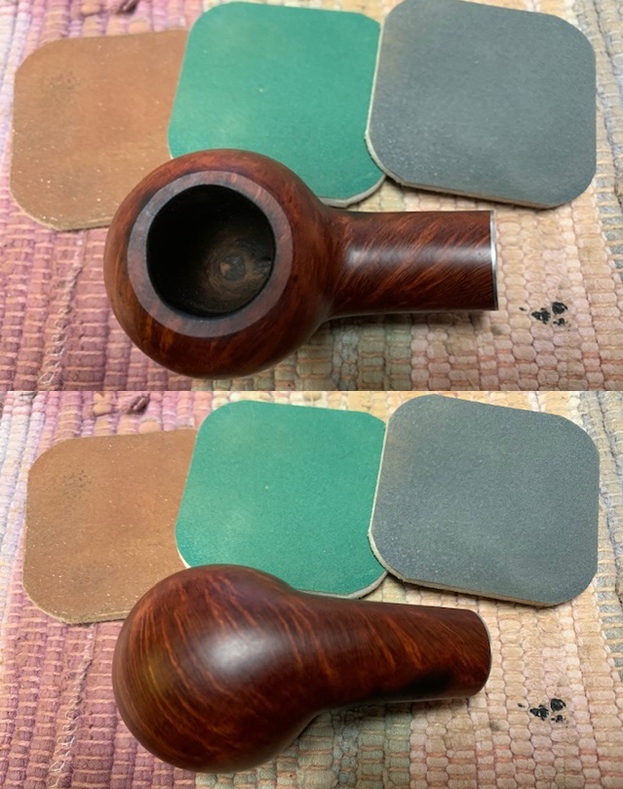
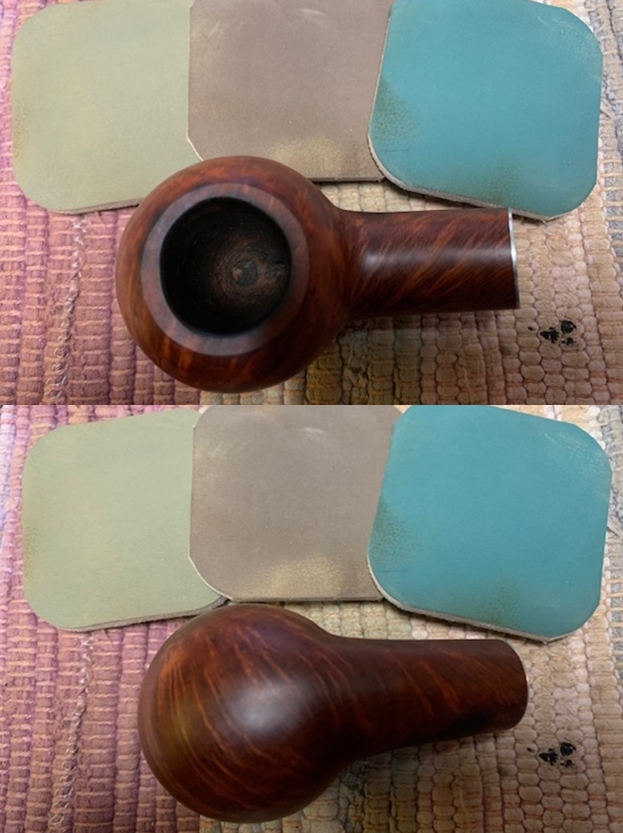
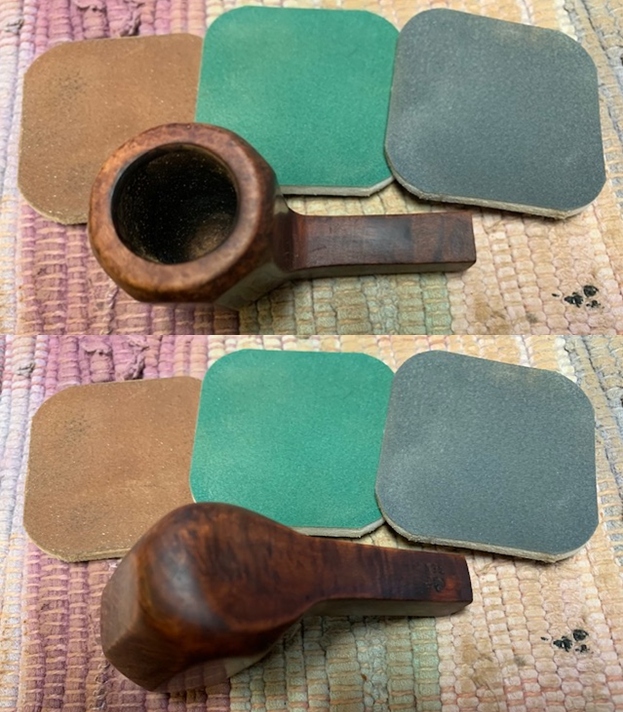
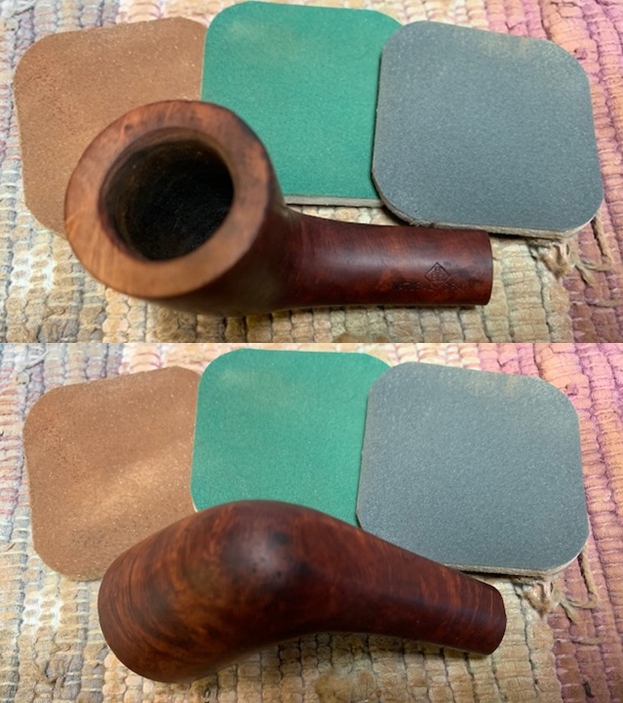
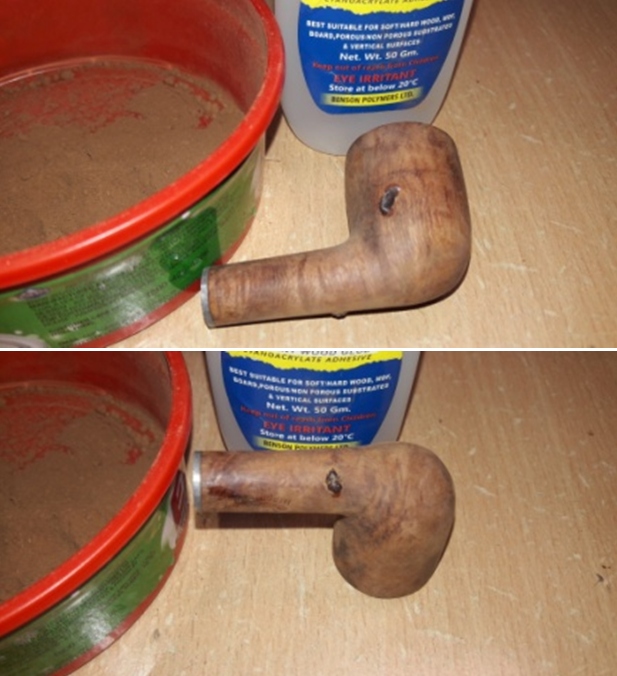
I topped the rim top surface on a piece of 220 grit sand paper, checking frequently for the progress being made as I hate to loose briar estate any more than absolutely necessary. The issue of uneven rim top surface has now been completely addressed. At this stage, the slight darkening to the outer edge too has been completely addressed while the charring to the inner edge, though eliminated to a great extent, is still discernible. I shall create a bevel to the inner edge to blend and mask the damaged edge with the rest of the inner edge.  
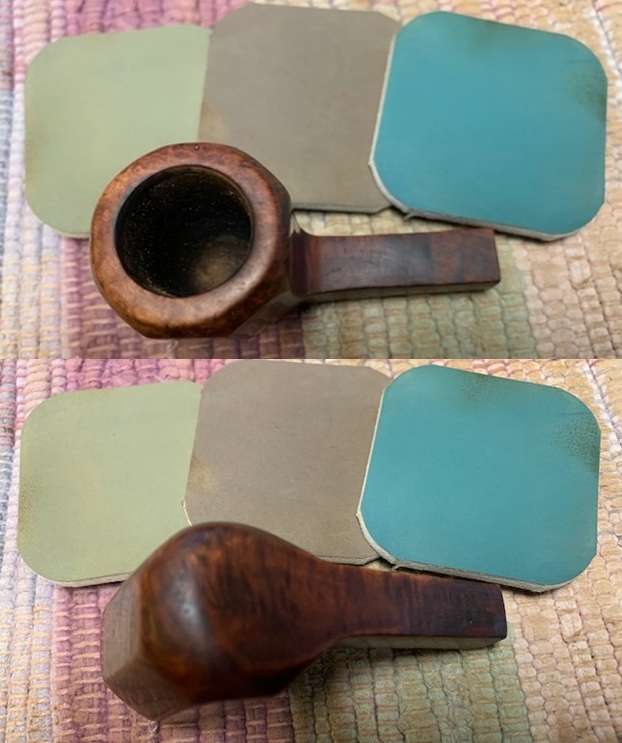
The inner rim edge appeared to be slightly uneven at the front and at the back end of the rim top due to charring and I decided to mask it by creating a bevel. With a folded piece of a 220 grit sand paper pinched between my thumb and forefinger, I create a nice and even bevel on the inner edge. I was careful so as not to alter the profile of the stummel by excessive topping or creation of the bevel. I am pretty pleased with the appearance of the rim top and edges at this stage. The following pictures show the progress being made and improvements to the inner and outer rim edges. 
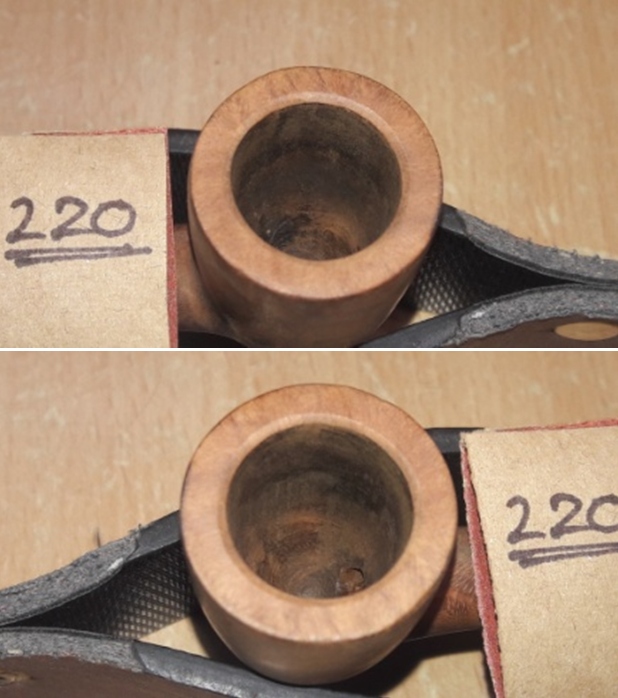
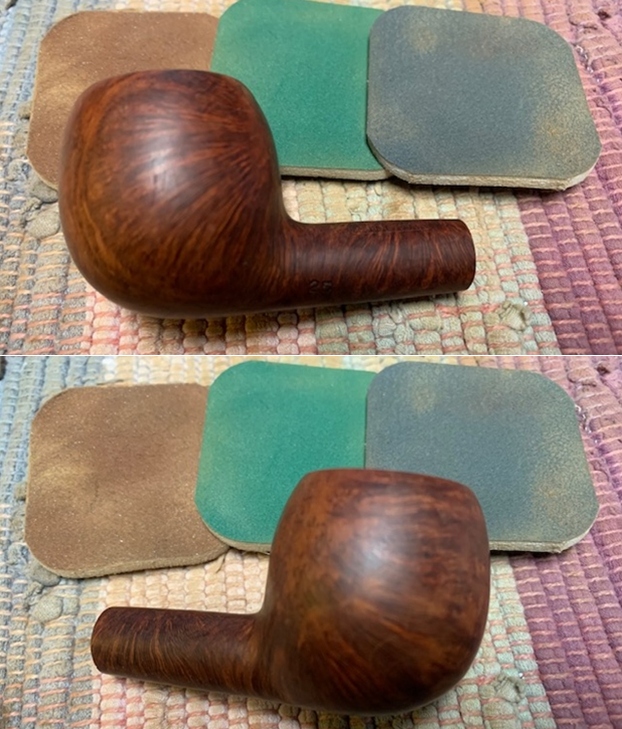
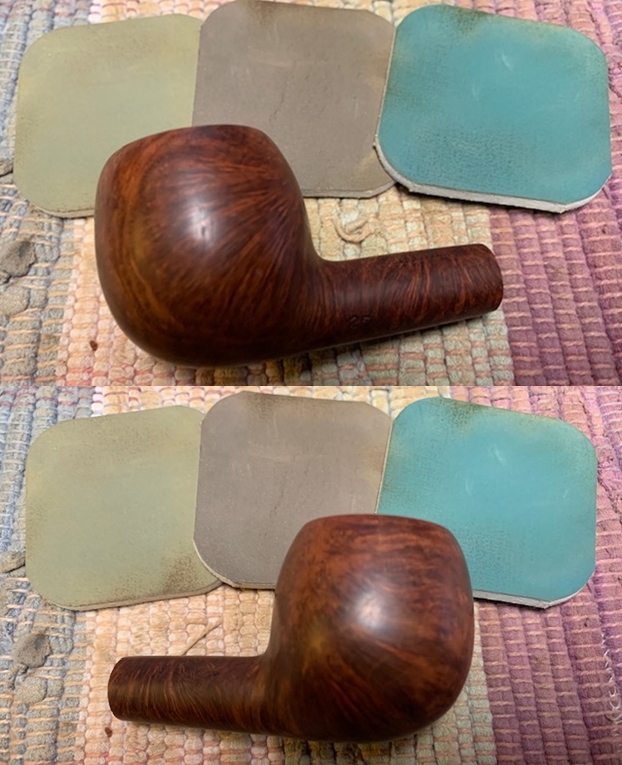
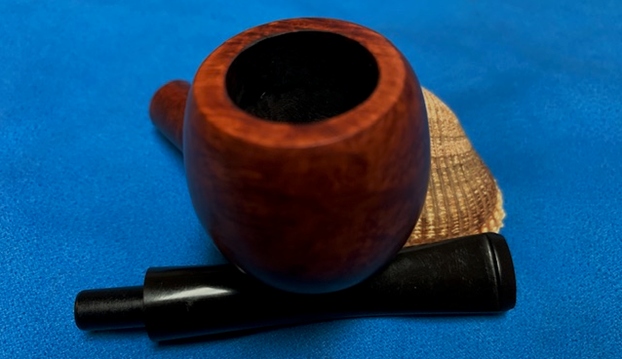
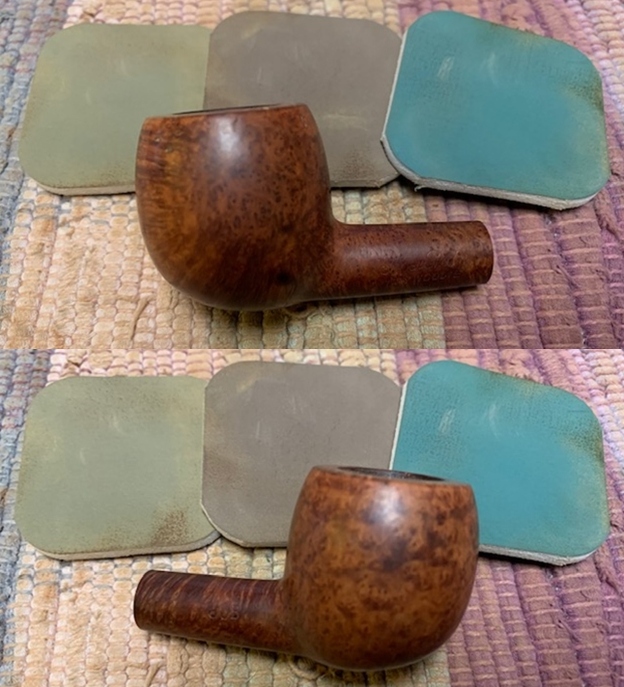
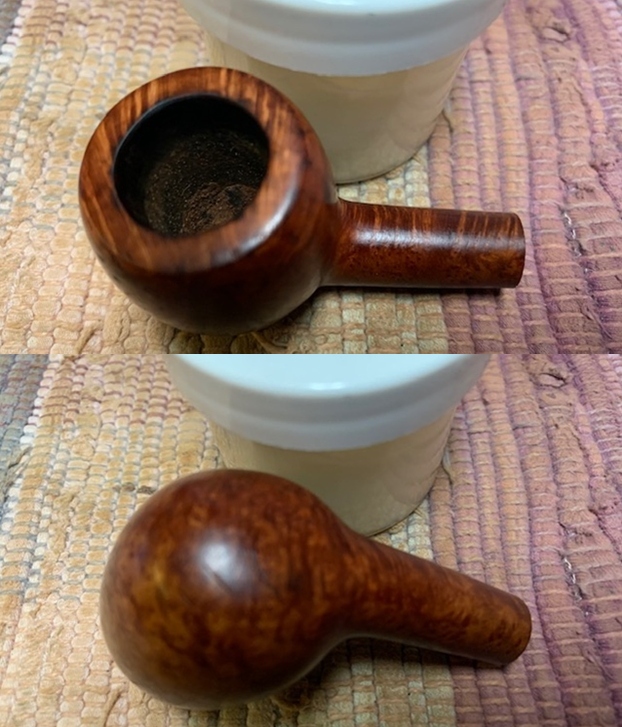
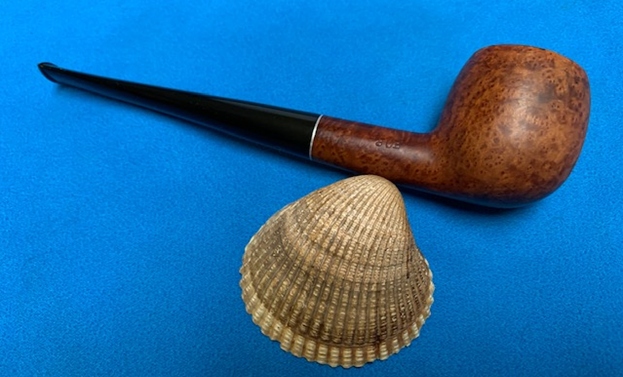
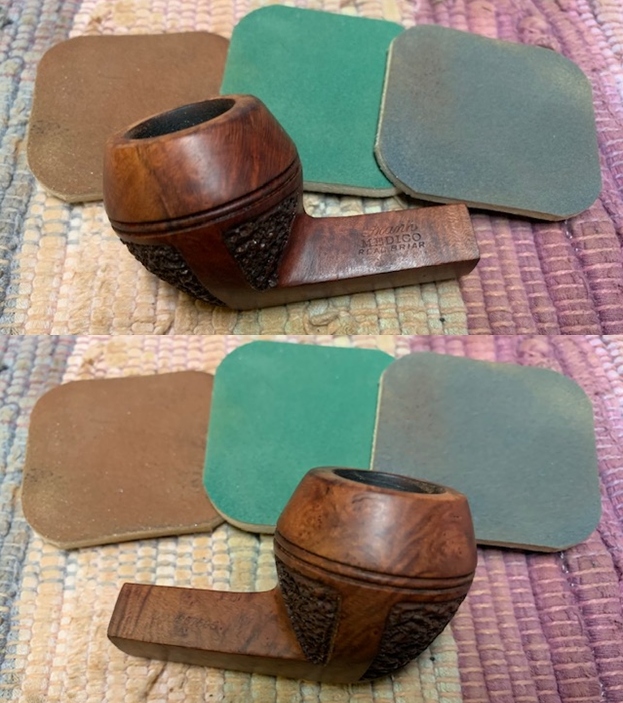
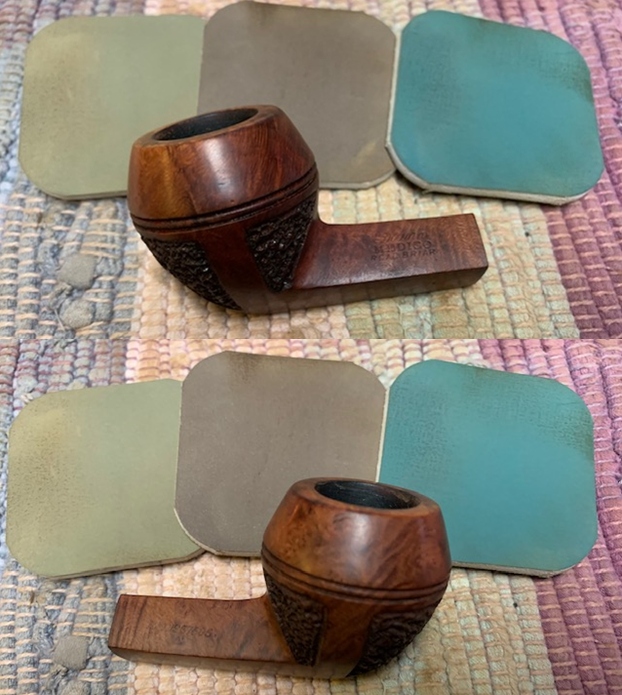
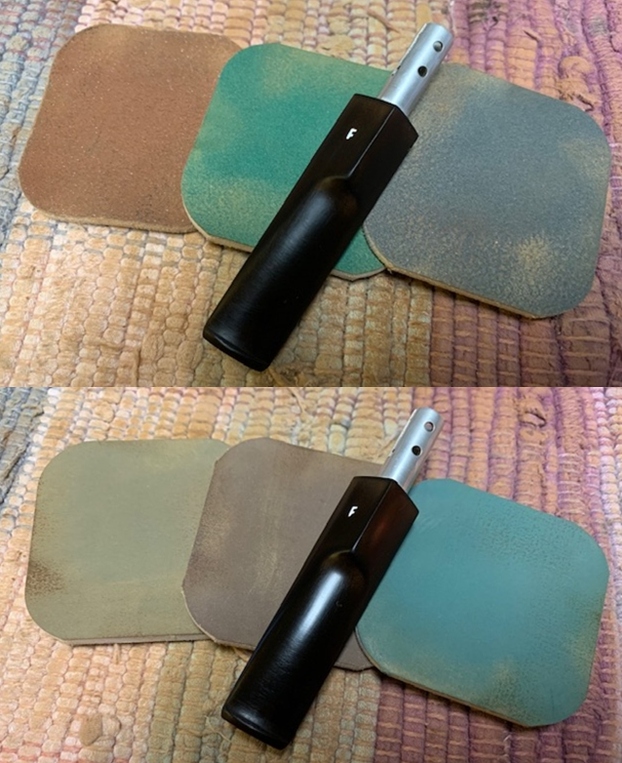
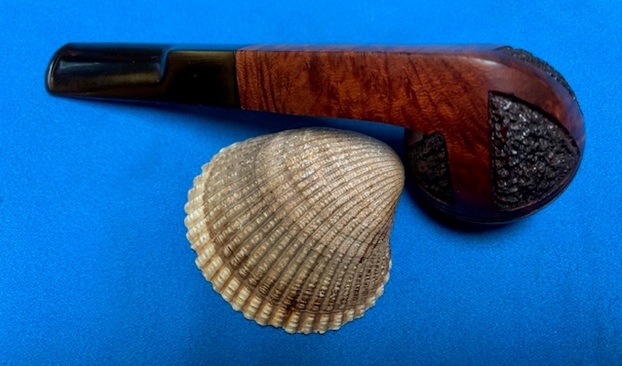
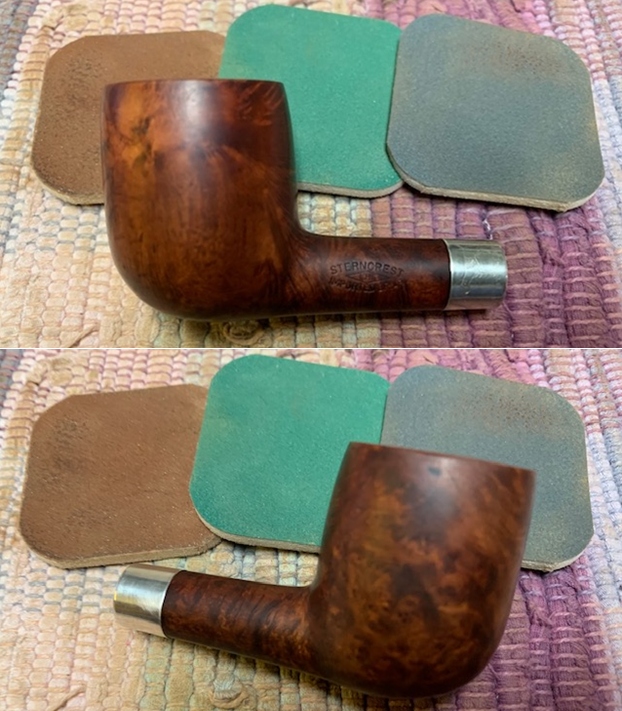
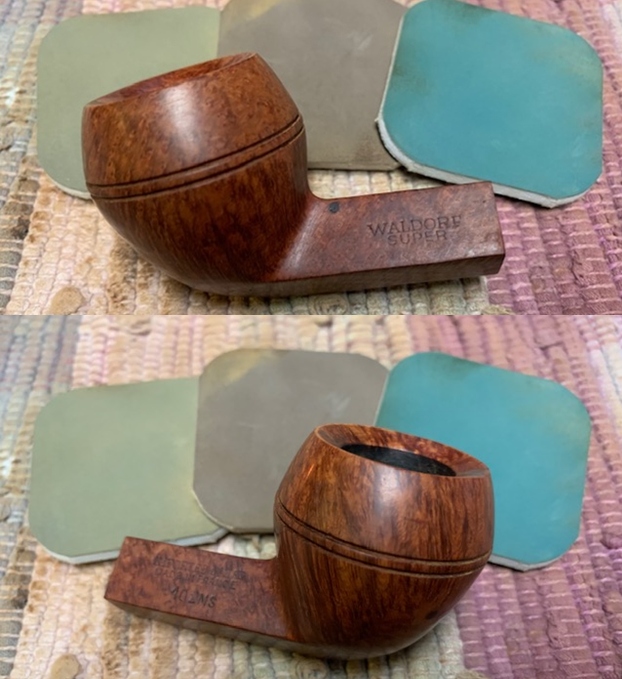
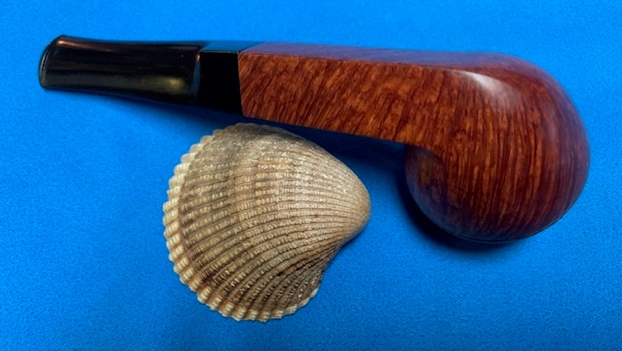
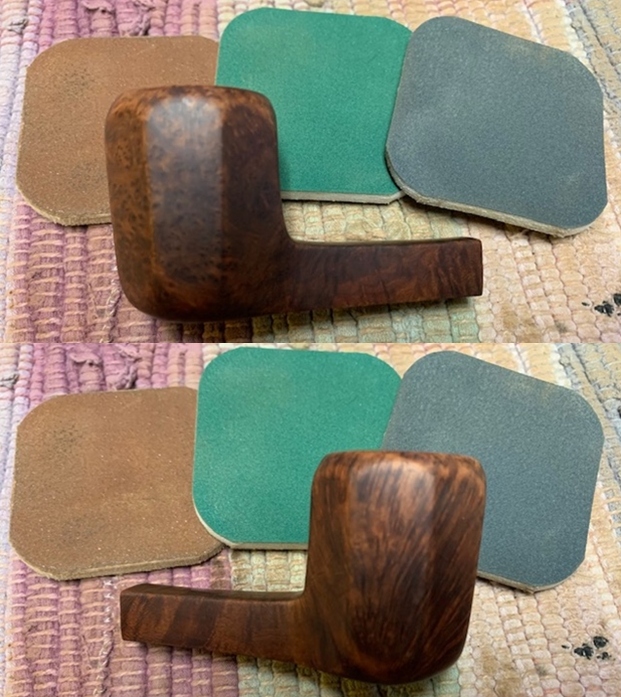
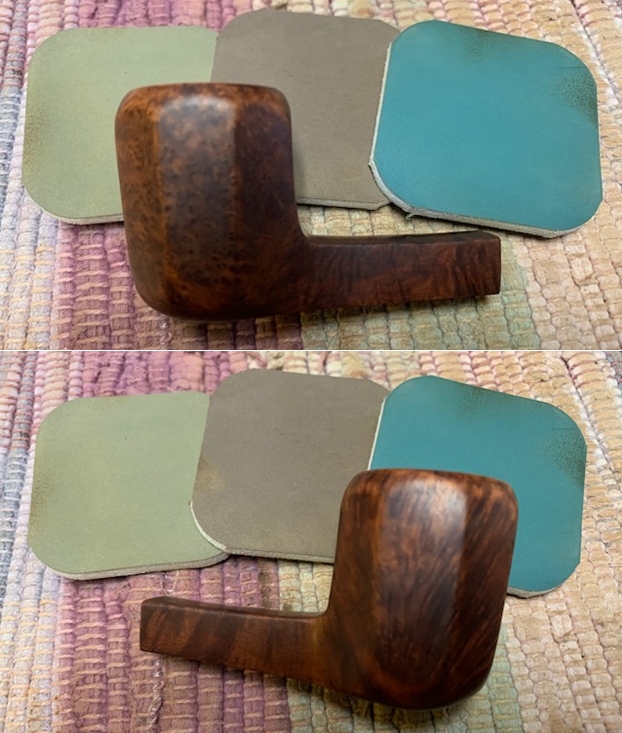
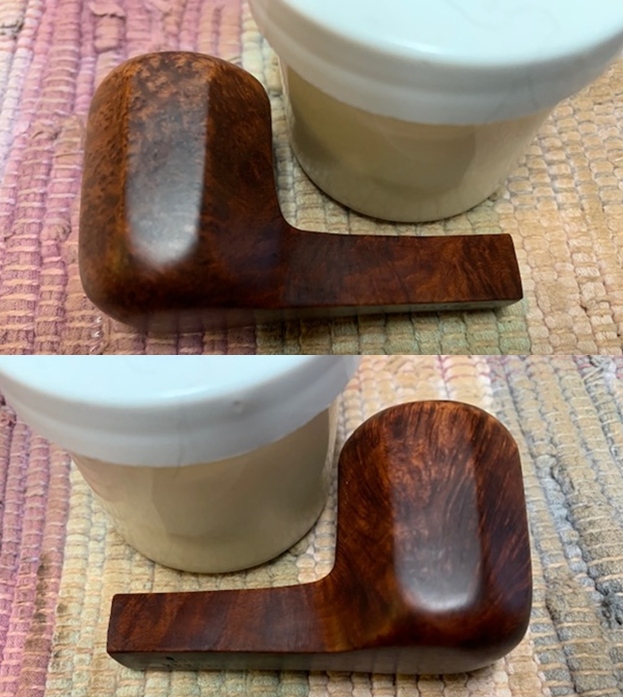
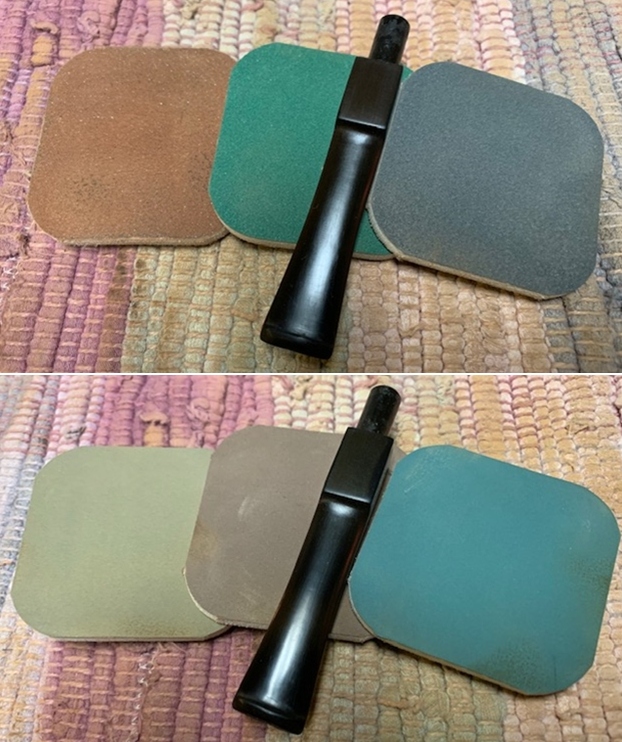
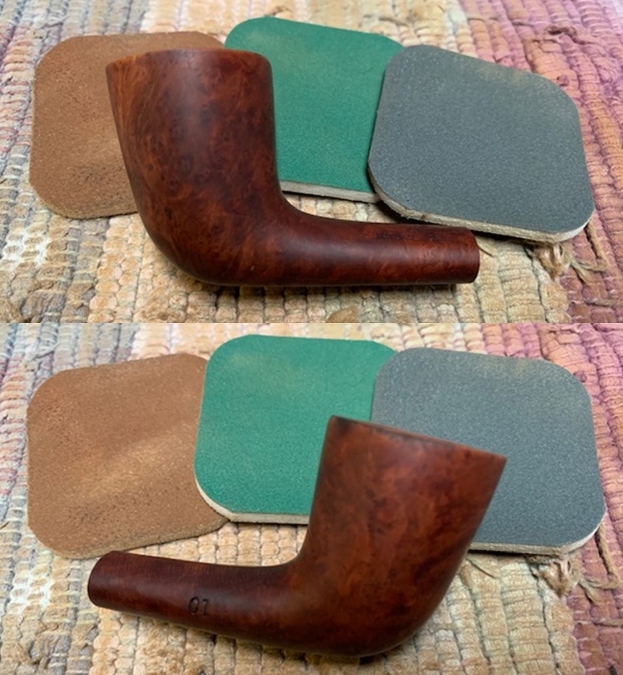
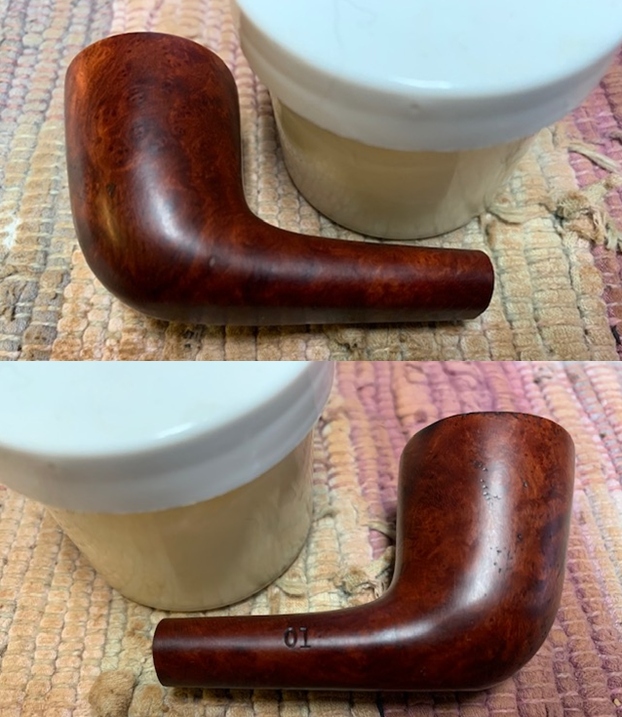
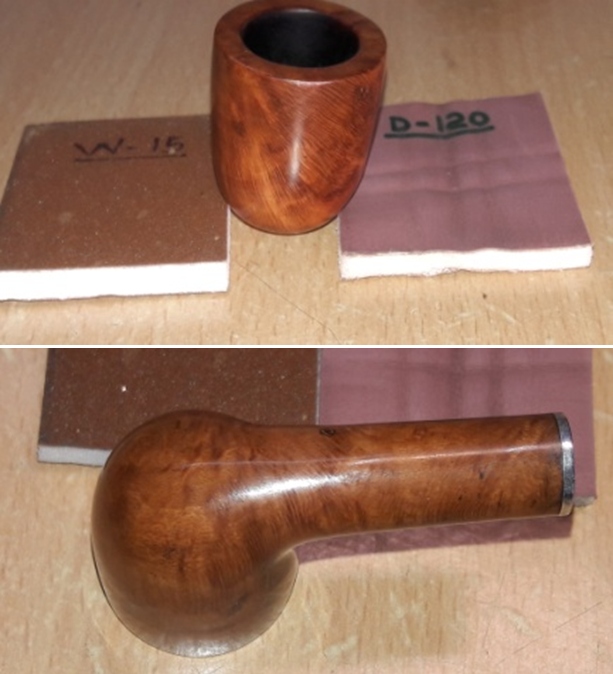
I wet sand the entire stummel with 1500 to 12000 grit micromesh pads, wiping frequently with a moist cloth to check the progress.I also polished the shank end aluminum spacer ring with the micromesh pads to a nice shine. I really like the looks of the stummel at this point in restoration. The grains and the clean lines of this piece of briar is really appreciable. The few scratches and dings that were noticed over the stummel surface too have been addressed by this stage due to the sanding and micromesh pad polishing. The fills are quite evident and whether to mask it using a dark brown stain or let it be, is a decision that I shall take subsequently.    
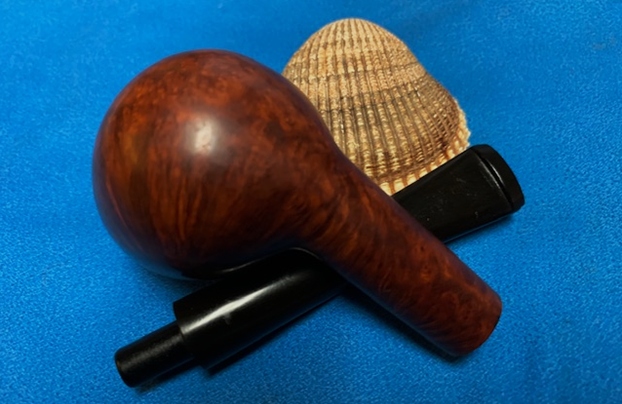
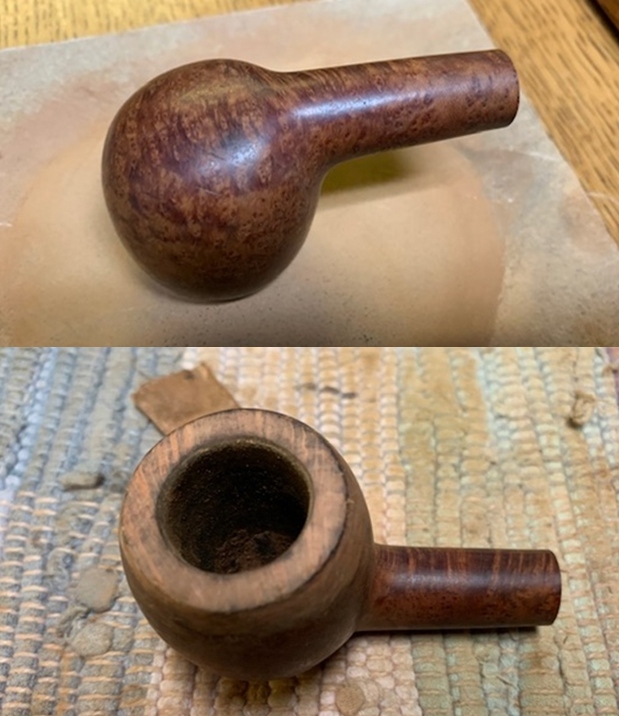
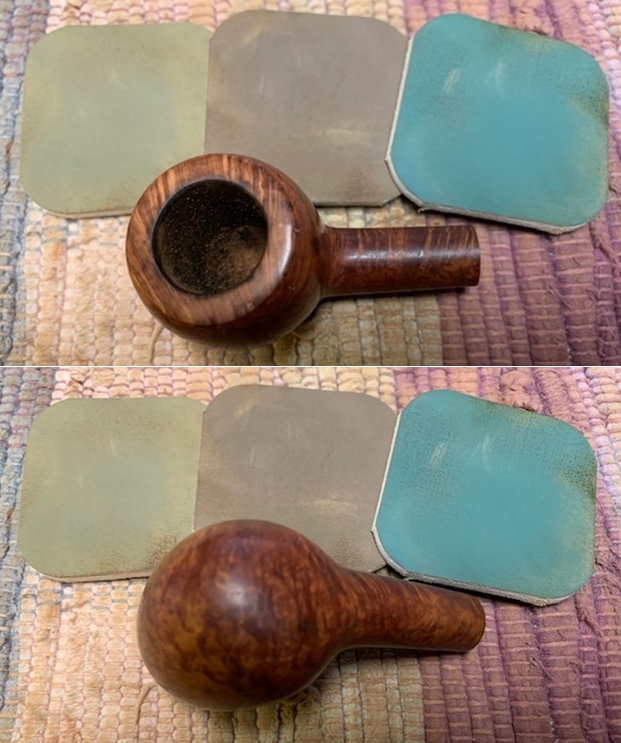
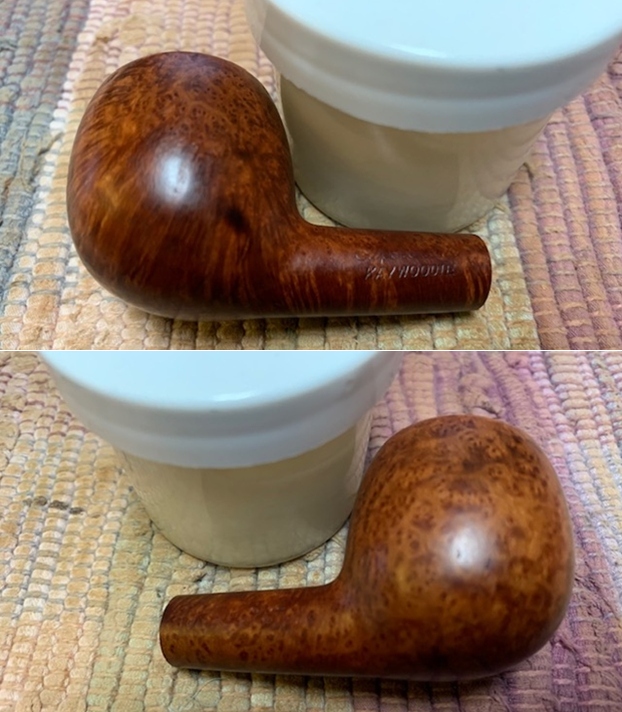
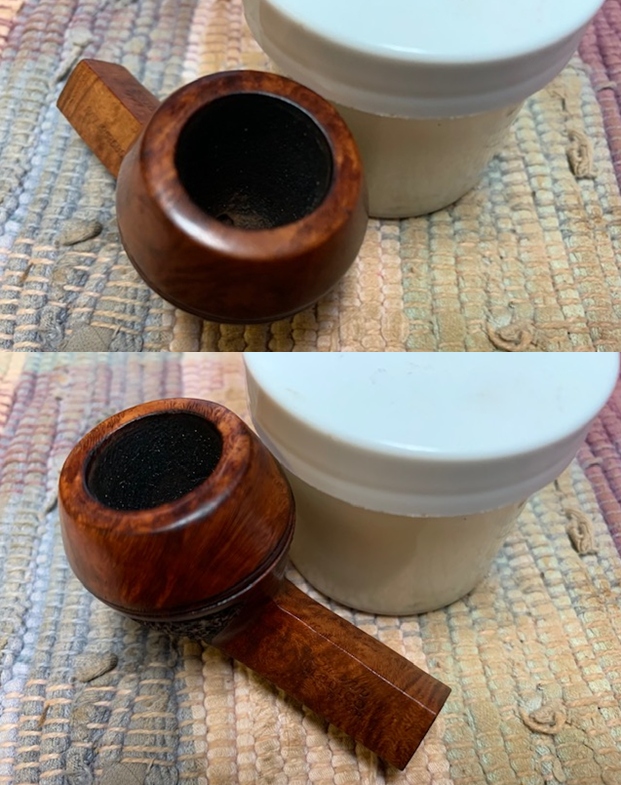
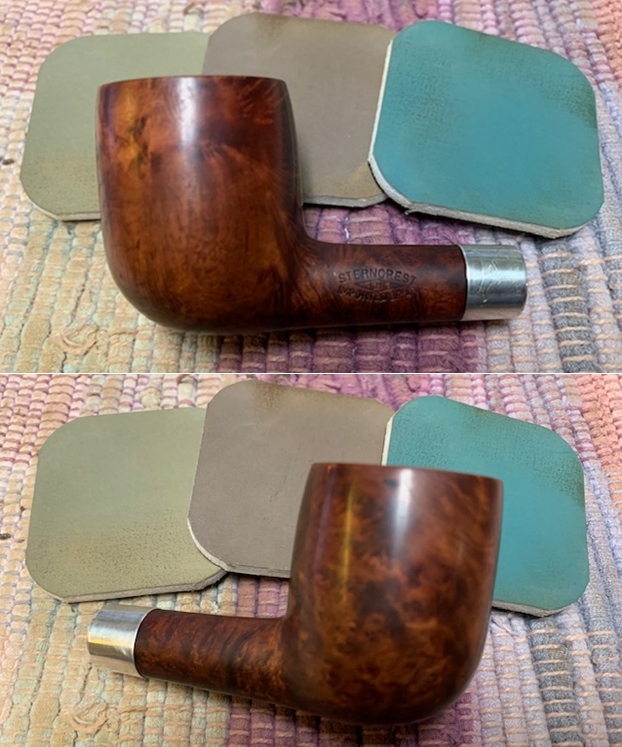
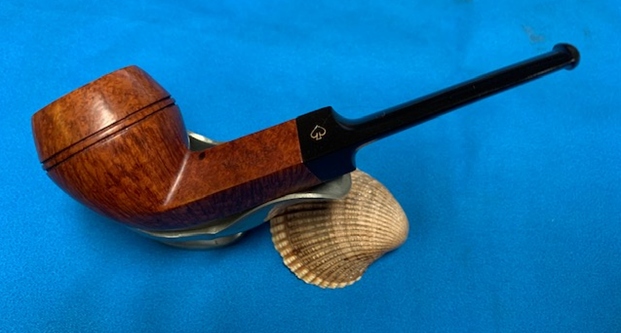
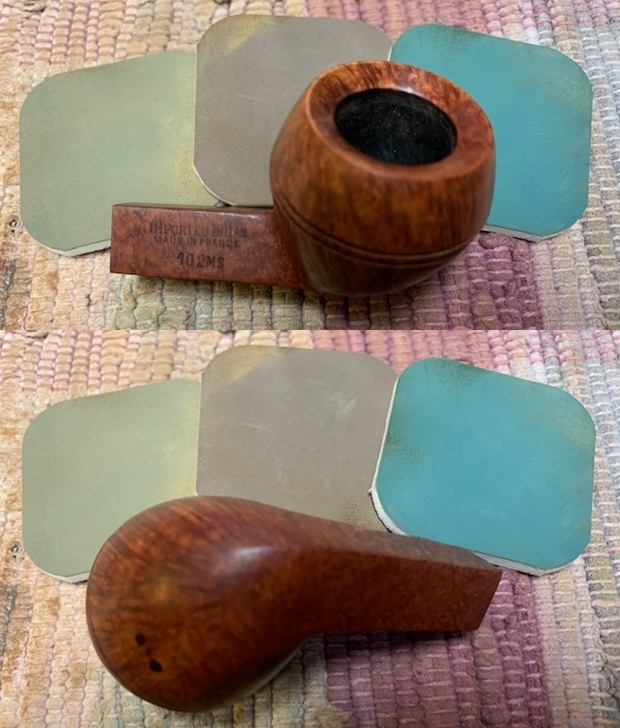
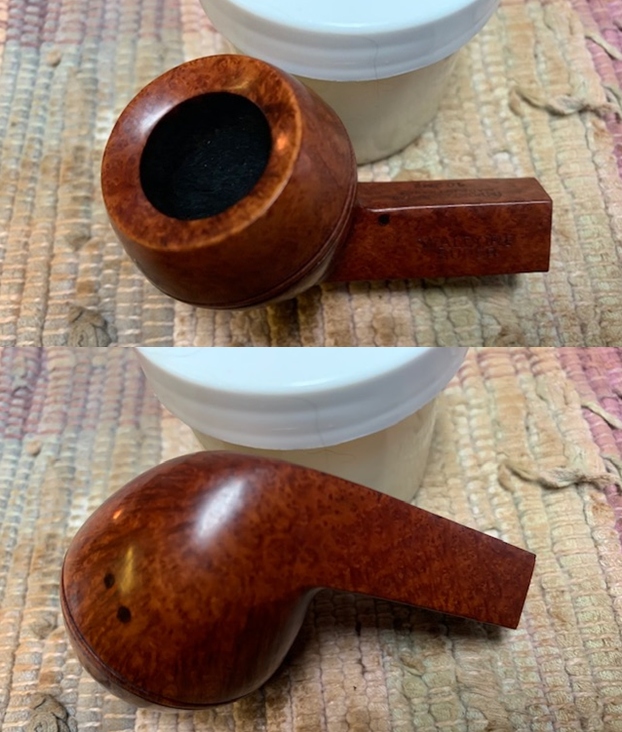
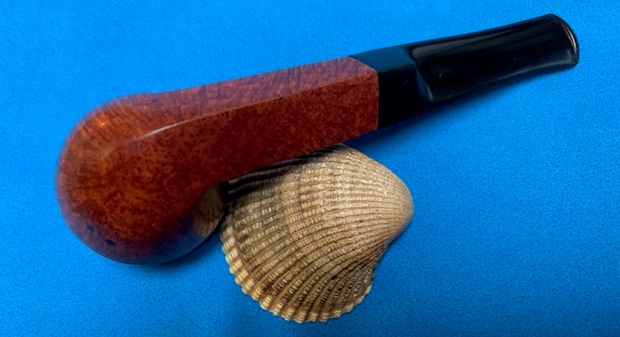
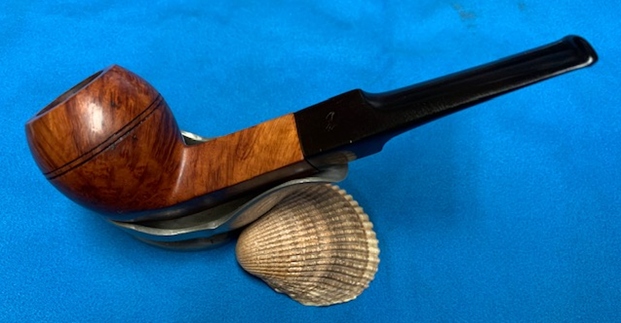
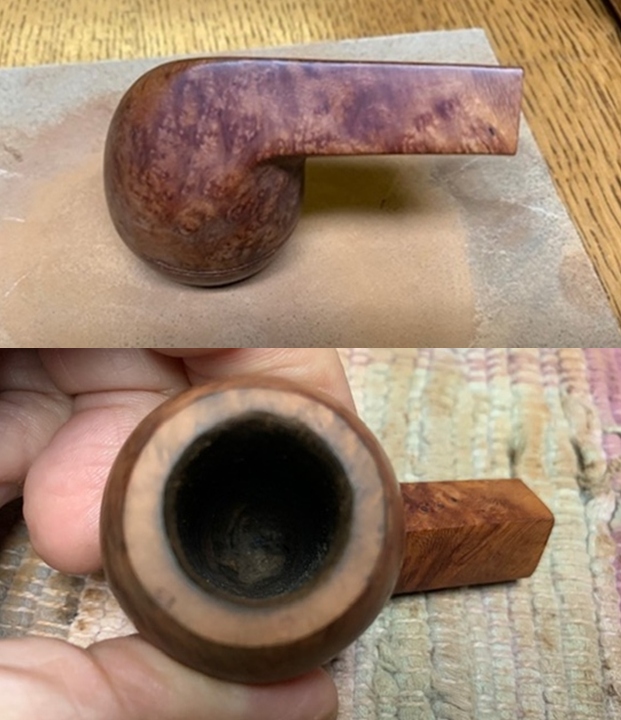
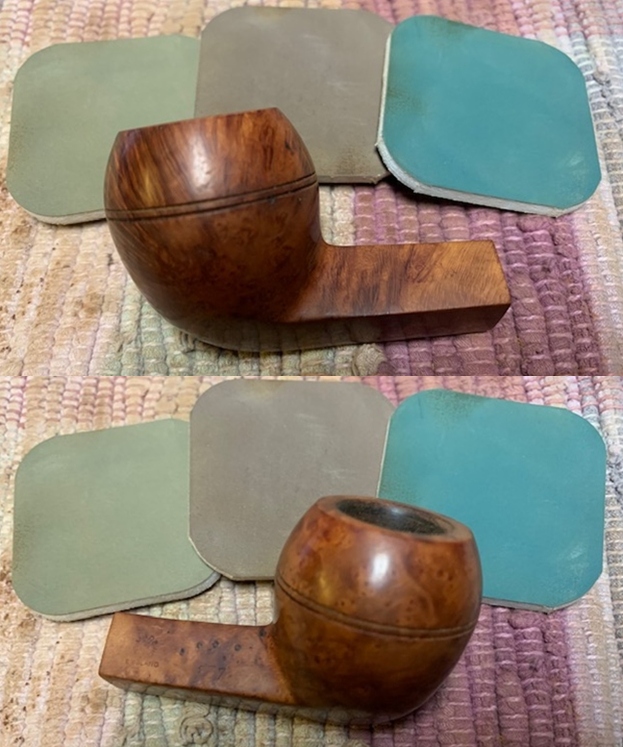
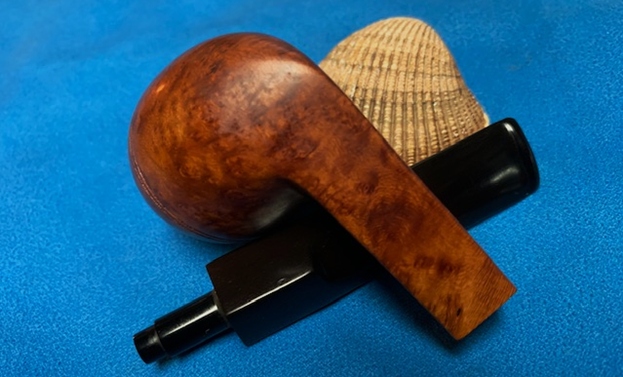
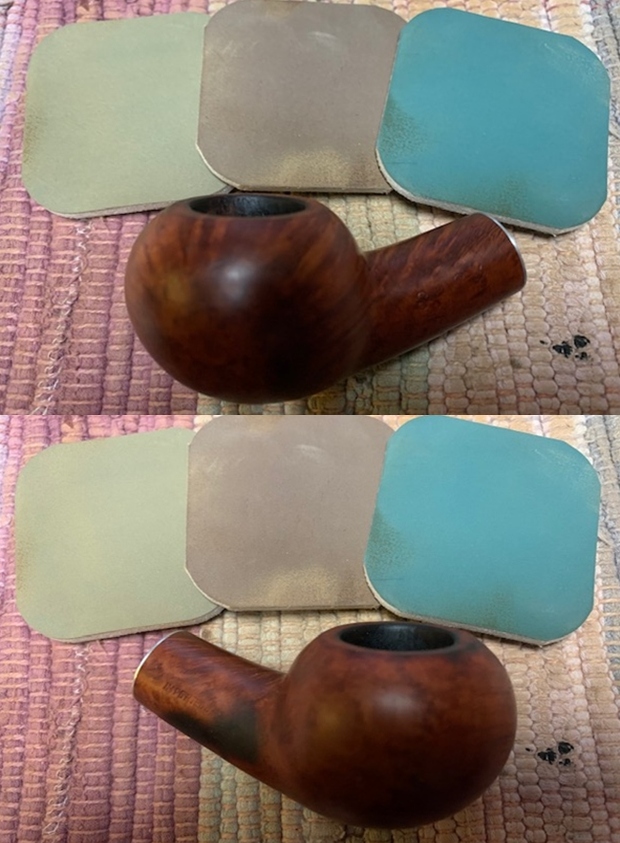
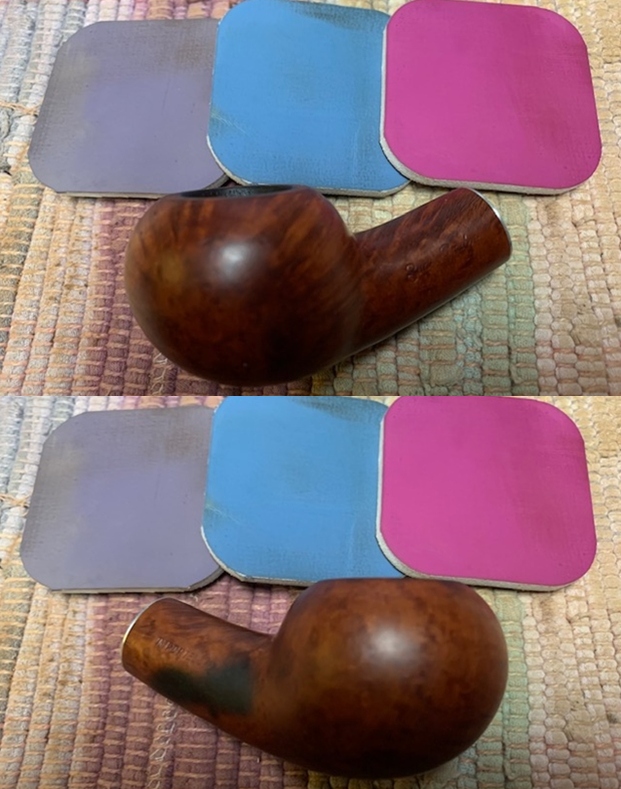
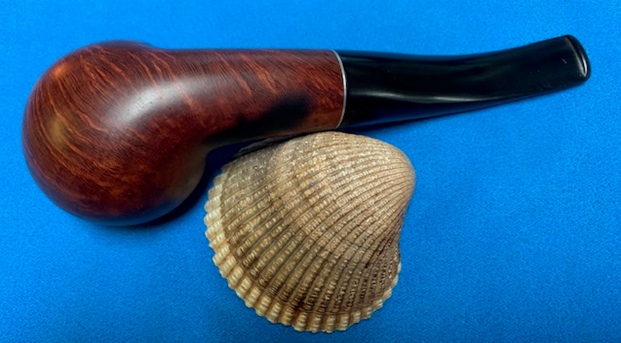
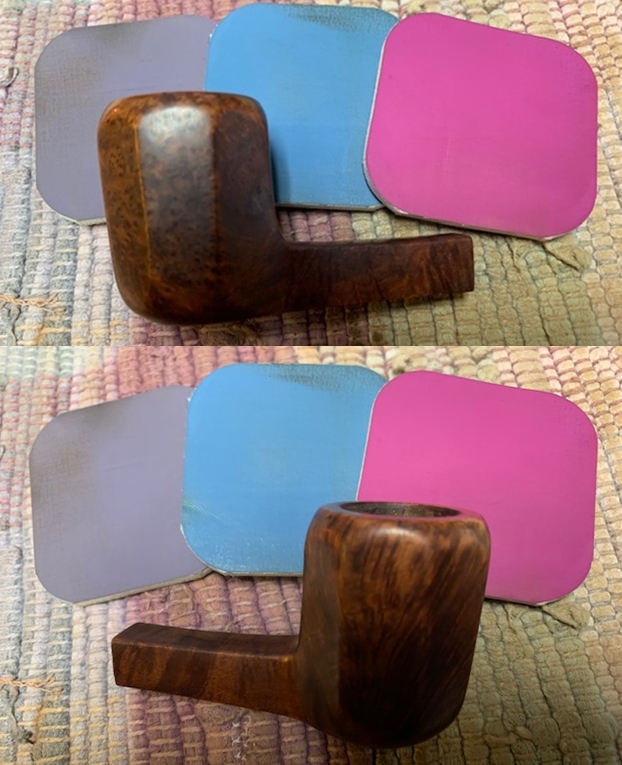
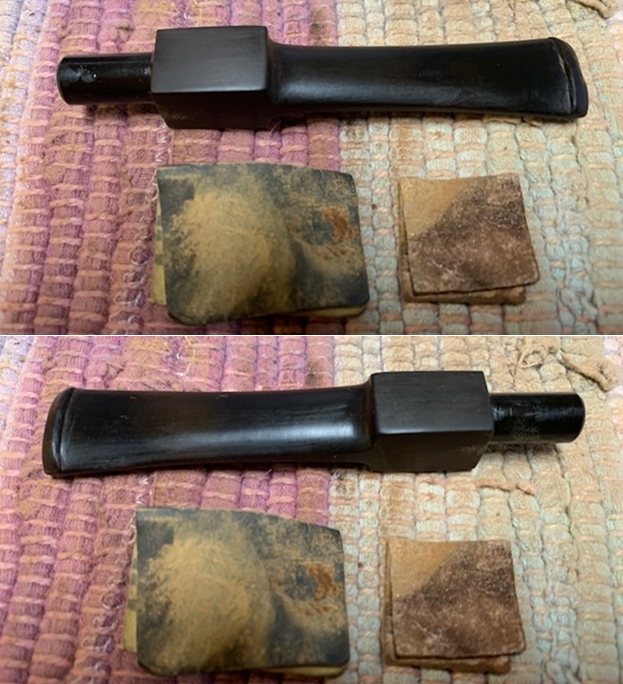
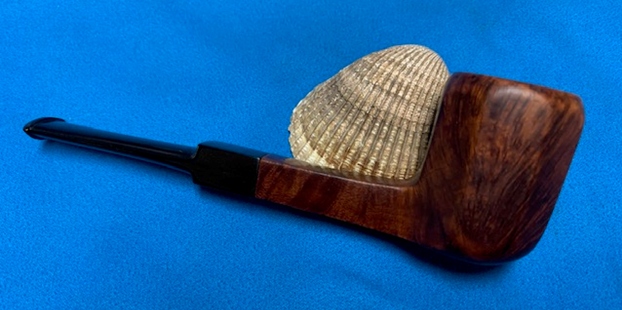
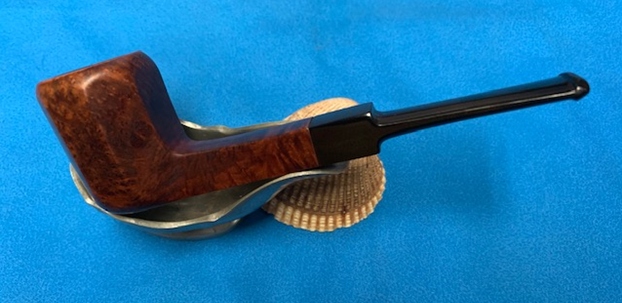
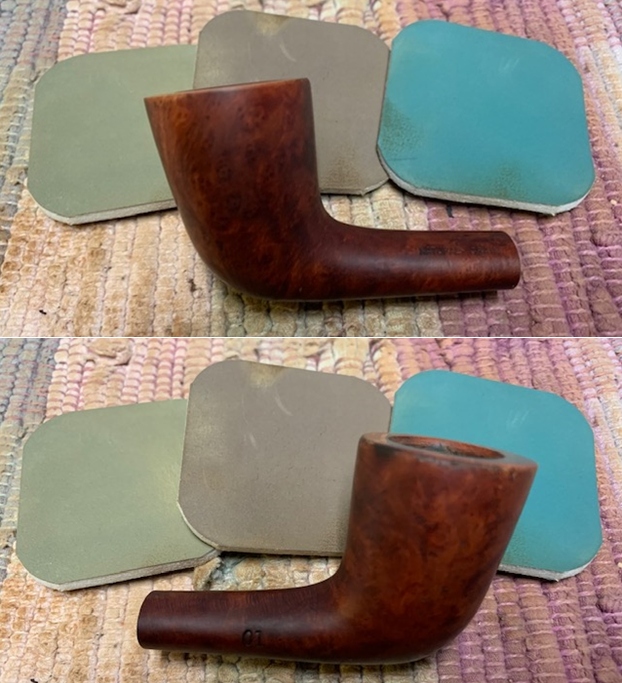
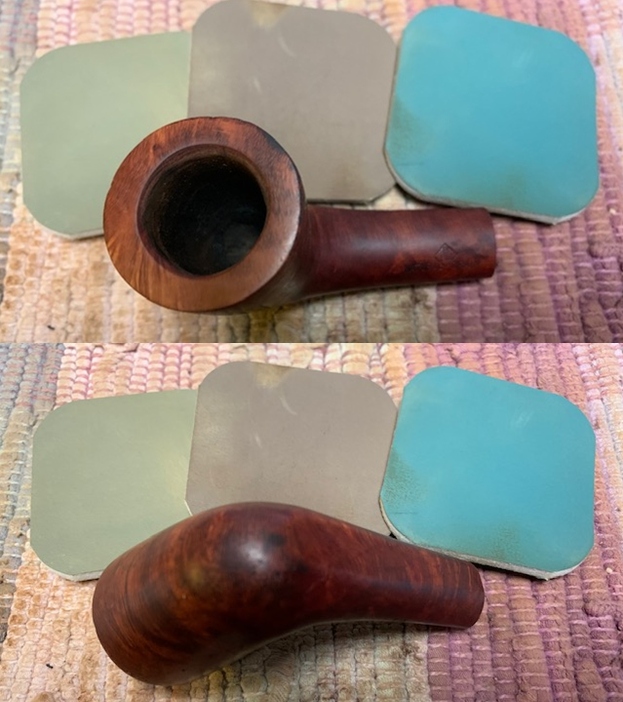
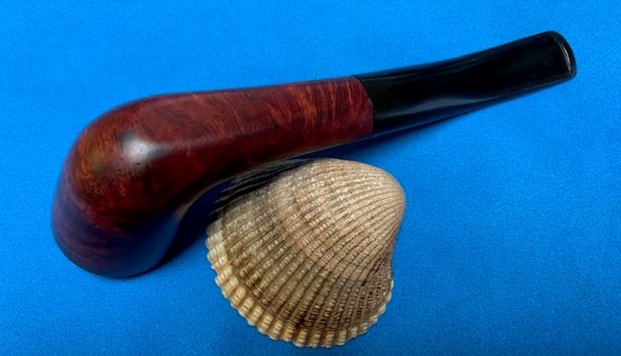
Next, I rub a small quantity of “Before and After Restoration Balm” in to the stummel surface with my finger tips and let it rest for a few minutes. I worked the restoration balm deep in to the briar wood. The balm almost immediately works its magic and the briar now has a nice vibrant appearance. The stummel looks very handsome with the contrasting dark and light brown hues. The fills have blended in quite nicely with the surrounding dark brown hues taken on by the stummel surface after the application of the balm. 
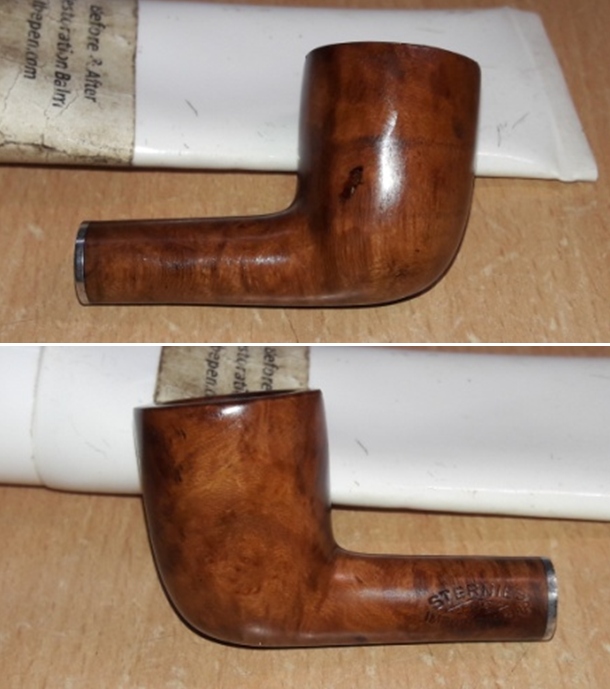
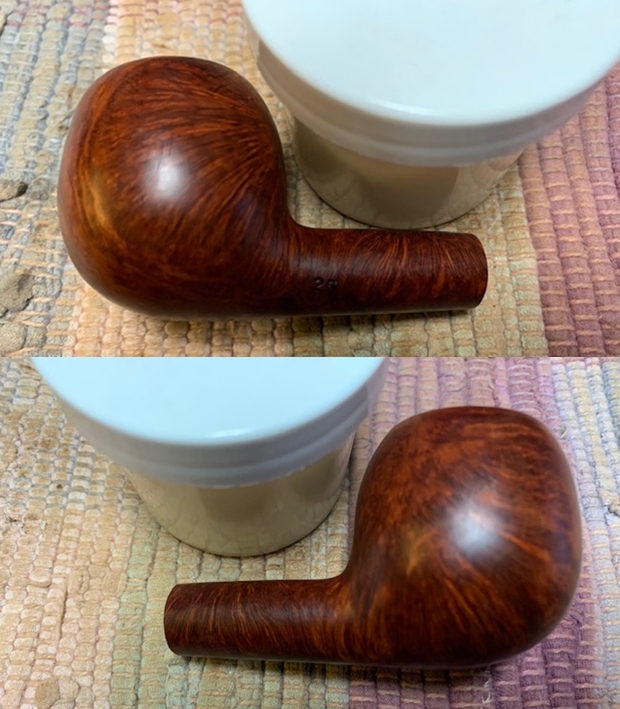
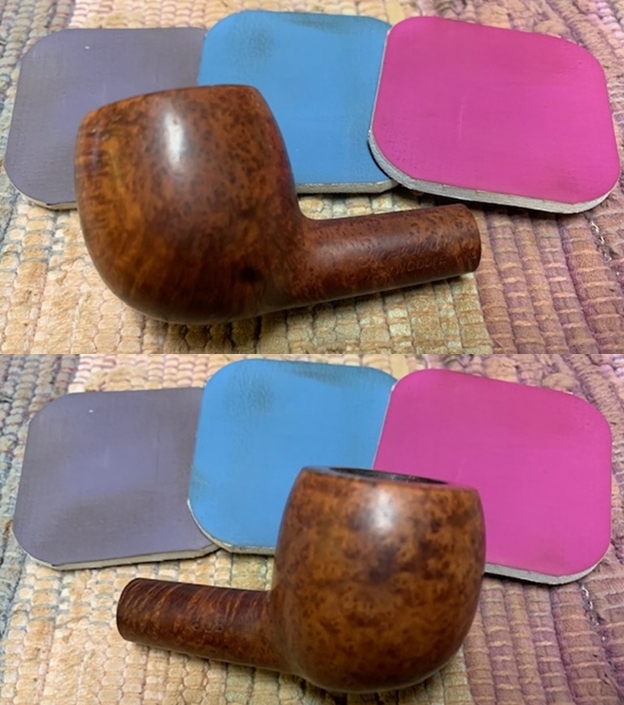
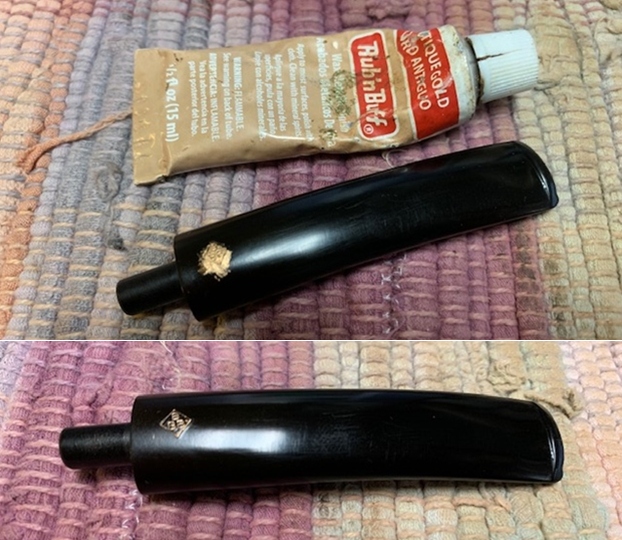
To complete the restoration, I mount a cotton cloth buffing wheel on to my hand held rotary tool and applied a coat of Blue Diamond to the stummel and the stem to polish out the minor scratches.    
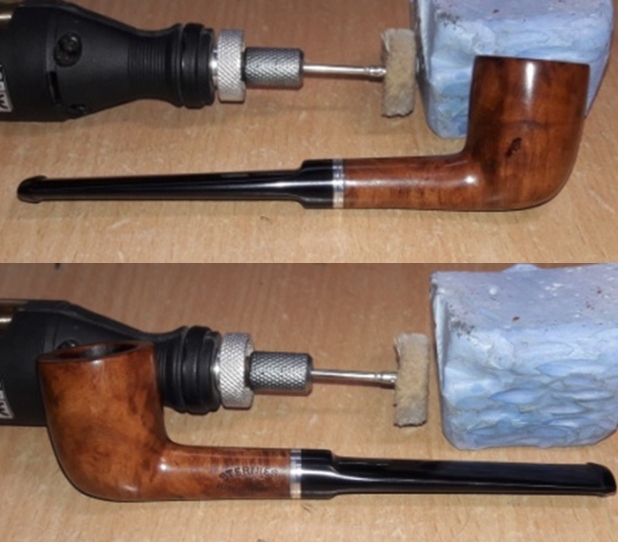
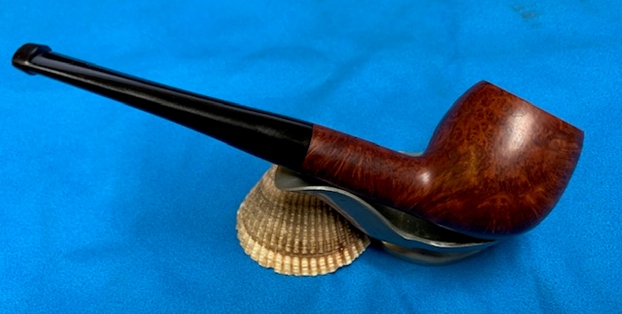
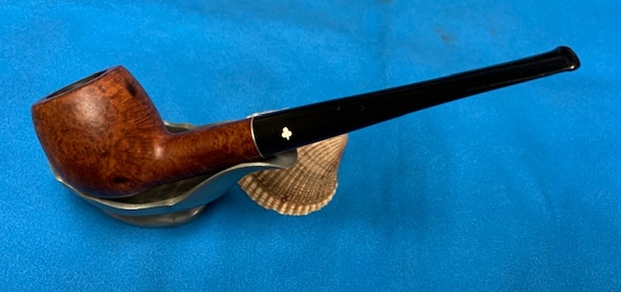
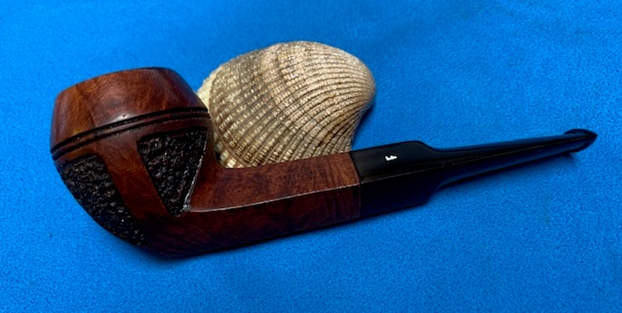
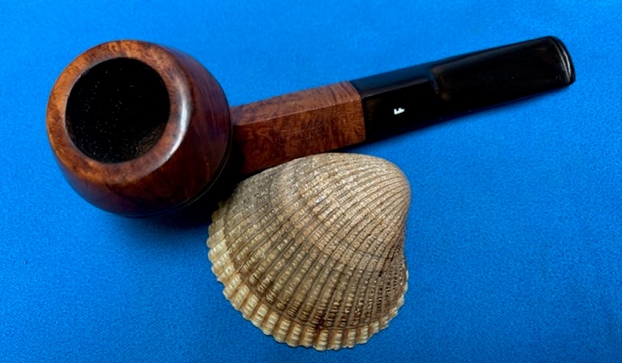
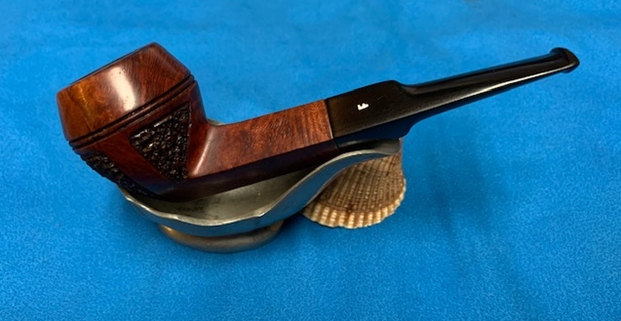
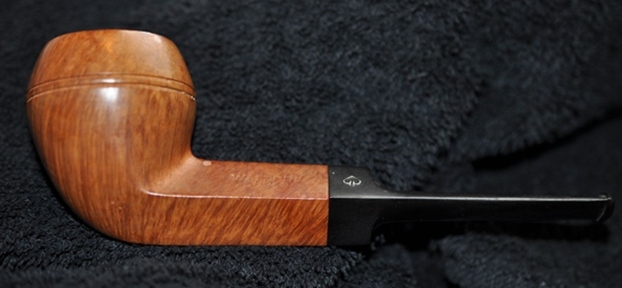
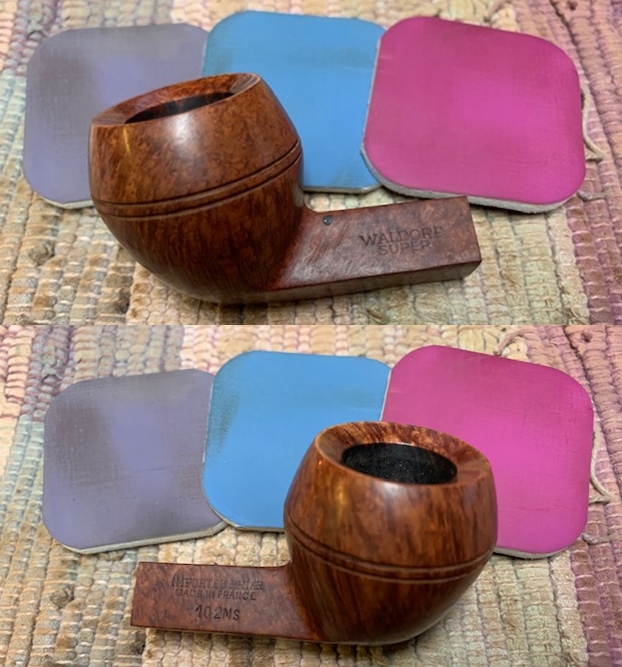
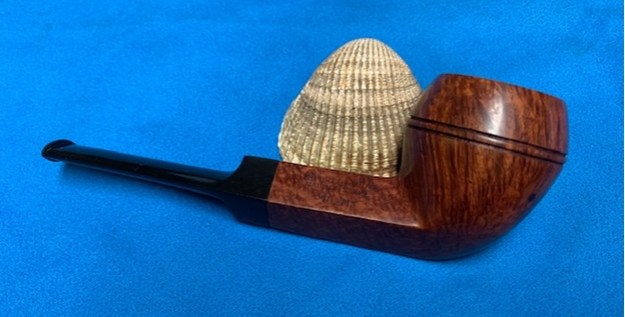
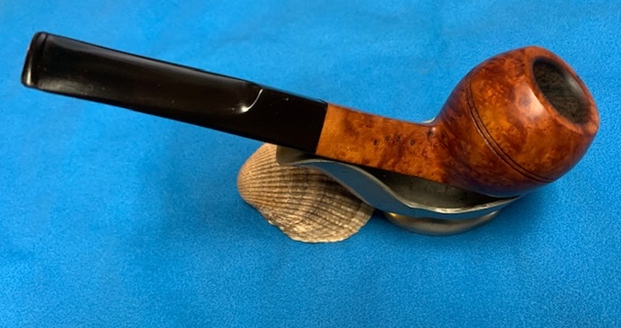
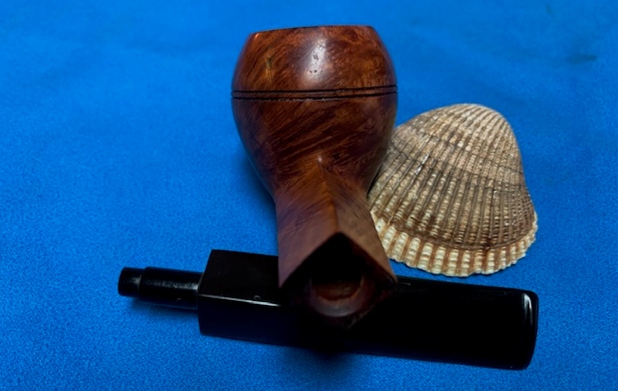
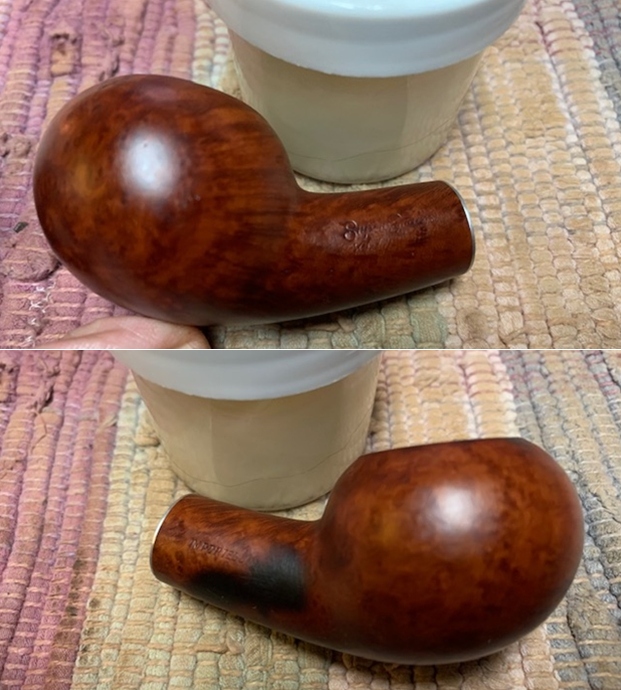
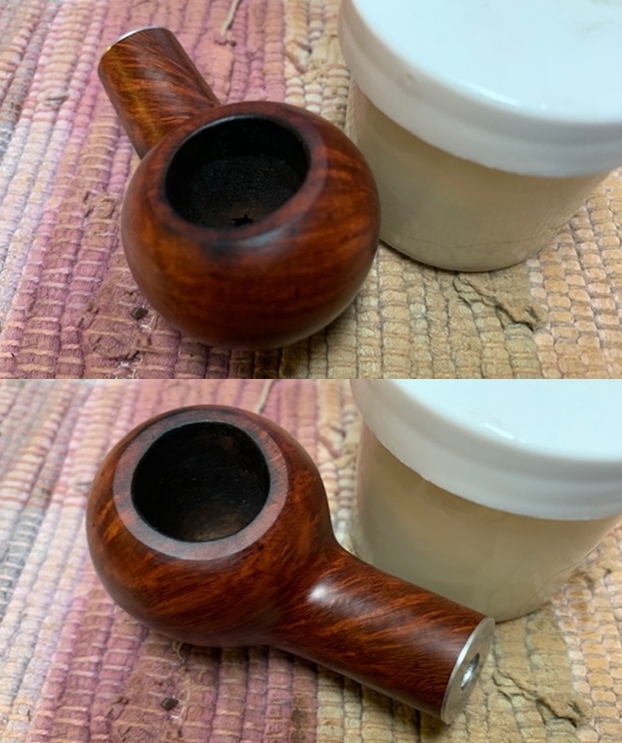
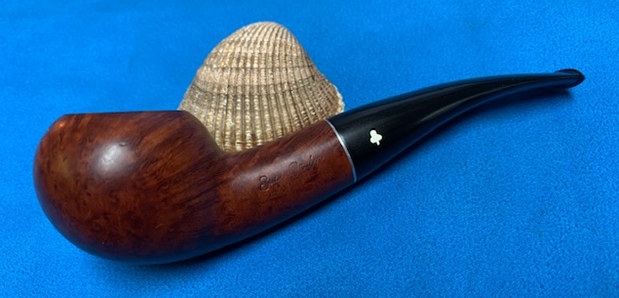
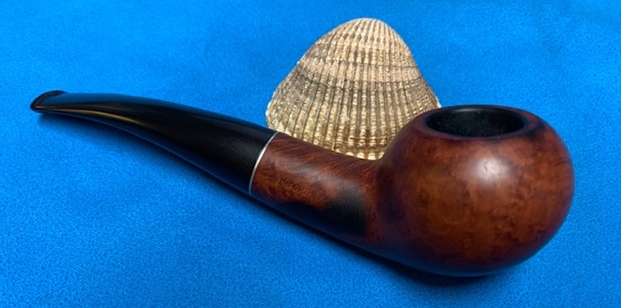
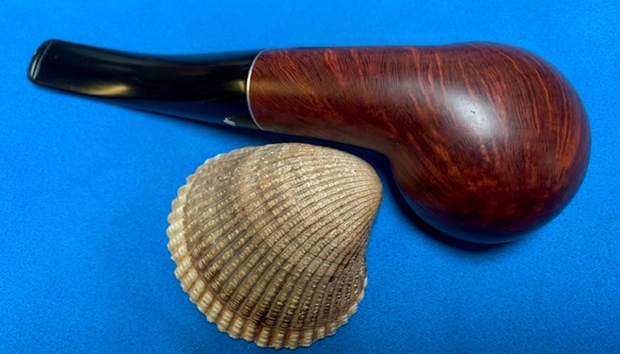
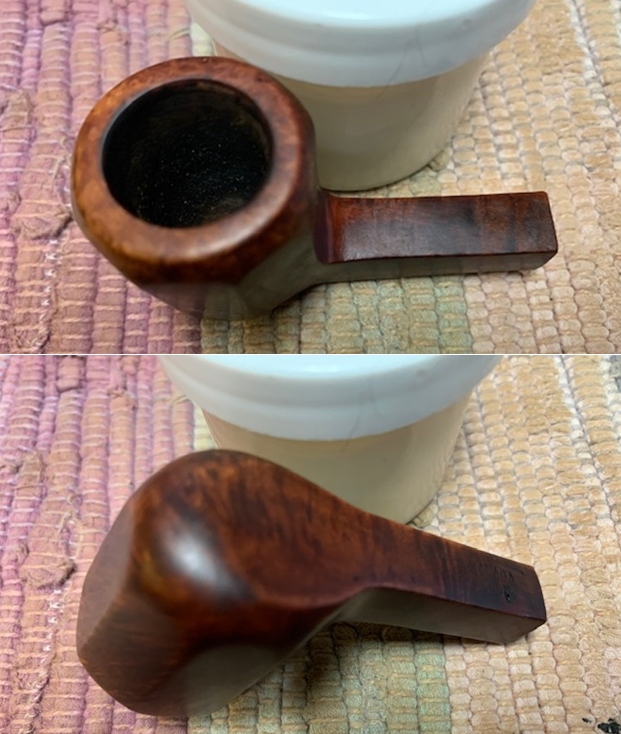
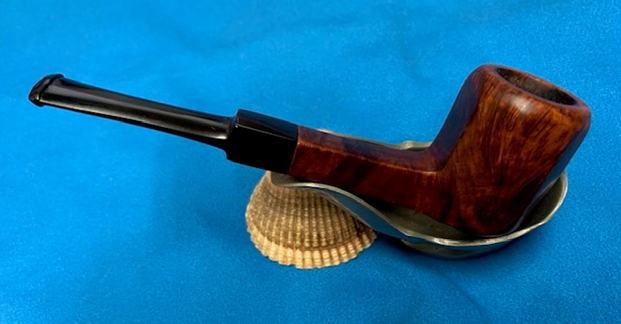
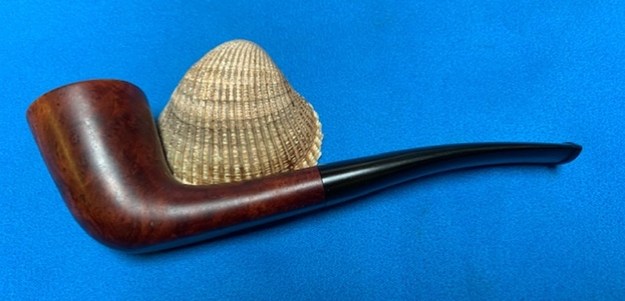
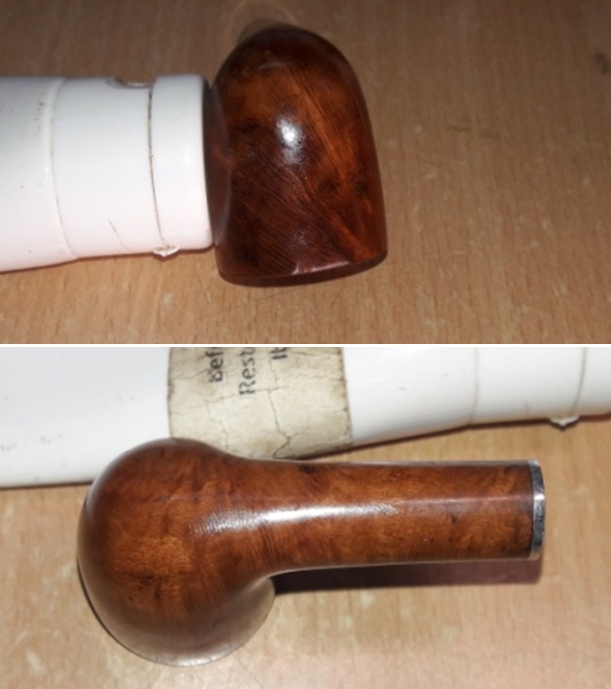
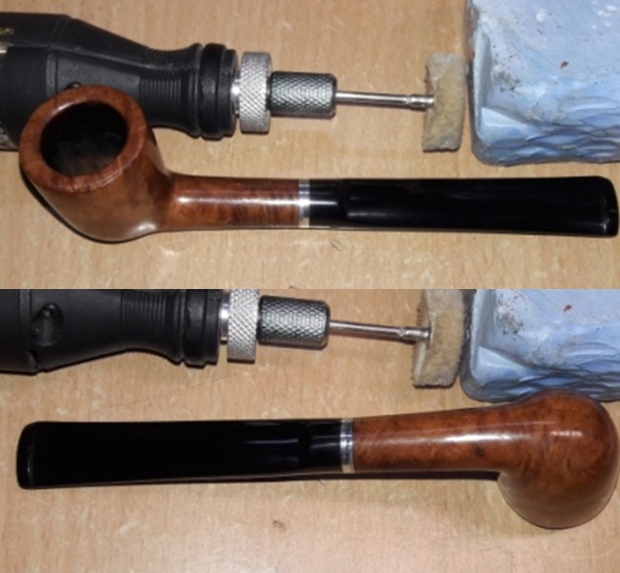
With a cotton buffing wheel that I use for carnauba wax, I apply a coat of carnauba wax and continue to work on it till the complete coat of wax had been polished out. I finished the restoration by giving the entire pipe a rigorous hand buffing using a microfiber cloth to raise the shine further. The completed pipe looks fresh, vibrant and ready for its next innings with a piper interested in adding it to his/ her collection. This piece of briar feels fantastic in hands with its ultra lightweight, classic shape and a size that is just right for a quick smoke in between breaks. Thank you to all esteemed readers for joining me and walking with me through this restoration. Cheers!! 
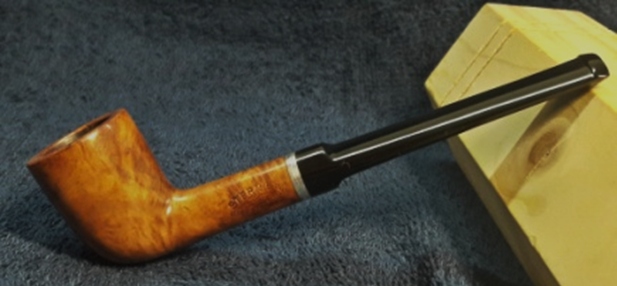
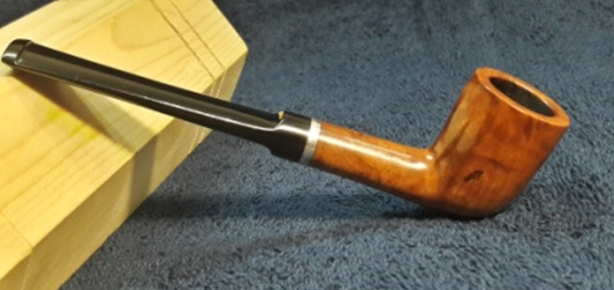
P.S. I had consulted with my wife, Abha, whether or not to stain this pipe with a dark brown stain to mask the fills since she has a better understanding and appreciation of colors than me (isn’t that true for all the men?). She suggested that the natural color of the briar looks smashing while any staining will hide the grain patterns and that the fills actually blend in nicely when seen in person. It’s actually a fact that pictures highlights flaws more than they actually appear in person.

Praying for the safety and well being of all readers and their loved ones…

Beautification for an American Made Bertram Washington DC Grade 25 Apple


Blog by Steve Laug

The next pipe on the work table came to me from one of our estate purchases. Between us we pick up quite a few pipes for restoration. I try to work them into the restoration queue so that I can keep them moving. We picked up over 120+ Bertram pipes from an estate that a fellow on the east coast of the US was selling. This next one is from that estate – a beautifully grained Bertram Apple Grade 25 with a tapered vulcanite stem. The pipe is stamped on the lower left side near the shank junction with the stem and reads 25. Higher up on the left side it is stamped Bertram [over] Washington D.C. centered on the shank. The finish had a lot of grime ground into the smooth finish on the bowl and some darkening around the sides of the bowl. There are also some nicks on the backside of the bowl toward the back top. The bowl was caked with an overflowing lava coat on the top of the rim, heavier toward the back of the bowl. The edges looked okay other than some potential burn damage on the back inner edge. The stem was lightly oxidized, dirty and had light tooth chatter and marks on the top and underside near the button. There were not markings or a logo on the taper stem. Like the rest of the Bertrams in this lot the pipe had promise but it was very dirty. Jeff took photos of the pipe before he started his cleanup work.          He took photos of the rim top and bowl to give a clear picture of the thickness of the cake and the lava on the rim top. The lava was thicker toward the back of the rim and there were remnants of tobacco on the walls of the thickly caked bowl. He also took photos of the top and underside of the stem to show the chatter and tooth marks. Otherwise the stem is quite clean. Jeff took photos of the sides and heel of the bowl to give a picture of what the briar around the pipe looked like. There is some stunning grain under the grime.   He took photos of the stamping on the shank. It reads as noted above and is clear and readable. The grade number is 25.     As I have worked on Bertram pipes I have written on the brand and have included the following information. If you have read it in past blogs, you can skip over it. If you have not, I have included the link to Bertram history and information. I would recommend that if you don’t know much about them take some time to read the background. I include a link to the write up on Pipedia (http://pipedia.org/wiki/Bertram). Bertram pipes were based out of Washington DC. They were popular among famous politicians and celebrities of the time. They made many products for them from FDR’s cigarette holders to Joseph Stalin’s favorite pipe. They were considered some of the best America had to offer till they finally closed their doors in the 70s. Bertram graded their pipes by 10s and sometimes with a 5 added (15, 25, 55 etc.), the higher the grade the better. Above 60s are uncommon and 80-90s are quite rare. I have worked on one 120 Grade billiard. I have several blogs that I have written on rebornpipes that give some history and background to Bertram pipes. (https://rebornpipes.com/2015/06/16/an-easy-restoration-of-a-bertram-grade-60-217-poker/). I have included the following link to give a bit of historical information on the pipe company. It is a well written article that gives a glimpse of the heart of the company. http://www.streetsofwashington.com/2012/01/bertrams-pipe-shop-on-14th-street.html#

From this information I learned that all of these Bertrams were made before the closure of the shop in the 1970s. This Bertram Straight Apple has a stunning a mix of grain around the bowl. This pipe has a 25 Grade stamp on it which I am sure explains the quality of the briar. But like many of these Bertrams the Grading system is a mystery to me.

Jeff had cleaned up the pipe with his usual penchant for thoroughness. He reamed the pipe with a PipNet Pipe Reamer and cleaned up the remnants with a Savinelli Fitsall Pipe Knife.  He scrubbed the bowl with undiluted Murphy’s Oil Soap with a tooth brush. He rinsed it under running warm water to remove the soap and grime. He cleaned out the inside of the shank and the airway in the stem with alcohol, cotton swabs and pipe cleaners. He soaked the stem in Before & After Deoxidizer and rinsed it off with warm water. I took photos of the pipe once I received it.   The rim top had some slight darkening on the back of the bowl but otherwise looked very good. The inner edge of the rim looked very good with no damage. The stem surface looked very good with a few small tooth marks and chatter on both sides near the button. I took a photo of the stamping on the shank. The Bertram Washington DC is toward the top of the left side mid shank. On the underside of the shank is stamped the Grade 25 number.  I removed the stem and took a photo of the pipe to give a sense of the whole. The stem is tapered. I started my work on the pipe by polishing the bowl and the rim top, sides and shank with micromesh sanding pads – wet sanding with 1500-12000 grit pads and wiping it down after each pad with a cloth.  I rubbed the bowl and shank down with Before & After Restoration Balm. I worked it into the surface of the bowl sides and shank with my fingertips to clean, enliven and protect the briar. I let the balm sit for a little while and then buffed with a cotton cloth to raise the shine.   I set the bowl aside and turned to work on the stem. It was in very good condition so I polished the vulcanite stem with micromesh sanding pads – 1500-12000 grit pads. I wiped it down with a damp cloth after each sanding pad. I used Before & After Pipe Polish – both Fine and Extra Fine to further polish the stem.     This Bertram Washington DC Grade 25 Apple with a vulcanite taper stem is a great looking pipe now that it has been restored. I put the stem back on the bowl and carefully buffed the pipe with Blue Diamond on the buffing wheel using a light touch on the briar. I gave the bowl and the stem multiple coats of carnauba wax on the buffing wheel and followed that by buffing the entire pipe with a clean buffing pad. I hand buffed the pipe with a microfiber cloth to deepen the shine. The finished Bertram 25 Apple fits nicely in the hand and feels great. Give the finished pipe a look in the photos below. The dimensions of the pipe are Length: 5 ½ inches, Height: 1 ½ inches, Outside diameter of the bowl: 1 ¼ inches, Chamber diameter: ¾ of an inch. The weight of this pipe is 35g/1.23oz. If you are interested in adding this pipe to your collection send me a message or an email. Thanks for reading this blog and my reflections on the pipe while I worked on it. There are many more to come!

Breathing Life into a Super Grain Kaywoodie 80B Apple


Blog by Steve Laug

The next pipe on the table has been here a long time. It was found in a pipe hunt that Jeff and I did in 2017 at long since closed Antique Mall in Pocatello, Idaho, USA. It was a tired and worn Kaywoodie Super Grain straight apple with a threaded tenon. The smooth finish on the bowl was very dirty and worn. The pipe was filthy and there was significant rim top damage. The bowl had a thick cake that made me wonder how it could still be smoked. There was tobacco debris in the bottom of the bowl and a thick overflow of lava on the rim top. It is hard to know what the inner edge of the rim looked like under the lava coat. The outer edge of the rim had some darkening and chips around the edges. The pipe is stamped on the left side of the shank and reads Super Grain [over] Kaywoodie on the left side of the shank. On the right side it is stamped with the shape number 80B. The stamping is faint but readable on the pipe. The stem was dirty and lightly oxidized. There were light tooth marks and chatter on the stem near the button on both sides and some on the surface of the button as well. There was the Kaywoodie White Club/Clover logo on the left side of the taper stem. The stinger apparatus is a four-hole one that is threaded into the threaded tenon. It is a different kind of set up than previous Super Grain pipes that I have worked on it. The stamping and the stinger date it as an older one. Jeff took photos of the pipe before he worked on it. Jeff took a close up photo of the bowl and rim to capture the condition of the pipe before he started the cleanup work. The bowl had an incredibly thick cake and a thick overflow of lava on the rim top. It was hard to know what the inner edge looked like but the outer edge was a mess. The stem is lightly oxidized, calcified and dirty and there is tooth chatter and marks on both sides of the stem ahead of the button.   Jeff took a photo of the side and heel of the bowl to give a picture of what the briar looked like. There is some nice grain on the piece of briar. The stamping on the sides of the shank read as noted above. The photos show that they are very faint but readable. The Clover/Club on the left side of the stem is in good condition. Jeff took a photo of the interesting stinger and threaded tenon set up. The stinger was absolutely covered with grime and tars.  The two digit shape number and the threaded 4 hole stinger told me a lot about the age of the pipe but I wanted to know a bit more. I turned first to Pipephil’s site as it is always a quick sources of information (http://pipephil.eu/logos/en/logo-kaywoodie-2.html). I have included a screen capture of the section on the Super Grain Below.Up until the late 1940’s/early 50’s, the logo was on top of the stem. After that the logo was moved to the side of the stem (exceptions exist). The one I am working on has the white cloverleaf logo on the left side making the pipe an early 1950’s. The 4-hole stinger also fits this time period.

From that section I learned that indeed the pipe was older because of the stamping, Super Grain over Kaywoodie. I could narrow it down because it did not inlcude the Imported Briar stamp which was added in 1935 though that is not always the case. The cloverleaf logo on the left side of the stem also moved the date forward to the early 1950’s. I also knew that 4 hole stingers occurred on pipes in the 60’s. So it appears that the pipe came out between the early 50s to the 1960s.

Jeff had cleaned up the pipe with his usual penchant for thoroughness. He reamed the pipe with a PipNet pipe reamer and removed the rest of it with a Savinelli Fitsall Pipe Knife.  He scrubbed the bowl with undiluted Murphy’s Oil Soap with a tooth brush. He rinsed it under running warm water to remove the soap and grime. He cleaned out the inside of the shank and the airway in the stem with alcohol, cotton swabs and pipe cleaners. He soaked the stem in Before & After Deoxidizer and rinsed it off with warm water. When the pipe arrived and I unpacked it the stem was broken off at the end. There was about a ¼ inch of the stem and the entire button was in the bottom of the bag that the pipe was packed in. I took photos of the pipe once I received it. The rim top cleaned up really well. The rim top and outer edge of the bowl show damage from being knocked against a hard surface. There is damage to the inner edge of the bowl and bowl is slightly out of round.  The stem surface looked very good with tooth marks and chatter on the top side and the underside near the button.     The stamping on the sides of the shank is faint but readable. It reads as noted above. I removed the stem and took a photo of the pipe to give a sense of the whole.  The four hole stinger is in excellent condition.   I started my work on the pipe by cleaning up the inner edge of the bowl with a folded piece of 220 grit sandpaper. I topped the bowl on a topping board to remove the damage to the rim top. It also helped to minimize some of the damage to the inner edge. Once I had it cleaned up the rim top damage was minimized. I sanded the outer edge of the bowl with the sandpaper to smooth out the damage there. I polished the briar with micromesh sanding pads – wet sanding with 1500-12000 grit pads and wiping the briar down with a damp cloth after each pad. The briar began to take on a rich glow. I rubbed the briar down with Before & After Restoration Balm. I worked it into the briar with my fingertips into the briar. The product works to clean, enliven and preserve the briar. I let it sit for 10-15 minutes while I worked on the stem. After the time passed I buffed it with a cotton cloth to deepen the shine. I set the bowl aside and turned my attention to the stem. The stem was in good condition and I would be able to polish out the tooth chatter. I polished the stem with micromesh sanding pads – 1500-12000 grit pads. I wiped it down with Obsidian Oil after each sanding pad. I used Before & After Pipe Polish – both Fine and Extra Fine to further polish the stem.    This Super Grain Kaywoodie 80B Straight Apple is a great looking pipe. The smooth finish and brown stain around the bowl sides and shank make the grain just pop. Even the burn mark on the right side of the shank while present does not detract from the beauty of the pipe. The finish on the pipe looks great and the brown stains work well to give some contrast to the polished black vulcanite taper stem. The pipe is really quite eye-catching. I put the stem back on the bowl and buffed the pipe with Blue Diamond on the buffing wheel, carefully avoiding the stamping on the shank. I gave the bowl and the stem multiple coats of carnauba wax on the buffing wheel and followed that by buffing it with a clean buffing pad. I hand buffed the pipe with a microfiber cloth to deepen the shine. There were two burn marks – one on the lower left side of the bowl and the other on the back toward the topside. The finished Straight Apple Super Grain is quite nice and feels great in the hand. Give the finished pipe a look in the photos below. I can only tell you that like the other pipes I am working that it is much prettier in person than the photos capture. The dimensions of the pipe are Length: 6 inches, Height: 1 ½ inches, Outside diameter of the bowl: 1 ¼ inches, Chamber diameter: ¾ of an inch. The weight of the pipe was 32g/1.13oz. Thanks for walking through the restoration with me as I worked over another interesting pipe. This Super Grain Kaywoodie will be added to the American Pipe Makers section of the rebornpipes store soon. If you want to add it to your collection send me an email or a message! Thanks for your time.

Rebirthing a Frank Medico Patent Bulldog


Blog by Steve Laug

The next pipe on the work table came to us from an online auction from Mountain Top, Pennsylvania, USA. It is classic Bulldog with a mixed finish (rusticated and smooth) around the bowl. It is stamped on the left side of the shank and reads Frank is script [over] Medico [over] Real Briar. On the right side of the shank it read PAT. 1967585. One of my first pipes was a Medico so there is always something that draws me to the brand. The finish on the bowl was very dirty with dust and grime ground into the bowl sides and obscuring the grain. The rusticated panels were also very dirty. The twin rings around the bowl cap had a lot of debris ground into them. There was a very thick cake in the bowl and lava overflow on the rim top. The vulcanite stem was oxidized, calcified and had tooth marks and chatter ahead of the button on both sides. The tenon was metal and perforated and dirty. I cannot remember whether it had a filter in the tenon or not when we got it. Jeff took photos of the pipe to show its general condition before he did his cleanup.  As I mentioned above the exterior of the pipe was very dirty – grime and grit ground in from years of use and sitting. I have to say that this was obviously someone’s favourite pipe judging from the buildup in the bowl. The rim top was covered with a coat of thick lava that overflowed from the thick cake in the bowl. It was hard to know what the rim edges looked like because of the lava.  The stem was dirty and oxidized with tooth chatter and marks on the top and underside of the stem at the button. Jeff took photos of the sides and the heel of the bowl to give a better feel for the condition of the briar around the bowl. The pink fills are visible all around the bowl sides.  The next photos show the stamping on the sides of the shank. The stamping is very readable. It reads as noted above.      Before doing my part of the work on the pipe I decided to do some research. I have worked on and smoked Medico pipes in the past but I have never worked on a Patent Frank Medico like this one with the mix of rusticated and smooth finishes. I decided to look on the normal sites to see what I could find out about this line. I to Pipephil’s website and found some information on the Frank Pipe Company with a white F logo (http://www.pipephil.eu/logos/en/logo-f4.html). The FRANK stamp is identical to the one that I am working on.I turned then to the second on the Medico Pipe line to see if there was any information on a pipe that was stamped like the one I was working on and sure enough found one. It is stamped the same as the one am working on (http://www.pipephil.eu/logos/en/logo-medico.html). I did a screen capture of the Patent section. The Patent Number is the same on the second line. The logo on the stem is the same as the pipe I am working on.I turned to Pipedia to see what further information was available on that site and if there was anything specifically on this line (https://pipedia.org/wiki/Medico). I quote from the history of the brand:

Medico was created in 1933, and is still produced by S.M. Frank. The brand is famous for its pipe filters, which were launched in the same year. Since 1966, some models have been made in Brylon, a synthetic material, and others in briar. The brand was also sold by the English

Symbol: M inside a shield, although early pipes, like the example bellow, had a + sign, like a Medic would have on their sleeve.

The pipe I am working on is stamped with the letter F on the left topside of the saddle stem. It is like the one in the second screen capture above.

I did a search of the United States Patent and Trademark Office for the Patent Number 1,967,585. I was able to find the patent information for the absorbent filter cartridge that was granted on July 24, 1934. Jeff cleaned the pipes with his usual penchant for thoroughness that I really appreciate. The pipe was a real mess when he got it and I did not know what to expect when I unwrapped it from his box. I was surprised to see how well it turned out. He reamed it with a PipNet pipe reamer and cleaned up the reaming with a Savinelli Fitsall Pipe Knife. He scrubbed out the internals with alcohol, pipe cleaners and cotton swabs until the pipe was clean. He scrubbed the exterior of the bowl with Murphy’s Oil Soap and a tooth brush to remove the grime and grit on the briar and the lava on the rim top. The finish looks very good with good looking grain around the bowl and shank. The putty fills had all fallen out on the sides and front of the bowl and left pits. Jeff scrubbed it with Soft Scrub and soaked it in Before & After Deoxidizer to remove the oxidation on the rubber. When the pipe arrived here in Vancouver for the second stop of its restoration tour it looked a lot better. I took photos before I started my part of the work.  I took some close up photos of the rim top and the stem surface. I wanted to show what cleaned bowl and rim top looked like. The rim top shows some darkening and some nicks. The edges look quite clean. I also took close up photos of the stem to show the tooth chatter and marks on the stem surface. There is also some light oxidation remaining.    I took photos of the stamping on the side of the shank and it is clear and readable. It is stamped as noted above.    I removed the stem for the shank and took a photo of the bowl and stem to give a picture of what it looked like. It is a classically shaped Bulldog with a metal tenon made to hold the Medico Filters!Now, on to my part of the restoration of this Frank Medico Pat Bulldog. I decided to clean up the remaining varnish/lacquer finish on the bowl and shank. I wiped it down with acetone on a cotton pad until I had removed all of the shiny spots on the smooth portion of the finish and the spots in the rustication as well. The bowl and rim top were in very good condition once I had cleaned them off. I polished the top of the bowl, the repaired areas and the entirety of the bowl with micromesh sanding pads – wet sanding with 1500-12000 grit pads and wiping the briar down with a damp cloth after each sanding pad.   I rubbed the bowl down with Before & After Restoration Balm. I worked it into the surface of the briar with my fingertips to clean, enliven and protect it. I let the balm sit for 10-15 minutes and then buffed with a cotton cloth to raise the shine.     I set the bowl aside and turned my attention to the stem. I “painted” the surface of the mouthpiece with the flame of a Bic lighter to lift the tooth marks. I was able to remove the majority of them this way. I filled in the tooth marks that remained with clear super glue. I set the stem aside to let the repairs cure. Once the repair had cured I used a needle file to clean up the button edge and flatten out the repairs. I sanded it with 220 grit sandpaper to further blend the repairs into the vulcanite. I started polishing the stem with 400 grit wet dry sandpaper.  I scrubbed the stem with Soft Scrub all-purpose cleanser to remove the remaining oxidation on the stem surface. Once it was scrubbed clean it was ready to polish.     I polished the vulcanite with micromesh sanding pads – 1500-12000 grit pads. I wiped it down with a damp cloth after each sanding pad. I used Before & After Pipe Polish – both Fine and Extra Fine to further polish the stem.  I have a few packages of Medico Filters that were made for the Medico system of this pipe. I took one out of the package and put it in the tenon. The photos show the fit of the filter.  This Frank Medico Patent Mixed Finish Bulldog turned out to be a great looking pipe. The brown finish on the smooth portions of the pipe is a great contrast with the dark brown/black rustication in the panels around the bowl sides. The pipe is in great condition and works well with the polished vulcanite saddle stem. I put the stem back on the bowl and carefully buffed the pipe with Blue Diamond on the buffing wheel. I gave the bowl and stem multiple coats of carnauba wax on the buffing wheel and followed that by buffing the entire pipe with a clean buffing pad. I hand buffed the pipe with a microfiber cloth to deepen the shine. The finished Frank Medico Filter Bulldog fits nicely in the hand and feels great. Give the finished pipe a look in the photos below. The dimensions of the pipe are Length: 5 inches, Height: 1 ½ inches, Outside diameter of the bowl: 1 ¼ inches, Chamber diameter: ¾ of an inch. The weight of the pipe is 29g/1.02oz. If you are interested in carrying on the pipe man’s legacy with this pipe send me a message or an email. I have more to work on of various brands. Perhaps one of those will catch your attention. Thanks for reading this blog and my reflections on the pipe while I worked on it.

A Rebirth for LHS Sterncrest Hunter’s Billiard


Blog by Steve Laug

The next pipe on the work table came to us from an online auction from Schulenburg, Texas, USA. It is classic Billiard with mixed grain around the bowl and shank. It is stamped on the left side of the shank and reads Sterncrest [over] LHS in a Diamond [over] Imported Briar. There is a Sterling Silver band on the shank that has the image of a hunting dog (pointer) [over] Sterling on the top side. I have worked on and restored quite a few American made LHS (LH Stern) pipes over the years and quite a few have been Sterncrest. However, this is the first one I have done with the hunting dog etched in the Sterling Silver band. The finish was very dirty with dust and grime ground into the bowl sides and obscuring the grain. There were some putty fills and deep nicks in the finish around the bowl sides. There was a very thick cake in the bowl and lava overflow on the beveled rim top. The silver band was oxidized and dirty. The vulcanite stem was oxidized, calcified and had deep tooth marks and chatter ahead of the button on both sides. Jeff took photos of the pipe to show its general condition before he did his cleanup.  As I mentioned above the exterior of the pipe was very dirty – grime and grit ground in from years of use and sitting. I have to say that this was obviously someone’s favourite pipe judging from the buildup in the bowl. The rim top was covered with a coat of thick lava that overflowed from the extremely thick cake in the bowl. It was hard to know what the rim edges looked like because of the lava.  The stem was dirty and oxidized with tooth chatter and marks on the top and underside of the stem at the button. Jeff took photos of the sides and the heel of the bowl to give a better feel for the condition of the briar around the bowl. The pink fills are visible all around the bowl sides.  The next photos show the stamping on the side of the shank and the etched hunting dog on the band. The stamping is very readable. It reads as noted above. The stamped dog comes through in the tarnished silver in the pictures.  Jeff took a photo of the stem removed from the shank to show the pressure fit stinger in the tenon.Jeff cleaned the pipes with his usual penchant for thoroughness that I really appreciate. The pipe was a real mess when he got it and I did not know what to expect when I unwrapped it from his box. I was surprised to see how well it turned out. He reamed it with a PipNet pipe reamer and cleaned up the reaming with a Savinelli Fitsall Pipe Knife. He scrubbed out the internals with alcohol, pipe cleaners and cotton swabs until the pipe was clean. He scrubbed the exterior of the bowl with Murphy’s Oil Soap and a tooth brush to remove the grime and grit on the briar and the lava on the rim top. The finish looks very good with good looking grain around the bowl and shank. The putty fills had all fallen out on the sides and front of the bowl and left pits.  Jeff scrubbed it with Soft Scrub and soaked it in Before & After Deoxidizer to remove the oxidation on the rubber. When the pipe arrived here in Vancouver for the second stop of its restoration tour it looked a lot better. I took photos before I started my part of the work.  I took some close up photos of the rim top and the stem surface. I wanted to show what cleaned bowl and rim top looked like. The rim top shows some darkening and some damage to the inner edge of the rim on the front. I also took close up photos of the stem to show the tooth chatter and marks on the stem surface.     I took a photo of the stamping on the side of the shank and it is clear and readable. It is stamped as noted above. I removed the stem for the shank and took a photo of the bowl and stem to give a picture of what it looked like. It is a classically shaped Billiard. To me the stinger needs to go!Now, on to my part of the restoration of this Sterncrest Billiard. I decided to clean up the damaged rim top and inner edge of the bowl. I cleaned up the inside of the bowl edges with a folded piece of 220 grit sandpaper. I sanded the darkening on the rim top with a folded piece of 220 grit sandpaper. Once I was finished the top and edge looked a lot better.  I was glad to see that all of the pink putty fills had come out during the cleanup process. I decided to replace them with briar dust and clear super glue. There were actually quite a few of them. I did the repairs to the fills and took photos of the “freckles” around the mid-bowl on the left, front and right sides. Once the repairs cured I sanded them smooth with 220 grit sandpaper. I wiped the bowl down with isopropyl alcohol to remove the debris and the heavier stained areas and even out the coverage on the bowl. I wanted to make the stain more transparent so the grain would show through the finish.   I polished the top of the bowl, the repaired areas and the entirety of the bowl with micromesh sanding pads – wet sanding with 1500-12000 grit pads and wiping the briar down with a damp cloth after each sanding pad.   I rubbed the bowl down with Before & After Restoration Balm. I worked it into the surface of the briar with my fingertips to clean, enliven and protect it. I let the balm sit for 10-15 minutes and then buffed with a cotton cloth to raise the shine.     I set the bowl aside and turned my attention to the stem. I heated the stinger and wiggled it free from the tenon with a pair of pliers. I dropped the stem in Briarville’s Pipe Stem Oxidation Remover to clean up the remaining oxidation. I let it sit in the bath for 2 hours and then removed it and dried it off. I forgot to take a photo of the stem when I removed it from the bath. I dried it off and then filled in the deep tooth marks with black super glue. I set the stem aside to let the repairs cure. Once the repair had cured I used a flat rasp and a file to clean up the button edge and flatten out the repairs. I sanded it with 220 grit sandpaper to further blend the repairs into the vulcanite. I started polishing the stem with 400 grit wet dry sandpaper. I polished the vulcanite with micromesh sanding pads – 1500-12000 grit pads. I wiped it down with a damp cloth after each sanding pad. I used Before & After Pipe Polish – both Fine and Extra Fine to further polish the stem.  I left a little oxidation around the stamp so as not to damage it more.      This LHS Sterncrest Hunter’s Billiard turned out to be a great looking pipe. The brown stained brown mixed finish (smooth/rusticated) on the pipe is in great condition and works well with the polished vulcanite taper stem. I put the stem back on the bowl and carefully buffed the pipe with Blue Diamond on the buffing wheel. I gave the bowl and stem multiple coats of carnauba wax on the buffing wheel and followed that by buffing the entire pipe with a clean buffing pad. I hand buffed the pipe with a microfiber cloth to deepen the shine. The finished LHS Sterncrest Billiard fits nicely in the hand and feels great. Give the finished pipe a look in the photos below. The dimensions of the pipe are Length: 5 ¾ inches, Height: 1 ¾ inches, Outside diameter of the bowl: 1 ¼ inches, Chamber diameter: ¾ of an inch. The weight of the pipe is 36g/1.27oz. If you are interested in carrying on the pipe man’s legacy with this pipe send me a message or an email. I have more to work on of various brands. Perhaps one of those will catch your attention. Thanks for reading this blog and my reflections on the pipe while I worked on it.

A Rebirth for a French Made Waldorf Super 102MS Bulldog


Blog by Steve Laug

The next pipe on the work table came to us from an online auction from Corning, New York, USA. It is classic shaped French Made Bulldog with great flame and straight grain around the bowl and shank. It was stamped on both sides of the shank. On the left side it is stamped Waldorf [over] Super. On the right side it is stamped Imported Briar [over] Made in France [over] the shape number 102MS. The Waldorf brand was not one I had heard of before. I knew it was American Made because of the Imported Briar stamp but not much else. The finish was dirty with dust and grime ground into the bowl sides. There were three visible fills – one on the topside of the shank near the bowl junction and two are on the right side of the bowl toward the front. There was a thick cake in the bowl and lava overflow on the beveled rim top. The vulcanite stem was oxidized and had tooth marks and chatter ahead of the button on both sides. Jeff took photos of the pipe to show its general condition before he did his cleanup.  As I mentioned above the exterior of the pipe was very dirty – grime and grit ground in from years of use and sitting. The rim top was covered with a coat of thick lava that overflowed from the thick cake in the bowl. It was heavier toward the back side of the bowl. It was hard to know what the rim edges looked like because of the lava.  The stem was dirty and lightly oxidized with tooth chatter and marks on the top and underside of the stem at the button. Jeff took photos of the sides and the heel of the bowl to give a better feel for the condition of the briar around the bowl.    The next photos show the stamping on the sides of the shank and it is very readable. It reads as noted above. You can also see the Spade logo on the left side of the stem.  The pipe is stamped on the left side of the shank, Waldorf [over] Super as pictured below. On the right side it is stamped Imported Briar [over] Made in France. Under that is stamped shape number 102MS. In checking on Pipephil’s site on the Waldorf brand it appears that there is a connection to WDC (http://www.pipephil.eu/logos/en/logo-w1.html). WDC is the American Company William Demuth Company. The stem has the same logo as Phil shows on his site though the pipe in hand has much fainter stamping.I turned to Pipedia’s article on WDC pipes and read through the great article on the history of WDC (https://pipedia.org/wiki/William_Demuth_Company). There was a noted that Waldorf was originally made by WDC in the American pipemakers list. Other than that there was no mention.

Jeff cleaned the pipes with his usual penchant for thoroughness that I really appreciate. The pipe was a real mess when he got it and I did not know what to expect when I unwrapped it from his box. I was surprised to see how well it turned out. He reamed it with a PipNet pipe reamer and cleaned up the reaming with a Savinelli Fitsall Pipe Knife. He scrubbed out the internals with alcohol, pipe cleaners and cotton swabs until the pipe was clean. He scrubbed the exterior of the bowl with Murphy’s Oil Soap and a tooth brush to remove the grime and grit on the briar and the lava on the rim top. The finish looks very good with good looking grain around the bowl and shank. Jeff scrubbed it with Soft Scrub and soaked it in Before & After Deoxidizer to remove the oxidation on the rubber. When the pipe arrived here in Vancouver for the second stop of its restoration tour it looked a lot better. I took photos before I started my part of the work.   I took some close up photos of the rim top and the stem surface. I wanted to show what cleaned bowl and rim top looked like. The rim top shows some darkening on the beveled rim top. I also took close up photos of the stem to show the light tooth chatter and marks on the stem surface. I took photos of the stamping on the sides of the shank and it is clear and readable. It is stamped as noted above.   I removed the stem for the shank and took a photo of the bowl and stem to give a picture of what it looked like. It is a classically shaped Bulldog.Now, on to my part of the restoration of this Waldorf Super Bulldog. I decided to clean up the damaged rim top and inner edge of the bowl. I cleaned up the inside of the bowl edges with a folded piece of 220 grit sandpaper. Once I was finished the edge looked a lot better.  I took photos of the fills on the right front of the bowl side and the left top of the shank. They were like pink circles. They were indented so I filled them in with super glue and briar dust. Once the repairs cured I sanded them smooth with a folded piece of 220 grit sandpaper.    I polished the top of the bowl, the repaired areas and the entirety of the bowl with micromesh sanding pads – wet sanding with 1500-12000 grit pads and wiping the briar down with a damp cloth after each sanding pad.   I sanded the lighter spots around the fills with a Walnut stain pen to blend it into the surrounding briar. I rubbed the bowl down with Before & After Restoration Balm. I worked it into the surface of the briar with my fingertips to clean, enliven and protect it. I let the balm sit for a little while and then buffed with a cotton cloth and shoe brush to raise the shine.  I set the bowl aside and turned my attention to the stem. The Waldorf Spade logo on the left topside of the saddle stem was worn so I touched it up with Liquid Paper.  Once it dried I scraped it off and took a photo.   I polished the vulcanite with micromesh sanding pads – 1500-12000 grit pads. I wiped it down with a damp cloth after each sanding pad. I used Before & After Pipe Polish – both Fine and Extra Fine to further polish the stem.  This French Made Waldorf Super 102MS Bulldog turned out to be a great looking pipe. The mixed stain brown finish on the pipe is in great condition and works well with the polished vulcanite saddle stem. I put the stem back on the bowl and carefully buffed the pipe with Blue Diamond on the buffing wheel. I gave the bowl and stem multiple coats of carnauba wax on the buffing wheel and followed that by buffing the entire pipe with a clean buffing pad. I hand buffed the pipe with a microfiber cloth to deepen the shine. The finished Waldorf Super Bulldog fits nicely in the hand and feels great. Give the finished pipe a look in the photos below. The dimensions of the pipe are Length: 5 ¼ inches, Height: 1 ¾ inches, Outside diameter of the bowl: 1 ½ inches, Chamber diameter: ¾ of an inch. The weight of the pipe is 35g/1.23oz. If you are interested in carrying on the pipe man’s legacy with this pipe send me a message or an email. I have more to work on of various brands. Perhaps one of those will catch your attention. Thanks for reading this blog and my reflections on the pipe while I worked on it.

A Rebirth for a Comoy’s Made Royal Falcon 237 Bulldog


Blog by Steve Laug

The next pipe on the work table came to me from one of our estate purchases. Between us we pick up quite a few pipes for restoration. I try to work them into the restoration queue so that I can keep them moving. The next one is classic shaped Bulldog with a mix of grains around the bowl. It was stamped on both sides of the shank. On the left side it is stamped Royal [over] Falcon. On the right side it has the shape number 237 next to the bowl shank junction and to the left of that it has Made in London in a circle [over] England COM stamp. The finish was dirty with dust and grime ground into the bowl sides. There was a thick cake in the bowl and lava overflow on the rim top. The vulcanite stem was oxidized and had tooth marks and chatter ahead of the button on both sides. Jeff took photos of the pipe to show its general condition before he did his cleanup.  As I mentioned above the exterior of the pipe was very dirty – grime and grit ground in from years of use and sitting. The rim top was covered with a coat of thick lava that overflowed from the thick cake in the bowl. It was hard to know what the rim edges looked like because of the lava.  The stem was dirty, calcified and oxidized with tooth chatter and marks on the top and underside of the stem at the button.  Jeff took photos of the sides and the heel of the bowl to give a better feel for the condition of the briar around the bowl.    The next photos show the stamping on the sides of the shank and it is very readable. It reads as noted above. You can also see the Falcon head logo on the left side of the stem.  The pipe is stamped on the left side of the shank, Royal over Falcon as pictured to the left. On the right side it is stamped Made in London in a Circle over England. Next to that is stamped shape number 157 which is a Comoy’s number. In checking on Pipephil’s site on the Royal Falcon brand (http://www.pipephil.eu/logos/en/logo-r6.htmlit) it is clear that the pipe is definitely a Comoy’s brand. The stem has the same logo as Phil shows on his site though the pipe in hand has much fainter stamping.

I turned to Pipedia’s article on Comoy’s pipes and scrolled down to the section on seconds and the brand is listed there (https://pipedia.org/wiki/Comoy%27s). There was also was a photo of a Comoy’s made Royal Falcon on the site. Underneath it is written the following: Early Comoy’s Royal Falcon with circular Made in England stamp. Thin pencil shank pipe. 1930’s? The pipe I am working on is stamped with the same Made in England circular stamp.

From the above information I knew that I was working on an early Comoy’s made Royal Falcon. Perhaps as early as the 1930s!

Jeff cleaned the pipes with his usual penchant for thoroughness that I really appreciate. Once he finished he shipped them back to me. The pipe was a real mess when he got it and I did not know what to expect when I unwrapped it from his box. I was surprised to see how well it turned out. He reamed it with a PipNet pipe reamer and cleaned up the reaming with a Savinelli Fitsall Pipe Knife. He scrubbed out the internals with alcohol, pipe cleaners and cotton swabs until the pipe was clean. He scrubbed the exterior of the bowl with Murphy’s Oil Soap and a tooth brush to remove the grime and grit on the briar and the lava on the rim top. The finish looks very good with good looking grain around the bowl and shank. Jeff scrubbed it with Soft Scrub and soaked it in Before & After Deoxidizer to remove the oxidation on the rubber. When the pipe arrived here in Vancouver for the second stop of its restoration tour it looked a lot better. I took photos before I started my part of the work. I took some close up photos of the rim top and the stem surface. I wanted to show what cleaned bowl and rim top looked like. The rim top shows some damage on the outer edge of the bowl on the right front and on the inner edge at the top of the bevel and rim top. I also took close up photos of the stem to show the tooth chatter and marks on the stem surface.  I took photos of the stamping on the sides of the shank and it is clear and readable. It is stamped as noted above. There is some staining around the shank end.    I removed the stem for the shank and took a photo of the bowl and stem to give a picture of what it looked like. It is a classically shaped British Bulldog.Now, on to my part of the restoration of this Comoy’s made Royal Falcon Bulldog. I decided to clean up the damaged rim top and inner edge of the bowl. I lightly topped the bowl on a topping board with 220 grit sandpaper. I cleaned up the inside of the bowl edges with a folded piece of 220 grit sandpaper. Once I was finished the edge looked a lot better. I polished the top of the bowl and the entirety of the bowl with micromesh sanding pads – wet sanding with 1500-12000 grit pads and wiping the briar down with a damp cloth after each sanding pad.   I rubbed the bowl down with Before & After Restoration Balm. I worked it into the surface of the briar with my fingertips to clean, enliven and protect it. I let the balm sit for a little while and then buffed with a cotton cloth and shoe brush to raise the shine. I set the bowl aside and turned my attention to the stem. I used a Bic lighter to “paint” the surface of the stem with the flame to lift the tooth marks on both sides of the stem. The heat lifted most of the tooth marks. I filled in the remaining tooth marks with clear super glue. Once the repairs had cured I filed them flat with a small file. I sanded the repaired areas with 220 grit sandpaper to smooth and blend them. I started polishing the stem with 400 grit wet dry sandpaper. Royal Falcon, Falcon Head logo on the left topside of the saddle stem was worn and would not hold any touch up material. I would not be able to preserve or restore that stamp. I polished the vulcanite with micromesh sanding pads – 1500-12000 grit pads. I wiped it down with a damp cloth after each sanding pad. I used Before & After Pipe Polish – both Fine and Extra Fine to further polish the stem.  I left a little oxidation around the stamp so as not to damage it more.   This Comoy’s Made Royal Falcon 237 Bulldog turned out to be a great looking pipe. The mixed stain brown finish on the pipe is in great condition and works well with the polished vulcanite saddle stem. I put the stem back on the bowl and carefully buffed the pipe with Blue Diamond on the buffing wheel. I gave the bowl and stem multiple coats of carnauba wax on the buffing wheel and followed that by buffing the entire pipe with a clean buffing pad. I hand buffed the pipe with a microfiber cloth to deepen the shine. The finished Royal Falcon Bulldog fits nicely in the hand and feels great. Give the finished pipe a look in the photos below. The dimensions of the pipe are Length: 5 ½ inches, Height: 2 inches, Outside diameter of the bowl: 1 ¼ inches, Chamber diameter: ¾ of an inch. The weight of the pipe was 38g/1.38oz. If you are interested in carrying on the pipe man’s legacy with this pipe send me a message or an email. I have more to work on of various brands. Perhaps one of those will catch your attention. Thanks for reading this blog and my reflections on the pipe while I worked on it.

Breathing Life into a Kaywoodie Super Grain 50 Chubby Apple


Blog by Steve Laug

The next pipe on the table came to us from one of our pipe hunts or a trade I just cannot remember. It is a very nice Kaywoodie Super Grain Chubby Apple with a threaded tenon stem. The finish is quite nice with a classic Kaywoodie smooth finish. There are burn marks around the right side of the bowl at the rim as well as some serious damage on the right side of the shank that hides the shape number quite a bit. The pipe was pretty clean other than the burn damage on the bowl. The bowl had been reamed somewhere along the way and the bowl was pretty clean. There was darkening on the rim top and a bit of damage on the inner edge of the rim. The pipe is stamped on the sides of the shank and reads Super Grain [over] Kaywoodie on the left side of the shank. On the right side it reads Imported Briar [over] the shape number and what appears 50. The stamping is faint but readable on the pipe. The stem was dirty and lightly oxidized. There were light tooth marks and chatter on the stem near the button on both sides and some on the surface of the button as well. There was the Kaywoodie White Club/Clover logo on the left side of the taper stem. The stinger apparatus is a four hole one that dates it as an older one. Jeff took photos of the pipe before he worked on it. Jeff took a close up photo of the bowl and rim to capture the condition of the pipe before he started the cleanup work. The bowl has a light cake and the burn marks on the top and right side of the bowl. The inside edge of the rim was damaged on the right inner edge of the wall. The stem is deeply oxidized, calcified and dirty and there is tooth chatter and marks on both sides of the stem ahead of the button.   Jeff took a photo of the side and heel of the bowl to give a picture of what the briar looked like. There is some nice grain on the piece of briar.The stamping on the sides of the shank read as noted above. The photos show that they are very faint but readable. The burn mark on the right side of the shank is also very visible. The Clover/Club on the left side of the stem is in good condition. The two digit shape number and the threaded 4 hole stinger gave a hint about the age of the pipe but I wanted to know a bit more. I turned first to Pipephil’s site as it is always a quick sources of information (http://pipephil.eu/logos/en/logo-kaywoodie-2.html). I have included a screen capture of the section on the Super Grain Below.Up until the late 1940’s/early 50’s, the logo was on top of the stem. After that the logo was moved to the side of the stem (exceptions exist). The one I am working on has the white cloverleaf logo on the left side making the pipe a post early 1950’s. The 4 Hole stinger also fits this time period.

From that section I learned that indeed the pipe was older because of the stamping, Super Grain over Kaywoodie. I could narrow it down because it also included the Imported Briar stamp which was added in 1935. The cloverleaf logo on the left side of the stem also moved the date forward to the early 1950’s. I also knew that 4 hole stingers occurred on pipes in the 60’s. So it appears that the pipe came out between the early 50s to the 1960s.

Jeff had cleaned up the pipe with his usual penchant for thoroughness. He reamed the pipe with a PipNet pipe reamer and removed the rest of it with a Savinelli Fitsall Pipe Knife.  He scrubbed the bowl with undiluted Murphy’s Oil Soap with a tooth brush. He rinsed it under running warm water to remove the soap and grime. He cleaned out the inside of the shank and the airway in the stem with alcohol, cotton swabs and pipe cleaners. He soaked the stem in Before & After Deoxidizer and rinsed it off with warm water. When the pipe arrived and I unpacked it the stem was broken off at the end. There was about a ¼ inch of the stem and the entire button was in the bottom of the bag that the pipe was packed in. I took photos of the pipe once I received it. The rim top cleaned up really well. The rim top and outer edge of the bowl show the burn damage on the top an front of the bowl. There is damage to the inner edge of the bowl and bowl is slightly out of round.  The stem surface looked very good with tooth marks and chatter on the top side and the underside near the button.      The stamping on the sides of the shank is faint but readable. It reads as noted above. You can also see the burn mark in the briar on the  right side of the shank.      I removed the stem and took a photo of the pipe to give a sense of the whole.  The four hole stinger is in excellent condition.I started my work on the pipe by topping  the bowl on a topping board to remove the damage to the rim top. It also helped to minimize some of the damage to the inner edge. I cleaned the inner edge of the bowl with a folded piece of 220 grit sandpaper. Once I had it cleaned up the rim top damage was minimized. I also worked on the shank side burn damage and was able to remove some of the damage but the burn mark was quite deep. When working with burn marks you have to make a decision how far to go with the sanding. In this case too much sanding would have changed the profile of the pipe so I worked to minimize it rather than remove it. I polished the briar with micromesh sanding pads – wet sanding with 1500-12000 grit pads and wiping the briar down with a damp cloth after each pad. The briar began to take on a rich glow.  I rubbed the briar down with Before & After Restoration Balm. I worked it into the briar with my fingertips into the briar. The product works to clean, enliven and preserve the briar. I let it sit for 10-15 minutes while I worked on the stem. After the time passed I buffed it with a cotton cloth to deepen the shine. I set the bowl aside and turned my attention to the stem. The stem was in good condition and I would be able to polish out the tooth chatter. I polished the stem with micromesh sanding pads – 1500-12000 grit pads. I wiped it down with Obsidian Oil after each sanding pad. I used Before & After Pipe Polish – both Fine and Extra Fine to further polish the stem.    This Super Grain Kaywoodie 50 Chubby Apple is a great looking pipe. The smooth finish and brown stain around the bowl sides and shank make the grain just pop. Even the burn mark on the right side of the shank while present does not detract from the beauty of the pipe. The finish on the pipe looks great and the brown stains work well to give some contrast to the polished black vulcanite taper stem. The pipe is really quite eye-catching. I put the stem back on the bowl and buffed the pipe with Blue Diamond on the buffing wheel, carefully avoiding the stamping on the shank. I gave the bowl and the stem multiple coats of carnauba wax on the buffing wheel and followed that by buffing it with a clean buffing pad. I hand buffed the pipe with a microfiber cloth to deepen the shine. The finished Chubby Apple Super Grain is quite nice and feels great in the hand. Give the finished pipe a look in the photos below. I can only tell you that like the other pipes I am working that it is much prettier in person than the photos capture. The dimensions of the pipe are Length: 5 ½ inches, Height: 1 ¼ inches, Outside diameter of the bowl: 1 ½ inches, Chamber diameter: ¾ of an inch. The weight of the pipe was 43g/1.52oz. Thanks for walking through the restoration with me as I worked over another interesting pipe. This Super Grain Kaywoodie will be added to the American Pipe Makers section of the rebornpipes store soon. If you want to add it to your collection send me an email or a message! Thanks for your time.

Restoring a MALAGA Second  Octagonal Panel, Square Shank Billiard


Blog by Steve Laug

The next pipe on the table is a “Malaga” Second pipe that Jeff picked up from an online auction early in 2019 from Columbus, Michigan, USA. It is an interesting looking octagonal Panel Billiard with a square shank.  It has the classic Malaga oil cured finish and some great looking grain around the bowl and shank. The pipe is stamped on underside of the shank and reads MALAGA. Second. From what I can see the large flaw on the underside of the shank near the stamping is the only thing that made it a second. The carver did a great job of carving the pipe to capture the grain around the bowl and shank. The bowl had a heavy cake with an overflow of lava on the rim top with heavier overflow on the back side of the rim top. The sides of the bowl and shank are very dirty with grime and oils ground into the finish from prolonged use. The vulcanite stem was heavily oxidized and calcified. It had tooth dents and chatter on the top and the underside of the stem. Jeff took photos of the pipe before he started the cleanup work. With some work it will be a real beauty. I looked forward to seeing it in person.    Jeff took a close up photo of the bowl and rim to capture the condition of the pipe before he started the cleanup work. The bowl has a thick cake and the uneven overflow of lava on the rim top is quite thick all the way around but slightly heavier toward the back. The inside edge of the rim could be damaged but it quite hidden under the lava coat. The stem is deeply oxidized, calcified and dirty and there is tooth chatter and marks on both sides of the stem ahead of the button.  He took a photo of the stamping on the underside of the shank. It read as noted above. You can also see the large flaw in the shank under the stamp.Jeff took photos of the sides and heel of the bowl to give a picture of what the briar looked like. There is some nice grain around the sides. You can also see the damage to the rim edges and the heel of the bowl in the photos below.    I am including the link to a blog that I wrote that gives some of the history of the Malaga brand and the Malaga Pipe Shop in Royal Oak, Michigan in the USA. I have written an earlier blog to give a little history of the Malaga Brand and the pipemaker, George Khoubesser. Here is the link – https://rebornpipes.com/tag/malaga-pipes/.That blog also includes links to a catalogue and the history of the pipemaker George Khoubesser. Follow the link to get a feel for the brand and the pipemaker.

Jeff had cleaned up the pipe with his usual penchant for thoroughness. He reamed the pipe with a PipNet pipe reamer and removed the rest of it with a Savinelli Fitsall Pipe Knife.  He scrubbed the bowl with undiluted Murphy’s Oil Soap with a tooth brush. He rinsed it under running warm water to remove the soap and grime. He cleaned out the inside of the shank and the airway in the stem with alcohol, cotton swabs and pipe cleaners. He soaked the stem in Before & After Deoxidizer and rinsed it off with warm water. I took photos of the pipe once I received it.    The rim top cleaned up really well. The rim top and outer edge of the bowl show some darkening over most of the surface. There is damage to the inner edge of the bowl and bowl is out of round.  The stem surface looked very good with tooth marks and chatter on the top side and the underside near the button. The stamping on the underside of the shank is clear and readable. It reads as noted above. You can also see the flaw in the briar on the underside of the shank.  I removed the saddle stem and took a photo of the pipe to give a sense of the whole.  I started my work on the pipe by cleaning the inner edge of the bowl with a folded piece of 220 grit sandpaper. Once I had it cleaned up I topped the bowl on a topping board to remove the damage to the rim top. It also helped to minimize some of the damage to the inner edge.   I filled in the flaw on the underside of the shank with briar dust and clear super glue. Once the repair cured I carefully sanded it smooth with 220 grit sandpaper and blended it into the surrounding briar. I used a Walnut Stain Pen to touch up the sanded area of the repair on the underside of the shank.   I combined a Cherry and a Walnut stain pen to blend the topped rim to match the rest of the bowl and shank.  I took a photo of the shank end to show the relative thinness of the right side of the shank. I wonder if this was not also a reason the pipe was a second.I polished the briar with micromesh sanding pads – wet sanding with 1500-12000 grit pads and wiping it down after each pad with a damp cloth.     I rubbed the bowl and shank down with Before & After Restoration Balm. I worked it into the surface of the bowl sides and shank with my fingertips to clean, enliven and protect the briar. I let the balm sit for 10-15 minutes and then buffed with a cotton cloth to raise the shine. The grain came alive and the finish looked rich.   I set aside the bowl and turned my attention to the stem. I “painted” the surface of the stem with the flame of a Bic lighter to lift them as much as possible. I filled in the remaining tooth dents and marks with Clear Super Glue and set it aside for the repairs to cure. Once they cured I flattened them with a file. I cleaned up the repaired areas with 220 sandpaper to blend the repairs into the surface of the stem. I started polishing it with 400 grit wet dry sandpaper.  I polished the vulcanite stem with micromesh sanding pads – 1500-12000 grit pads. I wiped it down with Obsidian Oil after each sanding pad. I used Before & After Pipe Polish – both Fine and Extra Fine to further polish the stem.     This Malaga Second Octagonal Panel Square Shank Billiard with a vulcanite saddle stem turned out to be a real beauty. The carver really maximized the grain with the shape of the pipe. I polished stem and the bowl with Blue Diamond polish on the buffing wheel and the finish just popped and came alive. I gave the bowl and the stem multiple coats of carnauba wax. I buffed the pipe with a clean buffing pad to raise the shine. I hand buffed it with a microfiber cloth to deepen the shine. The pipe polished up pretty nicely. The pipe took on life with the buffing. The rich oil cured colour works well with the polished black vulcanite stem. The finished Malaga Second has a rich look that is quite catching. Have a look at it with the photos below. The shape, finish and flow of the pipe and stem are very well done. The dimensions are Length: 5 ¼ inches, Height: 1 ½ inches, Outside diameter of the bowl: 1 ¼ inches, Chamber diameter: ¾ of an inch. The weight of the pipe was 27g/.95oz. I will be putting it on the rebornpipes store shortly. Thanks for reading this blog and my reflections on the pipe while I worked on it. There are many more to come!    

Breathing Life into a BBB Natural Grain 01 Zulu


Blog by Steve Laug

The next pipe on the work table came to us from a pipe hunt that Jeff and his wife recently did in Utah, USA.  The pipe is a classic Zulu shape pipe. The pipe was an absolute mess which probably accounted for how it ended up where it was at a fair price. On the top of the shank it is stamped with the BBB Diamond Logo [over] Silver Grain. On the right side of the shank it is stamped with the shape number 01. The stain is a mix of browns that makes me wonder about the Natural Grain stamping on the pipe. The finish was very dirty making it hard to see beyond that to the grain that pokes through underneath. There was a thick cake in the bowl and a thick overflow of lava onto the rim top and edges. It was hard to know at this point the condition of the rim edges. The stem was oxidized and there were deep tooth marks and chatter on both sides just ahead of the button and on the button surface itself. The stem had a stamped BBB Diamond logo on the topside of the taper. Jeff took photos of the pipe before he started working on it. I include those below.   Jeff took photos of the bowl and rim top to show the cake in the bowl and the condition of both. It was thick and hard cake with an unbelievably thick lava overflow on the rim top and edges. Hopefully it had protected the rim and edges from damage. He took photos of the top and underside of the stem showing the scratching, oxidation and tooth marks on the stem surface and button. The tooth marks are quite deep on both sides of the stem.     Jeff took a photo of the sides and heel of the bowl to show the condition of the finish – the grime and grit all over the sides and bottom of the bowl. The finish so dirty it is hard to see the grain but it is present nonetheless.  Jeff took photos of the stamping on the top and right side of the shank. It is very clear and readable as noted above.    This pipe was a real mess like many of the pipes we work on. I was curious to see what it would look like when I unpacked it. I was surprised at how good it looked. Jeff reamed it with a PipNet pipe reamer and cleaned up the reaming with a Savinelli Fitsall Pipe Knife. He scrubbed out the internals of the shank and stem with alcohol, pipe cleaners and cotton swabs until the pipe was clean. He scrubbed the exterior of the bowl with Murphy’s Oil Soap and a tooth brush to remove the grime and grit on the briar and the lava on the rim top. The finish on the bowl looked really good when I got it. The rim top looked much better but had some darkening that I would need to deal with. The inner edge showed some significant damage and outer edges looked good. He soaked the stem in Before & After Deoxidizer bath to remove the oxidation. The stem looked better other than some light oxidation and the tooth marks and chatter in the surface. When the pipe arrived here in Vancouver for the second stop of its restoration tour it looked much better than when he found it. I took photos of the pipe before I started my work on it.  I took photos of the condition of the rim top and stem before I started working. The rim top looks better than before and the damage is very obvious to the rim top and the inner edge. The bowl is spotless. The stem has some deep tooth marks on both sides and the button itself. I took photos of the stamping on the sides of the shank. It is clear and readable as noted above.  I took the bowl and stem apart and took a photo of the pipe to show the look of the pipe. I was surprised to see a rather large stinger. I would be removing that and not putting it back. If the new owner wants it I will include it in the package with the pipe.I started my work on the pipe by cleaning the inner edge of the bowl with a folded piece of 220 grit sandpaper. Once I had it cleaned up I topped the bowl on a topping board to remove the damage to the rim top. It also helped to minimize some of the damage to the inner edge. I polished the briar with micromesh sanding pads. I dry sanded the bowl and rim top with 1500-12000 grit pads and wiped the bowl down with a damp cloth after each pad. The briar really took on a shine by the final pads.   I touched up the rim top with a Maple stain pen to match the rest of the briar around the bowl. Buffing and polishing would blend it in further.I worked some Before & After Restoration Balm into the finish of the bowl, rim top and shank with my fingertips to clean, enliven and protect it. I find that the balm really makes the briar come alive again. The contrasts in the layers of stain and the separate finishes really made the grain stand out. I let the balm sit for 10-15 minutes and then buffed with a cotton cloth to raise the shine. The bowl really looks good at this point. I set it aside and worked on the stem. I set aside the bowl and turned my attention to the stem. I started by heating the stinger with a lighter and carefully turning it out of the tenon. It was pressure fit so the heat loosened the tars that held it fast and I was able to remove it. I “painted” the surface of the stem with the flame of a Bic lighter to lift them as much as possible. I filled in the remaining tooth dents and marks with Black Super Glue and set it aside for the repairs to cure. Once they cured I flattened them with a file. I cleaned up the repaired areas with 220 sandpaper to blend the repairs into the surface of the stem. I started polishing it with 400 grit wet dry sandpaper.  I polished the stem with micromesh sanding pads – wet sanding it with 1500-12000 grit pads. I polished it further with Before & After Pipe Stem Polish – both fine and extra fine.   I used some Rub’n Buff Antique Gold to touch up the brass/gold colour in the BBB Diamond logo on the topside of the stem. I rubbed it in and rubbed it off leaving the gold behind in the stamp.   Once again I am the part of the restoration that I always look forward to – the moment when all the pieces are put back together. I put the pipe back together and lightly buffed the bowl with Blue Diamond. I buffed the stem with a heavier touch with Blue Diamond on the buffing wheel. I gave the bowl and the stem multiple coats of carnauba wax. I buffed the pipe with a clean buffing pad to raise the shine. I hand buffed it with a microfiber cloth to deepen the shine. It is fun to see what the polished bowl looks like with the smooth finish and the black vulcanite stem. This richly stained BBB Natural Grain 01 Zulu must have been a fine smoking pipe judging from the condition it was when we received it. Have a look at it in the photos below. The dimensions are Length: 5 ½ inches, Height: 1 ½ inches, Outside diameter of the bowl: 1 ¼ inches, Chamber diameter: ¾ of an inch. The weight of the pipe is 25grams/.88oz. This is one that will go on the British Pipemakers section of the rebornpipes online store shortly. Thanks to each of you who are reading this blog. Remember we are not pipe owners; we are pipemen and women who hold our pipes in trust until they pass on into the trust of the next generation.