Monthly Archives: December 2019

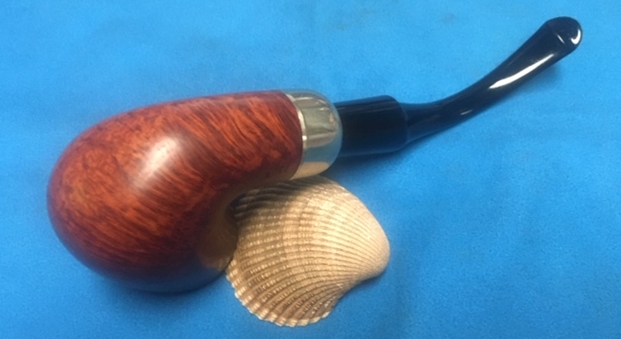
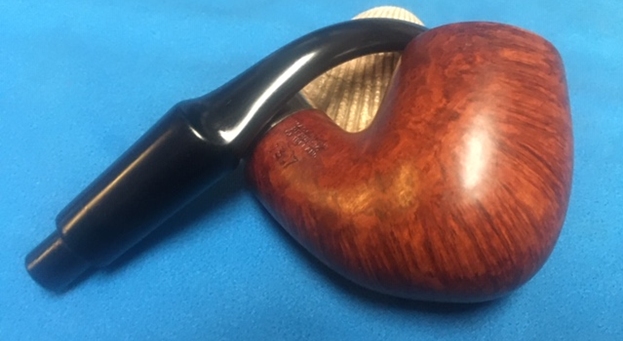
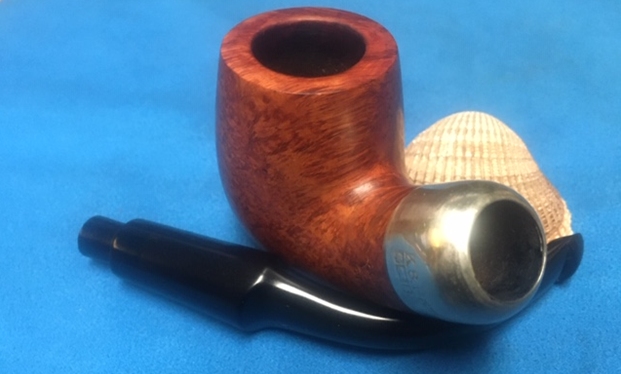
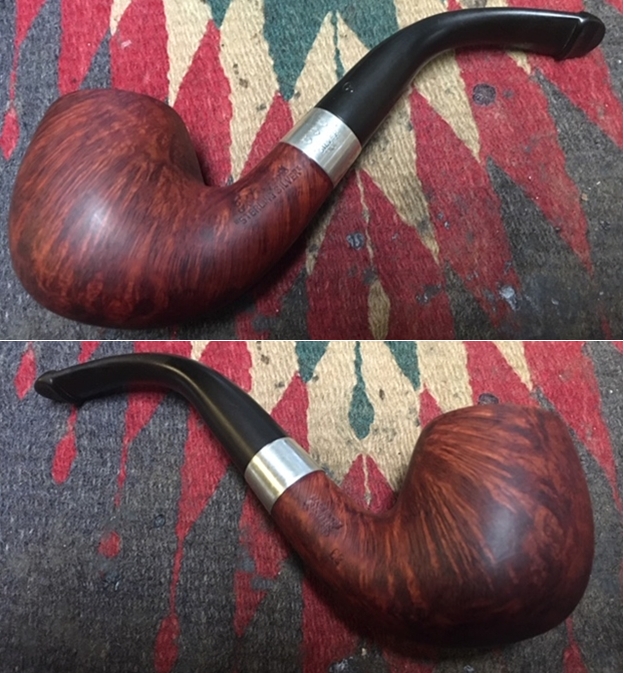
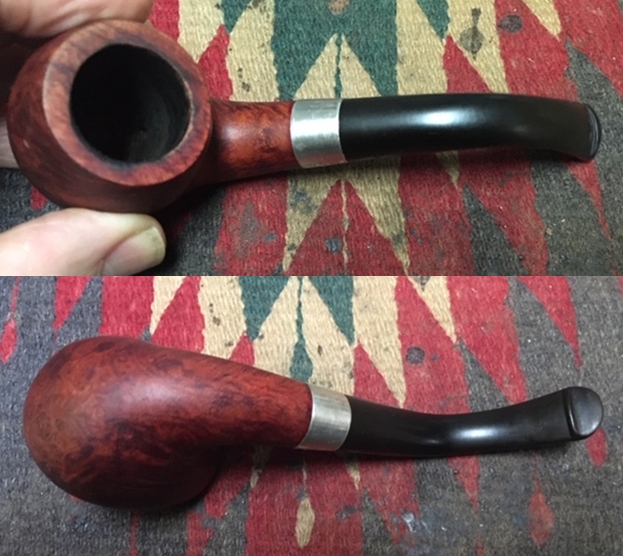
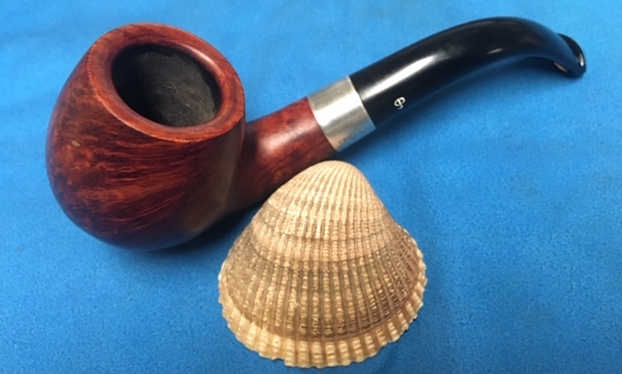
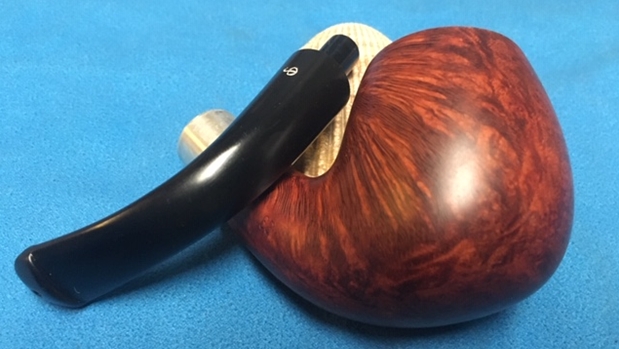
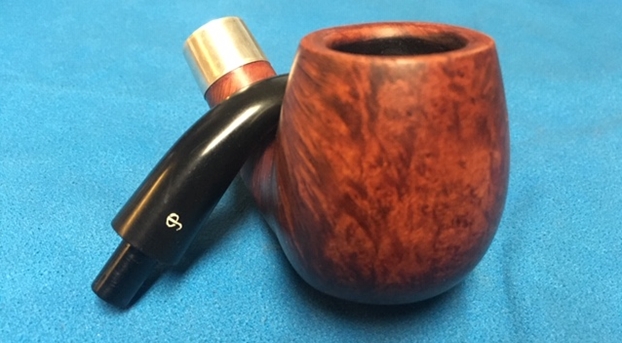
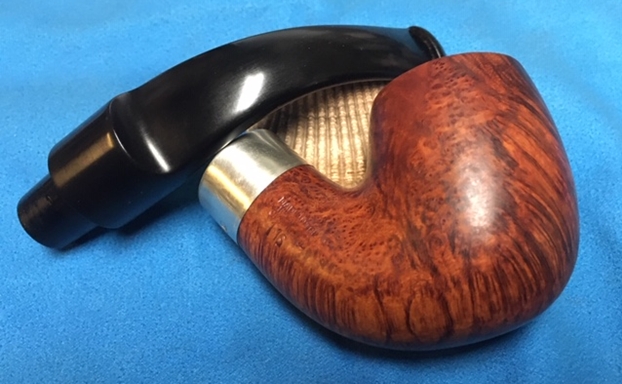
A Stunning Republic Era Peterson’s 1307 System Standard from Bob Kerr’s Estate


Blog by Steve Laug

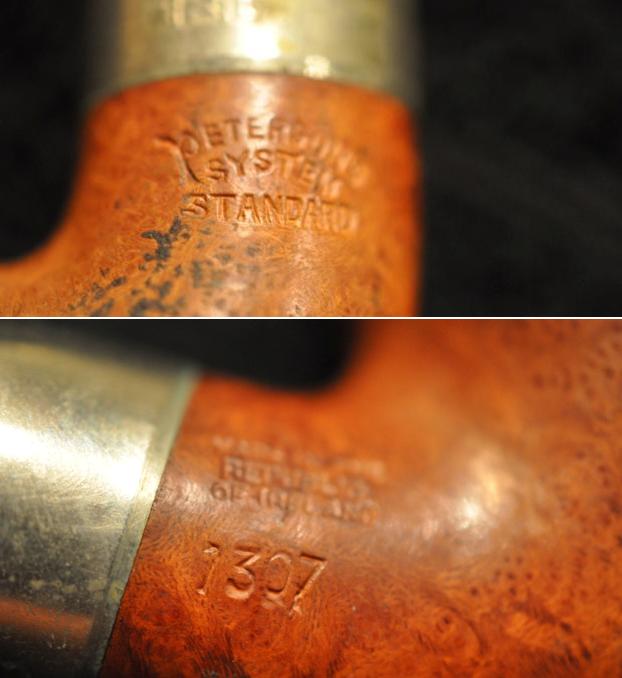
I am moving into another section of Bob Kerr’s Estates with this pipe. It one of about 9 Peterson’s System pipes that are ready to be restored. It is the first of the large Standard System pipes that I have in his estate. I have restored quite a few of his Petersons already so this is kind of subset of the Peterson Collection. You can read about those restorations in previous blog. To be honest with you I have been dreading working on these 9 because when they arrived they were absolutely filthy and the reservoir in the shank was filled with tars and oils. It looked to me that they had never been cleaned. However, I have been enjoying working on these Peterson’s particularly because Jeff has done such a thorough cleanup of them before I receive them. When I took it out of the box of the pipes that Jeff had cleaned up and sent back to me, I could see that it was stamped Peterson’s System Standard vertically on the left side of the shank next to the band. The right side of the shank was stamped Made in the Republic of Ireland over the shape number 1307. It has some stunning grain around the bowl and shank under the thick grime.

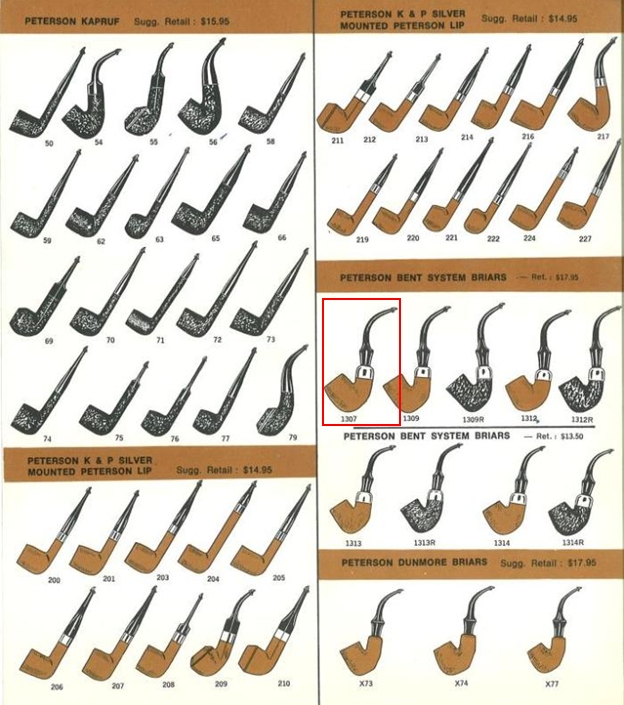
There was a thick cake in the bowl with remnants of tobacco stuck on the walls. There was a lava overflow on the rim. The top and edges of the rim looked very good under the grime. I think that there was a beautiful pipe underneath all of the buildup of years of use. The nickel ferrule on the shank end is stamped on the top and left side K&P Peterson’s over three hallmarks. It is not dented or damaged. The stem was oxidized and calcified toward the end with some tooth chatter but surprisingly it did not have the deep tooth marks that I have come to expect from Bob’s pipes but the button edges were worn. Jeff took photos of the pipe before he started his cleanup work on it.   Jeff took photos of the bowl and rim top to show the thick, hard cake in the bowl and the lava build up on the top of the rim and the edges of the bowl. The rim top had some cut marks on the rear left of the bowl and had some darkening and a potential burn marks on the front and the back right inner edge. The outer edges of the rim appeared to be in good condition.    Jeff took photos of the sides and heel of the bowl to show the condition of the finish. You can see the beautiful birdseye grain on the sides and cross grain on the front, back and underside of the bowl and shank. Even under the dirt and debris of the years it looked very good. The cross grain on the heel was beautiful.Jeff took photos of the stamping on both sides of the bowl and shank. The vertical stamping on the left side was readable as you can see from the photos. It read Peterson’s System Standard. The stamp on the right side read Made in the Republic of Ireland with the shape number 1307 underneath. The nickel ferrule on the shank end is stamped on the top and left side K&P Peterson’s over three hallmarks – a Shamrock, a shape that looks like a reclining lion and a tower. Typically these hallmarks are not like those in silver that help to date a pipe but are rather marks that make it clear that the pipe was made in Ireland. Jeff took photos of the top and underside of the stem showing the tooth chatter, scratching and oxidation on the stem surface and wear on the edges of the button.  I wanted to find out information on the shape number on this pipe. It is one of three Peterson’s System Standard pipes in Bob’s collection marked with the 1307 shape number. There are also 2 System Standards marked 307 and for the life of me I cannot tell the difference. They are virtually identical in shape, size and marking. I started my hunt for information by turning to a Peterson Catalogue that I have on rebornpipes and looked up the System Standard pipes (https://rebornpipes.com/tag/peterson-hallmark-chart/). I have put a red box around the 307 shown in the catalogue page shown below. That should give a clear picture of the size and shape of the pipe. But there was nothing to give me any information on what the first number 1 meant in the shape number 1307 pipe that I am working on. I decided to email Mark Irwin to see if he could point me in the right direction either in the book to something I was missing or to something else that might help.As usual Mark was prompt and helpful. He pointed me in the direction that I needed. I quote the pertinent part of his email. The red highlighted portion was the clue I was looking for on this pipe. I have already cleaned up several of Bob’s pipes that were sold through GT&C (Genin, Trudeau and Company, Montreal, Quebec).

The index at the back of the book is pretty good, and points you to all the GT&C goodies, but 155 has a photo from the catalog with your 1307, while 318 and 323 explain the rationale for the “1” prefix. In a nutshell, just drop the “1” and you’ve got the shape. My theory is that GT&C added this to aid them in warranty work, so they’d know the pipe was bought on Canadian soil.

I turned then to a previous blog I had written on a Kapruf 54 that had an odd shape number stamp and referred to the Canadian numbering system used by GT&C. Here it the link to that blog (https://rebornpipes.com/2019/08/09/back-to-bob-kerrs-estate-another-canadian-import-petersons-kapruf-a-54/). In the blog I included a link to a blog I did on the GT&C Catalogue that came to me in some paperwork the family gave me. I have included the cover of the catalogue and the page on the system pipes showin the 1307 shape. I have put a red box around the shape for ease of reference (https://rebornpipes.com/2016/09/13/petersons-pipes-brochure-from-genin-trudeau-co-montreal-quebec/). Be sure to check out the rest of the document on the link.

The GT&C Catalogue combined with the earlier Peterson Pipe Catalogue page make the link definitive. I turned to Pipedia’s article on Peterson pipes to see what I could garner from that information. It is a great read in terms of the history of the brand (https://pipedia.org/wiki/Peterson). I have included a bit of the pertinent history here.

1950 – 1989 The Republic Era  – From 1950 to the present time, the stamp for this era is “Made in the Republic of Ireland” in a block format generally in three lines but two lines have been used with or without Republic being abbreviated.

During the 1950’s and 60’s the Kapp & Peterson company was still in the ownership of the Kapp family. However 1964 saw the retiral of the company Managing Director Frederick Henry(Harry) Kapp.

Pipedia also included a section of information on the System pipes including a diagram of the sytems look (https://pipedia.org/wiki/Peterson#Republic_Era_Pipes). I quote a section of the article in part and include a link to another article on Pipedia on the System pipe.

The Peterson System pipes are the standard bearers of the Peterson pipe family, famous for the excellent smoking pleasure they provide. Often imitated but never equaled, the Peterson System smokes dry, cool and sweet, thanks to the scientific effectiveness of the original design. The heart of the System is the unique graduated bore in the mouthpiece. This makes the suction applied by the smoker 15 times weaker by the time it reaches the tobacco chamber. The result is that all the moisture flows into the reservoir and, thus cannot reach the smoker’s mouth. The Peterson Lip further enhances the effectiveness of the graduated bore by directing the flow of smoke upwards and away from the tongue. This achieves a uniquely even distribution of smoke and virtually eliminates any chance of tonguebite or bitterness. Furthermore, the shape is contoured so that the tongue rests comfortably in the depression under the opening. Each “PLip” mouthpiece is made from Vulcanite. For the Peterson System pipes to work properly, the stem/tenon has to have an extension, the tip of which will pass by the draft hole from the bowl and into the sump. Upon the smoker drawing in smoke, this extension then directs the smoke down and around the sump to dispense a lot of the moisture before the smoke enters the extension and stem. On the System Standards and other less expensive systems, this extension with be made of Vulcanite turned integrally with the stem. On the more expensive System pipes this extension will be made of metal which screws into the Vulcanite stem. This extension on the earlier pipes will be of brass and the newer pipes will be of aluminium. Most smokers not knowing this function of the metal extension, assumes that it is a condenser/stinger and will remove it as they do with the metal condensers of Kaywoodie, etc. Should you have a System pipe with this metal extension, do not remove it for it will make the System function properly and give you a dryer smoke (https://pipedia.org/wiki/A_closer_look_at_the_famous_Peterson_Standard_System_Pipe).

With that information in hand I knew what I was dealing with in terms of the stamping and the age of this pipe. I knew from the information that the pipe was made during the Republic Era between 1950 and 1989. Most of Bob’s pipes were purchased in the 60s so my guess is that this is also a 60’s era pipe. I also knew that the pipe was brought into Canada by the Canadian importer, Genin, Trudeau & Co. in Montreal, Quebec. Noting above that the catalogue postal code puts it in the late 60s early 70s which also fits the story. Now it was time to work on the pipe.

I am really happy to have Jeff’s help on cleaning these 9 Peterson’s System Standard pipes as they are a real pain to get clean. He cleaned this filthy pipe with his usual penchant for thoroughness that I really appreciate. This one was a real mess and I did not know what to expect when I unwrapped it from his box. He reamed it with a PipNet pipe reamer and cleaned up the reaming with a Savinelli Fitsall Pipe Knife. He scrubbed out the internals with alcohol, pipe cleaners and cotton swabs until the pipe was clean. He scrubbed the exterior of the bowl with Murphy’s Oil Soap and a tooth brush to remove the grime and grit on the briar and the lava on the rim top. The finish looks very good with great looking grain around the bowl and shank. Jeff soaked the stem in Before & After Deoxidizer to remove the oxidation on the rubber. When the pipe arrived here in Vancouver for the second stop of its restoration tour I was amazed it looked so good.   I took some close up photos of the rim top and also of the stem surface. I wanted to show what an amazing job Jeff did in the cleanup of the rim top. The rim top was burned and darkened with nicks and notches around the top and inner edge. I also took close up photos of the stem to show the lack of tooth marks and chatter on the stem surface. It was very clean.   One of the things I appreciate about Jeff’s cleanup is that he works to protect and preserve the nomenclature on the shank of the pipes that he works on. The stamping on this one was very faint to start with so I was worried that it would disappear altogether with the cleanup. He was not only able to preserve it but it is clearer than shown in the earlier photos. I took some photos to show the clarity of the stamping. I have noticed that many restorers are not careful to protect the stamping in their cleaning process and often by the end of the restoration the nomenclature is almost destroyed. I would like to encourage all of us to be careful in our work to preserve this as it is a critical piece of pipe restoration!   Since this is another pipe Bob’s estate I am sure that some of you have read at least some of the other restoration work that has been done on the previous pipes. You have also read what I have included about Bob Kerr, the pipeman who held these pipes in trust before I came to work on them (see photo to the left). Also, if you have followed the blog for long you will already know that I like to include background information on the pipeman whose pipes I am restoring. For me, when I am working on an estate I really like to have a sense of the person who held the pipes in trust before I worked on them. It gives me another dimension of the restoration work. I asked Brian if he or his wife would like to write a brief biographical tribute to her father, Bob. His daughter worked on it and I received the following short write up on him and some pictures to go along with the words including one of Bob’s carvings. Once again I thank you Brian and tell your wife thank you as well.

I am delighted to pass on these beloved pipes of my father’s. I hope each user gets many hours of contemplative pleasure as he did. I remember the aroma of tobacco in the rec room, as he put up his feet on his lazy boy. He’d be first at the paper then, no one could touch it before him. Maybe there would be a movie on with an actor smoking a pipe. He would have very definite opinions on whether the performer was a ‘real’ smoker or not, a distinction which I could never see but it would be very clear to him. He worked by day as a sales manager of a paper products company, a job he hated. What he longed for was the life of an artist, so on the weekends and sometimes mid-week evenings he would journey to his workshop and come out with wood sculptures, all of which he declared as crap but every one of them treasured by my sister and myself. Enjoy the pipes, and maybe a little of his creative spirit will enter you!

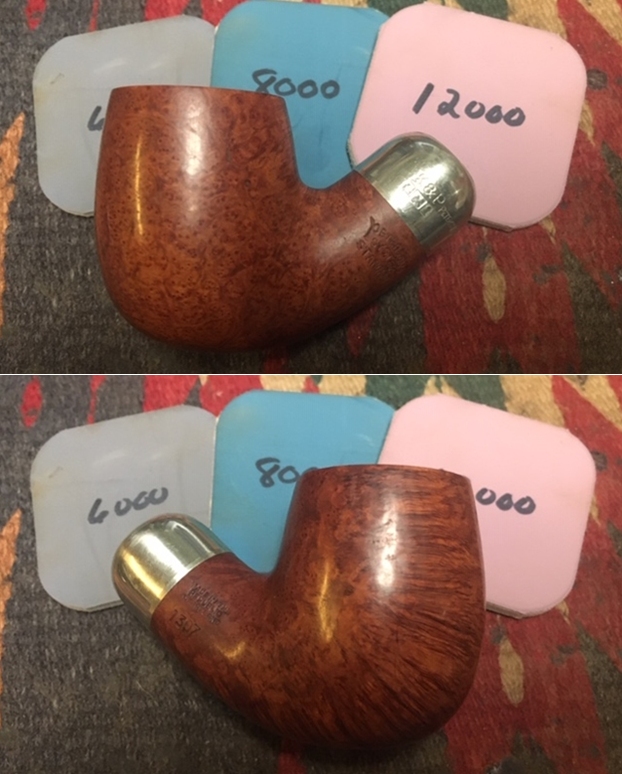
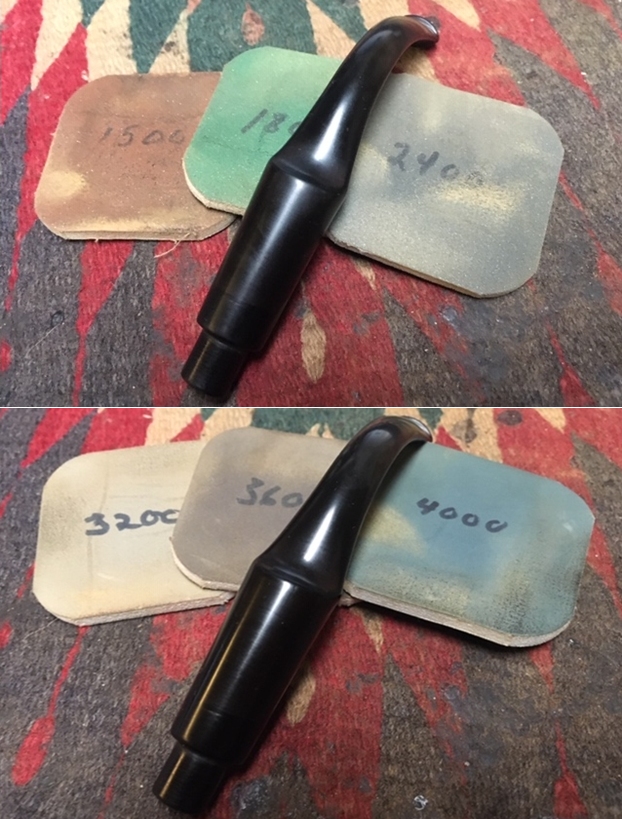
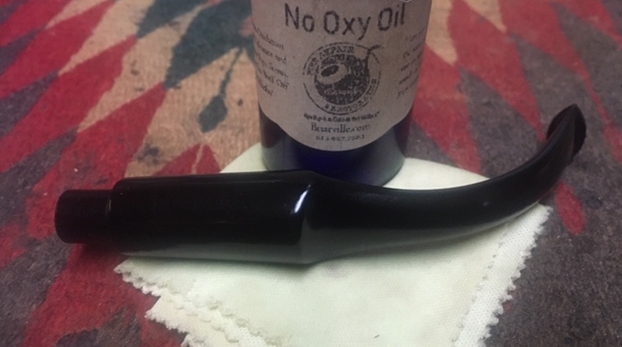
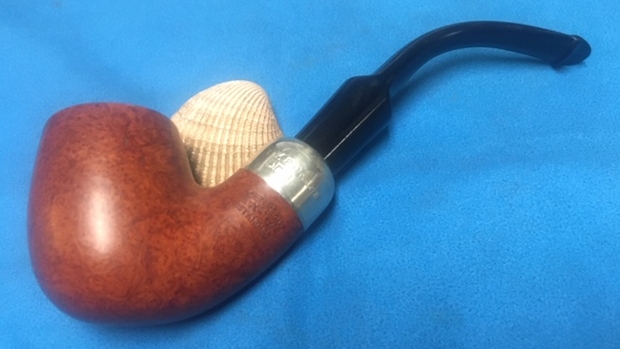
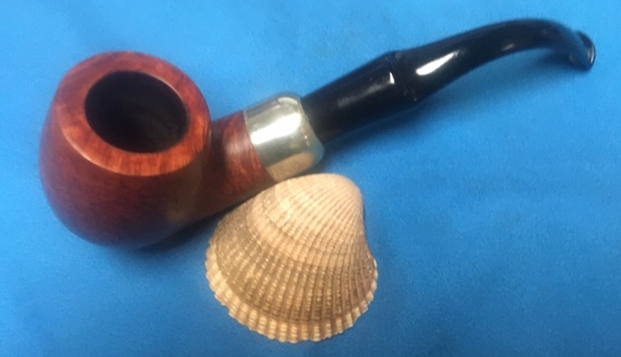
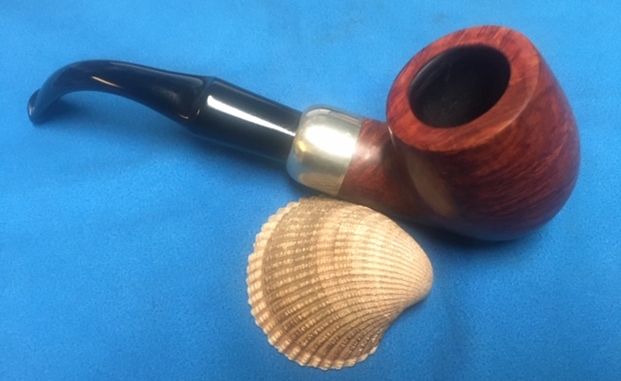
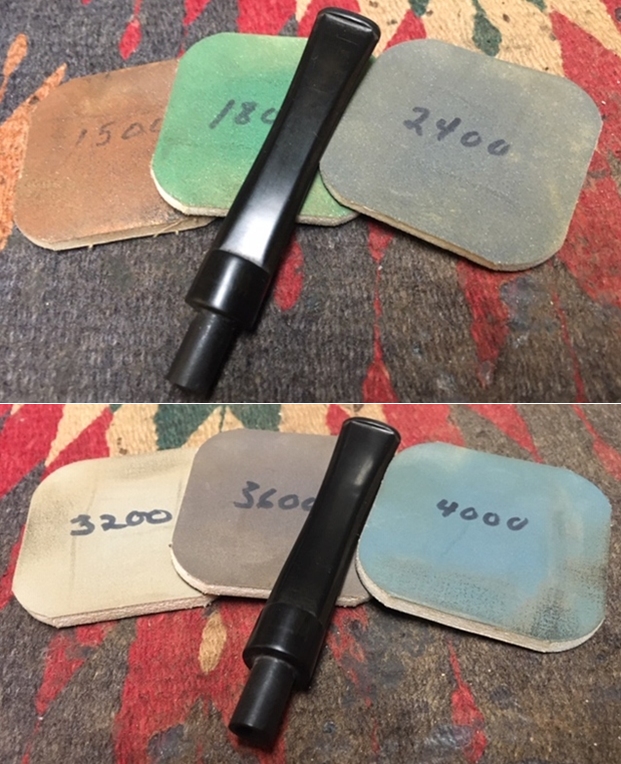
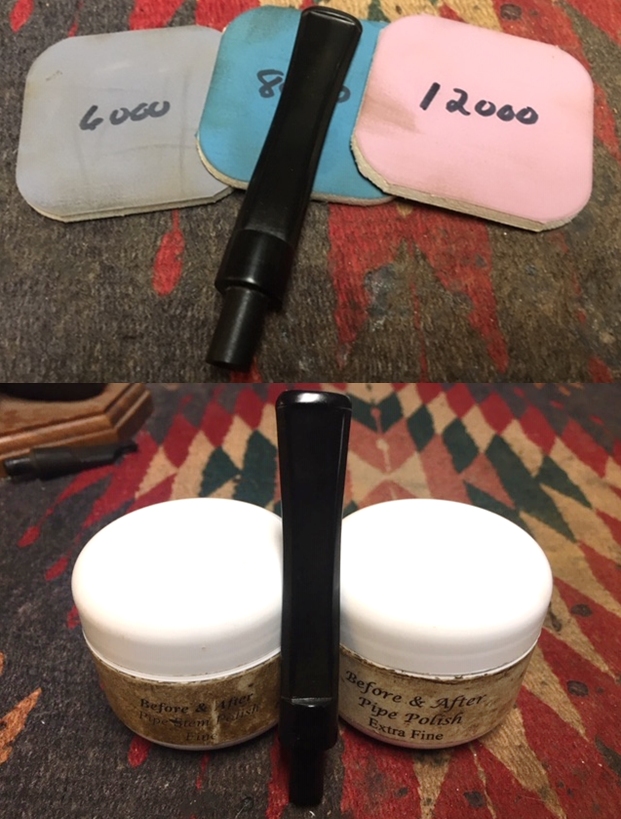
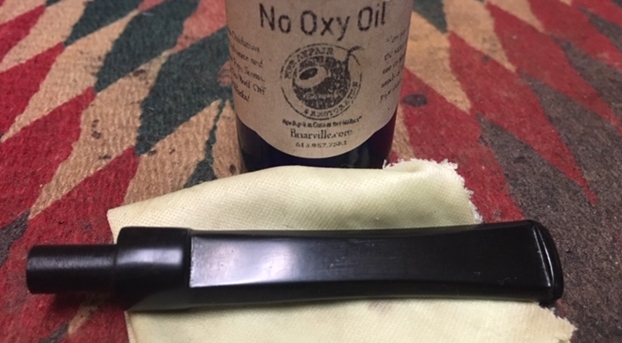
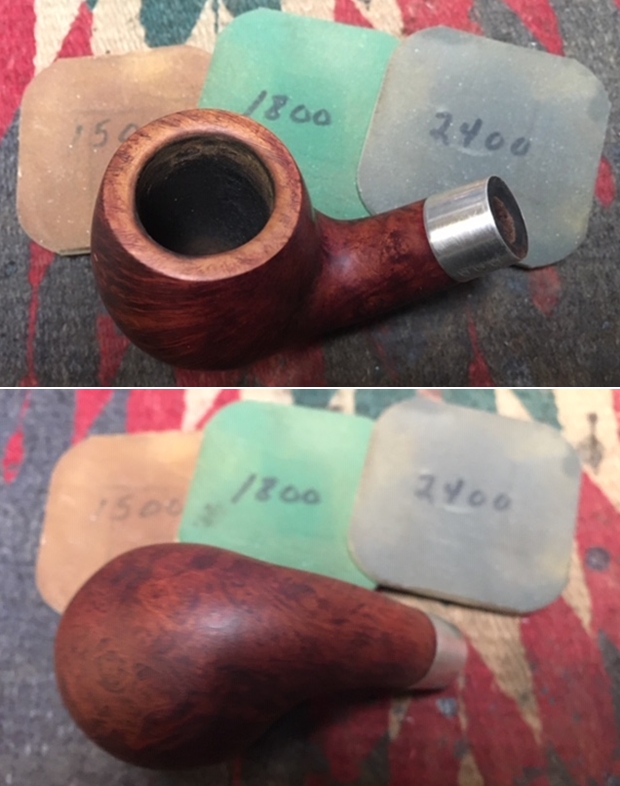
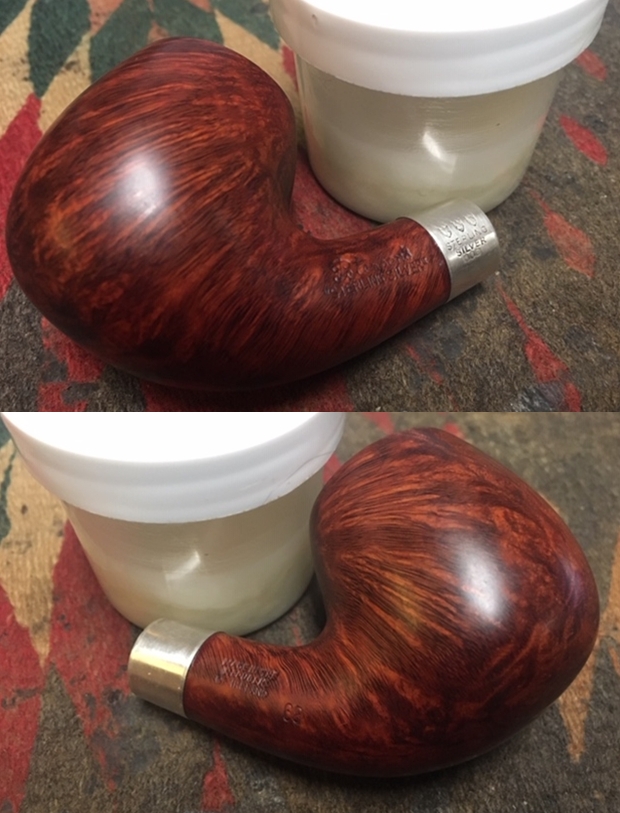
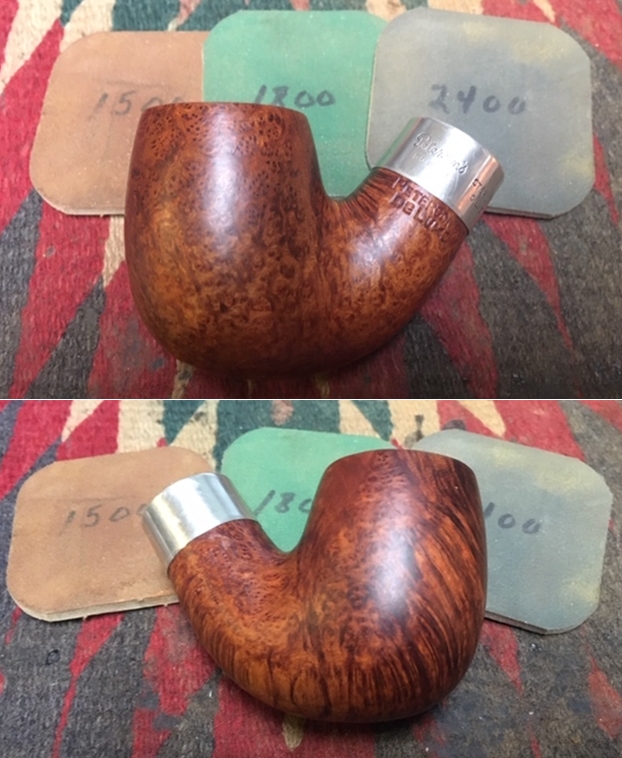
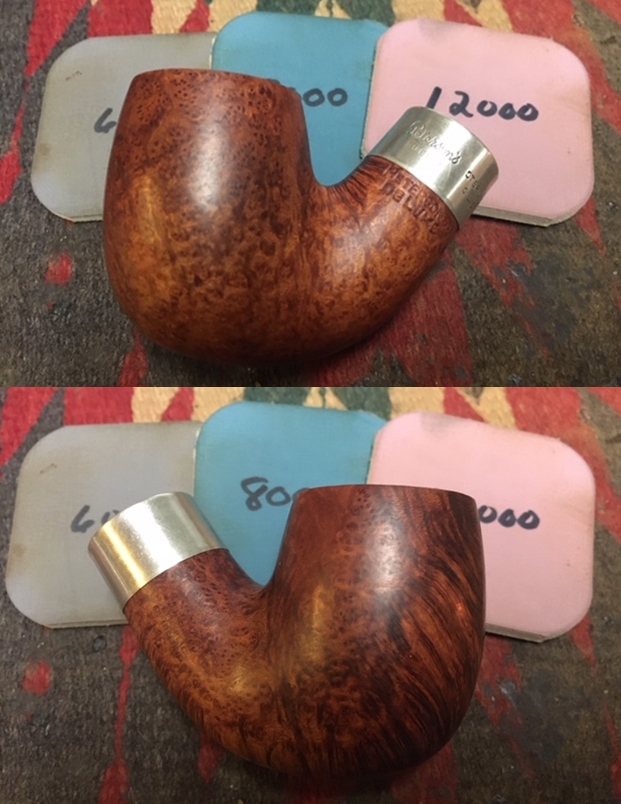
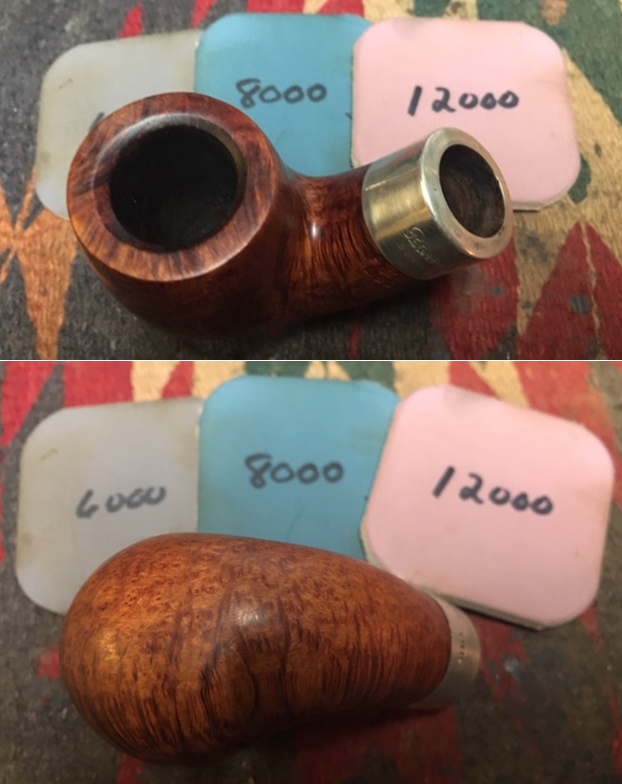
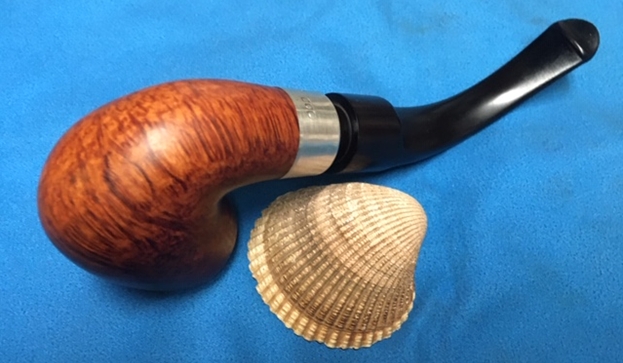
Now with all of the background on the line and the background on Bob Kerr it was time to get on with the restoration of this beautifully grained Peterson’s System Standard 1307 Bent Billiard. I am really coming to appreciate the hard cleanup work that Jeff did on these pipes. They were a real mess when I sent them to Jeff and I have to tell you it was great that I did not need to clean this pipe. I decided to start the process by dealing with the damage to the inner edge and top of the rim. I sanded it with 220 grit sandpaper and worked on the flat surface as well as the inner edge. I gave it a very light bevel so that it took care of the damage on the front and back side of the inner edge.   I polished the briar with micromesh sanding pads – wet sanding it with 1500-12000 grit pads and I wiped the bowl down after each sanding pad with a damp cloth. The bowl began to take on a finished shine. I stained the rim top and edges with a Maple stain pen to match the colour of the rest of the bowl. Once it had dried I buffed it with a cotton buffing pad and on the buffing wheel.I rubbed the bowl and rim down with Before & After Restoration Balm. I worked it into the surface of the briar with my fingertips to clean, enliven and protect it. I let the balm sit for a little while and then buffed with a cotton cloth to raise the shine. I really like watching the Balm do its magic and bring the briar alive. The stem was in such good condition that I could skip working on it with sandpaper and went directly to polishing it with micromesh sanding pads – wet sanding with 1500-12000 grit pads. I wiped the stem down after each sanding pad with Obsidian Oil. I polished it with Before & After Pipe Stem Polish – both Fine and Extra Fine. Once I had finished the polishing I gave it a coat of a new product I am experimenting with from Briarville Pipe Repair. It is called “No Oxy Oil” and it is made to protect the stem from oxidizing. I set it aside to dry. As usual at this point in the restoration process I am excited to be on the homestretch. I look forward to the final look when it is put back together, polished and waxed. I put the bowl and stem back together. I polished the bowl and stem with Blue Diamond to polish out the scratches in the briar and the vulcanite. I gave the bowl and the stem multiple coats of carnauba wax. I buffed the pipe with a clean buffing pad to raise the shine. I hand buffed it with a microfiber cloth to deepen the shine. The pipe polished up pretty nicely. The grain really pops with the wax and polish. The shiny black vulcanite stem is a beautiful contrast to the browns of the bowl and thick shank. This Peterson’s System Standard 1307 Bent Billiard was another fun pipe to work on thanks to Jeff’s cleanup work. The polished nickel Ferrule works as a contrast between the stem and the briar and binds it all together. It really is a quite stunning piece of briar whose shape follows the flow of the briar. The pipe is comfortable pipe to hold in the hand. The finished pipe is shown in the photos below. The dimensions of the pipe are Length: 6 ½ inches, Height: 2 inches, Outside diameter of the bowl: 1 ½ inches, Chamber diameter: ¾ of an inch. This beautiful pipe will be going on the rebornpipes store if you would like to add it to your collection and carry on Bob’s legacy. If not, I have a lot more of Bob’s estate to work on of various brands. Perhaps one of those will catch your attention. Thanks for reading this blog and my reflections on the pipe while I worked on it. This is an interesting estate to bring back to life.

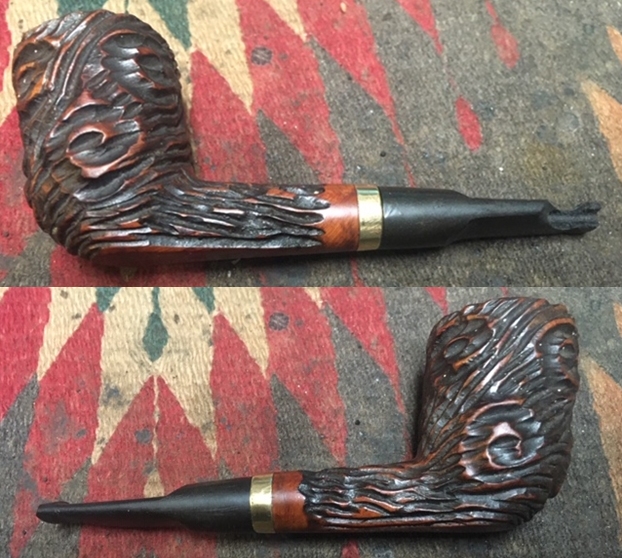
Restoring and Restemming an LHS Rusticated Sterncrest Billiard


Blog by Steve Laug

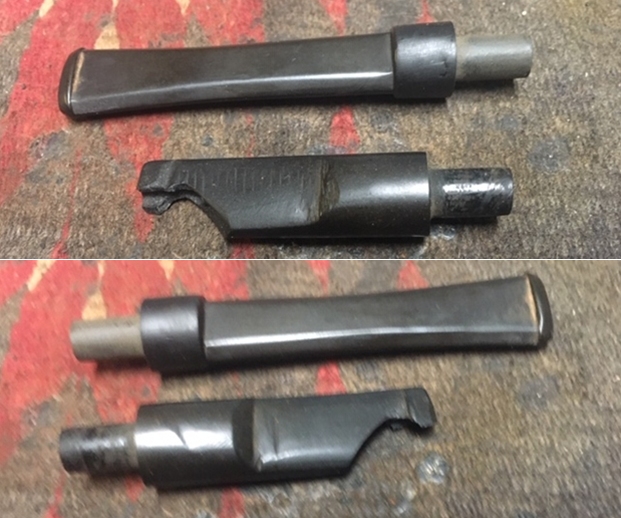
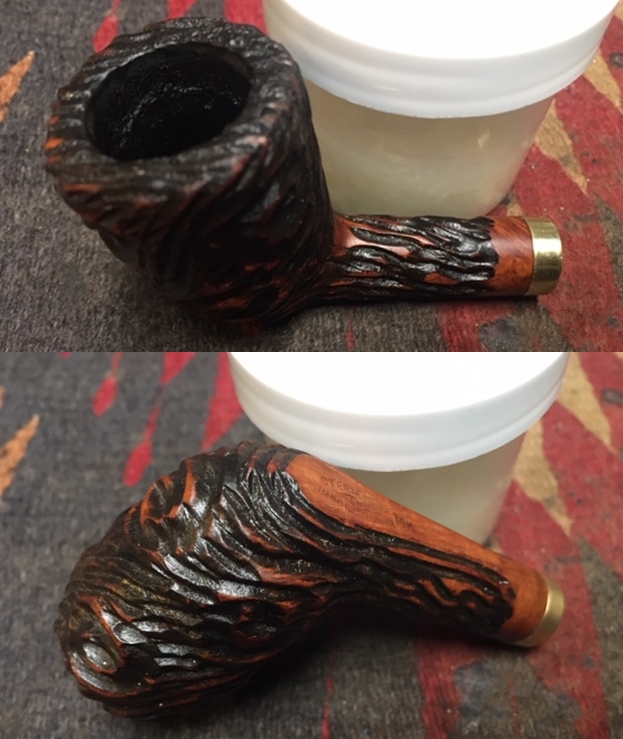
I am doing periodic repairs for a local pipe/cigar shop. They give my card to people who come in needing pipe repair. On Monday I received a call from a fellow who had an older LHS pipe that he had picked up in Europe on a trip. It turned out he lived around the corner from my house and he and his wife walked over with the pipe. It had an interesting rustication pattern around the bowl and shank that was unique. It sported a gold band on the shank that was original. The bowl exterior was very dirty. The rim top had lava overflow in the grooves and the bowl had a very thick cake inside it. The inner and outer edges of the rim looked very good. The stem had been jerry-rigged to function on the pipe before half of the button and back end of the stem had broken off. It looked like someone had used a knife and cut down the stem to make it a saddle stem. They had also carved a button on the stem. The saddle on the stem was in very rough condition and the carving marks in the stem surface were very rough. The young guy and his wife who dropped it off were hoping to get a new stem made and I was hooked and want to do that for them. I took photos of the pipe when it arrived so I had a benchmark to work with. I took a photo of the stamping on the underside of the shank. It was very readable and was stamped Sterncrest of LHS in a diamond and underneath Imported Briar. Next to it was stamped 14K. The gold band was also in good condition but scratched. I also include a photo of an LH Stern sign that was included on Pipedia (https://pipedia.org/wiki/LHS). I have included the information below from the article on Pipedia (https://pipedia.org/wiki/LHS). It gives a great brief history of the brand that is a quick overview of the Company.

Ludwig Stern, a successful pipe manufacturer since 1893 and closing around 1960, reorganized his company along with his brother Hugo Stern, opening a factory in 1911. They named the company L&H Stern Smoking Pipes & Holders. The newly formed company was moved into a six story building on the corner of Pearl and Waters street Brooklyn, NY.

Thoroughly organized in all departments, and housed in a well-lighted and ventilated modern office and manufacturing building, the firm of L&H Stern Inc. is located near the first arch of the Manhattan bridge, near the river and convenient to the Brooklyn bridge, which makes it accessible from all the hotels in the metropolis for visiting buyers. The structure is six stories with a seventeen-foot basement, with light on three sides through prismatic glass windows, the first floor being seven feet above the sidewalk. Light enters the upper floors from all four sides.

L&H Stern is known to every important wholesaler and jobber in the country. LHS manufactures a complete line of briar pipes. Ginmetto wood pipes are also made, as well as Redmanol goods, the man-made amber. The first substitute for amber. Everything, even down to the sterling silver and other metal trimmings are made under one roof.

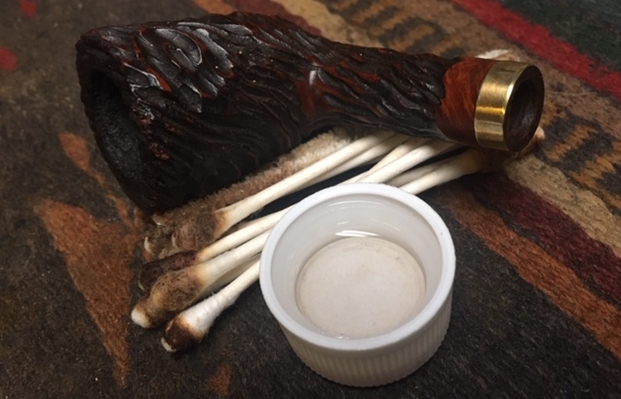
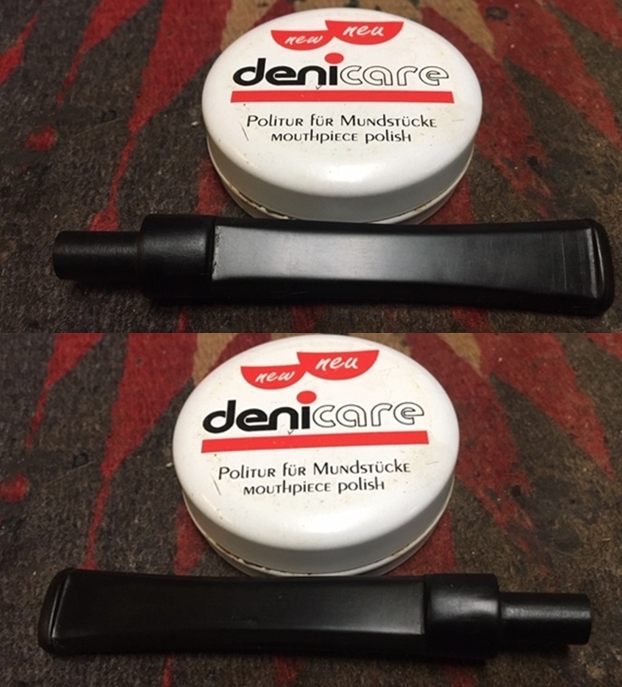
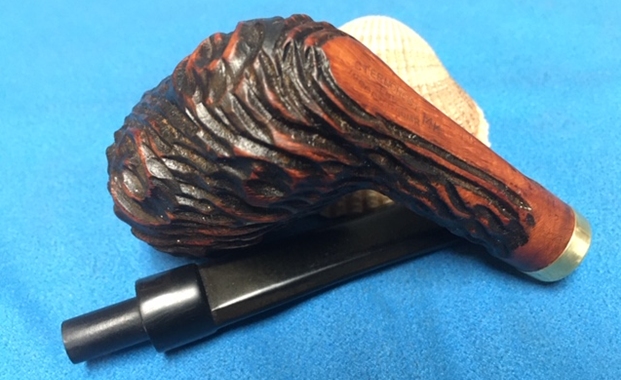
To begin the process of the restoration on this pipe I decided to see what kind of stem I had to replace the one that came with the pipe that was dropped off for me. I went through my can of stems and found a thin tapered saddle stem. It was more delicate looking than the broken one and I felt like it would look very good with the lines of the rustication on the bowl and shank. It was in good condition other than some light oxidation. I set the new stem aside and turned my attention to the bowl. I needed to clean out the bowl and shank before I fit the new stem on it. I reamed it with the third cutting head on the PipNet pipe reamer. I took the cake back to bare briar. I cleaned up what was left with a Savinelli Fitsall Pipe Knife and finished with sanding the bowl with a piece of dowel wrapped with 220 grit sandpaper to smooth out the walls on the bowl.   With the cake cleaned out of the bowl, it was time to clean the shank and airways. I used alcohol, cotton swabs and pipe cleaners to scrub out the shank. I scraped the walls of the shank and mortise clean with a dental spatula to clean up the built tobacco lacquer on the walls. Once it was scrubbed clean the pipe smell much better.I scrubbed the exterior of the bowl with Murphy’s Oil Soap and a tooth brush to remove the grime. I used a brass bristle brush to scrub the rim top with the soap. I rinsed the grime off the bowl with warm water and dried it off with a soft cotton cloth. Once the grime was gone I found flecks of white paint in the grooves of the rustication. I picked them out with a dental pick and used the wire brush to clean up the debris of the paint flecks. I rubbed the bowl and rim down with Before & After Restoration Balm. I worked it into the surface of the briar with my fingertips to clean and worked it into the rustication with a horsehair shoe brush. The balm work to enliven and protect the briar. I let the balm sit for a little while and then buffed with a cotton cloth to raise the shine. I really like watching the Balm do its magic and bring the briar alive.  I sanded the scratches and tooth chatter out of the stem surface and the saddle with 220 and 400 grit sandpaper. I worked it over to remove the oxidation that remained in the stem surface.I rubbed the stem down with Denicare Mouthpiece Polish. I have a few tins of this laying around so I am trying to use them up. It does a pretty good job polishing the stem.The stem was looking much better. I polished it with micromesh sanding pads – wet sanding with 1500-12000 grit pads. I wiped the stem down after each sanding pad with Obsidian Oil. I polished it with Before & After Pipe Stem Polish – both Fine and Extra Fine. Once I had finished the polishing I gave it a coat of a new product I am experimenting with from Briarville Pipe Repair. It is called “No Oxy Oil” and it is made to protect the stem from oxidizing. I set it aside to dry.   As usual at this point in the restoration process I am excited to be on the homestretch. I look forward to the final look when it is put back together, polished and waxed. I put the bowl and stem back together. I polished the bowl and stem with Blue Diamond to polish out the scratches in the briar and the vulcanite. I gave the bowl and the stem multiple coats of carnauba wax. I buffed the pipe with a clean buffing pad to raise the shine. I hand buffed it with a microfiber cloth to deepen the shine. The pipe polished up pretty nicely. The grain really pops with the wax and polish. The shiny black vulcanite stem is a beautiful contrast to the textures and the various browns of the bowl and shank. This LH Stern (LHS) Sterncrest Billiard was another fun pipe to work on thanks the fact that I could in essence start over with it. The thin saddle stem looks really good with the rustication on the bowl and shank. The original 14K Gold band on the shank looks very good breaking up the shank and the stem. It is a real contrast and binds it all together. It really is a quite stunning piece of briar with an unusual rustication on the bowl. The pipe is comfortable pipe to hold in the hand. The finished pipe is shown in the photos below. The dimensions of the pipe are Length: 5 ½ inches, Height: 2 inches, Outside diameter of the bowl: 1 ¼ inches, Chamber diameter: ¾ of an inch. This newly stemmed piece of  pipe history will soon be going back to my neighbour who I think is really going to enjoy it. It is a piece of he and his wife’s travels so now he can enjoy it with the memories of the find. Thanks for reading this blog and my reflections on the pipe while I worked on it. This is an interesting estate to bring back to life.

Making the Best of Beautiful Pipe with an Unbelievably Rough Patch of Briar – A Giant Gold Crown Bent Billiard


Blog by Dal Stanton

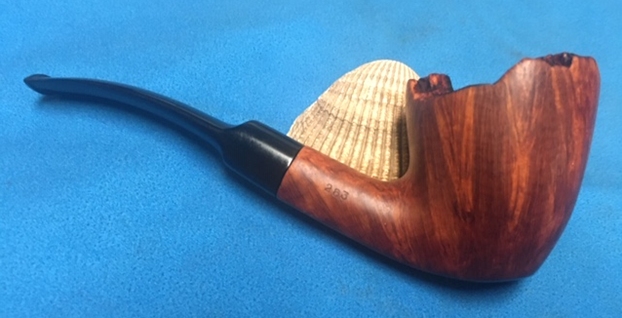
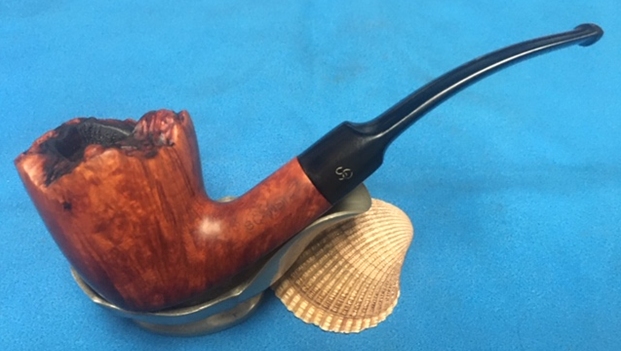
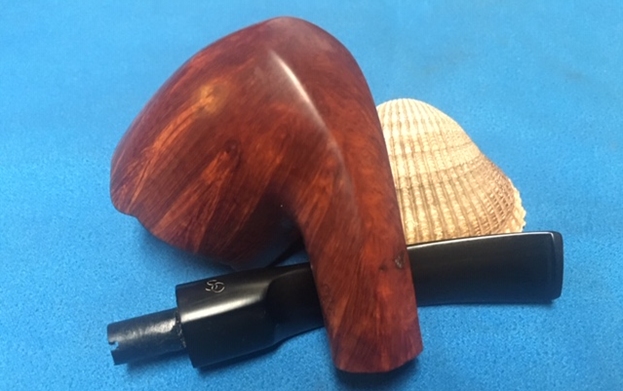
The story begins when I first laid my eyes on this pipe.  It was when the box containing the ‘French Lot of 50’ arrived here in Sofia, Bulgaria, from Paris, and oh my – talk about excitement!  I was alerted to this online Lot by Romanian pipe man friend, Codruț (aka: Piper O’Beard), who had previously become the steward of an L. J. Peretti Oom Paul I had restored. I carefully and slowly unwrapped each pipe, relishing each moment. I had seen the pipes in a pile displayed by the seller on France’s eBay.  Interestingly, when I unwrapped the ‘Gold Crown Giant Bent Billiard’ now on my worktable, I went back and looked at the eBay ‘pile’ picture with the question, how could I have missed this?  I was attracted to this French Lot because of the many horn stems and several very uniquely shaped pipes – the Cutty on the top had my attention!  Yet, the Gold Crown was not visible.After unpacking and cataloging all the pipes from France, each was pictured and put online in the ‘For “Pipe Dreamers” Only!’ collection where hopeful stewards search for a pipe that speaks their name.  After all, as in Harry Potter’s wand lore, the pipe chooses the steward, not the other way around! Now, pipe man and friend, Cyrus, enters the story when he saw this pipe online in ‘Pipe Dreamers!’ collection.  He and his wife became good friends when they served here in Bulgaria with US Peace Corp for a few years.  After returning to the US, their family grew, and we stayed in touch.  Cyrus was no stranger to ‘Pipe Dreamers!’ having already commissioned and received a very nice Jarl Dublin (See: Refreshing a Jarl 1545 Made in Denmark Dublin) which benefited our work here in Bulgaria with the Daughters of Bulgaria – women and girls who have been trafficked and sexually exploited. His return to Dreamers found him drawn to the Crown Giant Billiard.  Here are pictures of the Giant Bent Billiard: The only markings on this pipe are on the gold band and the ‘tenon ring’.  I have to be honest with full confession – when I first saw this pipe, I was excited about it thinking it might have some historical value.  When it had first come out of the box, I hadn’t taken a good look at it.  When I looked at it again, it was not long after restoring another pipe from this French Lot of 50 which was a treasure.  The writeup was: Discovering the History with the Reclamation of this Petite EPC Majestic Bent Horn Stem Billiard, where my researched uncovered a long-forgotten French pipe manufacturer which resulted in my first submission to Pipedia: A. Pandevant & Roy Co..  The problem, which I have since come to realize more fully, is that one of the trademarks of this French company that disappeared in the late 1930s, based near Paris, was a trademark with the stamp ‘EP’.  The difficulty with this is that it is also now a mark stamped on metals and it simply signifies, ‘Electro Plated’.  When I pulled the acrylic stem out of the mortise and discovered the ‘tenon ring’ with ‘EP’ on it, the novelty of a ‘tenon ring’ and the ‘EP’ stamp with some sort of hallmarks created question – could this be something in line with the Petite EPC?  The gold band was stamped with a crown and a very miniscule stamped letter that I couldn’t make out for certain: GG or GP?  Probably ‘GP’ for gold plated. With questions in my mind about the ‘tenon ring’ and the ‘EP’, I sent my questions off to Steve, Master of Restoration, of rebornpipes.com and not too long after received his replies.

Dal: A strange but interesting huge Bent acrylic stem Billiard with no shank nomenclature and doesn’t appear to ever have been smoked appears to have a gold-plated band.  There are stampings on it – a crown and a very small stamp beneath.  My guess is GG or GP – but it’s so small I can’t be sure.  Then, there is a solo stamp on the opposite side of the band that appears to be the same GG or GP.  Of course, GP could signify Gold Plated.  But perhaps that’s what I want to see!  That’s the band – thoughts?

Steve: I have had gold plated bands on older Weber’s that looked the same. I concur that the GP stamp is gold plated.

 Dal: Then, on the same pipe, I was surprised that when I retracted the ample acrylic stem out of the stummel, there was a band around the tenon!  Have you ever seen anything like this?  The alignment or fit of the stem and shank isn’t great and this band is serving to expand the fit of the tenon in the mortise.  The band also has stampings which I’m assuming are faux of some sort, but the tenon band I’m assuming is an aluminum – it’s light.  I first thought it might be silver, but whoever puts anything of value around a tenon?  Thoughts?

 Steve: I have never seen this before and I can see nothing but problems with this so-called solution. The EP stamp means it is electro plated. Could be silver but looks to like nickel and definitely an aftermarket repair. It is a nice-looking pipe though.  

 It’s so much fun unpacking the package of pipes, one at a time, each one wrapped with newspaper…. Christmas over and over!

Dal

After Cyrus commissioned this pipe and it was getting closer to the worktable, I took a closer look at the pipe trying to figure out its story. The bowl is huge and quite attractive. I weigh the pipe and it comes in at a hefty, 84g. It has never been smoked. The acrylic stem is pristine but needs to be cleaned and receive a fine-tuning regarding sanding and buffing.  The pictures below show ripples where the finishing was not completed or not thorough.The chamber is virgin briar.  The rim shows some roughness – like it wasn’t finished off as well.The craftmanship is not superior. Looking down the mortise, the airway drilling isn’t straight.  Is veers off to the left so that the draft hole’s entry point is not centered, but off to the left a bit. The tenon with the ring, as Steve said, is an attempt to perfect the fit, but after taking the tenon out, I’m not able to put it back in the mortise!  The stem fit from the earlier pictures shows that it’s not good – there is a large gap on the upper side of the shank.  I pry the tenon ring off with a little effort with a pocketknife and try the fit in the mortise without the ring.  The fit is very loose – too loose for use. Carefully I rotate the gold band off the shank with no problem.  It caps the shank with a shank face overhang.  I again insert the stem to see what it looks like. The sizing of the stem is in the ballpark.Then, there’s the mysterious crop of pits and ravines on the left side of the Giant’s bowl – what’s the deal with this?  It’s not a crack or trauma but it appears to be very rough briar that emerged during the fashioning of the stummel from a block of briar – a block of briar that obviously showed great potential for the one crafting this Giant Bent Billiard.  The severity of the briar below is in such contrast to the beauty of the briar on the rest of the pipe!  Such beauty and also such despair!  So much like life….  I’m giving some thought to how to approach this. My theory is that someone, probably in France, crafted this pipe.  The block of briar is beautiful, but the shaping of the stummel revealed the imperfections – but too many to fill, but the crafter went with it anyway hoping for a good ending, attaching an attractive acrylic stem and gold band.  Yet, at the end of the day, no one wanted this pipe with the scarring it bears.  It just seems to me that the crafter of this pipe gave up on it and the fine finishing of the pipe was not worth the effort.  I’m not sure the many grain faults that are in this briar patch can be removed or repaired so that there are no lingering scars, but the beauty of the rest of the pipe can offset the imperfections and scarring – off set, probably not erase fully! It reminds me of the Daughters we work with here in Bulgaria – beautiful but also broken and of great worth and worth the effort.

I decide to address the stem fitting first.  As I looked at the fitting, the tenon ring and stem wobbling in the mortise, my first thought is to expand the acrylic tenon like a vulcanite stem.  This method is to heat the tenon by painting it with the open flame of a Bic lighter and then inserting a slightly larger drill bit end into the softened tenon resulting in some expansion. Two questions come to mind – I’m not sure if acrylic will act like vulcanite – a rubber compound.  Will it expand the same way?  I’m not sure.  The second question is, if it does expand, I’m not sure it will expand enough to de-wobble the current situation?  After puzzling more, the solution came to me after reflecting on shank repairs that both Steve has done as well as Charles Lemon of Dad’s Pipes of utilizing inserts in the airways to connect broken shanks.  The solution was staring me in the face.  The nickel band that was acting as a poor ring for the tenon, could very well serve quite nicely as an insert in the mortise.  It is already sized for the tenon correctly.  I wondered if that was the original intent of the ring, but the crafter never got around to finishing? To test my theory, I slide the ring – now an insert – partially into the mortise, and partially insert the tenon.  I believe this will work nicely. To make the insert permanent, I use BSI Maxi-Cure Extra Thick CA glue.  I place some CA on the inside lip of the mortise then spread it around the circumference using a toothpick.  I then insert the nickel ring and press it down firmly on the table top surface pushing the insert into the mortise. The end of the nickel ring is flush with the shank facing.The insert seats as hoped, but what the picture shows is the pressure of the insert creates a small crack on the shank on the upper left side.  The good news is 3-fold.  First, the crack is very small.  Secondly, the insert on the inside will not expand any further and so the crack should not have additional pressure on it.  Lastly, the gold band on the outside will help fully cover the crack cosmetically and provide additional external pressure to support the shank. To address the crack, I first drill a counter hole to keep the crack from expanding. First, using a sharp dental probe, I press a hole at the end of the crack to serve as a guide for the drill. Next, after mounting a 1mm drill bit on the Dremel, I drill a hole at the end of the crack keeping my hand as steady as possible! The counter-creep hole is good.With the drill bit still mounted in the Dremel, I decide also to drill counter creep holes at the ends of the two most distinct ravines in the rough briar grain patch topography.  While these ravines are not cracks in the sense of a trauma related problems, treating these as cracks to guard against the ravines expanding is a good thing to do it seems. I’ve numbered them below.To prepare for drilling the counter-creep holes, I place guide holes as before using the sharp dental probe.Then I drill holes at the end of each ravine.  No problems.The ravines are deep – surprisingly so!  I double check in the chamber to make sure there are no corresponding ravines!  I see none – it looks good. I make sure the crevasses are cleared of loose stuff that may have collected.  I use a dental probe to clean what I can.  I pick at the smaller grain faults as well. I finish the cleaning by wiping the ravine area and the shank crack with a cotton pad wetted with isopropyl 95%.At this point I would usually mix a batch of briar dust putty with dust and thick CA glue.  Instead, I use only regular, thin CA glue on the shank since it will be covered by the band. With the ravines and the grain faults I’ll use regular thin CA glue and sprinkle them with Briar dust building the patches in steps.  Using the thinner CA glue will allow penetration into the deeper parts of the crevasses forming a more sure foundation.  The pictures show the progress. The night is late, I set the stummel aside for the patches to cure through the night.The next morning, what’s on my mind is seeing how the stem will react to the mortise insert.  The glue will be fully cured and with the insert firmly in place, I give the stem a try.  The fit tightens with the tenon inserted about halfway into the mortise. Not wishing to force the issue, I begin sanding the fat part of the tenon down first using 240 grade sanding paper.  When the progress seemed to be stymied, I then resorted to using a flat needle file to help.After several re-tries and additional filing and sanding, the stem seated in the new insert.  It looks good.  There still seems to be a slightly larger gapping on the top, but I will wait until remounting the gold band to make a final assessment on the stem fitting.With flat needle file in hand, filing begins on the bowl patches. Since this entire area is rife with pits and crevasses, I’m not too concerned about using the needle file down to the briar surface.  Usually, I transition to 240 sanding paper when the patch is close to the briar surface using the file, but with all the sanding that will be required for this project, I use the file for sake of speed.After the filing, I finish the first round of sanding with 240 grade paper.  All the light areas in the area indicate that the briar is not smooth and that pitting remains.  The briar dust created by the sanding packs in the holes which helps to show progress, or lack!Beginning the second round of patching, I again use the probe to excavate the compacted briar dust and then I wipe the area with a cotton pad wetted with alcohol to clean.I repeat the patching process with the same, regular thin CA glue and sprinkle the patches with briar dust.In the interest of full disclosure and brevity of describing the same process repeatedly, I repeated the patching process as described above about three more time and made slow progress eradicating the pitting.  I found though, that some of the pits would resist holding the CA glue fill.  After filling with CA glue, curing and sanding, the pit would remain.  I started testing different approaches – I used CA glue, then kneaded the patch with a toothpick to release possible air pockets hindering the glue from filling and holding the crevasses.  I also utilize an accelerator before and after applying CA.The solution that I found that seemed to work the best was not using the regular, thinner CA glue but switching to an extra-thick CA glue in combination with an accelerator.  In the picture below, on this pass of patching (I’ve lost count), I’ve painted a patch of very small grain faults with the thick CA using a toothpick to spread. After using the accelerator and allowing it a few minutes to cure, I go to work on the patch with the file.  I did this method several times to fill in the grain faults as much as I could.At the end of the day, perfection is not achievable.  Yet, the lion’s share of faults have been filled and hugely minimized but some scarring remains.  After finishing the patching and filing, I go over the area with 240 grade paper followed by 600 grade paper. I think that the area is much better, and the finishing process will continue to blend and mask the rough briar patch – I hope!  I move on – finally 😊.Moving now to the top, the rim has some rough spots which are easily dispatched with the topping board.  I first place a sheet of 240 grade paper on the chopping board, my topping board.  I rotate the inverted stummel on it several times, checking as I go.  I then switch to 600 grade paper.  The rim is looking good.  Moving on. Next, using sanding sponges I continue the sanding of the stummel.  I use a coarse sponge, followed by a medium grade then finish with a light grade.  Wow, comparing the two side in the pictures below, ugh!Moving straight away to the micromesh pad regimen, with pads 1500 to 2400 wet sanding is then followed with dry sanding with pads 3200 to 4000 and 6000 to 12000.  Wow!  What a piece of briar!  Other than the area where the grains were pitted, the grain is absolutely striking on this goliath. Without doubt, if not for the rough patch of briar – that has been helped immensely, I would be applying Before & After Restoration Balm now and moving to the finer polishing processes.  But with the rough briar patch, applying a darker dye will assist in masking the many patches.  I decide to mix Fiebing’s Saddle Tan and Dark Brown – about 2 to 1 ratio.  I want a darker brown hue but with the reddish hints that the Saddle Tan will brings.  After ‘unwrapping’ the initial coat, I may decide to do a straight Saddle Tan overcoat. I assemble my desktop dyeing module.  After mixing the dyes to the ratio I described using the large eye dropper, a cotton pad wetted with isopropyl 95% is used to clean the stummel.  The end of a spring-loaded clothes pin inserted into the mortise serves as a handle. The stummel is warmed using a hot air gun to expand the briar grain helping it to be more receptive to the dye. After heated, using a folded over pipe cleaner, the dye is painted onto the stummel in swatches and then, using a lit candle, the wet dye is ‘flamed’.  The aniline dye’s alcohol base combusts and leaves the hue behind in the briar grain.  After methodically covering the entire stummel with dye and firing as I go, I then set the stummel on a cork in the candle holder to let it rest through the night.With the dyed stummel now on the sideline, I turn to the attractive acrylic stem.  As I mentioned earlier, the stem is essentially unused, but it doesn’t appear to be in a pristine state.  The finishing left ripples and some rough spots on the stem.  I take a few pictures to illustrate what I’m seeing.To address these issues, I sand the entire stem using 240 grade paper then follow by wet sanding with 600 grade paper and finish this phase by applying 000 grade steel wool.  I like the results!  The acrylic surface has cleaned up nicely. Moving on now to the full regimen of micromesh pads, starting by wet sanding with pads 1500 to 2400 and dry sanding with 3200 to 4000 and 6000 to 12000. I apply Obsidian Oil to the stem after each set of three pads. This stem is spectacular!  The shine and that acrylic translucence is eye catching.  The stem will wait till the morning for the stummel to be ready to go. The next morning has arrived and I’m looking forward to ‘unwrapping’ the dyed stummel to see how the finish came out and how well it has helped mask the rough briar patch.  I mount a felt cloth buffing wheel onto the Dremel, reduce the speed to the lowest possible and apply Tripoli compound to the bowl.  The speed is reduced to decrease the friction and heat generated.I’ve developed this technique that works very well for me.  The following pictures show the process of removing the flamed crust to reveal the grain beneath. It takes patience to move over the surface and spotting the places where dye is still thick.  Usually it looks like a dark spot on the surface.  When I apply additional rotations with the Tripoli on these areas the excess dye is removed revealing the different grain compositions – the softer wood absorbs the dye while the harder wood doesn’t – these are the lighter grains.After unwrapping the stummel, I wipe the surface with a cotton pad wetted with alcohol.  I do this to blend the new dye as well as to lighten the hue.  Lightening the hue a bit softens the finish.Next, after mounting a cotton cloth wheel and adjusting the speed of the Dremel to about 40% full power, I apply Blue Diamond to both the stummel and the rejoined stem.  Yes, I am not replacing the gold band until the end of the process.After completing the compounds, I buff/wipe the pipe with a felt cloth to remove the compound dust in preparation for the wax.  Not pictured is mounting another wheel, maintaining the speed, and applying carnauba wax to the pipe.I have two remaining mini projects before the final hand buffing.  First, to remount the gold-plated band.  I first clean the band using Tarn-X tarnish remover.  It restores a very nice shine to the metal. The band fits over the shank easily about 70% of the way, but to be on the safe side, I use the hard surface cushioned by a few cotton pads to press the band fully on the shank.  The band fit easily the rest of the way with a gentle push.With the band fully seated on the shank, I test fit the stem with disappointing results.  In the picture below the gap at the top is huge. With the band easily moving on the shank, I partially retract the band off the shank and then reengage the stem so that the stem pushes the band over the shank.  With the band pressed with the stem tenon facing, its orientation is now much more favorably aligned with the stem with the gap minimized.  This looks much better as the second picture shows.The next step is to apply some CA glue to the inside of the band and repeat the same process of reseating the band using the stem itself. Using BSI Maxi-Cure Extra Thick CA glue, I place a large drop of glue on the inside of the band and then use a toothpick to spread the glue around the circumference of the inner wall of the band.  Then, after slipping the band carefully over the end of the shank, I press the stem forward over the shank keeping the facing of the stem squarely on the band to avoid the gapping.  When the band starts to gap, I know I’m far enough.  I retract the band slightly with the stem firmly seated and essentially no gap present.  Not wanting to get CA glue on the tenon, I remove the stem and set the stummel in an egg crate to allow the glue to cure.  The results look good!While the CA glue is curing, I move to the final project.  In order to provide the virgin briar in the chamber a good foundation to build a protective cake and for aesthetics, I mix a batch of natural yogurt and activated charcoal.  This mixture is applied to the chamber wall and it hardens to provide a layer over the briar. A pipe cleaner is inserted into the airway to guard the draft hole from being blocked.  When I inserted the pipe cleaner, what I remarked about earlier regarding the off-center drilling of the air way was illustrated graphically by the angle of the pipe cleaner!  These pictures show what I’m seeing.I place a small amount of natural yogurt in a small dish and add activated charcoal to it and mix until it thickens enough not to drip off the spoon.  With a pipe nail as a trowel, I scoop the mixture into the chamber and spread it on the chamber wall with the back side of the nail. When the wall is totally covered, I set the stummel aside allowing the mixture to dry and harden.  My day has come to an end and the lights are turned off. The next morning, the gold band is solidly in place and the yogurt/charcoal coating is dry and hard.  After reattaching the stem, I give the pipe a rigorous hand buffing to raise the shine.

I’m pleased with how far this unmarked, gold band Giant Billiard has come.  The rough briar patch on the side of the bowl was a mess and took a lot of time to provide the healing that I see.  Yet, there remains some pitting from the briar faults.  The dark stain does a great job helping to mask the imperfections.  Yet, as with life, this pipe will carry with it some of the scars of its past.  However, the briar grain on this bowl is beautiful and it is huge!  I’m very pleased with the striking difference the darker brown finish provides – it changes the disposition of the entire pipe presentation.  There is now, I believe, a more striking contrast with the gold band which transition into the stem with all the same tones of color.  I like it.  Reseating the acrylic stem with the insert works well and the Crown Gold Giant Bent Billiard will sit very well in the palm of its new steward.  Cyrus saw the potential of this Giant and commissioned it.  He will have the first opportunity to claim it from The Pipe Steward Store.  Thanks for joining me!


Restoring and Replacing a Broken Tenon on a Scandia 263 Danish Freehand


Blog by Steve Laug

I am currently not taking on anymore restoration work from the internet or groups that I am part of on Facebook because of the large amount of estate pipes that I am working on to sell. But I have my name in at a local pipe shop here in Vancouver, British Columbia to do repair work for the shop as it comes in. there are no other pipe repairers in Western Canada that I am aware of so I feel a bit of an obligation to take care of these folks as they come. Fortunately there are not a lot of referrals but periodically they get pipemen or women stopping by with work – that is where I come in. They give them my number and email and then the repair work is between us. On Wednesday this week I received an email from one of their customers, Ron in Victoria, B.C. about a pipe that had been dropped and had a broken tenon. He described the broken stem and that left me with some questions. I had him send me photos of the broken pipe so I would be sure to have a clear picture of the issues. He said that the shank was not cracked and really the only issue was the tenon. He send the photos below so I could see what he was speaking of. Not too big an issue really – a cleanup and tenon replacement and the pipe would be good to go.After our emails back and forth he put it in the mail to me. It arrived on Friday and I took it out of the box to see what I was going to be dealing with on this pipe. Descriptions and photos are one thing but I like to have the pipe in hand to examine for myself. This is what I saw. The pipe was dirty and dull looking. There was some faint stamping on both sides of the shank. It was stamped Scandia over Made in Denmark on the left side and had the shape number 263 on the right side. There was a very uneven cake in the bowl that was crumbling. The tenon had snapped off almost smooth against face of the stem. The stem had some tooth marks and was oxidized. There was a faint SC on the left side of the saddle. It appeared that someone had tried to glue the tenon back on the stem – unsuccessfully. There was a lot of sloppy glue on the end of the stem and tenon. I took some photos of the pipe as it looked when it arrived. He had taped the broken tenon on the underside of the stem. The bowl itself was dirty with a crumbling cake about half way up the bowl from the bottom. The plateau rim top had tars and some darkening on the right top and edges. There was a large sandpit on the left side of the bowl near the rim and one on the underside of the shank that would need to be dealt with.  I removed the taped on broken tenon from the stem. I used a Dremel and sanding drum to take down the sharp edges of the old tenon remaining on the face of the stem. I wiped the face down with acetone on a cotton swab to remove the old glue. It was a sticky mess but came off quite easily with the acetone. When it was clean I used a series of drill bits to drill out the airway to accommodate the new threaded tenon. I usually start with a drill bit slightly larger than the airway and work my way up to the one that fits the tenon end. I used my cordless drill and the airway as the guide for each successive drill bit. This keeps things lined up.Once I have the airway drilled to accommodate the end of the tenon. I use a tap to thread new airway. The tenon replacements I use have a hip around the middle that I need to take down. I use a Dremel and sanding drum to smooth things out. I also rough up the threads to reduce the diameter to make room for the glue that I use to set the tenon in the stem.I used a needle file to smooth out the slight ridge at the end of the tenon. I sanded the tenon smooth to clean up the fit. I would further polish it once it was in place in the stem. I dribbled some Krazy glue on the threads and quickly turned it into the stem making sure that the alignment was correct.I took photos of the new tenon before I polished and finished it. The tenon is solid and the alignment in the shank is perfect. I set it aside to cure and turned my attention to the bowl.With the stem repaired I remembered that Ron had asked me to give him some background information on the brand so I paused at this point to gather the info. I turned to Pipephil’s site (http://www.pipephil.eu/logos/en/logo-s4.html) to get a quick overview. As expected the Scandia brand is a Stanwell second line. In this case the sandpits make it clear why it has this designation. I have included a screen capture of the pertinent section from the site.I turned then to the section on Pipedia that dealt with the Stanwell Sub-brands the Scandia pipe listed there (https://pipedia.org/wiki/Stanwell#Sub-brands_.2F_Seconds). I followed several other links listed on the article to check who designed this particular shape for Stanwell (https://pipedia.org/wiki/Stanwell_Shape_Numbers_and_Designers). Bas Stevens, a dear friend who know longer is living compiled a list of the shape numbers and their designer. The 263 was not listed there however, I remembered that the shape was actually a Stanwell shape 63. That shape was a Freehand with a plateau top and a saddle mouthpiece and was designed by Sixten Ivarsson.

To verify that my memory was correct I did a quick Google search for images of the shape 63 for comparison purposes. I include the photo below with thanks to http://www.Bollitopipe.it for the image (https://www.bollitopipe.it/en/hand-made-polished-royal-guard/18983-stanwell-royal-guard-63-bark-top.html). You can see that the shape is identical so that it is clear that the 263 and the 63 are the same shapes.With the background information gathered and summarized I turned my attention to the cleanup of the bowl. I reamed the crumbling and uneven cake out of the bowl. I left a very thin cake on the walls of the bowl. I cleaned up the small bits toward the bottom of the bowl with a Savinelli Fitsall Pipe knife. I finished by smoothing out the slight cake on the walls with a piece of 220 grit sandpaper wrapped around some doweling. I a soft bristle brass brush to clean off the debris in the plateau finish on the rim top. I was able to remove most of the darkening at the same time. While not flawless it looks significantly better.To clean the surface of the briar and remove the oils and dirt I scrubbed the briar with a tooth brush and undiluted Murphy’s Oil Soap. I rinsed off the bowl under warm water and dried it off with a soft cotton cloth. The finish looks much better with stunning grain. The sandpits are quite visible now that the pipe is clean. I repaired the sandpits with a few drops of Krazy Glue. I slightly overfill the pit with the glue as it shrinks as it cures. Once the repairs cured I sanded them with 220 grit sandpaper to blend them into the rest of the bowl. I polished the entire bowl with 400 grit wet dry sandpaper in preparation for the micromesh polishing. I polished the briar with micromesh sanding pads – wet sanding with 1500-12000 grit pads. After each pad I wiped the bowl down with a damp cloth to remove the sanding dust. The photos tell the story. I used a black Sharpie pen to darken in the deep grooves on the plateau as it would help to mask the darkening on the right and left side of the rim top and it would highlight and give depth to the finish. I rubbed the bowl down with Before & After Restoration Balm. I worked it into the surface of the plateau rim top and the rest of the briar with my fingertips and a horsehair shoe brush to clean, enliven and protect it. I let the balm sit for a little while and then buffed with a cotton cloth to raise the shine. I really like watching the Balm do its magic and bring the briar alive. With the bowl finished I turned my attention to polishing the stem. I sanded the surface of the stem with 220 grit sandpaper and 400 grit wet dry sandpaper to remove the remaining oxidation in the vulcanite and the last of the light tooth chatter.  I polished the stem with micromesh sanding pads – wet sanding with 1500-12000 grit pads. I wiped the stem down after each sanding pad with Obsidian Oil. I used some liquid paper to touch up the “SC” on the left side of the stem. I applied it and let it dry and cure. Once it had cured I scraped the excess off with a tooth pick. The “SC” looks very good.  I polished it with Before & After Pipe Stem Polish – both Fine and Extra Fine. Once I had finished the polishing I gave it a coat of a new product I am experimenting with from Briarville Pipe Repair. It is called “No Oxy Oil” and it is made to protect the stem from oxidizing. I set it aside to dry.I am happy with how this pipe looks compared to what it looked like when it arrived in pieces. It definitely has that Stanwell look to it – very Danish Freehand looking. I am excited to be on the homestretch with it and took it to the buffing wheel and polished it on the wheel with Blue Diamond to polish out the scratches in the briar and the vulcanite. I gave the bowl and the stem multiple coats of carnauba wax. I buffed the pipe with a clean buffing pad to raise the shine. I hand buffed it with a microfiber cloth to deepen the shine. The pipe polished up pretty nicely. The grain really pops with the wax and polish. The shiny black vulcanite stem is a beautiful contrast to the blacks and browns of the bowl and shank. This Scandia Made in Denmark Freehand was fun to bring back to life. It really is stunning piece of briar whose shape follows the flow of the grain. The pipe is comfortable pipe to hold in the hand. The finished pipe is shown in the photos below. The dimensions of the pipe are Length: 5 ½ inches, Height: 2 inches, Outside diameter of the bowl: 1 ¾ inches, Chamber diameter: ¾ of an inch. This beautiful pipe will be going back to Ron tomorrow. If the mail is as fast as it was bringing it to me he should have it in hand by the first part of the week. I hope that he enjoys this beauty and that it serves him well. Thanks for reading this blog and my reflections on the pipe while I worked on it. This is an interesting one to bring back to life.

GBD New Era “Collector” Oddity


By Al Jones

This GBD shape is odd in that it has no shape number and it is unlike any GBD shape that I’ve seen.  The bowl walls are thick, also unlike any GBD that I’ve previously encountered.  The pipe is a New Era grade and it sports a somewhat rare “Hand Cut” stem stamp.  New Era grade briar can be very nice and this one, in a light stain, is a great example.  Why was this pipe chosen for a unique shape and deemed worthy of a “Hand Cut” stem?  Who knows, those details now lost to time.

The “Collector” stamp denotes one of three stamps GBD used on oversized pipes, with Collector in the middle between Conquest and Colossus.

The pipe arrived in very good condition, with some darkening of the bowl top and mild oxidation on the stem.

The bowl had a very slight cake, but the rim was slightly out of round.  I removed the cake and used some 320 paper to smooth out the bowl shape.  The bowl was soaked with alcohol and sea salt.  There were several handling dings on the briar, most of which steamed out with an electric iron on High and a wet cloth.  The briar was then lightly buffed with White Diamond and several coats of Carnuba wax.

Following the sea-salt soak, the stem was mounted and oxidation removed with 800,  1,500 and 2,000 grade wet paper.  I was careful to work around the “Hand Cut” stem stamp.  Oxidation around the stamp was removed with a Magic Eraser pad, which doesn’t diminish the stamping. This was followed by 8,000 and 12,000 grade micromesh sheets and then buffed with White Diamond and Meguiars Plastic Polish.

Below is the finished pipe.


Life for a Republic Era Peterson’s “Cara” 608S from Bob Kerr’s Estate


Blog by Steve Laug

I am working on another pipe from Bob Kerr’s estate, another one of his Petersons. This one is “Barling-ISH” style saddle stem pot with the dark contrasting stain that I have seen on Barling pots. It is a thin shank/saddle stem pot with a silver band. It has some beautiful grain on the briar. I have restored ten of his Peterson pipes including two of these were Peterson’s pipes made specifically for import into the Canadian market – one was a Kapruf 54 sandblast bent billiard (https://rebornpipes.com/2019/08/09/back-to-bob-kerrs-estate-another-canadian-import-petersons-kapruf-a-54/) and the other was a Kapruf 9BC 56 (https://rebornpipes.com/2019/08/09/back-to-bob-kerrs-estate-linking-petersons-kapruf-9bc-with-the-56-shape-number/). These were interesting that they had a unique numbering system designed for Petersons pipes that were specifically brought to Canada by the Canadian importer, Genin, Trudeau & Co. of Montreal, Quebec. I have included the links on that company below. (https://rebornpipes.com/2016/09/13/petersons-pipes-brochure-from-genin-trudeau-co-montreal-quebec/). I restored an English Made Peterson’s System ‘0’ 1307 bent billiard a  (https://rebornpipes.com/2019/08/17/an-english-made-petersons-system-0-1307-bent-billiard-from-bob-kerrs-estate/) and a Republic Era Peterson’s Flame Grain Bent billiard with a fishtail stem (https://rebornpipes.com/2019/08/16/a-petersons-flame-grain-x220s-bent-billiard-from-bob-kerrs-estate/).

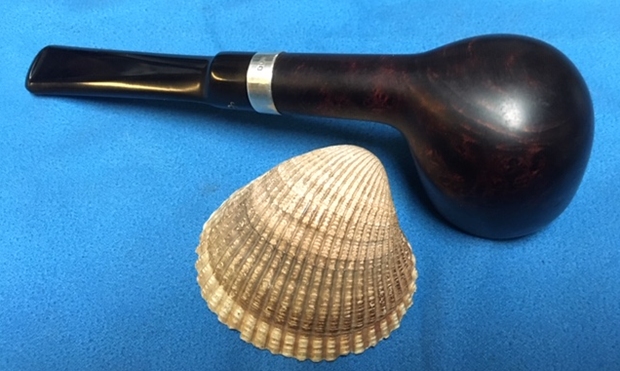
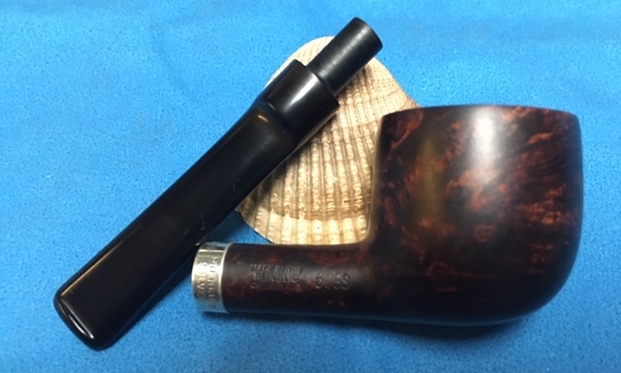
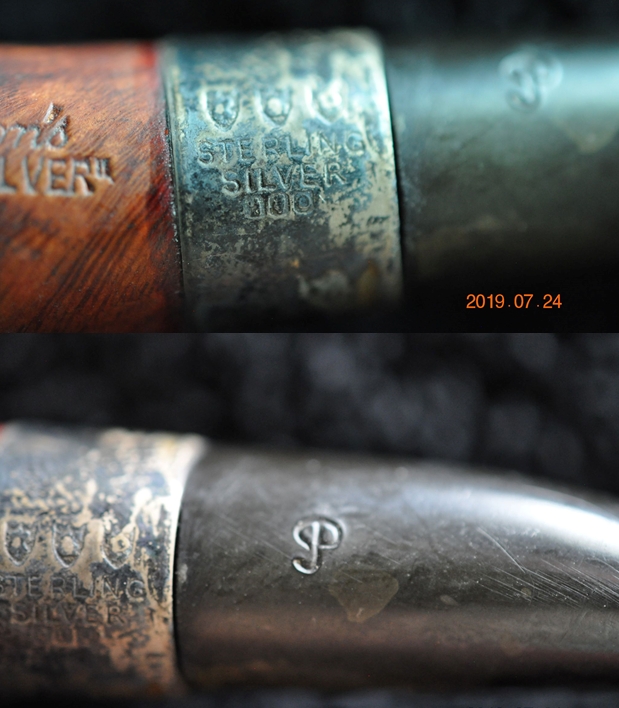
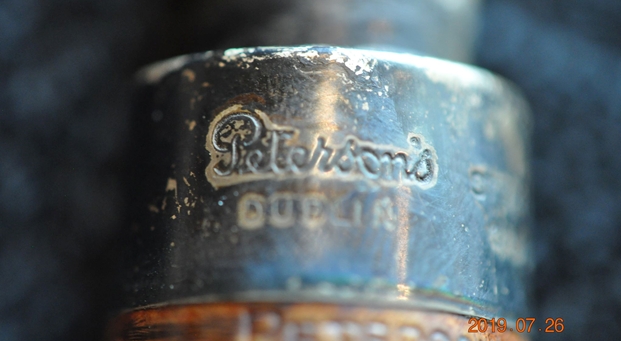
I have been enjoying working on these Peterson’s particularly because Jeff has done such a thorough cleanup of them before I receive them. When I took this one out of the box of the pipes that Jeff had cleaned up and sent back to me, I could see that it was stamped Peterson’s “Cara” on the left side of the shank next to the band. The right side of the shank was stamped Made in the Republic of Ireland over the shape number 608S. It has some stunning grain around the bowl and shank under the dark stain and the thick grime. Cara pipes feature a deep ebony finish and a sterling silver band. There was a thick cake in the bowl with remnants of tobacco stuck on the walls. There was a fair lava overflow on the rim. The top and edges of the rim looked good under the grime. I think that there was a beautiful pipe underneath all of the buildup of years of use. The band is stamped Peterson’s followed on the right by Sterling Silver. On the underside of the band it is stamped with three hallmarks – The Hibernia stamp, the Crowned Harp stamp and finally the lower case italic letter “n”. The stem was oxidized and calcified toward the end with some tooth chatter but surprisingly it did not have the deep tooth marks that I have come to expect from Bob’s pipes but the button edges were worn. Jeff took photos of the pipe before he started his cleanup work on it. Jeff took photos of the bowl and rim top to show the thick, hard cake in the bowl and the lava build up on the top of the rim and the edges of the bowl. The rim top, with the inner bevel appeared to be in good condition with a potential burn marks on the left front. The outer edges of the rim also appeared to be in good condition.    Jeff took photos of the sides and heel of the bowl to show the condition of the finish. You can see the beautiful grain on the front and the heel. The mixed grain on the back and sides of the bowl and shank look good even under the dirt and debris of the years.   Jeff took photos of the stamping on both sides of the bowl and shank. The stamping on the left side was readable as you can see from the photos. It read Peterson’s “Cara”. The stamp on the right side read Made in the Republic of Ireland with the shape number 608S to the left of that. The band was also stamped in the silver. Jeff took photos of the stamping. The band was loose and it had rotated to the right. On the topside of the band it is stamped Peterson’s (photo 1). As the pipe is turned it reads Sterling Silver (photo 2). On the underside it is stamped with three hallmarks -1. Hibernia, 2. Crowned Harp and 3. The letter “n”. I did not have a photo of it. I will need to look that up during the restoration. The third photo shows the “P” stamped on the left side of the saddle stem. Jeff took photos of the top and underside of the stem showing the tooth chatter, scratching and oxidation on the stem surface and wear on the edges of the button.I turned first to Pipephil’s site to acquaint myself with the Cara line as this was the first one I have had in hand. Unfortunately there was no information to be found on this specific line. I then turned to Pipedia’s article on Peterson pipes to see what I could garner from that information. It is a great read in terms of the history of the brand (https://pipedia.org/wiki/Peterson). I have included a bit of the pertinent history here.

1950 – 1989 The Republic Era  – From 1950 to the present time, the stamp for this era is “Made in the Republic of Ireland” in a block format generally in three lines but two lines have been used with or without Republic being abbreviated.

During the 1950’s and 60’s the Kapp & Peterson company was still in the ownership of the Kapp family. However 1964 saw the retirement of the company Managing Director Frederick Henry(Harry) Kapp.

In the 1960’s Peterson hallmarked all gold mounted pipes but apparently they used their own marks on silver. This practice stopped at the end of that decade when they started to have all silver bands hallmarked.

                                                                                                                                                                            With that information in hand I knew what I was dealing with in terms of the stamping on the pipe. It is a 1979 Republic Period pipe. I also wanted to be able to interpret the hallmarks on the silver band. I have captured a portion of the chart that include below that helps to clarify the meaning of each of the three hallmarks. I like the Hallmark feature on the higher end Peterson pipes with Sterling silver bands. It helps to pin down the date even further.

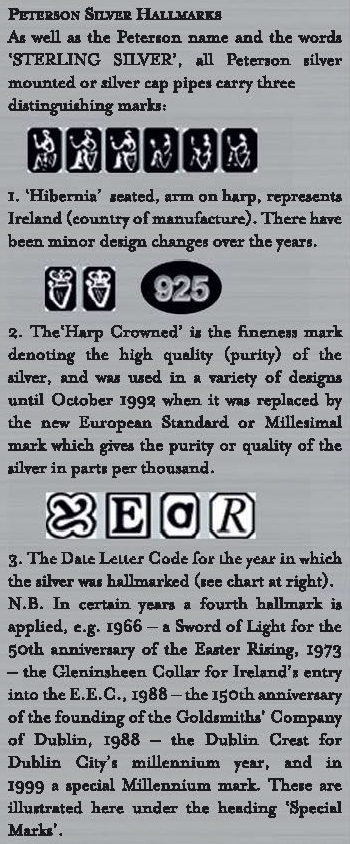
  • “Hibernia” seated, arm on harp represents Ireland (country of manufacture). There have been minor design changes over the years.
  • The “Harp Crowned” is the fineness mark denoting the high quality (purity) of the silver, and was used in a variety of designs until October 1992 when it was replaced by the new European Standard or Millesimal mark which gives the purity or quality of the silver in parts per thousand.
  • The Date Letter Code for the year in which the silver was hallmarked (see the chart below). In certain years a fourth hallmark is applied – for example 1966 – a Sword of Light for the 50th anniversary of the Easter Rising 1973. There were also other marks used for the fourth hallmark.

The pipe on my table had the Hibernia seated mark (Ireland) followed by the Harp Crowned signifying Sterling Silver percentage and finally in this case a lower case “n”. Each of the hallmarks was in an octagonal cartouche. The chart below helps me identify the date mark to 1979. I have highlighted the 1979 mark with a red arrow in the chart below. I have included the entire Hallmark chart for ease of reference show any of you be looking to date the pipes that you are working on at present.I took photos of the pipe with the right stem. With over 125 pipes to clean from Bob’s estate I am very glad for Jeff’s help cleaning them. He remembers this pipe as one of the really dirty ones in Bob’s estate. He cleaned this filthy pipe with his usual penchant for thoroughness that I really appreciate. This one was a real mess and I did not know what to expect when I unwrapped it from his box. He reamed it with a PipNet pipe reamer and cleaned up the reaming with a Savinelli Fitsall Pipe Knife. He scrubbed out the internals with alcohol, pipe cleaners and cotton swabs until the pipe was clean. He scrubbed the exterior of the bowl with Murphy’s Oil Soap and a tooth brush to remove the grime and grit on the briar and the lava on the rim top. The finish looks very good with great looking grain around the bowl and shank. Jeff soaked the stem in Before & After Deoxidizer to remove the oxidation on the rubber. When the pipe arrived here in Vancouver for the second stop of its restoration tour I was amazed it looked so good. I took some close up photos of the rim top and also of the stem surface. I wanted to show what an amazing job Jeff did in the cleanup of the rim top. The rim top has a bit of damage to the front left inner edge of the rim. I also took close up photos of the stem to show the lack of tooth marks and chatter on the stem surface. It was very clean.   One of the things I appreciate about Jeff’s cleanup is that he works to protect and preserve the nomenclature on the shank of the pipes that he works on. The stamping on this one was very faint to start with so I was worried that it would disappear altogether with the cleanup. He was not only able to preserve it but it is clearer than shown in the earlier photos. I took some photos to show the clarity of the stamping. I have noticed that many restorers are not careful to protect the stamping in their cleaning process and often by the end of the restoration the nomenclature is almost destroyed. I would like to encourage all of us to be careful in our work to preserve this as it is a critical piece of pipe restoration!     Since this is another pipe Bob’s estate I am sure that some of you have read at least some of the other restoration work that has been done on the previous pipes. You have also read what I have included about Bob Kerr, the pipeman who held these pipes in trust before I came to work on them (see photo to the left). Also, if you have followed the blog for long you will already know that I like to include background information on the pipeman whose pipes I am restoring. For me, when I am working on an estate I really like to have a sense of the person who held the pipes in trust before I worked on them. It gives me another dimension of the restoration work. I asked Brian if he or his wife would like to write a brief biographical tribute to her father, Bob. His daughter worked on it and I received the following short write up on him and some pictures to go along with the words including one of Bob’s carvings. Once again I thank you Brian and tell your wife thank you as well.

I am delighted to pass on these beloved pipes of my father’s. I hope each user gets many hours of contemplative pleasure as he did. I remember the aroma of tobacco in the rec room, as he put up his feet on his lazy boy. He’d be first at the paper then, no one could touch it before him. Maybe there would be a movie on with an actor smoking a pipe. He would have very definite opinions on whether the performer was a ‘real’ smoker or not, a distinction which I could never see but it would be very clear to him. He worked by day as a sales manager of a paper products company, a job he hated. What he longed for was the life of an artist, so on the weekends and sometimes mid-week evenings he would journey to his workshop and come out with wood sculptures, all of which he declared as crap but every one of them treasured by my sister and myself. Enjoy the pipes, and maybe a little of his creative spirit will enter you!

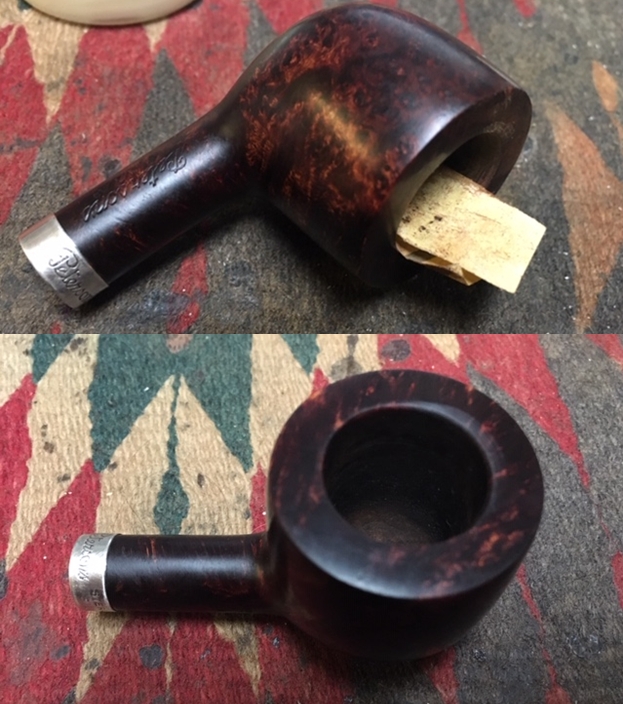
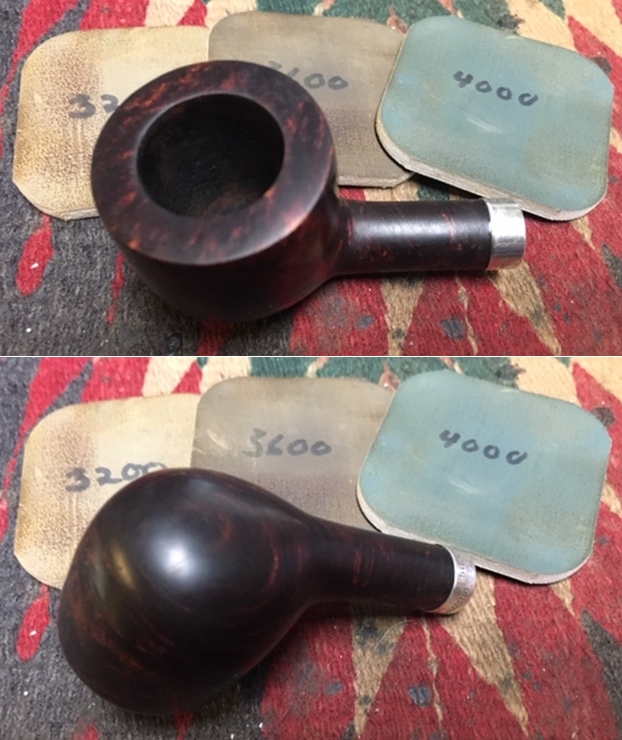
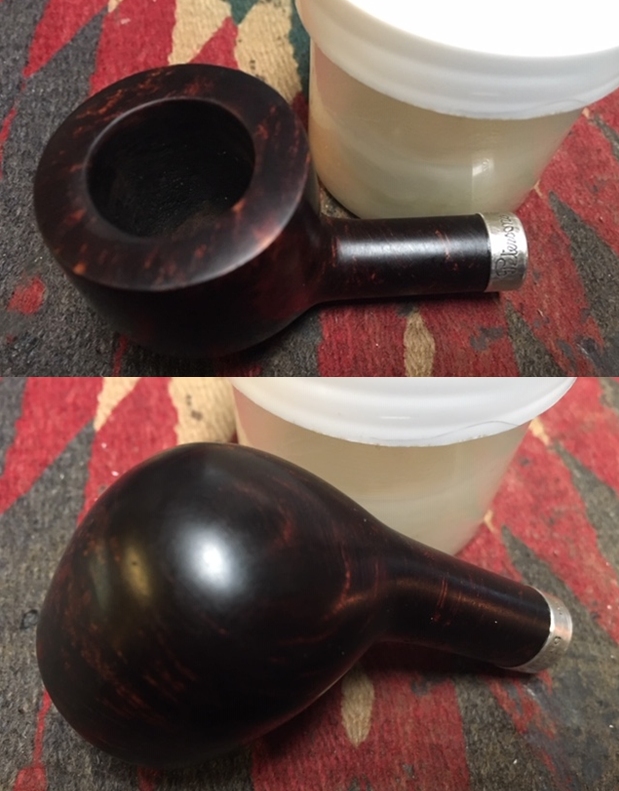
Now with all of the background gathered online and the background on Bob Kerr it was time to get on with the restoration of this beautifully grained Peterson’s “Cara” 608S Pot. I am really coming to appreciate the hard cleanup work that Jeff did on these pipes. They were a real mess when I sent them to Jeff and I have to tell you it was great that I did not need to clean this pipe. I decided to start the process by cleaning up the inner edge of the rim top. I used a folded piece of 220 grit sandpaper to smooth out the edge and give it a bevel.I polished the briar with micromesh sanding pads – wet sanding it with 1500-12000 grit pads and I wiped the bowl down after each sanding pad with a damp cloth. The bowl began to take on a finished shine.  I rubbed the bowl and rim down with Before & After Restoration Balm. I worked it into the surface of the briar with my fingertips to clean, enliven and protect it. I let the balm sit for a little while and then buffed with a cotton cloth to raise the shine. I really like watching the Balm do its magic and bring the briar alive.  I set the bowl aside and turned my attention to the stem. I “painted” the surface of the stem on both sides with a Bic lighter flame to lift the tooth marks. It did not take too much work to bring the light dents back to smooth.I sanded the surface of the stem with 220 grit sandpaper and 400 grit wet dry sandpaper to remove the remaining oxidation in the vulcanite and the last of the light tooth chatter.  The stem was in such good condition that I could skip working on it with sandpaper and went directly to polishing it with micromesh sanding pads – wet sanding with 1500-12000 grit pads. I wiped the stem down after each sanding pad with Obsidian Oil. I used some liquid paper to touch up the “P” on the left side of the stem. I applied it and let it dry and cure. Once it had cured I scraped the excess off with a tooth pick. The P looks very good.I polished it with Before & After Pipe Stem Polish – both Fine and Extra Fine. Once I had finished the polishing I gave it a coat of a new product I am experimenting with from Briarville Pipe Repair. It is called “No Oxy Oil” and it is made to protect the stem from oxidizing. I set it aside to dry. Once again I am excited to be on the homestretch. I look forward to the final look when it is put back together, polished and waxed. I put the bowl and stem back together. I polished the bowl and stem with Blue Diamond to polish out the scratches in the briar and the vulcanite. I gave the bowl and the stem multiple coats of carnauba wax. I buffed the pipe with a clean buffing pad to raise the shine. I hand buffed it with a microfiber cloth to deepen the shine. The pipe polished up pretty nicely. The grain really pops with the wax and polish. The shiny black vulcanite stem is a beautiful contrast to the blacks and browns of the bowl and shank. This Peterson’s “Cara” 608S Pot was another fun pipe to work on thanks to Jeff’s cleanup work. The pipe almost looks unsmoked. The “Sterling Silver” has a silver Band that is hallmarked and works as a contrast between the stem and the briar and binds it all together. It really is another stunning piece of briar whose shape follows the flow of the briar. The pipe is comfortable pipe to hold in the hand. The finished pipe is shown in the photos below. The dimensions of the pipe are Length: 5 ½ inches, Height: 1 ½ inches, Outside diameter of the bowl: 1 ½ inches, Chamber diameter: ¾ of an inch. This beautiful pipe will be going on the rebornpipes store if you would like to add it to your collection and carry on Bob’s legacy. If not, I have a lot more of Bob’s estate to work on of various brands. Perhaps one of those will catch your attention. Thanks for reading this blog and my reflections on the pipe while I worked on it. This is an interesting estate to bring back to life.

GBD 2006 Virgin Bulldog Restoration (Perspex)


By Al Jones

The 2006 is the classic straight bulldog shape from the GBD catalog.  This one was a Virgin and grade and like many came with a Perspex stem.  The sellers photographs were sparse, but the price was right so I bit.

The bowl top has some build-up, but that is not always a bad thing.  While the Perspex acrylic stem was brown and discolored, it had very little teeth marks.  Below is the pipe as it was received.

I used some bristle cleaners dipped in alcohol to remove most of stains inside the stem.  I always run a dry cleaner thru to avoid hazing.  That didn’t quite get all of the brown so I used a little acetone (finger-nail polish remover) also on a bristle cleaner.  That had the stem looking like new.  The very slight teeth chatter was removed with 1,500 and 2,000 grit wet paper followed by 8,000 grade micromesh. The stem was then polished with White Diamond and Meguiars Plastic polish.  I was very pleased with this outcome and it now looked like a nearly unused stem.

I used a worn piece of scotch-brite to remove the build-up on the bowl top.  The cake was removed with my reamer set and a piece of 320 grit paper on a reamer bit to finish it.  The bowl was soaked with alcohol and sea salt.  There were several handling marks on the bowl and I used an electric iron and wet cloth to stem them out.  The briar bowl was then buffed with White Diamond and several coats of Carnuba wax.

Below is the finished pipe. With no oxidation to remove from the stem, this was all completed rather quickly compared to a vulcanite stemmed pipe.  The biggest challenge was photographing the clear Perspex stem on a white background!


Life for a Republic Era Peterson’s “Sterling Silver” 68 from Bob Kerr’s Estate


Blog by Steve Laug

I am working on another pipe from Bob Kerr’s estate, another one of his Petersons. It is beautiful bent billiard with a taper stem. It is a large pipe that has some amazing grain on the briar. I have restored nine of his Peterson pipes and two of these were Peterson’s pipes made specifically for import into the Canadian market – one was a Kapruf 54 sandblast bent billiard (https://rebornpipes.com/2019/08/09/back-to-bob-kerrs-estate-another-canadian-import-petersons-kapruf-a-54/) and the other was a Kapruf 9BC 56 (https://rebornpipes.com/2019/08/09/back-to-bob-kerrs-estate-linking-petersons-kapruf-9bc-with-the-56-shape-number/). These were interesting that they had a unique numbering system designed for Petersons pipes that were specifically brought to Canada by the Canadian importer, Genin, Trudeau & Co. of Montreal, Quebec. I have included the links on that company below. (https://rebornpipes.com/2016/09/13/petersons-pipes-brochure-from-genin-trudeau-co-montreal-quebec/). I restored an English Made Peterson’s System ‘0’ 1307 bent billiard a  (https://rebornpipes.com/2019/08/17/an-english-made-petersons-system-0-1307-bent-billiard-from-bob-kerrs-estate/) and a Republic Era Peterson’s Flame Grain Bent billiard with a fishtail stem (https://rebornpipes.com/2019/08/16/a-petersons-flame-grain-x220s-bent-billiard-from-bob-kerrs-estate/).

I have been enjoying working on these Petersons particularly because Jeff has done such a thorough cleanup of them before I receive them. When I took it out of the box of the pipes that Jeff had cleaned up and sent back to me, I could see that it was stamped Peterson’s “Sterling Silver” on the left side of the shank next to the band. The right side of the shank was stamped Made in the Republic of Ireland over the shape number 68. It has some stunning grain around the bowl and shank under the thick grime. There was a thick cake in the bowl with remnants of tobacco stuck on the walls. There was a fair lava overflow on the rim. The top and edges of the rim looked good under the grime. It appears that there may be some damage on the inner edge on the left front. I think that there was a beautiful pipe underneath all of the buildup of years of use. The band is stamped Peterson’s over Dublin followed by Sterling Silver on the left side. On the underside are three hallmarks – The Hibernia stamp, the Crowned Harp stamp and finally the letter “O”. The stem was oxidized and calcified toward the end with some tooth chatter but surprisingly it did not have the deep tooth marks that I have come to expect from Bob’s pipes but the button edges were worn. Jeff took photos of the pipe before he started his cleanup work on it. Jeff took photos of the bowl and rim top to show the thick, hard cake in the bowl and the lava build up on the top of the rim and the edges of the bowl. The rim top, with the inner bevel appeared to be in good condition with a potential burn marks on the left front. The outer edges of the rim also appeared to be in good condition. Jeff took photos of the sides and heel of the bowl to show the condition of the finish. You can see the beautiful birdseye grain on the front and the heal. The flame and mixed grain on the back and sides of the bowl and shank. Even under the dirt and debris of the years it looked very good. Jeff took photos of the stamping on both sides of the bowl and shank. The vertical stamping on the left side was readable as you can see from the photos. It read Peterson’s “Sterling Silver”. The stamp on the right side read Made in the Republic of Ireland with the shape number 68 underneath and toward the bowl.The band was also stamped in the silver. Jeff took photos of the stamping. On the left side of the band/ferrule it is stamped Peterson’s Dublin. As the pipe is turned it reads Sterling Silver. Finally on the underside it is stamped with three hallmarks -1. Hibernia, 2. Crowned Harp and 3. The letter “O”. I will need to look that up during the restoration. Jeff took photos of the top and underside of the stem showing the tooth chatter, scratching and oxidation on the stem surface and wear on the edges of the button. I turned to a Peterson Catalogue that I have on rebornpipes and looked up the Classic Range Sterling Silver pipes (https://rebornpipes.com/tag/peterson-hallmark-chart/). I have put a red box around the shape 68 pipe shown in the catalogue page shown below.I turned first to Pipephil’s site to reacquaint myself with the Sterling Silver. Unfortunately there was no information to be found on this specific line. I then turned to Pipedia’s article on Peterson pipes to see what I could garner from that information. It is a great read in terms of the history of the brand (https://pipedia.org/wiki/Peterson). I have included a bit of the pertinent history here.

1950 – 1989 The Republic Era  – From 1950 to the present time, the stamp for this era is “Made in the Republic of Ireland” in a block format generally in three lines but two lines have been used with or without Republic being abbreviated.

During the 1950’s and 60’s the Kapp & Peterson company was still in the ownership of the Kapp family. However 1964 saw the retiral of the company Managing Director Frederick Henry(Harry) Kapp.

In the 1960’s Peterson hallmarked all gold mounted pipes but apparently they used their own marks on silver. This practice stopped at the end of that decade when they started to have all silver bands hallmarked.

  • With that information in hand I knew what I was dealing with in terms of the stamping on the pipe. It is a 1980 Republic Period pipe. I also wanted to be able to interpret the hallmarks on the silver band. I have captured a portion of the chart that include below that helps to clarify the meaning of each of the three hallmarks. I like the Hallmark feature on the higher end Peterson pipes with Sterling silver bands. It helps to pin down the date even further.

  • “Hibernia” seated, arm on harp represents Ireland (country of manufacture). There have been minor design changes over the years.
  • The “Harp Crowned” is the fineness mark denoting the high quality (purity) of the silver, and was used in a variety of designs until October 1992 when it was replaced by the new European Standard or Millesimal mark which gives the purity or quality of the silver in parts per thousand.
  • The Date Letter Code for the year in which the silver was hallmarked (see the chart below). In certain years a fourth hallmark is applied – for example 1966 – a Sword of Light for the 50th anniversary of the Easter Rising 1973. There were also other marks used for the fourth hallmark.

The pipe on my table had the Hibernia seated mark (Ireland) followed by the Harp Crowned signifying Sterling Silver percentage and finally in this case a lower case “o”. Each of the hallmarks was in an octagonal cartouche. The chart below helps me identify the date mark to 1980. I have highlighted the 1980 mark with a red arrow in the chart below.

I have included the entire Hallmark chart for ease of reference show any of you be looking to date the pipes that you are working on at present.I took photos of the pipe with the right stem. With over 125 pipes to clean from Bob’s estate I am very glad for Jeff’s help cleaning them. He remembers this pipe as one of the really dirty ones in Bob’s estate. He cleaned this filthy pipe with his usual penchant for thoroughness that I really appreciate. This one was a real mess and I did not know what to expect when I unwrapped it from his box. He reamed it with a PipNet pipe reamer and cleaned up the reaming with a Savinelli Fitsall Pipe Knife. He scrubbed out the internals with alcohol, pipe cleaners and cotton swabs until the pipe was clean. He scrubbed the exterior of the bowl with Murphy’s Oil Soap and a tooth brush to remove the grime and grit on the briar and the lava on the rim top. The finish looks very good with great looking grain around the bowl and shank. Jeff soaked the stem in Before & After Deoxidizer to remove the oxidation on the rubber. When the pipe arrived here in Vancouver for the second stop of its restoration tour I was amazed it looked so good. I took some close up photos of the rim top and also of the stem surface. I wanted to show what an amazing job Jeff did in the cleanup of the rim top. The rim top was burned and darkened on the left front inner edge. I also took close up photos of the stem to show the lack of tooth marks and chatter on the stem surface. It was very clean.   One of the things I appreciate about Jeff’s cleanup is that he works to protect and preserve the nomenclature on the shank of the pipes that he works on. The stamping on this one was very faint to start with so I was worried that it would disappear altogether with the cleanup. He was not only able to preserve it but it is clearer than shown in the earlier photos. I took some photos to show the clarity of the stamping. I have noticed that many restorers are not careful to protect the stamping in their cleaning process and often by the end of the restoration the nomenclature is almost destroyed. I would like to encourage all of us to be careful in our work to preserve this as it is a critical piece of pipe restoration!   I also have included a photo of the cleaned up hallmarks that were noted above.    Since this is another pipe Bob’s estate I am sure that some of you have read at least some of the other restoration work that has been done on the previous pipes. You have also read what I have included about Bob Kerr, the pipeman who held these pipes in trust before I came to work on them (see photo to the left). Also, if you have followed the blog for long you will already know that I like to include background information on the pipeman whose pipes I am restoring. For me, when I am working on an estate I really like to have a sense of the person who held the pipes in trust before I worked on them. It gives me another dimension of the restoration work. I asked Brian if he or his wife would like to write a brief biographical tribute to her father, Bob. His daughter worked on it and I received the following short write up on him and some pictures to go along with the words including one of Bob’s carvings. Once again I thank you Brian and tell your wife thank you as well.

I am delighted to pass on these beloved pipes of my father’s. I hope each user gets many hours of contemplative pleasure as he did. I remember the aroma of tobacco in the rec room, as he put up his feet on his lazy boy. He’d be first at the paper then, no one could touch it before him. Maybe there would be a movie on with an actor smoking a pipe. He would have very definite opinions on whether the performer was a ‘real’ smoker or not, a distinction which I could never see but it would be very clear to him. He worked by day as a sales manager of a paper products company, a job he hated. What he longed for was the life of an artist, so on the weekends and sometimes mid-week evenings he would journey to his workshop and come out with wood sculptures, all of which he declared as crap but every one of them treasured by my sister and myself. Enjoy the pipes, and maybe a little of his creative spirit will enter you!

Now with all of the background on the line and the background on Bob Kerr it was time to get on with the restoration of this beautifully grained Peterson’s “Sterling Silver” 68 Bent Billiard. I am really coming to appreciate the hard cleanup work that Jeff did on these pipes. They were a real mess when I sent them to Jeff and I have to tell you it was great that I did not need to clean this pipe. I decided to start the process by cleaning up the left front inner edge of the rim top. I used a folded piece of 220 grit sandpaper to smooth out the edge and give it a bevel.I polished the briar with micromesh sanding pads – wet sanding it with 1500-12000 grit pads and I wiped the bowl down after each sanding pad with a damp cloth. The bowl began to take on a finished shine.  I used Mahagony and Cherry stain pens to restain the rim top. The combination blends with the stain on the body of the bowl.I rubbed the bowl and rim down with Before & After Restoration Balm. I worked it into the surface of the briar with my fingertips to clean, enliven and protect it. I let the balm sit for a little while and then buffed with a cotton cloth to raise the shine. I really like watching the Balm do its magic and bring the briar alive. The stem was in such good condition that I could skip working on it with sandpaper and went directly to polishing it with micromesh sanding pads – wet sanding with 1500-12000 grit pads. I wiped the stem down after each sanding pad with Obsidian Oil. I polished it with Before & After Pipe Stem Polish – both Fine and Extra Fine. Once I had finished the polishing I gave it a coat of a new product I am experimenting with from Briarville Pipe Repair. It is called “No Oxy Oil” and it is made to protect the stem from oxidizing. I set it aside to dry. I used some liquid paper to touch up the P on the left side of the stem. I applied it and let it dry and cure. Once it had cured I scraped the excess off with a tooth pick. The P looks very good.I polished it with Before & After Pipe Stem Polish – both Fine and Extra Fine. Once I had finished the polishing I gave it a coat of a new product I am experimenting with from Briarville Pipe Repair. It is called “No Oxy Oil” and it is made to protect the stem from oxidizing. I set it aside to dry. As usual at this point in the restoration process I am excited to be on the homestretch. I look forward to the final look when it is put back together, polished and waxed. I put the bowl and stem back together. I polished the bowl and stem with Blue Diamond to polish out the scratches in the briar and the vulcanite. I gave the bowl and the stem multiple coats of carnauba wax. I buffed the pipe with a clean buffing pad to raise the shine. I hand buffed it with a microfiber cloth to deepen the shine. The pipe polished up pretty nicely. The grain really pops with the wax and polish. The shiny black vulcanite stem is a beautiful contrast to the browns of the bowl and thick shank. This Peterson’s “Sterling Silver” 68 Bent Billiard was another fun pipe to work on thanks to Jeff’s cleanup work. The pipe almost looks unsmoked. The “Sterling Silver” has a silver Band/Ferrule that is hallmarked and works as a contrast between the stem and the briar and binds it all together. It really is another stunning piece of briar whose shape follows the flow of the briar. The pipe is comfortable pipe to hold in the hand. The finished pipe is shown in the photos below. The dimensions of the pipe are Length: 6 inches, Height: 2 inches, Outside diameter of the bowl: 1 ¼ inches, Chamber diameter: ¾ of an inch. This beautiful pipe will be going on the rebornpipes store if you would like to add it to your collection and carry on Bob’s legacy. If not, I have a lot more of Bob’s estate to work on of various brands. Perhaps one of those will catch your attention. Thanks for reading this blog and my reflections on the pipe while I worked on it. This is an interesting estate to bring back to life.

A Project  Close to My Heart;  Restoring a Dunhill from Farida’s Dad’s Collection


Blog by Paresh Deshpande

The next pipe that I have selected as my new project is a very special pipe for the following reasons:-

(a) Firstly, this pipe was in the trust of an adventurer who has been on expeditions to Antarctica, the Arctic and loved Dunhill pipes (and I happen to carry forward that trust with one of his Dunhill pipes).

(b) Secondly, is the reason why and how this pipe came to me. During one of the many Face Time chats with Steve more than a year ago, I remarked that in spite of the huge collection of British, American and Danish pipes that I had inherited, there was not a single Dunhill pipe in it and that how expensive it was to own one. Steve had then only recently acquired an estate lot that contained, amongst other pipes, seven Dunhills. We discussed each of the Dunhill and I zeroed in on one. A few days later, I received a parcel from Steve that contained the Dunhill pipe that I had selected and along with it came another Dunhill in classic Billiard shape. A call to Steve confirmed that the second pipe was not an error, but a surprise for me. He conveyed that should I decide to and thereafter be able to restore it; I could keep it!!

(c) Thirdly and most importantly, I treat this restoration as a tribute to the daughter who loves her father and desired to share that love and those memories with other pipers who wished to carry forward her father’s trust.

Well, with this as a background, the pipe on my work table once belonged to Late Mr. John Barber. His daughter, Farida had requested Steve to restore her Dad’s pipe and pass them on to others for her. Here is the link to the pipe that I had selected for carrying forward the trust of John Barber:-

https://rebornpipes.com/2018/07/07/faridas-dads-pipes-5-restoring-a-dunhill-root-briar-56-bent-billiard/

The above blog makes for a very interesting read to know the personality of Late Mr. John Barber and his adventures as conveyed by his daughter, Farida. The below picture has been picked from the above blog which Steve had done and the pipe that I had selected from Farida’s Dad collection (indicated with a yellow arrow) and the one now on my work table has been marked in blue circle.As with few other pipes from John Barber’s collection, this pipe too has very worn out and faint stampings. Under magnifying glass and bright light one is able to make out the very faint stamping on the left of the shank as “# 197” followed by “DUNHILL” over “BRUYERE”. On the right side the very faint stamping that is visible is “ENGLAND” and a circled “4” followed by the letter “A”. The high quality vulcanite stem bears the trademark Dunhill white dot.To be very honest, I am not very keen to ascertain the vintage of this pipe and lack of stampings don’t help either, since I know that all the pipes that belonged to Farida’s father are from 1950s to 1970s. Having worked on eight Dunhill pipes from my Mumbai Bonanza and researched each one, I roughly know that a Dunhill Billiard with long tapered bit with shape code # 197, similar to what I have on my work table, is from the period 1950 and 1969. This corresponds with other pipes that Steve had worked on from this collection.

I now move ahead with my initial visual inspection as it helps me chalk out a rough path or sequence that I would follow during restoration and also the processes that I would have to employ at each stage of restoration.

INITIAL VISUAL INSPECTION
This is indeed one pipe which I would have not have selected and worked on in the first place, even though it is a Dunhill, but for the provenance of this pipe and for the reasons mentioned above. The stummel is covered in dirt and grime of decades of uncared for use and storage. The stummel is very sticky to the touch and appears to be smothered in some kind of lard, could it be whale fat or fish oils from the Arctic or Antarctic expeditions that it had accompanied the previous owner? I would not know, but it is all prevalent over the stummel surface. Underneath all this lard, dirt and grime, the highest quality of the briar and solid feel in hand for which Dunhill pipes are renowned, can be seen and be felt. Beautiful cross grains along the shank bottom, front and back of the stummel await to be revealed in all their glory. Similarly, lovely bird’s eye grains on both the sides of the stummel should show up nicely when the surface is cleaned. A distinct patch on the left and right side of the stummel is prominently seen which could have been caused due melting of the lard (?) from the warmth and holding of the stummel while smoking. There is a prominent crack on either sides of the stummel extending downwards from the rim outer edge towards the heel for a few millimeters and is marked in red circle. The front and foot of the stummel is peppered with dents and dings. These should be addressed to a great extent when I sand the stummel surface to get rid of all the sticky substance and grime. Coming on to the assessment of the rim top surface and the chamber, it is immediately apparent that this is where the maximum damage lies!!!! There is an even layer of thick cake and appears to have been partially reamed before being stowed away. The rim top surface also appears to have been topped to address the severe charring to the inner edge of the rim at 6 o’clock and 12 o’clock direction (marked in red circle) and at the outer edge towards the front and back end of the stummel (marked in green semi circle). The inner edge is completely out of round and is at its thinnest in the 6 o’clock direction and along the left side of the chamber. A crack (marked with yellow arrow) is clearly visible on the left side atop the rim top surface in 9 o’clock direction which extend in to the chamber as well as to the outside as described in stummel condition above. The topped rim surface is considerably darkened and appears to have absorbed copious amounts of oils and tars. I plan to extract these oils through a salt and alcohol soaking of the chamber. The condition of the inner walls of the chamber will be ascertained only after the cake has been taken down to the bare briar. However, I envisage heat lines and fissures all over the inner walls what with the pipe being subjected to some serious use! And the smell of St. Bruno tobacco, Farida’s Dad’s favorite tobacco, is all pervading and super strong. The shank and mortise is completely clogged with accumulated oils, tars and grime and air flow is laborious to say the least. The edges of the shank end are out of round resulting in shouldering effect once the stem is seated in to the shank. The seating of the stem also appears to be a bit skewed towards the right side by a minuscule margin though not easily noticeable.The vulcanite stem has calcium depositions on either sides about an inch and a half from the button edge towards the tenon end. There are deeper bite marks on the upper and lower stem surface near the buttons in the bite zone. However, the buttons on either surface is undamaged. The tenon and horizontal slot show heavy deposition of dirt, oils and tars, adversely affecting the air flow.THE PROCESS
The restoration process started with sanding the bite zone of the stem with a folded piece of 220 grit sand paper to remove the calcium deposition and followed by internal cleaning of the tenon, stem air way and the slot with pipe cleaners and isopropyl alcohol. This was followed by cleaning the stem surface of all the oxidation by immersing the stem in “Before and After Stem Deoxidizer” bath overnight. This solution developed by Mark, pulls all the oxidation to the surface and makes the subsequent cleaning a breeze.The next morning, Abha my wife, took the stem out and cleaned all the thick sticky solution from the surface under running warm water. She blew out the solution that had clogged the airway and scrubbed out the raised oxidation with cotton pads and a piece of 0000 grade steel wool. She applied a little quantity of Extra Virgin Olive oil in to the stem to hydrate the vulcanite and set it aside. The initial sanding with a folded piece of 220 grit sand paper had evened out the minor tooth chatter and now that the stem is free of the heavy oxidation, I have a clear understanding of the damage that needs to be addressed, which by the way, is very minimal. I am pleased with the stem appearance at this stage.To raise the deeper bite marks from the upper and lower surface of the stem, I flamed the surface with a lighter flame. I went ahead and sand the raised bite mark with a 220 grit sand paper and sharpened the button edges. With a cotton swab and isopropyl alcohol, I wiped the stem surface to clean it of all the dust. I mixed superglue and activated charcoal powder and filled the bite marks and set it aside to cure. While the stem fill was set aside to cure, I worked the stummel and reamed the chamber with size 3 blade head of PipNet pipe reamer. Using my smaller sized fabricated knife, I removed all the cake from the areas which could not be reached by the reamer head. Very carefully, I removed all the charred briar from the outer and inner edges till I reached solid briar wood. With a folded piece of 220 grit sand paper, I sand the chamber walls to remove the last remaining traces of cake and wiped it with a cotton swab dipped in isopropyl alcohol. I am not very enthusiastic about the way the chamber appears at this stage. The inner edge at the rear has been pushed back significantly thinning the rim top surface. Also, the walls are peppered with numerous minor heat fissures/ lines making a web pattern. The crack, it is now clear, extends in to the chamber over the rim surface and on to the outer stummel surface. Another crack is now evident on the right side of the rim surface, but it’s superficial and not deep. Here is how the chamber appears at this stage, though not very encouraging, I say. Continuing with internal cleaning, I cleaned out the mortise, first by scrapping out the entire dried accumulated gunk with a dental tool. I further cleaned the shank internals with hard and regular pipe cleaners dipped in alcohol. Even after removing the cake from the chamber and cleaning the shank internals, the smells in the chamber are still very strong; in fact, my entire room smells of it!!Before I moved to the next stage in the process, I wanted to access the extent of charring over the outer rim edge. I gently scraped the charred briar from the outer rim edge with a sharp knife. Again not a very encouraging sight as the gaping saddle that was formed at the front and back of the stummel was anything that could be addressed by simply creating a bevel over the outer rim edge. Sad!! I have the option of addressing this issue either by topping the rim top surface or by the way of rebuilding the outer rim edge. I shall decide on the best course of action when I reach that stage.Next I decided to address the copious amounts of oils and tars that have been absorbed by the stummel giving it a considerably darkened appearance and a sticky feel in the hand. I stretched a cotton ball into a thick wick, wound it around a folded pipe cleaner and inserted it in to the shank and pushed it till it came out of the draught hole and packed the chamber, just below the rim, with Kosher salt. I topped the bowl with isopropyl alcohol using a syringe. I topped the bowl with alcohol again after 20 minutes when the alcohol level had gone down and set it aside overnight for the salt and alcohol to do its intended job. The next morning, the salt had turned a dirty and smelly brown and so was the wick and pipe cleaner in the shank. The ghost smells, the rim top dark coloration and the stickiness in the surface were still strong and hence I decided to give it a second salt and alcohol bath. This time around I used cotton balls in place of Kosher salt what with Kosher salt being more expensive and not readily available. I repeated the entire process described above and set the bowl aside overnight. By the next afternoon, the alcohol had drawn out maximum of the remaining oils and tars from the stummel surface and trapped it in the cotton balls. I am satisfied with the condition of the bowl internals with this cleaning.With the internals of the pipe cleaned and sorted, it was time to move to the external cleaning of the stummel. Using a hard bristled tooth brush dipped in undiluted Murphy’s oil soap, I very deliberately scrubbed the stummel, cleaning the surface thoroughly. I was very deliberate on the surface areas which were covered in fat-like sticky substance over which dirt and grime had accumulated over the years. I also cleaned the mortise with a shank brush and dish washing soap. I scrubbed the surface with a pad of Scotch-Brite to rid the surface of the slime. I was surprised to observe the stummel turning greasy white. This would need resorting to some heavy duty and abrasive methods to get rid of this grease from the stummel surface. Here is how the stummel appeared at this stage. I am happy that the salt and alcohol treatment had drawn out all the oils from the pores of the briar as can be seen from the cleaned up rim top surface. Next, I decided to stabilize the cracks that were observed prominently on either sides of the stummel extending downwards from the rim outer edge for a few millimeters. Under a magnifying glass, I marked the end point of the cracks and using a 1 mm drill bit, I drilled a counter hole at the base of the crack taking care that I did not drill a through hole. This ensures that the crack is stabilized and does not spread any further. With a heat gun, I warm the stummel and this expands the crack minutely. I fill this crack with clear CA superglue and firmly press the sides together. Once the superglue had sufficiently hardened, I apply a little superglue along the entire crack (rim top and side of the stummel) and press briar dust over it. This further stabilizes, strengthens and masks the fill in the cracks. I had reached that point in restoration where I had to decide on the way ahead for rim repairs. I could either top the bowl till I had a perfectly even round rim top, compromising on the shape and size or I could go for a complete rebuild. I decided on the latter as topping would significantly reduce the bowl size. Using a worn out piece of 150 grit sand paper, I completely remove the charred briar from the outer and inner rim edges in preparation for rebuilding the rim top. Using the layering technique (layer of glue followed by briar dust pressed on to this layer and repeating till the fill is over and above the intact rim surface), I completely rebuild the rim top and set the stummel aside for the fills to harden. While the rim top rebuild was curing, I decided to address the stem repairs. The stem fills had cured nicely and using a flat head needle file, I sand the fill to achieve a rough match with the surrounding stem surface. I further sand the stem surface with a folded piece of 220 and 320 grit sand papers to further blend in the repairs. However, a minor air pocket was revealed on the lower surface of the stem and I spot filled it with clear superglue and set it aside to cure and turned my attention to the stummel repairs again.The rim rebuilt surface had cured nicely. I could now proceed with reshaping the rim top and the inner rim edge to an even round. I mount a coarse 150 grit sanding drum on to my hand held rotary tool and setting a speed at half, I carefully sand off the excess fill from the rim top surface and the rim inner edge till I had achieved a rough match with the intact portion of the rim top and inner edge. I further top the rim on a 220 grit sand paper to achieve a seamless rim top surface. With a folded piece of 220 grit sand paper, I worked the inner rim to a crisp and perfectly rounded edge. I am very pleased with the rim surface rebuild at this stage in restoration. Staying with the stummel, I next decide to address the greasy white coating of whale fat or blubber or whatever fats that covered the stummel surface (remember all the Arctic and Antarctic expeditions on which this pipe must have accompanied Late Mr. John Barber!!). I sand the entire stummel surface with a piece of 180 grit sand paper. I frequently wiped the stummel with a cloth wetted in hot water to get rid of the loosened fat coating. A lot of elbow grease and few grueling hours later, beautiful bird’s eye grains and swirls began to make an appearance over the stummel surface. With renewed vigor, I completely remove the greasy white coat of fat from the stummel. I was careful not to sand the sides of the shank, but only wiping with hot water in an attempt to preserve the worn out stampings on this pipe. Though the surface has been cleaned up nicely, it appears dry and lackluster. I rub a small quantity of Extra Virgin Olive oil in to stummel to hydrate the briar and set it aside for the oil to be absorbed by the briar. The grains in the stummel now pop out and appear resplendent in their beauty. All the hard work up to this stage was well worth the effort and much more. The following pictures speak for themselves! To further smooth out the rim top, I topped the rim surface over piece of 320 grit followed by 420, 600 and 800 grit sand papers. Even though the cracks have now been exposed as a result of this topping, I am not overly worried as I am confident that the cracks have been solidly filled and stabilized.At this point I decided to work on the inner walls of the chamber. There are heat lines seen on the walls of the chamber and add to that the rebuilt inner edge using superglue and briar dust. To protect the walls and prevent the superglue and briar dust from coming in to direct contact with the burning tobacco, I plan to first coat the rebuilt part and the heat lined surface of the chamber walls with J B Weld followed by a second coat of activated charcoal and yogurt to the entire chamber which would assist in faster cake formation. J B Weld is a two-part epoxy Cold Weld that consists of two parts; hardener and steel which are mixed in two equal parts (ratio of 1:1) with hardening time of 5-6 minutes and complete curing time of 6-8 hours. I poured the contents of the two tubes and mixed it well. With a flat bamboo frond, I applied this mix, as evenly as possible, over the intended areas. I worked fast to ensure an even coat over the chamber walls before the weld could harden. I set the stummel aside for the application to harden and cure overnight. By next afternoon when I got back to working on this pipe, the J B Weld coat had completely cured and hardened considerably. With a folded piece of 150 grit sandpaper, I sand the weld coating to a smooth surface and continued till I had as thin a coat as was essential to protect and insulate the walls from the direct heat of the burning tobacco. Here are pictures of the process and the progress at this stage. Wanting a change, I decided to now tackle the stem fill which had been left curing for the last couple of days. Little did I know at this point that I was still some days away from completing the stem repairs!! I followed the golden rule of pipe restoration; “Less is more” and move ahead with sanding the fill with a piece of 220 grit sand paper without first using a flat head needle file. I followed it up with sanding the entire stem surface with 400, 600 and 800 grit sand papers. I finished the sanding regime with a 0000 grade steel wool. It was at this stage that I noticed the same dreaded air pocket and the fill was peeling out. With a dental pick, I completely removed the old fill and refilled it with a fresh mix of activated charcoal and superglue. I set the stem aside to cure overnight, third fill for the same spot!! With time still on my side before I hit the bed for the night, I decided to work on the stummel which had been set aside to absorb the olive oil. I thoroughly wiped the bowl with an absorbent paper towel to remove all the excess oils from the bowl surface. I polished the stummel, including the newly rebuilt rim top surface, wet sanding with 1500 to 12000 grit micromesh pads. I wiped the surface with a moist cloth to remove all the sanding dust left behind by the pads. I was very careful with the stamping as I desired to preserve as much of the worn out stampings as was possible. Though the rebuilt rim surface and outer rim edges stand out as sore thumb at this stage, I intend to mask the same with a dark stain. The stummel surface appears promising and I am absolutely in love the bird’s eye grains on this pipe. Next, I rub a small quantity of “Before and After Restoration Balm” in to the briar with my finger tips and let it rest for a few minutes. The balm almost immediately works its magic and the briar now has a nice vibrant appearance with the beautiful darkened grain patterns on full display. I further buff it with a horse hair shoe brush. While the stummel was set aside for the balm to be absorbed, I worked the stem fill which had cured over 24 hours. I sand the fill with a used and worn piece of 180 grits sandpaper and followed it with wet sanding the entire stem with 1500 to 12000 grade micromesh pads. I wiped the stem with a moist cloth to remove the dust and monitor the progress being made after every three grit pads. The stem polished up nicely and has a rich deep black shine to it. I applied a little Extra Virgin Olive oil to rehydrate the vulcanite and set the stem aside.Though the stummel had cleaned up nicely with a deep color to the briar, it was nowhere near the deep reddish brown coloration associated with the Bruyere line of Dunhill pipes; in fact it was much lighter. While restoring a Dunhill Bruyere from my Mumbai Bonanza (https://rebornpipes.com/2019/03/13/reconstructing-a-broken-stem-on-dunhill-bruyere-51671/), I had stained the stummel in cherry red stain and though the end results were great, it was not the original color associated with a Bruyere. The comments and suggestions received from esteemed readers of the write up pointed me in the direction of achieving this color!!! I decided to first apply a coat of DB followed by a final coat of red stain. However, when I went through my stains, I realized that I did not have Dark brown stain; the Feibing’s stain bottle had mysteriously dried out!!!!! The next best option available was the Cordovan. I consulted Steve and though he was not sure about the color, he encouraged me to go ahead and that is exactly what I did. I heated the stummel surface with my heat gun to open up the pores on the stummel so that the stain is well set while being careful that I do not overheat the fill, a lesson learned while restoring Steve’s Alexander Zavvos pipe. I dipped a folded pipe cleaner in Feibing’s Cordovan leather dye and liberally applied it over the heated surface of the stummel, flaming it with a lighter as I progressed. This helps in the setting of the stain in the grain of the briar. I set the stummel aside overnight for the stain to set. The next afternoon, I mounted a felt cloth buffing wheel on to my hand held rotary tool and proceed, as my dear friend Dal Stanton likes to say “unwrap the coat of stain to reveal the grains” on the stummel surface. Alas, there was no revelation of any sorts!! All that I saw was a dark stummel. You must understand my disappointment at this stage. I realized that the stain coat was too thick. I needed to lighten it up a bit and hence, with a cotton swab wetted in isopropyl alcohol, I wiped the entire stummel surface. Though the stain has lightened a bit, it was not the result that I desired. Here is how the stummel appeared at this stage. To further lighten the stain and “reveal” the stummel grains, I dry sand the entire stummel with 1500 to 12000 grit micromesh pads. The grains are now clearly visible. However, the trademark color of Bruyere line is still an illusion……it was browner than the reddish brown stain that I was looking for. I decided on giving the stummel a stain wash with a Cherry Red stain as suggested by Steve. I diluted the Cherry Red stain powder in 99.9% isopropyl alcohol in approx ratio of 1:4. With a cotton swab, I dabbed the diluted stain over the stummel surface, letting it set for a few moments and thereafter wiping it off with a dry clean cotton swab. I repeated the process till I had achieved the desired coloration. I am pleased with the color of the stummel which is as close as I could achieve, to the original Bruyere color. This time around, even the fills had absorbed the stain and blended in nicely with the rest of the stummel. To complete the restoration, I reattach the stem with the stummel. I mount a cotton cloth buffing wheel on to my hand held rotary tool and applied several coats of carnauba wax. I finished the restoration by giving the entire pipe a rigorous hand buffing using a microfiber cloth to raise the shine further. This dude has definitely come a long way from the condition it was in at the start.Now that the cosmetic aspects of this pipe have dealt with, all that remained was the functional aspect that needs to be taken care of. The minor heat lines and the J B Weld coated surface needs to be protected from the direct heat of the burning tobacco and for this; I coat the complete chamber walls with a mix of activated charcoal and yogurt and set it aside to harden naturally.I shared a few pictures of the pipe with my mentor, Steve, expecting some hearty praises on this restoration!! However, his keen eyes noticed an issue which had missed mine. He very gently pointed that a sterling silver band at the shank end would mask the shouldering that was inadvertently created!! This remark of his left me shocked!! Not at the remark as such, but at the fact that I had shouldered the shank end during the restoration process. Still smarting at being chided by my teacher, I revisited all the pictures and true enough, this issue already existed and I had missed out mentioning it in my initial inspection in the write up and hence missed it out during the entire process. I made necessary amendments to the post and had to keep the pipe aside till I reached back home during my leave where my local silversmith would fabricate one such ring for me.

I revisited the small, dingy and unsophisticated shop with rudimentary tools where the craftsman had built me a Sterling Silver ring for an Alfred Massin Meerschaum cutty that I had restored two months ago (https://rebornpipes.com/2019/10/09/complicating-a-simple-restoration-of-a-cutty-meerschaum/). The craftsman at the shop made me a perfect ring for the Dunhill shank end. This ring not only masks the shouldering, it also adds a touch of class while breaking the monotony of the pipe. I refreshed the bowl coating with activated charcoal yogurt mix and completed this project with a vigorous hand buffing with a microfiber cloth. How I wish I had carried my hand held rotary tool and some carnauba wax for a final polish while on leave!!! Nevertheless, the finished pipe has received a fresh lease on life and is now all set to stay with me for the rest of my time on this earth as part of my Dunhill rotation. The repairs are solid and blended in well with the surrounding surfaces. All that now remains is to load a nice English blend and enjoy a quite peaceful smoke… P.S. This perhaps would be the longest write up that I ever have posted on rebornpipes.com!! Apart from the Alfred Massin Meerschaum pipe that I have mentioned above, this project extended over a period of two months, just for the want of sterling silver band. Nonetheless, it was one project that I enjoyed working on and hope that my Guru and mentor Steve gives me passing marks on this test project (remember that it was a sort of test put forth by Steve for me!).

The most important aspect of this restoration was being able to live up to the belief and faith that Farida had entrusted in Steve and through him, in me, to carry forth the trust of her Father. It is while working on this project that I fully comprehend and understand what and why Dal Stanton calls himself Pipe Steward!! A perfect term coined by this well read gentleman, I say.

Farida, if at all you read this write up, I wish to let you know that it has been a privilege to have been afforded an opportunity to carry forward the trust of your father. As I puffed on this Dunhill, I could conjure up images of your father and his dogs amidst all the snow and loneliness…. A MAN, HIS FAITHFUL PIPE AND HIS BELOVED DOGS!! Thank you Steve and Farida…… and the pipe has a new friend!!

Life for a Republic of Ireland Peterson’s DeLuxe 11S Bent Billiard from Bob Kerr’s Estate


Blog by Steve Laug

I am working on another pipe from Bob Kerr’s estate, another one of his Petersons. It is the first of the system pipes that I have in his estate and the first Deluxe. It is a large pipe which came with a stem from one of his other pipes. I have restored eight of his Peterson pipes and two of these were Peterson’s pipes made specifically for import into the Canadian market – one was a Kapruf 54 sandblast bent billiard (https://rebornpipes.com/2019/08/09/back-to-bob-kerrs-estate-another-canadian-import-petersons-kapruf-a-54/) and the other was a Kapruf 9BC 56 (https://rebornpipes.com/2019/08/09/back-to-bob-kerrs-estate-linking-petersons-kapruf-9bc-with-the-56-shape-number/). These were interesting that they had a unique numbering system designed for Petersons pipes that were specifically brought to Canada by the Canadian importer, Genin, Trudeau & Co. of Montreal, Quebec. I have included the links on that company below. (https://rebornpipes.com/2016/09/13/petersons-pipes-brochure-from-genin-trudeau-co-montreal-quebec/). I restored an English Made Peterson’s System ‘0’ 1307 bent billiard a  (https://rebornpipes.com/2019/08/17/an-english-made-petersons-system-0-1307-bent-billiard-from-bob-kerrs-estate/) and a Republic Era Peterson’s Flame Grain Bent billiard with a fishtail stem (https://rebornpipes.com/2019/08/16/a-petersons-flame-grain-x220s-bent-billiard-from-bob-kerrs-estate/).

I have been enjoying working on these Peterson’s particularly because Jeff has done such a thorough cleanup of them before I receive them. When I took it out of the box of the pipes that Jeff had cleaned up and sent back to me, I could see that it was stamped Peterson’s DeLuxe vertically on the left side of the shank next to the band. The right side of the shank was stamped Made in the Republic of Ireland over the shape number 11S. It has some stunning grain around the bowl and shank under the thick grime. There was a thick cake in the bowl with remnants of tobacco stuck on the walls. There was a fair lava overflow on the rim. The top and edges of the rim looked very good under the grime. I think that there was a beautiful pipe underneath all of the buildup of years of use. The band is stamped Peterson’s over Dublin followed by Sterling Silver on the left side. On the underside are three hallmarks – The Hibernia stamp, the Crowned Harp stamp and finally the letter “O”. The wrong stem was in the shank when I sent it to Jeff so that is the one shown in the photos. It was oxidized and calcified toward the end with some tooth chatter but surprisingly it did not have the deep tooth marks that I have come to expect from Bob’s pipes but the button edges were worn. Jeff took photos of the pipe before he started his cleanup work on it. Jeff took photos of the bowl and rim top to show the thick, hard cake in the bowl and the lava build up on the top of the rim and the edges of the bowl. The rim top, with the inner bevel appeared to be in good condition with no burn marks or chips. The outer edges of the rim also appeared to be in good condition. Jeff took photos of the sides and heel of the bowl to show the condition of the finish. You can see the beautiful birdseye grain on the sides and cross grain on the front, back and underside of the bowl and shank. Even under the dirt and debris of the years it looked very good. The cross grain on the heel was beautiful.   Jeff took photos of the stamping on both sides of the bowl and shank. The vertical stamping on the left side was readable as you can see from the photos. It read Peterson’s DeLuxe. The stamp on the right side read Made in the Republic of Ireland with the shape number 11S underneath. The band was also stamped in the silver. Jeff took photos of the stamping. On the left side of the band/ferrule it is stamped Peterson’s Dublin (photo 1). As the pipe is turned it reads Sterling Silver (photo 2). Finally on the underside it is stamped with three hallmarks -1. Hibernia, 2. Crowned Harp and 3. The letter “O”. I will need to look that up during the restoration. Jeff took photos of the top and underside of the stem showing the tooth chatter, scratching and oxidation on the stem surface and wear on the edges of the button. I turned to a Peterson Catalogue that I have on rebornpipes and looked up the System Deluxe pipes (https://rebornpipes.com/tag/peterson-hallmark-chart/). I have put a red box around the 11S pipe shown in the catalogue page shown below.   I turned first to Pipephil’s site to reacquaint myself with the DeLuxe. Unfortunately there was no information to be found on this specific line. I then turned to Pipedia’s article on Peterson pipes to see what I could garner from that information. It is a great read in terms of the history of the brand (https://pipedia.org/wiki/Peterson). I have included a bit of the pertinent history here.

1950 – 1989 The Republic Era  – From 1950 to the present time, the stamp for this era is “Made in the Republic of Ireland” in a block format generally in three lines but two lines have been used with or without Republic being abbreviated.

During the 1950’s and 60’s the Kapp & Peterson company was still in the ownership of the Kapp family. However 1964 saw the retrial of the company Managing Director Frederick Henry(Harry) Kapp.

In the 1960’s Peterson hallmarked all gold mounted pipes but apparently they used their own marks on silver. This practice stopped at the end of that decade when they started to have all silver bands hallmarked.

With that information in hand I knew what I was dealing with in terms of the stamping on the pipe. It is a 1980  Republic Period pipe. I also wanted to be able to interpret the hallmarks on the silver band. I have captured a portion of the chart that include below that helps to clarify the meaning of each of the three hallmarks. I like the Hallmark feature on the higher end Peterson pipes with Sterling silver bands. It helps to pin down the date even further.

  • “Hibernia” seated, arm on harp represents Ireland (country of manufacture). There have been minor design changes over the years.
  • The “Harp Crowned” is the fineness mark denoting the high quality (purity) of the silver, and was used in a variety of designs until October 1992 when it was replaced by the new European Standard or Millesimal mark which gives the purity or quality of the silver in parts per thousand.
  • The Date Letter Code for the year in which the silver was hallmarked (see the chart below). In certain years a fourth hallmark is applied – for example 1966 – a Sword of Light for the 50th anniversary of the Easter Rising 1973. There were also other marks used for the fourth hallmark.

The pipe on my table had the Hibernia seated mark (Ireland) followed by the Harp Crowned signifying Sterling Silver percentage and finally in this case a lower case “o”. Each of the hallmarks was in an octagonal cartouche. The chart below helps me identify the date mark to 1980. I have highlighted the 1980 mark with a red arrow in the chart below.

I have included the entire Hallmark chart for ease of reference show any of you be looking to date the pipes that you are working on at present.

From this information and the catalogue page I wanted to see what the original stem looked like then I could go through the other pipes in the estate and see if somehow it had been used on the wrong pipe. I found a pipe that is very similar – an 11S with a thick P-lip stem that did not have the P logo on the side on the Smokingpipes.com online store. I have included both the link and the photo below.

https://www.smokingpipes.com/pipes/new/peterson/moreinfo.cfm?product_id=167772#fullscreenI also found a description of the 11S Deluxe System online on another site:

The 11s Deluxe system is a bent billiard with broad, continuous curves and an extra-stout shank. The high quality briar is carefully selected and incorporates the signature system functionality. The shape is fitted with a black acrylic Peterson-Lip mouthpiece, containing an inner metal ‘condenser’ which facilitates a cooler smoking experience. The aluminum Peterson ‘P’ and large hall marked sterling silver band both signature elements of Peterson craftsmanship, combine wonderfully to create a high quality Peterson pipe.

The description includes the aluminum Peterson “P” on the stem which the example I show above and the pipe I am working is lacking. It seemed to have come out both ways. I went through the other Peterson pipes that Jeff had cleaned up and sent back to me. I found one that had the stem switched with the Deluxe. Here are some photos of the two pipes with the wrong stems. The thicker stem shown at the top of both photos is the proper one for the Deluxe. I removed the stems and took photos of the stems.I put the correct stem in the Deluxe and turned my attention to the pipe. I took photos of the pipe with the right stem. With over 125 pipes to clean from Bob’s estate I am very glad for Jeff’s help cleaning them. He remembers this pipe as one of the really dirty ones in Bob’s estate. He cleaned this filthy pipe with his usual penchant for thoroughness that I really appreciate. This one was a real mess and I did not know what to expect when I unwrapped it from his box. He reamed it with a PipNet pipe reamer and cleaned up the reaming with a Savinelli Fitsall Pipe Knife. He scrubbed out the internals with alcohol, pipe cleaners and cotton swabs until the pipe was clean. He scrubbed the exterior of the bowl with Murphy’s Oil Soap and a tooth brush to remove the grime and grit on the briar and the lava on the rim top. The finish looks very good with great looking grain around the bowl and shank. Jeff soaked the stem in Before & After Deoxidizer to remove the oxidation on the rubber. When the pipe arrived here in Vancouver for the second stop of its restoration tour I was amazed it looked so good. I took some close up photos of the rim top and also of the stem surface. I wanted to show what an amazing job Jeff did in the cleanup of the rim top. The rim top was burned and darkened with nicks and notches around the top and inner edge. I also took close up photos of the stem to show the lack of tooth marks and chatter on the stem surface. It was very clean.   One of the things I appreciate about Jeff’s cleanup is that he works to protect and preserve the nomenclature on the shank of the pipes that he works on. The stamping on this one was very faint to start with so I was worried that it would disappear altogether with the cleanup. He was not only able to preserve it but it is clearer than shown in the earlier photos. I took some photos to show the clarity of the stamping. I have noticed that many restorers are not careful to protect the stamping in their cleaning process and often by the end of the restoration the nomenclature is almost destroyed. I would like to encourage all of us to be careful in our work to preserve this as it is a critical piece of pipe restoration!   I also have included a photo of the cleaned up hallmarks that were noted above. Since this is another pipe Bob’s estate I am sure that some of you have read at least some of the other restoration work that has been done on the previous pipes. You have also read what I have included about Bob Kerr, the pipeman who held these pipes in trust before I came to work on them (see photo to the left). Also, if you have followed the blog for long you will already know that I like to include background information on the pipeman whose pipes I am restoring. For me, when I am working on an estate I really like to have a sense of the person who held the pipes in trust before I worked on them. It gives me another dimension of the restoration work. I asked Brian if he or his wife would like to write a brief biographical tribute to her father, Bob. His daughter worked on it and I received the following short write up on him and some pictures to go along with the words including one of Bob’s carvings. Once again I thank you Brian and tell your wife thank you as well.

I am delighted to pass on these beloved pipes of my father’s. I hope each user gets many hours of contemplative pleasure as he did. I remember the aroma of tobacco in the rec room, as he put up his feet on his lazy boy. He’d be first at the paper then, no one could touch it before him. Maybe there would be a movie on with an actor smoking a pipe. He would have very definite opinions on whether the performer was a ‘real’ smoker or not, a distinction which I could never see but it would be very clear to him. He worked by day as a sales manager of a paper products company, a job he hated. What he longed for was the life of an artist, so on the weekends and sometimes mid-week evenings he would journey to his workshop and come out with wood sculptures, all of which he declared as crap but every one of them treasured by my sister and myself. Enjoy the pipes, and maybe a little of his creative spirit will enter you!

Now with all of the background on the line and the background on Bob Kerr it was time to get on with the restoration of this beautifully grained Peterson’s DeLuxe llS Bent Billiard. I am really coming to appreciate the hard cleanup work that Jeff did on these pipes. They were a real mess when I sent them to Jeff and I have to tell you it was great that I did not need to clean this pipe. I decided to start the process by polishing the briar with micromesh sanding pads – wet sanding it with 1500-12000 grit pads and I wiped the bowl down after each sanding pad with a damp cloth. The bowl began to take on a finished shine.  The stem was in such good condition that I could skip working on it with sandpaper and went directly to polishing it with micromesh sanding pads – wet sanding with 1500-12000 grit pads. I wiped the stem down after each sanding pad with Obsidian Oil. I polished it with Before & After Pipe Stem Polish – both Fine and Extra Fine. Once I had finished the polishing I gave it a coat of a new product I am experimenting with from Briarville Pipe Repair. It is called “No Oxy Oil” and it is made to protect the stem from oxidizing. I set it aside to dry. As usual at this point in the restoration process I am excited to be on the homestretch. I look forward to the final look when it is put back together, polished and waxed. I put the bowl and stem back together. I polished the bowl and stem with Blue Diamond to polish out the scratches in the briar and the vulcanite. I gave the bowl and the stem multiple coats of carnauba wax. I buffed the pipe with a clean buffing pad to raise the shine. I hand buffed it with a microfiber cloth to deepen the shine. The pipe polished up pretty nicely. The grain really pops with the wax and polish. The shiny black vulcanite stem is a beautiful contrast to the browns of the bowl and thick shank. This Peterson’s DeLuxe 11S Bent Billiard was another fun pipe to work on thanks to Jeff’s cleanup work. The pipe almost looks unsmoked. The original Sterling Silver Band/Ferrule works as a contrast between the stem and the briar and binds it all together. It really is a quite stunning piece of briar whose shape follows the flow of the briar. The pipe is comfortable pipe to hold in the hand. The finished pipe is shown in the photos below. The dimensions of the pipe are Length: 6 ½ inches, Height: 2 inches, Outside diameter of the bowl: 1 ¼ inches, Chamber diameter: ¾ of an inch. This beautiful pipe will be going on the rebornpipes store if you would like to add it to your collection and carry on Bob’s legacy. If not, I have a lot more of Bob’s estate to work on of various brands. Perhaps one of those will catch your attention. Thanks for reading this blog and my reflections on the pipe while I worked on it. This is an interesting estate to bring back to life.