Blog by Steve Laug
My brother Jeff always keeps an eye open for Churchwardens and so far he continues to come up with not only brands that I have heard of but also Churchwardens from name brand pipes that I had no idea existed. The pipe on the worktable today is made by Jobey and has the patented Jobey link between the stem and the shank. The bowl is a fairly classic Dublin shape but that is where the classic is modified. The first modification is that the shank is rounded almost like it was made for a stick bit or for a metal ferrule. I expected the shank to be faced, as usual on a churchwarden, to take a long tapered stem that flows directly from the shank with no interruption. The modification to the classic is related but refers to how the stem seats in the shank of the pipe. Instead of the expected stick bit with a push tenon this one has the threaded mortise that the Jobey Link screws into. The Link has a smooth end that the stem can be pushed on and held in place by friction. I have included a patent drawing of the link in a pipe. Note the threads in the shank and the smooth end in the stem. That is followed by an advertisement for the link and a picture of the link.
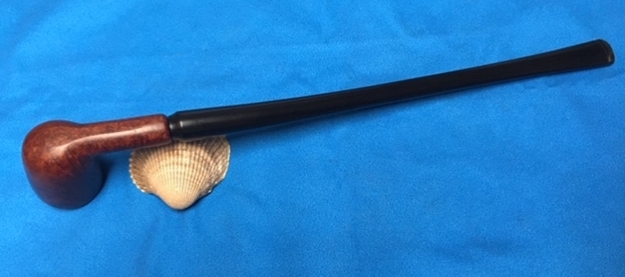
 This Jobey had been well loved and smoked often. The stem had tooth chatter on both sides near the button. The finish was dirty but otherwise looked good. The rim top appeared to be in good condition under the coat of lava on the back side. The bowl had a thick cake and the interior of the pipe was dirty with tars and oils. Jeff took photos of the pipe before he started his cleanup.
 Jeff took photos of the bowl and rim as well as the sides of the pipe to show the general condition of the briar before cleaning.
 He took photos of the stamping on the left and right side of the shank. The stamping on the left read Jobey in script over the block letters CHURCHWARDEN. On the right side it was stamped with the shape number 085. He also took photos of the fit of the stem in the shank and the brass Jobey logo inset on the stem top. You can see the debris in the logo and the oxidation on the stem in the photos below.
 The stem had tooth marks and chatter on both the top and underside near the button.
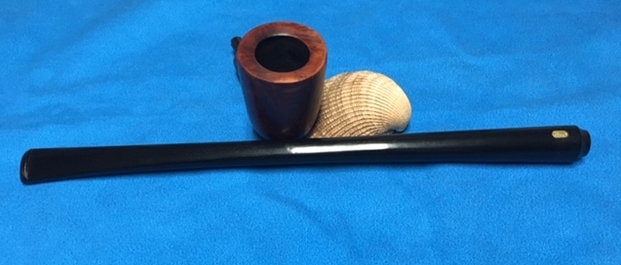
 Jeff had reamed the bowl with a PipNet pipe reamer and followed up with a Savinelli Fitsall pipe knife to remove the cake. He scrubbed out the mortise and the airway in the shank and the stem with alcohol, cotton swabs and pipe cleaners. He scrubbed the exterior of the bowl, rim, shank and stem with a tooth brush and Murphy’s Oil Soap to remove the oils and tars on the bowl, rim and shank. He rinsed it under running water. He dried it off with a soft cloth. The lava mess on the rim was thoroughly removed without harming the finish underneath it. Without the grime the finish looked good. The inner edge of the bowl was beveled inward and looked very good. The out edge had a few tiny nicks in it. The oxidation on the stem was gone and all that remained were some tooth marks and chatter at the button on both sides. Otherwise it was actually in pretty good condition and would only need to be polished. I took photos of the pipe to show its condition before I started my work on it.
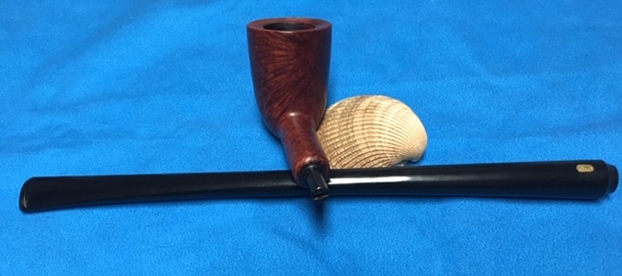
 I took close up photos of the rim top that shows the clean bowl and how it was beveled inward. You can also see the small nicks along the outer edge of the bowl toward the back side. The stem was clean and Jeff had used Before & After Deoxidizer to soak and remove much of the oxidation. He rinsed out the inside of the stem and rinsed off the exterior as well. The photos of the stem show how good the stem actually looked after this treatment.
 I removed the stem from the shank and unscrewed the Jobey Link from the shank. I took a photo of it with the Link removed and the Link in place in the shank.
 I decided to start my work on the pipe by addressing the tooth marks on the top and underside of the stem at the button. I sanded the tooth marks out the stem surface with 220 grit sandpaper. I sanded the stem until the surface was smooth and the marks had disappeared.
 I polished the stem with micromesh sanding pads – wet sanding it with 1500-2400 grit pads and dry sanding it with 3200-12000 grit pads. I wiped the stem down after each pad with a damp cloth to remove the sanding dust. I used the Before & After Pipe Polish to remove the small minute scratches left in the vulcanite. I finished by wiping the stem down with a final coat of Obsidian Oil and set it aside to dry.
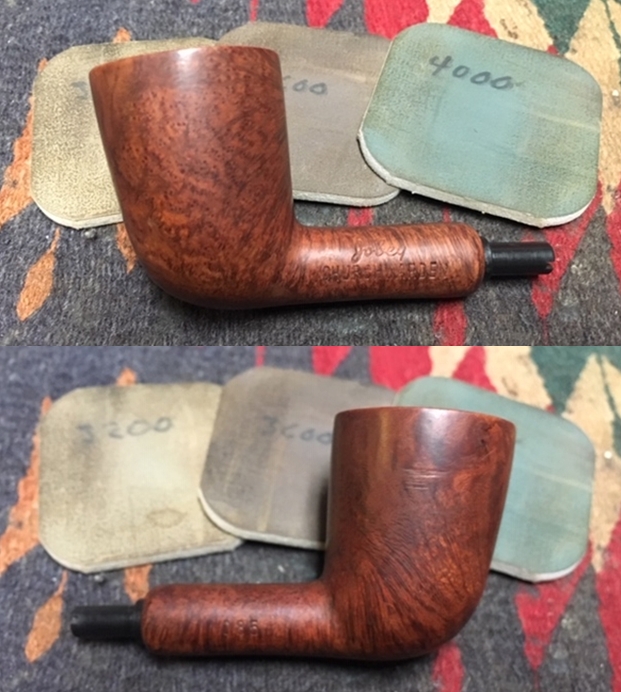
 I set the stem aside and turned my attention to the bowl. I polished the rim top and edges – both inner and outer with micromesh sanding pads – wet sanding with 1500-2400 and dry sanding with 3200-12000 grit pads. I worked on the nicked edges on the outside of the bowl to smooth them out. I polished the entire bowl avoiding the stamping with the pads. I wiped it down with a damp cloth after each sanding pad. You can see the progress in the photos below.


 I put the bowl and stem back together. I buffed the bowl and stem with Blue Diamond to polish the briar and the vulcanite. I gave the bowl and the stem multiple coats of carnauba wax. I buffed the pipe with a clean buffing pad to raise the shine. I hand buffed it with a microfiber cloth to deepen the shine. The pipe polished up pretty nicely. The pipe turned out very well and shows the grain shining through. The contrast of the various grains – birdseye, flame and straight swirling around the bowl and shank looked good with the polished, long black vulcanite. I will soon be putting this Jobey Churchwarden on the rebornpipes store. The finished pipe is shown in the photos below. The dimensions of the pipe are Length: 11 1/2 inches, Height: 1 3/4 inches, Outside diameter of the bowl: 1 3/8 inches, Chamber diameter: 3/4 of an inch. If this is the kind of Churchwarden you might want to add to your collection then send me a message or an email. Thanks for reading this blog and my reflections on the pipe while I worked on it.