Blog by Paresh Deshpande
I was surprised to find a pipe in my old man’s collection which was nicely reamed, free of any overflowing lava, clean stummel and mortise and only light tooth chatter on either surfaces of the stem. As with many of his pipes, or dare I say a majority, this one too was a billiard. I have also observed that most of his British made pipes are classic billiard shaped (though a few of his Danish made pipes are also billiard shaped!!!!). Well, at first glance itself I had anticipated this pipe to a London made and Boy was I correct! The pipe that I am now working on is an enigmatic British brand “LOEWE & Co”.
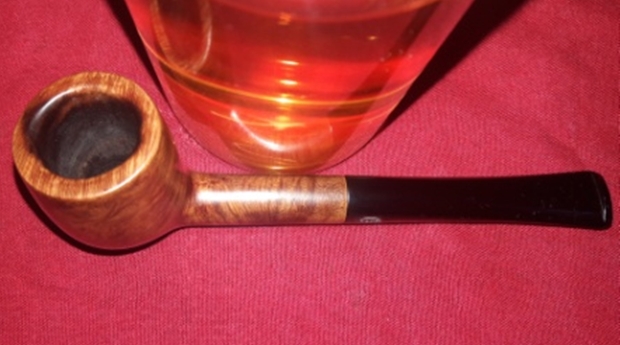
The first thing that amazed me was how light weight this pipe felt in my hands! The second aspect that I noticed was the beautiful cross grains, interspersed with tight Bird’s eye grains on either side of the bowl, that cover the entire stummel. It is stamped on the left side of the shank as “L & Co” in an oval over “STANDARD” in capital letters. On the right side of the shank, it is stamped as “LOEWE” over “LONDON W”. The bottom of the shank is stamped “KENTON”. The vulcanite stem is surprisingly black and shining and bears the stamp “L & Co” in an oval. These stampings are crisp and clear.
 To be very honest, I had never ever heard of Loewe & Co brand of pipes before this. Even while surfing eBay and other sites, I had not come across this brand. Now that I have one, I wanted to know more about this brand and establish the vintage of this pipe, if possible. As usual, I visited rebornpipes.com and Lo and behold, there was a very similar sized and shaped pipe that Mr. Steve had researched and worked on in Feb 2017. The similarities were to the extent that the condition of the chamber, the damage to the rim top and the stem condition were identical and matched to a “T”. Even the stamping matched to a great extent, the only difference being that the pipe I am working on bears the “KENTON” shape name on shank bottom and “STANDARD” below the oval enclosed “L&Co” on the left side. Here is the link to the write up by Mr. Steve https://rebornpipes.com/2017/02 /22/refreshing-a-tiny-lco-billiard/
INITIAL VISUAL INSPECTION
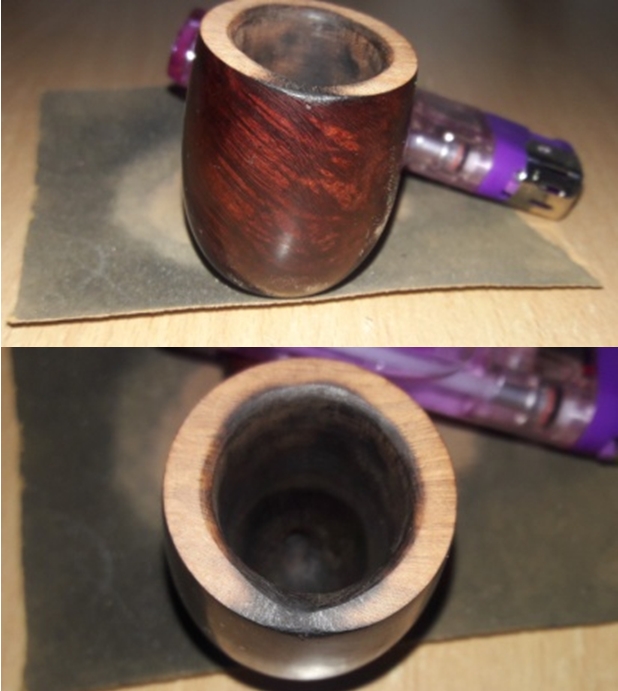
The briar has taken on a layer of aged patina, through which one can make out the beautiful cross grains all around interspersed with tightly packed Bird’s eye. There are a few minor dents and dings on the stummel surface, probably due to rubbing against other pipes while being stored for more that 40 years. However, there is not a single fill in the entire stummel, signifying very high quality of pipe for which Loewe pipes were famous. In all probability, I shall let these minor dents and dings remain and avoid the process of sanding the stummel with sand paper in order to preserve the beautiful patina. Maybe, micromesh polishing will address a few of these dents and scratches.
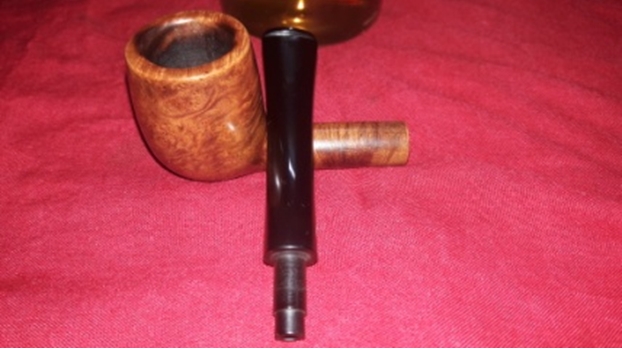
 There is a very thin and even layer of cake in the chamber. I do not envisage any damage to the inner walls of the chamber. The rim top has darkened due to a slight overflow of lava. There is significant damage to both the inner and outer edge of the rim in 1 o’clock direction in the form of being badly scorched, a result of frequent, continuous and prolonged exposure to the flames of a lighter. The bowl is completely out of round, both inside and from outside, due to this damage. In addressing this issue, though I absolutely hate it unfortunately, I would be losing some briar estate, a price I am willing to pay to resurrect this beauty. The shank end of the pipe is clean and so is the mortise. The draw is smooth, full and open.
 The vulcanite stem has minor tooth chatter on the upper and lower surface. Both upper and lower button has minor tooth chatter. Surprisingly, the stem has minimum oxidation and is an even black. The step tenon is also clean and sits snugly in to the mortise with all the right noises. The air way is clear and draw is easy and smooth.
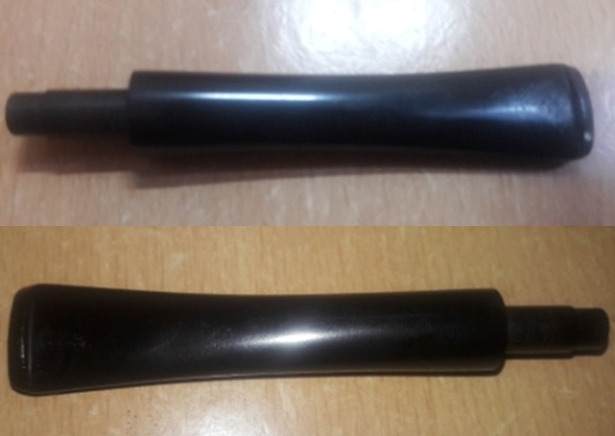 THE PROCESS
I reamed the bowl with size 2 head of the PipNet reamer and followed it up with my fabricated knife to clean up the chamber of the bowl. The bowl had already been reamed and there were only slight remnants of a cake in the bowl. I gently scrapped away the remnants of lava overflow from the rim top. I used a 220 grit sand paper, pinched between my thumb and forefinger, to sand the inner walls of the chamber of the pipe. Once I had reached the bare briar, I wiped the chamber with a cotton pad dipped in isopropyl alcohol. This removed all the residual carbon dust and also rid the chamber of all ghost smells. The walls of the chamber are nice and solid with no signs of heat fissures or cracks. I followed up the reaming process by cleaning the mortise and air way of the pipe using hard bristled and regular pipe cleaners, q-tips dipped in alcohol. The mortise and the draught hole were given a final clean with shank brushes dipped in alcohol. I dried the mortise with a rolled paper napkin. The shank internals and the draught hole are now nice and freshened up.
 I cleaned out the internals of the stem using hard bristled and regular pipe cleaners dipped in alcohol. The bite marks on the stem were flamed using a Bic lighter to raise it to the surface. I sand the stem with a folded piece of 220 grit sandpaper to remove the oxidation, tooth marks and chatter. A little bit of sanding smoothed out the damage to the buttons. I polished the stem with micromesh sanding pads – wet sanding with 1500-2400 grit pads and dry sanding with 3200-12000 grit pads. I rubbed the stem down with Extra Virgin Olive Oil after each set of three pads. I set the stem aside to dry. I highlighted the stamping on the stem with a whitener pen.
 Now, it was the turn of the stummel to get cleaned up. Using a hard bristled tooth brush dipped in undiluted Murphy’s oil soap, I very deliberately scrubbed the stummel, cleaning the surface thoroughly. I was not satisfied with the rim top had cleaned up. I used a Scotch Brite pad and further cleaned the rim top. I dried the stummel with a cotton cloth a paper napkin.


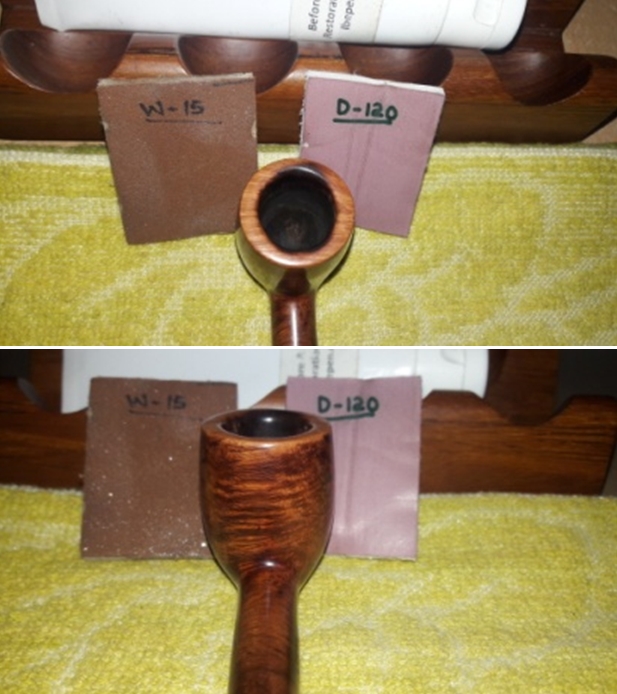
 At this stage of restoration, there was only one issue remaining to be addressed, that of the charred front rim and one which I did not want to address as I simply detest loosing briar!!!! But as is known in a battle field, sometimes amputation, though painful and traumatic to a soldier as well as the Surgeon, is the only way to save his life. Thus, with a heavy heart, I began the process of topping the rim to reduce the charred surface and bring the bowl back to round. I use a square piece of 220 grit sand paper and firmly hold it with my hand on my work table. I work the rim top on the sand paper in circular motion, frequently checking the progress as I wanted to keep the briar loss to a bare minimum necessity. Once I was satisfied that the charred surface has been reduced and the roundness of the bowl has been restored to the extent possible, I created an inner edge bevel by pinching a folded piece of 180 grid sand paper between my thumb and forefinger and moving along the inner edge with a constant pressure, to minimize the charring on the inner edge of the rim. Similarly, I created a slight bevel on the outer edge of the rim. Thereafter, I moved to the next stage of polishing and revitalizing the entire rim top and the stummel.
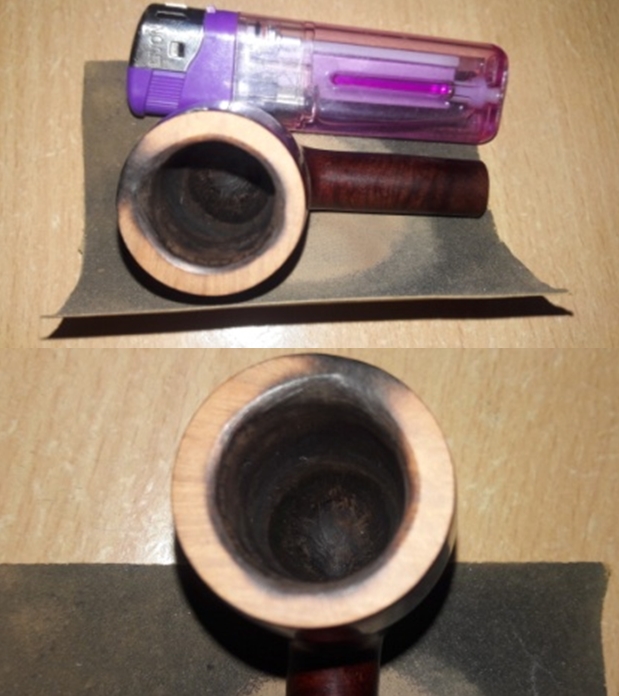
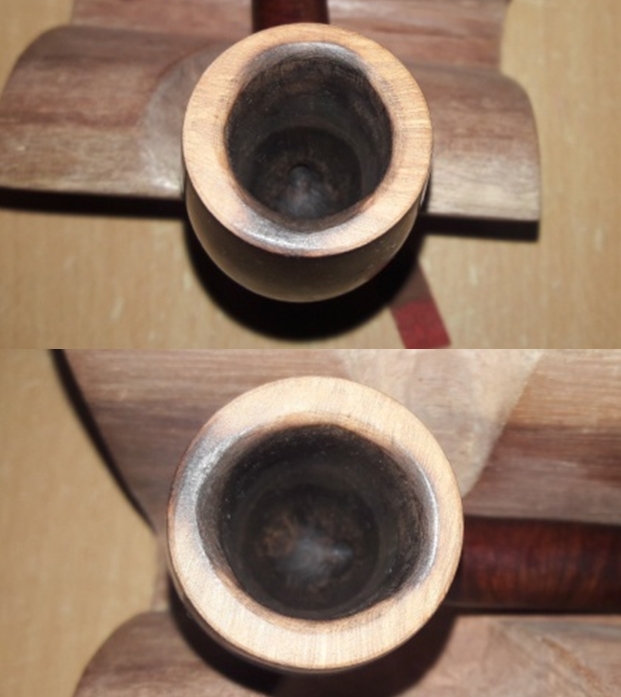
 Before proceeding on to polishing, I steam out all the minor dents and dings by heating my fabricated knife on a candle and placing it on a wet towel covering the dents. The generated steam pulls the dents to the surface. I even out the discoloration and stummel surface by polishing with micromesh pads, wet sanding with 1500 to 2400 grit pads and dry sanding with 3200 to 12000 grit pads. I wiped the stummel with a moist cloth after each wet pad to see the progress. I rub a small quantity of “Before and After Restoration Balm” in to briar and let it rest for a few minutes. I took some extra efforts to work the balm in to the hand carved rustications of the bowl. The balm almost immediately works its magic and the briar now has a nice vibrant appearance. I further buff it with a horse hair shoe brush.
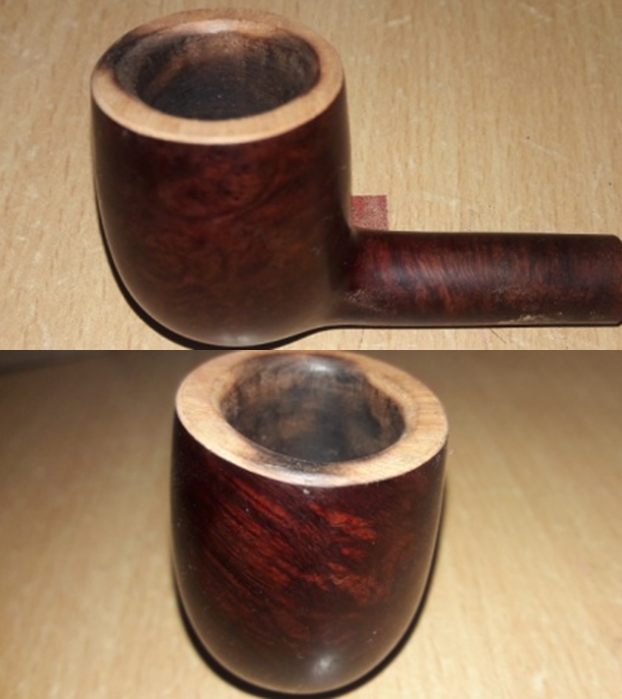
 After I was through with the polishing and buffing, I realized that the rim top surface was a lighter shade than the rest of the stummel. I used a Chestnut and a Dark Brown stain pen to blend the colors to match the color of the rest of the bowl. The finish turned out to be darker than the stummel!!!! I wiped of excess stain with a pipe cleaner dipped in alcohol to achieve a perfect match. This also helped to further mask the darkened rim surface. I would buff it and blend it in better once the stain dried.
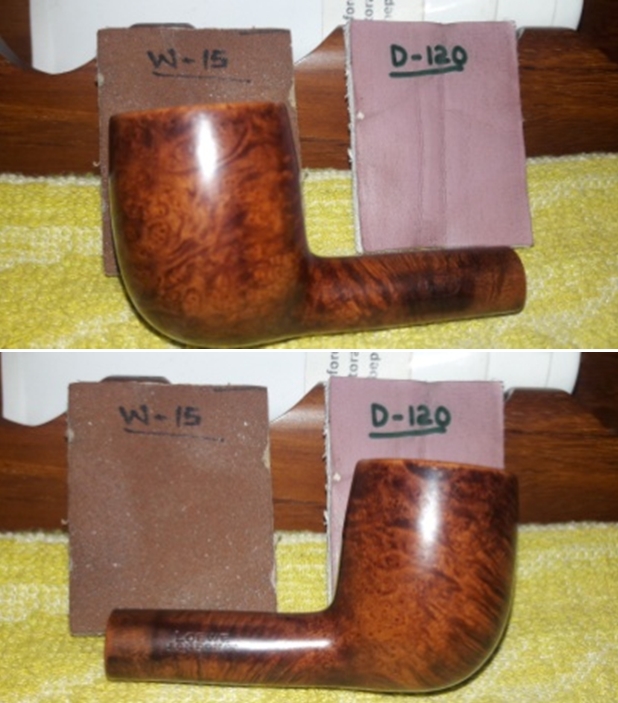
 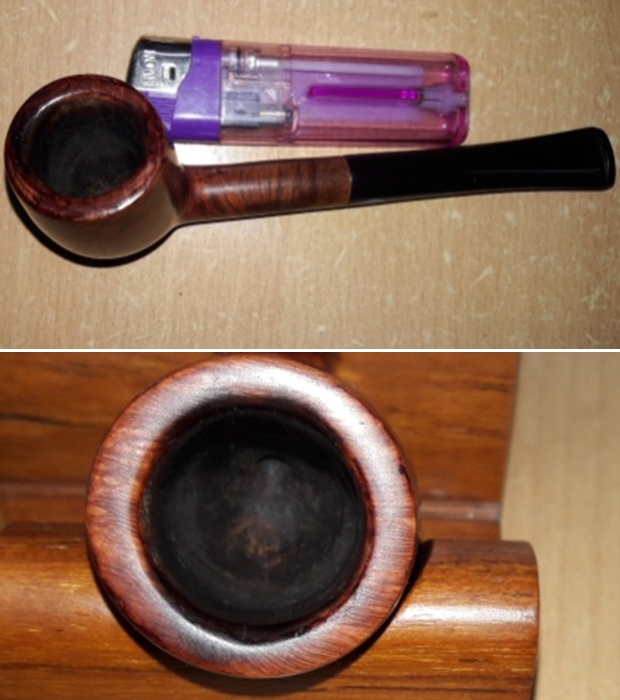 To finish, I re-attach the stem with the stummel. I mount a cotton cloth buffing wheel on to my local machine which is similar to a Dremel. I set the speed at about half of the full power and applied White Diamond compound to each of the three pipes. I wiped/ buffed the pipe with a soft cotton cloth to clear it of any leftover compound dust. I then mounted another cotton cloth wheel on to the polishing machine and applied several coats of carnauba wax over the stummel and the stem. I finished the restoration by giving the pipe a rigorous hand buffing using a microfiber cloth to raise the shine further. The completed pipe, with the beautiful grains on the stummel contrasting with the shiny black stem, looks lovely, fresh and vibrant; the photographs speak for themselves. If only the pipe could tell some of my grand Old man’s stories and why was it so clean as compared to other pipes in his collection.…………… Cheers!!