Blog by Steve Laug
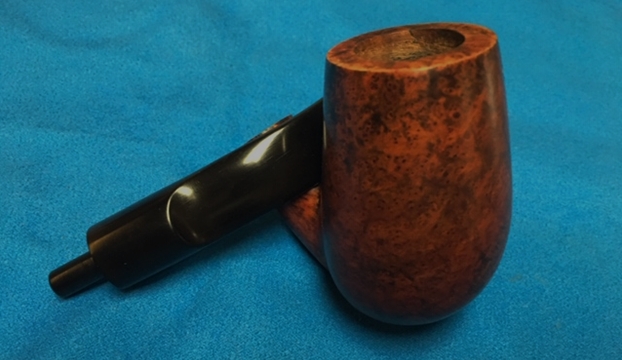
 Continuing with changing things up a bit with Bob Kerr’s estate clean up I decided to work on large and beautiful W.O Larsen Hand Made Full Bent Stack. It was very dirty but there was some beauty underneath the grime and the lava on the rim. Up until this pipe and the Brigham Canadian that I just finished I have focused entirely upon Bob’s Dunhill collection and I will be going back to it eventually. I wanted to continue the change and this Larsen called out to me. It is stamped Super 15 on the underside of the shank, following that it is stamped W.O. Larsen over Handmade over Made in Denmark. The stem is a saddle stem bent to work well with this ¾ bent pipe. The grain and shape on this one was stellar and really called me to careful observation while I worked on it. I took photos of the pipe before I started my cleanup on it.
 I turned to Pipedia to gather some background on the pipe and to see if I could possibly arrive at a date for its crafting (https://pipedia.org/wiki/W.%C3%98._Larsen). I quote from that article in part to set the stage for this restoration.
W.Ø. Larsen is Denmark’s oldest and probably the most famous pipe and tobacco Store, placed in the center of Copenhagen on the main pedestrian street, Stroget. If you visit Copenhagen and do a “pipe crawl” this Store is a must. In the beginning of the 60’s the Store had begun to sell Danish handmade pipes, especially from Poul Rasmussen. This went very well and Poul Rasmussen could not keep up with the demand. W.Ø.Larsen – with their dynamic business manager Svend Bang (he later started in business for himself) – decided to establish their own workshop in rooms next to the Store.
The first manager of the pipe shop was Sven Knudsen, but he soon left to make pipes under his own name. The next manager was Hans Nielsen, also known as “Former” (named after the late British actor George Formby, with whom he had some similarity. By coincidence in Danish Former means Shapes). Under the management of Former the workshop grew and W.Ø.Larsen pipes became a very good name abroad. Among the prominent pipemakers educated here were: Else Larsen (Denmark’s first female pipemaker),Poul Ilsted, Ph. Vigen, Teddy Knudsen, Tonni Nielsen, Peter Hedegaard.
Typical for the W.Ø.Larsen School is the semi-classic shapes, that means classic shapes, but slightly different, often a little more full or round. The pipes often have lower point of gravity. A typical billard would have a bowl shaped more like a pear and the connection between the bowl and the shank would be clearly distinguished. Yellow and orange are colors more widely used for the finish.
The site did not give me a lot of information other than the famous Danish pipemakers who worked for Larsen were many and many of them were favourites of mine. On the site there were links to catalogues from the 60s and I went through each of them looking for the shape of this pipe. The only stacks that were present were straight rather than bent but they looked similar to this one. They were made by Poul Ilsted so I think a good guess on this make would be Ilsted. I cannot prove it but it is my guess. All of the catalogues were from the 1960s and that would fit with the majority of Bob’s pipes.
I took some close up photos of the rim top and the stem to show what I was dealing with. This W.O. Larsen bent stack was in pretty good condition considering its age and use. The photo shows the cake in the bowl and the thick buildup of lava on the back side of the rim top. You can see the cake in the bowl in the first photo below. The stem was dirty and oxidized with very light tooth chatter on the top and underside for about an inch ahead of the button. The oxidation was worse on the underside of the stem than the topside. The surface of the stem was also rough. I am also including the photo of the stamping so you can see what it looked like when I examined it. It is clear and readable.
 With the identification of the pipe as potentially a 60s era W.O. Larsen Handmade I thought it would be good to once again remind you of the pipeman who held this pipe in trust. This is another pipe from the estate of Bob Kerr. I asked his son in law, Brian if he or his wife would like to write a brief biographical tribute to her father, Bob. His daughter wrote the following tribute to her Dad and it really goes well with the belief of rebornpipes that we carry on the trust of the pipe man who first bought the pipe we hold in our hands as we use it and when it is new we hold it in trust for the next person who will enjoy the beauty and functionality of the pipe.
Brian and his wife included the great photo of Bob with a pipe in his mouth. Thank you Bob for the great collection of pipes you provided for me to work on and get out to other pipemen and women who can enjoy them And thank you Brian and your wife for not only this fitting tribute but also for entrusting us with the pipes. Here is his daughter’s tribute to her Dad.
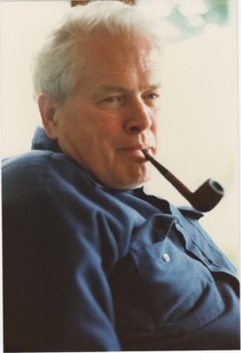 I am delighted to pass on these beloved pipes of my father’s. I hope each user gets many hours of contemplative pleasure as he did. I remember the aroma of tobacco in the rec room, as he put up his feet on his lazy boy. He’d be first at the paper then, no one could touch it before him. Maybe there would be a movie on with an actor smoking a pipe. He would have very definite opinions on whether the performer was a ‘real’ smoker or not, a distinction which I could never see but it would be very clear to him. He worked by day as a sales manager of a paper products company, a job he hated. What he longed for was the life of an artist, so on the weekends and sometimes mid-week evenings he would journey to his workshop and come out with wood sculptures, all of which he declared as crap but every one of them treasured by my sister and myself. Enjoy the pipes, and maybe a little of his creative spirit will enter you!
I reamed the bowl to remove the cake on the walls and the debris that still remained in the bowl. I used a PipNet pipe reamer to start the process. I followed that with a Savinelli Fitsall Pipe Knife to clean up the remaining cake in the U-shaped bottom of the bowl. I sanded the bowl with 220 grit sandpaper wrapped around a piece of dowel. It smooths out the walls and also helps deal with slight damage to the inner edges of the bowl.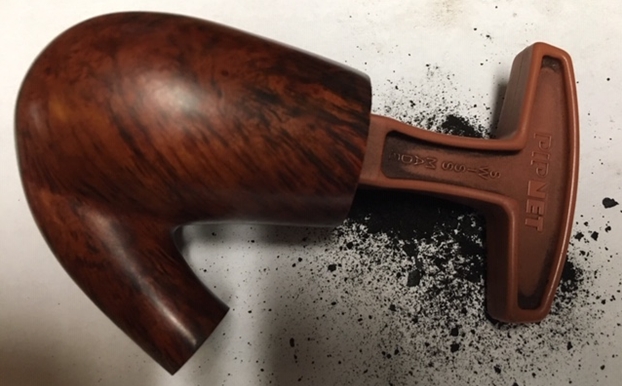
 I cleaned up the rim top and removed the thick lava coat on the back top side of the rim. I used a pen knife blade the edge of the Savinelli Fitsall knife to scrape away the high spots of lava. I used a Scotch-Brite sponge pad to scrub off the remaining lava on the top of the bowl and wiped it down with a bit of saliva on a cotton pad.
 I polished the rim top with micromesh sanding pads – wet sanding with 1500-2400 grit pads and dry sanding with 3200-12000 grit pads. Each successive pad brought more shine to the rim top. I wiped the rim down with a damp cotton pad after each sanding pad. The shine develops through the polishing.
 I cleaned out the internals of the bowl, shank and the airway in the shank and the stem with alcohol, pipe cleaners and cotton swabs until they came out clean.
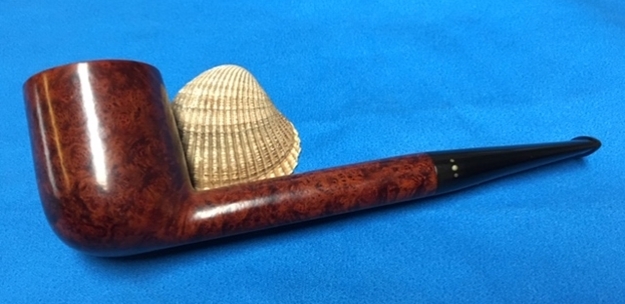
 I worked some Before & After Restoration Balm into the finish of the bowl and shank as well as the surface of the rim top. I worked it into the surface with my fingertips to clean, enliven and protect the wood. I let the balm sit for about 20 minutes and buffed it off with a soft cotton cloth to polish the bowl. I took photos of the pipe at this point in the process to show what the bowl looked like at this point.

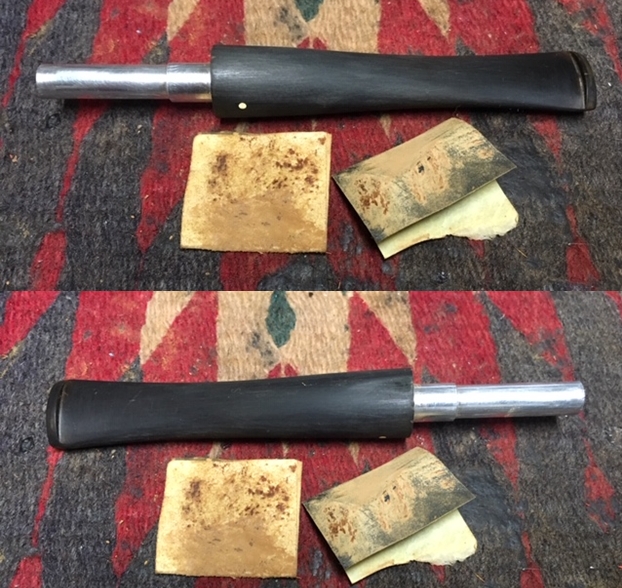
 I set the bowl aside and turned my attention to the stem. I sanded out the light tooth chatter on the surface of the vulcanite with a folded piece of 220 grit sandpaper and worked on the spotted oxidation on the surface. I followed the 220 grit sandpaper with 400 grit wet dry sandpaper to minimize the scratching. The two papers combined did a pretty decent job of getting rid of the tooth marks and chatter as well as the oxidation.
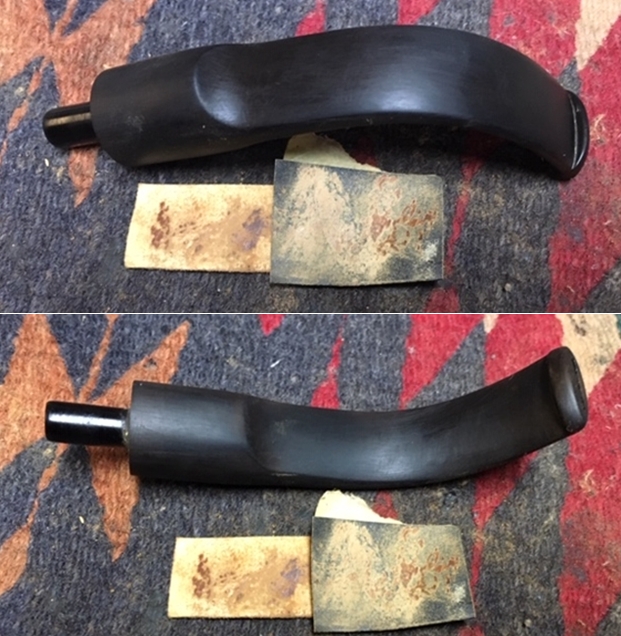 I polished the stem with Denicare Mouthpiece Polish to take out the oxidation at the button edge and on the end of the mouthpiece. I also worked hard to scrub it from the surface of the stem at the tenon end.
  I polished out the scratches with micromesh sanding pads – wet sanding with 1500-2400 grit pads and dry sanding with 3200-12000 grit pads. I wiped the stem down after each sanding pad with Obsidian Oil. I polished it with Before & After Pipe Stem Polish – both Fine and Extra Fine. Once I had finished the polishing I gave it a final coat of oil and set it aside to dry.
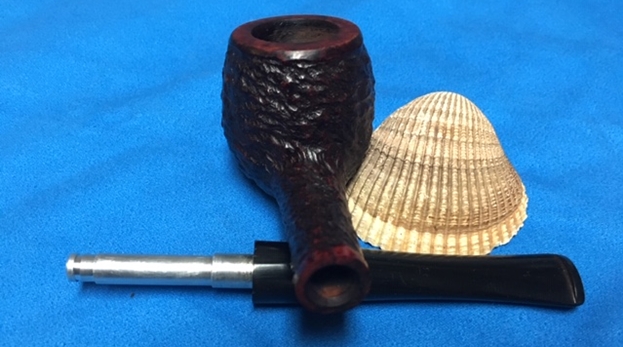
 I put the bowl and stem back together. I buffed the bowl and stem with Blue Diamond to polish out the scratches in the briar and the vulcanite. I gave the bowl and the stem multiple coats of carnauba wax. I buffed the pipe with a clean buffing pad to raise the shine. I hand buffed it with a microfiber cloth to deepen the shine. The pipe polished up pretty nicely. The smooth finish on this W.O. Larsen Handmade Super 15 Bent Stack is quite beautiful and it has some amazing grain around the bowl – a mix of cross grain, birdseye and flame. The contrast of swirling grain looked good with the polished black vulcanite. This Larsen will soon be heading off to India to join Paresh’s rotation. The finished pipe is shown in the photos below. The dimensions of the pipe are Length: 5 3/4 inches, Height: 2 ½ inches, Outside diameter of the bowl: 1 3/8 inches, Chamber diameter: 3/4 of an inch. This is the 17th pipe from the many pipes that will be coming onto the work table from the Bob’s estate. There are a lot more pipes to work on from the Estate so keep an eye on the blog to see forthcoming restorations. Thanks for reading this blog and my reflections on the pipe while I worked on it. I am having fun working on this estate.