Blog by Steve Laug
I wanted to work on something a little different before getting back to more briar. I chose a Barling Meerschaum pipe that I have had in the “to do” box for a while now. My brother picked this one up in an online auction or sale somewhere along the way in his hunting. It is an interesting pipe. There is no stamping on the pipe or the “gold” band but the stem has the Barling cross logo on top of the saddle. It is also stamped England on the underside of the stem. Many of the pipe companies in Great Britain seemed to have meerschaum pipes somewhere in their history. I have seen GBD and Peterson’s and Barlings. I believe they are all made on the Isle of Man by the Laxey Pipe Factory which closed in 2002. This bent apple with the Barling cross is in decent condition. It has a flume finish – darkened at the top of the rim and partway down the bowl sides. This one is a brownish/red in colour on the rest of the bowl. The band on the shank is Gold in colour. The bowl is very clean – in fact I wonder if it has been smoked more than a few times. There is a Delrin insert in the shank for strengthening of the meer. The stem is in decent condition with oxidation on the top surfaces of the saddle and stem and on the underside of the stem. Jeff took photos of the pipe before he cleaned it up.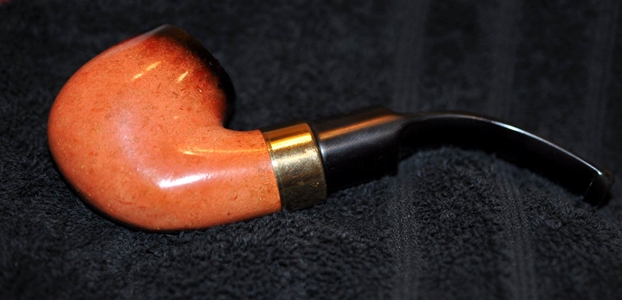
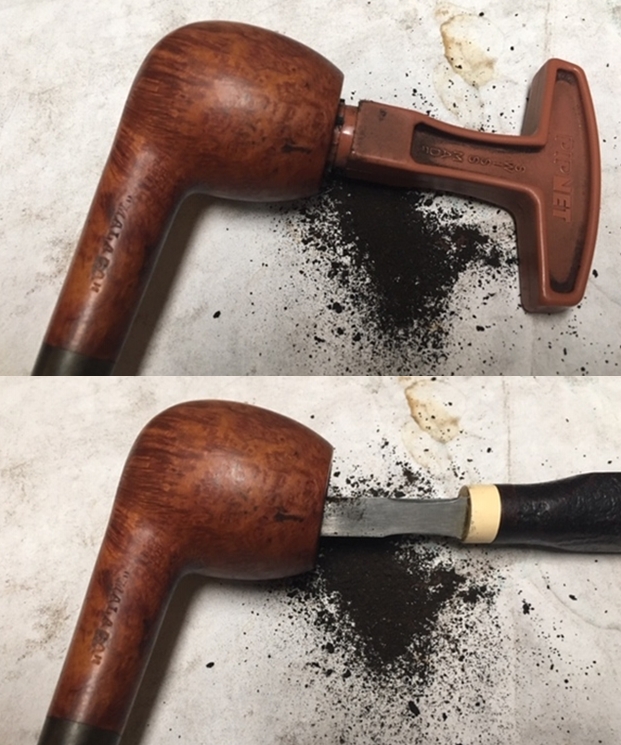
 The bowl was pretty clean, though the top portion had some cake and there was light lava on the surface of the rim top. Jeff took some photos that give a clear picture. The first is a close up that shows the lava on the rim. The second gives a feel for the colour of the rim and the flumed edge of the bowl. He also took a photo of the underside and side of the bowl. The finish on the meer is in excellent condition.
 The stem was oxidized on both the top and underside but otherwise clean. There was no tooth chatter or bite marks in the rubber.
 The stamping on the top and underside of the saddle stem were very clear and readable. The Barling cross was clear and there was a remnant of white in the stamp. The England on the underside also was very clear. The gold band was dirty and showed grime.
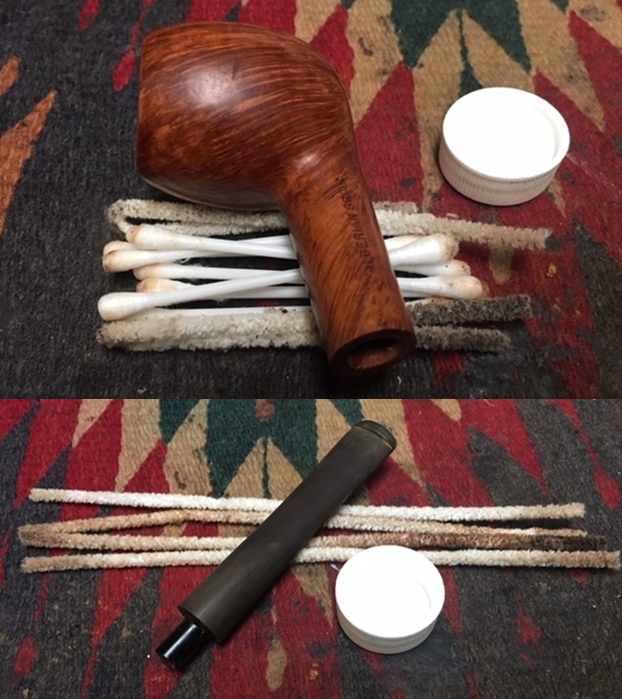
 Jeff follows his cleaning regime to a letter each time he works on the pipes. This pipe was no exception. He cleaned out the internals of the shank and stem with pipe cleaners, cotton swabs and alcohol. He cleaned the top of the rim and the bowl with a tooth brush and mild soap. The stem was in decent condition so he put it in a bath of Before & After Deoxidizer and let it soak for an hour or so and it did the work on removing the oxidation. The band looked pretty good when he polished it. It looked like some of the dust had rubbed off of the band on the top side of the saddle stem as it had a gold dusting to the surface of the rubber that I first took to be oxidation. I took some photos of the pipe when it arrived to show the condition.
 I took some close up photos of the rim top and the stem to show how good the condition was on this pipe. It is really quite amazing. The rim top and bowl looked really good. There was some scratching and marks on the rim that should be able to be buffed out. The stem was in great condition. The dusting on the top of the saddle looks like oxidation but it was not and came off really easily.
 I took a photo of the stamping on the top and underside of the shank. It was very sharp and readable. The photos also show the gold dusting on the top side and in the Barling cross. The England stamp on the underside was perfect.
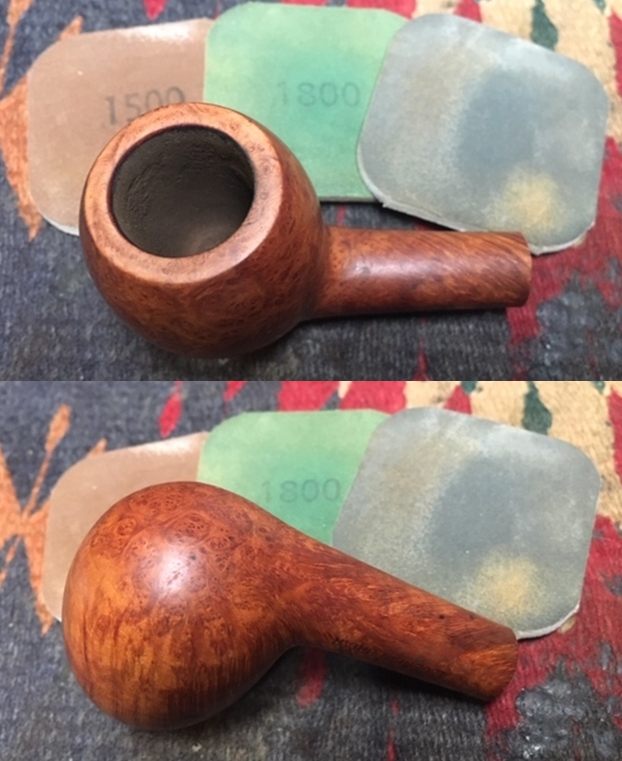
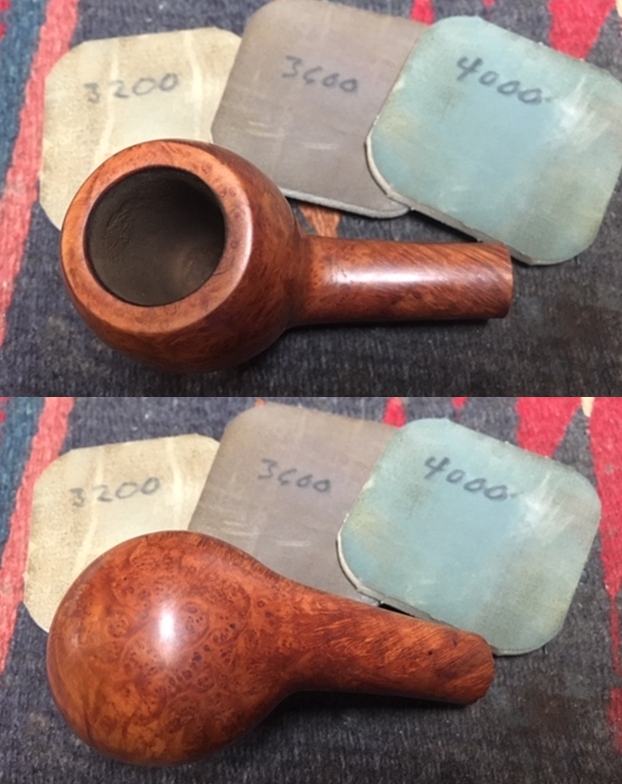
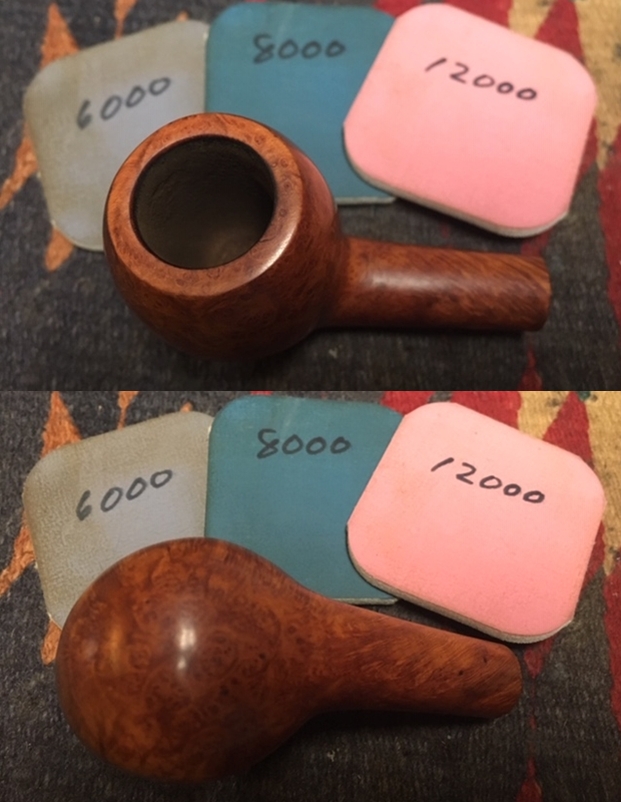
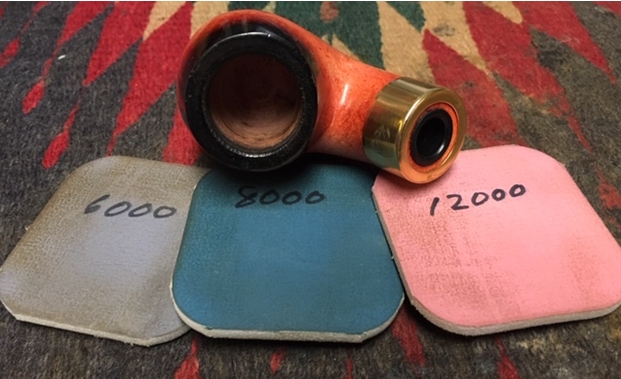
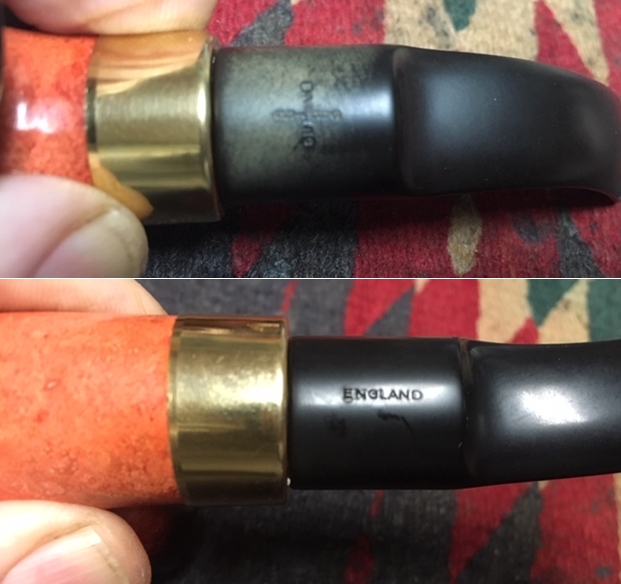 The bowl was in such good condition I did not need to do any work on it. Jeff had done all that needed to be done on the bowl. I decided to polish the rim top and see if I could remove some of the scratches and light build up there. I polished the rim top with micromesh sanding pads. I wet sanded it with 1500-2400 grit pads and dry sanded it with 3200-12000 grit pads. I wiped it down with a damp cloth after each sanding pad. The pictures tell the story and show the increasing shine of the briar after each set of pads.
 I set the bowl aside and turned my attention to the stem. I polished it with Before & After Pipe Stem Polish – both Fine and Extra Fine. My hope was that it would remove the gold dust on the top of the saddle. I rubbed it onto the stem with my finger and buffed it off with a cotton pad. The polish removed the gold tint and left the stem shiny. I would need to polish it a bit with the micromesh sanding pads and touch up the stamping but it looked very good.
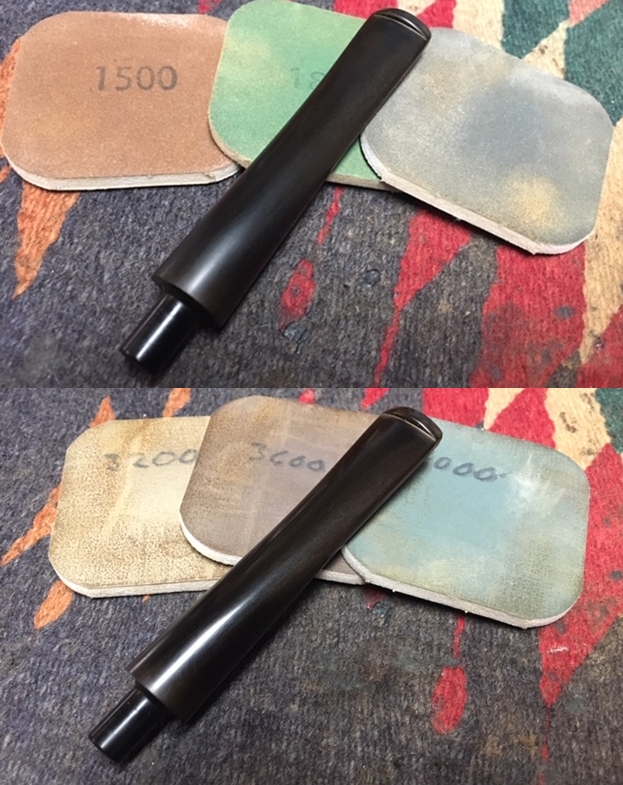
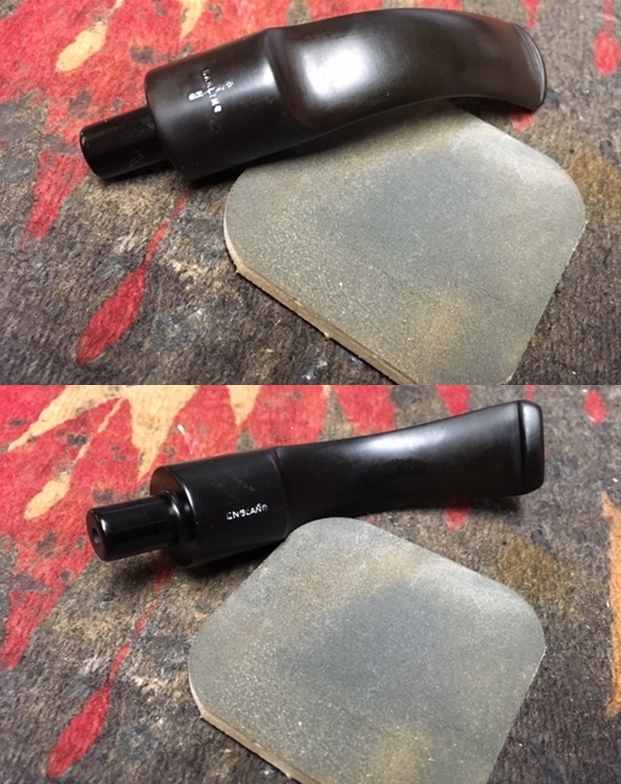
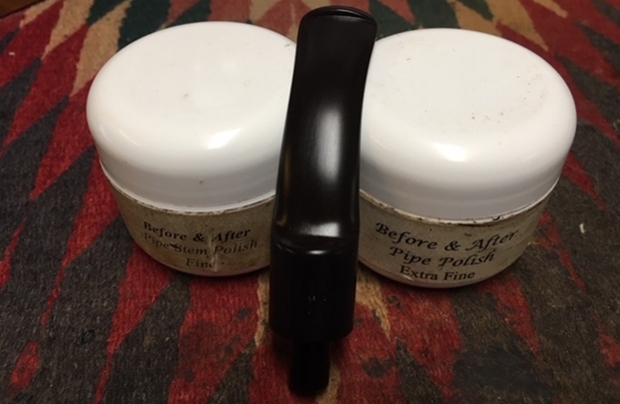 I polished the rest of the stem with micromesh sanding pads – wet sanding with 1500-2400 grit pads. I wiped it down with Obsidian Oil.
 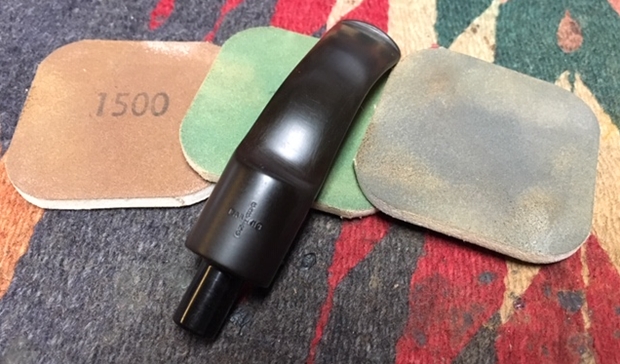 When the oil dried I touched up the stamping on the saddle with a white correction pen. I cleaned off the excess white correction pen with a 2400 grit micromesh sanding pad.
 I continued to polish the stem with 3200-1200 grit pads. I wiped it down with Obsidian Oil after each pad. I once again polished it with Before & After Pipe Stem Polish – both Fine and Extra Fine. When I finished I gave it another wipe down with Obsidian Oil and set it aside to dry.
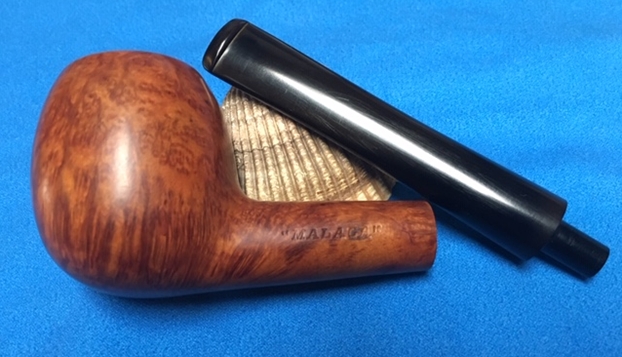
 I polished the bowl by hand and gave it several coats of Conservator’s wax to protect it. I buffed the stem with Blue Diamond to polish out the scratches in the vulcanite and gave it multiple coats of carnauba wax. I buffed the pipe with a clean buffing pad to raise the shine. I hand buffed it with a microfiber cloth to deepen the shine. The pipe polished up pretty nicely. The flume finish with the dark rim top and edges of the bowl and the reddish brown colour of the meerschaum works well with the gold band and the polished vulcanite stem. The finished pipe is shown in the photos below. The dimensions of the pipe are Length: 5 1/2 inches, Height: 1 3/4 inches, Outside diameter of the bowl: 1 1/4 inches, Chamber diameter: 3/4 of an inch. I will be putting this one on the rebornpipes store shortly if you are interested in adding it to your collection.Thanks for reading this blog and my reflections on the pipe while I worked on it.