Blog by Steve Laug
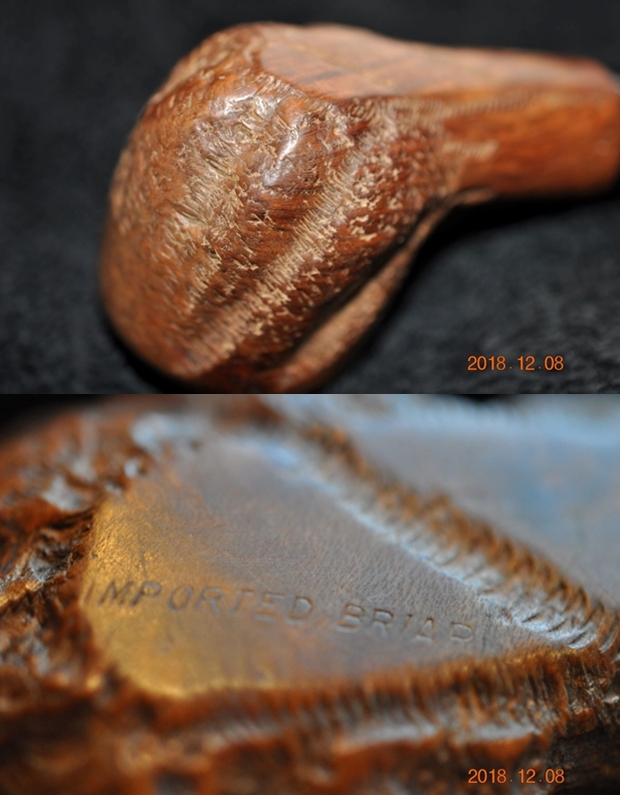
I have always been intrigued by Tracy Mincer and his Custom-Bilt pipes and even his Custombilt pipes like this one. There is something about the rugged carving and appearance of the pipes that gets my attention. I have a few of them in my collection and always enjoy the tactile nature of the pipe when it is being smoked. This old billiard has the Custombilt stamp and I will need to reacquaint myself with the eras of the various spellings of the brand so that I can place it in the hierarchy. The pipe was in pretty decent condition when Jeff received it – dirty but really not too bad. The finish was dusty and dirty in the worm trail carvings. The bowl had a decent cake in it that was lightly flowing over the rim top into the rustication. The inner and outer edge of the bowl appeared to be in great condition. The stem had a chip out of the edge of the button on the topside and tooth marks in the stem just ahead of the button on the underside. The smooth part of the shank, between the worm trails is stamped Custombilt in script on the left side. On a smooth panel on the heel of the bowl it is stamped Imported Briar. Jeff took these pictures of the pipe to show its condition before he started his cleanup work. 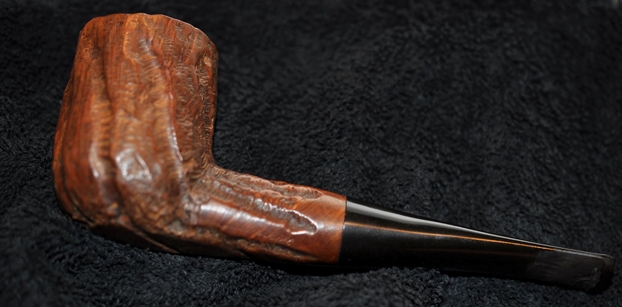
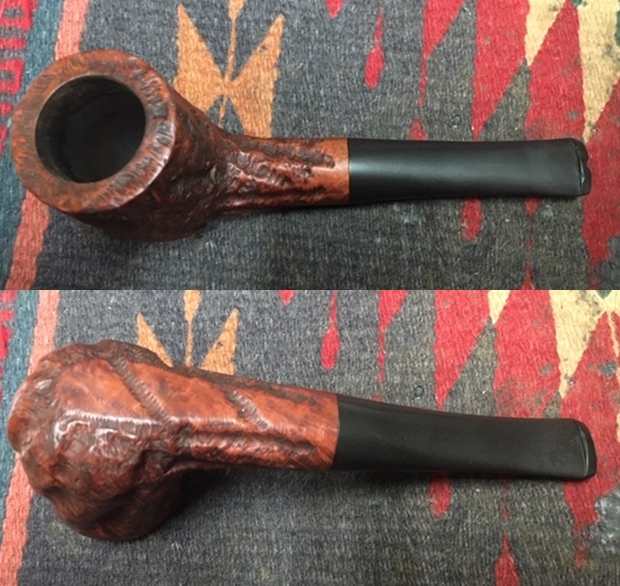
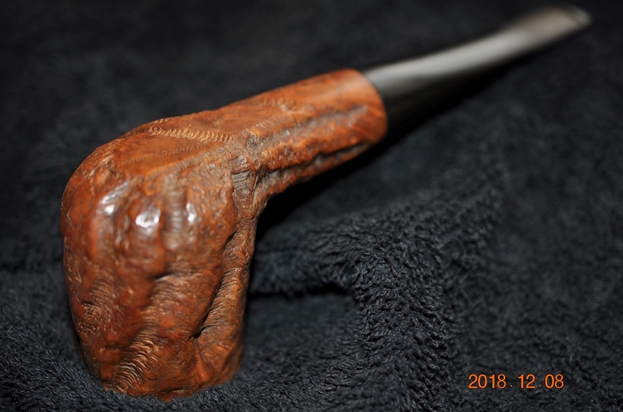 He took close up photos of the rim top and the side and bottom of the bowl to show the condition of the briar and the bowl. You can see the cake in the bowl and the lava overflowing onto the top of the rim. The worm trail rustication is quite dusty and dirty.
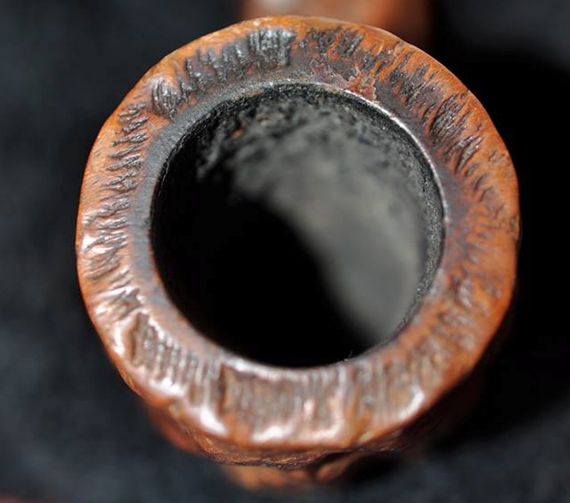
 The photos of the stem show the tooth chatter and marks as well as the chip out of the topside of the button.
 When I brought the pipe to my worktable I did some reading on Pipedia to before starting the restoration. I have learned that it is important to keep the variations in spelling of this brand clear in mind when trying to put these on a timeline. The names Custom-Bilt, Custombilt, and other variations help place the pipes in the history of the Company.
There is a great article on Pipedia that helps understand the brand and give a sense of what the various stamping looks like on the pipes (https://pipedia.org/wiki/Custom-Bilt). I cite from that article to give a feel for the brand:
In 1946, the name was changed to Custombilt after Mincer began an association with Eugene J. Rich, Inc. There were some big changes in advertising and distribution. The slogan “AS INDIVIDUAL AS A THUMBPRINT” began at this time as well.
In 1953, Leonard Rodgers bought the company and emphasized tobacco pouches and butane lighters. (However, it appears Mincer was working on his new pipe, the Doodler.) In 1968, Rodgers sold the Company to Consolidated Cigars. In the early 1970s, Wally Frank Co. bought the Custombilt trademark and began to produce their version of the pipe in 1974 or 1975. Hollco Rohr owned the Weber pipe factory, located in New Jersey, and produced the Custombilt pipes there. In 1987, the pipes were made out of the Butz-Choquin factory (France) and then Mexico until the late 1990s. Currently, the Custombilt name is owned by Tobacalera of Spain.
Along with the information above I found that the stamping that is on this pipe is identical to that identified in the article as Stamp Number Five. I have included that graphic because of the information that it included. It brings some of the issues in identifying the maker and the time period of the brand. In my mind the pipe I have in hand is very much like the Rich era pipes that I have seen and the note below says that. Interestingly the author also says he has seen the same stamping on the Wally Frank era pipes. It is a fascinating piece of history and a beautifully made old pipe. Armed with that information I turned to working on the pipe. Jeff had cleaned the pipe with his usual thoroughness – reaming the bowl with a PipNet pipe reamer and cleaning up the remnants with a Savinelli Fitsall Pipe Knife. He scrubbed the internals of the bowl, shank and stem with alcohol, cotton swabs and pipe cleaners. He scrubbed the exterior with Murphy’s Oil Soap to clean off the dust and grime on the finish. The rim top looked very good under the thick lava coat. I love the way the grain of the briar shows through the rustication. There were just a few nicks and scratches to deal with. The inside of the bowl itself looked great. The stem was in great shape other than a bit of tooth marks and the chip out of the top of the button. I took photos of the pipe before I started working on it.
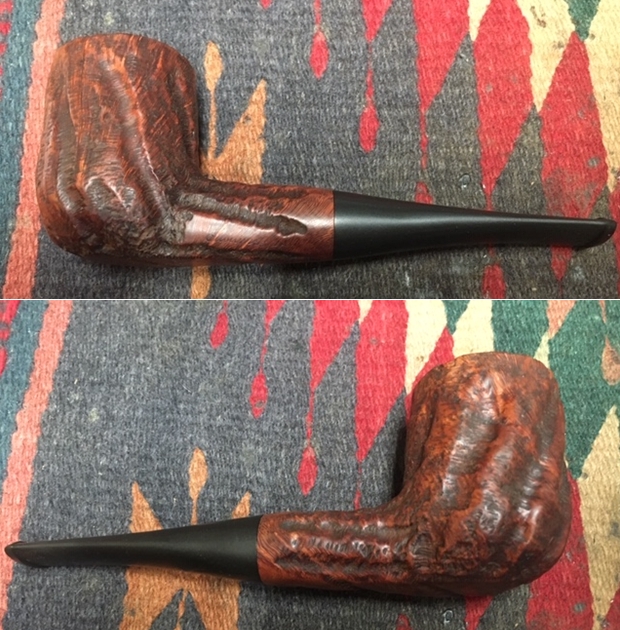
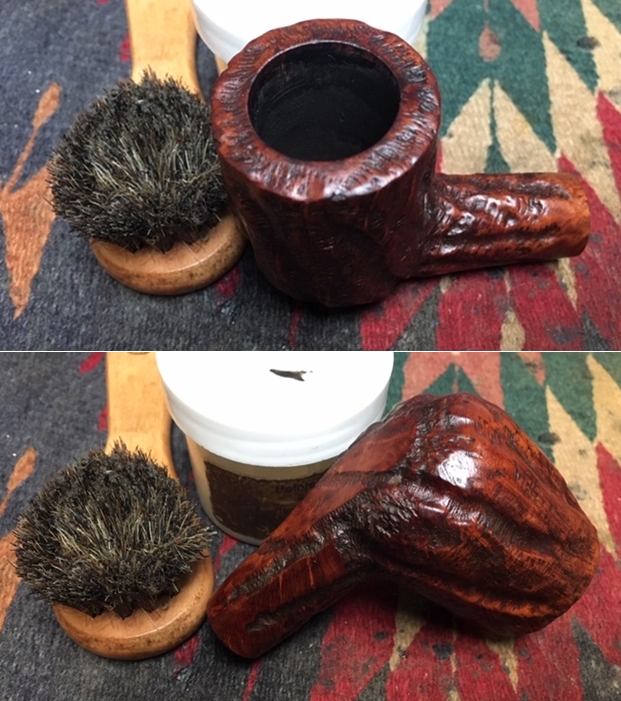
 I took some close up photos of the rim top, bowl and stem to show what they looked like after Jeff’s cleanup. It is a startling difference. The rim top looked very good and the edges were clean and undamaged. The stem was in good shape other than the chipped button and the tooth marks and chatter on both sides near the button.
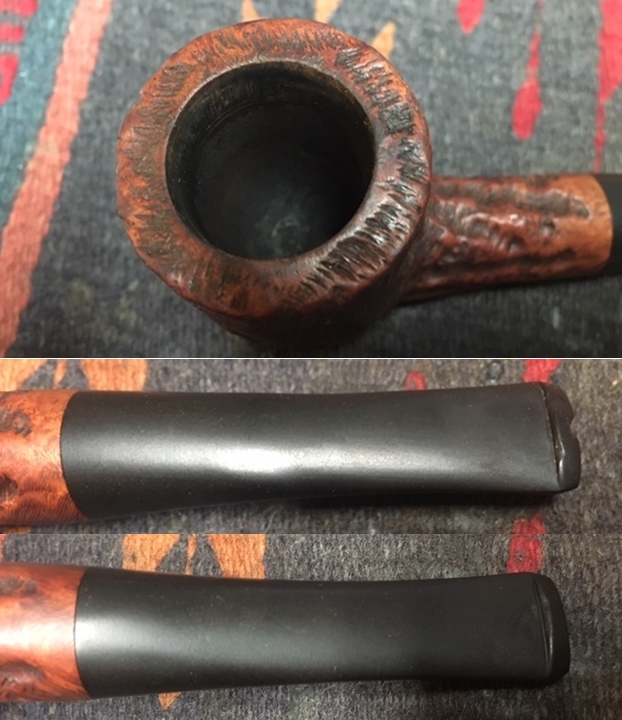 I took some photos of the stamping which seemed far more visible after Jeff’s cleanup than before.
 Since the briar was in such good condition I started with rejuvenating the wood. I worked some Before & After Restoration Balm into the rustications and worm trails on the bowl and the rim top. I worked it into the surface of the briar with my fingertips and a shoe brush to clean, enliven and protect the wood. Once the bowl was covered with the balm I let it sit for about 20 minutes and buffed it off with a soft cotton cloth and then polished it with a microfiber cloth. I took photos of the pipe at this point in the process to show what the bowl looked like at this point.
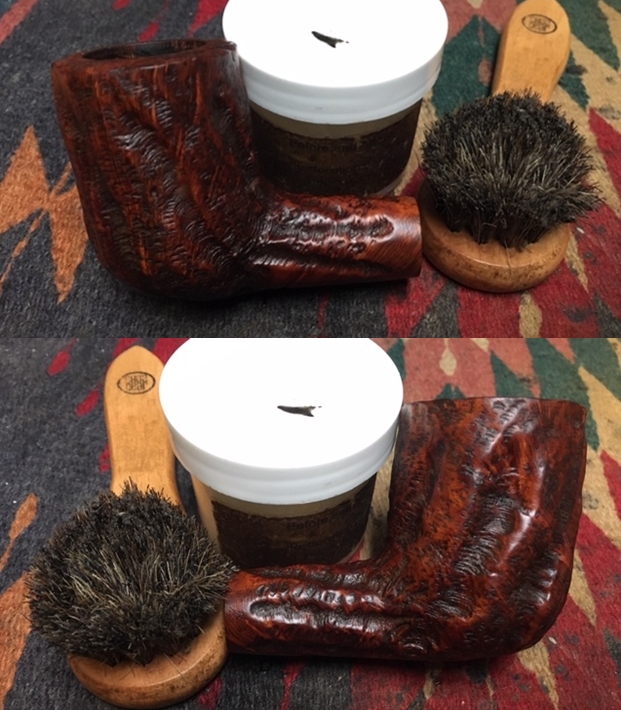
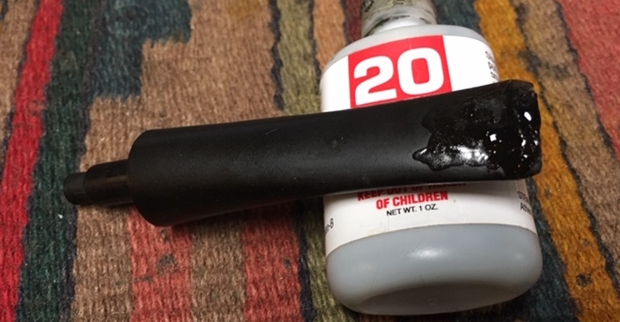
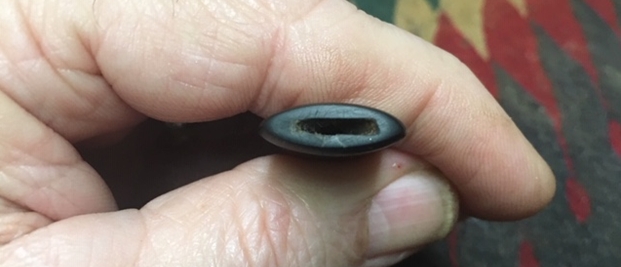
 I set the bowl aside and turned my attention to the stem. I decided to address the deep tooth mark on the underside of the stem and the chip in the top edge of the button. I filled in the tooth mark on the underside of the stem with a clear super glue (Jeff had already cleaned the stem very well so it was not an issue). I used the clear superglue to fill in the chipped area and build it up. I did this by layering the super glue until the surface was filled in with the glue. The last coat of glue that I applied was black super glue. I set the stem aside to let the repairs cure.
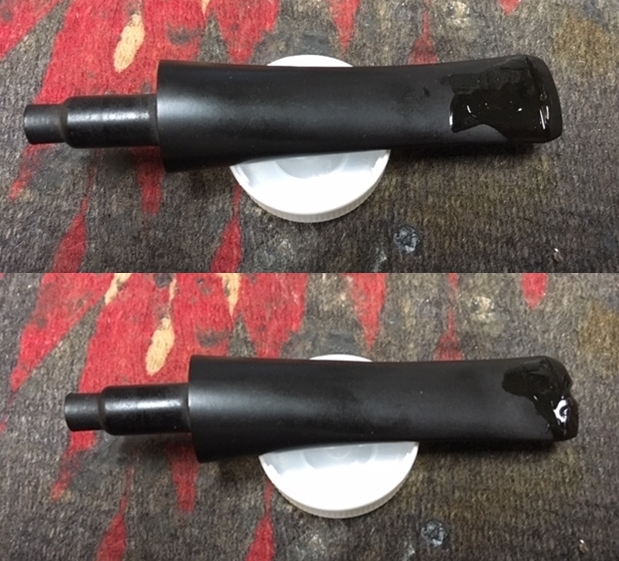

 Once the repair had cured I used a flat blade needle file to sharpen the edge of the button on both sides of the stem. I also used it to flatten out the repairs. I worked on the remaining repaired areas with 220 grit sandpaper to blend them into the surface of the stem.
 I smoothed out the slotted edge of the button with 220 grit sandpaper on the topping board. I reworked the edges of the slot with a needle file to clean up the repair. I shaped and polished the button with 400 grit wet dry sandpaper. The repaired area looks very good and will look even better as the stem and repairs are polished with micromesh sanding pads.
 I polished the stem with Denicare Mouthpiece Polish to take out the oxidation at the button edge and on the end of the mouthpiece. I also worked hard to scrub it from the surface of the stem at the tenon end.
 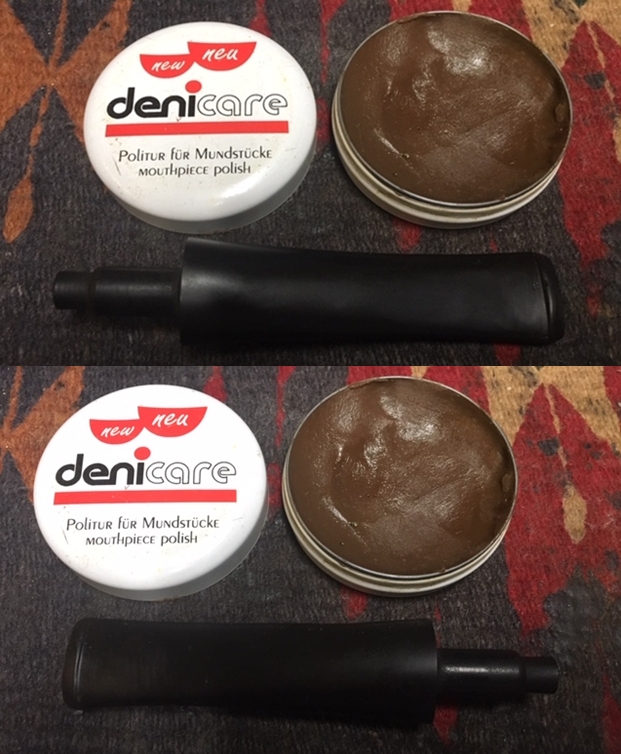 I polished repaired areas on the stem, button and blade with micromesh sanding pads – wet sanding with 1500-2400 grit pads and dry sanding with 3200-12000 grit pads. I wiped the stem down after each sanding pad with Obsidian Oil. I polished it with Before & After Pipe Stem Polish – both Fine and Extra Fine. Once I had finished the polishing I gave it a final coat of oil and set it aside to dry.
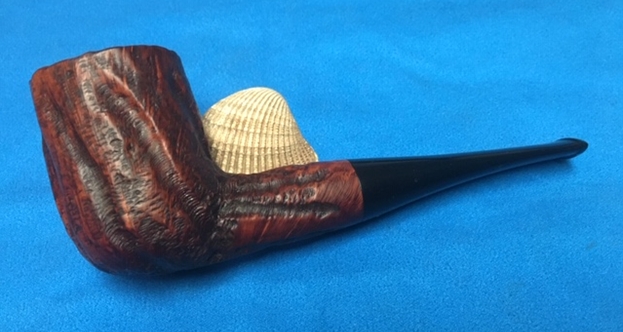
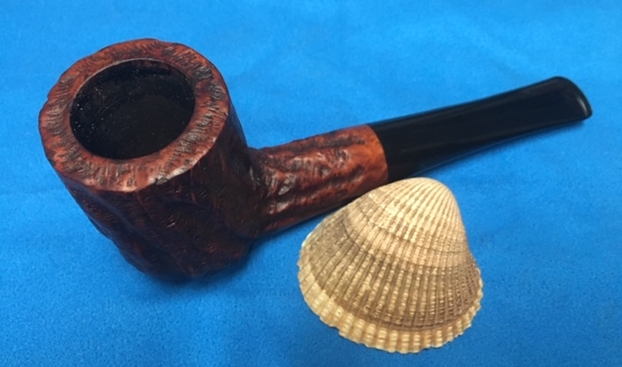
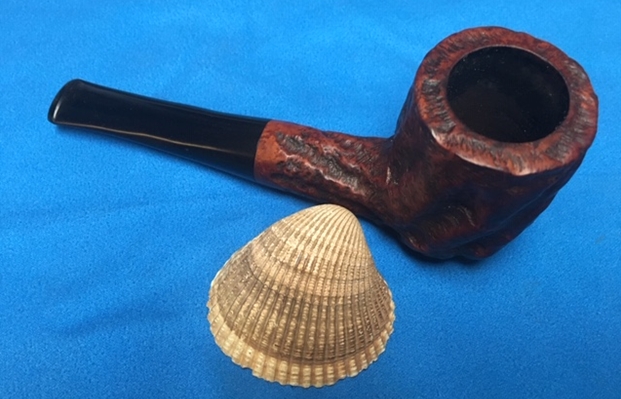
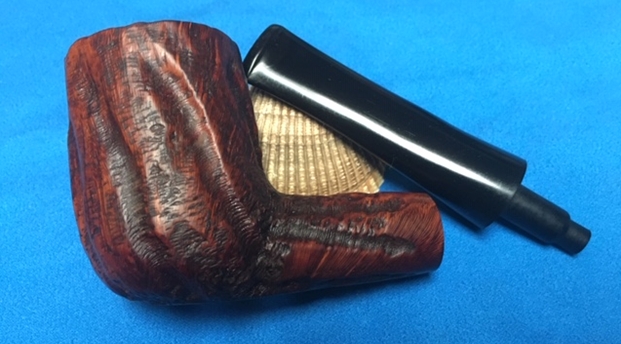
 I put the bowl and stem back together. I buffed the bowl and stem with Blue Diamond to polish out the light scratches that remained in the briar and the vulcanite. I gave the bowl and the stem multiple coats of carnauba wax. I buffed the pipe with a clean buffing pad to raise the shine. I hand buffed it with a microfiber cloth to deepen the shine. The pipe polished up pretty nicely. The worm trail rusticated finish on this Rich era Custombilt turned out very nice and shows the grain shining through. It has the kind of rustic beauty that draws collectors to them after all of these years. The contrast of the worm trails with the grain swirling through them looked good with the polished black vulcanite. This Custombilt billiard will soon be joining the other pipes I have on the rebornpipes store. The finished pipe is shown in the photos below. The dimensions of the pipe are Length: 5 3/4 inches, Height: 2 ¼ inches, Outside diameter of the bowl: 1 ½ inches, Chamber diameter: 7/8 of an inch. If you are interested in adding it to your collection let me know. Thanks for reading this blog and my reflections on the pipe while I worked on it.


Pingback: New Life for an old Custombilt Apple | rebornpipes