Monthly Archives: August 2016

Peacemaker Brochure


When my brother sent me the latest batch of pipes there was a boxed Peacemaker. I wrote about it earlier on the blog. Inside the box was this brochure. It always interests me to be able to see the original literature that came with a pipe and advertised its strengths. This brochure is double sided and on the front side explains the Peacemaker, its special features and its guarantee. On the other side are some general smoking hints, care for the pipe and then some of the variety of bowls that are available in terms of shape and finish. It makes a fascinating step back in time to read the descriptions and the promises. I scanned it to post it here so you all could enjoy it as well. Thanks for looking.

Peace1

Peace2

The box said it was a BBB Peacemaker


Blog by Steve Laug

I learned something this afternoon as I worked on a Peacemaker. The stem bears the Dr. Plumb stamp and red dot but the box says BBB. So who made this pipe? What I found inside the box may well explain that question. The brochure reads The Peacemaker Pipe. There is no Dr. Plumb or BBB on the brochure. This got me thinking that the pipe was probably made by a third manufacturer and sold under a variety of labels. Somewhere along the way a Dr. Plumb version got placed in a BBB box. The interesting thing about the box was that it had peal and stick logos on circular marked areas. It was missing a sticker on one side. I looked on-line and found a BBB version of the pipe. It was stamped identically to mine with the only difference being on the top of the stem. Where my pipe had the Plumb and red dot it had the BBB Diamond on the top. I tried to find out who made them but everything pointed to them being made by Peacemaker. I am wondering if they were not made by the Cadogan Group after they had bought out both GBD and BBB. Maybe some of you know some of the history about the brand. Don’t be shy let us all know.

When my brother received the pipe and opened the box it was an interesting discovery. The pipe definitely did not read BBB and it was in pretty decent condition. The metal was in great shape as was the stem. There was some minor tooth chatter on the top and bottom sides of the stem. The finish on the bowl was in good condition. There was a cake in the bowl and the rim top was dirty and the inner edge of the bowl had some nicks that made it slightly out of round.BBB1 BBB2The box had a Peacemaker brochure inside and a pipe cleaner sleeve for the Smokin’ Bowl, a pipe shops in Charleston, Beckley and Vienna West Virginia.BBB3 BBB4My brother took the above photos and also some close-up photos to show the condition of the pipe before he cleaned it up.BBB5The bottom of the metal base is stamped Peacemaker England in a Circle and the number 1 in the centre of the circle.BBB6He took a close up photo of the rim top and bowl. It shows the chips and nicks on the inner edge of the rim.BBB7He took the bowl off of the base and took a photo of the bottom of the bowl and the inside of the base that both reveal the tars and oils built up in both places.BBB8When the pipe arrived here it was in the BBB box. I took some photos of the box because I had not seen one of them before. It is an interesting box. The BBB logo is a sticker on the top and on one side of the box. BBB10I opened the box and inside was the pipe and a brochure for Peacemaker pipes. It shows the various bowl shapes and finishes that are provided. The pipe looked pretty good. My brother had done the hard work of cleaning up the bowl and the base. He had reamed it and scrubbed the finish and rim. He had also washed the base to remove the hardened oils and tars.BBB11I took the pipe out of the box and took some photos of it showing where it stood when I started my clean up.BBB12 BBB13I took a close up photo of the rim and bowl. I still needed to do some light reaming with the Savinelli pipe knife and the bowl would need to be topped to remove the damage to the inner edge of the bowl.BBB14I took the bowl off the base to see what I would need to do to clean out the inside of the base. The threads and the entry of the airway into the shank needed to be cleaned up. I removed the stem from the shank and used pipe cleaners, cotton swabs and alcohol to clean out the base and the entrance of the airway into the base. I cleaned out the airway in the stem with pipe cleaners and alcohol.BBB15 BBB16I took a photo of the cleaned up parts of the pipe. It is a simple and yet effective design that is very similar to the Falcon pipe in basic concept.BBB17I topped the bowl on the topping board with 220 grit sandpaper to remove the damage to the rim and the inner edge. I sanded until the rim was smooth and the rim was round once again.BBB18I cleaned up the inside of the bowl with a Savinelli Pipe Knife to remove the light cake that still was in the bowl. I smoothed out the walls and the base of the bowl.BBB19The stem had tooth chatter on the top and the bottom sides near the button. These plastic stems are not too hard to sand smooth but it is an issue to get the shine back. It takes a lot of sweat equity investment to bring a shine back to the stem. I sanded it with 220 grit sand paper and then with a series of 400-600 grit wet dry sandpaper to smooth out the scratches.BBB20 BBB21I wet sanded it with 1500-2400 grit micromesh sanding pads. I gave it a rub down with Obsidian Oil. I dry sanded it with 3200-4000 grit pads and gave it another coat of oil. I finished sanding it with 6000-12000 grit pads, gave it a final coat of oil and set it aside to dry.BBB22 BBB23 BBB24I sanded the rim with 1500-4000 grit micromesh sanding pads to smooth out the scratches left behind when I topped the bowl. I used a dark brown stain touch up pen to restain the rim to match the sides of the bowl. I touched up the outer edge of the rim as well making sure that all the stain matched the bowl. I gave the bowl multiple coats of Conservator’s Wax and then used a shoe brush to buff it. I also buffed it with a clean buffing pad to raise the shine (The second photo was taken when I had coated the bowl with the third coat of wax).BBB25I lightly buffed the aluminum base and the stem with Blue Diamond on the wheel. I put the pipe back together and then buffed the pipe with a light touch giving it multiple coats of carnauba wax. I buffed it with a clean buffing pad and then with a microfibre cloth. The finished pipe is shown in the photos below. It is a great example of the Peacemaker Pipe. I have several of these so I will not be keeping this one either. If any of you want to have a Peacemaker for your metal collection, contact me and this one can be yours. Thanks for looking.BBB27 BBB28 BBB29 BBB30 BBB31 BBB32 BBB33 BBB34 BBB35

An Unsmoked Aldo Velani Trio 56


Blog by Steve Laug

I have never worked on or seen an Aldo Velani Italian made pipe before. I have read about them but never had one in my hands. This one came to me from my brother and it needed no clean up or refurbishing. This pipe was spotless and appeared to be unsmoked. I am always dubious when I get what appears to be an unsmoked pipe. I spent some time going over the internals of this pipe to check that out. It did not smell like tobacco or smoke. When I ran a pipe cleaner through the stem and shank it came out pristine. So I am fairly convinced that the pipe is unsmoked. The bowl has a dark neutral tasting bowl coating on the walls. The finish is clean and unblemished. There are no scars or damage to the finish on the bowl. It has a combination of cross grain on the top and underside of the bowl and shank and up the front and back of the bowl. There is also some great birdseye grain on the bowl sides. It is not a pipe that I will be keeping. If any of you who are reading this blog want to add it to your rack it can be yours for $60 + postage. The shape is great in the hand and it would be one I would keep if I did not have so many already. AV1 AV2AV3Av4The stamping on the bowl read Aldo Velani over Trio on the left side of the shank and Italy 56 on the underside. There is no stamping on the right side of the shank. The stem was a shiny black Lucite and there was a brass end cap/band on the shank. The band sat between the bowl and the shank. The stem had the stylized Aldo Velani stamp – a kind of AV that ran together. The pipe came with a thick velvet pipe sock with drawstrings.AV5I took the pipe apart to make sure that it was clean and had no dust or debris from sitting in the bag and it was very clean. There is no smell of tobacco in shank or the stem. The stem has a well done funnel at the end of the tenon. The drilling in the shank is at the top of the shank but comes out at the bottom of the bowl and is centred. The draught on the pipe is open and easy.AV6 AV7 AV8 AV9 AV10 AV11 Av12Once again if you are interested in adding this one to your collection email me at slaug@uniserve.com or send me a message on Facebook. We can work out a deal. Thanks for looking.


A Butz-Choquin Millesime Limited Edition 1986 Pipe


Blog by Steve Laug

One of the pipes that my brother sent me was a Butz-Choquin that was in a large presentation box. It was stamped Butz-Choquin on the bottom of the shank and had a silver disk on the left side of the shank with 1986 engraved on it. On the right side of the shank it was stamped MILLESIME with C in a circle and 215 underneath. The box was satin lined and the pipe was held in place by an elasticized band. The stem bore the acrylic inset BC logo. In the lid of the box was a Butz-Choquin pipe sock and a certificate stating that this pipe was a limited edition and bore the number 215 of 1200 pipes made.BC1On the satin lining of the box it was stamped BC and the Butz-Choquin logo. Underneath was Millesime. Underneath that to the left it read Limited Edition, central it read Maitre Pipier a Saint Claude – France, and to the right it read edition numerotee. A little research on Google told me that Millesime translated Year and the Millesimei line was composed of the BC pipes of the year. Thus I had in my hands a 1986 Pipe of the Year.BC2I took the pipe out of the box and laid it on the pipe sock and took a photo of it. It is a beautifully grained piece of briar with a shiny Lucite stem.BC3The certificate has the BC Butz-Choquin logo and Millesime. Then it reads:

This year we have carefully selected this model B.C. Millesime 1986. This year is engraved on a silver plate inlaid in the briar and the edition is limited to 1200 pieces.

We have created the B.C. Millesime for the special and individual taste of pipe lovers. Those who appreciate their pipe will be able to savour this new B.C. shape and start a new collection.

The distribution has been intentionally limited and great attention has been given to it production.

This has made this B.C. Millesime 1986, with the No. 215, a pipe that caters to the pipe smoker’s enjoyment.

This certificate which accompanies this pipe guarantees its authentic and unique character and justifies its prestige.

Jacques et Jean-Paul Berrod, Maitres Pipiers a Saint-Claude. The certificate bears his signature below the name and title.BC4I took the pipe to the work table and took some photos of it before I started to clean it up. The first four photos show the various views of the pipe. The grain on the pipe is quite a stunning mixture of flame, cross grain and birdseye.BC5 BC6The pipe had obviously been lightly smoked as the tobacco chamber still the bowl coating on the bottom two-thirds of the bowl. I think that the most disturbing feature of this pipe to me was that the sanding marks were still visible on the rim and bowl. I am not sure if those were original or if the entire pipe had been brushed with a coat of varnish. In the close up photos you can see the marks that I am talking about. Each of the photos shows a different portion of the pipe from the rim to the stamping on the sides and bottom of the shank.BC7 BC8I cleaned out the mortise and the airway in the shank and the stem with alcohol, cotton swabs and pipe cleaners until they were clean.BC9The Lucite stem had scratches and small nicks in the surface so wet sanded it with 1500-2400 grit micromesh sanding pads and dry sanded it with 3200-12000 grit pads. I wiped it down with a damp cotton pad between each set of three grits.BC10 BC11I sanded the briar with the same sequence of micromesh pads to remove the scratches. The more I worked with them the more convinced I became that the surface had a brushed on coat of varnish or shellac. I don’t think it came that way originally but had probably been done by the eBay seller to make the pipe look shiny.BC12When I finished sanding it with the micromesh sanding pads I buffed the bowl and the stem with Blue Diamond polish on the buffing wheel. The sanding pads and the buffing wheel took out the scratches and polished the finish. The grain really stands out after the buffing. I gave the pipe and stem several coats of carnauba wax and buffed it with a clean buffing pad. I hand buffed it with a microfibre cloth to deepen the shine. The finished pipe is shown in the photos below. The Lucite stem looks great with the newly polished bowl and shank. The silver inlaid disk engraved 1986 also shined up nicely with some silver polish.BC13 BC14 BC15 BC16 BC17 BC18 BC19

My brother found six NOS unsmoked Yello-Bole, Kaywoodie & Medico Pipes


Blog by Steve Laug

I got a call from my brother when he was driving from Idaho to Nebraska that he had scored a batch of New Old Stock (NOS) unsmoked pipes at an antique shop. These were some beauties he said and the price was right. From left to right in the first photo and from top to bottom in the second and third photo, there was a Yello-Bole Checker Acorn, a Kaywoodie Campus small Rhodesian/Prince, a Kaywoodie Campus Dublin (both of the Campus pipes had a spear shaped stinger), a Kaywoodie Super Grain S-L (with a three hole stinger), a Yello-Bole Collegiate Rhodesian with the bowl insert in place, and a Medico Tuxedo Acorn. These pipes are in excellent unsmoked condition. They will eventually go on the rebornpipes store for sale but I am putting them up as a blog if anyone is interested in purchasing any or all of them let me know. Don’t wait for them to go up on the store.NOS1 NOS3NOS2I took individual photos of each of the pipes to give a good picture of the look and the condition of each of them. The first one is the Yello-Bole Checker Acorn. The pipe is 5 ½ inches long, 1 ½ inches tall, the diameter of the bowl is ¾ of an inch, the external diameter of the bowl is 1 1/8 inches. It has the Yello-Bole spade stinger that is removable is you chose to do so.NOS4 NOS5 NOS6 NOS7The second pipe is a Kaywoodie Campus small Rhodesian/Prince. The shape is more of a Prince but it has the Rhodesian top cap with a single ring separating the bowl from the cap. The pipe is 5 inches long, 1 inch tall, the diameter of the bowl is ¾ of an inch, the external diameter of the bowl is 1 ½ inches. It has the integrated KW stinger/tenon that is non-removable. It is not the typical ball stinger but rather a spear head shaped stinger.NOS8 NOS9 NOS10 NOS11The third pipe is a Kaywoodie Campus small Dublin. It is a dainty, almost pencil shank pipe. The pipe is 5 inches long, 1 ½ inch tall, the diameter of the bowl is ¾ of an inch, the external diameter of the bowl is 1 inch. It has the integrated KW stinger/tenon that is non-removable. It is not the typical ball stinger but rather a spear head shaped stinger.NOS12 NOS13 NOS14 NOS15The fourth pipe is a Medico Tuxedo Acorn. The tenon is the typical Medico metal tenon that holds their patented paper filters. The length of the pipe is 5 inches, the height of the bowl is 1 3/8 inches. The diameter is of the chamber is ¾ of an inch and the diameter of the bowl is 1 inch.NOS16 NOS17 NOS18 NOS19The fifth pipe is a Yello-Bole Collegiate Thin Rhodesian. The pipe is 5 ½ inches long, 1 ½ inches tall, the diameter of the bowl is ¾ of an inch, the external diameter of the bowl is 1 inch. It has the Yello-Bole spade stinger that is removable is you chose to do so. The bowl has the round bowl insert that caps the new Yello-Bole pipes. It sits in the bowl and reads Honey Caked Bowl over Guaranteed Burn-out Proof. It is a great piece of Yello-Bole history.NOS20 NOS21 NOS22 NOS23 NOS24The sixth pipe is a Kaywoodie Super Grain S-L Apple. It is a combination sandblast and rusticated bowl and shank. The pipe is 5 ½ inches long, 1 ½ inches tall, the diameter of the bowl is ¾ of an inch, the external diameter of the bowl is 1 1/4 inches. It has the integrated KW stinger/tenon that is non-removable. It is a three hole typical KW stinger with a ball on the end.NOS25 NOS26 NOS27 NOS28Once again all of these pipes are unsmoked. They are NOS – New Old Stock pipes. All of them are for sale as individual pieces or as a set. Contact me through email at slaug@uniserve.com or leave a response here following the blog. Thanks for looking.

A Nice Looking Drucquer & Sons Berkeley DRUKE 187 Pipe


Blog by Steve Laug

My brother sent me an eBay link that had a few pipes from Drucquer & Sons Ltd, Tobacconists for sale. We bid on several of them and this was one of the ones we won. It is a lot like the Pipo shaped pipes that are still made today. This one is English made and I have no idea what to call the shape. The photos taken on top of the pipe sock came from the seller.Dru1The pipe is stamped on the underside “DRUKE” over Drucquer & Sons Ltd. Underneath that it is stamped Berkeley with a shape number 187 below and toward the stem. Next to the shank/stem junction it is stamped Made in England. I have done some searching but cannot find either the shape or the number on the various English pipe brand charts.Dru2 Dru3When the pipe came to my brother he took some photos to capture the condition of the pipe before he cleaned it up for me. The next photo shows that the overall condition of the pipe is quite good. The finish is not too bad though there are some sand pits or nicks on the back side of the bowl. The rim is dark and oily. The bowl had a thin cake. The stem was oxidized and there was some tooth chatter on the top and bottom sides near the button.Dru4 Dru5He took a close up photo of the top of the bowl that shows the cake and the condition of the rim. It was covered with lava over flow but there appeared to be little rim damage other than a few shallow nicks on the outer edge of the rim.Dru6He reamed the pipe and scrubbed the exterior of the bowl with Murphy’s Oil Soap and a tooth brush. He was able to remove the majority of the rim darkening and all of the cake. The soap took off the grime on the finish so that when he sent me the pipe it was clean. The stem oxidized a bit more after the cleaning but it was not too bad. The pipe has some excellent grain around all sides of the bowl and shank. The next photos show the pipe as it was when it arrived in Vancouver.Dru7 Dru8 I took a close up of how the rim looked after my brother had cleaned it up. It was in decent shape with just some darkening and a few pieces of tar stuck to the surface.Dru9I wiped down the rim with a cotton pad and alcohol to remove the remnants and then sanded it with a folded piece of 220 grit sandpaper. I sanded it until the rim was clean and the bevel was smooth to touch. I sanded it with 1500-3200 grit micromesh sanding pads to remove any scratches left behind by the sandpaper.Dru10I wiped the pipe down with a light coat of olive oil and polished it by hand. The grain began to really stand out and the virgin finish looked good (the pipe had never been stained so the oil approximated what would have been there when the pipe was new).Dru11I sanded the stem with 220 grit sandpaper to remove the tooth marks and chatter on both sides of the stem. I wet sanded it with 1500-2400 grit micromesh sanding pads and gave it a coat of Obsidian Oil. I dry sanded it with 3200-4000 grit pads and gave it another coat of oil. I finished sanding it with 6000-12000 grit pads and gave it a final coat of oil. I set the stem aside to dry.Dru12 Dru13 Dru14I buffed the entire pipe with Blue Diamond on the wheel to polish the stem and the bowl. I gave it multiple coats of carnauba wax to protect and give it shine. I buffed it with a clean buffing pad to shine it and then hand buffed it with a microfibre cloth. The finished pipe is shown in the photos below. Does anyone know what to call this shape? Does anyone have a similar pipe or even the same one from Drucquer’s & Sons Ltd.? Thanks for looking.Dru14a Dru15 Dru16 Dru17 Dru18 Dru19 Dru20 Dru21 Dru22

Restoring an Old Bruyere Extra Floral Carved Bent Billiard


Blog by Steve Laug

This interesting old pipe is unique in many ways. The first and most obvious is the floral pattern carved on the bowl sides and bottom. It is well carved and the petals and the leaves flow around the bowl. They sit against a rusticated finish in the gaps of the leaves and around the top of the bowl. There was one burn spot on the bottom of the shank where it looked as if the pipe had been set down in an ashtray and was burned. The second visible uniqueness is the horn stem with the orific button on the end. It had a little damage on the right edge of the stem but it was fixable. The third unique feature was not visible until I removed the stem. The stem had a large chamber in the saddle portion as did the shank. There were also two tubes at the end of the mortise and a collecting chamber or sump. The pipe was in pretty decent shape for its age. I can only hope that when I reach that age, if I am still around I will look as good.Bru1My brother Jeff had reamed the bowl and done the initial clean up. He had scrubbed the surface of the bowl and the shank. It is great that he is doing that part of the job for me as it speeds up the process that I do in the restoration. The rim had some hard cake built up on the surface. There was a burn spot on the bottom of the shank that is visible in the second photo below.Bru2I took some close up photos of the areas that needed work. The first photo shows the burned spot. Fortunately the burn had not softened the wood too much. It was hard when I probed it with a dental pick. The second photo shows the hard cake on the rim. It is quite thick but the rim appears to be undamaged and the inner and out edges of the rim are in great shape. The third photo shows the damaged portion of the right edge of the stem. I have seen these often on horn stems and have always wondered if it was not damage done by a worm eating the horn.Bru3I took several more close up photos. The first photo shows the two inner tubes that enter the bowl in two spots at the bowl bottom. It is a twin bore airway. The second photo shows the stamping on the left side of the shank – it reads Bruyere Extra. The right side of the shank is stamped with the shape number 6185. The band has three hallmarks and EP in a diamond. The hallmarks are letters, each in a car-touche. My guess is that these signify the maker.B

The letters are JBF and look like the ones I have pictured to the left.

Bru4The inside edge of the briar was thin in several spots. The two that were the most problematic can be seen on the bottom edges of the shank on the right side of the photo below. I have circled the two spots in red. The top one was missing a wedge of briar and the bottom was a half circle of briar. Both were repairable with briar dust and wood glue.Bru5I decided to work on the stem repair first. I cleaned the area on the horn with alcohol and a cotton swab and then filled it in with clear super glue. For some reason this time around the repair turned white. That has never happened for me. Generally the glue dries clear and the underlying colour of the horn shines through. I set the stem aside to let the glue cure.Bru6The tars and oils were almost petrified on the top of the rim. I had soaked the rim with alcohol to try to soften them with no success. I decided that the best option was to lightly top the bowl until the hard tars were gone. I used a topping board and 220 grit sandpaper to remove the buildup. I sanded the burned area on the bottom of the shank at the same time to remove the surface damage to the briar. I sanded it until the briar was darkened but solid.Bru7Once the rim was clean I sanded it with 1500-3200 grit micromesh sanding pads to smooth out the scratches left behind by the topping of the bowl. I scrubbed out the sump and the open mortise with cotton swabs and alcohol until it was clean. I cleaned out the twin bore tubes with pipe cleaners and alcohol. I used an all purpose wood glue and briar dust to build up the two spots on the inside of the shank and sanded them smooth. They are circled in red in the photo below.Bru8I sanded the repair to the horn with 220 grit sandpaper and sanded the tooth marks and chatter on the top and bottom of the stem until it was smooth. I cleaned out the chamber in the stem with pipe cleaners, cotton swabs and alcohol until it was clean. I had to do two full cleanings remove the tars in the chamber. The first photo below shows the stem after the first cleaning. The second photo shows the second cleaning. It took a lot of cotton swabs to clean out the chamber. I don’t like to boil hot alcohol through horn stems with the retort as I do not want to damage the stem.Bru9With the inside of the stem clean I sanded the exterior with micromesh sanding pads. I wet sanded it with 1500-2400 grit pads and rubbed it down with Obsidian Oil. I dry sanded it with 3200-4000 grit pads and gave it another coat of oil. I finished sanding it with 6000-12000 grit pads and gave it a final coat of Obsidian Oil.Bru10 Bru11 Bru12I polished the Electro-Plated silver end cap with silver polish to remove the tarnish and restore the shine. I stained the rim with a light brown stain touch up pen to match the colour of the rest of the bowl.Bru13I gave the bowl several coats of Conservators Wax and hand buffed it with a shoe brush. I buffed the stem with Blue Diamond on the wheel and then gave the bowl and stem several coats of carnauba. I had a light touch on the bowl so it did not clog up the carvings. I buffed the pipe with a clean buffing pad to shine it and then hand buffed it with a microfibre cloth. The finished pipe is shown in the photos below. Have any of you seen a pipe with plumbing like this one? Do you recognize the hallmarks or the brand or shape number? Let me know as I am curious. Thanks for looking.Bru14 Bru15 Bru16 Bru17 Bru18 Bru19 Bru20 Bru21


Cleaning up a No Name Lattice Meerschaum Bent Billiard


Blog by Steve Laug

When my brother first showed me this bent lattice meerschaum pipe in a Pioneer box I was excited. I have never found a boxed Pioneer Meerschaum pipe before. I thought maybe, just maybe this was the first. I have learned never to assume that just because something is in a box it is necessarily that product. In this case at least we were talking the same material. When I brought it home with me and finally opened it up to work on it I was impressed by the beautiful lattice-work carving that left a series of tear drop shaped windows over an inner bowl. The yellow Lucite stem was also well made and looked good.meer1 meer2The rim on the pipe was darkened and dirty with a tar build up on the back side. There was a small chip (maybe it was made when the pipe was carved, I am not sure) on the front right side of the rim. I say maybe because the carving is also in the groove of the small chip. meer3The right side of the bowl had a dark soiled area where someone’s thumb had left a lot of dark grime. It was in the grooves around the tear drop but not inside the hole. There was some nice colouring happening all around the shank.meer4 meer5I took a close up photo of the rim to show the tar and the indented/chipped area. It can be seen in the centre of the red circle in the photo below.meer6The stem was loose so when I took it apart I was a bit surprised to find that it had the Jobey Link system in the shank and stem. I wonder if that is original or if someone restemmed the pipe and decided to use the Link and stem from a Jobey pipe. I probably will never know for sure but I would hazard a guess that this is what happened on this pipe. They did a great job in fitting the connector in the shank and aligning the stem and shank.meer7The stem is an interesting mix of yellows and brown swirls that is hard to capture in the photos. There was also some tobacco staining in the airway of the stem and the button. Differentiating between the stain and the colour was an interesting problem. I figured that the straight airway from button to shank was stained and the other parts were part of the swirled pattern. I worked on the airway with alcohol and soft scrub cleanser and pipe cleaners until I removed as much of the stain in the airway as possible. I also worked on the area where the end of the Jobey Link sat in the stem using cotton swabs and alcohol. The stain did not come out all the way but it is clean. The brown swirl in the stem runs alongside of the airway which makes the stain interesting. The cleaned stem is shown in the photo below.meer8I took the Jobey Link out of the shank and cleaned out the airway with pipe cleaners, cotton swabs and alcohol. I scrubbed the rim and the soiled spot on the left of the bowl with alcohol and cotton swabs and was able to remove much of the dirt. I sanded the rim top with 1500-2400 grit micromesh sanding pads to further remove the buildup. The cleaned rim and left side of the bowl can be seen in the photos below.meer9 meer10I put the stem in place and took the following photo to show how good the soiled area on the left side of the bowl came out after cleaning.meer11The stem was rippled and wavy to touch. It felt as if someone had overdone the buffing and left behind the waves of too much pressure against the buffing wheel. I sanded the top and bottom surfaces of the stem with 220 grit sandpaper to remove the waves and ripples. I sanded both sides until the surface was smooth to touch.meer12 meer13I wet sanded the stem with 1500-2400 grit micromesh sanding pads and dry sanded it with 3200-12000 grit pads to polish out the scratches left behind by the sandpaper. Each successive grit of micromesh left the stem more shiny and smooth.meer14 meer15 meer16I buffed the stem with Blue Diamond and lightly buffed the bowl as well. I gave the stem several coats of carnauba wax and then buffed the pipe and stem with a clean buffing pad to polish it. I wish I could have gotten more of the stain out of the stem but it is what it is.  The finished pipe is shown in the photos below. It is quite nice but I am still not sure whether it is a Pioneer Meerschaum or not and I am not sure that I will ever know. It is a beauty. If you are interested in adding it to your collection let me know in the response below or via messenger or email. We can make a deal. meer17 meer18 meer19 meer20 meer21 meer22 meer23

Savinelli Guibileo d’Oro 320KS Fiamatta Restoration


By Al Jones

The Savinelli 320 shape has been on my “Holy Grail” list for a few years, but I wanted the pipe to be in the Guibileo d’Oro grade and have a vulcanite stem. After a while, it seemed hopeless to actually find one. In fact, I had dropped it from my eBay search list last year. Only because of the eagle eye of my friend, Dave J, was I able to acquire one. Dave gave me the heads up on this pipe when it was listed. I put in a last second bid and lost by one dollar. I figured it was not to be. A few weeks later, the seller messaged me that the winning bidder had never made payment and it was mine for my final bid, how fortunate!

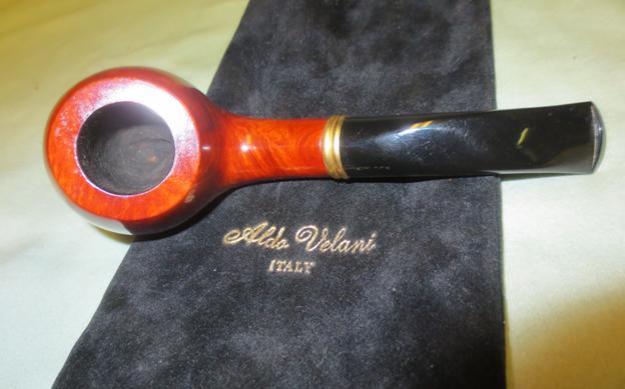
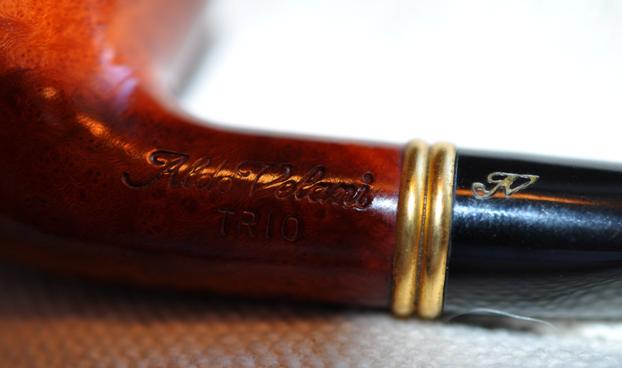
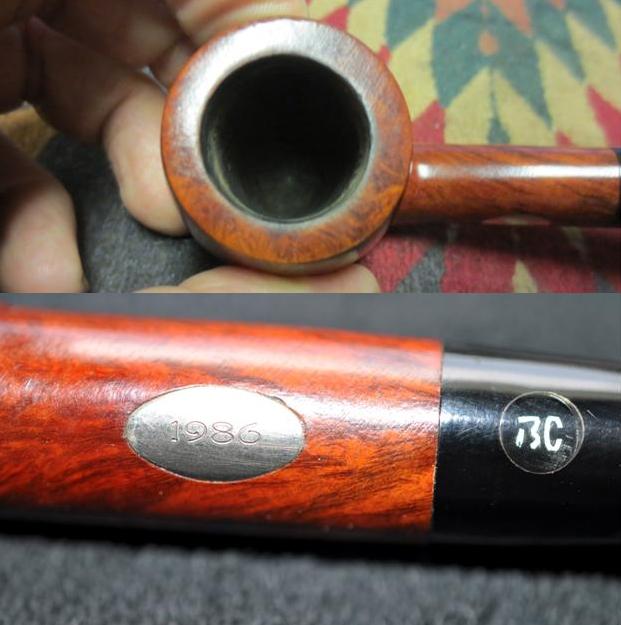
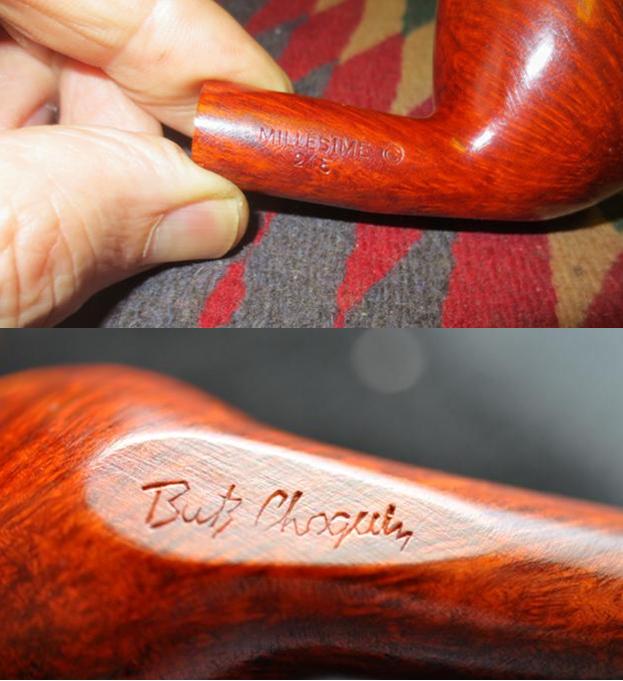
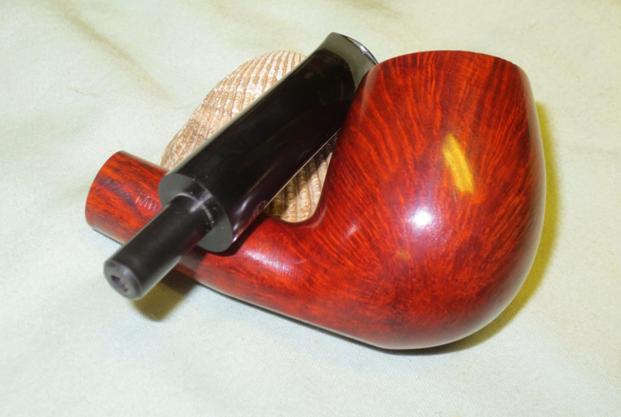
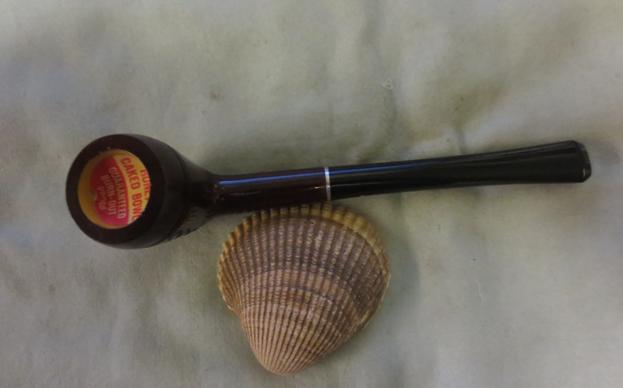
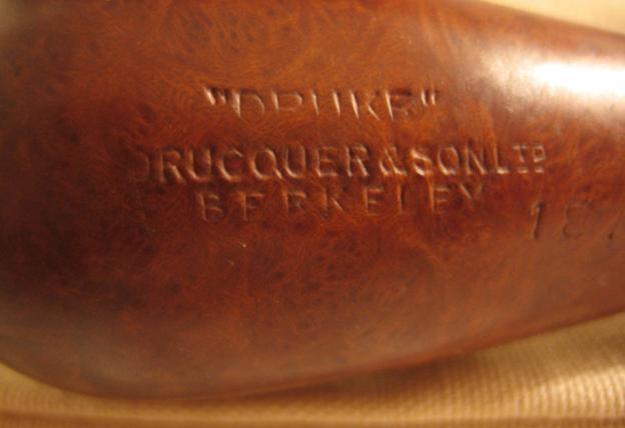
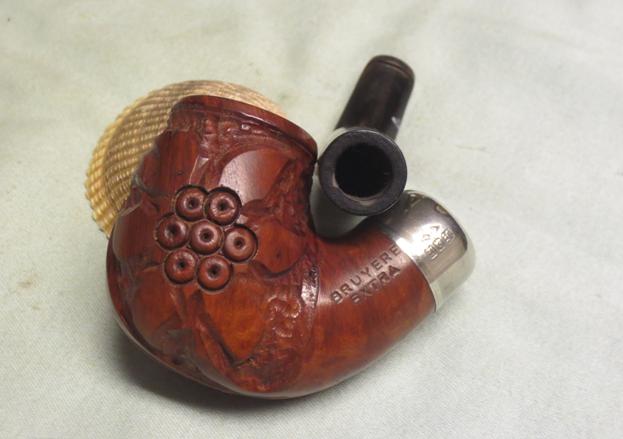
After making the purchase, it only occurred to me that this one has the additional “Fiamatta Straight Grain” stamp. I knew that only one in a thousand Savinelli’s make the Guibileo d’Oro grade but I had no idea on how many of those had the “Fiamatta” stamp. This pipe has a Vulcanite stem, with no filter, which means it was made before 1982 when the factory switched to acrylic/filter stems.

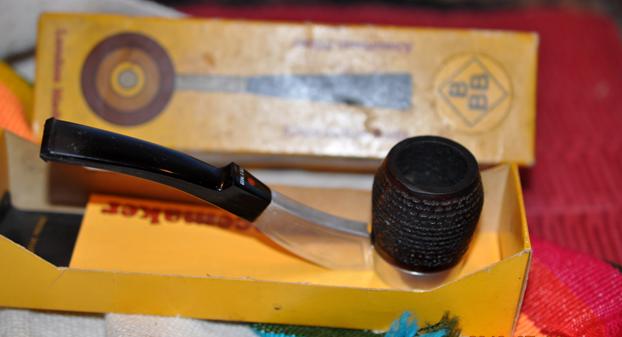
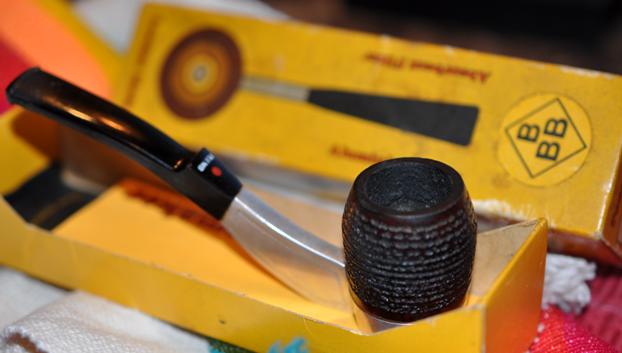
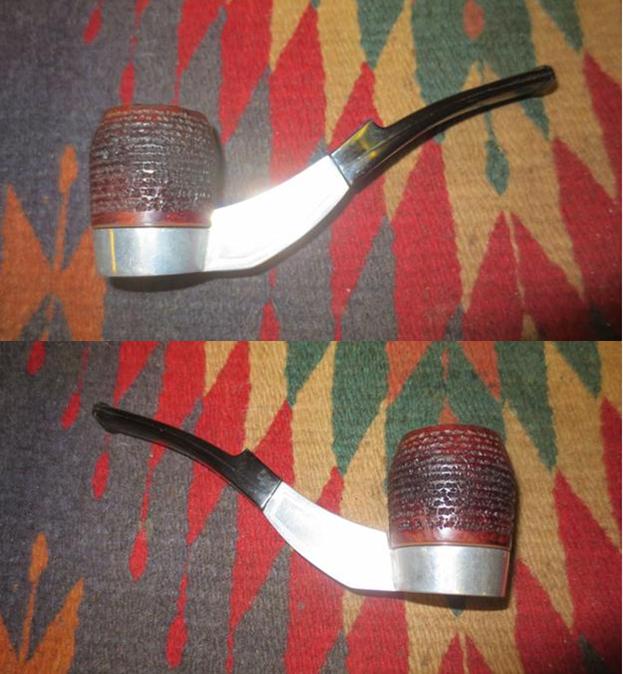
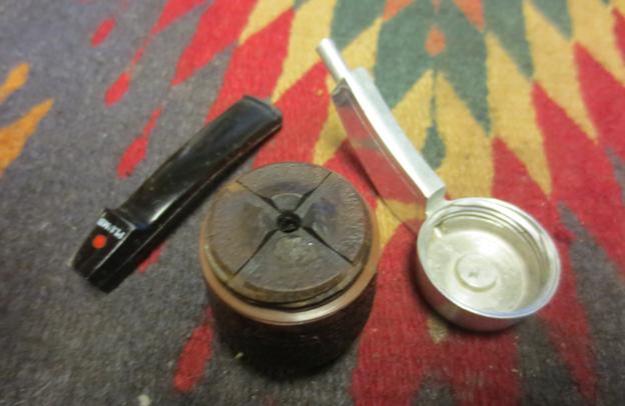
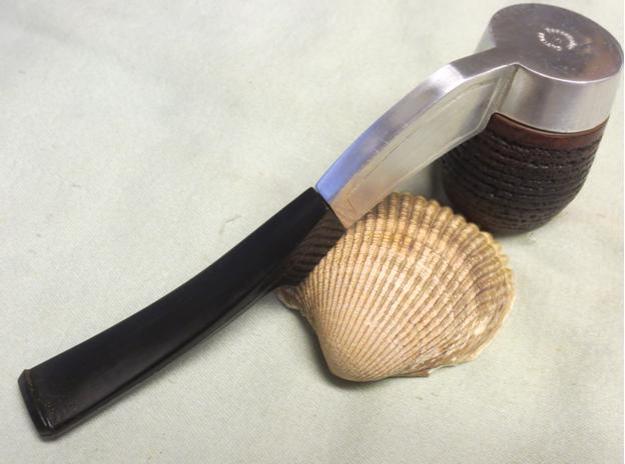
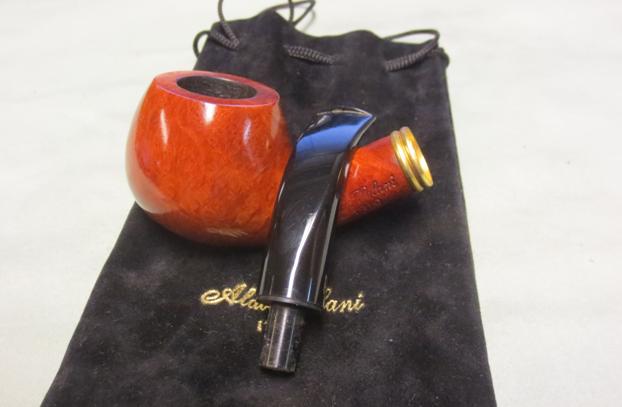
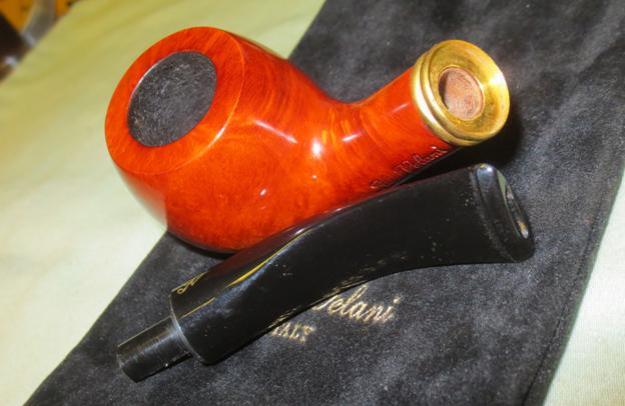
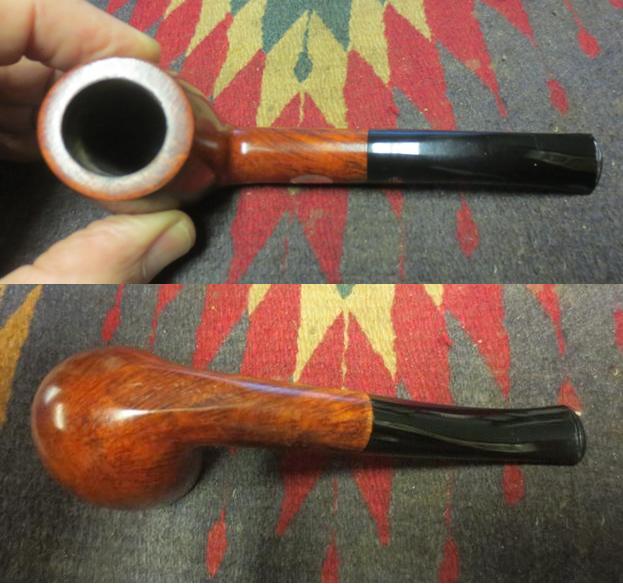
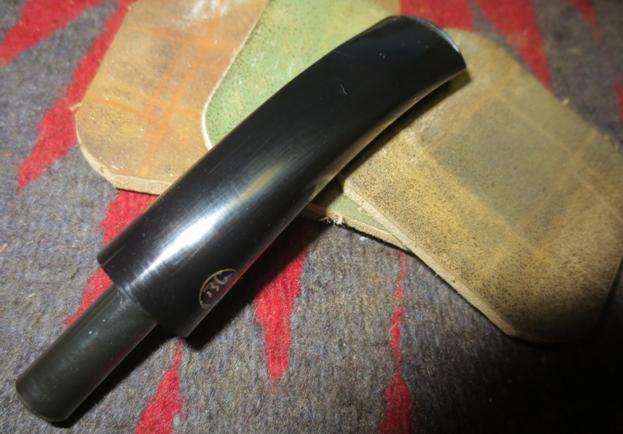
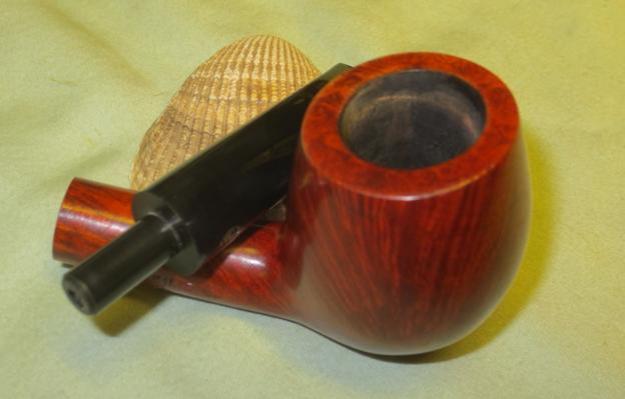
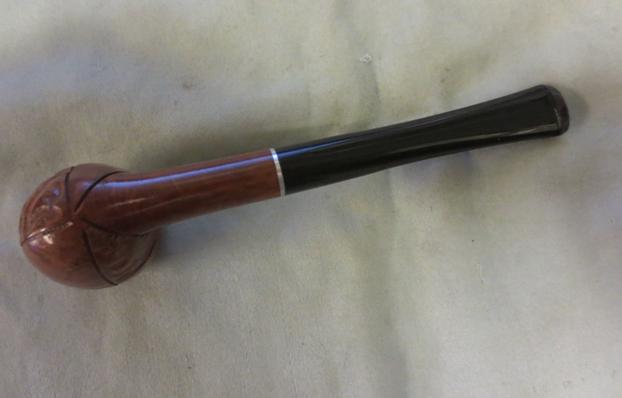
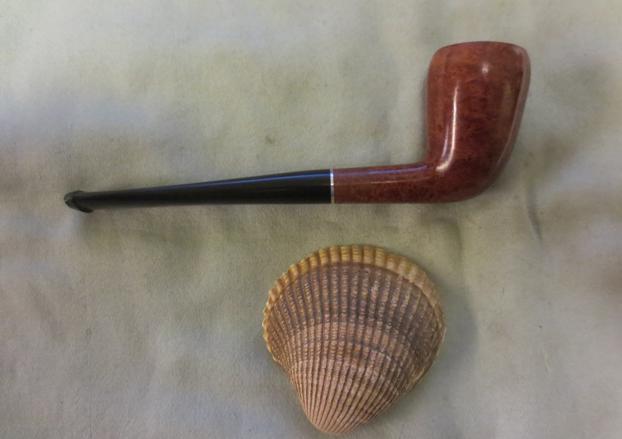
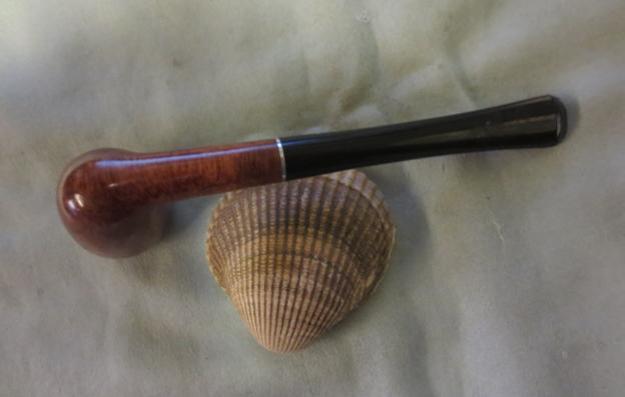
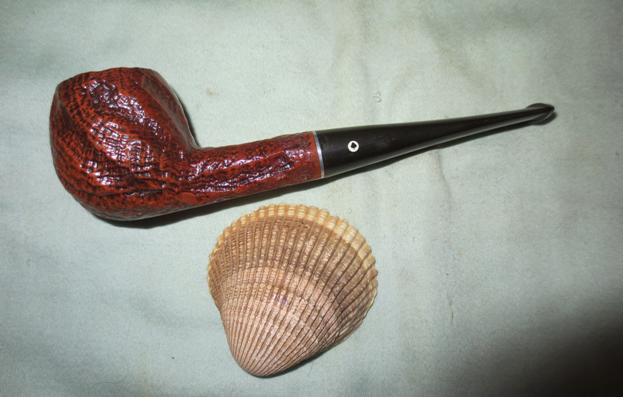
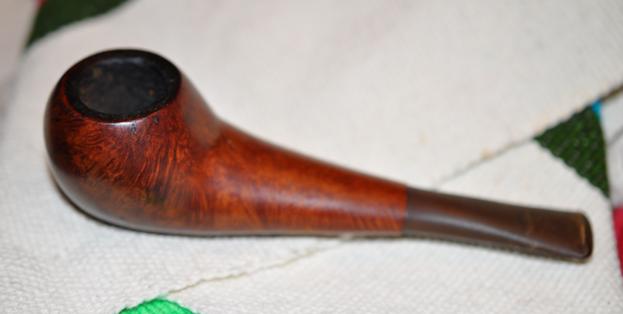
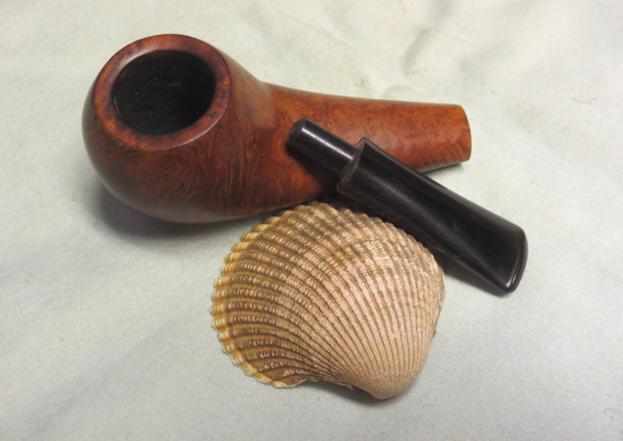
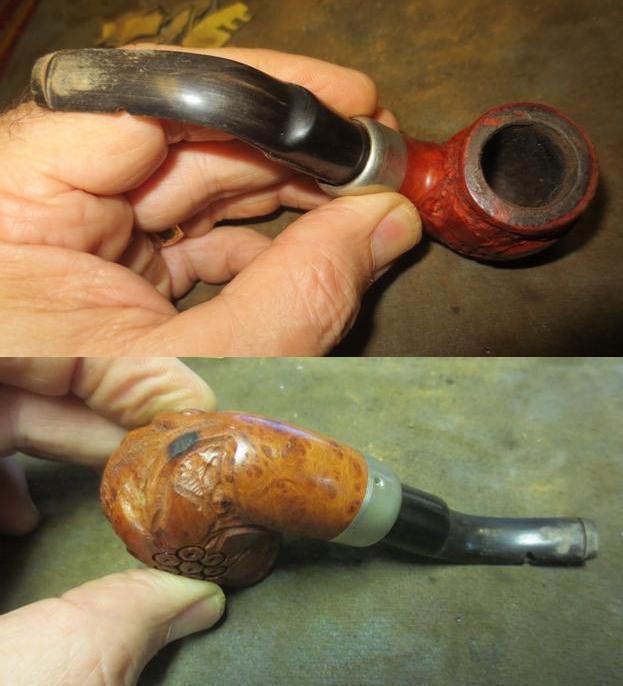
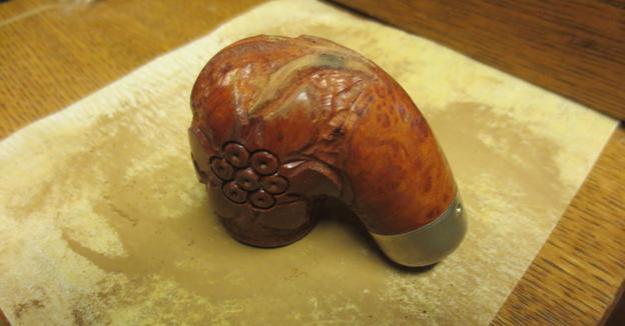
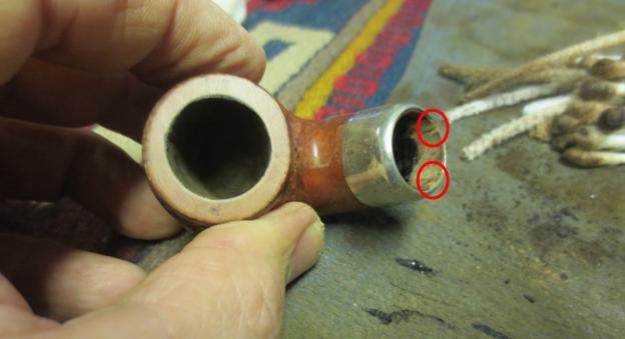
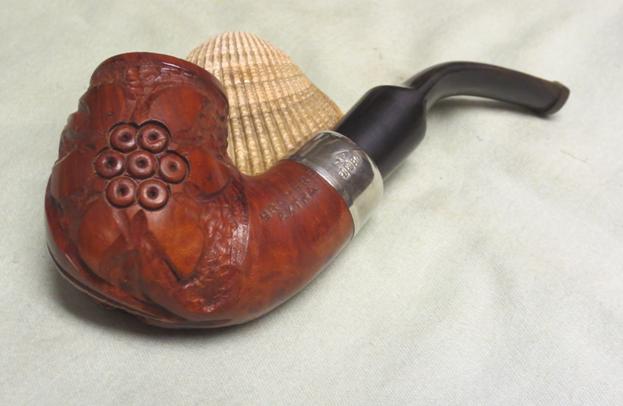
The pipe was in very good shape, with a mild cake, some oxidation on the stem and a few minor bite marks. The stem fitment was excellent.

Savinelli_GBD320KS_Before (1)
Savinelli_GBD320KS_Before (2)
Savinelli_GBD320KS_Before (3)

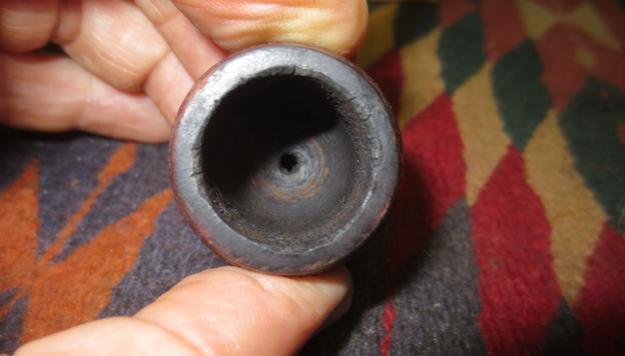
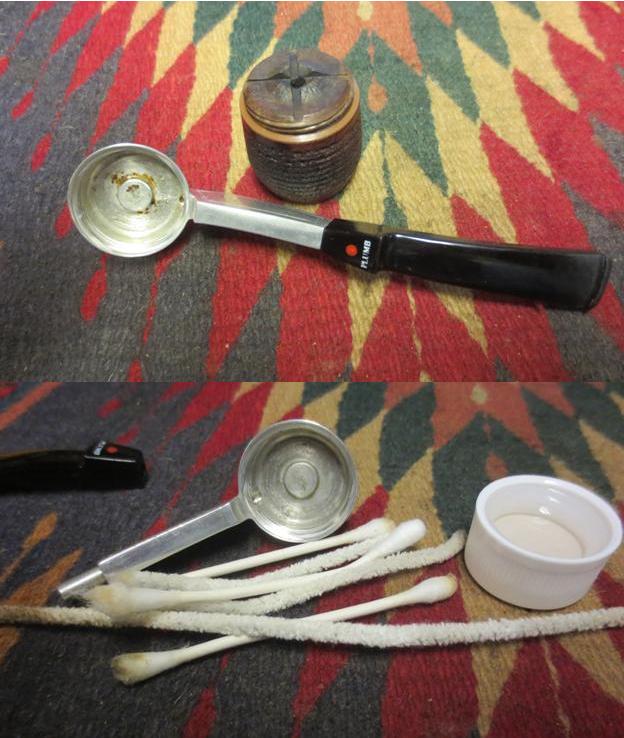
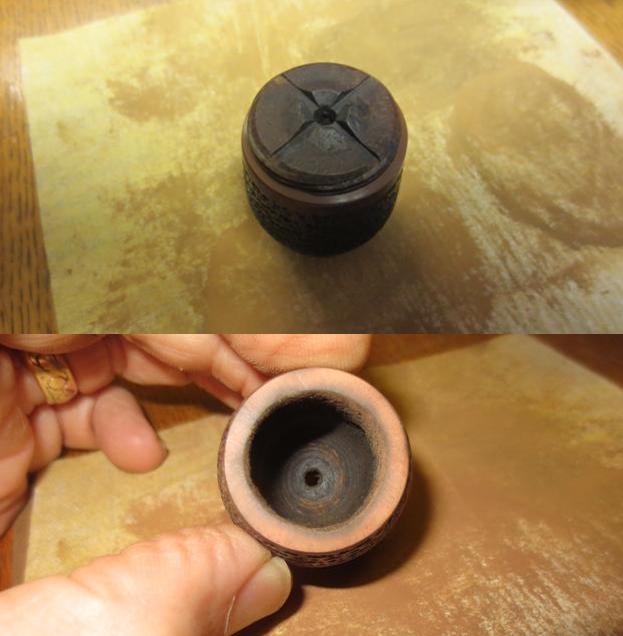
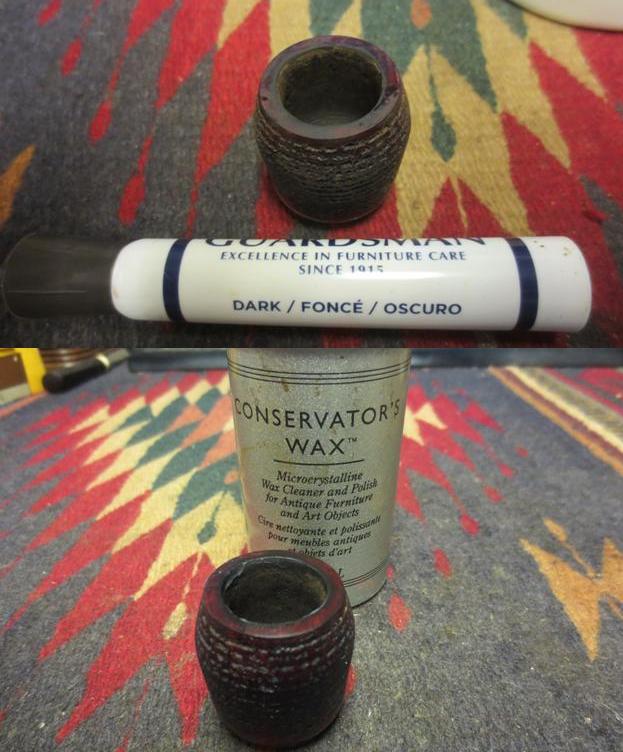
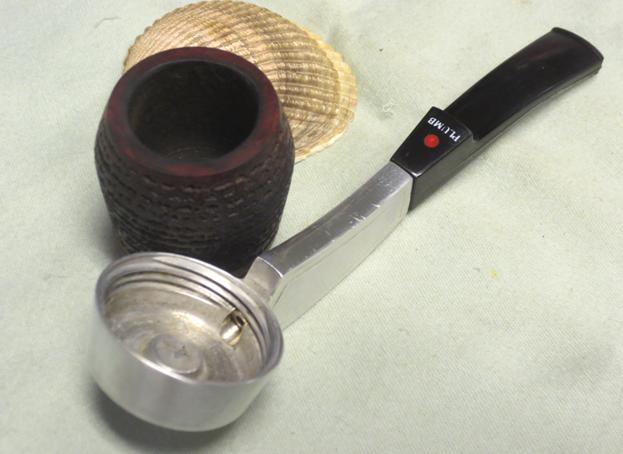
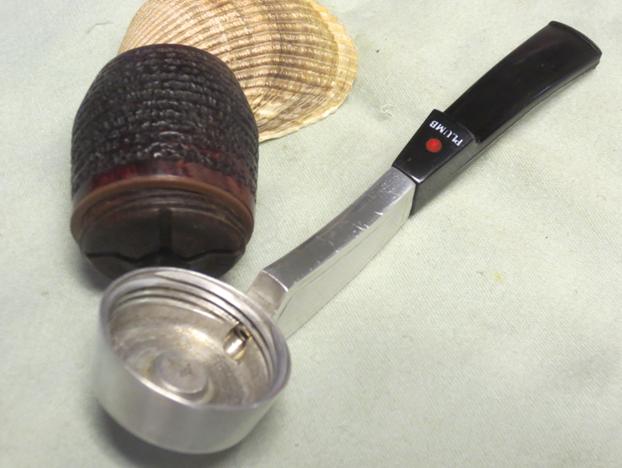
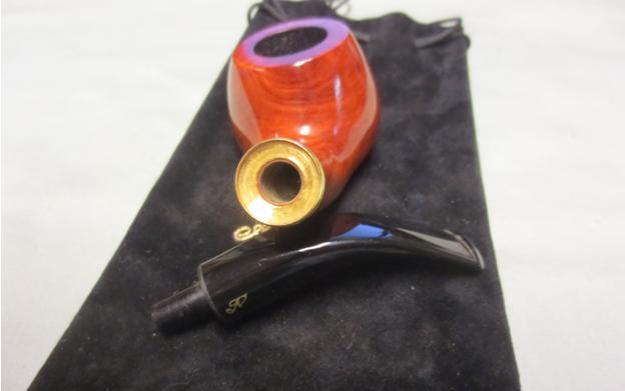
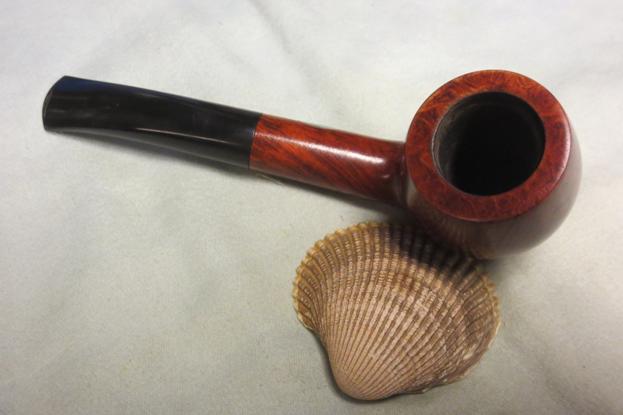
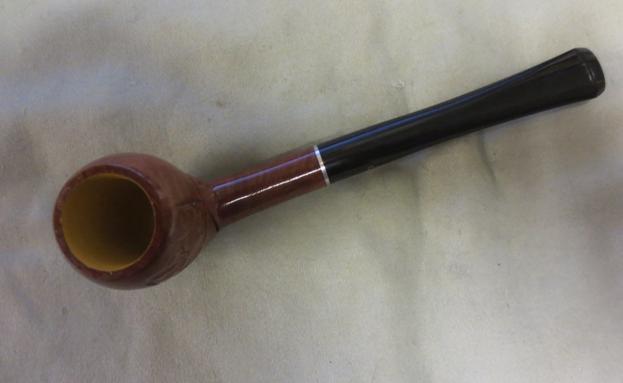
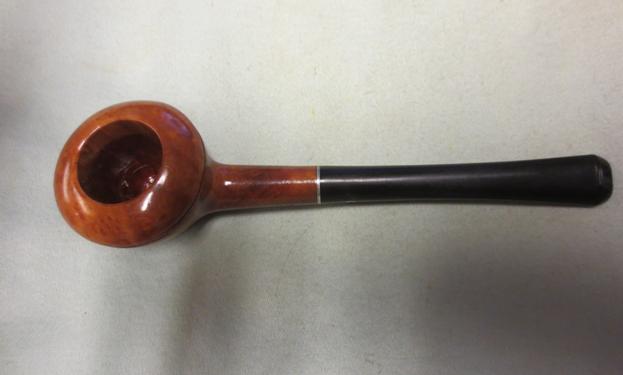
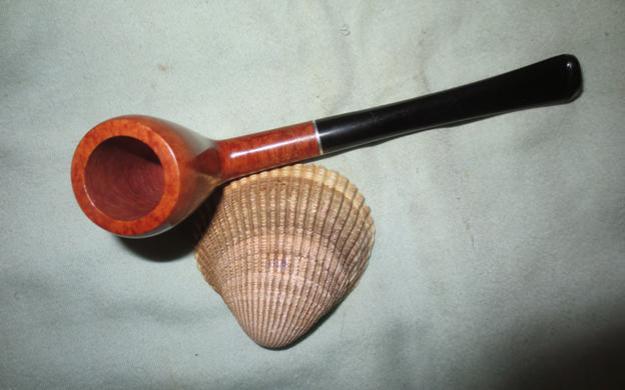
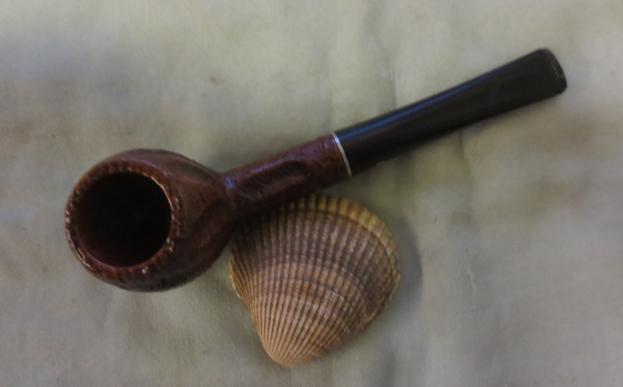
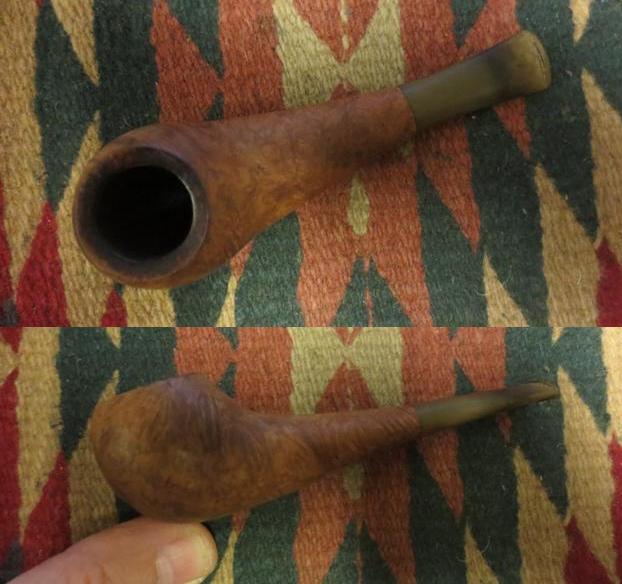
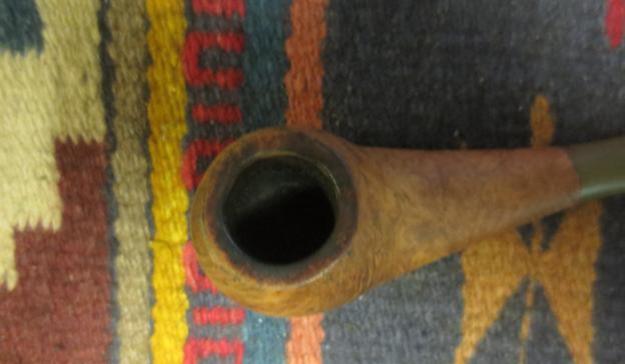
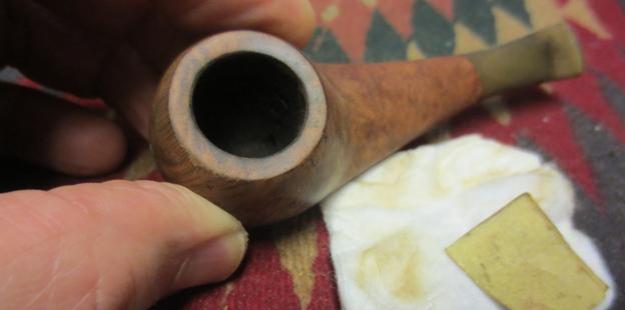
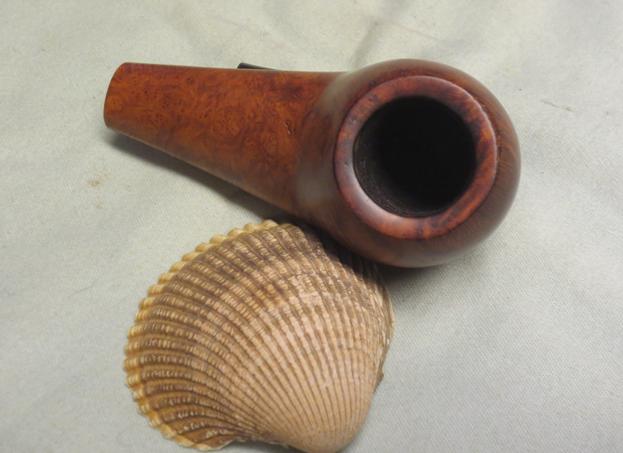
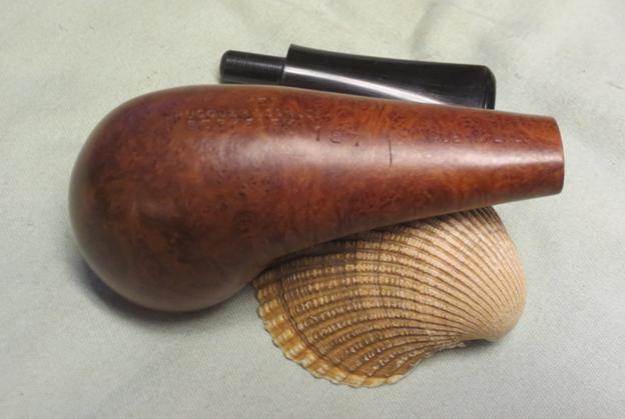
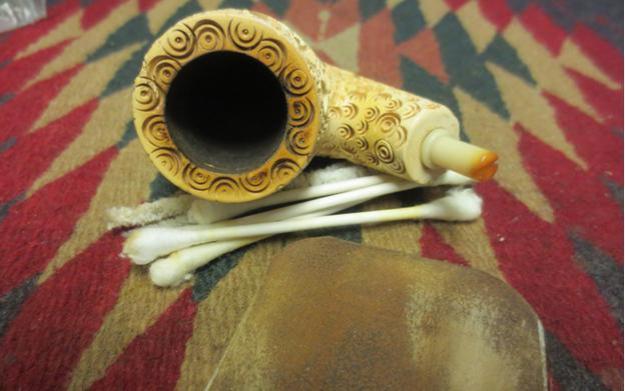
I used a wet cloth to remove the thin layer of buildup on the polished rim. It was undamaged underneath. I removed the cake with my Castleford reamer set. The bowl is quite wide, conical and in excellent condition. The briar was then soaked with alcohol and sea salt. Here’s a shot as it was soaking, after the rim was cleaned, polished with White Diamond and some Carnuba wax.

?

?

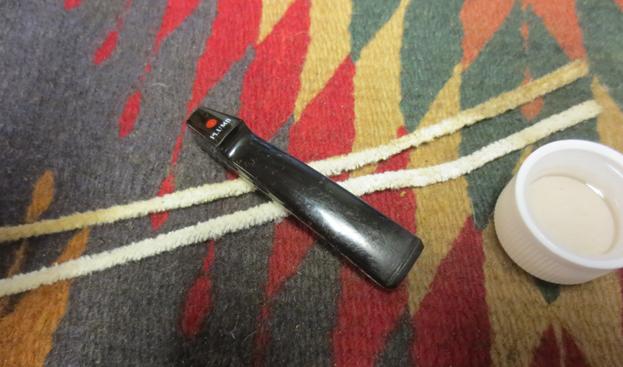
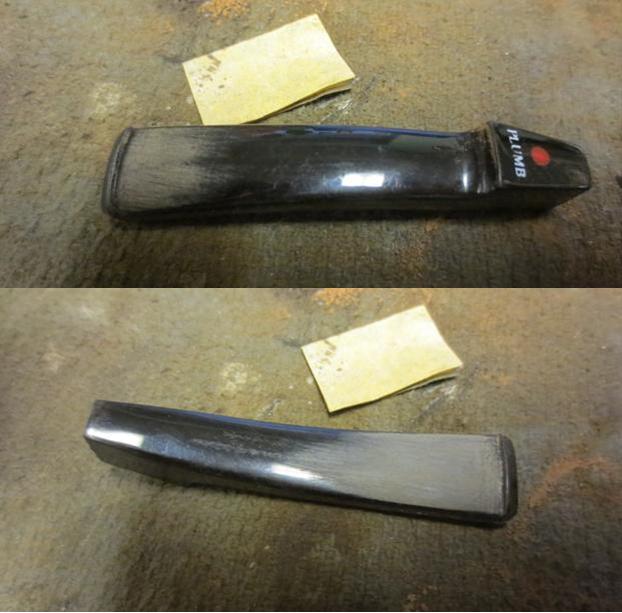
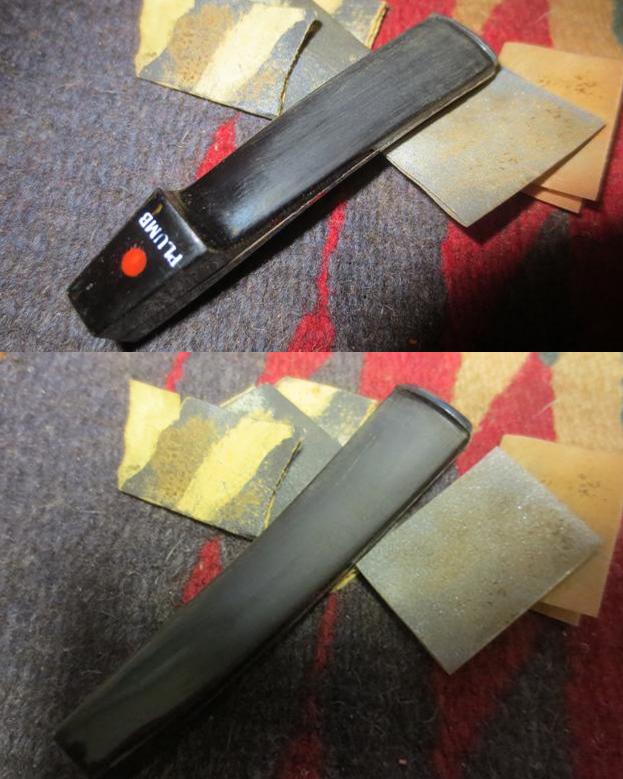
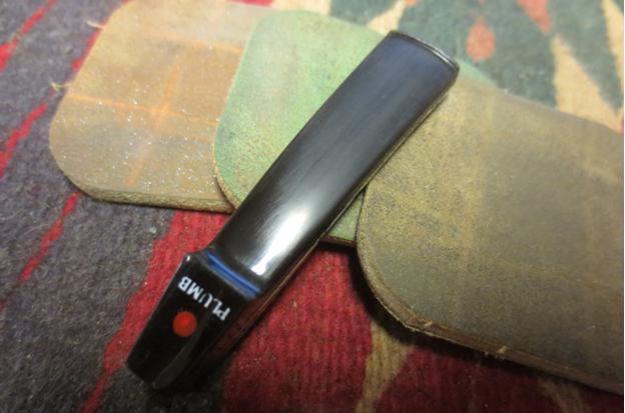
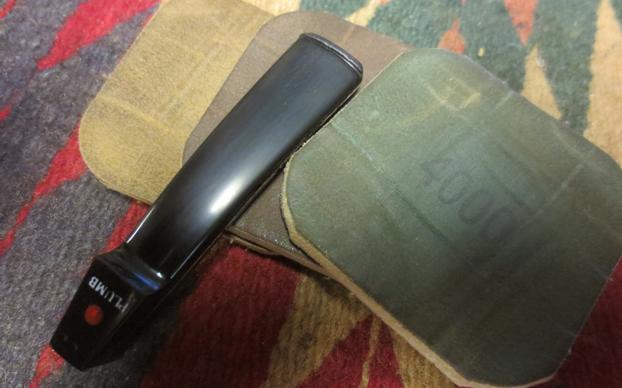
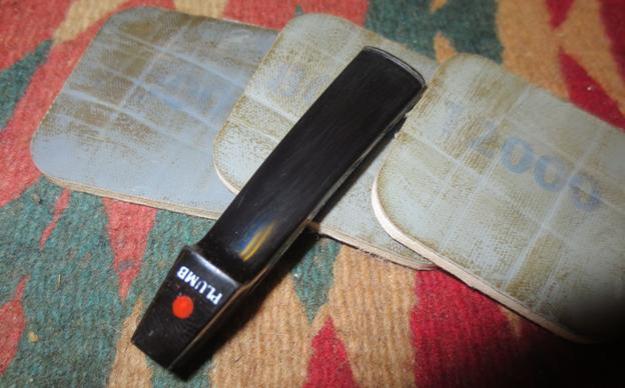
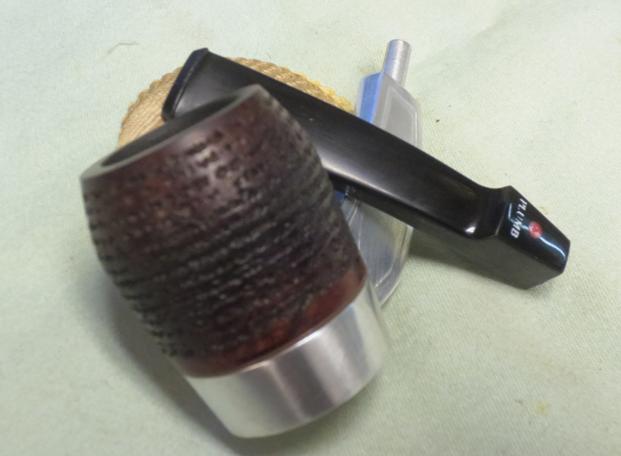
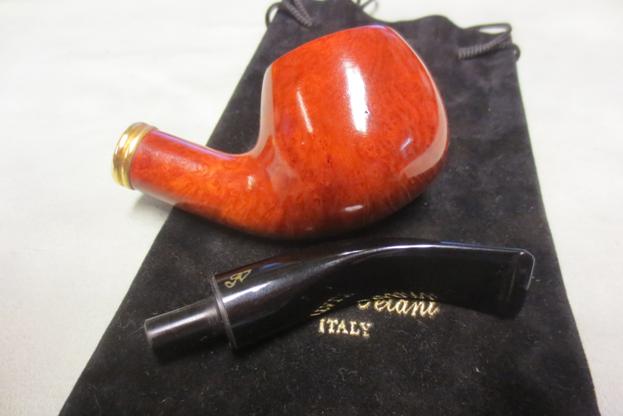
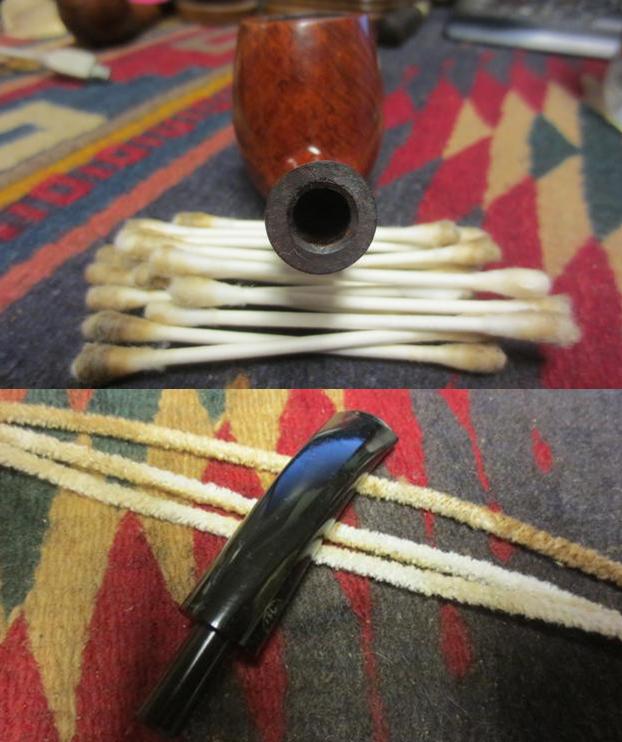
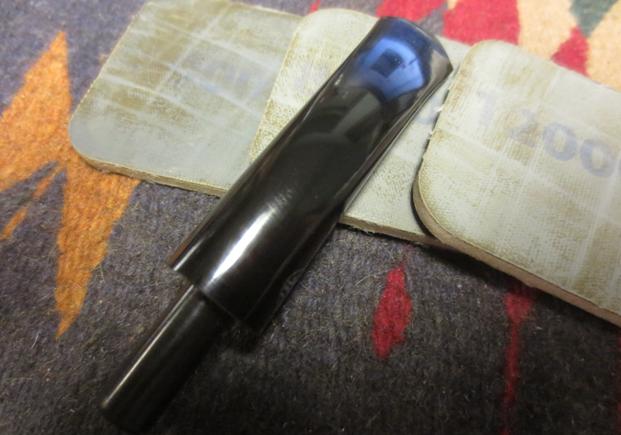
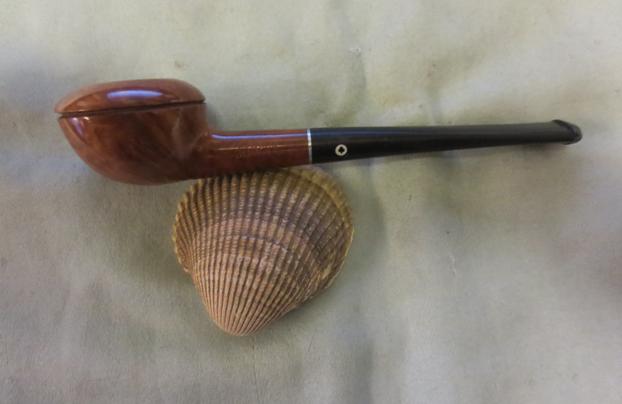
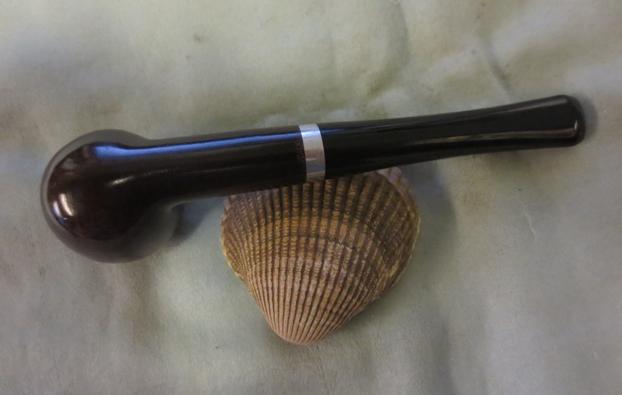
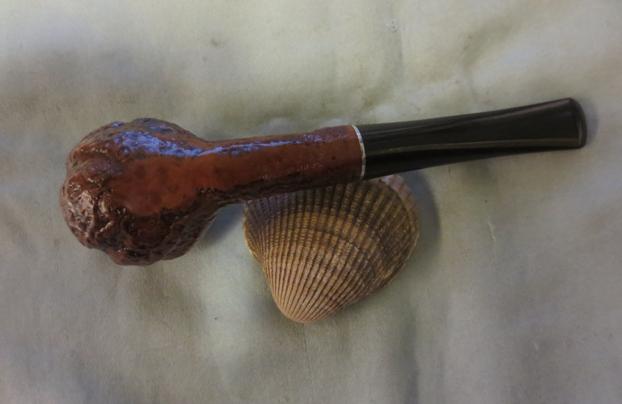
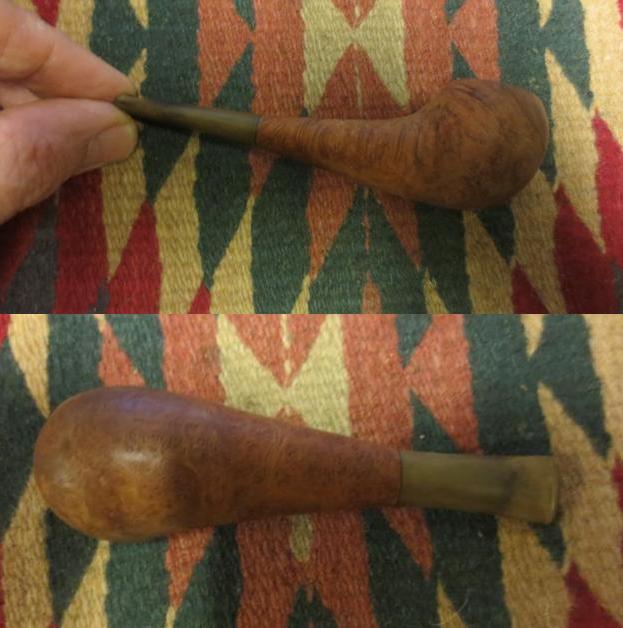
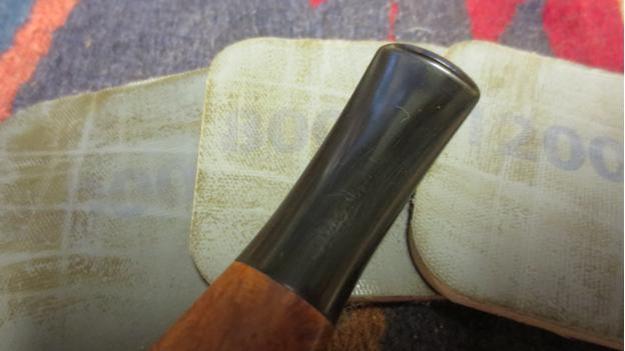
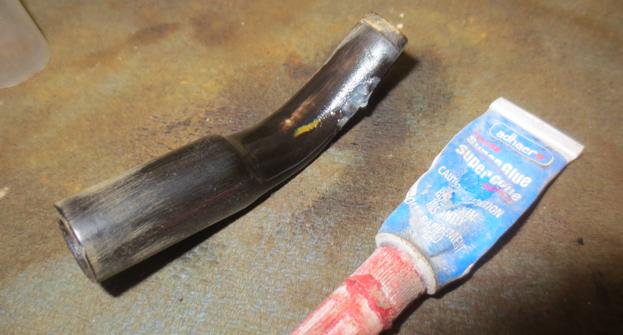
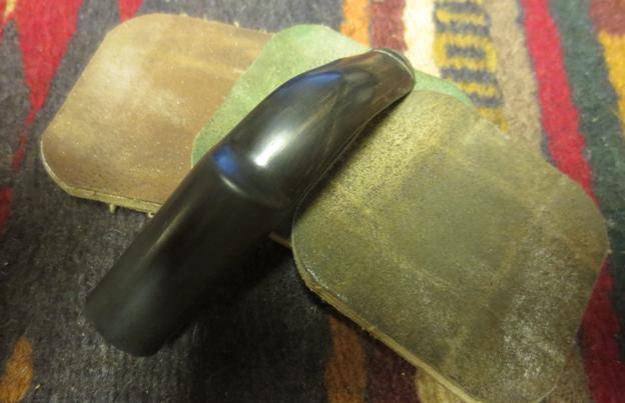
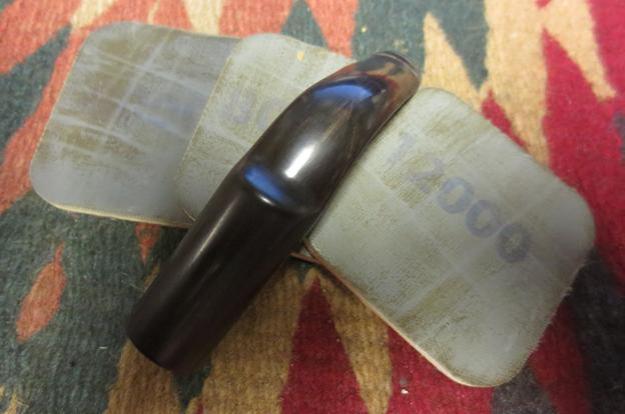
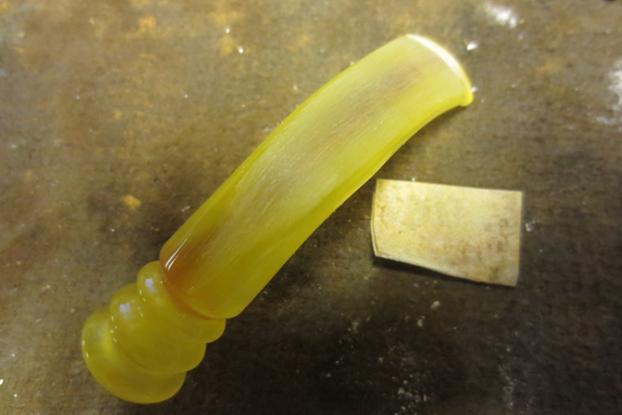
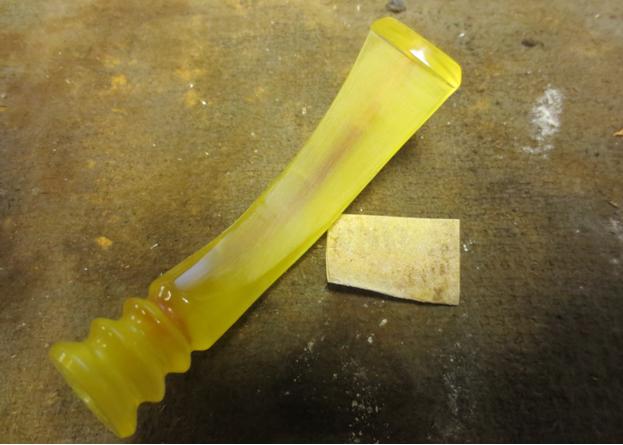
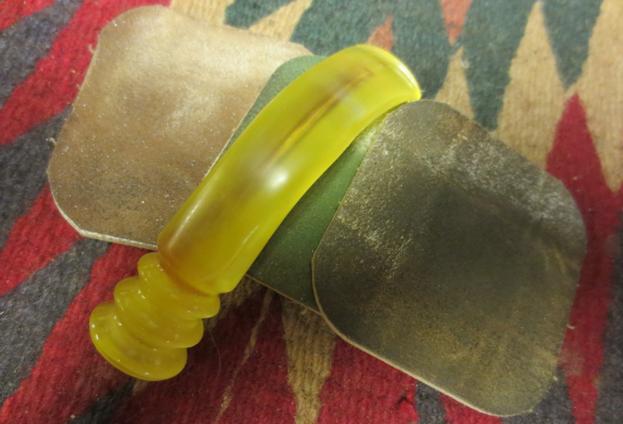
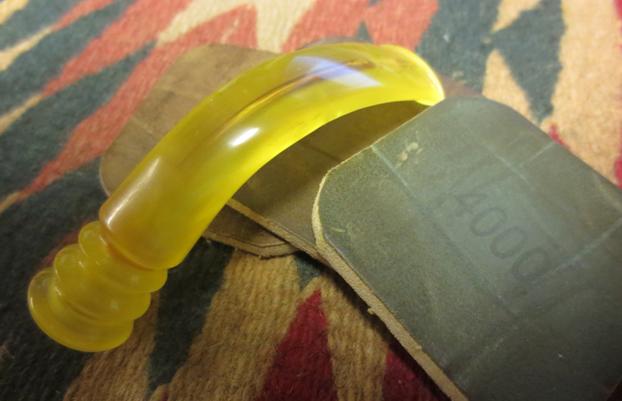
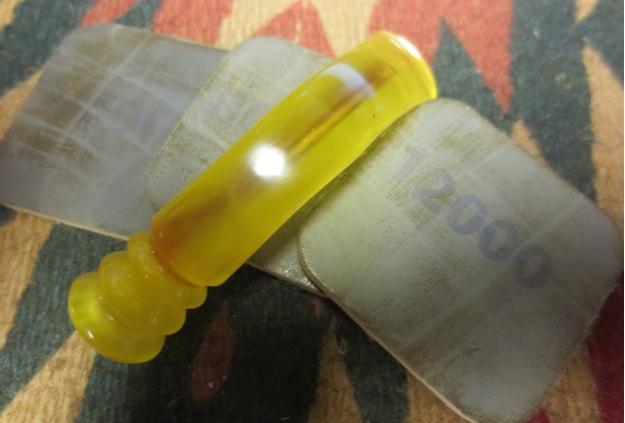
I put some grease on the gold stem dots and soaked it in a mild Oxy-Clean solution. While it was soaking, I removed the salt from the bowl and cleaned it with a bristle brush and alcohol. I was able to raise the teeth marks with some heat from a lighter flame. The stem was then mounted to the bowl and I used 800, 1000 and 2000 grades of sandpaper to remove the oxidation and polish the stem. 8,000 grade micromesh was then used. The stem was buffed with White Diamond and Meguiars plastic polish.

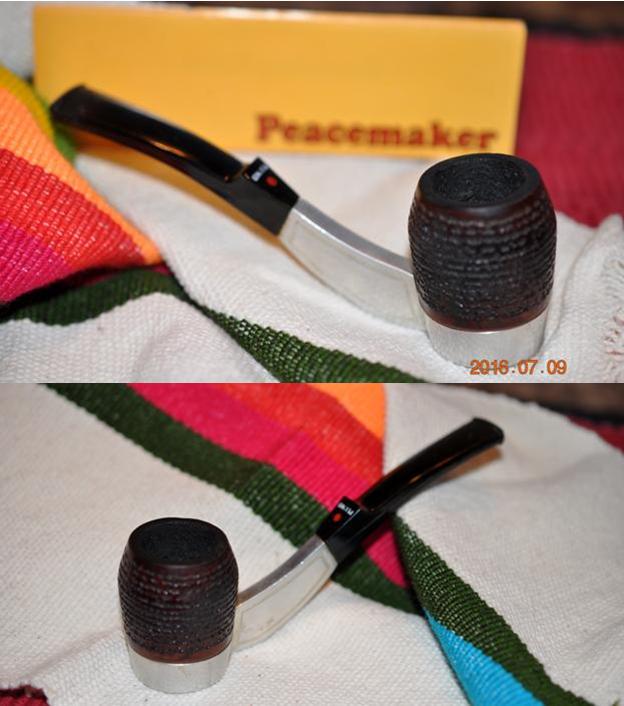
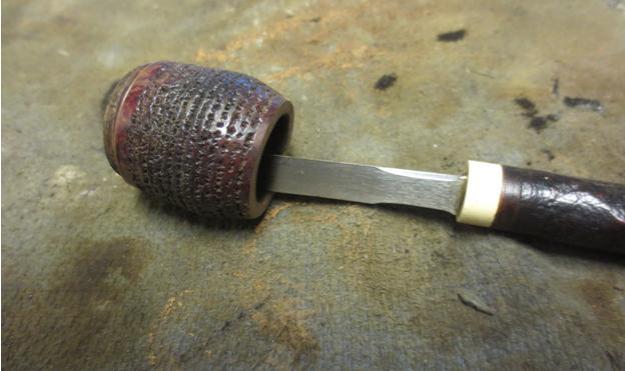
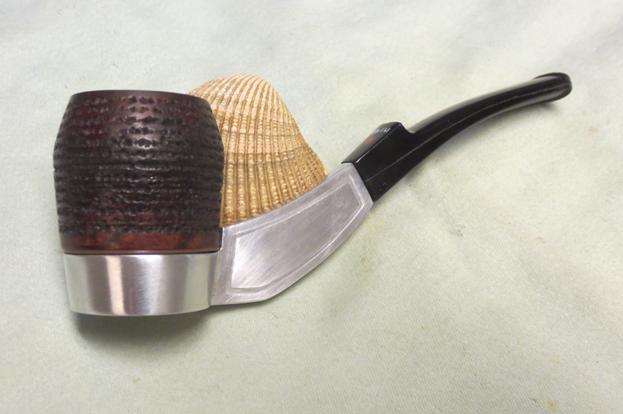
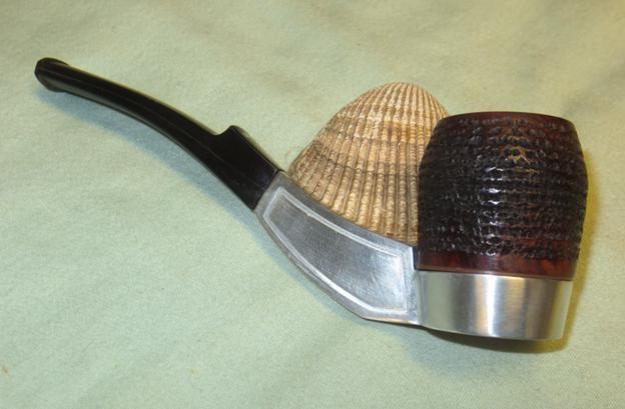
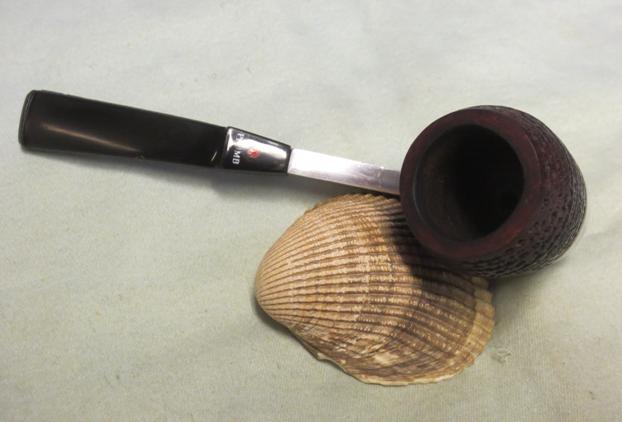
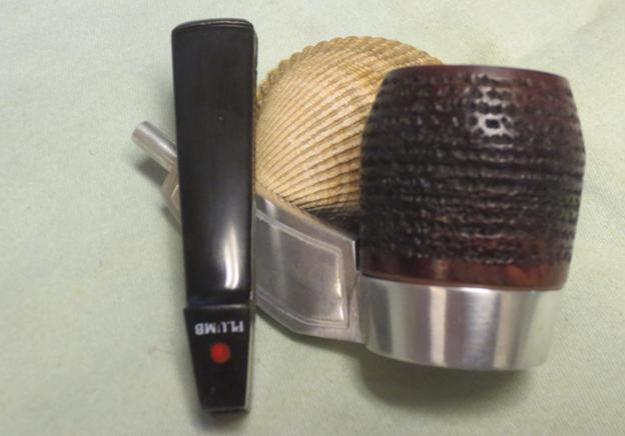
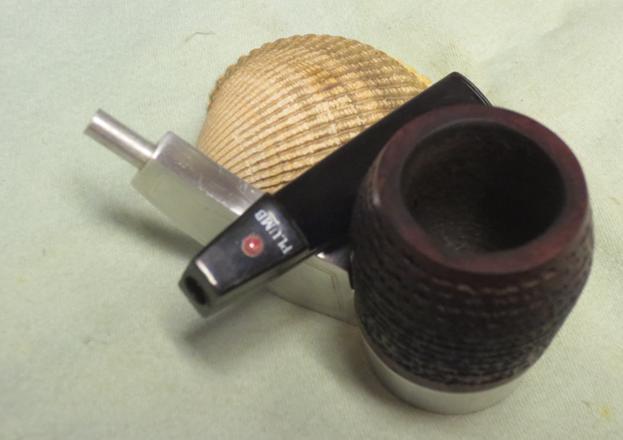
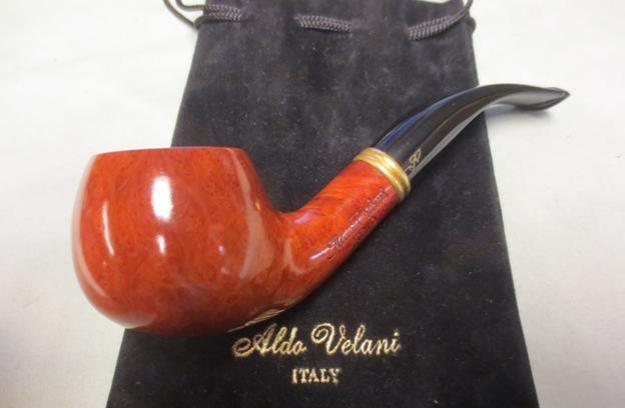
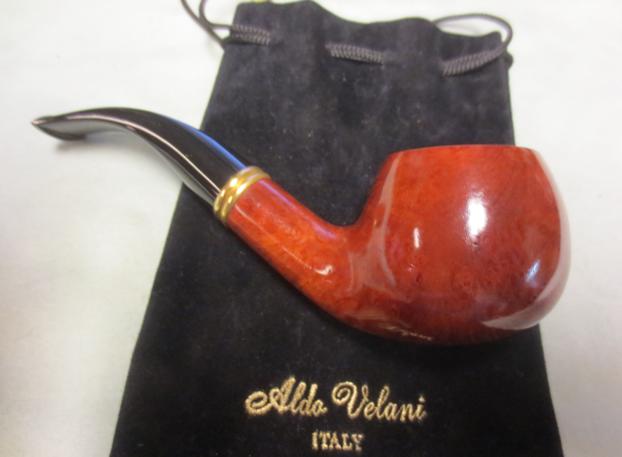
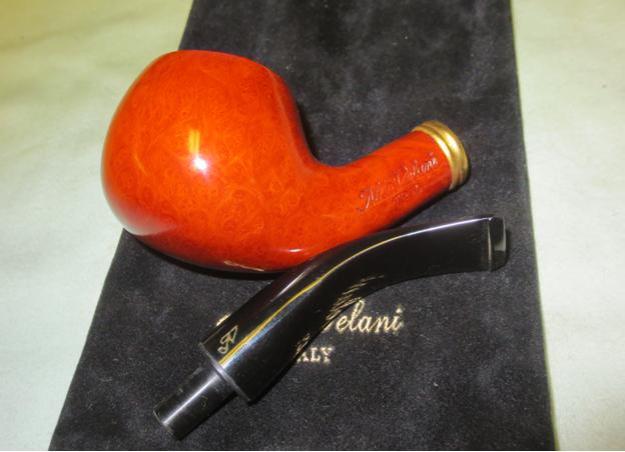
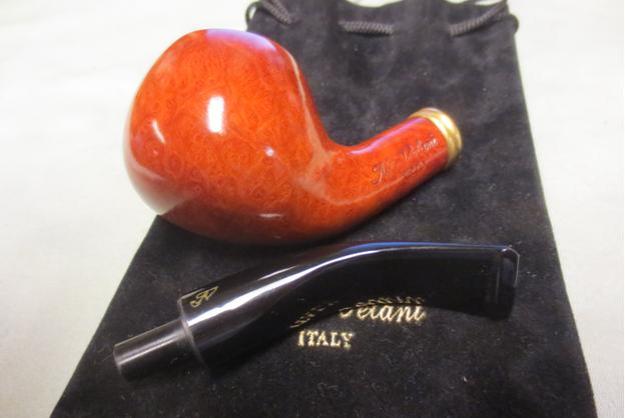
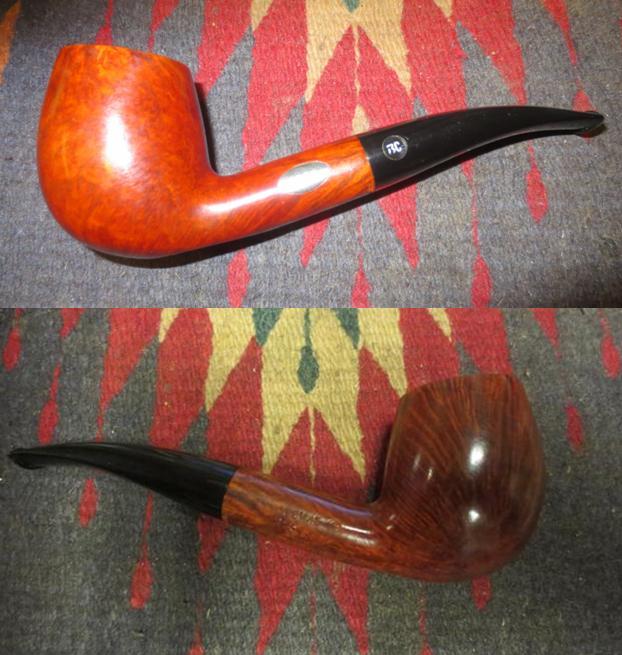
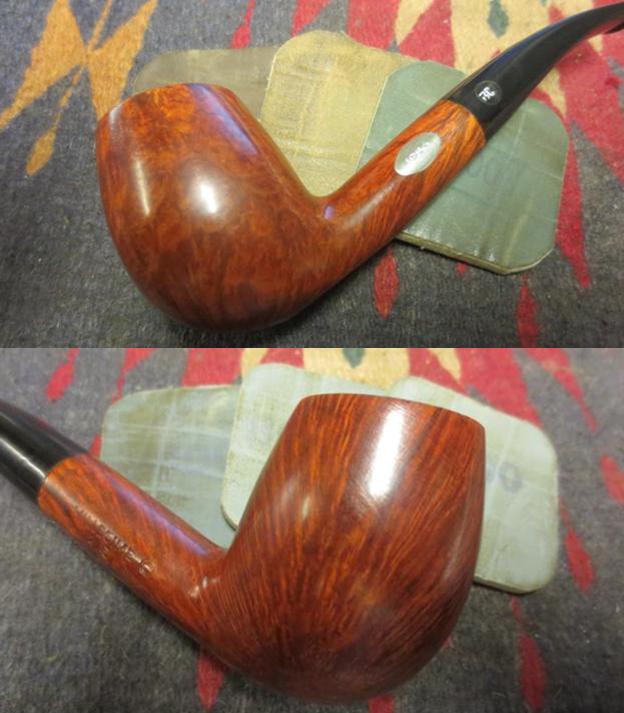
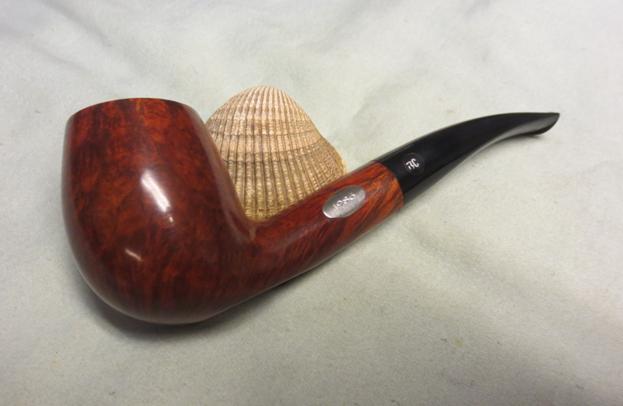
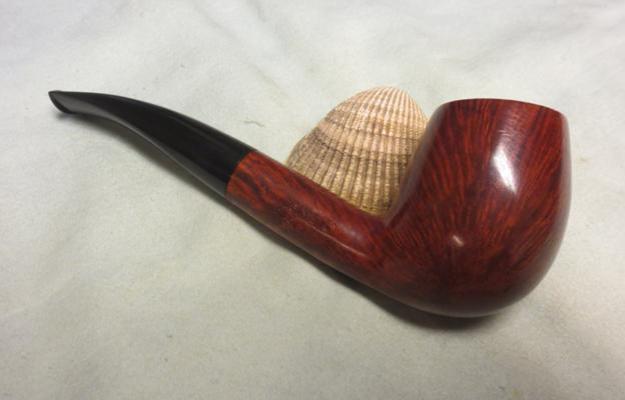
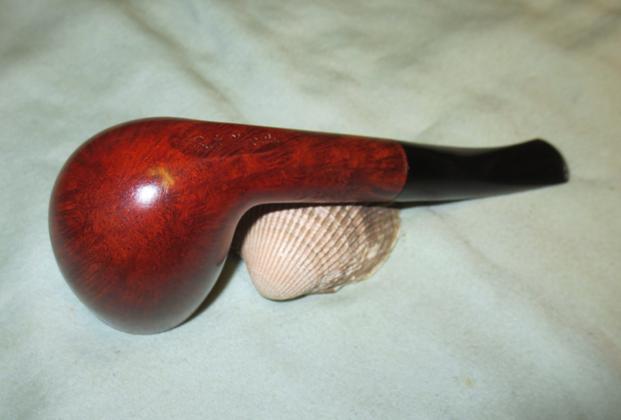
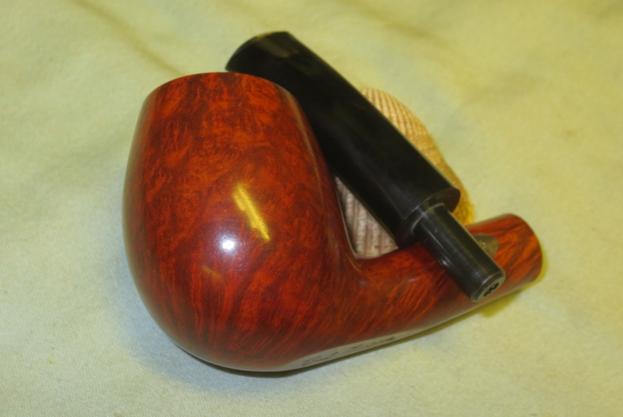
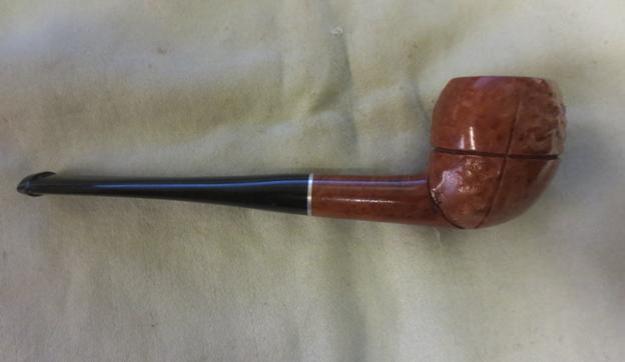
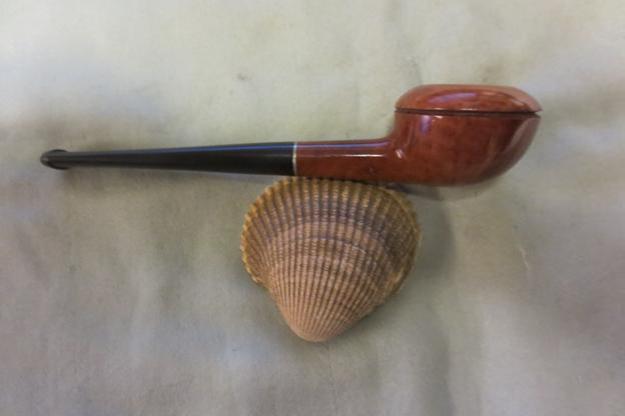
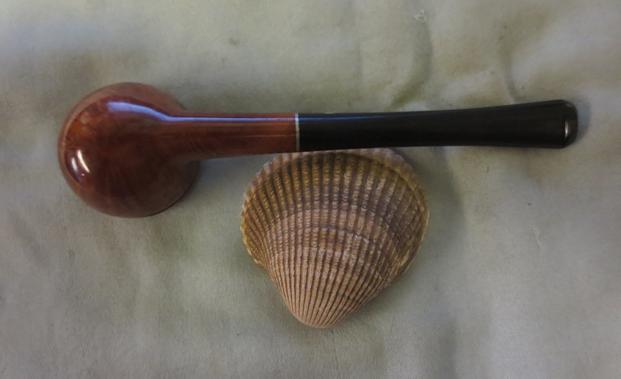
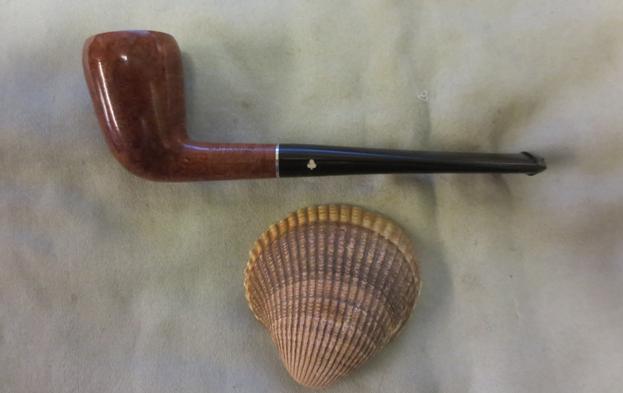
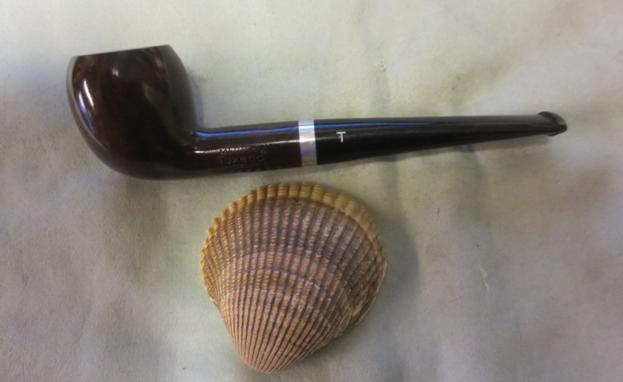
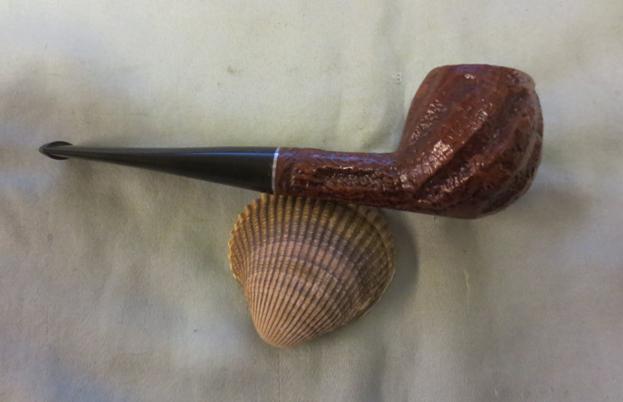
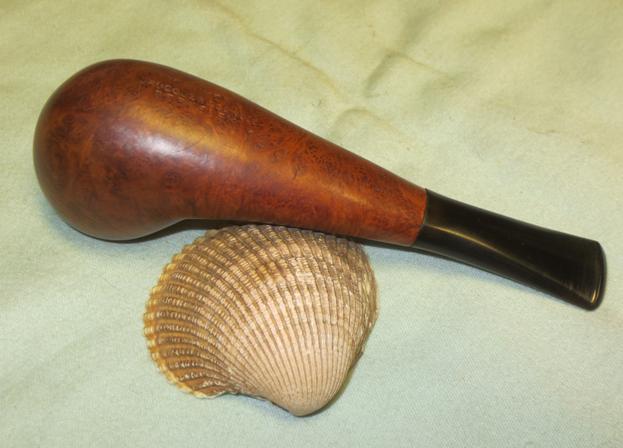
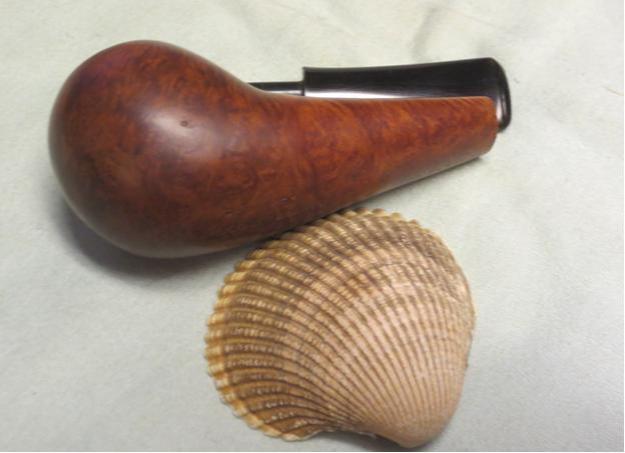
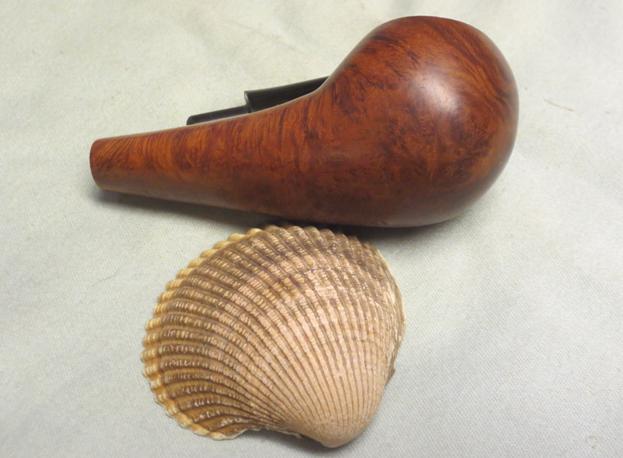
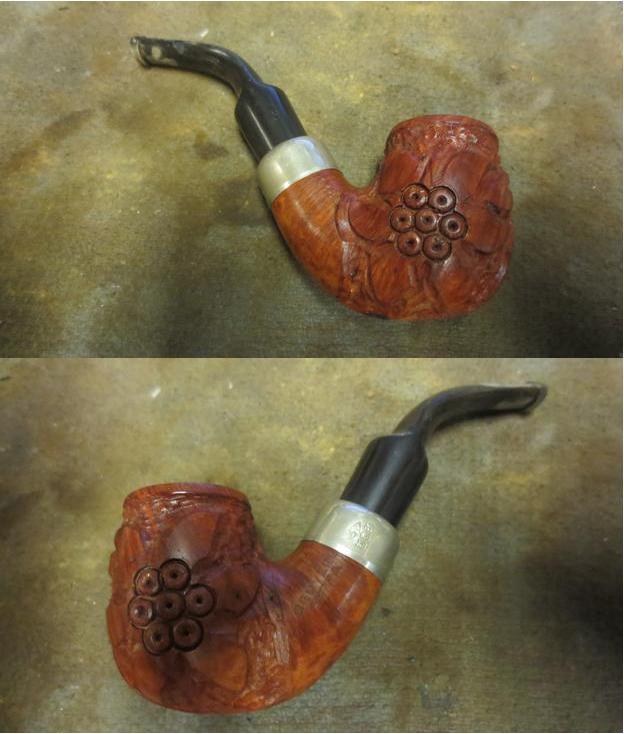
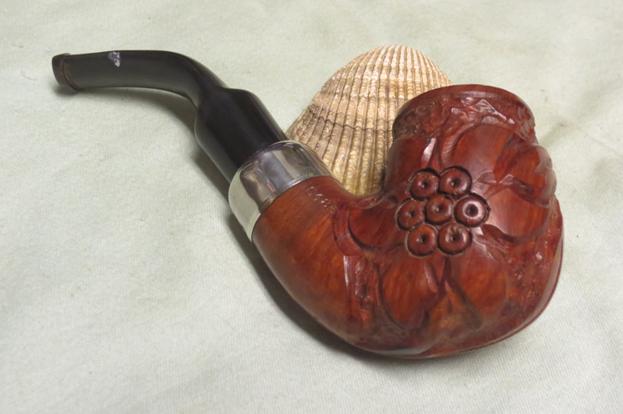
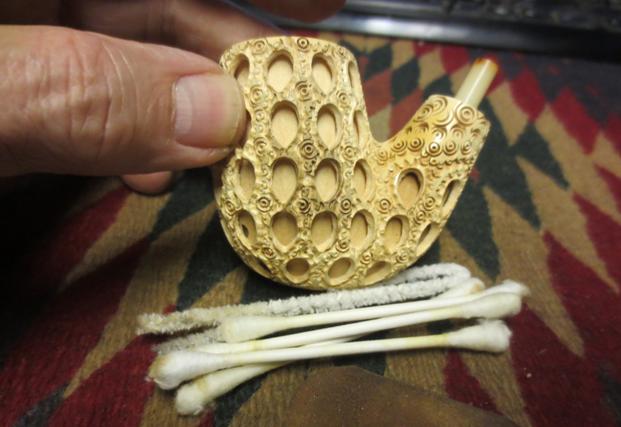
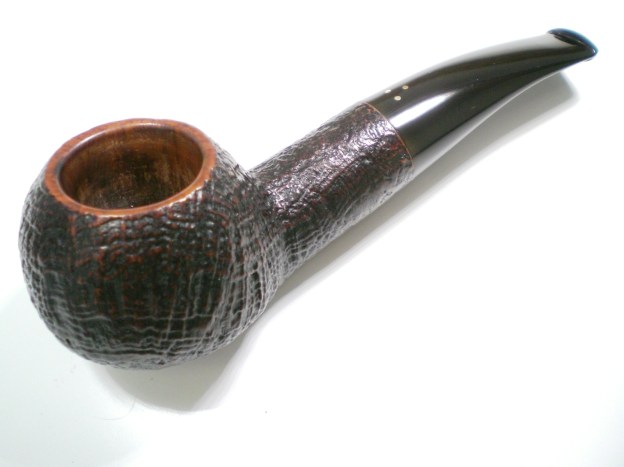
The KS designation is for an oversized pipe and this one is a hefty 70 grams, which is slightly larger than a GBD 9438. Here is the finished pipe.

If anyone has information on the “Fiamatta” stamp, please comment.

Savinelli_GBD320KS_Finish (1)

Savinelli_GBD320KS_Finish (2)

Savinelli_GBD320KS_Finish (3)

Savinelli_GBD320KS_Finish (4)

Savinelli_GBD320KS_Finish (5)

Savinelli_GBD320KS_Finish (6)

Savinelli_GBD320KS_Finish (7)

?

?

Savinelli_GBD320KS_Finish (1)

Butz-Choquin Pamphlet


WIth the recent Butz-Choquin Chombord pipe that I refurbished there was a great pamphlet in the box with it. I thought it would be good to post that here as well for all of you to enjoy. I particularly found the write up on “The Minor Art of Pipe-Smoking” fun to read. The language is clearly translated by one whose first language is not English so it make it more enjoyable to read. Enjoy.

BC Brochure2

BC Brochure1