Monthly Archives: June 2013

Experiencing a New Smoke Shop in Bellingham, Washington – The Senate Smoke Shop


Blog by Steve Laug

For many years now I have been making the trek from Vancouver, British Columbia into the US to Bellingham, Washington to visit a pipe shop in old Bellingham, a place called Fairhaven. The shop is called the Fairhaven Smoke Shop and is located at 1200 Harris Avenue Suite 100 Bellingham, Washington. When I first started visiting shop 15-18 years ago it was operated be an older gent who seemed like he could have cared less if he had customers, but he had a huge assortment of estate pipes and some great older tobaccos. I got to know him over the years and enjoyed his company. About 8 years ago a young fellow – mid 20’s bought the shop and took over. I had visions of it becoming yet another head shop! But you got to give him credit. He kept it as a pipe and tobacco shop (mind you he added the typical glass pipes and hookahs). He upgraded the shop layout and look, added new pipes and tobaccos and continued in the tradition of a pipe shop. He set up a web presence at http://fairhavensmokes.com/ I really expected the place to shrivel up and disappear in the anti-smoking environment of Washington State. But instead it seems to have done well.

On Saturday I made the trip to Bellingham once again. I really was hoping to get a side trip over to Fairhaven but we did not have time to visit the shop on this trip. My wife and I brought along two of our daughters for the day. Whenever we are in Bellingham my wife and I always visit a little coffee and donut shop on Holly St. called Rocket Donuts so we wanted to show it to the girls. As we made our way to the shop my youngest daughter pointed up the street to a sign that said The Senate Tobacconist and Smoke Shop. I have walked down that street for over 20 years and I had never seen that shop. You know how sometimes you wonder if you missed seeing something because you were focused on other things? That is what crossed my mind when she pointed out the shop. My wife and the girls went in for coffee and donuts but needless to say, I had to go check out the shop.

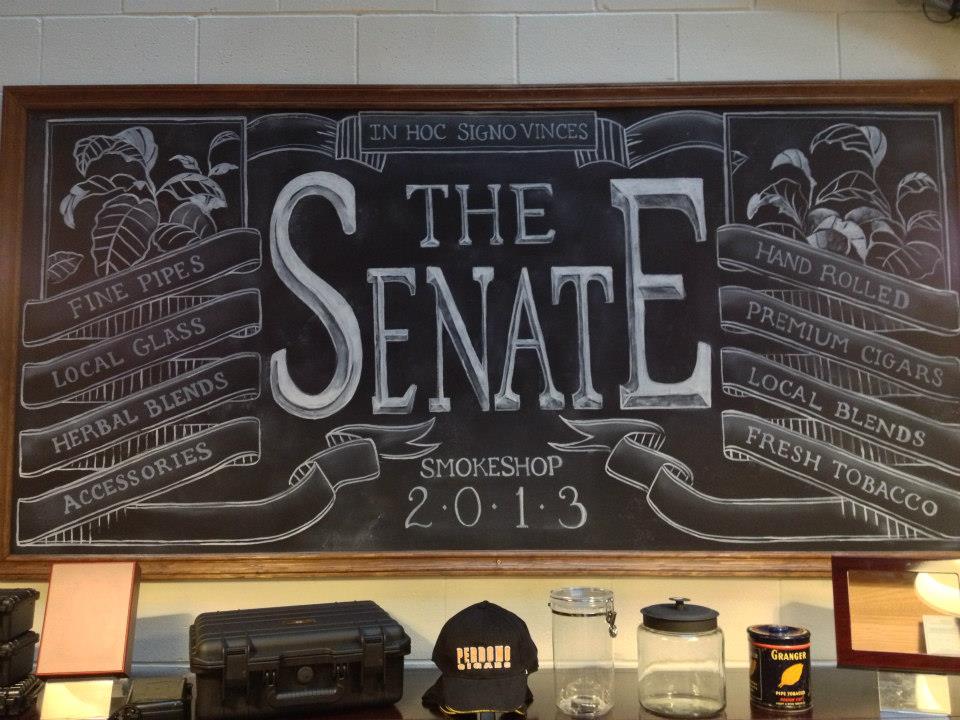
In a world in which more and more head shops with glass pipes, bongs and the like are replacing the old bona fide tobacconist shops I had really low expectations about this shop. I walked up the street toward it and paused to read the sandwich board on the street. As yet I had not looked in the window. I have to say the sign had elements of both hopefulness and resignation in its words – hopeful: tobacco at the top of the list, and cigars – resignation: herbs and glassware. Before getting to the shop I had already made up my mind as to what I could expect when I entered. Glassware! Herbs! Sheesh, it was almost like experiencing again what I had experienced when the Tinderbox Tobacco Shops became glorified gift shops that also sold tobacco and cigars. So was this going to be a head shop that also sold a few cigars and some tobacco? I tell you what, I almost turned and went back to the coffee and donuts. I really did not want yet another disappointment.

Senate23

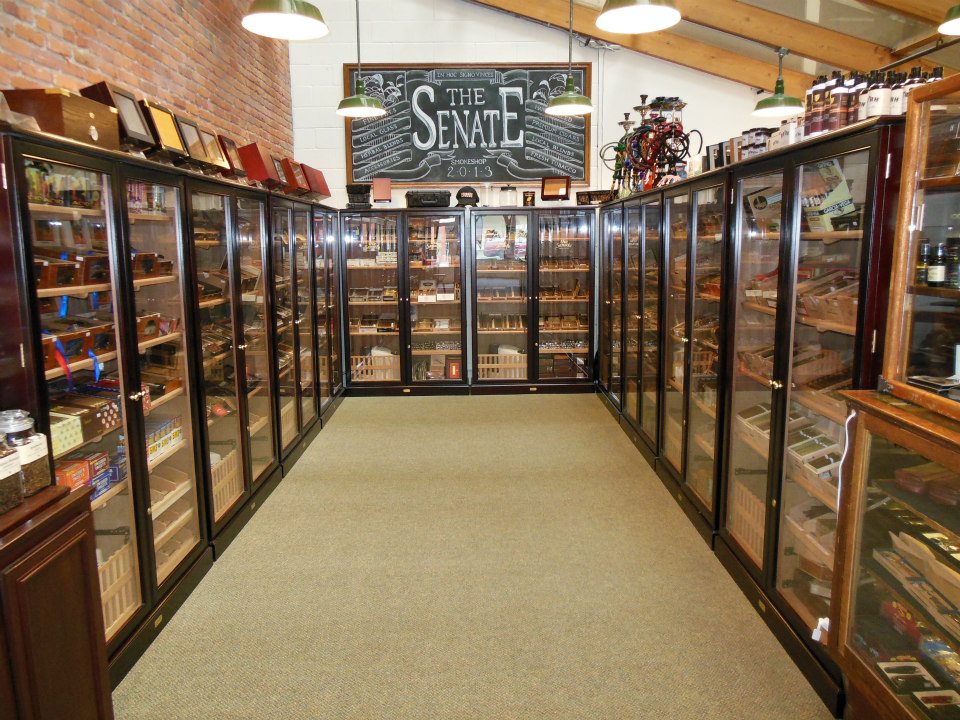
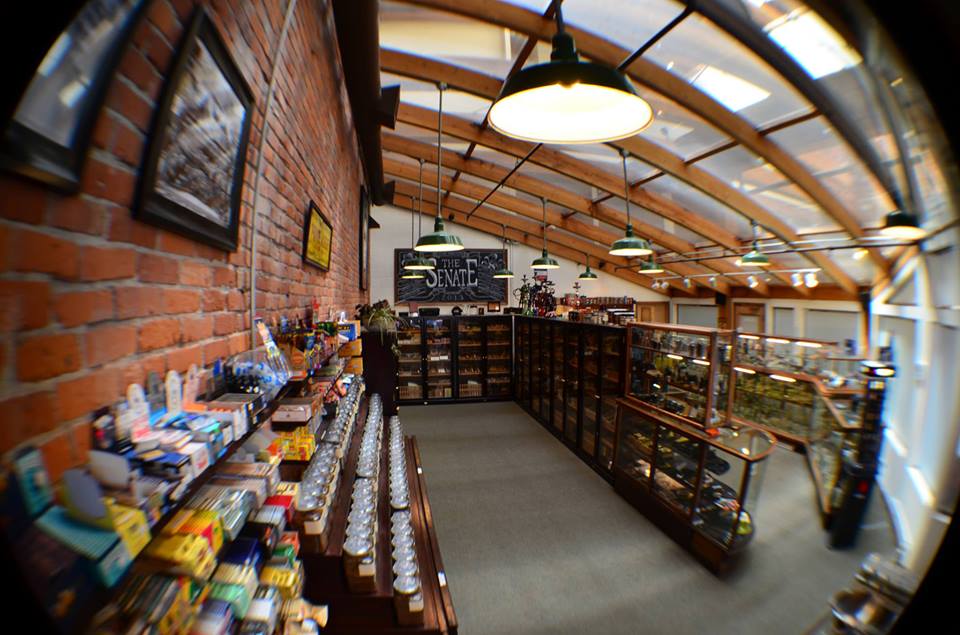
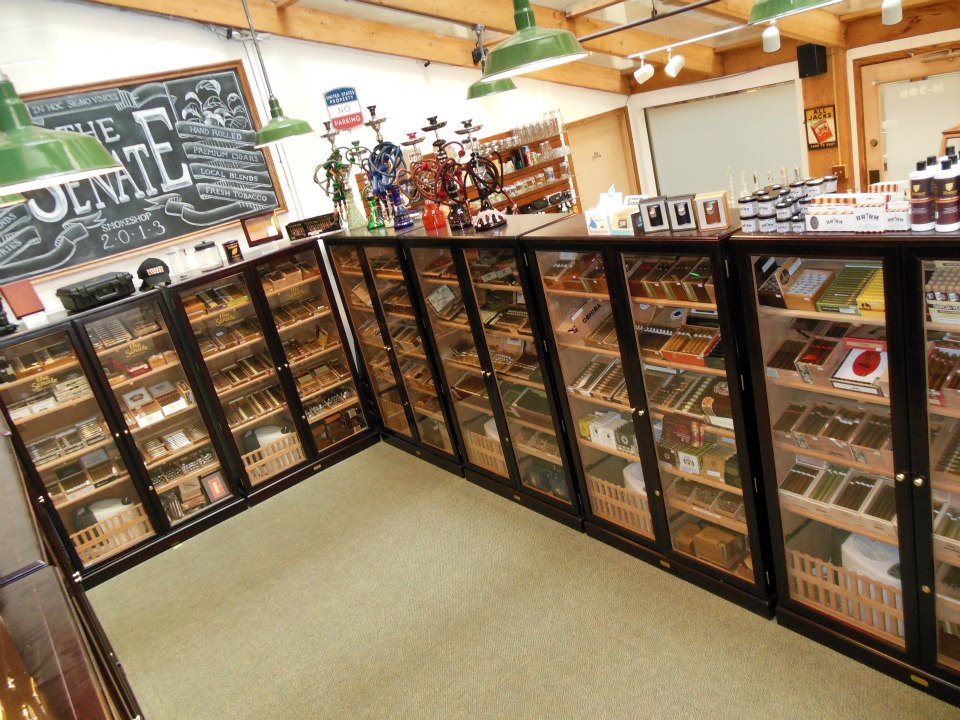
But my curiosity got the better of me and I shrugged my shoulders and went over to the window and looked in. I fully expected a typical smoke shop/paraphernalia shop but what I saw was not that. I could not believe my eyes. The glassware was not that visible and what I saw through the window was a pipeman’s feast – lots of display cases with pipes and tins and jars of bulk tobacco front and center. Then in the back, away from the window were bookcase style humidors with many cigar choices. Off to the side in the corner was the collection of glassware. To be honest I never went over to that corner to have a look. It is truly amazing in this day and age to see a shop like this in my neck of the woods. This was a fully-fledged tobacconist!

Senate26

Senate29

Senate19

Senate15

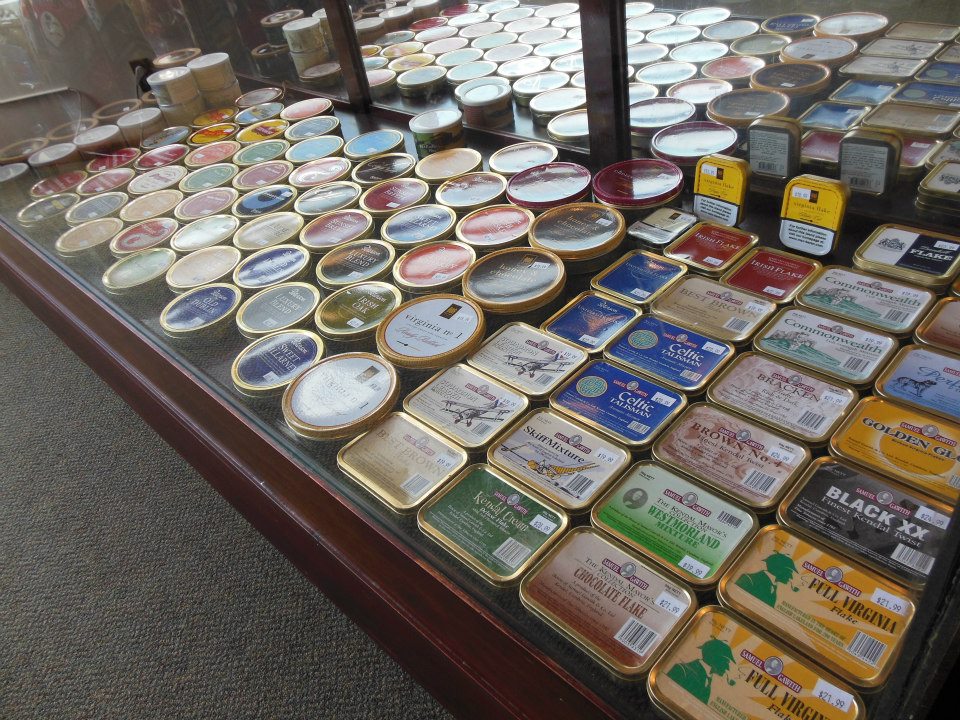
I opened the door and went in. I laugh now, but I must have looked like a kid in a candy shop. I eyed the open topped display case of tins and pouches of tobacco for sale on my left. I looked at the brands of tobacco that were carried and available and was pleased to see many of my favourite blends. I proceeded down the display counters on the left and looked at pipes – Vauen, Peterson, Ascorti, Big Ben, Stanwell, Butz-Choquin and others beautifully laid out for the buyer to see. There were both briars and meerschaums of every shape and size and price range. The display cases were well lit and the pipes were well displayed. It was a briar feast for the eyes. I only wish I had had more time to look things over more carefully. I walked past the cash register and the Three Brass Monkeys on display in front of it, past the tobacco scales on the counter to have a look at the bulk tobacco selections. There was an unbelievable array of blends – Aromatics, Virginias, English and some straight blending tobaccos – Latakia and Perique. There were even some cigarette cut tobacco. I went through the well labeled Virginia, Virginia Perique and English blends and took each lid off to have a good sniff of the blend in the jars. I skipped over the aromatics – chocolate, raspberry, cherry, vanilla, mocha, caramel and other mixtures with edible names as it has been a long time since I smoked them. I could easily have spent more time going through the many blends that were carried by the shop. As I was only in Bellingham for one day I could only purchase a 100 gram pouch and hope to not get dinged with duty at the border. But I would be back!

Senate24

senate2

Senate18

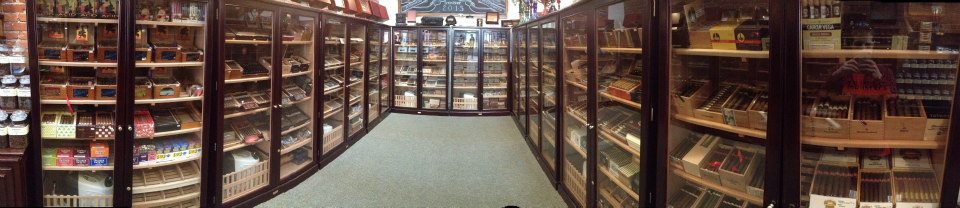
I wandered through the cigar humidor sections – I loved the cherry wood cabinets that each housed cedar lined walls and shelves and a humidor unit so that each glass doored cabinet was a sealed unit. The only thing missing that I could see were the Cubans that we have in Canada. There were all kinds of cigars and all kinds of sizes. I am pretty cigar ignorant but the selection seemed to cover a wide range of country of origin, price, blend and style.

Senate14

Senate11

Senate12

Senate13

I went back to the bulk tobaccos and picked the blend I had chosen, a Dark English – Virginias, Stoved Virginias, Latakia, Orientals and Perique and carried the jar to the scale to have the proprietor weigh it out and bag it up for me. To my surprise the gent behind the counter was the same fellow who had purchased the old Fairhaven Shop, now eight years older. He recognized me and remembered our first meeting many years earlier when he had given me two tins of Erinmore Flake on a visit I made to the shop. I asked him how that shop was doing and he said it was doing well. I asked him when he had opened the Senate and why. He responded that he had always wanted a shop in this area and had opened the doors four months earlier. Business was doing well and he loved the new location. We had a great visit and I asked him about several tobaccos that he did not have. He said he would order them in. I paid for my tobacco and a couple of bundles of pipe cleaners before I headed out the door. I am looking forward to another longer visit soon.

Senate25

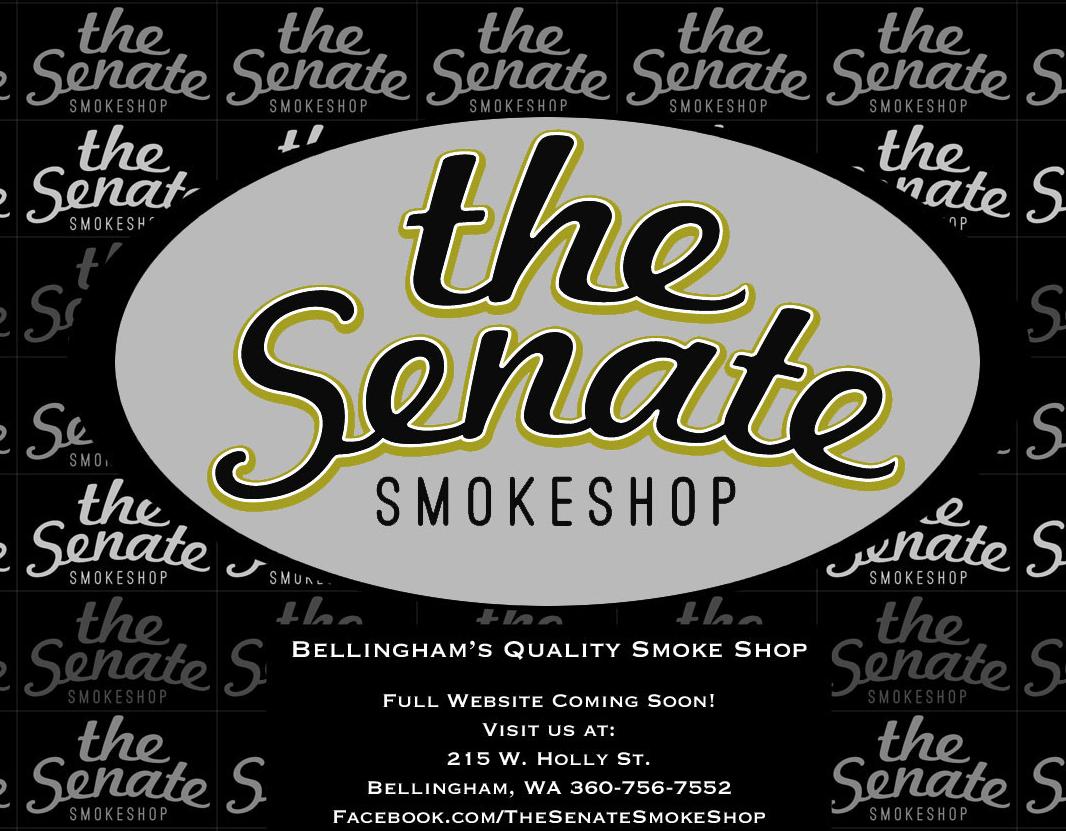
If you find yourself in the Bellingham area, I would heartily recommend that you stop by the shop and have a visit. The shop is called the Senate and is located at 215 West Holly Street, Suite H-20. The phone number is 360-756-7552. It has a great selection of pipes and cigars as well as house blends and tinned tobacco to purchase. The proprietor Mike Waters is a great guy – personable, knowledgeable and genuinely interested in serving the pipe and cigar smoking public. Stop by and say hi. In this anti-smoking state of Washington in the anti-smoking climate of our world it was great to see a new tobacco shop open its doors. It was encouraging to see this young fellow doing well enough in his first shop to open this second one. The store will have a web presence soon as the shop website, http://www.senatecigar.com is under development. Check it often as Mike says that the full site will be open soon. Who knows we may run into each other at the shop. Until then enjoy your pipe!

Senate

Steve Laug
06/17/13

GBD Oval-Shank Pot “Seventy-Six” Restoration


In 1976 GBD introduced a series called the “Seventy-Six” to commemorate the United States Bicentennial.  I was in Sophomore in high school during 1976 and the year-long celebration had a big impact on me.  The Seventy-Six model remained in the GBD catalog until 1981.  From the 1976 Catalog:

“The GBD “Seventy-Six” is our contribution to the Bicentennial celebrations.  We have really pushed out the boats for “the colonies” in launching this new series that will be remembered by its proud owner long after the celebrations are forgotten.”

My first “Seventy-Six” model was a 1976 Coloussus and I’ve since added three more, including this Shape 1353.  I would call this a banker, but in a Smokers Haven sales ad, it is referred to as a “bent oval-shank pot”.

The pipe was in decent shape, with a moderate coating tars on the bowl top, along with a few nicks and dents.  The stem, while heavily oxidized still had the brass rondell.  The rondell along with the “London, England” stamp indicated a pre-Cadogan era GBD.  The stem was also free of any serious teeth marks.  Several of the nicks were very noticeable and I wasn’t sure they could be removed or hidden easily.

GBD_1353_76_Before GBD_1353_76_Before (1) GBD_1353_76_Before (2) GBD_1353_76_Before (3)

I reamed the bowl and soaked it for six hours with some Everclear and sea salt.  Prior to soaking, I buffed the pipe lightly with some Tripoli and White diamond followed by a buff with carnuba wax.  I like to leave the wax on the pipe during the soaking process in the event some alcohol is splashed on the briar bowl top and I believe the wax gives it some protection from lifting the stain.  While the bowl was soaking, the stem was also soaked in a mild solution of Oxy-clean.  I put a dab of grease on the brass rondell.  The oxidation was so heavy, part of the rondell was obscured and at first I thought it was just worn heavily.   That turned out not to be the case.

GBD_1353_76_Restore (13) GBD_1353_76_Restore (5)

After the bowl was soaked, I emptied the salt and alcohol solution.   I heated a kitchen knife with a torch and applied that to the dents with a wet towel.  The steam generated allows the dents to pop back out most of the time.  In this case, the dents did spring back to shape and I was able to reduce the depth of some of the nicks.  Next I buffed the briar bowl again, using separate wheels of Tripoli, White Diamond and several coats of carnuba wax.  I was able to diminish all of the nicks, in particular the one on the right side of the oval stem.

Next I went to work on the stem, which I re-attached to the bowl in order not to round off the crisp edge.  I removed the oxidation with 1500 grade wet paper (dipped in my oxy-clean solution) followed by 2000 grade paper.  Next I moved to the Micromesh sheets, using 8000 and finally 12000 grade paper.  I then buffed the stem with white diamond and Blue Magic brand plastic polish.

A wire bristle brush dipped in Everclear was used to clean the shank.  It took approximately 25 swabs with the bristle cleaner until the brush came out clean.    I’ll let the briar dry out for a few days before smoking the pipe.   Below are some pictures of the finished pipe.

GBD_1353_Gallery2 GBD_1353_Finished (1) GBD_1353_Finished2 (3) GBD_1353_Finished (3) GBD_1353_Finished (5) GBD_1353_Finished (4)

Tobacco Review – Burlington on Whyte’s Montego Bay Blend


The website, http://www.tobacconist.ca/menu.html describes this great tasting tobacco as a unique earthy but sweet, herbal tobacco. While in Edmonton, Alberta, Canada I visited the shop and was able to open various jars of house tobacco and get a feel for the aromas and look of the tobacco. I spoke with the house blender, Chris and described the kind of tobaccos that I like, particularly Virginias and Virginia Perique blends. At the price of Canadian tobacco I did not want to make a mistake and pick up a blend that I would hate.

I opened the jar of Montego Bay and sniffed the aroma. The look was of a mottled light and darker brown ribbon cut tobaccos blended together. The smell was of a sweet, pungent Virginia, the grassy undertones but on top of that there was a subtle sweetness in the smell. I asked Chris if the tobacco had any topping and he assured me that it did not. The aroma was from the blend itself not from toppings.

IMG_1153

I purchased 50 grams of the blend and left the shop. Over the rest of my trip I smoked the blend in an old bent pipe that I always use when I travel. It is a Virginia pipe and it always delivers a good smoke for me. The sweetness was subtle and the good Virginias – both red and yellow came through beautifully. I liked that aspect of the blend a lot but there were two unidentifiable tastes that haunted me with each smoke. In my hotel room I looked at the blend in a bright light and I could see flecks of green in the blend. I separated a few of them out and put them on my tongue. Ah, I knew what I tasted – it was an herb called Deer’s Tongue. It has been repeatedly spoken of on the pipe and tobacco forums and blogs as adding a very earthy, sweet almost minty vanilla flavor to the blend. I would not describe it as minty vanilla but rather as a very herbal taste, not bitter or sweet but with a taste like vanilla bean or mint leaves. It is not an overpowering taste but it is very evident. There was another taste there that I could not quite get to but I was guessing it was some Oriental tobacco that was used as a condiment in the Virginias.

IMG_1151

I smoked it for the remainder of my trip and quite a bit more in the month and a half since the trip. I really like the multidimensional flavor of the blend. The mixture and layers of flavor added to the Virginias by the Deer’s Tongue and the Oriental make this a thoroughly enjoyable smoke regardless of the time of day. Its flavor stays with you after you smoke it on the insides of your lips and mouth and gives a reminder of the fullness of the smoke.

After smoking most of the 50 gram bag I emailed Chris at Burlington and asked him to confirm what I tasted in the blend. He responded with a prompt email. I was right about the Deer’s Tongue it was there as a condiment. I was also correct in tasting an Oriental. This particular one was Dubec. It had just a bit of astringency to the taste which is what I have come to expect from Orientals. It is not bitter or tangy but has a definite taste and effect on the tastebuds toward the back edges of the tongue. I like the taste of Dubec and I really liked the addition of it in the Montego Bay Blend.

I have just enough left for a few more bowls and then I will have to either give them a call and order some more or visit again when I am there in September. We shall see. It is a great blend and one that is worth a try if you can stomach the high prices that the tax structures have added to tobacco in Canada.

Reworking a Mastercraft Custom Deluxe Billiard and Removing Mold


Blog by Steve Laug

This old Mastercraft billiard is the second pipe of the threesome that was sent to me last week as a gift. In his email asking if I wanted them he said they were either going to the rubbish bin or to me so I was not surprised when I opened the box and unpacked them. It had some nice looking grain underneath all of the grime and peeling varnish. But this one was in very rough shape. The stem was chewed in half so there was not enough to save. The inner tube apparatus inserted into the stem looked like it had been destroyed and then somebody bent it close to shape and cut a X cut in the end of the tenon so that it would fit into the stem. The shank was grimy and dark with a white mold residing inside both the bowl and the shank. The pipe reeked of mold. The bowl itself had a heavy but broken cake underneath the mold. It had a coat of varnish that was spotty and peeling where it was worn off the briar. In those worn spots the briar was almost black. The rim was also in very bad shape. The front was burned down from repeatedly lighting the pipe in the same spot with a torch. The back side of the rim looked like it had been scraped on concrete or hammered out on concrete because it was worn and broken down. The three photos below (I apologize for the poor quality – still getting used to this new camera!) show the state of the bowl and stem.

IMG_1009

IMG_1010

IMG_1011

I sorted through my stems and found two options that I thought might work on the pipe. The first one was an acrylic saddle stem that I thought might look good with the bowl (pictured in the first photo below). I turned the tenon and fit it to the pipe but did not like the proportion of the stem and shank length. I then took the second stem – a shorter, straight tapered stem and fit it to the pipe (pictured in the second – fourth photo below). It looked like it belonged on the pipe so my choice was made. It was an old previously used vulcanite stem from my collection of old pre-used stems that I collect. This one would take some work as it was oxidized and had a calcified buildup around the button area. It was also clogged and the slot was plugged to a small pin hole. But it had the right look so it would be worth cleaning up.

IMG_1020

IMG_1049

IMG_1050

IMG_1051

I set the stem aside and worked on the bowl. I reamed the pipe with a PipNet reamer to get rid of the cake and the mold. I cleaned the reamer with alcohol before putting it away. I cleaned the bowl and the shank with cotton swabs, pipe cleaners and Everclear to remove as much of the tars and oils and moldy smell as possible.

IMG_1021

IMG_1022

IMG_1023

When I finished it still smelled moldy, but I had several plans in mind for addressing that. But first I topped the bowl with my usual flat board and 220 grit sandpaper. I place the bowl rim down flat against the sandpaper and work in it a circle to remove the damage on the rim. This one took quite a bit of work to even out the top and get rid of the damage from the burn on the front side of the rim and the roughened back edge done by beating the pipe against concrete. I sanded it, repeatedly checking to see if I was removing enough of the damage to get a sharp edge on the bowl. On the outer rim next to the shank there was a chunk of briar missing that I would try to minimize after topping the bowl. I was able to remove all of the damage of the burned area and most of the damage of the battering the old pipe had taken. The rim looked good. I used a folded piece of sand paper to work on the inside edge of the rim and clean up the damage that was done there and keep the bowl in round.

IMG_1053

IMG_1054

IMG_1055

IMG_1056

IMG_1057

IMG_1058

I wiped the exterior of the bowl down with acetone on a cotton pad to remove the grime and the finish that remained. I repeated this until I could not remove any more finish or grime. The next two photos show the wipe downed bowl.

IMG_1059

IMG_1060

I placed the bowl in an alcohol bath for several hours while I worked on the stem and worked on several other old pipes that I have on the go. When I took it out of the bath, I dried it off with a cotton cloth and scrubbed it with a tooth-brush dipped in alcohol from the bath. I dried it again to check on the finish. There were still several spots where the varnish remained – the shank and the bottom of the bowl. One benefit of the bath was that the glue softened on the over pressed band and I was able to remove it from the shank. I sanded and scrubbed the old glue off the shank and sanded the bowl with a fine grit sanding sponge. I wiped it down with another acetone cotton pad. It still needed to soak a bit longer to finish breaking down the varnish that remained. While it soaked I cleaned up the silver band with silver polish and the jeweler’s polishing cloth. Under all the tarnish I found that the band was stamped Sterling.
I removed the bowl from the alcohol soak and dried it off. I used a lighter to burn off the alcohol from inside the bowl and the shank. I then recleaned the inside of the bowl and the shank with Everclear and many more pipe cleaners and cotton swabs. The amount of tars and sticky oils and grit that came out of the shank was incredible. It was no wonder that the pipe still reeked like mold. The next series of three photos show the pipe after soaking and sanding.

IMG_1061

IMG_1062

IMG_1063

I scoured the shank until it was fairly clean and then set up a retort to do a more thorough clean. The retort sends vaporized alcohol into the bowl and shank and in essence boils out the grime with hot alcohol. As the alcohol cools it returns to the tube and with it the grime and oils from the pipe. I repeated the retort three times on the pipe until the alcohol came out clean. I then took apart the pipe and cleaned out the shank with pipe cleaners and cotton swabs a third time. There was even more oil and grime that came out of the shank. I cleaned off the surface with an acetone wipe and then reset the silver band with Weldbond glue. I turned it so that the Sterling stamp was on the top of the shank and pressed it on to the shank until it was even with the edge of the shank. Weldbond dries fairly quickly to touch so that the band would not be loosened when I went on to the next step in my cleaning process.

IMG_1064

IMG_1065

IMG_1071

After removing the retort I cleaned the bowl and shank. Yet even more grime came out. I put the stem back on and took the four photos below to show the state of the pipe at this point. I did this more for an encouragement to me as this one was proving a difficult rework. The photos gave me a picture of what I was aiming for in cleaning this one up. If I lose sight of that it will end up in the bin as rubbish.

IMG_1066

IMG_1067

IMG_1068

IMG_1069

When the alcohol dried in the bowl and the visual showed a clean bowl and shank I took a sniff of the bowl. After all of this work the moldy smell still was present in the bowl and shank. This called for more drastic measures. I used the Dremel with a sanding drum on it and sanded the inside of the bowl until the briar was bare and clean. Then I filled the bowl with salt and alcohol to leach out the oil from the inside of the bowl and shank. My hope was that in doing this I would also kill the stench. I plugged the shank with a cork, filled the bowl with kosher rock salt (I was out of my normal cotton bolls) and set it up on an old ice-cube tray. I used an ear syringe to fill the bowl with 99% isopropyl alcohol. I set it aside and went to bed to let the treatment do its work while I was sleeping. The two photos below show the bowl after filling with alcohol.

IMG_1072

IMG_1073

In the morning the salt was a dark brown as pictured below. I emptied the now darkened salt and dried out the inside of the bowl by flaming the alcohol with my lighter. It still smelled like mold though the smell was definitely losing strength.

IMG_1070

I cleaned out the button area of the stem with the dental pick and then ran several bristle pipe cleaners through it and then followed up with regular pipe cleaners. I soak both in Everclear to clean out the stem. I then sanded the stem with 220 grit sandpaper to remove the calcification that was all over the stem. I also gave the stem a quick sand all over with the 220 grit to remove the top oxidation. I ran the flame from the Bic lighter over the surface to burn off the oxidation. It did a great job of removing what I had loosened with the sandpaper. I continued sanding it with a fine grit sanding sponge to remove the remaining oxidation. I rubbed down with Obsidian Oil and set it aside with the bowl while I went off to work. The Obsidian Oil sat on the stem and soaked in for the 9 hours I was at work.

IMG_1074

IMG_1075

IMG_1076

IMG_1077

I refilled the bowl with salt and put a cork in the shank. I again used the ear syringe to fill the bowl with alcohol and set it aside to work on the stem. It too sat for the nine hours I was at work.

IMG_1072

When I got home from work the stem looked quite good. It was significantly more black and the oxidation was gone except around the stem shank union. More work to do there. The salt was a dark brown, but slightly lighter than the first treatment. I dumped out the salt and cleaned out the bowl and shank with cotton swabs again. When I finished the smell was better but present nonetheless. I cleaned out the bowl with alcohol and cotton swabs again.

IMG_1078

I needed another bit of encouragement at this point so I decided to stain the pipe with a dark brown aniline stain cut 2:1 with isopropyl alcohol. I applied the stain, flamed it and then buffed it on with Tripoli and White Diamond (photos 1-4 below). The brown did a fair job of coverage but I would need to give it a second coat of stain using a oxblood colour to do some blending with the dark areas on the bowl.

IMG_1083

IMG_1084

IMG_1085

IMG_1086

I worked on the stem with fine grit sanding sponges and 1500-2400 grit micromesh sanding pads. There were some minor tooth dents that still showed up so I passed over them with a Bic lighter and was able to raise them. More sanding was needed and I repeated the sanding described above.

IMG_1079

IMG_1080

IMG_1081

IMG_1082

Once the bowl dried out it still smelled so I decided to repeat the salt and alcohol treatment a third time. I filled the bowl with salt and isopropyl and set it aside over night (photo 1 below). In the morning the salt was little lighter brown this time (photos 2-3 below). I dumped the salt out and cleaned the bowl and shank again. This time the cotton swabs came out fairly clean. I flamed the inside of the bowl. Once the bowl dried out it still smelled so I decided to repeat the salt and alcohol treatment again. I filled the bowl with salt and isopropyl and set it aside over night. In the morning the salt was once again a dark brown. I dumped the salt out and cleaned the bowl and shank again. This time the cotton swabs came out fairly clean. I flamed the inside of the bowl. Though the inside of the bowl and the shank was very clean the musty smell still remained, though less prevalent. This was one stubborn pipe bowl to clean.

IMG_1087

IMG_1088

IMG_1089

While the inside of the bowl dried out I decided to restain the bowl. For the second/top coat I used a oxblood stain. I applied it and wiped it off (first photo below). The coverage this time was much better. The dark reddish stain blended well and covered the dark areas of the bowl. The finished colour is a nice older deep reddish brown look (second-fourth photos below).

IMG_1090

IMG_1091

IMG_1092

IMG_1093

I decided to sand back the inside of the bowl yet again. I used the Dremel with the sanding drum a second time. When I was finished the inside of the bowl was very clean and fresh looking. The smell was still there. I stuffed the bowl with cotton bolls and then used an ear syringe to fill it with white vinegar and set it in the ice-cube tray to let it work. I have used that in the past to remove stubborn ghosts so I thought I would give it a try on this one.

IMG_1094

While the bowl soaked I worked on the stem with the remaining grits of micromesh sanding pads – 3200-12,000 to bring back the deep shine on the stem. Sanding them with the higher grits of micromesh really gives a deep shine to the stem. It is amazing to see the difference between each of the successive grits of micromesh. I did not take photos of the steps as almost all of my refurbishing posts have shown the polishing process with the micromesh. The next two photos show the finished stem. Once the bowl is finished I will buff the bowl and stem with White Diamond and then give the whole a buff with multiple coats of carnauba wax to polish.

IMG_1141

IMG_1142

Once the vinegar had soaked in the bowl for several hours I removed the cotton boll and dried out the bowl. I then used a Dremel with a sanding drum to sand back the sides of the bowl yet again. This time I extended the diameter of the bowl to get rid of the surface area of the bowl interior. Once I was finished with the Dremel I hand sanded the bowl with 220 grit sandpaper to smooth out the small ridges left behind by the drum sanding. The last two photos in this sequence show the newly sanded bowl.

IMG_1126

IMG_1127

IMG_1119

IMG_1120

I took the bowl outside and put it in the bright sun on my patio. I wanted to let the heat and the UV rays from the sun do more work on the potential mold in the bowl. The evening is cooling down and the sun is no longer as warm. I brought in the bowl and wiped down the inside of the bowl and shank with an alcohol based anti bacterial wipe. I took it to the buffer and gave the whole pipe a buff with White Diamond. I then gave it several coats of carnauba wax and buffed it with a clean flannel buff. The pipe is like new and it SMELLS GREAT. I finally beat the moldy smell. The final four photos show the finished pipe.

IMG_1143

IMG_1144

IMG_1145

IMG_1146

Beautifying a Sasieni Mayfair


Blog by Steve Laug

Yesterday I picked up this beautiful little Sasieni Mayfair. It is stamped Mayfair on the left side of the shank and London Made on the right side. The bowl was tarry with a sticky aromatic and the top had been burned on the front side and then poorly topped to get rid of the burn. This left the bowl slanted toward the front side where the burn had been. The rim was also covered with the aromatic goo. The stem was tight but I was able to remove it from the bowl at the shop and found the typical stinger apparatus intact. It was a flat metal blade that ended in a round tube that inserted into the tenon. The tube was slotted to allow the smoke to pass into the airway of the stem. The stem was slightly oxidized and had a tooth mark on the top and the bottom of the stem. Other than those things it was a nice piece of briar and the finish was actually in excellent shape. There were several small sandpits on the bottom of the bowl but they did not detract from the beauty. The shape is kind of a cross between a Prince and a Rhodesian. The shank is a pencil shank. Dimensions for this little pipe are: length 5 ½ inches, height 1 ¼ inches, bowl diameter ¾ inches, bowl depth ¾ inches, shank diameter 3/8 inches. The two photos below show the pipe as it was when I found it. We went for supper at a Mexican Restaurant and I took these photos on the table top.

IMG_0373

IMG_0374

This morning I went to work on it. I took the following photos on my work table. The first three show the externals of the pipe. The damage on the rim is visible as is the state of the bowl. In the third photo note the angle of the bowl top in comparison to the one above it in the second photo. The angles are different and the bowl top is slanted toward the left and the front of the bowl.
IMG_1101

IMG_1102

IMG_1103

I took the pipe apart to check on the internals and remove the stinger apparatus. The next two photos show the top and bottom of the stinger. It is also clear in these two photos the damage to the right inside edge of the rim as well. It is slightly out of round.

IMG_1104

IMG_1105

I reamed the bowl with a PipNet reamer using two different cutting heads. I start with one size smaller than the diameter of the bowl to start the reaming. I then follow-up using the correct size cutting head in the bowl. I find that it is easier to cut the cake carefully and not do any further damage to the roundness of the bowl.

IMG_1106

Topping the bowl on this one was a bit tricky. I needed to take down the back left side of the rim and even out the back side of the rim without removing any from the front edge. I used the flat hard surface that I always use for topping. I held the bowl with the back side pressed into the sandpaper and the front edge off the paper. I move the bowl right to left across the sandpaper checking to see the effect (photo 1 below). I did not want to make the top worse than it already was. Once I had the back left and right sides even and the front and the back even I was ready to do a slight topping on the bowl to even it up neatly (photo 2 below).

IMG_1107

IMG_1108

At this point I sanded the top a little more to clean off the burn damage on the front of the bowl. Once I had that minimized I sanded the top with a medium and a fine grit sanding sponge until the scratch marks were gone. I also used the Dremel to even out the diameter of the bowl and bring it back into round.
I then removed the stinger apparatus and cleaned it with alcohol and cotton pads. I picked the slot clean with the dental pick. I did not intend to use it on the pipe once it was clean so I put it away in case I sold the pipe and the new owner wanted the stinger.

IMG_1109

IMG_1110

I set up the retort and filled the test tube with isopropyl alcohol and boiled out the inside of the bowl and stem. The next four photos show the set up and the process. I heat the alcohol with a tea candle and once the alcohol has cooled from the boil it returns back to the test tube and carries the oils and tars of the bowl and shank with it. I repeated this process twice.

IMG_1111

IMG_1112

IMG_1113

IMG_1114

I cleaned up after the retort with pipe cleaners and Everclear. Both the stem and the shank were cleaned of all the internal grime. The pile of pipe cleaners in the picture below show the sheer volume of pipe cleaners used in cleaning up after the retort. Once this was finished the interior of the shank and stem were clean and pipe cleaners came out pristine.

IMG_1115

It was time to work on the stem. I ran the flame of a Bic lighter across the tooth marks on the topside and bottom side of the stem until they lifted. I then sanded the stem with 220 grit sandpaper to remove the remaining signs of the marks. And then I sanded the entire stem with a fine grit sanding sponge to remove the oxidation and to deal with the scratch marks from the sandpaper.

IMG_1116

IMG_1117

IMG_1118

I stained the top of the bowl with dark brown aniline stain that I thinned 2:1 with isopropyl to match the colour of the bowl and shank. I flamed it and then repeated the process until the colour was an exact match to the rest of the pipe.

IMG_1124

IMG_1125

I took the pipe to the buffer and buffed the bowl with White Diamond to shine up the bowl and the newly stained rim. I also buffed the stem with Tripoli and White Diamond at the same time to further shine the stem. The four photos below show the buffed and polished bowl and stem after the White Diamond buff.

IMG_1128

IMG_1129

IMG_1130

IMG_1131

I took the pipe back to my desk and sanded the stem with micromesh sanding pads. I worked through the various grits of micromesh from 1500-12,000 to polish the stem.

IMG_1132

IMG_1134

IMG_1135

IMG_1136

I gave the entire pipe another buff with White Diamond and then gave it multiple coats of carnauba wax and buffed it to a shine with a clean flannel buff. The final four photos show the finished pipe.

IMG_1137

IMG_1138

IMG_1139

IMG_1140

GBD Midnight 9456


Blog by Greg Wolford

The last few months have been extremely busy for me. It is amazing how much a disabled, non-working person can be obligated to do; I think I had more “free time” when I was working full time in the car business! Ah, but I digress …

By chance, I found myself today with no obligations, no chores, no appointments, just a day to myself. Unfortunately it also stormed badly which flared up my arthritic joints but I was able, finally, to get to a project, if only a simple one.

I picked up this GBD Midnight about two weeks ago. It was a fair price and an interesting pipe to me; all of the Midnight models I had seen before had acrylic stems and this one had vulcanite. Some later research led me to believe that there were at least two productions of this line: the first with vulcanite stems shortly after the merger and another some time later with acrylic stems.

Although I forgot to take “before” photos the seller’s were quite accurate except for the oxidation was a bit more than I anticipated: it wasn’t thick or heavy but was even, all over brown. The seller said he had only smoked it a few times over the years and didn’t like it; he prefers a 9 mm filter pipe. He said there were a few tooth dents but not bad ones and that he had cleaned it; these things were accurate, if he meant cleaned the inside.

The too had a fair amount if tar build up but not thick. The stummel was dirty but not in bad shape at all. And the dents were mild as be had said.

I began with an alcohol soaked pad, wiping down the stummel, paying extra attention to the rim’s build up. It didn’t take a lot to get it cleaned up and the rim smoothed out. I then reamed the bowl, which needed it but wasn’t badly caked. I set the stummel aside and began to work on the stem.

I started by rubbing the entire stem well with Back-to-Black, which removed a lot of oxidation. Then I took some automotive rubbing compound and cotton pads and polished away almost all of the remaining oxidation. After the rubbing compound I took the stem to the heat gun to raise the dents. They came up pretty well but not completely. But they were now slight enough I decided to not sand them smooth; I wanted to finish this pipe and write this blog tonight, those things and the small dents left made this decision for me easy. I did wet sand the stem with 400 grit wet/dry paper to remove the last of the oxidation and the few scratches I saw.

I reassembled the pipe and went to the buffing wheel. I like to buff the shank-stem union together so as to keep a nice fit. I began with black buffing compound, about an 800-grit I believe. After the union was buffed I took the stem and stummel apart and buffed each piece. I moved onto brown tripoli, then white diamond doing the same process.

I had a small deviation at the end of the white diamond buffing: the wheel grabbed the stummel and bounced it off my table. It left two dents, the bounce across the garage, that totally irritated me. I then had to steam the the dents out; thankfully the dents weren’t bad and came out. I went back to the white diamond and re-buffed the stummel.

I reassembled the pipe and gave it several coats of carnauba wax, buffed it on a soft, clean wheel and, finally, hand buffed it wearing a pair of linen gloves I bought just for that purpose.

The pipe came out quite well I think. After cleaning and buffing it is a bit lighter on color, which I am very happy with; the grain, especially the Birdseye on the front of the bowl really pops now.

Hopefully the frantic pace of life will slow some over the coming weeks; I have many more wonderful old pipes that are patiently awaiting being brought back to life. And I am anxious to do the work an share it with you.

20130613-222006.jpg

20130613-222015.jpg

20130613-222023.jpg

20130613-222030.jpg

20130613-222040.jpg

20130613-222049.jpg

20130613-222056.jpg

20130613-222105.jpg

20130613-222111.jpg

20130613-222119.jpg

20130613-222126.jpg

20130613-222132.jpg

Refinished Rims and Touch-Ups – Alan Chestnutt


A while ago Alan posted this on Smokers Forums and I kept a copy of it. We spoke of the process and how well it worked. Since then I have been hunting for them in my area and so far no luck. I thought I would post Alan’s piece so that you all could read it and give it a try. Let us know how it works.

When restoring pipes, I nearly always like to refinish the rim. I think a nice clean sharp rim always sets a pipe off. As well as this it is just as easy to sand and refinish a rim as to try to remove tar and staining to the old rim. One of the problems though in refinishing a rim is trying to match the stain to the rest of the bowl. I always shied away from getting leather dyes, simply because you would need to be artist to be able to correctly mix all the differing shades.

I always remember my grandfather staining shoes and the smell of the dye always lingered in my brain. In more recent times that memory was triggered when smelling a sharpie marker, so my thoughts were that it must contain a similar alcohol based dye. I used a sharpie a few years ago to restain a black sandblast bowl and it worked a treat. “If only they were available in shades of brown” I thought to myself.

So while walking through a local discount store a few months ago, I spied furniture repair markers. Exactly what I had been thinking of.

pens

They come in 5 shades of brown plus black and cost £2 (about 3 bucks). I couldn’t wait to get home and try them. They are a chisel shape marker and apply a translucent stain exactly like an alcohol dye. Perfect! With the variety of shades a match can be made 99% of the time by application of a couple of coats or moving to the next darker shade. Simply cover the rim by wiping the marker over it and a few seconds later remove the excess with a soft cloth.

pens2
A refinished Tilshead rim.

They are excellent for touch ups on other areas of the pipe and I often use them to just refinish the whole pipe to brighten up the grain. Needless to say I acquired a few more packs, but I have refinished literally hundreds of pipes and I am still on my first pack. Simple to use, no mess, a variety of shades and cheap. I class them as my best purchase ever for restoring pipes, so keep your eyes open for them. Available on eBay too, but at a premium.

They are excellent for touch ups on other areas of the pipe and I often use them to just refinish the whole pipe to brighten up the grain. Needless to say I acquired a few more packs, but I have refinished literally hundreds of pipes and I am still on my first pack. Simple to use, no mess, a variety of shades and cheap. I class them as my best purchase ever for restoring pipes, so keep your eyes open for them. Available on eBay too, but at a premium.

Mark Twain on Nicotine Nannies – The Moral Statistician


I came across this old file on my computer and thought I would pass it on to you all. I always enjoy Mark Twain and here he takes on the nannies who would tell us how to live our lives. Incredibly refreshing to read!

Originally published in Sketches, Old and New, 1893

Image
I don’t want any of your statistics; I took your whole batch and lit my pipe with it.
I hate your kind of people. You are always ciphering out how much a man’s health is injured, and how much his intellect is impaired, and how many pitiful dollars and cents he wastes in the course of ninety-two years’ indulgence in the fatal practice of smoking; and in the equally fatal practice of drinking coffee; and in playing billiards occasionally; and in taking a glass of wine at dinner, etc. etc. And you are always figuring out how many women have been burned to death because of the dangerous fashion of wearing expansive hoops, etc. etc. You never see more than one side of the question.

You are blind to the fact that most old men in America smoke and drink coffee, although, according to your theory, they ought to have died young; and that hearty old Englishmen drink wine and survive it, and portly old Dutchmen both drink and smoke freely, and yet grow older and fatter all the time. And you never try to find out how much solid comfort, relaxation, and enjoyment a man derives from smoking in the course of a lifetime (which is worth ten times the money he would save by letting it alone), nor the appalling aggregate of happiness lost in a lifetime by your kind of people from not smoking. Of course you can save money by denying yourself all those little vicious enjoyments for fifty years; but then what can you do with it? What use can you put it to? Money can’t save your infinitesimal soul. All the use that money can be put to is to purchase comfort and enjoyment in this life; therefore, as you are an enemy to comfort and enjoyment where is the use of accumulating cash?

It won’t do for you to say that you can use it to better purpose in furnishing a good table, and in charities, and in supporting tract societies, because you know yourself that you people who have no petty vices are never known to give away a cent, and that you stint yourselves so in the matter of food that you are always feeble and hungry. And you never dare to laugh in the daytime for fear some poor wretch, seeing you in a good humor, will try to borrow a dollar of you; and in church you are always down on your knees, with your ears buried in the cushion, when the contribution-box comes around; and you never give the revenue officers a full statement of your income.

Now you know all these things yourself, don’t you? Very well, then what is the use of your stringing out your miserable lives to a lean and withered old age? What is the use of your saving money that is so utterly worthless to you? In a word, why don’t you go off somewhere and die, and not be always trying to seduce people into becoming as ornery and unlovable as you are yourselves, by your villainous “moral statistics”?

Now, I don’t approve of dissipation, and I don’t indulge in it either; but I haven’t a particle of confidence in a man who has no redeeming petty vices. And so I don’t want to hear from you any more. I think you are the very same man who read me a long lecture last week about the degrading vice of smoking cigars, and then came back, in my absence, with your reprehensible fire-proof gloves on, and carried off my beautiful parlor stove.

Restoring and Reclaiming a Byford Prince


I was gifted three old pipes by a friend on Smokers Forums. The first that caught my attention was an older Byford Prince. It was pretty worn but the wood was in good shape under the wear and tear. The stem was shot. It had a split along the stop side and was missing a few pieces. When I removed it I found that it was quite brittle. Once I took the stem off I found the most interesting system inside. The shank had an aluminum attachment which held two metal tubes inside of it. On the inside of the broken stem was a third metal tube. These formed three concentric, nested circles which wicked out the moisture of the smoke while not hampering the flow of air in the pipe from bowl to button. The photo below shows magnified picture of the interior of the stem and shank.

Byford Pipes

The stem was so broken and damaged that I was not sure how the flow of the angles on the taper was supposed to look. I did not know what the button and the stem were supposed to be like. I did a search on the internet and found this photo of a Byford stem that showed the proper angles on the stem. I used the stem in the photo as a template for my replacement stem. I made one modification which I will speak about in the explanation of the restemming below.

Byford stem

The next photo shows the interior of the stem and shank – the system part of the pipe. The tube in the stem sits between the other two tubes in the shank creating three rings on the inside of the shank and stem. It looked like this stem apparatus would be a bear to clean up. I would have to used cotton swabs, folded pipe cleaners and whatever I could to get in between the layers.

Byford2

The bowl was badly caked with a broken cake. It was soft rather than hard. There was also a buildup of some blue substance on the bowl. I am not sure what it was but it smelled suspiciously like a mold. The stem as you can see in the poor quality pictures below was damaged beyond repair. The aluminum band or shank end was oxidized and rough. Underneath all of the grime it was a beautiful piece of briar. The shape is a well executed prince. The old stem seemed a bit long to my liking so the new one would be slightly shorter and accommodate the lines of the one in the photo.

IMG_1012

IMG_1013

IMG_1014

I removed the old stem and went through my box of stem and found what I was looking for. The drilling on this had to be very wide to accommodate the apparatus on the system of the Byford pictured above. This older style stem had exactly the right fit. It slipped into place and looked good. It was a bit flared on each side and on the top and bottom so that would need to be sanded back to a flush angle. In the photo below you can see the fit of the new stem before I did any shaping on it. You can also see the blue/green substance on the bowl.

IMG_1019

I used a Dremel with a sanding drum to remove the excess vulcanite and shape the stem to the proper angles. I reamed the bowl with a PipNet reamer starting with the smallest head and working up to the third head which took the cake back to bare wood. I wanted to remove the cake and whatever the buildup on the bowl and rim that was there.

IMG_1024

IMG_1025

IMG_1026

After reaming the bowl back I sanded the rim and inner edge with a fine grit sanding sponge to remove the remaining blue/green substance. I also sanded the inside of the bowl smooth to remove any thing that was buildup on the inside edges. I sanded the stem with 220 grit sandpaper to remove the scratches caused by the Dremel and sanding drum. I sanded the exterior of the bowl and the oxidized aluminum on the shank end with the fine grit sanding sponge as well. The next three photos below show the state of the bowl and stem at this point in the process.

IMG_1031

IMG_1032

IMG_1033

I wiped the bowl down with an acetone wetted cotton pad to remove the grime and the old finish. The next two photos show the bowl at this point. The cotton pad is below the bowl to show the amount of finish and grime that came off. I find that the acetone will even out the finish and clean up any remaining grime.

IMG_1034

IMG_1035

I continued to sand the stem with 220 grit sandpaper and also cleaned out the shank apparatus with Everclear and cotton swabs. That was a challenge! The grime that built up in the concentric tubes took some bends and twists of cotton swabs and pipe cleaners to remove from the shank. I also scrubbed down the interior of the bowl with Everclear on the cotton swabs and then scoured it out with 0000 steel wool. I did not want any remnants of the blue/green stuff. While the bowl was wet with the alcohol I also flamed the inside with a lighter. The alcohol burns quickly and should destroy whatever remnants of the sludge that may have been resident in the briar. I sanded the aluminum with 1500 grit micromesh sanding pads to remove the oxidation and crust that had built up at the junction of the aluminum and the briar.

IMG_1036

IMG_1037

The next two photos show the stem after the pipe and stem have been cleaned and after I had finished shaping the stem with the 220 grit and 340 grit sandpaper. The angles matched the photo above that I was trying to duplicate.

IMG_1038

IMG_1039

At this point it was time to sand with the micromesh sanding pads. The next series of five photos show the progressive shine that comes through the micromesh. I wet sanded with 1500 and 1800 grit micromesh to remove the scratches and begin to give the stem a polish. I also sanded the bowl with these two grits as well. I followed up by dry sanding with the remaining grits of micromesh from 2400-12,000. I sanded the bowl, the aluminum shank end and the stem.

IMG_1040

IMG_1041

IMG_1042

IMG_1043

IMG_1044

Upon completing the sanding and polishing with the micromesh pads I took the pipe to the buffer and buffed the stem and bowl with White Diamond on the wheel. It brought out the shine and help highlight the grain. I wiped down the stem with Obsidian Oil to protect it and then gave the entire pipe several coats of carnauba wax and buffed it to a shine. The last series of four photos show the finished pipe.

IMG_1045

IMG_1046

IMG_1047

IMG_1048

ADDENDUM 03/07/15
Just recently I discovered this interesting piece on the Byford pipes. They were originally made by Orlik. Here is a page from their catalogue.
445px-Orlik_70S07

Restemming and Reclaiming a BBB Hand Made Unsmoked Bowl


Blog by Steve Laug

This is the third unsmoked New Old Stock pipe bowl I picked up on EBay. It is stamped BBB in a diamond with Hand Made split by the Diamond on the top of the shank. The finish was very good and the bowl absolutely clean. Again it had no stem. I talked with a friend on the forums and he is sending some stems that may work. But, I decided to give it a go with fitting a stem blank while I was waiting. Sometimes the old impatience can be productive! The first series of four photos are from the EBay seller and show the condition of the bowl.

BBB1

BBB4

BBB3

BBB2

I sorted through my box of stems and chose an oval stem that looked to be the right length and close to the diameter that I needed. I used the PIMO tenon turning tool on my cordless drill to cut the tenon close to the diameter I was looking for. One issue with the turning tool is the inability to get accurate cuts so over time I have learned to take it very close and then finish the fit by hand. The first photo below shows the stem on the turning tool. Prior to putting it on the turner I had to drill out the airway to the same size as the stabilizing pin on the tool.

IMG_0958

The next photo shows the tenon after turning it on the tool. I needed to sand it by hand to get a proper fit in the mortise. I use medium grit emery paper to sand the tenon down and then 220 grit sandpaper to smooth it out.

IMG_0959

After sanding the tenon the fit is perfect. The next two photos show the stem in place. There are still casting marks on the sides of the stem and the diameter of the stem needs to be trimmed to match the diameter of the shank. I use a Dremel with a sanding drum to bring the stem diameter down close to the shank size. I am careful to not trim to close to the shank as I do not want to inadvertently scratch the shank and cause more work. I also run the Dremel the length of the stem to take down the casting marks and excess vulcanite. I use it the same way on the end of the button to remove excess and also clean up the marks from the cast.

IMG_0960

IMG_0961

After removing the excess material from the stem as close as I can to the shank using the Dremel the rest is handwork. I begin with medium grit emery paper to quickly remove more material. This is by far the most labour intensive part of the work. There is no way to rush it as it just takes patience to keep sanding until the fit is correct. I work it on the shank and off the shank. Photos one and two below show the results after the stem has been sanded with the emery paper. The diameter is getting close. Photos three, four and five below show the next progress of the shaping. For that I used 220 grit sandpaper. I cut it into squares and fold it so that I can get in close to the button and also close to the shank without scratching the shank. I also used a heat gun to bend the stem. This was done in several installments before I actually got it the way I wanted. The bend in the early photos below is a bit abrupt and too close to the button. I reheated and rebent the stem over a wooden rolling pin that I appropriated for this purpose.

IMG_1301

IMG_1302

IMG_1303

IMG_1304

IMG_1305

I continued sanding the stem to get the fit right with 340 grit sandpaper and then a fine grit sanding sponge. You can see from the photos that the shank stem junction is well fitted. There is no gap at the joint. The next two photos show the progress of the shaping after I used the sanding sponge. They also show the stem after it was rebent to the angle I wanted for this pipe.

IMG_1306

IMG_1307

Though the fit was good and the pipe looked and the stem was getting smoother, it just seemed bland to me. There was something missing to the look that would dress up this pipe and take it beyond just a well fit stem and a darkly stained bowl. I decided to shape and press on a nickel band to dress up the shank. The band was not necessary as the shank and stem union was perfect and the shank was uncracked. It was solely done for decorative purposes – to add a bit of bling to the shank of the pipe and dress it up (in my opinion!). The next three photos show the newly banded shank and the fit and look of the stem in place. The delicate bend of the stem, the flow of the bowl and the band all work together to give this pipe a touch of elegance.

IMG_1308

IMG_1309

IMG_1310

The next series of six photos show the progressive polishing of the new stem with micromesh sanding pads from 1500-12,000 grit. Each successive grit of micromesh sanding pad gives a deeper and more polished shine to the stem. It always amazes me to see the difference between the stem before the last three grits of micromesh (6000, 8000, 12000) and the previous grits.

IMG_1311

IMG_1312

IMG_1313

IMG_1314

IMG_1315

IMG_1316

Once I finished with the micromesh pads I took it to the buffer and buffed the bowl and stem with White Diamond polish on the wheel. The next two photos show the pipe after the buff. The shine is almost glass like by this point in the process. All that remains is to buff on several coats of carnauba wax and polish the metal band with metal polish.

IMG_1317

IMG_1318

The next four photos show the finished pipe. To me it has a gentle elegance to the shape and the bend. The slender stem and the bend make the pipe sit well in the mouth. The light weight makes this a likely clencher. The deep shine in the bowl and stem give it the look of a new pipe – which for all intents and purposes it is. This Hand Made BBB has come back to life to fulfill the purposes for which it was originally made.

IMG_1319

IMG_1320

IMG_1321

IMG_1322