Blog by Steve Laug
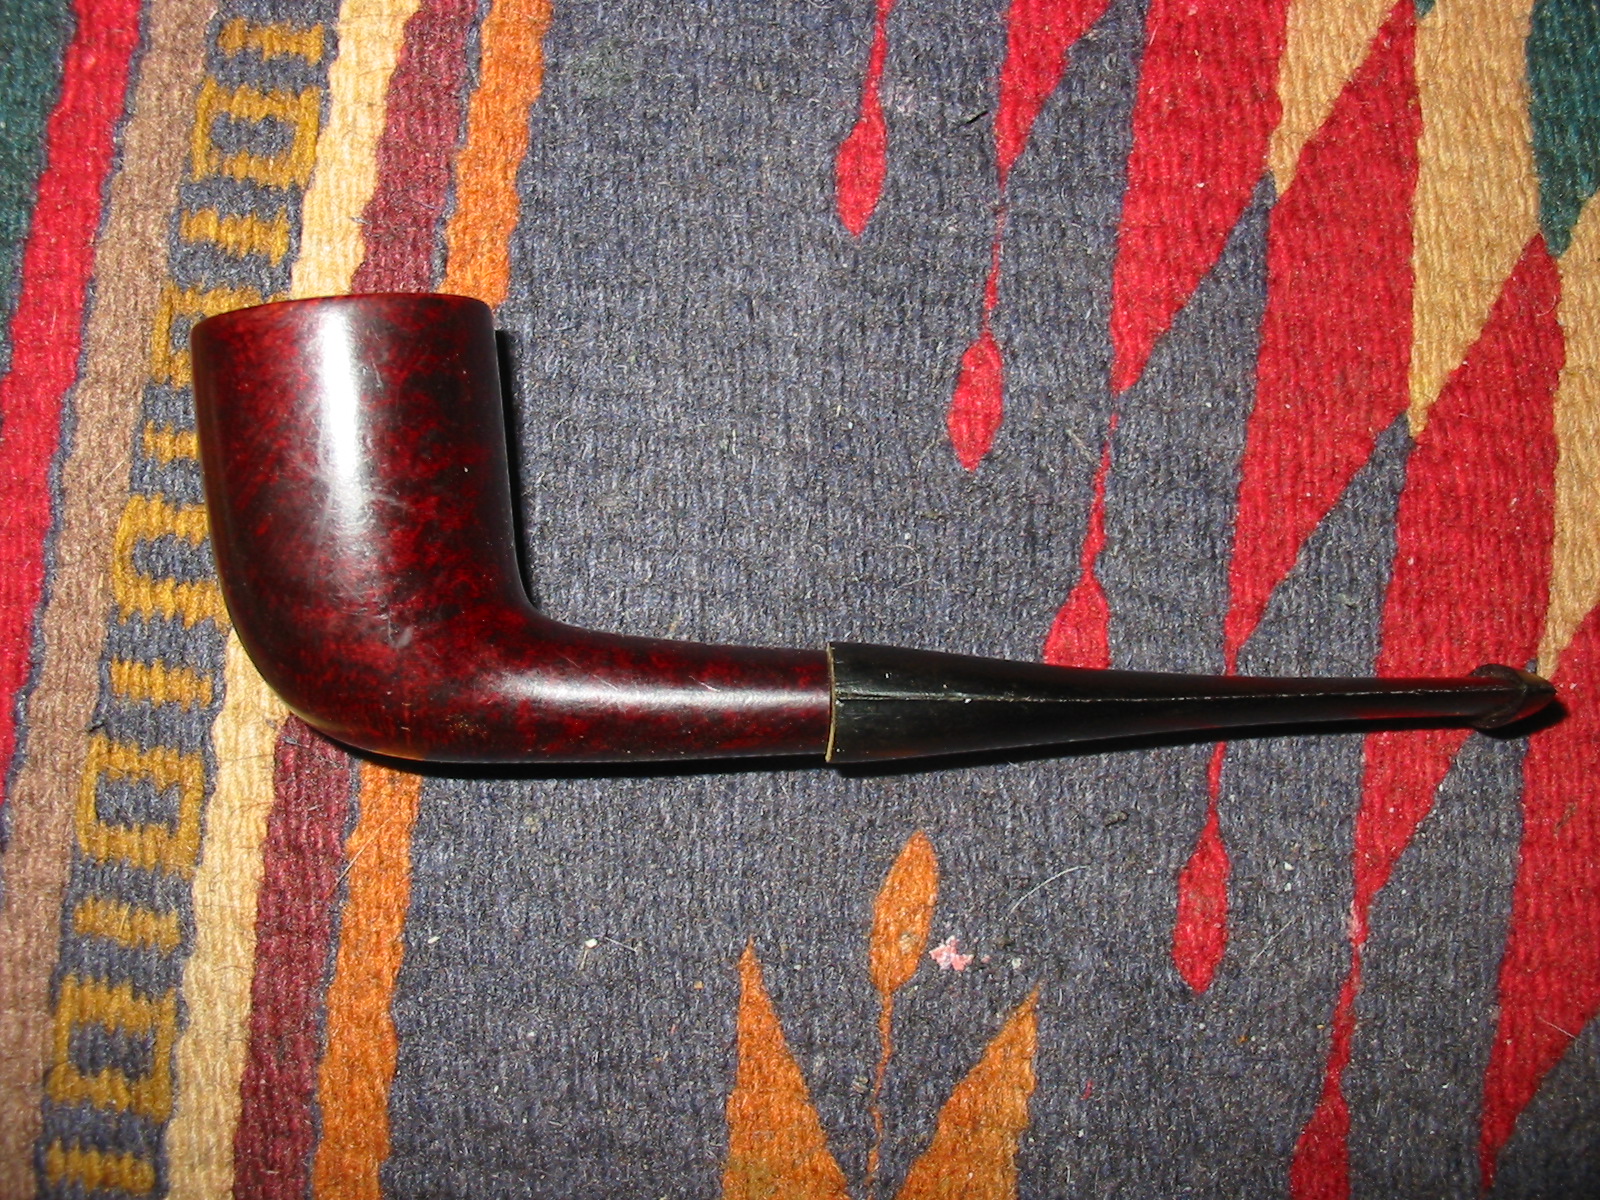
This is the third unsmoked New Old Stock pipe bowl I picked up on EBay. It is stamped BBB in a diamond with Hand Made split by the Diamond on the top of the shank. The finish was very good and the bowl absolutely clean. Again it had no stem. I talked with a friend on the forums and he is sending some stems that may work. But, I decided to give it a go with fitting a stem blank while I was waiting. Sometimes the old impatience can be productive! The first series of four photos are from the EBay seller and show the condition of the bowl.


I sorted through my box of stems and chose an oval stem that looked to be the right length and close to the diameter that I needed. I used the PIMO tenon turning tool on my cordless drill to cut the tenon close to the diameter I was looking for. One issue with the turning tool is the inability to get accurate cuts so over time I have learned to take it very close and then finish the fit by hand. The first photo below shows the stem on the turning tool. Prior to putting it on the turner I had to drill out the airway to the same size as the stabilizing pin on the tool.

The next photo shows the tenon after turning it on the tool. I needed to sand it by hand to get a proper fit in the mortise. I use medium grit emery paper to sand the tenon down and then 220 grit sandpaper to smooth it out.

After sanding the tenon the fit is perfect. The next two photos show the stem in place. There are still casting marks on the sides of the stem and the diameter of the stem needs to be trimmed to match the diameter of the shank. I use a Dremel with a sanding drum to bring the stem diameter down close to the shank size. I am careful to not trim to close to the shank as I do not want to inadvertently scratch the shank and cause more work. I also run the Dremel the length of the stem to take down the casting marks and excess vulcanite. I use it the same way on the end of the button to remove excess and also clean up the marks from the cast.

After removing the excess material from the stem as close as I can to the shank using the Dremel the rest is handwork. I begin with medium grit emery paper to quickly remove more material. This is by far the most labour intensive part of the work. There is no way to rush it as it just takes patience to keep sanding until the fit is correct. I work it on the shank and off the shank. Photos one and two below show the results after the stem has been sanded with the emery paper. The diameter is getting close. Photos three, four and five below show the next progress of the shaping. For that I used 220 grit sandpaper. I cut it into squares and fold it so that I can get in close to the button and also close to the shank without scratching the shank. I also used a heat gun to bend the stem. This was done in several installments before I actually got it the way I wanted. The bend in the early photos below is a bit abrupt and too close to the button. I reheated and rebent the stem over a wooden rolling pin that I appropriated for this purpose.


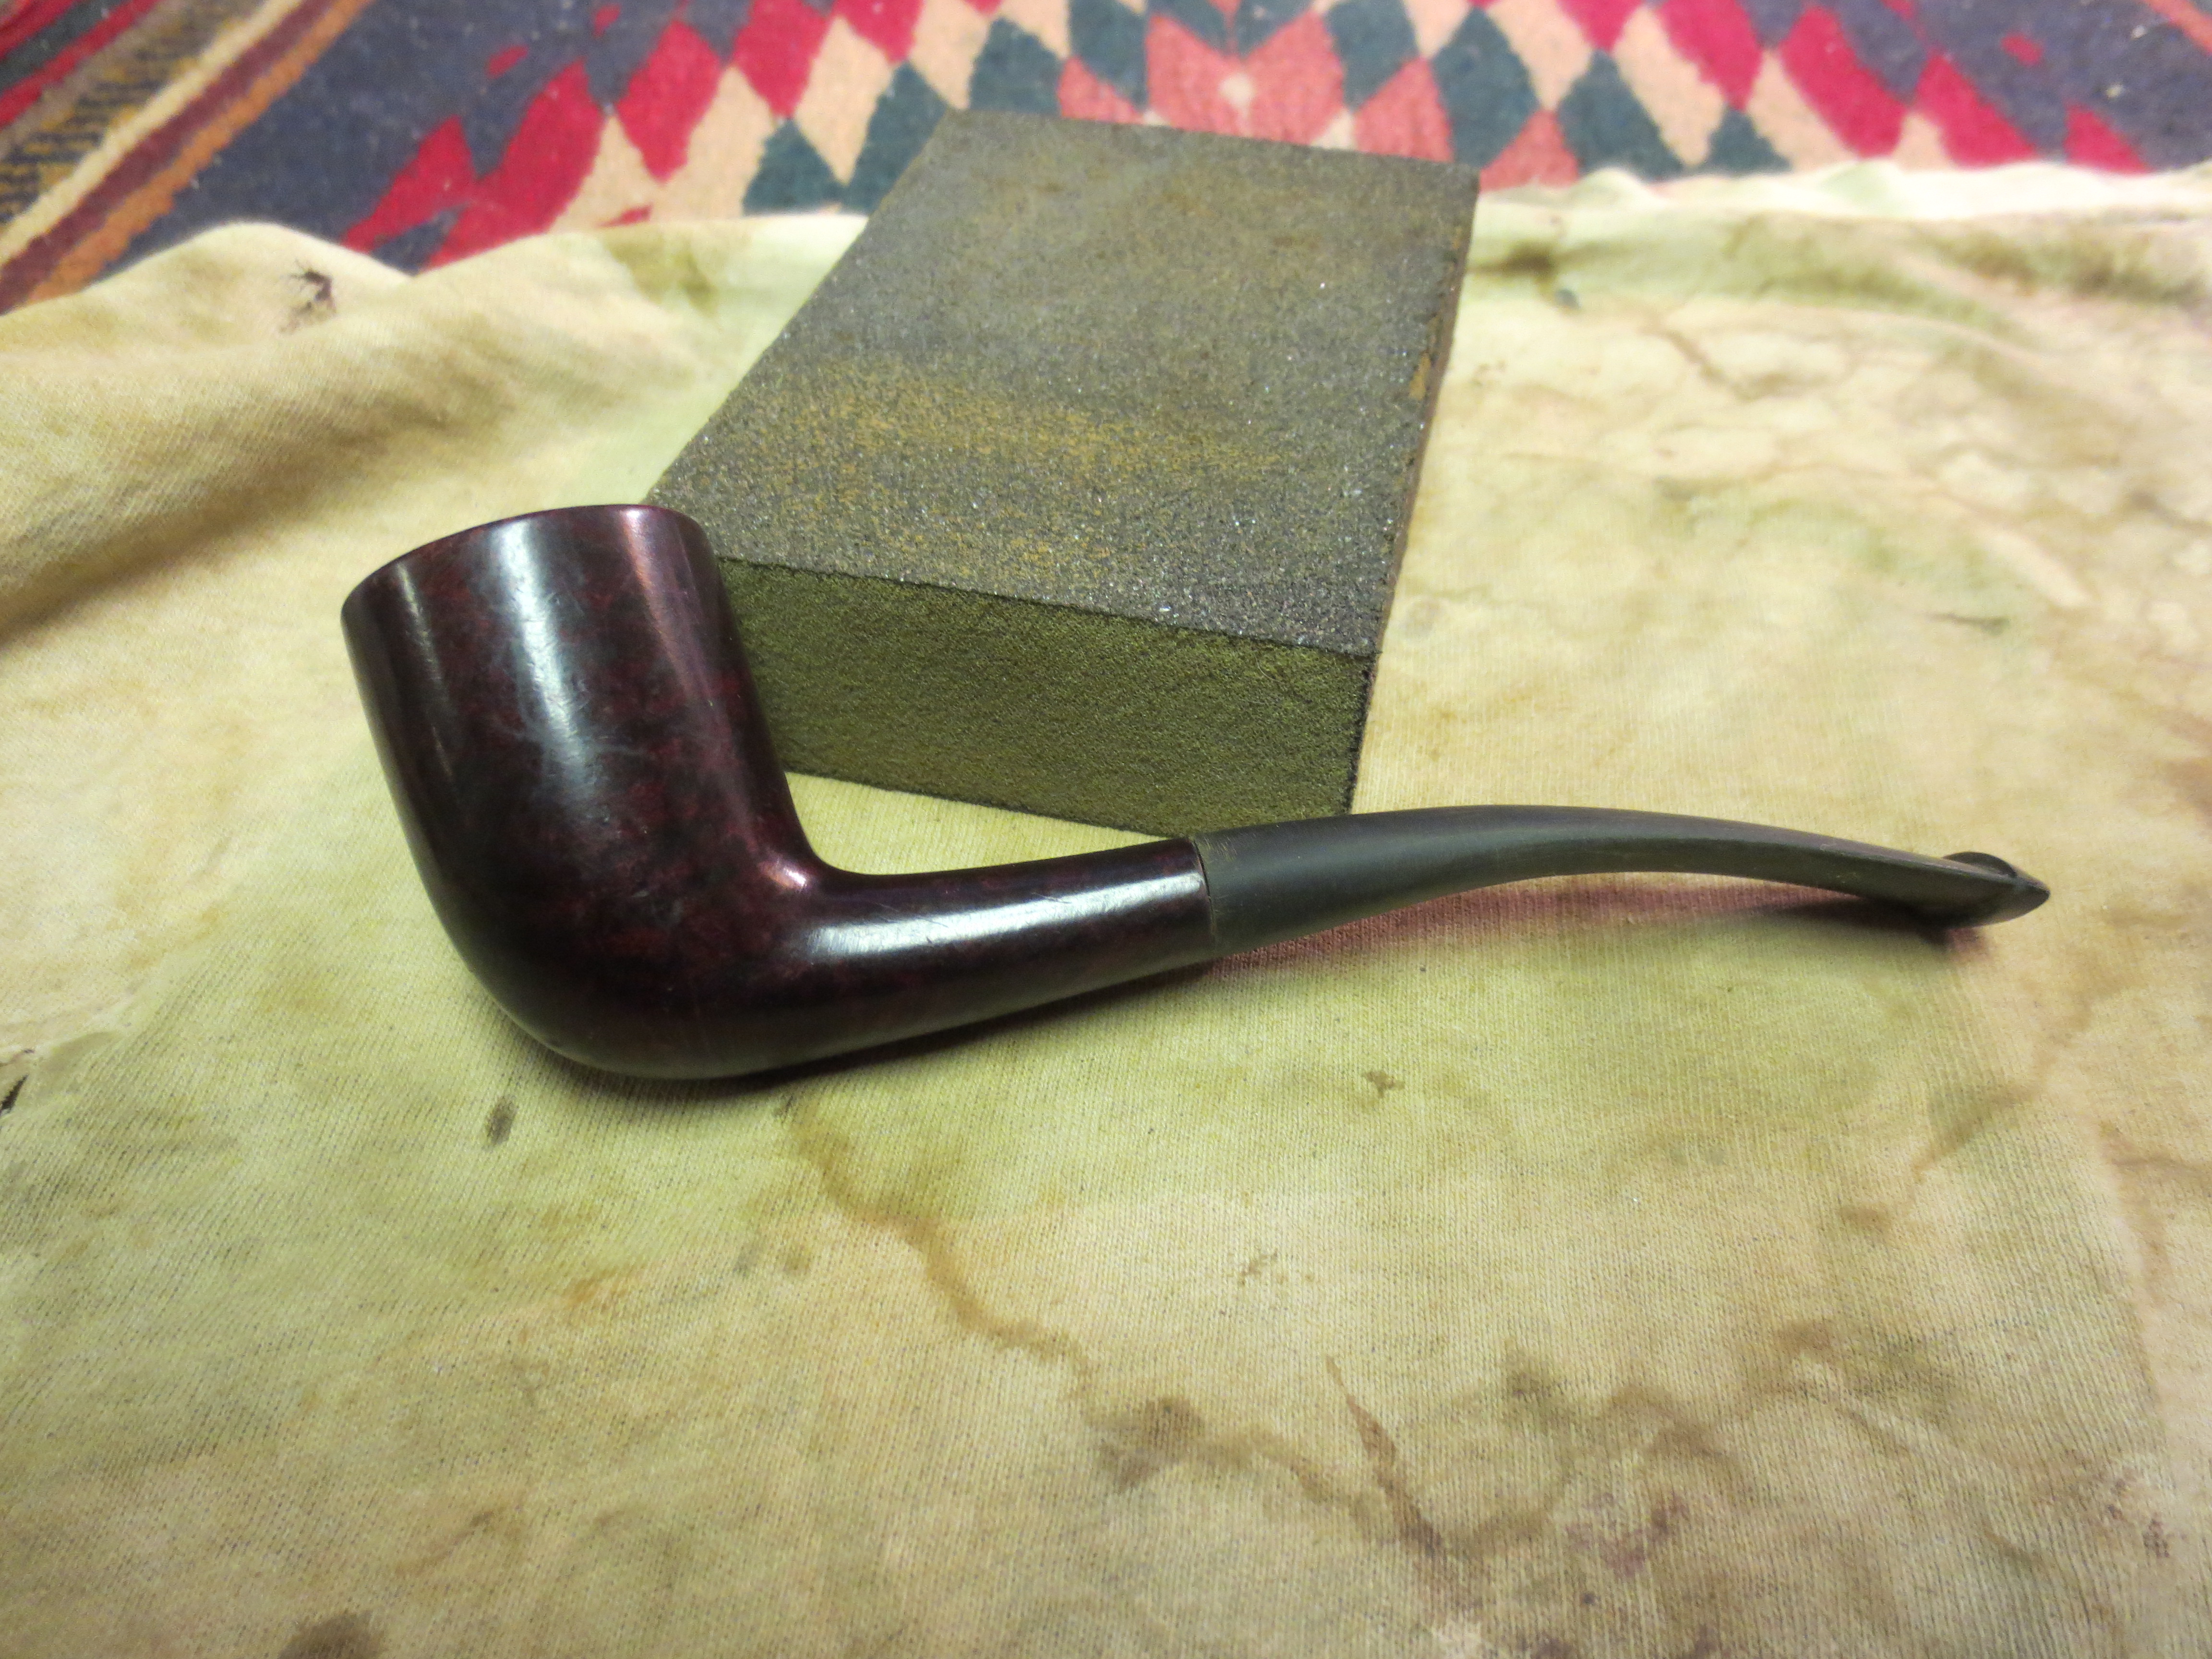
I continued sanding the stem to get the fit right with 340 grit sandpaper and then a fine grit sanding sponge. You can see from the photos that the shank stem junction is well fitted. There is no gap at the joint. The next two photos show the progress of the shaping after I used the sanding sponge. They also show the stem after it was rebent to the angle I wanted for this pipe.

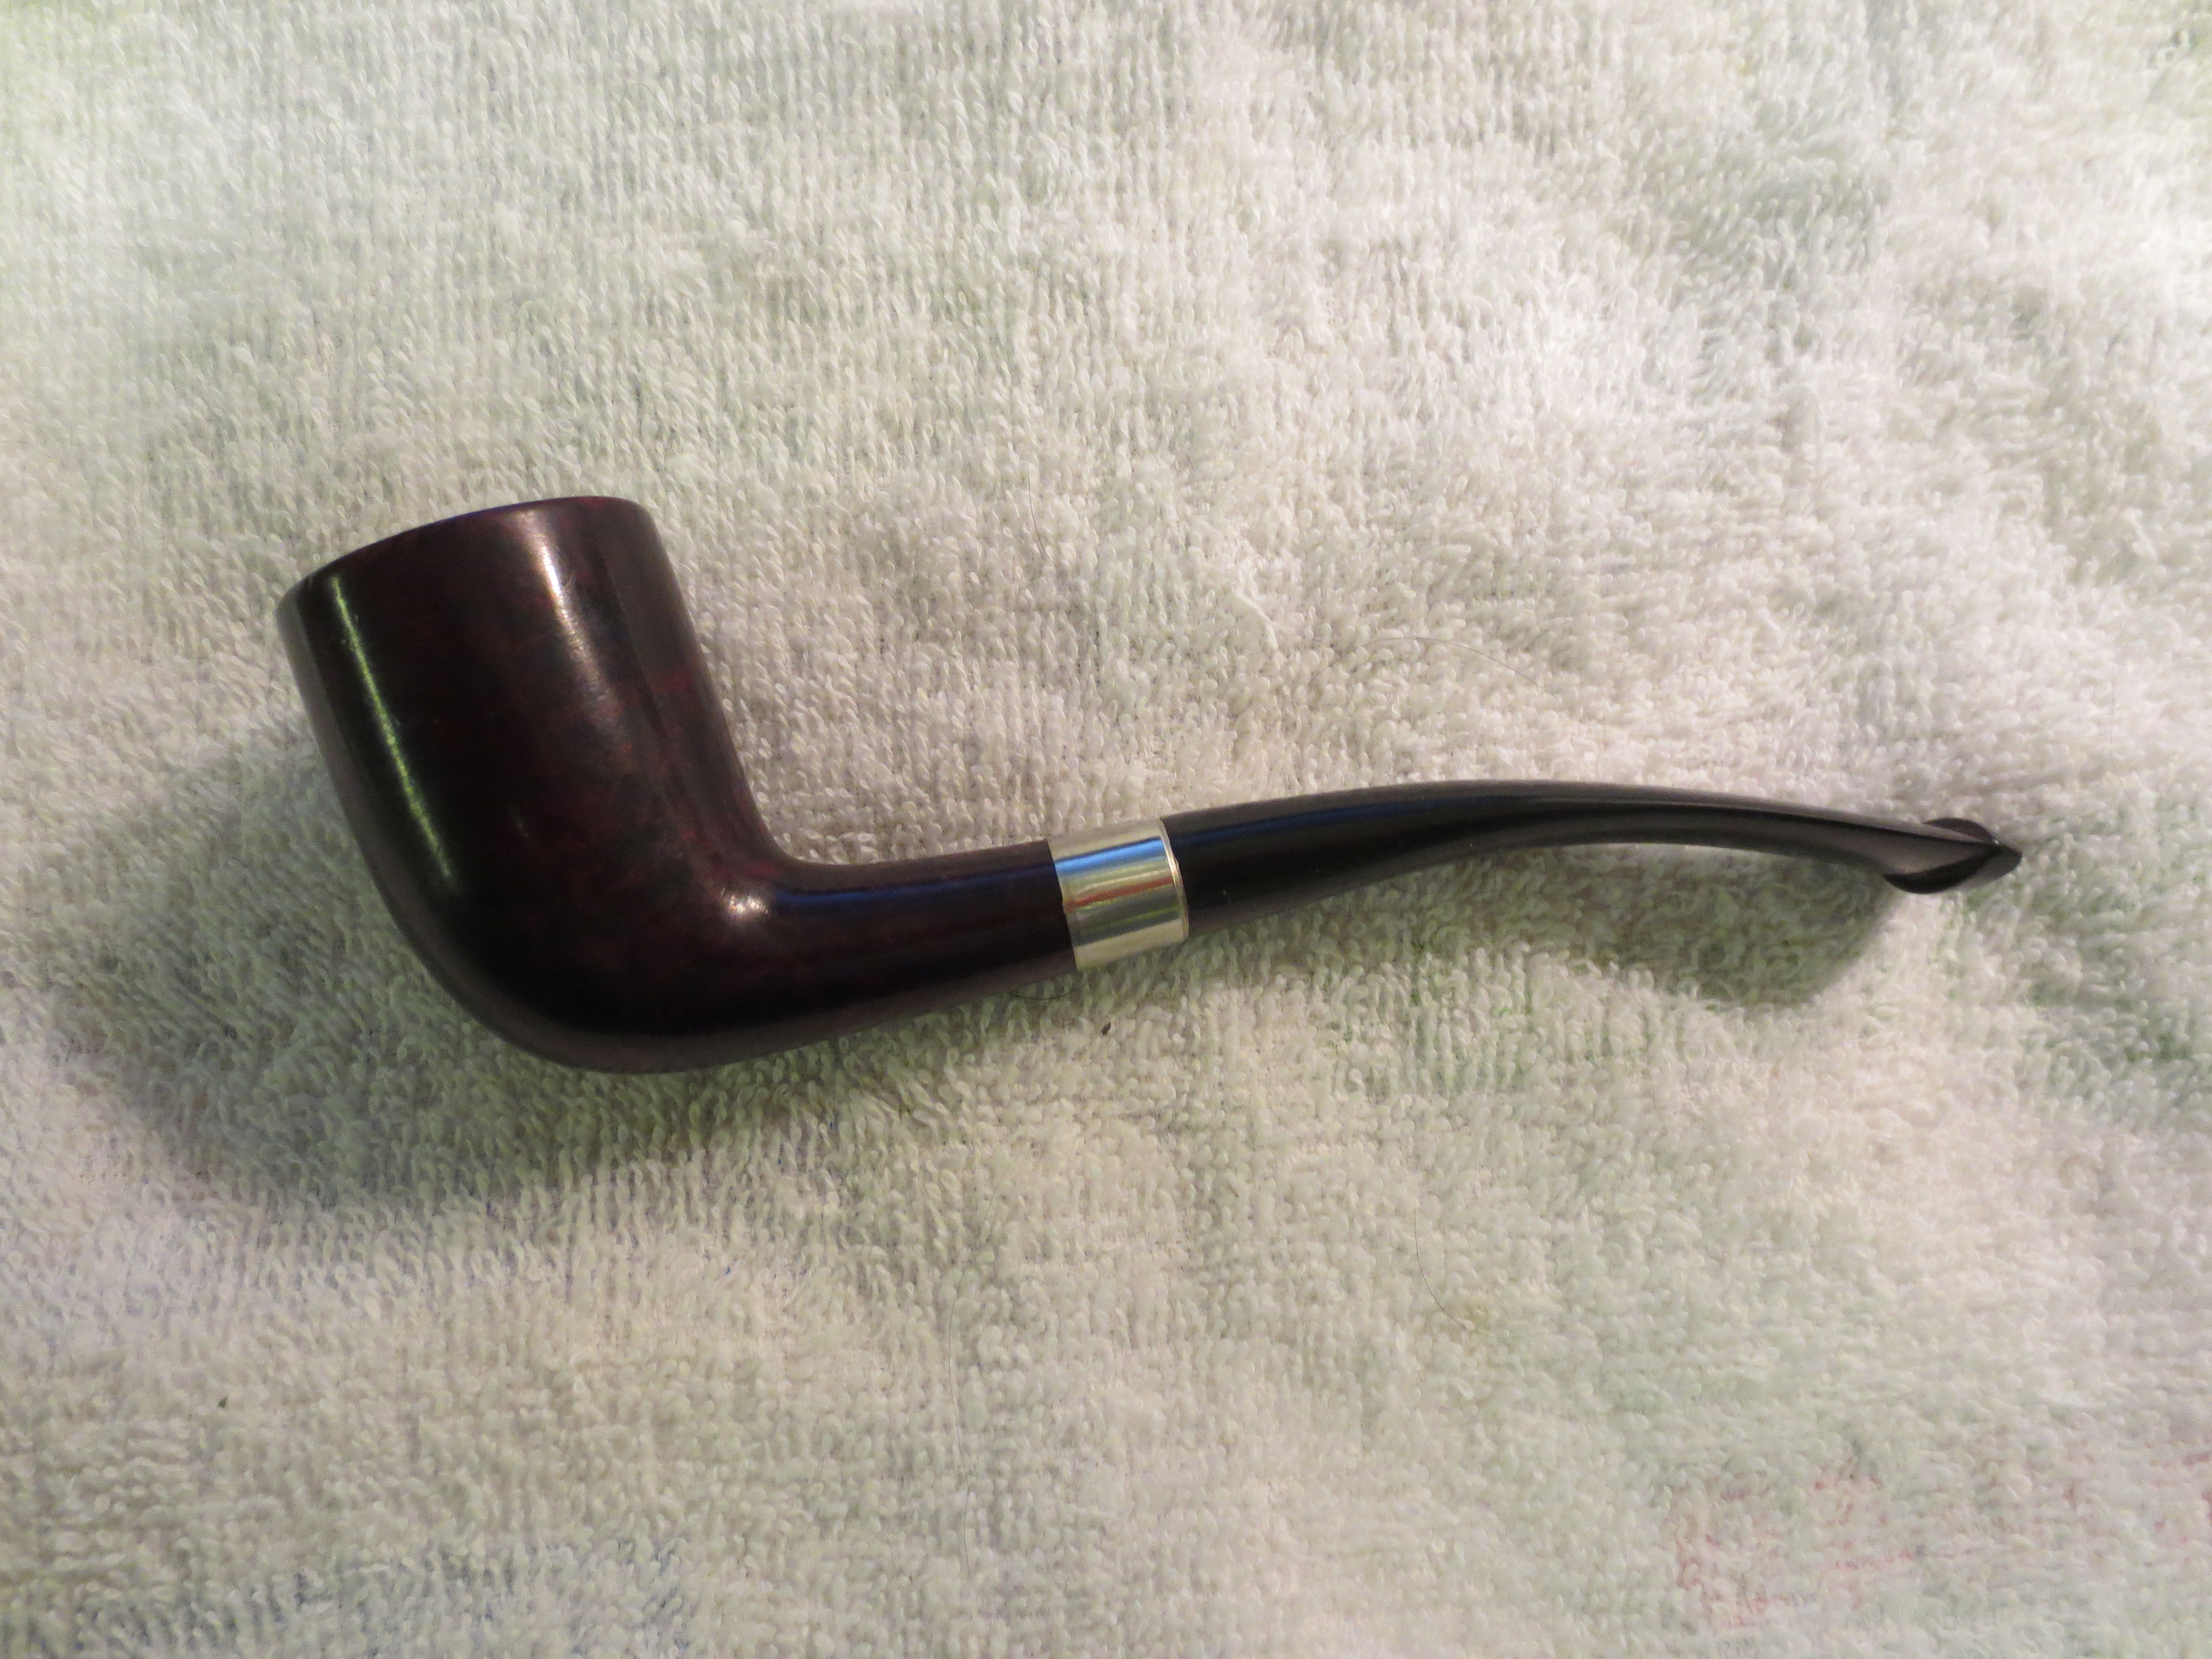
Though the fit was good and the pipe looked and the stem was getting smoother, it just seemed bland to me. There was something missing to the look that would dress up this pipe and take it beyond just a well fit stem and a darkly stained bowl. I decided to shape and press on a nickel band to dress up the shank. The band was not necessary as the shank and stem union was perfect and the shank was uncracked. It was solely done for decorative purposes – to add a bit of bling to the shank of the pipe and dress it up (in my opinion!). The next three photos show the newly banded shank and the fit and look of the stem in place. The delicate bend of the stem, the flow of the bowl and the band all work together to give this pipe a touch of elegance.


The next series of six photos show the progressive polishing of the new stem with micromesh sanding pads from 1500-12,000 grit. Each successive grit of micromesh sanding pad gives a deeper and more polished shine to the stem. It always amazes me to see the difference between the stem before the last three grits of micromesh (6000, 8000, 12000) and the previous grits.


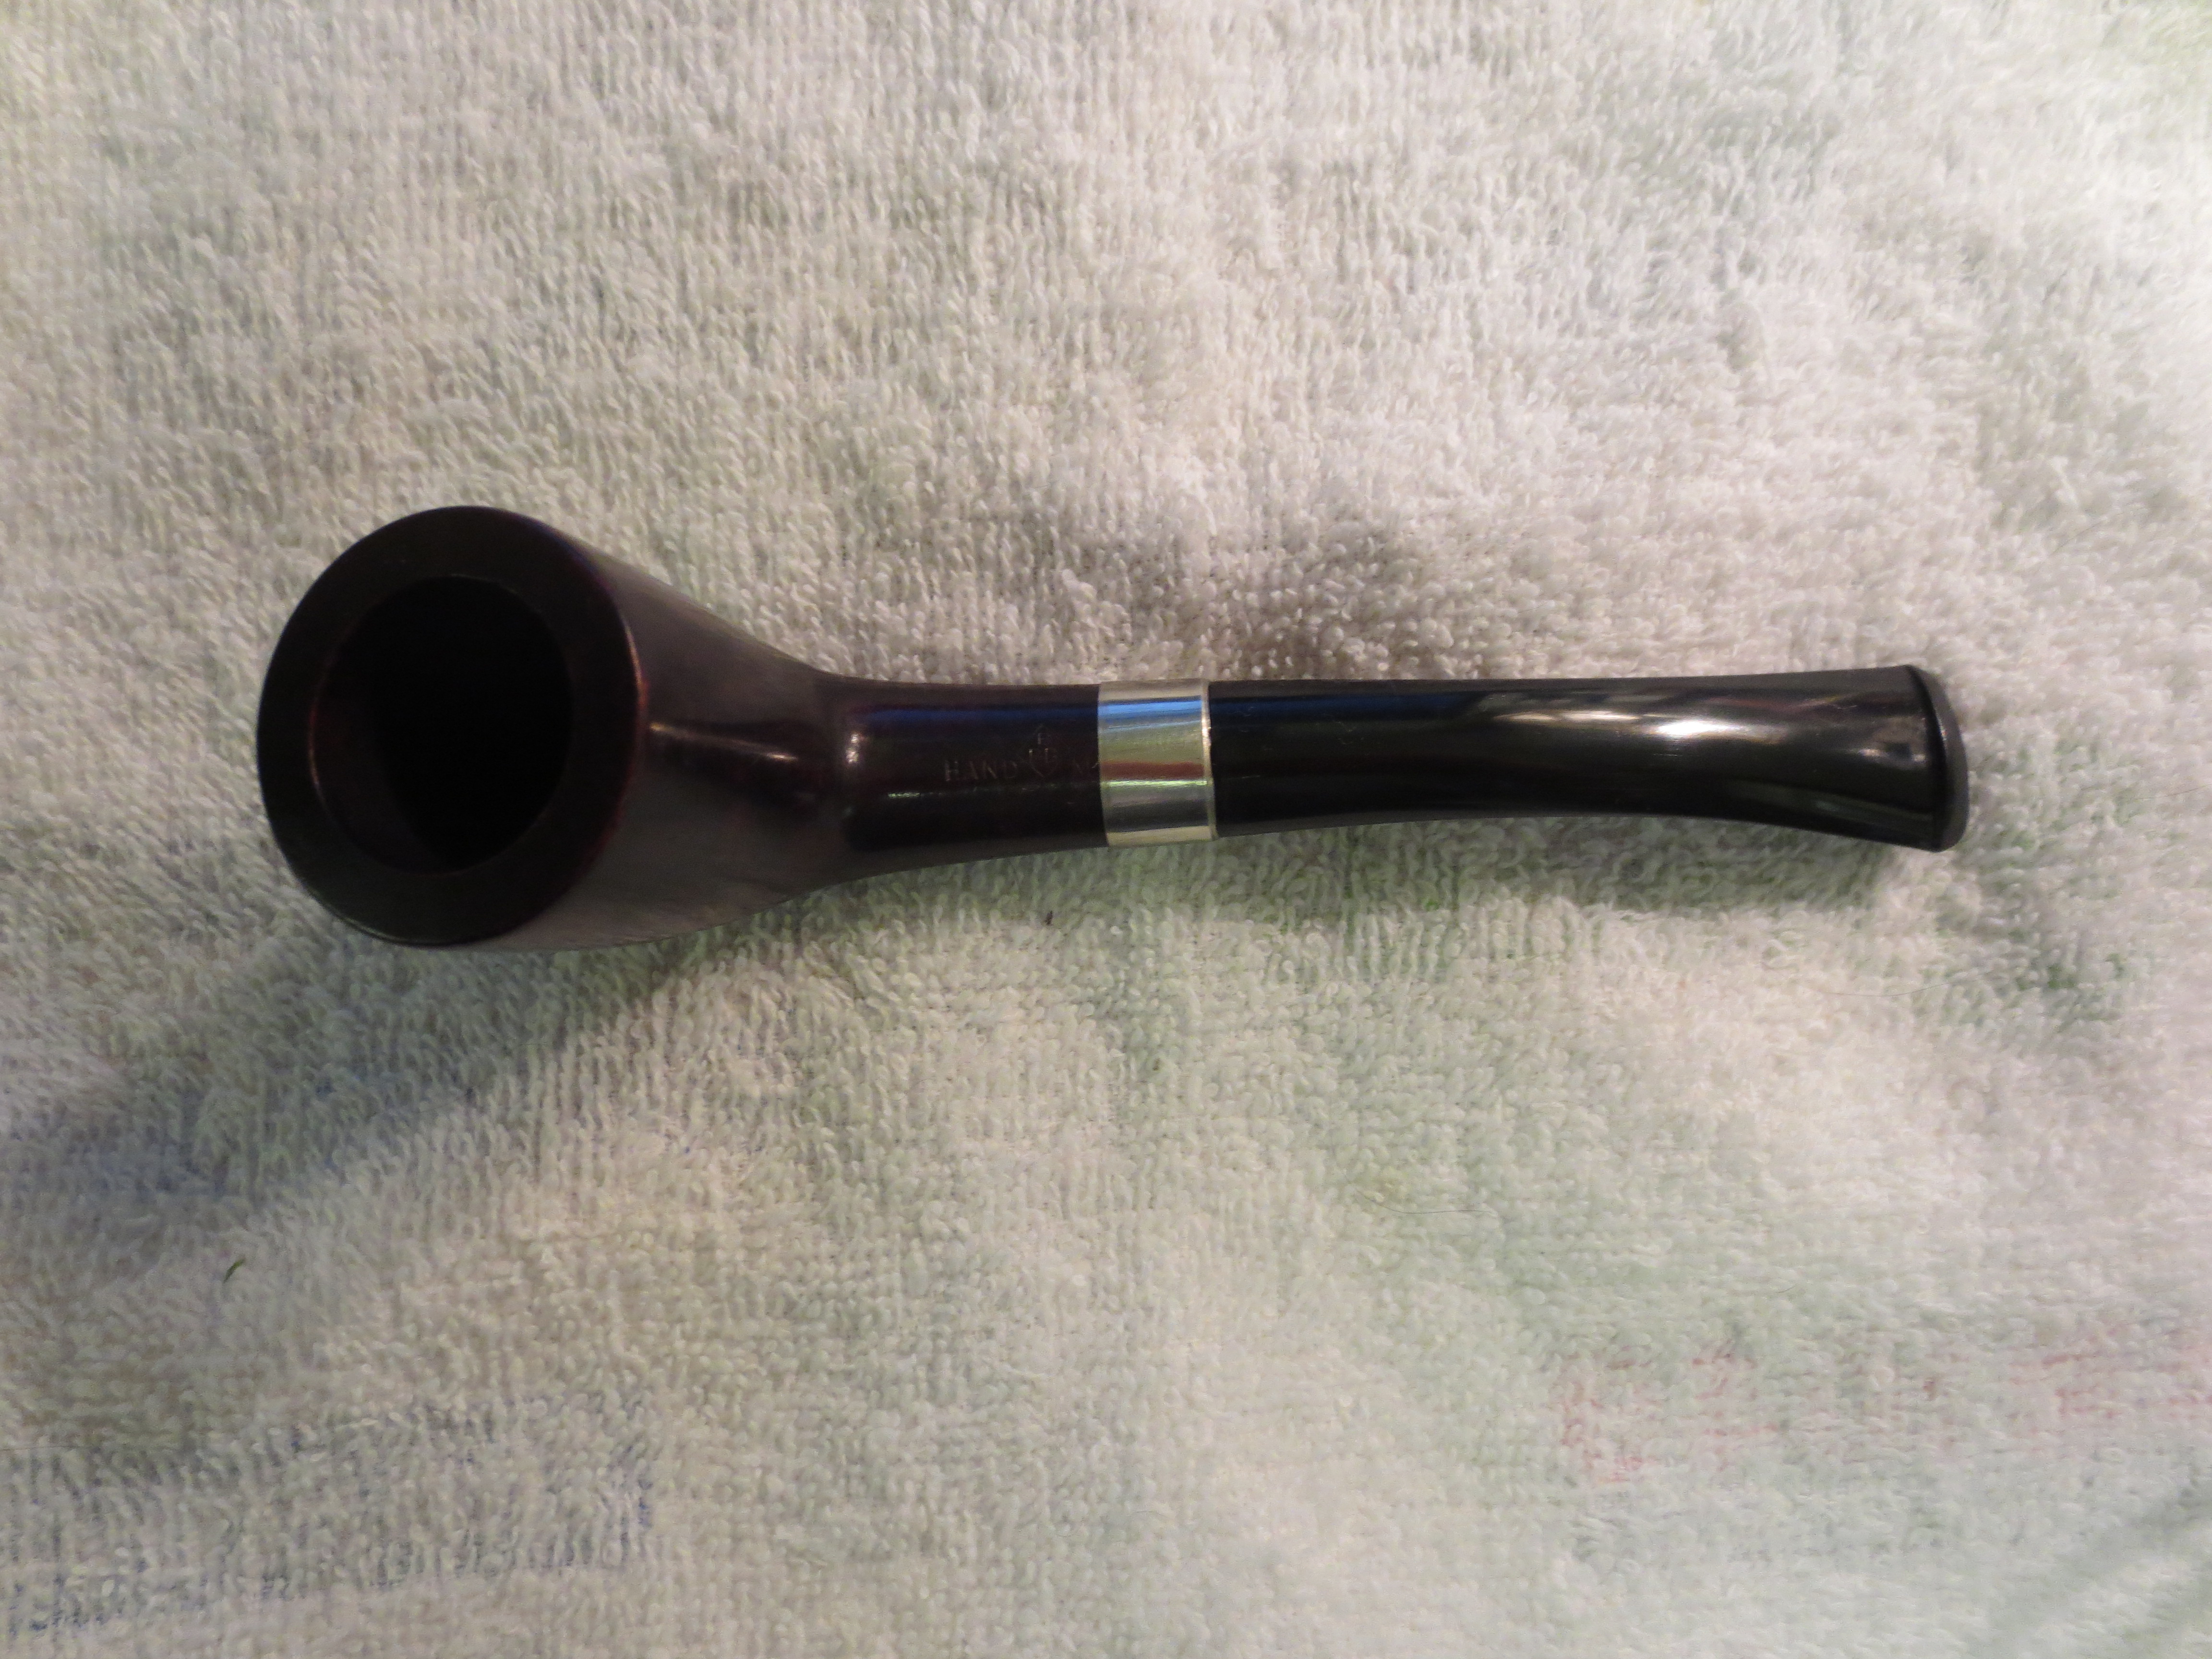
Once I finished with the micromesh pads I took it to the buffer and buffed the bowl and stem with White Diamond polish on the wheel. The next two photos show the pipe after the buff. The shine is almost glass like by this point in the process. All that remains is to buff on several coats of carnauba wax and polish the metal band with metal polish.


The next four photos show the finished pipe. To me it has a gentle elegance to the shape and the bend. The slender stem and the bend make the pipe sit well in the mouth. The light weight makes this a likely clencher. The deep shine in the bowl and stem give it the look of a new pipe – which for all intents and purposes it is. This Hand Made BBB has come back to life to fulfill the purposes for which it was originally made.