Tag Archives: stem polishing

Comoys 498 Extraordinaire Restoration


Many pipe smokers or collectors (I consider myself both) have a “Holy Grail” list of pipes they would like to own. My list totals five and this year I was fortunate to have acquired two from that list within six months. My five are highly sought after and fully restored examples are most likely beyond my meager pipe fund budget. My best bet to acquire any of these models is to find a pipe in need of restoration. Even then, I’m competing with collectors all over the world.

Two pipes on my list are Comoys Extraordinaire models. The Extraordinaire line is described in Pipedia as:

Extraordinaire. This designation was given to any pipe that was out of the ordinary in size or grain. The E/O was introduced in the 1930s, and “Extraordinaires” can be found with no other designation or also stamped, for instance, “Blue Riband” or “London Pride.”

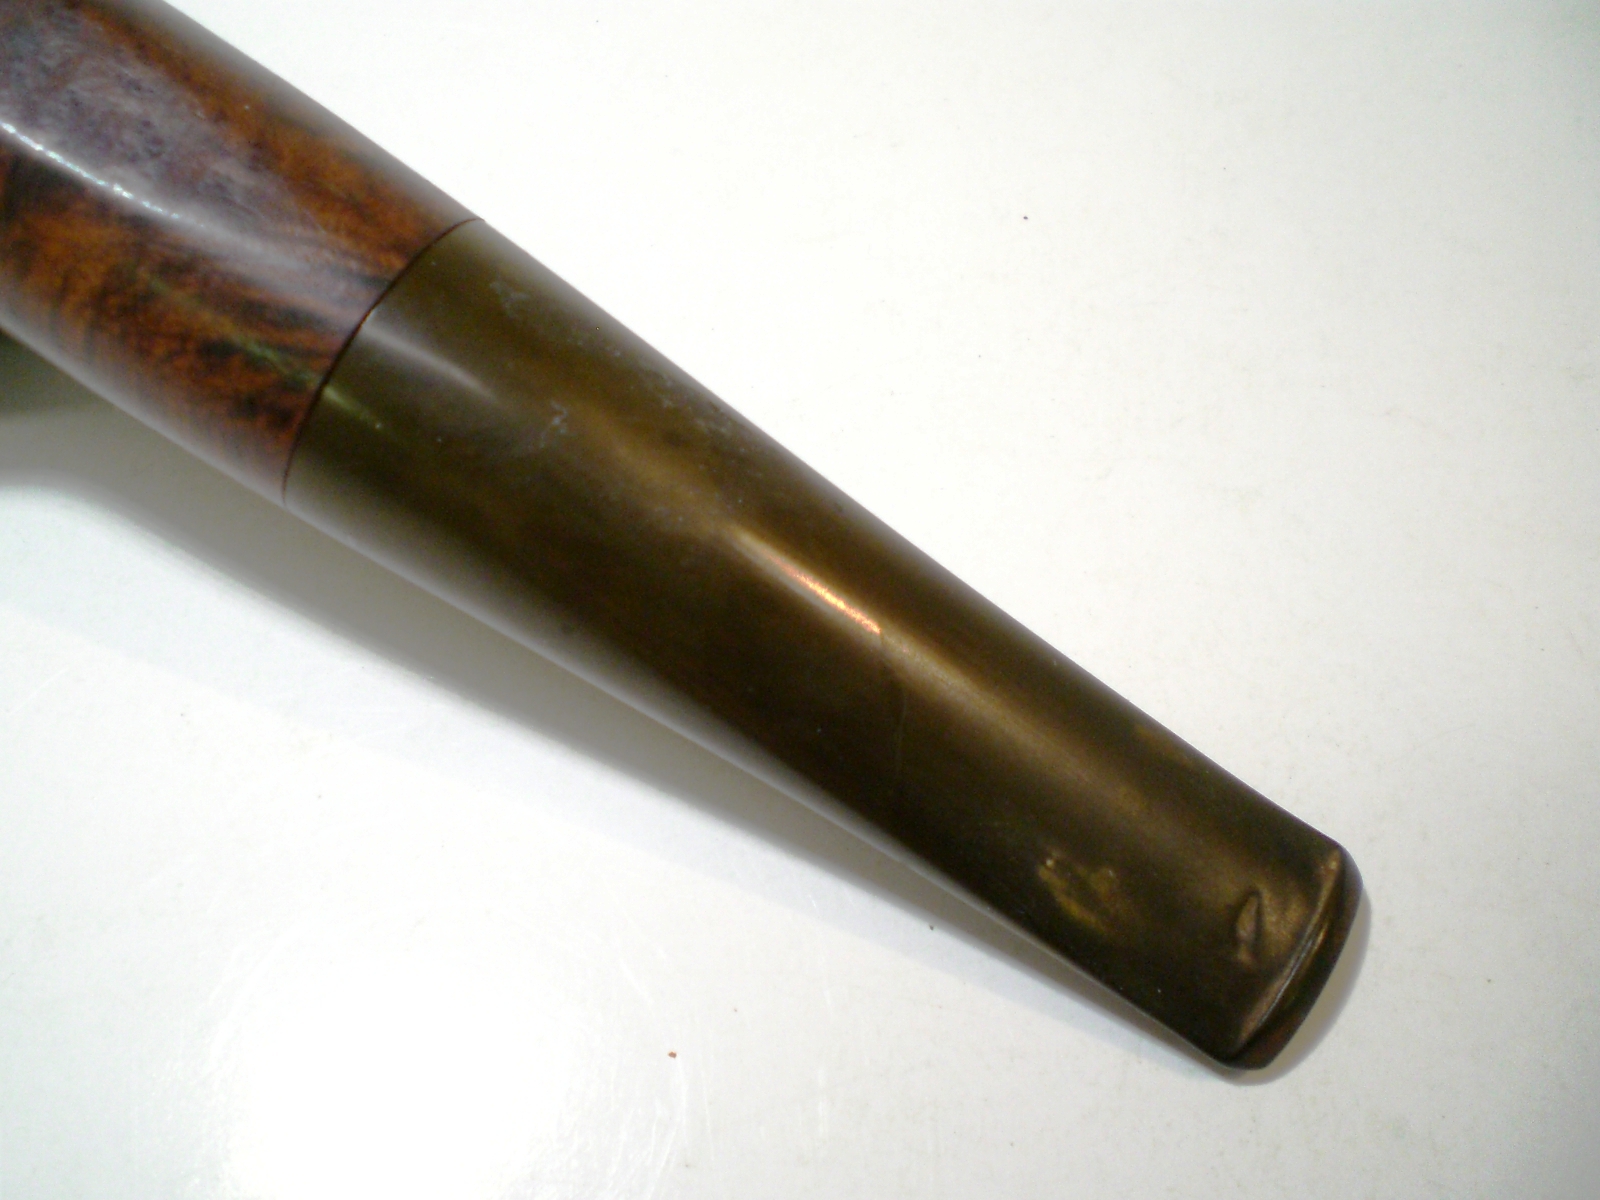
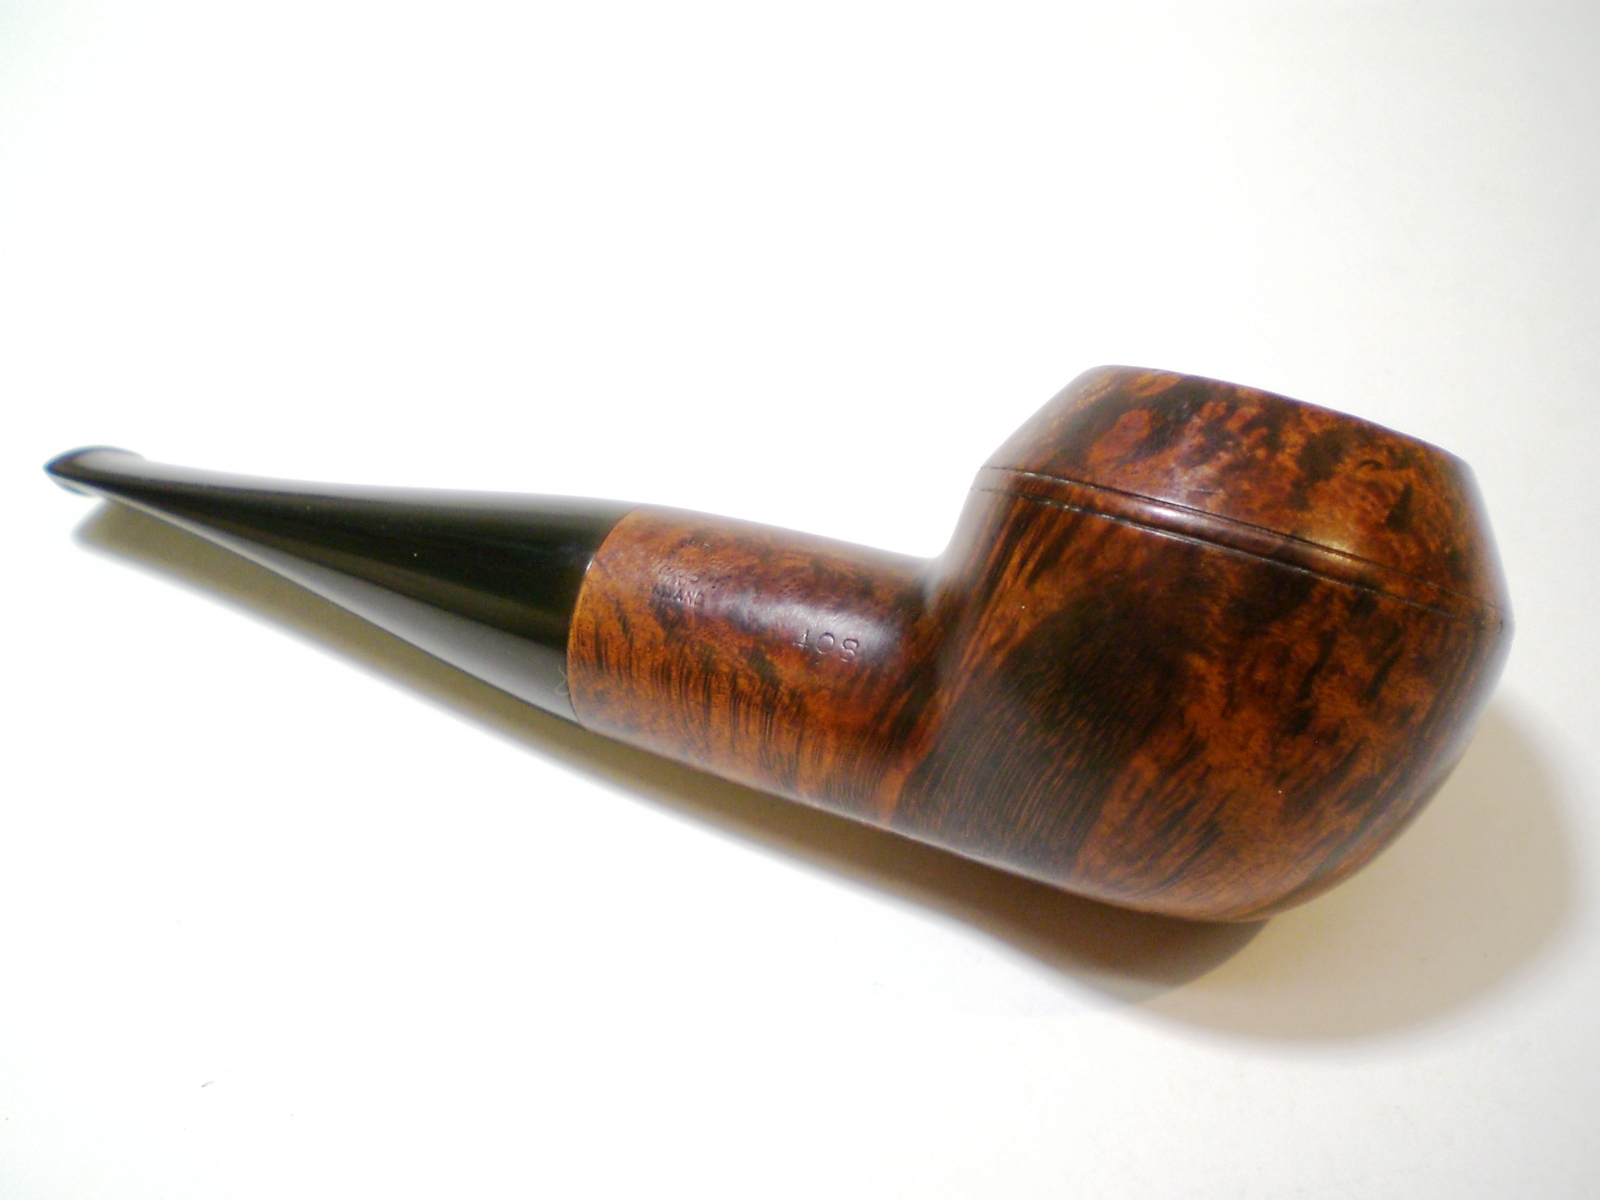
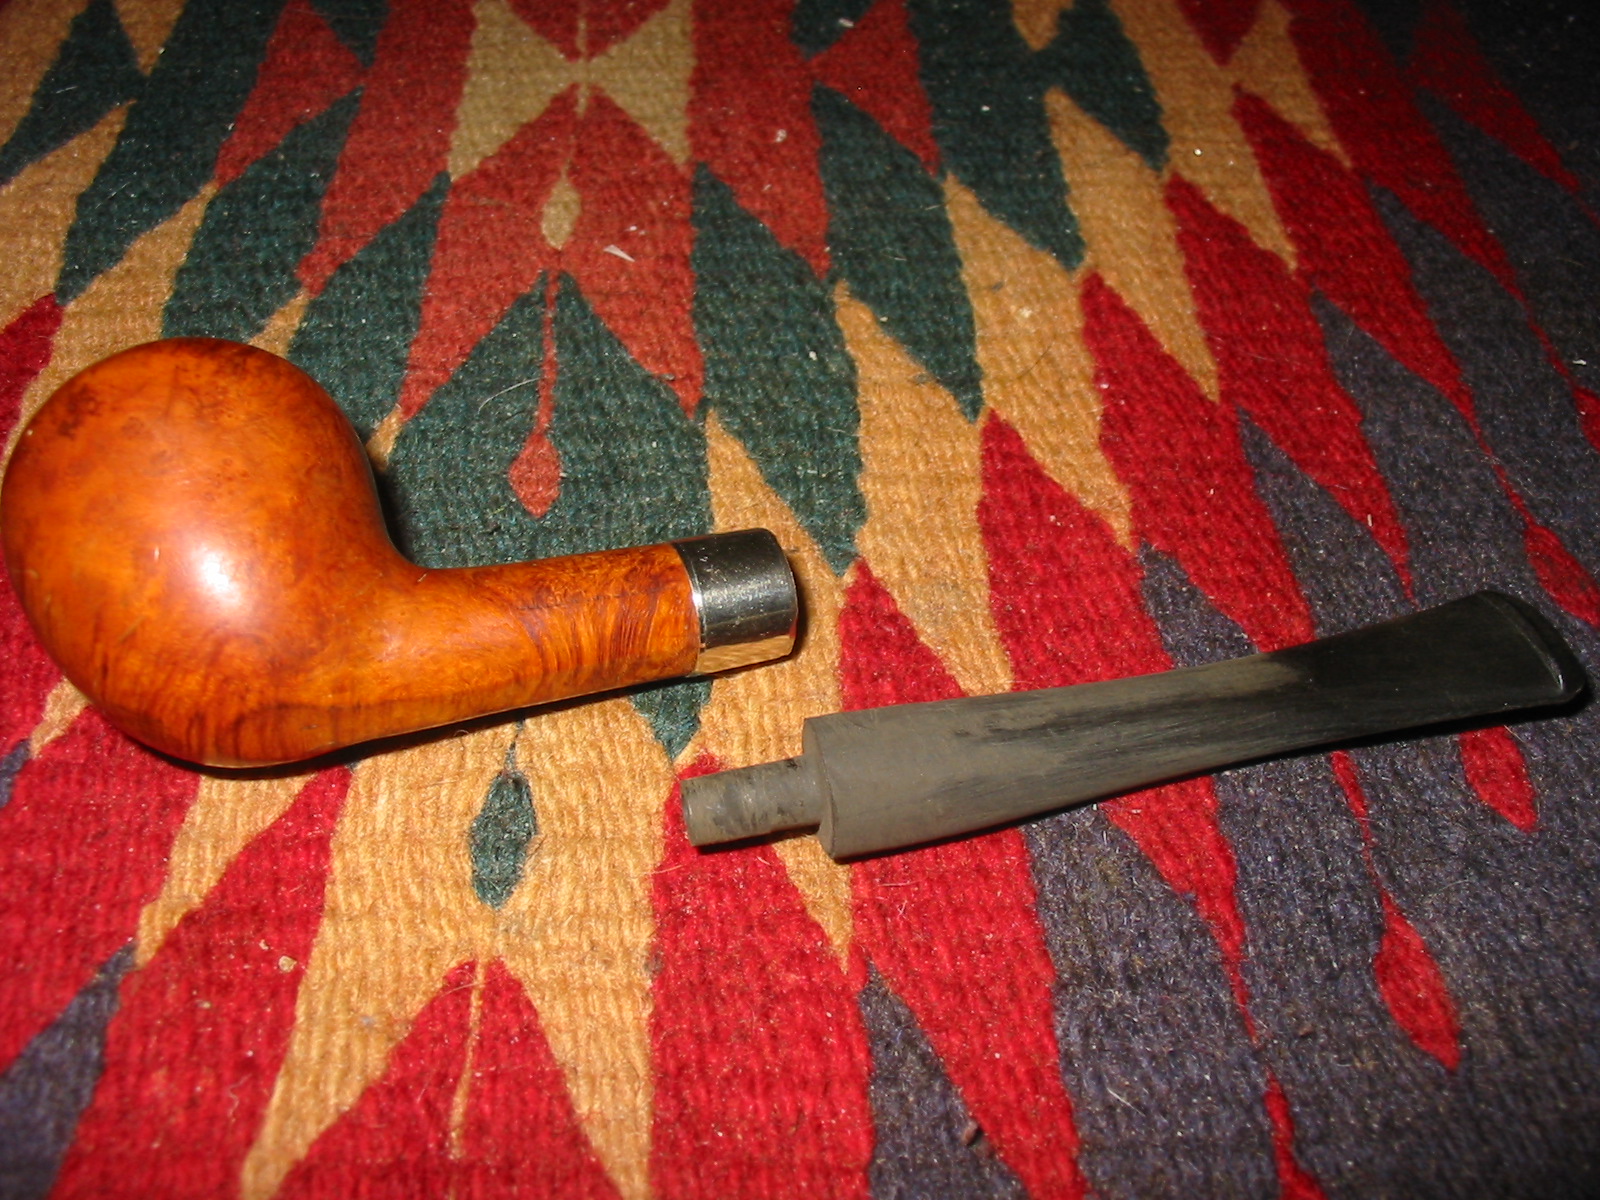
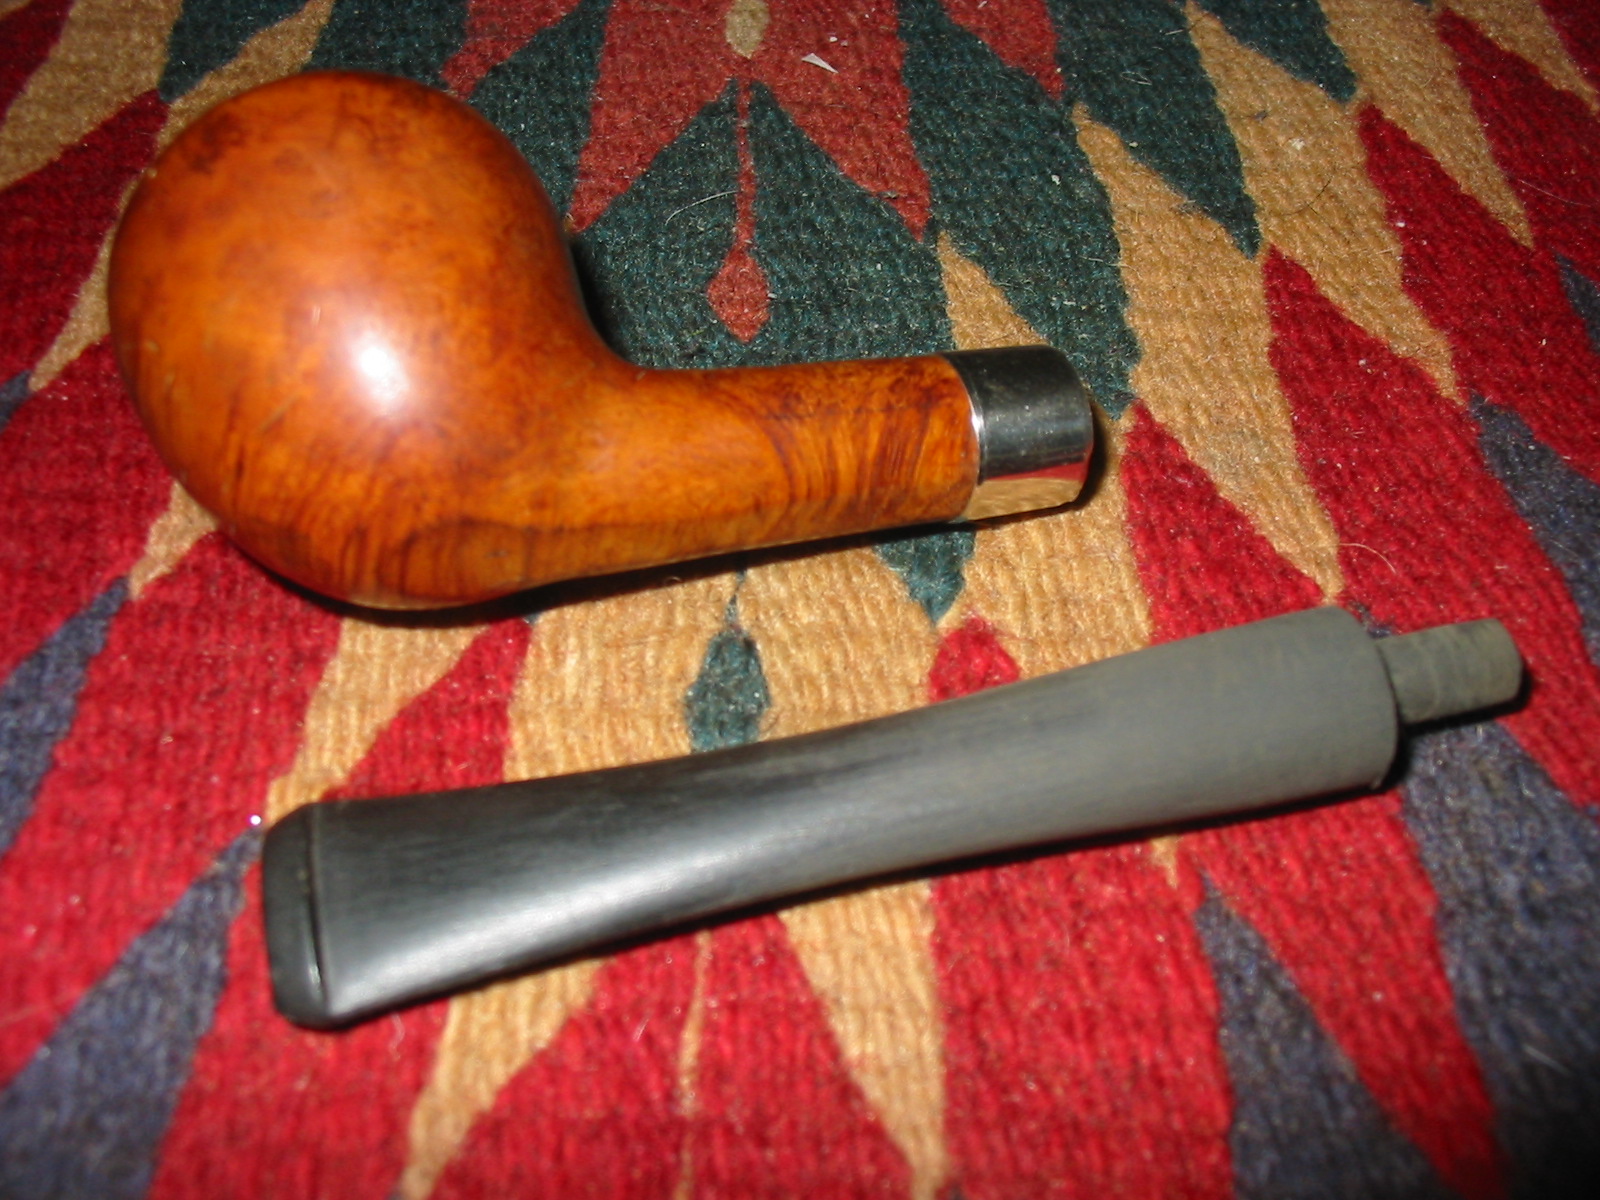
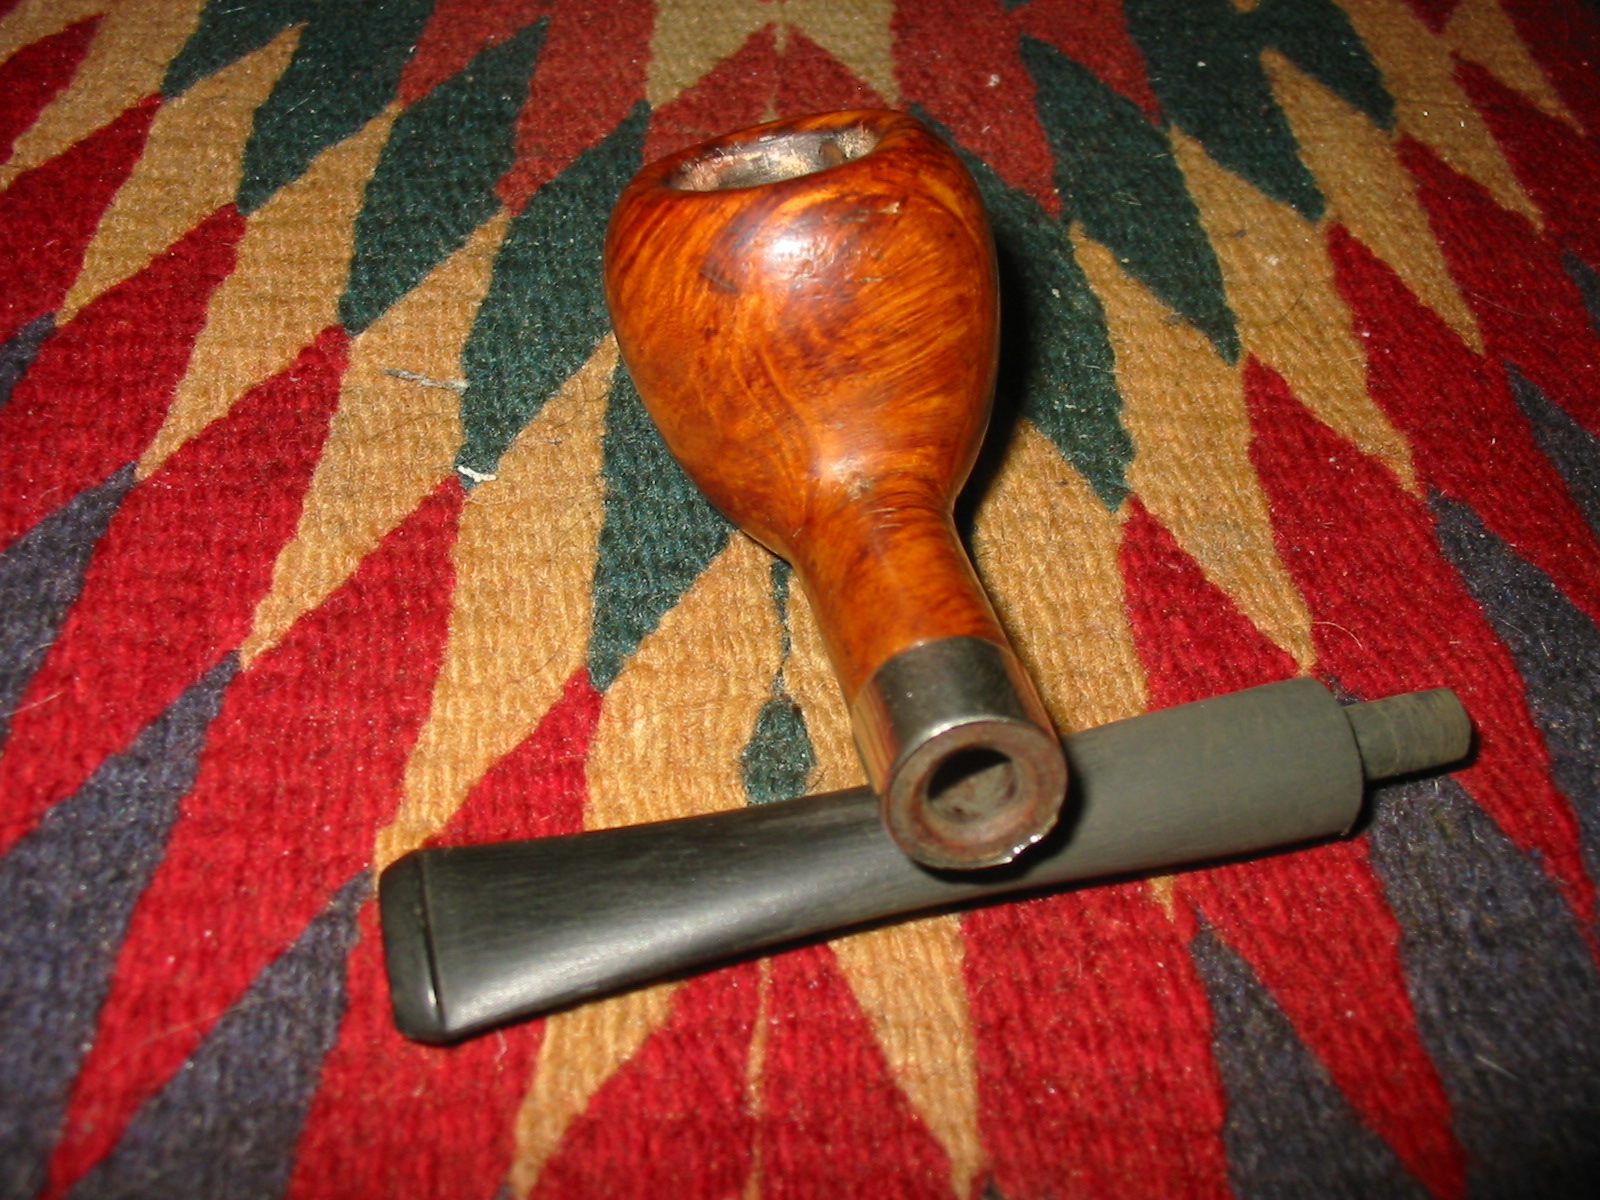
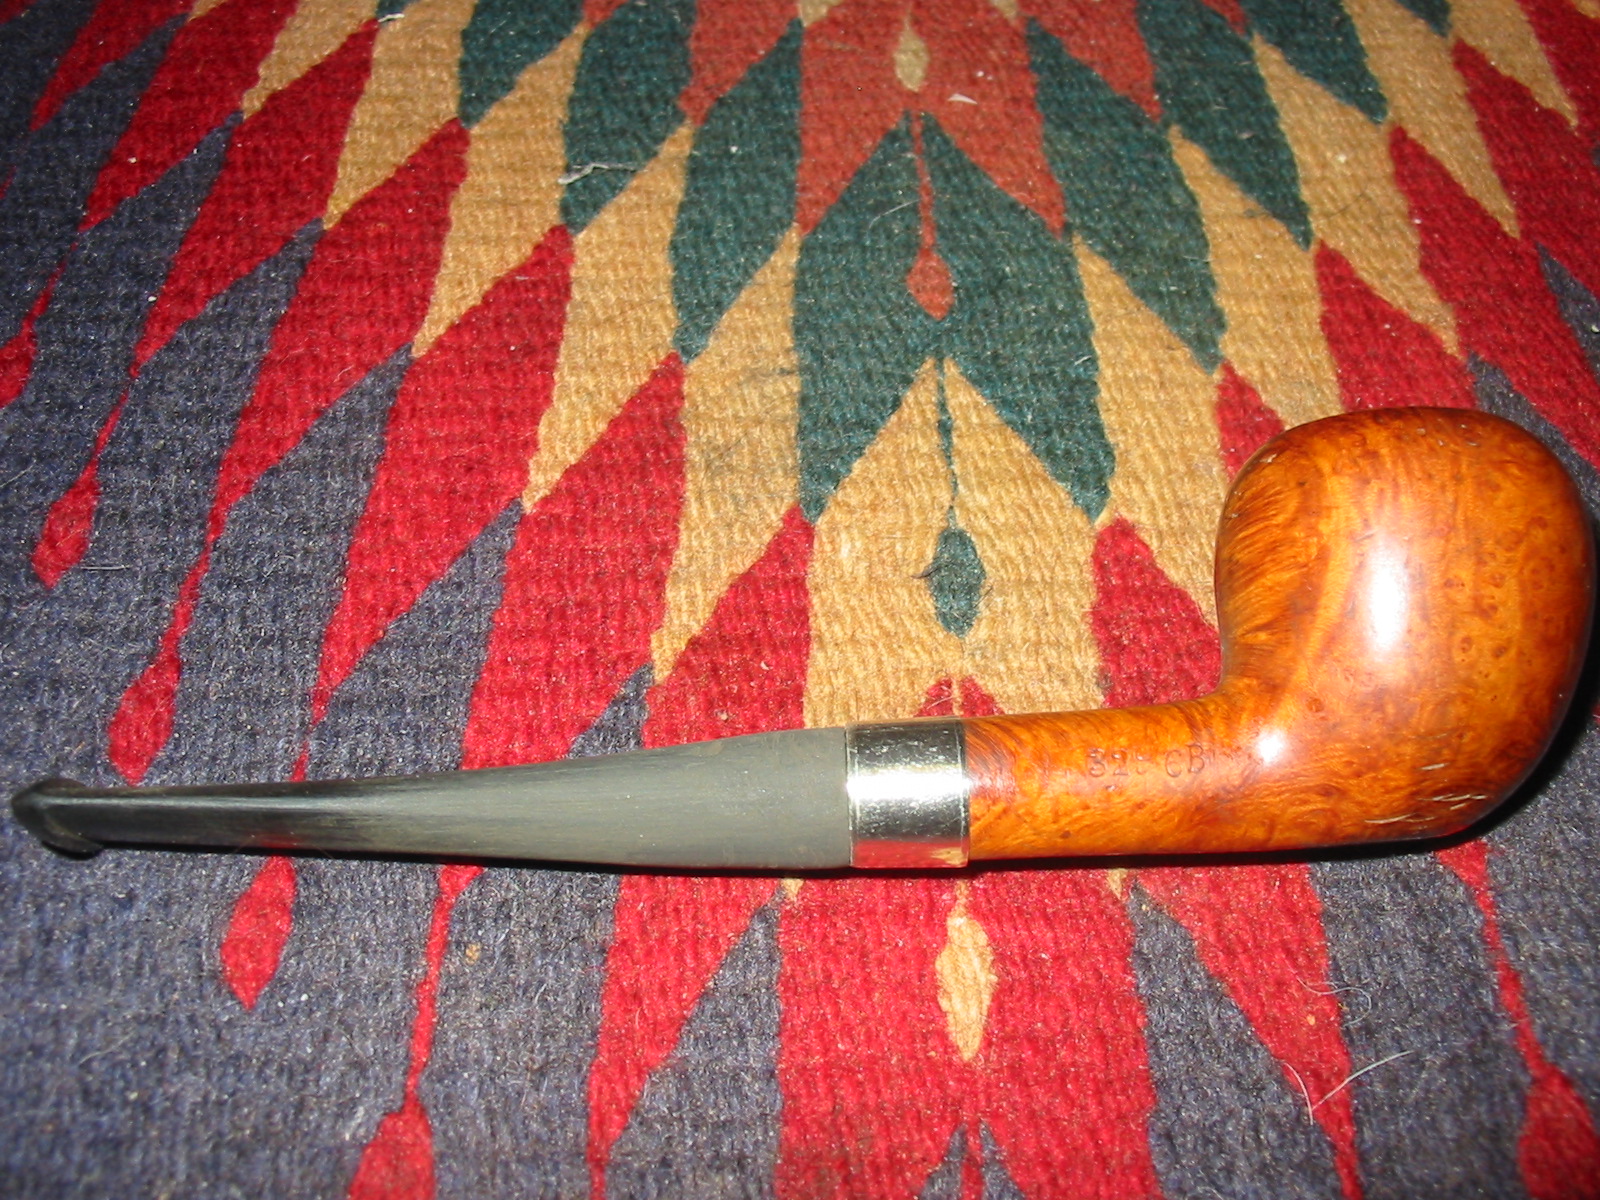
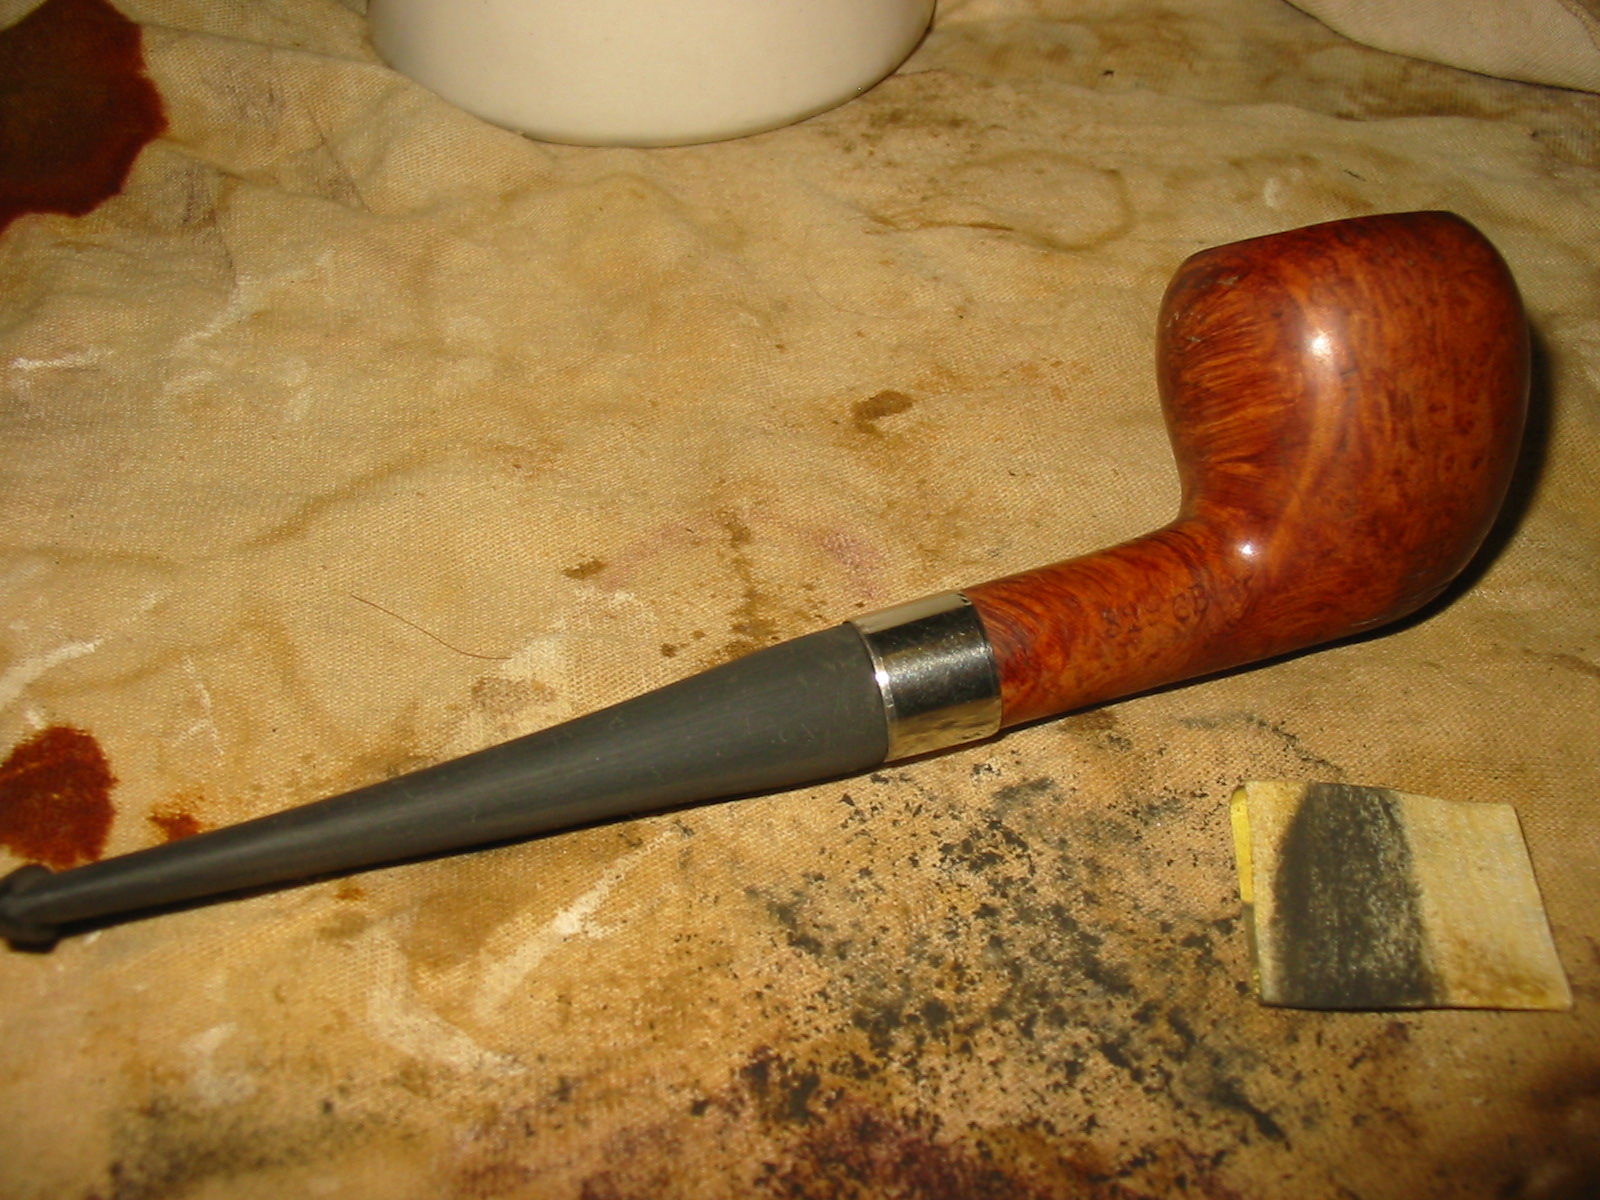
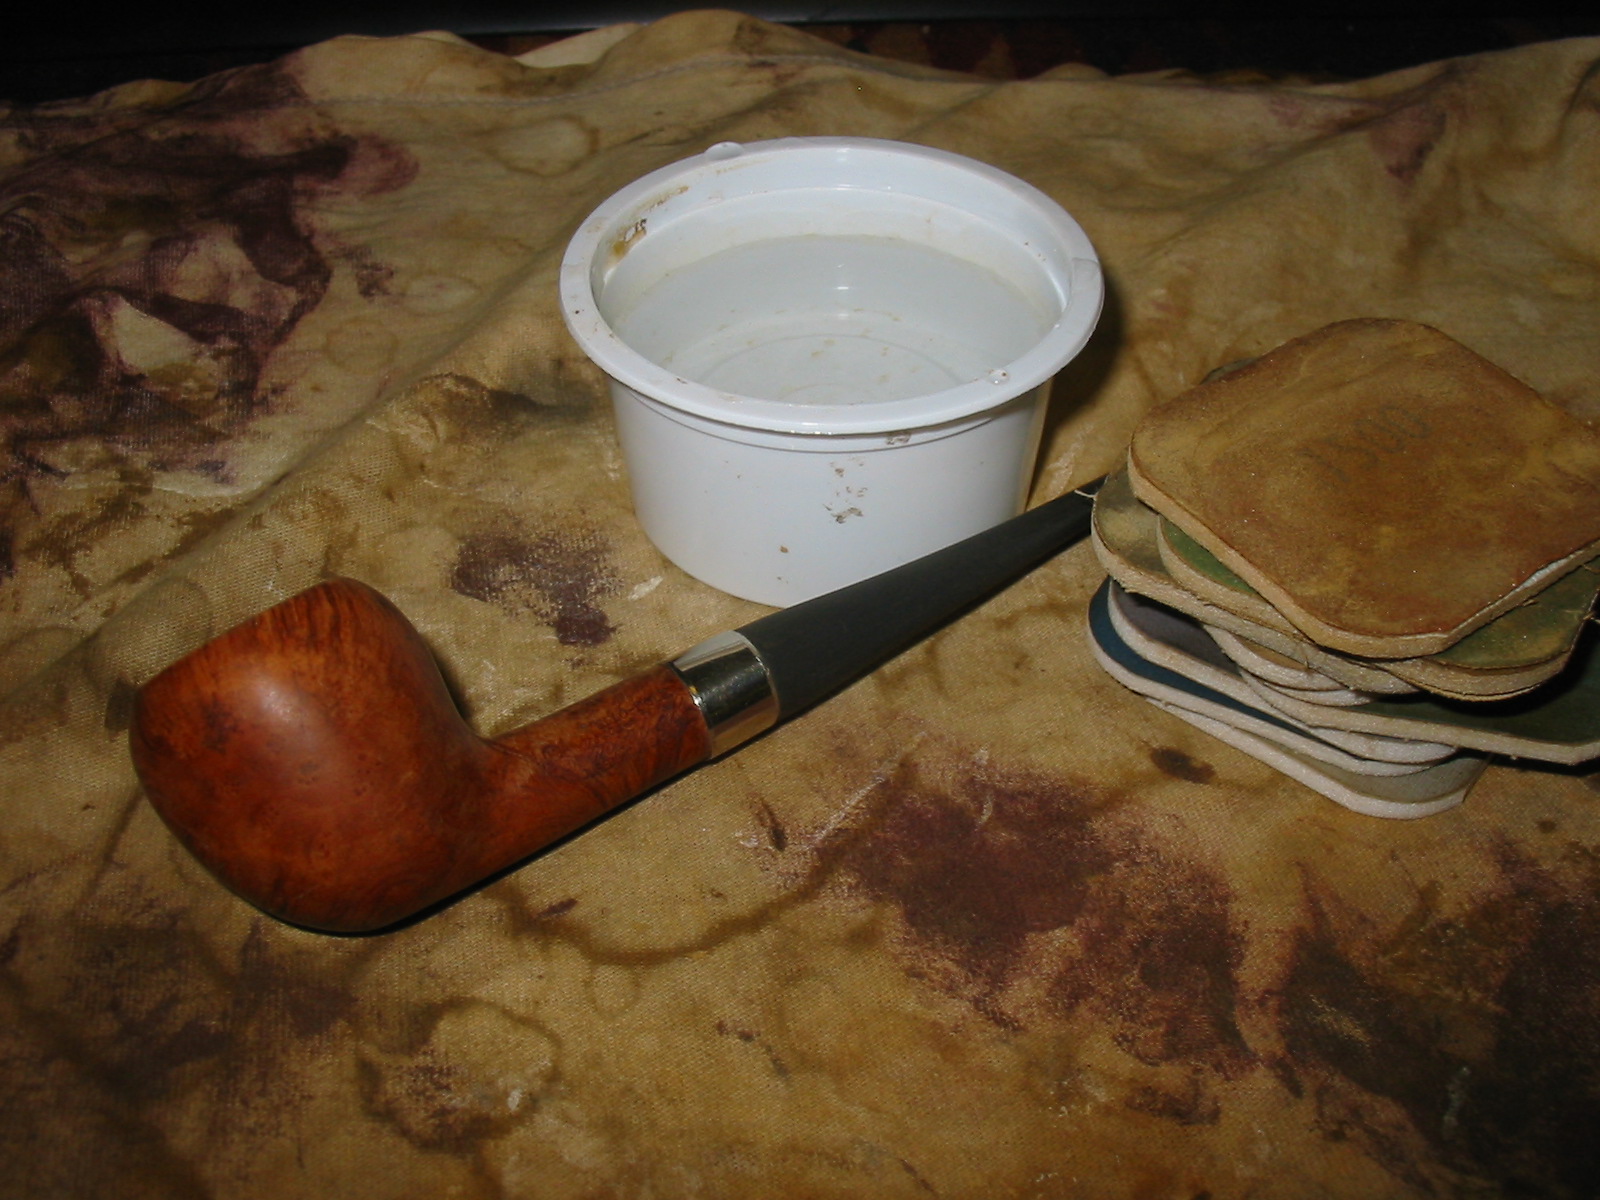
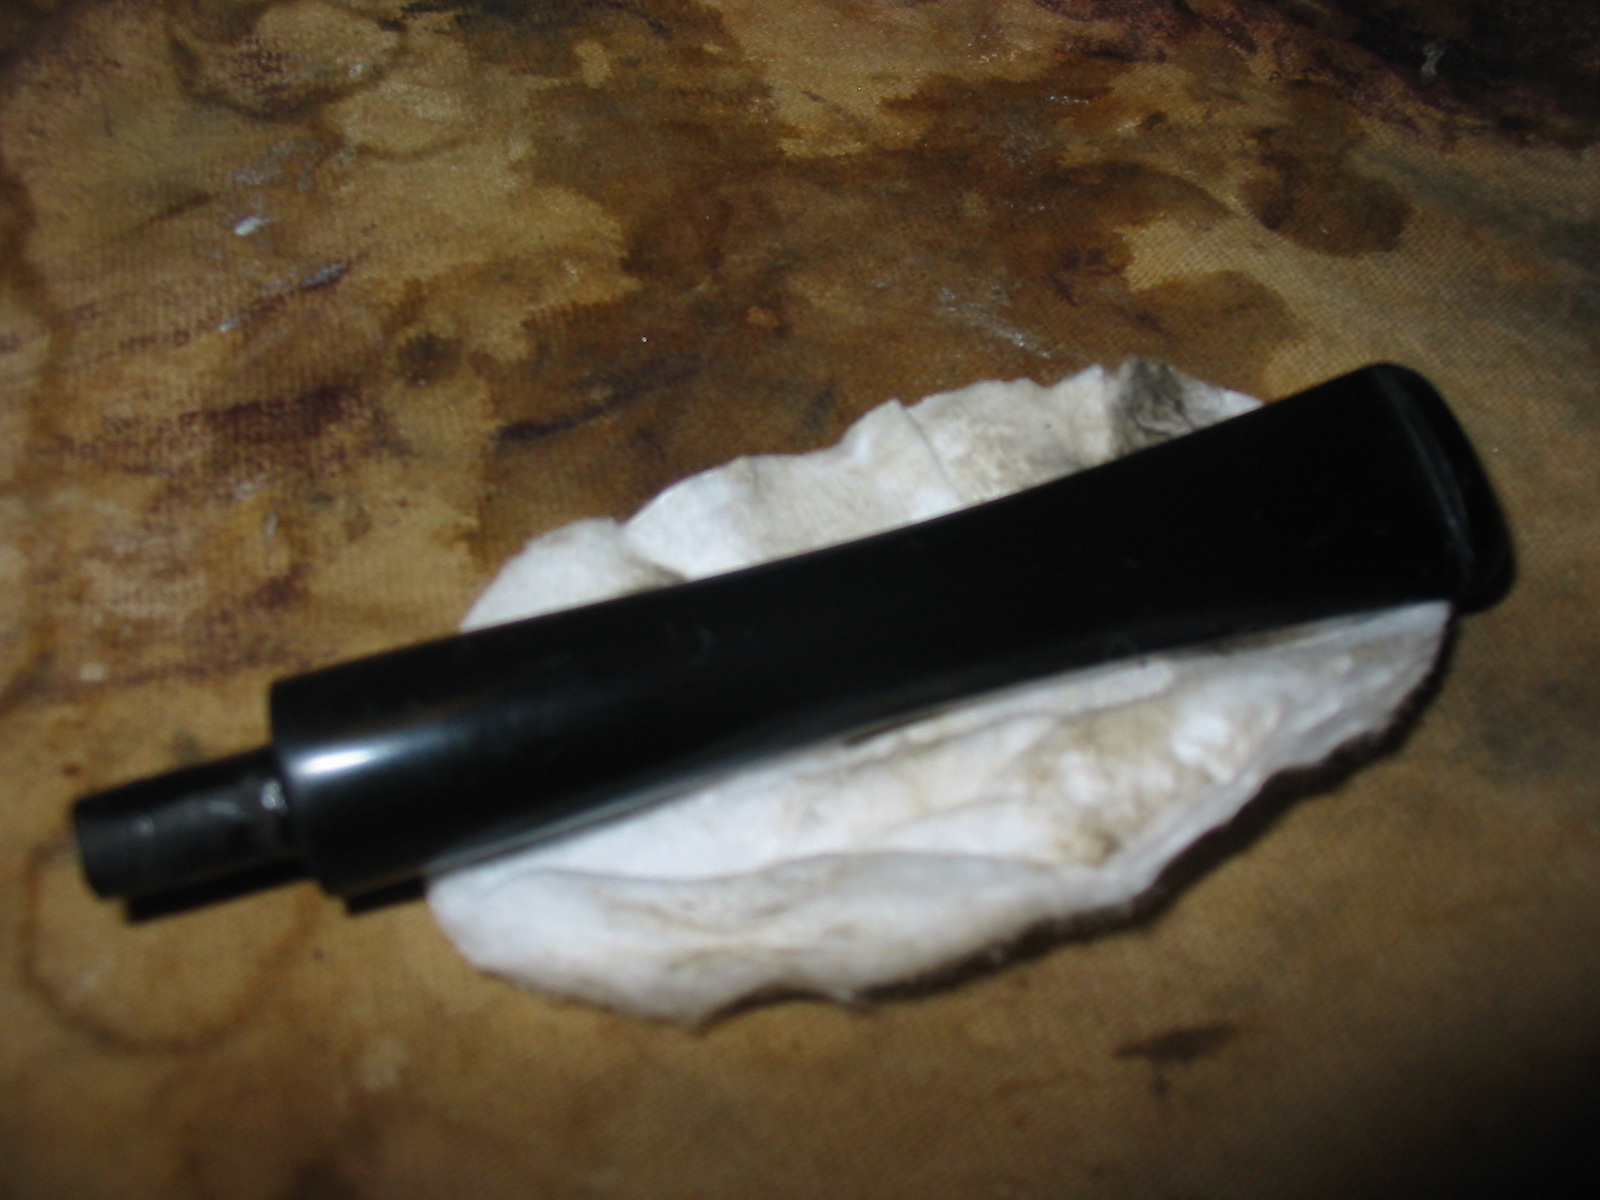
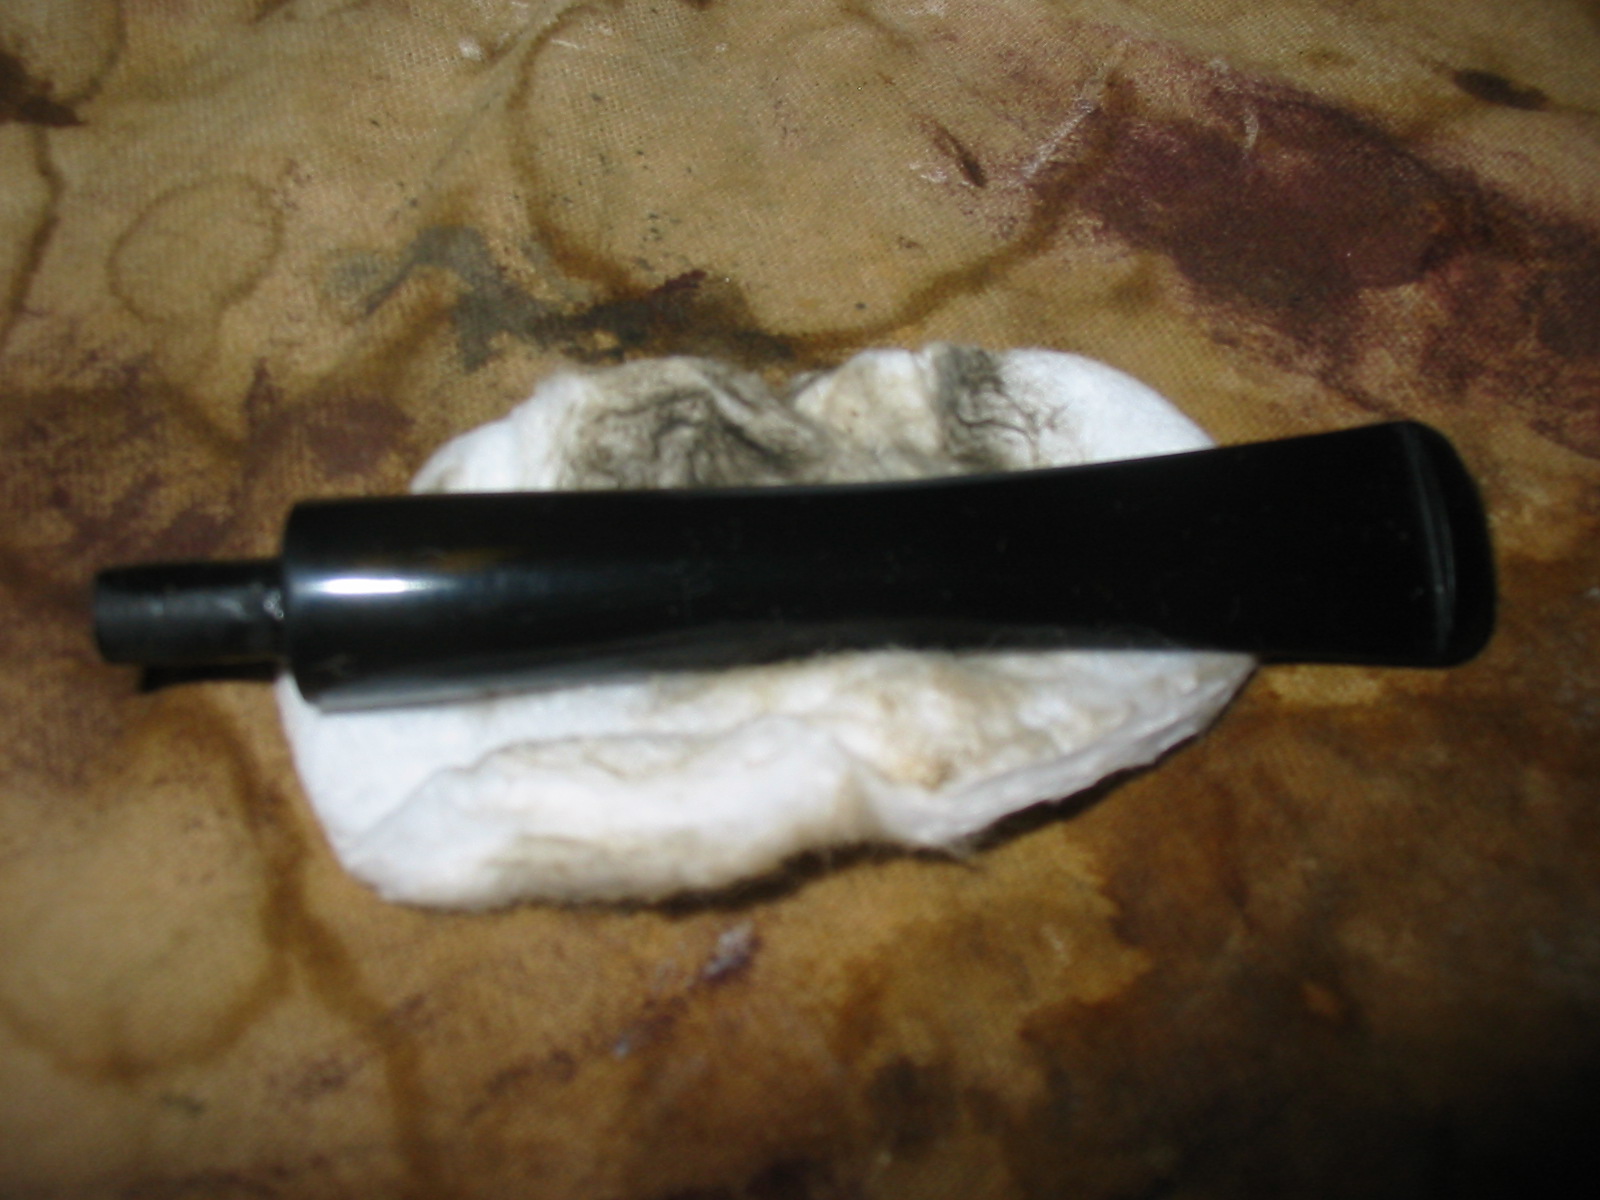
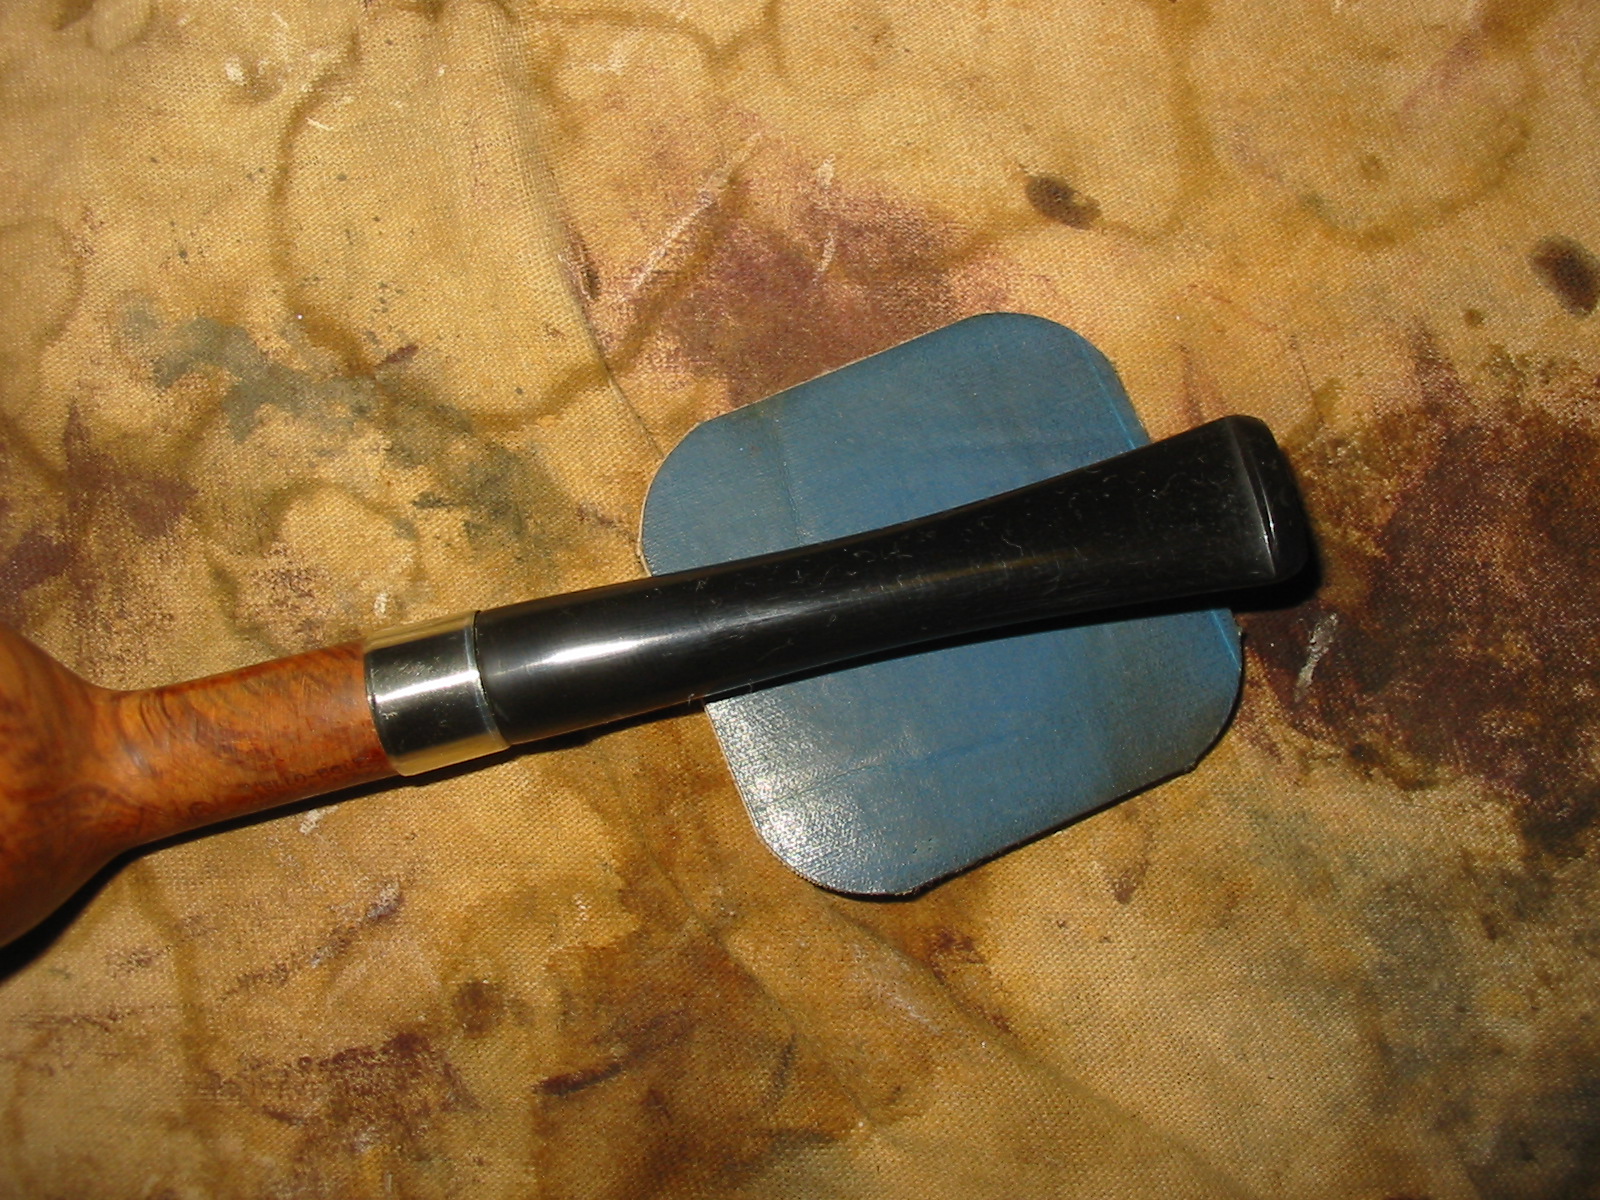
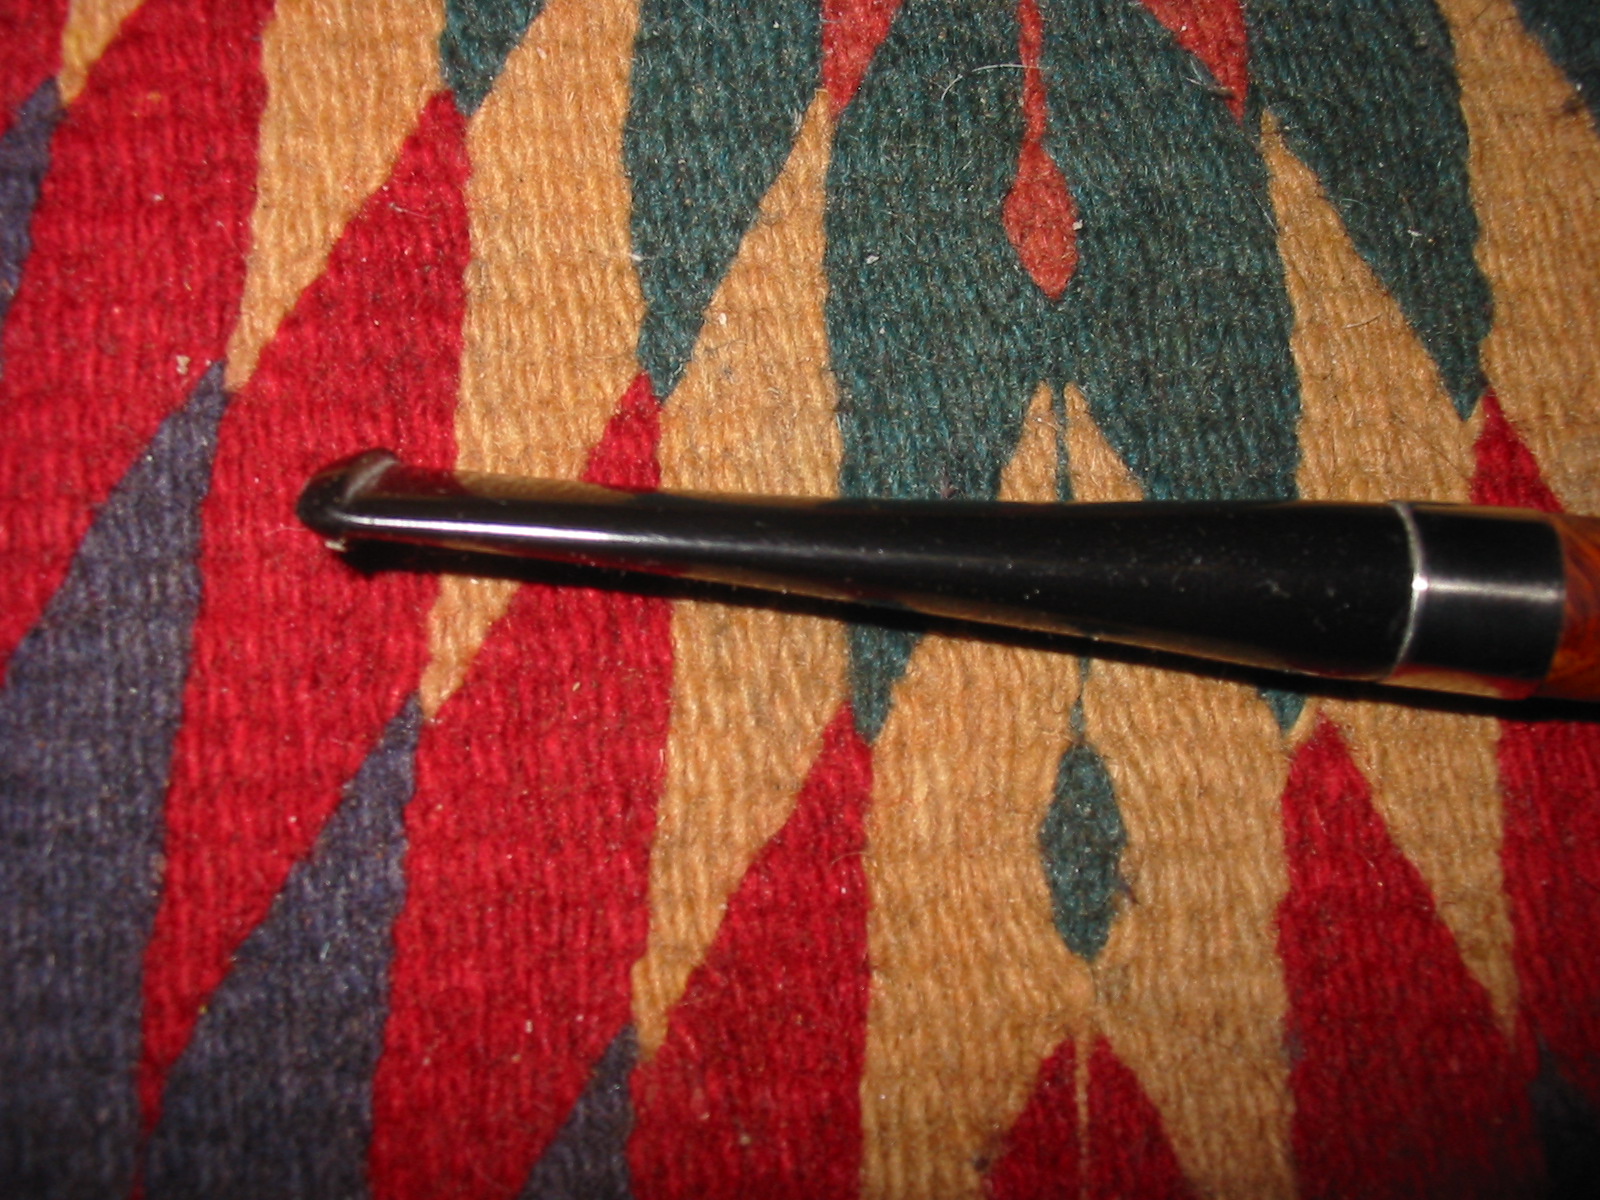
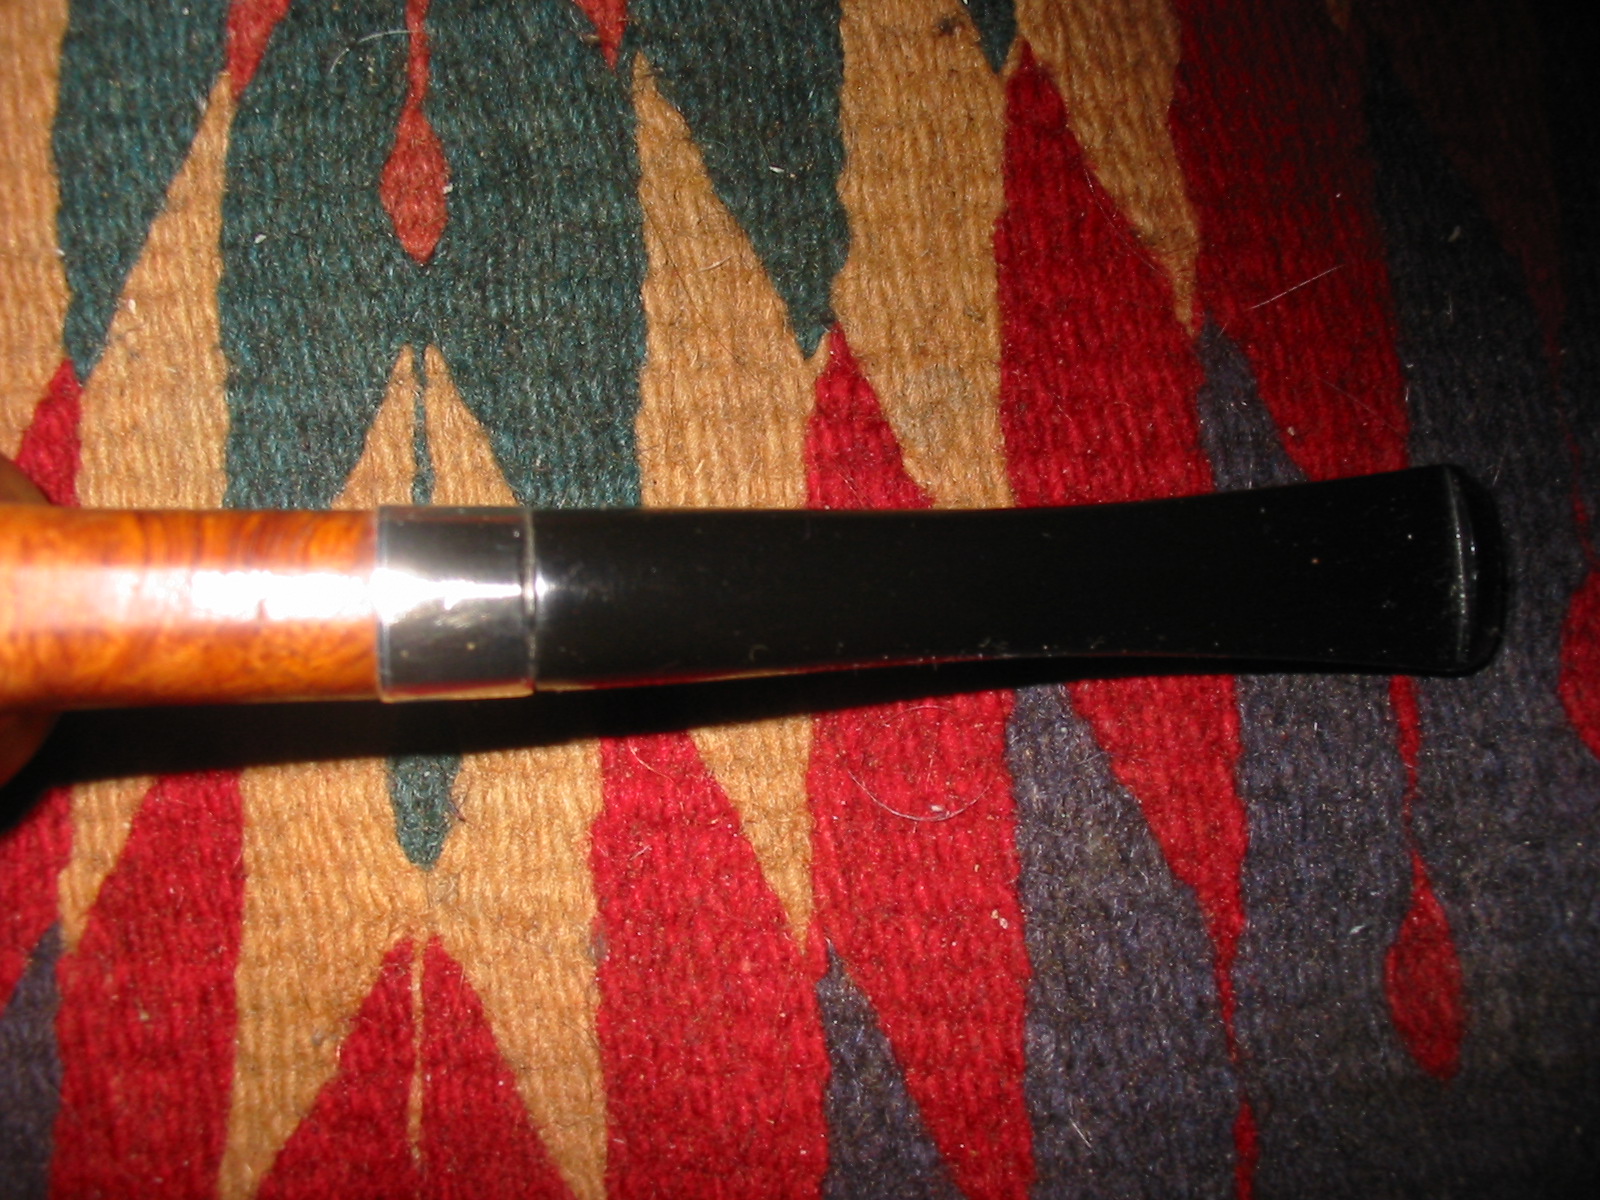
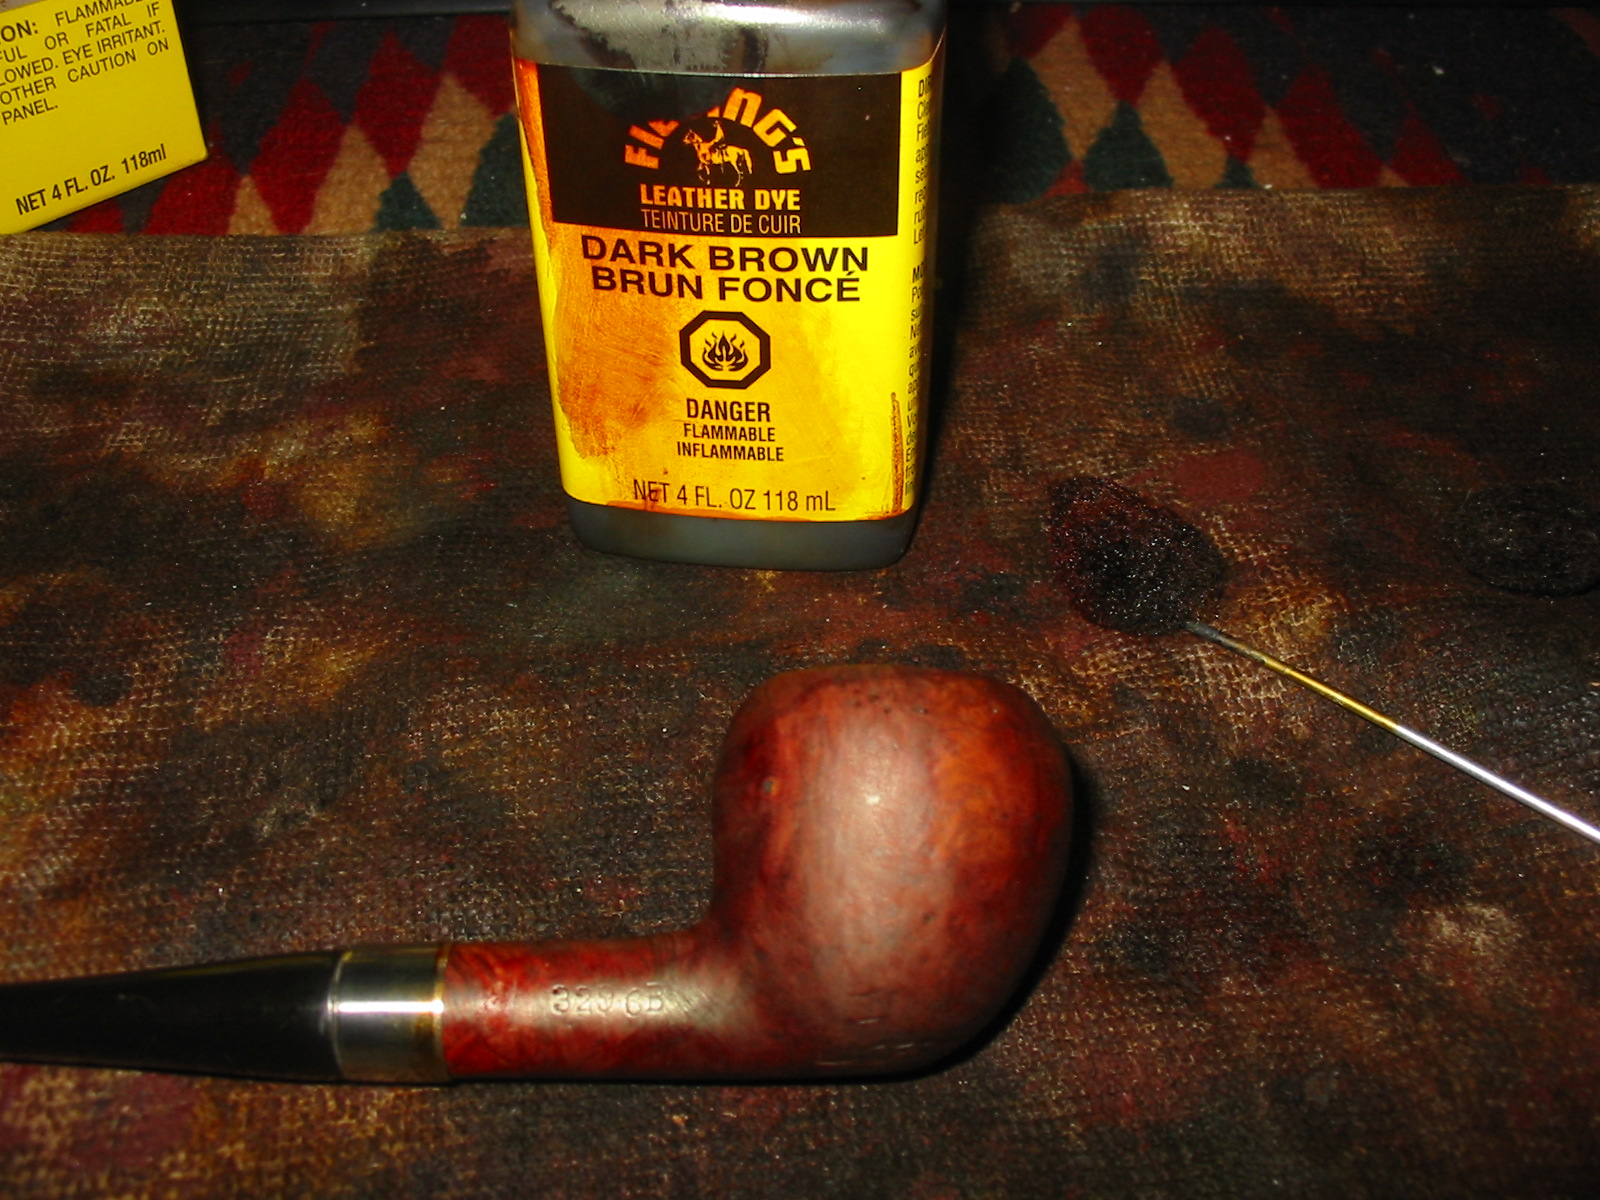
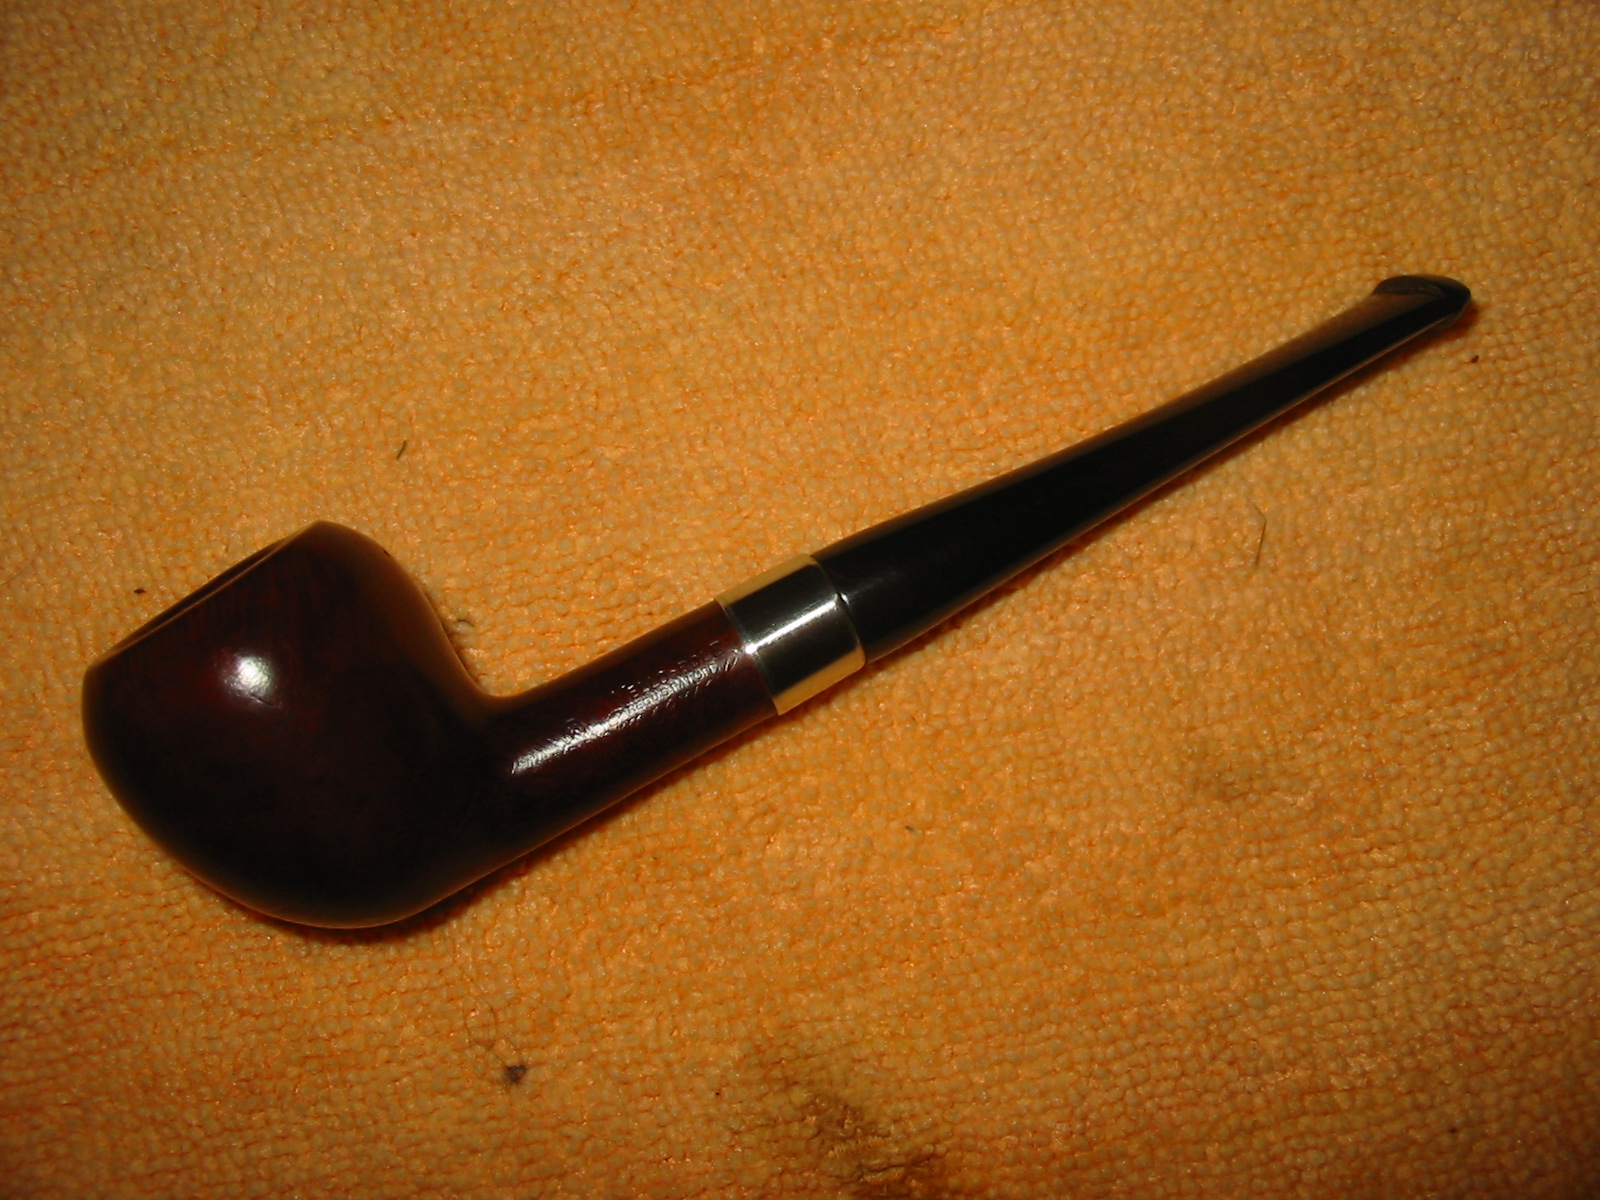
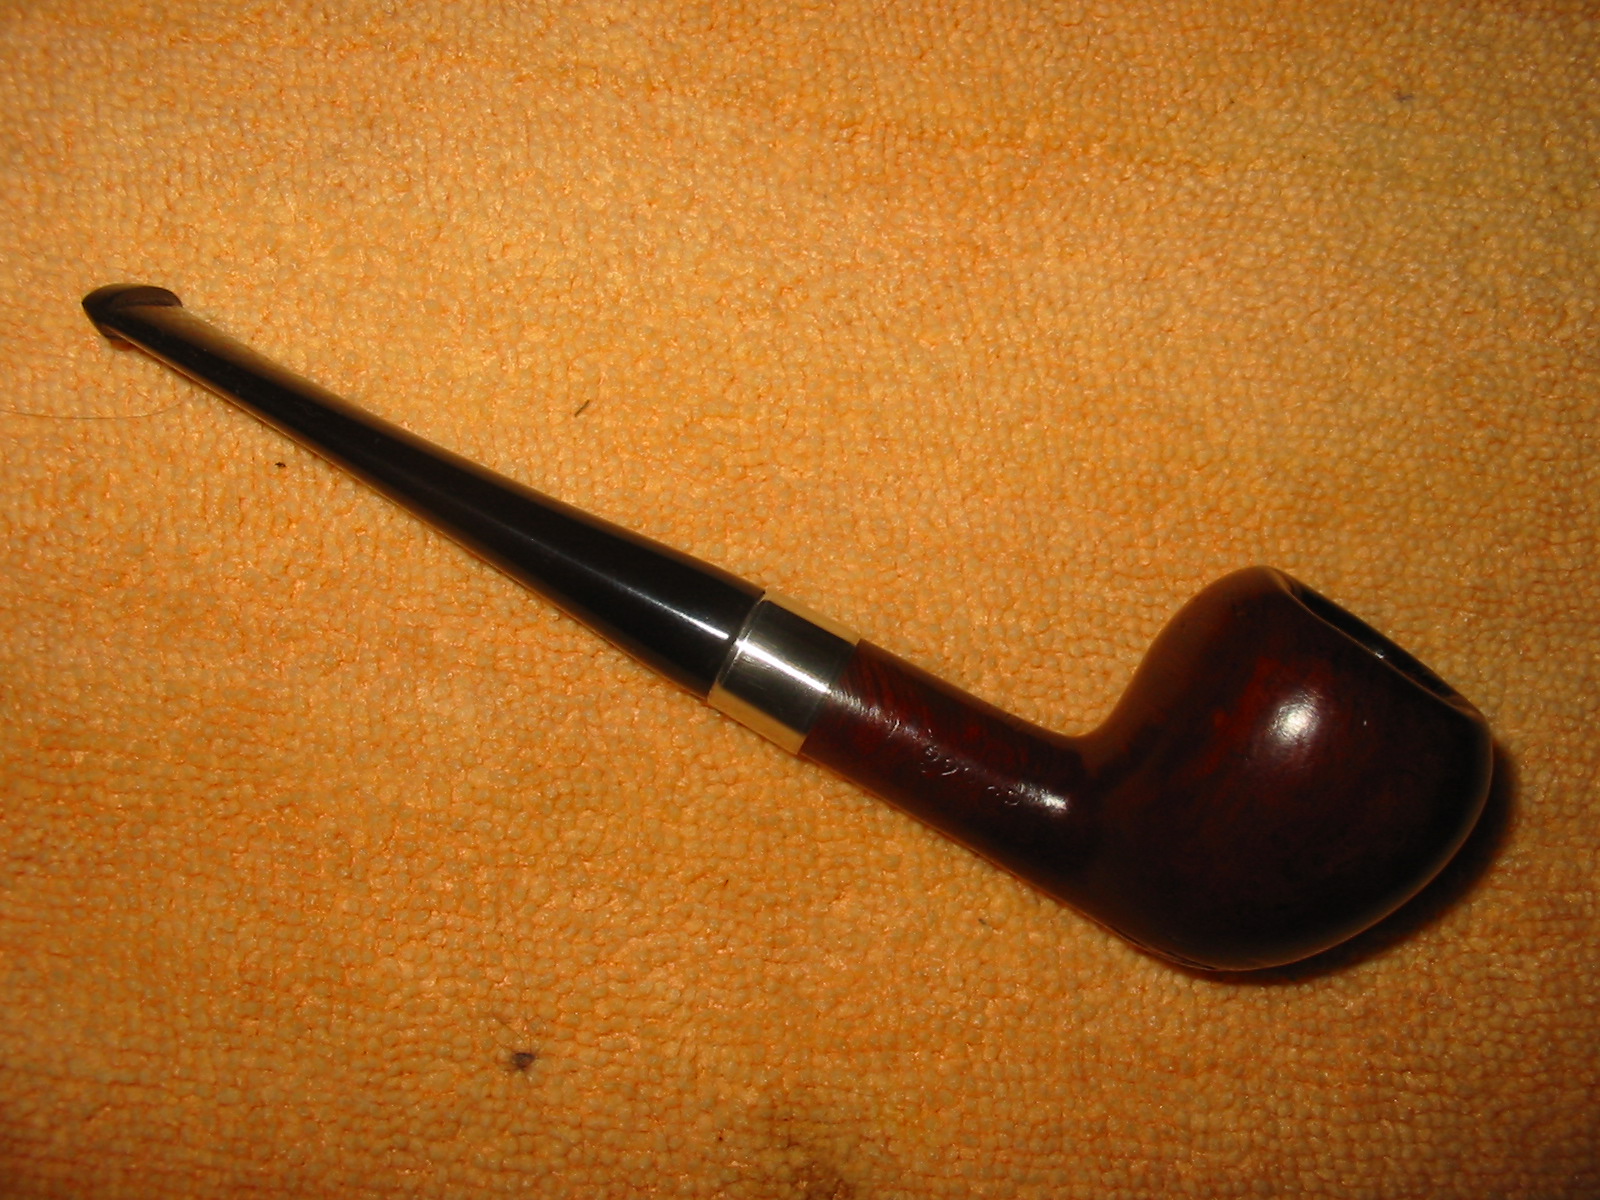
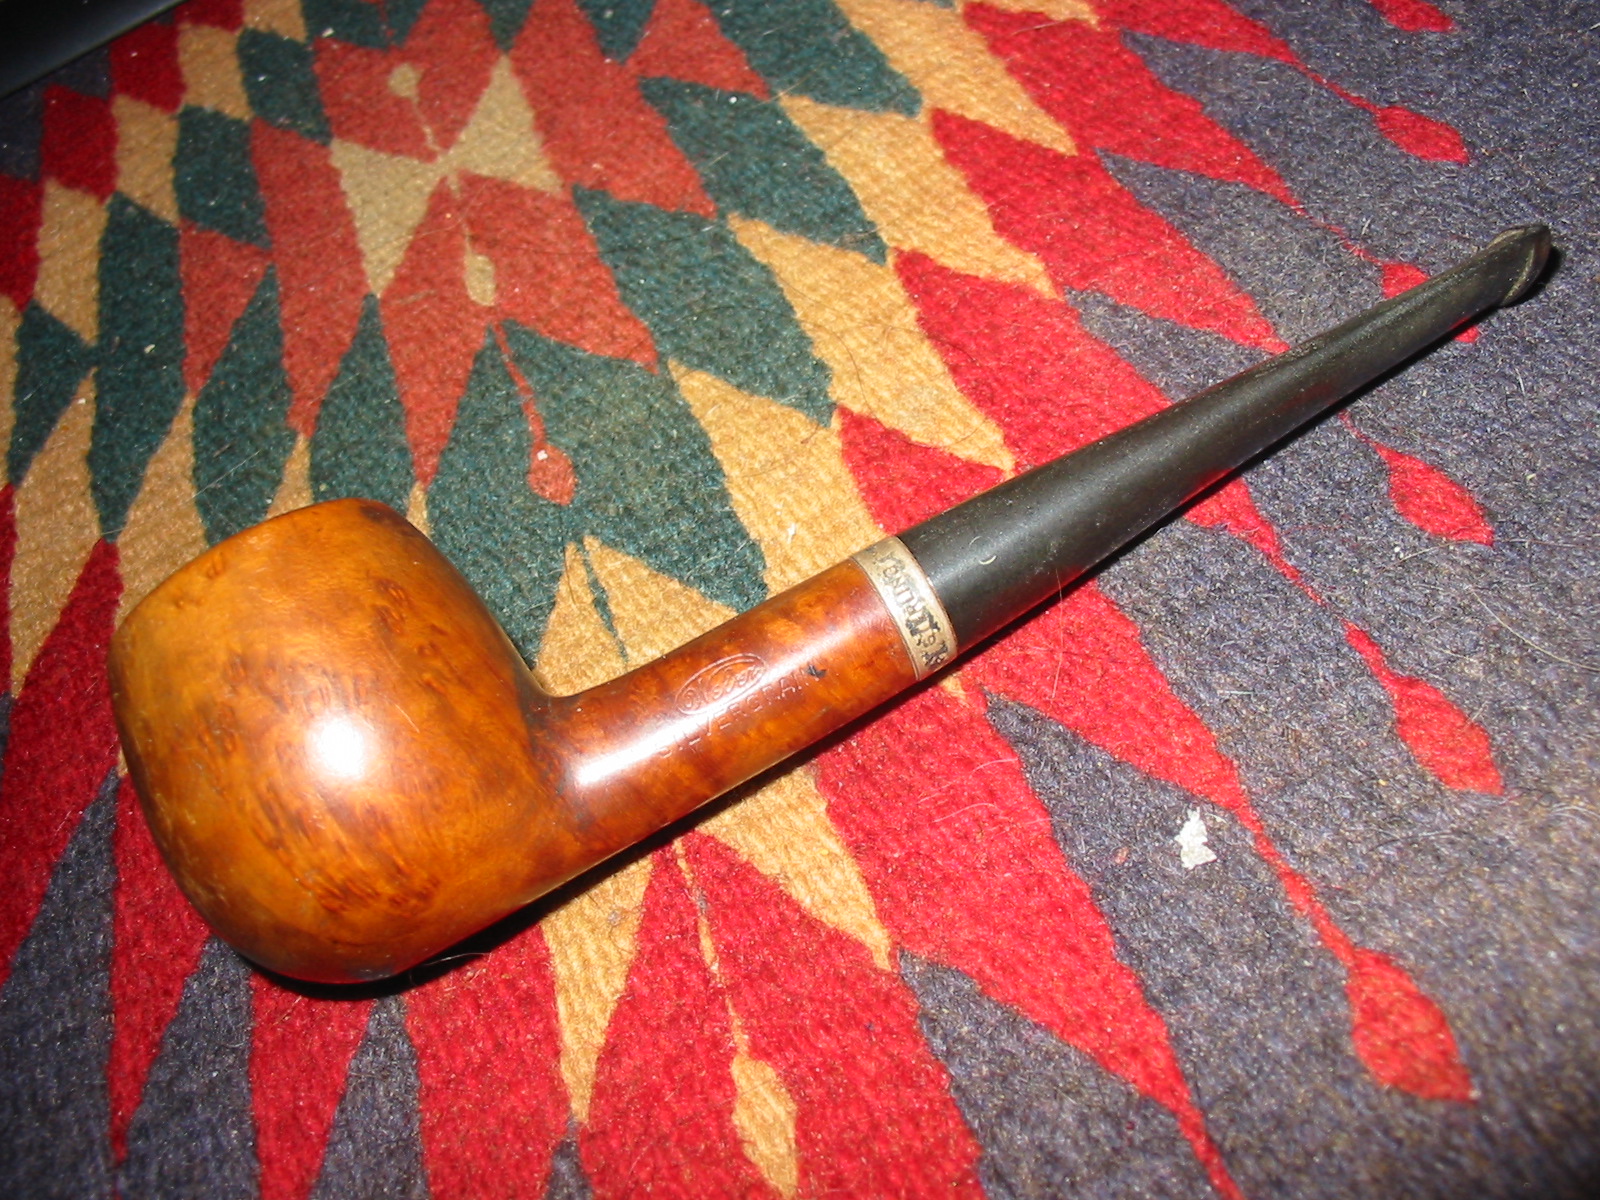
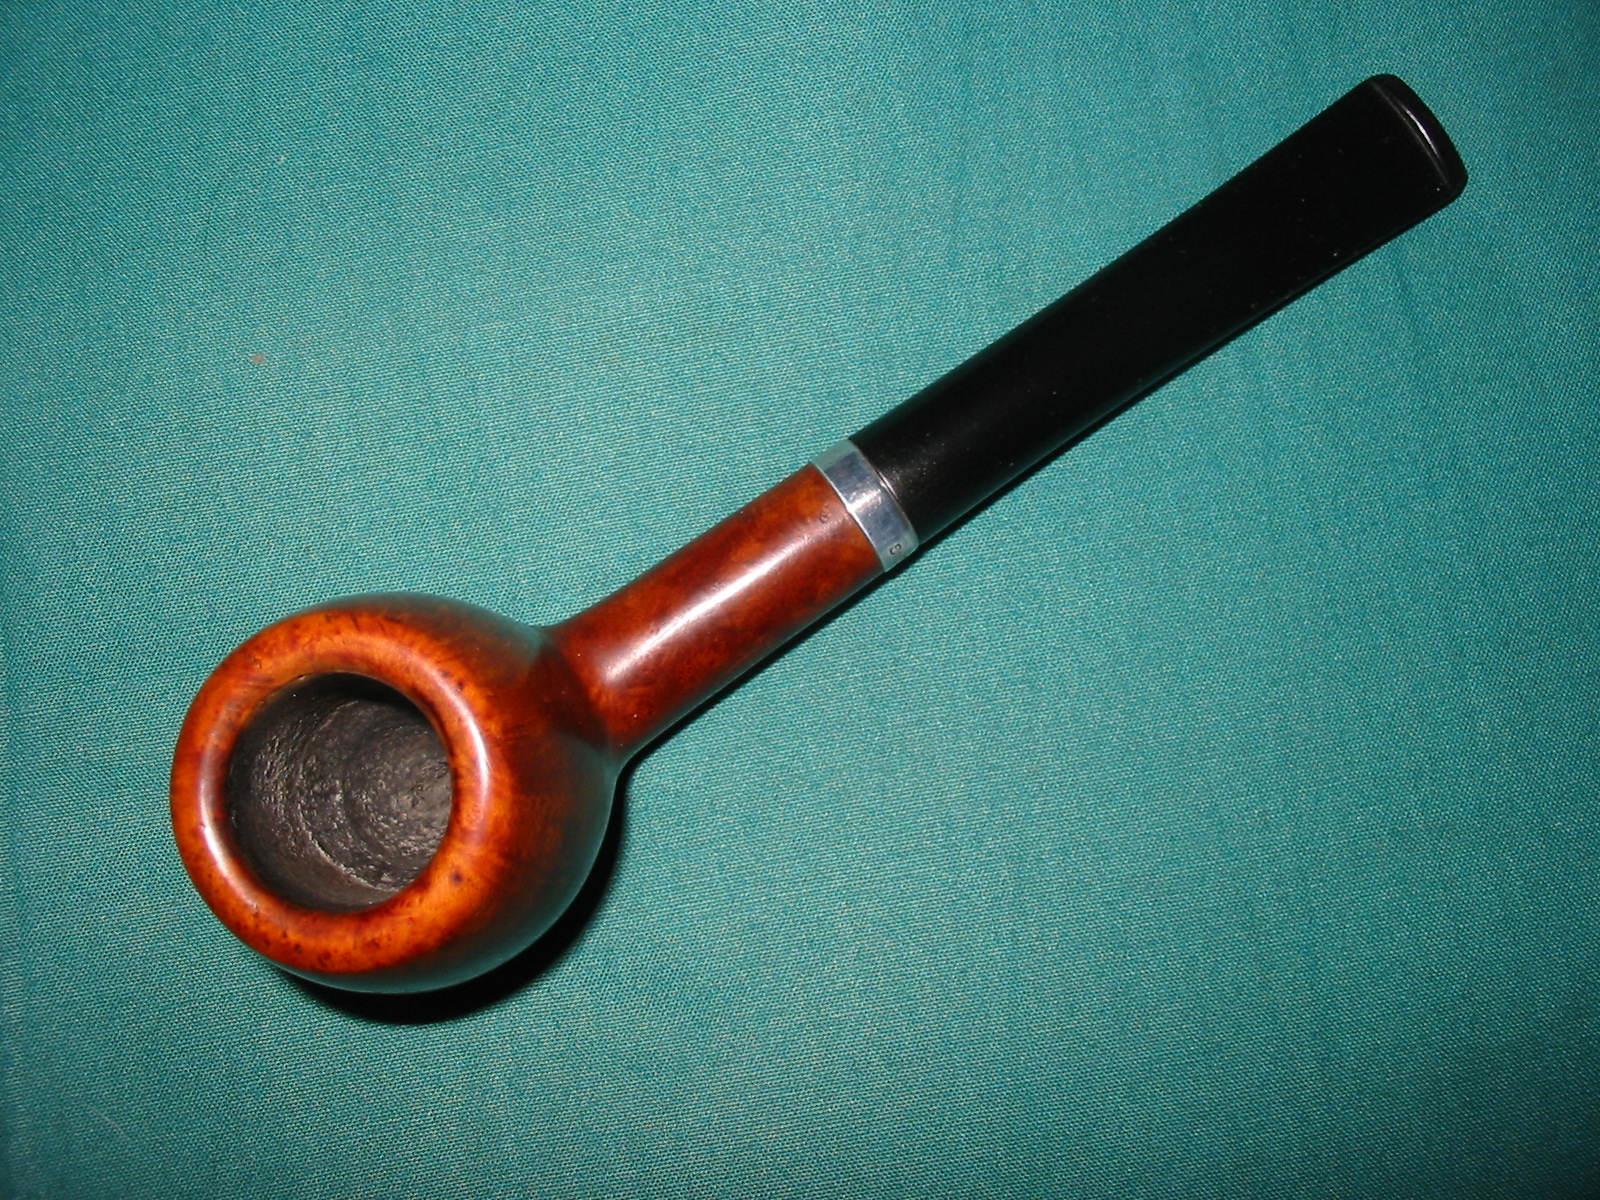
My first Extraordinaire is a 499 that has been dated to the 1930’s, from the “football” stamp and drilled “C” logo. I bought this one from a pipe friend and it was in the condition you see pictured below. (originally purchased at Fine Pipes) I found this 498 Extraordinaire listed on Ebay and was able to make a deal with the seller to acquire it before the auction continued. It was listed as a “283/Blue Riband”, both of which I knew it was not. The nomenclature isn’t as sharp as on my 499 but it is legible. The stamping style and C logo are identical to my 499, so I assume this one is also from the 1930’s. There were plenty of dings on the bowl, including some on the top. The stem was in pretty good shape, but heavily oxidized with one tooth indention on the bottom. Here is the condition of the pipe as delivered.

Comoys_498_Before

Comoys_498_Before (1)

Comoys_498_Before (2)

Comoys_498_Before (3)

Comoys_498_Before (4)

Comoys_498_Before (5)

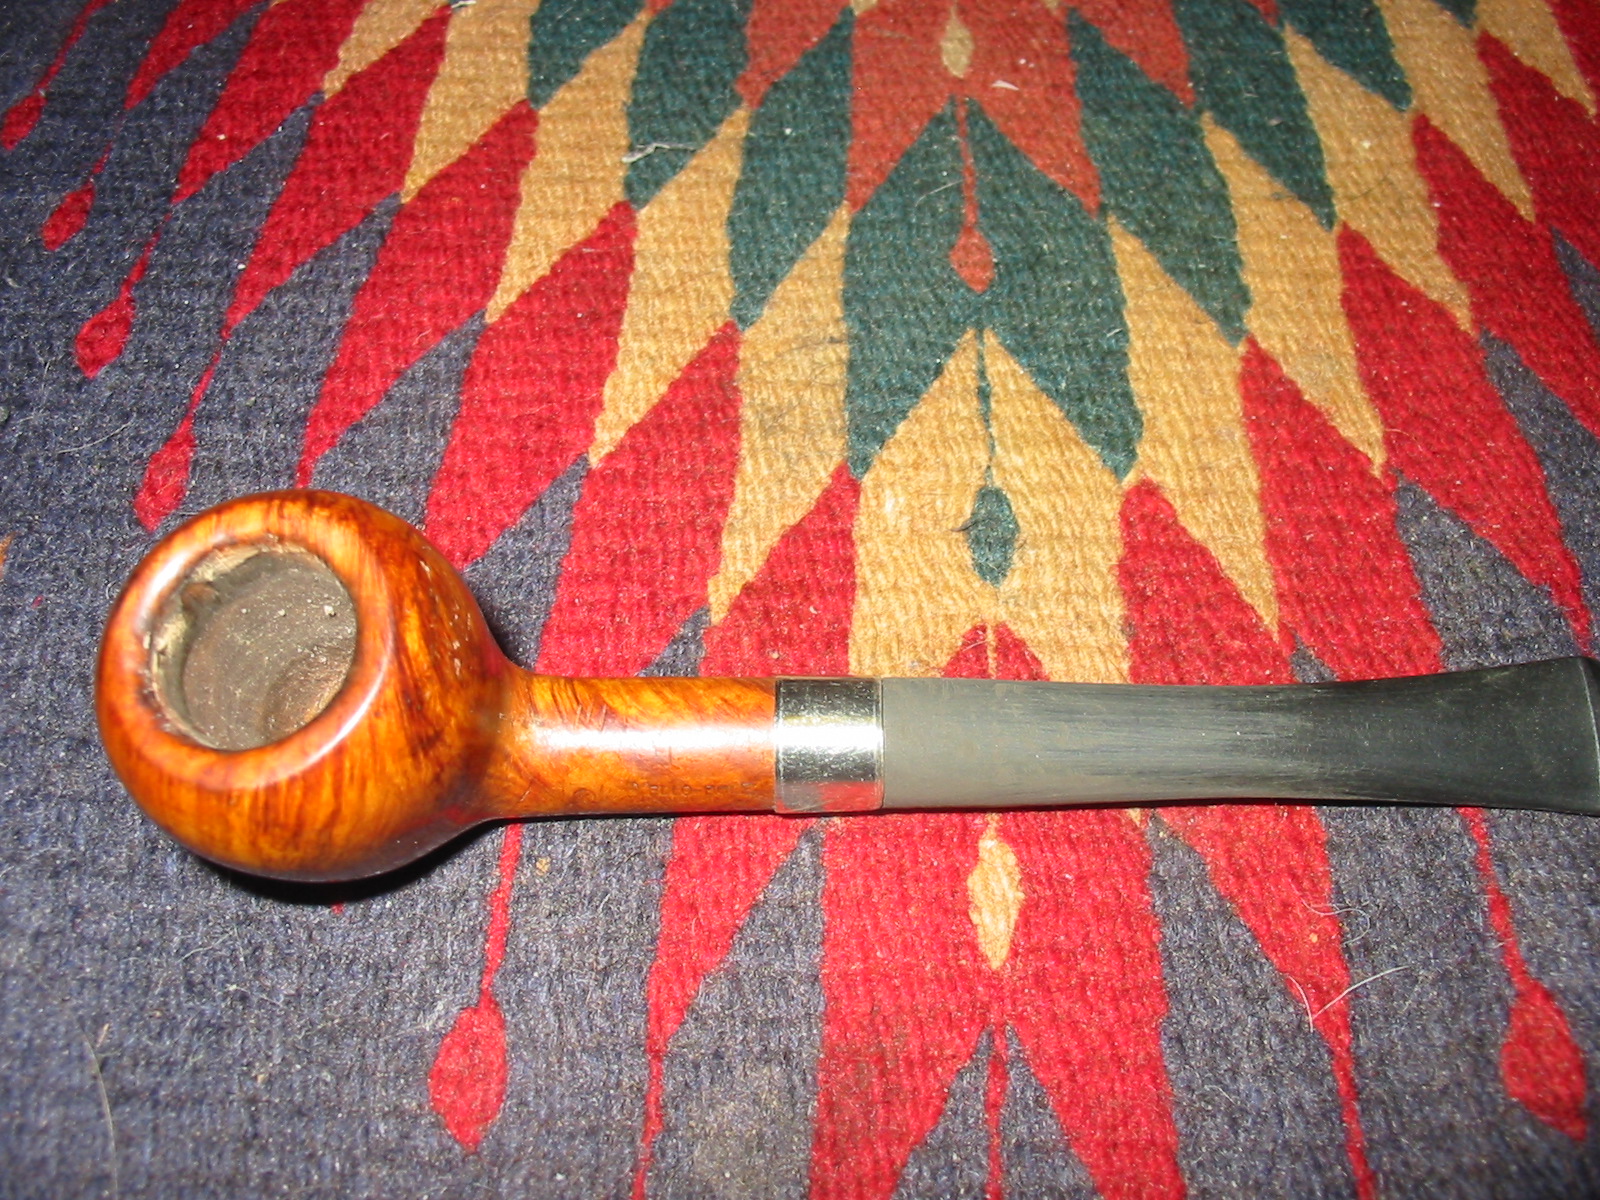
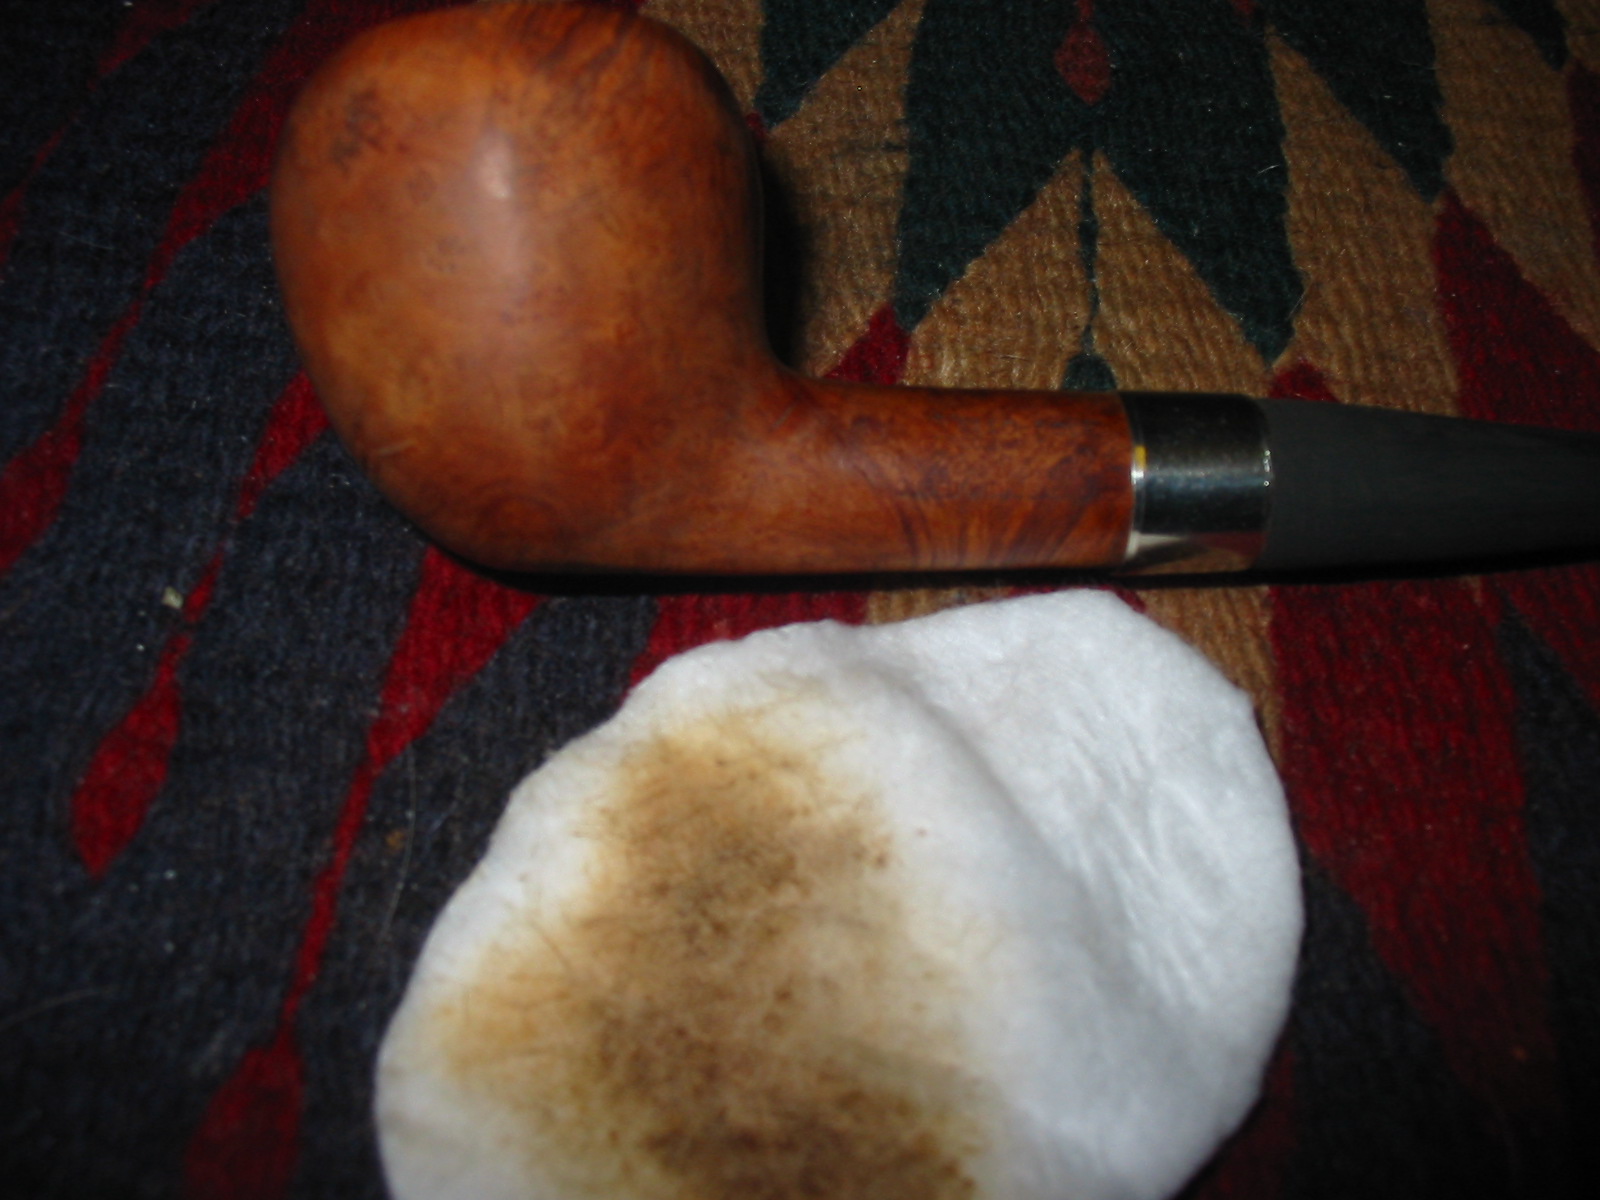
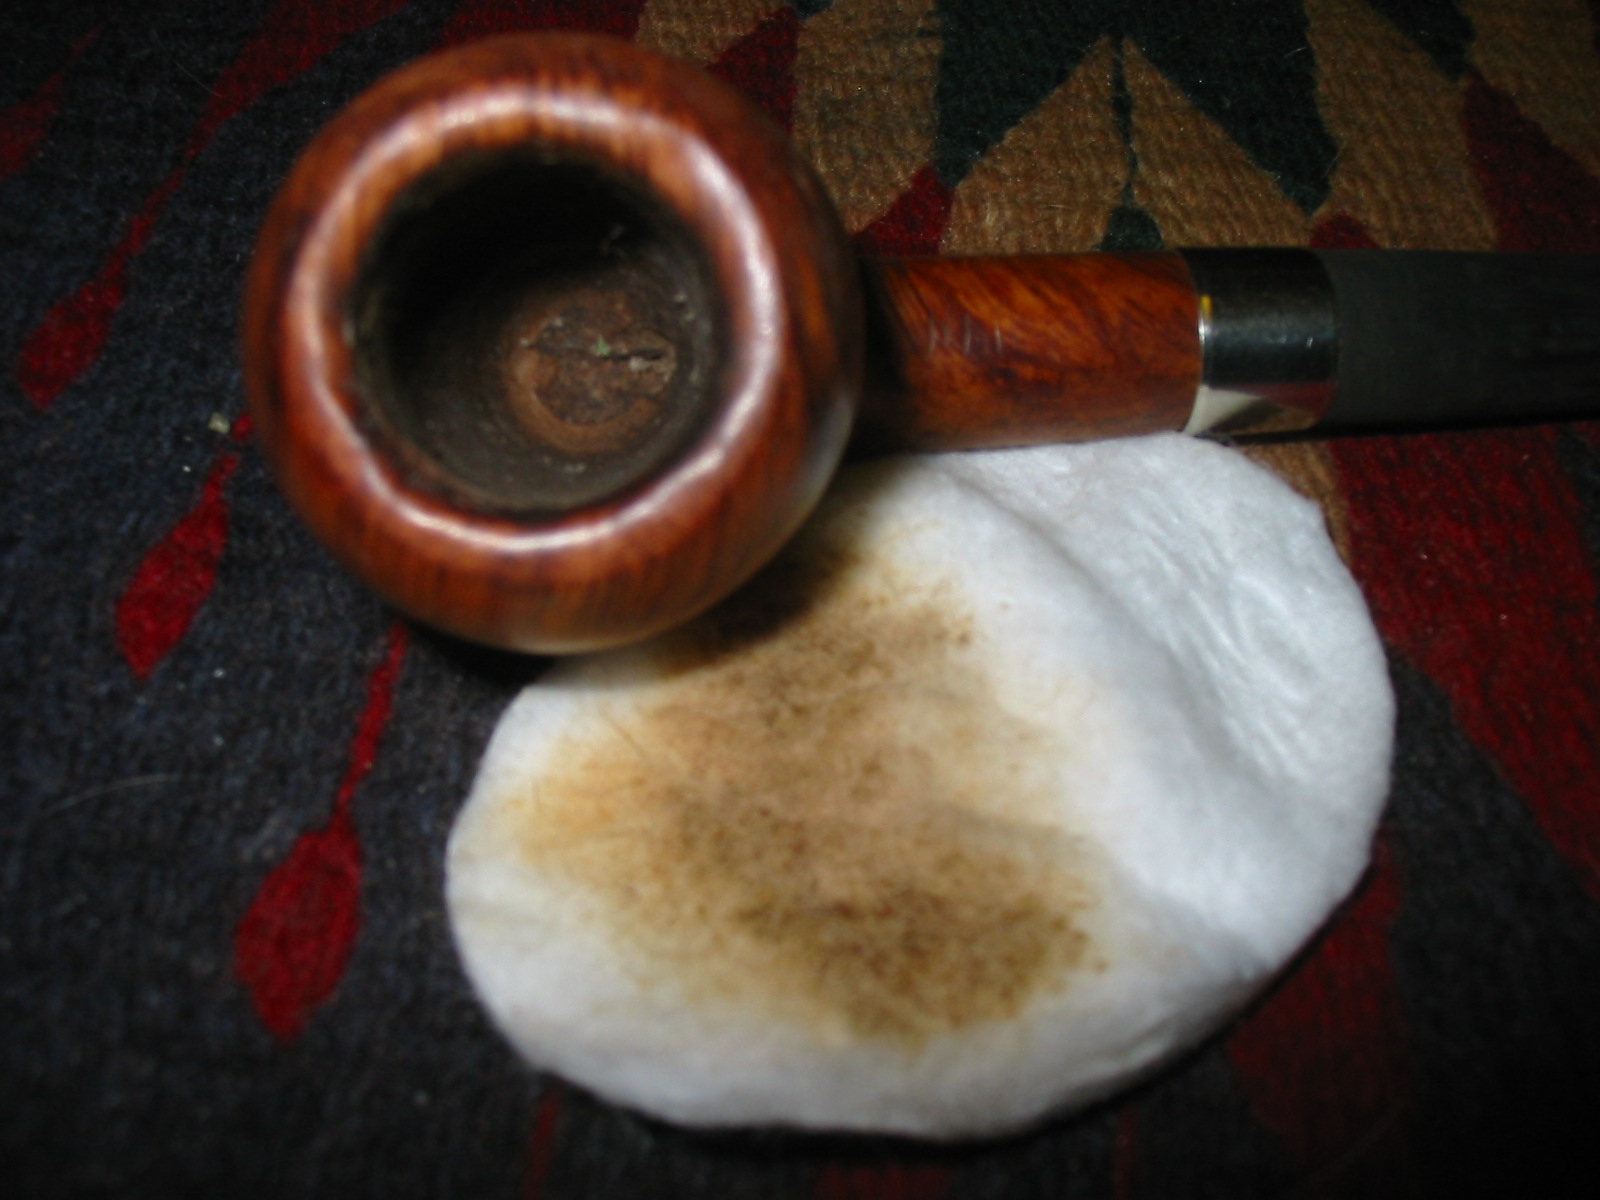
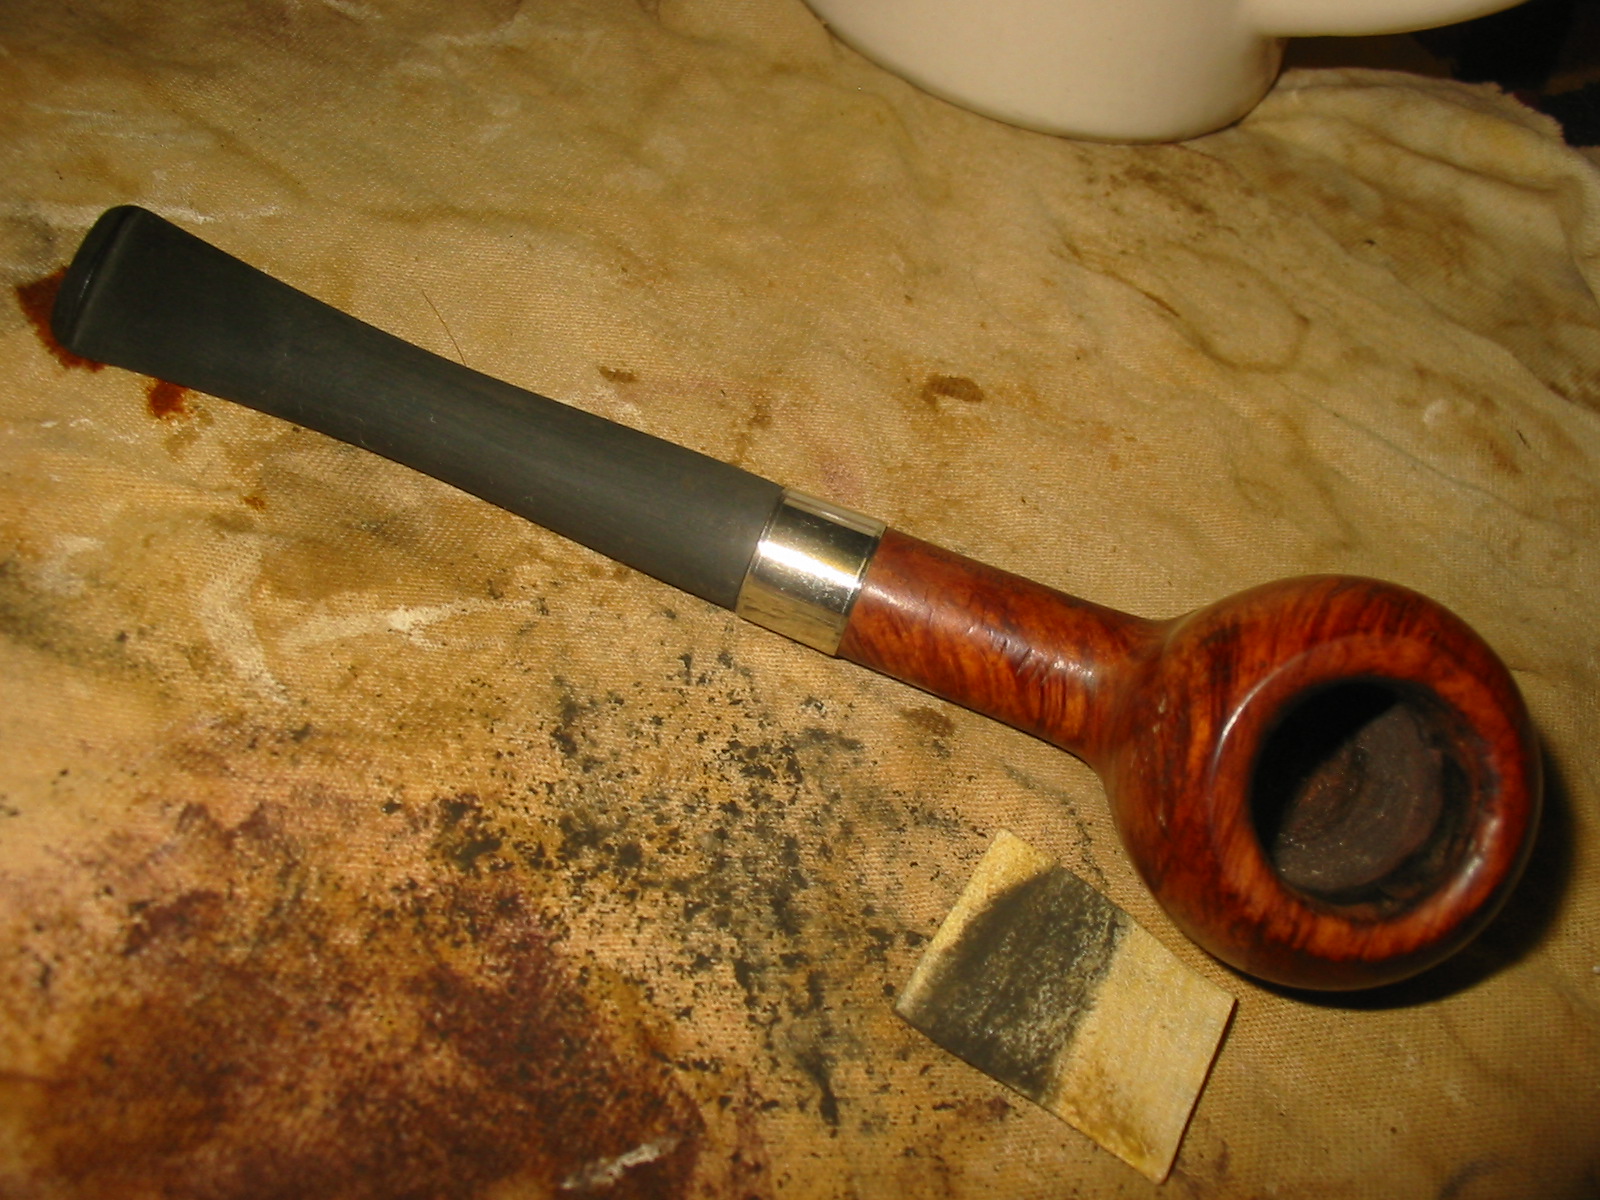
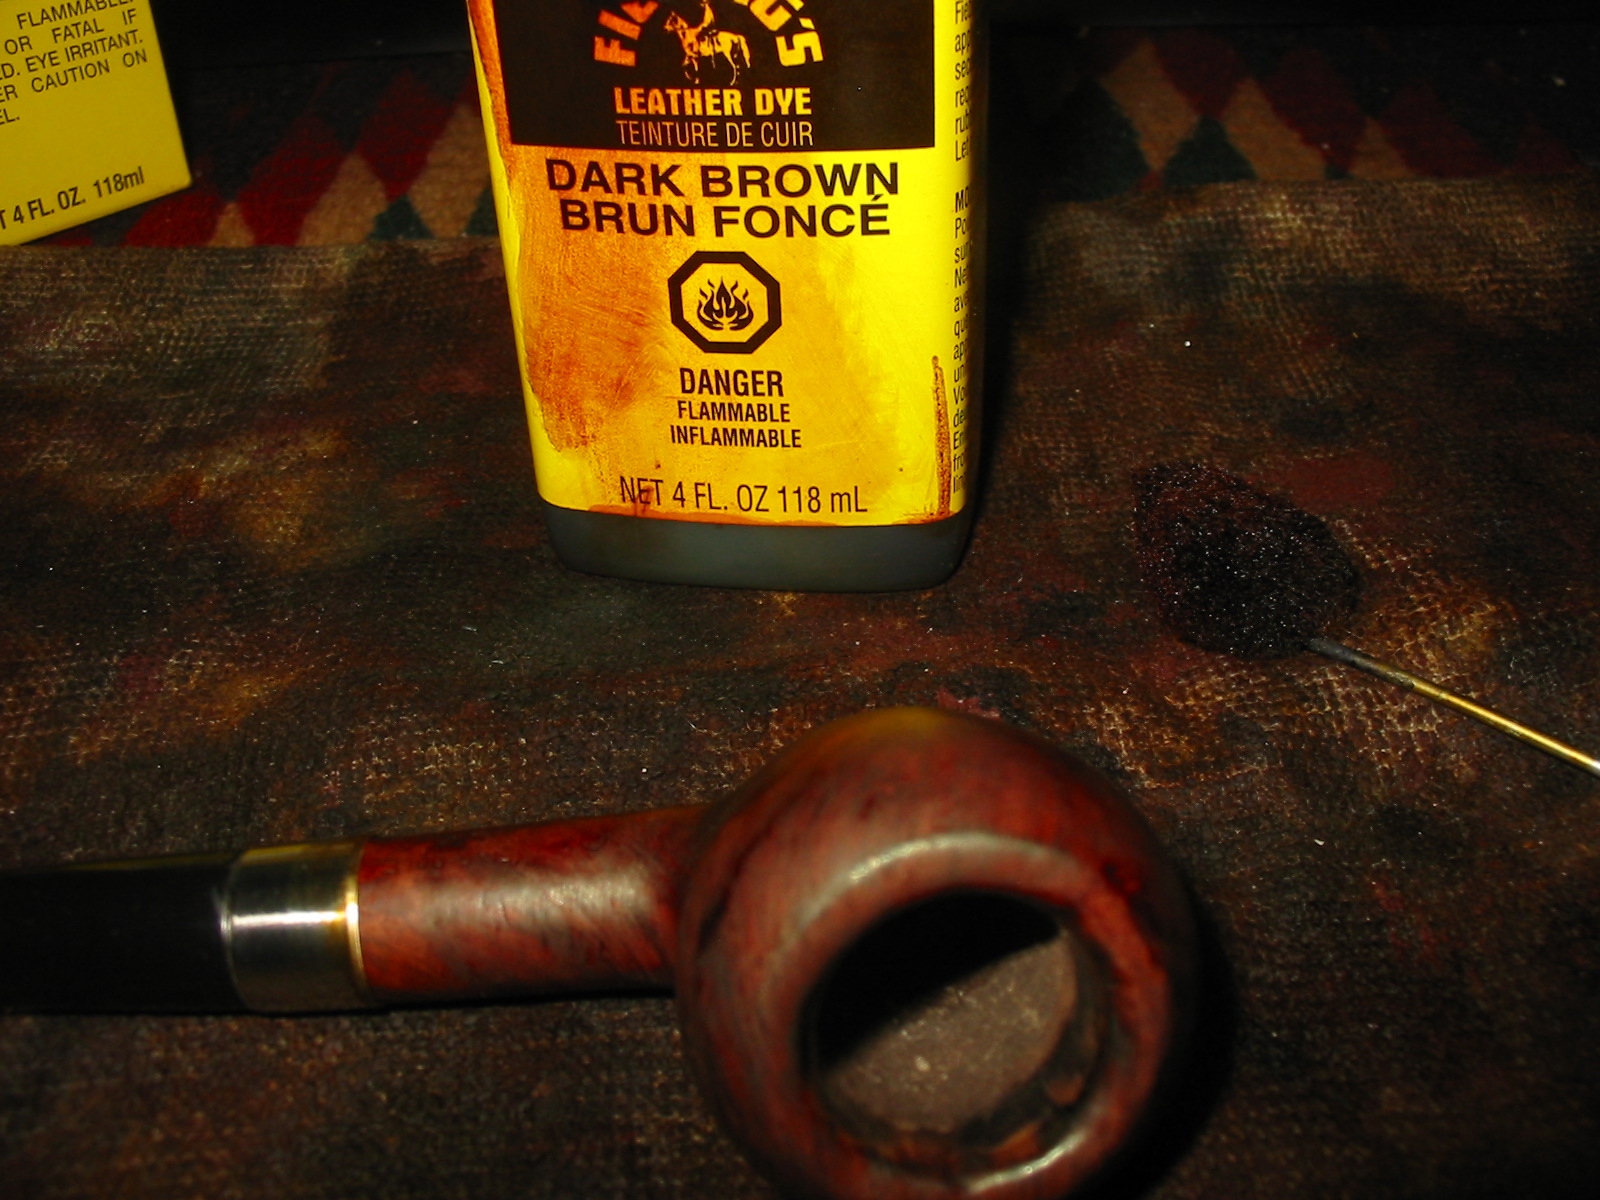
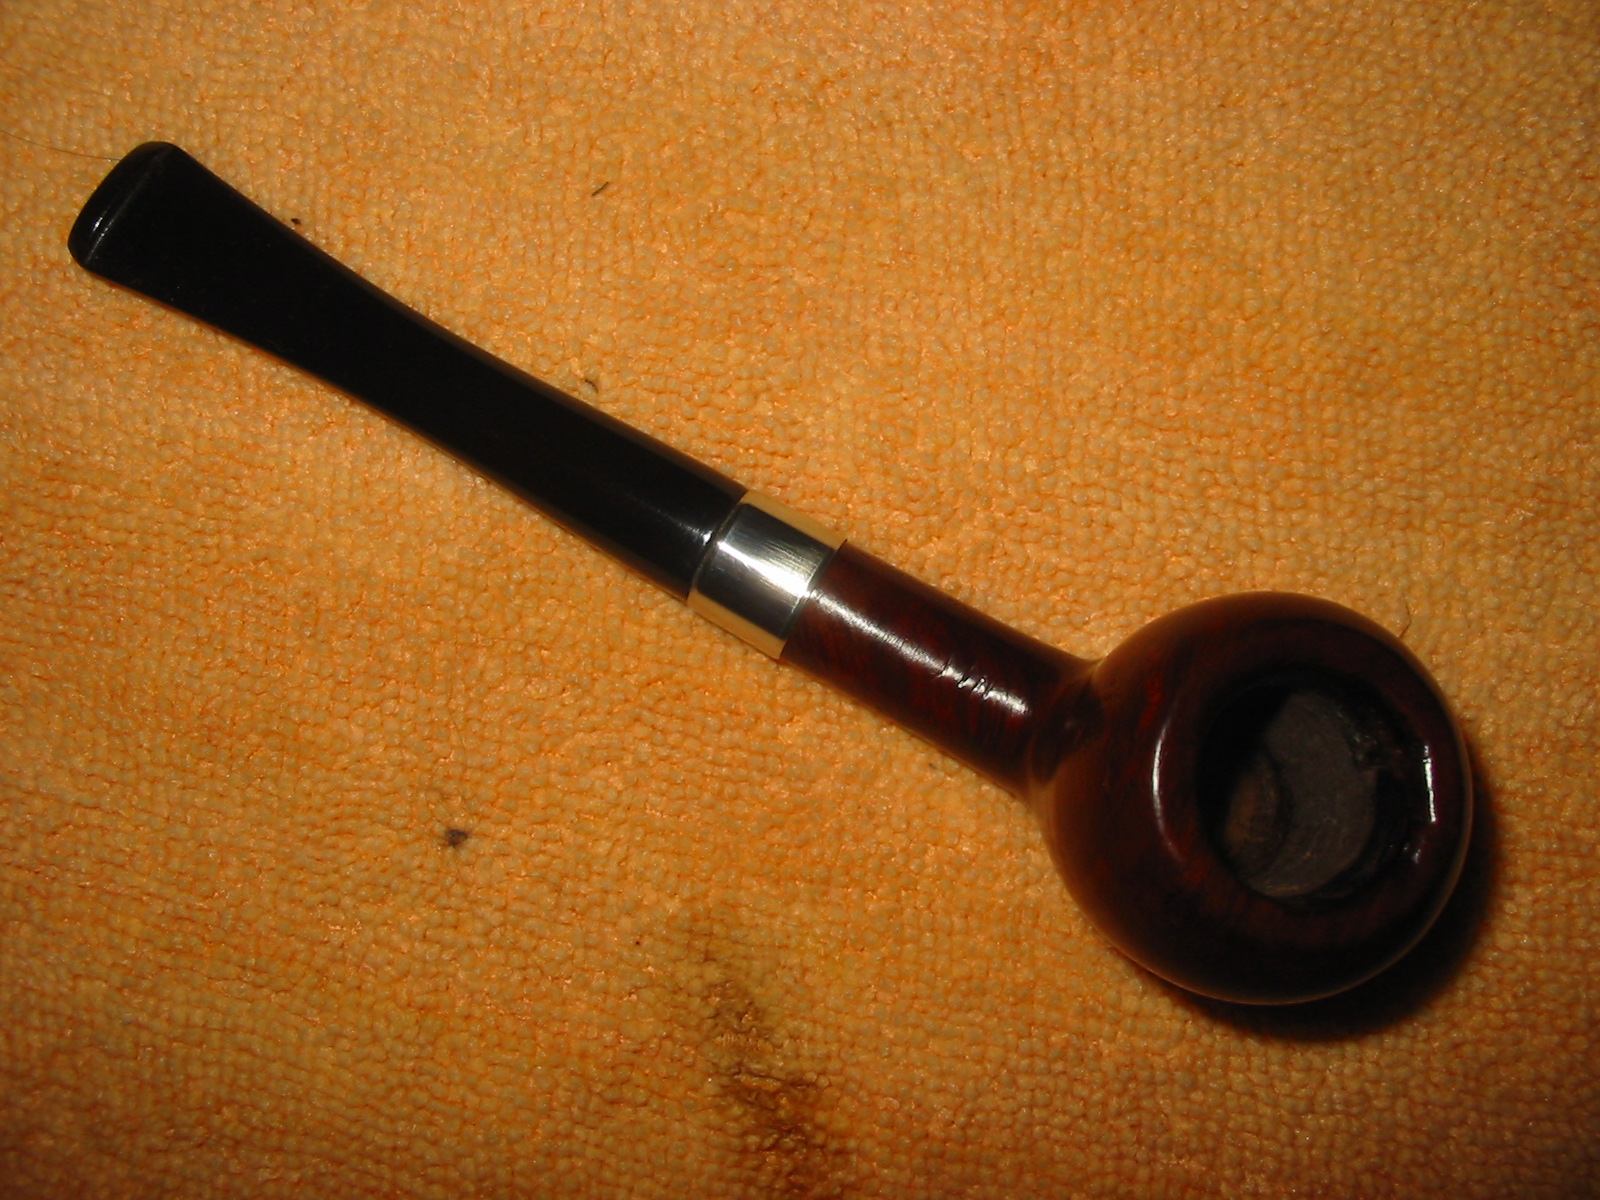
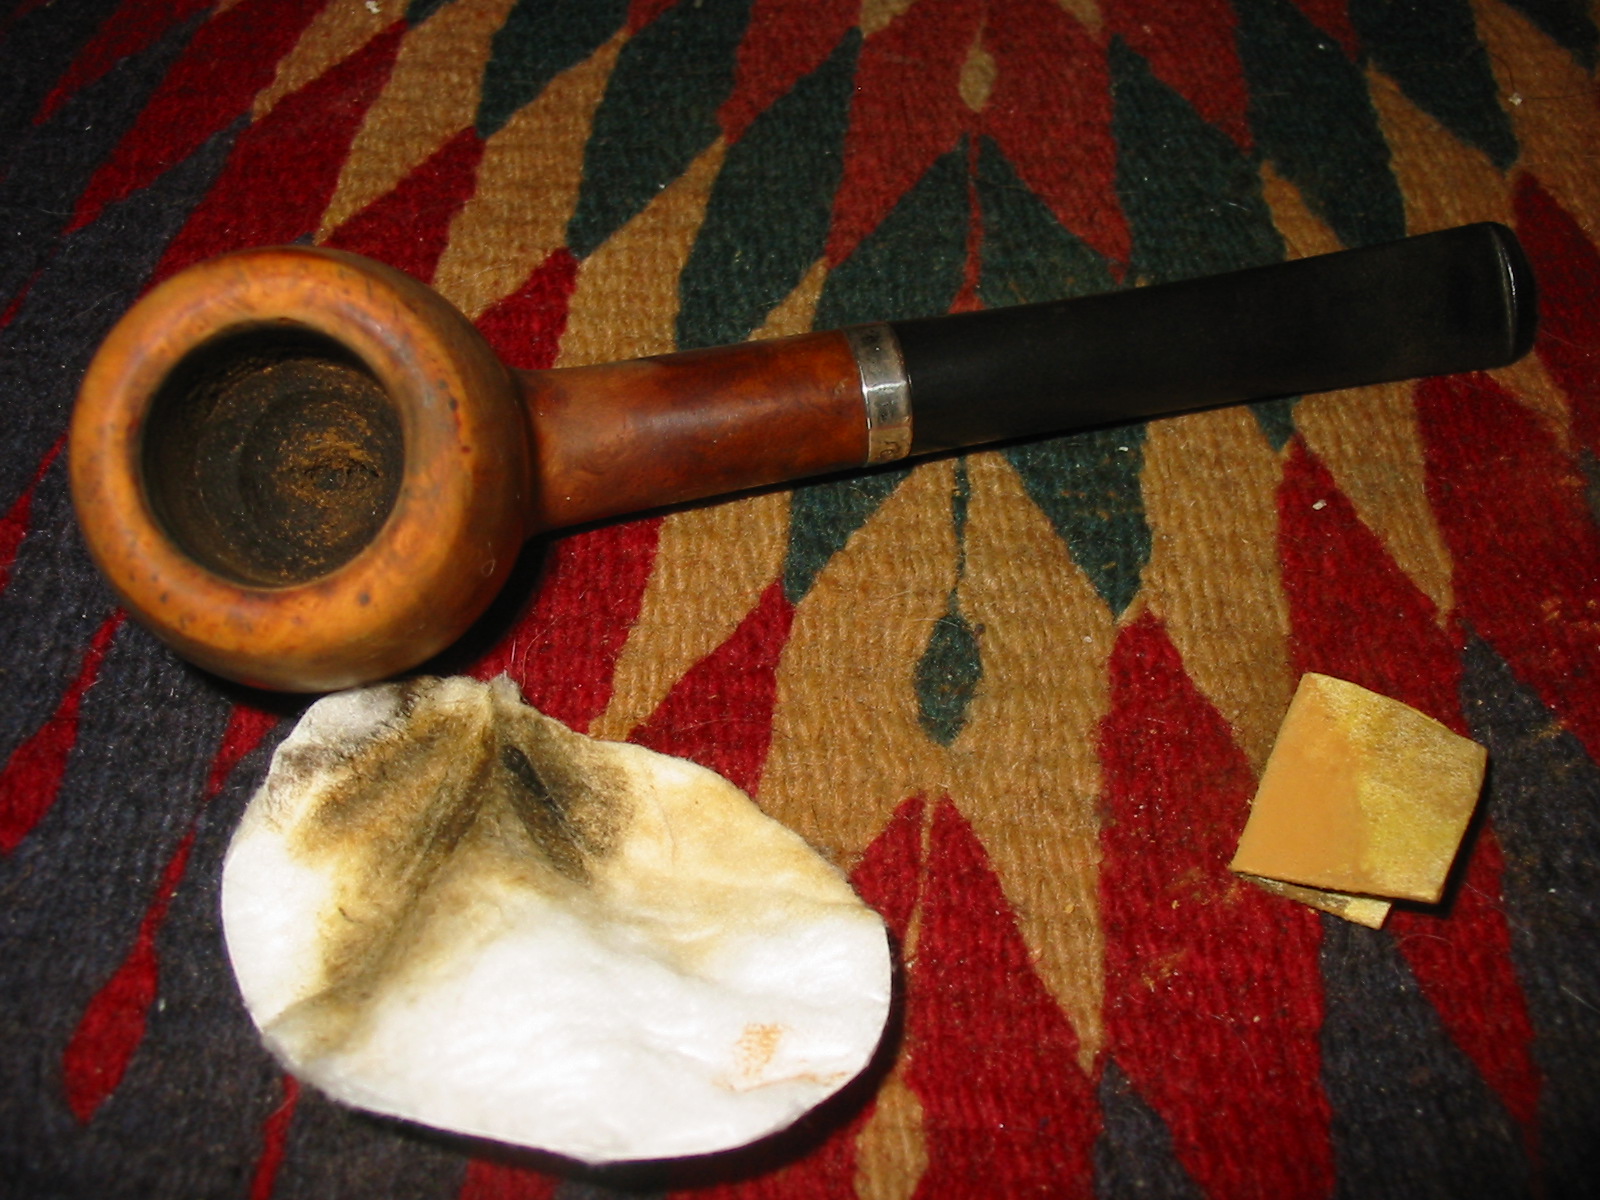
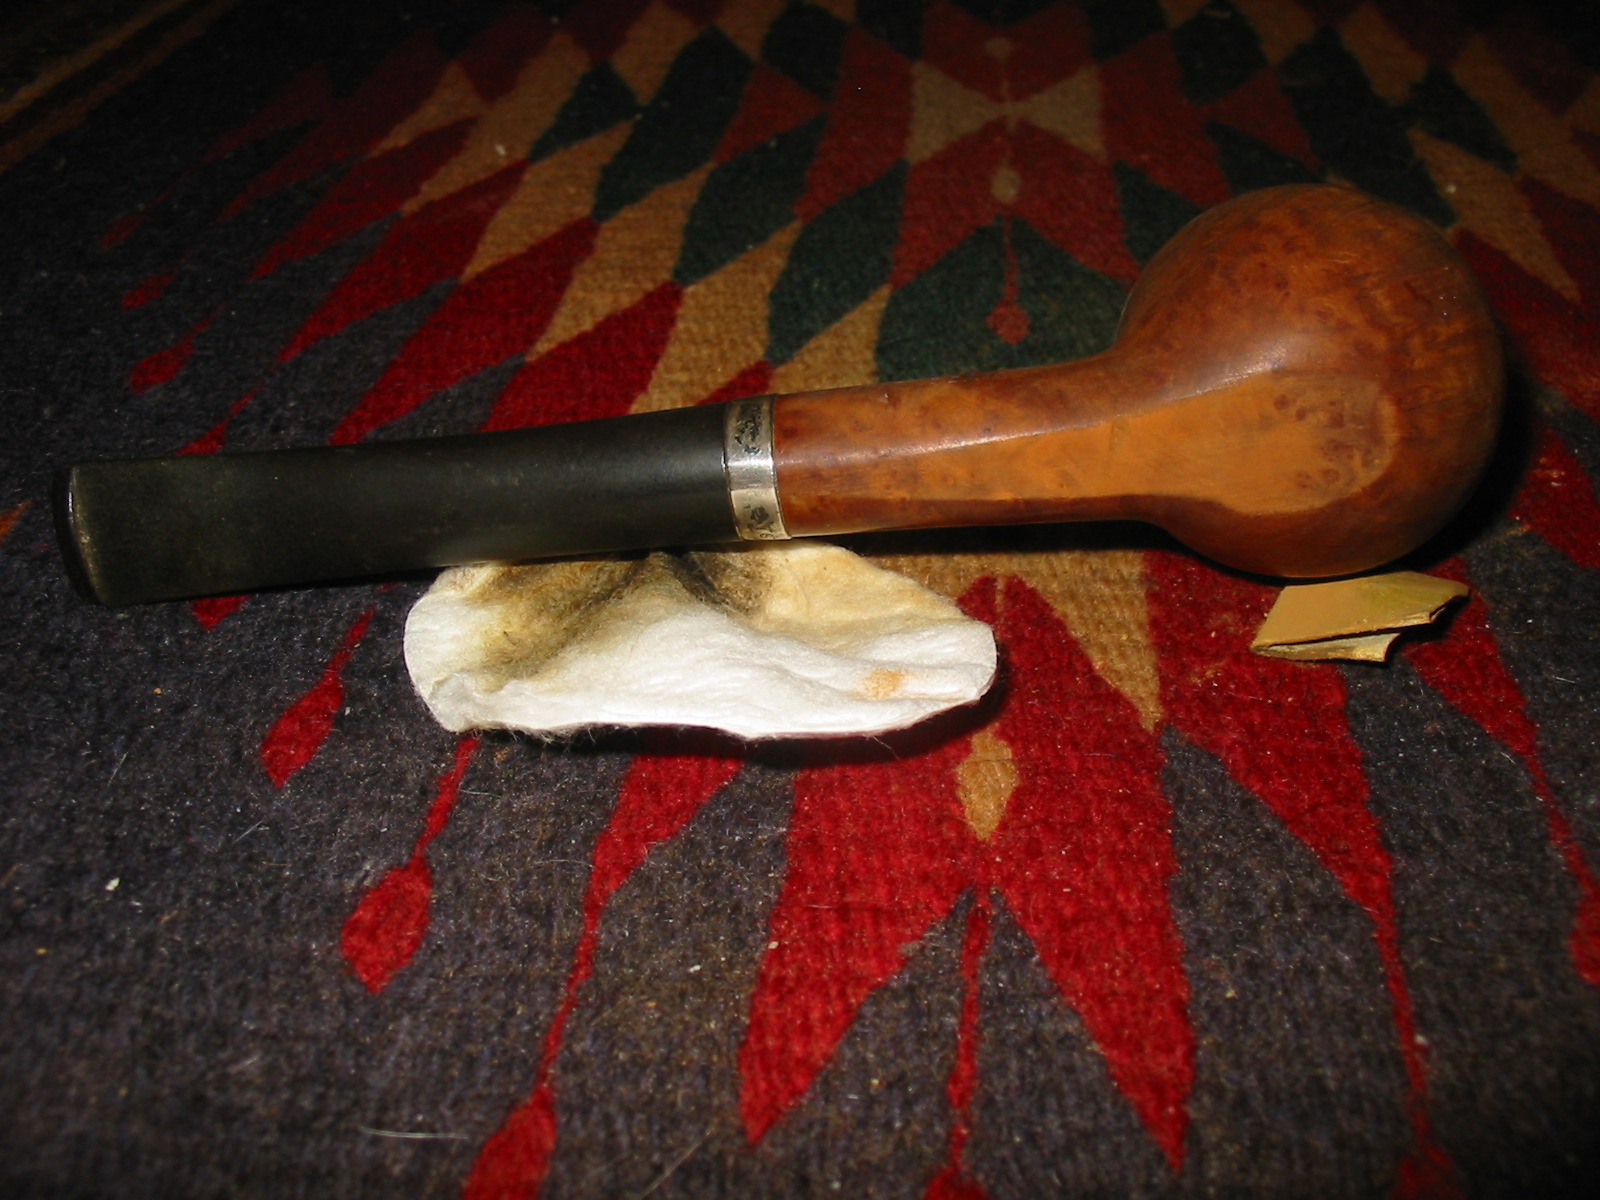
There was a moderate cake in the bowl, which I reamed and then filled the bowl and shank with Sea Salt and Everclear for an overnight soak. The alcohol and salt didn’t leach much tar from the bowl, so hopefully it will be ghost free. The bowl was previously reamed slightly out of round and the Comoys beveled bowl top has been dimished over the past seven or so decades.

The next step was to steam the dents and marks from the bowl. I heated an old kitchen knife tip with a propane torch. A wet cloth, doubled over was applied to the area with a dent, then the hot knife tip was pressed over the dent. The steam eventually causes the dent to rise and I was able to remove or diminish most of the dents. You have to be careful on this step not to scorch the wood, so keep your cloth wet. I was able to reduce the dents on the bowl top to much smaller marks. Fortunately, the bowl top was not scorched by previous smokers

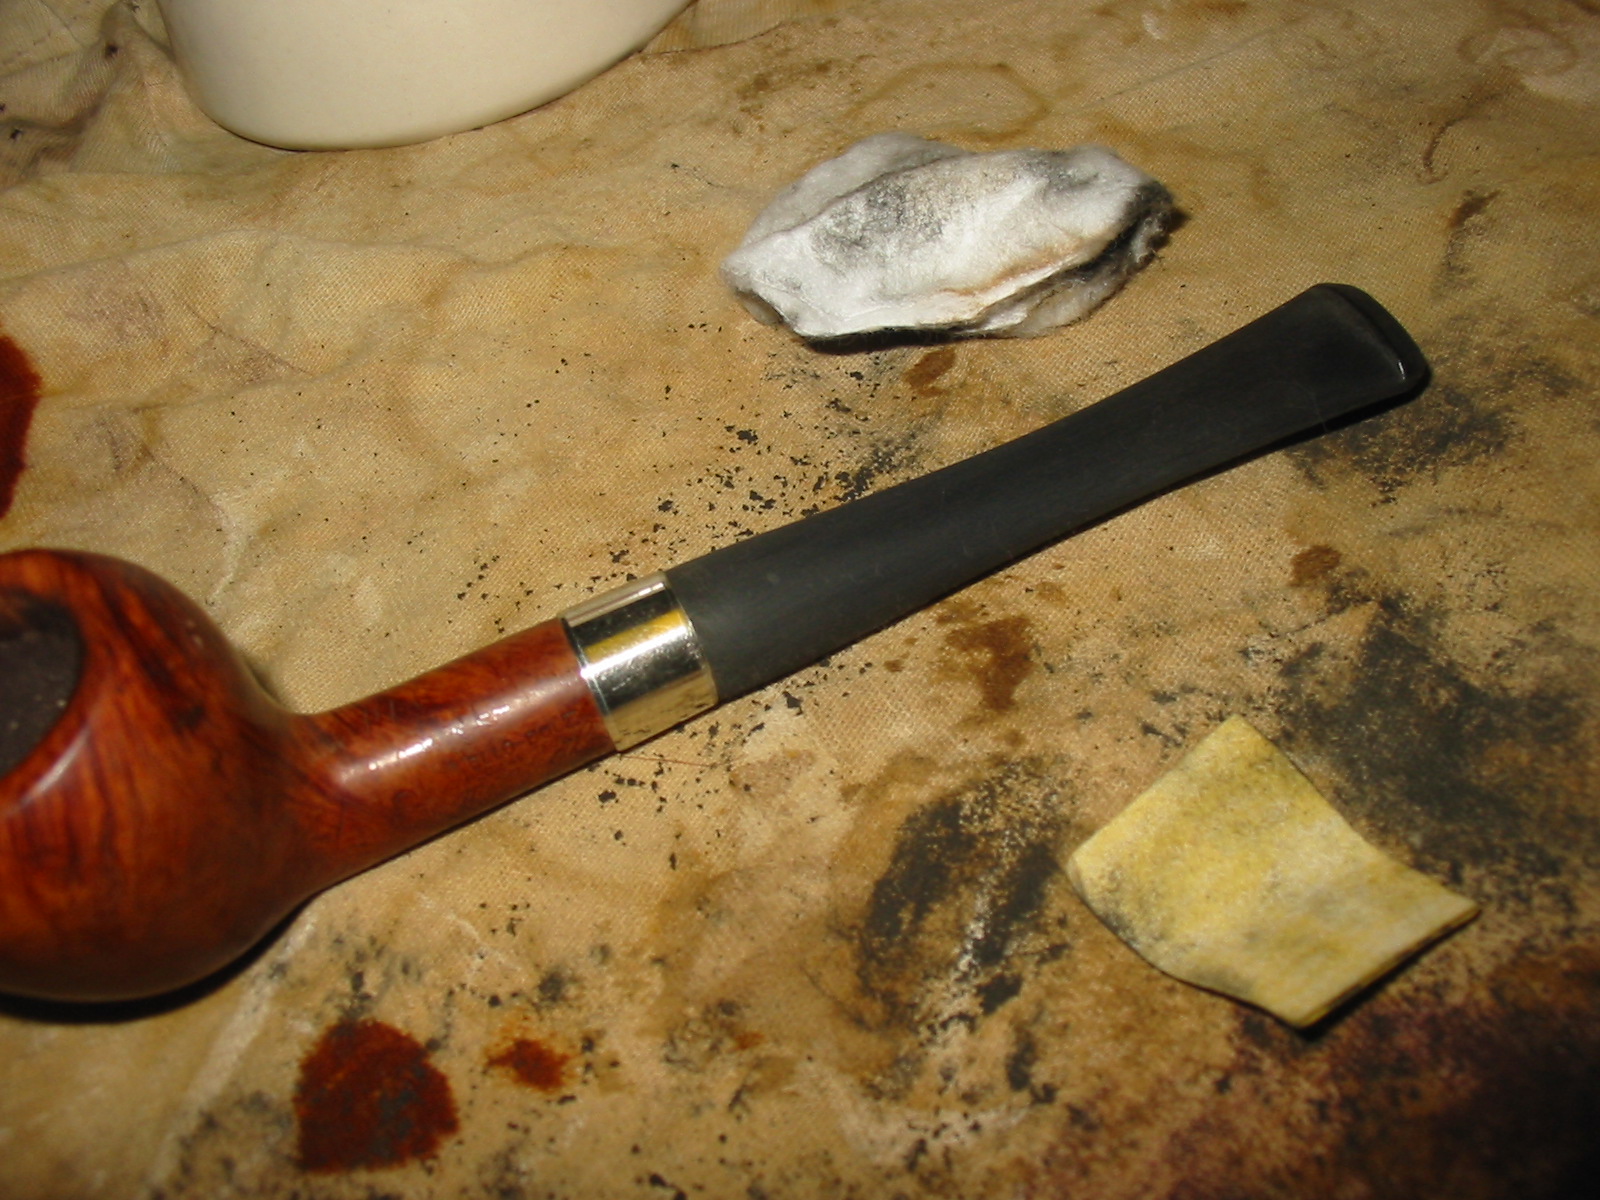
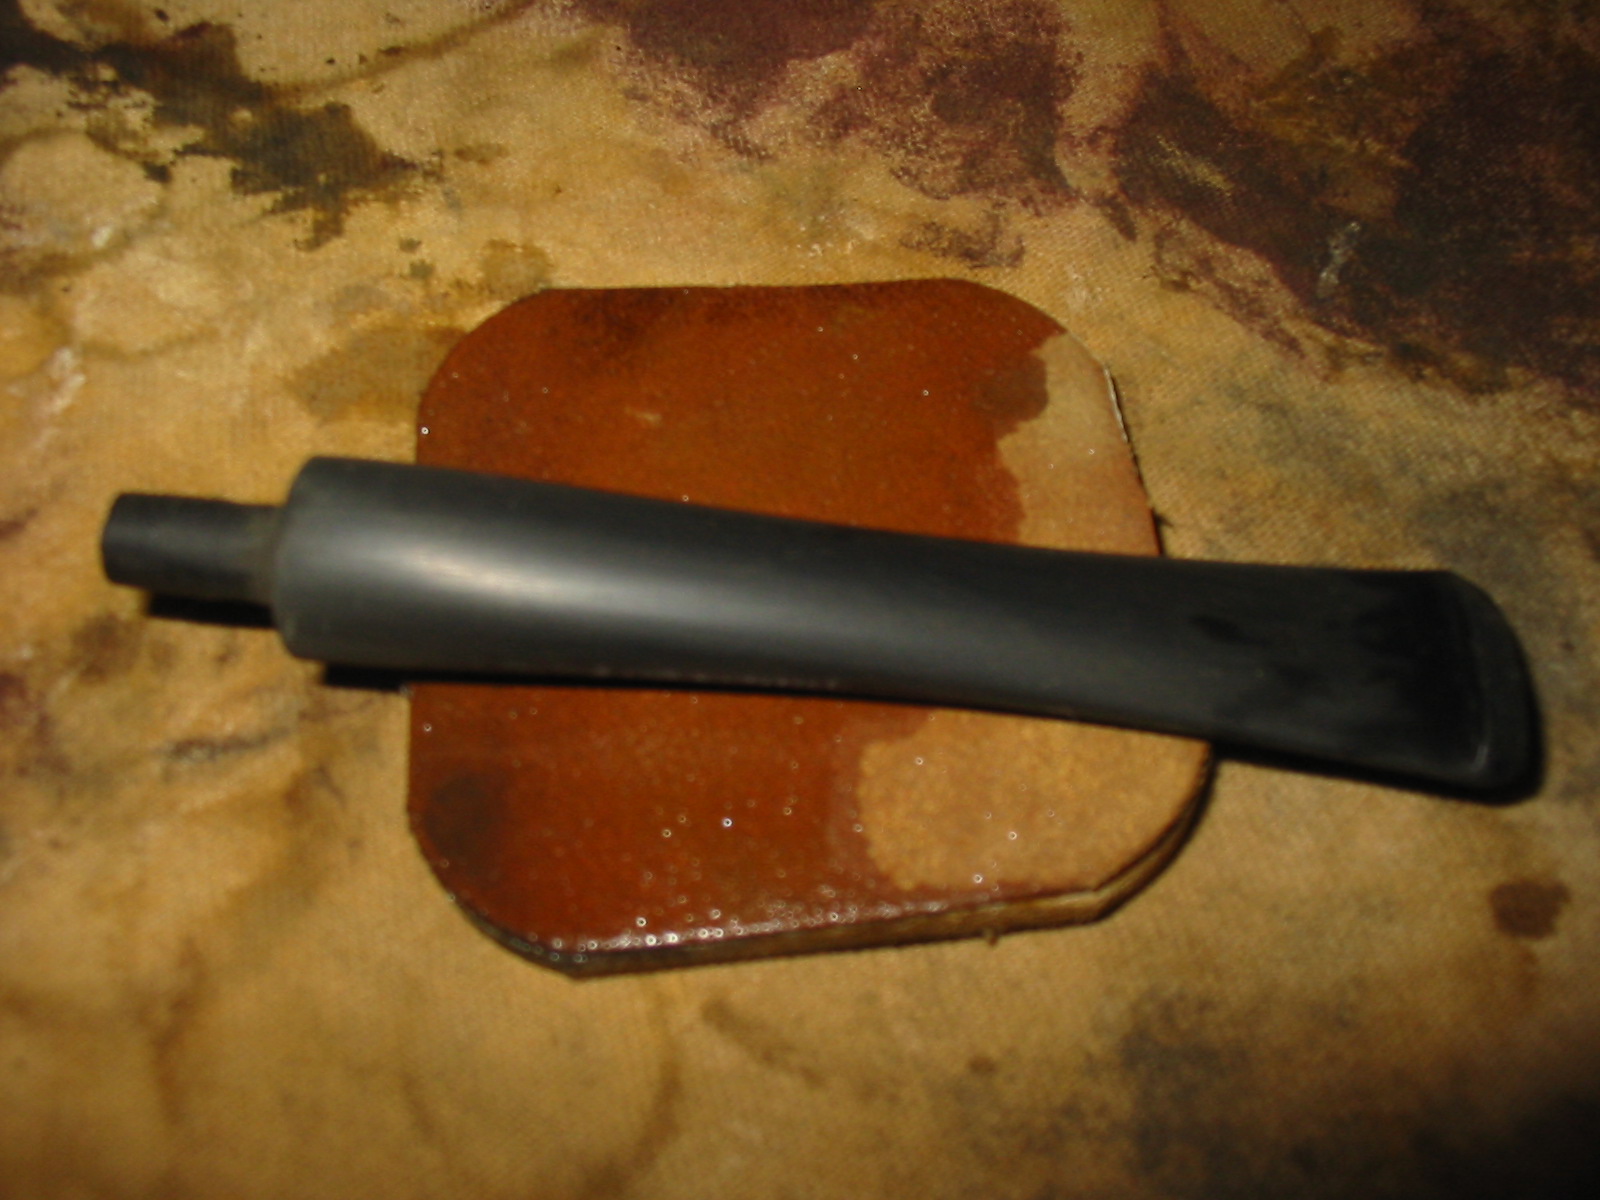
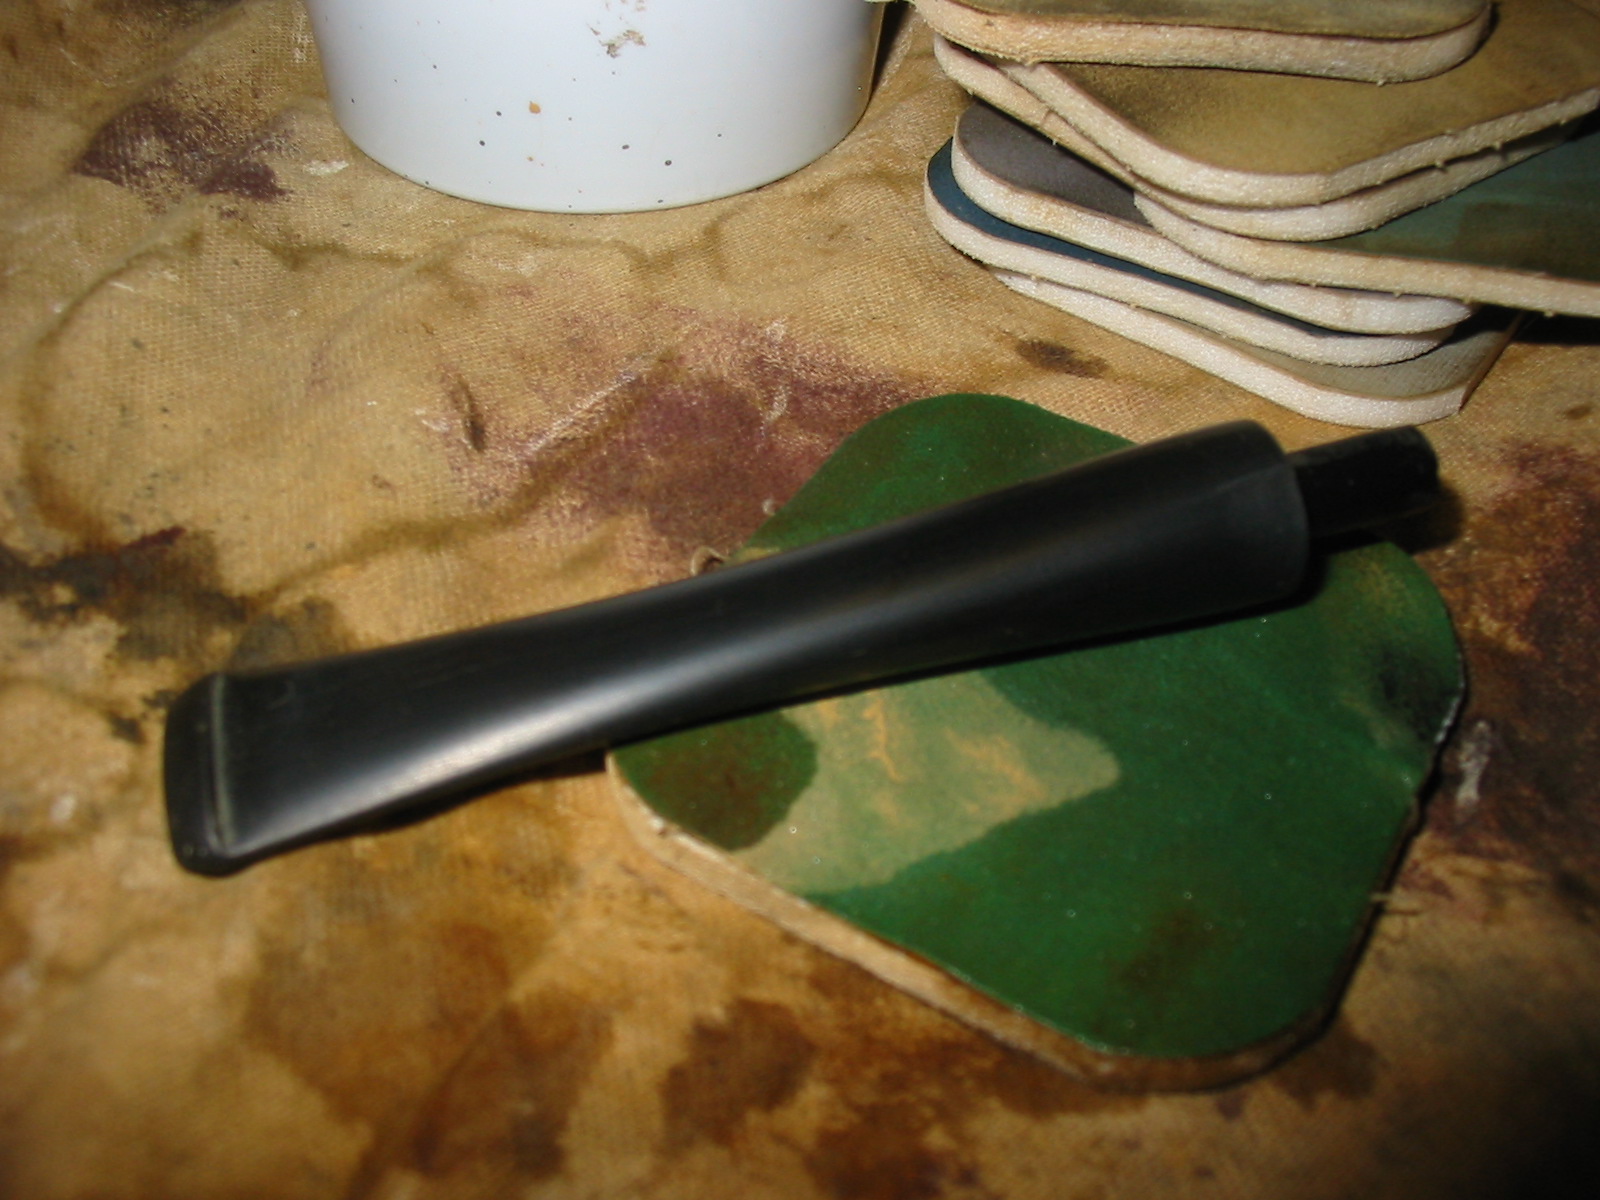
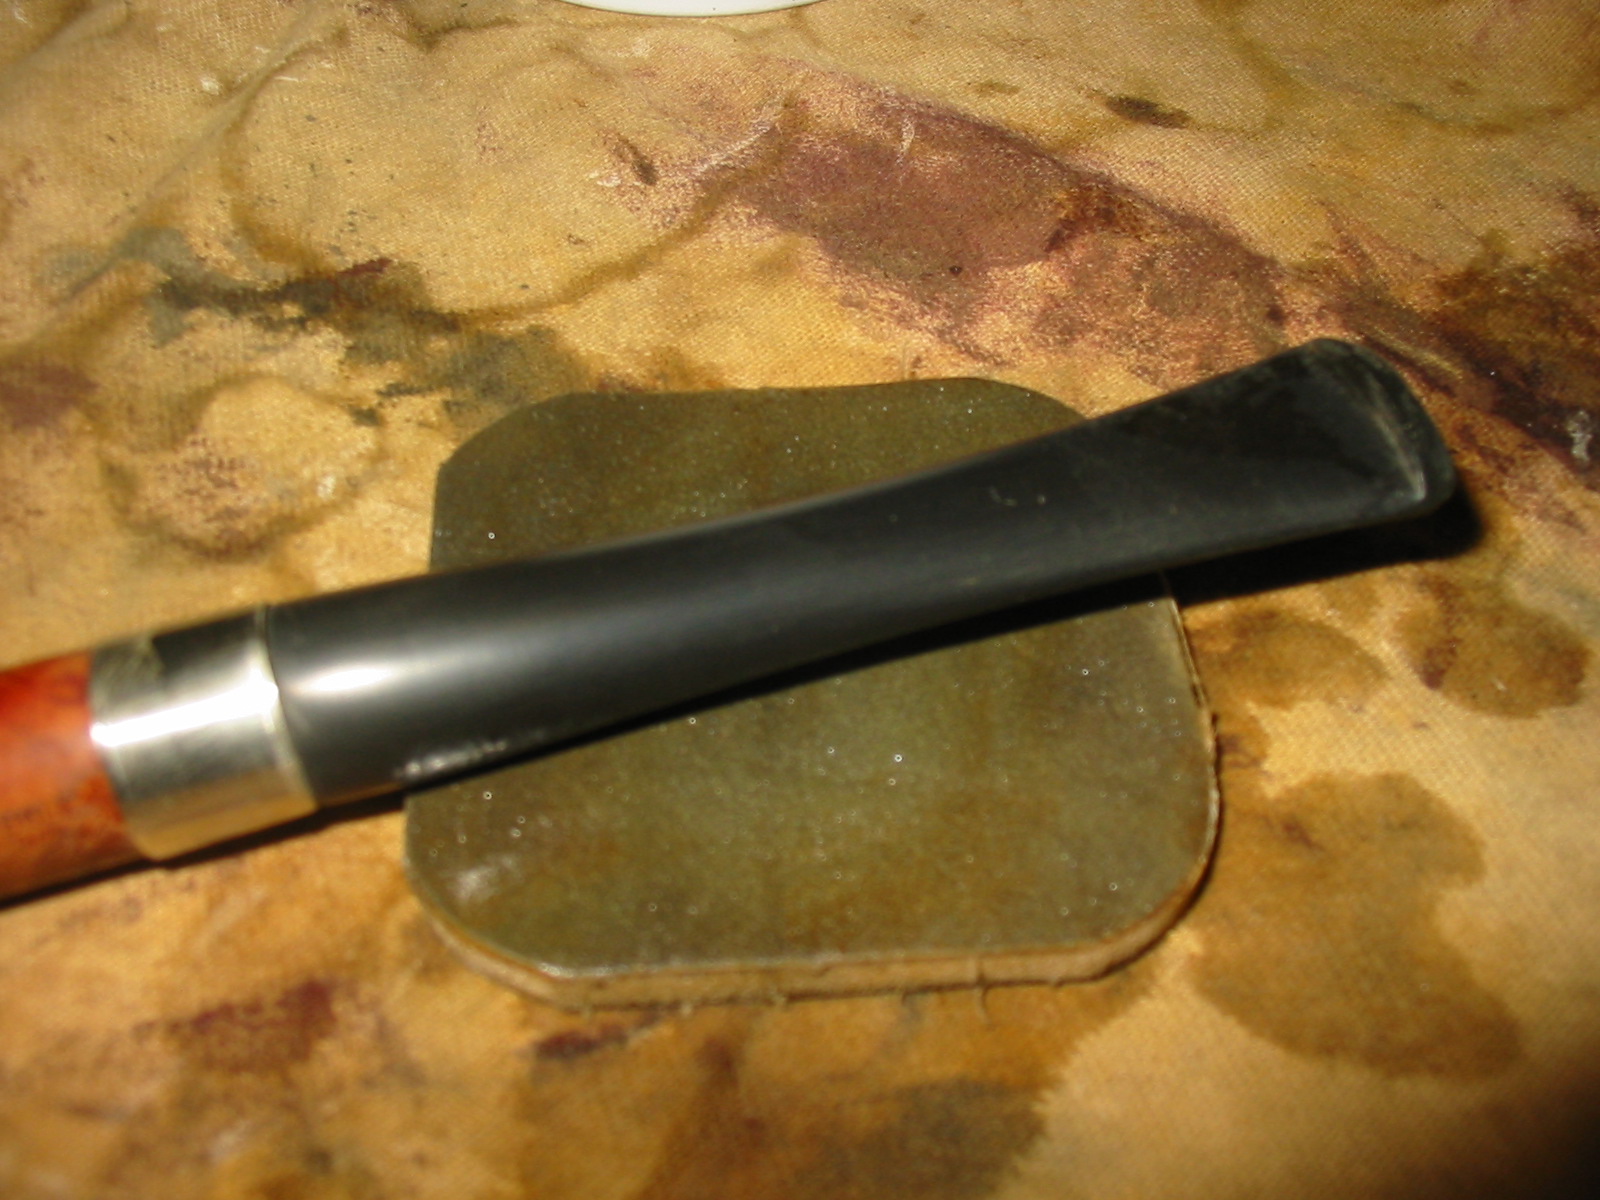
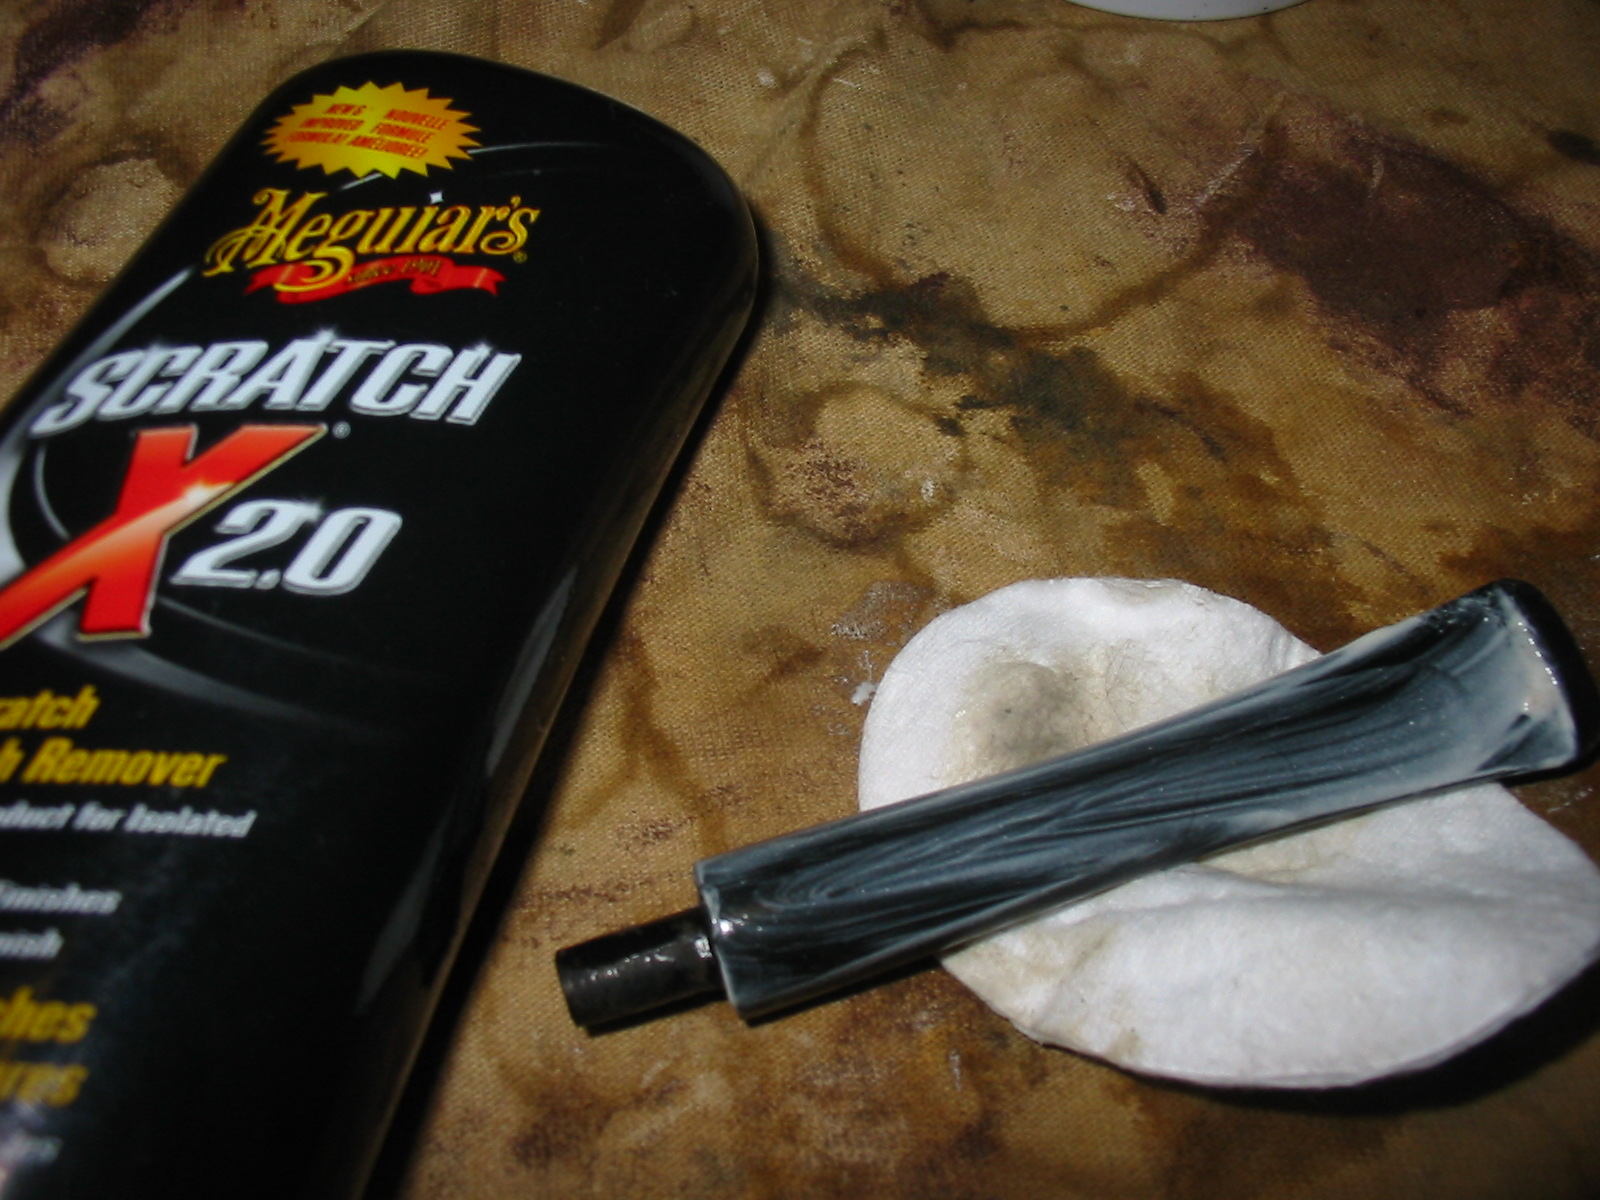
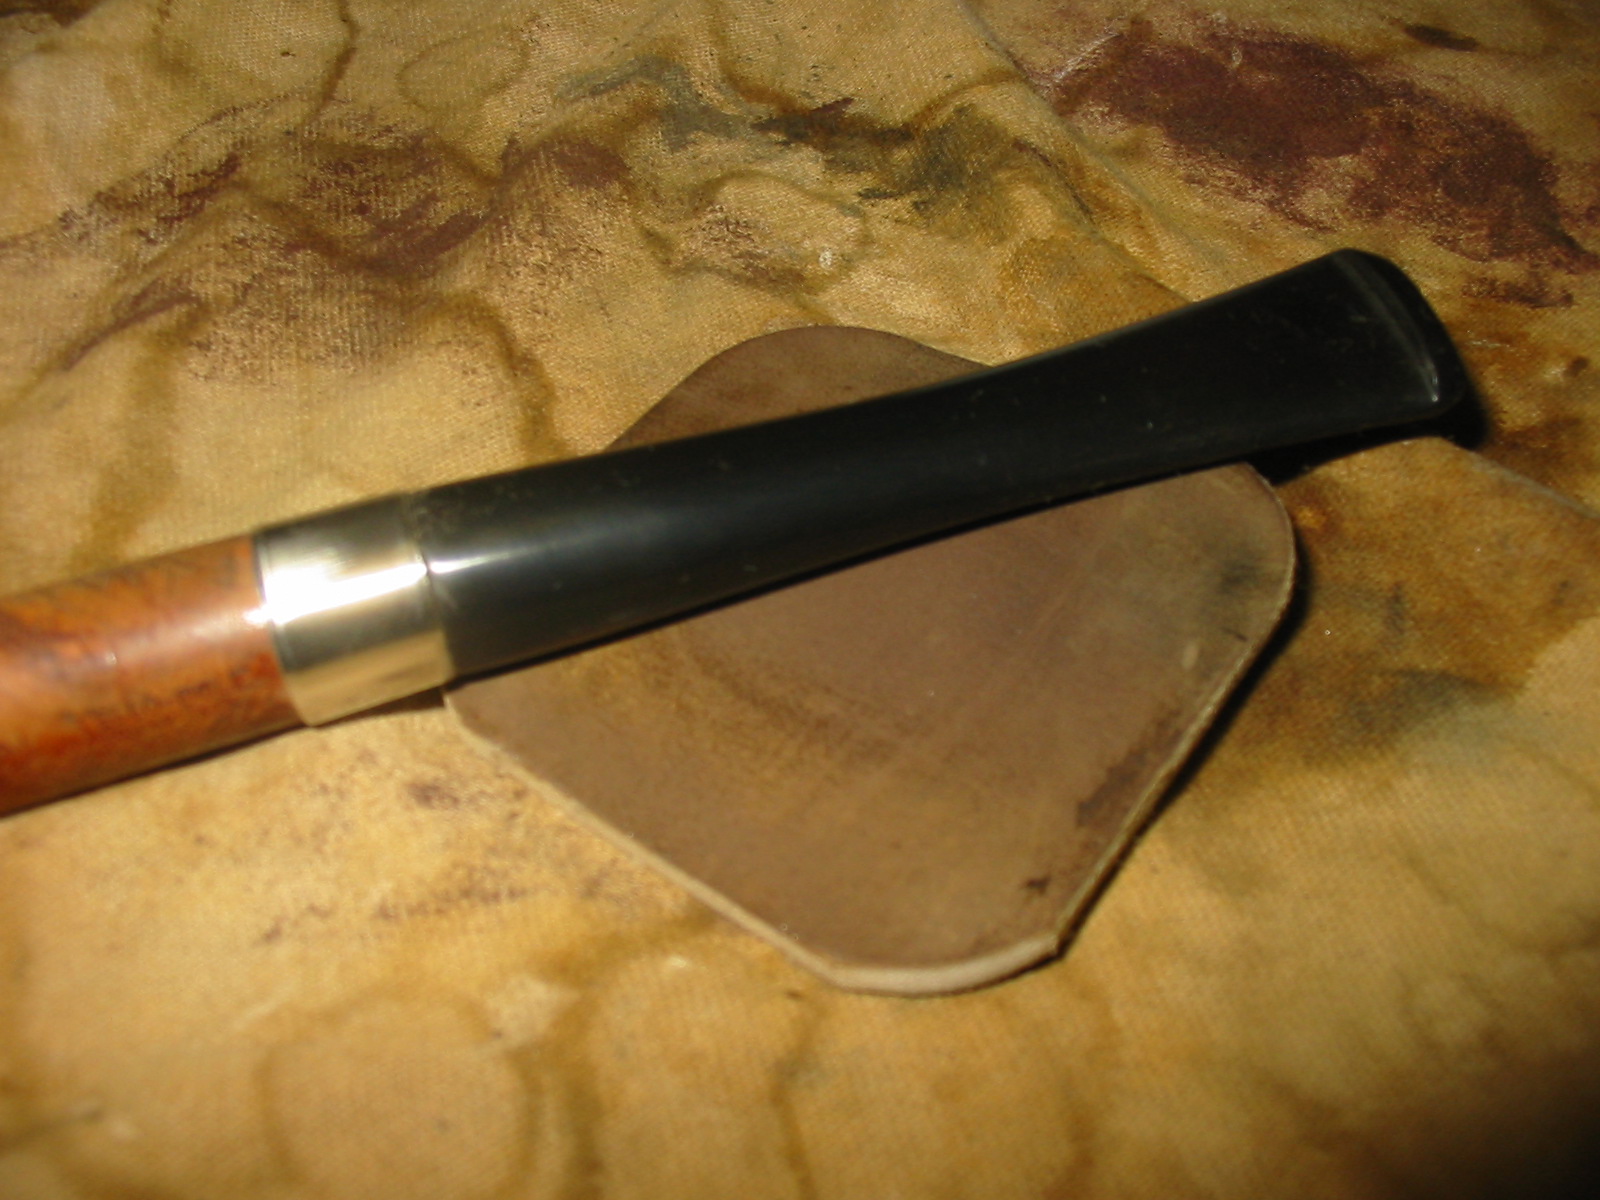
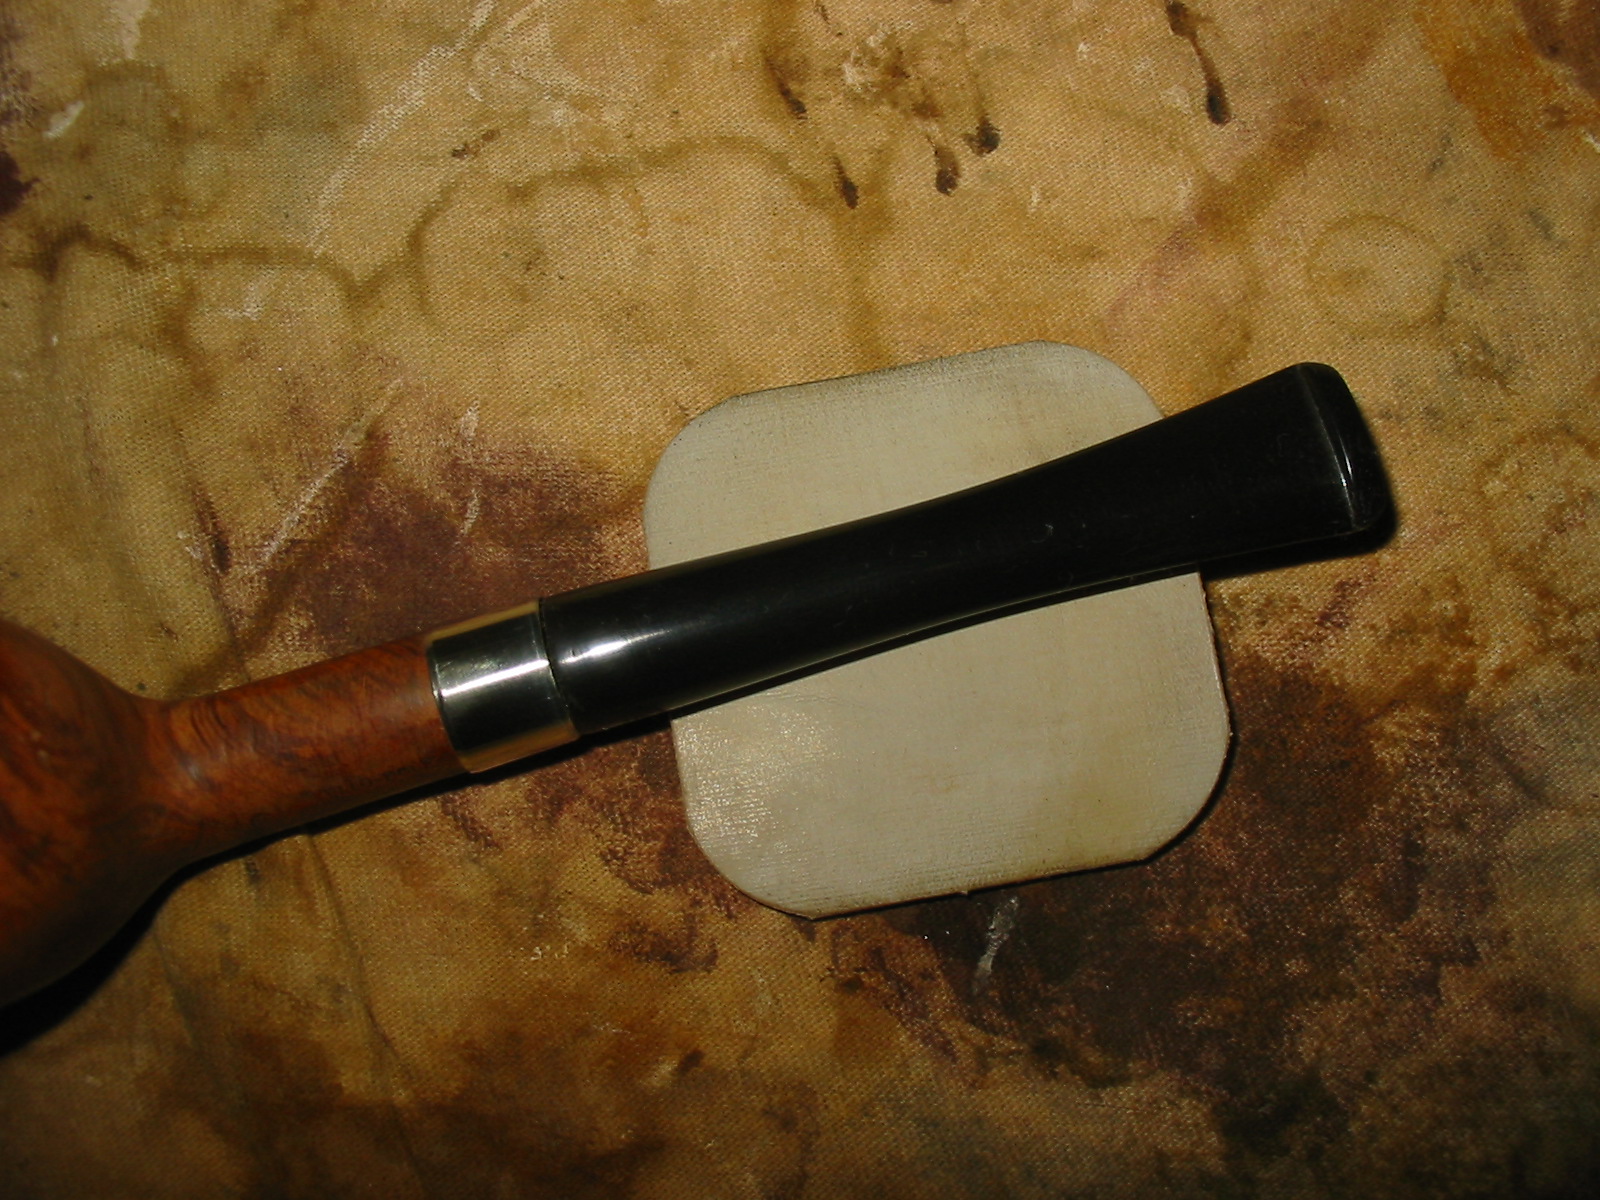
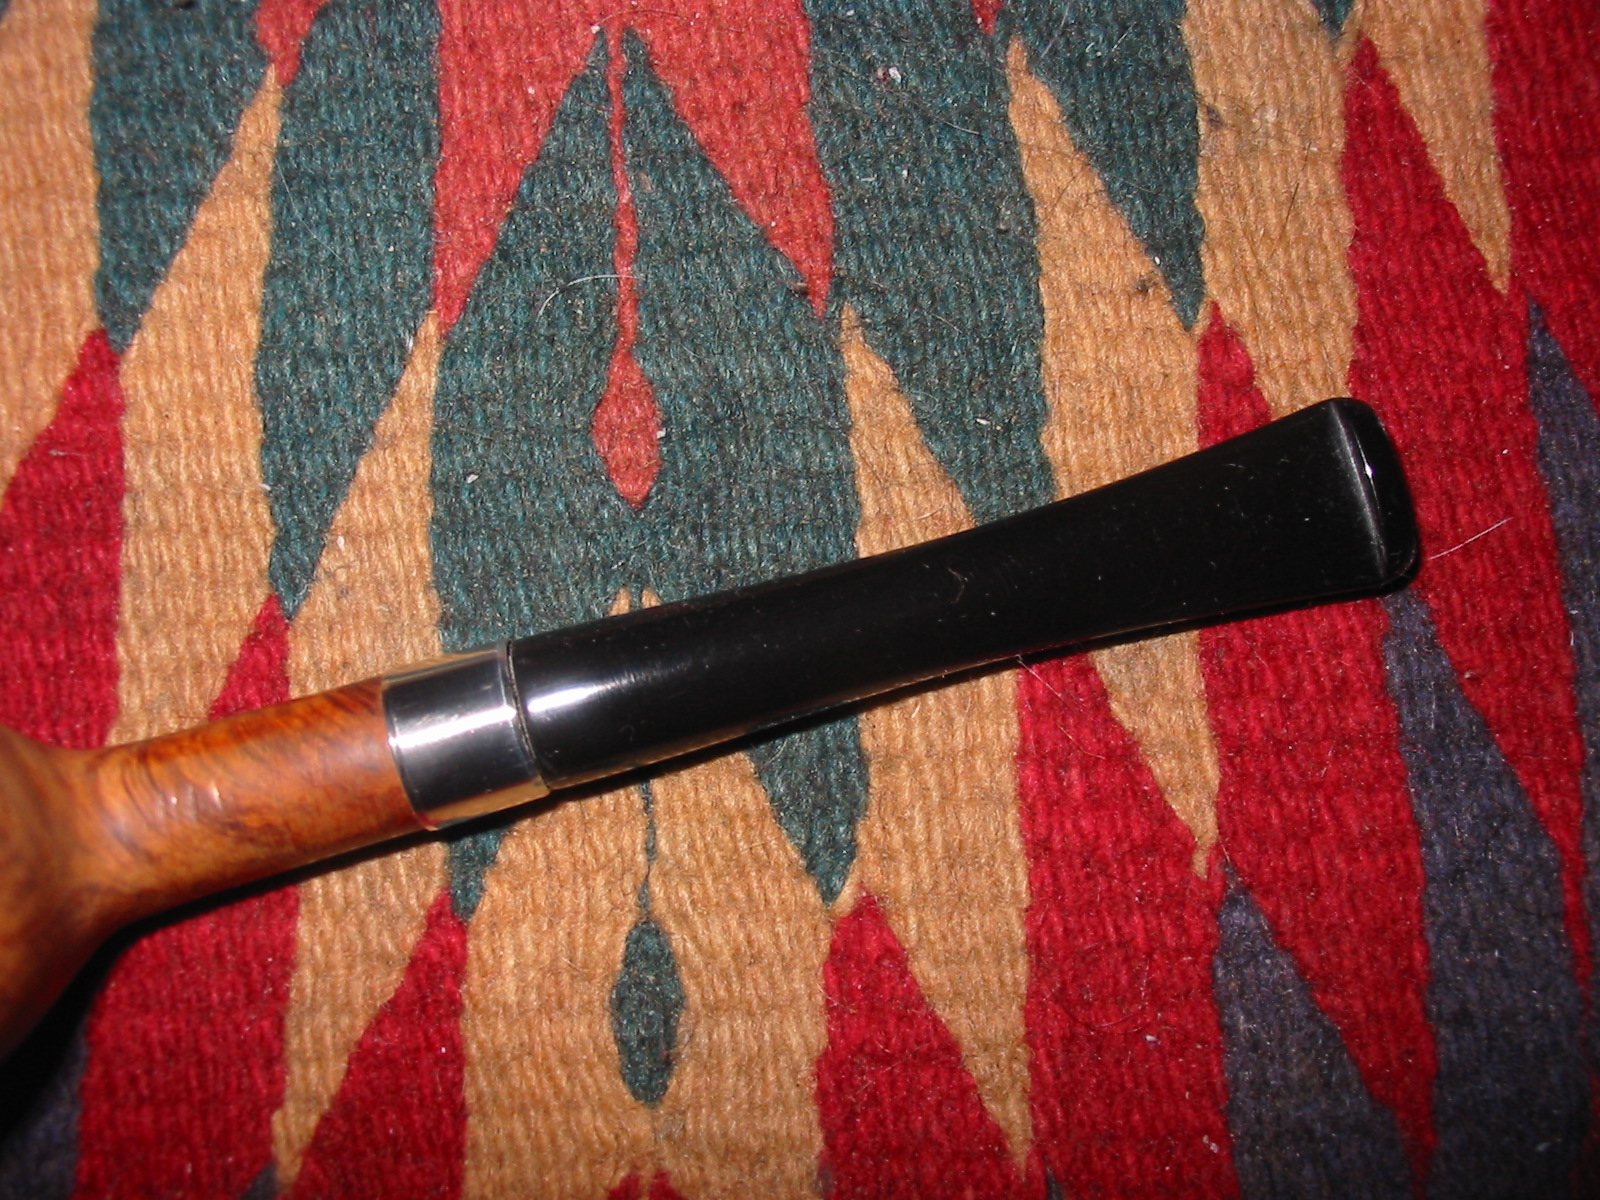
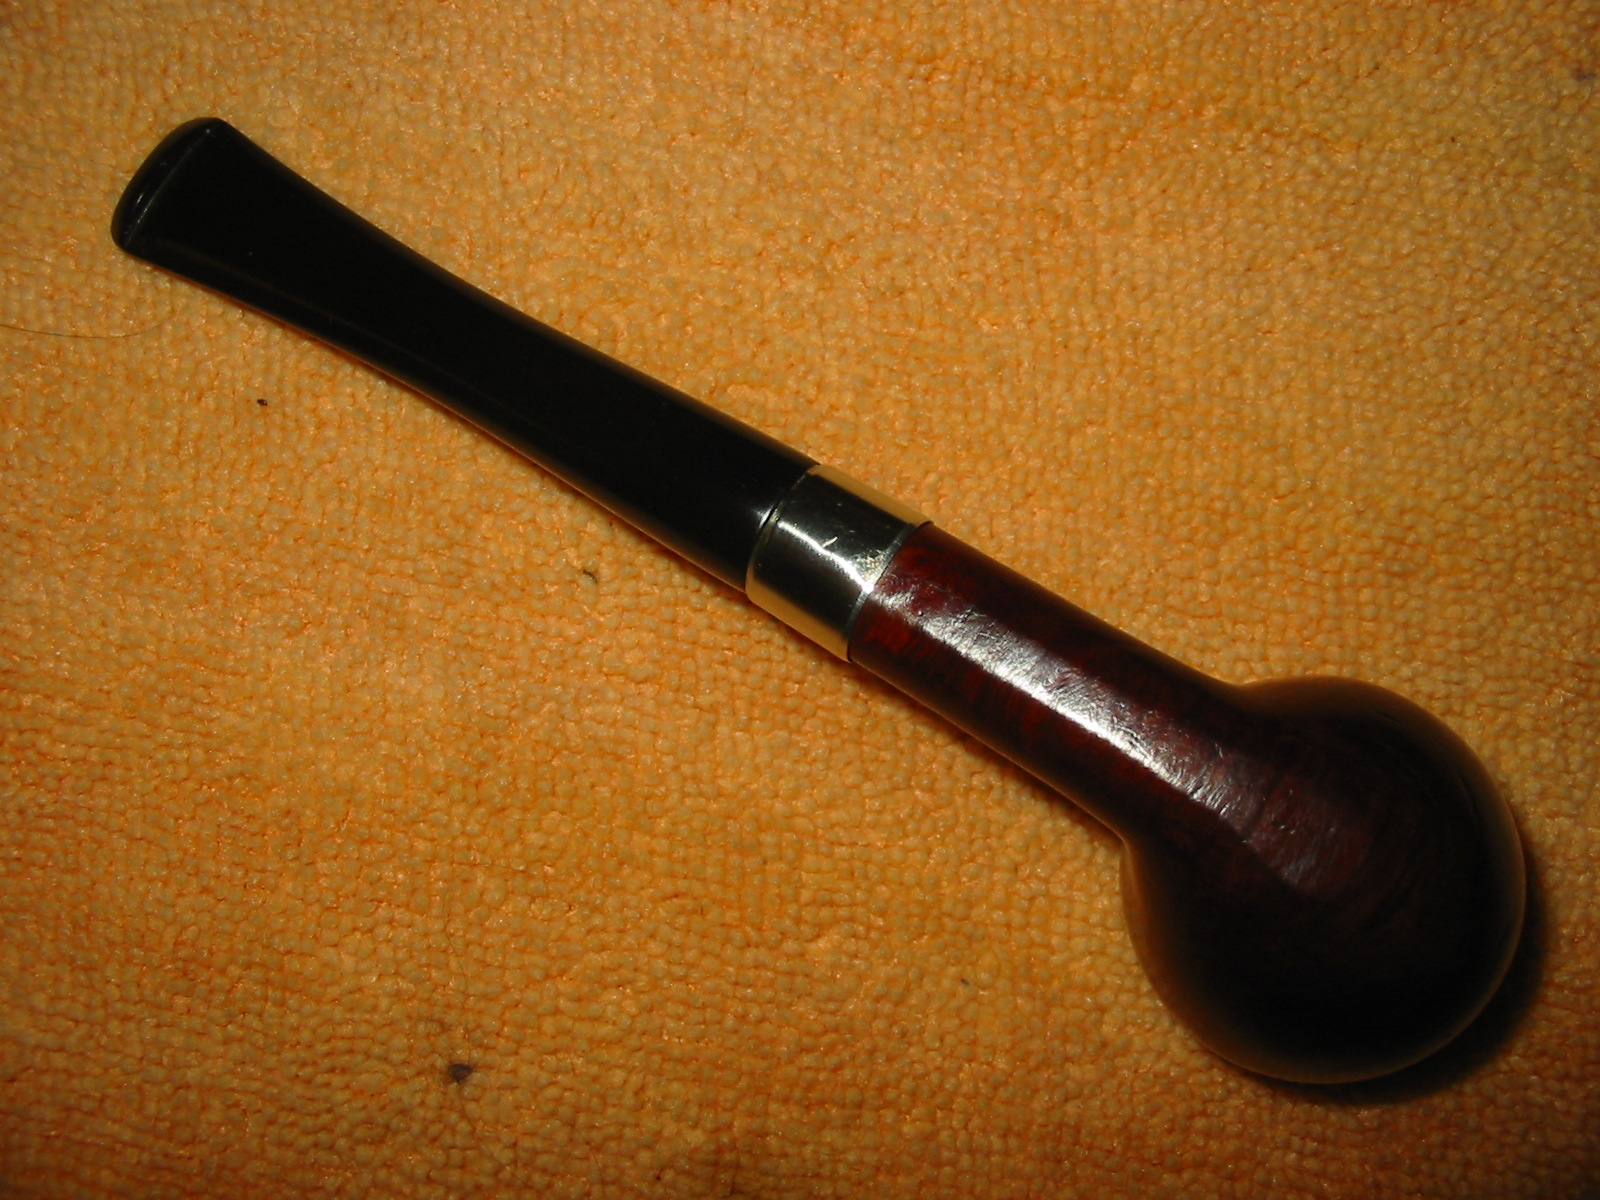
Removing the oxidation from the stem took several hours. I first soaked the stem in mild Oxy-clean solution to loosen the oxidation. I put a dab of grease on the “C” logo to protect it. I then used 1500 wet paper and then 2000 wet paper to remove the brown oxidation. I buffed the stem lightly with white diamond rouge (with the stem mounted to avoid rounding the edge). Next I sanded the stem with 8000 and then 12000 grade micromesh sheets. The stem was then buffed again with white diamond rounge and finally with Blue Magic automotive plastic polish.

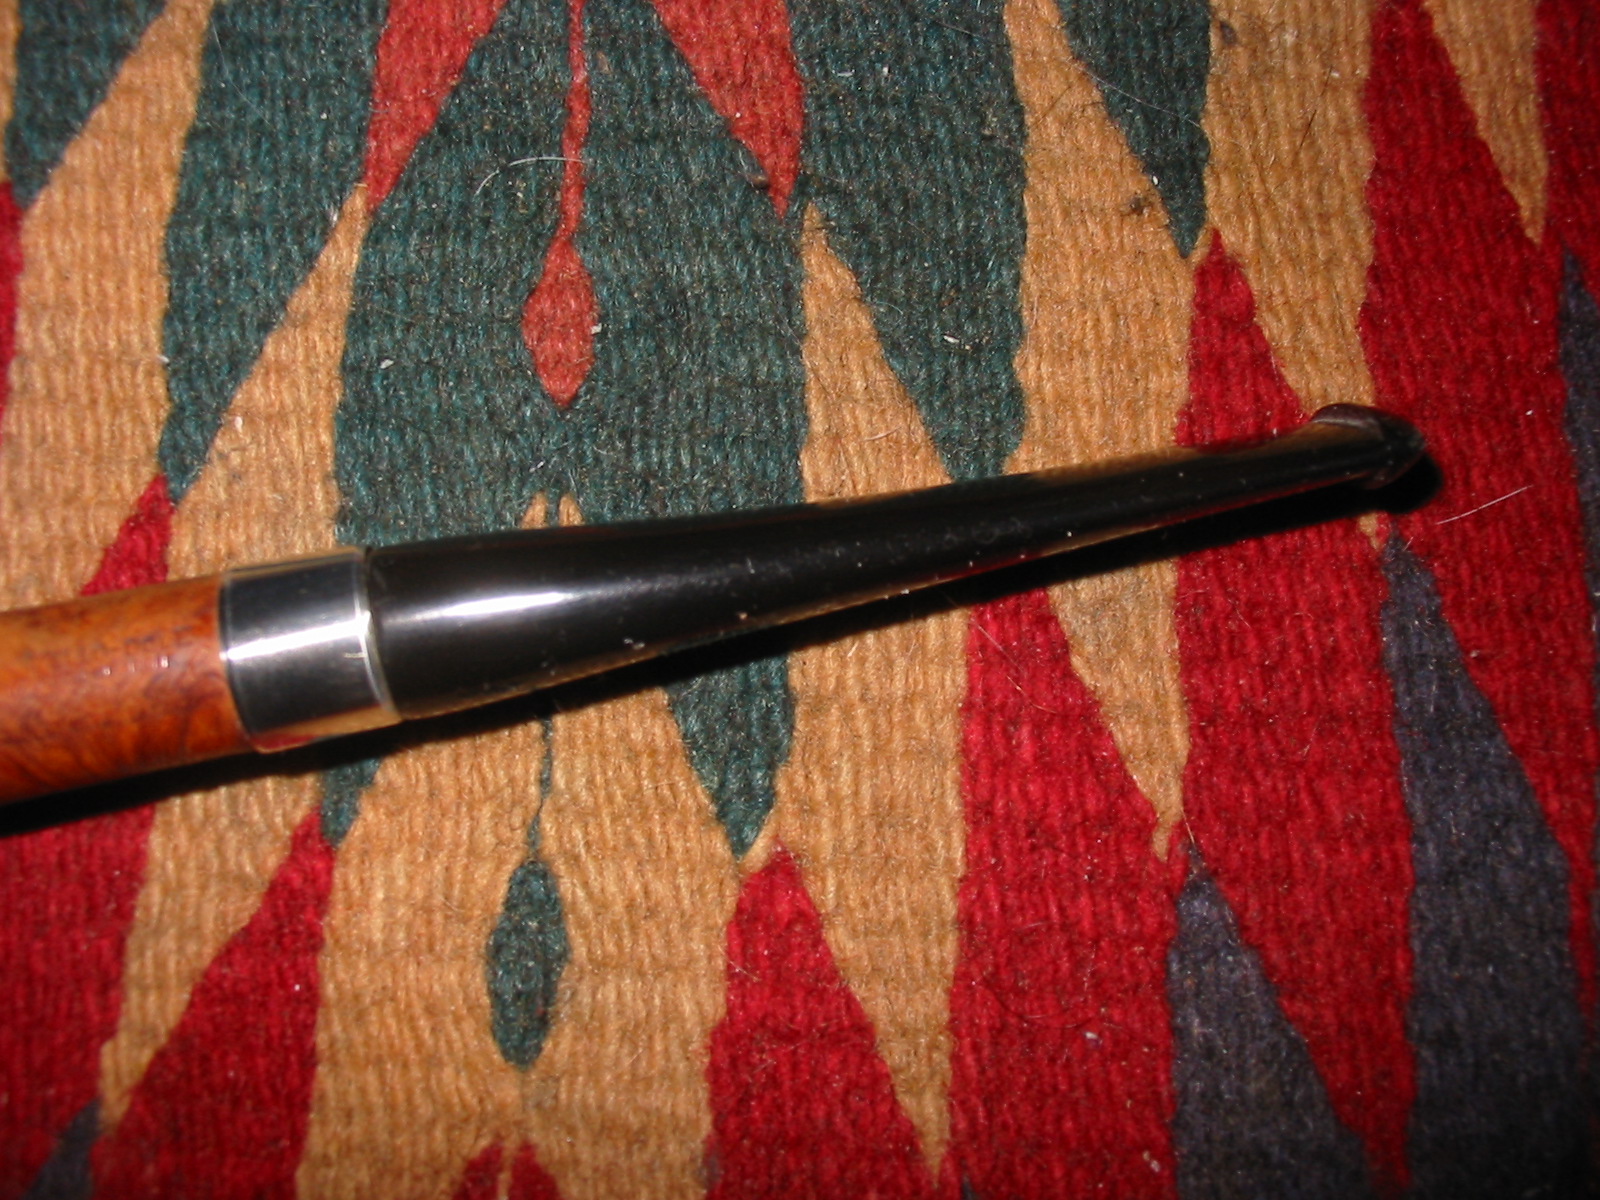
I tried to raise the tooth indention on the bottom of the stem, but it could not be raised much. I ordered a tube of black superglue that luthiers use for repair on stringed instruments. I’ve previously used regular superglue mixed with a little black vulcanite dust but this pipe seemed worthy of the investment ($15 delivered…). I’ll update the photos after the black superglue is used.

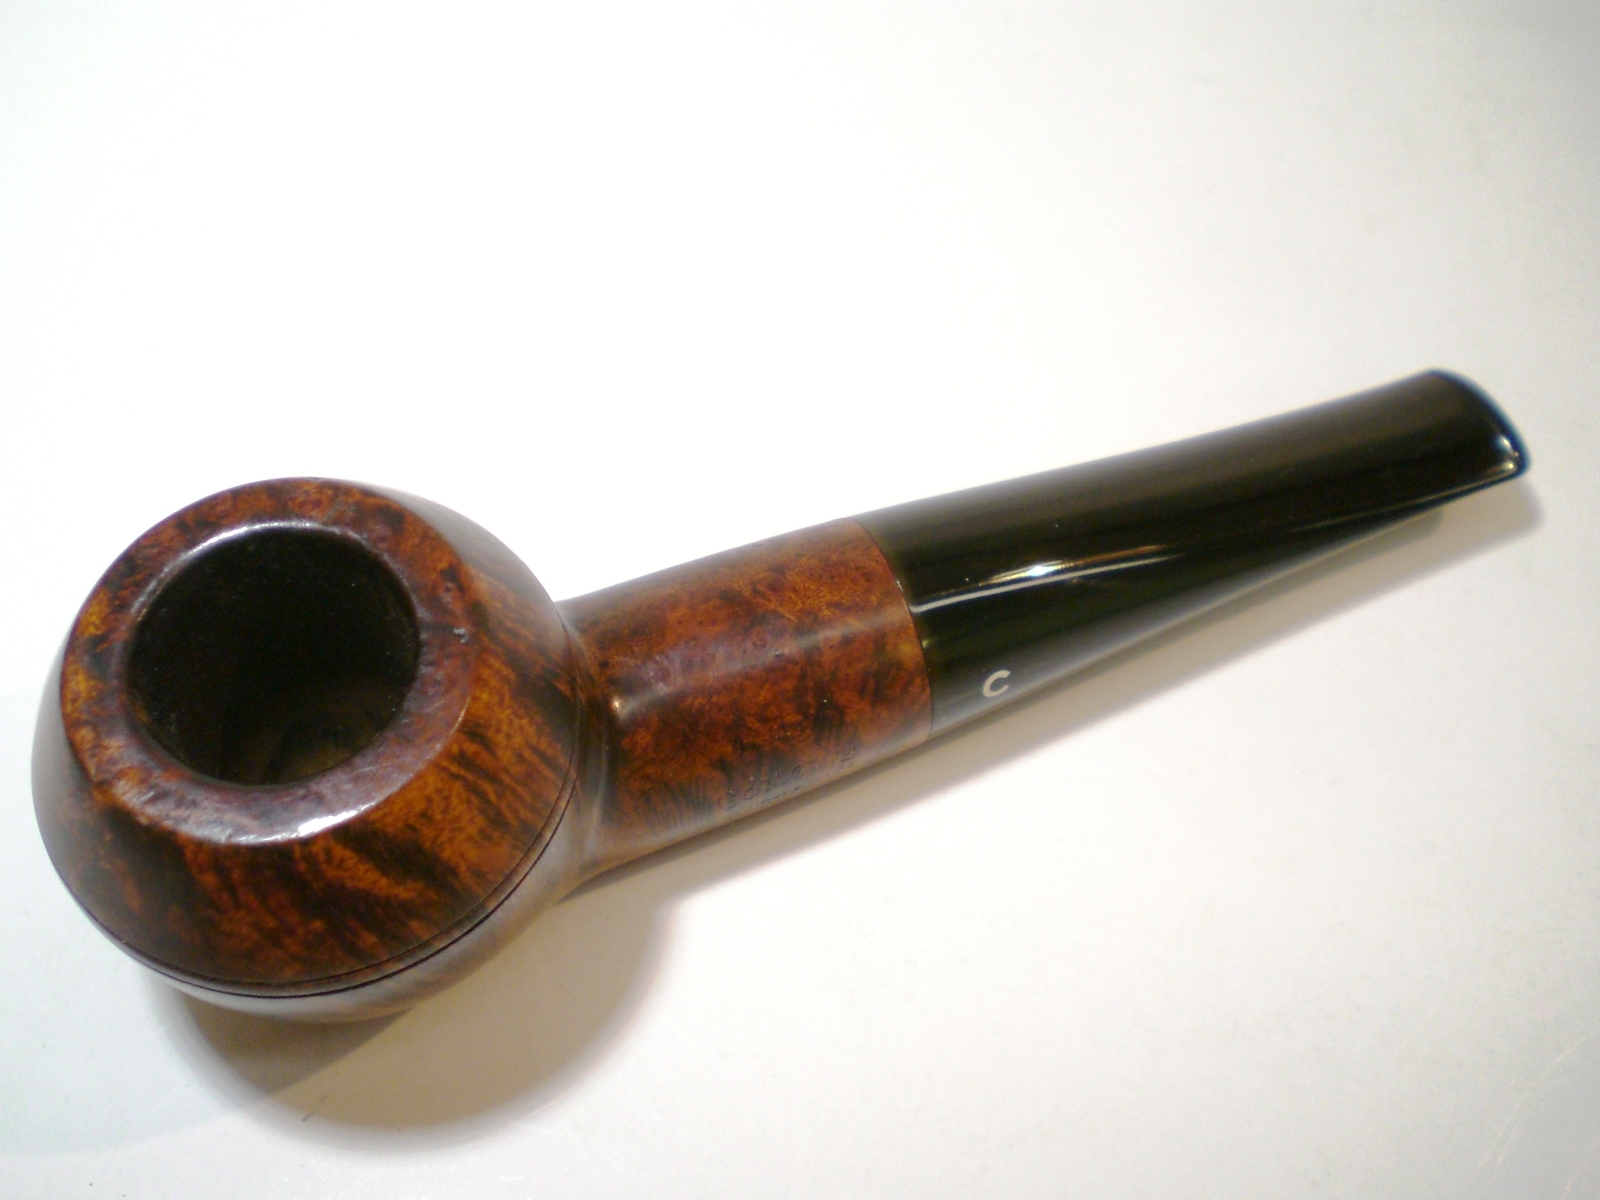
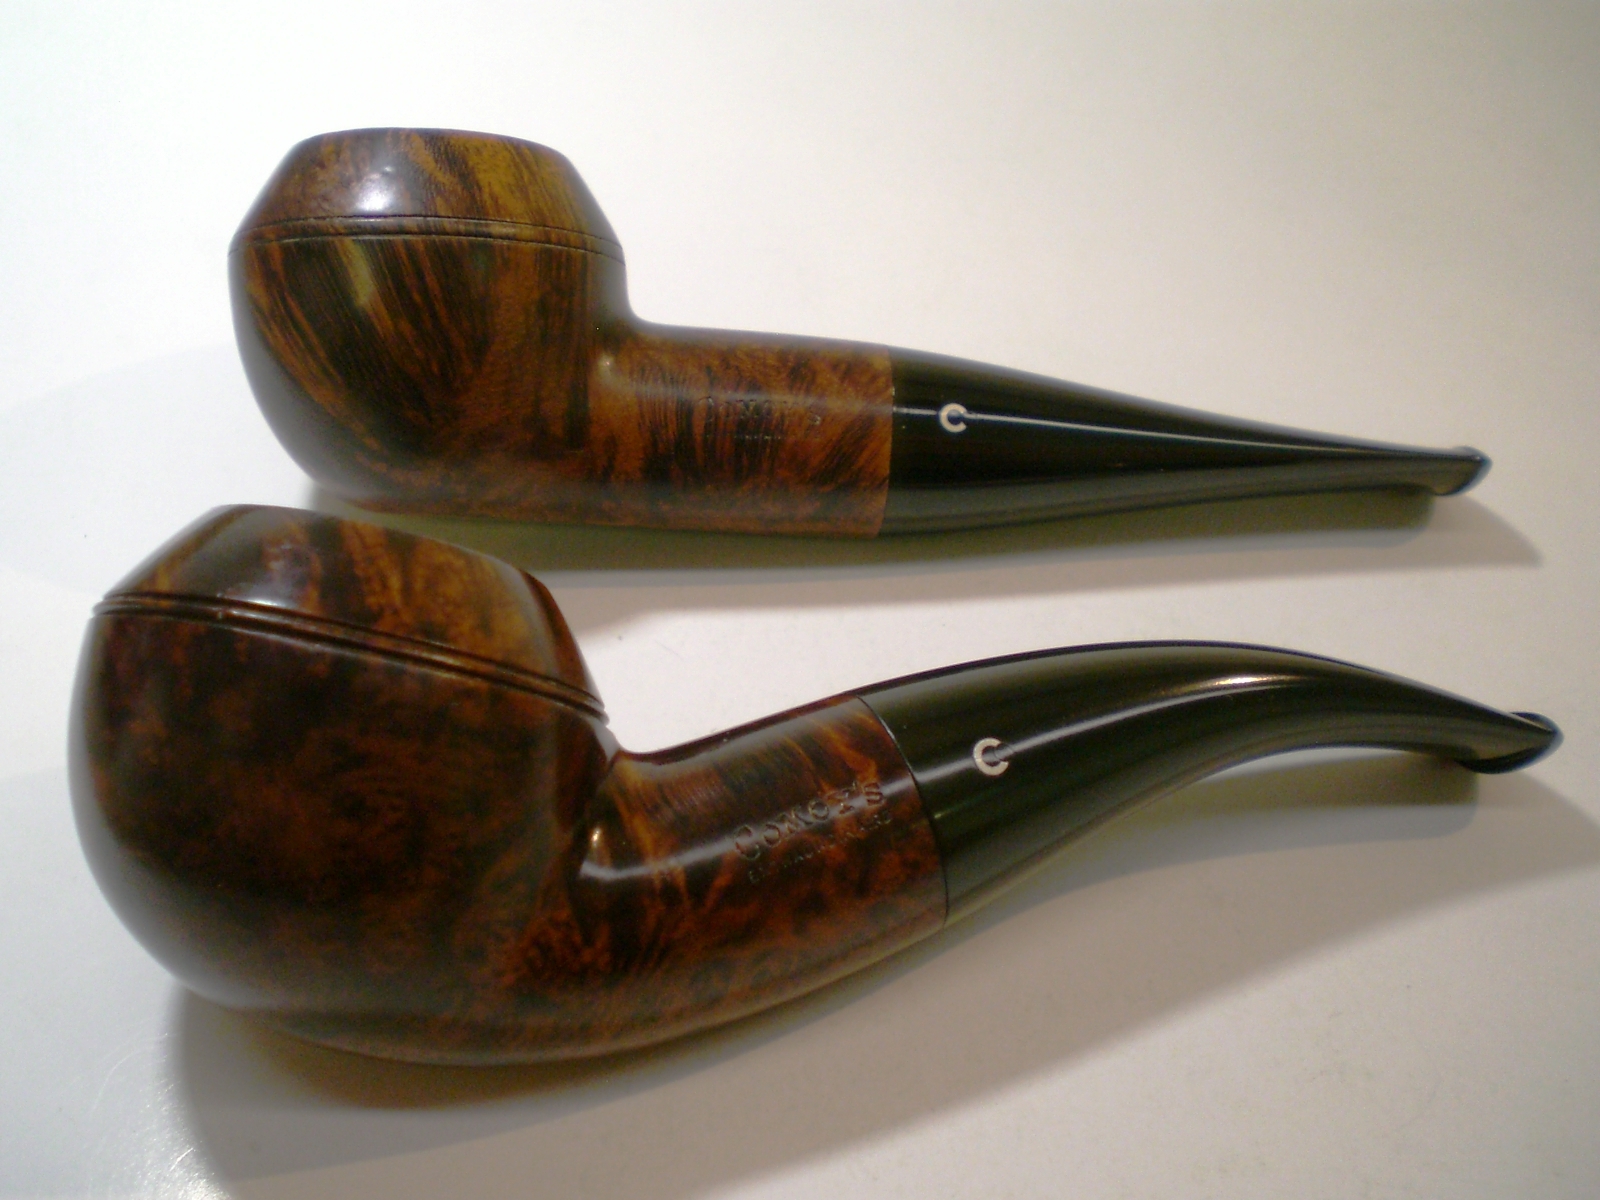
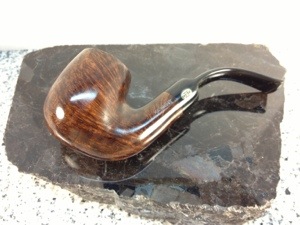
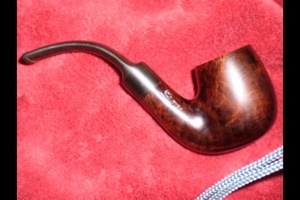
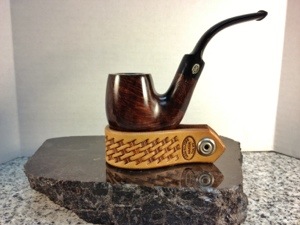
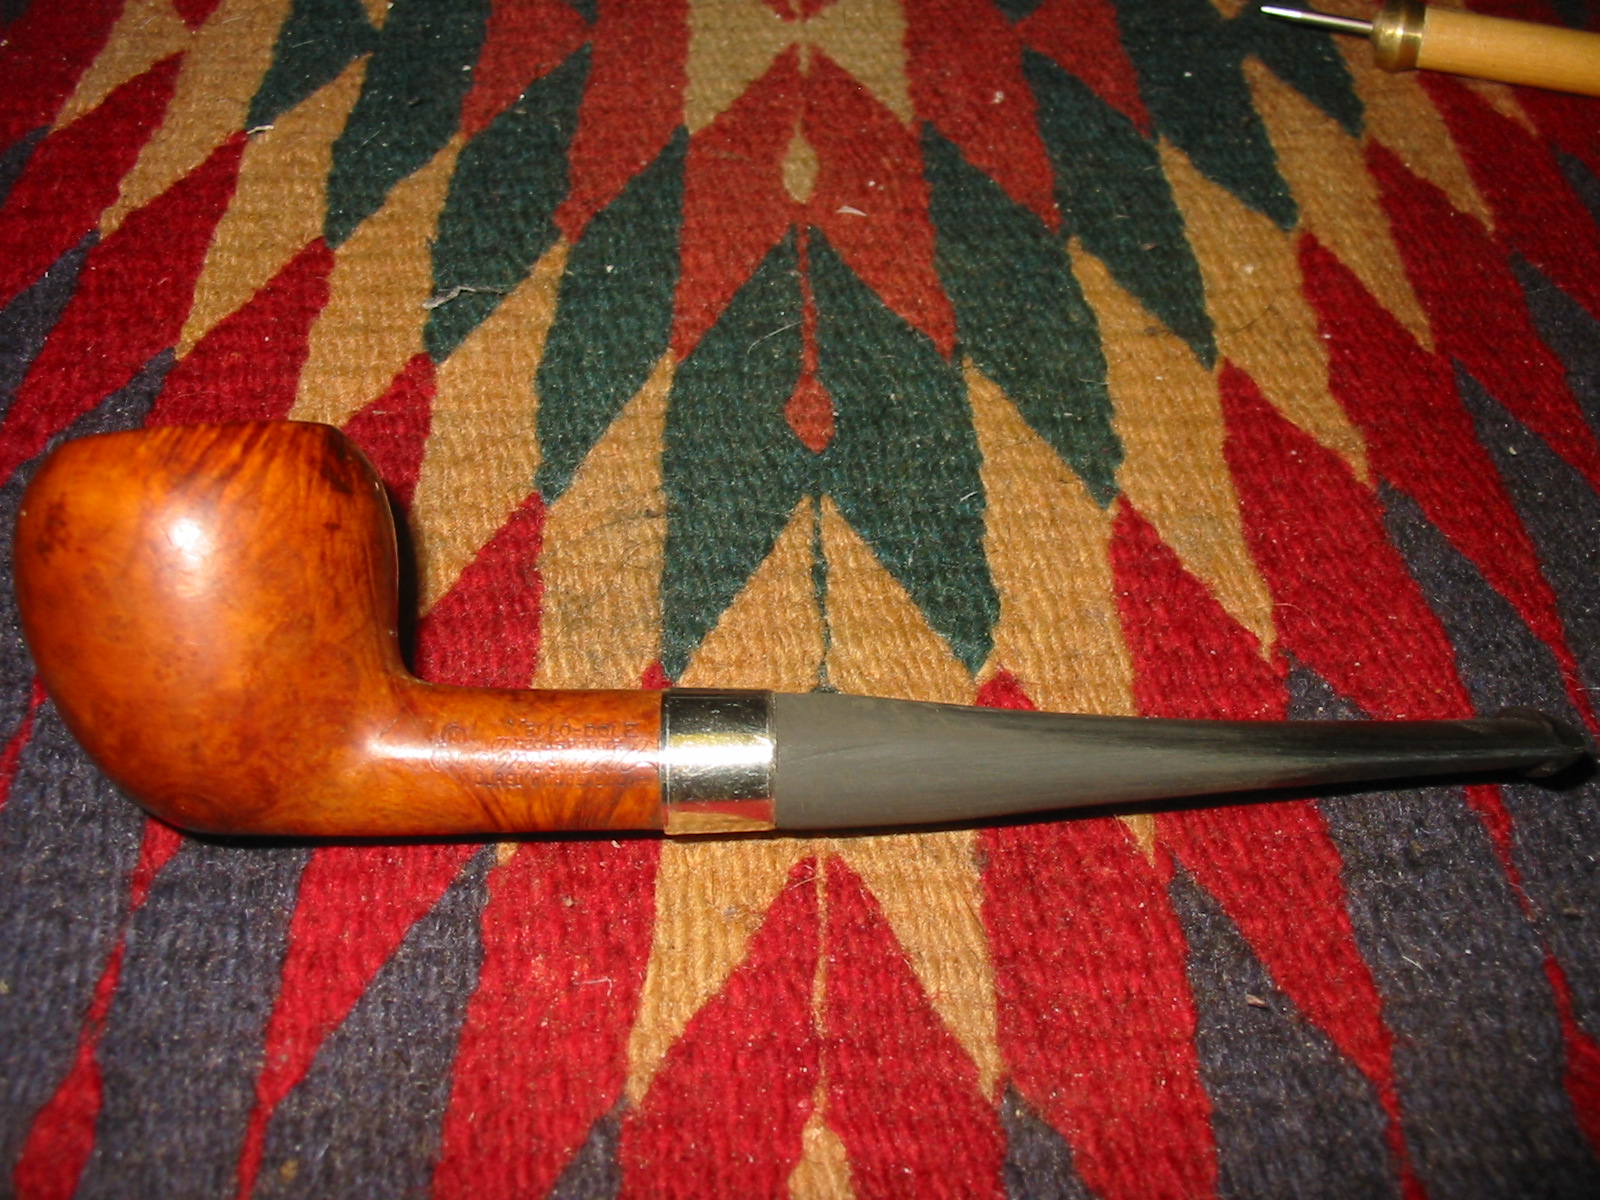
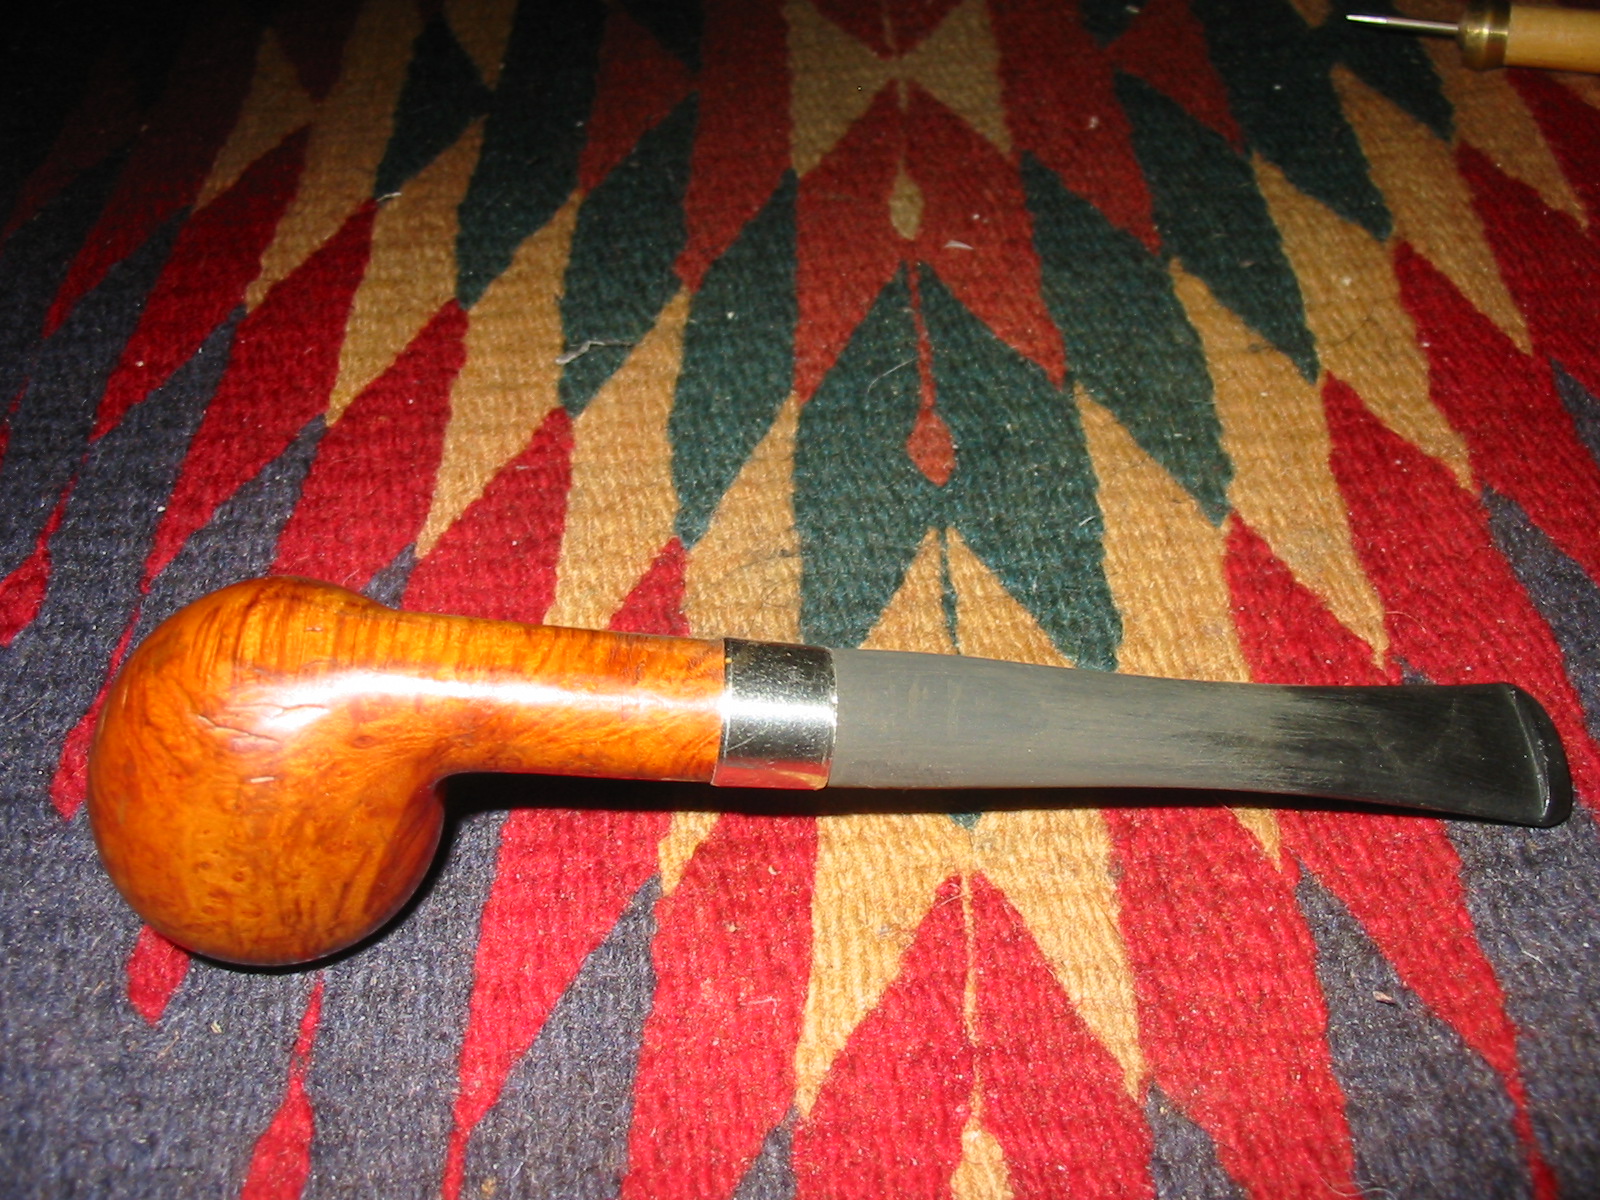
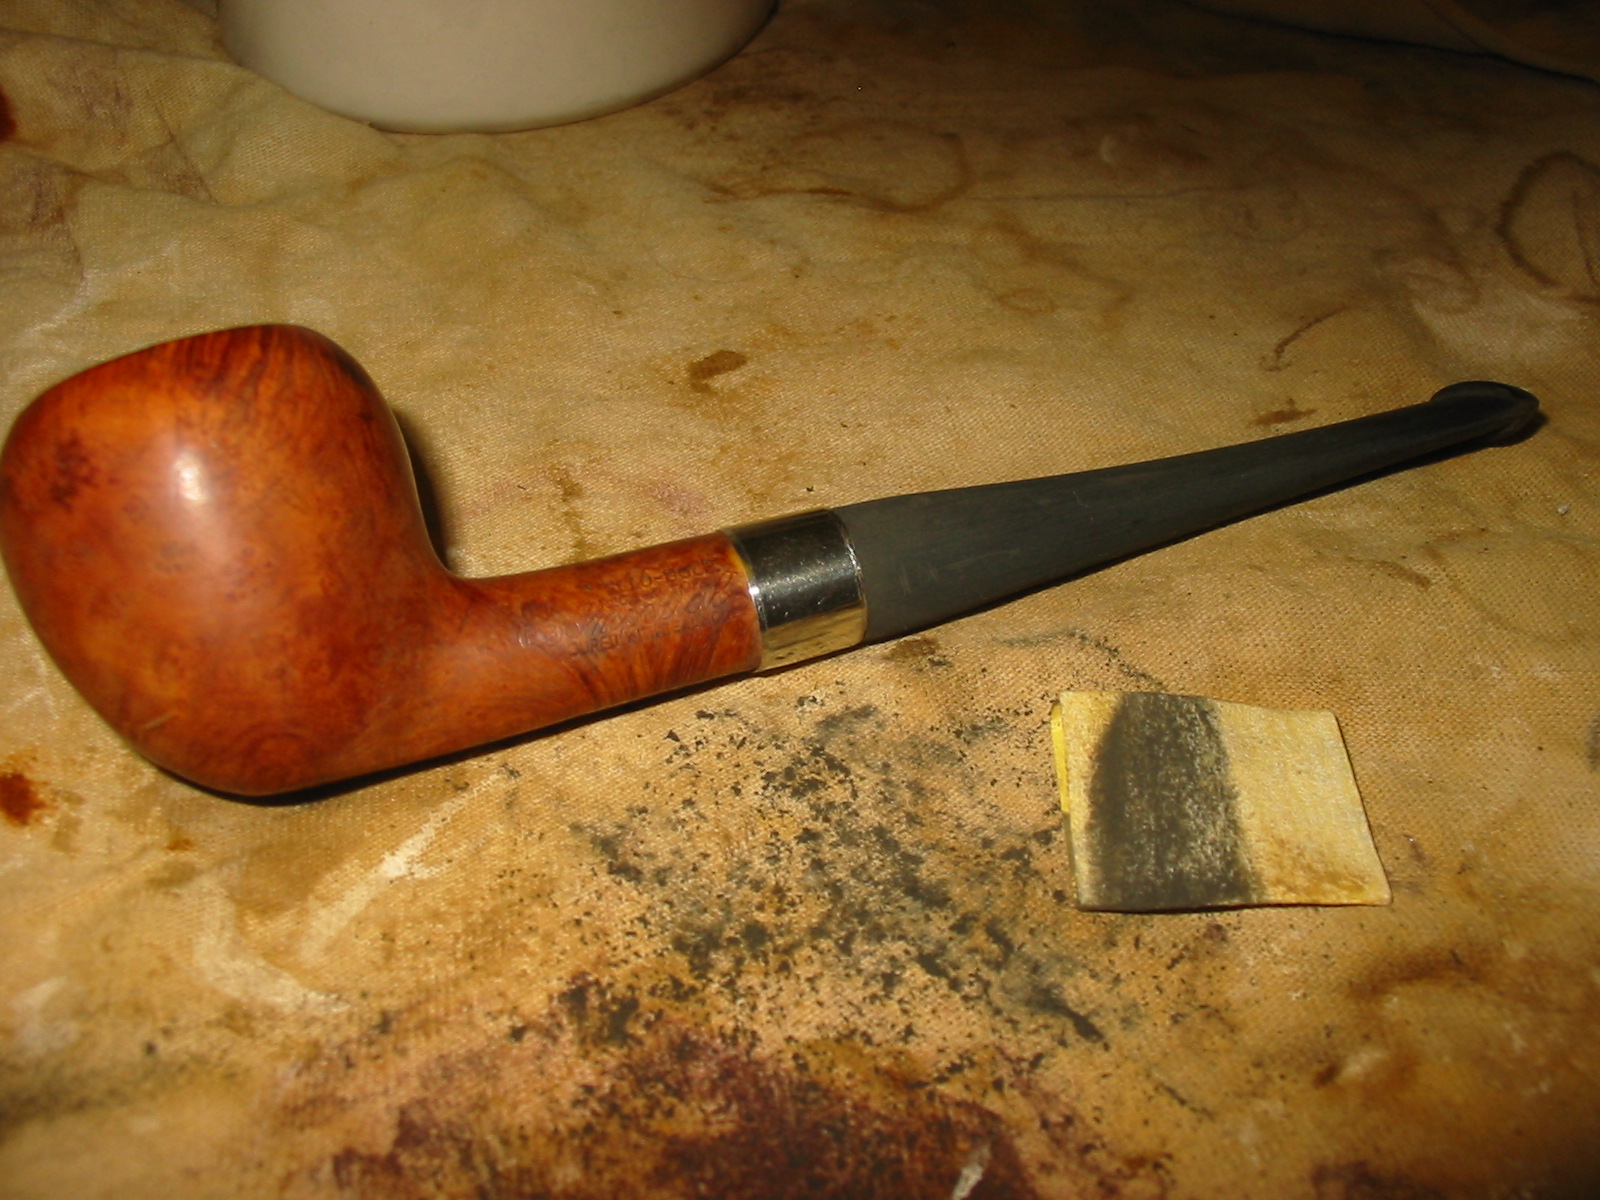
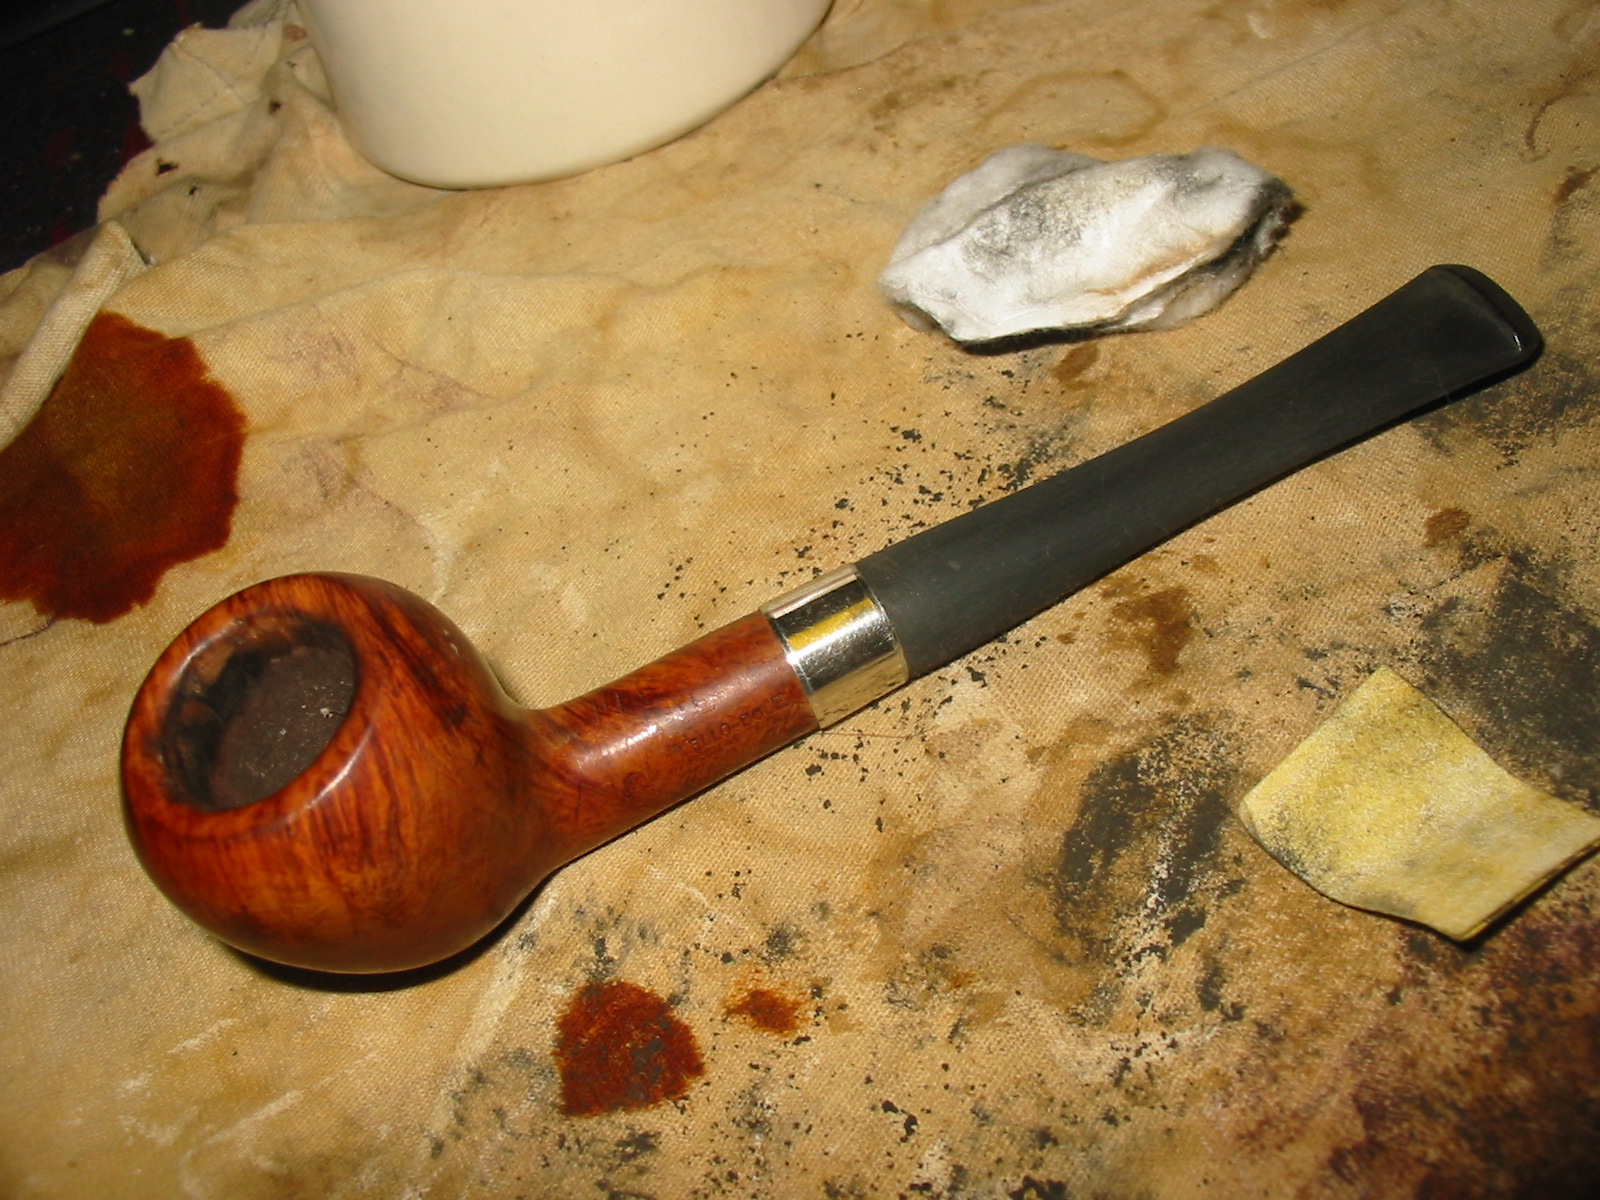
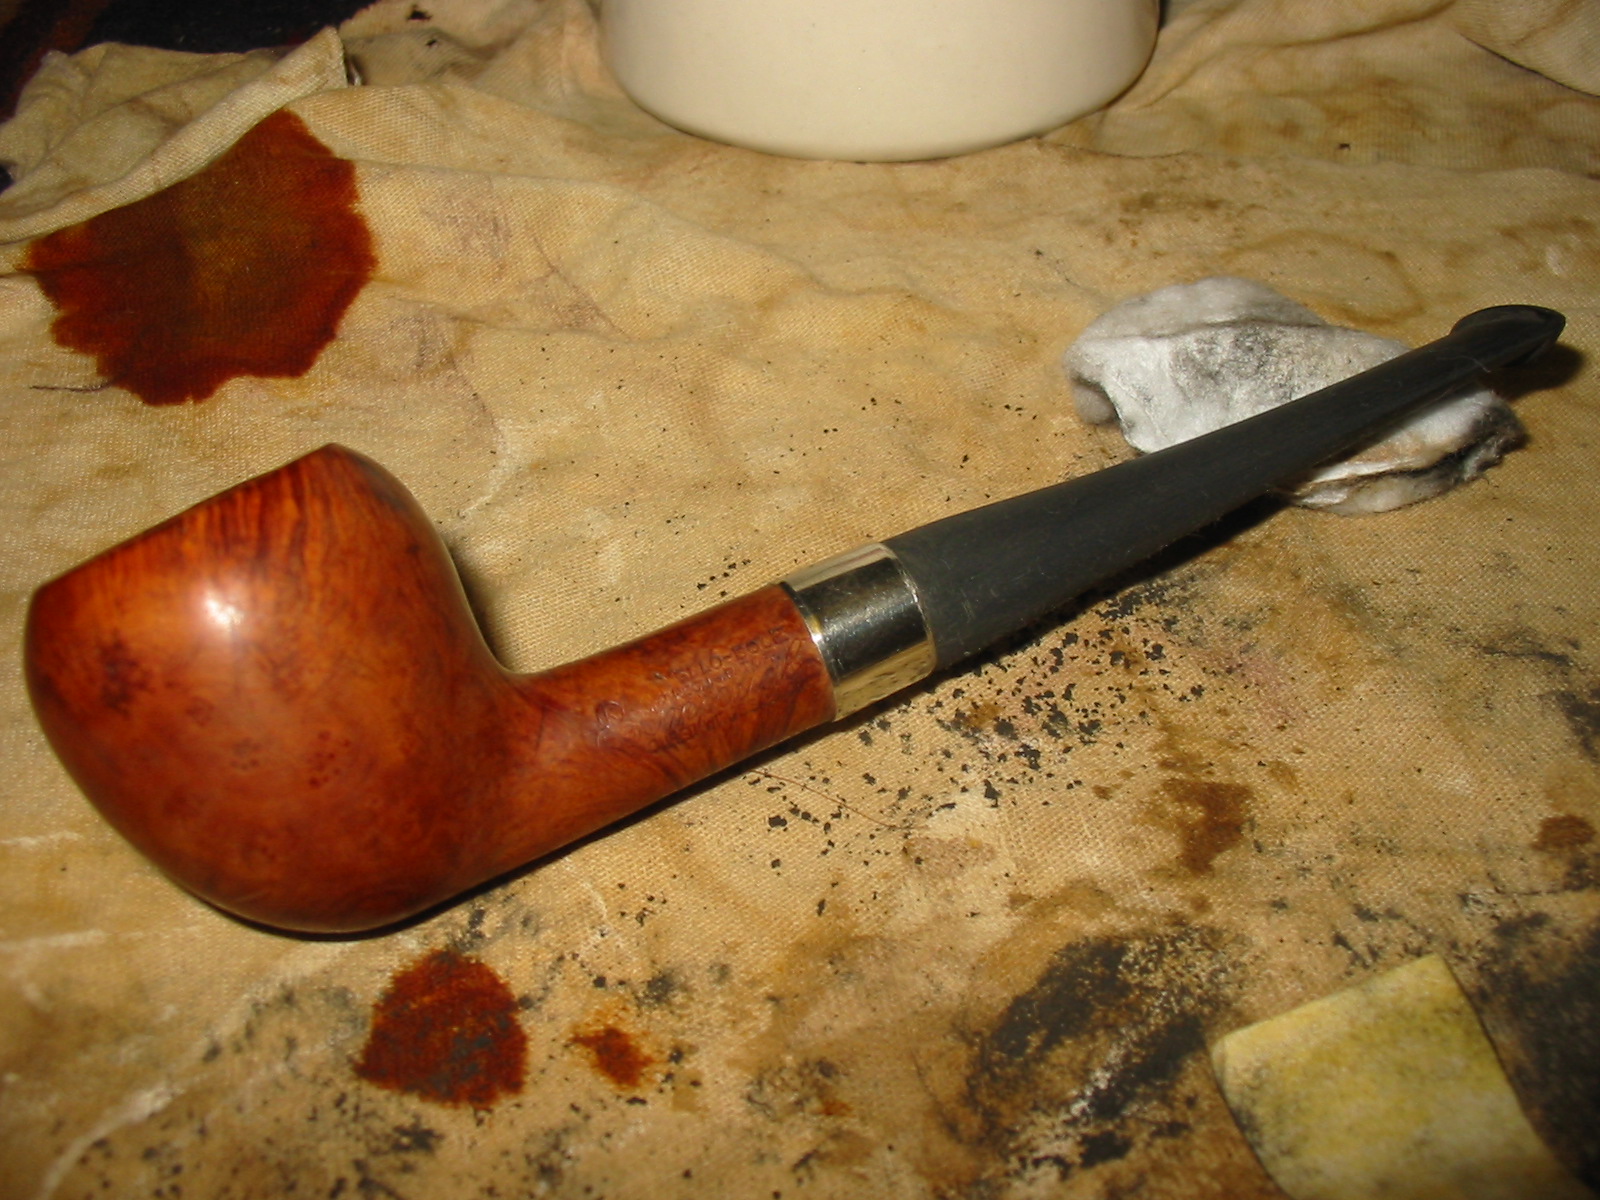
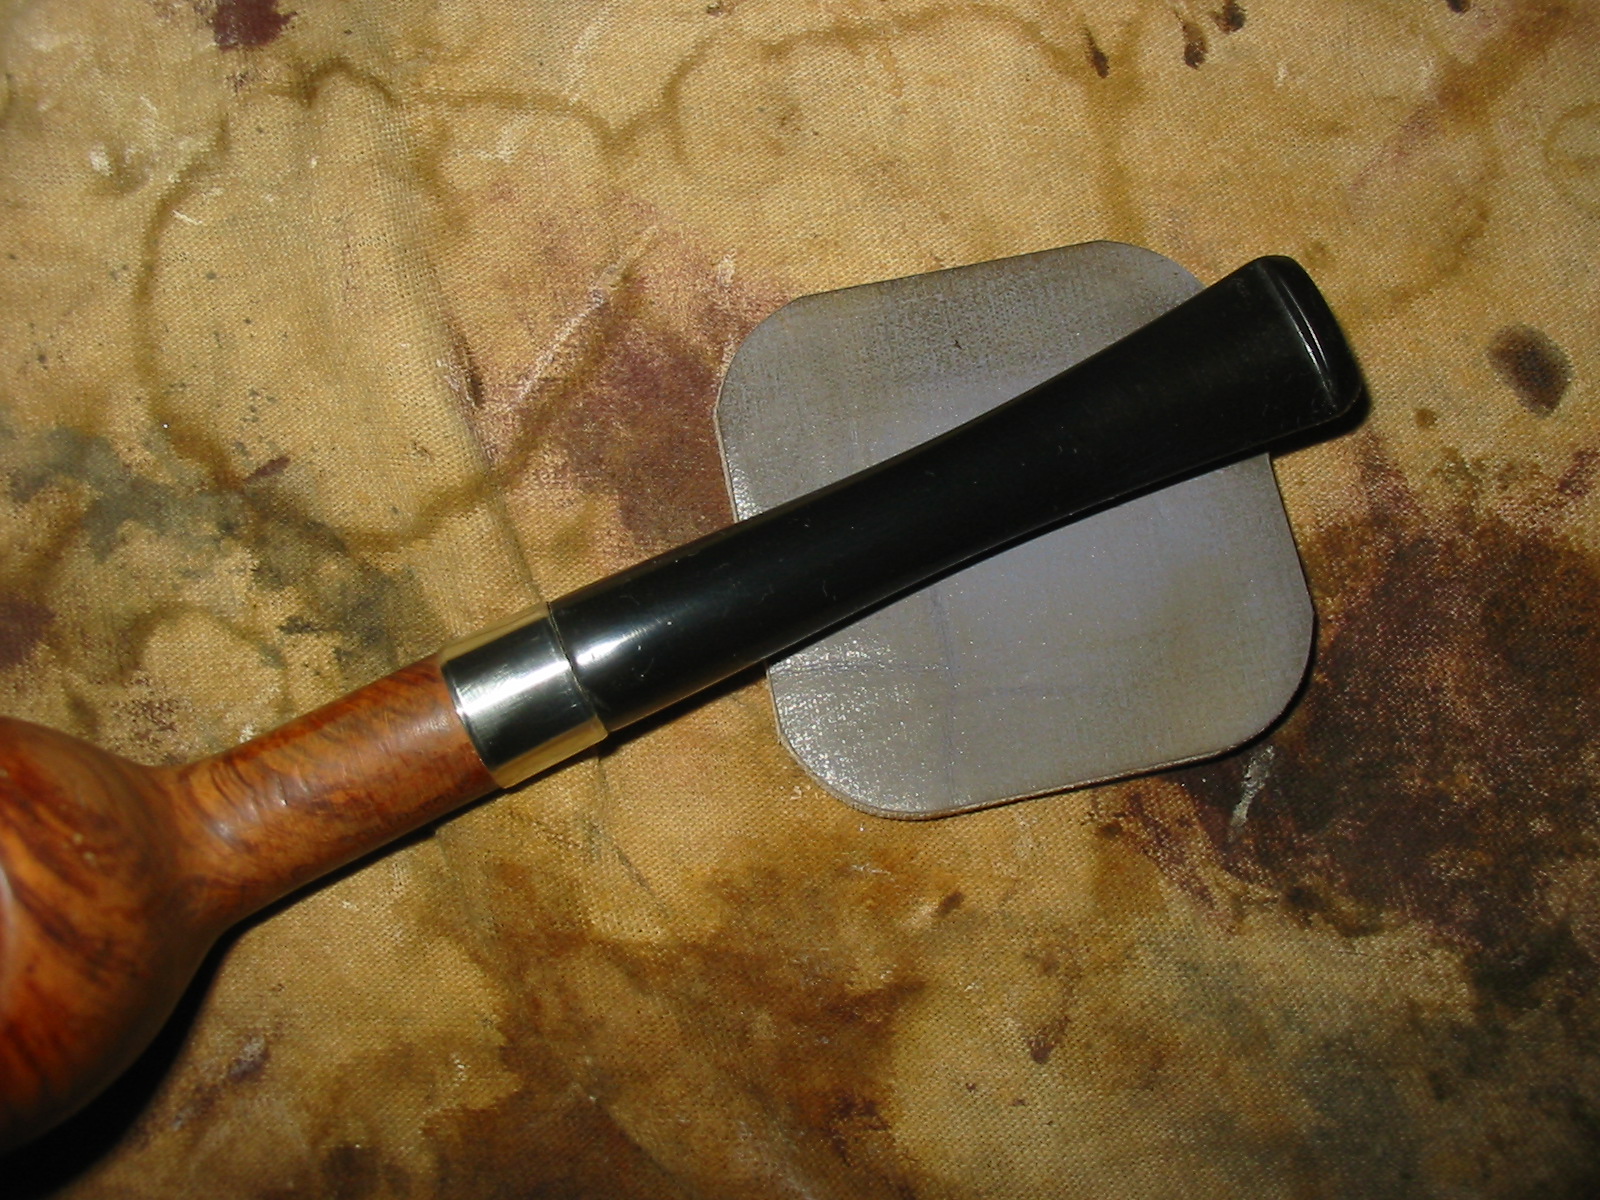
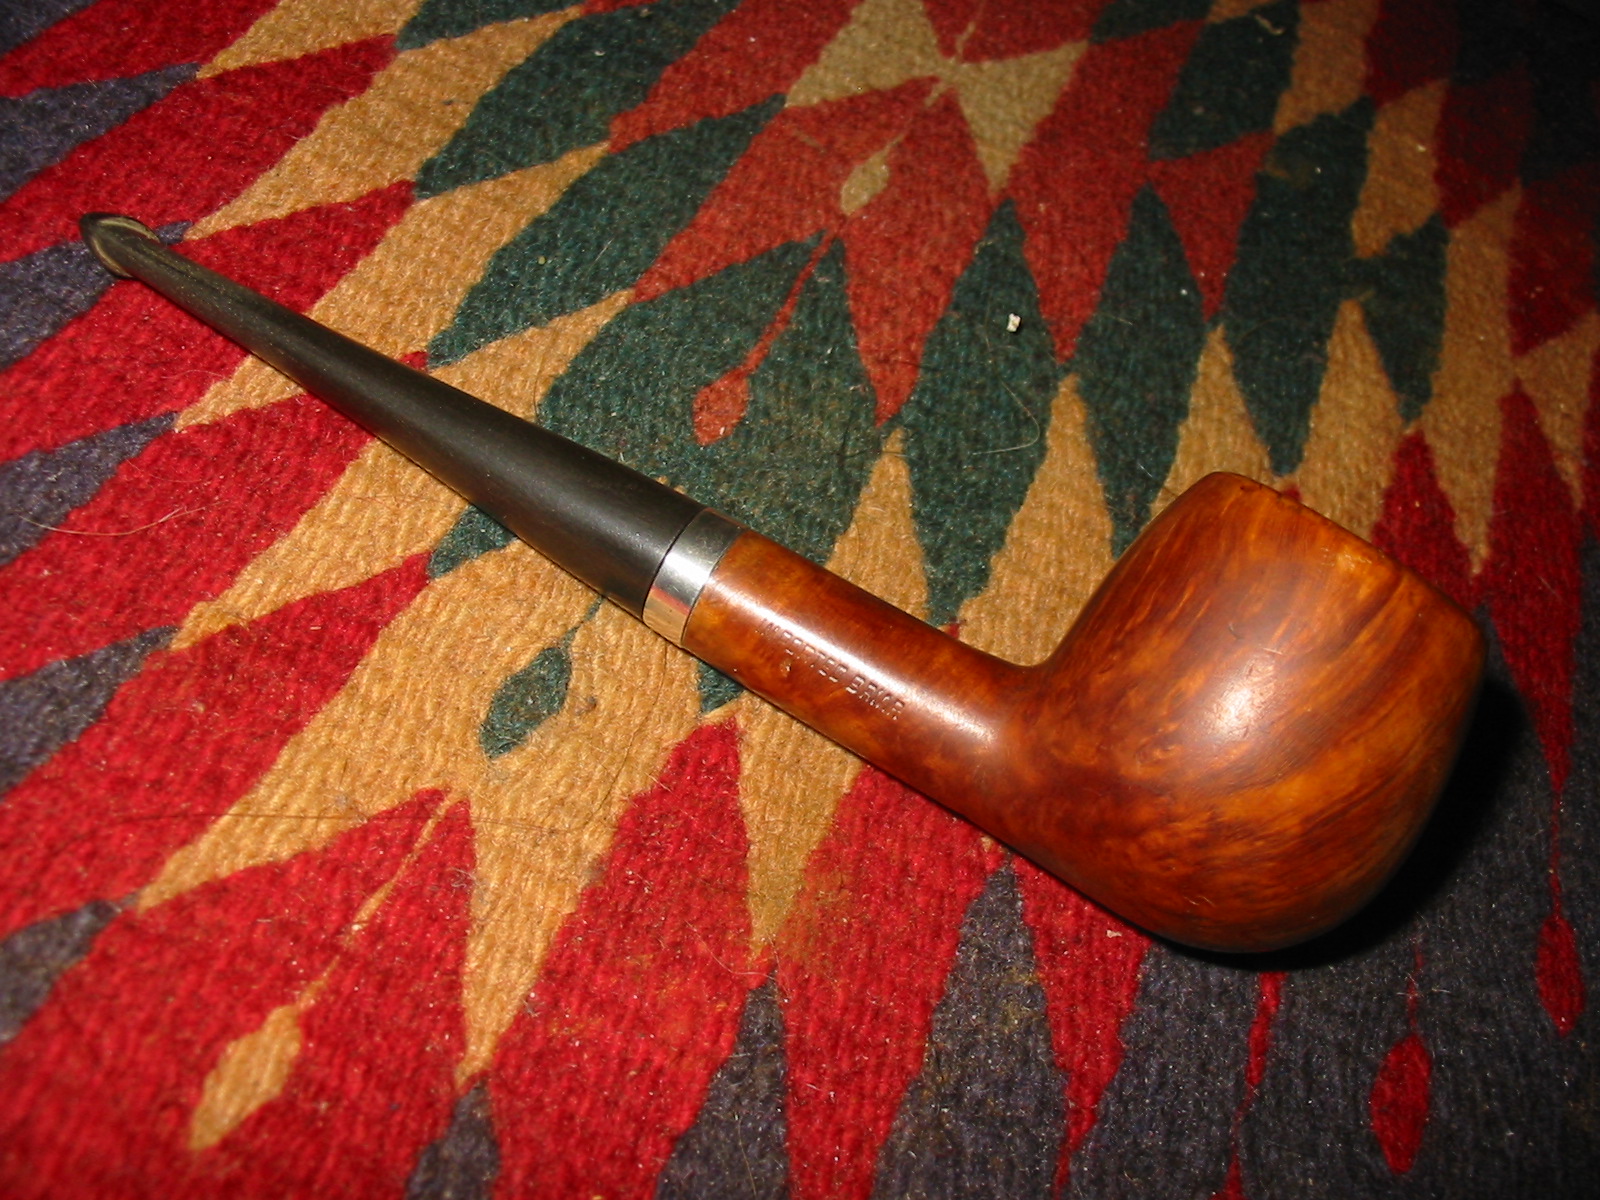
Below is the finished pipe along with my other Extraordinaire 499. I’m thrilled and fortunate to have acquired this one before it went thru the auction process. It makes a terrific stablemate to my 499.

Comoys_498_Finish

Comoys_498_Finish (3)

Comoys_498_Finish (2)

Comoys_498_Finish (1)

Comoys_498_Finish (4)

Update – Stem Tooth Indention Repair:

My order of Black Superglue was delivered this week from Stew-Mac. I forgot to order the accelerant, but Steve Laug told me to let the glue set overnight to dry.

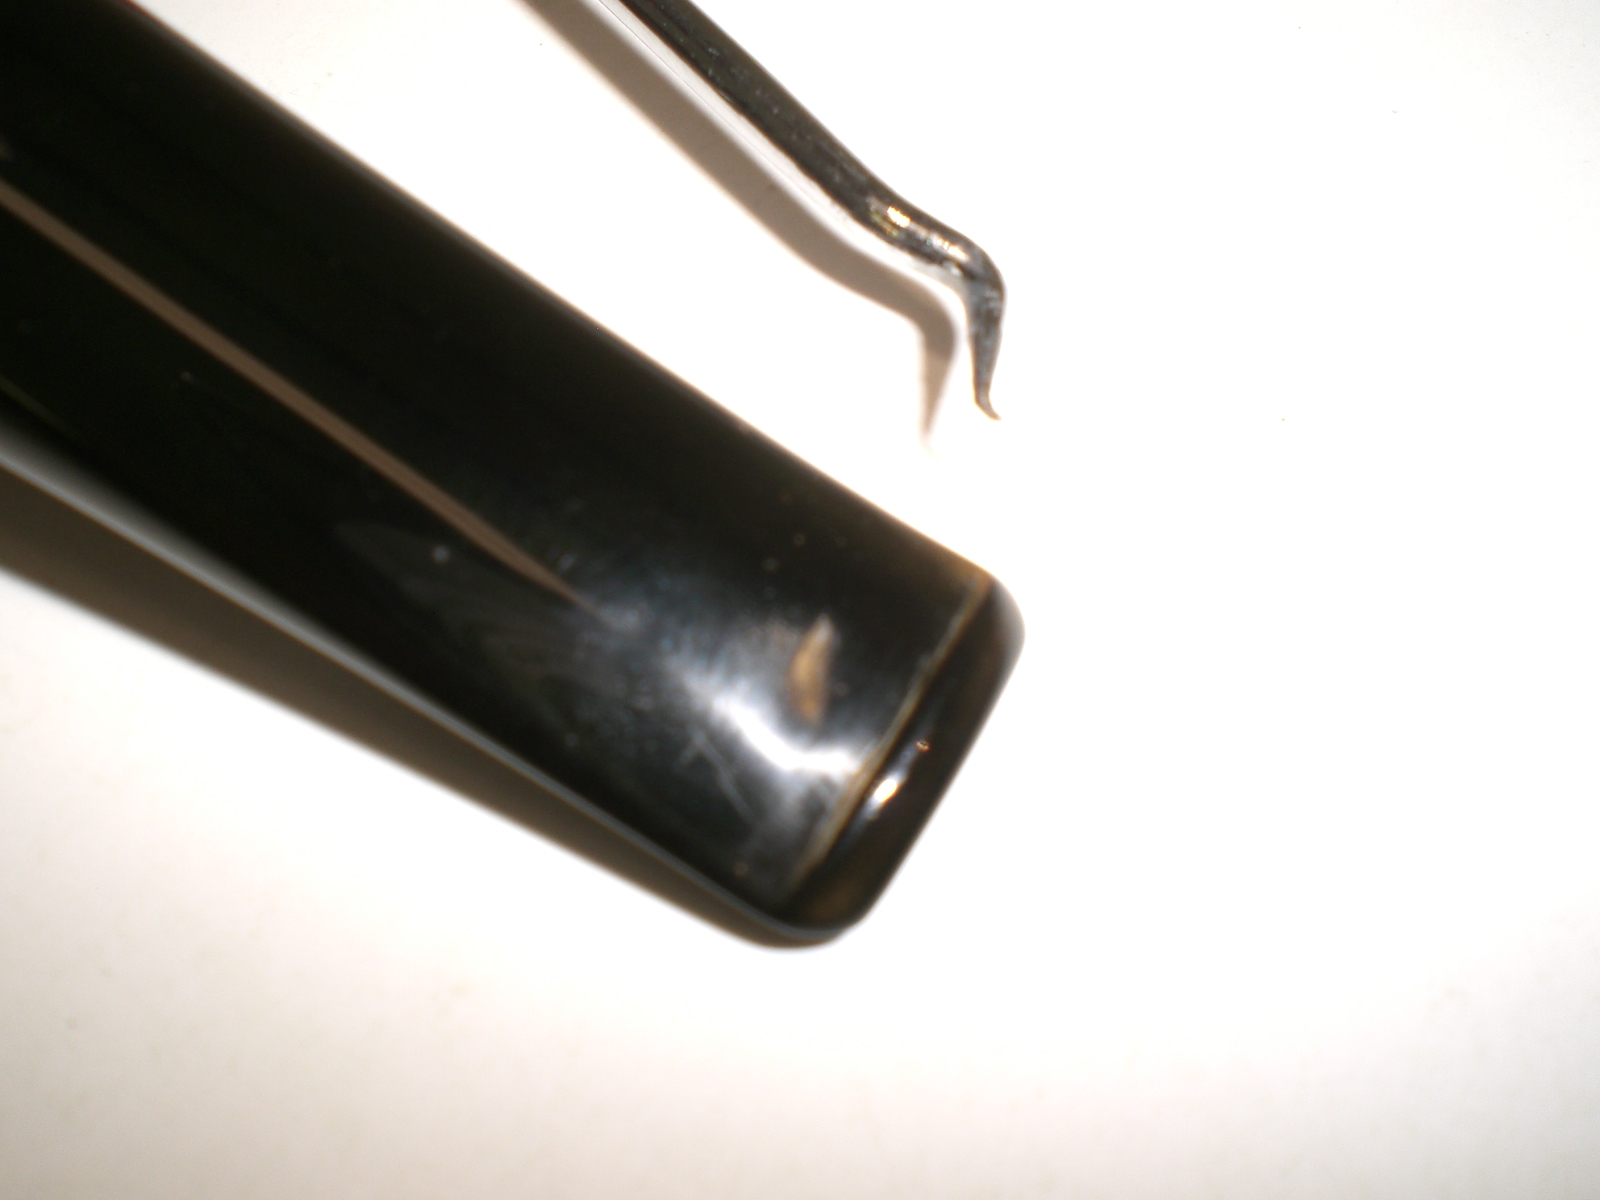
I cleaned out the tooth mark using a small pick, to allow the glue to have a good clean suface.

Comoys_Stem_Stem_Repair (2)

Comoys_Stem_Stem_Repair (1)

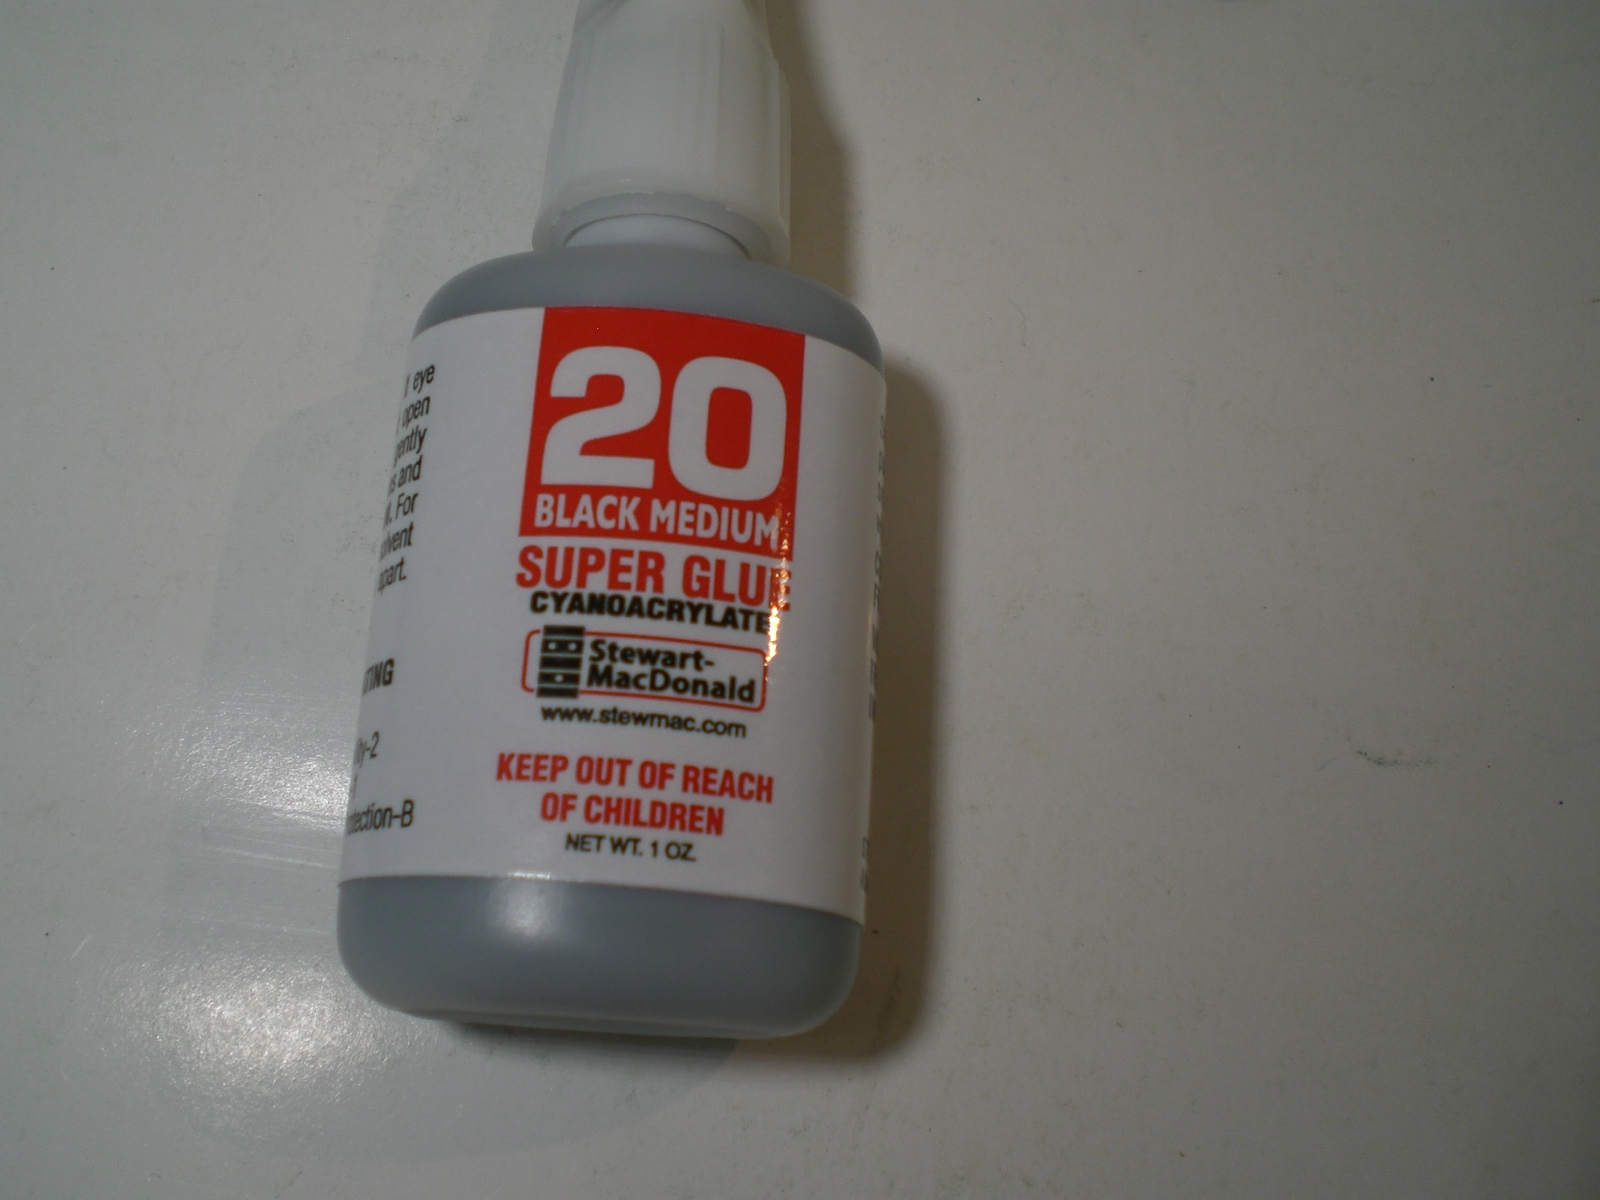
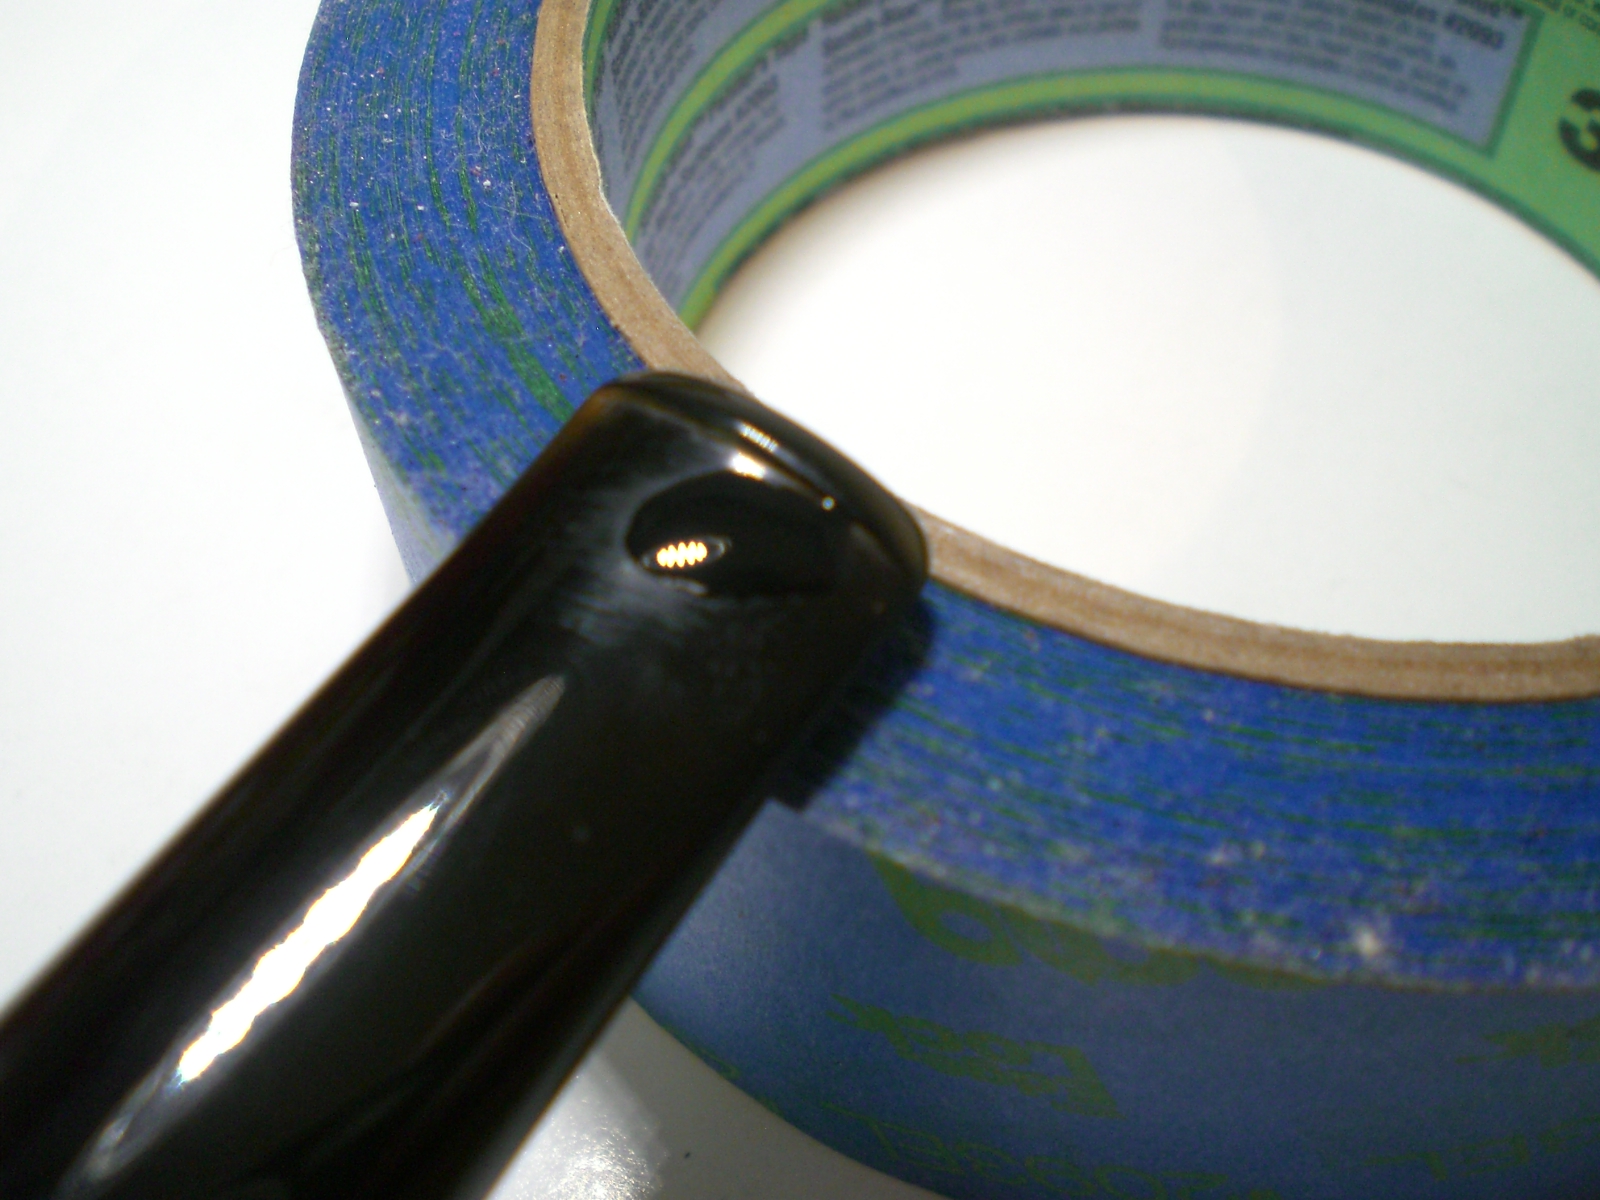
The glue is a little thicker than regular Superglue, but it can still run, so the pipe stem must be kept level. Cut the tube open with the smallest opening possible. The bottle does have a tight fitting cap, so hopefully it does not dry out between uses.

Comoys_Stem_Stem_Repair (3)

After the glue dried overnight, I sanded it smooth with some 400 and then 800 grit wet sandpapers. I followed this with 1500 and then 2000 grit wet papers.

Comoys_Stem_Stem_Repair (4)

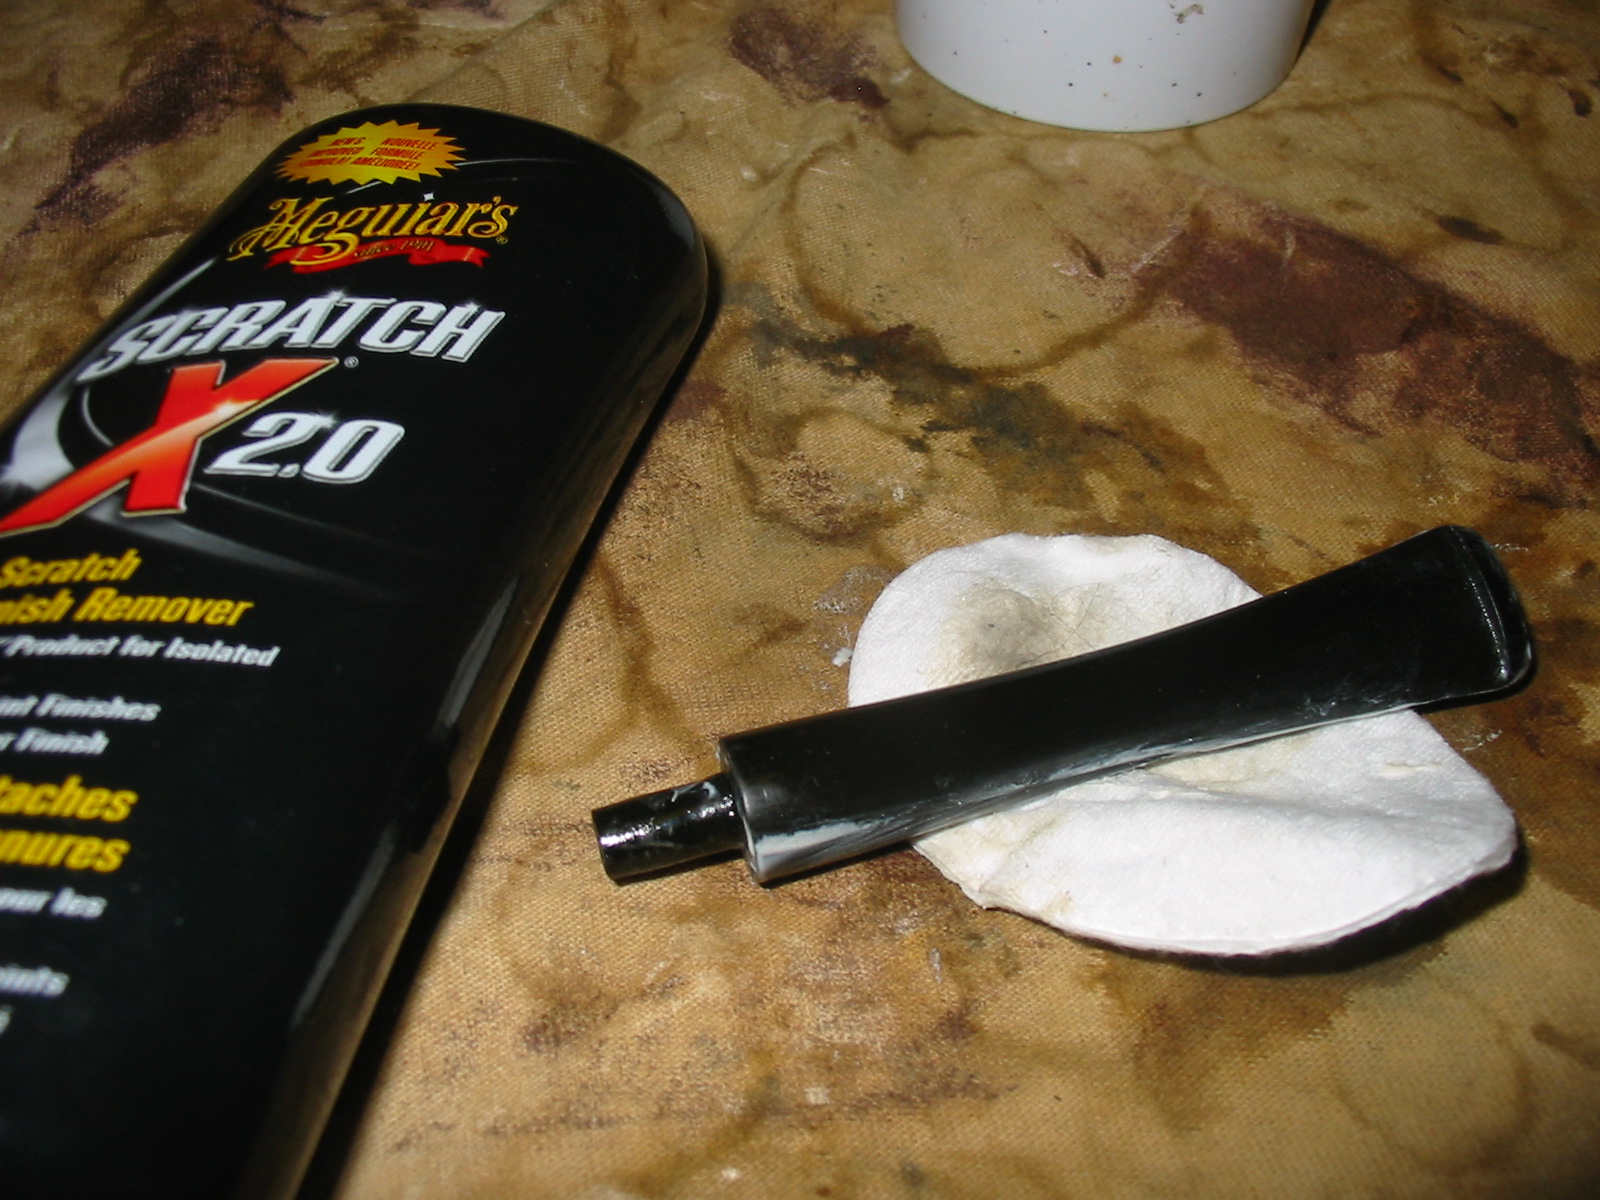
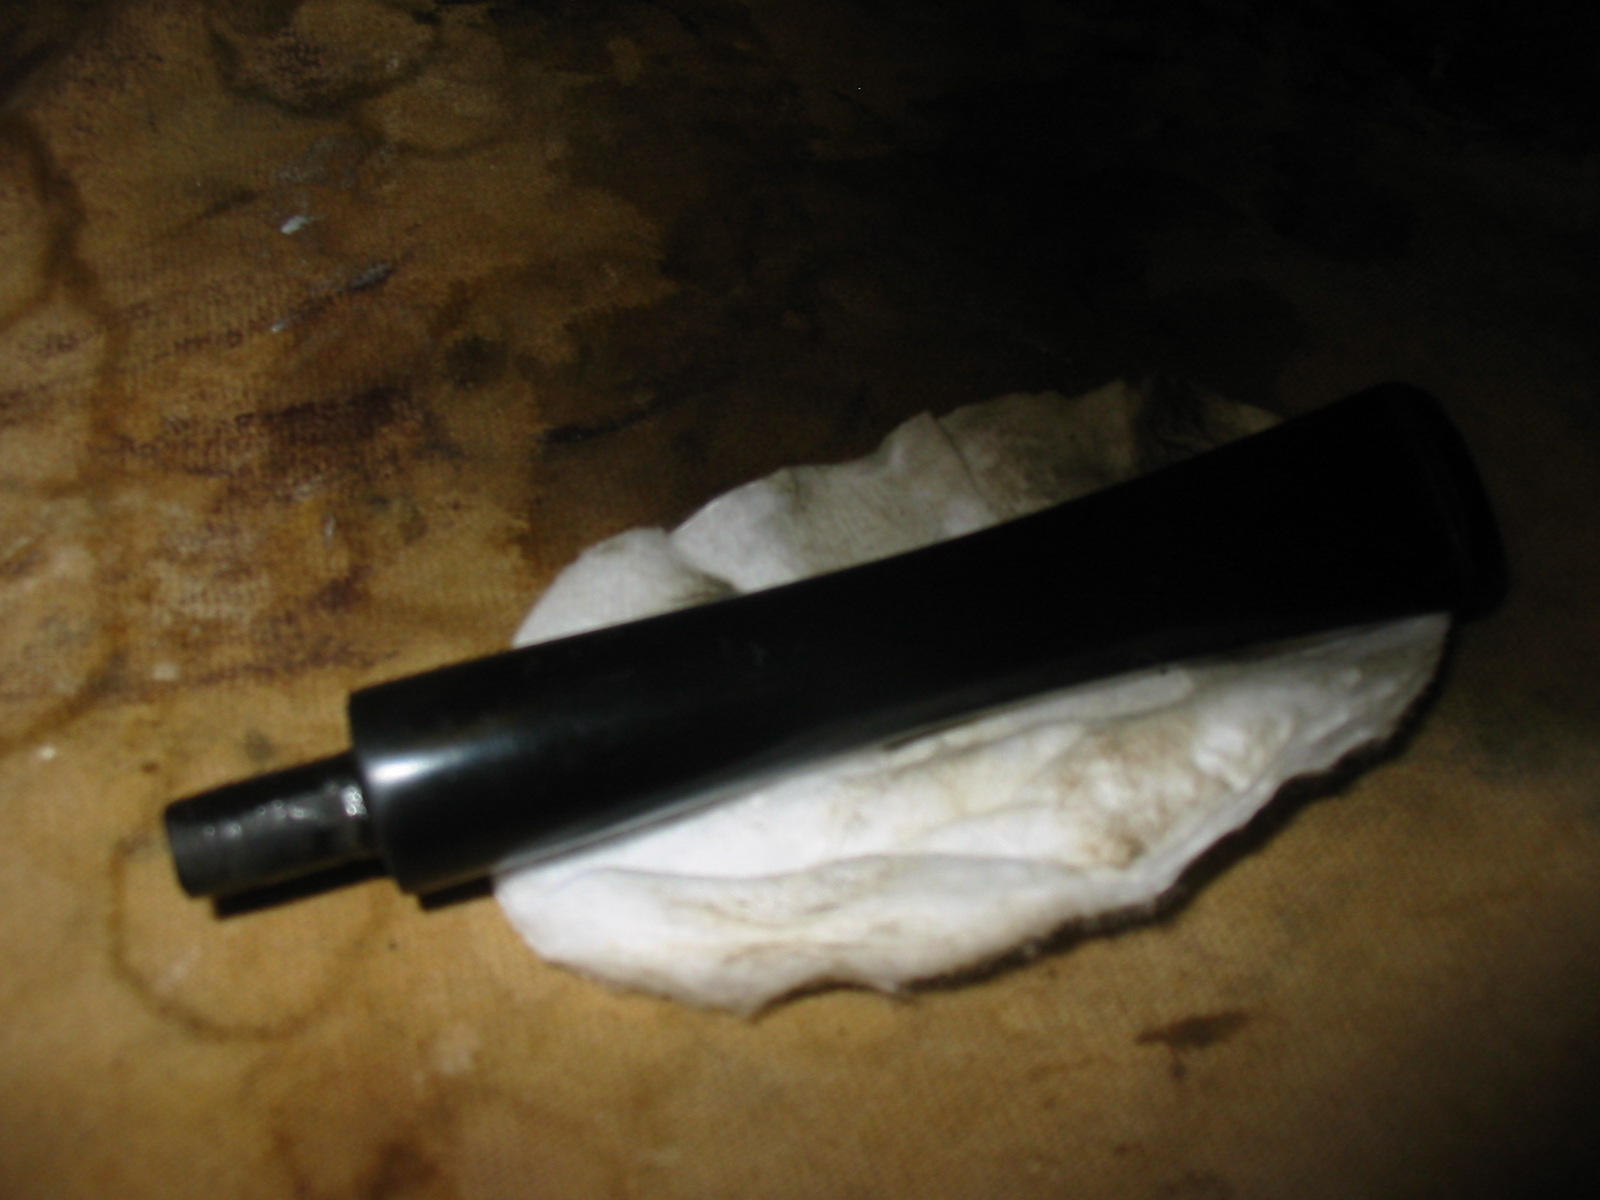
I then moved to the final two grades of micromesh, 8000 and 12000 grade papers, followed by a buff on the machine with White diamond rouge. I always do a final buff with automotive plastic polish. I’m pleased with how the repair came out and the black superglue does blend in better than the clear. I’m not a clencher, but I suspect the repair section would last longer then the original stem material.

Comoys_Stem_Stem_Repair

GBD Midnight 9456


Blog by Greg Wolford

The last few months have been extremely busy for me. It is amazing how much a disabled, non-working person can be obligated to do; I think I had more “free time” when I was working full time in the car business! Ah, but I digress …

By chance, I found myself today with no obligations, no chores, no appointments, just a day to myself. Unfortunately it also stormed badly which flared up my arthritic joints but I was able, finally, to get to a project, if only a simple one.

I picked up this GBD Midnight about two weeks ago. It was a fair price and an interesting pipe to me; all of the Midnight models I had seen before had acrylic stems and this one had vulcanite. Some later research led me to believe that there were at least two productions of this line: the first with vulcanite stems shortly after the merger and another some time later with acrylic stems.

Although I forgot to take “before” photos the seller’s were quite accurate except for the oxidation was a bit more than I anticipated: it wasn’t thick or heavy but was even, all over brown. The seller said he had only smoked it a few times over the years and didn’t like it; he prefers a 9 mm filter pipe. He said there were a few tooth dents but not bad ones and that he had cleaned it; these things were accurate, if he meant cleaned the inside.

The too had a fair amount if tar build up but not thick. The stummel was dirty but not in bad shape at all. And the dents were mild as be had said.

I began with an alcohol soaked pad, wiping down the stummel, paying extra attention to the rim’s build up. It didn’t take a lot to get it cleaned up and the rim smoothed out. I then reamed the bowl, which needed it but wasn’t badly caked. I set the stummel aside and began to work on the stem.

I started by rubbing the entire stem well with Back-to-Black, which removed a lot of oxidation. Then I took some automotive rubbing compound and cotton pads and polished away almost all of the remaining oxidation. After the rubbing compound I took the stem to the heat gun to raise the dents. They came up pretty well but not completely. But they were now slight enough I decided to not sand them smooth; I wanted to finish this pipe and write this blog tonight, those things and the small dents left made this decision for me easy. I did wet sand the stem with 400 grit wet/dry paper to remove the last of the oxidation and the few scratches I saw.

I reassembled the pipe and went to the buffing wheel. I like to buff the shank-stem union together so as to keep a nice fit. I began with black buffing compound, about an 800-grit I believe. After the union was buffed I took the stem and stummel apart and buffed each piece. I moved onto brown tripoli, then white diamond doing the same process.

I had a small deviation at the end of the white diamond buffing: the wheel grabbed the stummel and bounced it off my table. It left two dents, the bounce across the garage, that totally irritated me. I then had to steam the the dents out; thankfully the dents weren’t bad and came out. I went back to the white diamond and re-buffed the stummel.

I reassembled the pipe and gave it several coats of carnauba wax, buffed it on a soft, clean wheel and, finally, hand buffed it wearing a pair of linen gloves I bought just for that purpose.

The pipe came out quite well I think. After cleaning and buffing it is a bit lighter on color, which I am very happy with; the grain, especially the Birdseye on the front of the bowl really pops now.

Hopefully the frantic pace of life will slow some over the coming weeks; I have many more wonderful old pipes that are patiently awaiting being brought back to life. And I am anxious to do the work an share it with you.

20130613-222006.jpg

20130613-222015.jpg

20130613-222023.jpg

20130613-222030.jpg

20130613-222040.jpg

20130613-222049.jpg

20130613-222056.jpg

20130613-222105.jpg

20130613-222111.jpg

20130613-222119.jpg

20130613-222126.jpg

20130613-222132.jpg

Restemmed and Reworked an Old Yello Bole Acorn


I have cleaned out my box of pipes for refurbishing and all I have left are bowls that need to have stems made and fit. This little Yello Bole Acorn pipe attracted my attention and I decided it would be the first one I worked on. The pipe is stamped on the left side of the shank: KBB in a cloverleaf and next to that it is stamped Yello Bole over REGDUSPATOFF over Imperial in script. Underneath that it is stamped “Cured with Real Honey”. On the right side is stamped 3296B. I reamed the bowl and cleaned the airway and mortise area so that I could get a good clean fit with the new stem. I picked a stem blank from my can of stems and used my Pimo Tenon turning tool to turn the tenon to fit the shank. The stem was too large so I removed the excess material with a sanding drum on my Dremel. In the photo below you can see the stem after I had sanded the excess away with the Dremel. The shank on the pipe also had a small crack in it so I glued it with superglue and pressure fit a nickel band on the shank.

Image

I sanded the stem with medium grit emery cloth to remove the scratches and marks left by the sanding drum. I find that the emery cloth does a great job removing the deep scratches and marks around the diameter of the stem as well as fine tune the fit to the shank. The band had some small dents that needed to be taken out so I used a small round headed pick to bring the shape back into round. The next three photos show the stem after sanding with the emery cloth.

ImageImageImage

At this point in the process I used the tool to round out the band a bit more and then fit the stem on the pipe. The next series of four photos shows the stem on the pipe. I also noted at this point that the band needed to be flattened on the bottom to accommodate the flattened bottom of the shank on the pipe. I would also have to flatten the edge of the stem to also accommodate that flattening.

ImageImageImageImage

I took a break from the stem and worked a bit on the bowl of the pipe. I wiped it down with acetone on a cotton pad to remove the finish. I then sanded the bowl to remove some of the dents and marks in the finish. The deep gouges needed to be steamed and I was able to raise them slightly. They are still visible on the finished pipe but lend it some character. The next series of three photos show the bowl cleaned and ready for staining.

ImageImageImage

I then changed to sanding the stem with 240 and 320 grit sandpaper. The next series of six photos shows show the progression of the stem as I sanded it.  The shape was pretty close to finished by the time I was done. The fit was excellent and the look of the new stem gave the pipe a great look in my opinion. All that remained was to do a lot more sanding! The fourth through the sixth photos below show the stem after I had wiped it down with some Maguiar’s Scratch X2.0 applied by hand and rubbed down with cotton pads. The finish of the stem is getting smoother.

ImageImageImageImageImageImage

I then filled a small cup with water and moved on to wet sand the stem with the micromesh sanding pads. I used 1500, 1800 and 2400 to wet sand the stem. I wet the pad and sanded the stem. Then rinsed the pad and kept sanding until that particular grit had down its work and the stem was ready for the next one. Between pads I wiped the stem down with a wet cotton pad to clean off the grit. The first photo below shows the setup of my sanding area. I use an old rag for the work space so that it can pick up the dust and water from the sanded stem. The next series of three photos shows each of the three micromesh sanding pads from 1500-2400 and the stem after sanding with that particular pad.

ImageImageImageImage

Once I finished wet sanding the stems up through the 2400 grit micromesh pads I then used the Maguiar’s again to polish the stem to see what remained of the deep scratches. I rubbed it into the stem with my finger and then polished it off with the cotton pads. The next series of five photos shows the application and the progressive polishing of the stem. The final pictures in the series show the stem polish to this point. I decided after this was done to move on to dry sanding with the remaining micromesh sanding pads.

ImageImageImageImageImage

The next series of six photos show the sanding progress through the remaining grits of micromesh sanding pads – 3200, 3600, 4000, 6000, 8000 and 12,000 grits. Each picture shows the stem on top of the sanding pad that I used to sand it. I dry sand with these higher grit micromesh pads.ImageImageImageImageImageImage

The next series of four photos show the stem after finishing the sanding and polishing it with Maguiar’s polish. There is a nice deep black shine to the stem at this point.

ImageImageImageImage

Now it was time to stain the bowl of the pipe. I used a Dark Brown aniline stain that I had thinned with isopropyl 2:1 to stain the bowl. I wanted a consistency in the colour and also have the grain on the bowl show through the stain. I applied the stain with the wool dauber that came with the stain and then flamed it with a match to set the stain. I restained it and reflamed it a second and third time. The next two photos show the stained bowl.

ImageImage

Once the stain was dry I used some silver polish on the nickel band to shine it up and remove the stain that had spilled on it. I also used some sandpaper in the bowl to remove stain that ran into the bowl edges from the beveled rim. I then took it to the buffer and buffed it with Tripoli and White Diamond before giving the whole pipe multiple coats of carnauba wax and a final buff with a clean flannel buffing wheel. The final four photos show the finished pipe.

ImageImageImageImage


Resurrecting an Old Weber Silver Grain Apple


Blog by Steve Laug

The fifth pipe of the six that I picked up in the antique malls in Washington State is a Weber Silver Grain Apple. It was probably the cleanest of the six in terms of work that would need to be done to bring it back to life and usefulness. The stem was oxidized and very pitted. The vulcanite was actually rough to touch. It was not the typical roughness I have come to expect in old vulcanite stems but more pitted with visible pits and ridges. There were two tooth marks – one on the top and one on the bottom of the stem about ½ inch above the edge of the button. The button itself was still very clean and the slot was the typical wide open oval that I have found on most of the older Weber pipes I have worked on. It was stamped Weber over SILVERGRAIN on the left side of the shank and IMPORTED BRIAR on the right side of the shank. On the underside of the shank there were some fairly deep gouges to the briar. The finish was not too bad just very dirty. The rim and inside lip of the bowl were very caked with tars and buildup and the bowl was caked with a light build up that was uneven around the sides of the bowl. There were also dings in the sides of the bowl that would need work. The W in a circle stamping on the stem was basically gone other than a small bottom edge of the circle. The silver band was dirty.

ImageImageImageImage

I decided to start work on this refurb by reaming the bowl and cleaning the bowl and shank. I used cotton swabs on the shank as it is a wide open drill from mortise to bowl. I believe this is because of the stinger apparatus that the Weber pipes used. It creates a chamber where the smoke swirls around the stinger and cools as it is then drawn to the stem and the mouth of the smoker. Once the bowl and shank were clean I worked on the outside of the bowl. I first lightly sanded the tars and buildup on the rim and the inner edge of the bowl to remove them. I used 320 grit sandpaper and lightly worked the area over to remove the buildup and to work on the inner edge. Once the rim was free of the tars and buildup I wiped the bowl and rim down with acetone on a cotton pad. The first wipe of that can be seen in the dark stains on the cotton pad in the pictures below. I also sanded the deep marks on the bottom of the shank. I steamed them a little to raise them and then sanded them to be as smooth as possible. I could not remove them entirely as the wood fibres were broken and would not rise totally. Sanding it to make it smooth would change the profile of the bottom of the shank so I brought is as far up as I could and smoothed out the roughness with the 320 grit sandpaper. I also cleaned the silver band with some tarnish remover and a jewelers polishing cloth. The band is stamped STERLING and came back to a clean shine.

ImageImageImageImage

Once I had removed the grime and tars from the bowl and shank I took it to the buffer and buffed the pipe with Tripoli and White Diamond. The resultant shine and colour was excellent so I decided not to restain the pipe at all but to leave it natural and give it some wax. The next series of photos show the bowl and shank when I had finished the buffing. The stamping is still crisp and sharp as I lightly buffed over those areas. I also buffed the stem to remove some of the roughness of the vulcanite and prepare it for sanding. I did a bit of sanding around the tooth marks and chatter in front of the button before buffing.

ImageImageImageImage

The stem was in need of quite a bit of work. I buffed it to begin with using Red Tripoli and then took it back to the work table to sand it with a medium grit sandpaper on a foam back to allow me to really work with the angles of the stem and button. I sanded with that sandpaper until the surface began to get smooth and I could feel the smoothness. I then progressed to the 320 grit sandpaper and worked on it longer. It took quite a bit of sanding to remove the ridges and pits. Once I had it to that point I decided to use the Maguiar’s Scratch X 2.0 and rubbed it on by hand and scrubbed the stem with a soft cotton pad to clean off the polish and the oxidation. I then worked with my micromesh sanding pads and wet sanded with the 1500-3200 grit pads. I then used another wipe down with Maguiar’s and then used the 3600-6000 grit pads on it. The next series of photos show the stem after all of the work described above and you can still see the roughness of the finish and the pitted oxidized state of the stem.ImageImageImage

At this point in the process I started over with my sanding of the stem. I again used the medium grit foam back sanding sponge and broke up the finish. I wanted to smooth out the pits in the vulcanite. I sanded and buffed with red Tripoli and then sanded it once again with the foam back sanding sponge. I wiped it down with a damp cloth and could see that I was finally gaining some ground on the roughness of the stem. I then sanded it with some 320 grit sandpaper and dampened the stem before sanding. I sanded it until the stem was smooth to my touch. I again wiped it down with a cotton pad and was ready to move on to the 400 and 600 grit wet dry sandpaper. I sanded the entire stem with these two grits and then buffed it with White Diamond and was pleased to see that I had the oxidation beat and the pitting was minimized. I then wet sanded with 1500, 1800 and 2400 grit micromesh sanding pads, polished the stem with Maguiar’s Scratch X2.0 and then moved on to 3200-4000 grit micromesh pads. I dry sanded with these pads and then took the stem and pipe to the buffer again and buffed it with White Diamond. I brought it back to the work table and wiped it down with some Obsidian Oil and let it dry while I did a few other things. Once it was dry I finished sanding with 6000, 8000 and 12,000 grit micromesh pads. I used these dry and once I was finished I gave the bowl another coating of wax and the stem a coating of Obsidian Oil and then several coats of carnauba wax. The finished pipe is pictured in the next series of photos.ImageImageImageImage

The bowl is only finished with multiple coats of carnauba wax and buffed and polished. I did not use any stain on the bowl. In the final photo above you can see the dent in the bottom of the shank that remains but the roughness of the edges has been minimized. The silver band was also coated with several coats of wax to slow down the tarnishing. I lightly buffed the whole pipe on my buffer with a soft flannel buffing pad.

GBD Tapestry 9438 Re-boot


Earlier this year I refurbished a GBD 9438 in Tapestry finish and vowed never to touch a chair-leg stem again. That pipe proved to be a wonderful smoker and is a frequently used pipe in my rotation. A few weeks ago I found the identical pipe on Ebay and won the auction. This second 9438 was in a little better shape and the stem was not nearly as oxidized. The Rondell appeared to be damaged.

The bowl was in terrific shape, with very crisp nomenclature. There is an “E” stamp just at the end of the stem. If anyone has an insight as to what that means, please comment. The bowl was lightly reamed, then soaked with Everclear and sea salt. After the bowl was soaked, I buffed the briar with some Tripoli, White Diamond and finally a few coats of Carnuba wax. The briar is in really nice shape and the polished top is unmarred.

My attention then went to the stem. From the Ebay picture, I thought a piece of the brass rondell was missing. But that proved to be only grime. These rondells now appear to be unattainable, so I was pleased to discover this. The stem was soaked in an oxyclean solution. It was then cleaned with 2000 grit wet paper, than the last few grades of micromesh. After sanding, I buffed the stem with white diamond and then plastic polish.

I’m very pleased with the finished pipe. The briar a bit nicer than my first 9438 Tapestry. I bought it with the intention of giving to a family member as a Christmas gift, but now.….

Perspective of the pictures makes it appear the pipes are different sizes. However, they are identical in size. The tenon on the recent addition is curiously a bit longer than my first 9438.

Before:

The fisnished pipe and some shots with the sister 9438 Tapestry:

Al Jones aka “Upshallfan”