Tag Archives: waxing

NEPAL PROJECT PIPE SALE 1 – A Quick and Easy Clean up on a Don Carlos Three Note Dublin


Blog by Steve Laug

I was gifted a box of pipes from a good friend of mine for the distinct purpose of cleaning them up and selling them with all of the proceeds going to the aid of earthquake victims in Nepal. The funds raised will all go to the SA Foundation, and organization that has worked in Nepal for over 15 years helping provide recovery, housing and job training for women who are victims of sexual exploitation and trafficking. The ongoing earthquakes (over 300) that continue to shake Nepal have left much in ruins. The SA Foundation Project there was able to find new housing for the women and help with staff as well. Every dollar raised from the sale of these pipes will go to the work in Nepal.

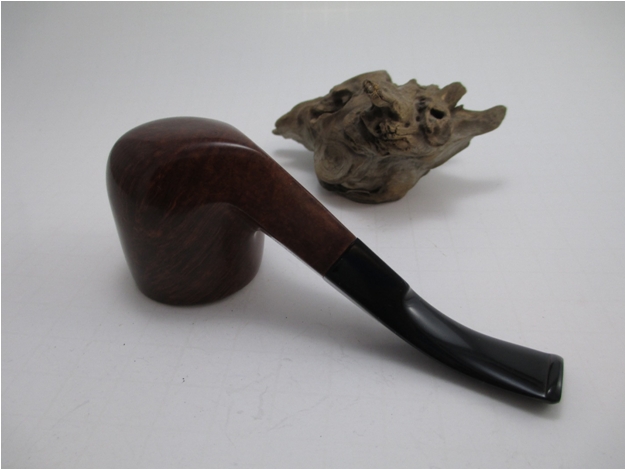
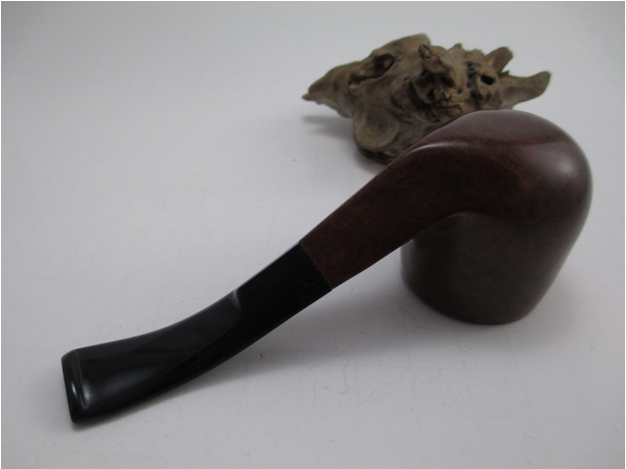
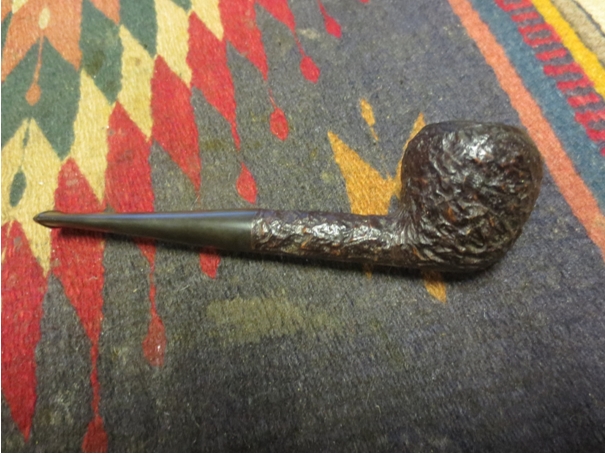
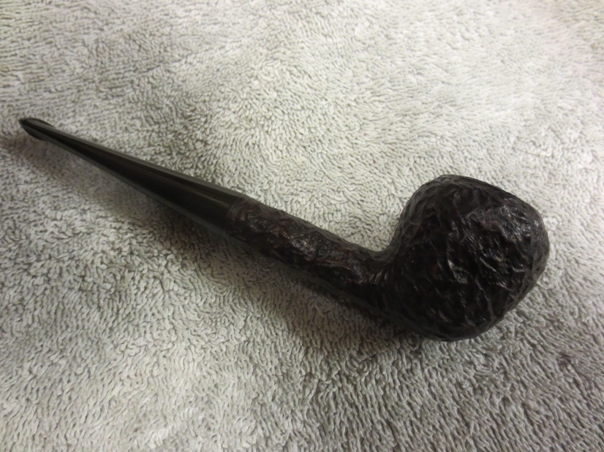
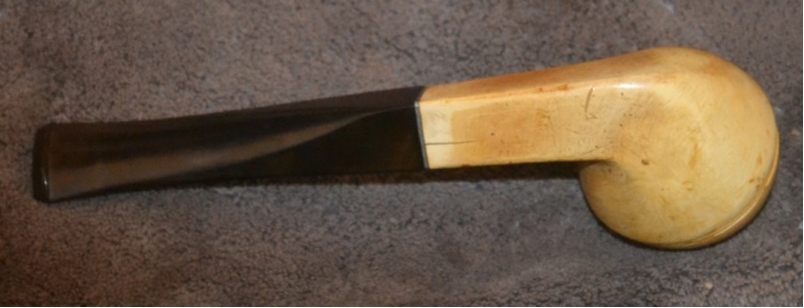
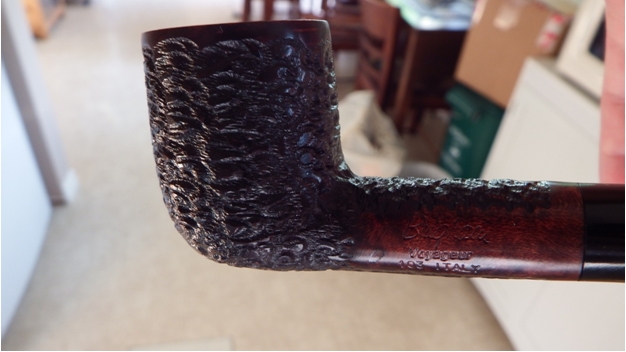
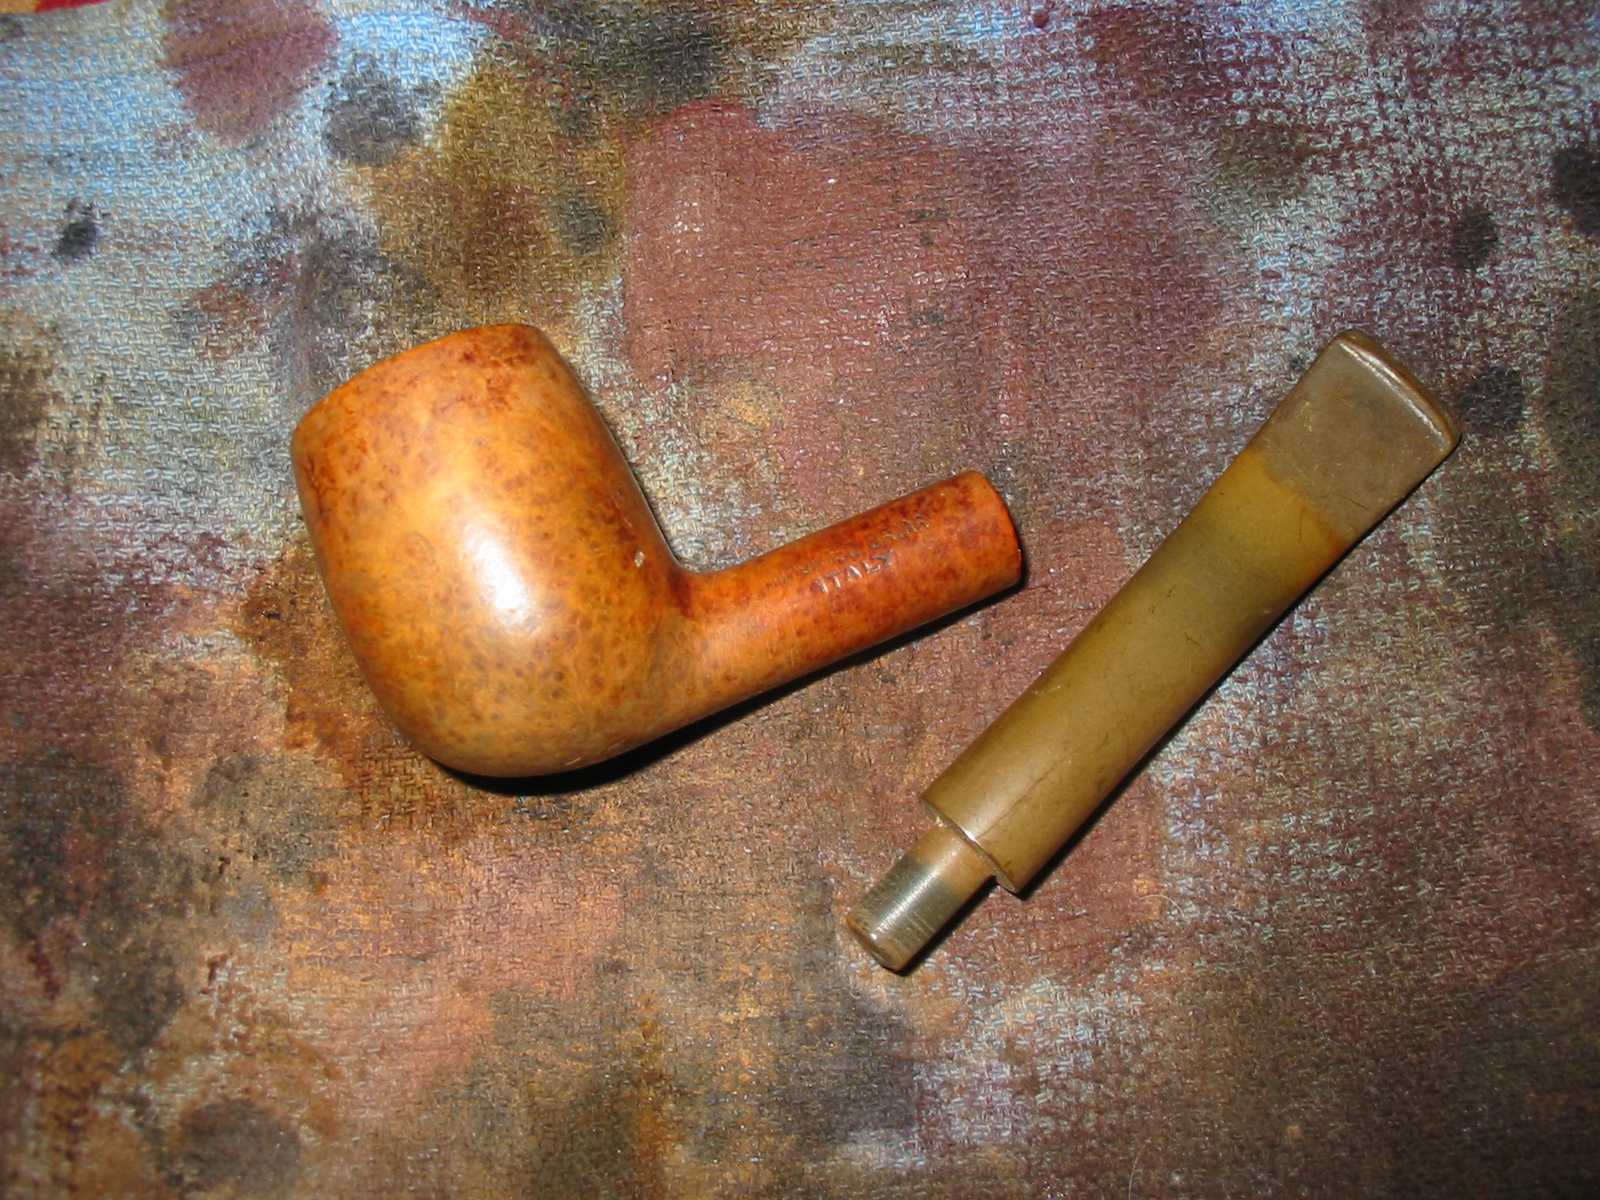
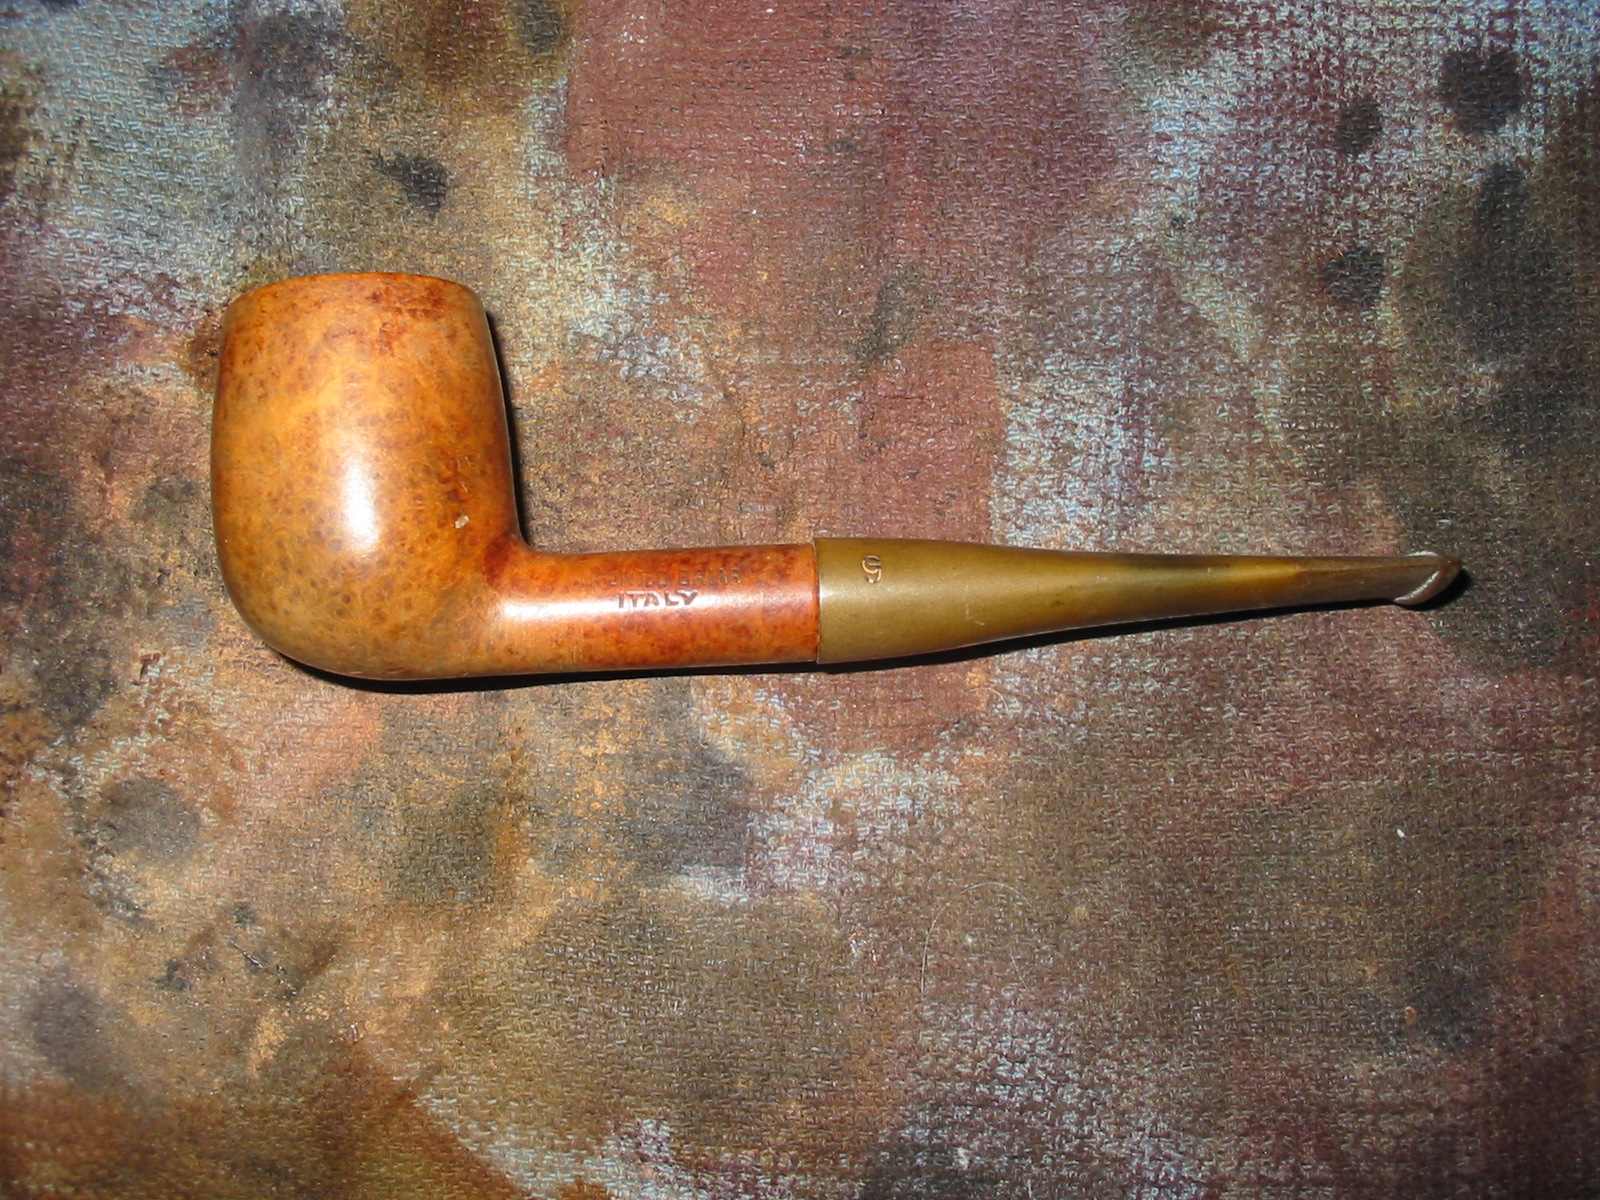
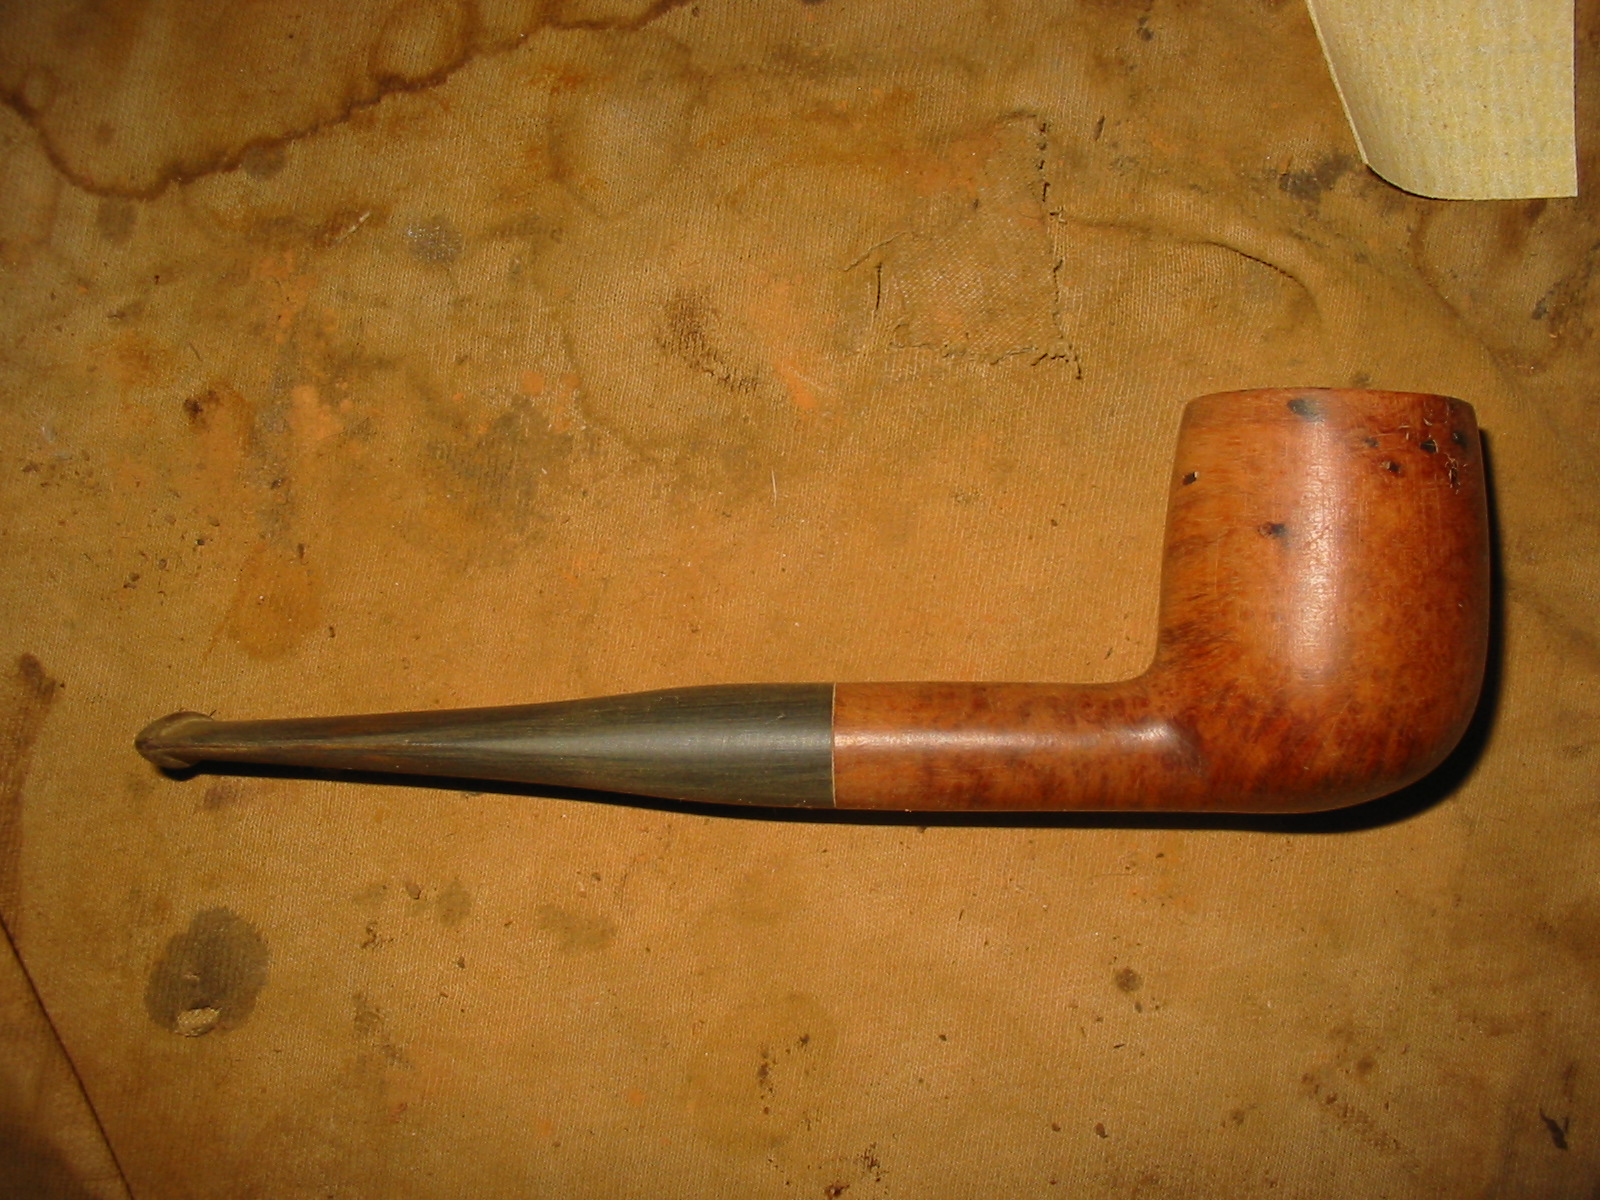
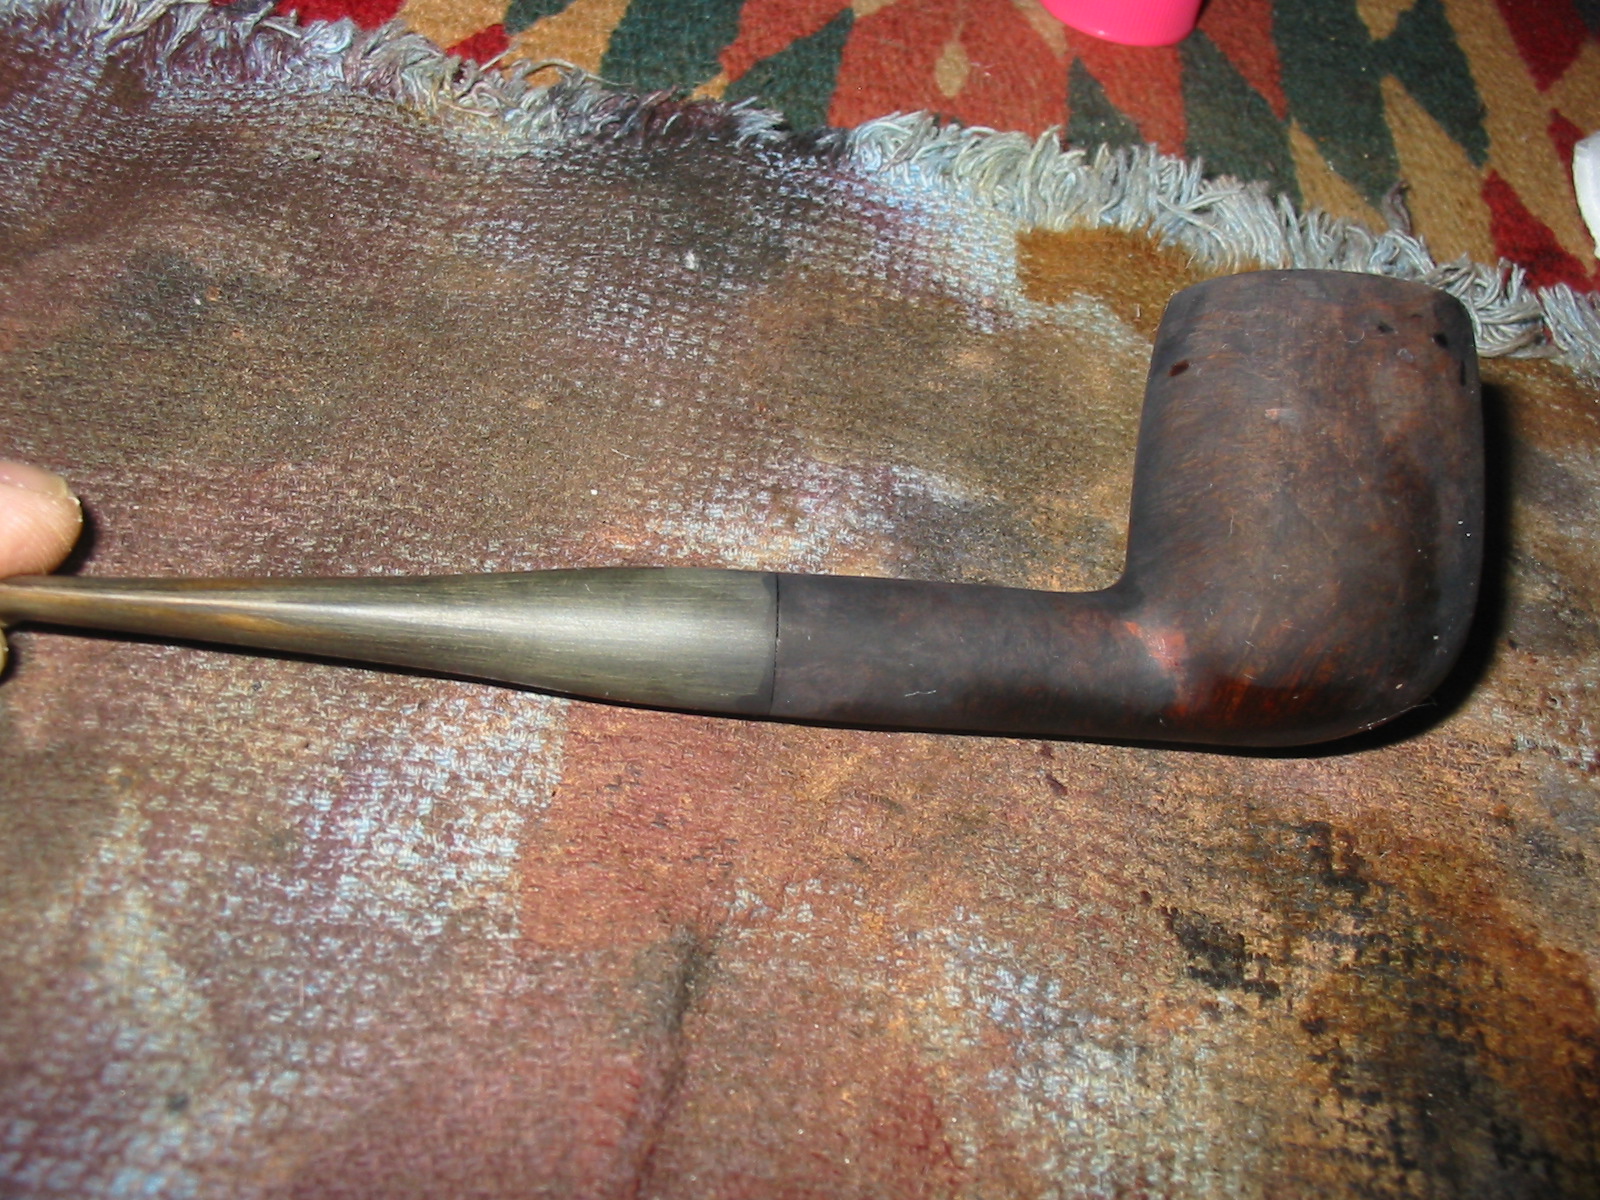
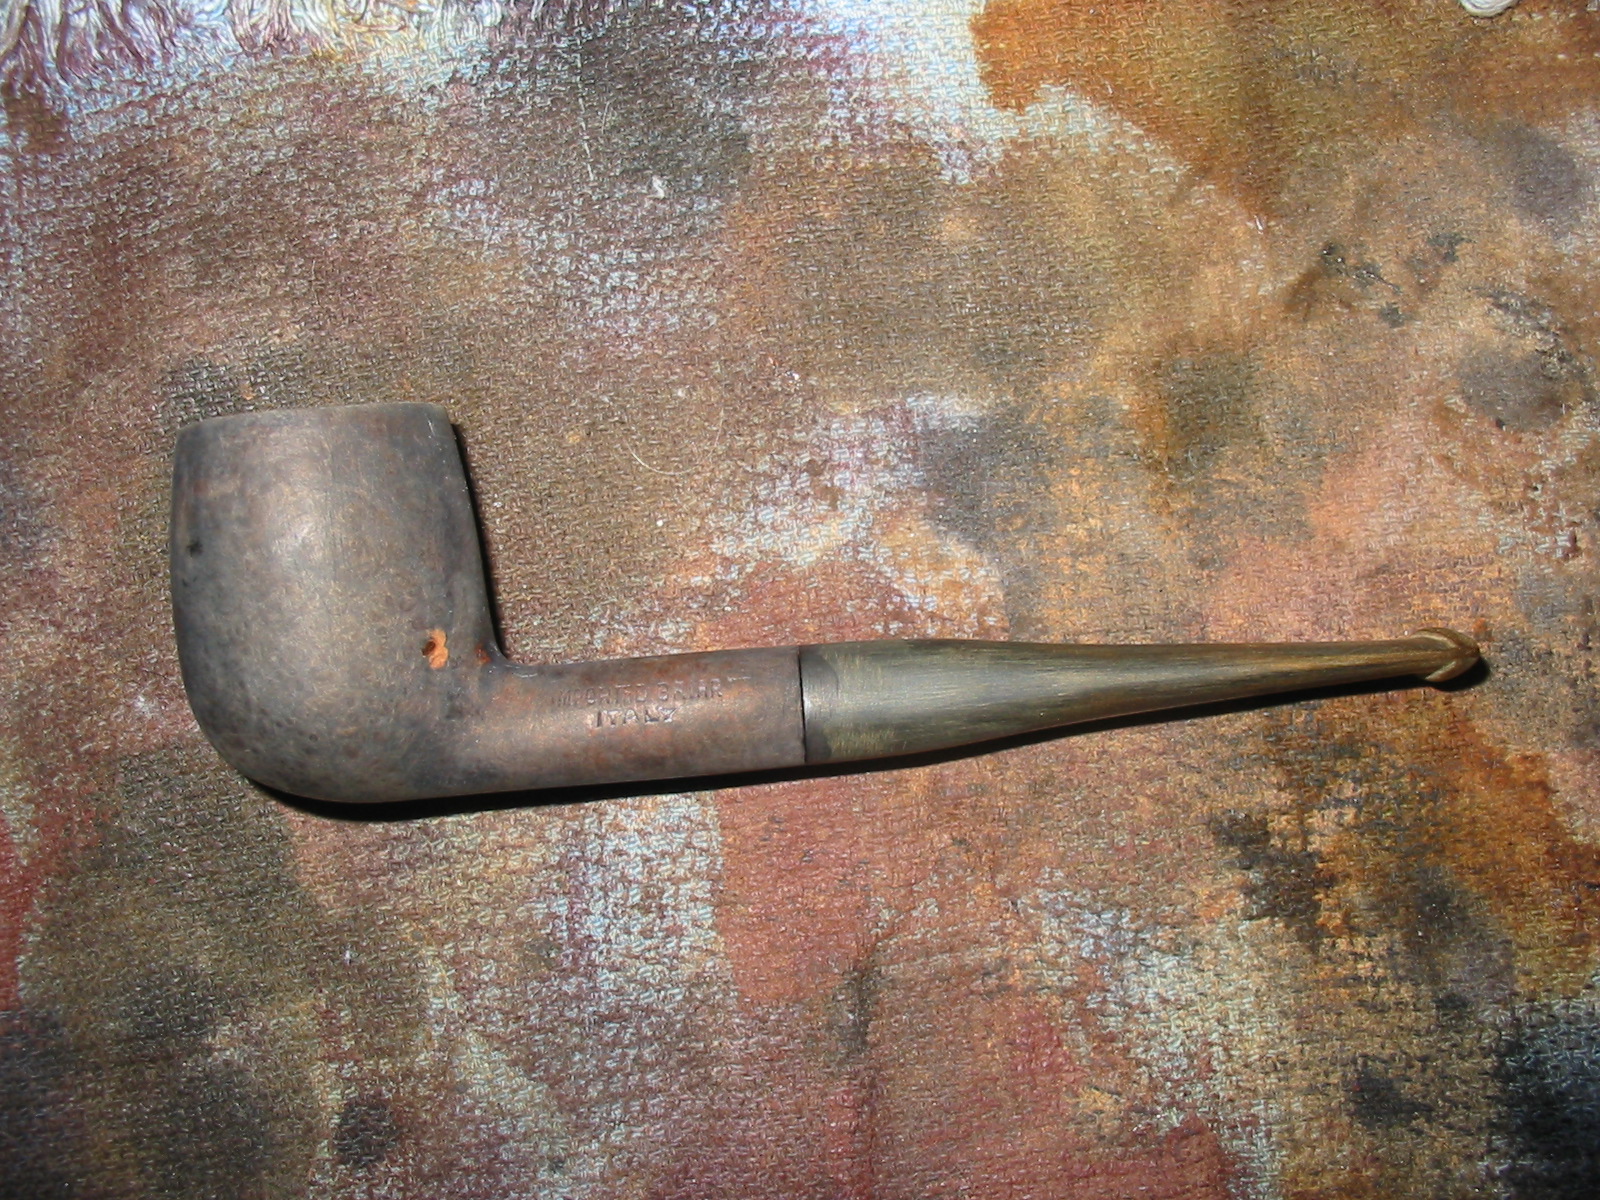
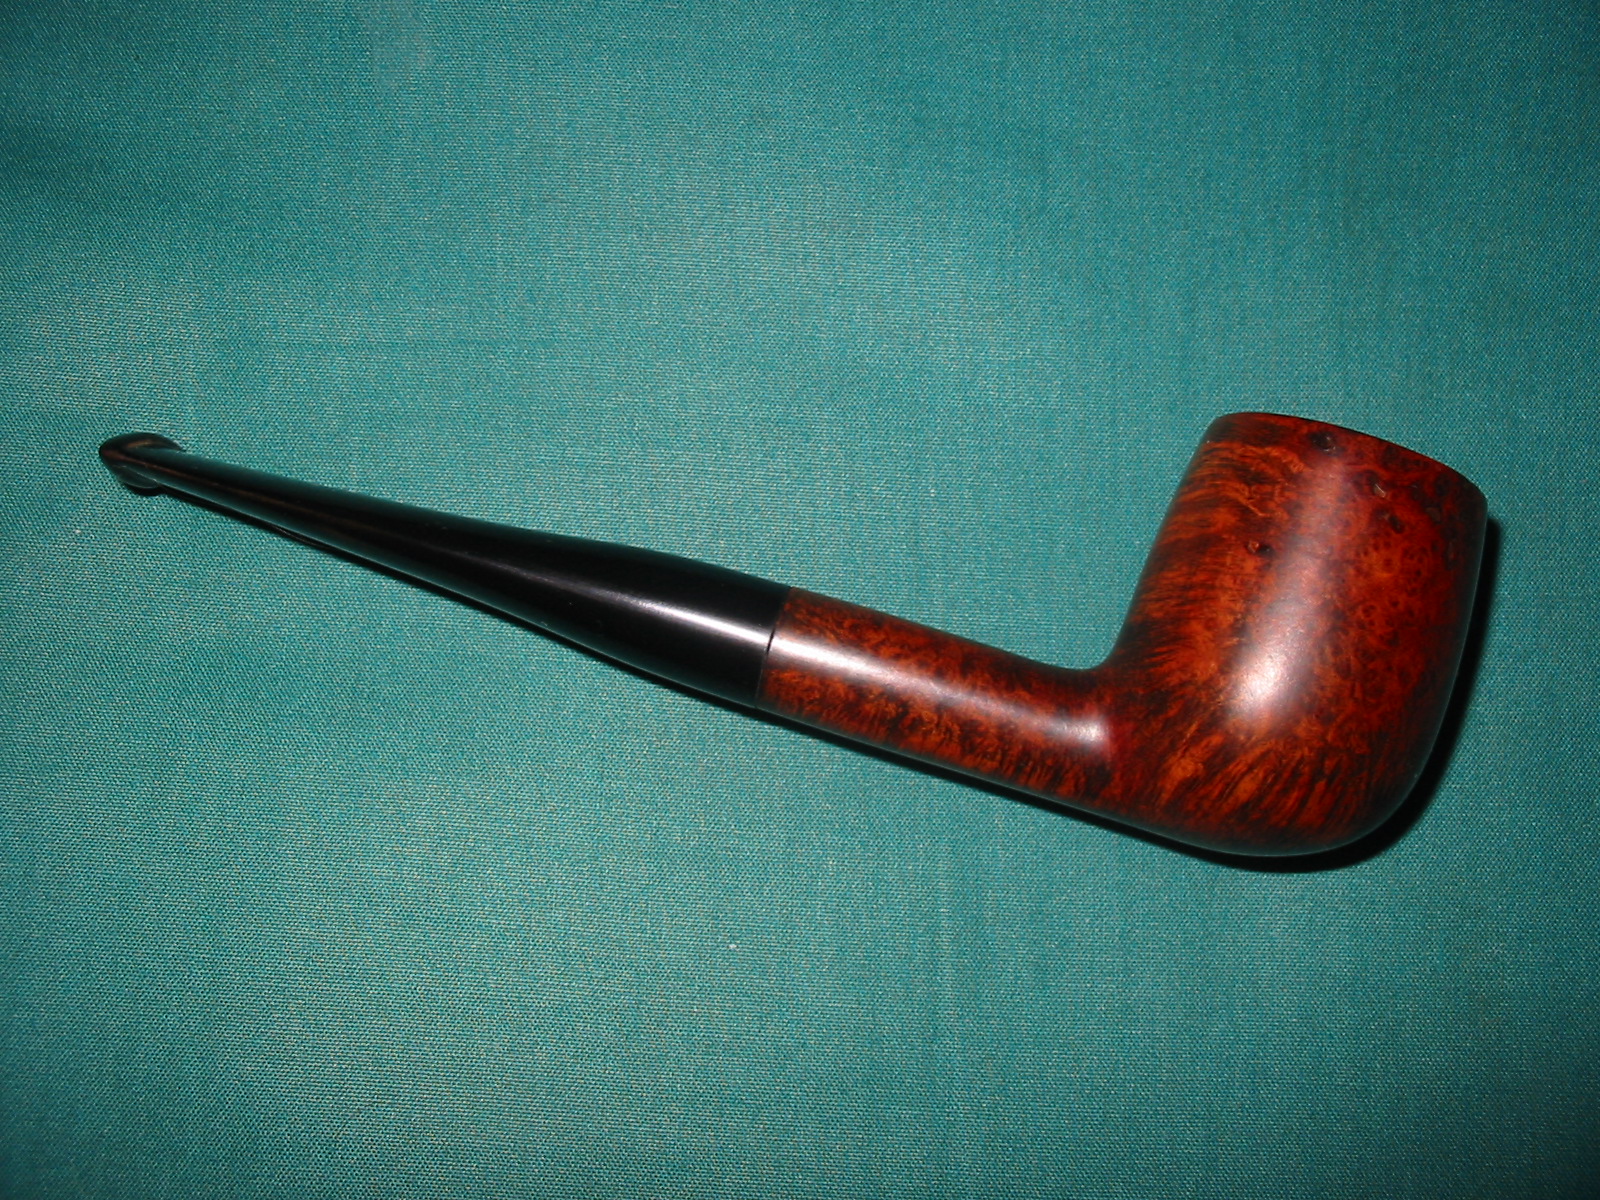
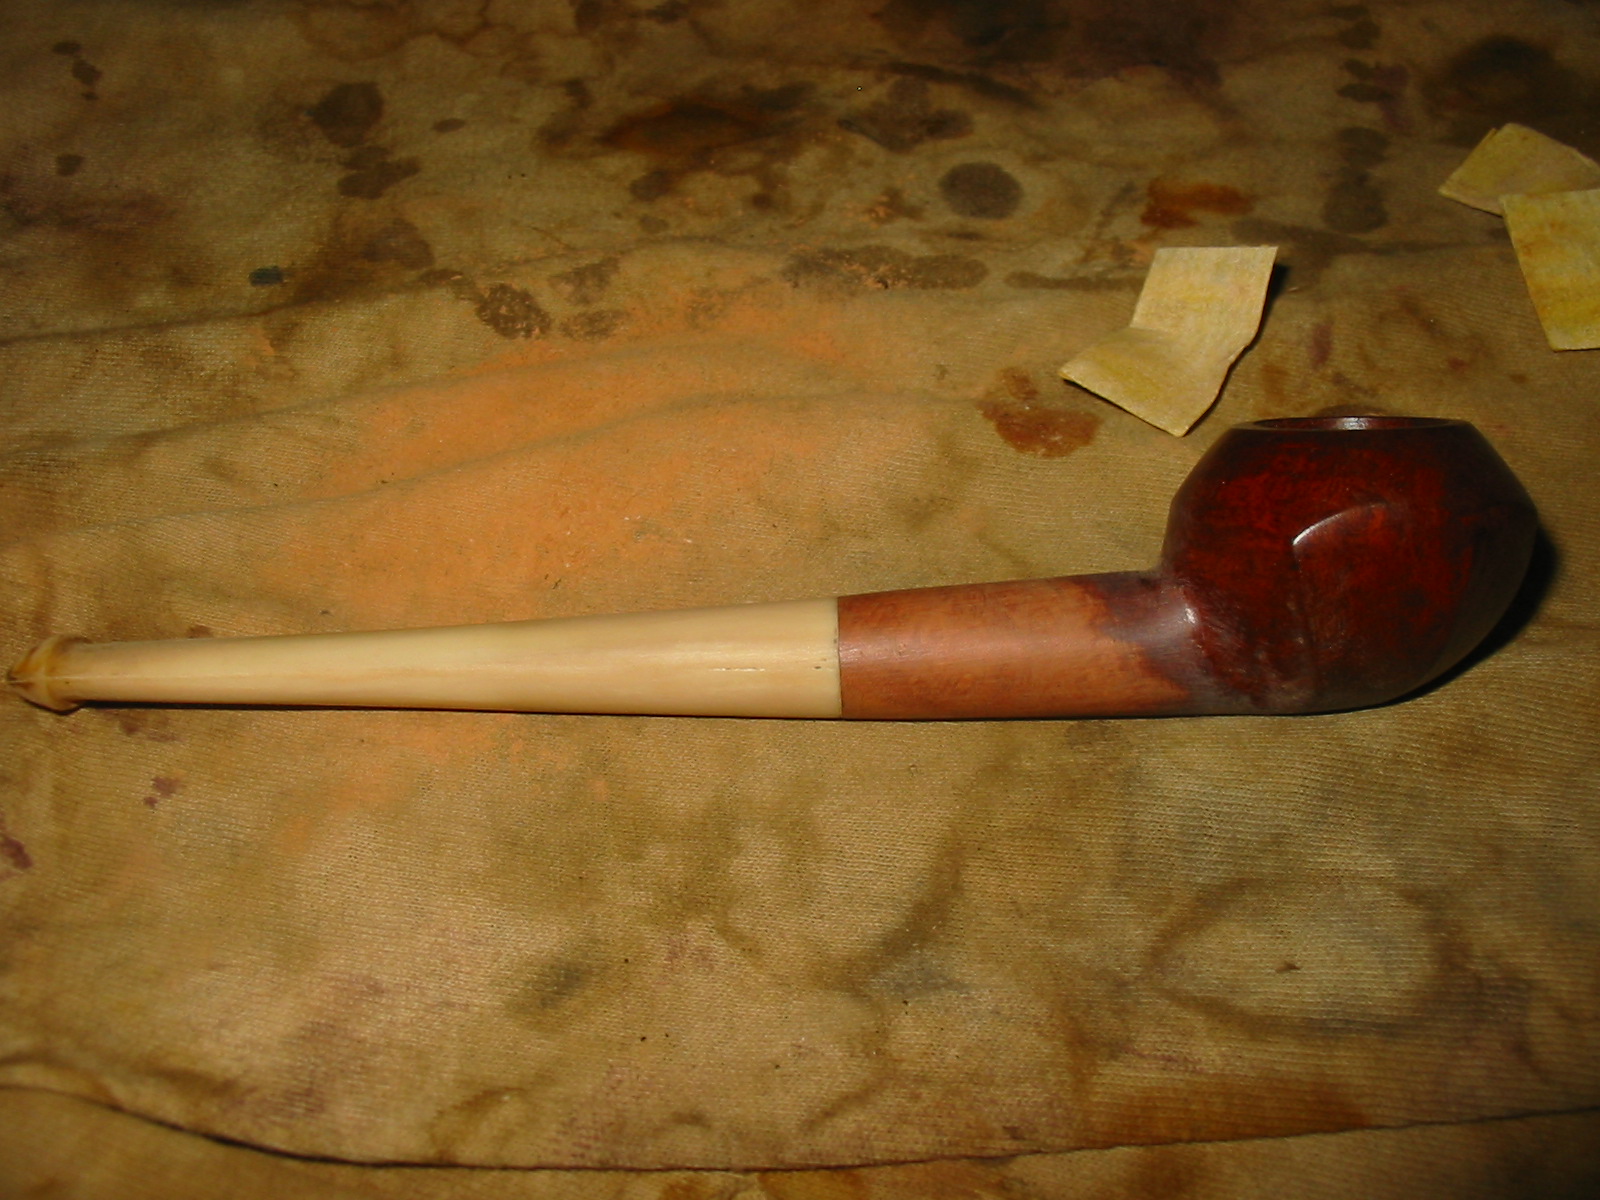
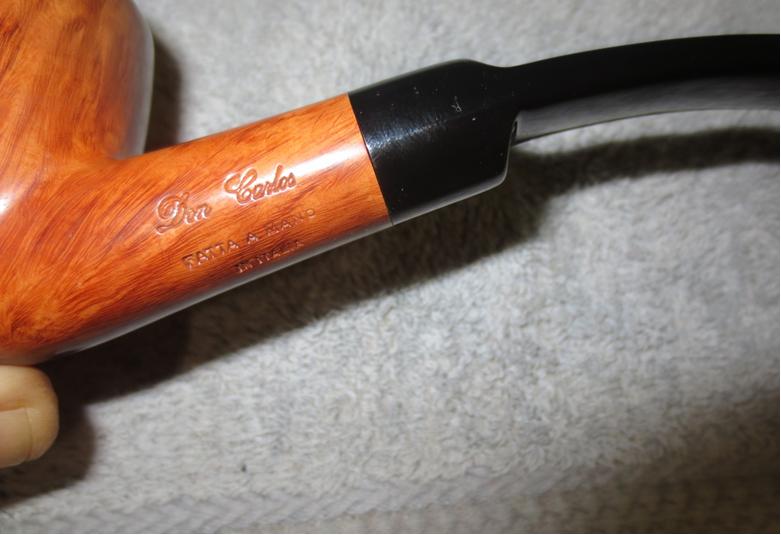
The first pipe on the work table is a beautiful Don Carlos Three Note Dublin made by Bruto Sordini in 1977. It is a large straight grained pipe. The dimensions are as follows: length 7 inches, height 2 1/2 inches, external diameter at the rim 2 3/8 inches and the diameter of the chamber is almost 1 inch.Carlos1 
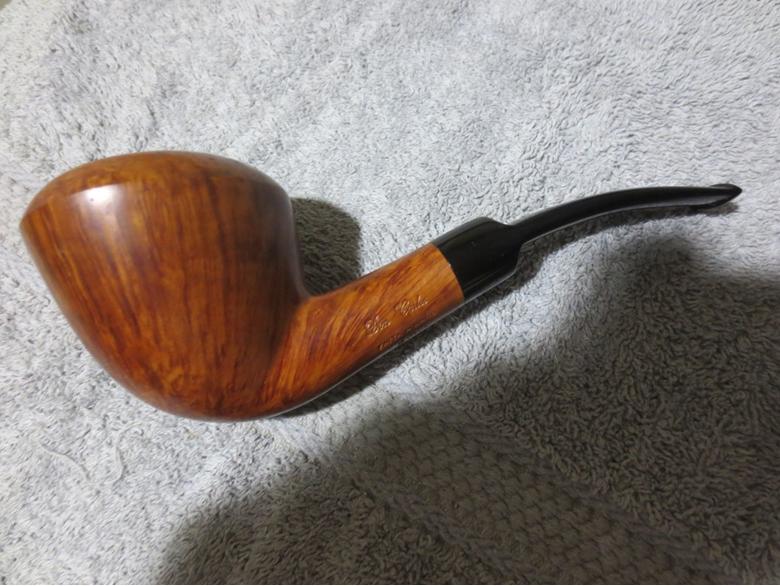
I knew next to nothing about Don Carlos pipes. This one was stamped on the left side of the shank Don Carlos in script over Fatta a Mano over In Italia.Carlos2 
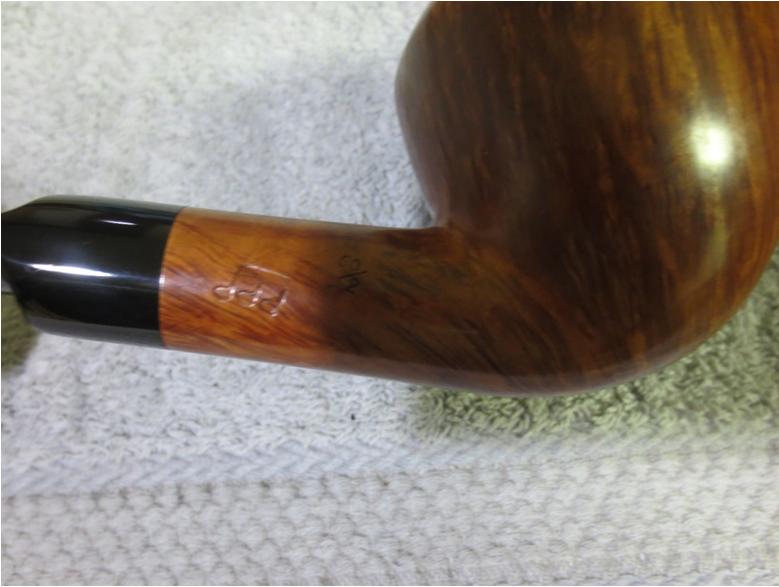
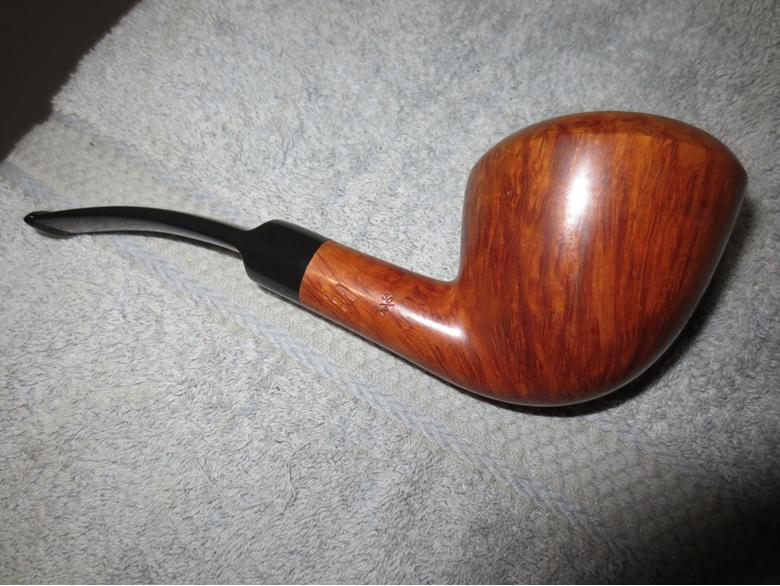
On the right side it is stamped with three music notes and 50/2. The stampings would certainly tell others who know the brand a lot about the pipe but I had no idea what I was dealing with. So I did a little digging on the web to see what I could find out.
I found a website that had lots of info on the stamping and grades that Bruto used on his pipes. http://www.theitalianpipe.com/infowell/guides/doncarlos.htm It also gave the following information on him.Carlos3

“Bruto was born in the small village of Cagli, where his world-famous Don Carlos pipes are currently being made. He’s in his mid-forties, married with three children. He first got into pipe making about 37 years ago. At that time, he was studying law, but slowly and surely he developed a passion for the artistry of making a work of art out of a piece of wood. After having worked for years and years for major pipe making establishments in the area of Pesaro, Bruto decided to get more independent; that was when he started a partnership with two other pipe makers and founded the Ser Jacopo. After a few years, Bruto took off and started the Don Carlos.”

On the PipePhil site I found this information: http://pipephil.eu/logos/en/logo-d7.htmlDon2 Using the formula for dating found on the photo above I was able to date the pipe. The 50/2 stamping is identical to the information above. It states that in 2002 the pipes started to be stamped with this date reference. The explanation of the stamp is that 50/2 = 25 which was the number of years that Bruto had spent in making pipes in 2002 having started in 1977. So this pipe was made in 2002.

Don Carlos pipes are the products of the creative mind of Bruto Sordini. His unique, and often whimsical shapes are a refreshing departure from the ordinary, and his craftsmanship is readily apparent in each pipe. He grades his pipes using musical notes, and they all feature gleaming Lucite stems.
Looking on the Don Carlos website I found this quick summary of the ranges and grading of his pipes. http://www.doncarlospipes.com/eng/doncarlospipes.html

“Our range includes Rusticated, Sandblasted (under Rusticated), Smooth, Smooth Straight-Grain, and Specialty pipes. Also, as many loyal supporters of Don Carlos pipes know, within each finish the pipes are graded according to its grain and are graded with musical notes: starting from 1 note up to 3 notes, with a 3-notes grade as the highest representing the finest pipe.”

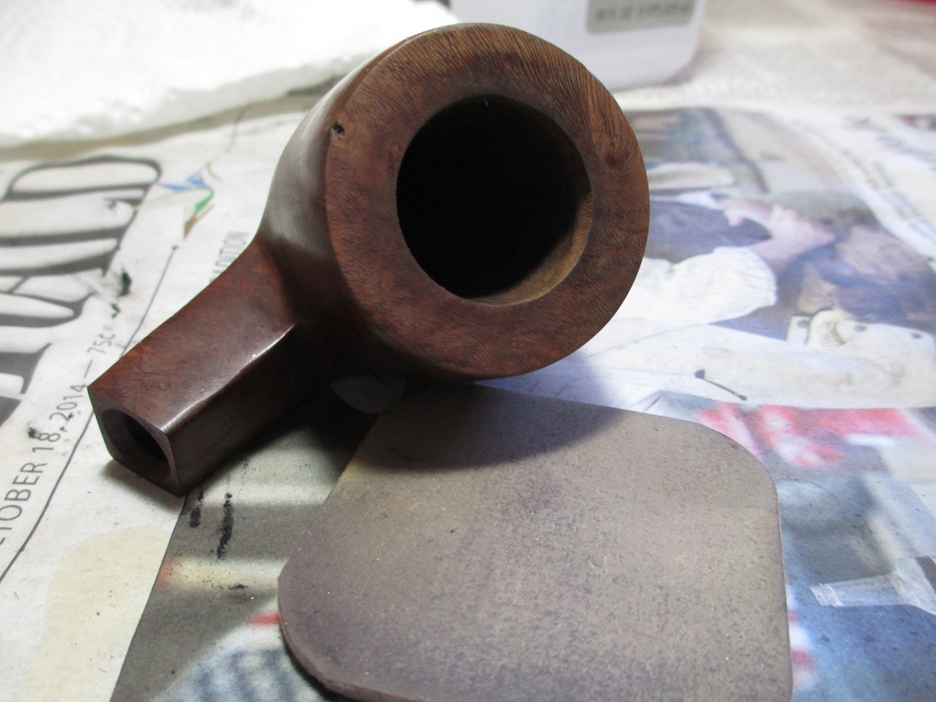
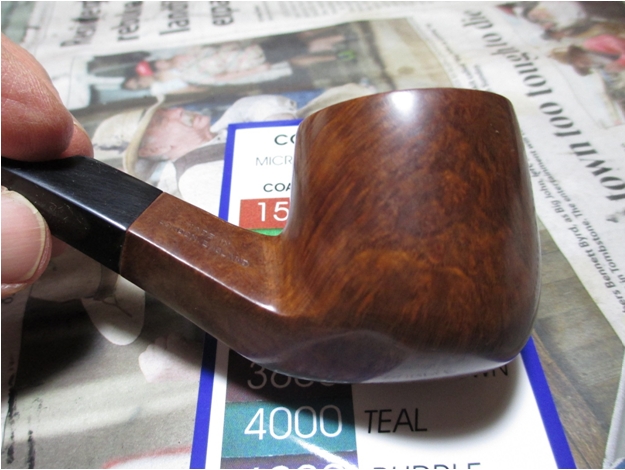
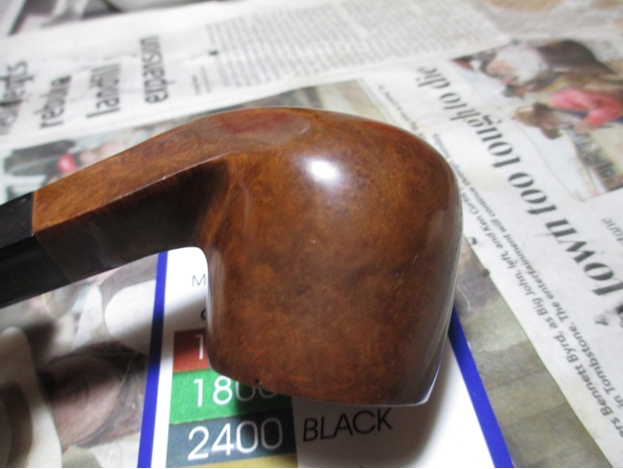
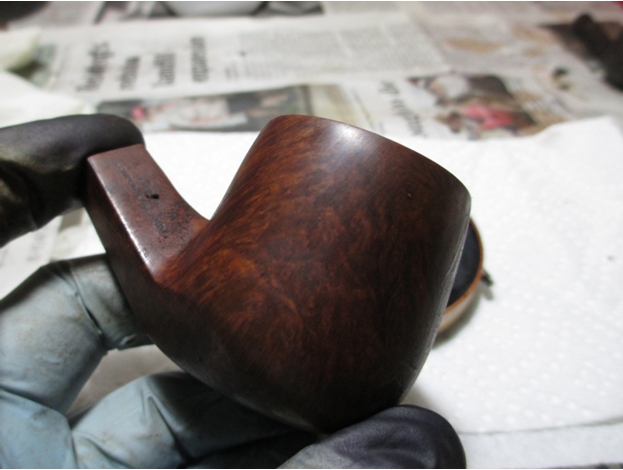
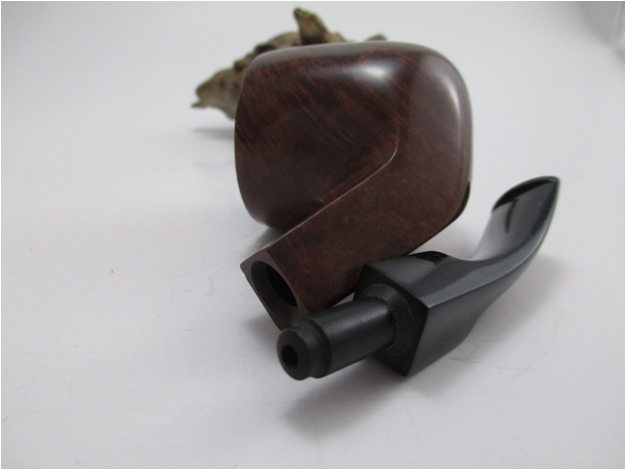
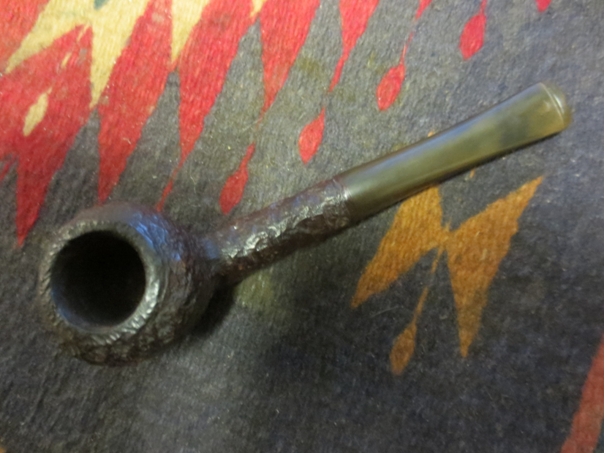
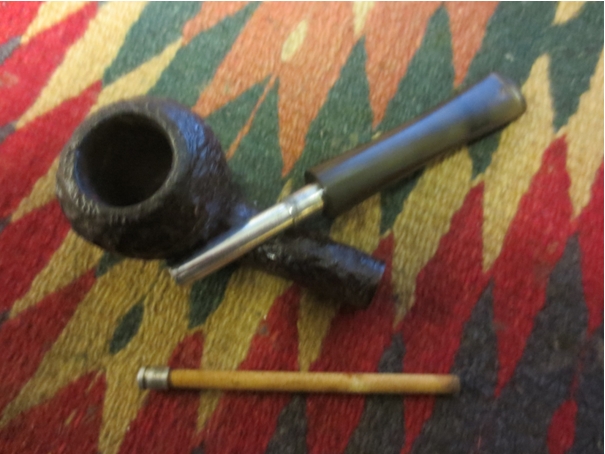
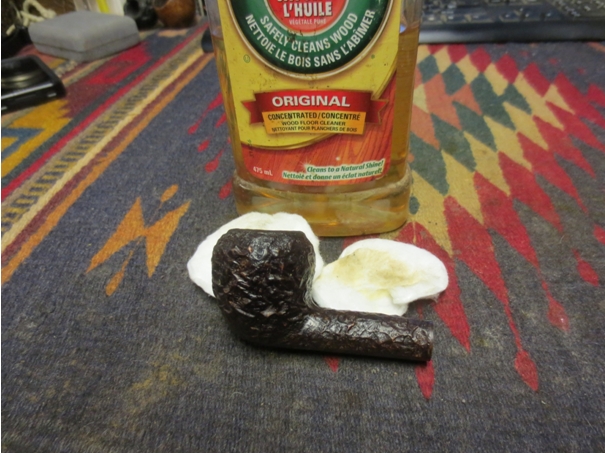
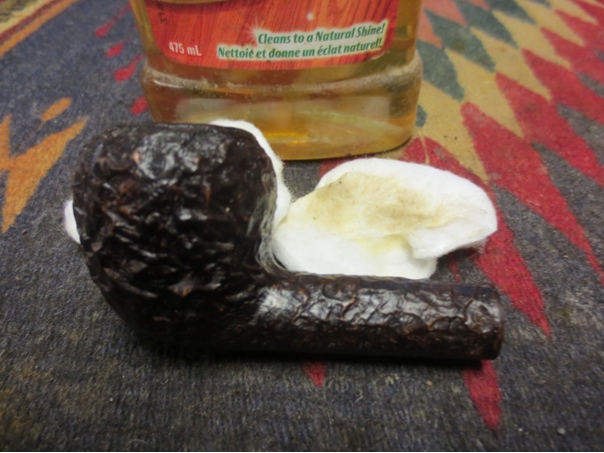
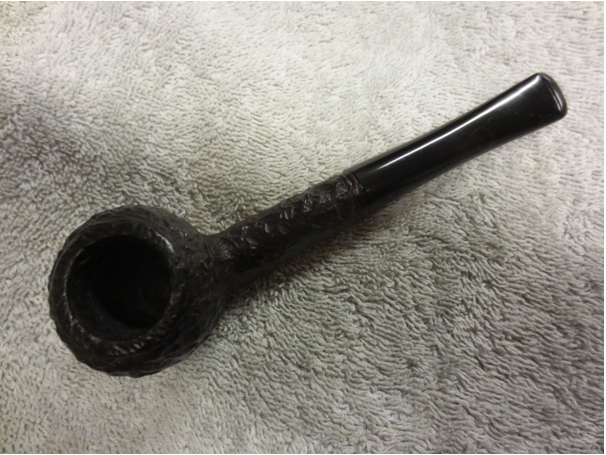
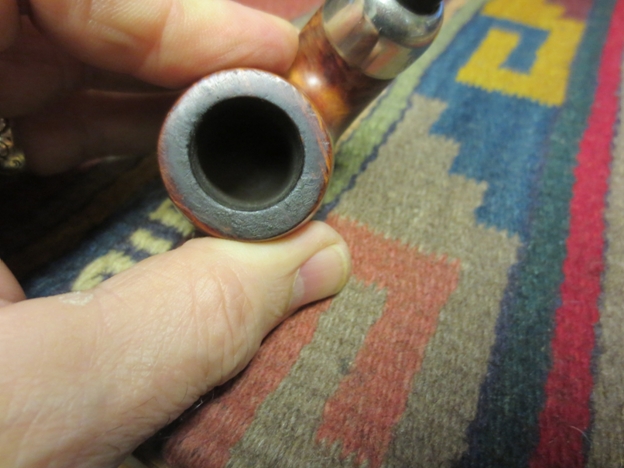
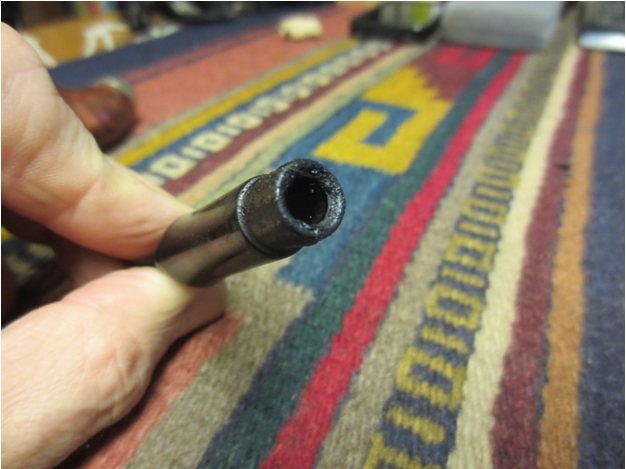
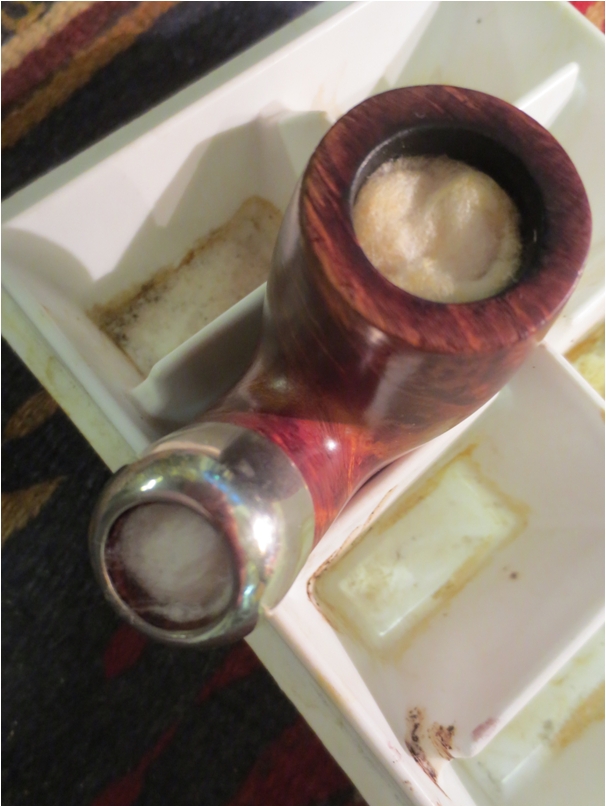
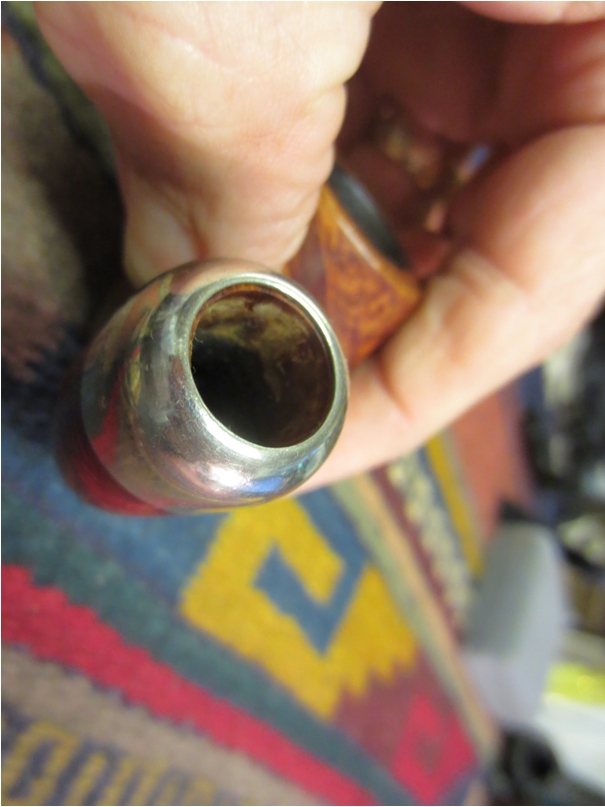
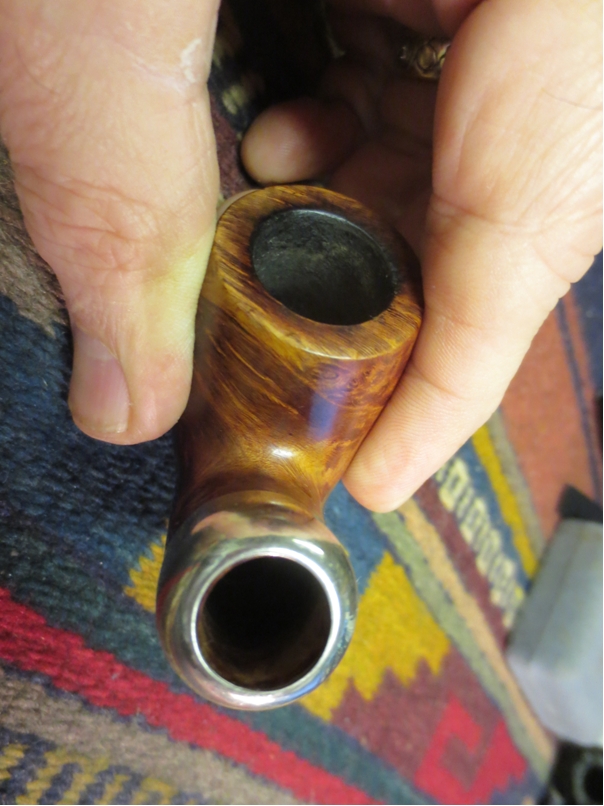
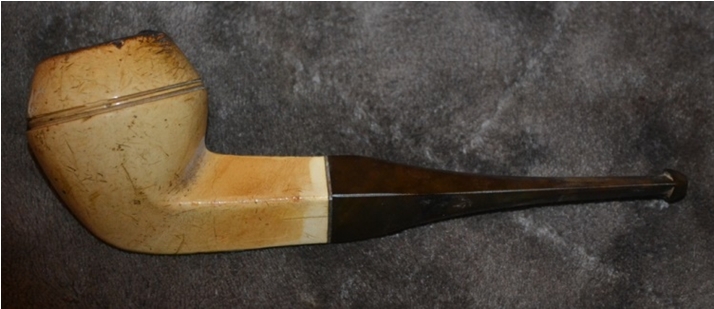
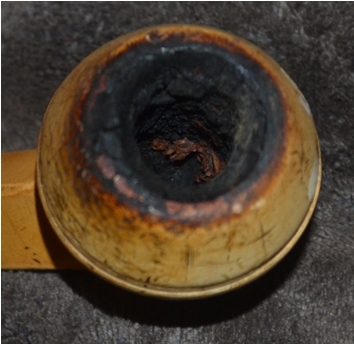
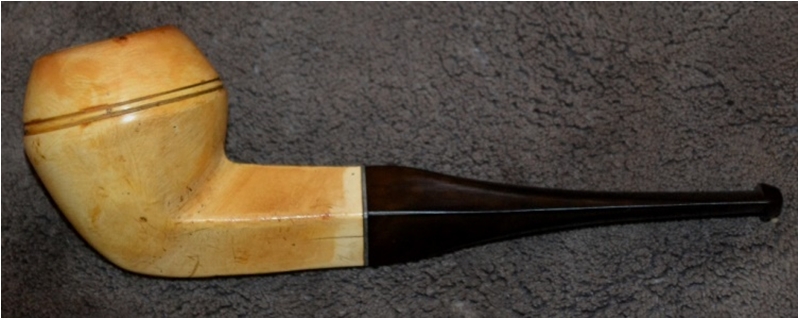
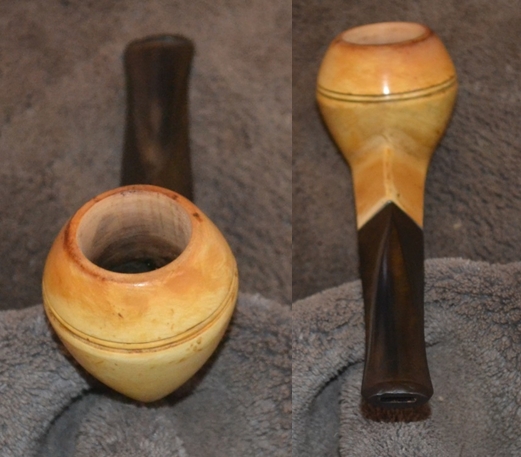
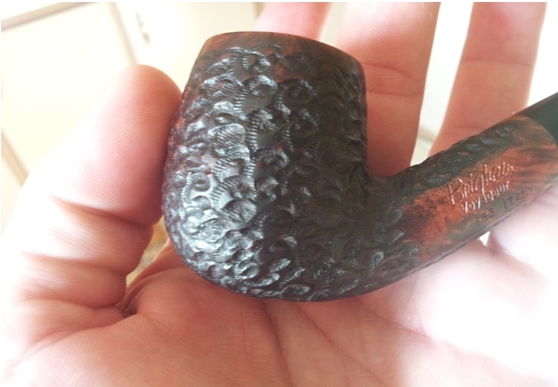
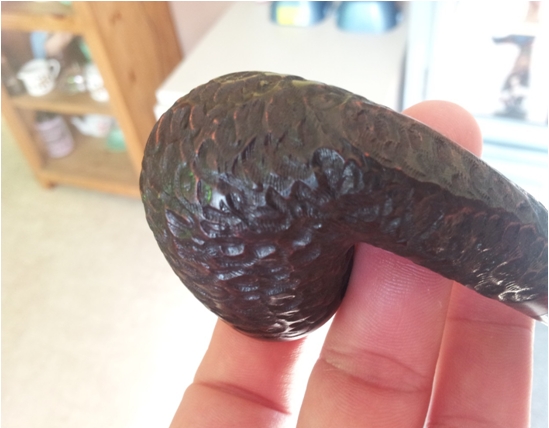
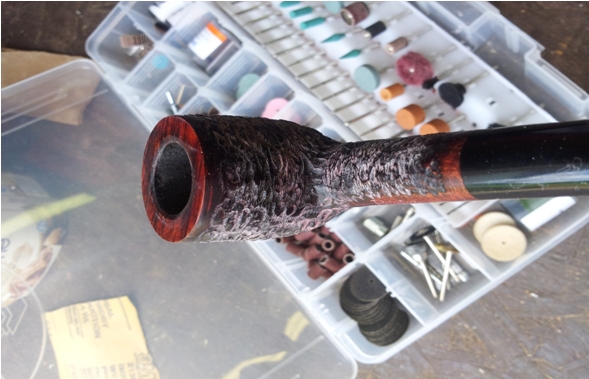
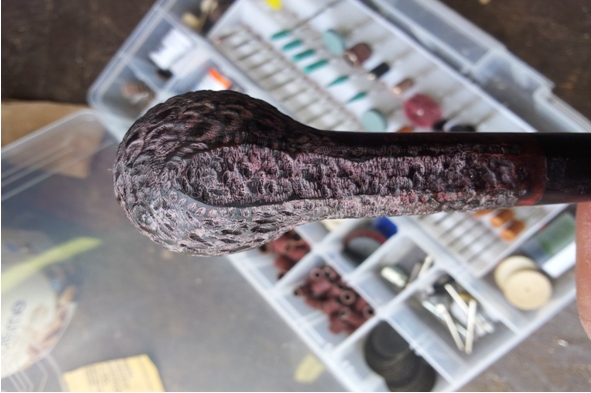
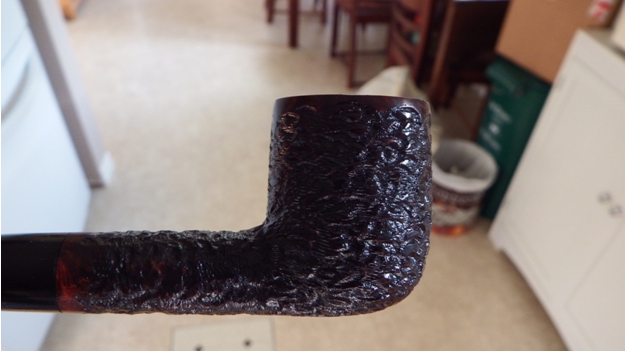
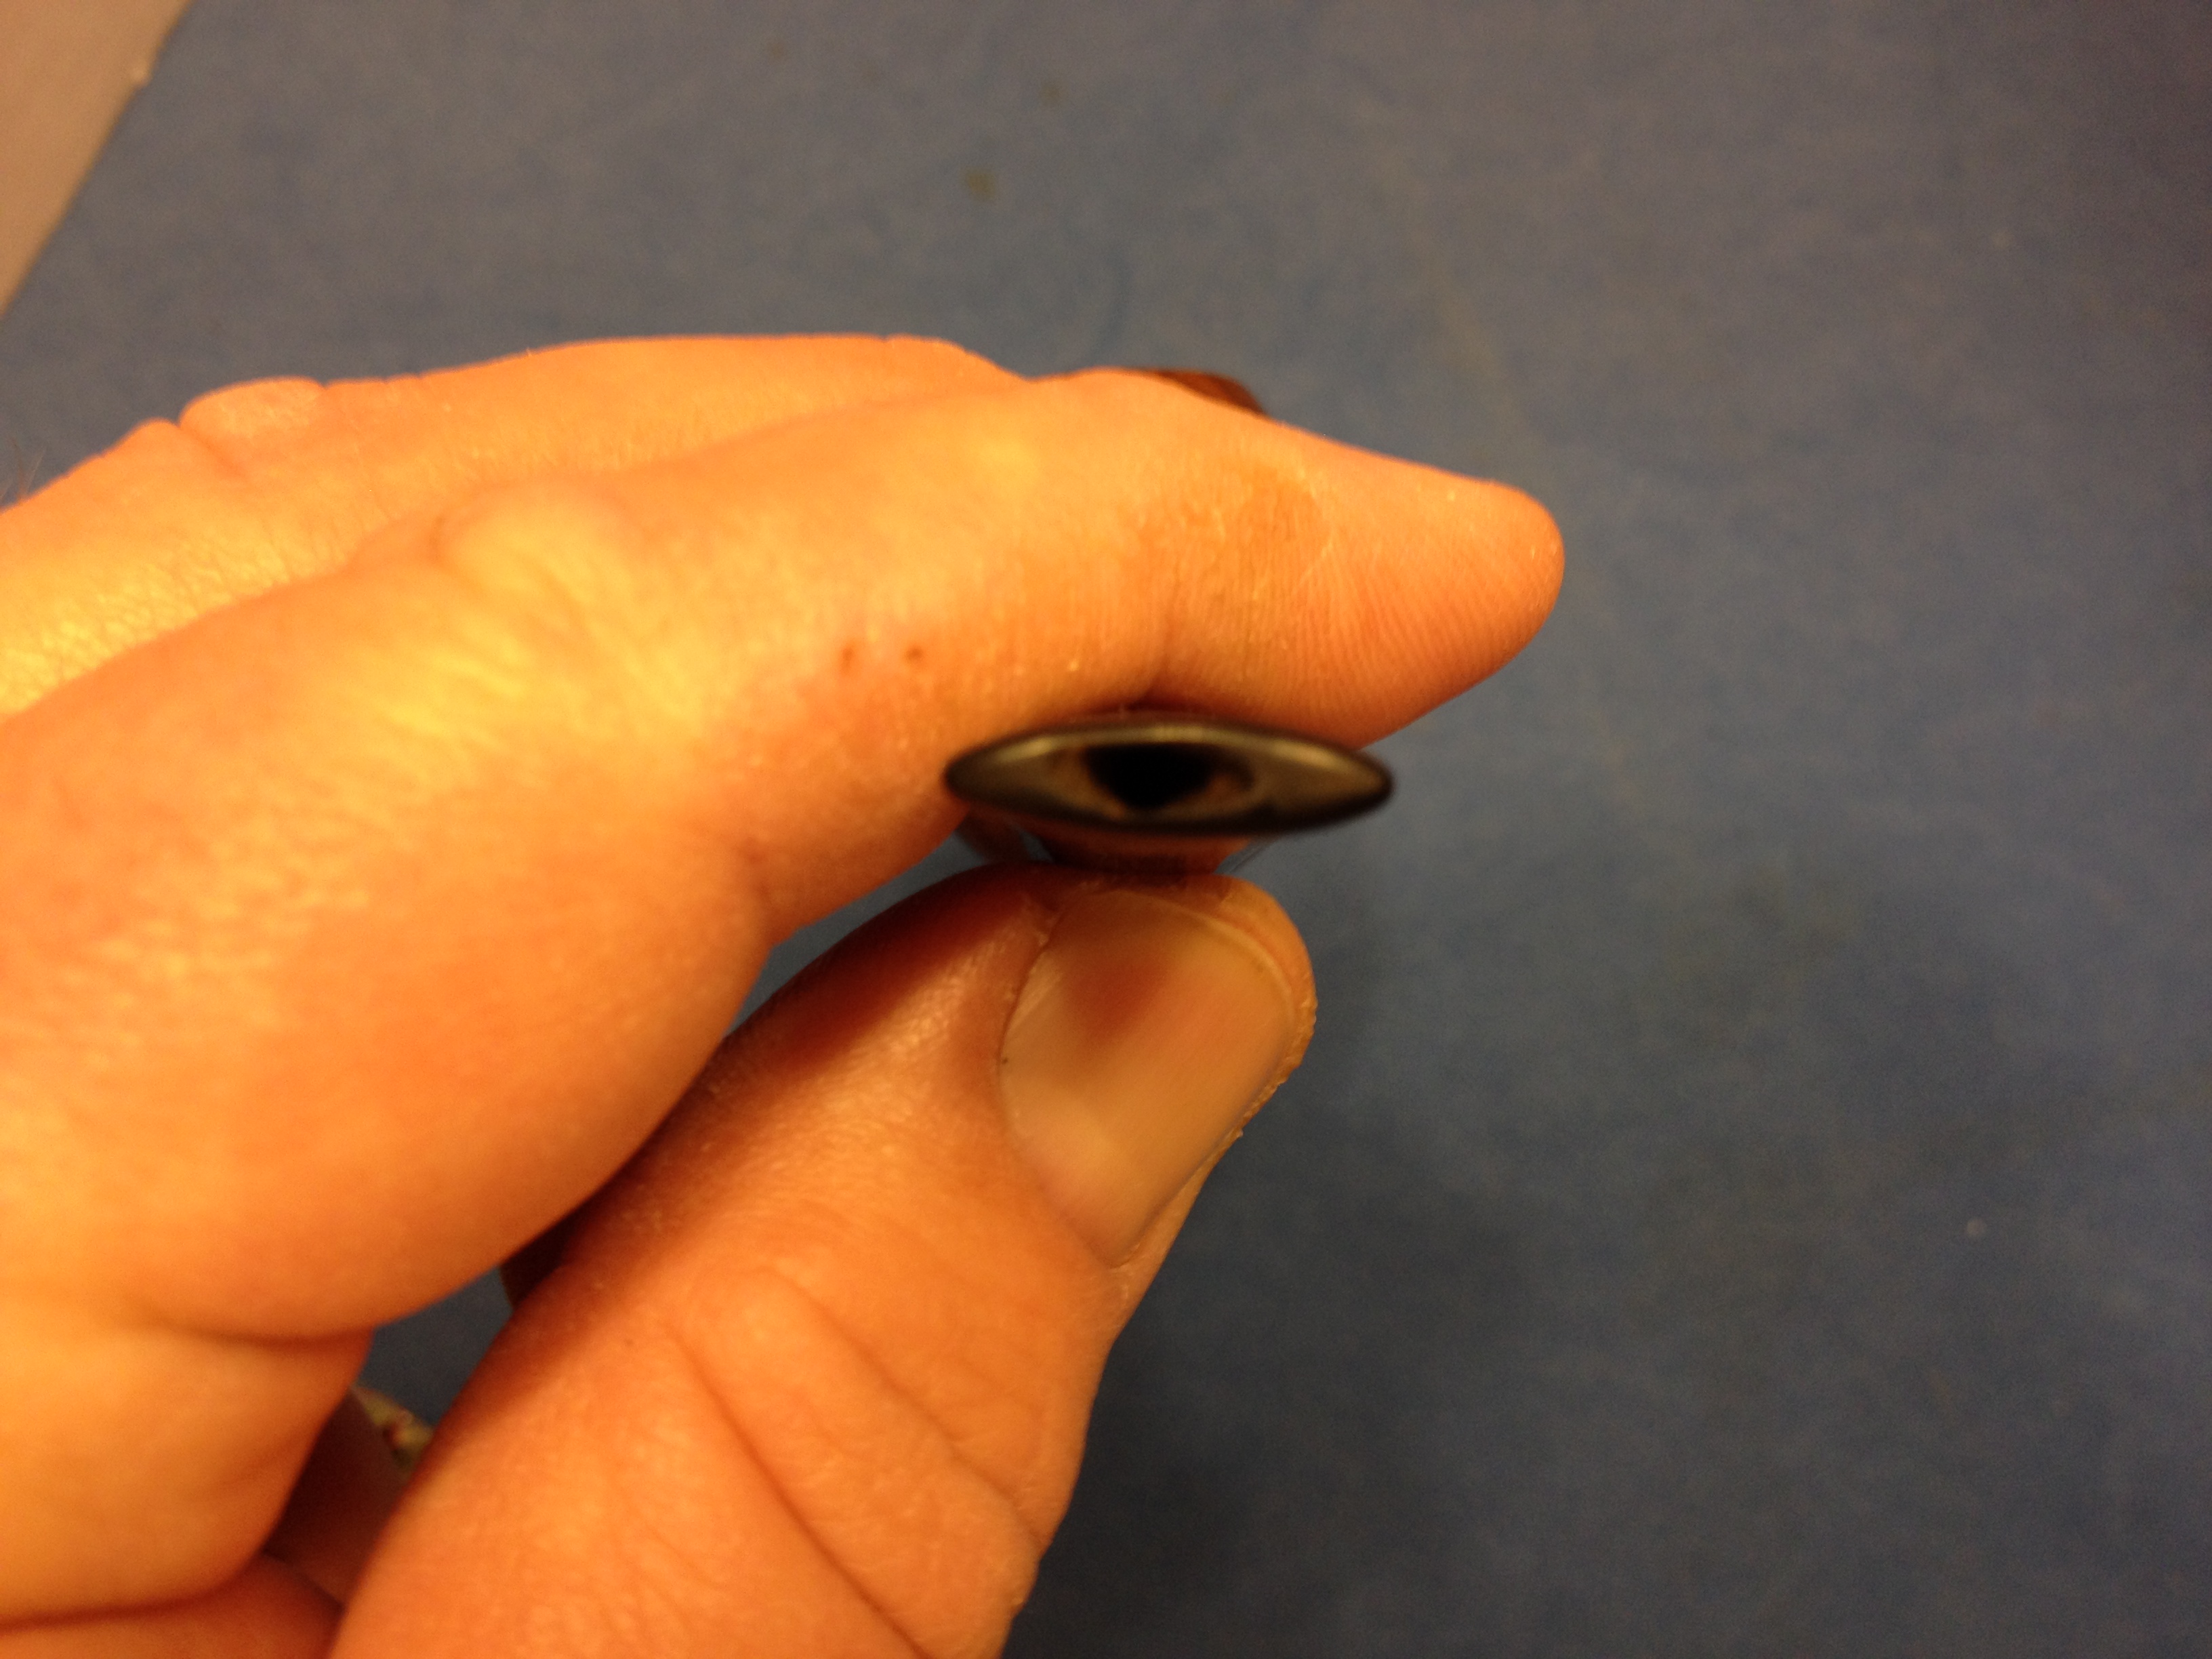
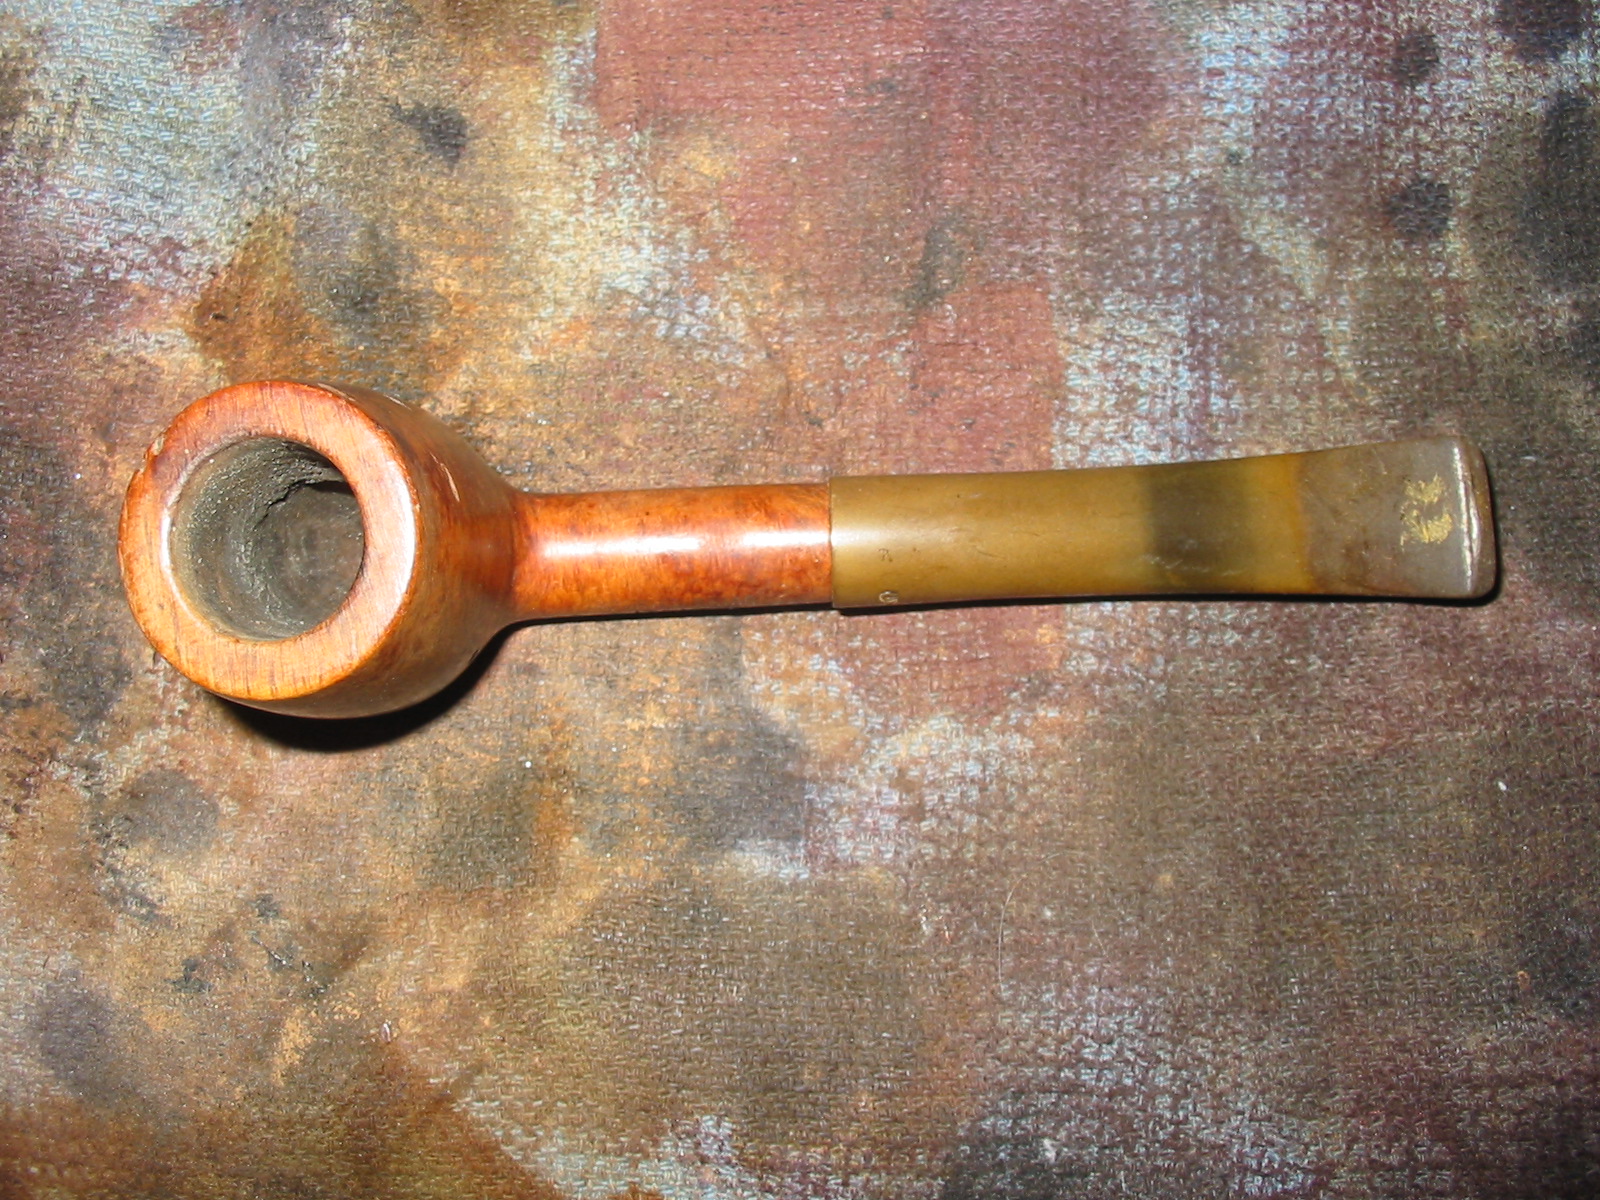
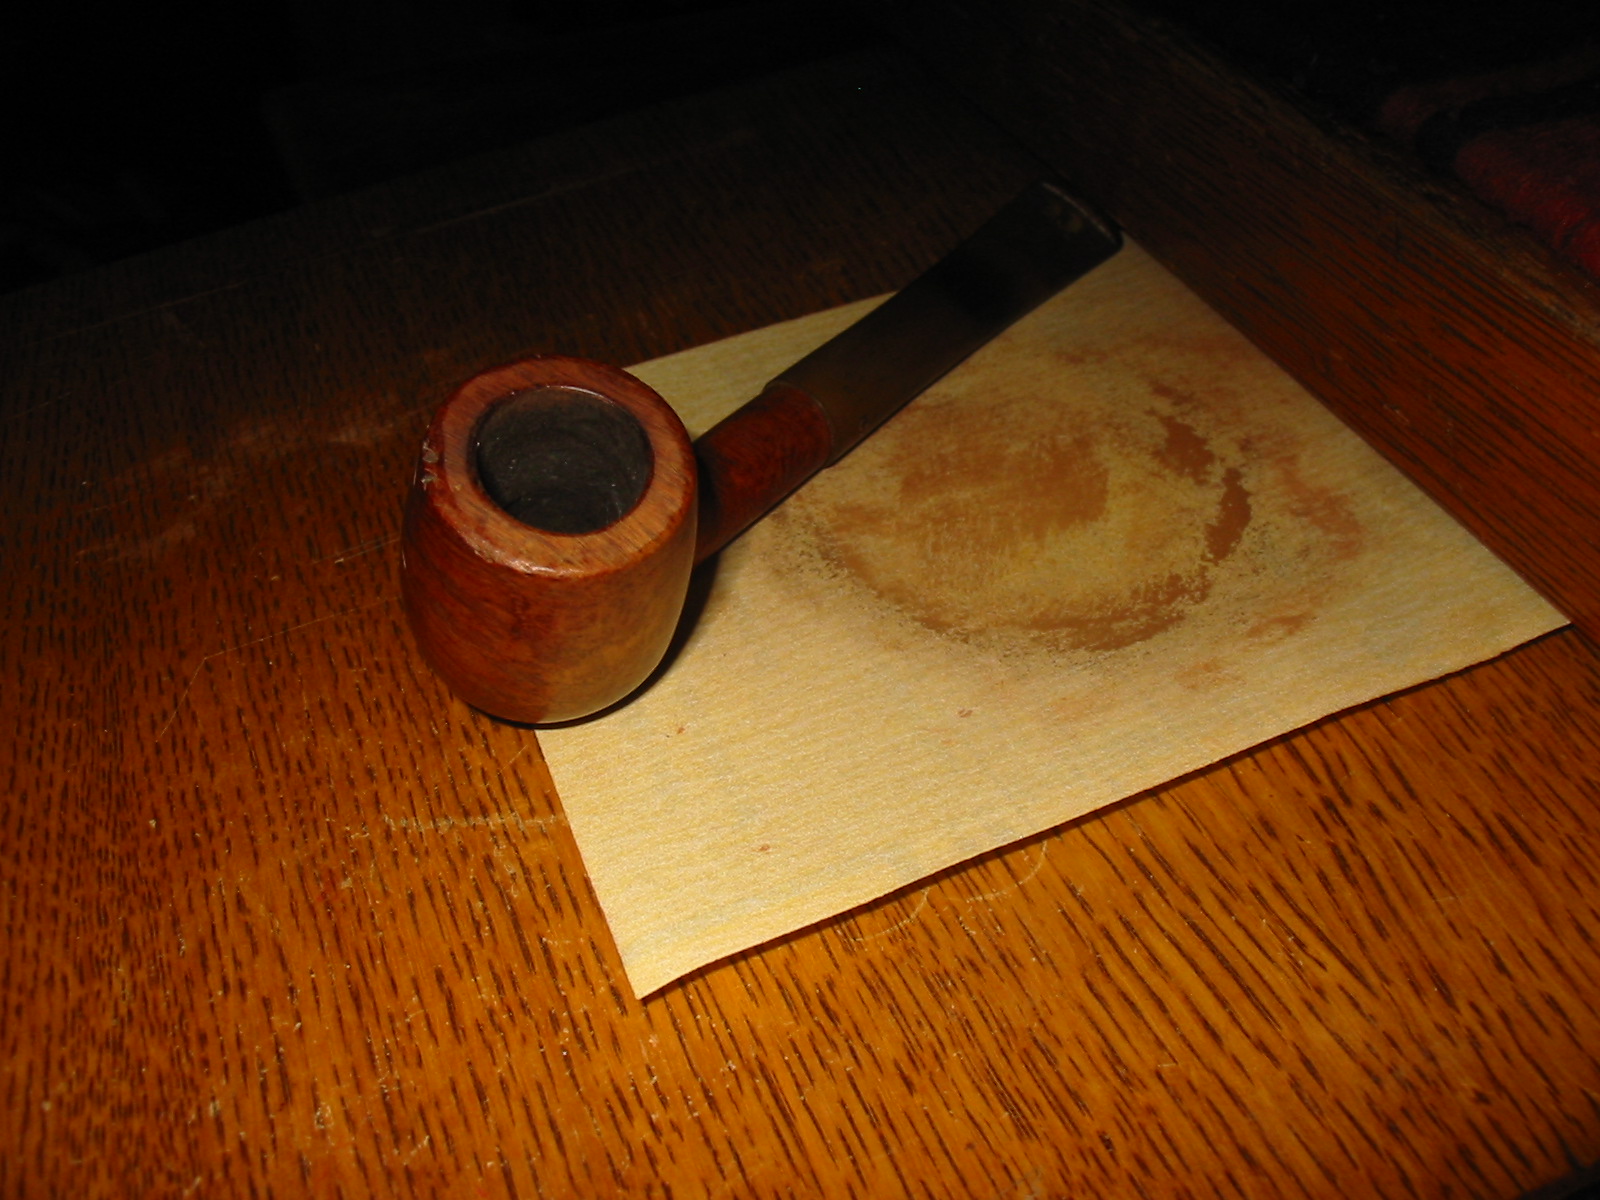
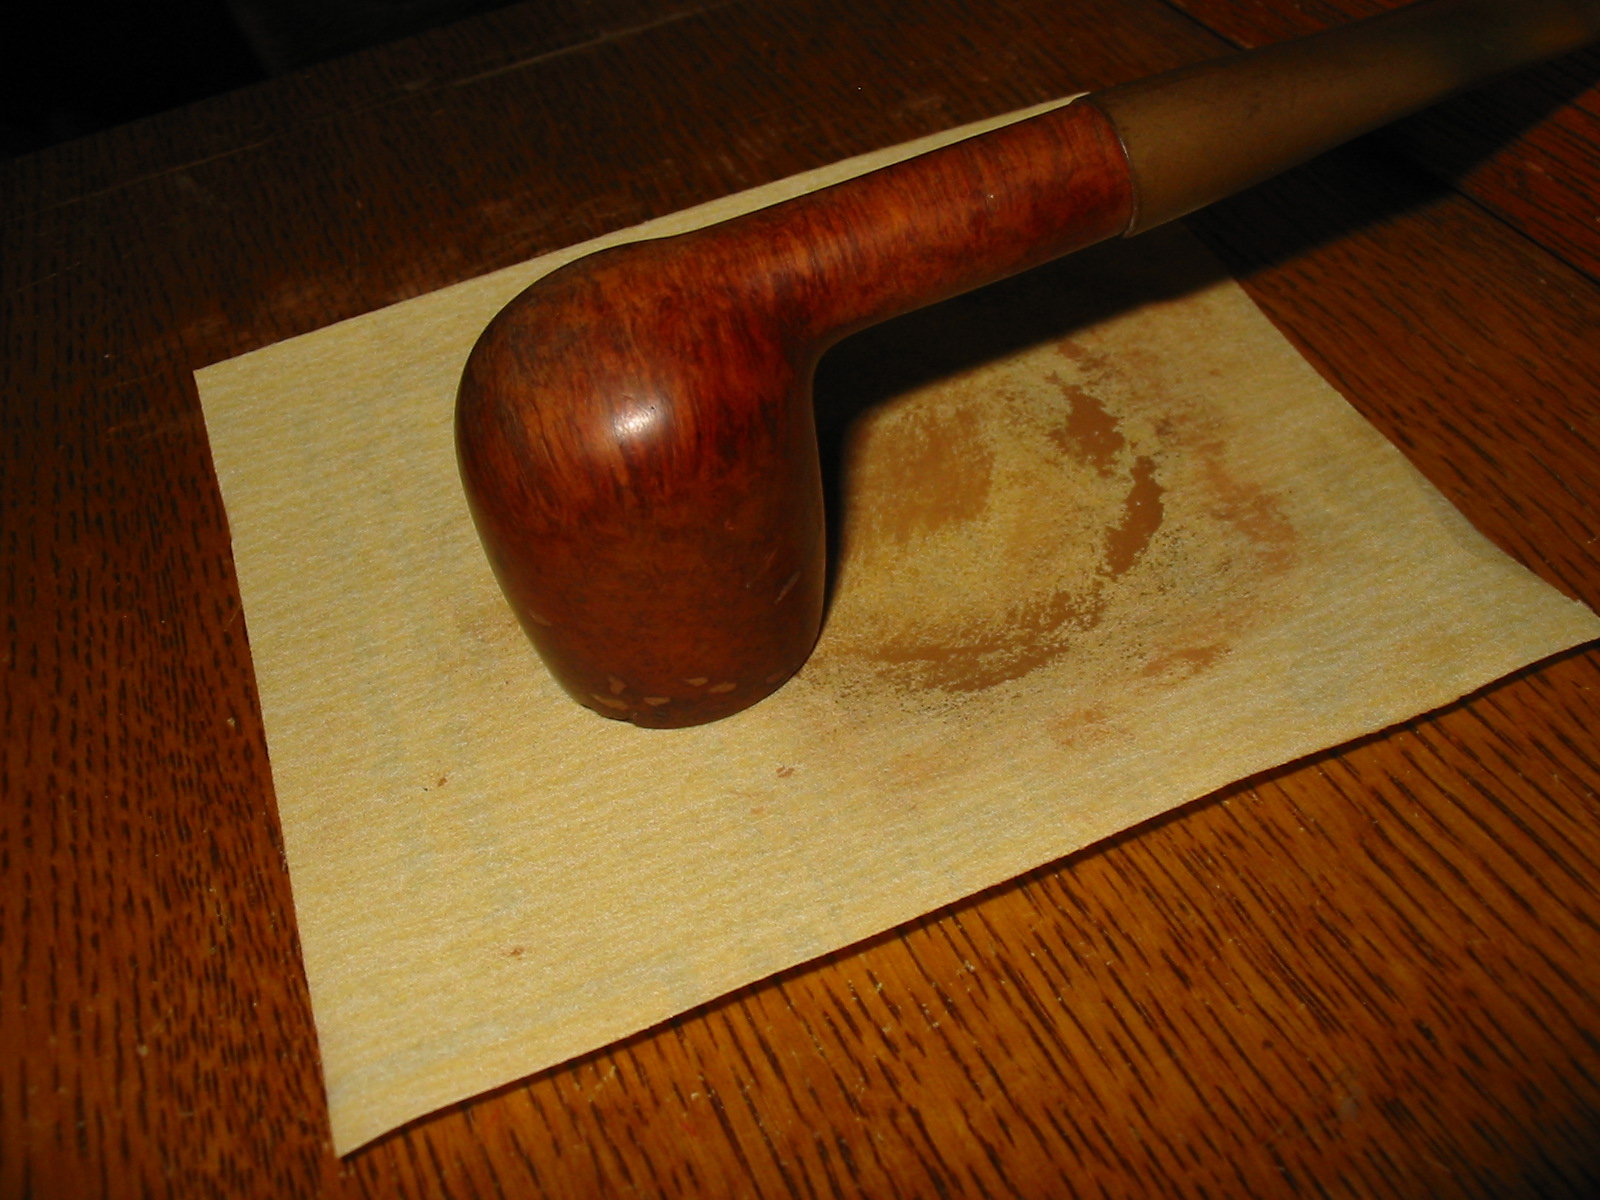
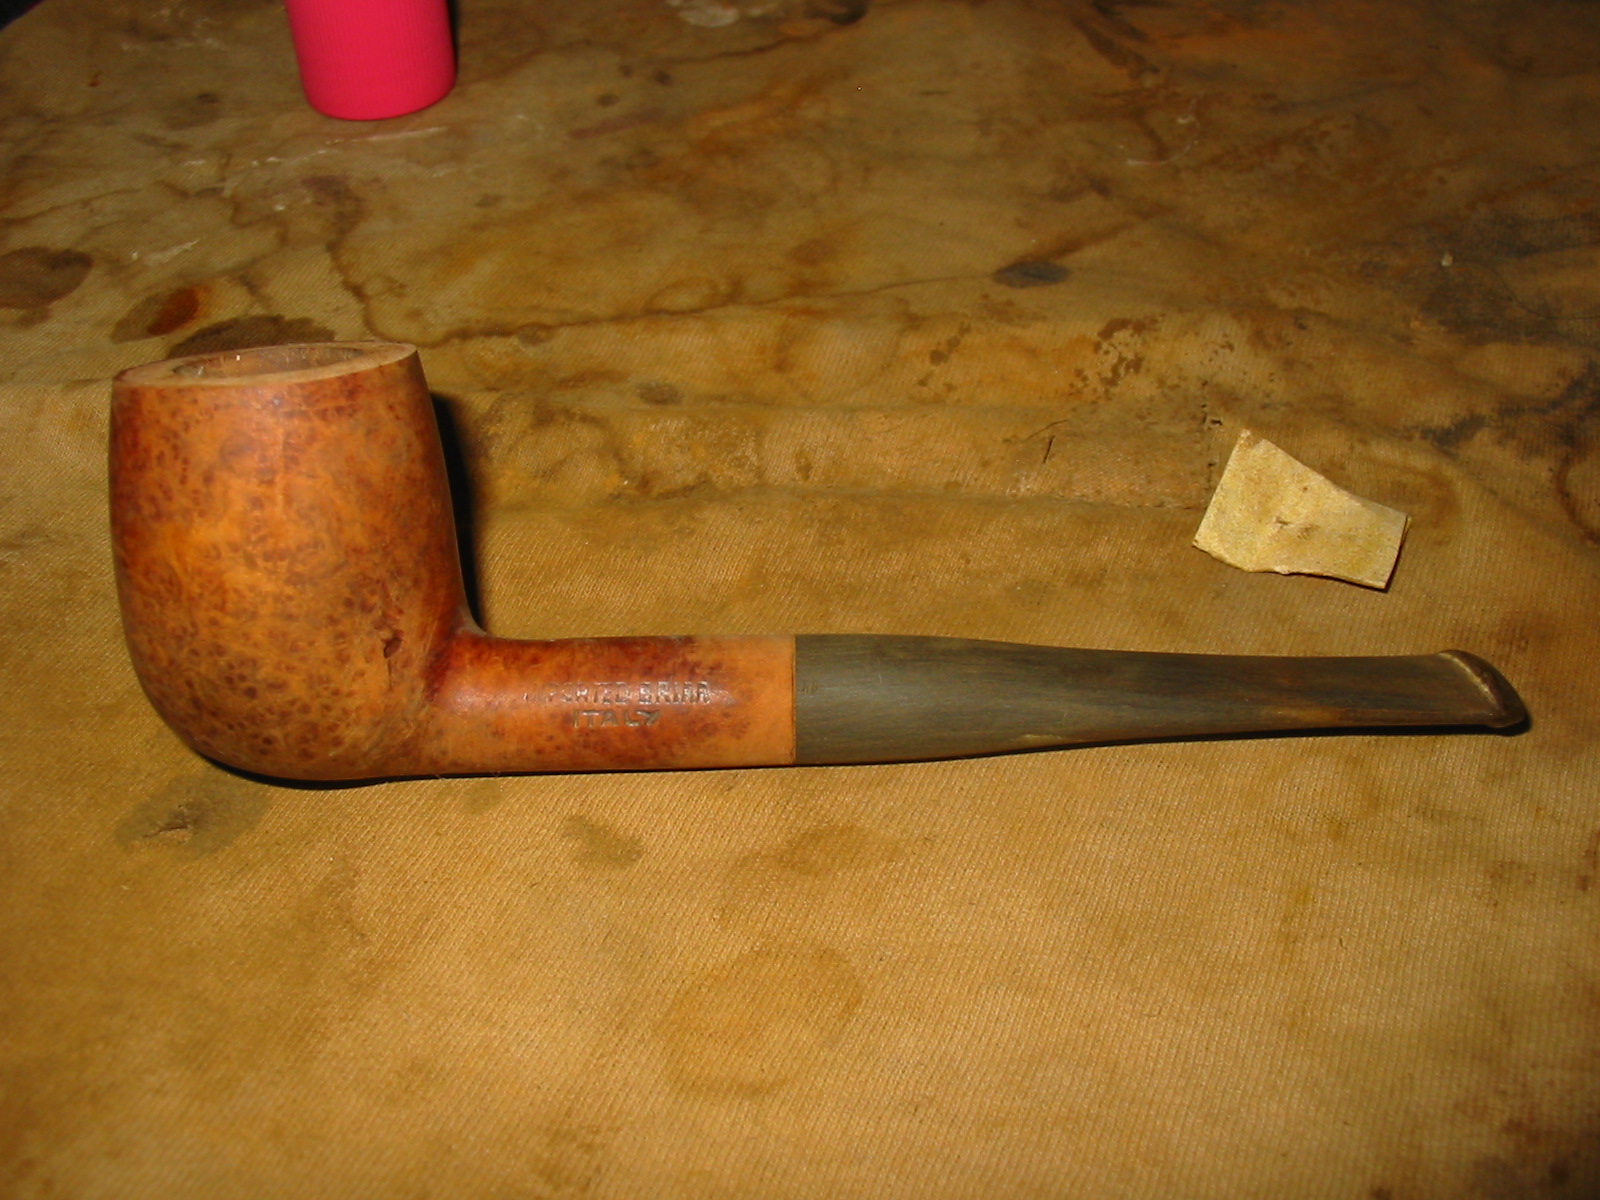
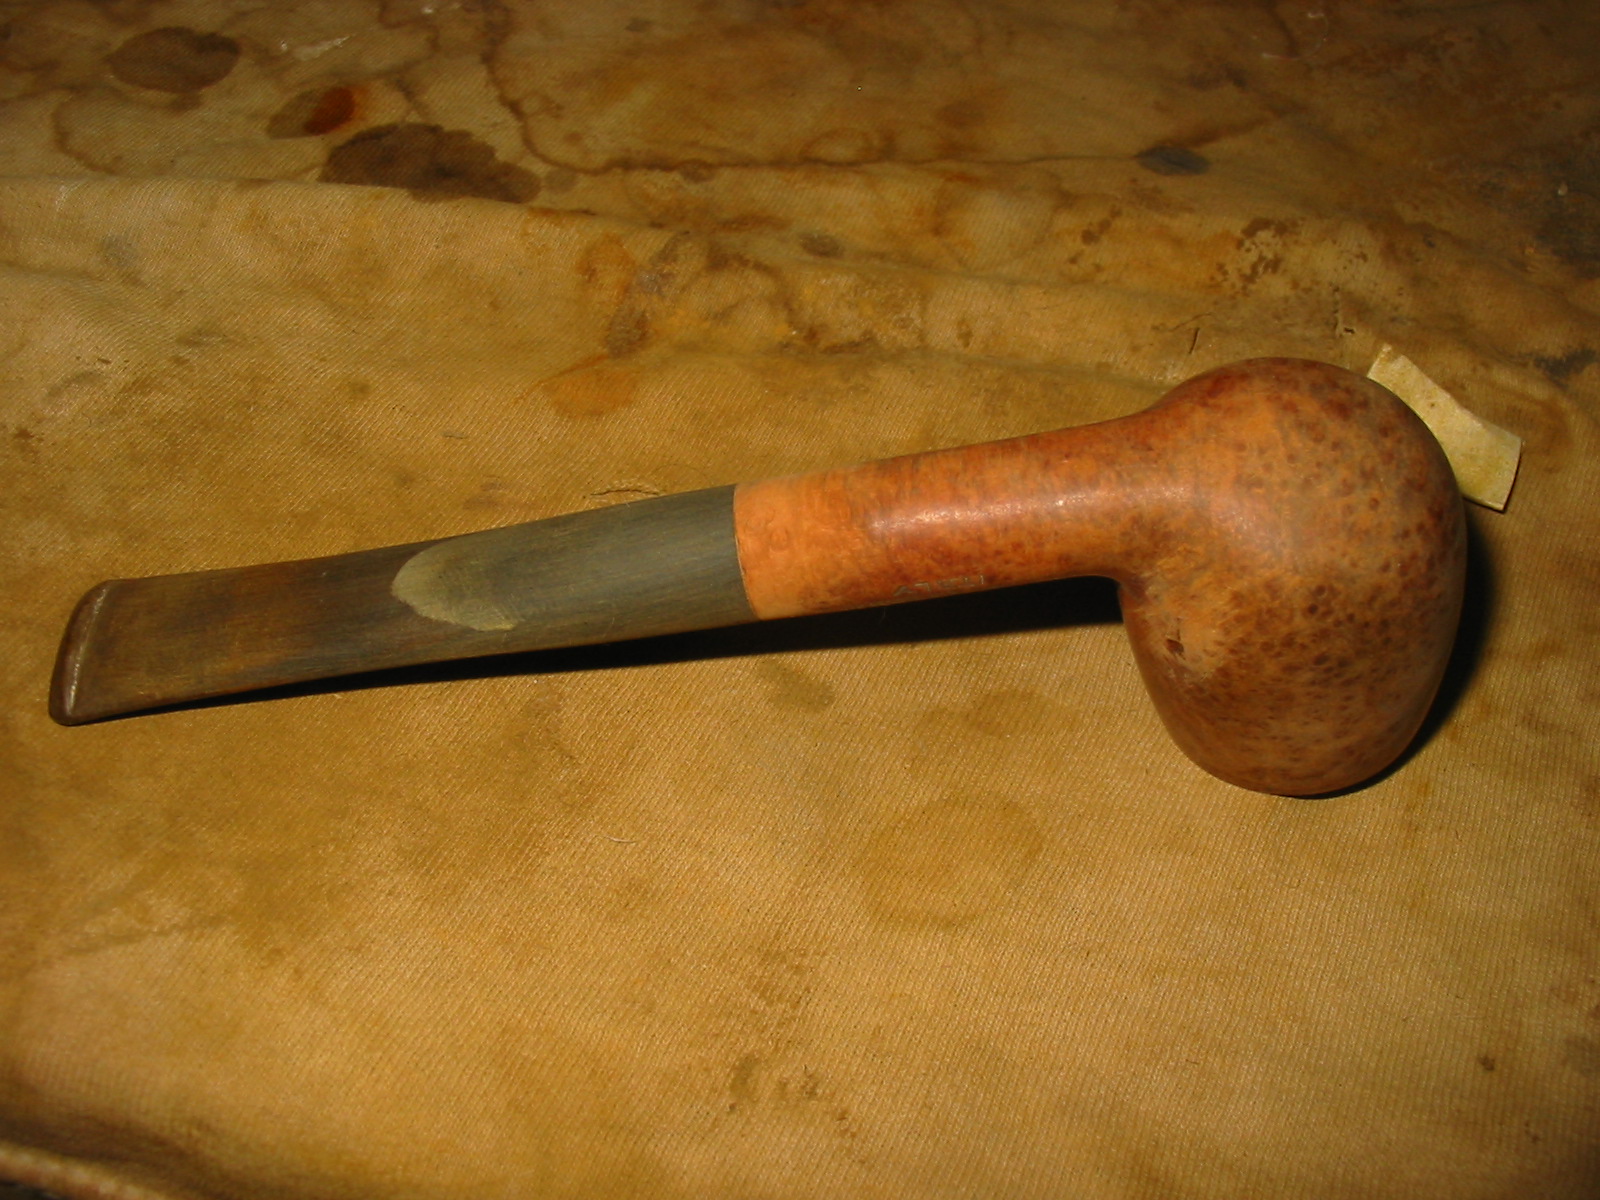
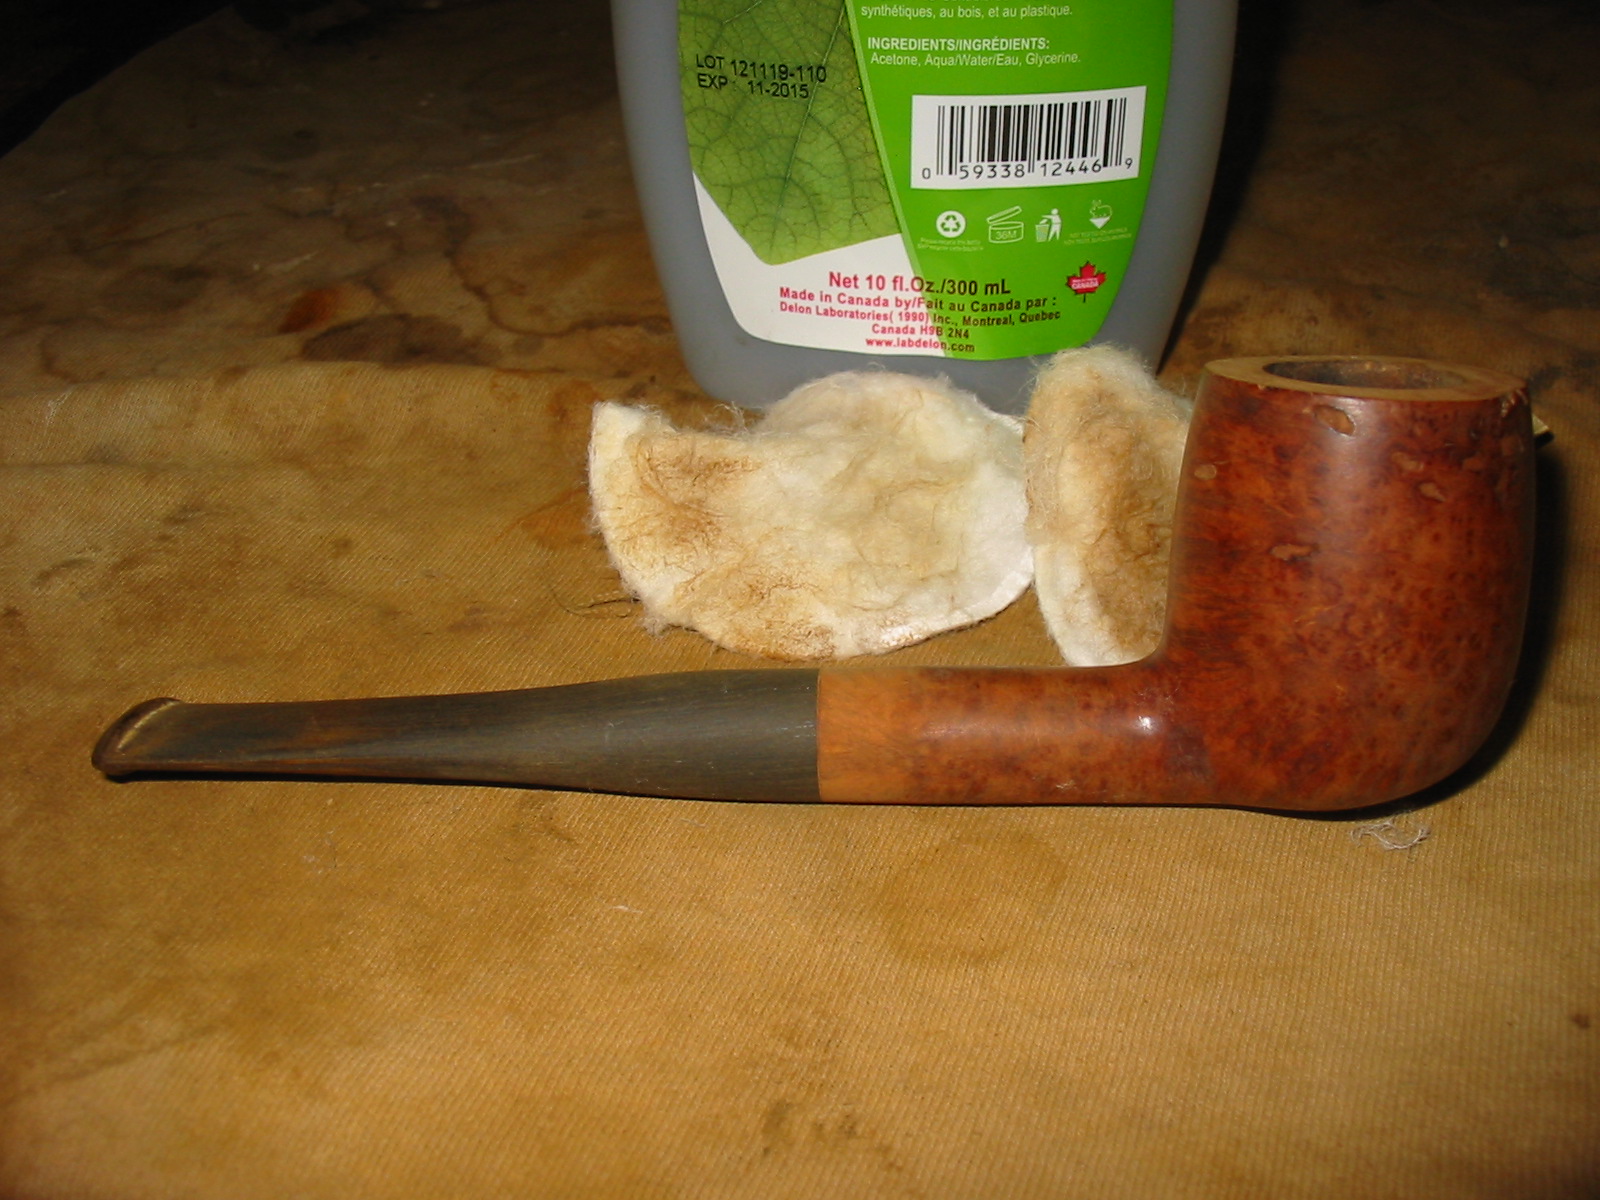
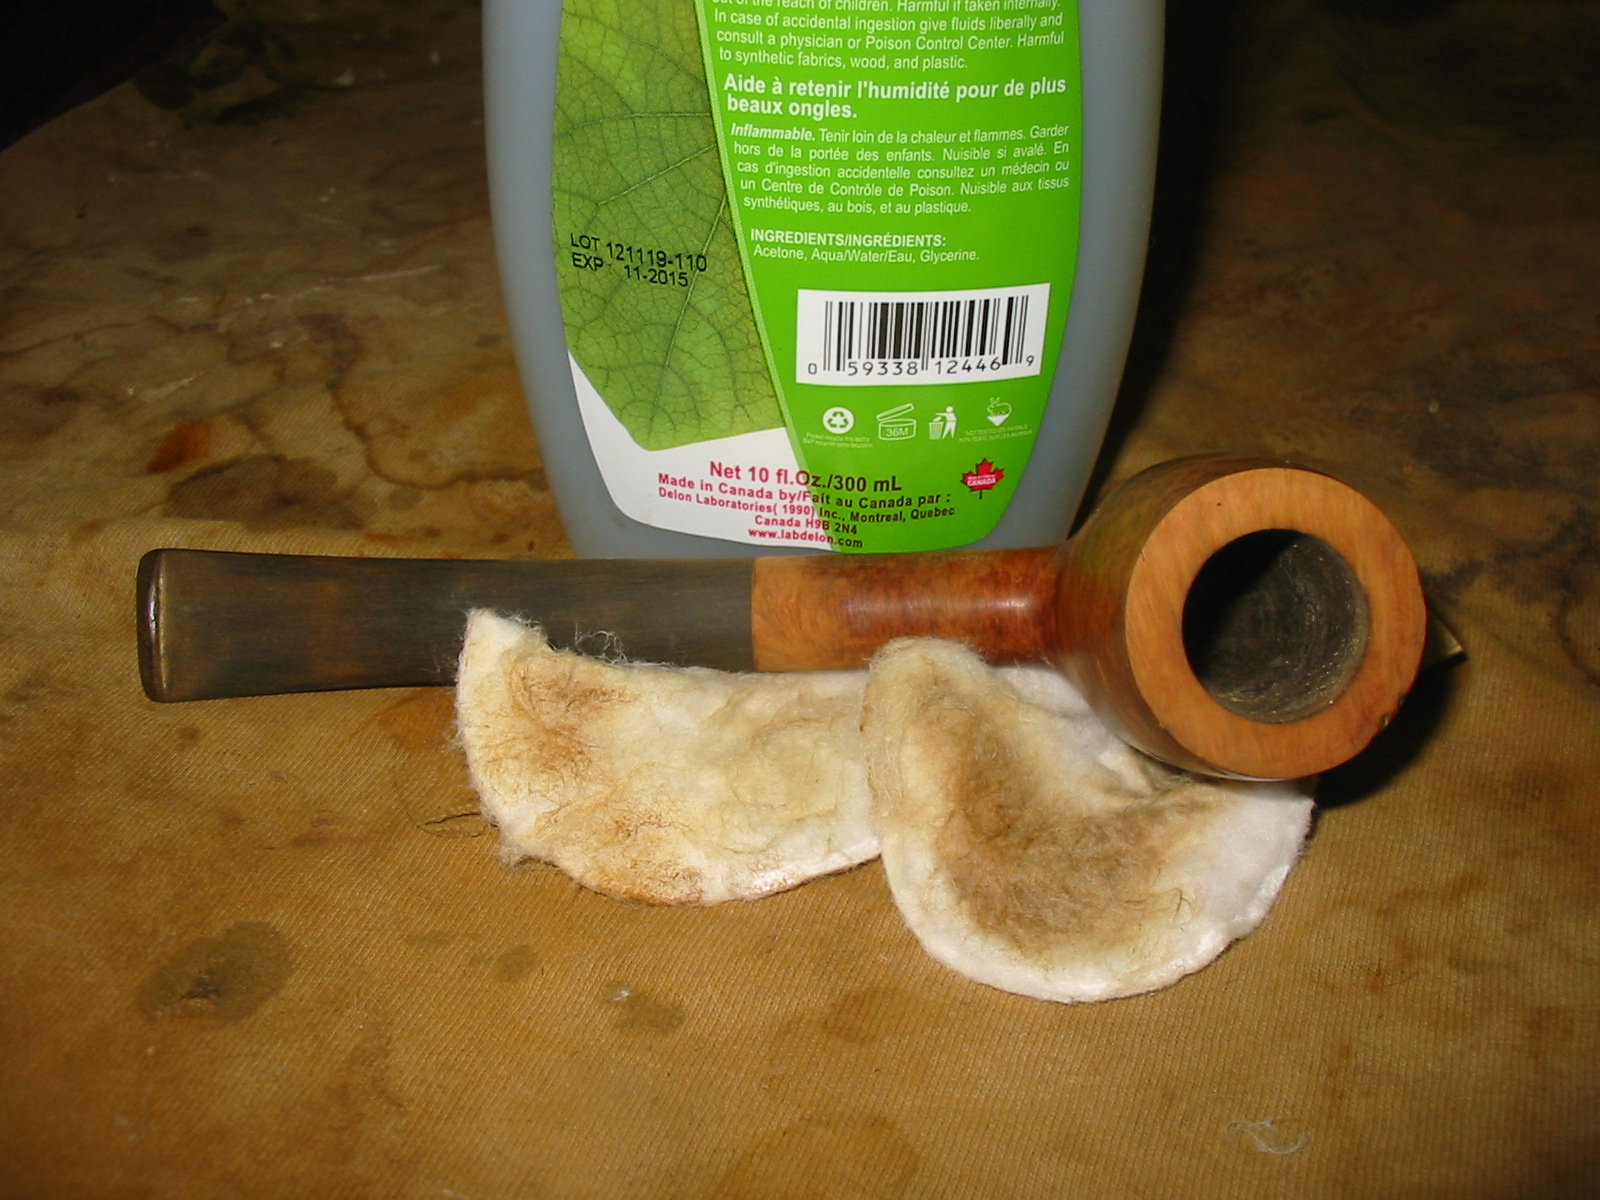
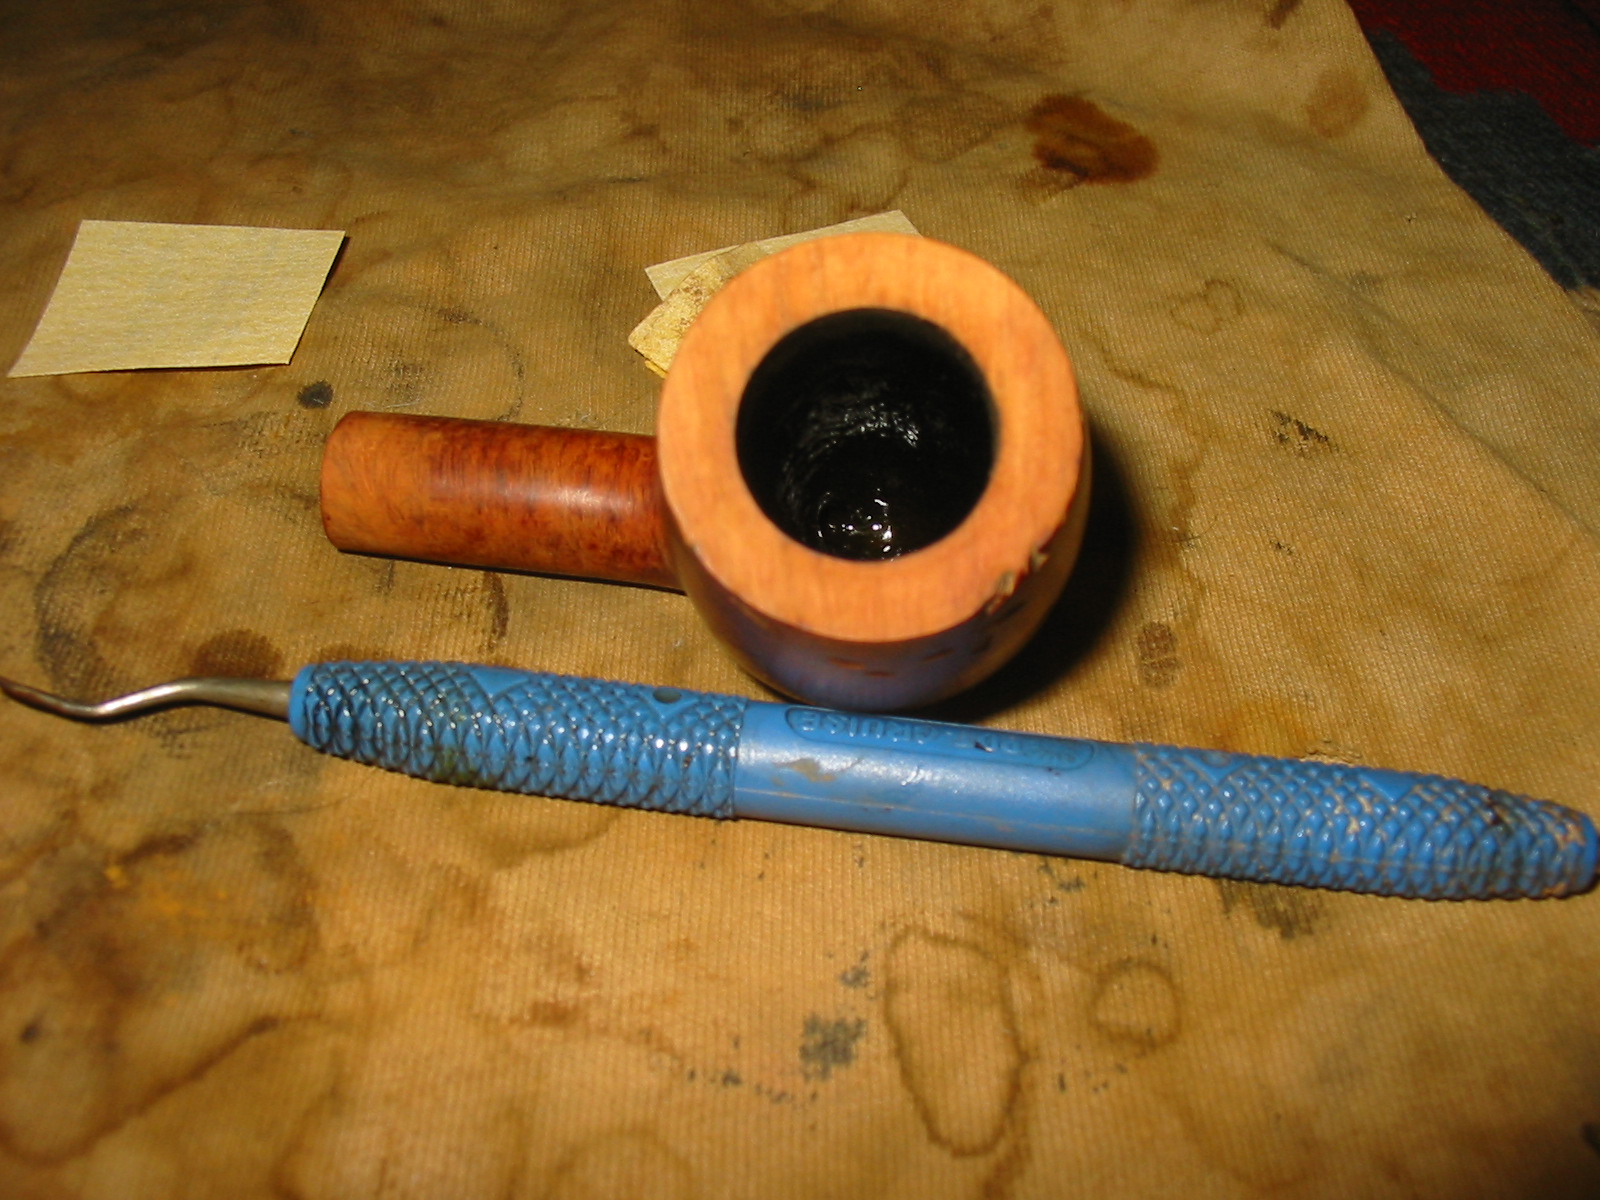
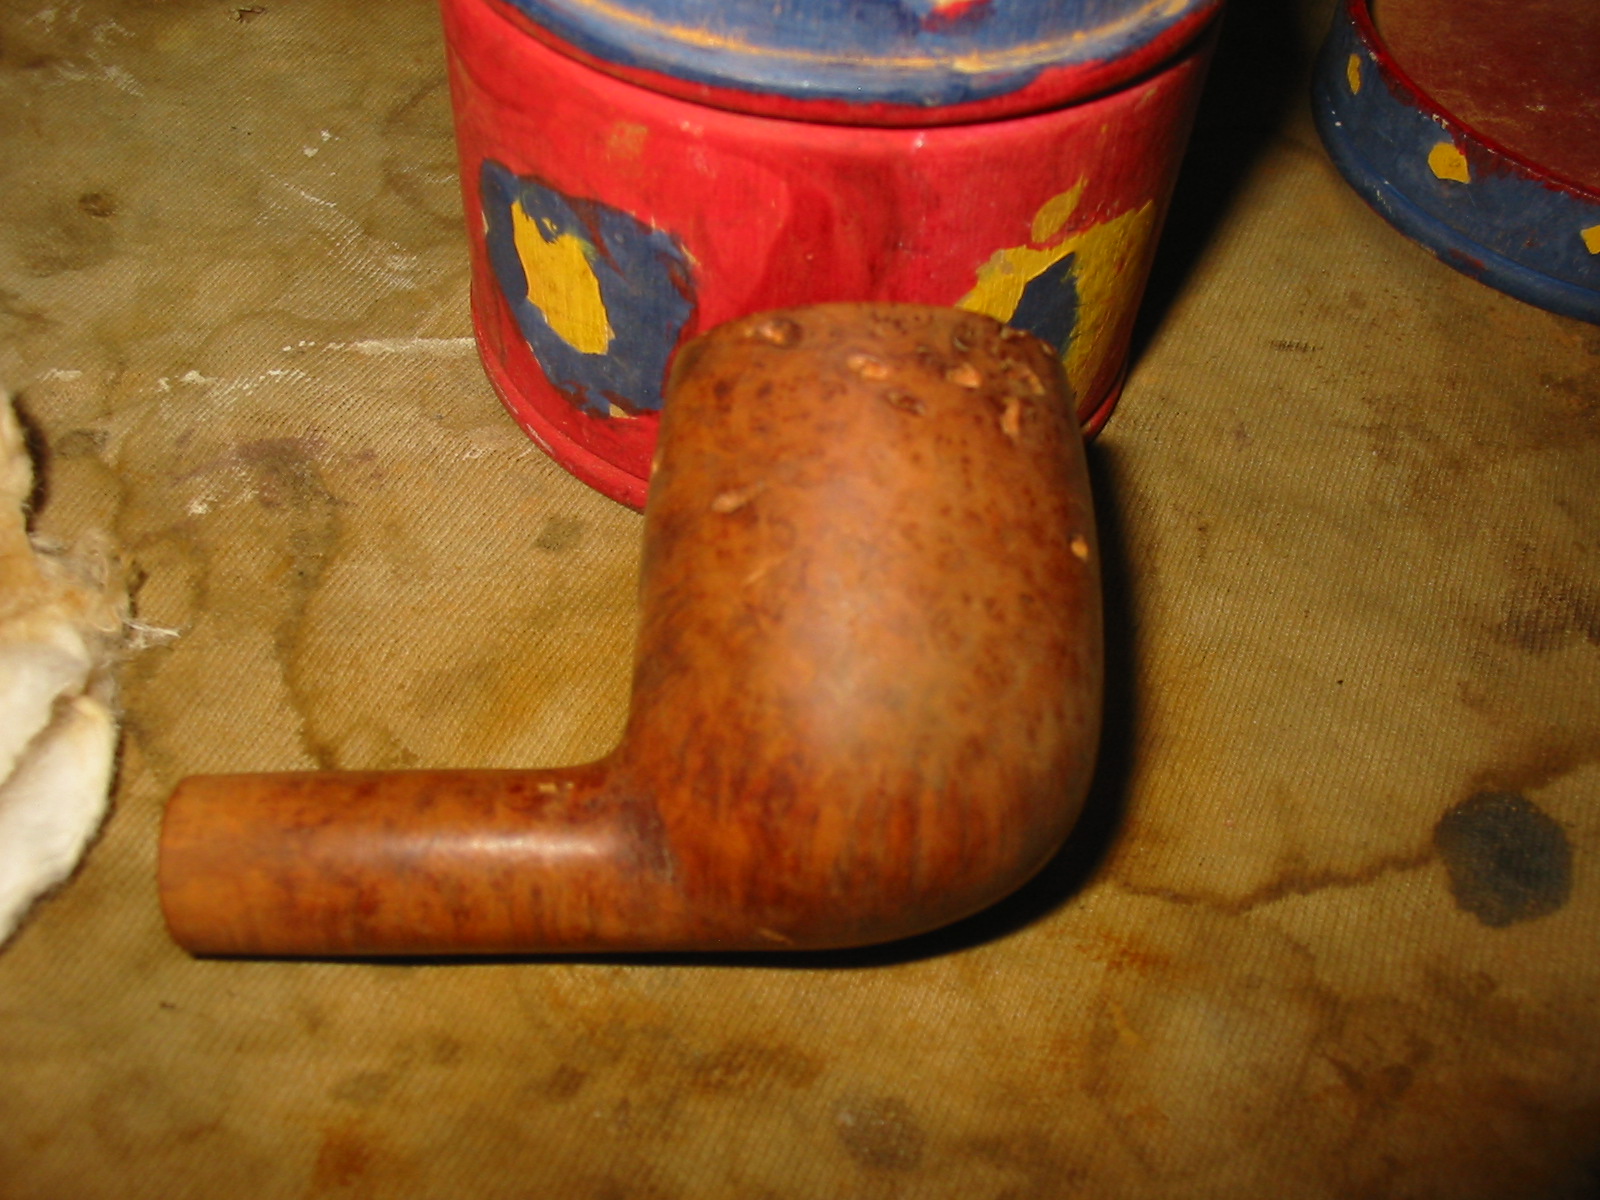
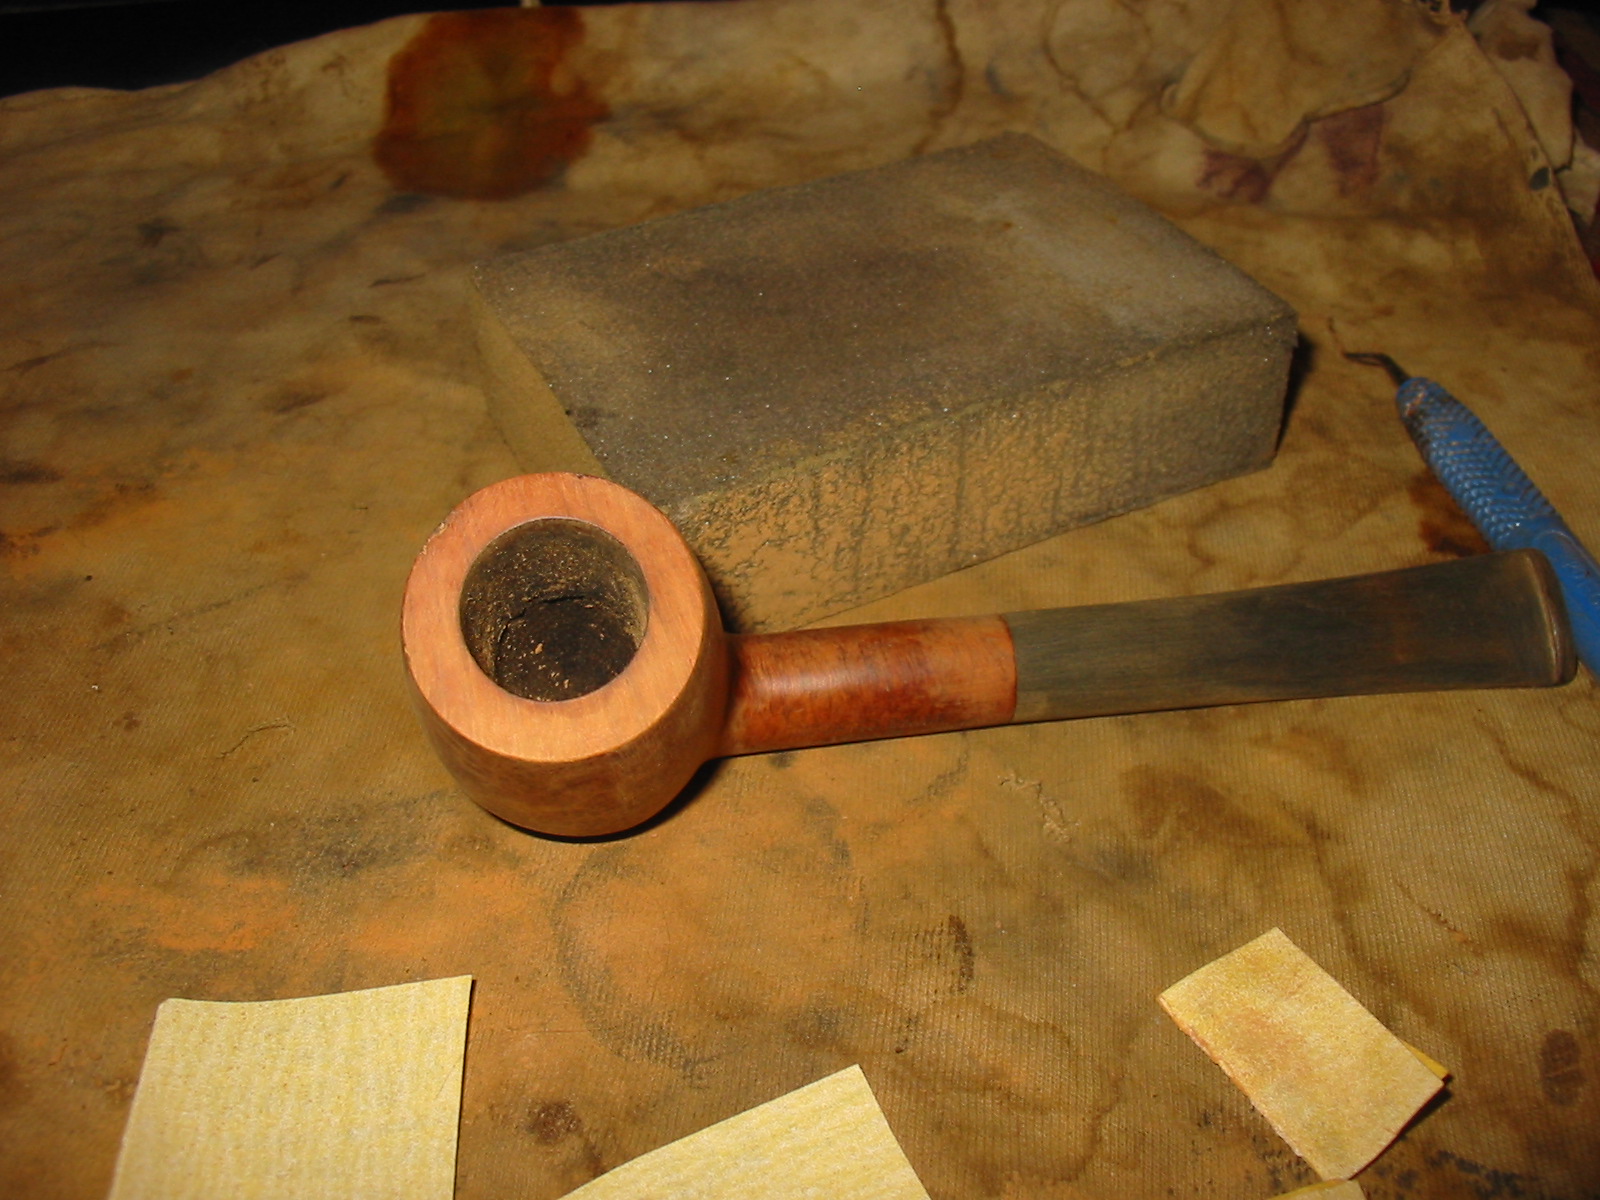
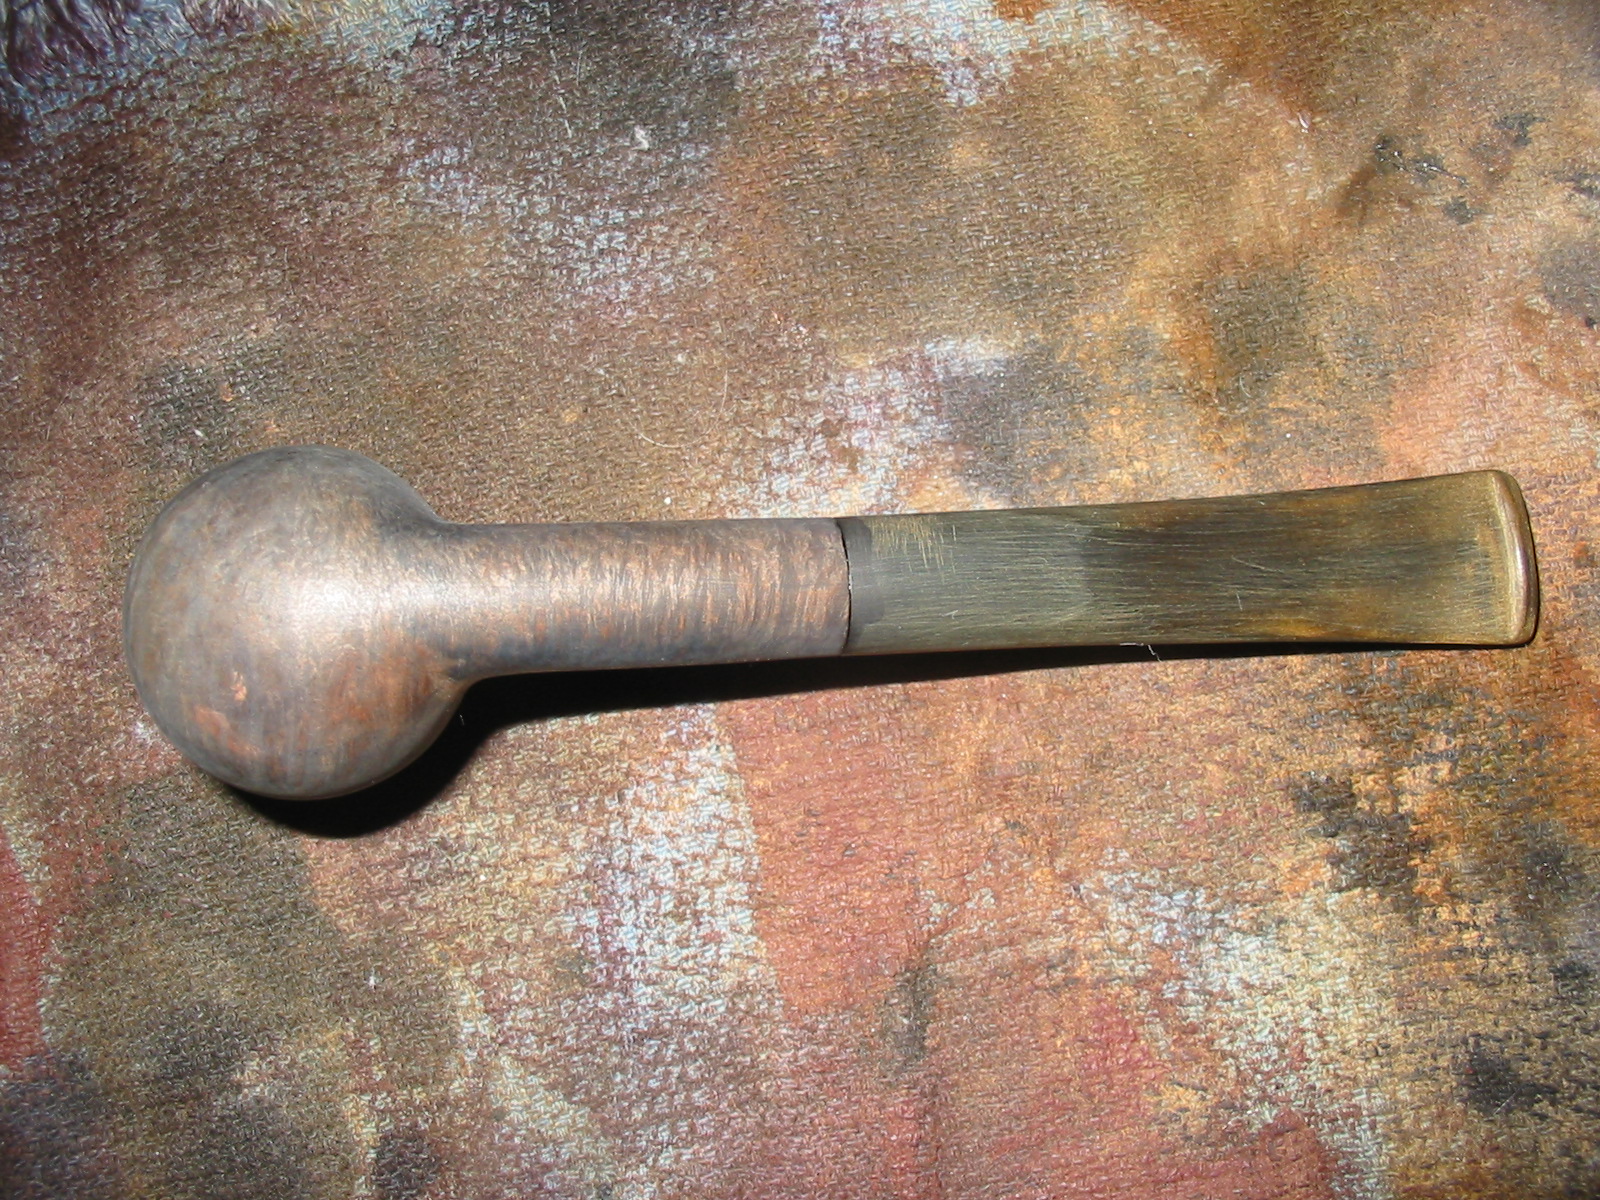
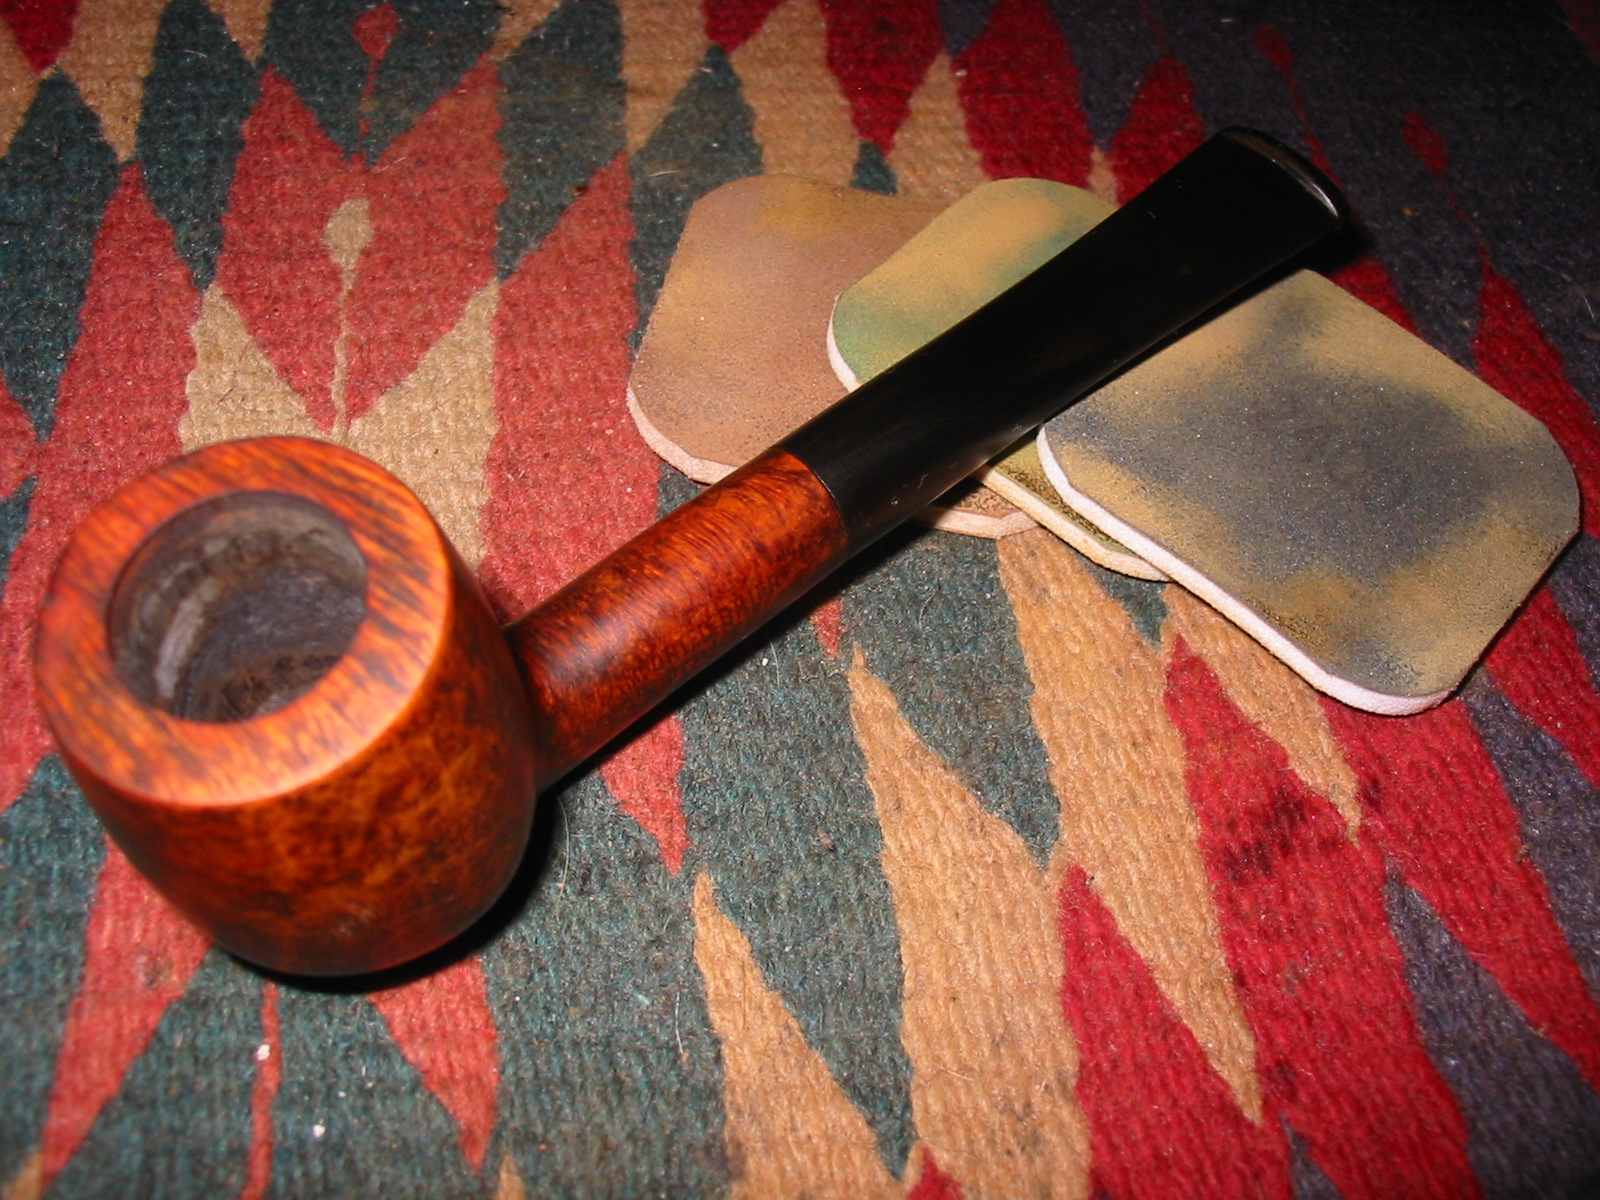
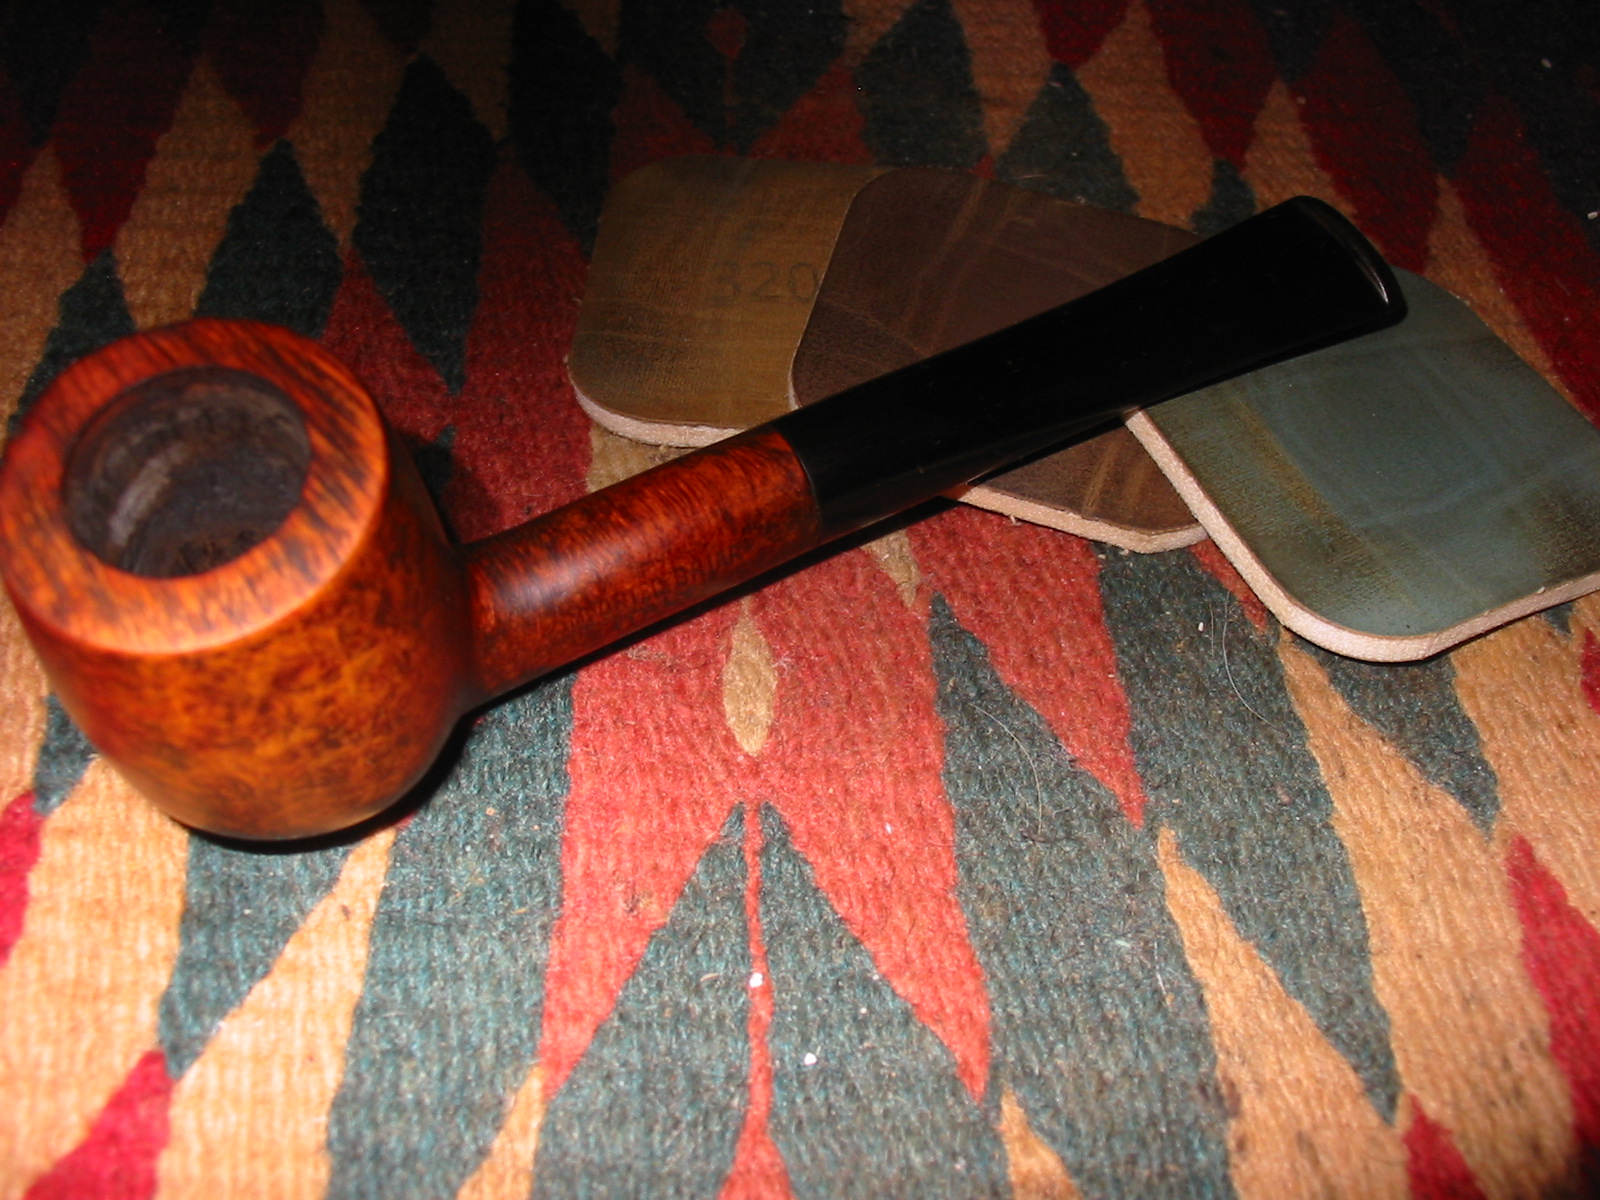
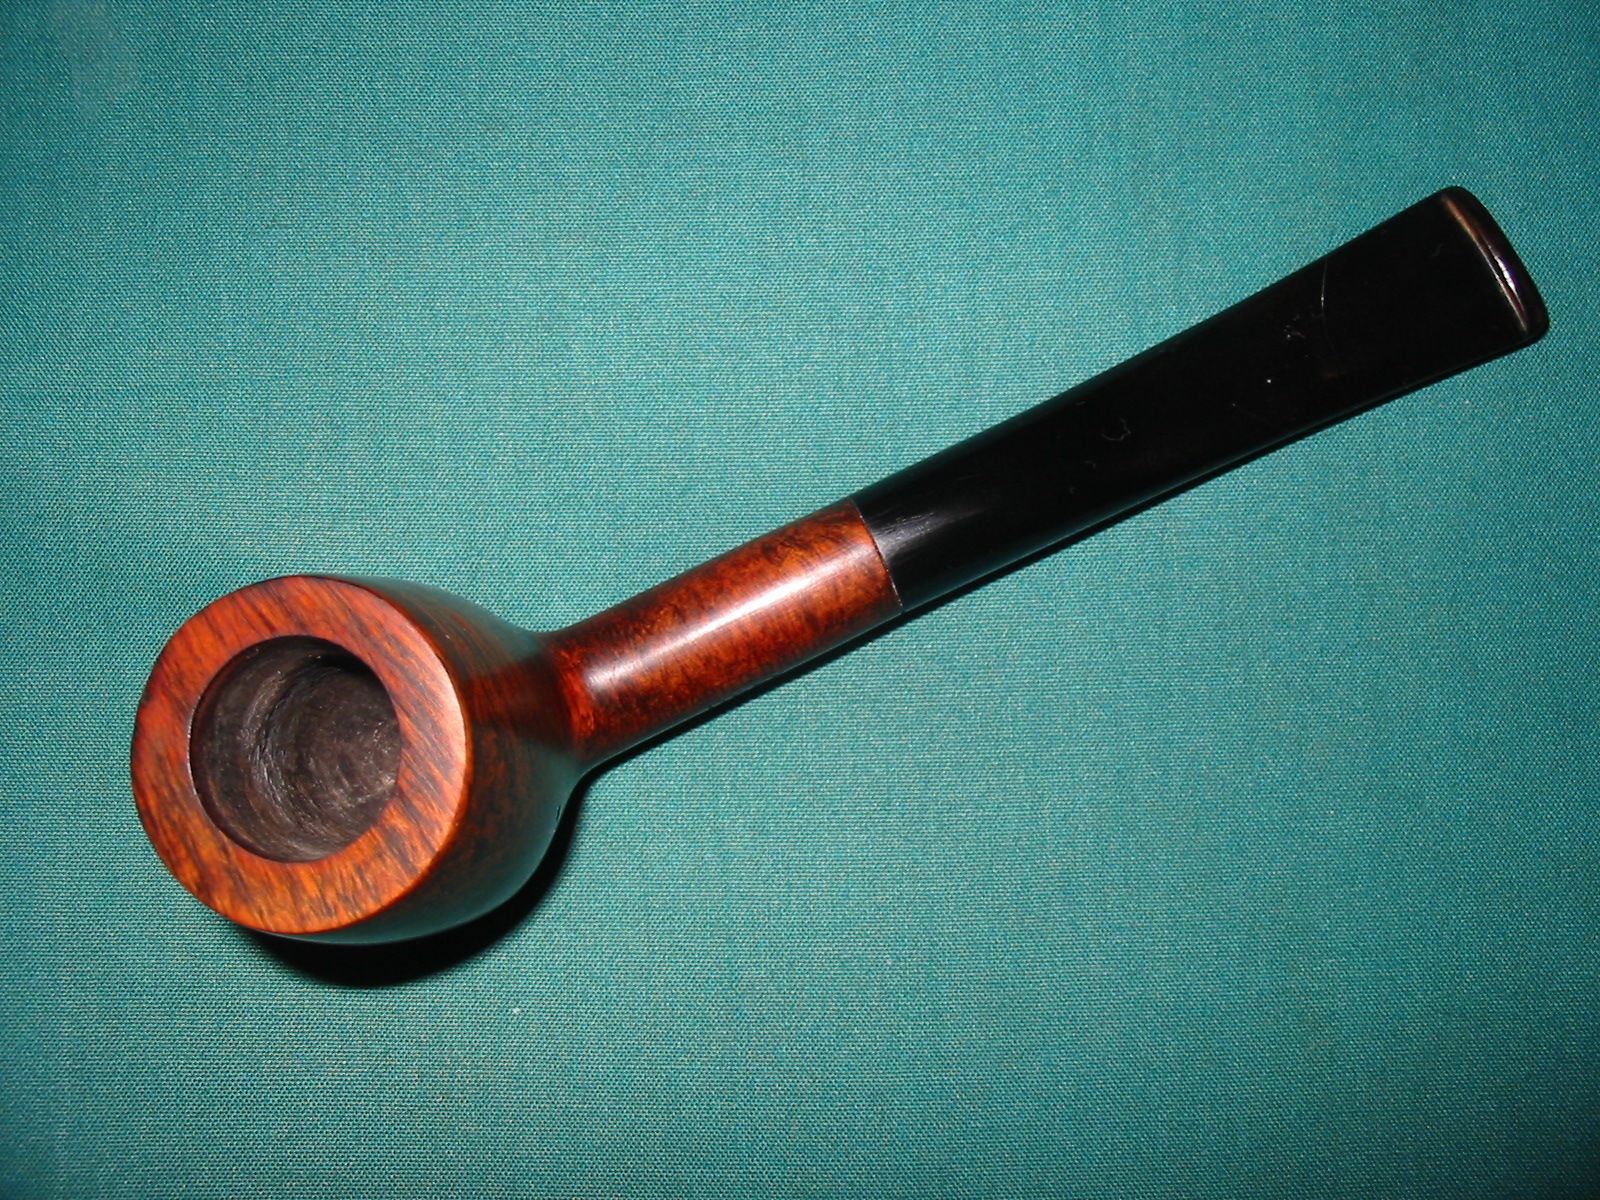
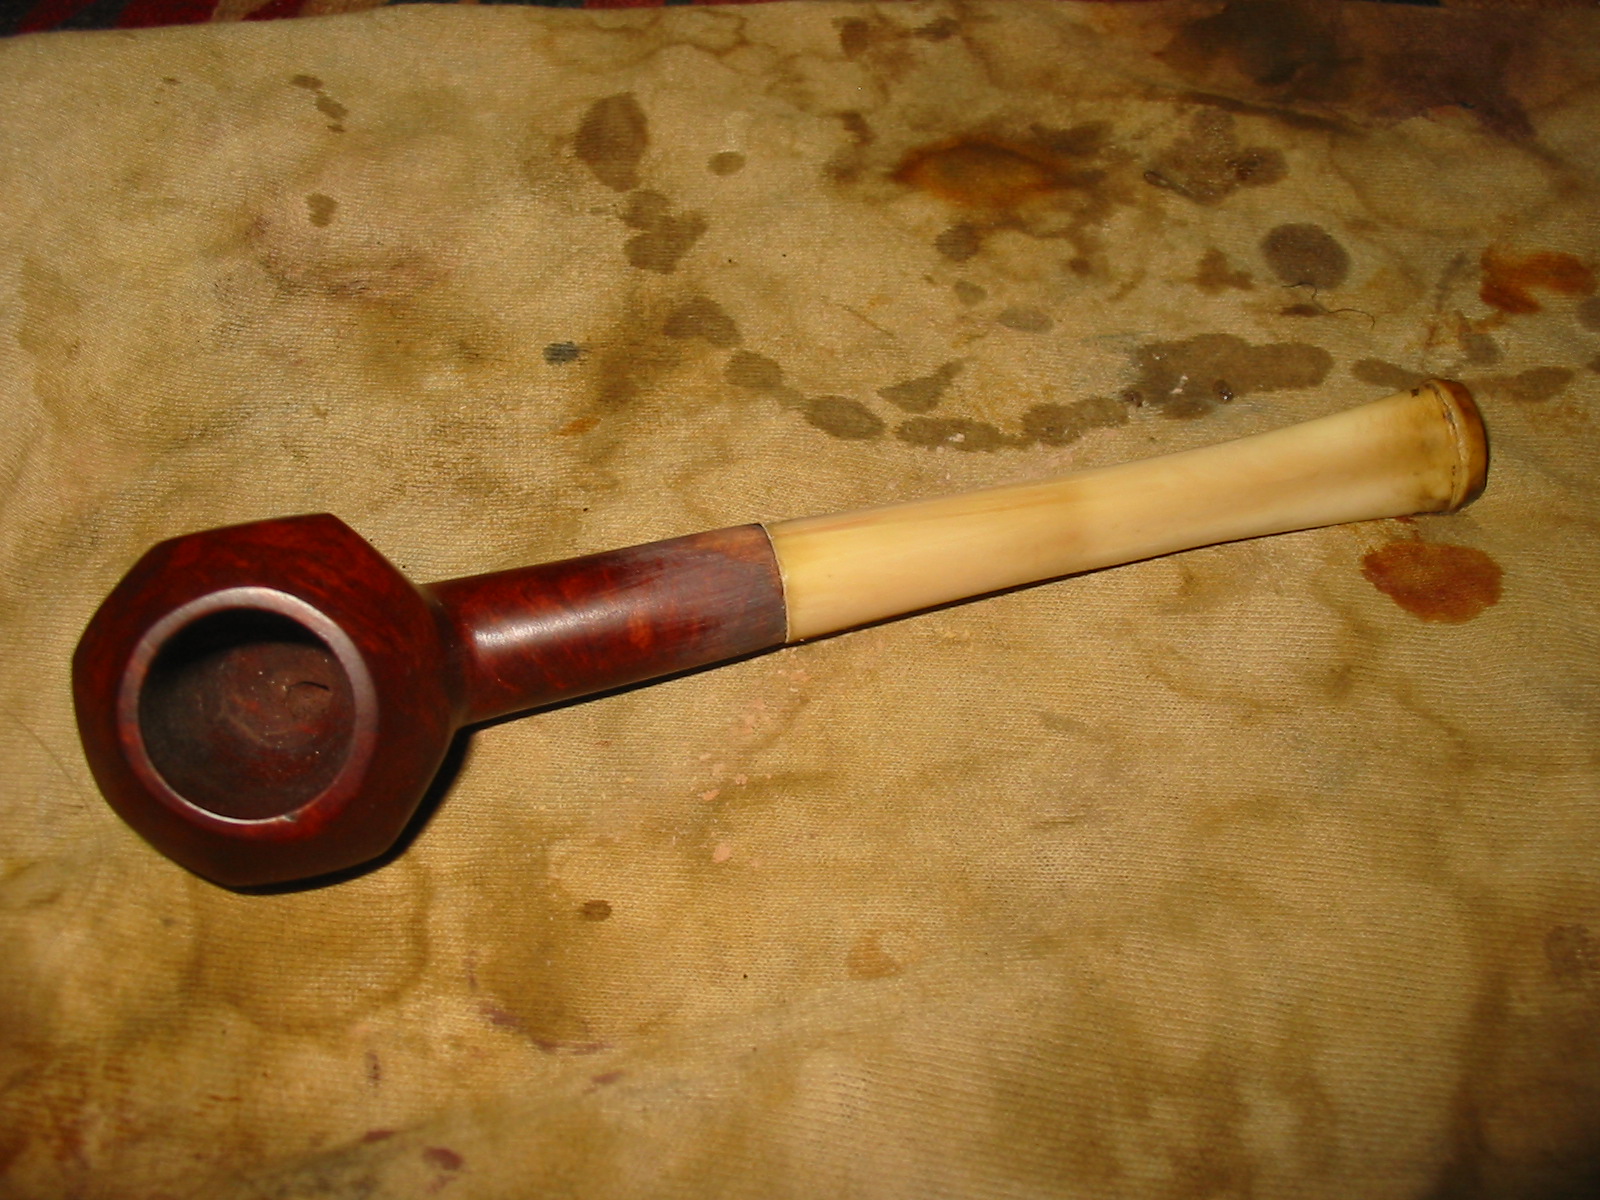
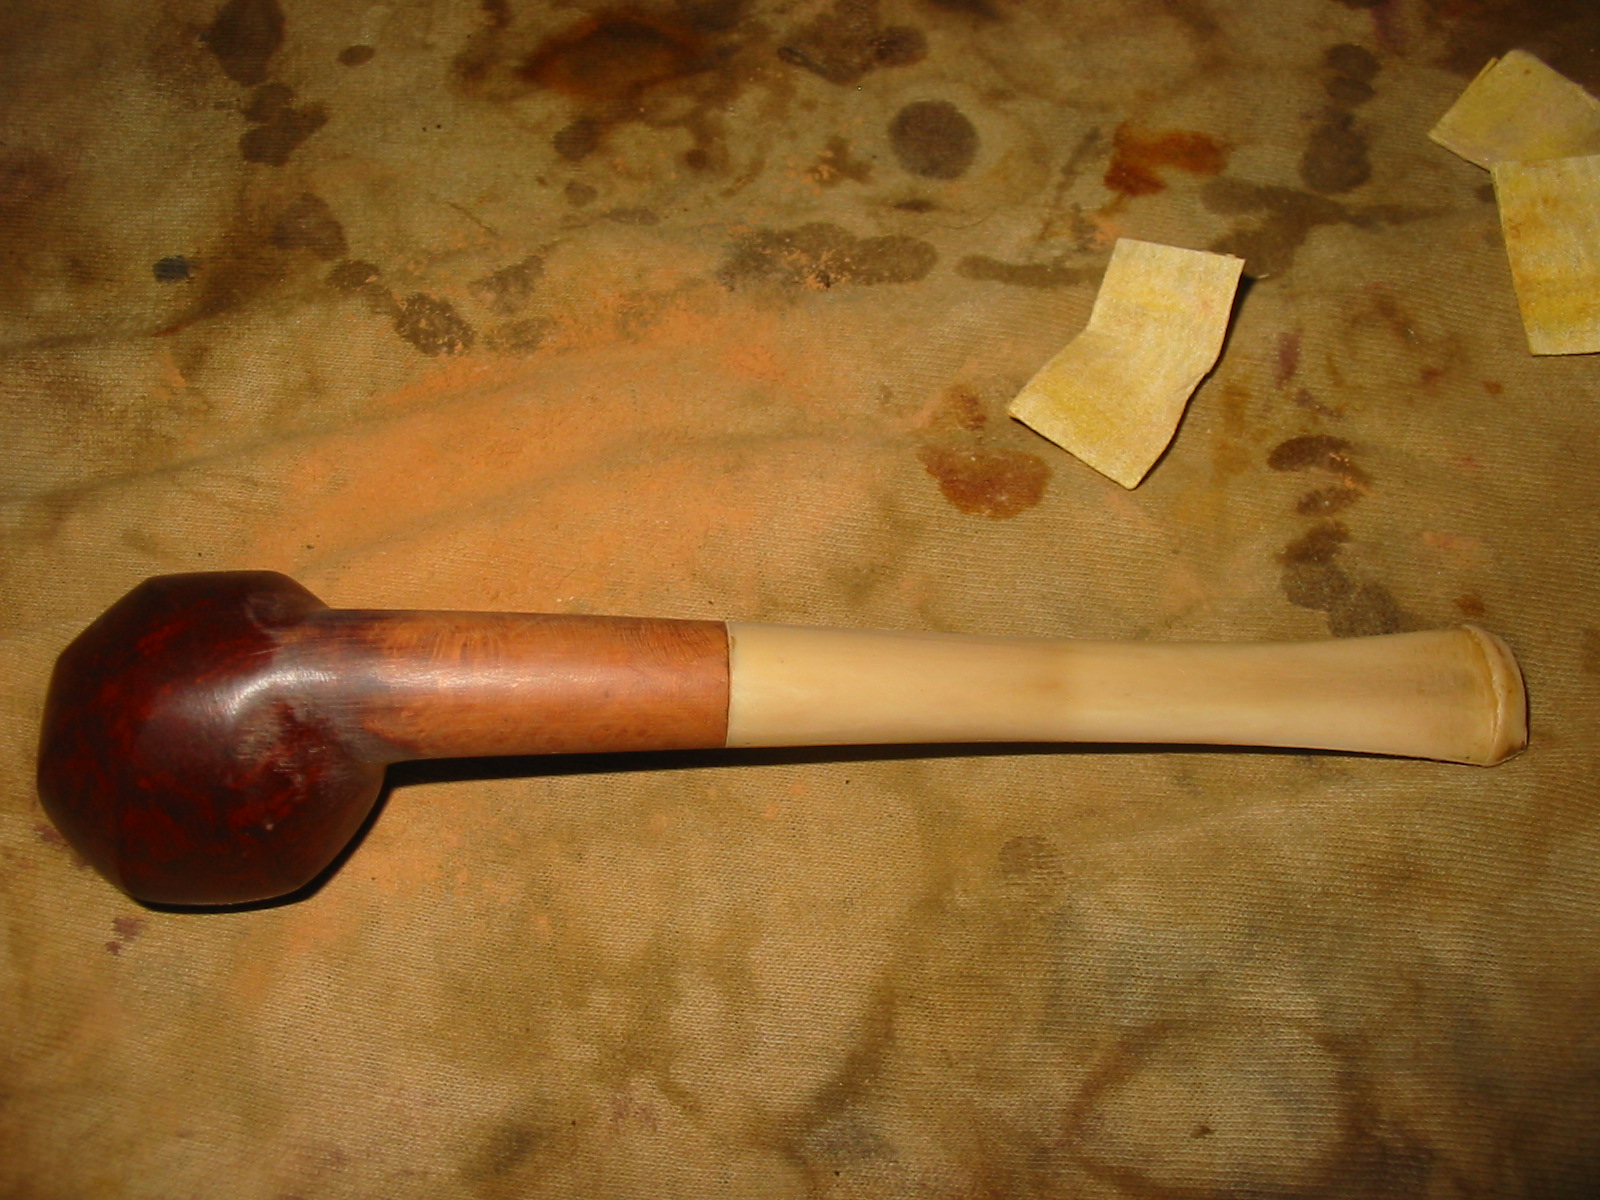
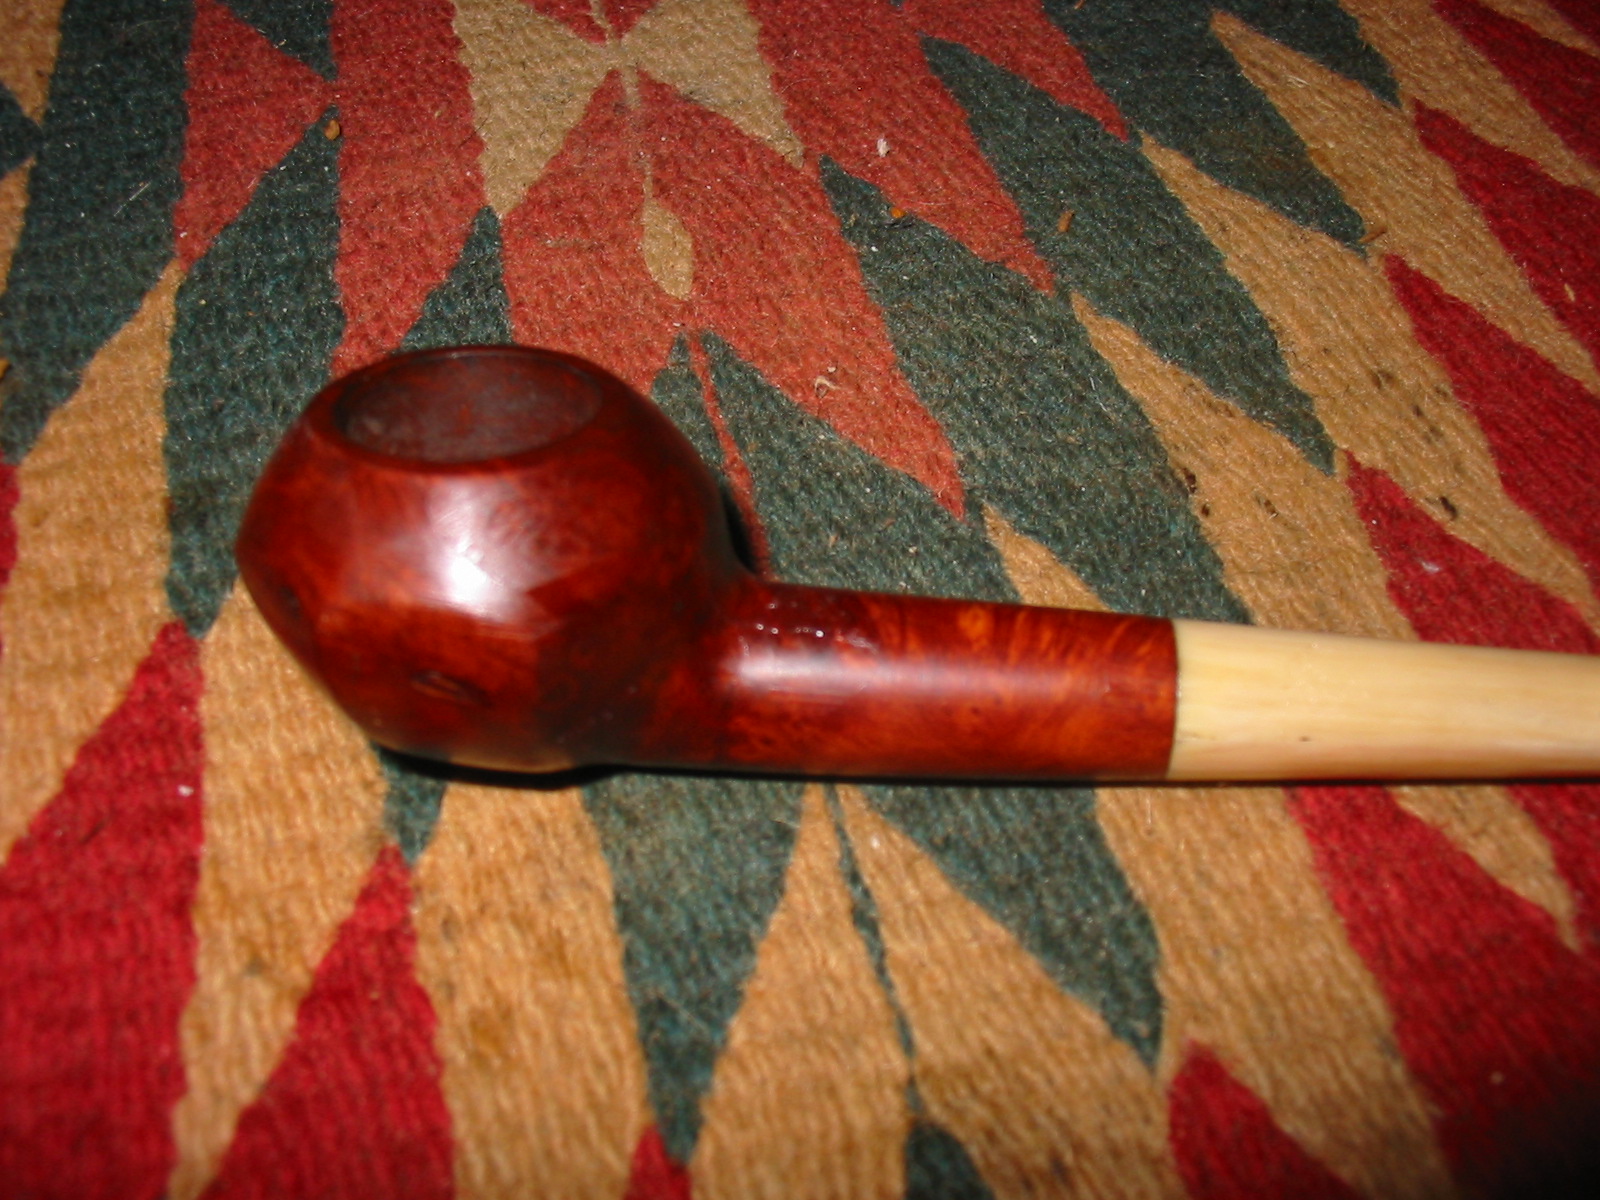
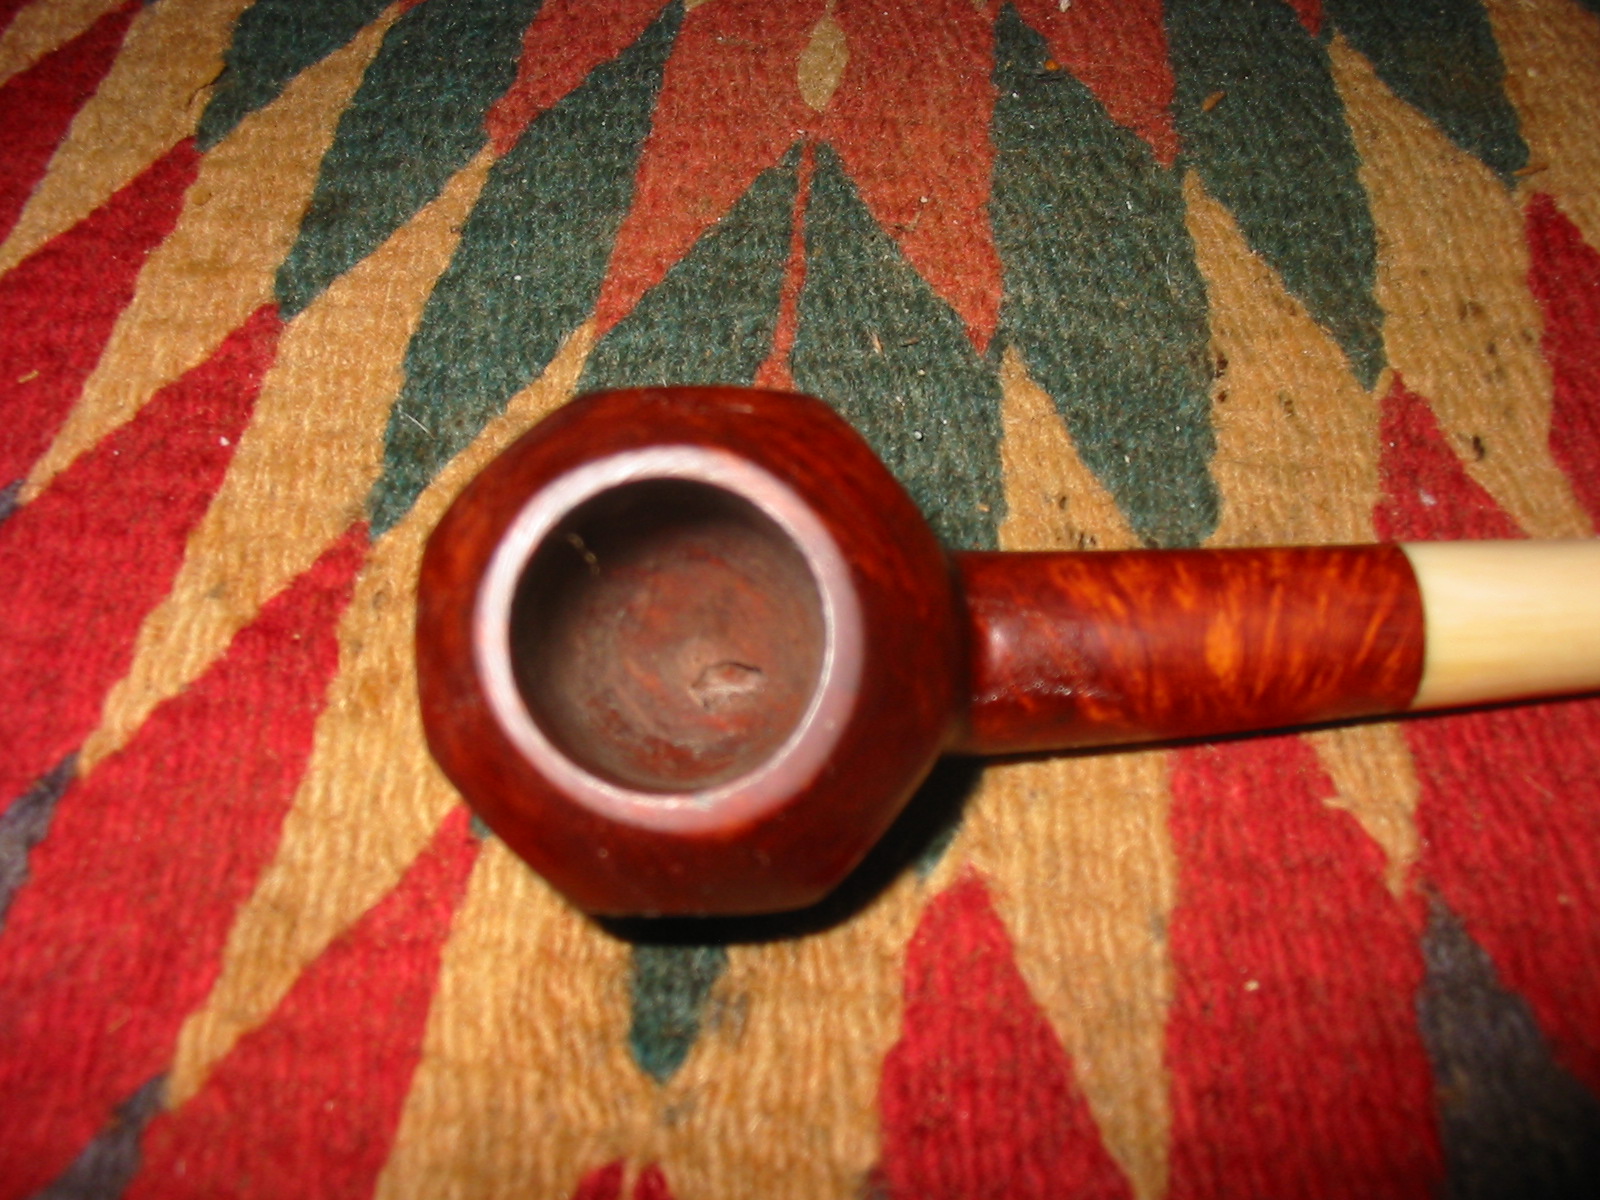
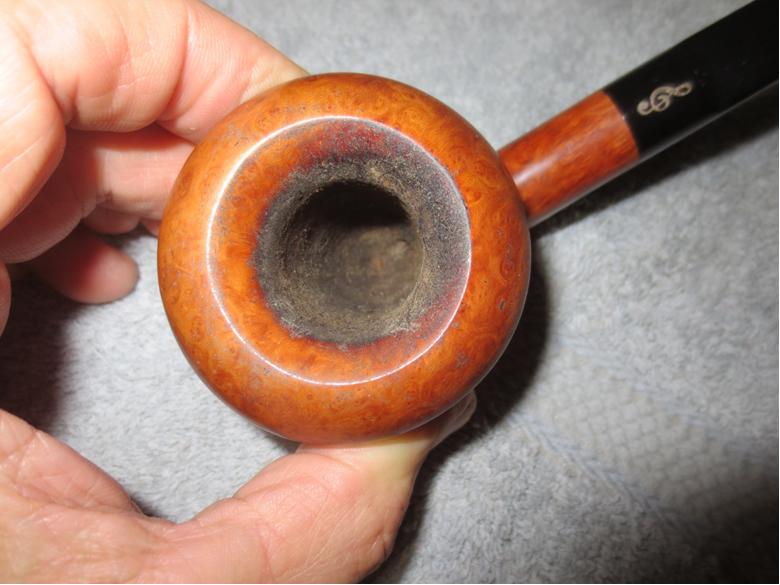
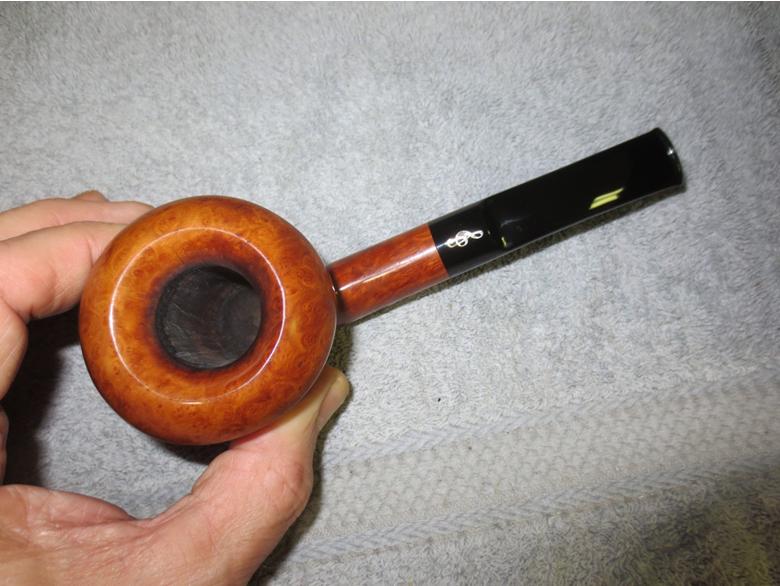
I also found the photo below that showed the stamping that was on the left side of the shank of the pipe I was working on.Don1 The pipe was in fairly decent shape when I received it. The finish on the bowl and shank were in excellent shape other than surface dirt. The natural colour of the briar was still in great shape and not darkened with use or age. The rim was the worst part of the exterior of the pipe. The back of the inner beveled rim had some tar build up and I was sure that once I removed it there would be some slight darkening there as well. The bowl also had developed a cake that came up over that beveled edge and would need to be removed. The next two photos show the rim condition and the state of the bowl.Carlos4

Carlos5 
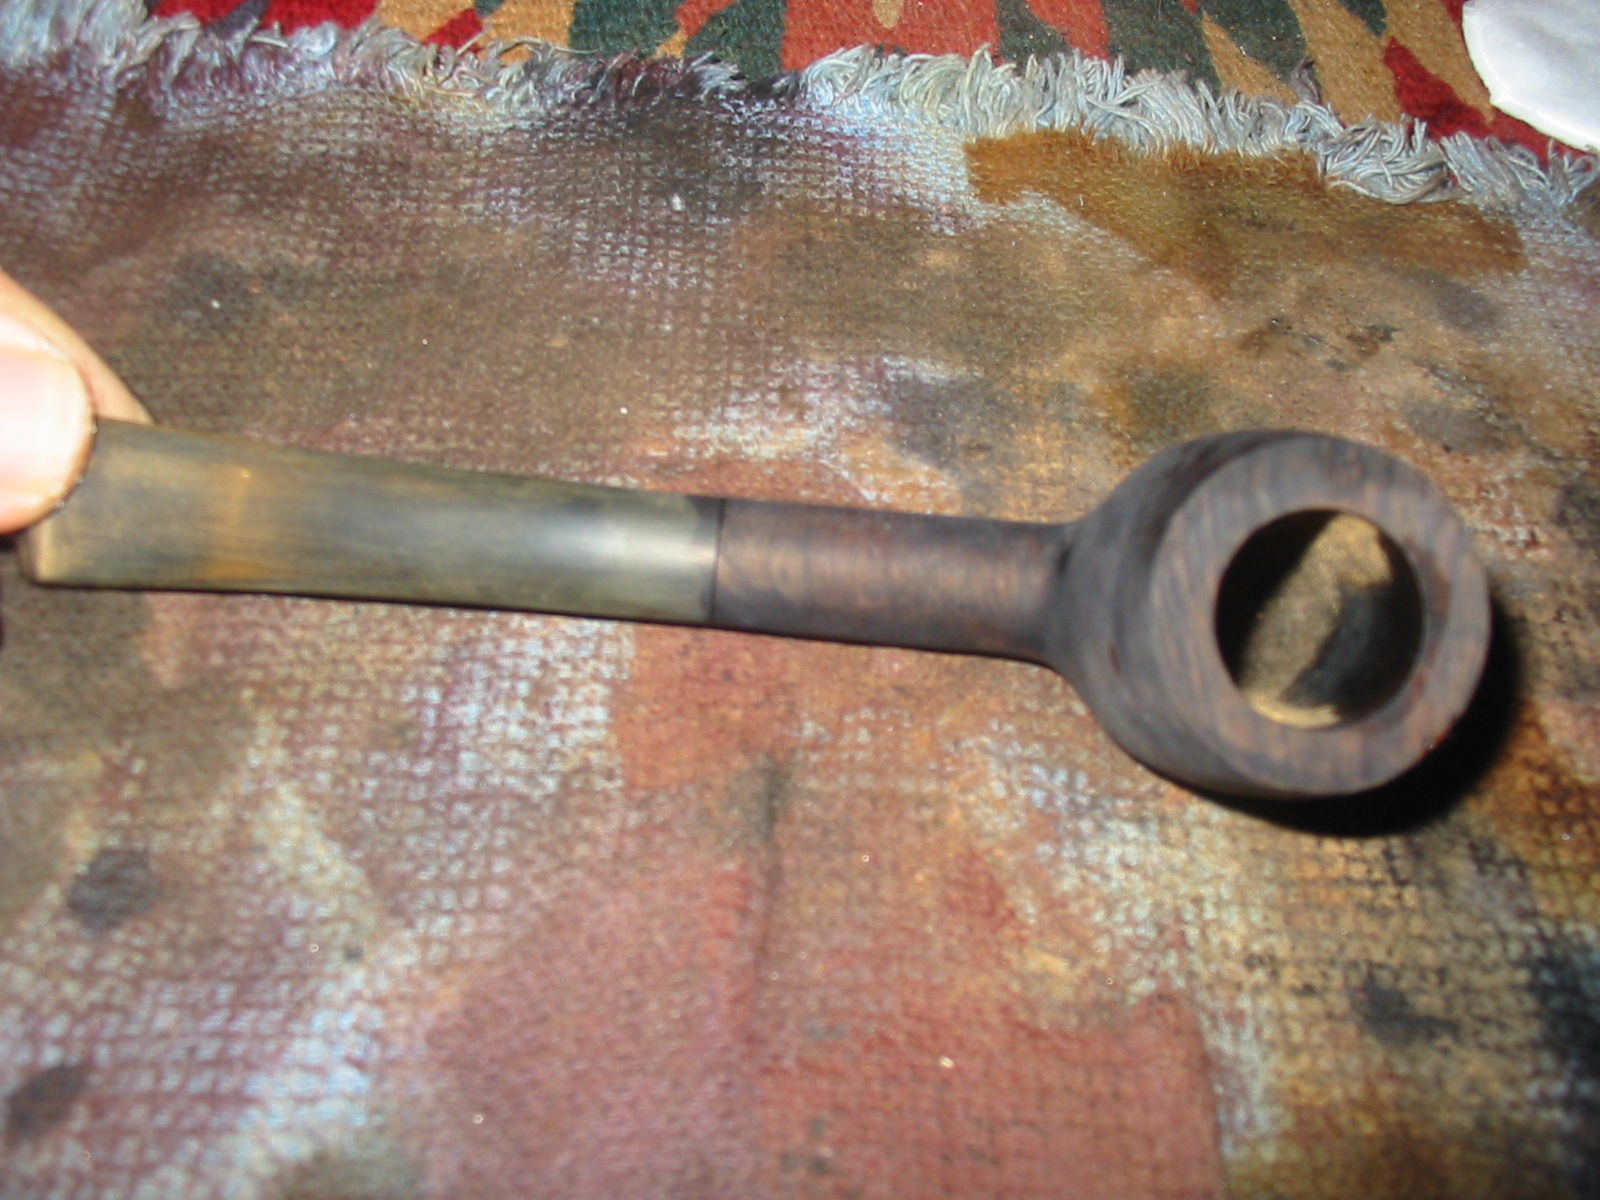
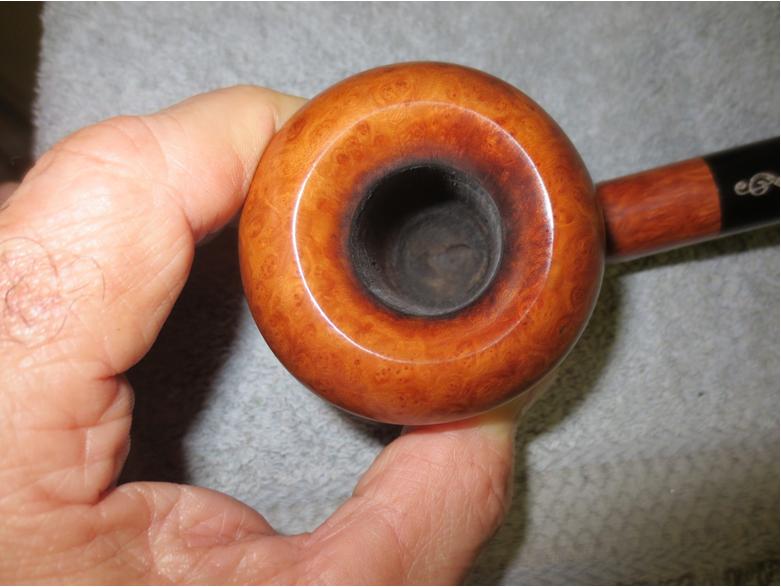
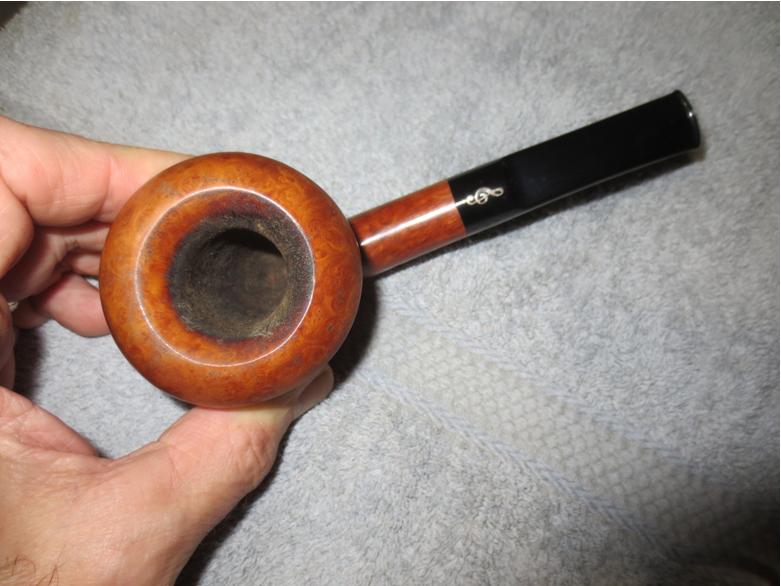
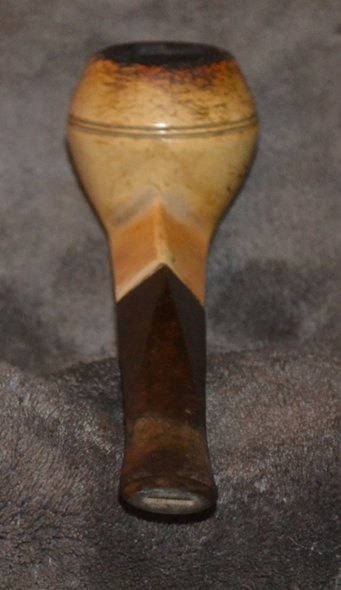
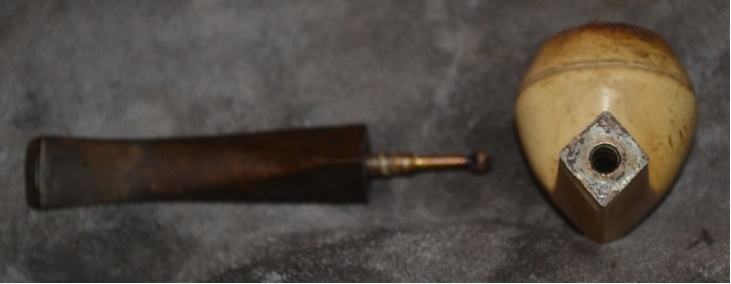
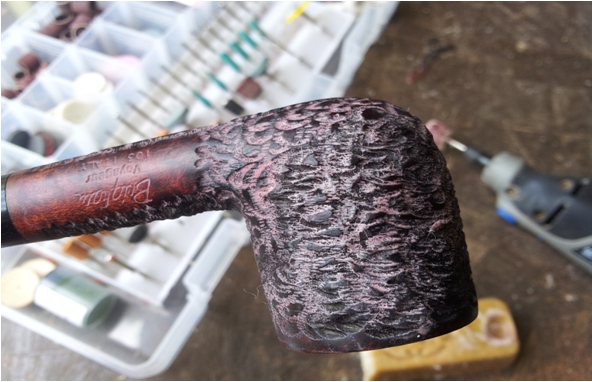
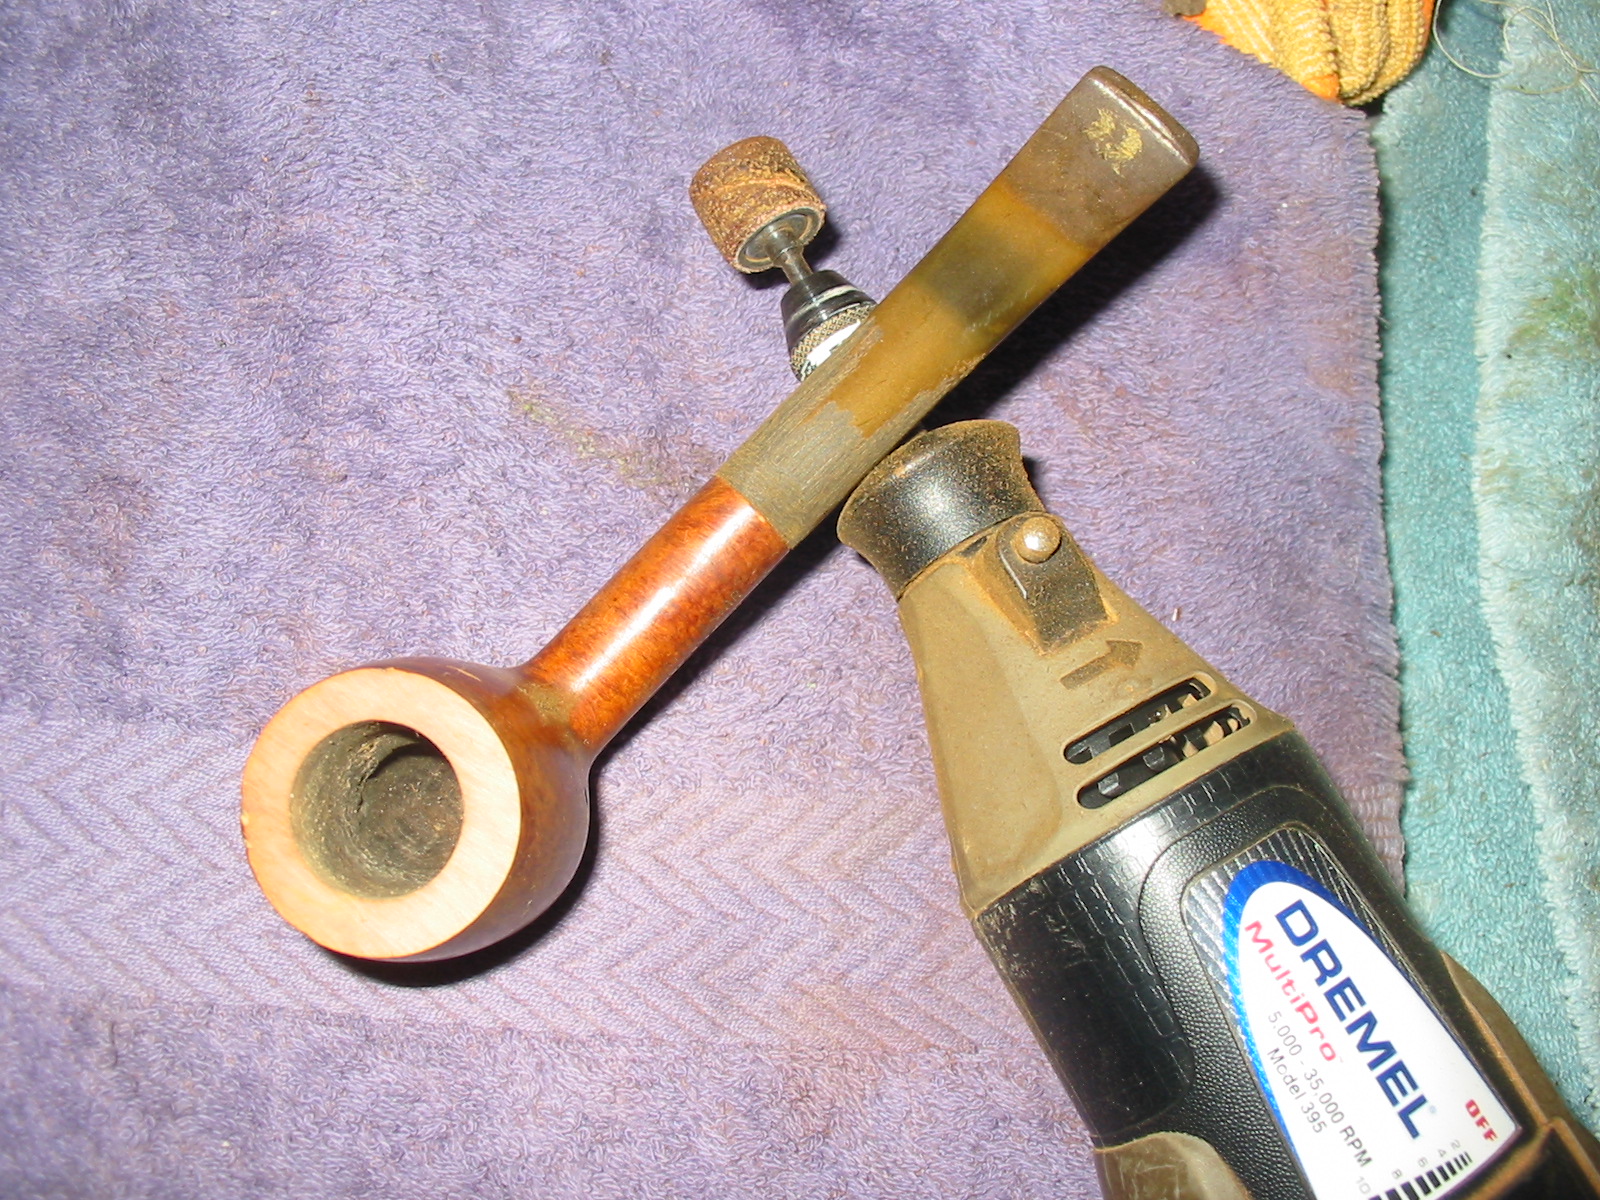
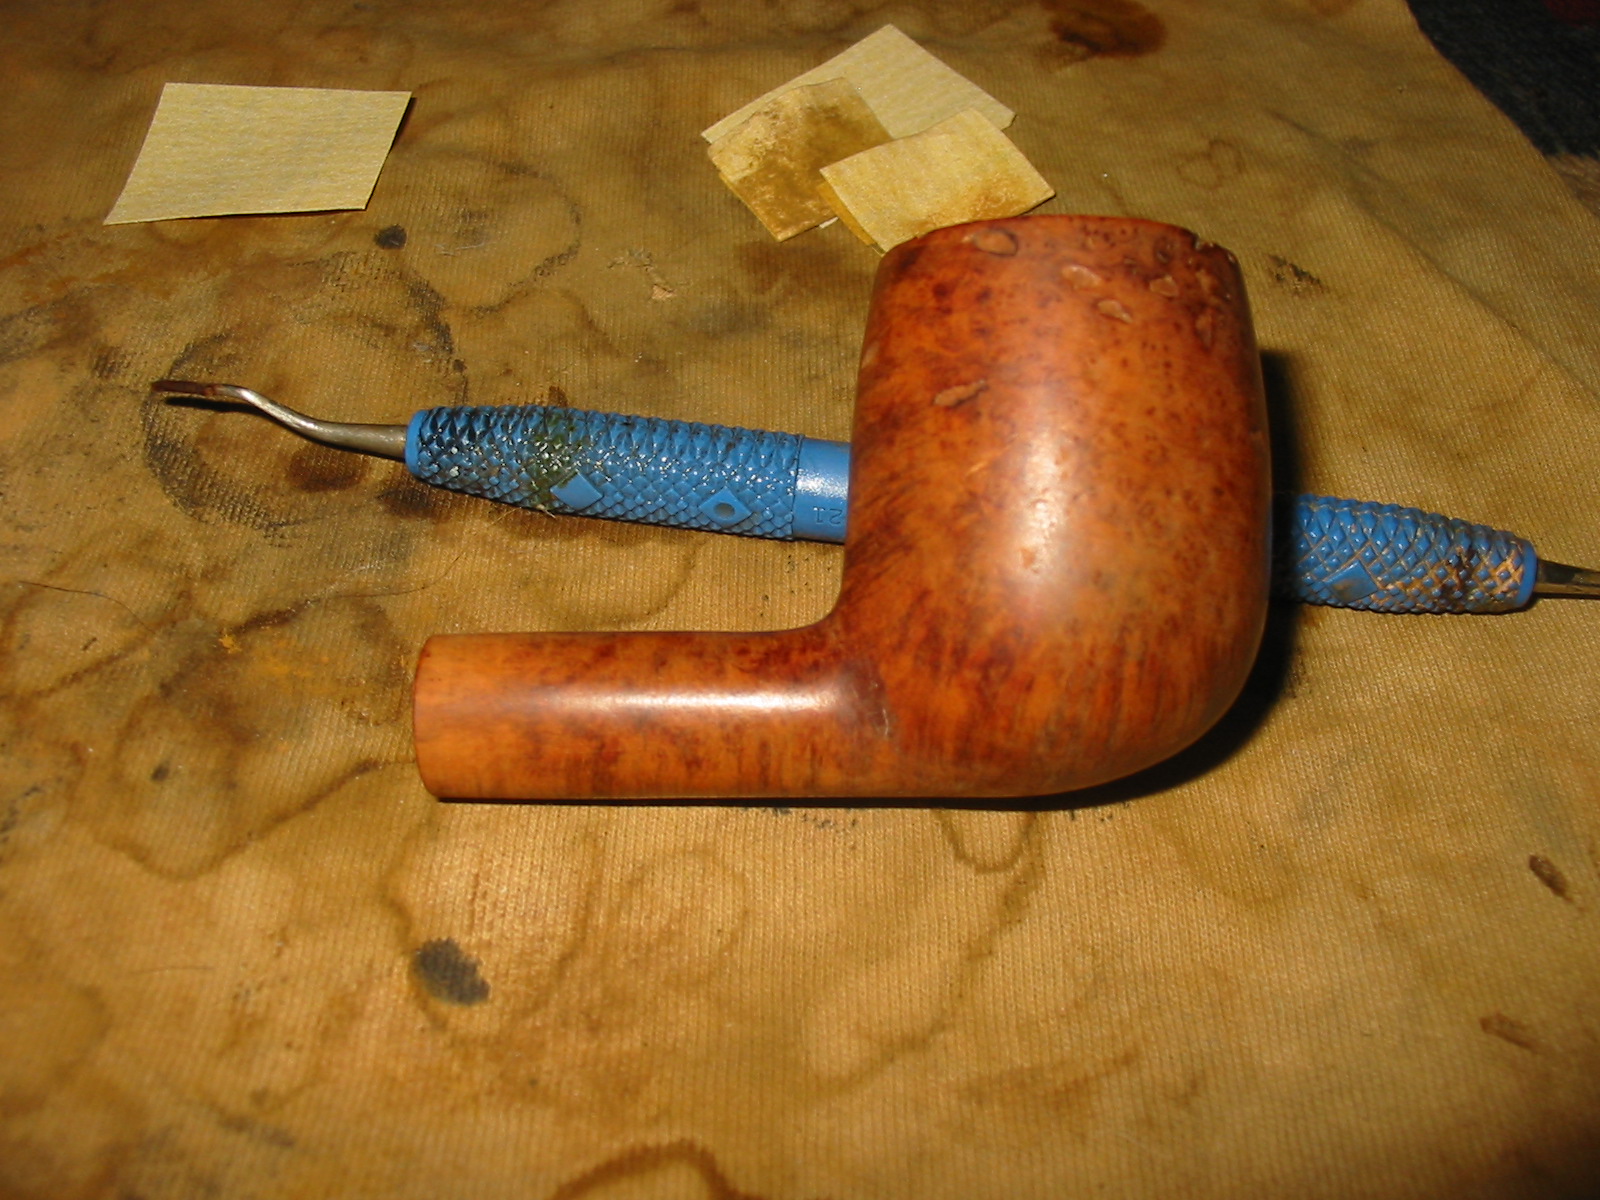
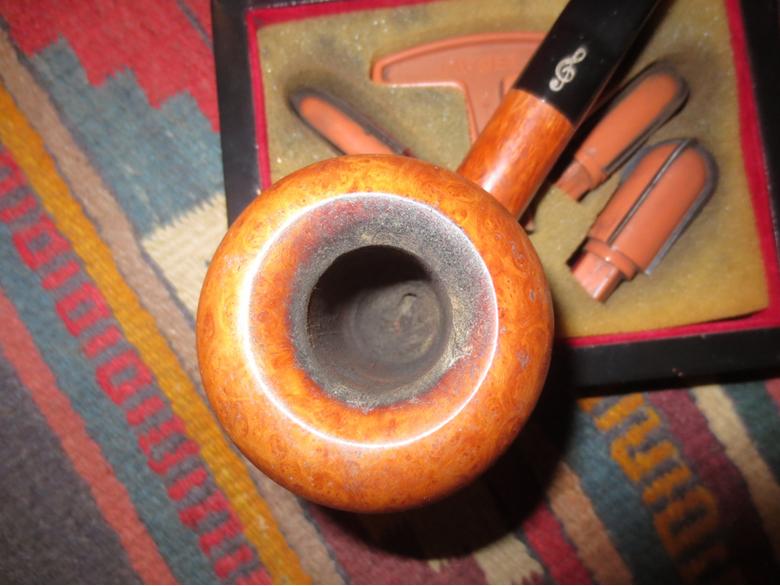
I reamed the bowl with a PipNet reamer using the largest cutting head to cut the cake back to bare wood. You will notice from the angle of the reamer that the bowl follows the angle of the front of the pipe.Carlos6

Carlos7 
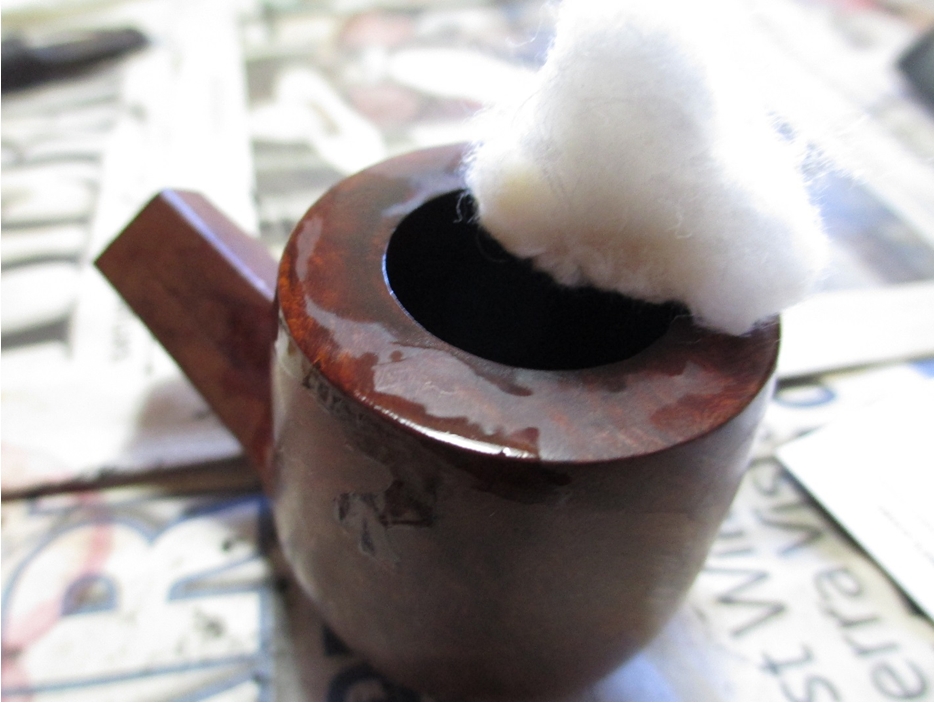
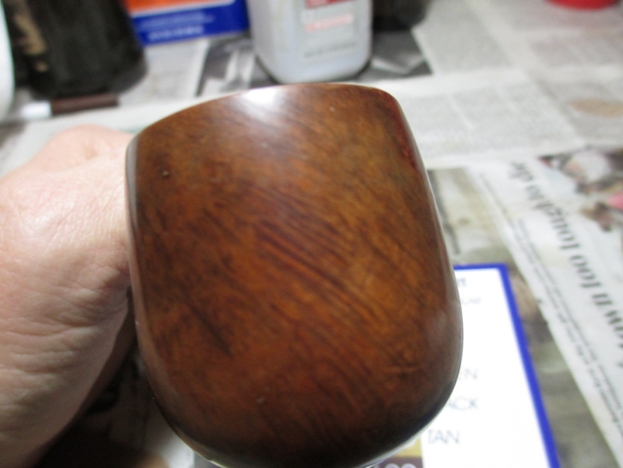
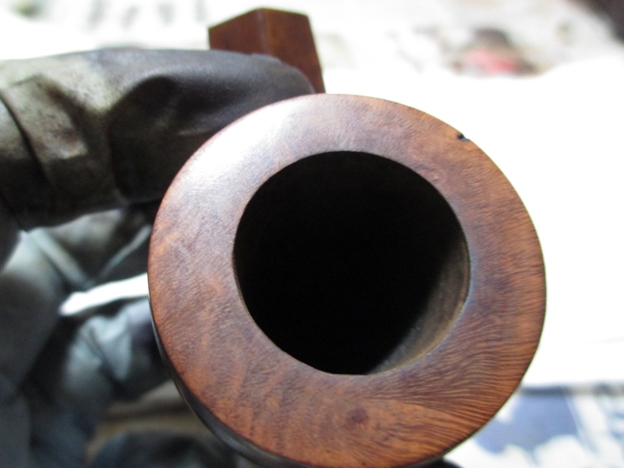
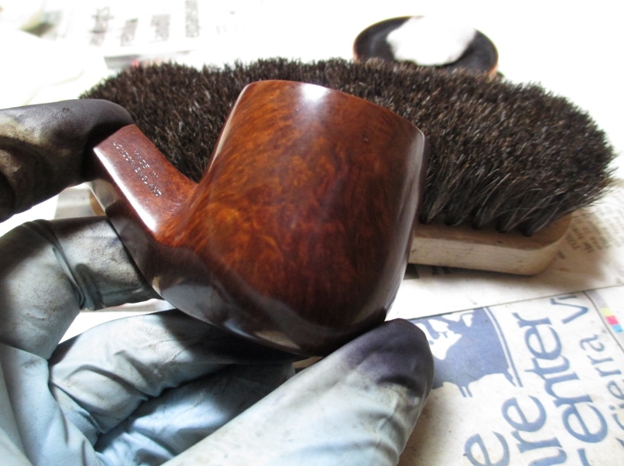
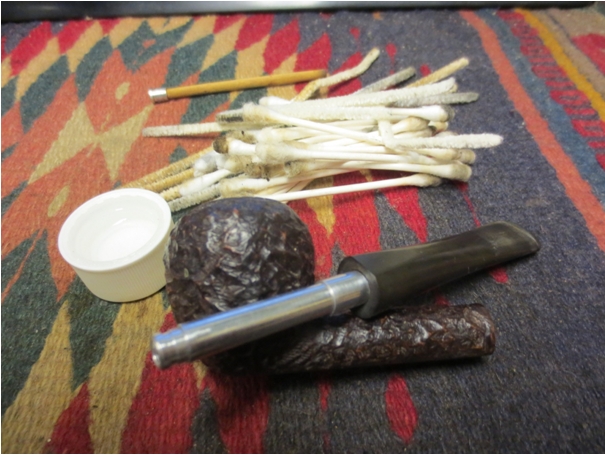
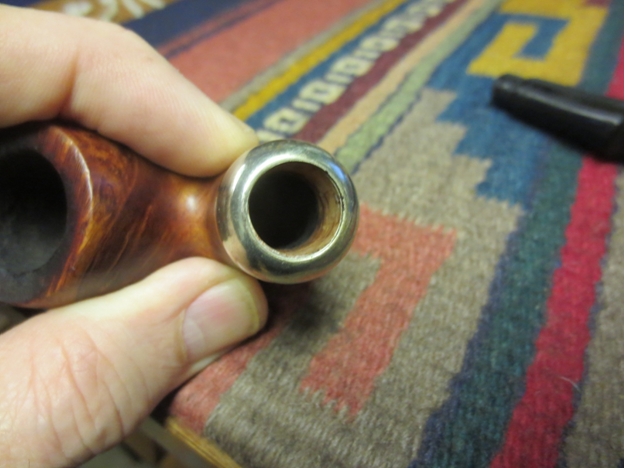
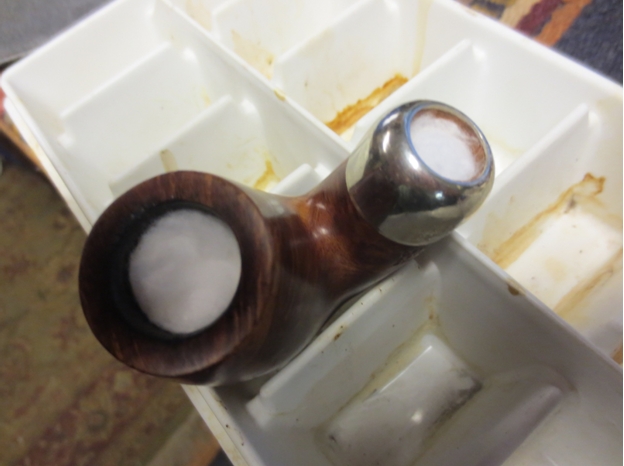
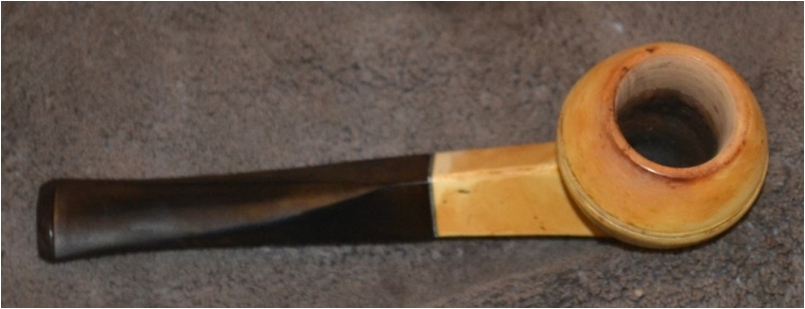
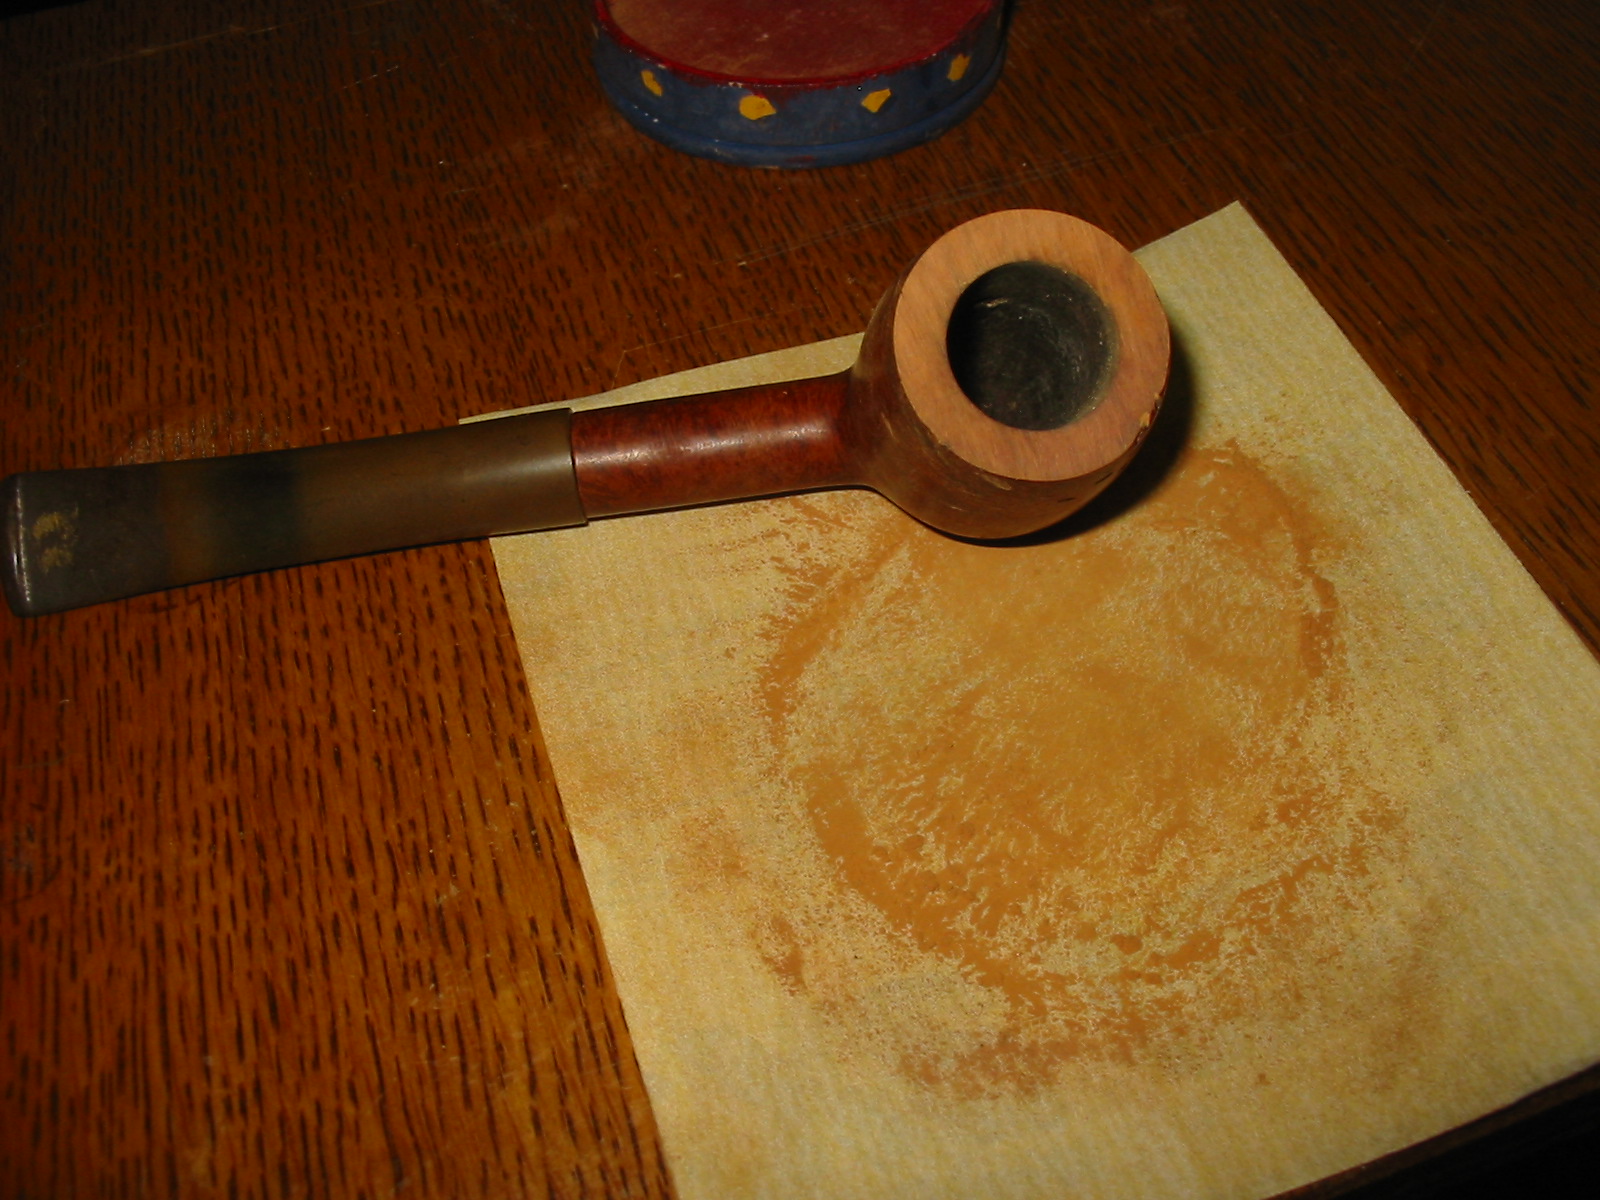
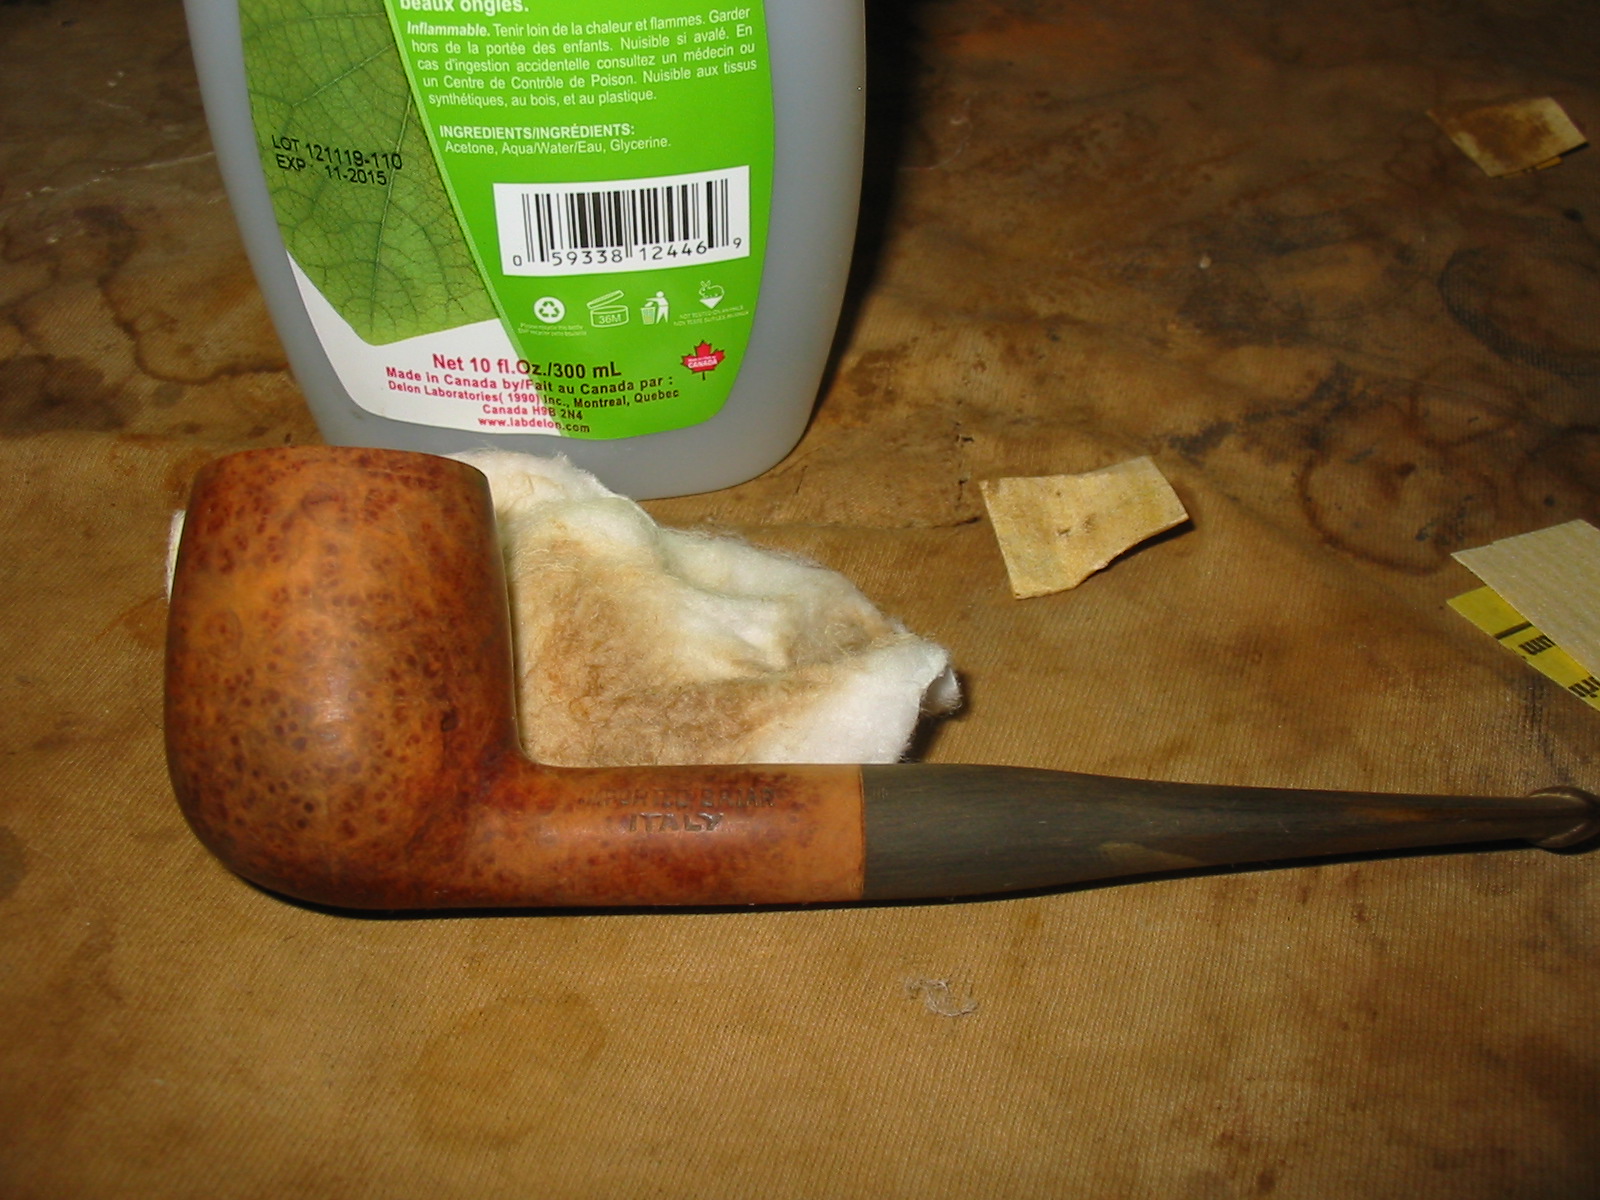
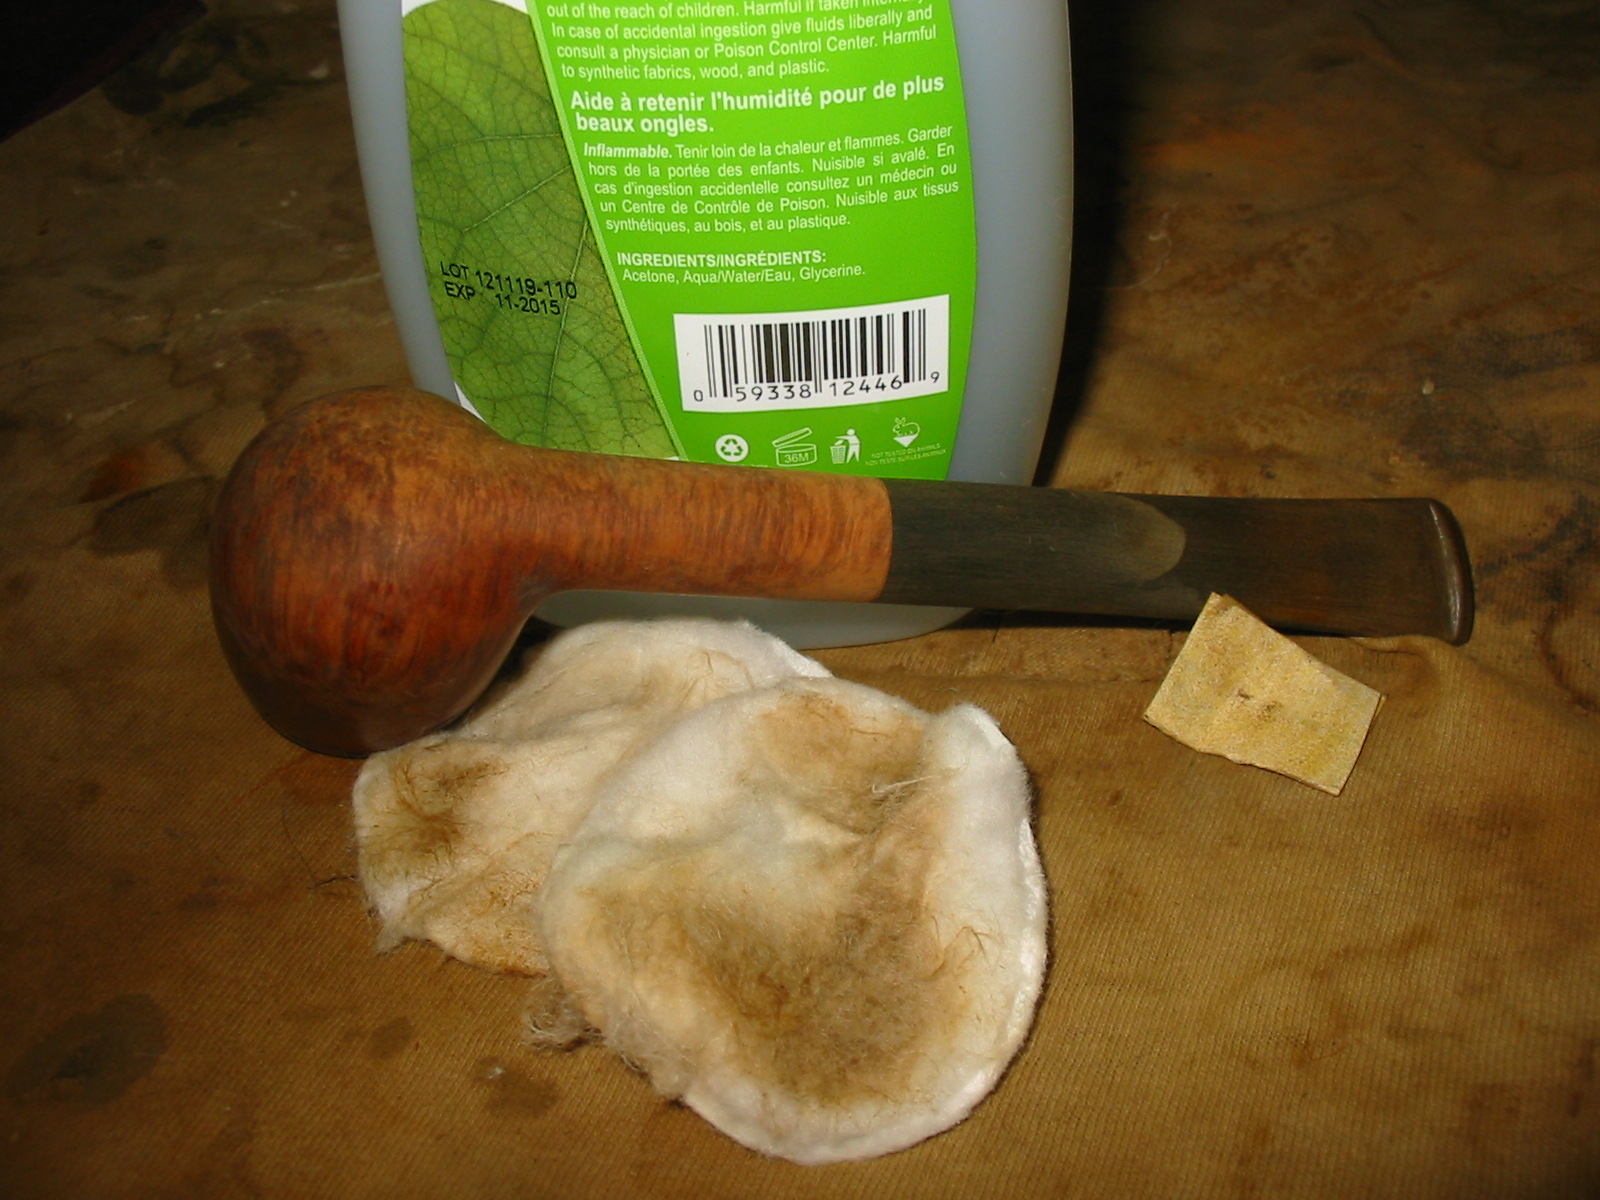
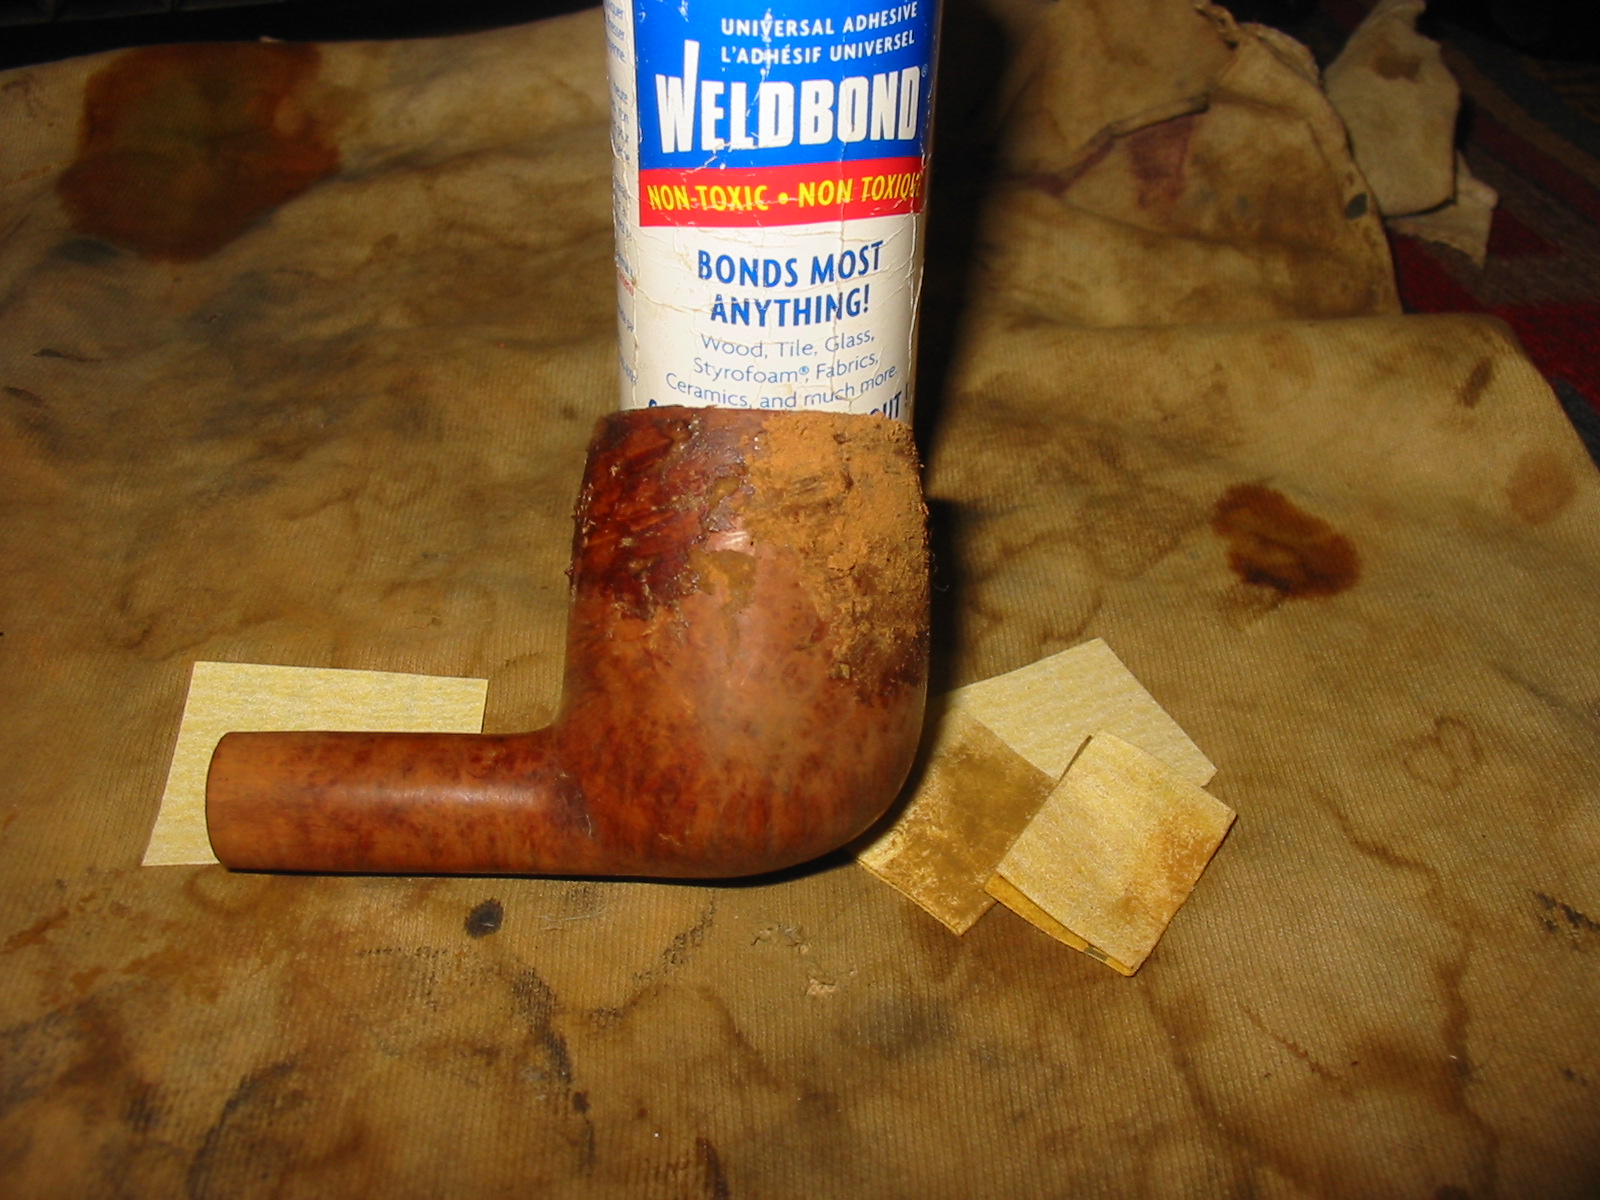
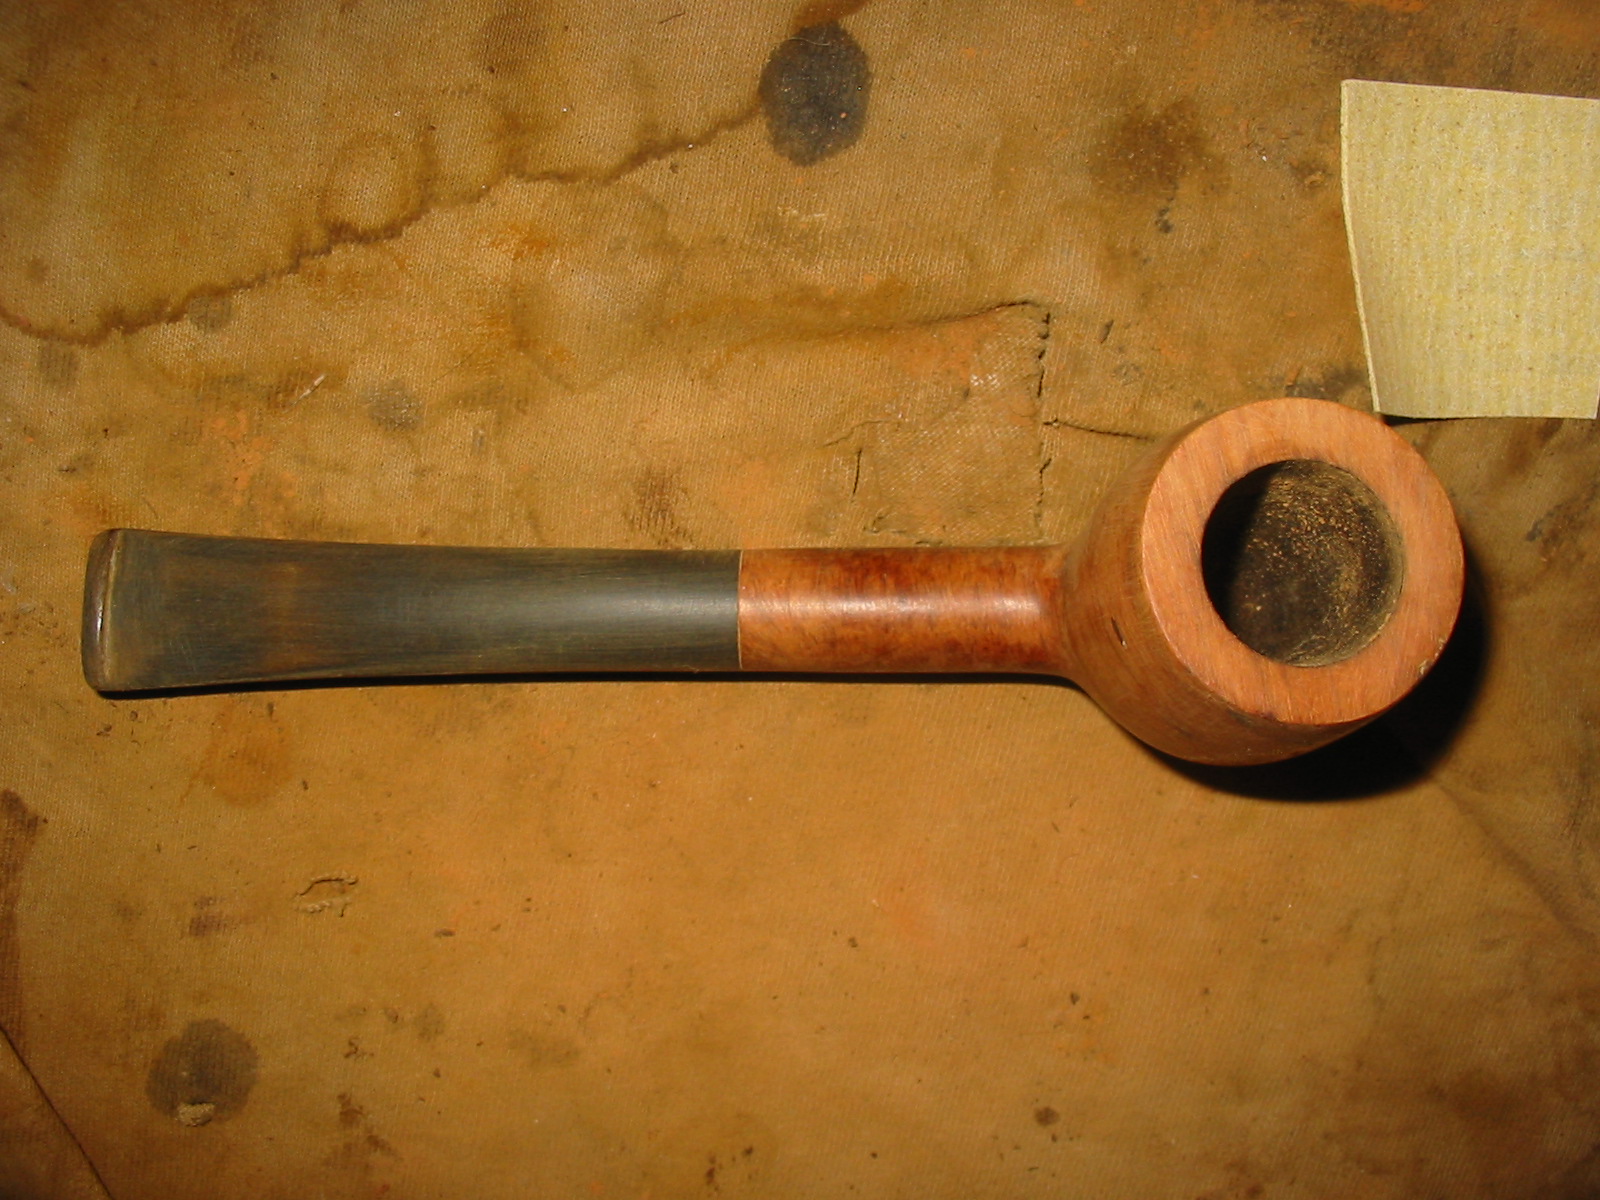
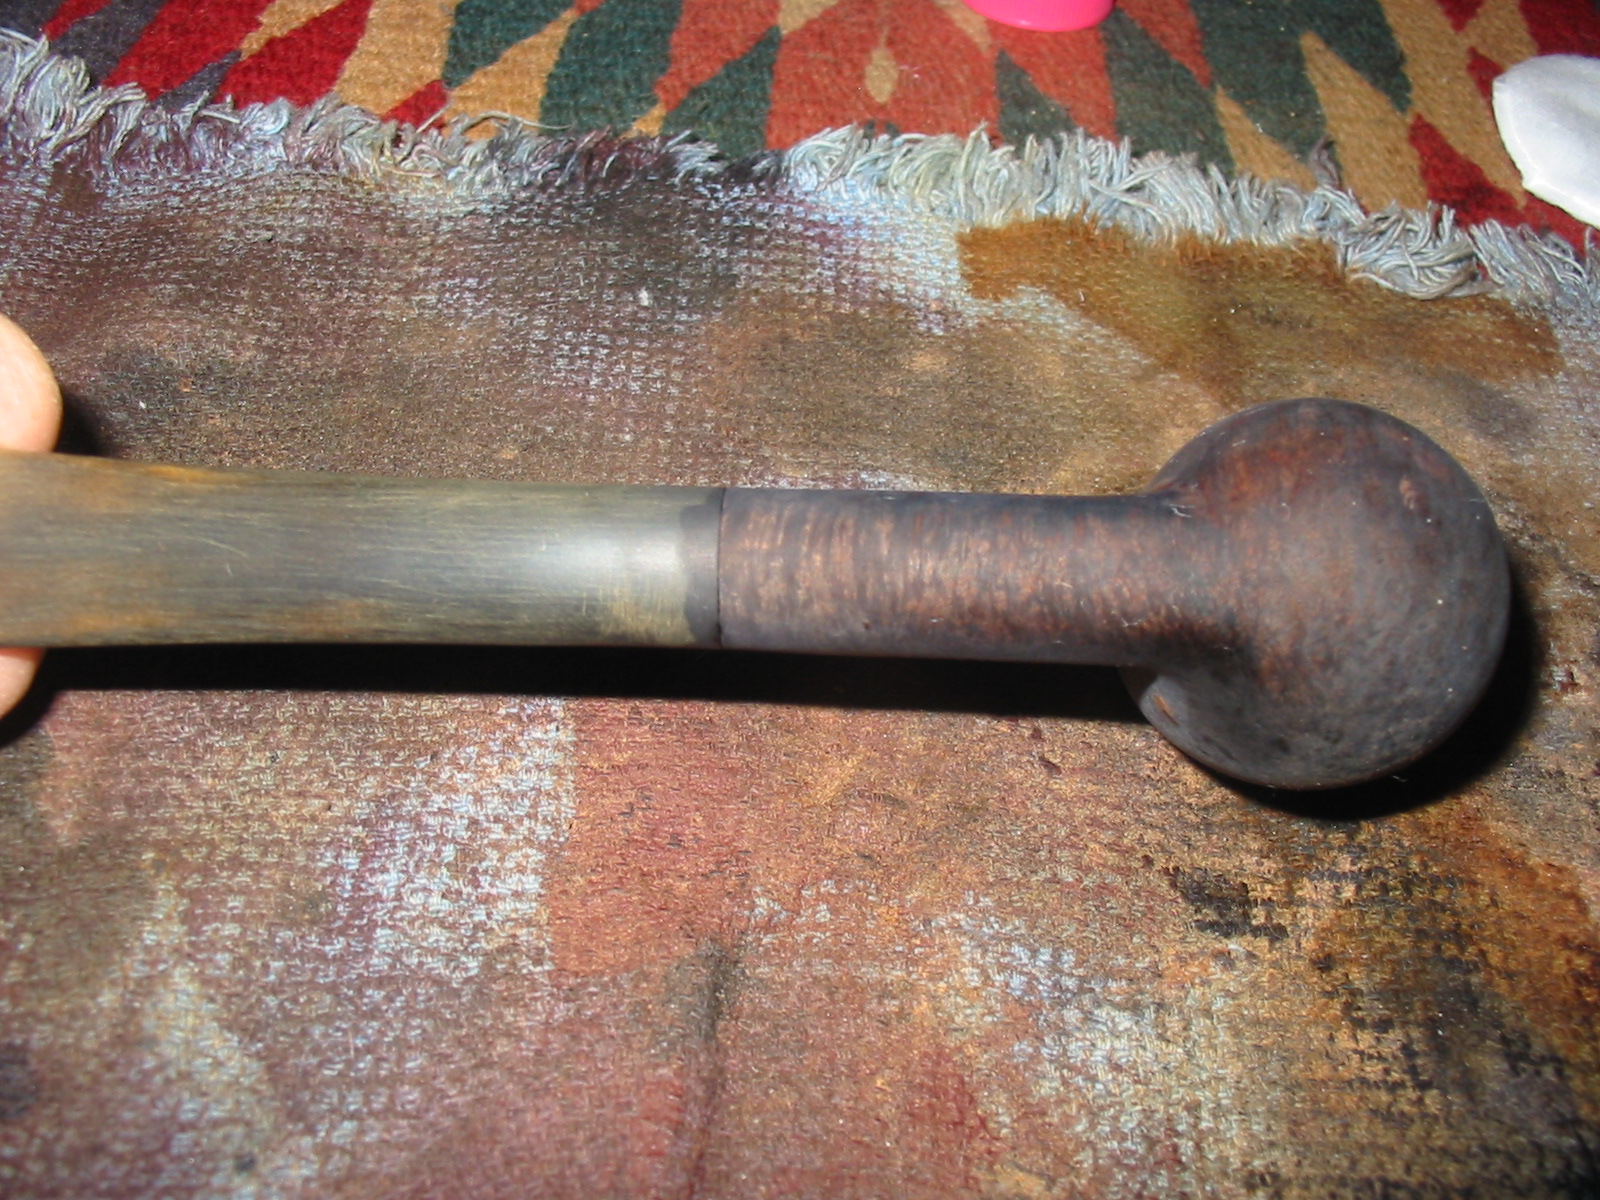
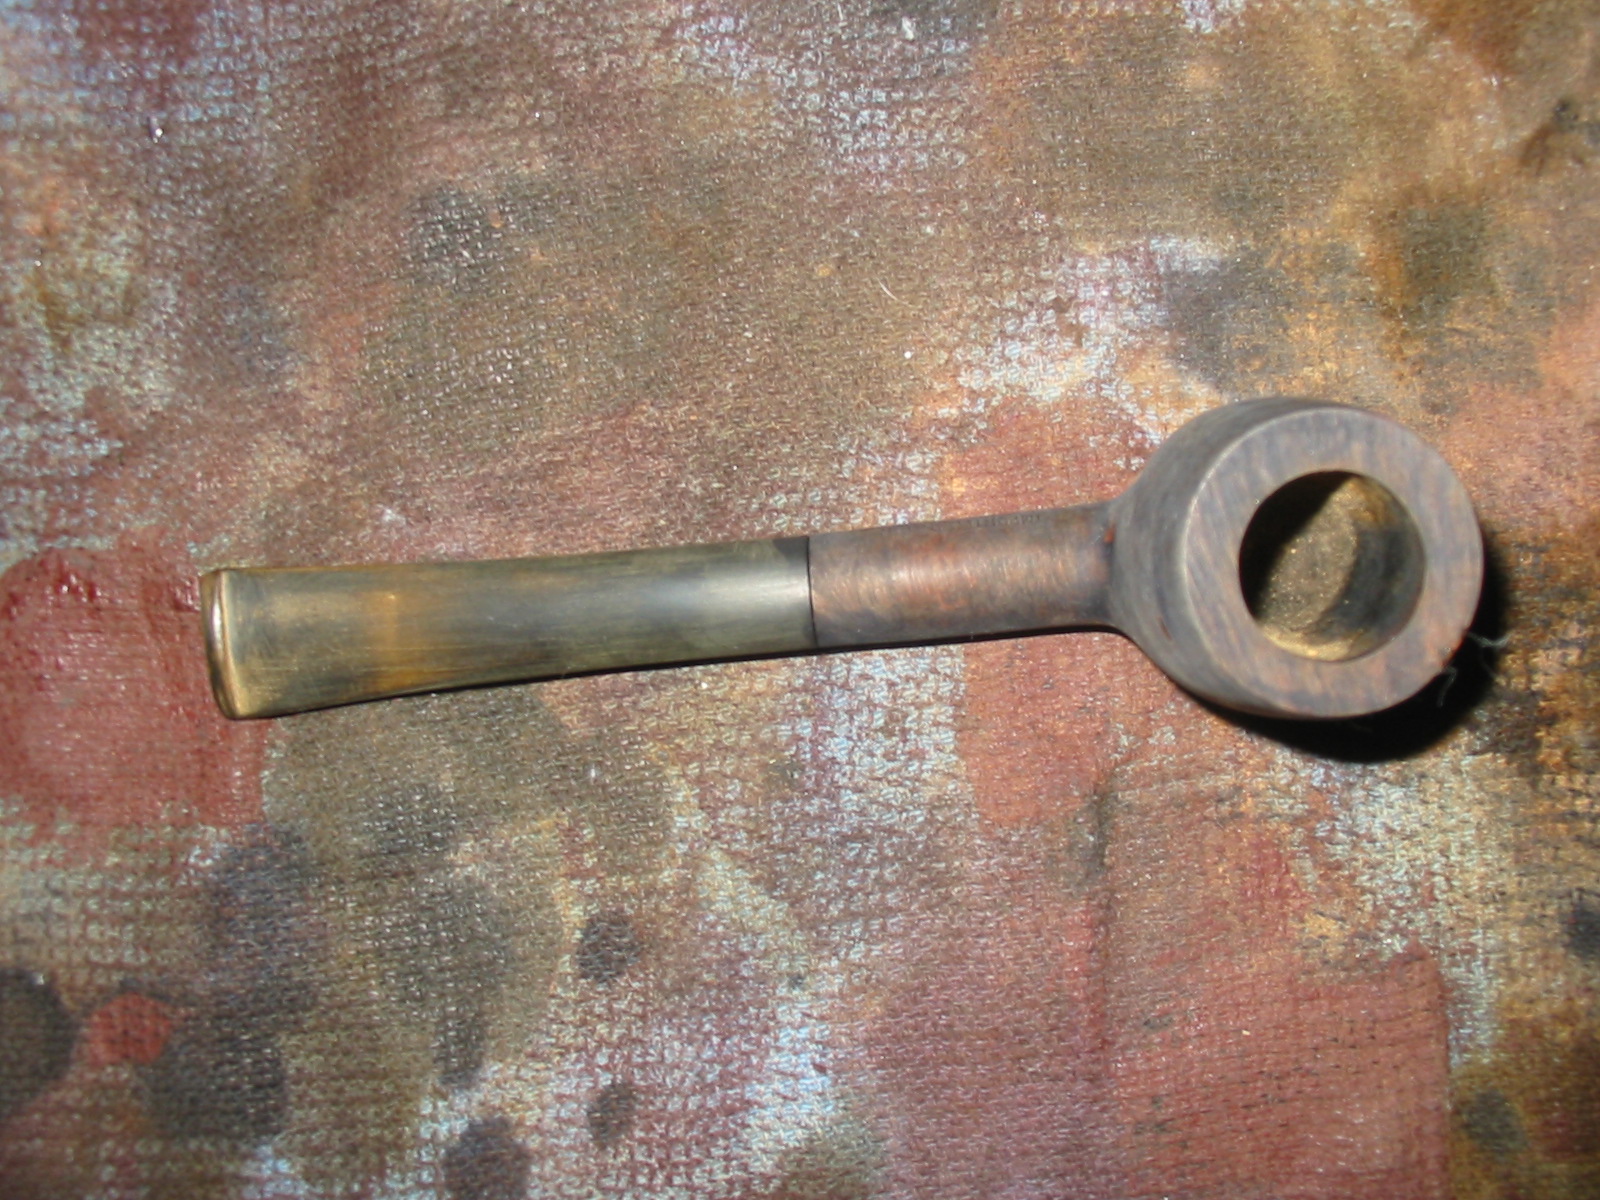
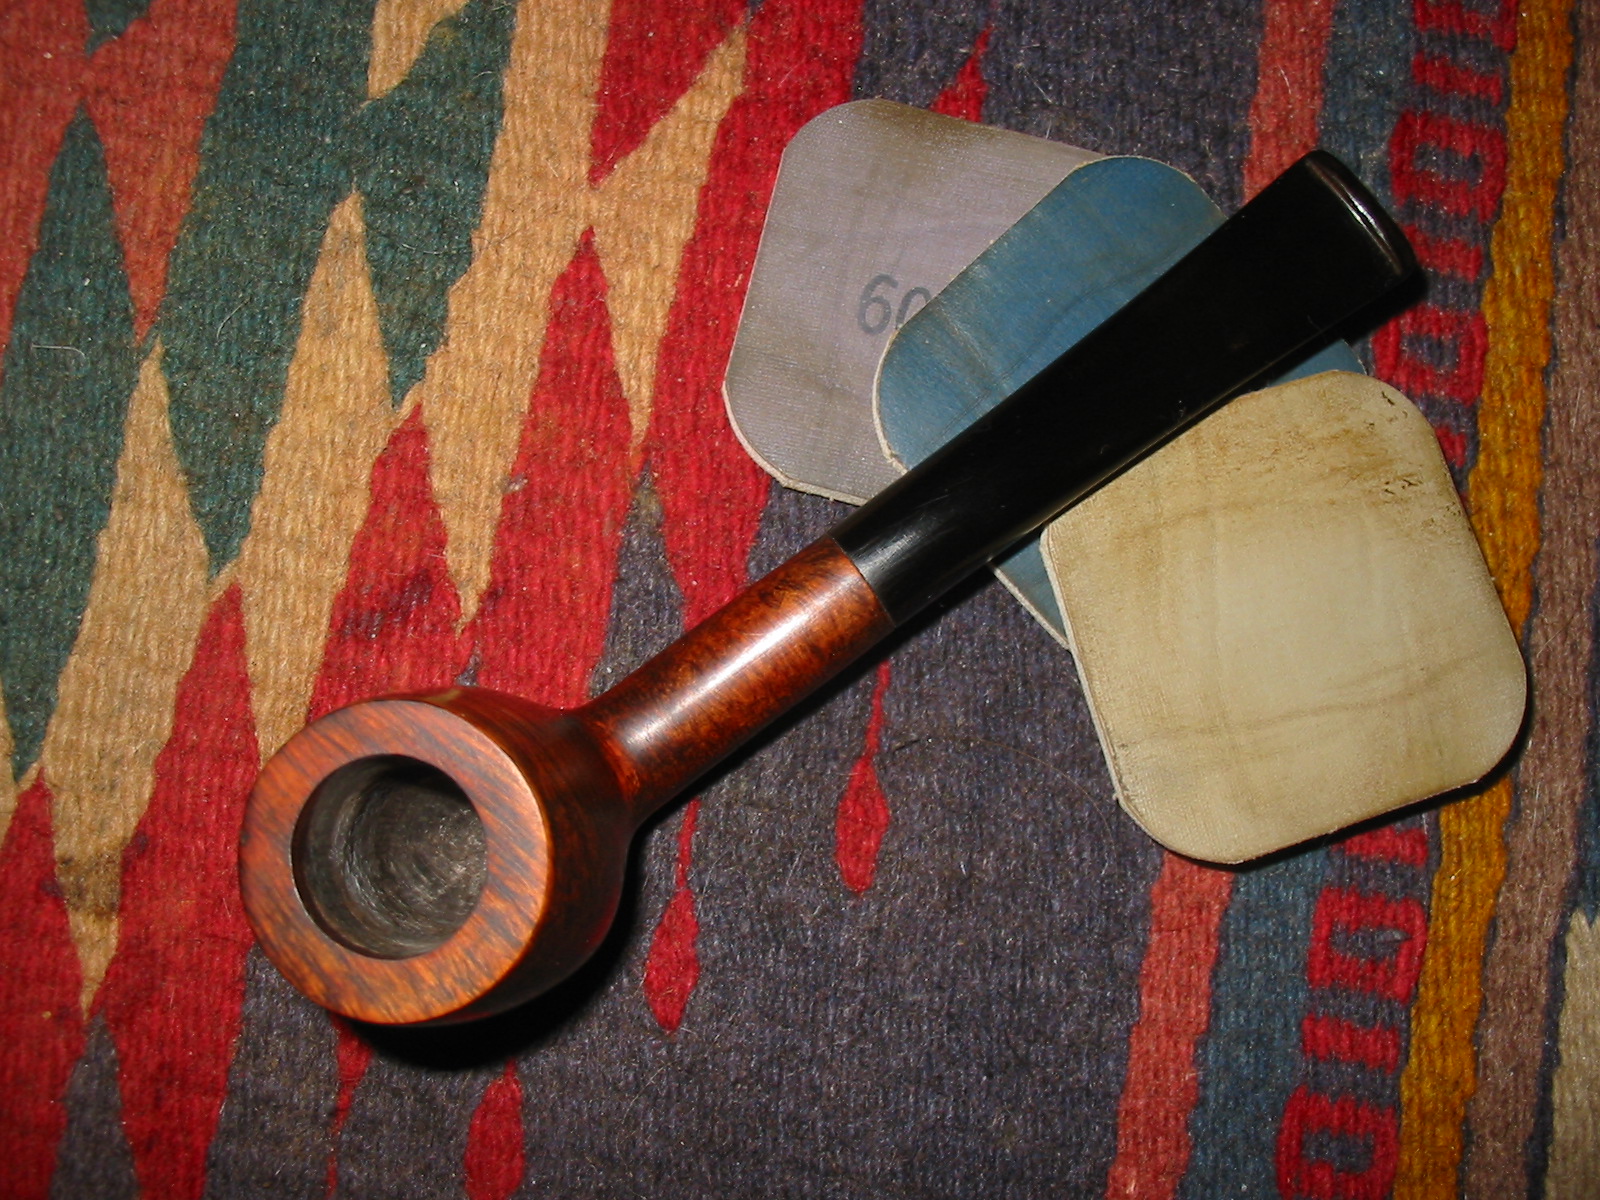
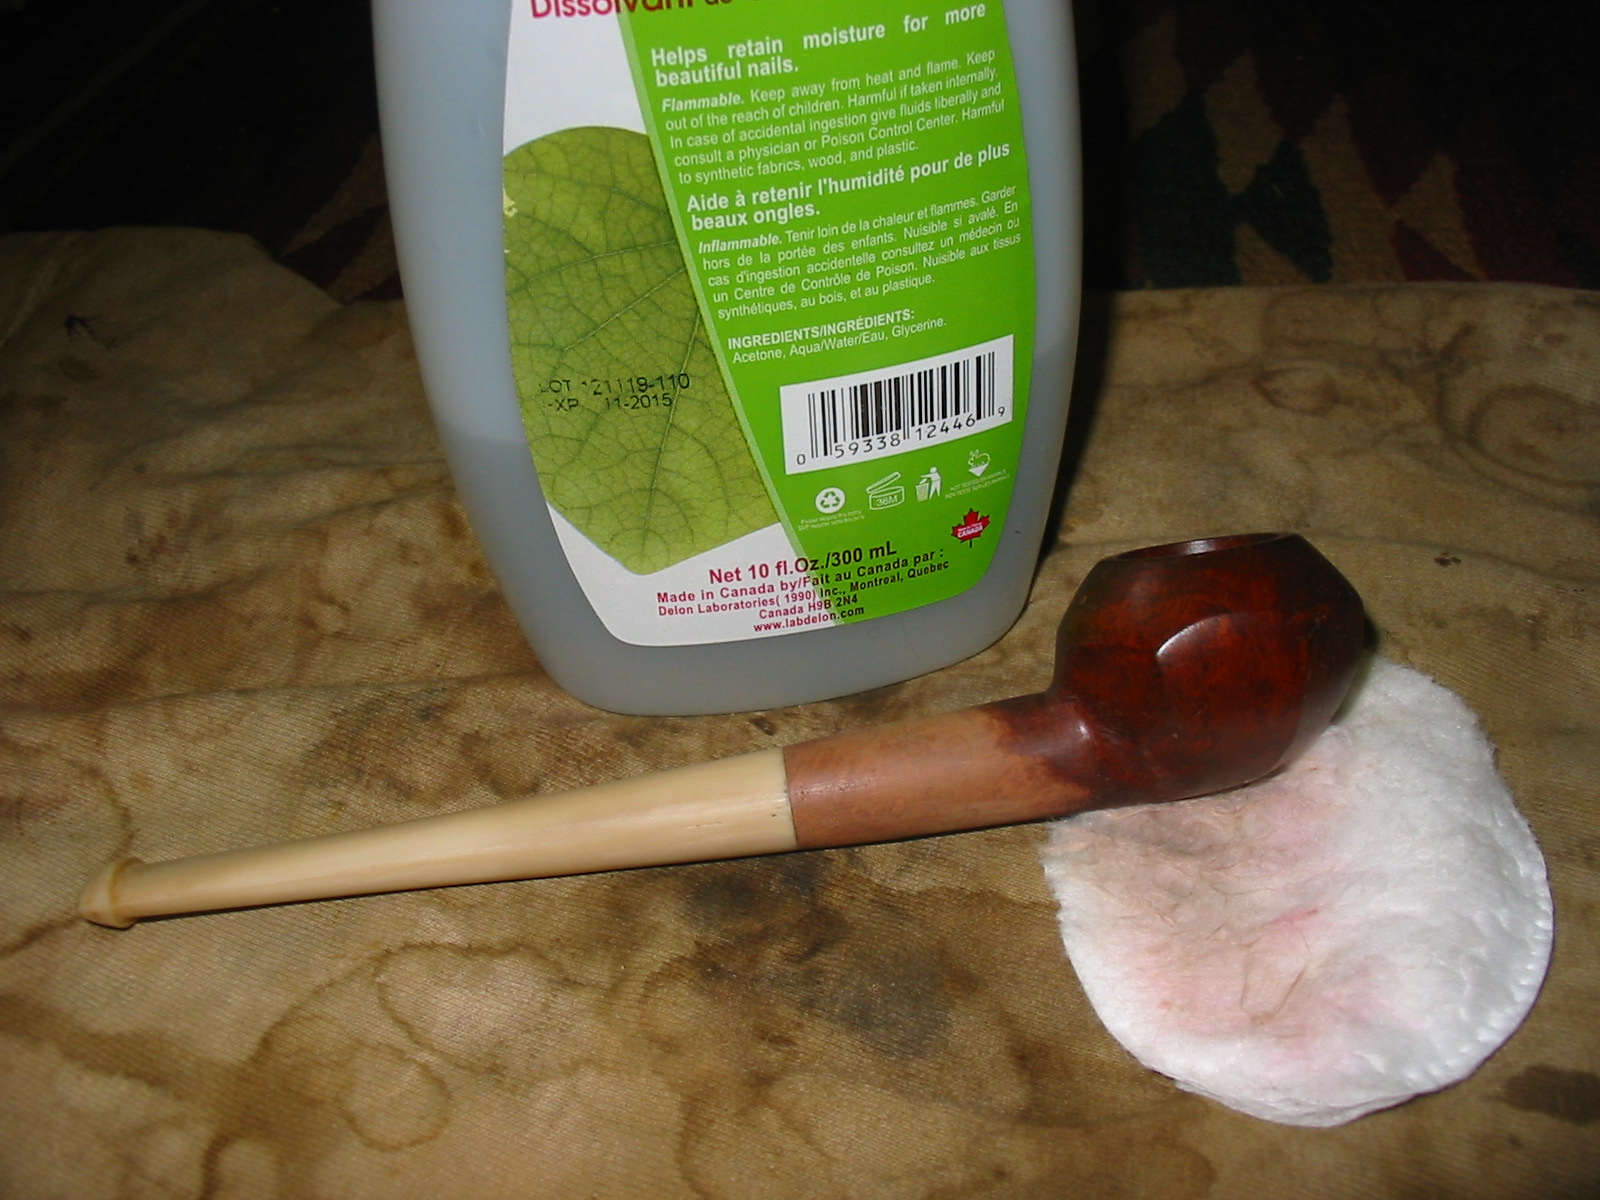
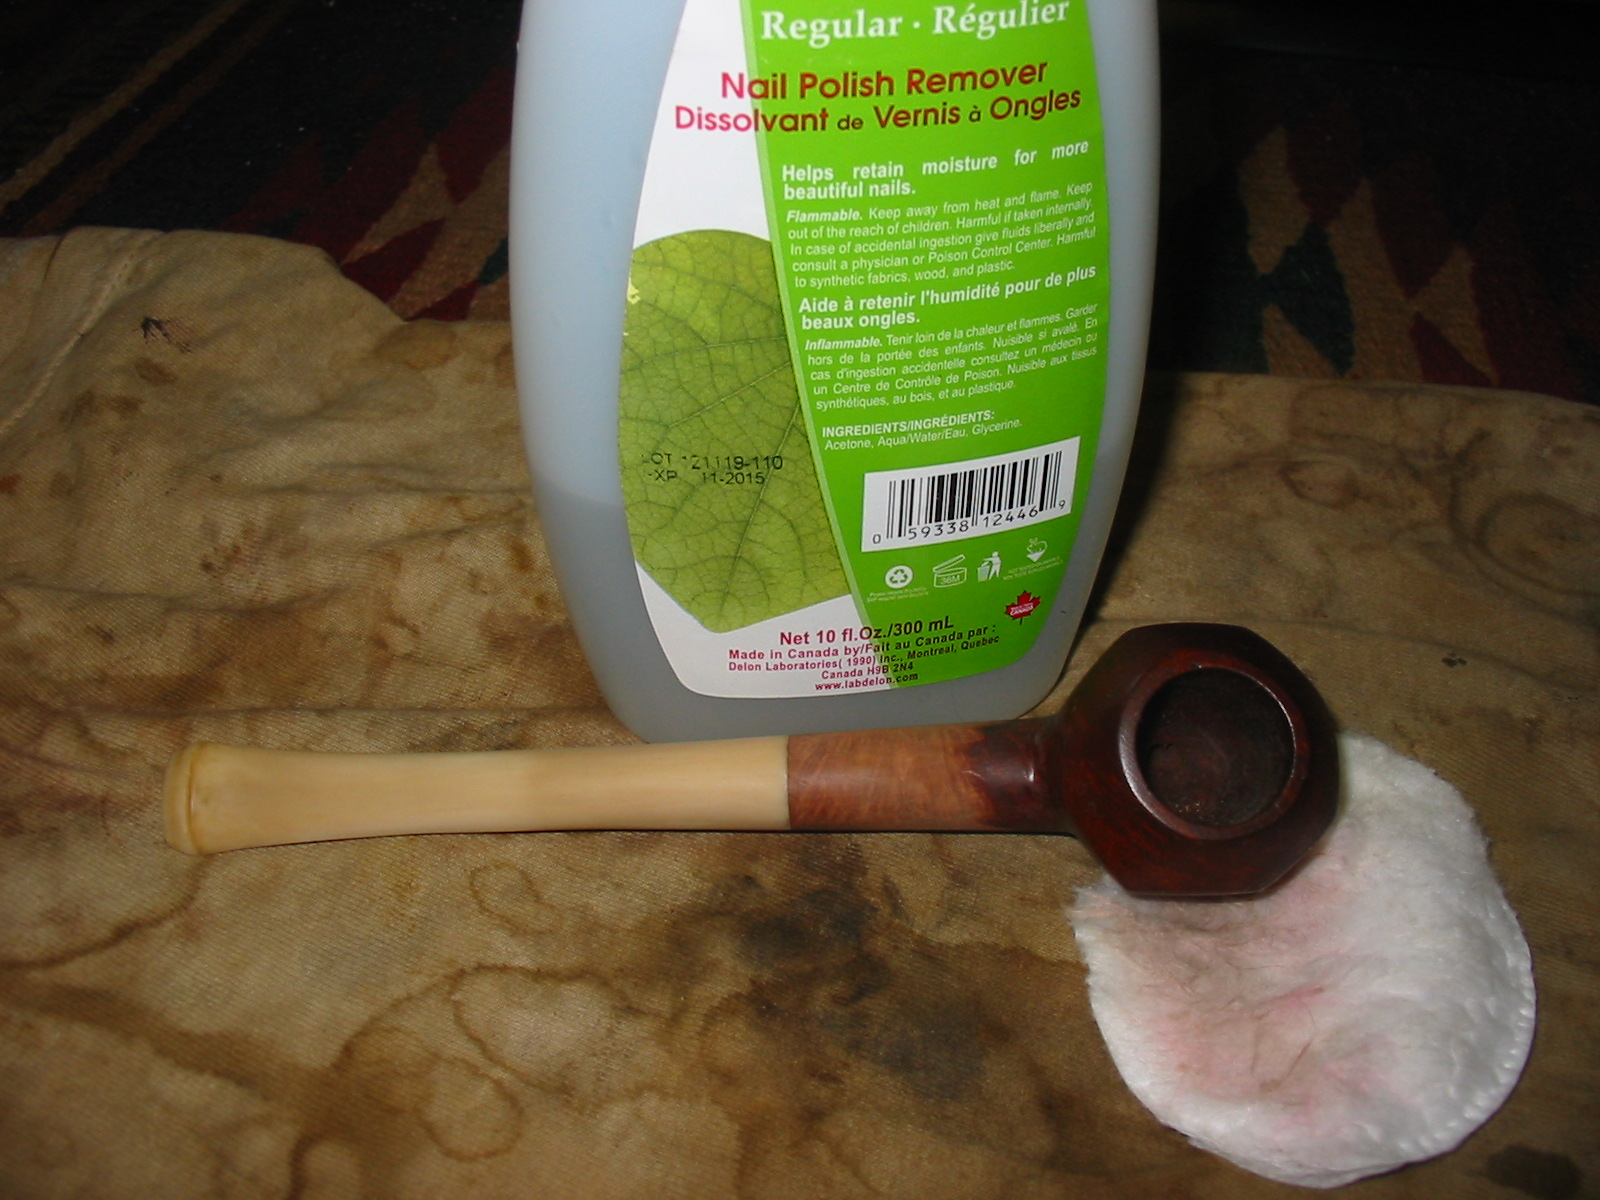
Once I had reamed the bowl I was ready to work on the inner edge of the rim. I scrubbed the rim with cotton pads and saliva. I put a lot of elbow grease into removing the buildup of tars and oils. I was able to remove the crust on the rim. There was indeed a little rim darkening in that spot but not nearly what I expected to find.Carlos8 
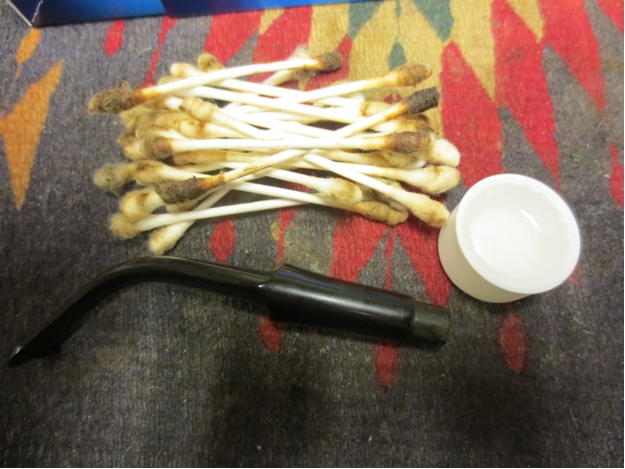
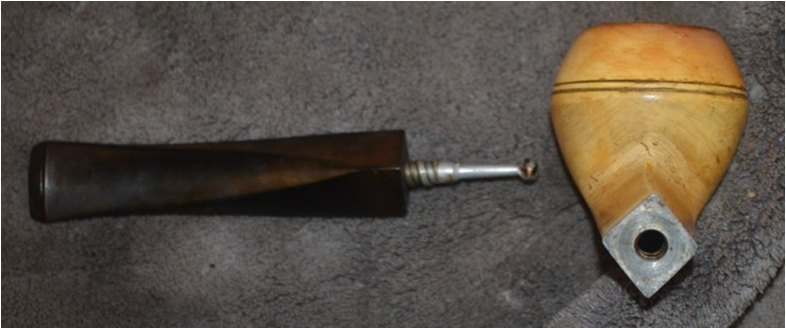
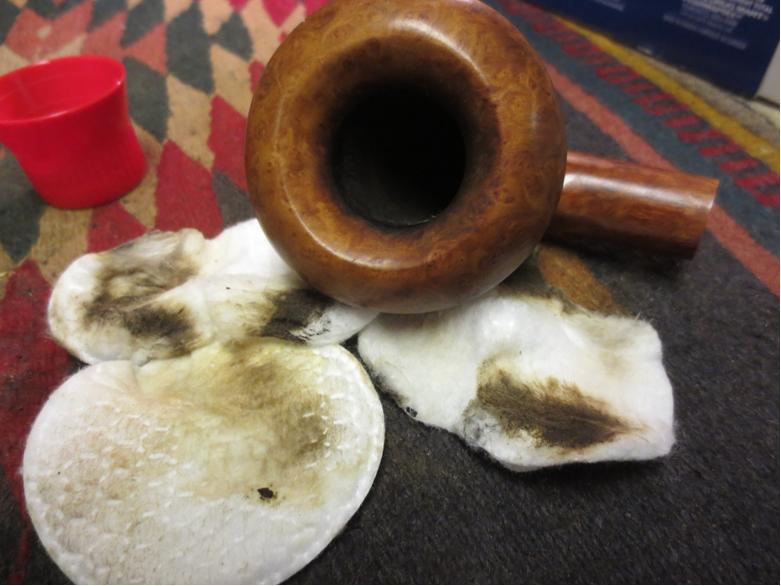
I wiped down the exterior of the bowl with Murphy’s Oil Soap to remove the grime on the surface of the bowl. With the exterior cleaned it was time to address the inside of the pipe. The shank and airway was dirty and darkened. I cleaned it with alcohol, cotton swabs and pipe cleaners until I was able to get clean pipe cleaners and swabs back after scrubbing. I also scrubbed the stem with the same and was able to remove all of the buildup from the tenon end and inside the airway.Carlos9 
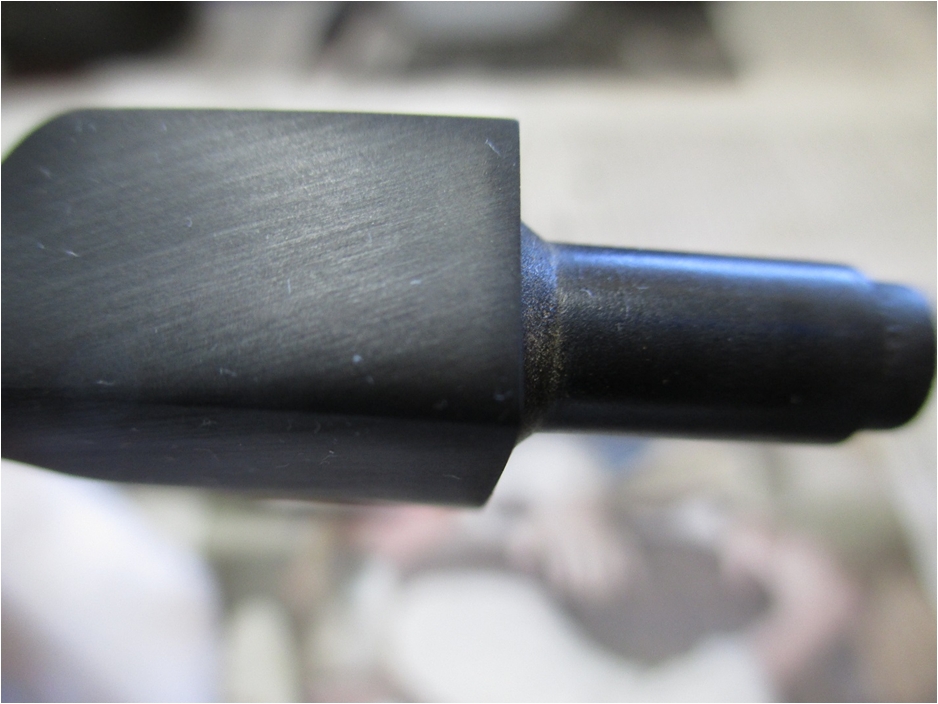
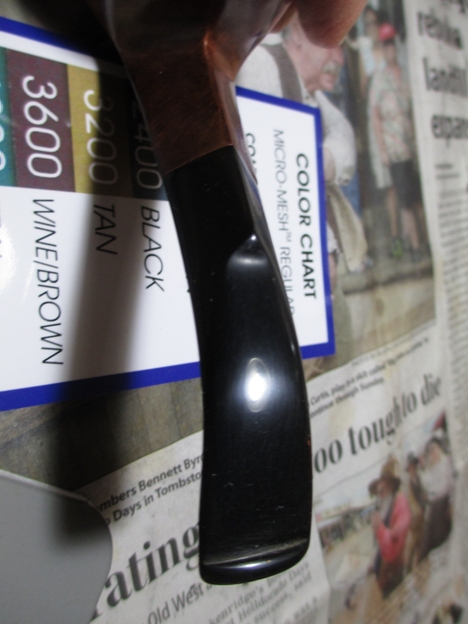
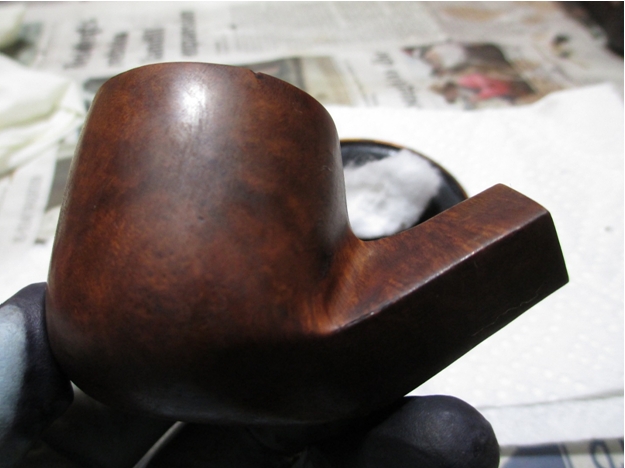
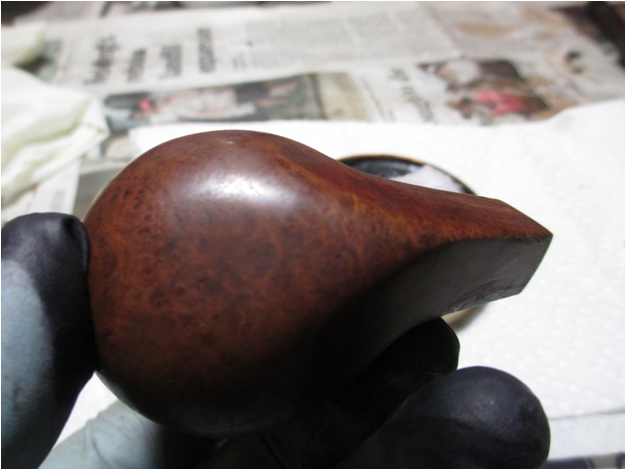
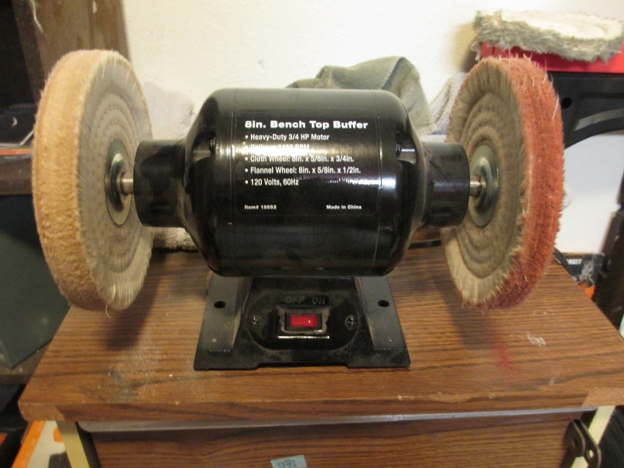
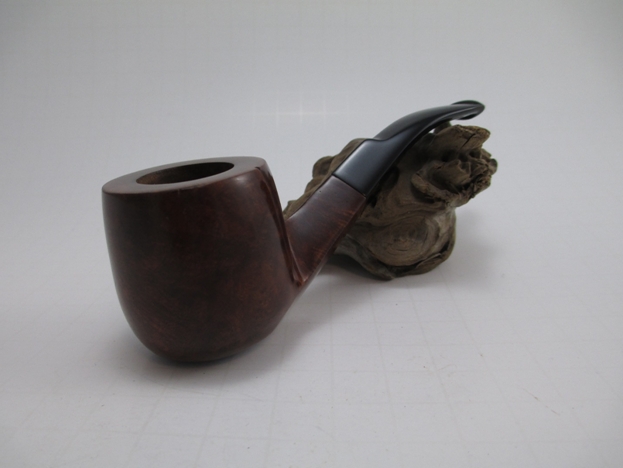
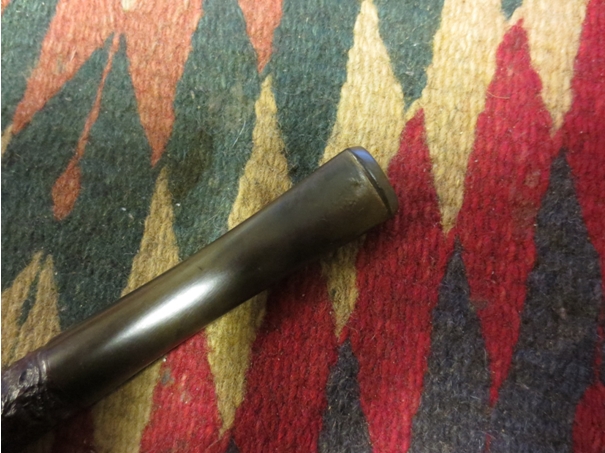
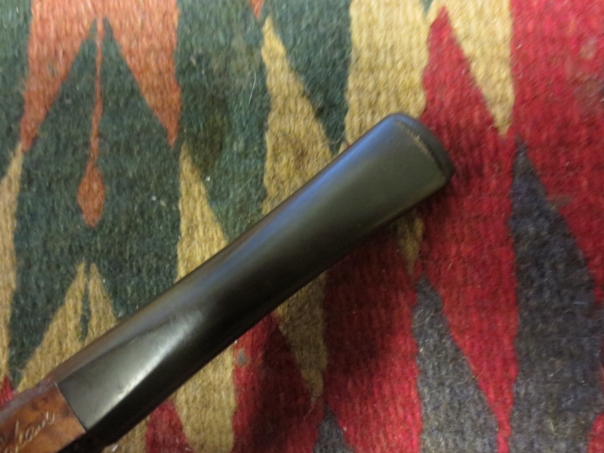
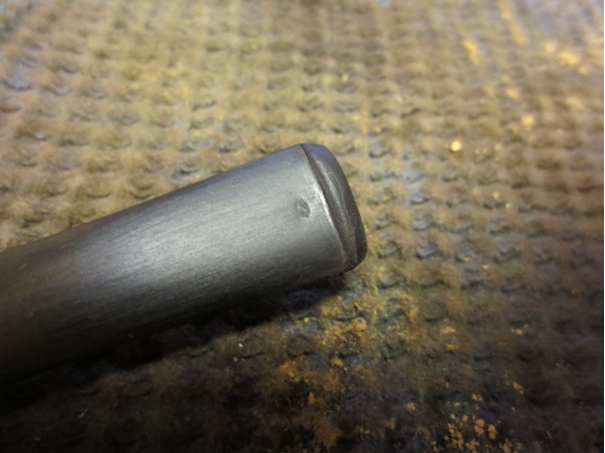
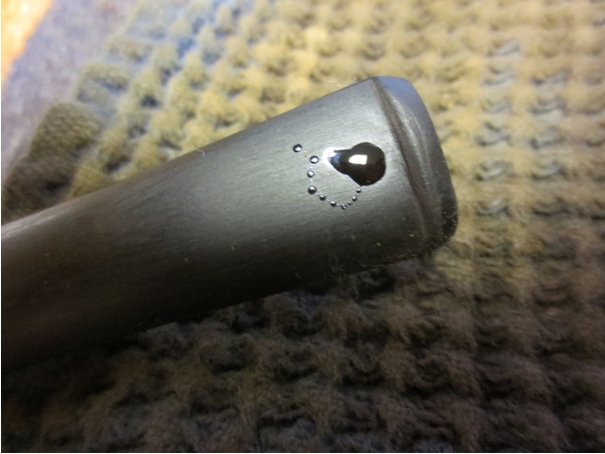
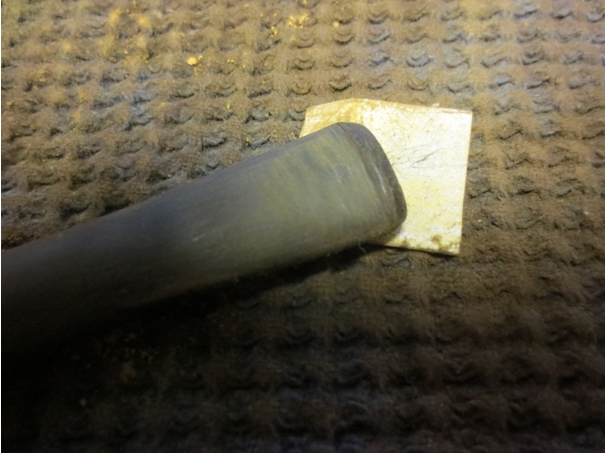
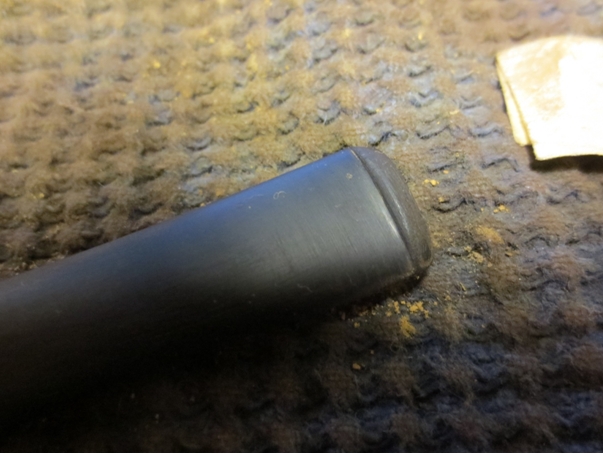
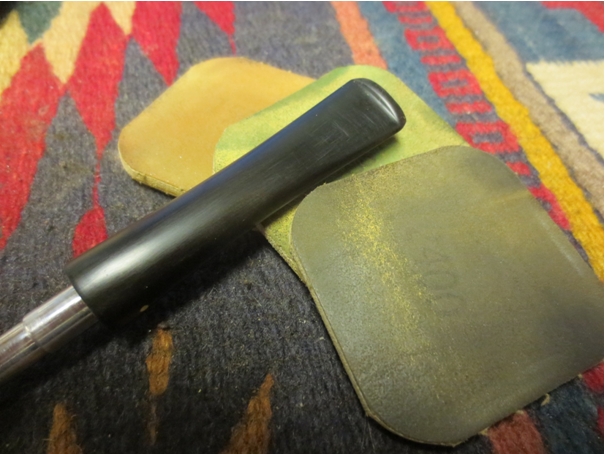
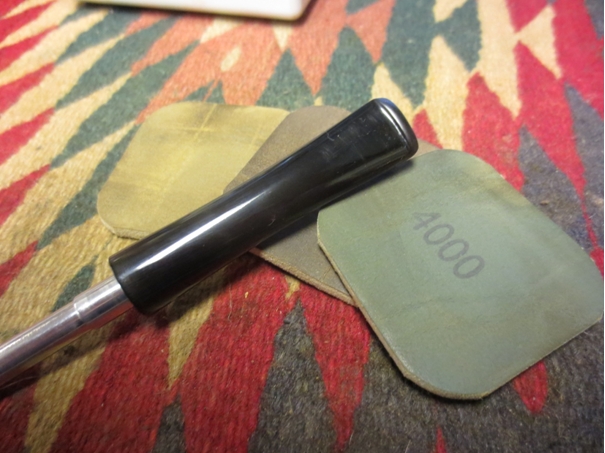
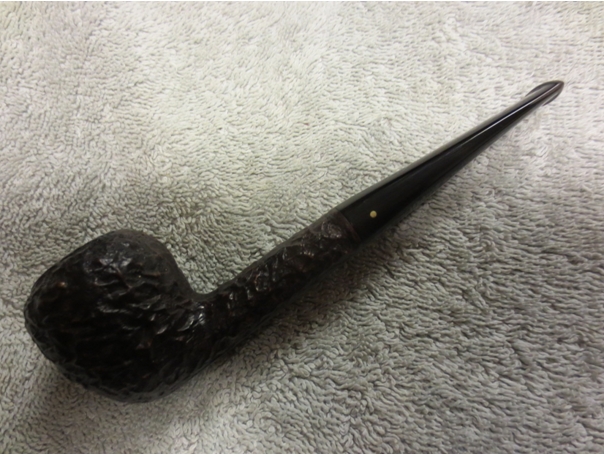
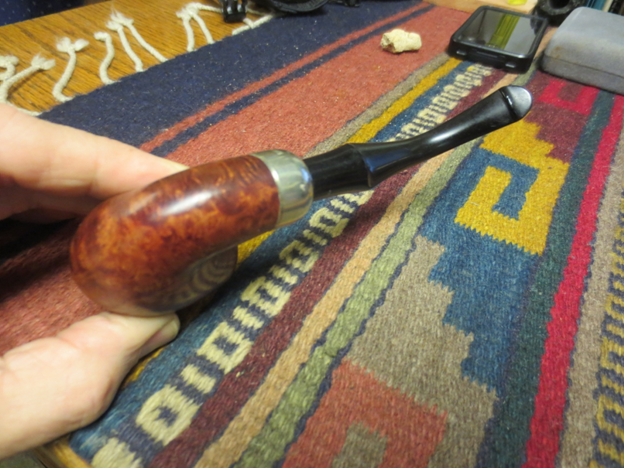
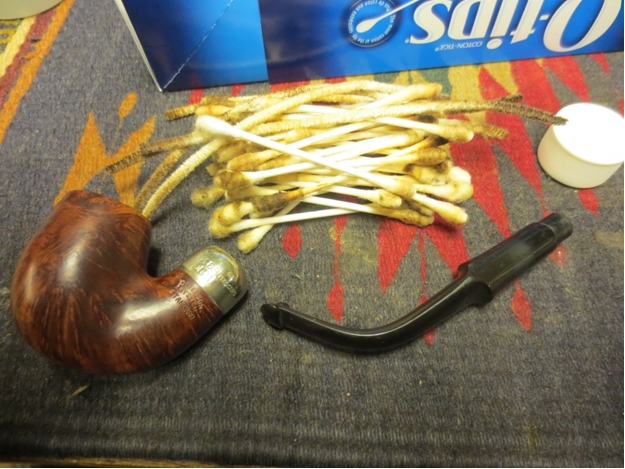
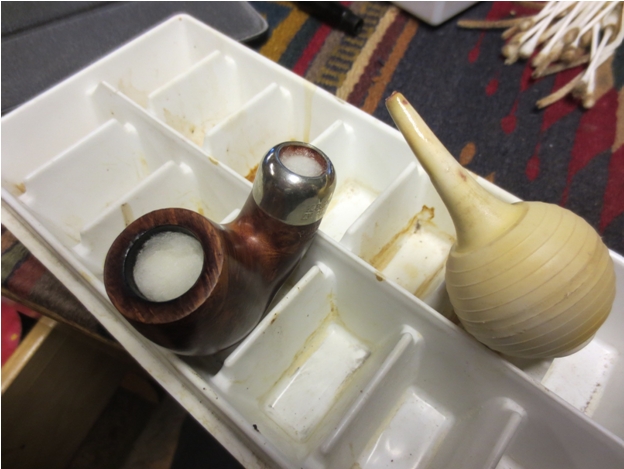
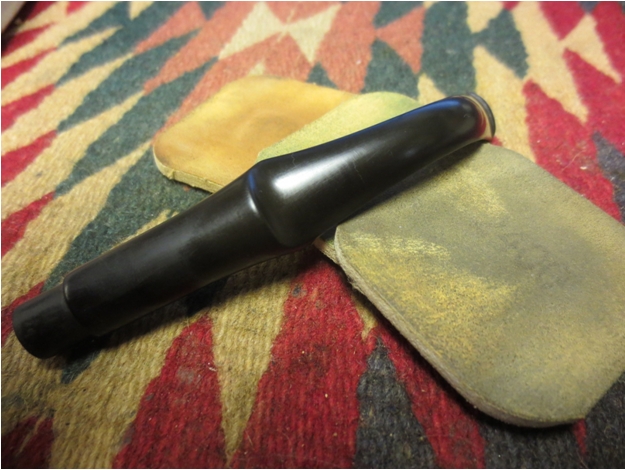
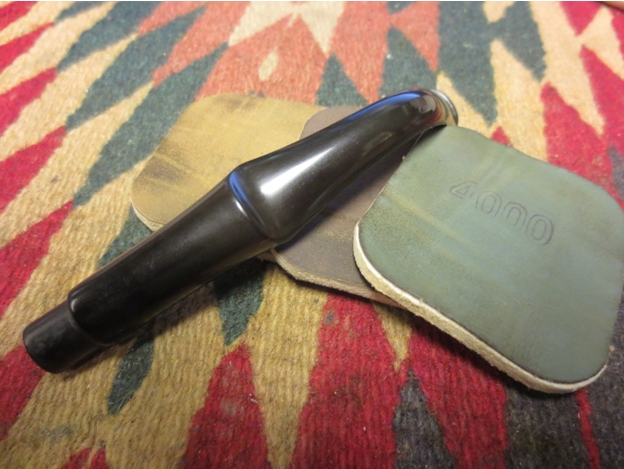
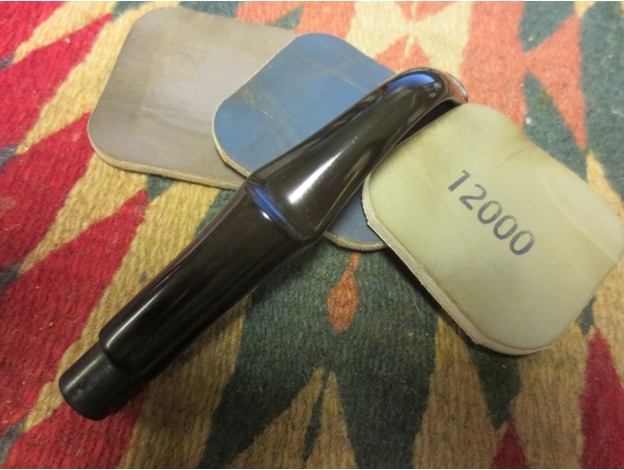
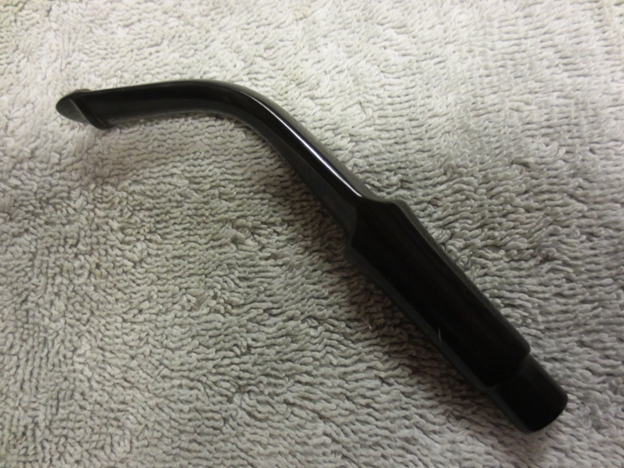
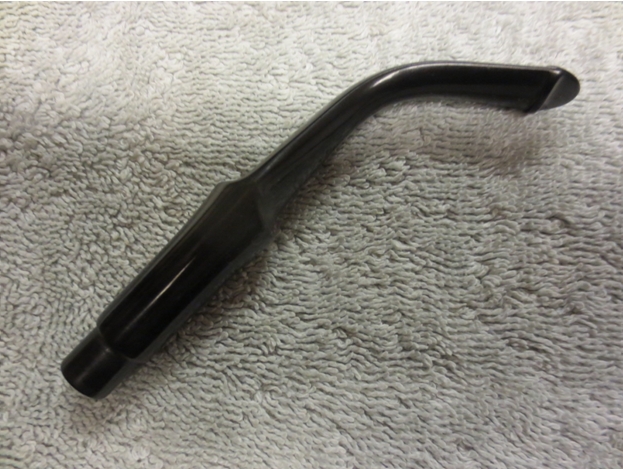
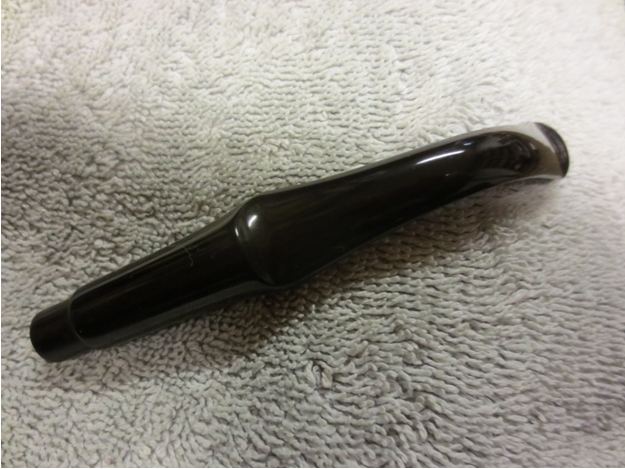
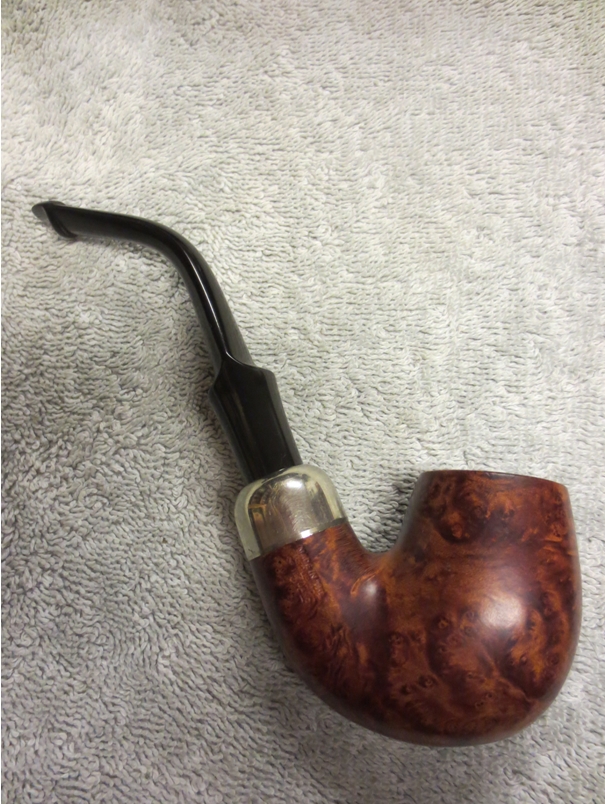
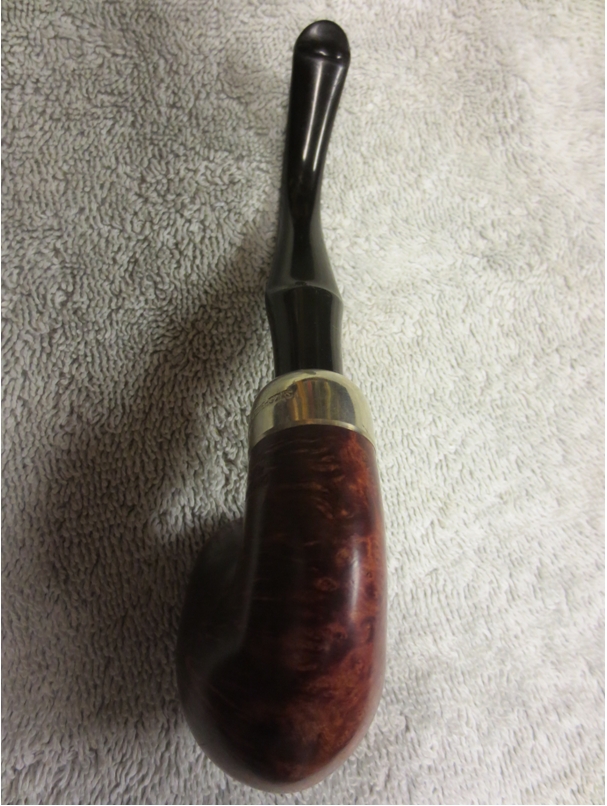
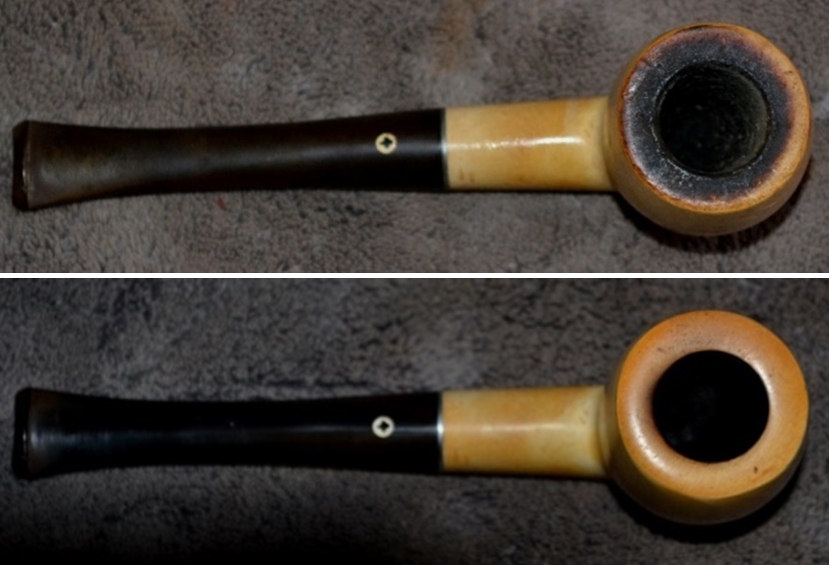
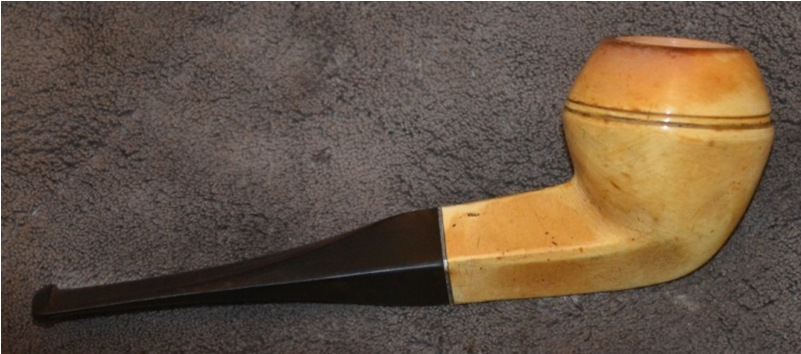
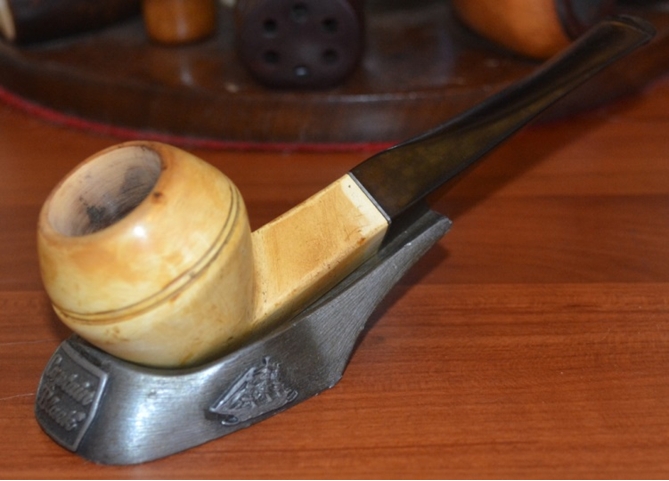
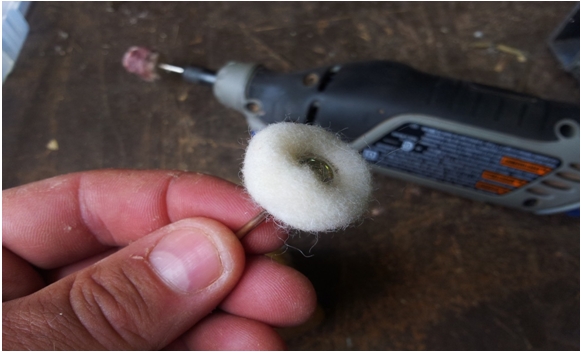
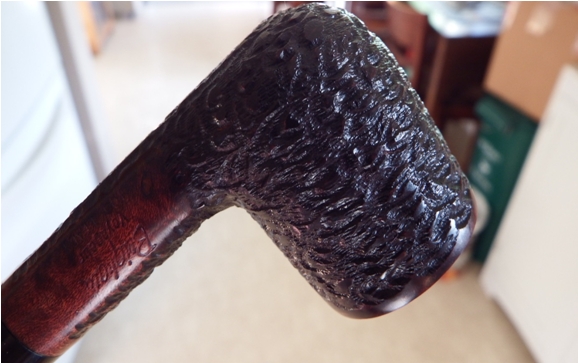
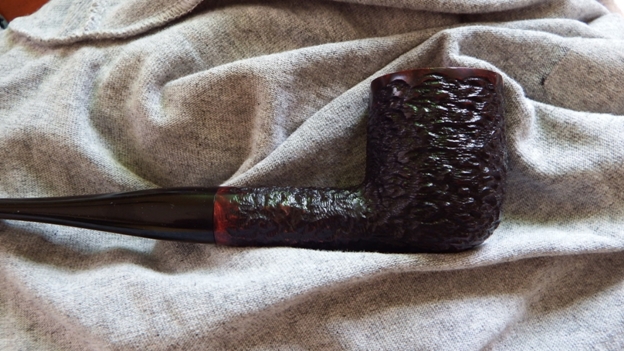
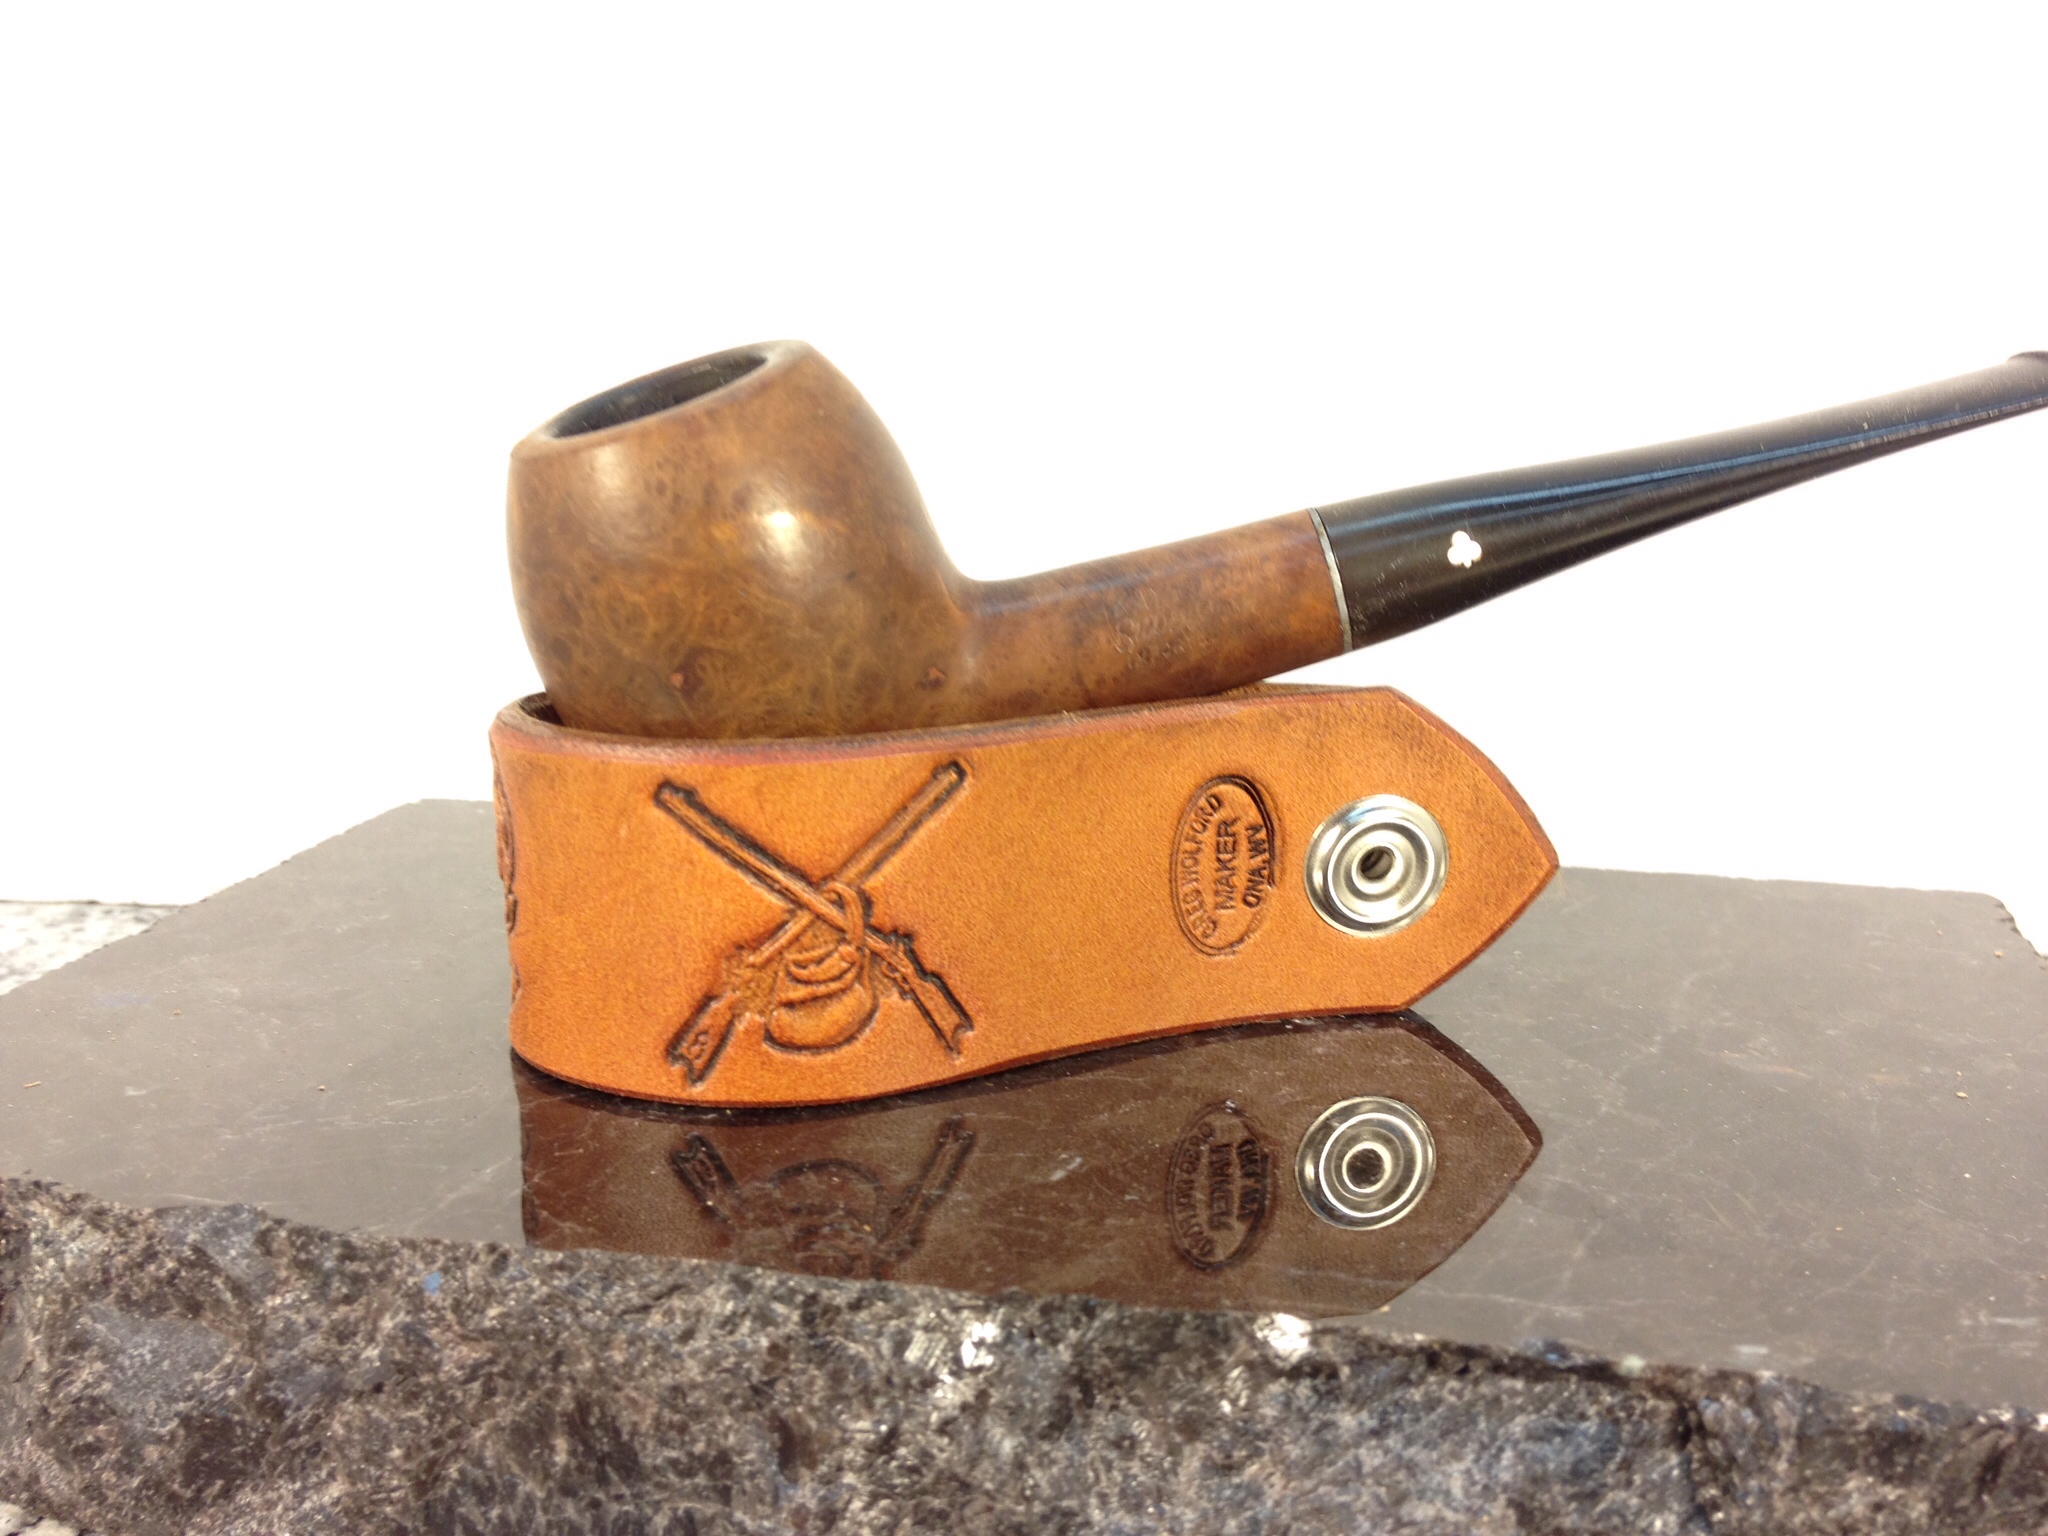
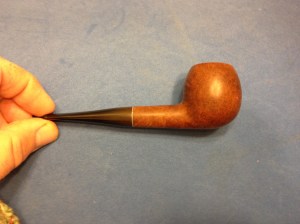
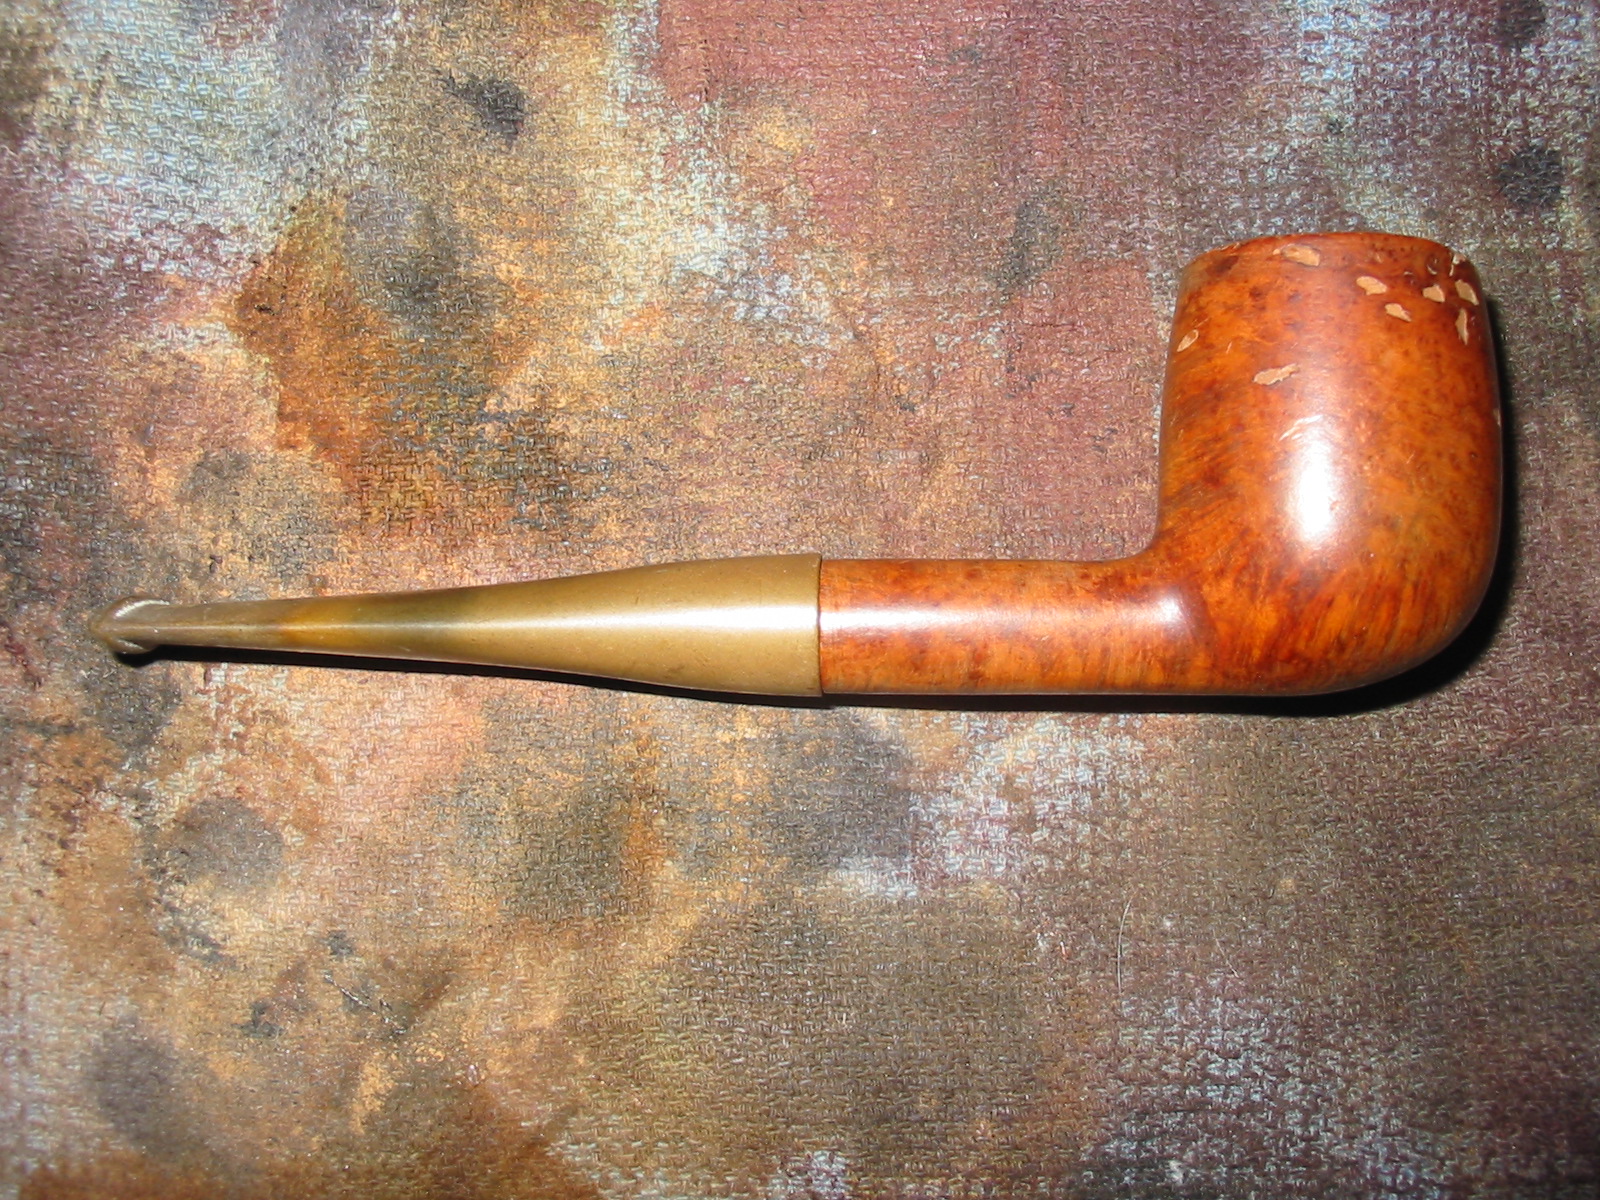
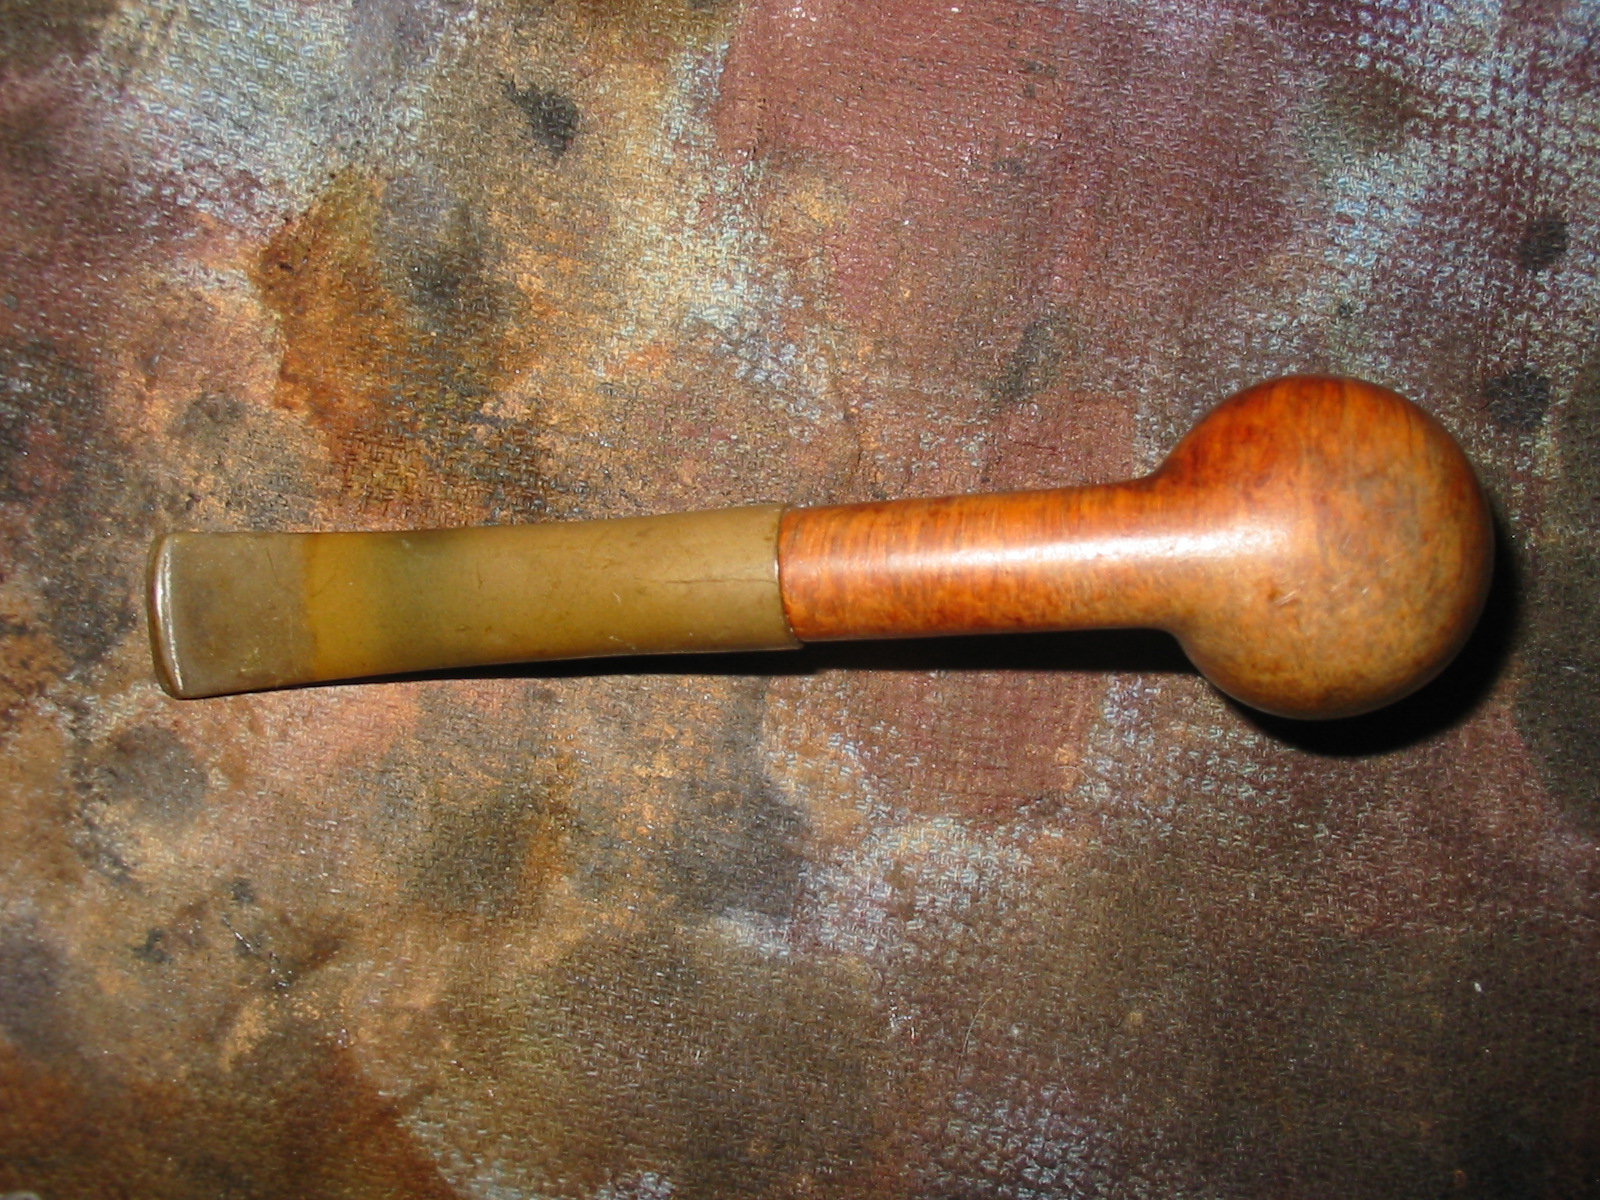
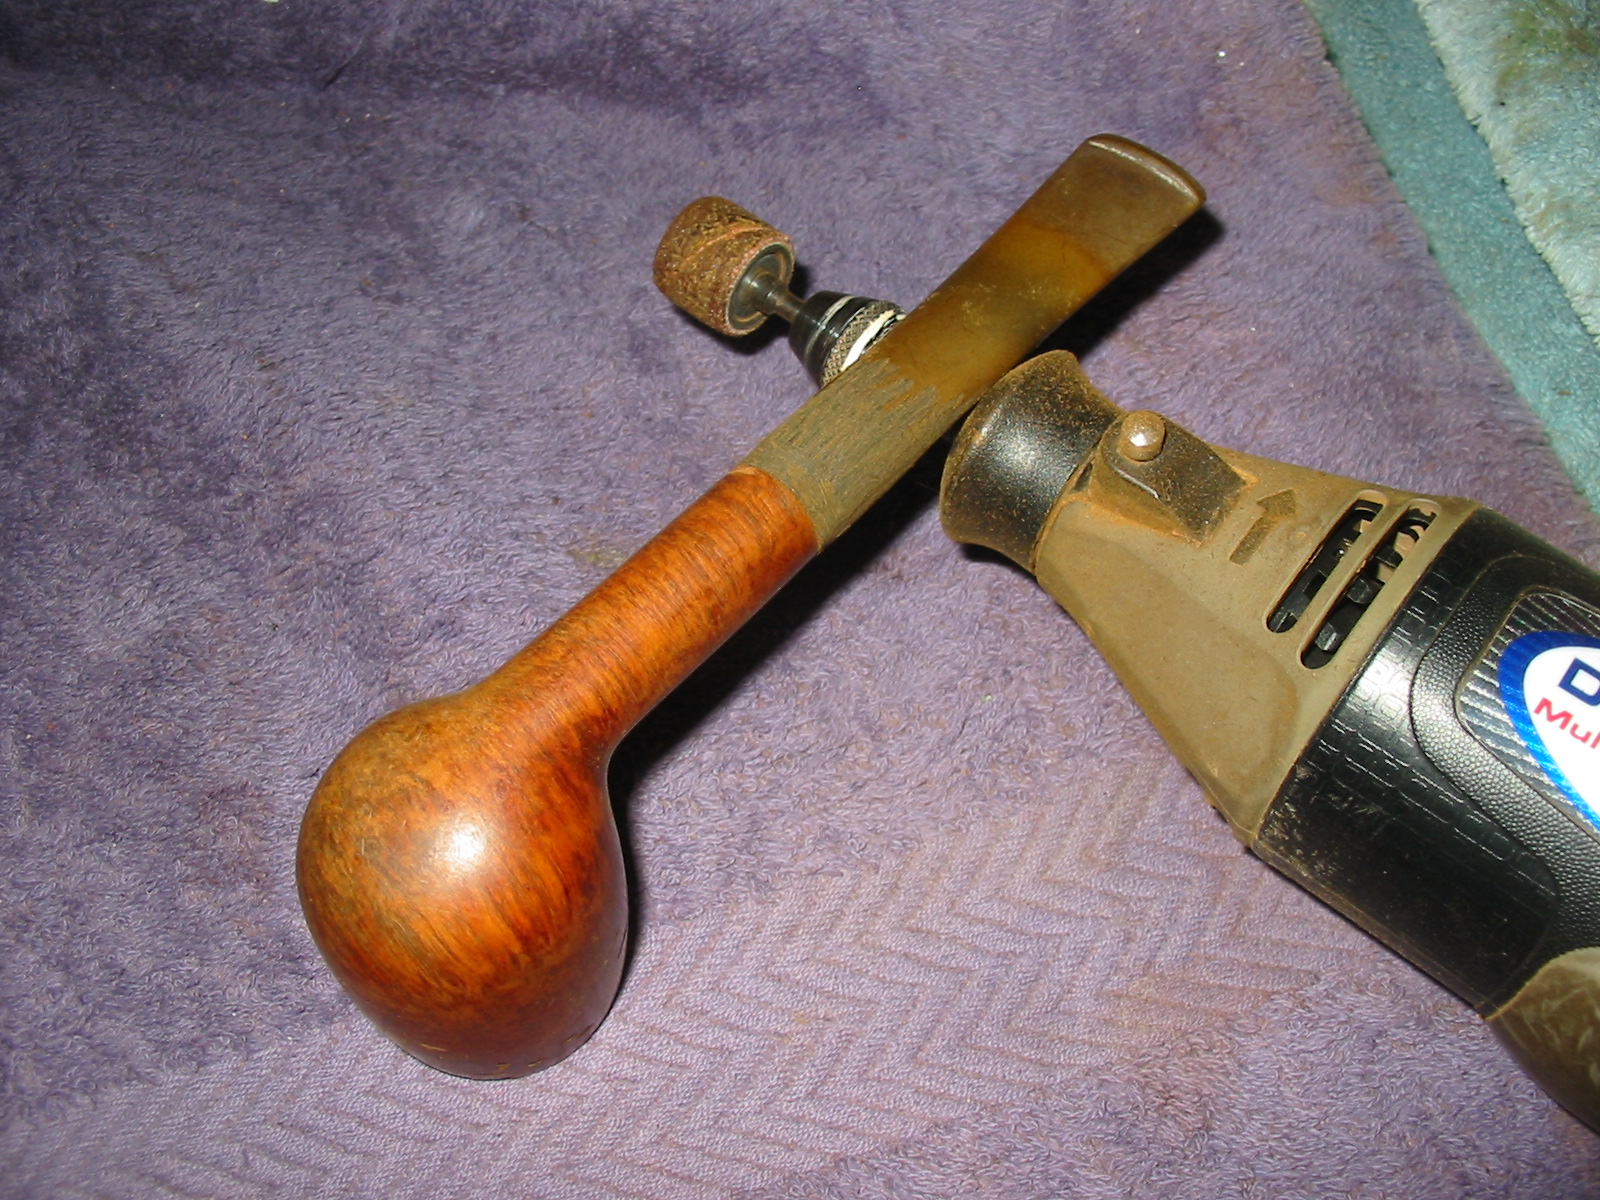
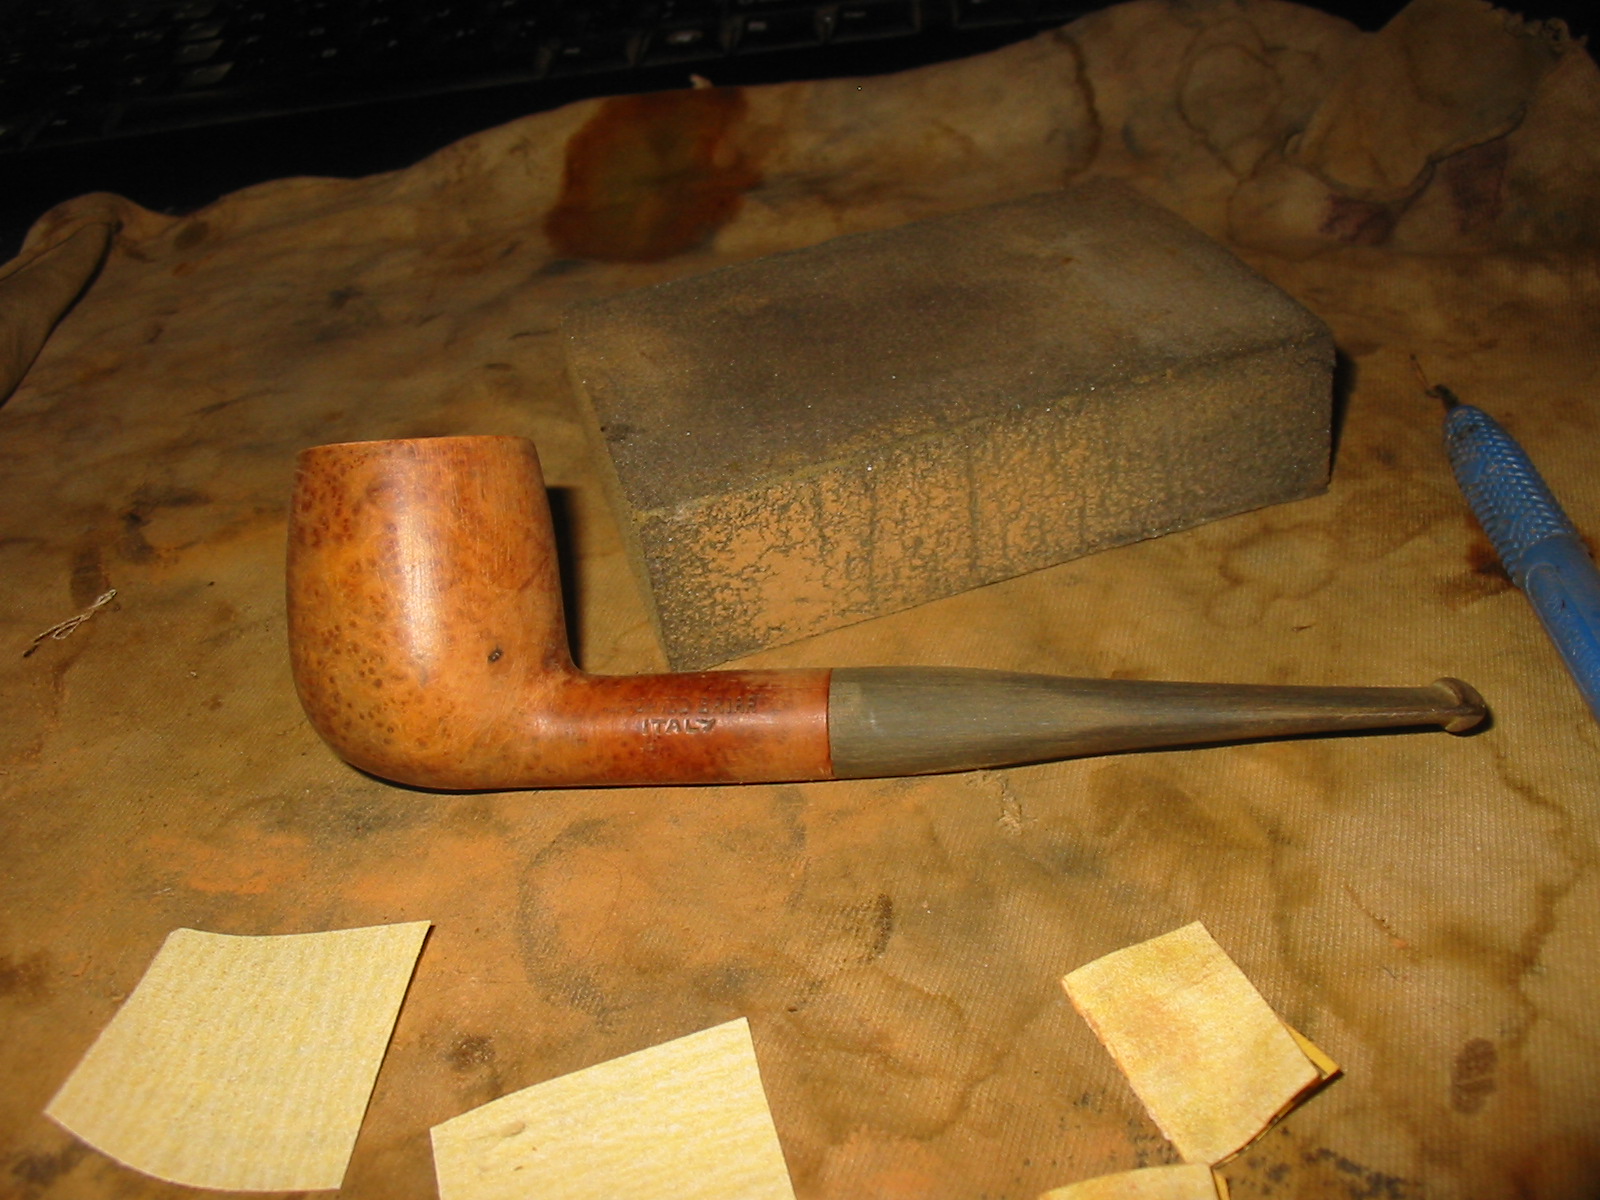
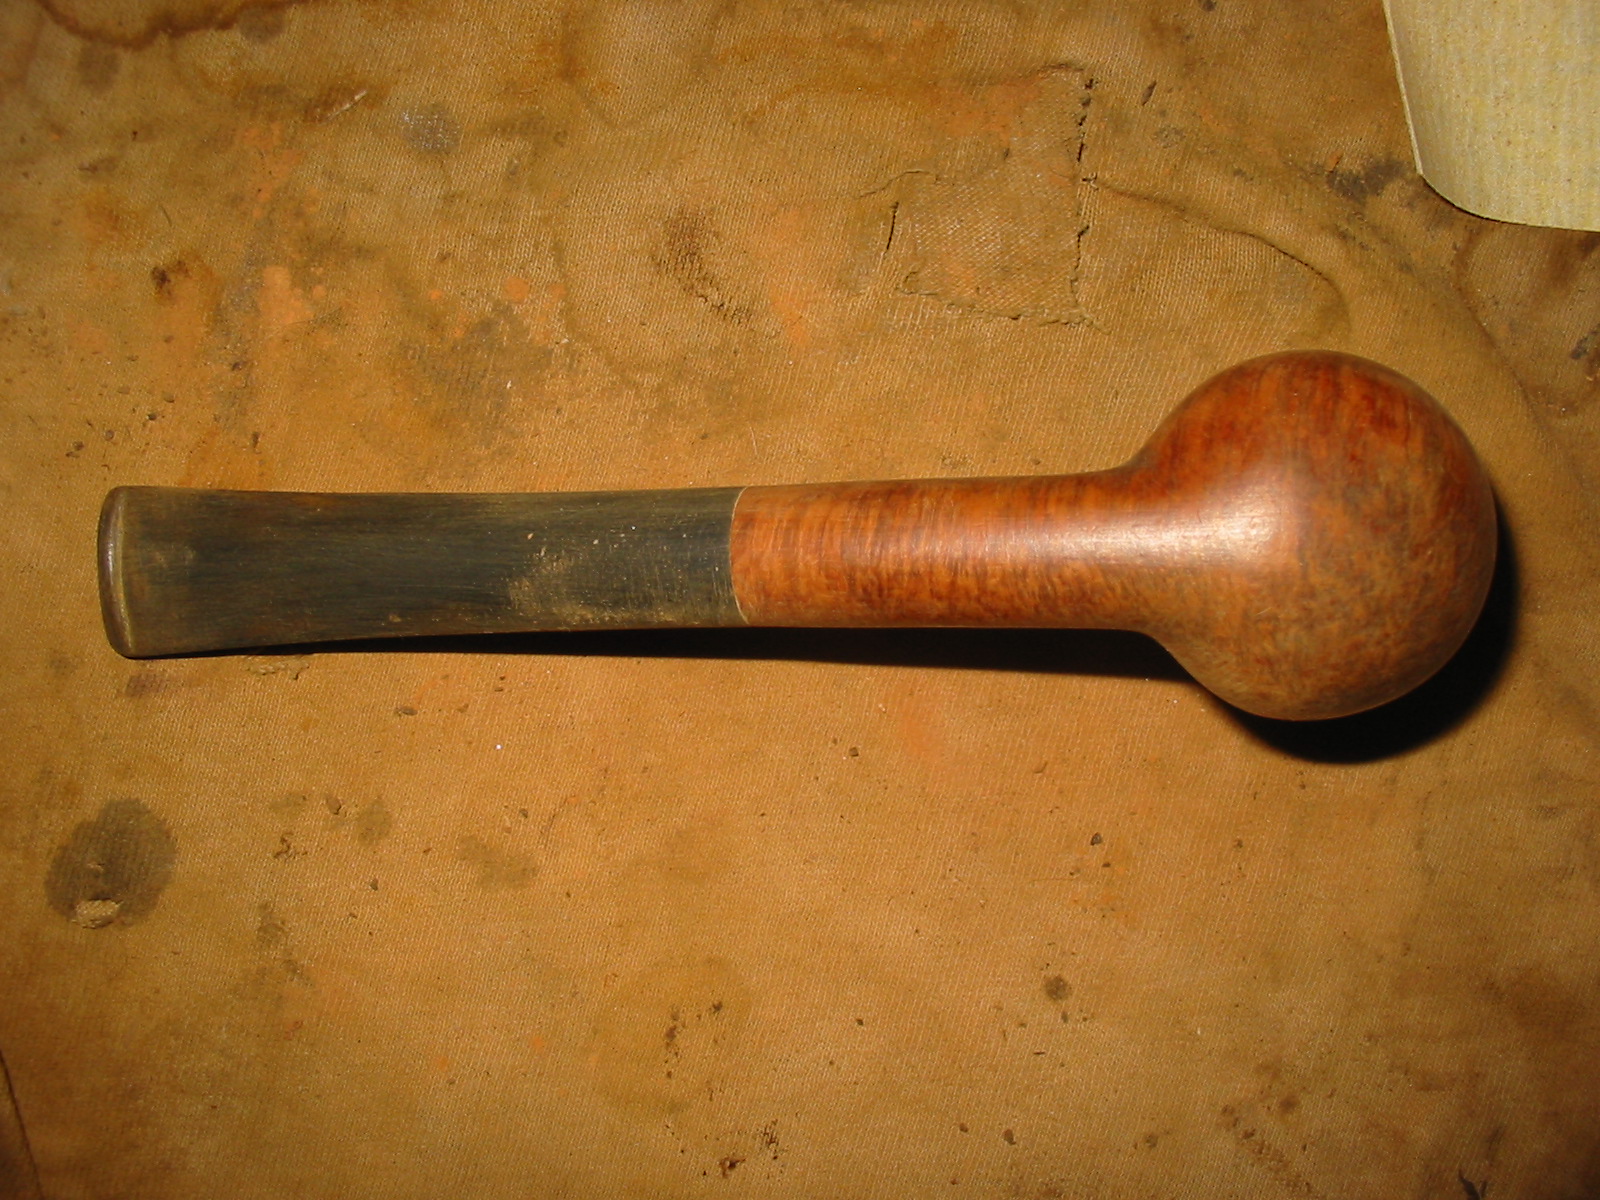
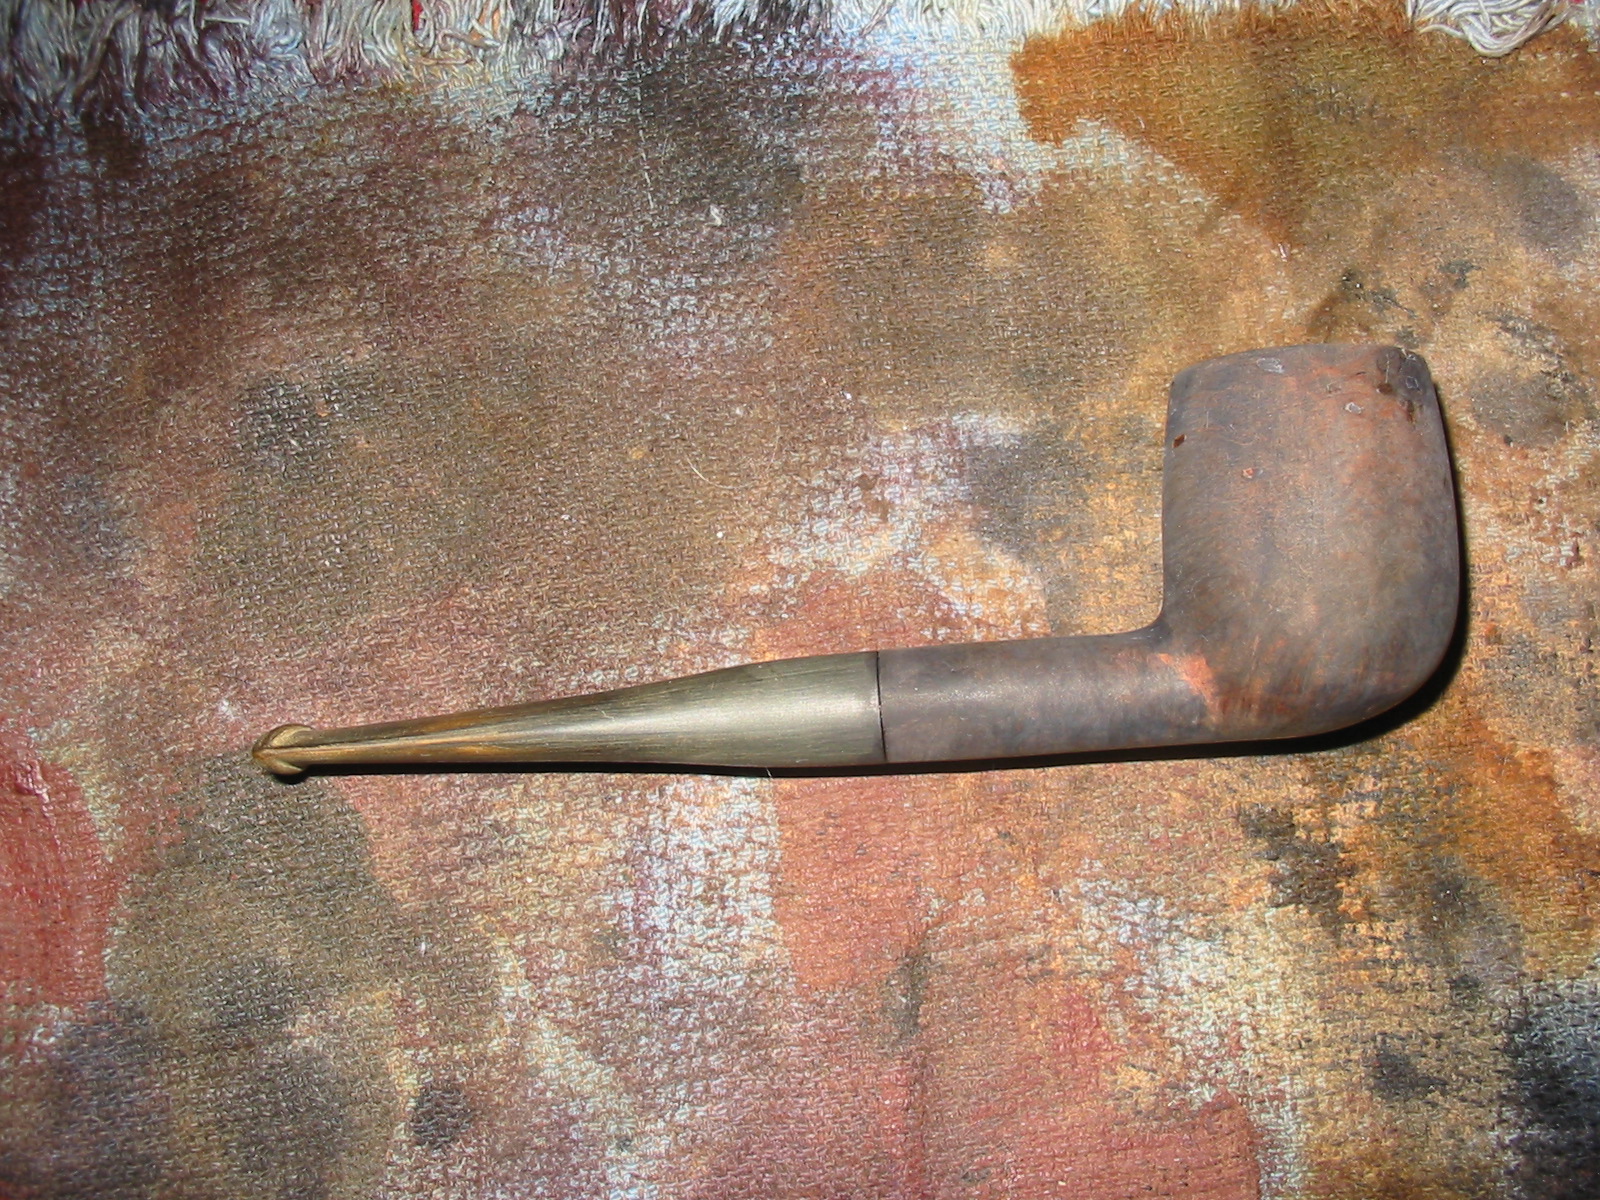
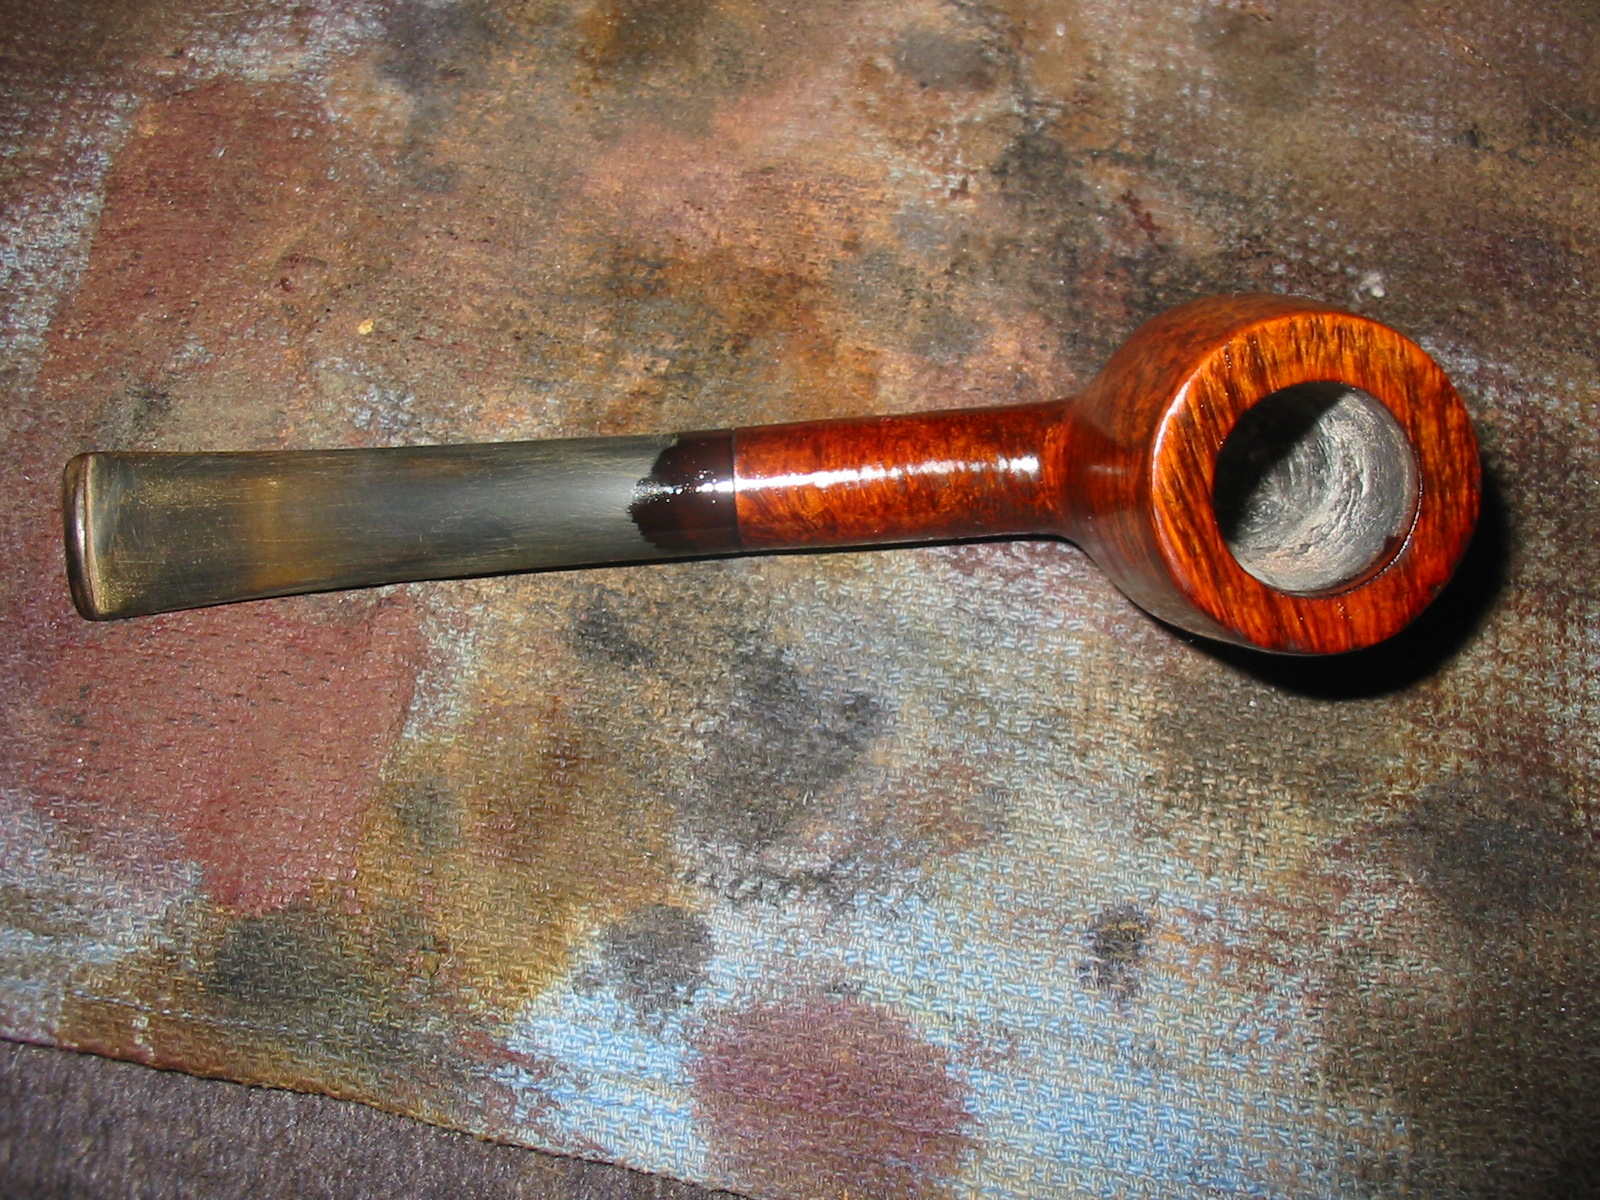
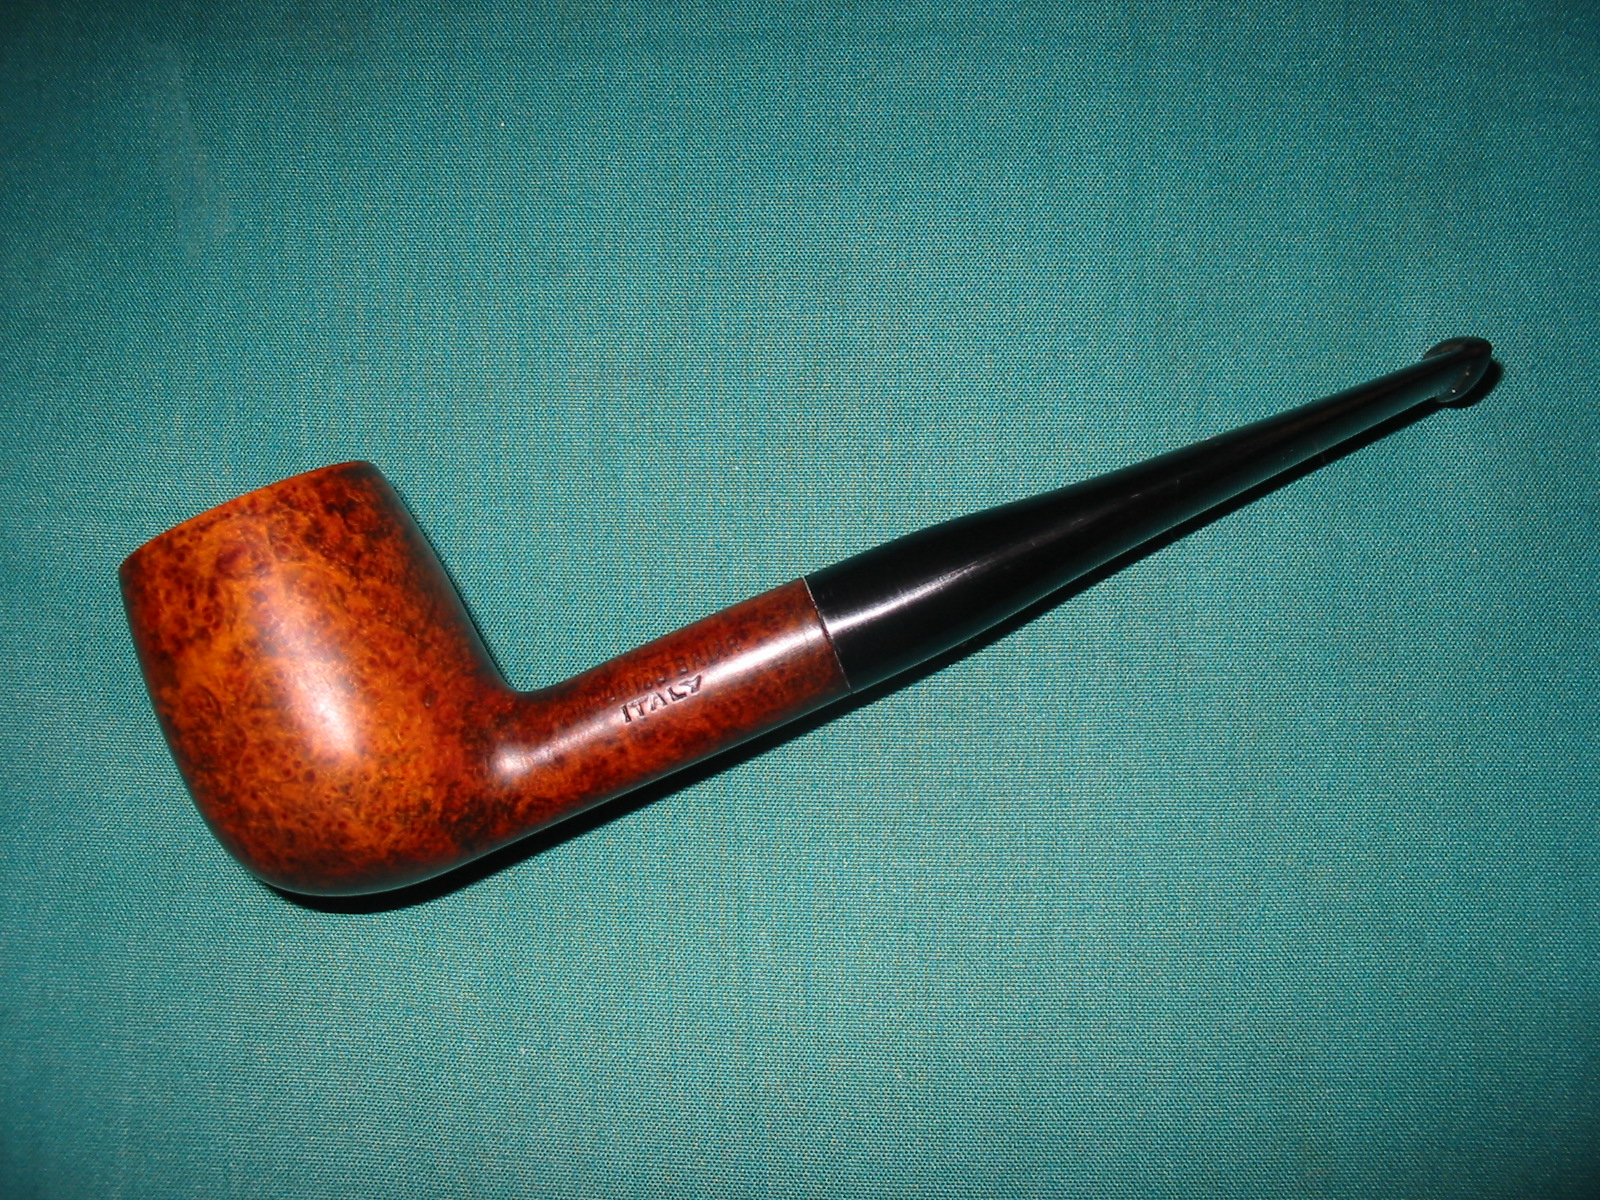
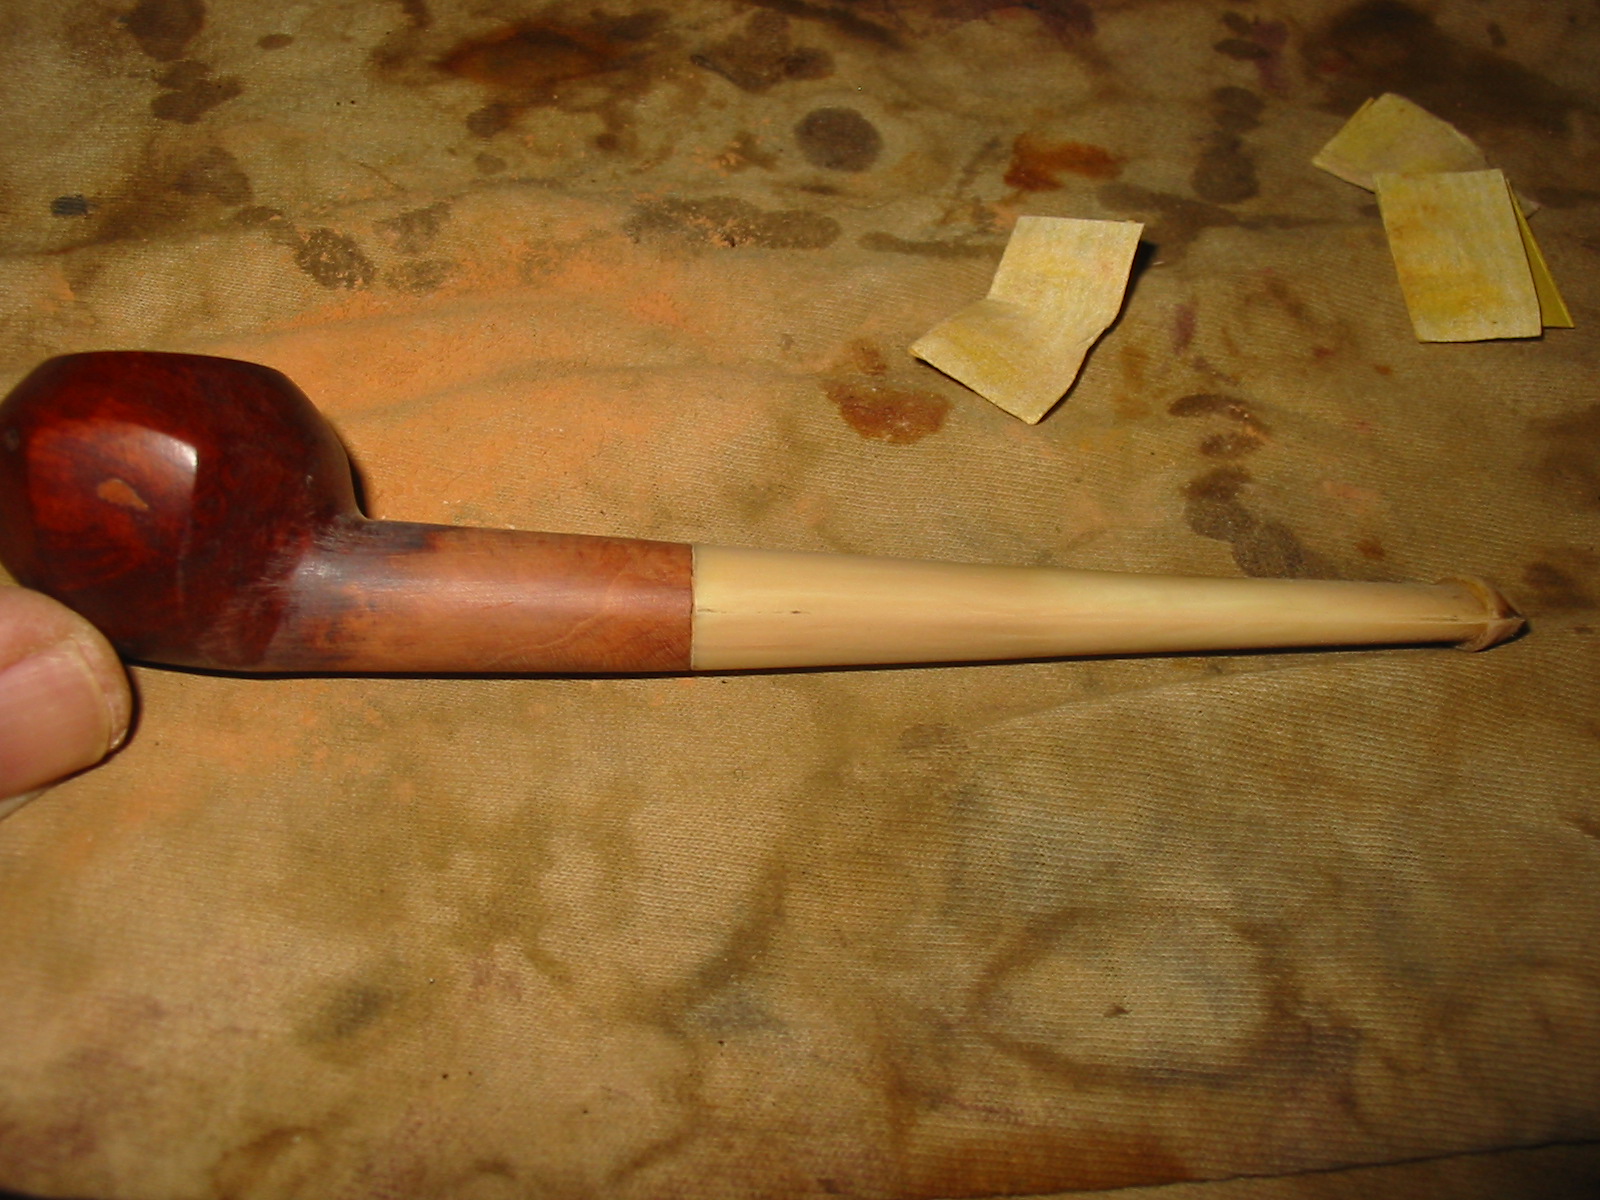
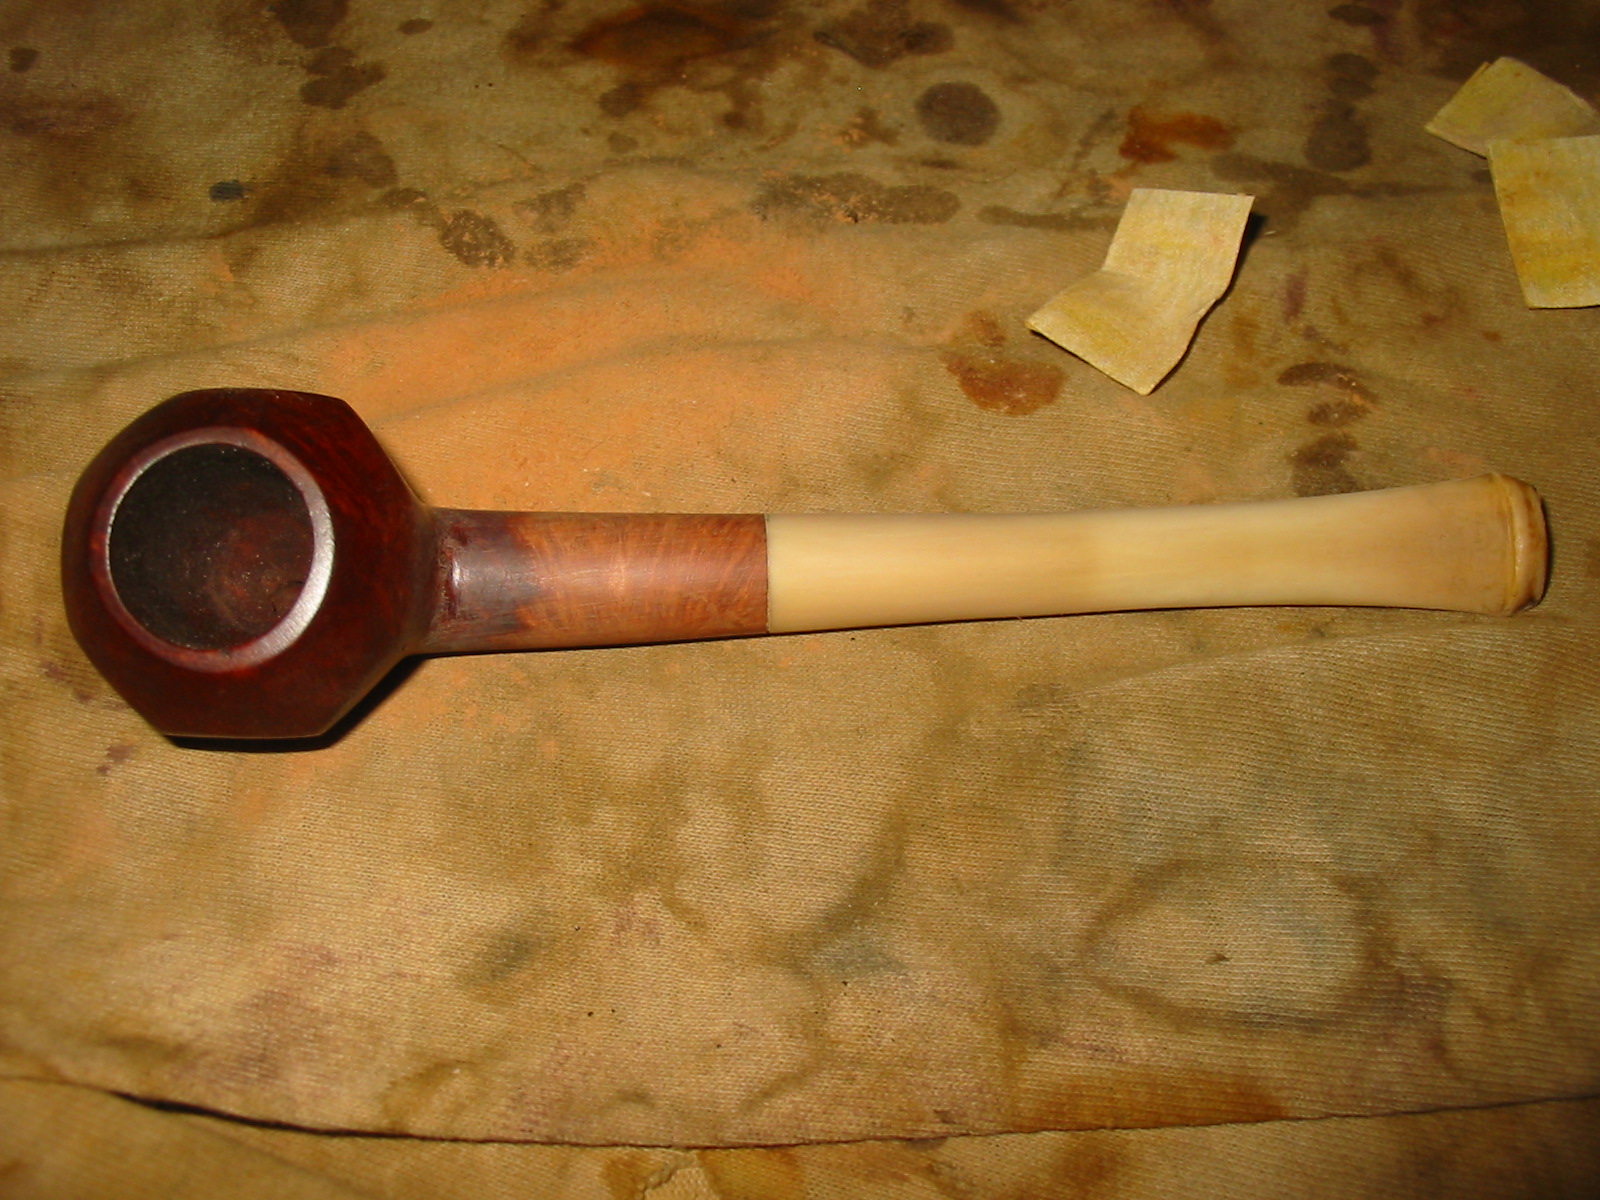
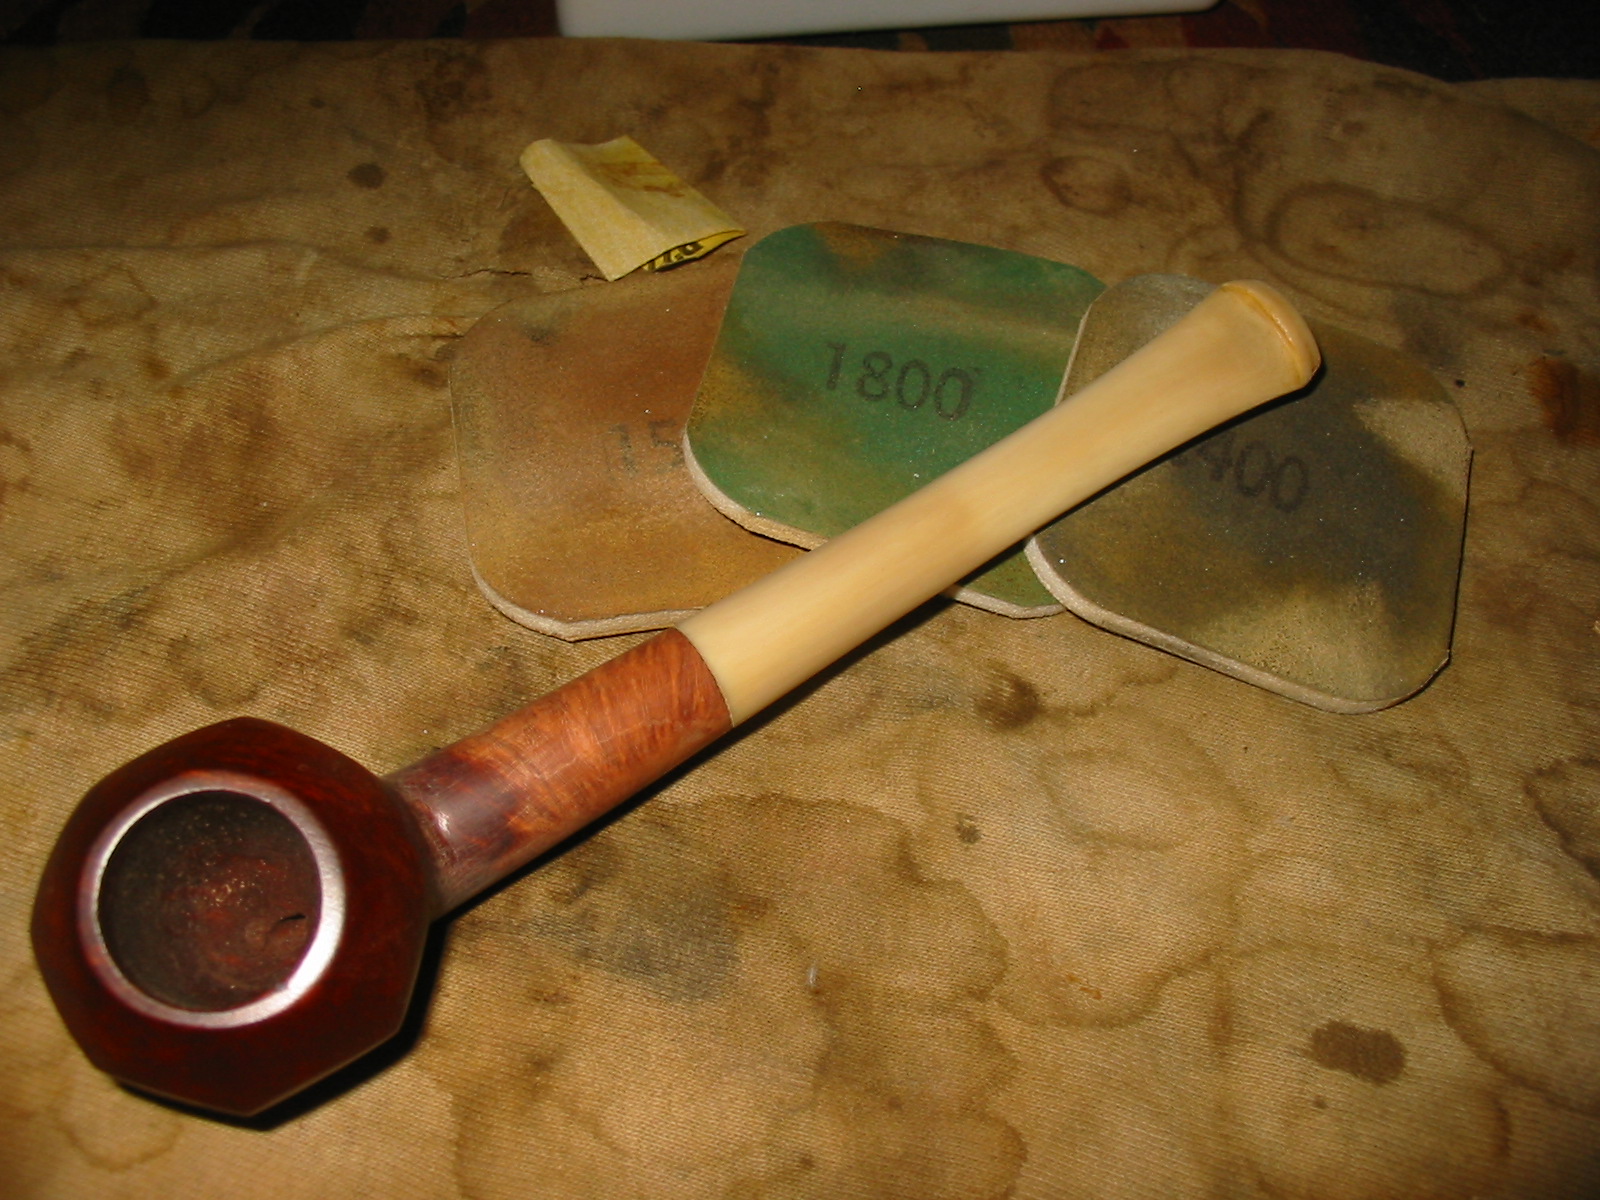
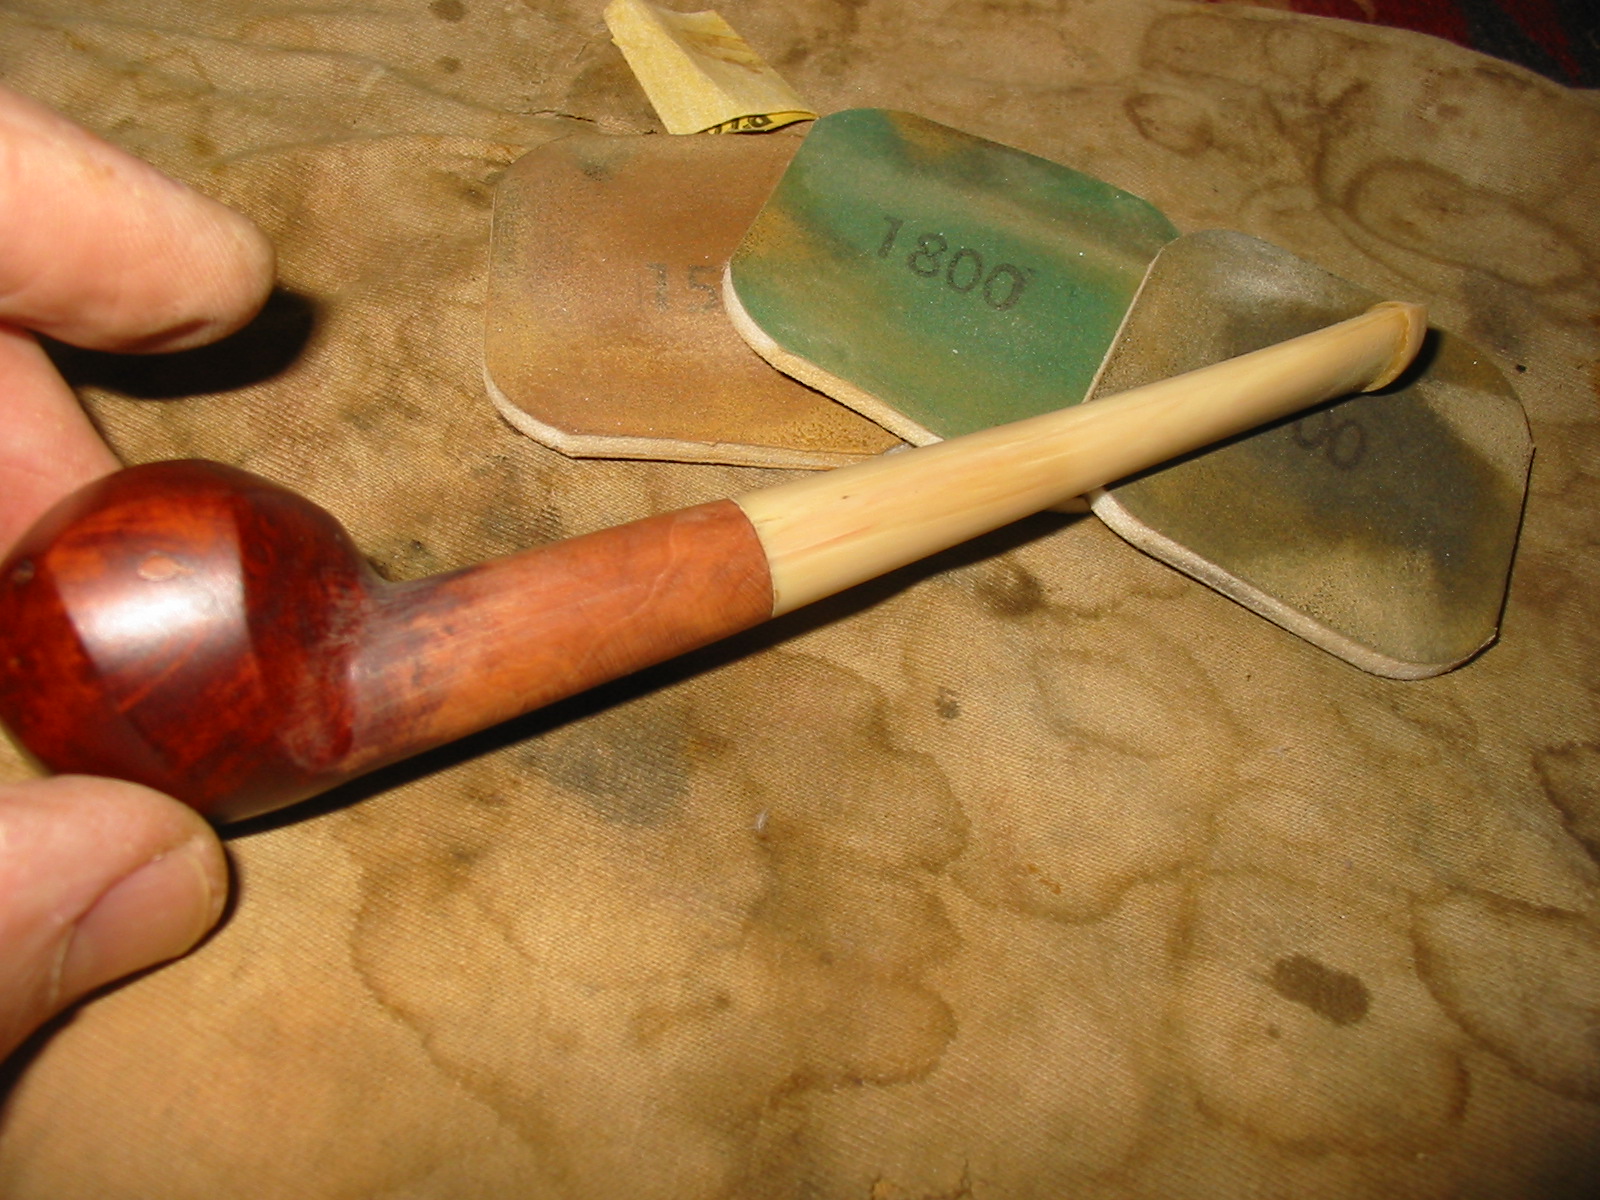
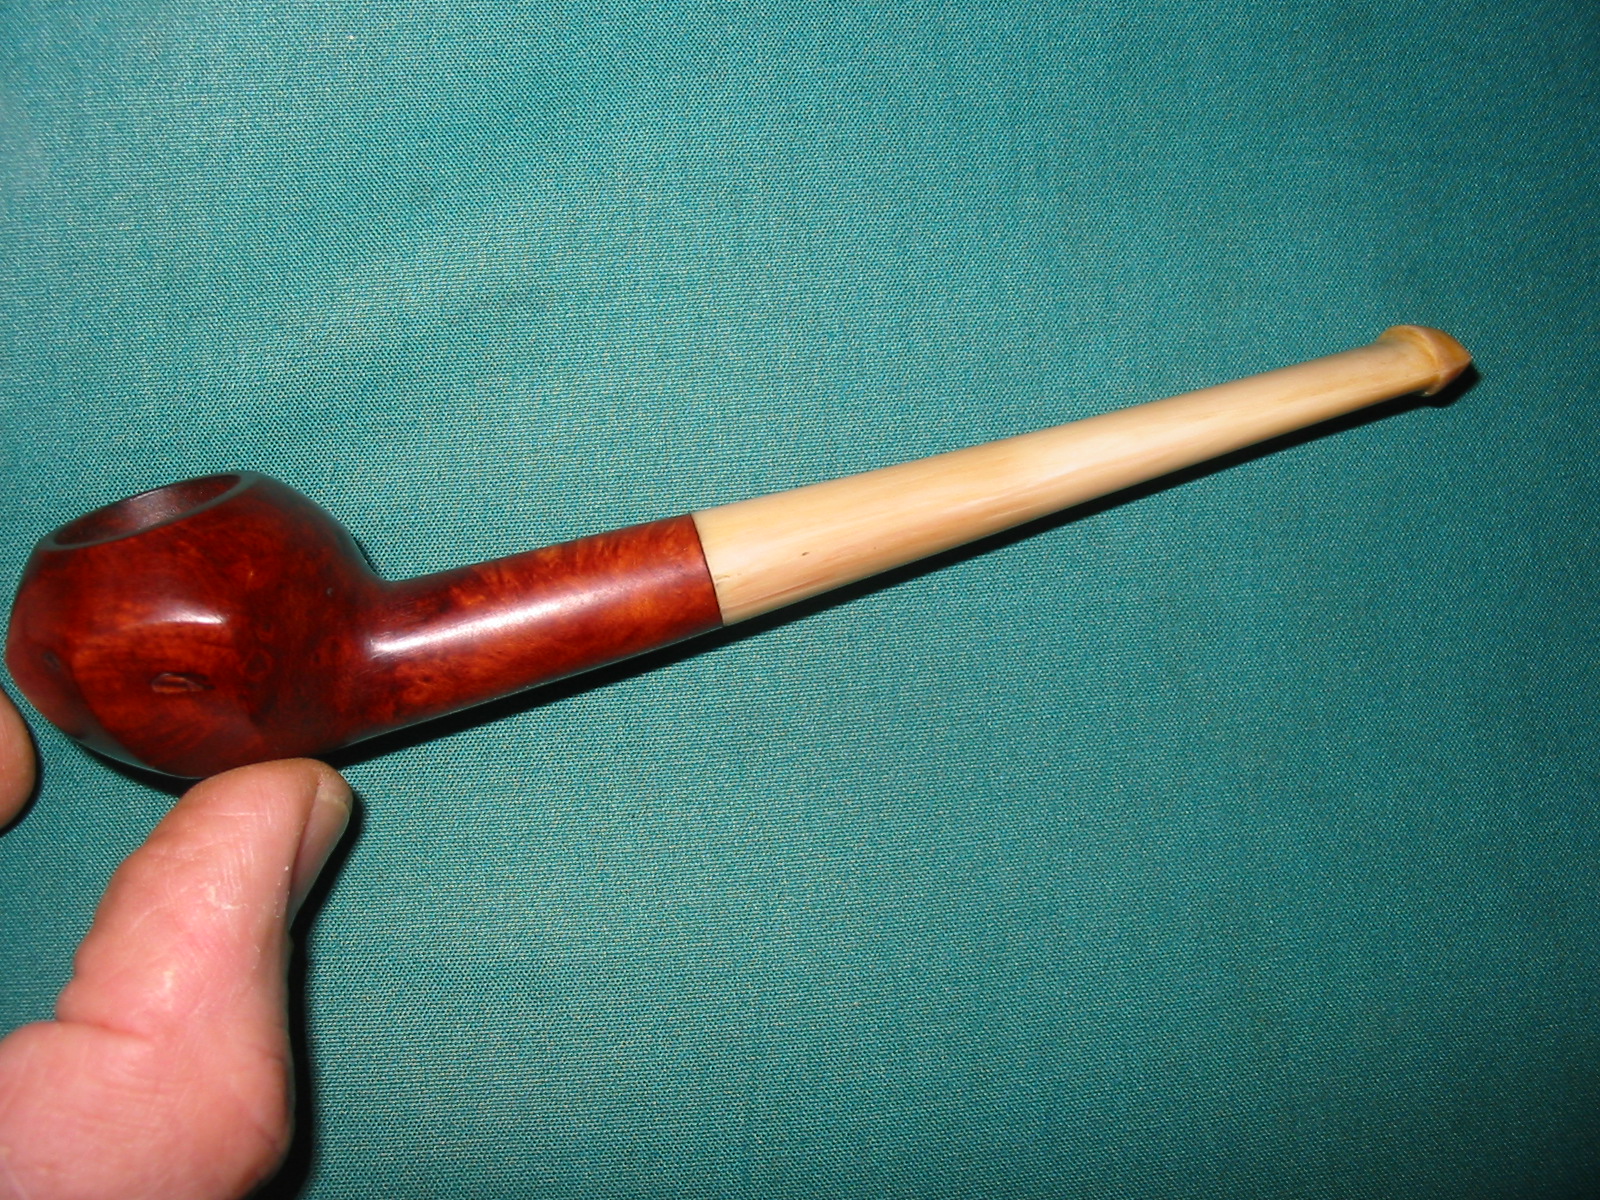
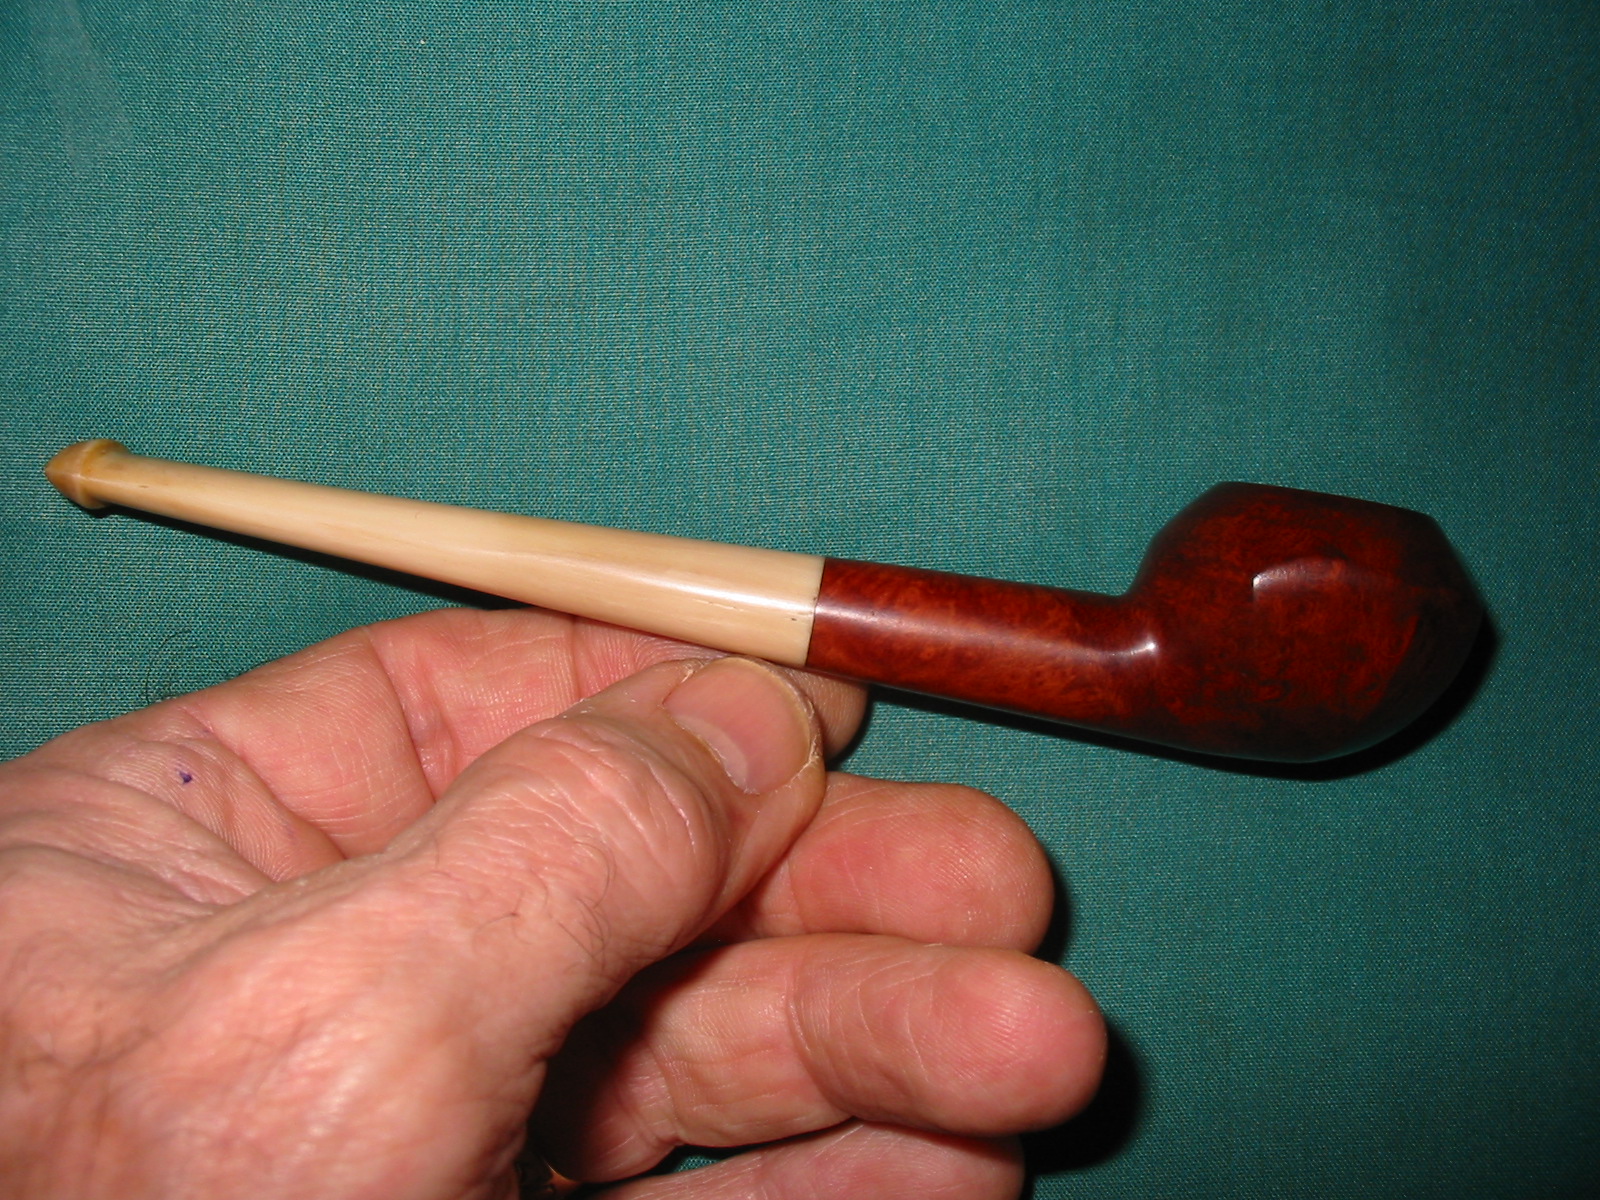
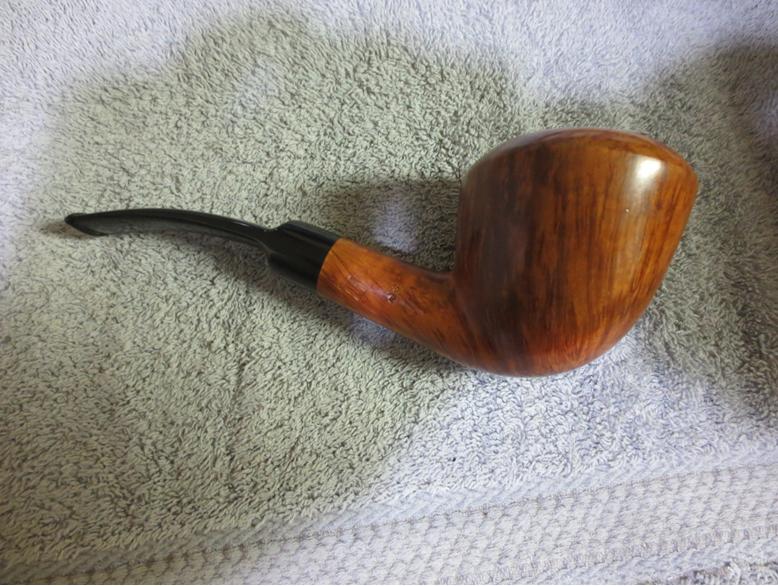
I wiped down the outside of the Lucite stem with alcohol on a cotton pad and used micromesh sanding pads to remove the light tooth chatter near the button on the top and bottom sides. I took the pipe to the buffer and buffed it with Blue Diamond Plastic Polish on the wheel and then gave the bowl and stem multiple coats of carnauba wax. I finished by buffing it with a clean, flannel buff to raise the shine. The finished pipe is shown below.Carlos10

Carlos11

Carlos12

Carlos13

Carlos14

Carlos15

Carlos16 
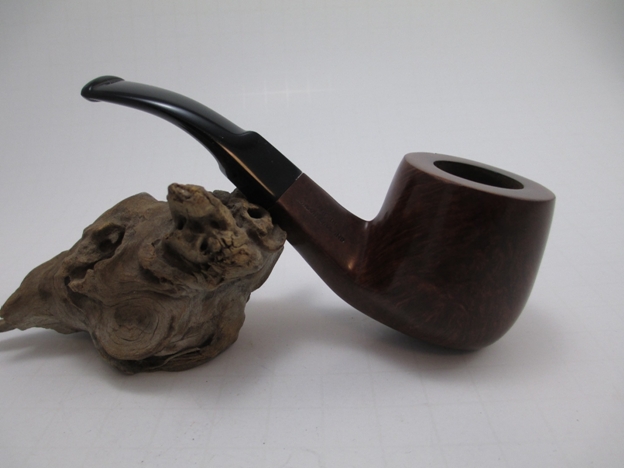
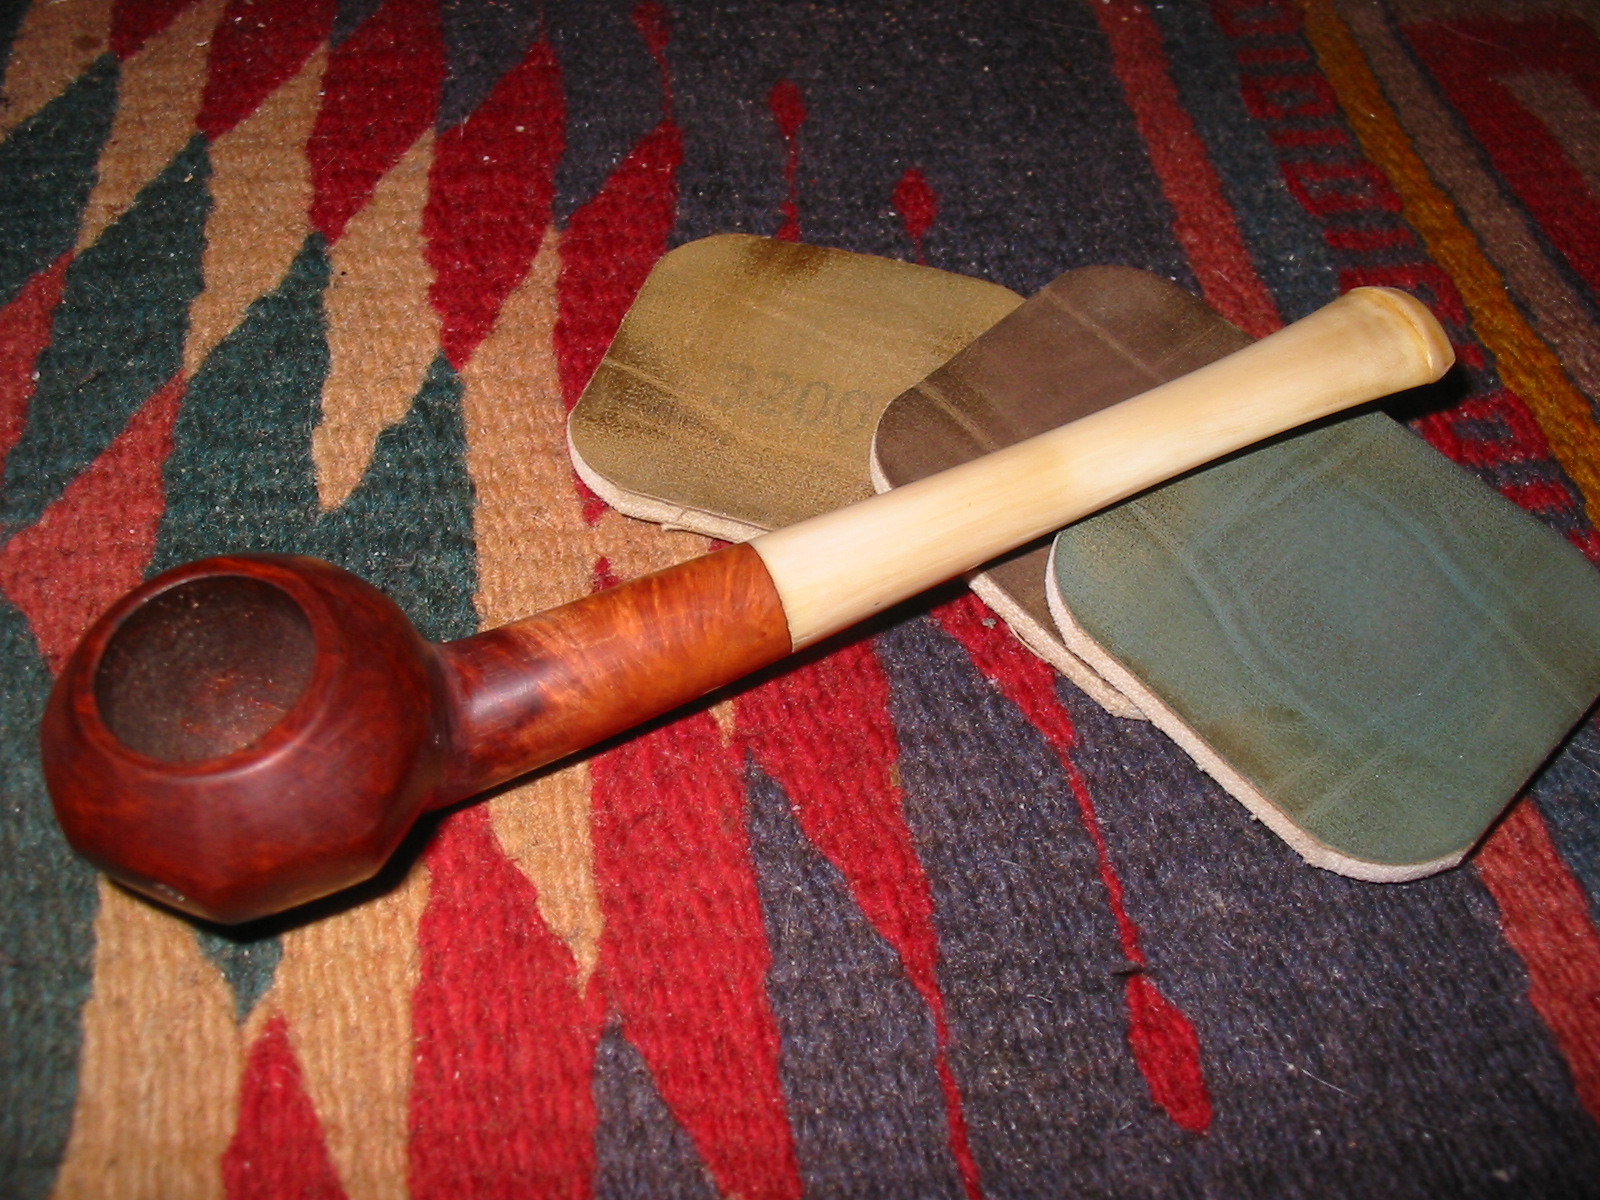
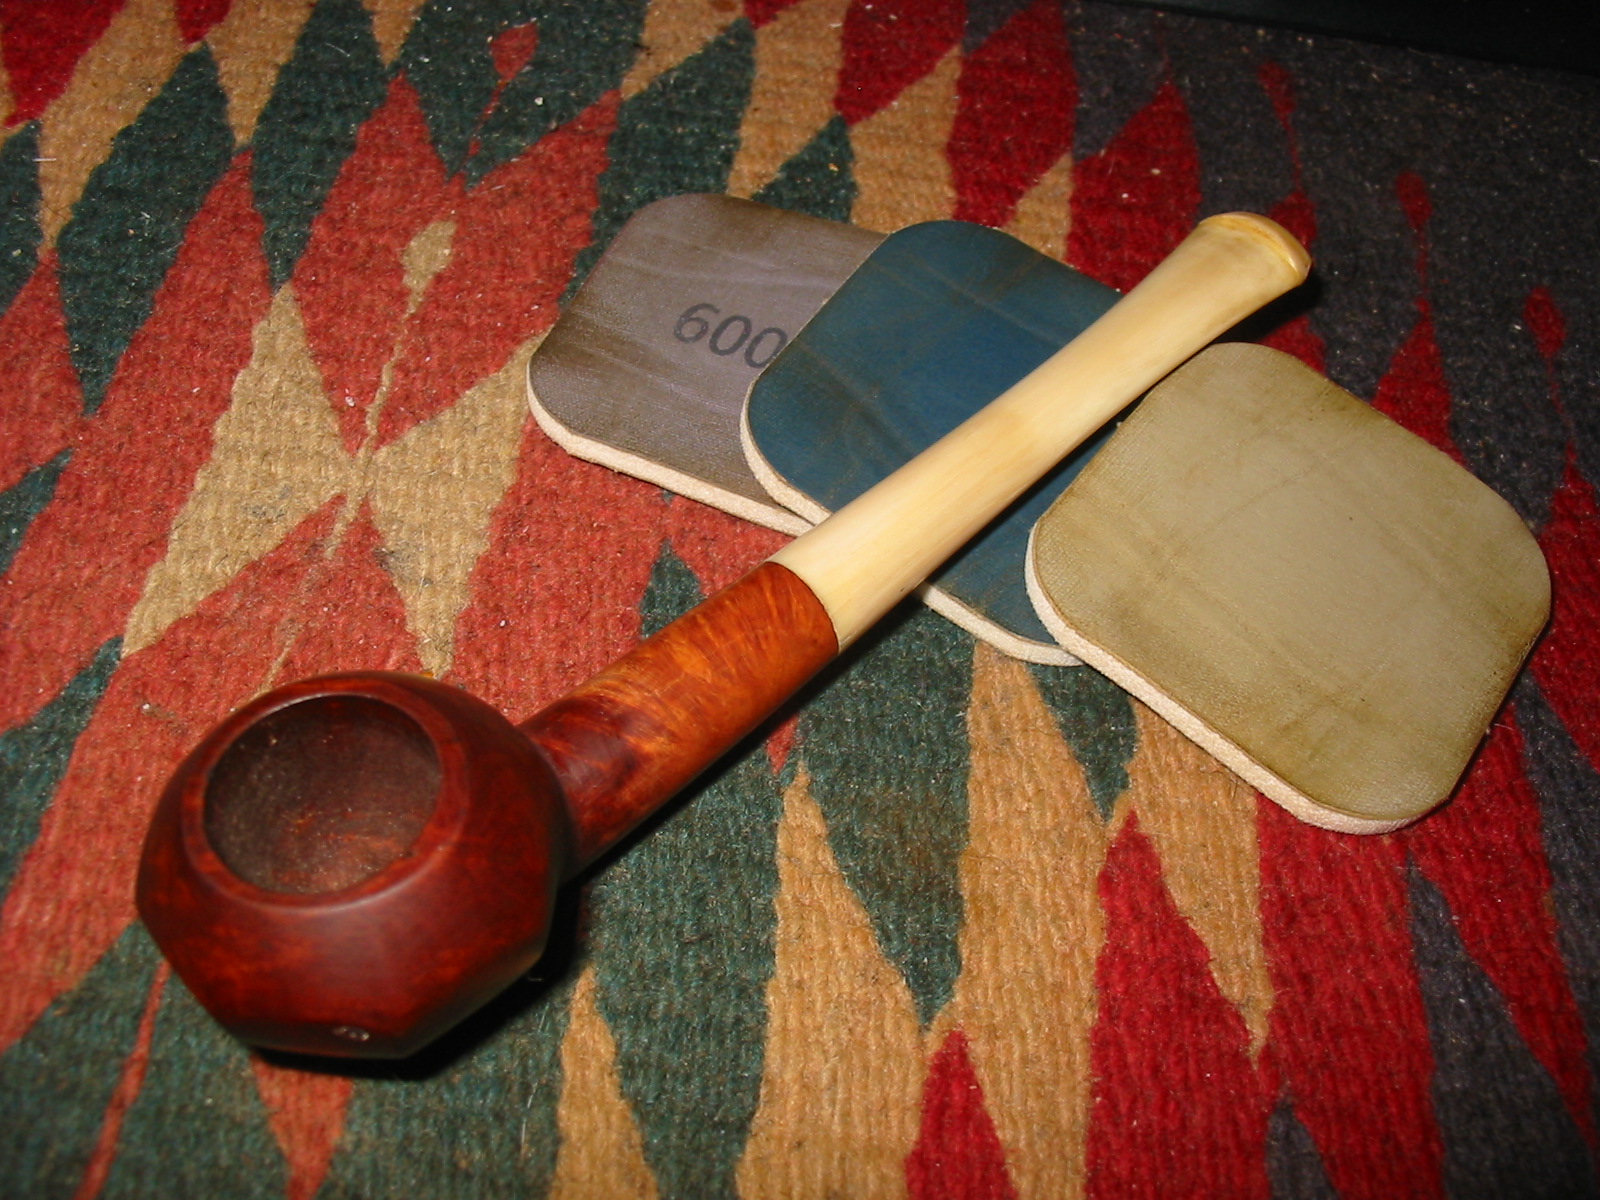
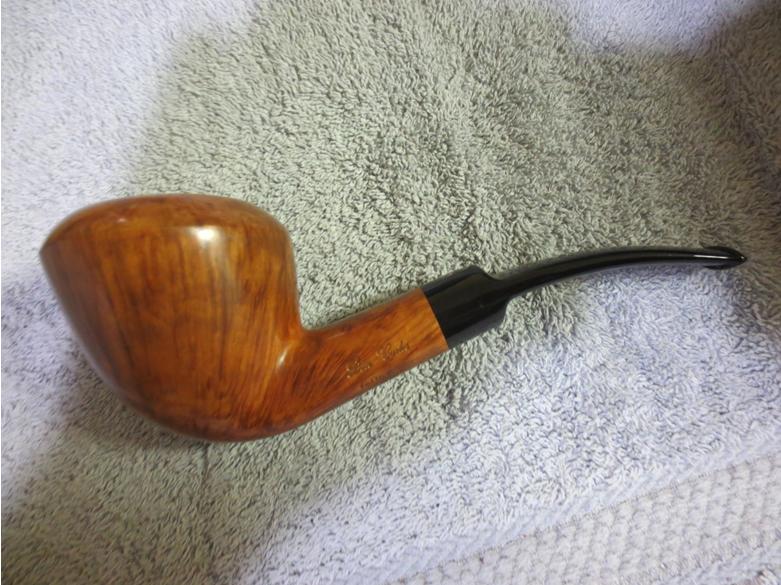
I am still researching the value on this pipe, but on EBay they sell for between $400-$500 each for the smooth 3 note pipes. This beauty is certainly worth that. If you are interested in this pipe email me at slaug@uniserve.com and we can discuss it. The entirety of the sale price will go to the Nepal project. I will pay the postage so that does not get taken off the proceeds. If you are interested in reading about the SA Foundation you can look at their website at http://www.safoundation.com.

Thanks for looking.

Fitting a Maplewood Bowl to fit a Kirsten Pipe Shank


Blog by Steve Laug

My son-in-law brought his Kirsten with him on the pipe hunt we went on recently and mentioned that the bowl was too small to his liking. We were talking about hunting for a bowl that had a airway drilled in the bottom of the bowl that could be modified to accept the fitting – screw and cap – on a Kirsten bowl. These fittings hold the bowl on the shank. I remembered that I had a Maplewood bowl in my box of pipe parts that could work really well. It had a nipple on the bottom of the bowl. The nipple ended at a rounded cap and then steps up to the bowl. The original bowl can be seen in the photo below. The bowl was clean and unsmoked. There was a varnish finish on the bowl and the wood was quite rough. Around the hip at the base of the bowl there was a rough band around one side of the bowl. The bowl had some really interesting grain on it. Around the top third of the bowl the grain went around the bowl horizontally. Below that there was some vertical grain. The combination was attractive. This bowl would work well once I modified it to fit the pipe.Bowl1 I sawed the nipple off the bottom of the bowl with a hacksaw. I sawed it flat against the bottom of the bowl to make that surface flush.Bowl2 With the nipple removed it was clear that the airway was slightly off centre and would need to be adjusted once I drilled it to open it up to hold the bottom cap from the Kirsten.Bowl3 I measure the diameter and the length of the insert to figure out how much of the bottom of the bowl I would need to remove. I drilled it out with a drill bit the same size as the insert on the Kirsten cap. I used a knife to open the air hole and move it more toward the centre of the bottom of the bowl.Bowl4 I used the Dremel with a sanding drum to shape the bottom of the bowl. I had to remove about ¼ of an inch or more from the bottom of the bowl. I sanded it bring it down and begin to round the edges. The next three photos show the progress of shaping the bowl bottom. The third photo shows the bowl after I also sanded it with 180 and 220 grit sandpaper.Bowl5

Bowl6

Bowl7 I sanded it with a medium grit sanding sponge to smooth out the scratches. I fitted the bottom cap to the bowl to see what more I would need to remove for a proper fit between the bowl and the shank. I fit the screw into the bottom cap and used a Philips screwdriver to tighten it in place.Bowl8

Bowl9 I sanded the bowl more to remove the finish and fine tune the shaping the bottom of the bowl. I wanted the finished bowl to look like a brandy glass shape.Bowl10

Bowl11 When I had fine tuned the bowl shape and the bottom of the bowl I fit it on a Kirsten shank from one of my pipes. The fit was pretty accurate and the look of the shape worked well with the pipe. I would need to sand the bowl some more, remove the remaining varnish and then stain the bowl once finished. I topped the bowl on a topping board with 220 grit sandpaper to smooth out the rim. Though the pipe was unsmoked the rim was roughly finished.Bowl12

Bowl13

Bowl14 I took the bowl apart and prepared it for staining. I wiped it down with acetone to remove the remaining varnish and dust from the bowl. I used a dark brown aniline stain to colour the bowl. I stained it and flamed it with a lighter. I reapplied and reflamed the bowl several more times until the coverage was even.Bowl15

Bowl16

Bowl17 I wanted the finish to be light brown in colour with dark grain patterns on the bowl. I wiped it down with alcohol on cotton pads to thin down the finish. I continued to wipe it until the underlying maple showed through and the grain patterns were darkened.Bowl18 I buffed the bowl with red Tripoli and also White Diamond. Once it was finished I sanded it with 1500-3200 grit micromesh sanding pads to smooth it out. I rubbed it down with a light coat of olive oil and rubbed it into the finish. The bowl was complete at this point – I fit it back on the shank and took the next set of photos to show the look I was aiming for.Bowl19

Bowl20

Bowl21

Bowl22 I took the bowl off the shank and buffed it with White Diamond once more. I gave it multiple coats of carnauba wax and buffed it with a soft flannel buff. The dark brown aniline stain had brought out the grain and contrasted nicely with the rest of the bowl. The horizontal and vertical graining makes this a nice looking pipe bowl.Bowl23

Bowl24

Bowl25

Bowl26

Bowl27I put the bowl back on the Kirsten shank and took the next set of photos to show the finished bowl and shank. It certainly fit the shank well and the larger bowl should meet my son-in-laws request for a longer smoking bowl for his Kirsten. He is away with my daughter for the weekend but when he returns home I look forward to seeing what he thinks of his new bowl.Bowl28

Bowl29

Bowl30

Bowl31

Addendum: I was working my way through Ebay UK when I found a pipe that had the same bowl as the one used in this article. It is a tourist pipe from the Smokey Mountains National Park. It looks to be the same pipe bowl and looks identical to the one I used.$_57

$_58

Giving New Life to a Briar Squire Bent Pot – Andrew Selking


Blog by Andrew Selking

This is the second article by Andrew that I have the pleasure of posting on the blog. It is about a well restored Briar Squire bent Pot. Andrew does some beautiful work and it is a pleasure to read and see the results of his work. Thanks Andrew.

I did not get as many pipes completed as I planned this past weekend, my honey-do list was longer than anticipated. However, I could not resist finding the time to fix up a Briar Squire bent pot with a diamond shank. According to Pipephil.eu, the Briar Squire was a brick and mortar tobacco and pipe shop located in Crystal Lake, IL from 1977 to 1983. I assume they had their pipes made by an outside pipe maker. Whoever made this pipe did a nice job. There were no fills in it and judging by all the angles on the stem that was hand cut as well.

The previous owner kept the bowl very clean, but the stem had some tooth marks and calcification on the end. I dropped the bowl into the alcohol bath and went to work on the stem with the 400 grit wet/dry with water. As you can see in this picture, there is still some faint oxidation left.Briar1 I readdressed the oxidation with the 400 grit until it was gone. I find that it helps to dry the stem when you think you’ve reached the point where the oxidation is removed.Briar2 I then proceeded to use the micro mesh, 1500-2400 grit, with water.Briar3 Next I turned my attention to the bowl. The rim had some tar build up, which I tried to remove with distilled water.Briar4 The water helped, but there was an area of stubborn tar that just wouldn’t come off. Since I didn’t want to remove all of the finish, I used 1500 grit micro mesh to top the bowl.Briar5 I used 1500-2400 grit micro mesh without water on the bowl, then 3200-12000 grit micro mesh on the bowl and the stem.Briar6 The last few levels really do a nice job of polishing both wood and vulcanite.Briar7

Briar8

Briar9

Briar10

Briar11 Next it was time to apply the wax/stain. For red/brown colored pipes I use Kiwi Brown. As I mentioned in my previous post, it is very easy to work with and gives a good base shine before the final polish on the buffing wheel. Briar12

Briar13

Briar14

Briar15 After applying the shoe polish, I used the heat gun to melt the wax and buffed it out with a brush. As you can see.Briar16 Finally it was off to the buffing wheel.Briar17 Here are the results. Thanks for looking.Briar18

Briar19

Briar20

Briar21

Briar22

Cleaning Up a Brigham One Dot Acorn 778


Blog by Steve Laug

One of the last pipes I picked up on my recent Alberta trip and the last pipe in my current pile of pipes to refurbish is a little Brigham Canada Acorn or Strawberry shaped rusticated pipe. The shape of the pipe is what caught my attention. And when I had it in hand the size was also a relevant feature. It is a very light weight pipe (don’t have a scale) and it is diminutive in size. The dimensions are: length – 5.5 inches, height – 1.5 inches, bore – .75 inches. The bowl is conical in shape ending well below the entry of the airway into the back wall. Overall the pipe was in decent shape and would be fairly easy to clean up. The finish was dirty and the bowl had a thin cake in it. The stem was oxidized and the inside of the shank was dirty. The stem was oxidized and had one tooth mark on the top surface near the button. On the underside of the stem near the button was a lot of tooth chatter. The stamping on the underside of the shank in a smooth area reads 778 which is the shape and that is followed by Made in Canada and then Brigham in script.Brig1

Brig2

Brig3

Brig4 The next two photos show the tooth marks and tooth chatter on the stem. The tooth dent on the top of the stem near the button was quite deep and would need to be raised with heat and then probably repaired with superglue.Brig5

Brig6The aluminum Brigham tenon system was in great shape and showed no wear or tear on it. In the past I have taken apart these older Brigham pipes with the aluminum tenon and found it pitted and sometimes even eaten away. The filter surprised me in that when I pulled it out it was actually quite clean. The bowl was very clean and the rim was also clean.Brig7 I cleaned out the aluminum tenon and the mortise area with isopropyl alcohol (99%) and cotton swabs and pipe cleaners. I ran them through the shank and stem until they came out clean.Brig8I sanded the stem with 220 grit sandpaper, medium and fine grit sanding sponges and then cleaned the surface with alcohol on a cotton pad. I scratched out the surface with a dental pick to remove any loose vulcanite or grit on the surface. I put several drops of clear superglue in the tooth dent and let it dry until it was hard.Brig9

Brig10Once it hardened and cured for about an hour I sanded it with 220 grit sandpaper to blend it into the surface of the stem. I wanted the surface to be smooth and the super glue bump to be smoothed into the surface. I also sanded it with a medium and fine grit sanding sponge to remove the scratches in the surface.Brig11

Brig12 I sanded the stem with micromesh sanding pads – wet sanding with 1500-2400 grit pads and dry sanding with 3200-12,000 grit pads. In between each set of three pads I rubbed the stem down with Obsidian Oil and let it soak into the vulcanite. I had to repeat the process several times to remove the oxidation near the shank. I buffed it with White Diamond and then gave it a coat of carnauba wax.Brig13

Brig14

Brig15 I set the stem aside and scrubbed the bowl with Murphy’s Oil Soap. I used a soft bristle tooth brush to scrub it and then rinsed it off with running water. I kept a thumb in the bowl to keep the water from getting into the inside of the pipe. I dried it off with a cotton towel.Brig16

Brig17 I rubbed down the bowl with Halcyon II wax and buffed it with a shoe brush to raise the shine and even out the wax. I put the maple filter back in the tenon and then put the stem on the bowl. I buffed the bowl lightly with carnauba wax and then with a soft flannel buff. The finished pipe is shown in the photos below. It is cleaned and ready to smoke. I love the older Brigham pipes like this one and find that they smoke very well. They deliver a cool dry smoke and the Brigham filter system works well to cool the smoke and not hamper the draw or the flavour. Sometime later this week I will load a bowl of Virginia and enjoy the first smoke in this old timer.Brig18

Brig19

Brig20

Brig21

Cleaning up a Peterson 312 System Pipe


Blog by Steve Laug

The Peterson I picked up on my trip was in great shape externally. The seller at the antique mall had cleaned up the outside of the pipe and polished the stem and bowl. The pipe was clean and shiny. The stamping was very clear on the ferrule and shank. The ferrule was stamped K&P Peterson’s and had three faux hallmarks as usual on the nickel ferrule of Peterson pipes. The shank was stamped on the left side with an arched Peterson’s over System and over Standard. On the right side of the shank the shape number has been stamped over with Made in the Republic of Ireland. The shape number is present under the over stamp and I can read the first two numbers clearly – 31_, but the third number is covered with other letters so it is not readable.Pete1 Pete2 I wanted to figure out the number stamping that lay hidden under the Made in the Republic of Ireland stamping. I went to the Peterson site and looked for the shape charts. I was able to identify the shape as a 312. Here is the link to the shape http://www.peterson.ie/p/5291/312-standard as well as a picture of the shape 312.0002552_312-standard_430 I also found this shape chart of Peterson System pipes on Pinterest and included the link to it here: http://www.pinterest.com/pin/464996730250913354/ I was particularly interested in noting the size variation between the 312 and the 314. While the shapes are very similar the 314 is significantly smaller than the 312.Pete3 The bowl had been wiped clean and had no cake inside. The rim was dirty and darkened with a thin buildup of carbon and oils. The inside rim was clean and the bowl was in round. There were no serious nicks in the bowl edges. The nickel band was polished and undented. The stem was lightly oxidized and had a light tint of brown. There were no tooth marks or bite marks on the stem. The pipe was in good shape and would be one of my easier clean ups. The inside of the shank and sump had a lot of tars built up inside. The airway was also dirty. The seller had used silver polish on the ferrule and there was a white buildup on the inside edges of the shank.Pete4 Pete5 Pete6 The next photo below shows the underside of the bowl and stem. Both the finish and the stem were in great shape with no visible dents or damage.Pete7 The tenon was wide open like it had been made for a filter. It could hold a paper Medico style filter. I have never seen a filter version of the system pipe. I am wondering if the stem is a replacement or possibly it was drilled out to open it up to receive the paper filter. Obviously the internals had not been cleaned. There was a buildup of hard carbon on the tenon end and on the inside of the tenon. It was hard and would not easily be removed.Pete8 I cleaned up the stem and the sump with cotton swabs, pipe cleaners and isopropyl alcohol until they came out clean. I used a lot of pipe cleaners and cotton swabs before it was clean. I softened the carbon buildup on the tenon with alcohol and then sanded it with 220 grit sandpaper and scraped it away with a small blade to remove the hardened carbon.Pete9 Pete10 The bowl and shank had a heavy aromatic tobacco smell so I stuffed them both with cotton balls and used an ear syringe to put alcohol in both the bowl and shank. I set the bowl upright in an ice-cube tray and let it sit while the alcohol and cotton wicked out the oils and tars and sweetened the pipe. By doing this the pipe would be reset and could be smoked with any tobacco without picking up residual tastes.Pete11 Pete12 While the bowl sat soaking I worked on the stem to remove the oxidation. I sanded it with micromesh sanding pads – wet sanding with 1500-2400 grit pads and dry sanding with 3200-12,000 grit pads. I wiped it down with Obsidian Oil between each set of three pads.Pete13 Pete14 Pete15 I buffed it with White Diamond on the buffing wheel. Then I gave it several coats of carnauba wax and buffed it to a shine with a soft flannel buffing pad.Pete16 Pete17 Pete18 Pete19 After the bowl had been sitting for 4 hours I took the photo below and then pulled out the cotton balls. The alcohol had evaporated and left behind a brown/amber residue on the cotton balls. Once the cotton was out I ran a folded pipe cleaner through the bowl and the sump area of the shank. It came out clean. I ran a straight cleaner through the airway into the bowl. It also picked up a slight bit of residue from the soak but it was clean after a few swabs. Best of all the smell of the aromatic tobacco was gone and what was left was a clean new pipe smell.Pete20 Pete21 Pete22 When the shank was dry I put the newly polished stem back in the shank. I gave the pipe a quick buff with some carnauba and polished it with a shoe brush to raise the shine. The finished pipe is shown in the photos below. It has some slight rim darkening from the previous owner but otherwise it is like new. The bowl and shank are fresh and ready to be loaded with a bowl of fine Virginias or some Virginia/Perique. I have some aged 5100 sitting in a jar here ready to smoke and also a small jar of some blending Perique so I may have to mix a small batch just for the inaugural smoke on this pipe…The briar is beautiful and the refurbished pipe came out very nice. I am looking forward to having a bowl very soon – just have to let the bowl dry out and air for a couple of days before I load it up and smoke it. In the meantime I will just look it over and enjoy the beauty of the pipe.Pete23 Pete24 Pete25 Pete26

A Face Lift for a Battered Old Meerschaum Bulldog – Robert M. Boughton


Guest Blog by Robert M. Boughton
Member, North American Society of Pipe Collectors
http://www.roadrunnerpipes.com
http://about.me/boughtonrobert
Photos © the Author

“Age should not have its face lifted, but it should rather teach the world to admire wrinkles as the etchings of experience and the firm line of character.”
— U.S. author Clarence Day, 1874-1937

INTRODUCTION
I agree that facelifts in most cases are attempts, nothing more than vain at best and narcissistic at worst, by those with money to burn to avoid the inevitable, and often enough have undesired effects the recipients deserve. However, in the case of a very battered and generally abused meerschaum pipe, as with some people who have suffered at the hands of others, at least a bit of a makeover is in order. This holds true with a bulldog, the animal breed of which many coarse or misguided folks think lacks beauty in the first place.

The unknown brand I will discuss, clearly a fine Turkish block example, is one of those exceptions. For reasons which will be obvious it resembled a dog that had been in a fight. I received it as part of a lot of eight from eBay that I purchased in large part because I saw the poor bulldog alone among all of the briars, and upon closer scrutiny with the magnifier observed it was filthy and somewhat oddly colored and had horrible scratches all over its once smooth, white, pristine body. Some unknown carver trying to eke out a living as his father and generations before him had done likely made it without even a signature of any sort, as is unfortunately all too common among Turkish crafters due to the central nature of humility in Islamic beliefs.

THE RESTORATION
This unfortunate meerschaum was in about as bad shape as I had ever seen any pipe I still wanted to buy. I thought, if not I, then who? There were others of more merit in the lot, but that one cried out to me. Then again, I do have a sizable collection of meerschaums and knew I would be more than happy to keep that one if things didn’t work out restoration-wise. A former roommate told me many years ago that I am attracted to strays, and although he said it with sarcasm I told him he was right. I see nothing wrong with that trait. By the way, I also tend to root for the underdog – although not as often in organized sports– such as the bull versus the matador. Nothing pleases me more than seeing a jerk in a pompous outfit, with all kinds of helpers, gang up on a bull and find himself gored and bleeding out. But that’s just a dark part of me.

THE PIPE RESTORATION

I have had fair success restoring meerschaums, including the following befores and afters: Robert1 Robert2 Robert3 Robert4And so I figured I would give this poor ol’ dog a shot:Robert5 Robert6 Robert7 Robert8 Robert9 Robert10 Robert11Despite the deplorable condition of the bowl and rim, I knew from the past that they would be the easy part of this job, so I tackled them first. I reamed the bowl and then used #800 micromesh to smooth it out. Surprisingly, with a light touch and a piece of 400-grit paper, I took the blackness right off of the rim and didn’t hurt the coloring at all. There were a few dings that rubbed out easily with #1000 micromesh.

The hard part, I knew and remember already indicating, but it bears repeating, was to remove as many of the scratches and other blemishes as I could with a minimum of damage to the nice if oddly distributed color on the outside of the bowl and shank. The spread of yellow and orange, not to mention the lack of any shine to the meerschaum, suggested over-hot smoking of this delicate if strongly shaped and named pipe. That conclusion would seem to be a no-brainer given horrendous caking within the bowl and cooking of the rim. And somehow I doubt the maker never treated it with beeswax or something else, yet it was as flat as could be.

My experience with washing the outside of a pipe with distilled water in general is that it seems to give a brighter light on the job at hand by removing all of the filth that has built up over time smoking any pipe. I could see this one was going to be worse than most, but nothing prepared me for the indefensible groping with dirty hands by whatever anti-aficionado of pipe smoking who had abused the bulldog with apparent joyful perversity. Why, I even had to scrub the muck out of the trademark groove beneath the rim! The result was not one or two, but three small pieces of cotton cloth spent and blackened with the physical dirtiness of some variety of pipe lecher.

Therefore, with the highest care, I applied stronger use of the #1000 micromesh to the seemingly endless scratches and other stray marks, like signs of skin cancer, that were everywhere. When I had stopped and resumed again time after time, finding more and more marks upon this wonderful pipe, I was at last as satisfied with the results as I knew I would ever be.

Then I used more stem cleaners and pipe freshener than I had ever expended on a single pipe, let me just say that, to sanitize the stem, shank and bowl, and by the end of it I have to admit only the stem came out perfectly clean. But I knew it was sanitized and ready to smoke one good bowl of tobacco, so I chose my own blend of burleys, Oriental, perique, a touch of Cavendishes and a bit of Virginias including red cake that I call Sneaky Rabbit (and which will soon be a house blend at my favorite tobacconist) to smoke the pipe once.
True enough, I wanted to know how this unusual bulldog smoked, but my main reason for lighting up a pipe I intend to sell and therefore knew I would have to give another quick clean was to heat the meerschaum enough to melt beeswax from a bar evenly over the outer area. I swear to it! I had researched online different processes for accomplishing this necessary completion for previous restorations, and the method I described had worked before so I knew it would again.

And so, once the smoking enjoyment had reached a high enough degree, I began applying the beeswax as described, and it worked just as well as I was certain it would. I took my last puffs of the pipe and cleared out the ash with care quickly before rubbing the beeswax vigorously into the meerschaum with a big soft cotton cloth.

The stem, despite the awful damage inflicted on the meerschaum, to my great surprise was in okay shape and only need some sanding and micro-meshing to prep it for a spin on the wax wheels.

Here are the final results:Robert12 Robert13 Robert14 Robert15 Robert16 Robert17 Robert18CONCLUSION
This was a work of love, and I know the results are a little rough around the edges. But I was determined throughout the process to assure that no more damage than had already been perpetrated against this pipe be made. It is already up for sale, but if nobody ever buys it, I know it is safe in my possession.

Waxing a Pipe Using Only a Dremel – Bill Tonge


Those who have read Bill’s previous two articles you have seen what he accomplishes with his refurbs. He does beautiful work. This third article that he has written is one that he wrote to me about. I was excited to read what he wrote as it challenges the common thinking of buffing with a Dremel. Thanks Bill for the interesting piece. Well done.

I thought I would ask Steve if I could do a little write up about waxing a pipe using only a Dremel, wool ball, fibre brush and Carnauba wax. I know there has been many a discussion about waxing this way and people say that you absolutely do not wax with a Dremel.

I want to show that with a little time, lots of patience and a steady hand, waxing any pipe especially a rusticated pipe is possible with a Dremel. This method may not be for everyone and please don’t try this for the first time on a good pipe. The first time I did this I melted an indent in a pipe stem. Practice, steadiness and constantly moving are the key. Do not worry about a build-up of wax because the step with the fibre brush will take care of that. Pictures are hard to show sometimes but hopefully you can see the difference from before to end. I am using a Brigham 103 Italy that I bought from Greg Wolford a little while back.
Billl1

Billl2

Bill3
I take the wool ball and run it into the carnauba wax until the ball is layered. I then run it across the rusticated and smooth parts reapplying wax to the ball as needed.
Bill4

Bill5

Bill6

Bill7

Bill8
Don’t be worried by the reddish colour on my pipe. Some of the Brigham’s pipes are known to bleed their colour.

The next step is to take the fibre brush attachment and use it to remove the excess wax, hair from the wool ball and leave a nice shine. Afterwards you can hand polish with a clean rag and if necessary re-buff with the fibre brush after it has been cleaned. I use hot water &Oxi-Clean for soaking the fibre brush to clean it.
Bill9

Bill10

Bill11

Bill12

Bill13
I use the Dremel set to the lowest speed. The wool balls are fairly cheap to buy. I bought a 15 pack on eBay from China for around $6.00 with free shipping.

I know there will still be people that say you can’t do it, but I say you can..…just have patience.

A Kaywoodie Reworked, with a Little Mystery!


Blog by Greg Wolford

This year has not been a banner one, so far, for me personally. The harsh weather, an accident, and a failure of one of my orthotics has had me mostly sidelined since the first of the year. My workshop is downstairs, in the garage, and it isn’t exactly the warmest, most comfortable place to work in the temperatures we’ve had, not to mention the difficulty of actually getting myself up and down the stairs … but I digress … so I’ve been able to do very little work on either of my hobbies so far in 2014.

Last week my wife had a little pity on me and allowed me to bring a few necessary tools and supplies up to the kitchen so I could work on a few old pipes; leather work is out of the question until the temperature and my body cooperate. I think she knew I was getting a bit restless, not being able to get into any of my projects. When I said she “allowed” it, she corrected me with “I didn’t say you could do that” but she didn’t send it all back down to the shop either, so I take that as permission I told her! LOL

Now, I must admit that my photographs, when I remember to take them (that’s a preview hint that I haven’t remembered as often as I should have), aren’t as good as I would like but I don’t have as good a set-up as I normally do. So, I ask you to bear with me on the quality and quantity of them.

Sometime back I acquired an older Kaywoodie model 33. It is an apple shape with a rounded bowl-top. The pipe was in pretty good condition other than the front edge was damaged from being knocked-out and the bottom of the stem had been bitten off. because of the stem damage I put off working on this pipe for months; I wanted to save the stem but didn’t have the black super glue yet, which I planned on using, to do the job. Here are a couple of photos (all I could find) of it before I started working on it.

Kaywoodie Apple (10) Kaywoodie Apple (11) Kaywoodie Apple (13)

Unfortunately all I can find are some photos that I used it as a “prop” in and one of the underside of the stem. You can see the pipe itself wasn’t too bad but the stem was another story.

Initially I tried to patch the chip with black super glue; I tried this three times: the first attempt the pipe cleaner I was using as a plug absorbed all the glue and the other two times, using different materials for the plug, the patch failed. It turned out that the chip was just too large for me to patch well so I decided to cut it off and file a new button since there seemed to be plenty of room to work with on this stem.

I used a hacksaw on a small frame to remove just behind the bite through. When I looked at the air hole I noticed two things, neither good: first I had closed off the airway accidentally with the glue and second the air hole wasn’t drilled center. I fixed the glue-plug problem quickly by drilling out the hardened glue with a pin vice and then picking out the small fragments that were left. One problem down – now onto forming a new button and slot.

I used various needle files to shape the new button, being timid about not getting it too thin. I recently bought a new set of Kobalt needle files, a big upgrade from my old ones, and found that this (only my second or third time making a whole new button and transition) went much smoother and faster than in the past. I also used the files and a bit of sandpaper to open and funnel the slot, again I was a bit timid in not going too thin; I have done that once and suffered a cracked bit afterward. This is a fair representation of what I ended up with:

Kaywoodie Apple (8)

Once I had the stem to my satisfaction I turned to the stummel.

I had at some time past already reamed the bowl lightly, it had very little cake, and cleaned the shank and stem. I now began by cleaning the stummel with acetone wetted cotton pads to remove the old finish and dirt. After the acetone I moved on to some alcohol wetted pads to lighten up the grime on the bowl top. When it was sufficiently clean I decided to use some 400 grit sandpaper to lightly smooth the edge damage. I didn’t know it at the time – because I failed to look first, a fault I have all too often – but the rim was supposed to be rounded. Luckily I liked the general look of the rounded top and thought it might be the way it was supposed to be so I wanted to keep it rather than topping the entire bowl. I personally like, in general, the less sharp lines on a bowl top so this was an easy choice – one that turned out to be a good one as well.

Once I had reduced the damage to the rim and front, keeping the shape as close to original/symmetrical as I could, I moved to micro mesh pads to sand and polish the bowl top. After getting through the first two grades I thought the entire pipe would look nice just polished with the micro mesh. At this point I reassembled the pipe and began to look for nomenclature to avoid during my polishing; this is when I discovered my “mystery”.

On the bottom of the stem, a origianl Kaywoodie, three-hole stinger with white clover logo, I saw something I had never seen before: there was stamping on the vulcanite “D-2”. This immediately intrigued me; I knew I would have to find out more about that … but lets’ wait a paragraph or two on that.

Kaywoodie Apple (9)

I polished the entire pipe with all of the micro mesh grits in order from 1500 – 12000, avoiding all of the stamping, including on the stem. I wet sanded the stem (only) through 4000, then polished the stem with plastic polish, before finishing the entire pipe through 12000 grit. I then applied Halcyon II wax to the entire pipe and hand buffed it. I was really pretty pleased with the results, considering I didn’t have access to my buffer and this was, more or less, my first experience with the Halcyon wax.

Kaywoodie Apple (2) Kaywoodie Apple (3) Kaywoodie Apple (5)Kaywoodie Apple (4)Kaywoodie Apple (6) Kaywoodie Apple (7) 

I missed some file marks on the stem, and the “bits” near the bit; I figure when I can properly buff the pipe I will get those taken care of, as well as put a better shine on it with some carnauba wax. But until then I am enjoying this old gal just as she is!

The stem still has oxidation near that stamping, which I began to research after I finished the work on the pipe. None of the other Kaywoodies I have, or have ever had, have any stamping on their stems like this one does. I scoured the ‘net and asked as many folks as I could think of to no avail … well, almost none. I am a member of the Kaywoodie Pipes Group on Facebook and one of the members there is Bill Fuerbach is as well. He saw my question that I posted about the stamping in that group and replied as follows:

Hey guys. I’ve seen this also on some older Kaywoodie stems. unfortunately at this time I don’t know what the significance is. :(:(

So unfortunately there is not yet an answer to what the stamping means or its significance is – and the mystery remains …  If by chance anyone what reads this knows the answer I would really appreciate it is you would leave a comment with the answers!

Edit

I received an email from Chris at PipePages about this question. He said in his personal opinion, and that it is only a guess, that it could be a factory replacement stem and the number was a style/guide for the repairman to know which stem to use. Although it is only a shot-in-the-dark type of guess, it seems like a plausible answer to me.

Reworking a No Name Brand Italian Billiard


I am definitely getting to the bottom of the refurbishing box – this pipe and one other left before it is empty and I need to start hunting again for more. This old-timer is only stamped on the left side of the shank with IMPORTED BRIAR over ITALY. There is no other stamping on the right side of the shank. The bowl was in pretty decent shape – no real dents or scratches other than around the rim. The edges of the rim were rounded over. The left side showed some nice birdseye grain and the front and the back of the bowl were cross grain. The right side of the bowl was a mess. There were at least a dozen putty fills in various states of coming out of the briar. There were two on the rim that took a bite out of the outer edge of the rim. The finish was gone and the stain had faded. The bowl did not come with a stem so I hunted through my can of stems and found one that would do the trick. It took very little work to get the tenon to fit into the shank. It was a wide blade stem that previously had been on a George Jensen pipe at sometime in its life but that pipe bowl had long since disappeared. With some minor adjustments to the diameter of the stem it would make a great stem for the Italian billiard.
IMG_3288

IMG_3289

IMG_3290

IMG_3291

IMG_3292

I decided to top the bowl to clean up the rounded edges on the outer rim and to minimize the damage from the two fills on the right edge. I set up my sandpaper on the flat board and turned the bowl top into the sandpaper. I work at this slowly and turn and sand and then tip the briar dust into a container that I have saved for repairs to fills. The first photo below shows the set up as well as the condition of the rim before I worked on it.
IMG_3302

IMG_3303

IMG_3304

I took the top down until the outer edges of the rim were sharp and clean. The damage from the fills is still visible but I stopped before I changed the overall shape of the bowl. I used a Dremel with a sanding drum to reduce the diameter of the stem to match the shank. I take it down as far as possible with the Dremel and then do the finish shaping by hand with sandpaper.
IMG_3305

IMG_3306

IMG_3307

IMG_3308

I sanded the stem with 220 grit sandpaper to remove the oxidation and to finish shaping the area around the shank and stem junction.
IMG_3309

IMG_3310

IMG_3311

IMG_3312

I wiped down the bowl with acetone on a cotton pad to remove the remaining finish.
IMG_3313

IMG_3314

IMG_3315

IMG_3316

I dropped the bowl in an alcohol bath to soften the putty fills to make them easier to remove. It also removed the remaining finish to the bowl. The dark colour of the alcohol bath adds a patina to the bowl that is something that I appreciate. (I continue to use the bath and filter out the grit and grime from the alcohol every other month. The filtering removes the impurities but leaves the alcohol the colour of the stain that has been removed from the bowl. It is a uniform dark brown colour. I rarely change the bath, just refill it as the alcohol evaporates over time.)
IMG_3317

When I removed it from the bath I picked out the softened putty fills with a dental pick and lightly sanded the bowl and shank with a fine grit sanding sponge.
IMG_3318

IMG_3319

IMG_3320

IMG_3321

I am continuing to experiment with wood glue and briar dust combined to replace the fills. I am finding that the mixture gives virtually the same darkening of the fill as the mixture of briar dust and superglue so I am not convinced. The drawback to using the wood glue is the slow drying time. That probably is not an issue for some of you but if the result is the same I will opt for the quick results of the superglue. I packed in the briar dust, dribbled the glue into the fills and then added more dust to the mixture. When it dried I sanded it with 220 grit sandpaper to remove the buildup and smooth out the surface of the bowl. I then sanded the bowl with a fine grit sanding block to remove the scratches.
IMG_3322

IMG_3323

IMG_3324

IMG_3325

IMG_3326

IMG_3327

IMG_3328

IMG_3329

I am also continuing to experiment with the contrast staining process so I used it again on this bowl. I wanted to highlight the beautiful birdseye grain and cross grain on the bowl and hide the repaired fills as much as possible. I used a black aniline stain for the first coat of stain. I applied it and flamed it and repeated the process until I had good coverage on the bowl.
IMG_3330

IMG_3331

IMG_3332

I wiped down the bowl with Everclear on a cotton pad to remove the heavy black stain from the surface of the bowl while leaving it deep in the grain. I notice in the process that the stain did not soak into the areas around the fills where there was remnant of wood glue on the surface of the briar. It left a shiny spot of unstained briar. To remedy that I would need to sand those areas of the bowl before applying the second coat of stain.
IMG_3333

IMG_3334

IMG_3335

IMG_3336

I sanded the bowl with a fine grit sanding sponge and also with micromesh sanding pads from 1500-2400 grit. I wet sanded with these grits as they work well to remove scratches in the surface and also to remove the remaining glue on the surface. Once I had the bowl sanded smooth I wiped it down with a damp alcohol pad to remove surface dust and then restained the bowl with an oxblood aniline stain. The next series of photos show the freshly stained bowl before I flamed it. The undercoat of black comes through and highlights the grain very nicely. Once the bowl was dry I buffed it lightly with White Diamond.
IMG_3337

IMG_3338

IMG_3339

IMG_3340

I sanded the bowl and stem with micromesh sanding pads to polish it further. I wet sanded with 1500-2400 grit and then dry sanded with 3200-12,000 grit pads. I find that the higher grit pads add a deeper level of shine with each successive grit. The next three photos show the stem and bowl after polishing with three grits of micromesh. The first photo shows 1500, 1800 and 2400 grit pads. The second photo shows 3200, 3600 and 4000 grit pads. The third photo shows 6000, 8000 and 12,000 grit pads.
IMG_3341

IMG_3342

IMG_3343

I rubbed the stem down with Obsidian Oil and when it was dry I buffed the stem and bowl with White Diamond. I gave the pipe multiple coats of carnauba wax to protect the finish and give it a shine. The contrast stain worked well with this pipe. The birdseye grain really pops and the cross grain is also highlighted. The black undercoat also minimizes the eyesore of the fills on the right side of the bowl and the small one on the left side has virtually disappeared. The final four photos below show the finished pipe. I am happy with the way it turned out – far better than I expected when I took it out of the box to refurbish.
IMG_3348

IMG_3349

IMG_3350

IMG_3351

Refurbishing and Restemming an Unsmoked Small Paneled Rhodesian


I am scraping the bottom of the box for pipes to refurbish. It is clear that I am going to have to go on the hunt again soon. At the bottom of the box I have a few small/tiny pipe bowls that have come to me from a variety of sources. I believe this little one came from Mark Domingues as well. It is unsmoked and stemless. The bowl was in pretty fair shape though the finish coat was varnish of some sort. The stain was spotty under the varnish coat. There was one dominant fill on the left side of the bowl on one of the panels. The drilling is a bit of centre in the bottom of the bowl – slightly to the left of centre. The drilling was wide open and the draught on the bowl was very good. The bowl did not have a ring around the top before the bevel to the rim. It was a smooth transition. I have had several of these older Rhodesian and Bulldogs in the past and they generally had horn stems. This one did not have any stamping on it so I have no idea as to the maker. There was also no stem present. I had a smaller nylon stem in my box of stems that took very little work on the tenon to make for a snug fit in the shank.
IMG_2798

IMG_2799

Once the stem fit well in the shank I sanded the shank and stem to get a good smooth transition between stem and shank. I used 220 grit sandpaper to do the rough work and then used a medium grit sanding sponge to clean up the shank and stem. The stem had casting marks on both sides of the stem and also heavy tobacco stains around the button and in the slot. The airway was virtually clogged and I could barely get a straightened paper clip through before I worked on it with Everclear and bristle pipe cleaners.
IMG_2800

IMG_2801

IMG_2802

I decided to sand the stain off the shank and rework the taper on the pipe from button to bowl. I sanded it with 220 grit sandpaper to remove the excess briar and nylon and smooth out the taper. What I wanted was a clean smooth line from button to bowl. The next four photos show the shank and the stem after sanding with the 220 grit sandpaper. The flow is smooth and even and the lines are very graceful. The casting marks are gone from both sides of the stem and the button is cleaned of the majority of the stains.
IMG_2803

IMG_2804

IMG_2805

IMG_2806

I wiped the bowl and shank down with acetone on a cotton pad to remove the varnish finish and some of the stain on the bowl in order to make it easier to match the stain on the newly sanded shank and the bowl. I also sanded the bowl, shank and stem with a fine grit sanding sponge to remove scratches left behind by the sandpaper and to prepare the stem for sanding with micromesh sanding pads.
IMG_2807

IMG_2808

I sanded the entire pipe and stem with micromesh sanding pads. I wet sanded the stem and the bowl with 1500-2400 grit sanding pads and dry sanded the bowl alone with 3200-12,000 grit pads. I did not want to make the briar to smooth to take a good coat of the stain.
IMG_2809

IMG_2810

IMG_2811

IMG_2812

I stained the bowl with a medium brown aniline stain mixed 2 parts stain with 1 part isopropyl alcohol to get the colour I wanted. I was going for more of a wash than a deep coat. I wanted the grain on the shank and bowl to come through the colour. I used a black permanent mark to draw grain marks on the two fills and to make it easier for the stain coat to blend in and hide the putty marks.
IMG_2813

IMG_2814

IMG_2815

IMG_2816

Once the stain was dry I buffed the bowl with White Diamond to give it a shine and then reinserted the stem and lightly buffed the stem with White Diamond as well. The nylon stems take a very soft touch or they are easily damaged. I gave the bowl and stem several coats of carnauba wax to protect them and then lightly buffed the pipe a soft flannel buffing pad. The finished pipe is pictured below. It is not a big pipe in any sense but should be a great flake pipe. The second photo below gives an idea of proportion by the inclusion of my hand with the pipe. The yellow nylon stem approximates the unique colour and look of the horn stem that must have originally graced this little bowl. The stem is thin and the new taper gives a very delicate look to the new pipe.
IMG_2817

IMG_2818

IMG_2820

IMG_2821