Blog by Dal Stanton
Jenny has laid the groundwork for a pipe restorer’s dream job! Jenny has been working with us here in Sofia, Bulgaria, as an intern for the last few years and she will be transitioning back to the US at the end of the summer. She’ll be working with international students at what she considers her home territory at the University of Tennessee – Knoxville. We’ll miss her, but she has created a bittersweet gauntlet for me! She has gone through my baskets and boxes of ‘pipes-in-waiting for help’ that I have culled and collected to create a gift trove for the special men in her life when she returns to the US – brothers, brothers-in-laws, father…. She knows that the pipes I restore benefit our work with the Daughters of Bulgaria, women/girls who have been sexually exploited and trafficked throughout Europe. She wants to support the Daughters but also communicate this to her loved-ones in the US by gifting them pipes restored by The Pipe Steward – me 😊. Since the proceeds benefit the Daughters, the agreement we have is that after each pipe is restored from her trove, I will determine a price and she will then decide if she would like to ratify the purchase – a win/win/win all around – for her, her special men and for the Daughters. As Jen poked and prodded through my pipes, I learned that she was seeking a variety shapes and sizes so that each gift would be unique. I hope that I can run the gauntlet well by providing her precious gifts AND finish on time!!!
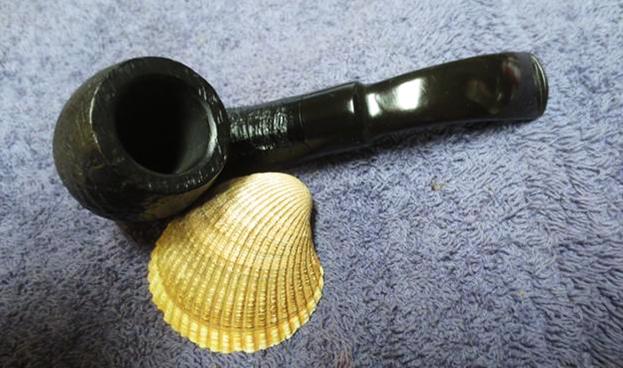
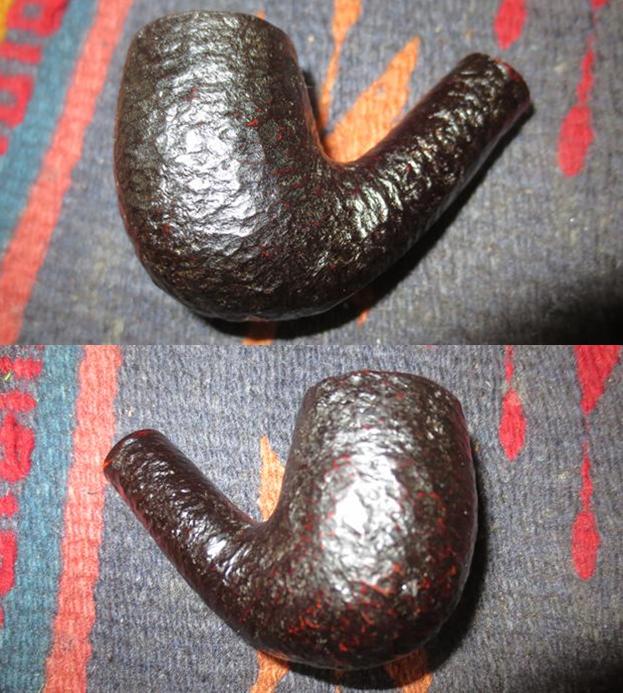
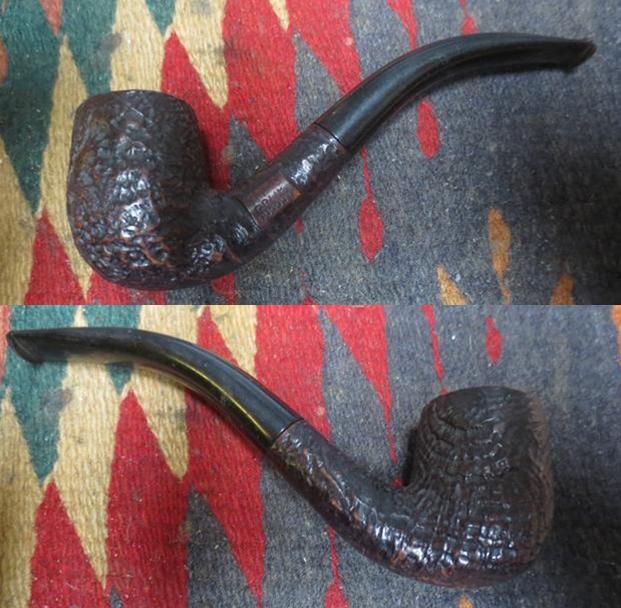
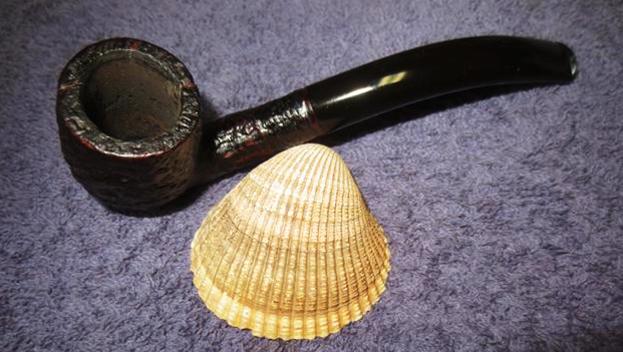
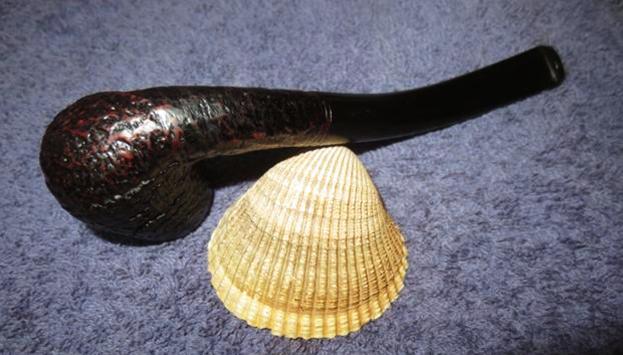
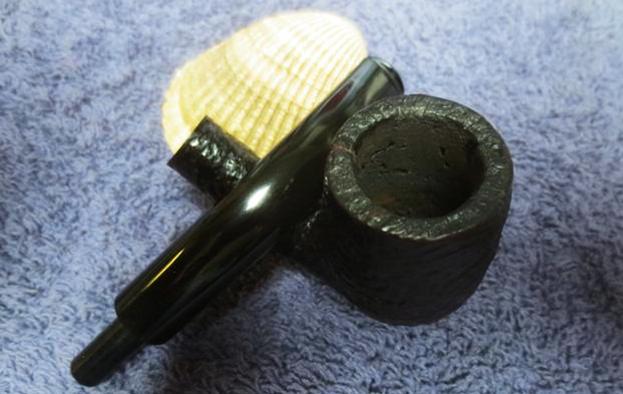
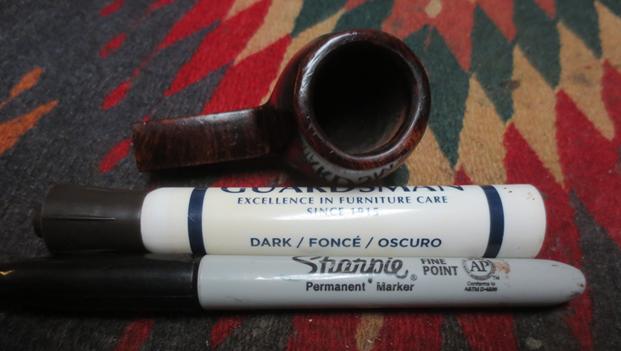
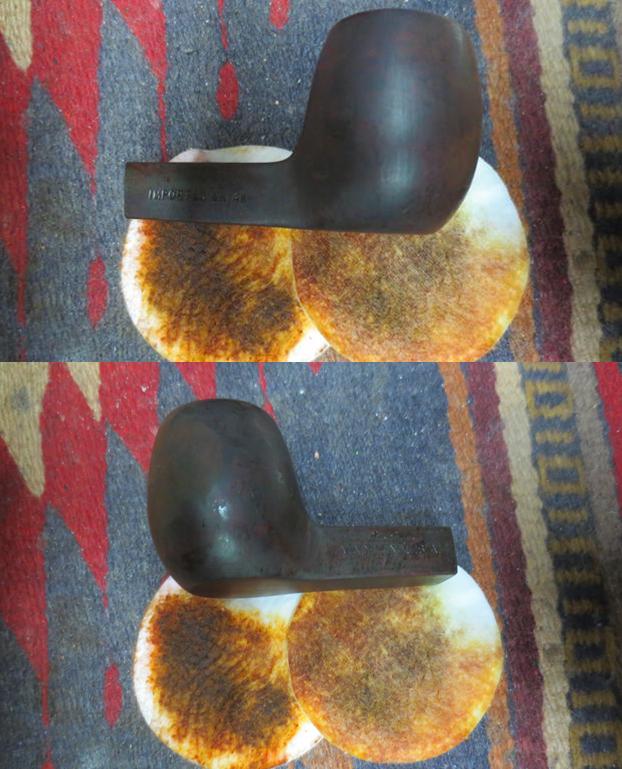
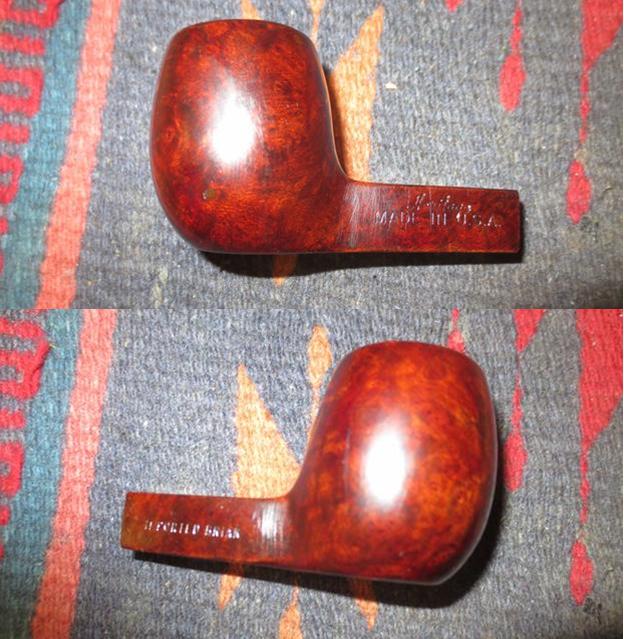
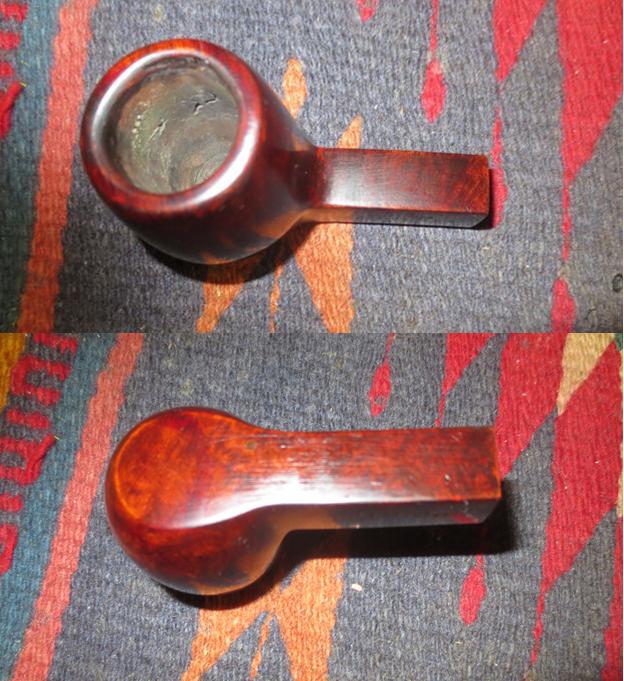
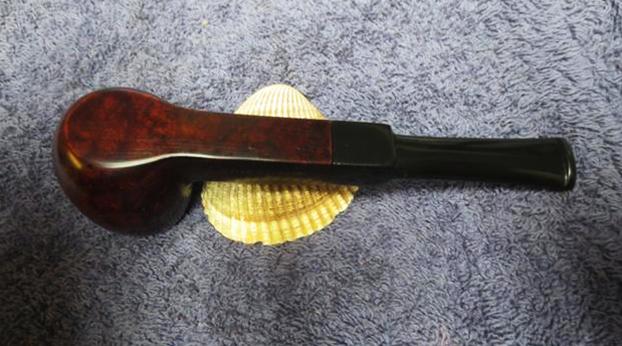
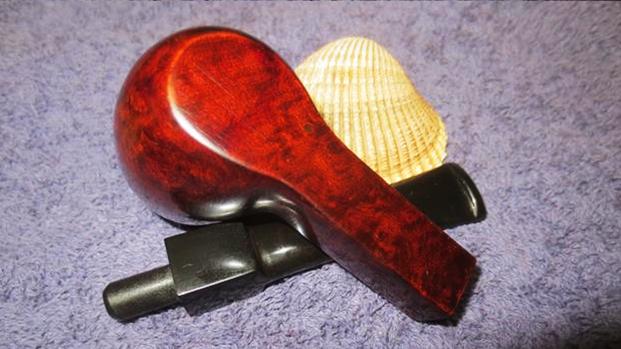
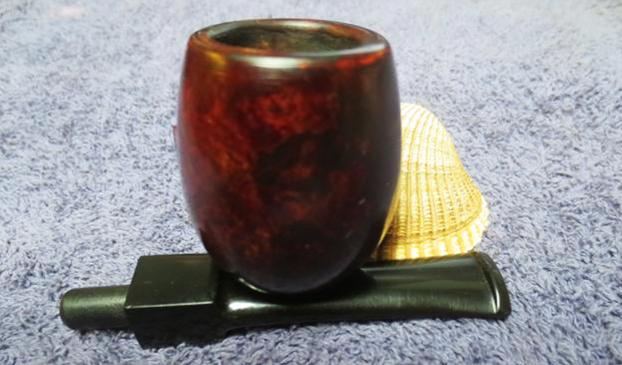
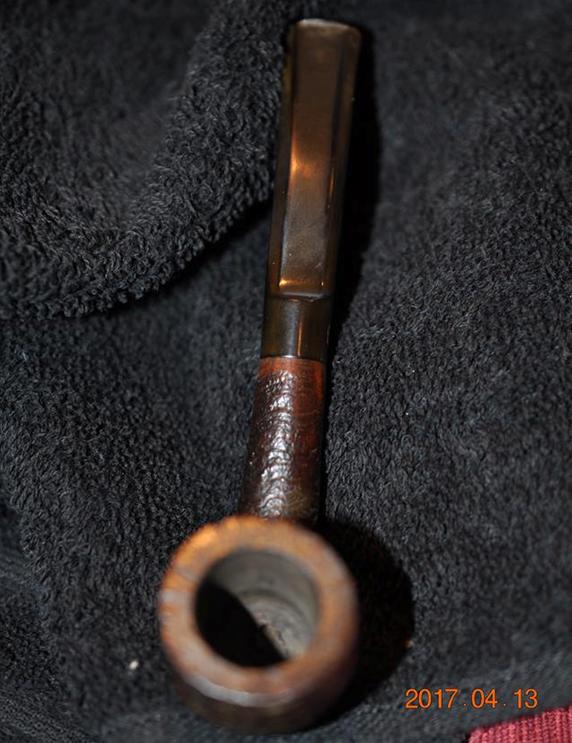
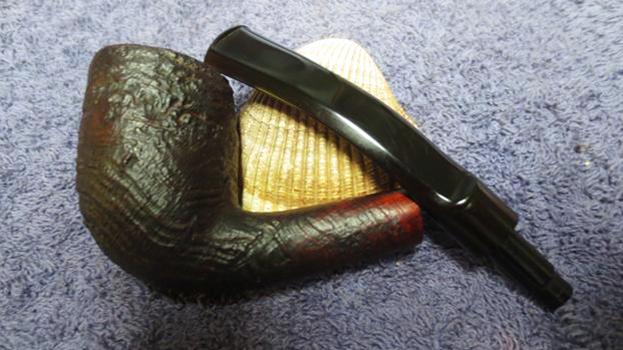
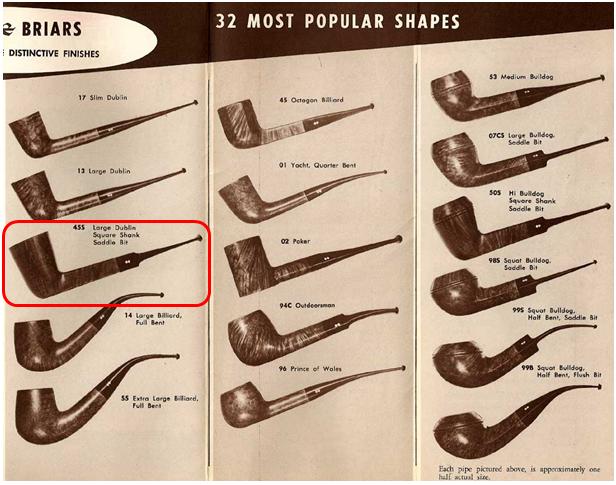
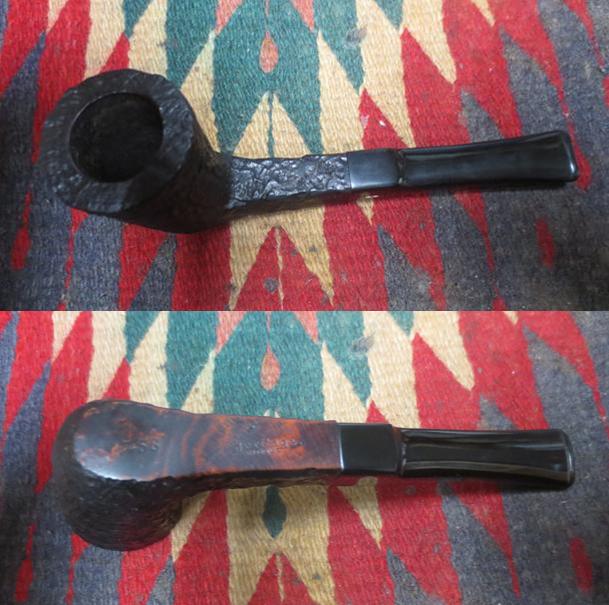
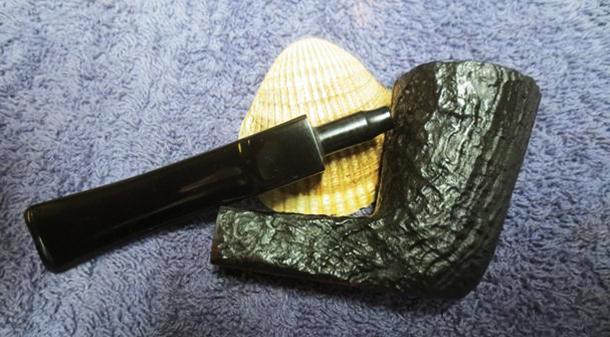
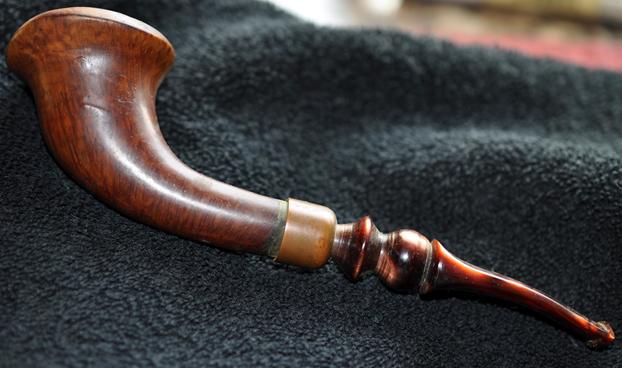
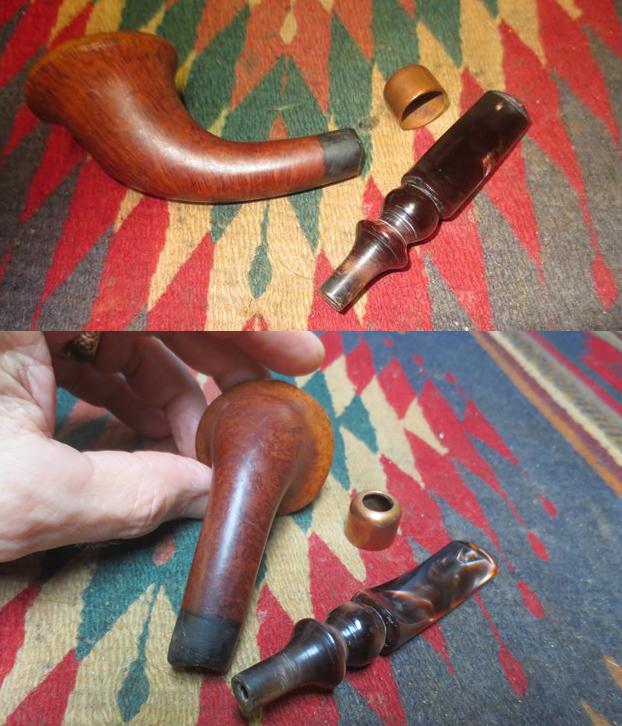
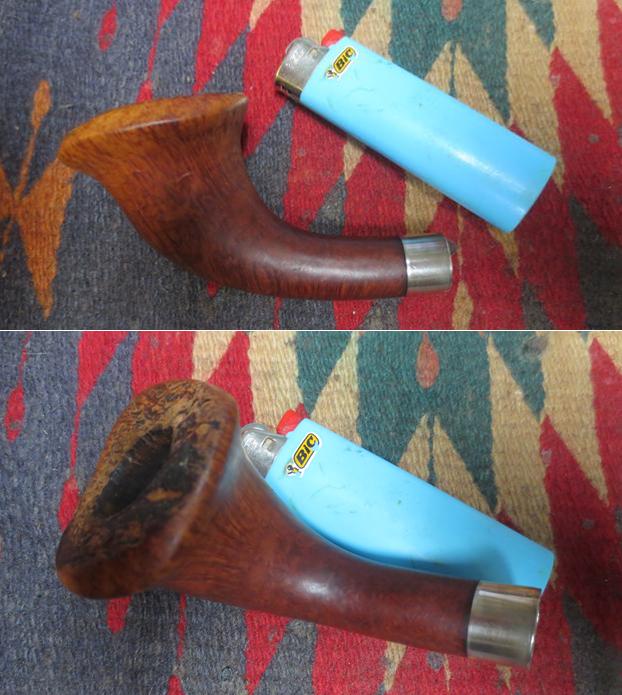
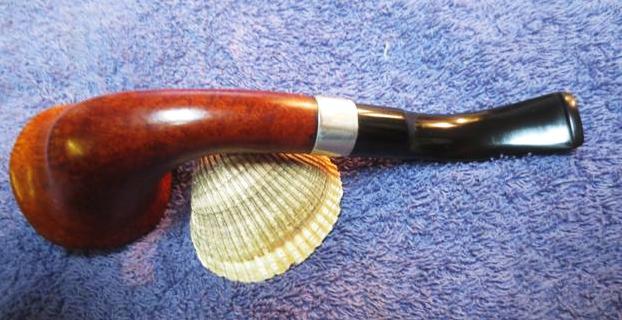
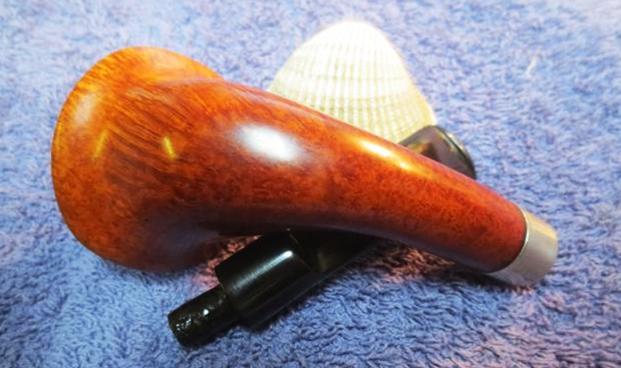
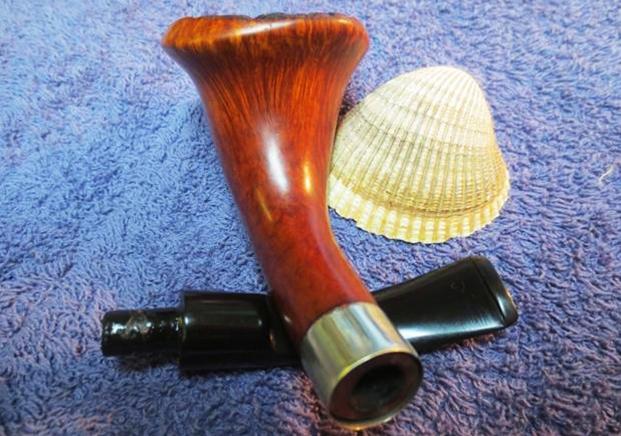
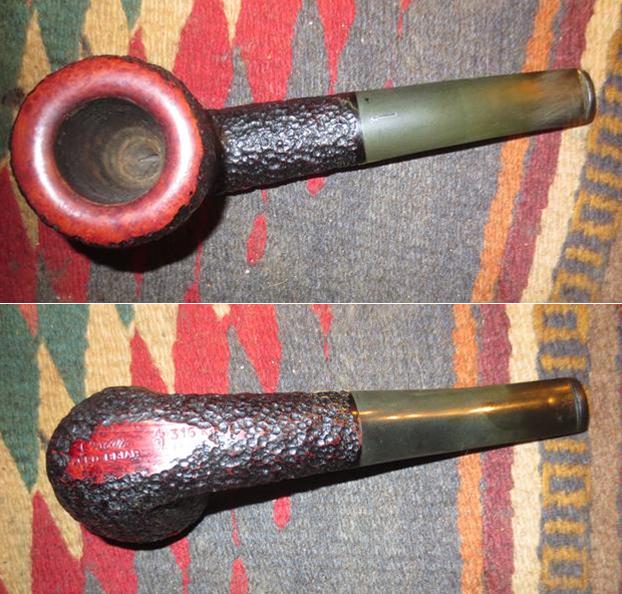
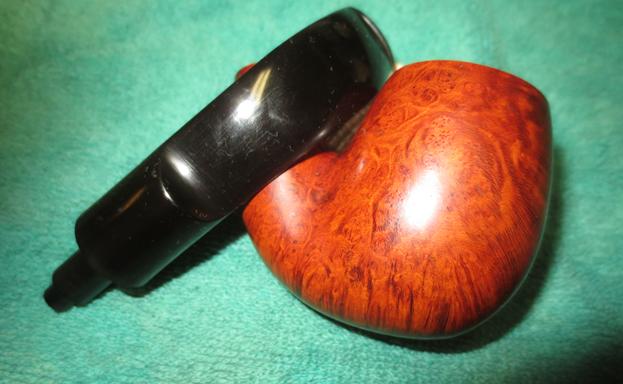
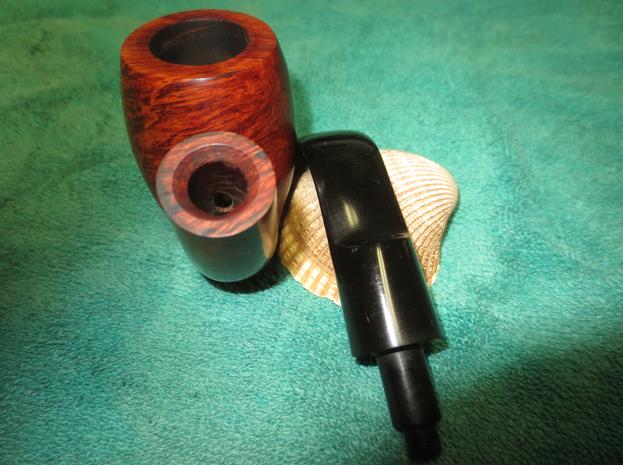
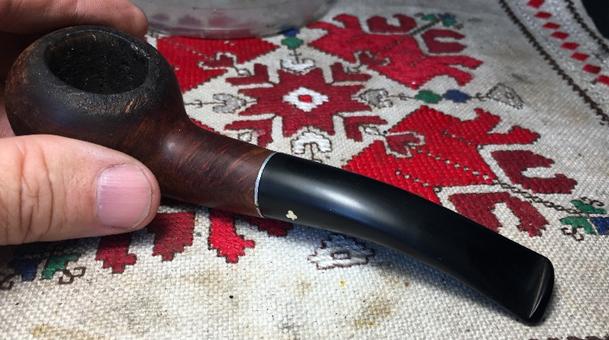
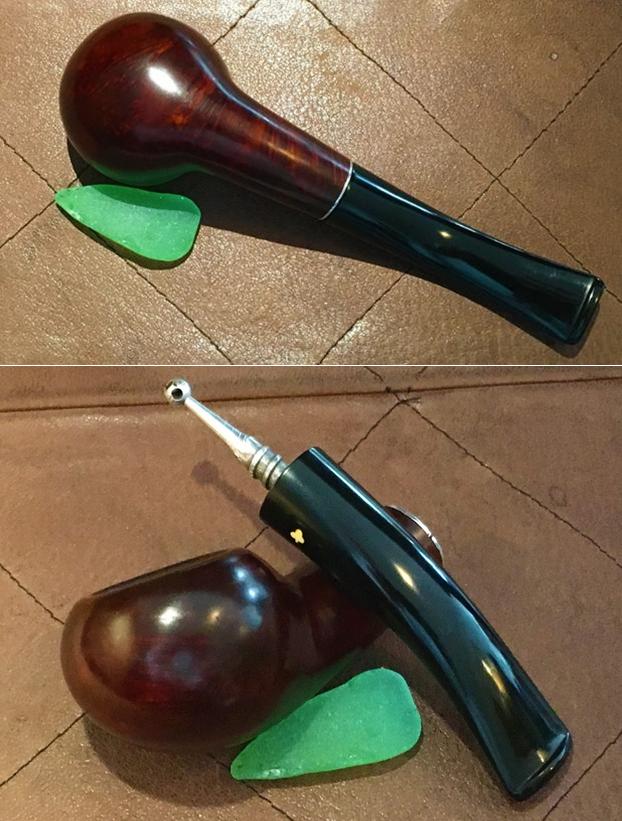
The first pipe I chose randomly out of the ‘Jen’s Trove Basket’ is a Kaywoodie Author shape. I saw this pipe on eBay and was attracted to the solid shape of the Kaywoodie ‘Ball’ shape that was advertised by the eBay seller in New Hampshire. Here is what I saw: When I looked at Pipedia’s Shape Chart put together by Bill Burney, I saw that the Ball and Author shapes are very similar, but Bill’s description of “The Author as a beefed-up prince, featuring a flattened ball-shaped bowl and a heavy 1/8 to 1/4 bent stem” caused me to classify this Kaywoodie as an Author. With the pipe now on my work table, I take more pictures to fill the gaps.


 This is the first Kaywoodie I’ve worked on. A plethora of information is available online about America’s oldest pipe making manufacturer. Kaywoodie’s website is informative:
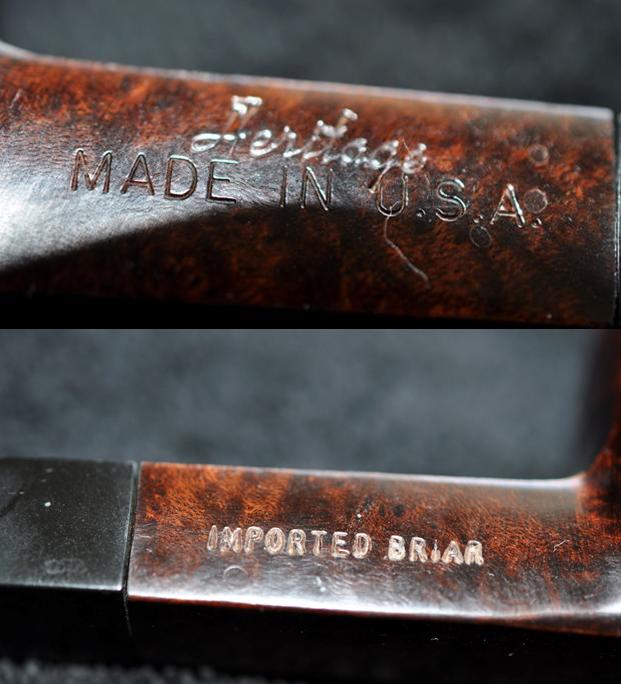
The history of S. M. Frank & Co. spans nearly a century and half of pipe making, supporting our claim as the “oldest pipe house in America.” S. M. Frank, as it exists today, is a combination of some of the biggest names in pipe making from the early part of the 20th. century. The pipe names Kaywoodie, Yello-Bole, Reiss-Premier, DeMuth, Medico, Heritage and Frank are familiar to generations of pipe smokers.
 The article describes how in 1919 the Kaufman Brothers & Bondy Company (KBB) produced the Kaywoodie and Dinwoodie pipe lines. By 1924 the Dinwoodie line fell by the wayside and the primary name of Kaywoodie was the mainstay pipe line and the company came to be known by that name. Little is known about the early activities of the KBB Company which started in 1851 by the German born Kaufman brothers. The company had several locations but was centered in the New York City region throughout its production history. The expansion of the KKB Company following the gold rush I find fascinating:
When one of the men from the New York office got “gold fever”, he carried a large supply of pipes with him to California that he sold along the way. This early “national distribution” did much to build the reputation of KBB. By the late 1800’s, branches of KBB were opened in Chicago, Atlanta, San Francisco and St. Louis with family and friends acting as agents. The trademarks, for the inlaid cloverleaf and the cloverleaf with the KBB initials inside, were issued in 1881.
In 1935, KBB boasted of being the largest pipe making facility in the world with 500 employees and a production of 10,000 pipes per day from their facility in West New York, New Jersey. In 1955, Kaywoodie was acquired by S. M. Frank & Co. (See Link) and continues to the present with well-known names Yello-Bole, Reiss-Premier, William Demuth Company, Medico, Heritage (Heritage Pipes Inc.), along with Kaywoodie (Link).
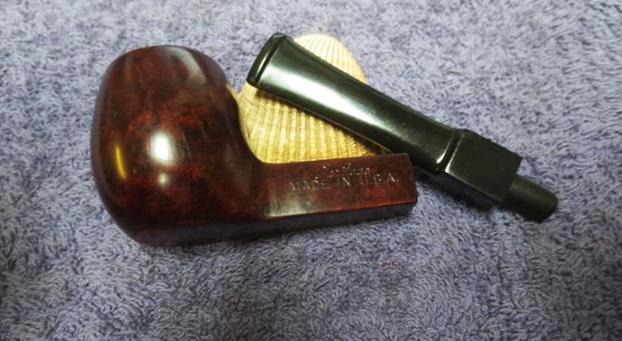
 It is difficult to date the Kaywoodie before me. The only identifying marker is the traditional white shamrock on the stem. There are no other markings that I see. To the left, a 1964-65 Kaywoodie Dealer Catalog from Pipepages.com shows a remarkable likeness to the Connoisseur line and the Author before me with the stem shamrock on the side rather than on the top as in a 1955 Kaywoodie catalogue (See LINK). There is no clear indicator for dating the Kaywoodie Author, but this catalog may put me in the ballpark.
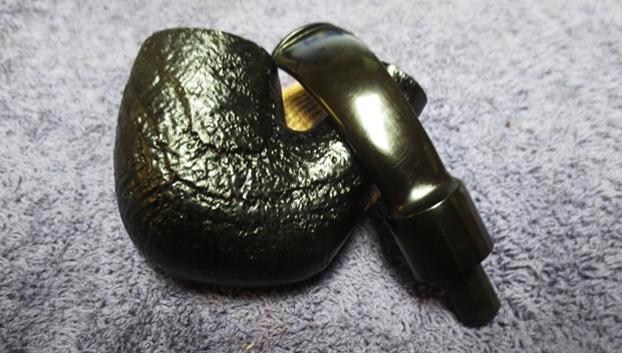
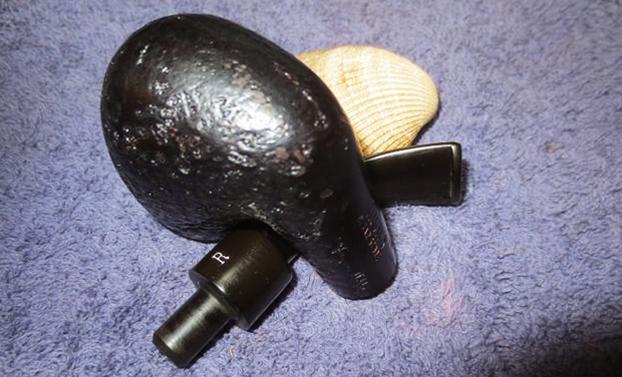
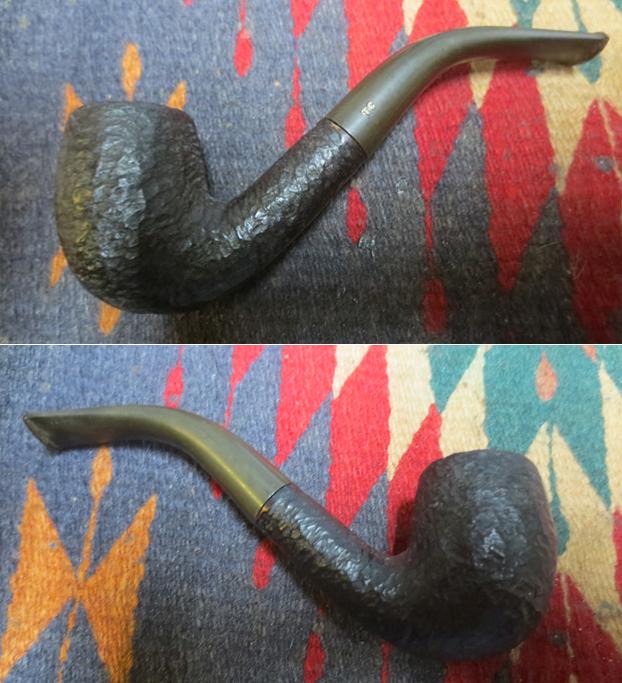
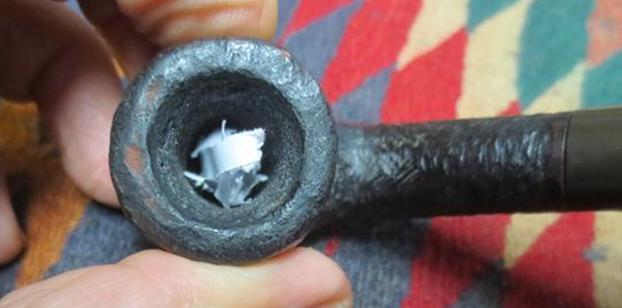
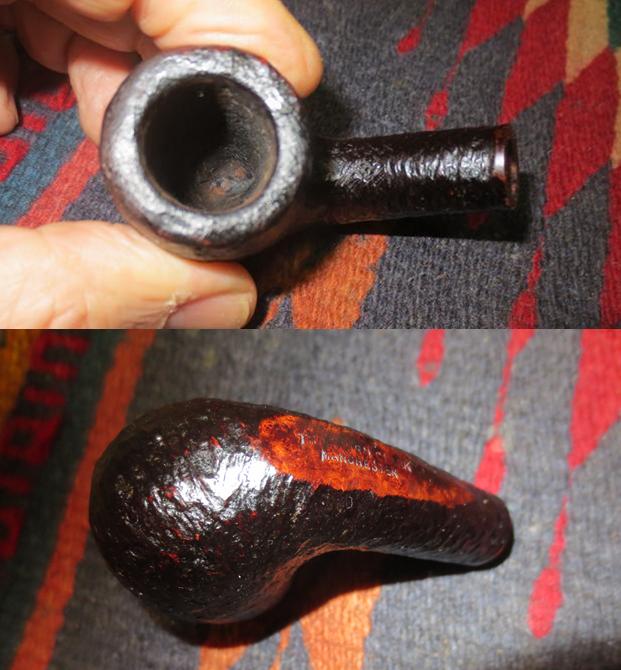
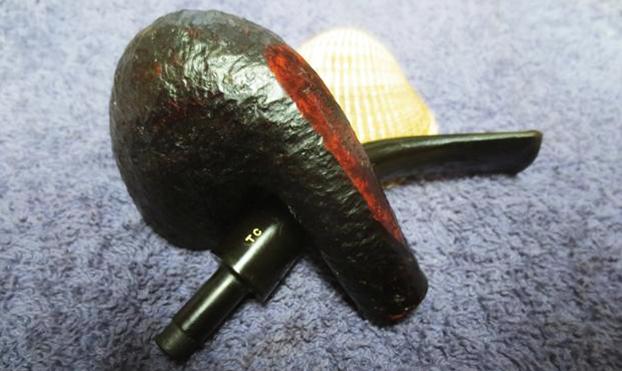
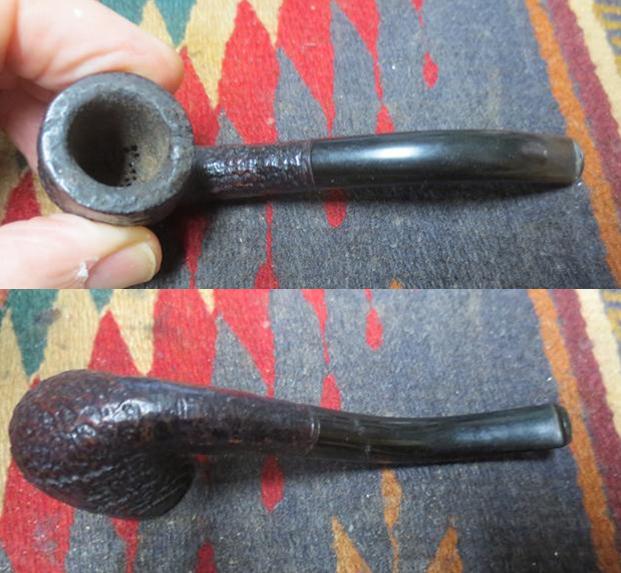
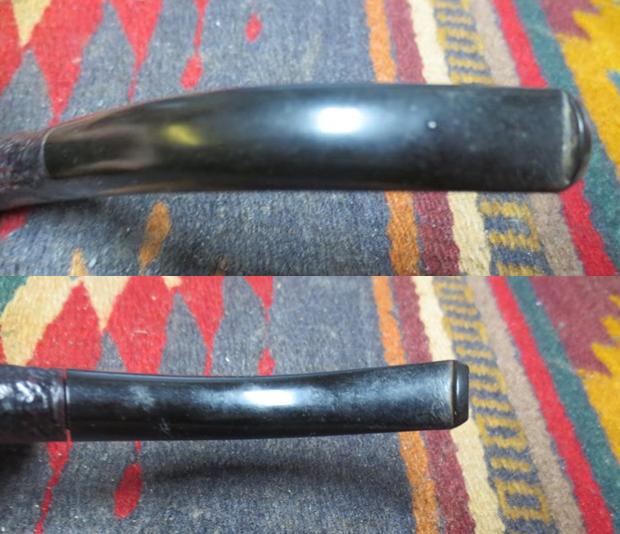
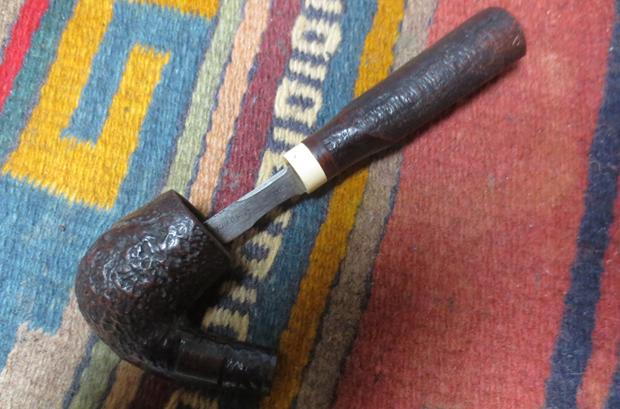
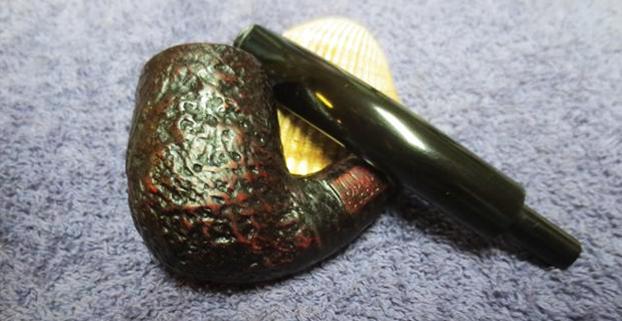
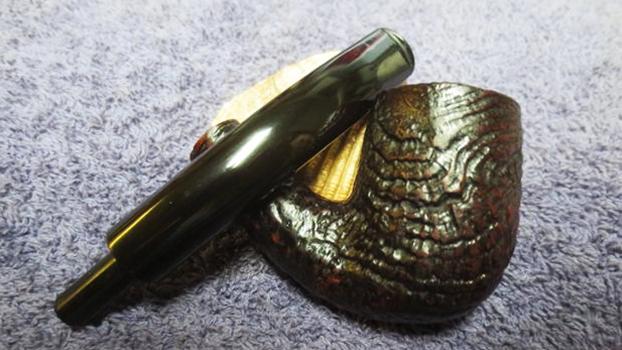
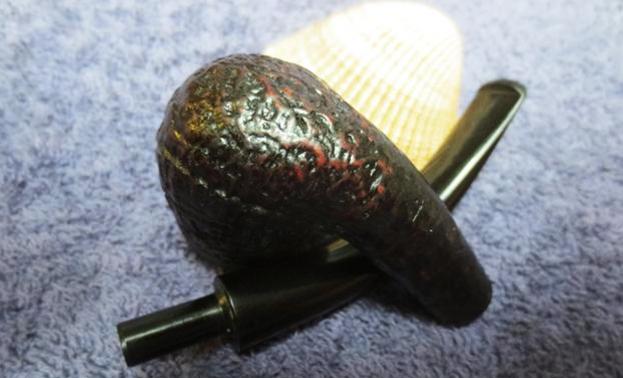
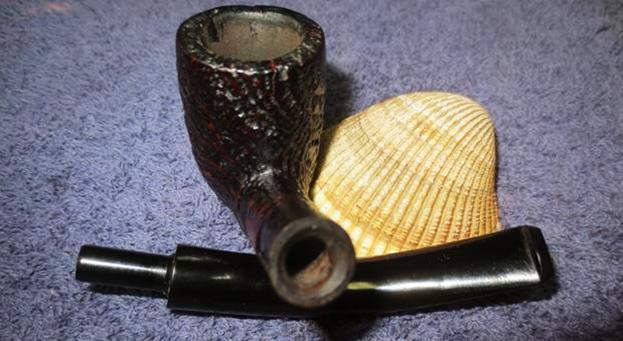
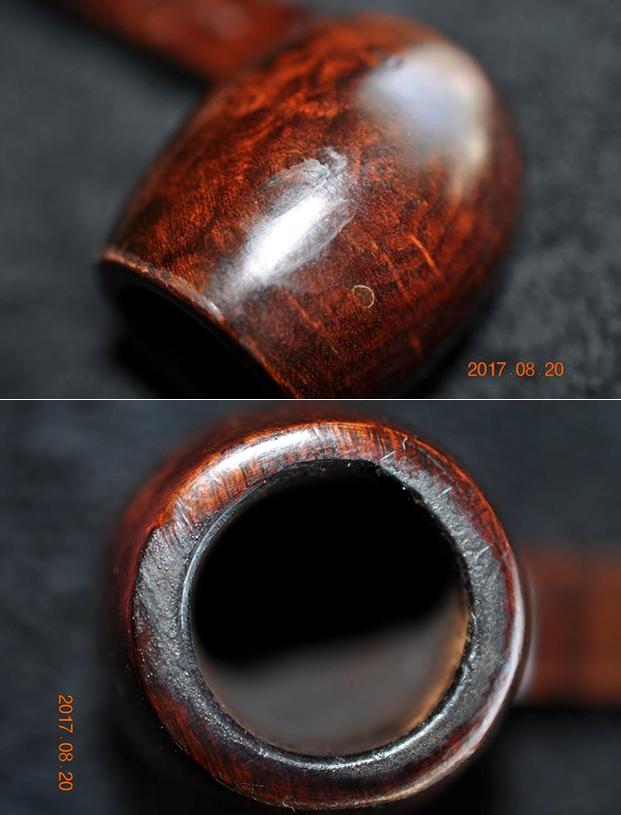
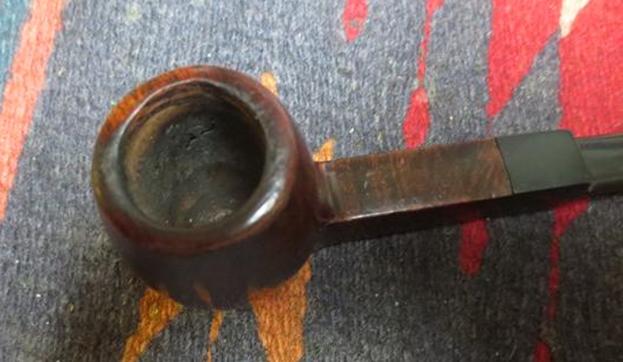
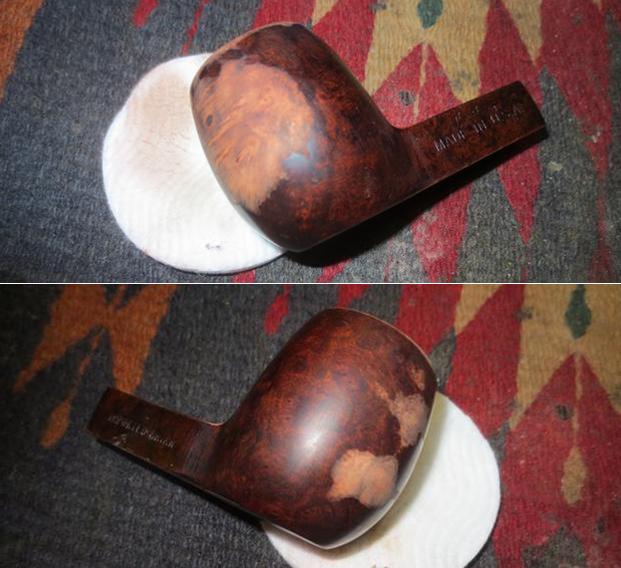
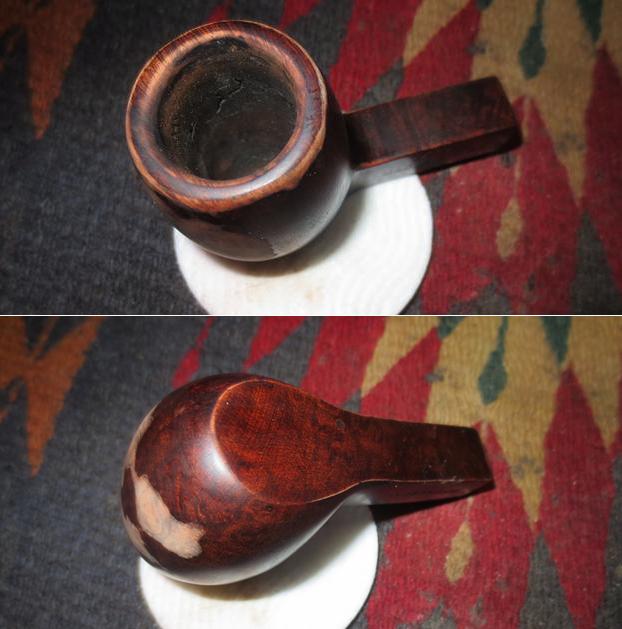
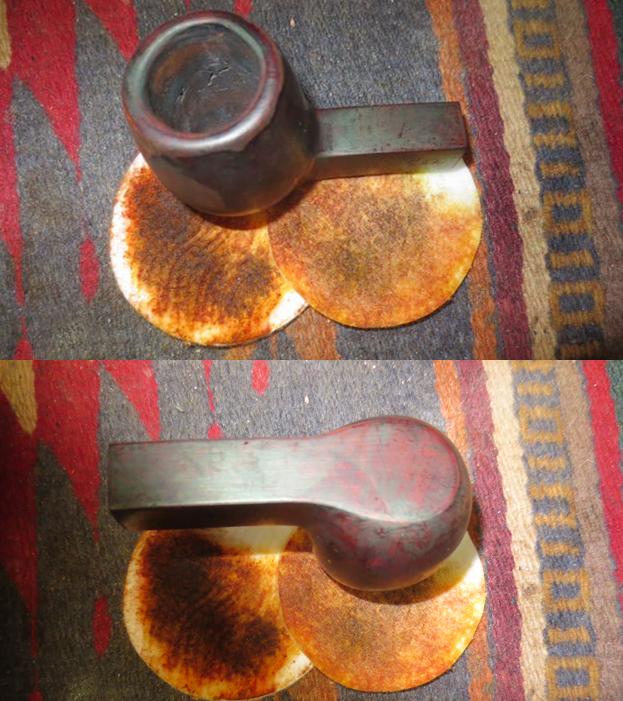
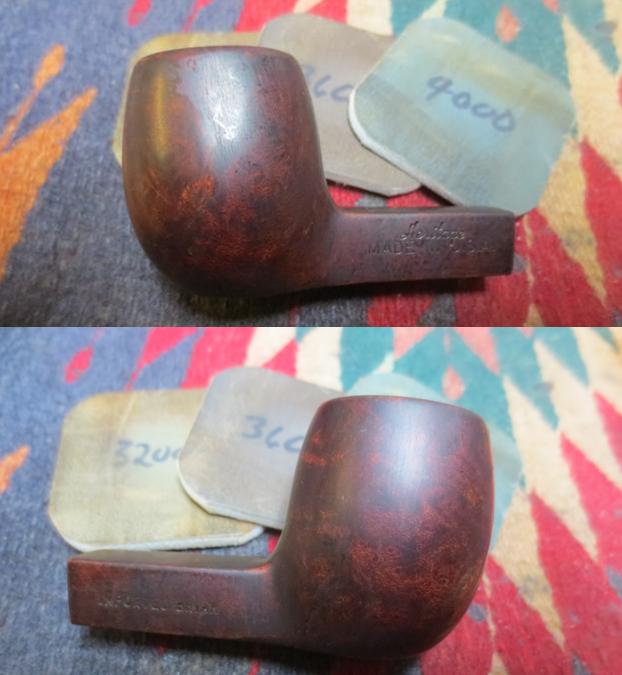
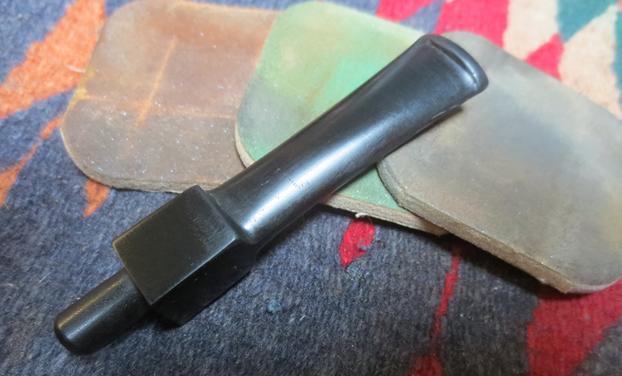
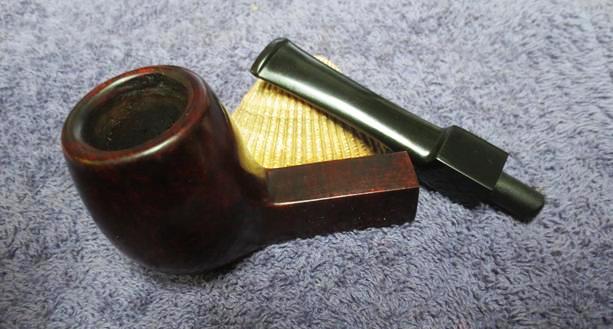
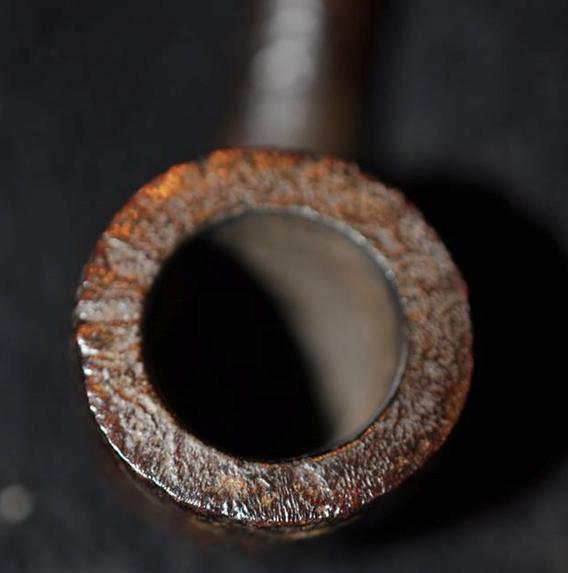
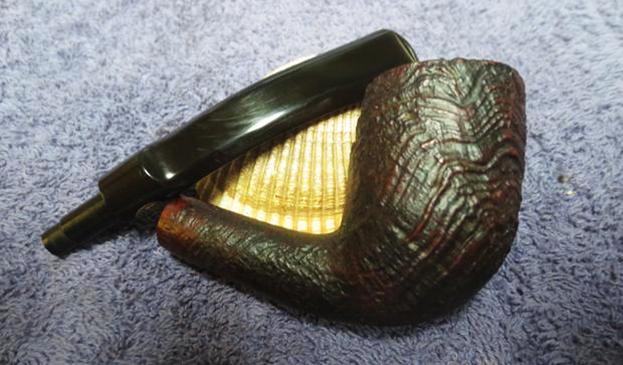
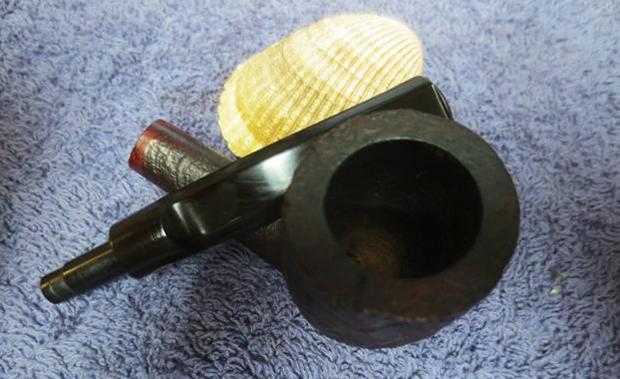
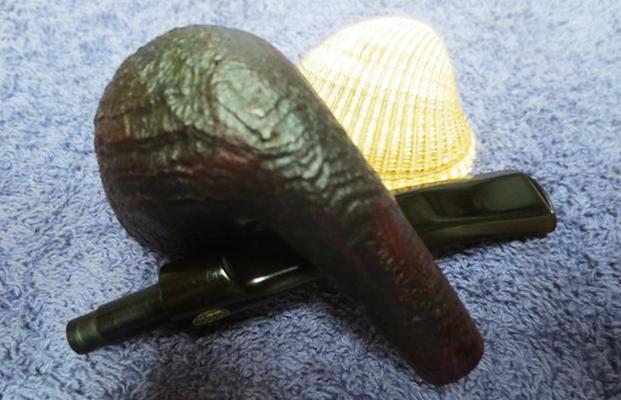
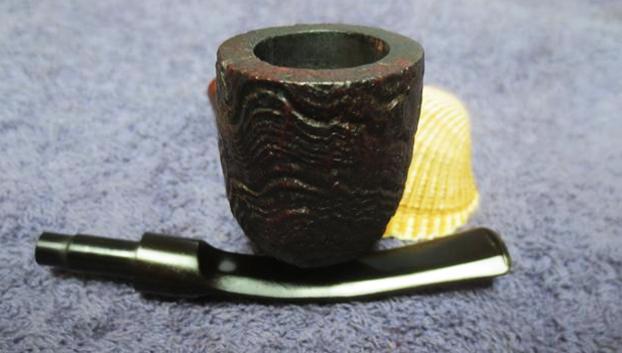
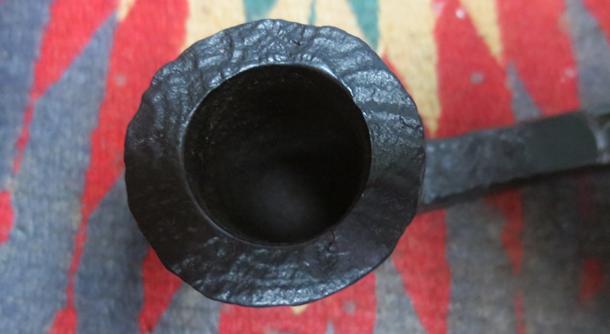
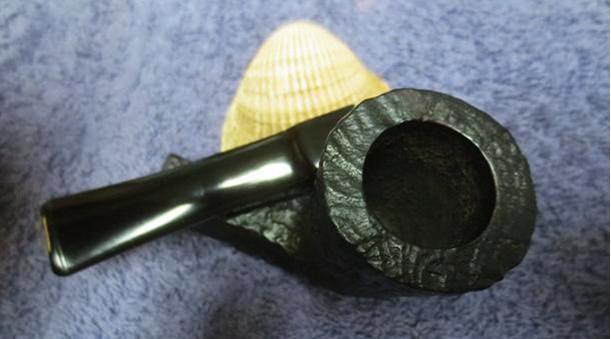
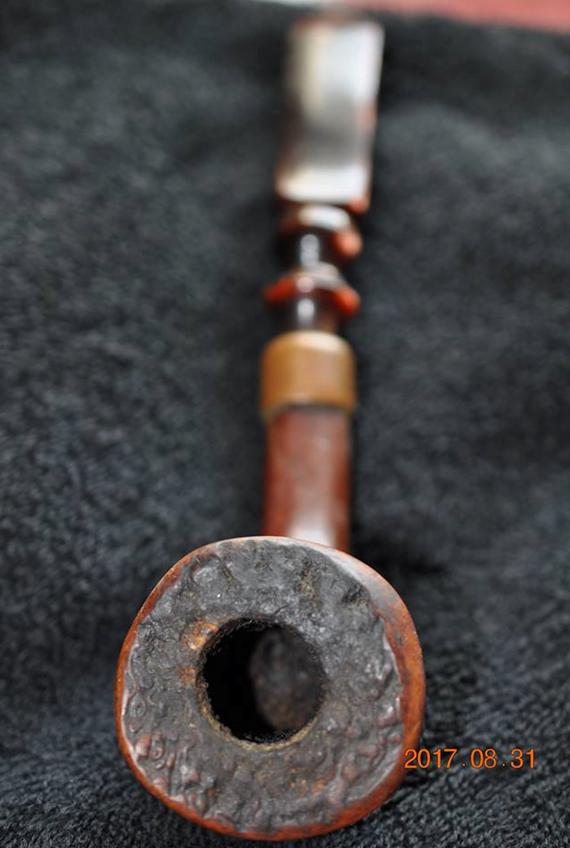
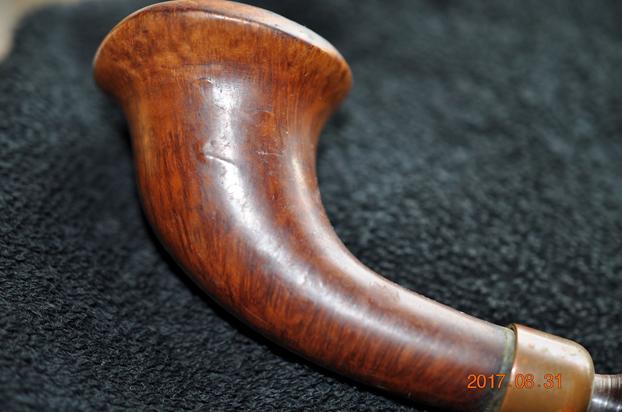
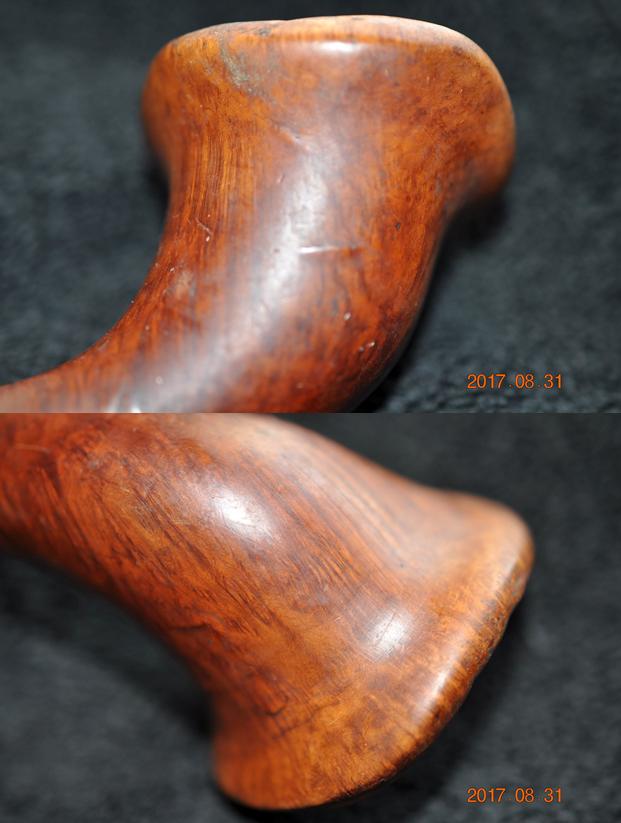
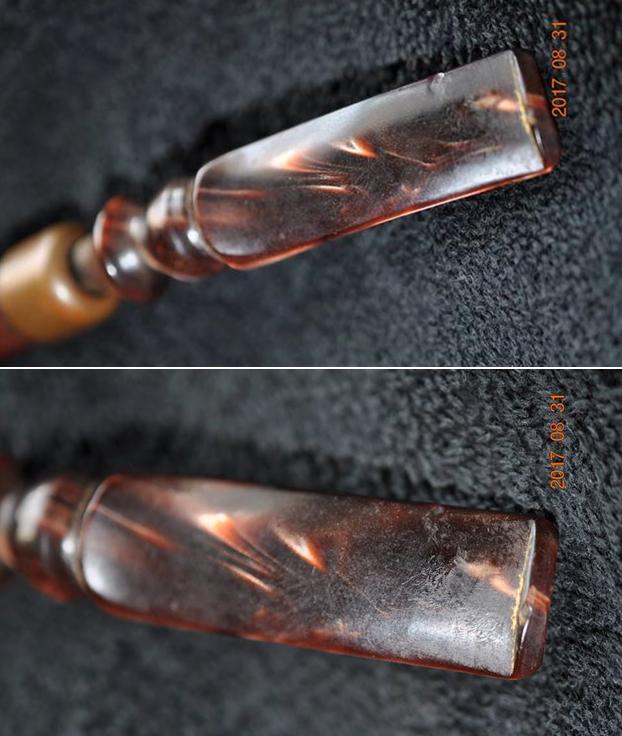
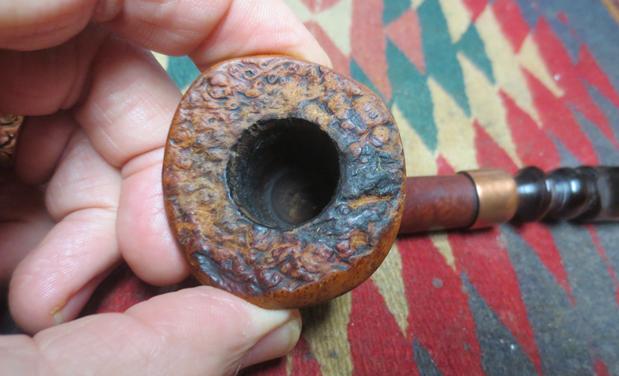
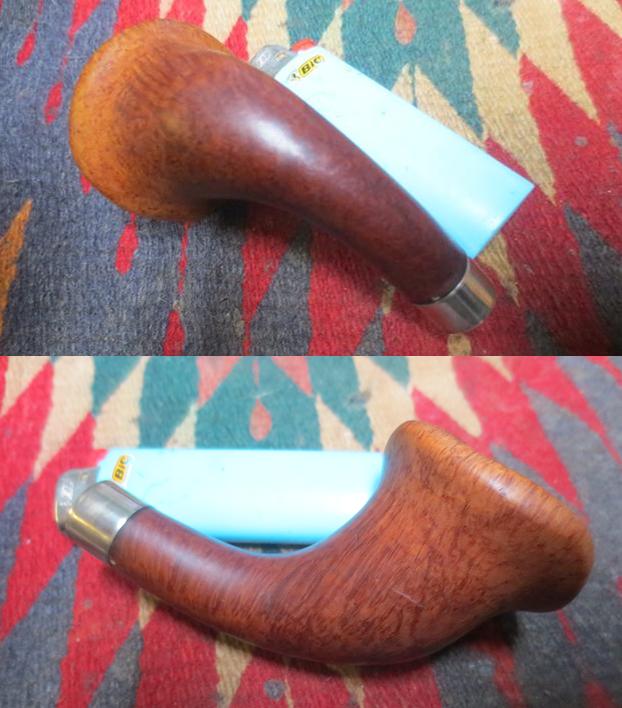
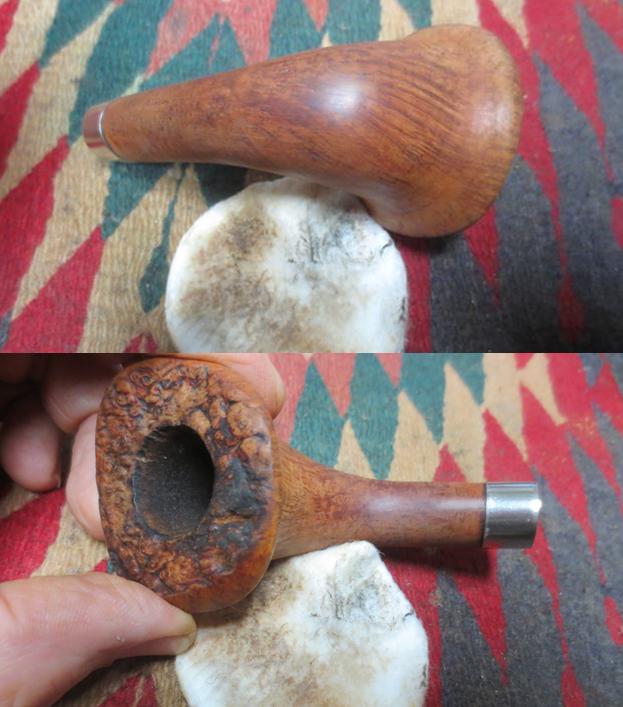
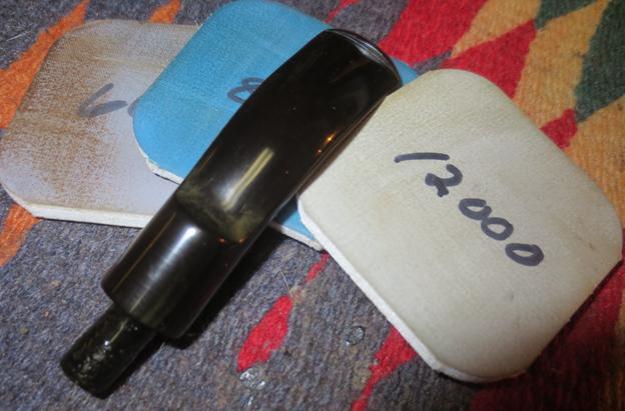
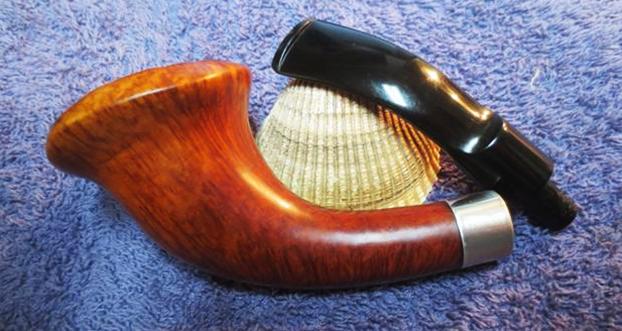
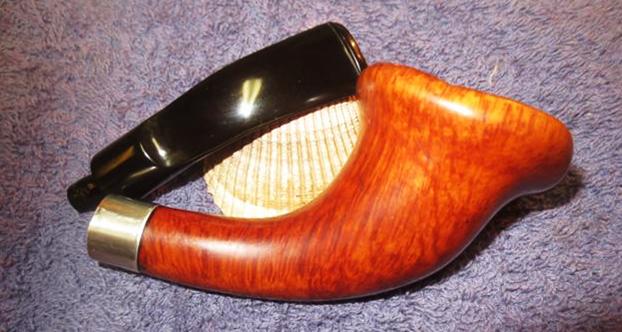
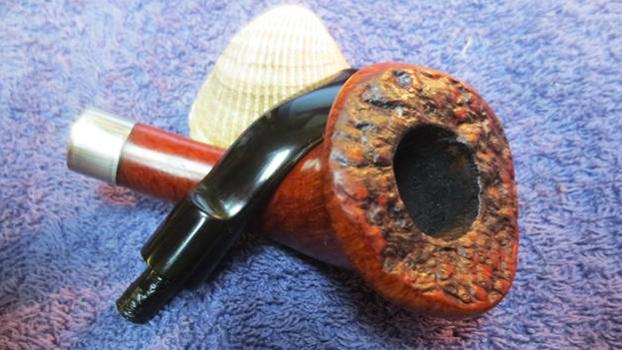
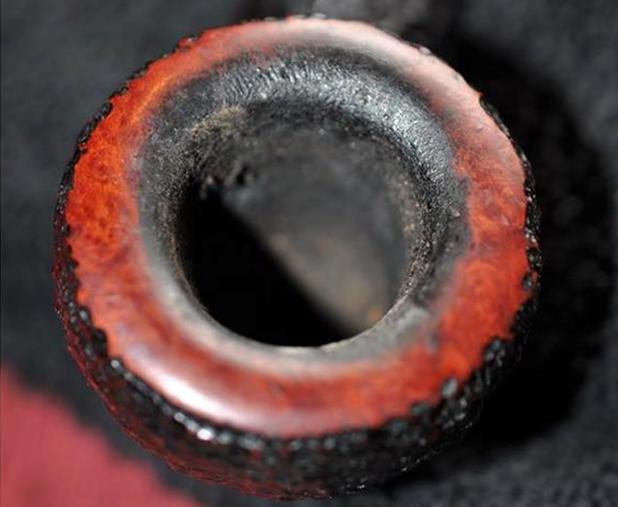
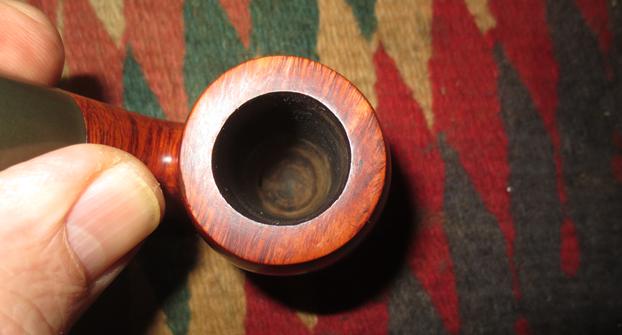
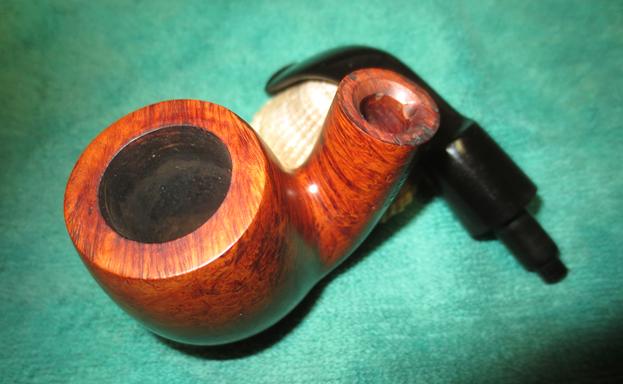
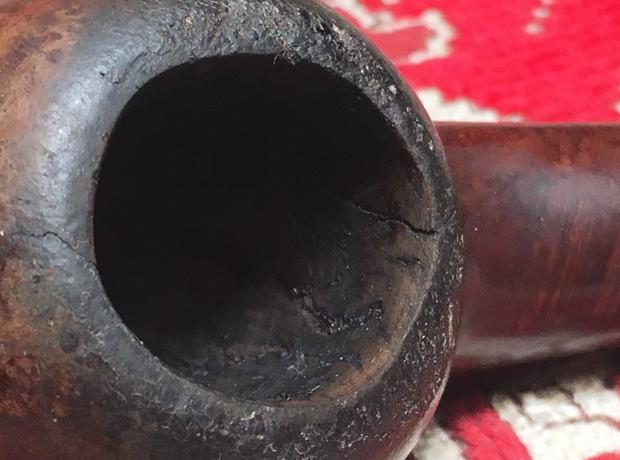
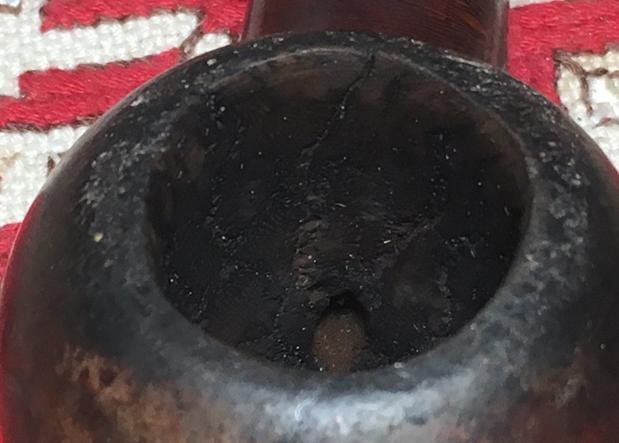
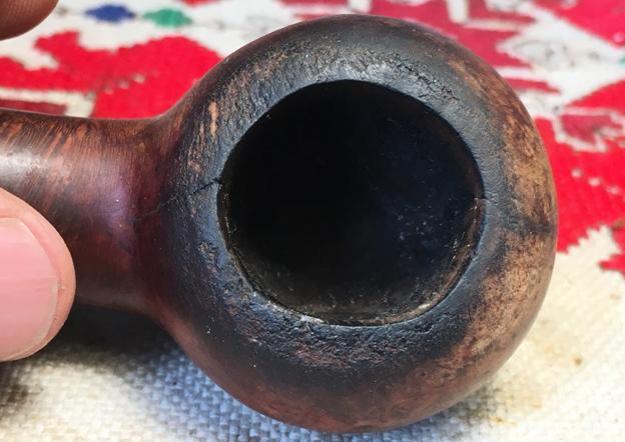
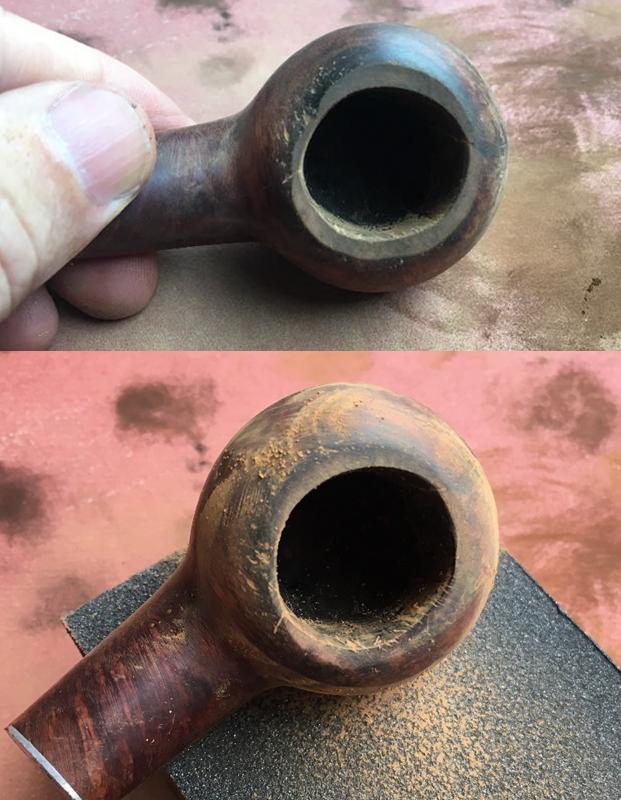
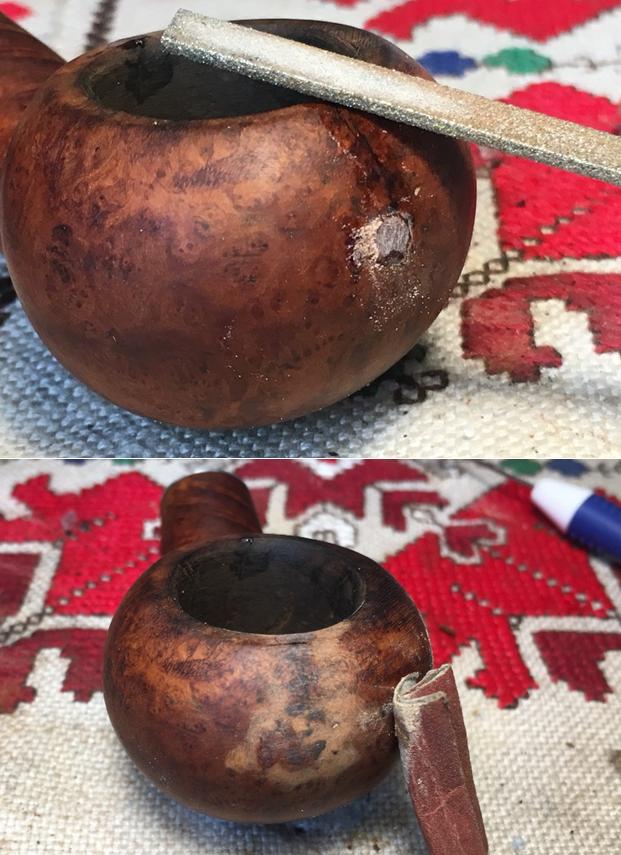
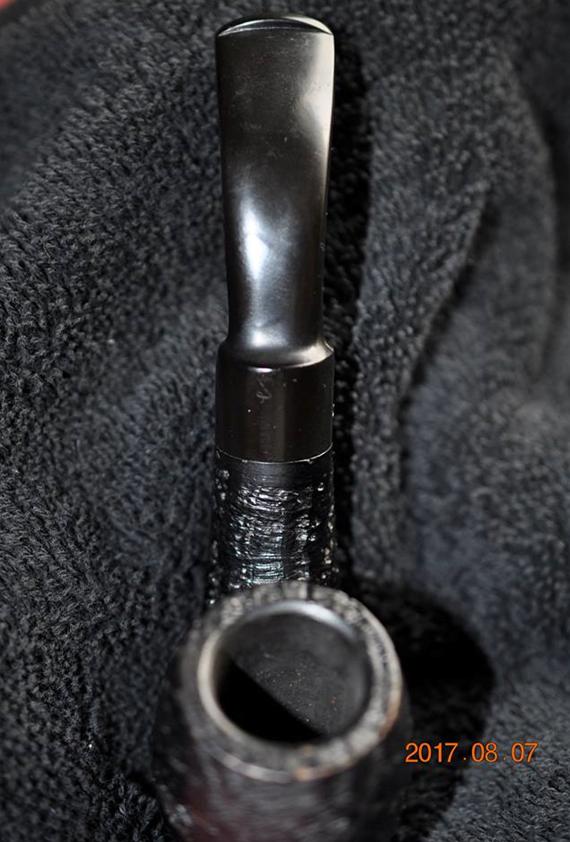
With a better understanding of the Kaywoodie name, I take a closer look at the Author. The good news is that the stem is in good shape with little tooth chatter. The classic Kaywoodie patented Synchro-Stem which boasts that “metal-to-metal contact prevents binding and sticking” from a 1955 catalogue. The stummel, however, is a different story. The rim is beat up significantly, and I detect what might be cracks in the stummel. Looking back at the eBay pictures provided by the seller, it made it very difficult to see what I seen now. There appear to be two cracks, across from each other on the front and on the back of the rim. I take a few closeups.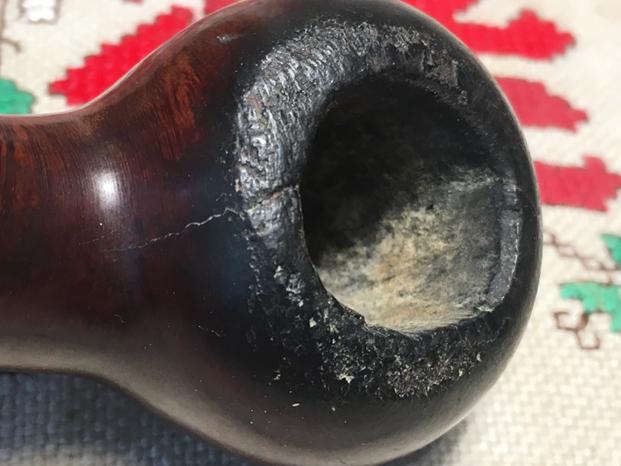
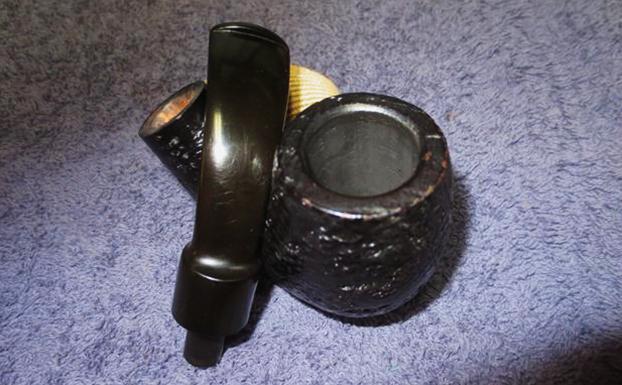
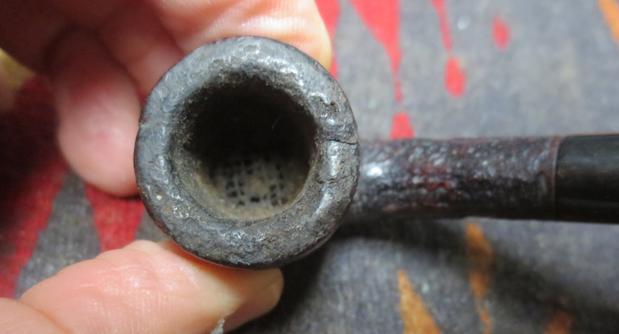
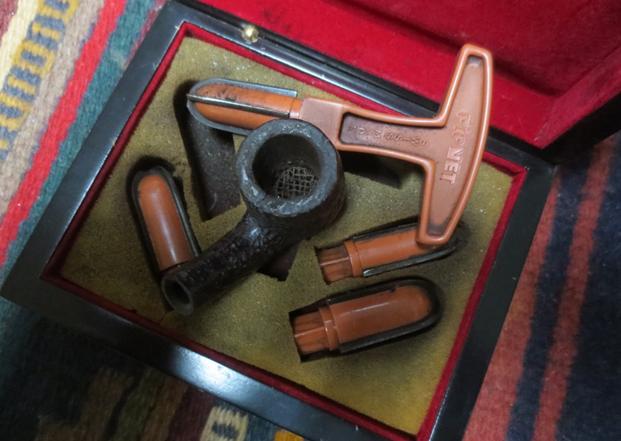
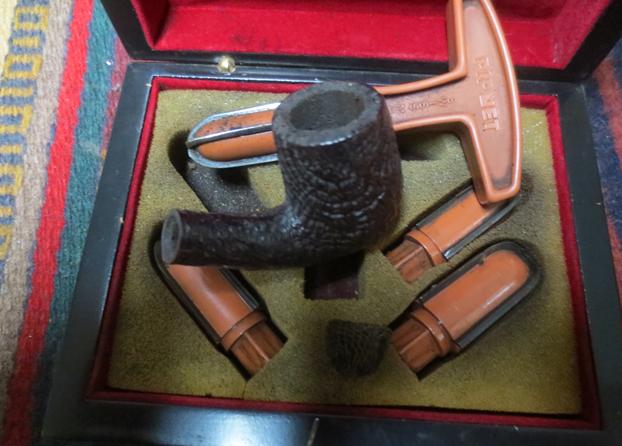
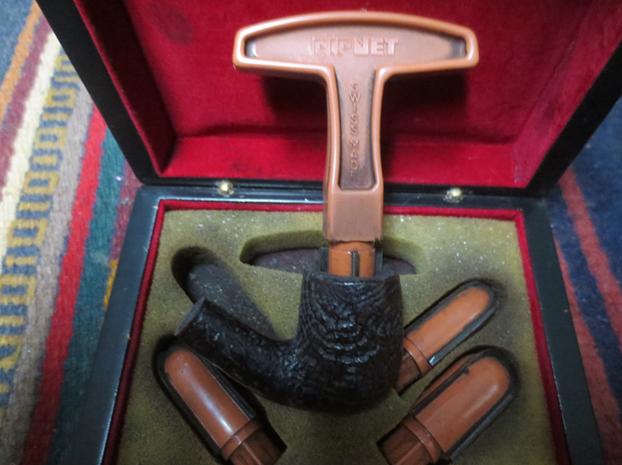
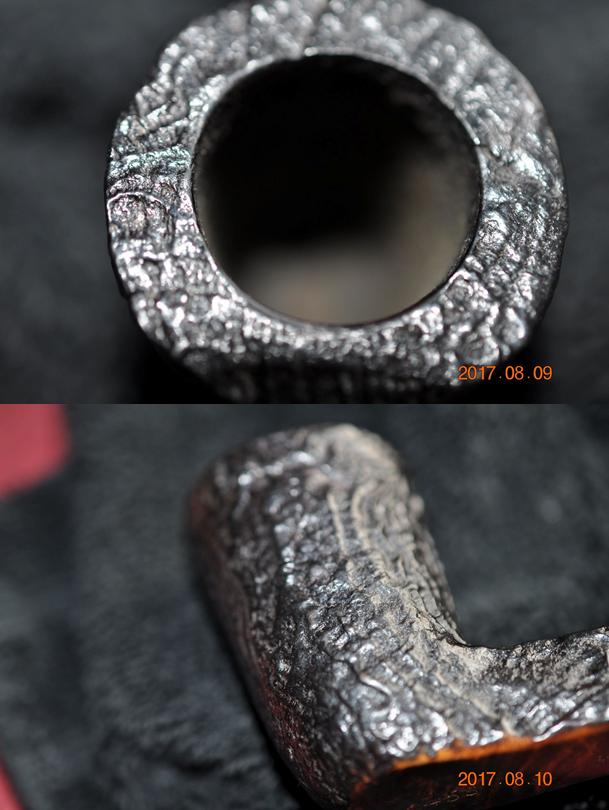
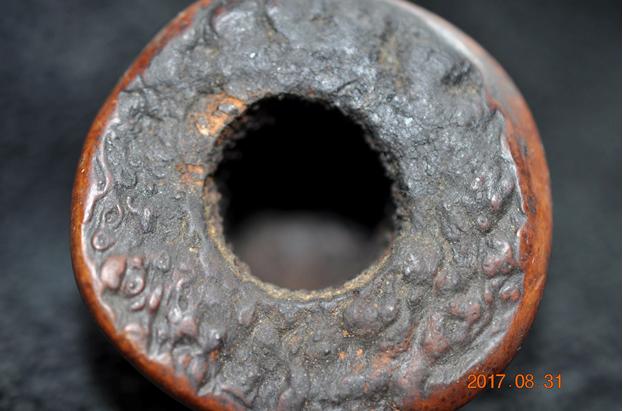
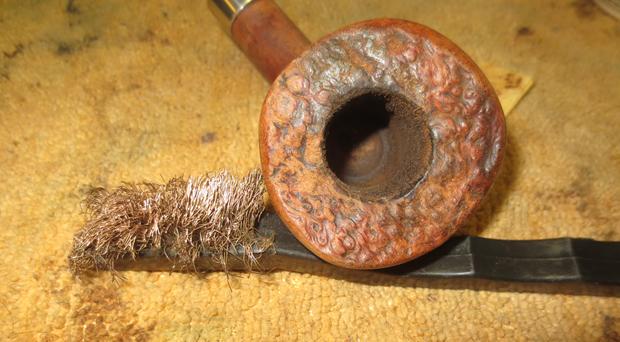
At this point, I’m not sure what I’m seeing. Are the cracks superficial or do the run deeply into the briar. It’s curious also that they seem to be opposites – perhaps part of the same trauma or what? I will need to clean the chamber and rim to see more clearly the depth of the problem. After spreading paper towel to minimize cleanup, I use the Pipnet Reaming Kit to work on the fire chamber. I use 2 or the 4 blades available, starting first with the smallest. I fine tune the reaming job with the Savinelli pipe knife then sand the chamber with coarse 120 grade sanding paper then 240 grade. I wipe the chamber with a cotton pad wetted with isopropyl 95% to clean the carbon dust. I take some close-ups of the chamber revealing some heat fissures and evidence that the crack seems to run through the bowl – especially the crack on the back-side of the bowl. 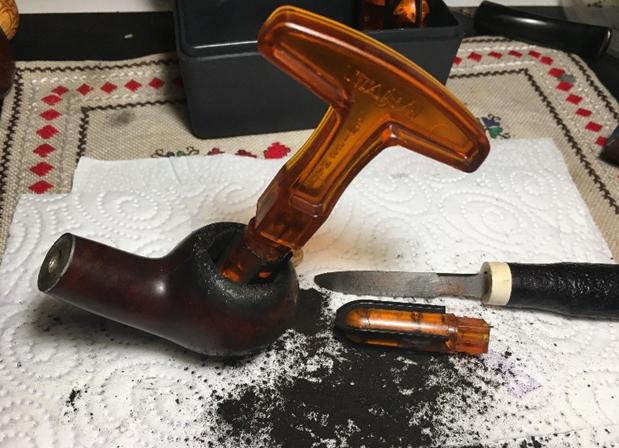
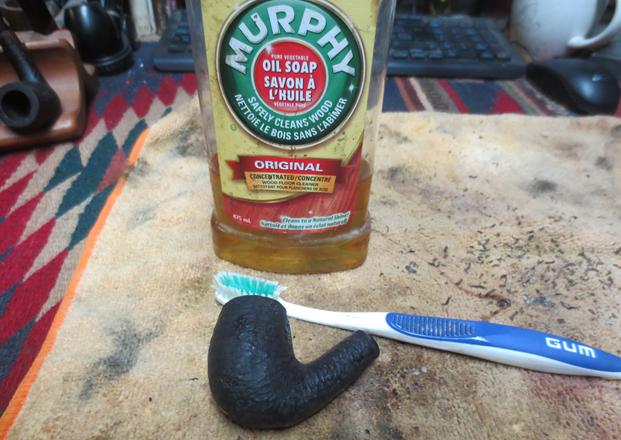
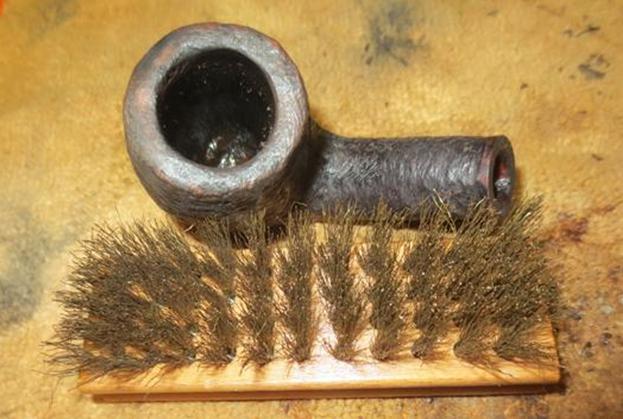
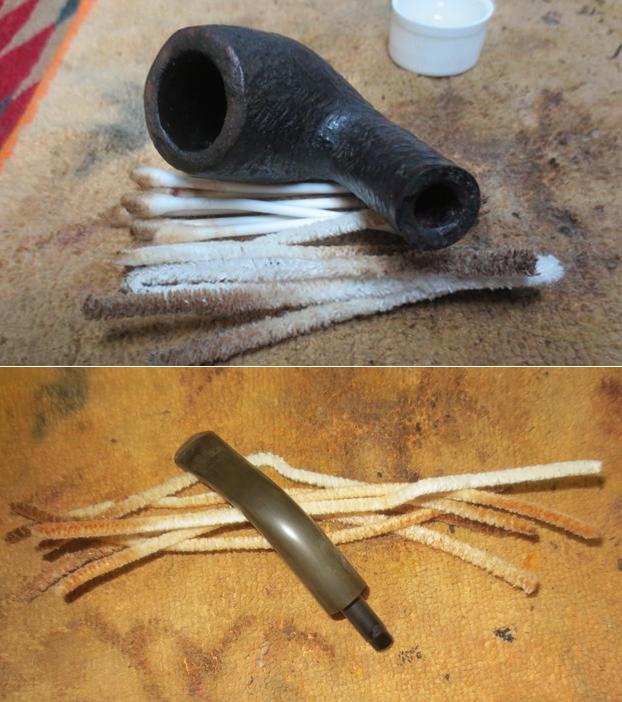
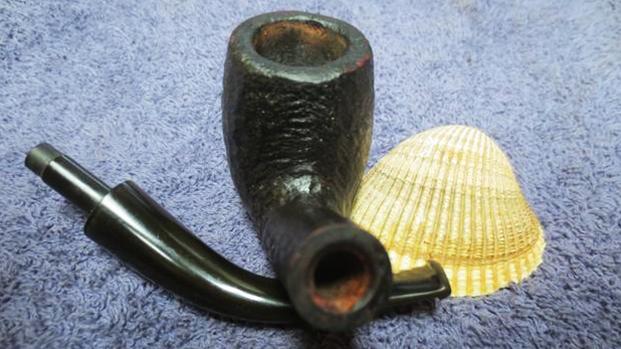
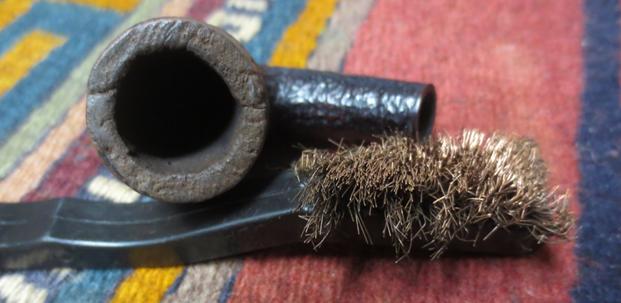
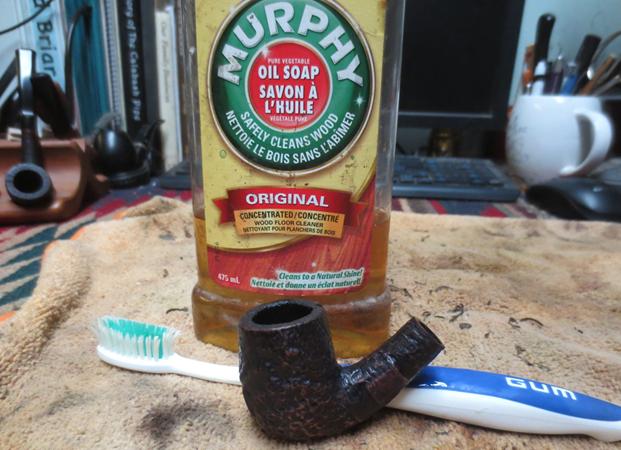
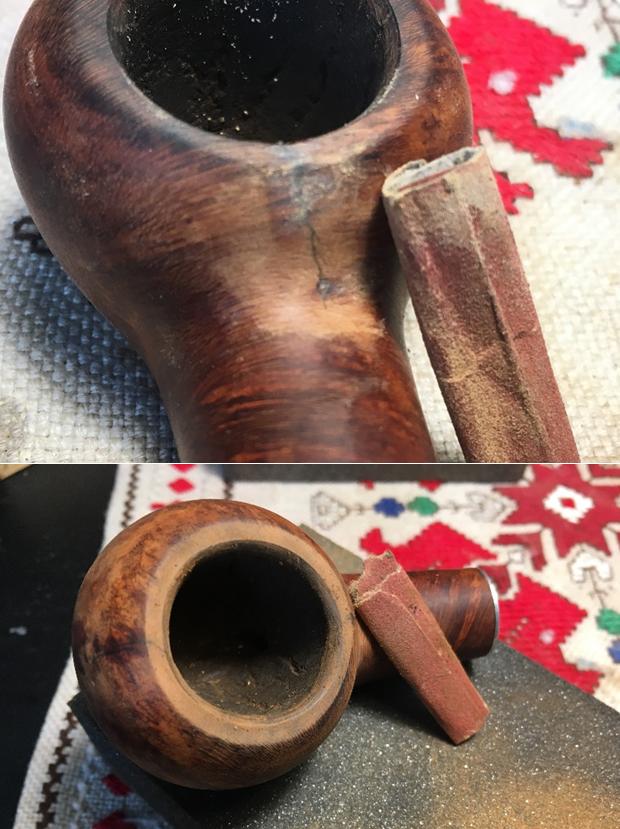
 I continue with the external cleaning using Murphy’s Oil Soap and cotton pads. I also employ a brass bristle brush to work on the rim which is really beat up and scorched. The cleaning reveals more of the damage to the rim as well as the cracks I will need to address. I’m guessing that the stummel cracks were caused by excessive heating of the briar. I decide to clean the internals of the stummel using cotton swabs and pipe cleaners dipped in isopropyl 95%. I also employ a straight needle file to scrape the walls of the mortise to dig out the gunk and tar. I like to take care of the dirty work before continuing with the externals. This also gives me time to think about how to approach the stummel repair. The pictures show the progress which is slow – the internals are really gummed up.
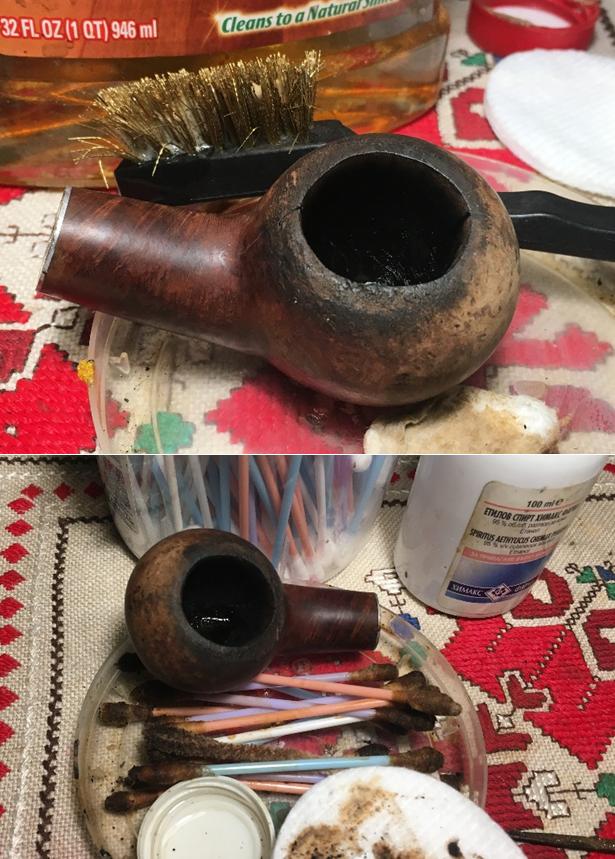
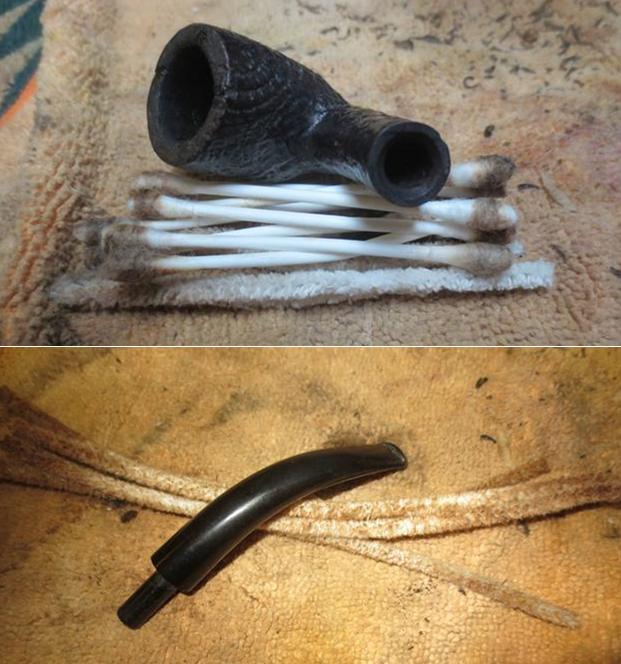
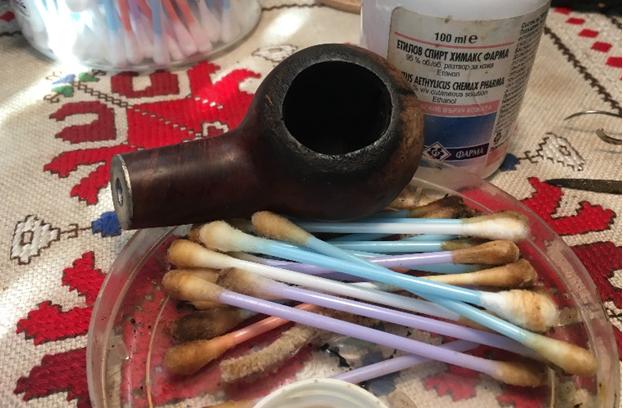
The day is coming to an end so I decide to employ a kosher salt and alcohol soak to make progress with the internals – while I sleep! I use kosher salt so not to leave an iodine after-taste. I stretch and twist a cotton ball to create a thinner ‘string’ of cotton to stuff down the narrow mortise opening through the metal plate of the Kaywoodie. This cotton string will act as a wick to draw out the oils. I then fill the bowl with kosher salt and cover the opening with my palm and give it a shake to displace the salt. Using a large eyedropper, I introduce isopropyl 95% to the bowl until it surfaces over the salt. I leave the stummel in an egg crate and turn the lights out – another day is done. The next morning, the salt/alcohol soak has done the job. The salt has discolored as well as the cotton wick. I dump the used salt into the waste basket, thumping the stummel on my palm. I wipe the chamber out with paper towel and using a long-bristled brush remove the excess salt from the internals. I then return to using cotton swabs dipped in isopropyl 95% to complete the cleaning. The pictures show the progress.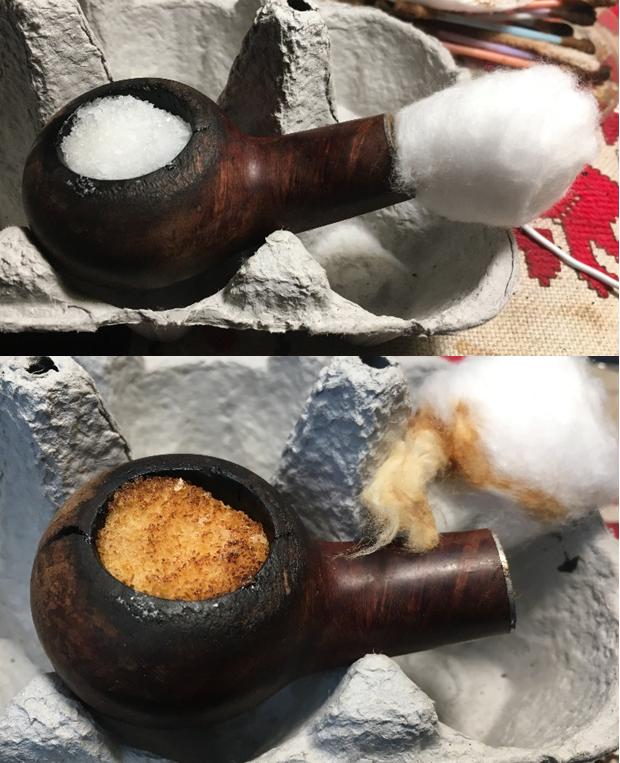
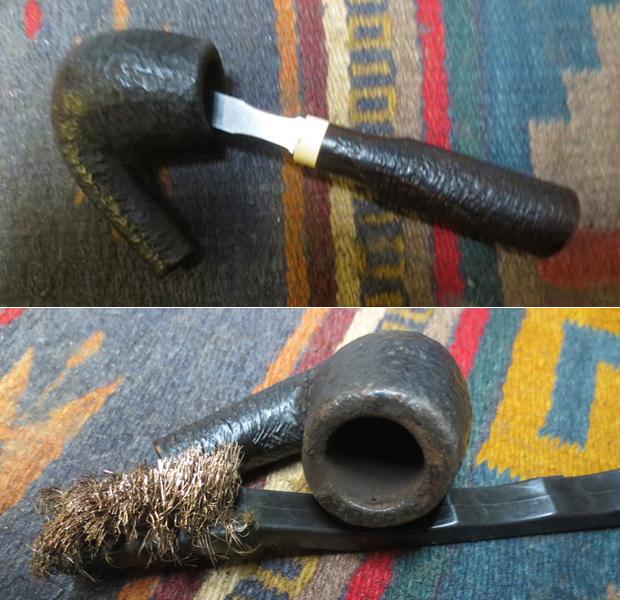
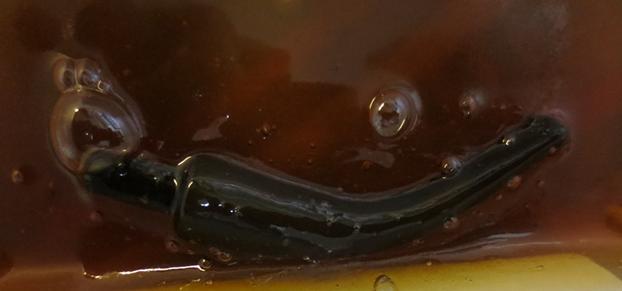
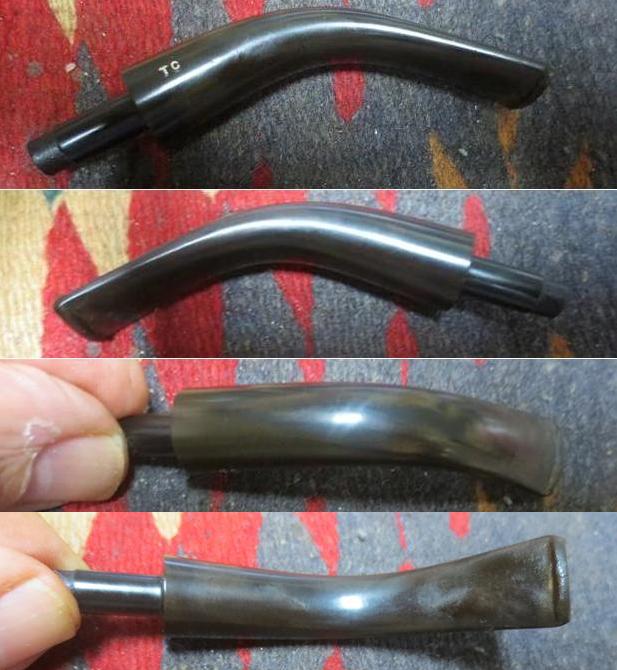
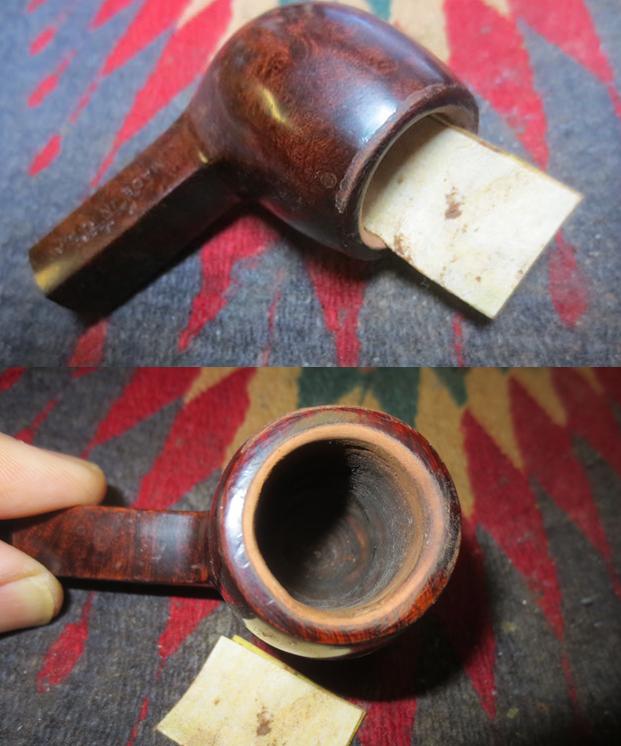
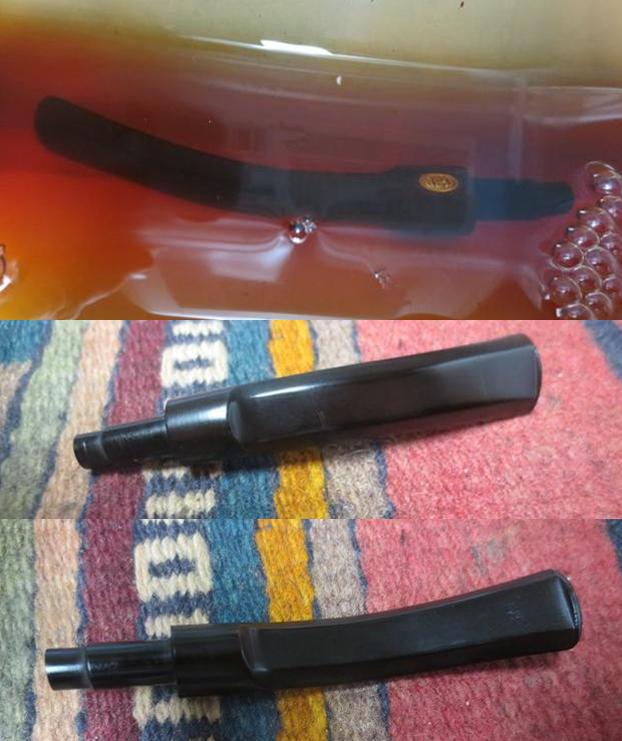
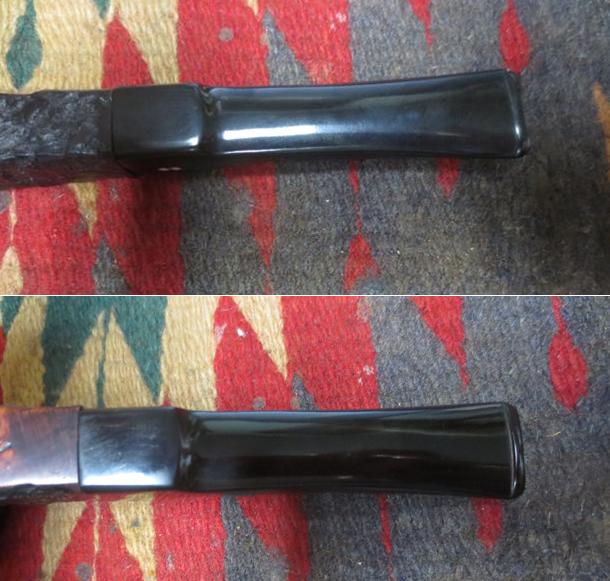
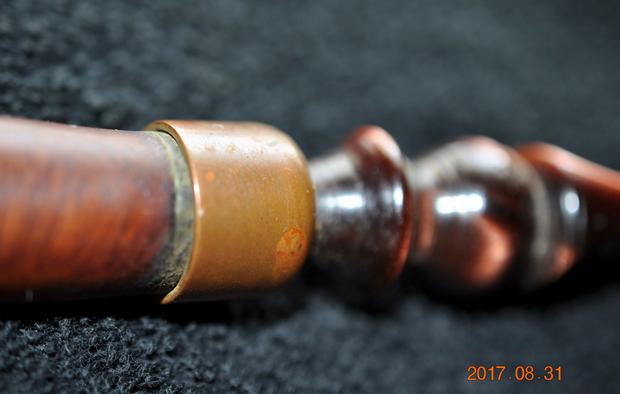
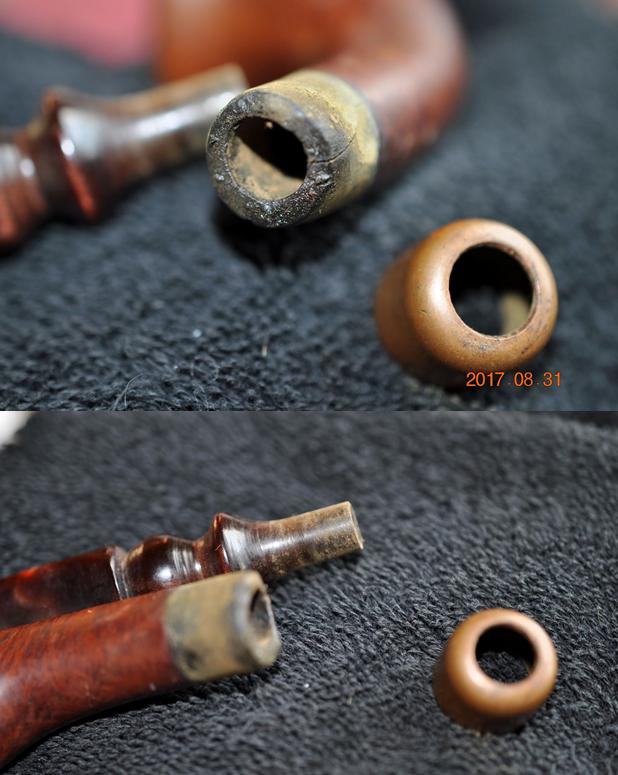
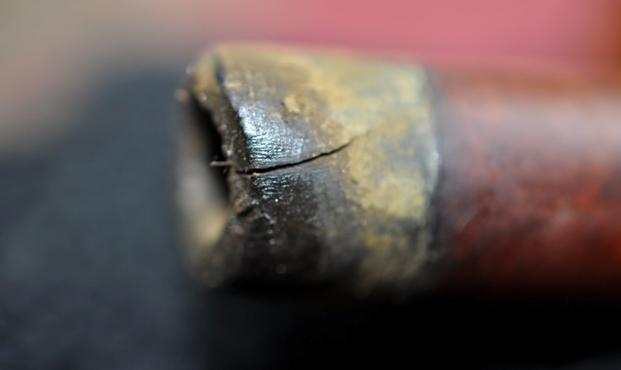
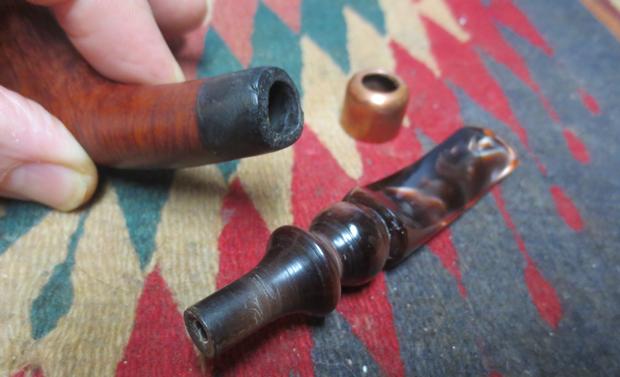
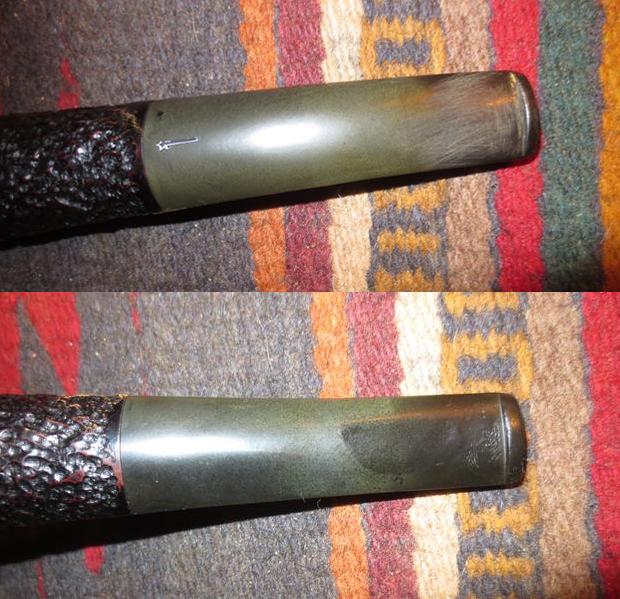
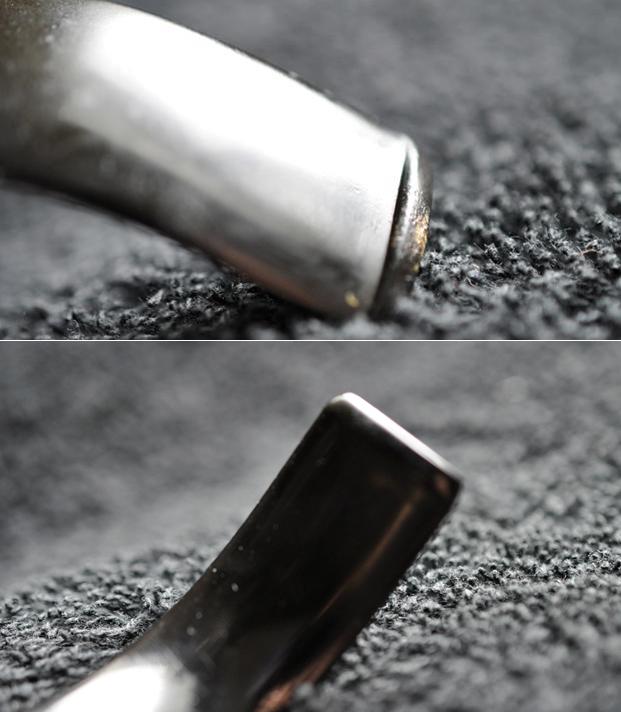
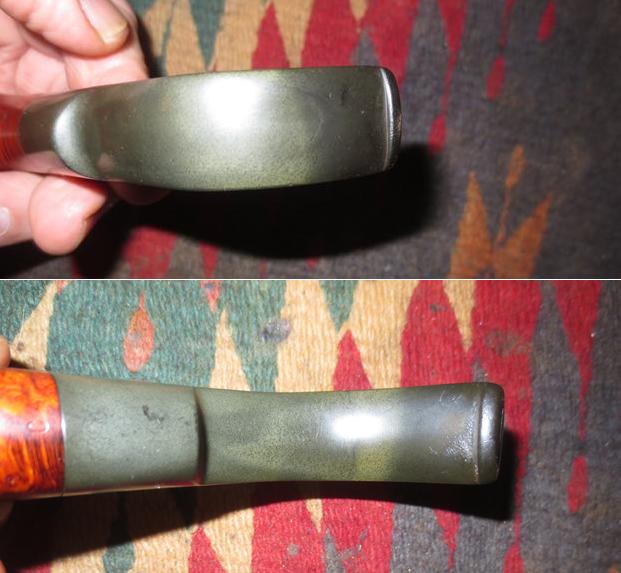
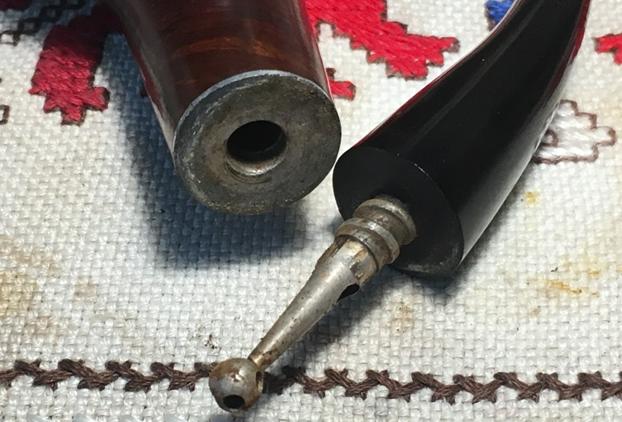
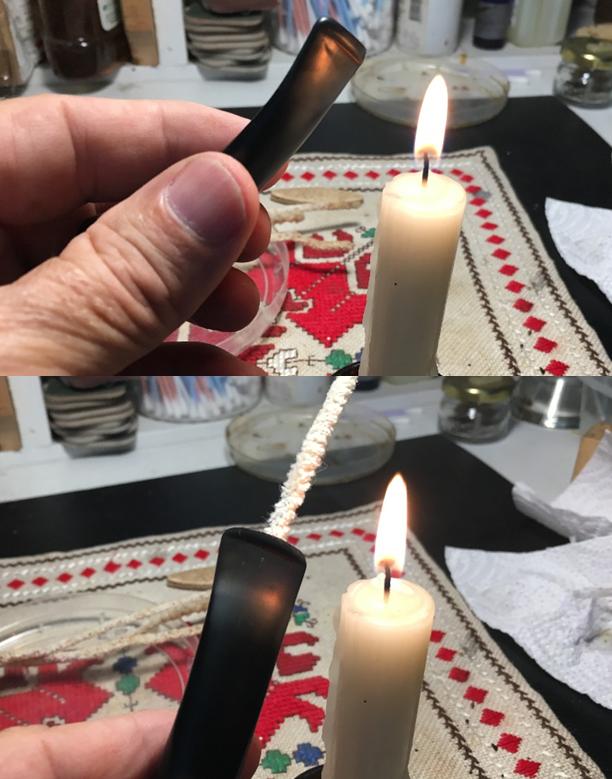
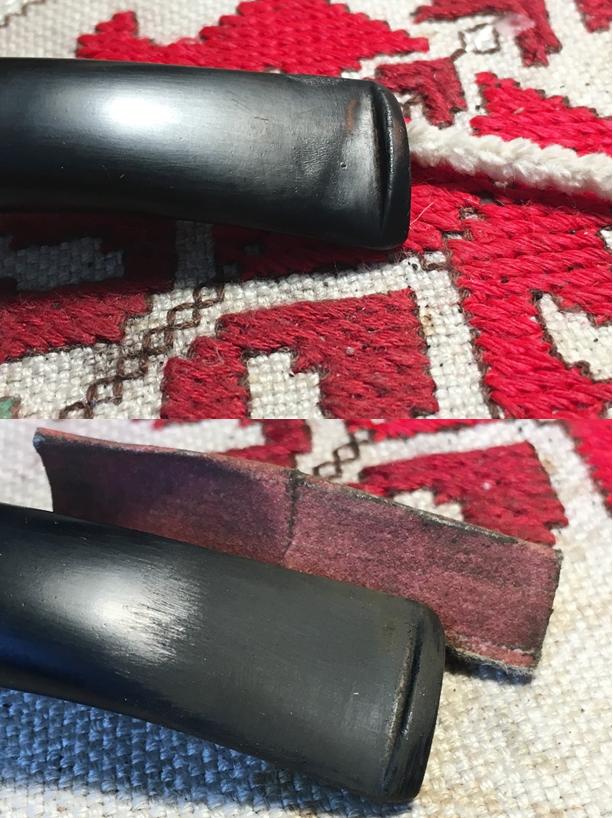
After sending an email off to Steve to get some advice on the stummel cracks and the stinger/tenon system of this older Kaywoodie, I put the stummel aside to work on the stem. I wasn’t exactly sure how the stinger on the stem which screws into the metal shank plate comes off – and off it must come if one is to adequately clean the stem – and keep it cleaned! Steve’s email was helpful with the question whether the stinger had 3 holes or 4 – 4 would indicate an older system according to Steve. Ok, another clue to the age of this old boy. I look and discover 4 holes on the end ball of the stinger which indicated to Steve that the stinger may be threaded and screws into the metal tenon. Taking a closer look, there does appear to be a seam marking the tenon and stinger contact point. Steve’s advice was to heat the tenon and twisting the stinger to release it. I take a couple of pictures to show what I’m seeing.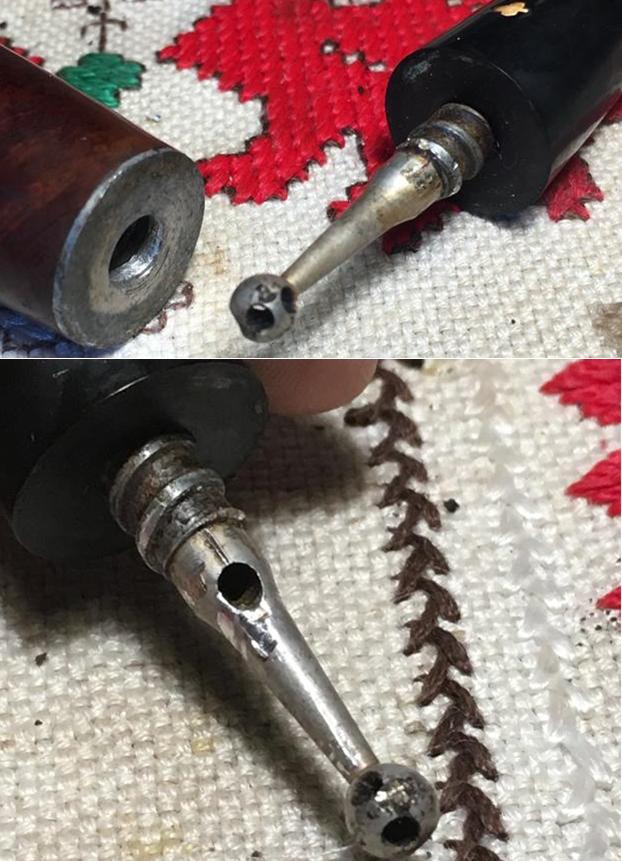 Holding the stinger over a lit candle, after a few tests to twist, the entire tenon unscrewed from the stem. By the appearance of the seam, I’m thinking that the stinger will separate from the tenon and needs to be removed for ease of cleaning. With another quick note off to Steve, I’m cautious because I don’t want to damage the tenon and Steve has seen a few more of these than I! I clean the tenon with alcohol and a cotton pad and then follow this with 0000 steel wool to finish cleaning the tenon/stinger. To work on the oxidation of the stem I drop the stem into an OxiClean bath to let it soak for several hours. The pictures show the progress.
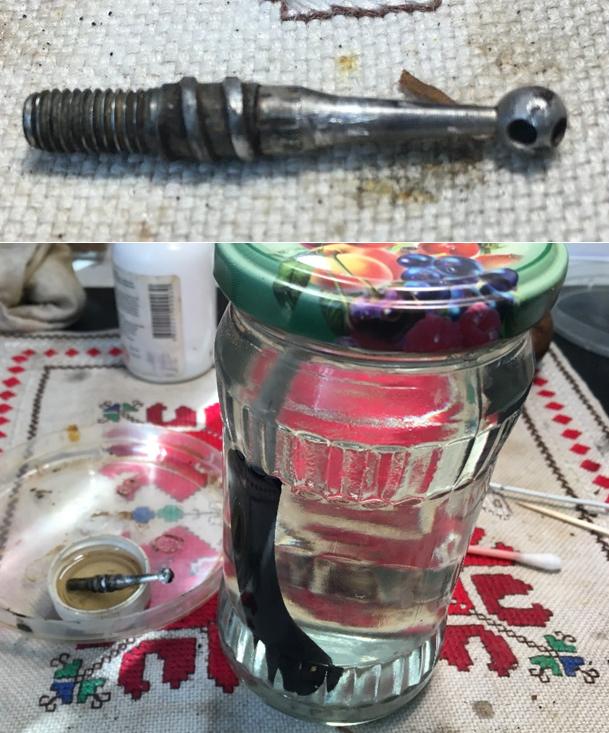
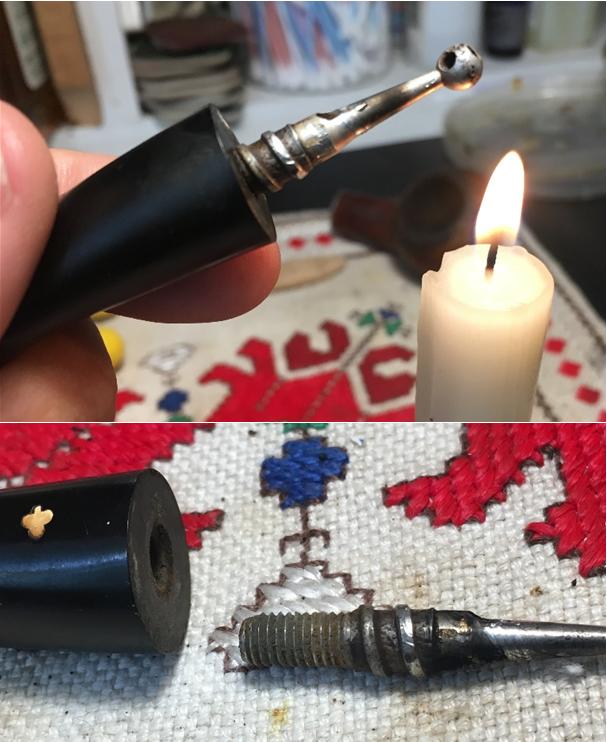
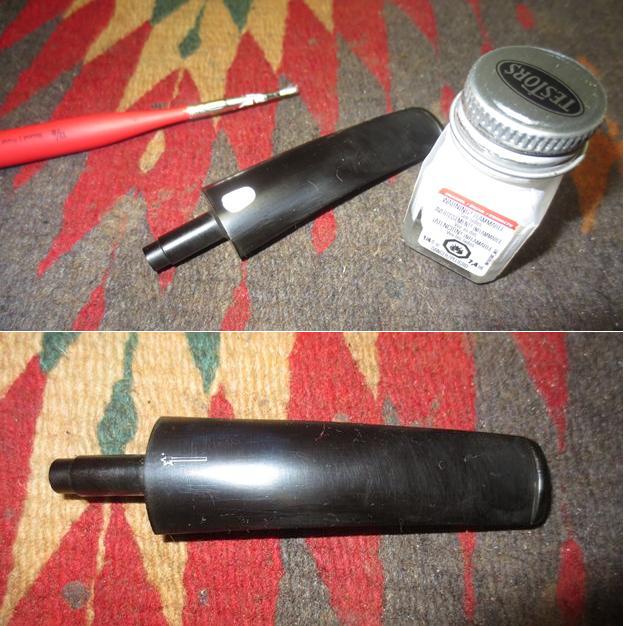
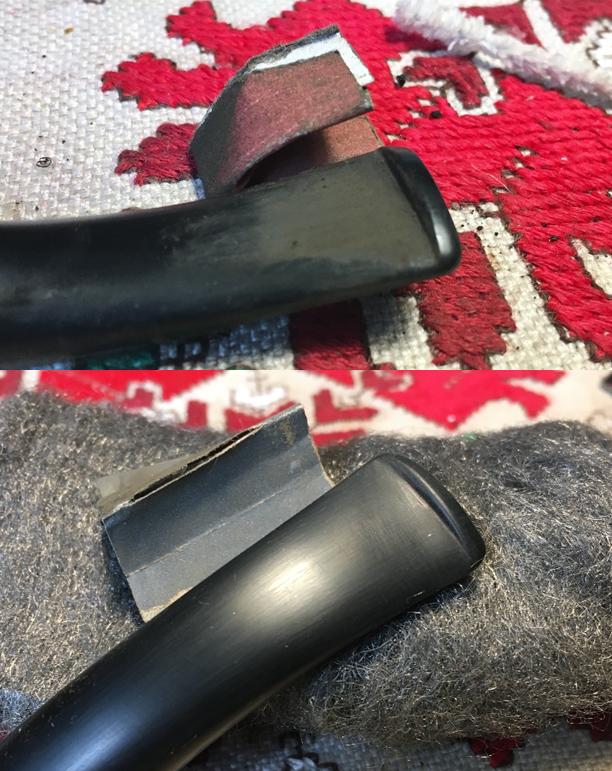
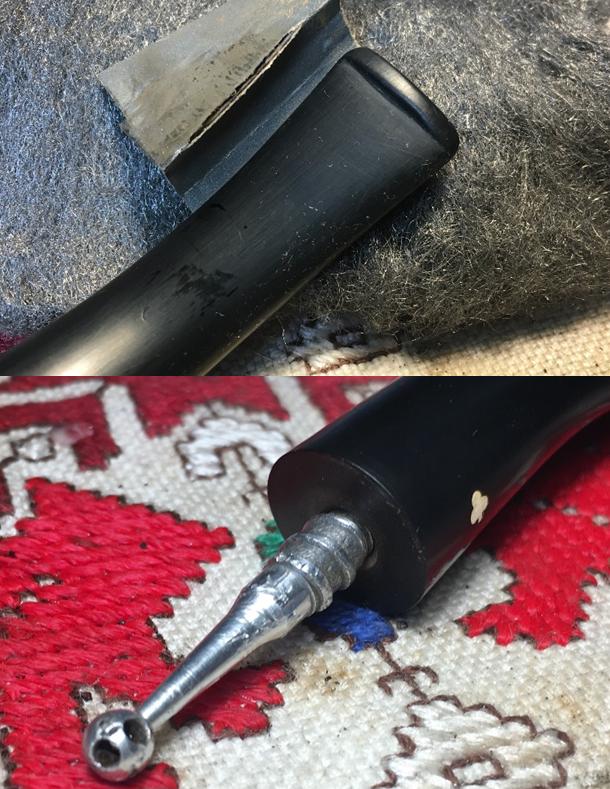
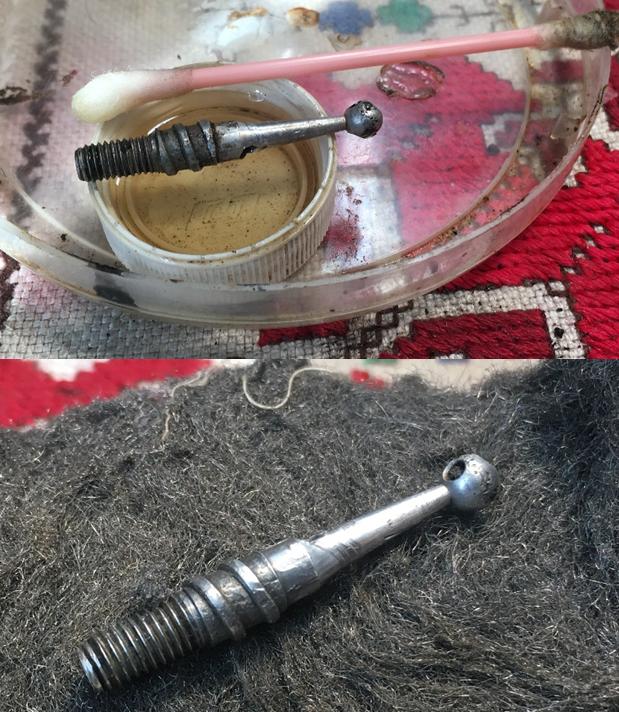 After several hours, I retrieve the stem from the OxiClean bath. The stem shows little oxidation after the soak. Using 0000 steel wool I clear the layer raised by the OxiClean bath. Then, using pipe cleaners and long-bristled brushes, dipped on isopropyl 95%, I clean the internals of the stem. The airway is tight and I resort to the long-bristled brushes to push through the airway. After cleaning the airway, I want to alleviate some of the tightness of the airway by expanding the slot area. I use a pointed needle file and insert the point into the slot and carefully apply abrasive pressure to the edges of the slot. The pictures show the progress.
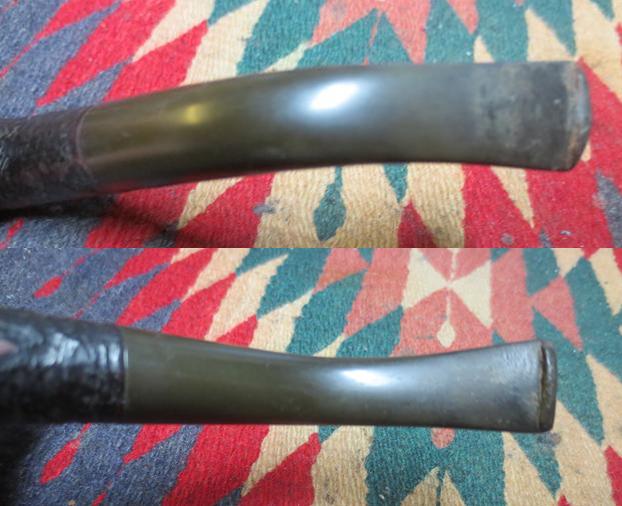
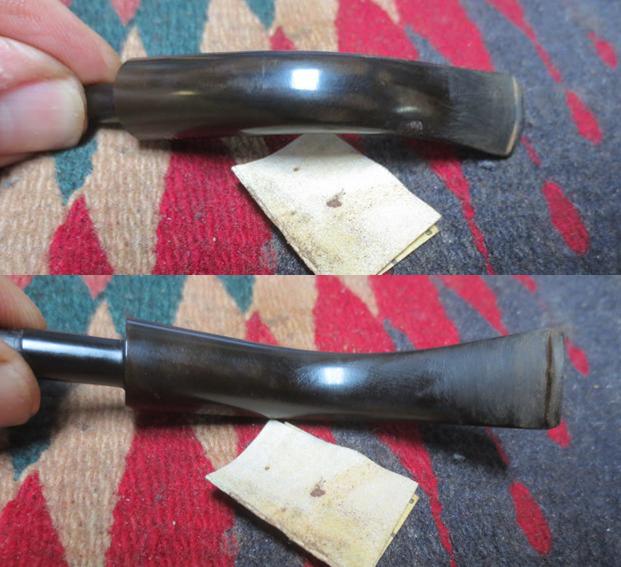
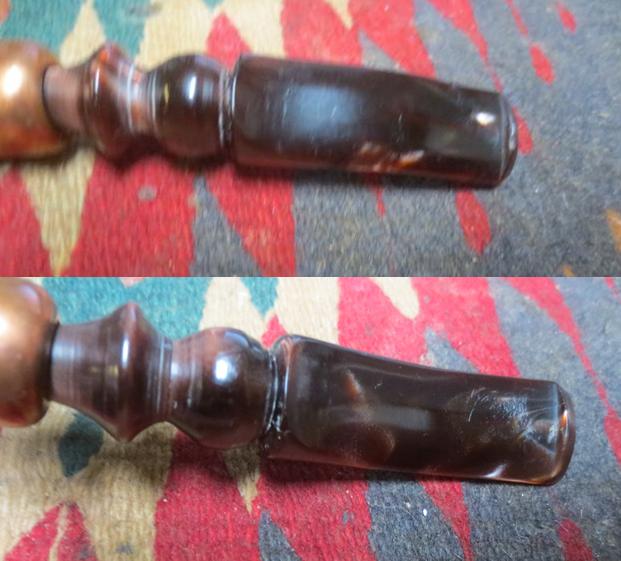
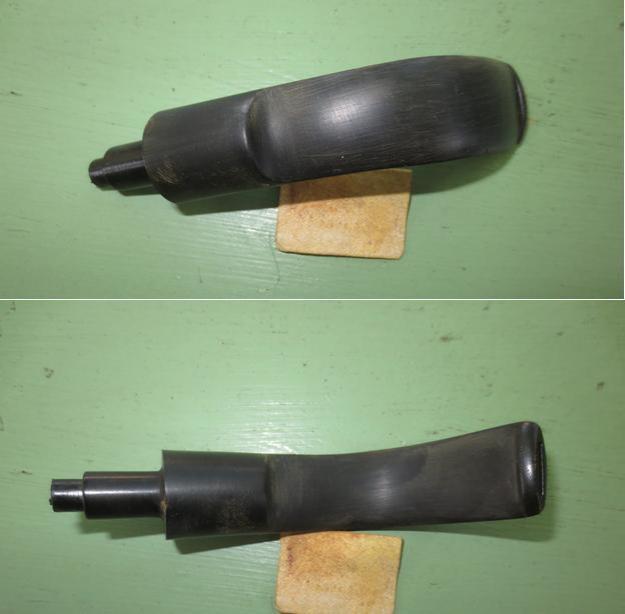
 The upper bit shows latent bite dents – the lower as well but much less. I use the heating technique to expand the vulcanite. With a lighted candle, I pass the end of the stem over the flame – in a back and forth motion, not allowing the stem to cook by holding it stationary over the flame. After a few passes, the idea came to my mind that while the vulcanite is pliable to insert a pipe cleaner in the airway to expand it a bit allowing pipe cleaners to pass through without as much fuss. The effort seems to work – both for expanding the vulcanite and the airway. There remains a ‘footprint’ of the bite dent, but not as much. Using 240 grit sanding paper I work the dents out on the upper and lower bit. Following the 240 grit paper, I use 600 grit and then finishing with 0000 steel wool. I reattach the tenon/stinger to the stem and clock it so that the stem tightens at the correct angle. I tighten the tenon one full turn less to make it easier to remove and therefore, much easier to clean the airway. I like the results – good progress on this nice-looking KW Author. The pictures show the progress.
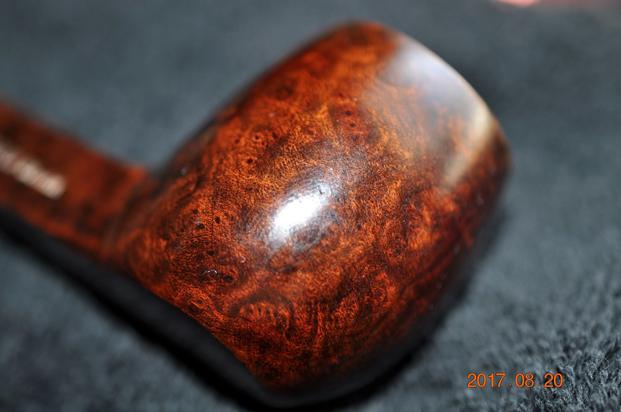
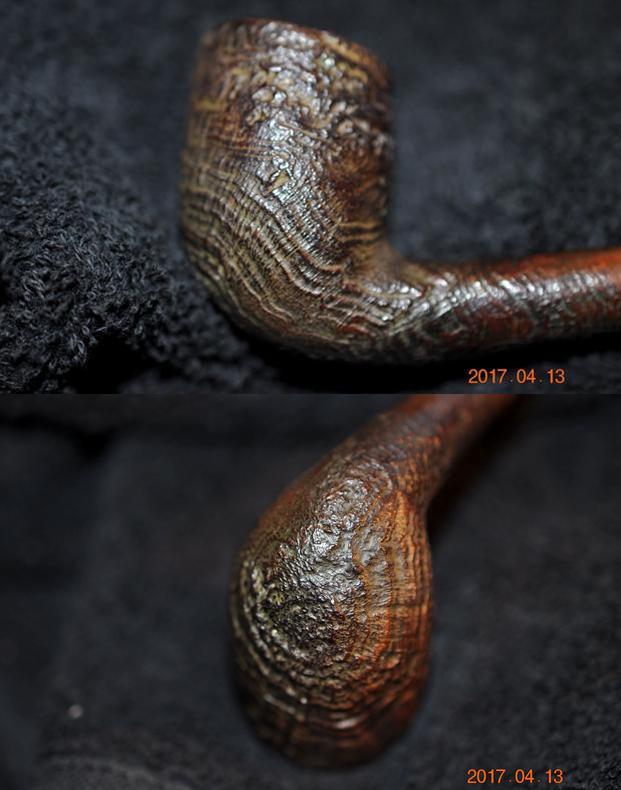
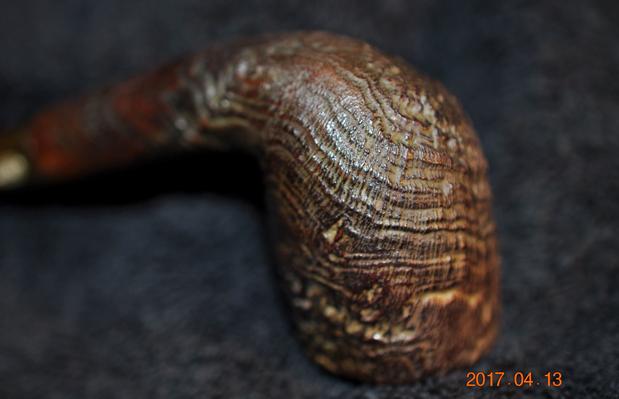
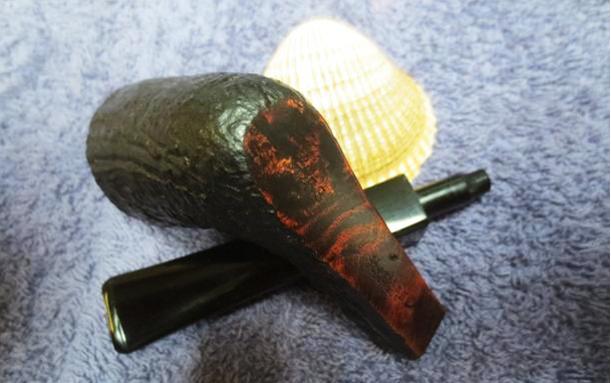
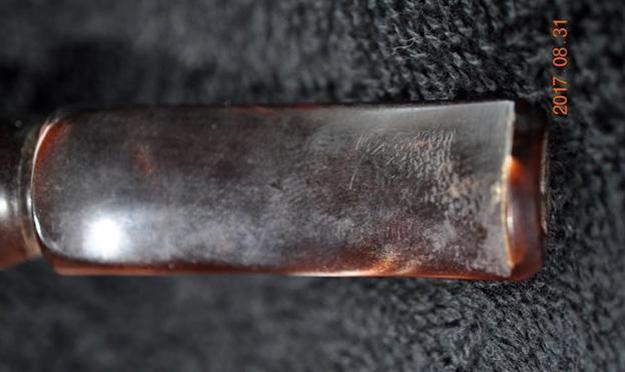
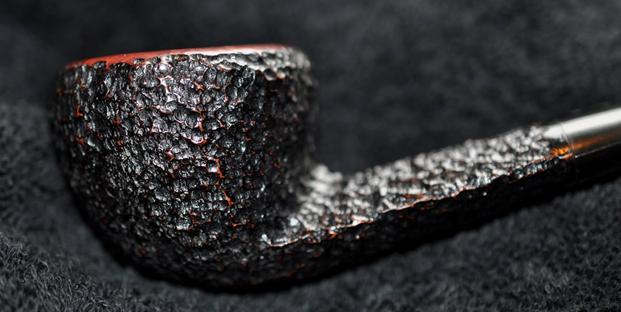
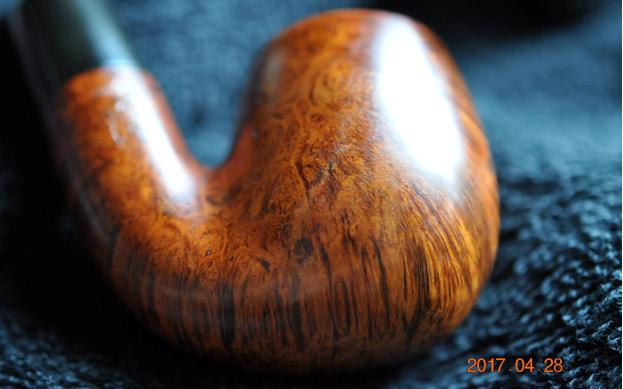
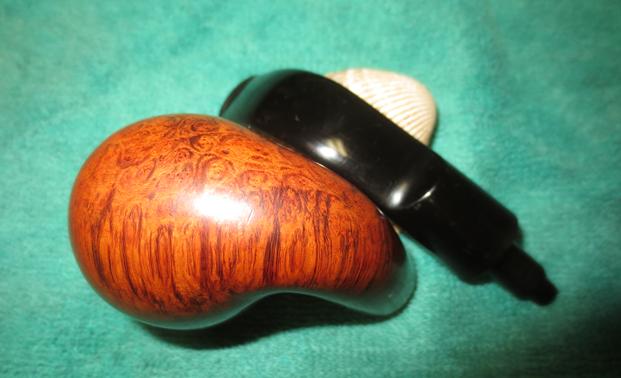
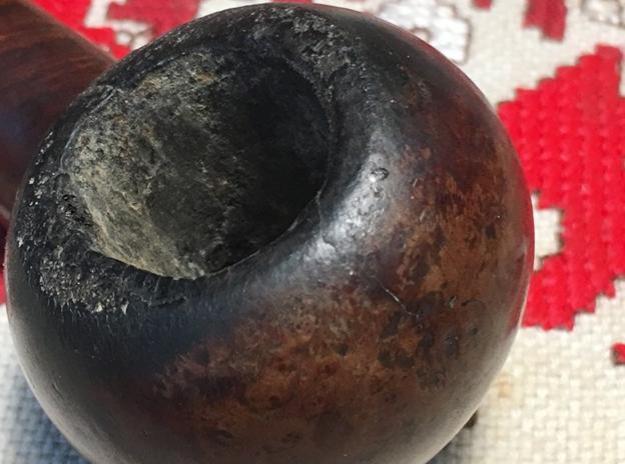
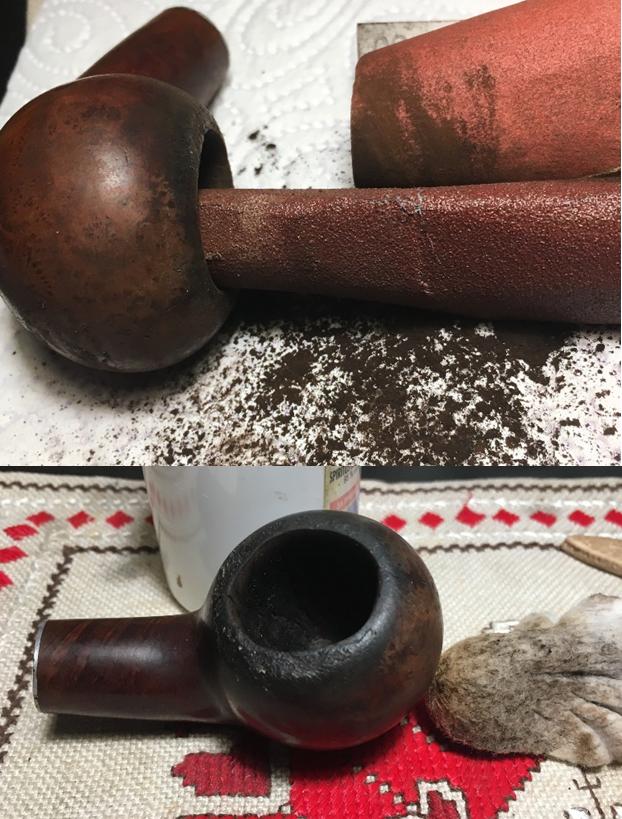
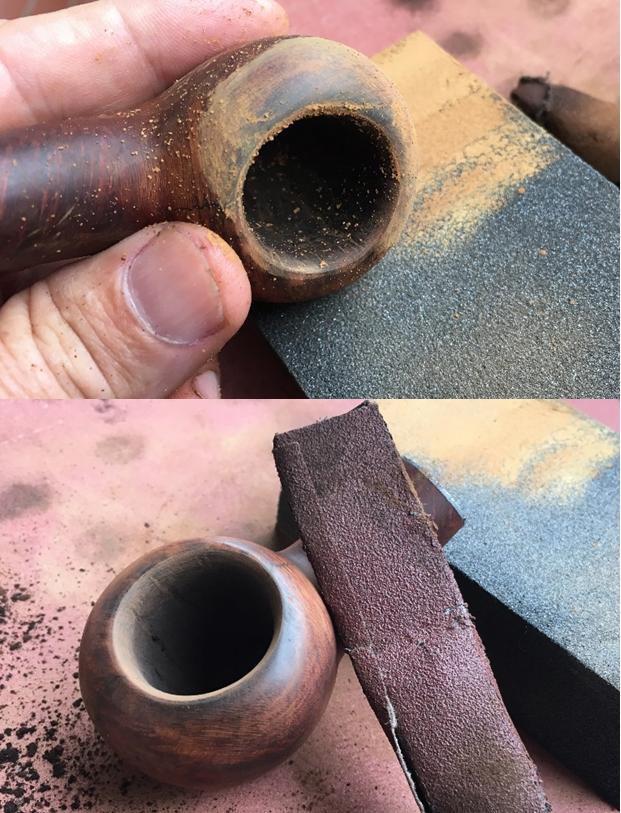
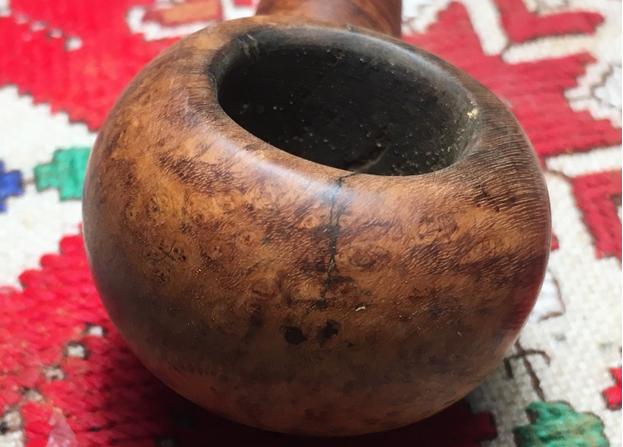
 I turn my attention back to the stummel, and take a few more up-close pictures. The burn damage is significant and the chamber is out of round. Heat fissures are evident in the chamber and I’ve already noted the cracks in the stummel which track over the rim into the chamber. I can say with little doubt, this pipe was loved and used much by its former steward. Yet, he’s taken quite a beating. My plan is to fill the heat fissures in the fire chamber with a coat of J. B. Weld. With Steve’s input, I’ll drill back-holes at the terminus points of both fore and aft cracks to prevent further crack creep. I will fill each hole with CA glue as well as apply a penetration layer of CA glue over the path of the crack to seal the cracks. Before I start these repairs, I work on the external rim area with the goal of cleaning up the damage, re-balancing the stummel’s look as much as I can through a combination of topping and sanding. When the stummel starts looking human again, if this is possible, I will then again assess the cracks and their needs. All in all, the stummel’s undamaged briar is quite attractive – nice grain. I hope I can return this Kaywoodie up to specs so that Jen can be proud to gift this old boy to her men-folk!
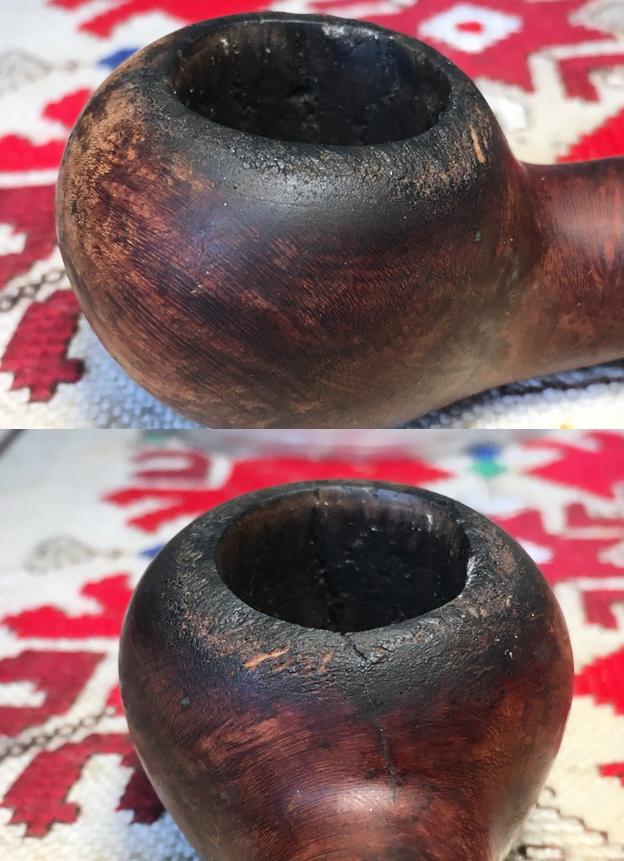
 I start with a coarse sanding sponge to see what progress can be made. I follow by gently topping the stummel with 240 grit paper on a chopping board and then again return to the coarse sanding sponge to ‘reduce’ the edge of the topped stummel. What develops is a technique of gradually reshaping the rim area to give the stummel a more uniform look. I cycled through a light topping and then returning to the coarse sanding sponge several times. The pictures show the process.
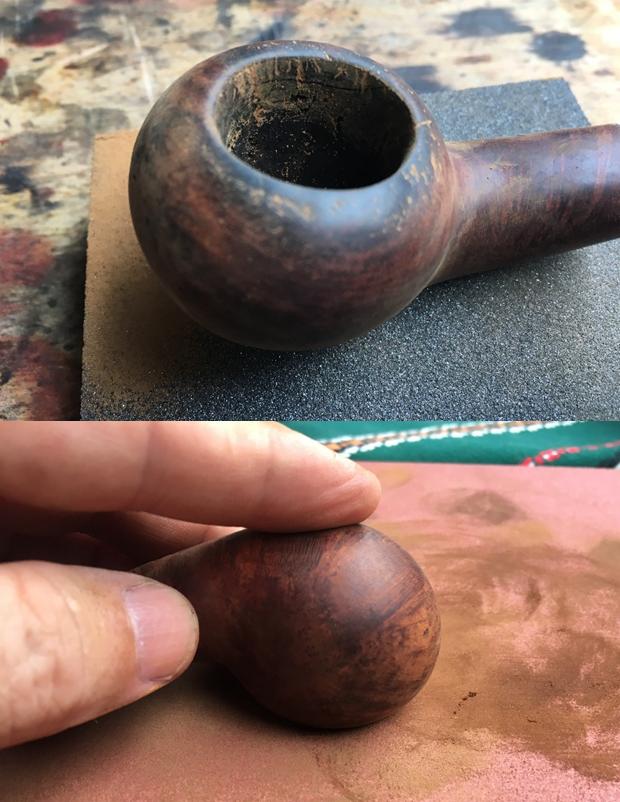
 As the rim starts taking shape, the fact that the bowl is out of round becomes even more distinctive. To shape incrementally a truer ‘round’ I use a coarse 120 grit sanding paper rolled up and I sand the internal bowl at the point where the rounding was needed. I gradually work around the internal chamber wall careful not to lean to aggressively into beveling an angle on the internal rim at this point. I want to address first the unevenness in the walls of the fire chamber. After doing this, I move more toward the top of the chamber and then create an inner bevel which gradually helps to round out the rim. As I work on the internal sanding, I recycle as before, doing a gentle topping followed by the coarse sanding sponge to even and balance the whole. The pictures show this gradual process starting with the ‘unrounded’ bowl.
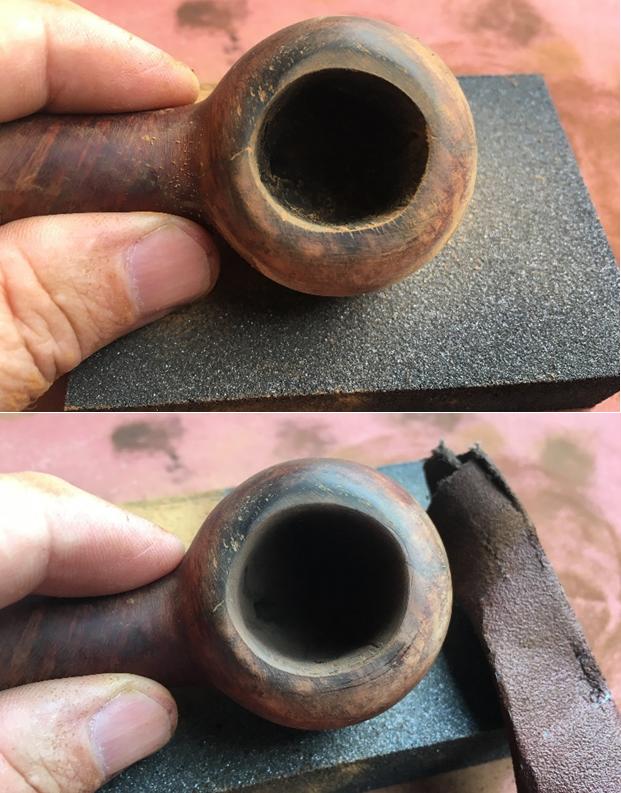
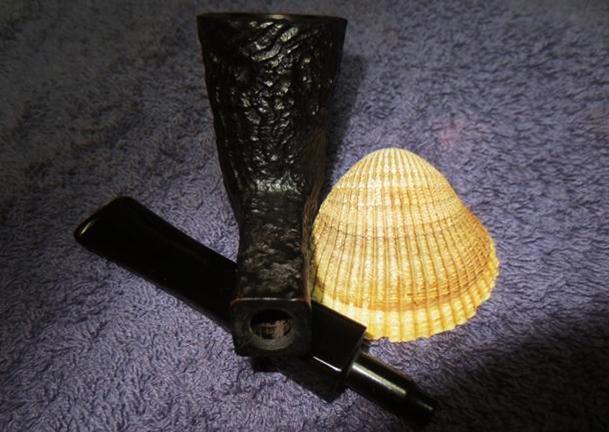
 While the completed shaping is not perfect, I’m pleased that the stummel has regained proportion with the removal of the damaged briar and the gradual shaping through sanding and topping. Looking very good at this point!
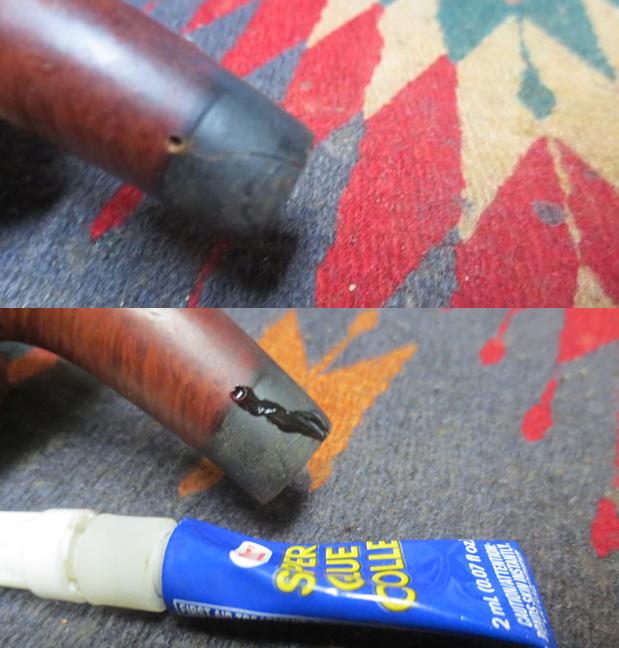
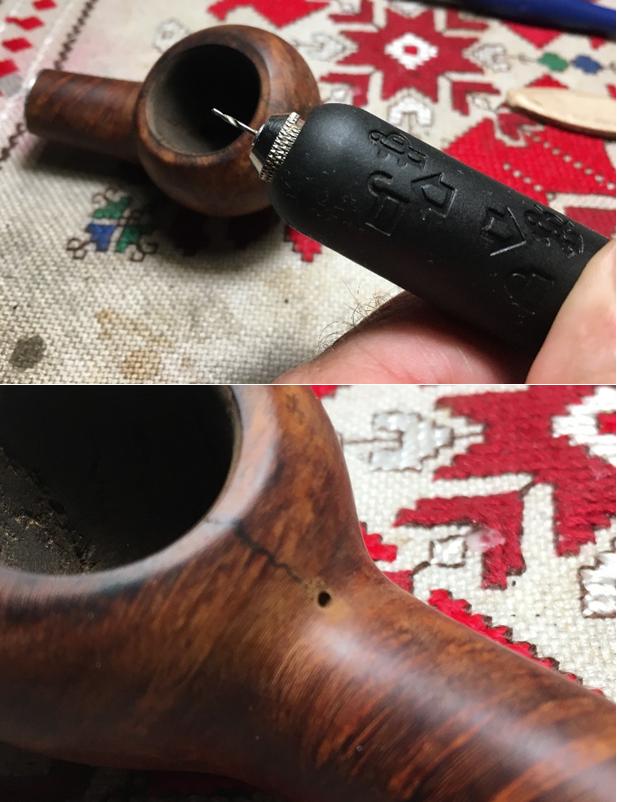
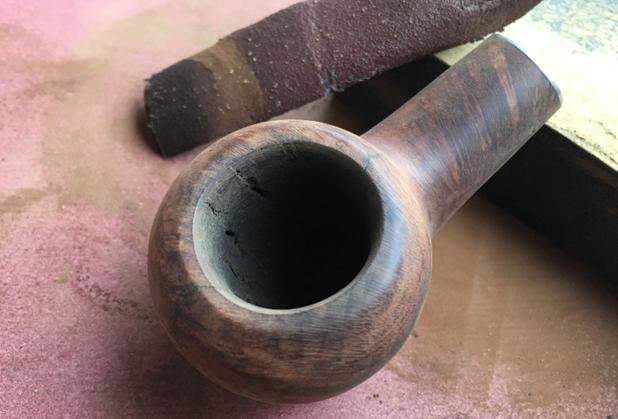 Before I move forward finishing the stummel, I need to do the crack repairs. The first thing I do, with the aid of a magnifying glass is mark the terminus points of the forward and aft cracks on the stummel. The mark is made by creating a dimple using sharp dental probe. This helps to guide the drill point when I create the ‘back hole’. Using a 1mm sized drill bit mounted on the Dremel, I drill holes at the terminus points of the cracks. With a somewhat steady hand, the work is successful.
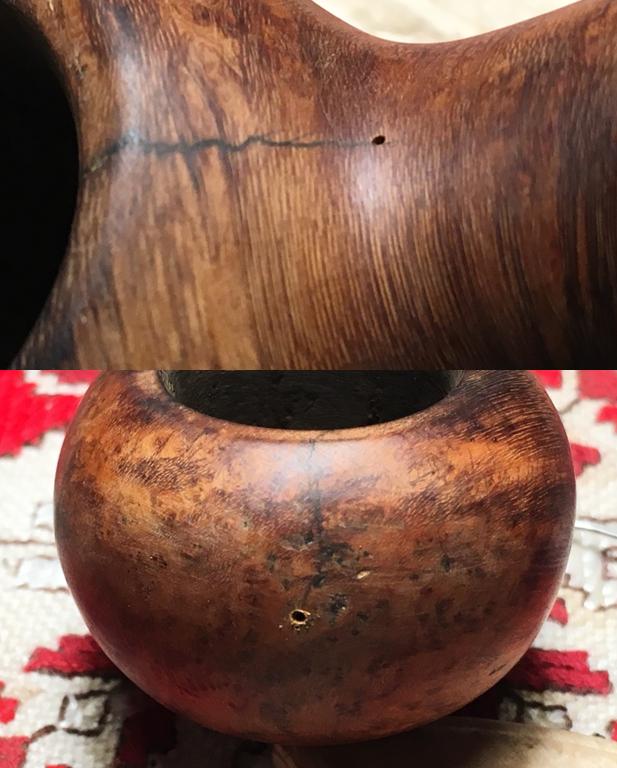
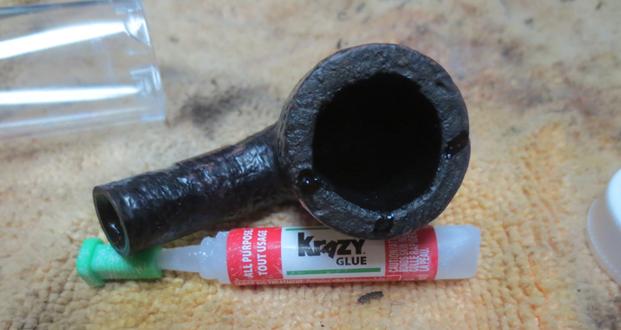
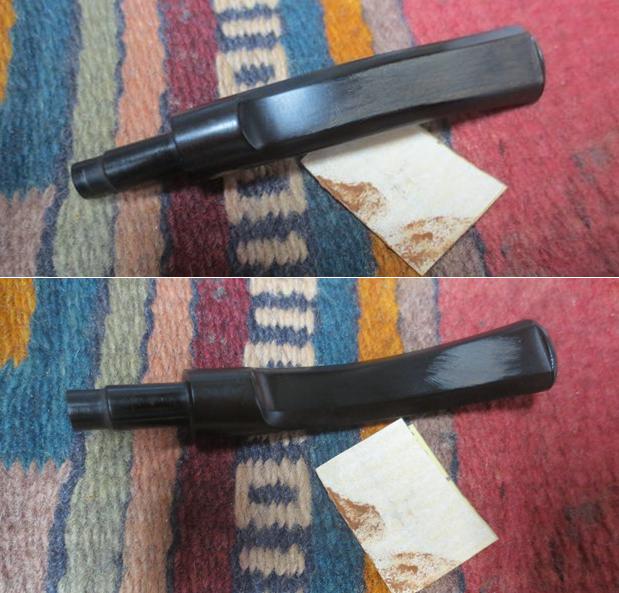
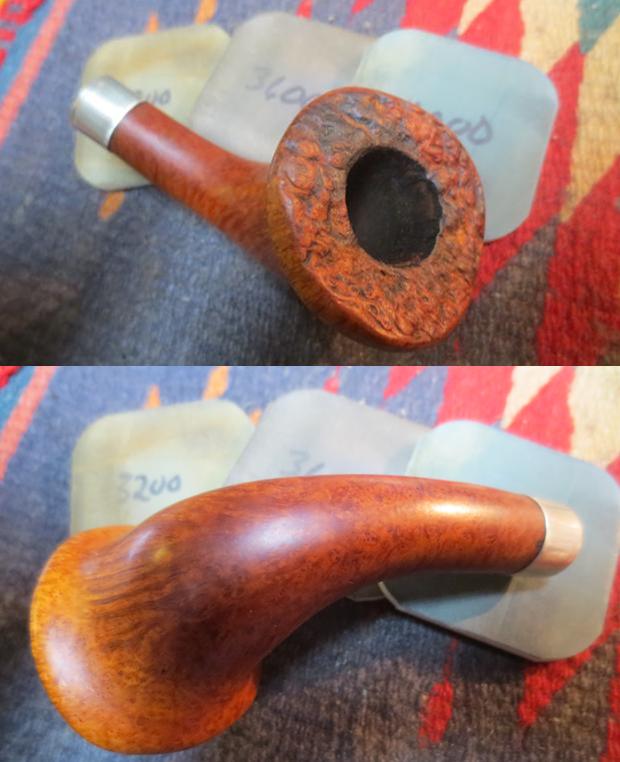
 With the ‘back-holes’ drilled I drop-fill the holes with CA glue using a toothpick, and sprinkle briar over the hole. I also apply a line of CA glue over the crack itself to strengthen the repair and seal the cracks. The CA glue I use is extra thin and will seep into the cracks – hopefully. I put the stummel aside for the night for the patches to cure. The pictures show the patch process.
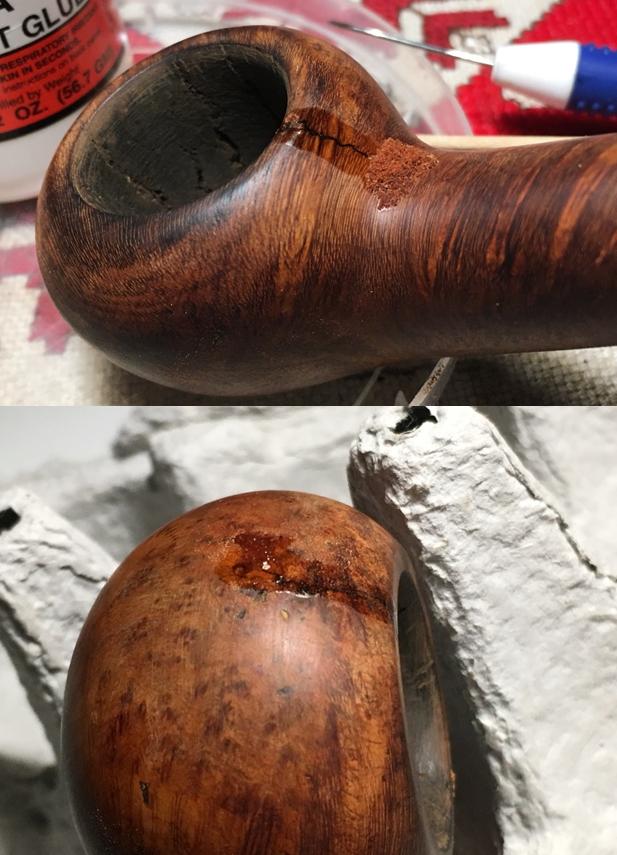 The next day, the patches have fully cured and I use a rounded and flat needle files to work on the ‘forward and aft’ cracks where the back-holes were drilled. When I bring the CA glue patch mound down to briar surface level, I use 240 grit sanding paper to smooth it further and to blend with the briar. Once this is completed, I again use the coarse sanding sponge and do a light topping to freshen the lines of the rim after the repair work. I then roll a piece of 240 grit paper and again freshen the rim’s internal bevel. The pictures show the progress.
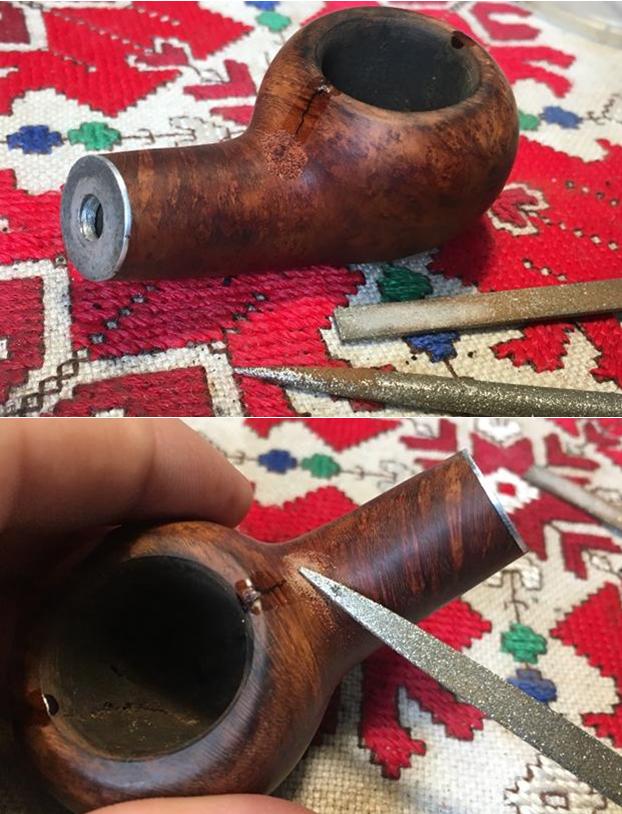
 I proceed to smooth and blend the stummel by using a medium grade sanding sponge followed by a light grade sanding sponge. The picture shows these last two stages and I take pictures of the finished crack repairs. During the staining, I’ll seek to blend these further – especially the aft crack.
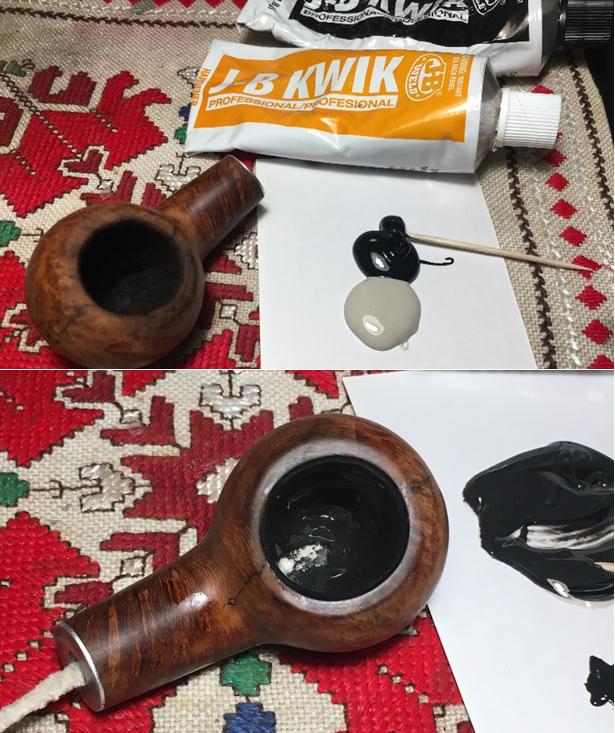
 At this juncture, I repair the fire chamber before continuing to the external stummel surface. Earlier I describe using J. B. Weld to coat the fire chamber, filling the heat fissures that had developed over years of use. The J. B. Weld compound will also provide a protective barrier against the heat. Later, I will coat the chamber with ‘pipe mud’ to provide a foundation for a new cake to develop to protect the chamber walls. The few times I’ve used J. B. Weld, I always mixed too much. I’ll try to moderate this time around. After cleaning the chamber with a cotton pad wetted with isopropyl 95%, I place equal parts of the J. B. Weld components on an index card – hardener and steel. The directions state that after mixing the two, one has about four minutes before they start setting. I insert a pipe clean into the draft hole to prevent the Weld mixture to plug the airway. I mix the components with a tooth pick then I place a dollop of the compound into the chamber walls. I use my pinky finger to spread the mixture evenly and pull out excess. After a bit, the mixture is setting up. I rotate the pipe cleaner out when the tackiness of the mixture has firmed up enough that it will remain in place. I set the stummel upright in an egg carton and let it cure overnight. The pictures show the process.
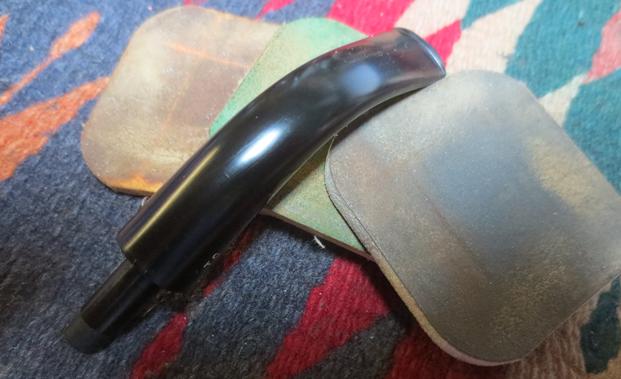
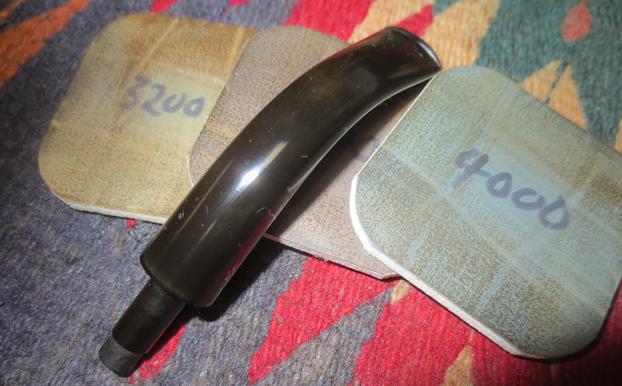
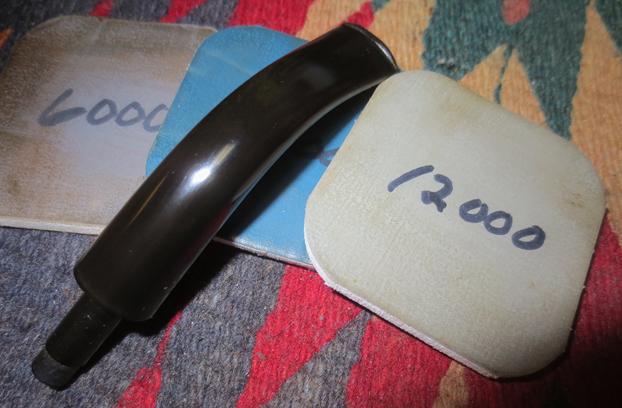
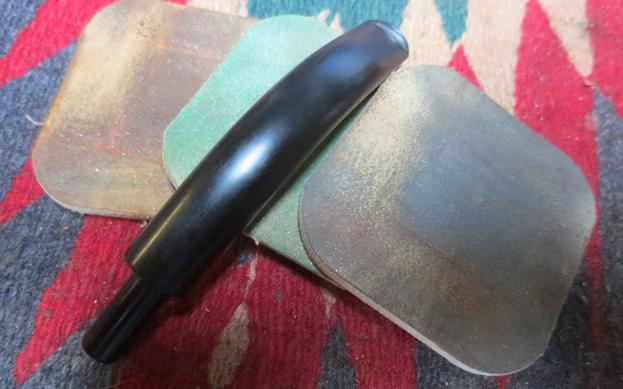
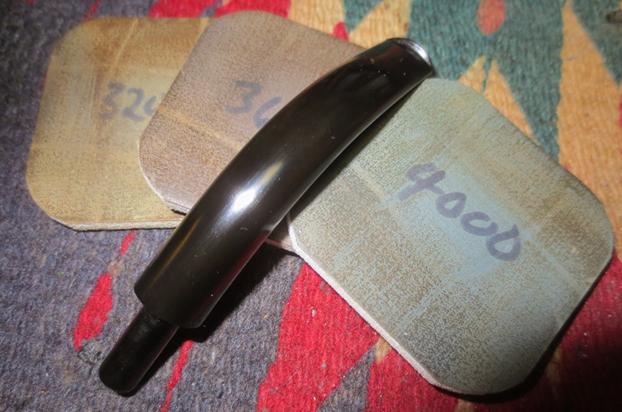
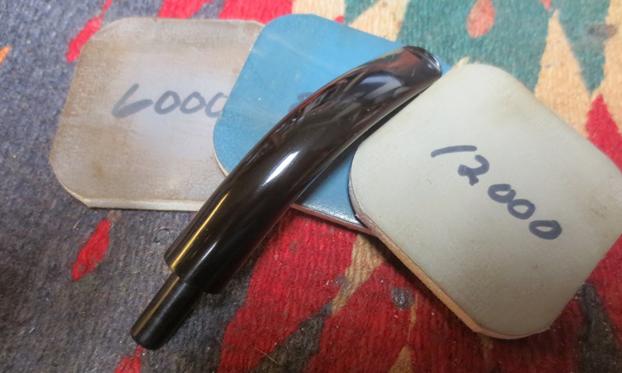
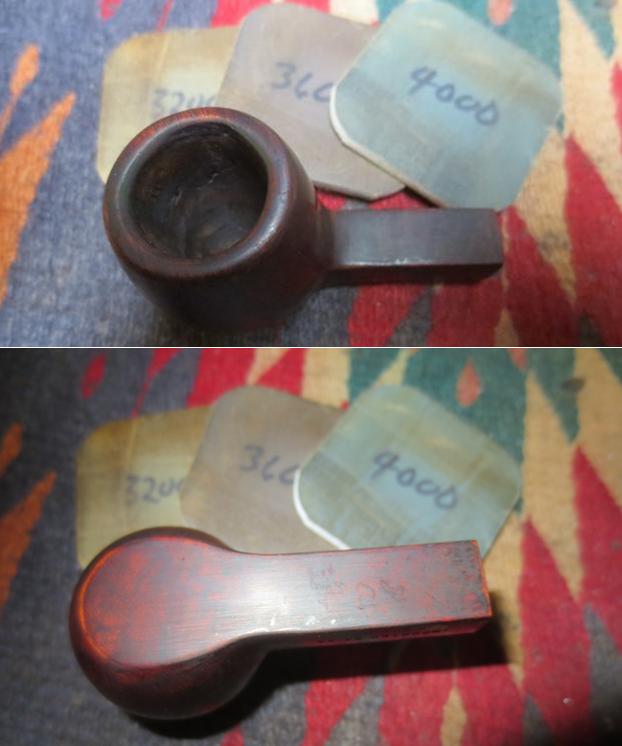
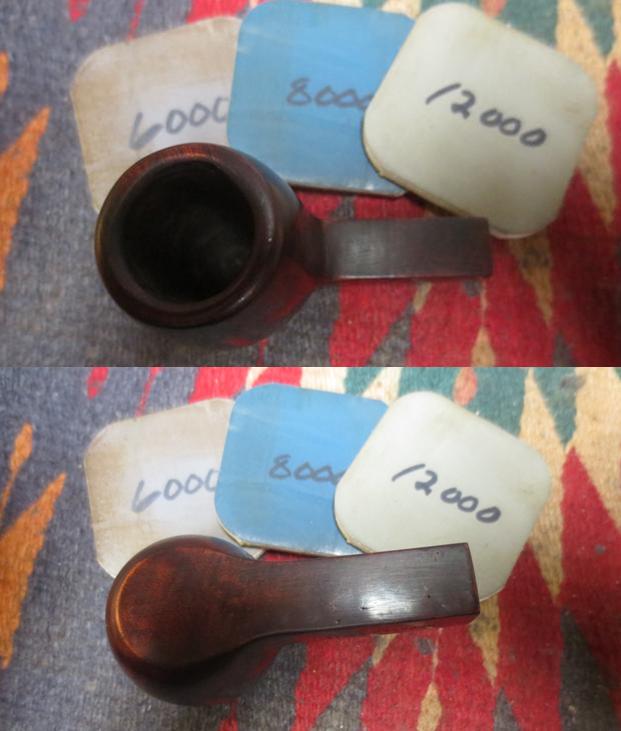
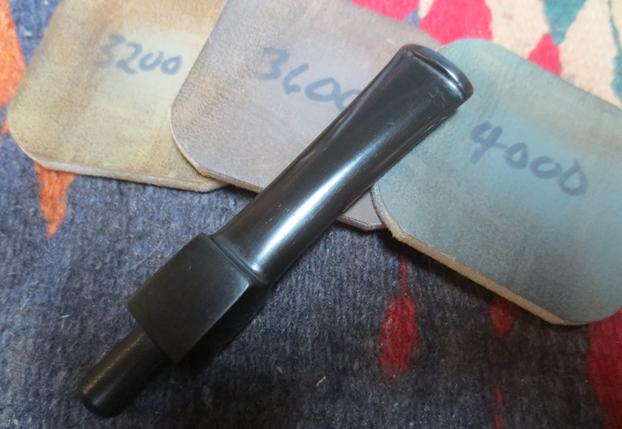
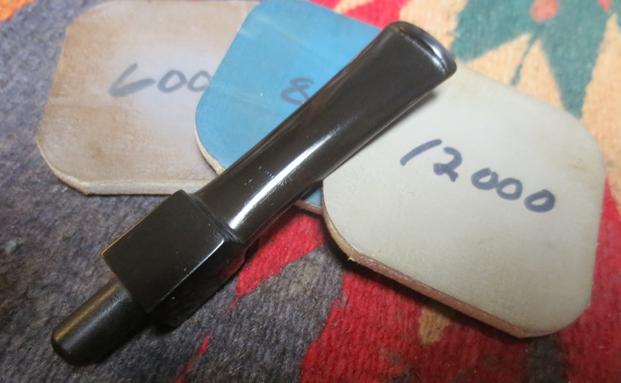
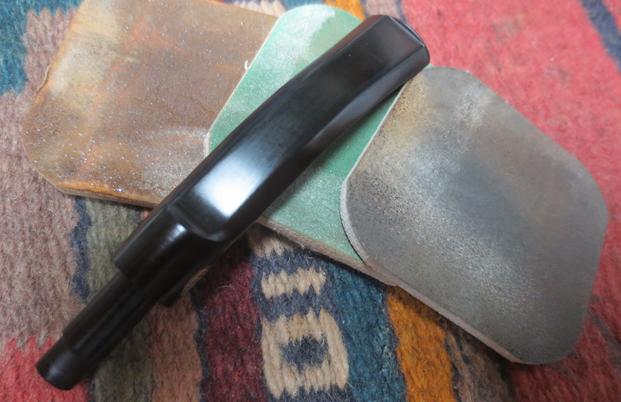
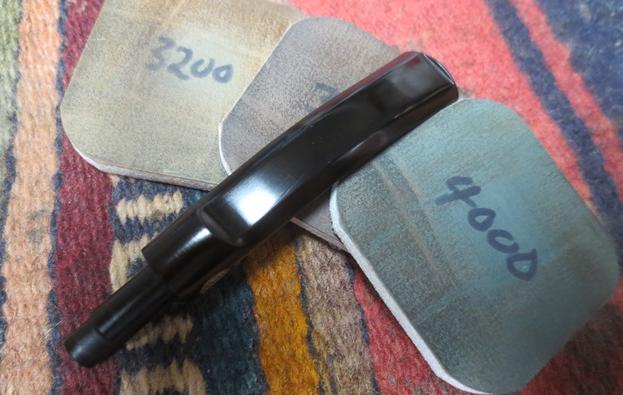
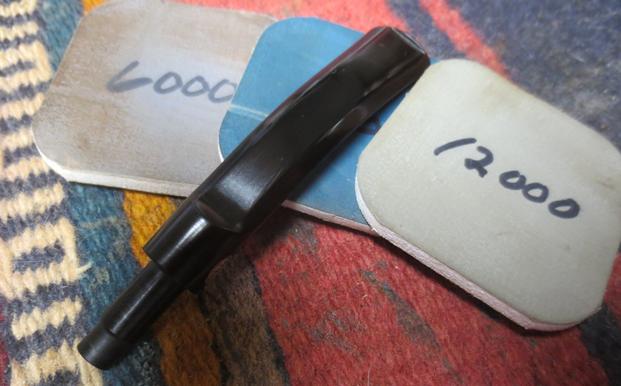
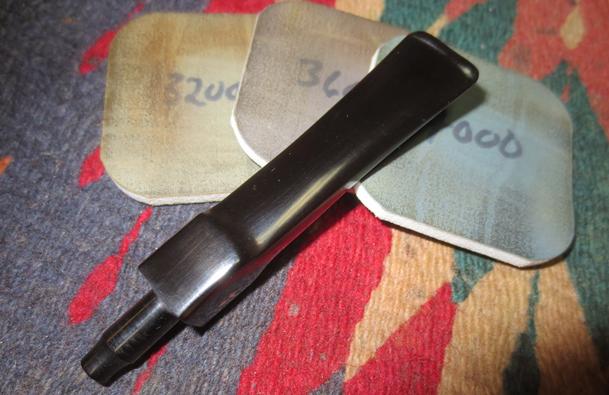
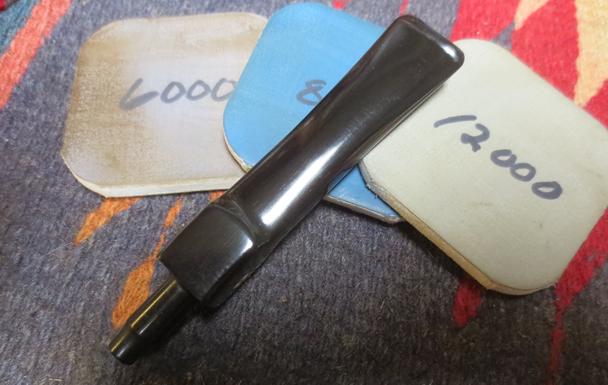
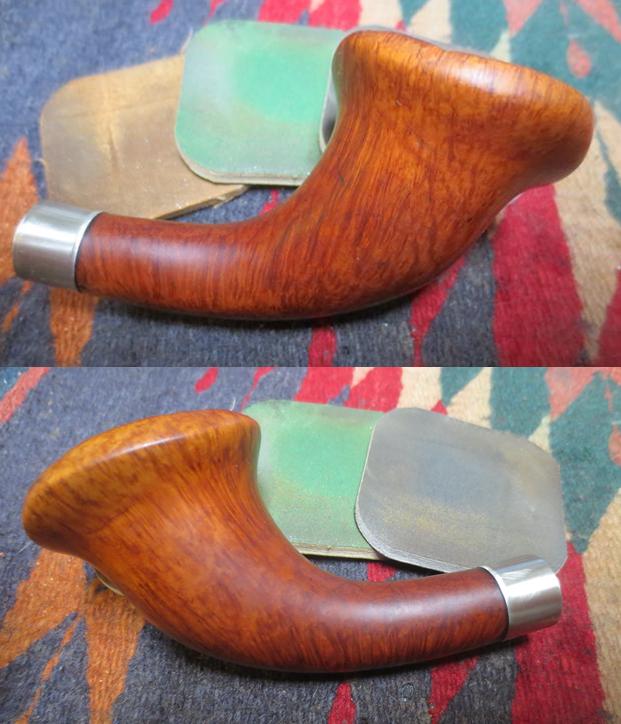
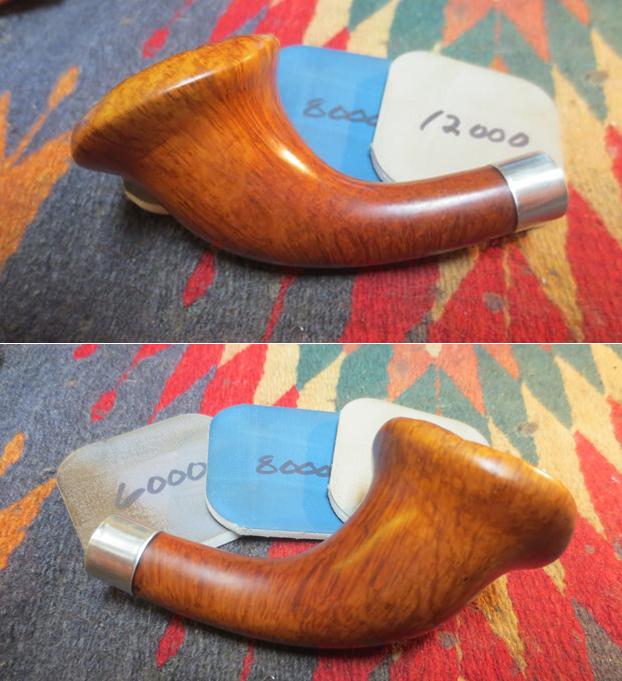
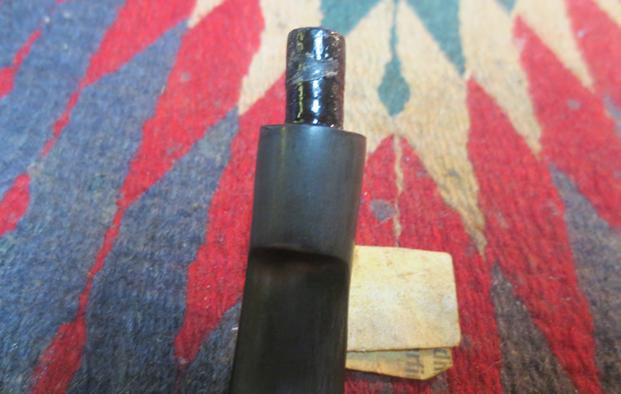
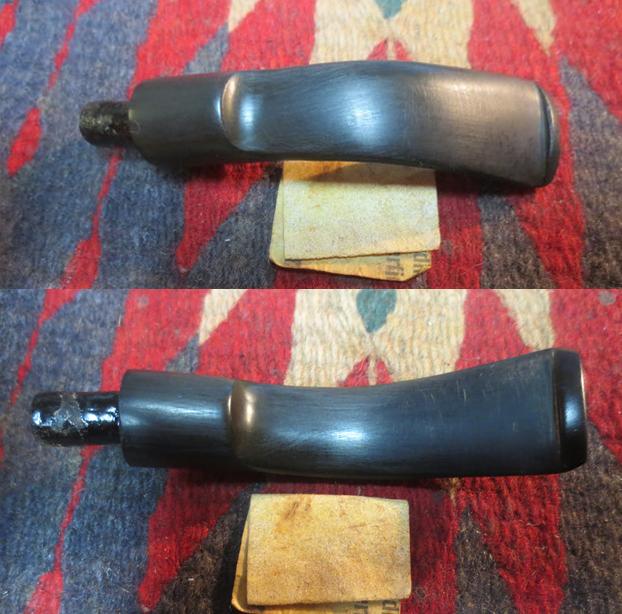
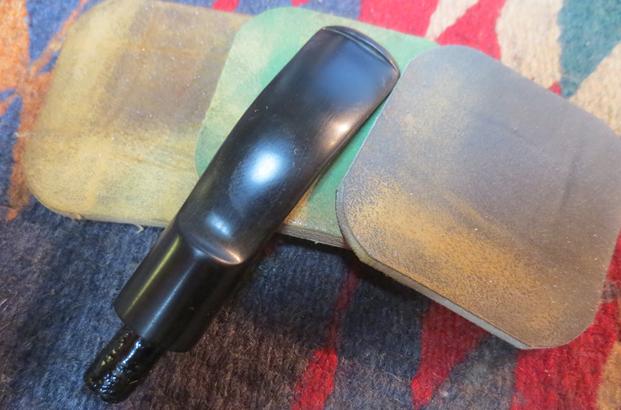
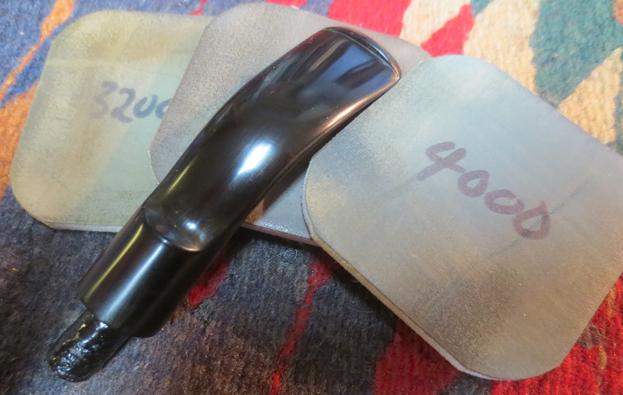
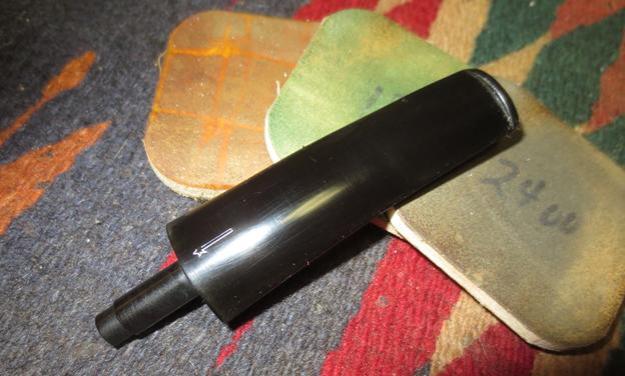
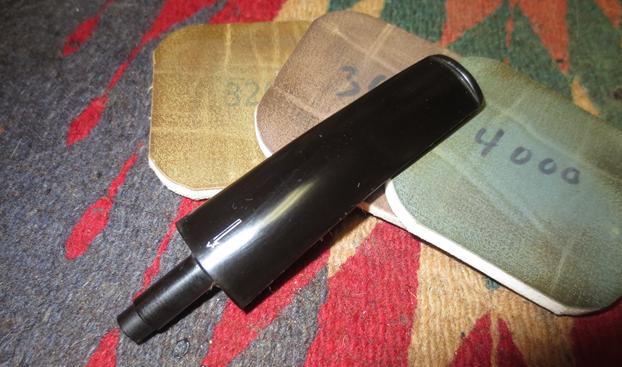
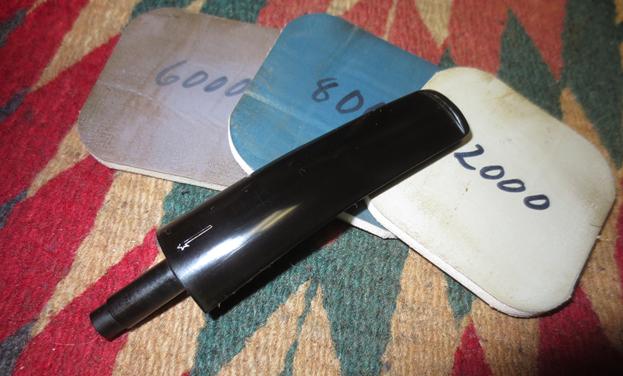
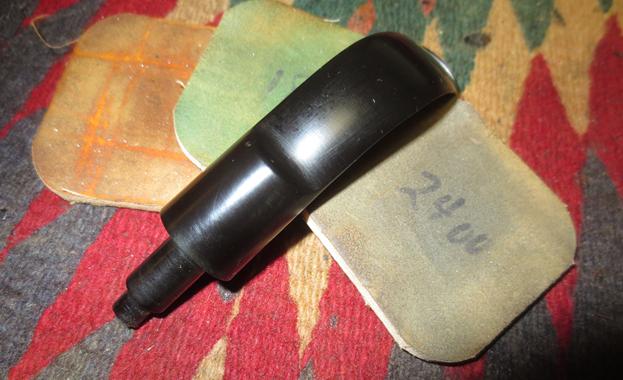
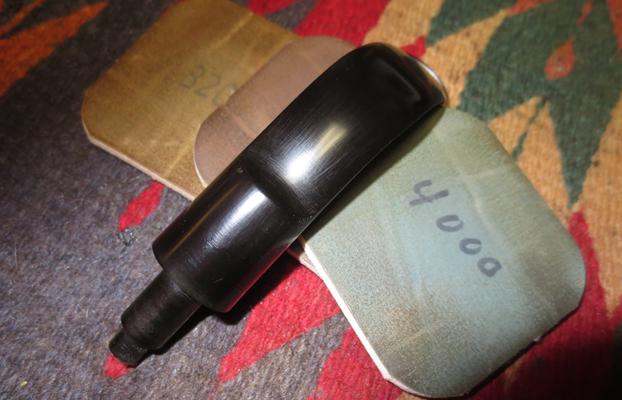
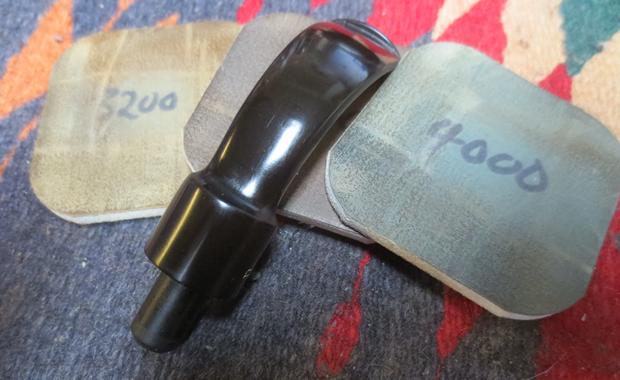
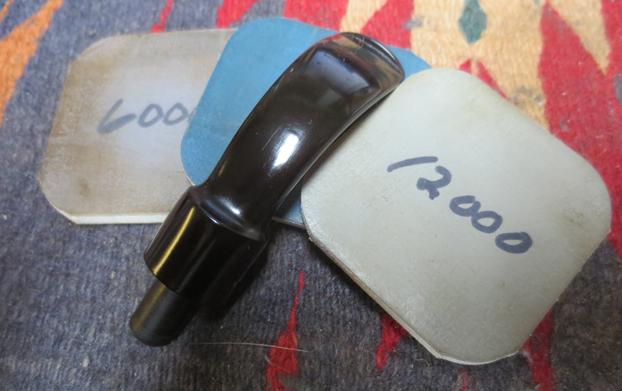
 Turning now to the stem restoration, I utilize a plastic disc I fabricated to protect the shoulders of the stem during the micromesh process. Using micromesh pads 1500 to 2400 I wet sand the stem, then follow with dry sanding with pads 3200 to 4000 then 6000 to 12000. After each cycle of three I apply a coat of Obsidian oil to the stem to revitalize the vulcanite. The stem looks good. The pictures show the progress.

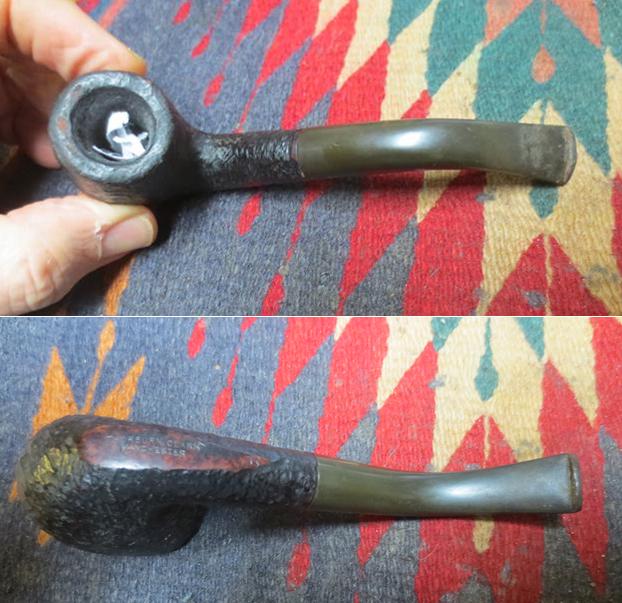
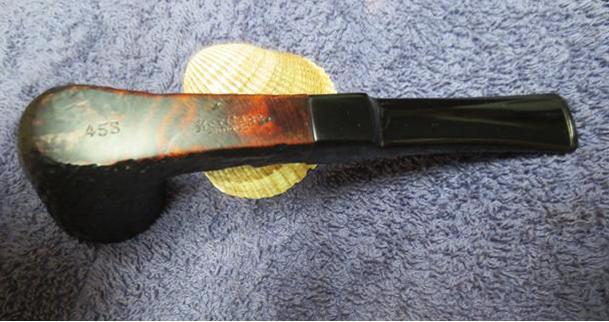
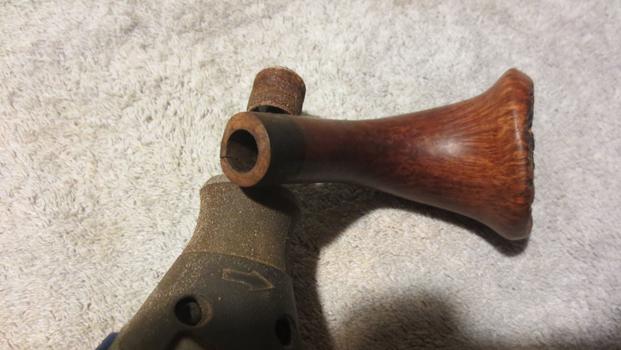
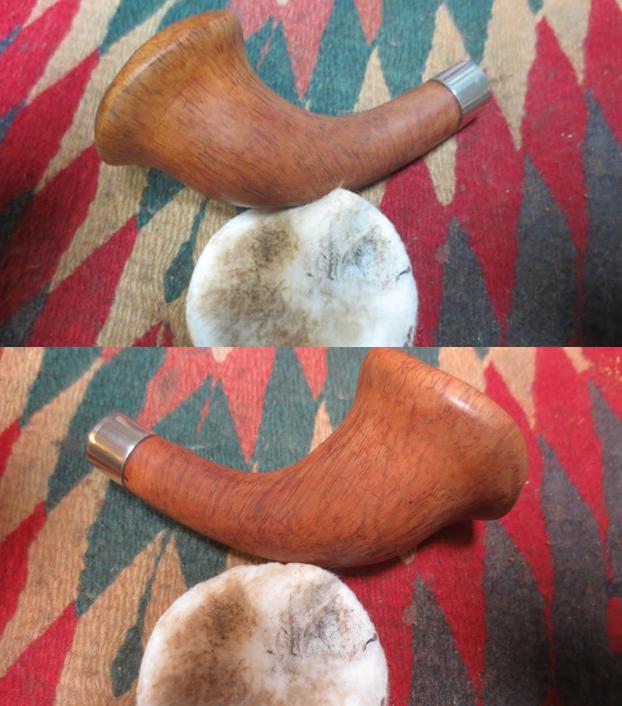
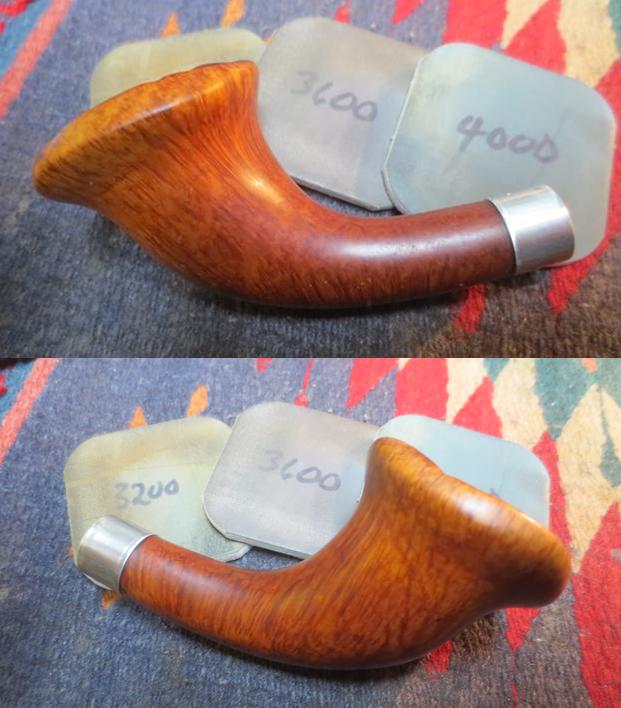
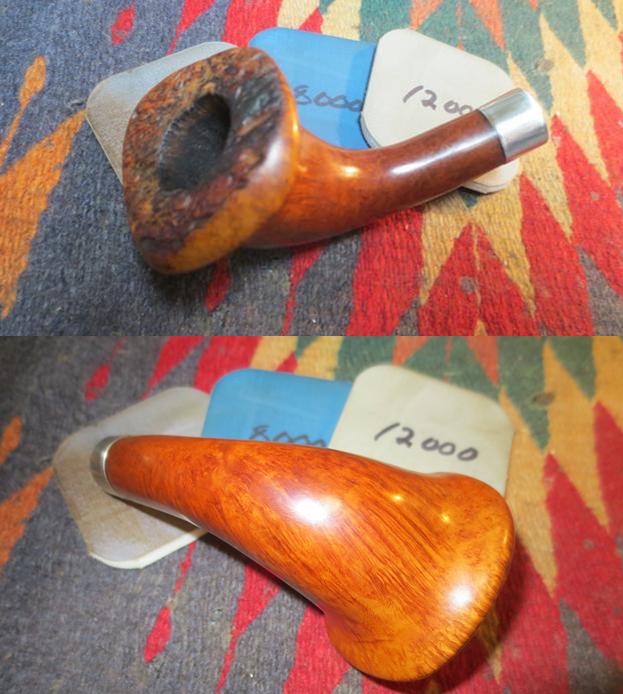
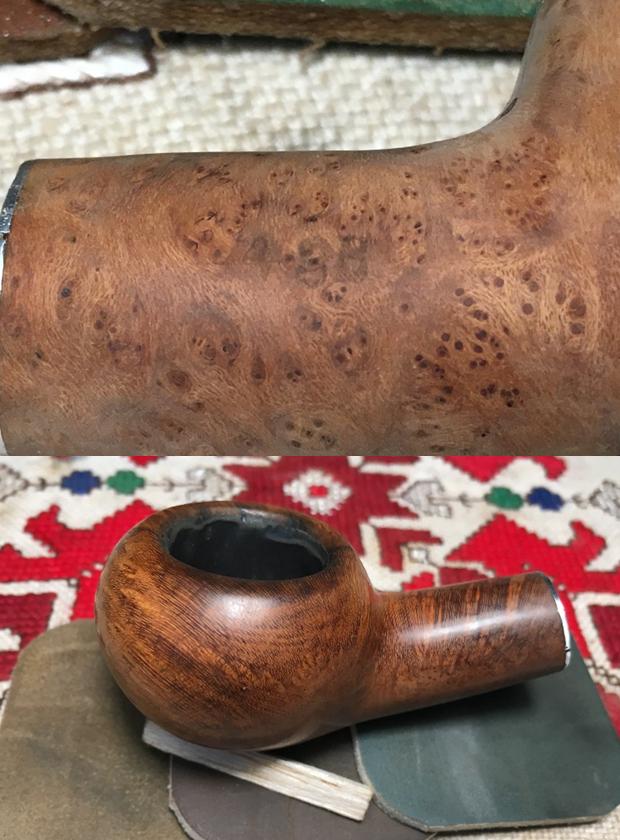
 A new day has arrived in Bulgaria and I turn again to the stummel. All the major repair work is completed and I begin to prepare the stummel’s surface for a stain finish. Using 1500 to 2400 micromesh pads I wet sand the stummel. Amazingly, after this first cycle, I see what I did not see before – Kaywoodie [over] Standard nomenclature on the left side of the shank and what appears to be 13B on the right side. I take a picture to mark this – unfortunately, I did not see it sooner to avoid sanding in that area. Checking again with Pipedia’s Collector’s Guide to Kaywoodie Pipes, 13B is the shape number identifying this as an Apple. Looking at the catalogs in the same article, with the stem shamrock on the side, I’m feeling pretty confident identifying this pipe from the 1960s. I follow this by dry sanding using pads 3200 to 4000 and then 6000 to 12000. I never grow tired of seeing the grain emerge as the micromesh cycles do their magic. The pictures show the process.
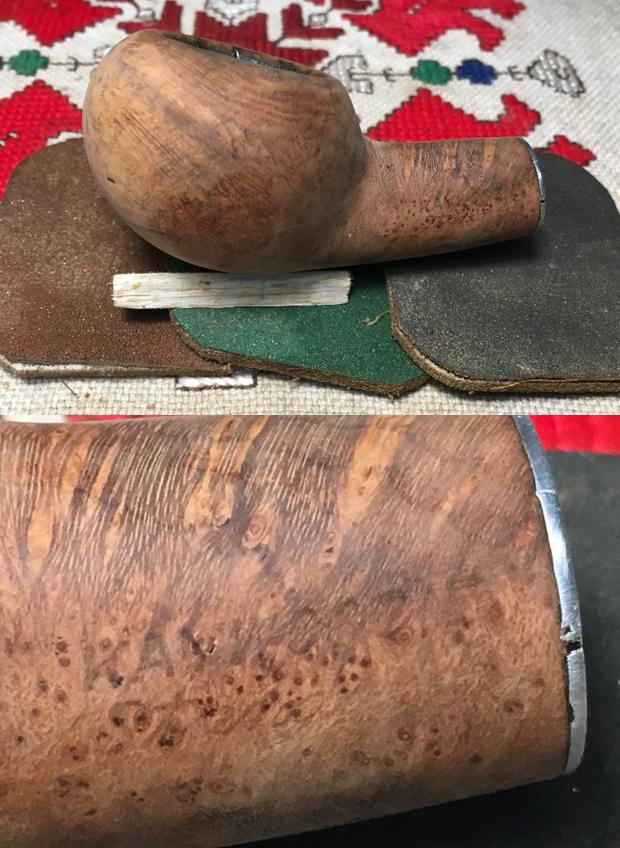
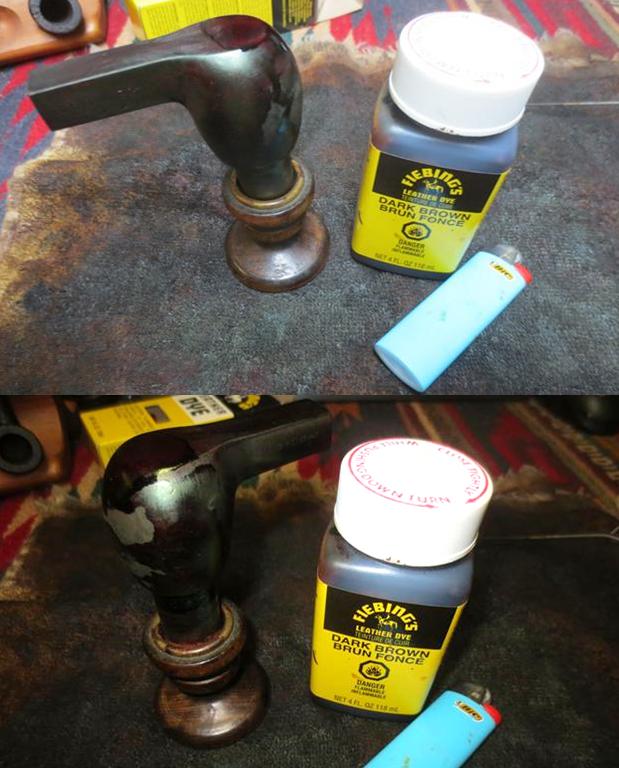
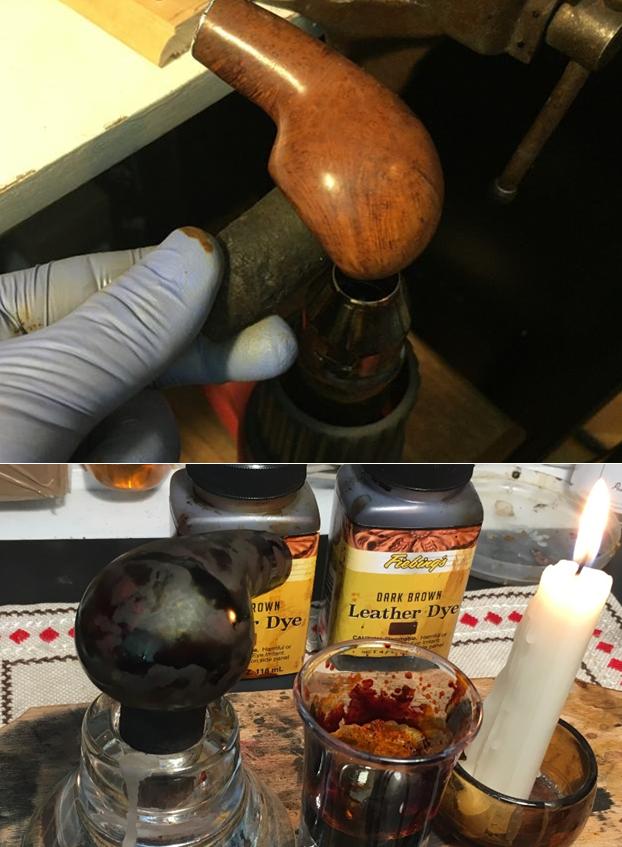
 To encourage better blending by hiding the cracks and repairs, I use a mixture of Fiebing’s Dark and Light Brown Leather Dyes. I use 2 parts light to 1 part dark. I don’t want to go too dark and hide the beautiful grain that has emerged. When I look at the original hue of the Kaywoodie (the 1960s catalogs above I think is a pretty good guess regarding the age of this KW) leveraged toward the lighter hues – yet, I do want to mask the cracks. After mixing the dyes, I heat the stummel using a hot air gun to open the briar making it more receptive to the dye. With the stummel heated, using a cork in the bowl as a handle, I liberally apply the dye over the stummel surface. Following this, I fire the wet dye with a lit candle and the alcohol immediately ‘flames’ and burns off setting the stain. I repeat the same process a few minutes later. After the second firing, I put the stummel aside for several hours. The pictures show the staining process.
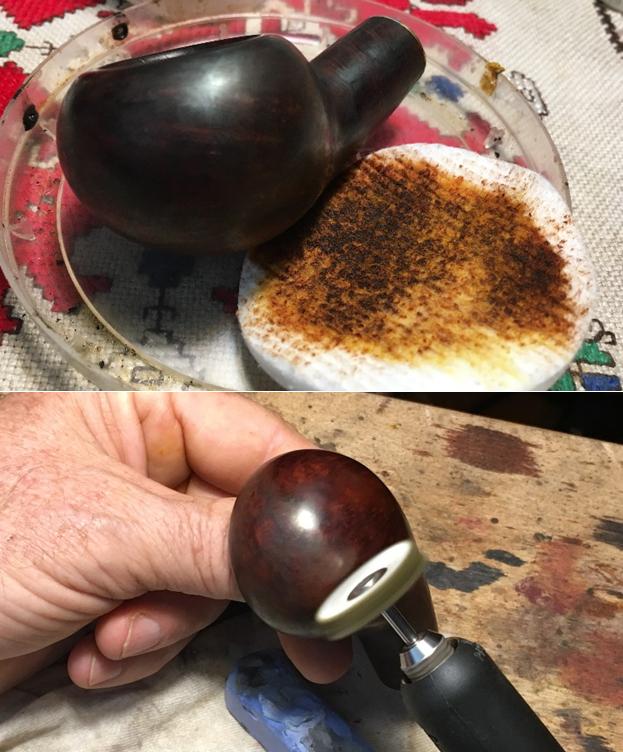
 Some hours later, I’m ready to ‘unwrap’ the fired layer to discover what the briar has done with the dye. Using a felt buffing wheel, I mount it on the Dremel and set the speed to the slowest. After purging the buffing wheel on the edge of the metal tightening wrench, using Tripoli compound I methodically begin removing the fired layer by not applying much downward pressure, and allowing the RPMs and the compound to do the work. When I complete the removal of the fired layer with Tripoli, I take a cotton pad wetted with isopropyl 95% and wipe down the stummel. I do this not only to blend the dye but also to lighten it. I then move to Blue Diamond compound. I use a cotton cloth buffing wheel mounted on the Dremel, increase the speed by one notch, and move in circular motions over the entire stummel – again, as with the Tripoli compound, I do not apply a lot of downward pressure on the buffing wheel but allow the RPMs and compound to buff up the surface. When completed with the Blue Diamond, I use a felt cloth to hand buff the stummel to remove compound dust before moving to the wax phase. The pictures show the compound process.
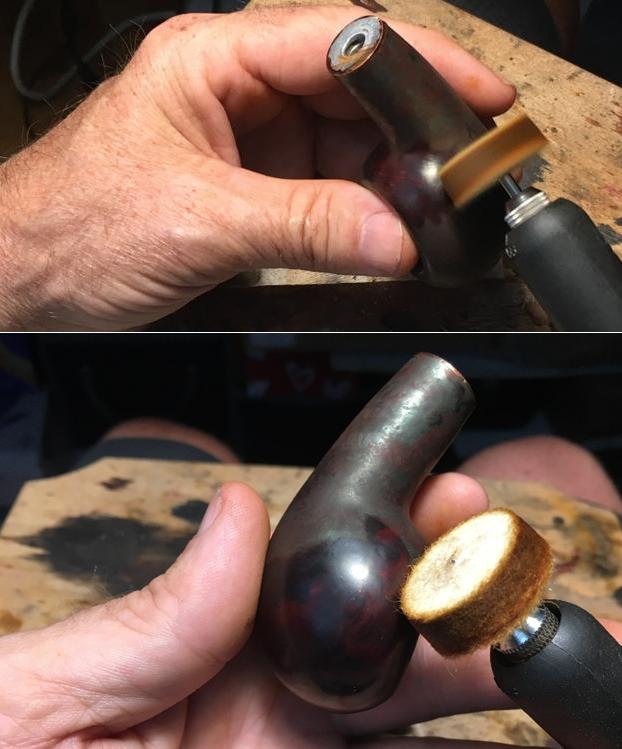
 Before finishing the external surface with carnauba wax, I apply a layer of ‘pipe mud’ in the fire chamber. This creates a layer to encourage the development of a carbon cake in the bowl. I use a mixture of sour cream and two 260mg capsules of activated charcoal powder. I mix the sour cream and charcoal powder with a wooden stick and then, after inserting a pipe cleaner through the draft hole, apply a dollop of pipe mud mix in the chamber. I then use my pinky finger to spread the mud evenly and draw out the excess. When finished, I put the stummel aside to let the pipe mud set up. The pictures show the mud process.
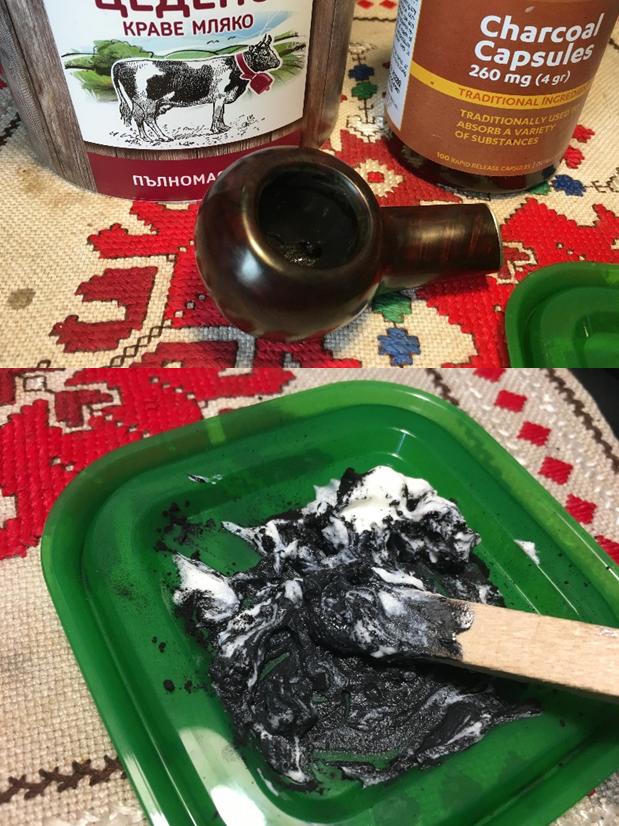
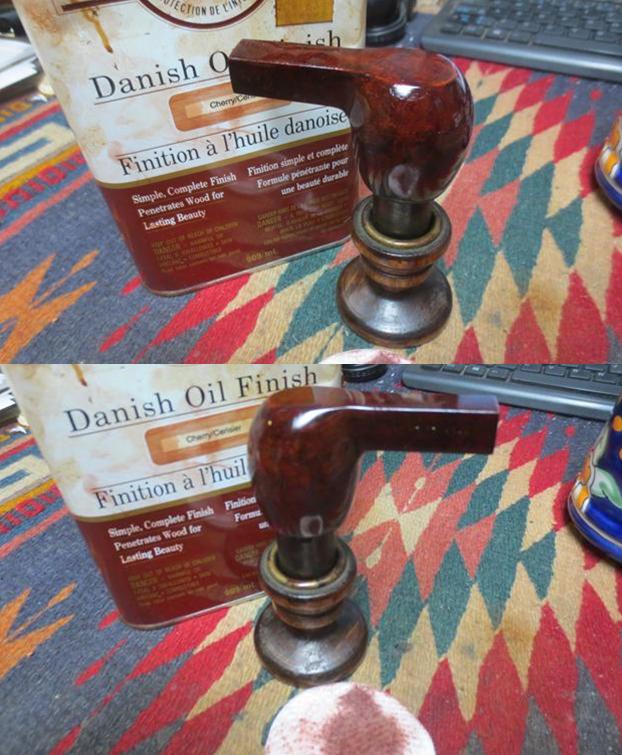
 With pipe mud set, I reattach stem and stummel. I mount a cotton cloth buffing wheel to the Dremel, set at speed 2, with the fastest being 5, and apply carnauba wax to the stem and stummel. After applying several coats, I switch the Dremel to a clean cotton cloth buffing tool and again buff the pipe. I do this to work in pockets of wax that were missed and to raise the shine. Following this, I hand buff the pipe with a micromesh cloth to raise the shine more.
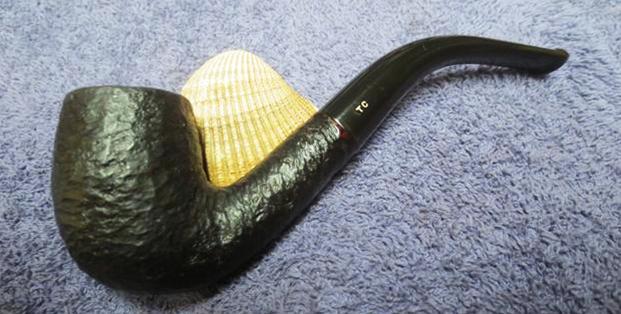
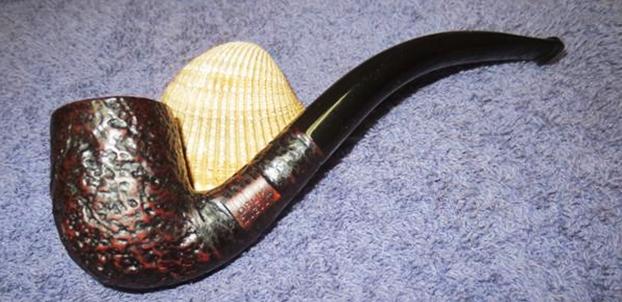
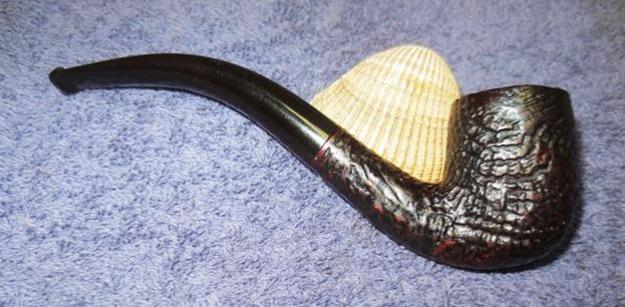
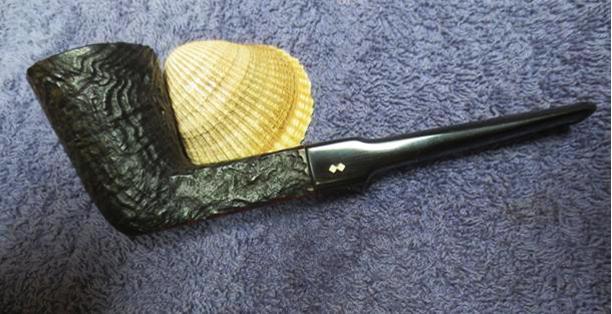
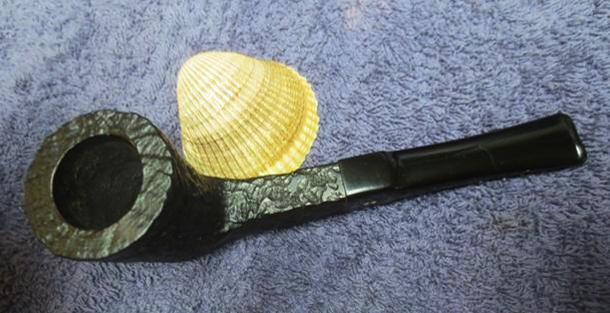
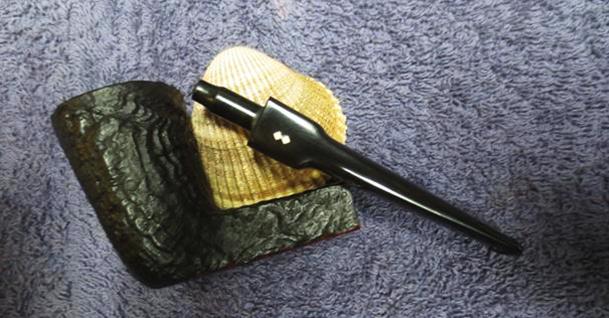
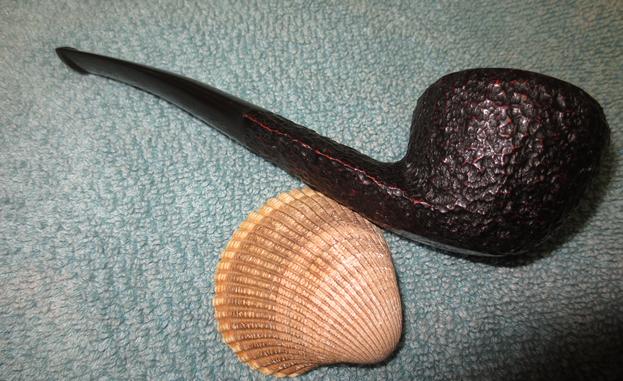
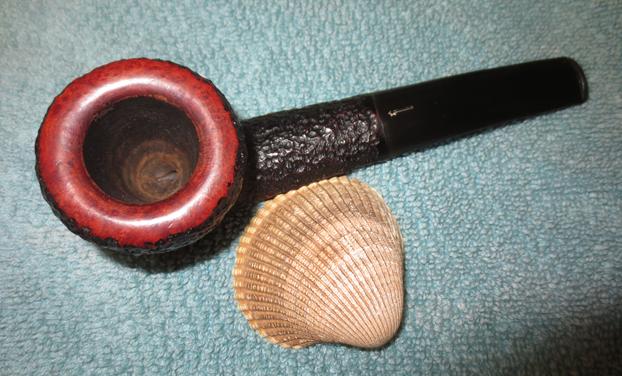
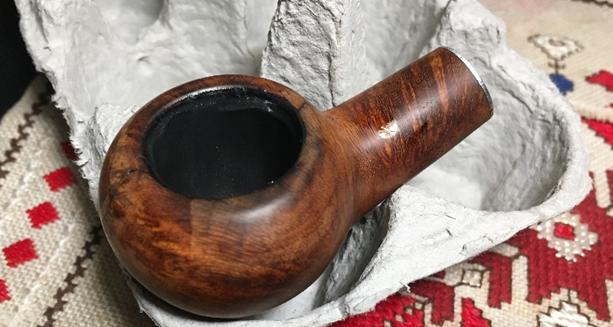
This Kaywoodie Standard Author has turned out in classic form. I’m very pleased with results of the rim repair and the rich, ‘smoking jacket’ finish that masks the crack repairs. The Author has a solid presence in the hand as I hold it – a classic shape that will provide a new steward with several more years of service. As I mentioned before, Jen’s purchase of this Kaywoodie Standard Author benefits the work we do here in Bulgaria with women who have been sexually exploited and trafficked, the Daughters of Bulgaria. If you would like more information about my restorations check out The Pipe Steward. Thanks for joining me!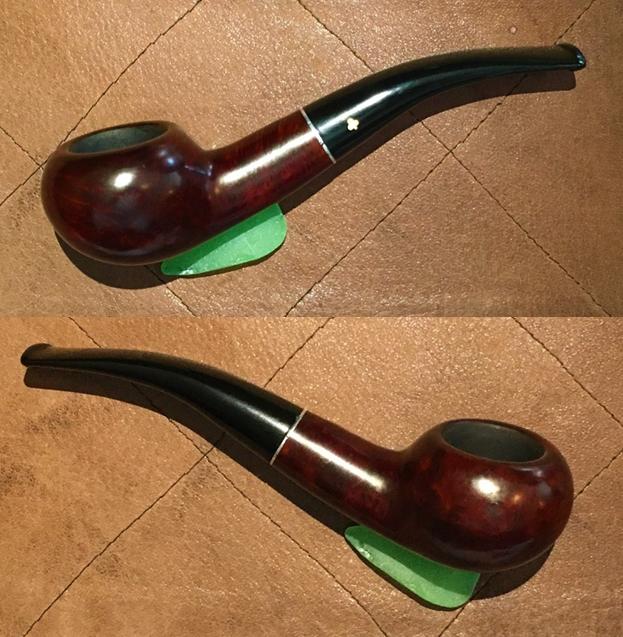


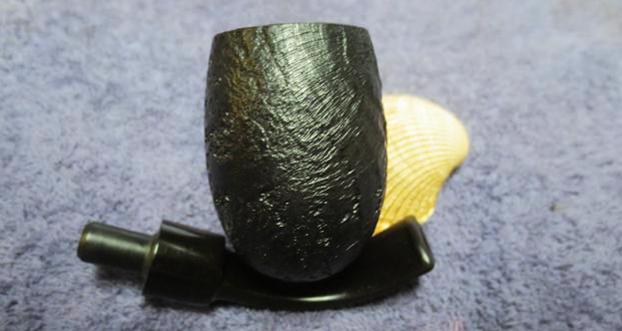
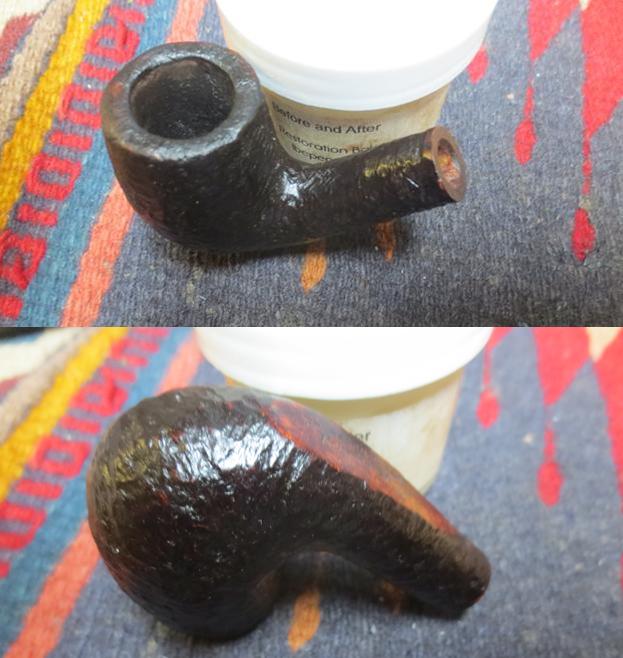
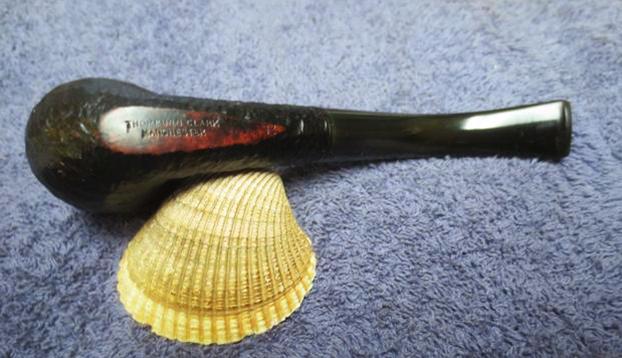
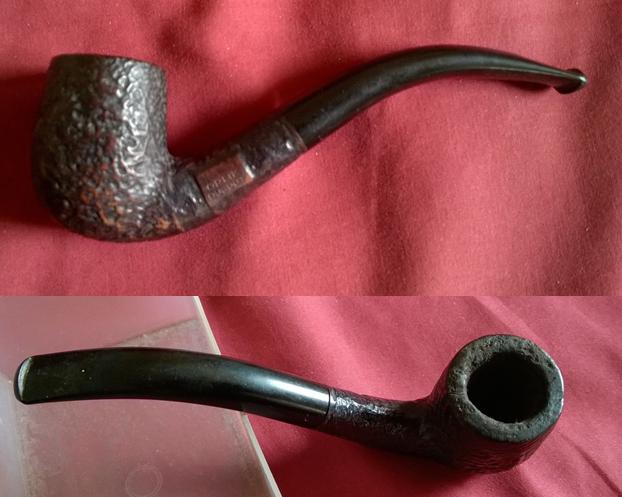
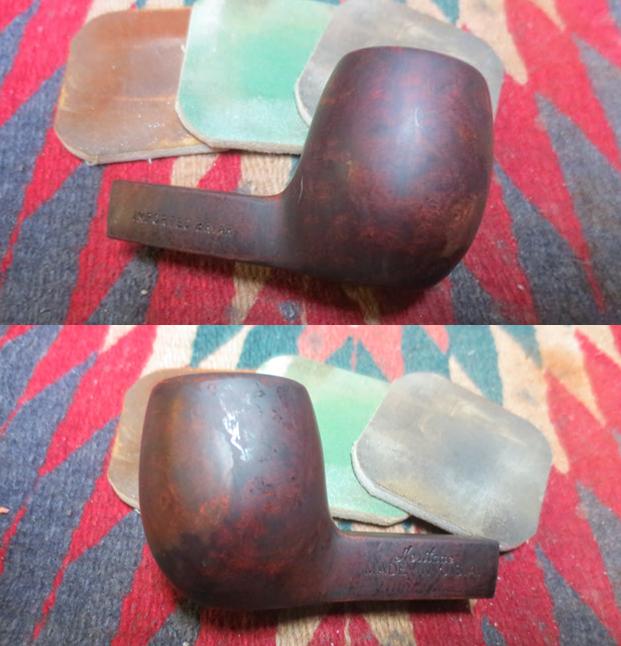
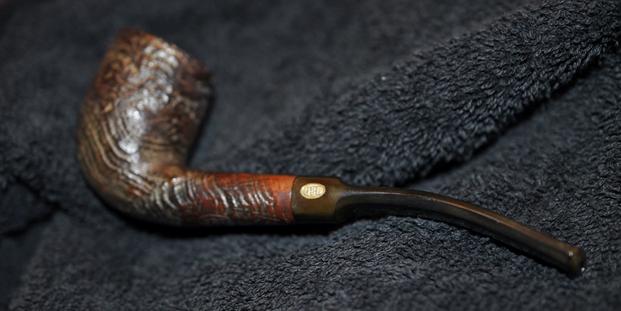
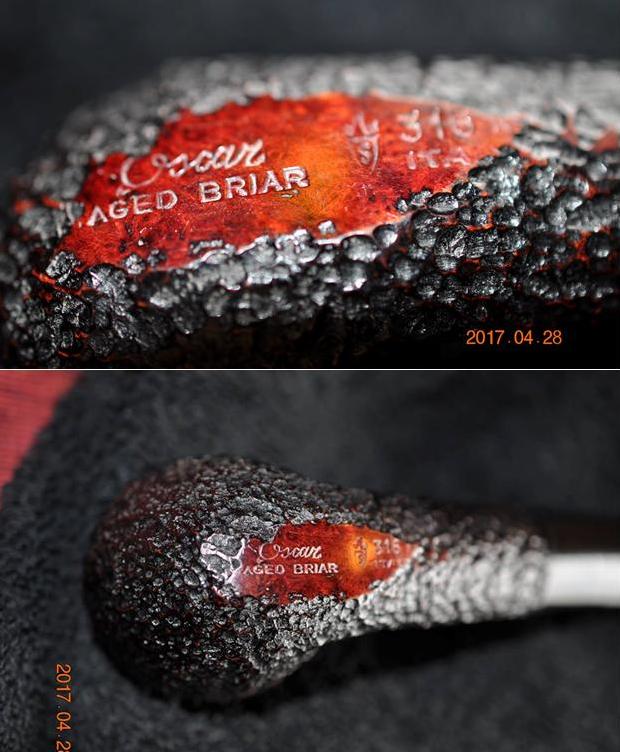
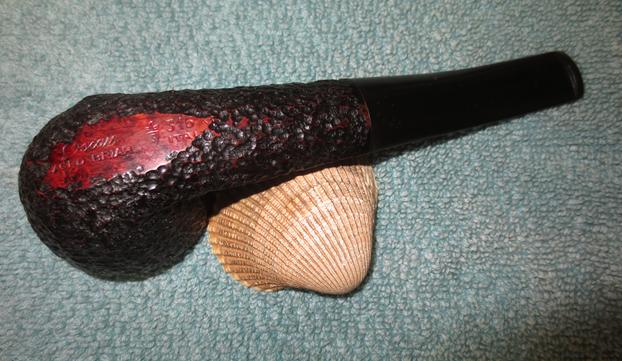
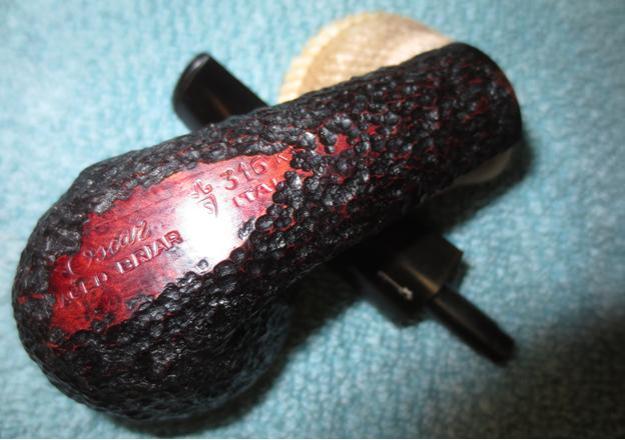
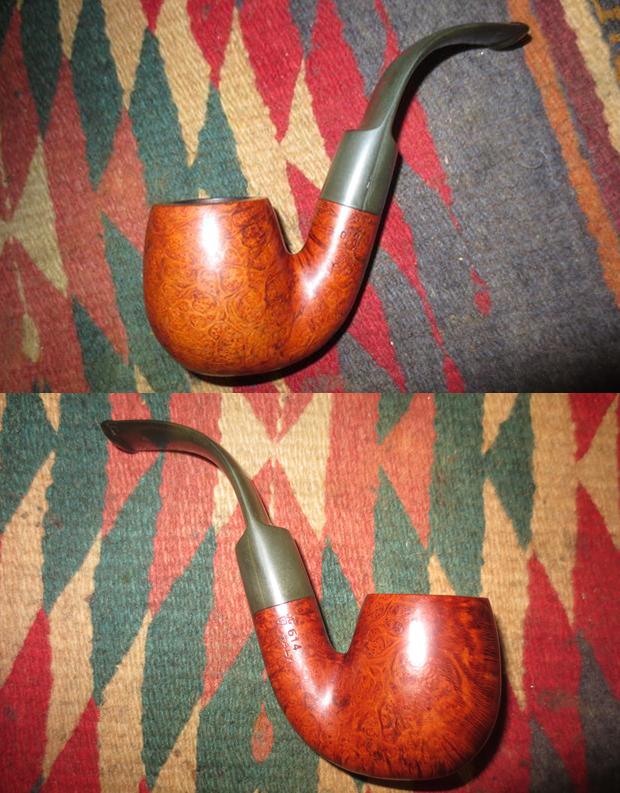
 The next pipe on my work table is a nice looking Oom Paul sandblast that is stamped Rich’s Cigar Store on the underside of the shank and Italy below that next to the stem shank union. The pipe was in decent shape with some minor nicks on the outer edge of the bowl and some darkening in the bowl. I am not sure whether the bowl was even smoked at all as the darkening could well be a bowl coating. Either way it is either NOS (New Old Stock) or lightly smoked. The stem was lightly oxidized and had some price sticker residue on the underside near the button. The R stamp on the right side of the saddle stem is clean and undamaged. It would be an easy cleanup for Jeff and me when it finally arrived in Vancouver.
 As I scrolled through the website I spent time on their history page. I read through the background material to the shop. I enjoyed reading about the company and how it came to be and what it looks like now. They call themselves, “Portland’s Mecca for smokers…”. They have existed for over 100 years. I quote in full from the History section of their website and have included a few photos as well. It is fascinating that the page does not give much history but more of a full blown advertisement for the shop.
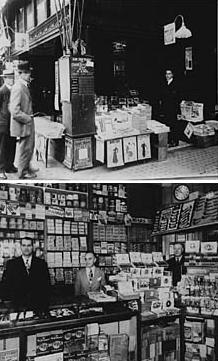 d at 820 S.W. Alder St. in the heart of Downtown Portland, we have expanded our extensive inventory of over 2500 periodicals, 1500 facings of cigars, hundreds of pipes, and over 200 blends of Tobacco on display. Our increased humidor storage areas allow us to keep thousands of boxes of cigars on hand for immediate in-store purchases.
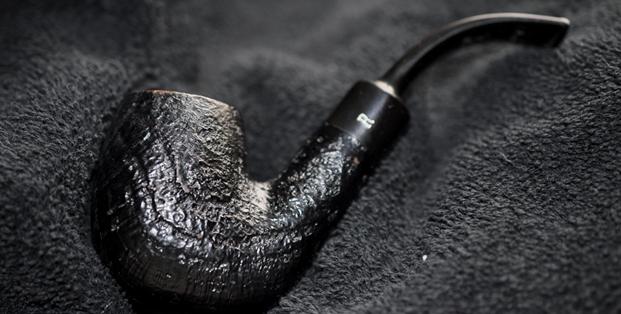
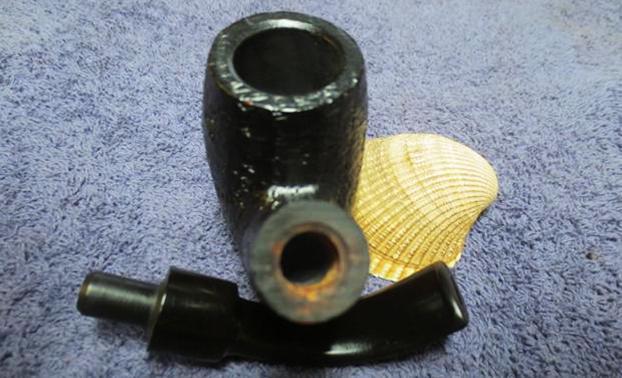
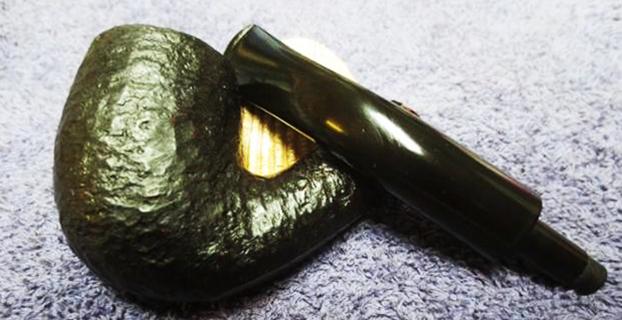
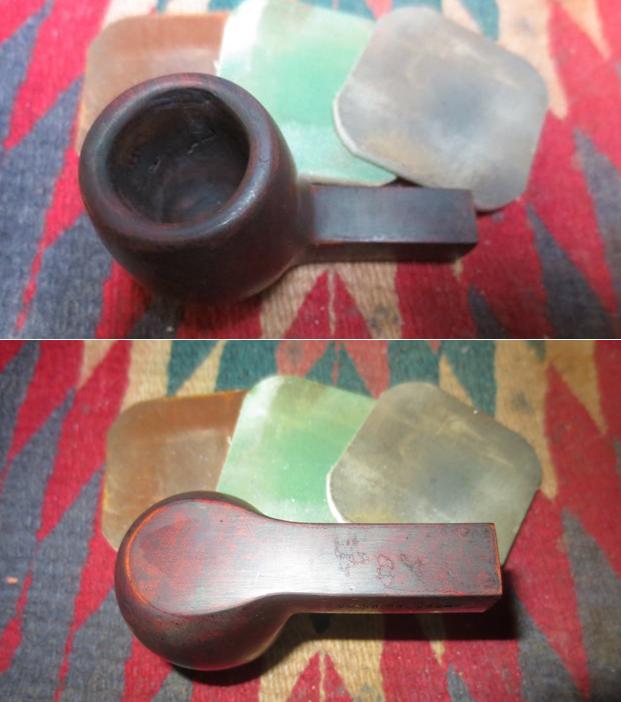
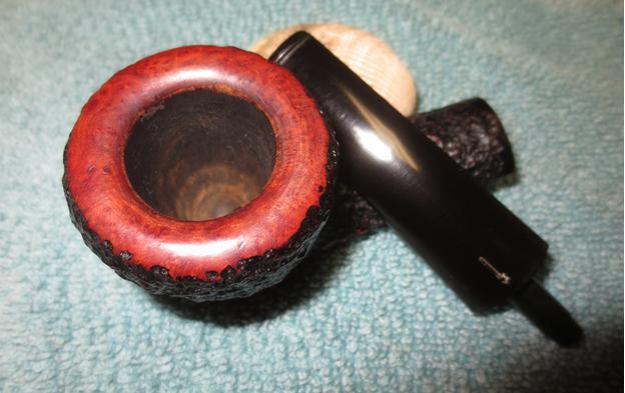
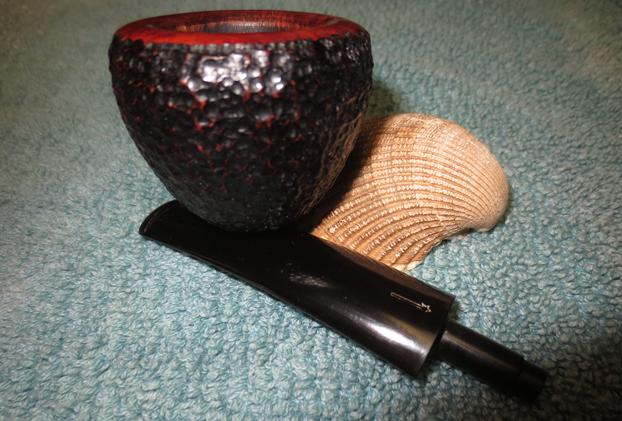
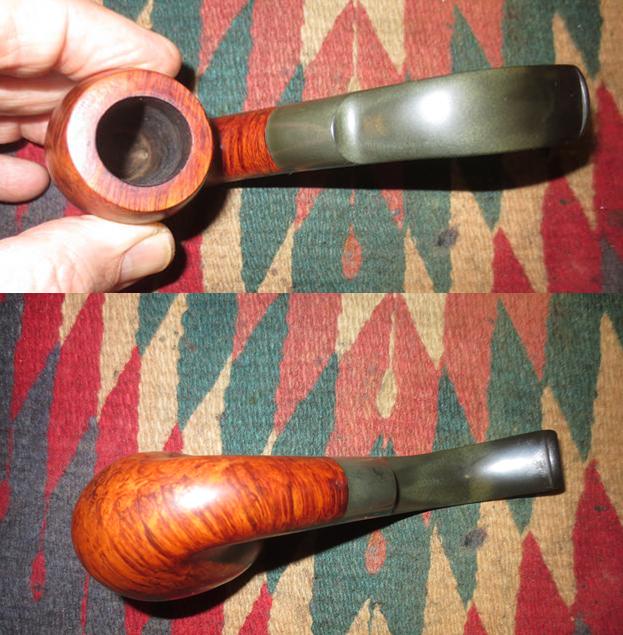
 The next photo shows the bowl and the inner and outer edge. The outer edge had some worn spots along the edges. The finish was worn but the briar was undamaged. The inner beveled edge is clean and undamaged.
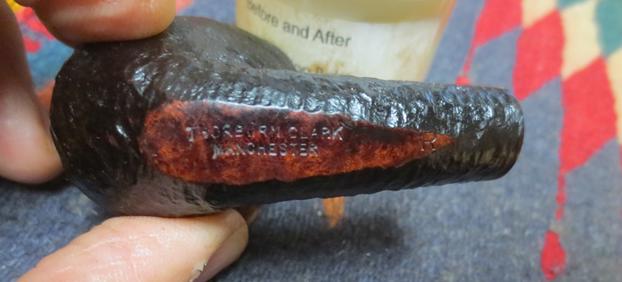
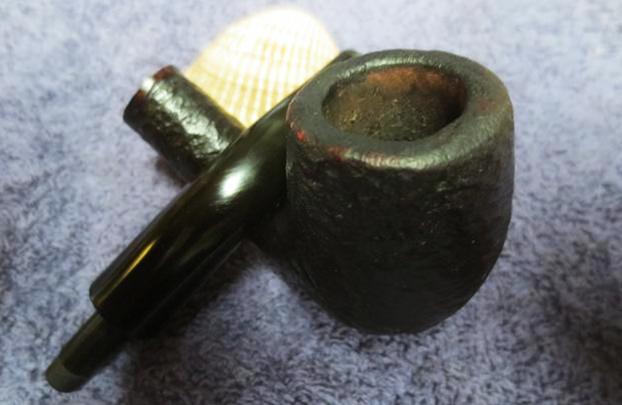
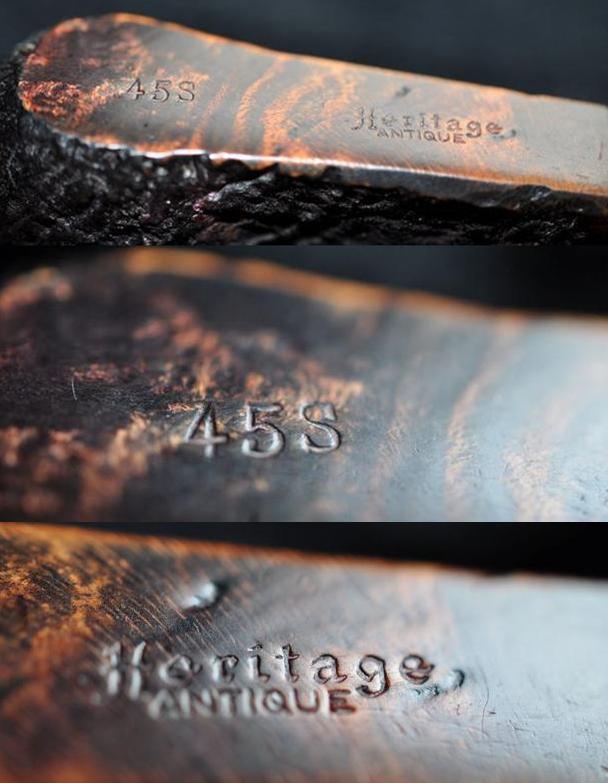
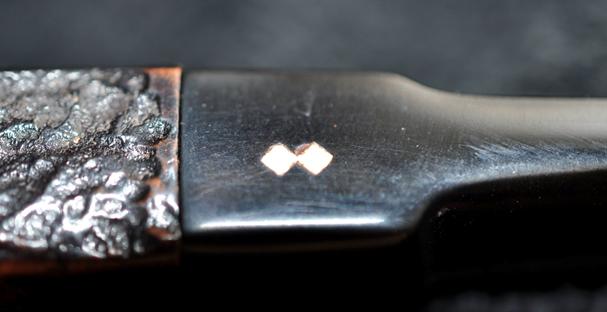
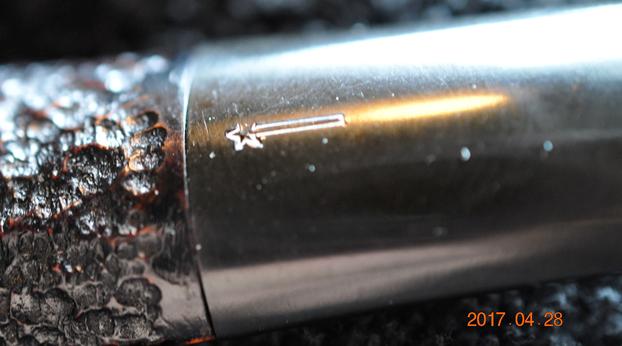
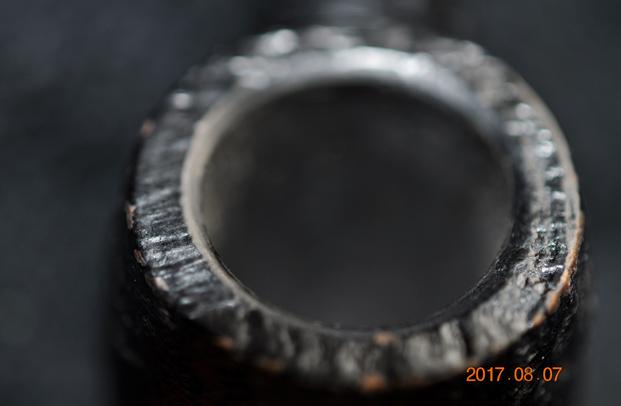 The next two photos show the stamping on the smooth underside of the shank. It is deeply stamped and very readable. The third photo shows that stamped R on the left side of the saddle stem is in excellent condition.
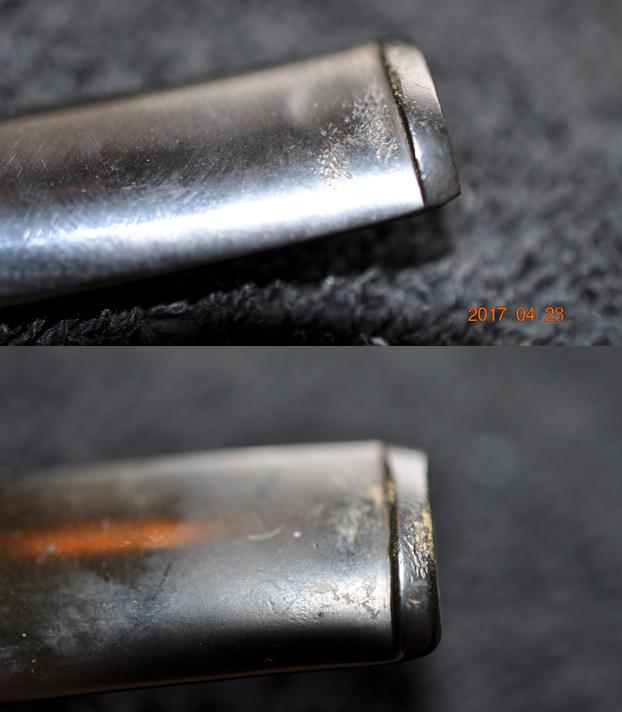
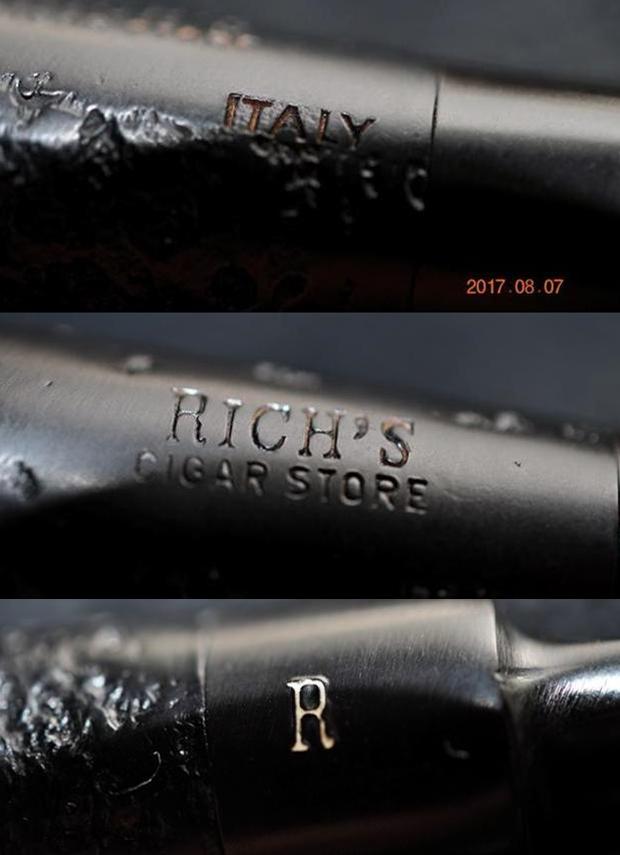 The stem was lightly oxidized as mentioned above. There was some residue on the underside of the stem near the button. It was the rubberized glue from a price tag. When the tag was peeled from the stem it left behind the residue. I wonder if it was not from the price tag that was put on at Rich’s Cigar Shop in Portland when the pipe was first sold. This would also lend to the theory that the pipe was NOS. I would be able to prove that it was unsmoked more adequately once the pipe arrived in Vancouver and I had a chance to look at it.
 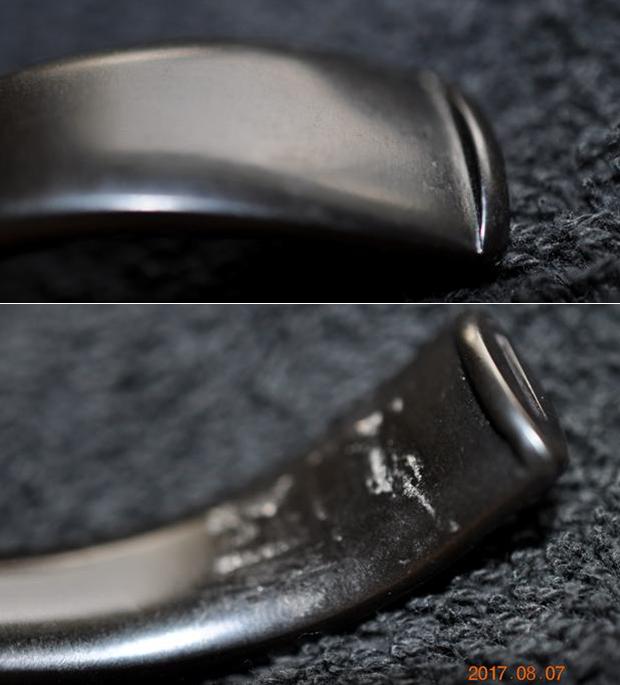 Jeff cleaned of the dust by a quick scrub with Murphy’s Oil Soap and a tooth brush. He was able to get all of the grime off the sandblast finish – even in the nooks and crannies the dust came off. He rinsed the pipe in running water to remove the soap and dried the pipe off with a soft cloth. He soaked the stem in Oxyclean to raise the oxidation to the surface of the rubber. The bowl was clean inside as was the shank. The pipe was indeed unsmoked. It still had the original bowl coating intact and it was unblemished. I took photos of the pipe before I did the finishing touches on it. It had a great sandblast and the finish was very nice.
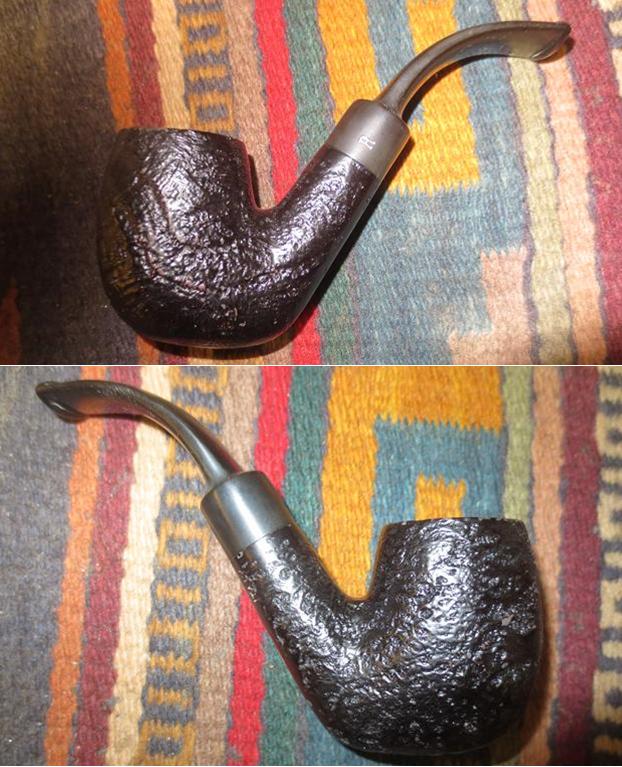
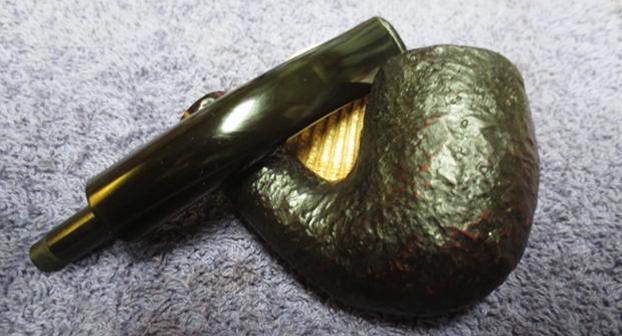
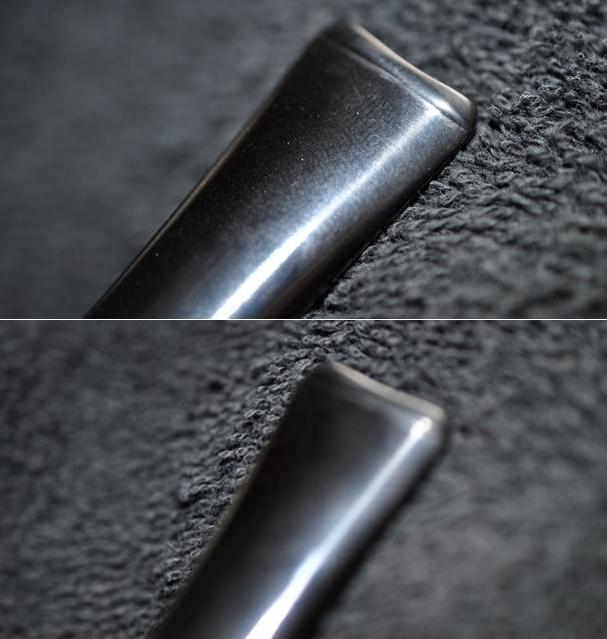
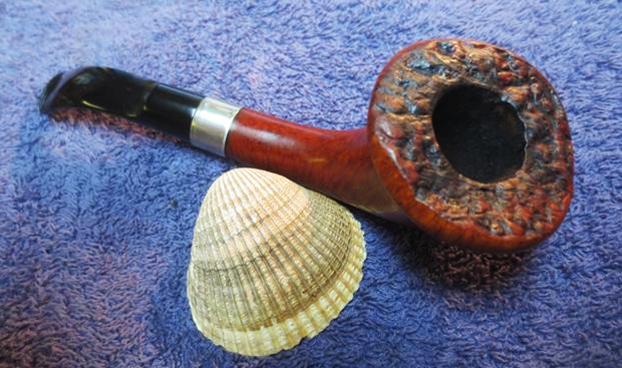
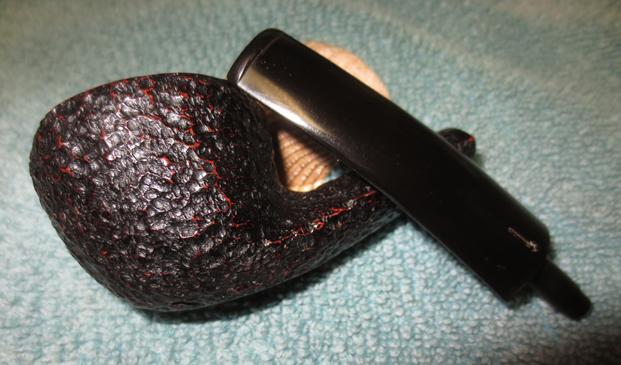
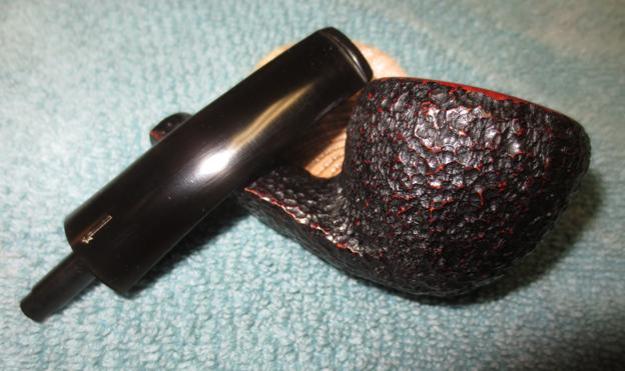
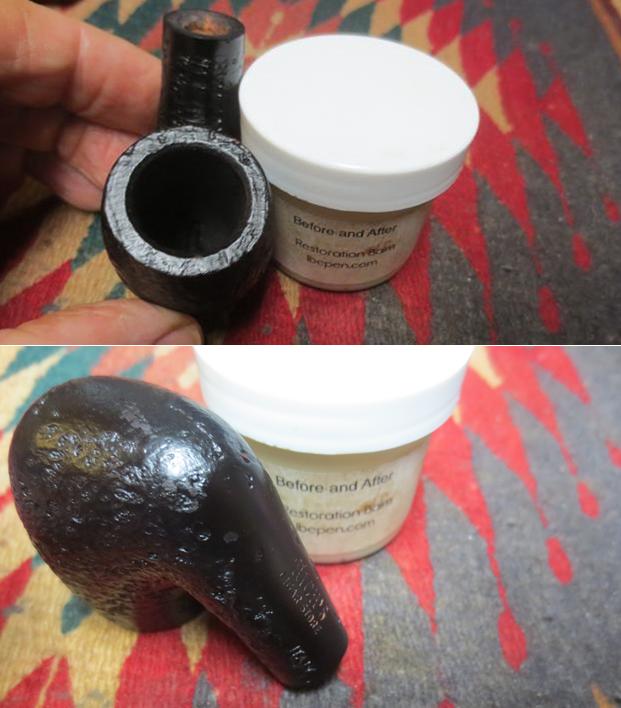
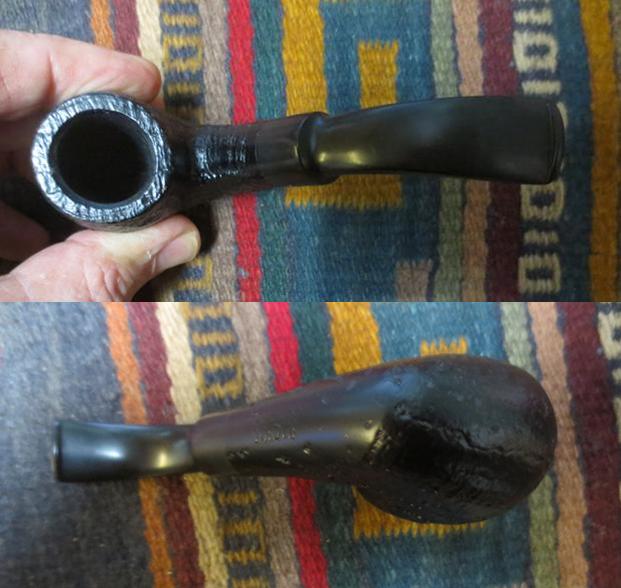 What had appeared to be wear on the outer edge of the rim must have been dust in the grooves of the finish. When Jeff scrubbed the pipe the marks disappeared and the rim looked very good. Other than the stem oxidation the pipe looked new. The close up photo shows the rim and bowl. I also included photos of the stem to show its condition as well – no tooth chatter or marks. All that was present was light oxidation of the rubber.
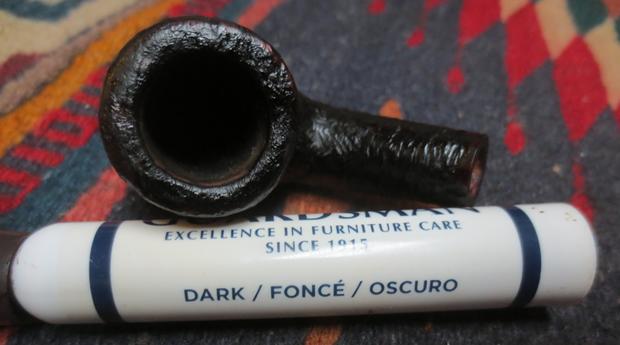
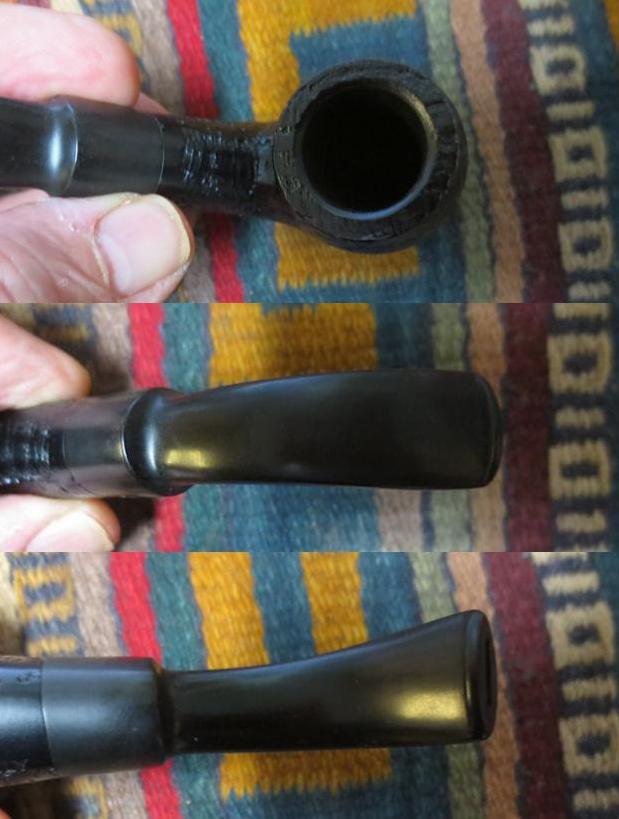 I put the stem in a bath of Before & After Stem Deoxidizer to soak while I worked on the bowl. I figured it would not take to long as it was not badly oxidized. I also put a second more oxidized stem in at the same time.
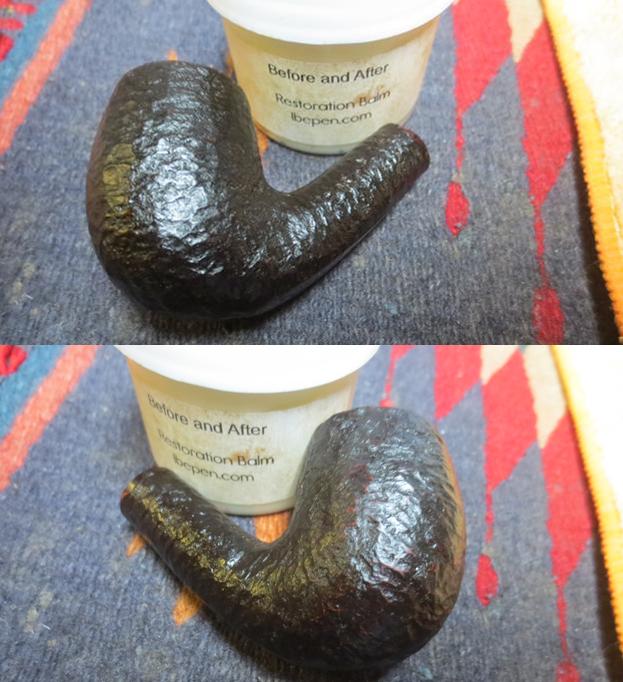
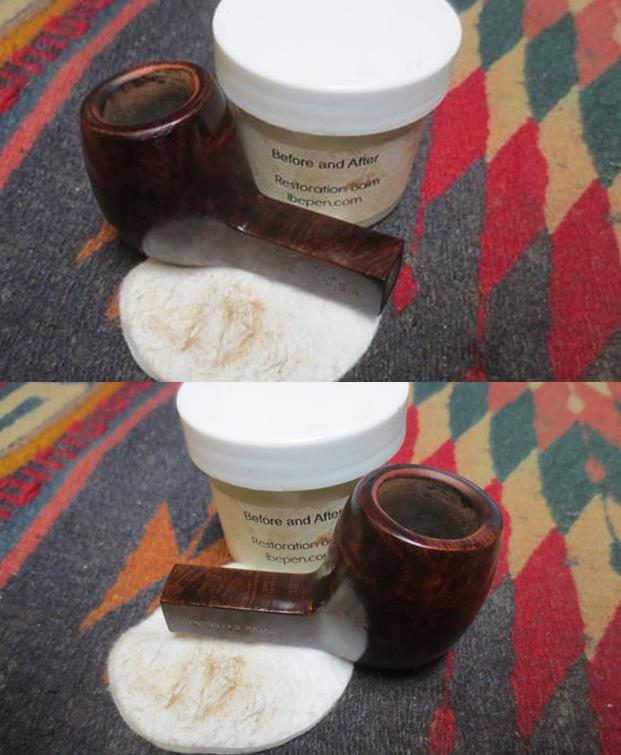
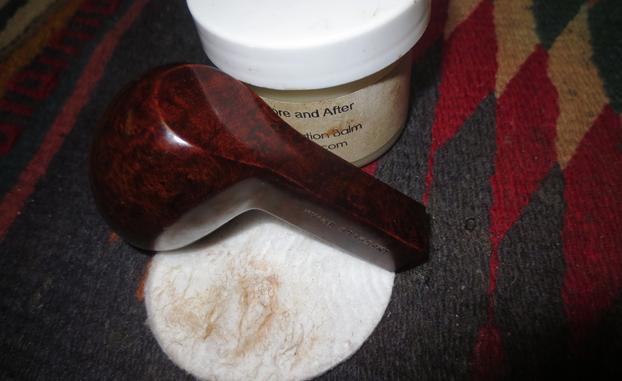
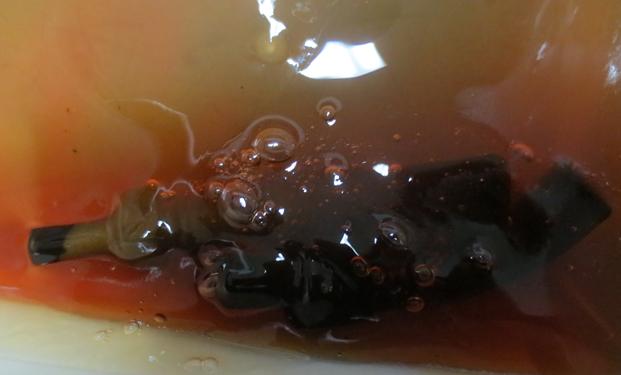 I turned my attention back to the bowl or stummel to finish it while the stem soaked. I scrubbed the briar with Before & After Restoration Balm to enliven and deep clean the sandblast finish. I worked it into the grain with my finger and a tooth brush. I rubbed it in and then buffed it with a horsehair bristle shoe brush.
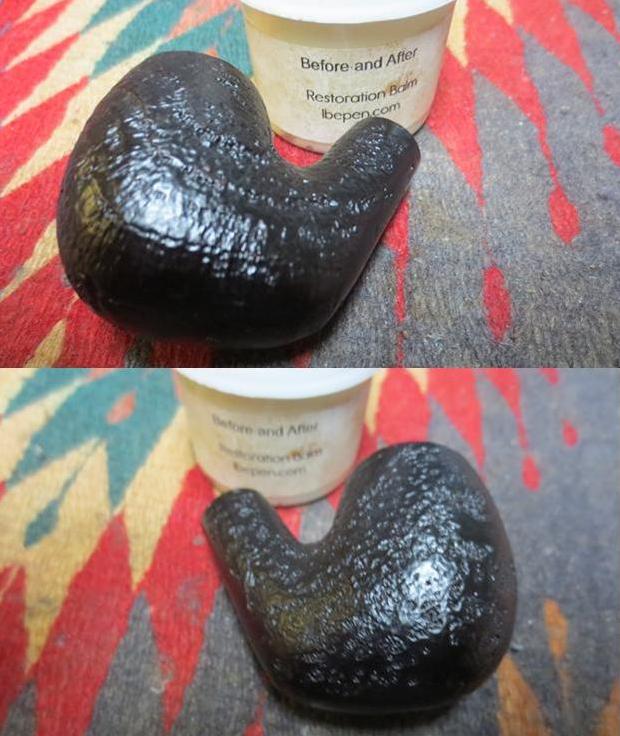
 I put aside the bowl and turned back to the stem. I removed it from the deoxidizer soak and dried it off with a cloth. I rubbed off the remaining oxidation and then cleaned out the airway with alcohol and pipe cleaners. The stem looked really good at this point. It would not take too much work to bring it back to a rich shine. I polished the vulcanite with micromesh sanding pads – wet sanding it with 1500-2400 grit pads and dry sanding it with 3200-4000 grit pads. I wiped the stem down with Obsidian Oil after each sanding pad. I buffed the stem with Blue Diamond on the buffing wheel. I brought it back to the table and sanded it with the final three 6000-12000 grit pads. After the final pad I gave it a final coat of oil and set it aside to dry.
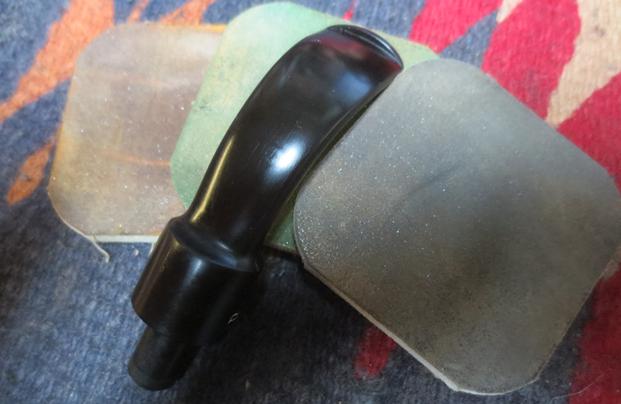
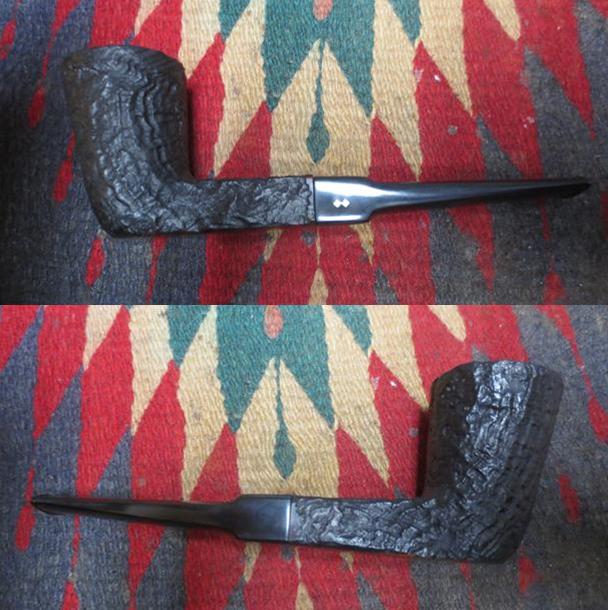
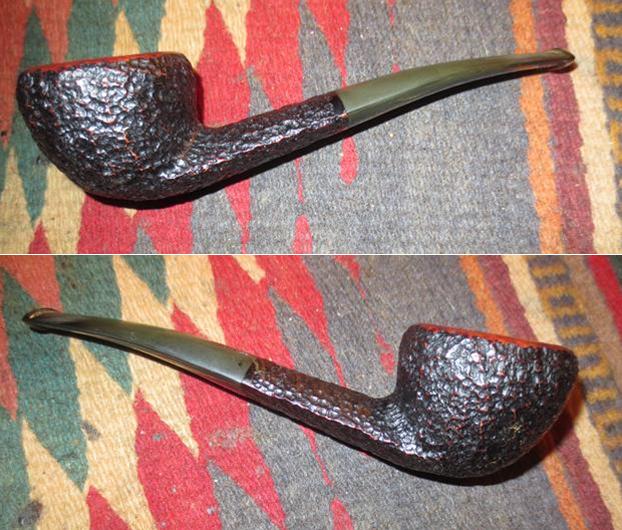
 I put the stem back on the bowl and worked the pipe over on the buffing wheel using Blue Diamond to polish the bowl and shank. I used a gentle touch on the briar when I was buffing it so that the nooks and crannies of the sandblast finish would not be filled in and make more work for me. I buffed the stem with a harder touch to raise the gloss on the rubber. I gave the bowl multiple coats of Conservator’s Wax and gave the stem multiple coats of carnauba wax. I buffed the pipe with a clean buffing pad to raise the shine. I hand buffed it with a microfiber cloth to deepen the shine. The finished pipe is shown in the photos below. The oxidation and dust from sitting on a shelf somewhere was gone and the pipe looks like new again – very fitting for a unsmoked, NOS pipe. It is truly a beautiful pipe. The dimensions of the pipe are: Length: 5 inches, Height: 2 inches, Diameter of the bowl: 1 ¼ inch, Diameter of the chamber: 3/4 inches. I will be adding this one to the rebornpipes store shortly if you are interested in adding this NOS, unsmoked pipe to your collection. It will make a fine addition to the rack. If you are interested email me at slaug@uniserve.com or send me a message on Facebook. Thanks for looking.