Blog by Paresh Deshpande
I had set my eyes on this pipe’s restoration for a long time, but was delayed for some reason or the other. Finally, it is now on my work table and I am looking forward to finishing this pipe. This is one of the two “SON” pipes from my inherited collection, the other being an un-smoked sandblasted bent brandy in its original sock.
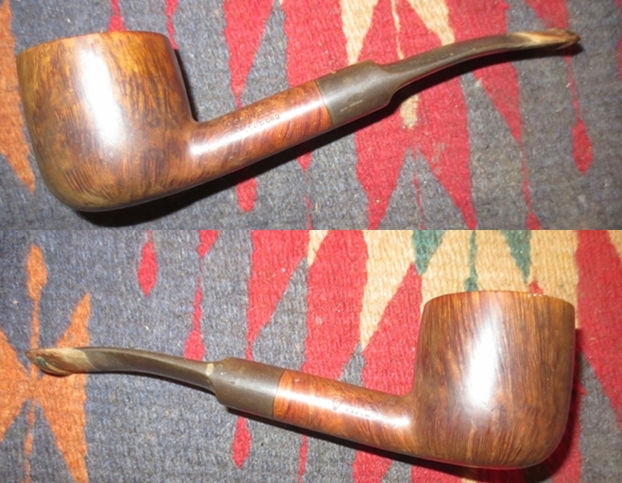
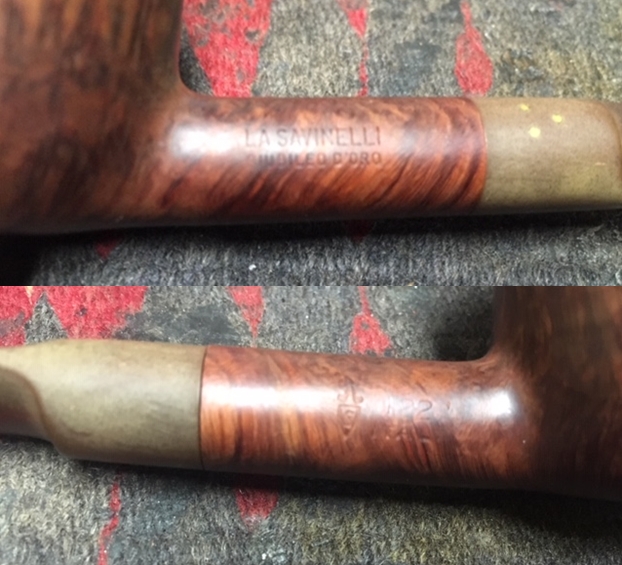
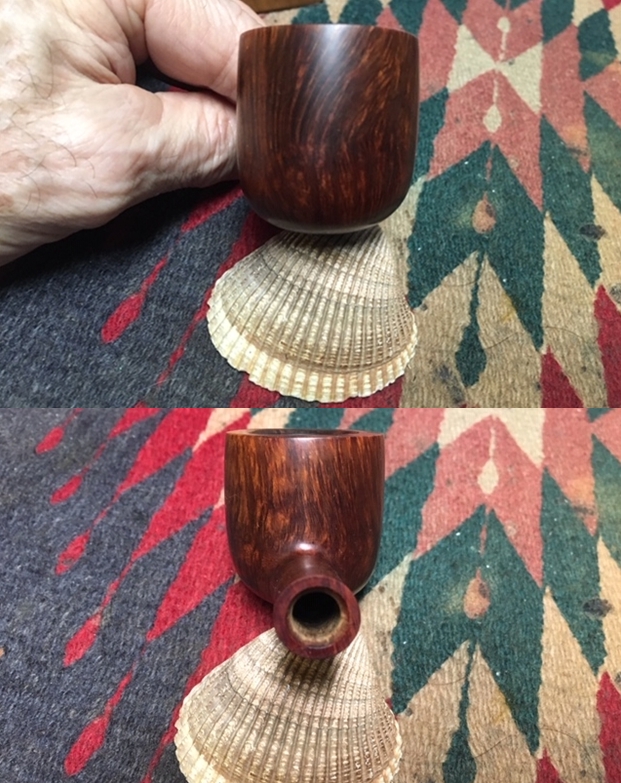
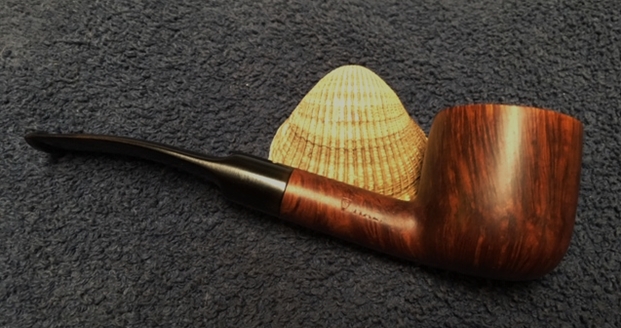
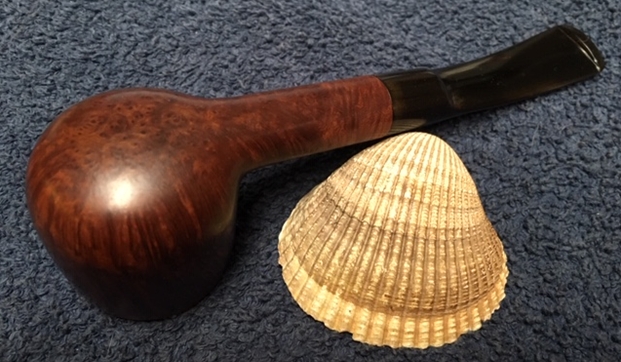
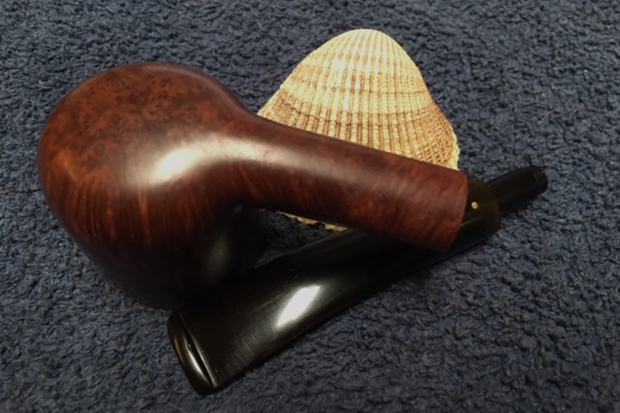
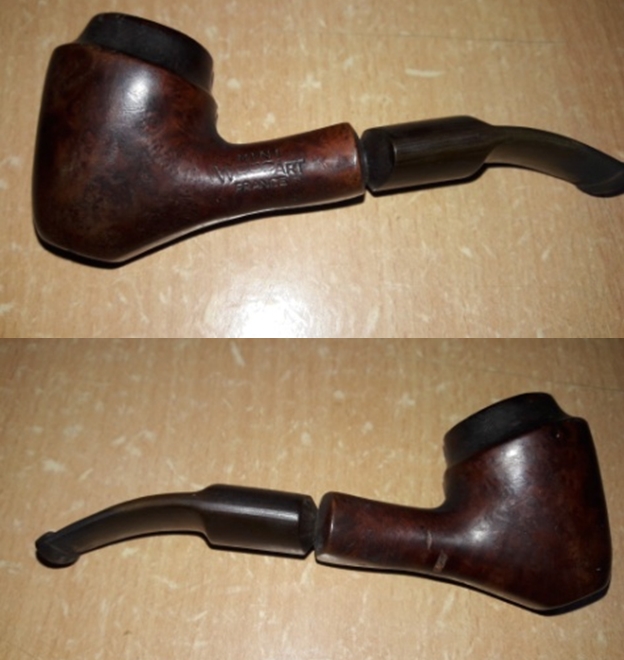
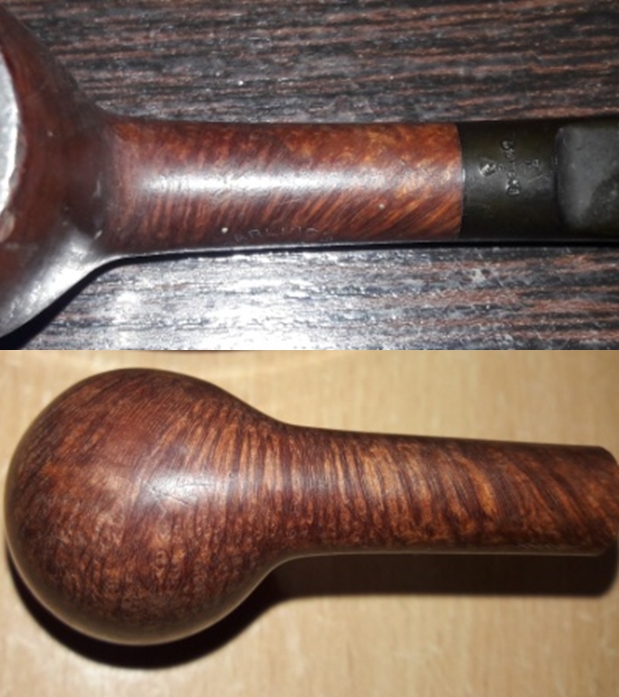
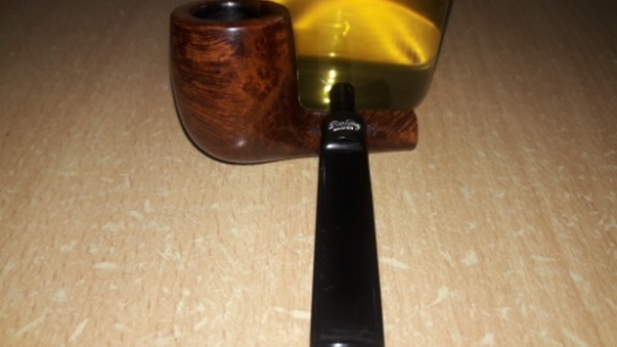
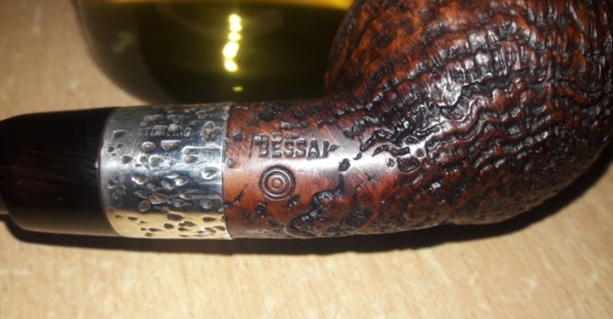
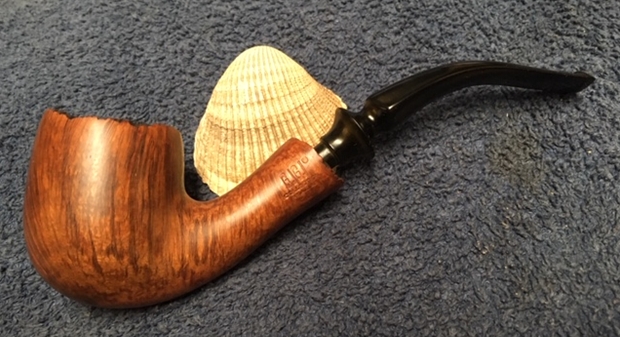
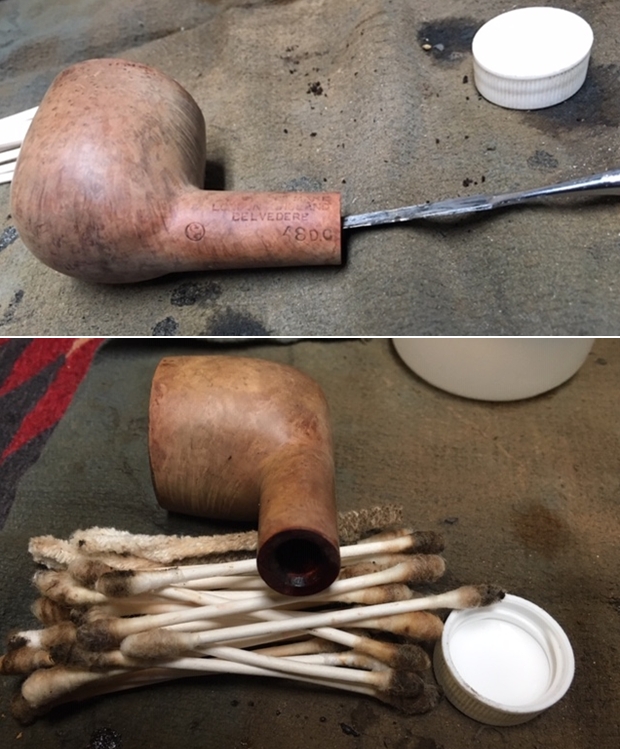
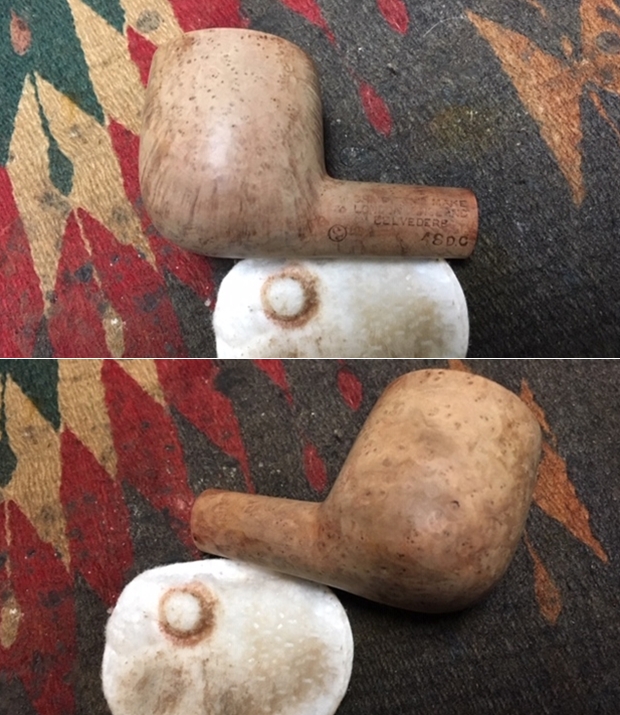
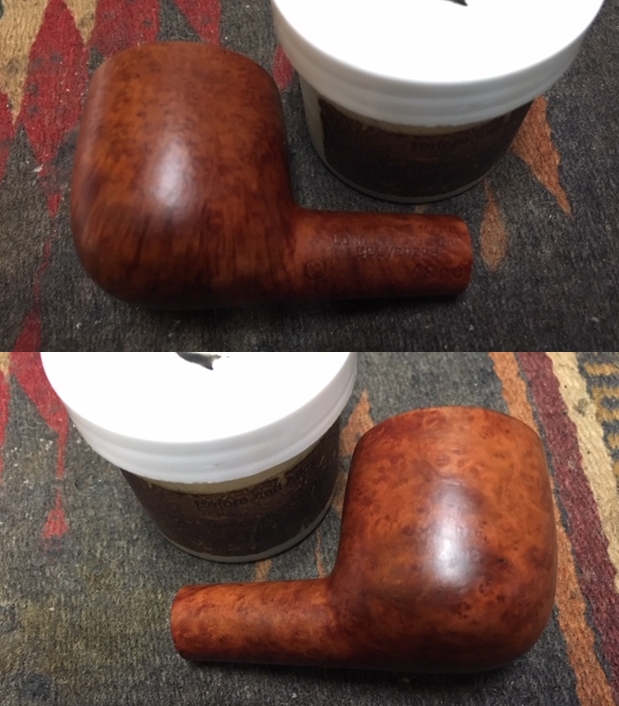
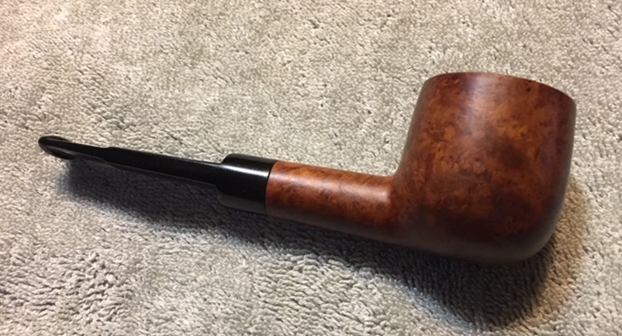
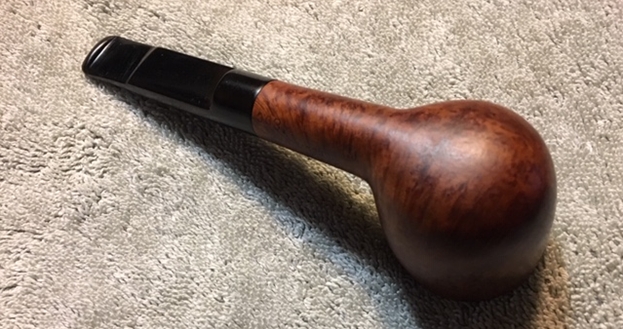
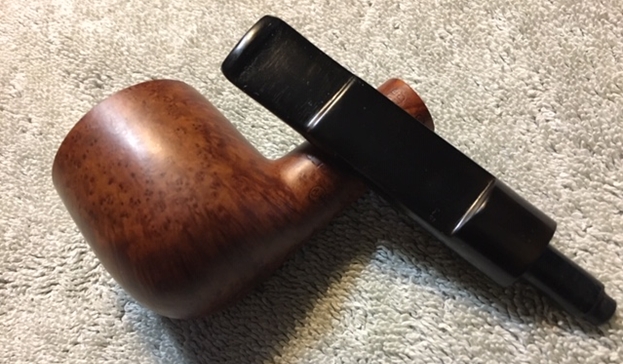
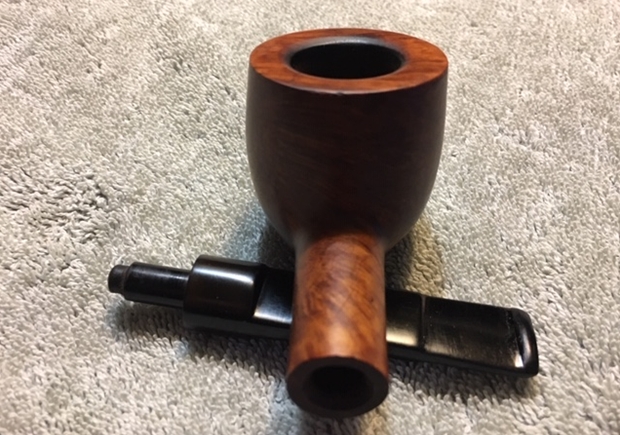
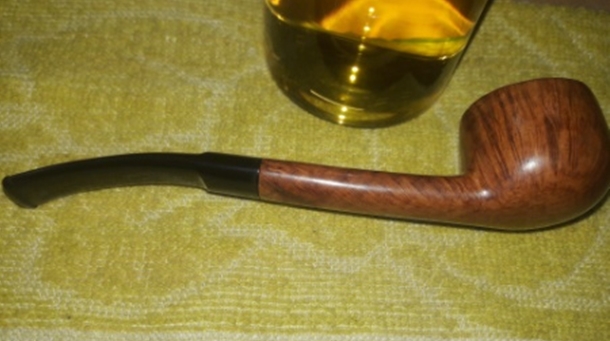
The stummel boasts of lovely straight grains rising from the heel of the stummel towards the rim while the long oval shank displays beautiful cross grains all round. The heel of the stummel has some fabulous swirls interspersed with bird’s eye!!!! The pipe is stamped on the bottom of the long oval shank end as “SON” over “HAND MADE” over “DANMARK”. The long ¼ bent saddle stem is devoid of any stamping. During my previous two restorations of Nording pipes, I had searched the internet and had come to know about the association between Mr. Nording and Mr. Skovbo and the first pipes that they made together were named “SON”! After the split, Mr. Nording continued to make pipes under this name before changing the company name to “Nording” in mid 1960s. Here is the link for more detailed information and reading interest; https://pipedia.org/wiki/Nørding. You may also like to read the write up on rebornpipes.com for abridged details; https://rebornpipes.com/2017/12/06/breathing-new-life-into-a-son-freehand-an-early-nording-pipe/
From the above information, I can safely claim that this pipe was made during the 1960s.
INITIAL VISUAL INSPECTION
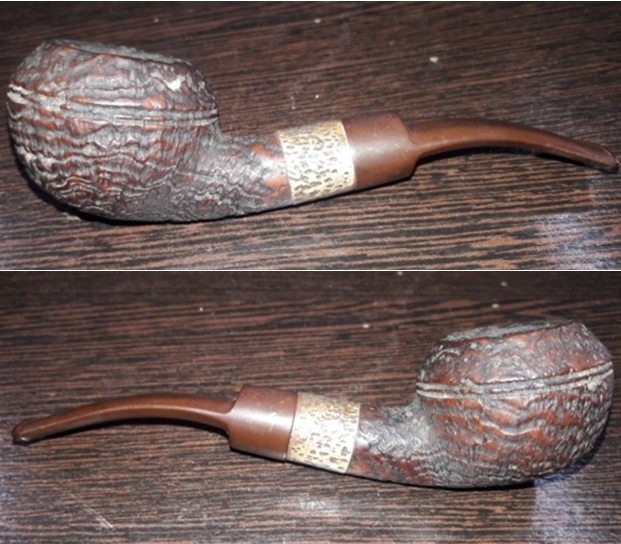
Most of the pipes in my grandfather’s collection show signs of heavy usage with heavy build up of cake in the chamber and overflow of lava over the rim. The stem is also generally in dire state. I have always thought that my grand old man believed in a “use and throw” policy! This pipe is no exception to this general observation.
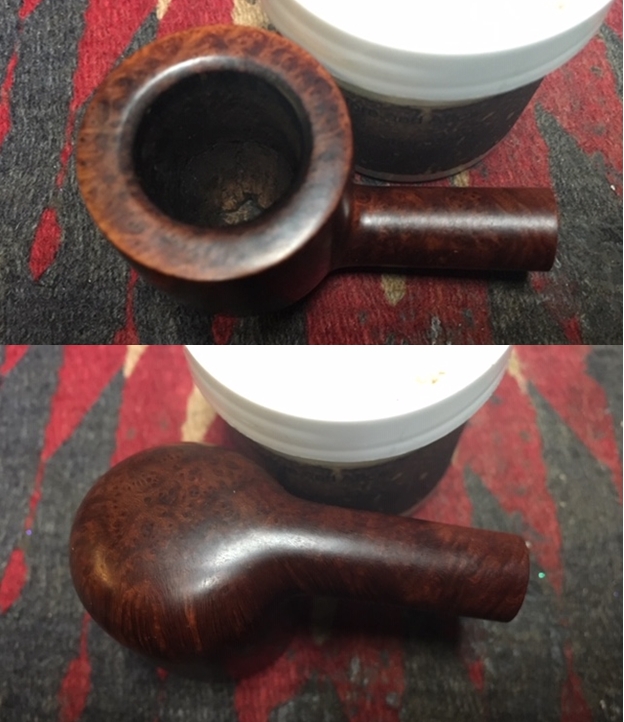
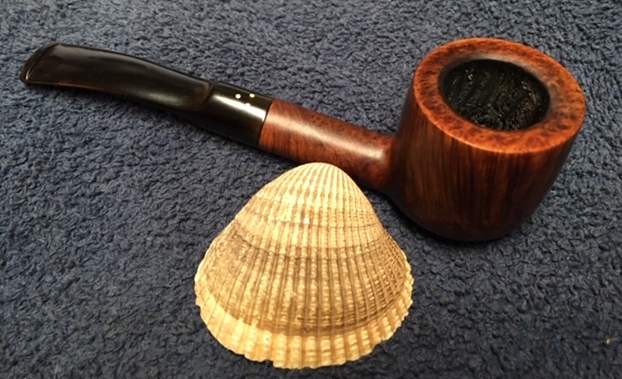
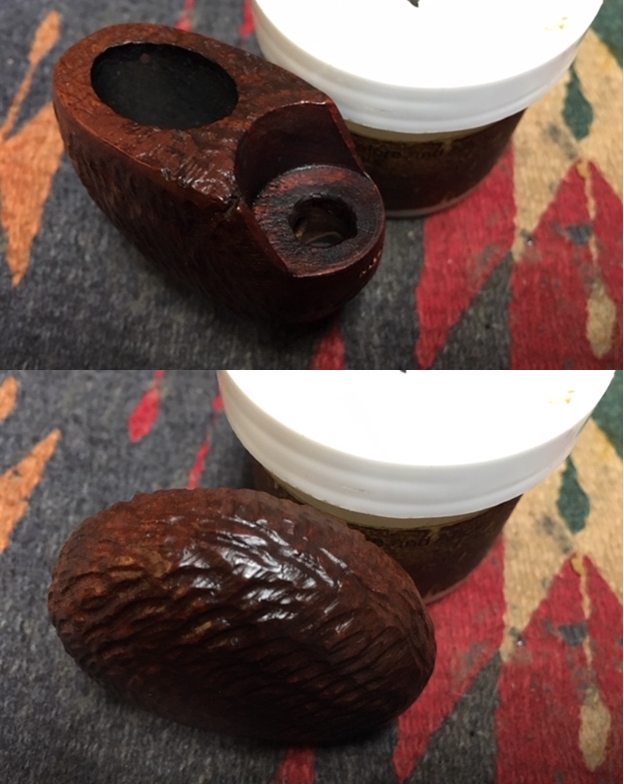
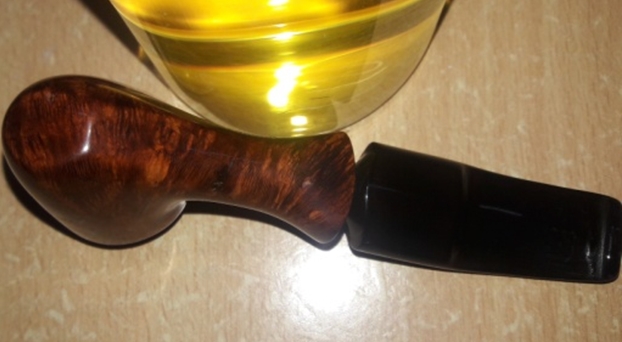
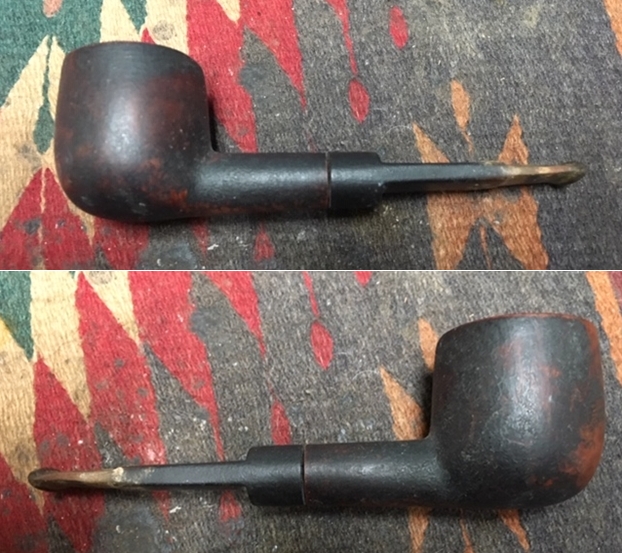
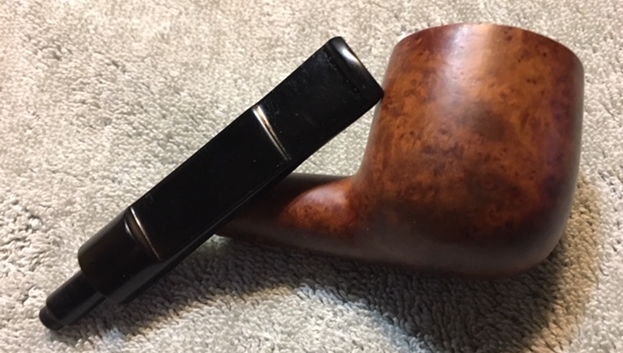
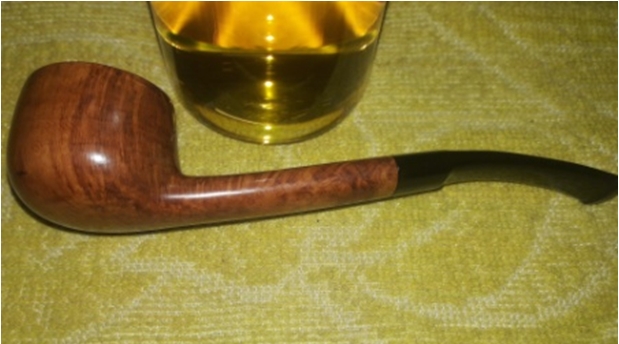
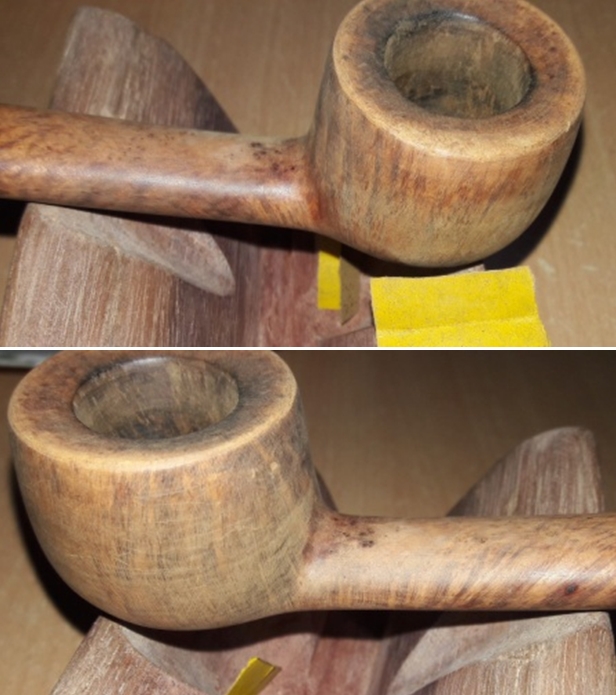
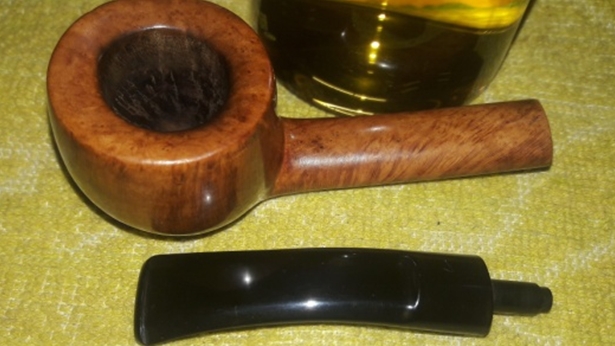
The stummel is covered in oils, tars and grime to such an extent that the bowl is very dull to look at with all the grains hidden and the surface sticky to the touch. This will need a thorough cleaning. There are a number of dents, dings and chipped surfaces over the entire stummel. Whether to sand the bowl with micromesh pads to bring to fore the lovely grains will be decided later.
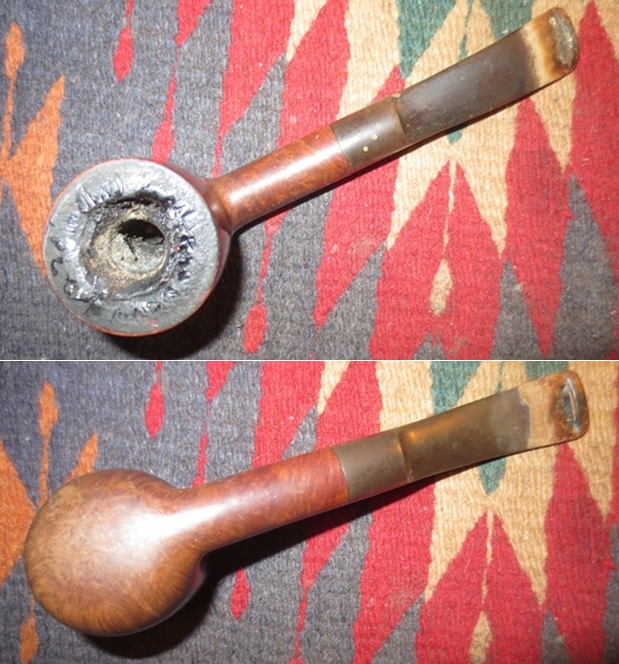
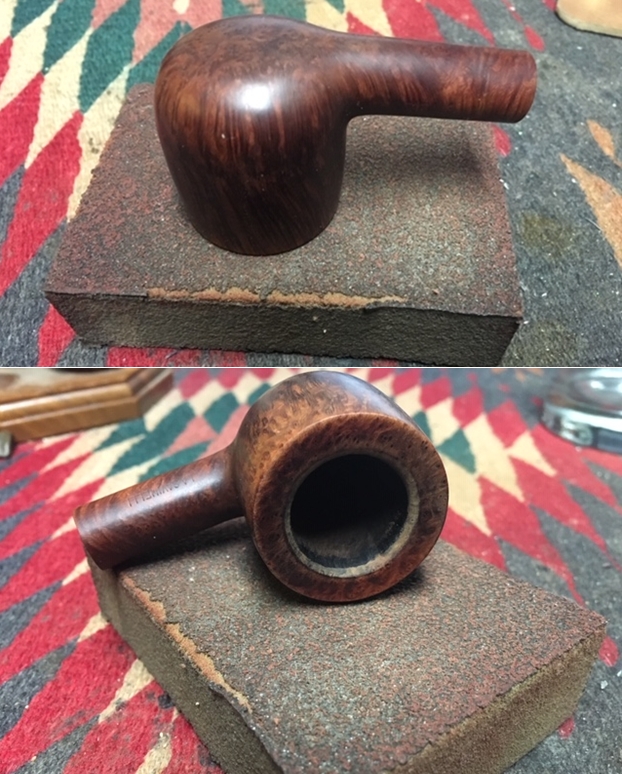
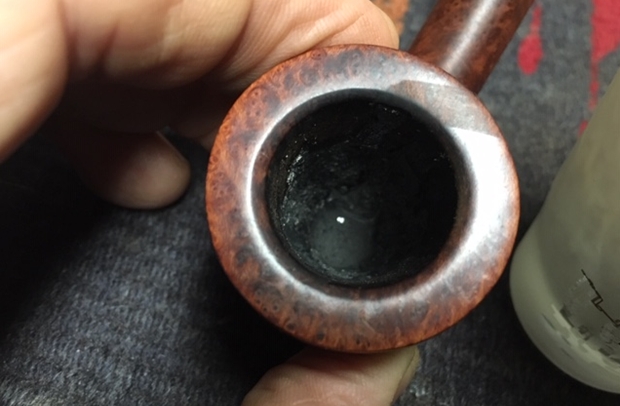
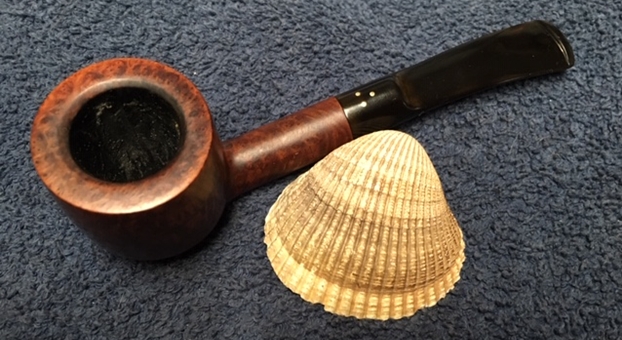
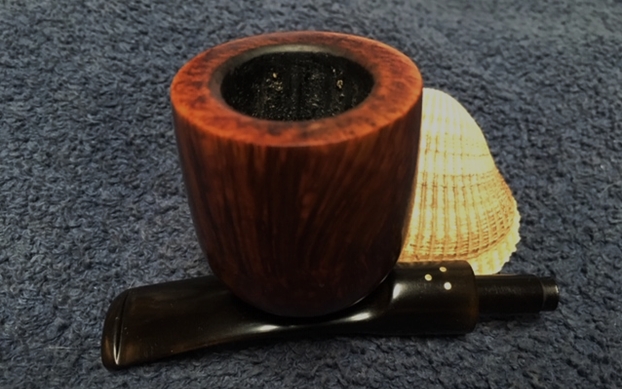
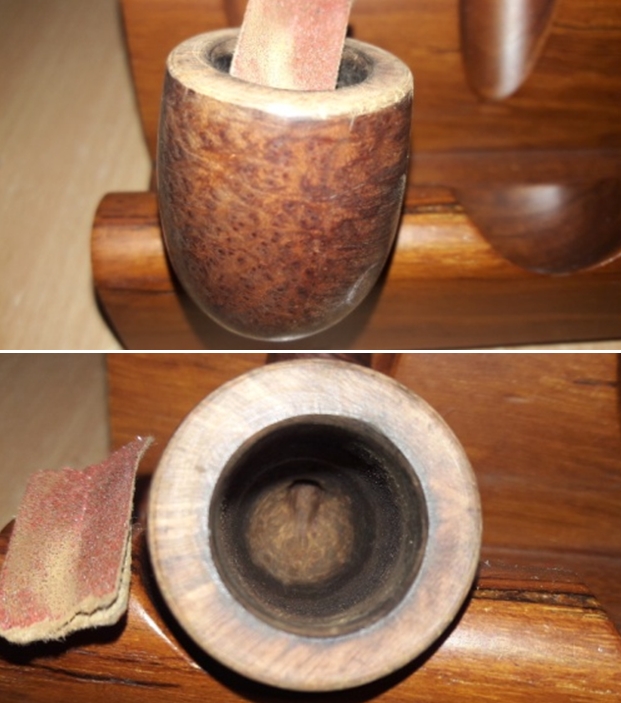
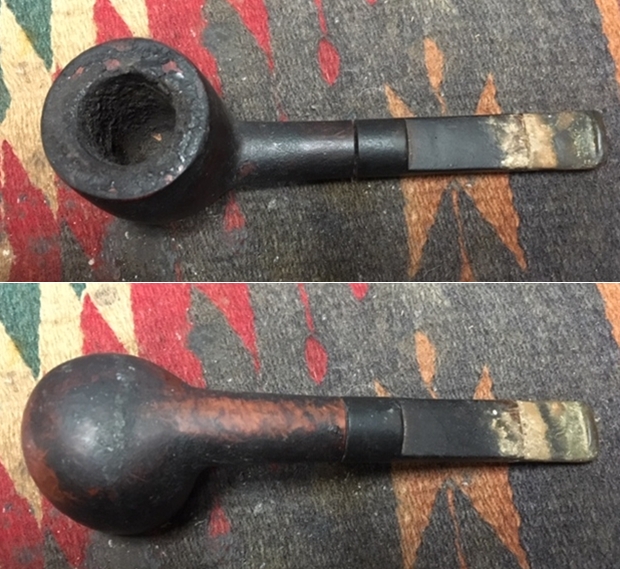
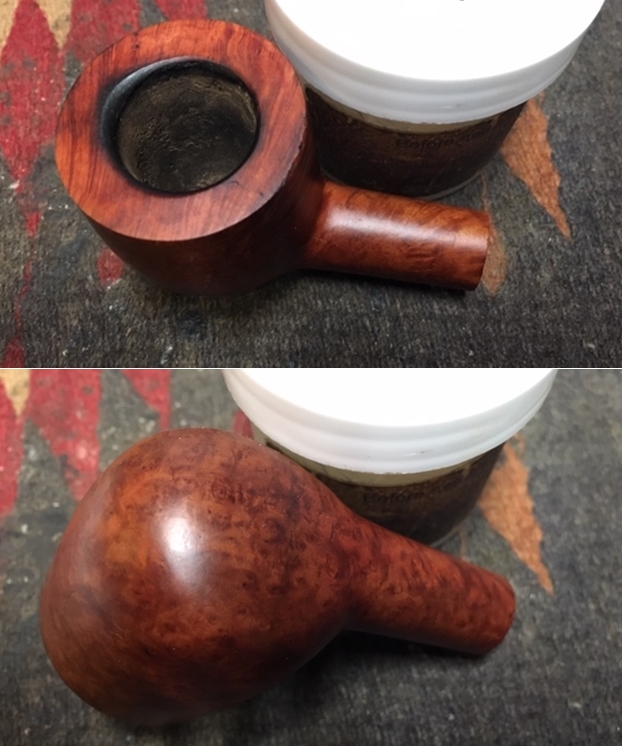
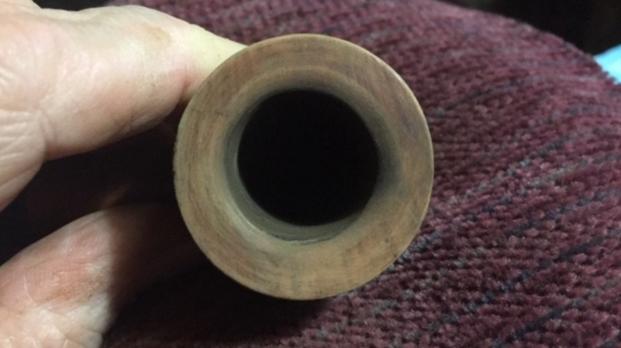
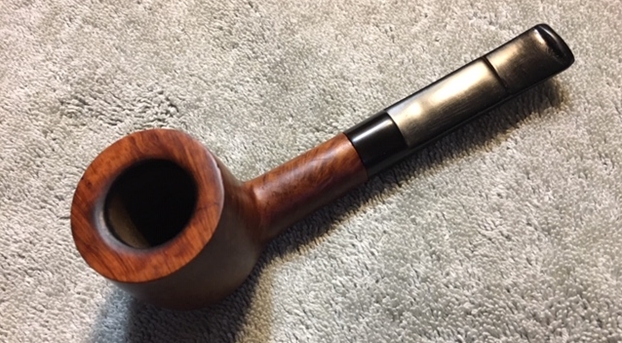
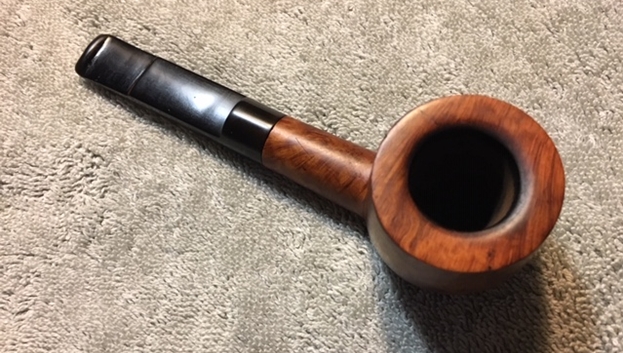
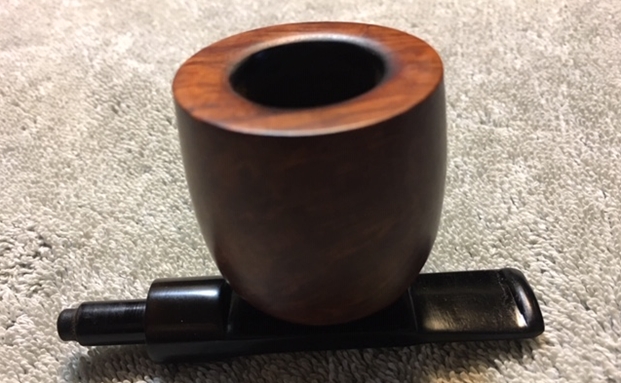
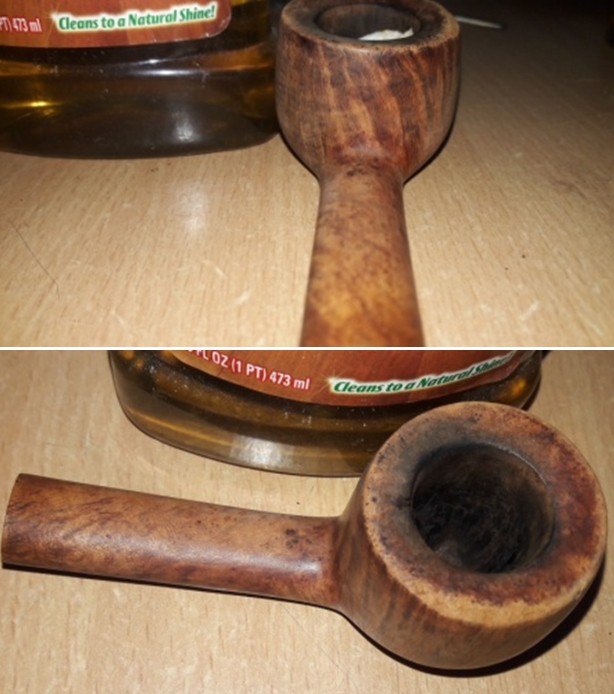
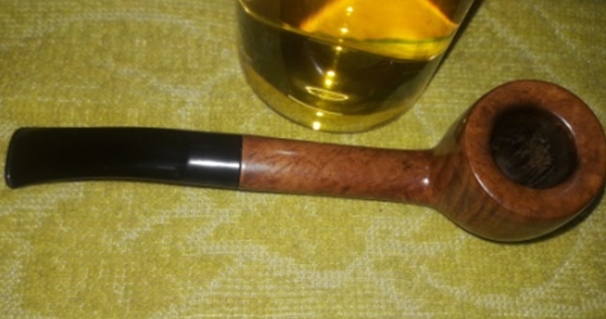
 The bowl is heavily caked and has large amounts of lava overflow on top of the rim. The internal condition of the bowl and rim will be ascertained only after the cake has been completely reamed out. There is always a fear of possibility of charred rim edges or burn fissures or charred briar inside the chamber of pipes in this condition. However, the entire stummel appears solid to touch from the outside reducing the probability of any of the above issues being present.
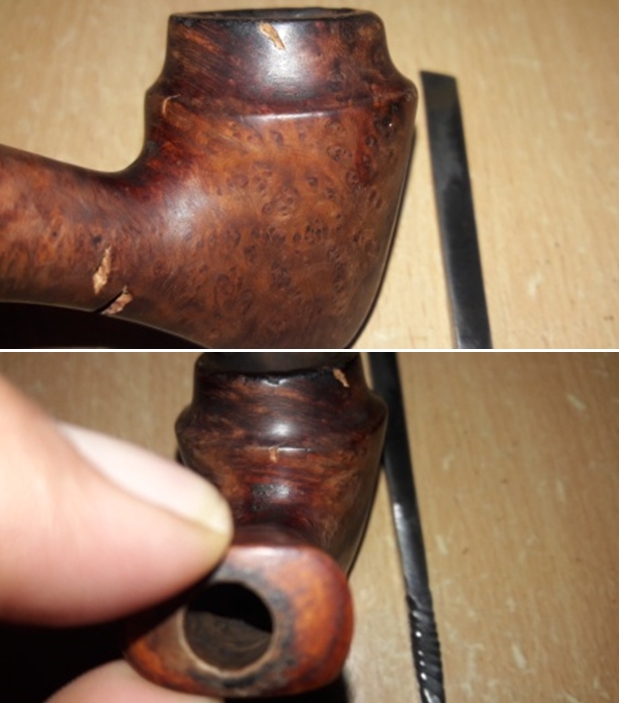
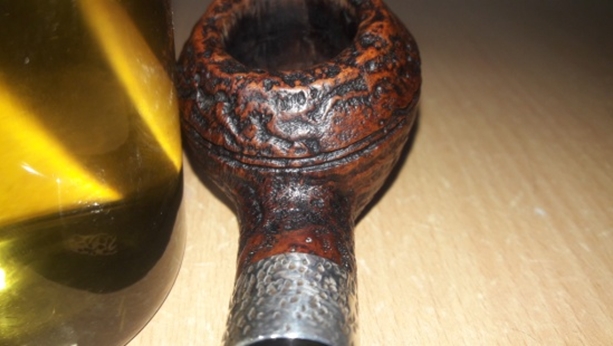
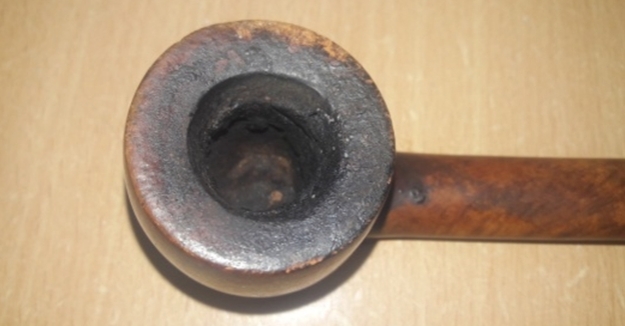 The rim top has an inward slope towards the chamber and will make topping impossible without compromising the rim profile, should the need arise. The heavy overflow of lava over the rim top also hides any damages to the inner edge of the rim and also atop the rim surface. However significant damage, in terms of chipped surface, is seen to the outer edge of the rim on the right side in 3 o’clock position and minor dents are seen along the entire outer rim edge. This will have to be taken care of.
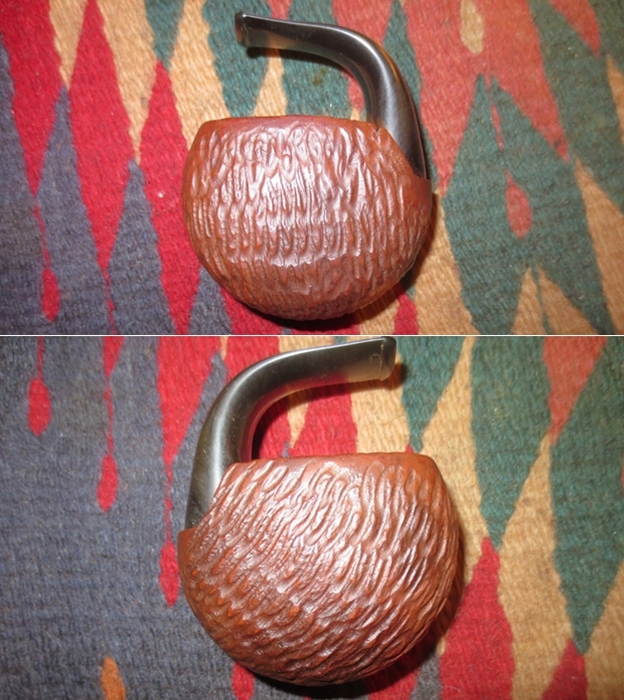
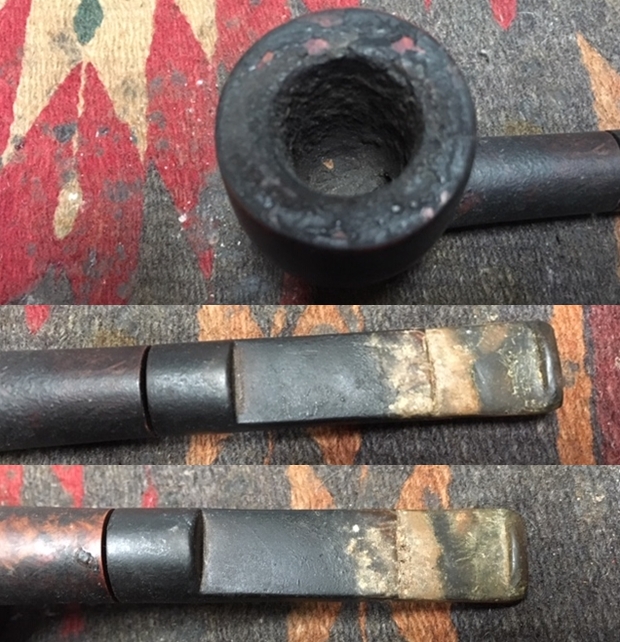
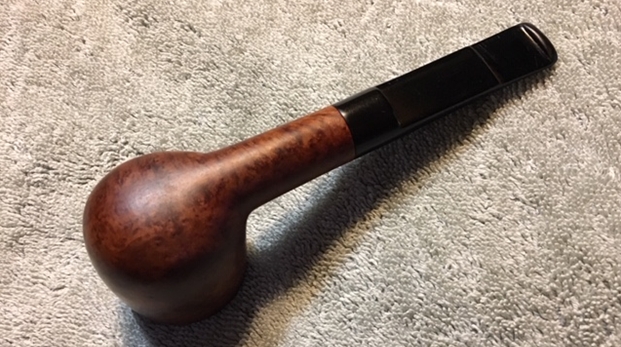
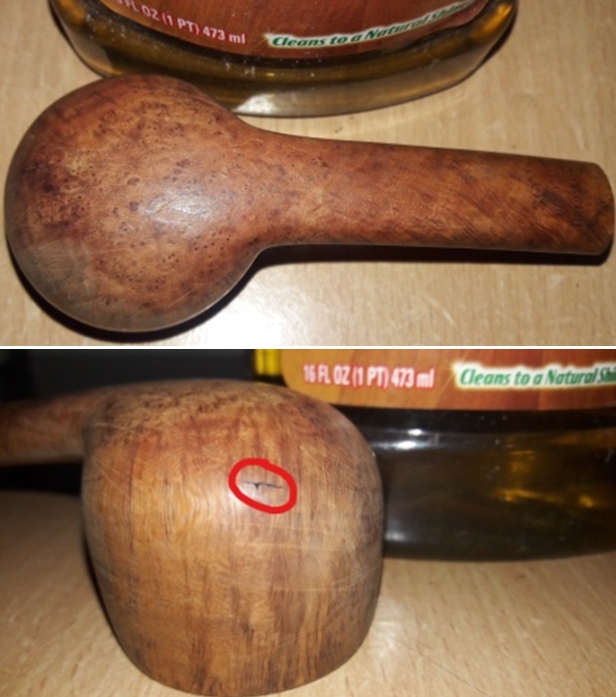
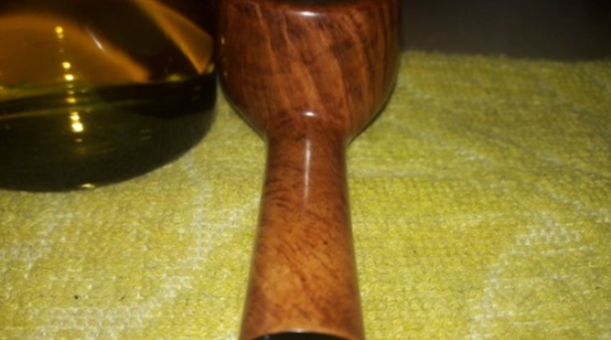
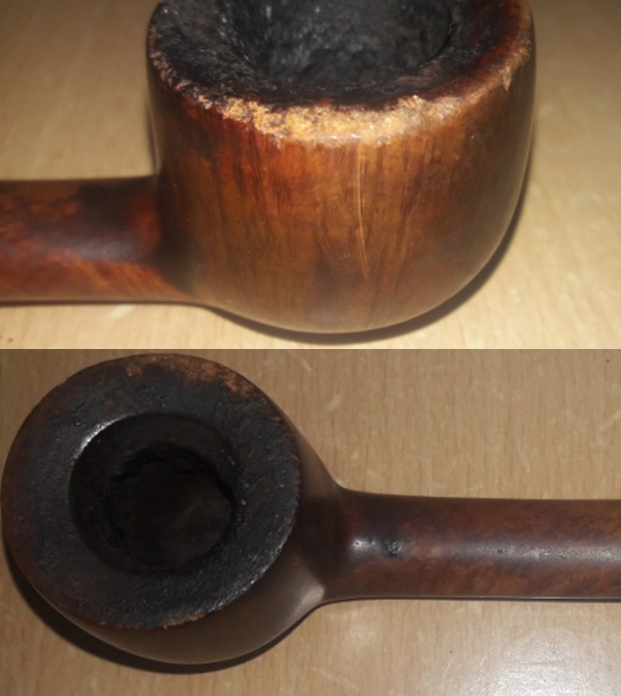 When I took some close up pictures of the heel of the pipe, I thought I could see a very small and thin crack dead in the center of the heel. My fears were confirmed when I shared pictures of this with my mentor, Mr. Steve, and he concurred with my assumptions. The exact extent of the damage, whether it’s a through crack or just a superficial external crack, can only be known after the cake has been completely reamed back to bare briar. Addressing this issue will be a first for me on my journey!
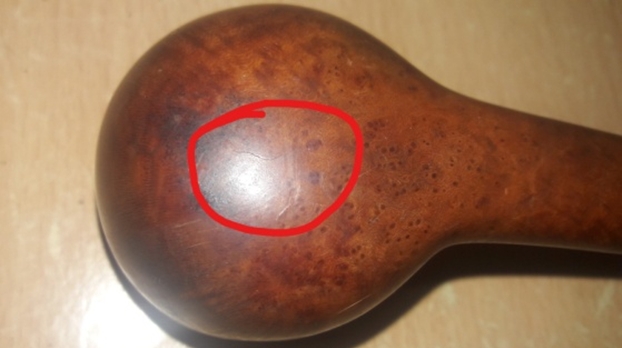 As expected from the condition of the pipe, both the mortise and stem airway is clogged and air flow is restricted.
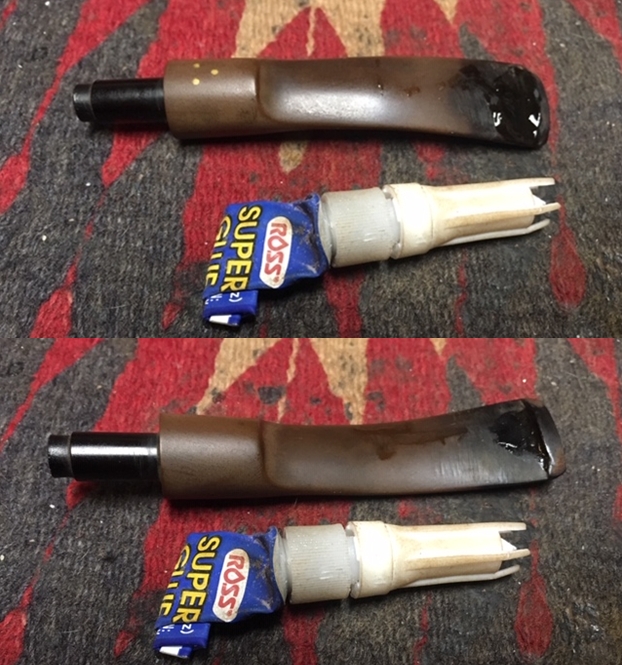
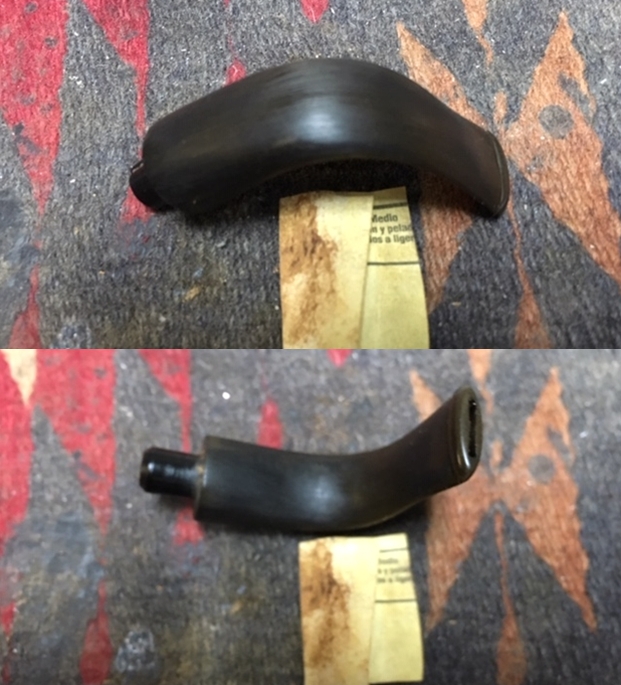
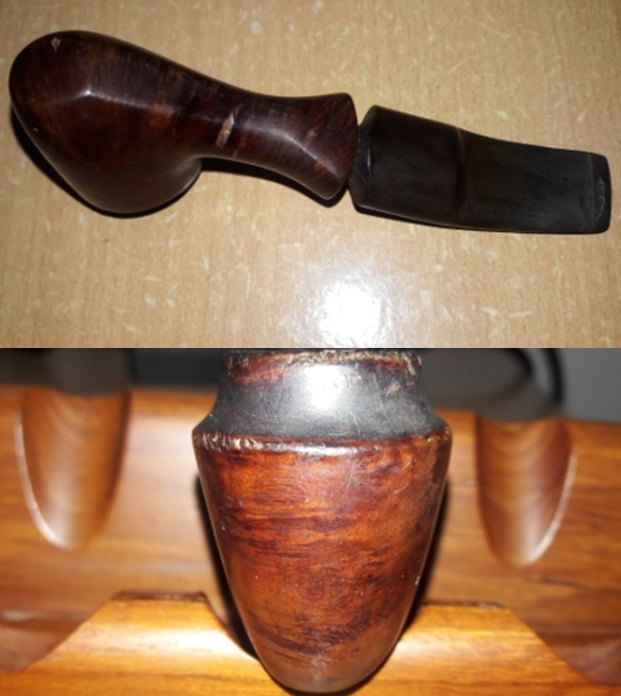
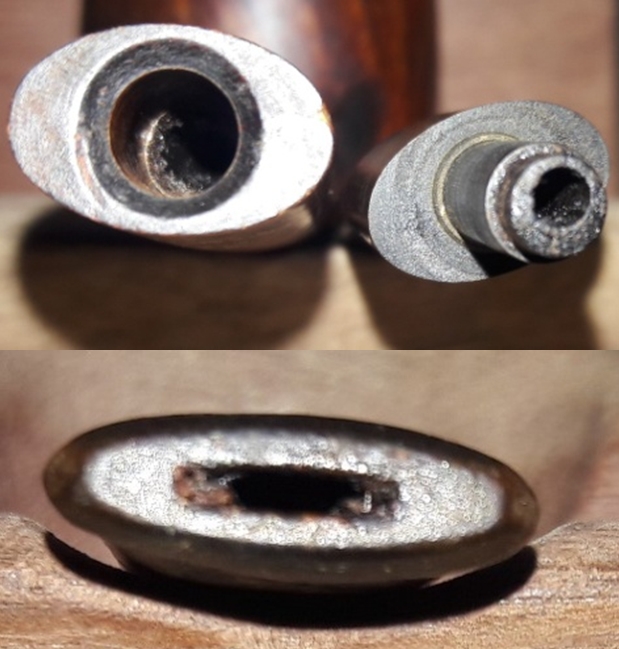 The long ¼ bent saddle stem is heavily oxidized with heavy tooth chatter on both surfaces near the button end. The oxidation is heavier about an inch from the lip. The edges of the lip are worn and will need to be reconstructed and reshaped.
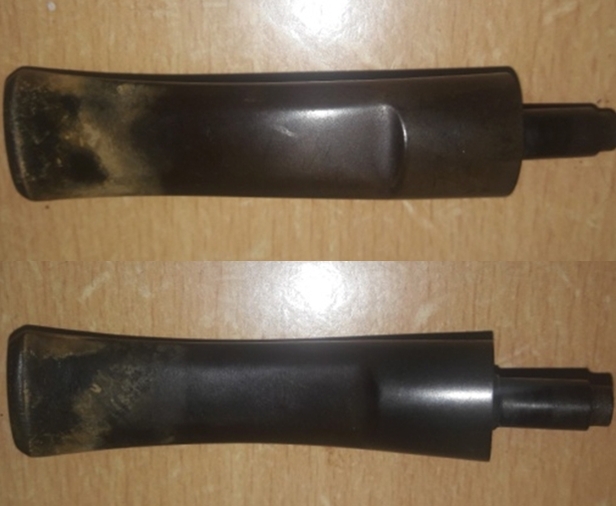 THE PROCESS
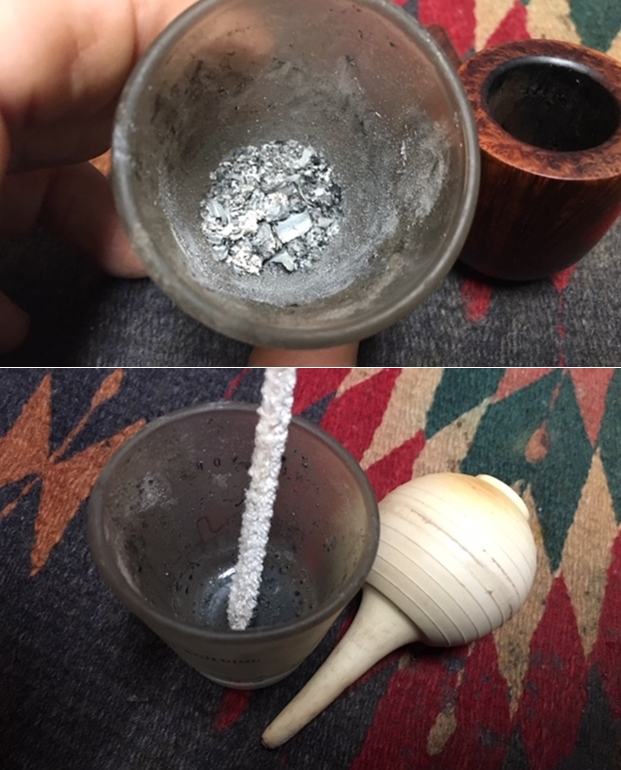
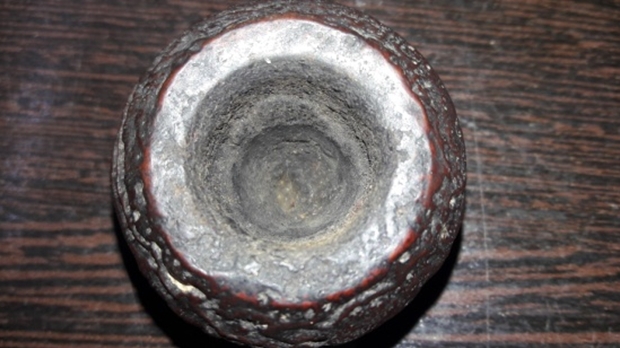
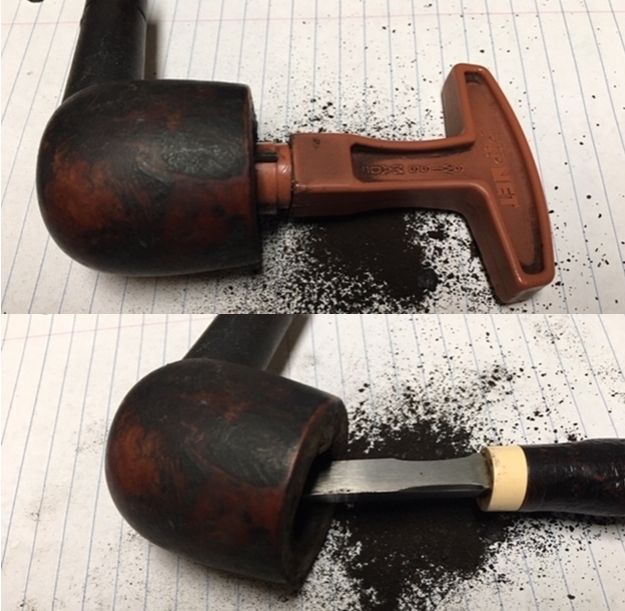
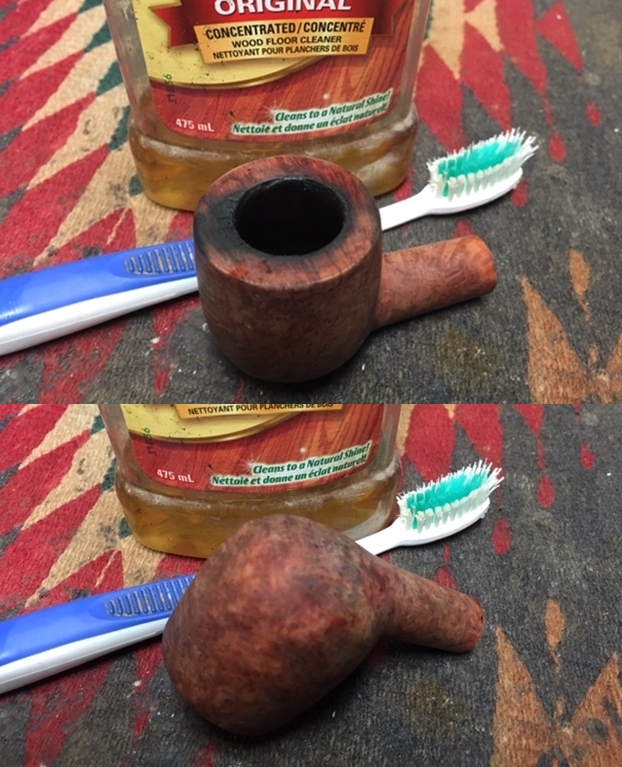
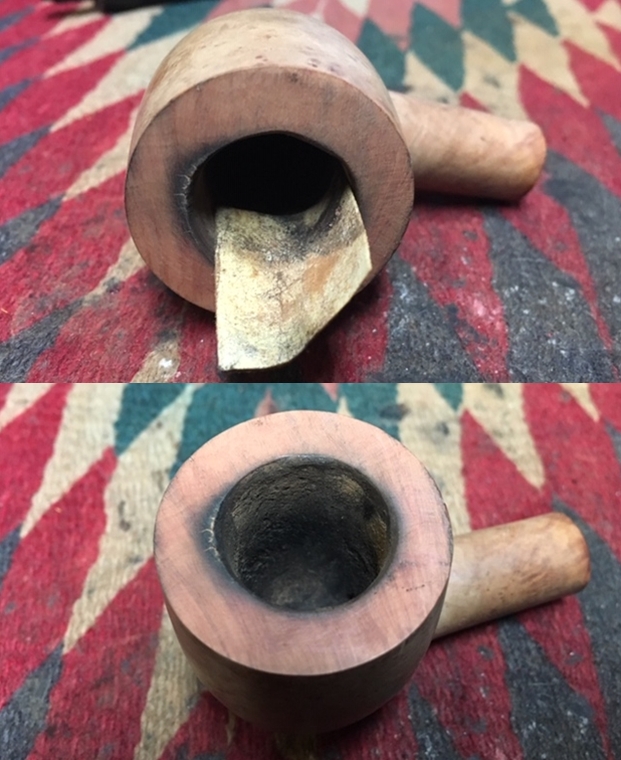
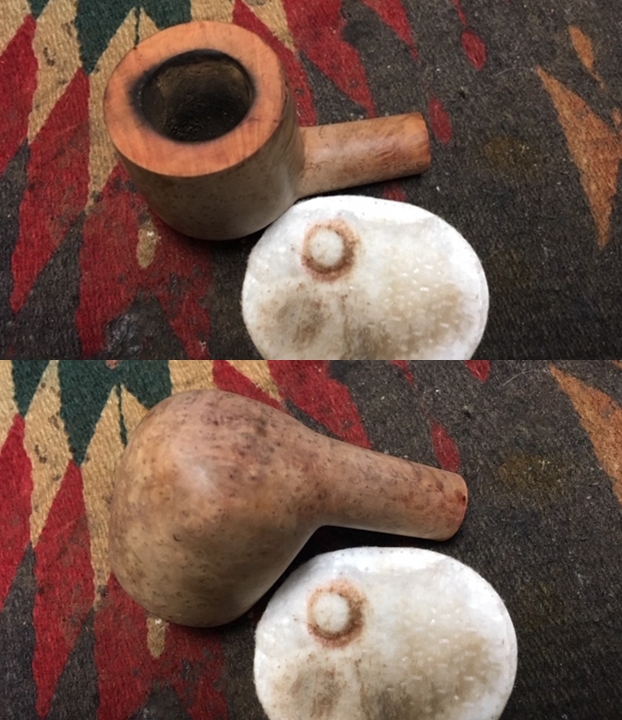
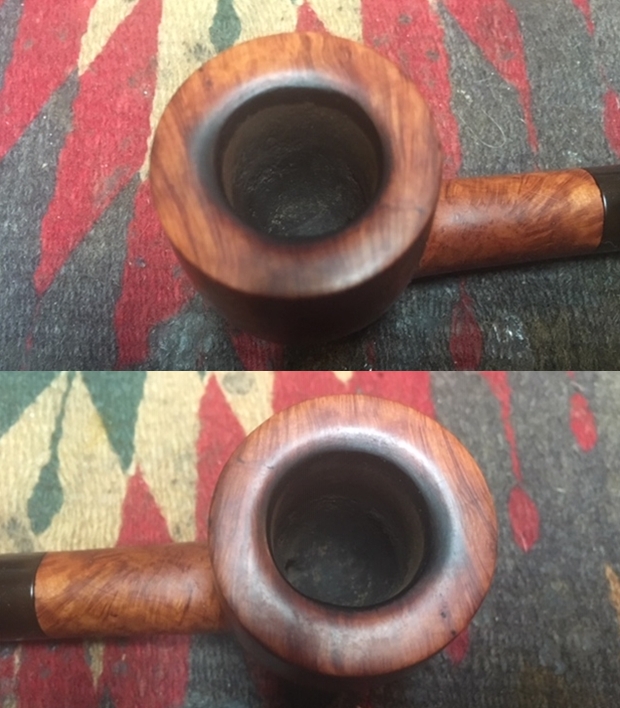
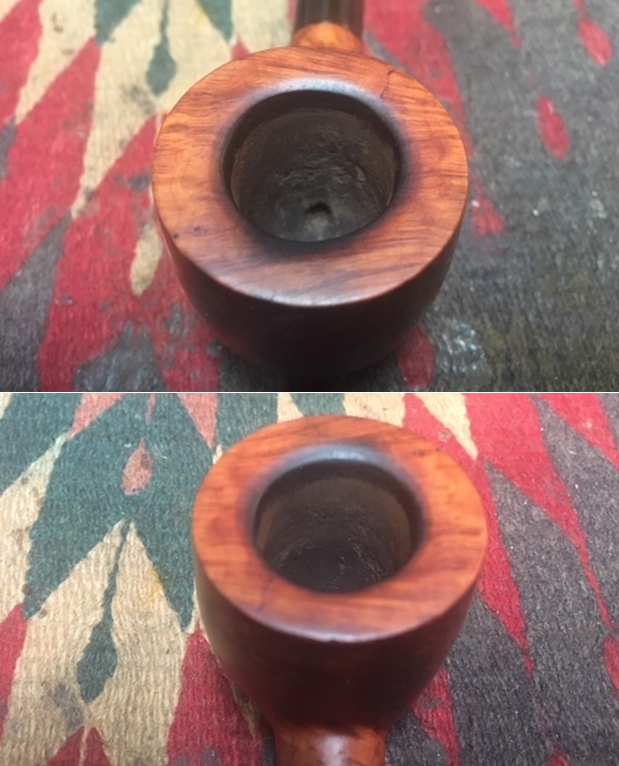
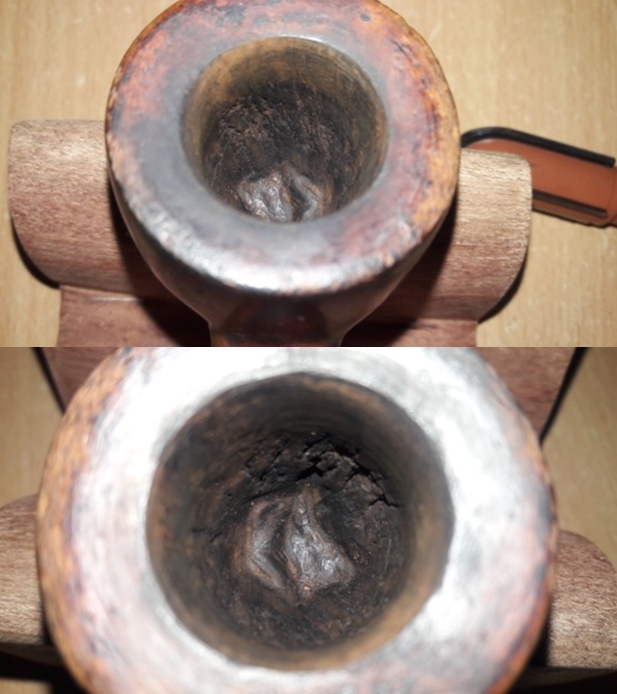
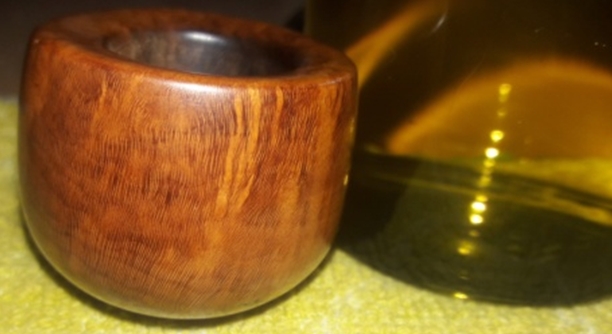
Since I had noticed a small hairline crack on the exterior surface at the bottom of the bowl, I wanted to investigate it further and that is where I start my restoration work. I ream the chamber with head size 2 of the PipNet reamer and progress to size 3 head. To smooth out the inner surface of the chamber and completely remove the last traces of remaining cake, I sand the inner surface of the chamber with a 220 grit sand paper. With a sharp knife, very gently I scrapped the surface of the rim top and removed the accumulated tars, oils and grime. I further clean the chamber with a cotton swab dipped in isopropyl alcohol.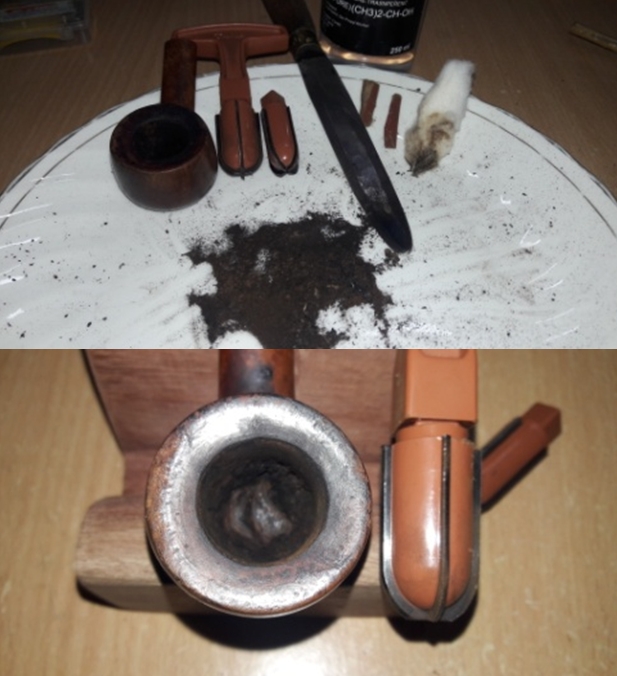 Once the chamber was cleaned, I was relieved that the hairline crack seen on the heel of the stummel was restricted to the external surface. However, the walls of the chamber have the markings of the beginning of burn out on the lower half of the chamber walls on the left, front and above the draught hole. I further sand the chamber walls with a 180 grit sand paper. With a fabricated thin and sharp knife, I gently remove all the charred briar from the walls and also from the bottom of the chamber. What was revealed really blew my sock away!!!! The extent of damage was something that I had not seen in 50 odd pipes that I have restored/refurbished to date. The gouges left behind were huge and the bottom surface was severely undulated. I shared these images with my Mr. Steve, who immediately responded and confirmed that the bottom had significantly thinned out and the walls have sustained significant damage. He suggested that the present condition necessitates coating with JB Weld to make it smokable and if that is not available, Plaster of Paris could be used as a substitute. But neither is available to me here in this remote area.
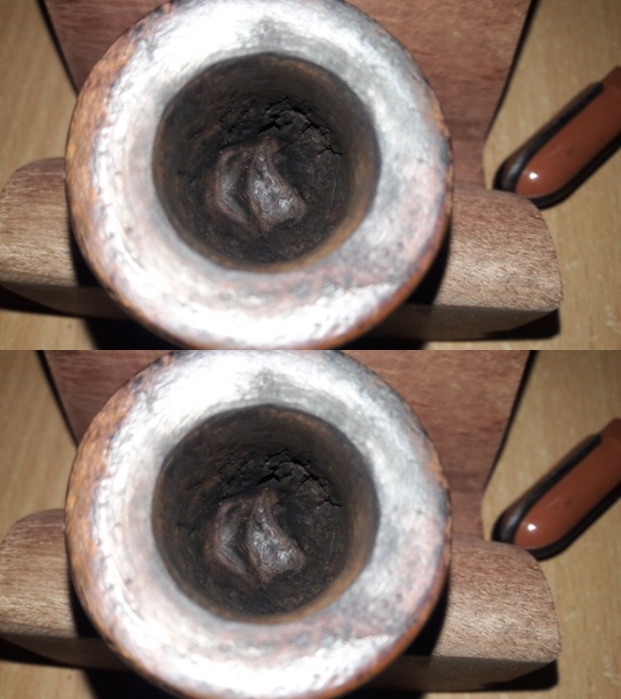
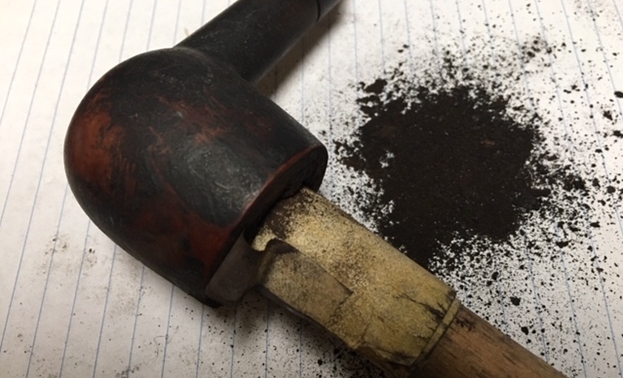
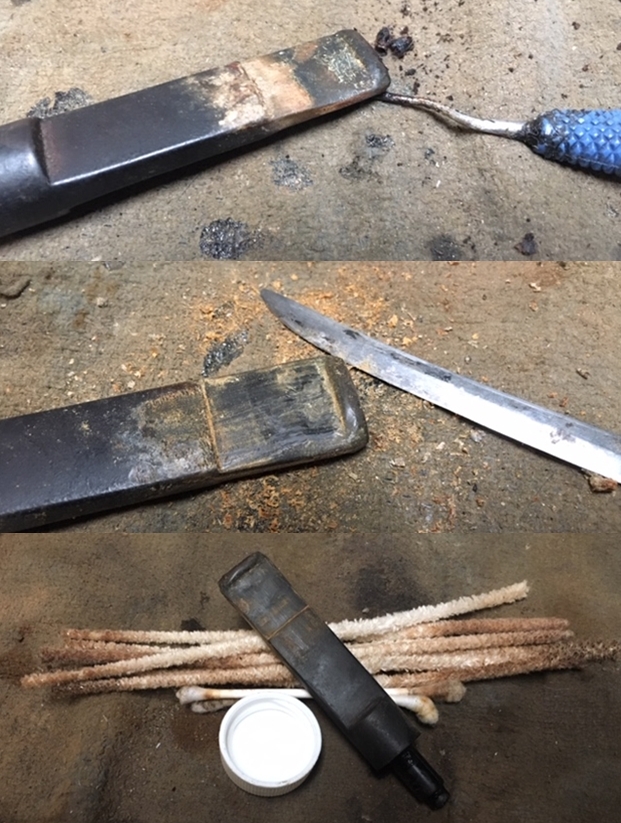
 I decided to proceed with further restoration while being on a look out for JB Weld! I clean out the mortise and the shank with a fabricated spatula, hard bristled and regular pipe cleaners dipped in isopropyl alcohol. To further clean and open out the drought hole, I had to use the shank cleaning tool of the KleenReem reamer. The amount of gunk, hardened oils and tars that was scooped out was astounding to say the least! After some efforts, I was finally able to clean out the mortise and airway of all the filth. The airflow is now open, full and free.
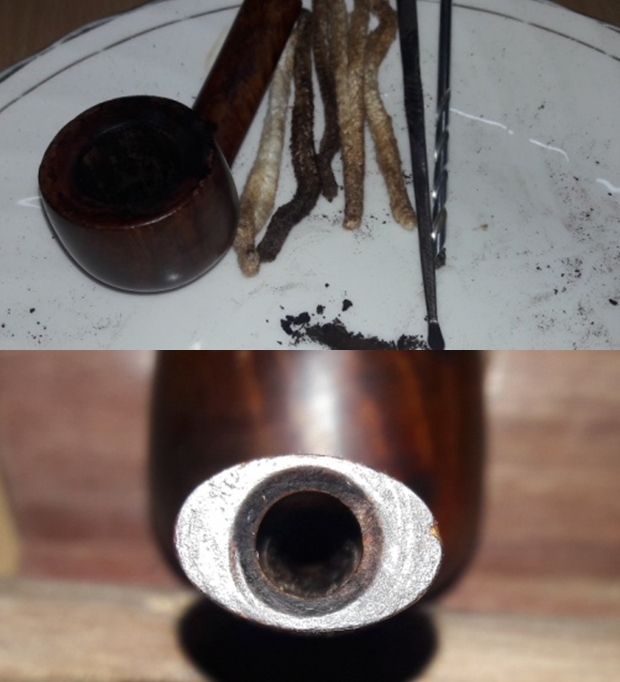
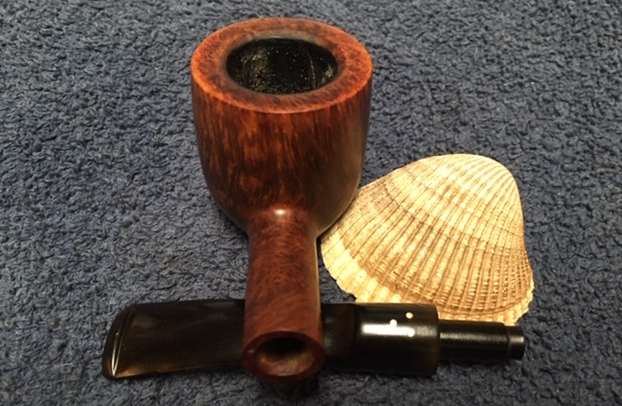
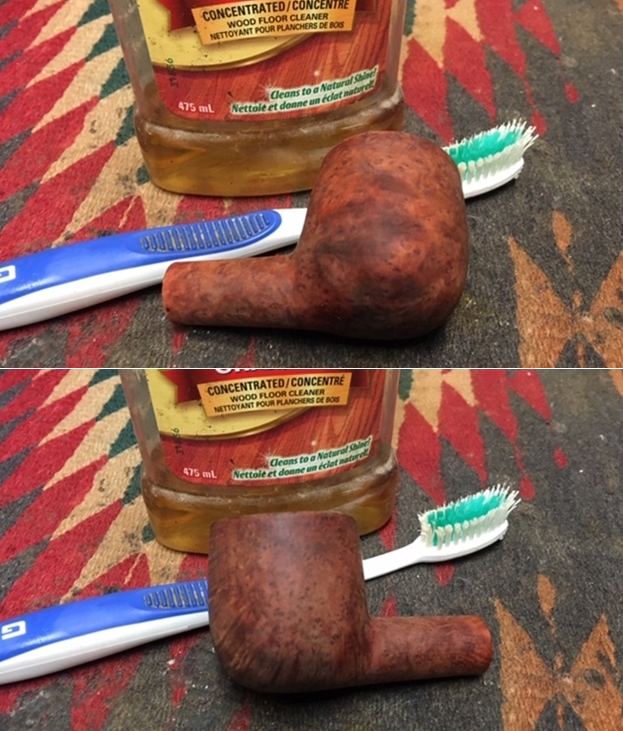
 Now, it was the stummel’s turn to be cleaned up. Using a hard bristled tooth brush dipped in undiluted Murphy’s oil soap, I very deliberately scrubbed all the stummel surfaces, cleaning them thoroughly. I cleaned the rim too. This cleaning and scrubbing revealed a new fissure/crack/fill towards the front of the bowl, on the left side. I checked the alignment of this crack with the heat fissures on the walls of the chamber as I feared a through burn out. Luckily, this fill was nowhere near the damaged portion of the chamber walls. The stummel and rim top was dried using paper napkins and soft cotton cloth. I set the stummel aside to dry out naturally.
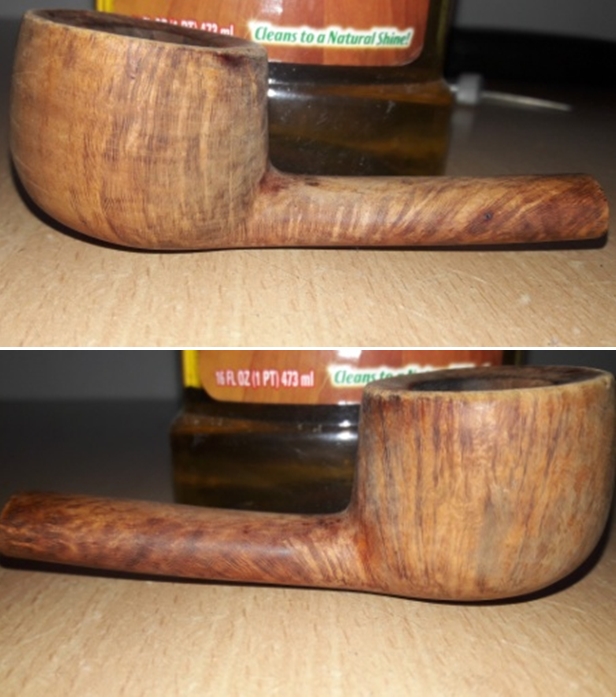
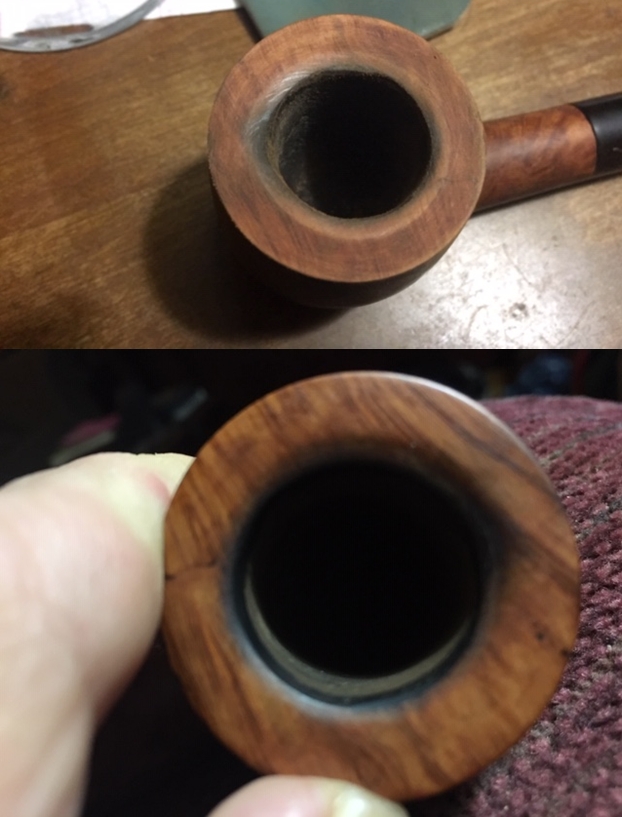
 Next I decide to address the issue of damaged outer rim edge. I raised the chipped surface of the outer edge using the steaming method. I heat my fabricated knife and placing a wet Turkish hand towel over the damaged rim edge, placed the hot knife over it. The steam raised the chipped surface to a great extent. I followed the steaming process with sanding the entire stummel and shaping the rim outer edge with a 220 grit sand paper. I sand the rim surface and edge such that the profile of the inward slope of the rim top is maintained. It was a painstaking and time consuming process, but the end result was a smooth and even stummel, rim top and edges. I was very satisfied with the results of the effort.
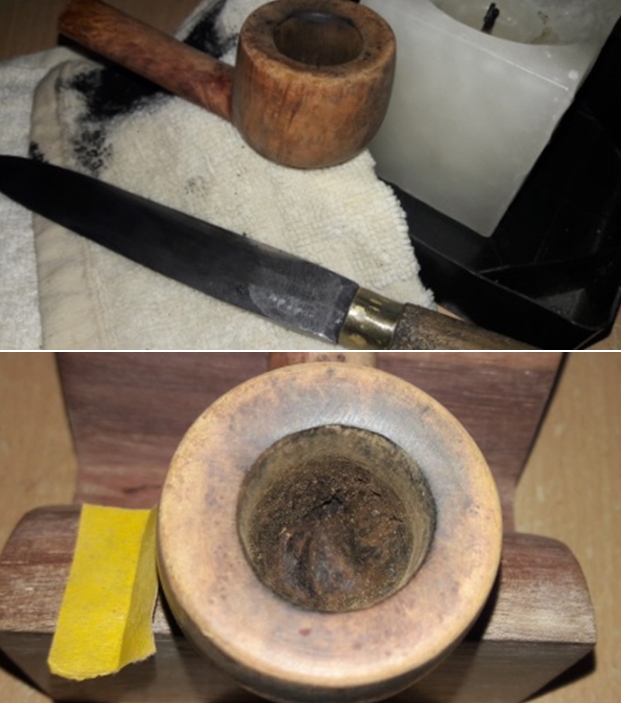
 The superficial crack that was revealed on the front of the bowl after the cleaning of the stummel and the thin superficial crack seen on the heel of the stummel were addressed next. I gouged out the dead and dried briar from the crack with a thin and sharp knife, cleaned it with a cotton swab dipped in alcohol and filled it with clear CA superglue. There was a small nick on the right side of the shank end. This too was filled with superglue. Using a magnifying glass and a whitener pen, I marked the start, turning and end points along the extent of the crack. I next drilled holes using a 1mm drill bit (this was the smallest sized drill bit I could lay my hands on!!!) fitted on to my local Dremel machine, taking care that I did not drill a through and through hole. This helps in preventing further spreading/ progression of the existing crack. I cleaned the crack with a toothpick and spot filled clear CA superglue in to the drilled holes and over the crack. I set aside the stummel for the glue to cure.

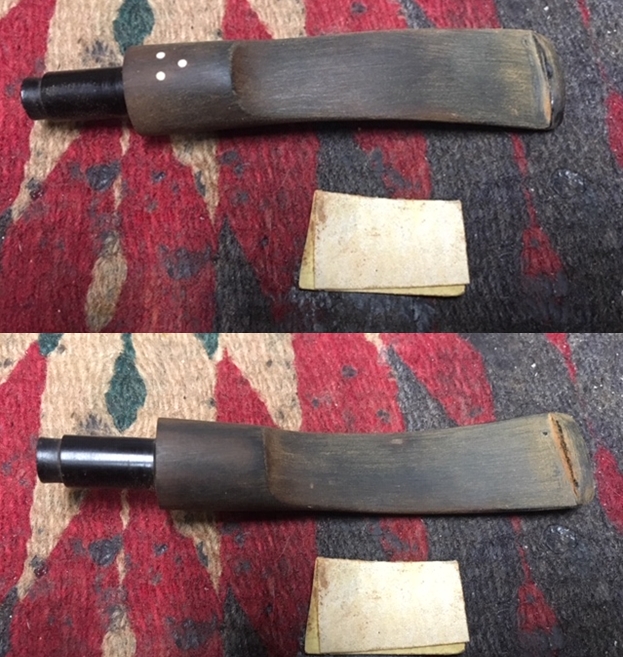
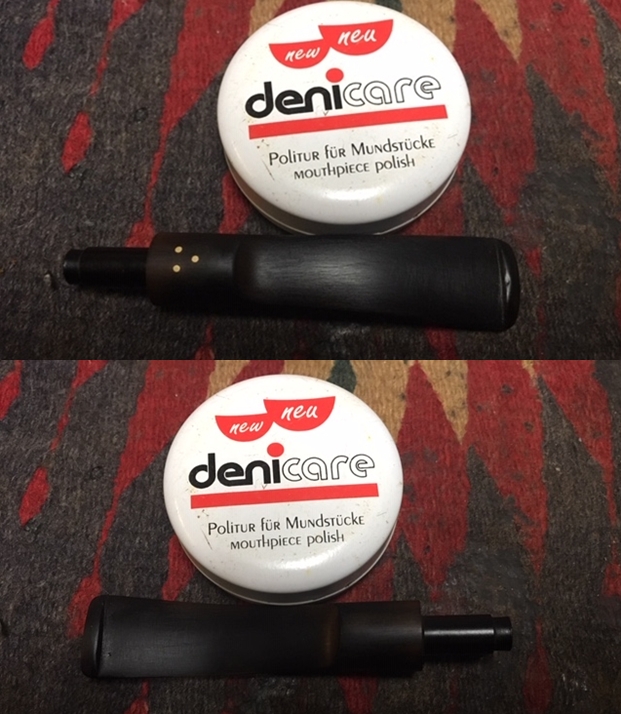
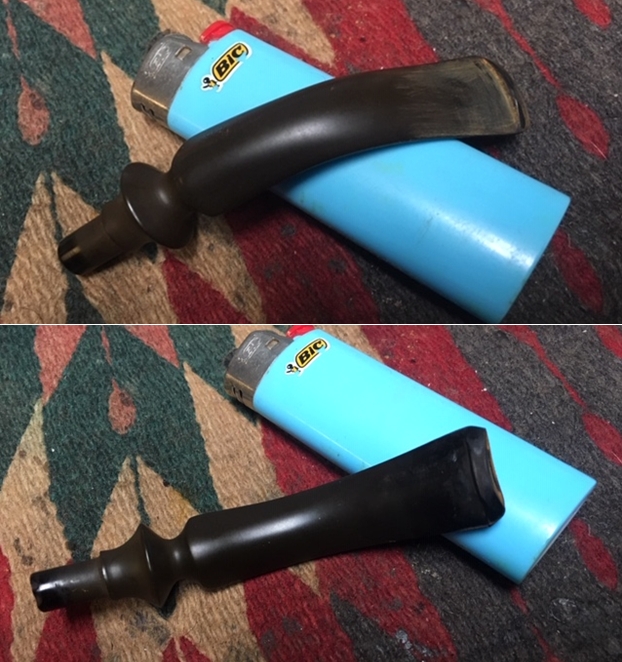
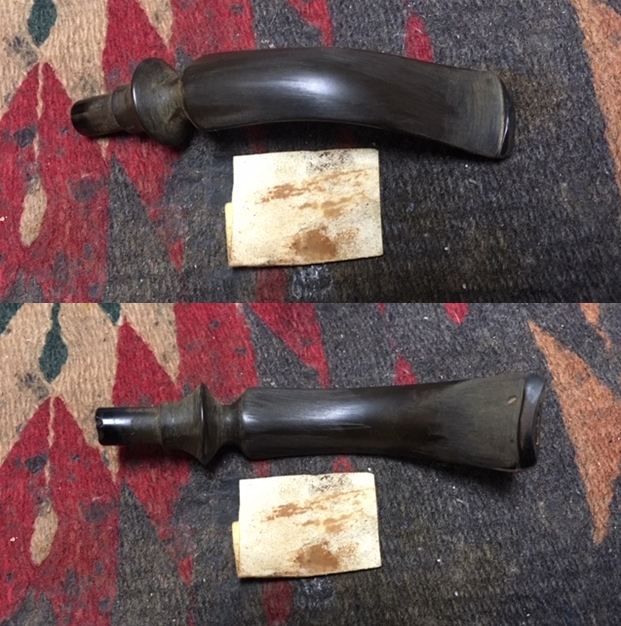
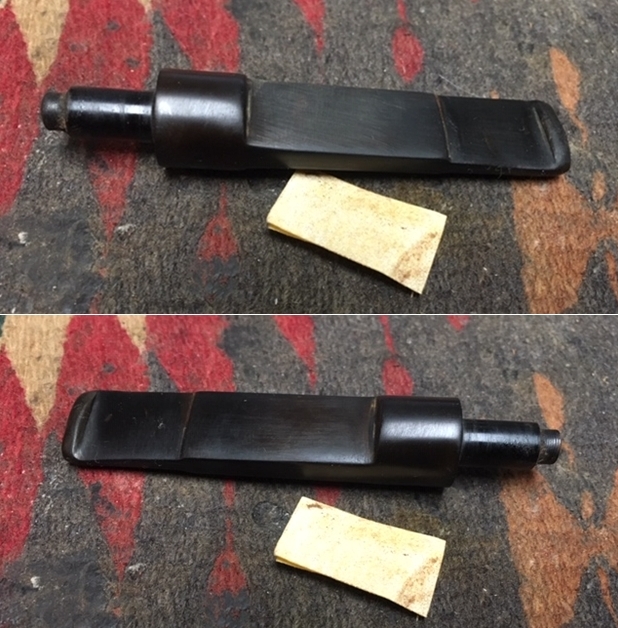
 While the repairs to the stummel were curing, I addressed the repairs to the stem. Using a Bic lighter, I flamed both the surfaces of the stem. This helped in raising some of the tooth chatter and bite marks to the surface as vulcanite has a property to regain its original shape on heating. The high quality of the vulcanite ensured that maximum of tooth chatter was raised to the surface and what little remained, would be addressed subsequently during the sanding process. I used a 220 grit sand paper to sand out the oxidation. I used a flat head needle file to sharpen and reshape the lip edge and rubbed a little Extra Virgin Olive oil in to the stem surface.
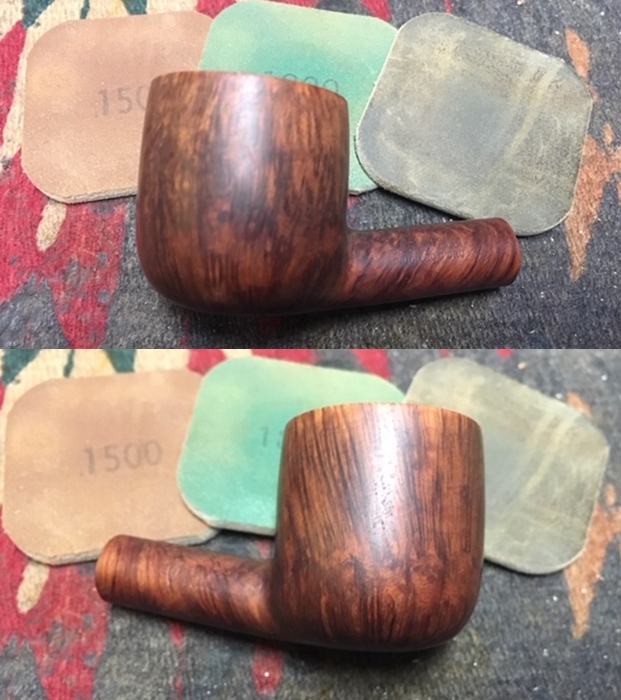
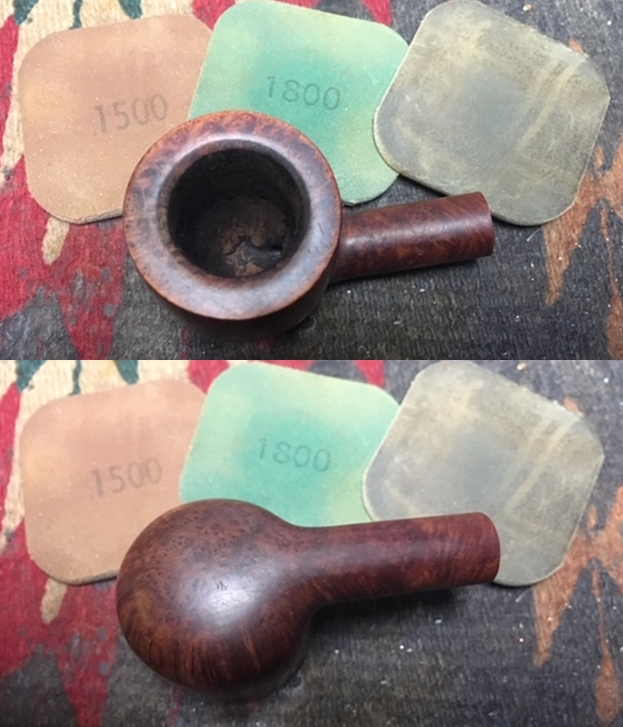
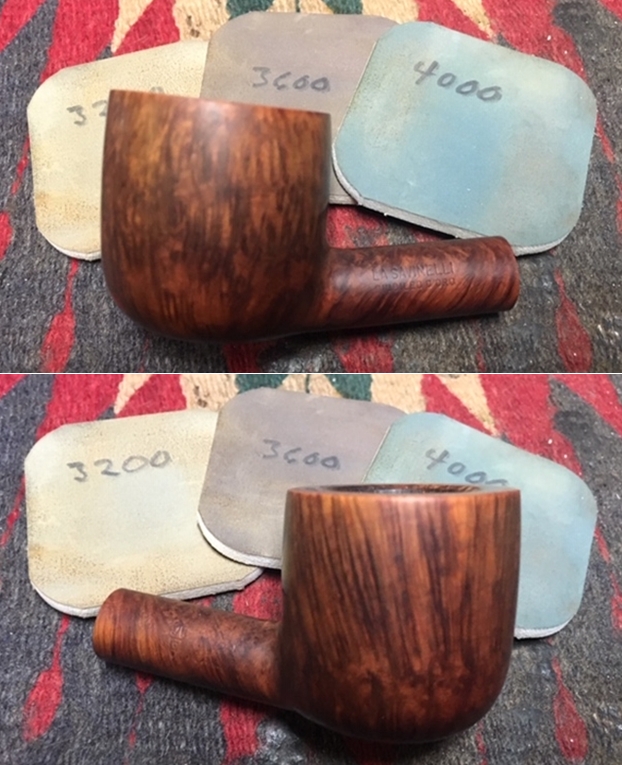
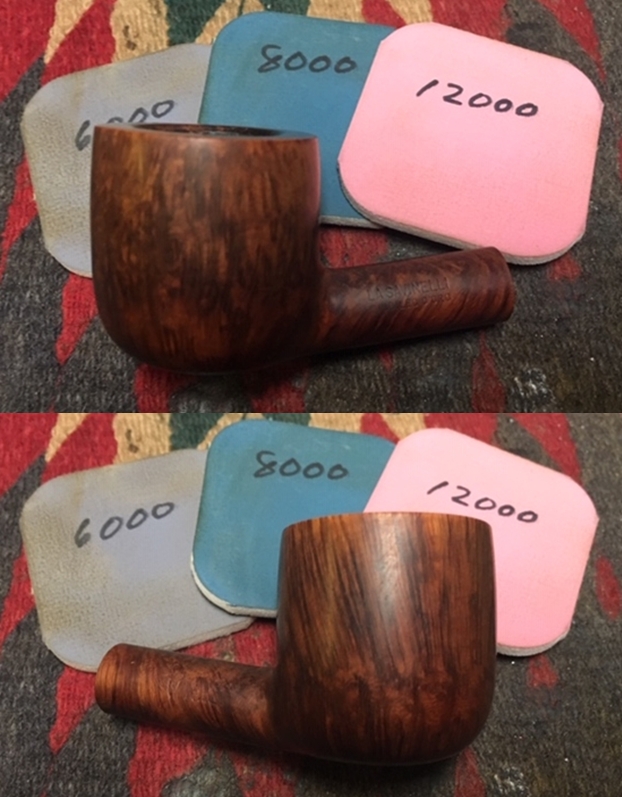
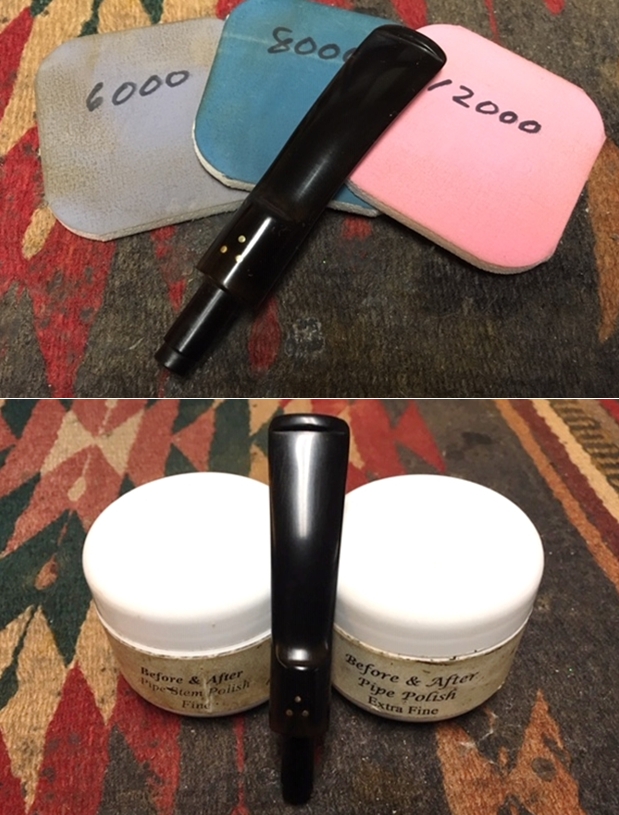
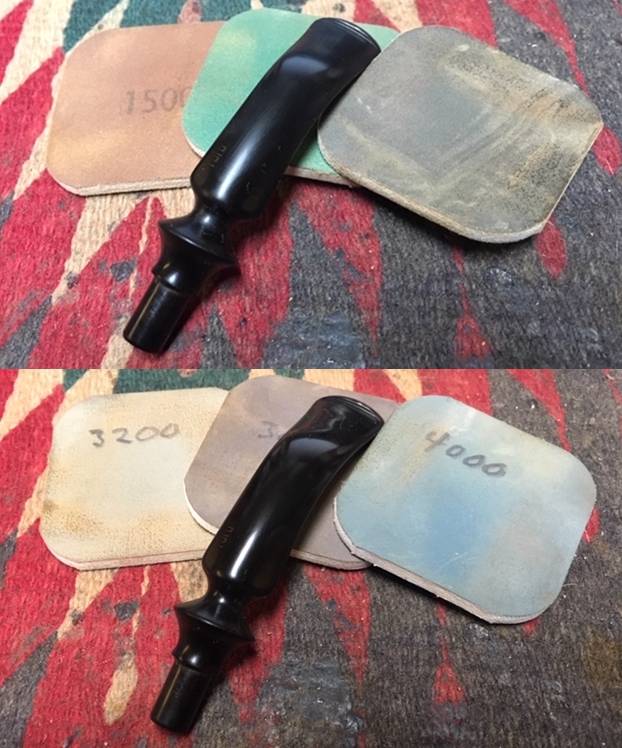
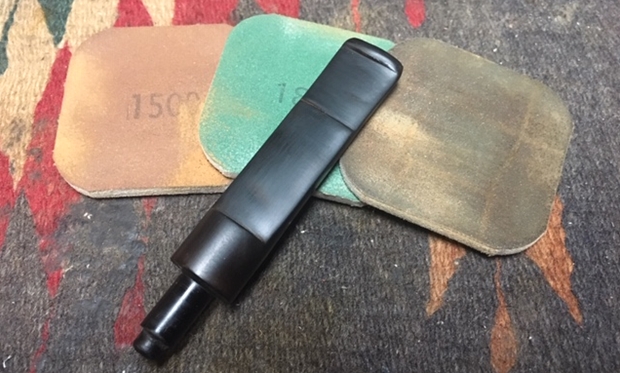
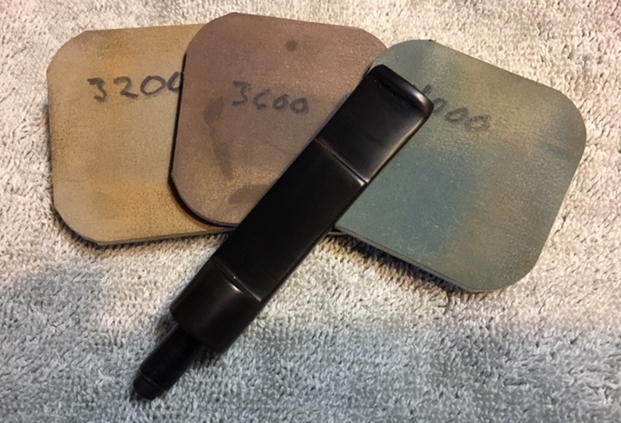
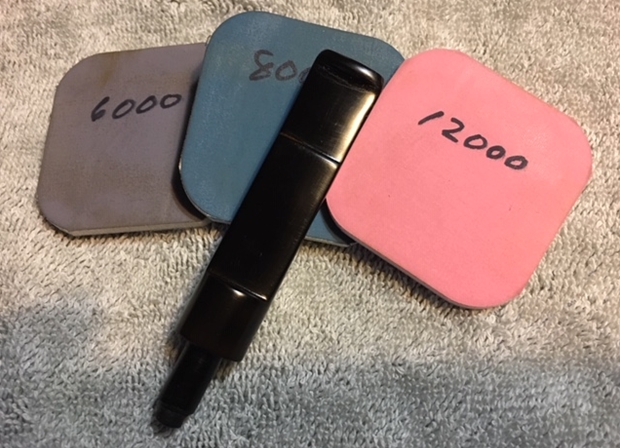
 I wiped the stem again and worked on it with micromesh sanding pads – wet sanding it with 1500-2400 grit pads and dry sanding with 3200-12000 grit pads. Between each set of three pads I rubbed the stem down with extra Virgin Olive Oil and also gave it a final rubdown after the 12000 grit pad. I cleaned the stem airway with pipe cleaners dipped in isopropyl alcohol. I set the stem aside to dry while I worked on the bowl.
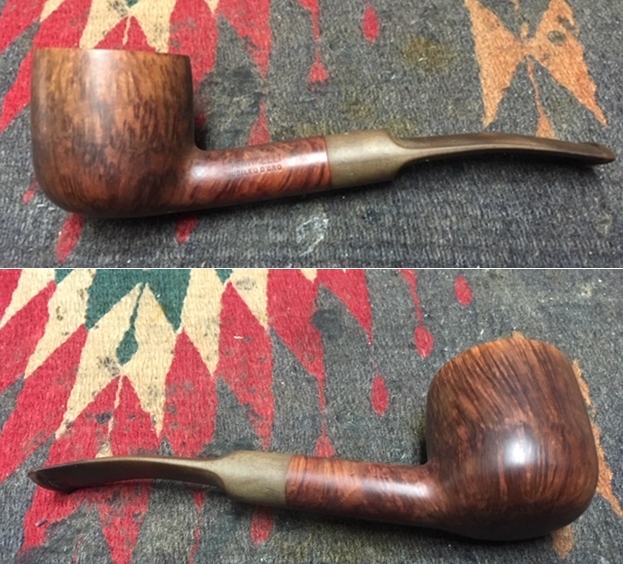
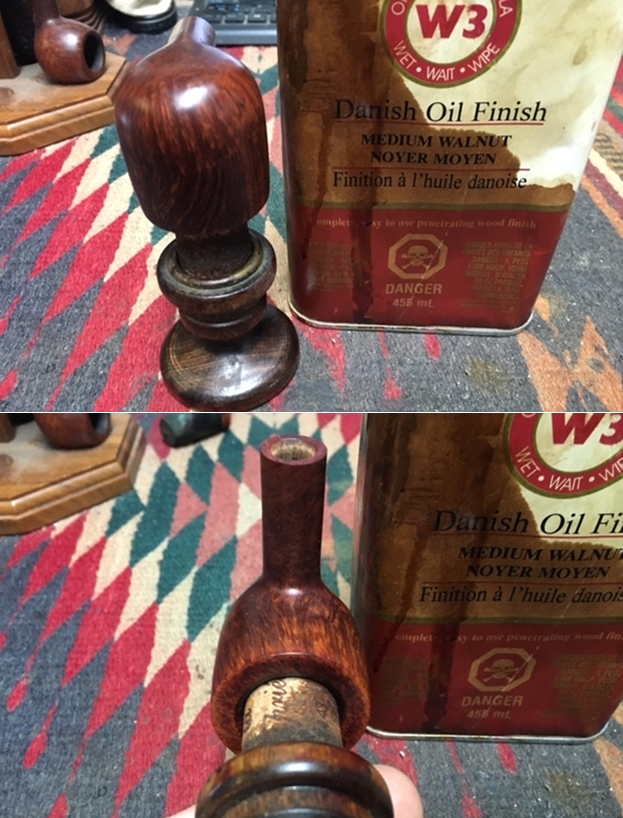
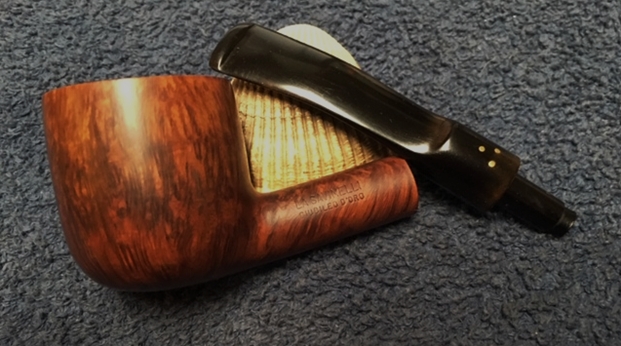
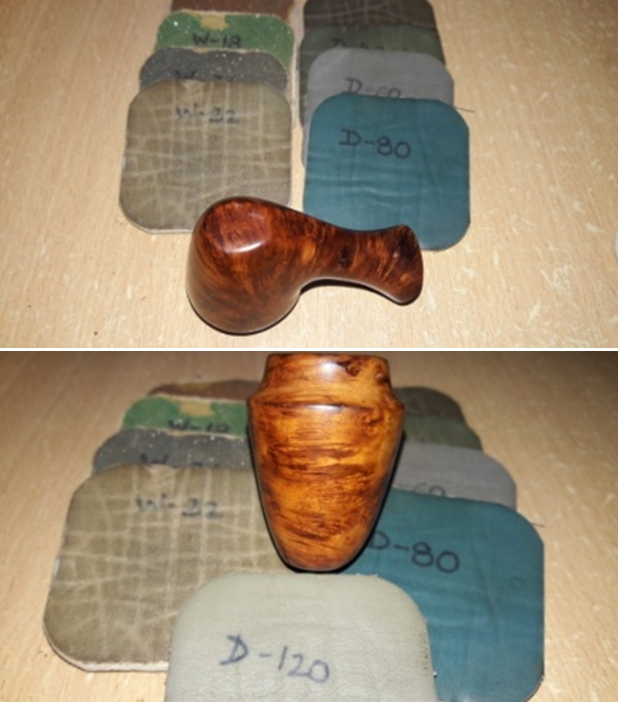
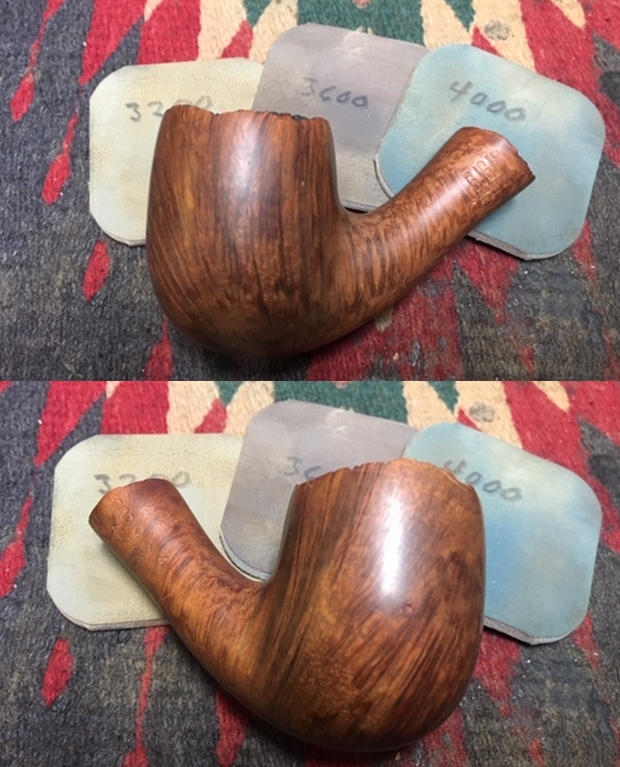
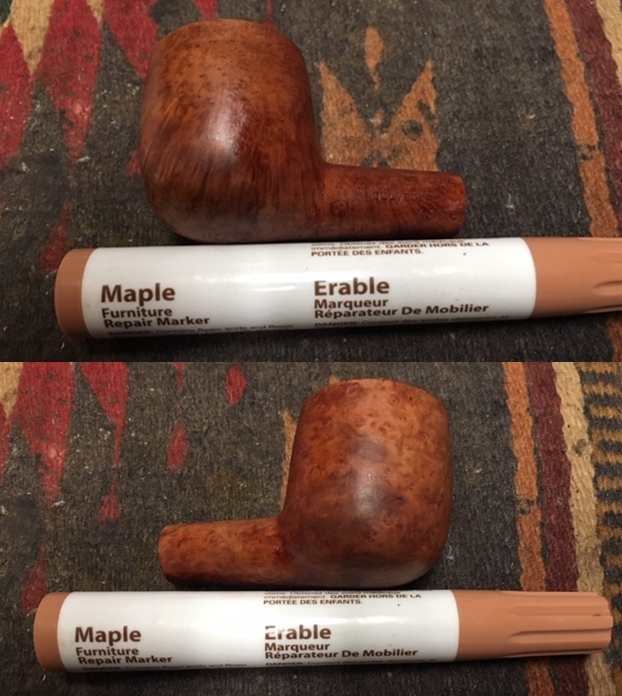
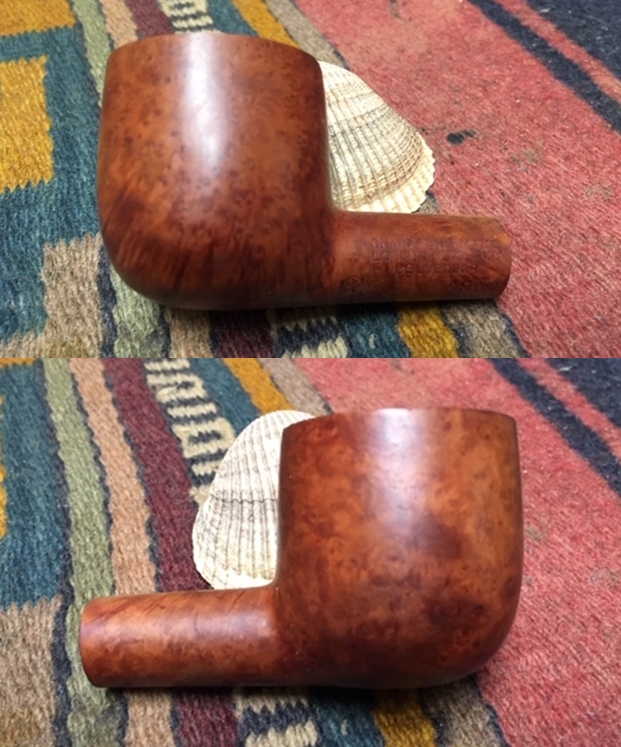
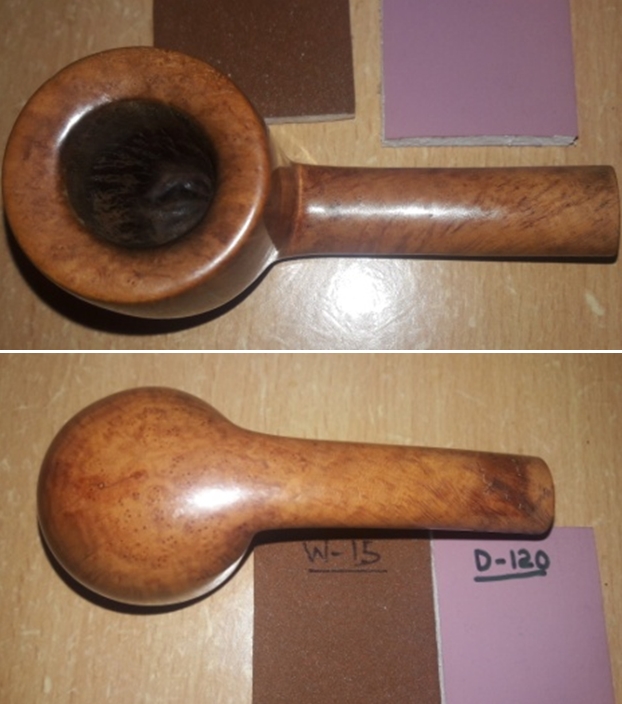
 I sand the fills on the stummel with a flat head needle file and further match these fills with the stummel surface by sanding it with a 220 grit sand paper. Once I am satisfied with the match, I progress to polishing the stummel with micromesh pads going through the entire cycle. Due to the light, natural hues of the briar, these fills are still visible, but overall, the pipe looks amazing. I intend to stain it with a darker shade, but as you guessed it right, I don’t have the material and wherewithal to carry out the staining.


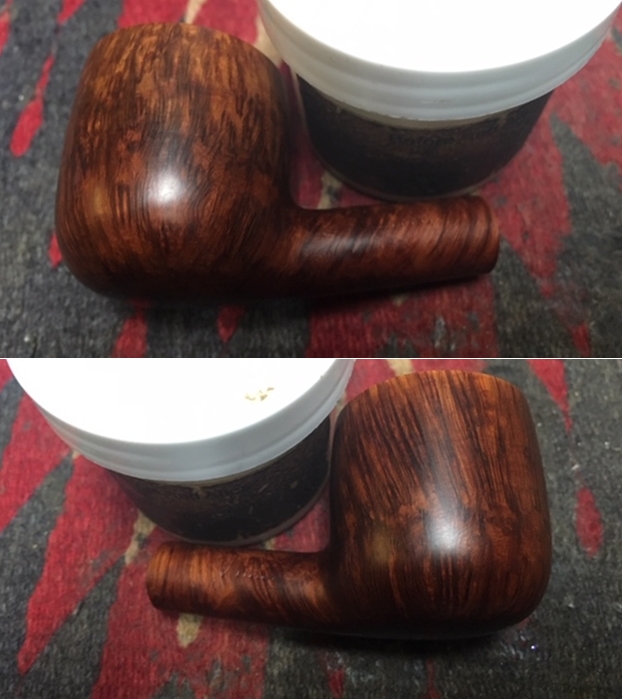
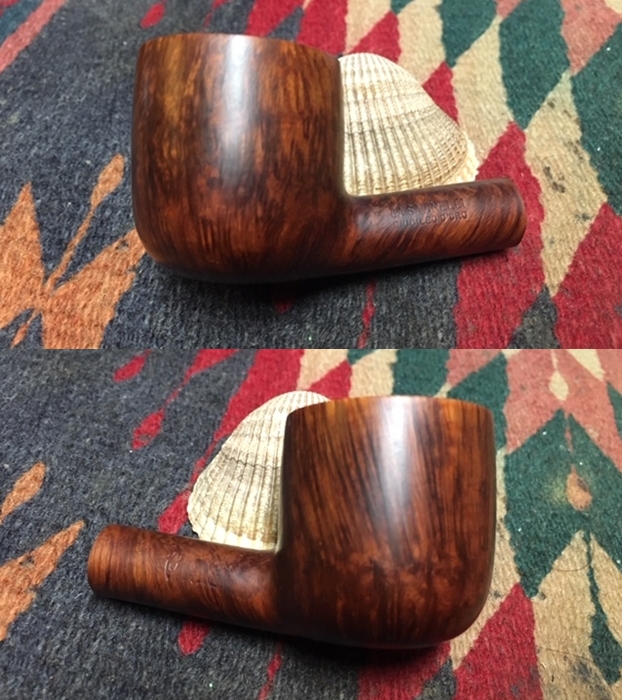
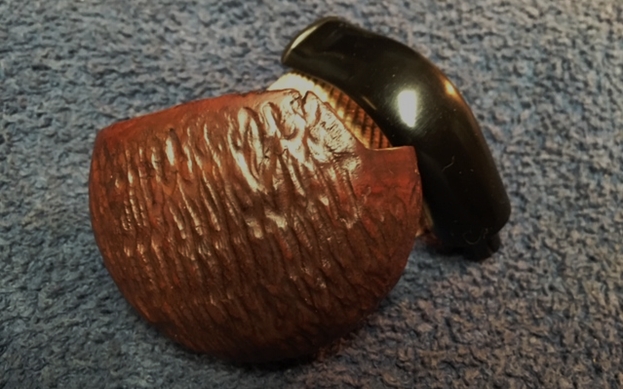
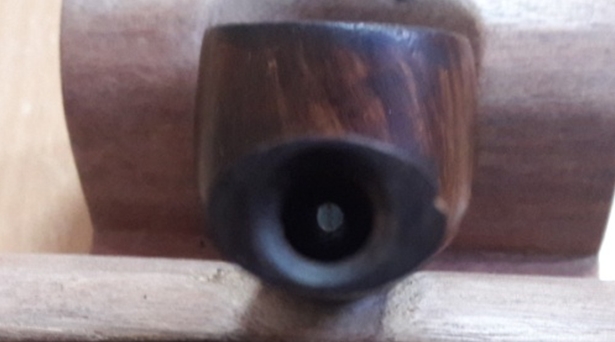
 I rub a small quantity of “Before and After Restoration Balm” into briar with my fingers and let it rest for a few minutes. This balm enlivens and protects the briar. The balm almost immediately works its magic and the briar now has a nice vibrant appearance. I further buff it with a horse hair shoe brush.
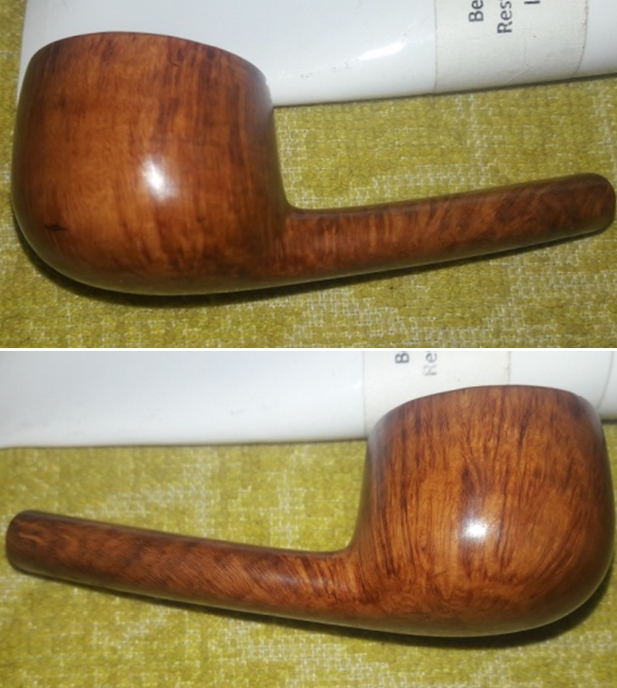

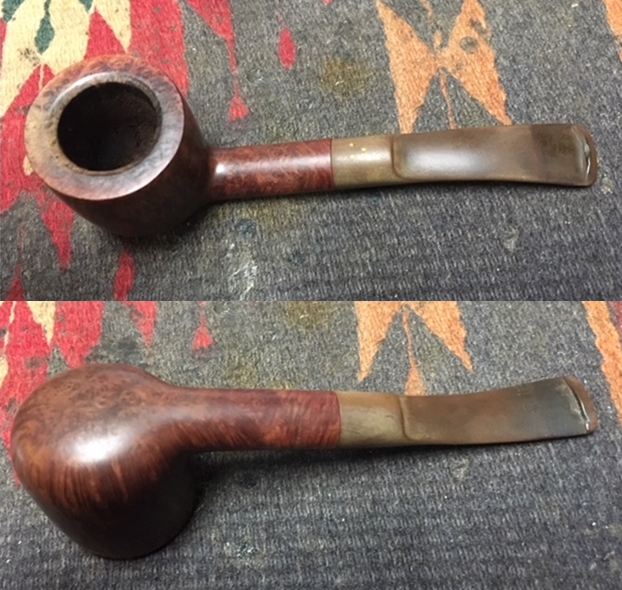
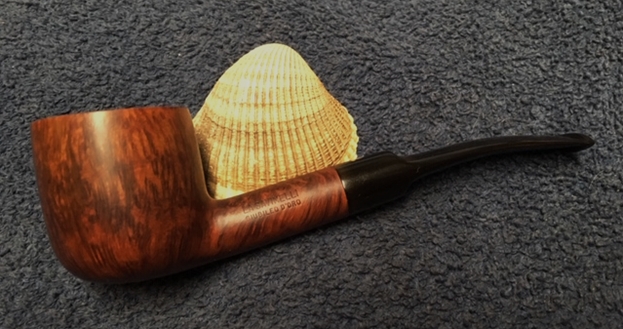
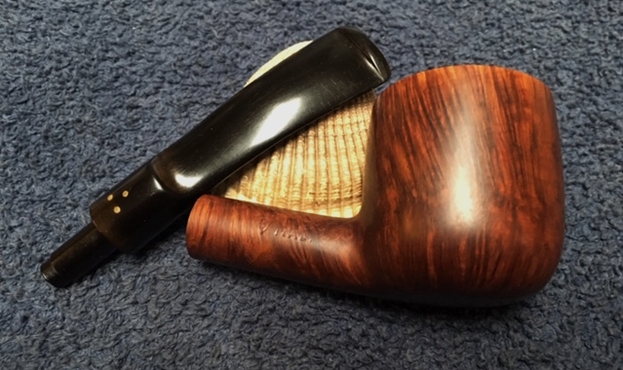
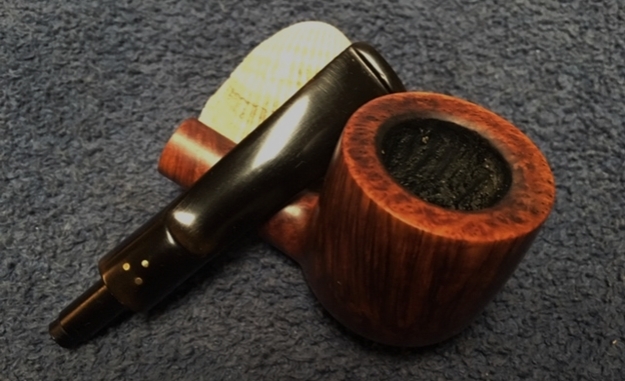
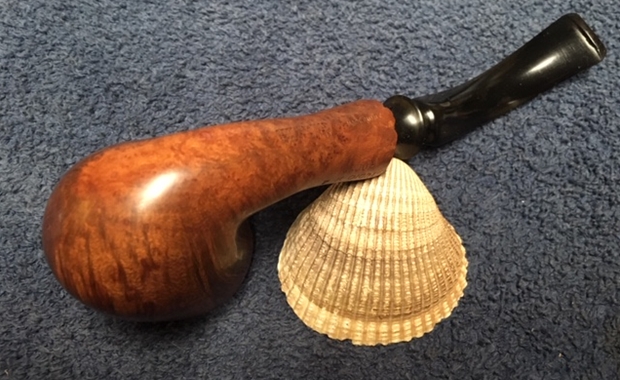
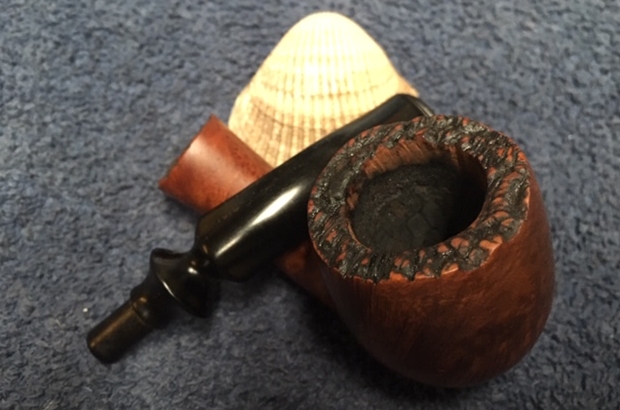
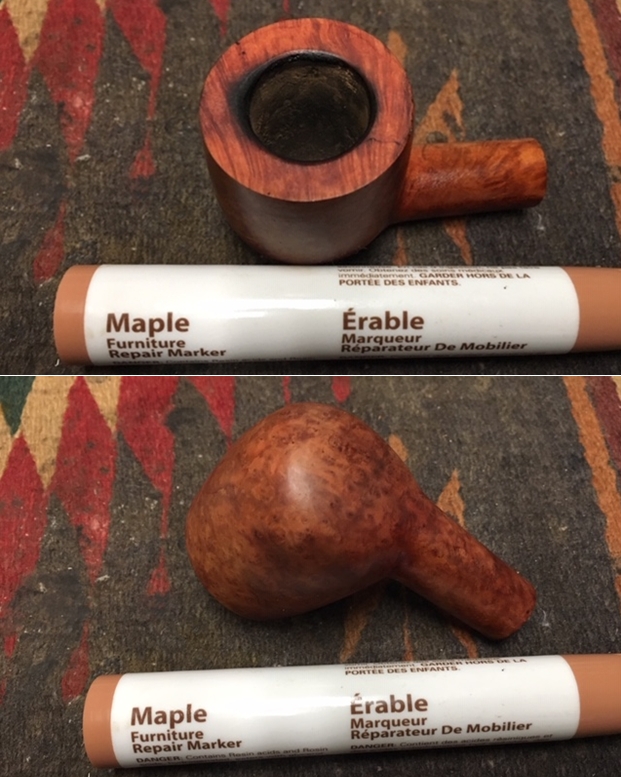
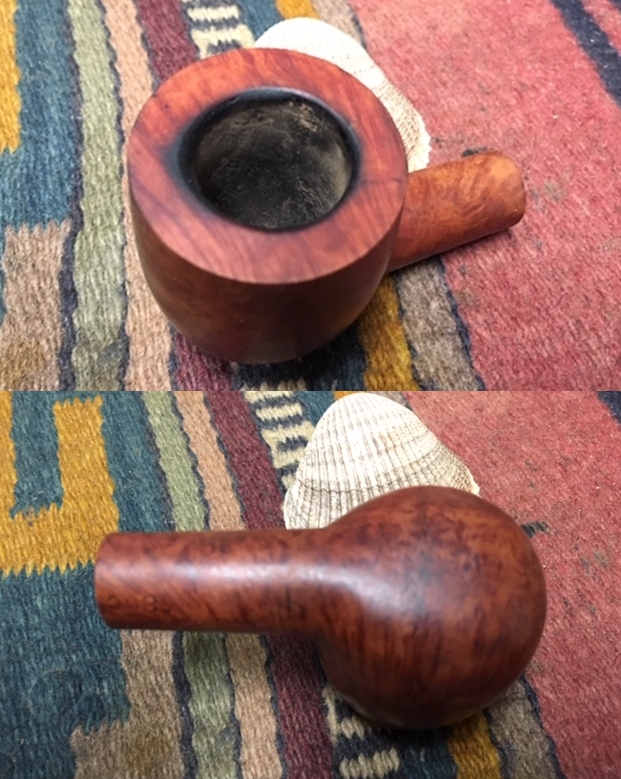
 To finish, I re-attached the stem with the stummel. I mounted a cotton cloth buffing wheel on to the Dremel (actually it is not the brand machine, but a local machine which is similar). I set the speed at about half of the full power and applied White Diamond compound to the entire pipe. I wiped/ buffed the pipe with a soft cotton cloth to clean it of any leftover compound dust. I then mounted another cotton cloth wheel on to the polishing machine and applied several coats of carnauba wax. I finished the restoration by giving the entire pipe a rigorous hand buffing using a microfiber cloth to raise the shine further.
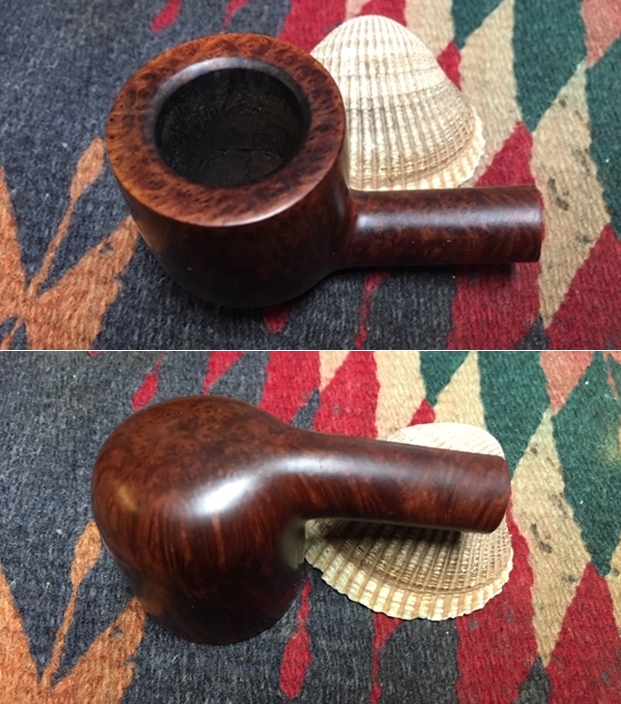
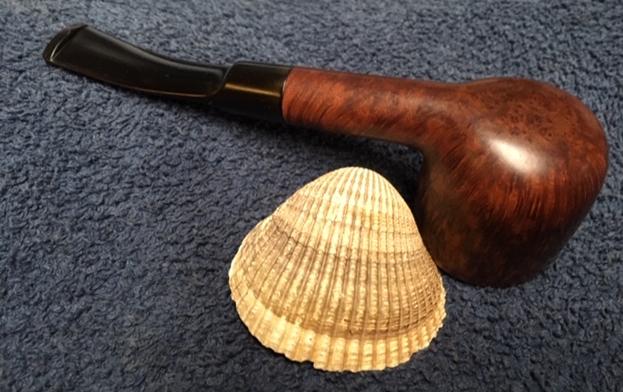
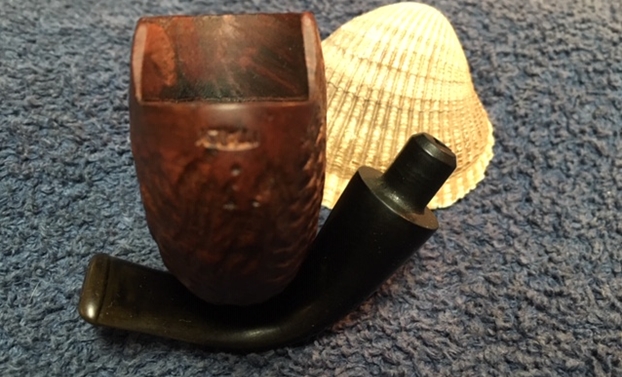
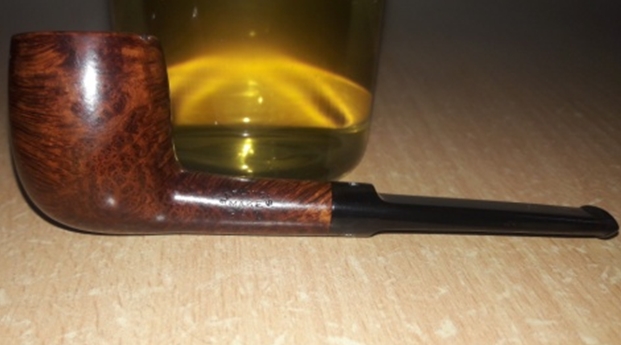
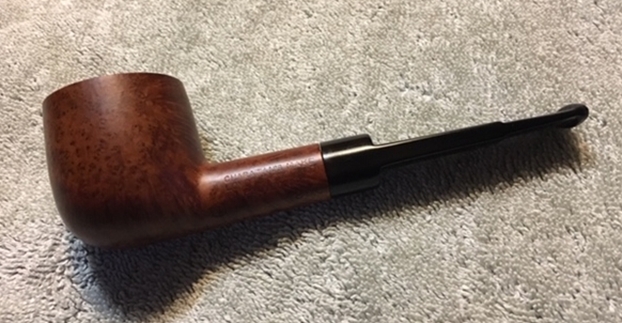
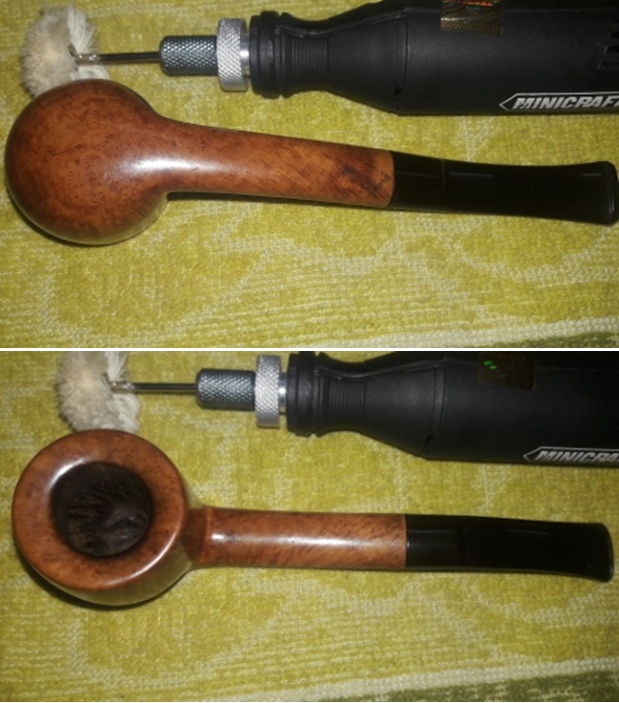 The completed pipe looks lovely, fresh and vibrant; the photographs speak for themselves. Thank you for having the patience to reach this far while reading the write up. It is always heartening when I receive comments on the write up, good or bad, either way is encouraging, but the real happiness and maximum satisfaction is derived from knowing that someone has dedicated his/ her precious time in reading your write up.

 PS: There are two issues which are yet to be addressed; one is the coating of the chamber for protection of the walls (functional necessity) and the second is staining the stummel in darker hues (cosmetic necessity). I do not have necessary materials and equipment to carry out these works as I pursue this hobby as a non earning pursuit. But I am gradually and step by step purchasing the equipment and materials necessary for reaching the standards that I have set myself. I shall keep you updated on this beauty as and when I address both the above issues. Cheers and wish me luck!!