Blog by Dal Stanton
One of the greatest challenges to me AND honors is to receive a request to restore a pipe that is a family’s heirloom. It’s amazing how when a loved one passes from this life, the things they leave behind become present links to the memories of the past. Pipes are favorite heirlooms because they hold an enormous sense of the presence of the loved one – the smell, marks left on the pipe, memories of the loved one sitting and reflecting with pipe in hand and a wink of the eye…. This was one of the reasons I took the name, The Pipe Steward, because of this strong sense of passing on something of great value – not just the physical pipe, but the memories and associations welded to that pipe’s presence. Joe contacted me with a request for some pipes that hold this honor. Joe and Hannah work in the same organization as my wife and I, but live in Athens, Greece. I met them for the first time at a conference there last year. This was Joe’s request:
Hey Dal,
Joe here…, we talked for a while about pipes. I have some old pipes. They were my wife’s Great-Grandfather’s pipes from Winston-Salem, NC. I’d love for them to be restored, and I’d love for the money to go to a good cause like the Daughters of Bulgaria program. All of them need an intense deep cleaning, and some have some stem damage. If I sent you some pictures, do you think you could offer a guesstimation of the price? I’d love to give these pipes to my father-in-law in the same condition as his grandfather smoked them.
Many blessings,
Joe
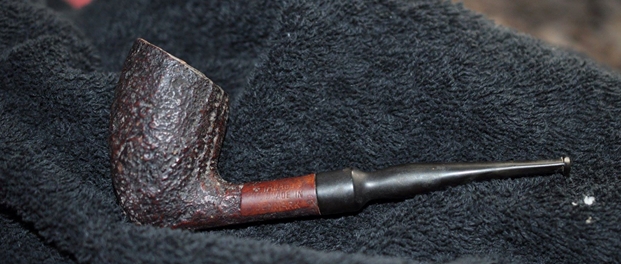
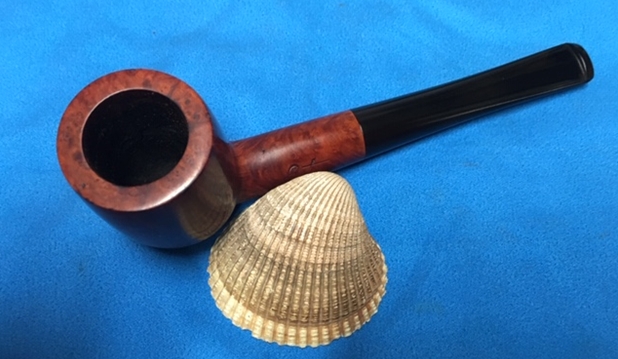
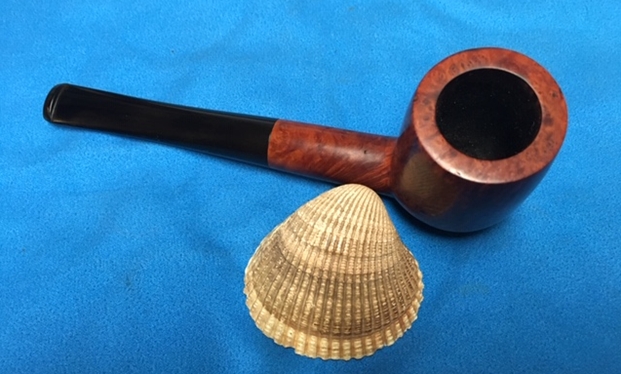
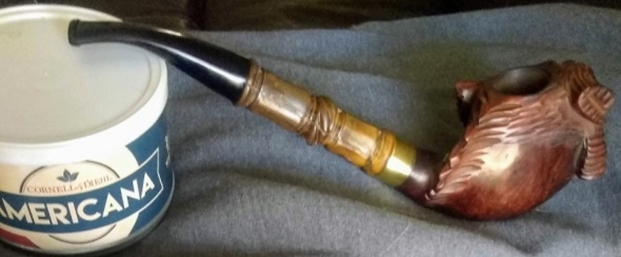
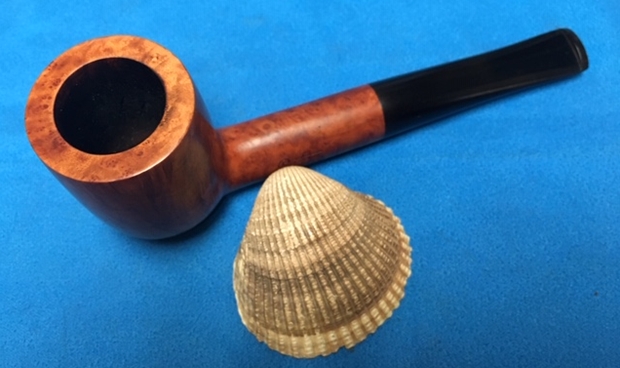
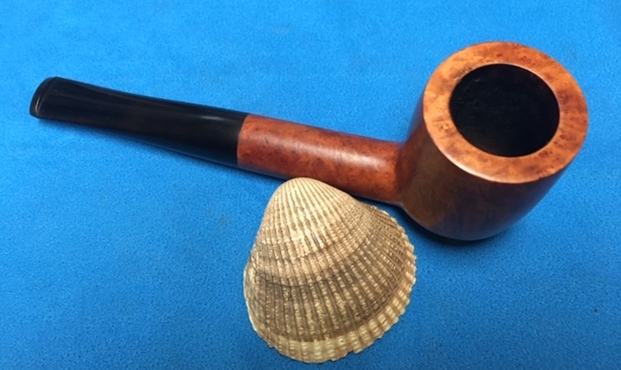
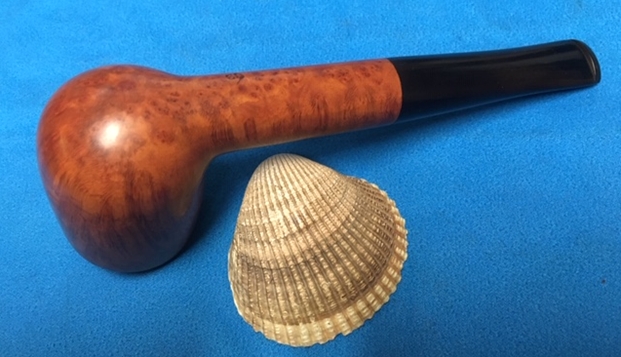
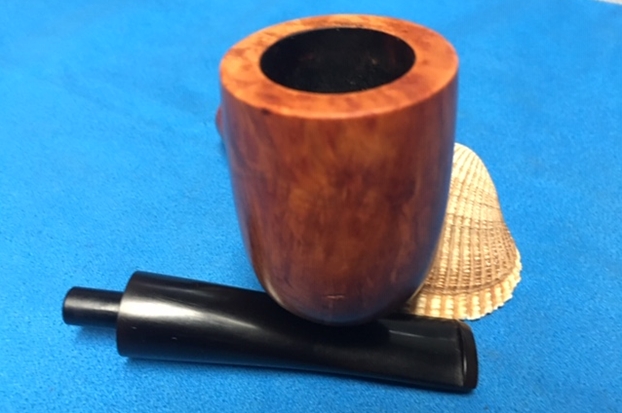
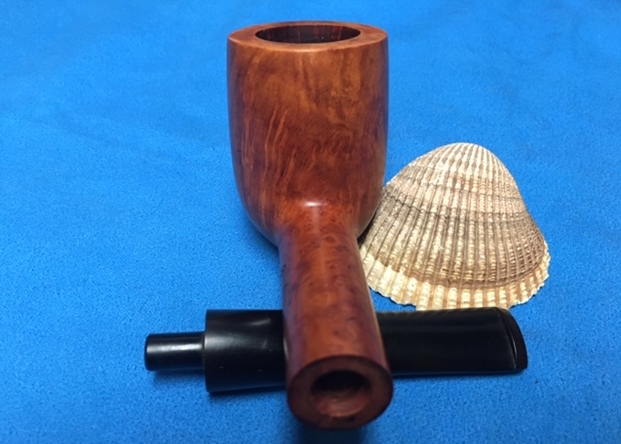
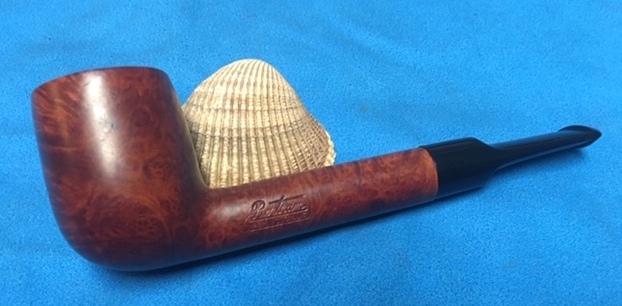
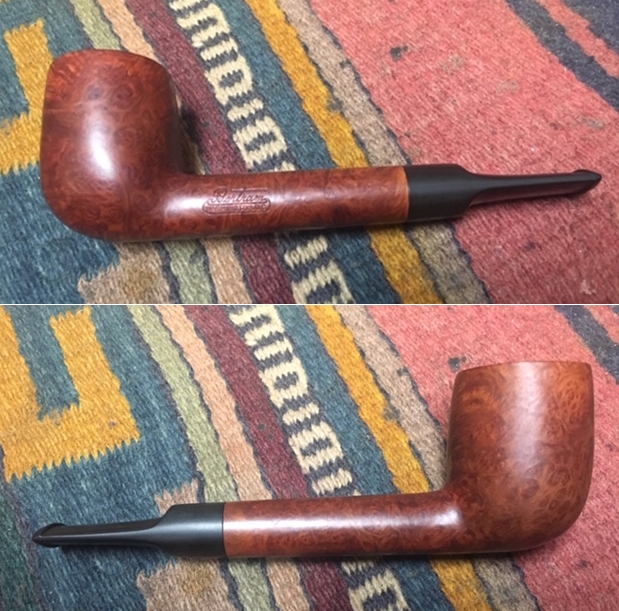
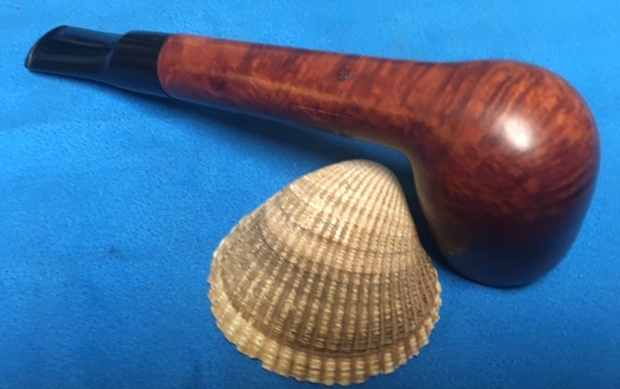
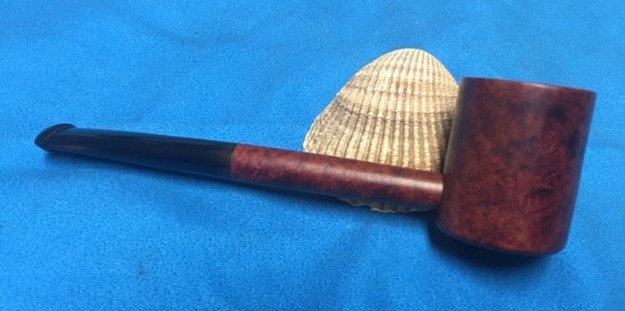
Joe sent some pictures on to me and he settled on one pipe as a starter project – a Kaywoodie “500” Lovat shape – or what I originally identified it as. Here were a few pictures showing the major issues. Since Joe wanted to gift the pipe to his father-in-law, which belonged to his grandfather – Hannah’s great-grandfather, I asked Joe what he knew about the pipe’s history. This is what he wrote:
History of the pipe… hmmm. That’s going to be tricky. I will ask and see if anyone can offer more input on the history of Paw’s pipes, but I can’t honestly say much myself.
Ben is my father-in-law. He was raised by a single mom, who worked a lot to raise her 4 boys. So, Ben’s grandparents raised the boys while the mom worked so much. When Ben’s mom passed away a few years ago, we were all cleaning out her home and I noticed a pipe stand in the garage with 5 pipes and a Sir Walter Raleigh bowl cleaner, and someone was asking if that should go in the garage sale. I quickly offered to be a home for it if no one else wanted it, which made Ben happy. He didn’t really have the capacity to decide things that week, he was just glad it was staying in the family and not going to a stranger.
My ultimate goal is to get these pipes, the stand, and this bowl cleaner in good shape to re-give them back to Ben (maybe for his 60th Birthday next year). I’ve really just been a pipe steward, myself. I think it will mean a lot to Ben to have an heirloom from his grandfather (who functionally was his father).
Dusty, cobwebby garages often hold the key to finding special heirlooms! After I wrote Joe describing some of the issues and remedies for Paw’s Kaywoodie “500”, he wrote back with some special instructions to preserve some of the evidences of Paw’s time with his Lovat. With the heavy erosion to the back of the rim, I had suggested rounding/topping the rim. Joe’s response:
My initial thoughts are to not round out the rim. I like the flat surface of the rim. As far as the damage on the backside, I know it should be cleaned up, but I wonder if taking 1/10 of an inch off instead of 1/8, if that would yield a proper looking bowl, yet still with the slightest reminder that Paw lit his pipes with a match from the back of the bowl. It’s just a thought. I like it when antiques look in their original condition (or close) but I’m also a sucker for the sentimental stuff, so I don’t mind having at least a little bit of the bowl erosion still visible.
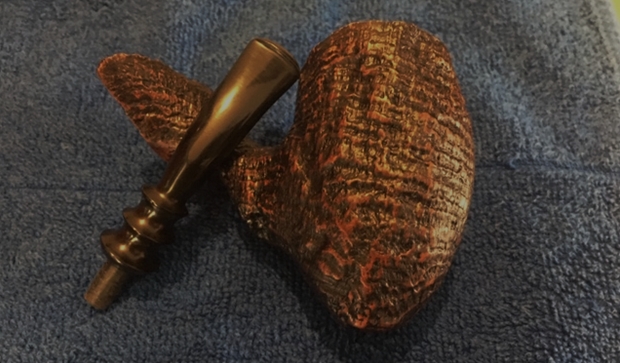
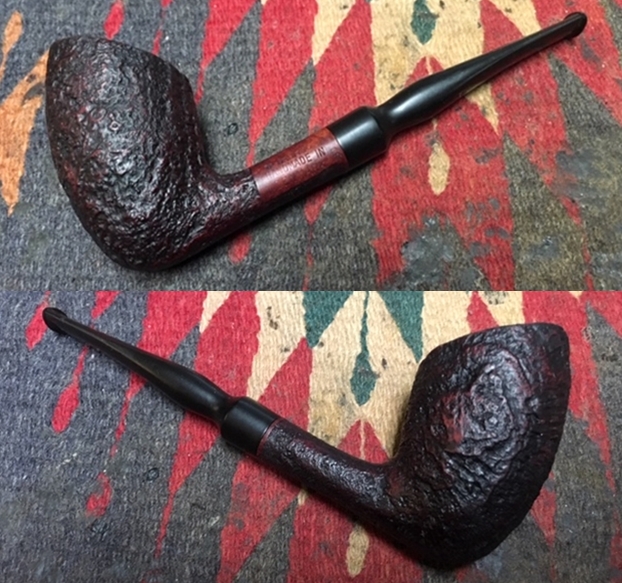
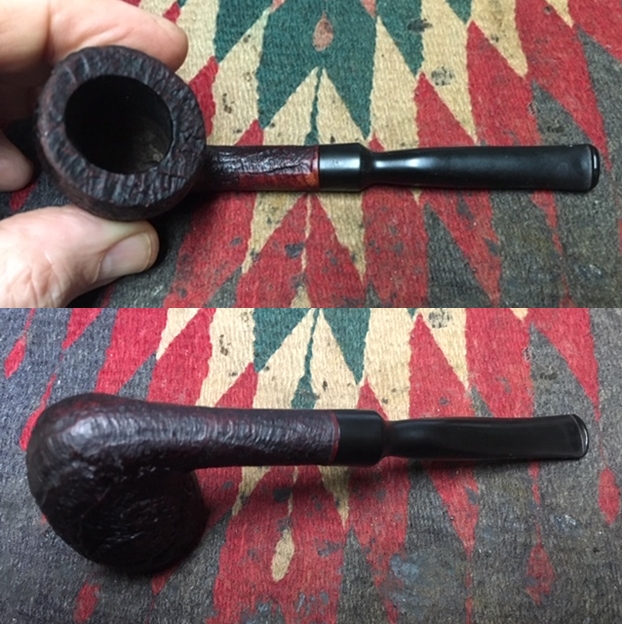
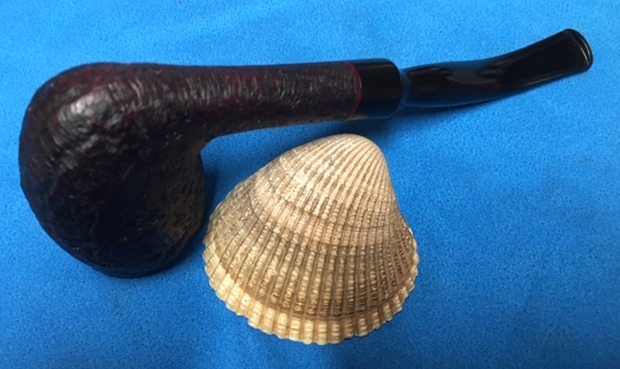
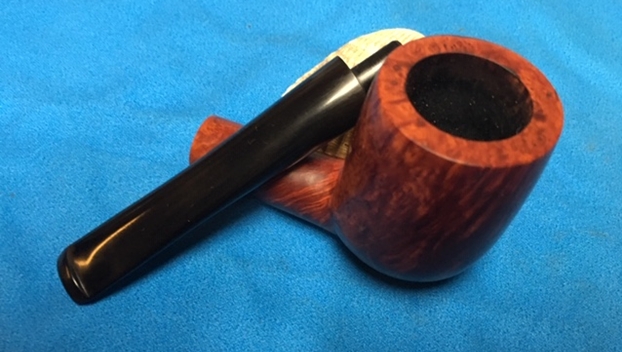
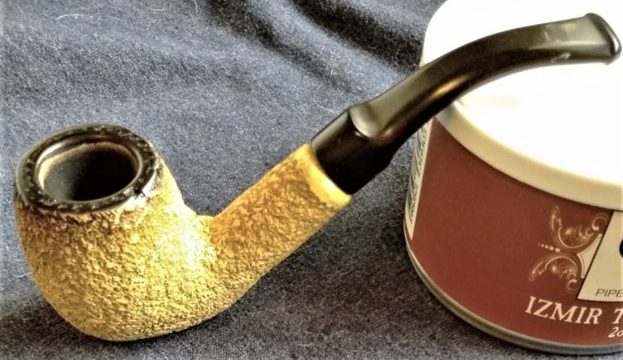
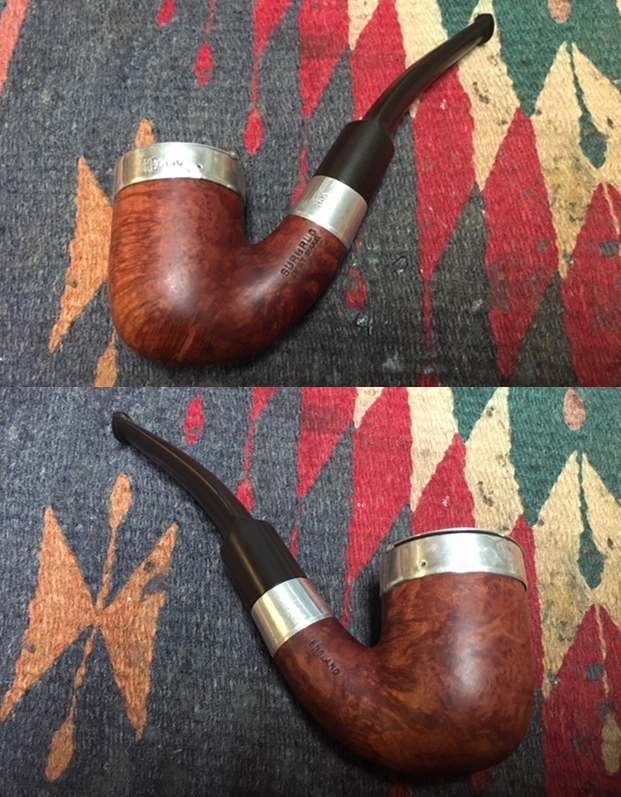
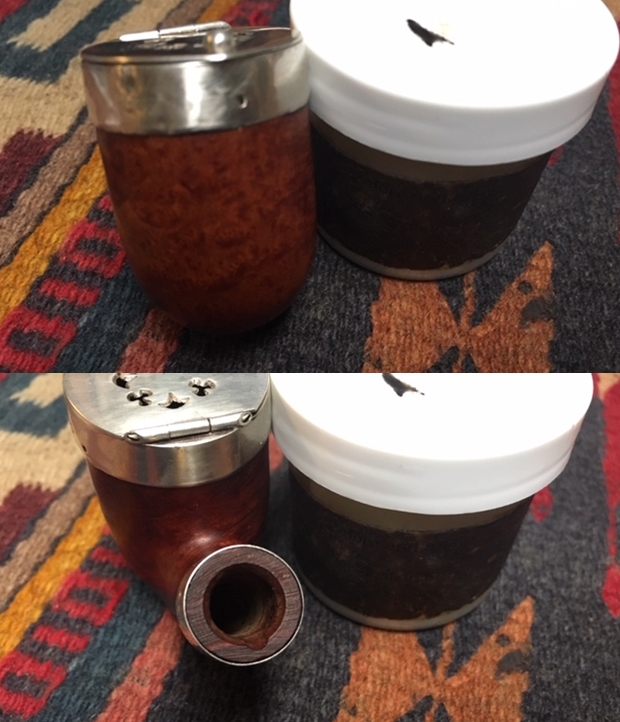
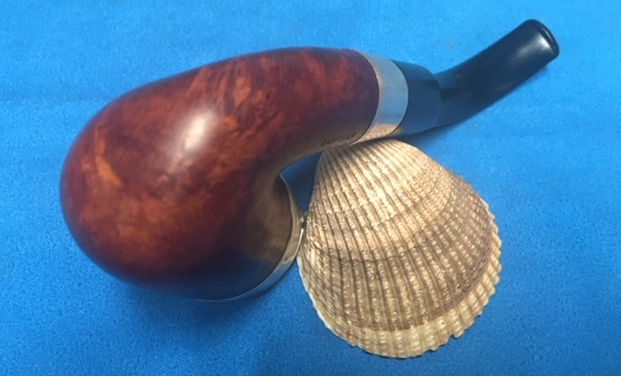
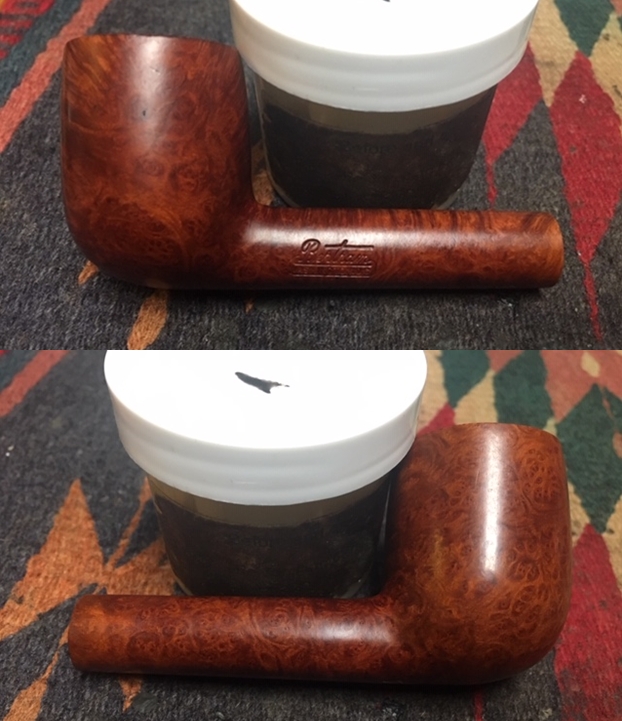
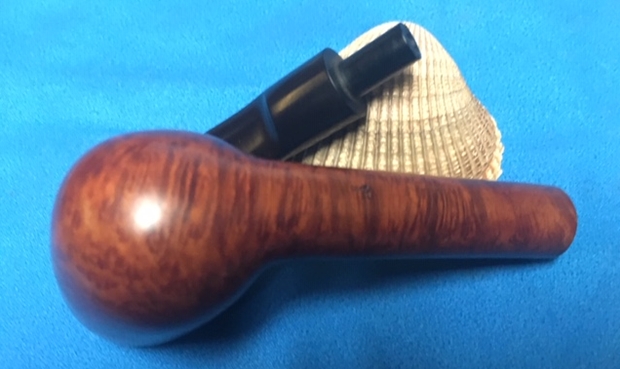
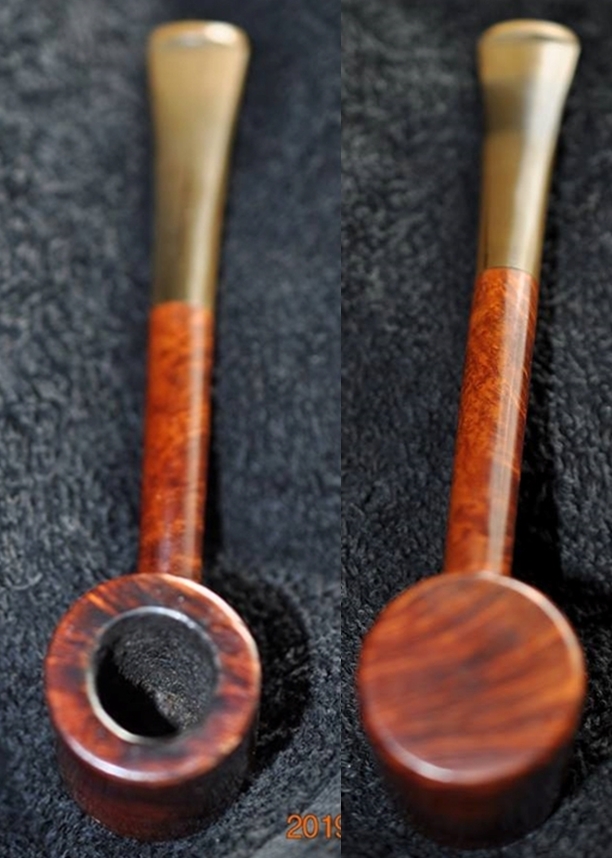
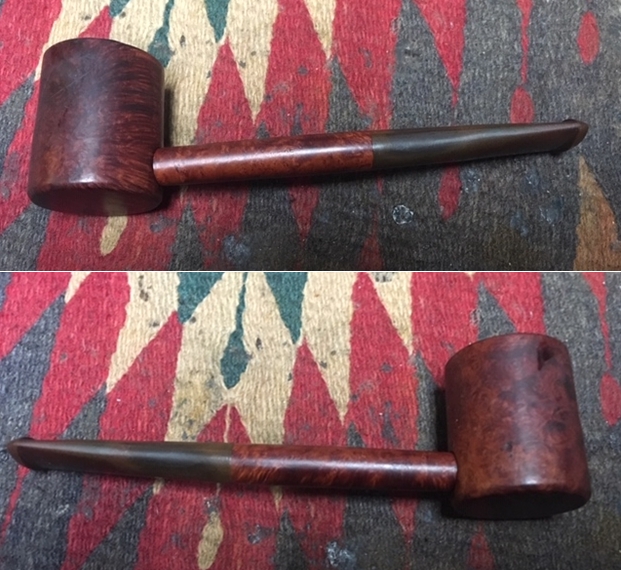
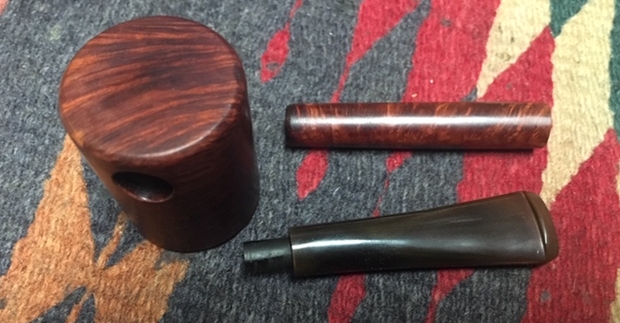
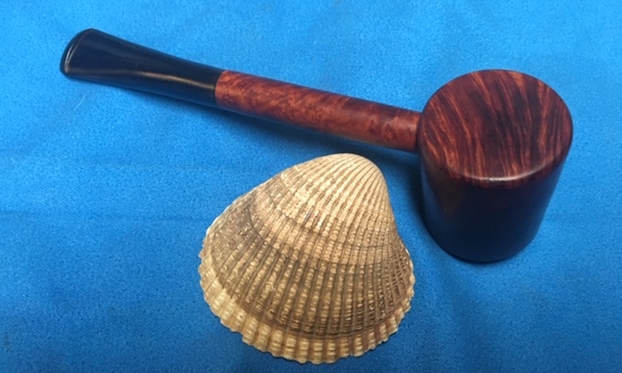
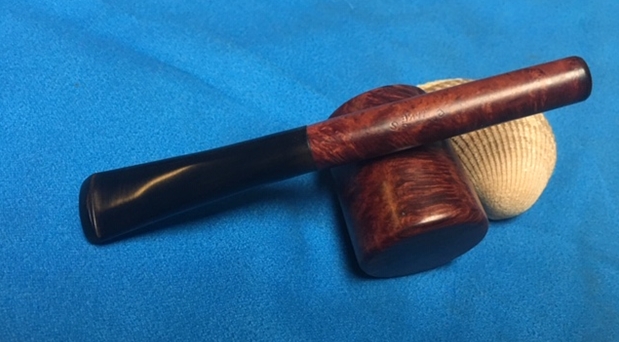
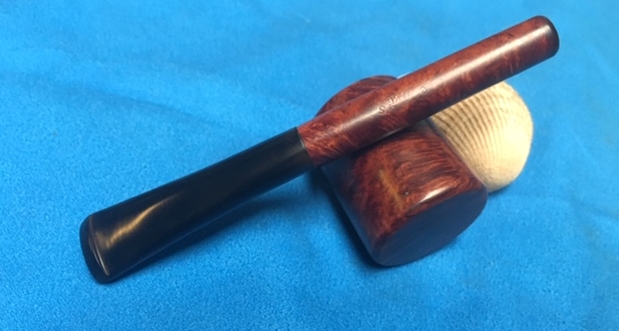
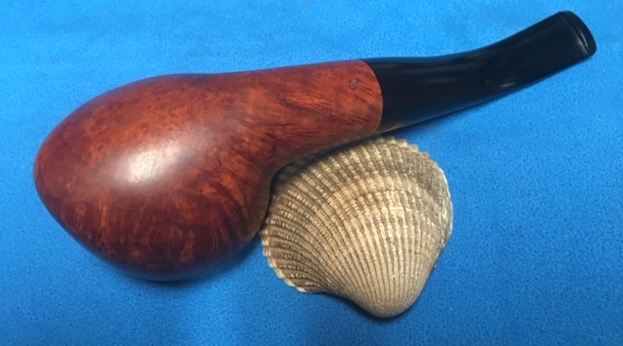
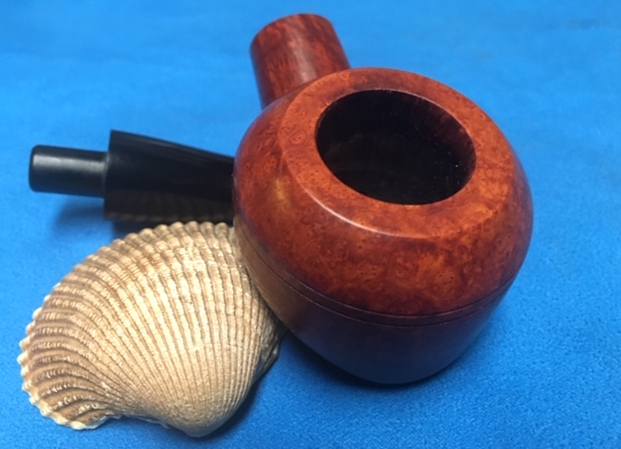
The pipe made it to Bulgaria from Greece via another colleague and another conference in Barcelona that I attended. With the Kaywoodie “500” now on my worktable I take more pictures to get a better idea of the pipe’s condition.


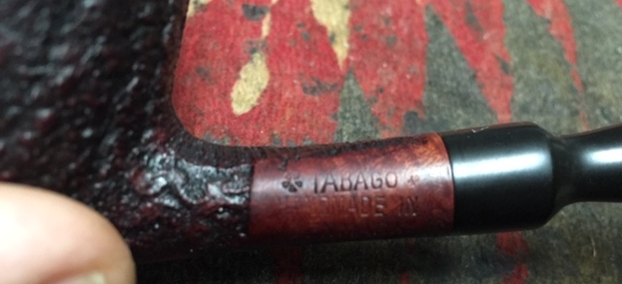
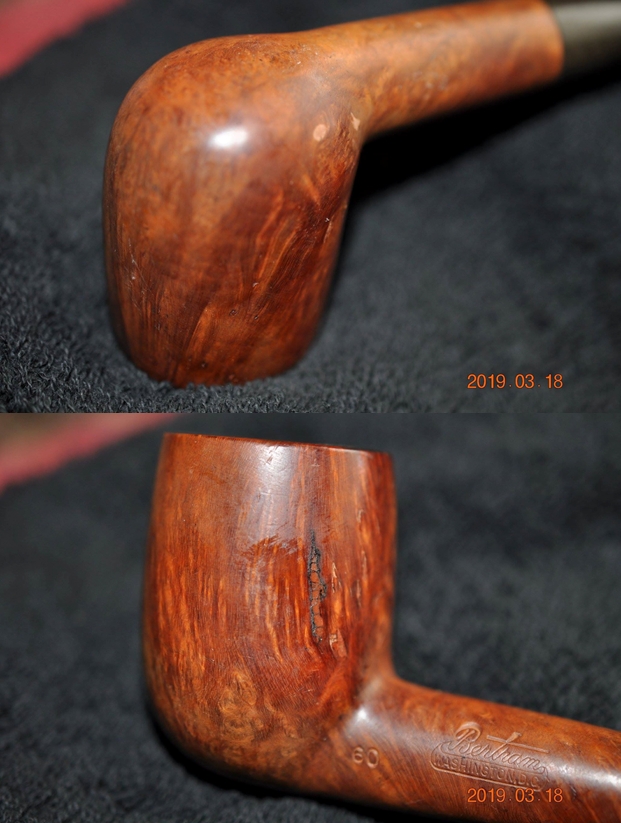
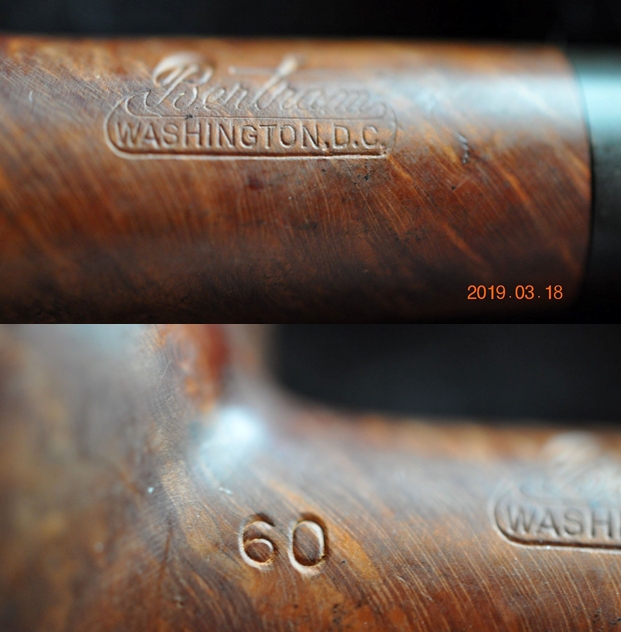
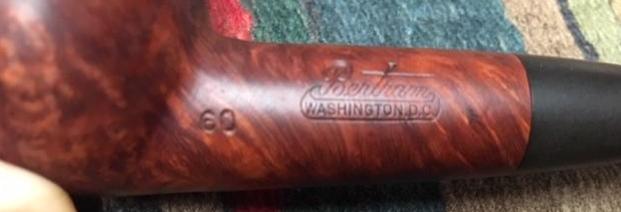
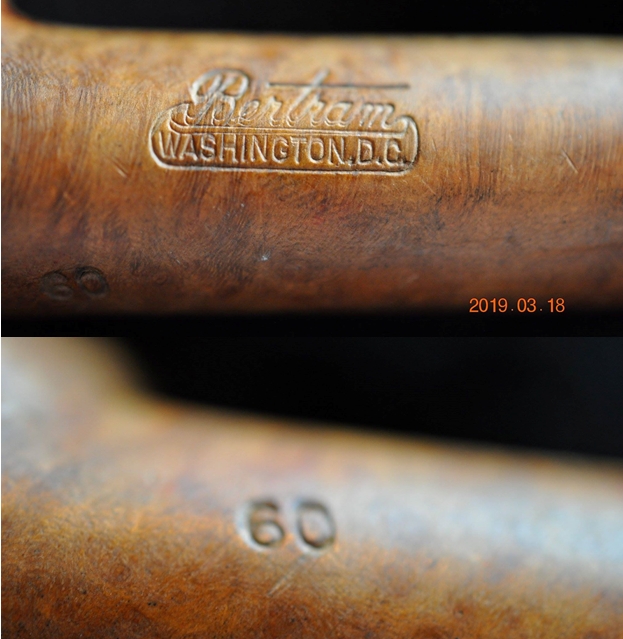
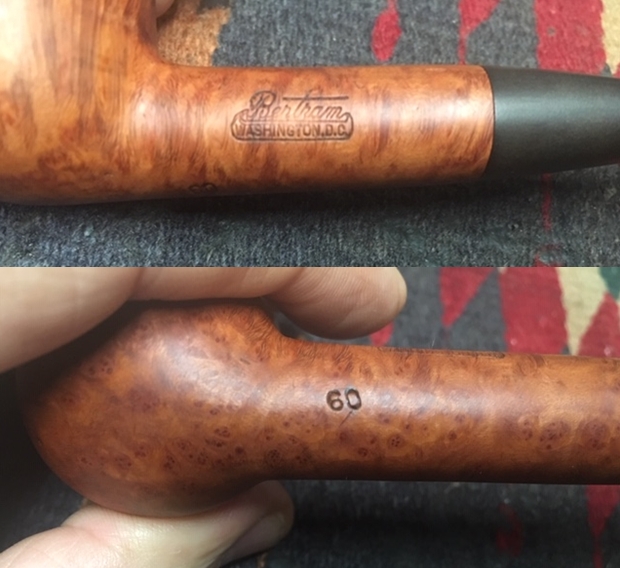
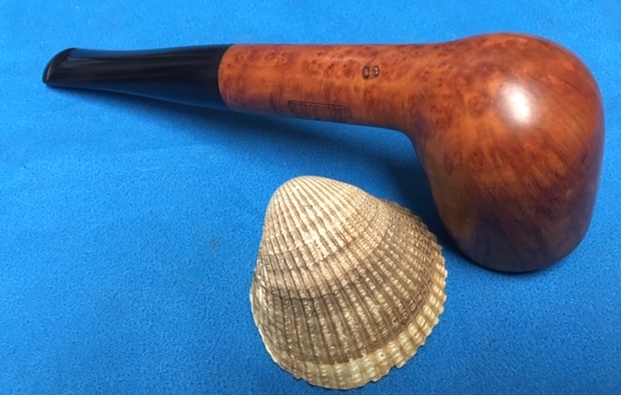
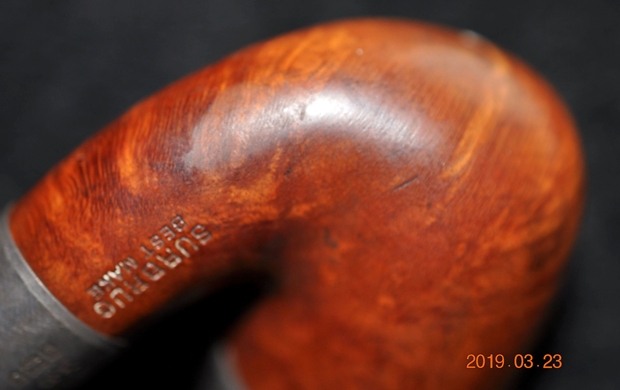
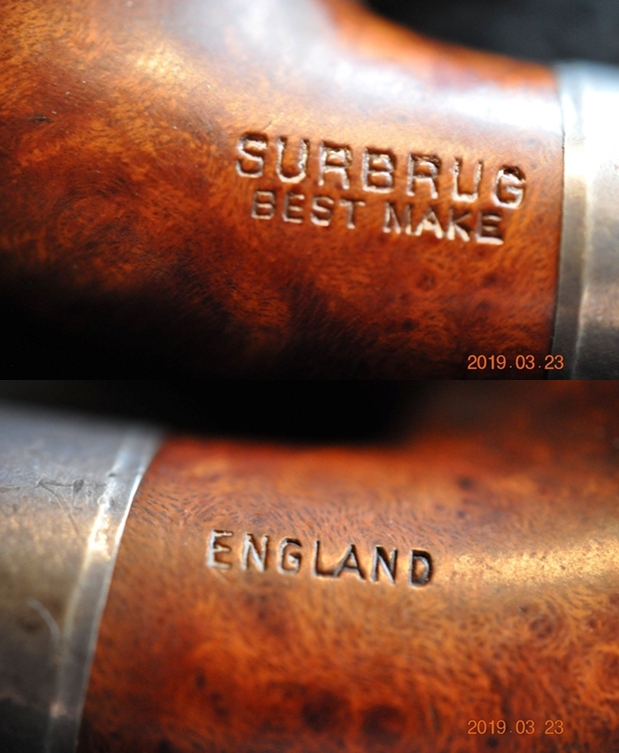
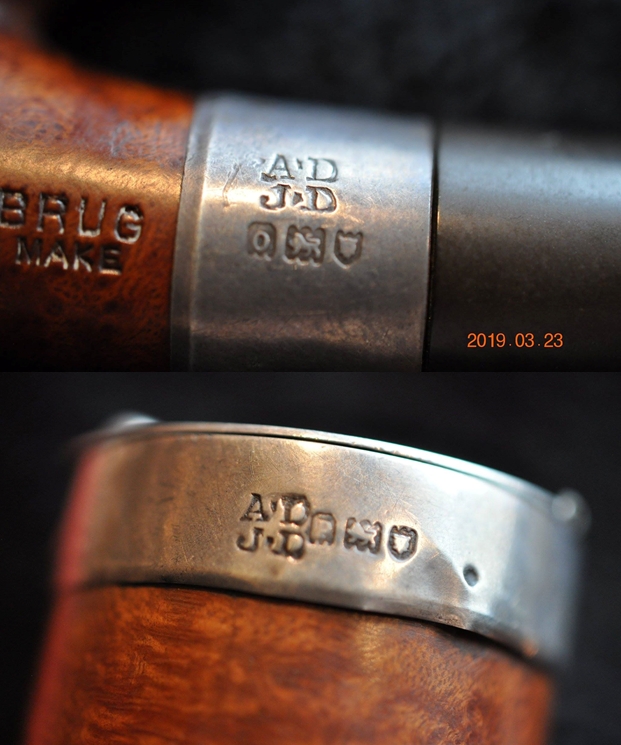
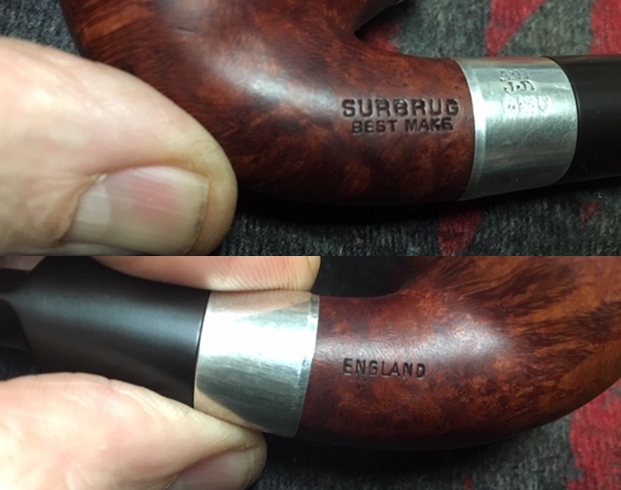
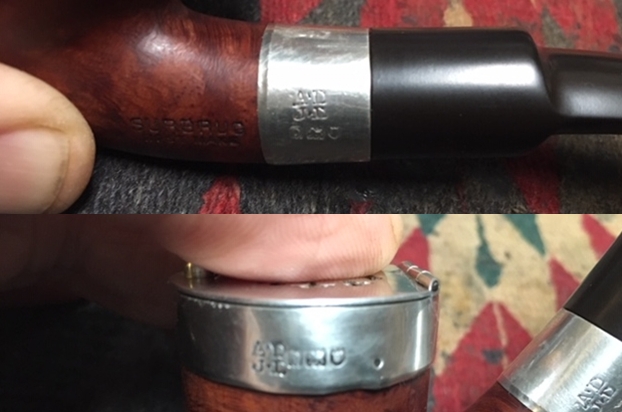
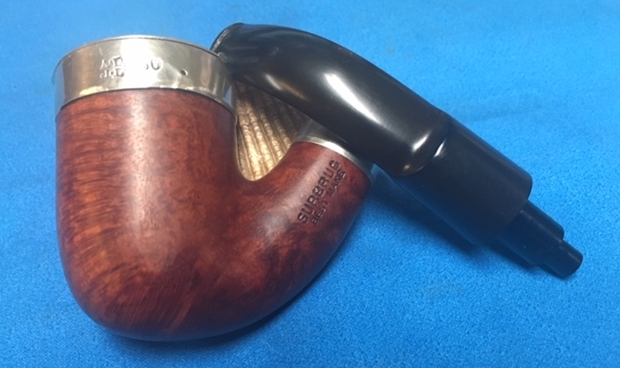
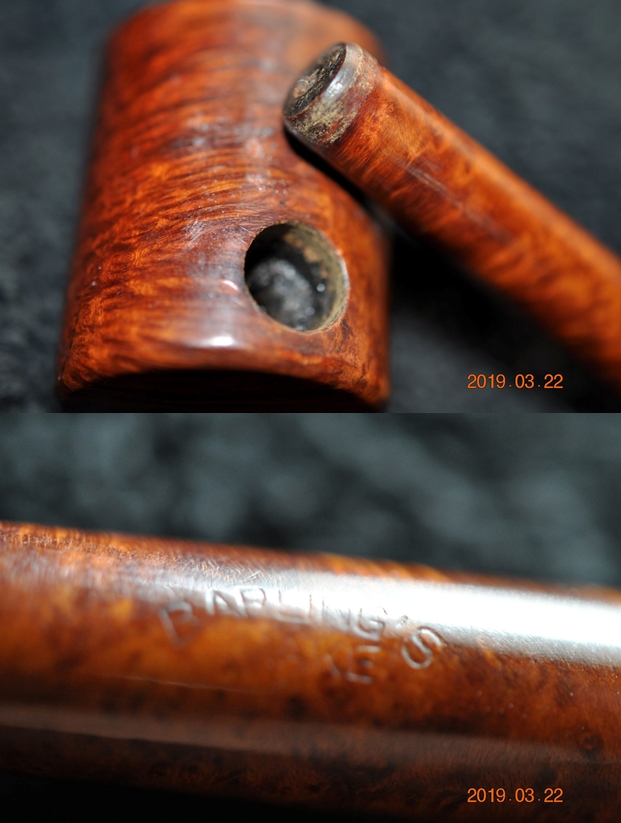
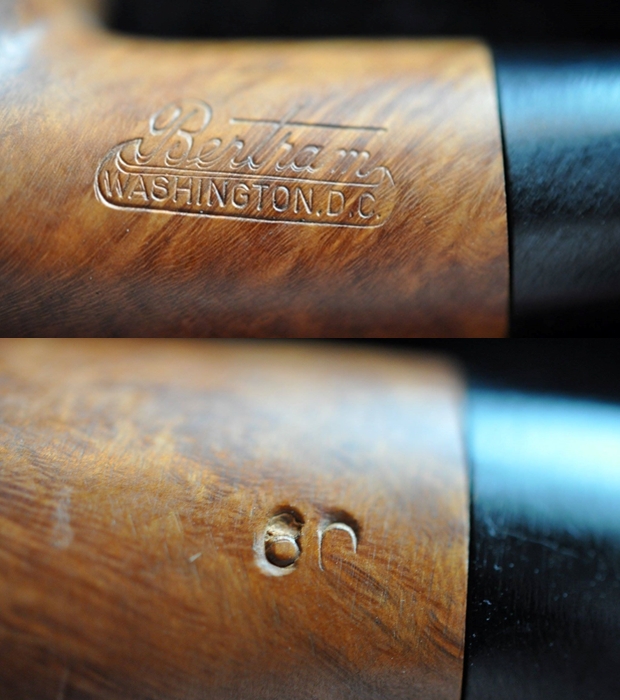
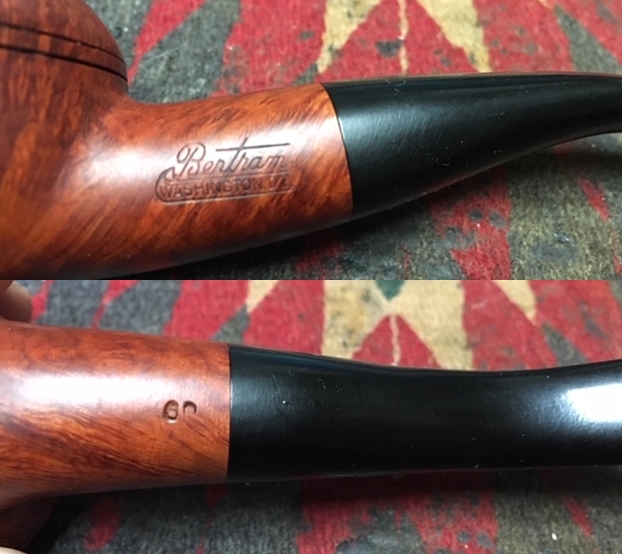
 The nomenclature on both sides of the long Lovat stem is clear. The left flank is stamped KAYWOODIE [over] “500” [over] IMPORTED BRIAR [over] PAT. 2808837. The right side of the shank is stamped with the Kaywoodie shape number, ‘06’. The stem holds the classic inlaid Kaywoodie shamrock or clover. Almost missed and lurking on the lower side of the stem is stamped: “B75” – I’ll need to check this out!

 Looking first for information about the shape number, ‘06’, Pipedia Kaywoodie Shapes Numbers list is helpful:
| 04 |
Large saddle bit billiard, long shank, short bit |
1931-1958, 1961-1970 |
The description is spot on with the saddle stem and long shank. Calling it a long shank Billiard is essentially the same as a Lovat, in the Canadian family of shapes. The potential dating brackets are also helpful. Another Kaywoodie Shapes chart I go to at Kaywoodie Free Forum confirms that this number describes a medium Billiard, long shank, saddle stem but I also see specific shape numbers for Canadians, ‘71’, and such. So, in deference to the Kaywoodie shape number specifications, I’ll be calling this a Long Shank Billiard and not a Lovat. Also at Kaywoodie Free Forum, there is a very helpful Kaywoodie Master List that was compiled and I quickly find the Kaywoodie “500” series listed as ‘low end pipes’ with the date range of 1957 to 1967. The list provided this example of the “500” series of a classic Billiard which matches Paw’s pipe scheme perfectly. These were not expensive pipes but attractive and well within a working man’s budget. I still have not seen anything regarding the ‘B75’ stamp on the lower side of the saddle stem. So, as I often do, with all of Steve’s rebornpipes.com experience, I send a note to him with the inquiry. This response cleared up the mystery:
As for the stamping on the stem I was told by a fellow on the KW forum that they were part numbers to make replacement of a stem easy, I have seen it on quite a few of the KWs I have restored.
So, with that mystery resolved, I look more at the Kaywoodie name.

 I’ve worked on several Kaywoodies before this and I am always intrigued by the story and repeat it here to give the broader heritage of Paw’s “500”. The Kaywoodie website, actually the S. M. Frank Co. & Inc. site, is informative:
The history of S. M. Frank & Co. spans nearly a century and half of pipe making, supporting our claim as the “oldest pipe house in America.” S. M. Frank, as it exists today, is a combination of some of the biggest names in pipe making from the early part of the 20th. century. The pipe names Kaywoodie, Yello-Bole, Reiss-Premier, DeMuth, Medico, Heritage and Frank are familiar to generations of pipe smokers.
The article describes how in 1919 the Kaufman Brothers & Bondy Company (KBB) produced the Kaywoodie and Dinwoodie pipe lines. By 1924 the Dinwoodie line fell by the wayside and the primary name of Kaywoodie was the mainstay pipe line and the company came to be known by that name. Little is known about the early activities of the KBB Company which started in 1851 by the German born Kaufman brothers. The company had several locations but was centered in the New York City region throughout its production history. The expansion of the KKB Company following the gold rush I find fascinating:
produced the Kaywoodie and Dinwoodie pipe lines. By 1924 the Dinwoodie line fell by the wayside and the primary name of Kaywoodie was the mainstay pipe line and the company came to be known by that name. Little is known about the early activities of the KBB Company which started in 1851 by the German born Kaufman brothers. The company had several locations but was centered in the New York City region throughout its production history. The expansion of the KKB Company following the gold rush I find fascinating:
When one of the men from the New York office got “gold fever”, he carried a large supply of pipes with him to California that he sold along the way. This early “national distribution” did much to build the reputation of KBB. By the late 1800’s, branches of KBB were opened in Chicago, Atlanta, San Francisco and St. Louis with family and friends acting as agents. The trademarks, for the inlaid cloverleaf and the cloverleaf with the KBB initials inside, were issued in 1881.
In 1935, KBB boasted of being the largest pipe making facility in the world with 500 employees and a production of 10,000 pipes per day from their facility in West New York, New Jersey. In 1955, Kaywoodie was acquired by S. M. Frank & Co. (See Link) and continues to the present with well-known names Yello-Bole, Reiss-Premier, William Demuth Company, Medico, Heritage (Heritage Pipes Inc.), along with Kaywoodie (Link).
I enjoyed seeing this picture in the 1955 Kaywoodie Catalog from Pipedia with a specific listing of shape 04. The ‘04’ is the forth pipe down (picture to the left) and this shows that the shape designations for Kaywoodie pipes stay consistent. This catalog pre-dates by a few years the ’57 to ’67 dating for the “500” series, but the shape again is spot on. I enjoyed seeing this catalog page because it shows the huge inventory variety that Kaywoodie provided its customers. The subtle nuances between these long shank, saddle stem Billiards is interesting to me. The ‘04’ enjoys the distinction of the longest shank compared to the shapes presented.
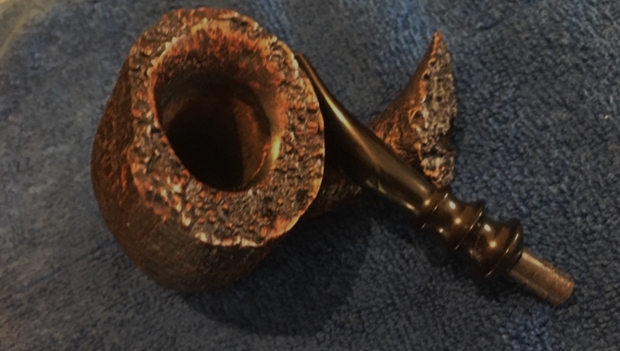
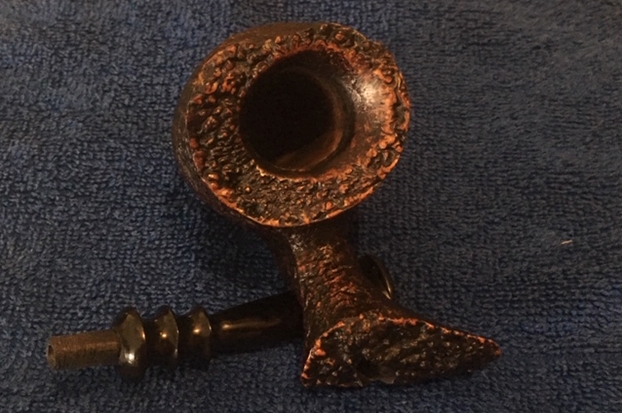
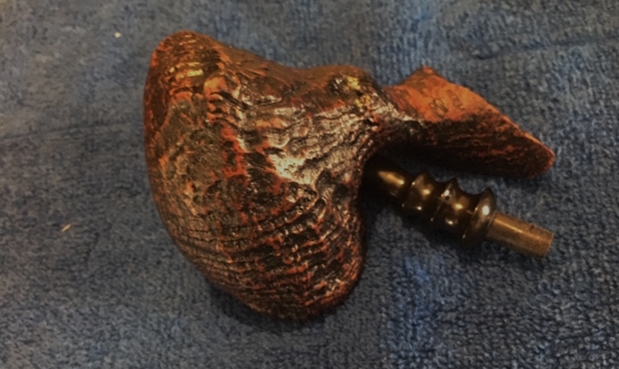
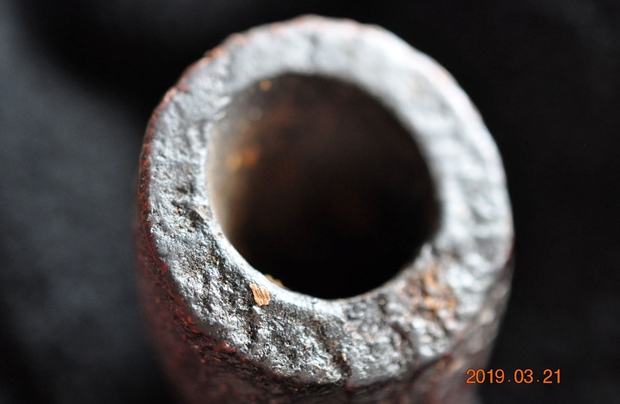
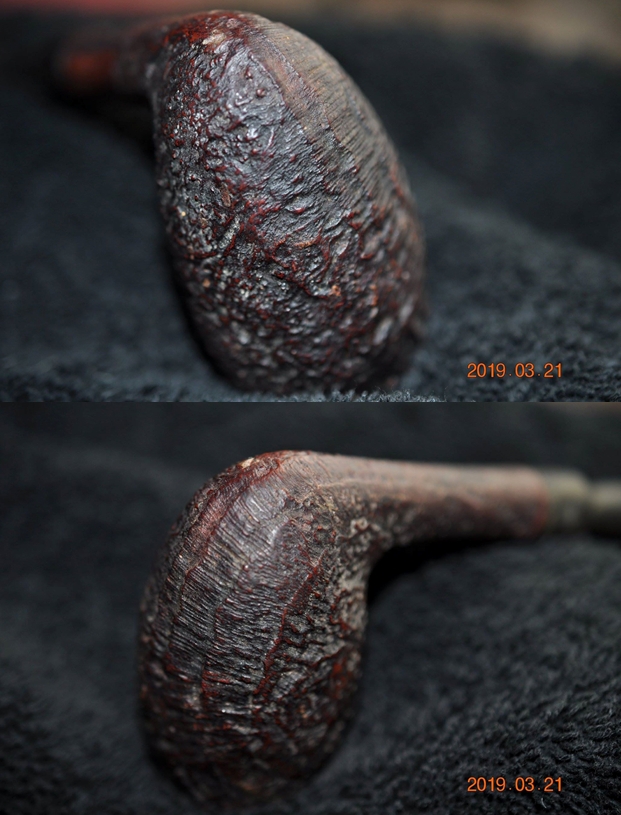
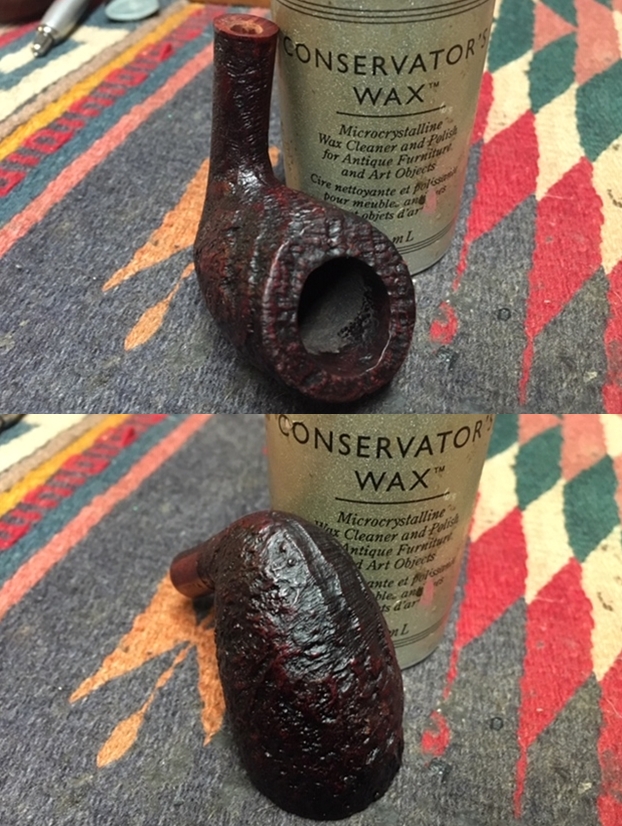
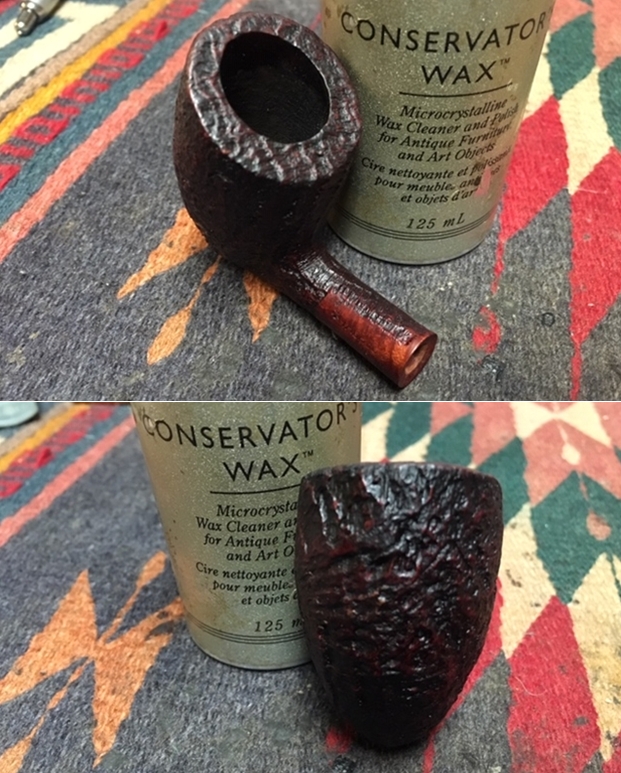
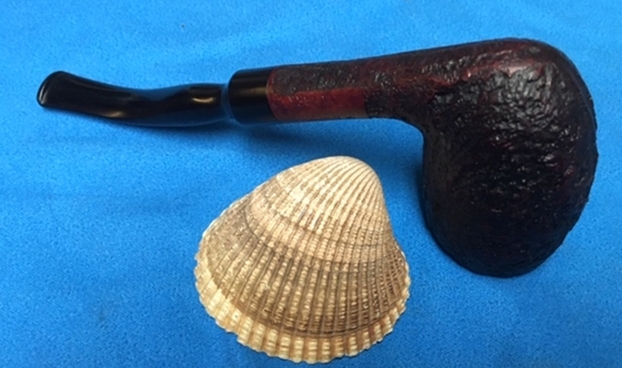
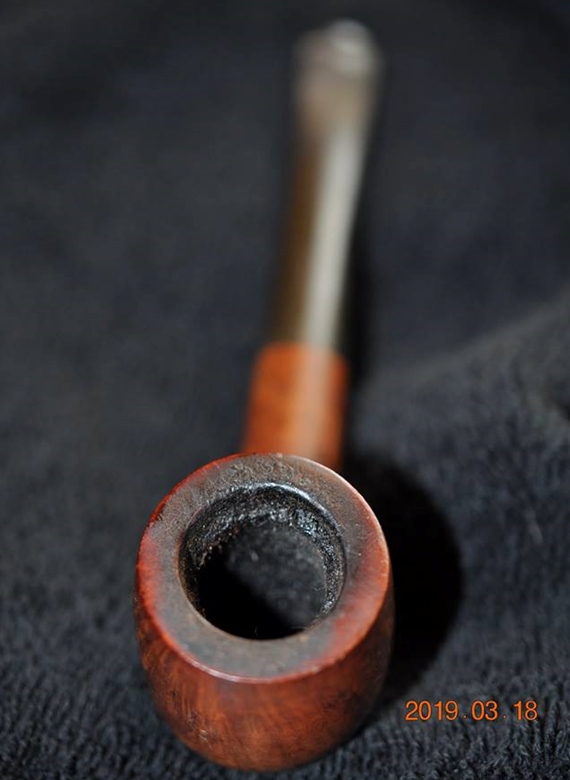
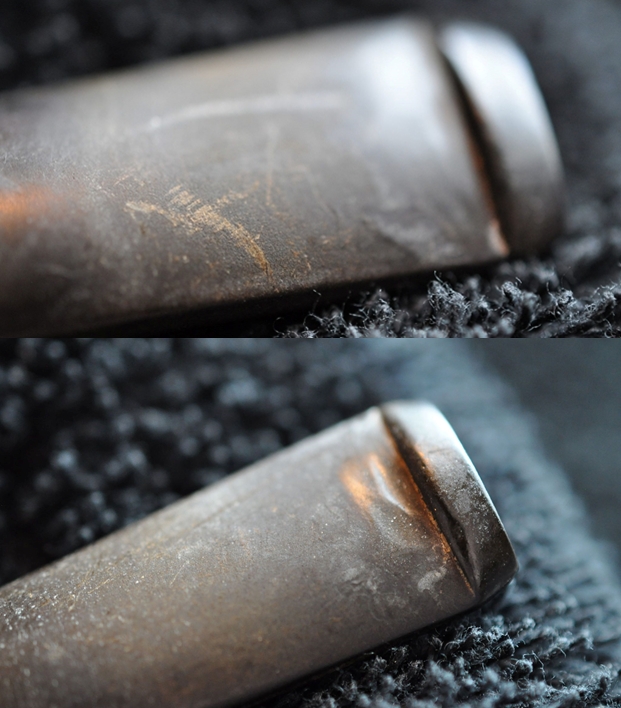
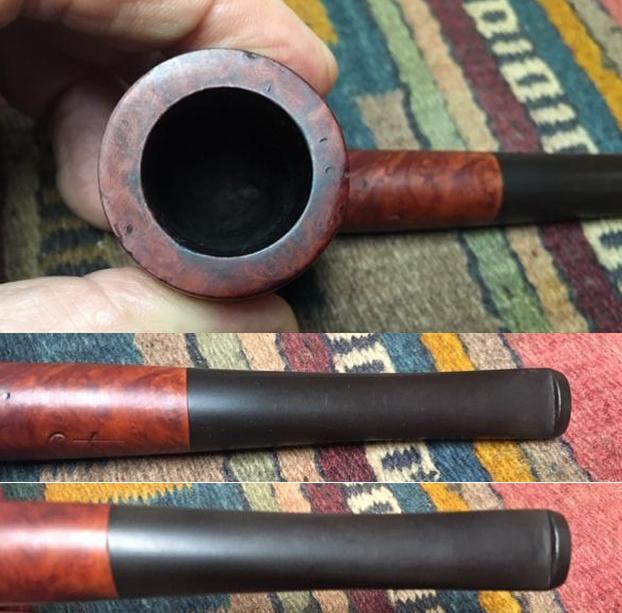
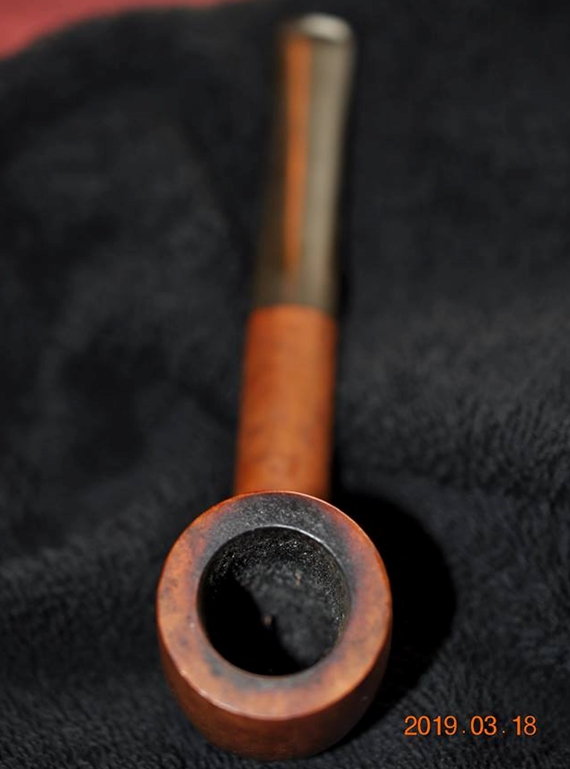
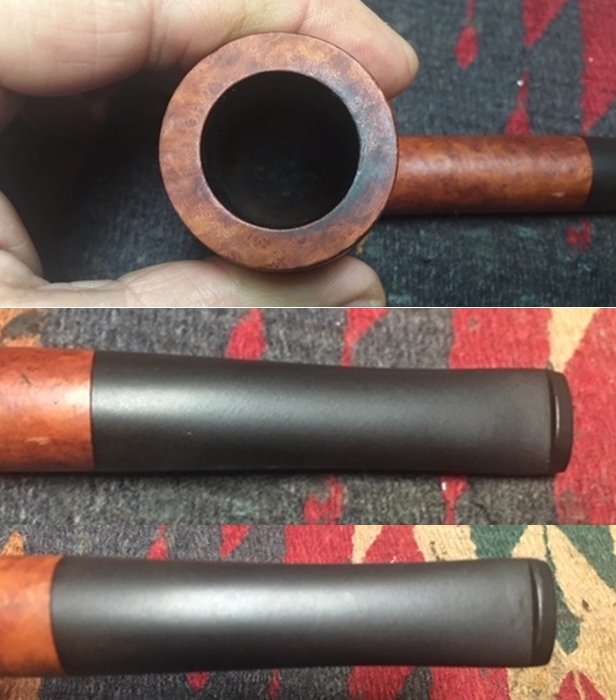
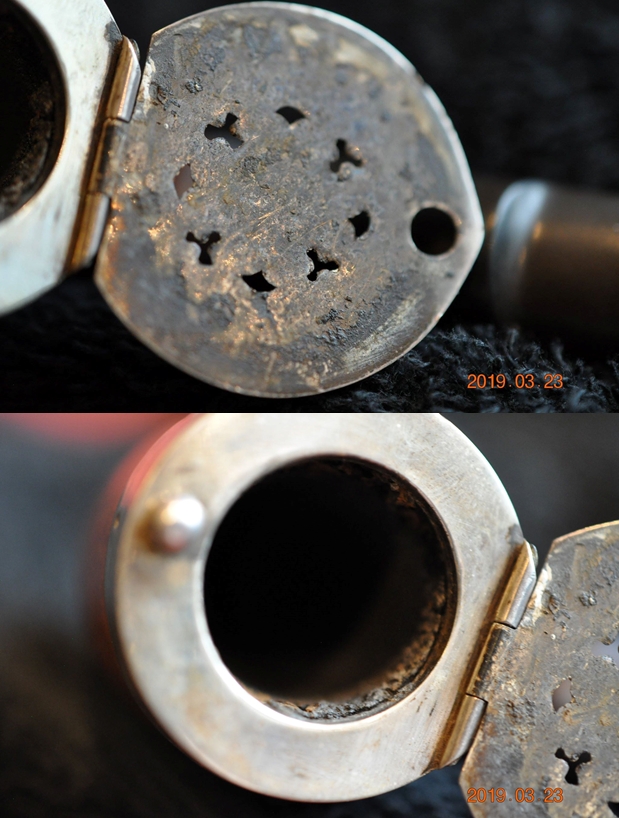
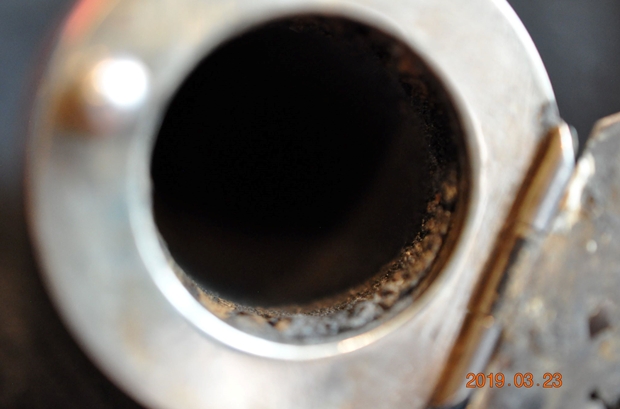
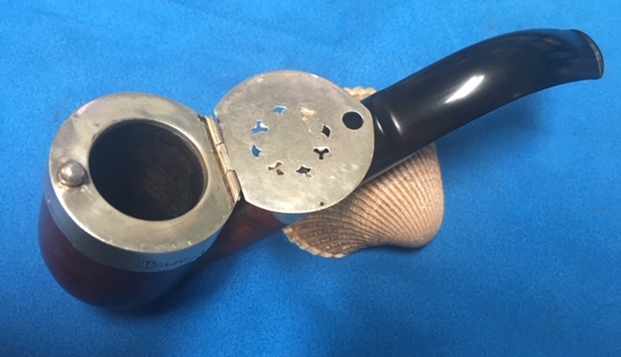
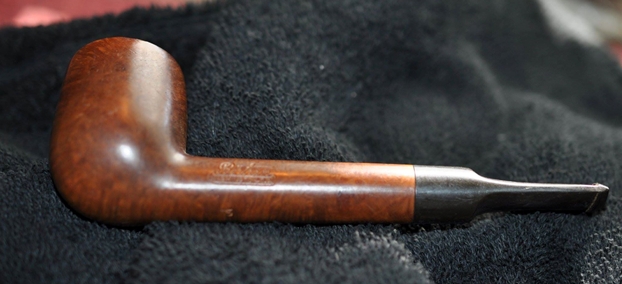
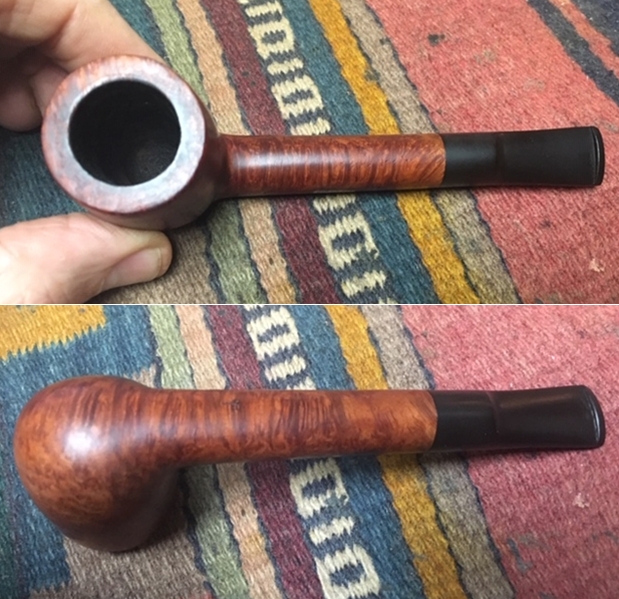
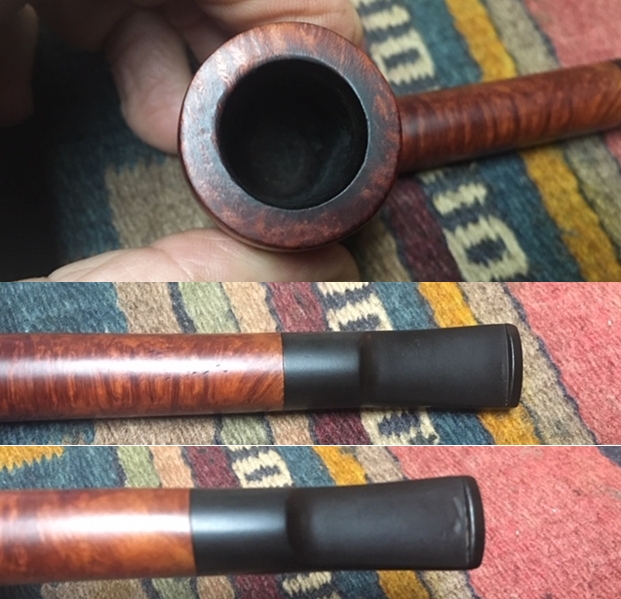
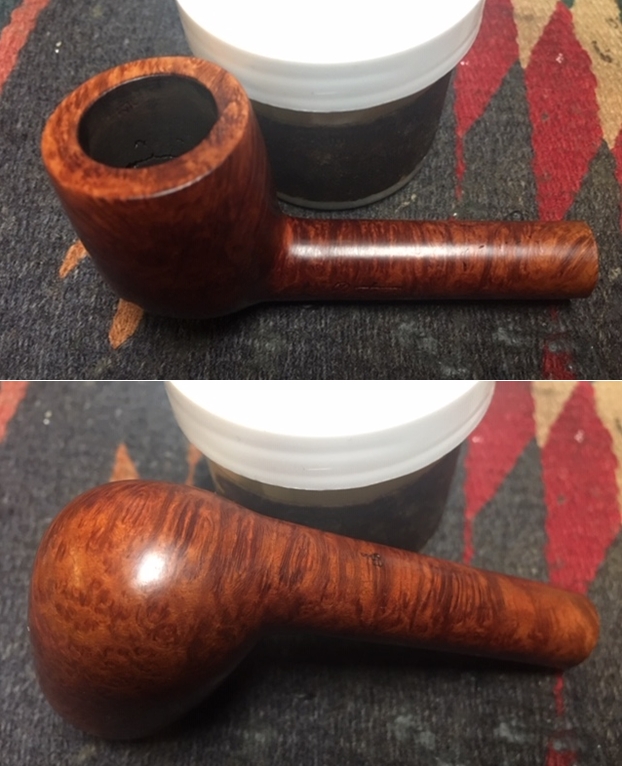
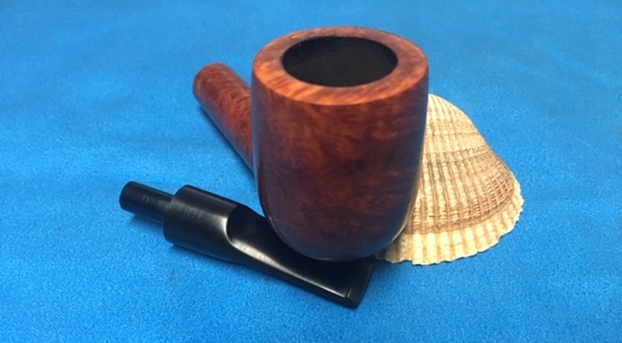
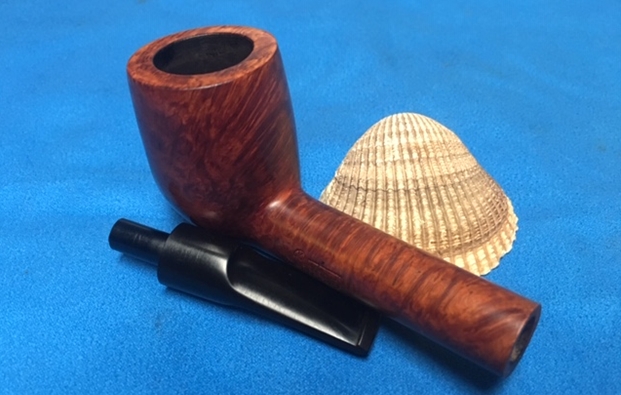
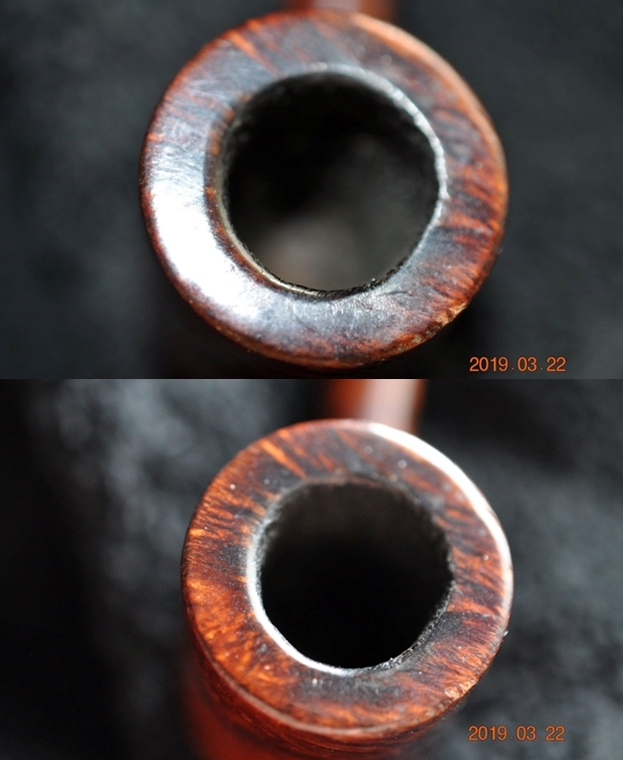
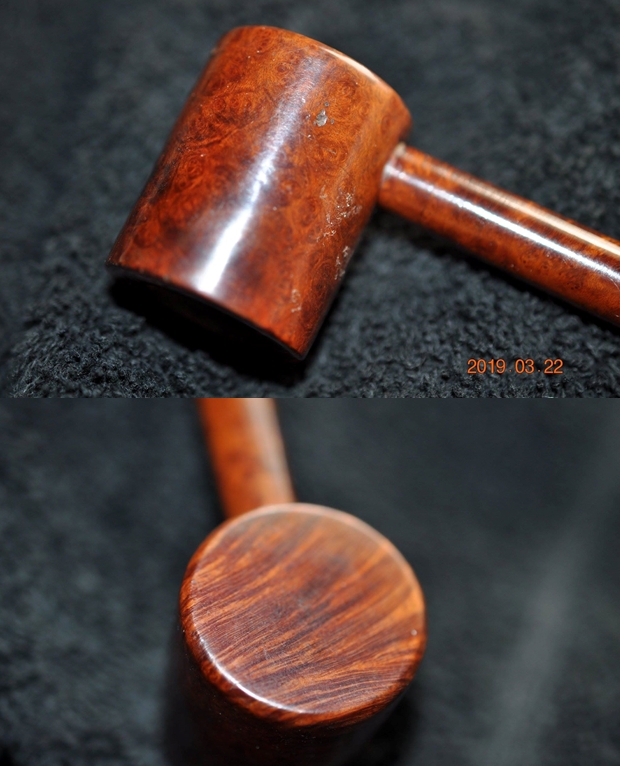
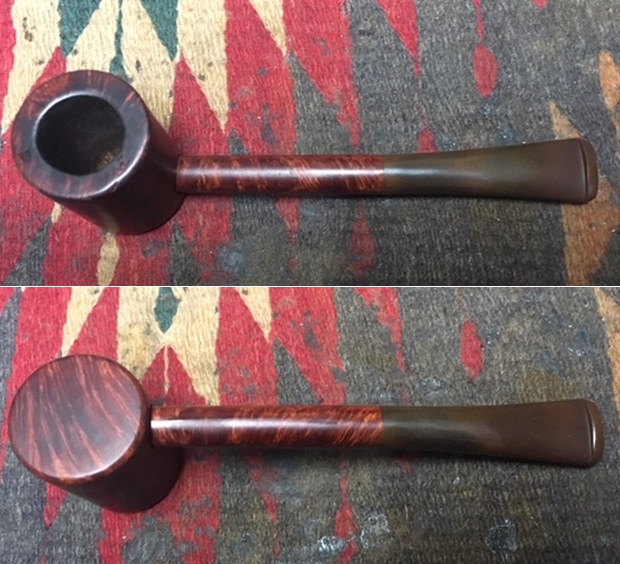
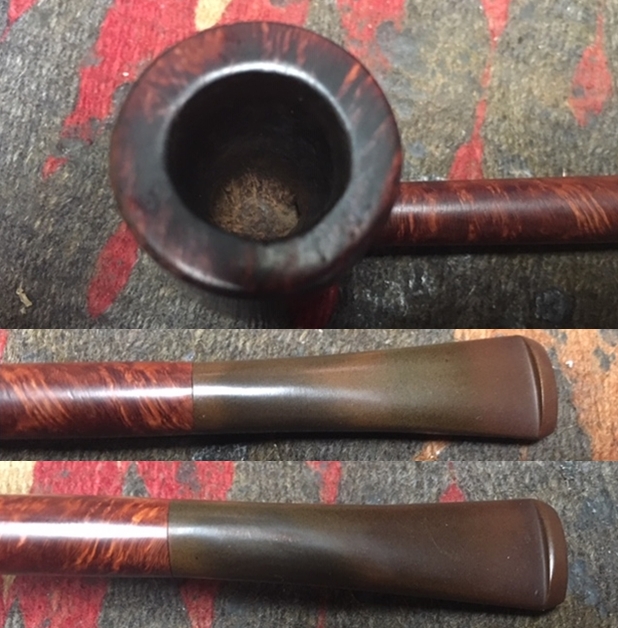
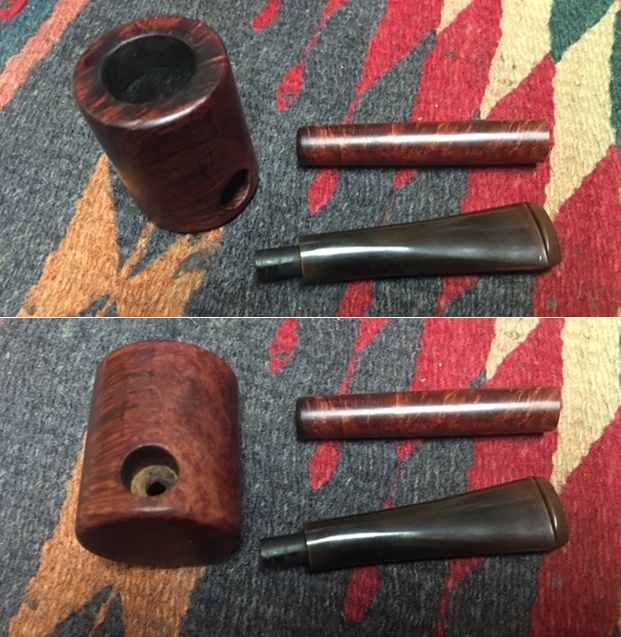
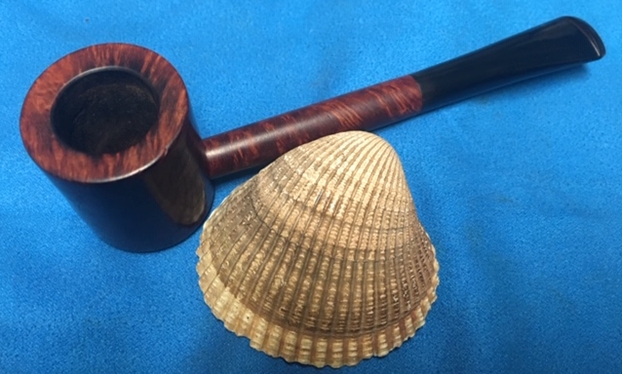
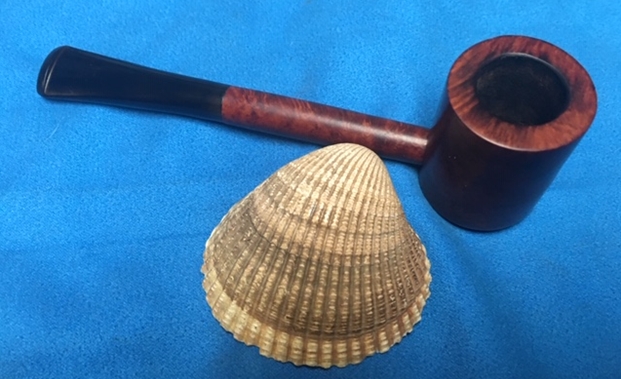
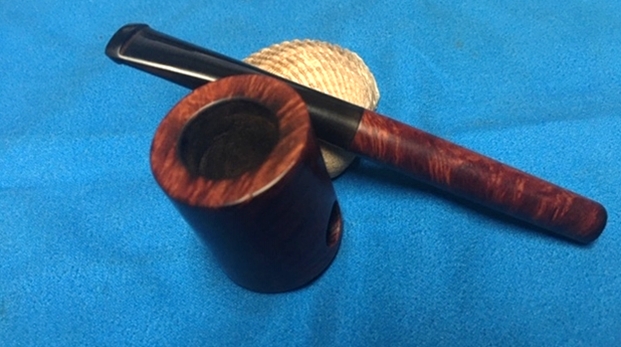
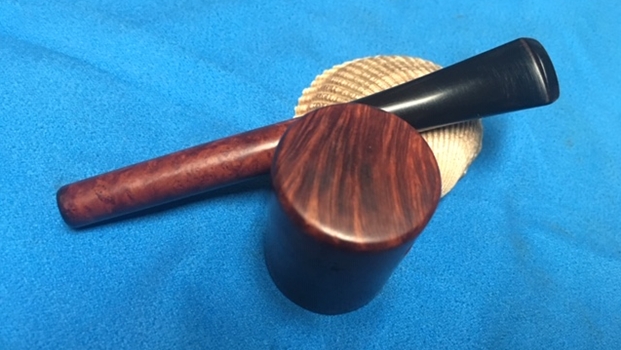
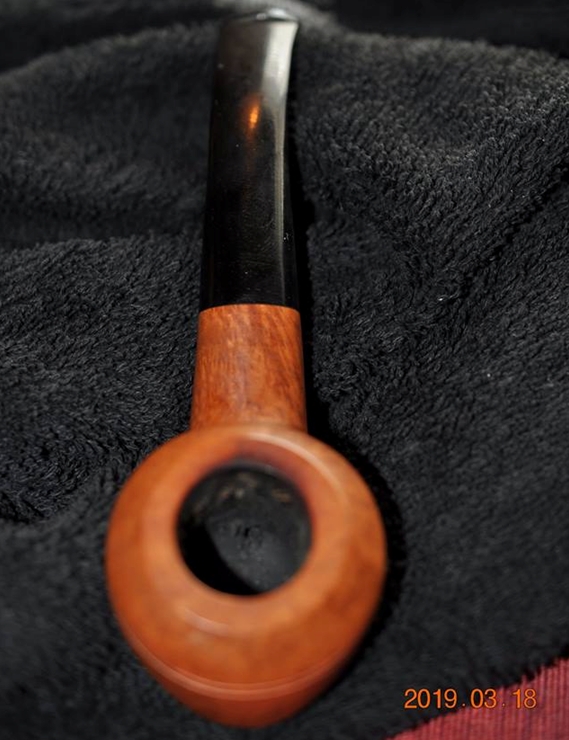
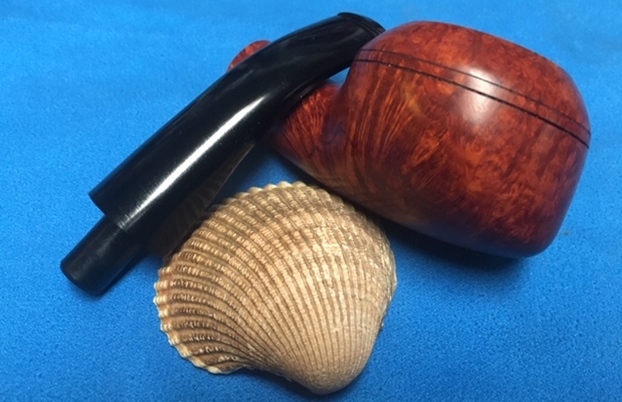
It is obvious from the condition of the Kaywoodie “500” that Paw loved this pipe and this pipe hung in there a long time! As you would expect, the briar surface has its share of nicks and grime after over half a century of service. The chamber has thick cake that has built up and closes the chamber as you go downward. The rim has seen better days. What I first thought might be burn damage on the back side of the rim. I think there’s evidence of that too, as the inner rim lip is burnt and receded, but there’s more. Because the briar is raw here, it indicates something else about Paw’s habits and rituals of pipe smoking. It looks as if Paw was a knocker. With that nice long shank in hand after finishing his bowl, my guess is that he would twist the pipe over and give the bowl a few knocks on whatever hard surface was nearby to loosen and remove the ashes. The knocker dent is what Joe would like to preserve to some extent as a lasting memory of Paw. The second picture below is convincing forensically to prove that Paw was a knocker – the angle is perfect!
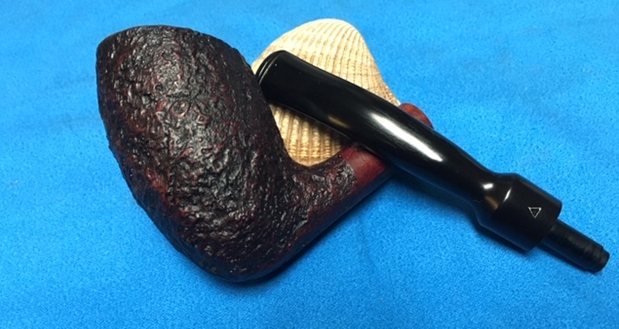
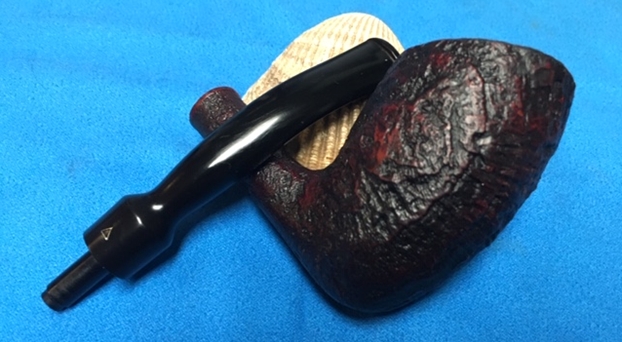
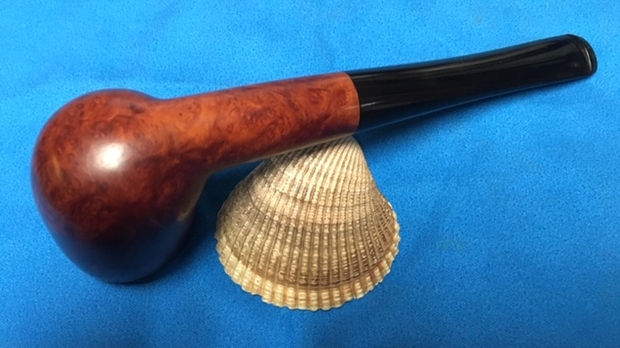
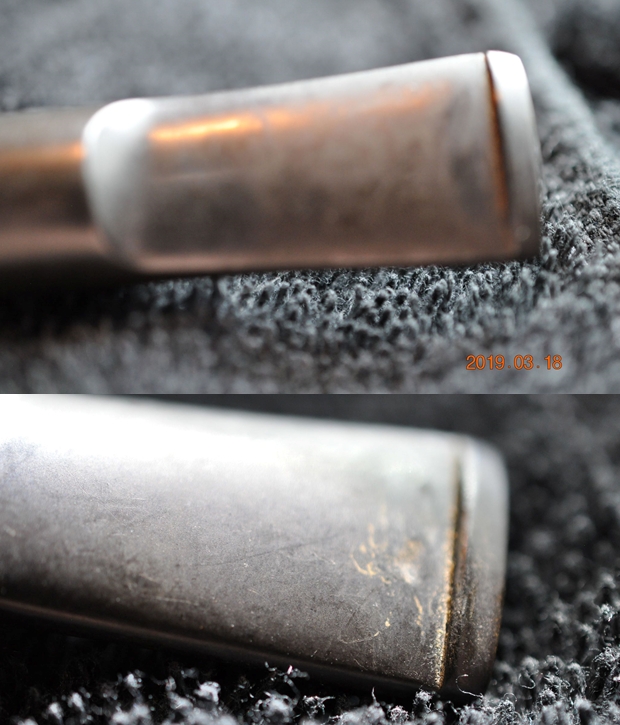
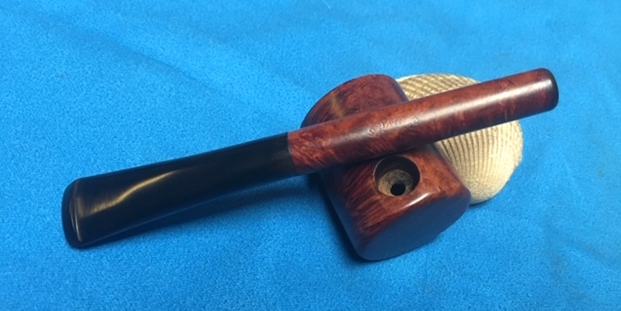
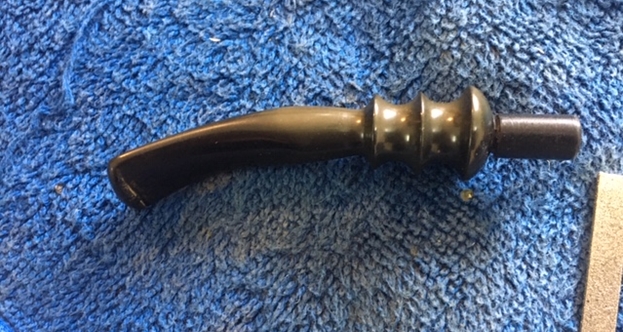
 The stem is a mess. The oxidation is deep. The tooth chatter and button compressions suggest also that Paw was a chewer! The upper bit over time took the brunt and over time cracked and the entire top of the button broke off, taking with it some of the flat bit vulcanite real estate. This area will need rebuilding.
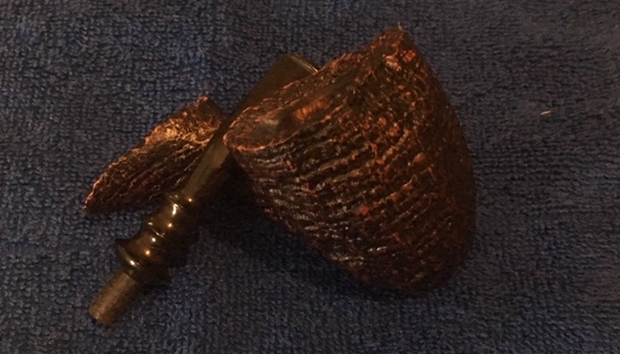
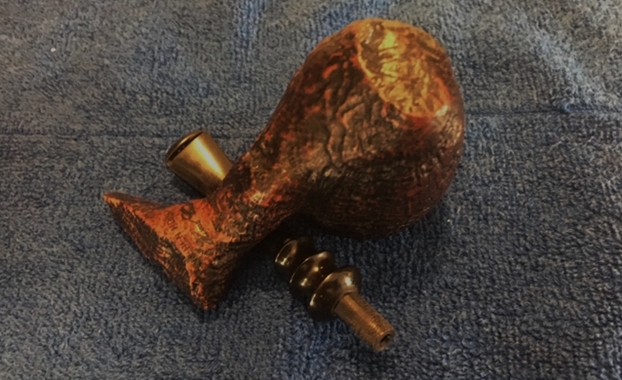
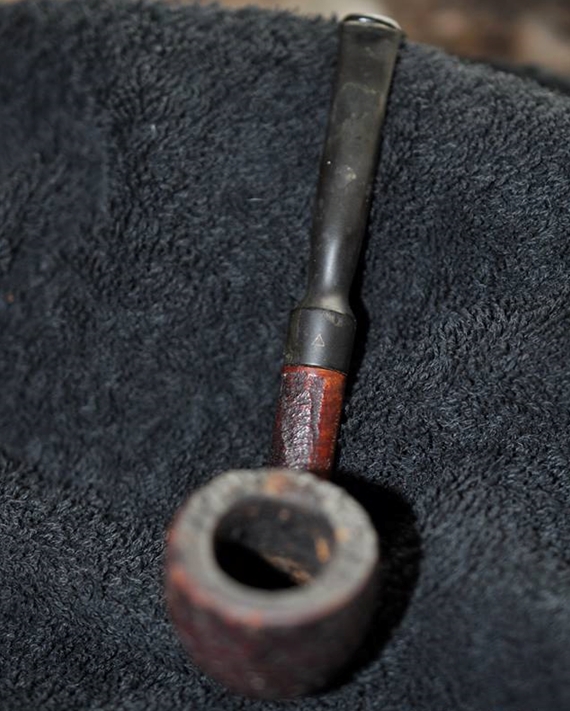
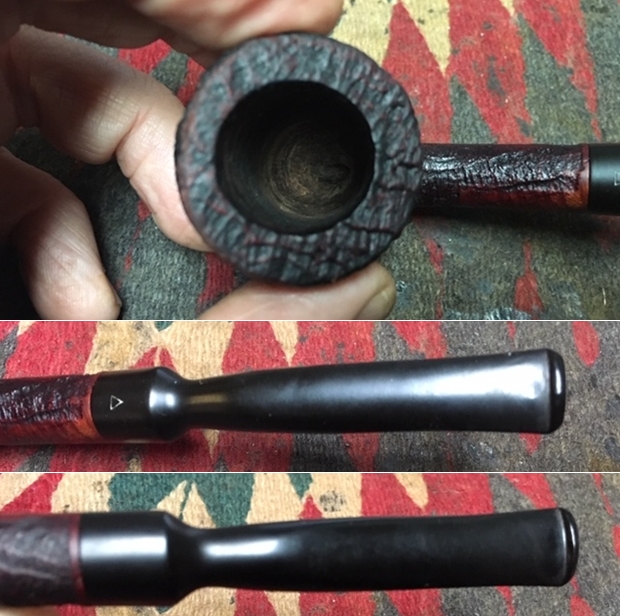
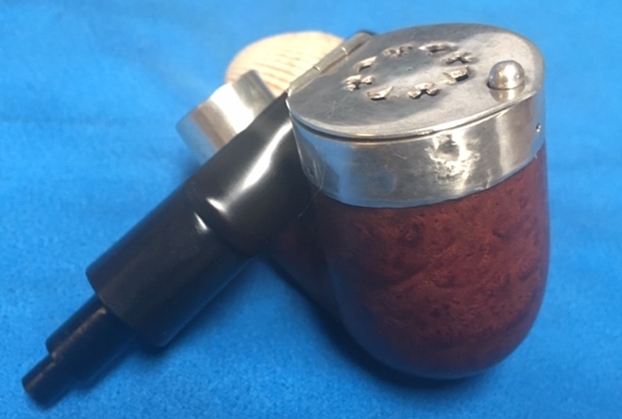
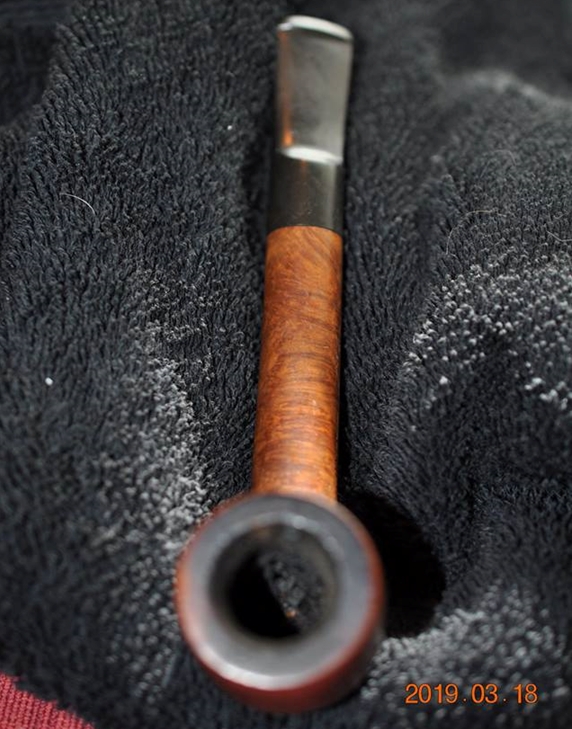
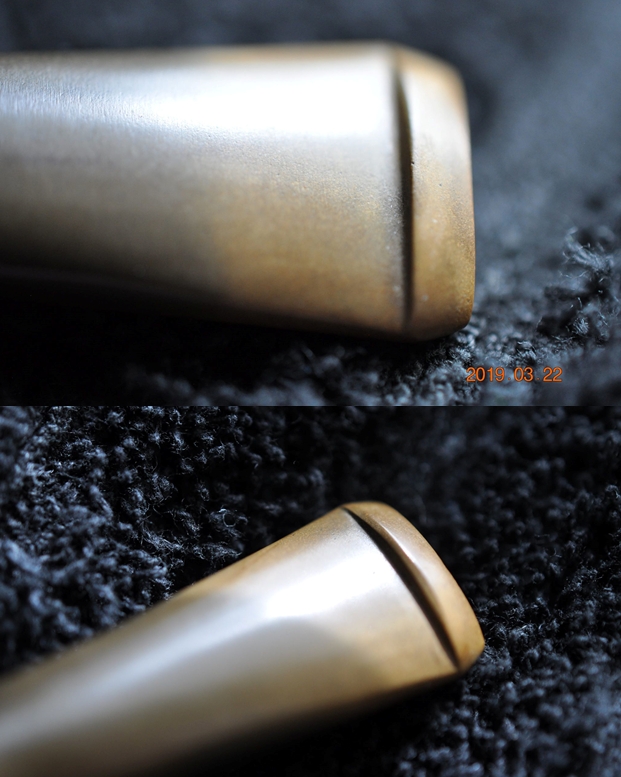
 The stem shows one more issue that needs addressing: the stem is over-clocked. It tends to be normal with these pipes as they age, with much wear and use, the metal fittings rubbing, gradually there is a microscopic loss in the metal composition. The result is more thread room and therefore, when the stem turns to the right and tightens, it’s not in the proper orientation. This is the case for this Kaywoodie “500” as this picture shows.
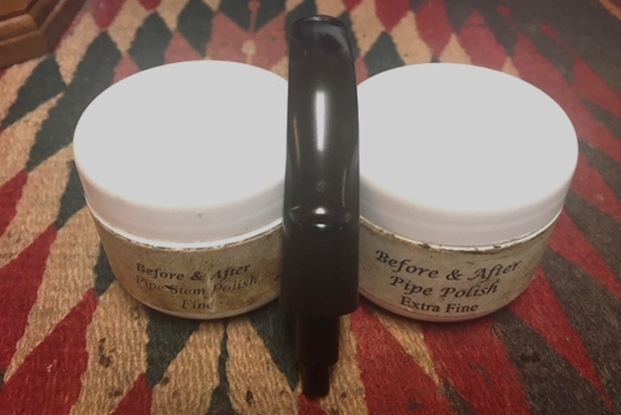
  With an ongoing appreciation for the history of the Kaywoodie name, and of this pipe’s former steward and Joe’s desires to gift the pipe to his father-in-law, Ben, I begin the restoration of Paw’s Kaywoodie “500” with a pipe cleaner dipped in isopropyl 95% and clean the airway of the stem. I also use a thin shank brush to clean up through the air hole on the metal Kaywoodie tenon. I then add the stem to a soak of Before & After Deoxidizer to work on the deep oxidation in the vulcanite. I don’t believe the Deoxidizer will have total success in raising all the oxidation, but this is a good start. There are other pipes and stems in the commissioning queue that the Kaywoodie joins, all of which have been restored and shipped off to new stewards!
 After several hours, I fish out the Kaywoodie saddle stem and let it drain. I then put another pipe cleaner wetted with alcohol through the airway to remove the excess Deoxidizer liquid.
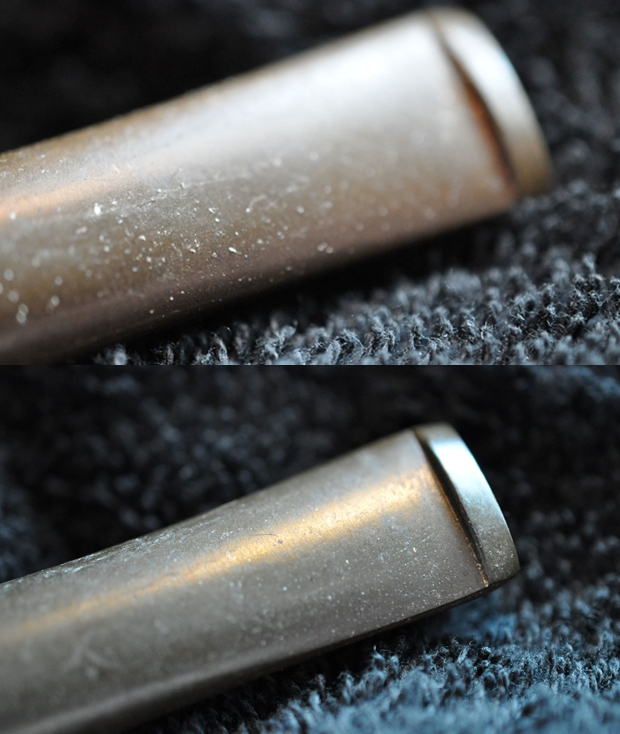
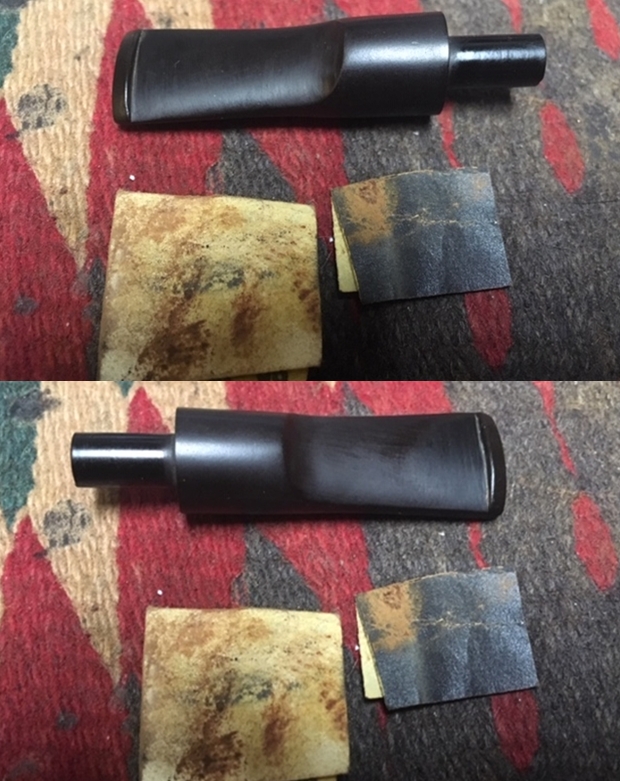
 Next, wiping the stem surface with cotton pads wetted with alcohol removes much of the raised oxidation. Much comes off, but the evidence of the residual deep oxidation is easily seen. I take some close up pictures of the upper and lower bit to show what I’m seeing – I notch down the aperture of the iPhone app I use to allow more light to see the brown/olive green oxidation more clearly.
 For now, with a cotton pad I apply paraffin oil (a mineral oil) to the stem to begin the process of revitalizing the stem.
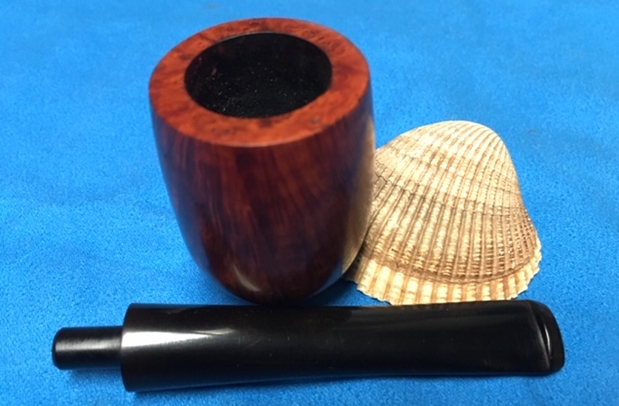
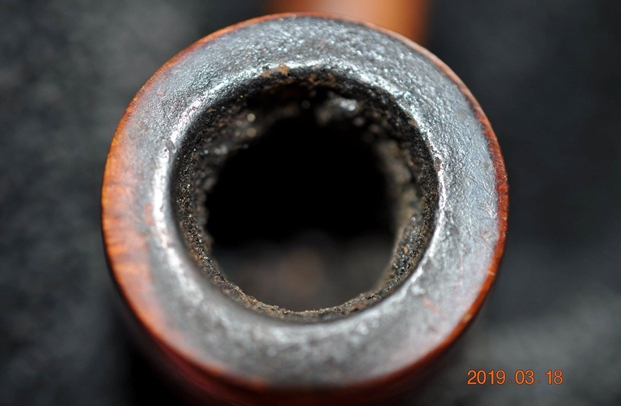
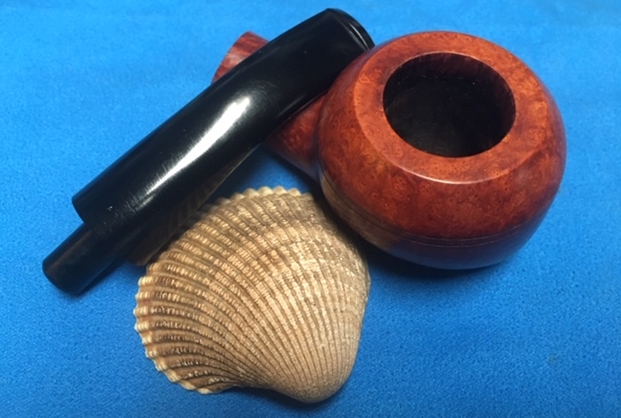
 I now commence the cleaning regimen of the stummel. First, I remove the carbon cake build up by reaming the chamber. I take a picture of the chamber to mark the start. I start by using the Pipnet Reaming Kit. After putting paper towel down to minimize cleanup, I start with the smallest blade head and go to work.
  It takes some time for the blade to break through to the floor of the chamber – the cake is hard and stubborn. In addition, I use the next 2 larger blade heads of the 4 blades available in the kit. I then scrape the walls more using the Savinelli Fitsall tool and finish by sanding the chamber with 240 grade sanding paper wrapped around a Sharpie Pen to give me reach and leverage. After wetting a cotton pad with alcohol, I clean the chamber of the carbon dust residue left over. The pictures show the progress.
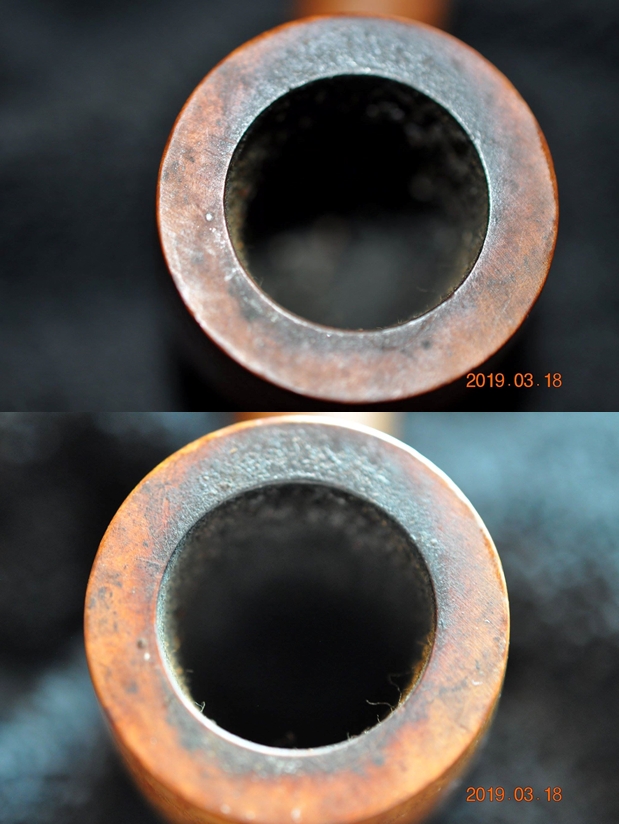
 When I inspect the chamber, the walls look good. There are heating veins in the wood, but no cracks or fissures from heating damage. I do note two things that give me some concern.
 In the picture below I mark off the draft hole with 2 yellow marks. The first issue I see is marked by the arrows. Through decades of reaming and scraping, which I just added to, a curved ridge has formed – you can see the edge of the ridge marked by the arrows. The briar curves outwardly to the ridge which I show with the curved red line. The ridge is only on the back side of the chamber, over the draft hole. I may need to sand this ridge down so that the chamber doesn’t have an abrupt bump to hinder future reaming and cleaning. The second issue is caused by overzealous reaming. The floor of the chamber drops underneath the proper amount of space below the draft hole. A floor cavity has been created by the chamber floor wearing down over time. The ridge of this floor cavity is marked with the red dashes. Not only does this create a burning dynamic that will always leave excess tobacco beneath the draft hole, but also the danger of a burn through is a concern with the thinning of the floor. I will continue to think about these new issues as I continue the cleaning process.
 Next, I work on cleaning the external briar surface by using undiluted Murphy’s Oil Soap on a cotton pad and I scrub. I also use a brass wire brush to clean the thick lava flow over the rim. I use cool tap water to rinse off the soap. The Murphy’s Soap does a good job cleaning, but the cleaning reveals the rough shape of the stummel.
  The finish is very thin with shiny finish patches here and there. There are also many scratches and pits – too many to count. I take pictures for an inventory.


 I need to remove the old finish so that there aren’t the shiny patches and unevenness. I first try wiping the stummel surface with cotton pads wetted with isopropyl 95%. The pads take a good deal off as evidenced in the coloration of the cotton pads, but there are still patches with the old finish hanging on.
 Next, I wet a cotton pad with acetone and again I scrub the surface. This does the trick. I move on.
 I turn now to the stummel internal cleaning. The effort is made difficult by the Kaywoodie metal shank facing which only provides a very small access point to the mortise through the thread air hole. I use cotton buds and pipe cleaners wetted with isopropyl 95% to clean the tars and oil accumulation out of the mortise and airway. I also reach through the metal hole with a smaller dental spatula to scrape the mortise wall as far as the tool will reach. But it doesn’t reach far. To save on my limited supply of pipe cleaners, I utilize shank brushes also wetted with isopropyl 95%. After some time, I decide to call a halt to this frontal assault which reminds me of the carnage of WWI – carnage but little advance as the lines were kept in check. The hour is late, and I change gears.
 I utilize the more passive approach of allowing the stummel to soak through the night with a kosher salt and alcohol soak. First, I stretch and twist a cotton ball to create the ‘wick’ which I stuff down through the mortise into the long shank airway. The wick will help draw out the tars and oils from the internal briar. I then set the stummel in an egg crate to stabilize it and fill the bowl with kosher salt which does not leave an aftertaste. I then fill the bowl until with isopropyl 95%, the purest alcohol I can purchase in Bulgaria, until it surfaces over the salt. In a few minutes I top off the alcohol after it has absorbed into the internals. I then turn the lights off and another day ends.
 The next morning, I’m hoping that the fact that the cotton wick and salt are strongly soiled is indication that the cleaning of the internals has advanced significantly with the kosher salt and isopropyl 95% soak through the night. I toss the expended salt in the waste and clean the leftover salt from the chamber with a paper towel, also blowing through the mortise to remove crystals. I follow this with a renewed regimen of pipe cleaners, cotton buds, shank brushes, and scraping with a dental spatula. Eventually, as I hear the hallelujah course in the recesses of my mind, the cotton buds begin to lighten and finally I declare that the job completed! The new steward will do well to clean the internals on a regular basis to avoid this in the future!

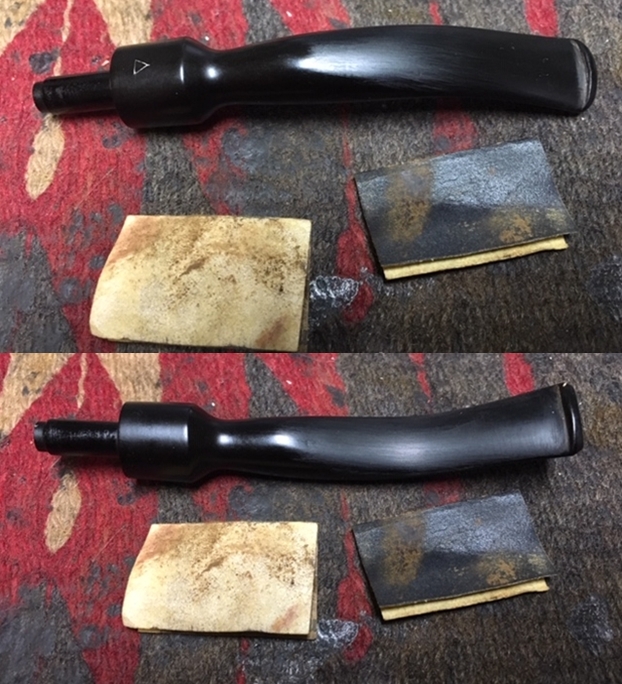
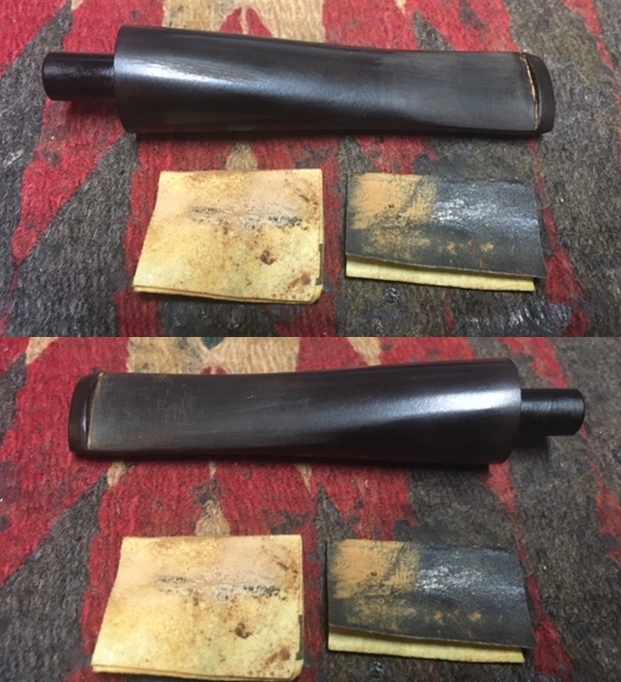
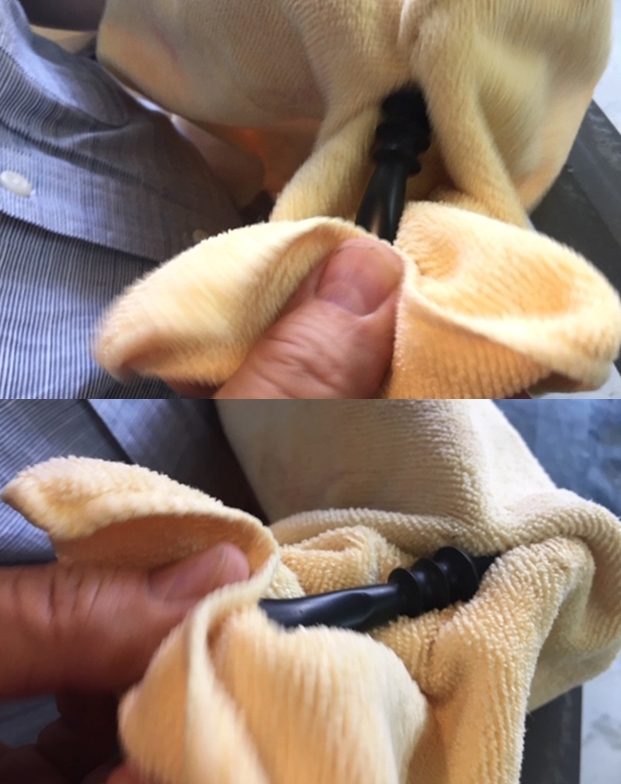
 For a change of scenery and to start on the stem repairs, I take a close look at the stem upper and lower. There remains deep oxidation of the vulcanite stem requiring sanding to bring it out. It is mainly in the flat part of the saddle stem. The tooth chatter and button compressions are significant and of course the upper button must be rebuilt using a mixture of CA glue and activated charcoal. Before working on this, I decide to use the heating method to bring out and minimize the tooth chatter by painting the areas with a Bic lighter. I do this before rebuilding the button because of the differences in the materials. Vulcanite will expand with heat – the CA glue/charcoal will not – at least not in the same way. So, to be on the safe side, I will work on raising and minimizing the tooth chatter and lower button compressions first, before working on the rebuild. Sanding will be necessary after both.
 I paint both upper and lower bit with a Bic and sand with 240 grade paper. The heating did raise the chatter nicely and the sanding erased it. I also work on the lower button with a flat needle file to refresh the lip and to work on a small compression. I’m pleased with this first phase of the stem repair.
 Next, the button repair. The first thing I do is create a wedge that fits in the slot. I use stiffer index card material to do it. I fold the card stock to form it into a triangle so that it wedges up the slot into the airway. I trim it a bit with scissors to make a good fit.
  I then cover the fashioned wedge with smooth scotch tape to help it not to stick to the patch material. I leave the end of the wedge open – not covered by the tape in order to leave a ‘sleeve’ opening to tighten the fit.
  I fit the wedge into the slot then slide other folded pieces of the index card through the end of the wedge which expands the wedge to hold it firm but also to form a mold for the formation of the slot. I also put a very thin coating of petroleum jelly on the wedge to help with the non-sticking.
 With the wedge firmly in place, I open a capsule of activated charcoal on an index card. I then place a puddle of thick CA glue next to the charcoal and then draw charcoal into the CA glue gradually until the mixture thickens to the consistency of molasses. I then apply the mixture to the button and build a mound over the cavity.
 The first application hardens on the index card before I had dolloped enough to area. I wait a few minutes and mix another batch and finish building the mound over the button rebuild area. With this completed, I set the stem aside for several hours for the CA glue and activated charcoal rebuild fully to cure.
 I look again to the stummel and decide that I will continue in the mixing and patching mode. I mix a small amount of J-B Weld Kwik to rebuild and reinforce the chamber floor. It will not take much J-B Weld to do this. I put a pipe cleaner in through the airway to better show the landscape.
 Again, on an index card, I mix a small amount of the two components of the Weld, the ‘Steel’ and the ‘Hardener’. The Weld does not set up immediately which is good. It takes about 4 minutes before it begins to set. As it’s setting, I will form a rounded chamber floor so that it’s not flat. I begin by wiping the chamber floor with a cotton pad wetted with alcohol to clean it. I mix small equal amounts of the J-B Weld and then spoon up a portion of the Weld on the end of a dental spatula and carefully carry it to the floor of the chamber.
  I hold the dental spatula there allowing the Weld to slide off the spatula to fill the cavity. I then carefully remove the spatula to avoid getting the Weld on the chamber wall. I repeat this again by bringing a spoon of Weld and allowing it to fill the cavity as it runs off the spatula.
  I take a picture of the Weld filling the cavity in the chamber floor and decide that I would let it set as it is which will result in a flat floor. I will use a grinding ball on the Dremel later to round it out for a more natural bowl. I set the stummel aside allowing the J-B Weld to cure fully.
 The stem button rebuild has set up and cured. As hoped, the wedge easily is removed revealing the rough form of a slot to be shaped.
 Using a flat needle file, I file and shape by bringing the build overhang of the wedge flush with the button face.
 After filing so that the button face is flush, I’m able to see the basic form of the slot. The left side of the slot is closed more than the right side as you can see in the picture above. I use a rounded sharp needle file to file the tighter end. I’m patient. I file gently and methodically.
 I come to a place where the button slot looks balanced. I can fine tune it later.
 Next, again using the flat needle file, I file the top of the button down to form the upper contours. I have the advantage of having the original ends of the button on both sides that were not broken off. These provide me with the angles of trajectory the upper button lip took. I try to file down to be consistent with this to form the button.
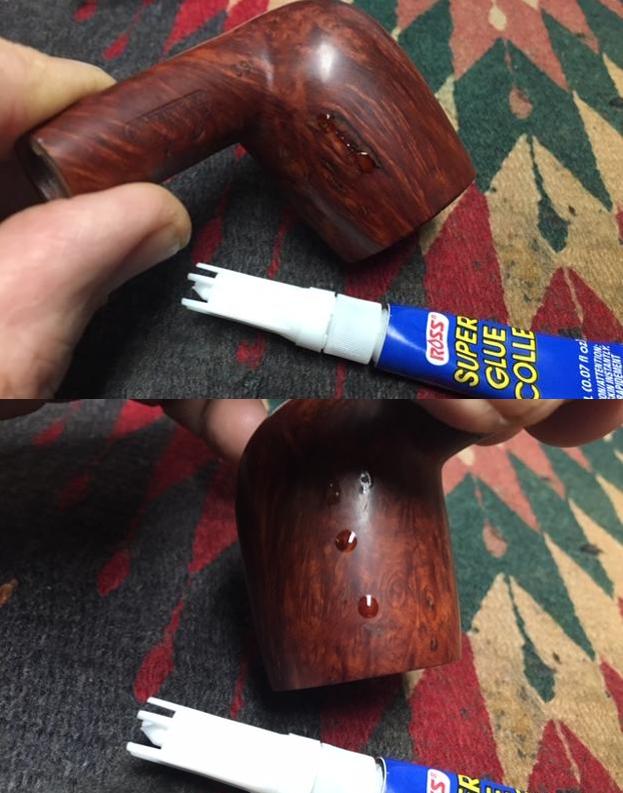
 The button is looking good, but I’m concerned that I did not put enough CA glue/charcoal mixture at the side. In the picture below you can see the unfiled repair material jutting on the right side. I’m concerned that this may leave a gap when I start filing the inner edge of the button. To be on the safe side, I apply a drop of Black CA glue on this gap to make sure that I have a uniform platform to file out and shape the button. I put the stem aside to allow the patch to cure.
 When CA patch cures, I quickly file off the excess patch material and continue with the lateral filing to form the internal button edge.
 After completing the filing, I switch to sanding the newly formed button with 240 grade paper and continue to smooth. I also sand the upper and lower bit to remove residual oxidation.
 While sanding the new button, an air pocket is uncovered which is visible on the lower side of the button.
 To fill this very small air pocket, I paint the button with regular CA glue. I apply a small drop on a toothpick and spot drop it and this spread the CA over the area.
 I spray the CA glue patch with an accelerator which quickly cures the glue. I then sand it with 240 grade paper.
 The stem is still rough from the 240 sanding and filing. I switch to 600 grade paper and wet sand the entire stem and follow this with applying 000 grade steel wool. Wow! I am pleased with the button rebuild. It looks great and blends well. I put the stem aside for now.
 Again, focusing attention on the stummel and the chamber repair. The J-B Weld is fully cured filling the cavity at the chamber floor.
  With gravity forming the orientation of the Weld, the floor is now flat. For a more natural bowl curvature, I initially use a round grinding ball mounted on the Dremel. Using the round ball, I grind out the flat surface of the J-B Weld. As I rotate the ball moving it in circles, I check often with my thumb to measure the progress.
 When the floor feels good, I mount a small sanding drum on the Dremel and reach in to the lower chamber above the new floor where I had earlier detected a distinct ridge from overzealous reaming. I use the sanding drum to smooth these out. I do the same as with the grinding ball, I sand and then feel with my thumb. Progress is made.
 After the sanding drum, I switch to sanding with 240 grade paper wrapped around a Sharpie Pen to help me reach and give me leverage. I further smooth the lower chamber. A ridge is still detected, but it is much less distinct. I like the progress and the entire chamber looks and feels much better. The new floor is now at a more appropriate orientation to the draft hole that is seen in the picture below.
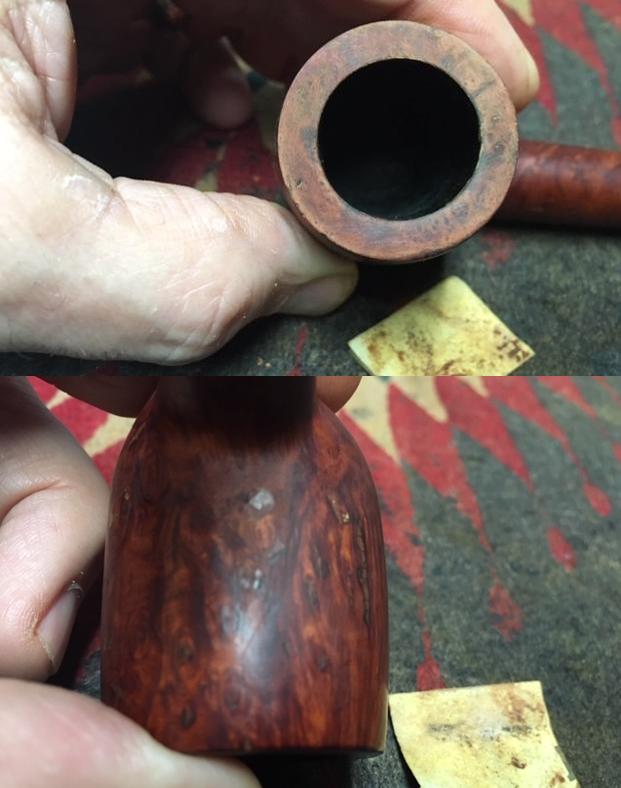
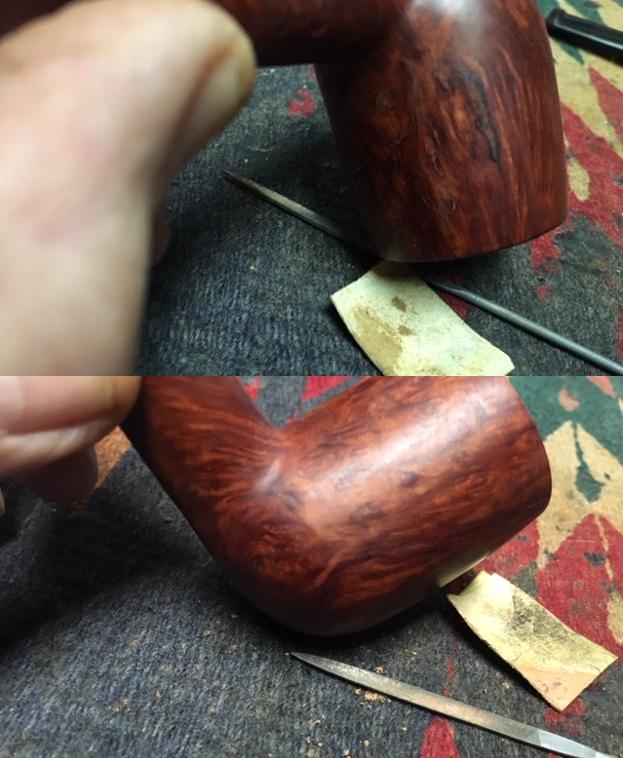
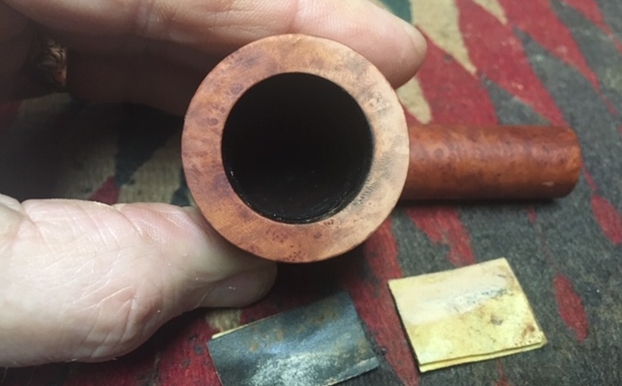
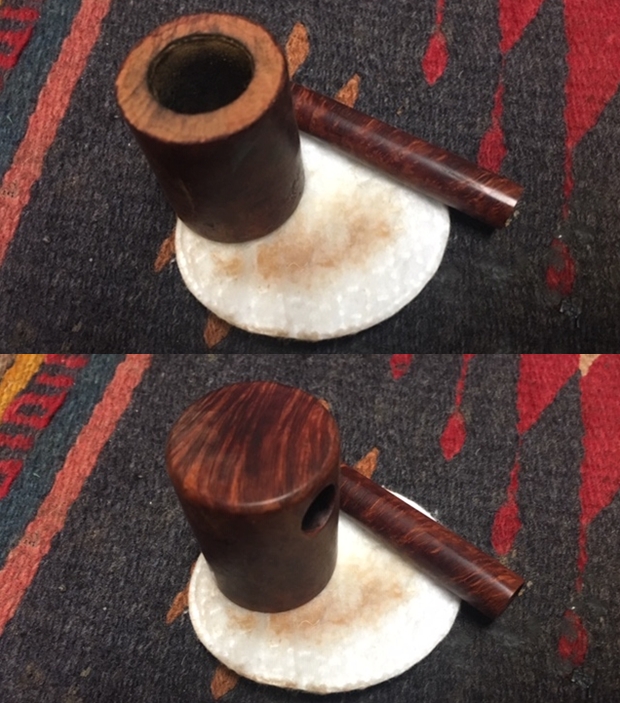
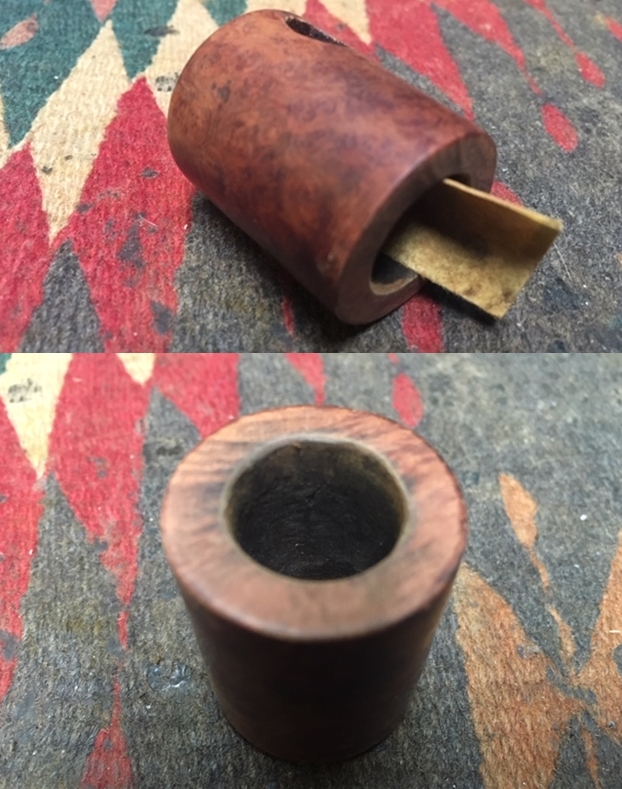
 With the internal chamber repair complete, I turn to the external surface. The first thing I look at is the rim repair. Joe wants the pipe in a pristine condition as much as possible. Yet, he asked to preserve in some degree the rim knocking damage at the back of the rim as an ongoing remembrance of Paw. With this motif in view, the restored rim will provide a strong contrast of new and old, but not forgetting what the ‘old’ represents. To begin the rim preservation and restoration, I take the chopping board and place 240 grade paper on it. Keeping the forward rim surface in contact with the board, I top the forward part of the inverted bowl.
 The picture below first shows the beginning progression and then after further rotations, the second picture shows the full extent of topping with 240 grade paper. I leave the area on the back side of the rim and it looks good.
 I then switch the paper on the board to 600 grade paper and turn the inverted stummel several more rotations to smooth out the 240 scratches.
 After the topping, I examine the rim edges. The external rim edge still shows many cuts and nicks. The internal edge is darkened.
  To freshen the rim edges and to address the residual blemishes I lightly run a rolled piece of 240 grade paper around the external and internal circumferences (minus Paw’s patch). I follow the 240 grade with 600 grade. This doesn’t introduce a bevel as much as clean the edges and soften the flat rim presentation. I think it looks good.
 Next, I take another inventory of the stummel’s briar surface. It has many nicks, scratches and some bruising on all sides of the stummel.


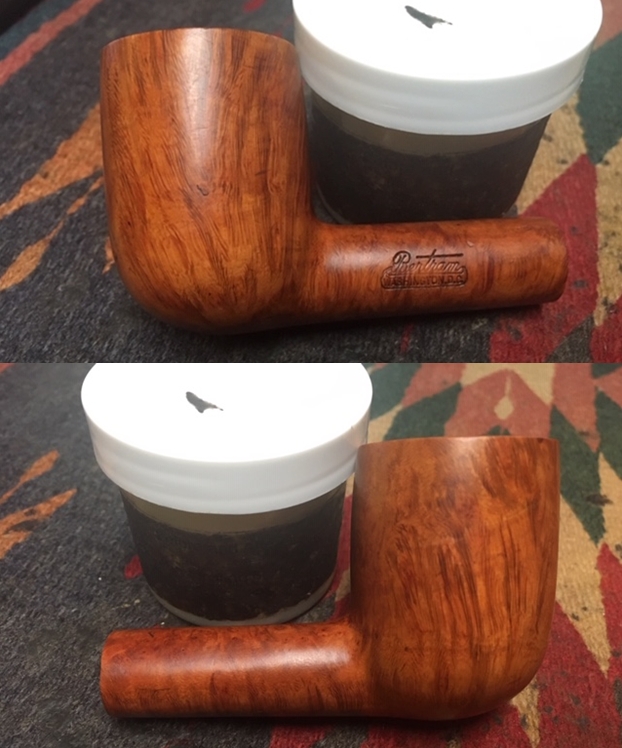
 I decide to clean the surface by utilizing sanding sponges. Sanding sponges do a great job addressing the minor issues of normal wear and tear that accumulates on the briar surface. The soft sponge texture also helps clean and freshen the nooks and corners. To protect the already thin Kaywoodie “500” nomenclature and shape number, I cover them with masking tape to protect their integrity during the sanding phase.
 I first use a coarse sanding sponge followed by medium and light grade sponges. The results are good, but I decided that whatever remains on the surface that is not removed through the sanding belong to Paw 😊.
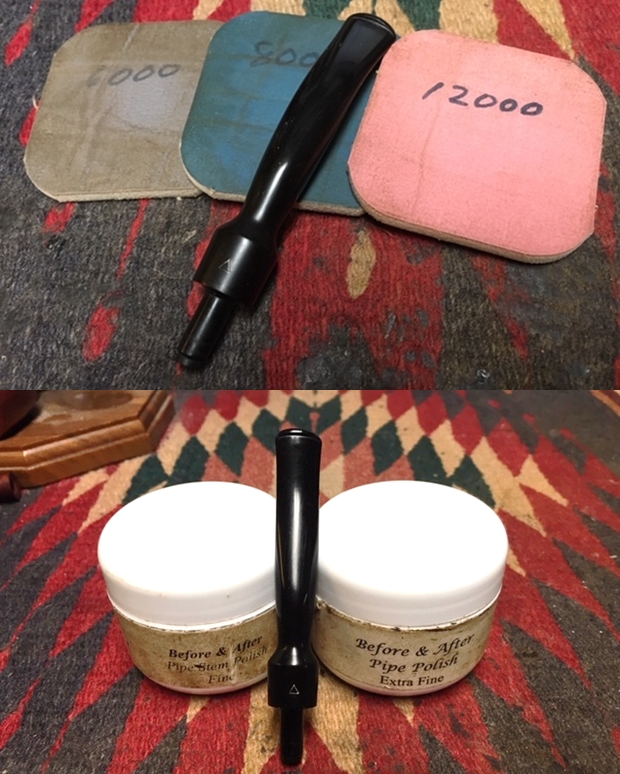
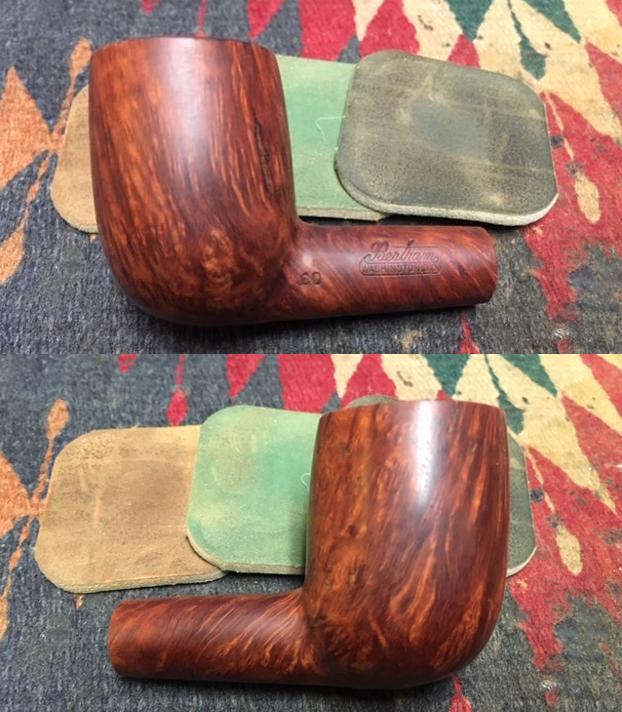
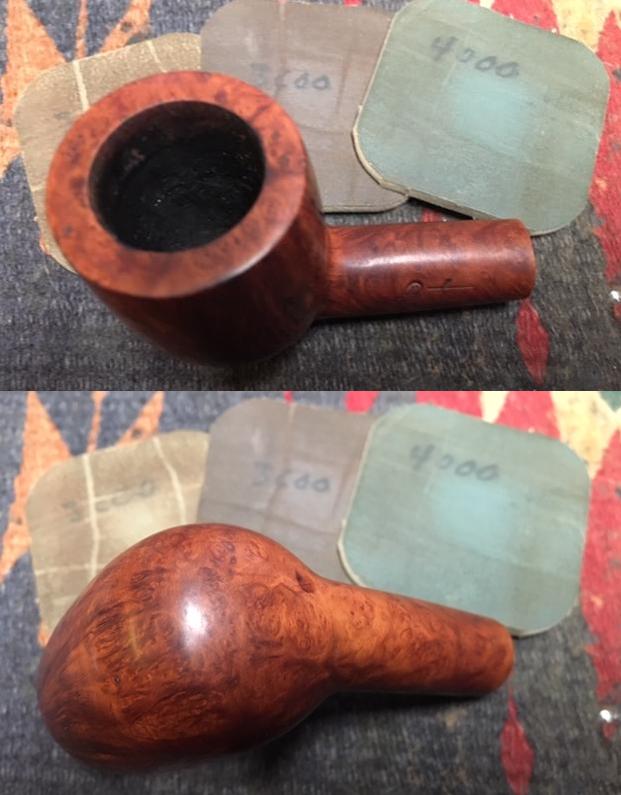
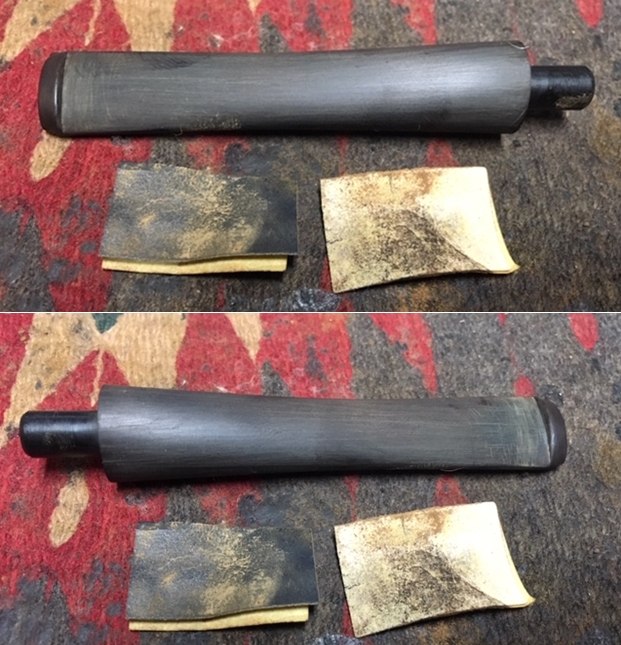
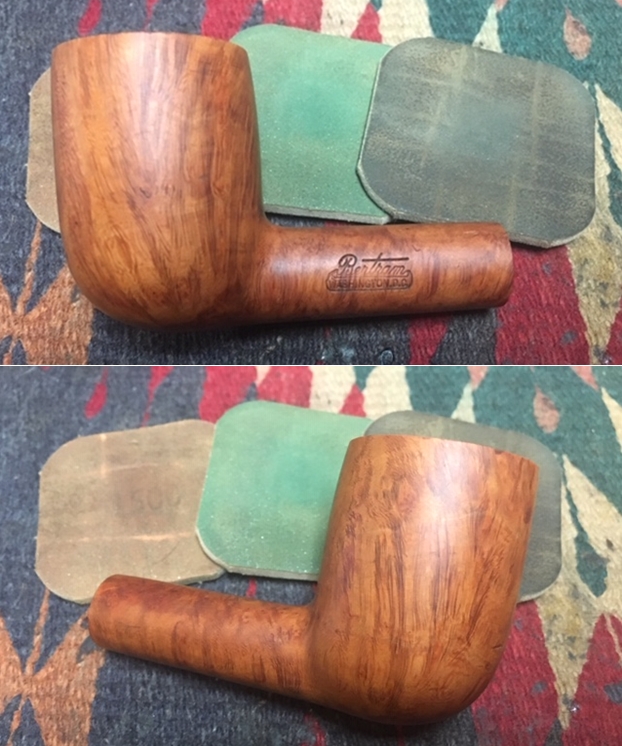
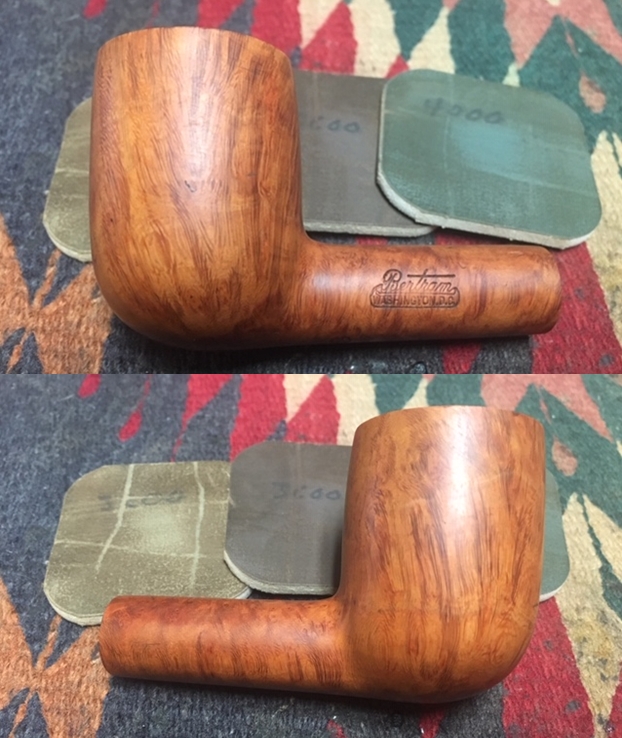
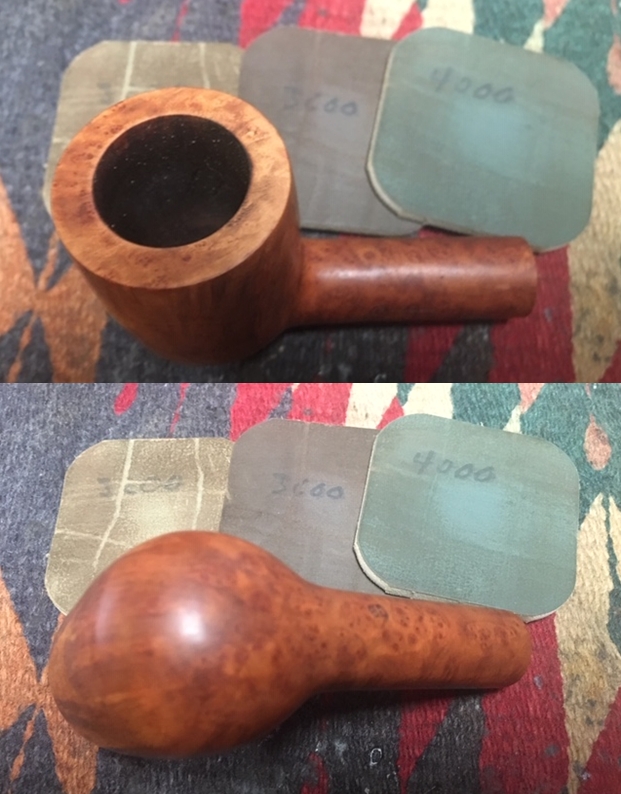
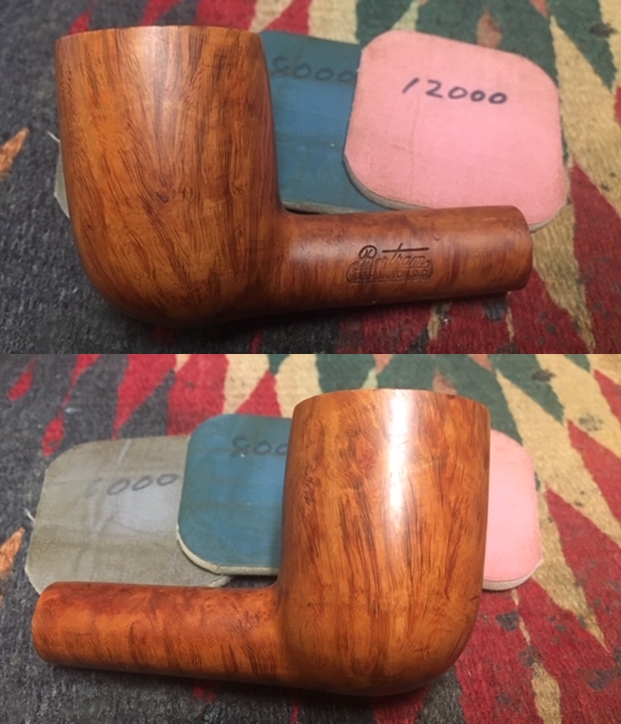
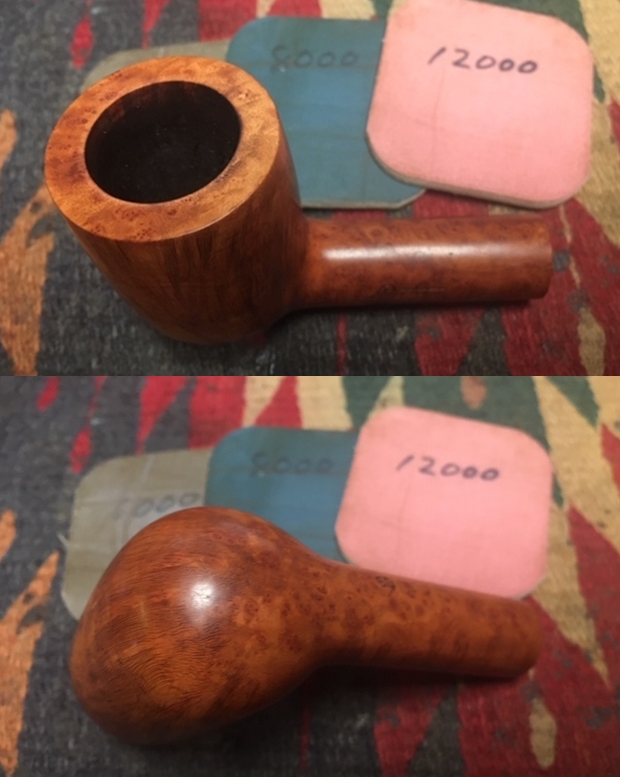
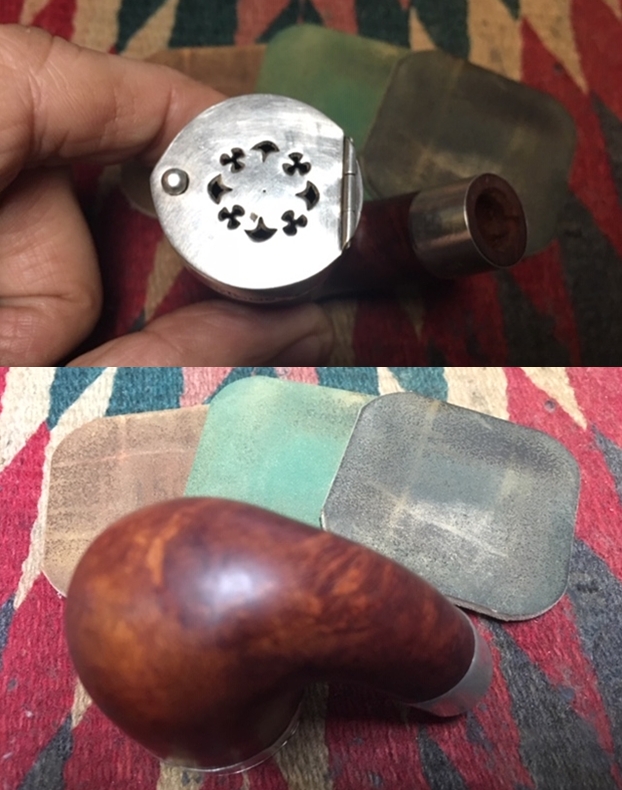
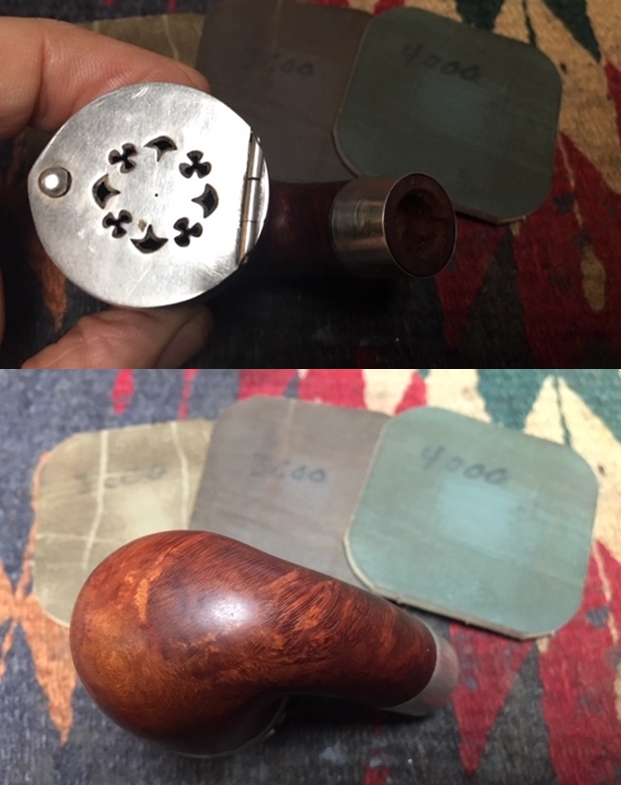
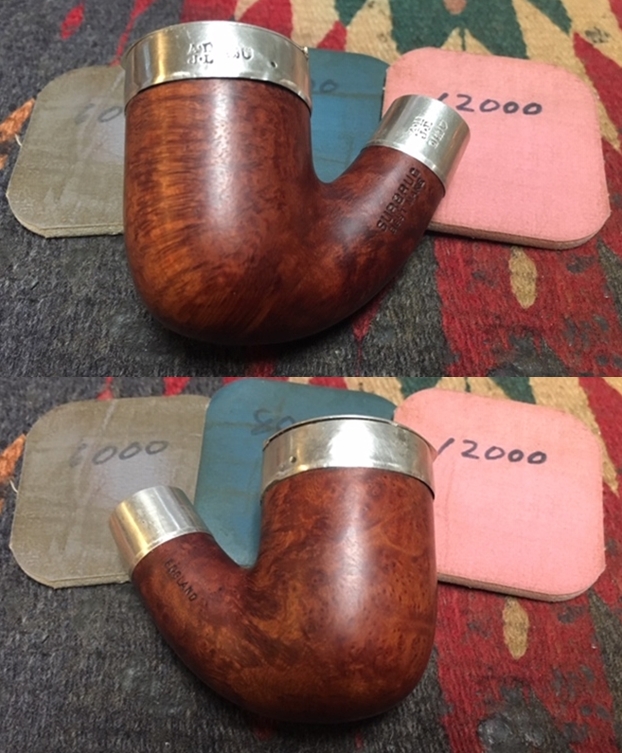
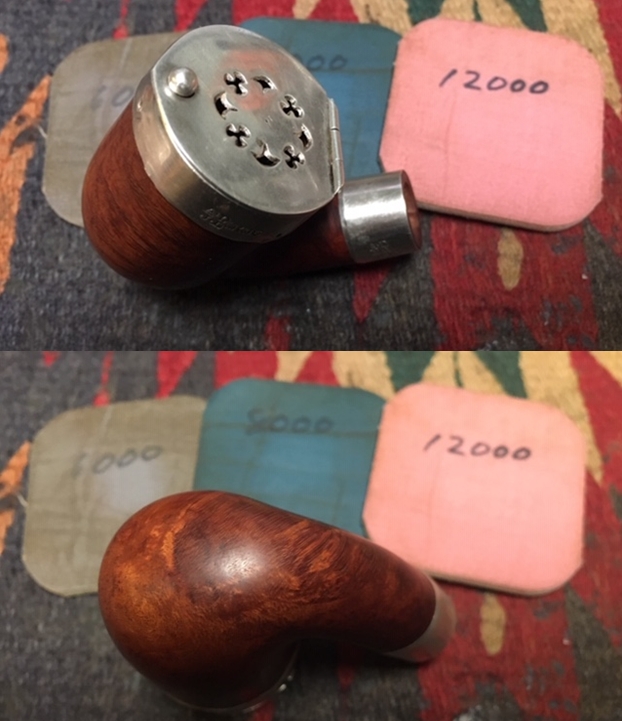
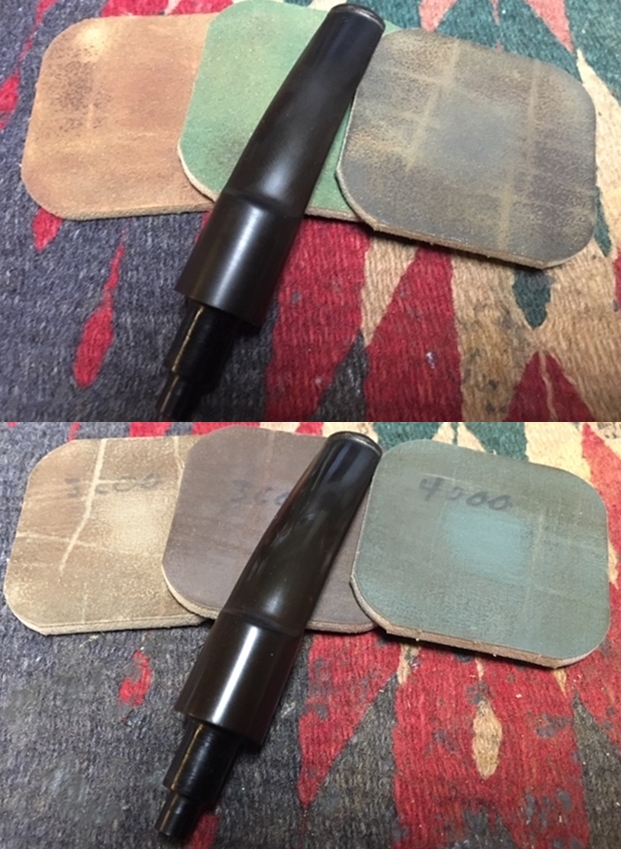
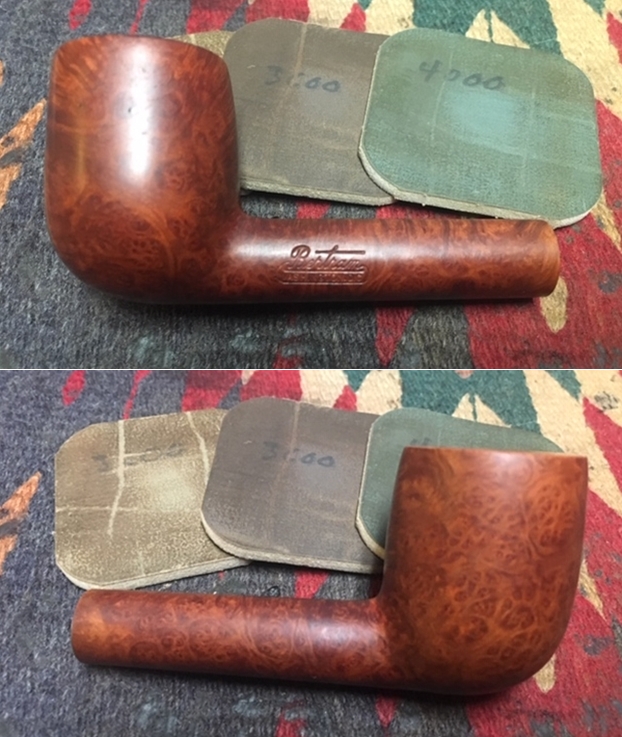
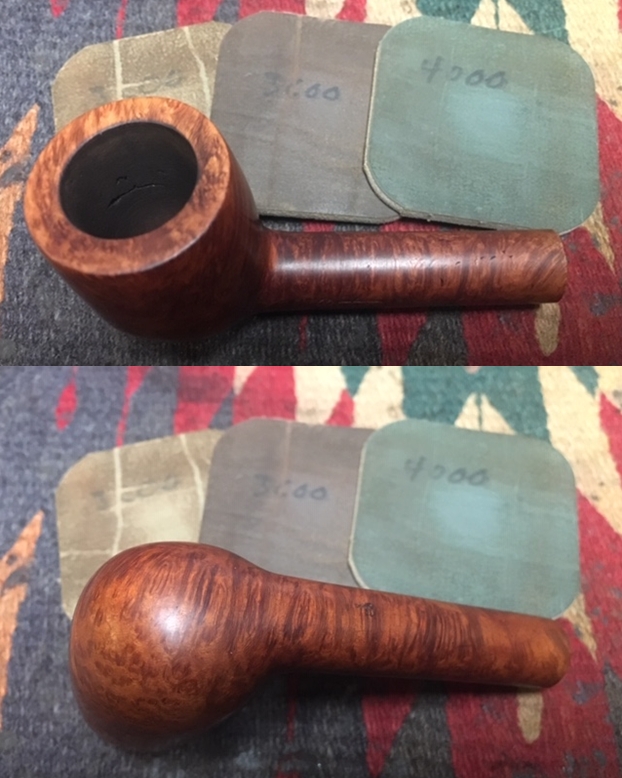
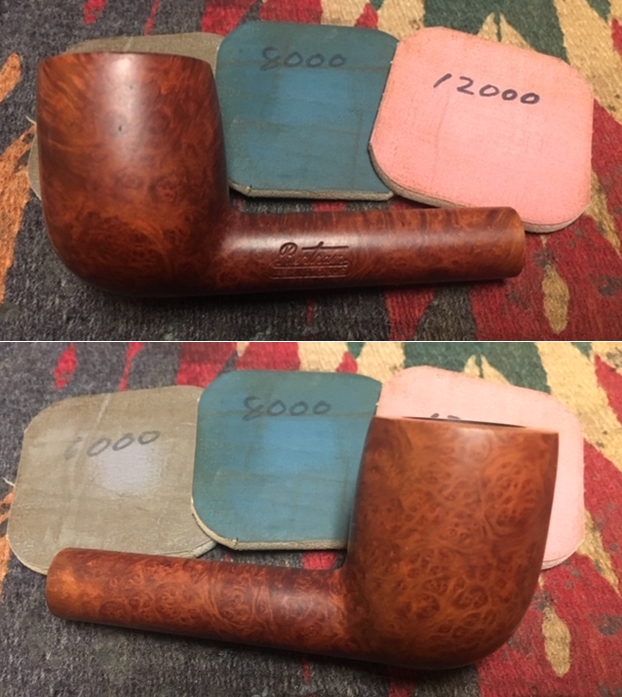
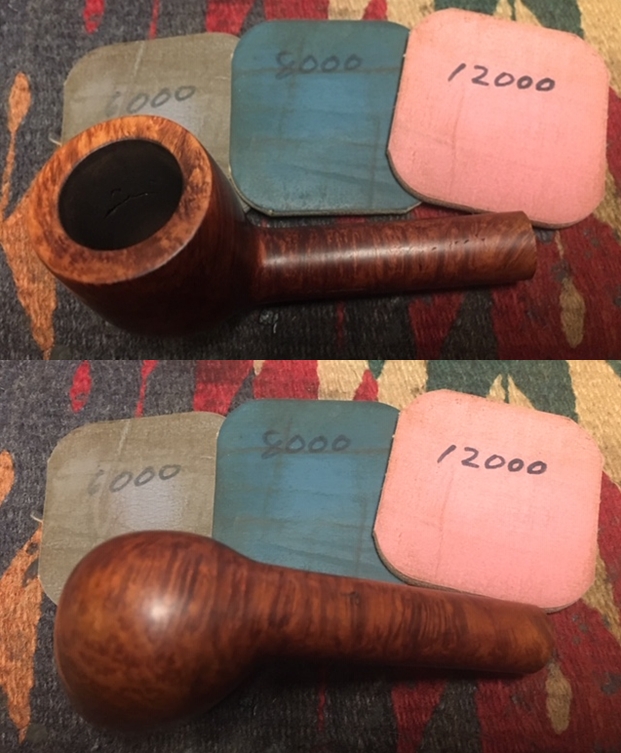
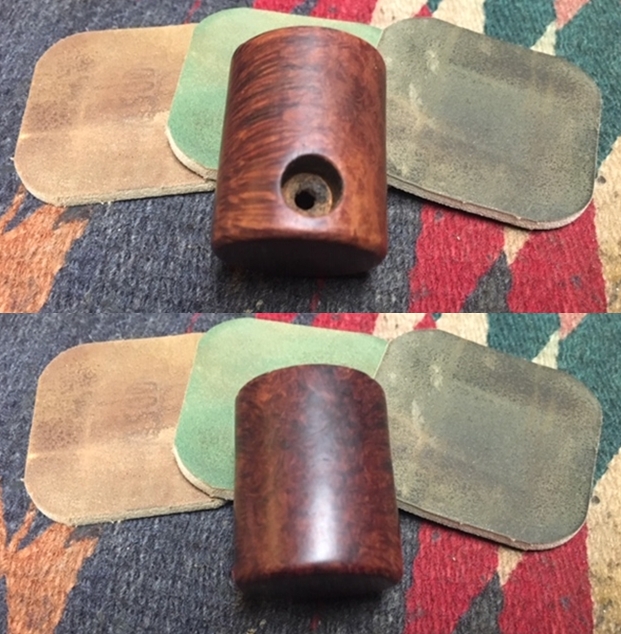
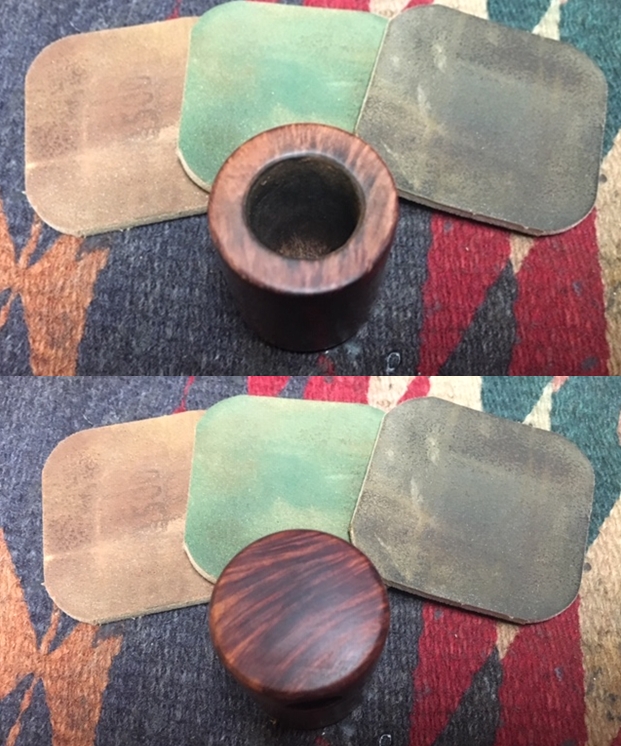
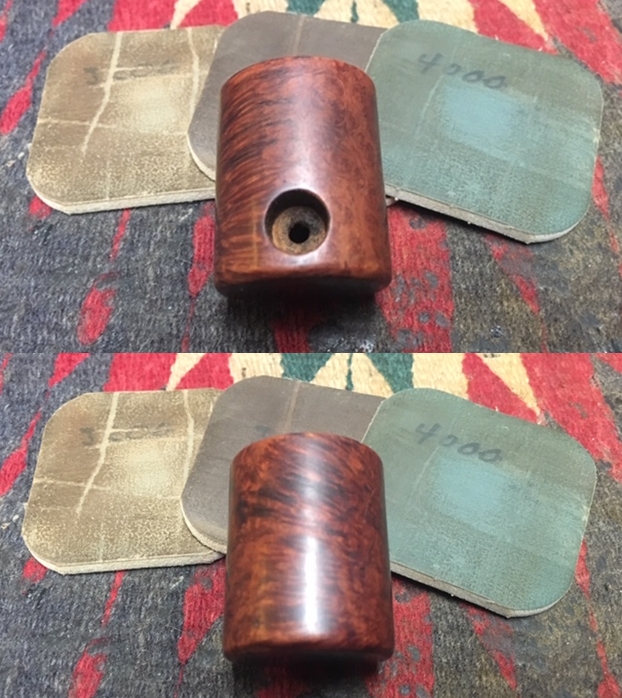
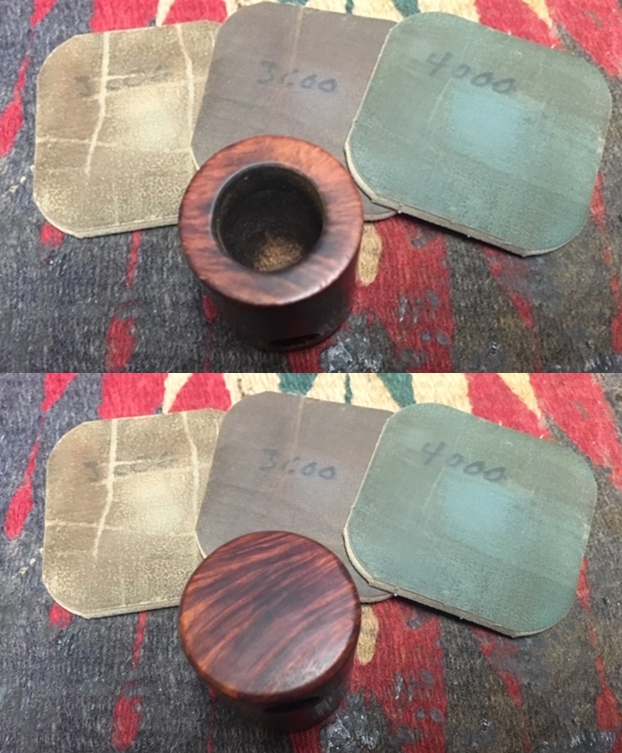
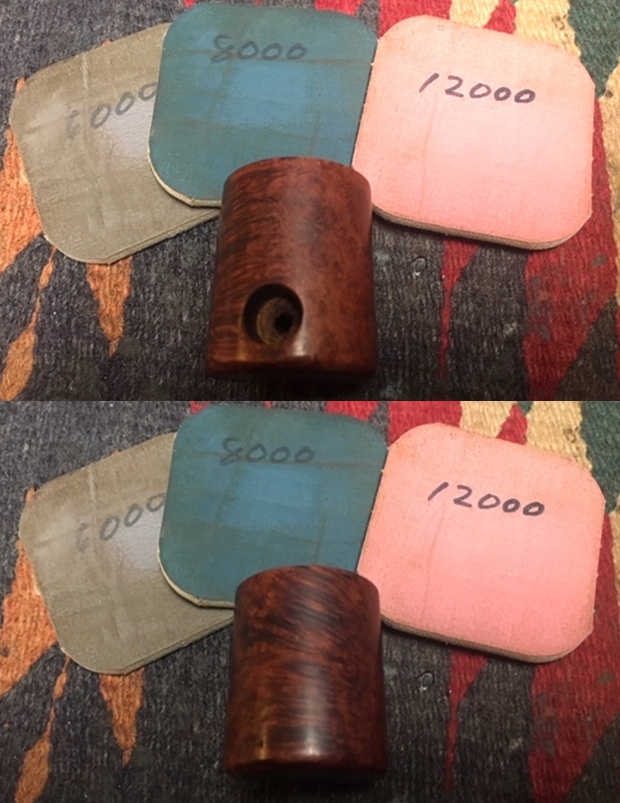
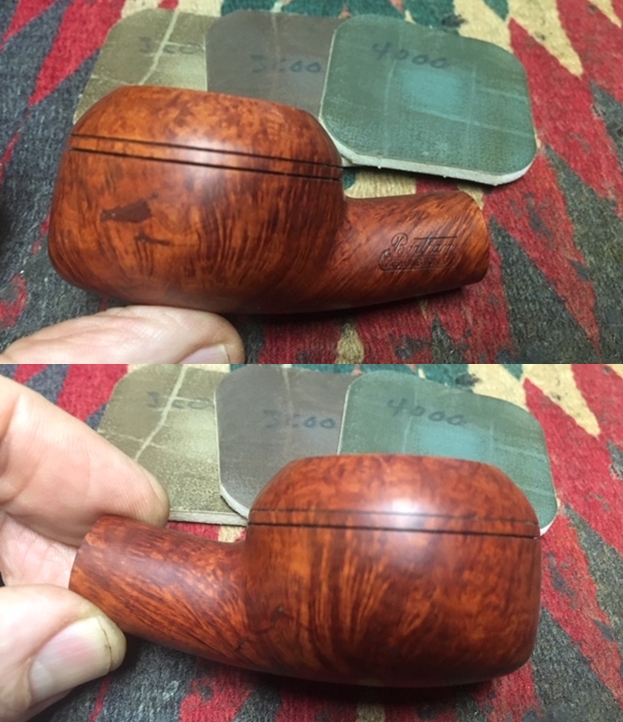
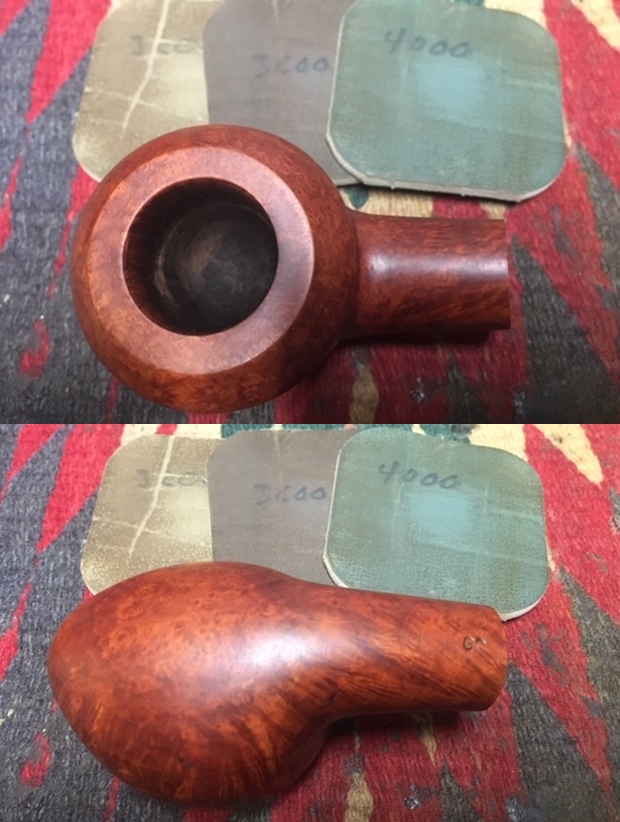
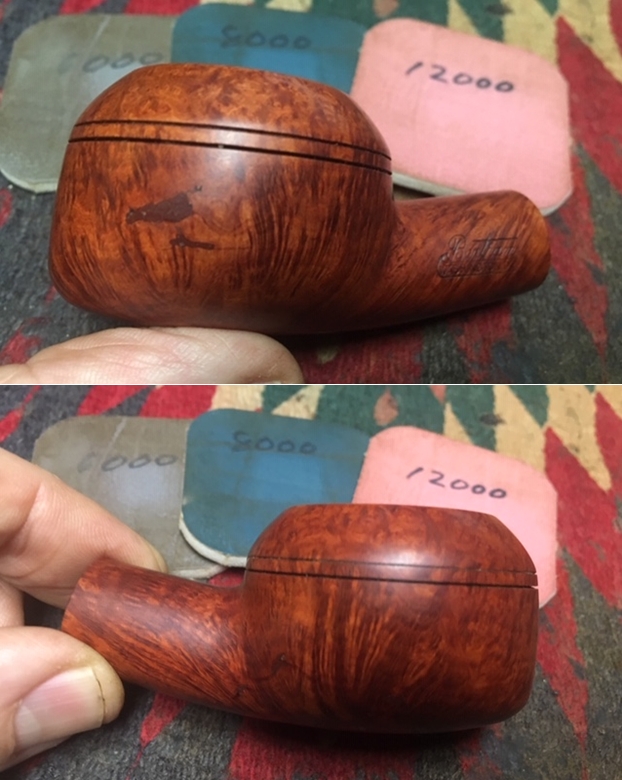
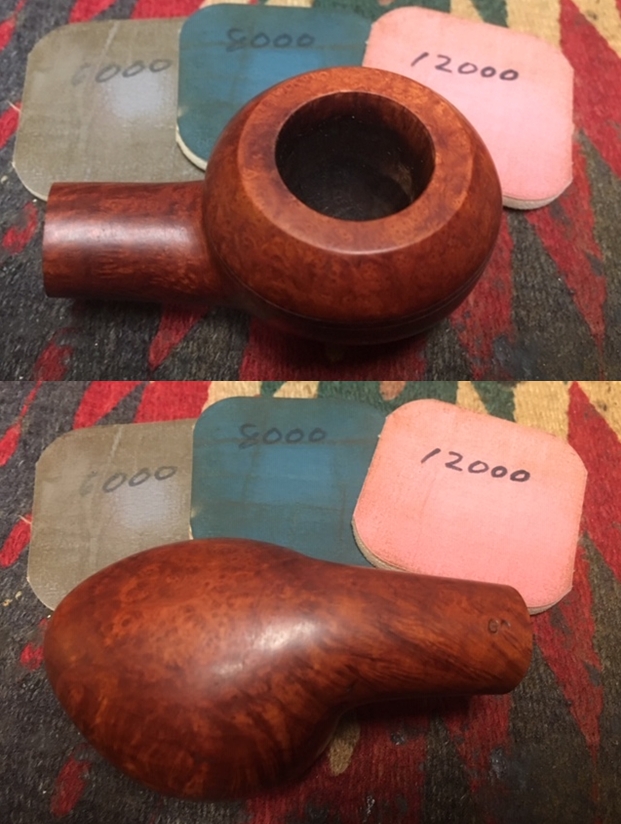
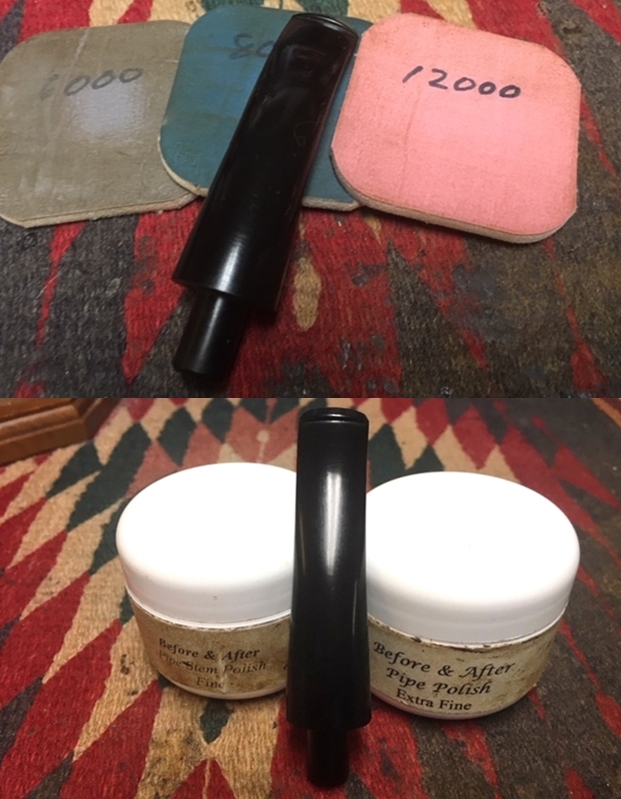
 Next, I take the Kaywoodie to the sink to wet sand with micromesh pads 1500 to 2400 grade pads. I follow wet sanding by dry sanding with pads 3200 to 4000 and 6000 to 12000. I take a different angle picture with each set of 3 pads. For the last 6 pads I remove the protective masking tape which reveals the contrast of the finish as it was and as it is now.
 I will add a stain to the stummel which will mask the difference between the dark nomenclature residue of the former hue and the rest of the stummel. To reduce this contrast, I try rubbing the darkened areas with a cotton pad wetted with acetone. This works somewhat, but there’s still a contrast, but toned down some.
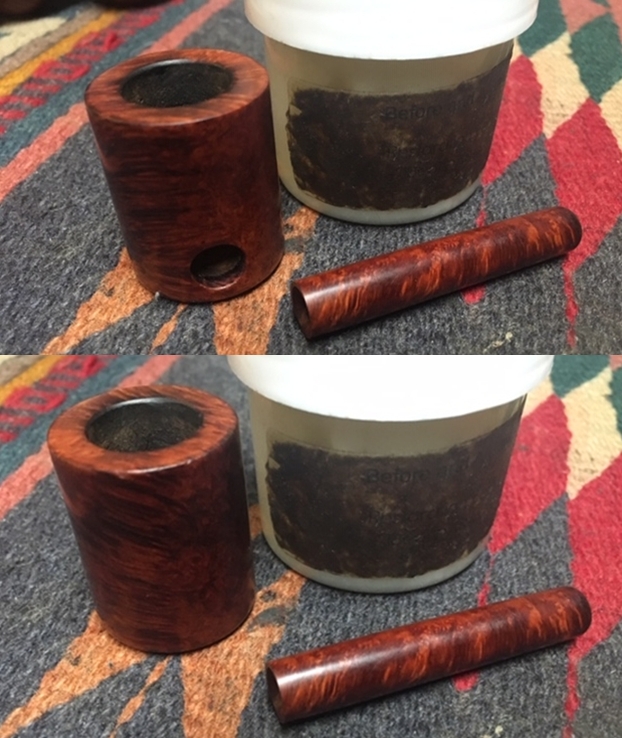
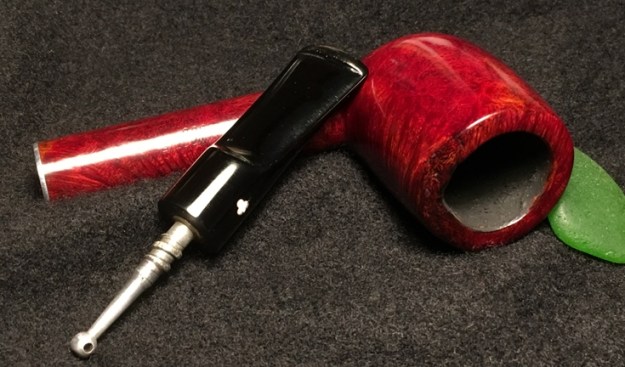
 The cotton pad in the picture above gives a good indication of the reddish hue of the original stain which is consistent with other examples that I’ve found on line of the “500” series. Pipephil’s information on the Kaywoodie “500” provides a few pictured examples. Here is one that shows the color used for this line of Kaywoodie pipes. I’ll aim to match it. My approach will be to first stain the stummel using a dark brown stain. I’ll then apply an overcoat of Fiebing’s Oxblood over this. I start with the dark brown first to darken the grain which is evident in the pictures below.
 I assemble my desktop staining station and fit the stummel with bent pipe cleaners through the mortise to serve as a handle. I have Fiebing’s Dark Brown Leather Dye in a shot glass with another bent over pipe cleaner ready to serve as an applicator. I wipe the stummel with a cotton cloth wetted with isopropyl 95% to clean it. I then warm the stummel with a hot air gun to heat the briar to expand the grain making it more receptive to the dye. I then use the pipe cleaner to apply the Dark Brown dye to the stummel and as I paint different sections of the stummel, I flame the dye by igniting it with a lit candle. As an aniline dye, the alcohol combusts, and it flames out leaving the dye pigment set in the grain. After I apply the dye thoroughly, I set it aside for a few hours to rest before the next step of the process.

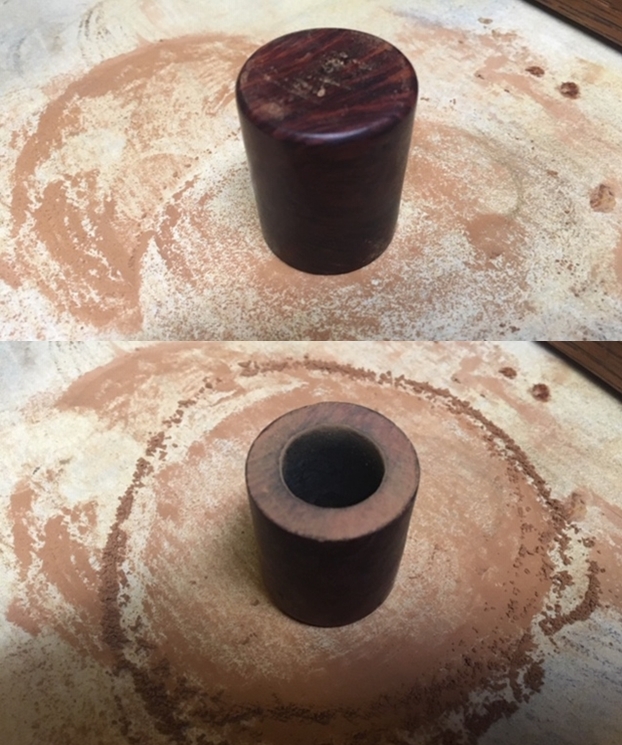
 After a few hours, I mount the Dremel with a felt cloth buffing wheel, speed set at the lowest possible to avoid too much heat. I then apply Tripoli compound to the stummel to remove the fired shell on the stummel. It takes some time to methodically move through the process of ‘plowing’ the crust then following with Tripoli. With my wife’s assistance, a picture of this is shown. When completed, I change the felt buffing wheel to a cotton cloth buffing wheel and again apply Tripoli compound to the entire stummel. This time it is much faster and the felt wheel allows me to reach into the elbow of the shank and bowl which was not possible with the harder felt wheel. After I complete the cotton cloth wheel cycle of Tripoli, I then buff the stummel with a felt cloth to remove the compound dust.
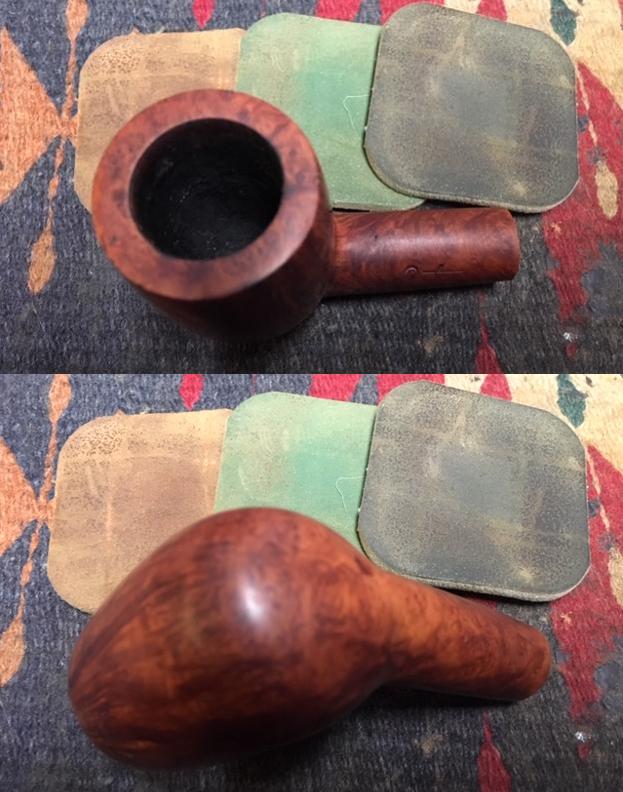
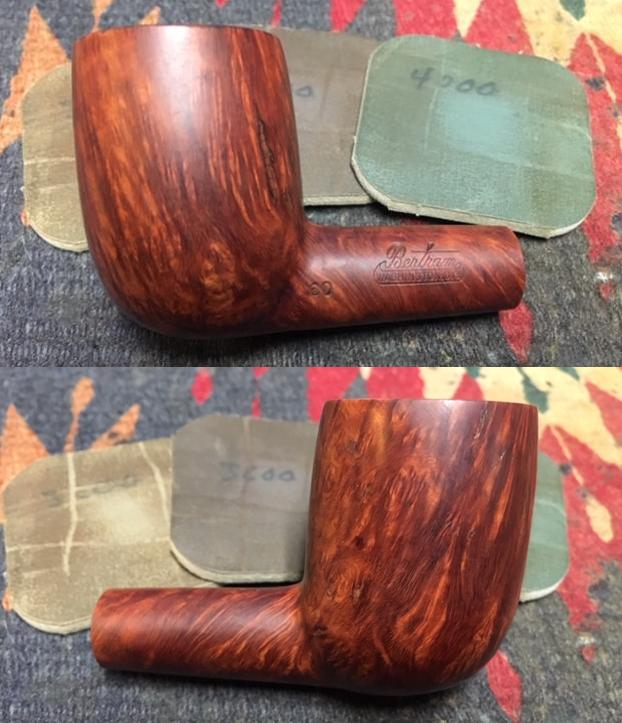
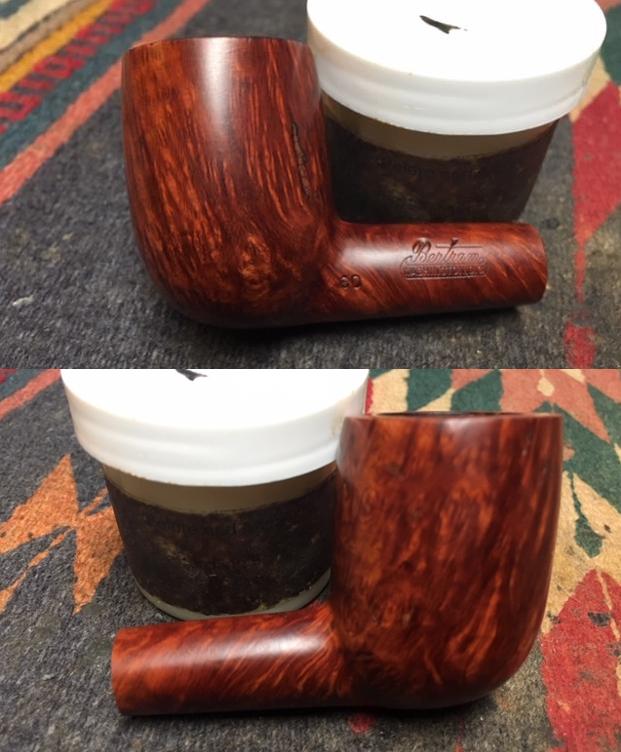
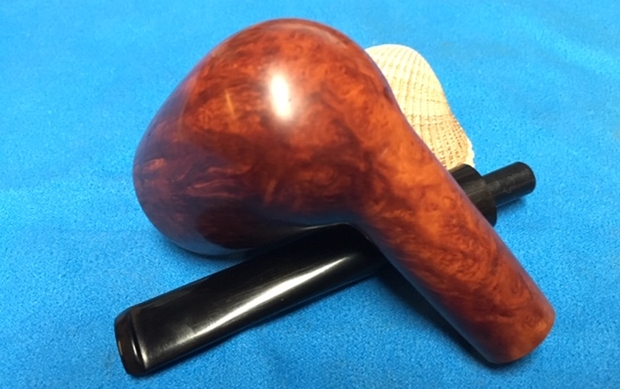
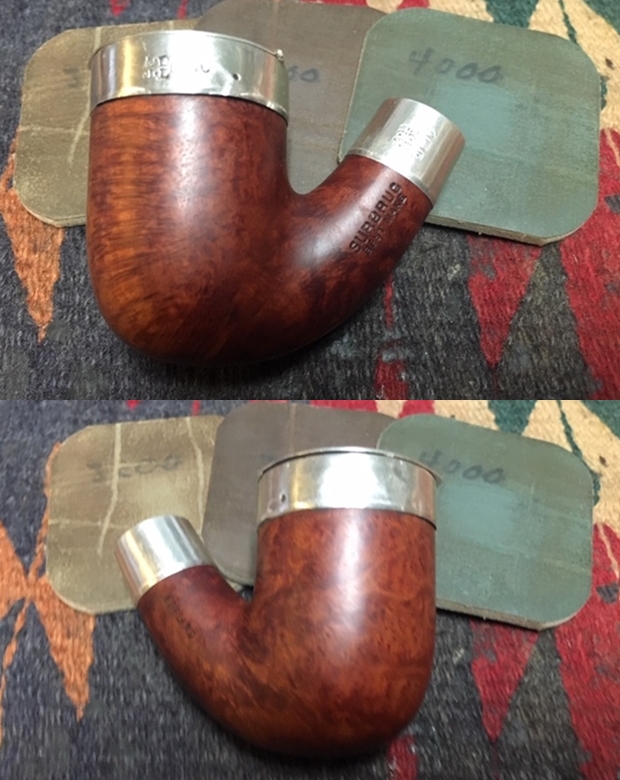
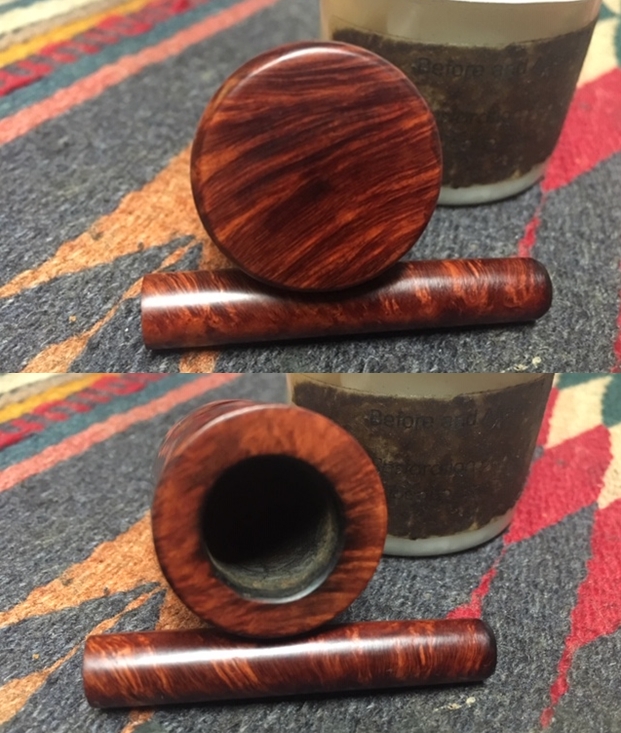
 The first phase results in the darkened grains. The grain is beautiful – the next pictures show the side of the bowl with beautifully swirled bird’s eye.
 The first phase results in the darkened grains. The grain is beautiful – the next pictures show the side of the bowl with beautifully swirled bird’s eye.
 I repeat the same process for the next phase of applying Fiebing’s Oxblood Leather Dye over the dark brown stained stummel – warming the stummel, applying and flaming the aniline Oxblood dye.

 I put the newly stained stummel aside to rest overnight.
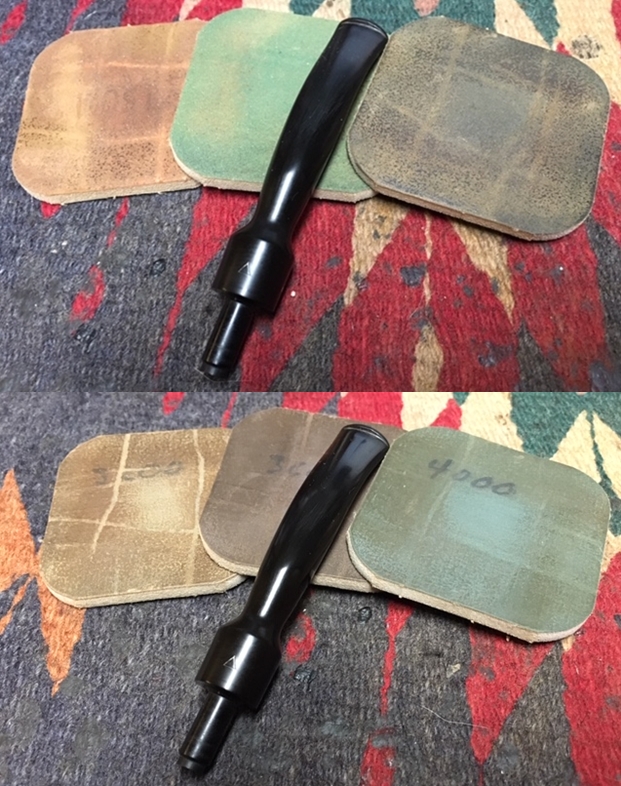
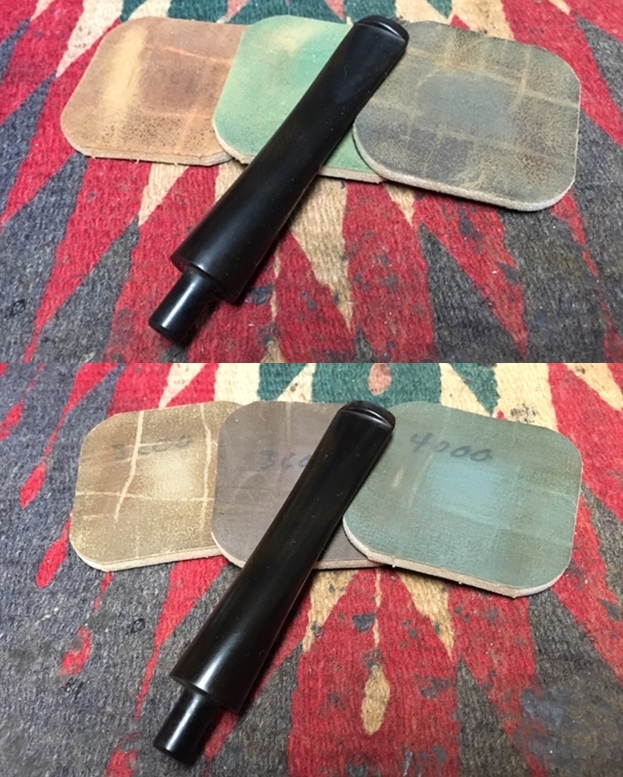
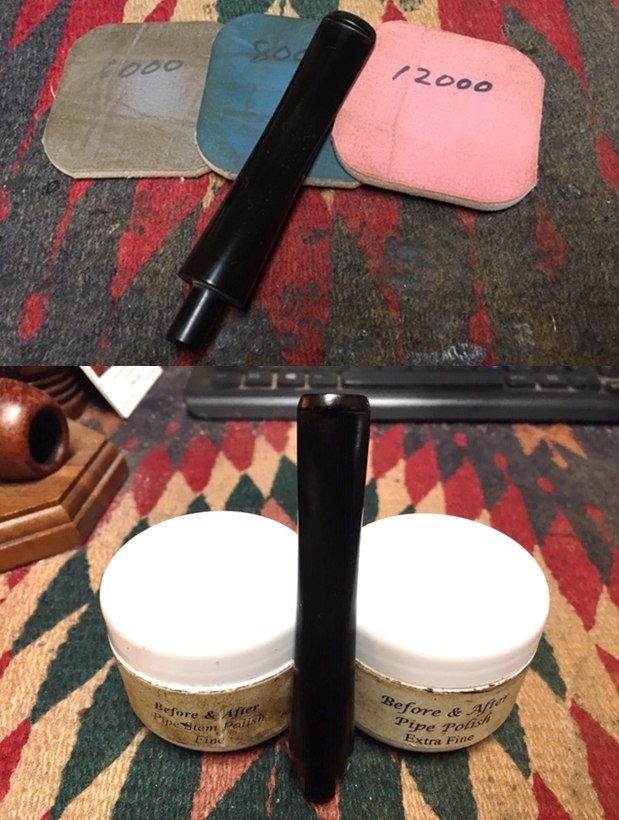
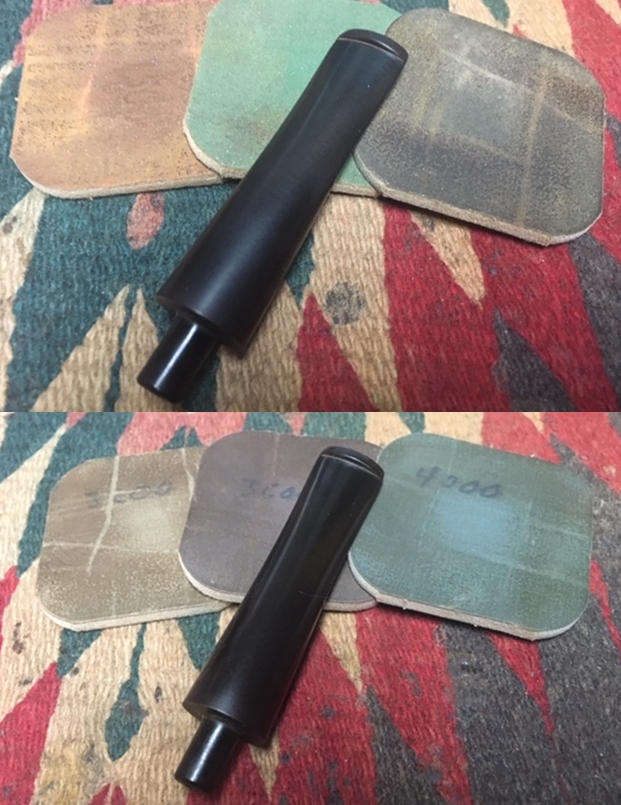
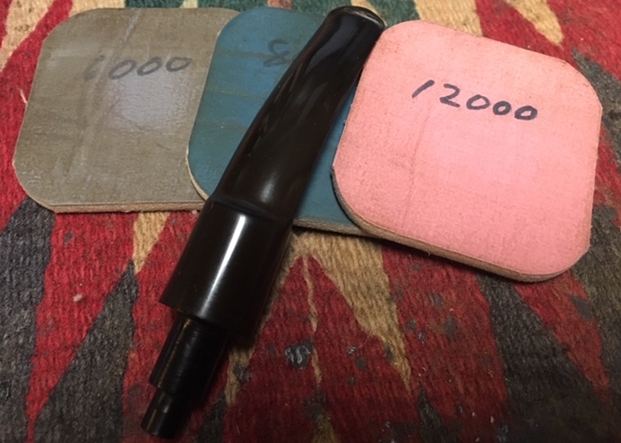
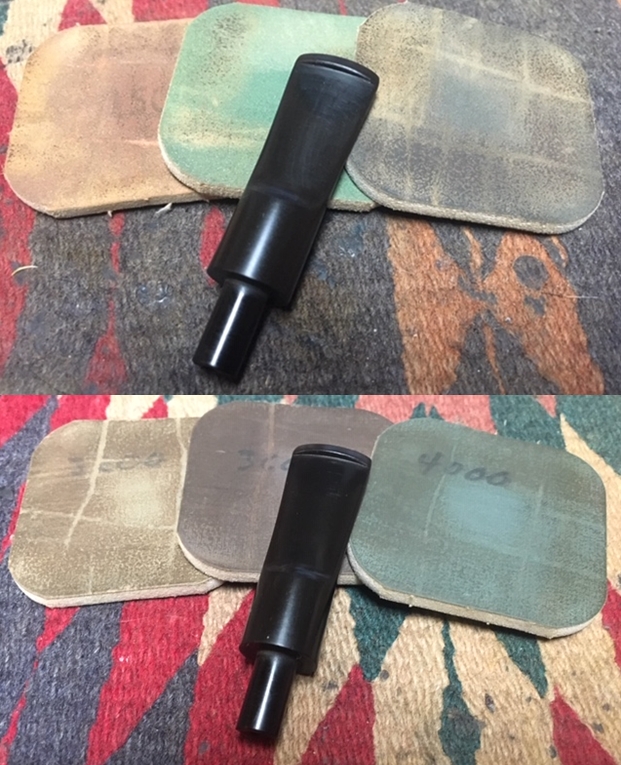
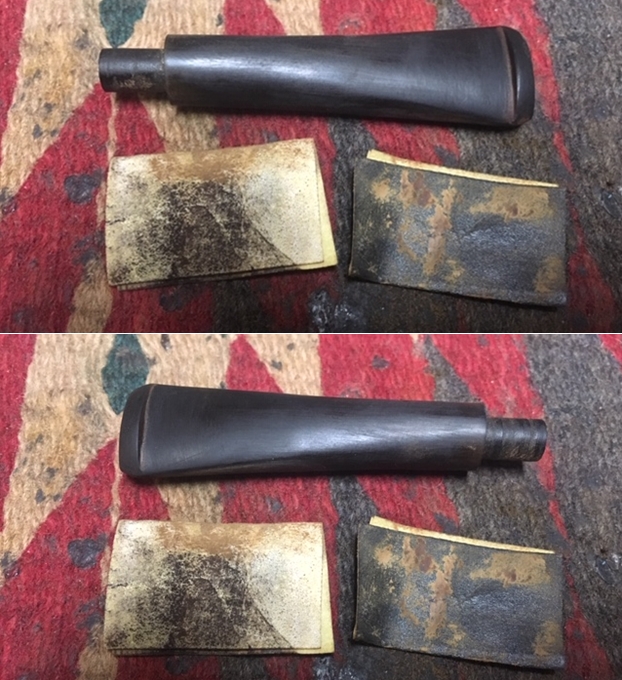
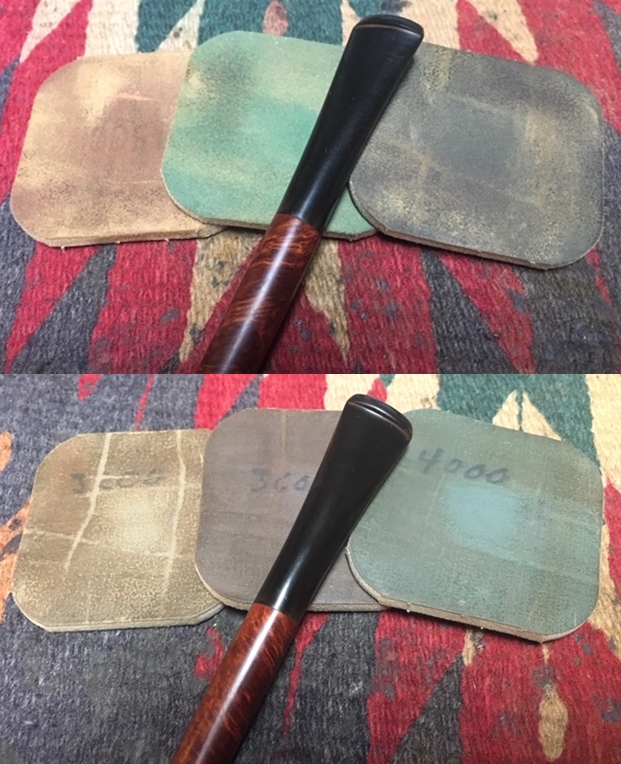
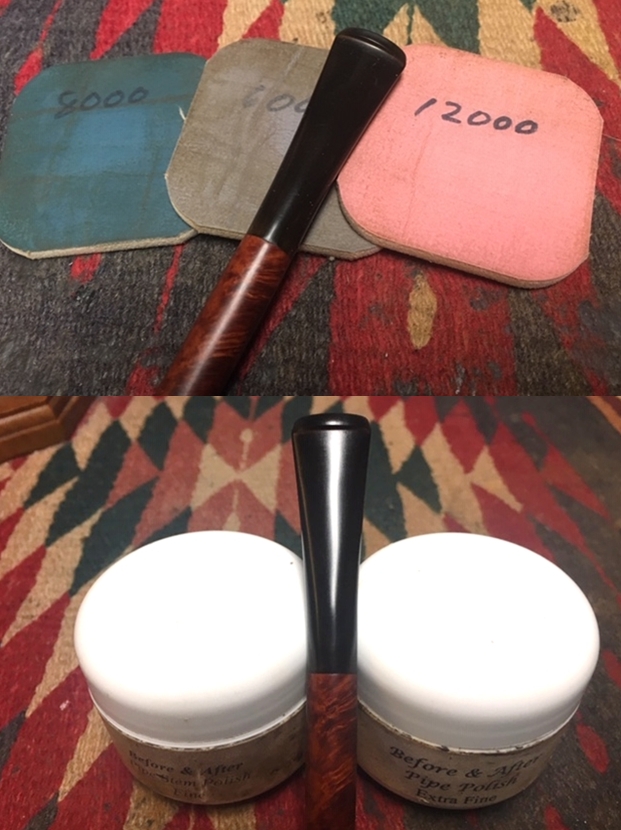
 Before I rest, I turn again to the Kaywoodie saddle stem waiting in the wings. I apply the entire regimen of 9 micromesh pads beginning with wet sanding using pads 1500 to 2400 followed by dry sanding with pads 3200 to 4000 and 6000 to 12000. Between each set of three pads I apply a coat of Obsidian Oil to enrich the vulcanite. This stem has come a long way and is looking great.
 Next, after a few days of a business-related trip, I return to Sofia and to the stummel that had been dyed first with a dark brown undercoat then with an Oxblood overcoat. I remove the Fiebing’s Oxblood Leather Dye fire crusted shell using a cotton cloth buffing wheel on the Dremel applying Tripoli compound. When completed, I use a cotton pad wetted with alcohol to lightly wipe the stummel to blend the dyed surface. I then change to another cotton cloth buffing wheel on the Dremel, remaining at 40% of full power and apply Blue Diamond to both stummel and stem. Following this, I wipe the surface of the stummel and stem with a felt rag to remove the compound dust.
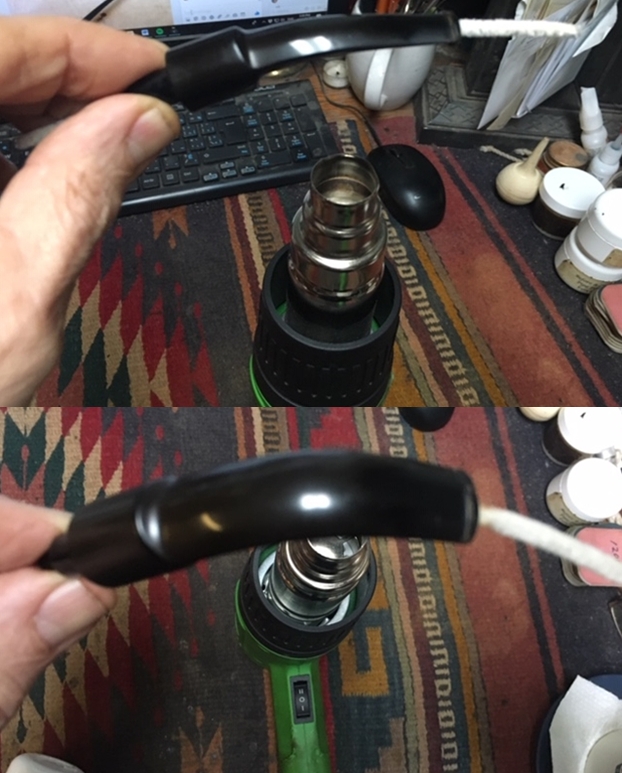
 Before moving to applying carnauba wax, I reunite the stem and stummel and address a few smaller projects. First, I noted before that the stem was overclocked by a few degrees. This happens through time. To realign the stem to the correct orientation, I heat the metal stinger until the heat loosens the grip of the metal stinger and while it is hot, I rejoin the stem and turn it clockwise. When it tightens it puts the necessary torque on the heated stinger which loosens it and allows me to continue the clockwise turn. I turn it a full 360 degrees bringing it back around into proper orientation. This works well. I move on.
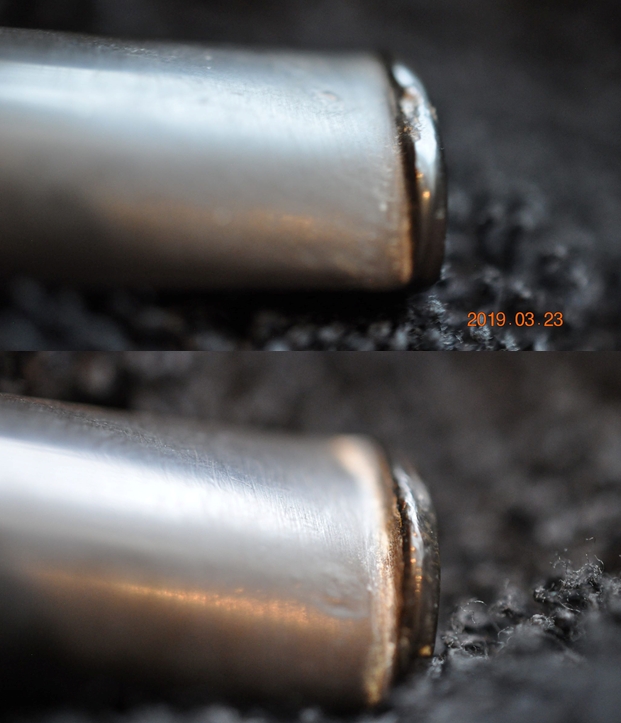
 Next, I do a quick job of polishing the metal shank facing using a piece of 000 steel wool. It did a great job.
 On last project before applying the wax. I rebuilt the chamber floor using J-B Weld. Now I apply a mixture of natural yogurt and activated charcoal to form a thickened mixture to apply to the chamber floor and wall to create a cake starter. After inserting a pipe cleaner in the airway to block the mixture, I then put a small about of Bulgarian natural yogurt in a dish and add activated charcoal and mix it. I continue to add charcoal and mix until it thickens and will not run. I then apply it to the chamber floor and wall using a dental spatula to apply and spread. It works well and I put the stummel aside for a time for the coating to cure.
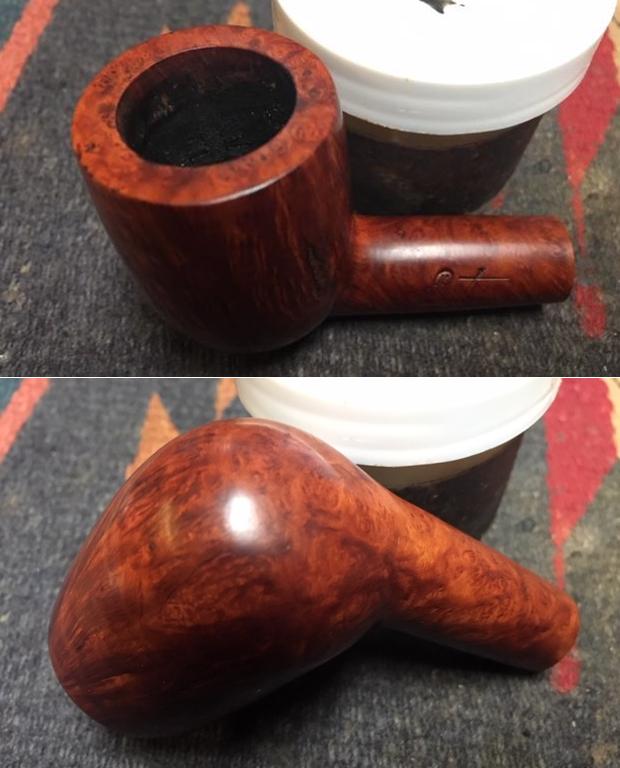
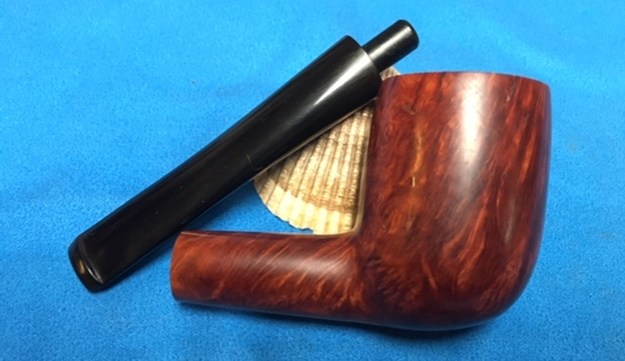
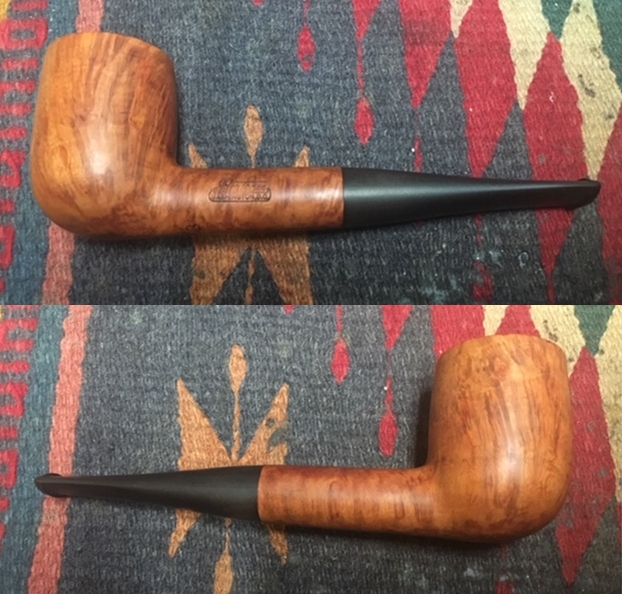
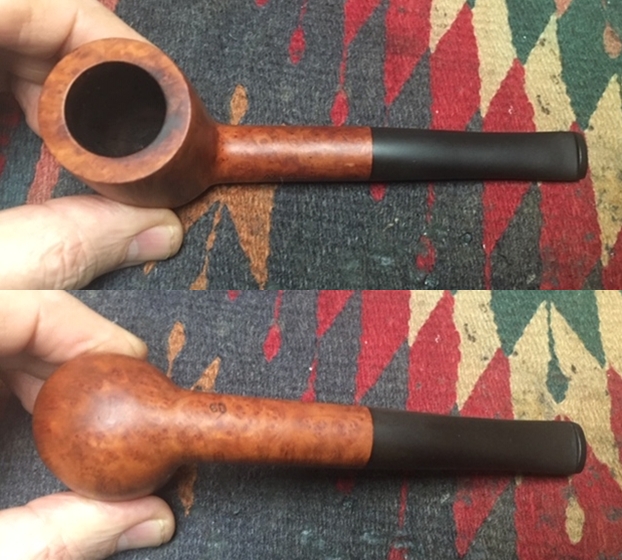
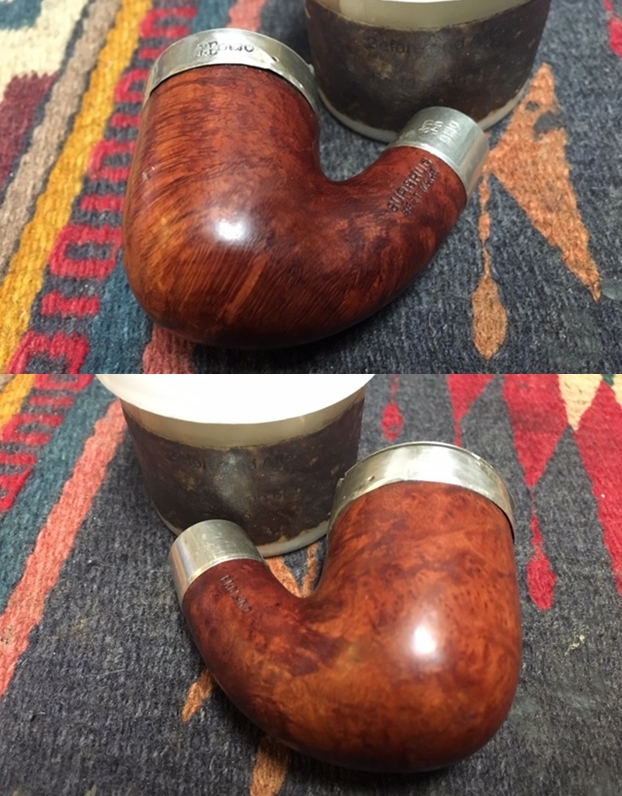
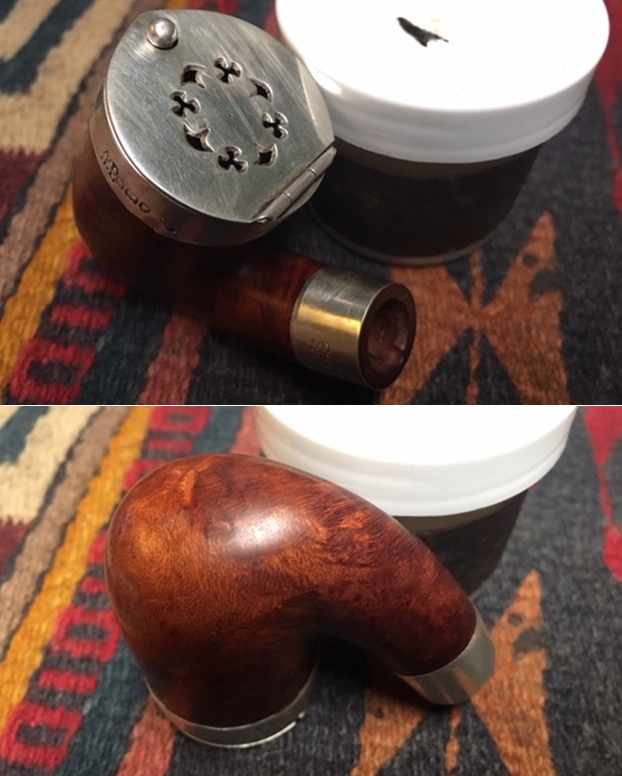
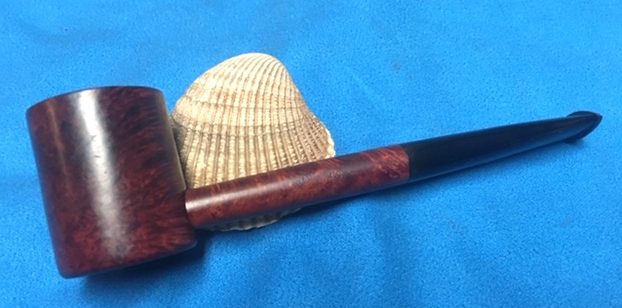
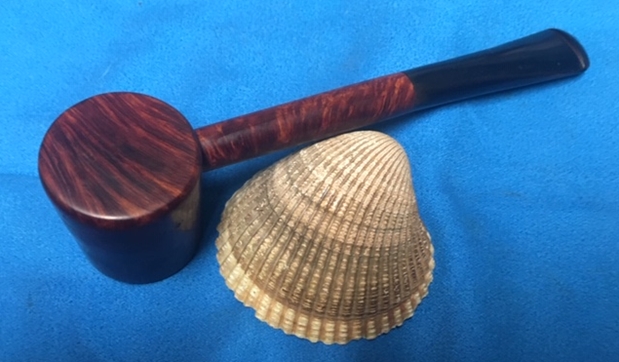
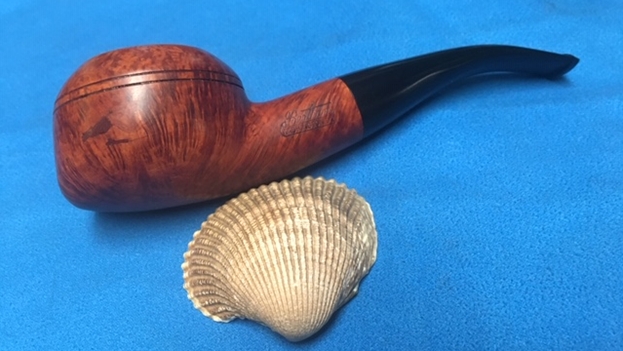
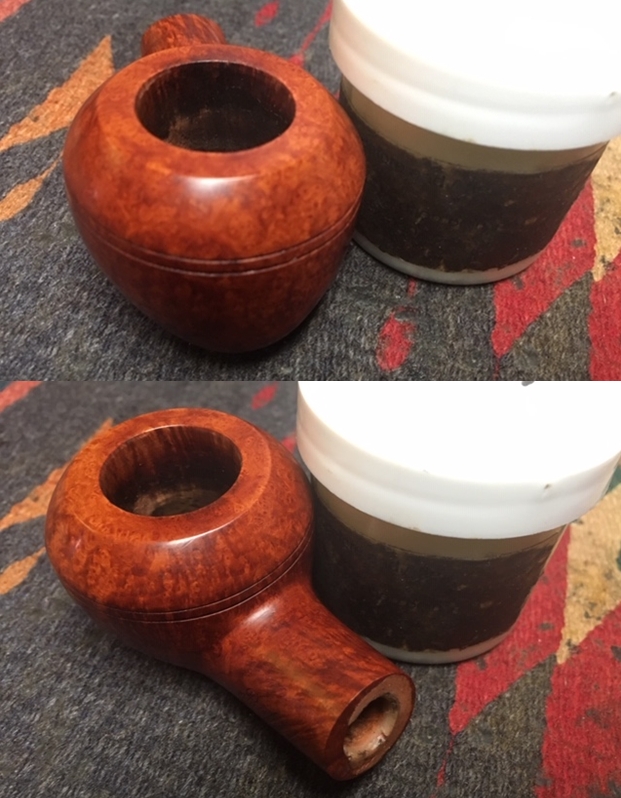
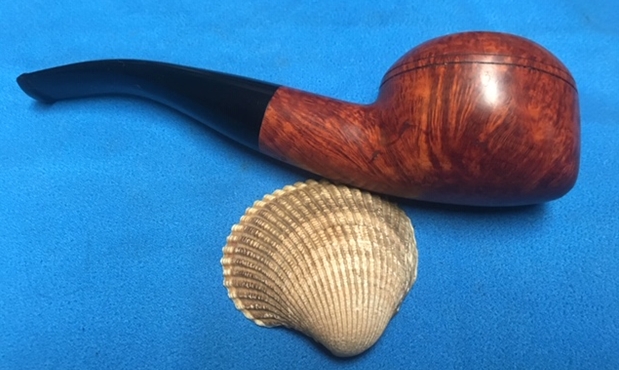
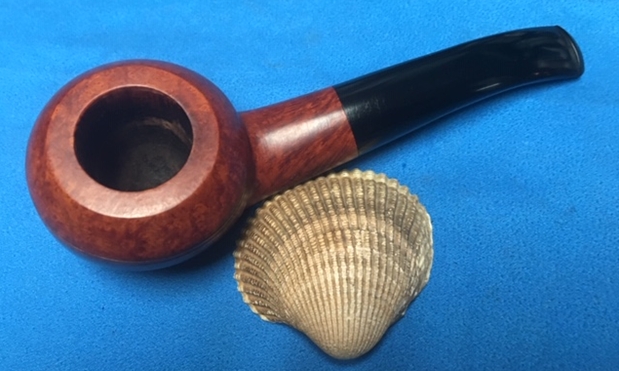
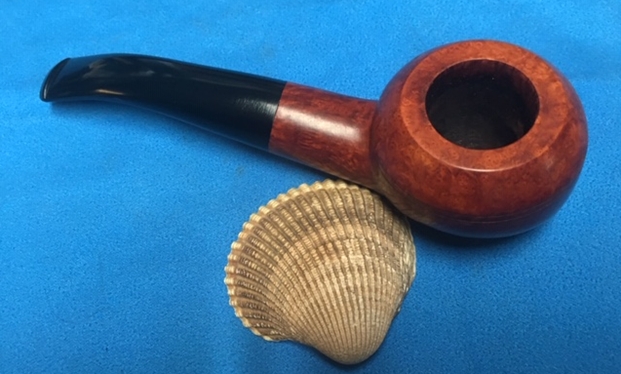
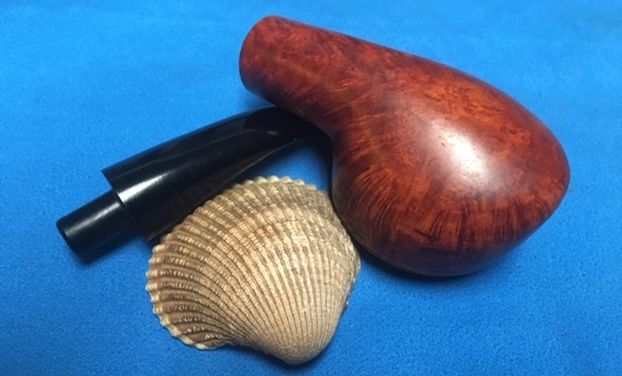
 In the home stretch, I mount another cotton cloth buffing wheel to the Dremel, maintaining the same speed, and apply carnauba wax to the stem and stummel. After applying a few coats, I then give the pipe a rigorous hand buffing using a microfiber cloth. This raises the shine even more.
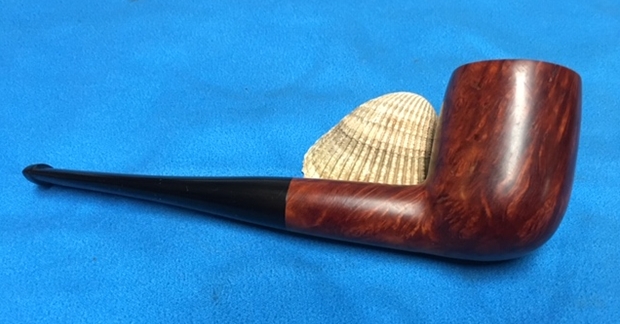
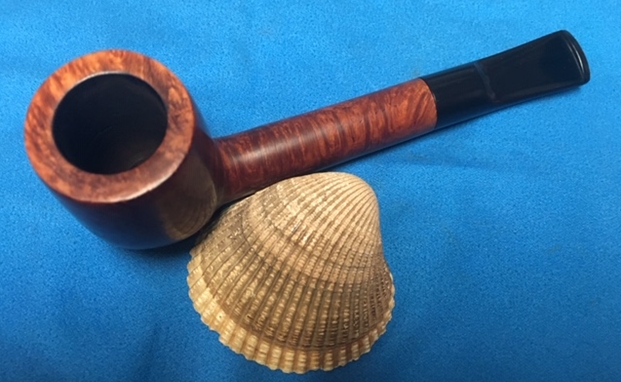
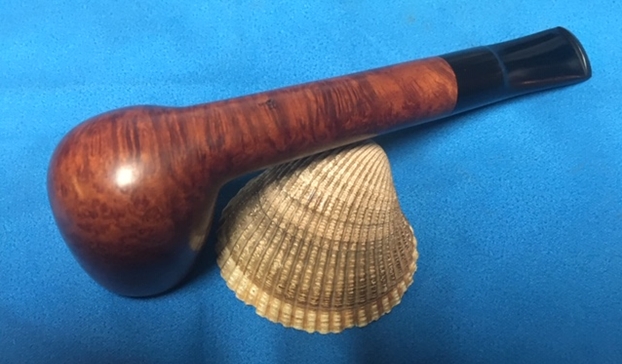
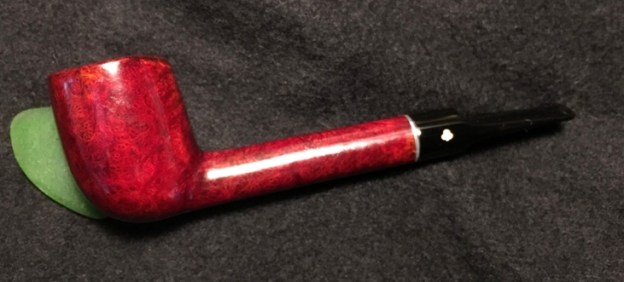
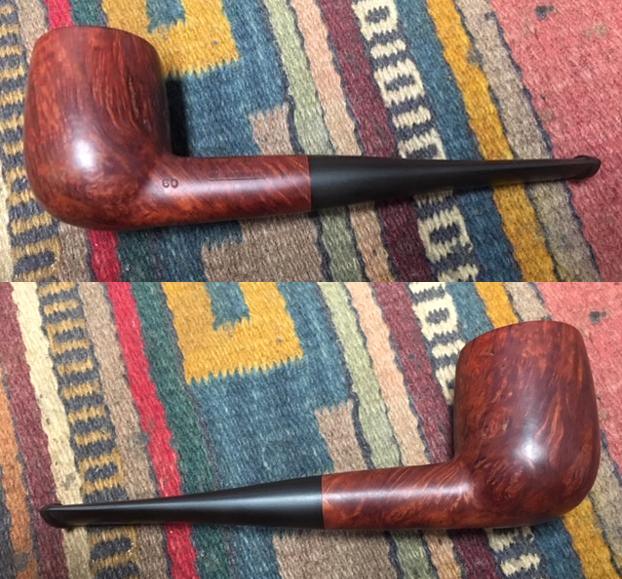
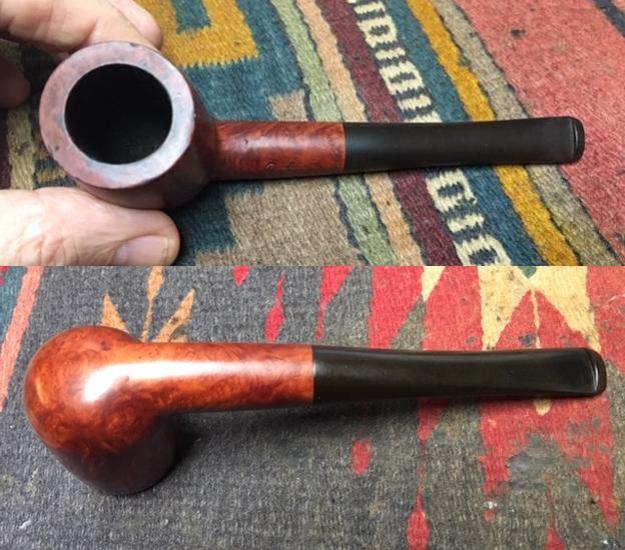
It was a privilege to restore Paw’s old Kaywoodie “500” Long Stem Billiard. I’m pleased with the stem button rebuild and catching the thinning chamber floor. I think the final stained hue captures well the historic Kaywoodie “500” theme that ranges from 1957 to 1967 – truly a vintage pipe. Best of all are the remnants of Paw’s stewardship of the Kaywoodie. Leaving the rim with latent evidences of Paw’s thumping and lighting, as he went through his own unique ritual with his Kaywoodie in hand, reflecting on life and family with his favorite blend stoked and ready to go. Joe’s desire to safeguard this heritage and restore this pipe for his father-in-law, benefits the Daughters of Bulgaria – women and girls who have been trafficked and sexually exploited. Thanks, Joe! And thanks for joining me (ThePipeSteward)!


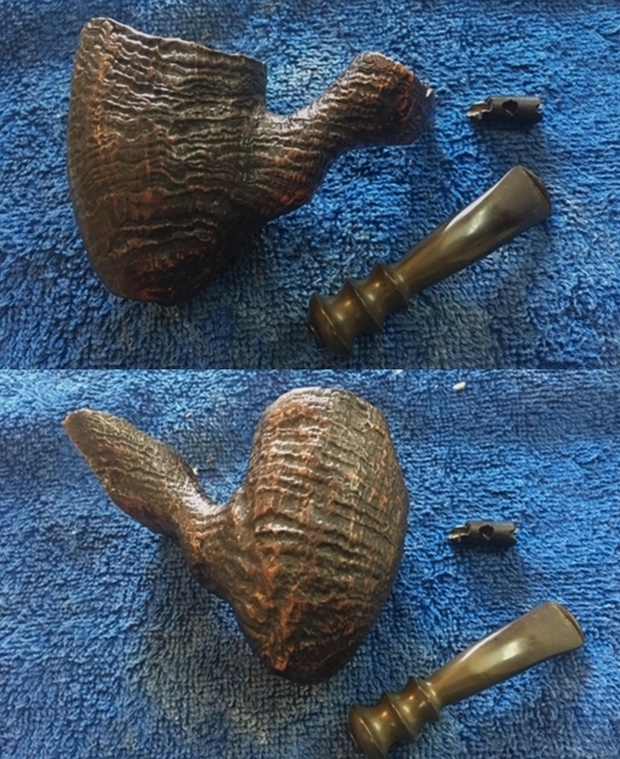
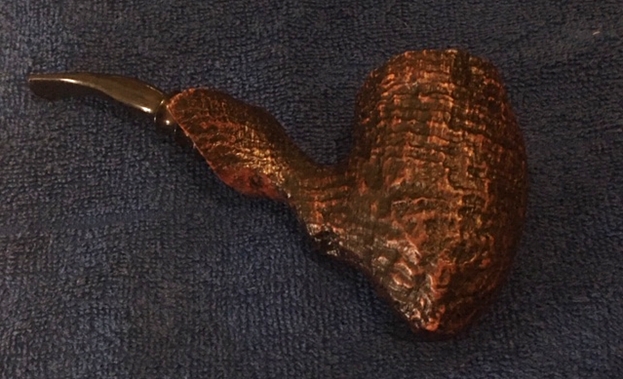
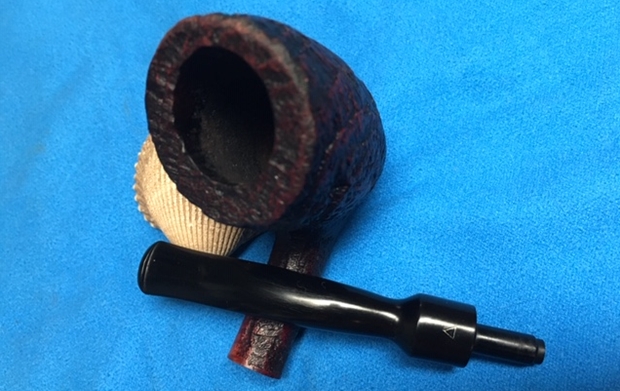
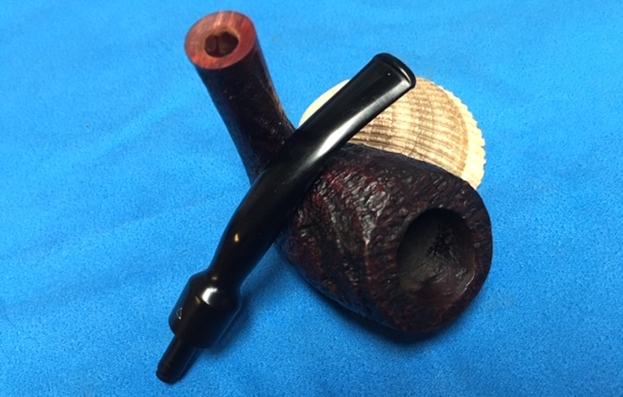
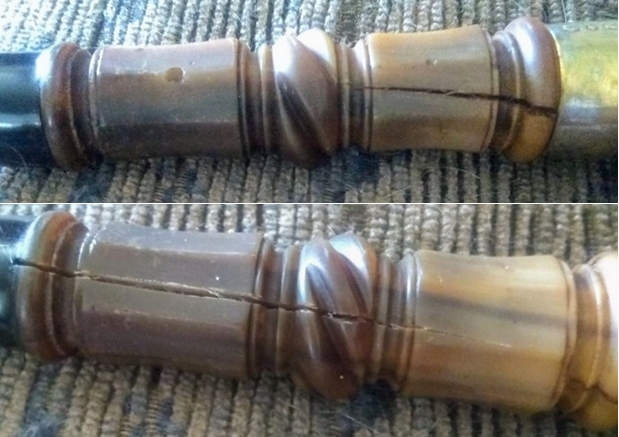
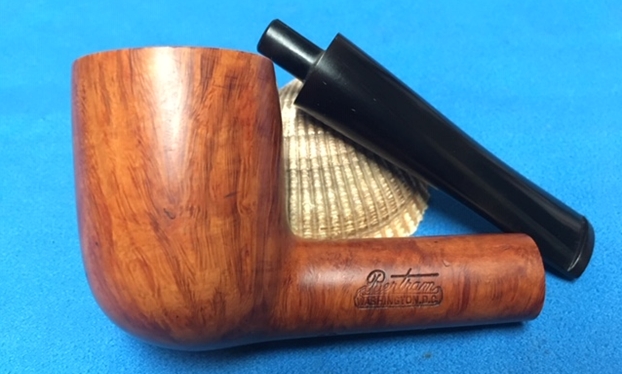
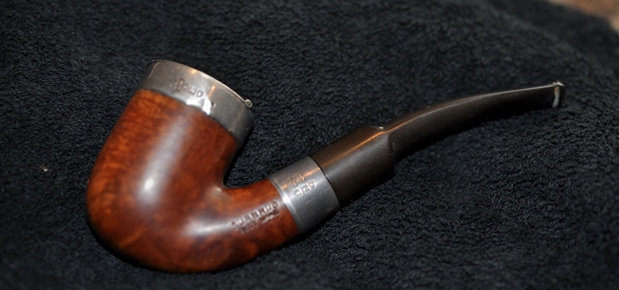
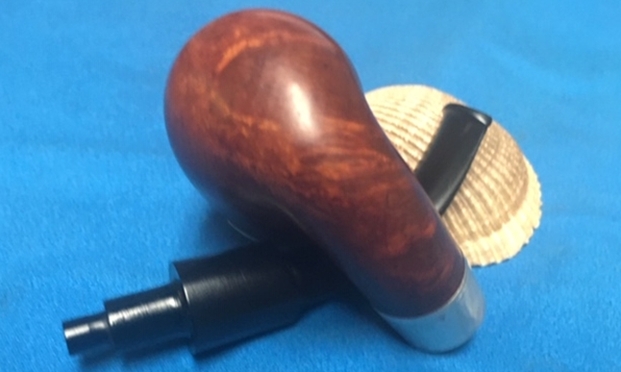
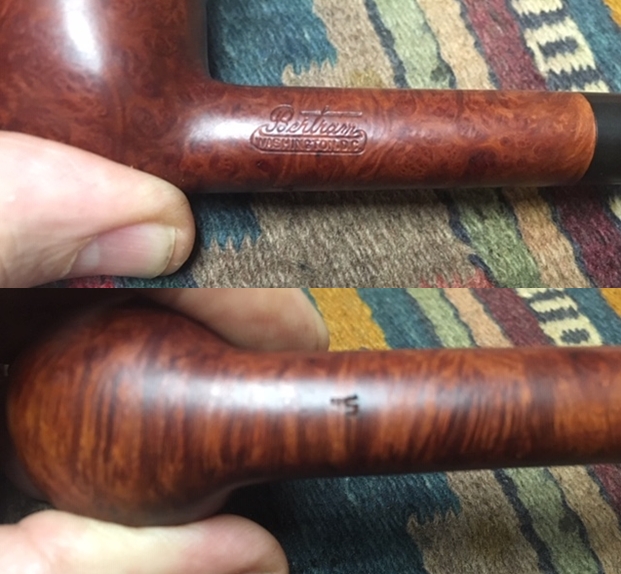
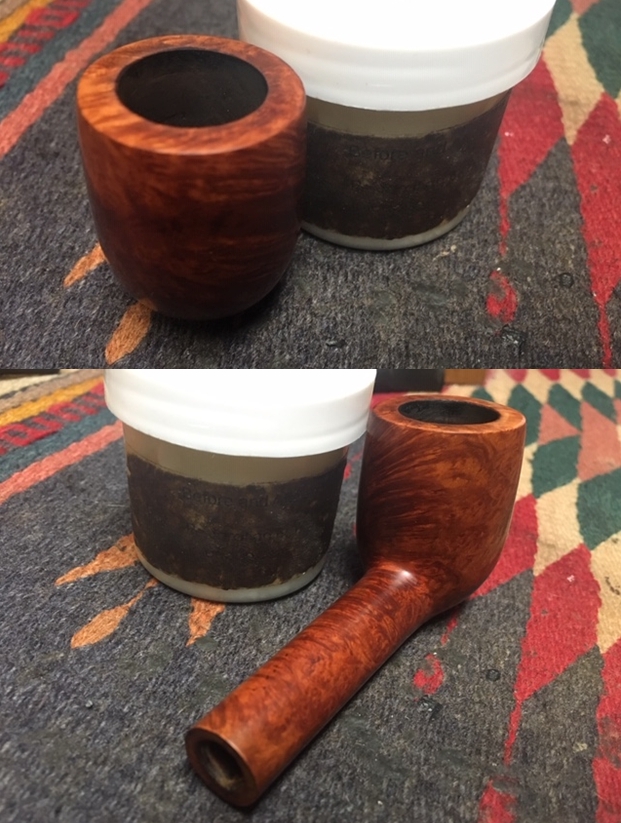
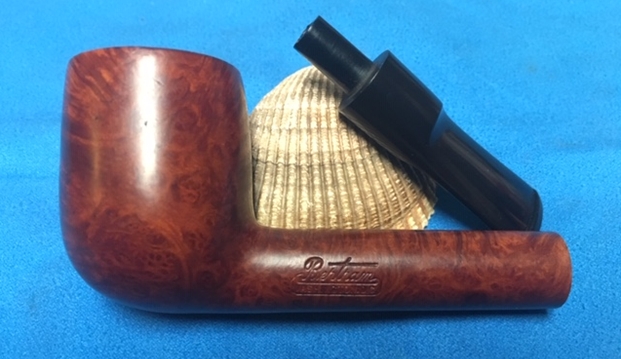
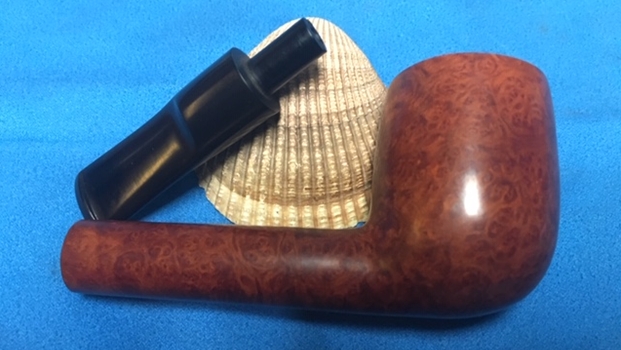
 I took a picture of the stamping on the underside of the shank. It was clear but showed some wear. It read Preben Holm over Hand Cut over Made in Denmark. There is also a circle with a number in it; sadly I failed to write down the number. I believe it is either a 1 or a 7. Perhaps Paresh can confirm this.
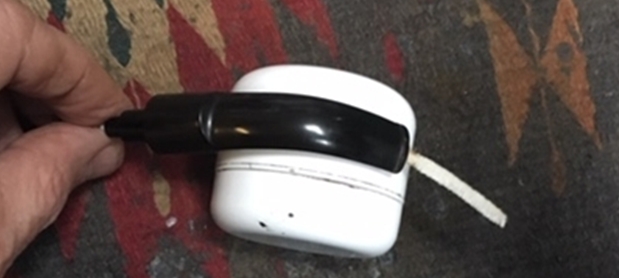
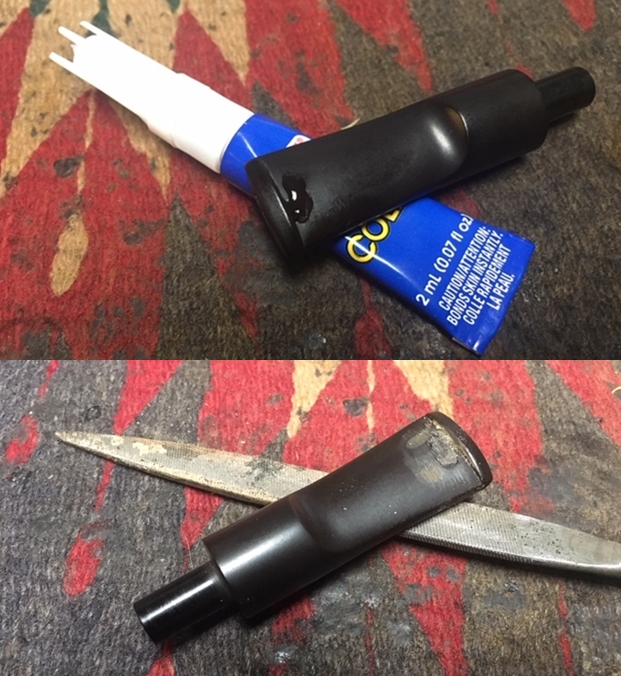
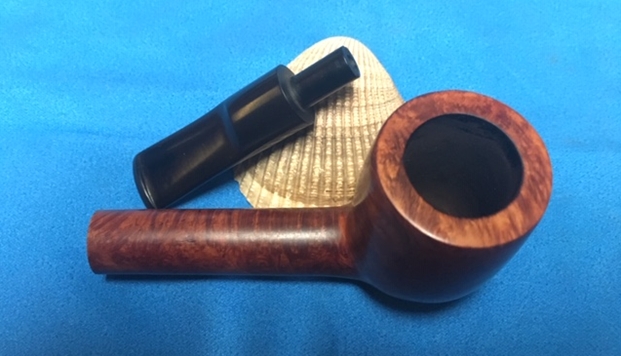
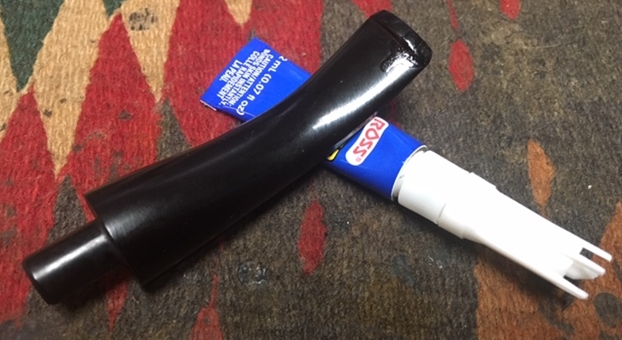
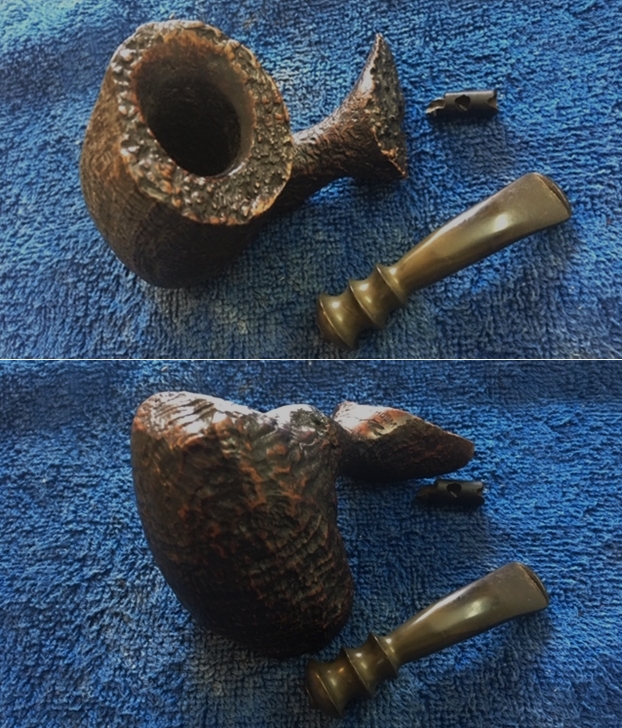
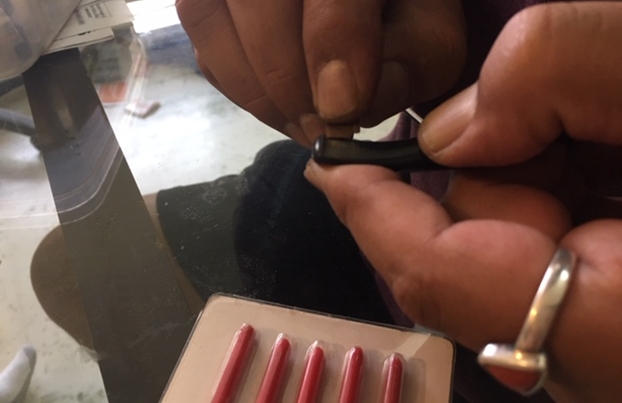
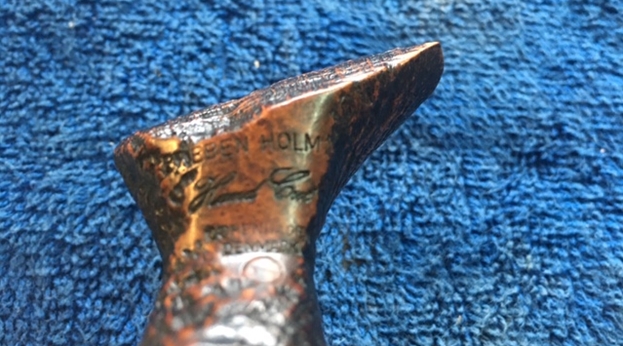 Now it was time to start on the stem repair on this pipe. I want to document the process on this restoration so that both Dal and Paresh have the information for their future tenon replacements. The first step is preparing the end of the stem for drilling out the airway. The remnants of the broken tenon need to be removed in order to have a smooth surface for drilling out the airway to receive the end of the new tenon. I did this be using a piece of 220 grit sandpaper on a topping board. I worked on the stem until the surface of the end was smooth.
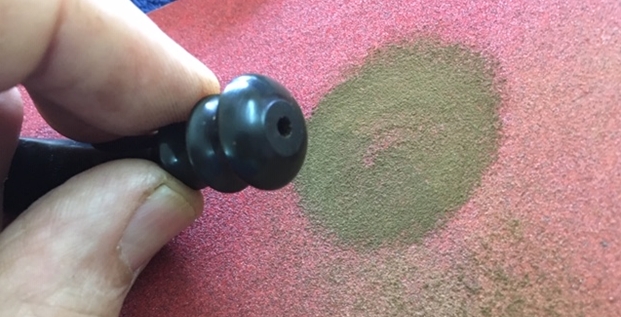 Once the end of the stem was smooth I used a sharp knife to give the airway a slight inward bevel to guide the drill bit when I started the drilling. I find that doing this helps facilitate a straight drill in the airway. The key for me in tenon replacement is to let the airway be the guide for the drilling. Doing this keeps things aligned and the airway straight. I started the drilling with a bit that was slightly larger than the existing airway. I proceed through a series of bits until I have drilled the airway with the final bit the same size as the end of the replacement tenon that I will use. I generally use a cordless drill to do this work but in this case I used a Hand Drill that Paresh had available. I tightened the bit in the chuck and carefully turned the stem onto the bit. I proceed with caution as I want to make sure that I keep the airway straight for a good fit of the new tenon. I use the length of the end of the tenon to determine the depth of the drilling. I generally mark the bit with a line of a piece of tape to ensure that I do not drill too deep.
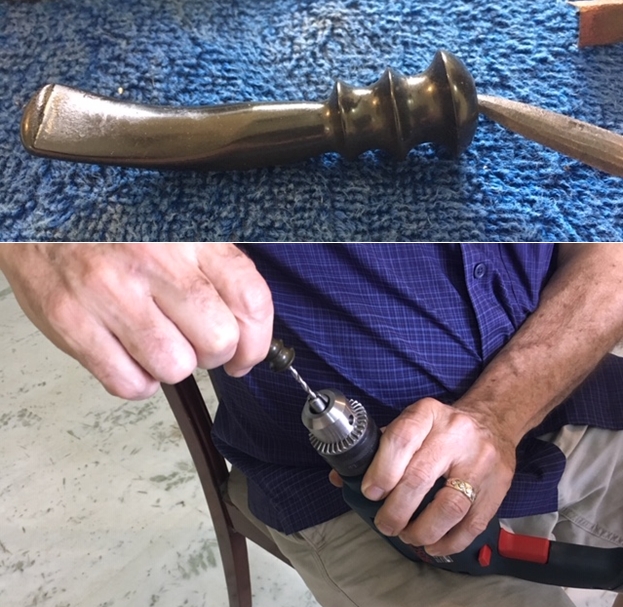 I worked my way up through a successive series of drill bits, to slowly open the airway to receive the tenon. I find that this process keeps the stem from chipping as I drill and creating more problems for me to repair in the process.
 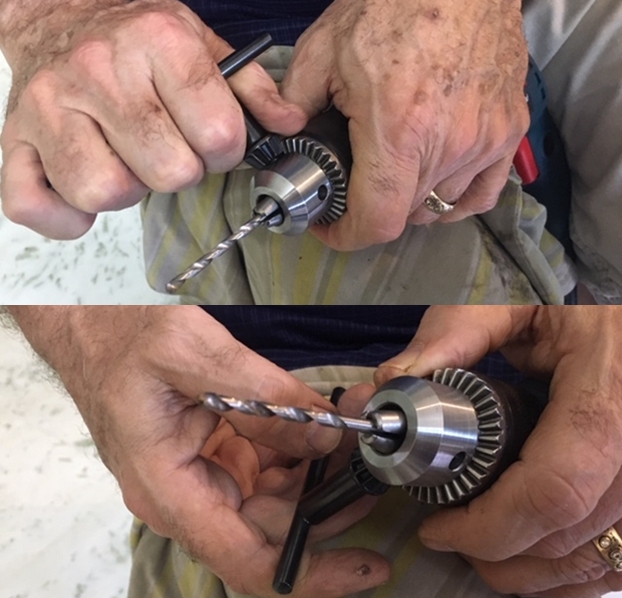 As I finshed using the first three bits I decided to use the power drill. Paresh gladly became the human vise to hold the drill. I aligned the bit and stem and pressed the trigger to drill the airway further. It was great to have extra hands in this process. Dal took photos as we worked on the stem.
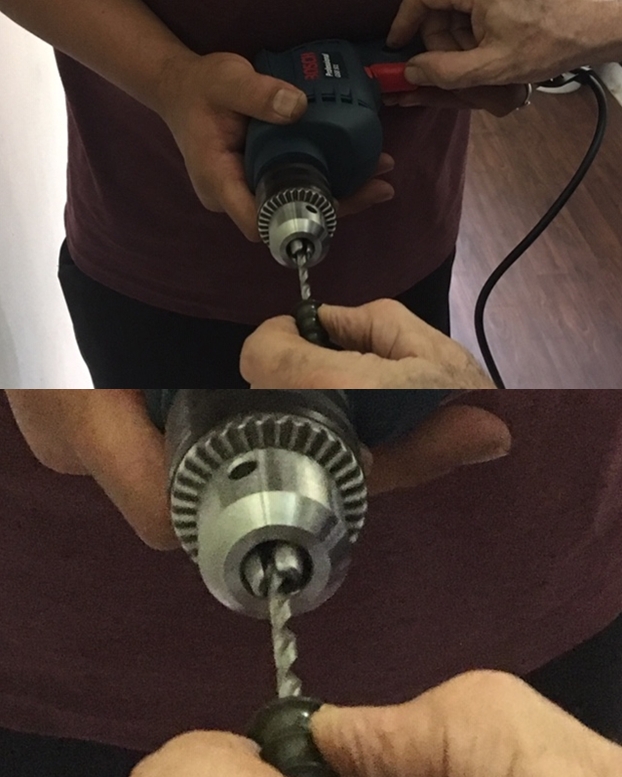 I used the 4.8 and 5 mm drill bits to finish drilling out the airway.
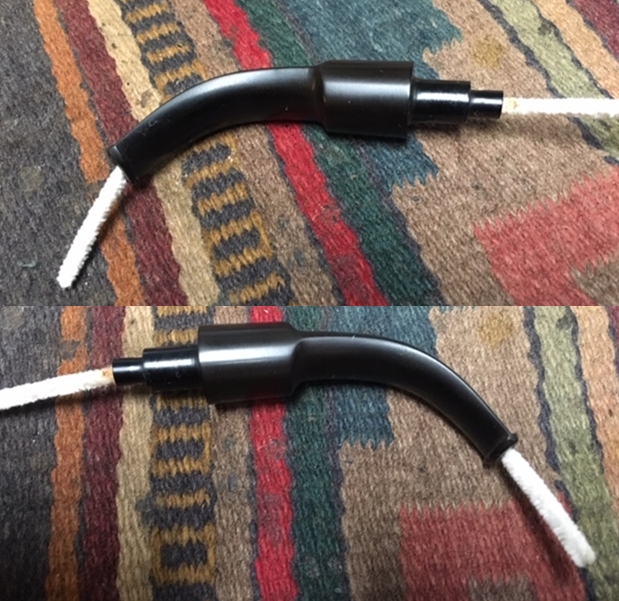
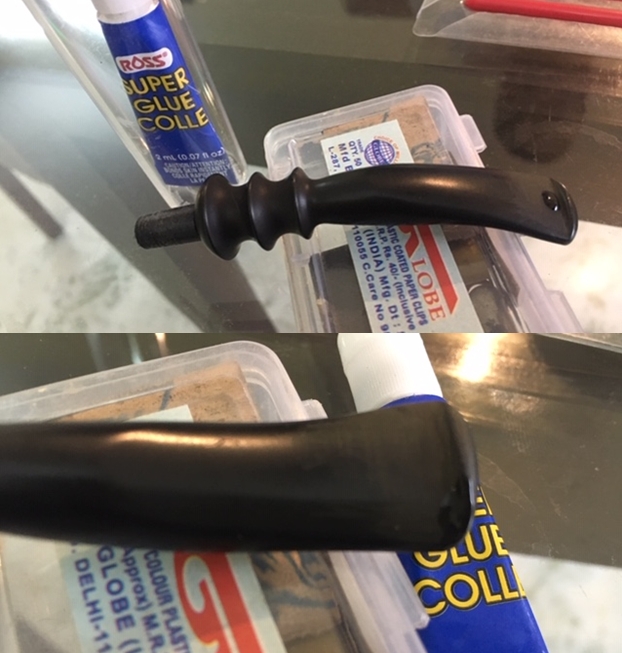
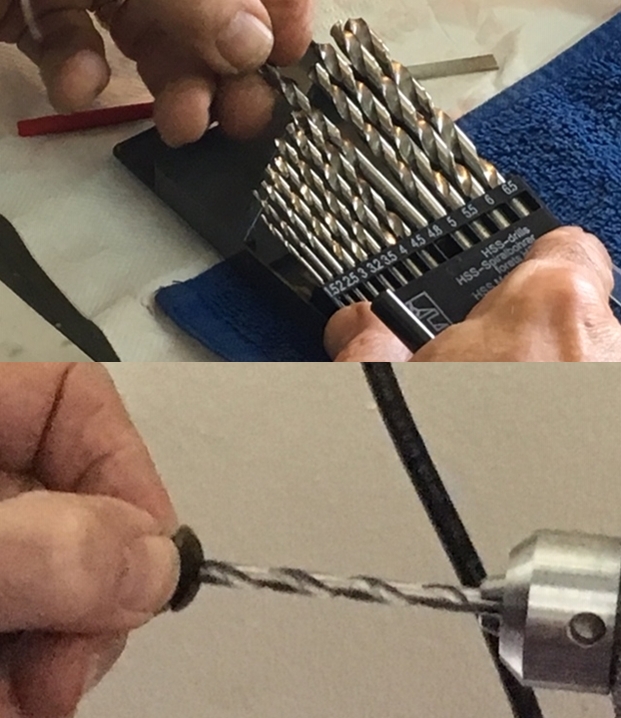 The airway was open to the right dimension to receive the new tenon. At home I have a tap set and would have threaded the airway to receive the tenon. In this case I did not have a tap so I used a file to knock off the threads on the tenon end enough to pressure fit it in place in the stem. Once they were knocked off enough I put some super glue on the tenon end and pressed it into the airway. I carefully checked the alignment to make sure the tenon was straight on the stem before setting it aside to cure.
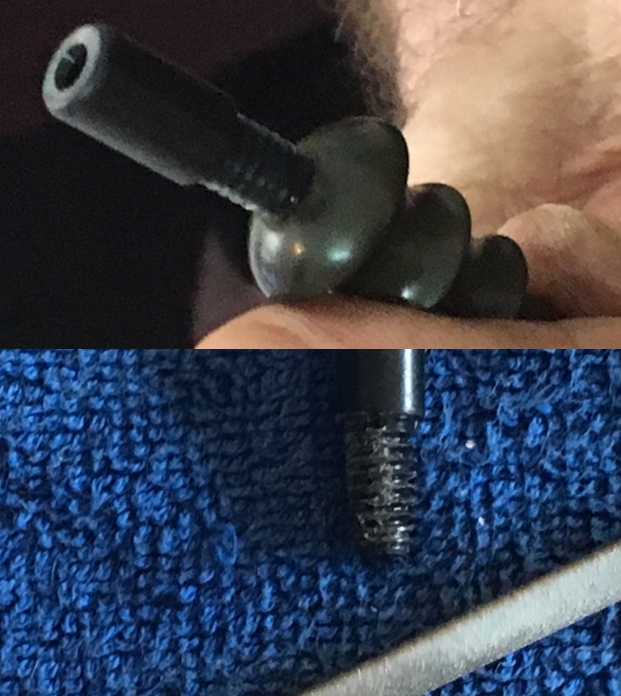
 Once the glue had cured on the tenon repair we put the stem in Mark Hoover’s Before & After Deoxidizer to let it do its work on the oxidation. I also wanted to experiment with how the deoxidizer affected the glue in the tenon repair. We set it aside for several hours while we worked on the bowl.
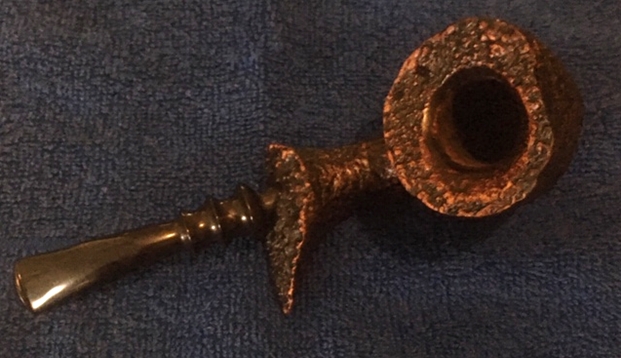
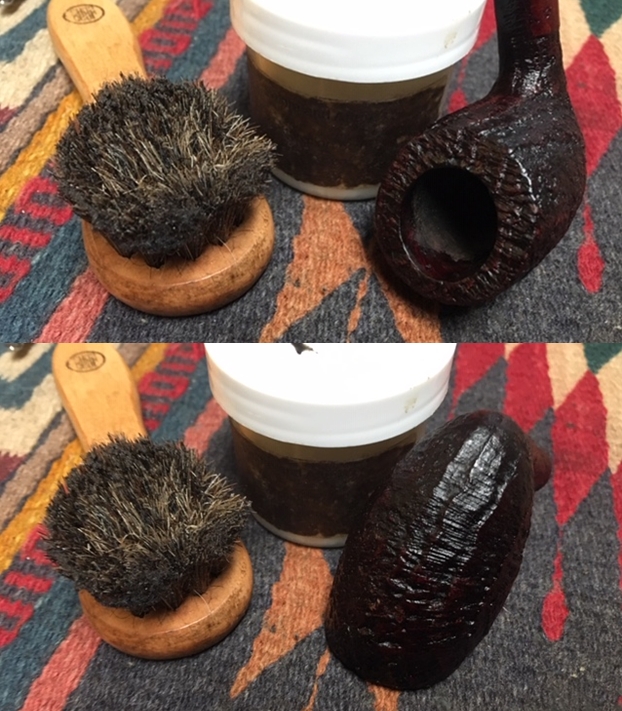
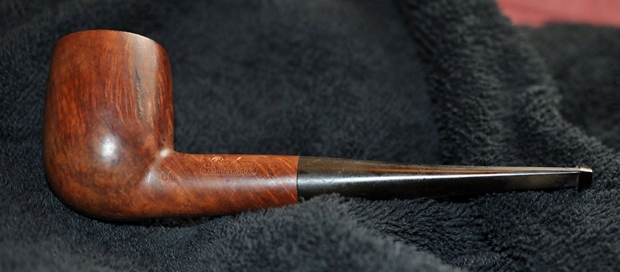
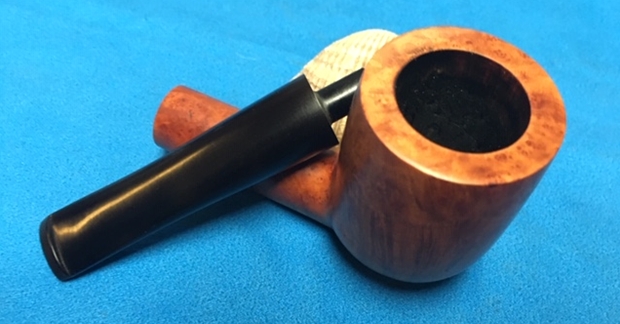
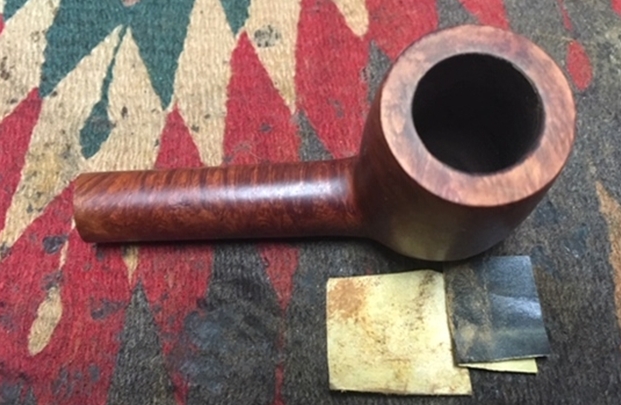
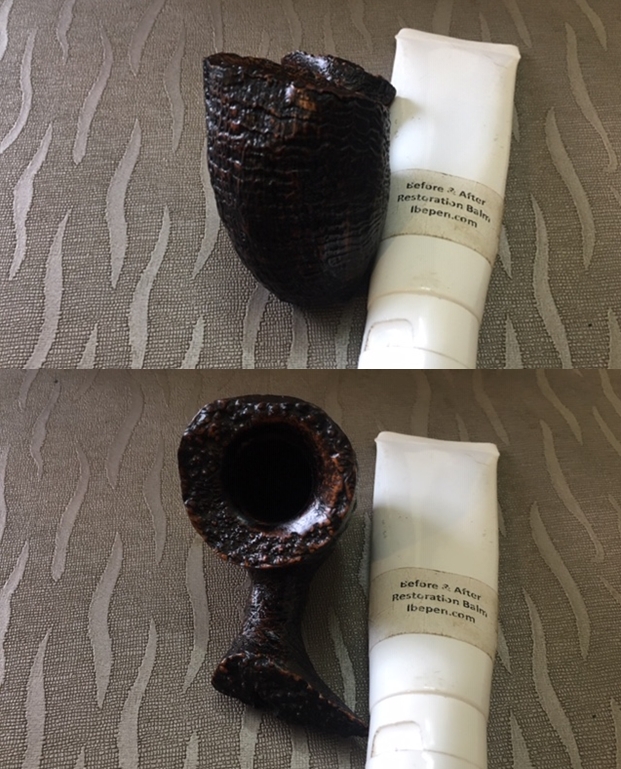
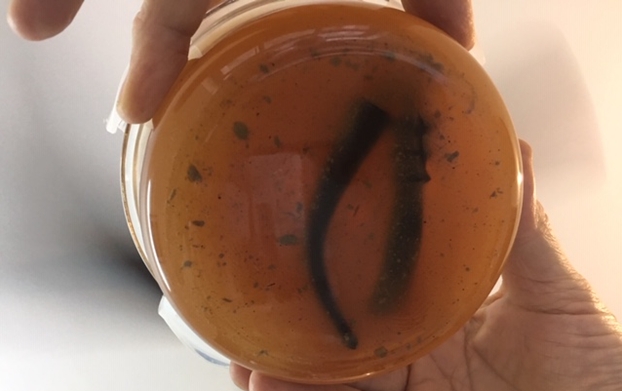 I turned the bowl over to Jeff to do the cleanup work and show us his process. Abha, Paresh’s wife joined in the cleanup process on this pipe as well as the others on the work table the week that we were all together. In watching him do the work we all learned some new tools and techniques to add to our arsenals of restoration. He reamed it with the Castleford Reamer that I brought as a gift for Abha. He took the cake back to bare briar so that we could check out the condition of the chamber walls. It looked very good. He cleaned the rim top and shank end with a brass bristle wire brush to clean the grime out of the plateau. He scrubbed out the interior of the pipe with pipe cleaners, cotton swabs and alcohol to remove the tars and oils. (Forgot to take pictures of this point of the process.)
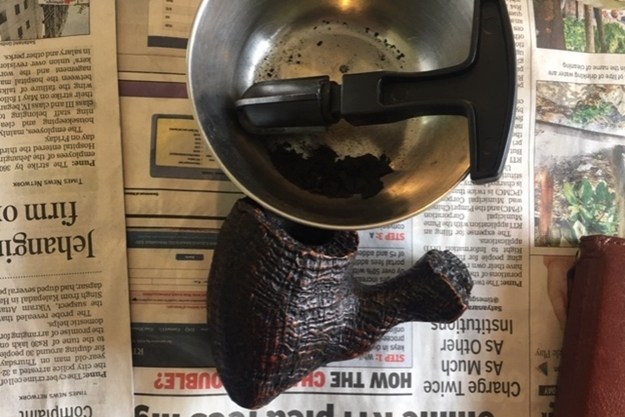
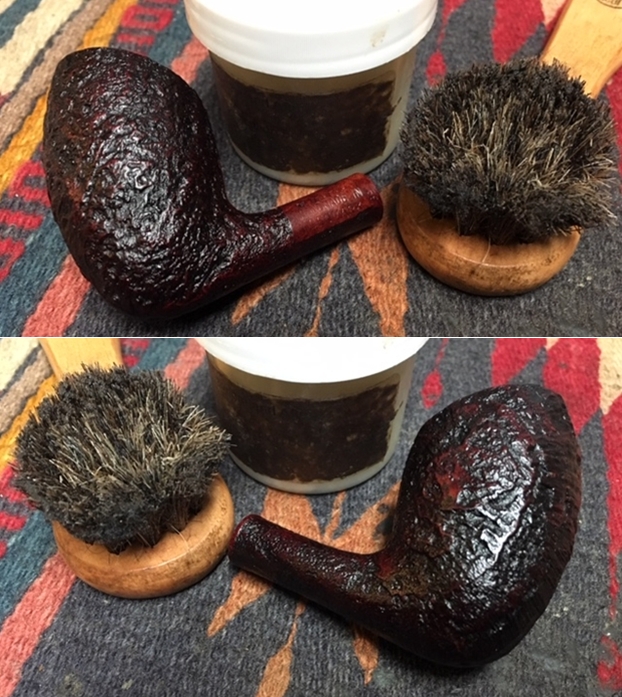
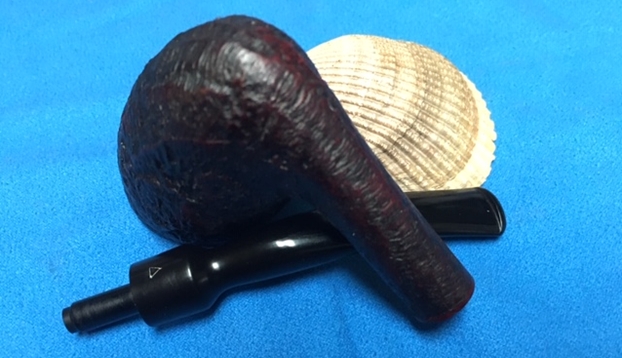
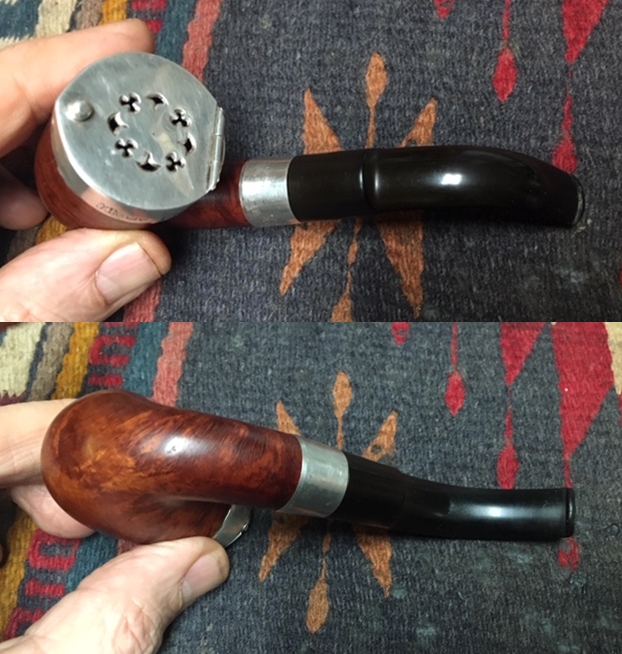
 Jeff scrubbed the surface of the bowl with Murphy’s Oil Soap and a tooth brush to remove the grime and debris from the plateau and the sandblast finish. Somehow we forgot a picture of this point of the process. He took it to the sink and rinsed it off and scrubbed the interior and exterior of the briar with dish soap. He scrubbed it further with the dish soap and tooth brush. He rinsed the pipe off with warm water in the sink.
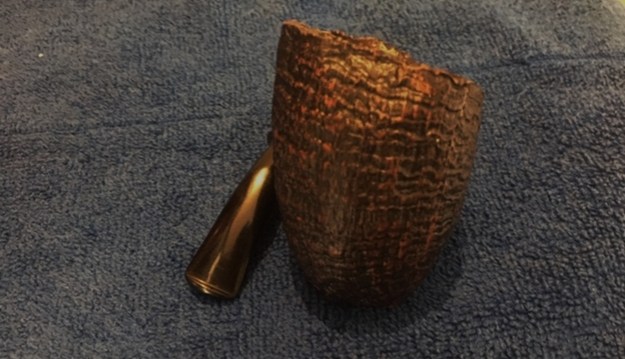
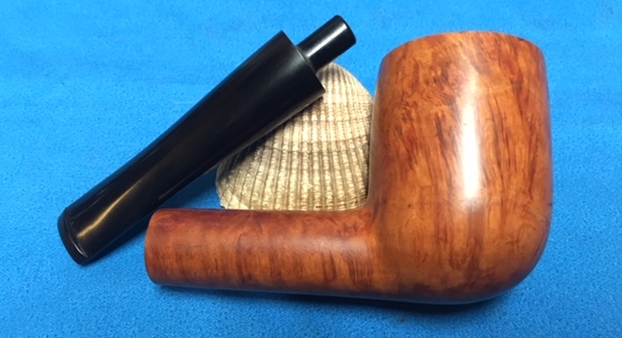
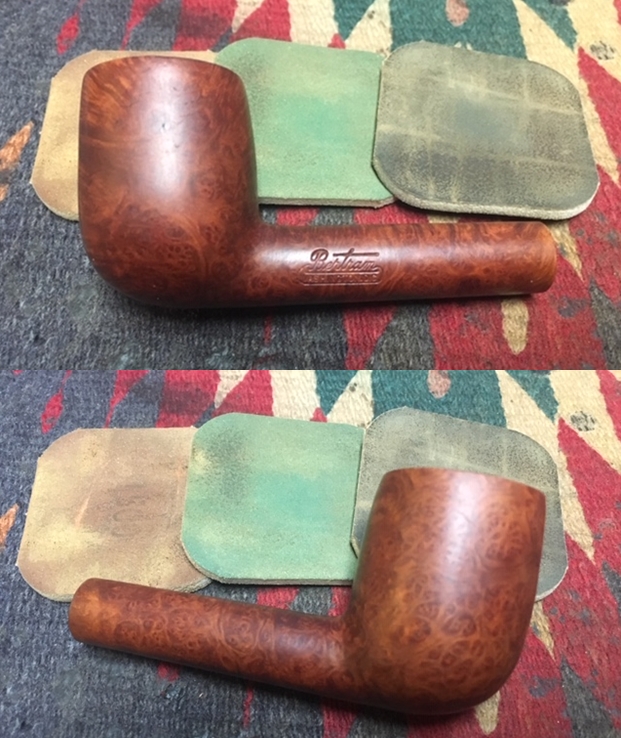
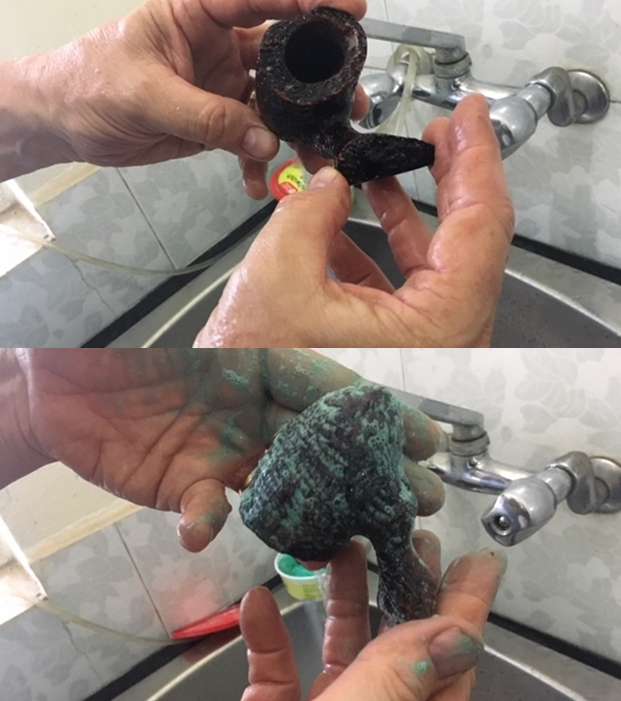 He dried the bowl off with a soft cloth and buffed it with a microfiber cloth to give some shine to the briar. We rubbed the surface down with some Before & After Restoration Balm to enliven, enrich and protect the briar. We buffed it once more with the microfiber cloth. The photos show the look of the cleaned briar.
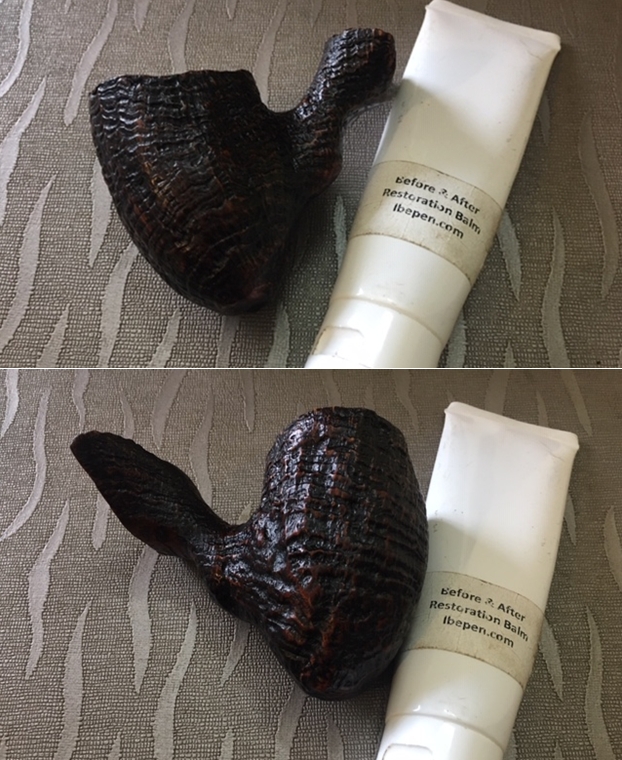
 With the bowl done we set it aside and turned our attentions to the stem. Jeff took it out of the bath and squeezed the excess deoxidizer off the stem into the bath. He rinsed it under warm water and ran water through the airway. He blew on the stem to clear out any deoxidizer in the airway. He ran a pipe cleaner with alcohol through the stem to remove any remaining dexodizer. He buffed it rigorously with a microfiber cloth to remove the remaining oxidation and polish the vulcanite. The tenon glue held up well in the bath and the tenon was tight in the stem.
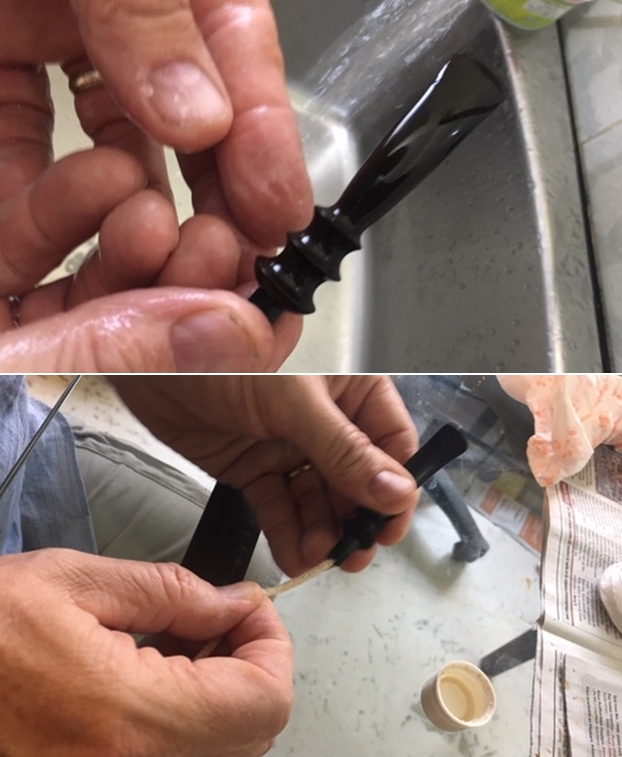
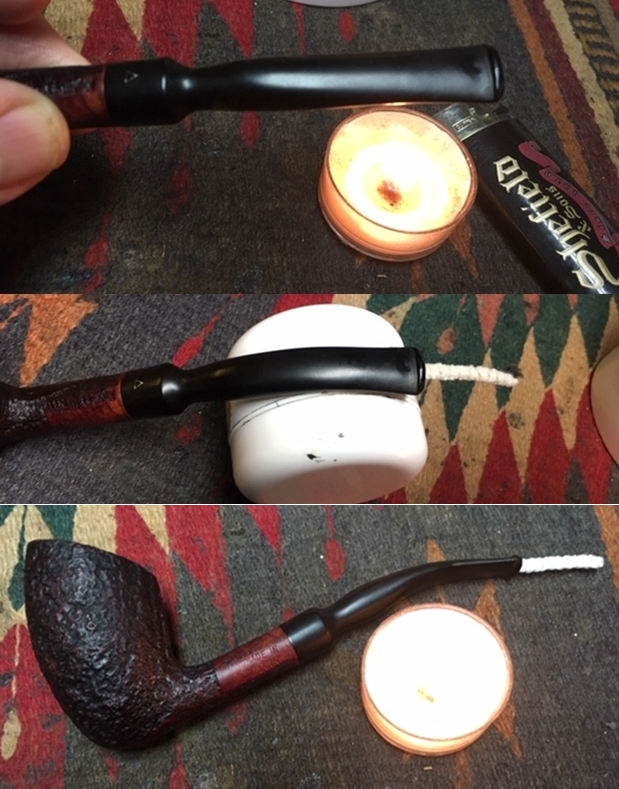
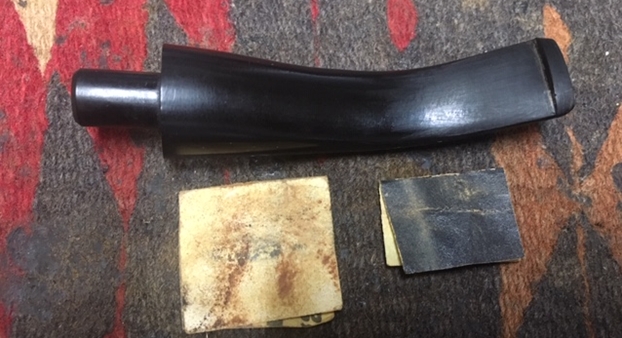
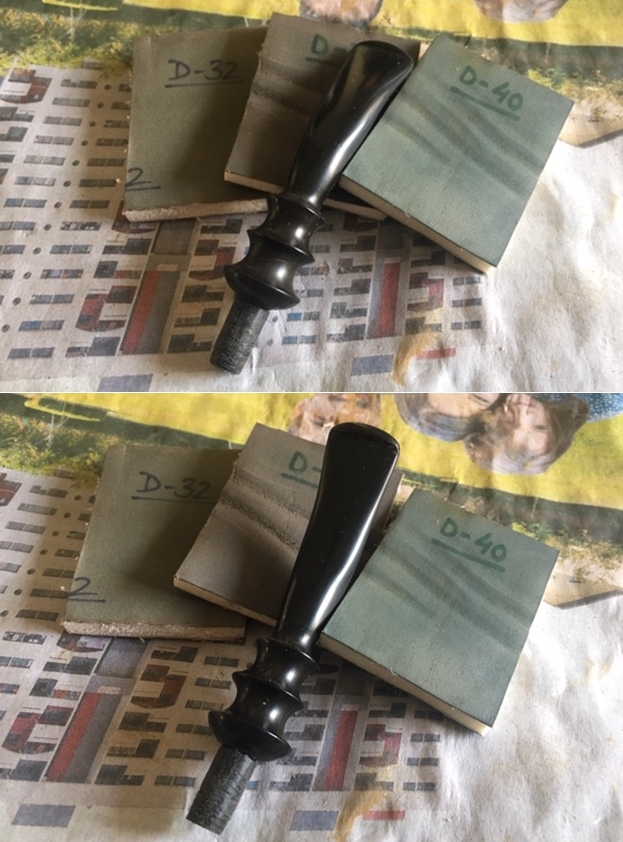
 I “painted” the stem surface with the flame of a Bic lighter to lift the tooth chatter and dents in the surface. Paresh sanded the stem surface with 220 grit sandpaper to remove the tooth chatter and minimize the tooth dents on the button and the surface of the stem. He wiped it down with alcohol and filled in the dents with clear super glue.
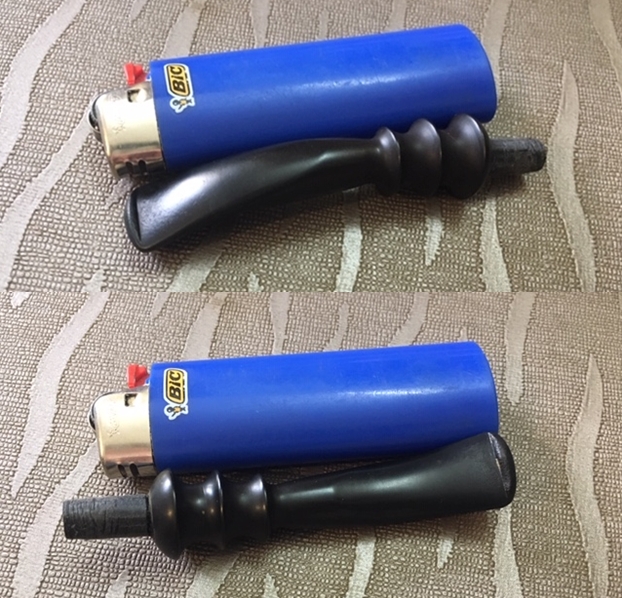
 When the glue had cured we smoothed out the repairs with a needle file and sanded them with 220 grit sandpaper to smooth and blend them into the surface of the stem. We polished the stem surface with micromesh sanding pads – wet sanding with all grits – 1500-12000 grit and rubbing the stem down with a microfiber cloth to give it a shine.
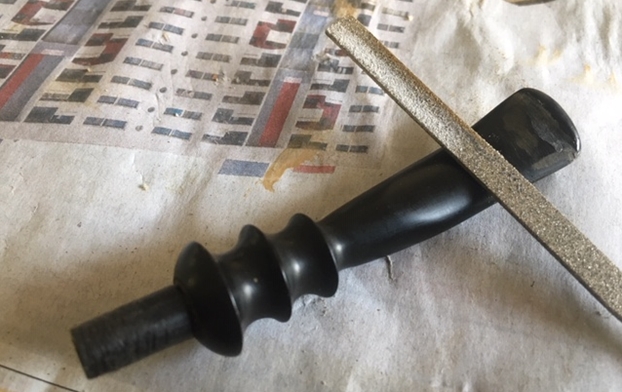

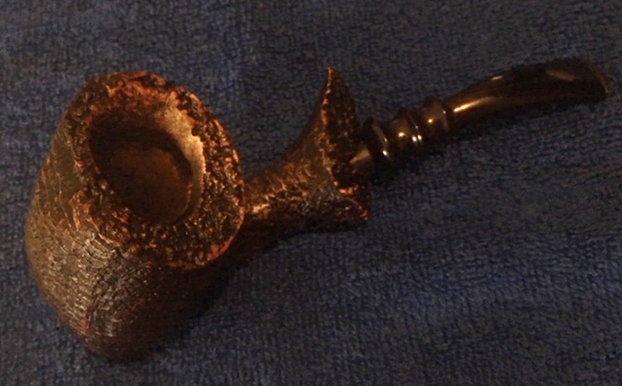
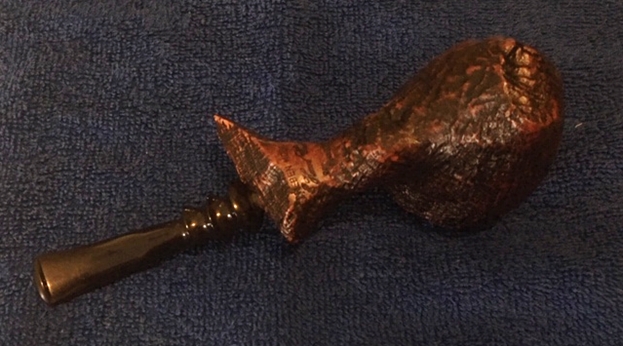
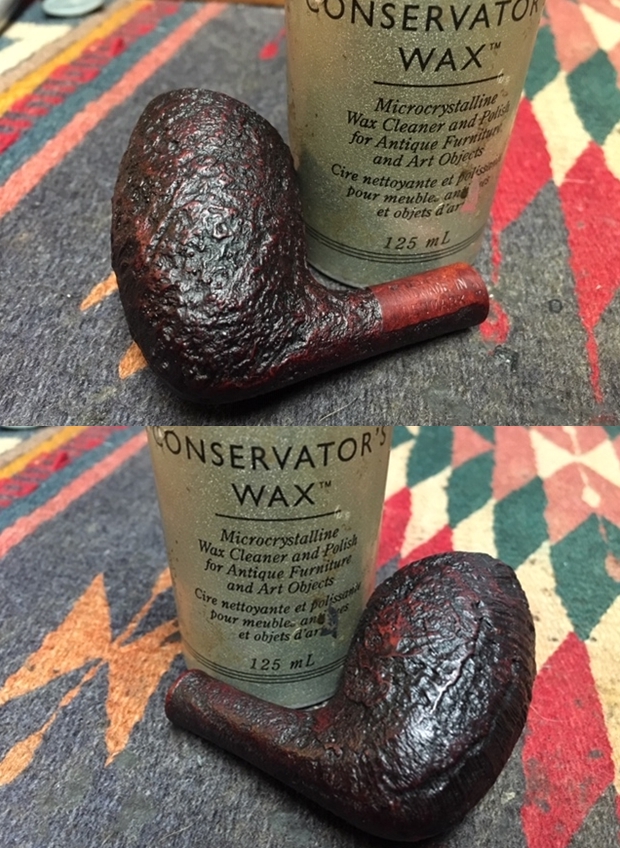
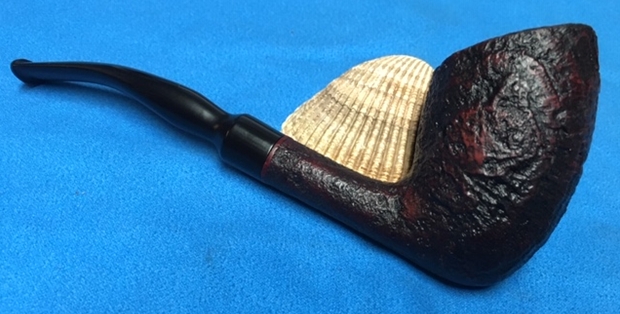
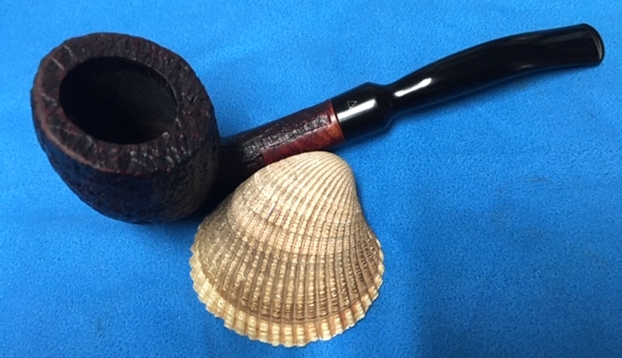
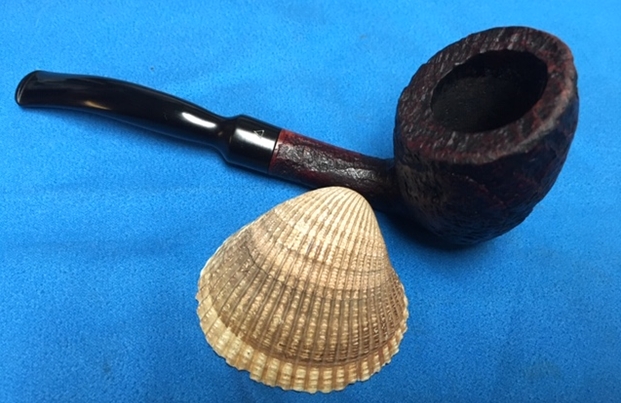
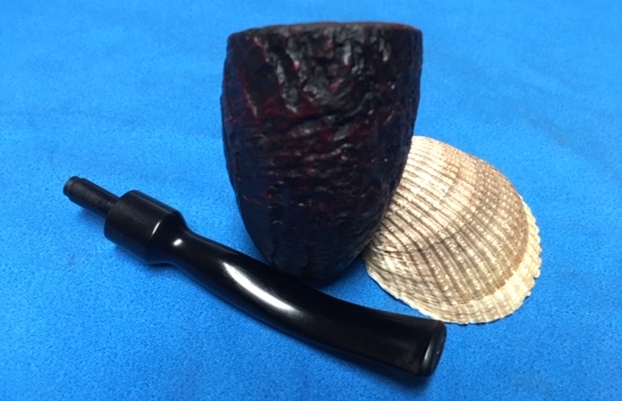
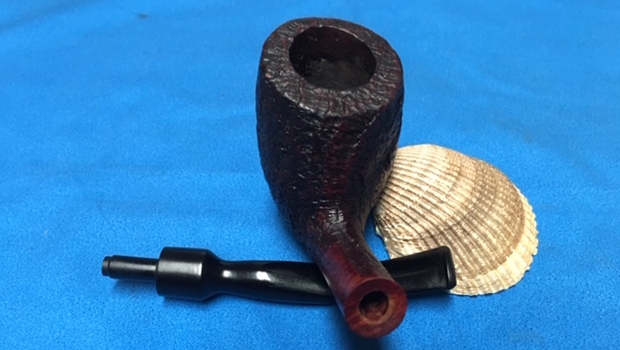
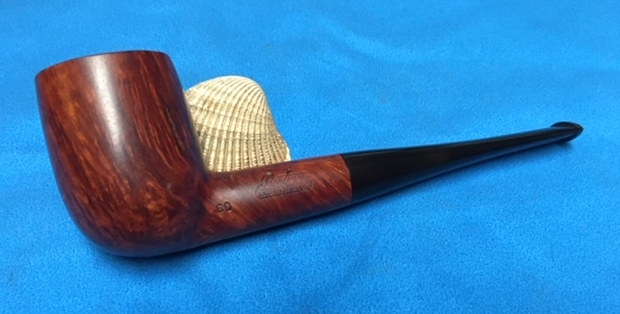
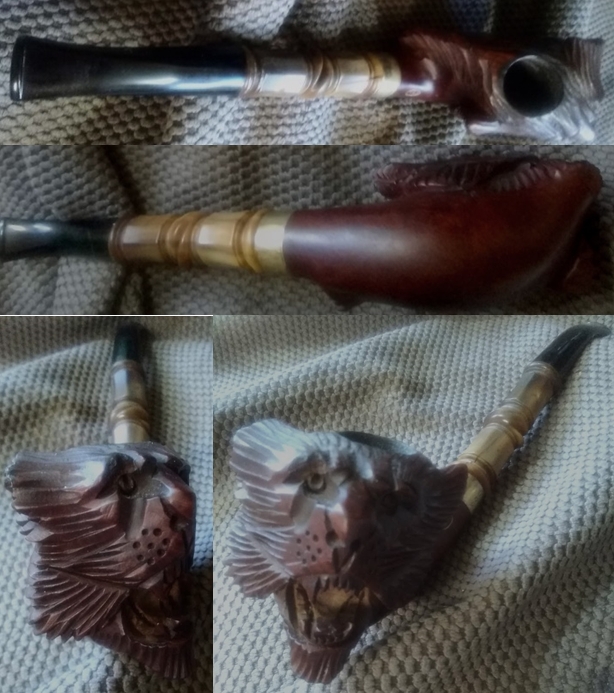
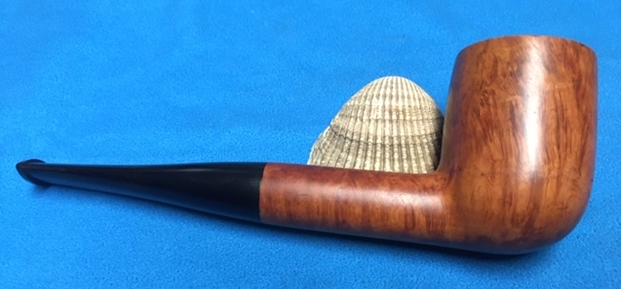
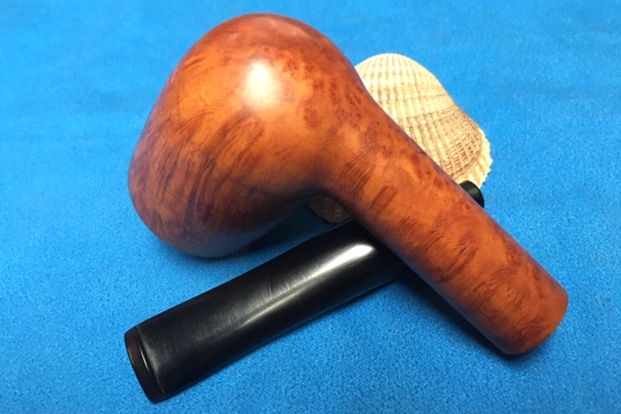
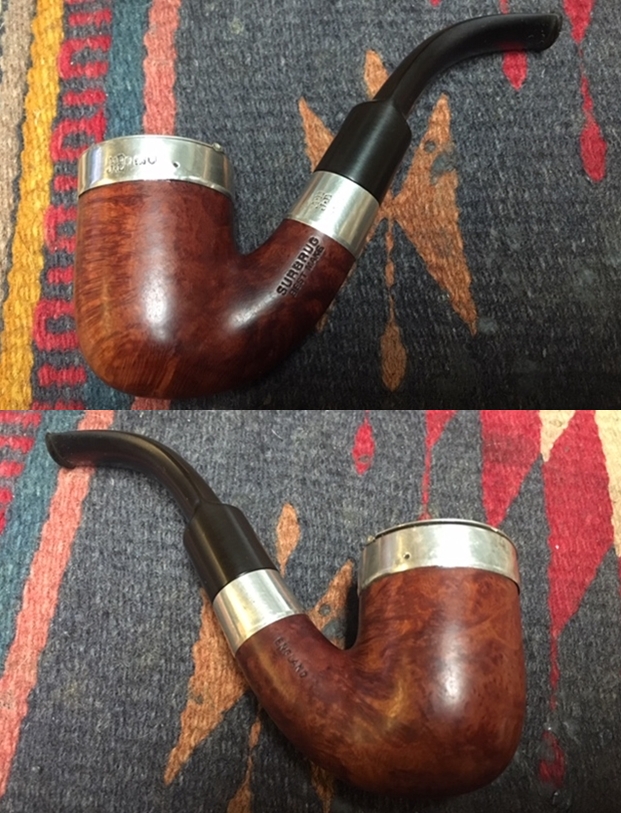
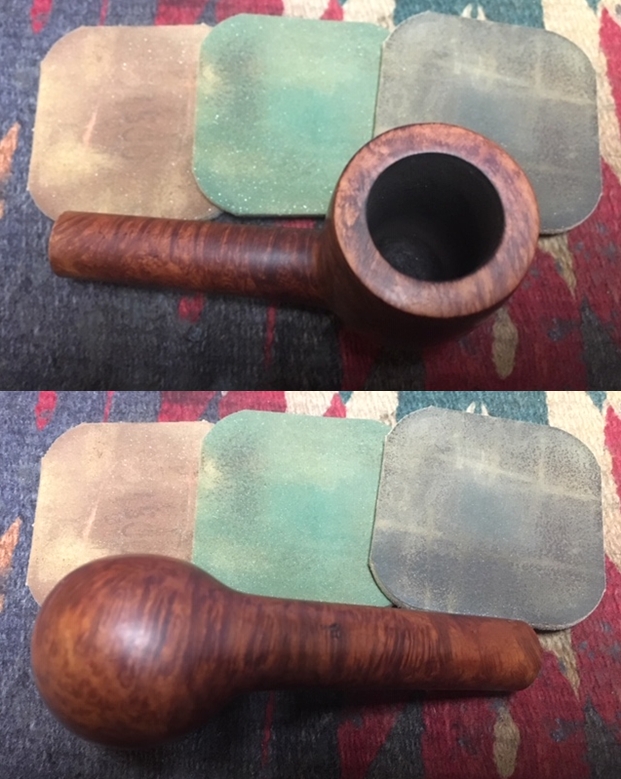
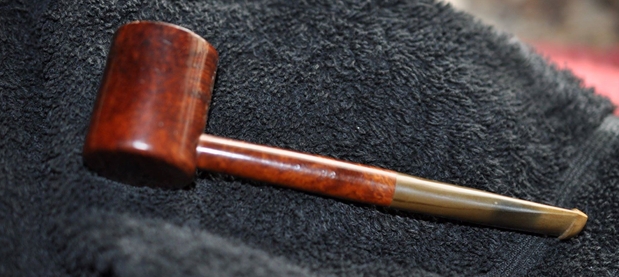
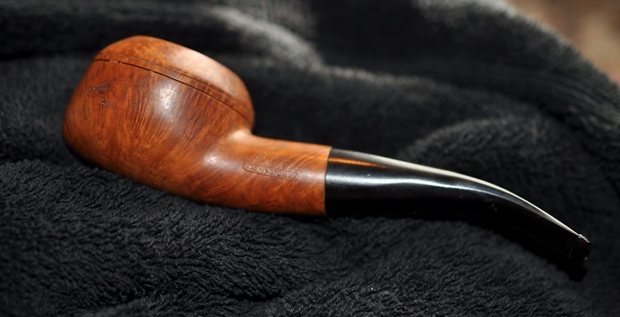
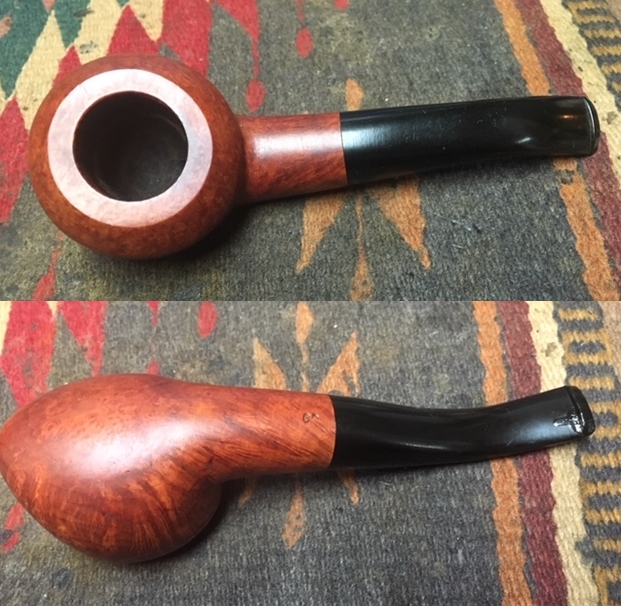
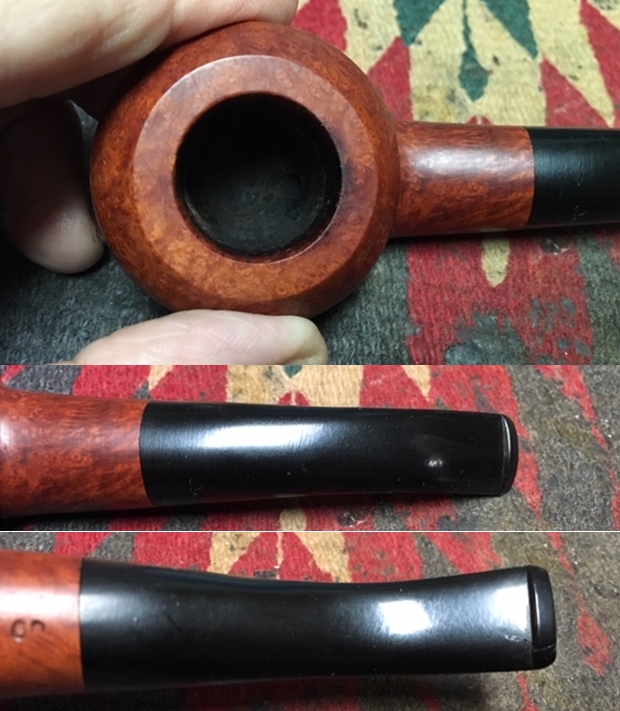
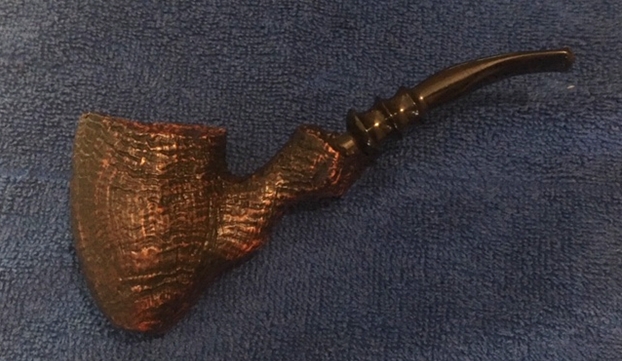
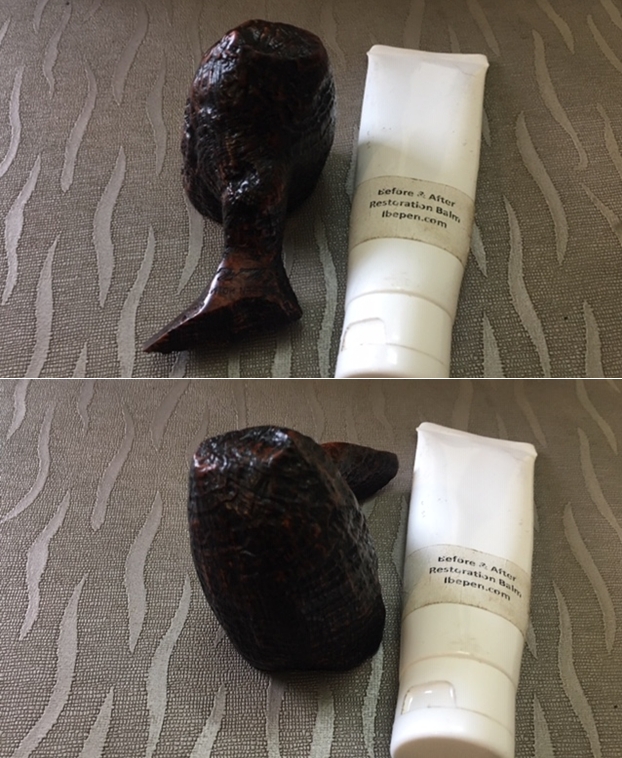
 I put the stem back on the bowl and buffed the bowl with a shoe brush that Paresh had in his kit. I rubbed the bowl and stem down with another coat of Balm and buffed it further with the brush. Dal, helped me install a new photo app on my phone to take the photos. (I have lots to learn about how to use the enhancements of the app but I took the photos and the lack of precision reflects my aptitude not Dal’s instruction.) The pictures below show the finished pipe. It is a beautiful Preben Holm Hand Cut Danish freehand that has a full life ahead of it in Paresh’s rotation. The process I use in putting a new tenon on the stem and revitalizing the finished pipe has been recorded. Jeff’s process on cleaning up the stem and briar has also been documented in the process. Paresh’s daughter Pavni polished the inside of the bowl with sandpaper bringing it to a shine that is unparalleled. This is a feature of all of Paresh’s restorations that none of us knew before. Thanks Pavni for your patient labour in bringing beauty to the inside of the bowl. The finished pipe is shown in the photos below. I look forward to hearing from Paresh how the pipe smokes as we did not get around to this one while we were in Pune. Thanks for looking and reading the blog. We all hope the documentation has been helpful.