Blog by Steve Laug
This restoration is Part 2 of one that started with an email from a reader of the blog name Tim. He had written the following email to me with a request. I have included that email below.
Hello Steve, I have a cased set of 1919 Charles Maas pipes that have been smoked hard and put away wet. Can I send them to you to have them restored? I’m a huge fan of your work and use your site often as inspiration, but these are outside my ability. – Tim
I finished the restoration of the Bulldog first and have written about the work on the blog already. Here is the link (https://rebornpipes.com/2021/05/30/what-a-tired-and-worn-pair-of-cased-1919-charles-mass-pipes-part-1-a-weary-bulldog/).
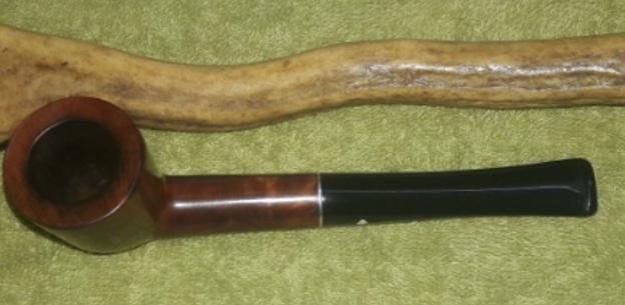
I am including the photos that Tim Sent me so you can see them if you have not read Part 1 of the blog on the Bulldog. 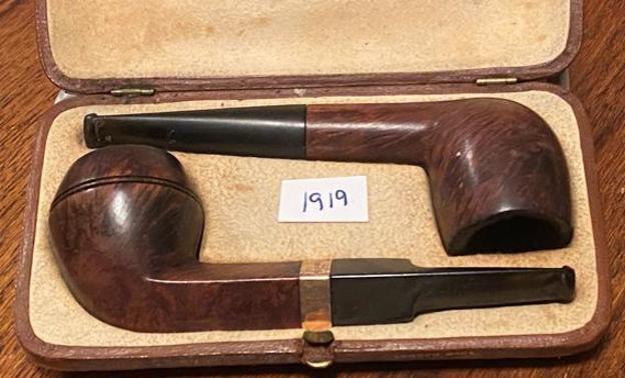

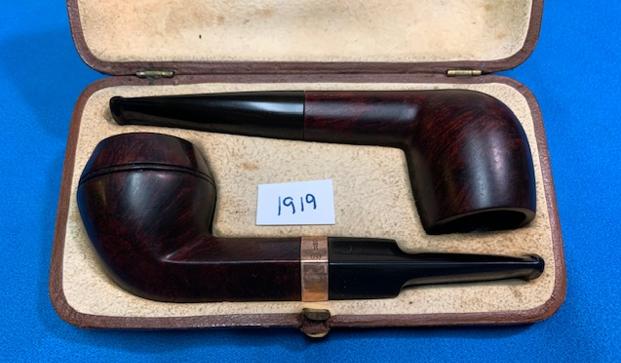
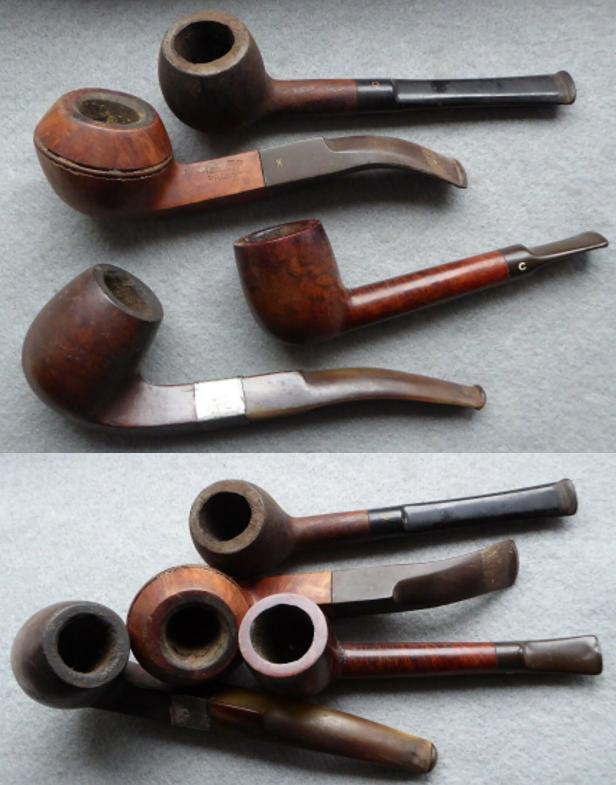
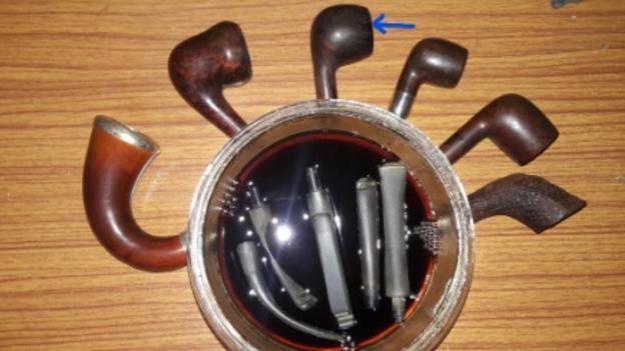
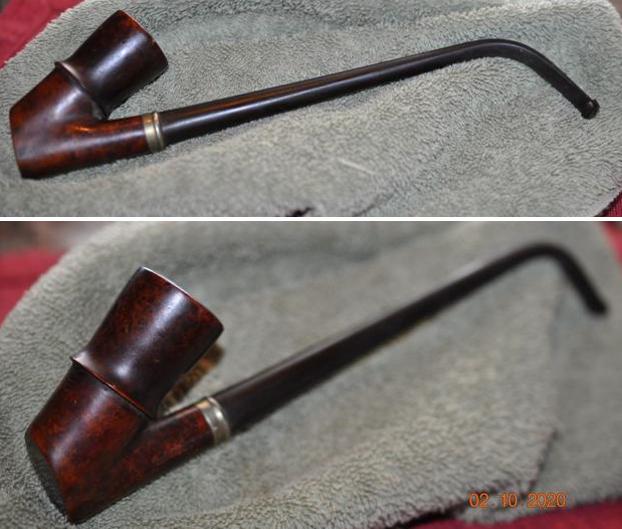
 Tim’s package arrived on Thursday and when I got home from work I opened it to have a look at the pipes first hand. I took the case out of the well packed box and this is what I saw. The case was suede with a fine leather edge around the sides. There was a thin gold line around the case edges. When I opened it I saw Tim’s 1919 label and the two pipes. There was a gold banded Bulldog and a nice stubby billiard. Both were nicely carved bowls and both had been heavily used and worn.
I sent Tim the following list summarizing the damages on the Billiard (a similar list is on the blog about the Bulldog). There is a lot of work to do to bring these back to life.
The billiard:
1. The rim top is badly damaged leaving the top uneven and thicker/taller toward the back of the bowl and more damaged than even the Bulldog.
2. The inner edge of the bowl is thicker than the bulldog but still thinner on the front side than the rest of the bowl. It is still thick enough.
3. The outer edge is chipped and uneven on the bowl front showing some burn marks.
4. The finish is worn and damaged with paint marks on the surface.
5. The bowl is slightly out of round with chips and marks on the inner edge
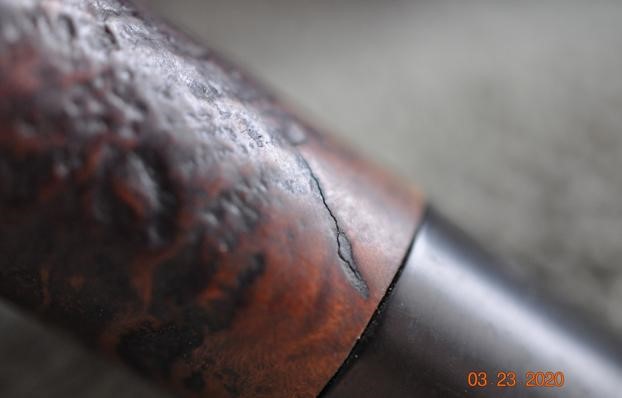
6. The stem has deep compressions from tooth marks on both sides at the button. 7. The inside of the bowl is badly checked and will need to examined for integrity.
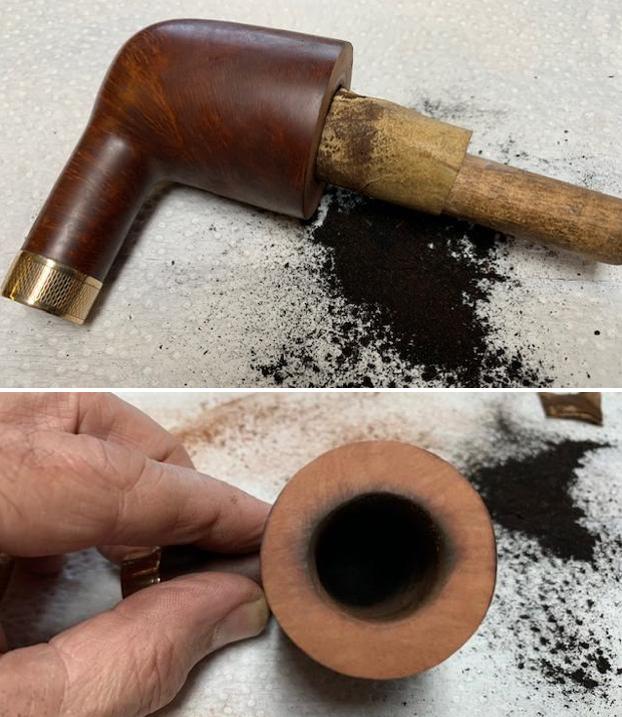
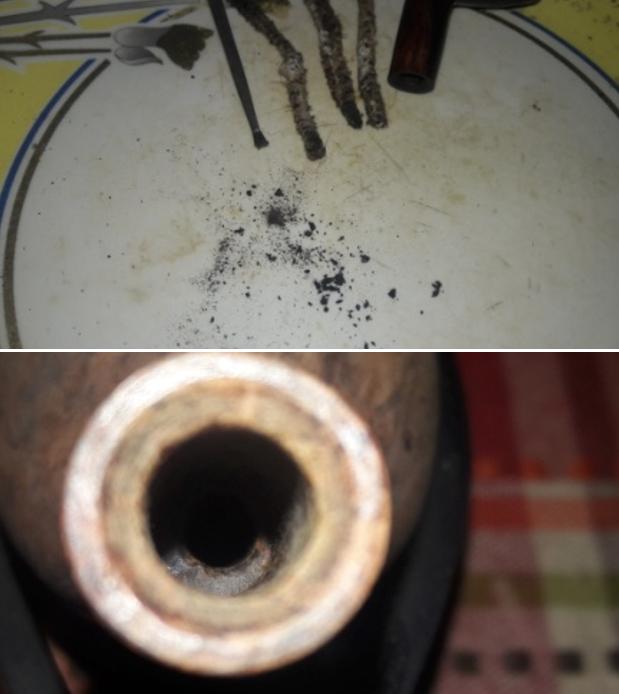
Both pipes had been reamed and they were quite clean inside. It appeared that previous earlier reaming somewhere along the way had left the inner edge chipped and damaged. That is the assessment of the Billiard and it is clear from the list that there is a lot of work to do on it.
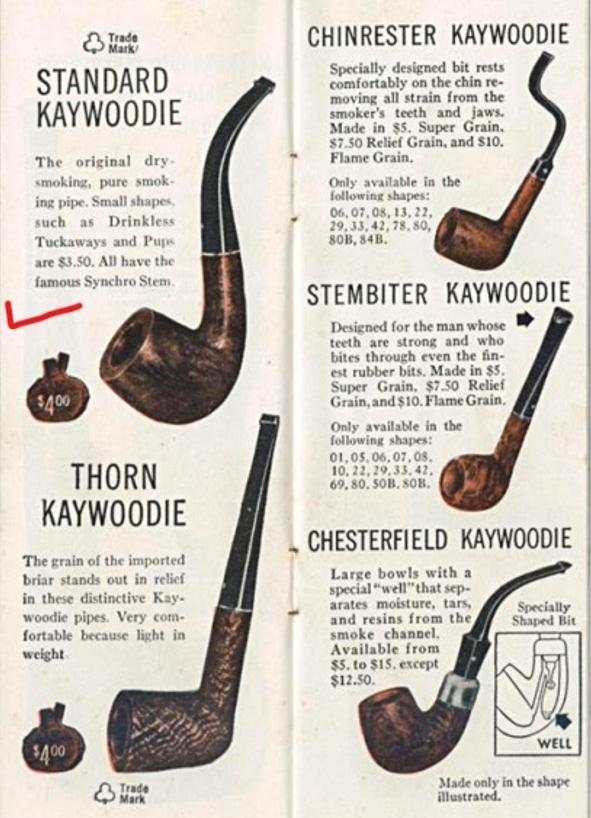
For background on the Charles Maas brand read the previous blog to get a clear idea of the history of the company. I will not include it again at this point. Here is another copy of the link for ease of reference (https://rebornpipes.com/2021/05/30/what-a-tired-and-worn-pair-of-cased-1919-charles-mass-pipes-part-1-a-weary-bulldog/).
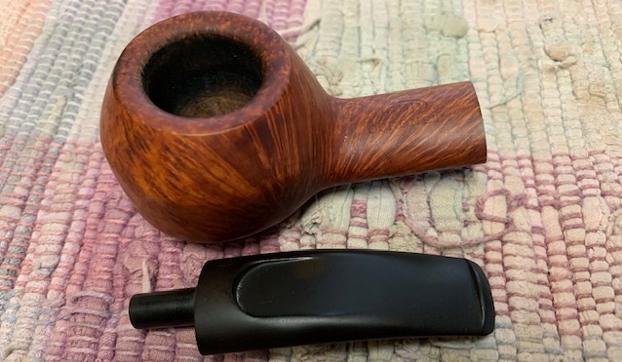
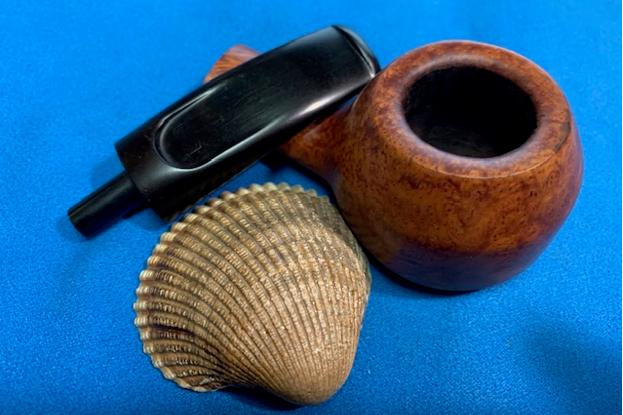
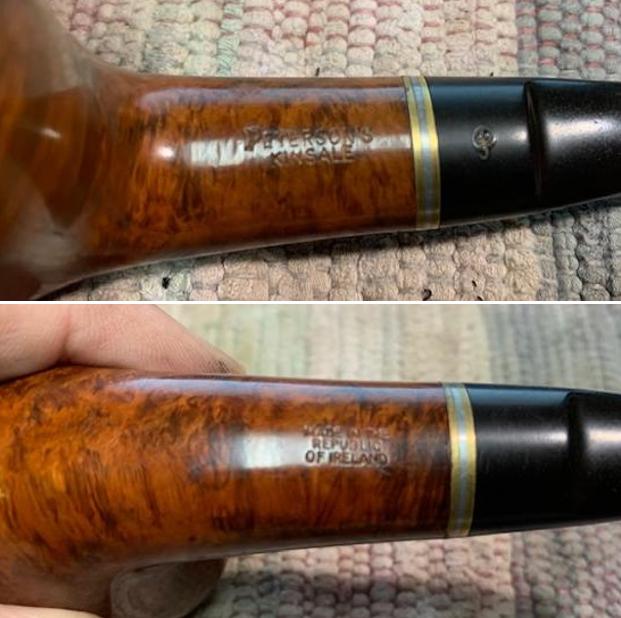
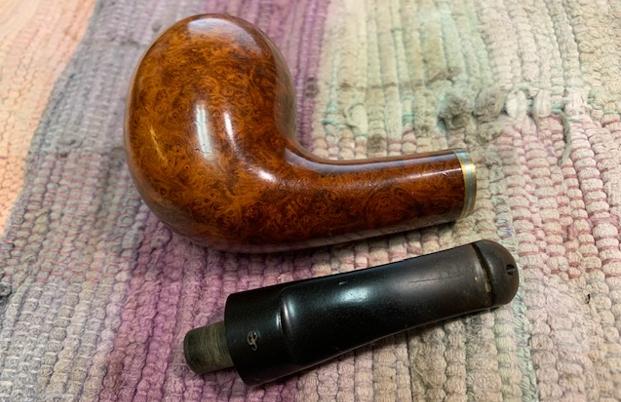
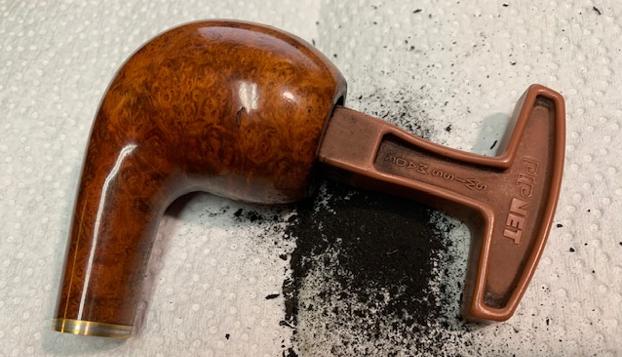
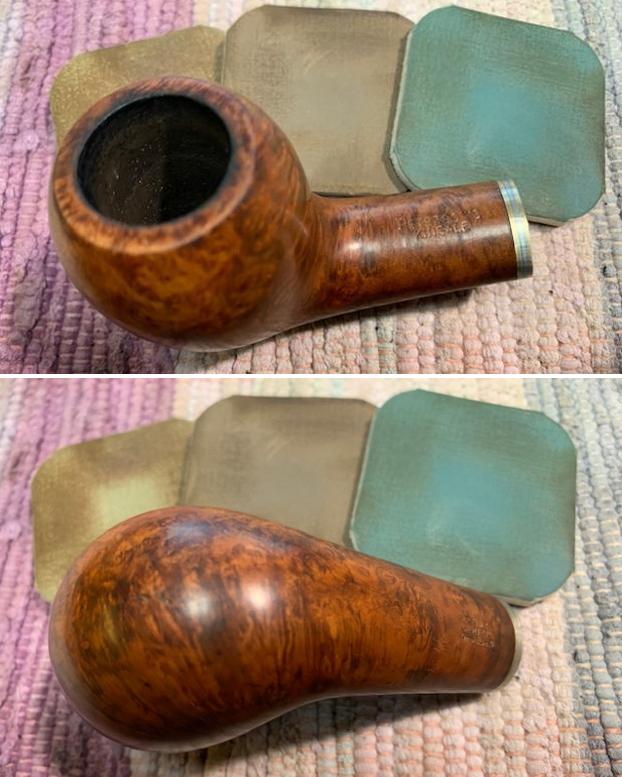
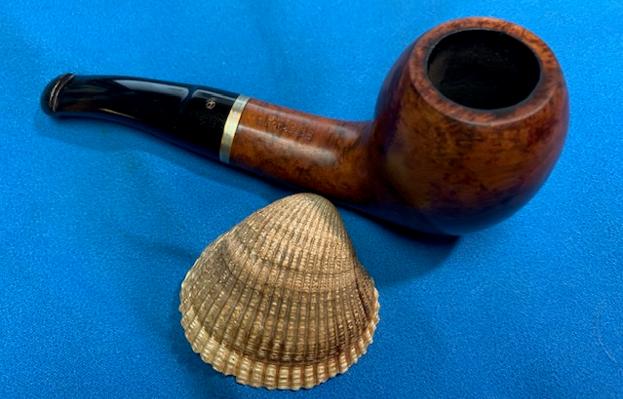
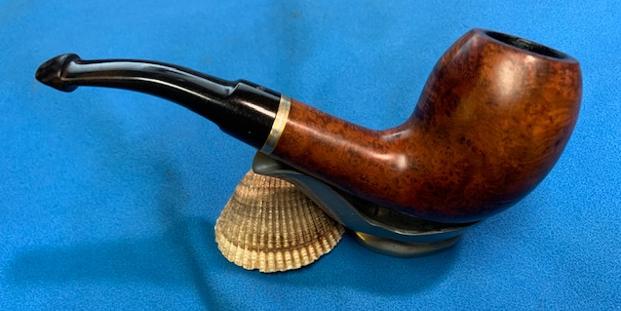
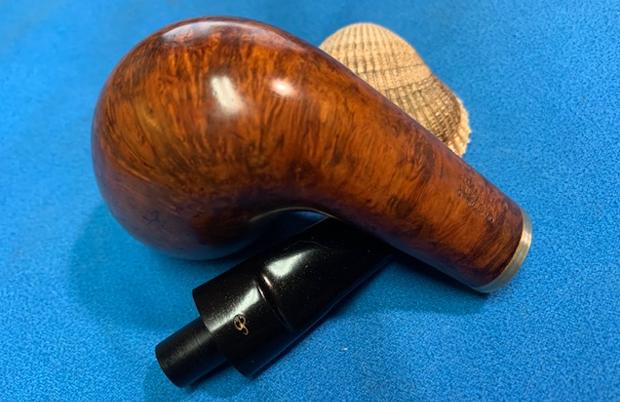
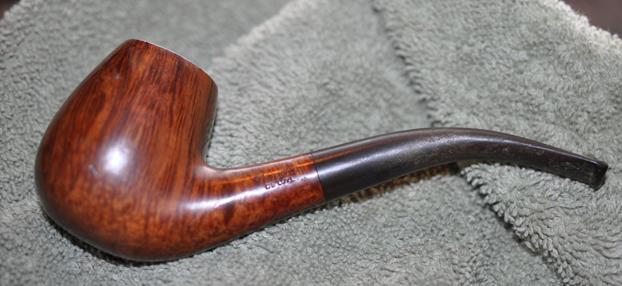
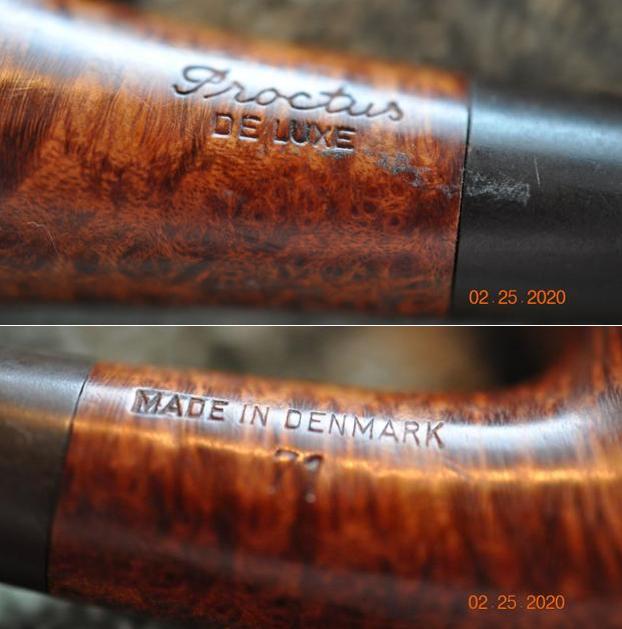
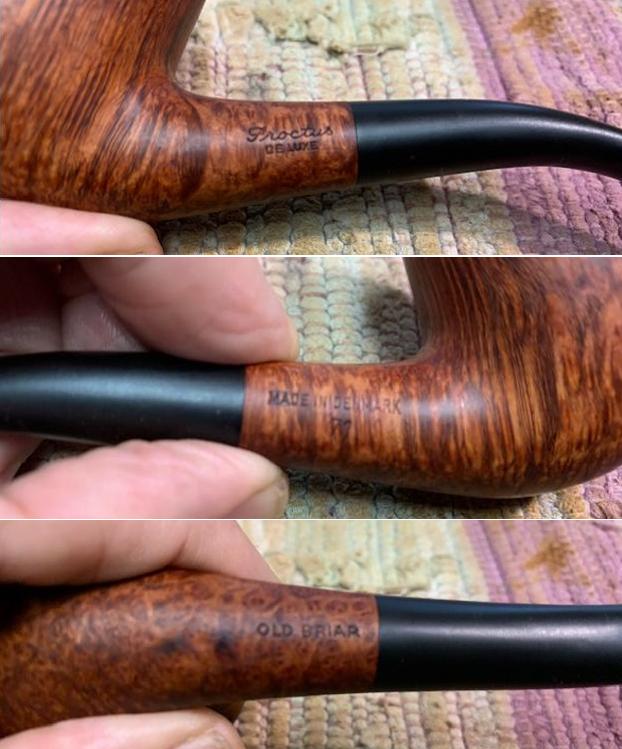
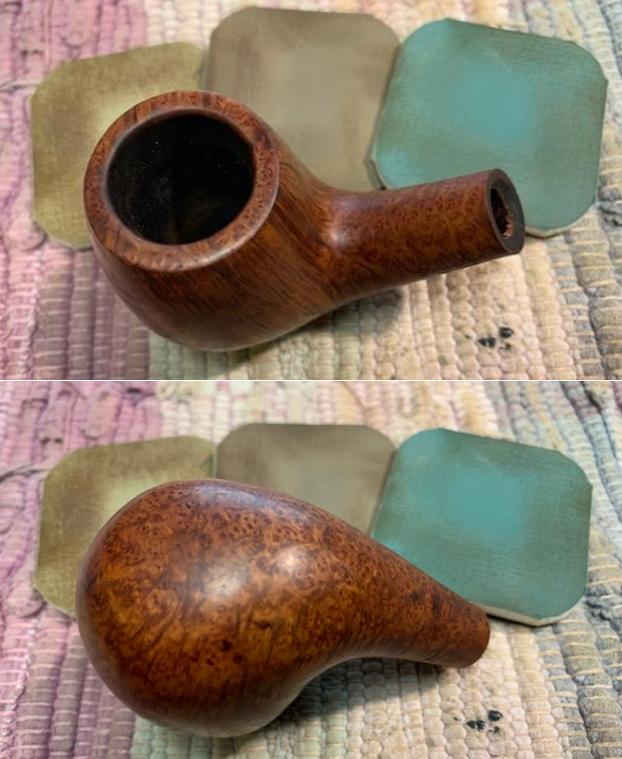
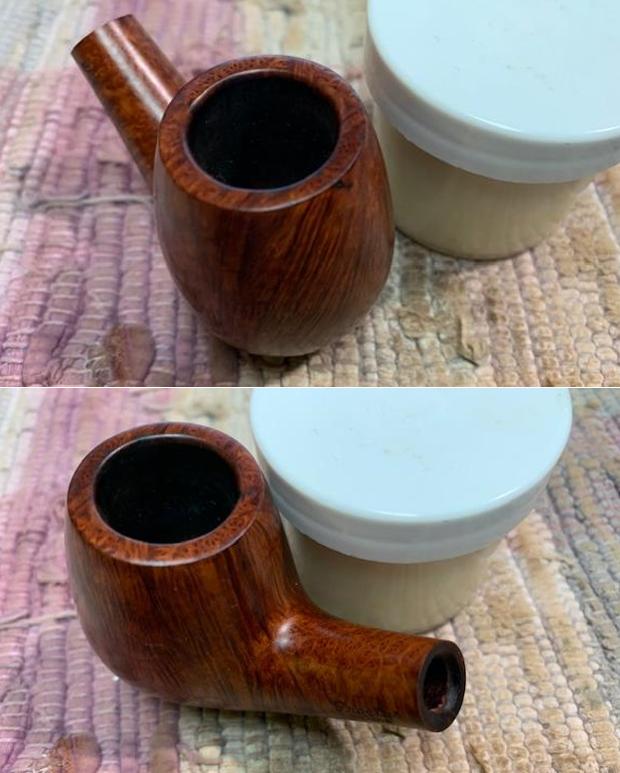
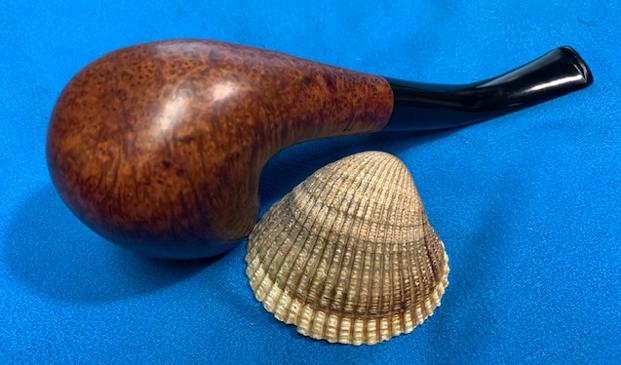
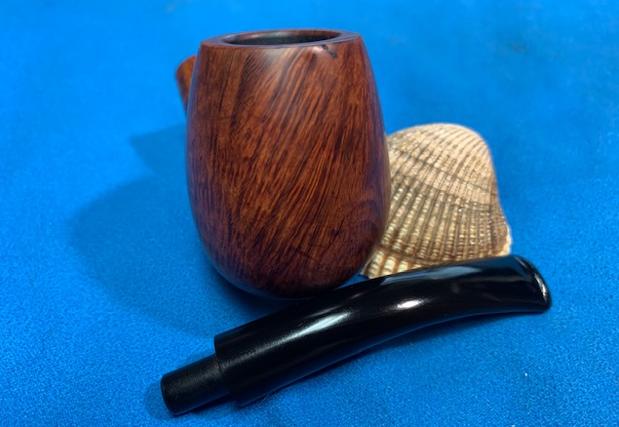
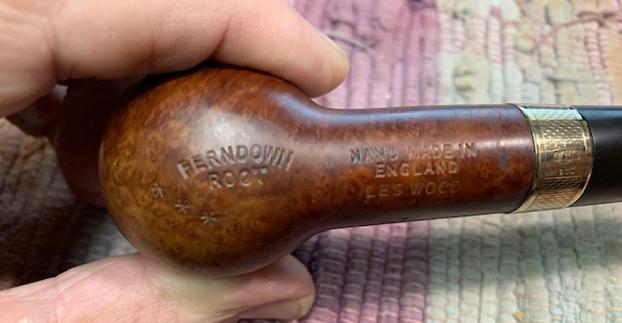
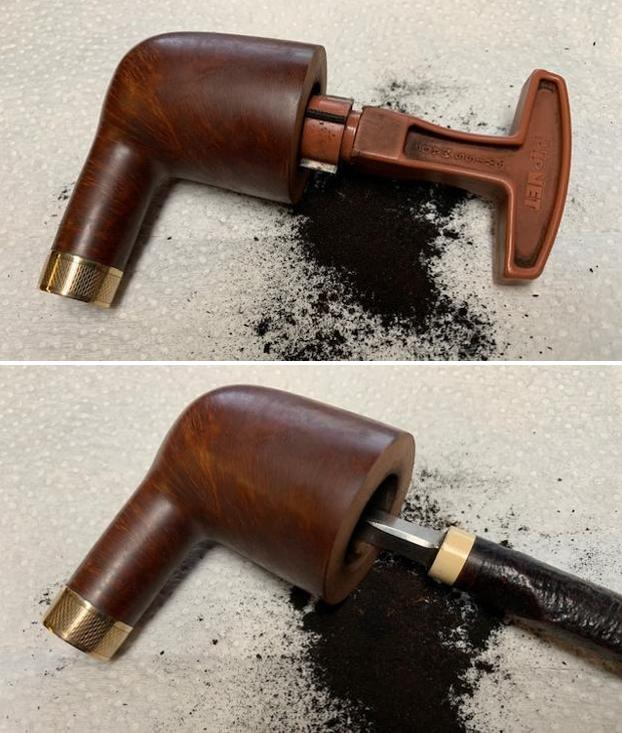
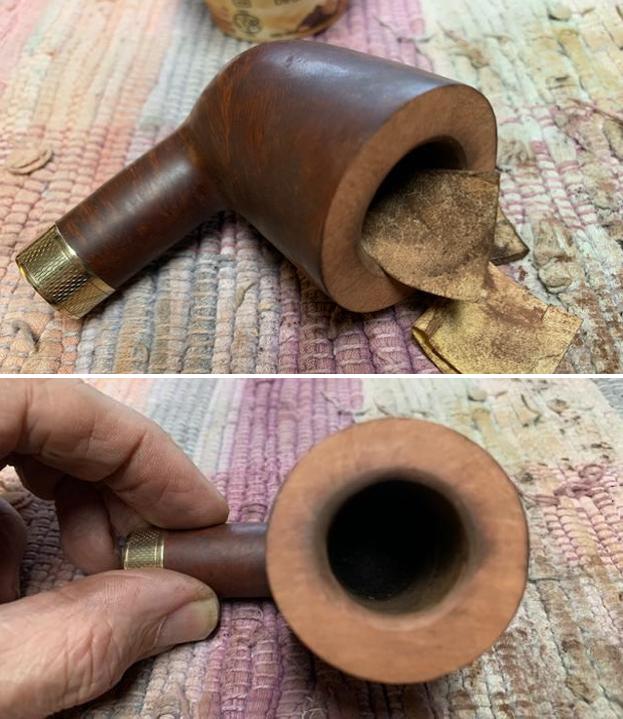
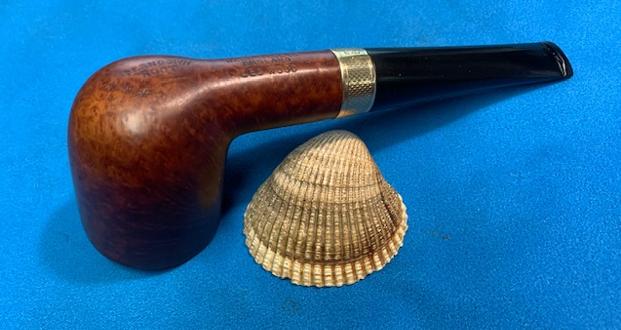
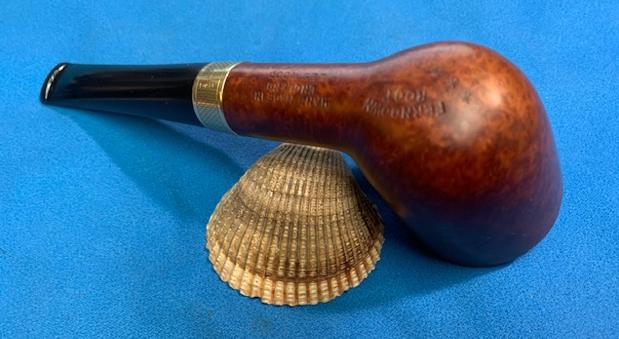
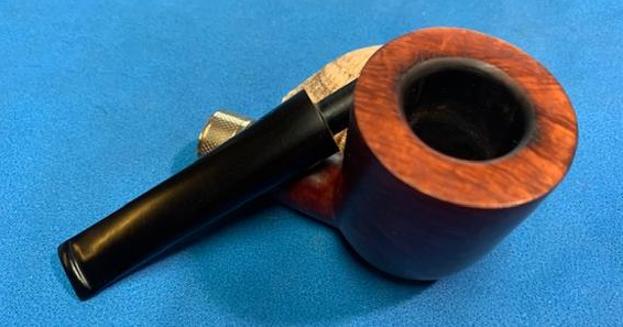
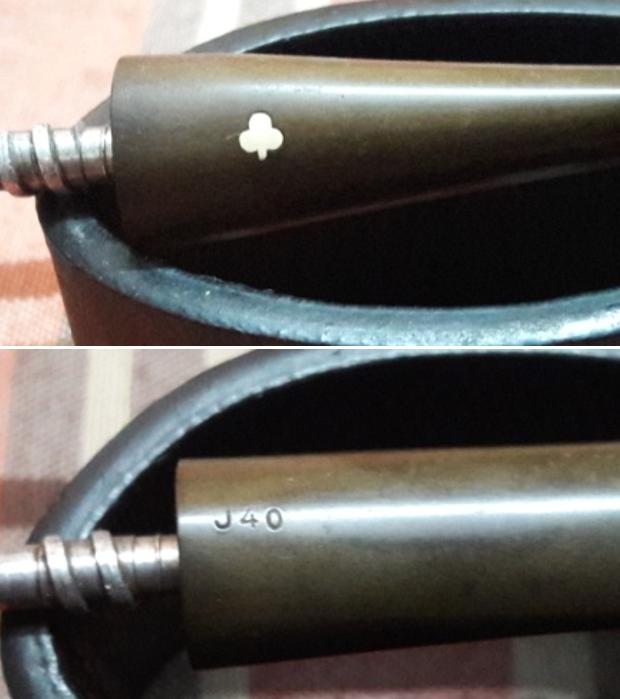
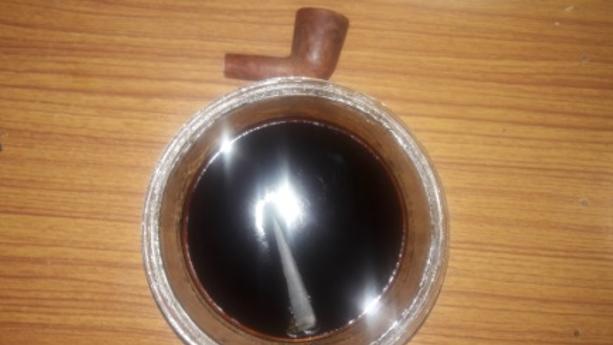
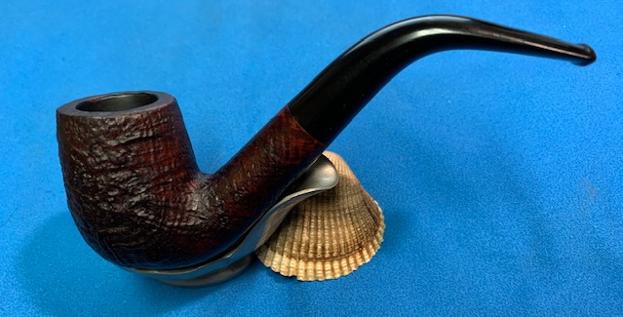
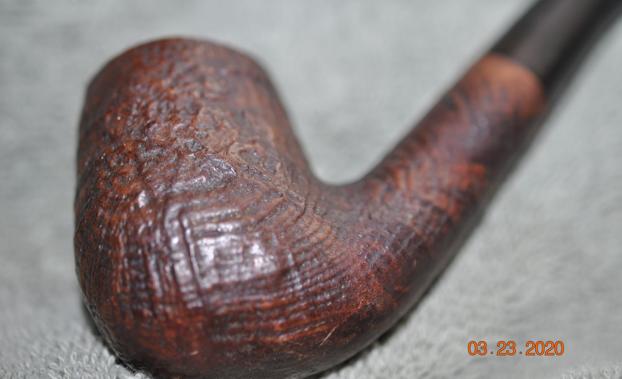
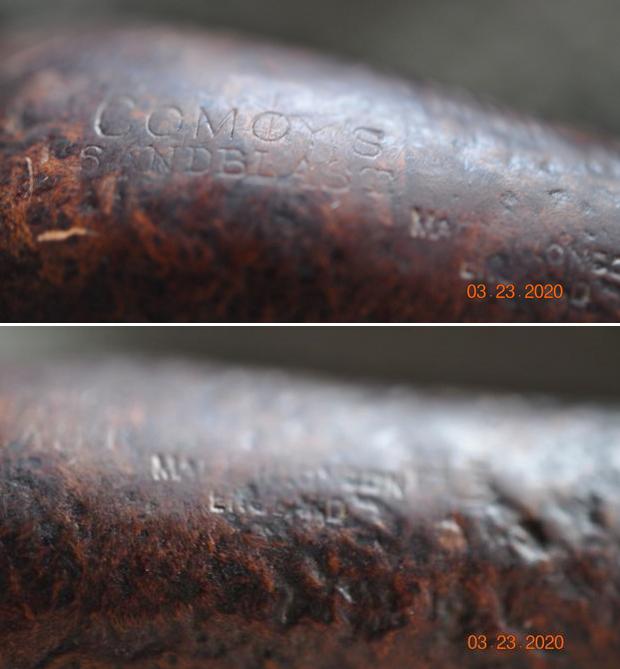
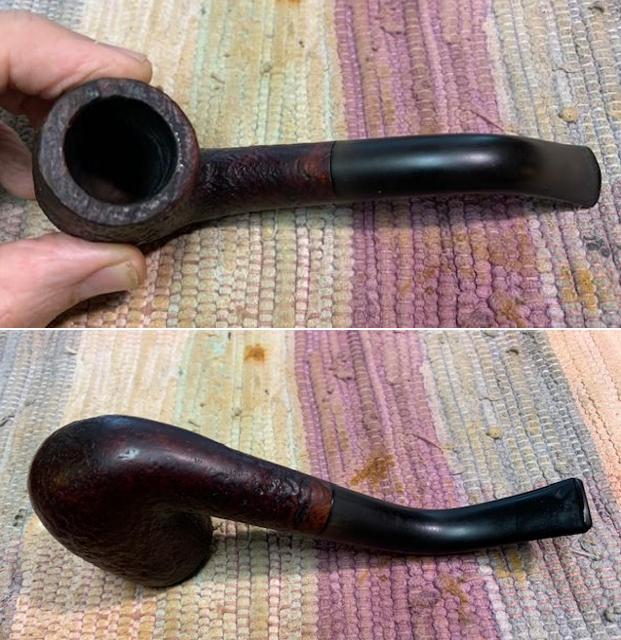
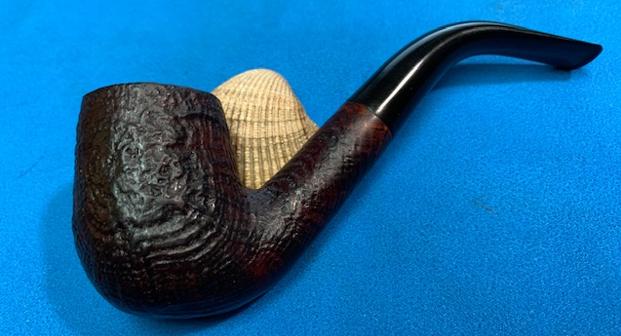
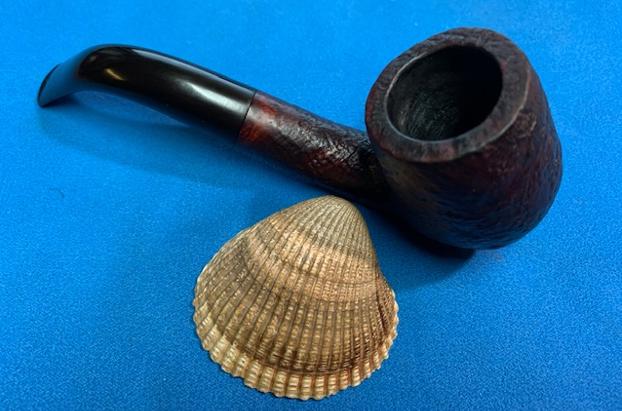
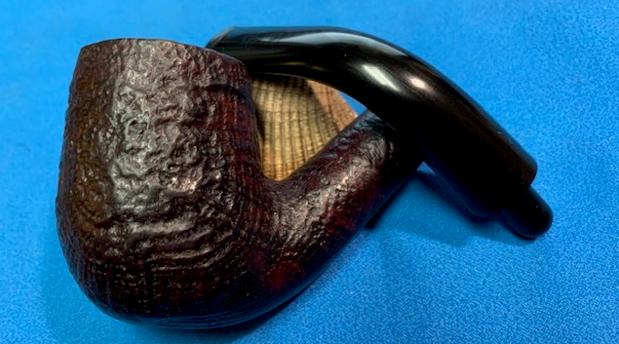
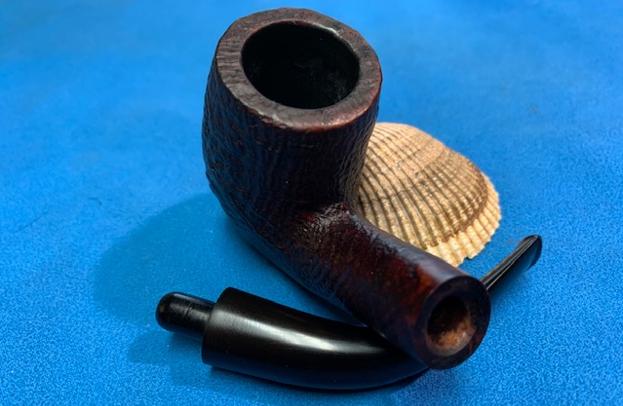
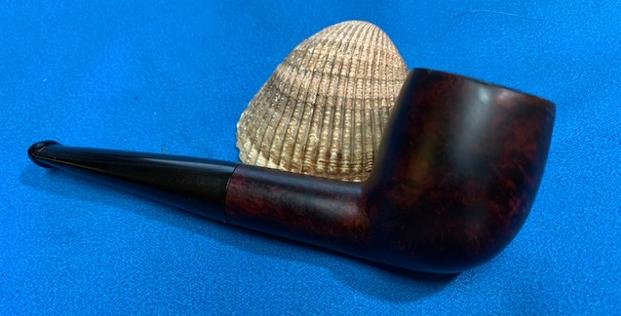
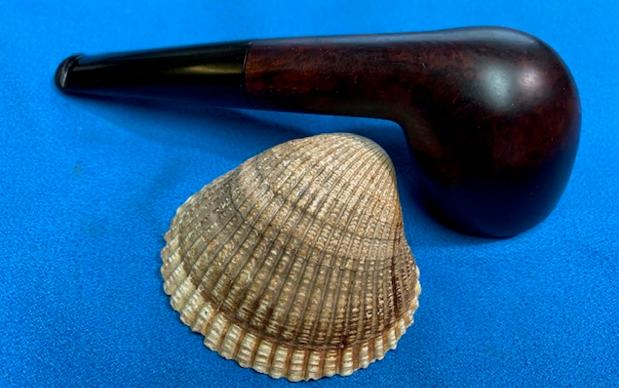
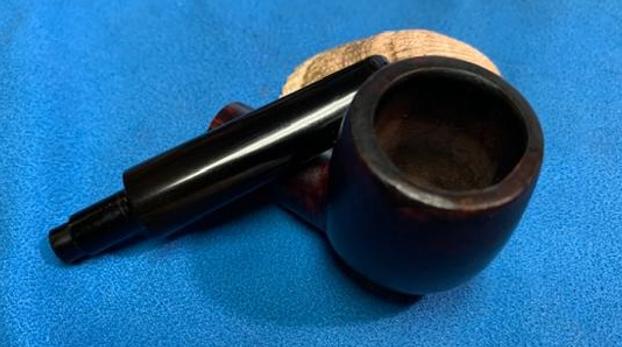
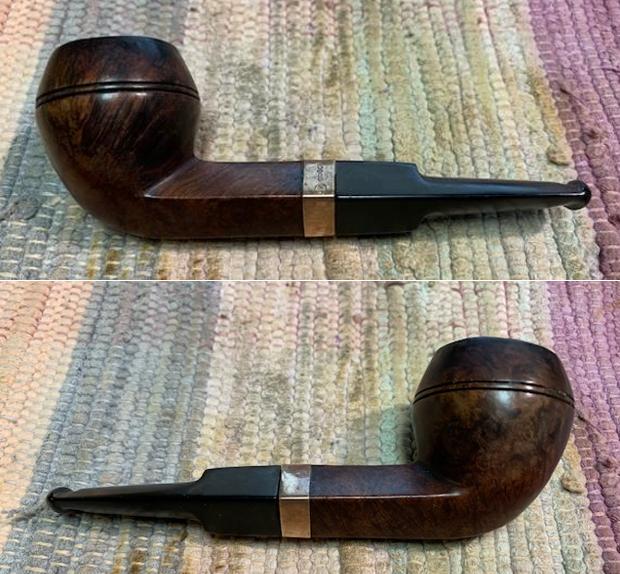
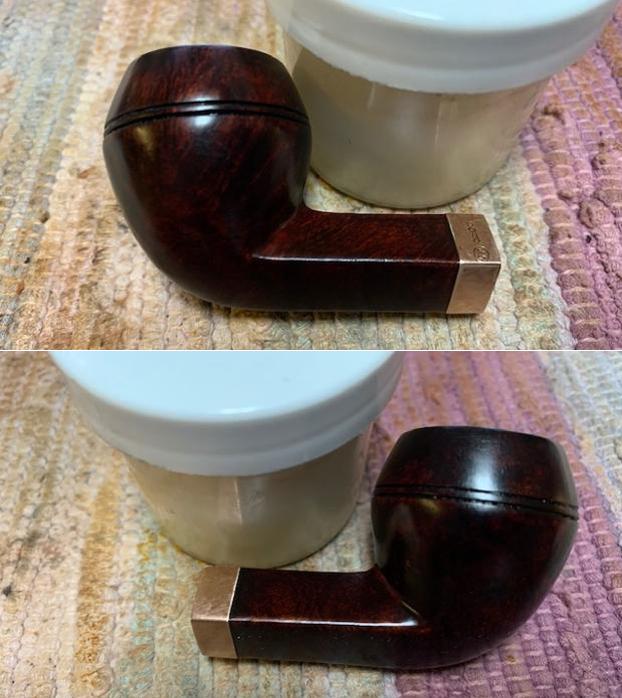
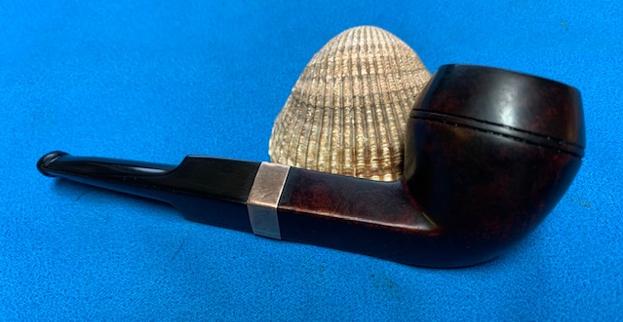
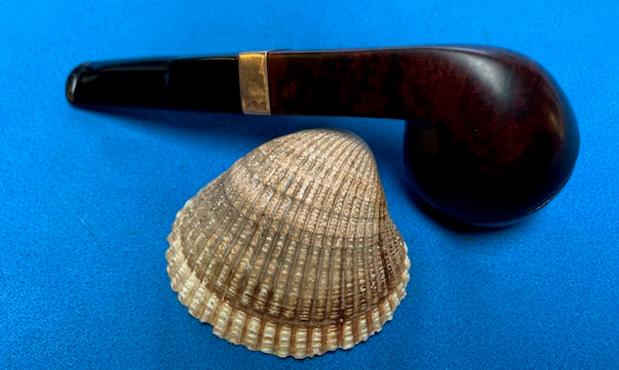
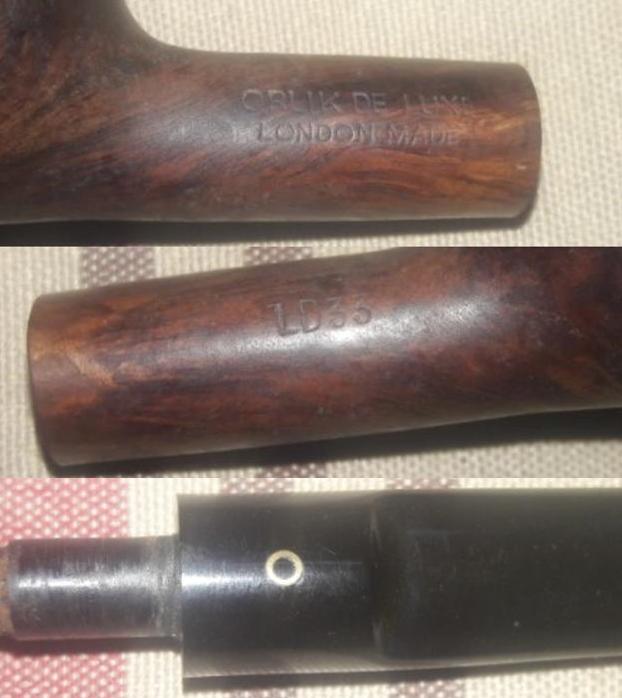
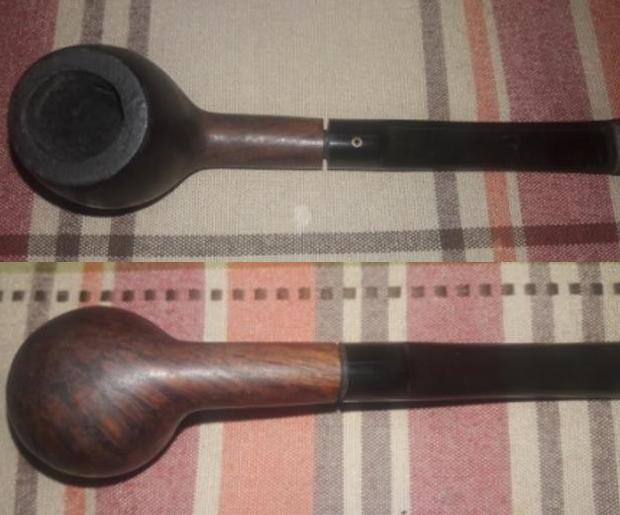
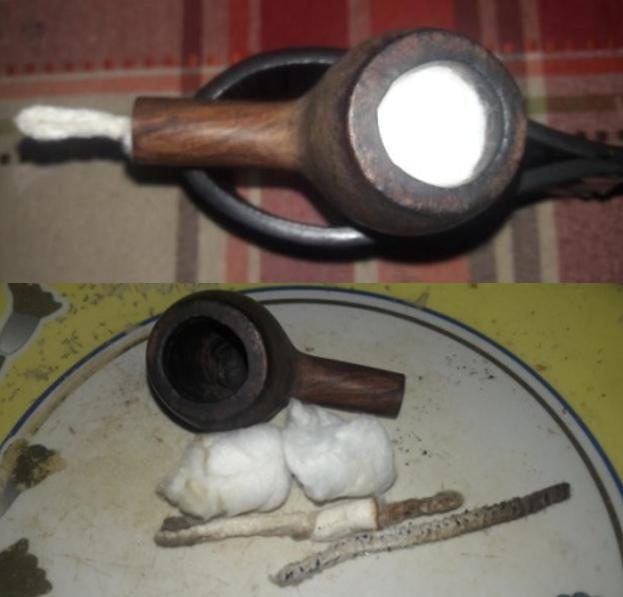
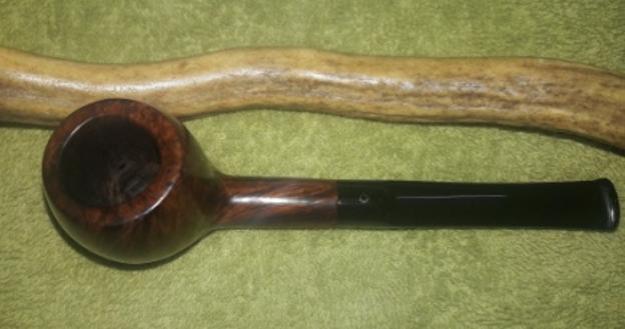
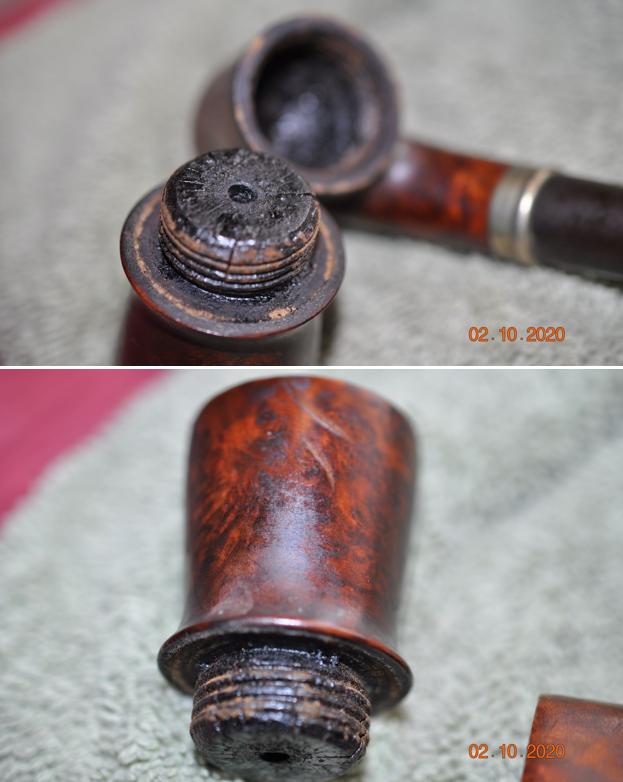
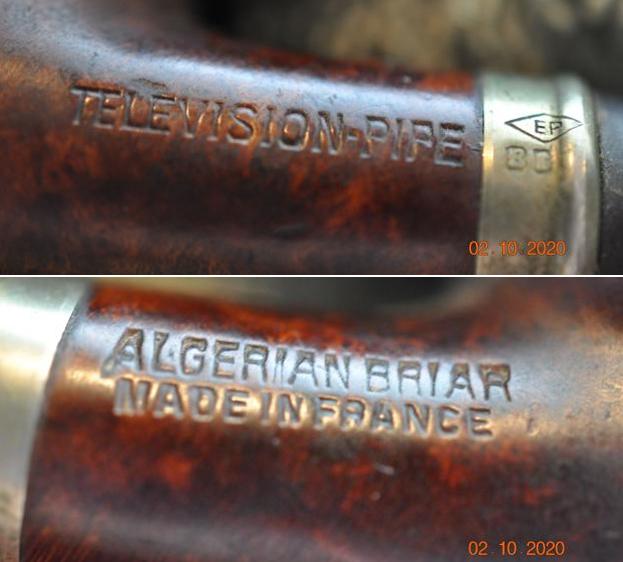
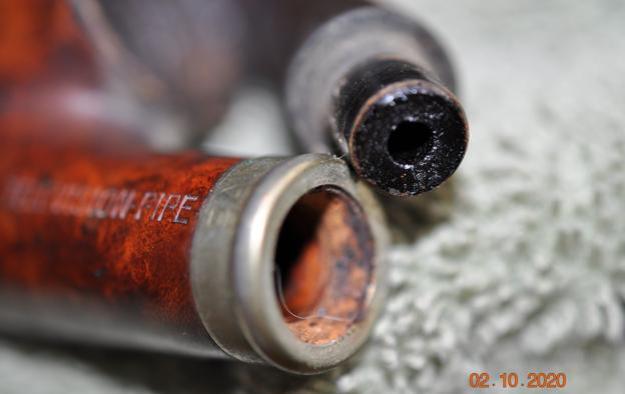
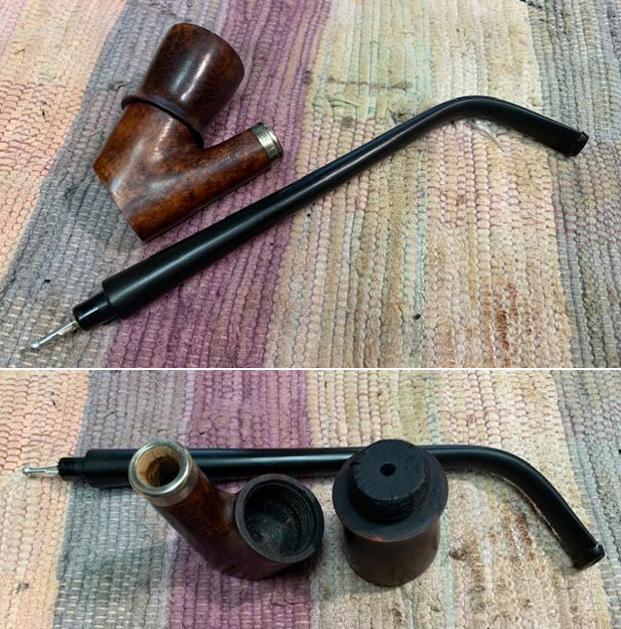
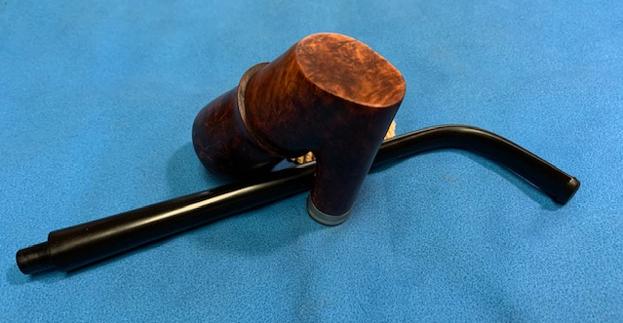
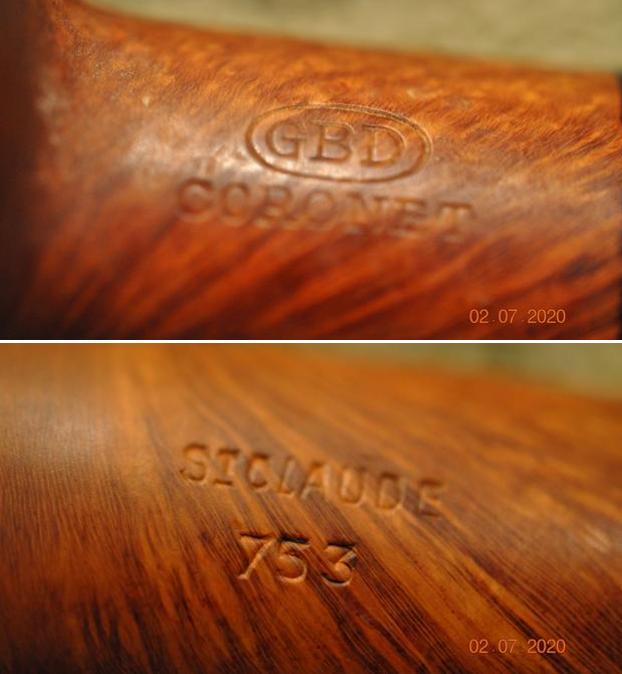
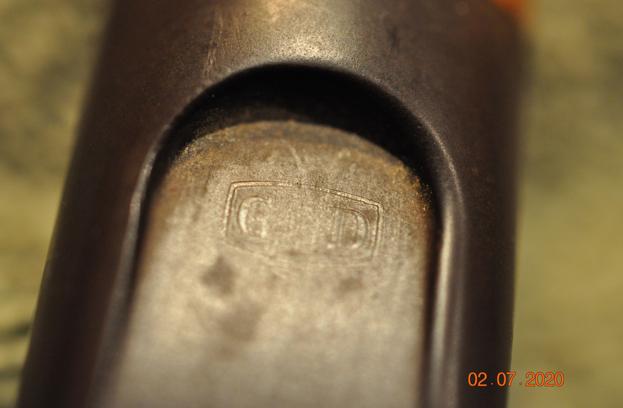
It was time to work on the second pipe – the Billiard. It was surprisingly clean. The bowl had been reamed and the airways cleaned. (I later found out that Tim had done the clean up for me. Thanks Tim!)There was no stamping on the shank of the pipe. There was no gold band to identify it as a Charles Maas pipe like the one on the Bulldog. However it was obvious that the case was custom fitted to this little Billiard so that is proof enough for me. I took some photos of the pipe before I began, to catalogue what I saw before I started.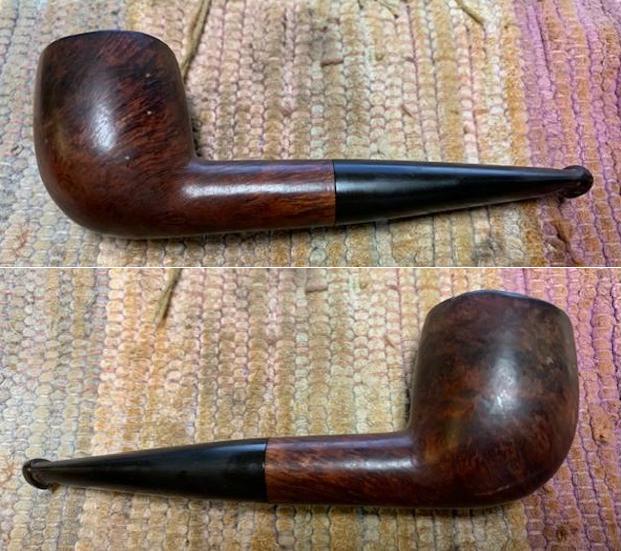
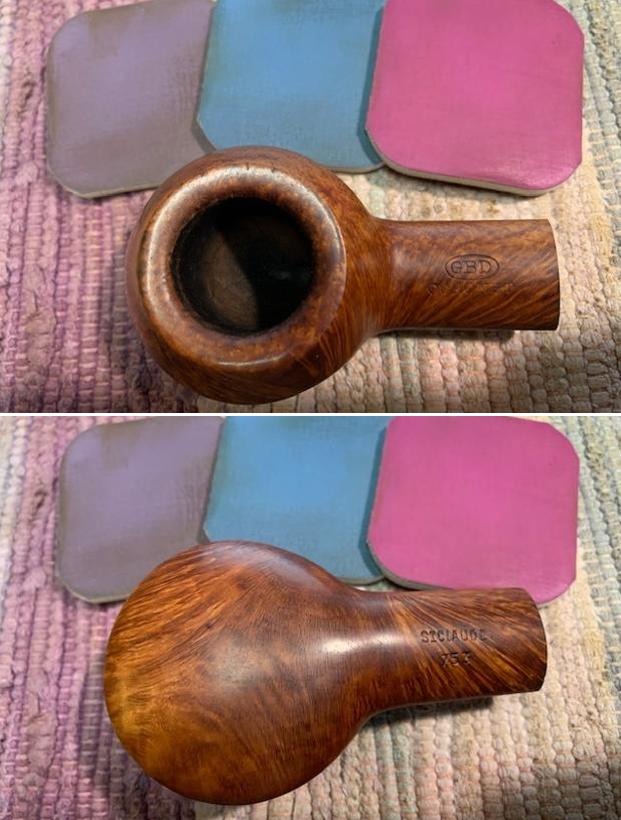
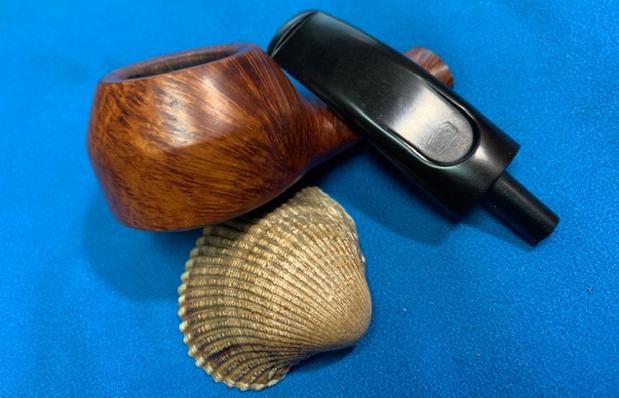
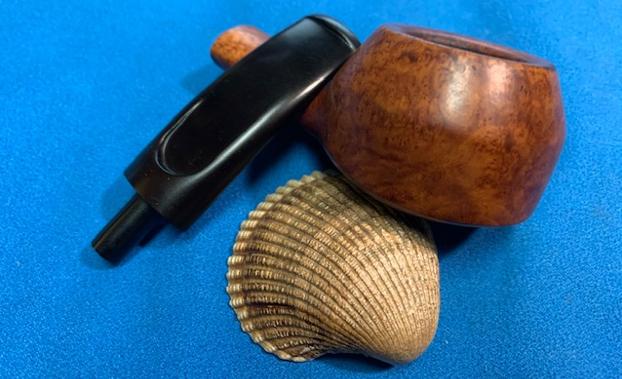
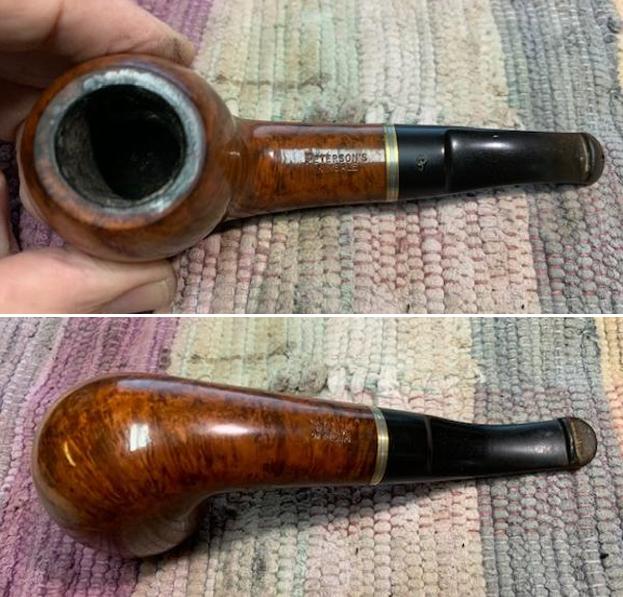
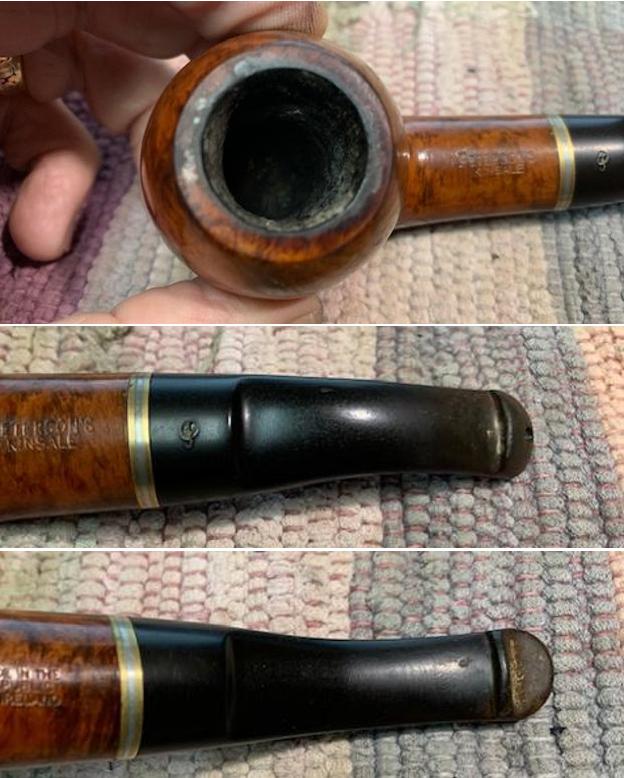
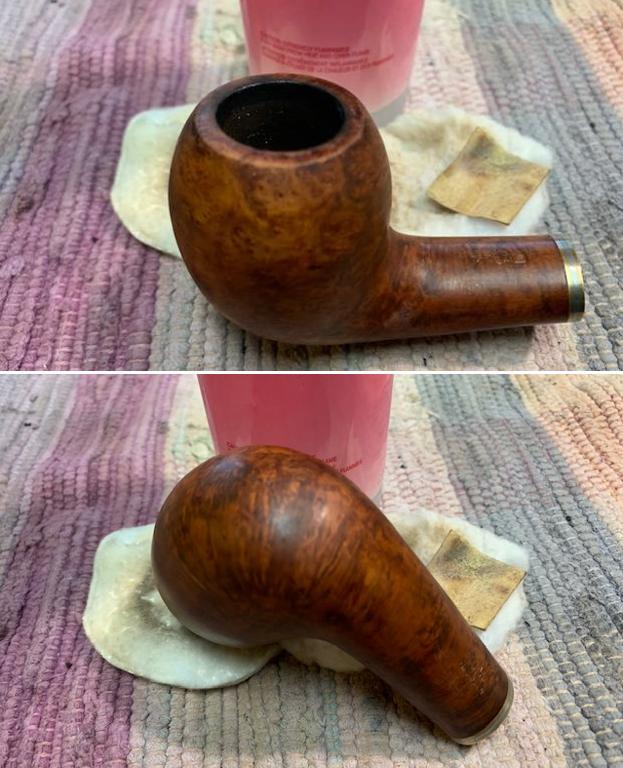
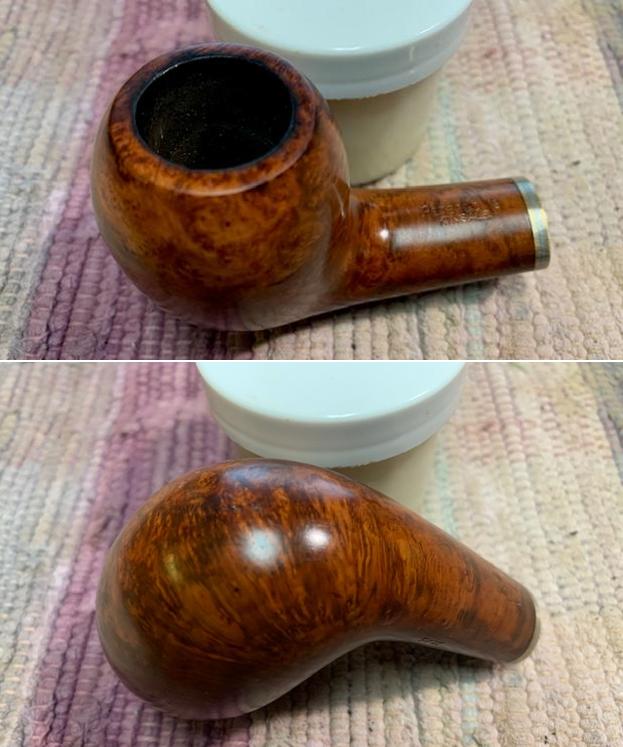
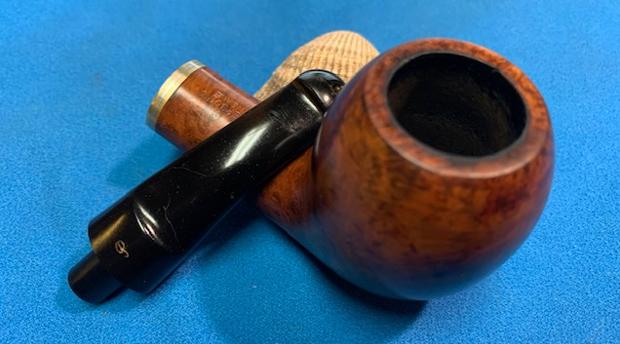
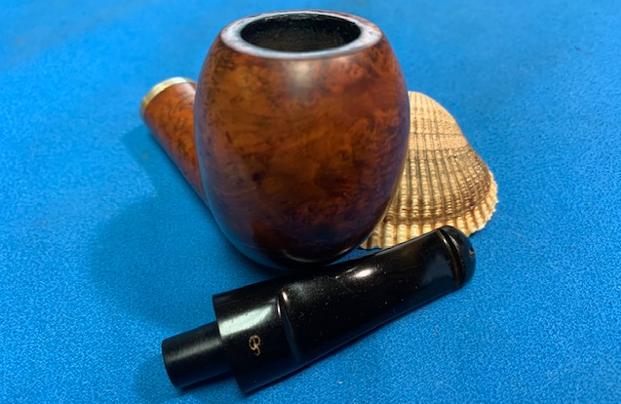
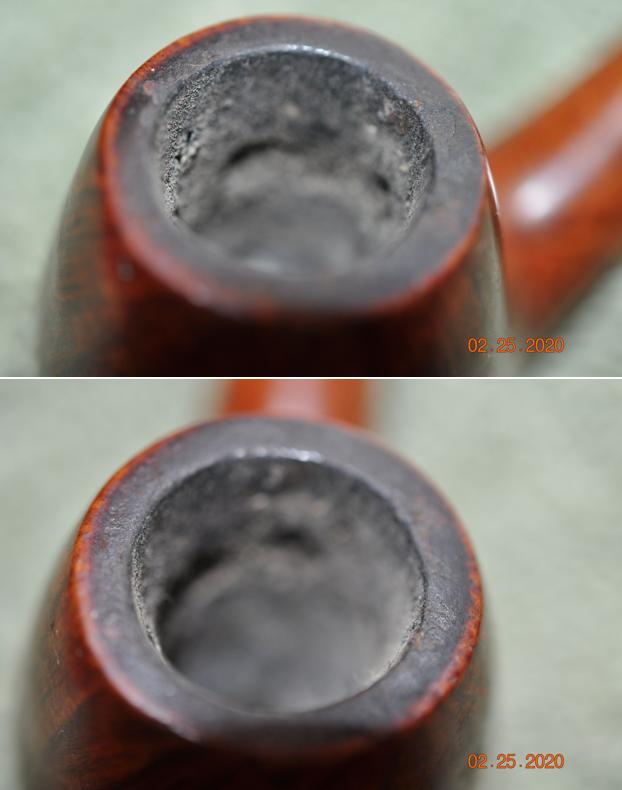
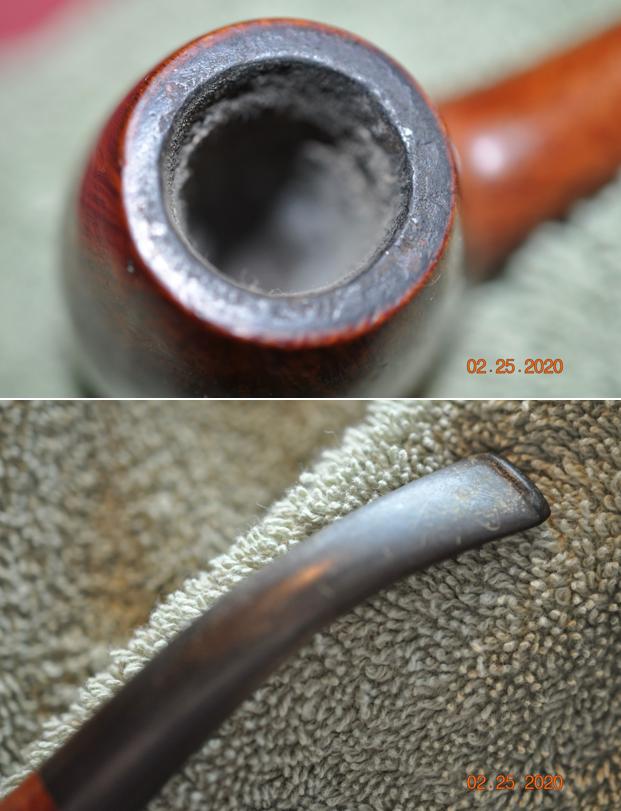
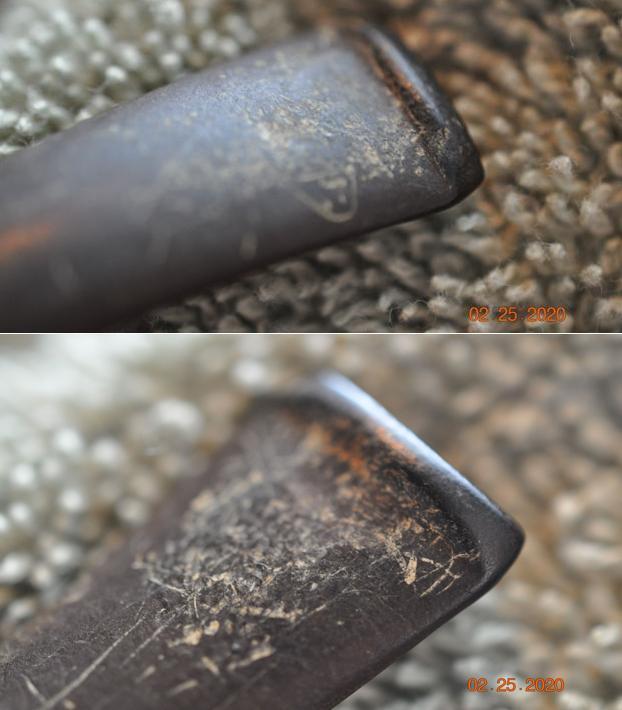
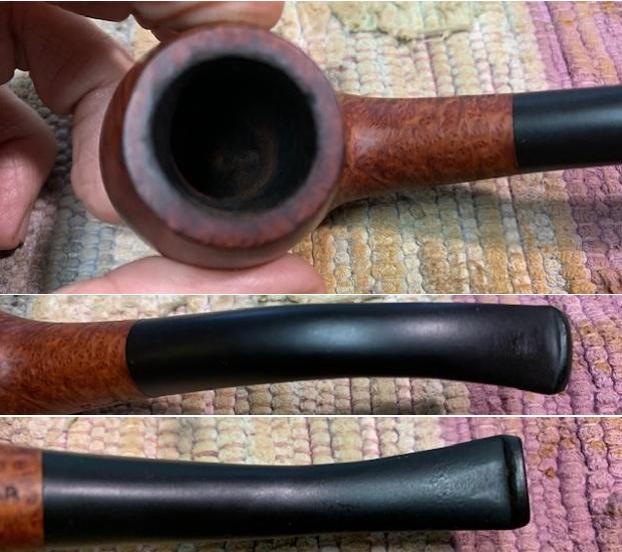
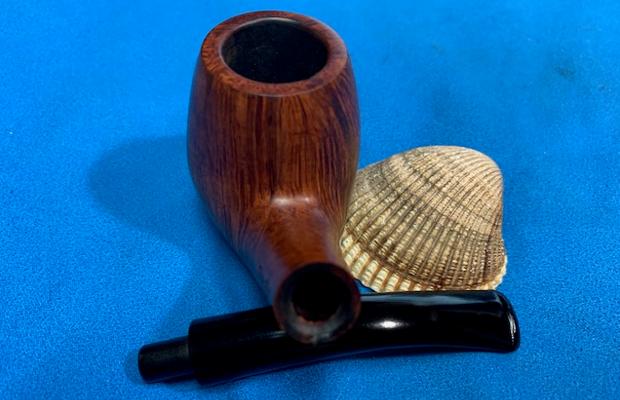
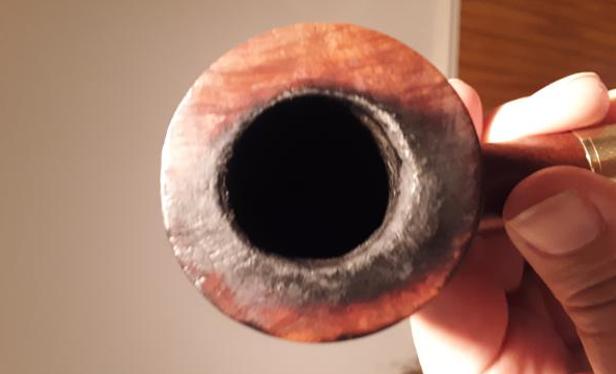
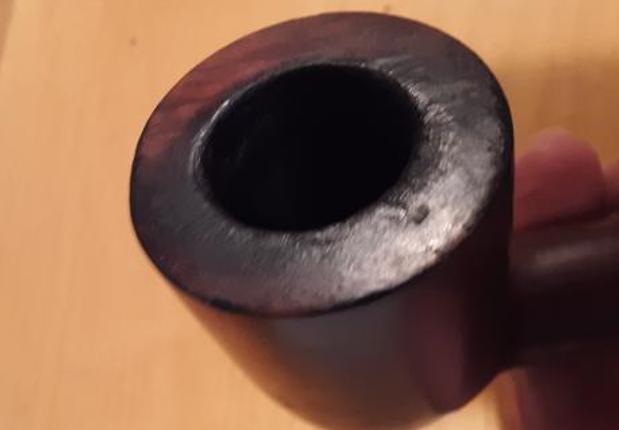
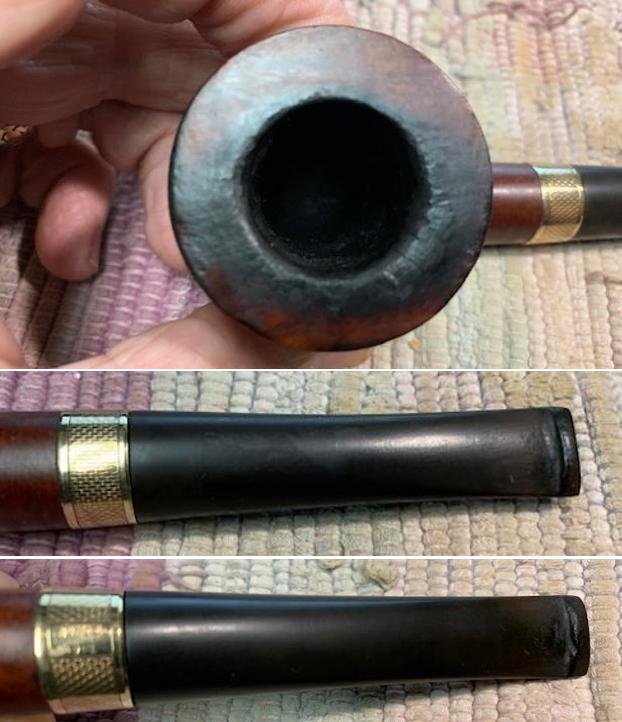
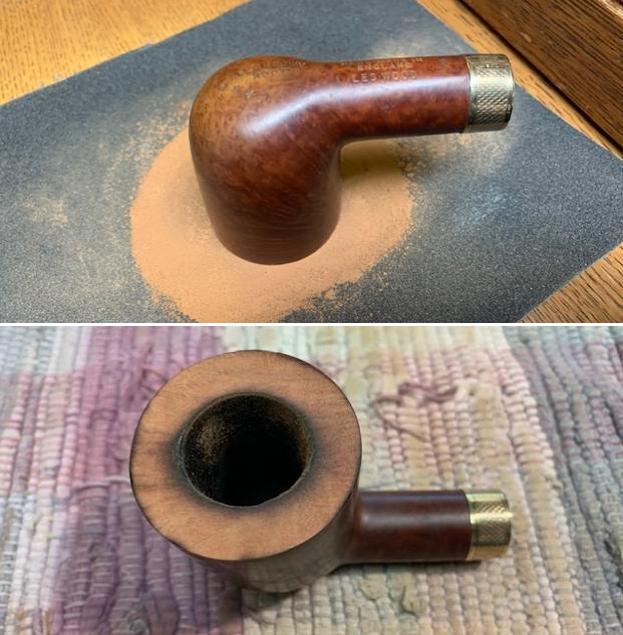
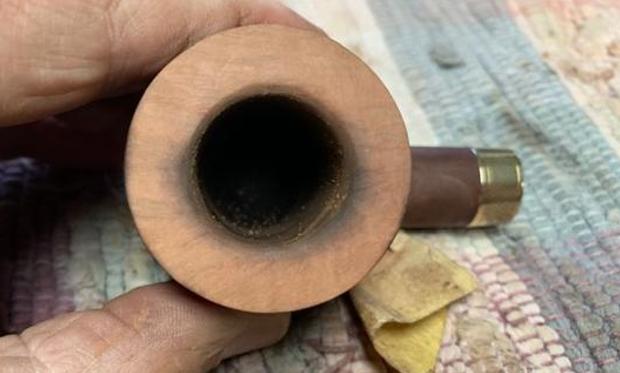
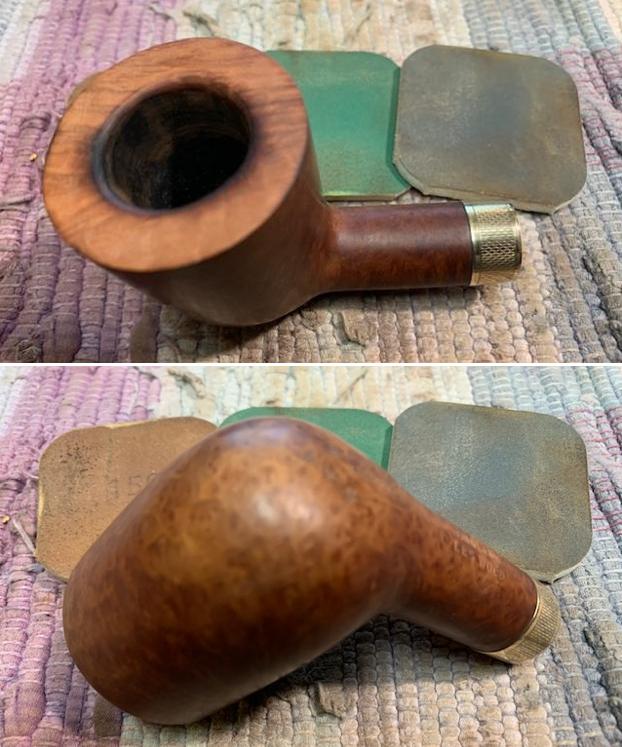
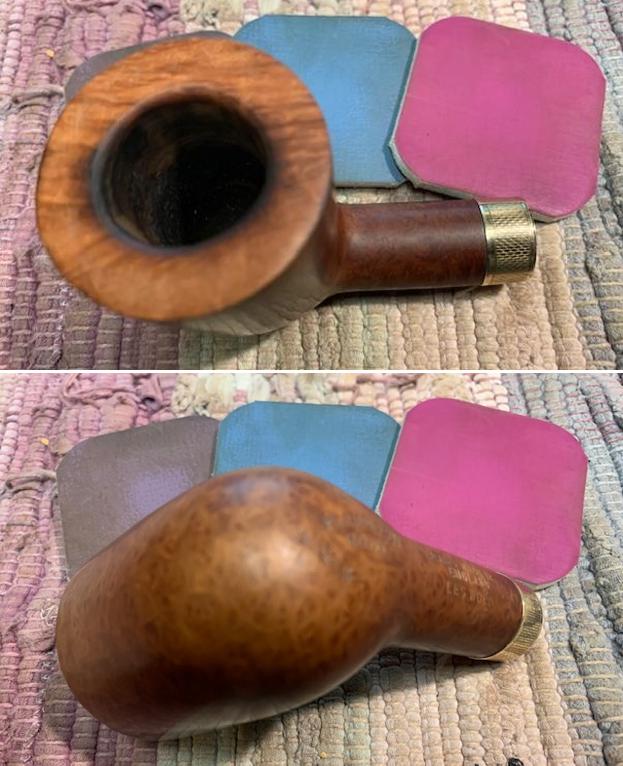
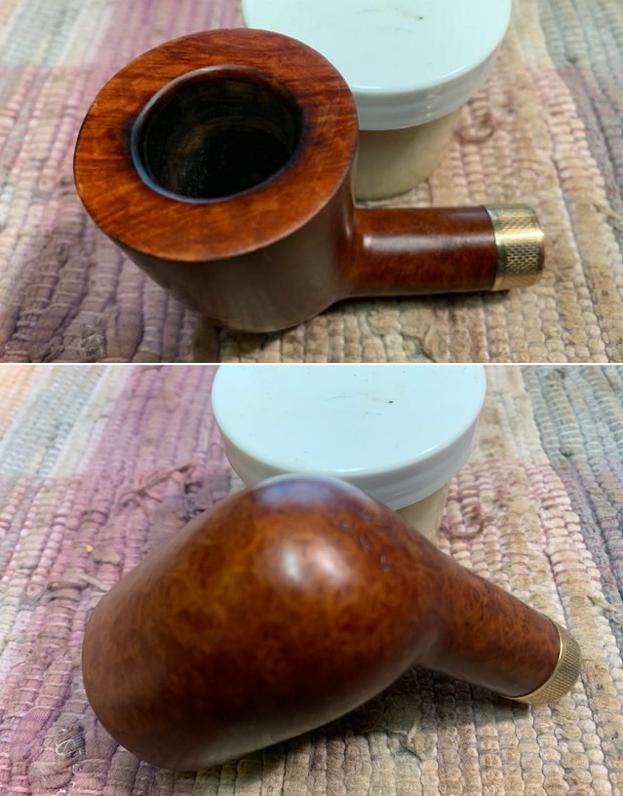
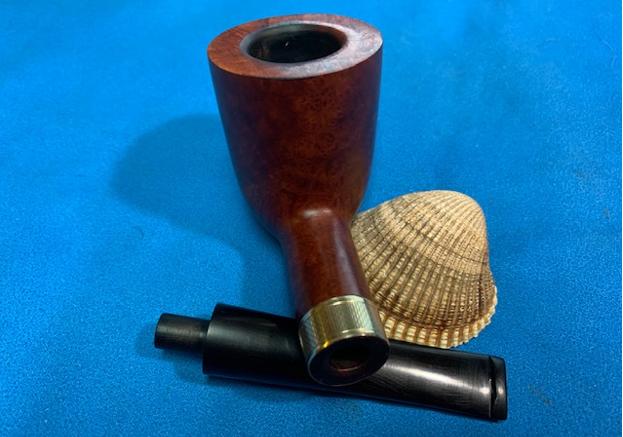
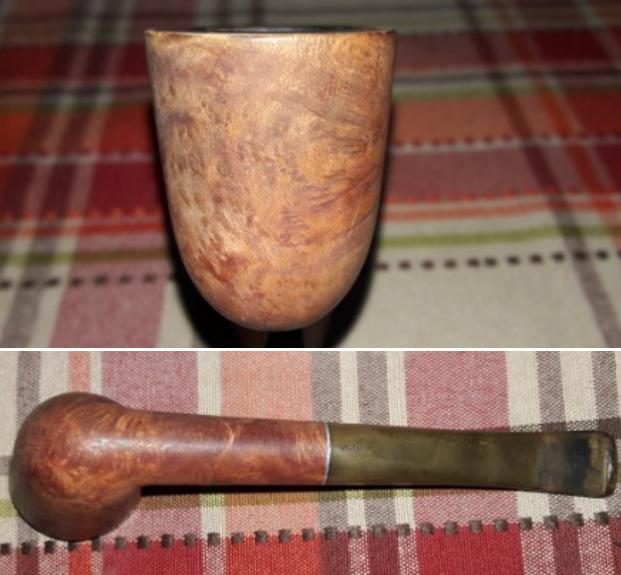
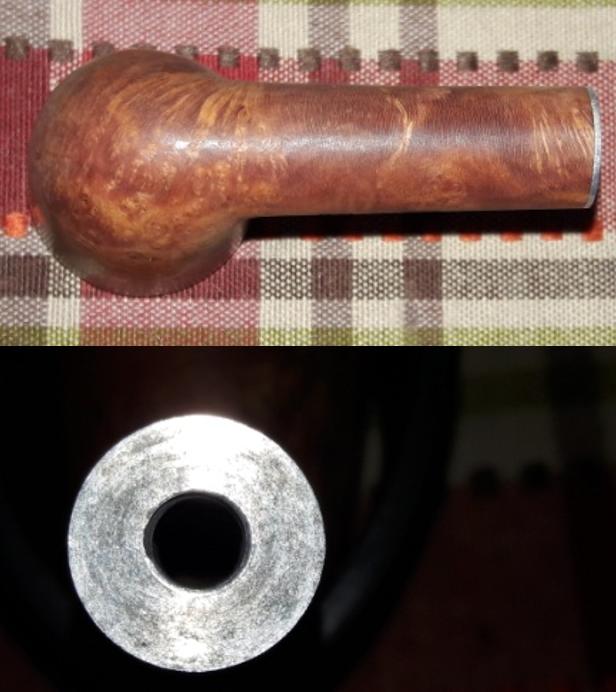
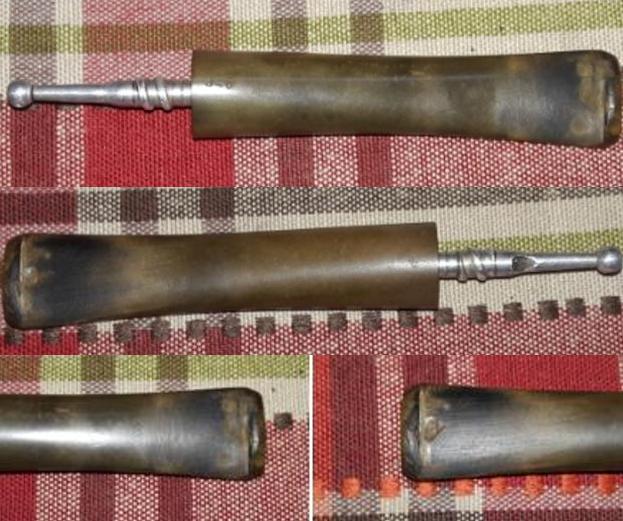
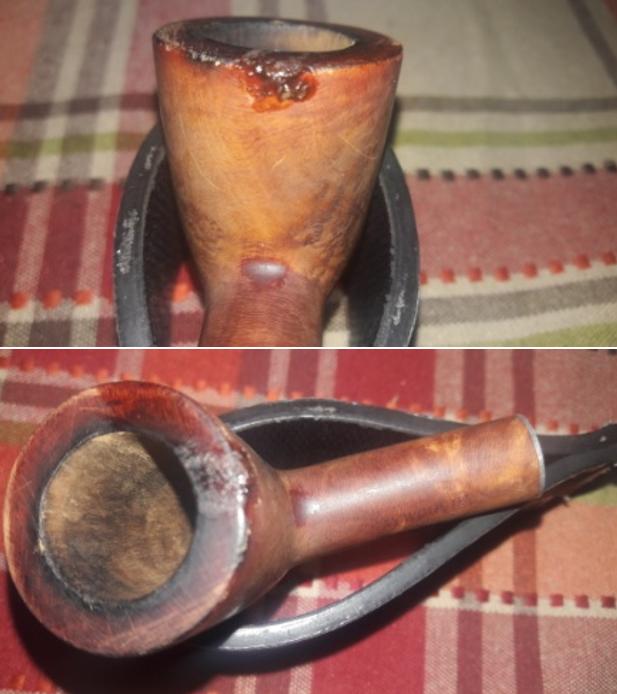
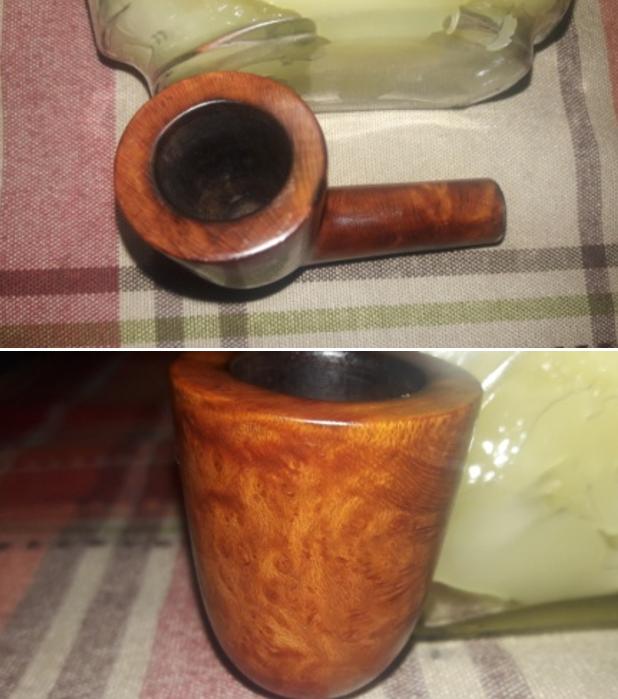
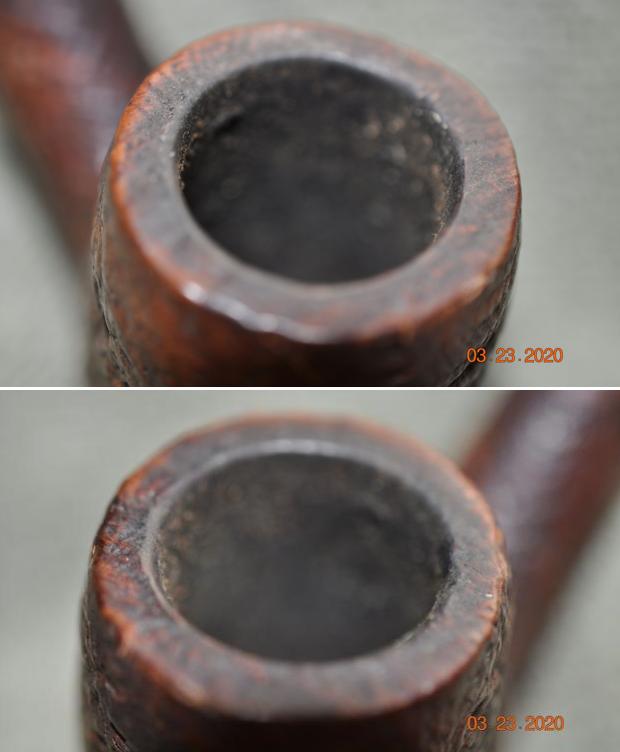
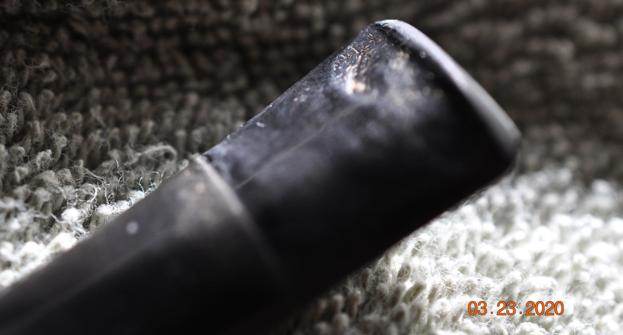
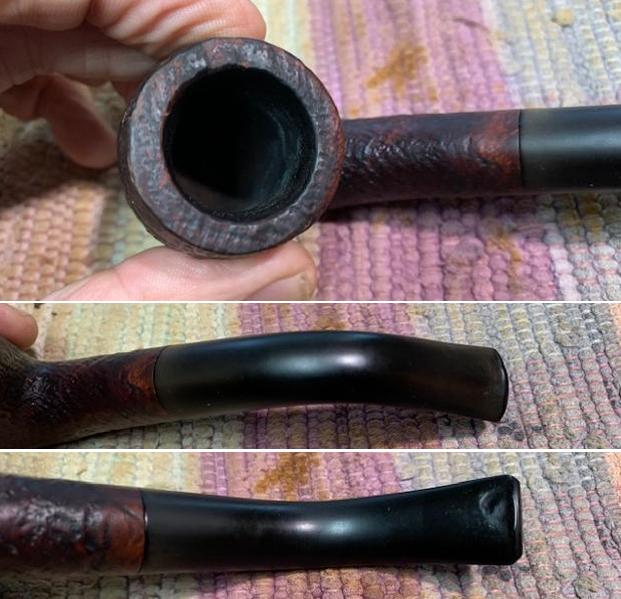
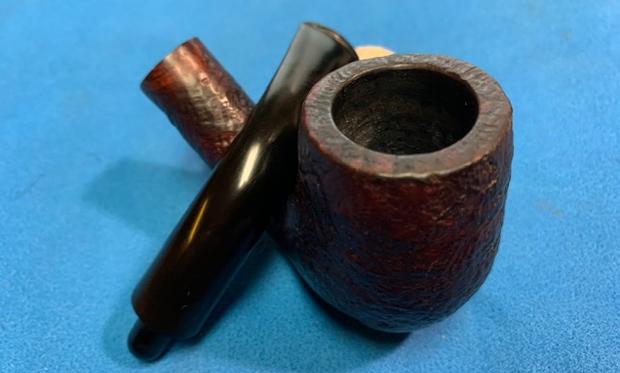
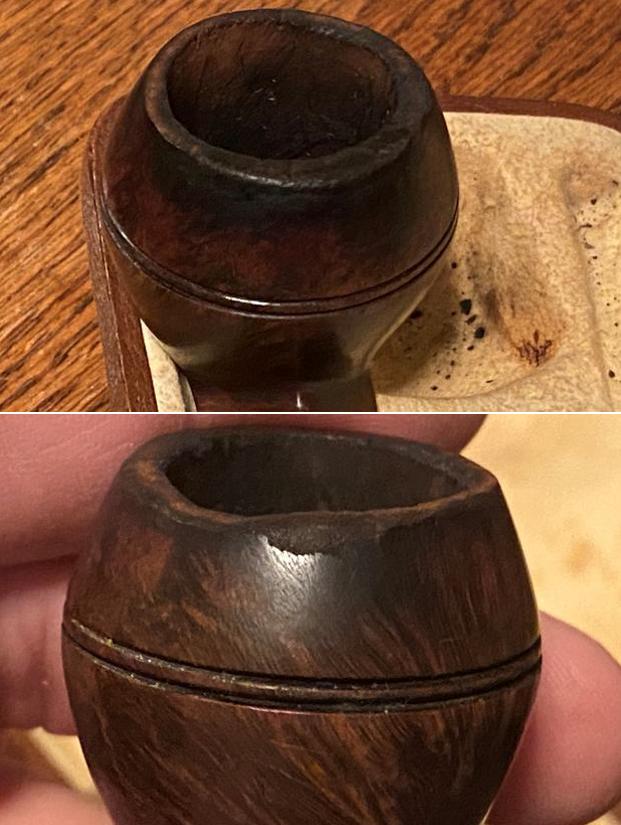
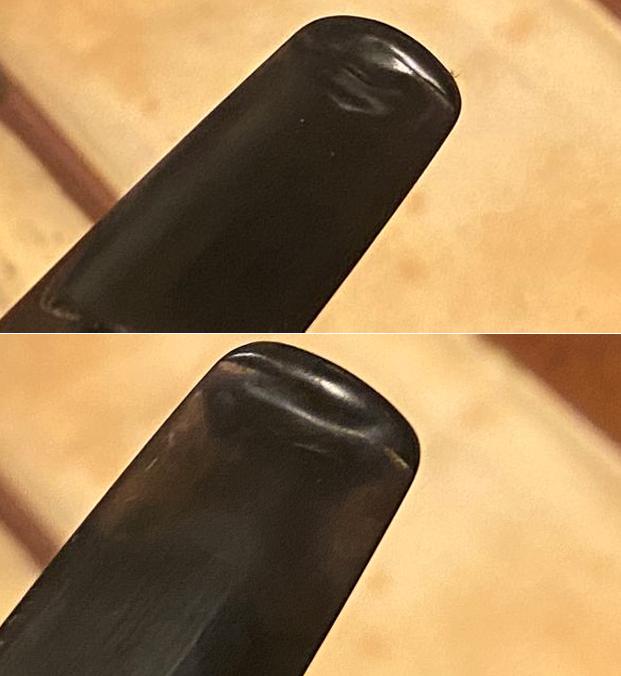
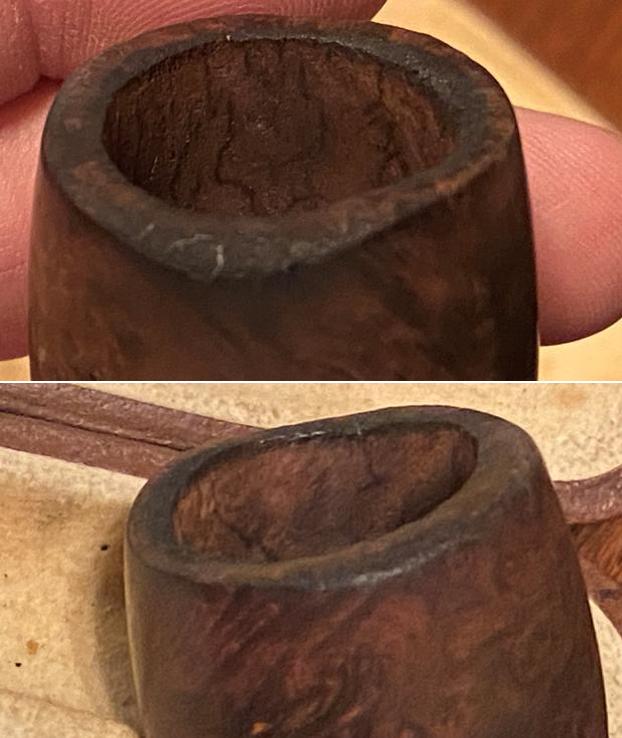
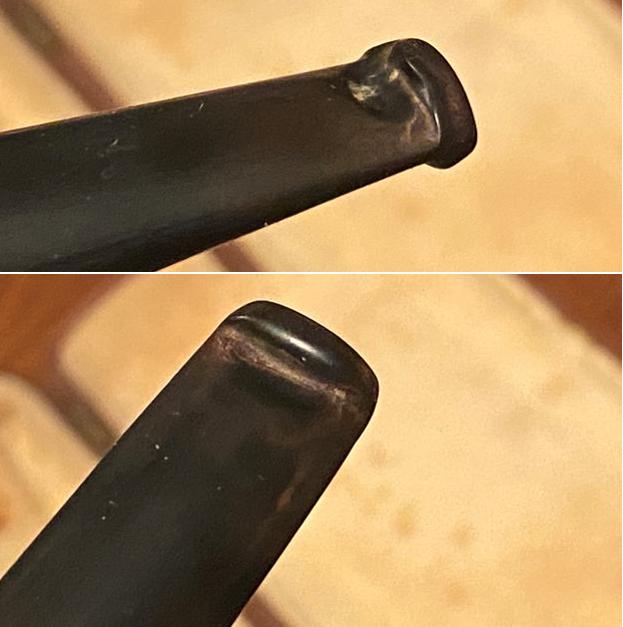
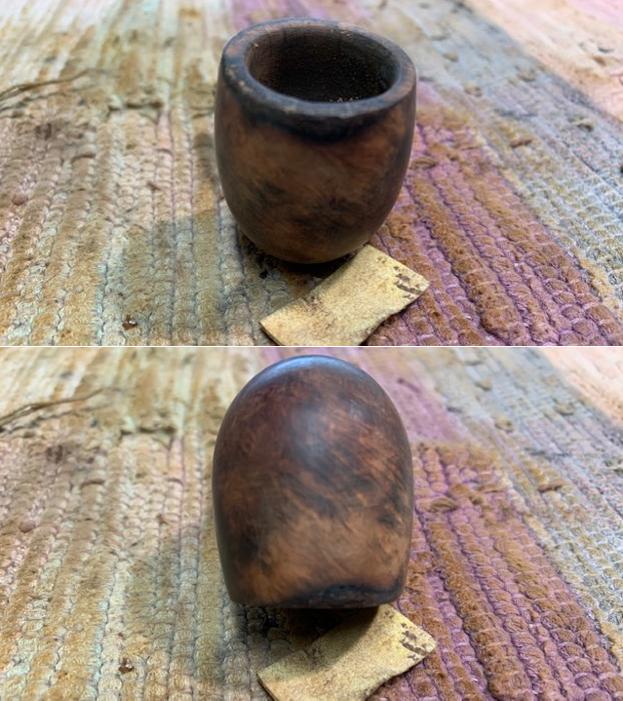
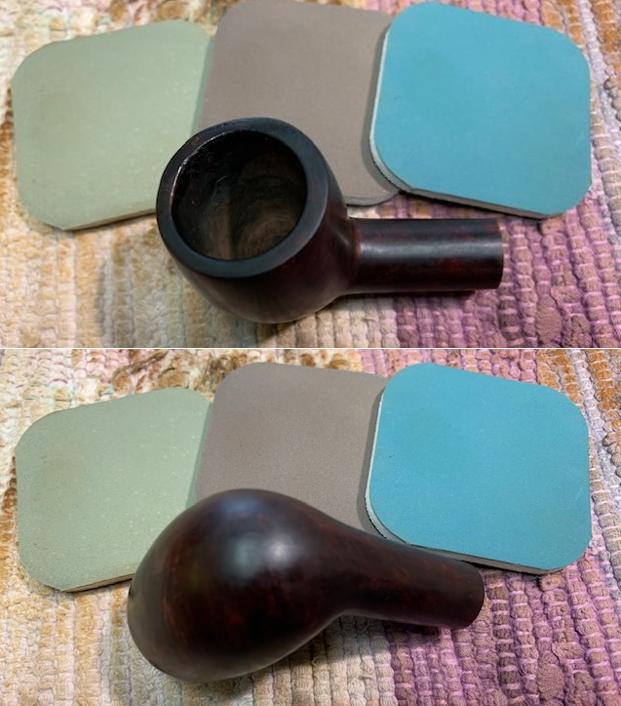
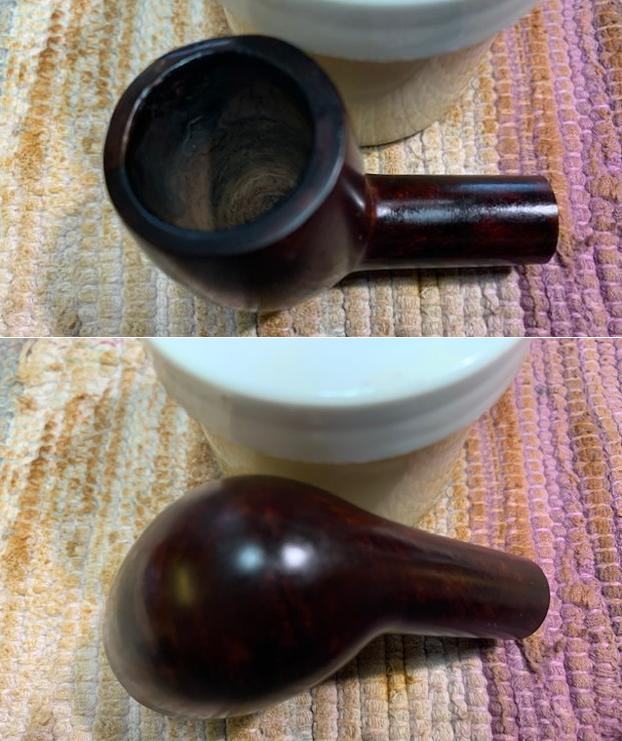
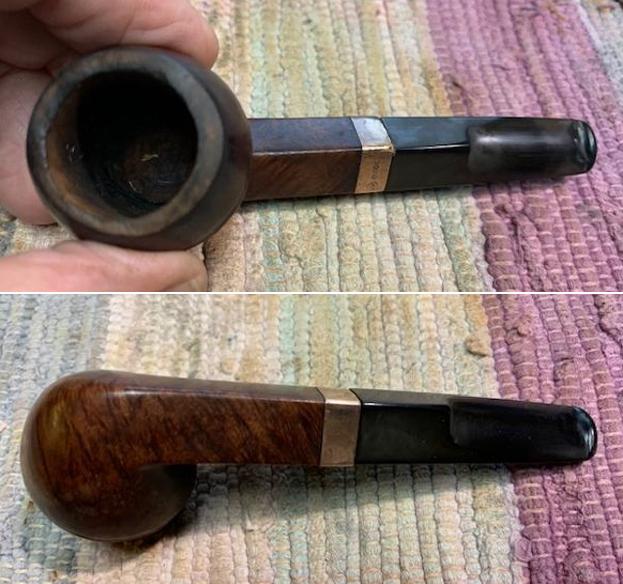
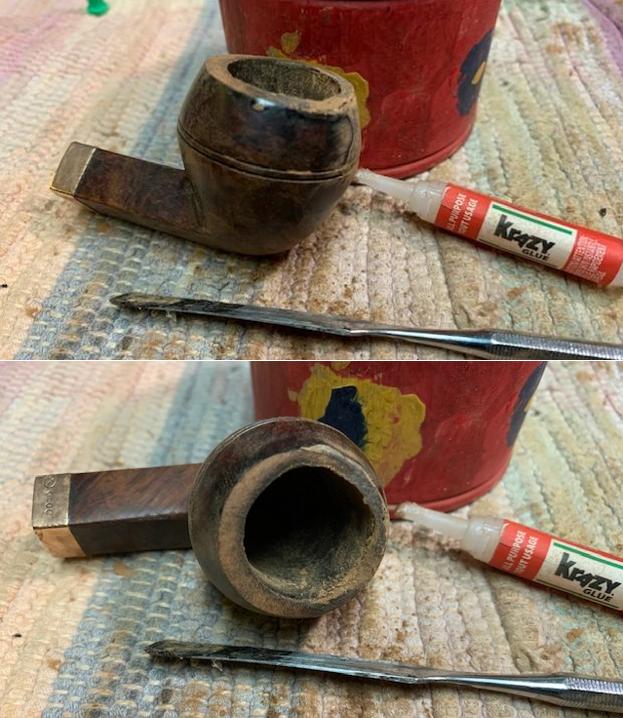
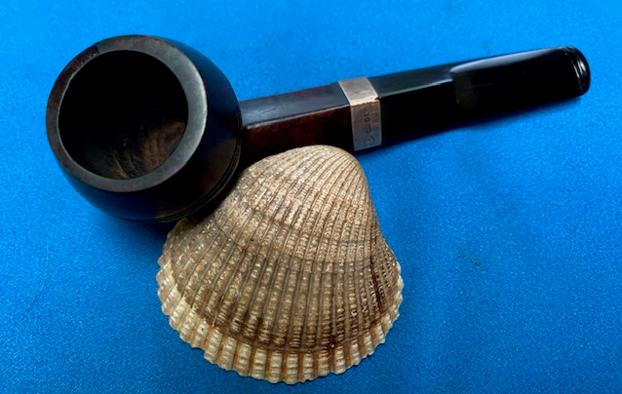
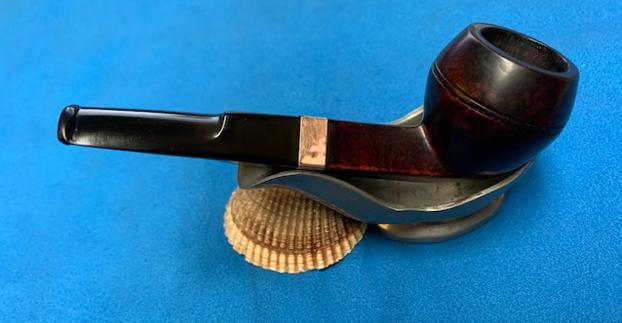
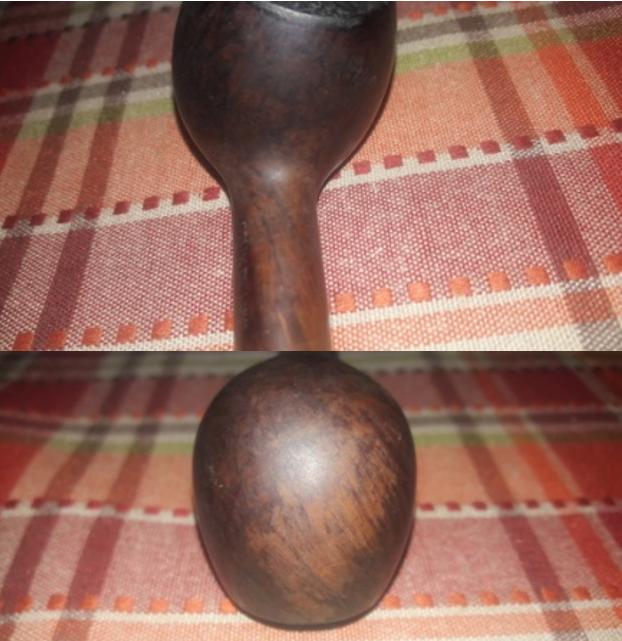
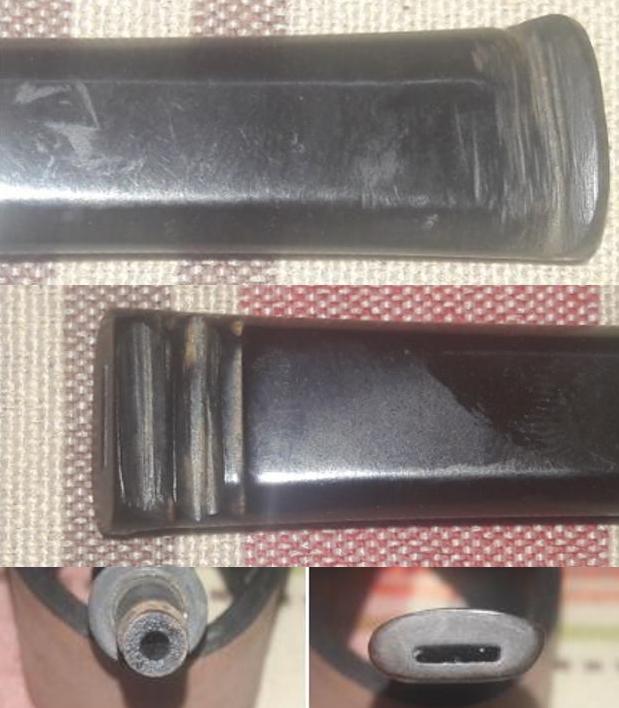
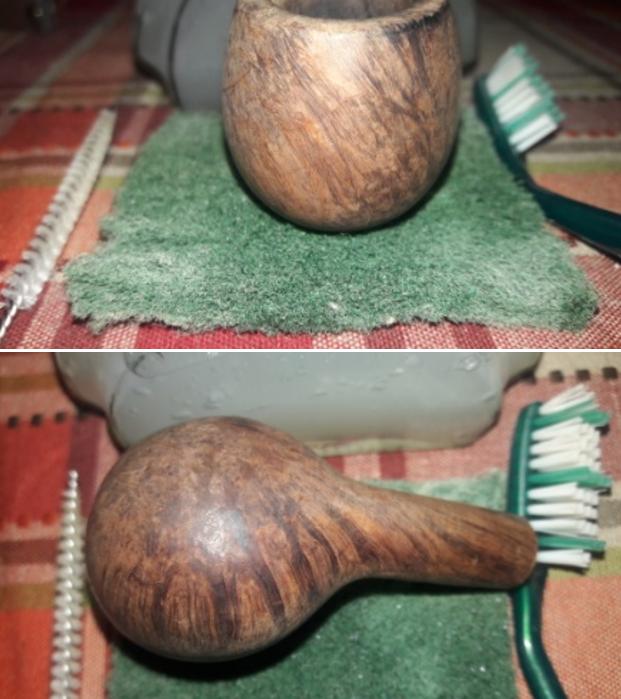
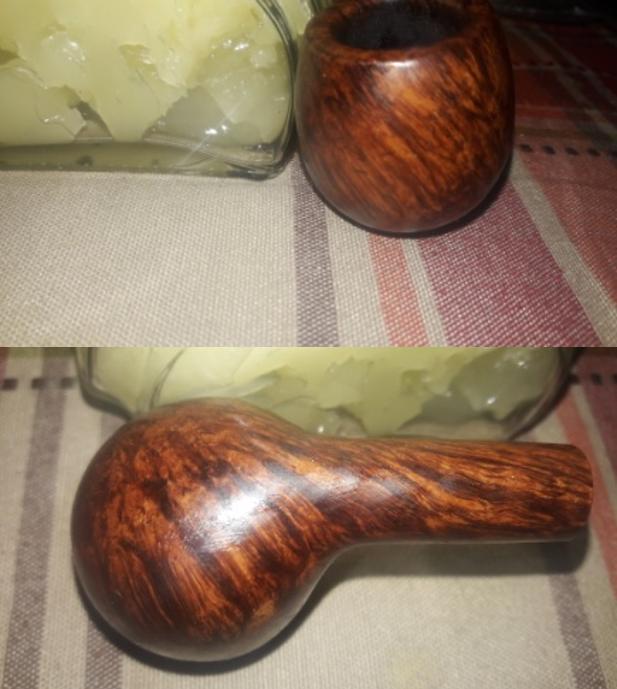
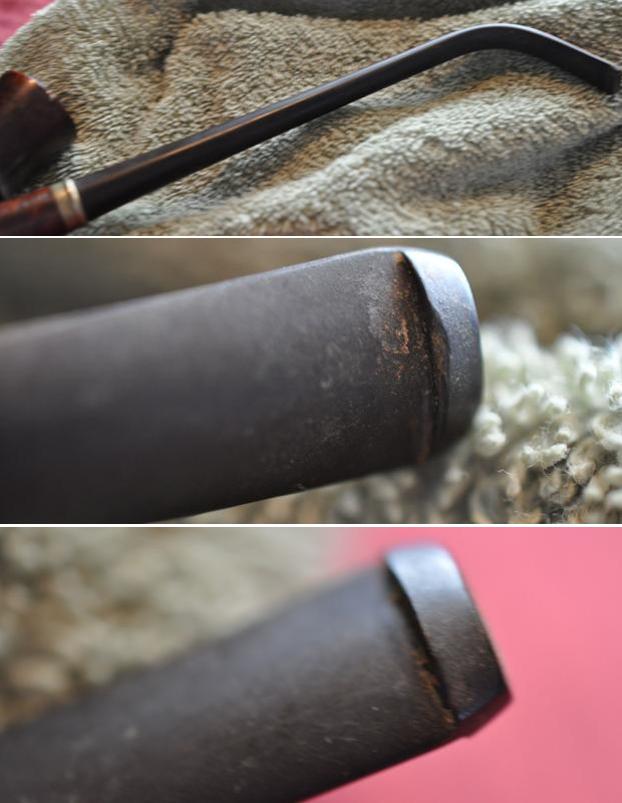
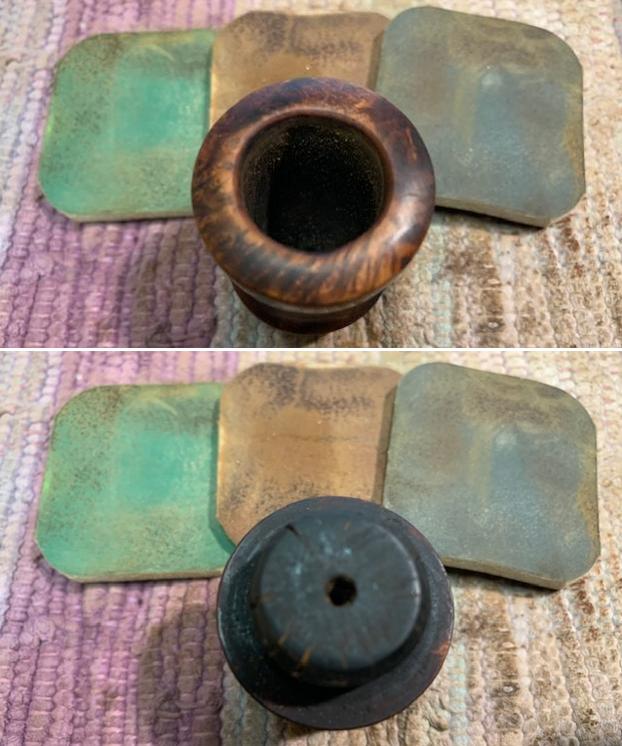
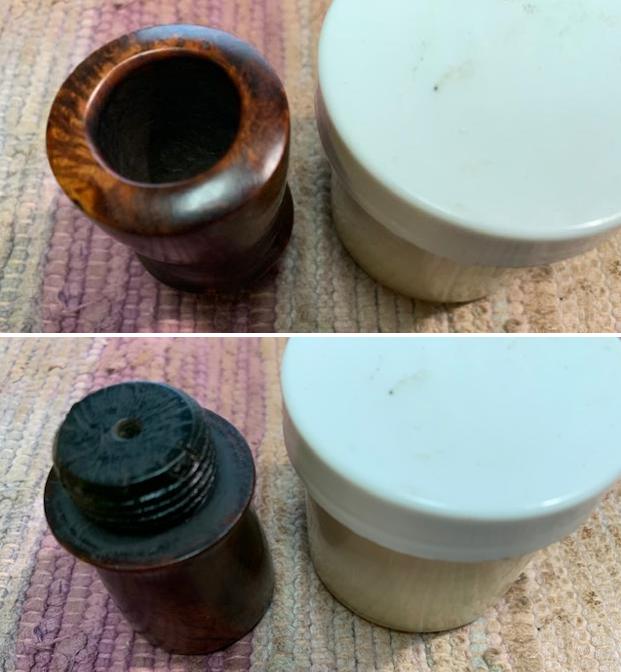
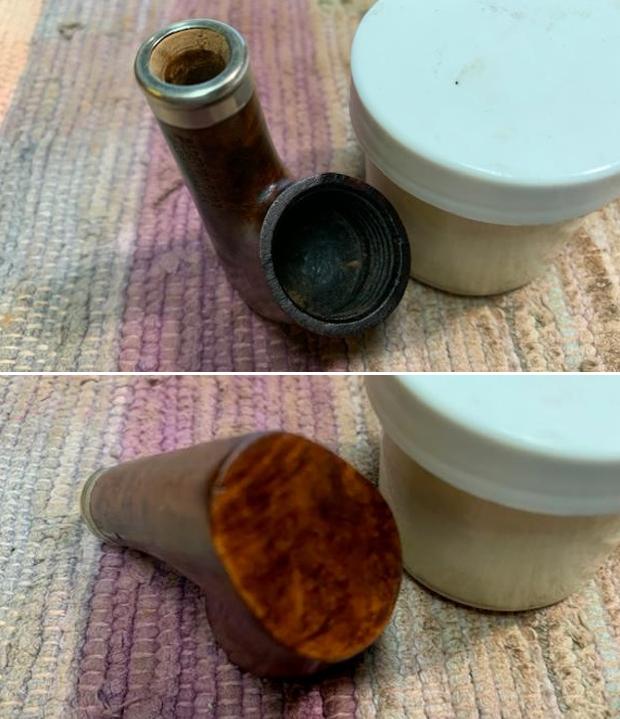
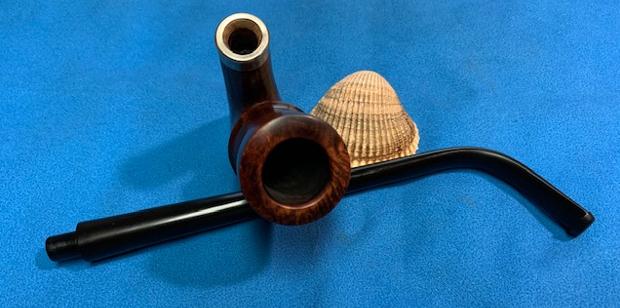
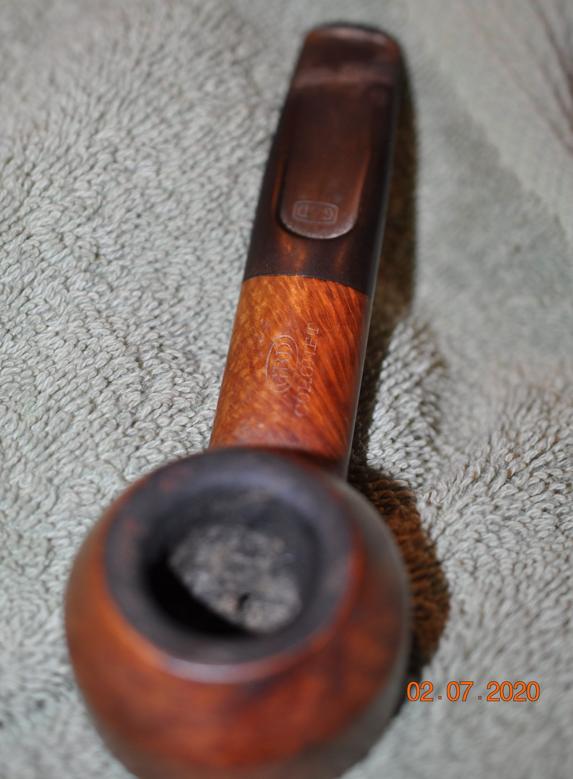
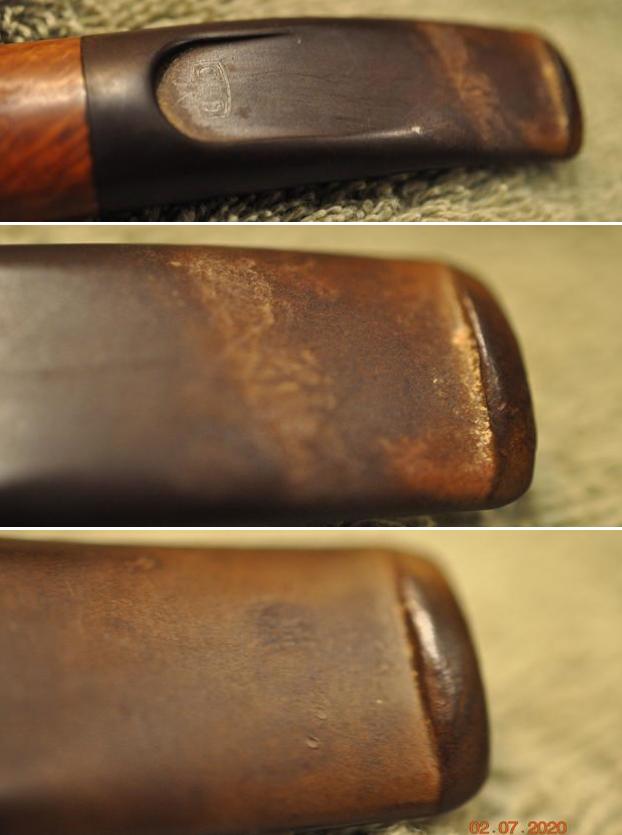
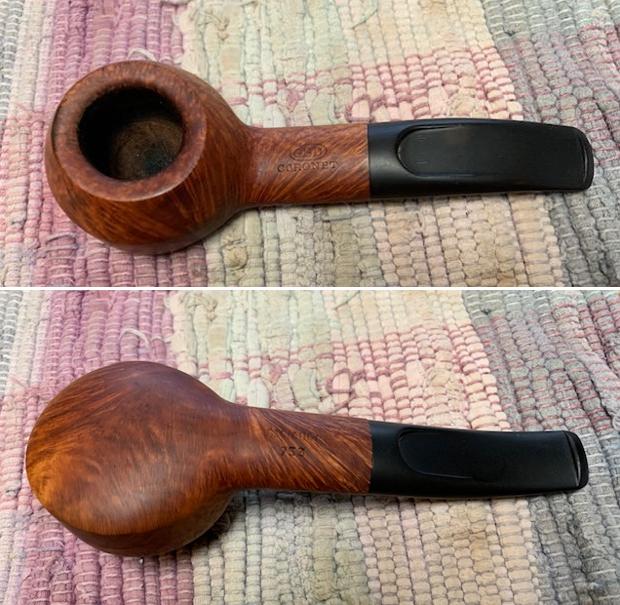
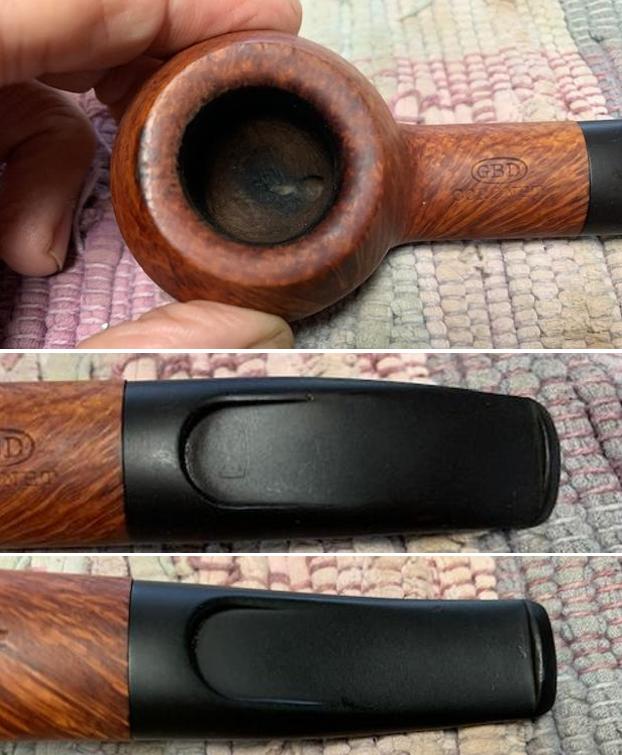
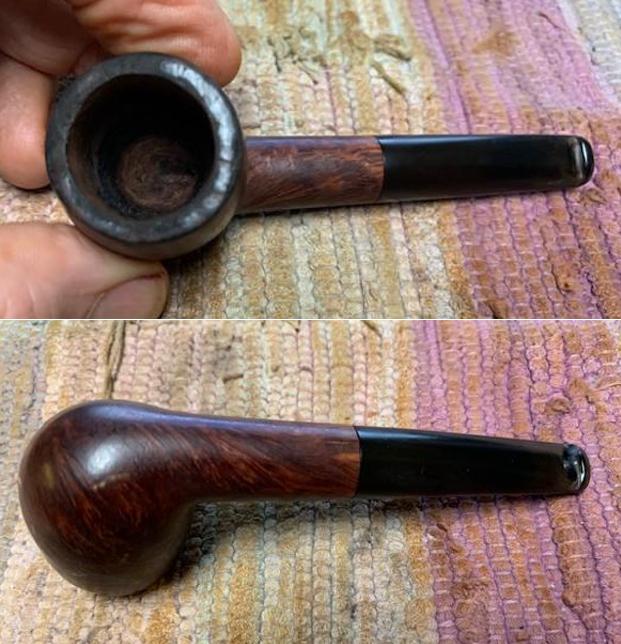 I took some close up photos of the rim top and the stem surfaces. You can see the chipping and damage to the top and inner edges of the bowl. The top is significantly lower on the front of the bowl with burn marks and charring to the top and front of the bowl. The stem shows some deep tooth marks on both sides ahead of the button.
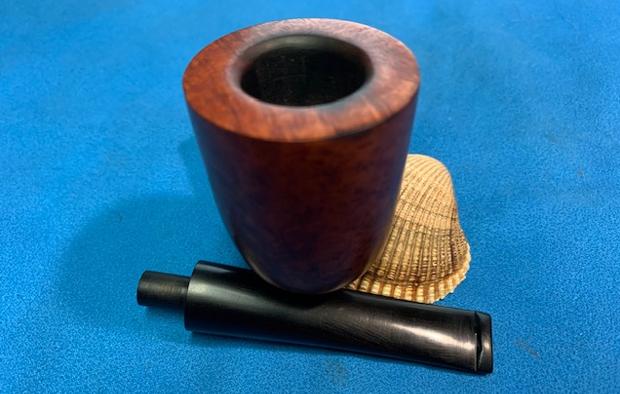
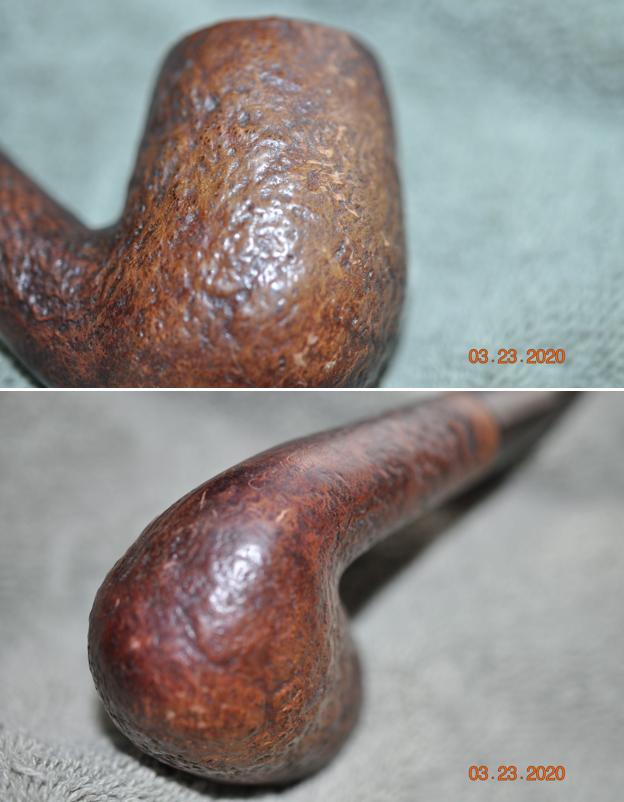
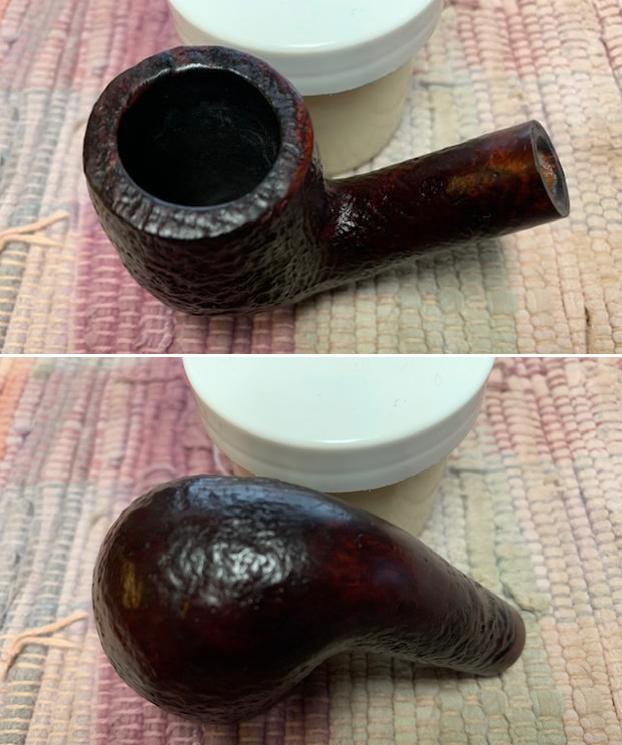
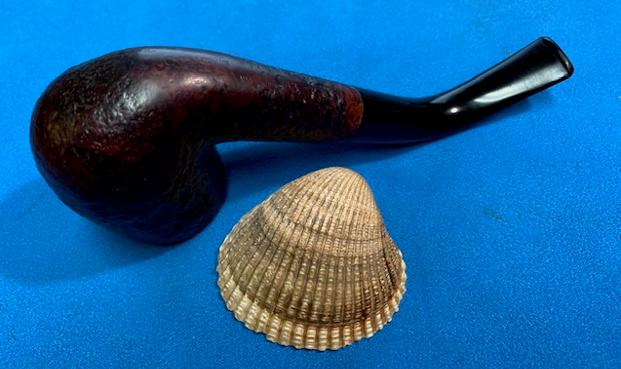
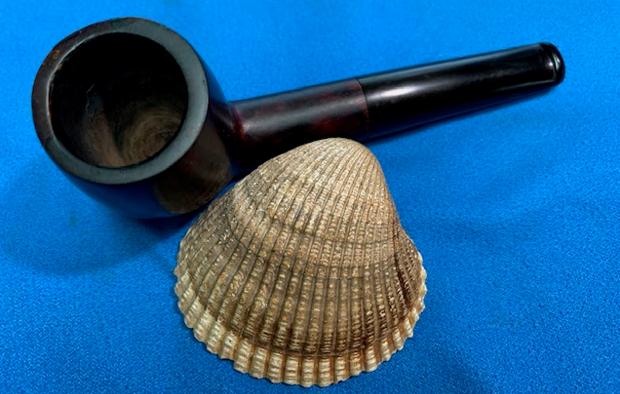
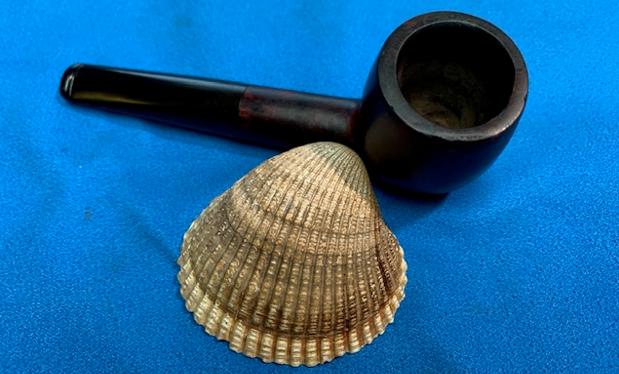
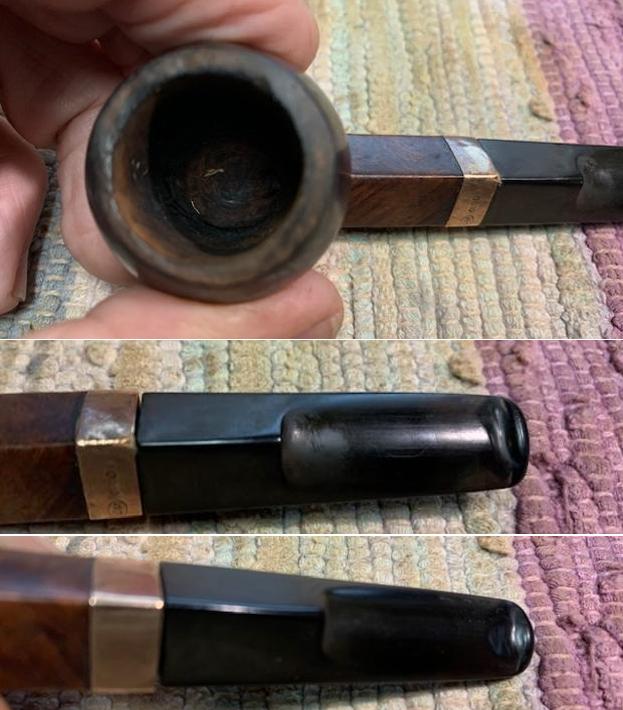
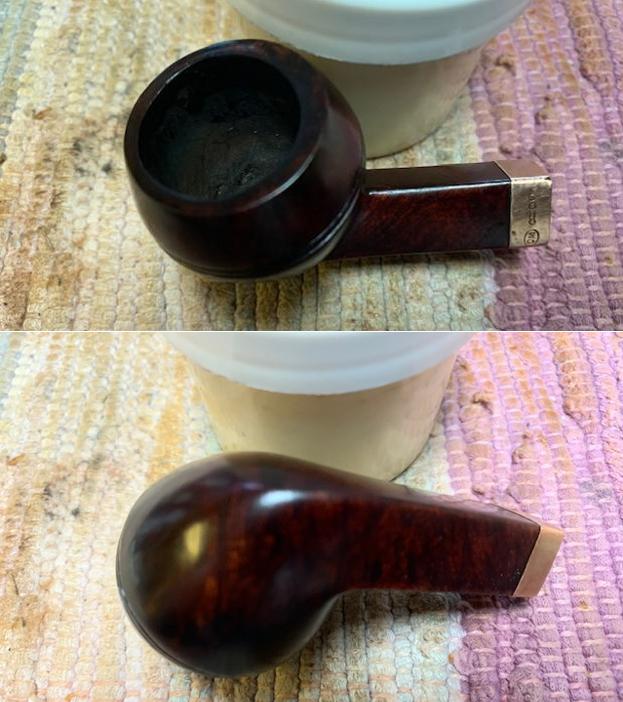
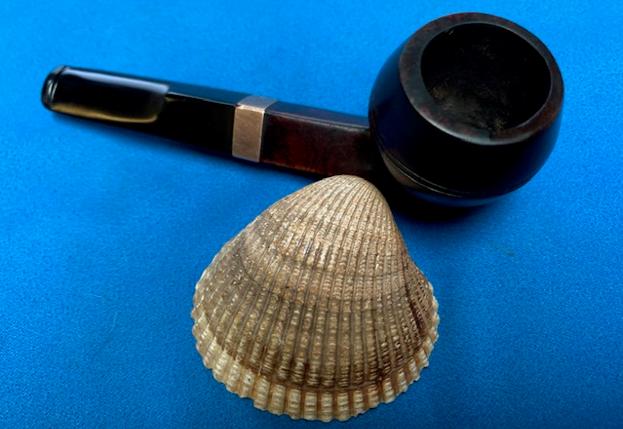
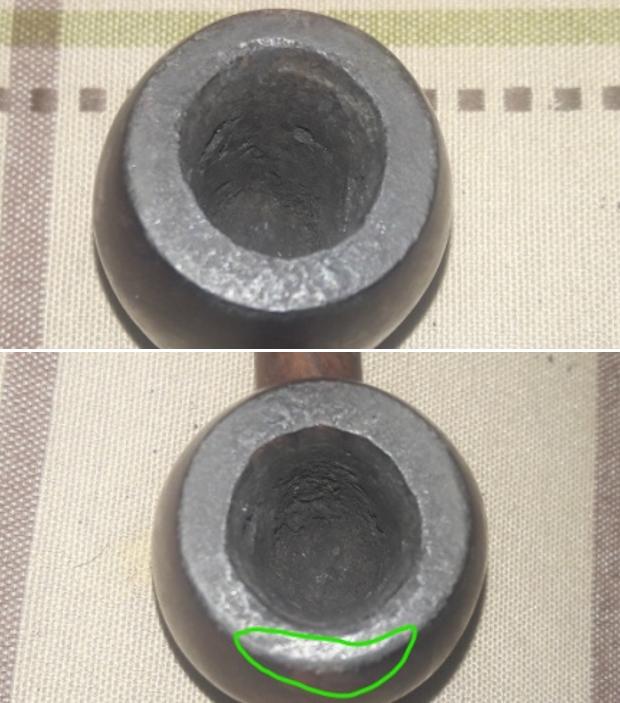
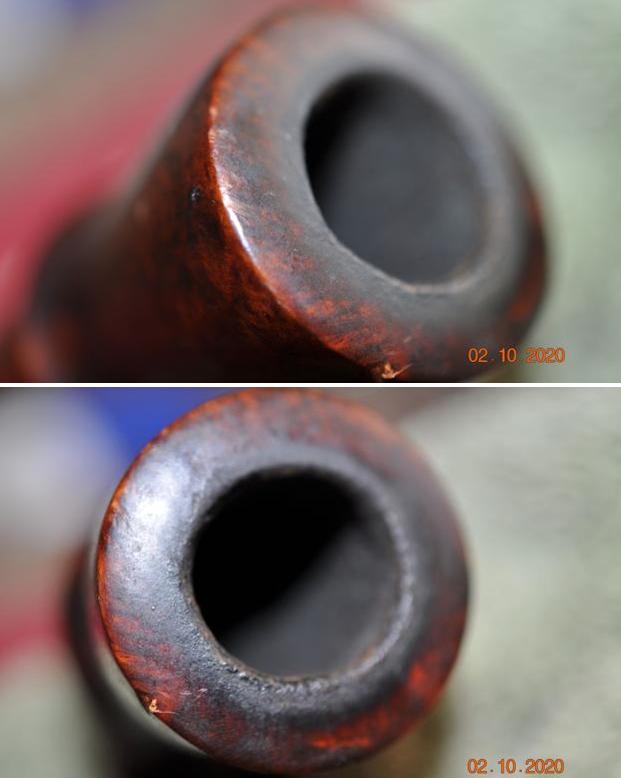
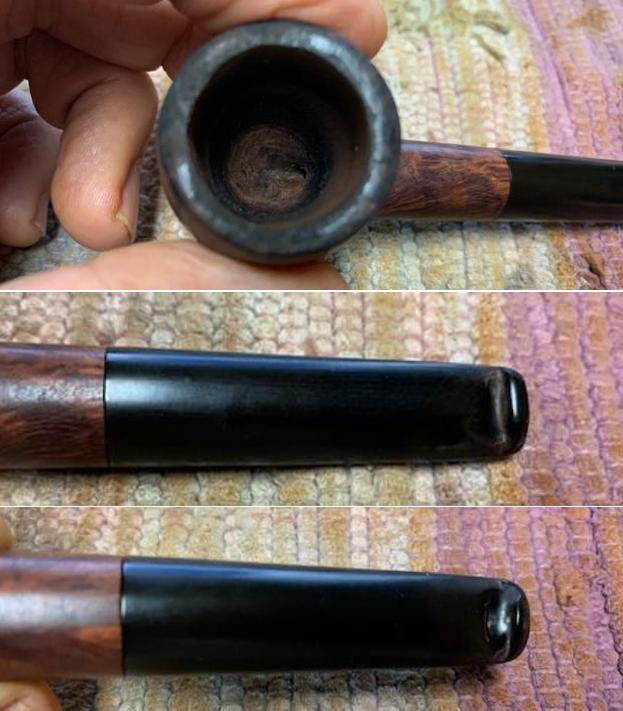 I took some photos of the rim from various angles to show the serious damage to the bowl top and edges. It really is a mess and will be an interesting challenge to rebuild.
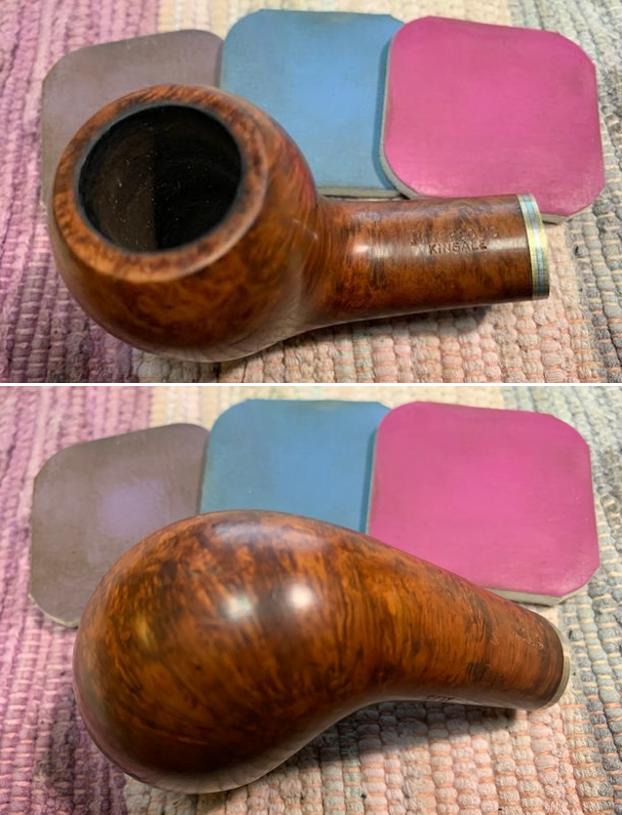
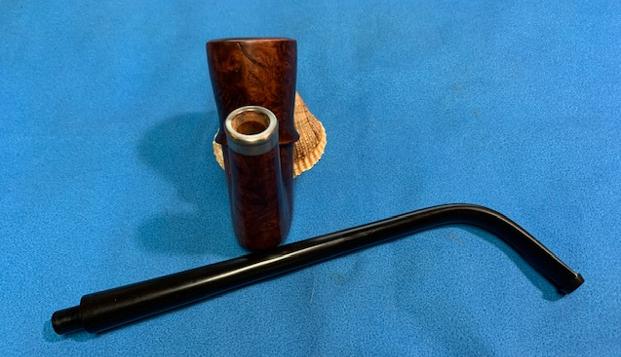
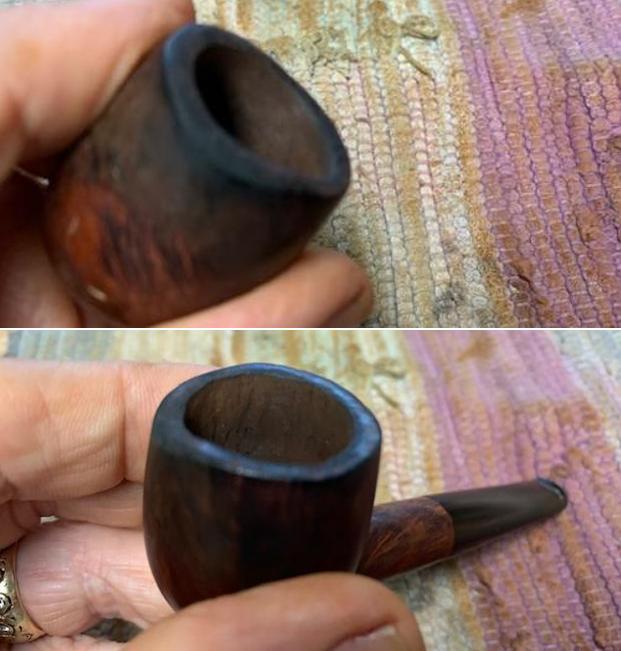
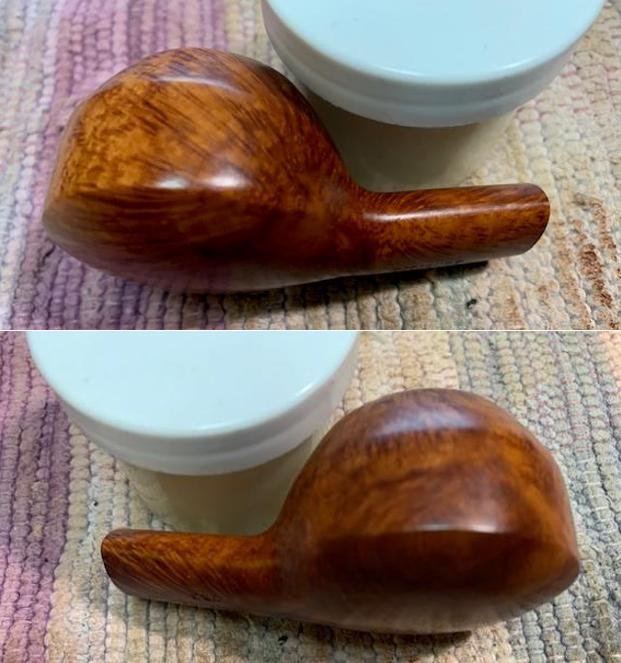
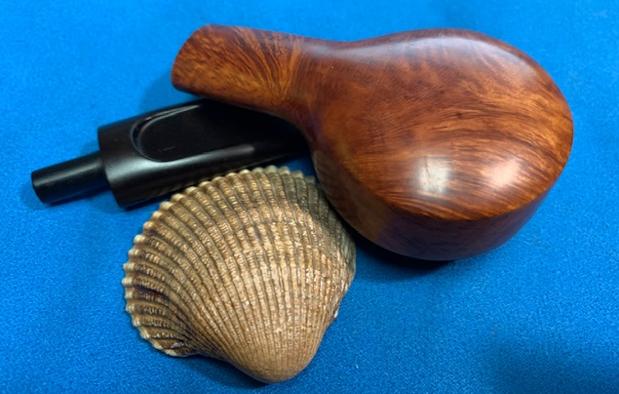
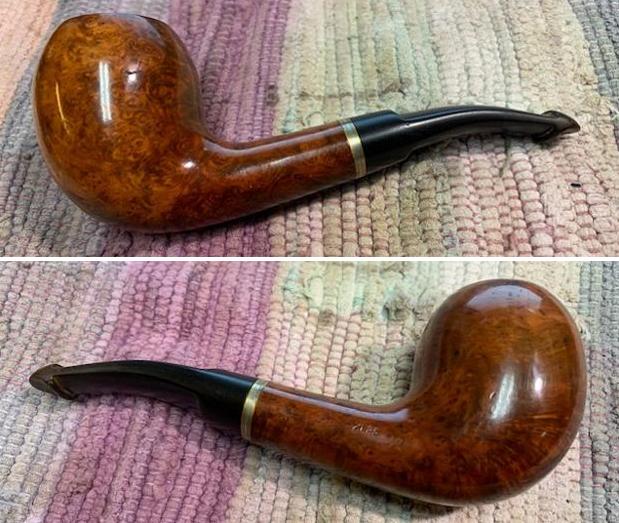
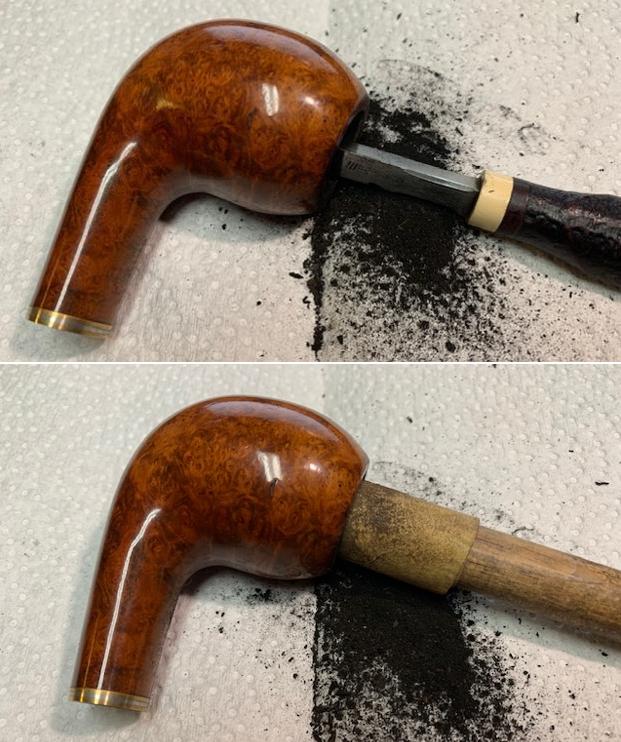
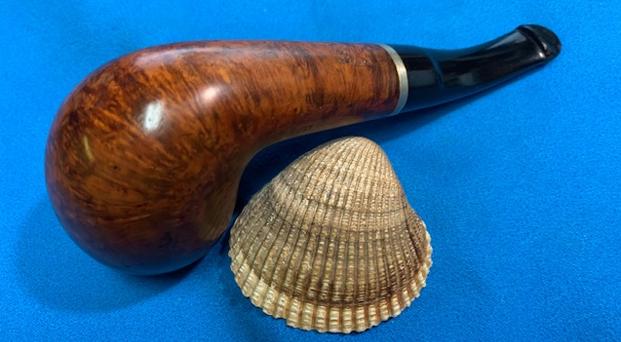
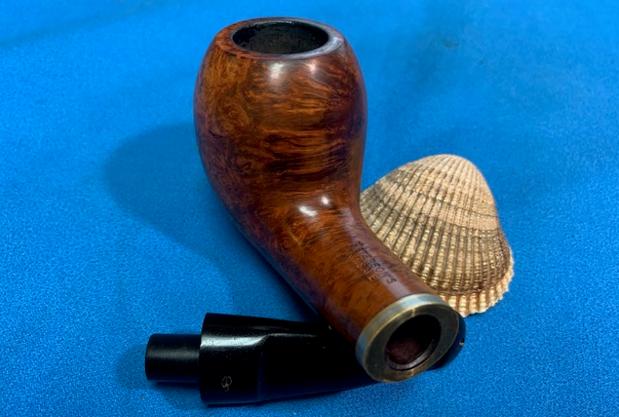
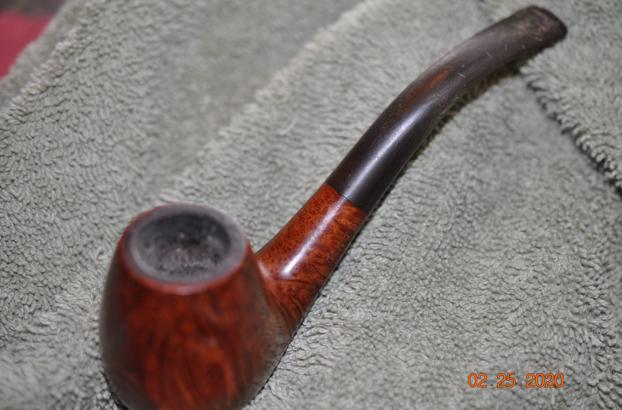
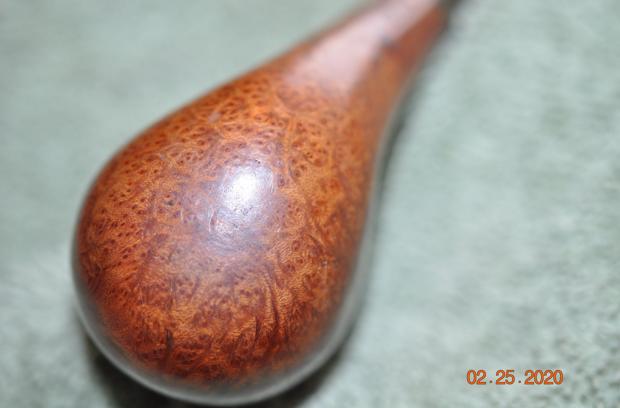
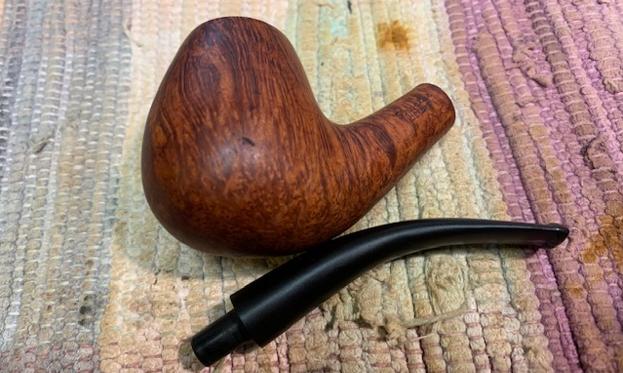
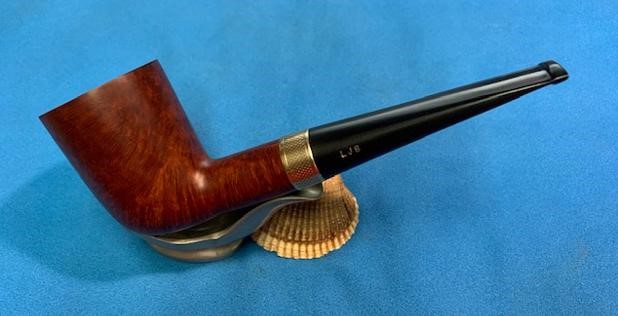
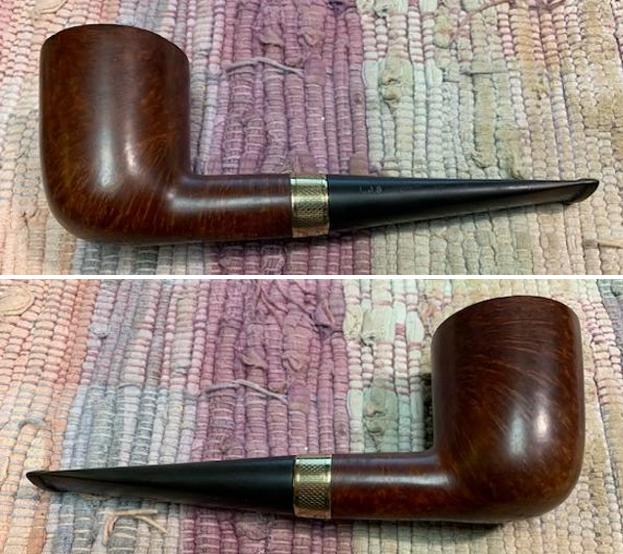
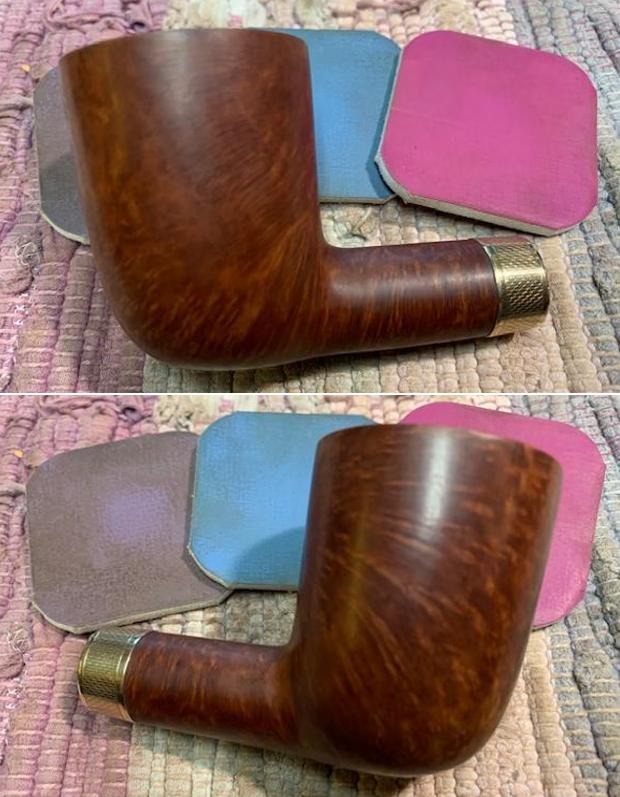
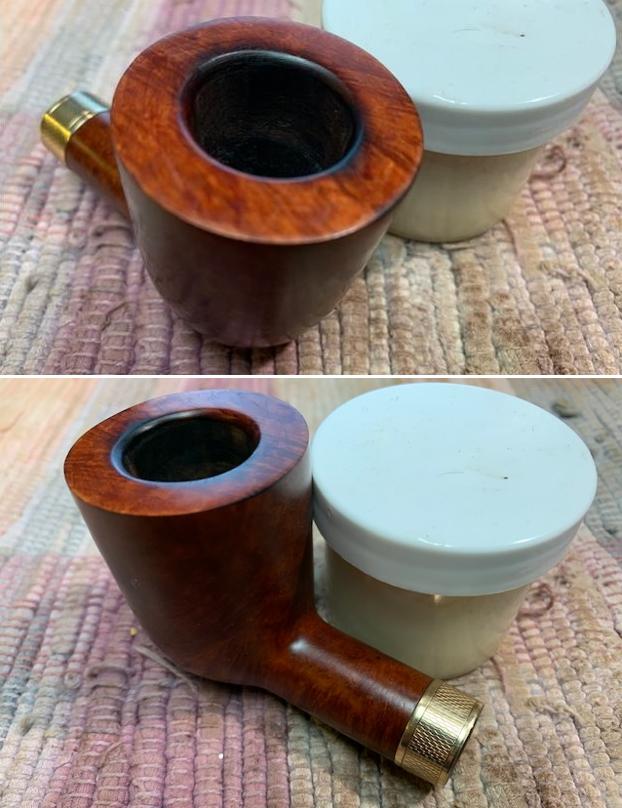
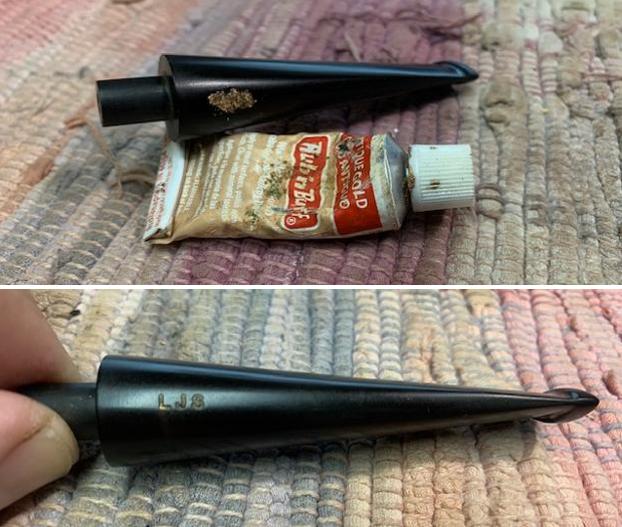
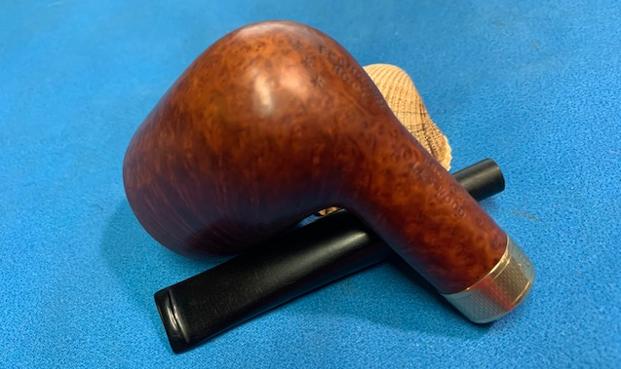
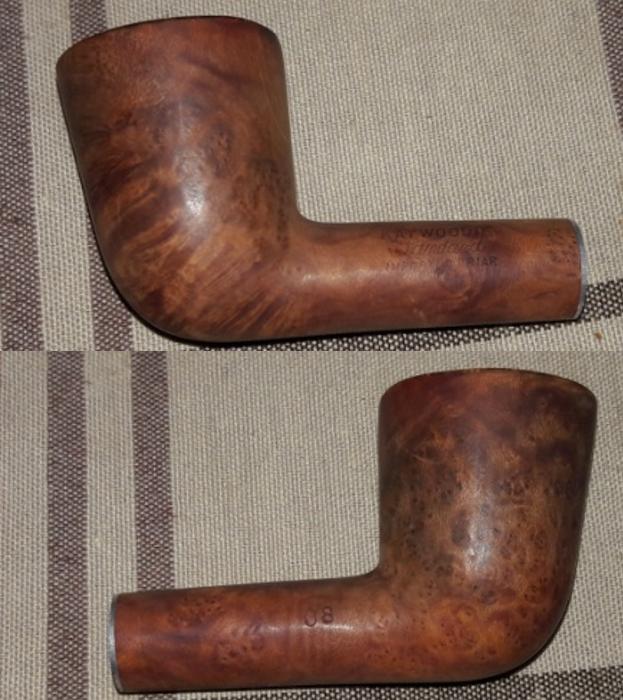
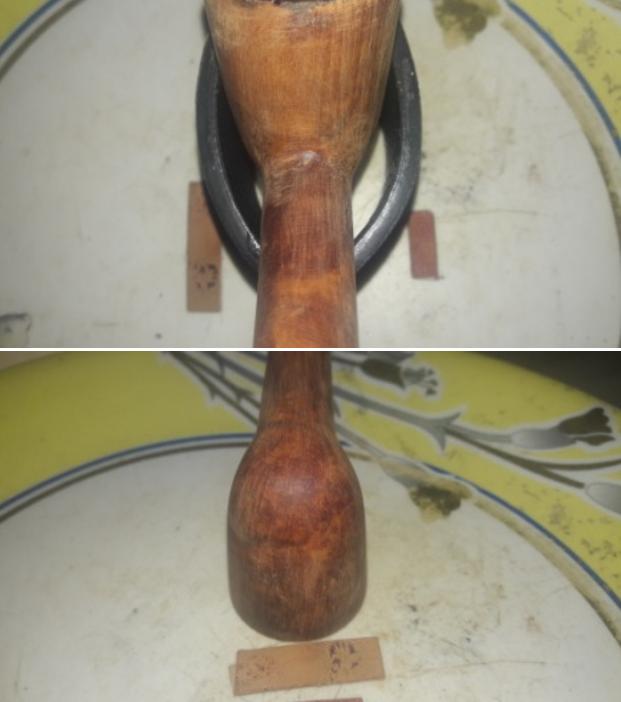
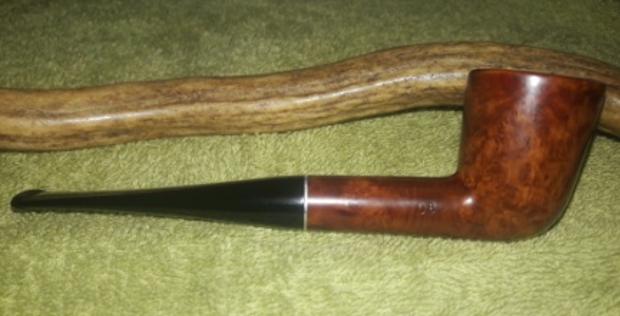
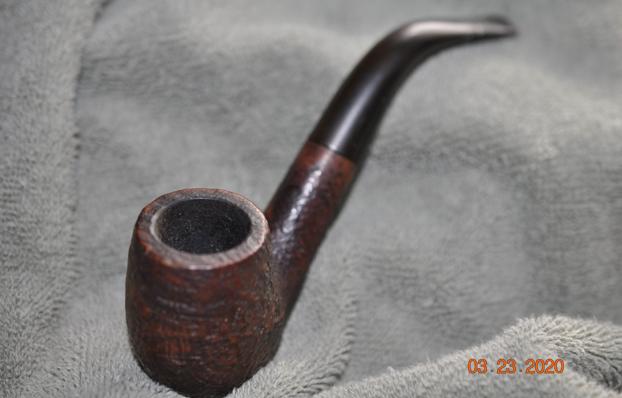
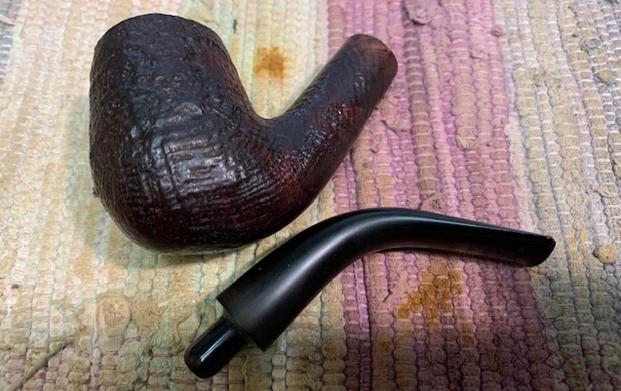
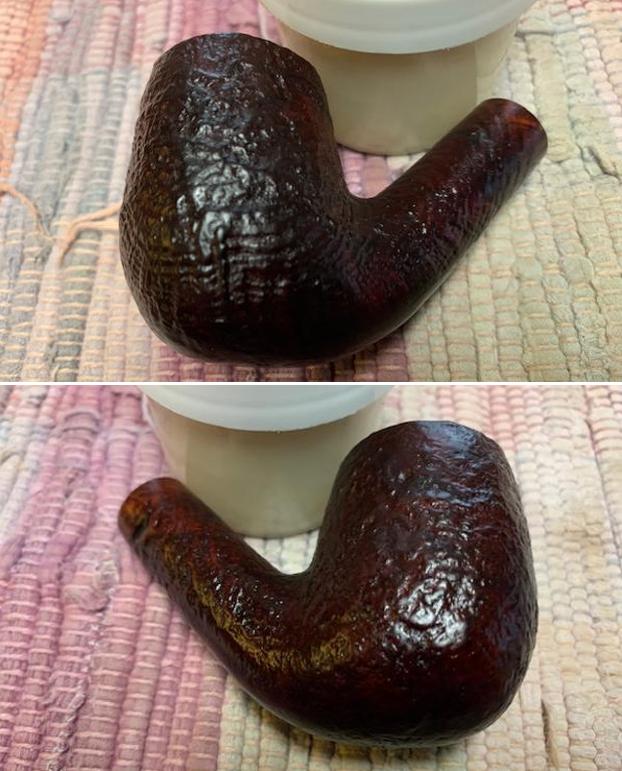
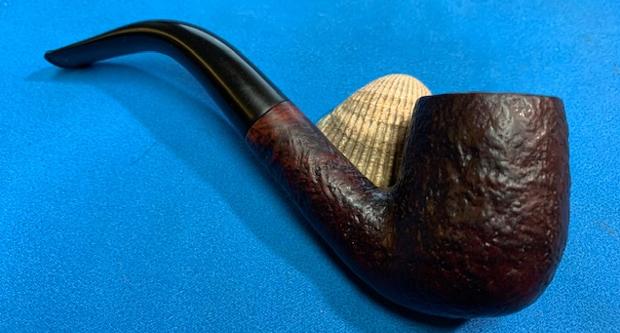
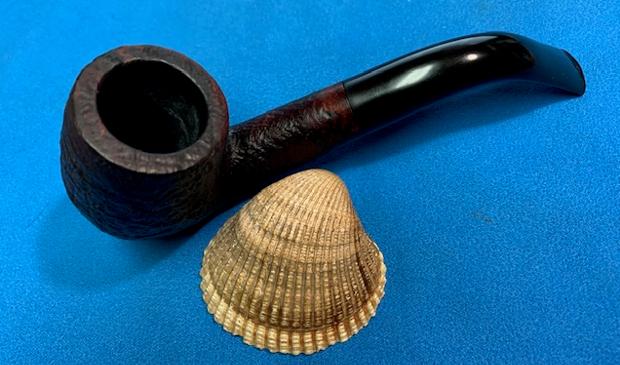
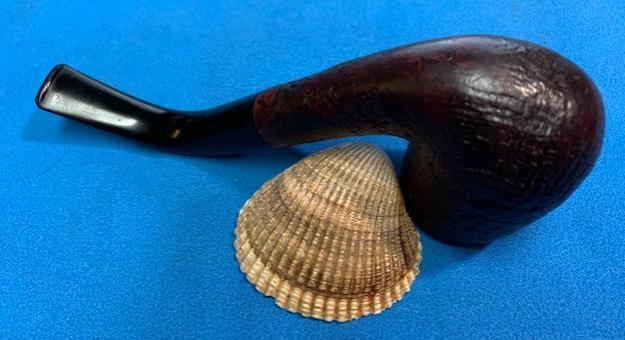
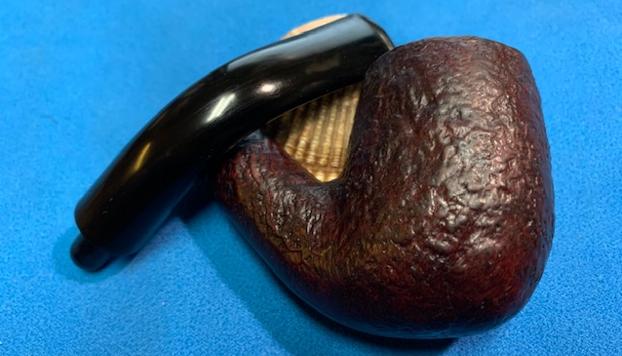
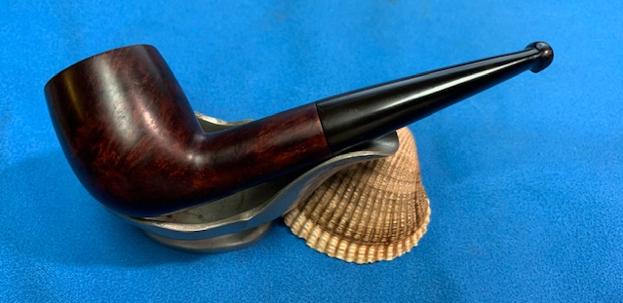
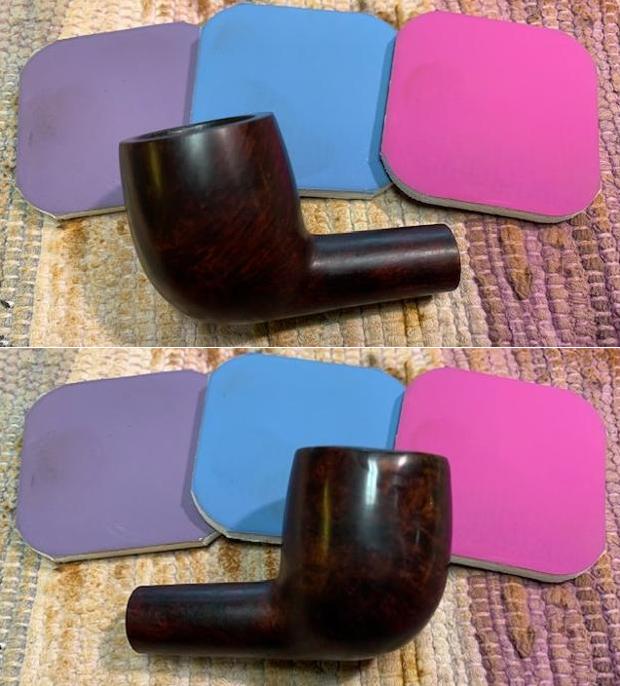
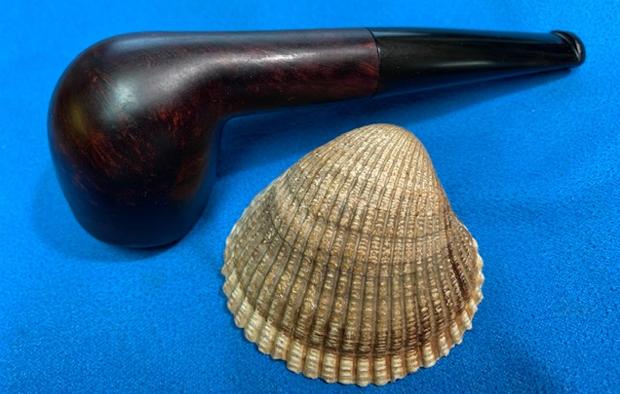
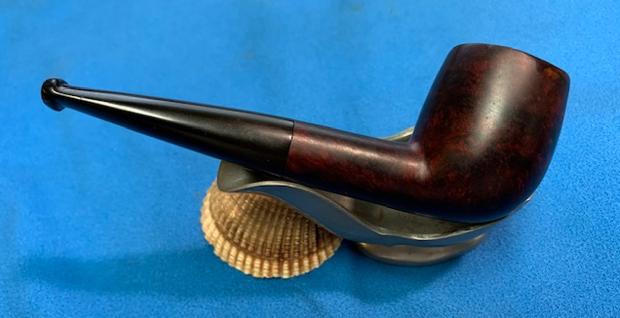
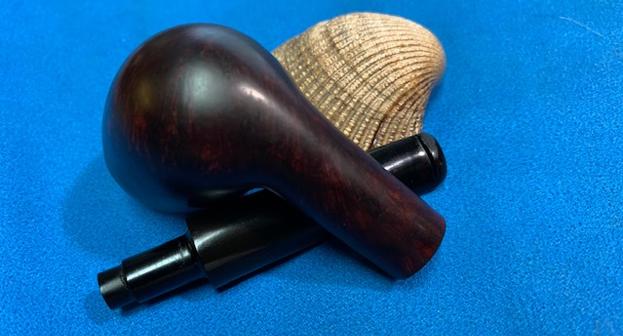
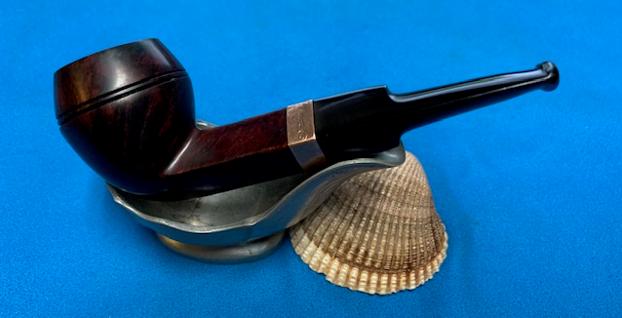
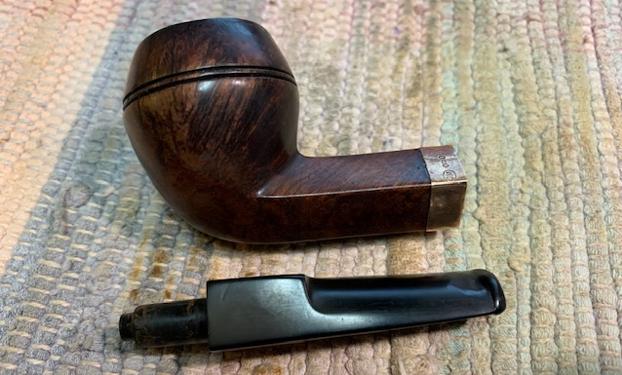
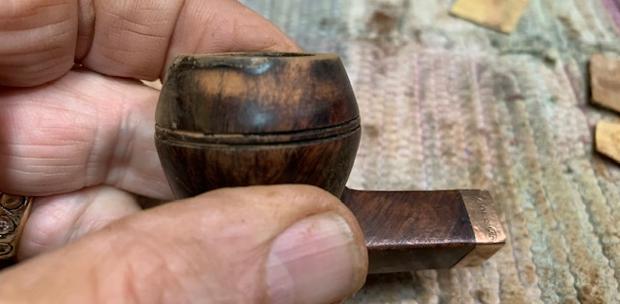
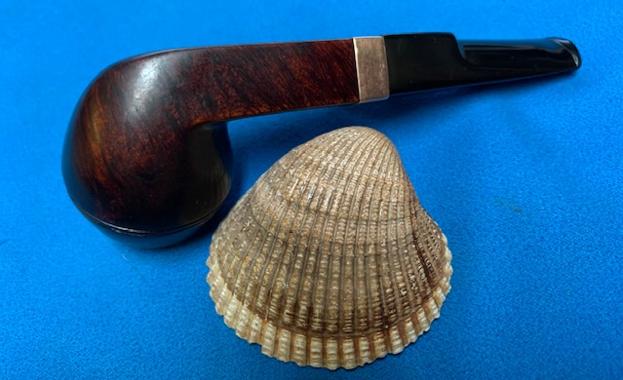
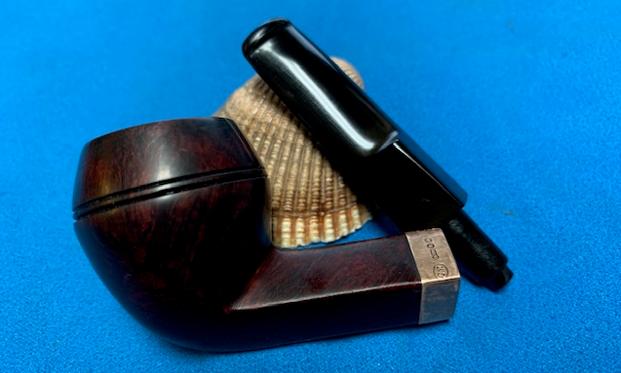
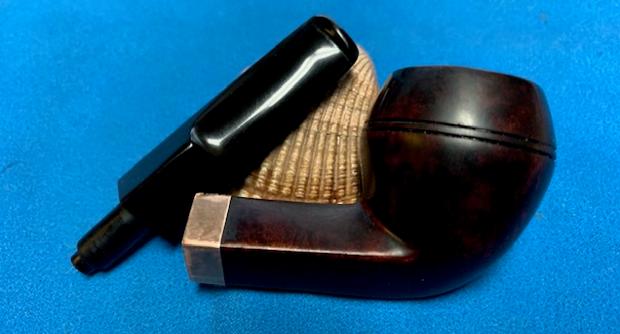
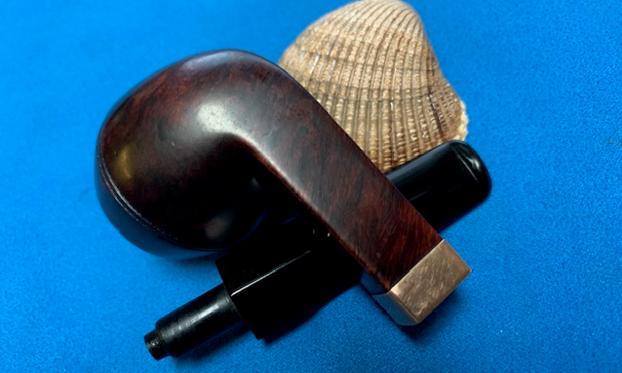
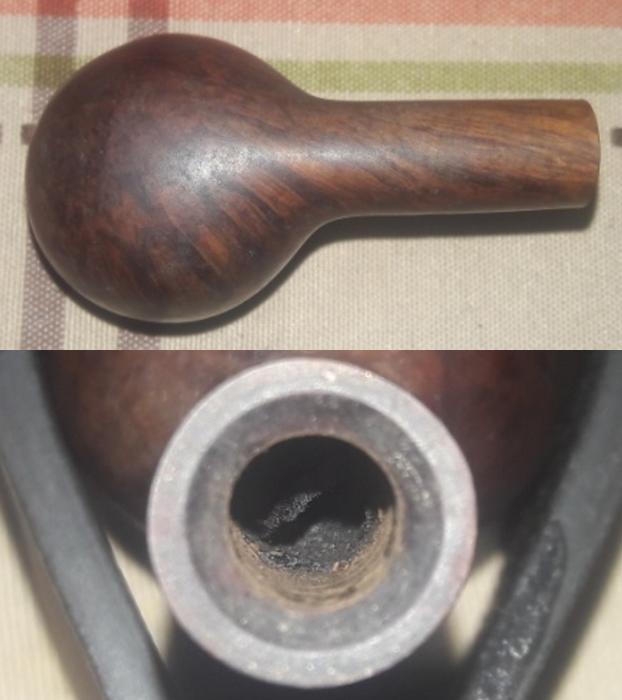
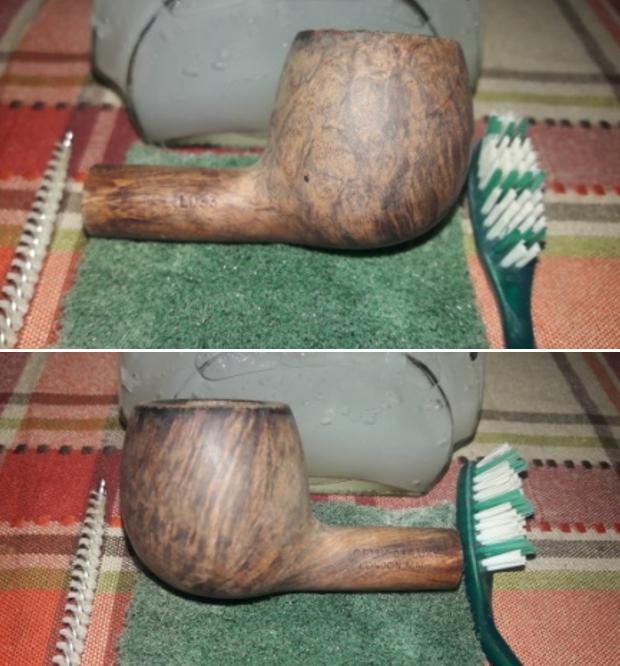
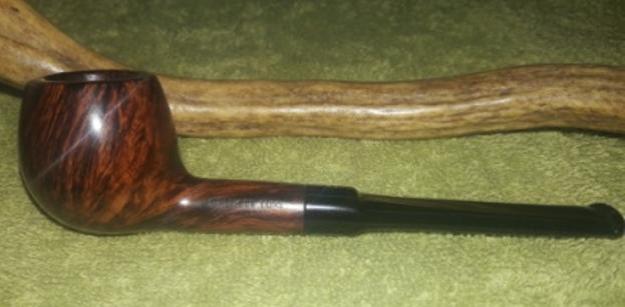
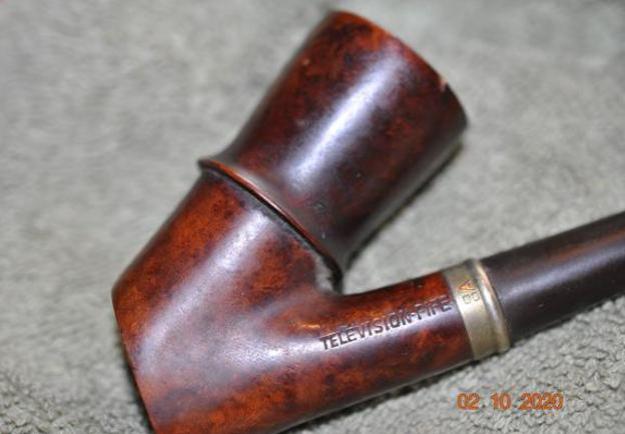
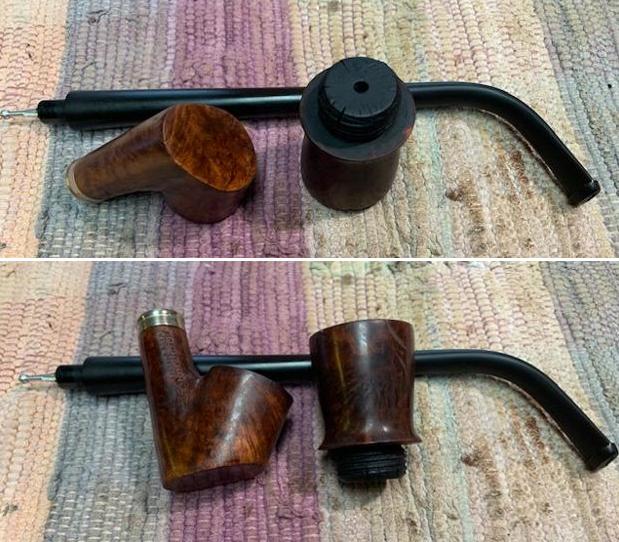
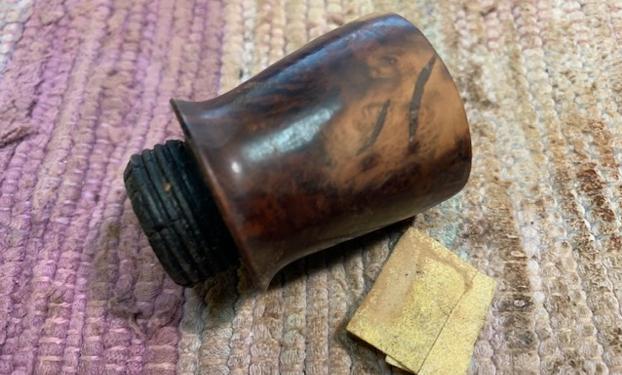
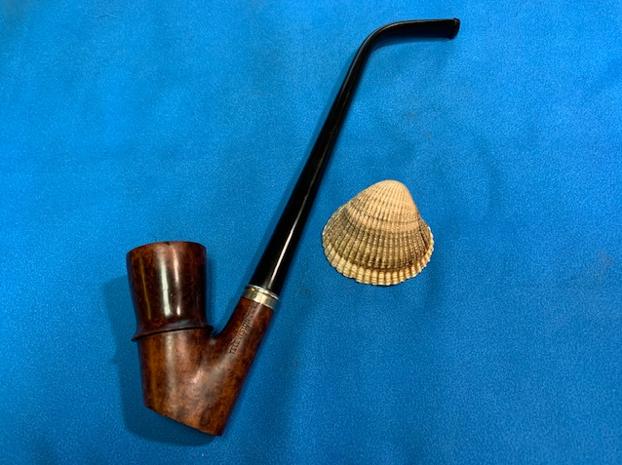
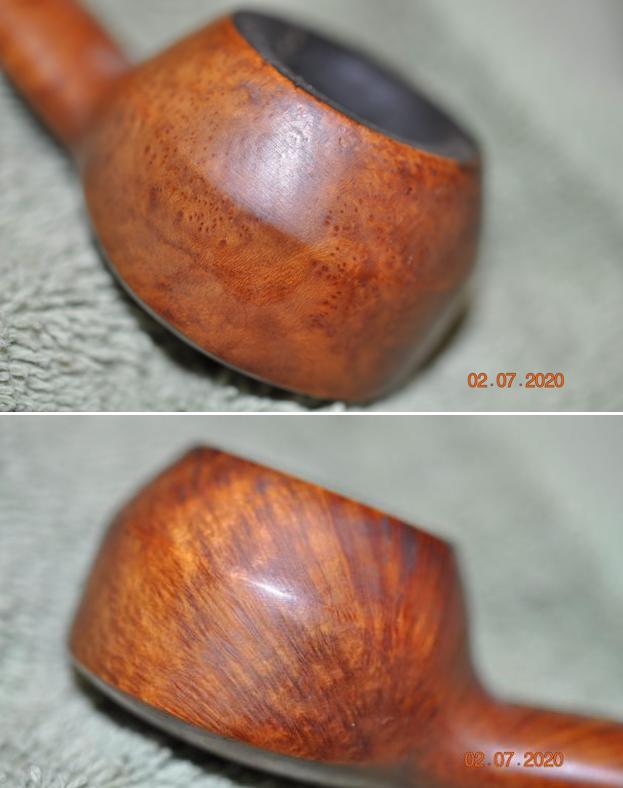
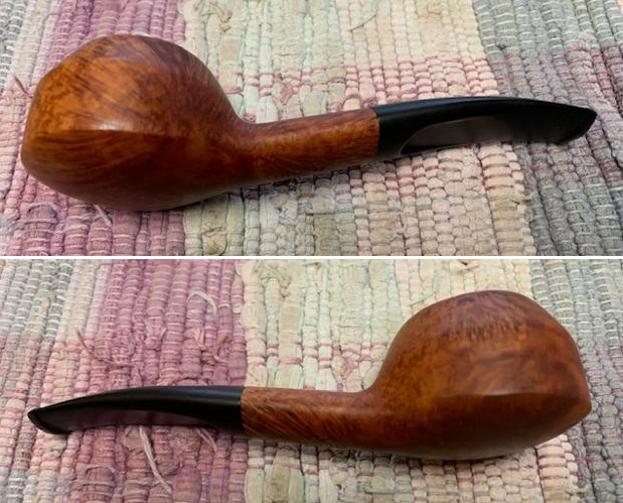
 I removed the stem from the shank and took a photo of the left side of the pipe as it really gave a good picture of what the pipe must have looked like when new.
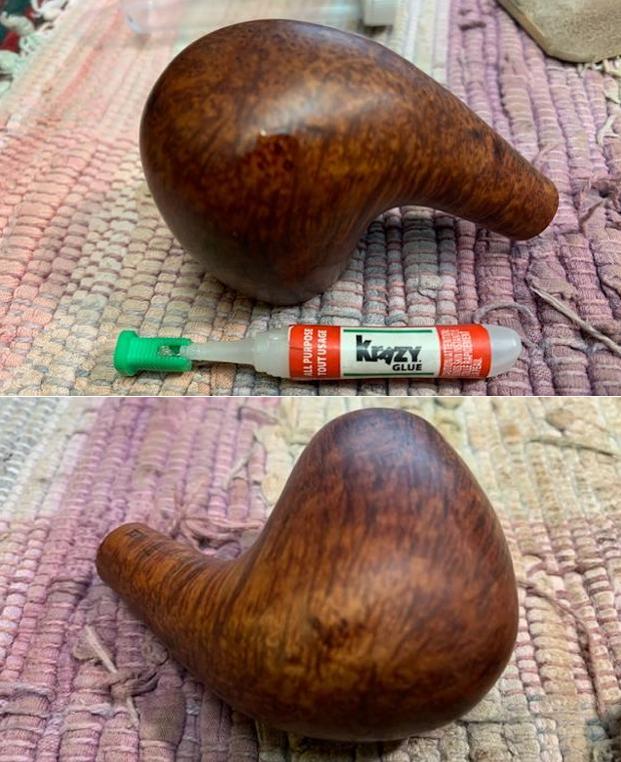
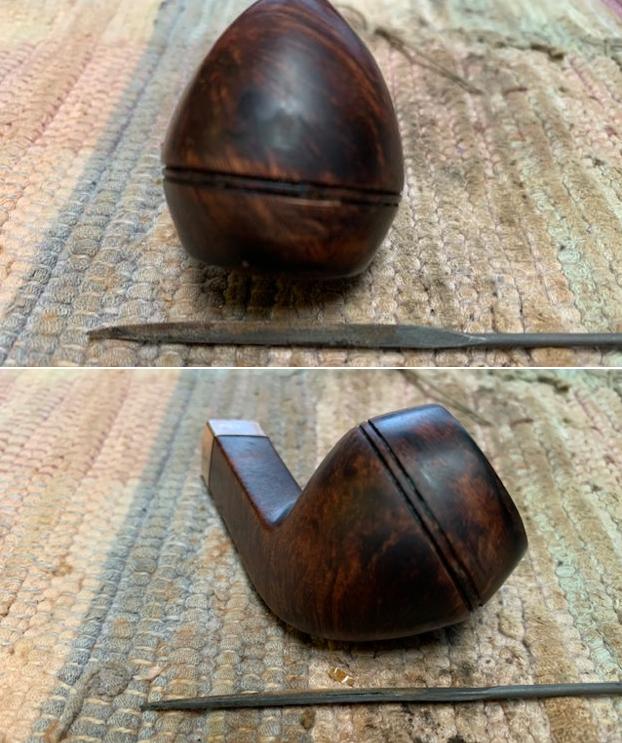
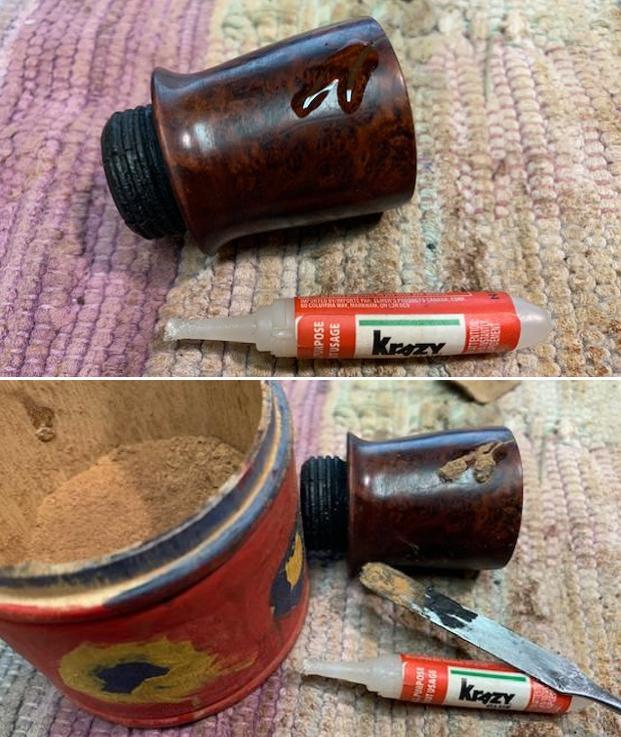
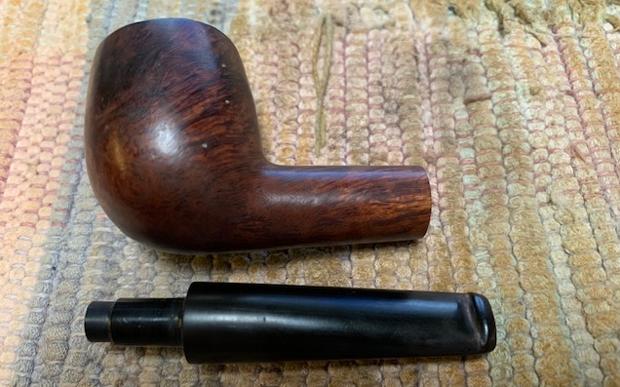 I decided to start work on this pipe by addressing the damaged rim top and edges. I built up the front edge of the bowl with briar dust and clear CA glue. My goal was to bring it up as close as possible to the height of the bowl on the left side. It took a bit of layering to get there. I also filled in the damage on the front outer edge of the bowl at the same time. Once I had the height as even as possible I would top the bowl on a topping board with 180 grit sandpaper to smooth out the rim top.
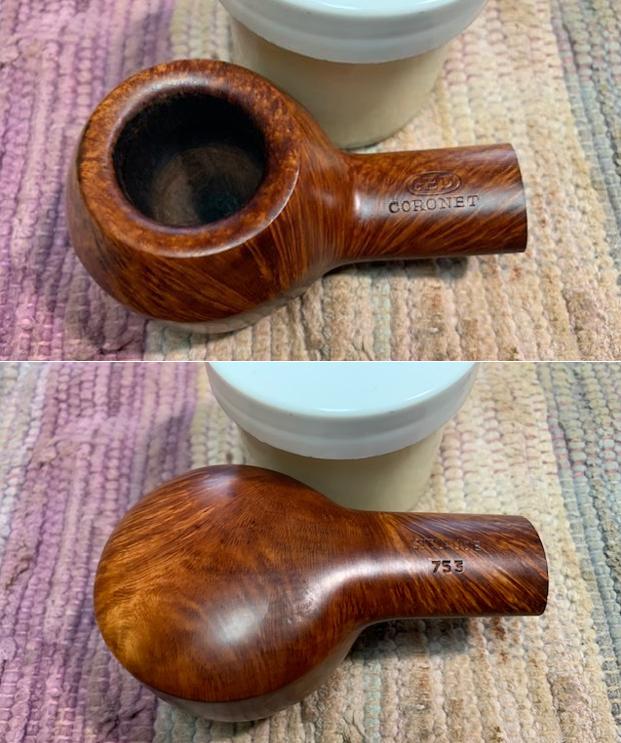
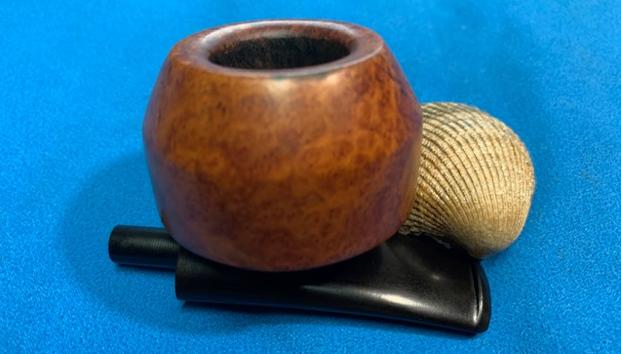
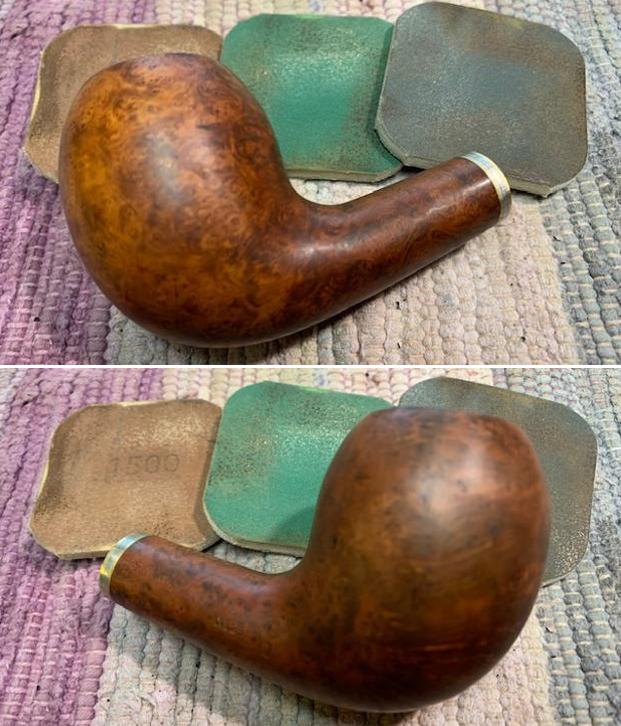
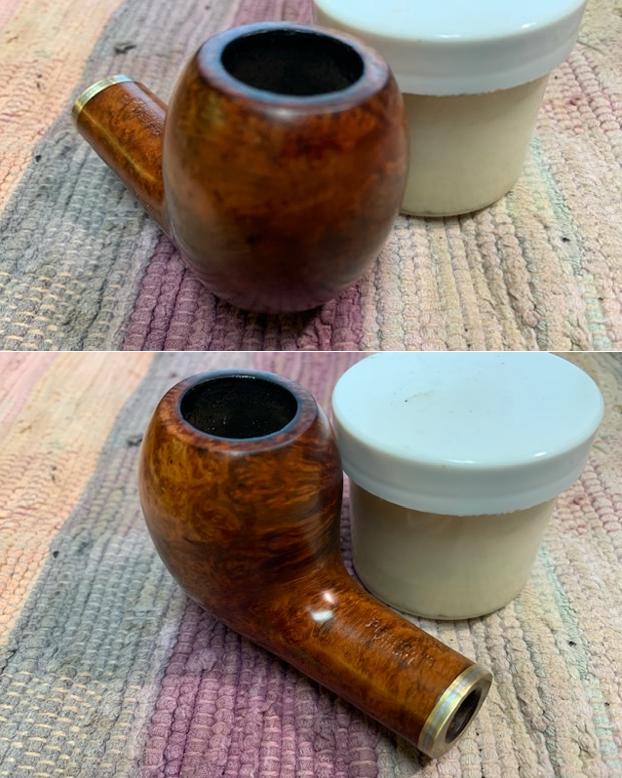
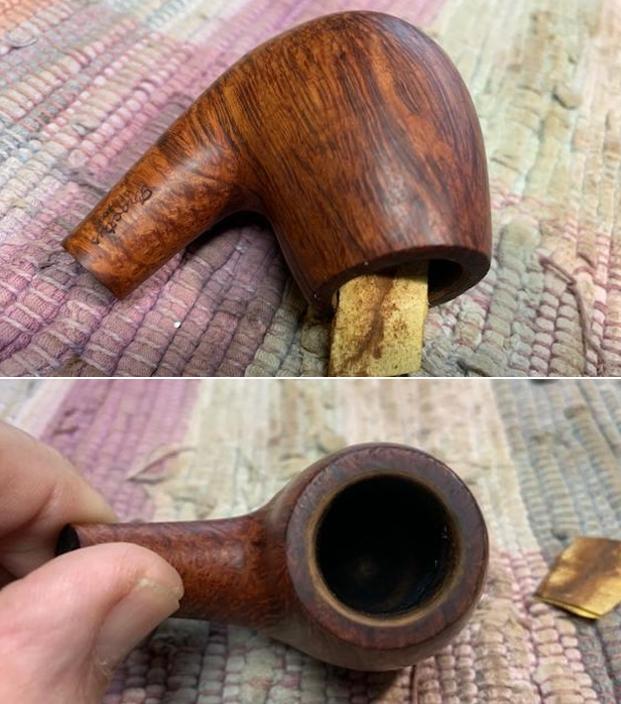
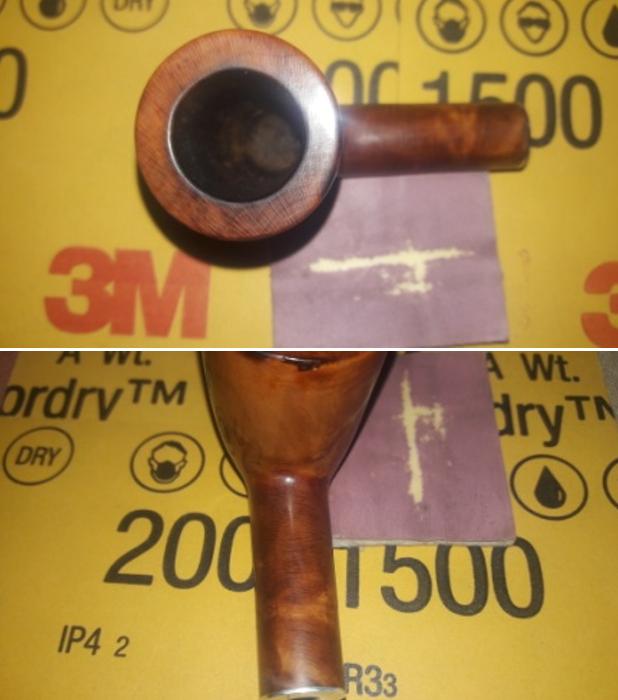
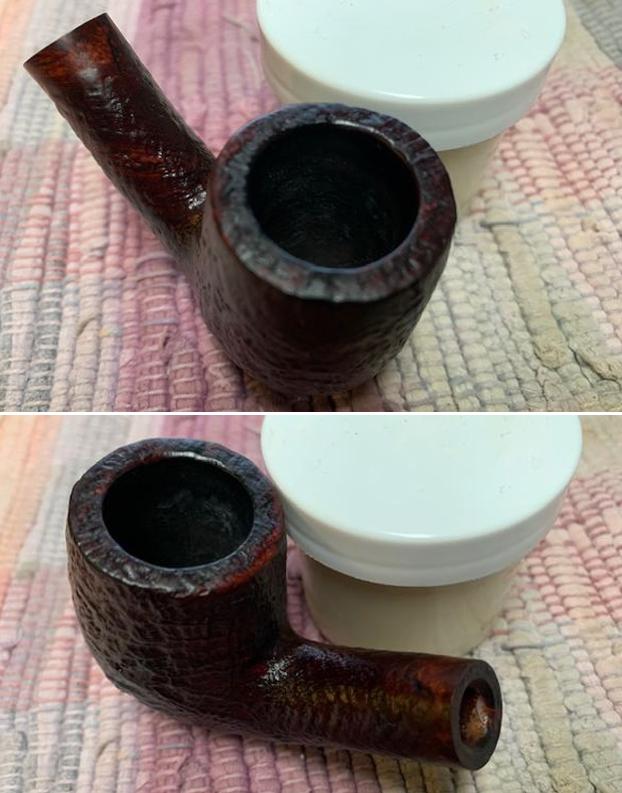
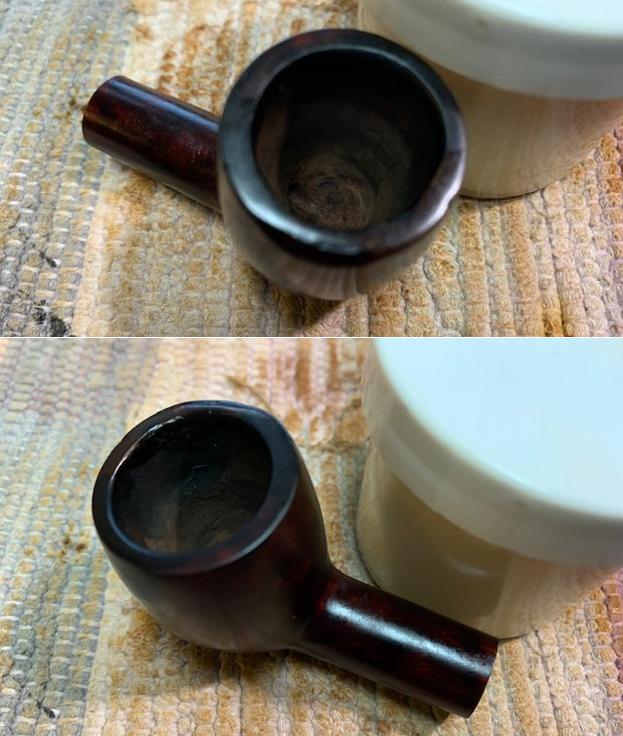
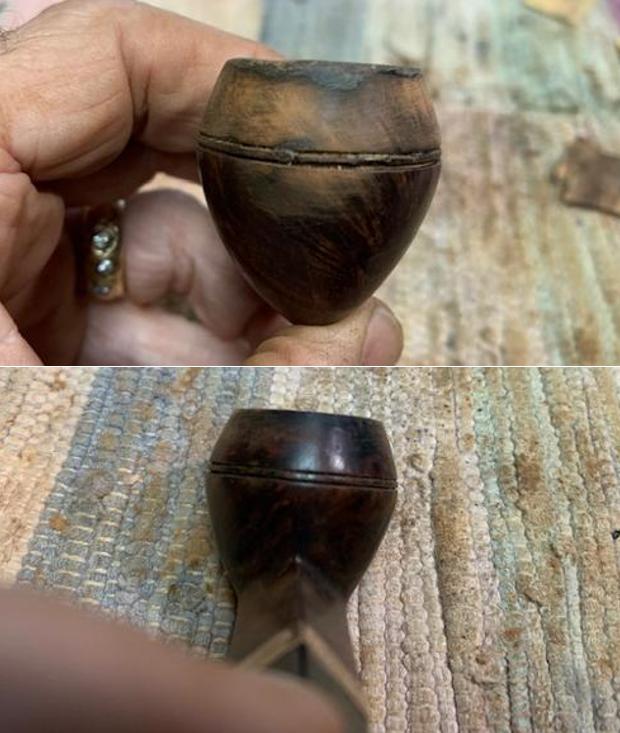
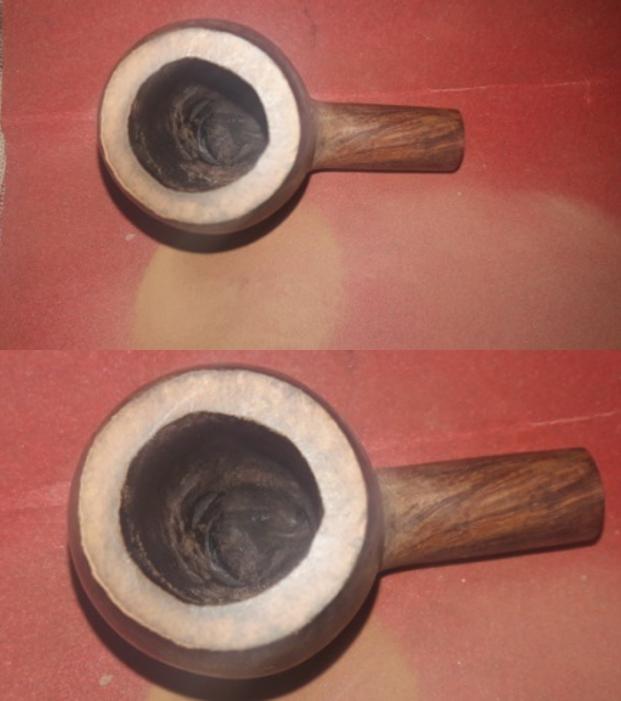
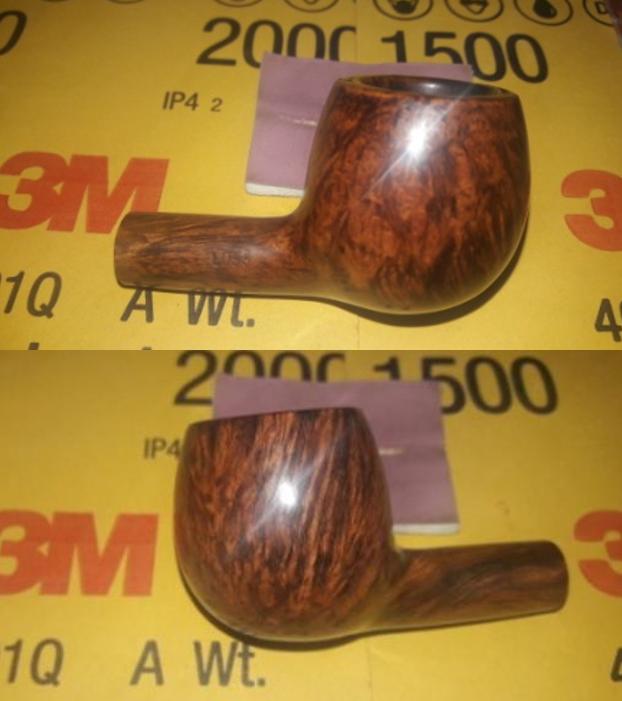
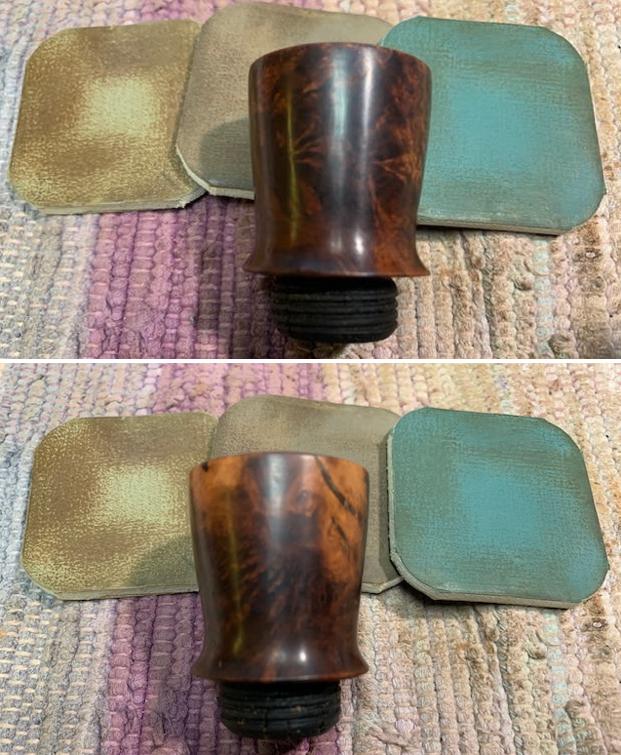
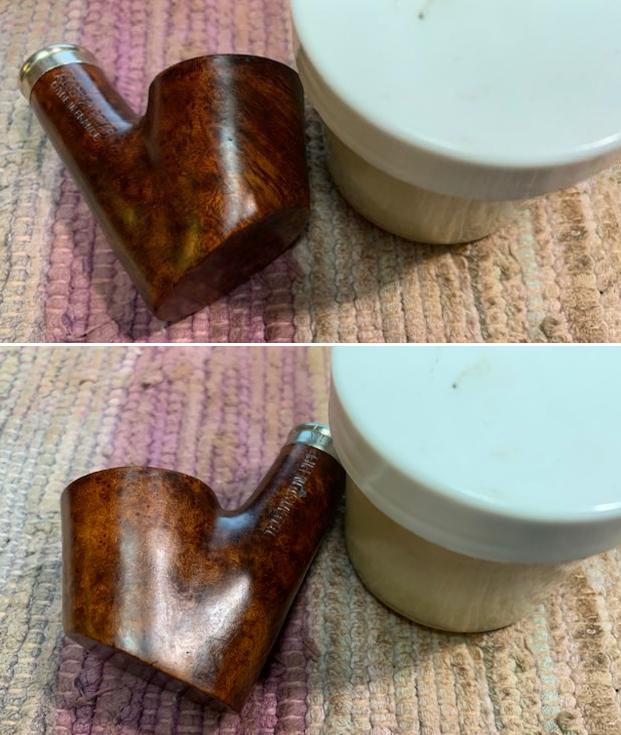
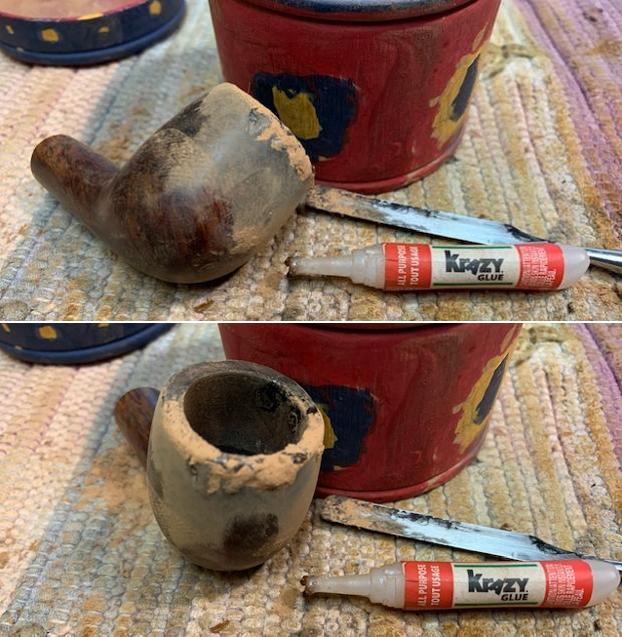 Once I had it close to even I topped it on a topping board with 180 grit sandpaper. I took a few photos of the front and sides of the bowl to show what the repair looked like at this point in the process. There is still work to do but it is definitely getting there. I sanded the repair on the front of the bowl a bit as well. Much work to do!
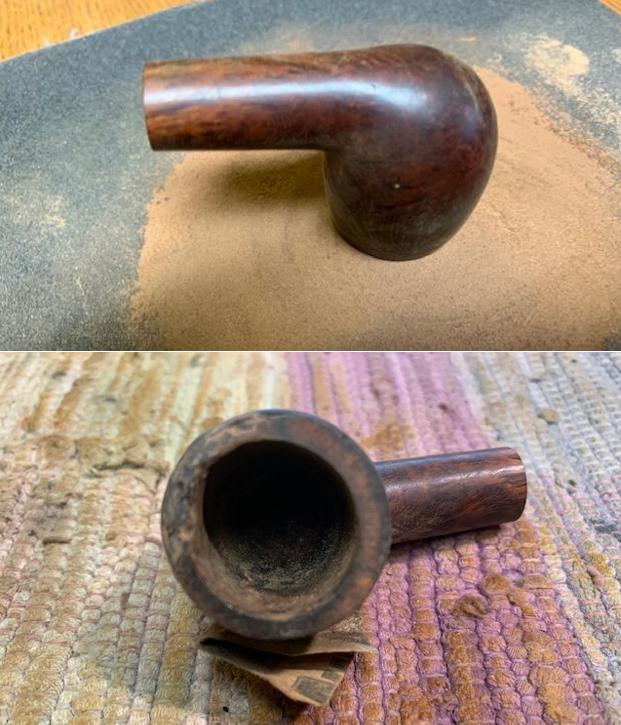
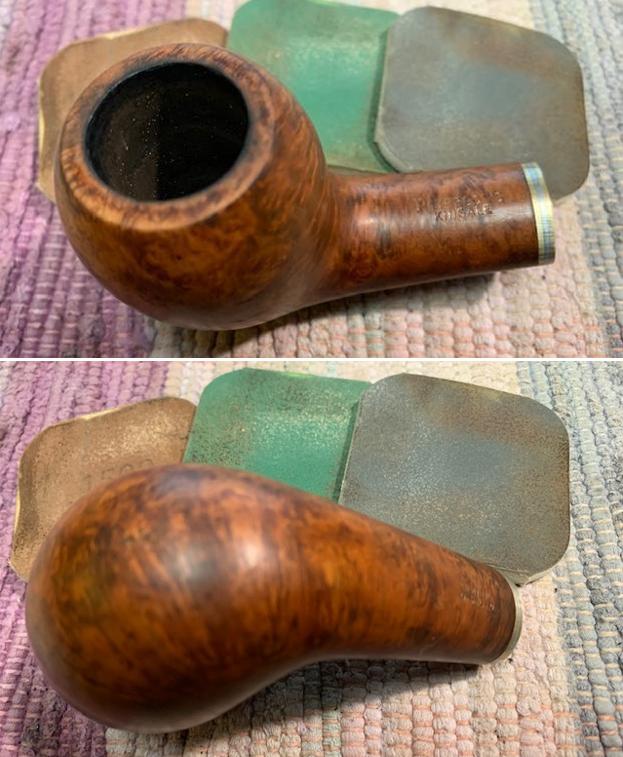
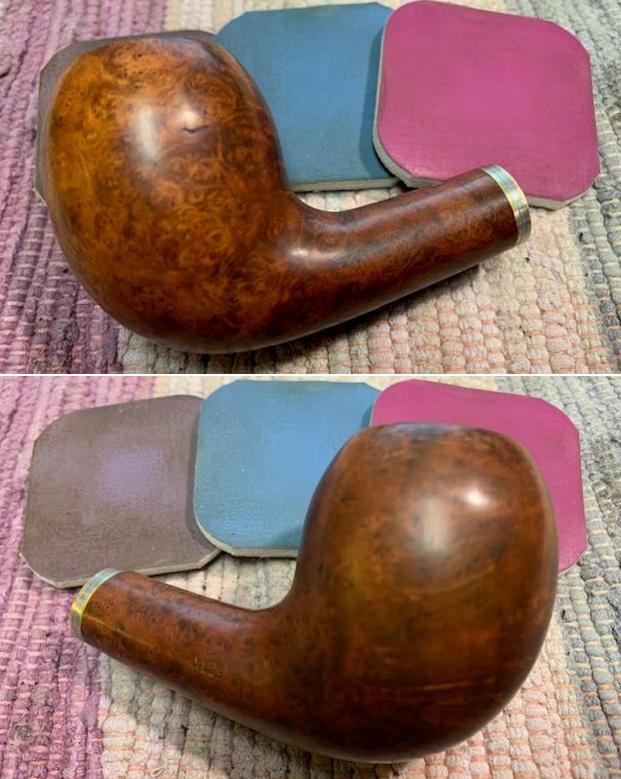
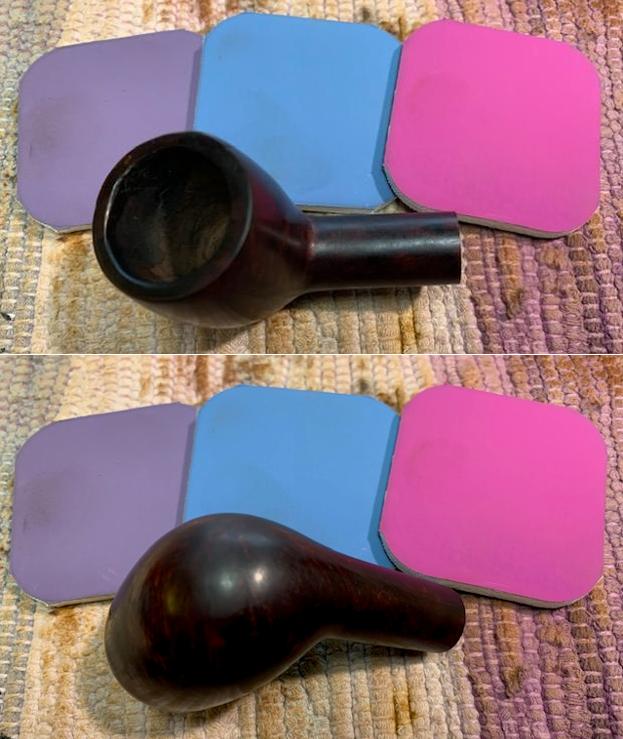
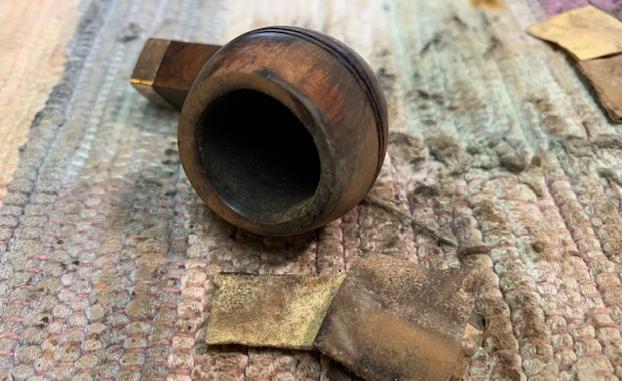
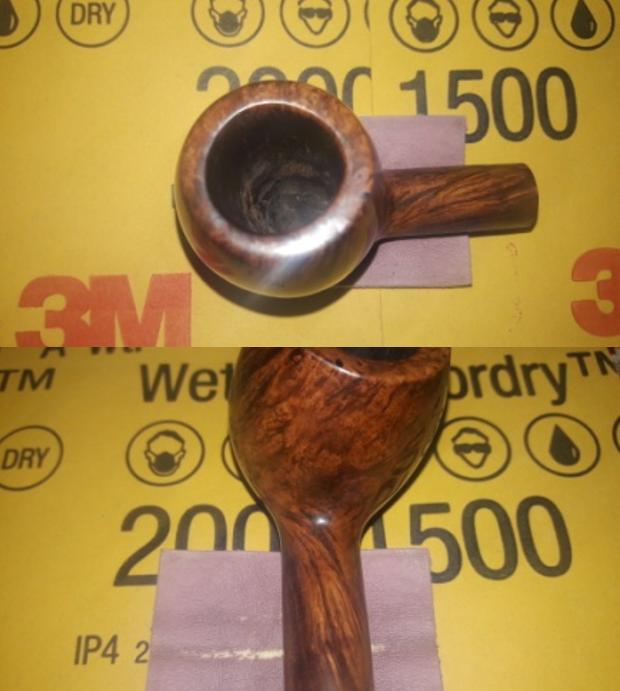
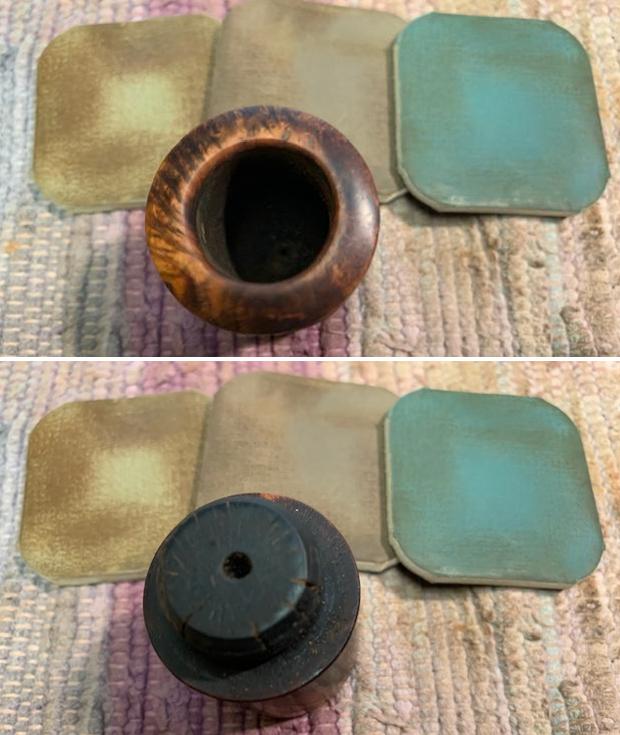
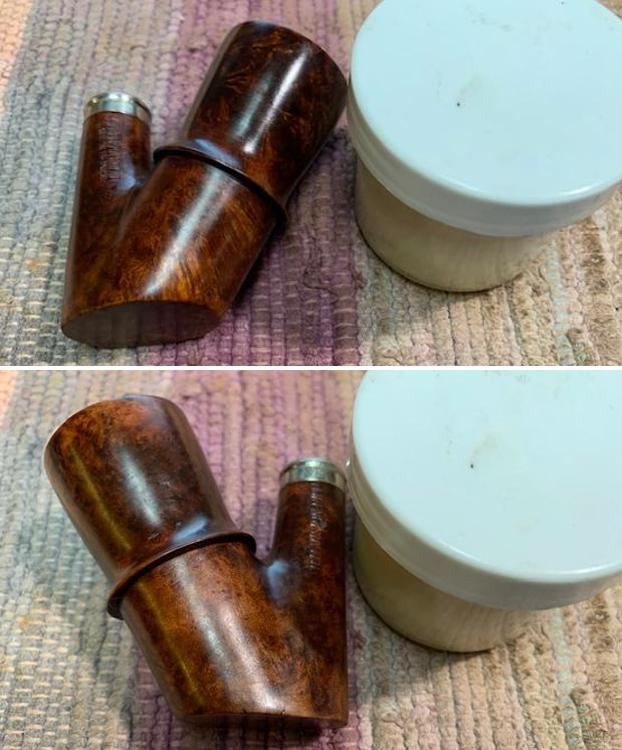
 I worked over the top and edges of the bowl – both inner and outer edges, with 220 grit sandpaper to capture the original shape as much as possible. You can see the repaired areas on the rim top and edges from the photos below. I am pretty pleased with the overall appearance of the cap and top at this point in the process. The repairs are very clear at this point.
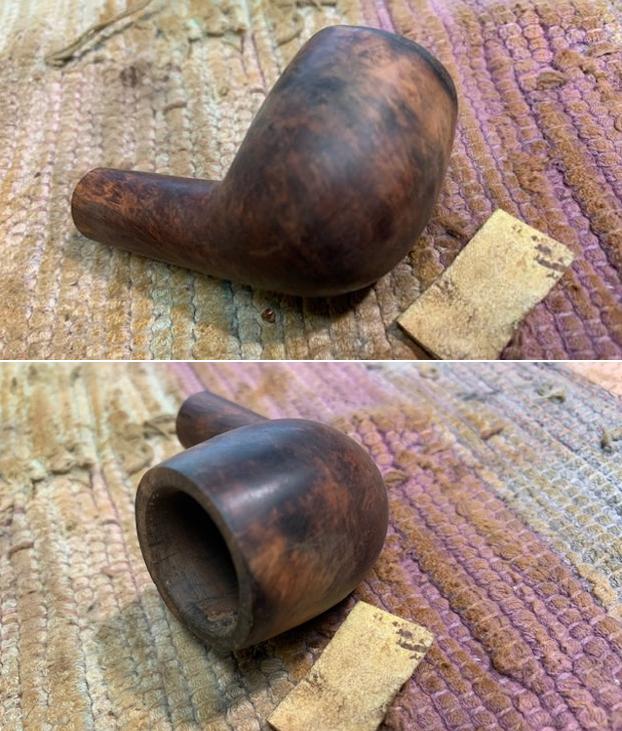
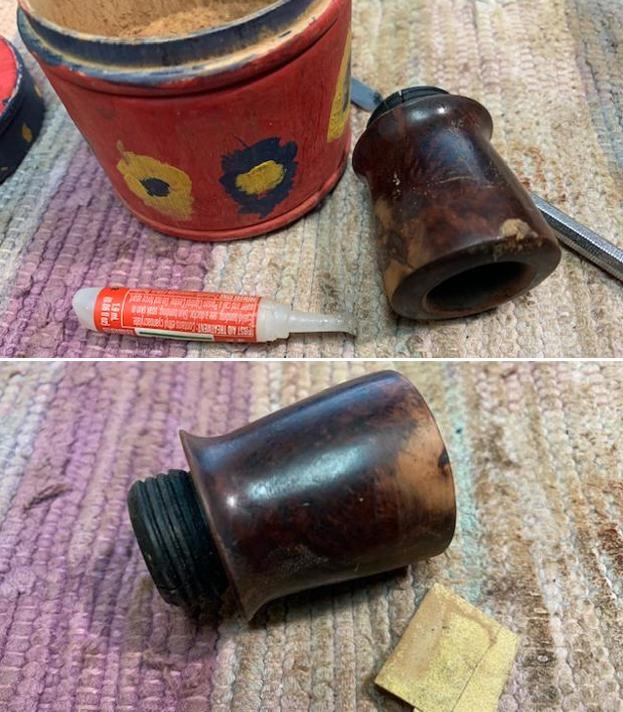
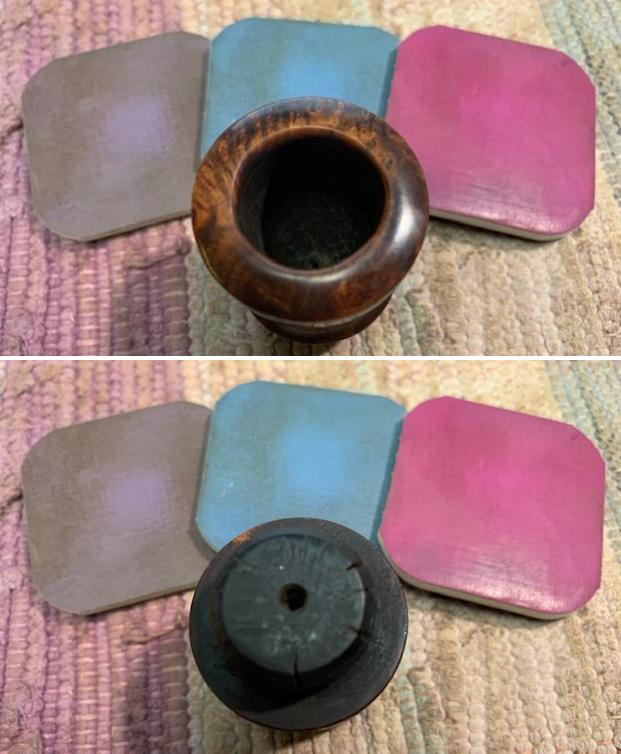
 I still had work to do on the rim top and outer edges but I also wanted to work on the inner edge. I repaired the damage there with the super glue and briar dust as well. I was not looking to build it up too much but to take care of the deep cuts and gouges on the left front of the edge. I sanded the repair with 180 and 220 grit sandpaper and I was happy with what I was seeing at this point in the process.
 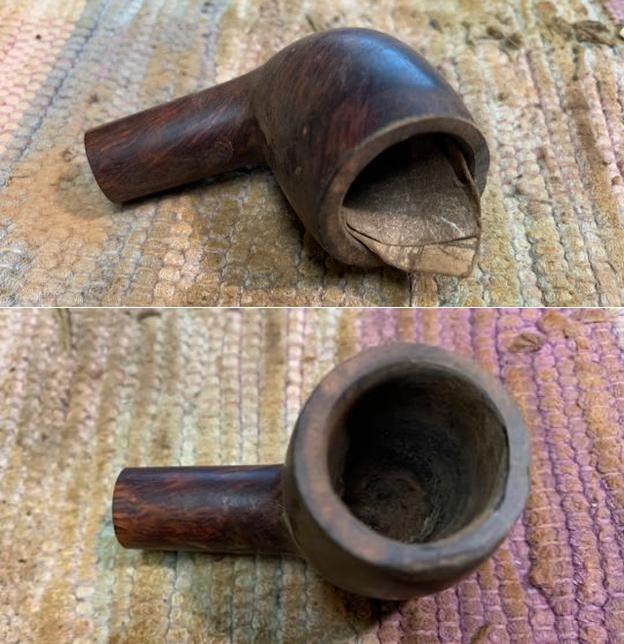 I worked some more on the inner edge of the bowl with a piece of 220 grit sandpaper wrapped around a piece of dowel. I wanted to smooth out the inside of the bowl and the inner edges of the rim.
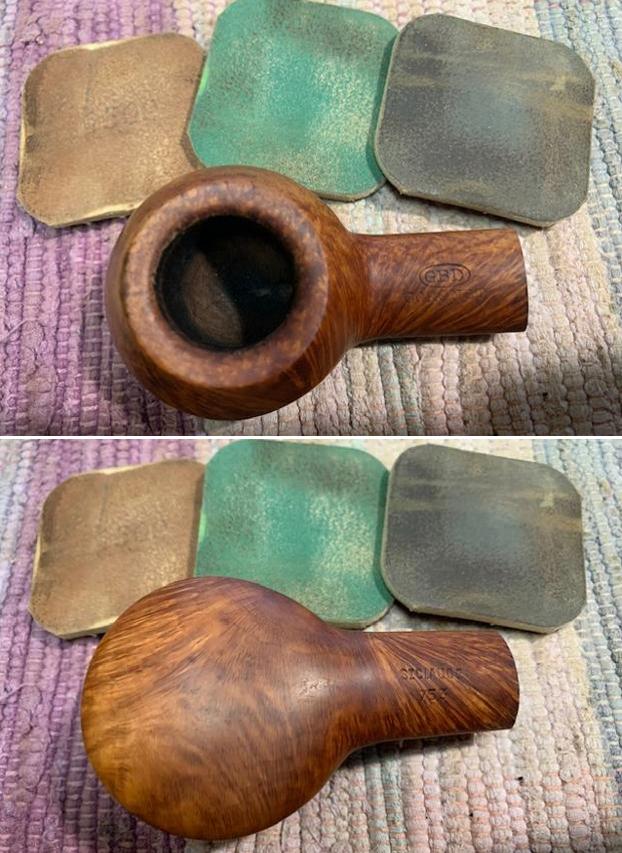
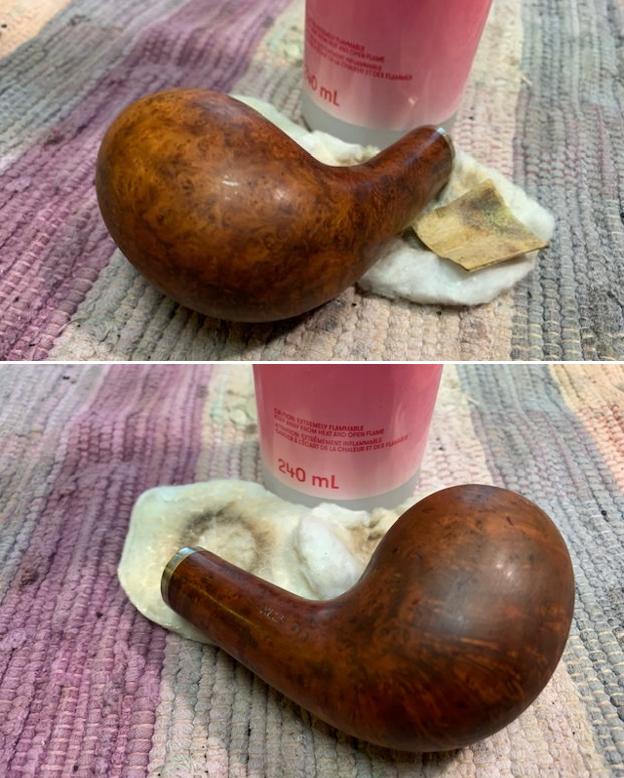
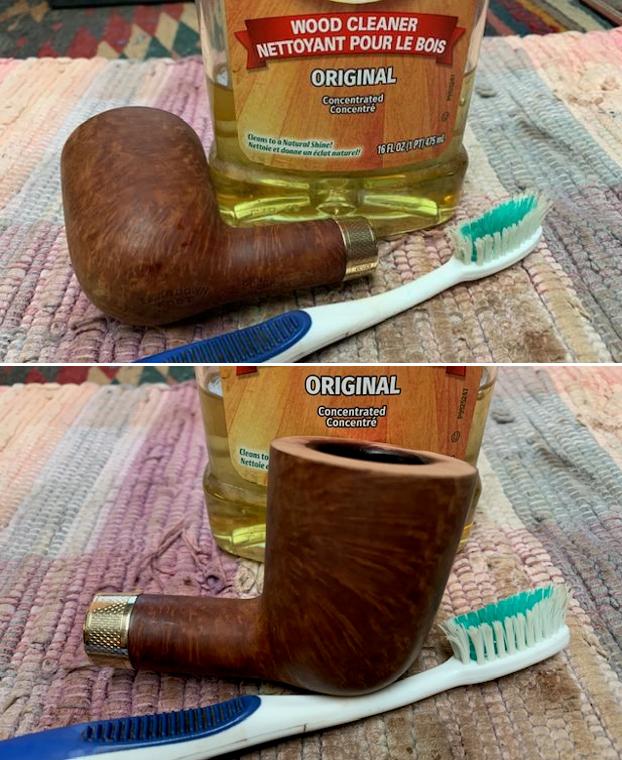
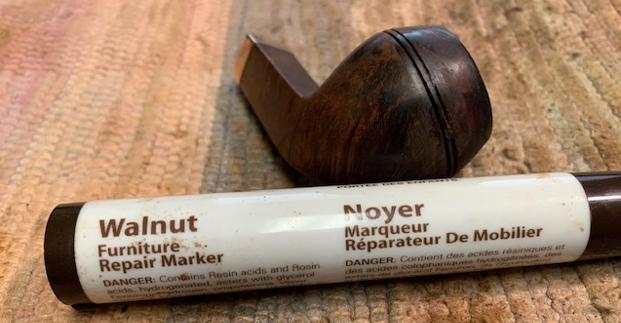
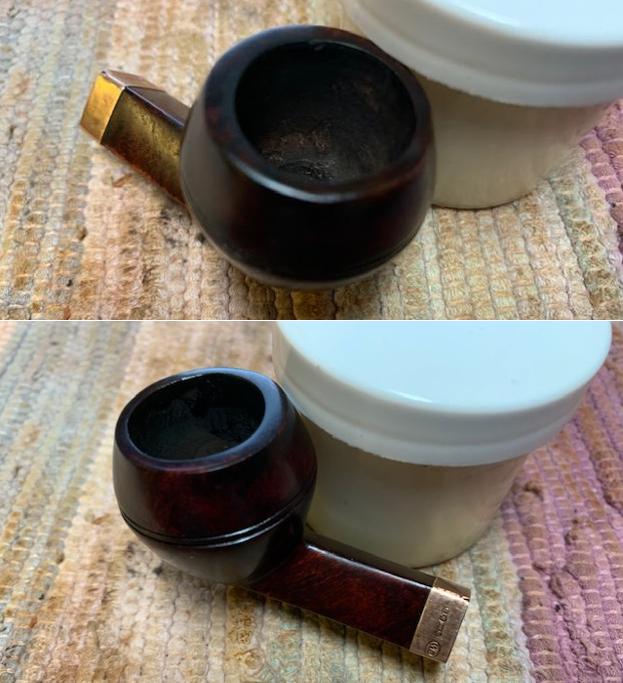
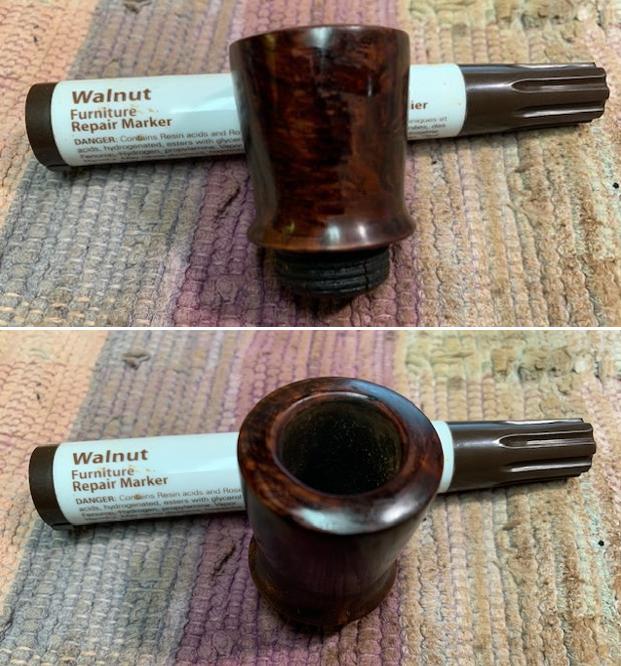
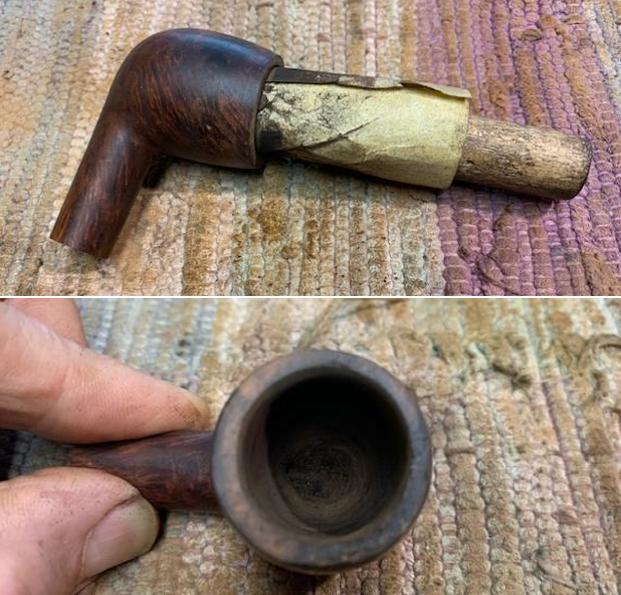 I decided to give the repaired edge and top a quick coat of Walnut stain to see what it looked like. I find that doing this often shows flaws that need to be addressed in the repair and makes it easier to see where I am with the top and edges.
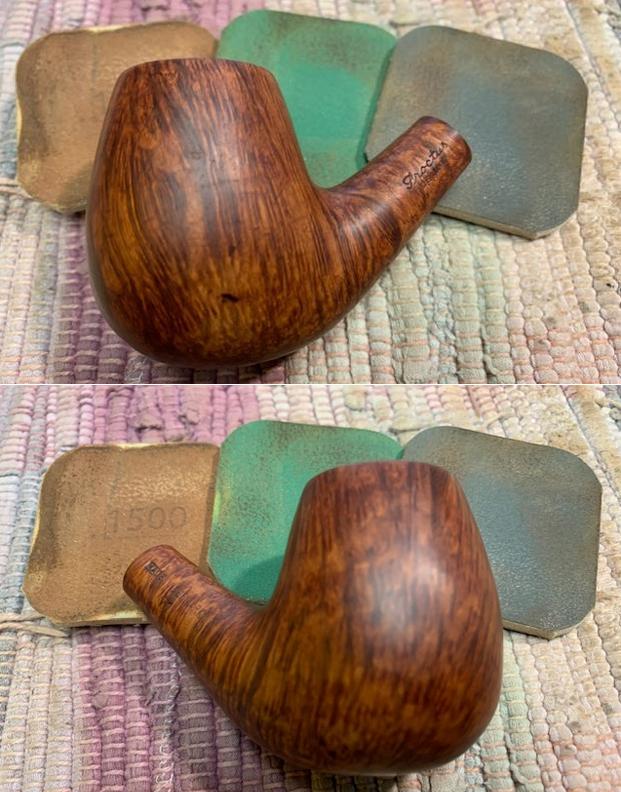
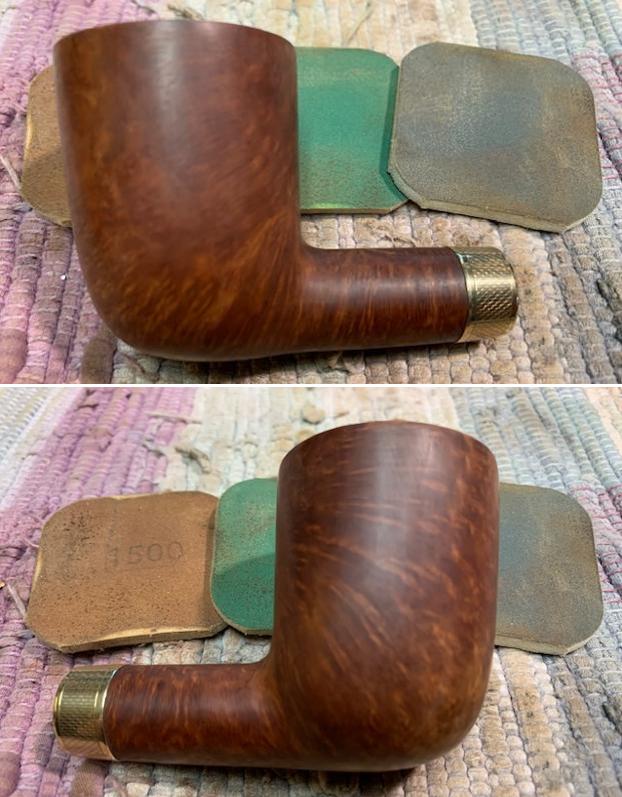
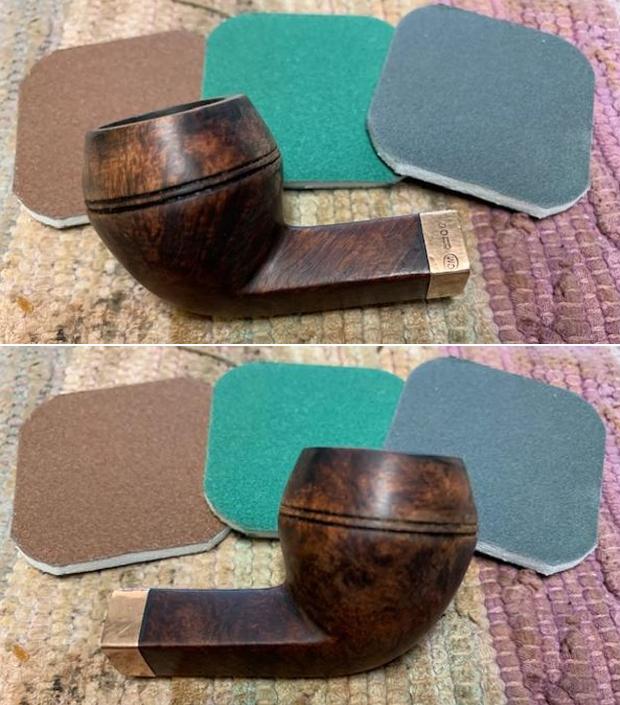
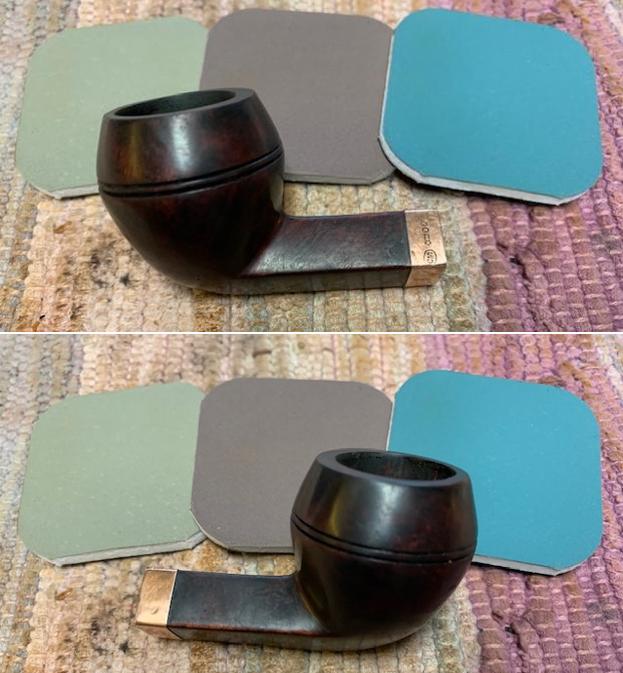
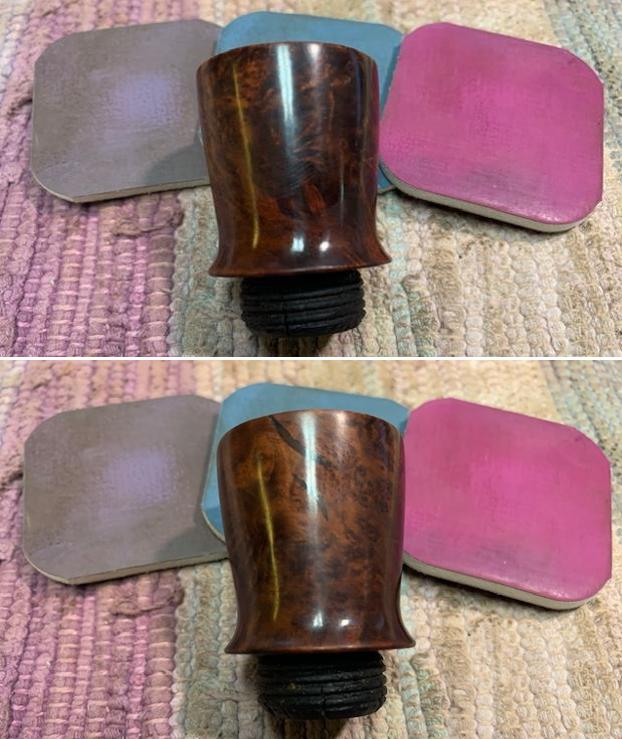
 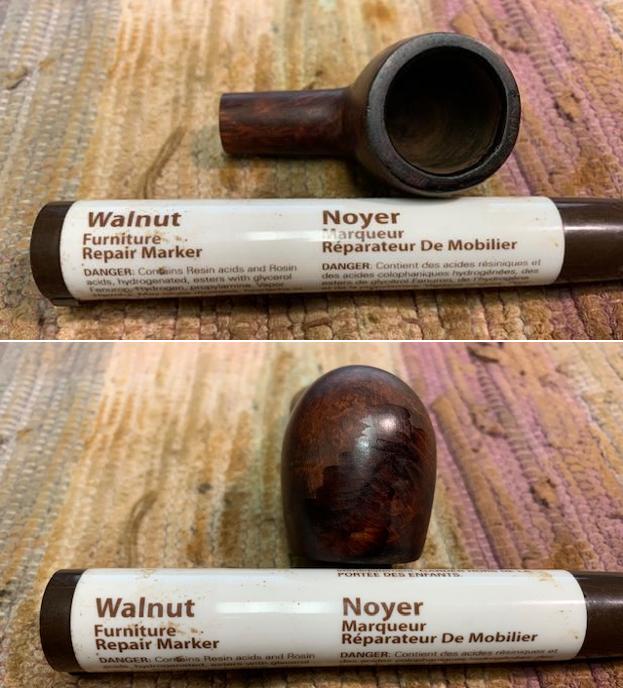 I started the polishing process with 1500-2400 grit micromesh sanding pads. I dry sanded with the pads in preparation for restaining the bowl. After each pad I wiped the bowl down with a damp cloth. My goal was to remove the scratching left behind by the repairs to the rim top and cap. I was able to remove them.
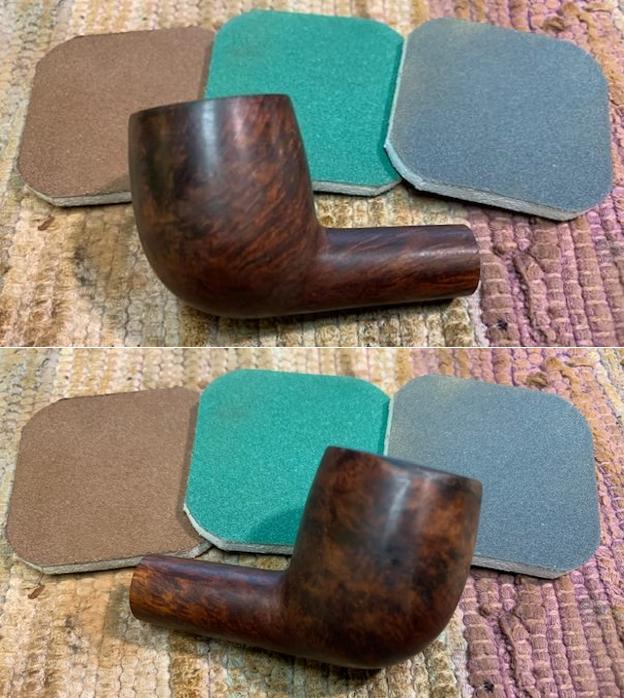
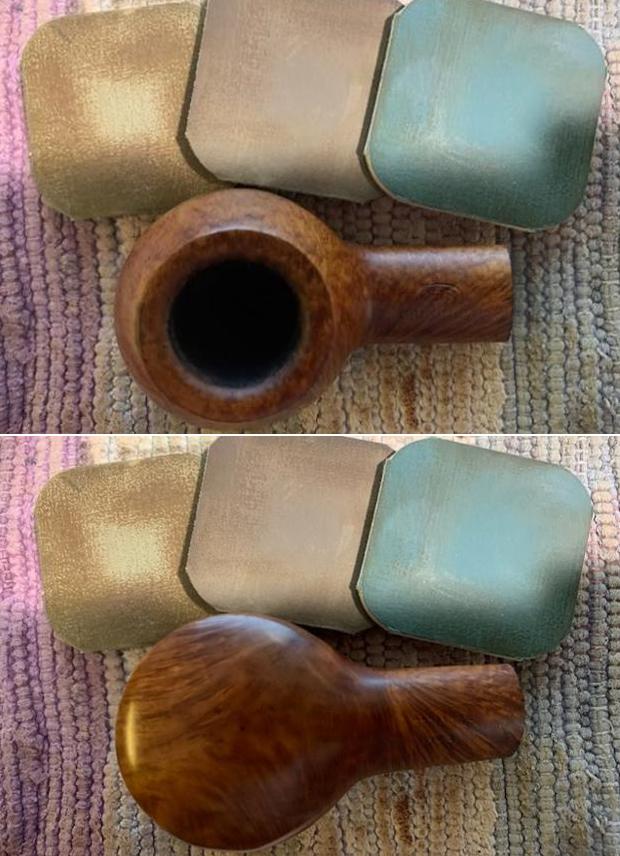
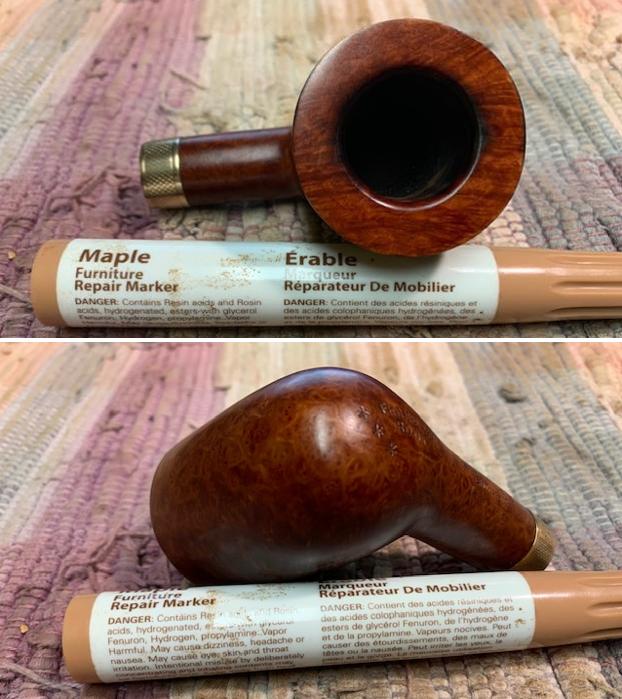
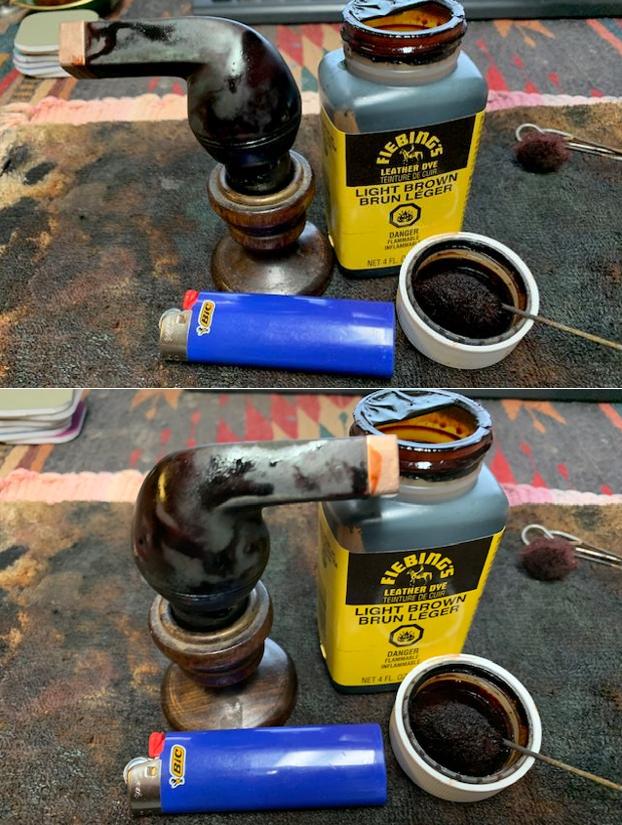
 Once it was smooth the briar was ready for staining. I stained it with a Feibing’s Light Brown aniline stain. I applied it and flamed it with a lighter to set it in the grain. I repeated the process until the coverage of the briar was good. I set it aside to let the stain cure.
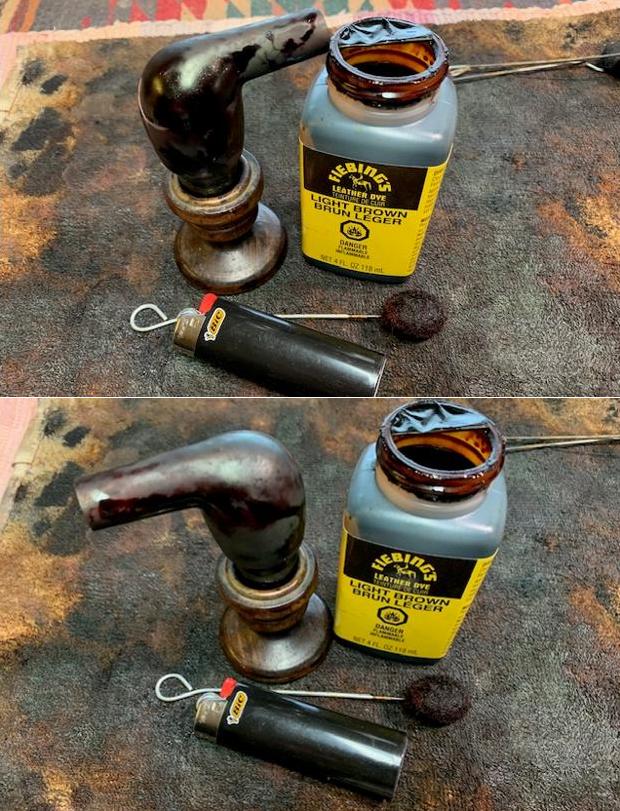 I buffed pipe with Blue Diamond on the buffing wheel to remove the crusty coat of stain. I then polished it with the remaining micromesh pads -3200-12000 grit pads. I wiped it down after each pad with a damp cloth.
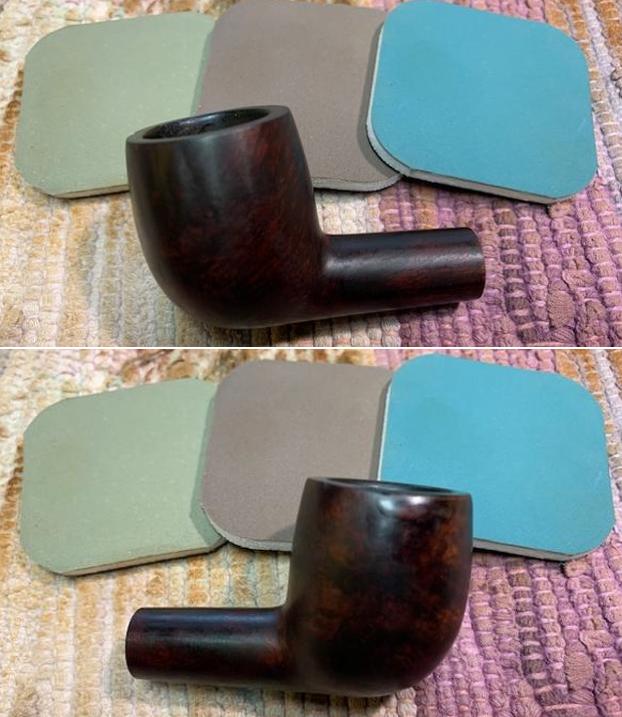
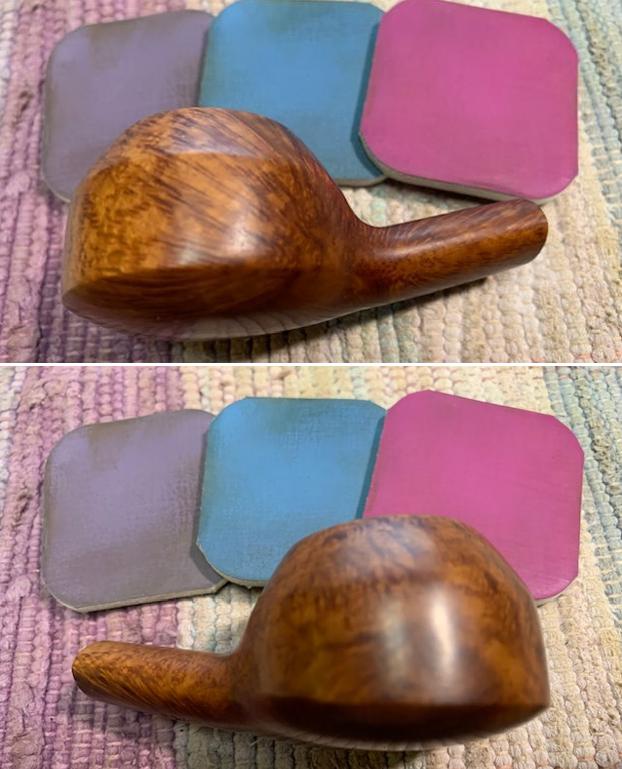
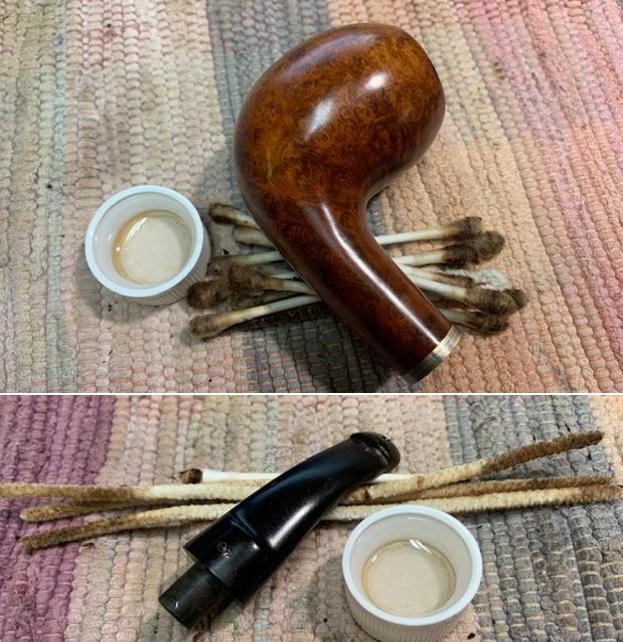
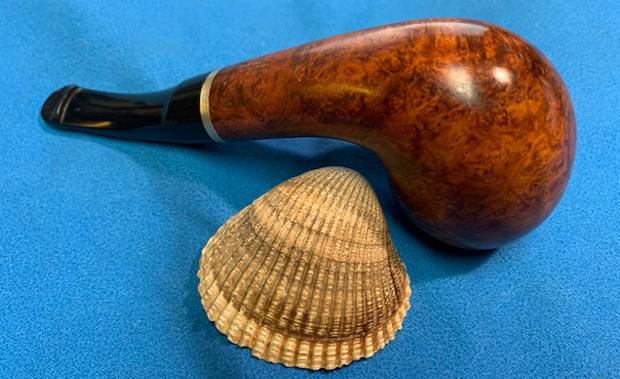
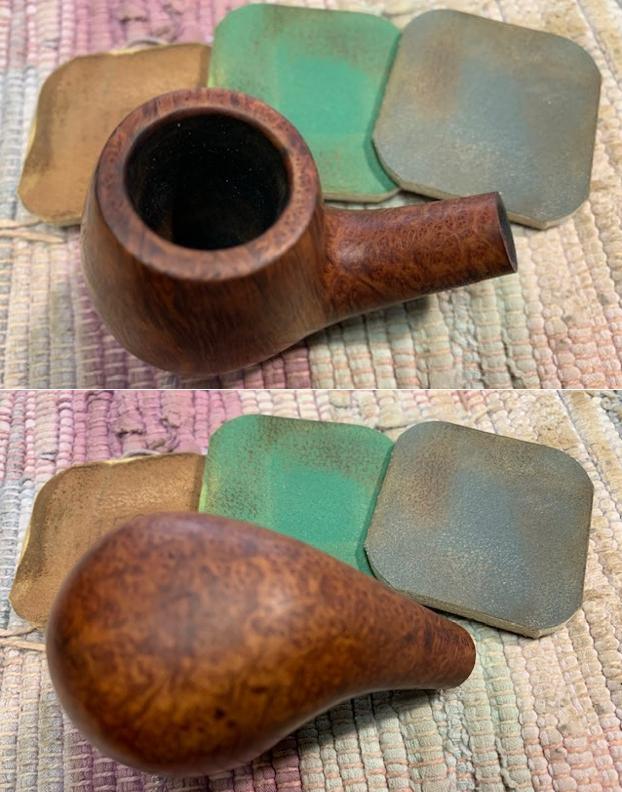
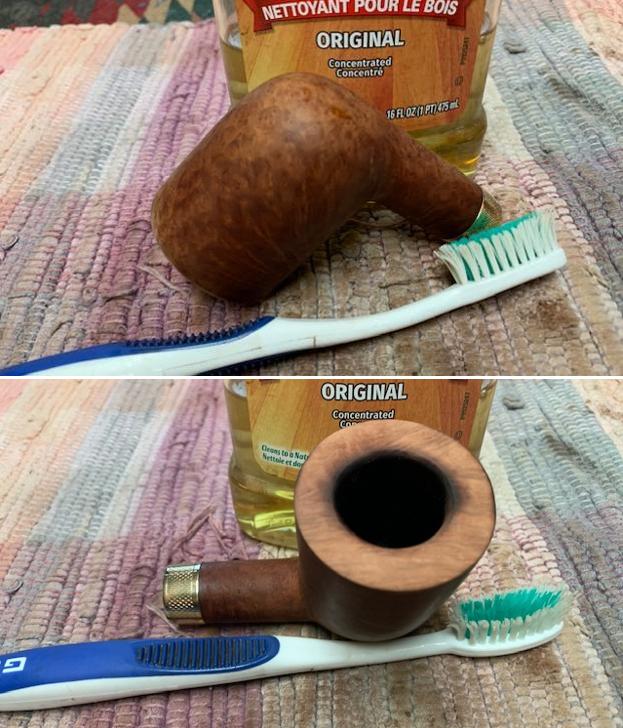
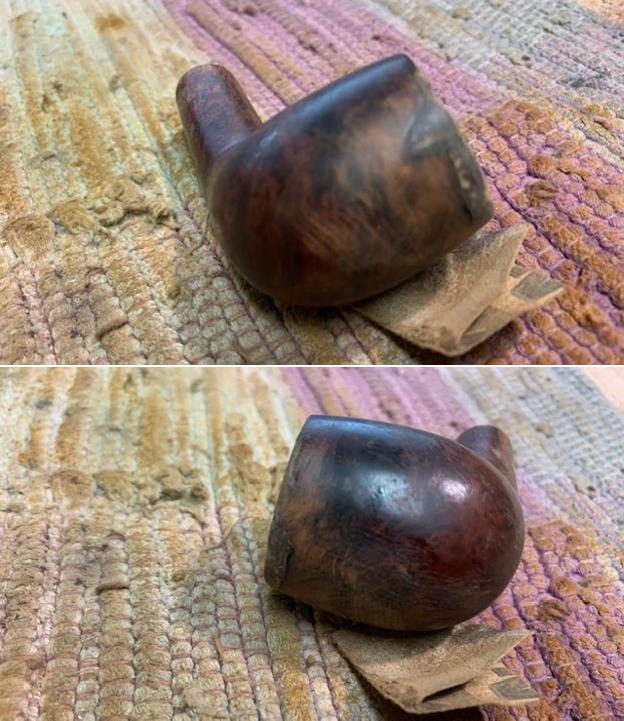
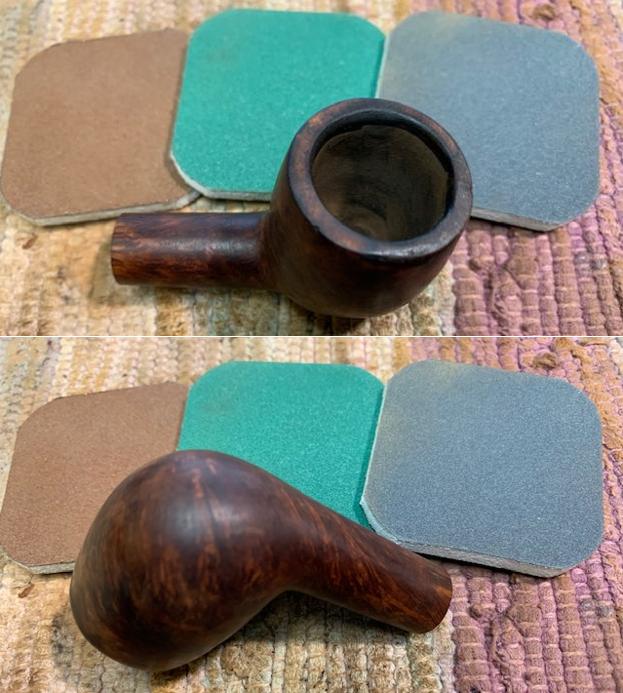
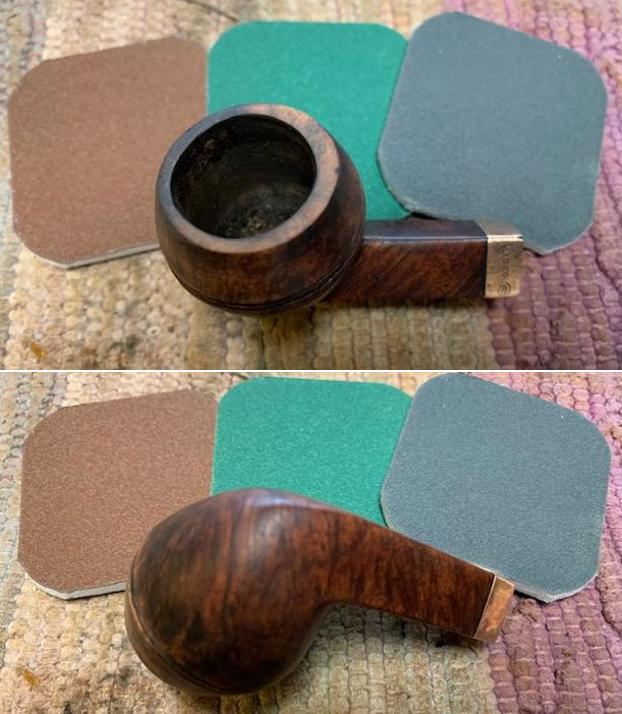
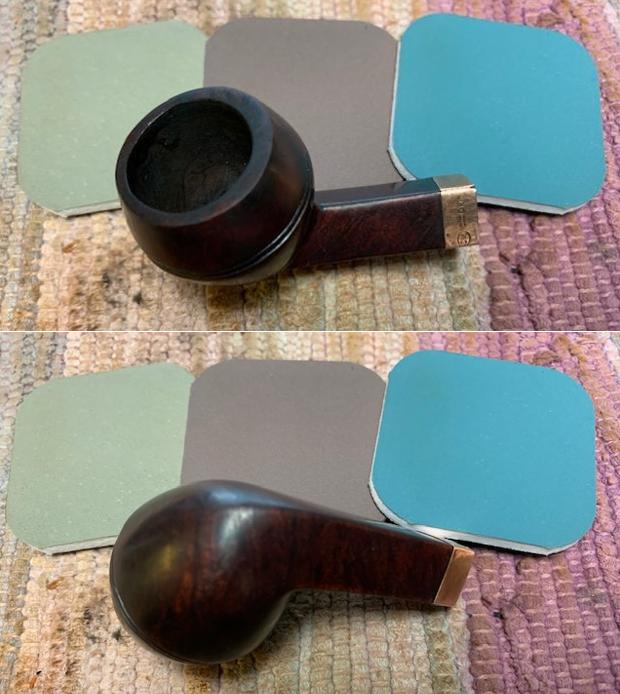
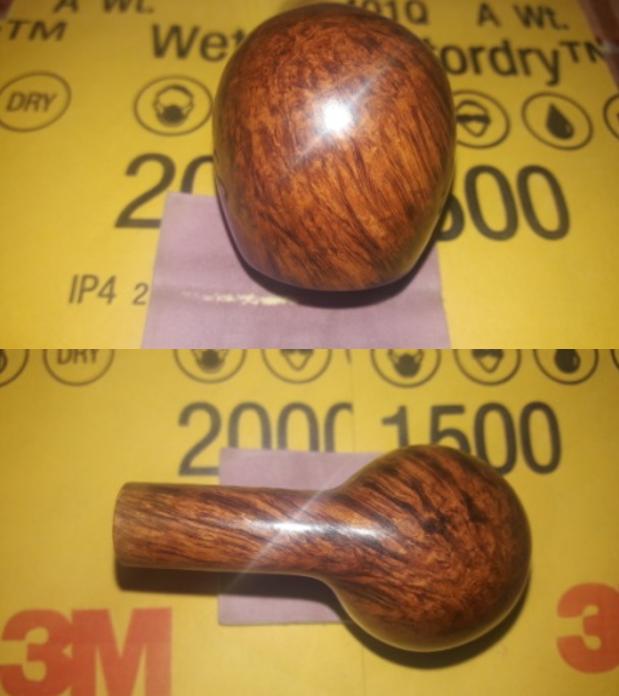
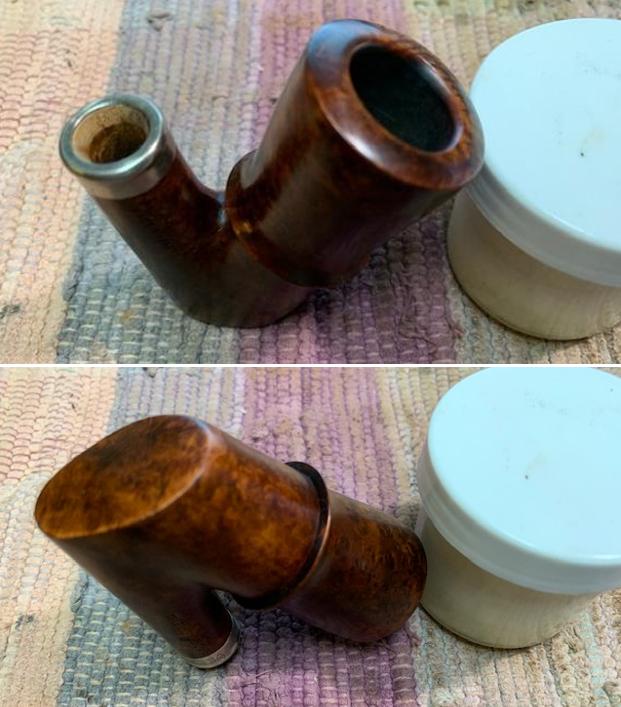
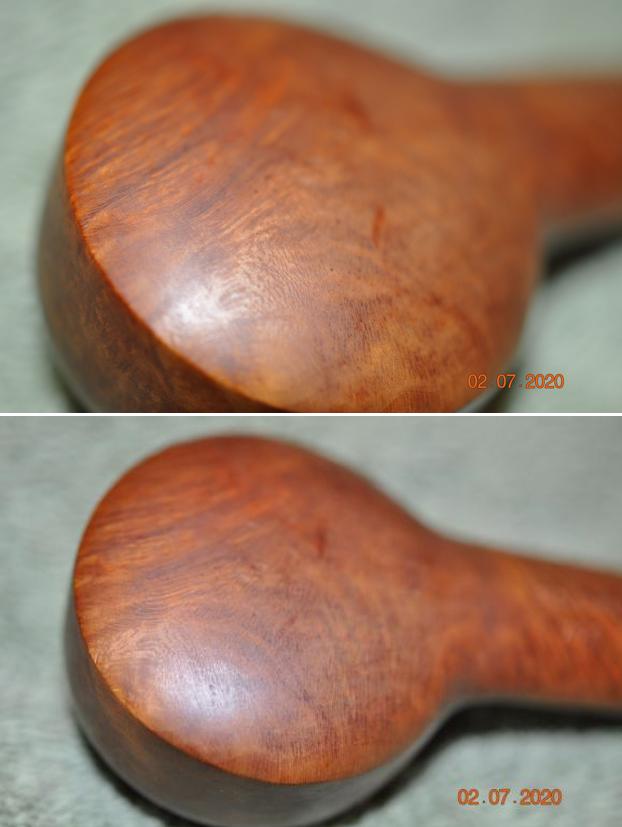
 I worked some Before & After Restoration Balm into the surface of the briar of the bowl with my finger tips. The product is incredible and the way it brings the grain to the fore is unique. It works to clean, protect and invigorate the wood.
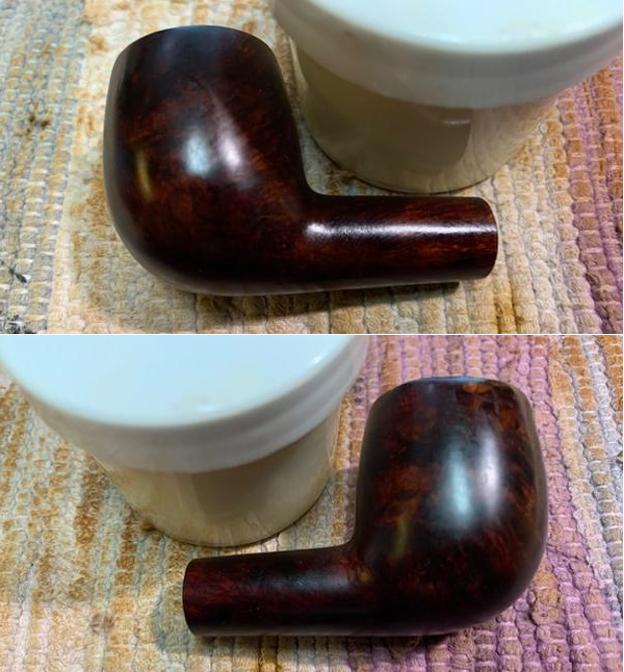
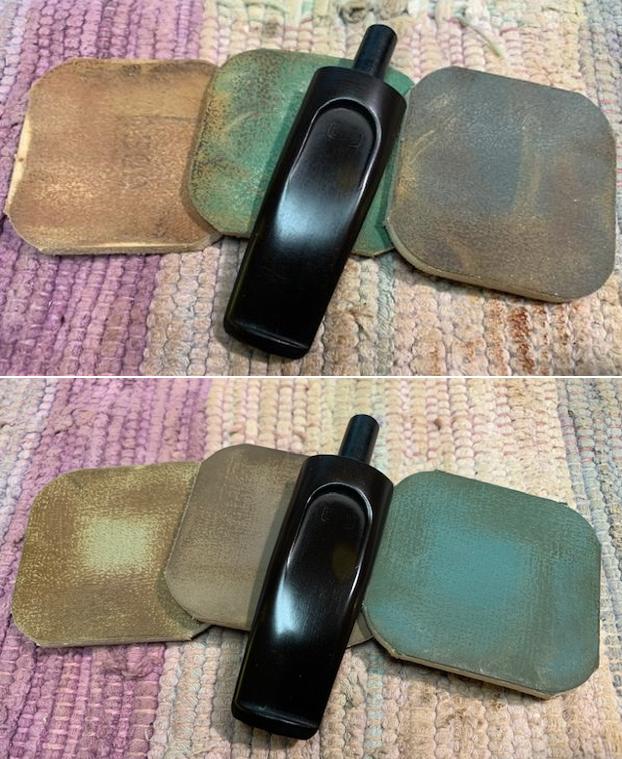
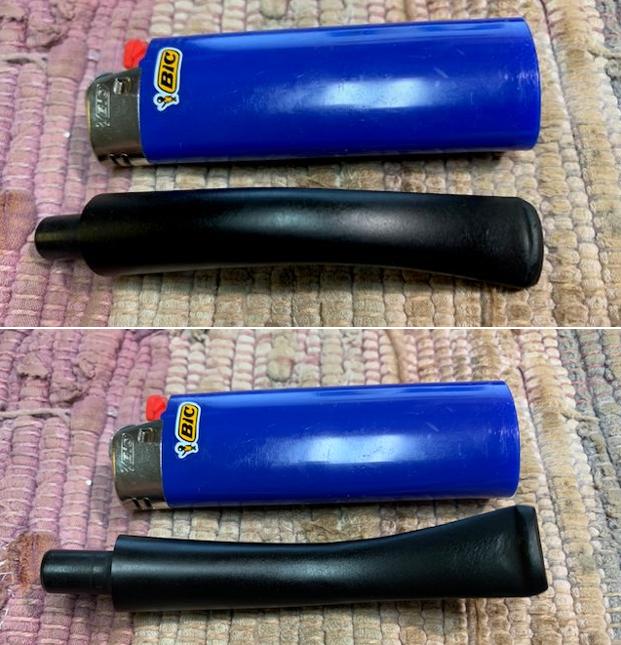
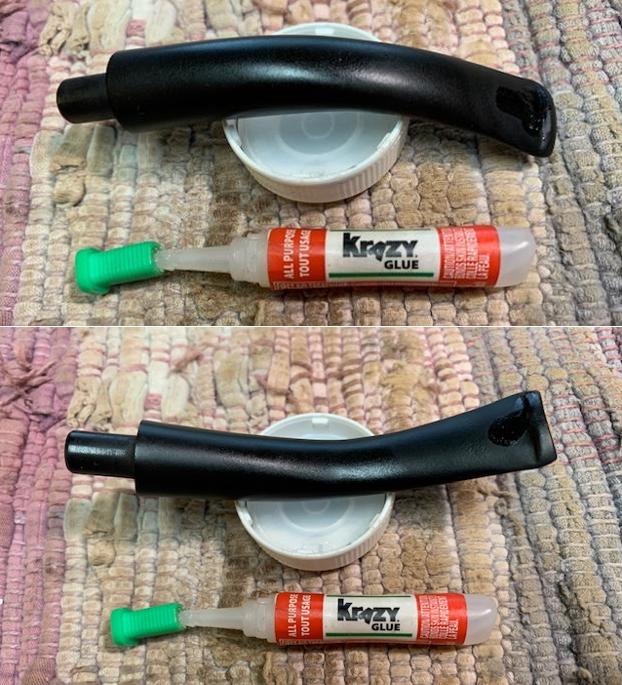
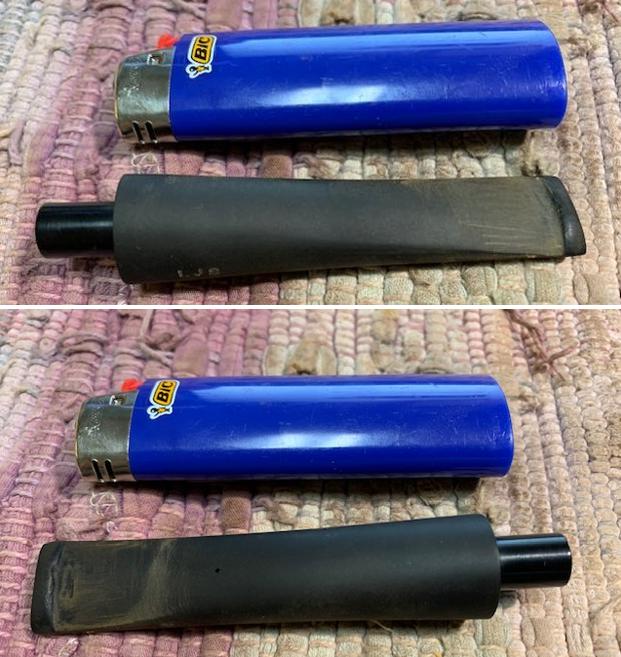
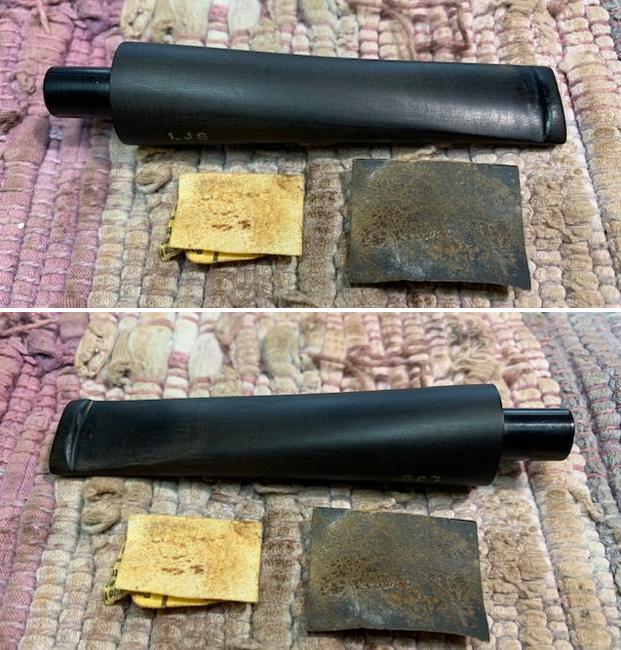
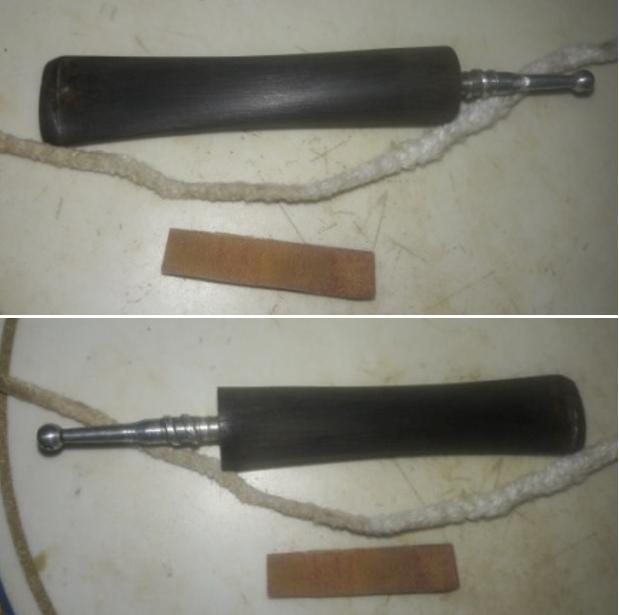
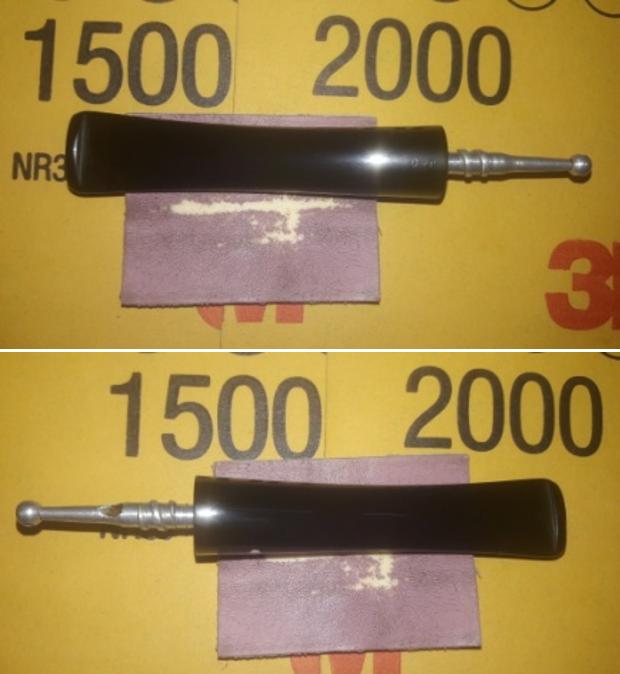
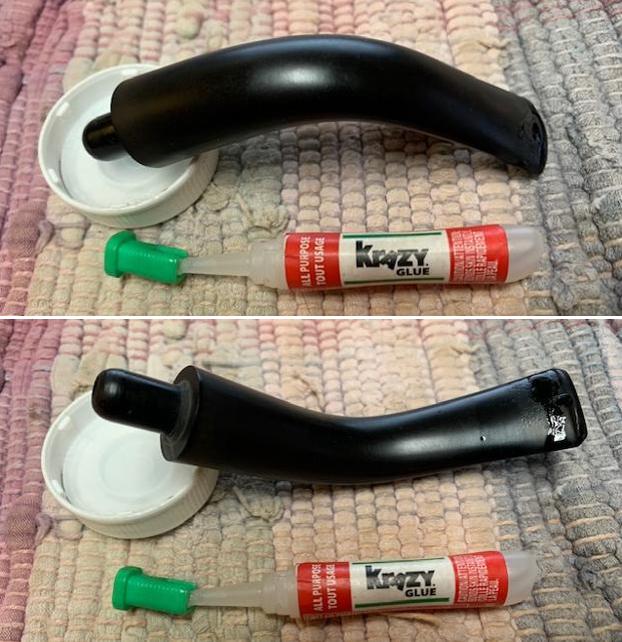
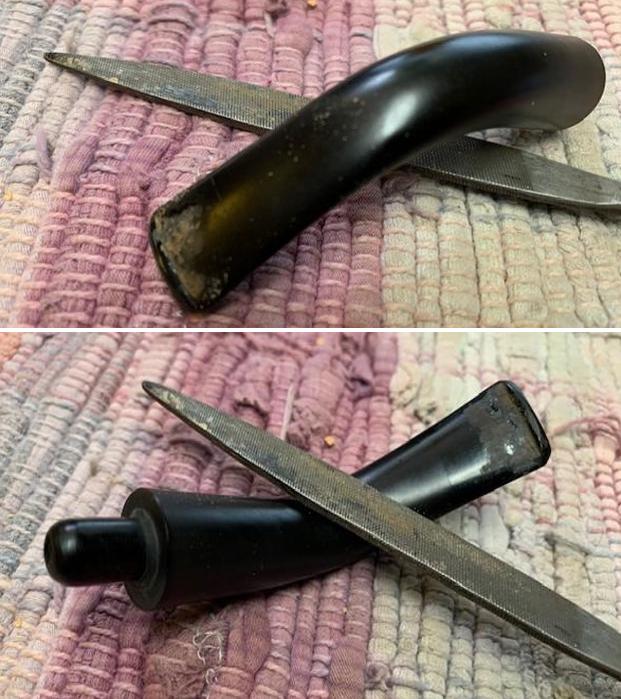
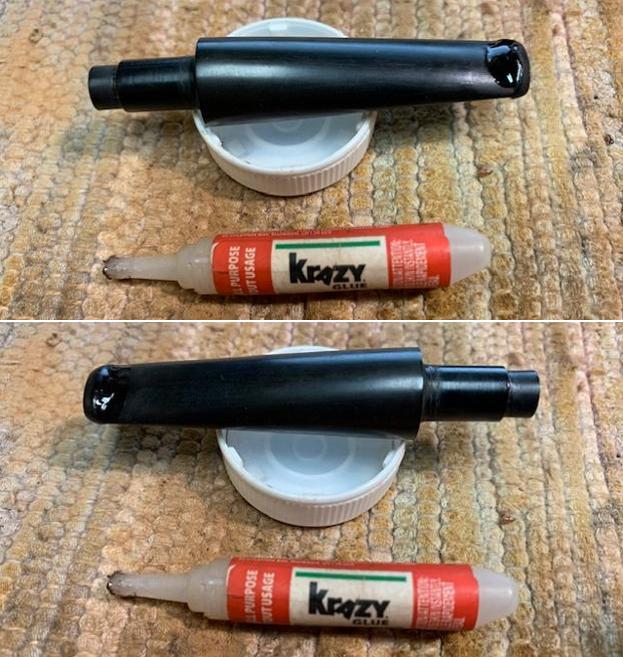
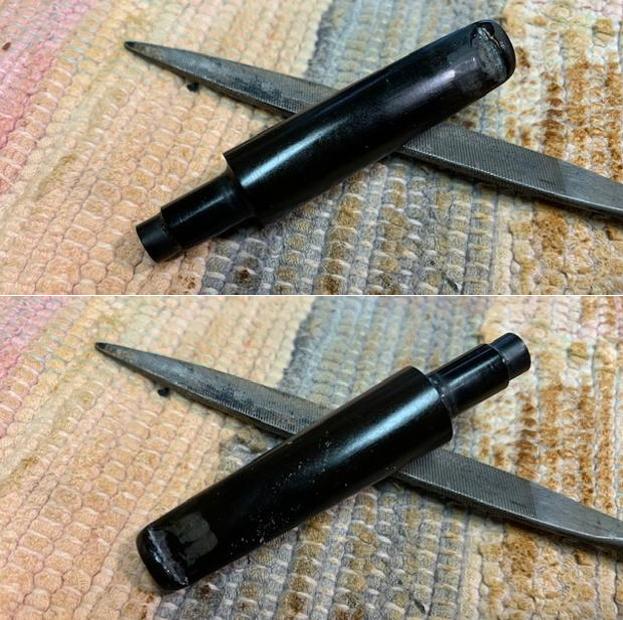
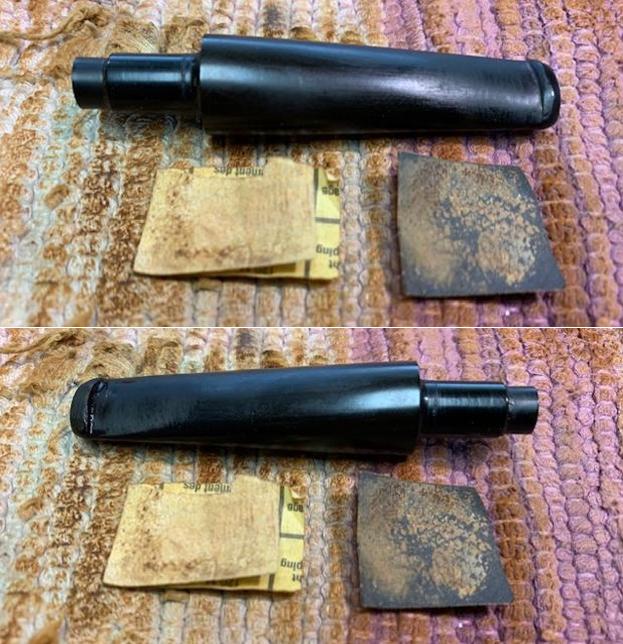
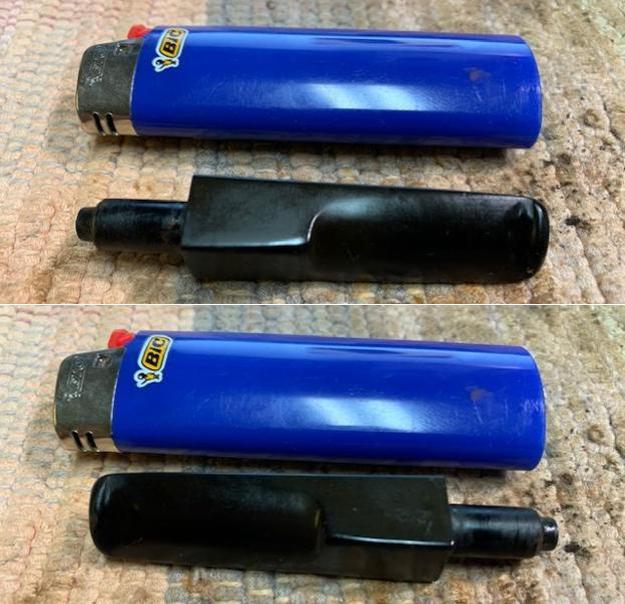
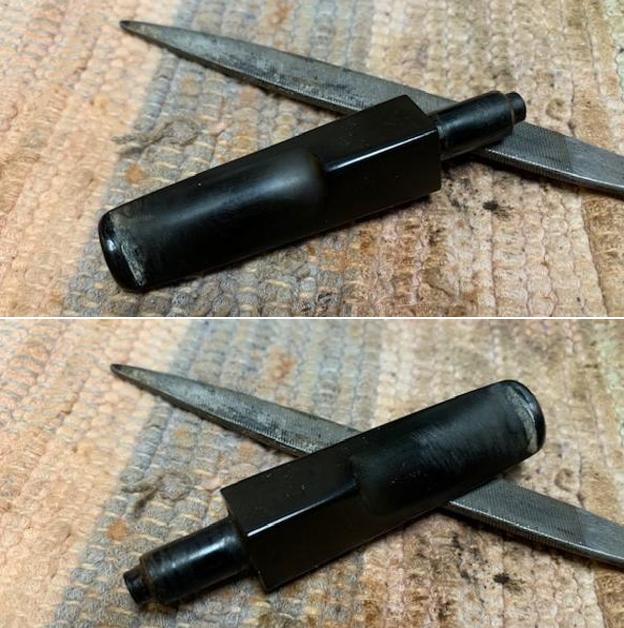
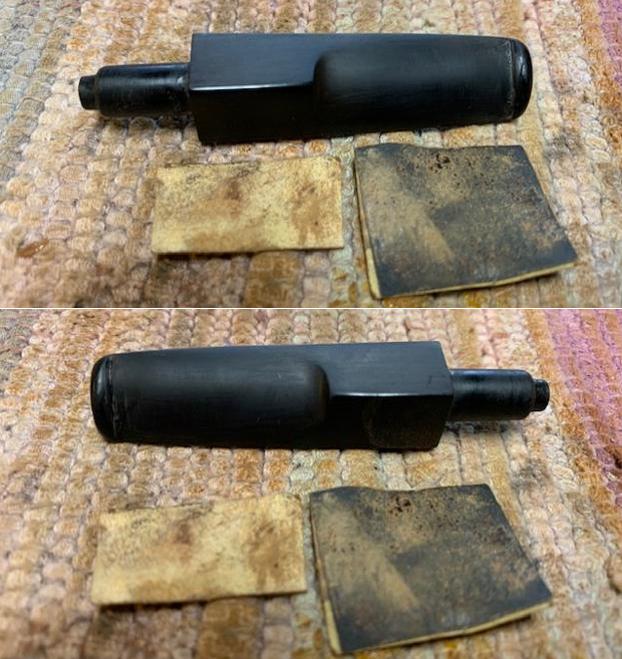
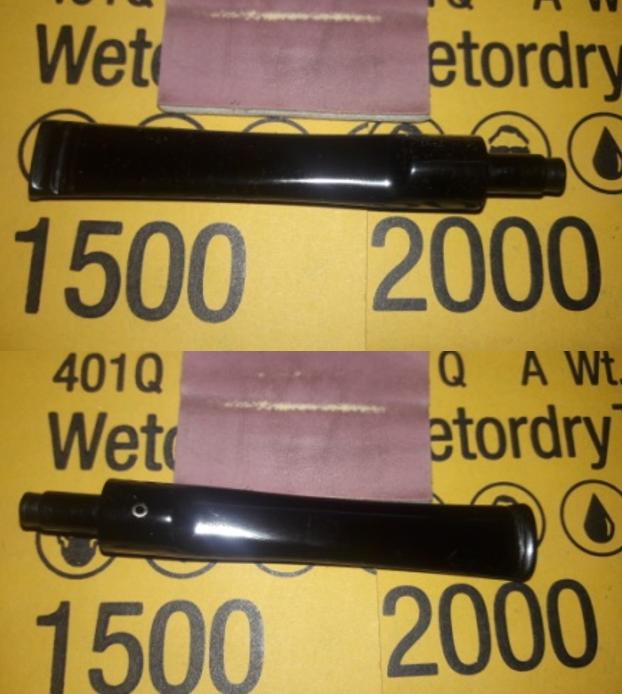
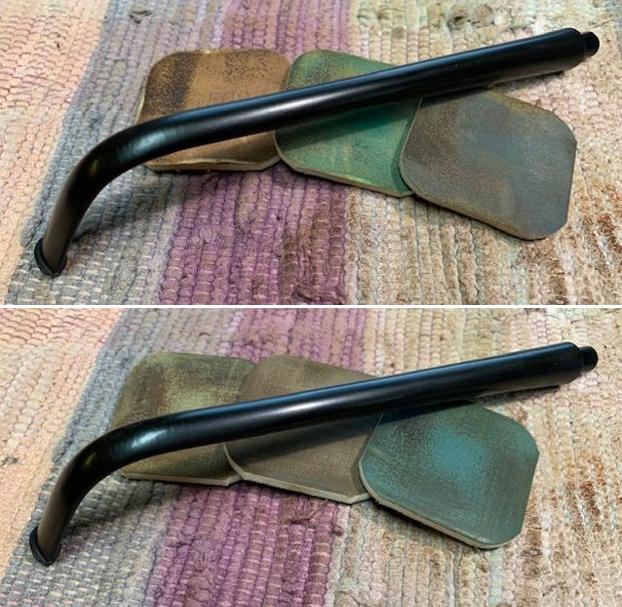
 I set the bowl aside and turned to work on the stem. I “painted” the stem with the flame of a Bic lighter to try to lift the tooth marks in the surface on both sides. I was able to lift it some but not completely. I filled in the remaining dents with clear CA glue and set it aside to cure. Once they cured I used a small file to recut the button edge and flatten the repairs to blend them into the surface. I sanded the stem with 220 grit sandpaper to remove the remaining oxidation on the saddle and also to further blend in the repairs. I started the polishing with 400 grit wet dry sandpaper.
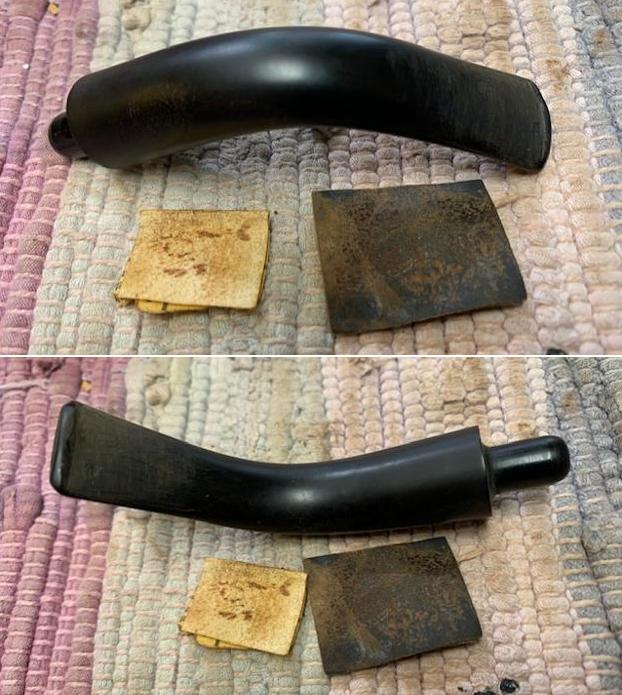
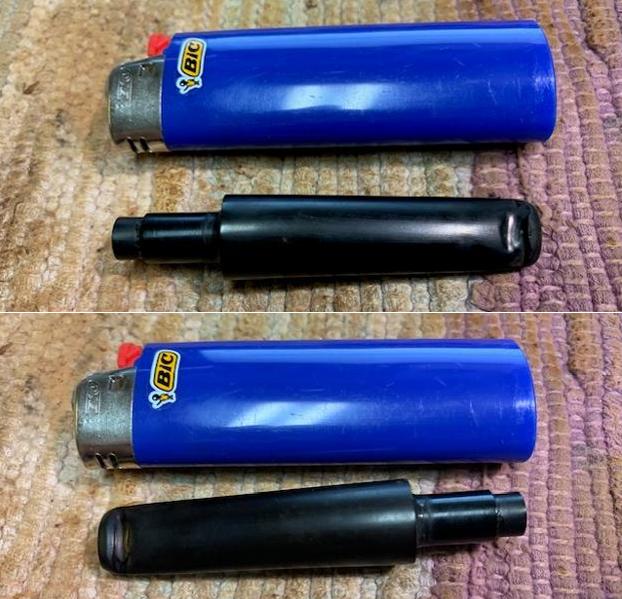
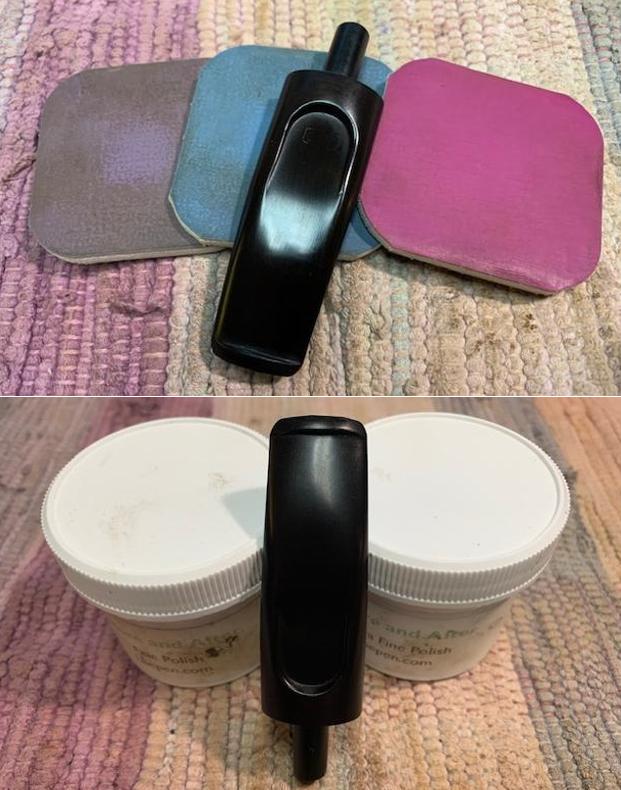
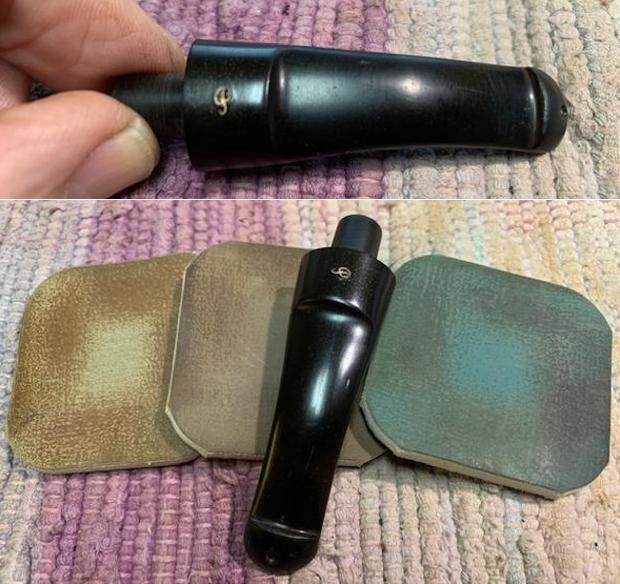
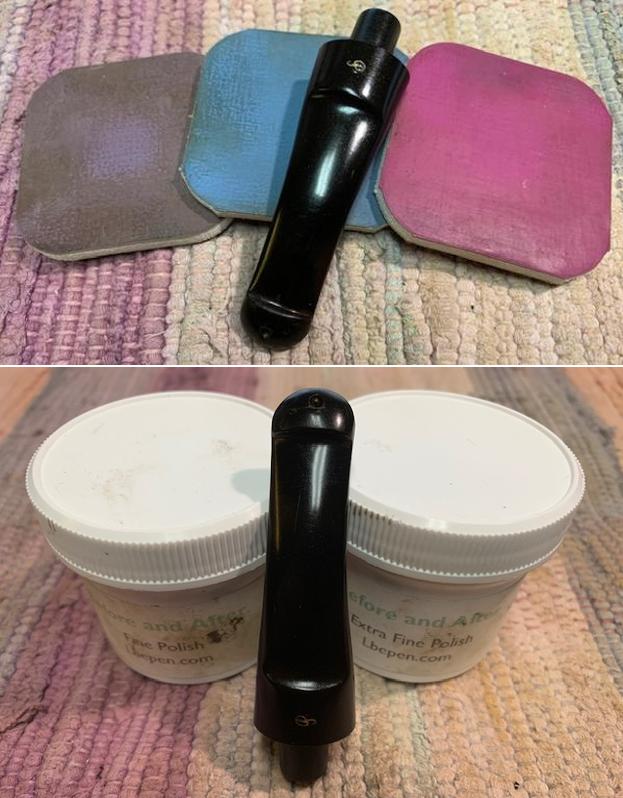
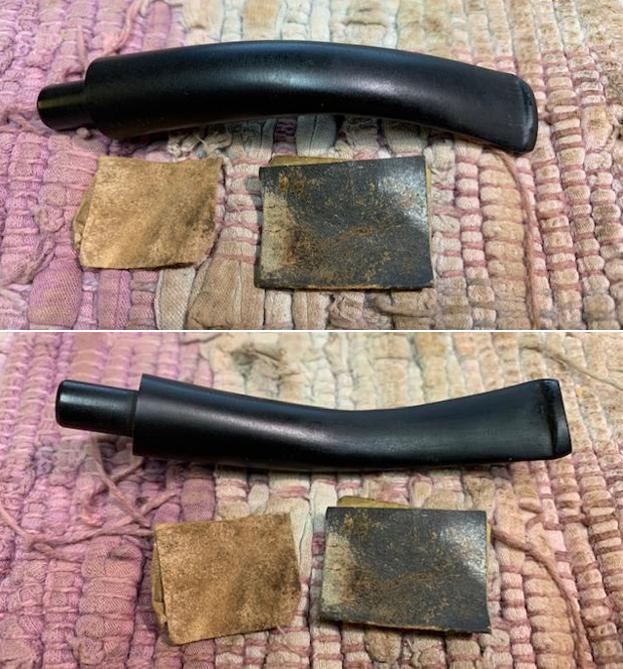
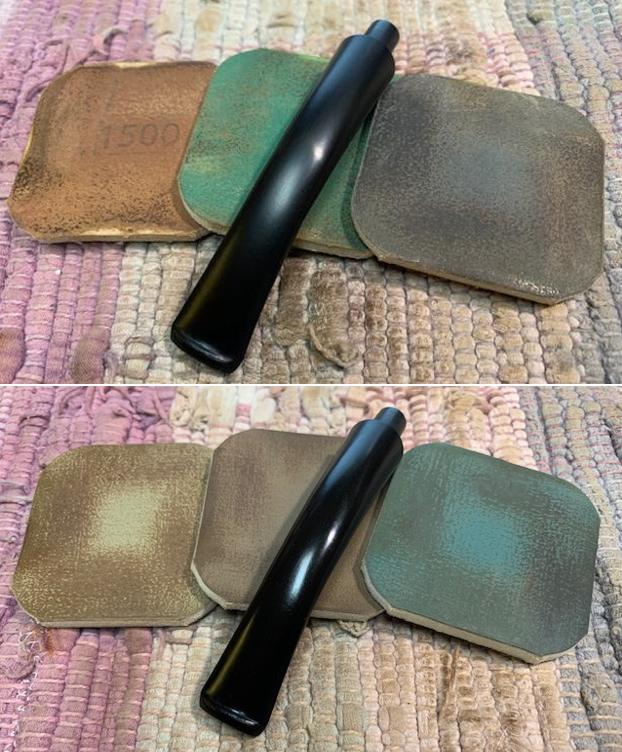
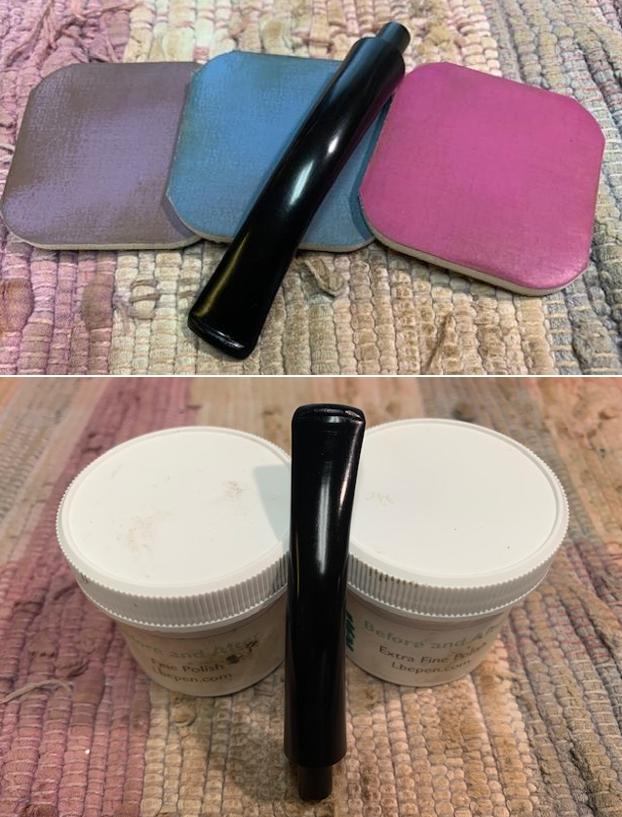
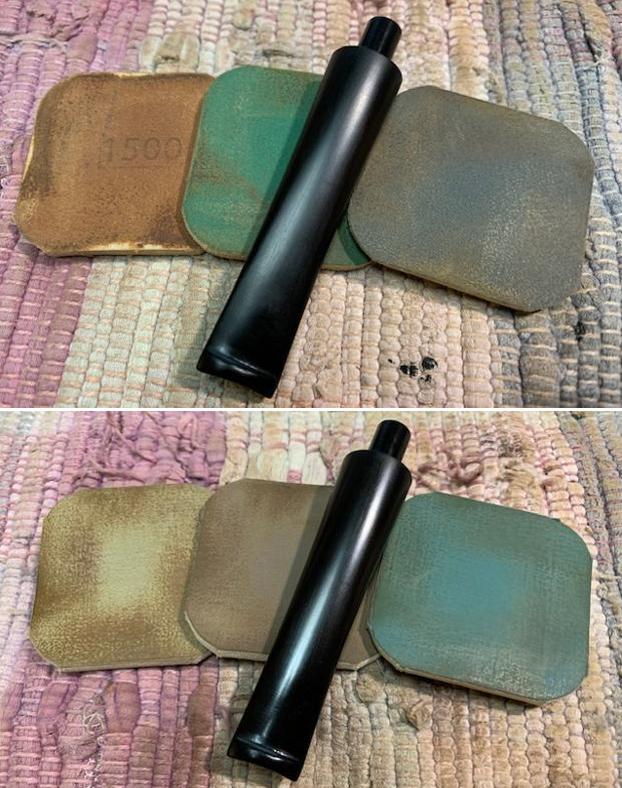
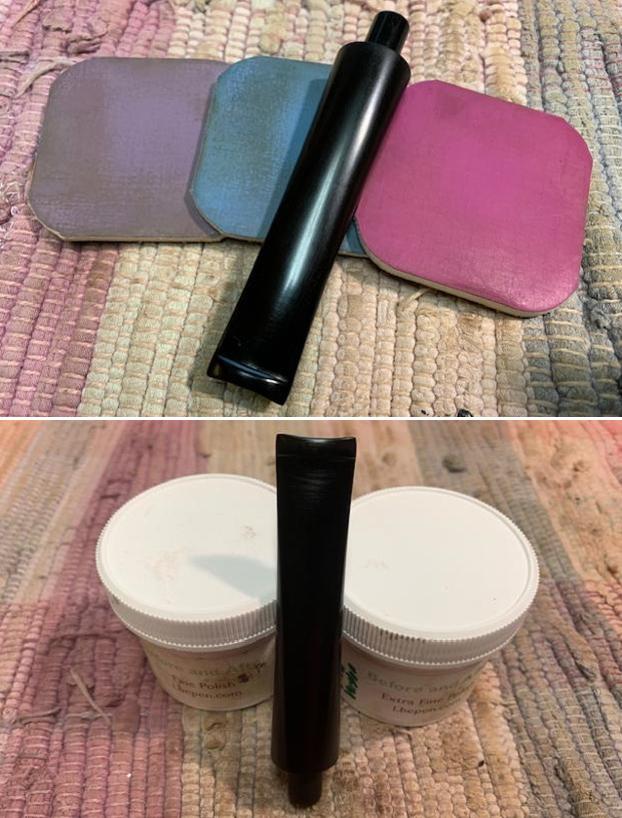
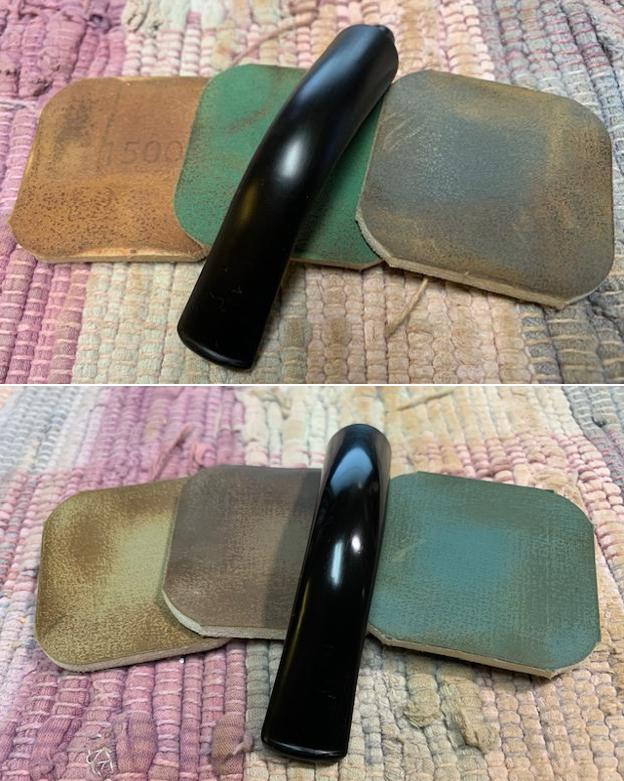
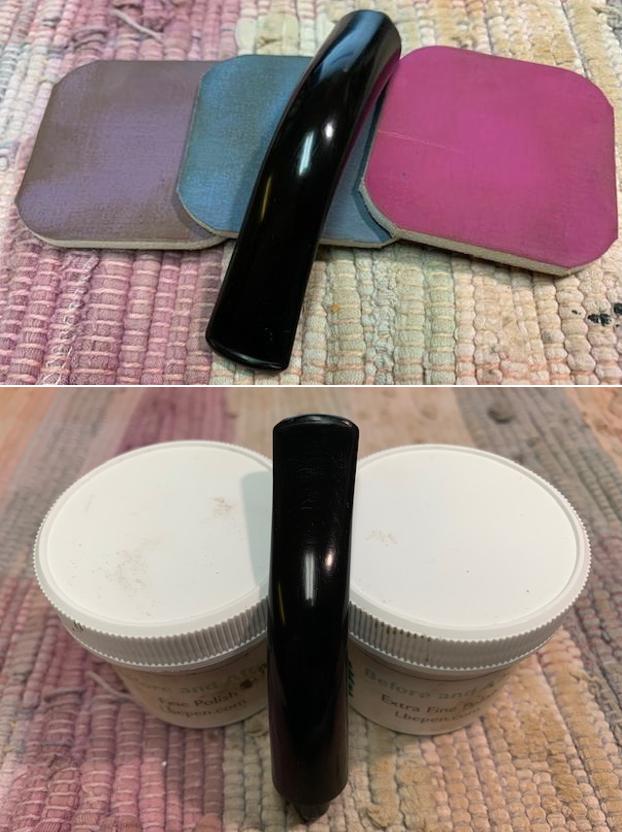
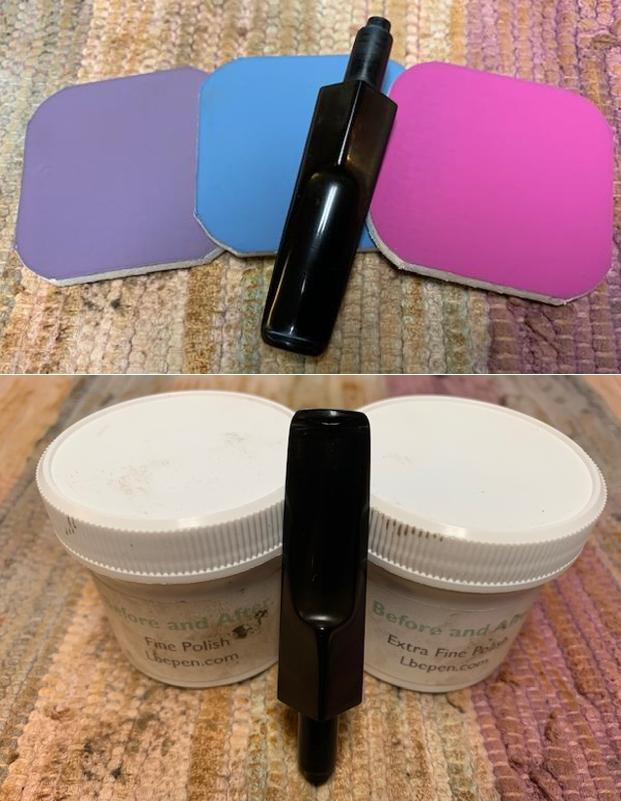
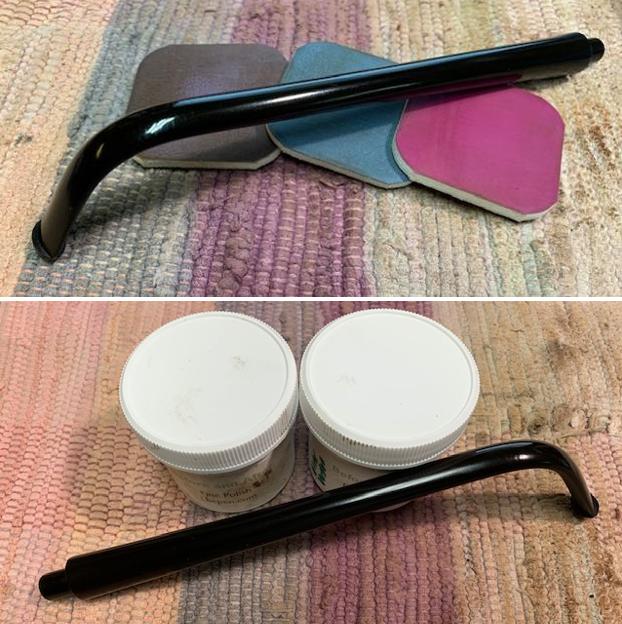
 I polished the stem with micromesh sanding pads – wet sanding with 1500-12000 grit pads. I wiped the stem down after each sanding pad with Obsidian Oil. I finished polishing the surface with Before & After Pipe Stem Polish – both fine and extra fine. I gave the stem a final coat of Obsidian Oil and let it dry.
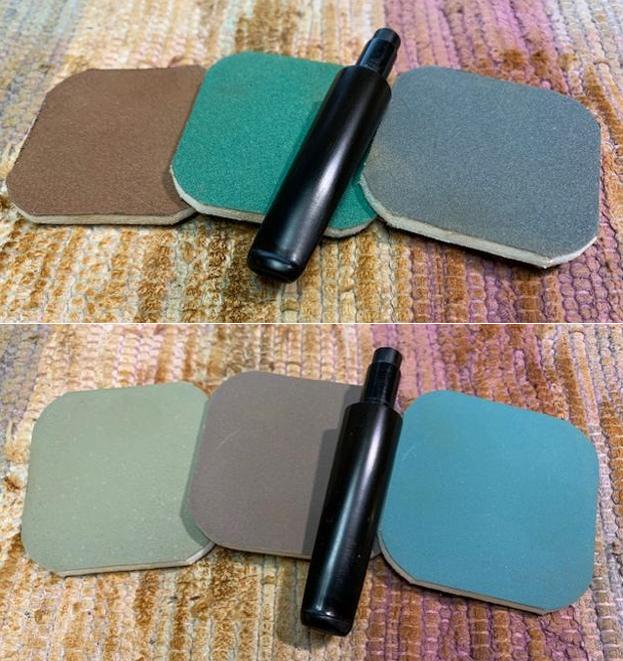
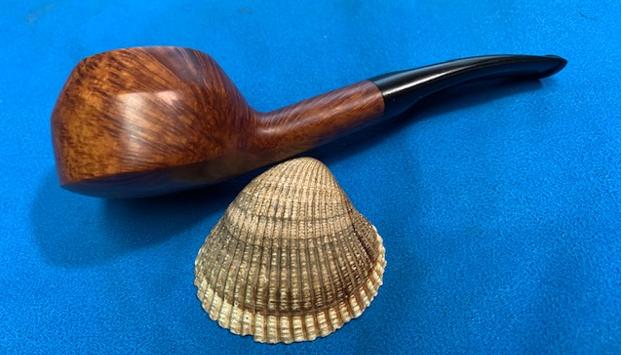
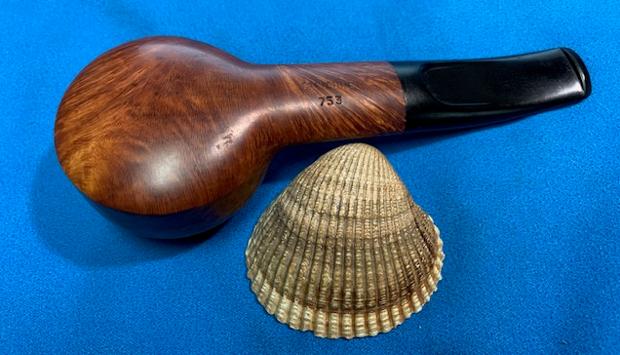
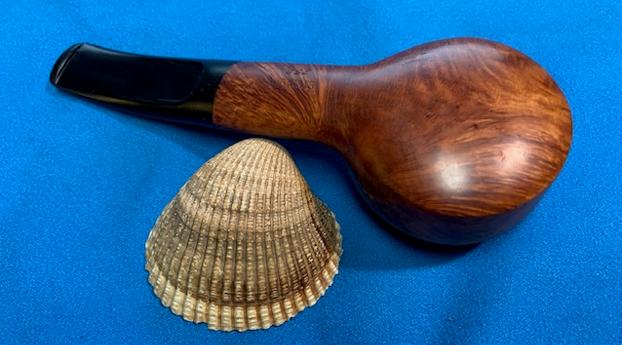
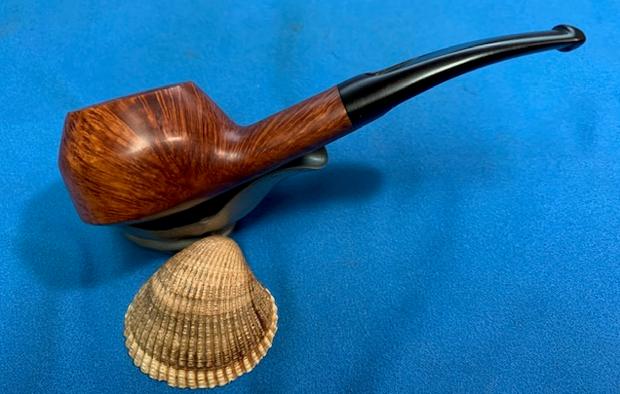
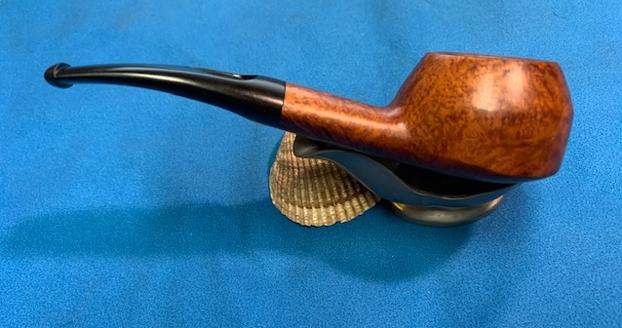
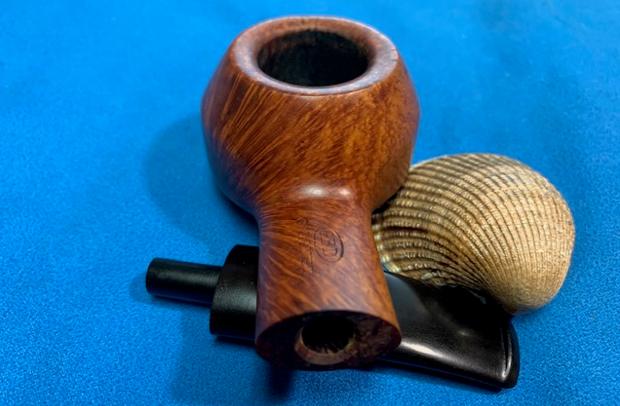
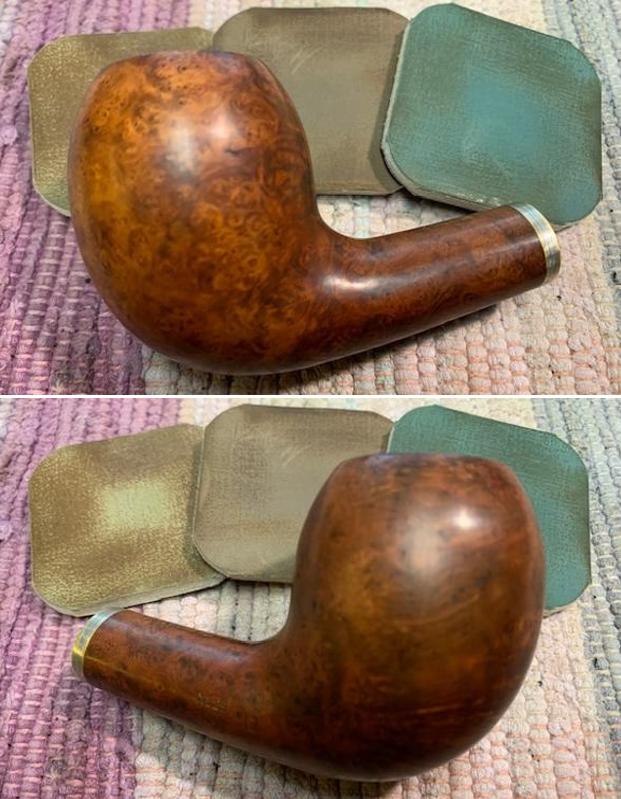
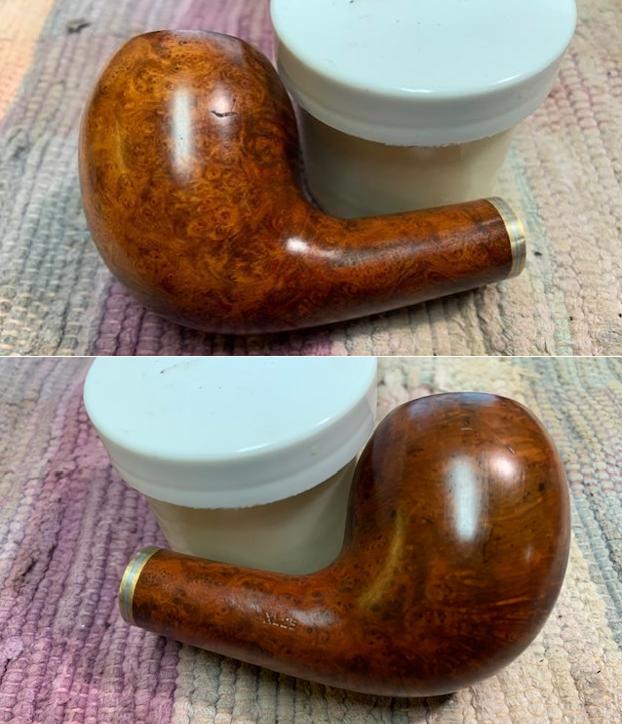
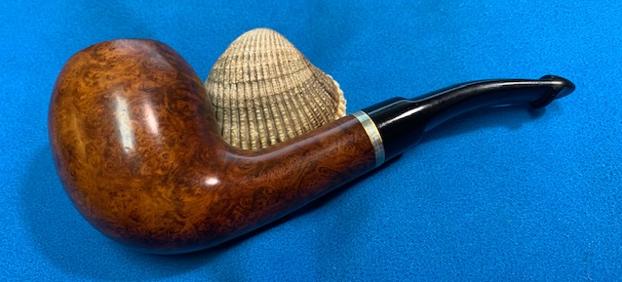
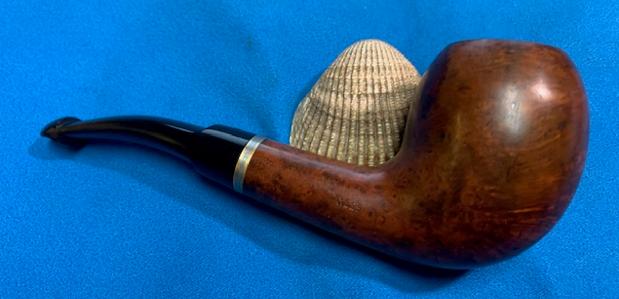
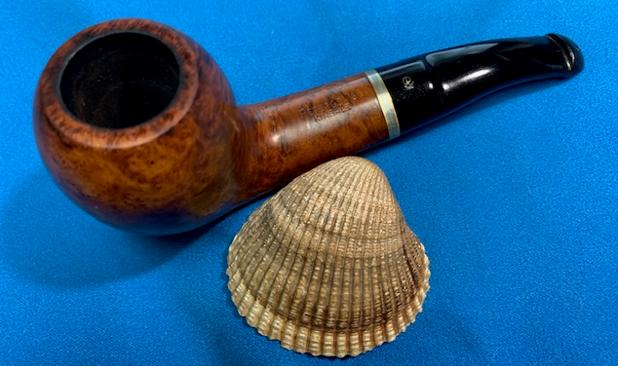
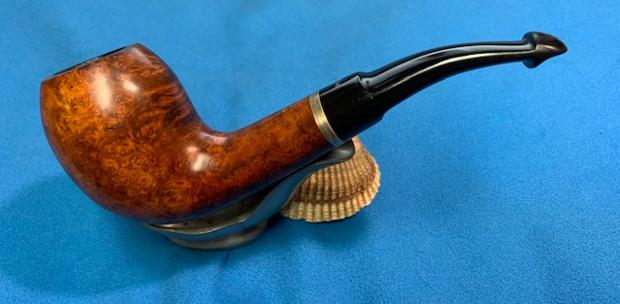
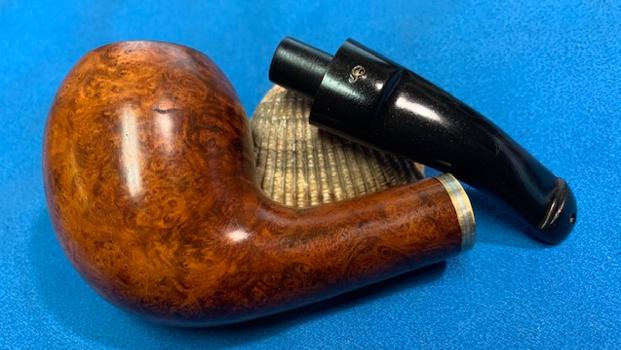
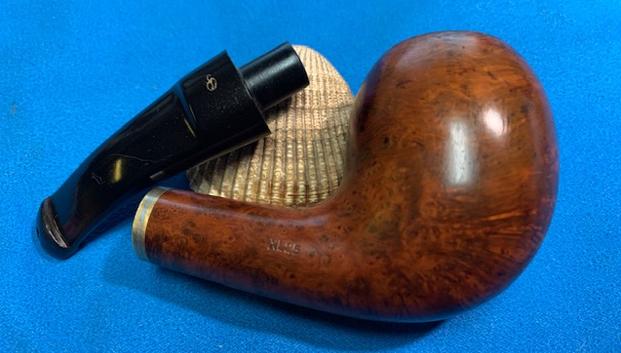
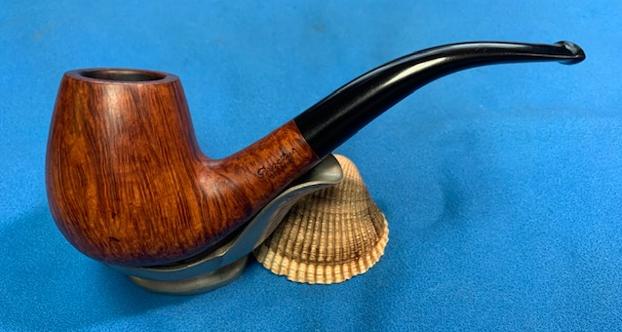
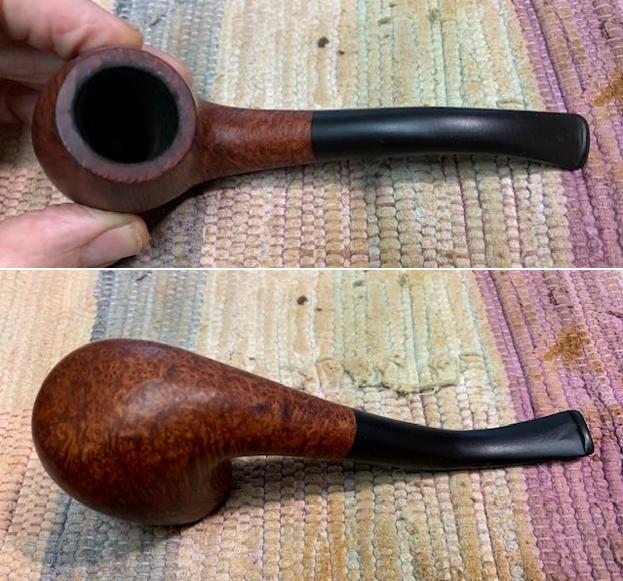
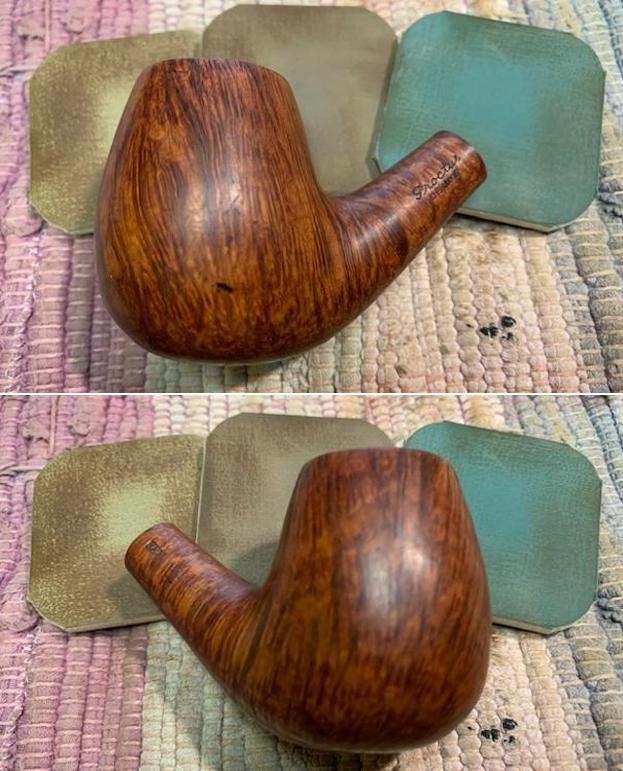
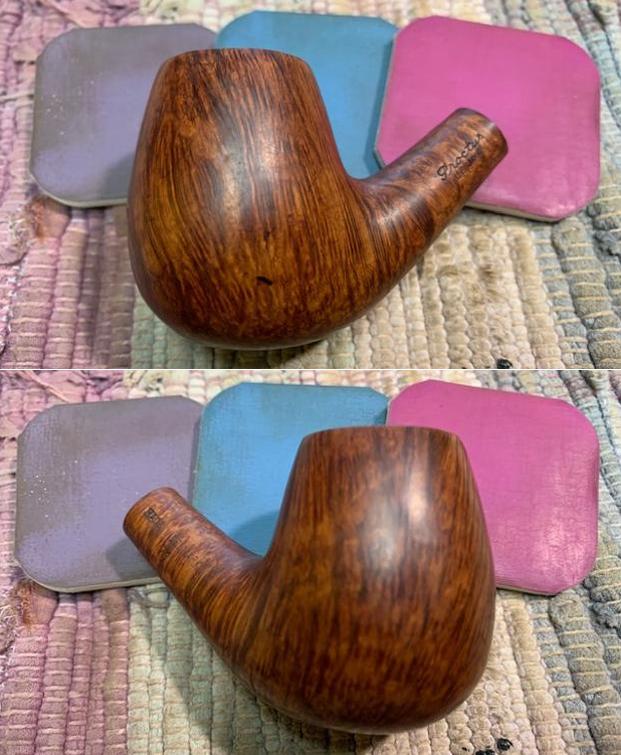
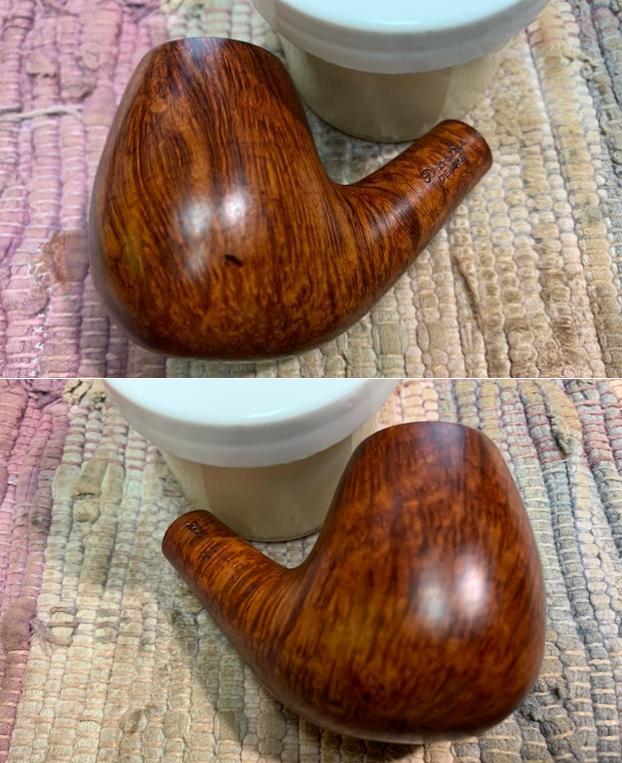
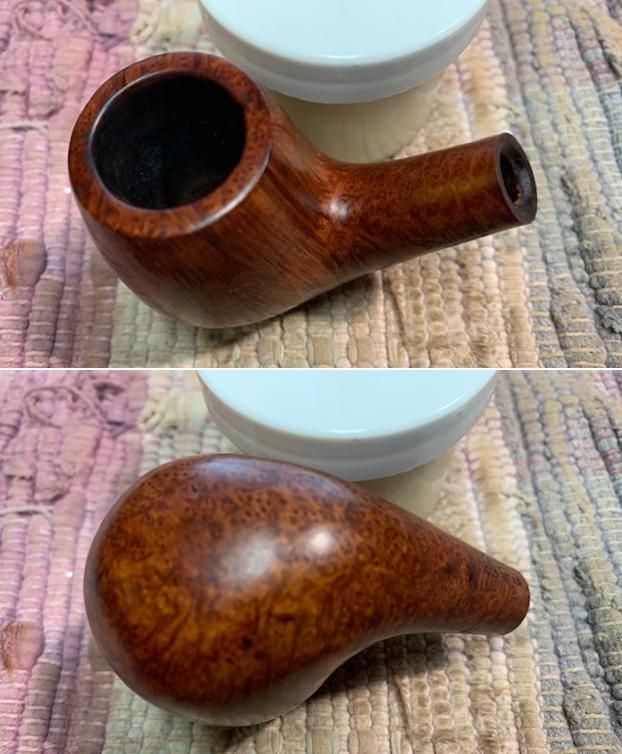
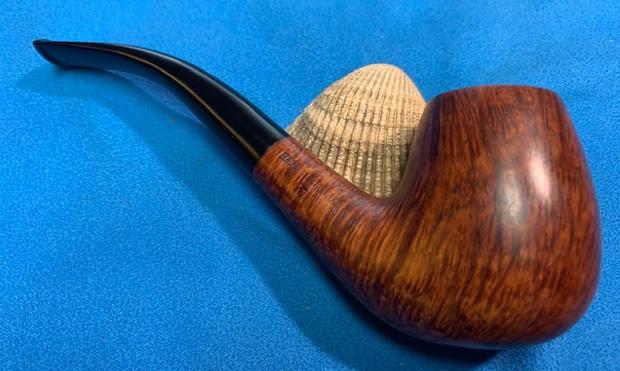
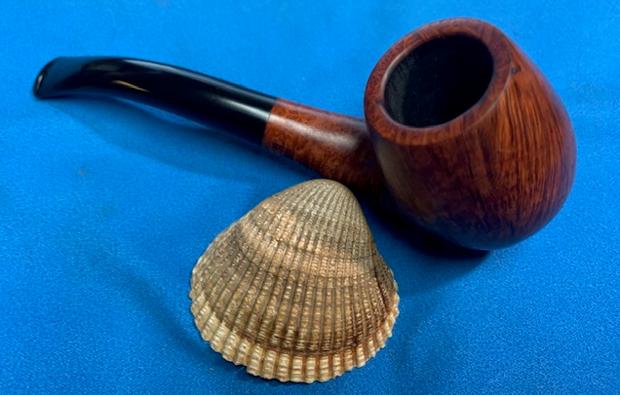
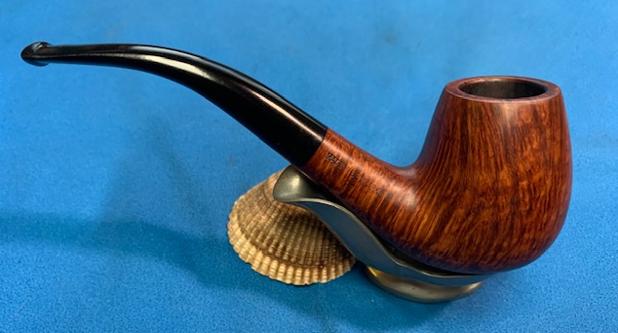
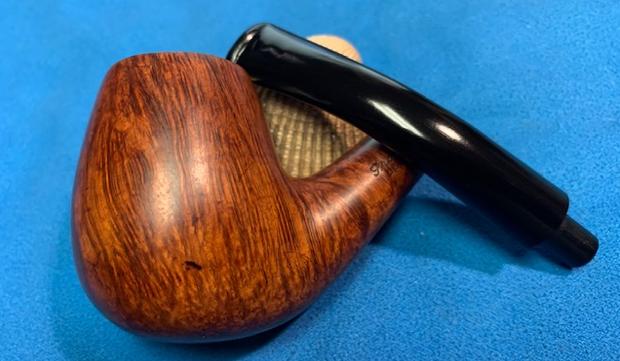
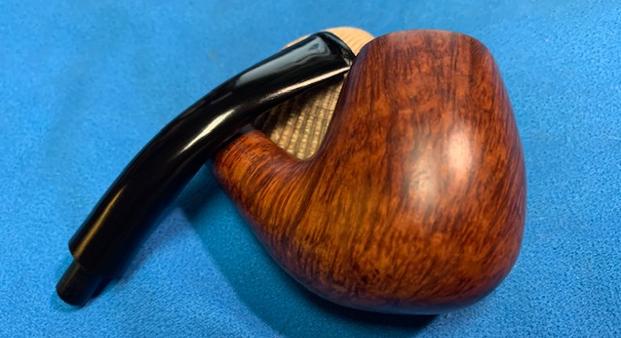
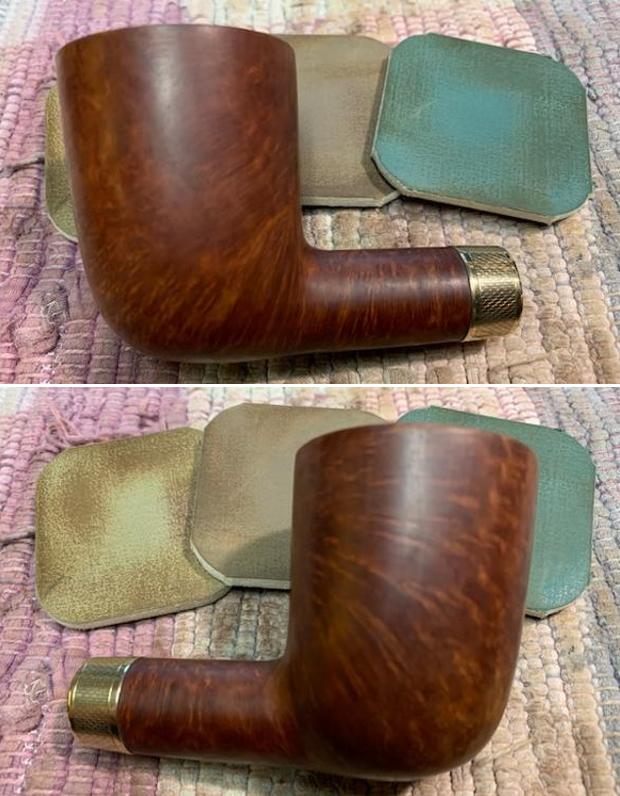
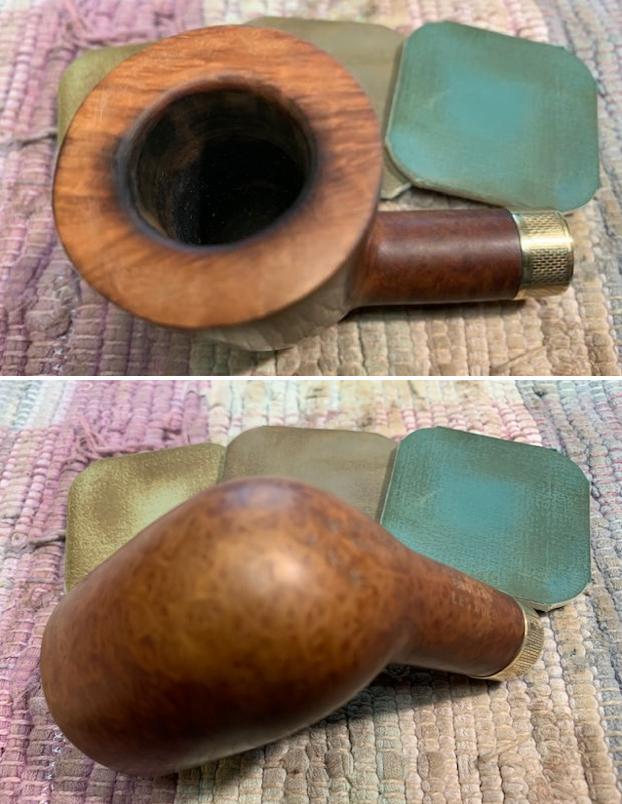
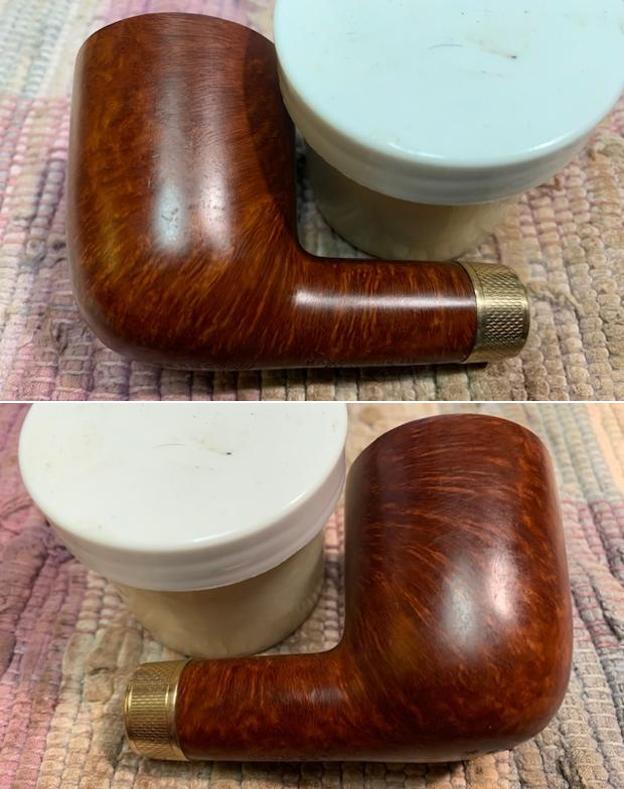
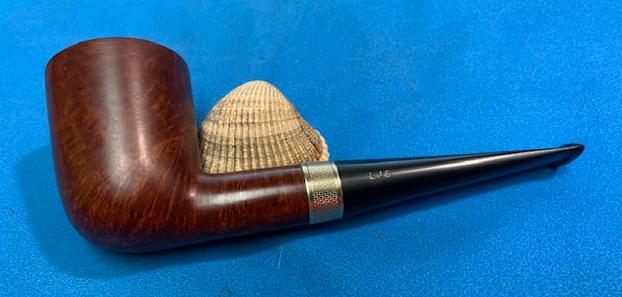
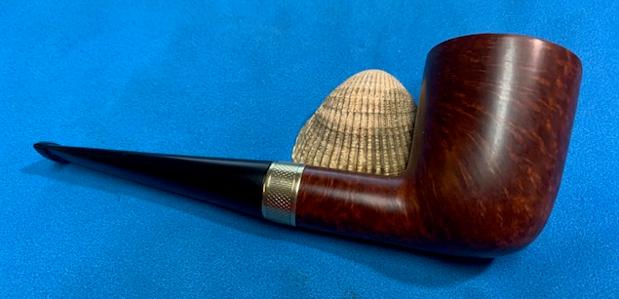
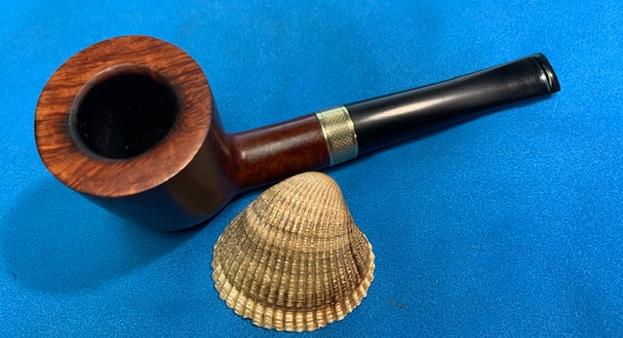
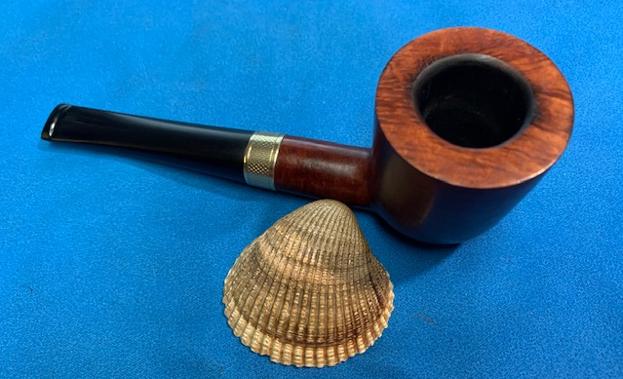
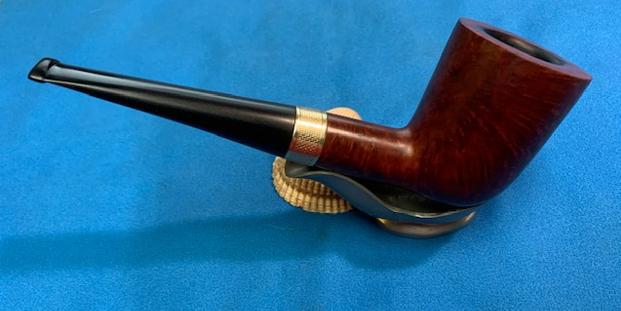
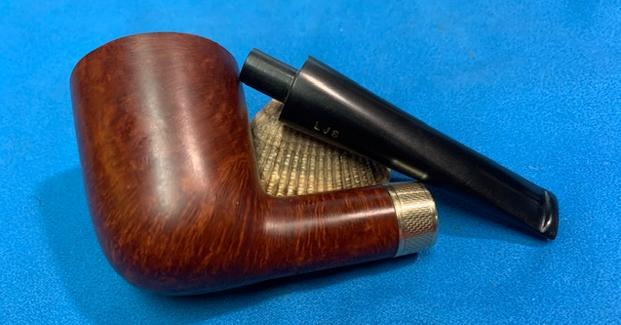
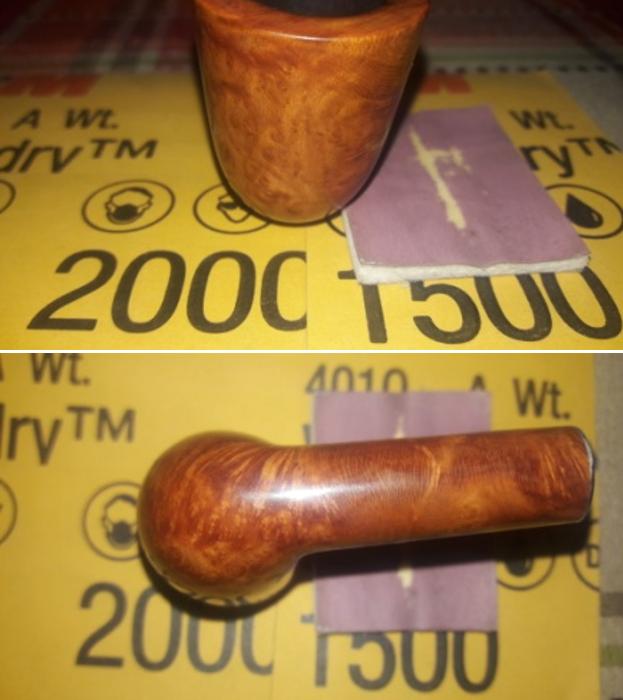
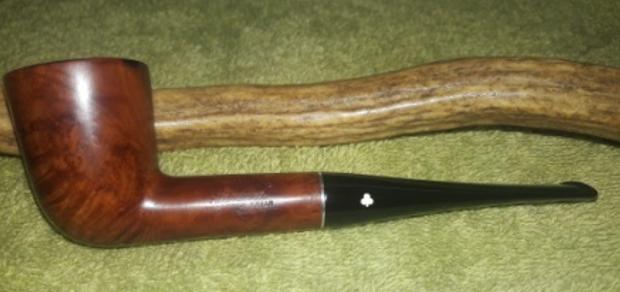
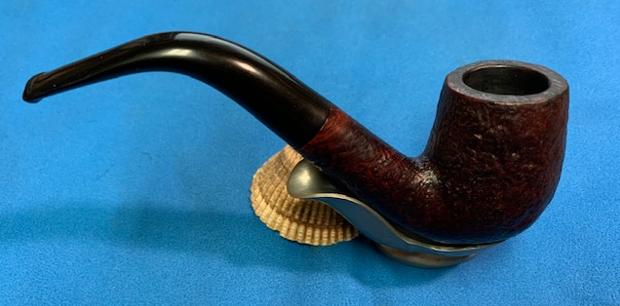
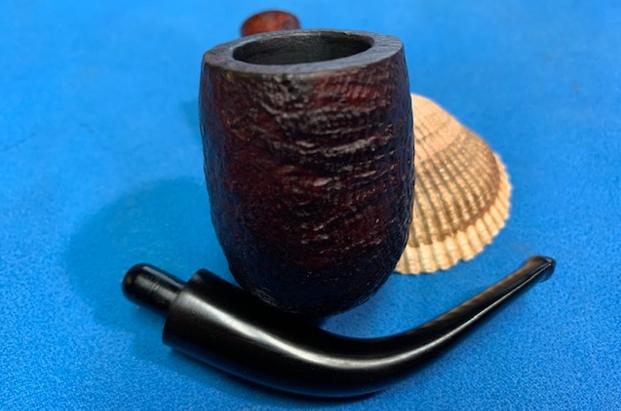
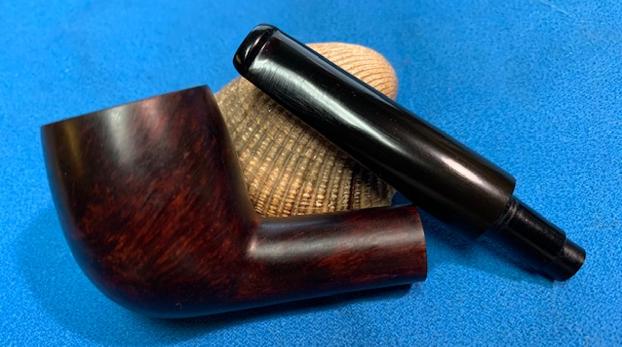
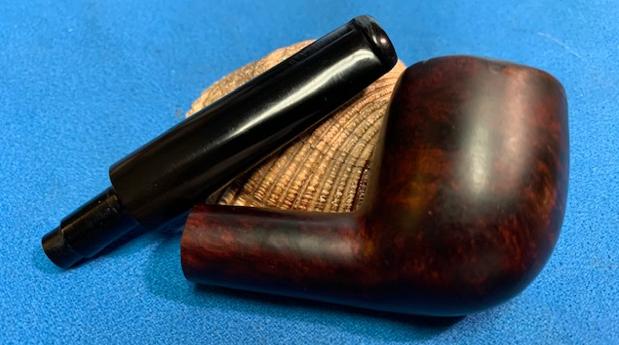
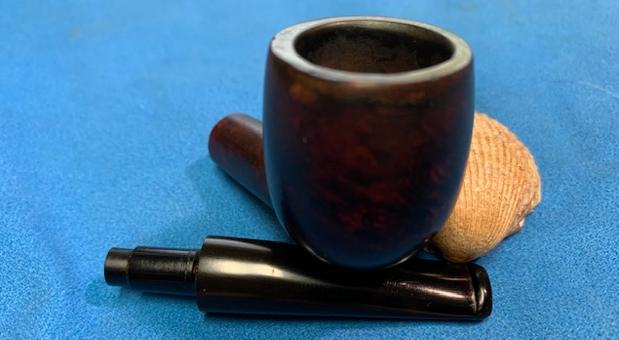
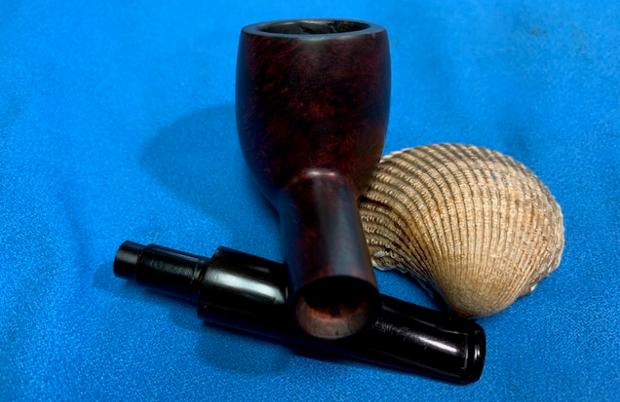
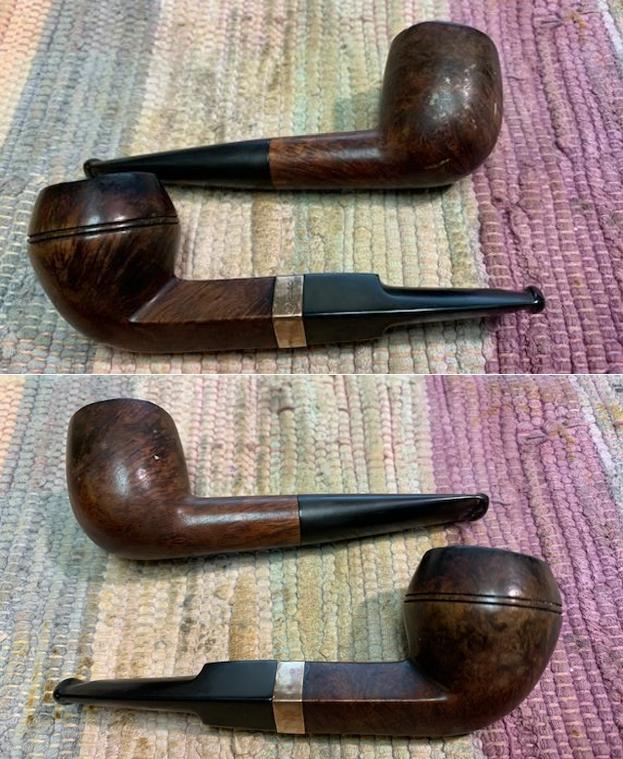
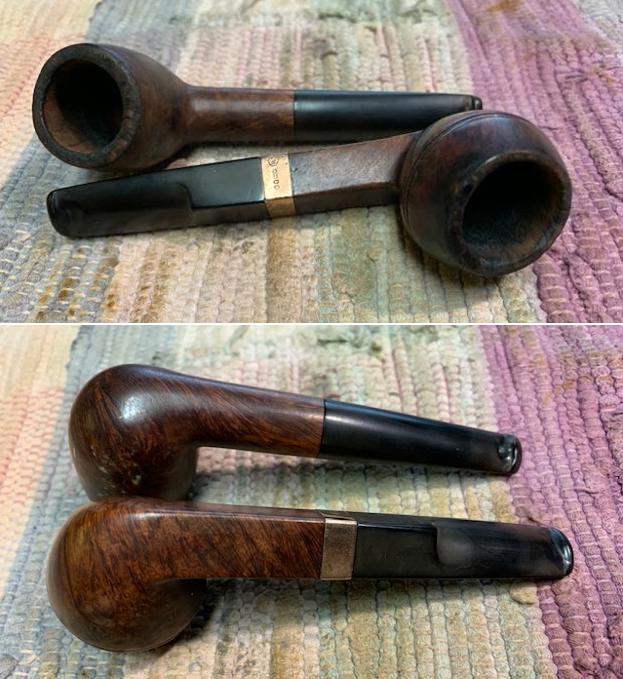
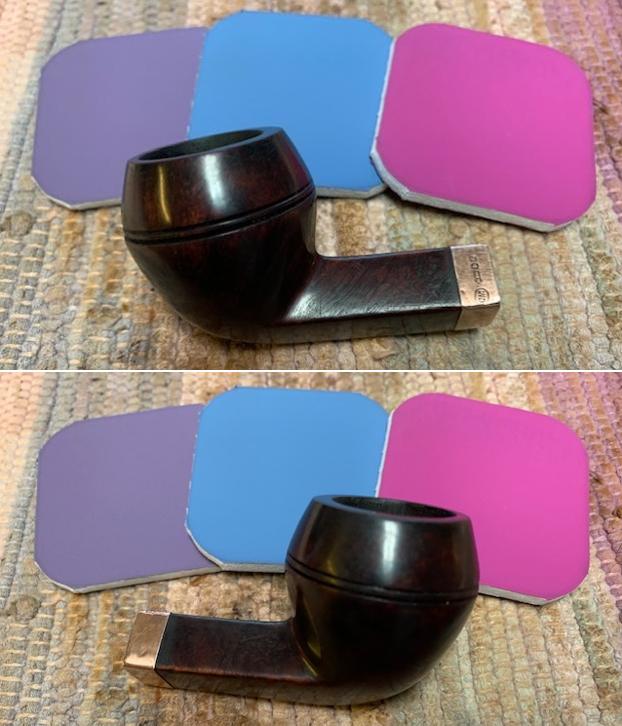
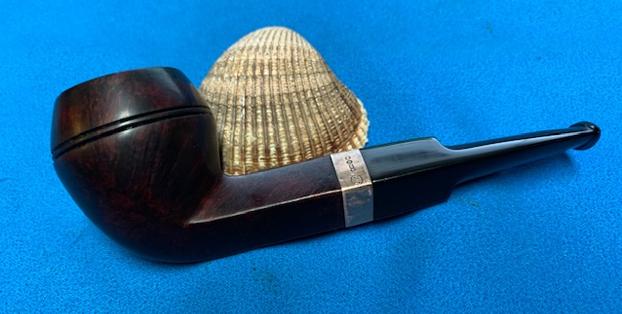
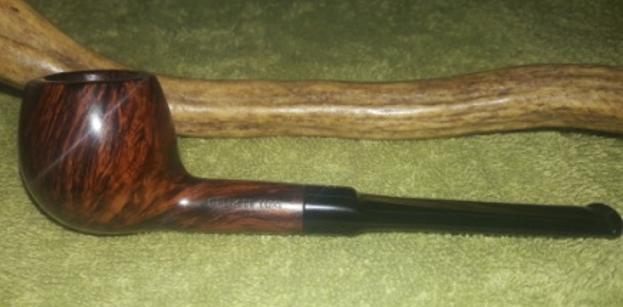
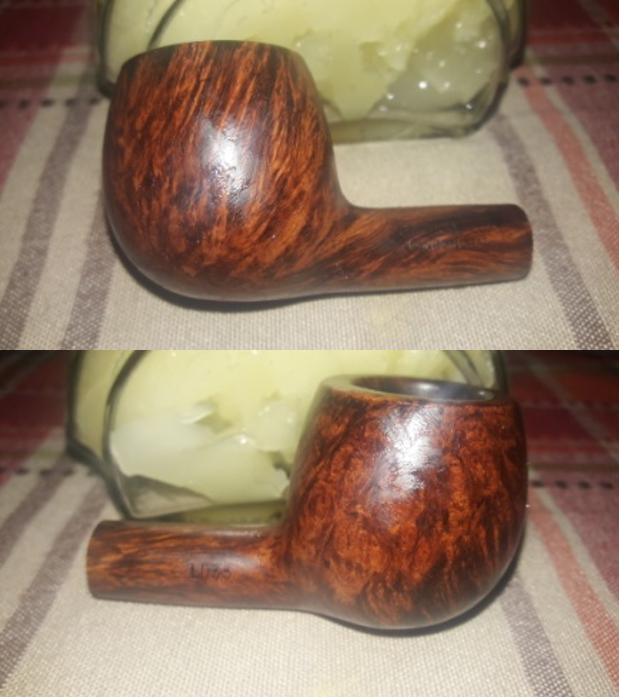
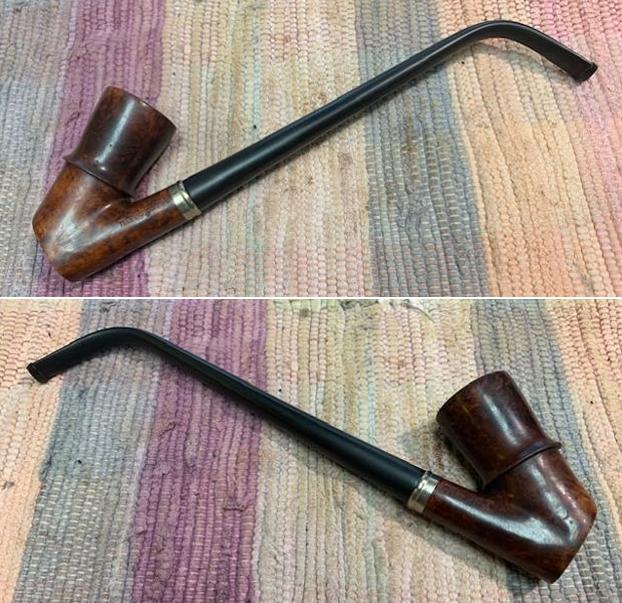
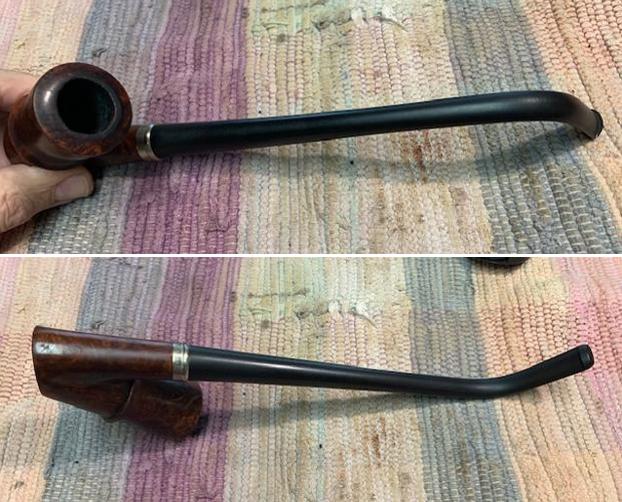
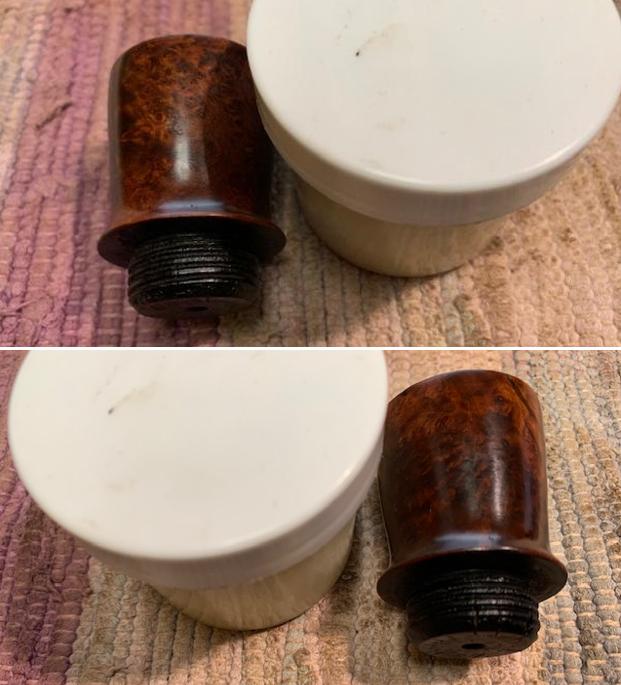
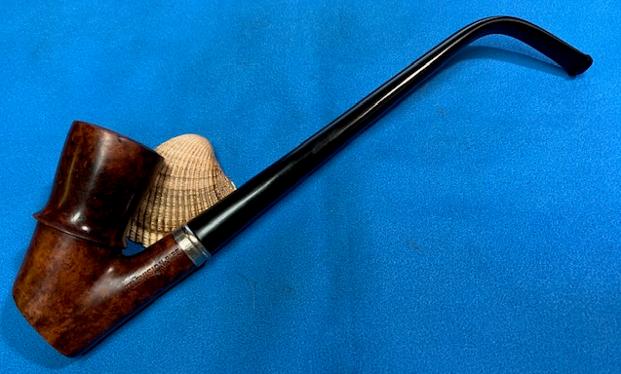
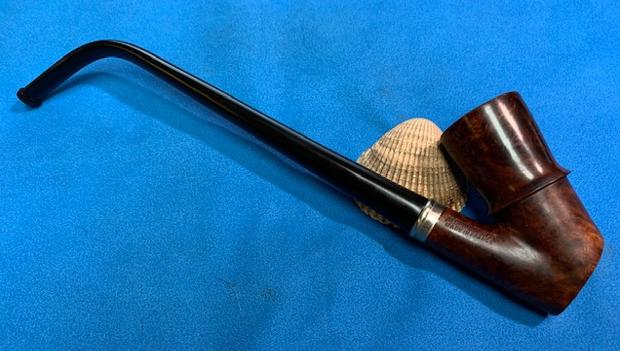
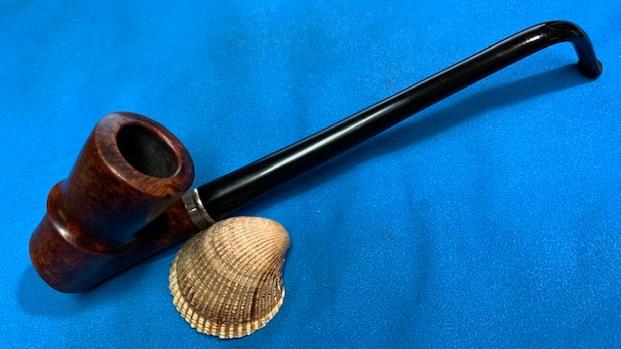
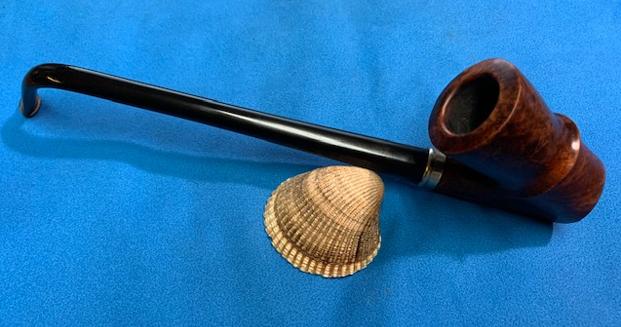
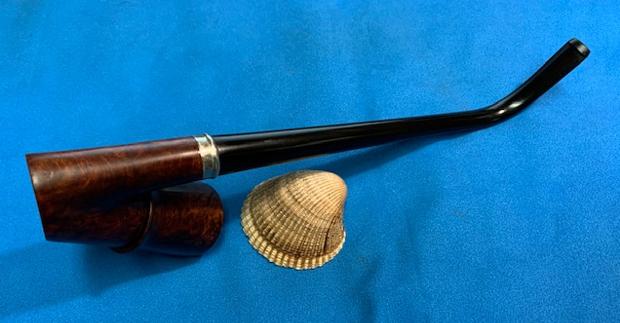
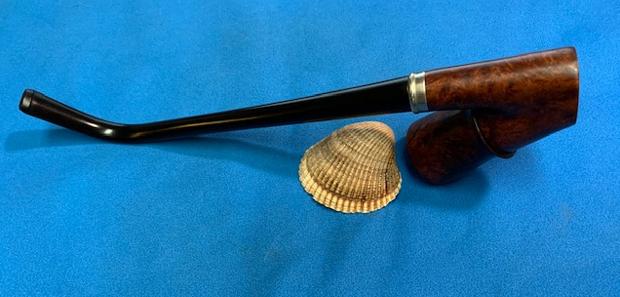
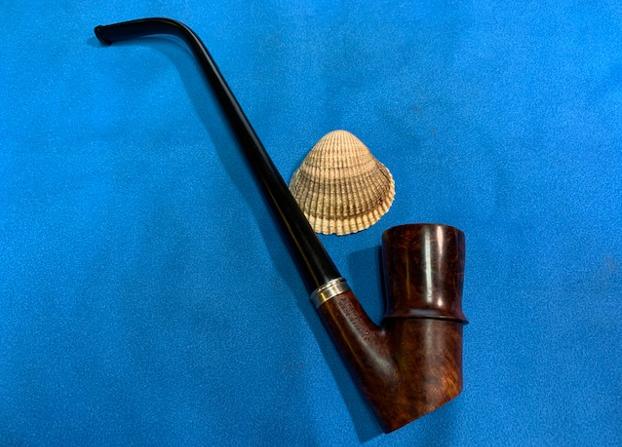
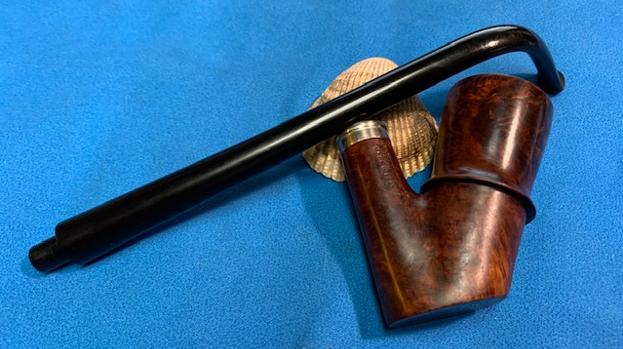
 I am really happy with the way that the rebuild of the rim and cap worked on on this Charles Maas Billiard (the second of two in a cased set). It really is a great looking pipe with lots of character. The old style hard rubber mouthpiece really look good with the brown of the briar. The grain really came alive with the buffing and a sense of depth came out with the polishing and waxing. I put the stem back on the bowl and carefully buffed the pipe with Blue Diamond on the buffing wheel using a light touch. I gave the bowl and the stem multiple coats of carnauba wax on the buffing wheel. I buffed the pipe with a clean buffing pad to raise the shine. I hand buffed the pipe with a microfiber cloth to deepen the shine. The finished Charles Maas Billiard really is a beauty and feels great in the hand and looks very good. Give the finished pipe a look in the photos below. The dimensions of the pipe are Length: 4 ¼ inches, Height: 1 ½ inches, Outside diameter of the bowl: 1 1/8 inches, Chamber diameter: ¾ of an inch. The weight of the pipe is 27 grams/.95 oz. The pipe will be going back to Tim with the Bulldog that I have finished. I think this little cased set is a real beauty.Thanks for reading this blog and my reflections on the pipe while I worked on it. It was a fun one to work on!
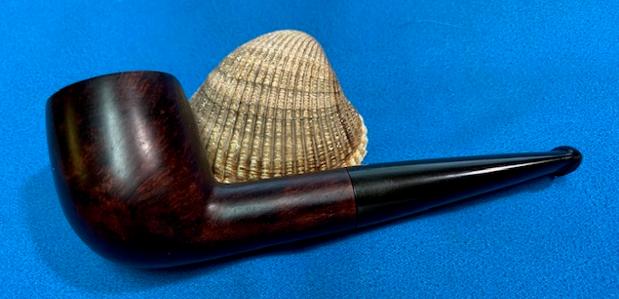


 I
I