Blog by Steve Laug
Last week I received and email from Dayton regarding a pipe he was seeking to have repaired. He was referred to me by our local pipe and cigar shop called City Cigar. He wrote the following email regarding the pipe.
Hey Steve my name is Dayton. I got your information from City Cigar, they said you’d be able to help with a pipe stem repair? If so I’d really appreciate it. Does email work or would you prefer text!
Thanks again – Dayton Lewis.
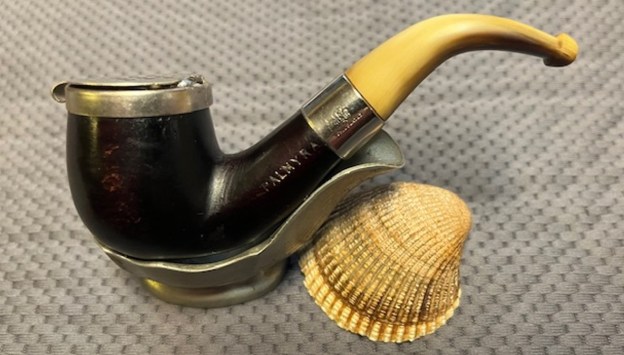
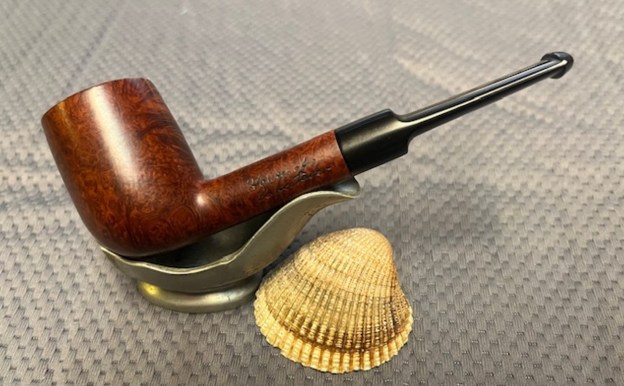
He wrote that it needed to have a stem repair done on the pipe. Before I take on work I always ask for photos or at least a photo to show me what needed to be done or at least the damage to the pipe. I wrote back and asked for a photo of the pipe that showed what needed to be repaired. He sent the photo below. You can see the nicely grained bowl on the pipe and the stem with the snapped tenon. The tenon included a metal stinger apparatus. It appeared to me that the break had occurred at the internal end of the inserted portion of the stinger. We talked about a price and he dropped the pipe off for repair yesterday evening. I brought the pipe and stem along with the broken parts in the bag he dropped off to the work table last evening. I examined the pipe carefully to see what I was dealing with in terms of a repair. I like to know the details about the pipes I work on. The pipe is stamped on the left side of the shank and reads Big Ben [over] Lectura. On the right side of the shank it was stamped with the shape number 420 [over] Made in Holland. The finish on the bowl was in good condition. The bowl had a thin cake inside and a light overflow of lava on the rim top. Overall the pipe was quite clean. With a repair on the stem the pipe would be in good condition to keep providing a great smoke to Dayton. I took photos of the pipe when I received it.
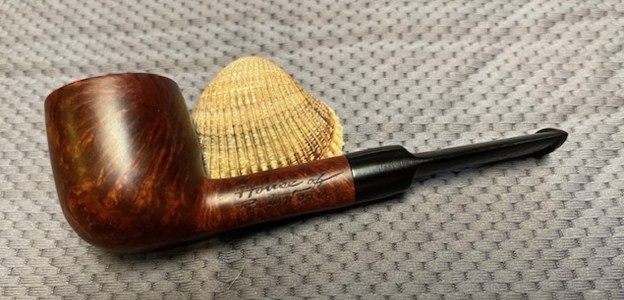
 In the photos above don’t miss condition of the bowl and the shank. The pipe looks quite clean and should polish up well. I examined the bowl and shank for damage that might have occurred when the tenon snapped. I have learned over the years to examine it carefully with a bright light and a lens. In this case I found there was a hairline crack on the lower right side of the shank just below the stamping Made in Holland. It extends from the shank end about a half inch up the shank dipping to mid-underside. I have inserted a red arrow in the second and third photos below to show that location of the crack. I wrote to Dayton and told him about my recommendations for a thin band to repair the cracked shank. I am waiting to hear from him.
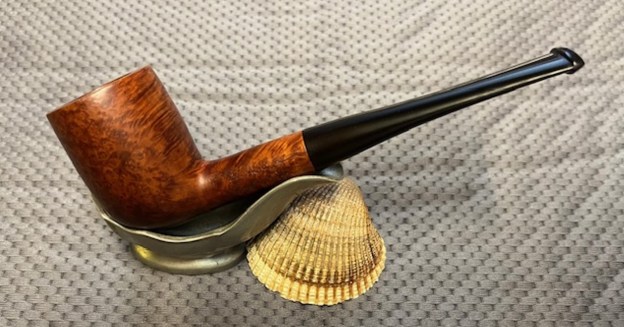
 I repaired the crack with a spot of clear CA glue and then pressed the thin brass band on to the shank end and it drew the parts of the crack together.
 Now on to the stem repairs my first thoughts were that I would insert a replacement tenon in the drilled-out air way in the stem. I examined the stem diameter and found that it was too thin to drill out. The tenon was quite large in diameter and it would not leave much on the stem if I were to drill it out. I decided to rather find a replacement stem for the pipe. I went through my stems and found one that was the same length, similar diameter and had a solid vulcanite tenon that would need slight adjustment to fit in the shank.
 I worked on the diameter of the tenon on the new stem with a file/rasp and removed enough to get a close fit. I used 220 grit sandpaper to smooth it out and bring it to round and get the fit what I needed. I also used the file and the sandpaper to reduce the diameter of the stem itself to get a clean fit against the shank end.
 I fit the stem on the shank and took photos of the fit. The stem looks perfect against the shank end. It is a snug fit and looks very good with the thin brass band.
 I sanded the stem with the 2 inch square 320-3500 grit sanding pads. I wiped down the stem after each sanding pad. I was able to remove the tooth marks and chatter on both sides with the pads. The stem looked very good. I wiped the stem down with some Obsidian Oil on a cloth to remove the debris from sanding. It was looking much better.
 I polished the vulcanite stem with micromesh sanding pads – dry sanding it with 1500-12000 grit pads. I wiped the stem down after each sanding pad with Obsidian Oil and set it aside to dry.
 I polished it further with Before & After Pipe Polish – using both the Fine and Extra Fine Polishes. I gave it a rubdown with Obsidian Oil one last time and set it aside.
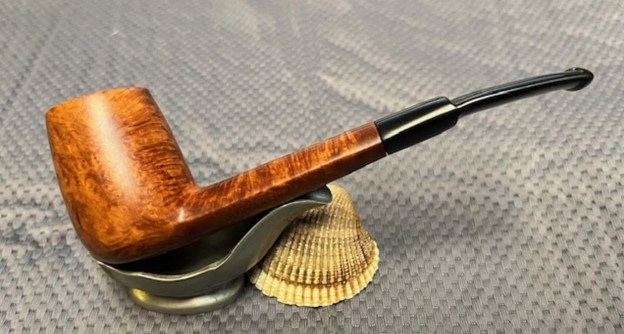
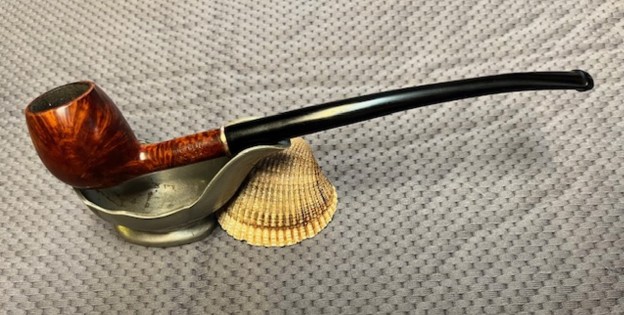
  I put the Big Ben Lectura 420 back together and worked the pipe over on the buffing wheel using Blue Diamond to lightly polish the stem. I buffed the bowl and stem to raise the gloss on the briar and the vulcanite. I gave the pipe multiple coats of carnauba wax. I buffed the entire pipe with a clean buffing pad to raise the shine. I hand buffed it with a microfiber cloth to deepen the shine. The finished Ben Ben Lectura is shown in the photos below. The medium brown stains on the smooth Billiard shaped bowl works well with the rich black of the vulcanite stem. The dimensions of the pipe are: Length: 7 ½ inches, Height: 1 ¼ inches, Outside Diameter: 1 inch, Diameter of the chamber: 3/4 inches. The weight of the pipe is .71 ounces/21 grams. This is an interesting piece of briar, cross grain and mixed grain on the bowl and shank. The patterns on the sides are a real mix. I really like how the briar, the thin brass band and the vulcanite work well together. This one will soon be going back to Dayton once I contact him. Thanks for walking with me through the restoration process.