Tag Archives: stem work

Restoring a Wally Frank Natural – Andrew Selking


Blog by Andrew Selking

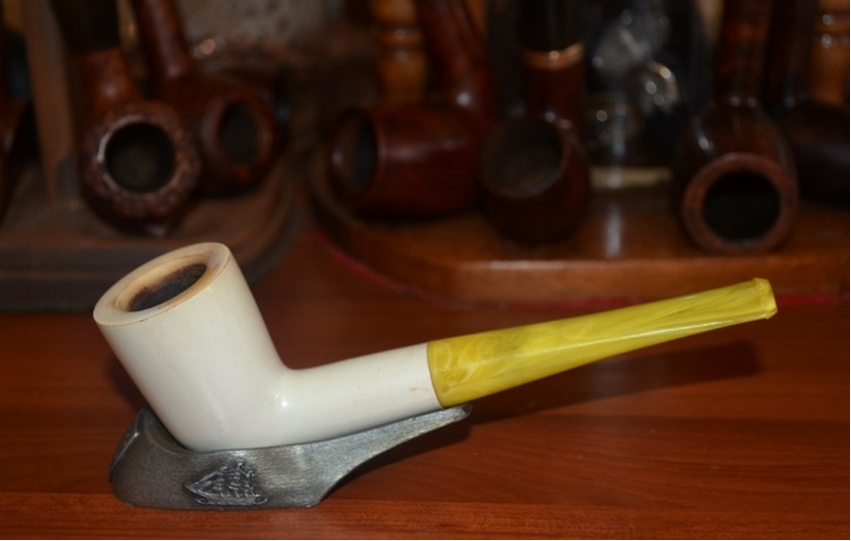
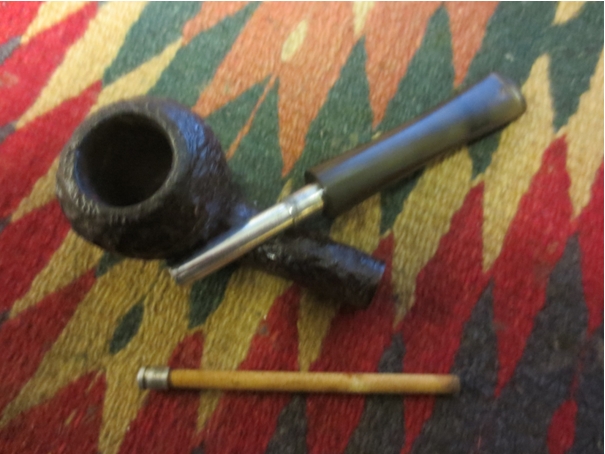
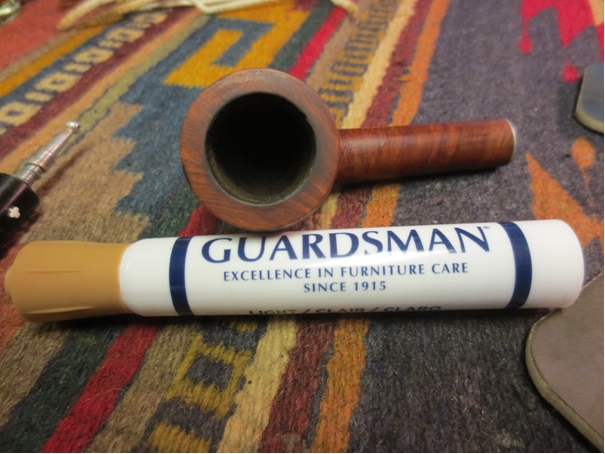
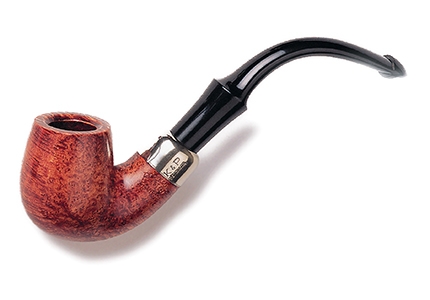
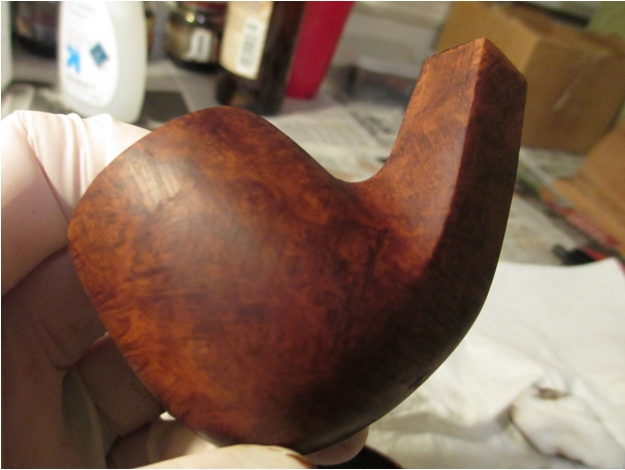
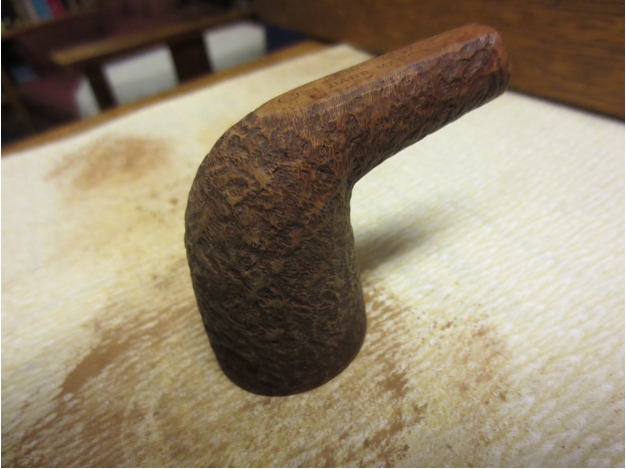
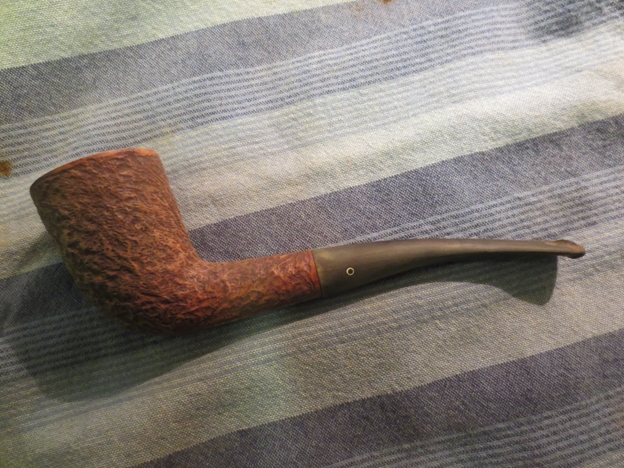
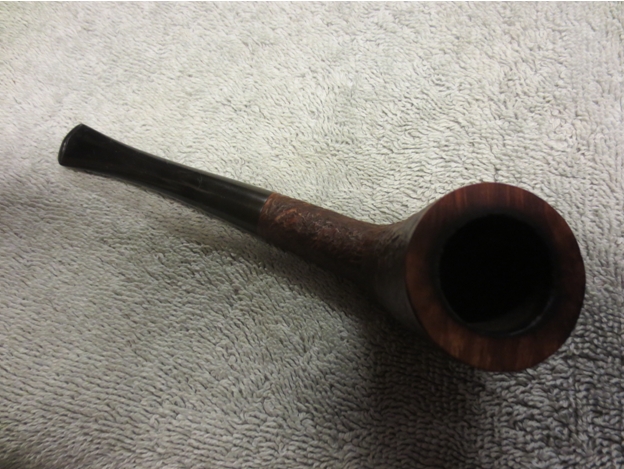
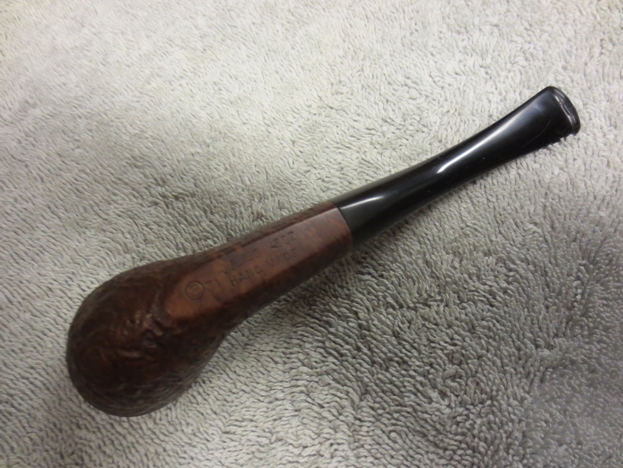
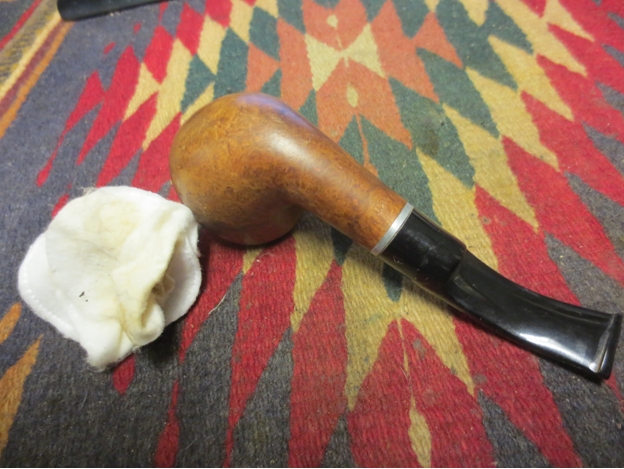
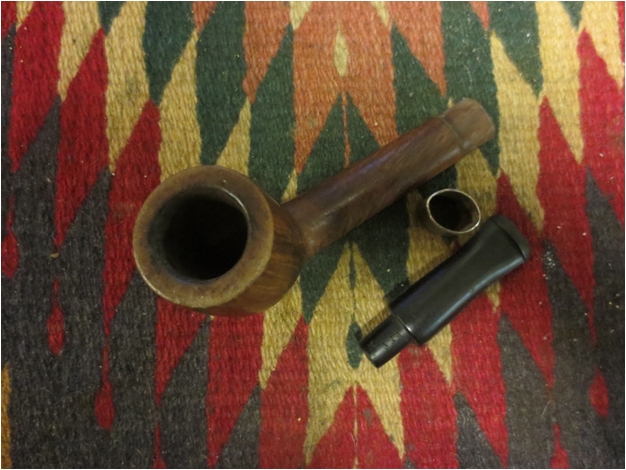
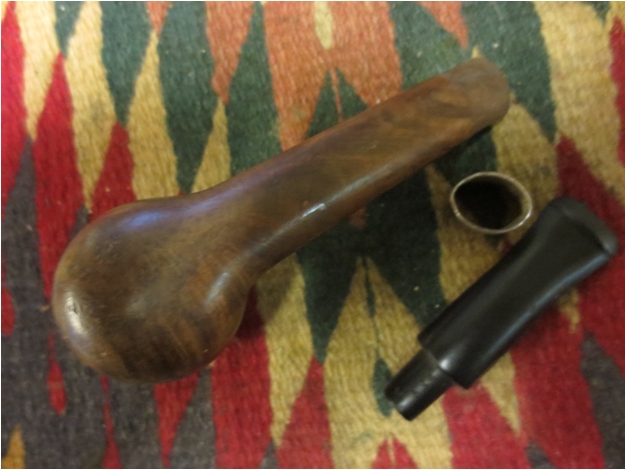
I promised Steve that my next restoration would not be another chunky diamond shank pipe, so I decided to do a Wally Frank Natural. Wally Frank was a New York tobacco shop that sourced its pipes from Charatan’s, Sasieni, Weber, and other European pipe makers. This is my second Wally Frank Natural and like the first, it is very well made. The briar is not very exciting and it has a small fill on the bottom, but the pipe is very light weight (1.3 ounces) and the lines are elegant.

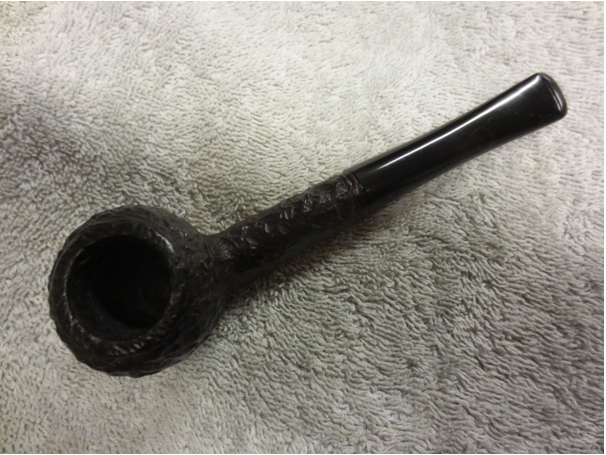
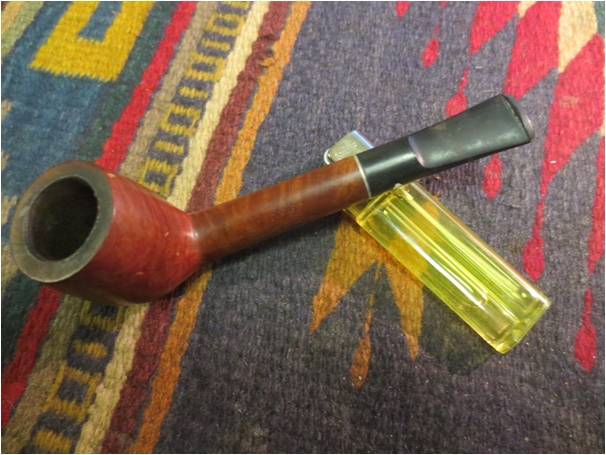
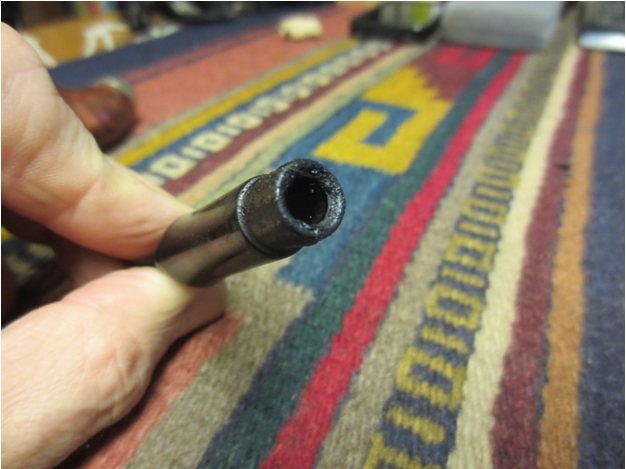
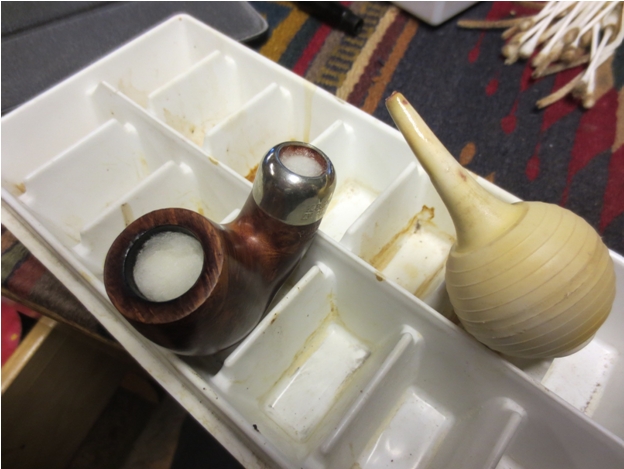
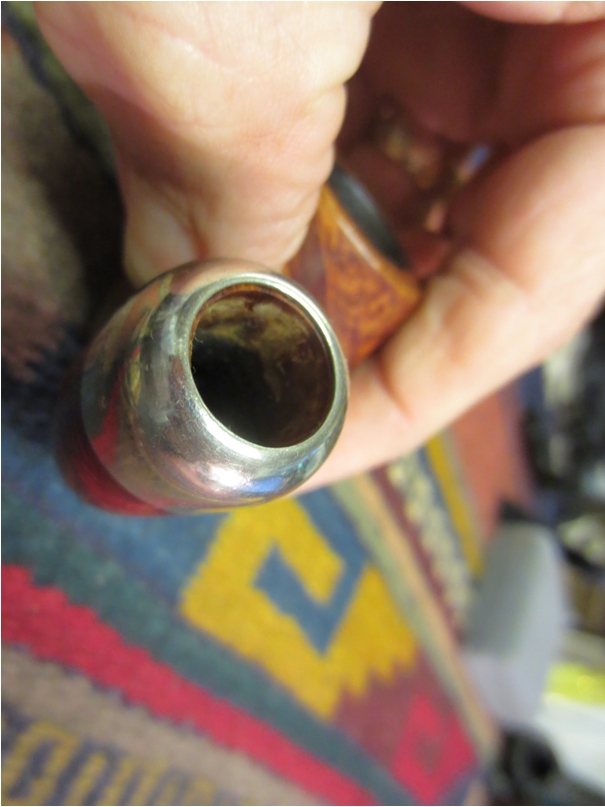
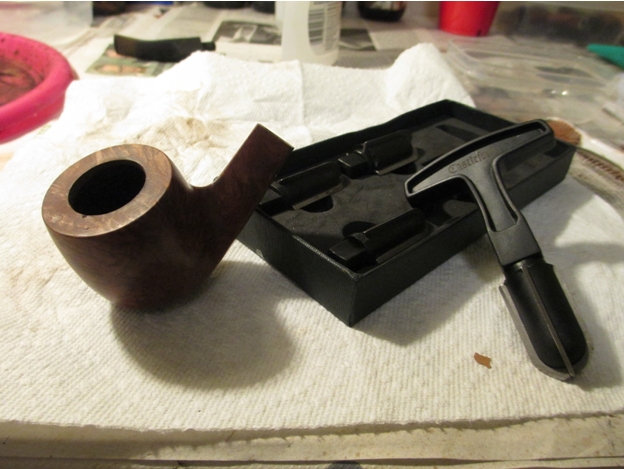
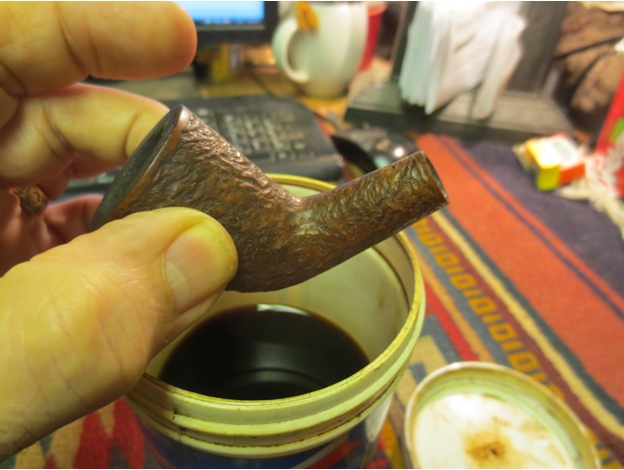
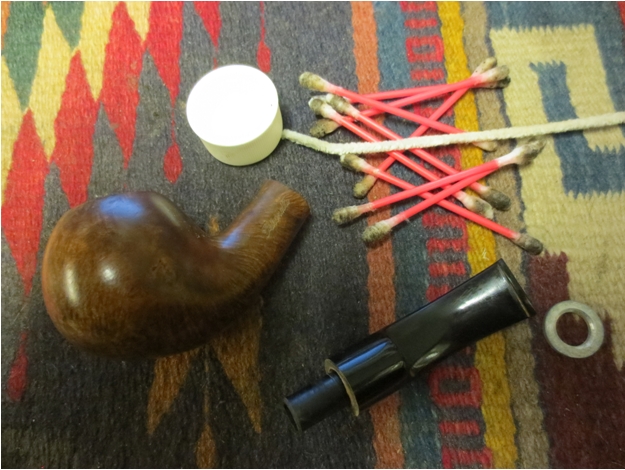
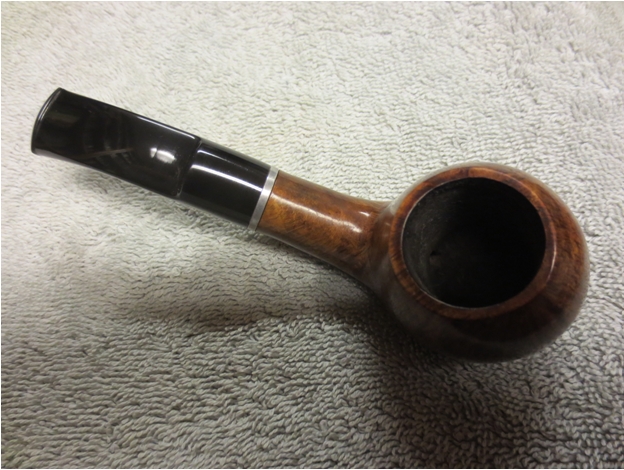
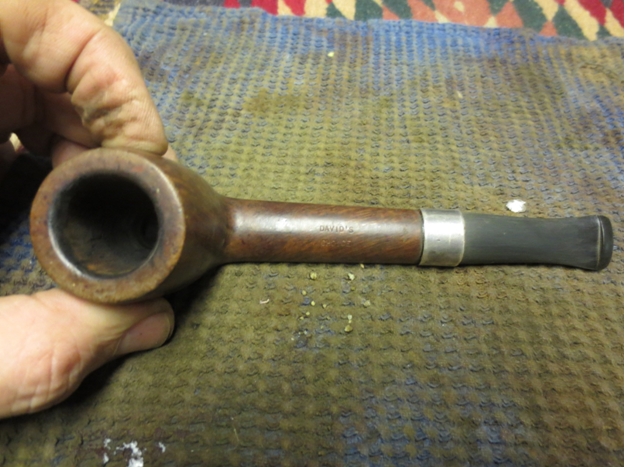
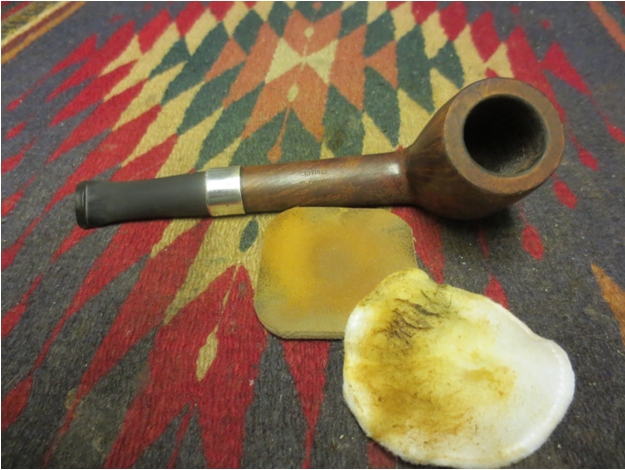
When I received the pipe, it looked fairly clean. It had some tar build up on the rim, slight oxidation of the stem, but not chatter and the bowl was well reamed.Frank1

Frank2

Frank3 
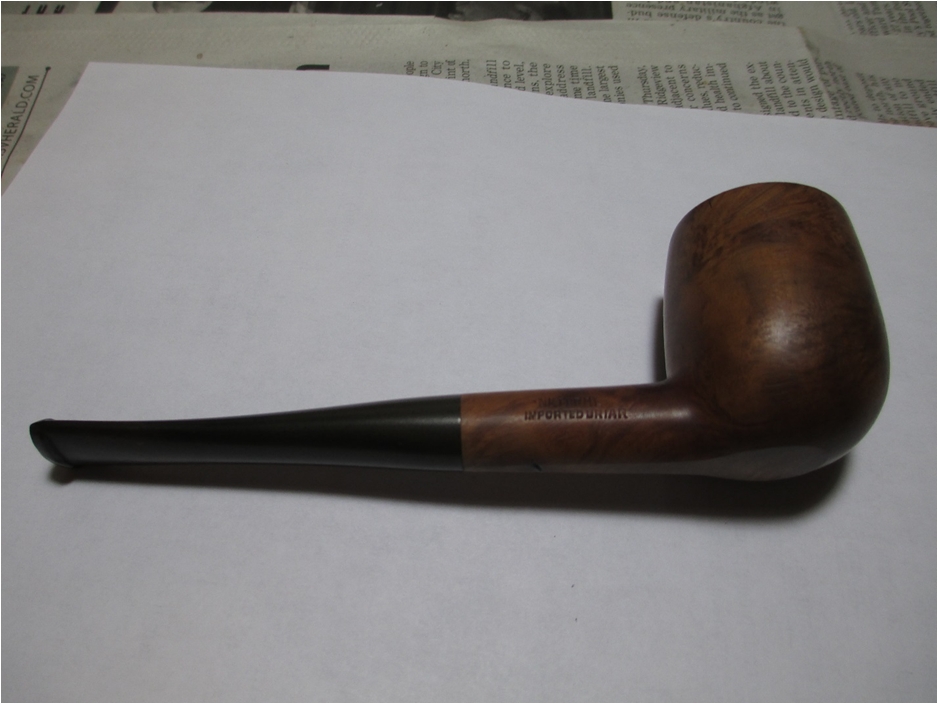
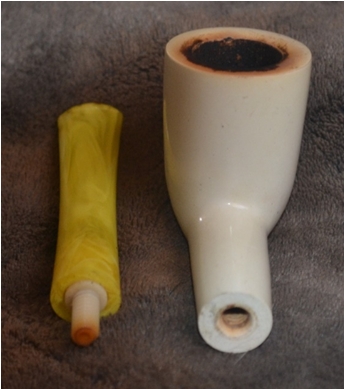
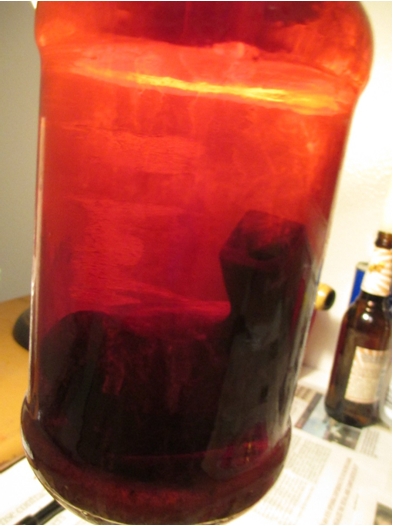
I dropped the bowl in the alcohol bath and placed the stem in a Oxyclean solution. The only challenge I anticipated with this pipe was the fill on the bottom, but I had a new secret weapon; CA glue accelerator.Frank4 
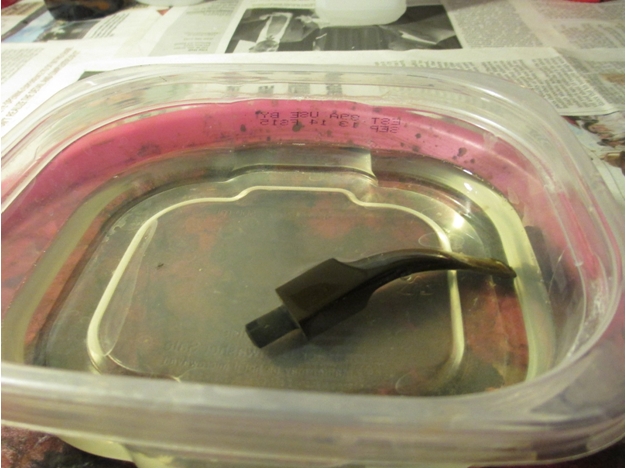
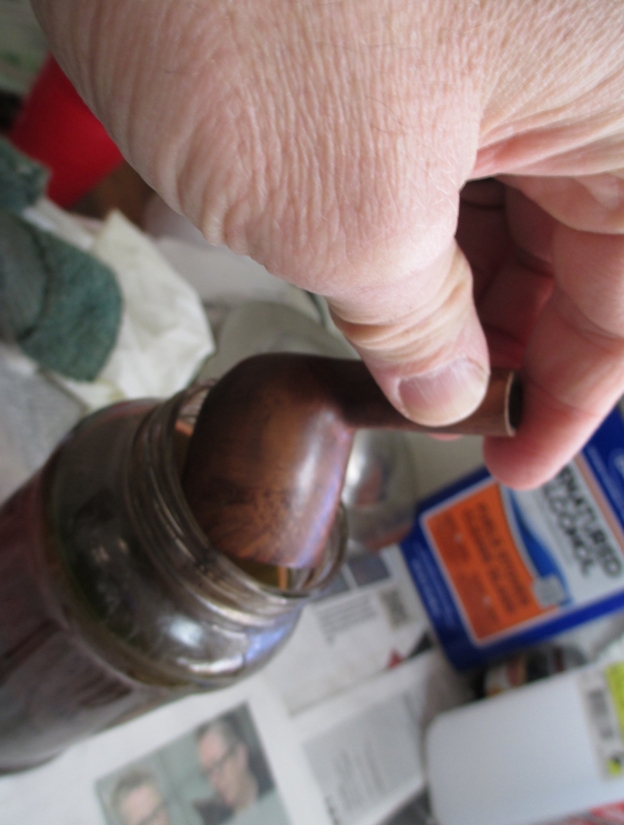
After soaking, I used a pipe cleaner and the Oxyclean solution to get the worst of the gunk out of the stem.Frank5 
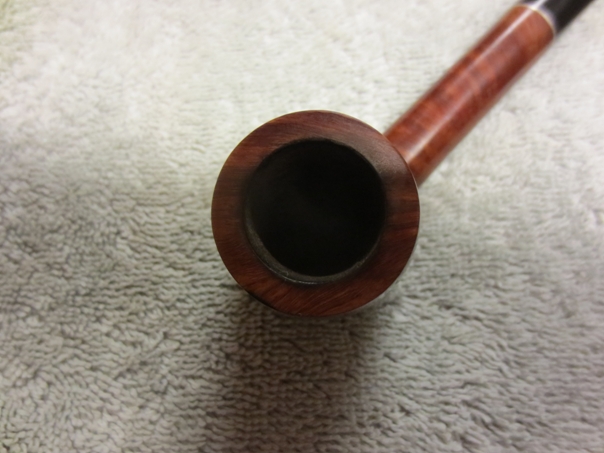
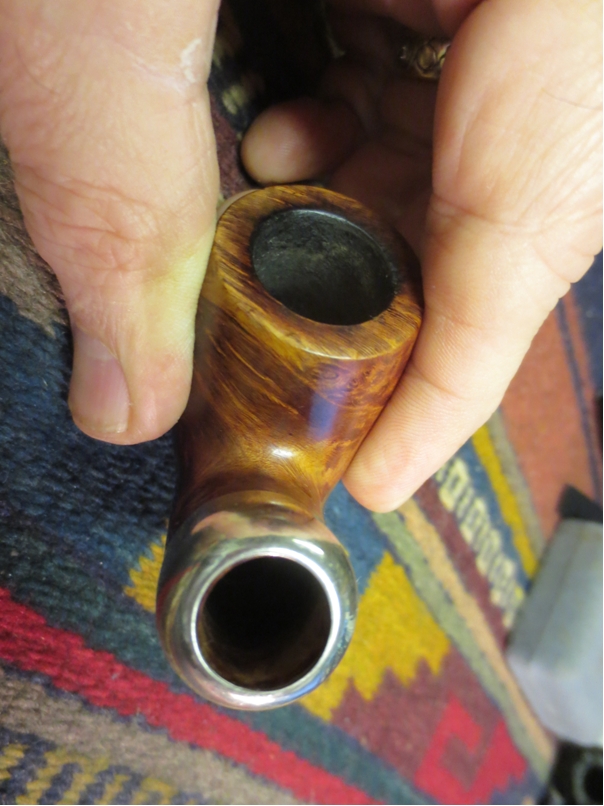
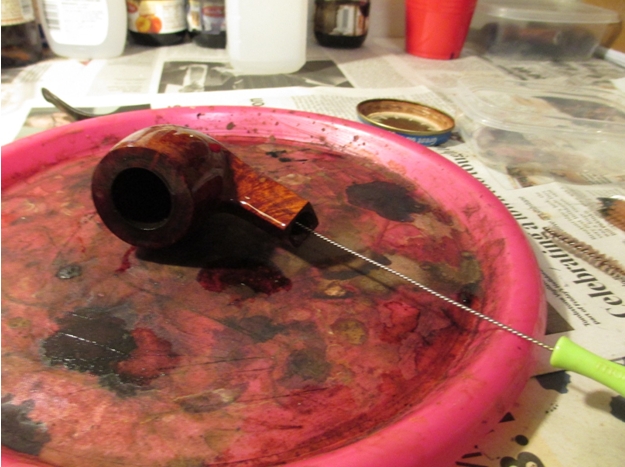
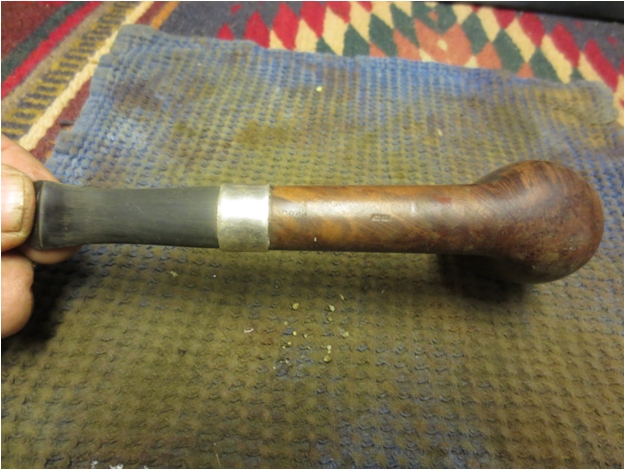
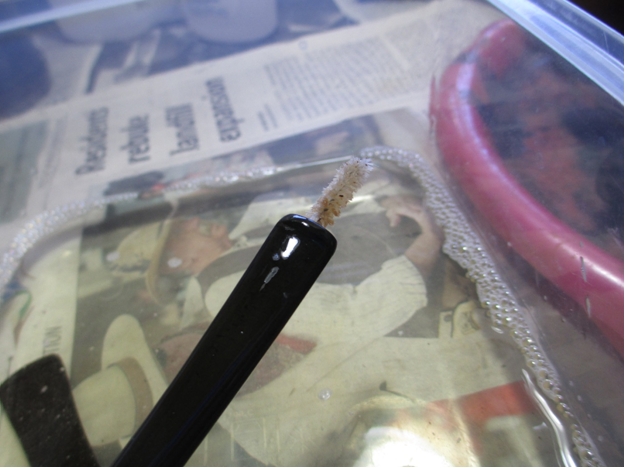
Next I reamed the bowl with my T-net reamer.Frank6 
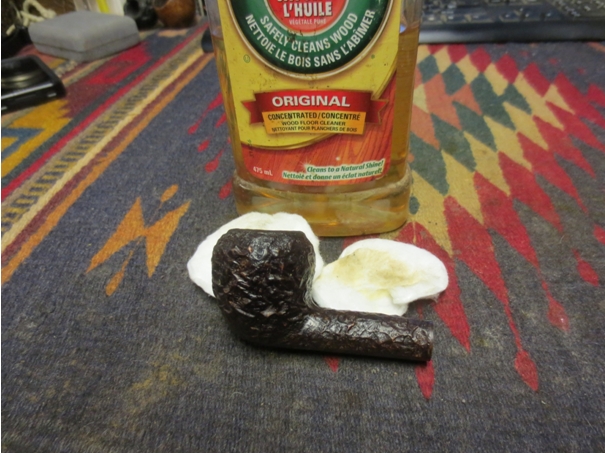
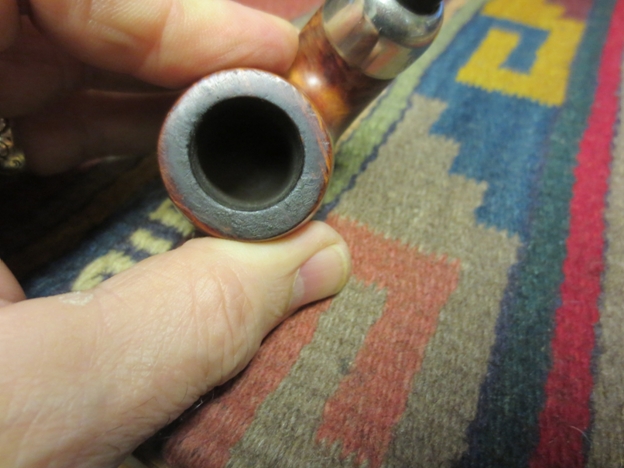
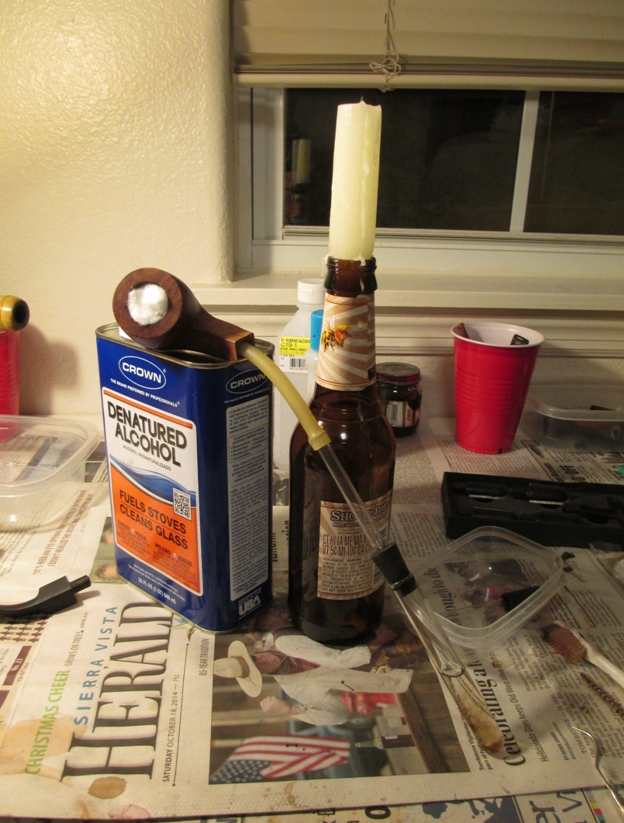
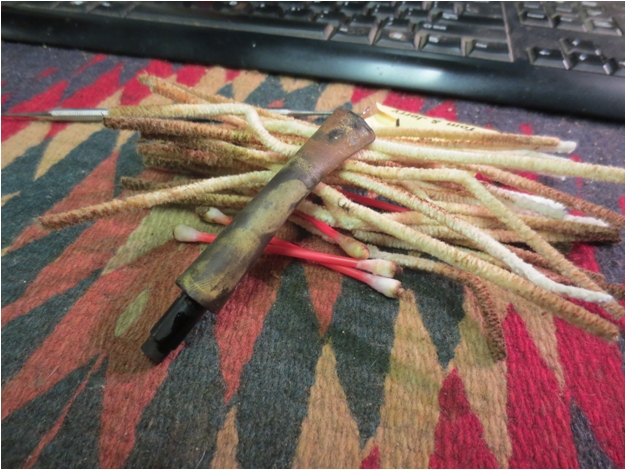
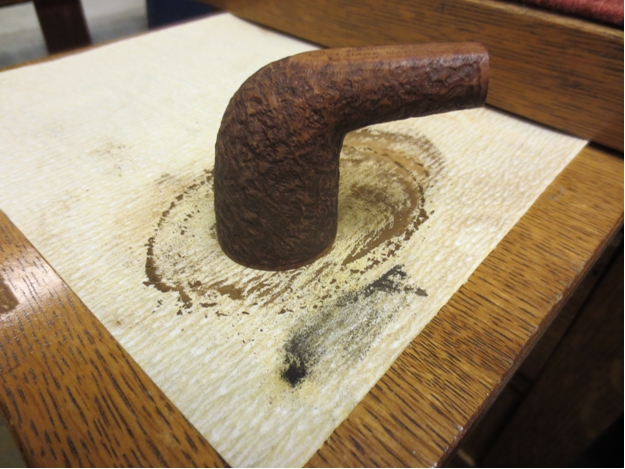
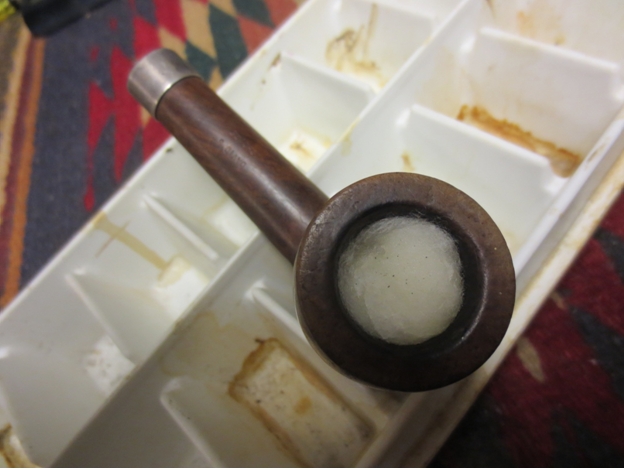
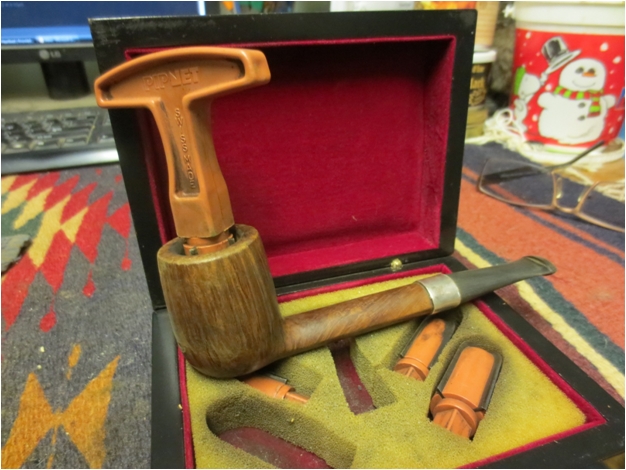
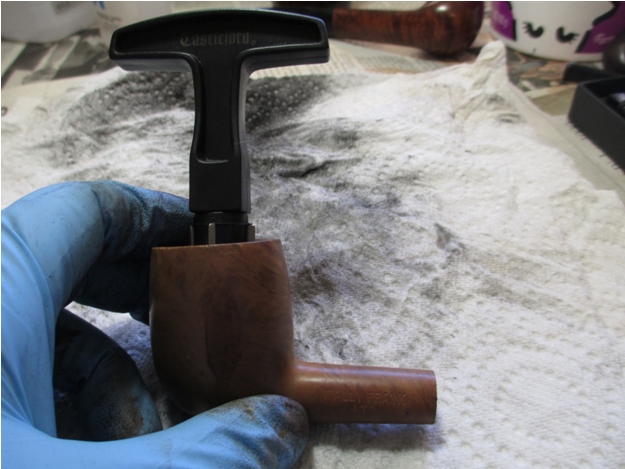
Everything looked pretty good to that point and I figured this would be an easy clean up. Boy was I wrong! I did a retort on the bowl first.Frank7 
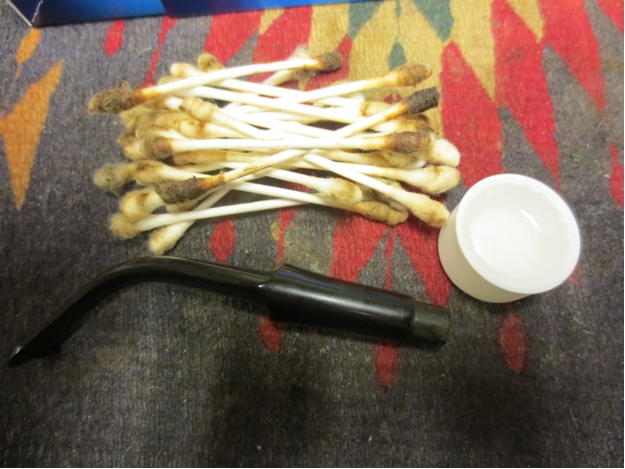
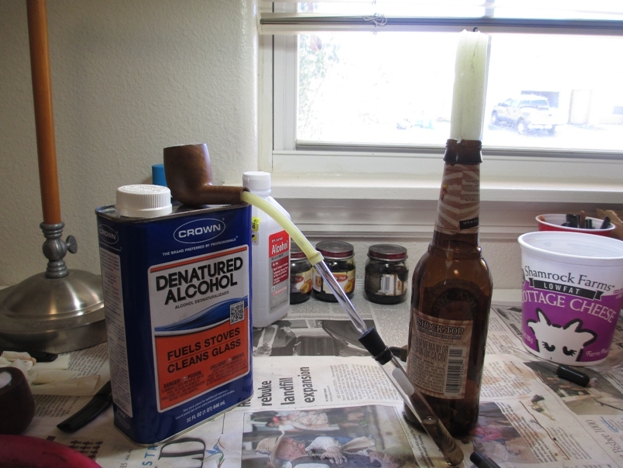
The pipe cleaning brush (available in the baby section at Walmart) came out loaded with gunk.Frank8 
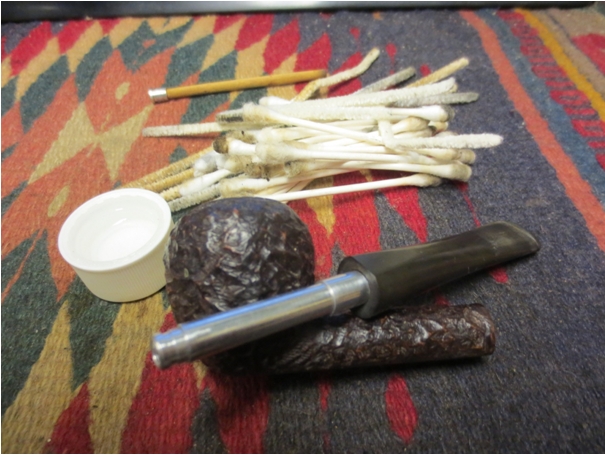
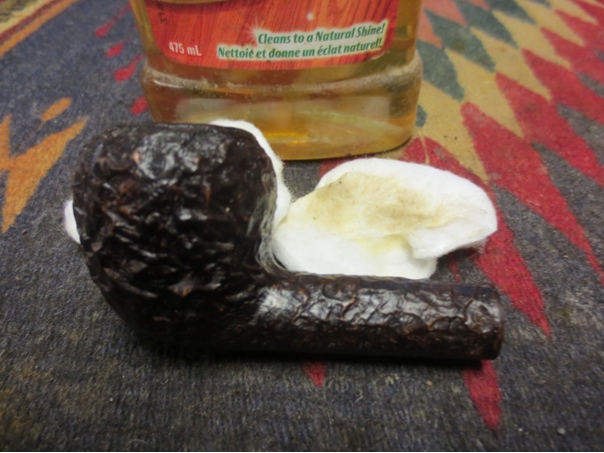
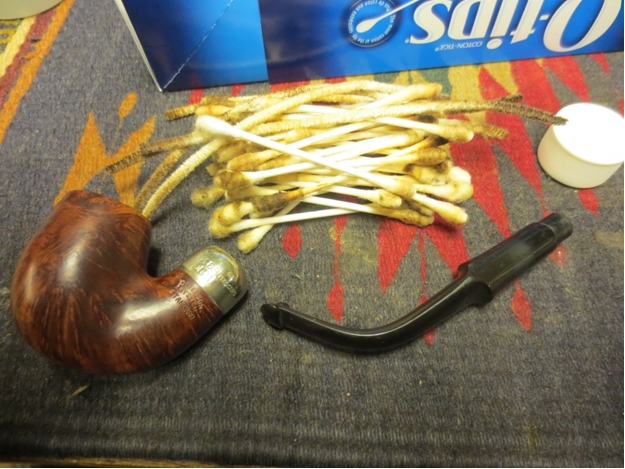
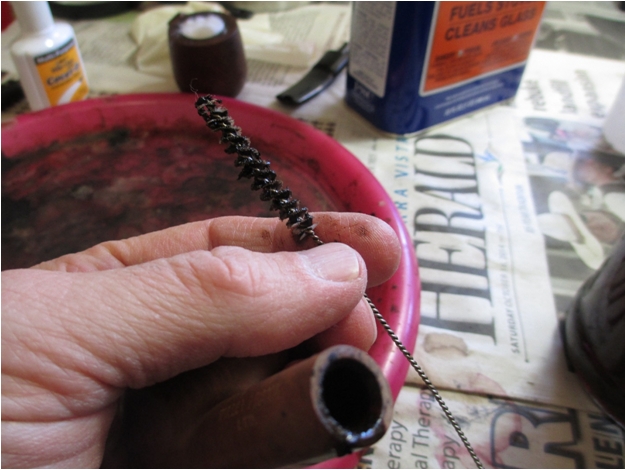
I did the retort four additional times, using the brush after each try, before finally moving on to pipe cleaners. Then I used a pile of q-tips. The only thing I can think is the previous owner smoked a goopy aromatic and didn’t use pipe cleaners afterwards.Frank9 
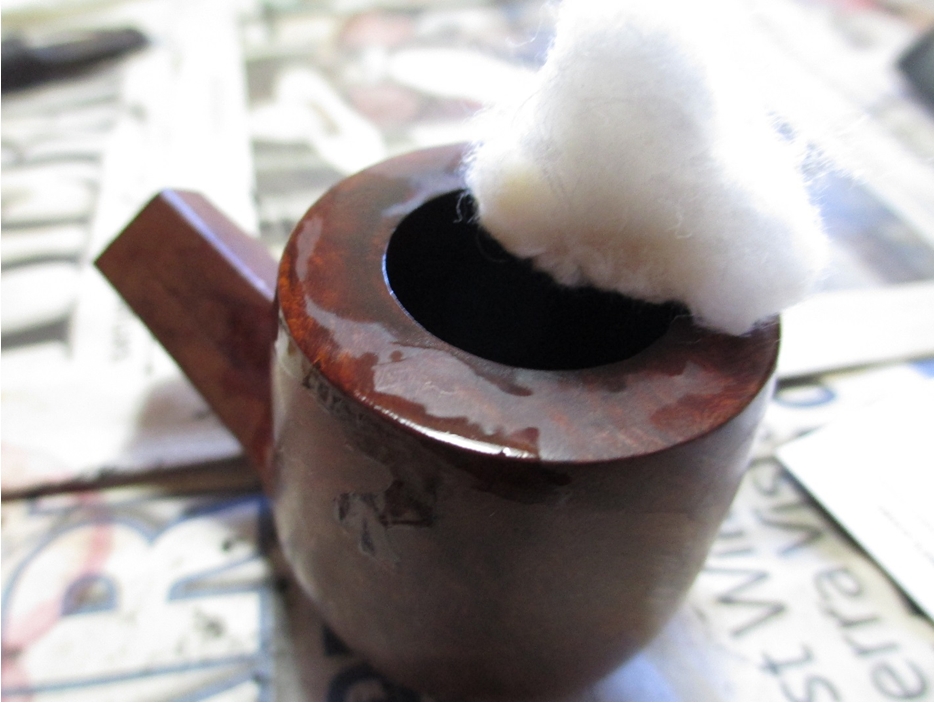
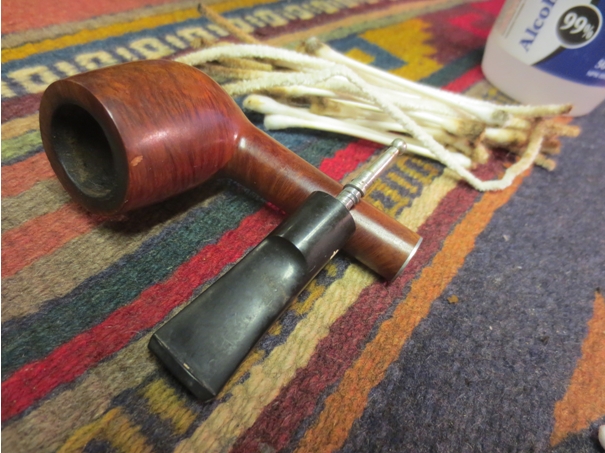
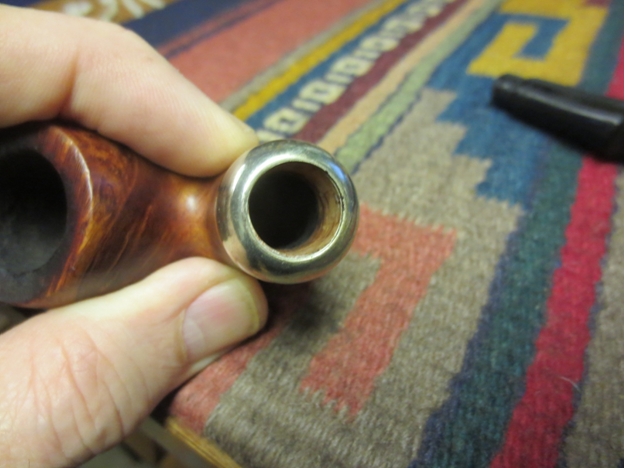
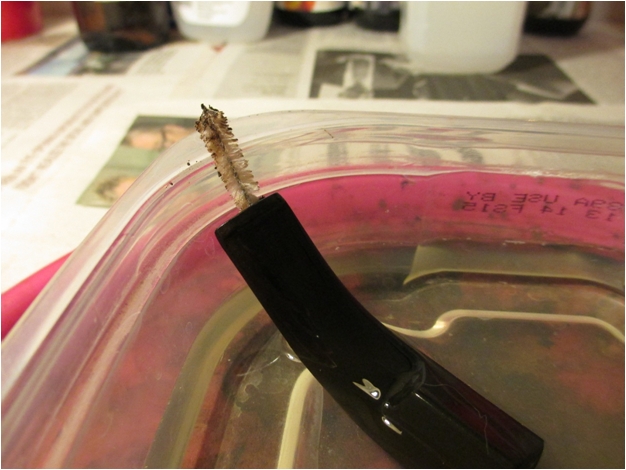
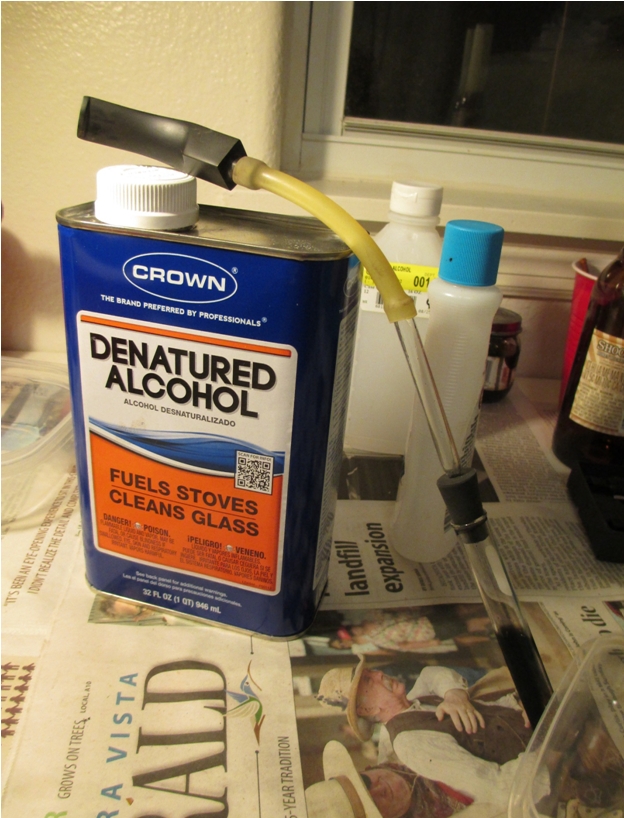
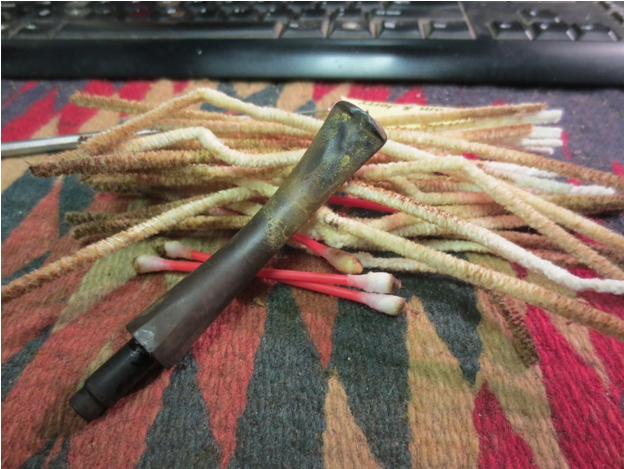
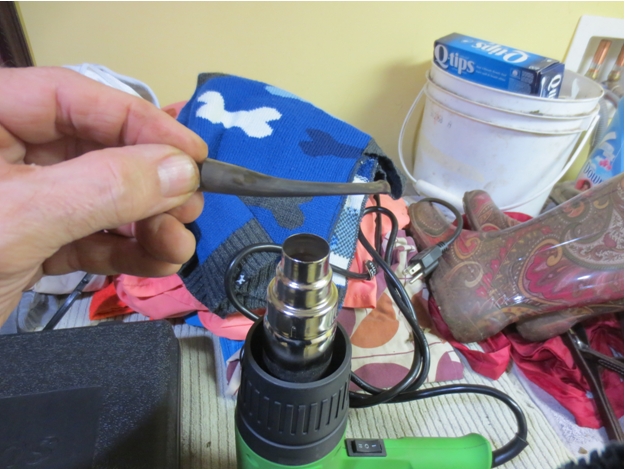
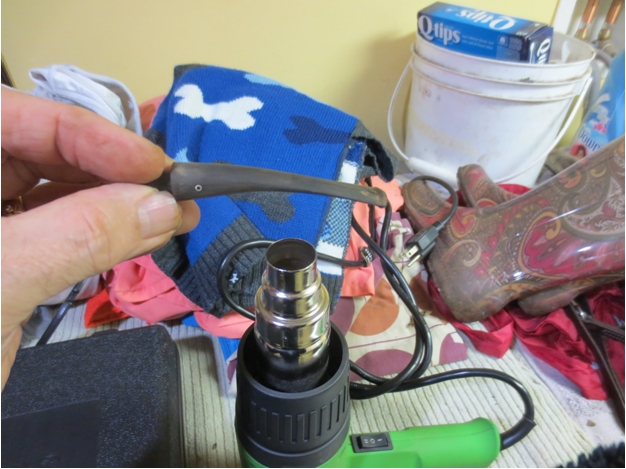
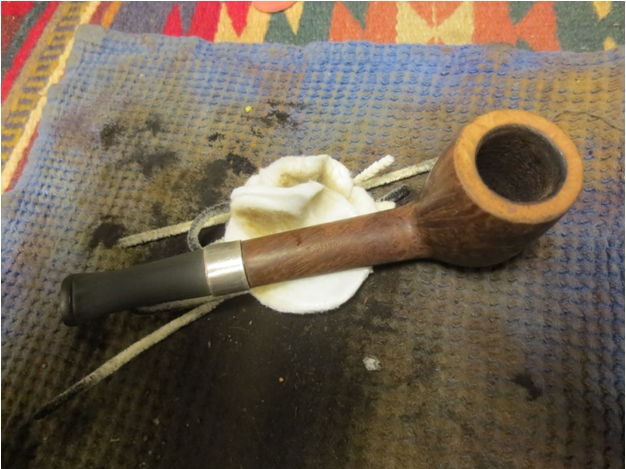
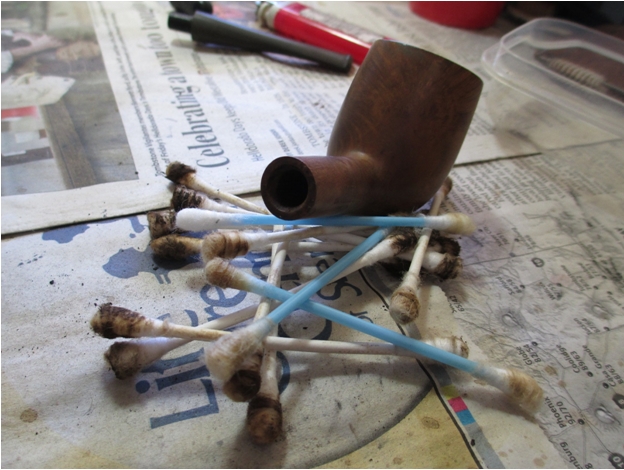
Next up, retort the stem.Frank10 
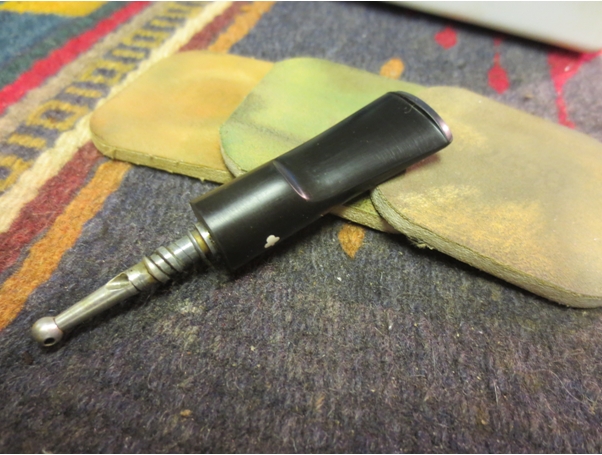
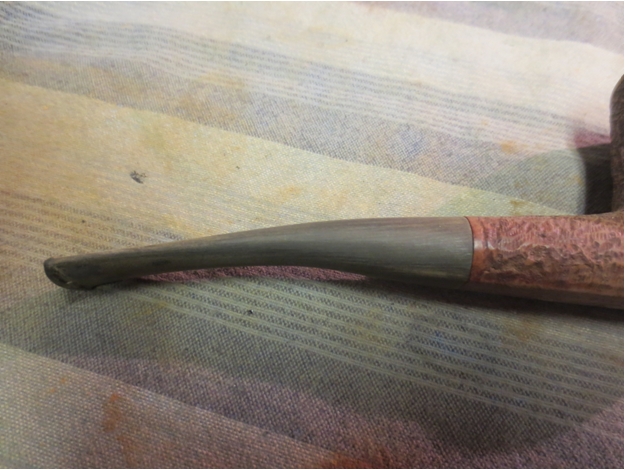
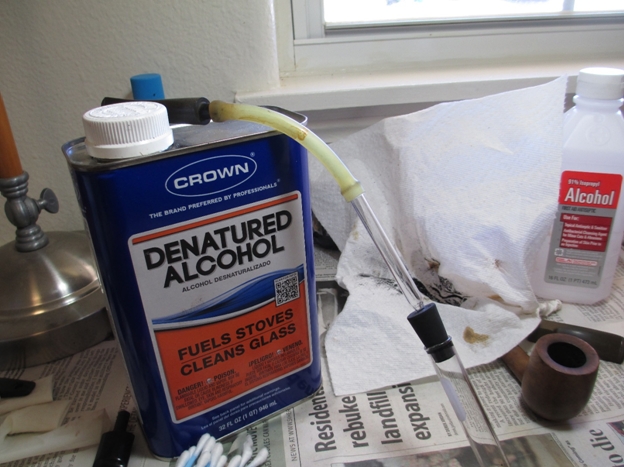
The stem was just as nasty as the shank, and I repeated the process four times. After numerous pipe cleaners, it finally came clean.Frank11 
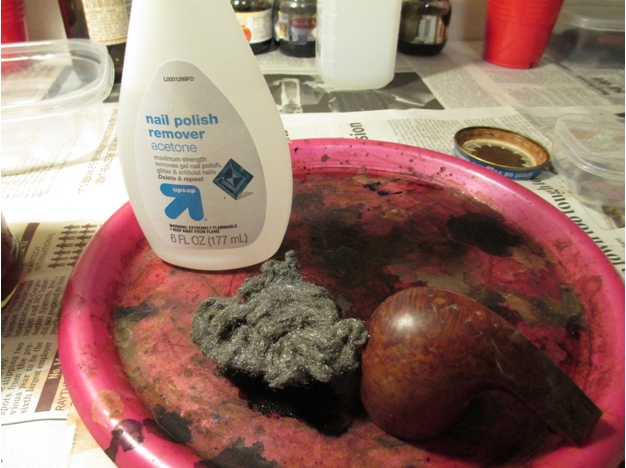
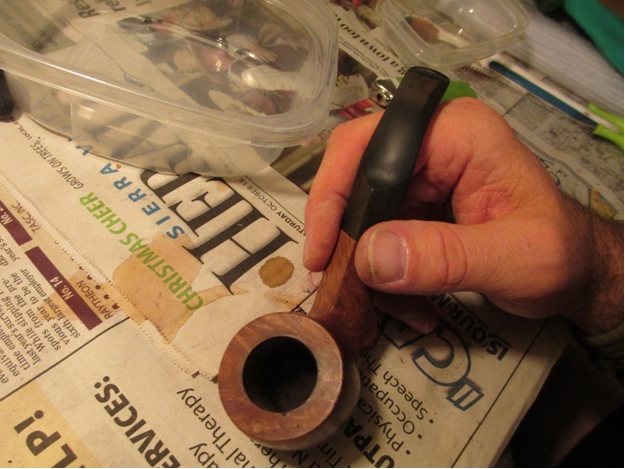
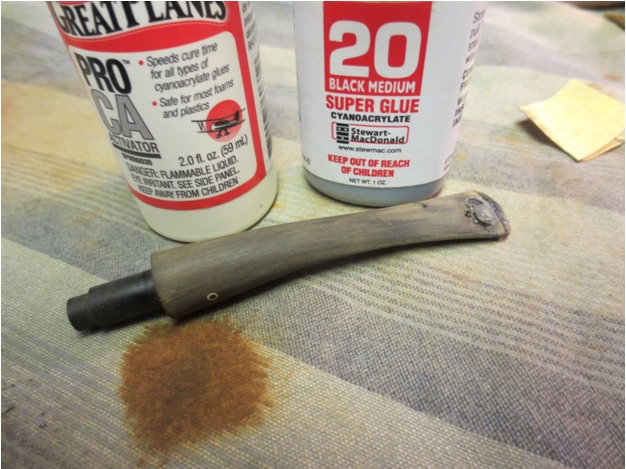
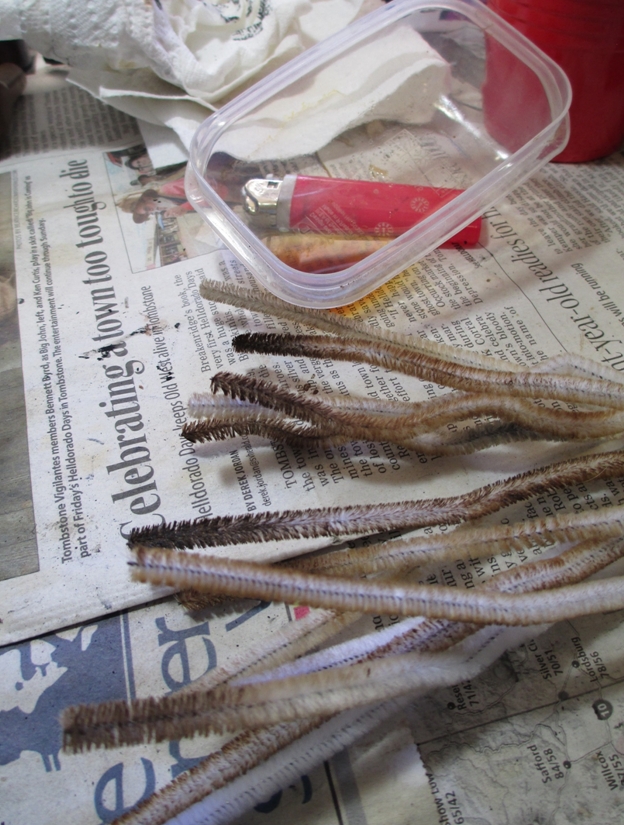
My next challenge was the fill on the bottom of the bowl. I have an old shank (a past victim of the buffing wheel) that I use for briar dust. I use a file to grind off the dust.Frank12 
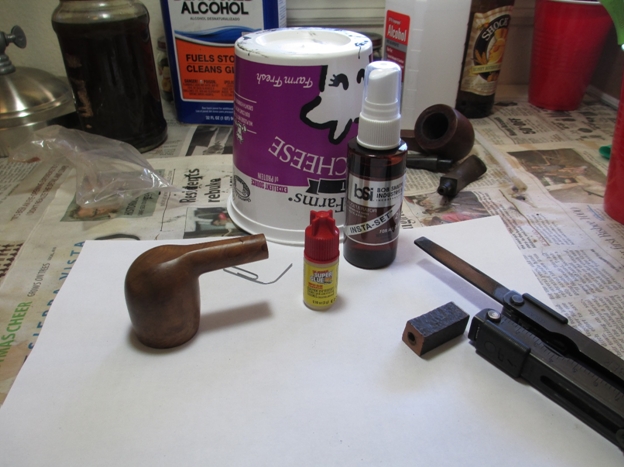
I put a drop of super glue on the bottom of the cottage cheese container and applied it to the fill area with the tip of the paper clip. I then packed the briar dust on top and sprayed it with the accelerator.Frank13

Frank14 
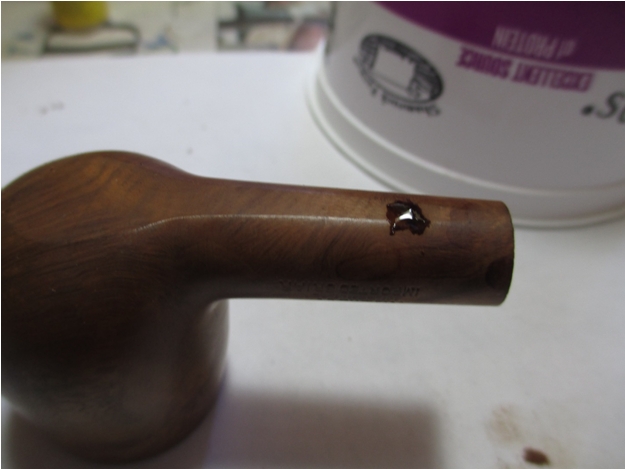
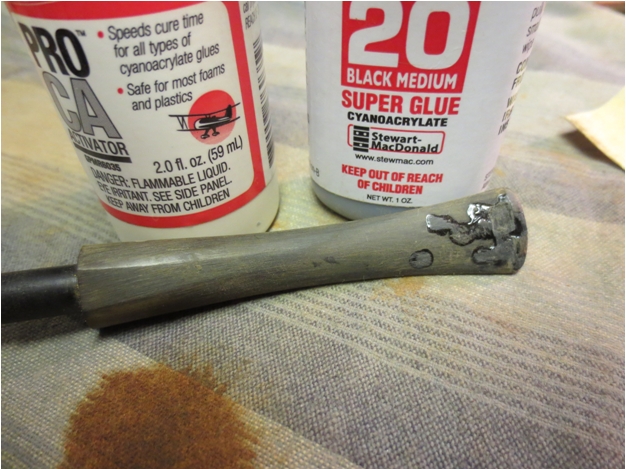
I’m going to work on refining that technique, it was a little messier than I like and the resulting lump of briar dust took more sanding than would have been necessary if had made the fill only as much as was needed.

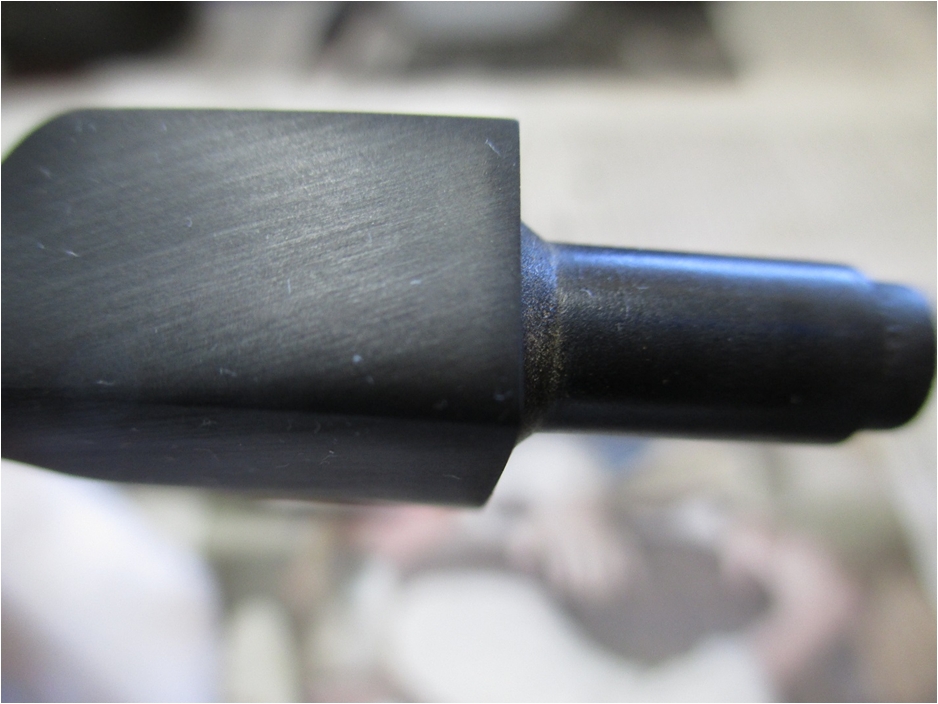
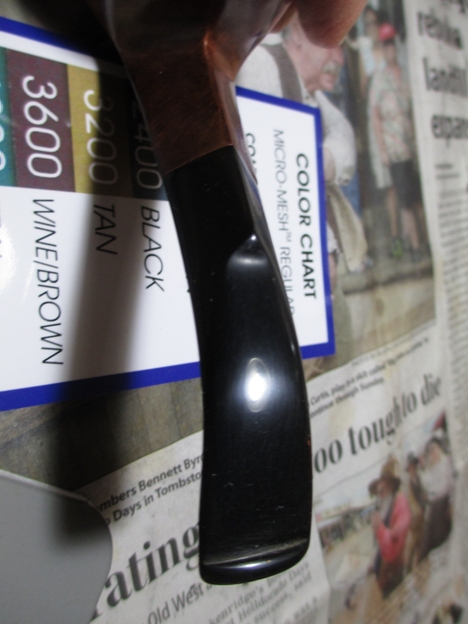
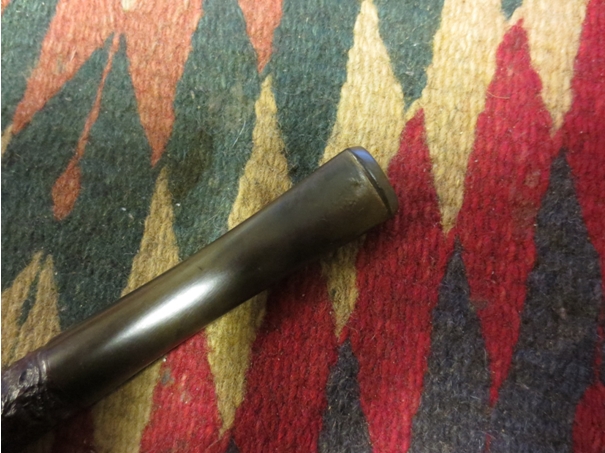
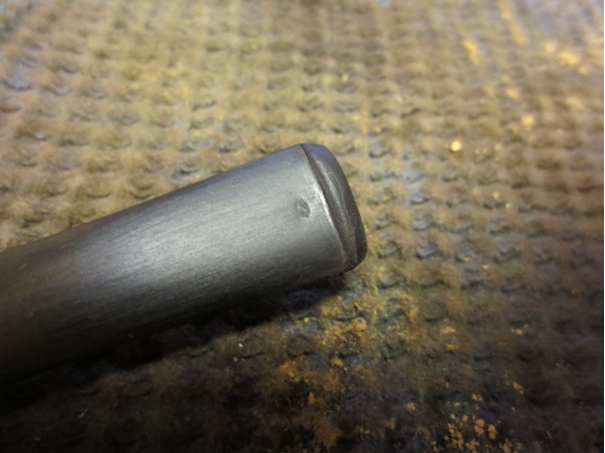
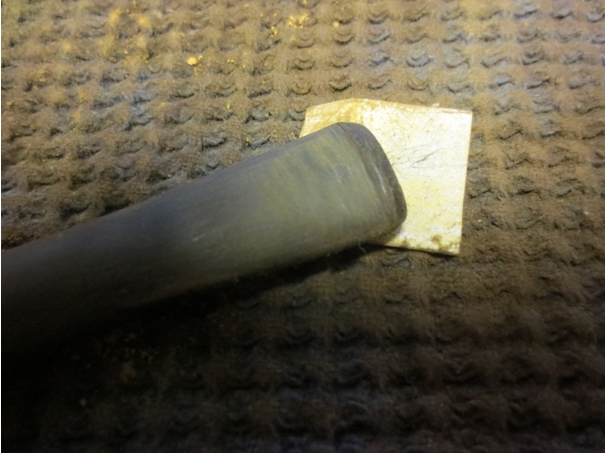
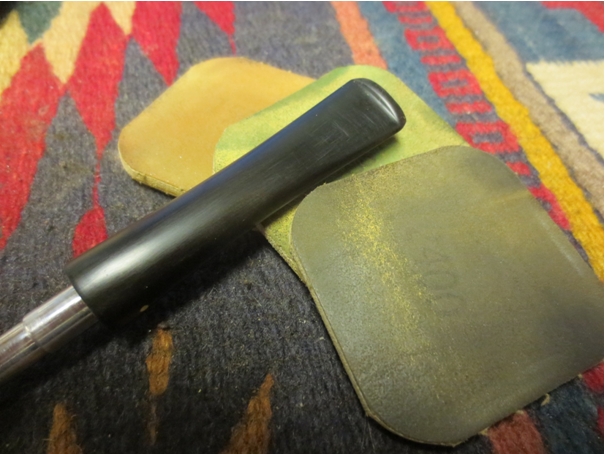
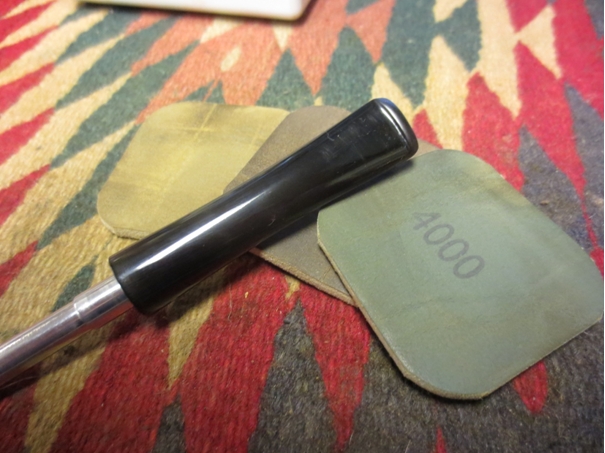
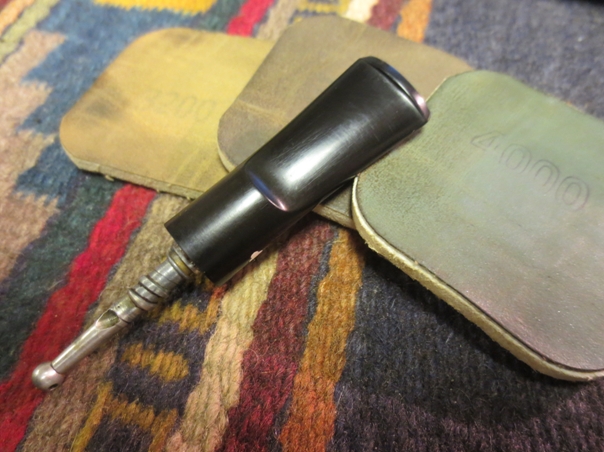
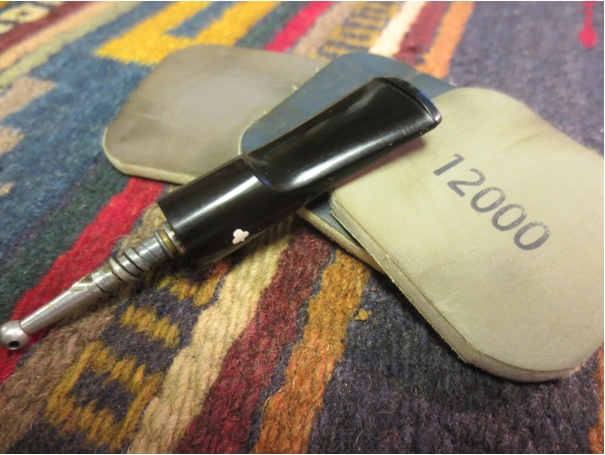
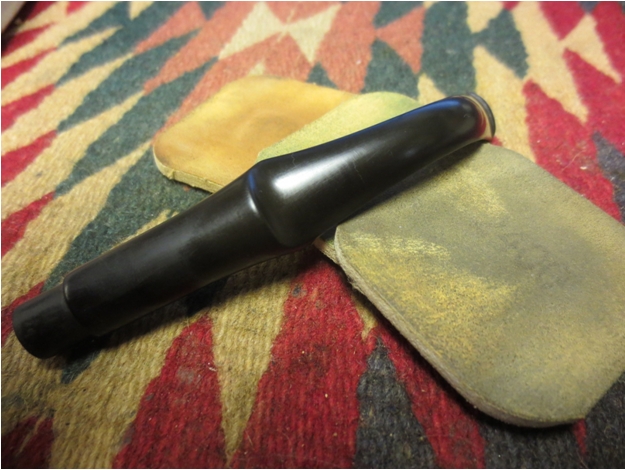
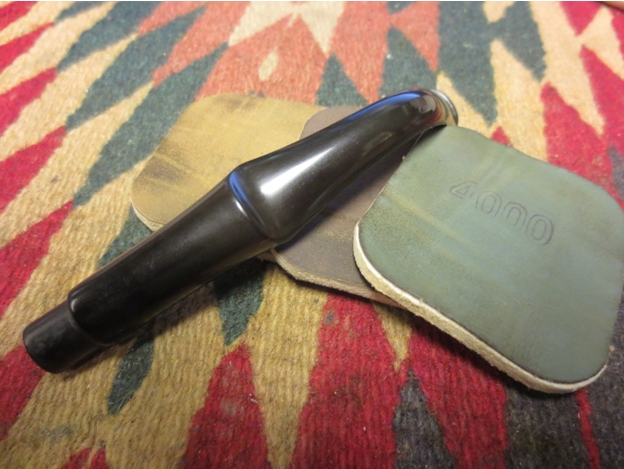
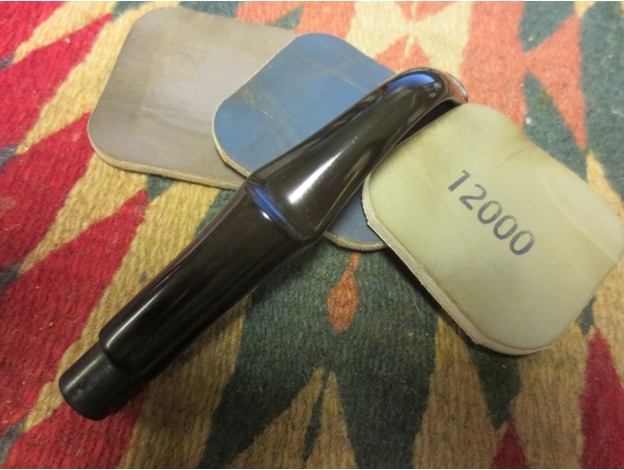
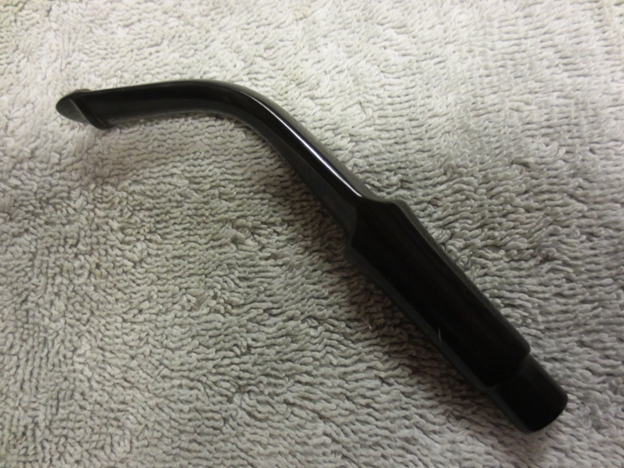
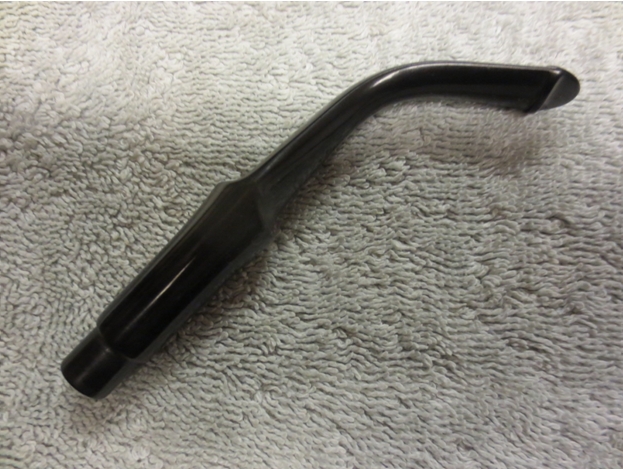
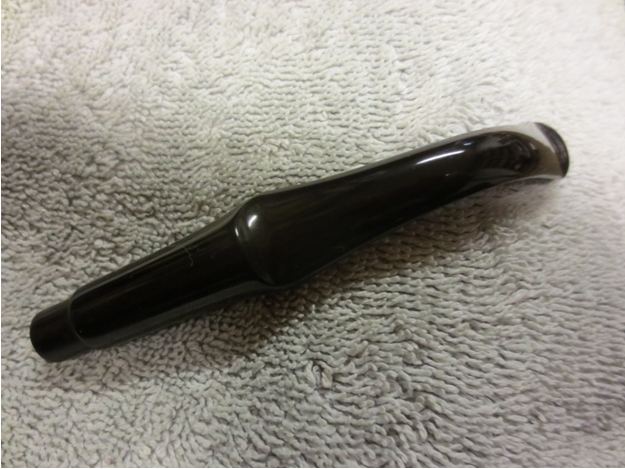
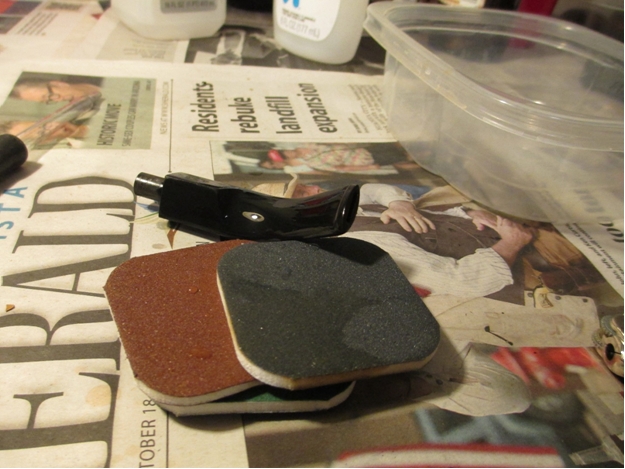
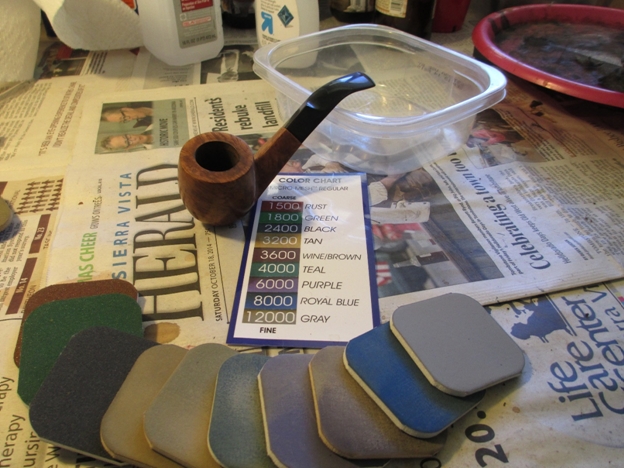
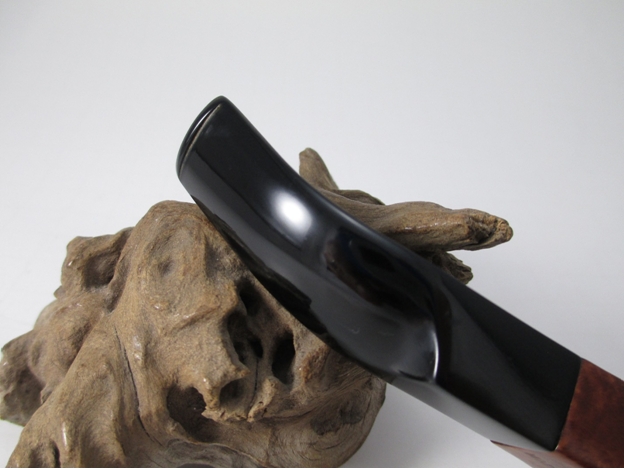
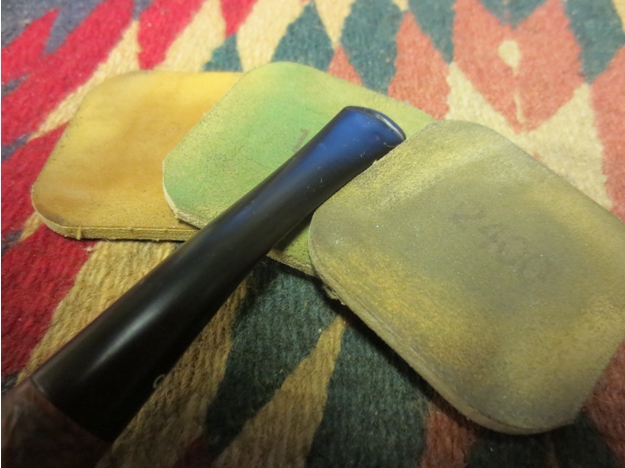
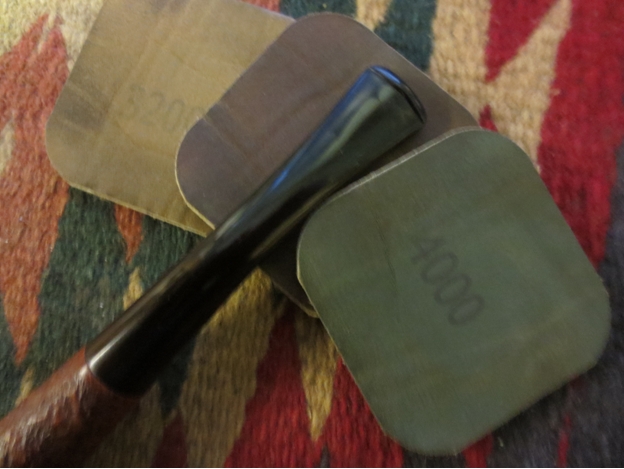
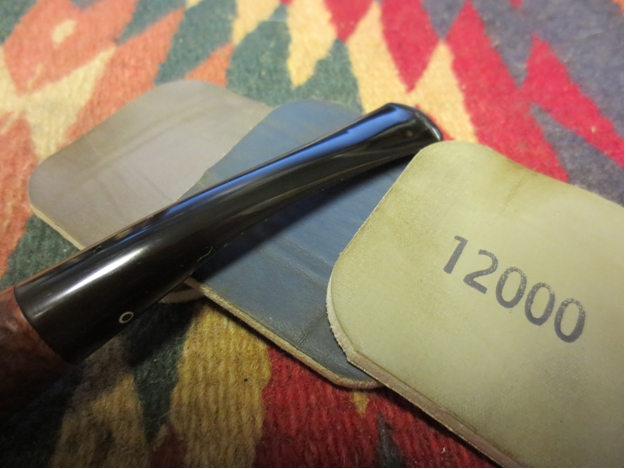
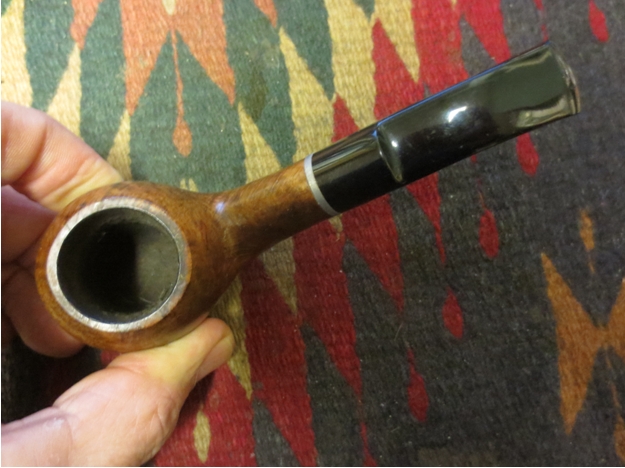
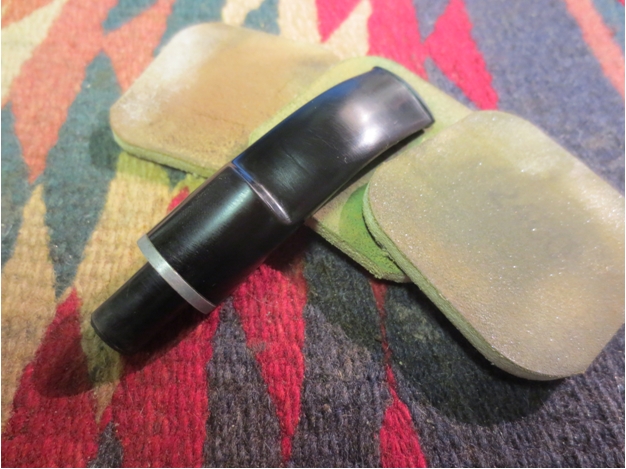
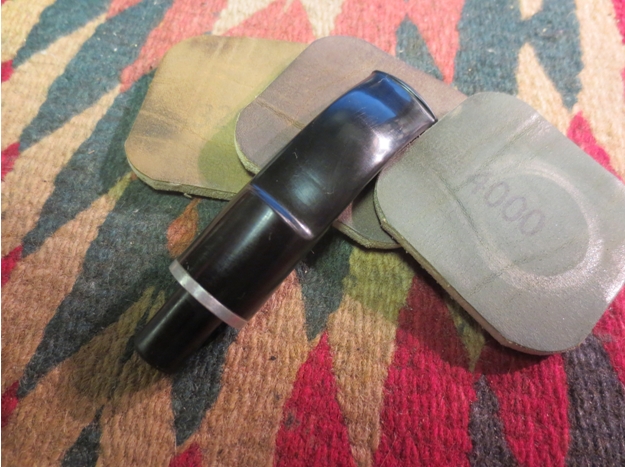
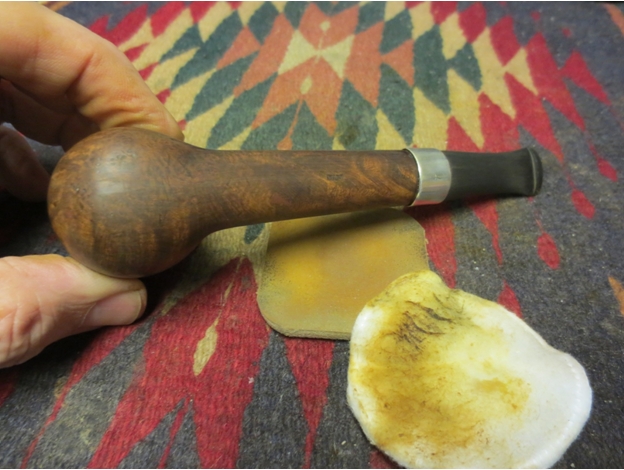
Next I turned my attention to the stem. I did the usual progression of 400 grit wet/dry with water, followed by 1500-2400 grit micro mesh with water.Frank15 
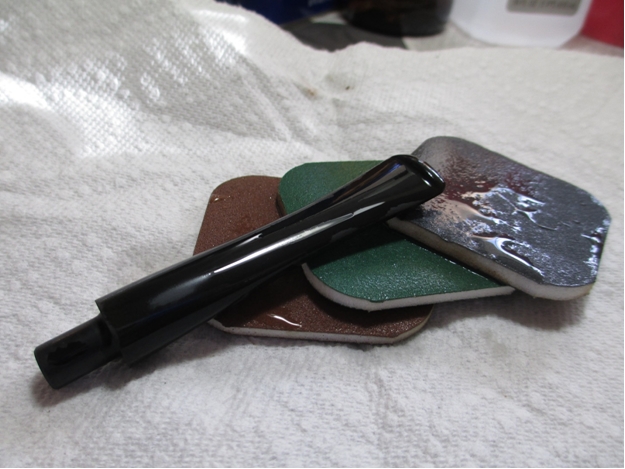
I then used a progression of 1500-12000 grit micro mesh on both the bowl and stem.Frank16 
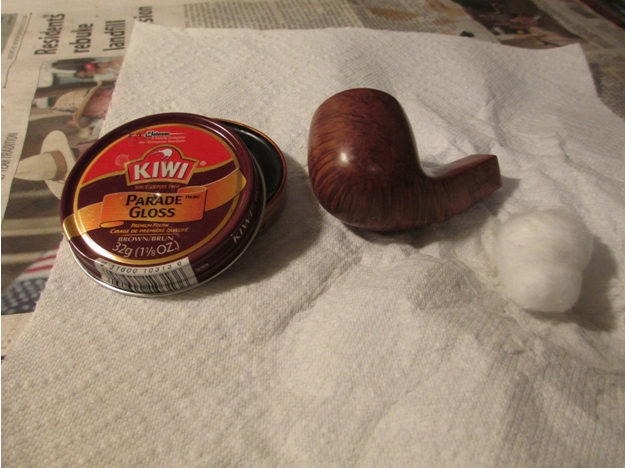
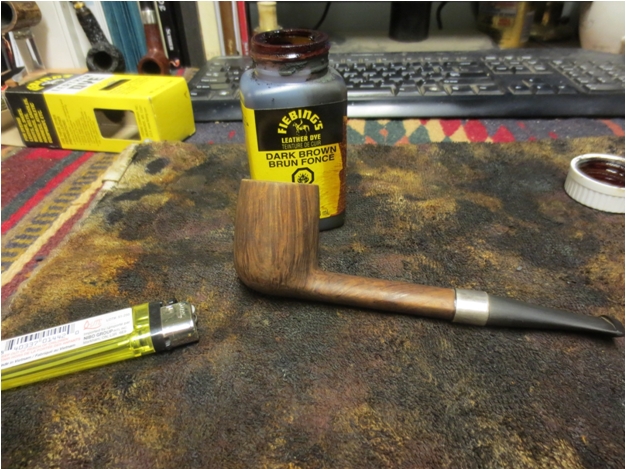
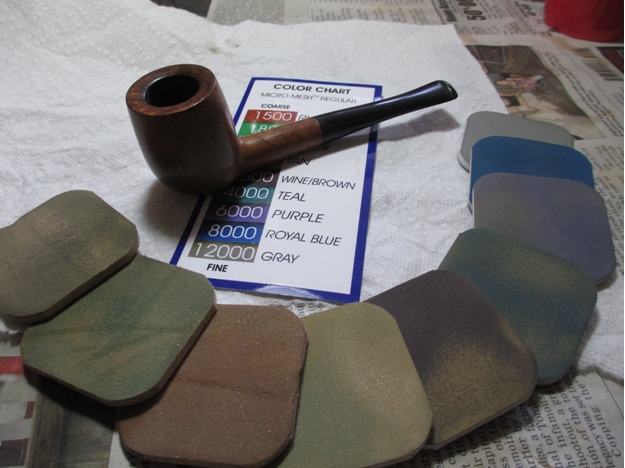
Although the pipe had a natural finish on it, I decided to darken it slightly to help cover the fill. To do this I used Kiwi Parade Gloss brown shoe polish.Frank17

Frank18 
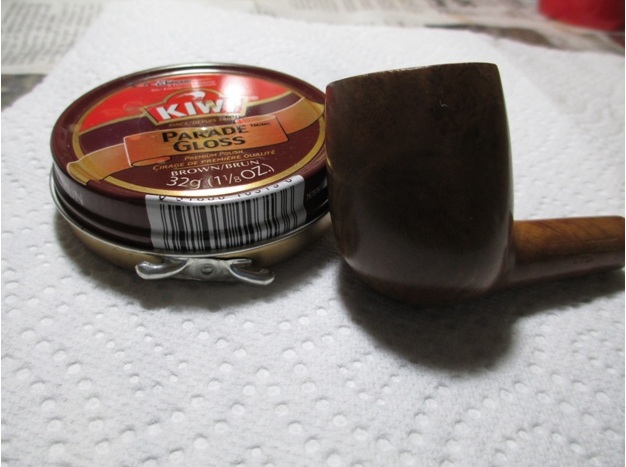
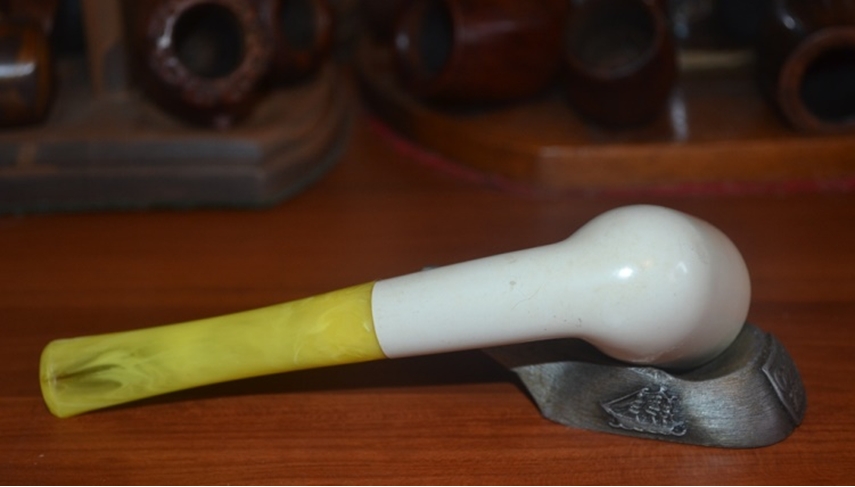
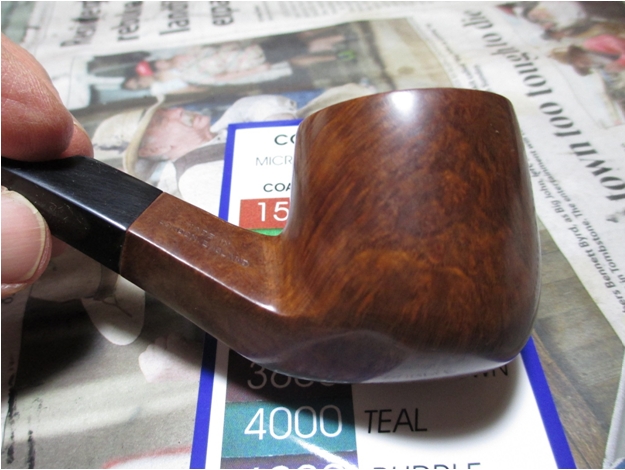
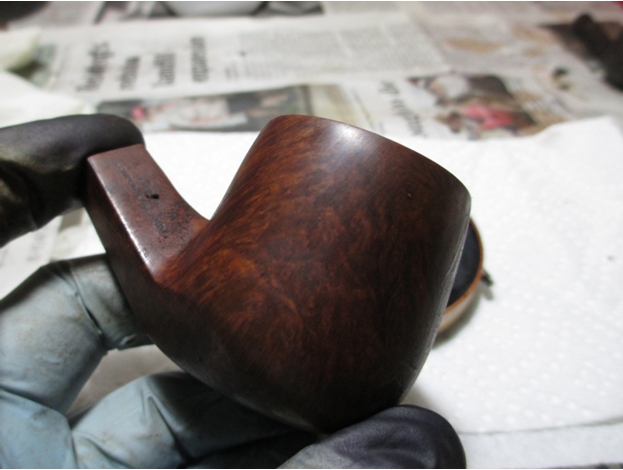
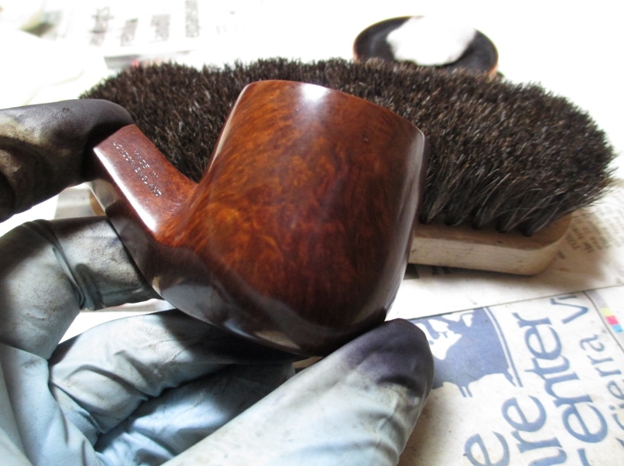
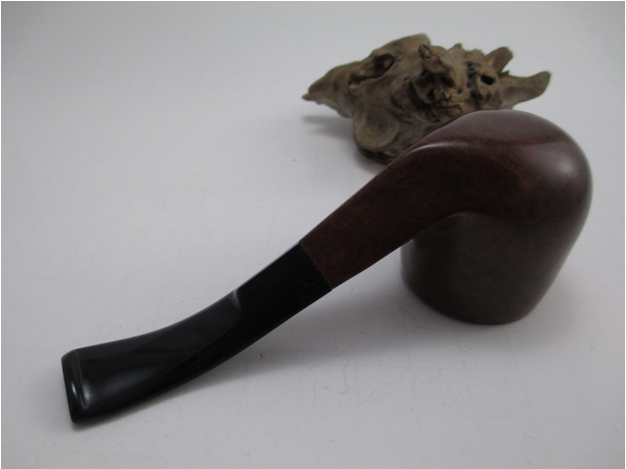
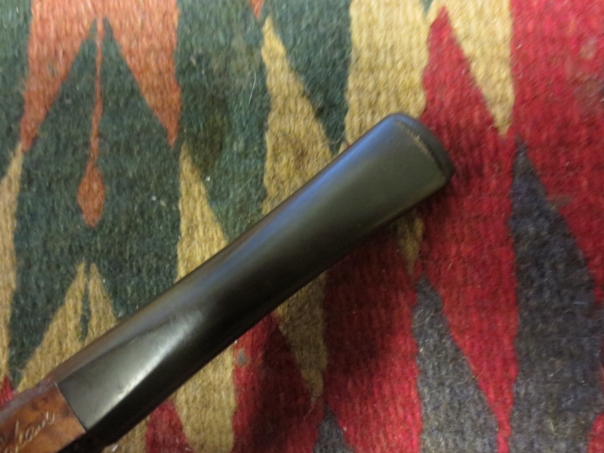
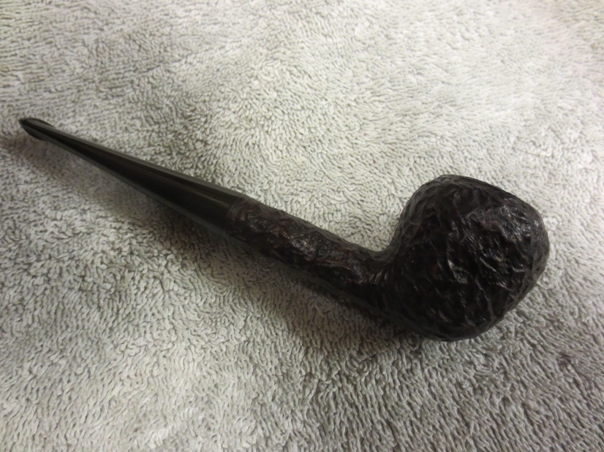
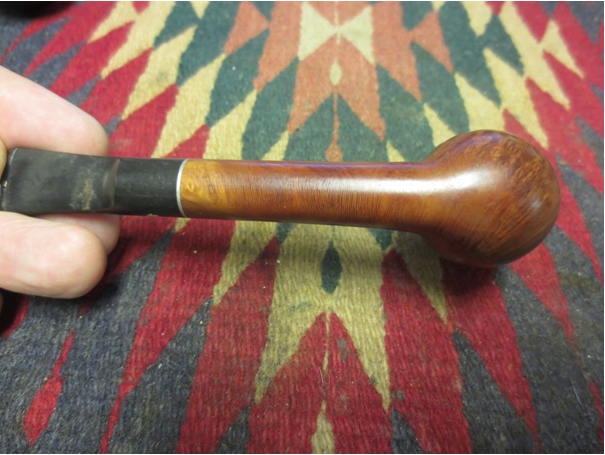
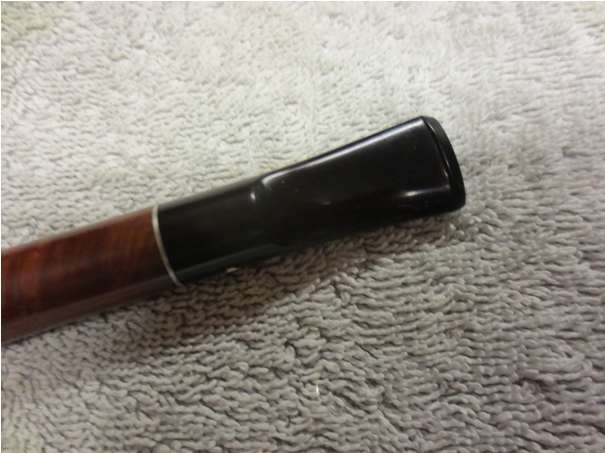
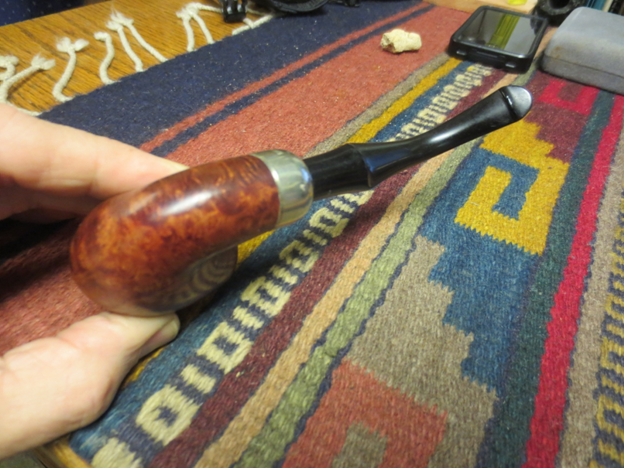
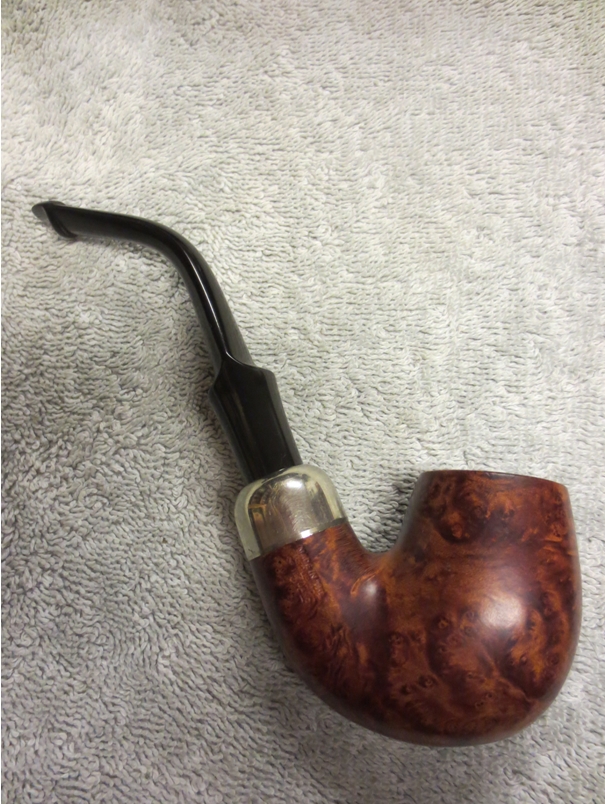
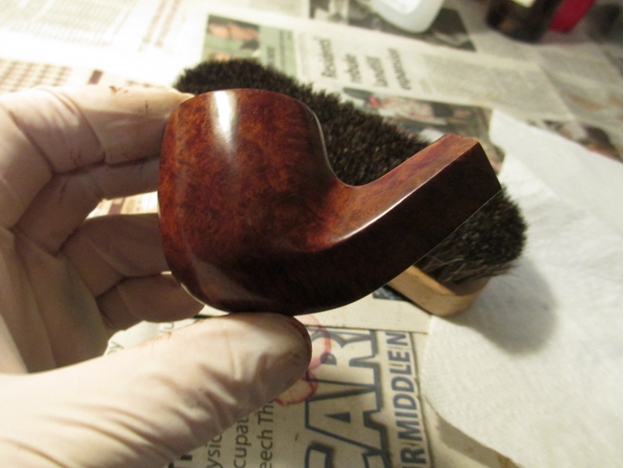
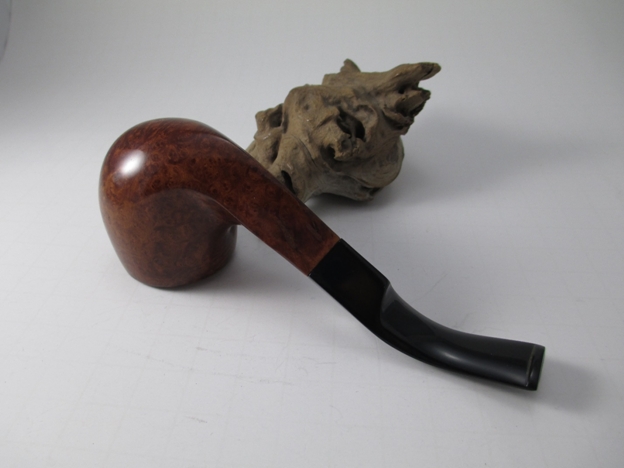
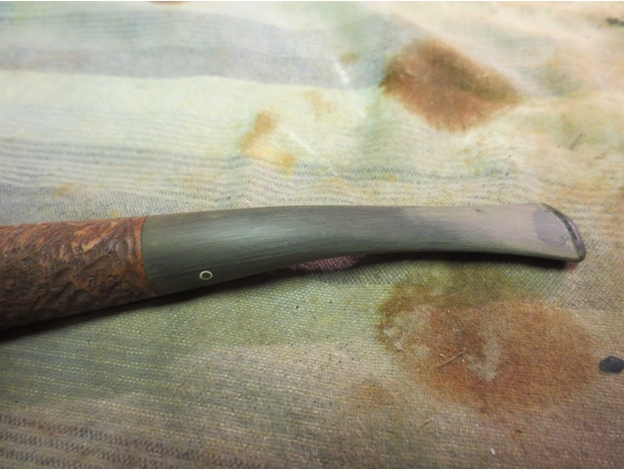
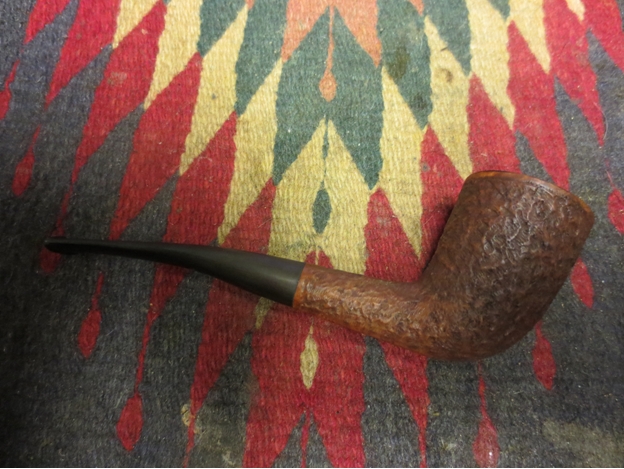
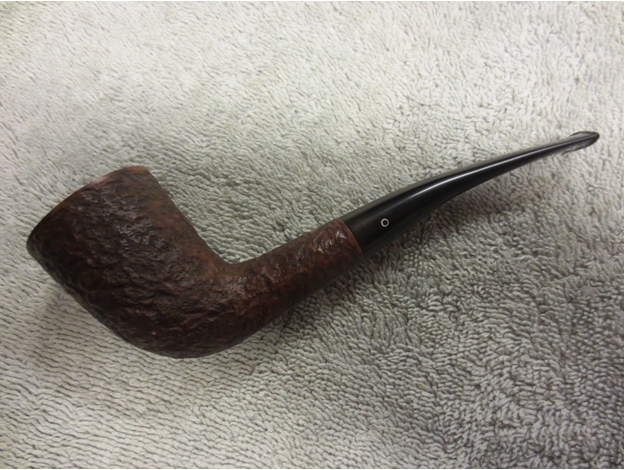
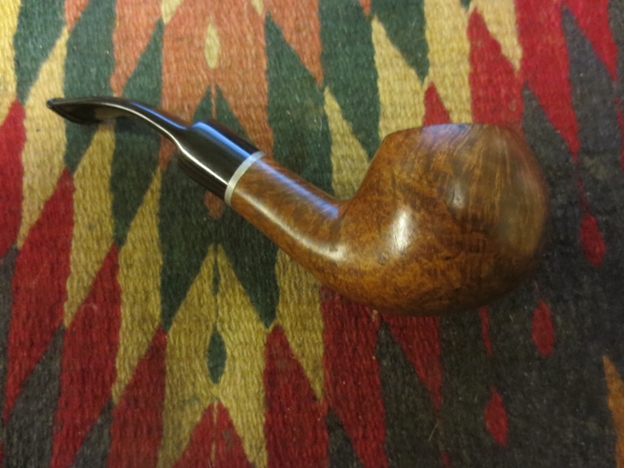
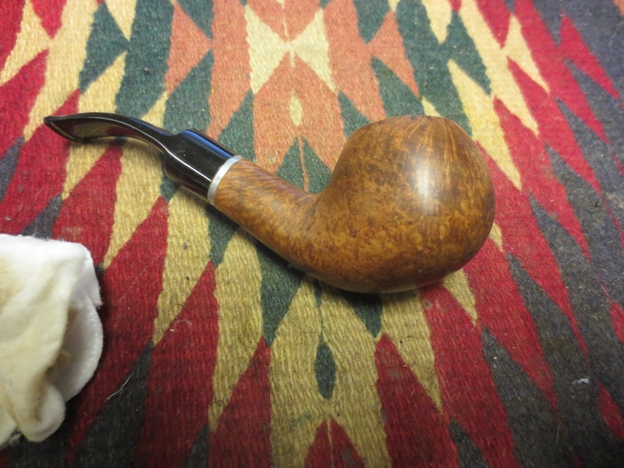
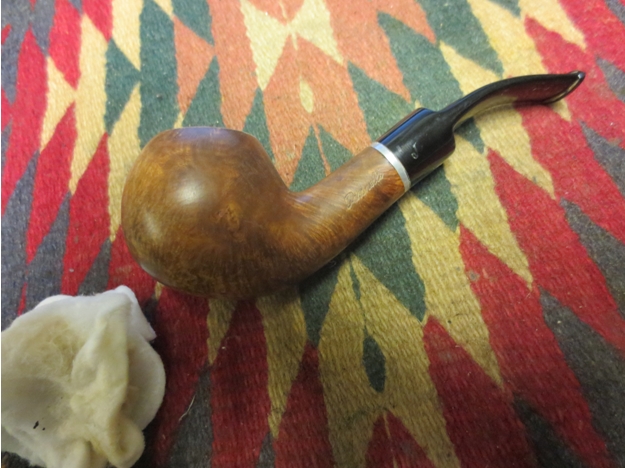
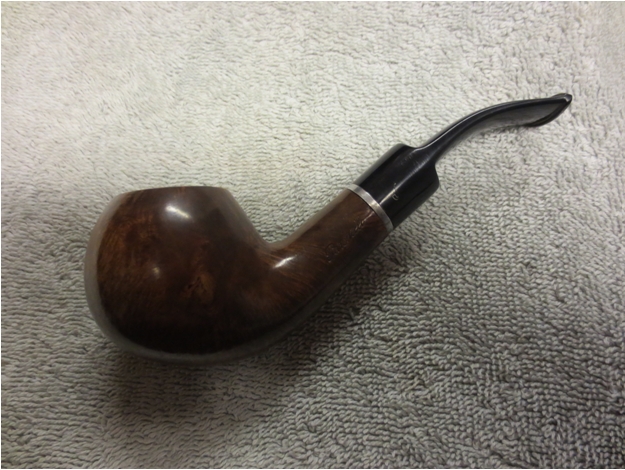
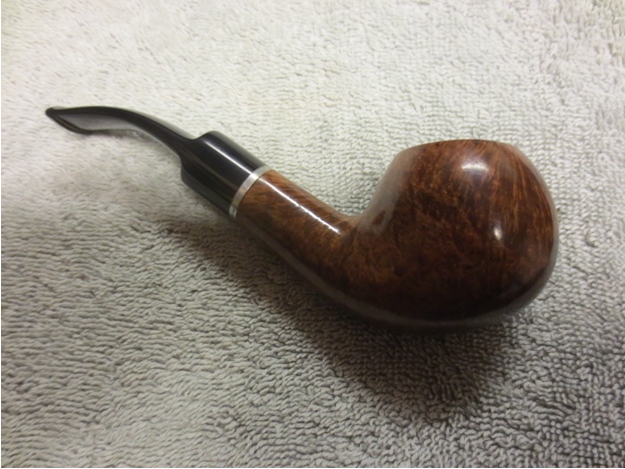
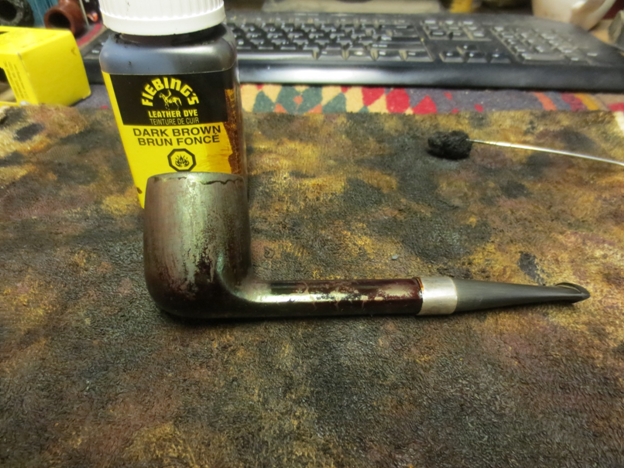
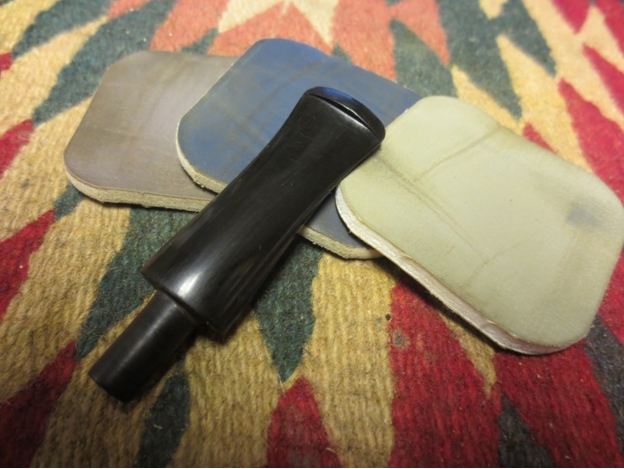
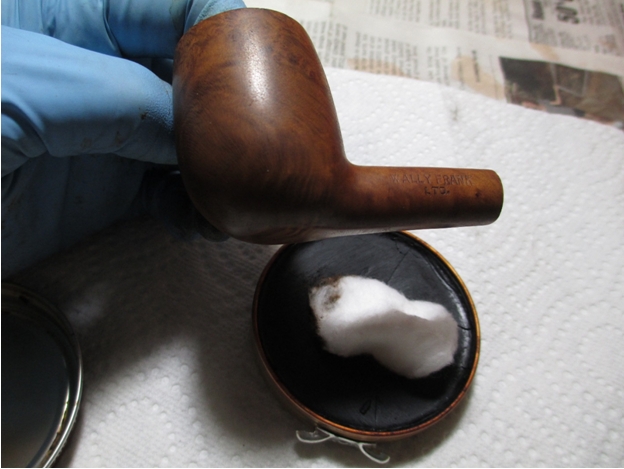
After applying the shoe polish I used a heat gun to briefly heat it up then buffed it out with a shoe brush. Here is the results after using the brush.Frank19 
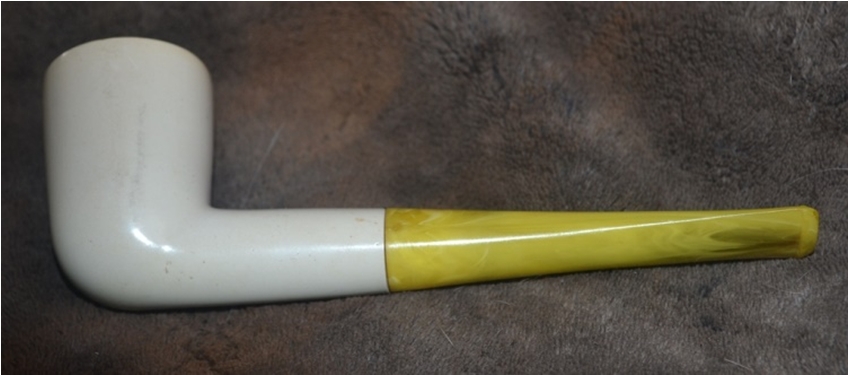
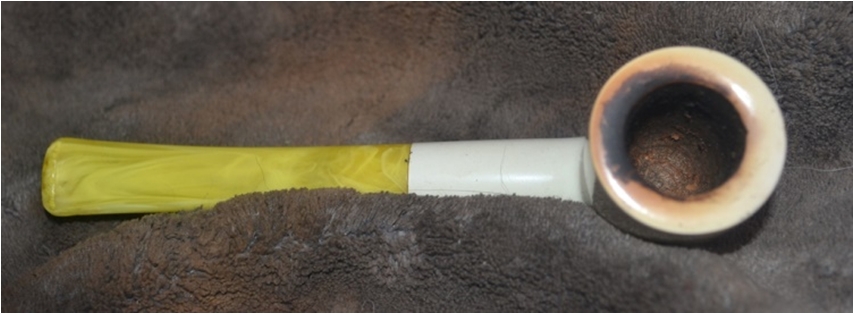
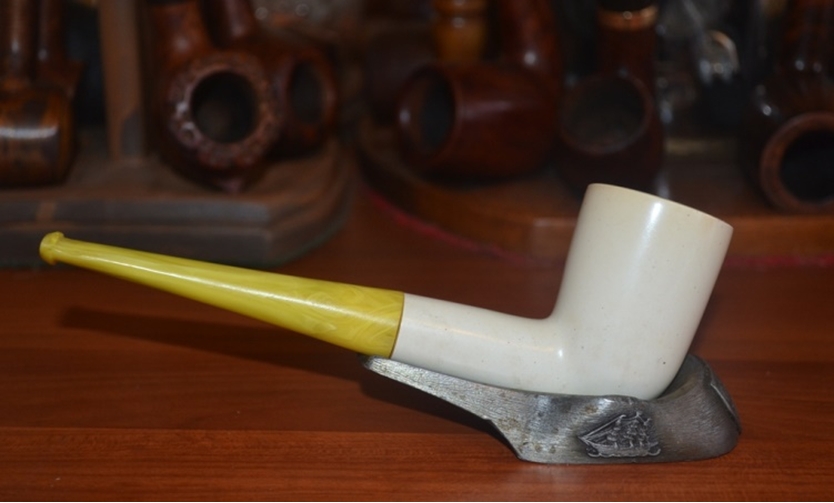
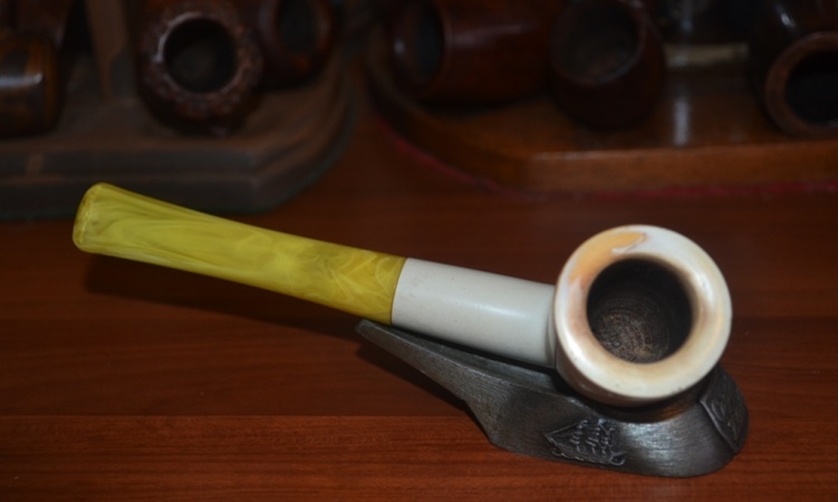
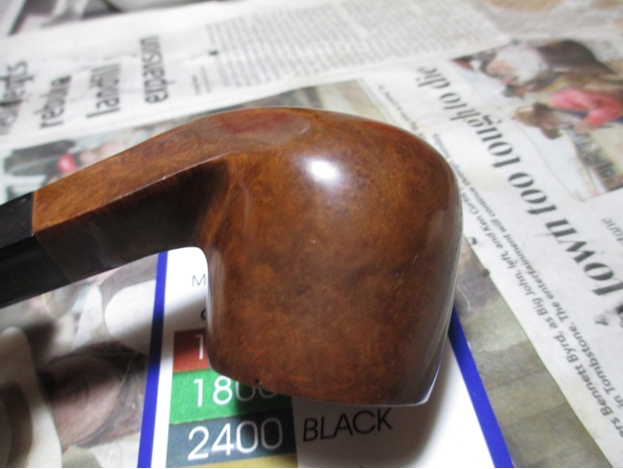
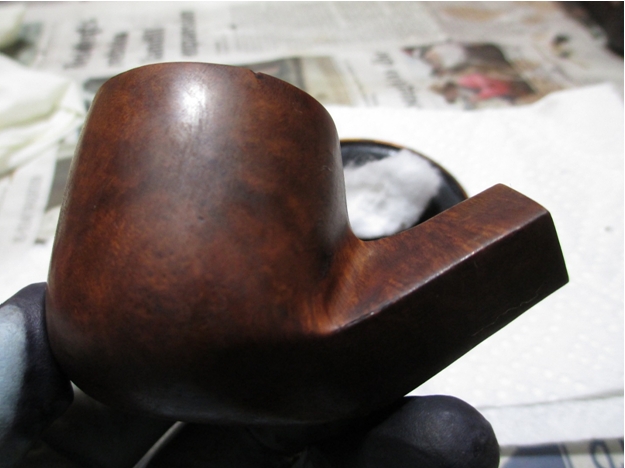
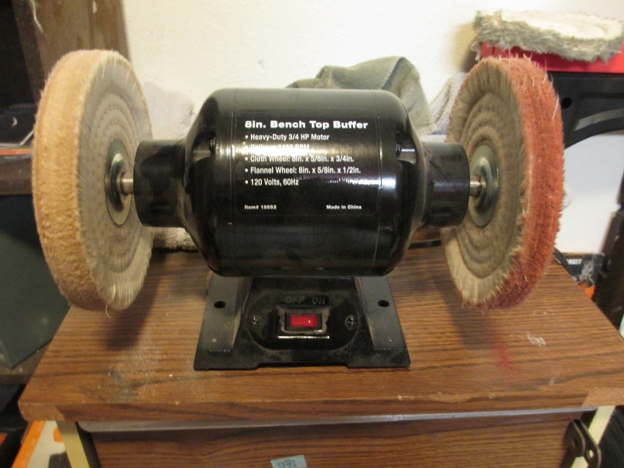
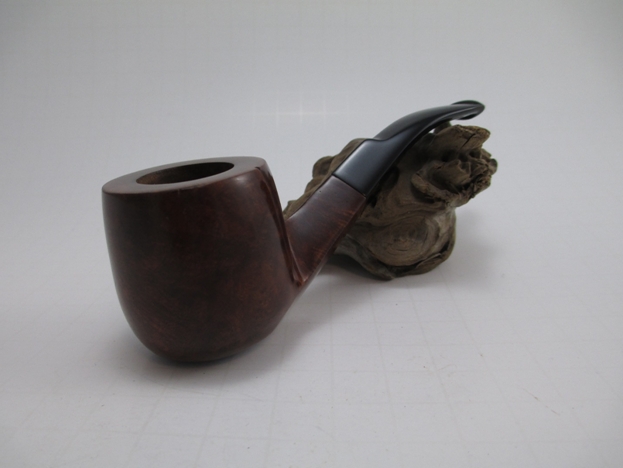
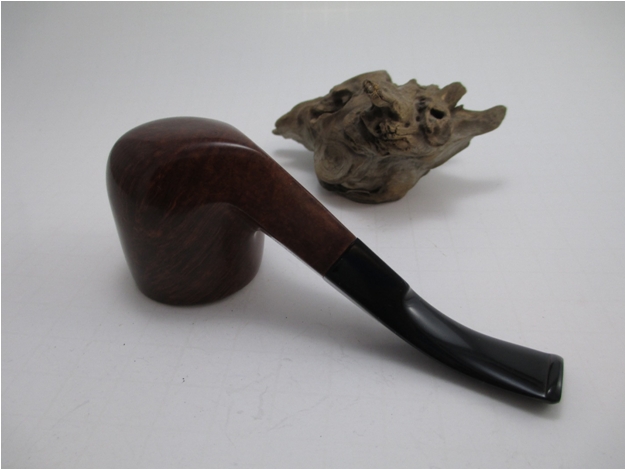
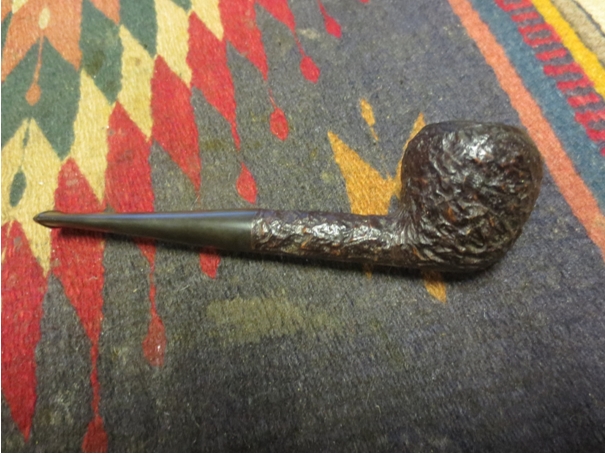
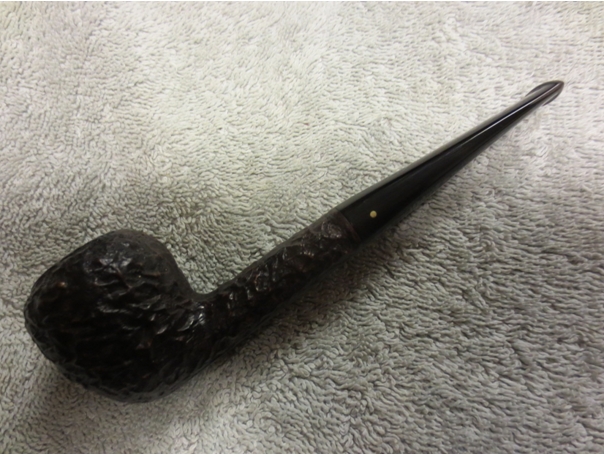
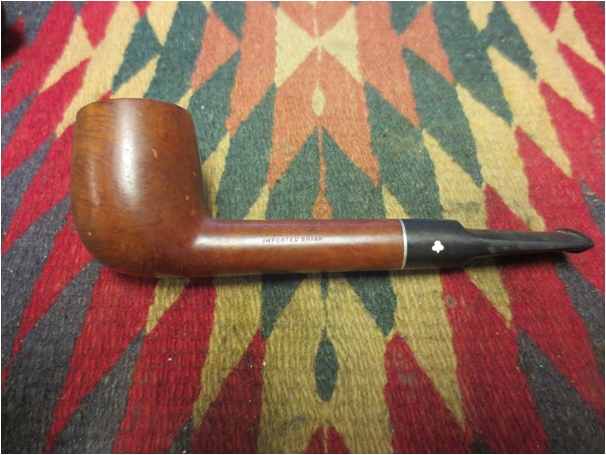
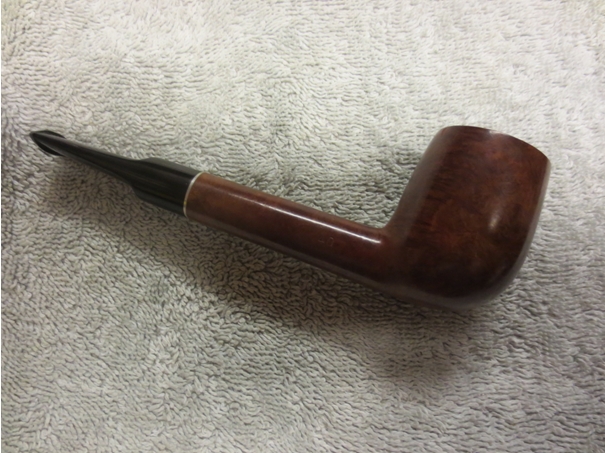
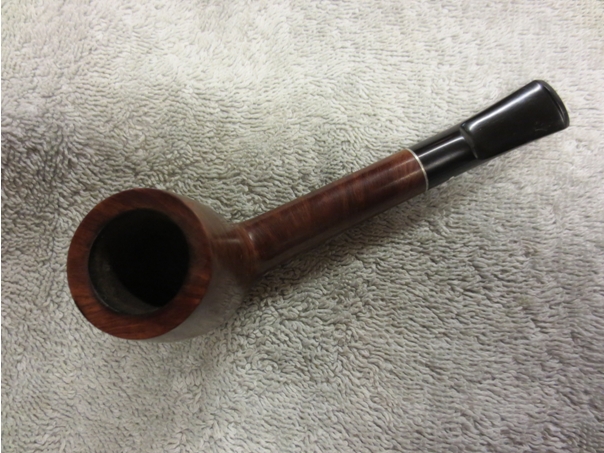
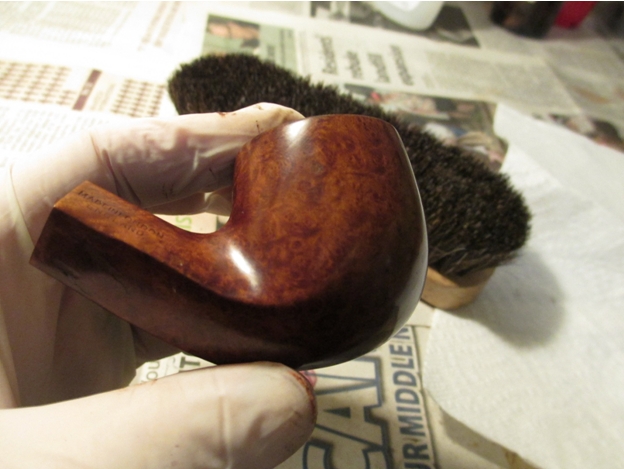
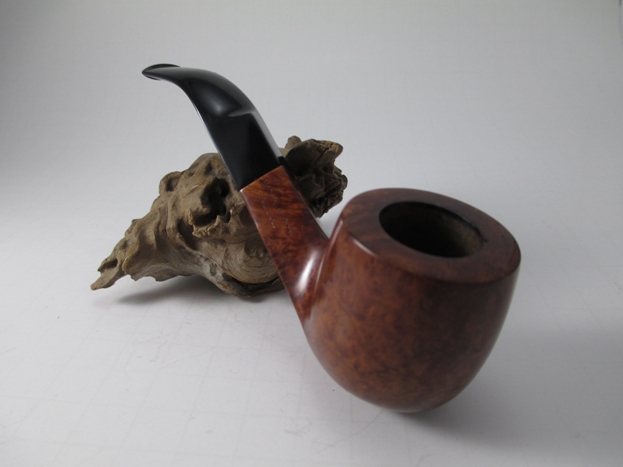
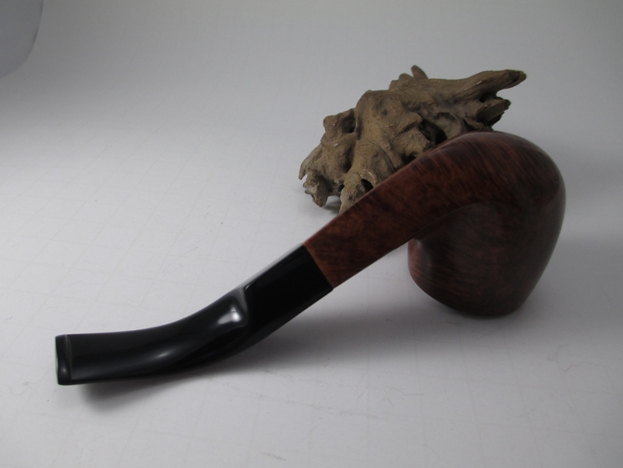
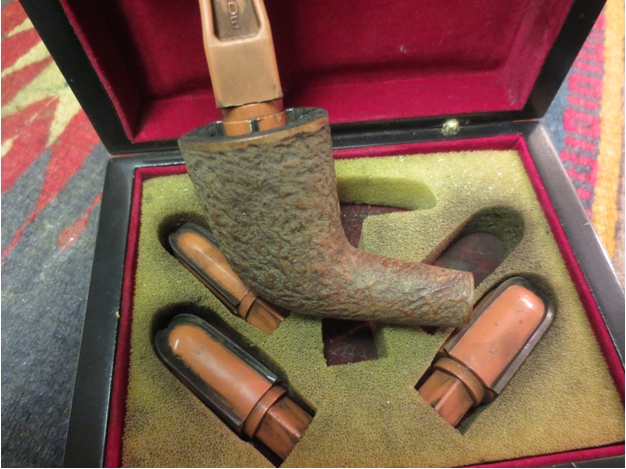
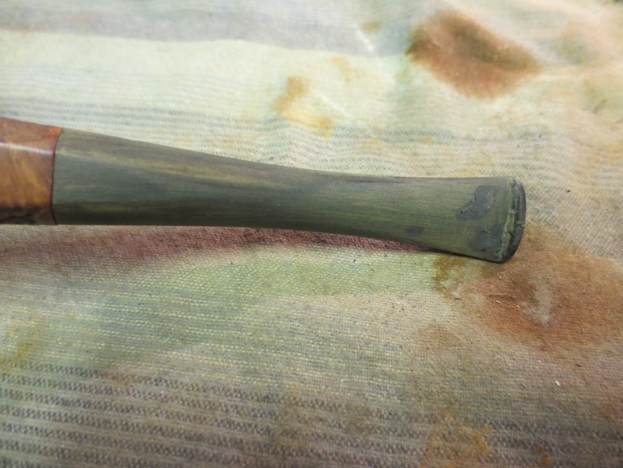
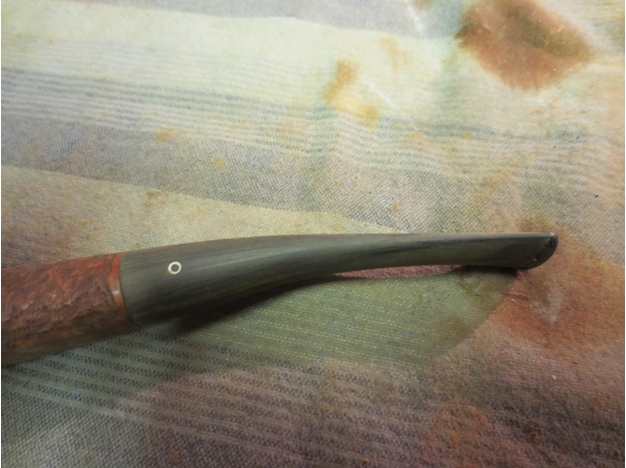
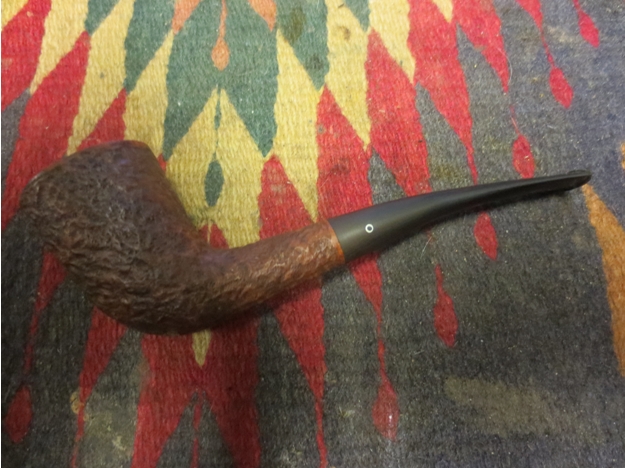
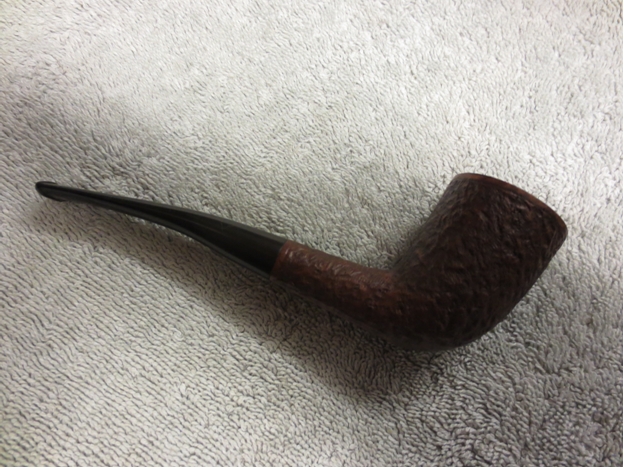
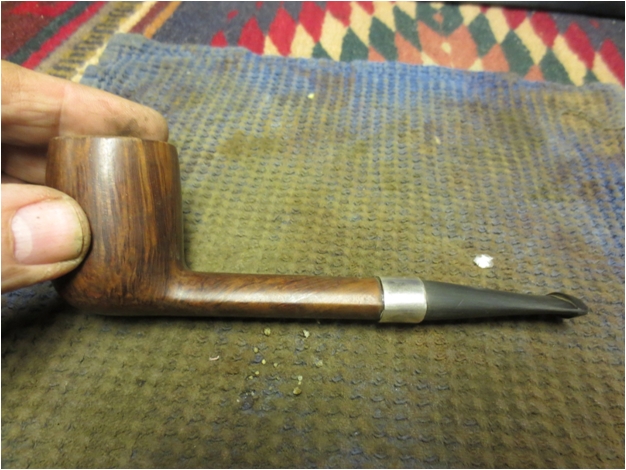
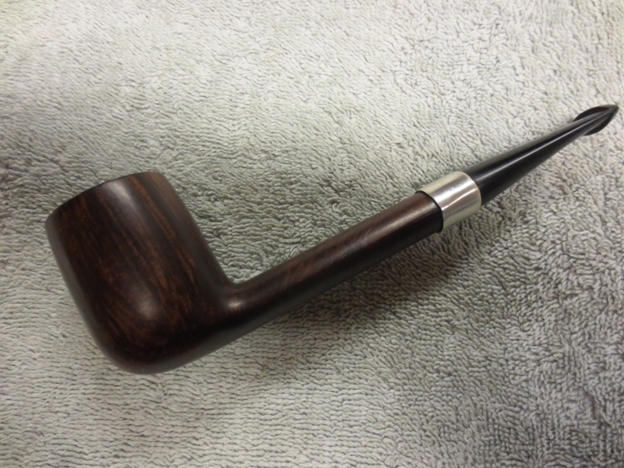
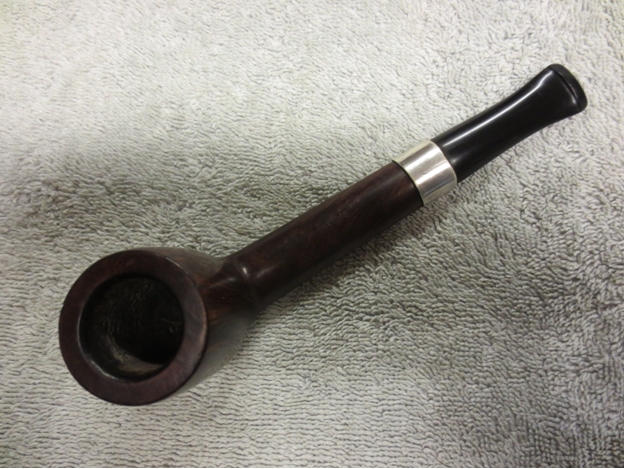
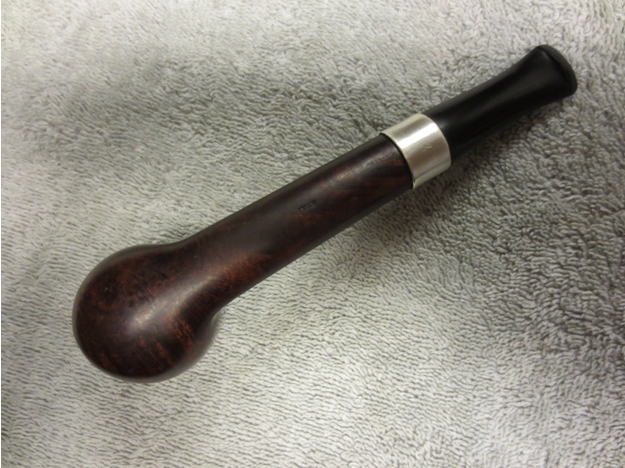
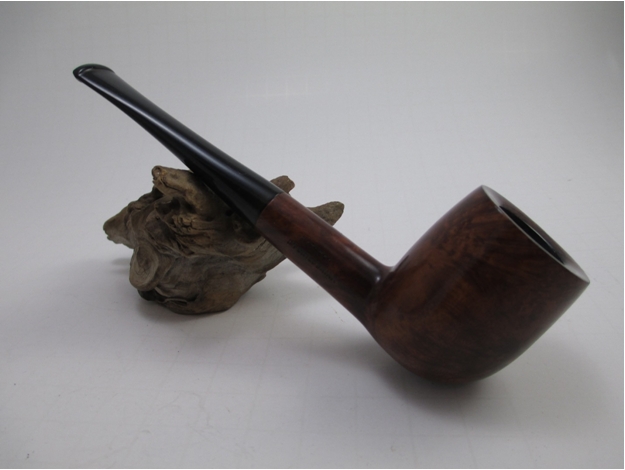
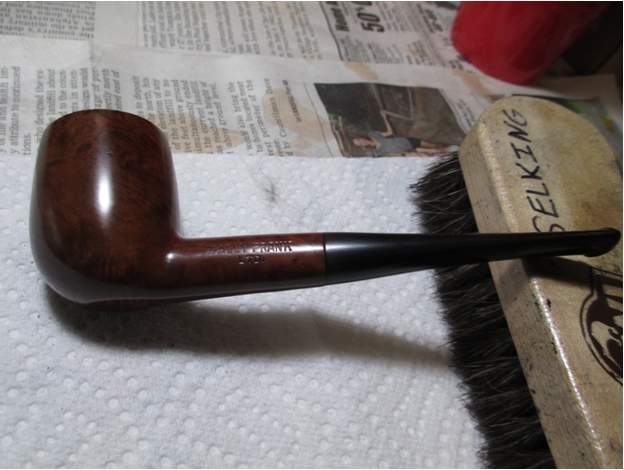
I had an uneventful trip to the buffing wheel, and here is the end result.Frank20

Frank21

Frank22 
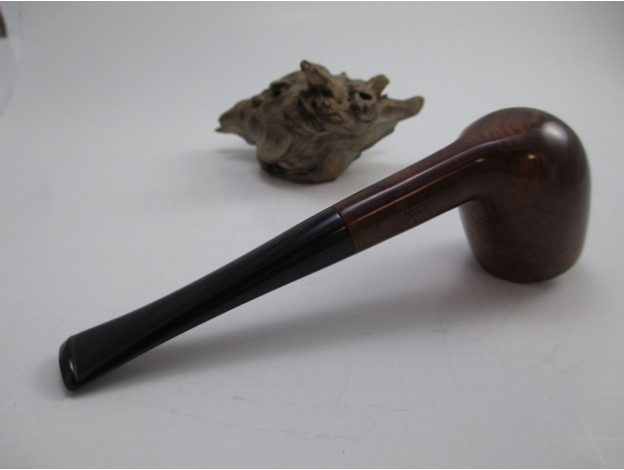
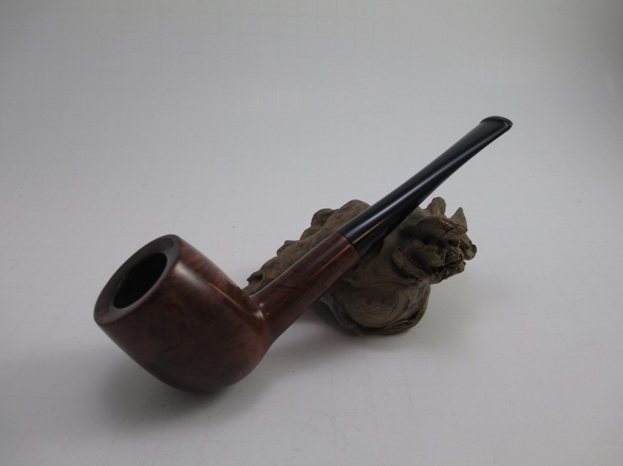
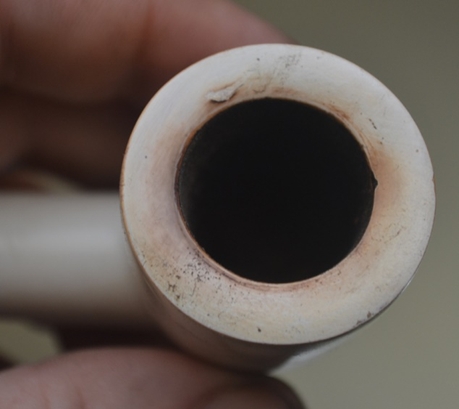
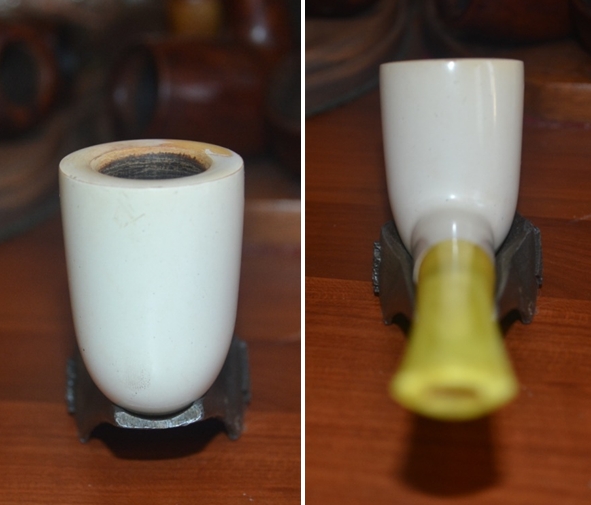
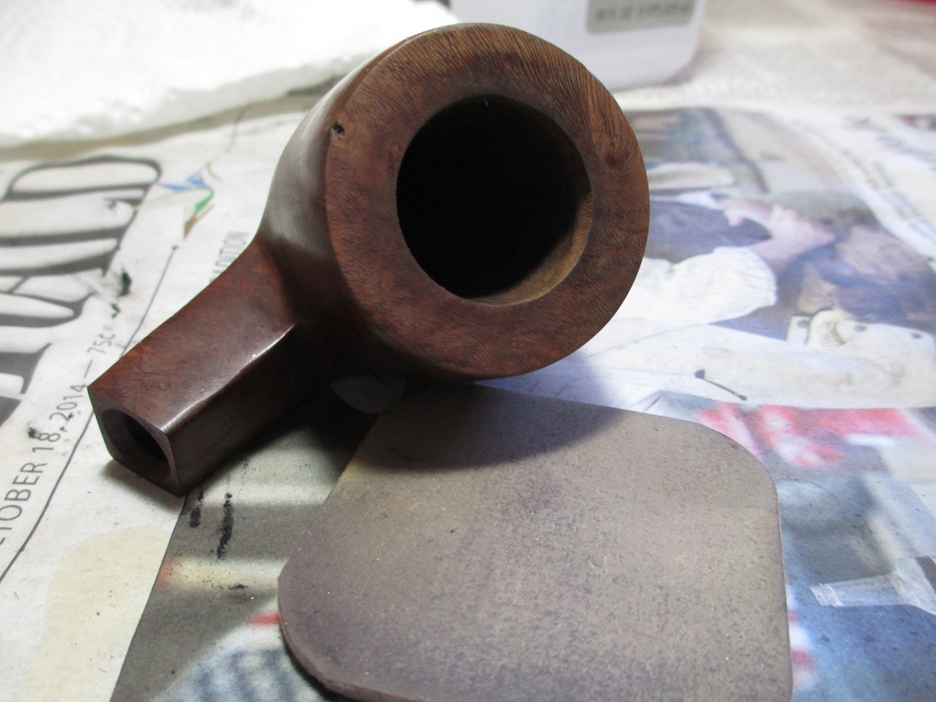
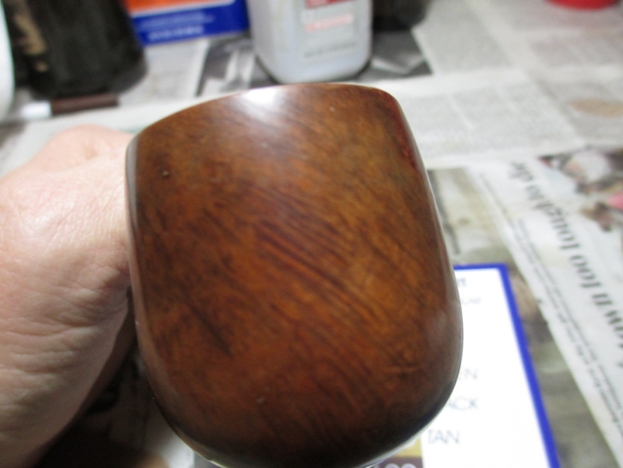
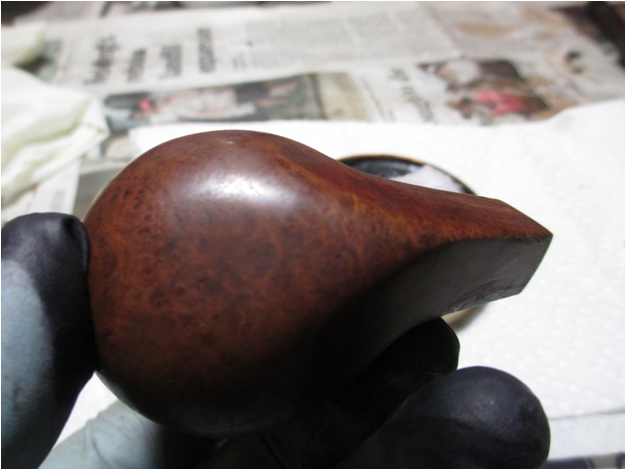
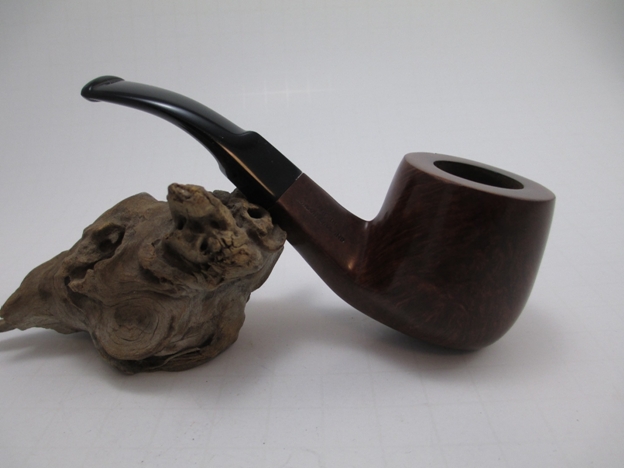
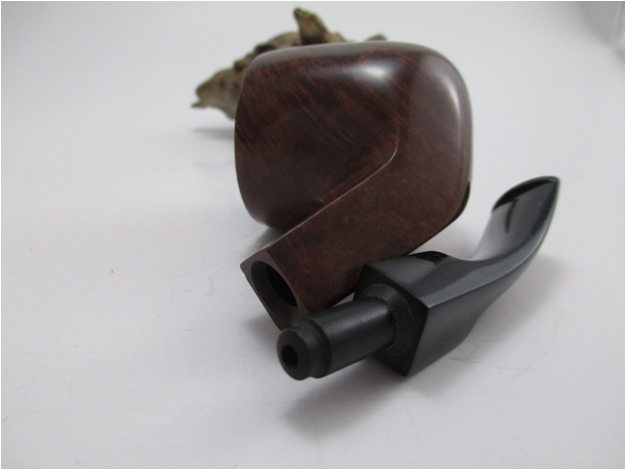
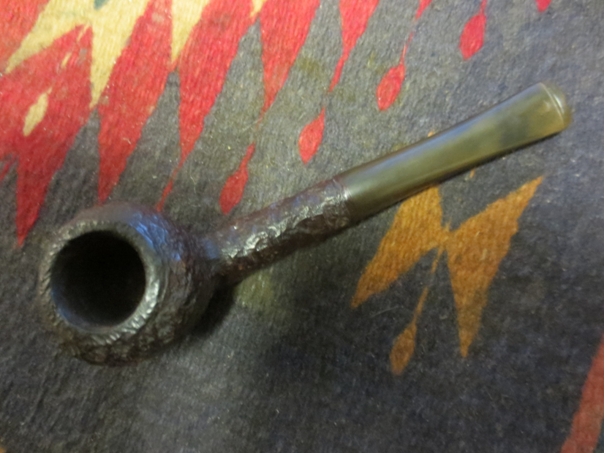
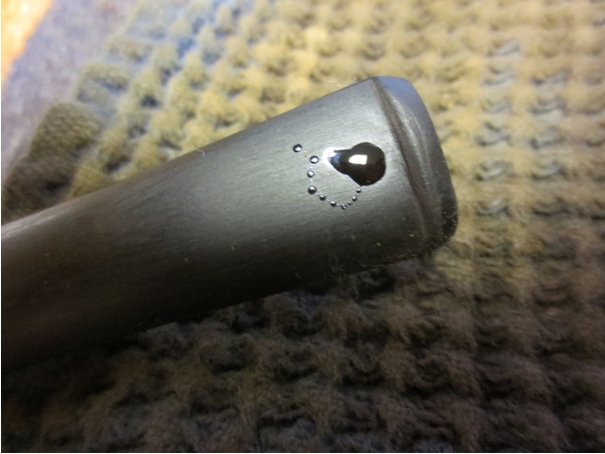
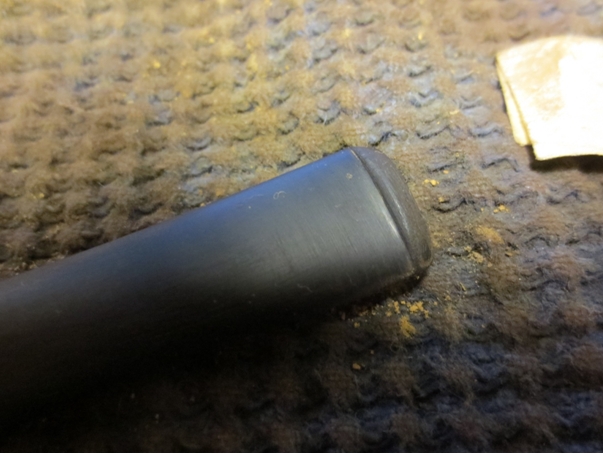
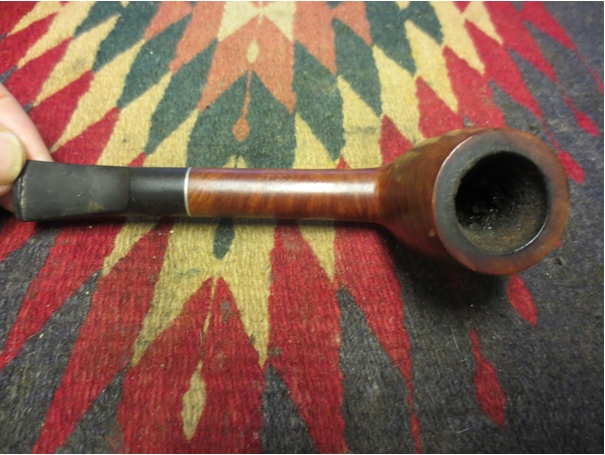
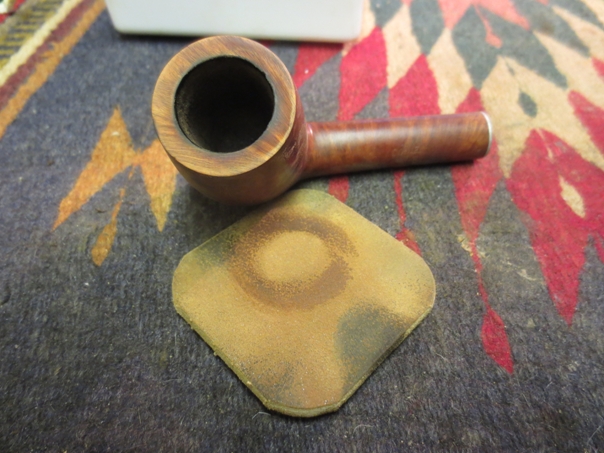
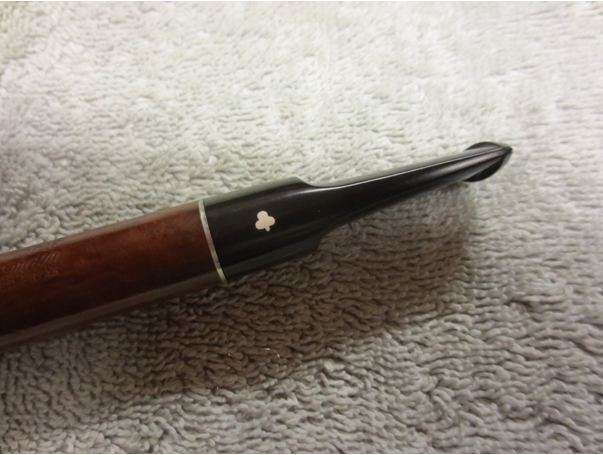
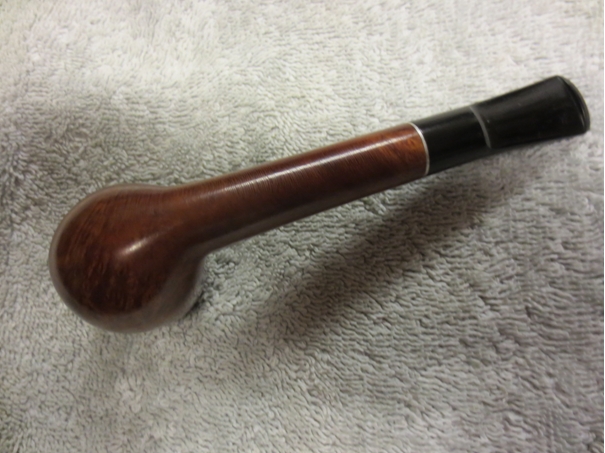
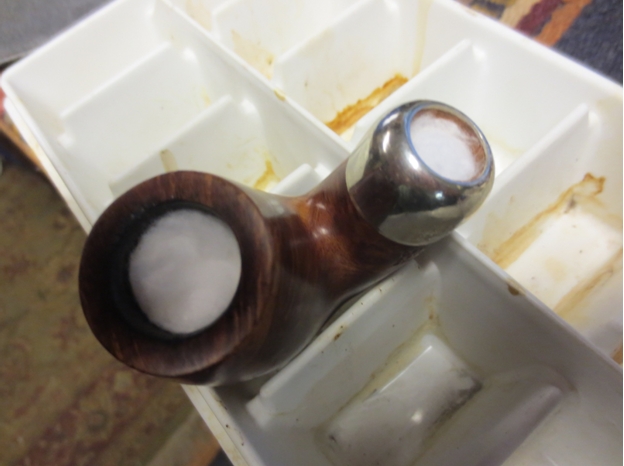
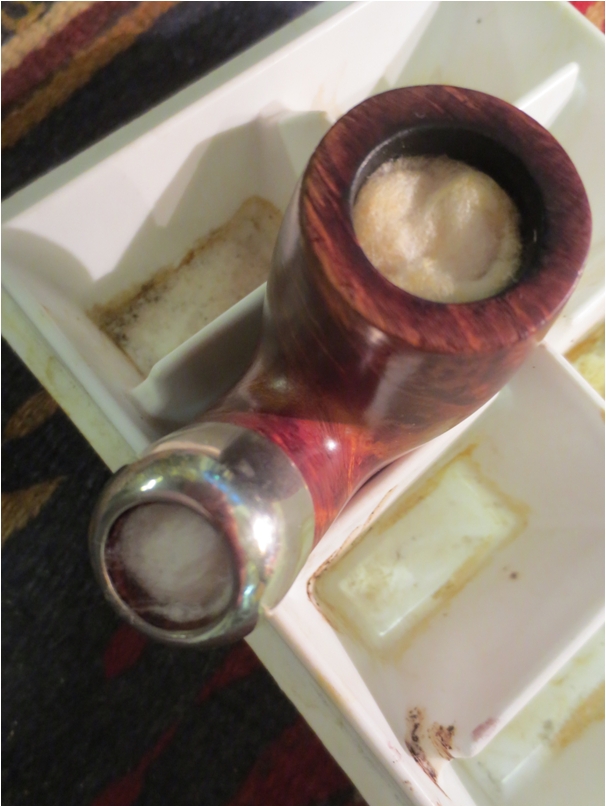
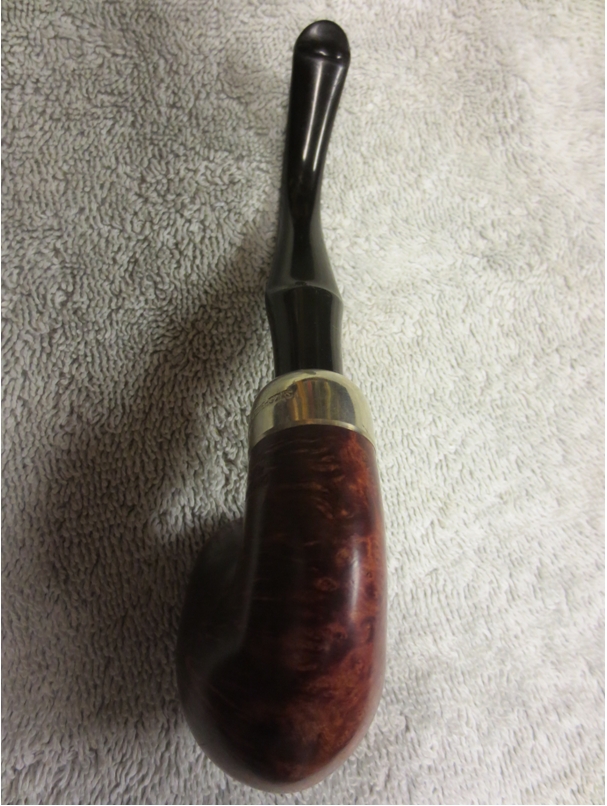
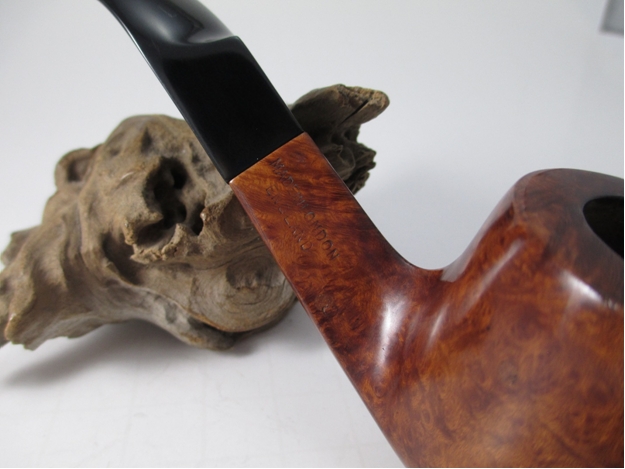
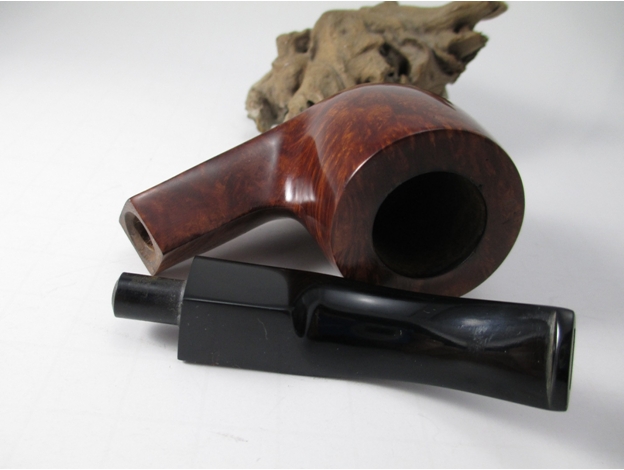
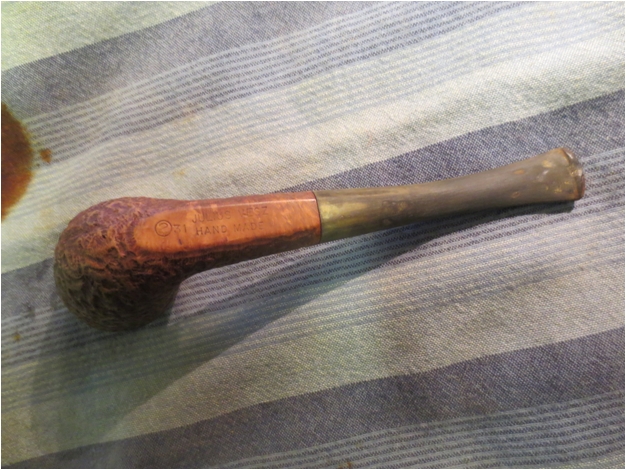
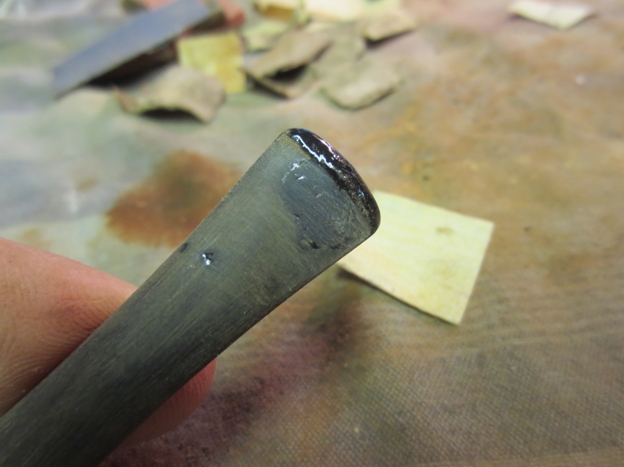
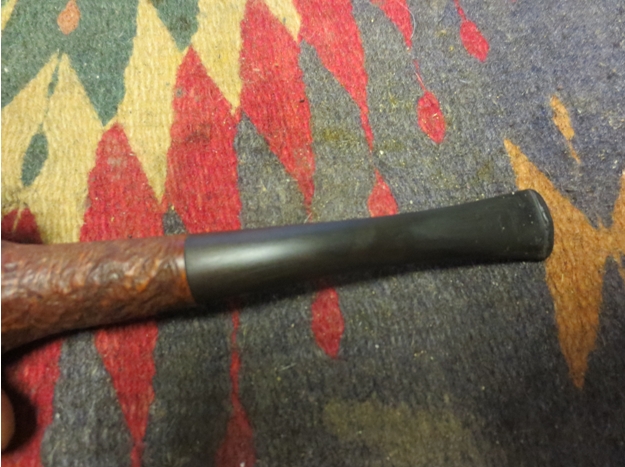
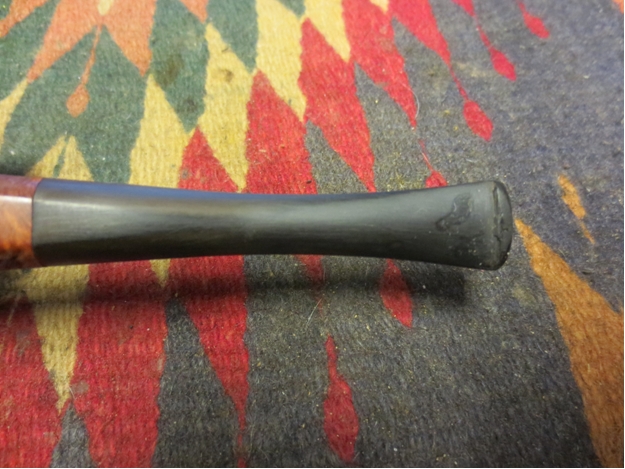
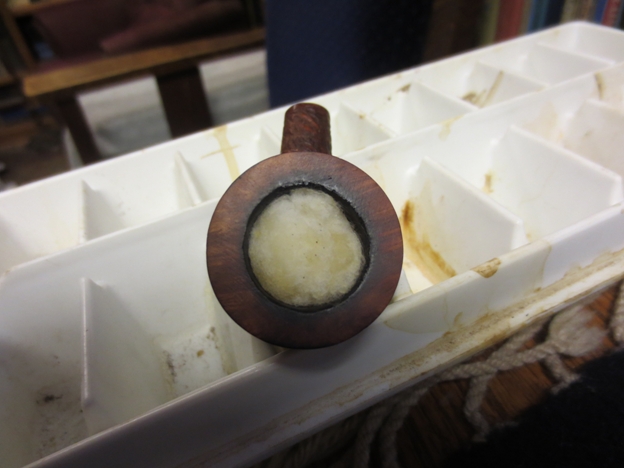
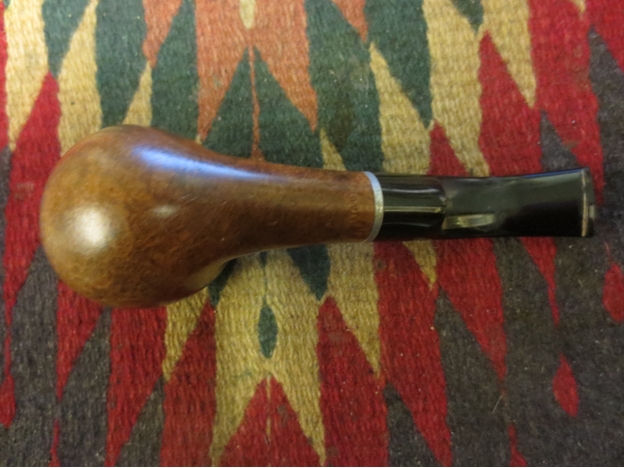
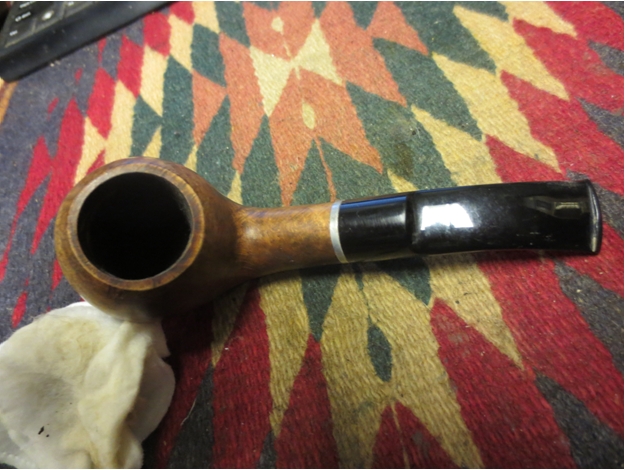
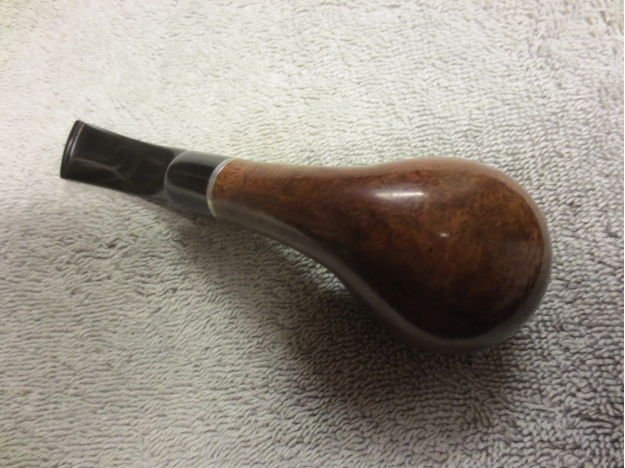
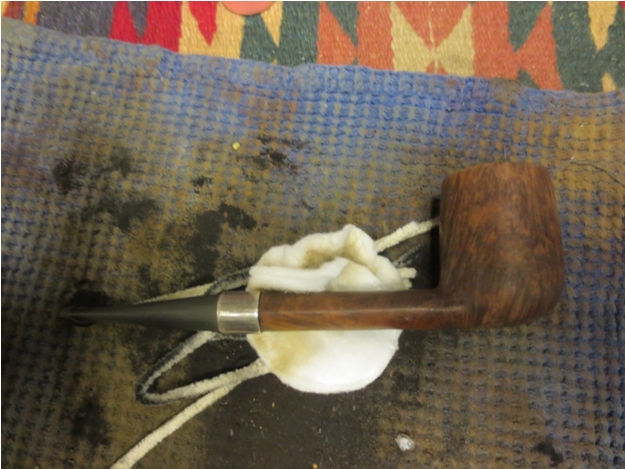
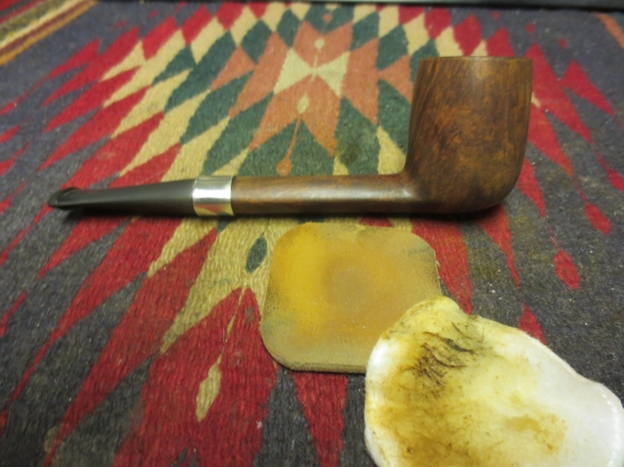
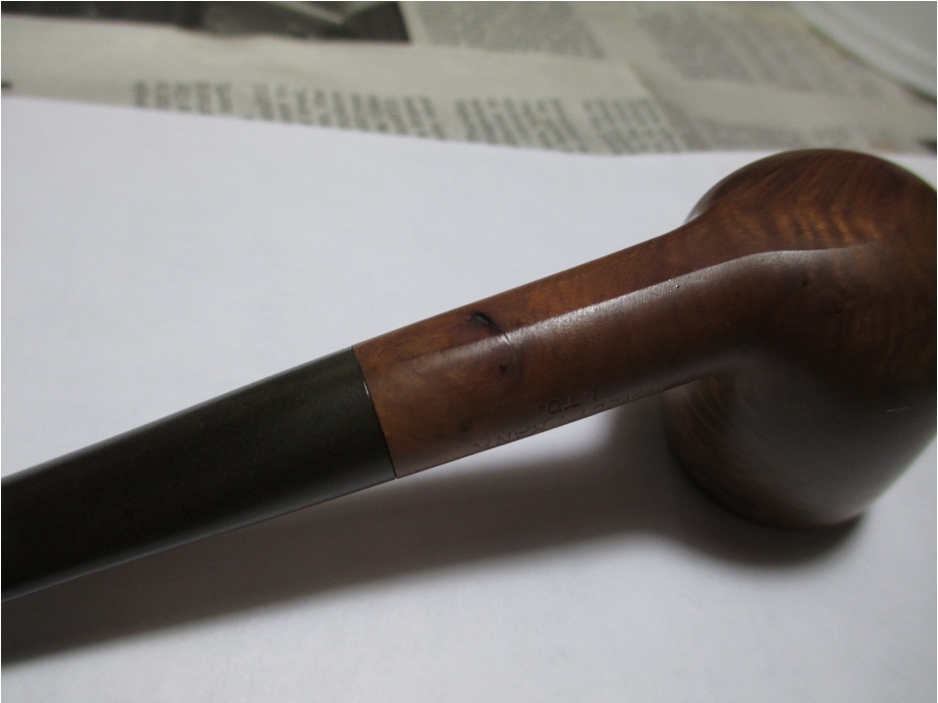
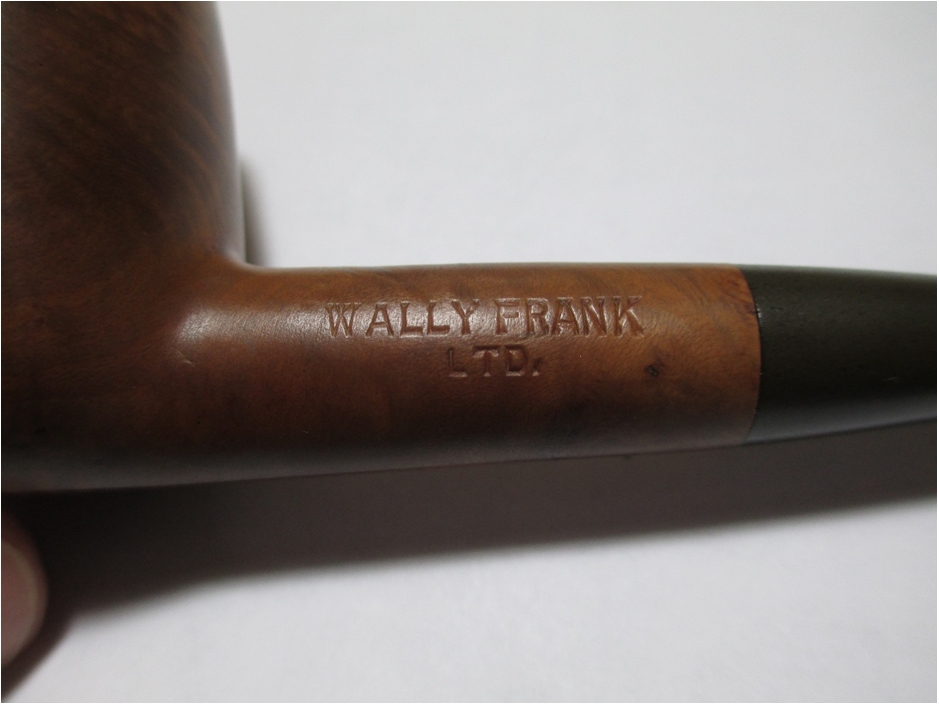
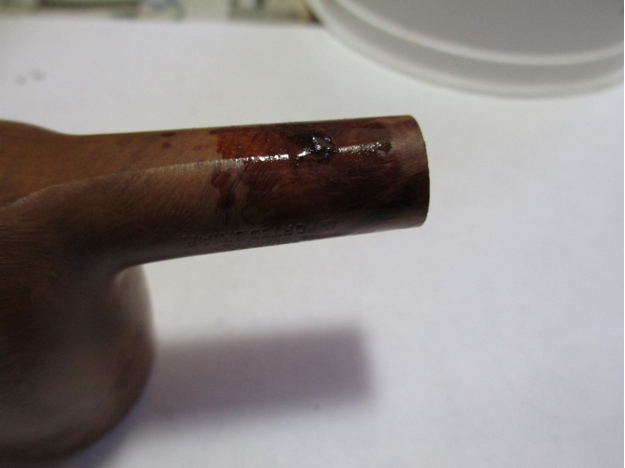
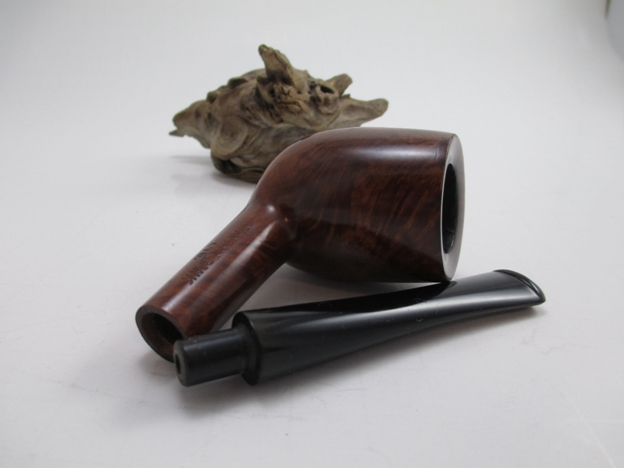
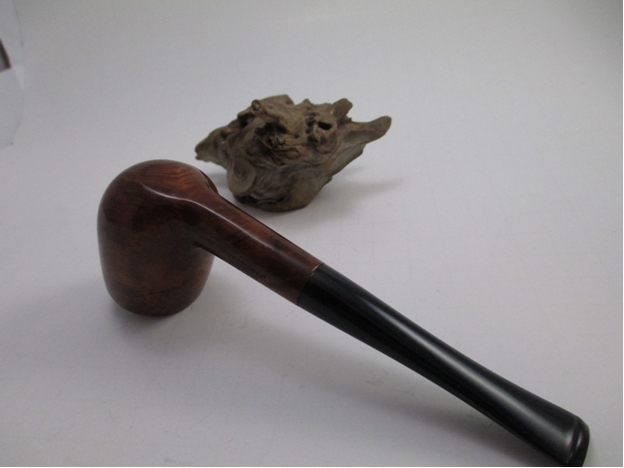
Here is a close up of the fill.Frank23

Frank24

Frank25 
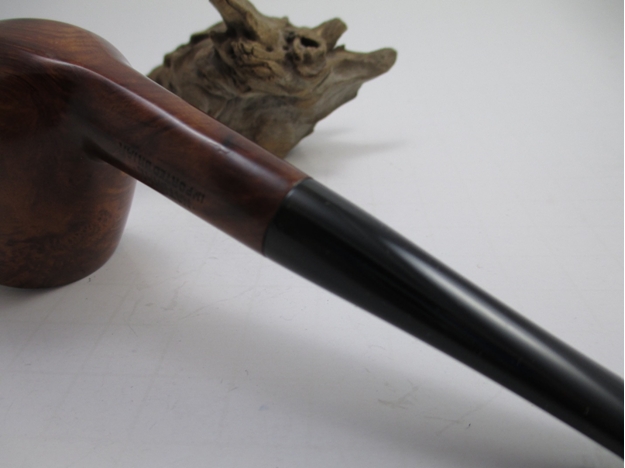
I hope you enjoyed this write up. If you happen to stumble across a Wally Frank Natural, I would encourage you to buy it. They are a good value for the money.

Refurbishing a Barely Smoked Smooth White Turkish Meerschaum Dublin – Robert M. Boughton


Guest Blog by Robert M. Boughton
Member, North American Society of Pipe Collectors
http://www.naspc.org
http://www.roadrunnerpipes.com
http://about.me/boughtonrobert
Photos © the Author

“If it ain’tbroke, don’t fix it.”
—Thomas Bertram Lance (1931-2013), Director of the Office of Management and Budget during the Jimmy Carter Administration

INTRODUCTION
Every now and then, a pipe comes my way that is in such good condition that I can only call what I have to do to clean it up a refurbish job as opposed to a real restoration, and for the most part I do not even bother with a blog. This is one of those rare but pleasant occasions with the exception that the smooth white hand-carved Turkish meerschaum in question is so elegant I just have to share it.

REFURBISH
Almost all this simple looking Dublin needed was a simple bath with purified water and a little work on the rim and chamber.Rob1

Rob2

Rob3

Rob4

Rob5 Starting with super fine steel wool on the rim, I encountered more difficulty than usual removing the thick char that seemed to have something else mixed in with it, but nothing worth griping about. As I worked through the char-grime, I saw more coloration emerge – along with a chip.Rob6 I even considered letting it be, but thinking better, added some elbow grease and focus to the steel wool. I removed enough of the chip and crack to be satisfied.Rob7 Then I buffed the rim with 1500 micromesh followed by 3200 and moved on to the chamber. Not about to assault it with the reamer that has been necessary for every meerschaum I have fully restored, I used 150-grit paper first and then 500 to smooth it out.

With all of the dirty work finished, I gave it the light bath it needed.Rob8

Rob9

Rob10

Rob11

Rob12 CONCLUSION
Of course, I ran a couple of bristly cleaners soaked in pipe freshener through the shank and around the chamber and one more through the stem, but that was all it took to clean this near-pristine pipe. Even the stem didn’t need any sanding or work of any kind.

And so, for once I cannot complain of a pipe abused. God bless the merry gentleman who owned and enjoyed this beauty, albeit for a short time.

Giving New Life to a Briar Squire Bent Pot – Andrew Selking


Blog by Andrew Selking

This is the second article by Andrew that I have the pleasure of posting on the blog. It is about a well restored Briar Squire bent Pot. Andrew does some beautiful work and it is a pleasure to read and see the results of his work. Thanks Andrew.

I did not get as many pipes completed as I planned this past weekend, my honey-do list was longer than anticipated. However, I could not resist finding the time to fix up a Briar Squire bent pot with a diamond shank. According to Pipephil.eu, the Briar Squire was a brick and mortar tobacco and pipe shop located in Crystal Lake, IL from 1977 to 1983. I assume they had their pipes made by an outside pipe maker. Whoever made this pipe did a nice job. There were no fills in it and judging by all the angles on the stem that was hand cut as well.

The previous owner kept the bowl very clean, but the stem had some tooth marks and calcification on the end. I dropped the bowl into the alcohol bath and went to work on the stem with the 400 grit wet/dry with water. As you can see in this picture, there is still some faint oxidation left.Briar1 I readdressed the oxidation with the 400 grit until it was gone. I find that it helps to dry the stem when you think you’ve reached the point where the oxidation is removed.Briar2 I then proceeded to use the micro mesh, 1500-2400 grit, with water.Briar3 Next I turned my attention to the bowl. The rim had some tar build up, which I tried to remove with distilled water.Briar4 The water helped, but there was an area of stubborn tar that just wouldn’t come off. Since I didn’t want to remove all of the finish, I used 1500 grit micro mesh to top the bowl.Briar5 I used 1500-2400 grit micro mesh without water on the bowl, then 3200-12000 grit micro mesh on the bowl and the stem.Briar6 The last few levels really do a nice job of polishing both wood and vulcanite.Briar7

Briar8

Briar9

Briar10

Briar11 Next it was time to apply the wax/stain. For red/brown colored pipes I use Kiwi Brown. As I mentioned in my previous post, it is very easy to work with and gives a good base shine before the final polish on the buffing wheel. Briar12

Briar13

Briar14

Briar15 After applying the shoe polish, I used the heat gun to melt the wax and buffed it out with a brush. As you can see.Briar16 Finally it was off to the buffing wheel.Briar17 Here are the results. Thanks for looking.Briar18

Briar19

Briar20

Briar21

Briar22

Cleaning Up a Brigham One Dot Acorn 778


Blog by Steve Laug

One of the last pipes I picked up on my recent Alberta trip and the last pipe in my current pile of pipes to refurbish is a little Brigham Canada Acorn or Strawberry shaped rusticated pipe. The shape of the pipe is what caught my attention. And when I had it in hand the size was also a relevant feature. It is a very light weight pipe (don’t have a scale) and it is diminutive in size. The dimensions are: length – 5.5 inches, height – 1.5 inches, bore – .75 inches. The bowl is conical in shape ending well below the entry of the airway into the back wall. Overall the pipe was in decent shape and would be fairly easy to clean up. The finish was dirty and the bowl had a thin cake in it. The stem was oxidized and the inside of the shank was dirty. The stem was oxidized and had one tooth mark on the top surface near the button. On the underside of the stem near the button was a lot of tooth chatter. The stamping on the underside of the shank in a smooth area reads 778 which is the shape and that is followed by Made in Canada and then Brigham in script.Brig1

Brig2

Brig3

Brig4 The next two photos show the tooth marks and tooth chatter on the stem. The tooth dent on the top of the stem near the button was quite deep and would need to be raised with heat and then probably repaired with superglue.Brig5

Brig6The aluminum Brigham tenon system was in great shape and showed no wear or tear on it. In the past I have taken apart these older Brigham pipes with the aluminum tenon and found it pitted and sometimes even eaten away. The filter surprised me in that when I pulled it out it was actually quite clean. The bowl was very clean and the rim was also clean.Brig7 I cleaned out the aluminum tenon and the mortise area with isopropyl alcohol (99%) and cotton swabs and pipe cleaners. I ran them through the shank and stem until they came out clean.Brig8I sanded the stem with 220 grit sandpaper, medium and fine grit sanding sponges and then cleaned the surface with alcohol on a cotton pad. I scratched out the surface with a dental pick to remove any loose vulcanite or grit on the surface. I put several drops of clear superglue in the tooth dent and let it dry until it was hard.Brig9

Brig10Once it hardened and cured for about an hour I sanded it with 220 grit sandpaper to blend it into the surface of the stem. I wanted the surface to be smooth and the super glue bump to be smoothed into the surface. I also sanded it with a medium and fine grit sanding sponge to remove the scratches in the surface.Brig11

Brig12 I sanded the stem with micromesh sanding pads – wet sanding with 1500-2400 grit pads and dry sanding with 3200-12,000 grit pads. In between each set of three pads I rubbed the stem down with Obsidian Oil and let it soak into the vulcanite. I had to repeat the process several times to remove the oxidation near the shank. I buffed it with White Diamond and then gave it a coat of carnauba wax.Brig13

Brig14

Brig15 I set the stem aside and scrubbed the bowl with Murphy’s Oil Soap. I used a soft bristle tooth brush to scrub it and then rinsed it off with running water. I kept a thumb in the bowl to keep the water from getting into the inside of the pipe. I dried it off with a cotton towel.Brig16

Brig17 I rubbed down the bowl with Halcyon II wax and buffed it with a shoe brush to raise the shine and even out the wax. I put the maple filter back in the tenon and then put the stem on the bowl. I buffed the bowl lightly with carnauba wax and then with a soft flannel buff. The finished pipe is shown in the photos below. It is cleaned and ready to smoke. I love the older Brigham pipes like this one and find that they smoke very well. They deliver a cool dry smoke and the Brigham filter system works well to cool the smoke and not hamper the draw or the flavour. Sometime later this week I will load a bowl of Virginia and enjoy the first smoke in this old timer.Brig18

Brig19

Brig20

Brig21

Restoring a Kaywoodie Super Grain 40 Lovat


Blog by Steve Laug

My son-in-law and I went pipe hunting a few weeks ago and this was one of the finds that day. I picked it up in an antique shop in Bellingham, Washington. I think I paid $15 for it. The stem was slightly overturned and would need to be fixed. The stem was clean of bite marks or tooth chatter. The stinger was intact and was a three-hole one so the pipe was newer rather than older. The finish was not ruined. The rim was caked with tars and oils. The buildup was only back side and went to the left side of the rim. The briar had quite a few fills on the sides and back of the bowl. The stamping on the left side was clean and easily read – Kaywoodie over Super Grain over Imported Briar. On the right side of the shank was stamped the shape number 40.KW1 KW2 The inside of the bowl had a light cake that was soft and crumbling. It would need to be reamed back to the bare wood in order to build a hard carbon cake.KW3 KW4 I reamed the bowl with a PipNet reamer and used the smallest cutting head first and then the second cutting head to finish the job.KW5 I removed the stem from the shank so that I could heat the stinger apparatus with a lighter. The black buildup of tars and oils on the stinger was hardened and not easily removed. Once I heated the stinger with the lighter I was able to wipe down the surface with a cotton pad and alcohol. I heated the stinger until the glue in the stem softened and then screwed the stem back into the shank and turned it until the stem lined up with the bowl.KW6 I cleaned the inside of the shank and stem with pipe cleaners, cotton swabs and isopropyl alcohol. The shank behind the metal insert was very dirty. I used the cotton swabs to clear out that area. I scrubbed it out until it was clean. I also cleaned out the airway in the stem the same way until it was clean.KW7 I scrubbed the top of the bowl with isopropyl alcohol on cotton pads to remove the buildup. It was thick so it took quite a bit of scrubbing. To finish removing it I used 1500 grit micromesh sanding pad and water. I was able to get the rim clean and then used a staining pen to touch up the rim.KW8 KW9 KW10 The lightest colour staining pen matched the finish of the bowl perfectly. I gave the bowl and rim a quick buff with White Diamond and then gave it multiple coats of carnauba wax and buffed it to a shine.KW11 I was fortunate that the stem was not damaged with bite marks or tooth chatter. I use micromesh sanding pads to clean up the stem. I wet sanded with 1500-2400 grit pads and dry sanded with 3200-12,000 grit pads until the finish of the stem was smooth. I buffed it with White Diamond to finish the process and then gave it a coat of carnauba.KW12 KW13 KW14 I put the stem back on the shank and then buffed the entire pipe with White Diamond a final time. I gave the stem and bowl multiple coats of carnauba wax and buffed it with a soft flannel buffing pad to raise the shine.KW15 KW16 I touched up the fills with the stain pen and then buffed the pipe bowl with White Diamond yet again. The results were acceptable. I gave the pipe several more coats of carnauba wax and buffed it with a soft flannel buffing pad. The finished pipe is shown in the next series of photos. It is ready to be loaded and smoked – clean and waiting for the next pipe man who will carry the trust to the next generation of pipe smokers.KW17 KW18 KW19 KW20

Cleaning up a Peterson 312 System Pipe


Blog by Steve Laug

The Peterson I picked up on my trip was in great shape externally. The seller at the antique mall had cleaned up the outside of the pipe and polished the stem and bowl. The pipe was clean and shiny. The stamping was very clear on the ferrule and shank. The ferrule was stamped K&P Peterson’s and had three faux hallmarks as usual on the nickel ferrule of Peterson pipes. The shank was stamped on the left side with an arched Peterson’s over System and over Standard. On the right side of the shank the shape number has been stamped over with Made in the Republic of Ireland. The shape number is present under the over stamp and I can read the first two numbers clearly – 31_, but the third number is covered with other letters so it is not readable.Pete1 Pete2 I wanted to figure out the number stamping that lay hidden under the Made in the Republic of Ireland stamping. I went to the Peterson site and looked for the shape charts. I was able to identify the shape as a 312. Here is the link to the shape http://www.peterson.ie/p/5291/312-standard as well as a picture of the shape 312.0002552_312-standard_430 I also found this shape chart of Peterson System pipes on Pinterest and included the link to it here: http://www.pinterest.com/pin/464996730250913354/ I was particularly interested in noting the size variation between the 312 and the 314. While the shapes are very similar the 314 is significantly smaller than the 312.Pete3 The bowl had been wiped clean and had no cake inside. The rim was dirty and darkened with a thin buildup of carbon and oils. The inside rim was clean and the bowl was in round. There were no serious nicks in the bowl edges. The nickel band was polished and undented. The stem was lightly oxidized and had a light tint of brown. There were no tooth marks or bite marks on the stem. The pipe was in good shape and would be one of my easier clean ups. The inside of the shank and sump had a lot of tars built up inside. The airway was also dirty. The seller had used silver polish on the ferrule and there was a white buildup on the inside edges of the shank.Pete4 Pete5 Pete6 The next photo below shows the underside of the bowl and stem. Both the finish and the stem were in great shape with no visible dents or damage.Pete7 The tenon was wide open like it had been made for a filter. It could hold a paper Medico style filter. I have never seen a filter version of the system pipe. I am wondering if the stem is a replacement or possibly it was drilled out to open it up to receive the paper filter. Obviously the internals had not been cleaned. There was a buildup of hard carbon on the tenon end and on the inside of the tenon. It was hard and would not easily be removed.Pete8 I cleaned up the stem and the sump with cotton swabs, pipe cleaners and isopropyl alcohol until they came out clean. I used a lot of pipe cleaners and cotton swabs before it was clean. I softened the carbon buildup on the tenon with alcohol and then sanded it with 220 grit sandpaper and scraped it away with a small blade to remove the hardened carbon.Pete9 Pete10 The bowl and shank had a heavy aromatic tobacco smell so I stuffed them both with cotton balls and used an ear syringe to put alcohol in both the bowl and shank. I set the bowl upright in an ice-cube tray and let it sit while the alcohol and cotton wicked out the oils and tars and sweetened the pipe. By doing this the pipe would be reset and could be smoked with any tobacco without picking up residual tastes.Pete11 Pete12 While the bowl sat soaking I worked on the stem to remove the oxidation. I sanded it with micromesh sanding pads – wet sanding with 1500-2400 grit pads and dry sanding with 3200-12,000 grit pads. I wiped it down with Obsidian Oil between each set of three pads.Pete13 Pete14 Pete15 I buffed it with White Diamond on the buffing wheel. Then I gave it several coats of carnauba wax and buffed it to a shine with a soft flannel buffing pad.Pete16 Pete17 Pete18 Pete19 After the bowl had been sitting for 4 hours I took the photo below and then pulled out the cotton balls. The alcohol had evaporated and left behind a brown/amber residue on the cotton balls. Once the cotton was out I ran a folded pipe cleaner through the bowl and the sump area of the shank. It came out clean. I ran a straight cleaner through the airway into the bowl. It also picked up a slight bit of residue from the soak but it was clean after a few swabs. Best of all the smell of the aromatic tobacco was gone and what was left was a clean new pipe smell.Pete20 Pete21 Pete22 When the shank was dry I put the newly polished stem back in the shank. I gave the pipe a quick buff with some carnauba and polished it with a shoe brush to raise the shine. The finished pipe is shown in the photos below. It has some slight rim darkening from the previous owner but otherwise it is like new. The bowl and shank are fresh and ready to be loaded with a bowl of fine Virginias or some Virginia/Perique. I have some aged 5100 sitting in a jar here ready to smoke and also a small jar of some blending Perique so I may have to mix a small batch just for the inaugural smoke on this pipe…The briar is beautiful and the refurbished pipe came out very nice. I am looking forward to having a bowl very soon – just have to let the bowl dry out and air for a couple of days before I load it up and smoke it. In the meantime I will just look it over and enjoy the beauty of the pipe.Pete23 Pete24 Pete25 Pete26

Restoring a Diamond Shank Bent – Andrew Selking


Blog by Andrew Selking

I have been following Andrew’s refurbishing work on Pipe Smoker Unlimited Forum for quite some time now and decided it was time to ask him if he would be willing to write some of his work up with photos for the blog. I sent him a message and he responded that he was glad to do so. I am happy to be able to present him to the readers here. He has been doing some great work in restoring pipes and has some great adaptations and innovations in terms of tools and equipment used to restore pipes. Besides he also takes amazing photos compared to me! Thanks Andrew for being willing to write for us here. So without further words from me I turn it over to Andrew.

It was a great honor when Steve asked me to write up a restoration for his blog. This pipe came in a lot of three. It’s a very chunky, diamond shank pipe marked Made in London England. It has a couple large fills near the end of the shank, one on the bottom of the bowl, and one on the rim. It also has an amazing feel in your hand and some very pretty cross grain. I decided to do this one for myself.

The first thing I do with all of my pipes is soak the bowl in isopropyl alcohol, usually for at least 24 hours. This serves multiple purpose; loosens the gunk inside the pipe (especially in the shank), makes the cake easier to remove, and usually takes of the exterior finish and softens any fills. Here is the bowl taking a bath.Sel1While the bowl marinated, I soaked the stem in a solution of hot water and Oxyclean. After sitting for several hours, I rinsed the stem under running water, this removes some of the oxidation. Next I took a pipe cleaner and used the Oxyclean solution to remove the built up tar and tobacco from inside the stem.Sel2 Sel3 I set the stem aside and turned my attention to the bowl. In the case of this pipe, the alcohol was not enough to remove all of the finish. When this happens, I use 0000 steel wool soaked in acetone. The steel wool is fine enough that it doesn’t damage the stampings on the shank, but aggressive enough to make short work of any remaining finish.Sel4Next I turned my attention to the bowl. I use a Castleford reamer (available on eBay for around $20.00) to remove the cake.Sel5I usually go down to the wood. I’ve found it’s better to use a reamer that is slightly smaller than the inside of the bowl to prevent damage to the wood.

Next I worked on the shank. I have some small brushes that I bought in the baby section at Walmart (normal people use them to clean baby bottles, but I find they work great for the shank of a pipe).Sel6 Sel7 Although the brush gets most of the gunk out, I use a retort to really clean the inside of the shank and the stem. I started using this method when I couldn’t fit the end of the rubber tube over the wide button on a pipe. The tenon was a perfect fit and the tube also fits perfectly into the shank. This saves a lot of time and pipe cleaners. After doing the retort, I run one pipe cleaner through the stem and a pipe cleaner and q-tip through the shank and it’s done.Sel8 Sel9 Sel10 Now that the inside of the pipe is clean, it’s time to start working on the outside.Sel11 For the stem, I used 400 grit wet/dry sandpaper with water. This gets the majority of the oxidation out, the wet sand paper also makes it easier to get the underside of the button. Next I used micro-mesh pads (1500-2400 grit) with water.Sel12 I wiped the stem dry and turned my attention to the bowl. I used a progression of micromesh pads, 1500-12000 grit. I also used the same progression on the stem.Sel13 Now the pipe was ready for stain. This next part might be kind of controversial (I have never seen this method anywhere else). I use shoe polish for stain. Now before you dismiss this as crazy talk, consider this. It is very simple. I apply the polish, heat it with a heat gun, and buff it out with a shoe brush. I also protect the finish with carnauba wax and have never had any issues with the polish melting or coming off in my hand.Sel14 Polish applied.Sel15 After melting with the heat gun and buffing with a shoe brush.Sel16 It is also very simple to even out the stain.Sel17Next up the heart breaker (also known as the buffing wheel). This little gem makes the difference between a really nice application of carnauba wax and an average looking pipe. It will also grab what you’re working on and fling it to the four winds and shatter the pipe you’ve just spent the last few hours working on. Hold what you’re working on with both hands, place as much padding as you can under and behind the buffer, and work on the stem and bowl separately. Sorry about the quality of the picture.Sel18 I didn’t lose the pipe to the buffer and here’s the results.Sel19 Sel20 Sel21 Sel22 Sel23 Sel24 Sel25 I anticipate that this pipe will pass on to my kids, or be part of the estate sale. I can’t wait to smoke it.

Rode Hard Put Away Wet – A Tired Julius Vesz shape 31 Zulu/Canted Dublin


Blog by Steve Laug

When I walked by the display case in the antique mall and saw the classic Vesz finish and the O logo on the stem I knew I was looking at one of Julius’ pipes. It was in very rough shape. The stem was covered on the topside and underside from the button forward for about an inch with a lot of dents and bite marks. On the topside there was a bite through – not large, more of a pinhole sized hole. There was also a lot of calcified buildup on the stem. The stem was over bent and the flat bottom of the bowl and shank did not rest on the desk top when laid down. The stem arch kept it from happening. The button and crease had were also worn. The rest of the stem was oxidized. The bowl finish was dirty and worn with white paint spots on the bowl. The stem was very tight and hard to remove but when I did remove it the tars on the end of the tenon were thick. The inside of the stem was so filled that the airway was virtually clogged. The slot on the end of the stem was plugged but for a hole the size of a pencil lead.Vesz1 Vesz2 The rim was damaged and worn from tapping it out on hard surfaces. There were large dents and worn areas. The inner edge was blackened and on first glance looked to have burned damage. It was hard to tell for sure but it also looked to be slightly out of round due to the damage to the inside edge. The bowl was heavily caked with a concrete like carbon build up. I tried to ream it and found it too hard to cut as it stood. The inside of the shank had heavy carbon and tar buildup.Vesz3 The pipe is stamped on the flattened bottom of the shank. Toward the front of the bowl it is stamped Circle 3 which denotes the price point of the pipes. Julius stamped them 1-6 to denote the price. That is followed by the shape number – in this case 31. The final stamping is Julius Vesz over Hand Made.Vesz4 To soften the concrete like cake so that I could ream it more easily without damaging the briar I put the bowl into an alcohol bath to soak for a while. I also wanted to remove the grime from the rustication on the bowl and the soak would facilitate that.Vesz5 While the bowl soaked I worked on the stem. I cleaned the inside of the stem with cotton swabs, pipe cleaners and isopropyl alcohol. I also sanded the calcification with 180 grit sandpaper and 220 grit sandpaper to remove the build up from the surface of the stem. The tooth marks are very evident in the photos below.Vesz6 Vesz7 I took the bowl out of the alcohol bath to ream it and found that indeed the alcohol had softened the cake enough to make reaming a very easy task. I reamed it with a PipNet reamer starting with the smallest cutting head and working up to the size of the diameter of the bowl.Vesz8 I topped the bowl and removed the damaged surface of the rim. I set up a topping board and used 220 grit sandpaper to gently and carefully remove the damage. I sanded the bowl in a circular pattern on the board as I find that doing so does not leave as deep scratches in the finish. Once I had removed the damage I could see the state of the inner edge of the rim. It had some darkening but it was still solid. There were no deep burned areas that needed to be removed.Vesz9 Vesz10 Vesz11 I set up a heat gun and heated the bent stem to reduce the bend to a point where the pipe would sit up right on the flat bottom of the shank and bowl. I also heated the tooth dents to raise them as much as possible before I sanded them.Vesz12 Vesz13 Once the stem was heated and flexible I inserted it in the shank and pressed down on the bend to adjust the bend to allow the bowl to sit without falling over. The tooth marks did lift quite a bit and are visible in the last two photos of the foursome below.Vesz14 Vesz15 Vesz16 I sanded the stem with 220 grit sandpaper and then with medium and fine grit sanding sponges to clean up the dents as much as possible. The surface needed to be cleaned and prepped for the work of filling the dents with black super glue. I washed down the dents with alcohol to remove the sanding dust. I filled the holes and built up the dents in the button lip with black super glue until they were overfilled, then sprayed them with the accelerator to harden the glue. I sanded the fills with 180 grit sandpaper and then with 220 grit sandpaper to begin the process of smoothing them and blending them into the surface of the vulcanite.Vesz17 Vesz18 I continued to sand with the 220 grit sandpaper to shape the crease and the button as well as the surface of the patches until they were at the same level as the surface of the stem.Vesz19 Vesz20 I sanded the stem after that with a medium and a fine grit sanding sponge to further blend it into the stem surface. It took a lot of sanding to blend it into the surrounding vulcanite.Vesz21 Vesz22Vesz23 Vesz24 I rubbed down the stem with Obsidian Oil to make the scratches and trouble areas very visible. I also rubbed down the bowl with olive oil and wiped it off and set it aside overnight to let the oil be absorbed into the wood. In the morning I took the following set of two photos to show the state of the pipe when I began to do the finishing work on it. Vesz25 Vesz26 I sanded the stem with fine grit sanding sponges to clean it up further and remove the deeper scratches. I then sanded it with micromesh sanding pads – wet sanding with 1500-2400 grit pads and dry sanding with 3200-12,000 grit pads. I rubbed it down with Obsidian Oil between each set of three pads. I finished the stem work by buffing the stem with White Diamond on the wheel to finish the polish. I gave it several coats of carnauba wax and buffed it with a soft flannel buff to raise the shine.Vesz27 Vesz28 Vesz29 Vesz30 Vesz31 The bowl had a heavy ghosting of aromatics – it was overwhelming and no matter how many times I cleaned it the smell remained. I filled the bowl with cotton balls, pressed them down and then filled the bowl with isopropyl alcohol with an ear syringe until the cotton was soaked. I set the pipe bowl in an old ice-cube tray that holds it upright and let the alcohol and cotton do their work to pull out the oils from the briar and sweeten it. I have moved more and more toward using cotton instead of coarse salt. It seems to work just as well and is less of a mess in the clean up stage.Vesz32 I let the pipe sit with the alcohol and cotton balls for about three hours. The photo below shows the oils that were drawn out of the bowl. The cotton turned a yellow-brown and was almost dry.Vesz33 I took the cotton balls out of the bowl and cleaned the shank and bowl with pipe cleaners. I put the stem back in place on the pipe and gave the pipe a hand polish with some Halcyon II Wax. I hand buffed it with a shoe brush to raise the shine. The finished pipe is shown below. The look and feel of the pipe is far better than when I started. The repairs to the stem and button worked well and blended in nicely to the stem. The topping of the bowl removed the damaged portion and the blackening of the inner edge of the rim is merely a character trait. This is one that will stay in my collection. It smells sweet and is ready to smoke.Vesz34 Vesz35 Vesz36 Vesz37

Restoring a Paronelli Bent Apple


Blog by Steve Laug

I picked up a large bent apple-shaped pipe from one of the antique shops I visited on my journey in Alberta. It is a filter pipe with a Lucite stem and a metal spacer between the shank and stem. The spacer was loose and would need to be glued in place. The stem had sticky gum on it from the sales tags that were on the pipe. There is a stylized pipe stamped on the left side of the saddle portion of the stem. The bowl had a light cake on the top 1/3 of the bowl and some darkening on the rim itself. There was no damage to the rim or the briar of the bowl. The piece of briar used had some great grain on the right side and the back and front of the bowl. The left side had a bald spot but overall the pipe had some nice grain. There is one fill on the back side of the bowl midway between the top edge and the junction of the bowl and shank. The finish was covered with a glossy varnish coat that was dirty, worn and had darkened in some spots on the bowl. The stamping was quite simple – Paronelli on the left side of the shank in script and on the underside of the shank next to the stem is ITALY. I was drawn to the shape as I had not heard of the brand before.Par1 par2 Par3 Par4 Before I started working on it I did a bit of digging on the web to see what I could find out about the brand. I found quite a few oddly painted Paronelli pipes and quite a few in wild colours with appliqués. But I did not immediately find anything on just simple briar pipes. Finally I found Paronelli pipes listed on http://www.theitalianpipe.com/artisans/paronelli.htm

Par5I copied the picture of Alberto Paronelli to put a name with the face for this pipe. The following is adapted from the site.

“Alberto Paronelli, now in his eighties, is undoubtedly one of the true fathers of the art of pipe design and craft. He continues to design and make briar and clay pipes. Many world-famous pipe makers, such as Tommaso Spanu, are indebted to him for their knowledge and fame. Among his endless achievements are the founding of the International Pipe Academy, the Pipe Museum in Gavirate (Italy), and the publication of the now out of print magazine called “La Pipa” (The Pipe).”

I reamed the bowl with a PipNet reamer and took back the cake on the top 1/3 of the bowl back to bare wood. I cleaned out the shank and the tenon/filter area with cotton swabs, pipe cleaners and alcohol. I scrubbed until they came out clean. I cleaned the metal spacer and reglued it to the stem. I wiped down the bowl and stem with alcohol to remove the gummy substance on the stem and on the sides of the bowl.Par6 Par7 Once I had the inside of the bowl, shank and stem clean I worked on the finish of the bowl. I decided to try to remove the shiny varnish finish so that I could clean off the dirty and worn areas. I wiped it down with acetone on cotton pads until I had cut through the finish. I sanded it with a medium grit sanding sponge to further break up the varnish and then wiped it again with the acetone.Par8 Par9 Par10 Par11I worked on the stem with micromesh sanding pads – wet sanding with 1500-2400 grit pads and dry sanding with 3200-12,000 grit pads. I rubbed the stem down with Obsidian Oil between each set of three sanding pads. Fortunately the Lucite stem was in excellent shape other than some minor scratching so it cleaned up quite easily. I reapplied the logo on the side of the stem with white out and lightly buffed the pipe stem with White Diamond when I had finished. I gave the stem multiple coats of carnauba wax and set it aside while I worked on the bowl.Par12 Par13 Par14 I buffed the bowl with White Diamond and then rubbed it down with a light coat of olive oil. I wiped the oil on and then off again and let it sit overnight. In the morning I buffed the bowl with White Diamond once again and then gave the pipe several coats of carnauba wax and buffed it with a soft flannel buff. The finished pipe is shown below. I will either have to get a 9mm converter to fill the open tenon or put a filter in place. I have some filters that I picked up in Europe when I was there that fit perfectly so that may well do the trick with this one.Par15 Par16 Par17 Par18

UPDATE: The pipe is on its way as a gift to a young pipeman to add to his growing rotation. Hope you enjoy this one Justin.

Giving new life to a Savinelli Product – a David’s Choice Canadian


Blog by Steve Laug

I have written about the restoration and restemming of the first pipe bowl I picked up while on a recent trip. It was found in an antique shop in Nanton, Alberta. It was an old AF Billiard from 1923. The second pipe bowl I found at the same shop is the focus of this refurbishing article. It is stamped on top of the shank with the words David’s Choice and stamped on the underside Italy and barely visible under the repair band Savinelli Product. The repair band was loose and when it was removed the shank had a crack on the bottom side. At the bowl shank junction there is also a small crack that extends back along the shank for almost an inch. It does not appear to go through the shank to the airway but it is visible. The rim of the pipe was clean but the outer edge was damaged and the top edge was badly dented. The finish on the bowl was gone and the briar, though it had stunning grain, was lifeless looking. The bowl was clean in the top ½ inch – looking to have been reamed. The rest of the bowl was badly caked to the point that a pencil would stand in the bottom half unaided. There was no room for additional tobacco. Surprisingly the shank was clean. The stem was long since gone but I found a stem blank in my stem can that would work very well with the pipe.Sav1 Sav2 Sav3 Sav4 Sav5 Sav6 The cake was like concrete in the bottom half of the bowl. I could not cut through it with either the PipNet or the KleenReem pipe reaming tools. I filled the bowl with cotton balls and then used an ear syringe to fill the bowl with isopropyl alcohol. I let it sit for several hours while I worked on fitting the stem.Sav7 Sav8 I used the Pimo Pipe Turning tool to reduce the diameter of the tenon and cut a clean edge against the stem. I sanded it by hand to get it to the proper diameter to fit the shank. I still needed to fit the stem to the angles of the shank and make the lines straight and clean from shank to button. I fit it on the pipe and took some photos to get an idea of what I needed to sand.Sav9 Sav10 I took the cotton balls out of the bowl and then reamed the bowl. The alcohol softened the hard cake and it came out more easily. I finished scraping the bowl with a sharp knife to take out the remnant of cake. I sanded the stem with 220 grit sandpaper to reduce the stem to fit the shank. I glued the band in place on the shank with an all-purpose wood glue.Sav11 Sav12 Sav13 Sav14 Sav15 I wiped down the bowl with acetone on cotton pads to remove the remaining finish from the briar. I would eventually stain the briar – not sure at this point what colour I would use but I wanted to have a clean surface for the stain. I also lightly topped the bowl with a topping board and 220 grit sandpaper to remove the damaged top and edges of the rim.Sav16 Sav17 Sav18 I heated the briar with a heat gun to open the pores in the briar to receive the stain and then used a dark brown aniline stain. I applied it and flamed and repeated the process until I had an even coverage over the surface of the bowl. In the past I have thinned the stain to lighten it but have lately just applied it and then wiped it down with alcohol and cotton pads to lighten it after staining.Sav19 Sav20 Sav21 I sanded the bowl and shank with a 1500 grit micromesh sanding pad to further lighten the finish and then wiped it down a further time with the alcohol wet pads.Sav22 Sav23 Sav24 Sav25 I sanded the stem with 220 grit sandpaper and medium and fine grit sanding sponges. I wet sanded with 1500-2400 grit micromesh sanding pads and dry sanding with 3200-12,000 grit pads. I rubbed the stem down with Obsidian Oil after each set of three pads. Once I had finished sanding I buffed the stem with White Diamond. I polished the band with silver polish and gave it a light buff with White Diamond as well.Sav26 Sav27 Sav28 I put the stem back on the pipe and buffed it all again with White Diamond and gave it a several coats of carnauba wax. I buffed it with a soft flannel buff to raise the shine. Though this old warhorse of a pipe has seen much use, the new finish and restored, rebanded and restemmed pipe should give many more years of service. It is cleaned and ready to load with its inaugural bowl. Though the pictures do not show it the pipe is a large one – it is 6 inches long with a bowl that is 2 inches tall. The diameter of the bore is 7/8 inches. It will certainly be a long smoke – and if the build of cake left behind by the previous owner tells any tales it will be a good smoking pipe.Sav29 Sav30 Sav31 Sav32